

Have you ever wanted to make your embroidery feel less static? To capture the graceful arc of a wave or the invisible energy of the wind? The secret isn’t in mastering dozens of complex stitches, but in learning to see thread as a line of pure motion.
In this collection, you won’t just see beautiful designs—you’ll discover the specific techniques that bring them to life. We will explore how changing the weight of your thread, the direction of your stitch, or the texture of your materials can transform a simple line into a dynamic, flowing current.
Consider this your guide to thinking like a painter, but with thread as your medium. It’s time to move beyond filling in shapes and start creating art that breathes, swirls, and flows with an energy that is uniquely yours.
1. Weaving Texture into Tides
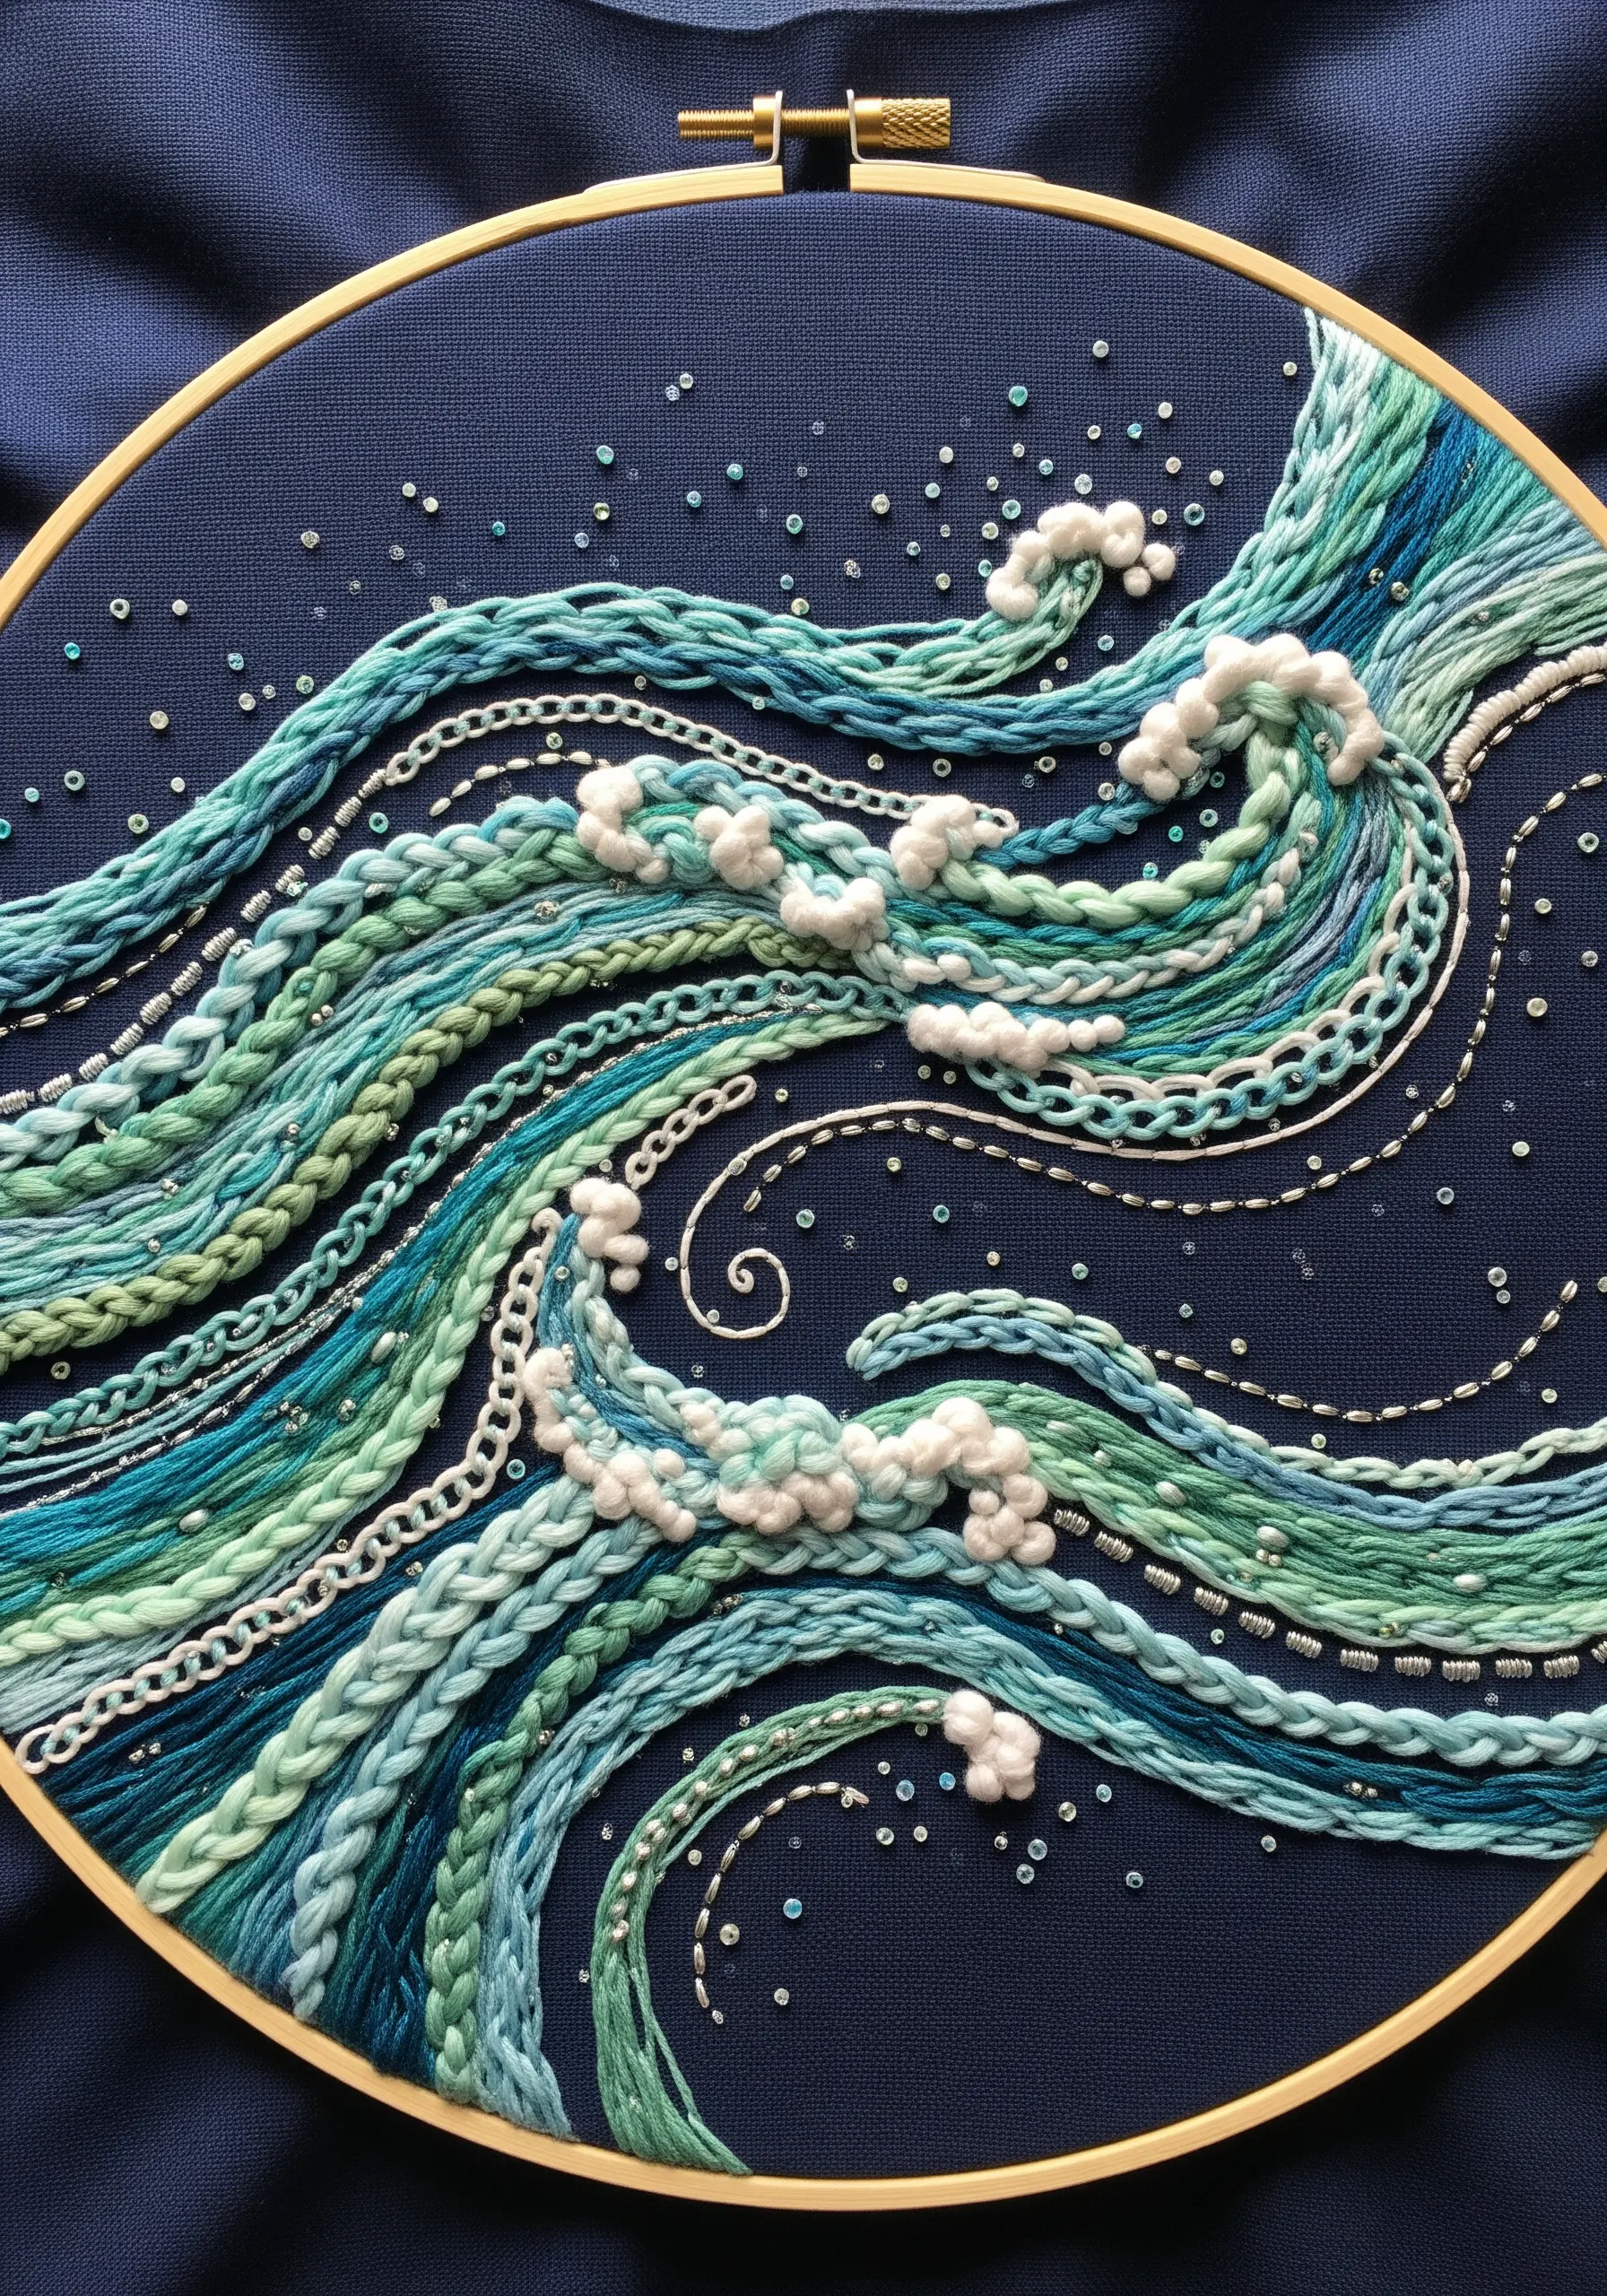
Create dynamic, flowing water by combining threads and stitches of different weights and textures.
Use a thick, soft yarn for a braided stitch to form the main body of the wave, giving it substance and high relief.
Incorporate finer, six-strand floss for chain stitches that suggest faster movement and detail within the larger flow.
For the sea foam, use a highly textured thread like a boucle or stitch dense clusters of French knots, which mimics the bubbly, airy quality of cresting waves.
Scatter tiny seed beads or use a single strand of metallic thread to represent sea spray, catching the light and adding a final layer of dimension.
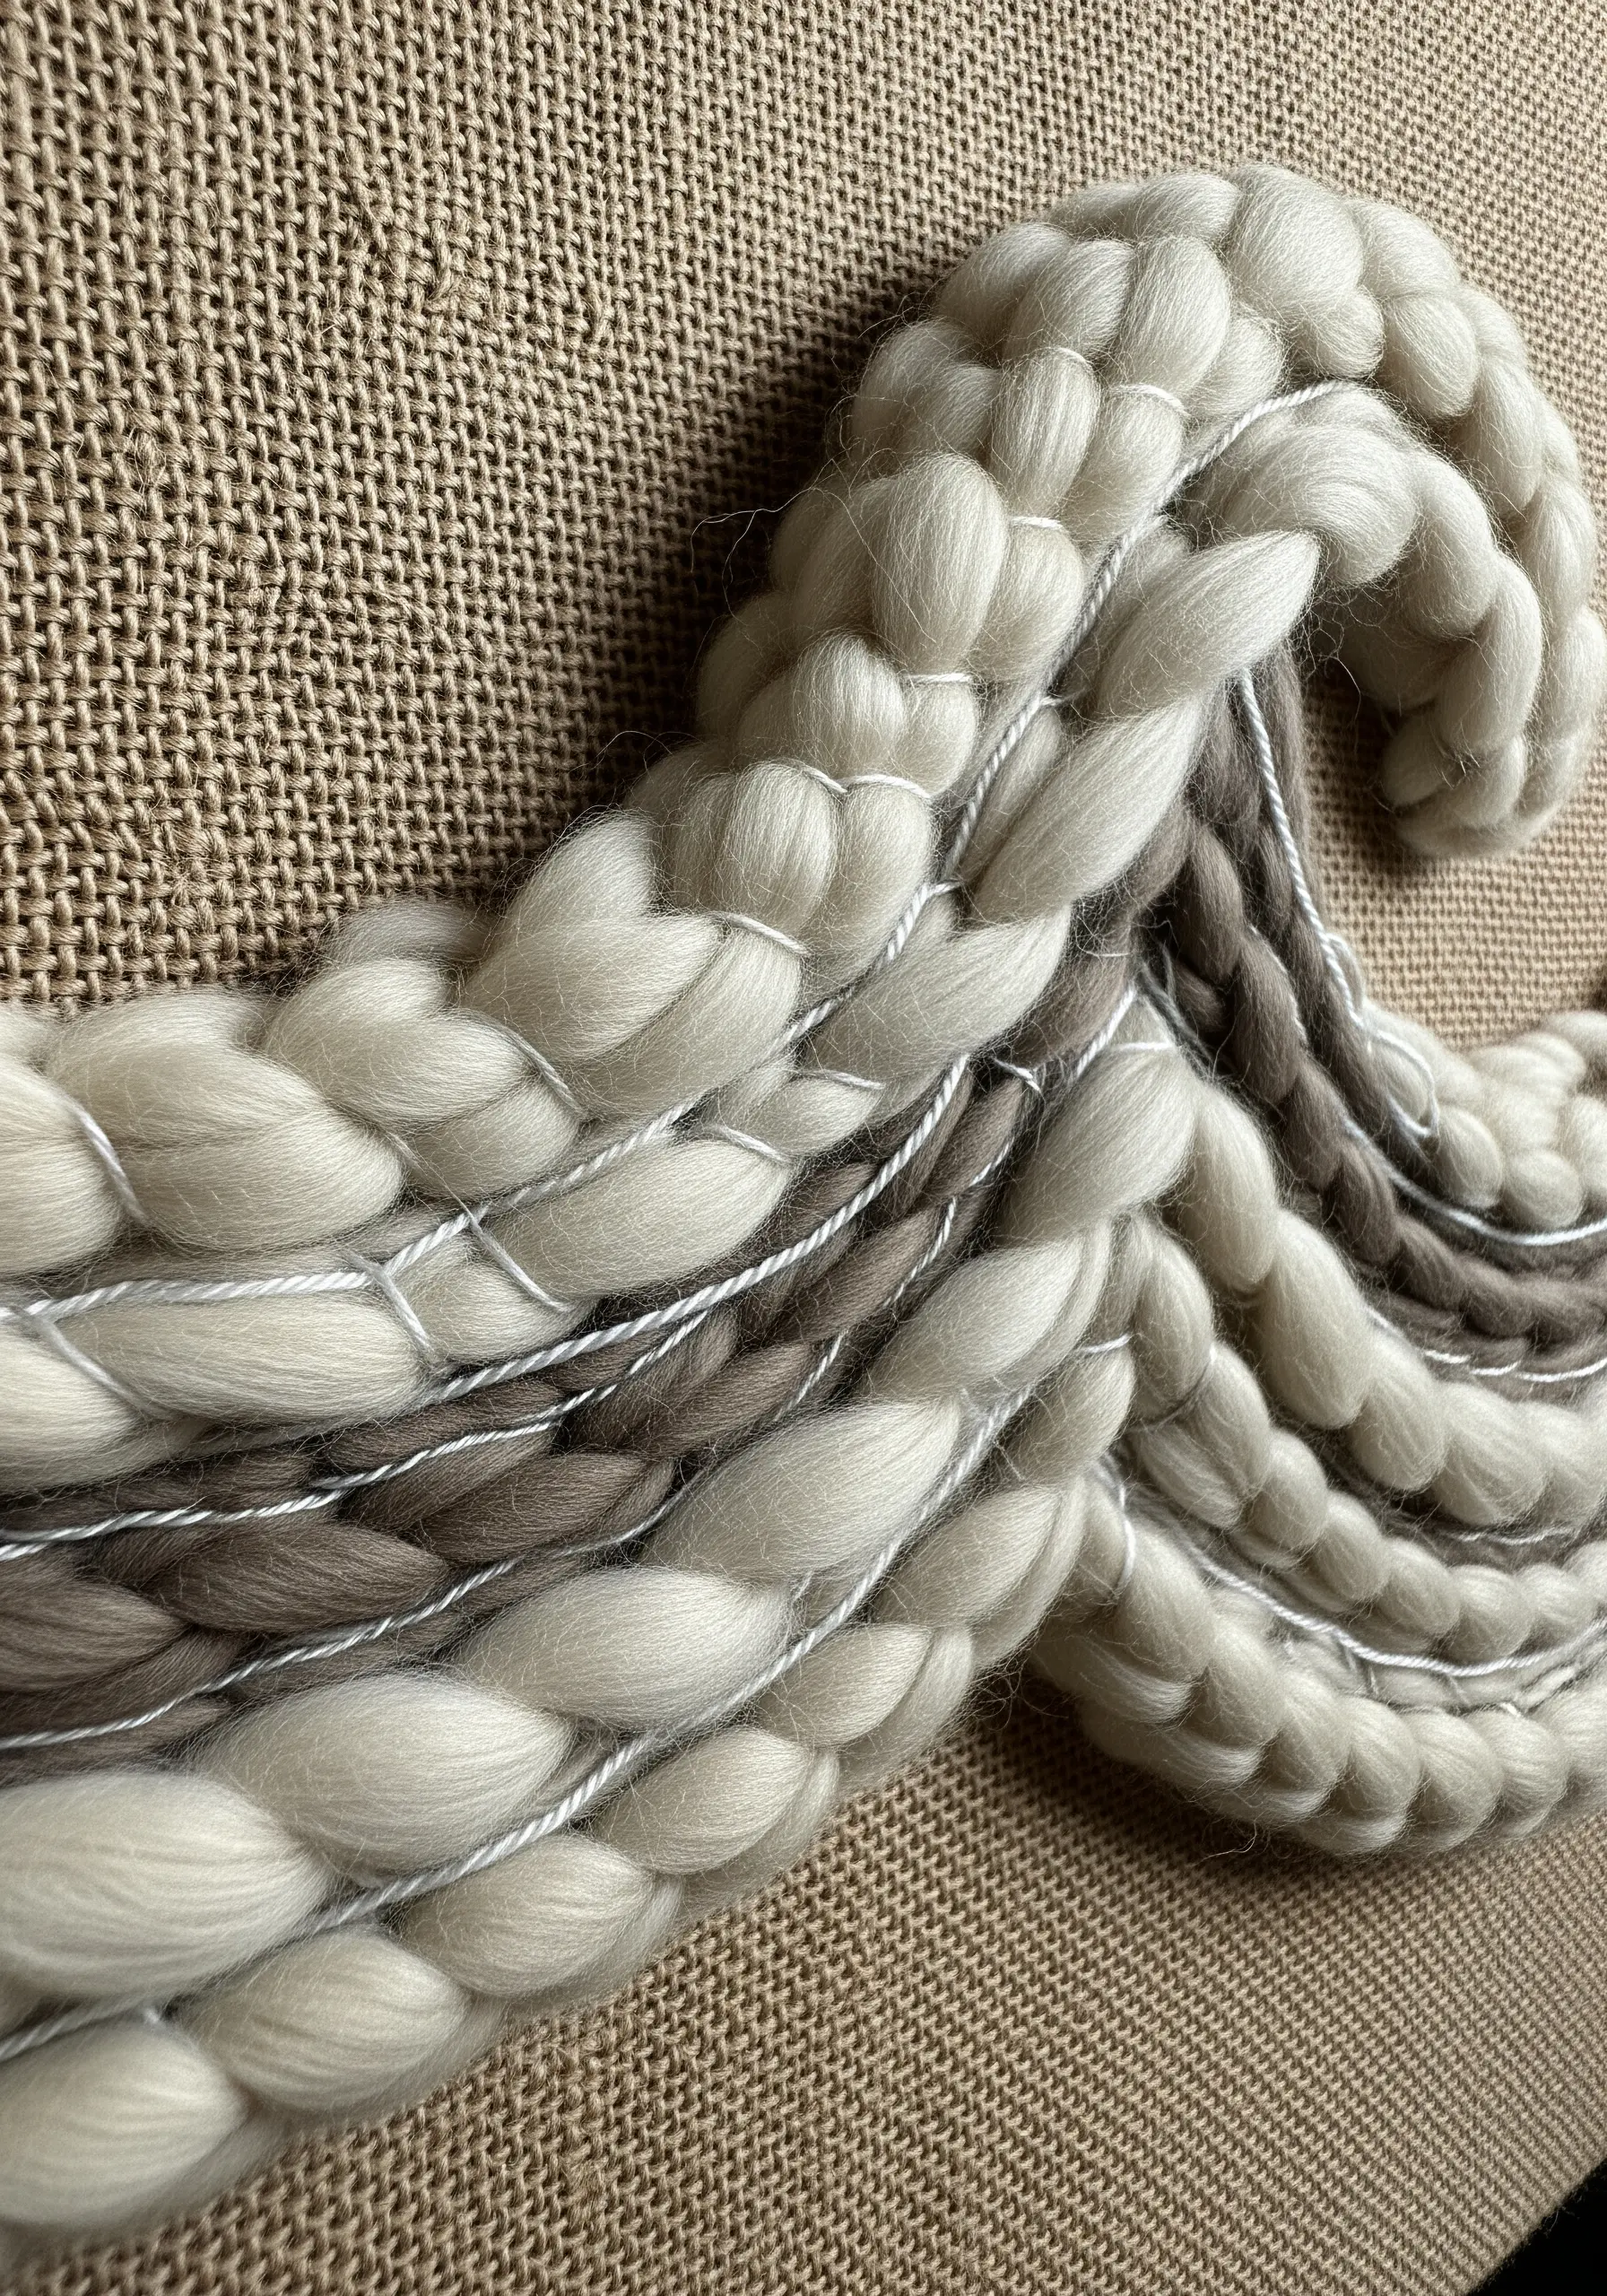
2. Sculpting Landscapes with Roving Wool

To achieve this highly sculptural, tactile effect, work with unspun wool roving instead of traditional thread.
Lay lengths of thick roving directly onto a sturdy base fabric, like canvas or heavy linen, shaping them into soft waves.
Then, use a technique called couching: with a standard needle and thread, make small, evenly spaced tacking stitches over the roving to secure it to the fabric.
This method allows you to build up form and texture quickly, creating fiber art installations that have an incredible sense of depth and warmth.
Layering different colors of roving will create soft, blended gradients that evoke natural landscapes.
3. Capturing Galactic Flow with Variegated Thread
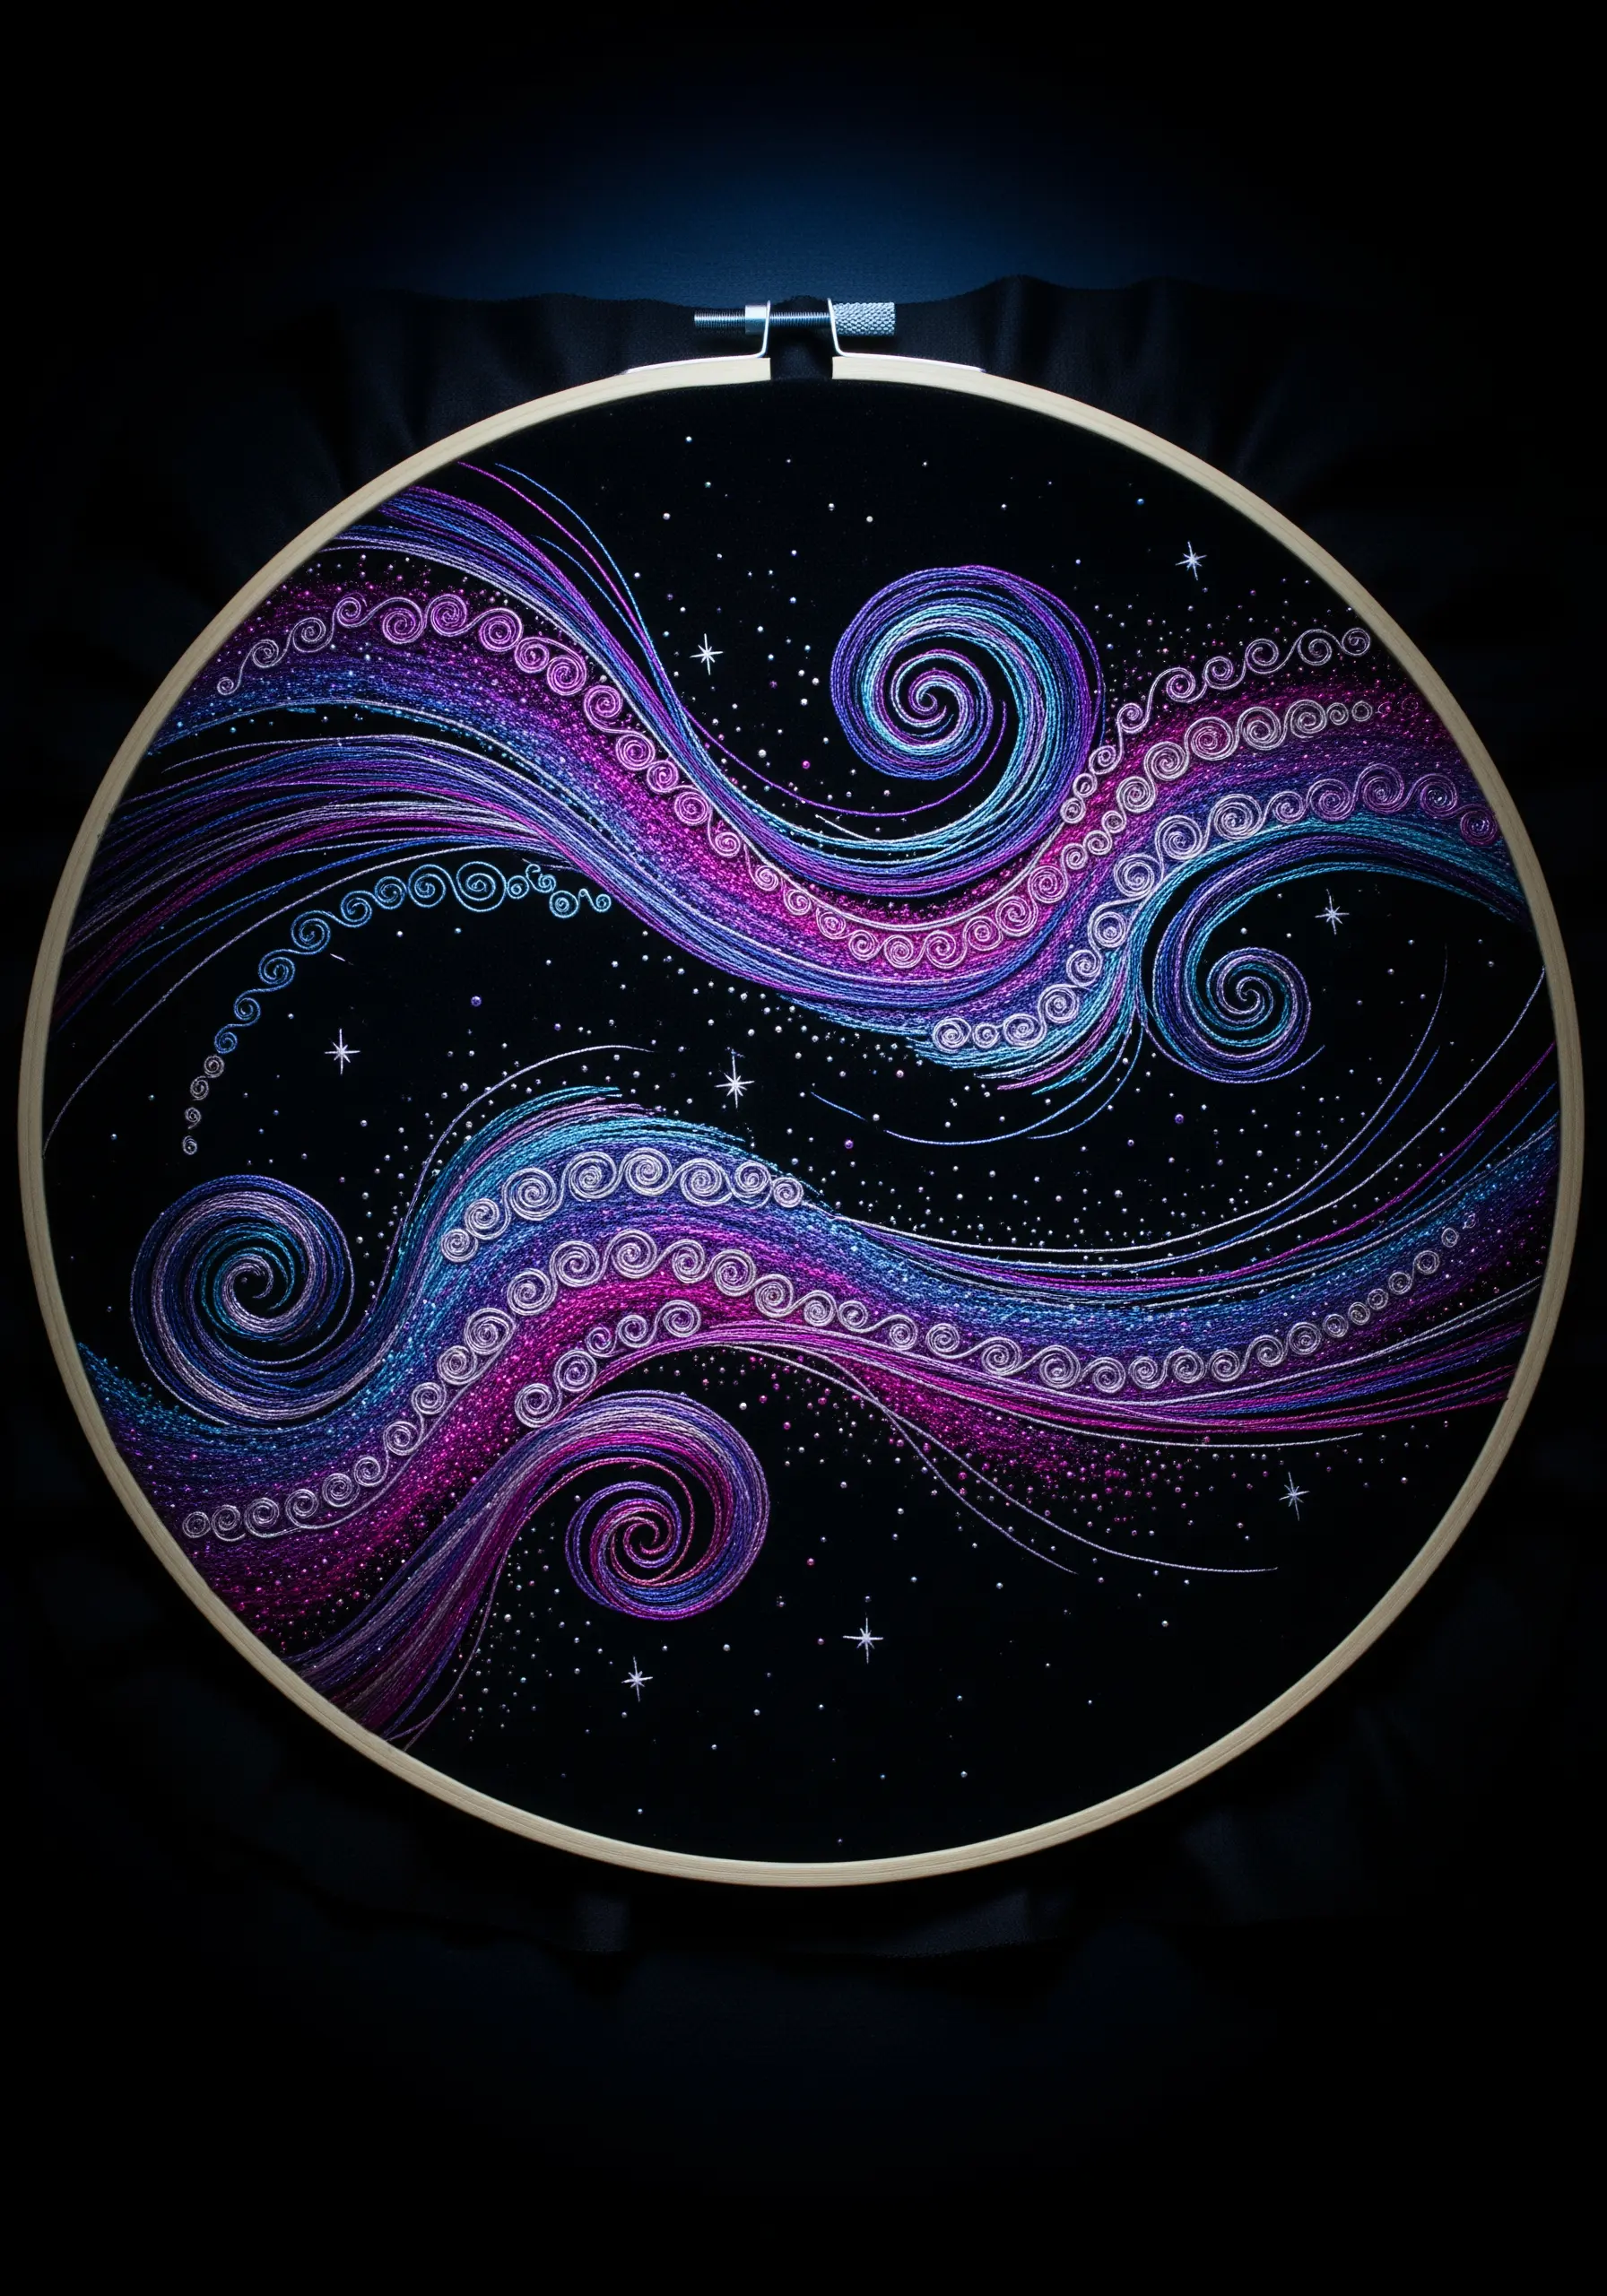
Let your thread do the color-blending for you by choosing a variegated or space-dyed floss for celestial swirls.
On a dark, solid background like black cotton or linen, the vibrant colors will appear to glow.
Use long, flowing lines of split stitch or stem stitch, allowing the curves to sweep gracefully across the hoop.
The magic of this technique is its simplicity; the thread’s inherent color shifts create a complex gradient effect without any extra work on your part.
Add tiny, scattered seed stitches or single French knots with a white or metallic thread to represent distant stars, completing the cosmic scene.
4. The Elegance of a Graduated Line

Achieve a flawless, liquid-smooth swirl by mastering the satin stitch on a stable surface like felt.
To create the seamless gradient, use the long-and-short stitch technique where the two colors meet, interlocking the stitches to blur the transition.
For the solid sections, ensure every single satin stitch lies perfectly parallel to the last, with no gaps or overlaps.
Using a single strand of floss gives you the finest control and the smoothest finish, creating a design that feels both minimal and incredibly refined.
5. Defining Motion with Bold, Couching Color
When you want to create clean, bold lines with materials too thick for a needle, couching is the perfect solution.
Simply lay your cord or thick yarn on the surface of the fabric in your desired wave pattern.
Using a thinner, matching sewing thread, make small, discreet stitches at regular intervals to tack the cord firmly in place.
This technique gives you complete control over the shape and flow of your lines, resulting in a graphic, rhythmic design with a clean and modern aesthetic.
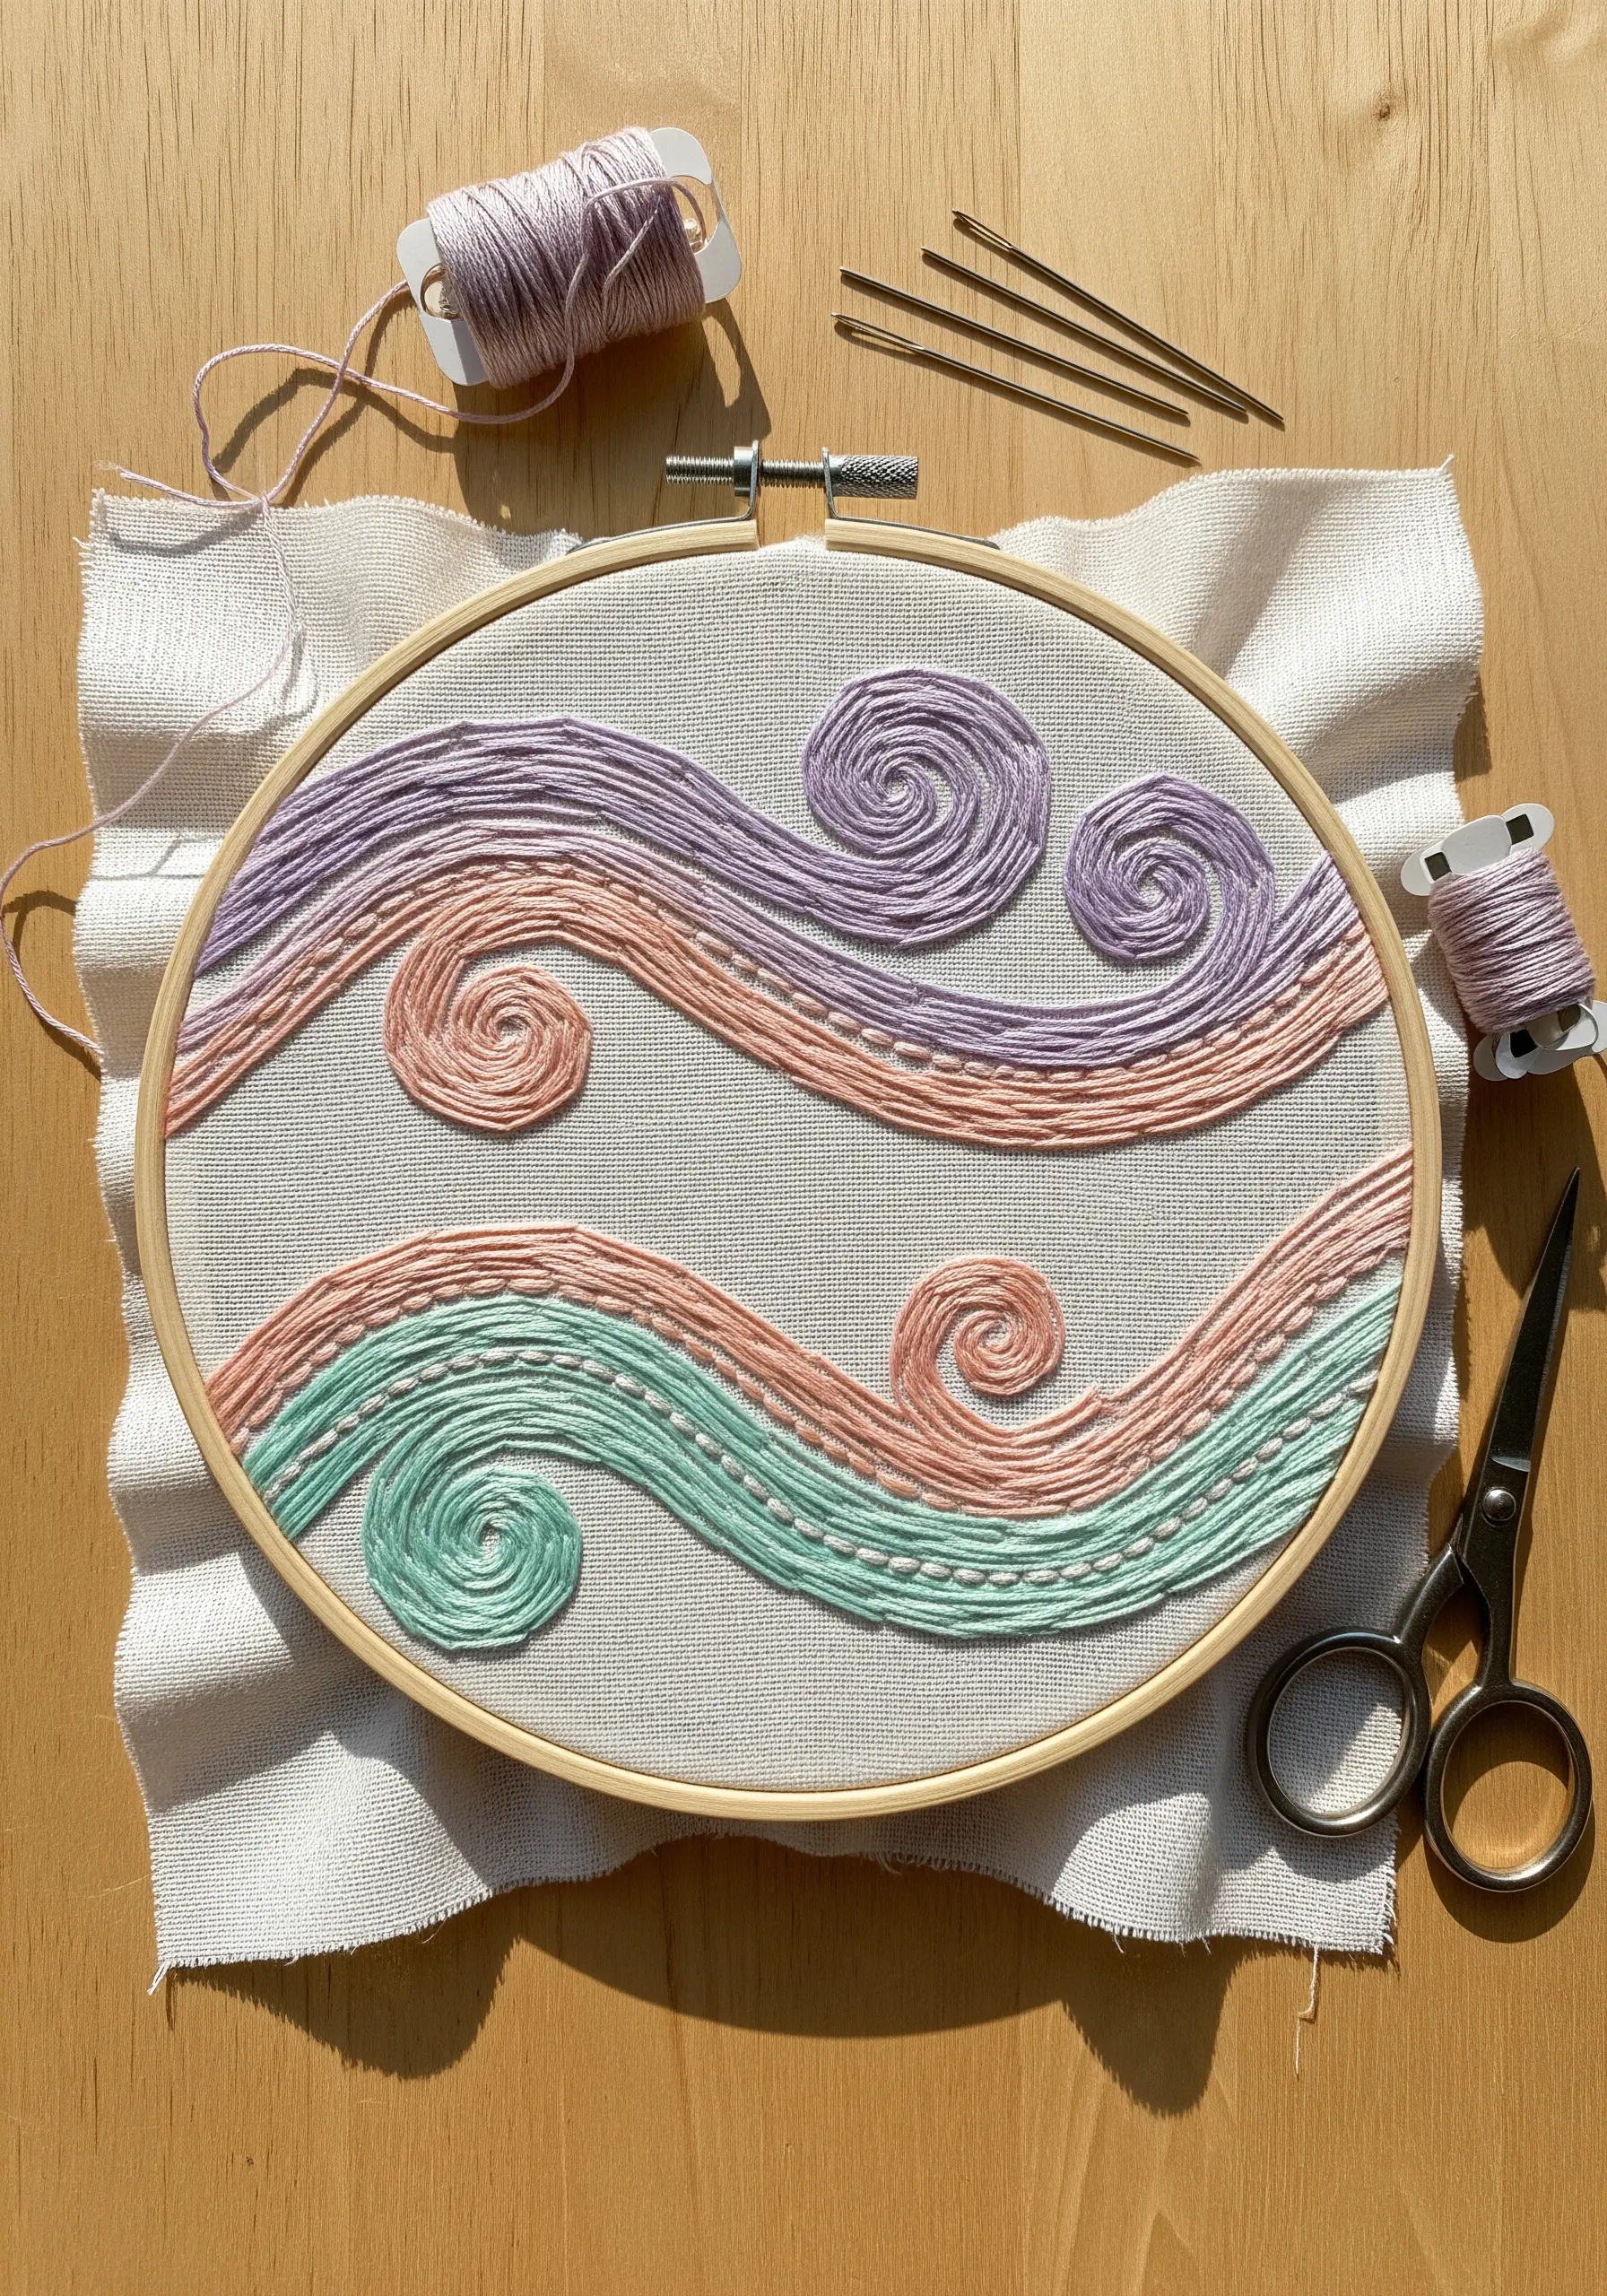
6. Designing Large-Scale Interwoven Pathways
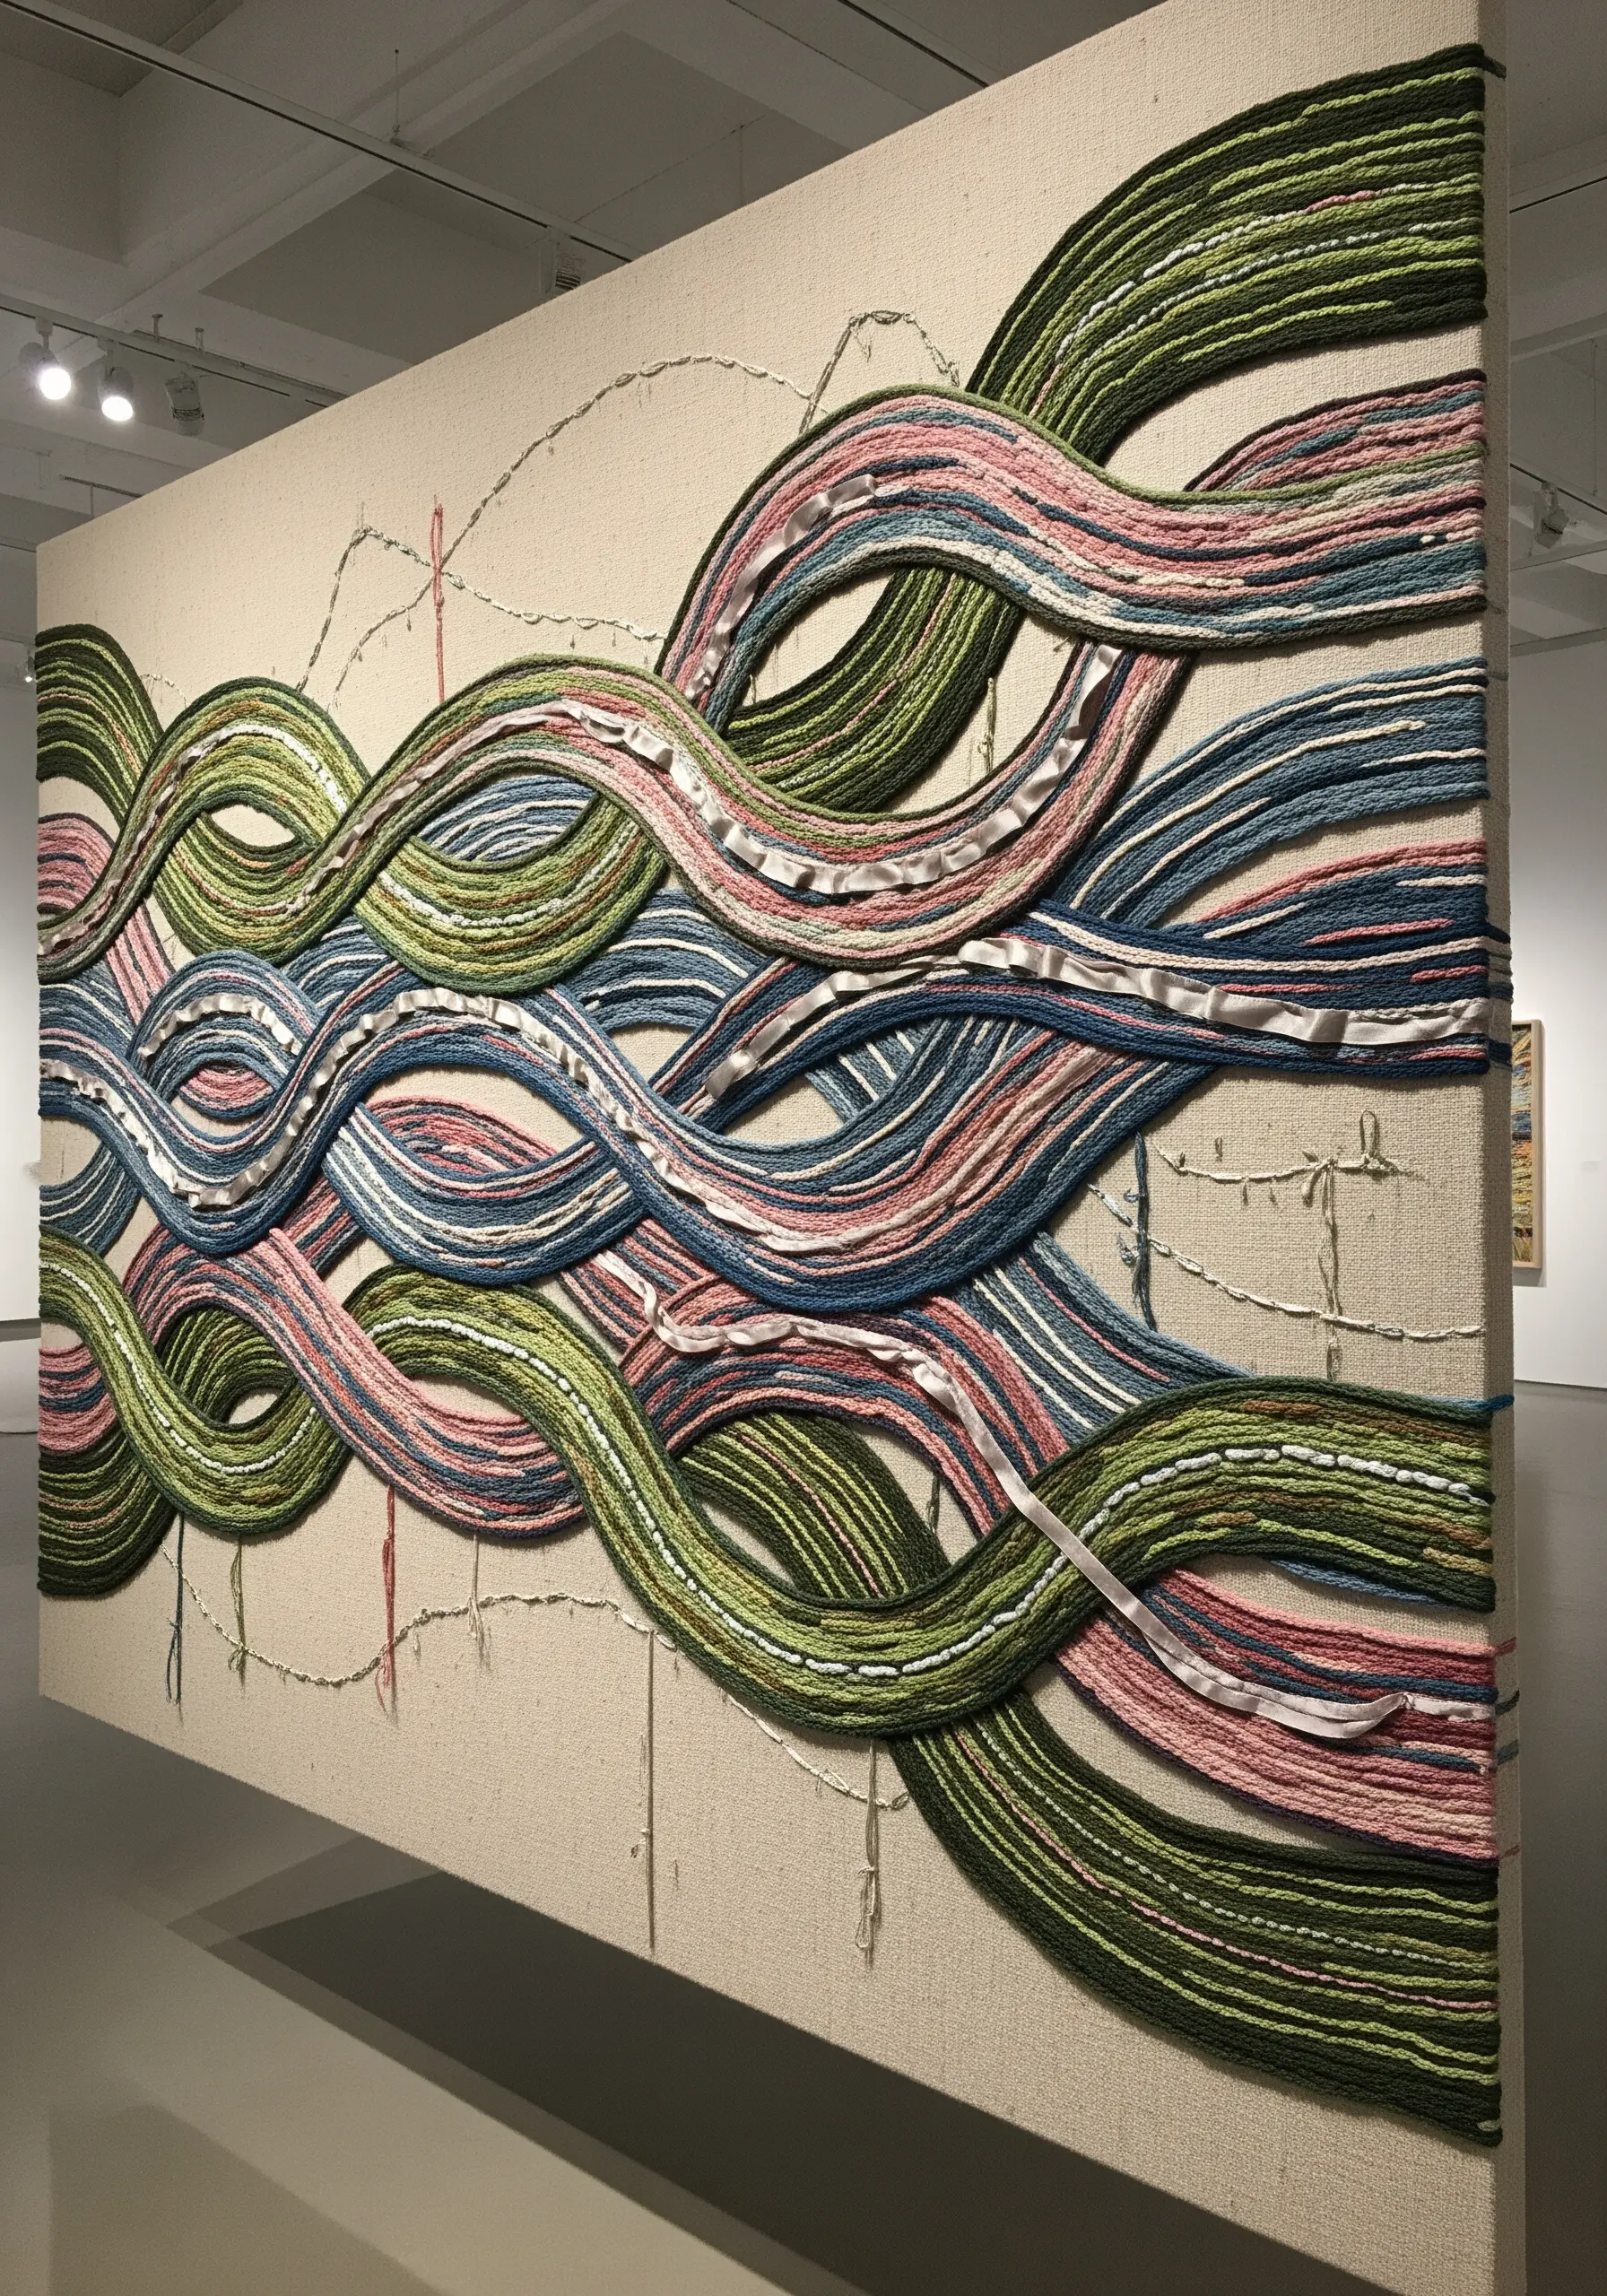
For a large, impactful piece, think beyond stitching *through* the fabric and start weaving *on* it.
Begin by couching down your primary, foundational lines of thick yarn to establish the main flow of the composition.
Next, take contrasting threads—like the delicate satin ribbon shown here—and manually weave them over and under the established yarn pathways.
This method builds incredible physical depth and a dynamic interplay of textures, transforming a flat surface into a complex, gallery-worthy DIY installation.
7. Couching Cord for Luxe Home Décor
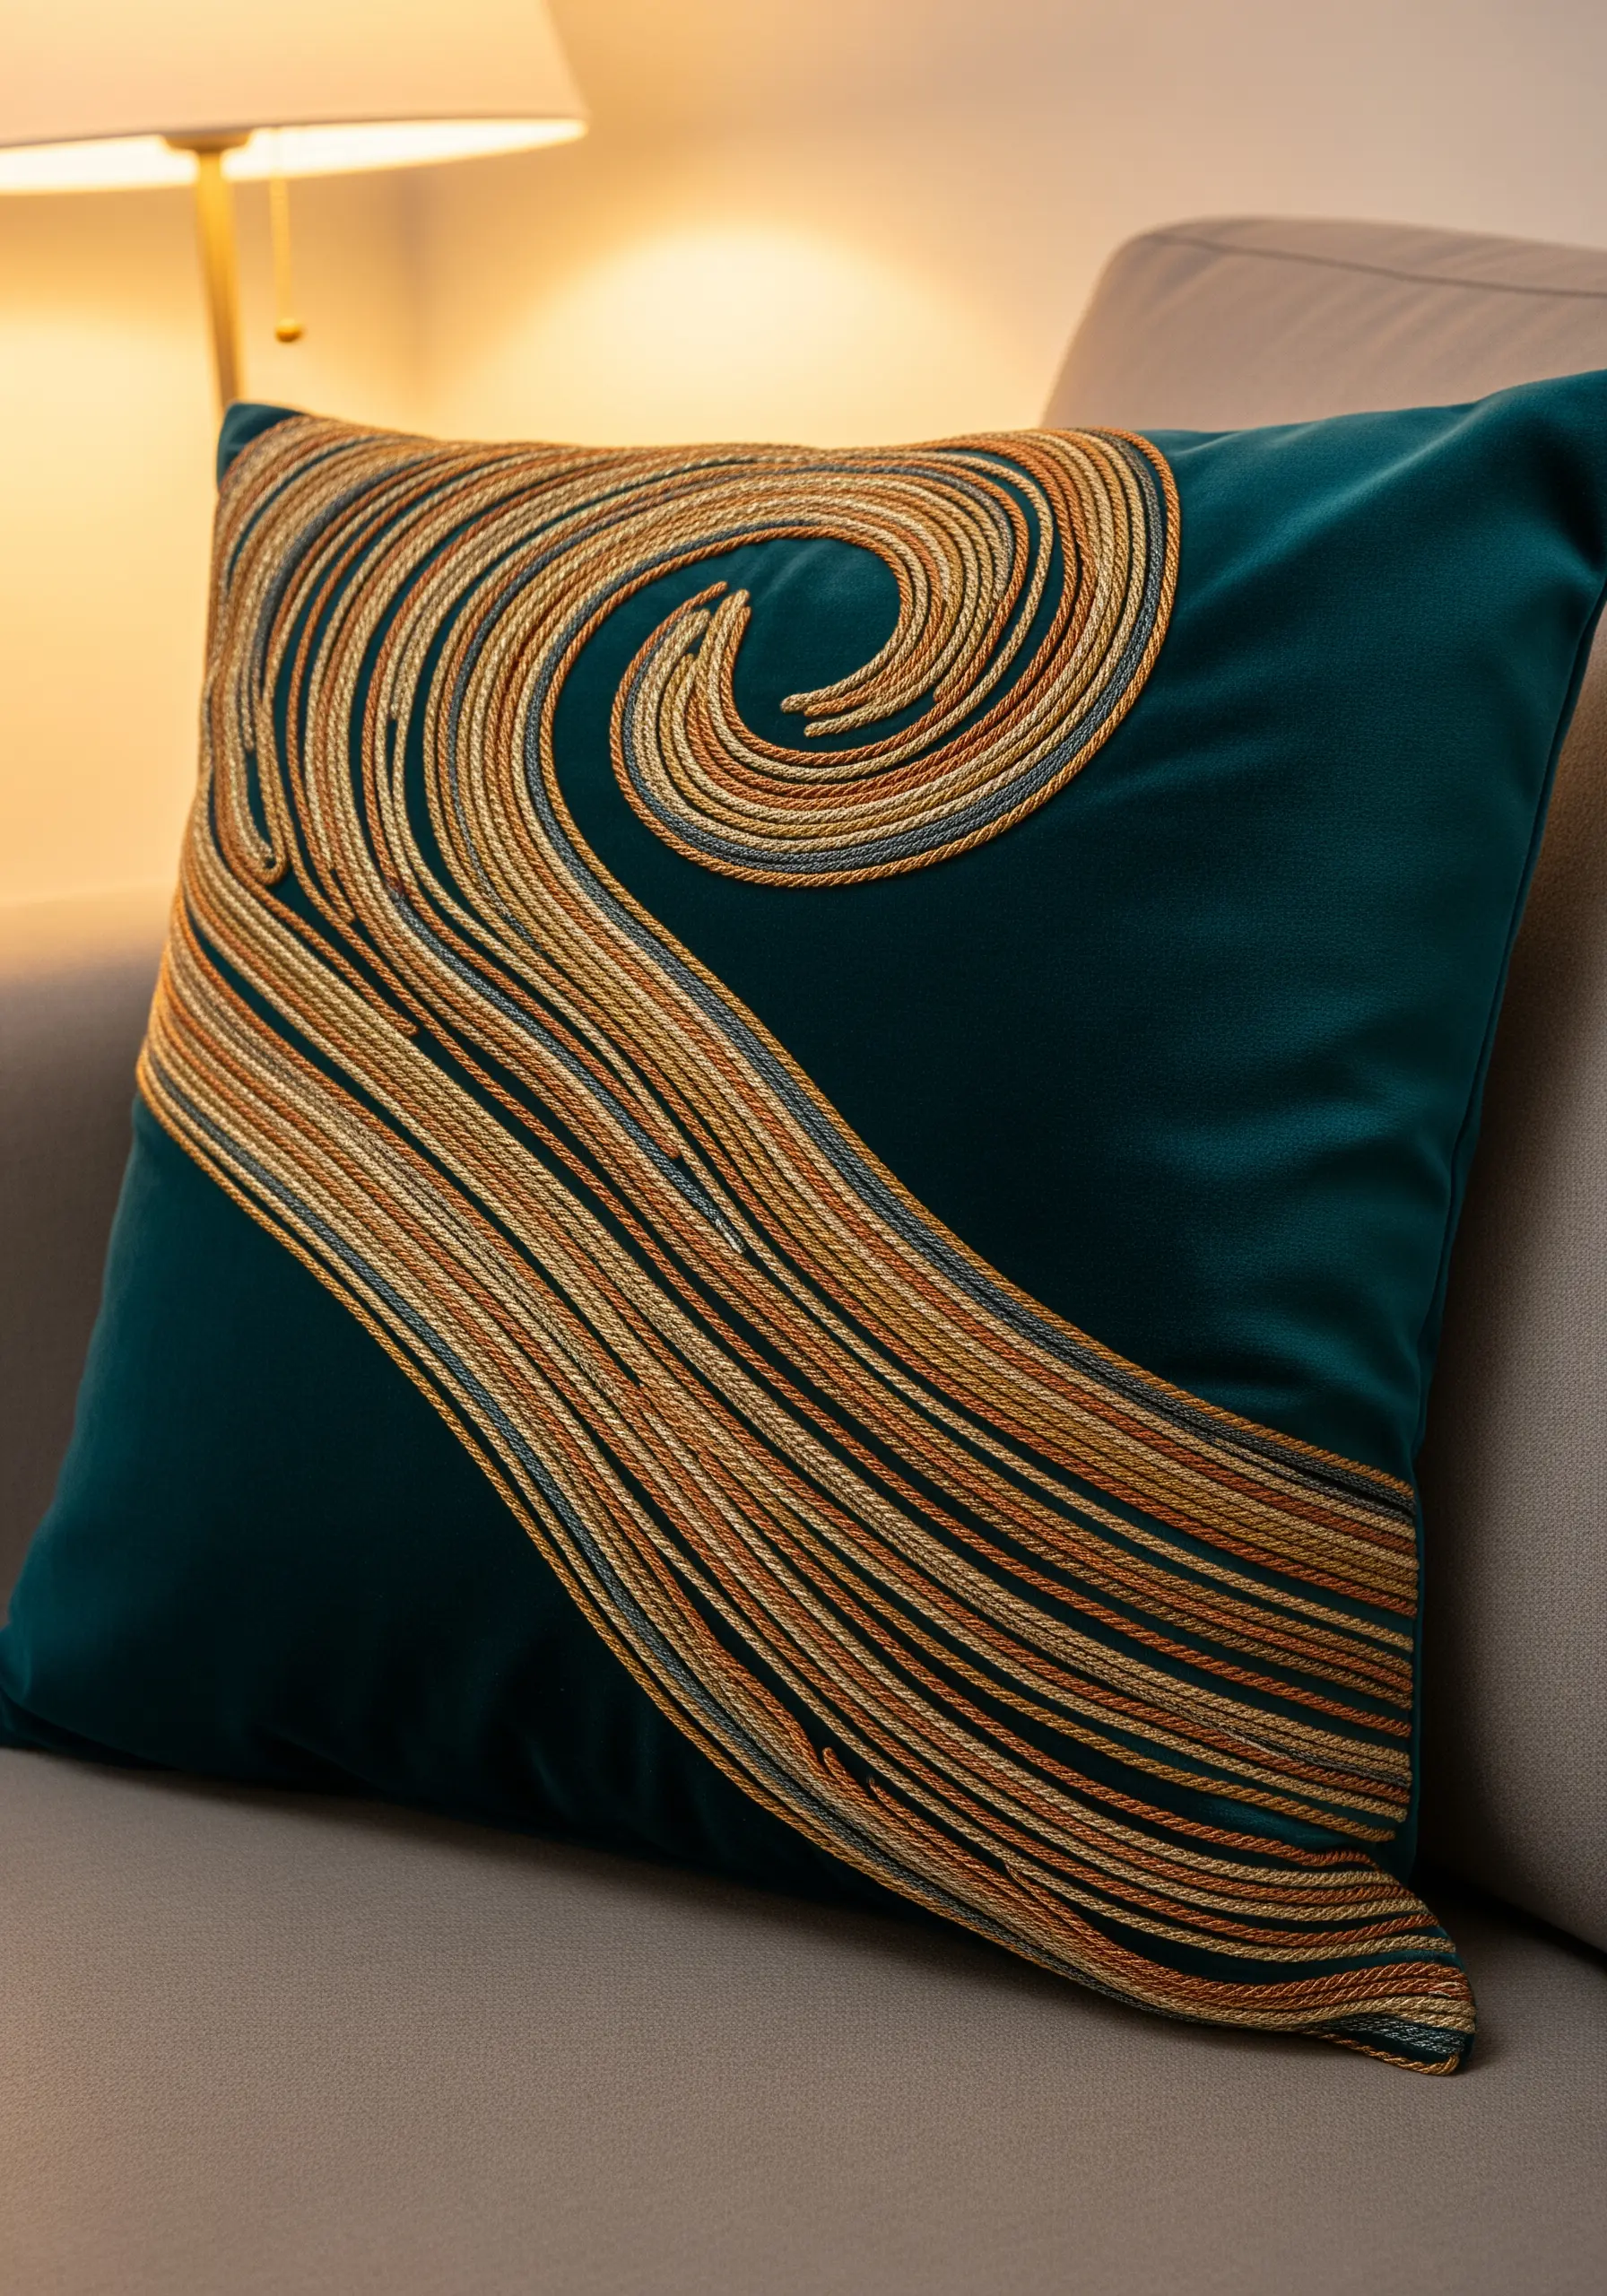
Instantly elevate a plain velvet cushion by adding a bold swirl using decorative cord and the couching technique.
Choose a cord with a bit of sheen or a multi-tonal twist to catch the light and add visual interest.
The rich, plush texture of velvet provides the perfect contrasting background for the smooth, defined lines of the cord, making the design feel intentional and luxurious.
This is one of the fastest ways to add a high-end, custom touch to your embroidery decor.
8. Building Volcanic Texture with Knots and Braids

To convey a sense of intense, molten energy, you need to build a dense and varied textural landscape.
Combine thick, rope-like braid stitches with clusters of tightly packed bullion knots to create a surface that is chaotic yet controlled.
Use padded satin stitch for the larger, smoother areas to give them lift and volume, suggesting slow-moving lava flows.
Allowing the different stitches and colors to overlap organically is key—it creates a rich, tactile surface that begs to be touched.
9. Creating Soft Motion with Whipped Stitches
For lines that are smooth, rounded, and slightly raised, a whipped stitch is the ideal choice.
First, create a foundation line using a simple backstitch or stem stitch along your desired curve.
Then, take a second length of thread (either matching or contrasting) and wrap it around each foundation stitch without ever piercing the fabric.
This wrapping motion smooths over the individual stitches, resulting in a continuous, cord-like line that is perfect for gentle, flowing designs on fabrics like linen or cotton.
10. Crafting Cascading Gradients with Loose Fiber

Mimic the movement of a waterfall by working with vertical lines and varied textures.
Secure long strands of yarn or unspun roving at the top of your piece, allowing them to hang freely to create a natural, cascading effect.
To create the wave-like crests, use a punch needle or turkey work stitch to build up dense, looped tufts of fiber that interrupt the downward flow.
Arranging your colors in a dark-to-light gradient enhances the sense of depth and mimics the way light interacts with moving water.
11. Capturing Ephemeral Smoke with Single-Strand Stitches

To embroider something as light and formless as smoke, you need to think like a sketch artist.
Use a single strand of black or grey floss to keep the lines incredibly fine and delicate.
Vary your stitch technique: use a solid stem stitch for the more defined edges of the swirls, then switch to tiny, scattered seed stitches or even free-motion machine stitching for the transparent, wispy areas.
Overlapping your lines loosely and embracing negative space is crucial for capturing that sense of airy, ephemeral movement.
12. Sculpting Form with Oversized Knots
Create powerful, high-relief forms by using chunky wool yarn on a sturdy, open-weave base like burlap.
Instead of small, delicate stitches, work with oversized French knots or bullion knots, packing them tightly together to build up mass and volume.
To add definition and hold the larger shapes in place, couch over the wool sections with a thin, contrasting thread.
This contrast between the massive, soft wool and the delicate, sharp lines of the couching thread is what gives the piece its dynamic, sculptural quality.
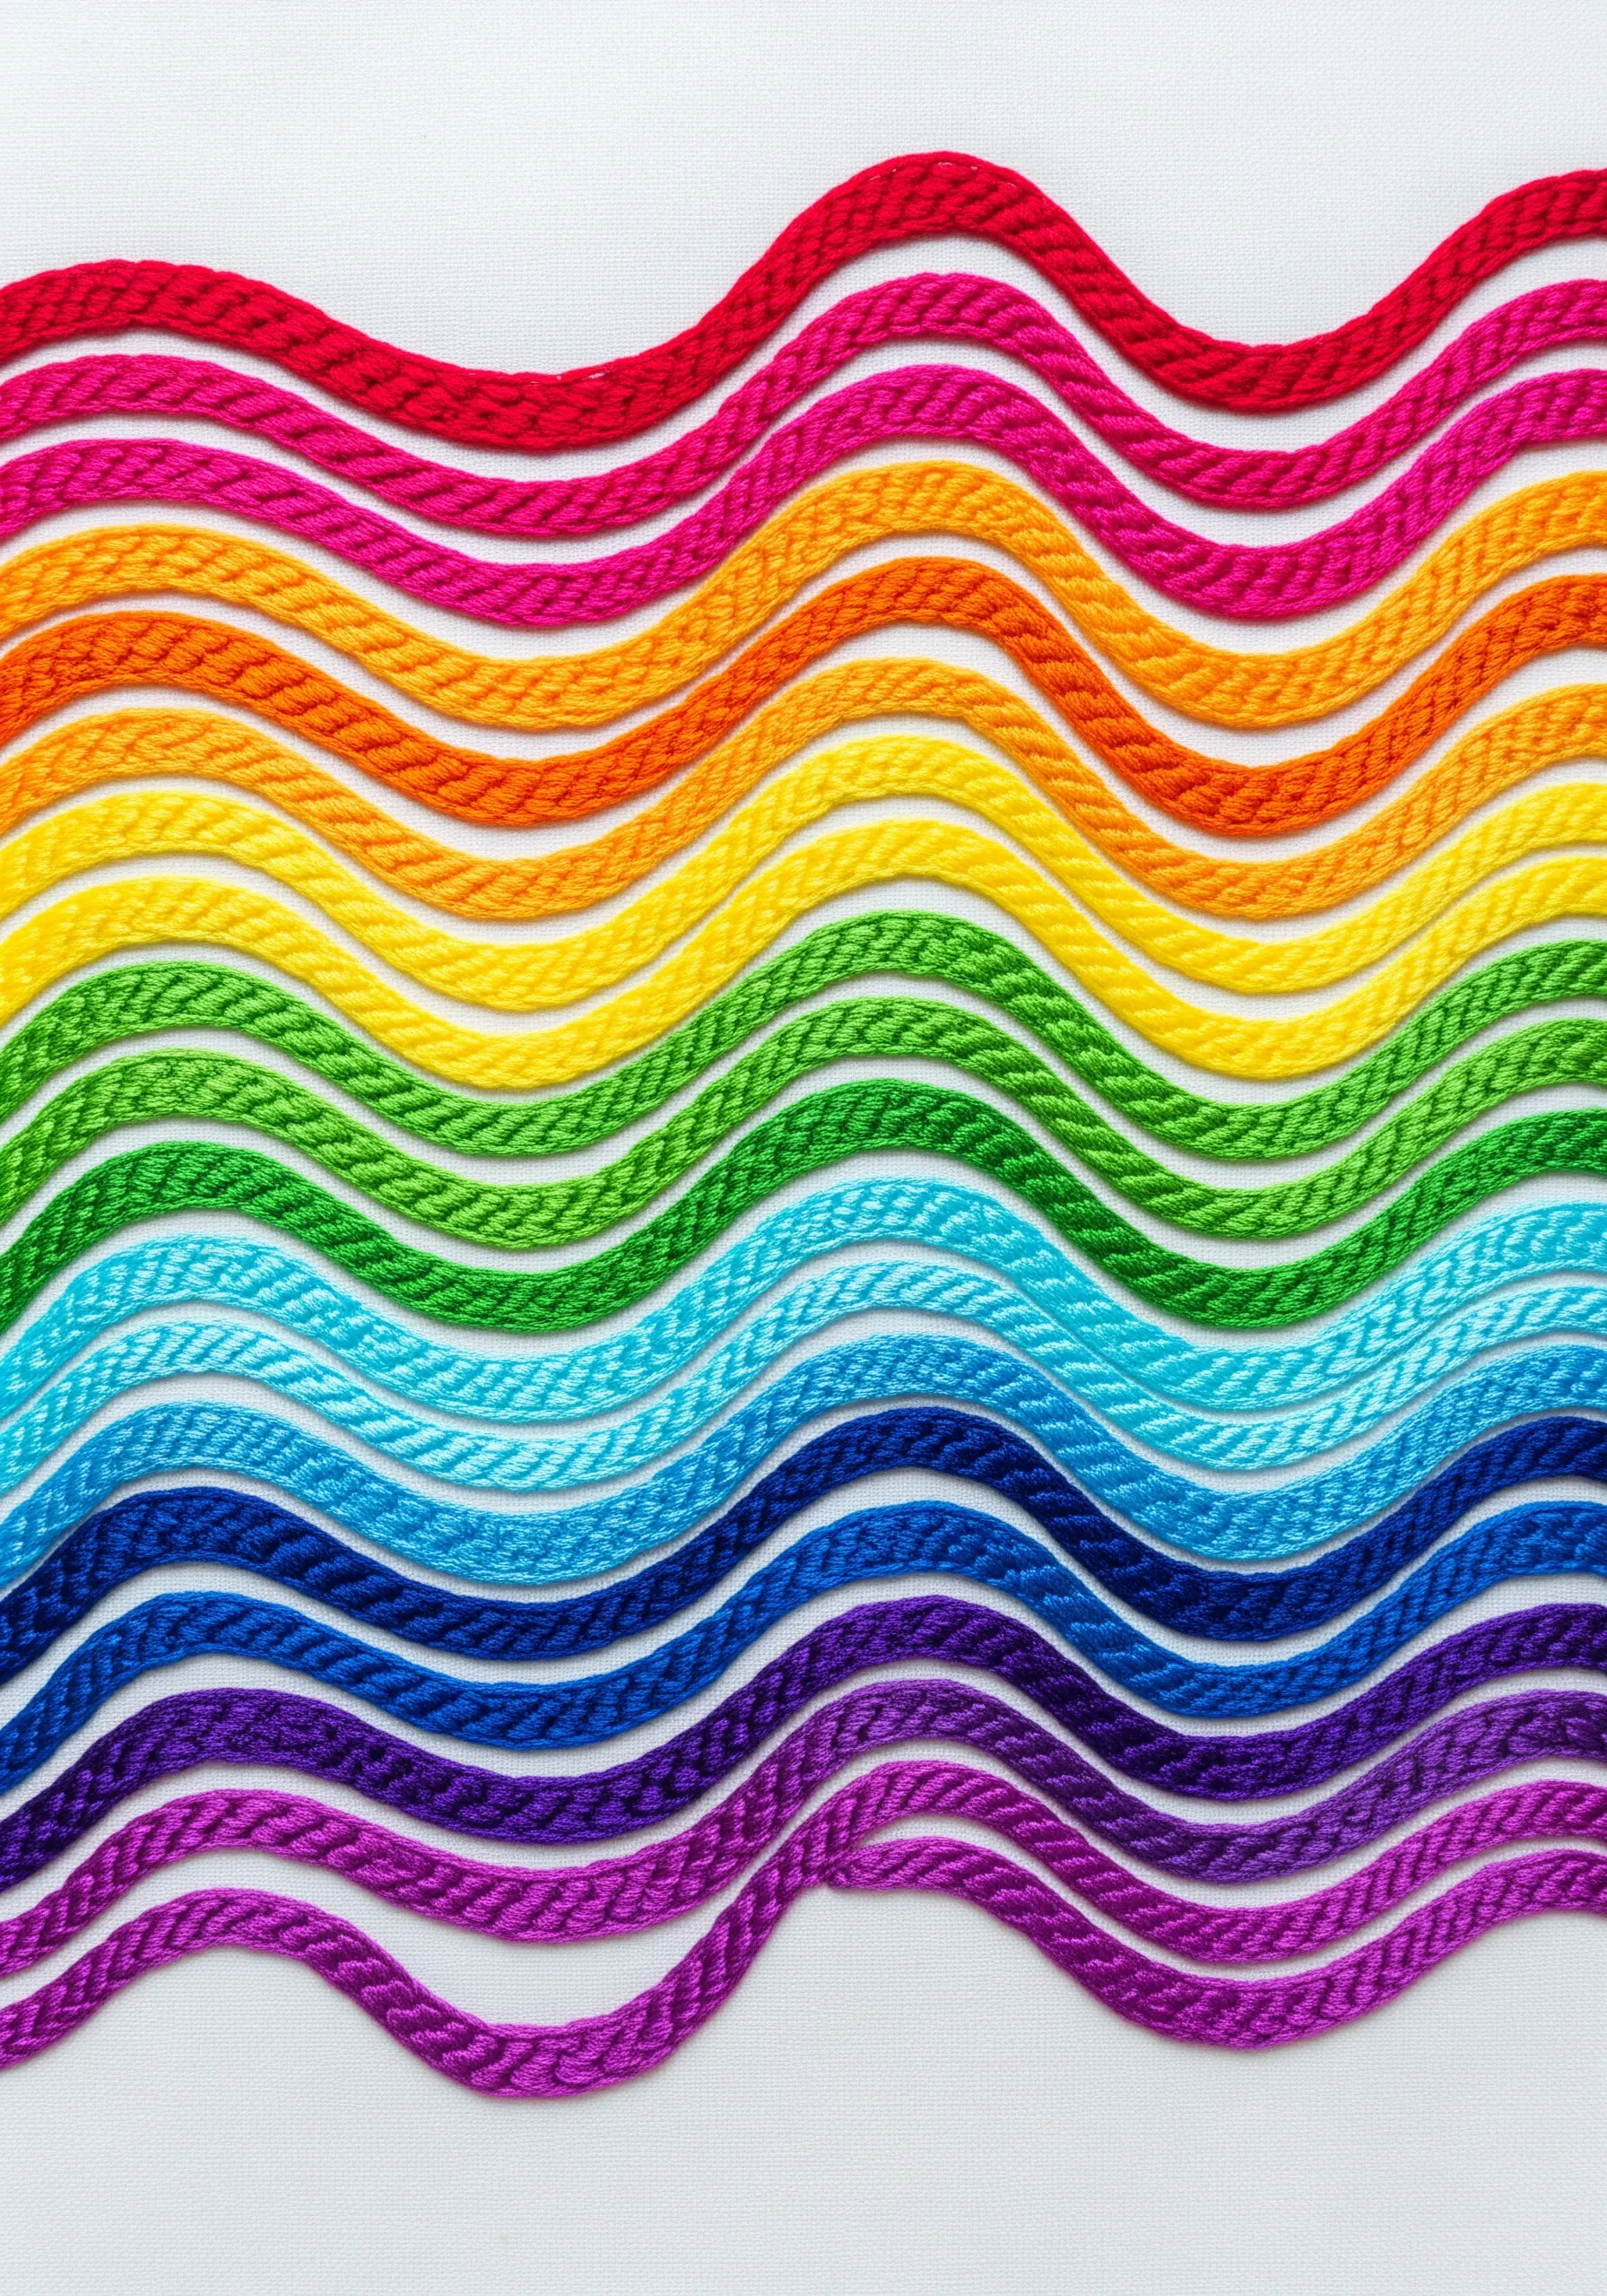
13. Spirals of Motion: A Study in Color

Explore how color influences the perception of energy by stitching the same spiral form in different palettes.
On a stark black canvas, stitch one spiral in cool, receding blues, another in earthy, grounding greens, and a third in vibrant, advancing reds.
Use a simple split stitch or stem stitch, blending two or three shades within each spiral to create a subtle gradient and add depth.
This exercise reveals how dramatically color choice can alter the mood and perceived motion of an identical shape.
14. Architectural Flow with Couched Rope
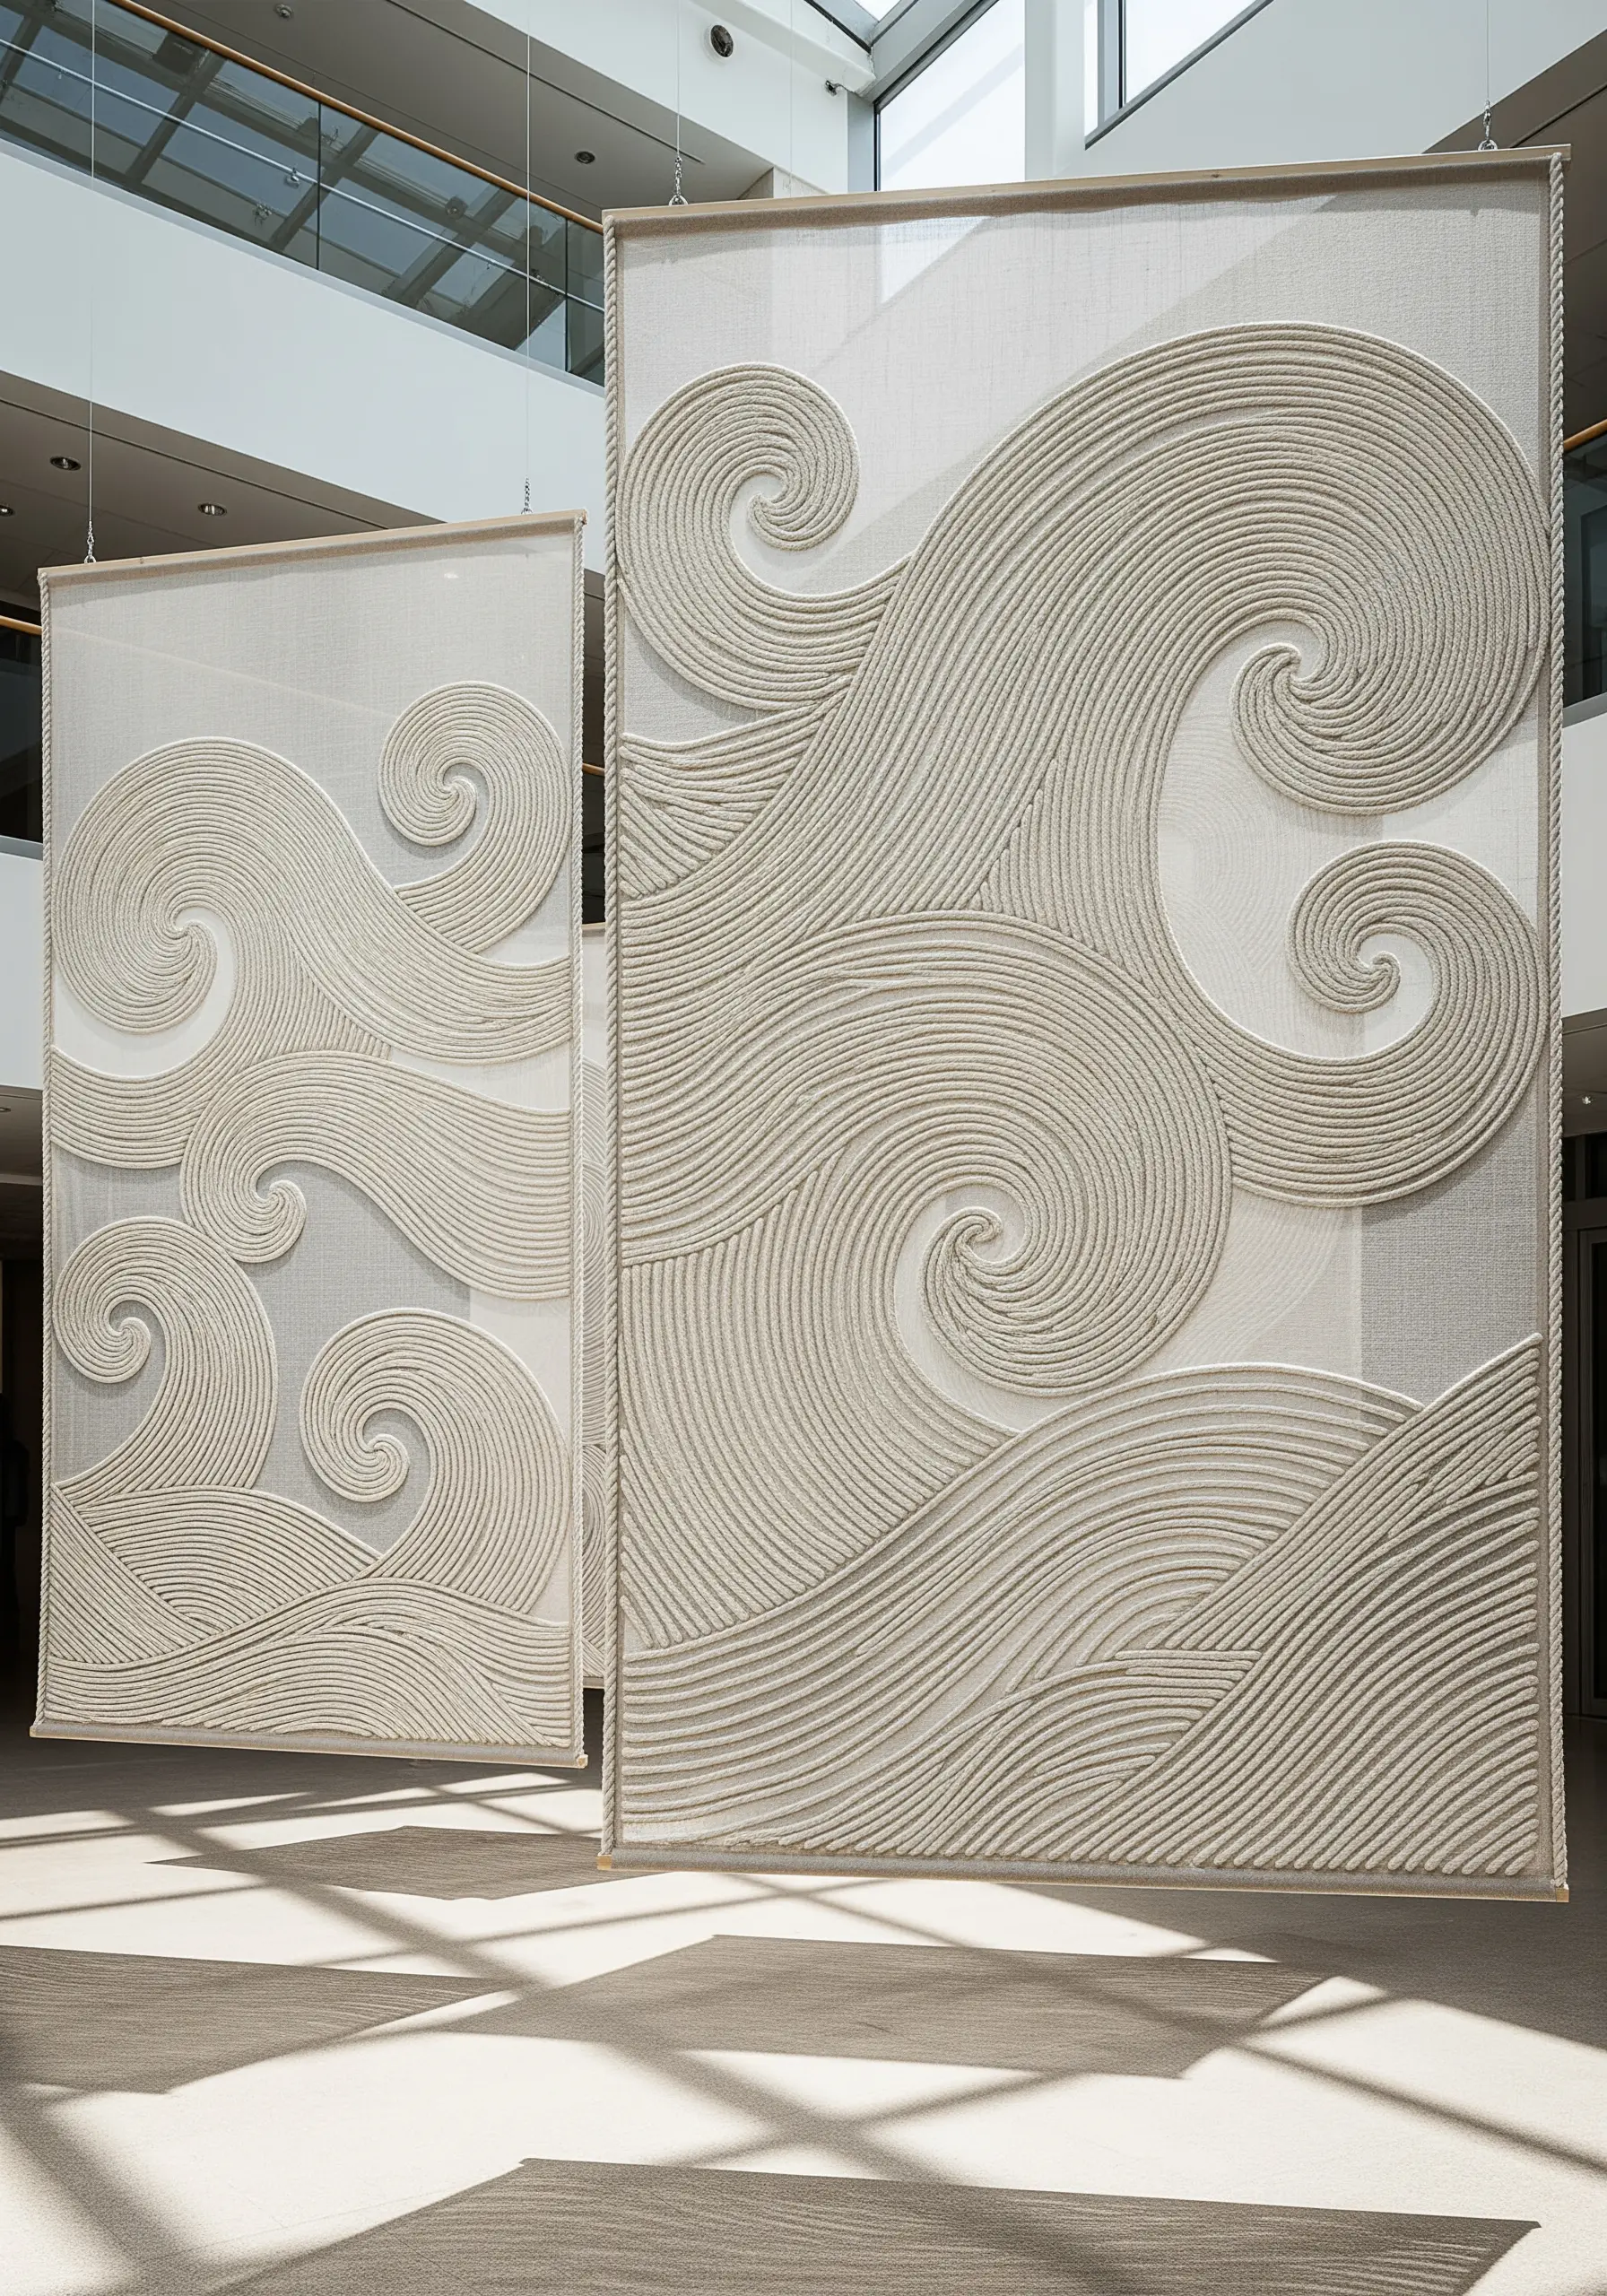
To make a true statement piece, scale up your materials and think architecturally.
Use thick, natural rope and couch it onto a large panel of semi-sheer fabric stretched taut in a frame.
The contrast between the heavy, opaque rope and the light, airy fabric creates a stunning visual tension.
This technique turns simple lines into a bold, graphic installation where the negative space and the play of light are as important as the stitched design itself.
15. Meditative Motion in a Stitched Mandala

Build a sense of rhythm and focus by creating a circular mandala with concentric rows of simple stitches.
Using a continuous chain stitch or split stitch for each ring creates a satisfying, rope-like texture.
The meditative quality comes from the repetition, while the sense of motion is created by the interplay of colors and the small, spiraling details that break the pattern.
This is a perfect project for mindful stitching and zen decor, allowing you to get lost in the flow of the process.
16. Dynamic Embellishment with Stitches and Sequins
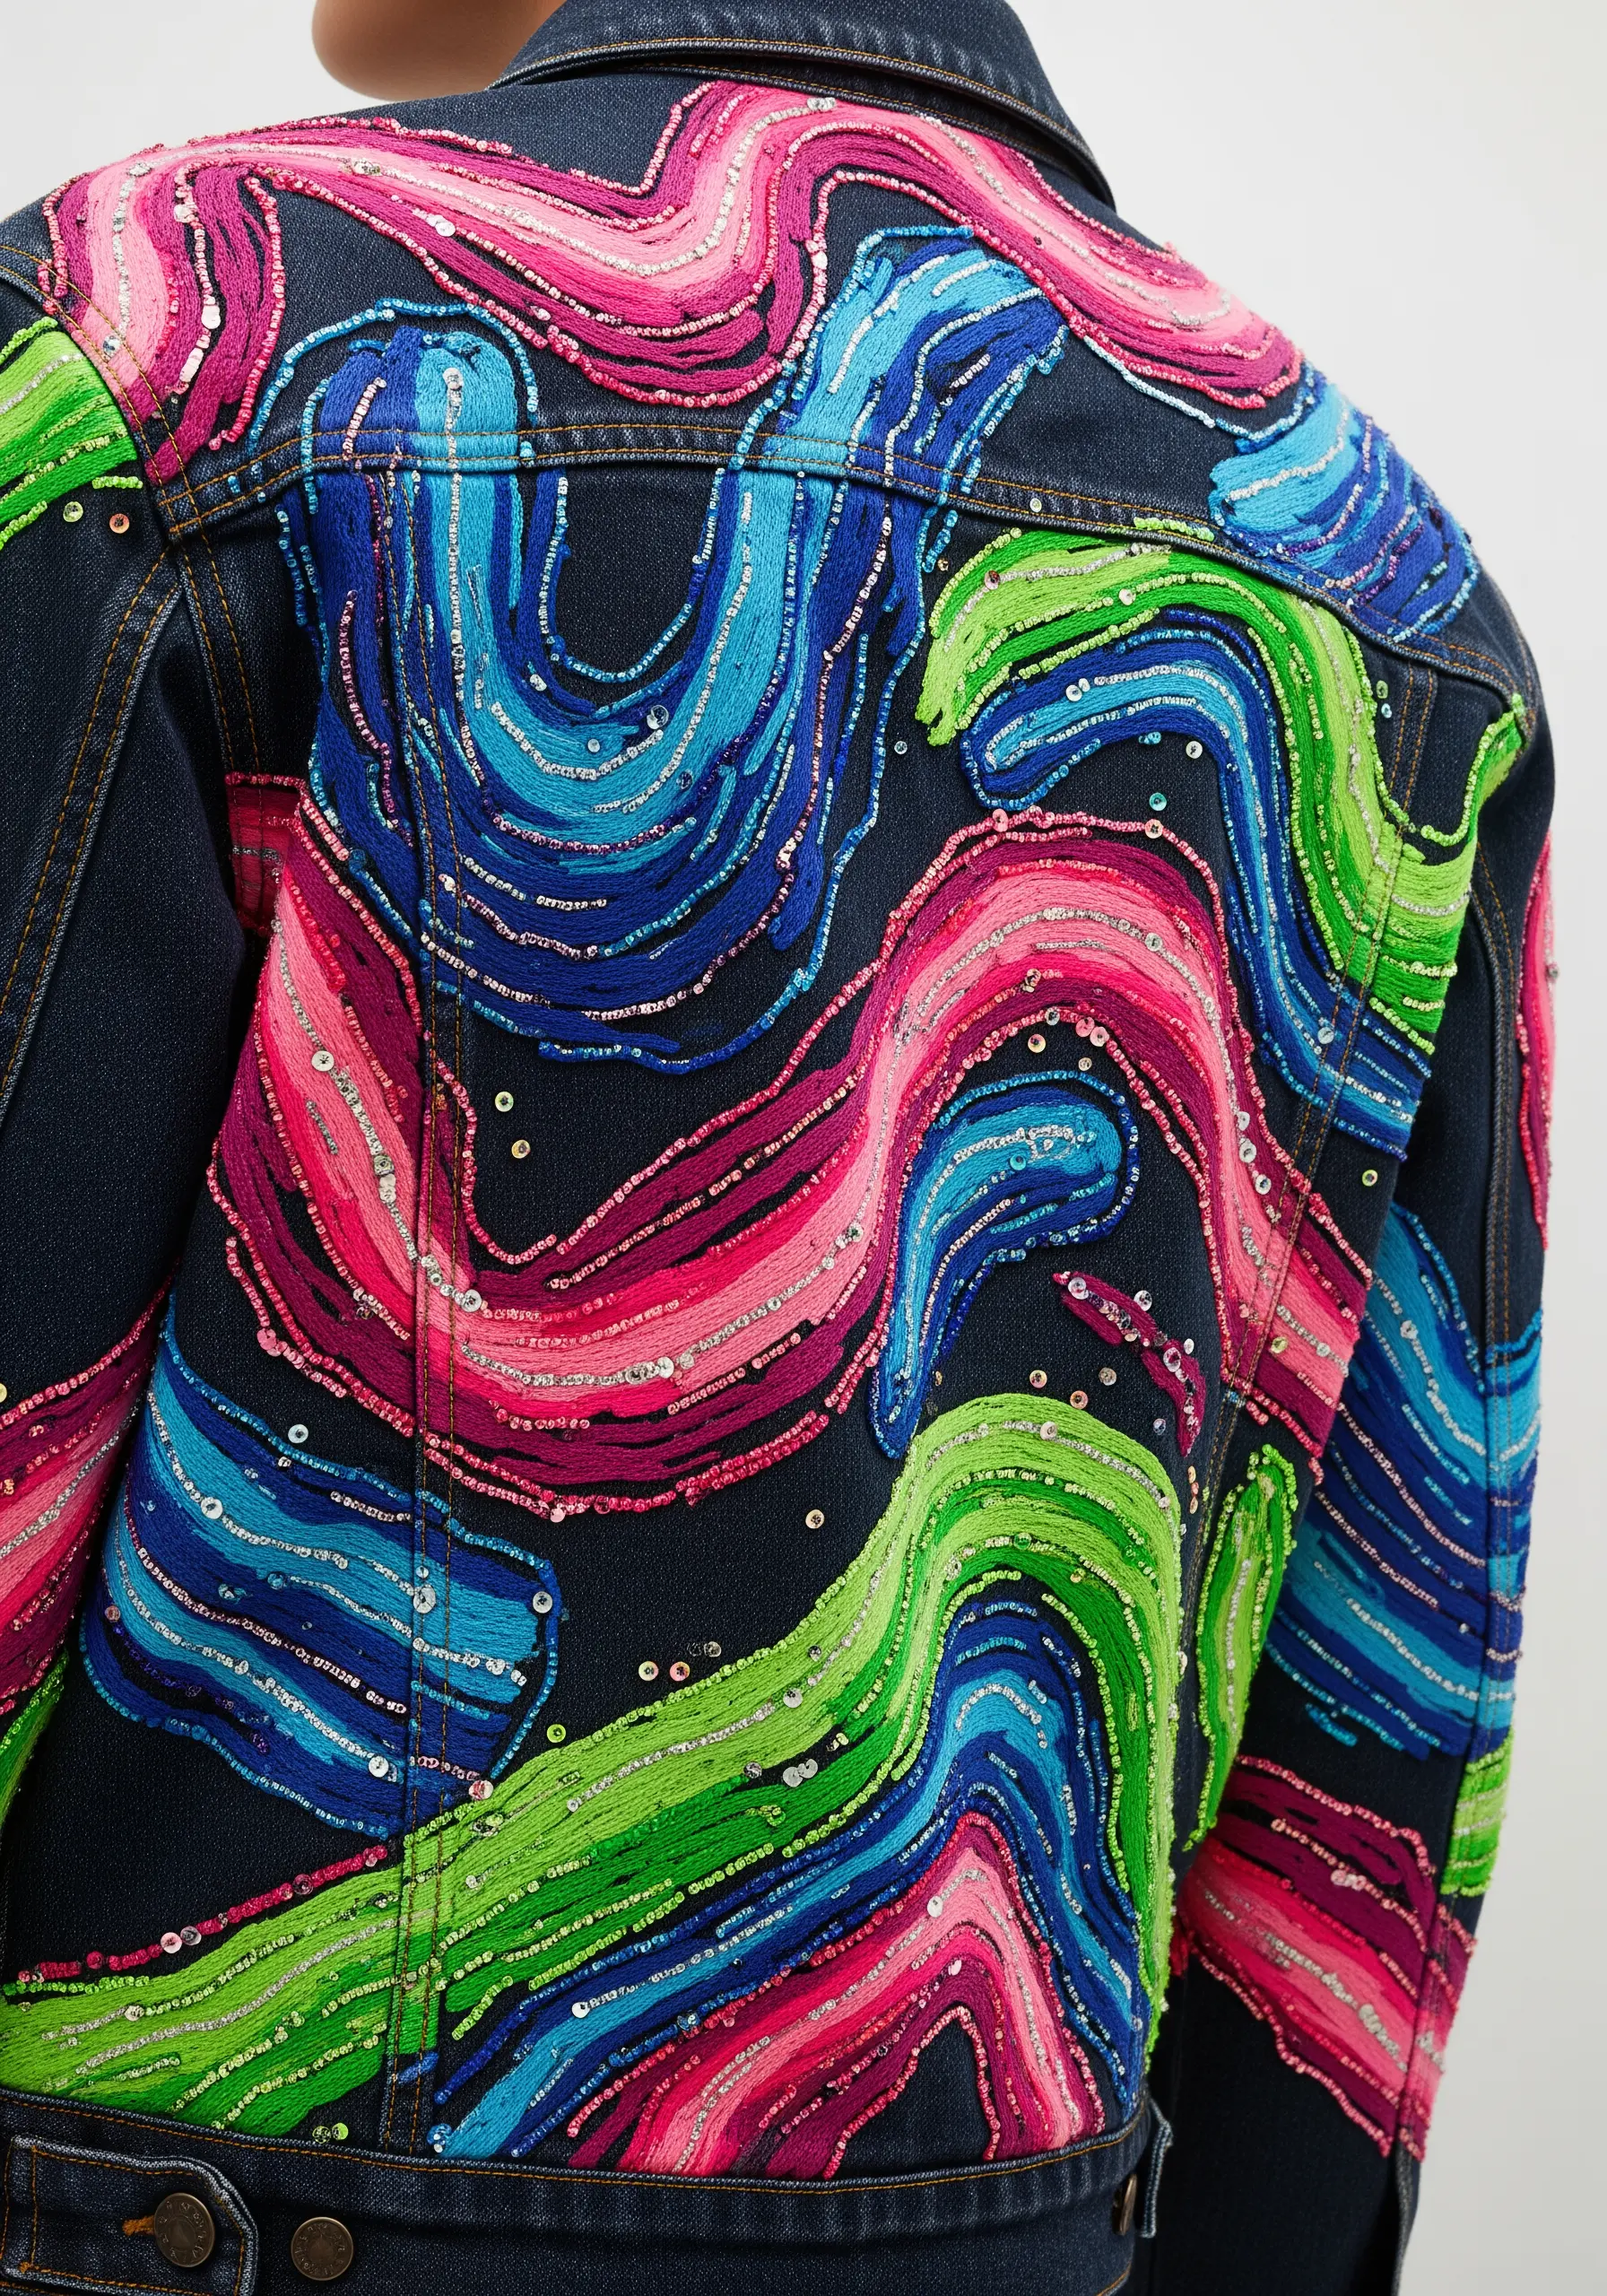
Combine the soft texture of thread with the hard shimmer of sequins to make your designs come alive on apparel.
First, fill in the broad areas of your waves with dense fields of seed stitch or satin stitch, focusing on bold color blocking.
Then, trace the edges of each color block with a line of sequins, stitching them down individually.
This technique adds a brilliant outline that catches the light with every movement, making the entire design pop with energy and dimension.
17. An Elegant Border of Rhythmic Waves
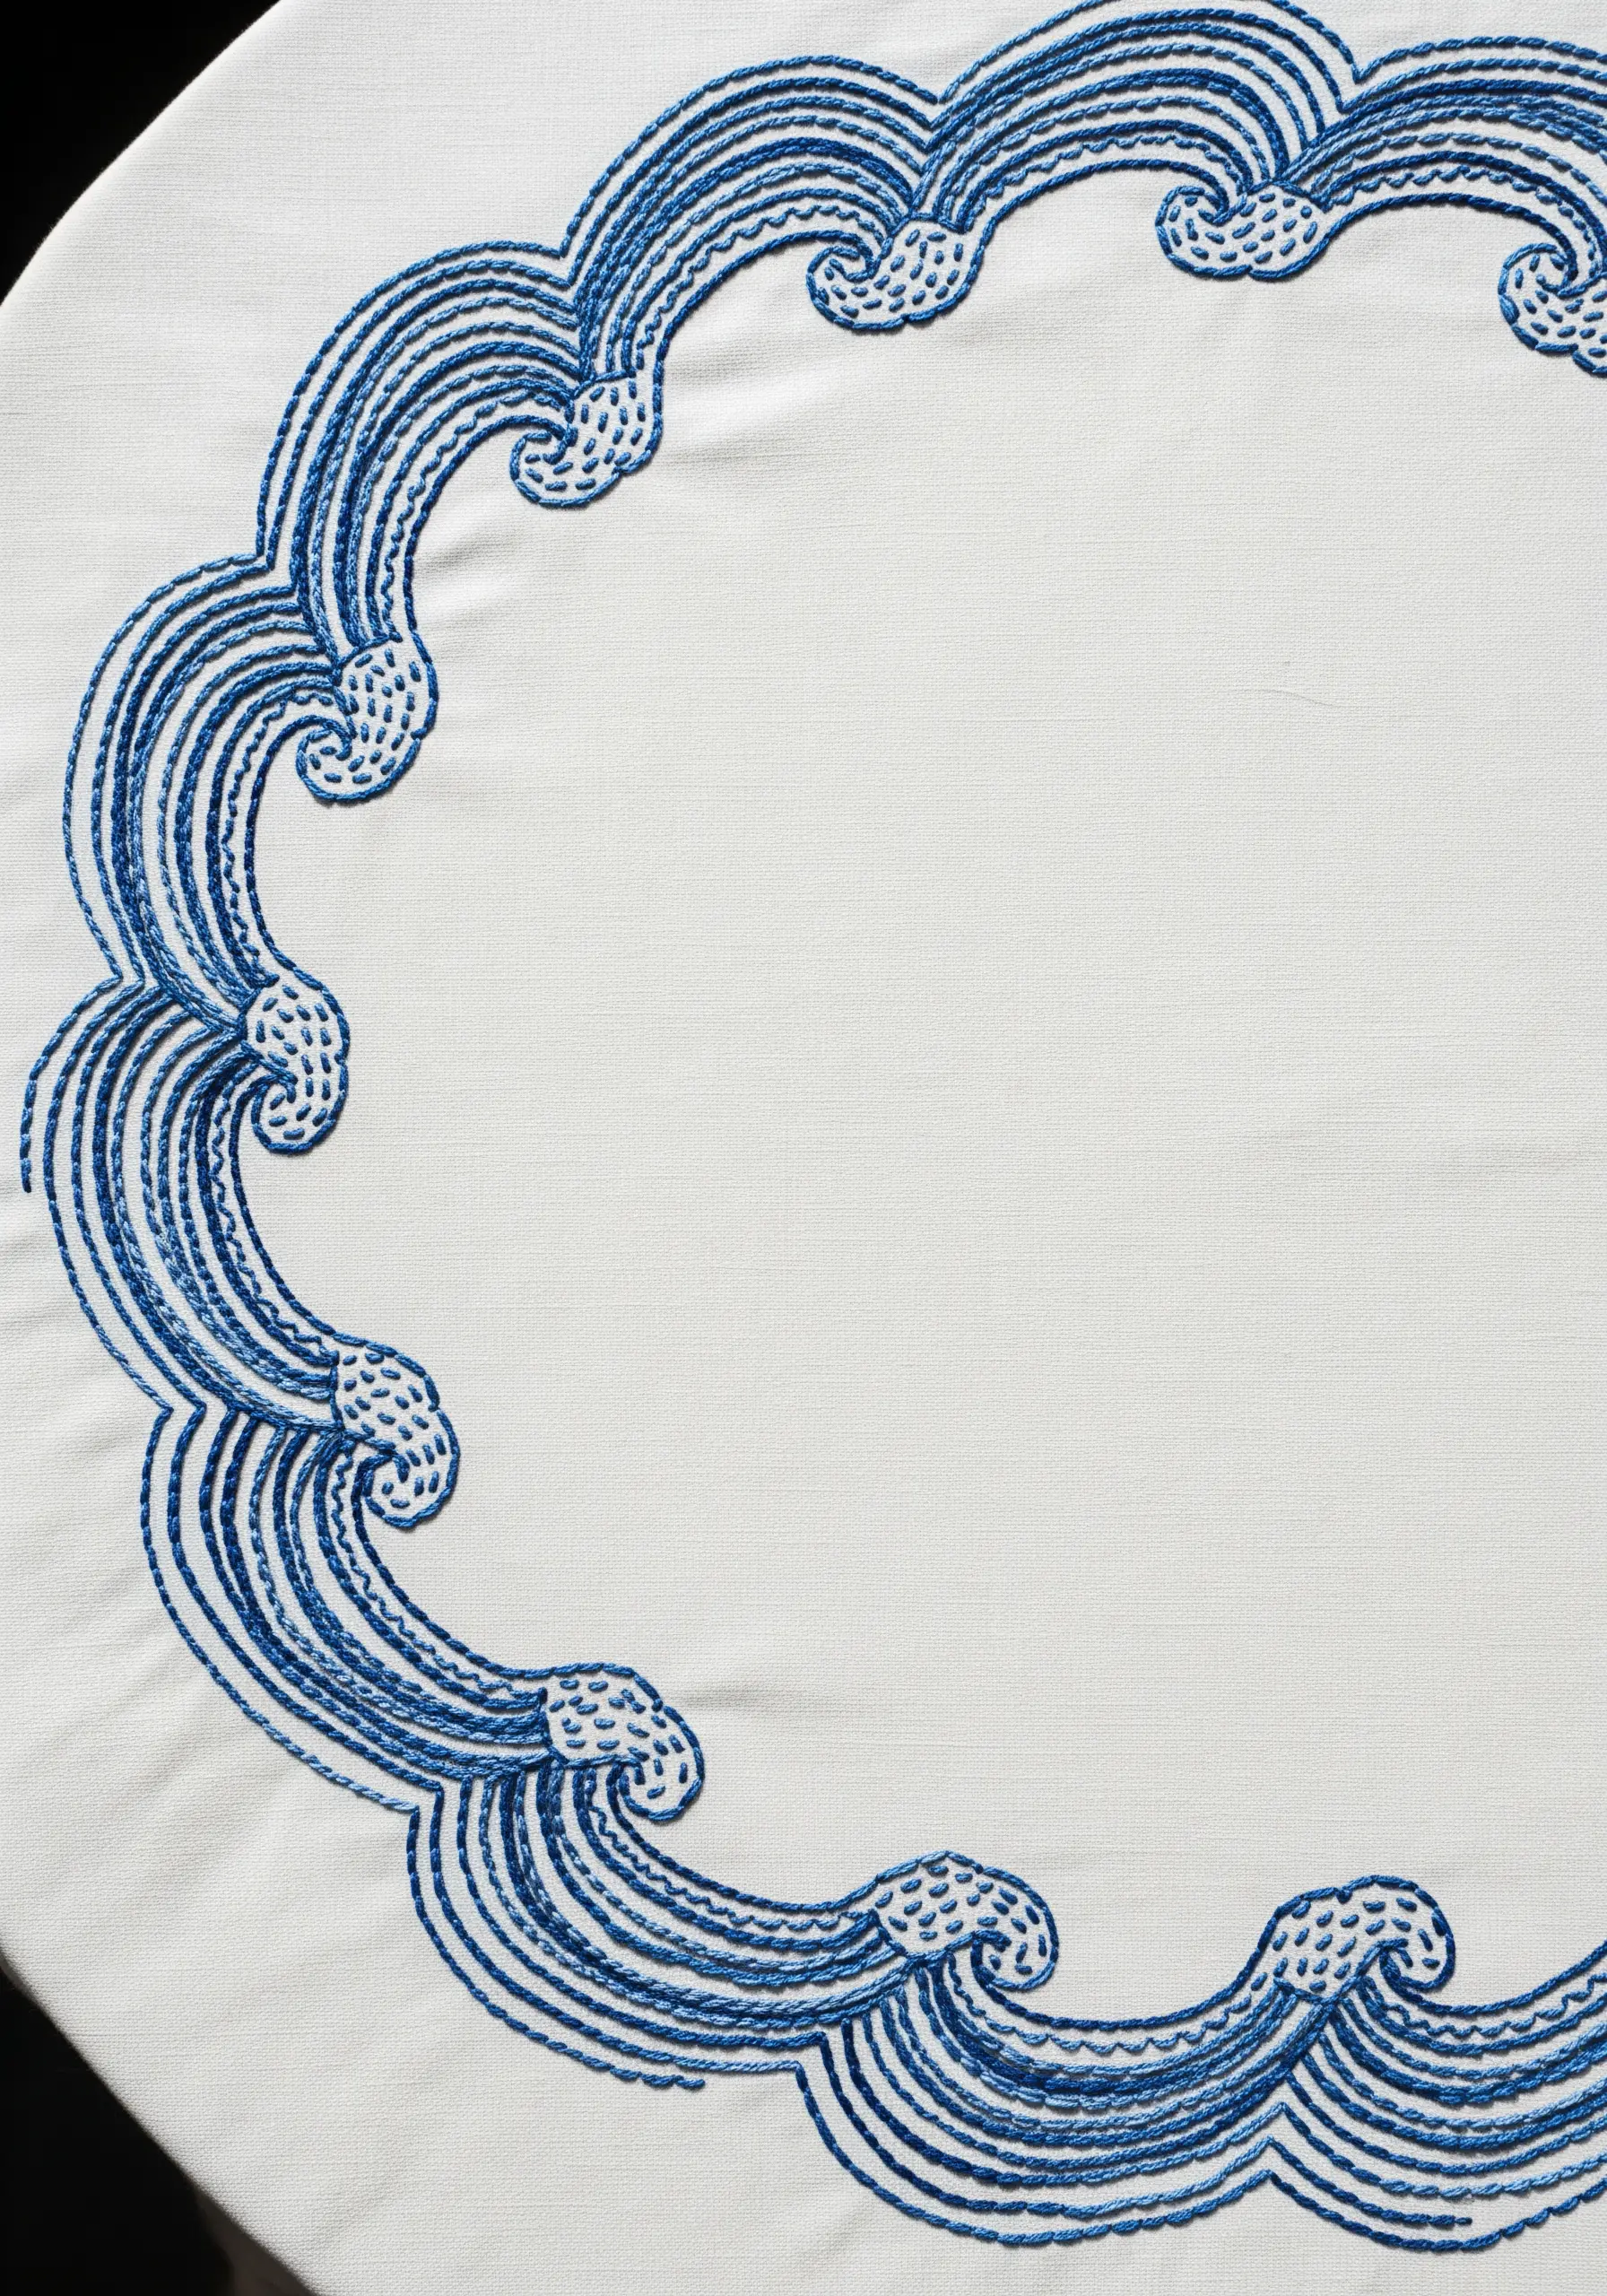
Transform a simple piece of table linen into an elegant heirloom with a classic, repeating wave border.
Use a consistent split stitch or stem stitch for the clean, flowing outlines of the waves. This creates a sense of continuous, rhythmic motion.
For the crests, add clusters of tightly packed French knots to represent sea foam, providing a beautiful textural contrast to the smooth outlines.
Sticking to a single, sophisticated color, like this classic blue, ensures the design feels timeless and refined.
18. Weaving a Storm with Directional Stitches
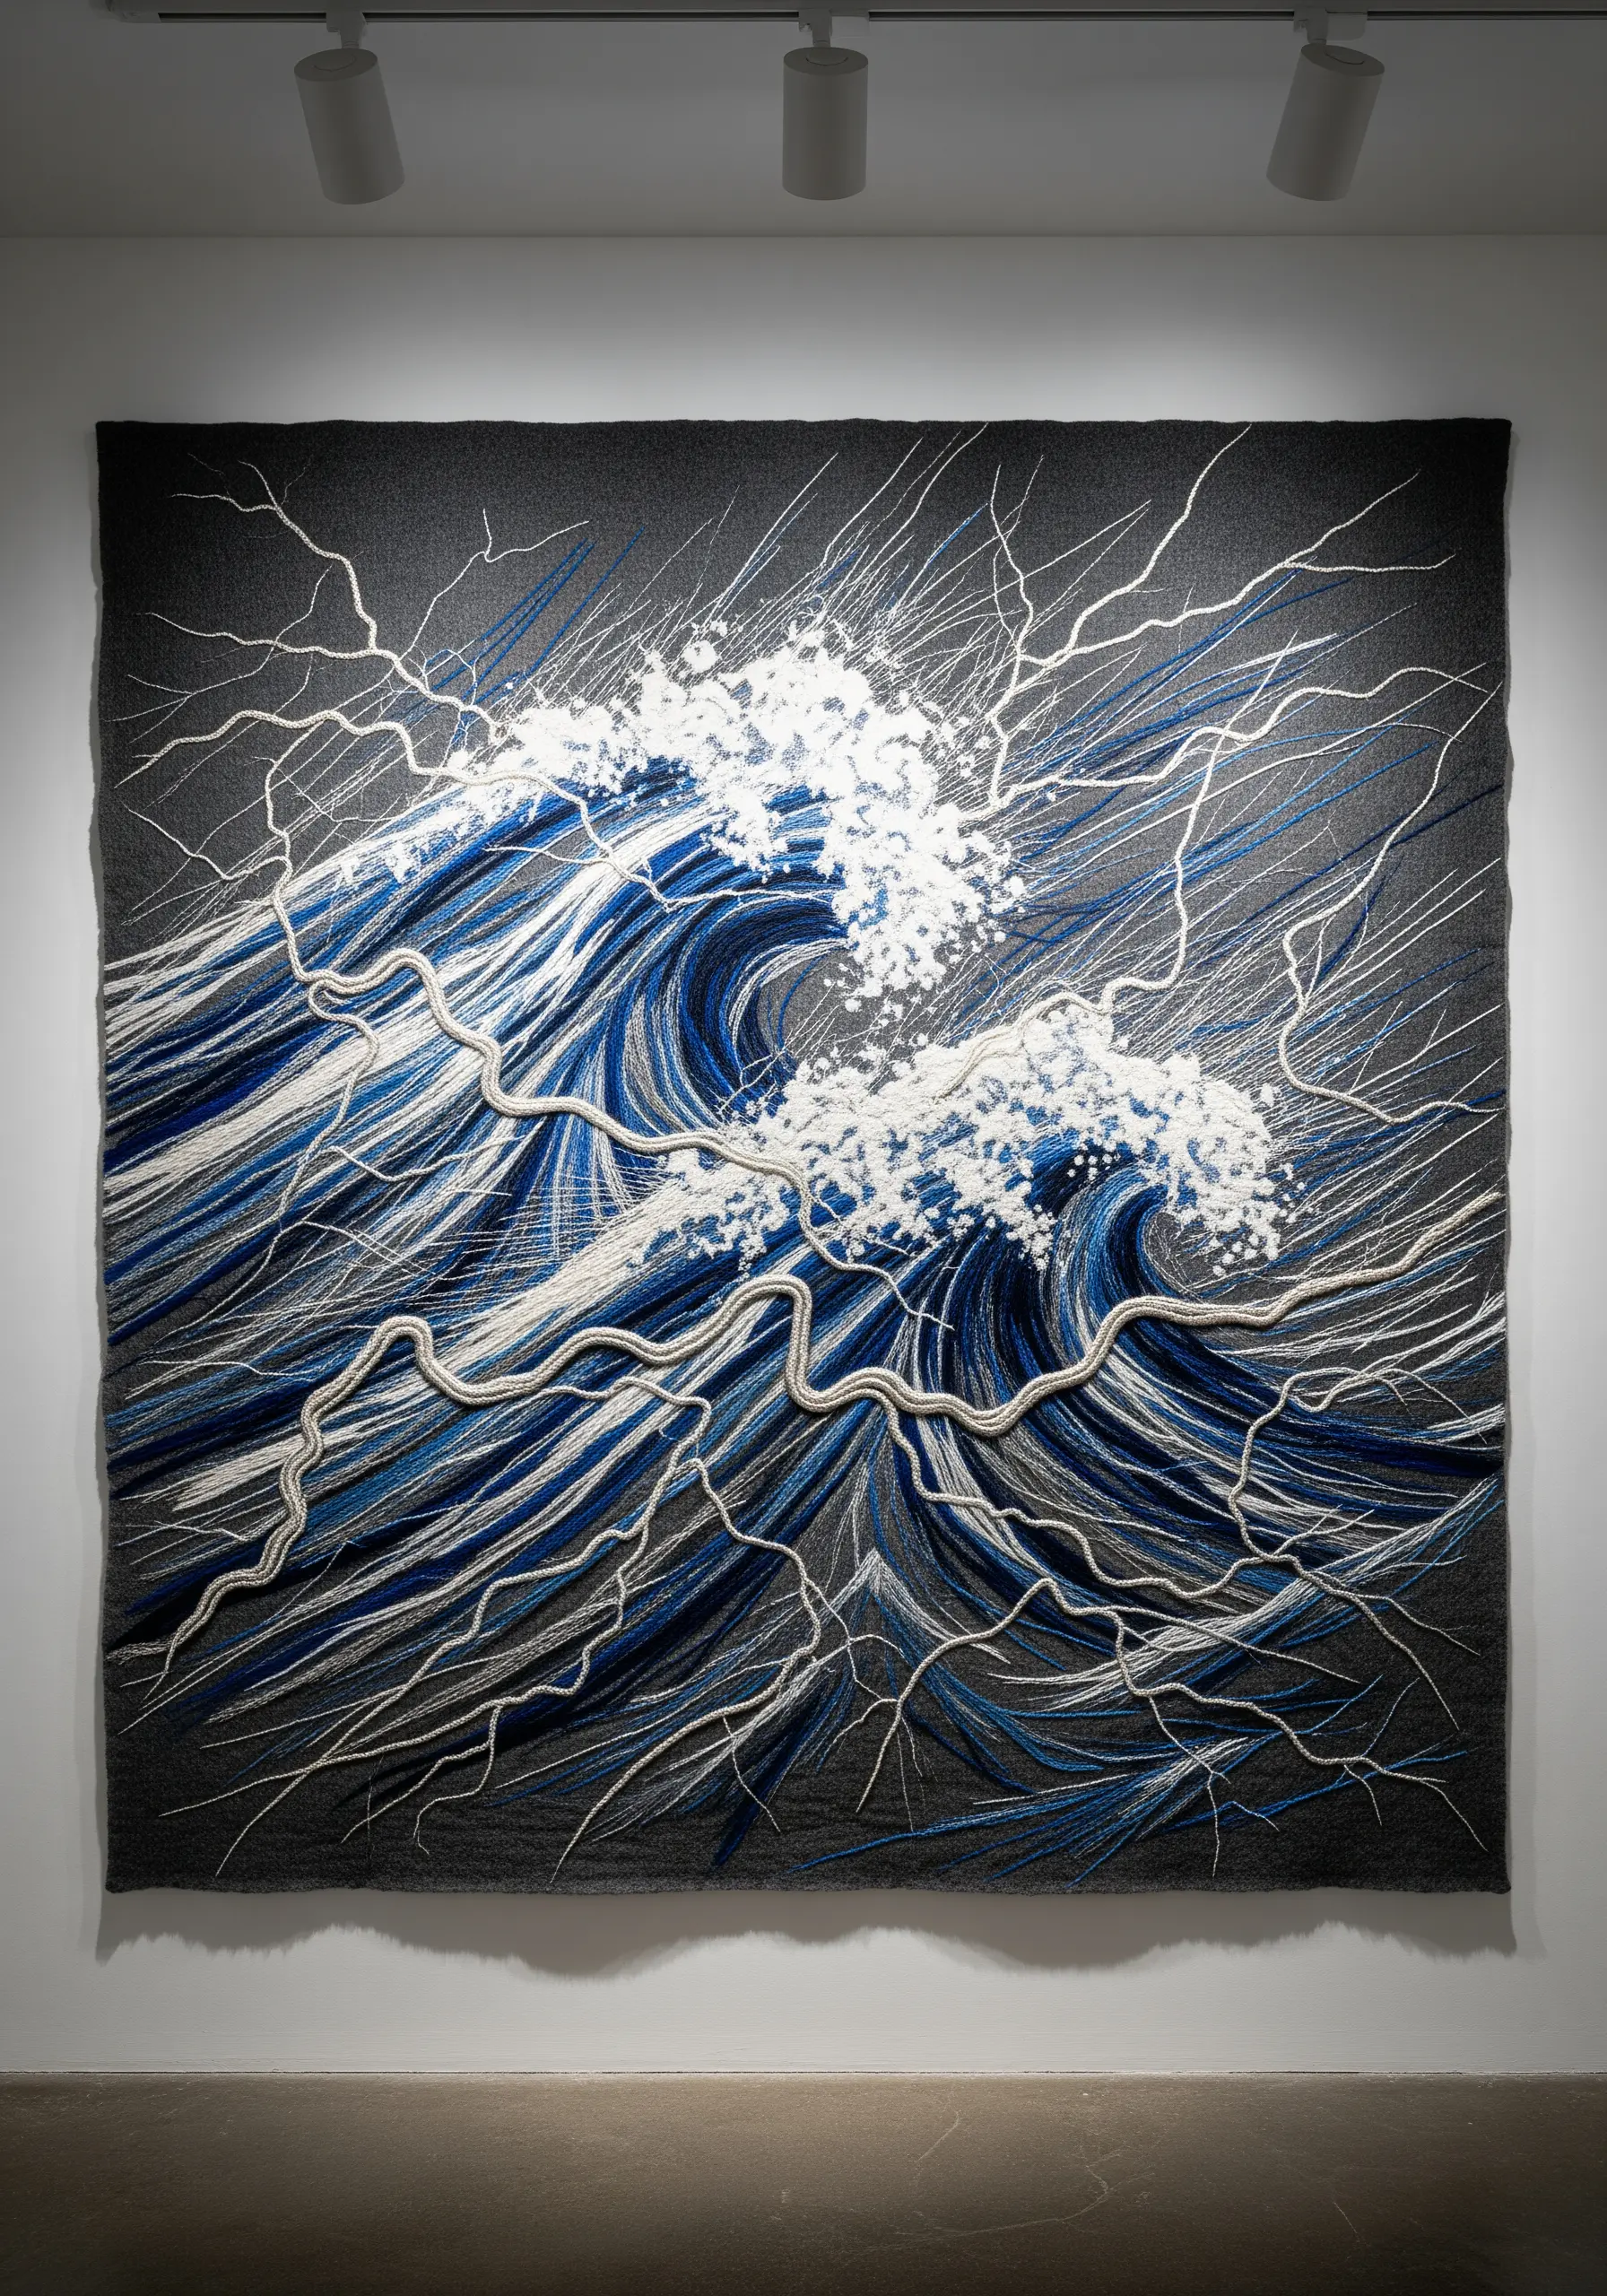
The key to conveying the chaos of a storm is controlling the direction of your stitches.
Use long-and-short stitch for the body of the waves, but angle the stitches sharply and erratically to suggest powerful, wind-driven water.
Create explosive sea spray by stitching dense, chaotic clusters of French knots in stark white and pale grey.
Finally, render lightning with a thin, jagged backstitch in a bright white thread, letting it cut across the darker background for maximum dramatic impact.
19. The Power of a Single, Delicate Line on Paper

Explore the quiet beauty of minimalism by stitching a single line on high-quality, handmade paper.
The crucial first step is to pre-pierce your stitching holes along the design line with a fine, sharp needle. This prevents the paper from tearing as you stitch.
Use a simple backstitch or stem stitch with a single strand of floss to create a clean, uninterrupted curve.
This technique elevates the thread itself into a form of drawing, creating a piece of art that is both delicate and profoundly intentional. It’s a beautiful way to use thread, paper, and tiny hand-stitched details.
20. Gilded Swirls for a Precious Object
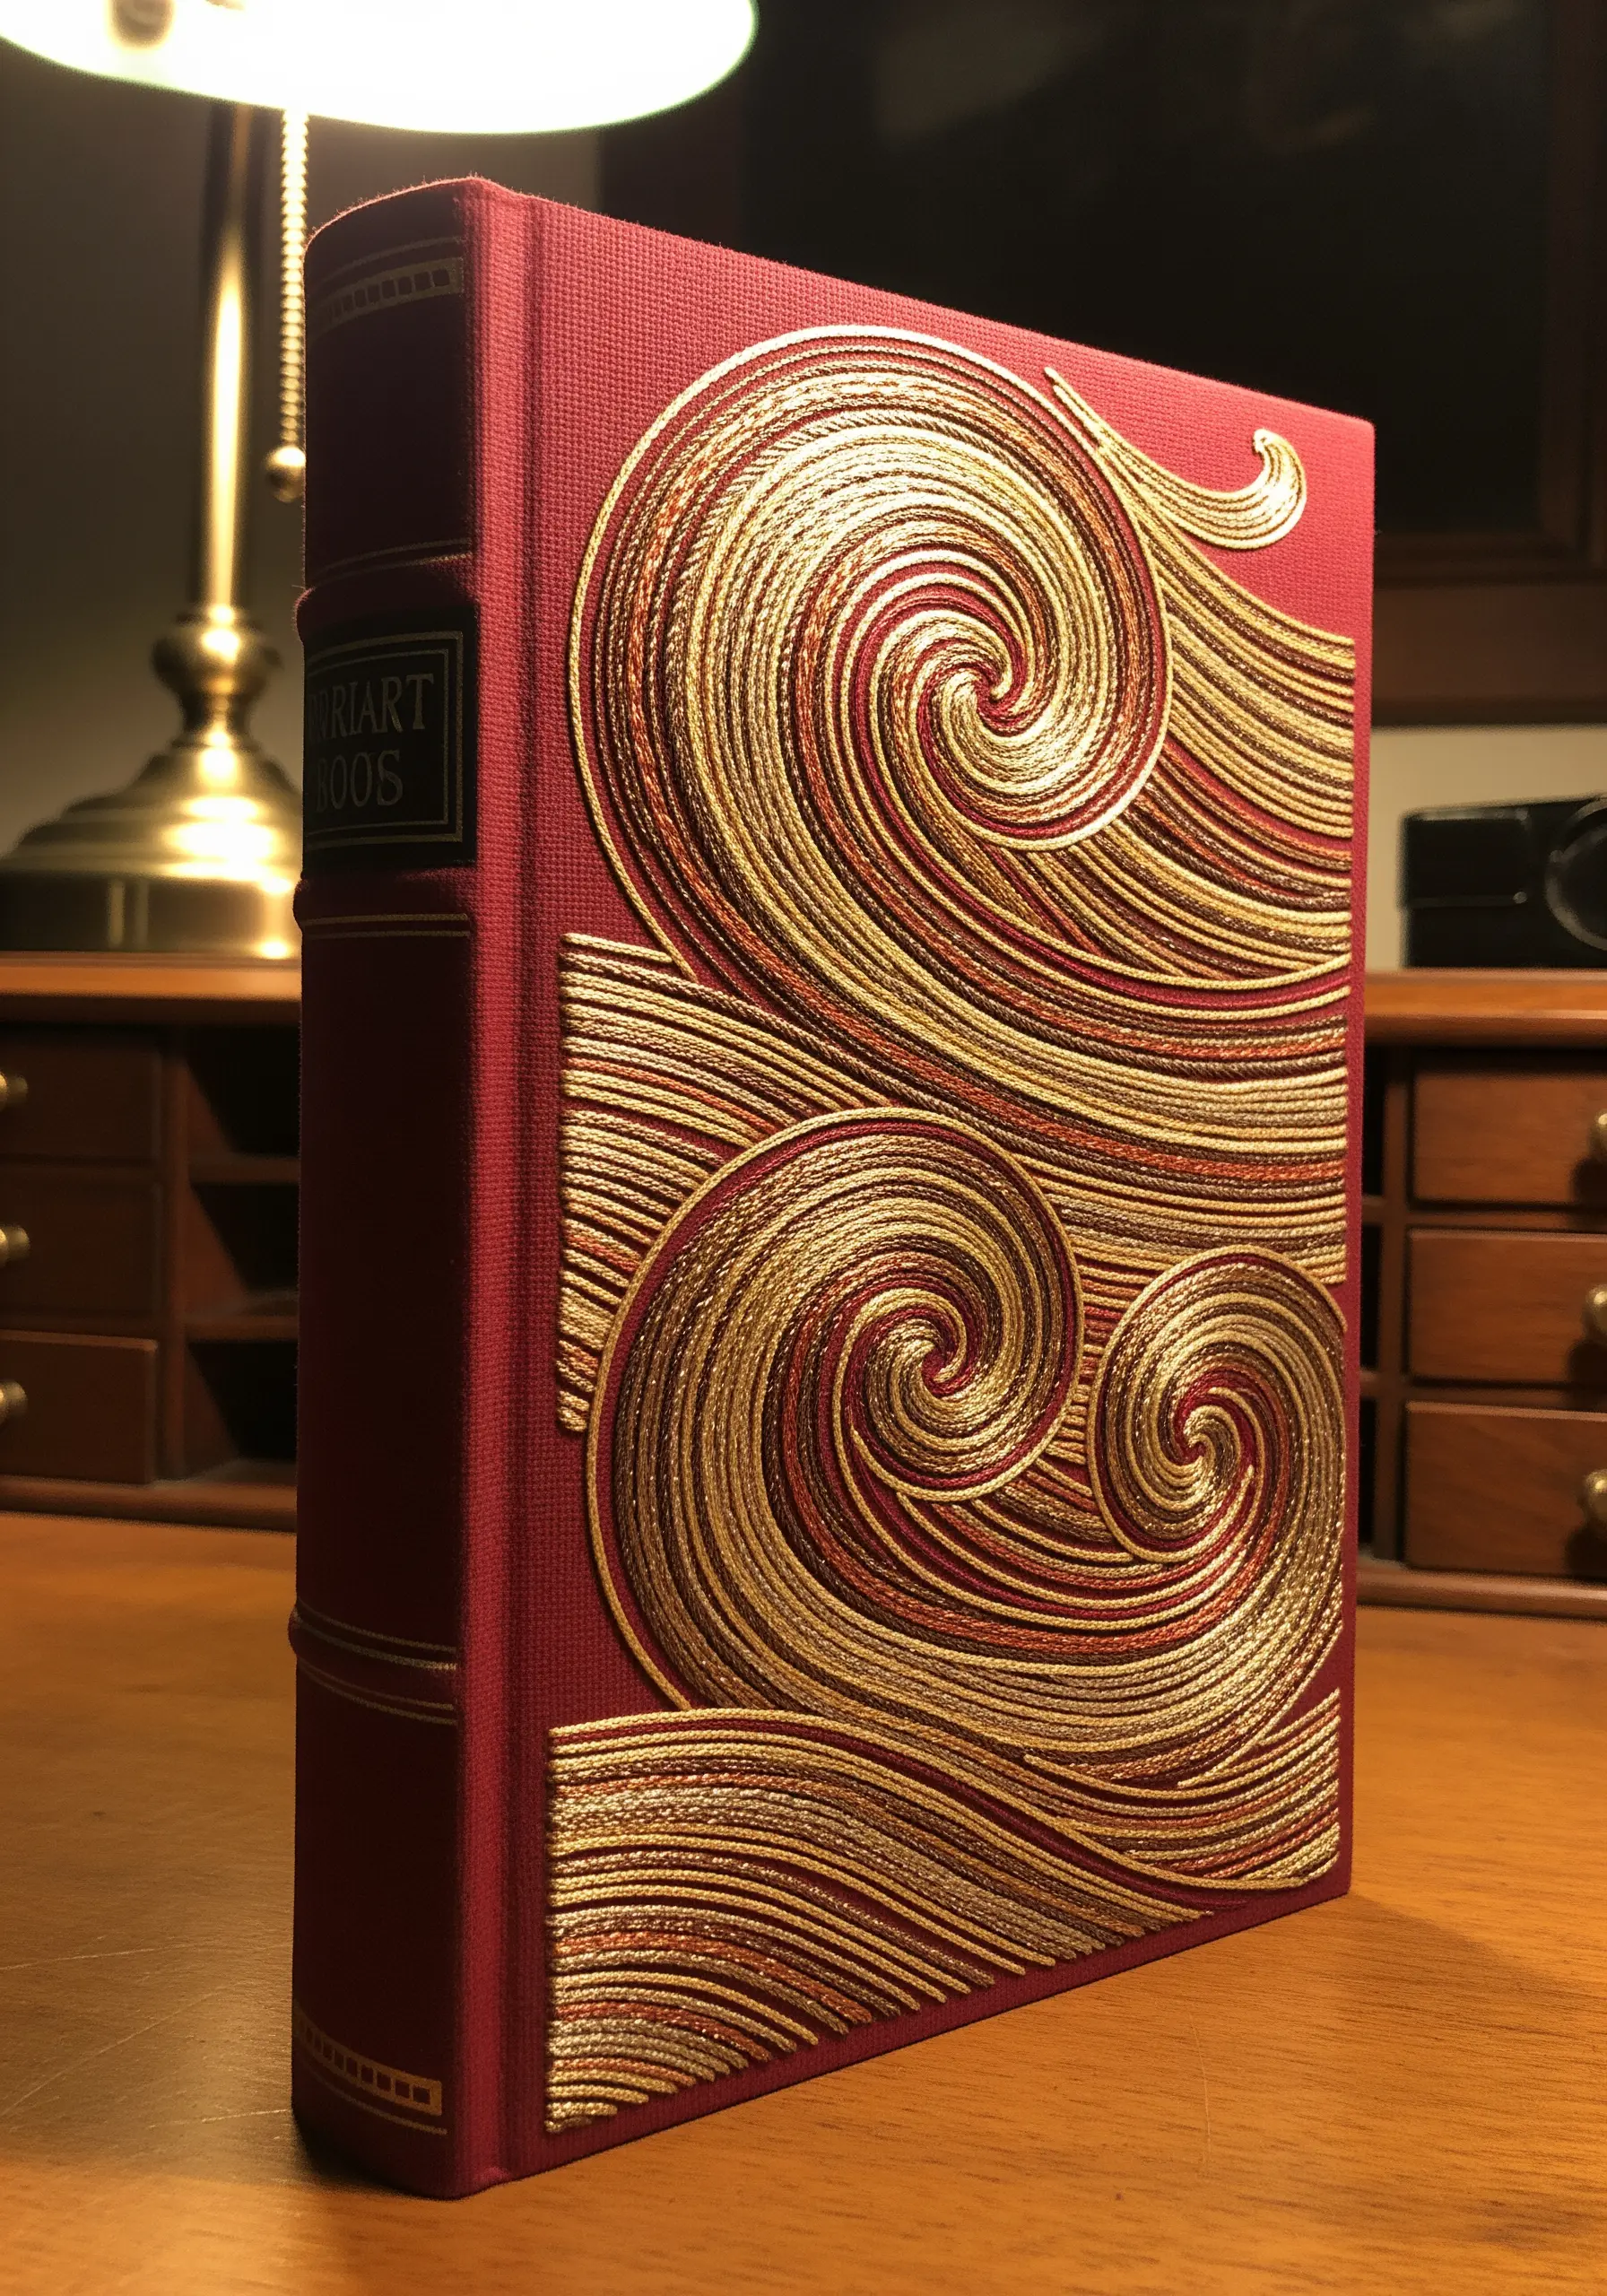
To give your embroidery a raised, embossed quality, use the technique of padded satin stitch.
First, create a foundation for your design by stitching several layers of straight stitches or cutting a piece of felt to shape. This is your padding.
Next, work your satin stitches over this padding using a high-sheen thread, like silk or a metallic floss.
The padding lifts the stitches off the surface, creating dramatic highlights and shadows that give the design a luxurious, sculpted, and antique look.
21. Capturing the Wind with Layered Straight Stitches
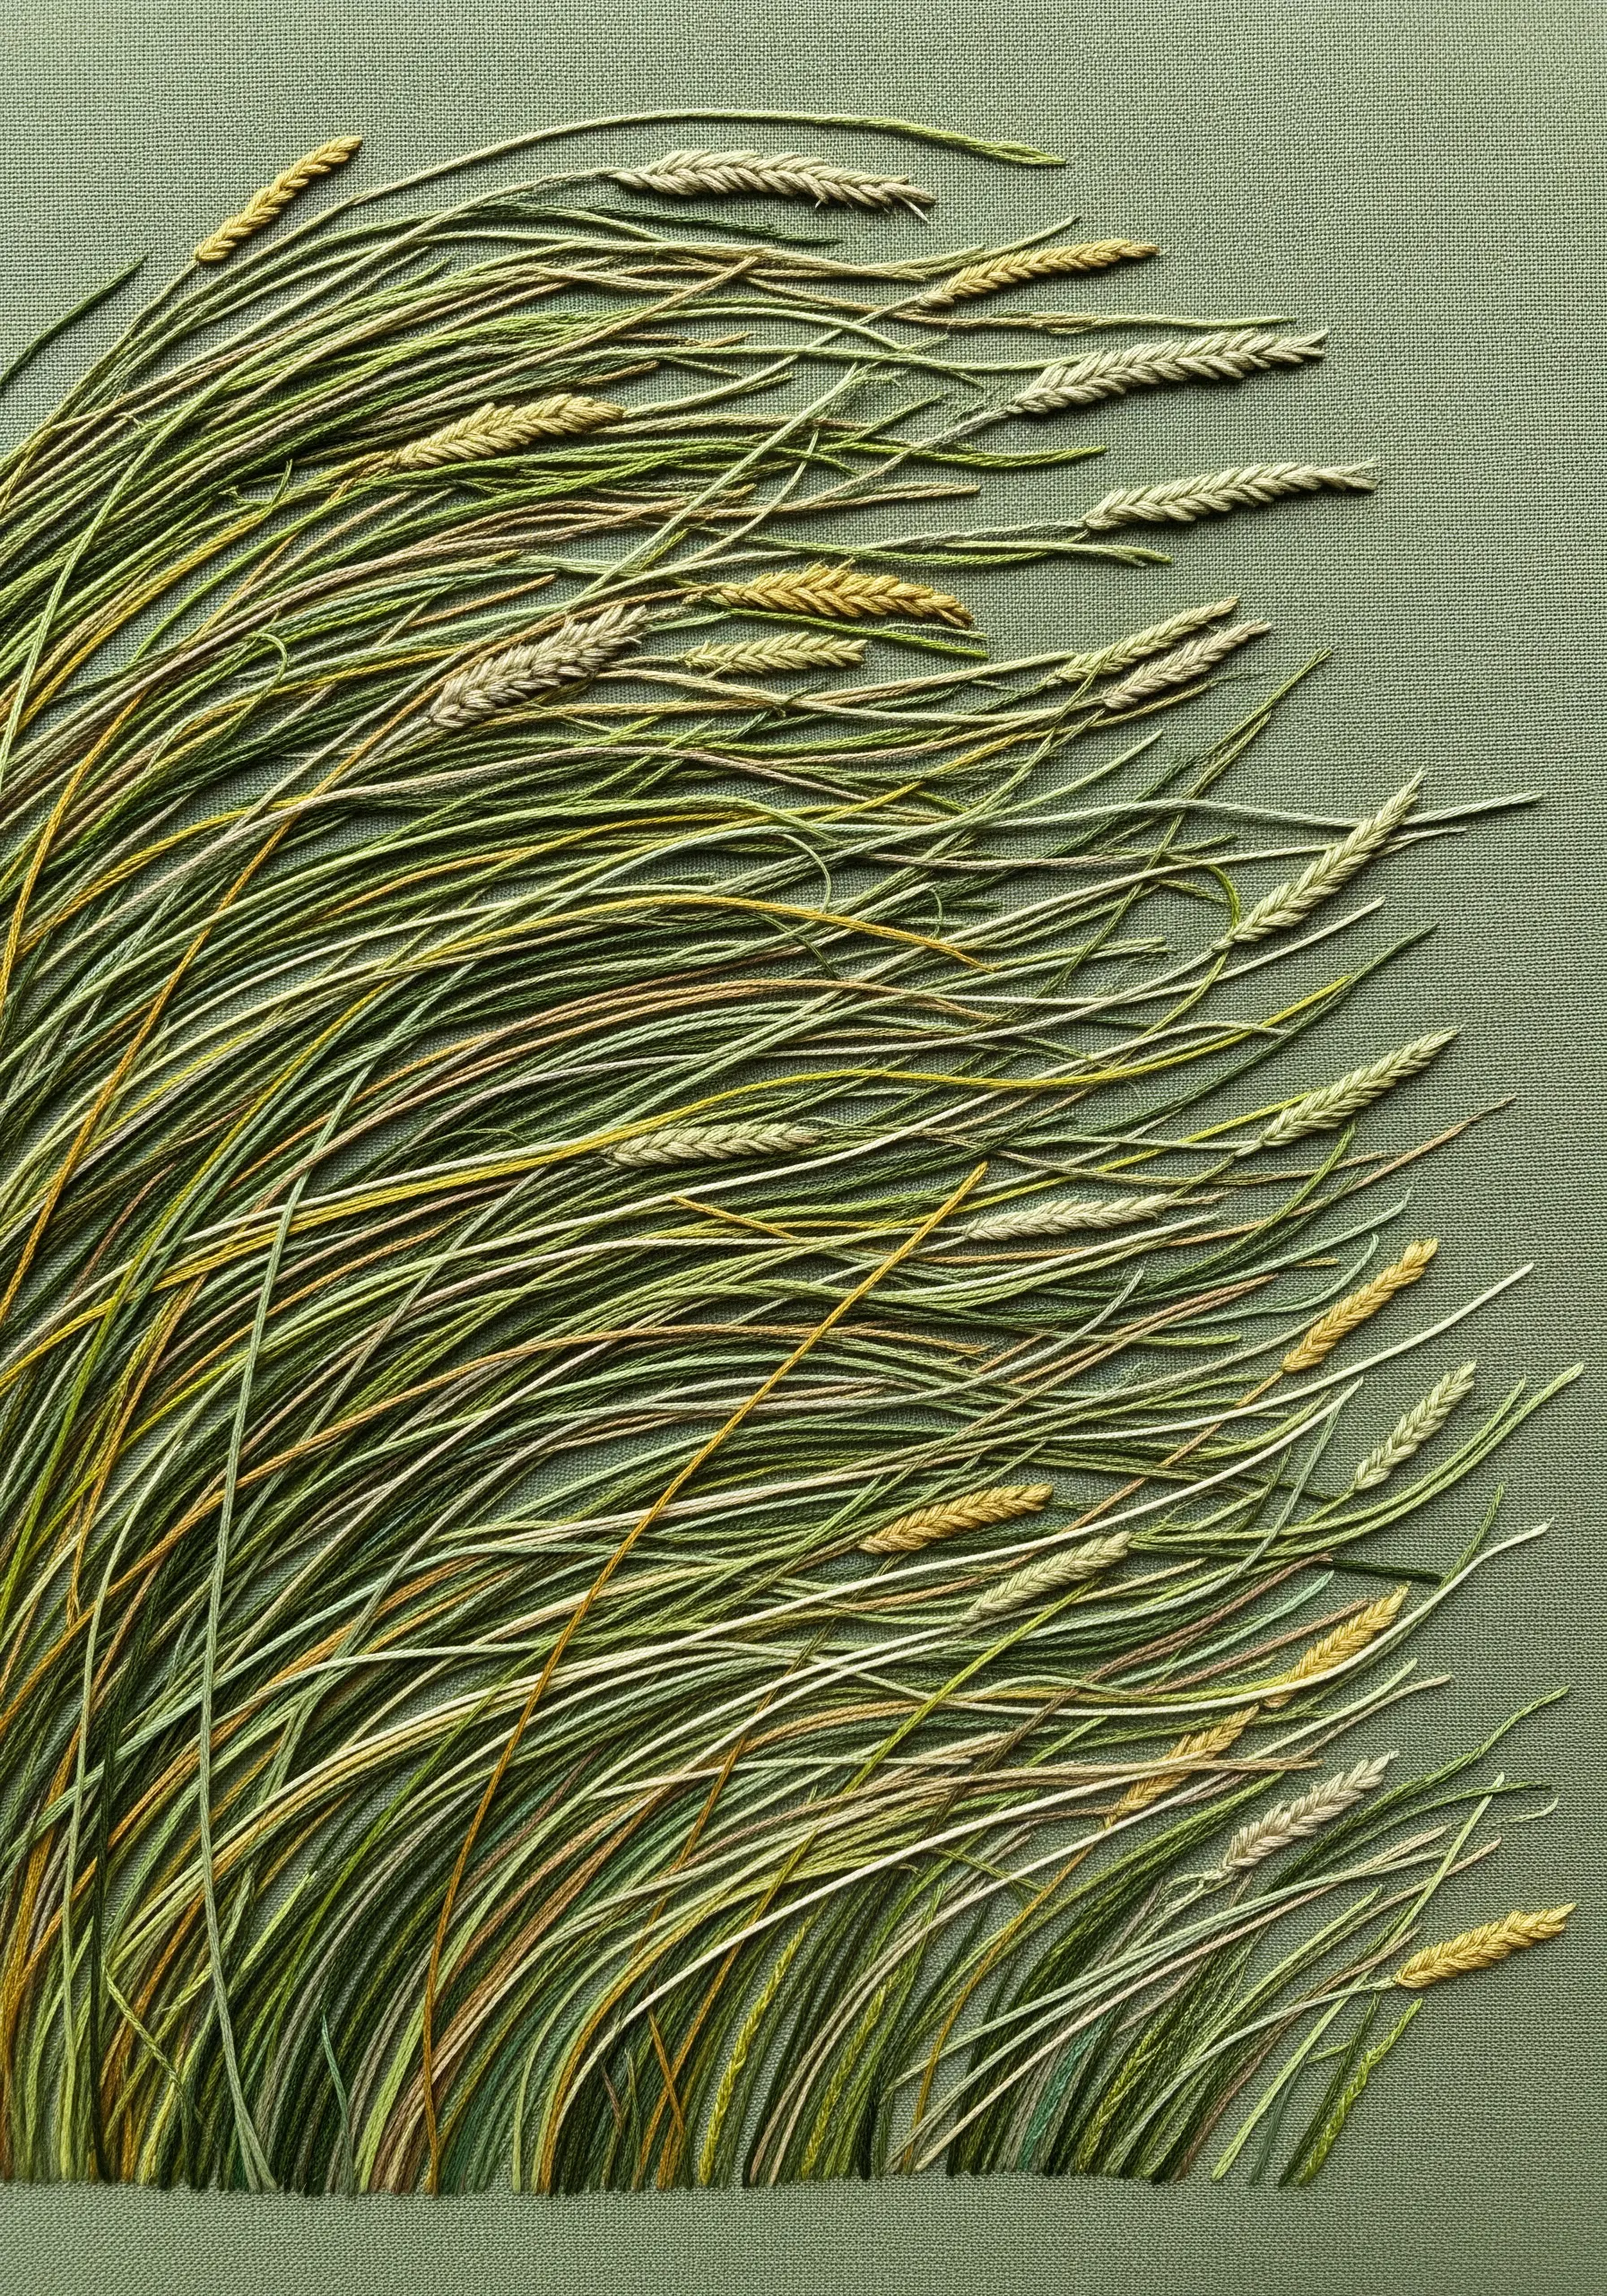
Suggest the invisible force of wind by carefully directing the flow of your stitches.
Use simple straight stitches to represent blades of grass, but ensure they all curve in the same general direction, as if bent by a breeze.
Create a naturalistic look by layering your stitches, using slightly darker shades of green in the background and lighter, yellowish tones in the foreground.
Varying the length, angle, and density of each stitch is what will make the final composition feel alive and full of movement.
22. Creating Optical Depth with Concentric Chain Stitch
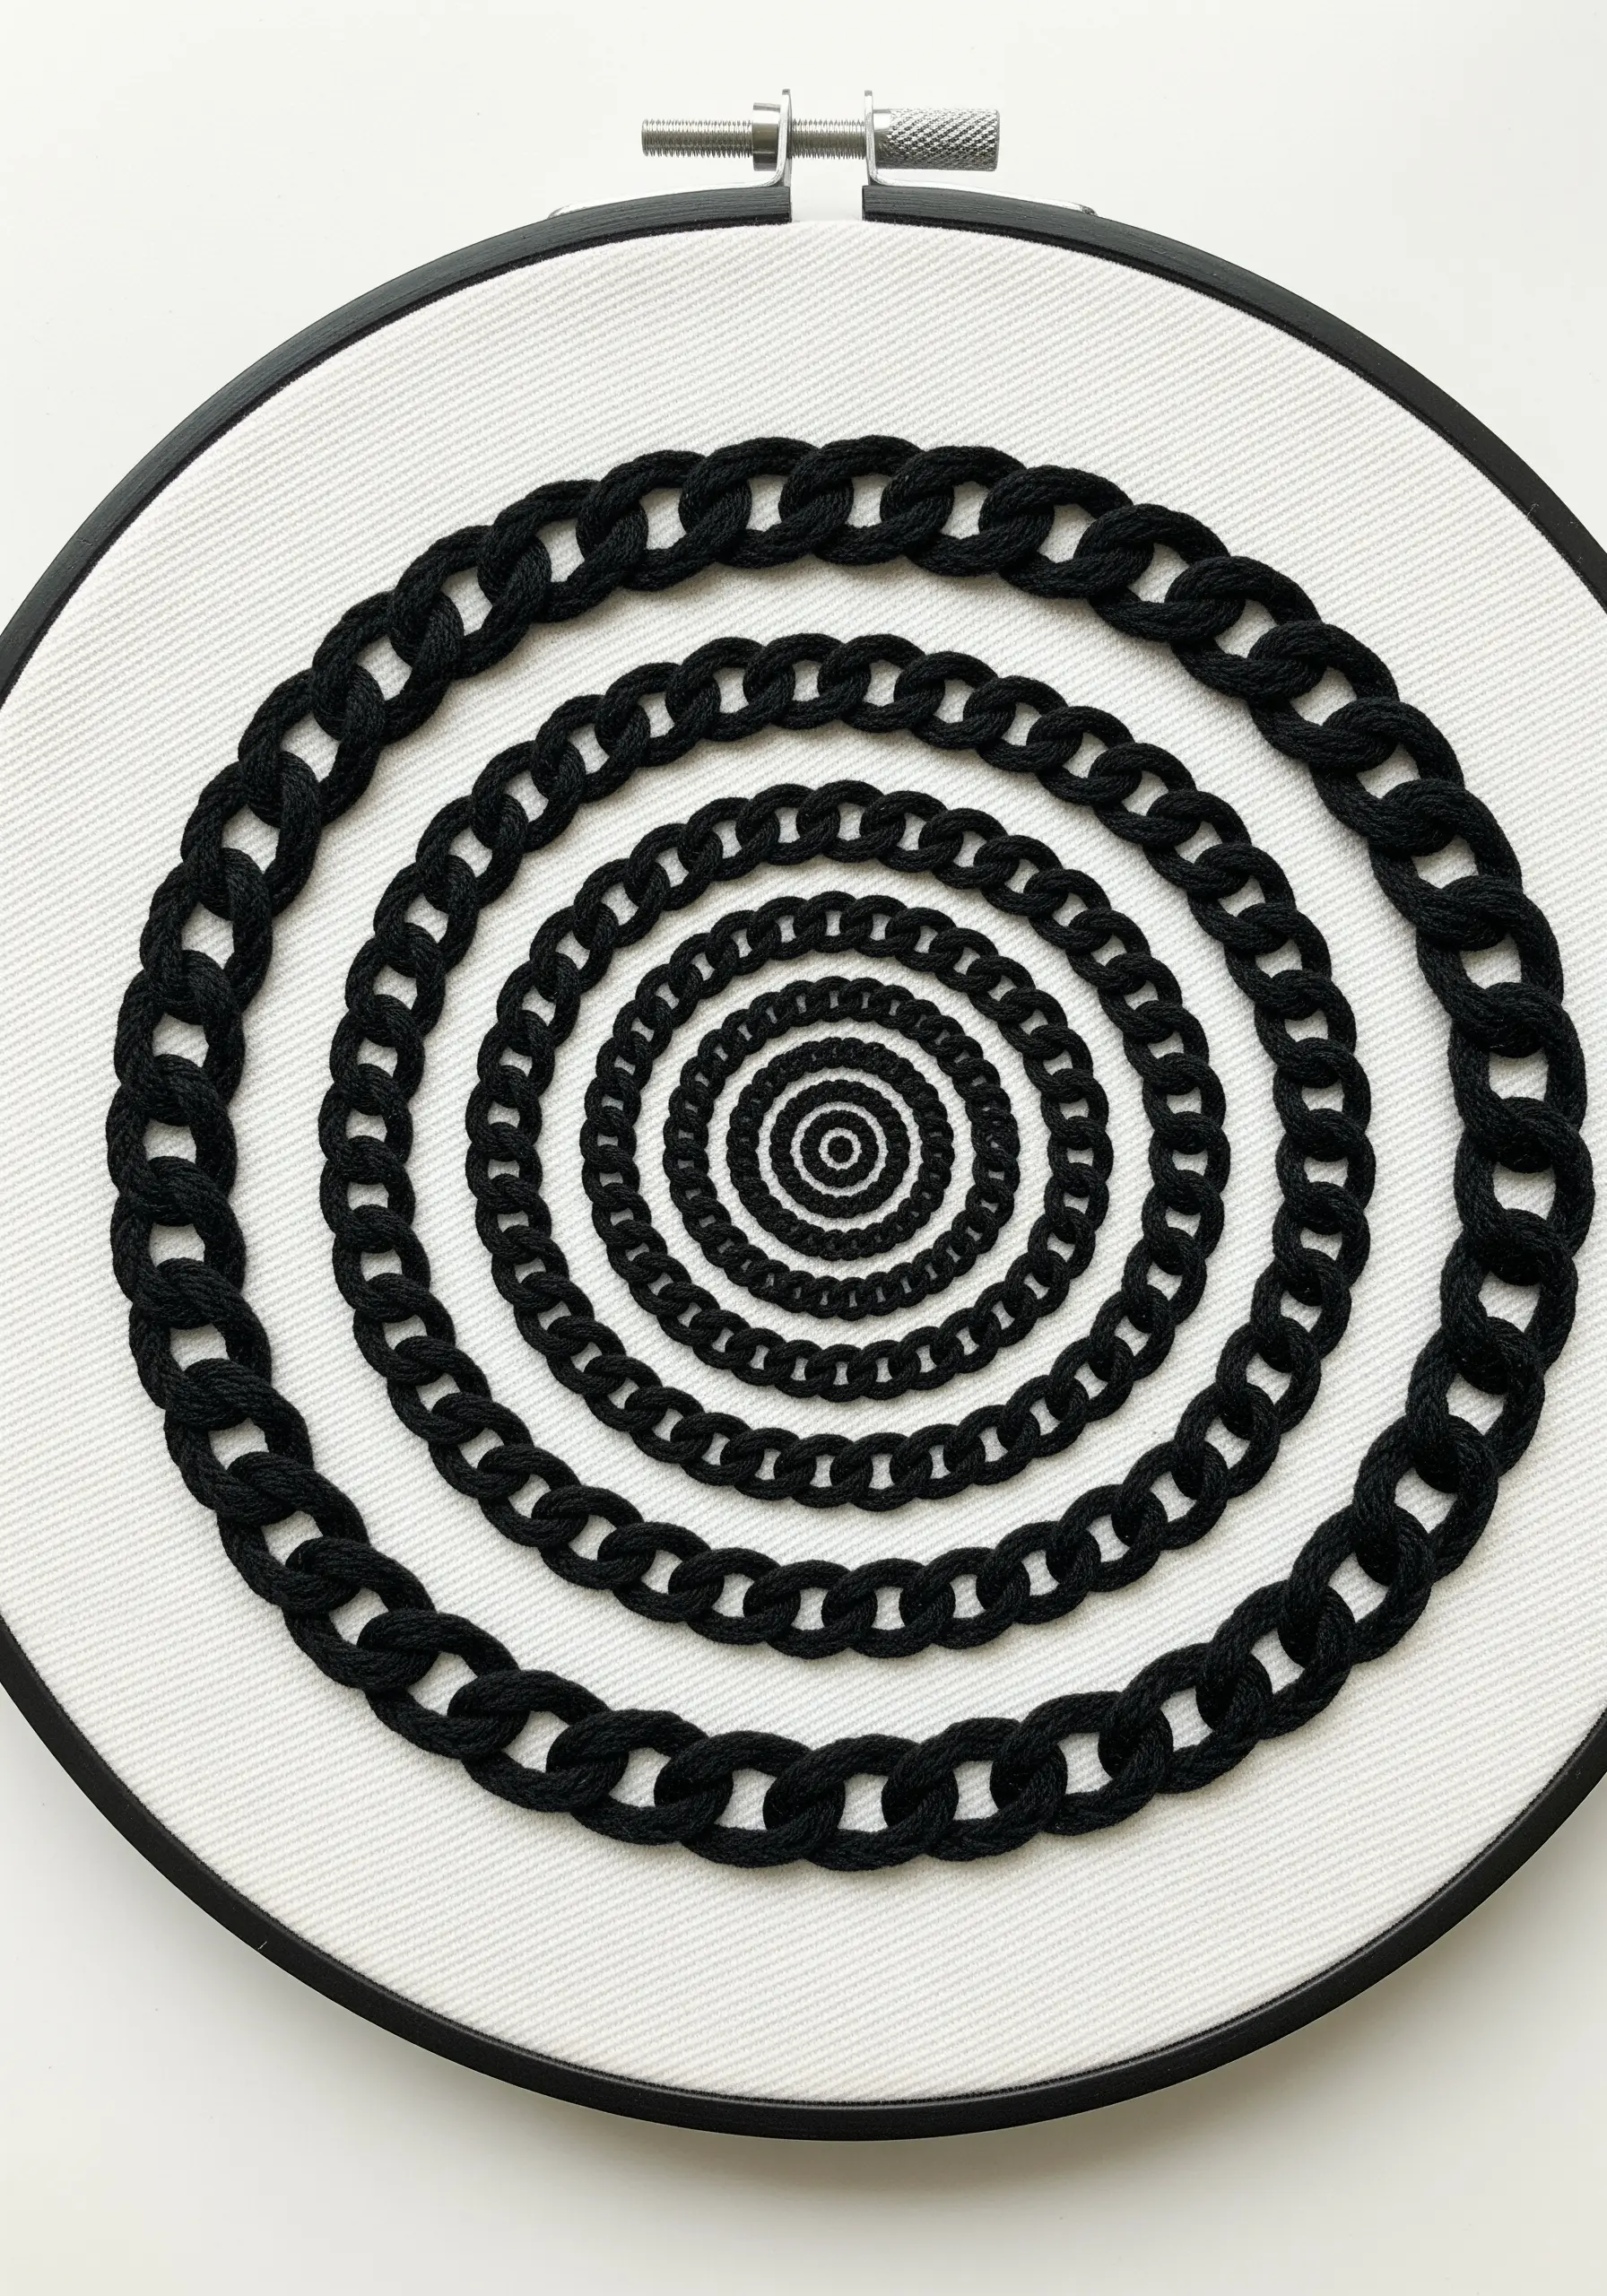
Use the texture of a single stitch to create a powerful optical illusion.
The chain stitch has a distinct, rope-like quality that forms strong, graphic lines.
When stitched in perfect concentric circles, these textured lines draw the eye inward, creating a hypnotic sense of a vortex or tunnel.
This technique is a perfect example of how a simple stitch, when used with intention and precision, can become the foundation for striking minimalist embroidery wall art ideas.


