
Have you ever finished a piece and felt it was missing a certain spark? That it was pleasant, but not quite *art*? The solution isn’t always a more complex pattern—it’s in the small, intentional details that elevate your work from a hobby to a craft.
These tiny hoops are your laboratory. They are the perfect canvas for experimenting with a new stitch, a different thread weight, or a surprising color combination. Mastering the way a single change—like switching from satin stitch to French knots for texture—can transform a simple design is the key to developing your unique artistic voice.
Consider these projects less as finished products and more as opportunities for focused practice. Each one is a chance to refine a skill, build your confidence, and create beautiful, marketable art that truly reflects your growing expertise.
1. Render Lavender with Texture and Restraint
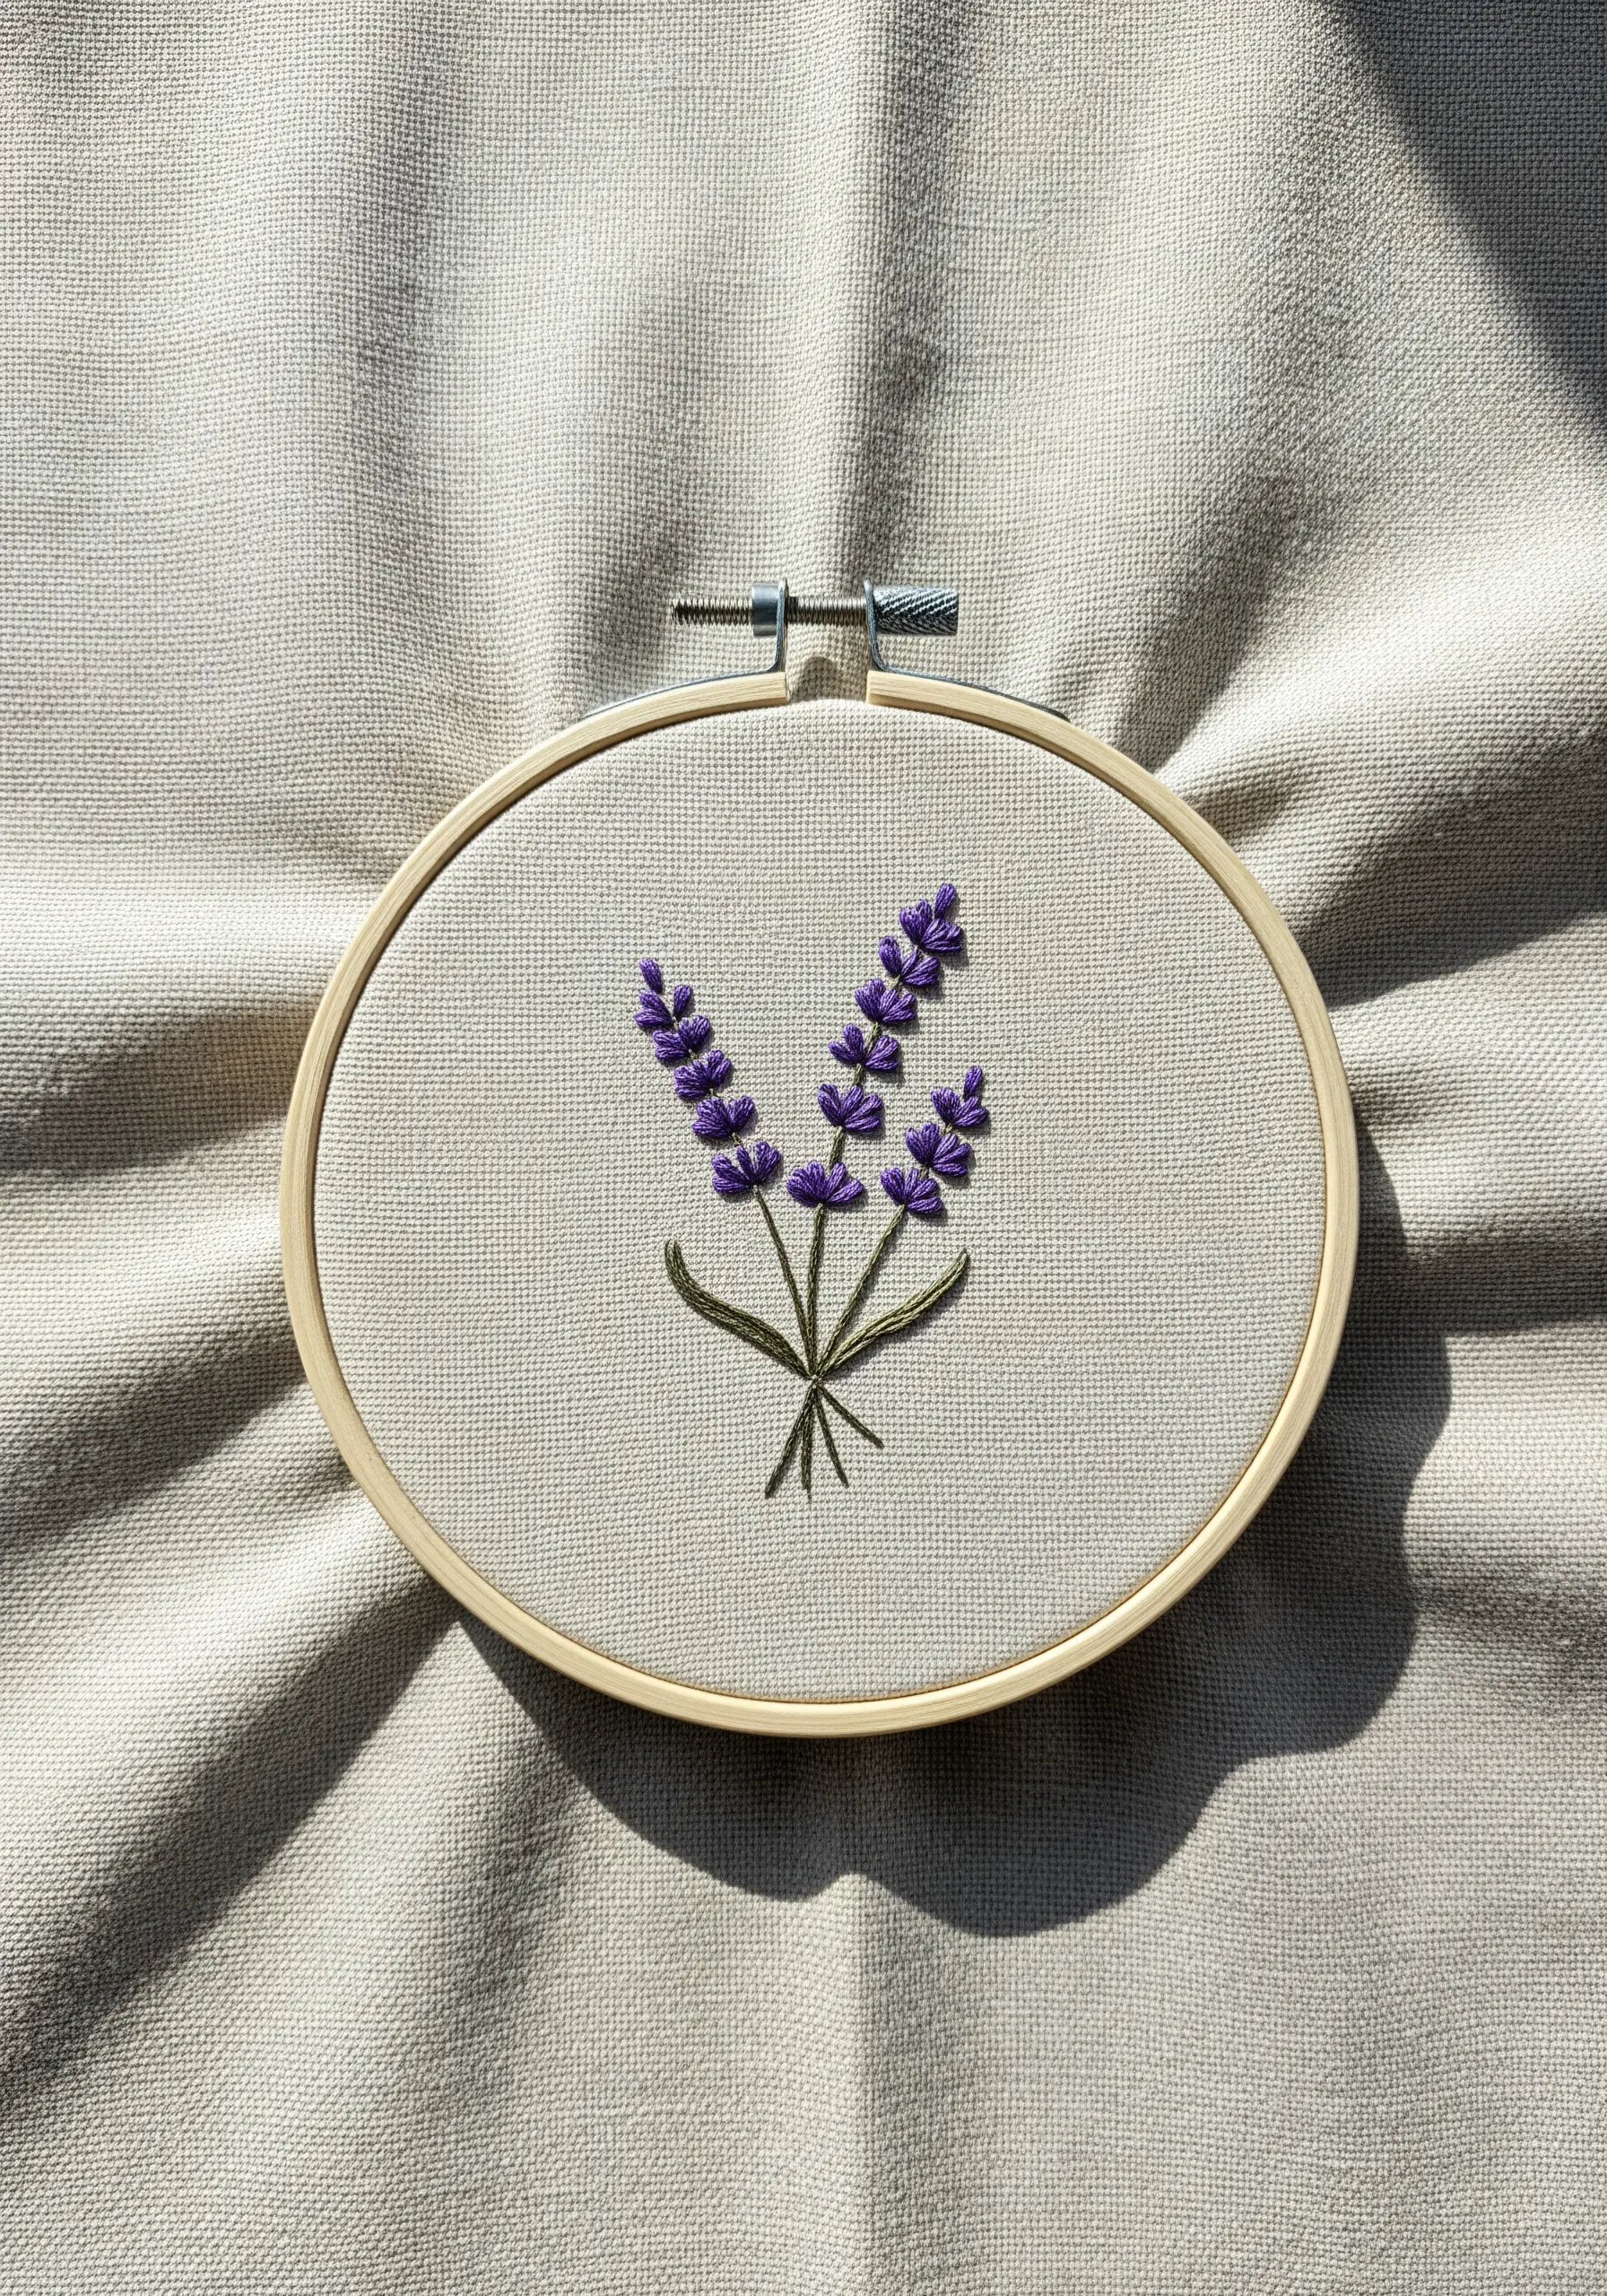
To give your lavender a delicate, realistic texture, avoid a heavy satin stitch for the buds.
Instead, use strategically placed French knots or small, detached chain stitches, clustering them tightly at the base and spacing them out toward the tip.
For the stems, use a single strand of thread in a stem stitch for a refined, elegant line.
This combination of textures creates a piece that feels both detailed and airy, drawing the customer’s eye without overwhelming the small hoop.
2. Weave a Luminous Crescent Moon
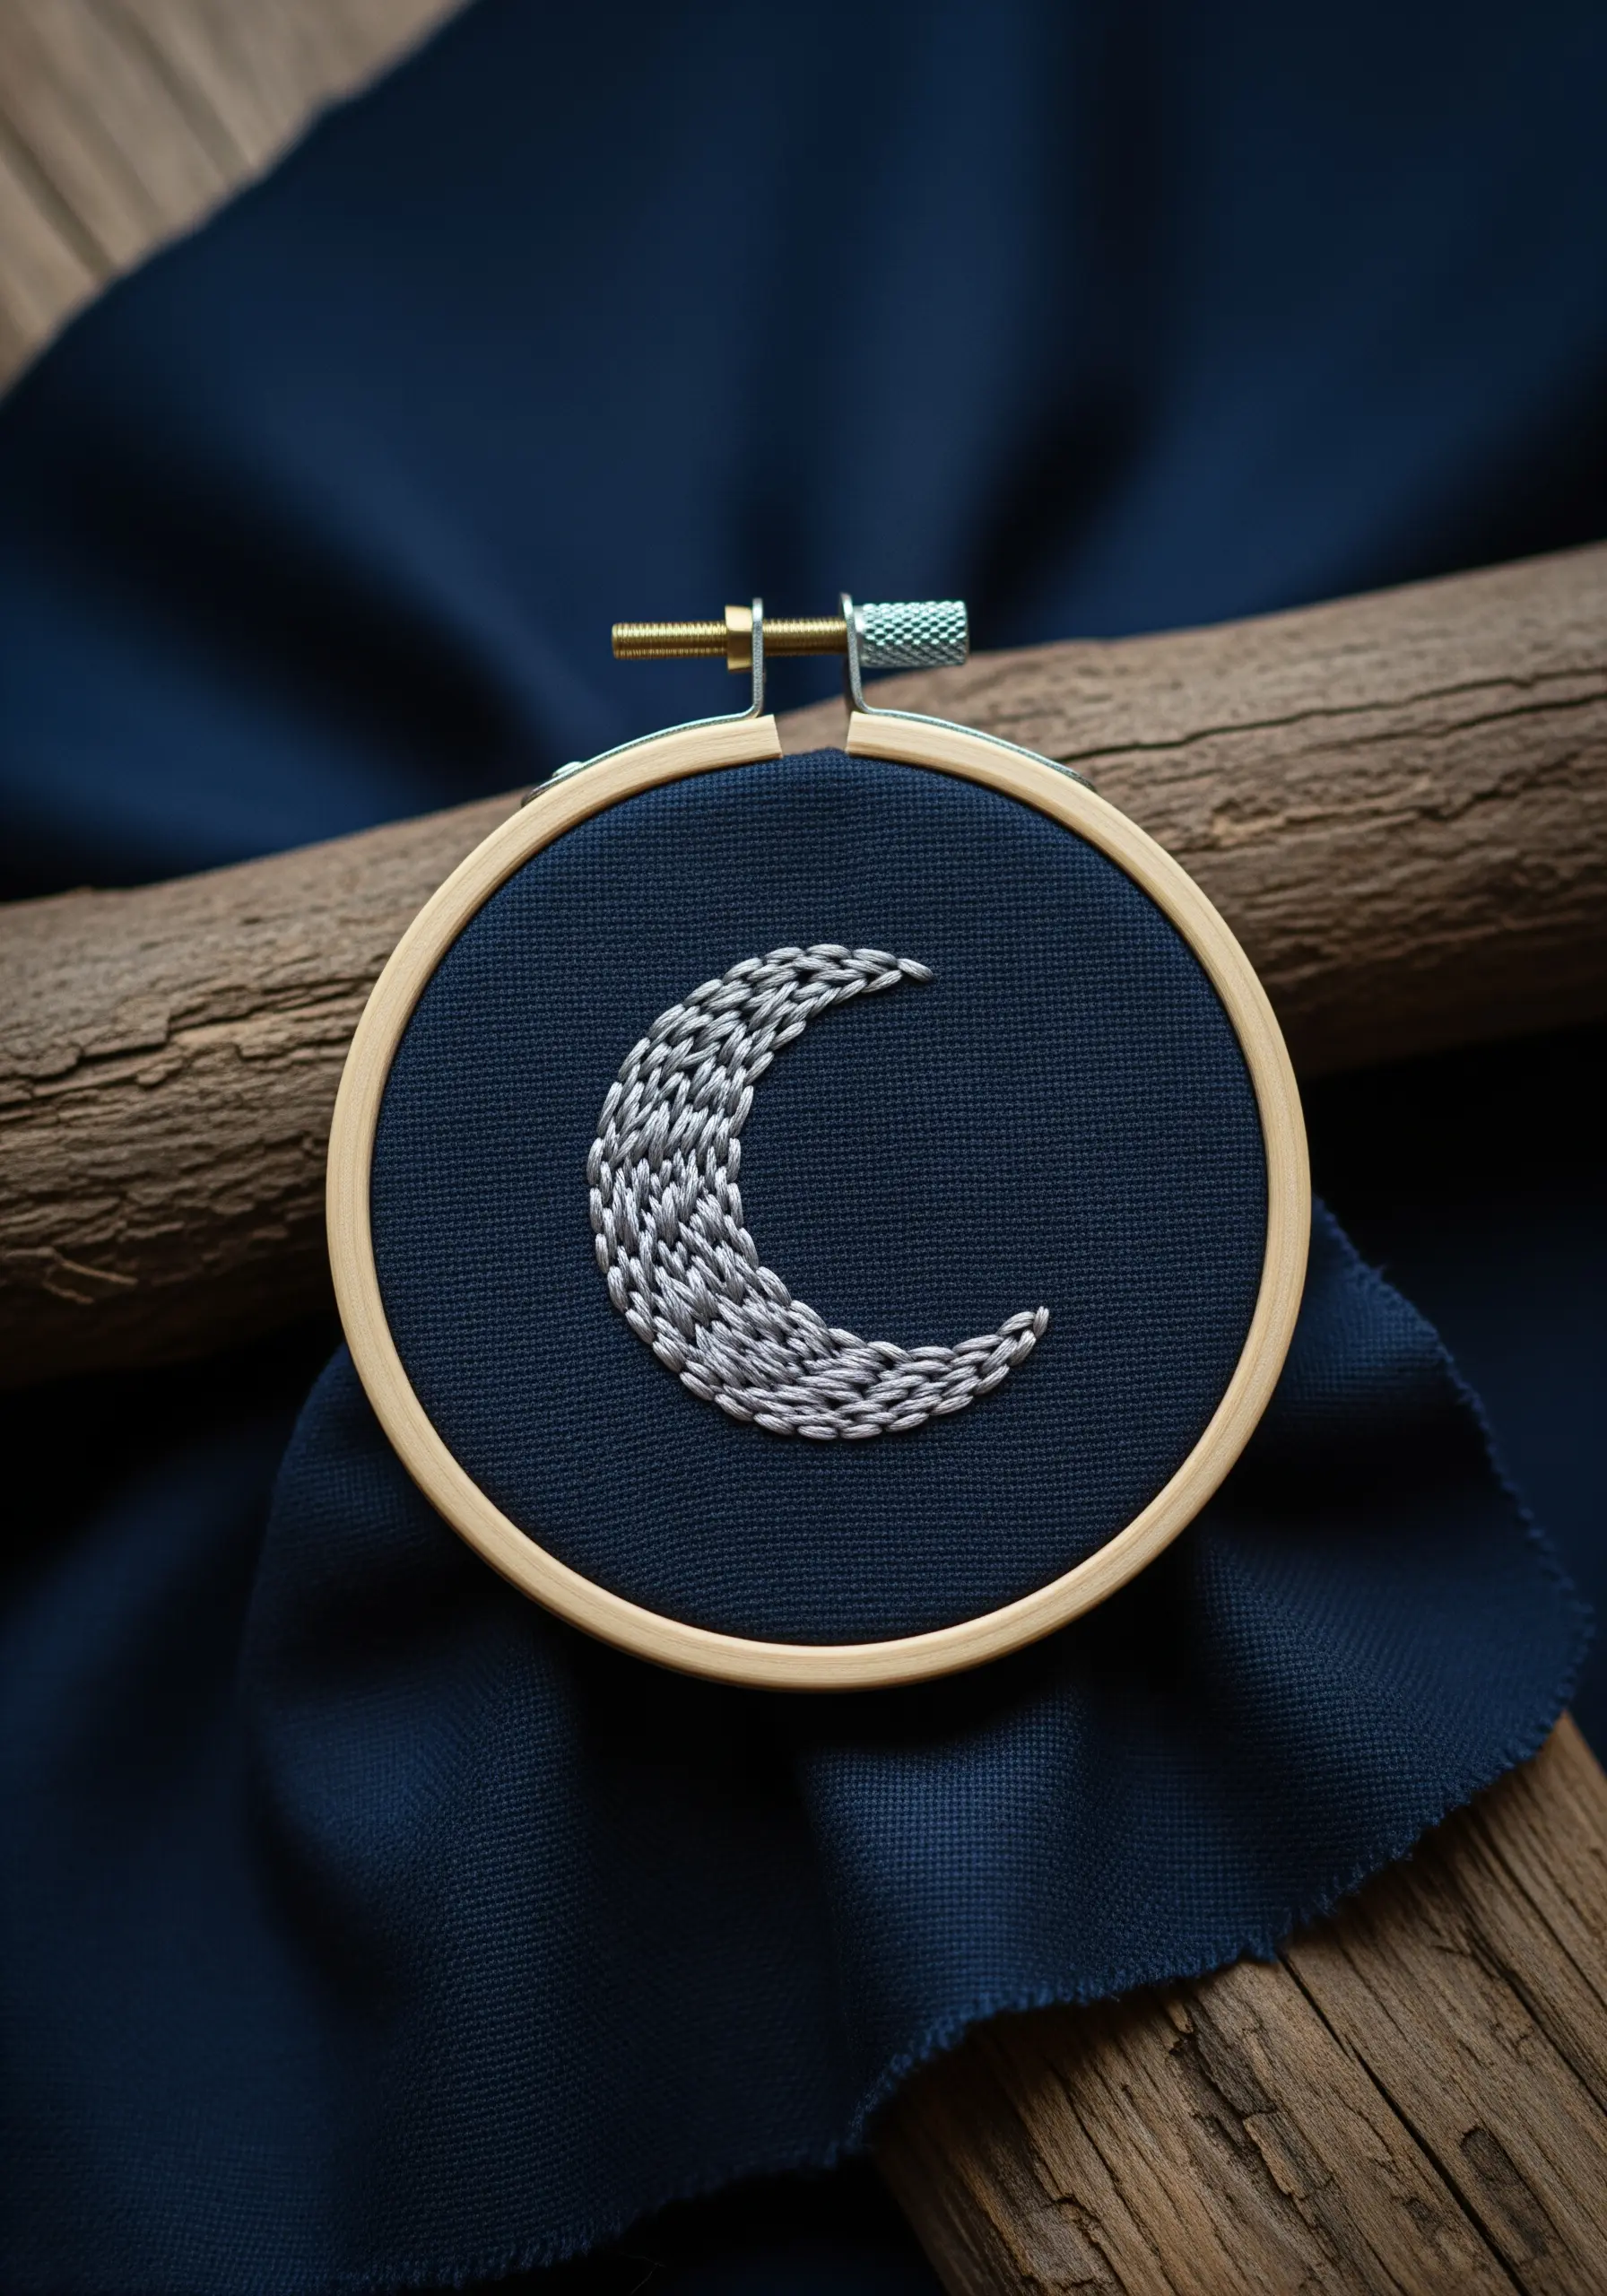
Create a stunning metallic effect by using just two shades of thread—a light silver and a medium grey.
Fill the crescent shape with short, dense satin stitches, angling them slightly to catch the light.
Instead of blocking out colors, allow the stitches to overlap and interlock, as if you are weaving the threads together.
This technique, known as thread painting, gives the moon a shimmering, textured surface that looks incredibly luxe on dark fabric.
3. Master the Art of Minimalist Line Work
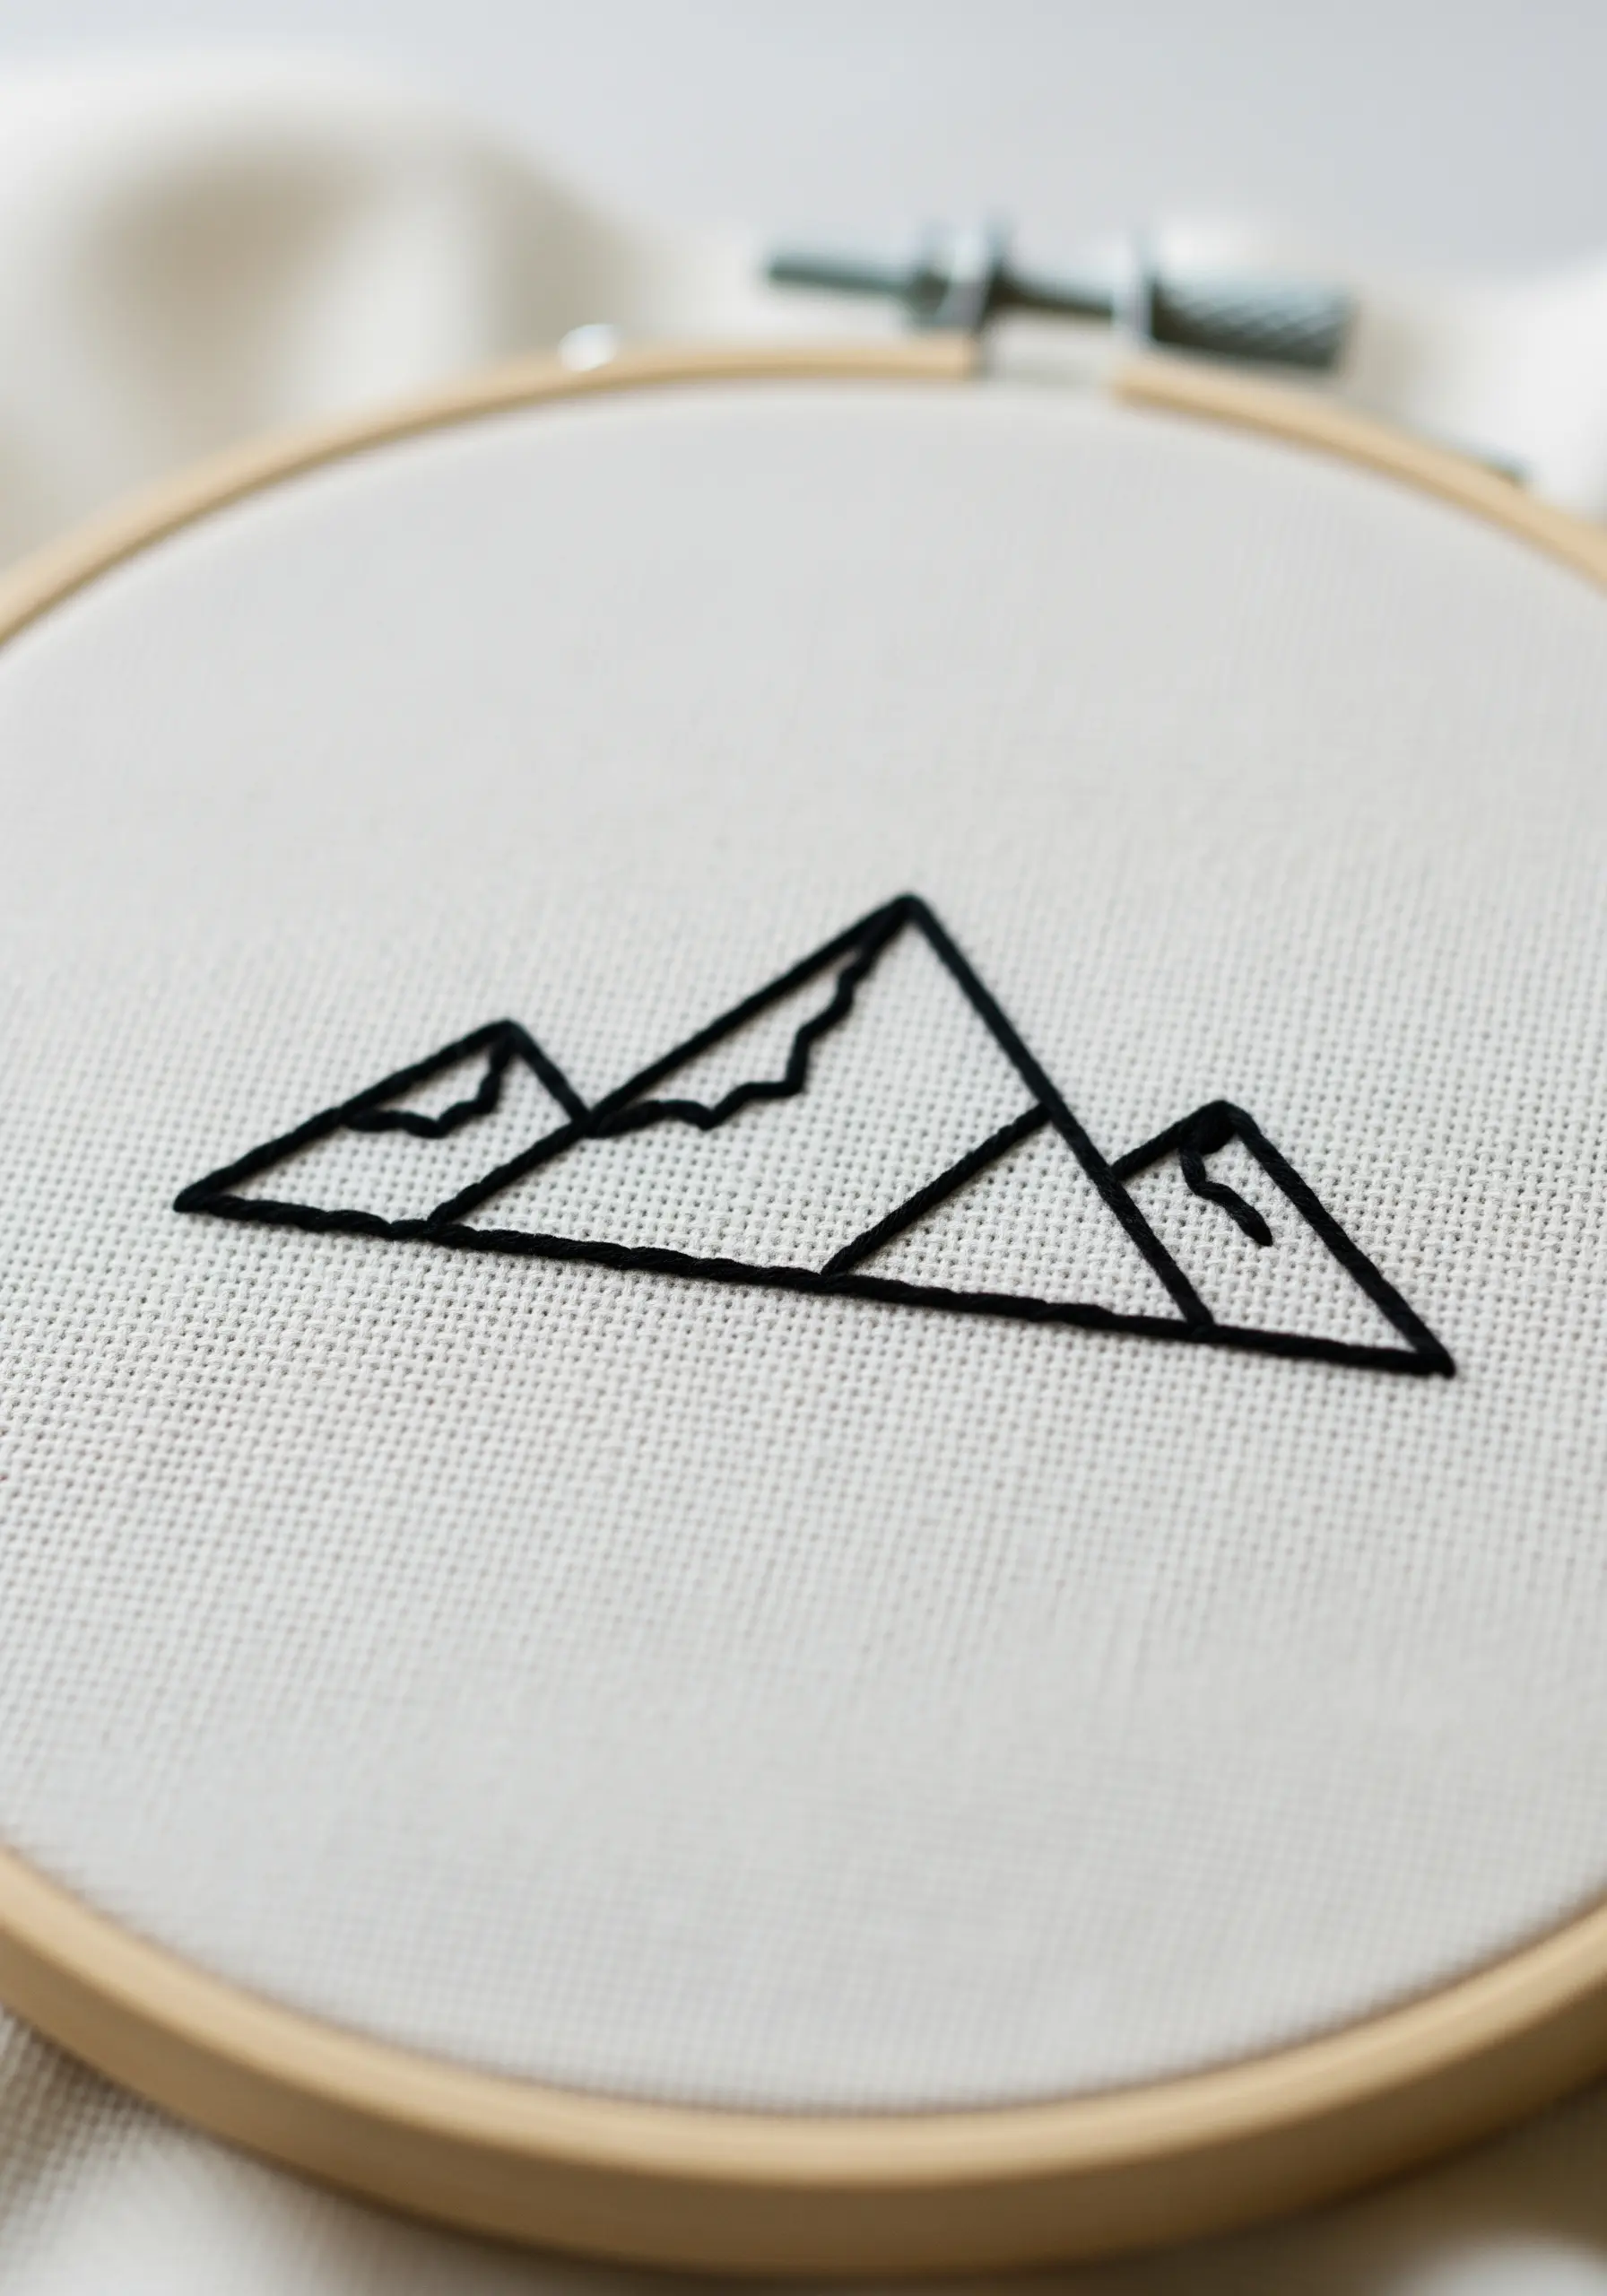
For a design this clean, your stitch consistency is paramount.
Use a two-ply backstitch for a bold, unwavering line. To ensure your corners are perfectly sharp, end your stitch precisely at the turning point and start a new one, rather than trying to angle a single stitch around the corner.
Using a tear-away stabilizer on the back will prevent any fabric puckering and keep your lines taut and professional.
This technique celebrates negative space, making the simple motif feel intentional and modern.
4. Give Botanicals Realistic Form with Directional Stitching
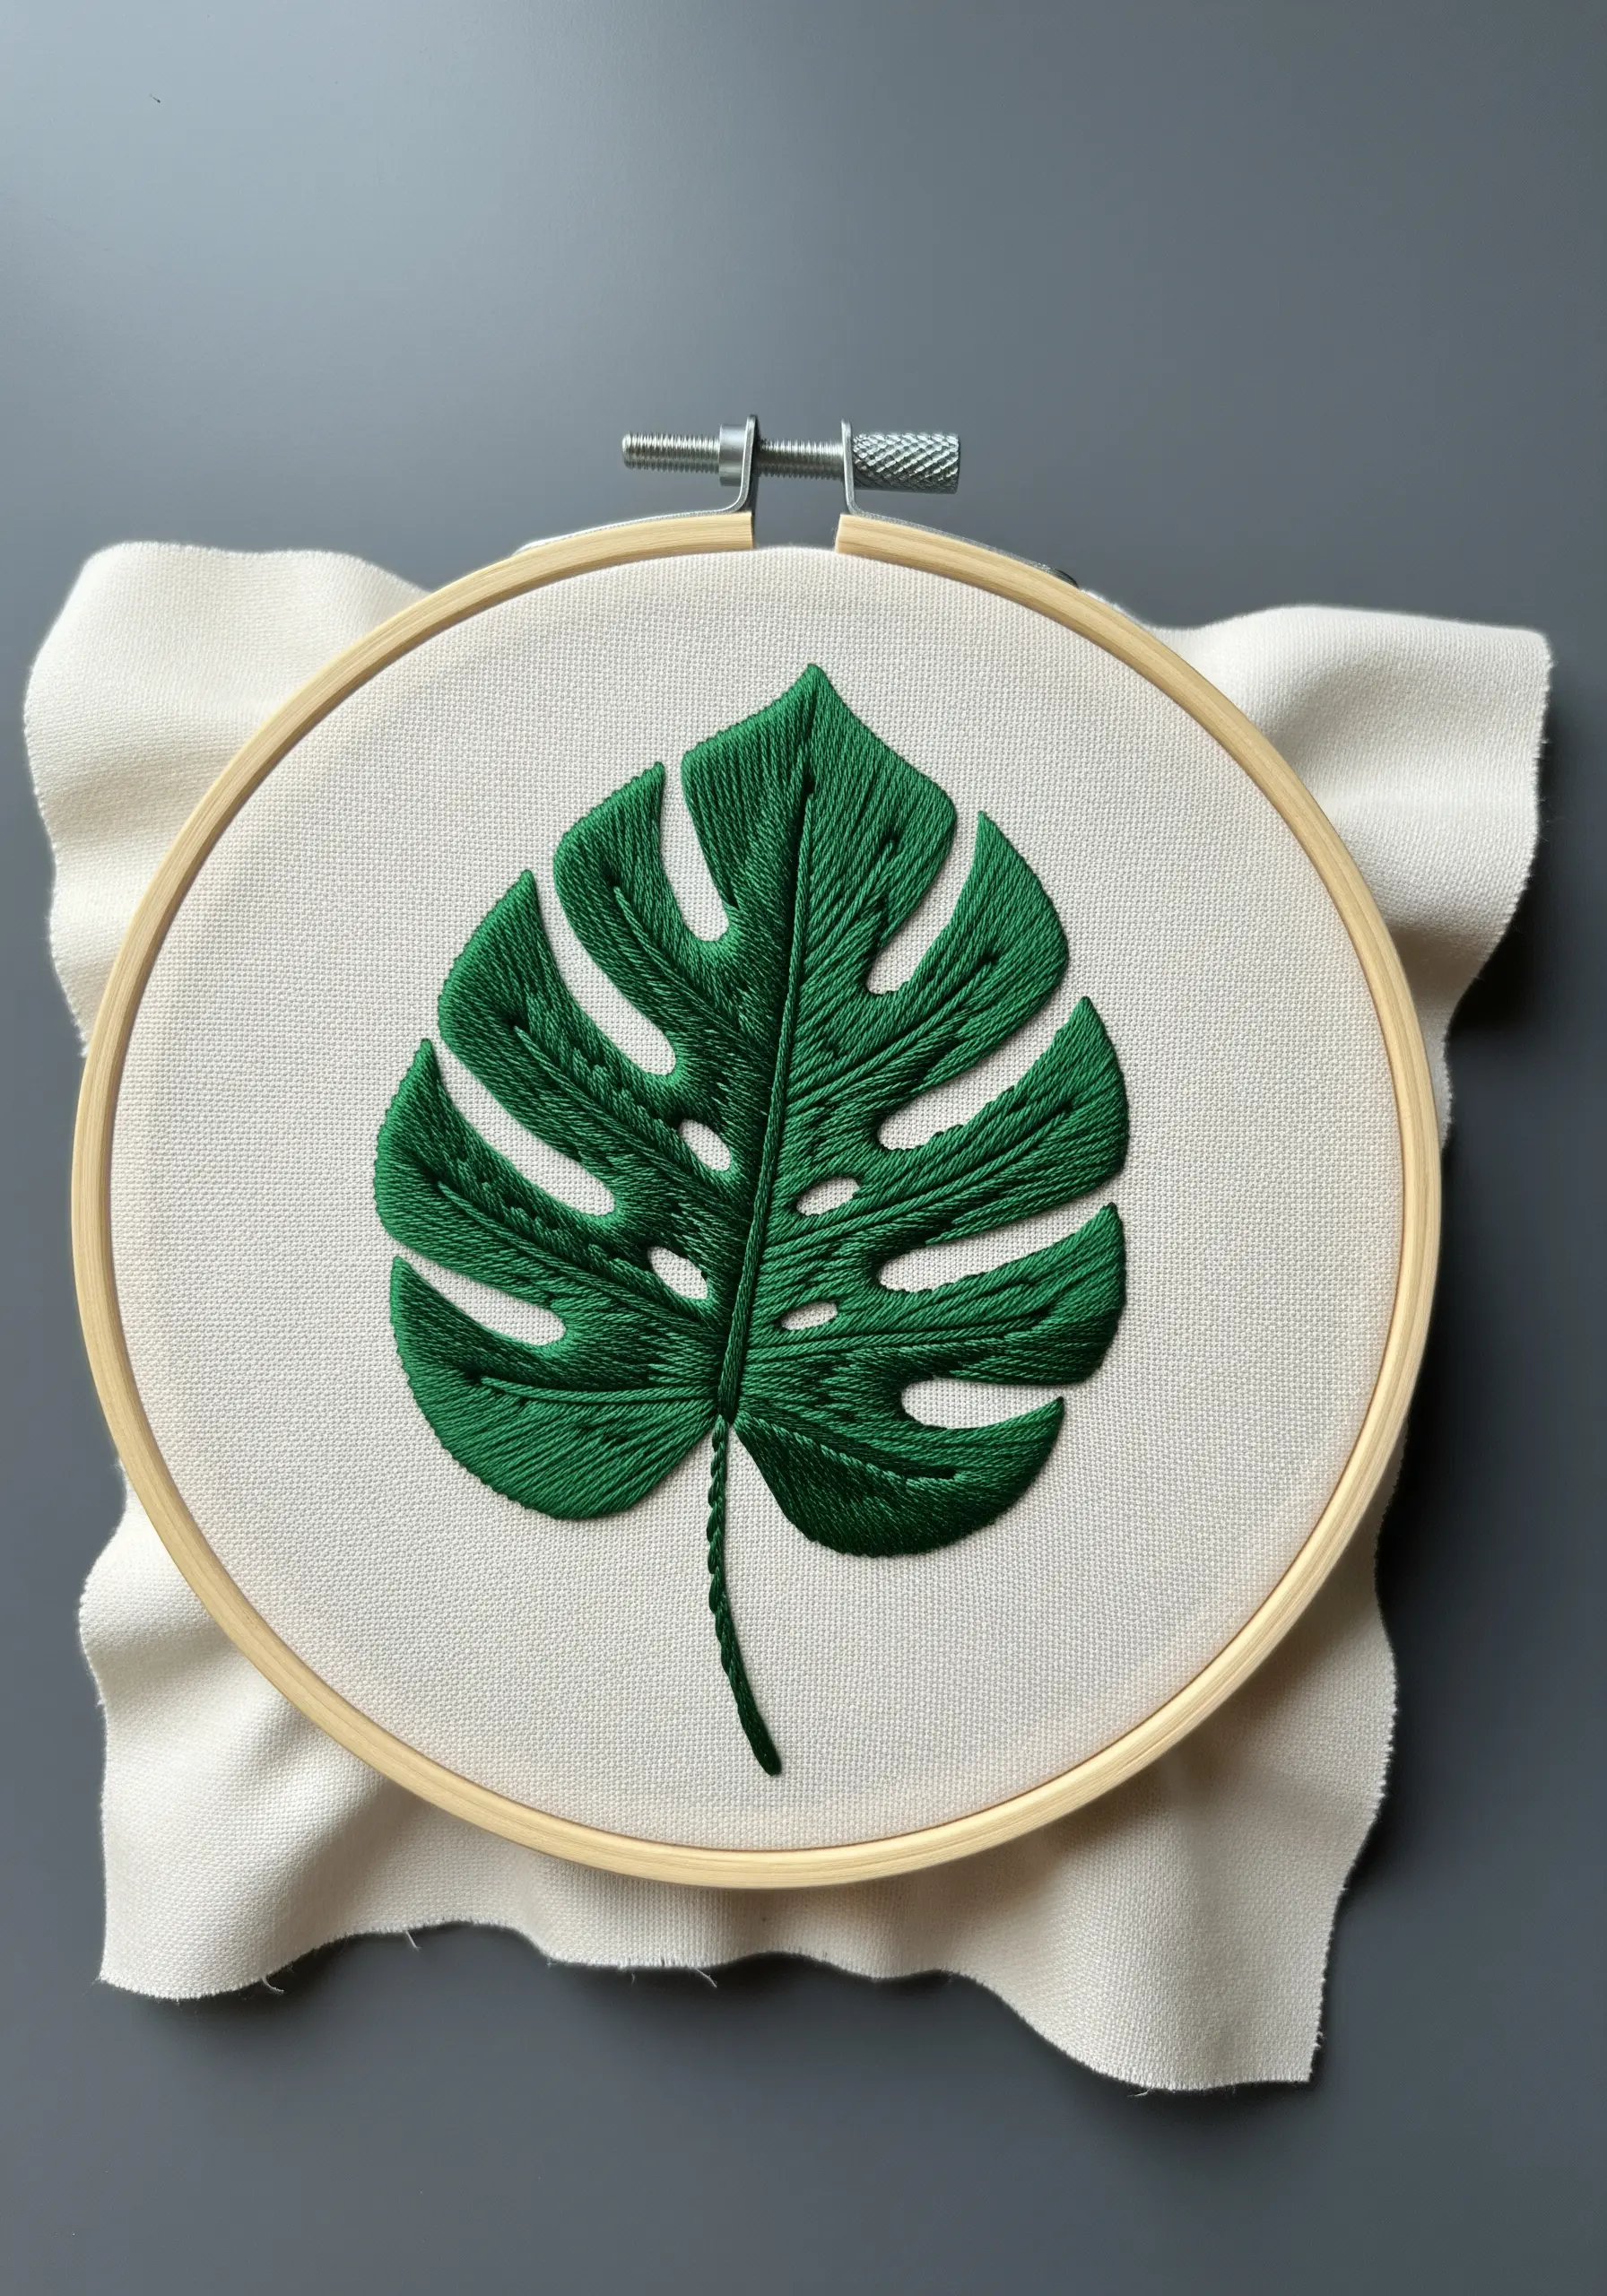
To prevent a large leaf from looking flat, your stitch direction must follow the object’s natural form.
First, create a split-stitch outline around the entire leaf and along the central stem. This provides a raised edge to tuck your satin stitches into for a perfectly clean finish.
Fill each section with long satin stitches angled outward from the veins, mimicking the leaf’s natural veins.
This approach creates subtle shadows and highlights, giving the monstera leaf lifelike dimension.
5. Elevate a Simple Rainbow with Tactile Stitches

Transform a classic rainbow from a flat design into a textural statement piece.
Instead of satin stitch, fill each arc with a chain stitch or a padded satin stitch (by laying down foundation stitches first). This immediately adds dimension and a satisfying, tactile quality.
Choose a sophisticated, earthy palette—like rust, ochre, and olive—to appeal to a modern market.
The combination of rich texture and a muted color scheme feels artisanal and high-end.
6. Define Intricate Details with Varied Thread Weights
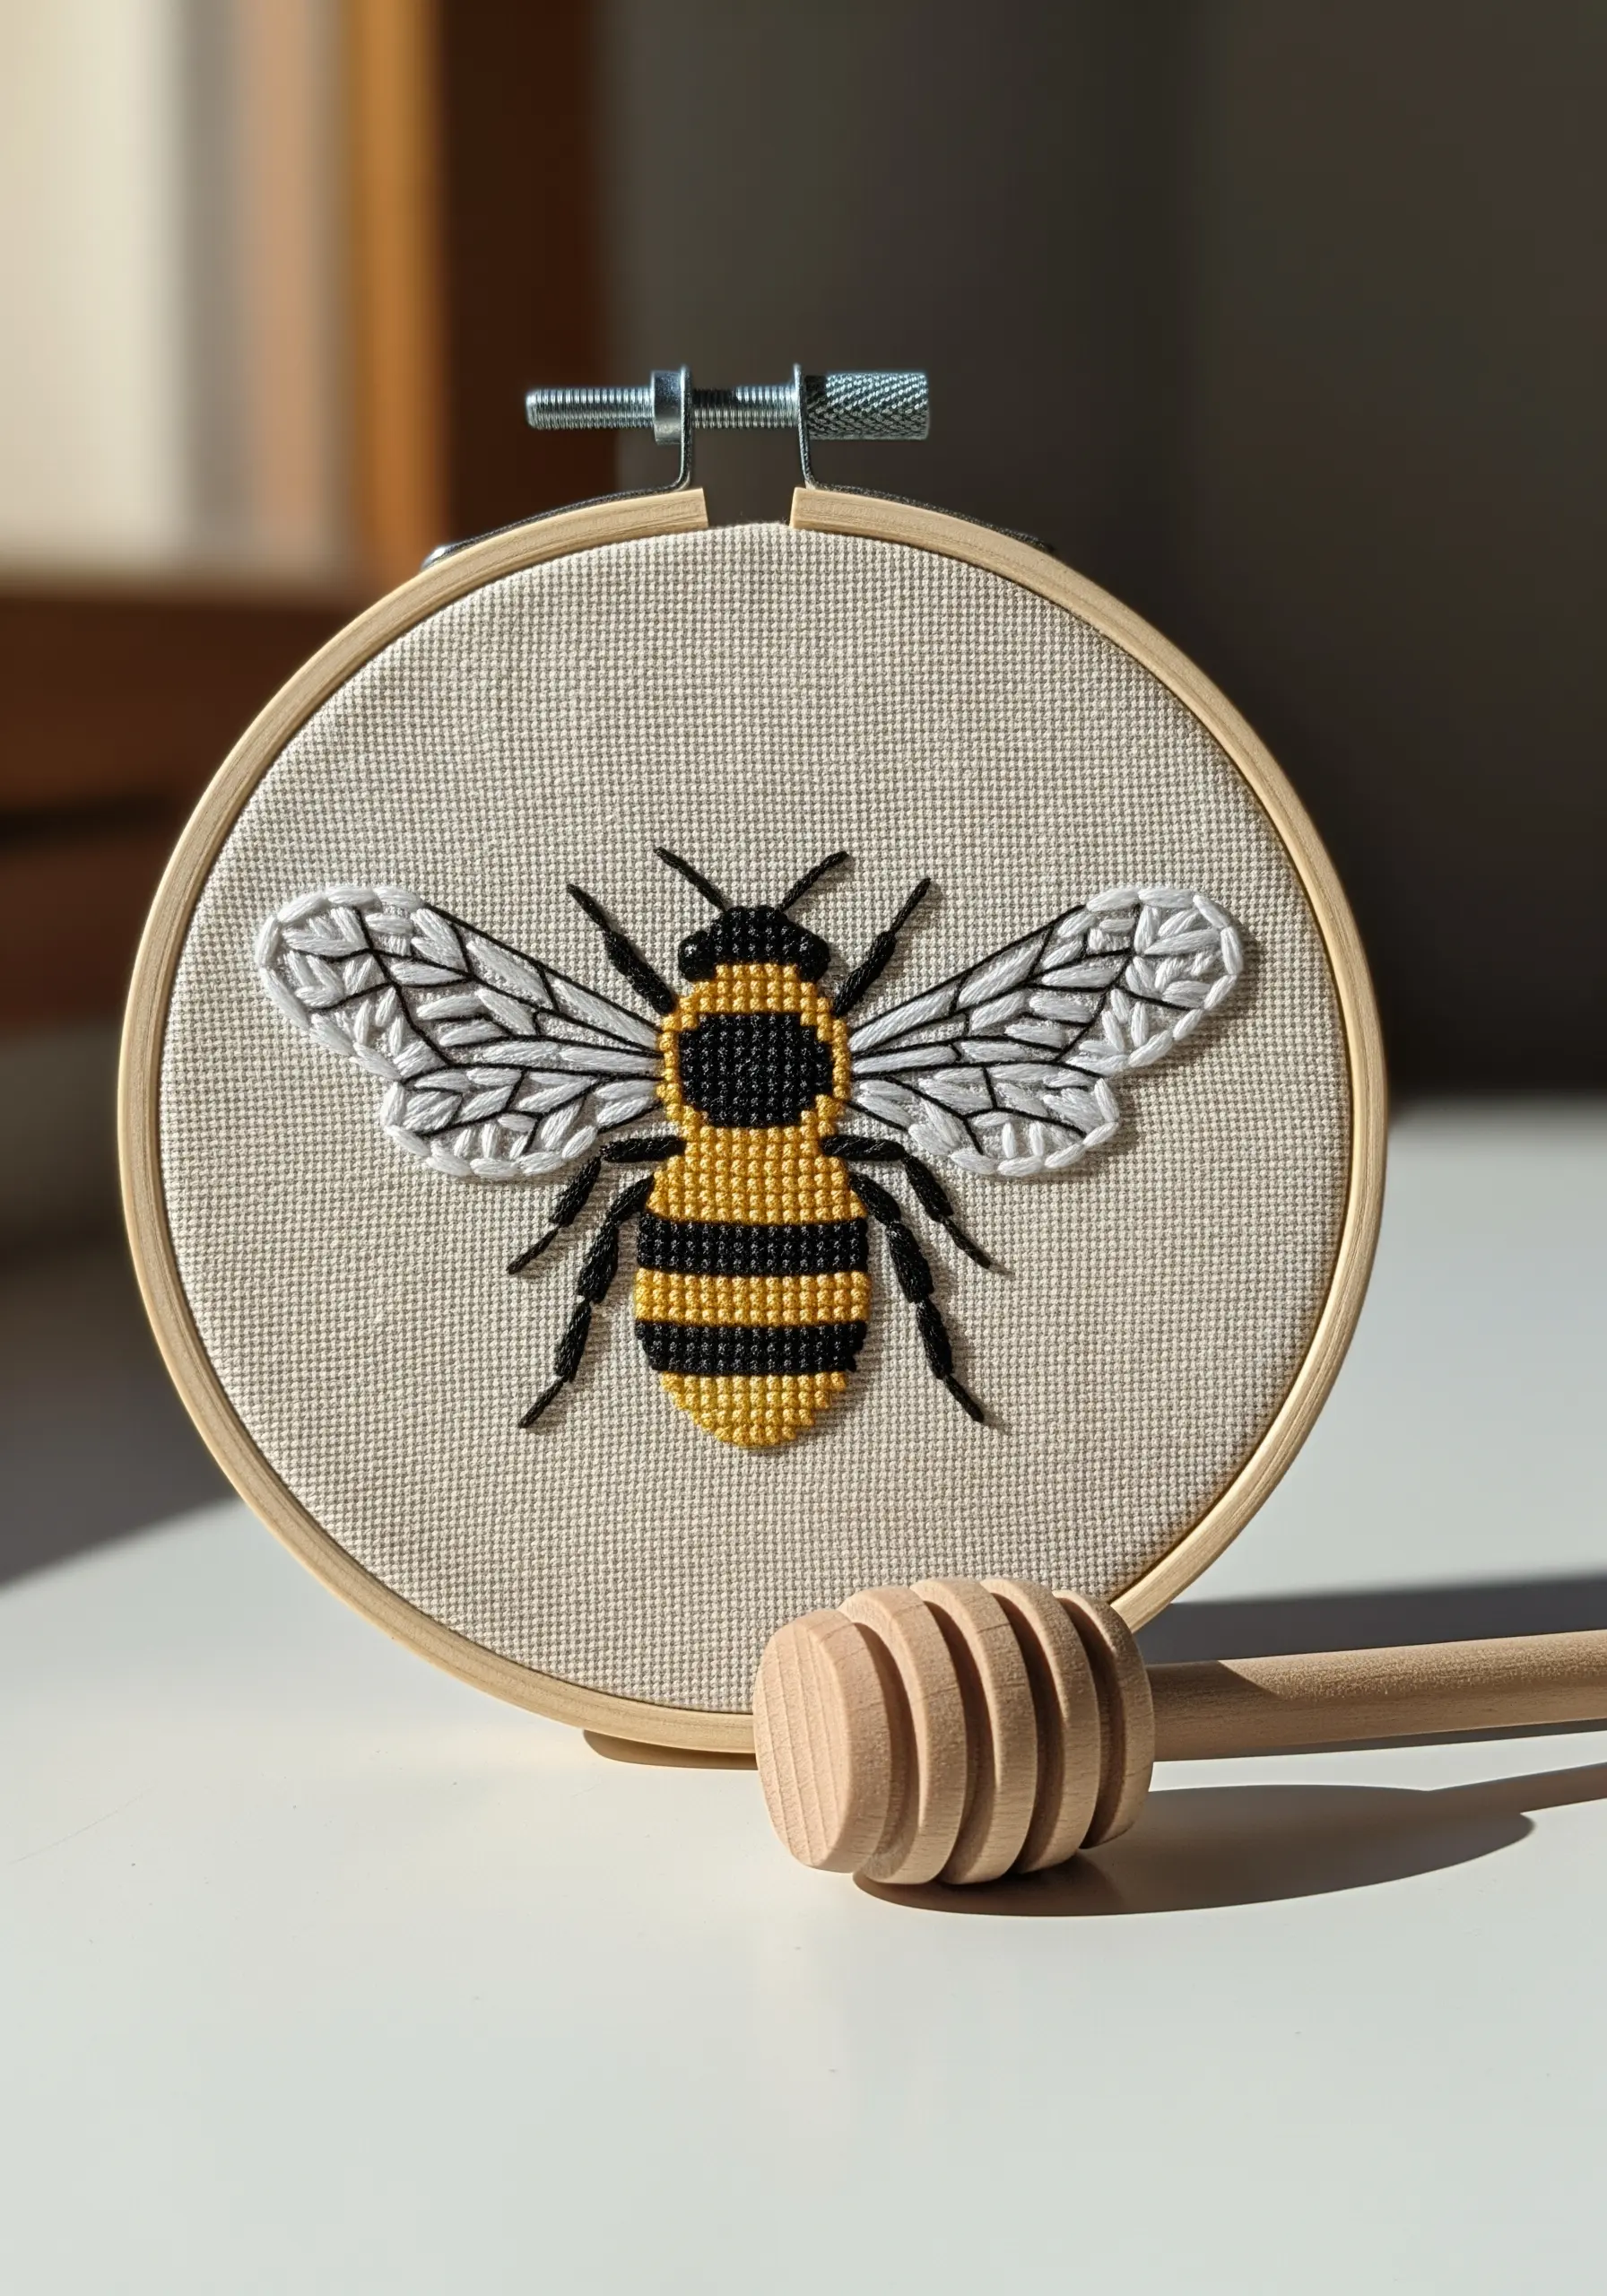
For motifs like insects to truly stand out, you need to create visual hierarchy.
Use a full six strands for the bold yellow and black satin stripes on the body. This makes it the focal point.
Then, switch to a single strand of black thread for the delicate wing details, legs, and antennae.
This contrast in thread thickness is what makes the bee look refined and detailed rather than cartoonish, demonstrating a command of your materials.
7. Create a Succulent Trio with Stitch Variation
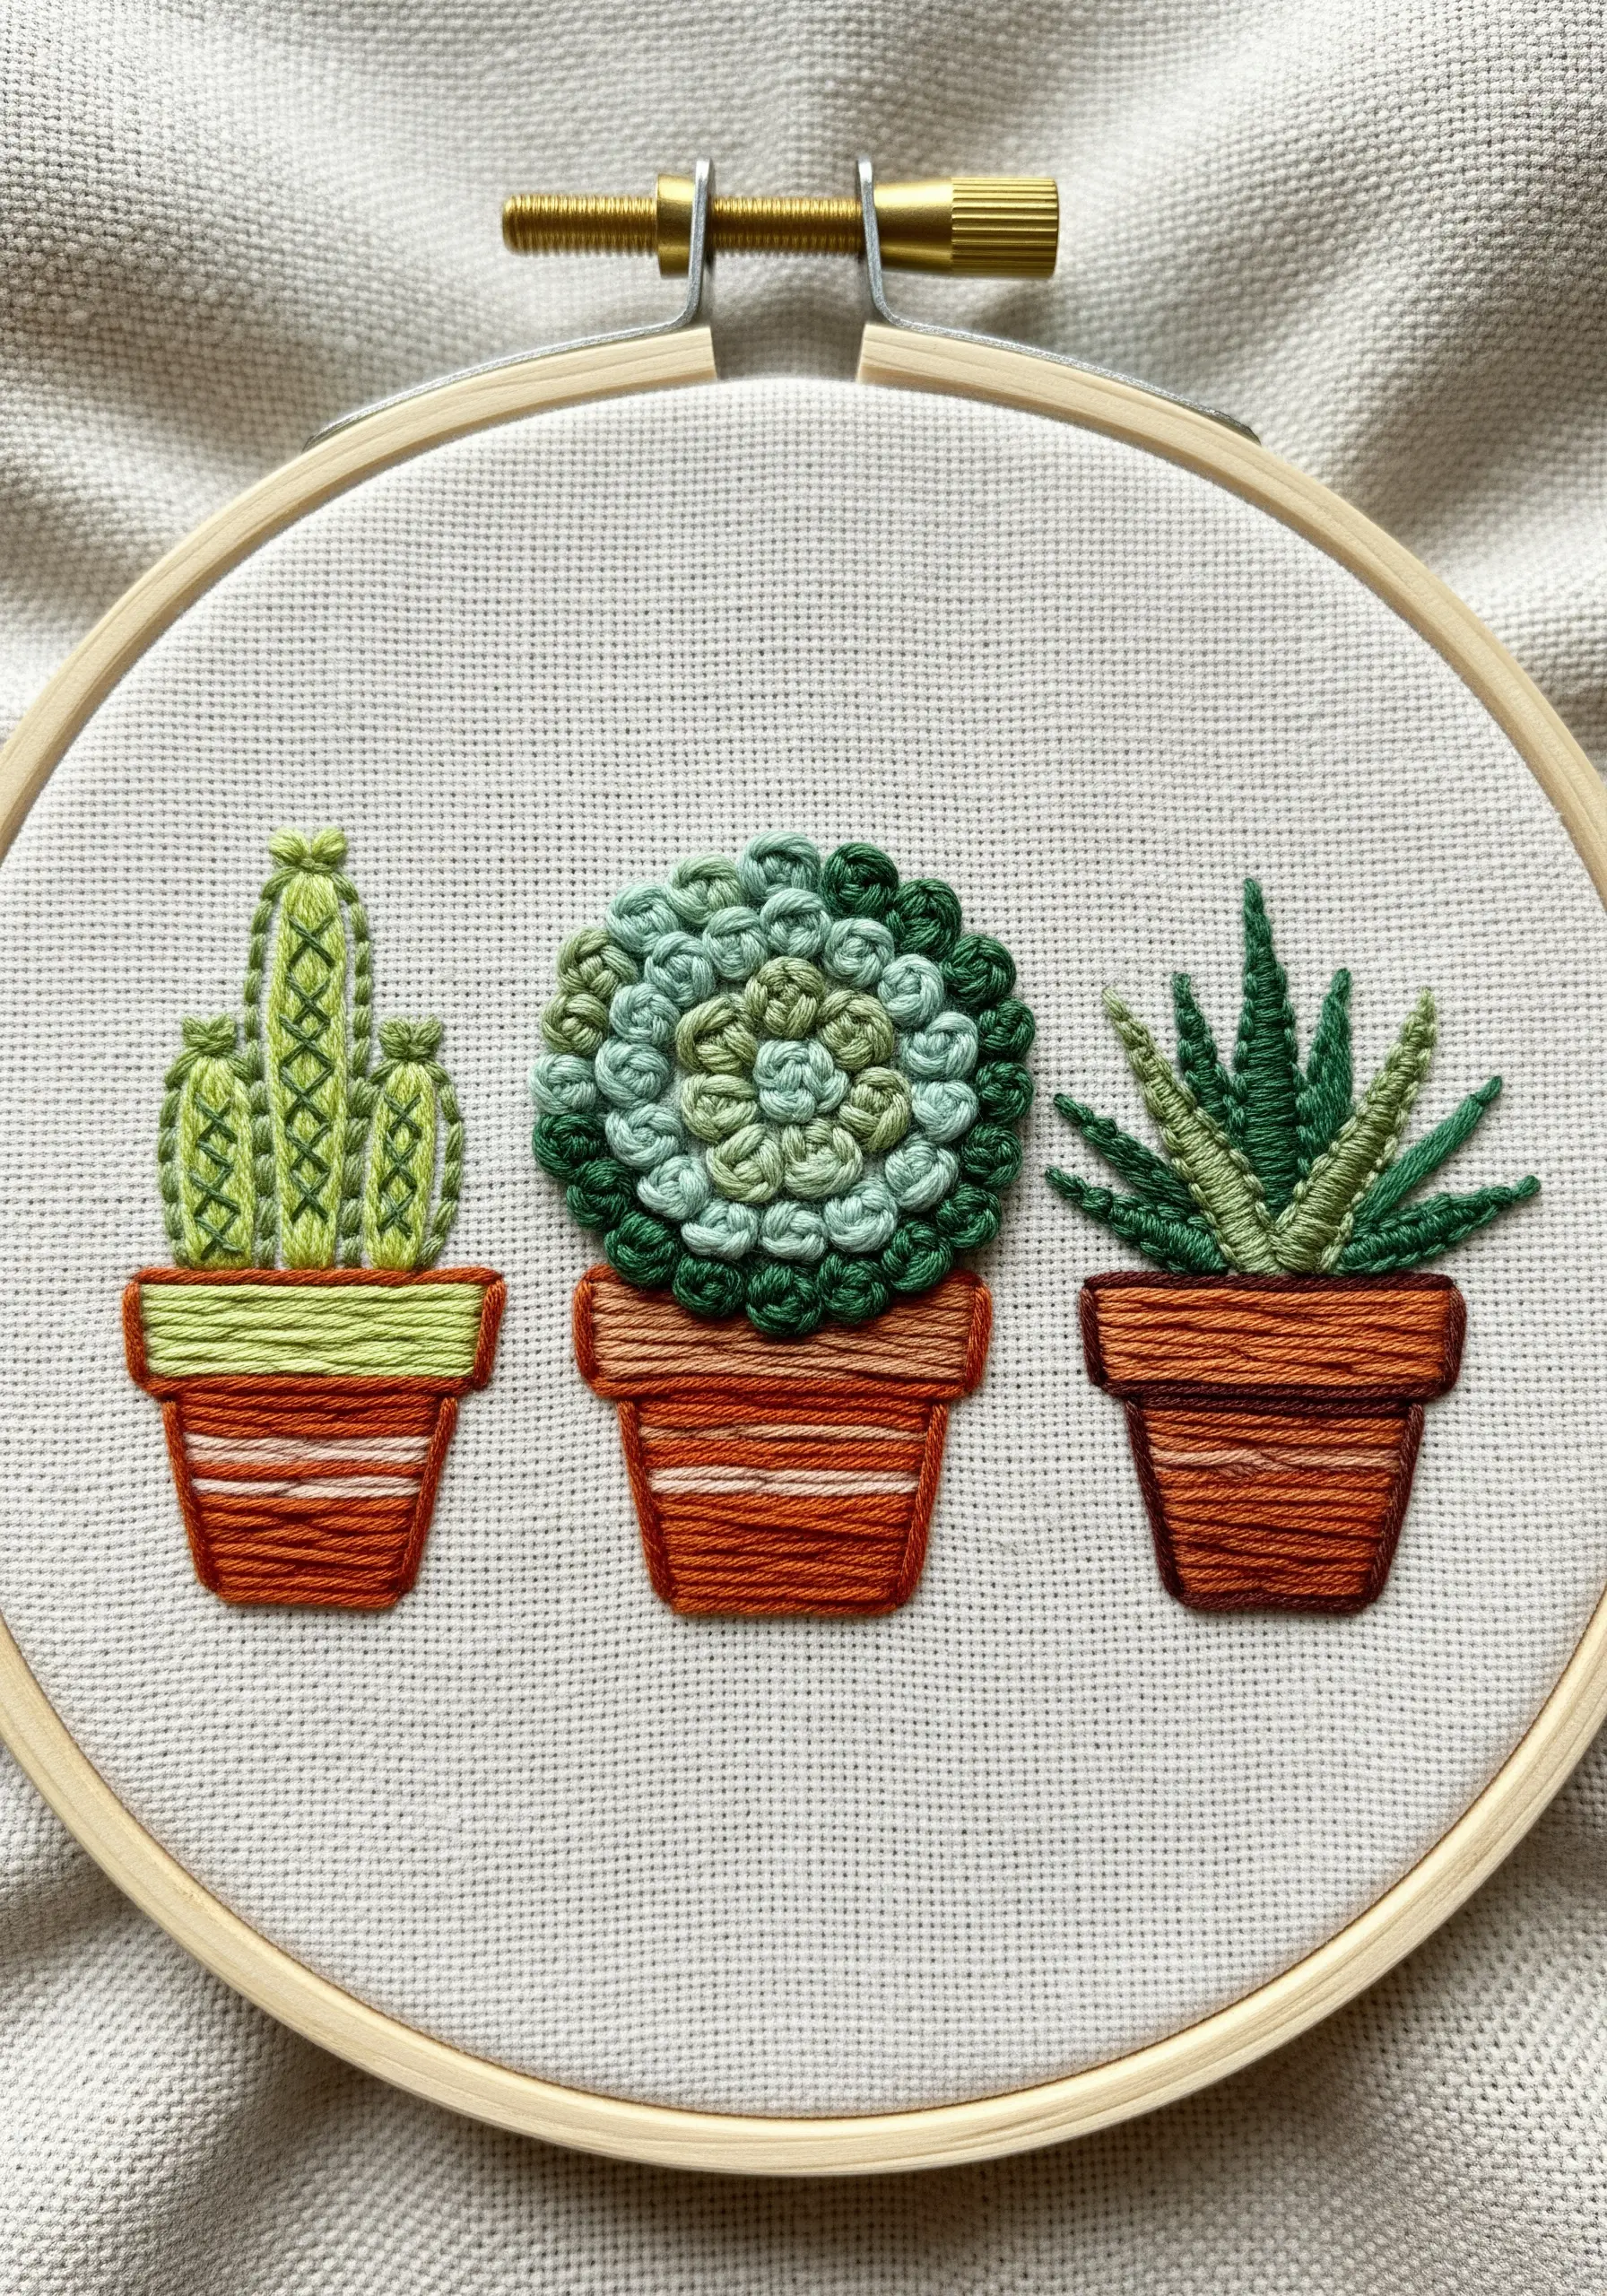
Showcase your versatility by assigning a unique, texture-specific stitch to each plant.
Use woven wheel stitches for the echeveria, layering different shades of green to create depth. For the cactus, use vertical satin stitches topped with tiny white seed stitches for spines. Render the aloe with fishbone stitches to create its pointed, ribbed leaves.
This thoughtful variety makes the composition far more engaging and demonstrates clear artistic intention.
8. Capture Ephemeral Steam with a Delicate Touch

The key to stitching something as light as steam is subtlety.
Outline the coffee cup with a two-strand whipped backstitch for a smooth, solid line.
For the steam, switch to a single strand of a slightly lighter thread, like a pale grey or off-white. Use loose, curved stem stitches, allowing the thread to arc gently above the fabric.
This contrast in weight and tension makes the steam feel weightless and ethereal.
9. Stitch Celestial Charts with Elegance
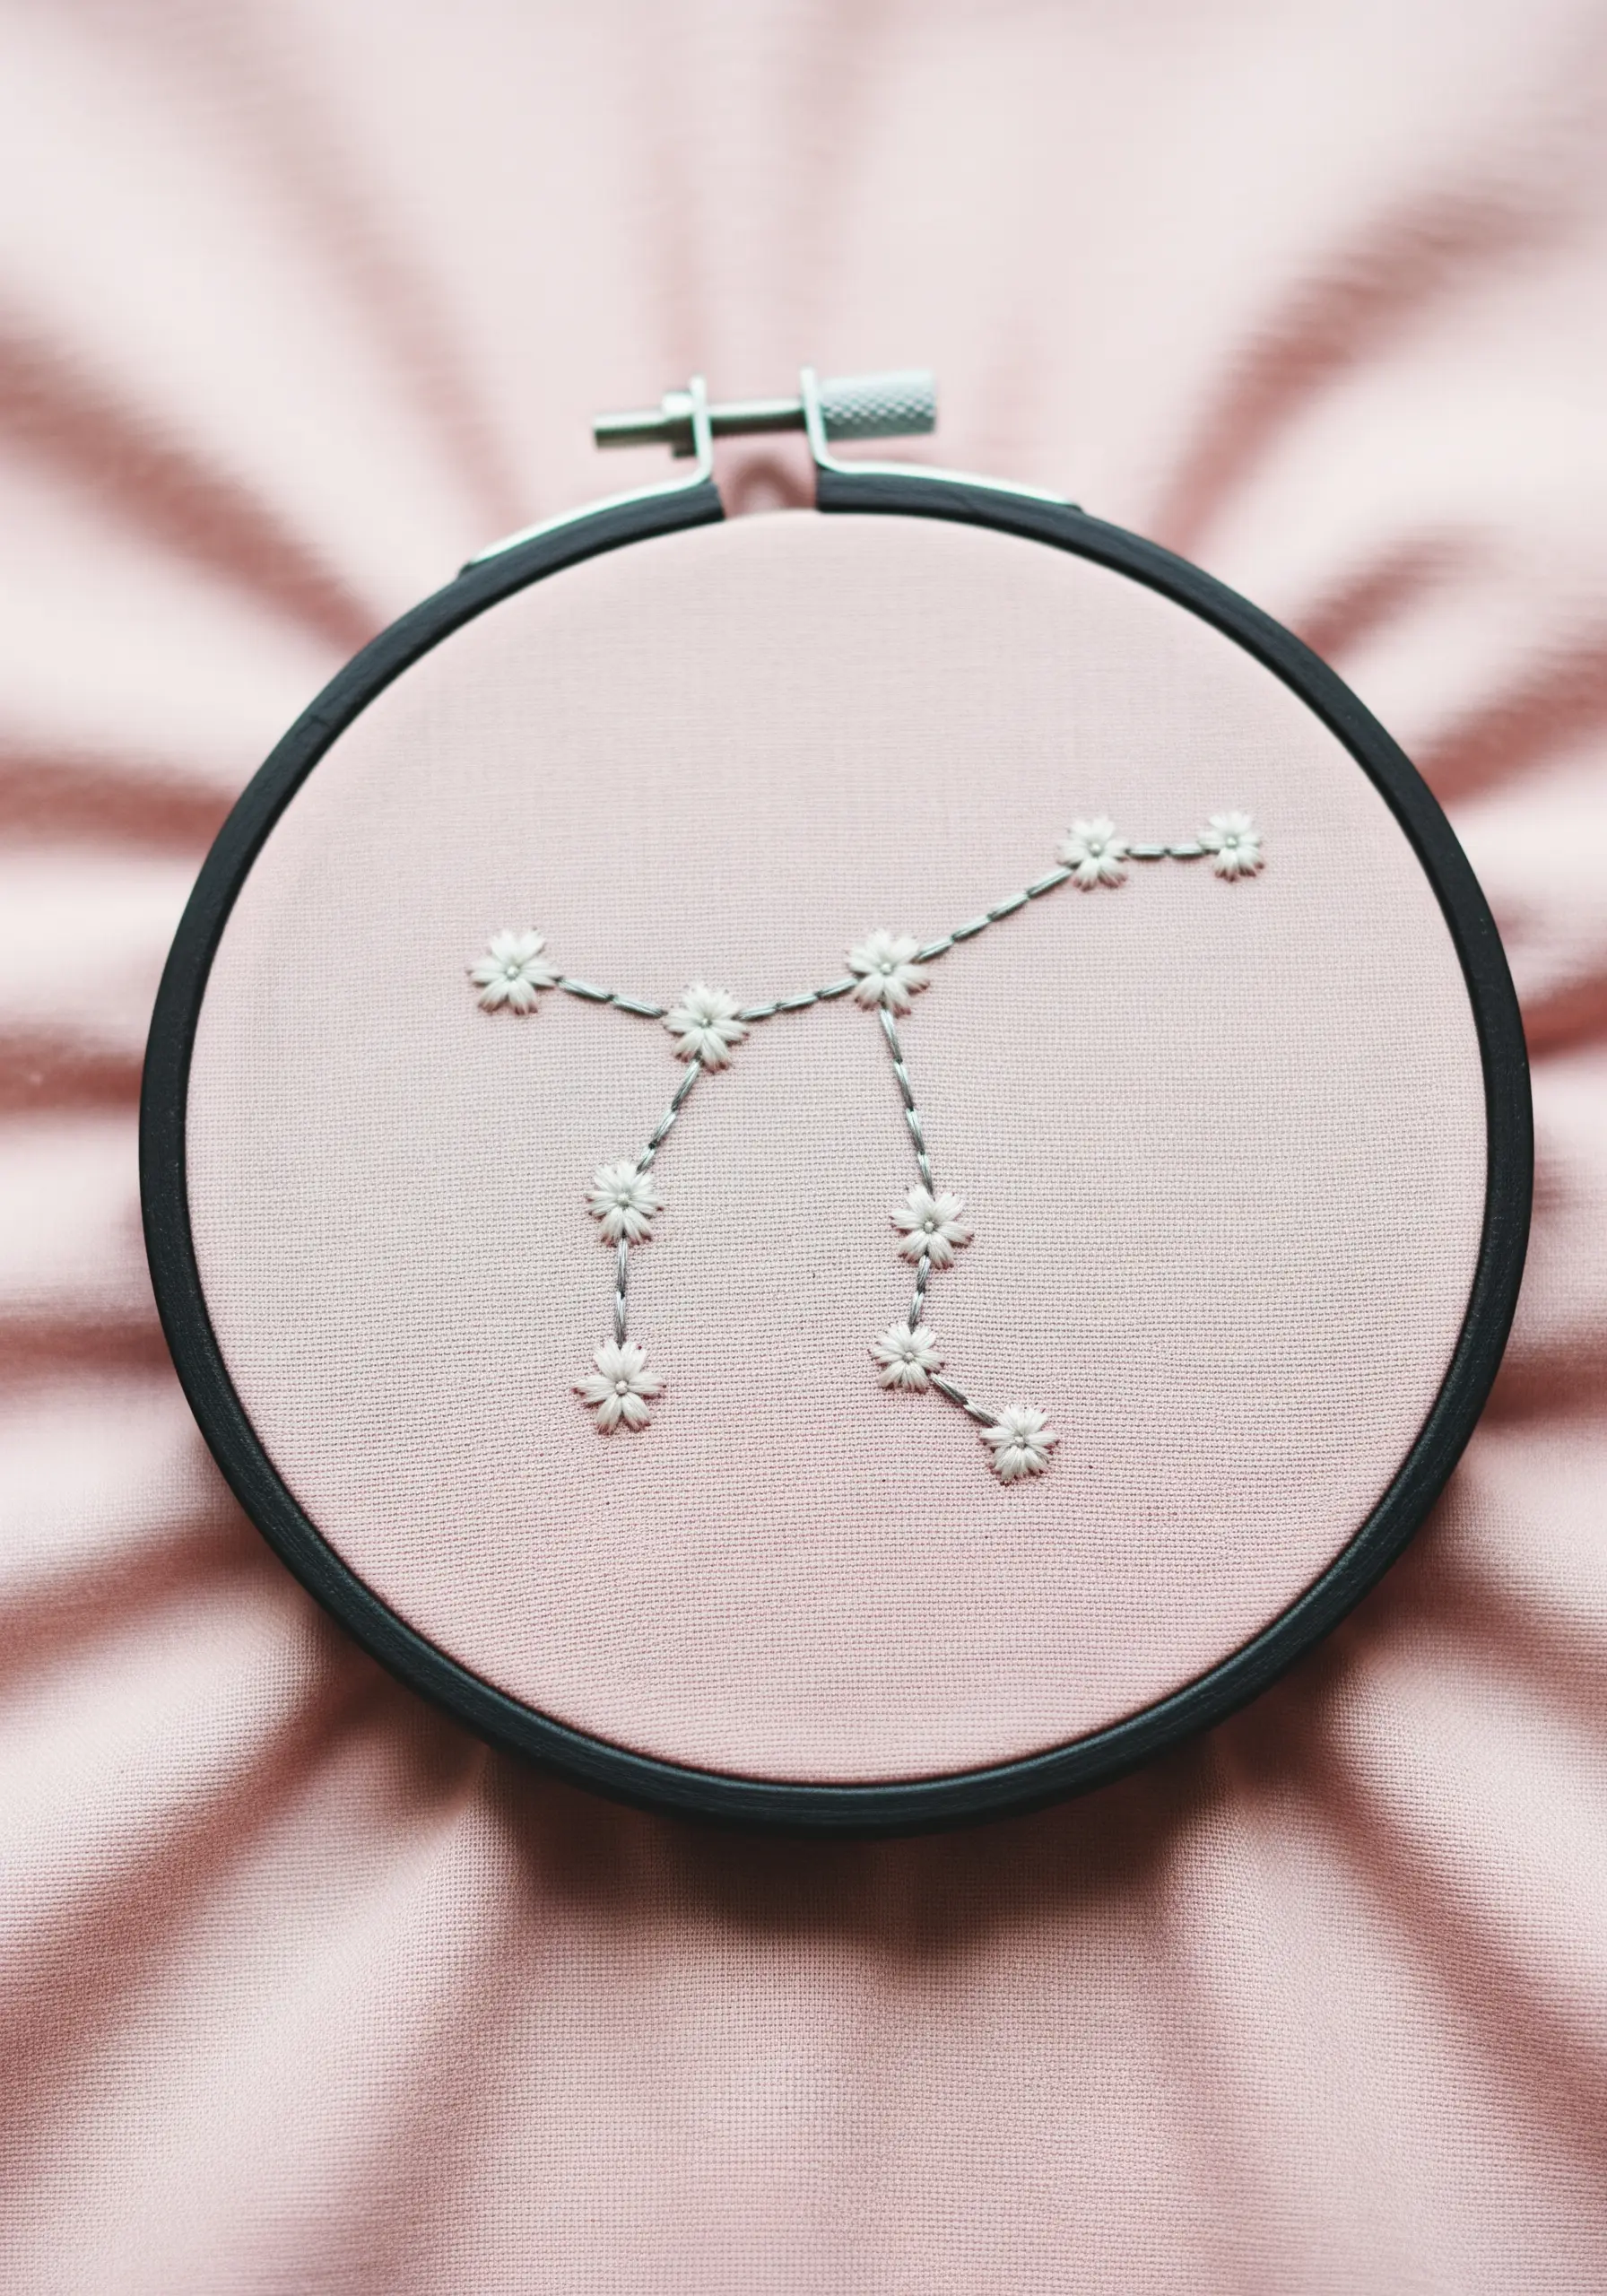
This design is all about delicate precision.
Use detached chain stitches (lazy daisies) to form the tiny, five-petaled flowers that represent the stars. This adds a soft, botanical touch to the astrological theme.
Connect them with a fine, single-strand backstitch to keep the lines crisp and unobtrusive.
Stitching on a soft, colored fabric like this dusky pink enhances the design’s gentle, dreamy quality, making it a perfect piece of personal art.
10. Convey Motion in Water with Layered Lines
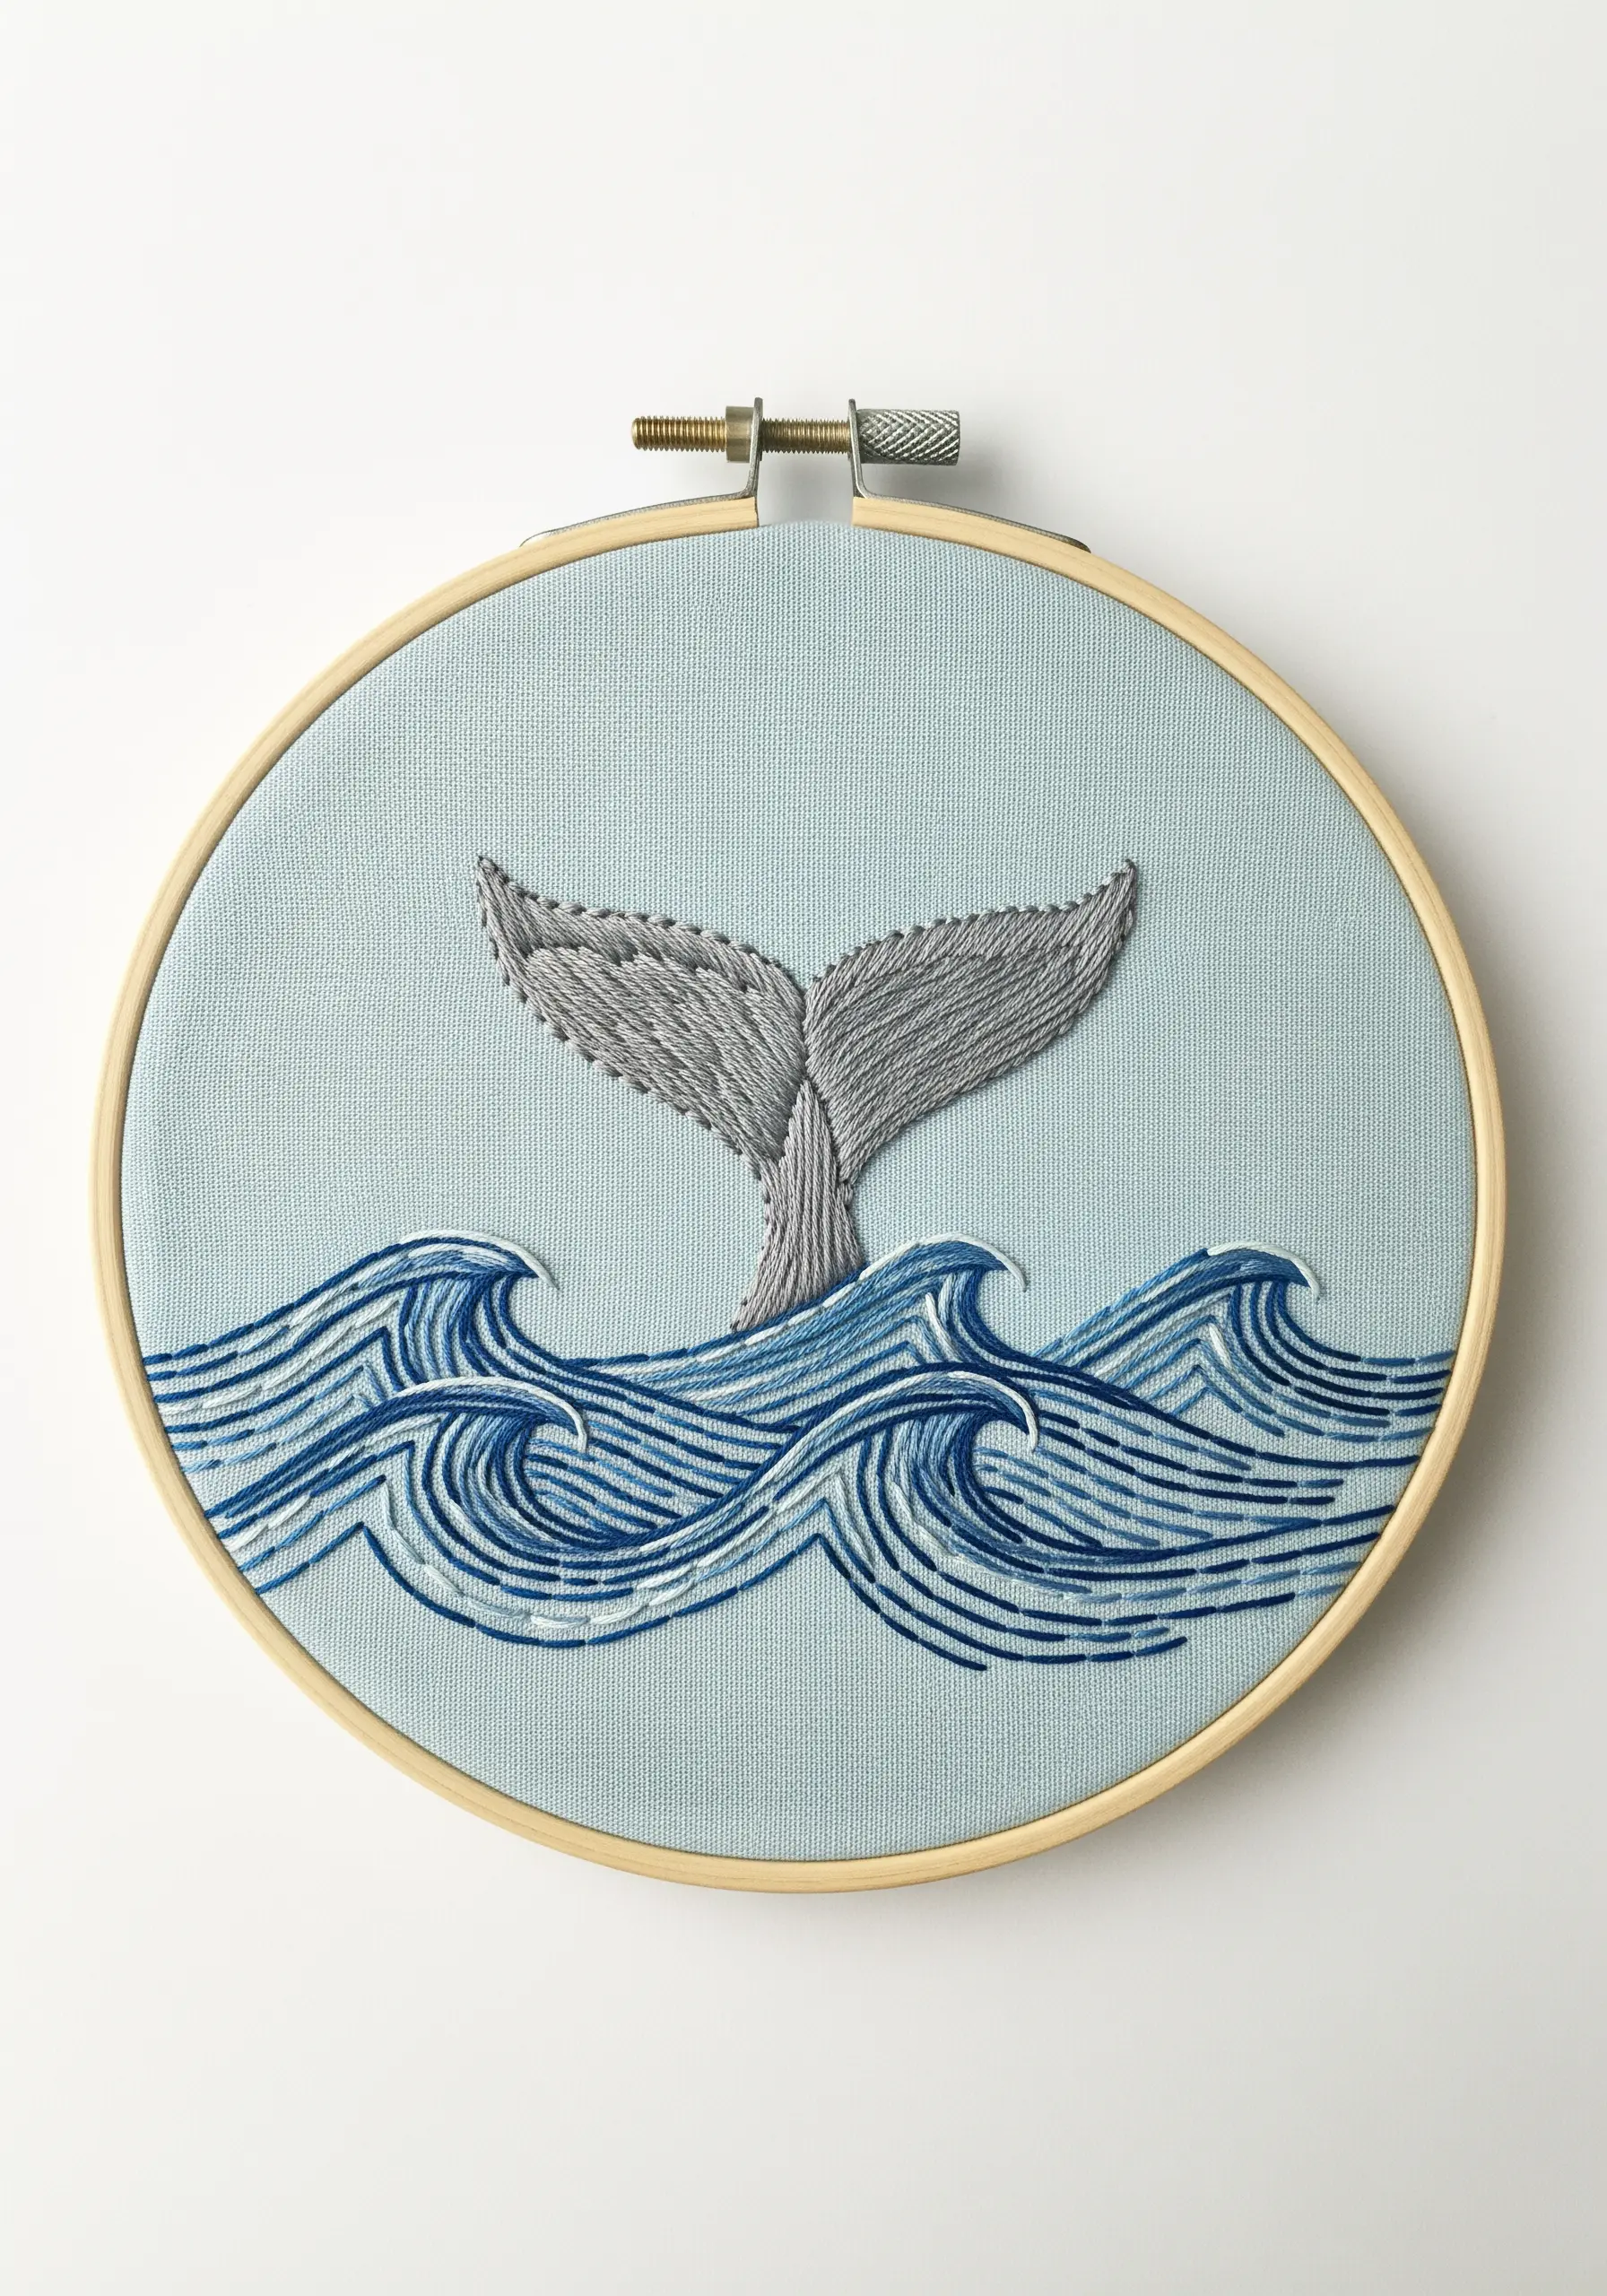
To make the ocean feel alive, avoid uniform stitches.
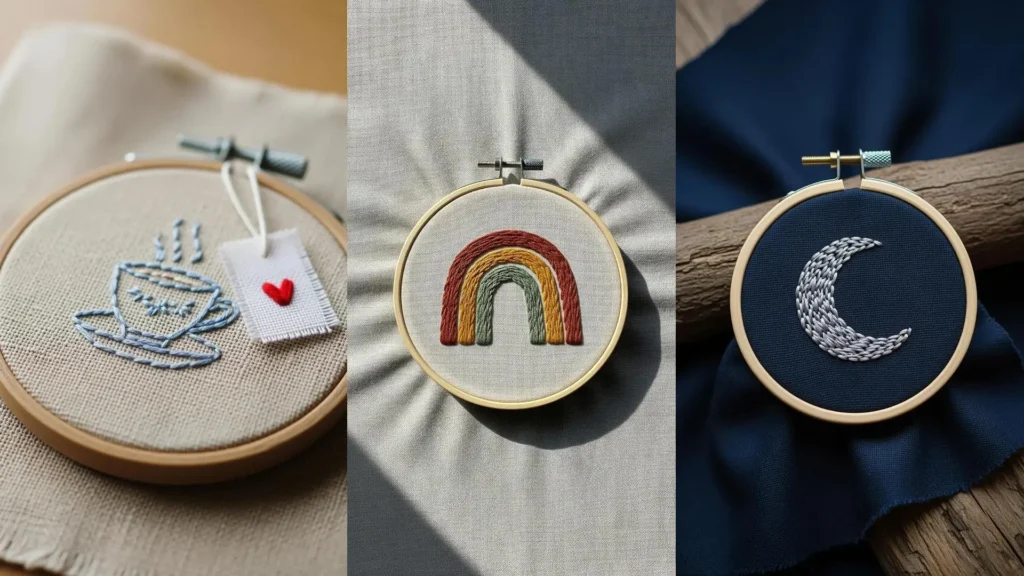
Use a backstitch or stem stitch for the waves, but intentionally vary the length and curvature of each stitch. Layer two or three shades of blue, allowing the lines to overlap and intersect.
This controlled chaos creates a sense of churning movement and depth.
For the whale tail, use a smooth long-and-short stitch to contrast with the energetic texture of the water.
11. Create a Sense of Whimsy with 3D Elements

Bring a dandelion to life by extending the embroidery beyond the confines of the hoop.
Stitch the core of the dandelion directly onto the hooped fabric. For the seeds blowing away, stitch them onto a separate piece of water-soluble stabilizer.
After stitching, dissolve the stabilizer, leaving you with freestanding embroidered seeds. Attach them to the main piece with a single, tiny stitch, allowing them to float just off the fabric’s surface for a magical, three-dimensional effect.
12. Balance Graphic Fills with Negative Space
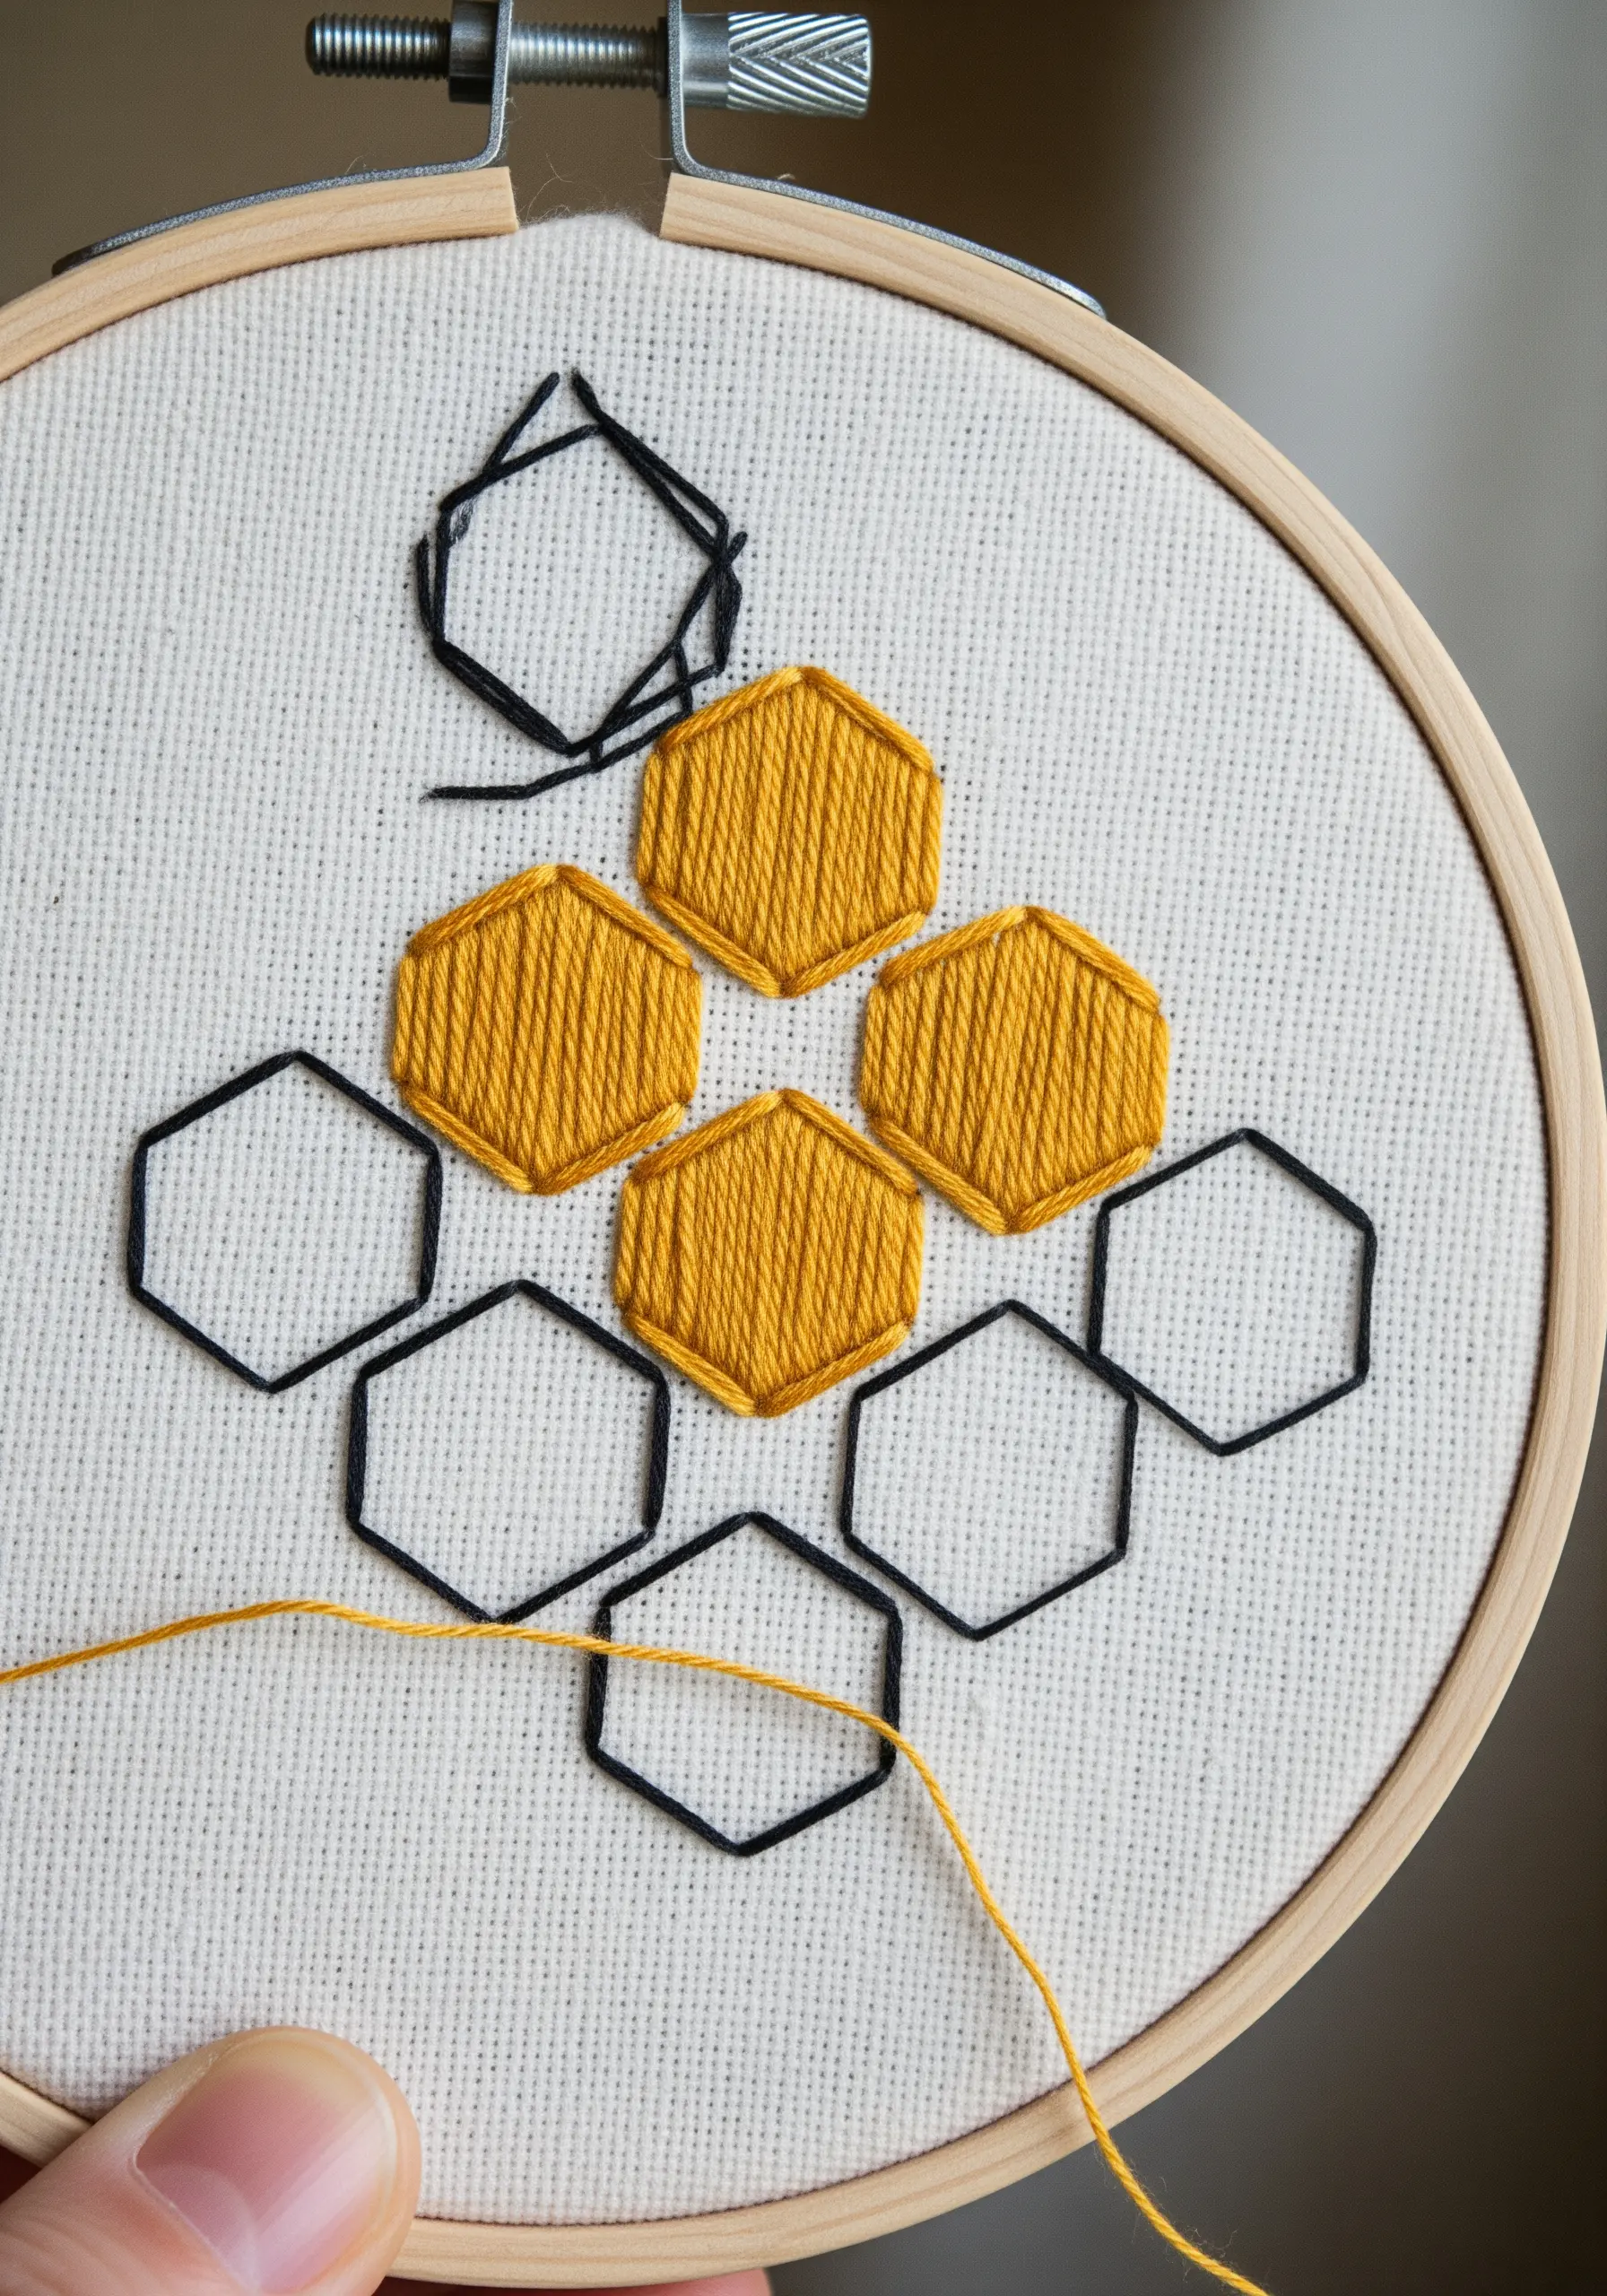
For a strong geometric design, the unfilled spaces are just as important as the stitched ones.
Outline all your hexagons first with a crisp backstitch to establish the pattern. Then, choose which cells to fill.
Use a perfectly smooth satin stitch, ensuring every stitch lies parallel. The contrast between the dense, light-reflecting fill and the empty, outlined shapes creates a dynamic visual rhythm that is both modern and compelling.
13. Achieve a Realistic Gradient with Thread Blending
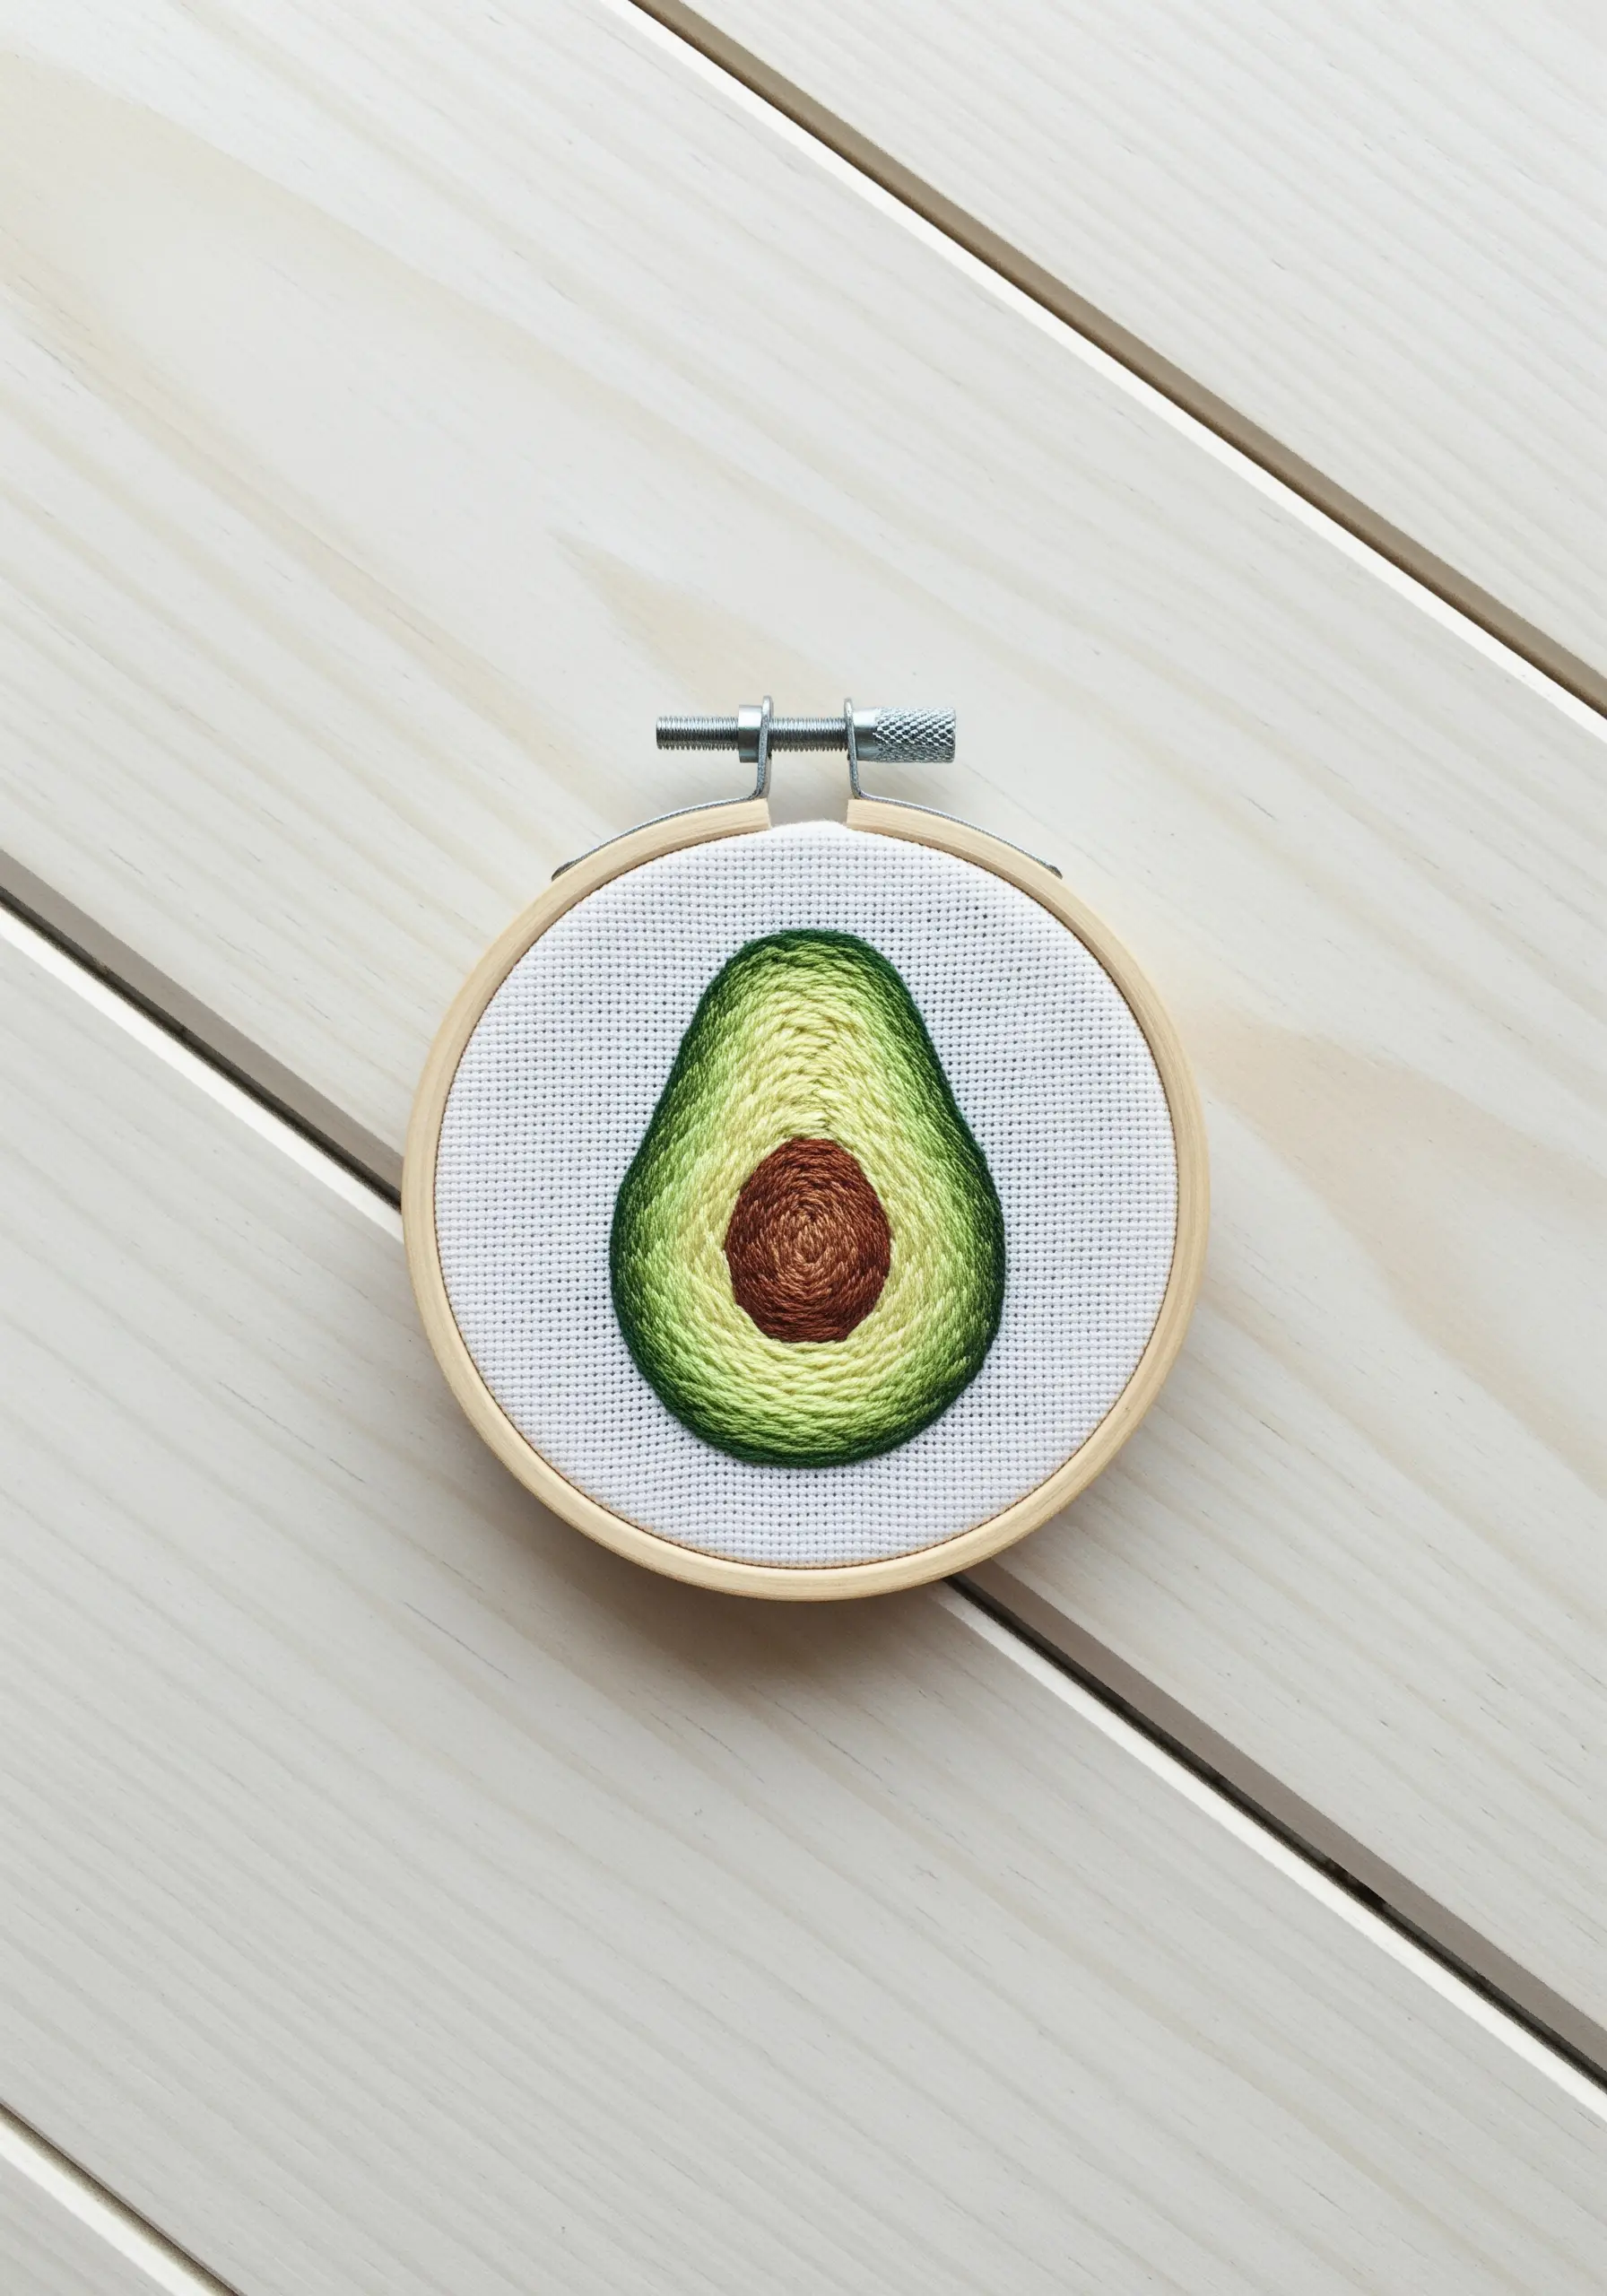
To create the soft, creamy texture of an avocado, you need to blend your colors seamlessly.
Work in concentric circles using a long-and-short stitch. Start with the darkest green near the skin, then introduce a lighter green, pulling its stitches deep into the previous color to eliminate any harsh lines.
Finish with a pale yellow-green near the pit. This technique creates a soft, painterly gradient that looks delicious and realistic.
14. Make Metallics Pop on a Dark Background
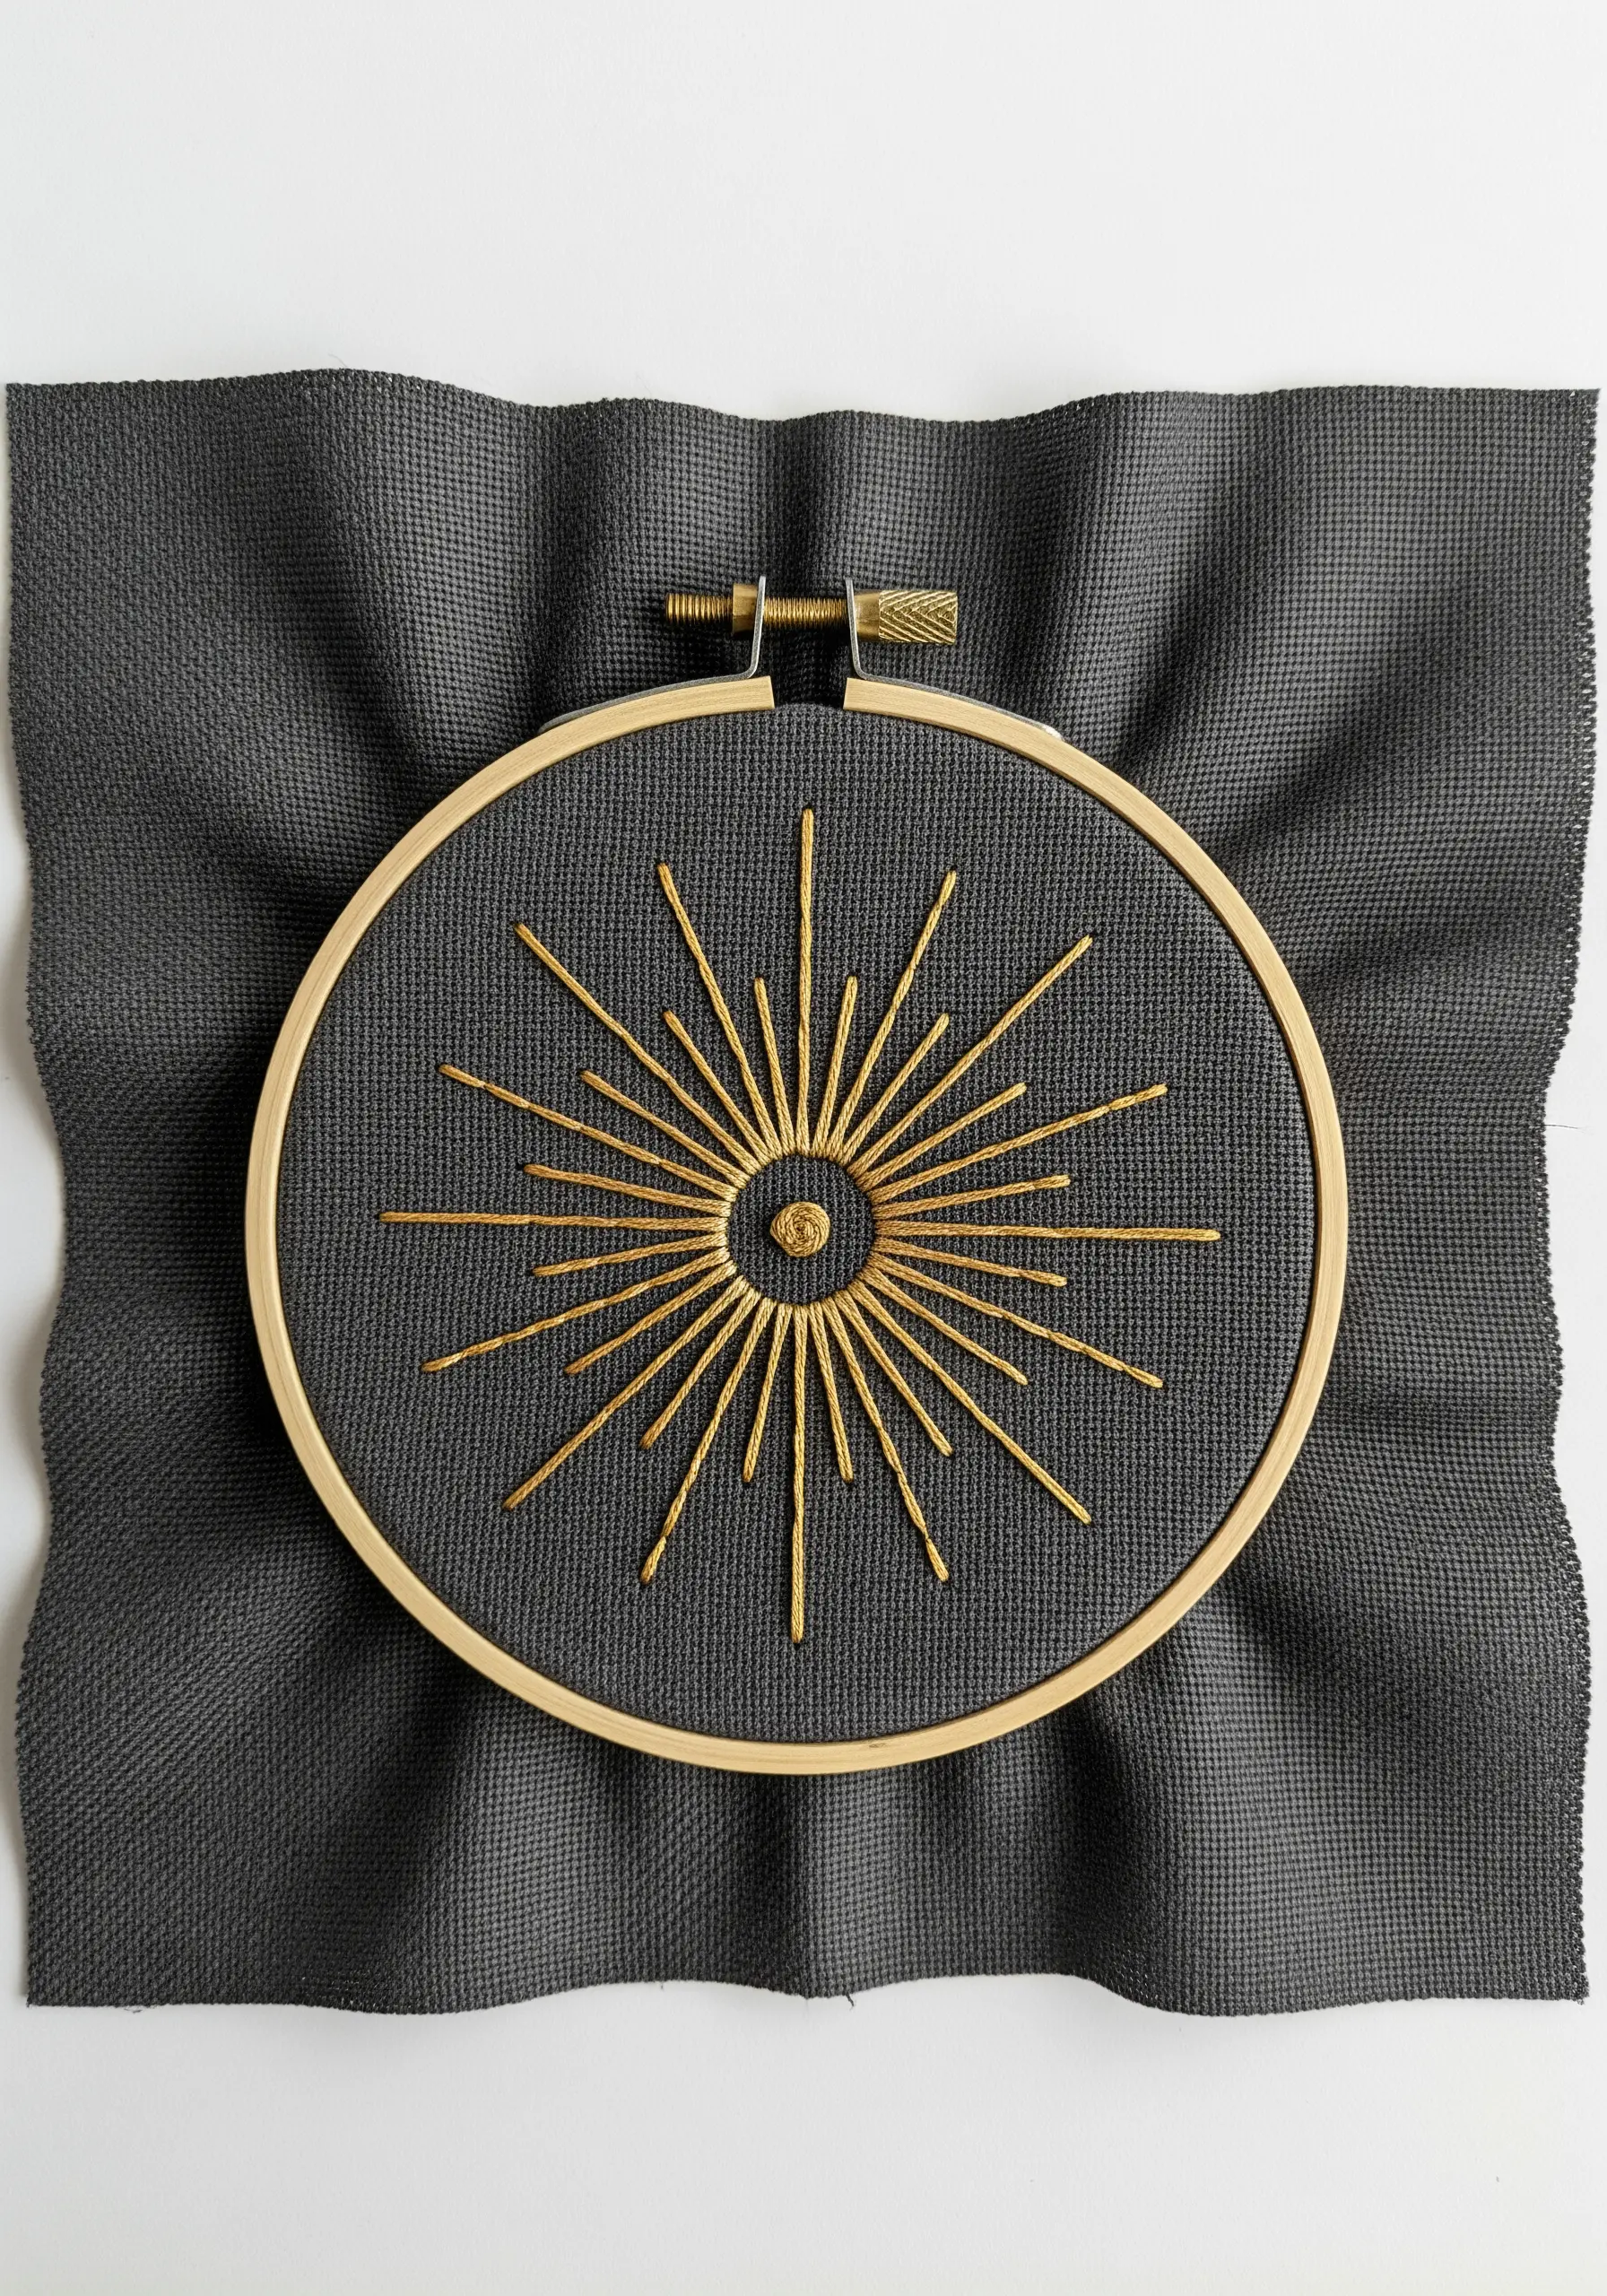
Metallic thread can be tricky, but it creates unmatched impact on dark, tightly woven fabric.
Use a thread conditioner or beeswax to prevent snagging. For the sun’s rays, use simple straight stitches, but pull your tension slightly looser than you would with cotton floss to allow the thread to catch the light.
A central French knot anchors the design. The stark contrast between the shimmering gold and the matte black fabric creates a dramatic, high-end look that is quick to stitch but sells fast.
15. Create Crisp Silhouettes with Fabric Appliqué
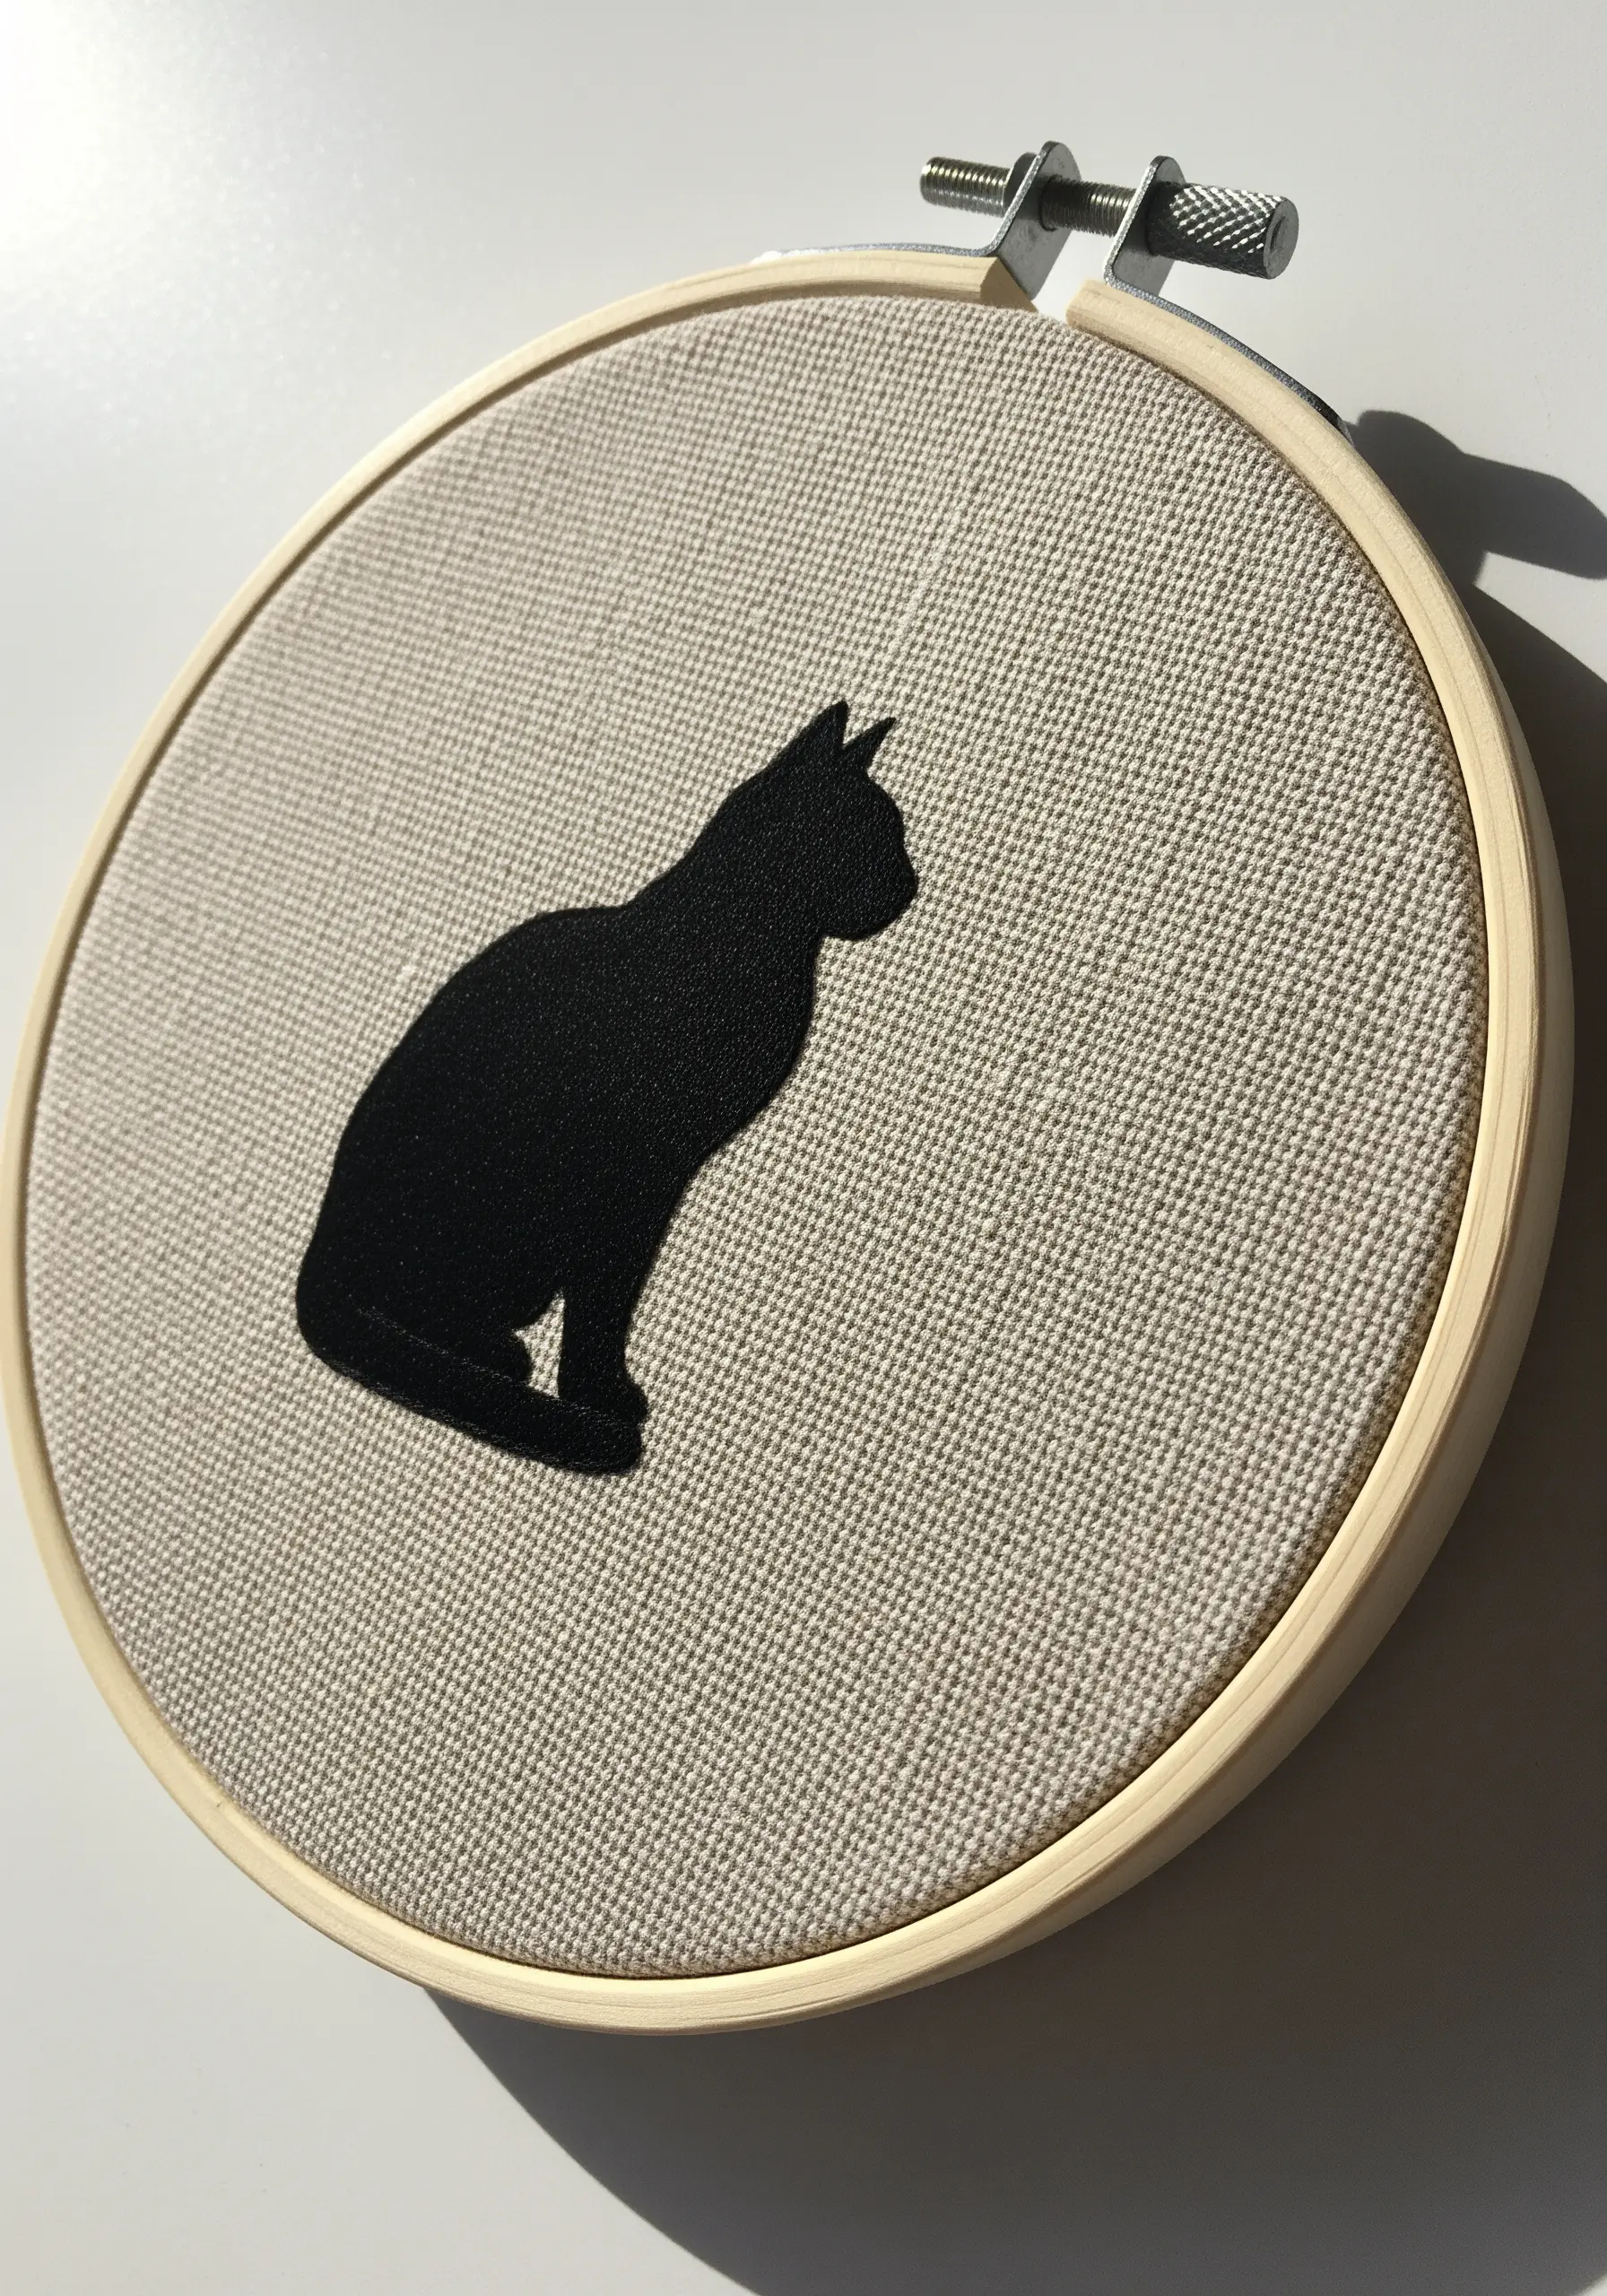
For a perfectly solid, clean-edged silhouette, sometimes the best stitch is no stitch at all.
Trace your design onto a piece of non-woven, iron-on interfacing. Iron it to the back of black felt, then cut the shape out precisely.
Peel the paper backing, position the felt silhouette on your hoop, and iron it in place. The result is an incredibly sharp, dense shape that would be nearly impossible to achieve with satin stitch, saving you time while delivering a flawless finish.
16. Capture the Delicate Structure of a Fern
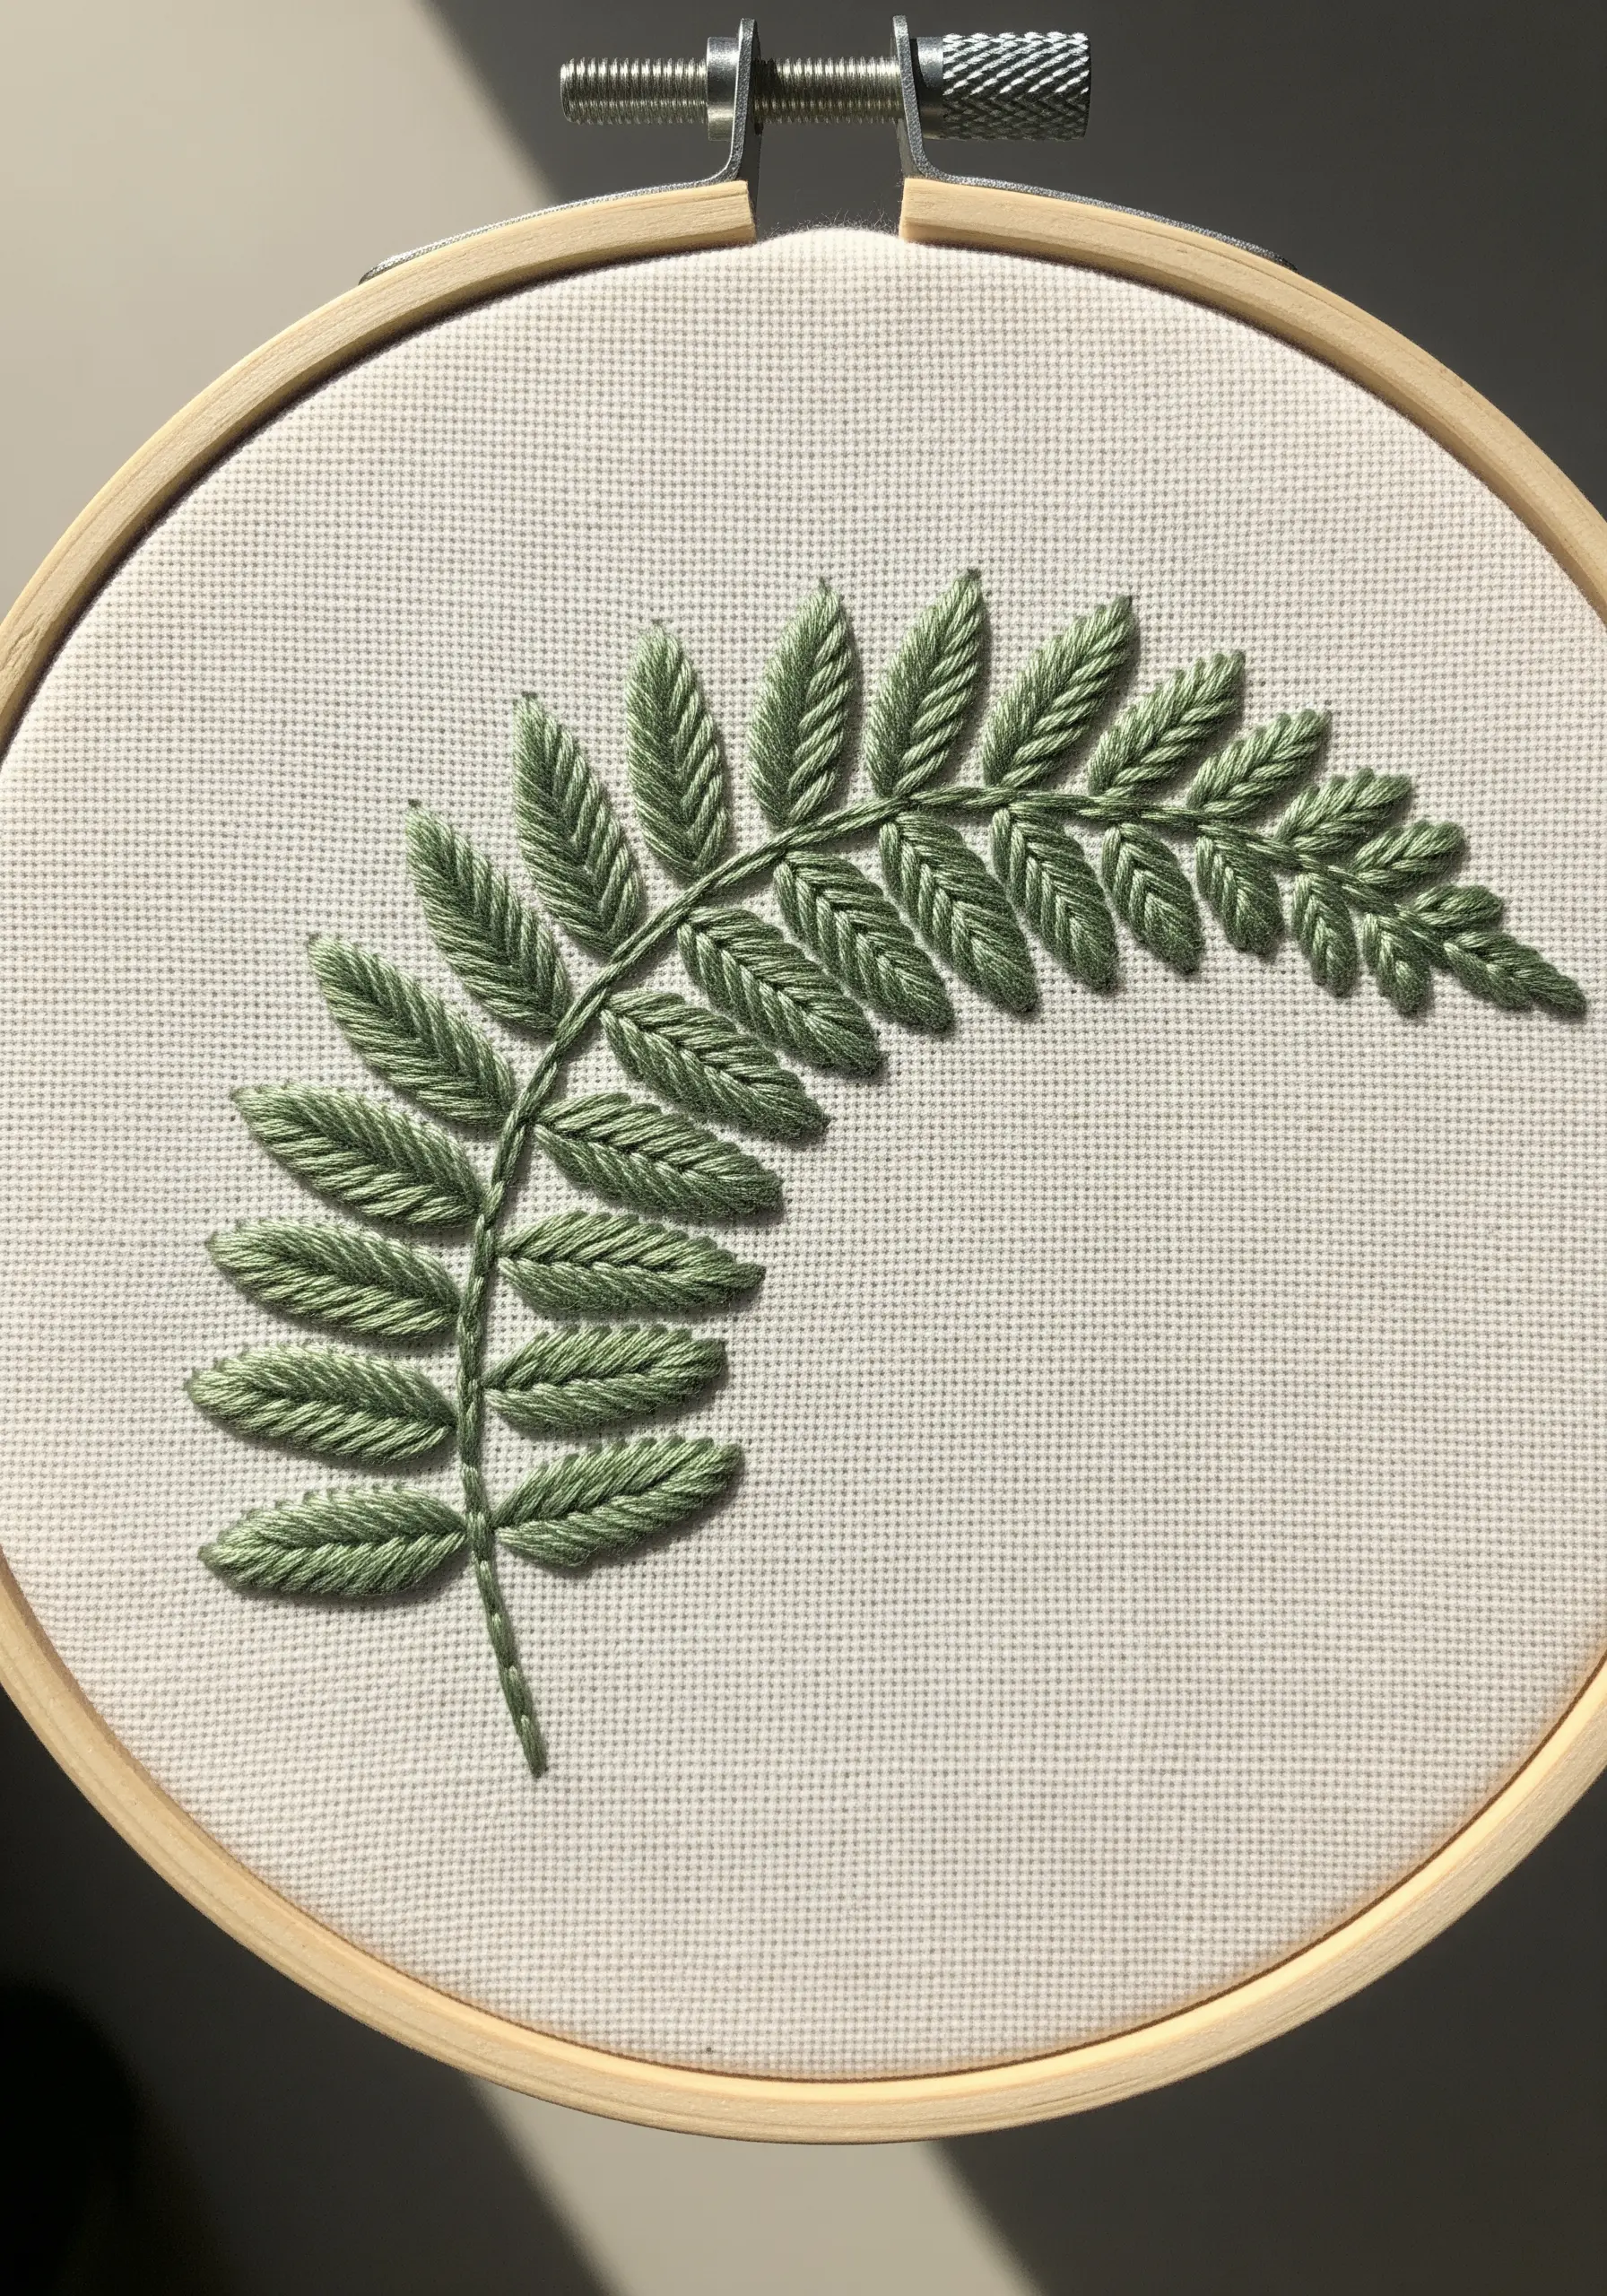
The fishbone stitch is the perfect choice for leaves like these because it creates the stem and leaves simultaneously.
Start at the very tip of the fern and work your way down, alternating stitches from left to right across a central guideline.
Keep your stitches angled and close together for a full, lush appearance. This single stitch choice does all the work, creating a beautifully structured and realistic botanical element with minimal effort.
17. Explore Abstract Compositions with Color and Texture

Abstract designs allow you to focus purely on the interplay of color and stitch.
Fill each circle with a spiral backstitch or chain stitch, starting from the center and working your way out. This creates a mesmerizing, tactile surface texture.
Choose a sophisticated color palette—like blush, slate blue, and mustard—and overlap the shapes to create new color interactions. This modern approach to hoop art appeals to buyers with an eye for contemporary design.
18. Use a Raised Outline to Define Your Shapes
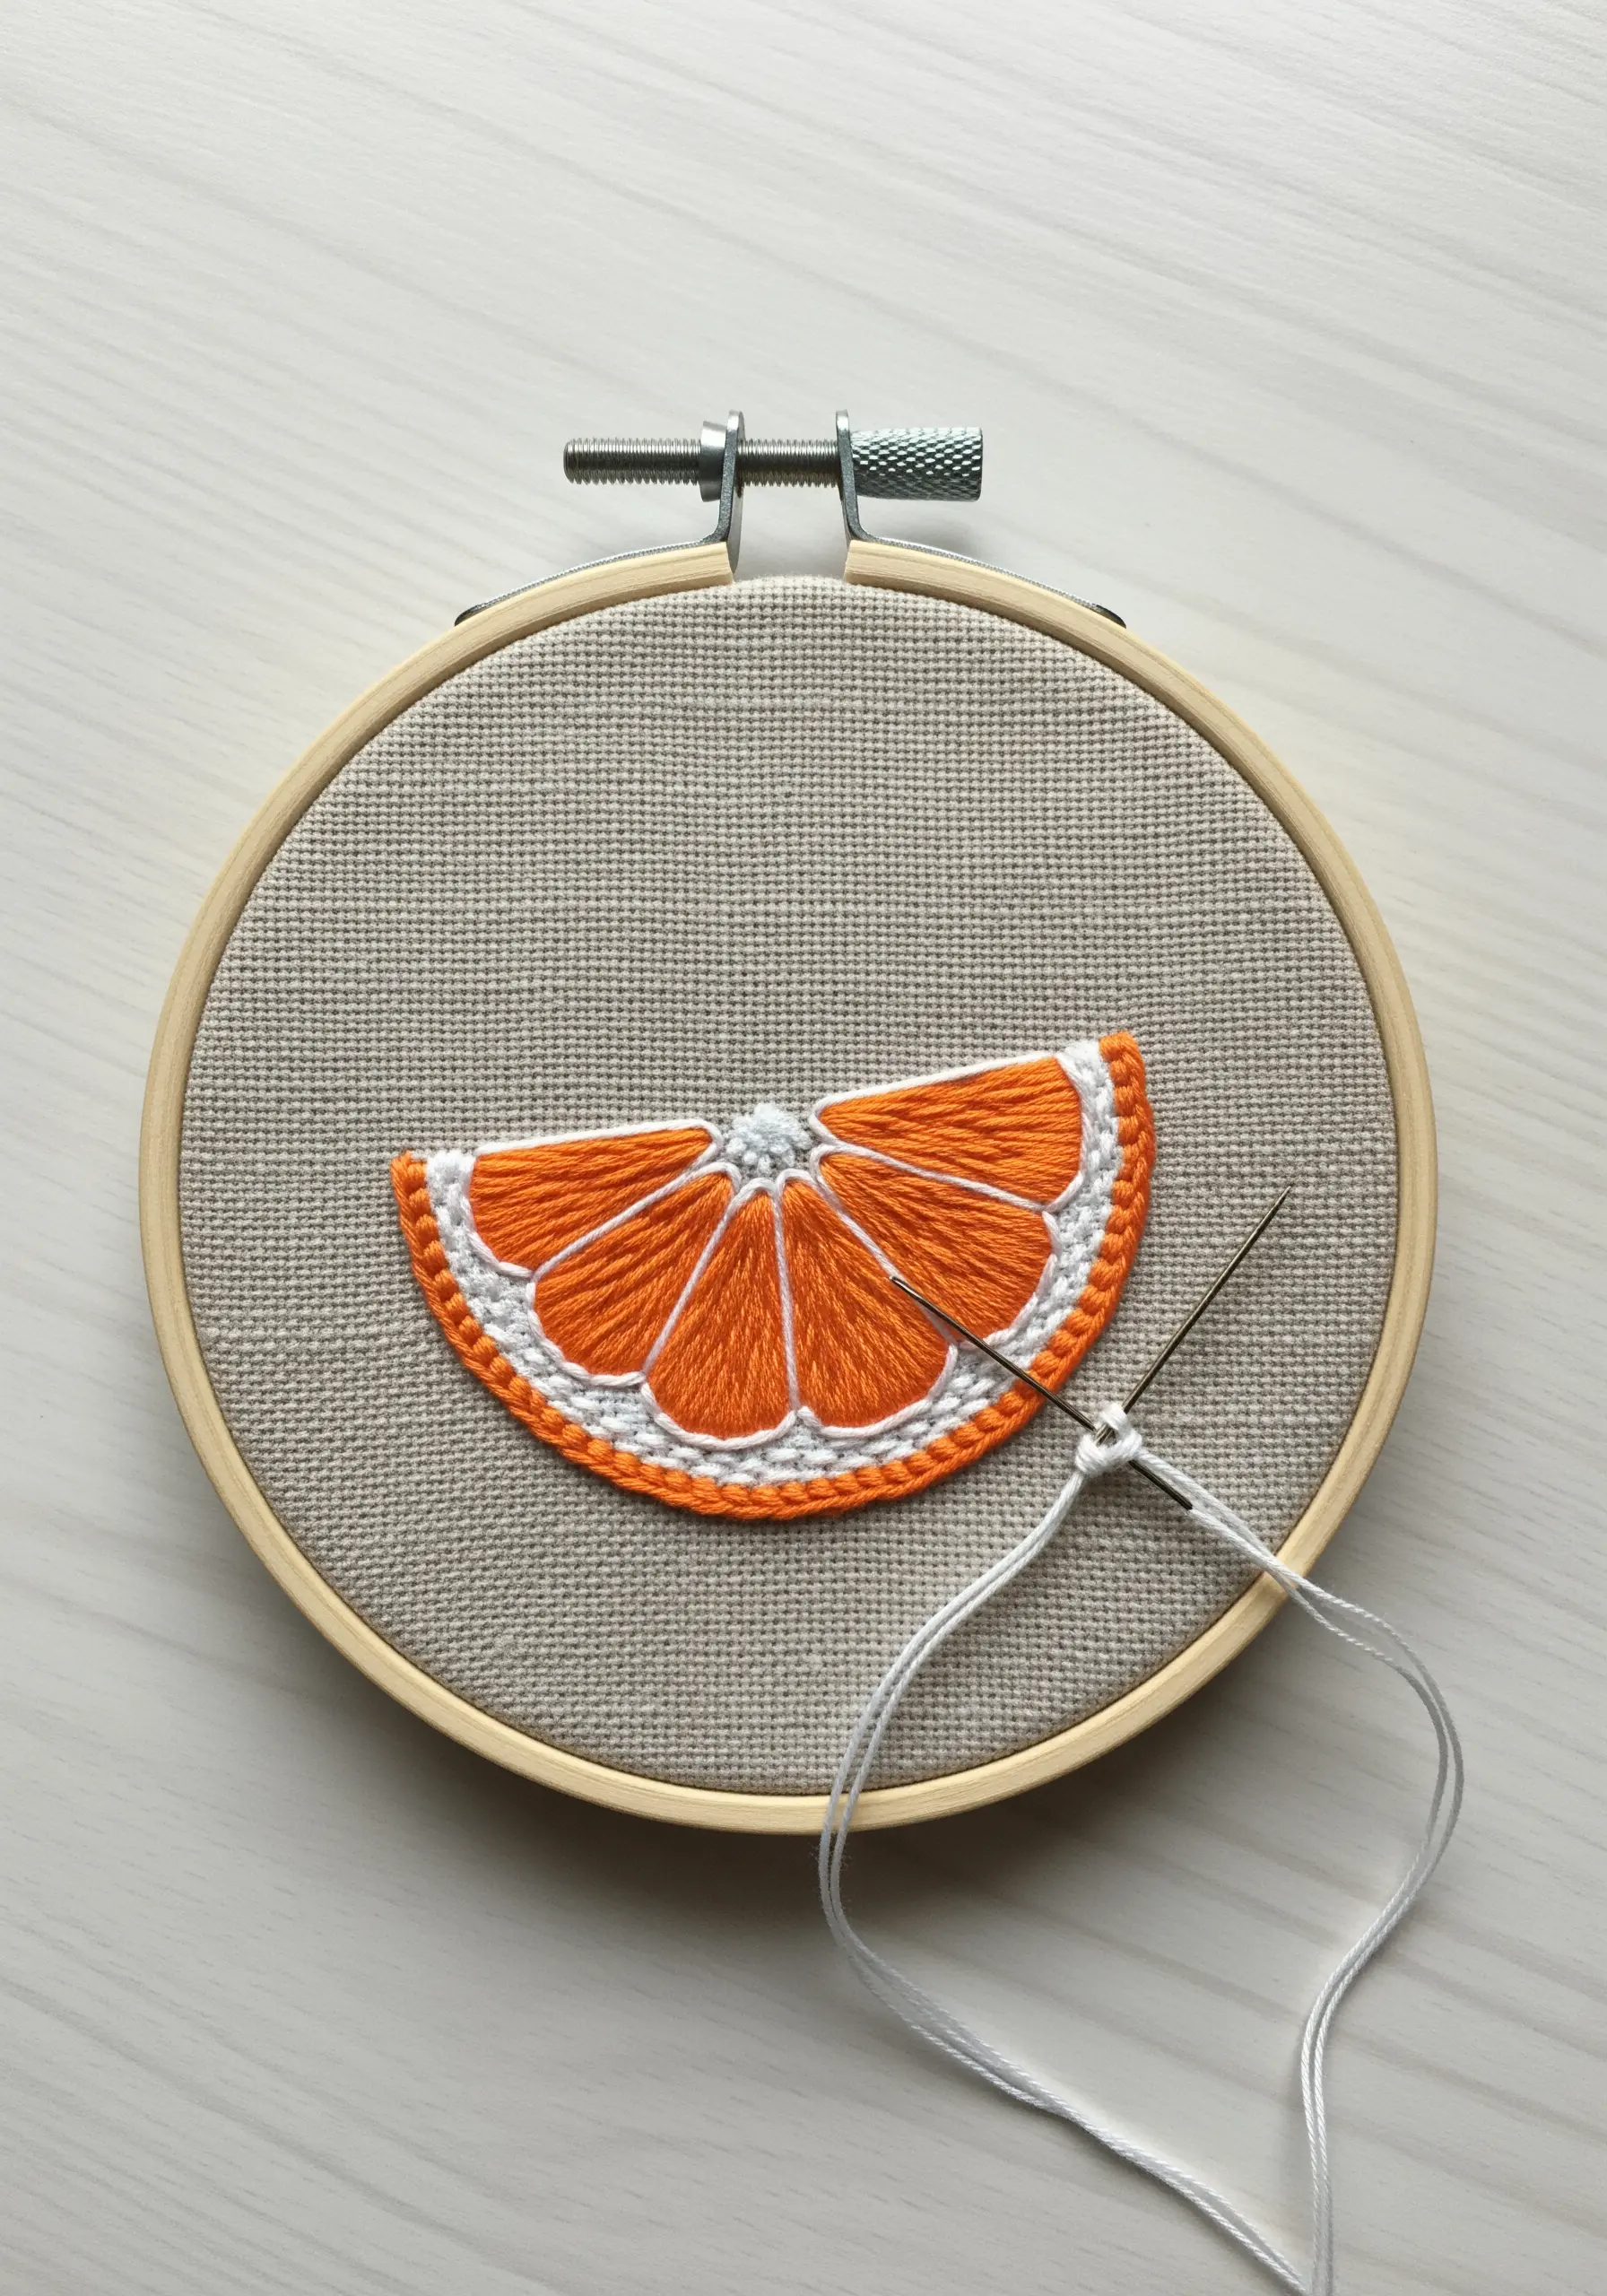
Make your central motif pop by giving it a strong, dimensional border.
First, fill the orange segments with a vibrant satin stitch. Then, outline the entire slice and each segment with a padded satin stitch or a heavy chain stitch in bright white.
This raised edge, representing the pith, creates a clean separation between the colors and adds a professional, polished finish. It physically lifts the design from the fabric, giving it a more substantial presence.
19. Build Fluffy Clouds with High-Texture Knots
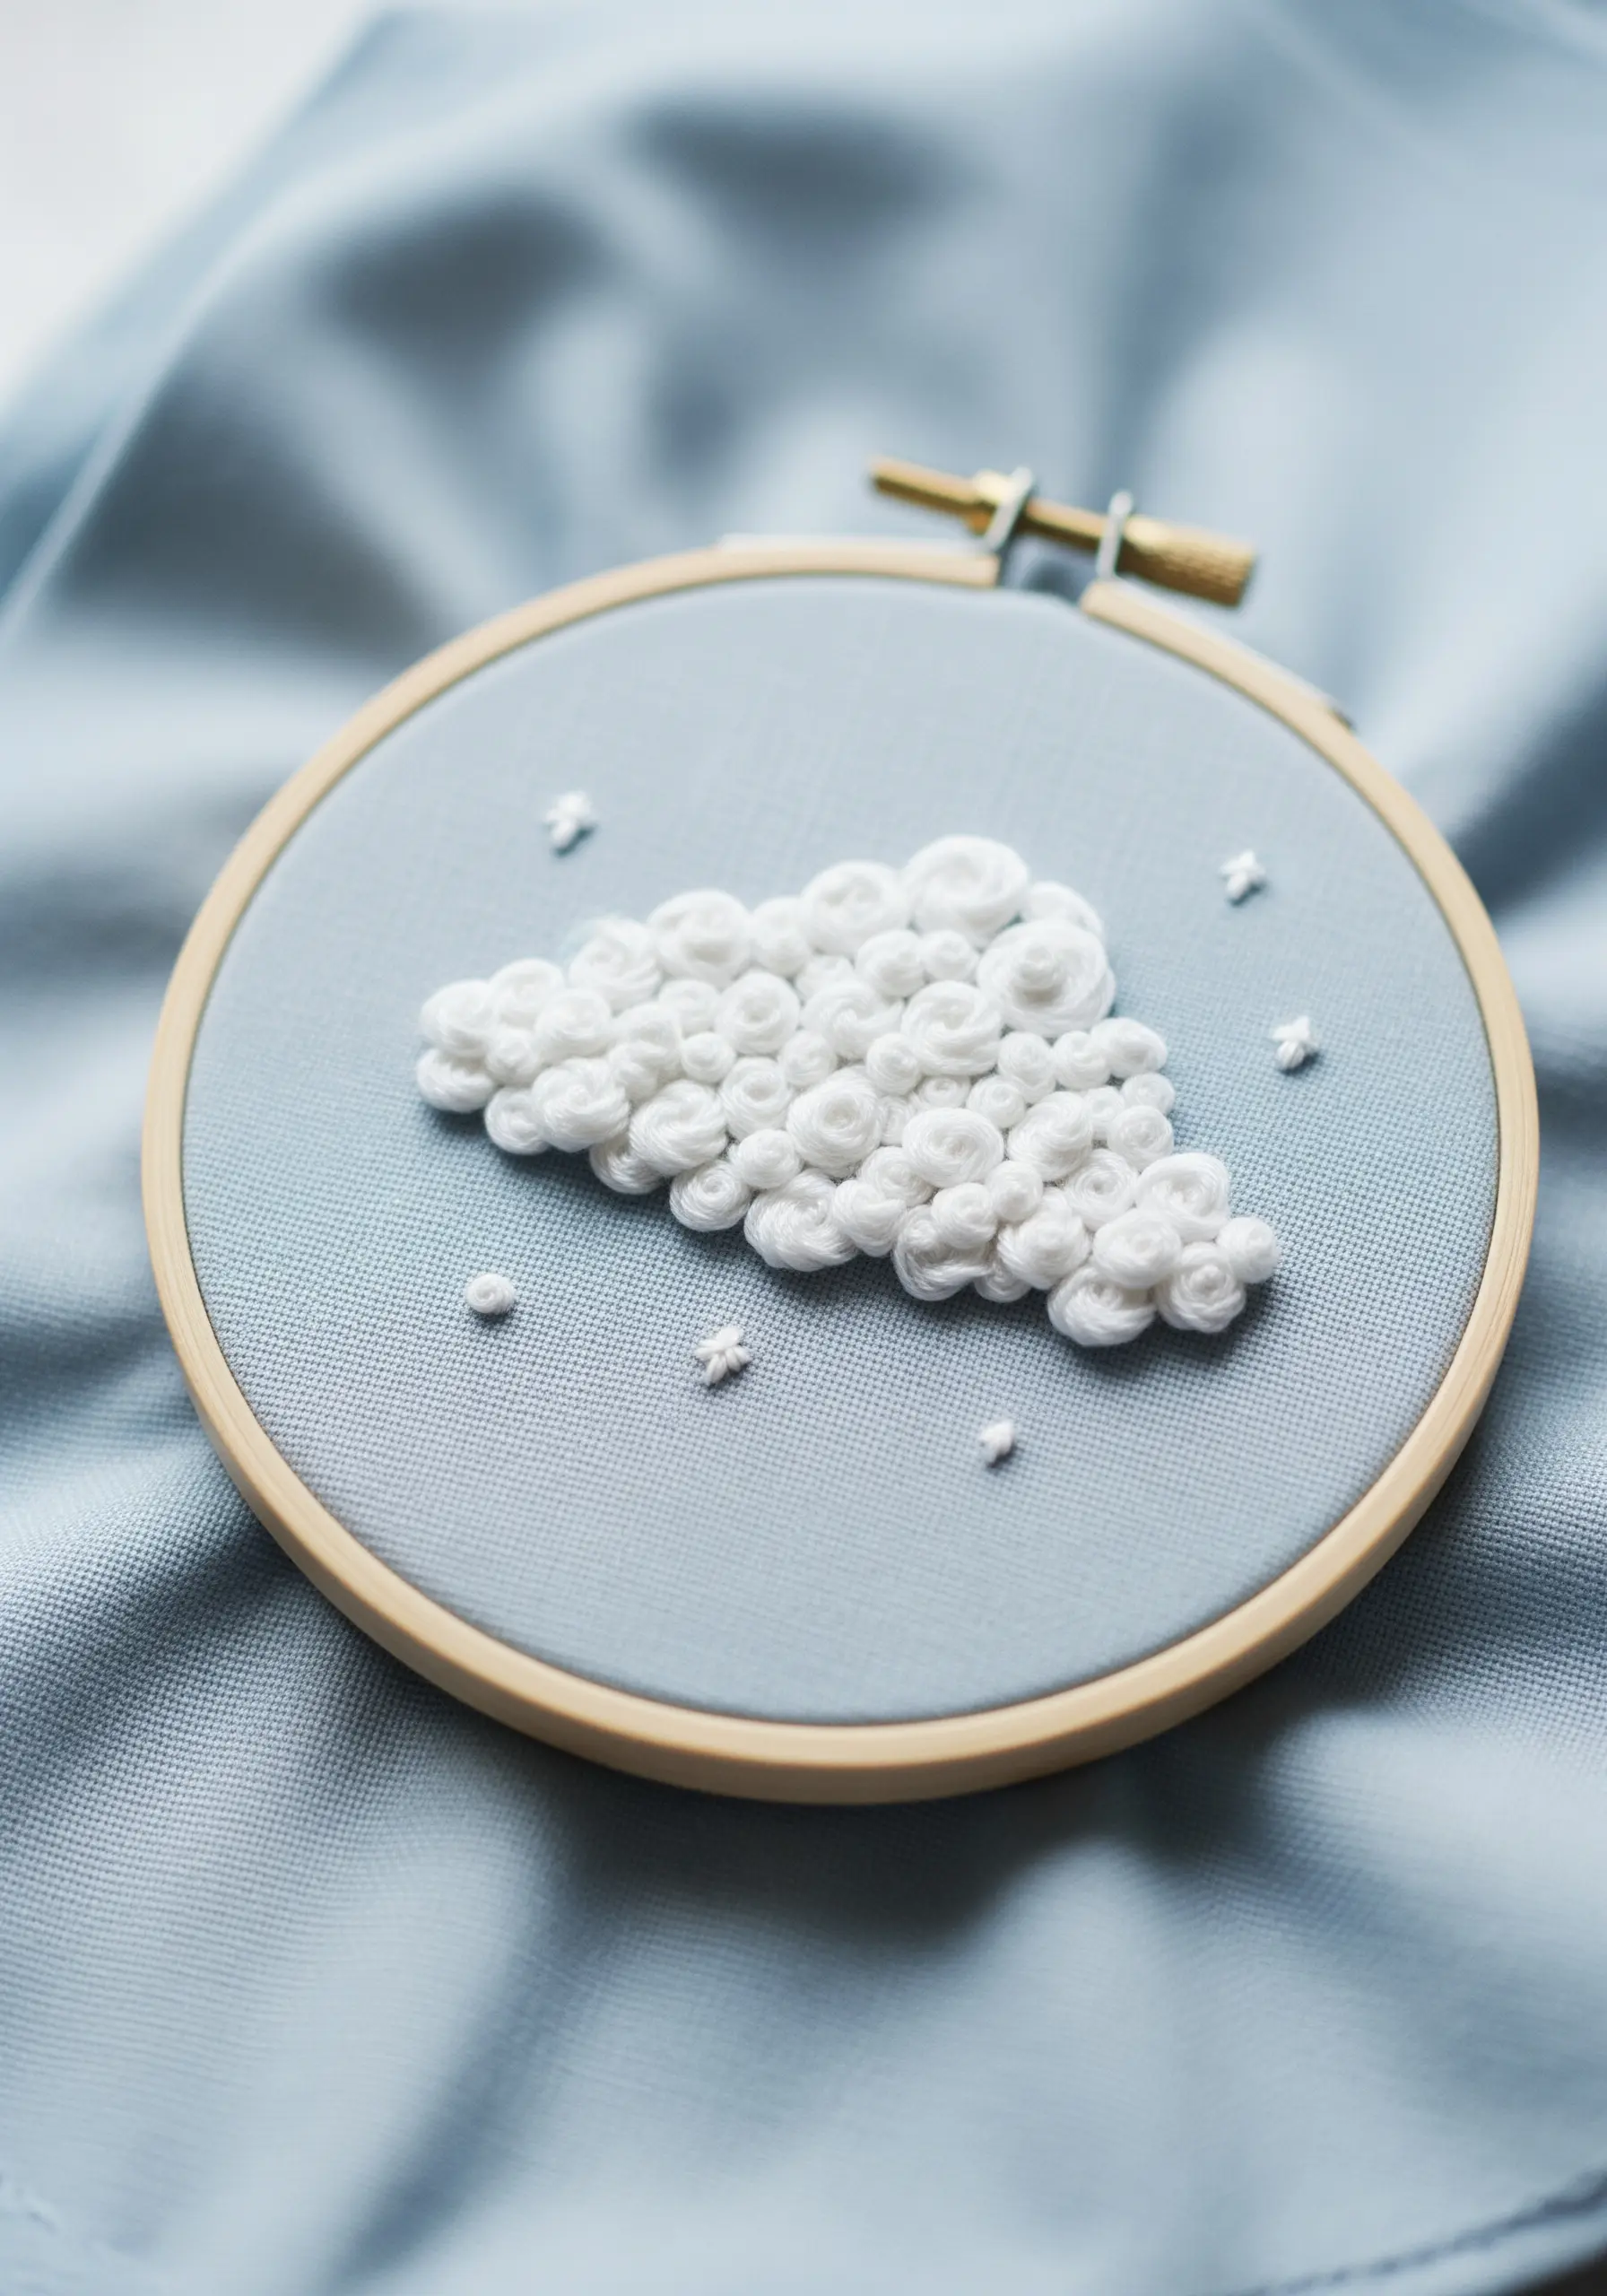
To create a cloud that looks soft enough to touch, fill the shape with a dense cluster of French knots.
Vary the size of your knots by changing the number of times you wrap the thread around the needle (once for small knots, twice for larger ones).
Use several shades of white, off-white, and pale grey, placing them randomly to create natural-looking volume and a soft, pillowy texture.
Scatter a few tiny star stitches around the cloud to complete the dreamy scene.
20. Stitch a Modern, Geometric Christmas Tree
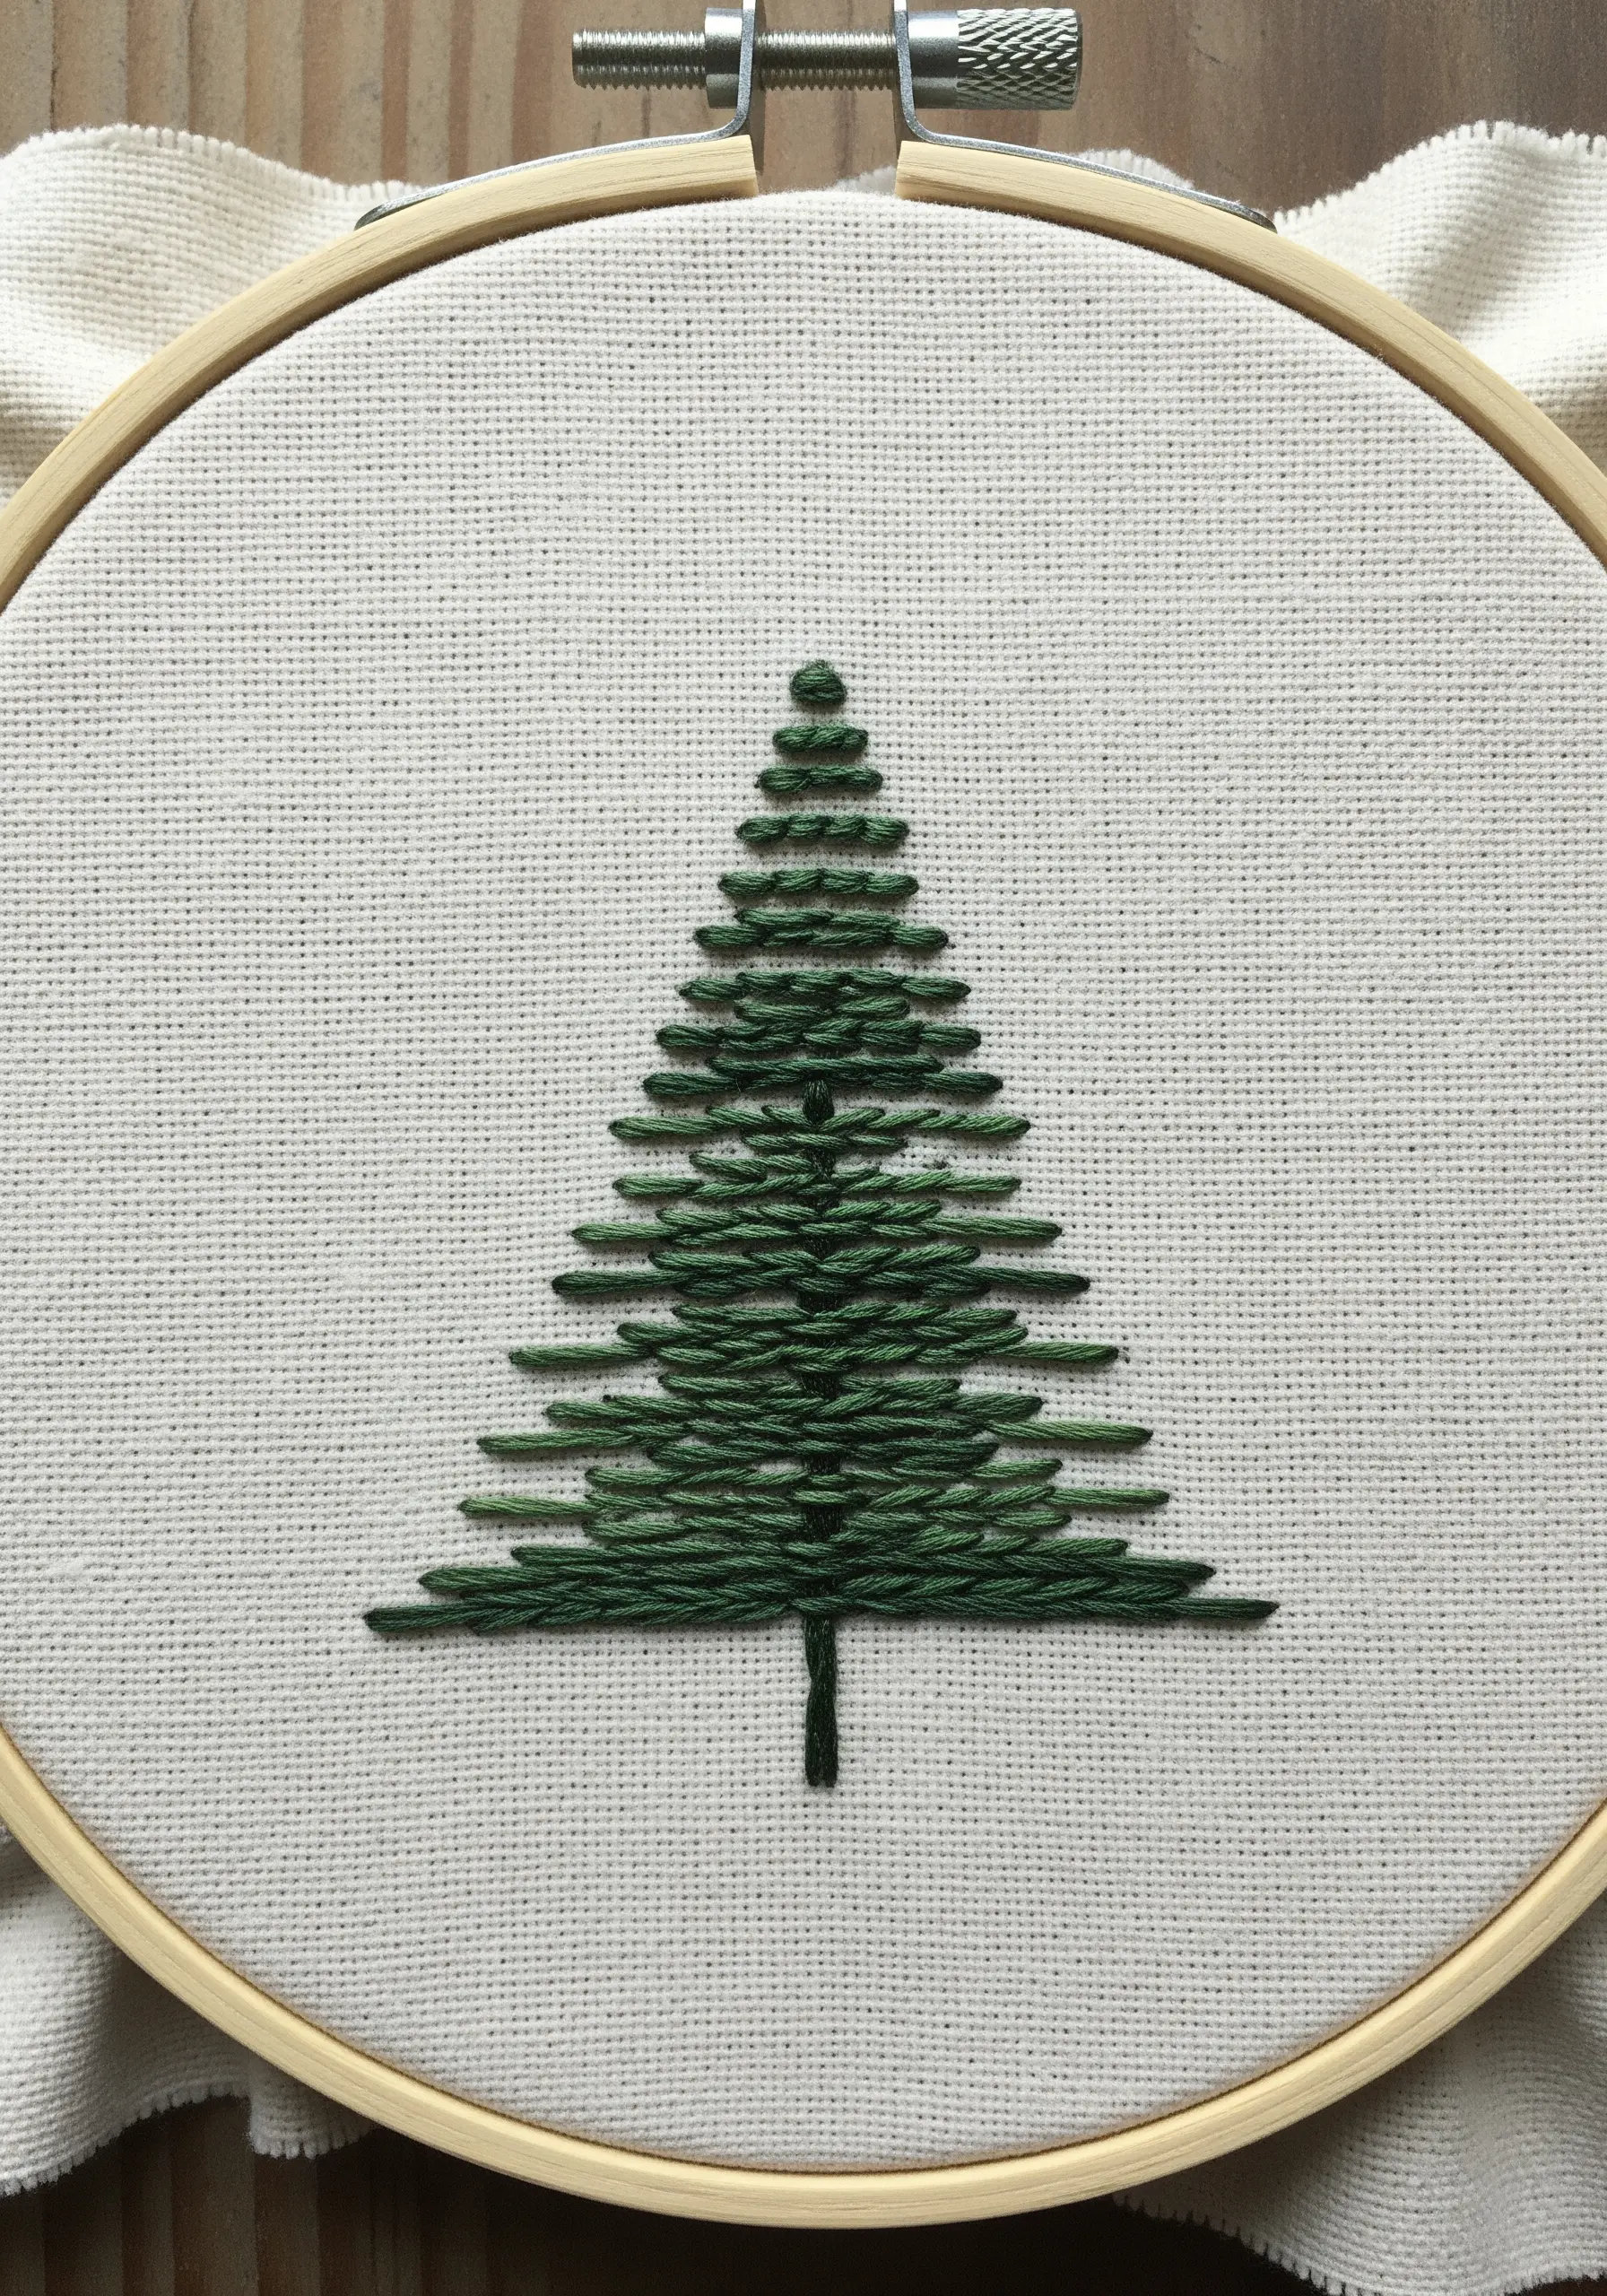
Reimagine a traditional holiday motif with clean lines and graphic simplicity.
This design uses only two stitches: a vertical straight stitch for the trunk and horizontal satin stitches for the branches.
The key is precision. Use a ruler and a fabric marker to draw exact guidelines. The perfectly spaced, symmetrical bars create a stylized tree that feels contemporary, minimalist, and chic—a fast and popular seller during the holiday market season.
21. Give Simple Daisies a Textured Center
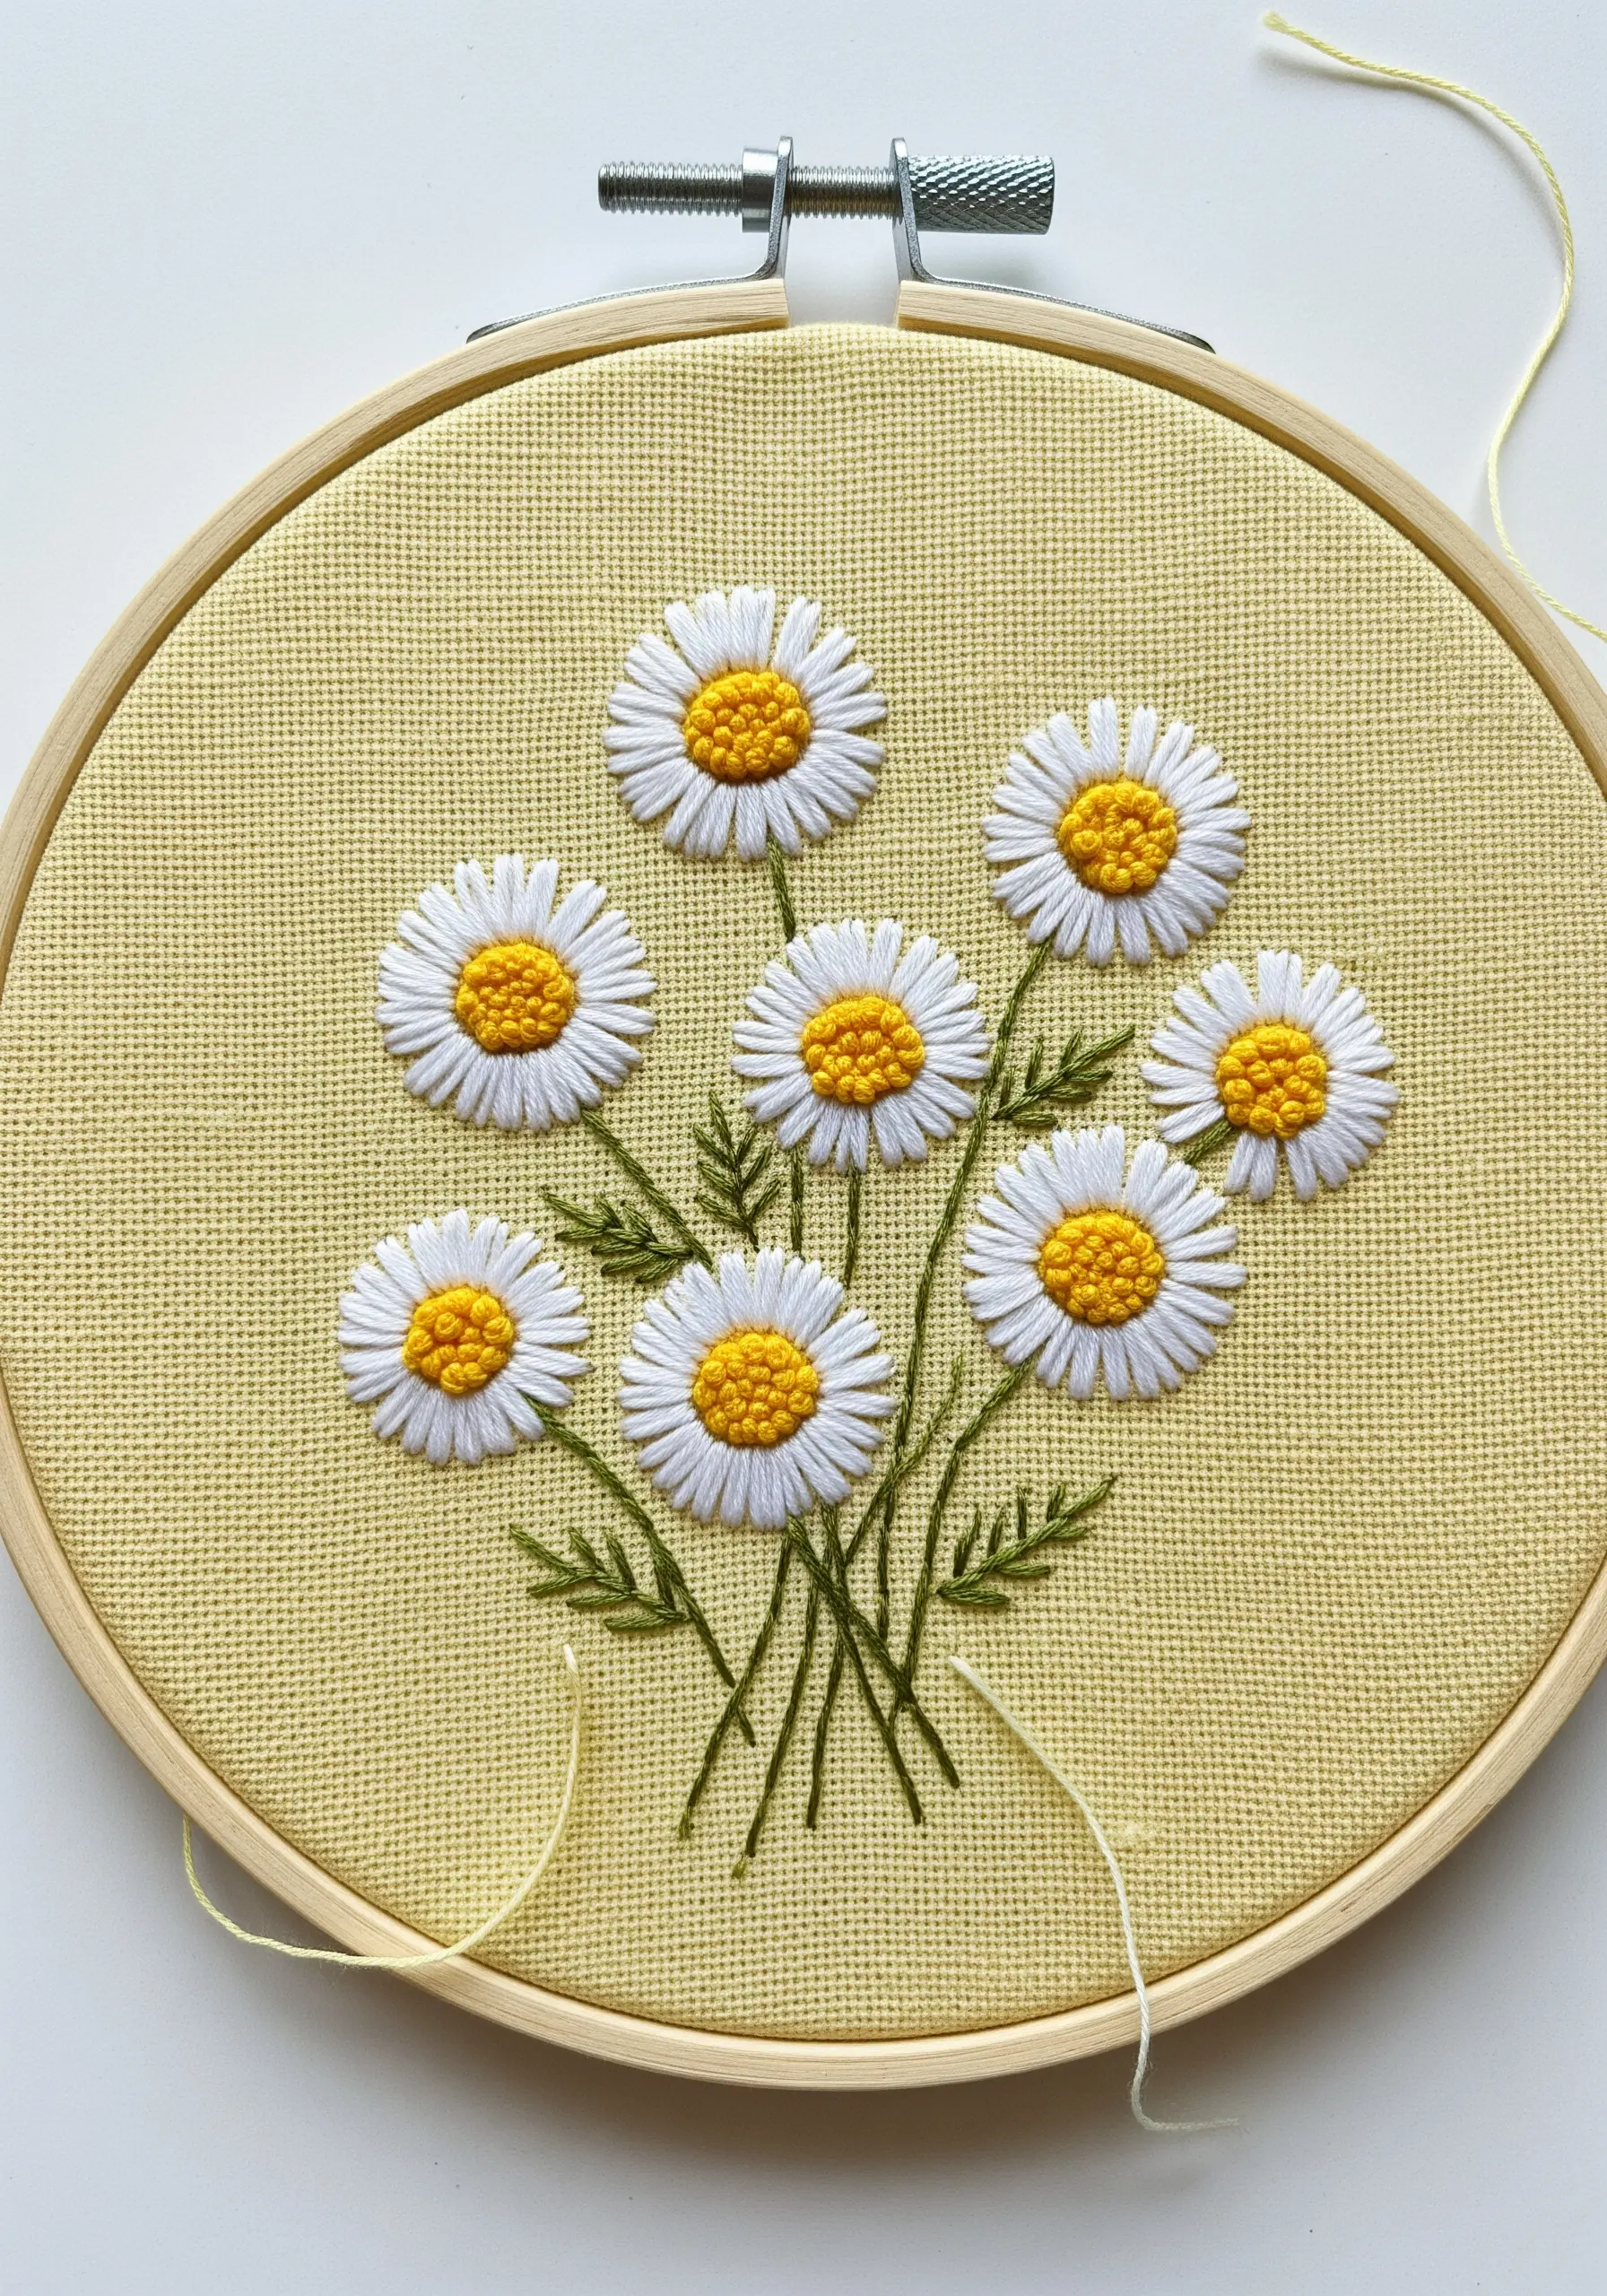
Elevate the humble daisy by focusing on its center.
Instead of French knots, use the woven wheel stitch (or spider web stitch). This creates a dense, raised, and beautifully textured center that contrasts wonderfully with the flat petals.
For the petals, use a simple satin stitch, ensuring each stitch is pulled neatly toward the center. This combination of a high-texture center and smooth petals gives the classic flower a sophisticated, polished look.
22. Illustrate Speed with Dynamic Stitches

Capturing the essence of movement is about showing a transition.
Stitch the star with a bold, five-pointed satin stitch. For the tail, begin with dense, long straight stitches right behind the star.
As you move away, gradually shorten the stitches and increase the space between them. This simple progression creates a powerful visual effect of speed and fading light, turning a static image into a dynamic moment.
23. Layer Petals for Botanical Depth
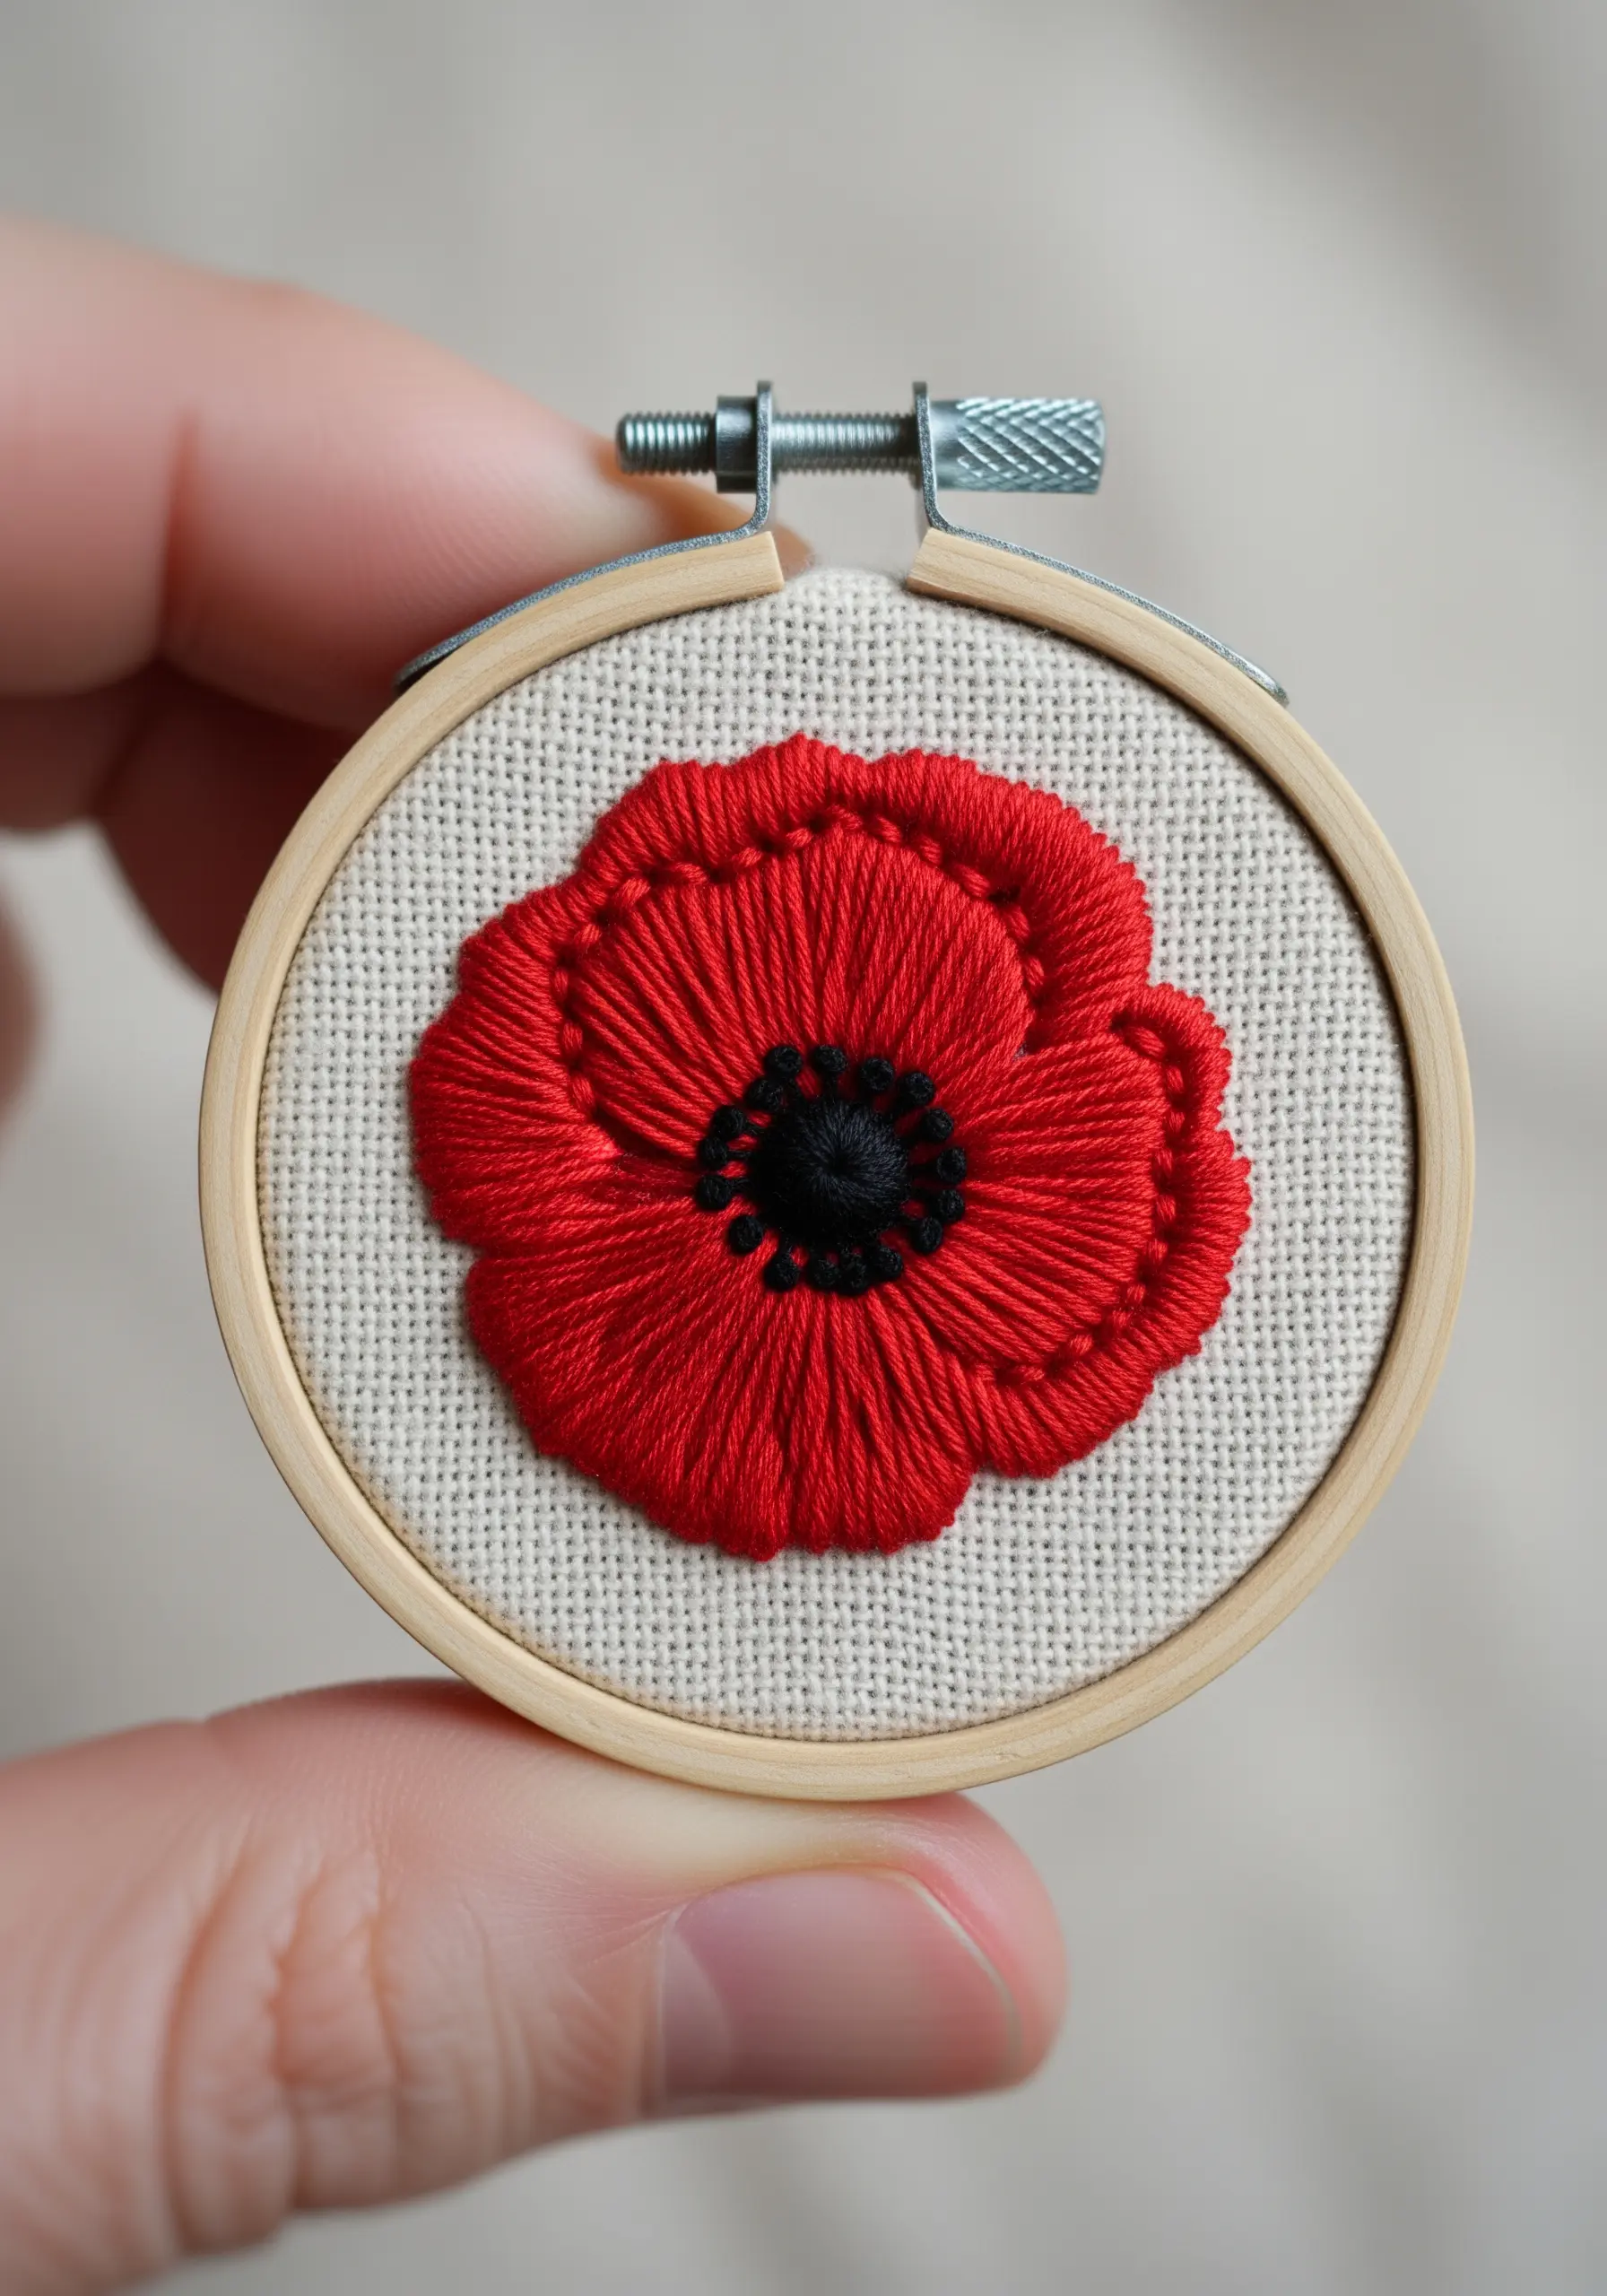
To make a flower feel full and lifelike, you must create layers.
Stitch the back petals first using a long-and-short stitch. Then, stitch the front petals directly on top, allowing them to slightly overlap the ones behind.
Use a slightly darker shade of thread where the petals overlap to create a natural shadow effect. This simple layering technique instantly adds dimension and realism to any floral design.
24. Imply Dimension with Line Weight
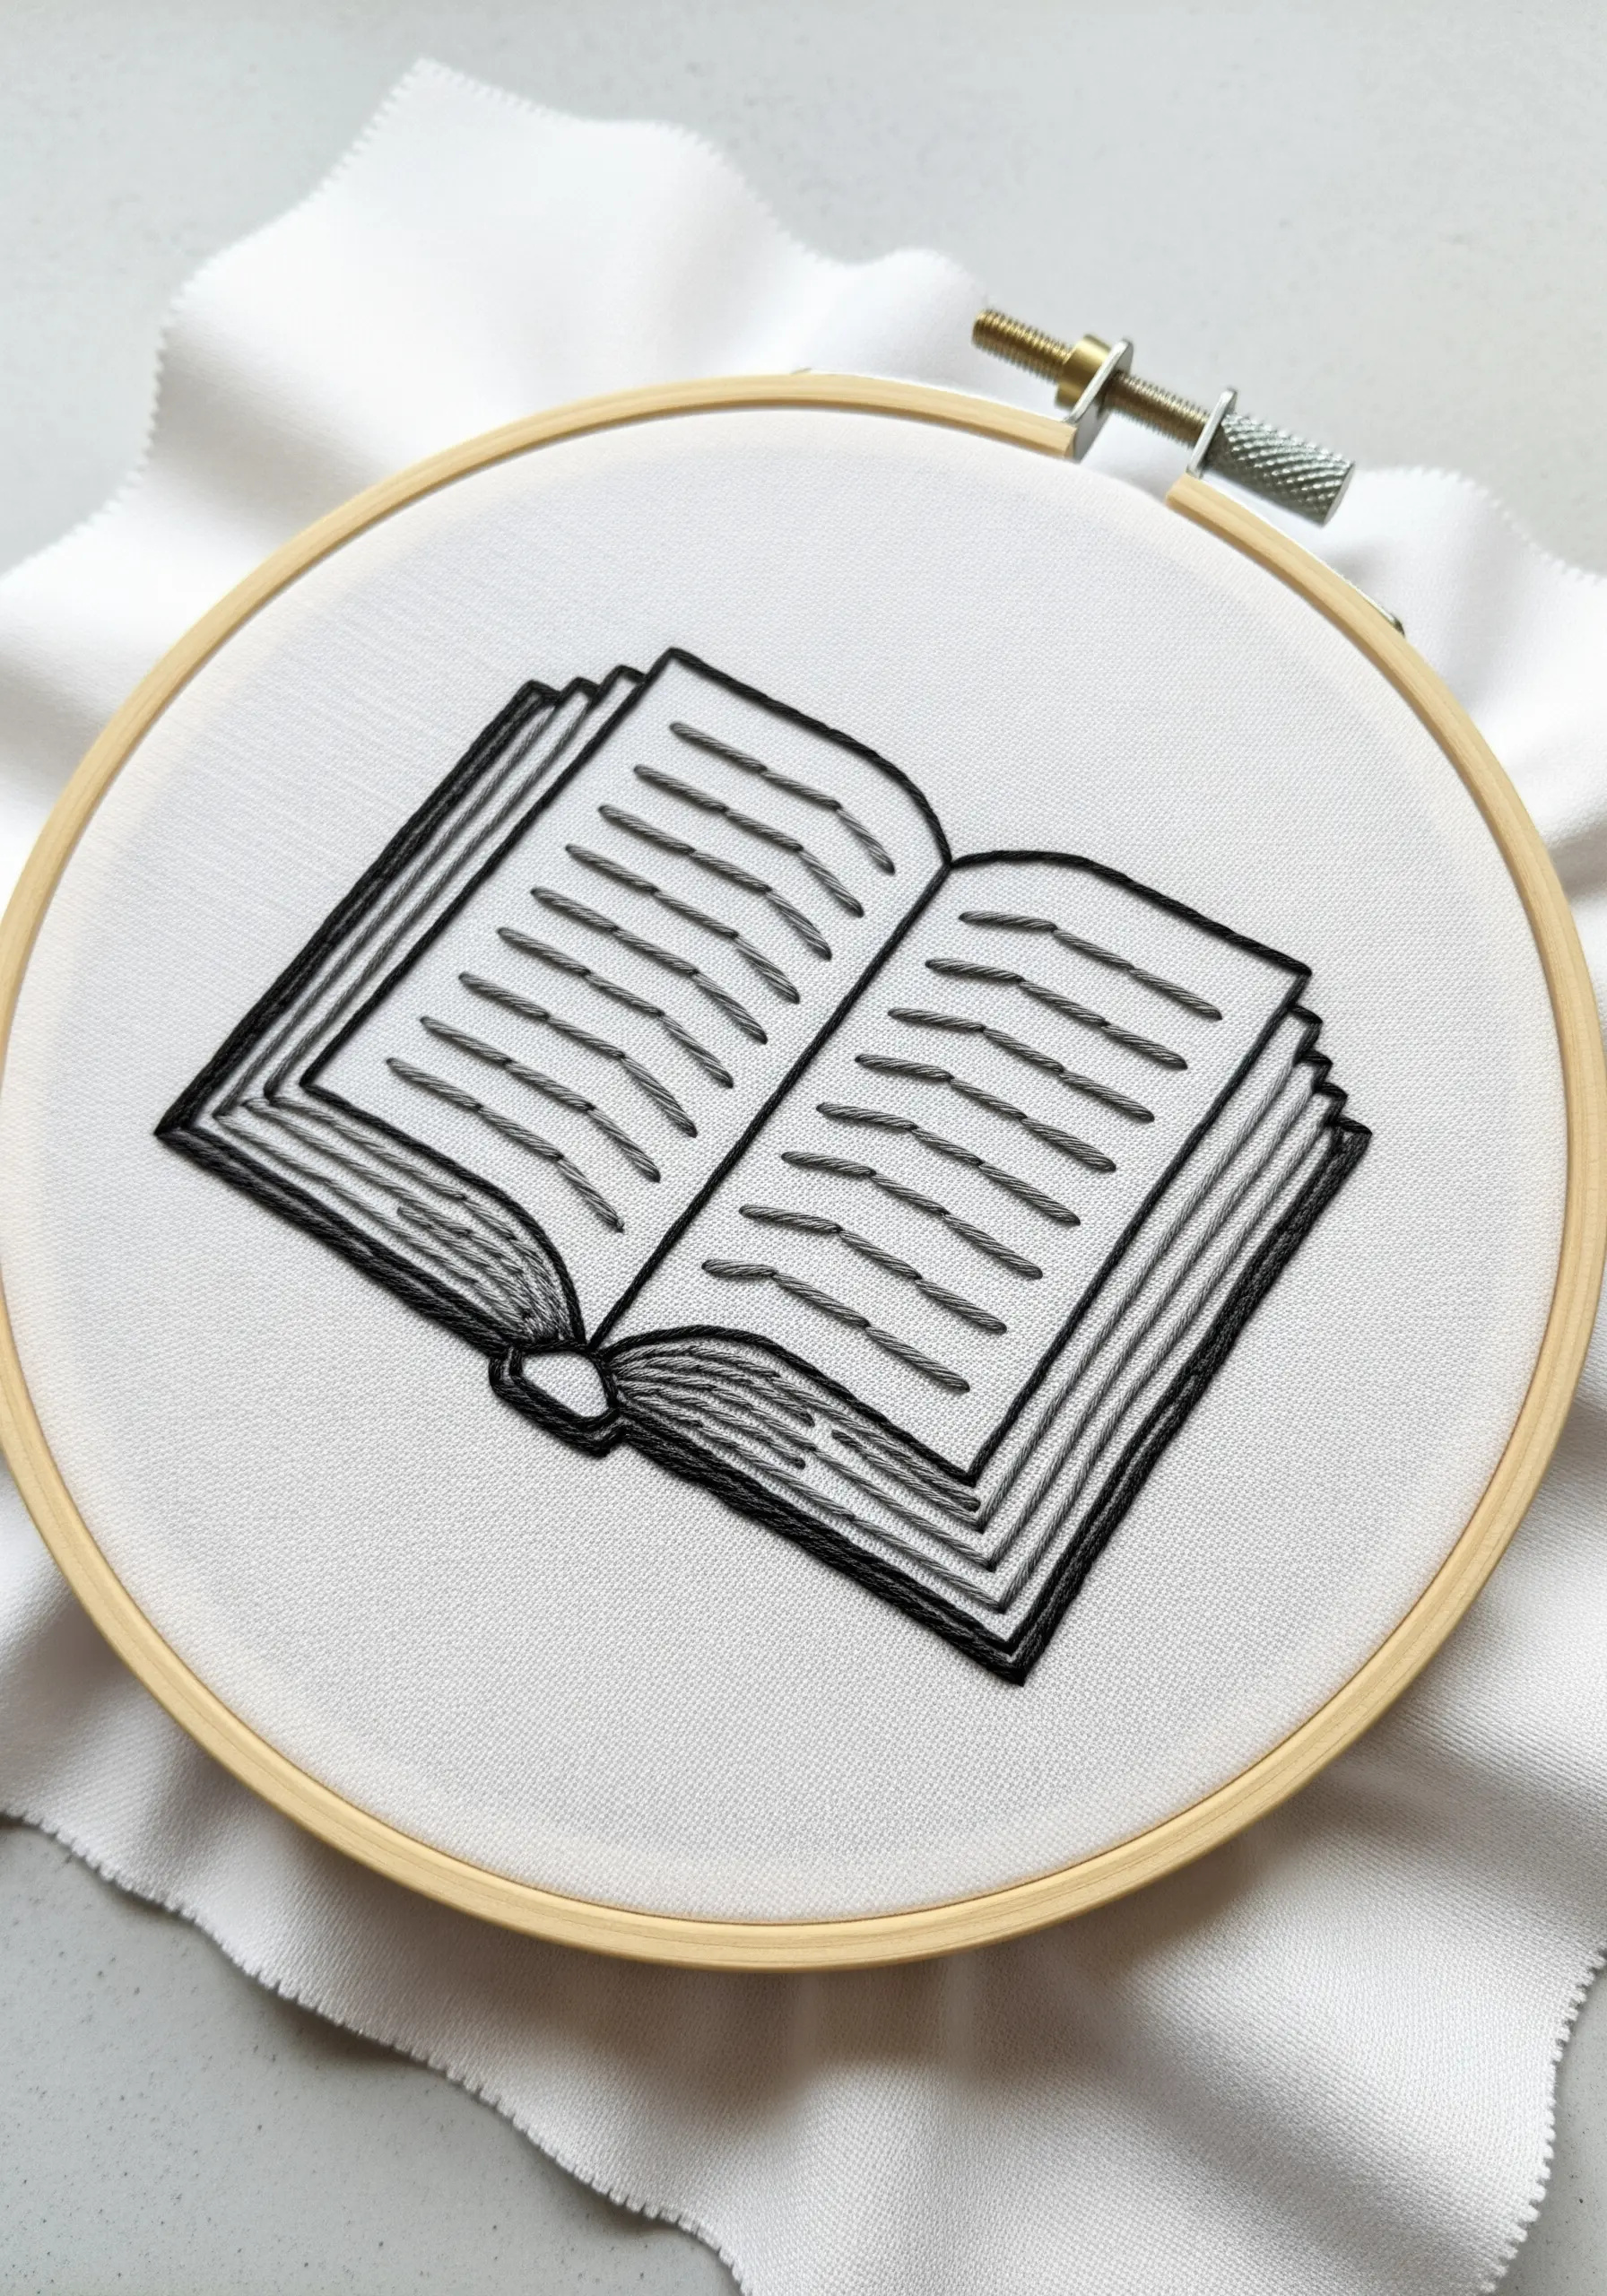
Create a 3D effect in a simple line drawing by varying your thread thickness.
Use a full three or four strands of floss with a backstitch for the book’s main outline and cover. This gives it a solid, heavy presence.
For the interior details, like the page edges and lines of text, switch to a single strand of thread. This subtle shift in line weight tricks the eye into seeing depth and perspective, making the illustration feel much more dynamic.
25. Follow the Form with Directional Fill Stitches
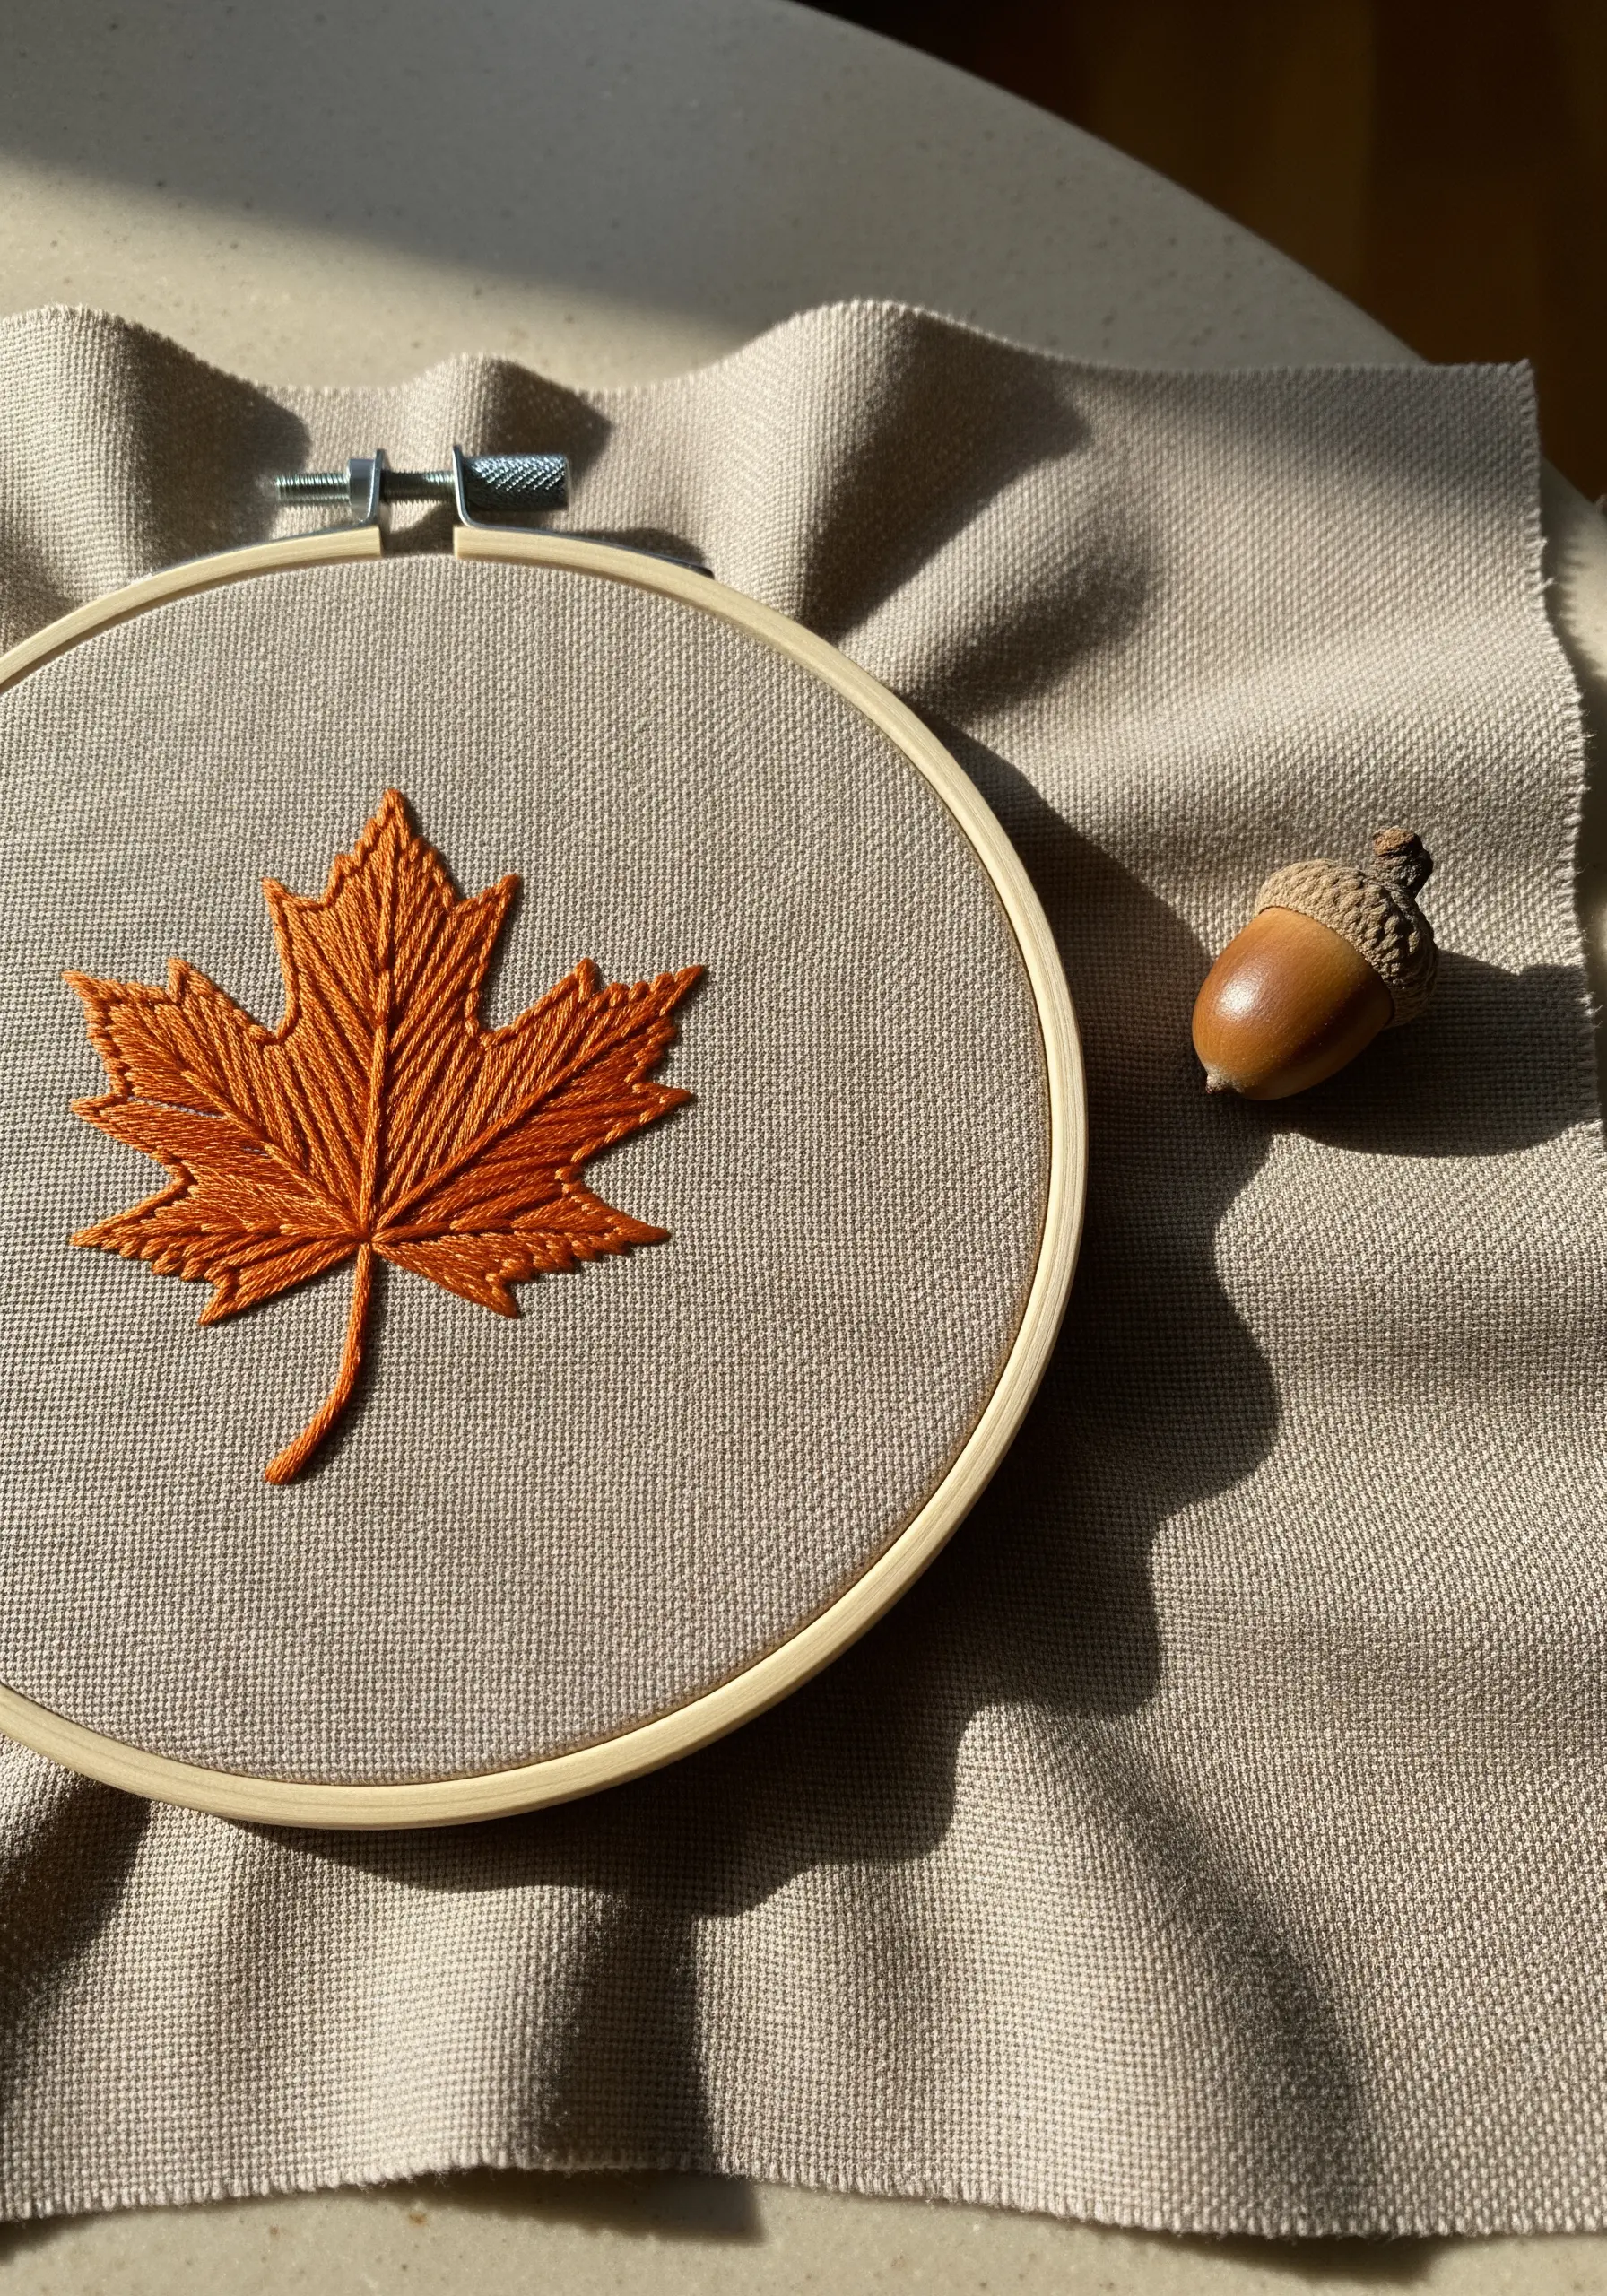
A complex shape like a maple leaf requires more than a simple satin stitch.
Use a central split stitch to define the main veins. Then, fill each section of the leaf with long, elegant satin stitches angled to follow the natural direction of growth.
Where the sections meet, allow your stitches to nestle closely together. This directional approach ensures the finished piece has a natural flow and a beautiful, subtle sheen that highlights its intricate shape.
26. Achieve Precision with a Whipped Backstitch

For intricate silhouettes with many thin lines, a standard satin stitch can be unforgiving.
Instead, outline the entire shape with a backstitch. Then, whip the outline by passing your needle under each backstitch without piercing the fabric. Repeat this process, packing the whipped stitches tightly together until the shape is filled.
This method gives you incredible control and results in a perfectly smooth, raised fill that is ideal for detailed work like bicycle spokes or fine lettering.
27. Recreate a Feather’s Texture with Fly Stitch
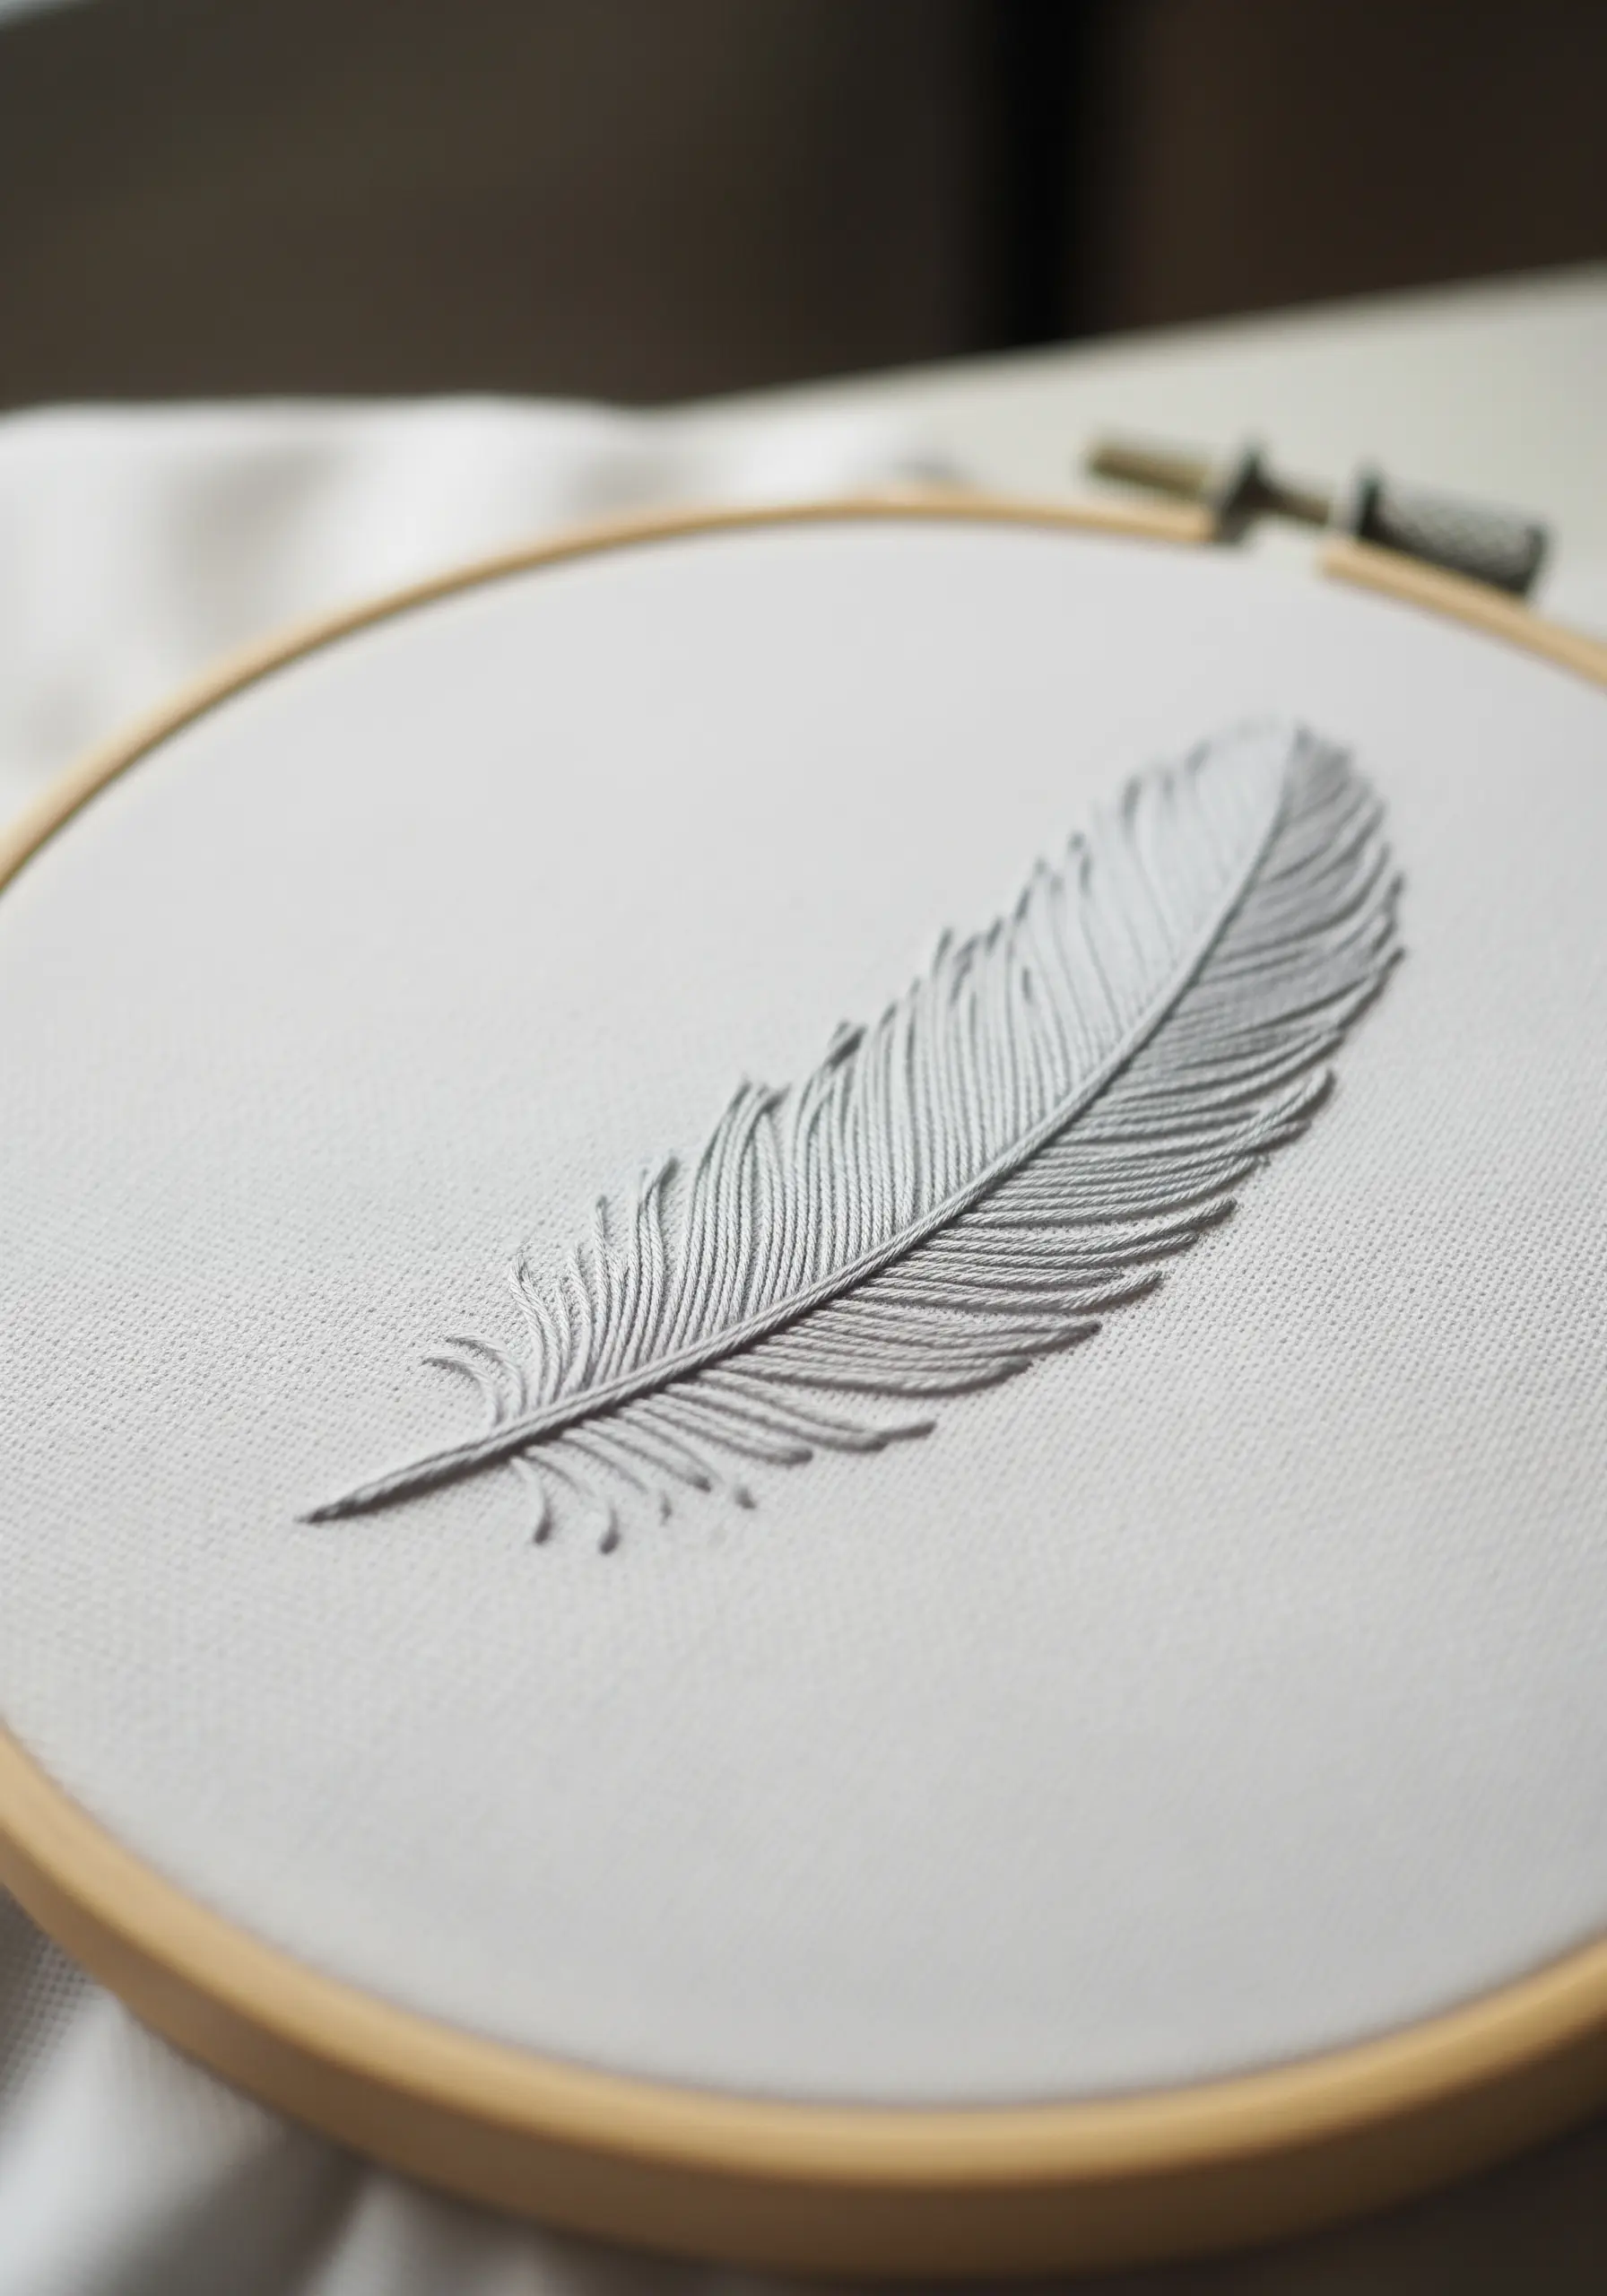
The fly stitch is perfect for capturing the delicate structure of a feather.
First, create the central shaft with a narrow line of stem stitch. Then, work fly stitches down each side, anchoring each ‘V’ shape close to the shaft.
Keep the stitches dense and slightly angled to mimic the soft, interlocking barbs of a real feather. Using a thread with a slight sheen, like silk or rayon, will enhance the realism.
28. Fill a Shape with an Internal Pattern
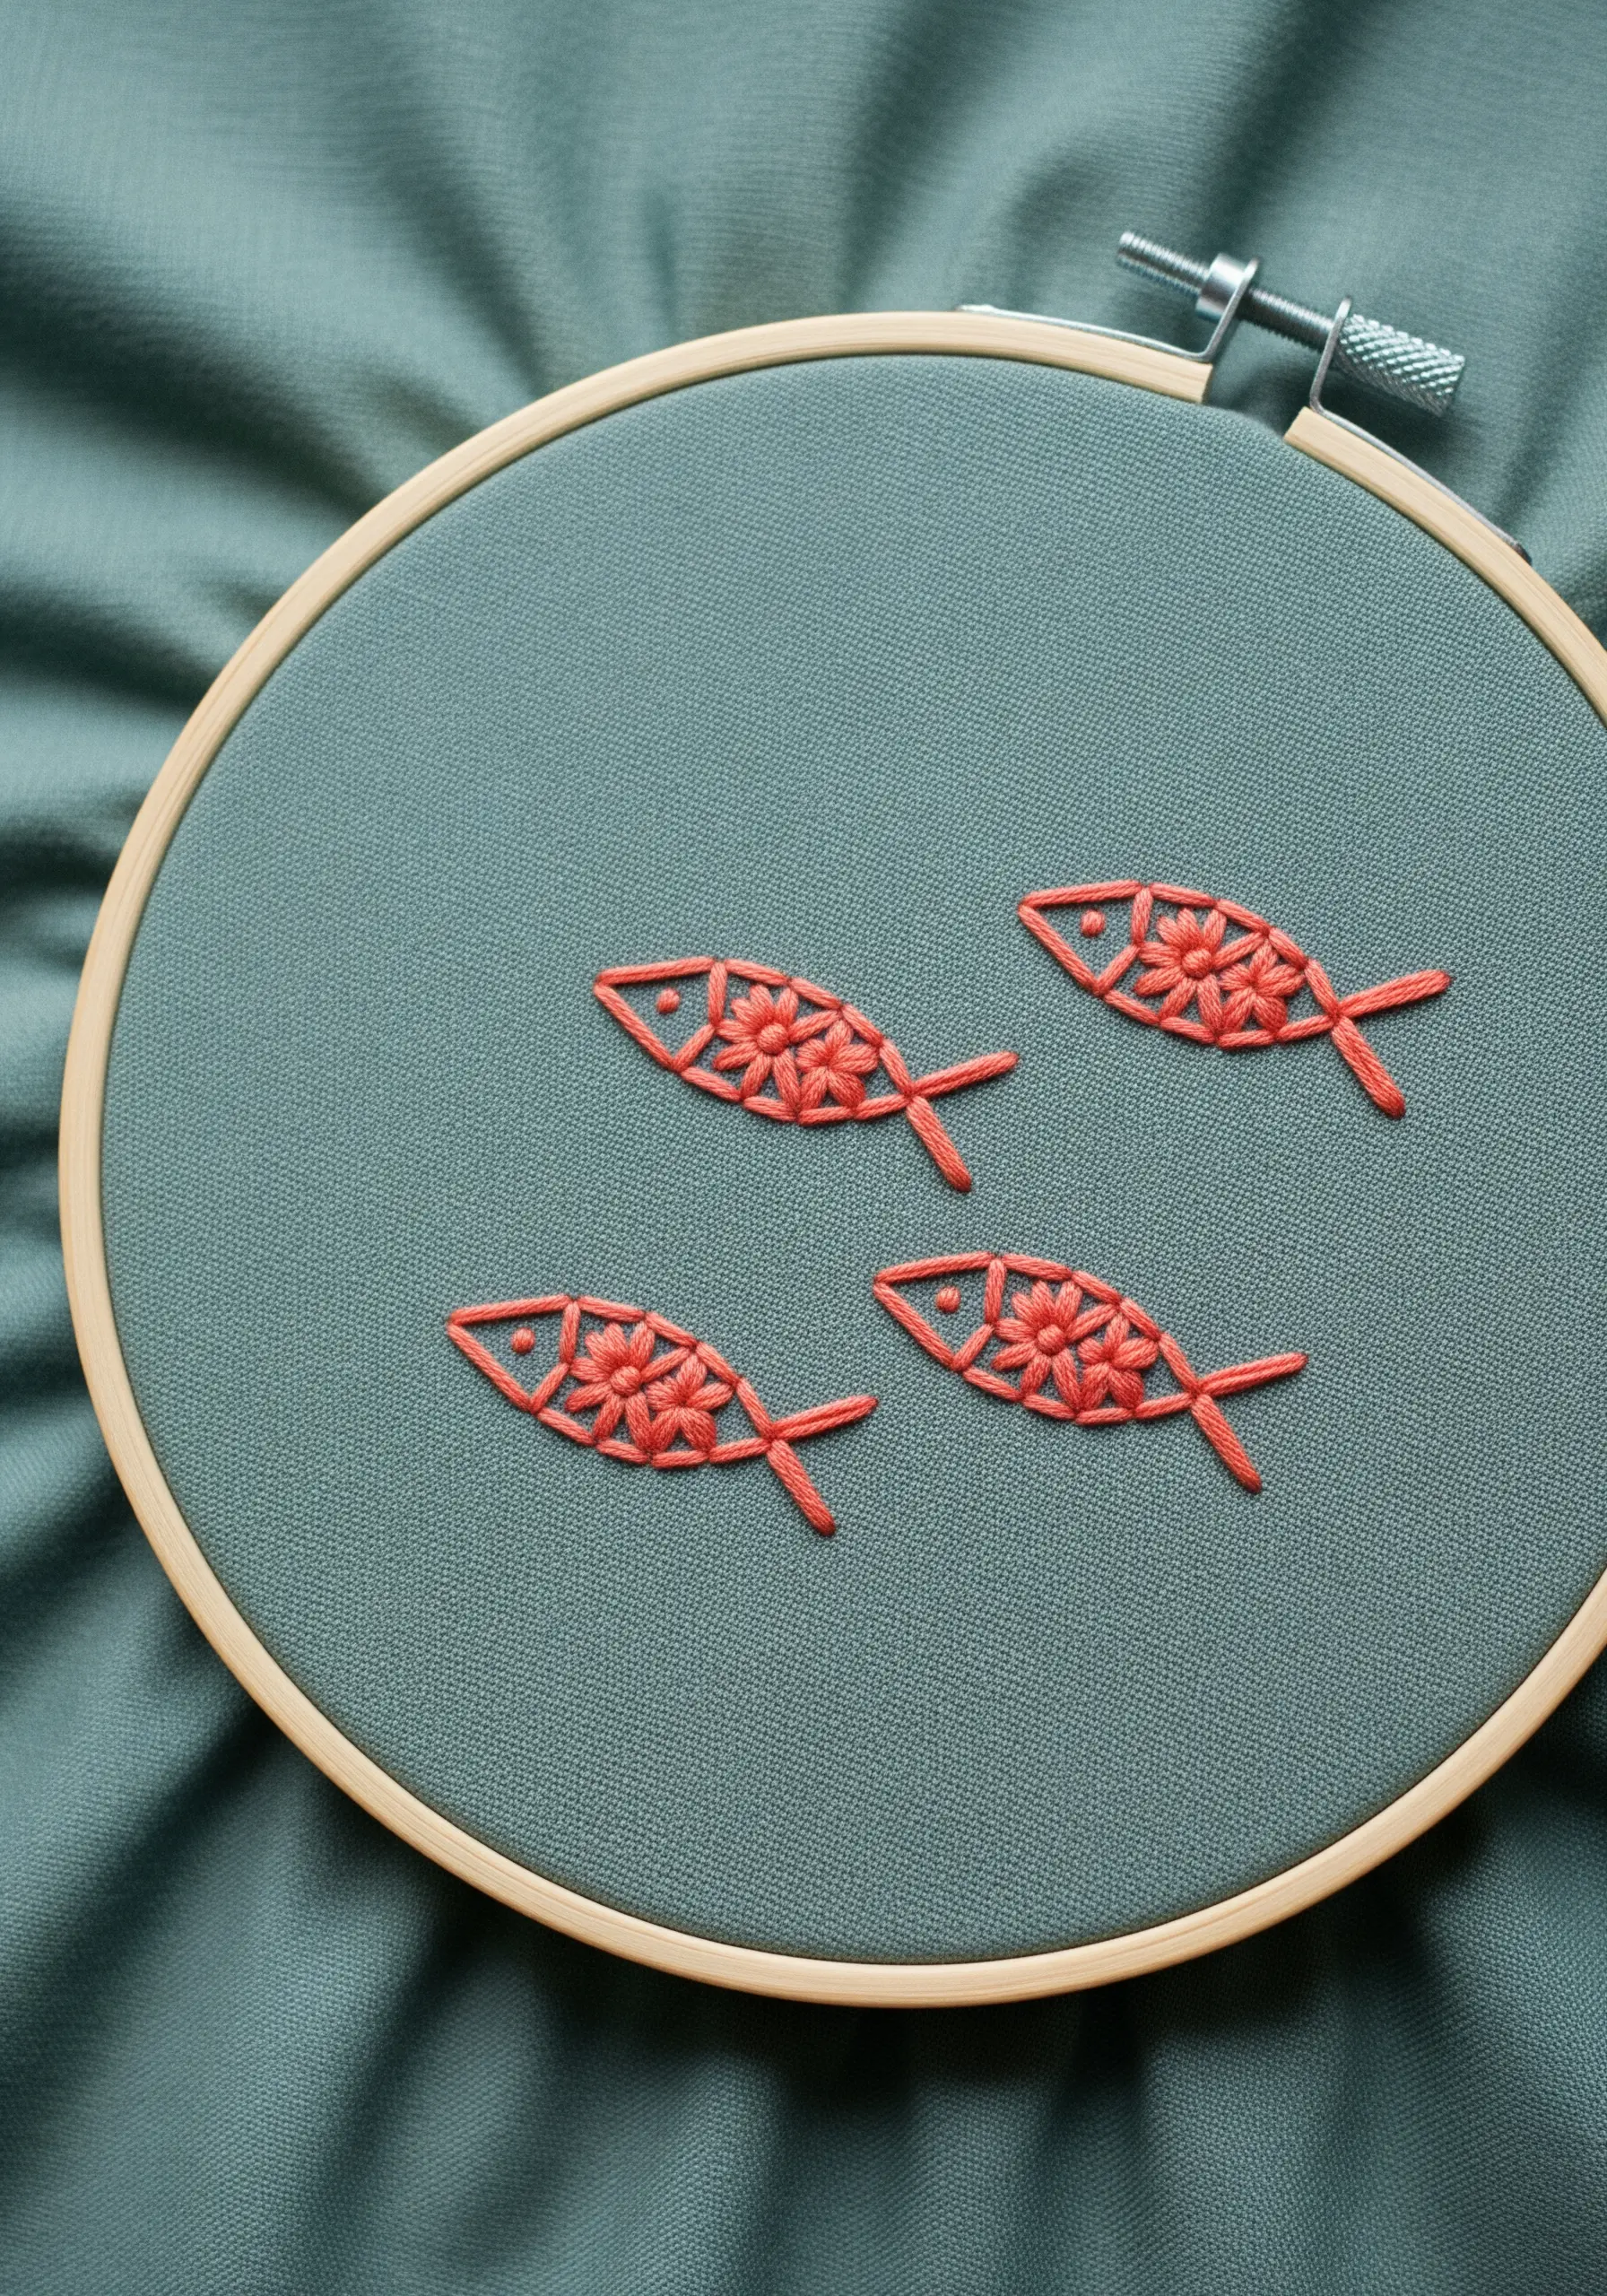
Instead of a solid fill, add character to a simple outline with a secondary stitched pattern.
First, establish the fish shape with a clean backstitch. Then, fill the body with a repeating motif, like detached chain stitches (lazy daisies) arranged into a floral pattern.
This technique adds a layer of intricate detail and personality, transforming a basic shape into a unique piece of folk art. It’s also much faster than filling the entire area with satin stitch.
29. Mimic Citrus Rind with French Knots

Engage more than just the sense of sight by choosing a stitch that evokes texture.
Instead of filling your lemon with a flat satin stitch, cover the entire area with tightly packed French knots. This immediately creates a bumpy, tactile surface that perfectly mimics the look and feel of a citrus rind.
Outline the shape with a clean split stitch first to provide a clear boundary for your knots. This simple stitch change makes the piece infinitely more interesting.
30. Tell a Story with a Single Pop of Color
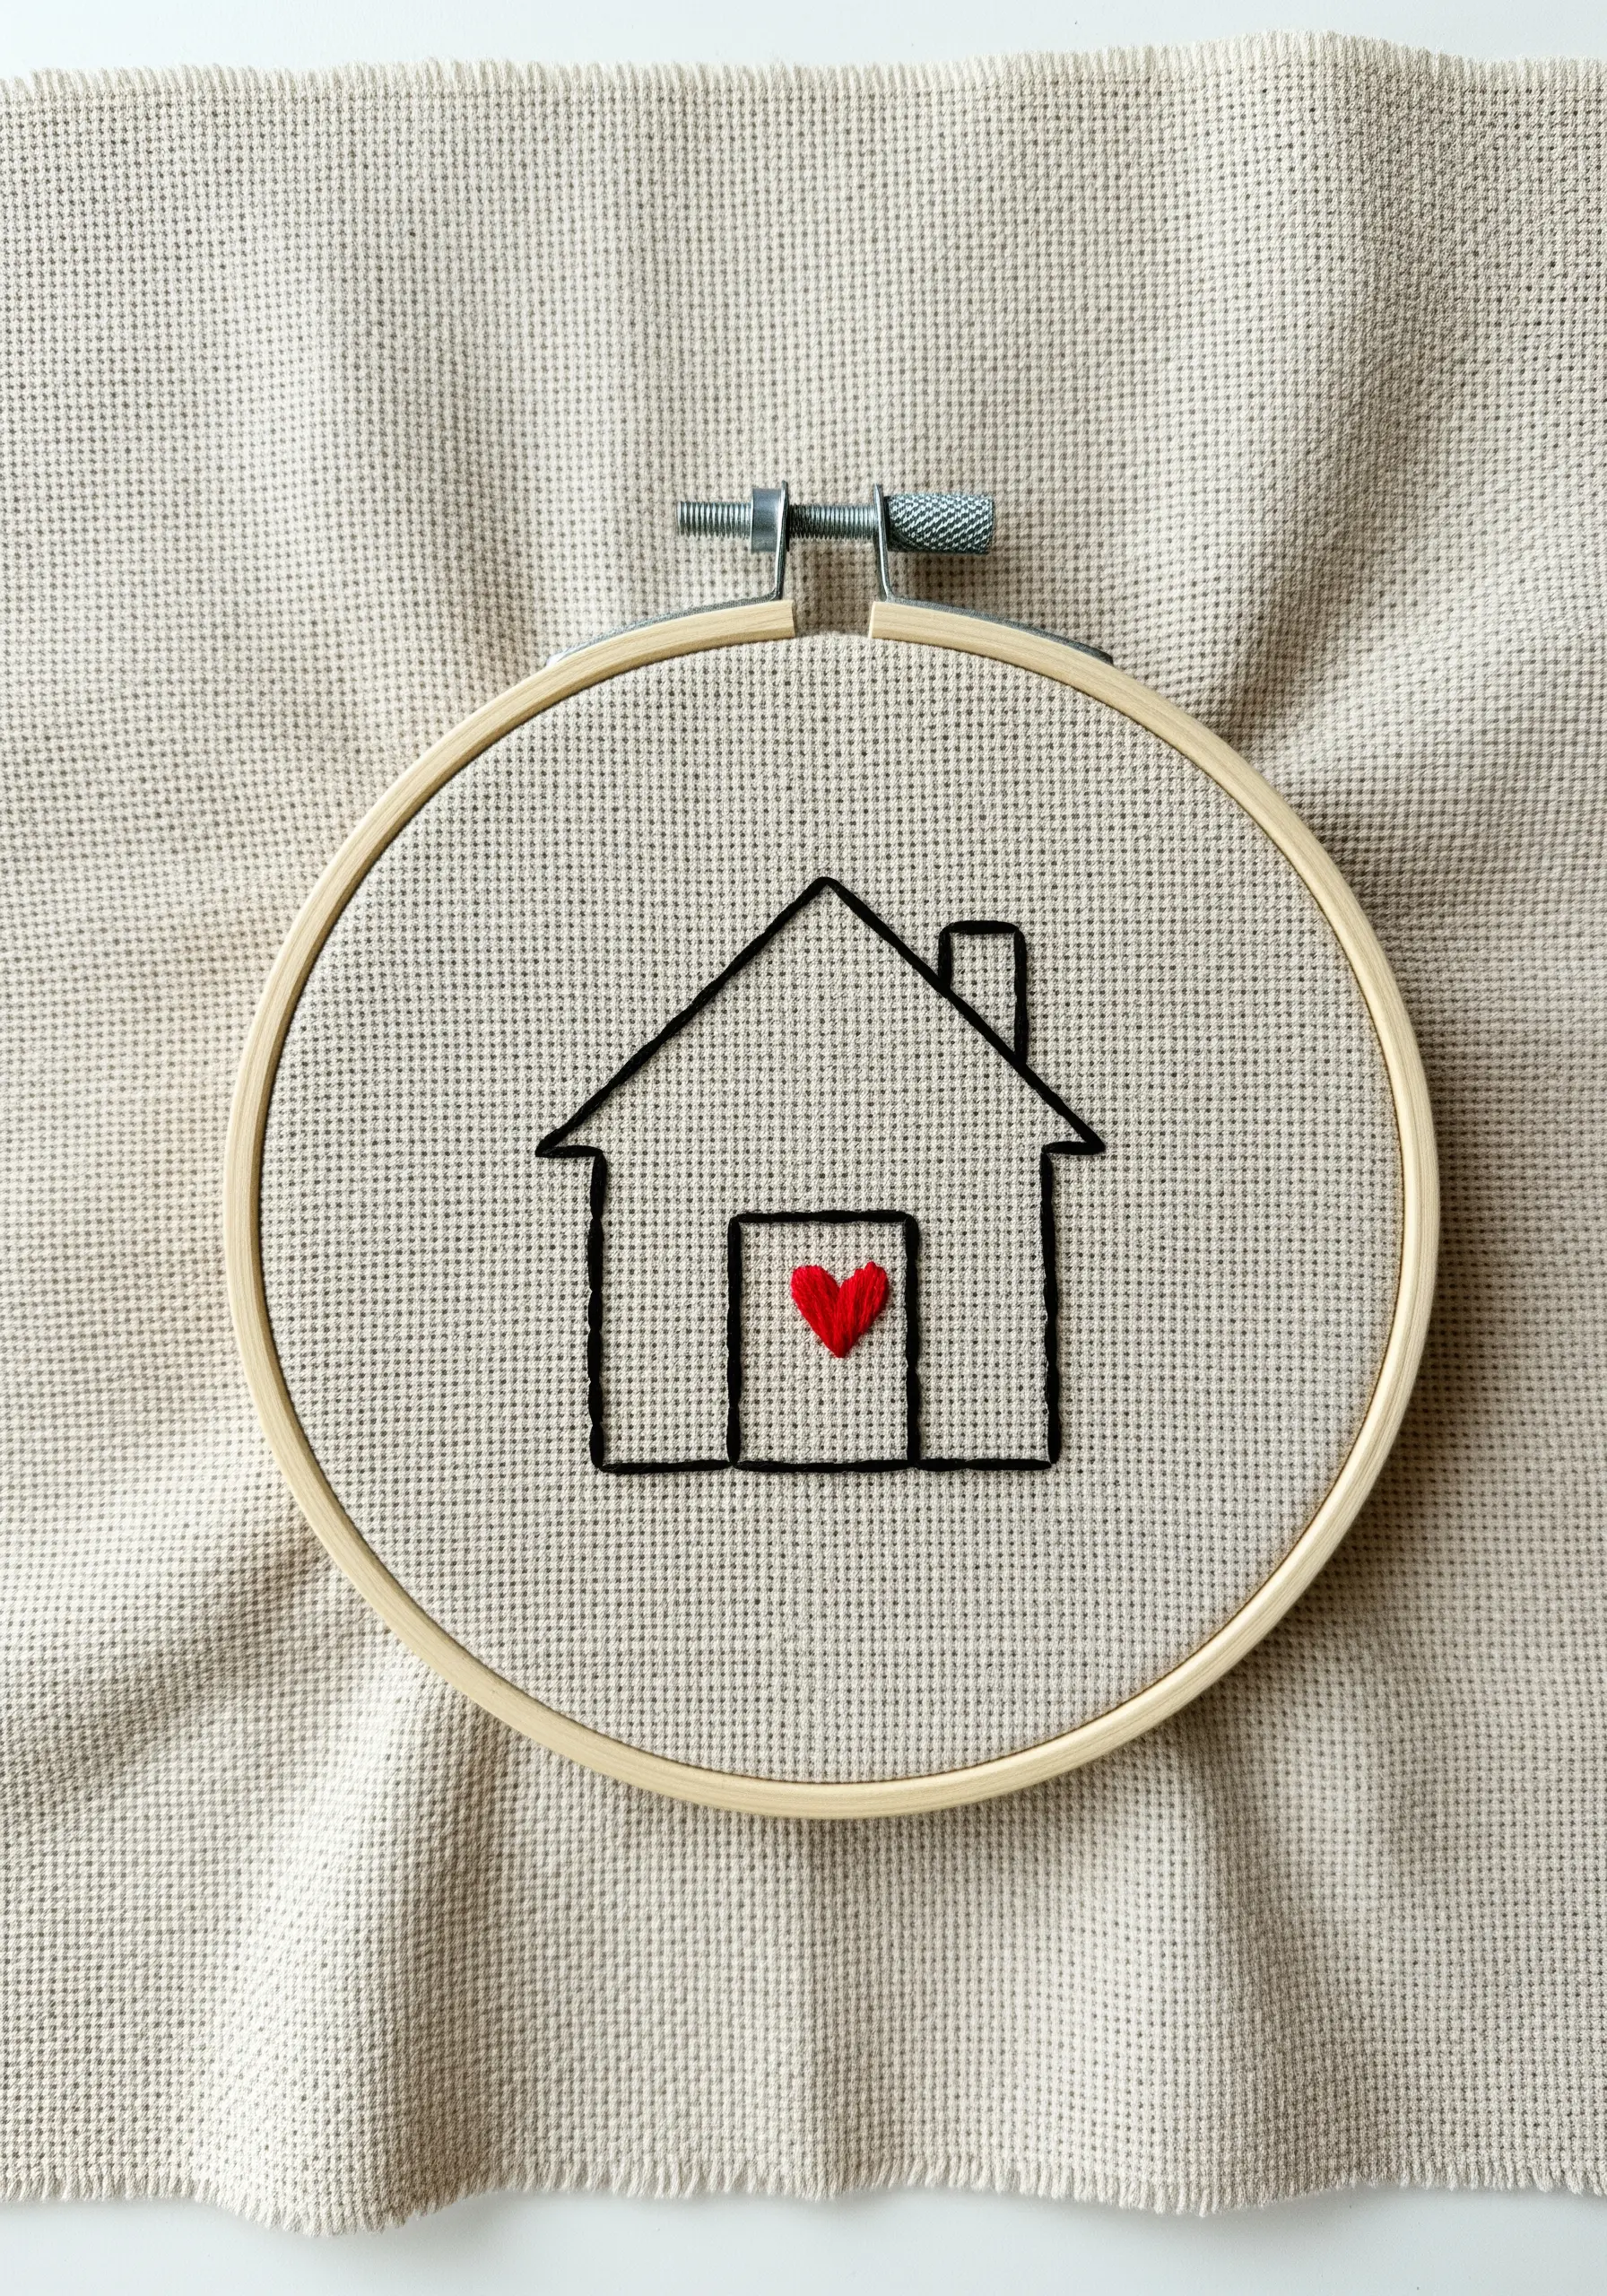
In minimalist design, less is more. The impact of this piece comes from its extreme simplicity and singular focal point.
Use a standard backstitch for the house outline—clean and simple. Then, fill the small heart in the center with a vibrant, contrasting color using a smooth satin stitch.
This technique draws the viewer’s eye directly to the heart, infusing the simple line drawing with a powerful sense of warmth and emotion. It’s a quick stitch with strong market appeal.
31. Capture the Form of Wheat with Smart Stitch Choices
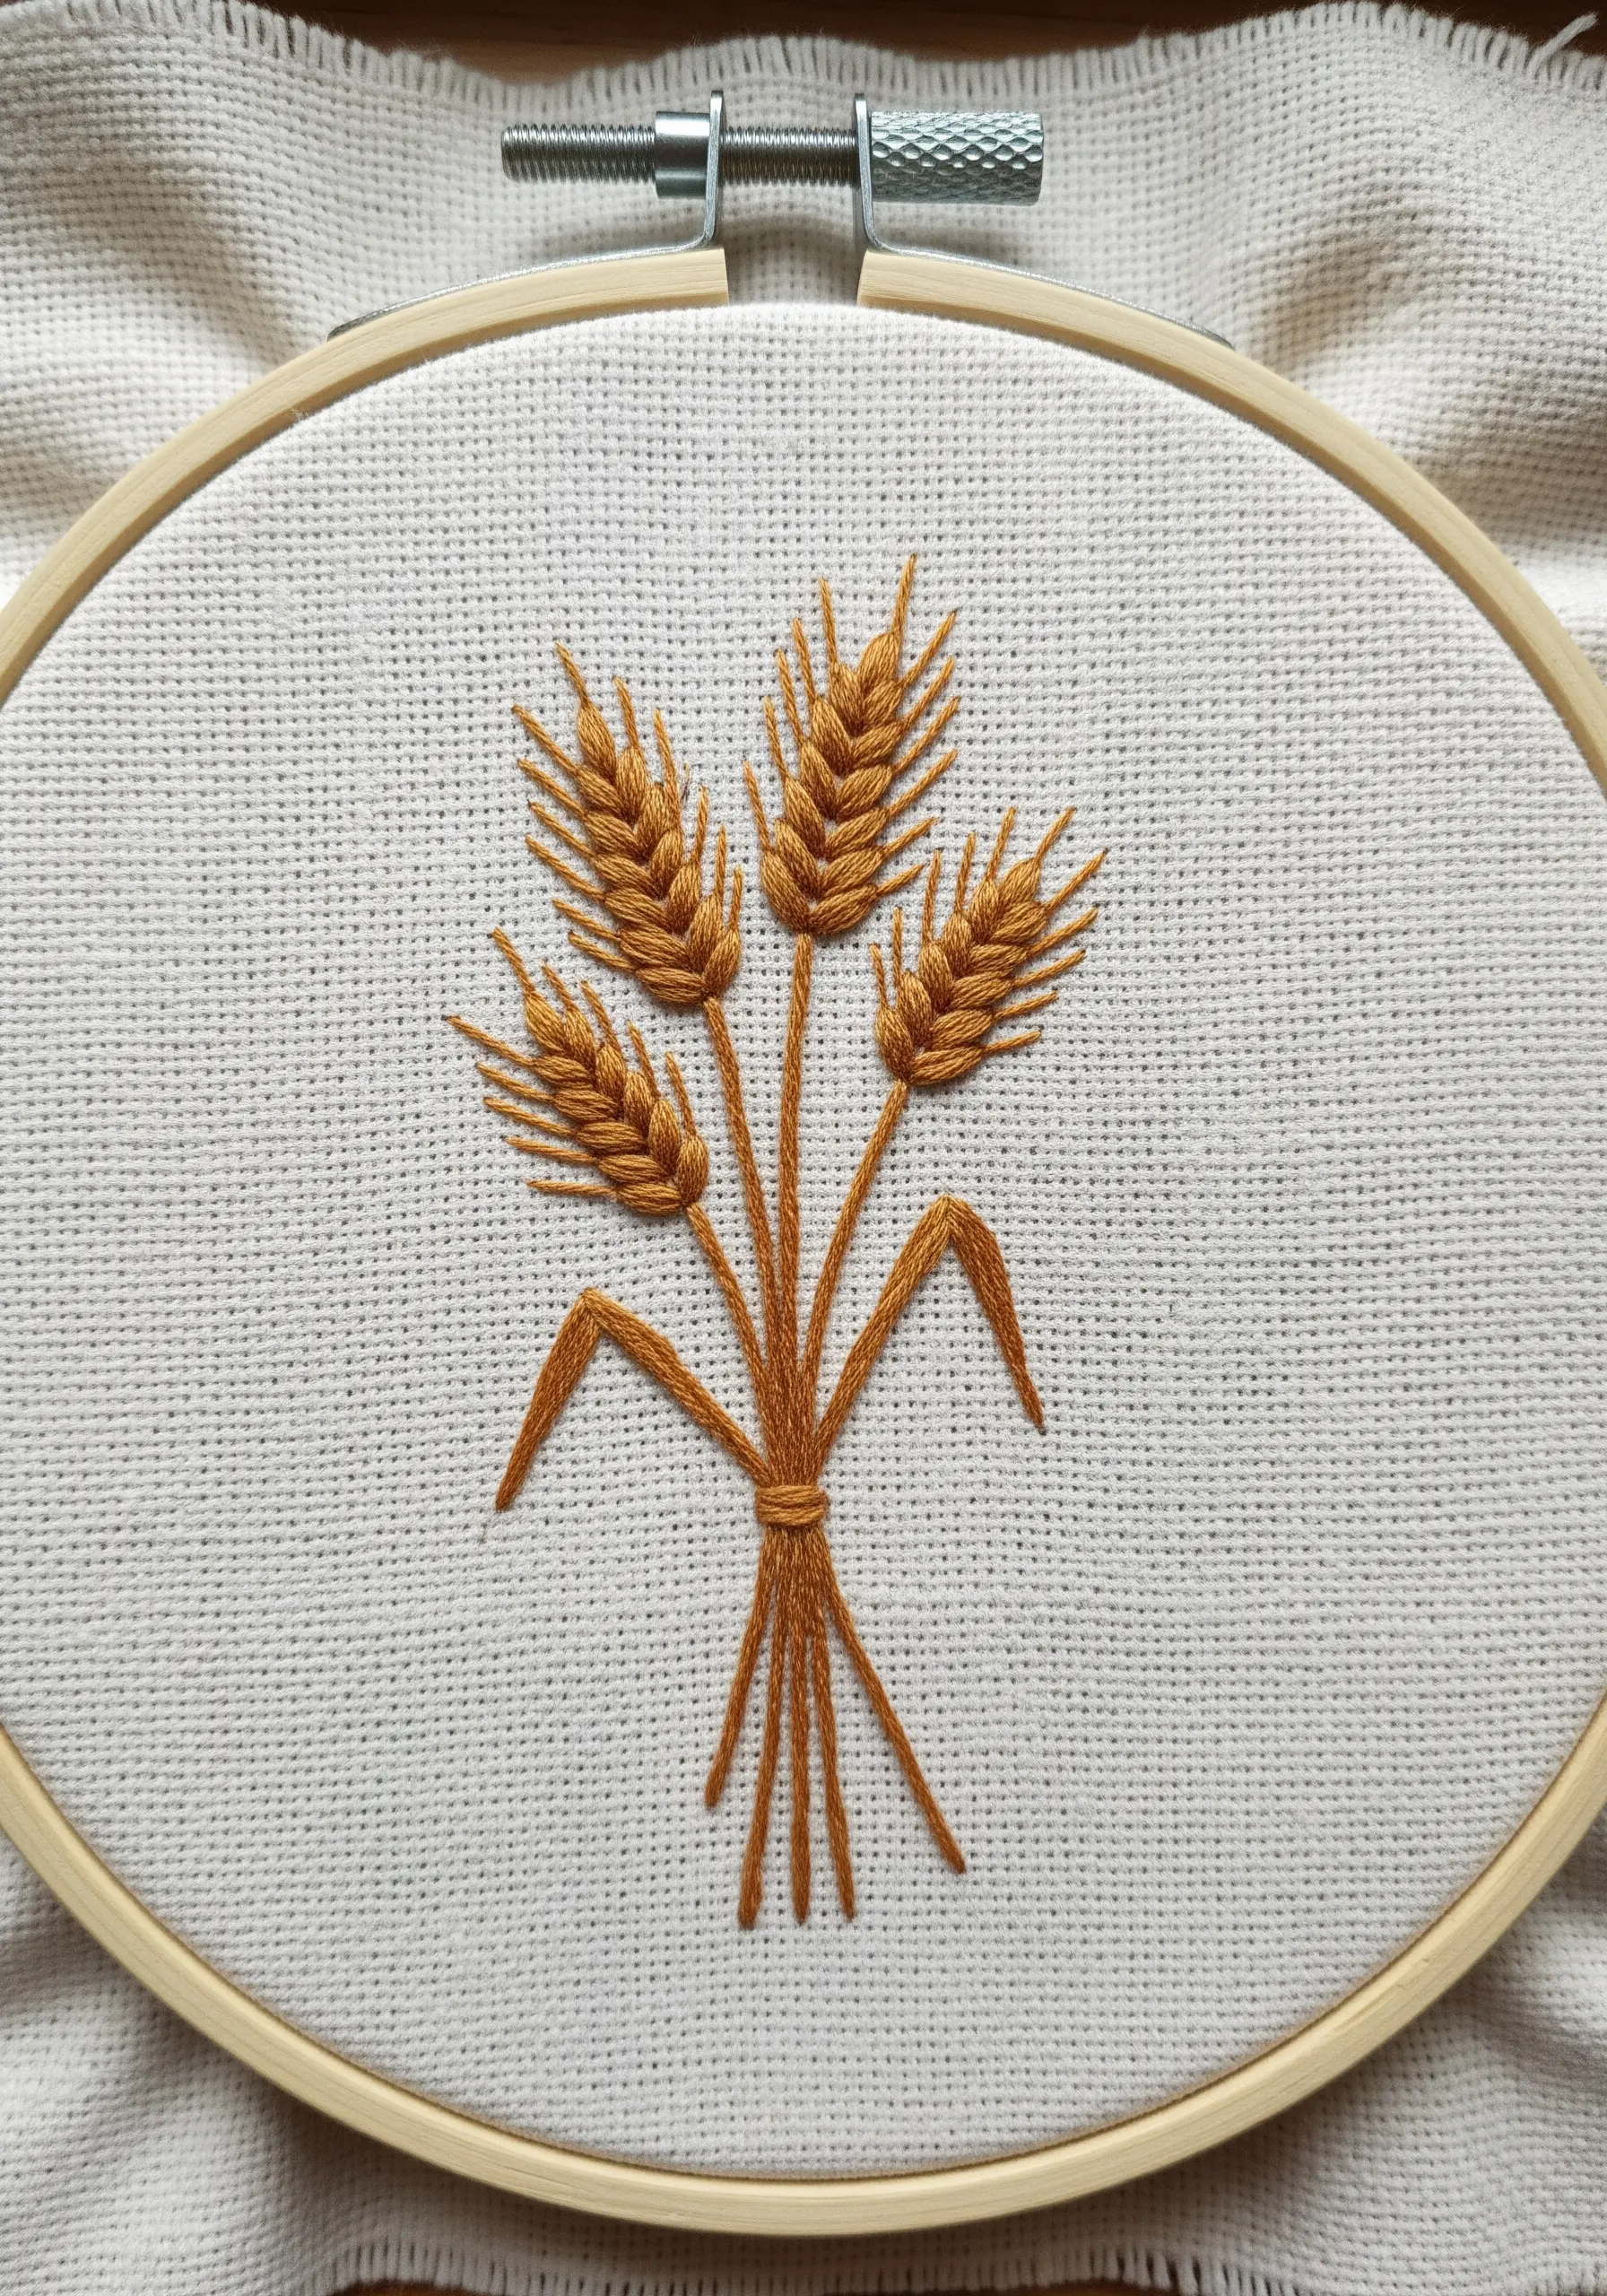
Select stitches that inherently mimic the shape you want to create.
The fly stitch is perfect for the individual grains of wheat. When stacked in two parallel, overlapping columns, they form a perfect wheat head.
Use a simple stem stitch for the stalks, bundling them together at the base. Choosing the right stitch for the job makes the work easier and the result more convincing and professional.
32. Achieve Fluid Lettering with a Heavy Chain Stitch
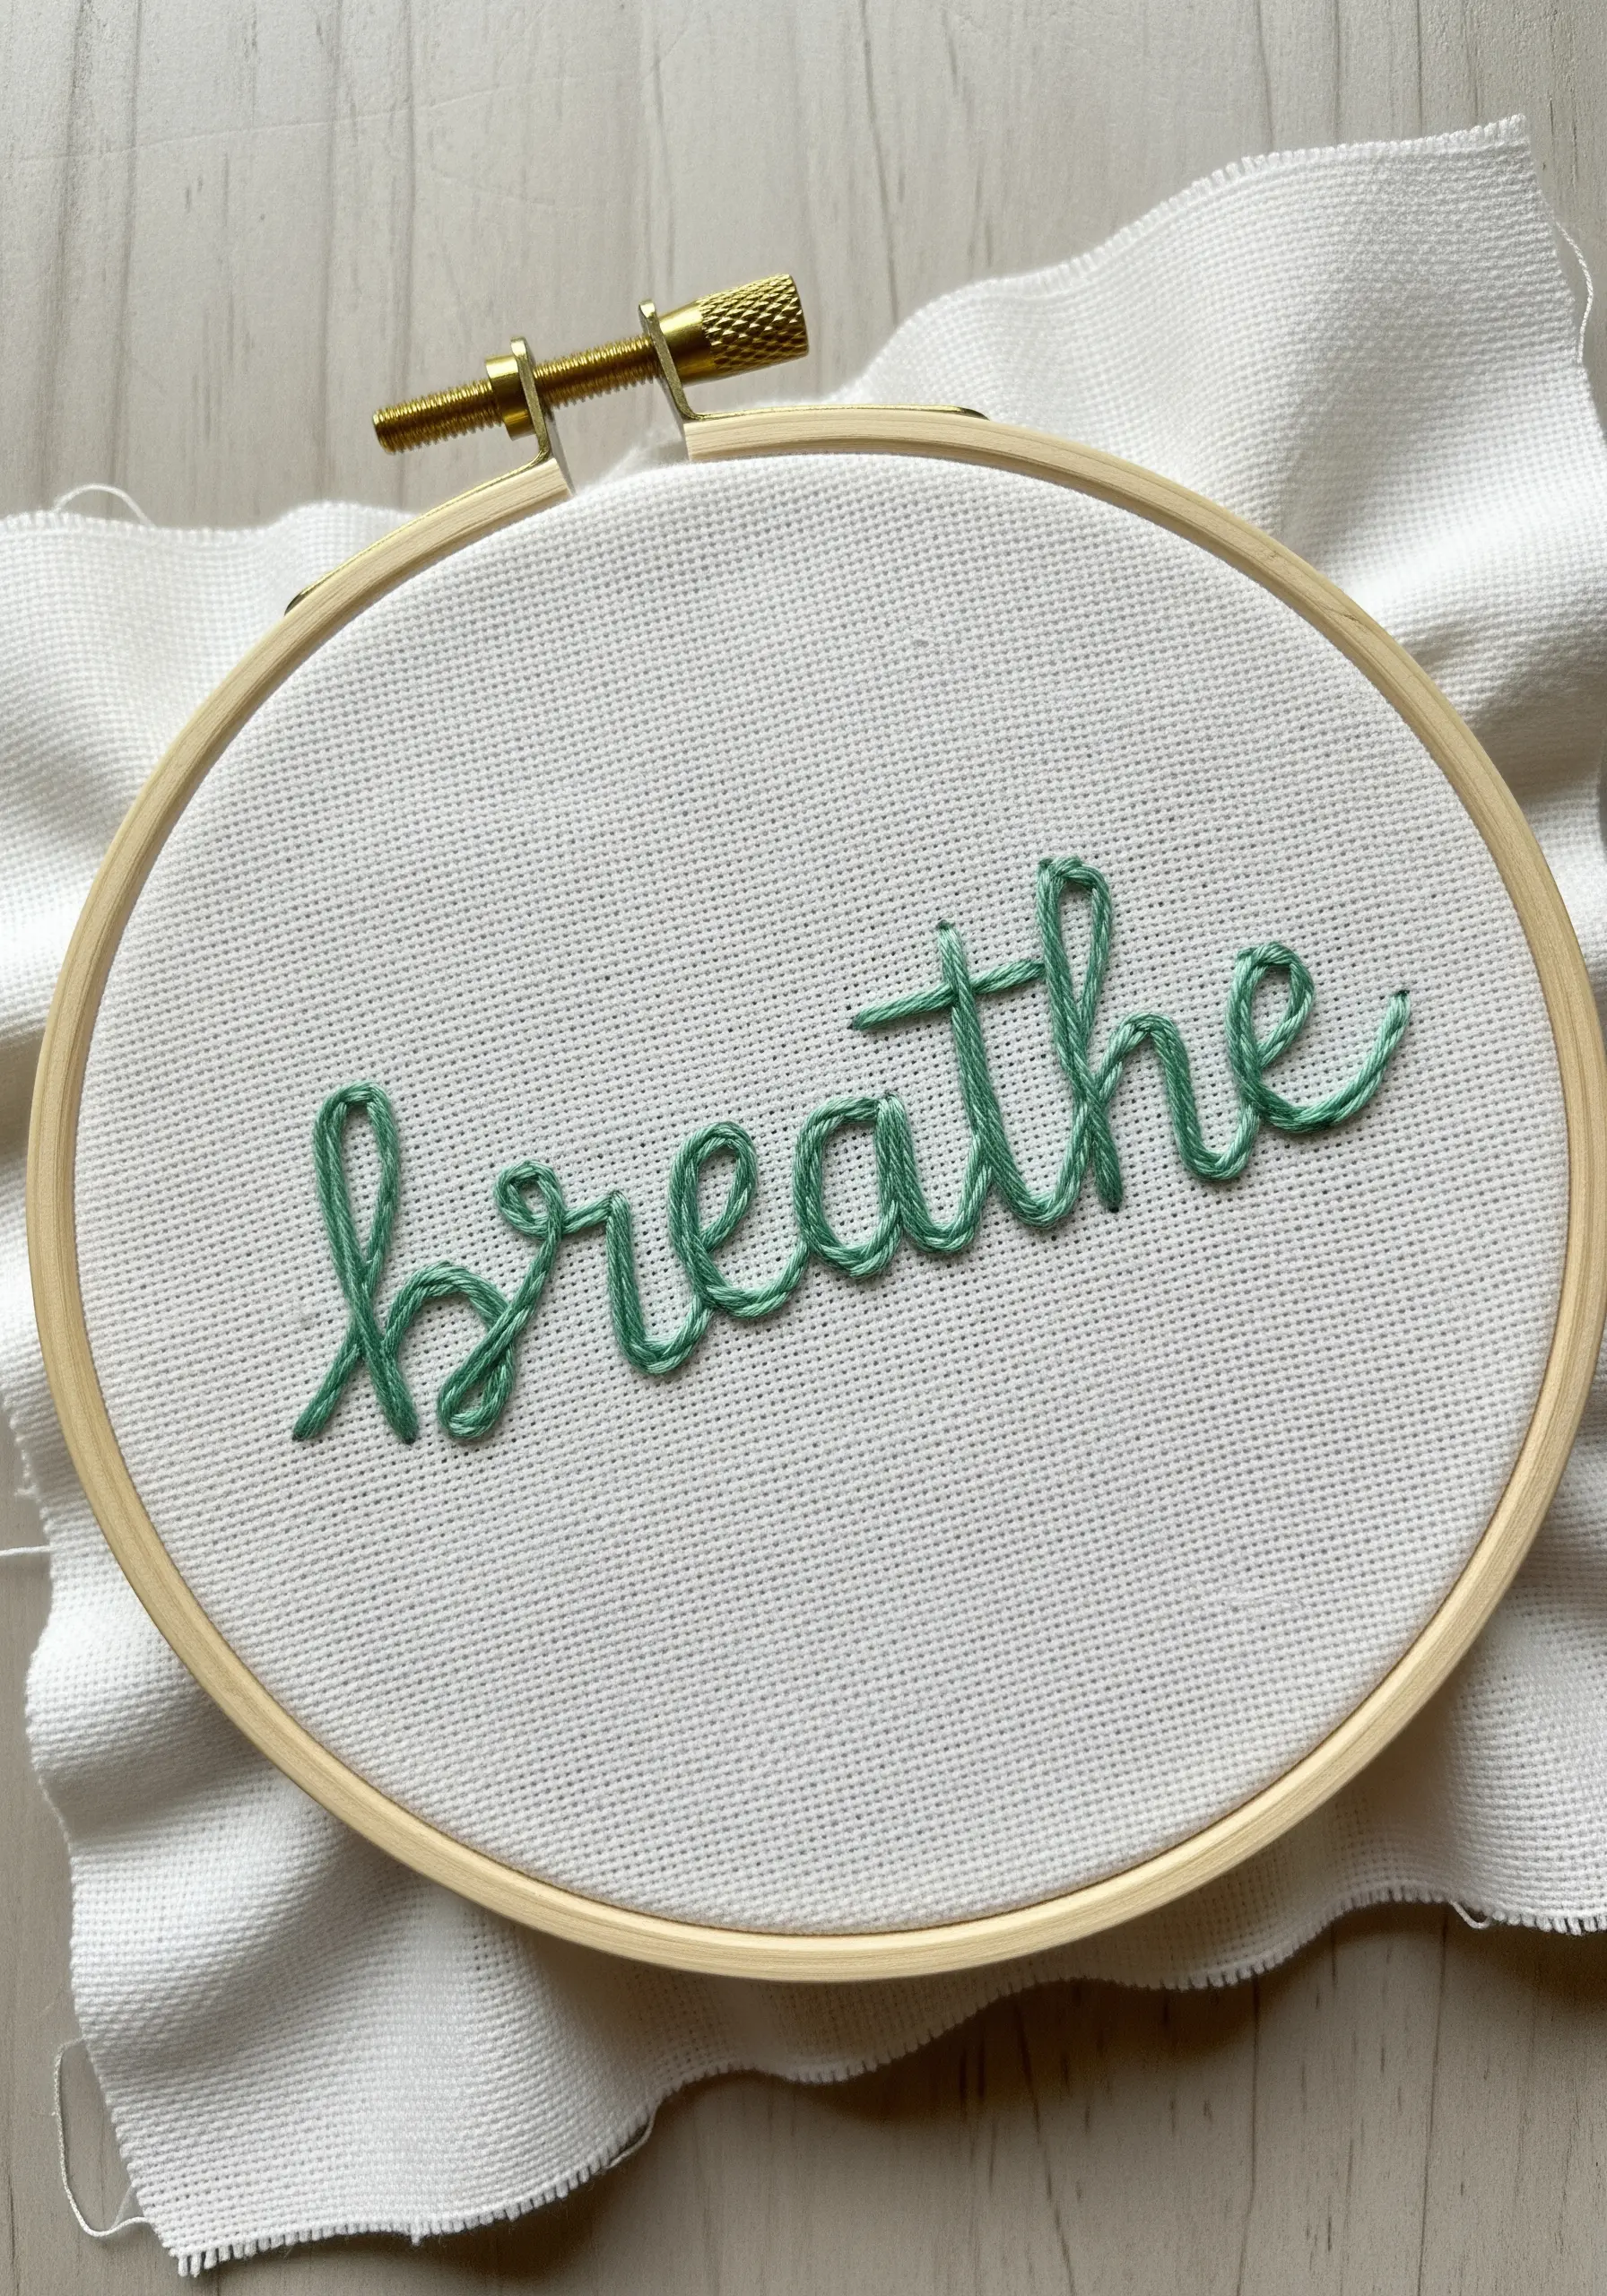
To make your embroidered words look like effortless, flowing script, you need a stitch that is both bold and smooth.
A heavy chain stitch, worked with three or four strands of floss, creates a beautiful, rope-like texture that follows curves gracefully.
Unlike backstitch, which can look segmented on curves, the chain stitch creates a continuous, unbroken line. This gives your lettering a professional, calligraphic quality that stands out.
33. Create a Radiant Glow with Thread Painting
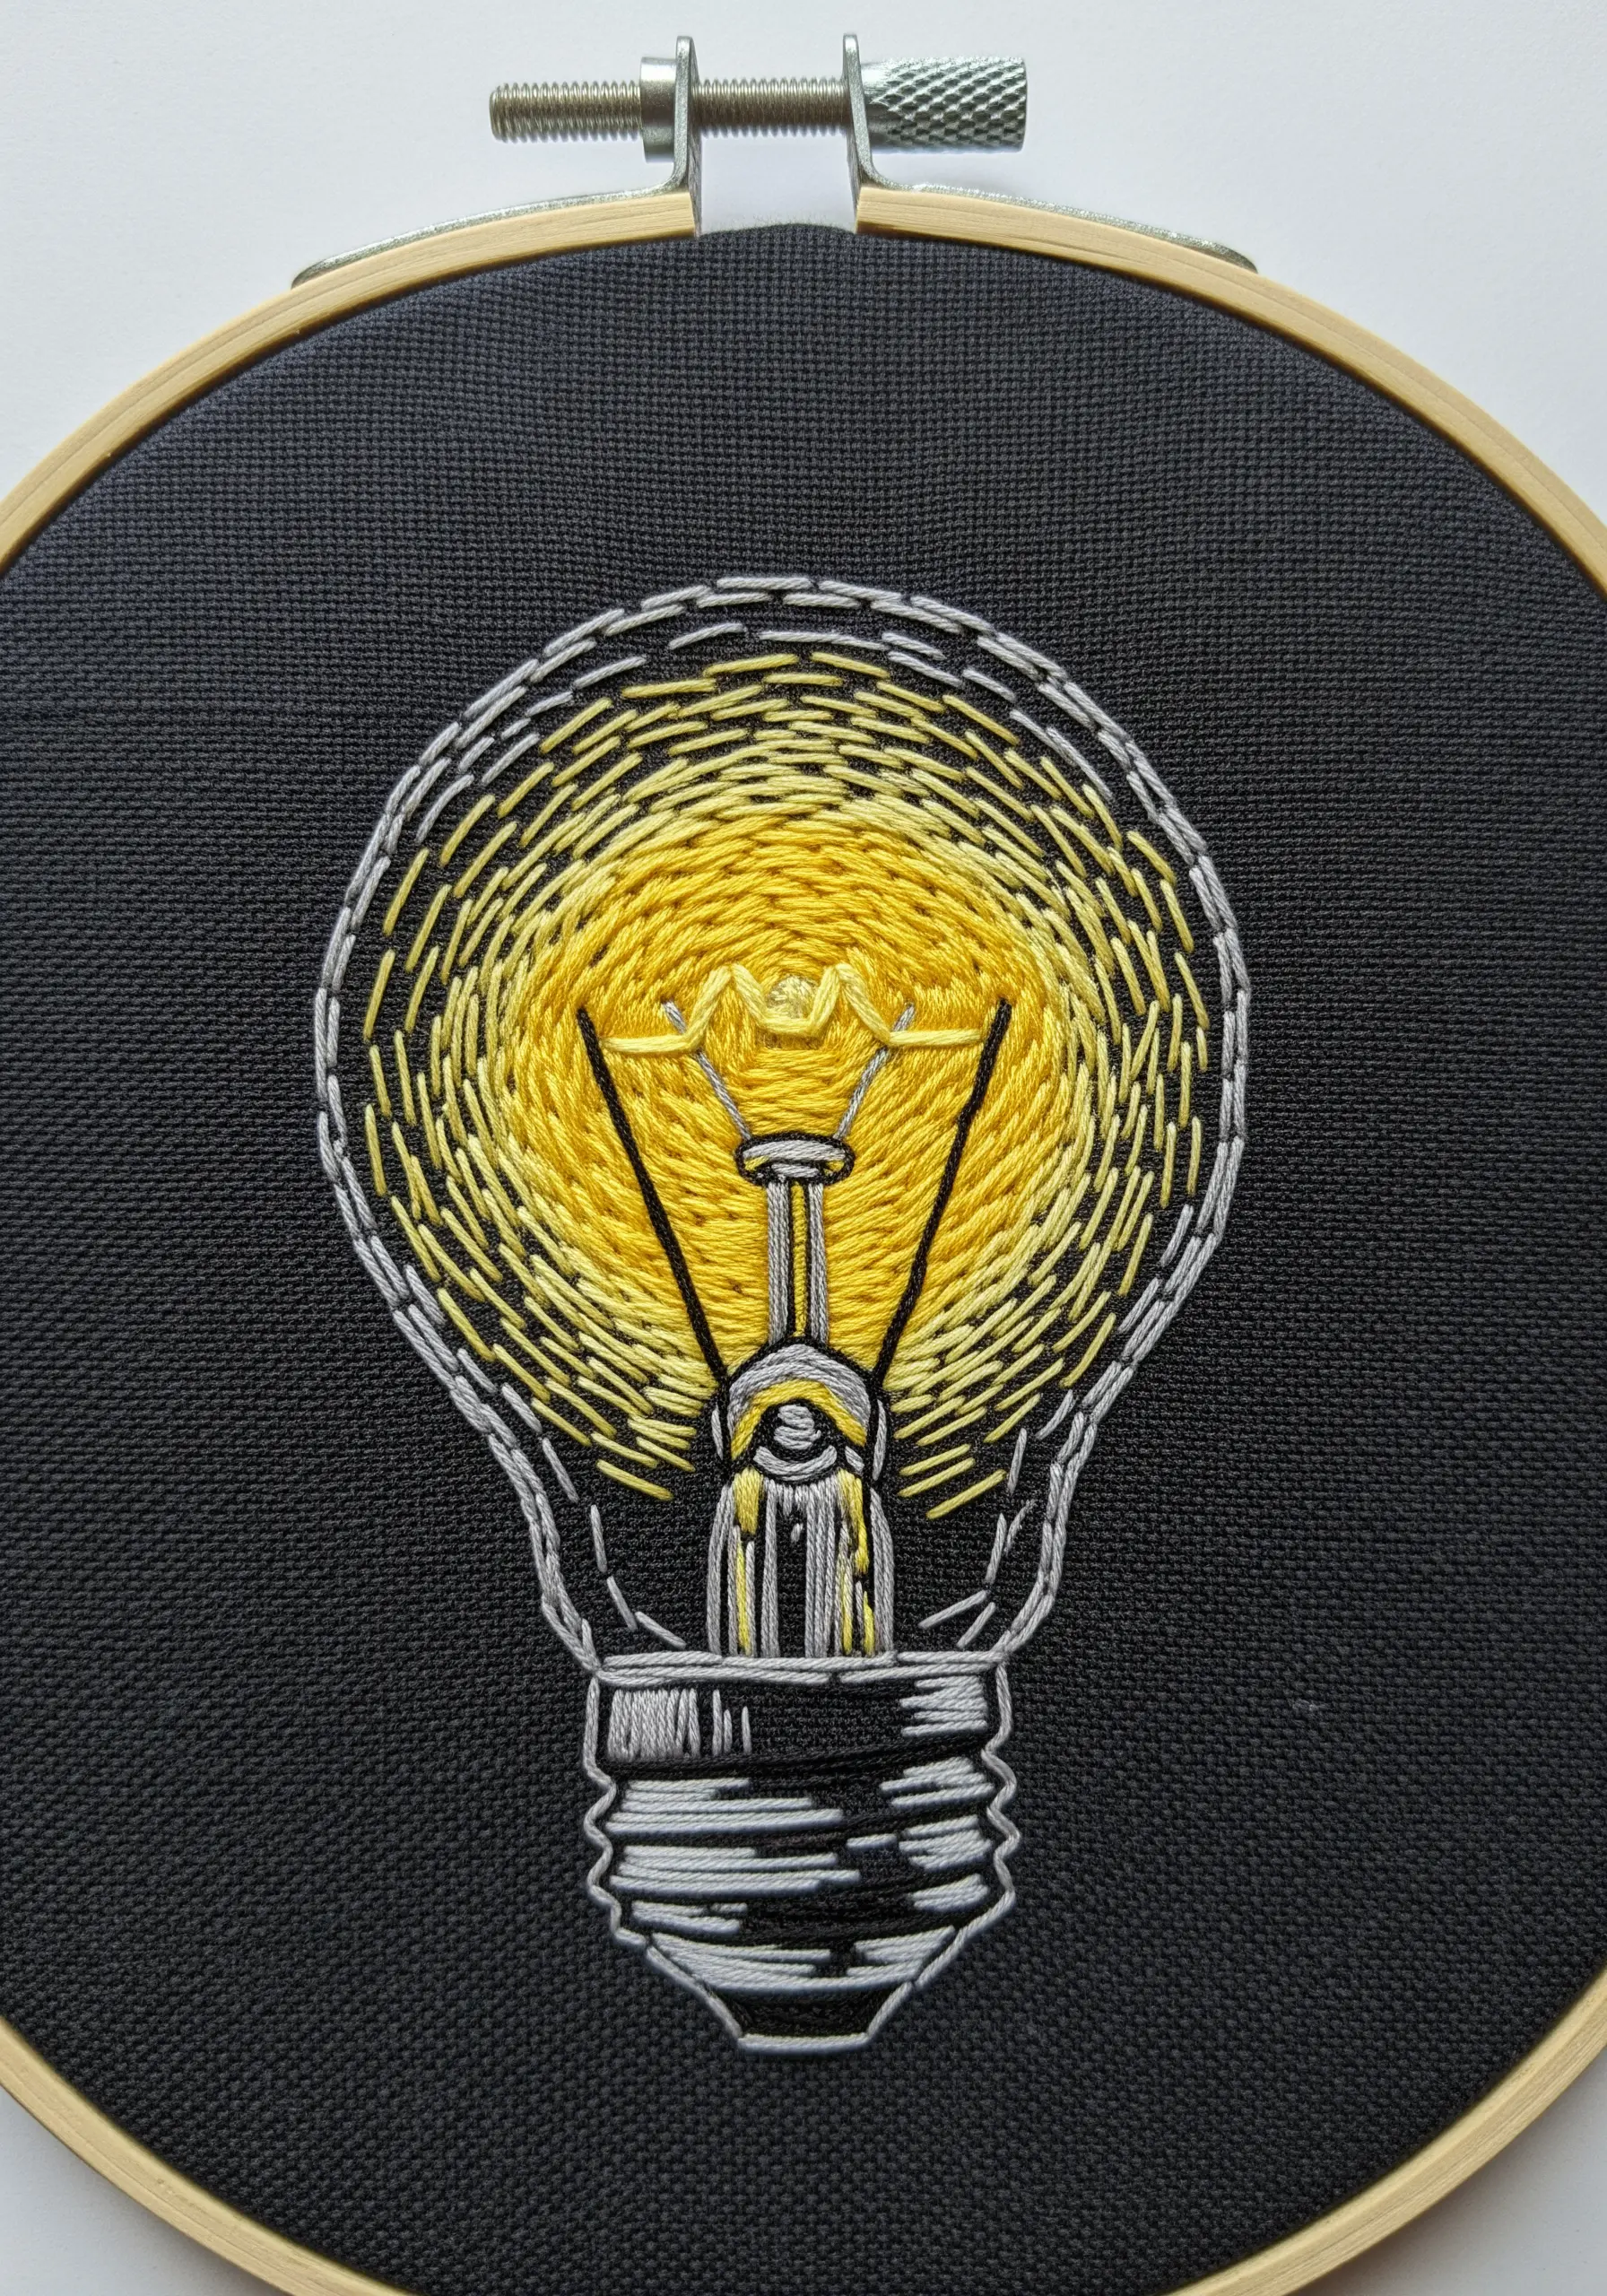
To make the lightbulb appear to glow from within, use a thread painting technique with radiating stitches.
Start with the brightest yellow at the very center, using short straight stitches. Surround this with a slightly paler yellow, blending the new stitches into the first layer.
Continue radiating outwards, transitioning to white to create a halo effect. The dark fabric is essential for making the ‘light’ appear luminous and bright, creating a striking and clever design.
34. Add Interest with Directional Satin Stitch
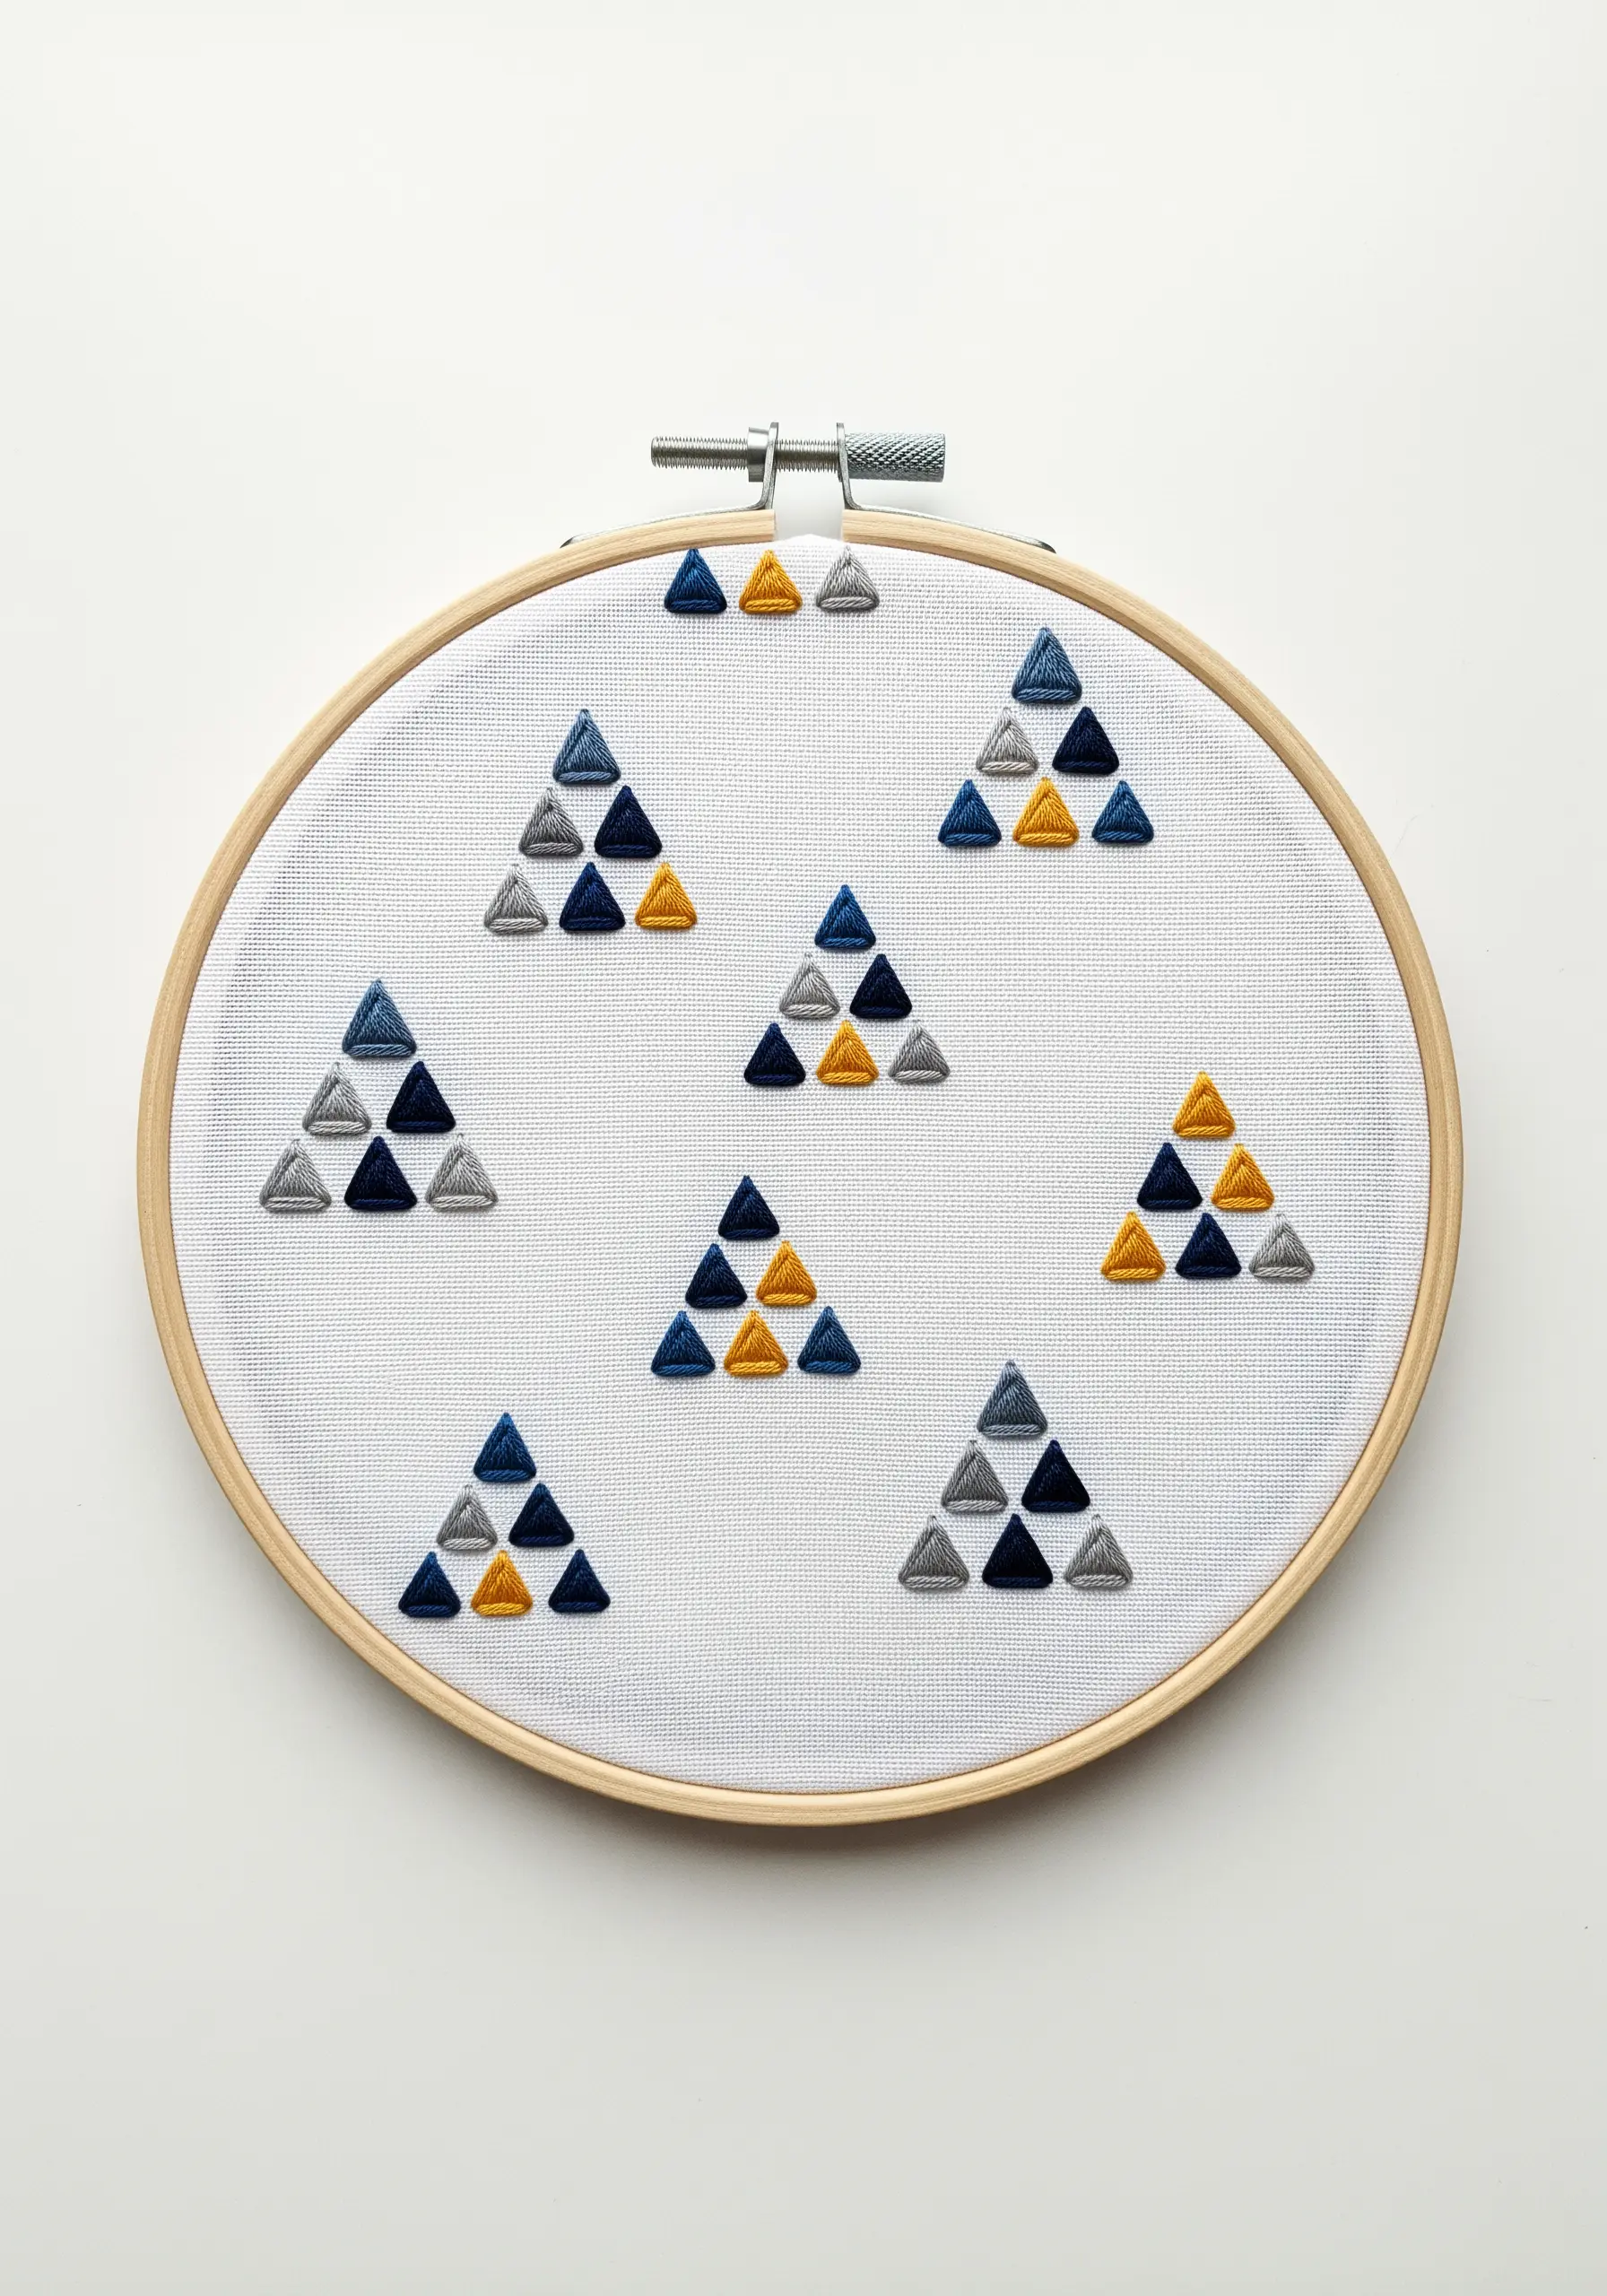
Even a simple geometric pattern can be made dynamic through thoughtful stitch direction.
In each small triangle, fill the shape with satin stitch. However, change the angle of your stitches for each color block.
For example, make the stitches in the blue triangles vertical, the grey ones horizontal, and the yellow ones diagonal. This subtle shift creates a sophisticated, quilt-like texture that catches the light in different ways, adding depth to the minimalist design.
35. Add a Charming Mixed-Media Detail
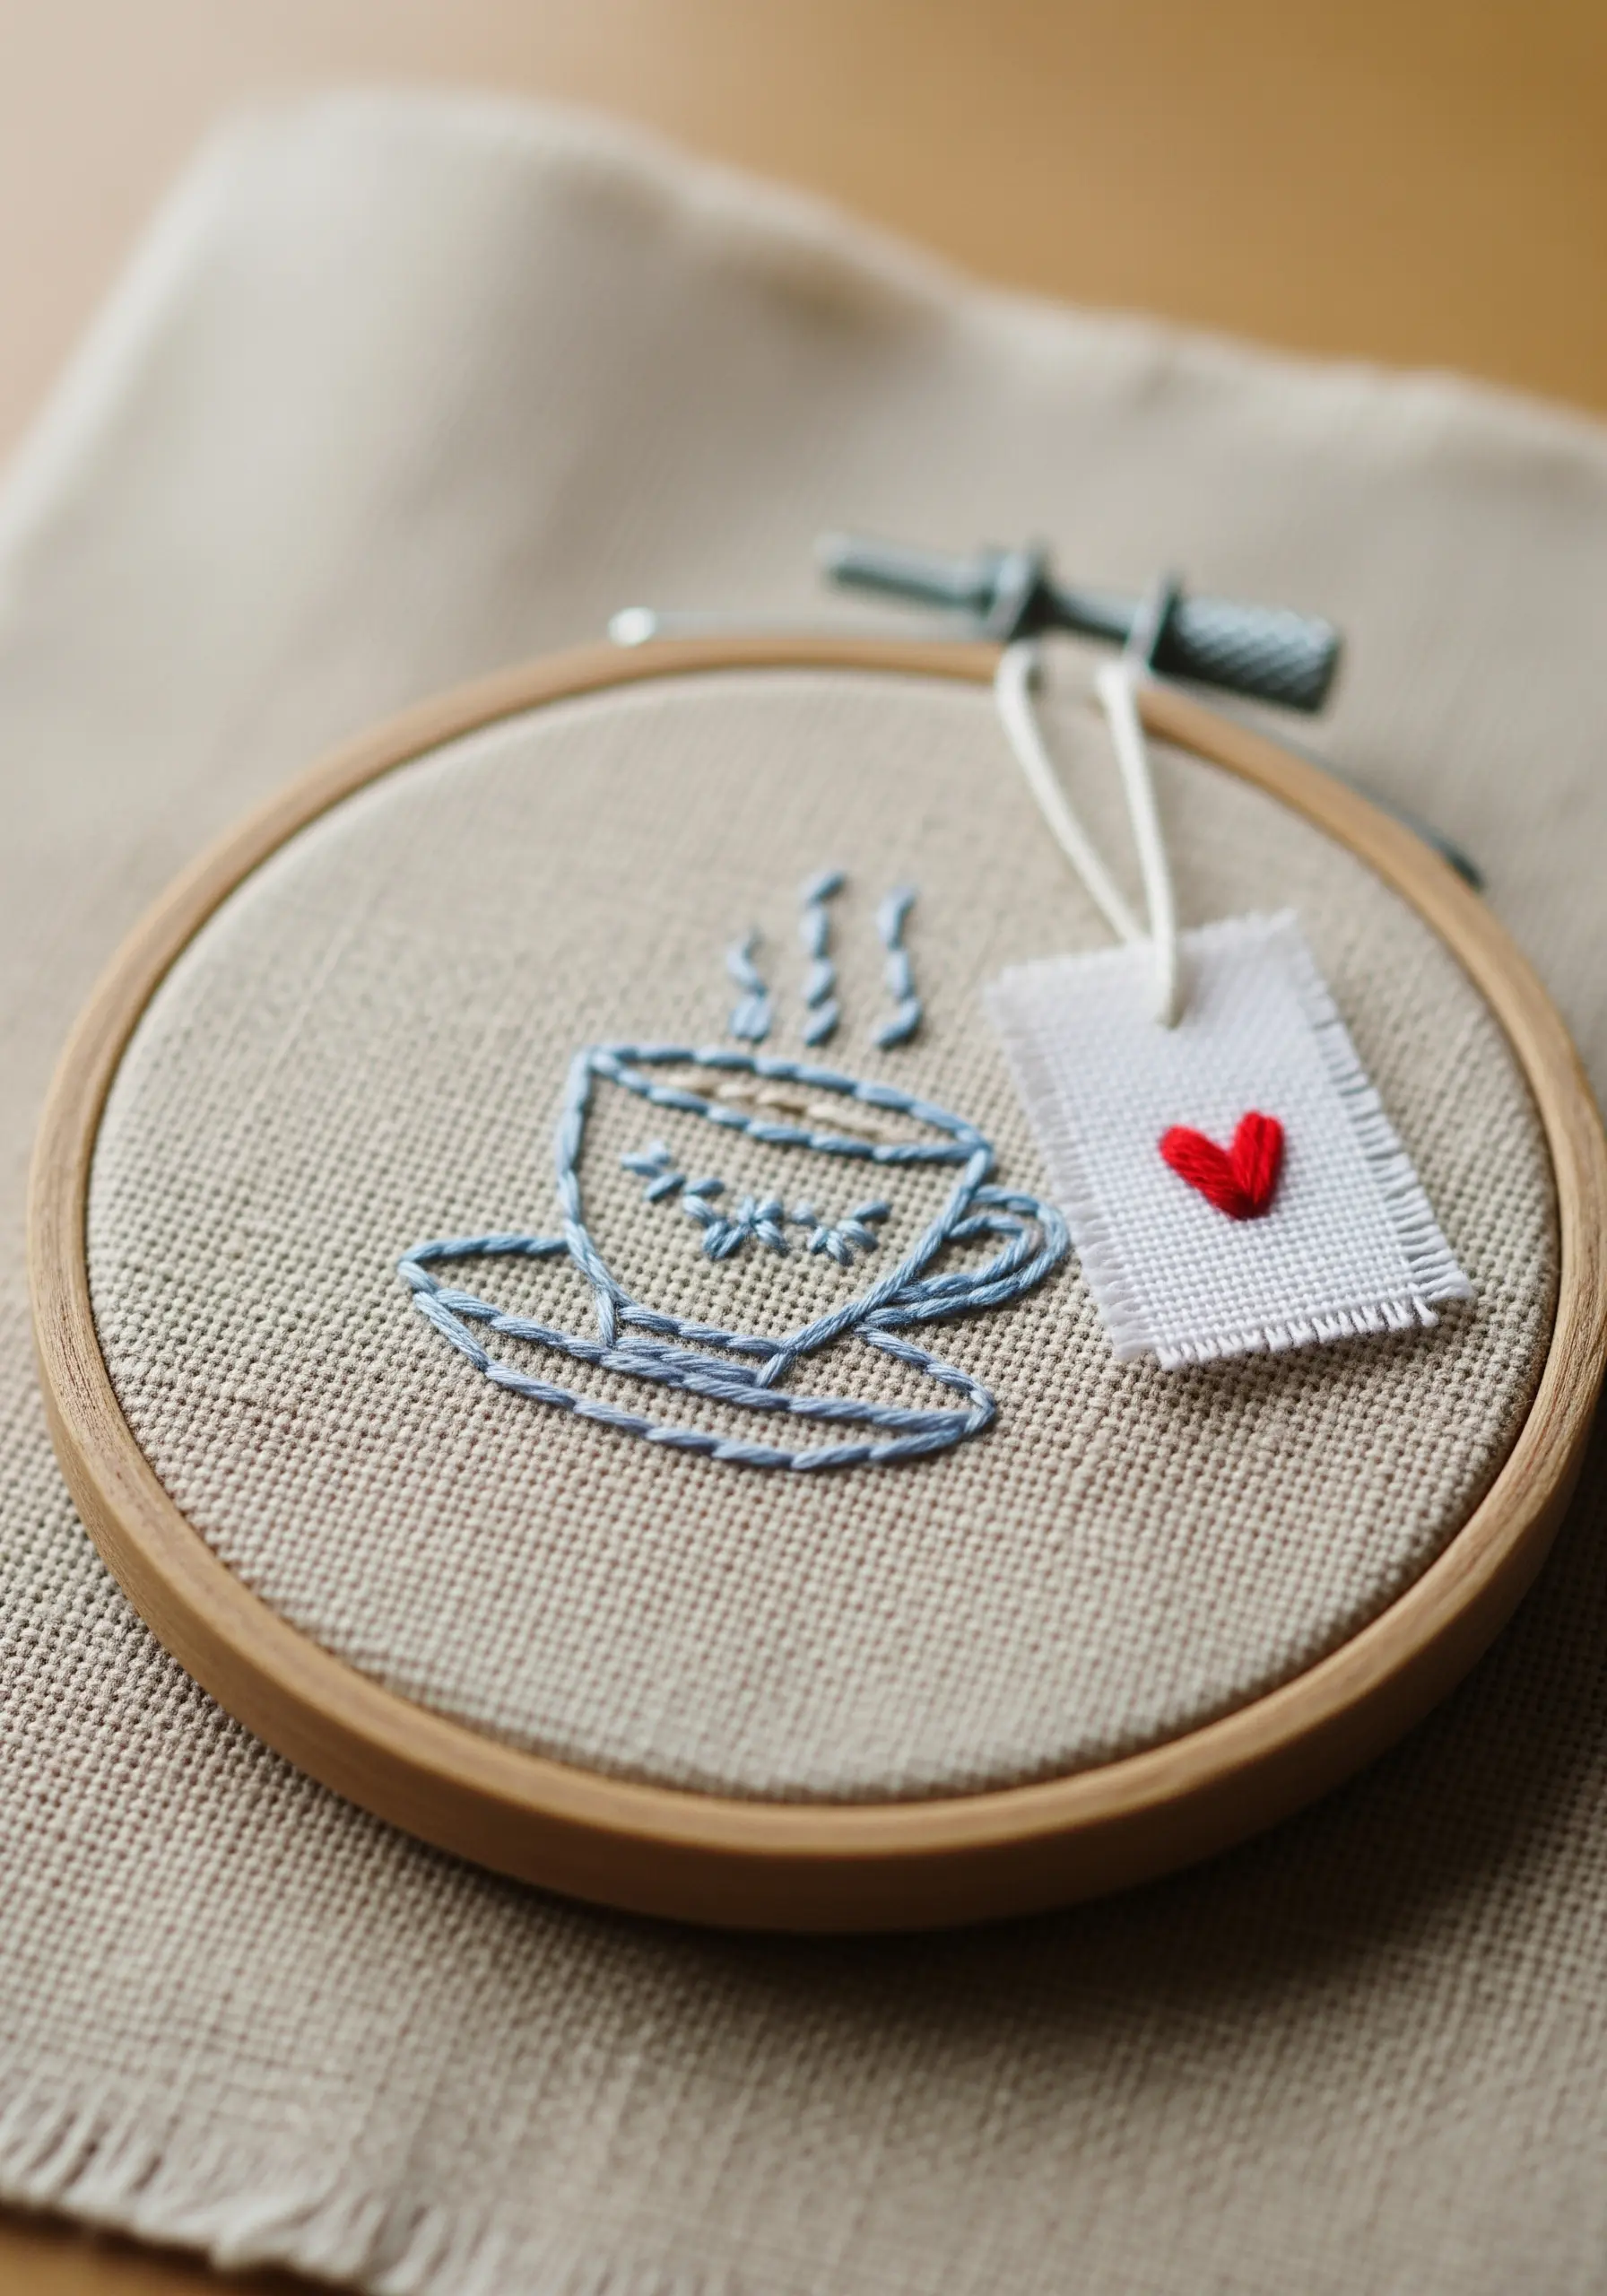
Elevate a simple design by adding an unexpected, three-dimensional element.
Stitch your main teacup motif using a simple backstitch. Then, create a tiny tea bag tag from a scrap of stiff fabric, like linen or Aida cloth.
Stitch a tiny satin heart onto the tag, then attach it to your main piece with a single strand of thread, letting it hang freely. This small, thoughtful detail adds a layer of charm and craftsmanship that is irresistible to market shoppers.


