

Your tote bag is more than just functional; it’s a portable canvas waiting for your signature touch. Forget generic patterns—let’s explore how intentional stitch choices can transform a simple bag into a piece of botanical art you’ll be proud to carry.
We’ll move beyond the basics, focusing on techniques that create depth, texture, and realism. You’ll learn how the direction of a single satin stitch can mimic the way light hits a leaf, or how blending three shades of green can turn a flat design into a living monstera.
These ideas are designed to build your confidence and refine your artistic eye. Each one is a small masterclass in composition, color theory, and tactile storytelling, giving you the skills to make every project feel polished and uniquely yours.
1. The Cascading Ginkgo in Golden Satin Stitch
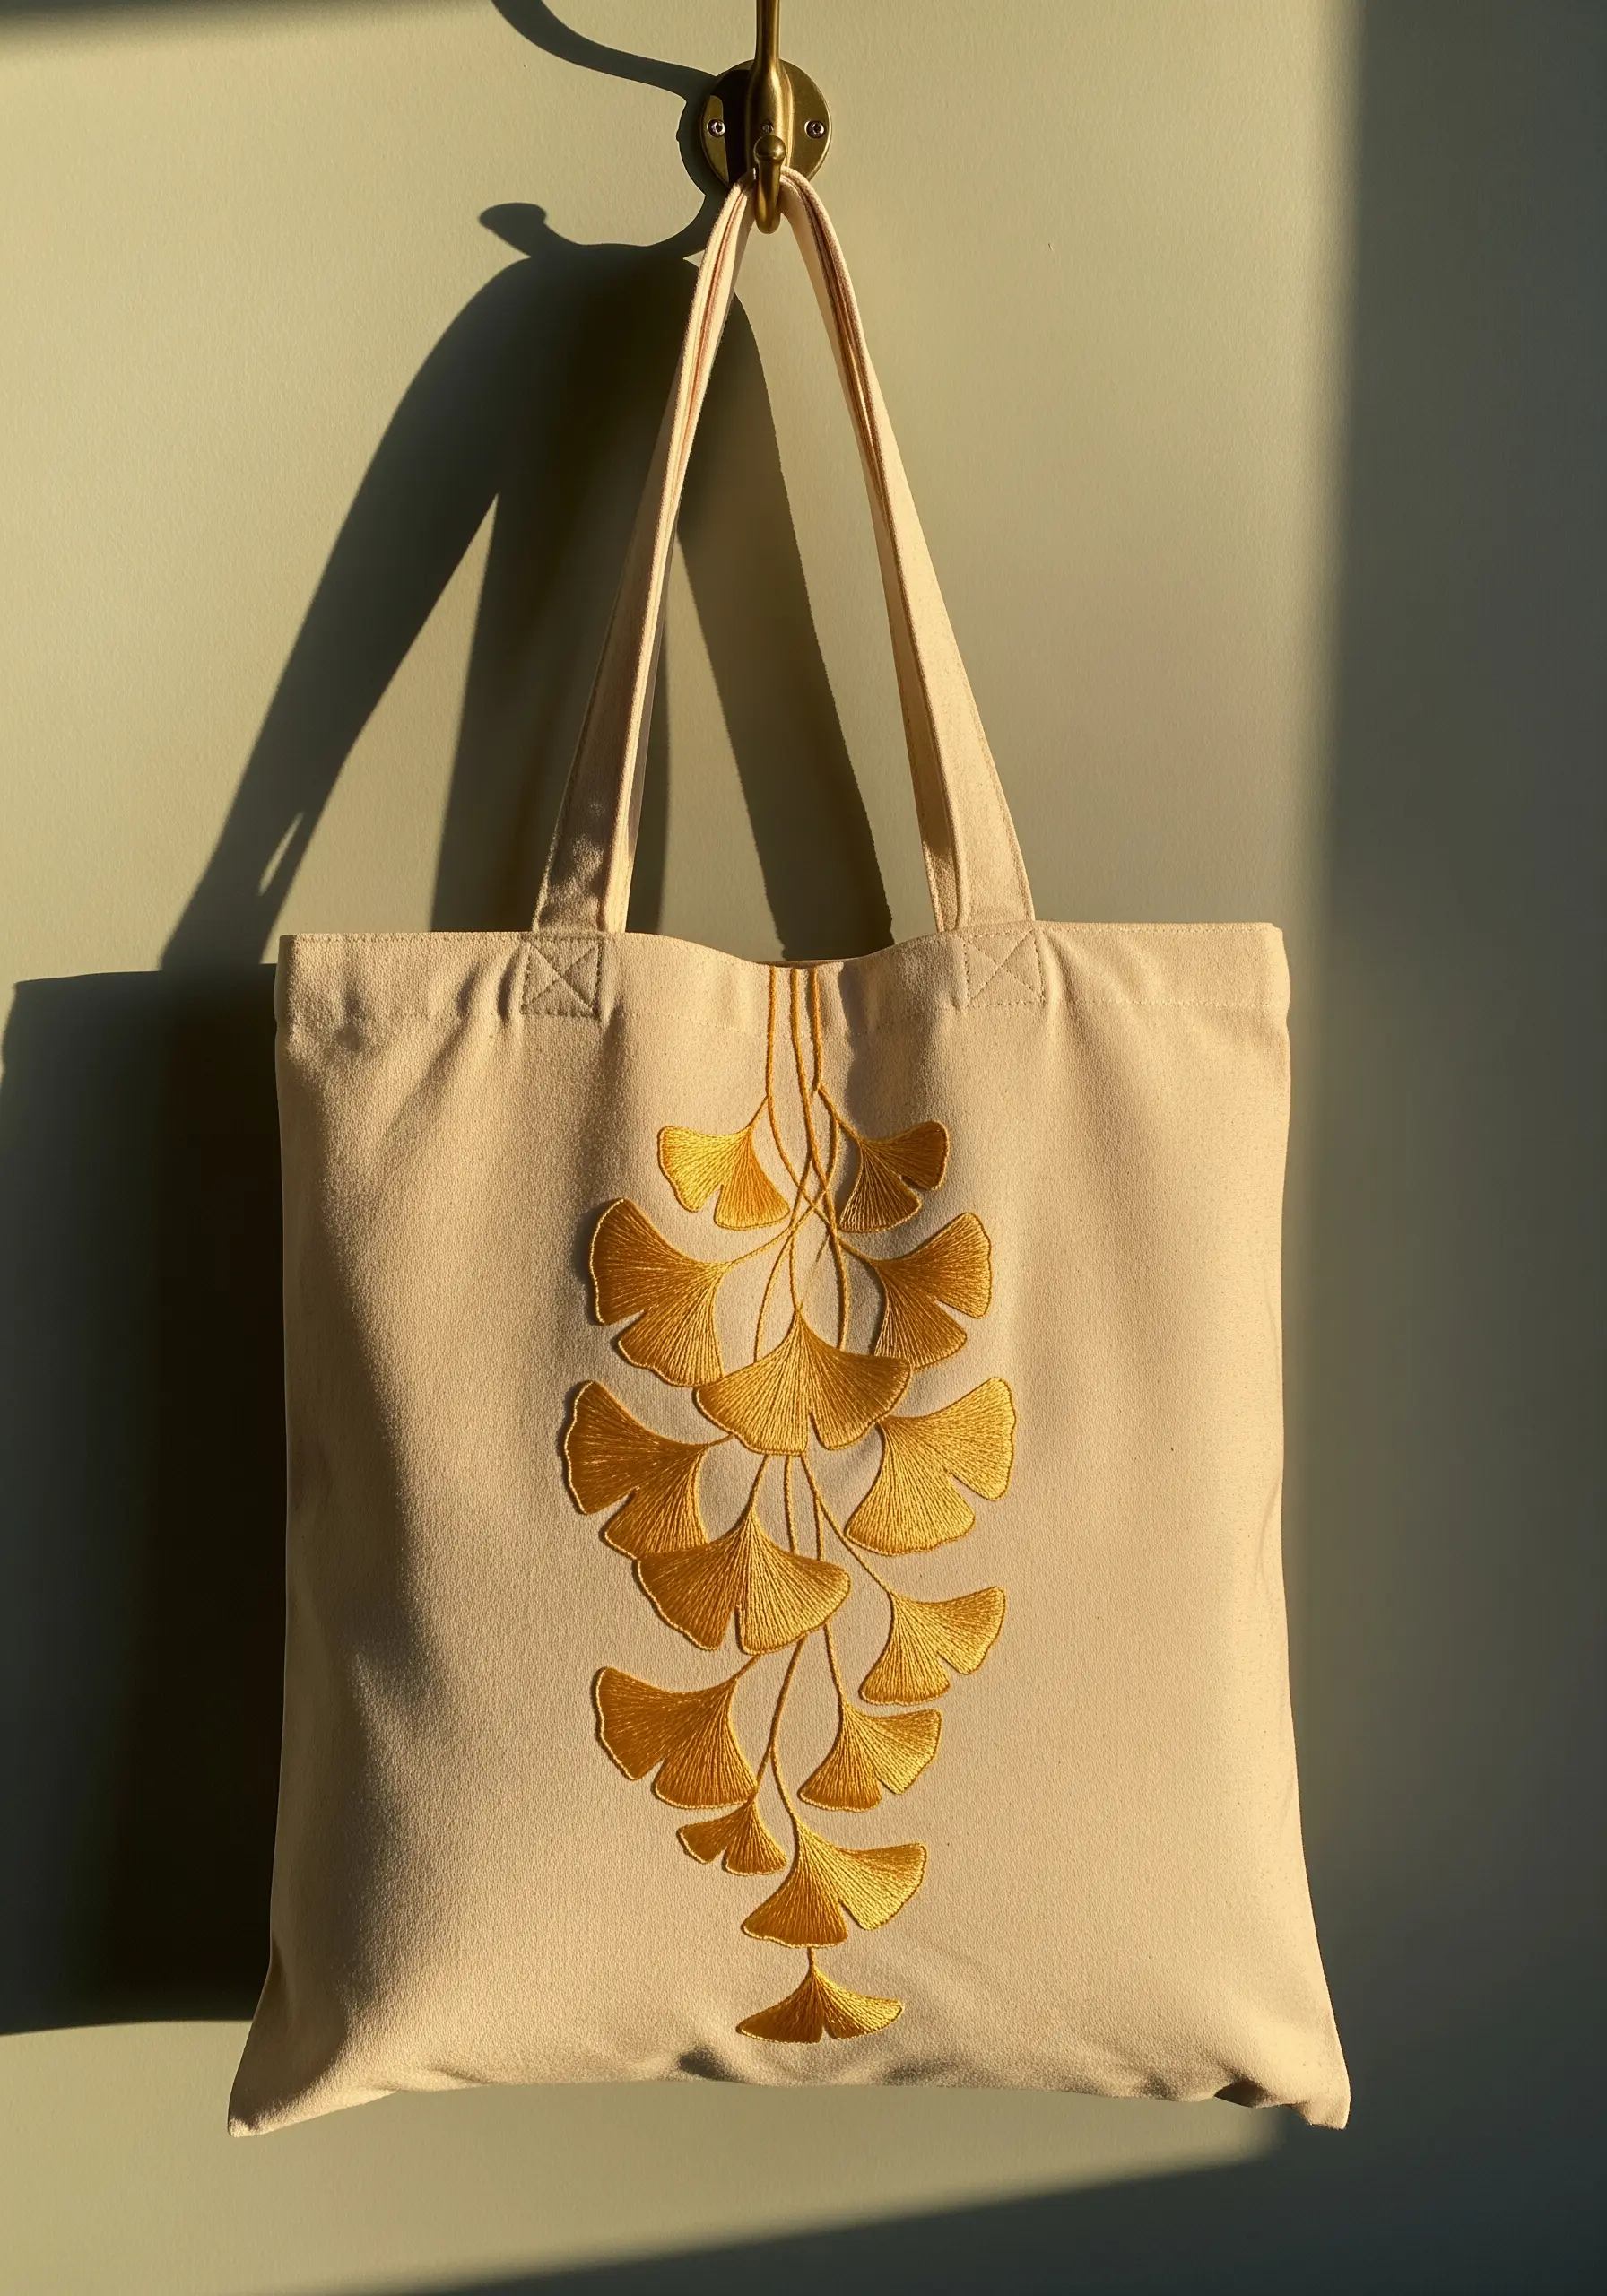
Achieve this luminous effect by mastering the direction of your satin stitches.
Instead of filling each leaf uniformly, angle your stitches to radiate from the base towards the fan-shaped edge, mimicking natural growth.
This subtle shift in angle is what catches the light, creating a sense of movement and a soft, golden sheen that feels both elegant and alive.
Use a high-sheen rayon or silk thread in a single, bold color against a neutral canvas to make the texture the focal point.
2. Mastering Realism with Thread-Painted Monstera
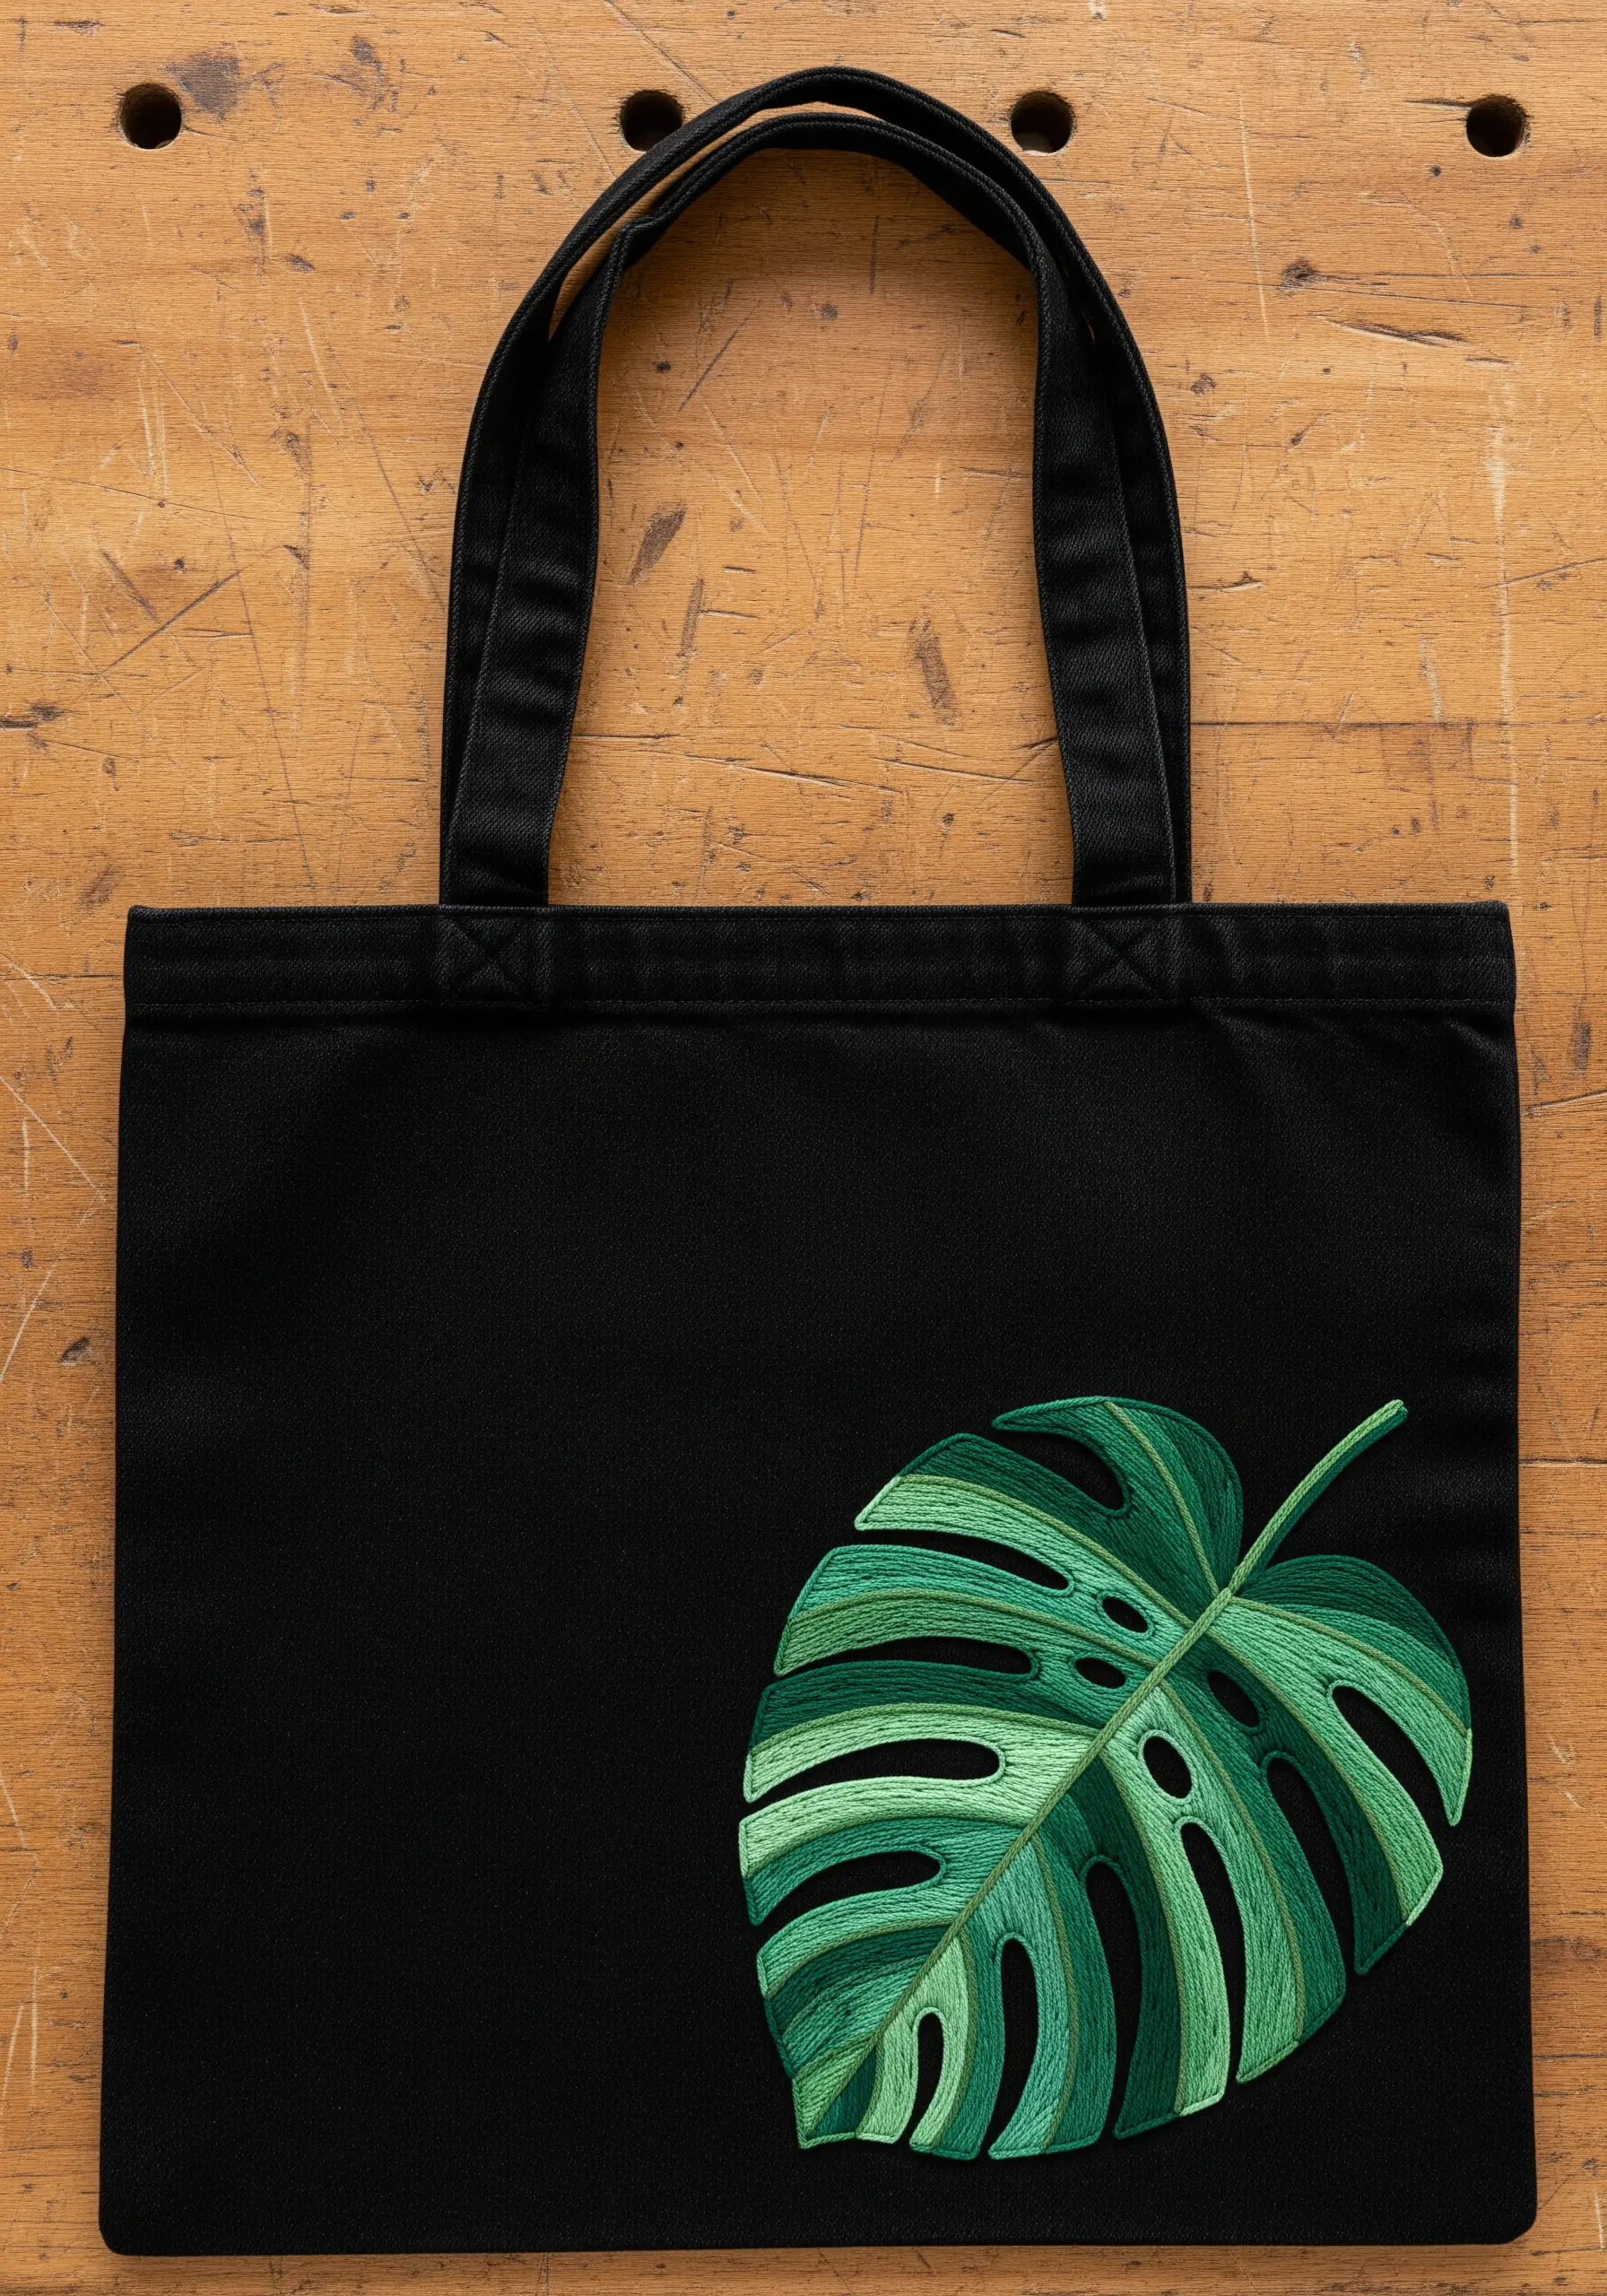
This realistic monstera leaf is achieved through long-and-short stitch, a technique often called “thread painting.”
Select four to five shades of green, from a bright lime to a deep forest green, to create a believable gradient.
Work in sections, starting with the darkest shade for the areas in shadow and blending into lighter tones where the light would naturally hit.
The key is to stagger your stitch lengths, allowing the colors to interlock seamlessly rather than creating harsh lines. This method adds professional-level depth to your botanical stitch ideas.
3. Layered Autumn Foliage on Textured Burlap
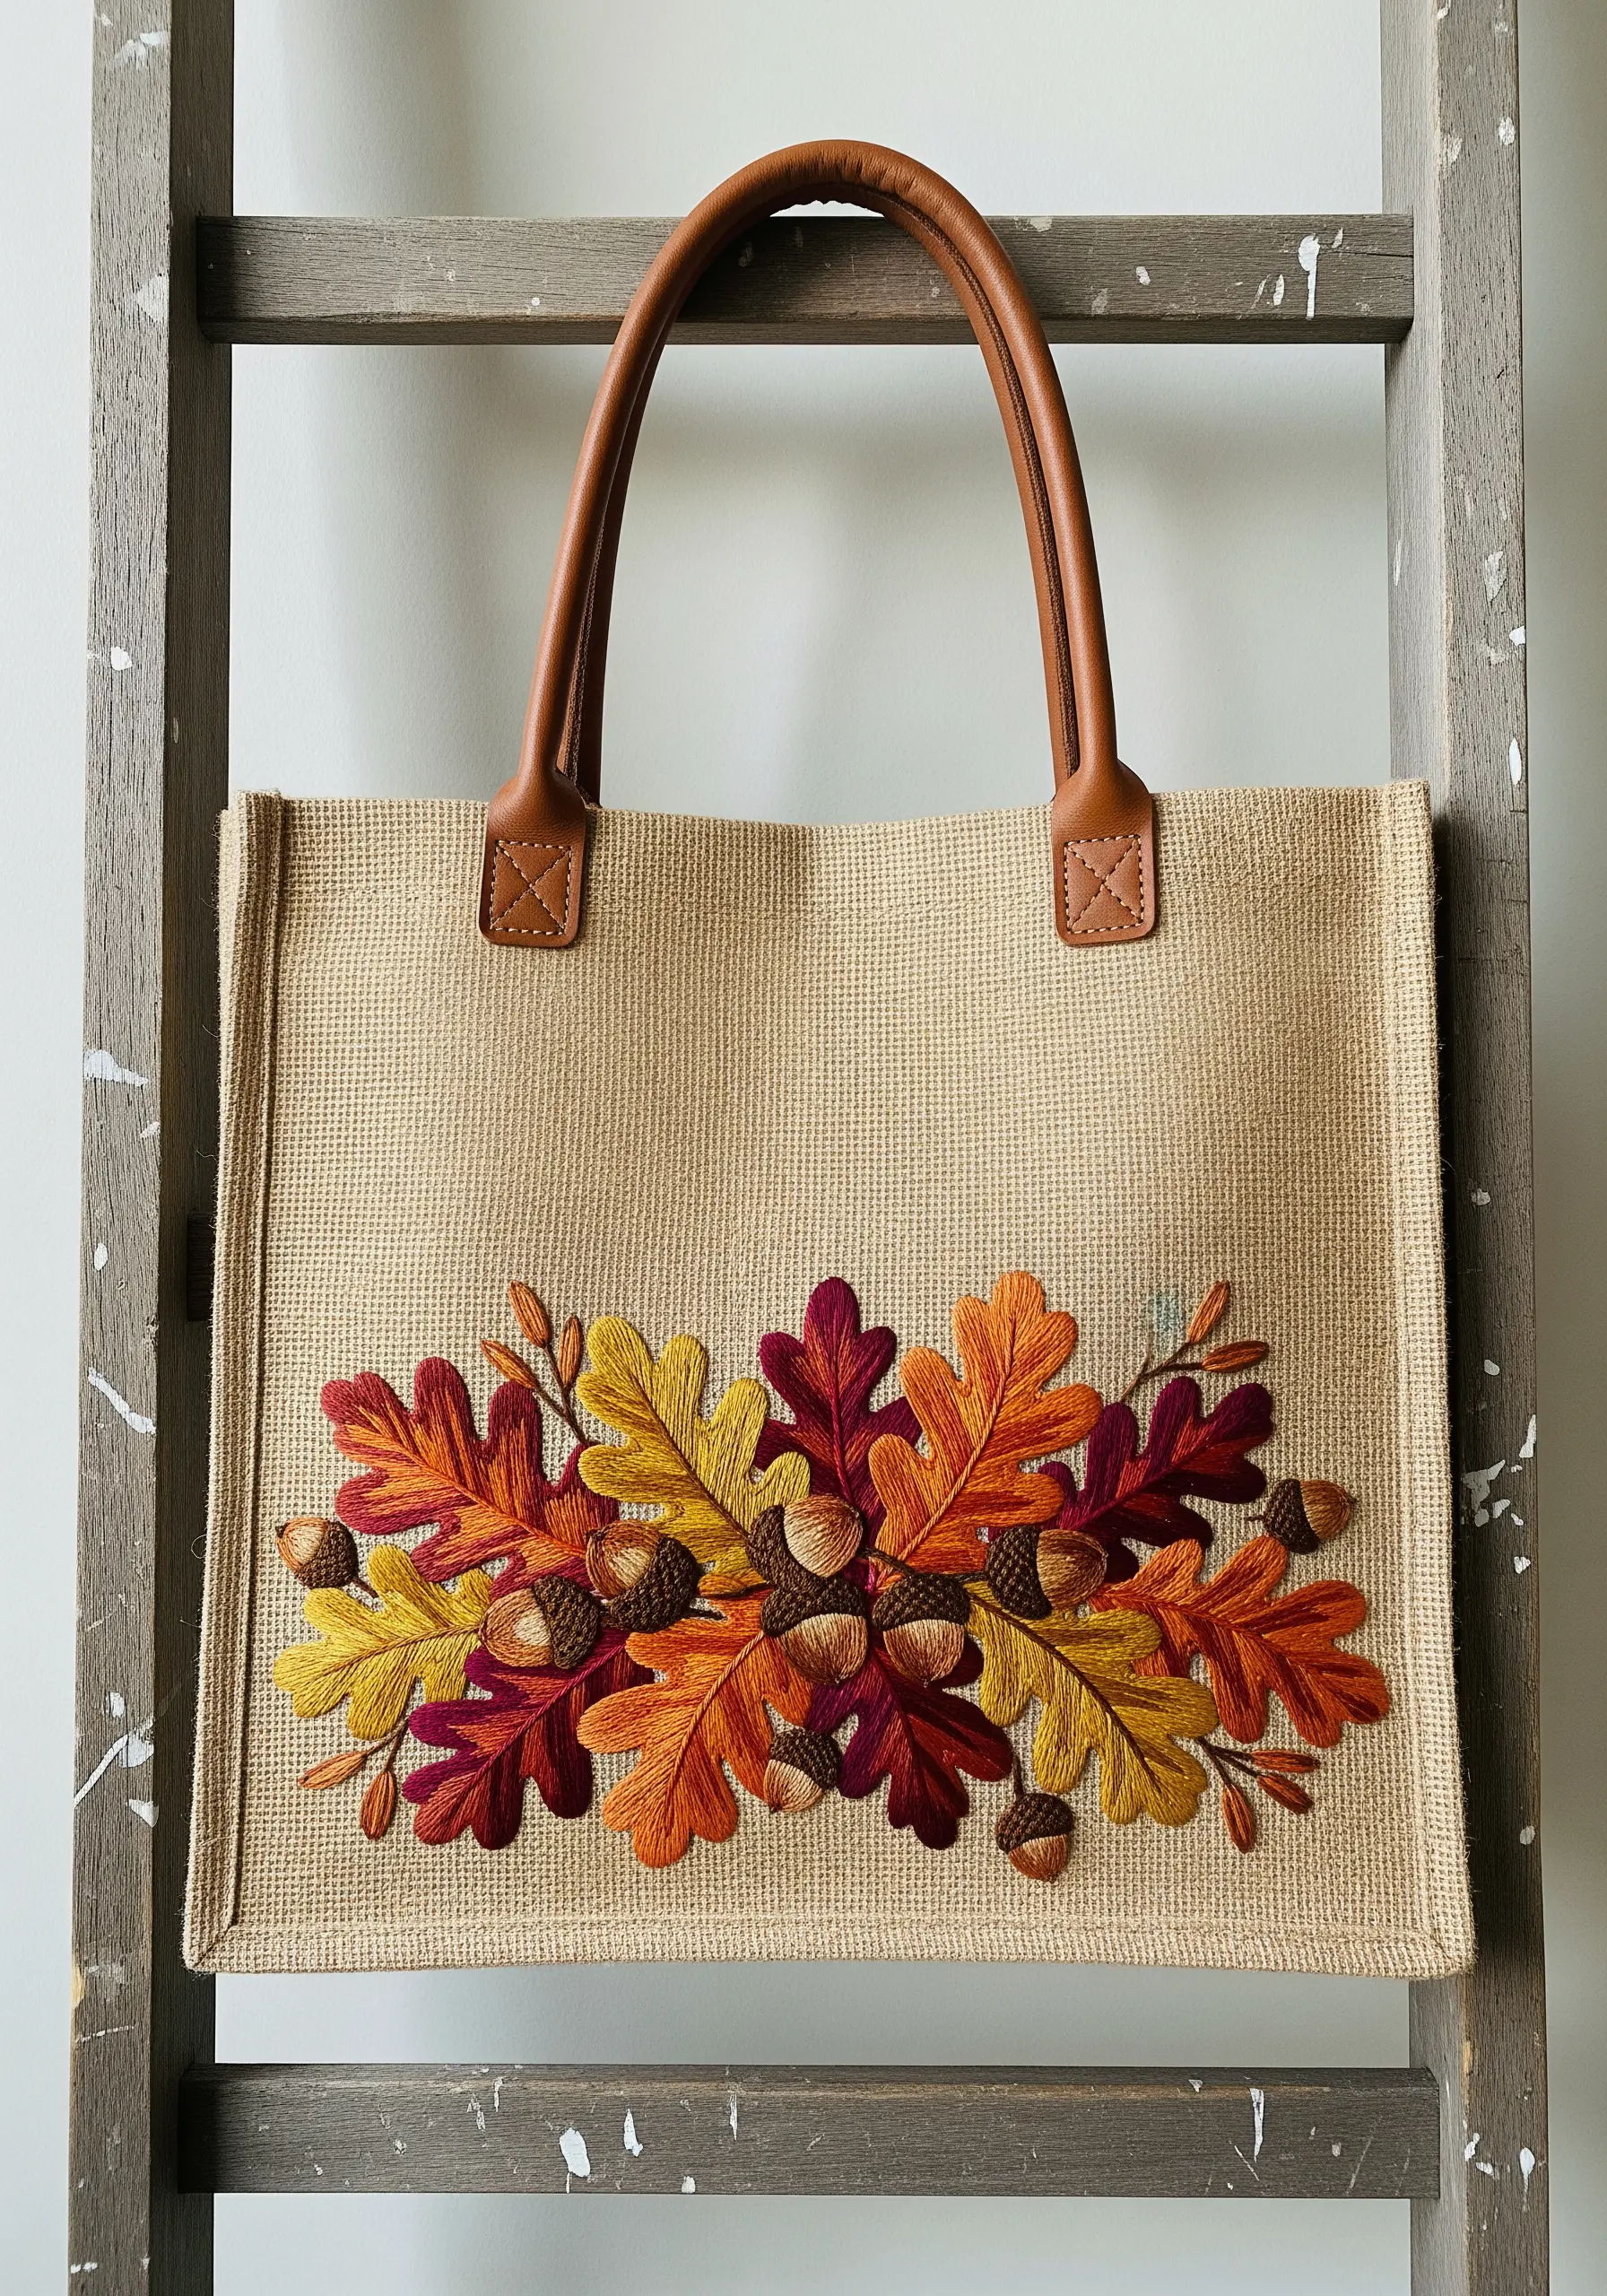
When embroidering on a coarse fabric like burlap or jute, use a dense fill stitch like satin stitch or long-and-short stitch to ensure full coverage.
A tear-away stabilizer on the back of the fabric is essential; it prevents the weave from stretching and keeps your stitches from sinking in.
Create visual depth by slightly overlapping the leaves and acorns, stitching the elements in the background first.
Choose variegated threads in autumnal colors to achieve subtle, organic color shifts within each leaf without constantly changing your floss.
4. The Delicate Climb of Minimalist Ivy
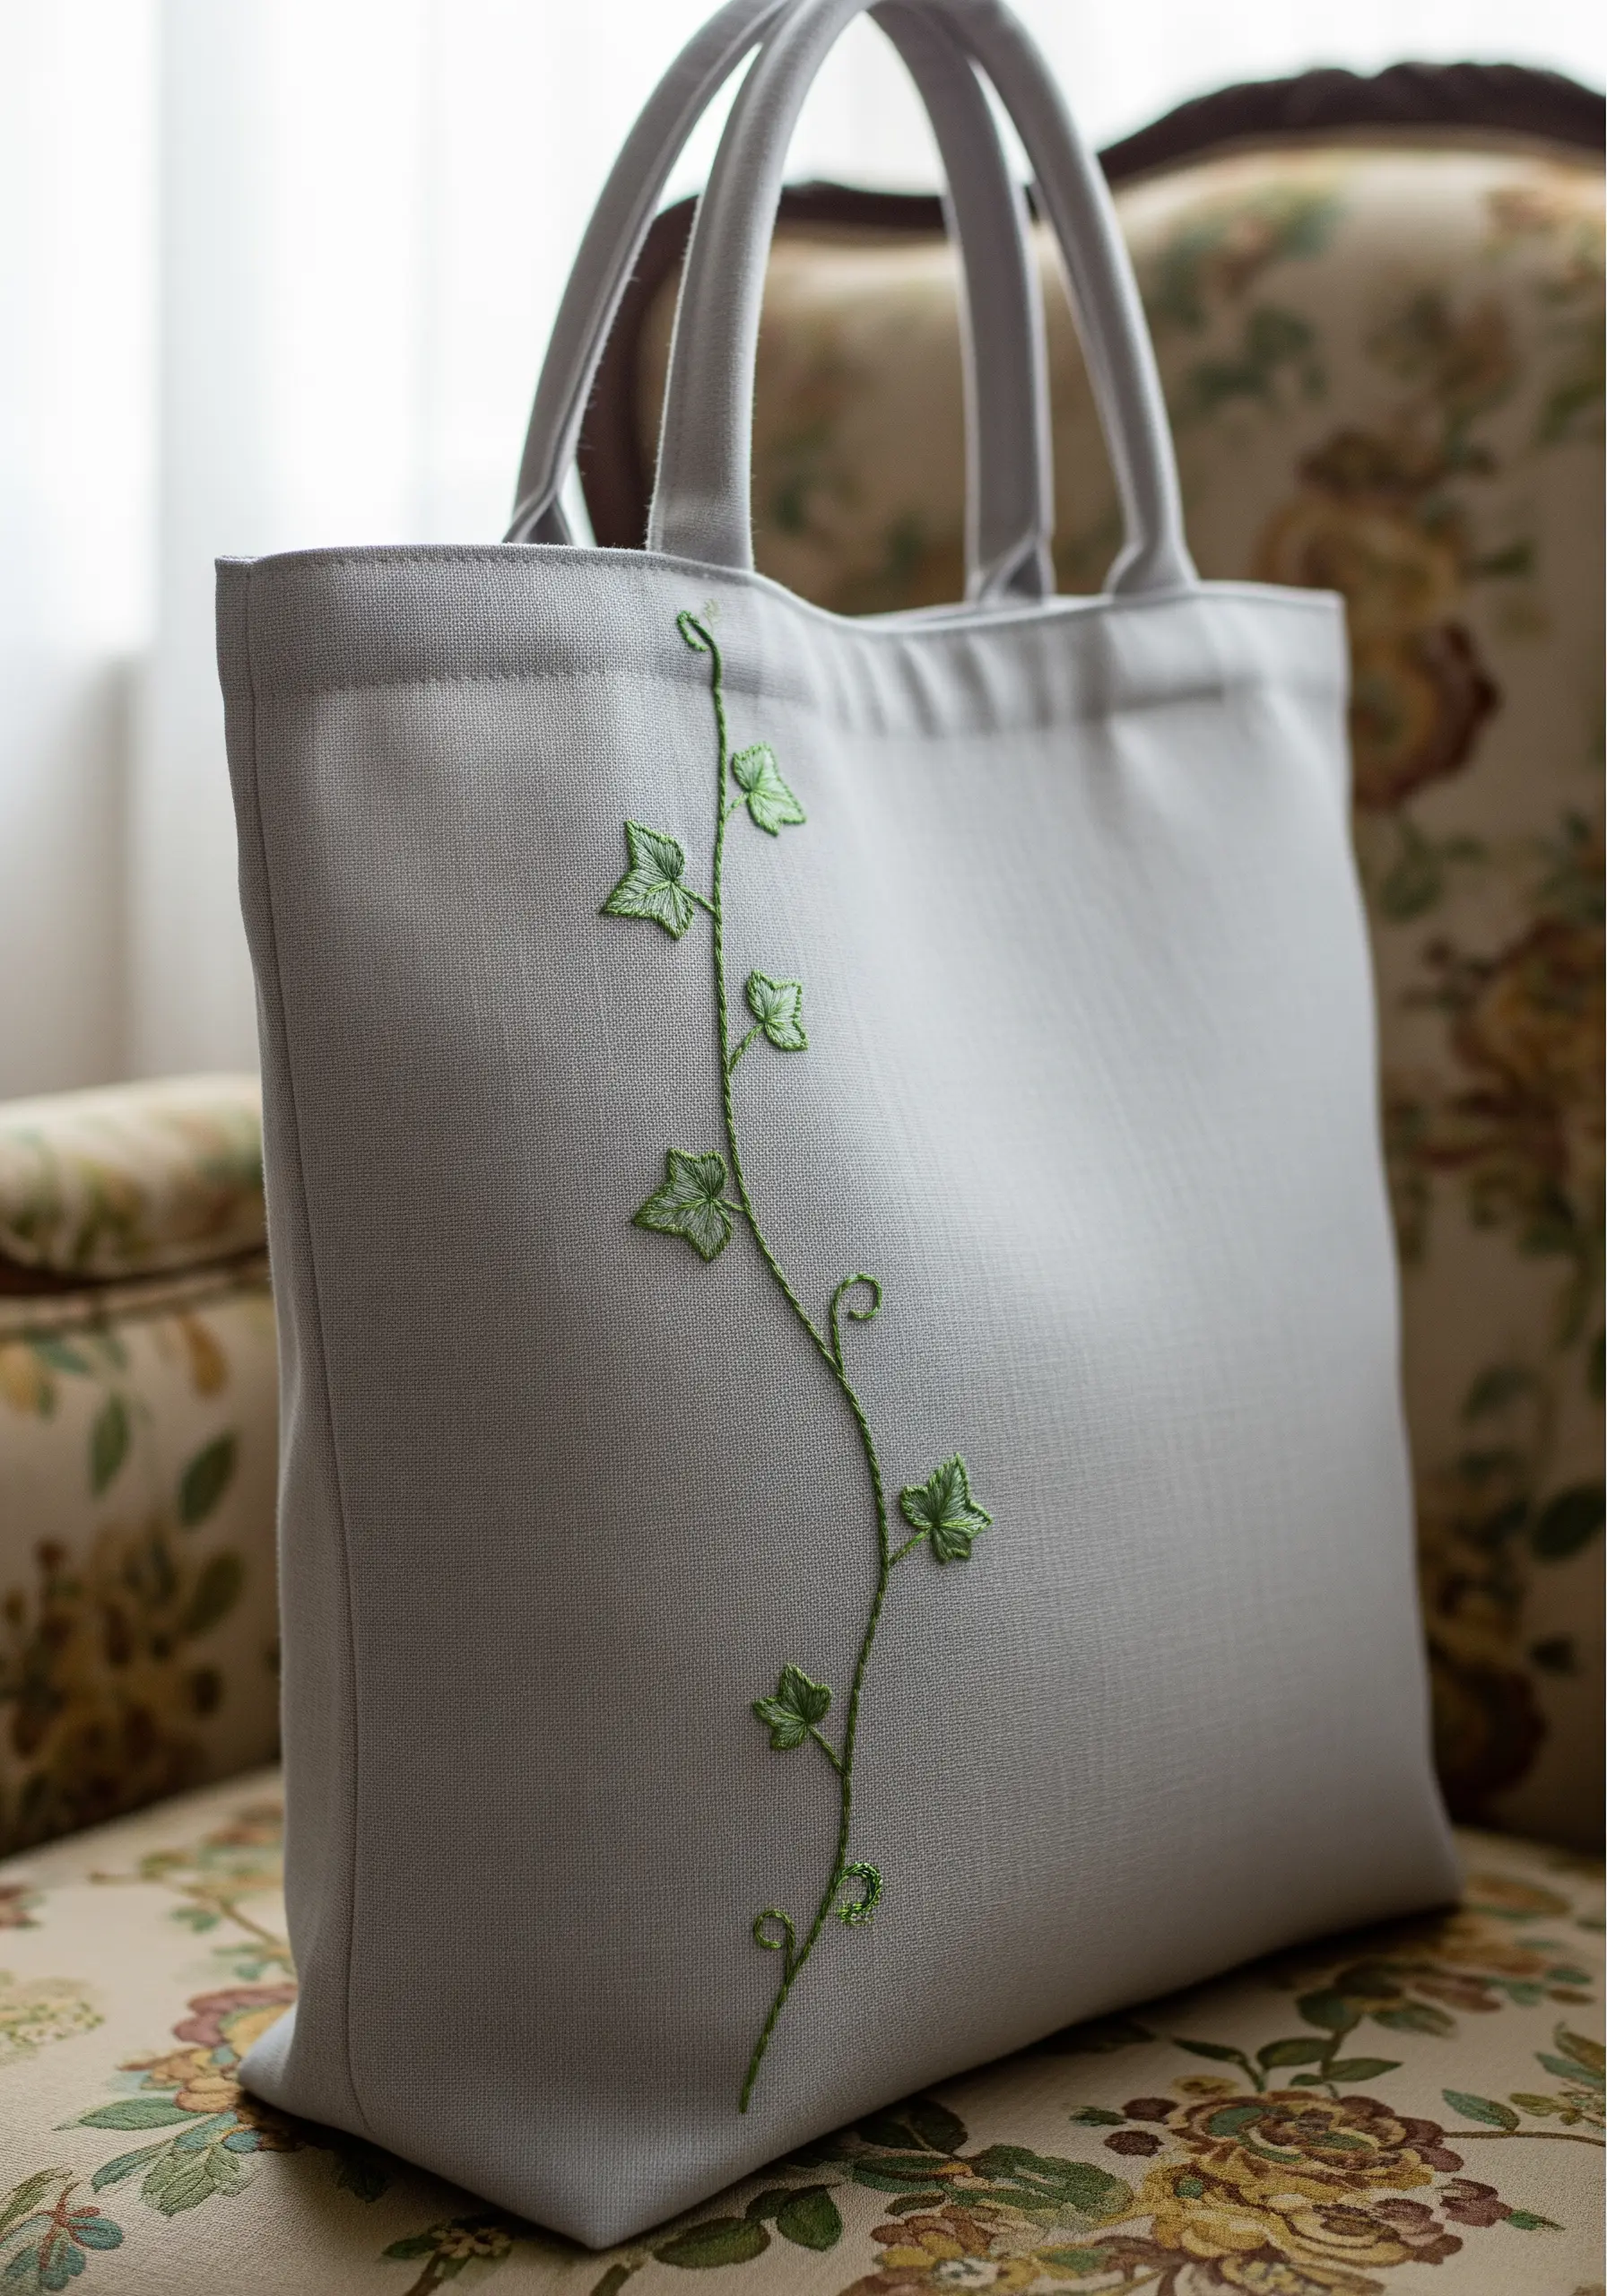
Embrace the power of negative space with a delicate, climbing vine design.
Use a whipped backstitch or stem stitch for the vine to create a smooth, rope-like line that flows elegantly up the side of the bag.
For the leaves, a simple fishbone stitch or a few detached chain stitches (lazy daisies) provide just enough form without overwhelming the design.
This minimalist approach is perfect for adding a subtle, personal touch that whispers rather than shouts, transforming a plain bag with just a few thoughtful stitches.
5. Symmetrical Ferns for a Natural Emblem
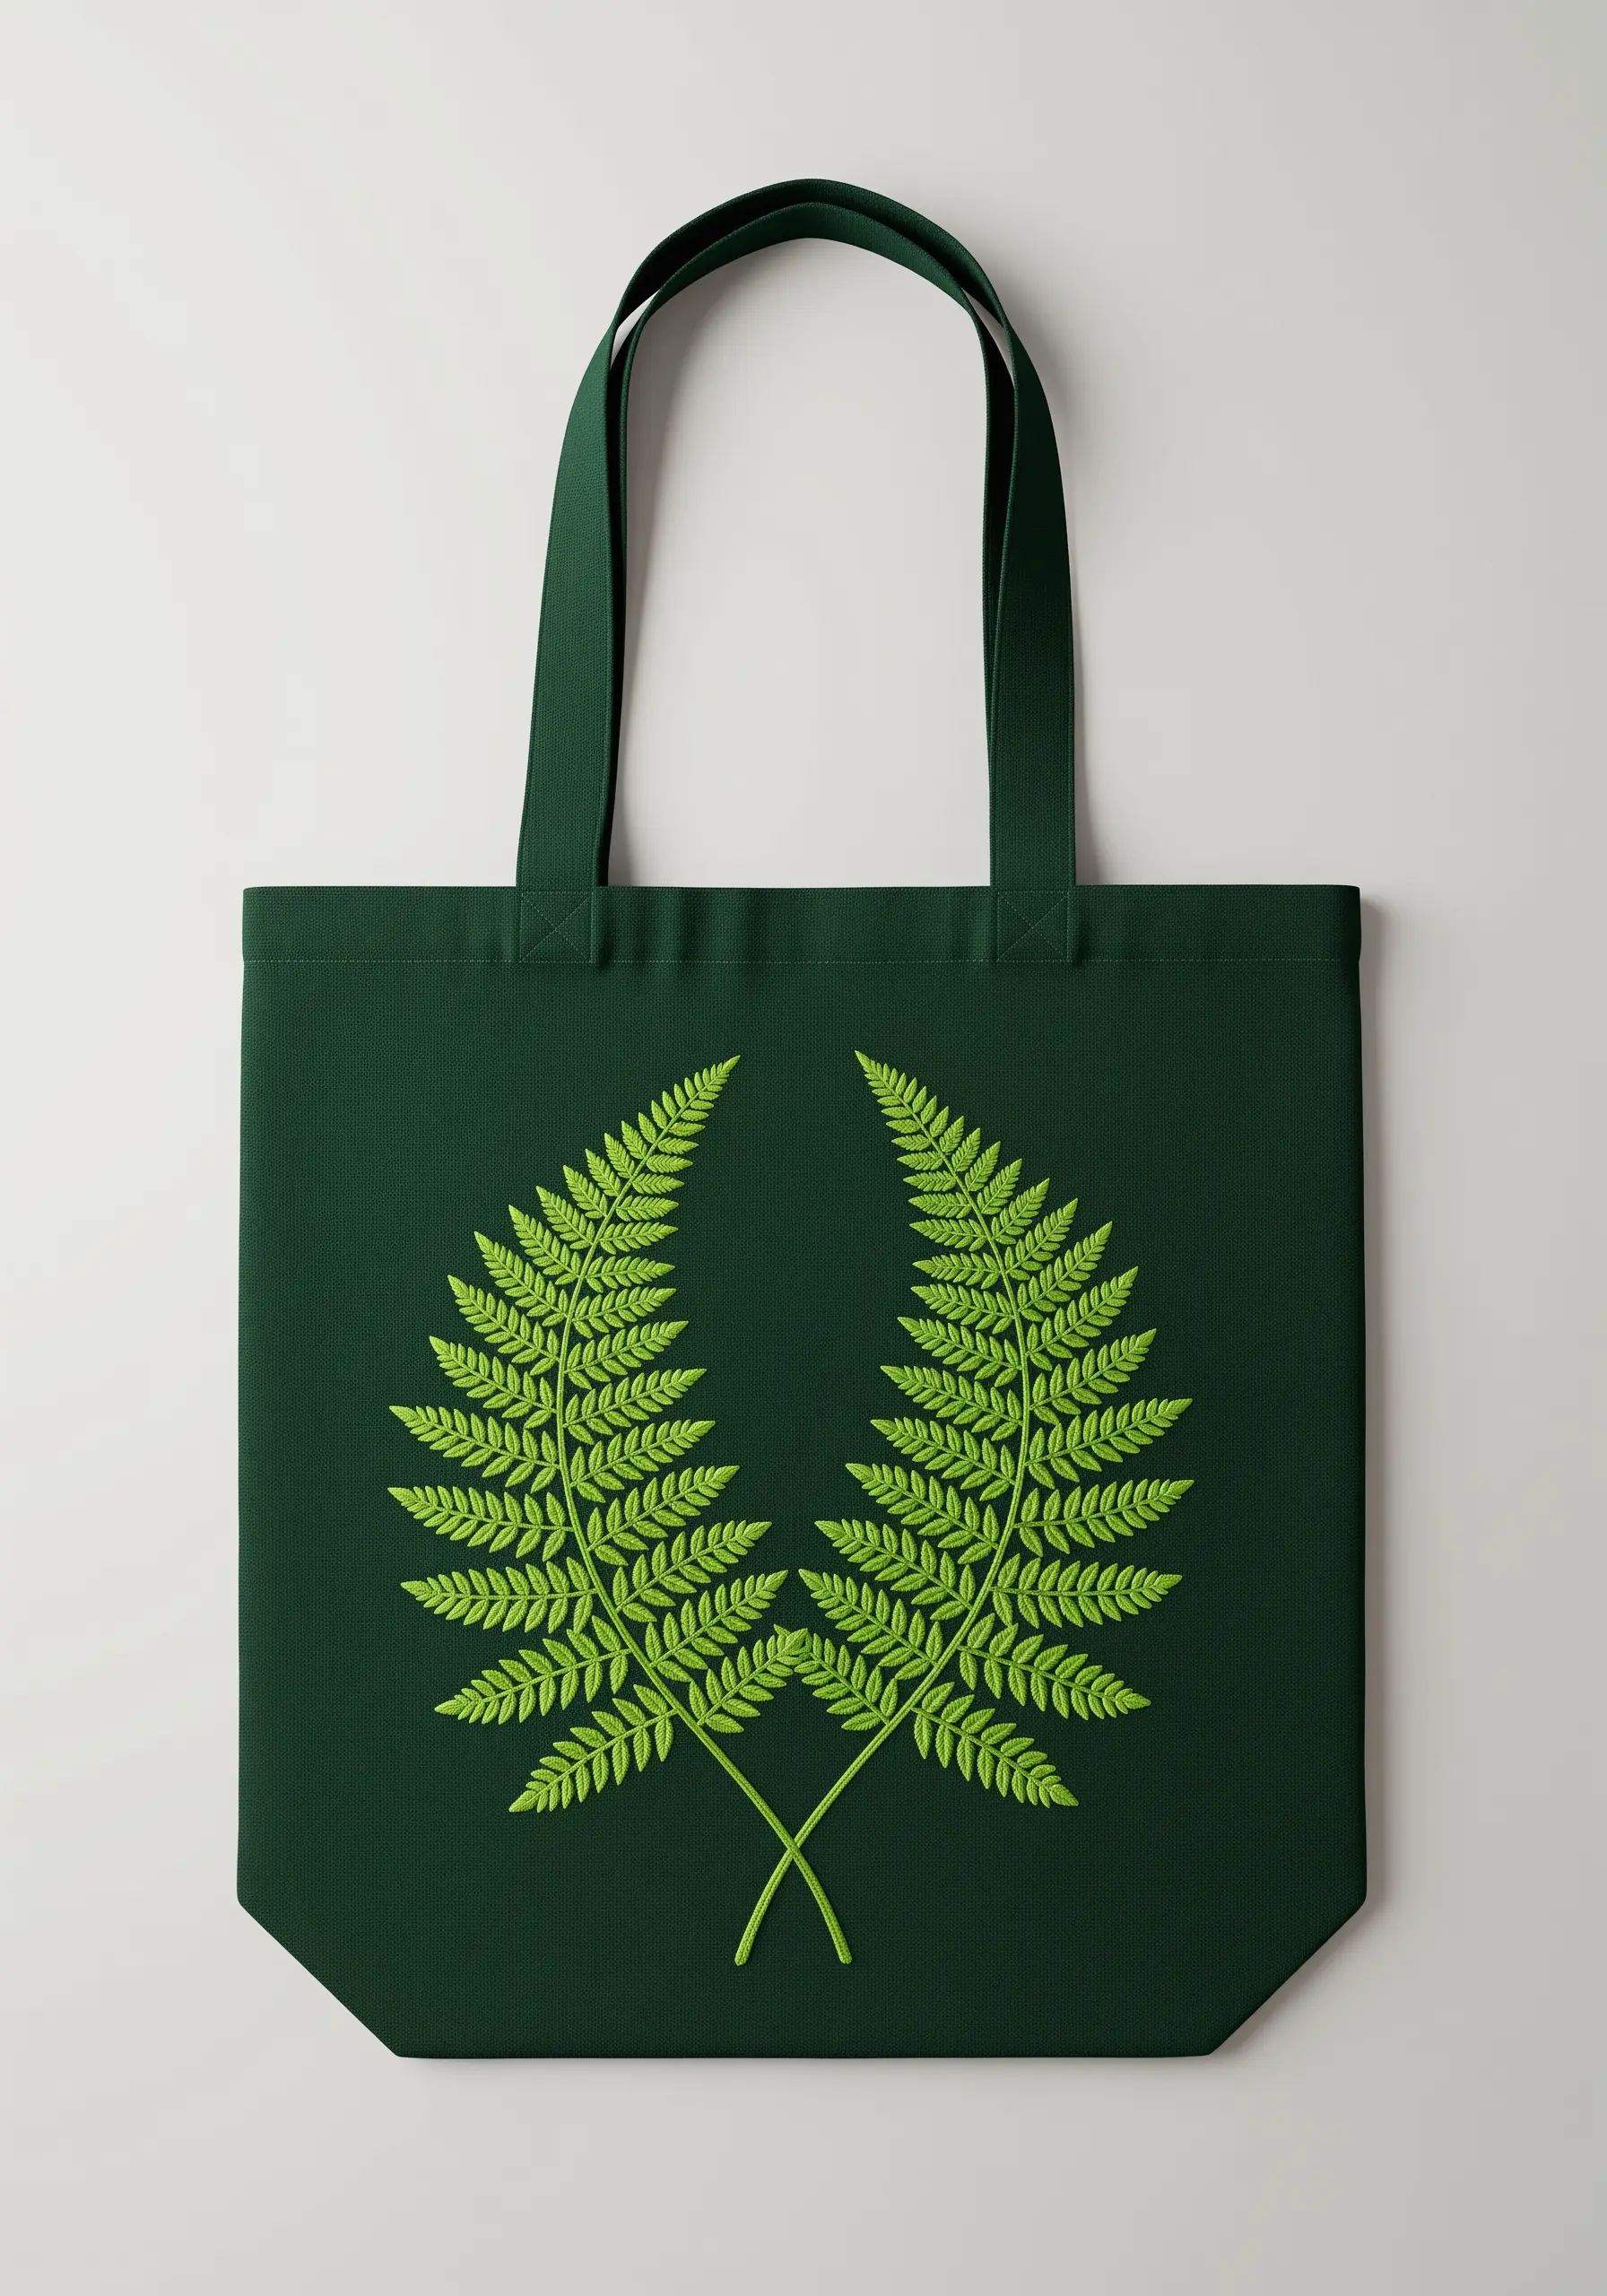
To create the intricate texture of fern fronds, use the fly stitch worked in close rows along a central stem.
First, stitch the main stem with a split stitch. Then, work your fly stitches off each side, keeping them small and uniform for a feathery, realistic look.
The bright lime green thread pops against the dark forest green bag, creating a high-contrast design that feels both classic and modern.
This symmetrical composition transforms the ferns into a crest or emblem, giving your tote a polished, graphic quality.
6. Combining Appliqué and Stitch for Soft Texture
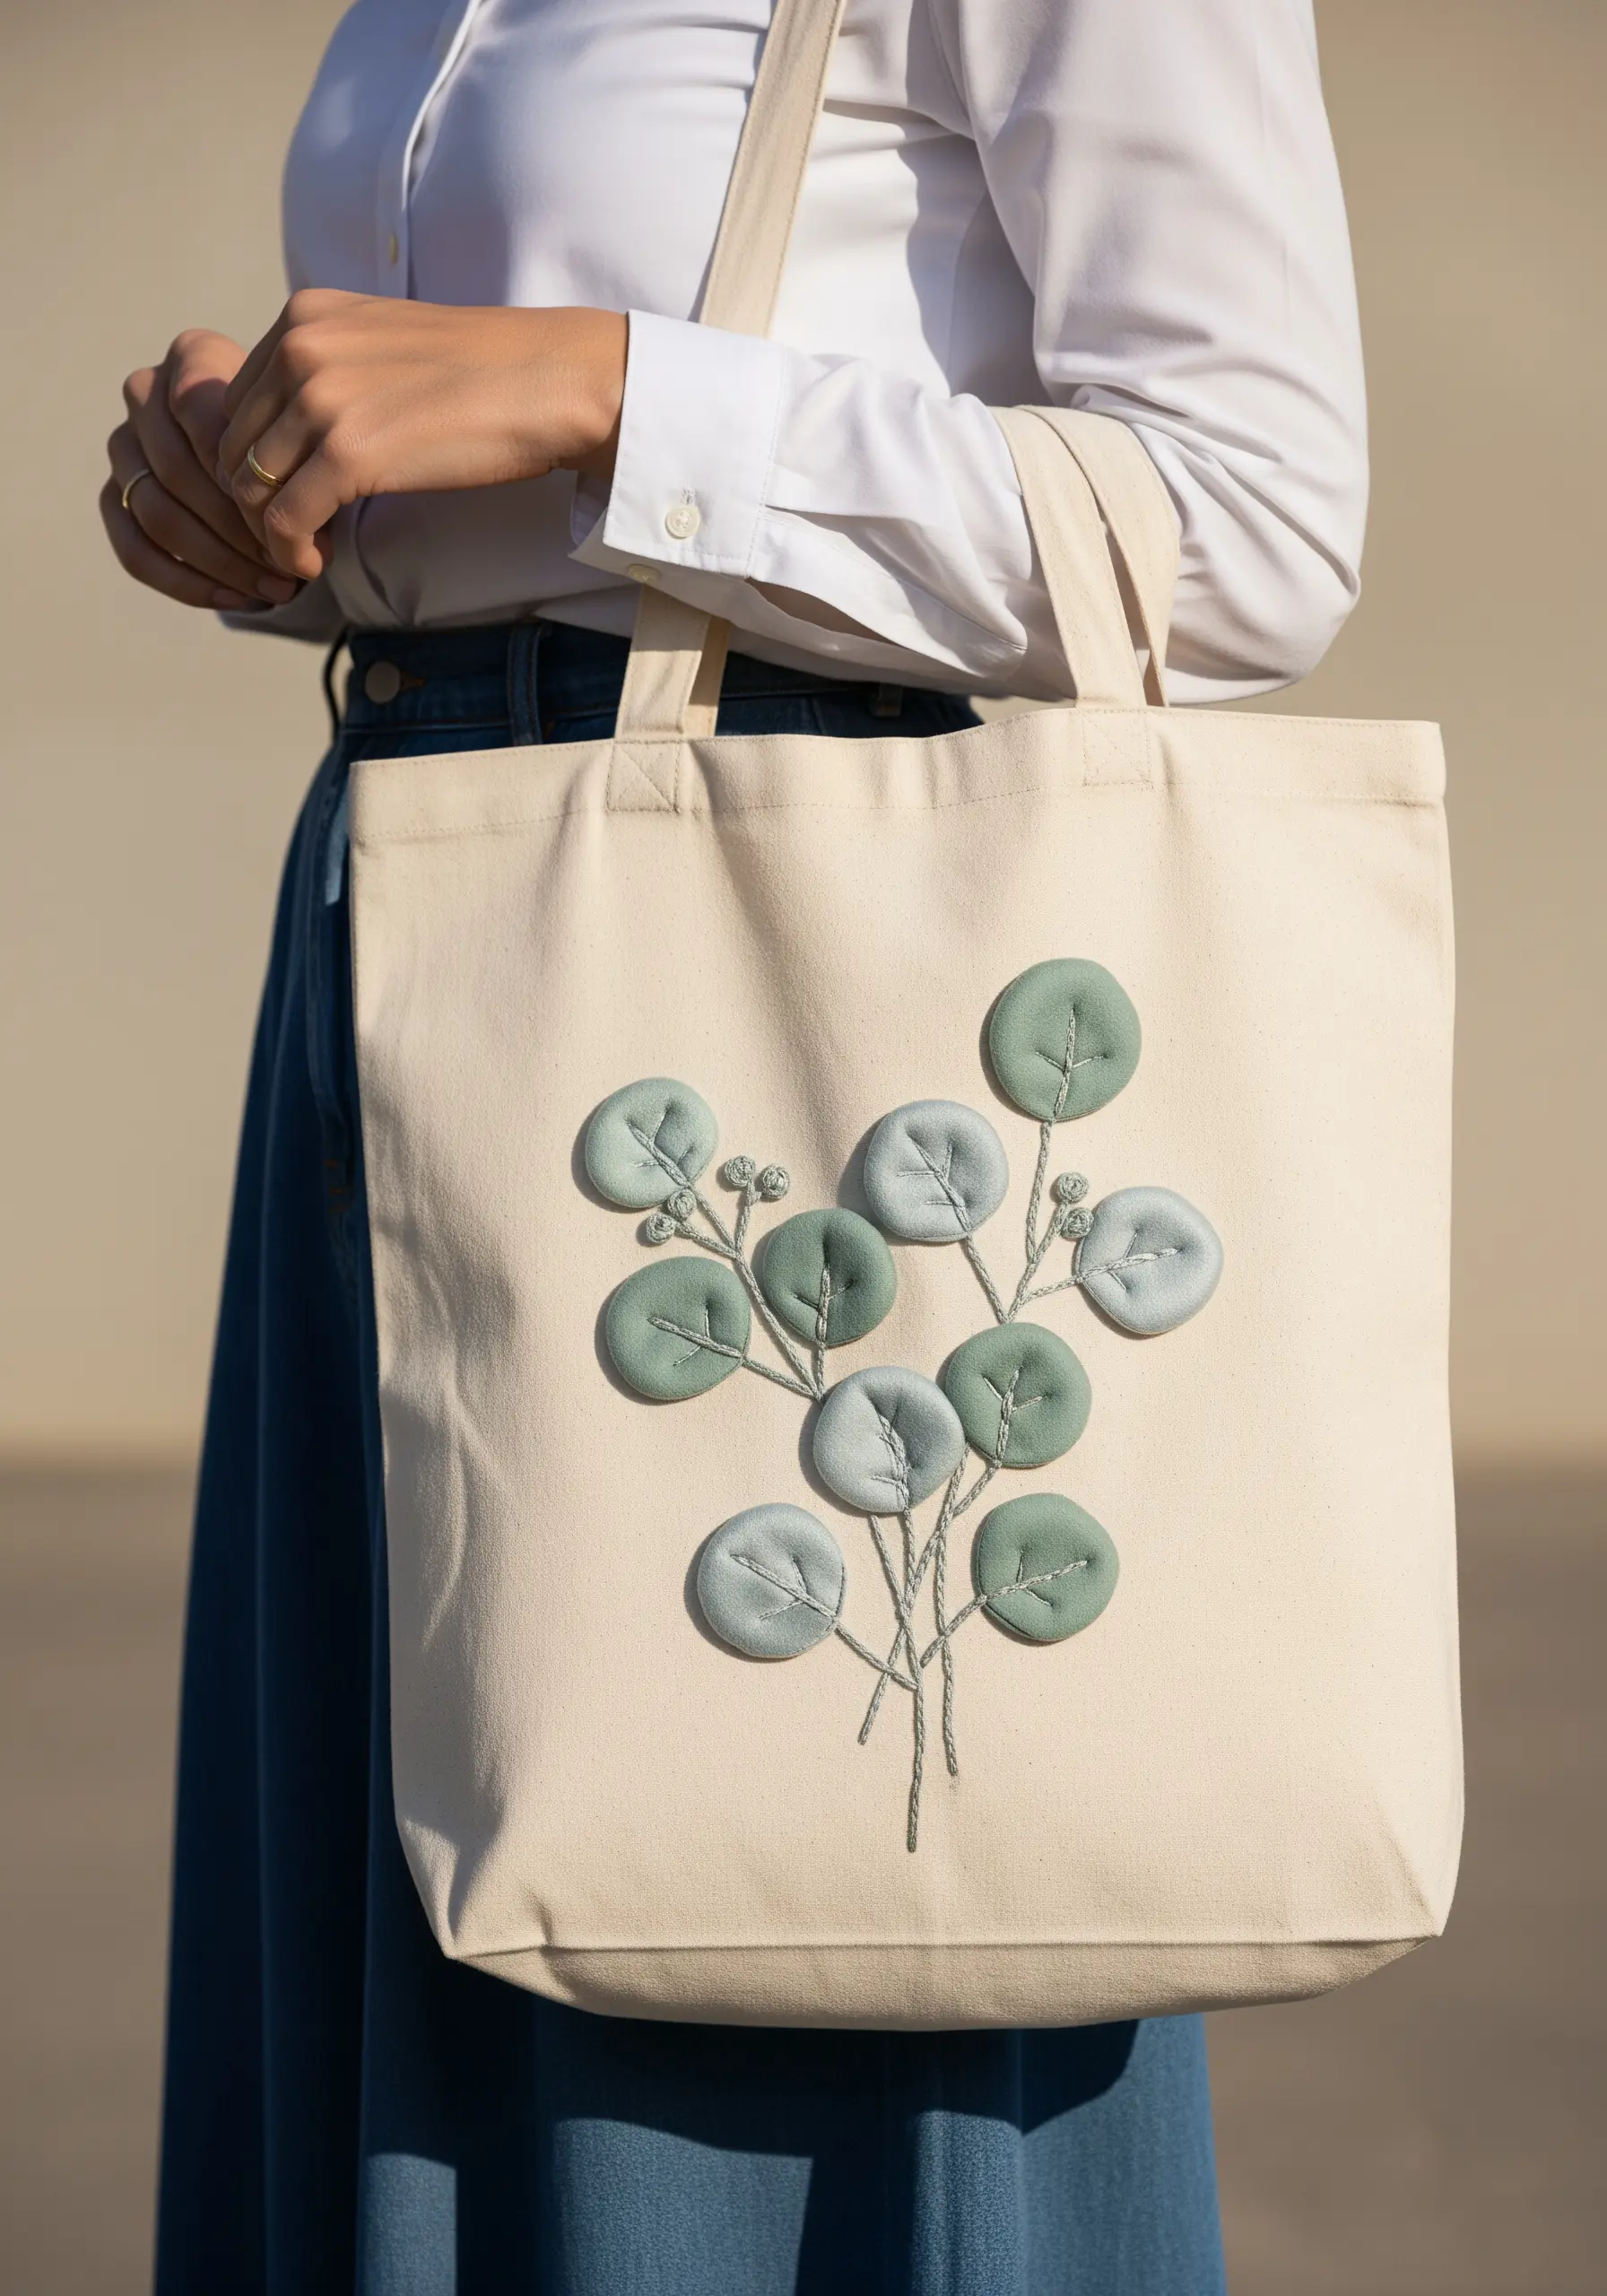
This design cleverly combines fabric appliqué with minimal embroidery for a soft, dimensional effect.
Cut your leaf shapes from a soft cotton or linen in muted tones. Use a lightweight iron-on adhesive like HeatnBond to secure them to the tote bag before stitching.
A simple running stitch or backstitch around the edge of each leaf secures it and adds a handcrafted outline.
Connect the leaves with a thin stem stitch, creating a cohesive botanical illustration that highlights the beauty of mixed textures.
7. The Saturated Gradient of a Single Maple Leaf
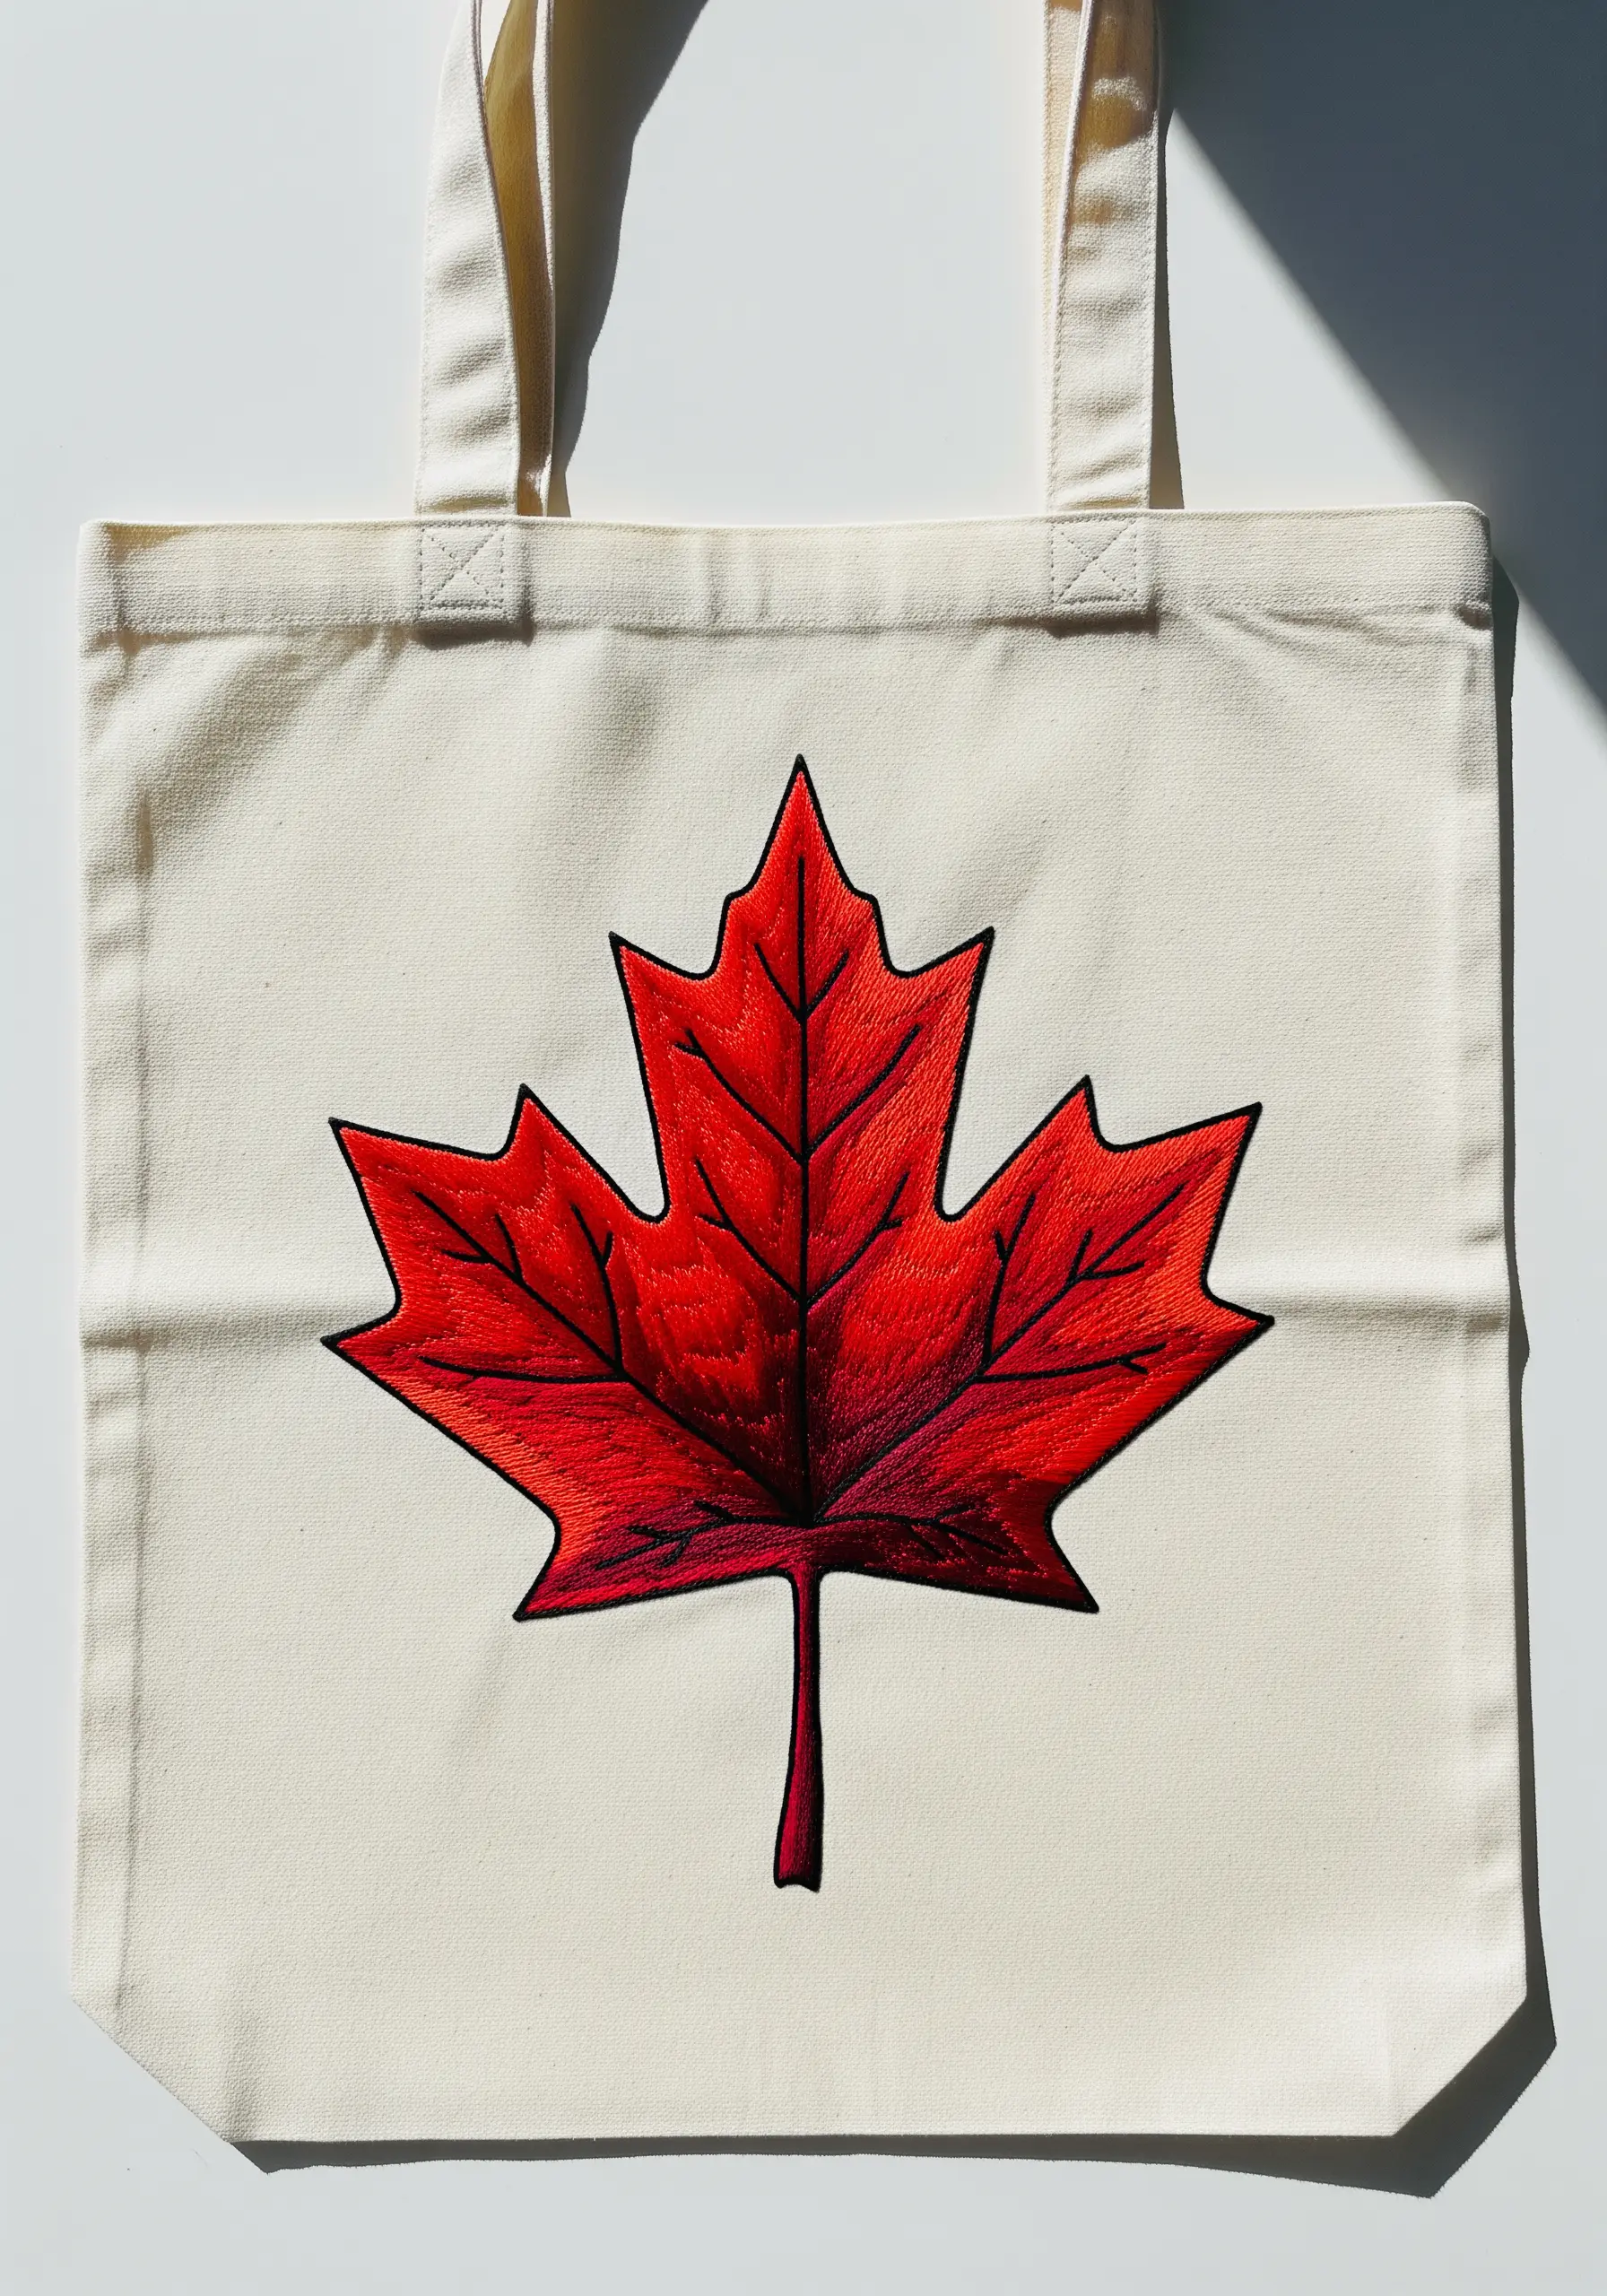
Achieve this intense color saturation by blending your threads from dark to light within a bold, containing outline.
First, create a crisp border using a split stitch or a thin satin stitch outline in black. This acts as a container for your fill stitches and gives the design a sharp, graphic edge.
Fill the leaf with long-and-short stitch, transitioning from a deep burgundy at the base to a vibrant red at the tips.
The black outline makes the colors appear even more brilliant and ensures the leaf stands out powerfully against the neutral fabric.
8. Abstract Foliage Through Geometric Fill Stitches
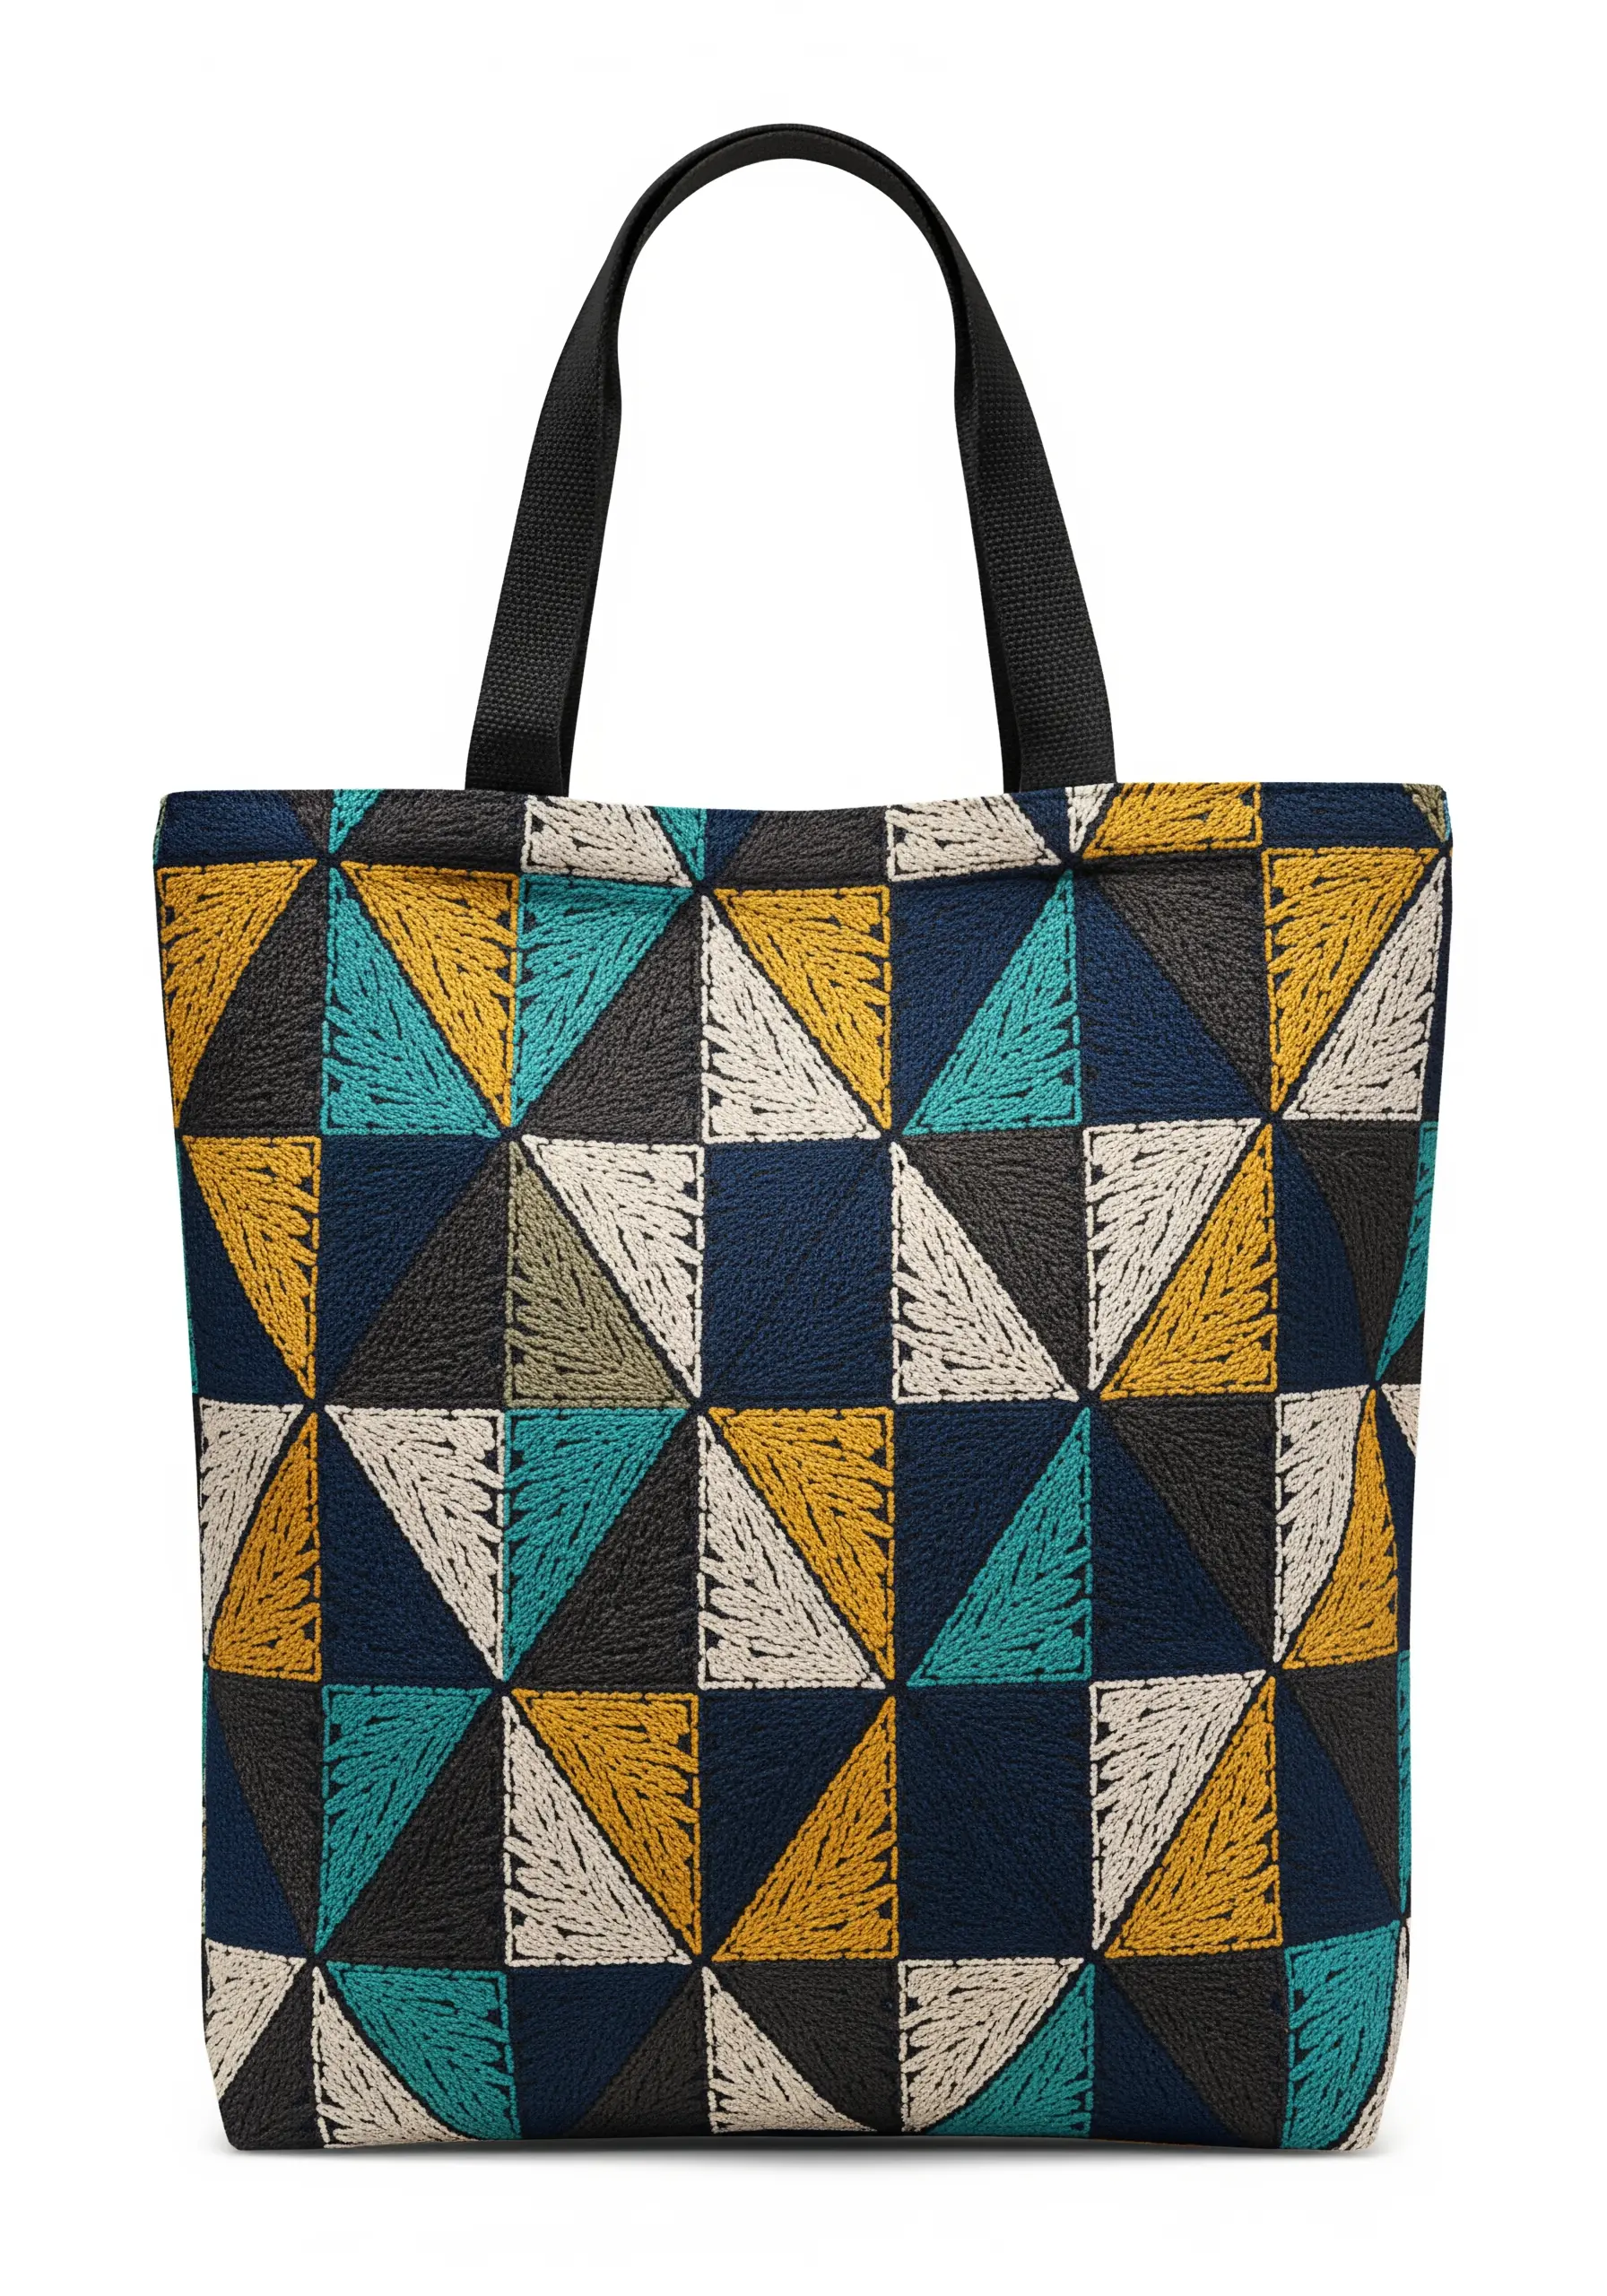
Translate the idea of leaves into an abstract, geometric pattern.
Use a single, versatile fill stitch—like the brick stitch or Romanian couching—to cover each shape. By changing the direction of the stitch in adjacent triangles, you create a dynamic, textured surface.
The limited color palette of ochre, teal, navy, and cream gives the design a sophisticated, mid-century modern feel.
This approach proves that botanical inspiration can be interpreted in non-literal ways, resulting in unique, high-impact fiber art installations for everyday use.
9. Intricate Beauty in a Silver Skeleton Leaf
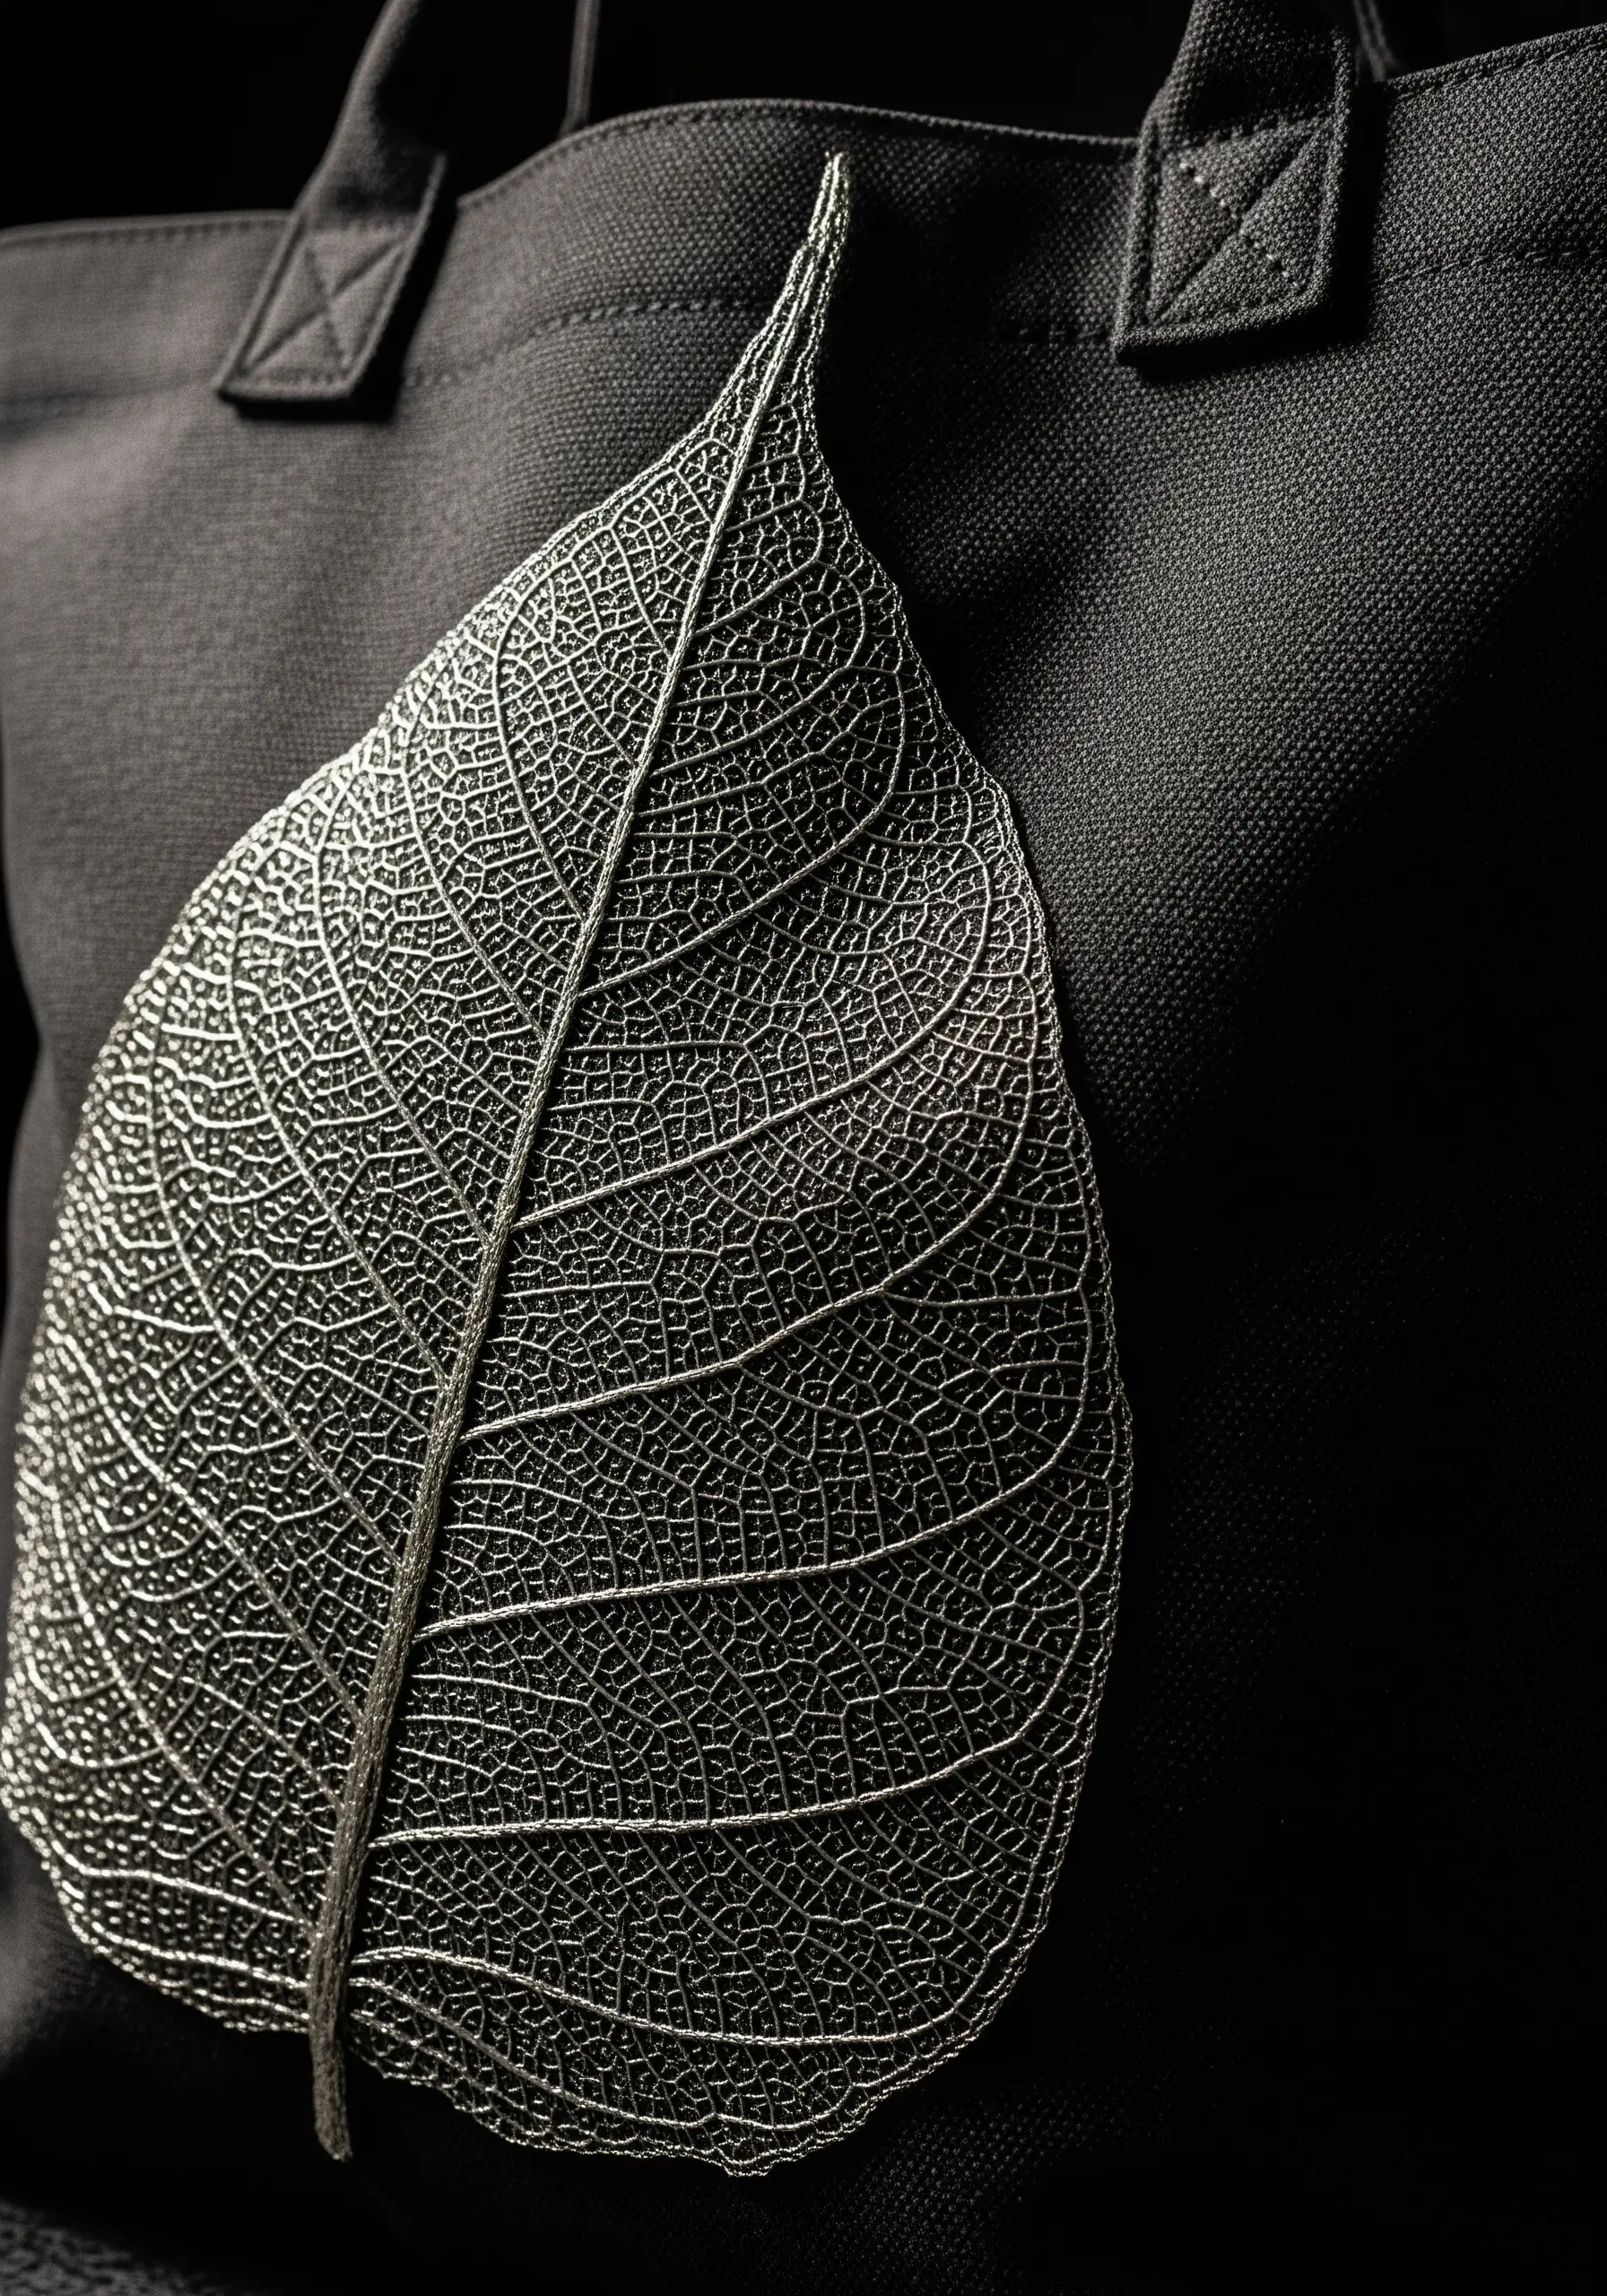
This stunningly detailed skeleton leaf relies on the precision of a single, fine thread.
Use one or two strands of a silver metallic or silk floss and a sharp, small needle to execute the intricate network of veins with a tiny backstitch or split stitch.
Trace a high-resolution image of a real skeleton leaf onto your fabric with a water-soluble pen for an accurate guide.
The contrast between the delicate, shimmering thread and the matte black canvas creates a dramatic, almost photographic effect that highlights the beauty of natural structures.
10. Building a Lush Tropical Canopy with Layering

Create the feeling of a dense jungle by overlapping various leaf shapes and colors.
Begin by stitching the leaves that appear to be in the background. As you add new leaves in front, their edges will slightly cover the ones behind them, creating a natural sense of depth.
Use a consistent satin stitch, but vary the direction in each leaf section to enhance the illusion of light filtering through the canopy.
A cool palette of blues and greens prevents the complex design from feeling overwhelming, resulting in a cohesive and immersive tropical leaf composition.
11. The Raised Satin Stitch Olive Branch
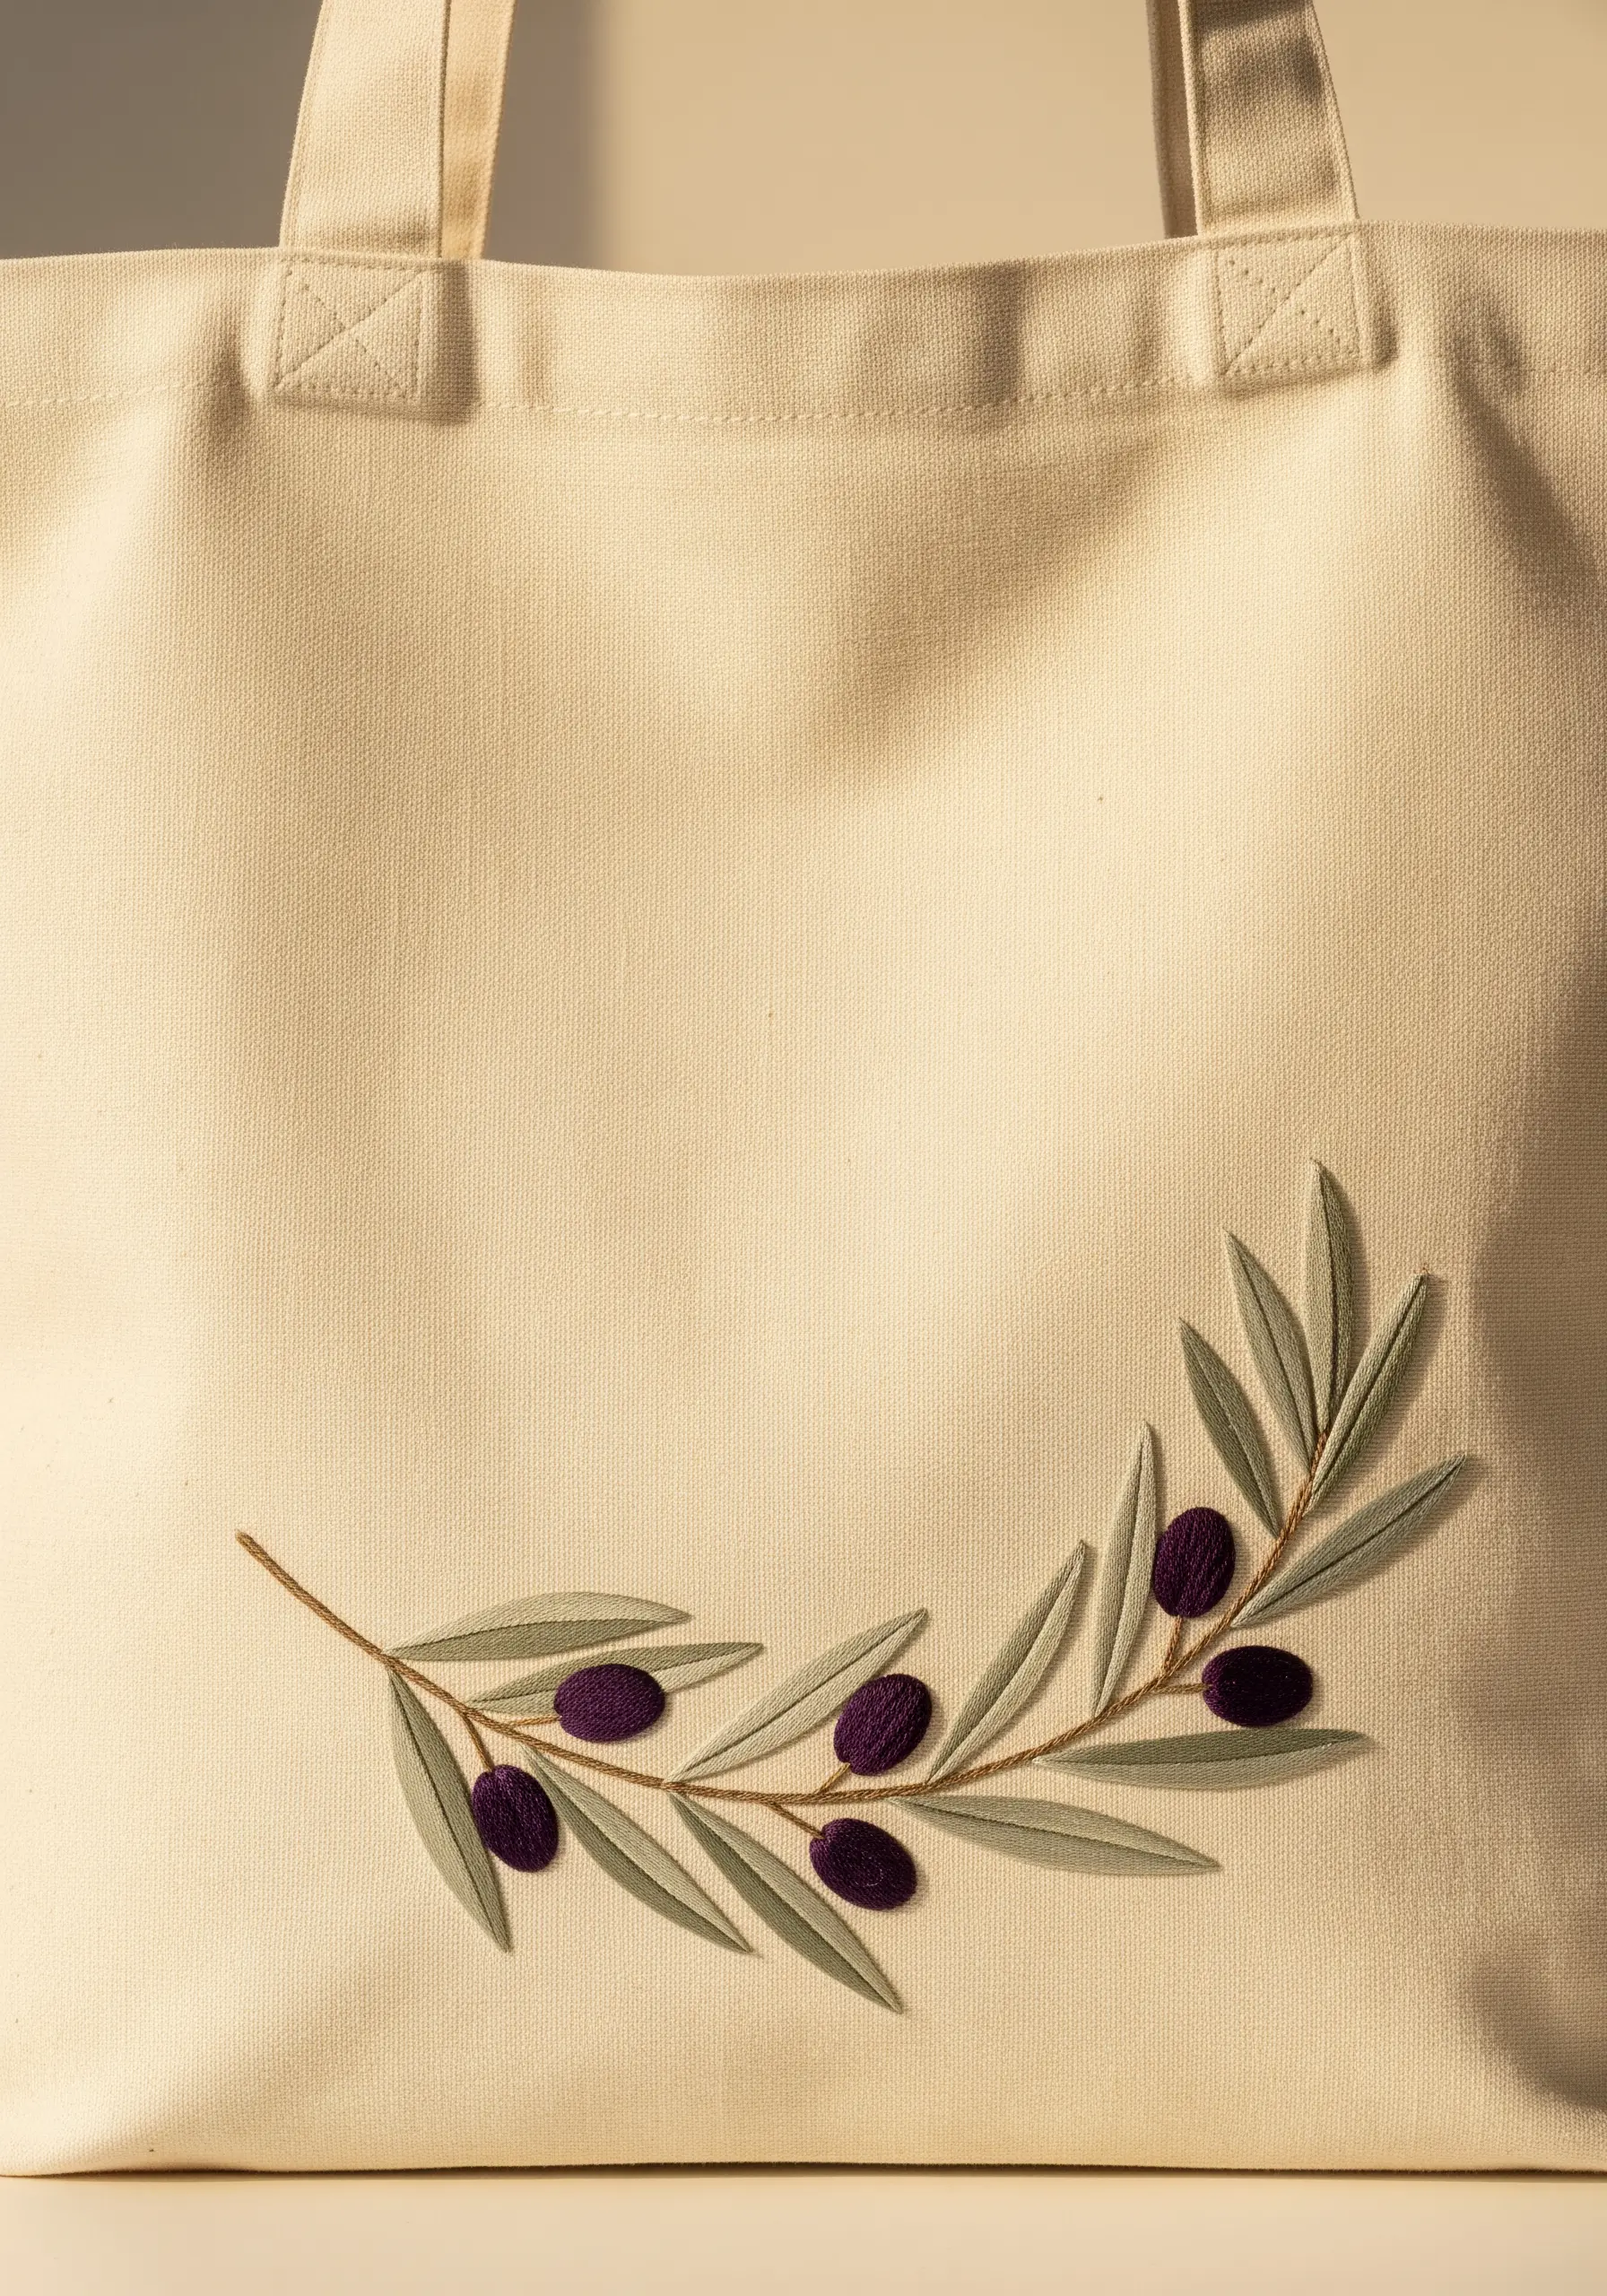
Give your leaves a subtle, three-dimensional lift using padded satin stitch.
Before stitching the leaves, create a small padding of underlying stitches (like seed stitches or a few straight stitches) within the leaf shape.
Then, cover this padding with your final satin stitches. The underlying layer will raise the surface slightly, giving the leaves a smooth, sculptural quality.
This technique adds a touch of sophistication to a simple design, making the elements physically stand out from the fabric.
12. Creating Dynamic Composition with Scattered Leaves

Transform a simple leaf motif into a dynamic pattern by scattering it across the fabric.
Stitch each leaf using a fishbone stitch, which creates a central vein and angled sides in one fluid motion, perfect for small, repeated motifs.
Vary the orientation and spacing of the leaves to create a sense of gentle movement, as if they are floating down on an autumn breeze.
The warm, autumnal color palette on the vibrant orange bag creates a harmonious and seasonally inspired design.
13. Reverse Appliqué with Textured Fill
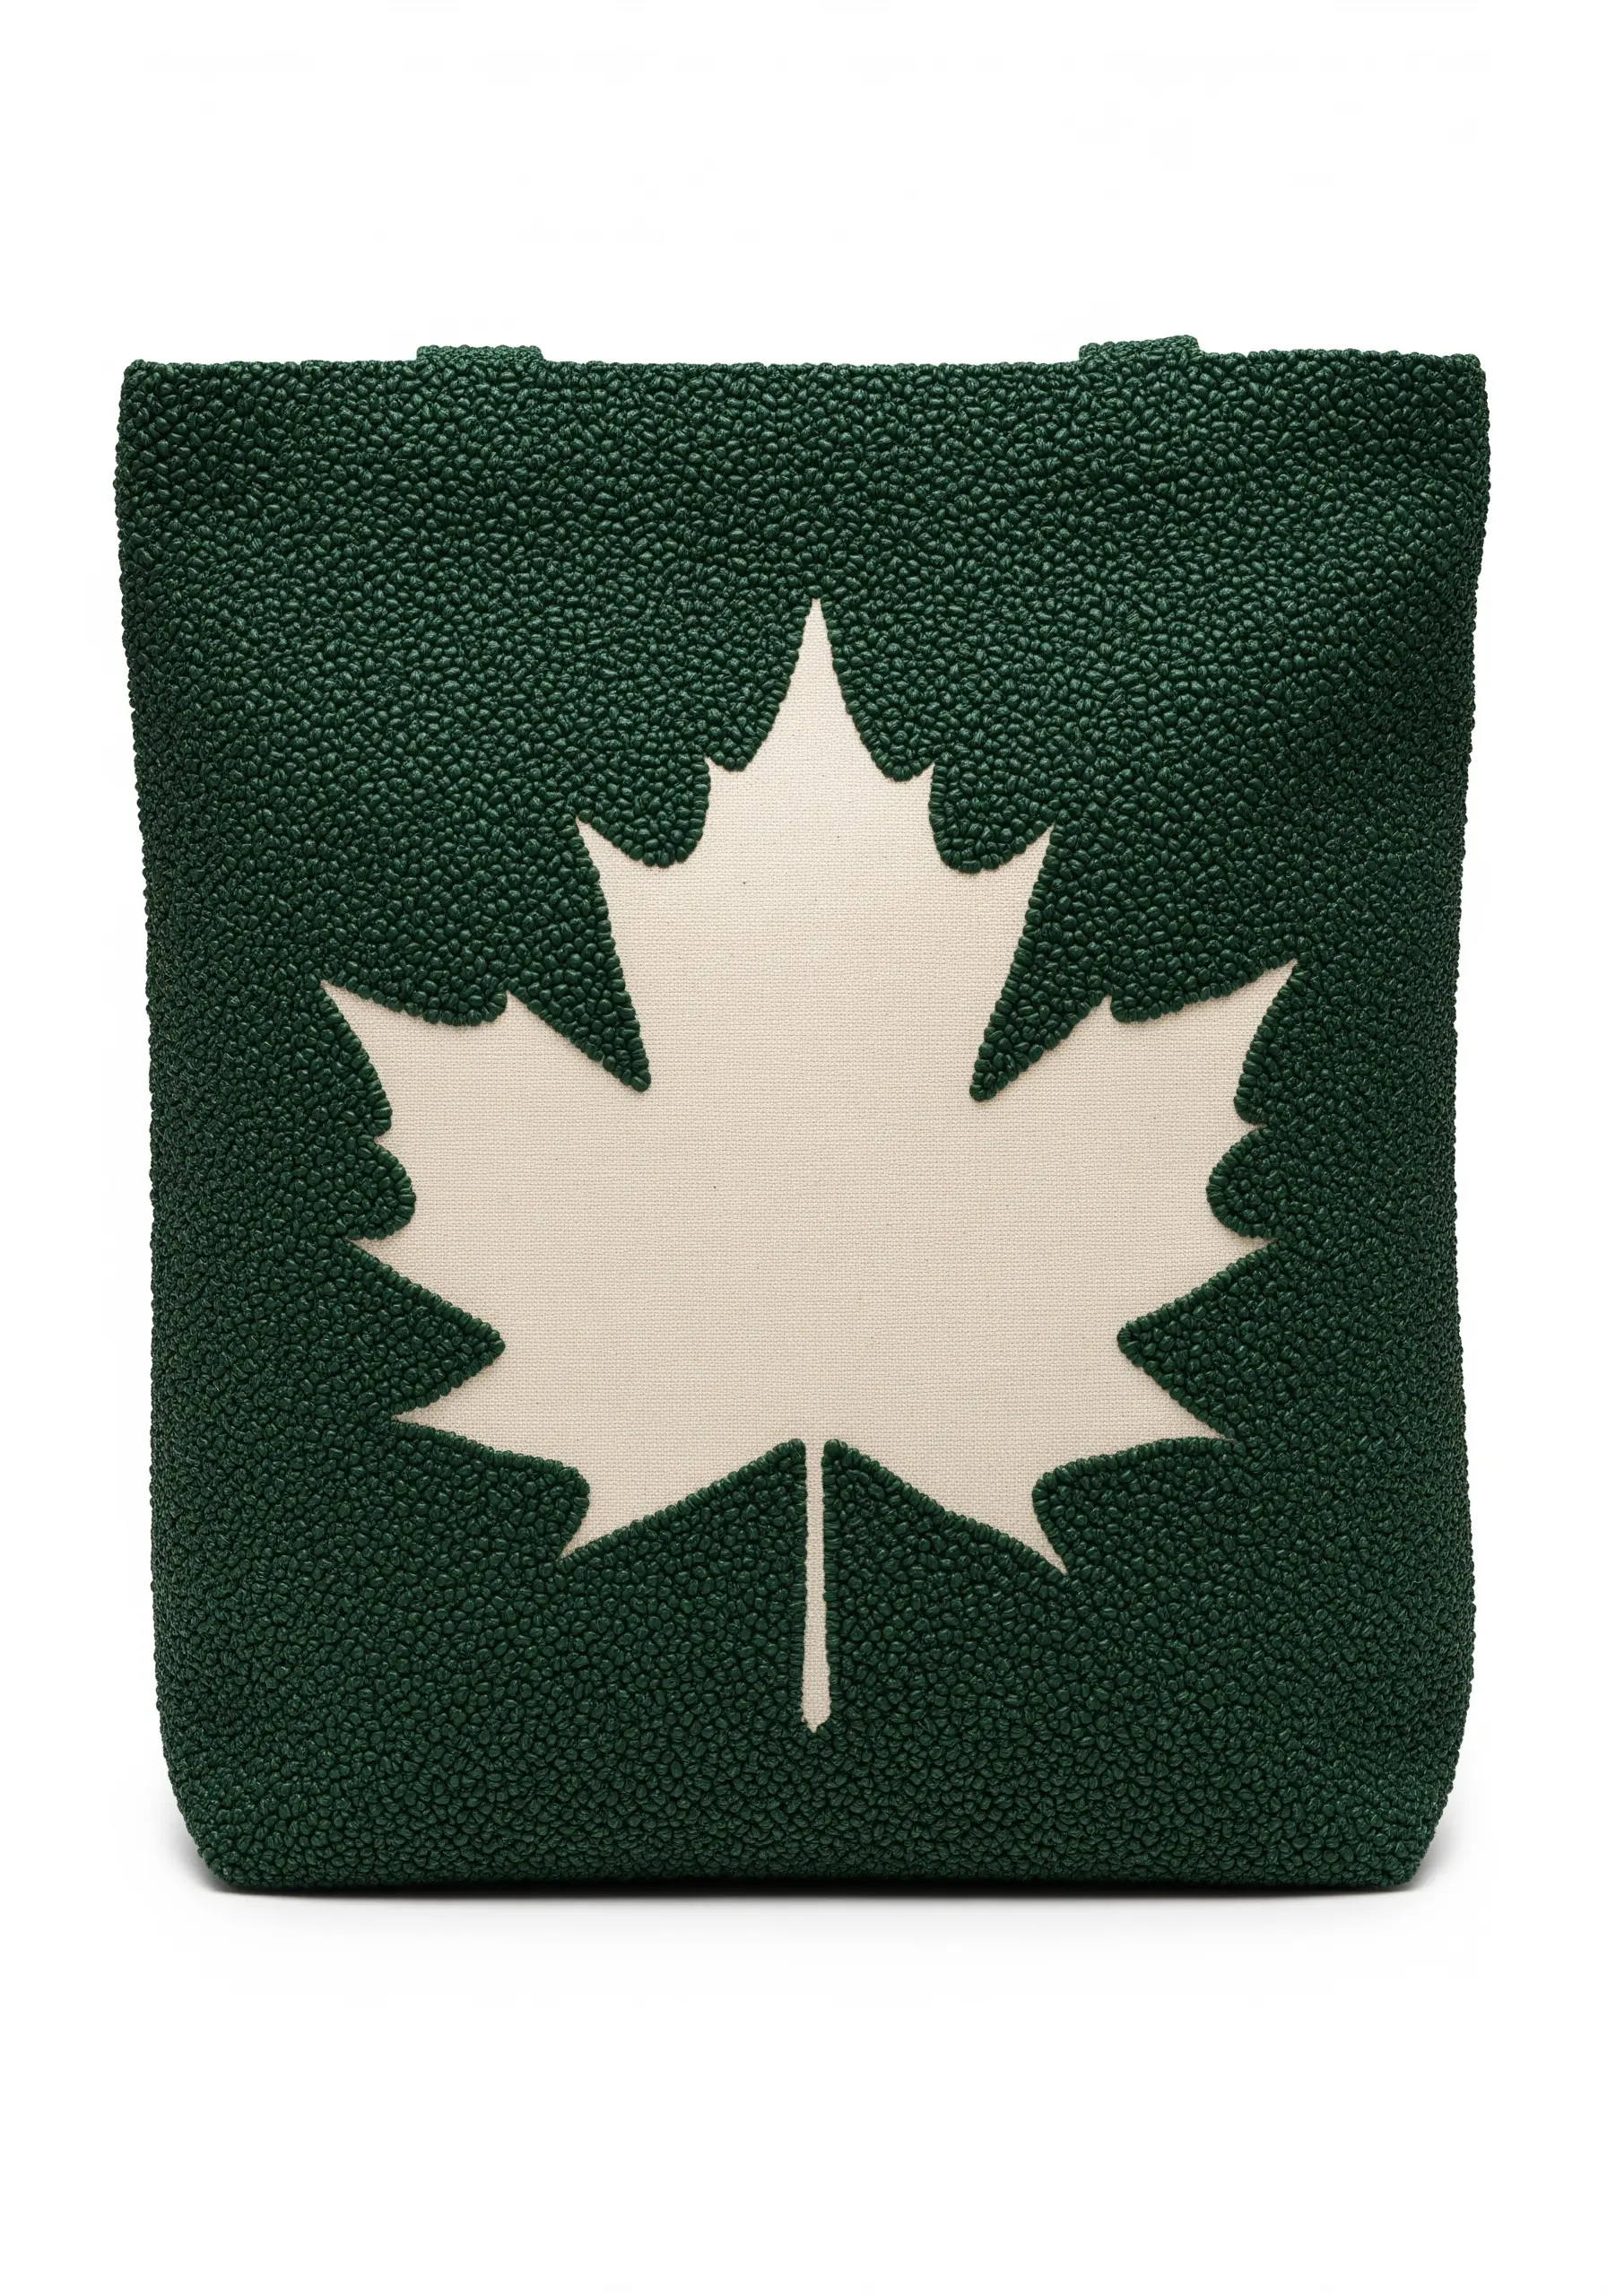
Explore negative space with reverse appliqué, a technique where the motif is revealed through a cutout.
Instead of stitching the leaf, you are stitching the background. Use a highly textured stitch like French knots or bullion knots on the dark green fabric.
Place a piece of plain cream fabric behind it, and carefully trim the top green fabric away from the inside of your stitched outline to reveal the leaf shape.
This method creates a stunning contrast in both color and texture, turning the leaf into a smooth, calm focal point.
14. Adding Luminous Texture with Seed Beads
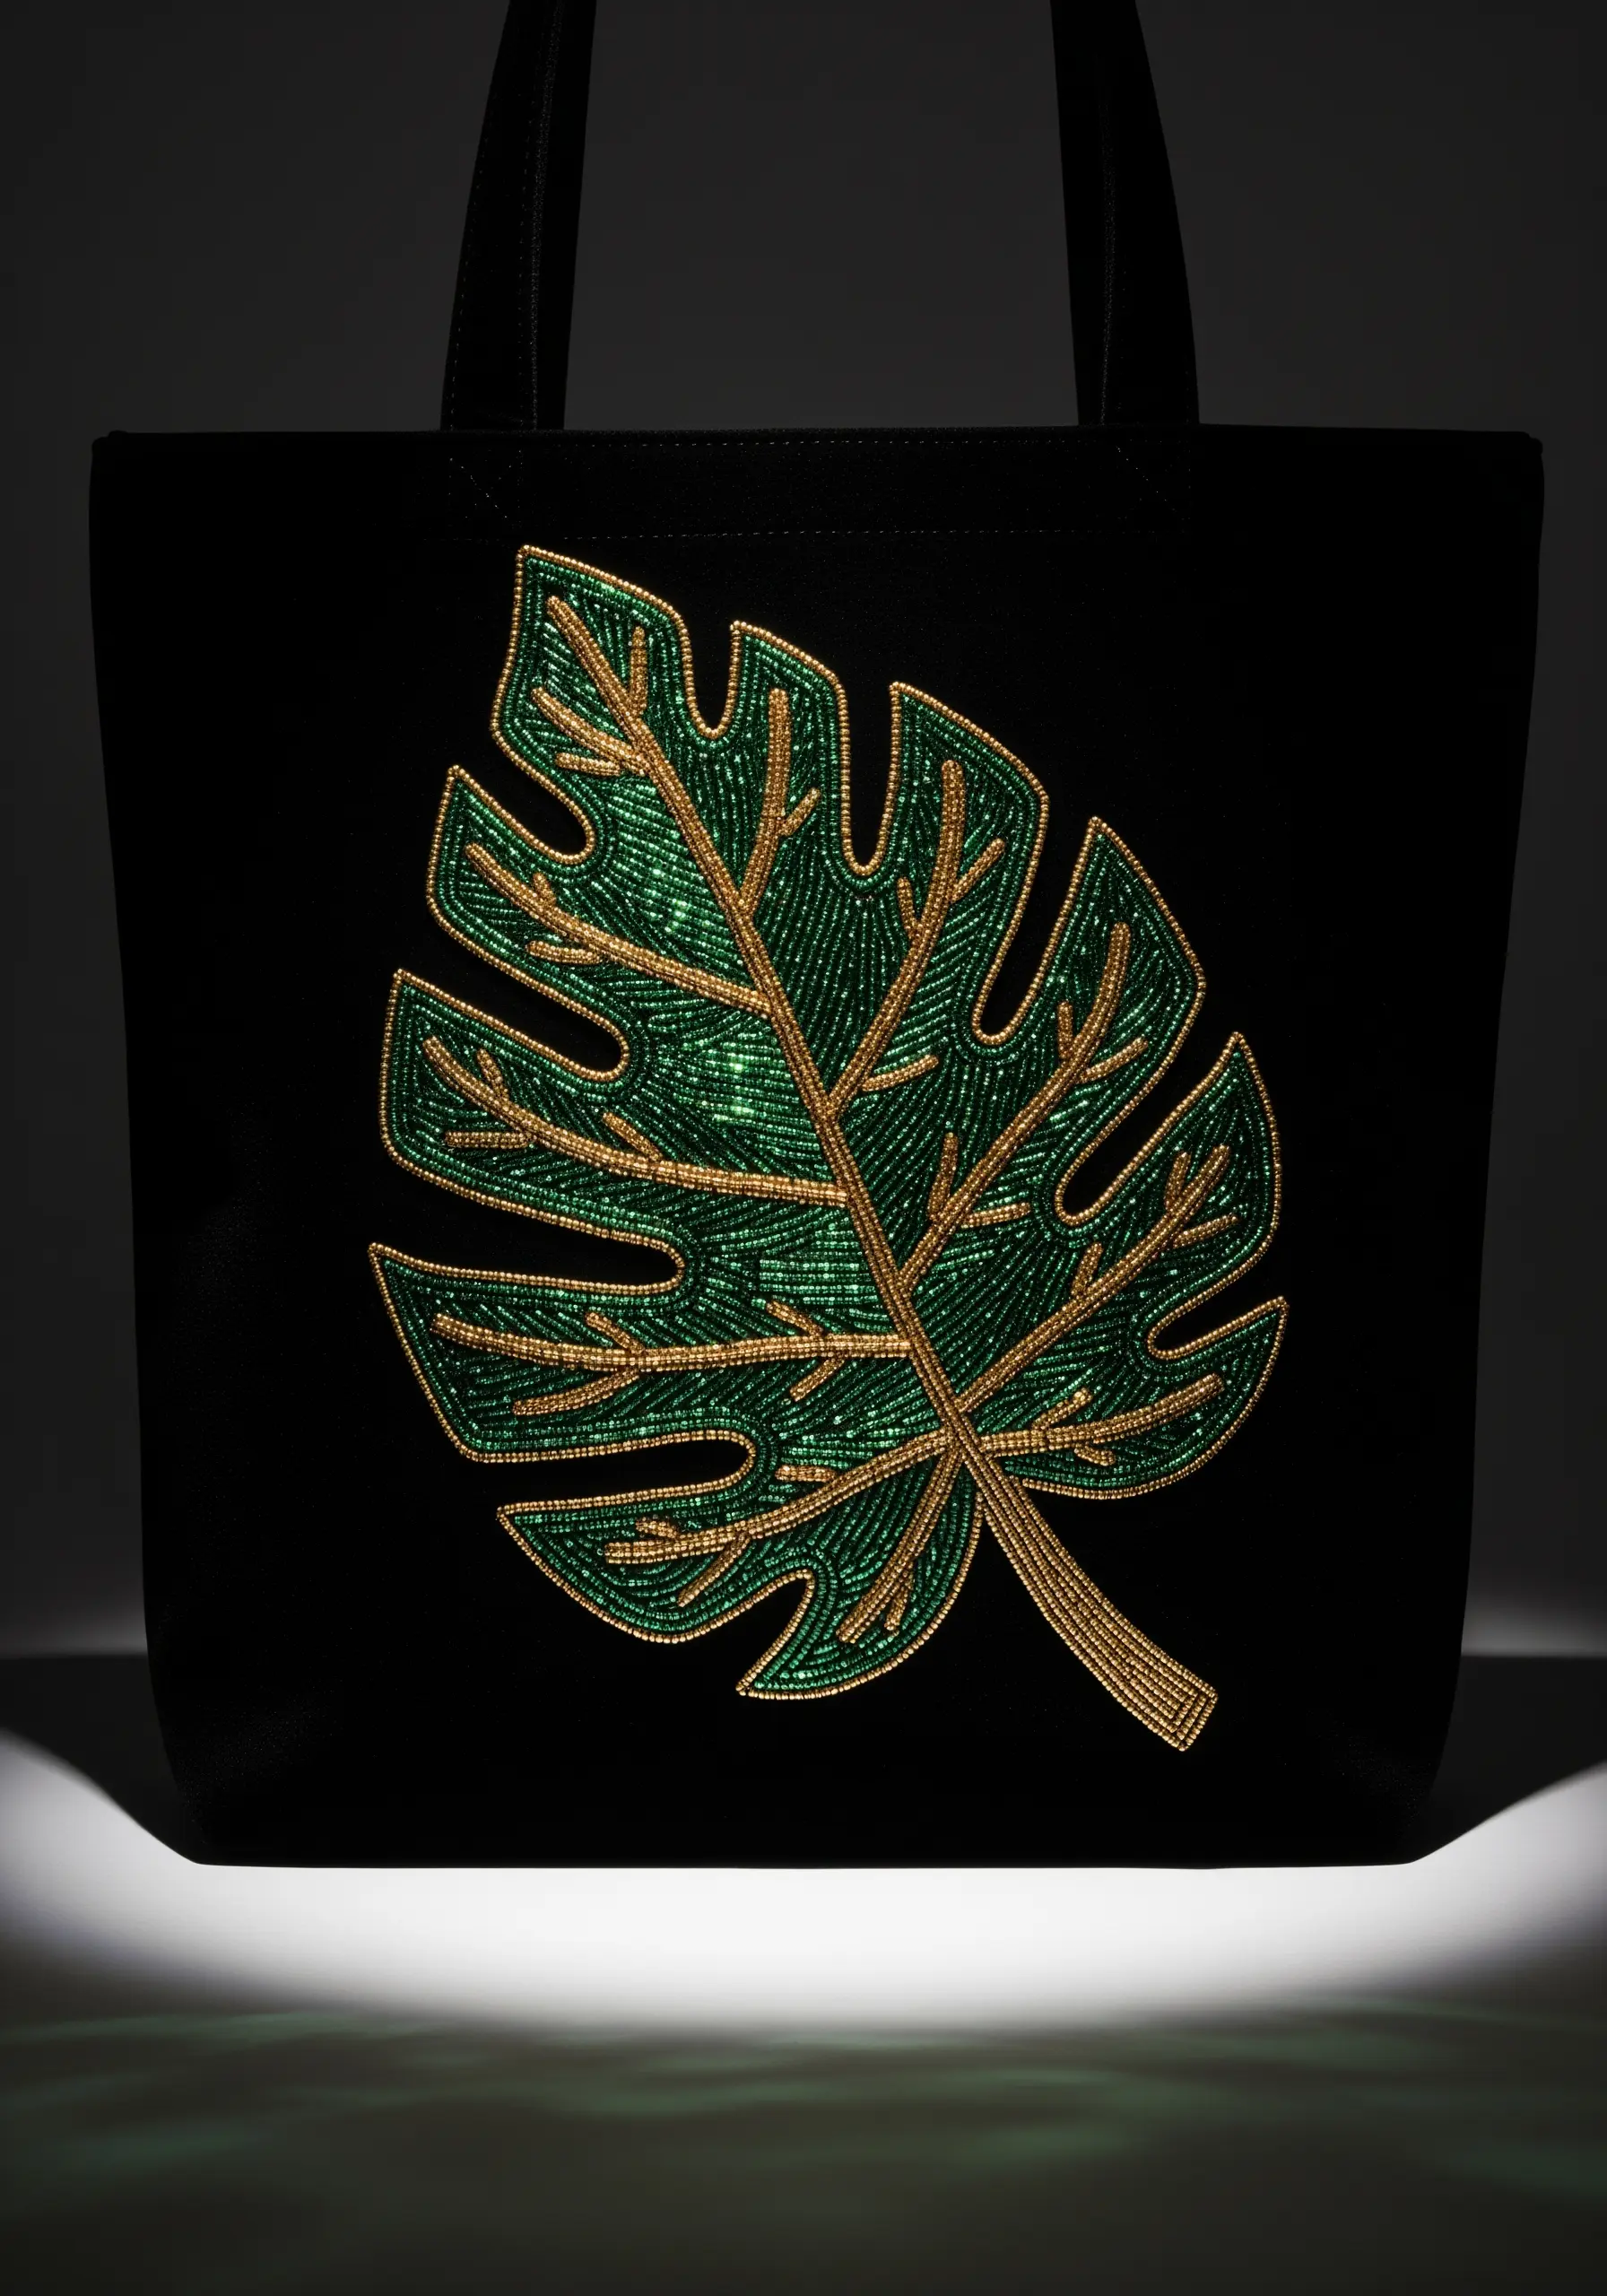
Elevate your embroidery by incorporating beadwork for a touch of glamour and light-catching texture.
Outline your leaf shape first with a simple backstitch in a contrasting metallic thread. This provides a guide and a clean edge for your beading.
Fill the interior with green seed beads, stitching them down two or three at a time for stability. Ensure your stitches follow the contours of the leaf sections to create direction and flow.
The combination of shimmering beads and metallic thread against the dark bag creates a luxurious and eye-catching effect, especially in low light.
15. The Graceful Drape of Weeping Willow Leaves
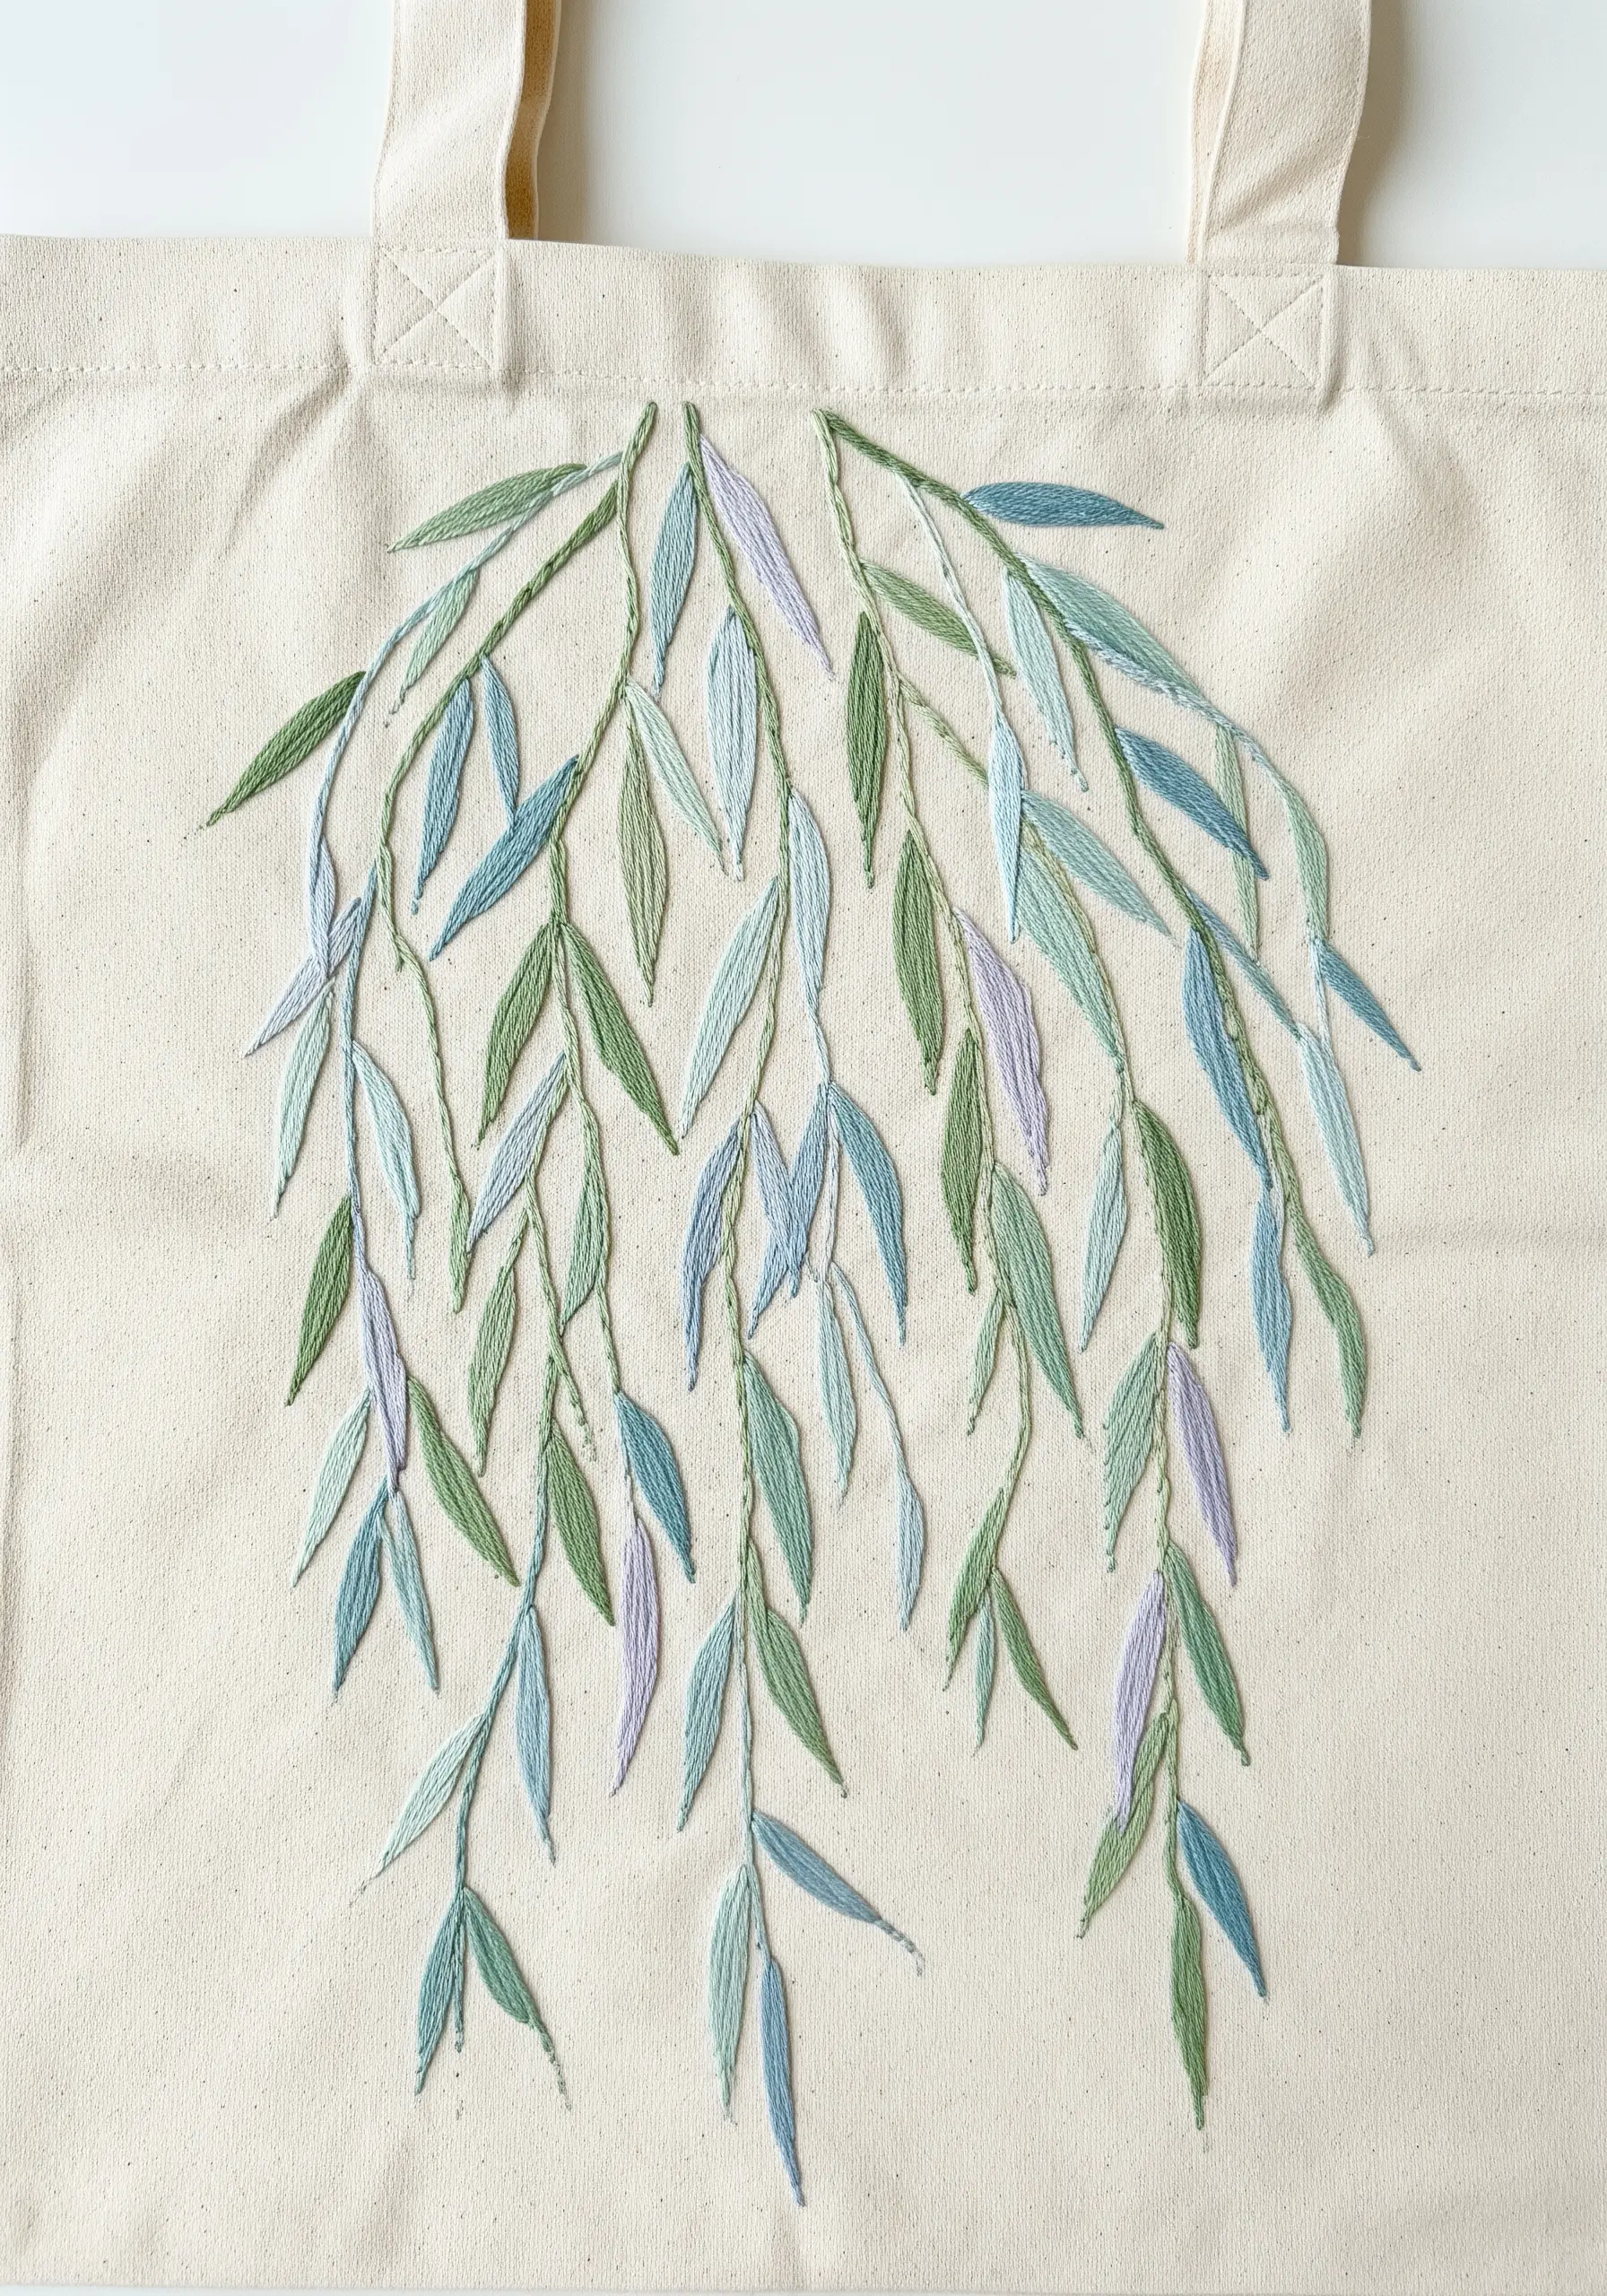
Capture the elegant, flowing nature of willow branches with long, simple stitches.
Use a combination of straight stitch and fishbone stitch for the leaves, intentionally keeping them long and narrow.
Let the branches hang naturally from the top of the design area, varying their lengths to create a gentle, cascading effect.
The cool, desaturated color palette of sage, lavender, and dusty blue gives the design a serene and calming quality, perfectly suited to the willow’s graceful form.
16. Building a Dense Canopy with Cast-On Stitches
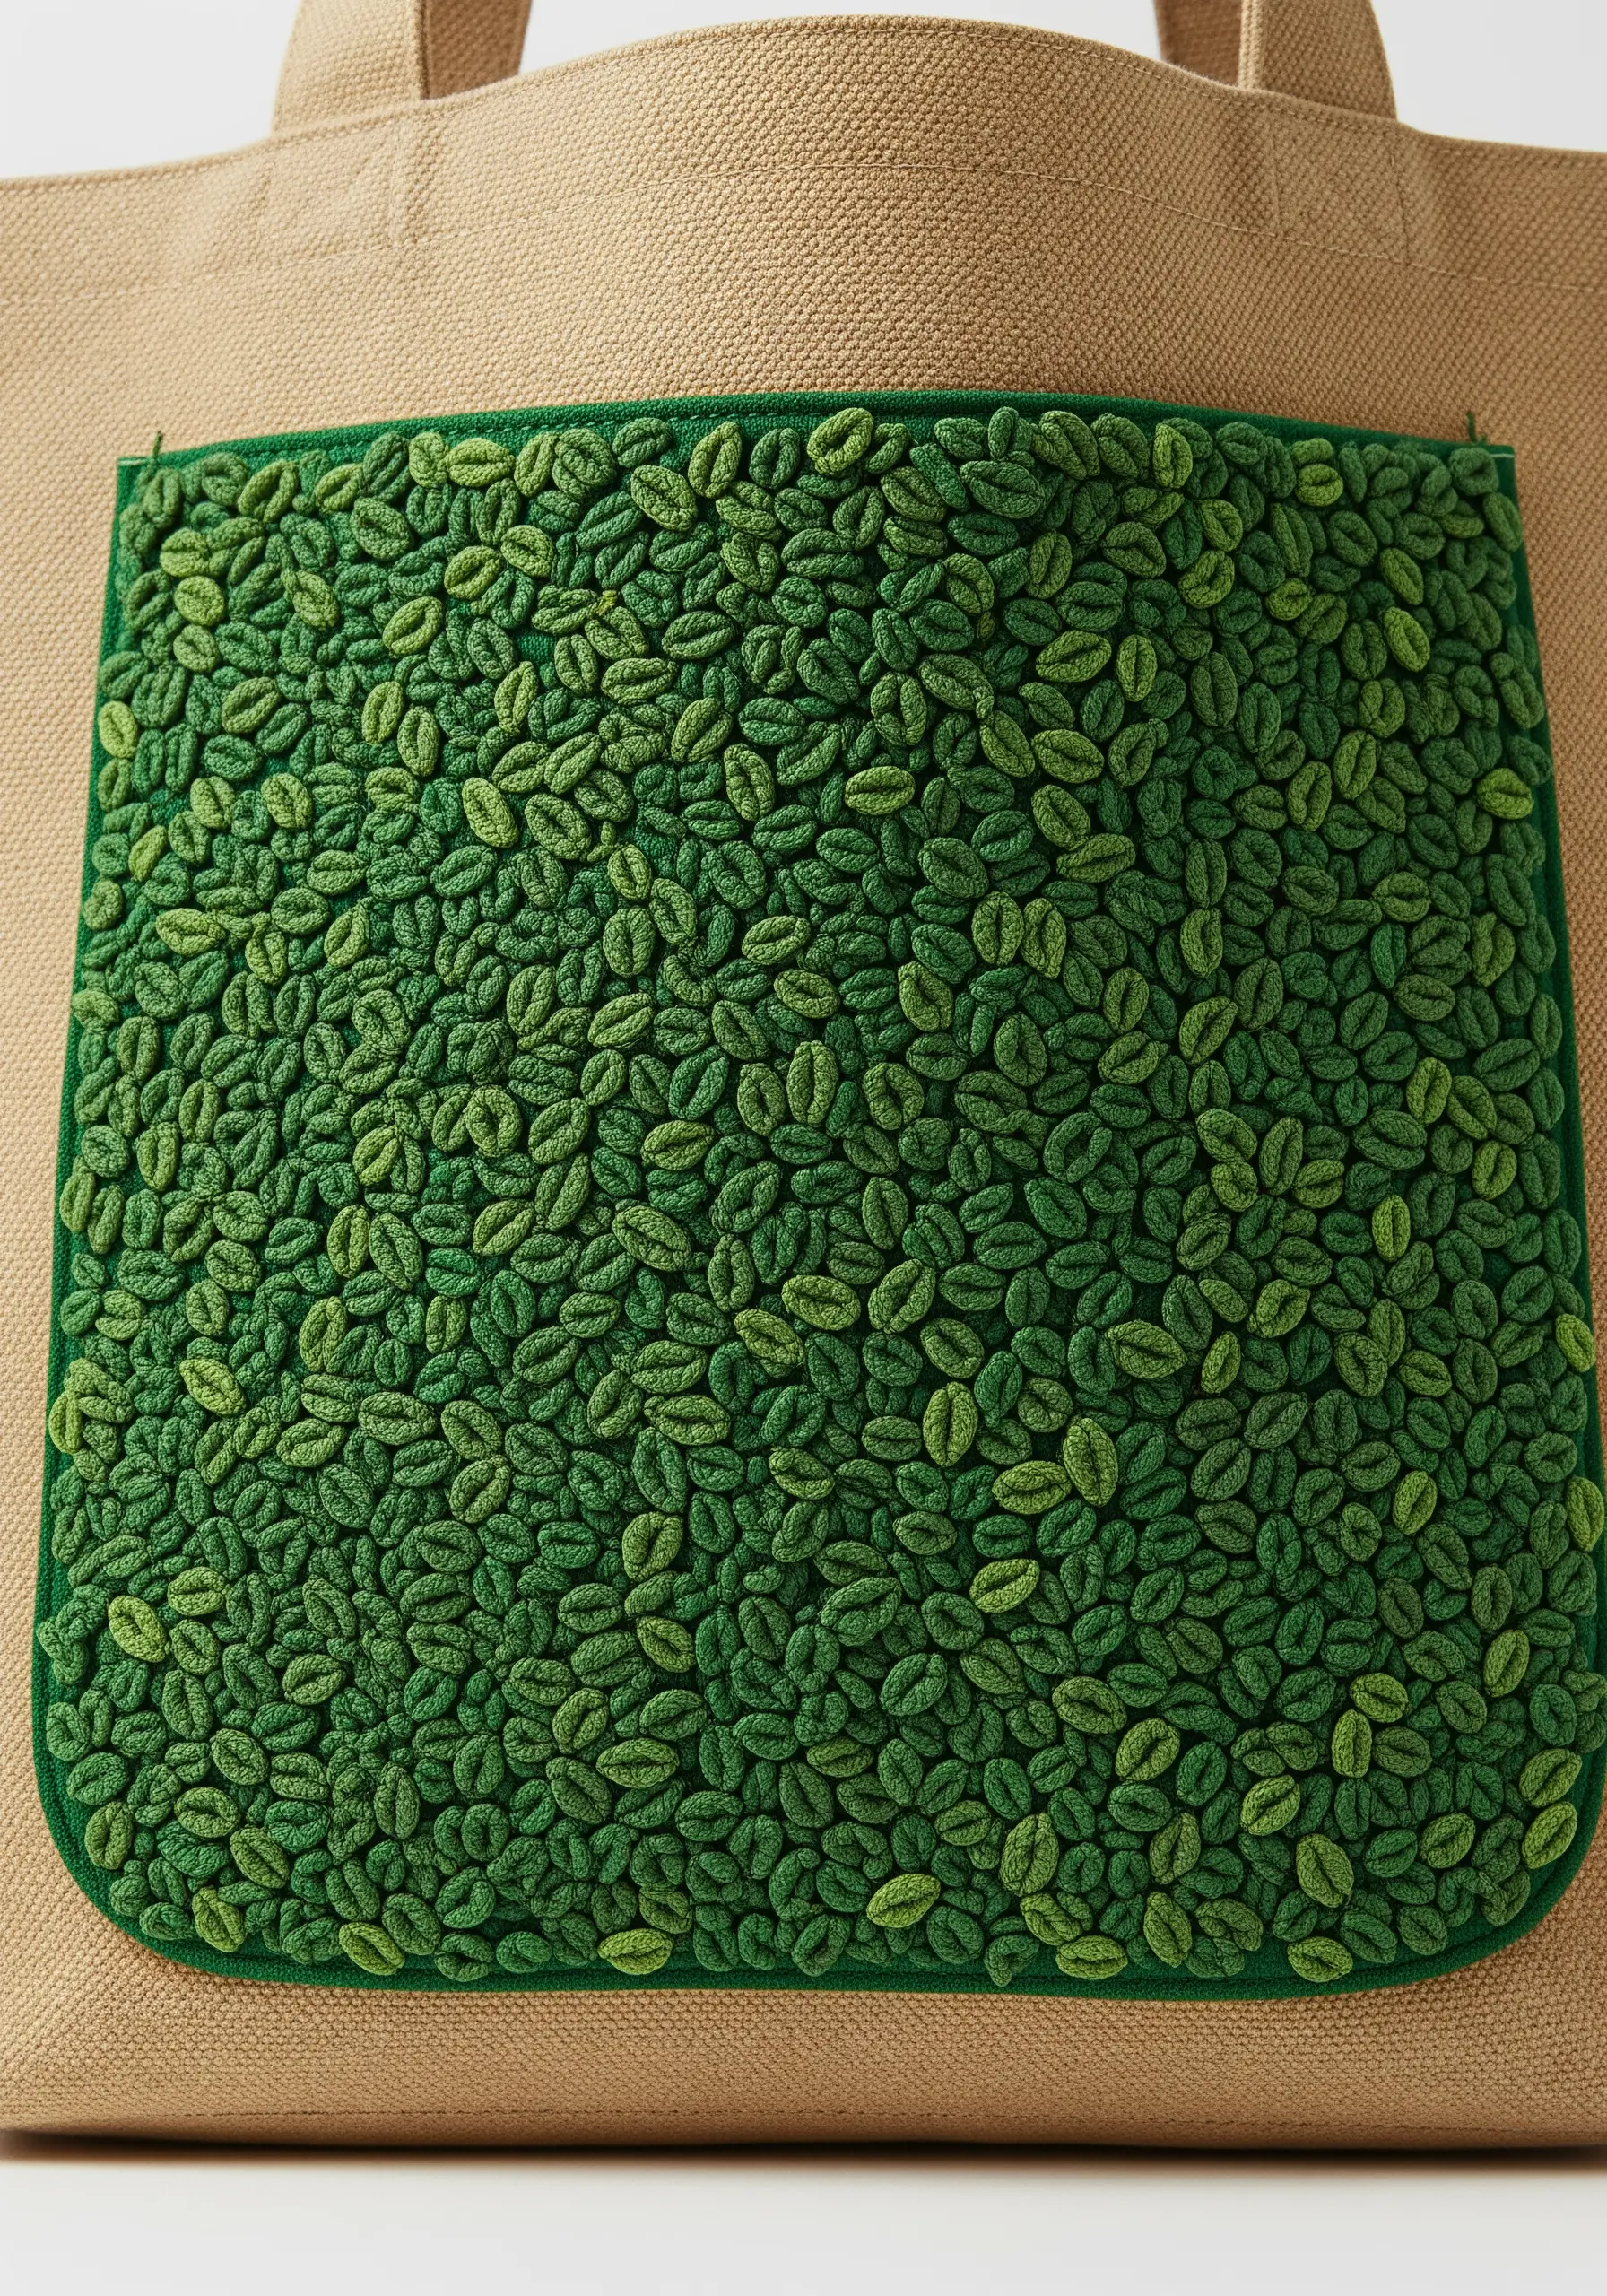
Achieve this incredibly dense, three-dimensional texture by filling an area with cast-on stitches or bullion knots.
Work in multiple shades of green to create subtle variations, just as you’d see in a dense cluster of leaves.
Pack the stitches closely together, varying their orientation slightly so they overlap and build up a rich, moss-like surface.
Applying this technique to a functional element like a pocket transforms it into a tactile art piece, making your tote both beautiful and useful.
17. The Unexpected Magic of Glow-in-the-Dark Thread
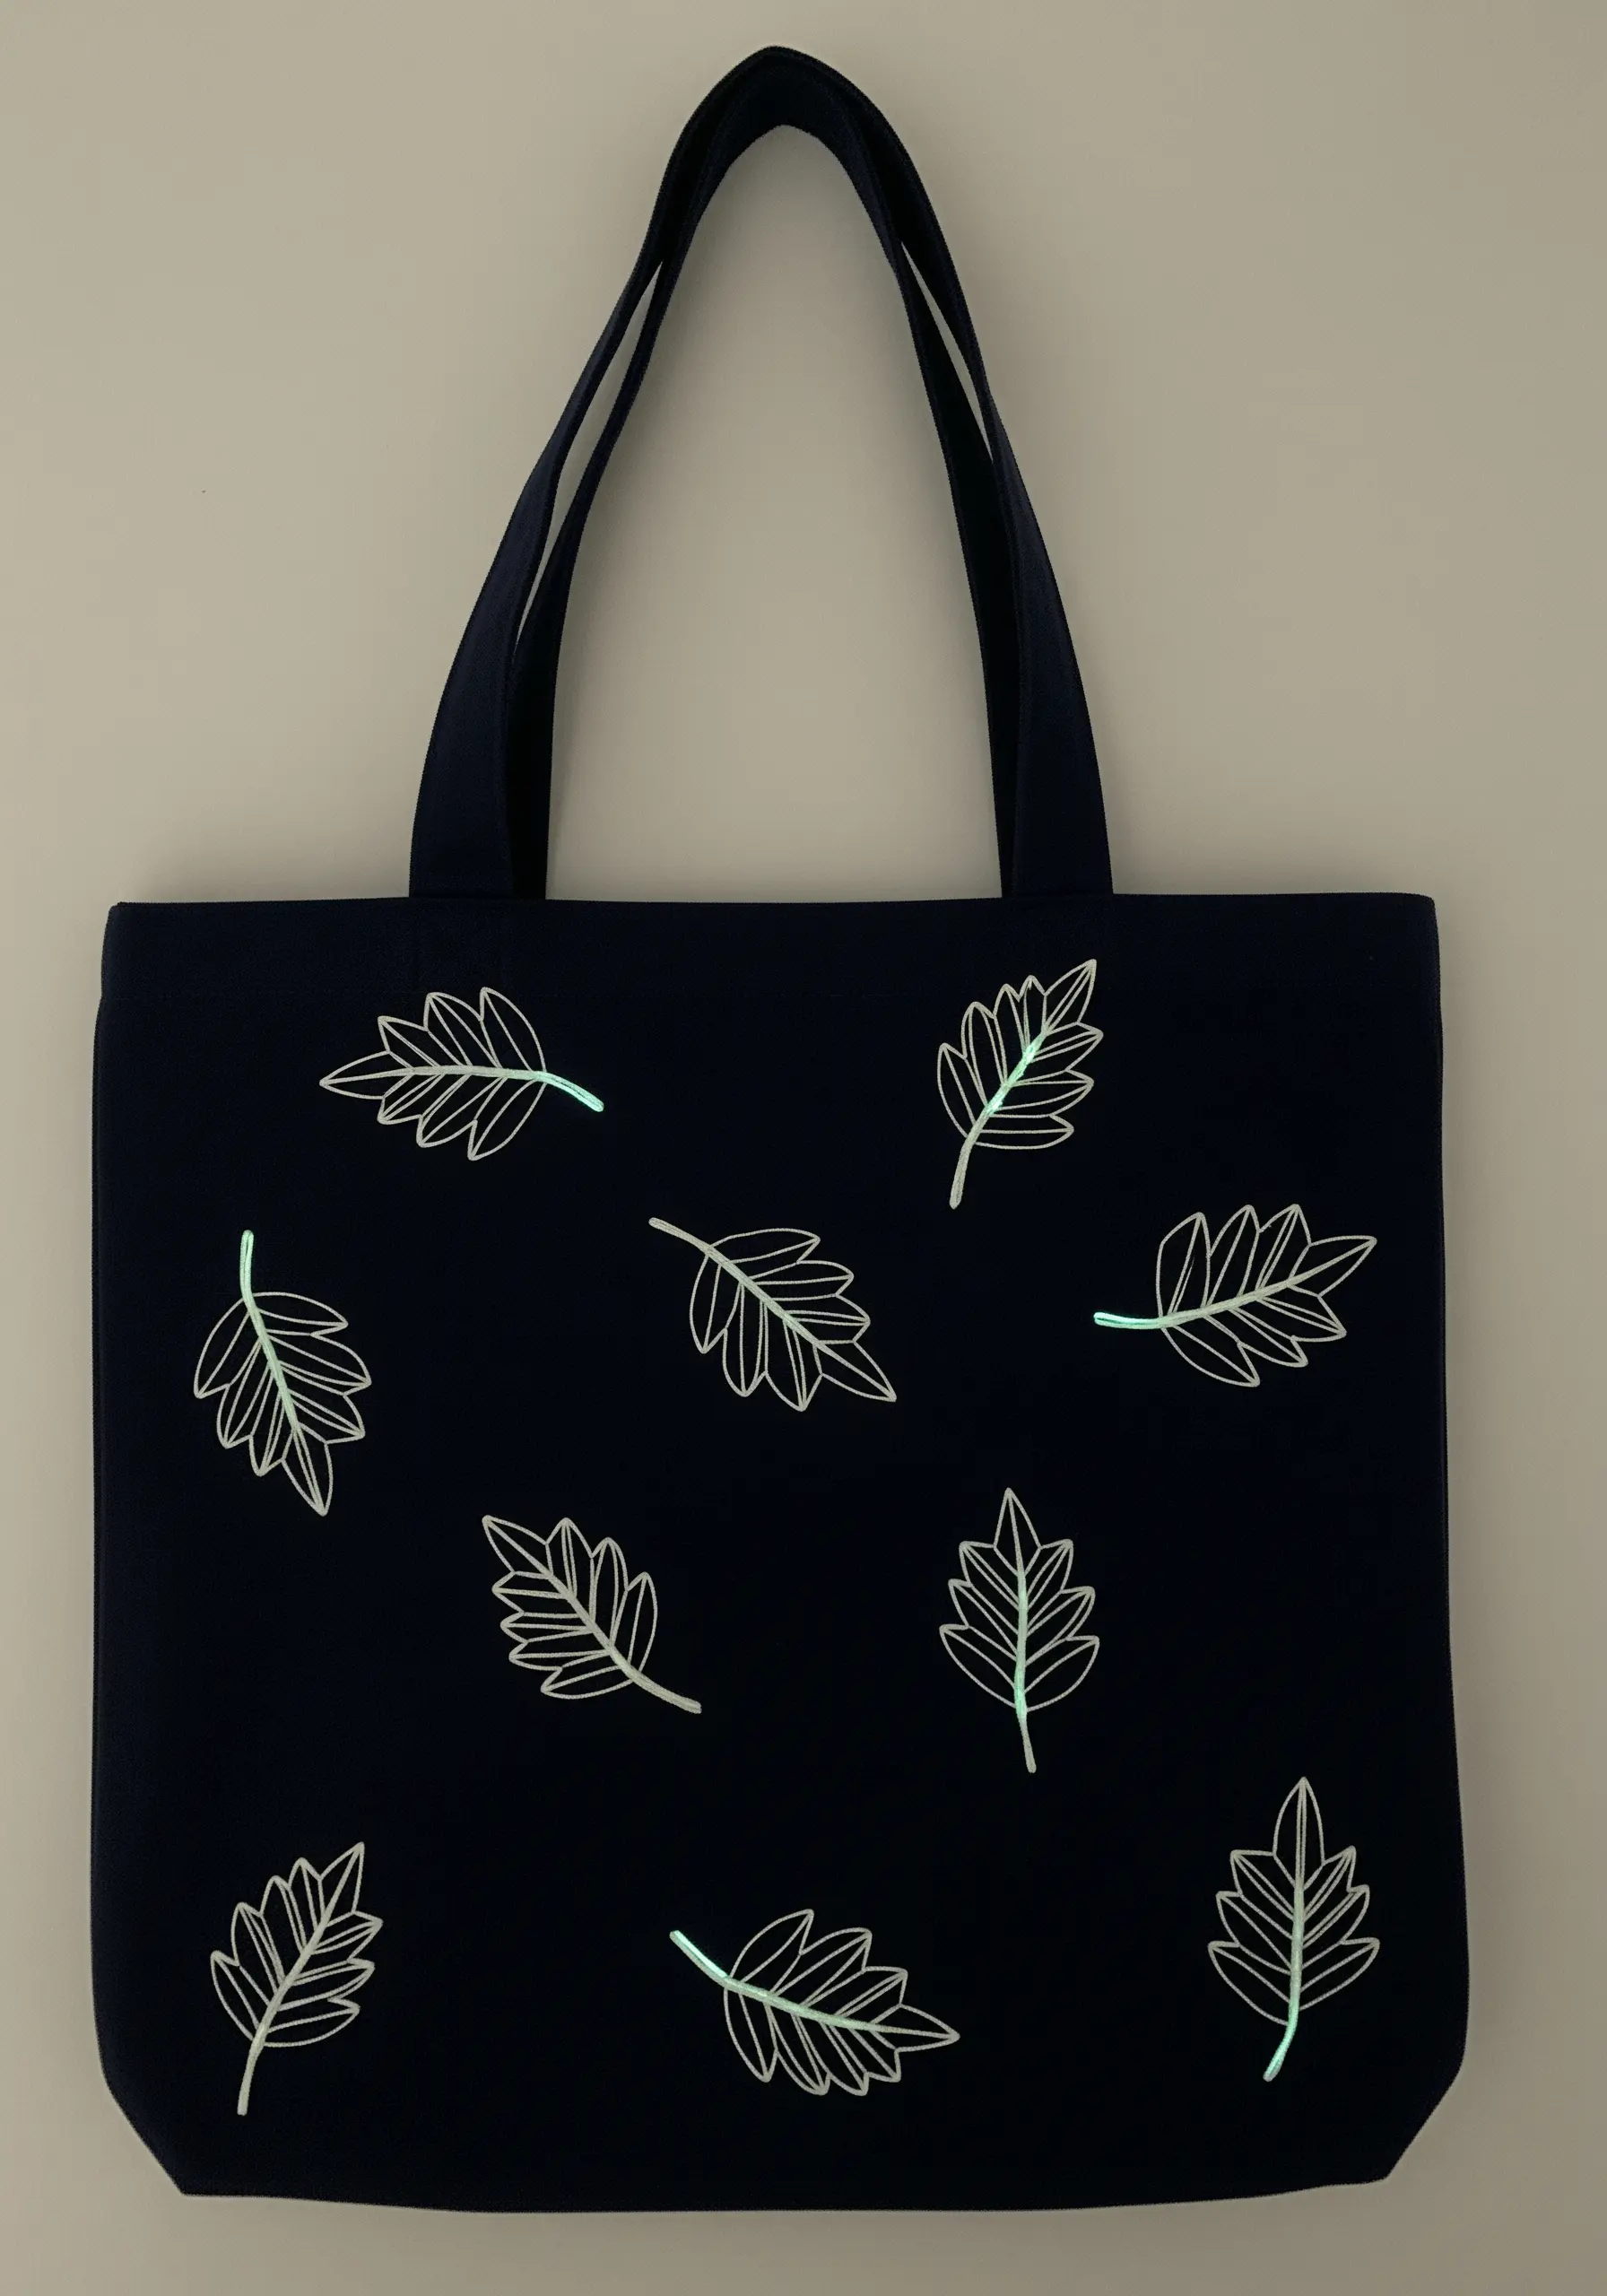
Surprise and delight with a design that has a secret second life after dark.
Use a specialty glow-in-the-dark embroidery floss to stitch simple leaf outlines. A basic backstitch or stem stitch is all you need for a clean, graphic look.
During the day, the thread appears as a subtle off-white, creating a minimal, tone-on-tone effect against a dark background.
Expose the tote to a bright light source to “charge” the thread, and it will emit a soft, ethereal glow, transforming your simple pattern into a magical display.
18. Creating a Delicate Lace Effect with Fill Stitches
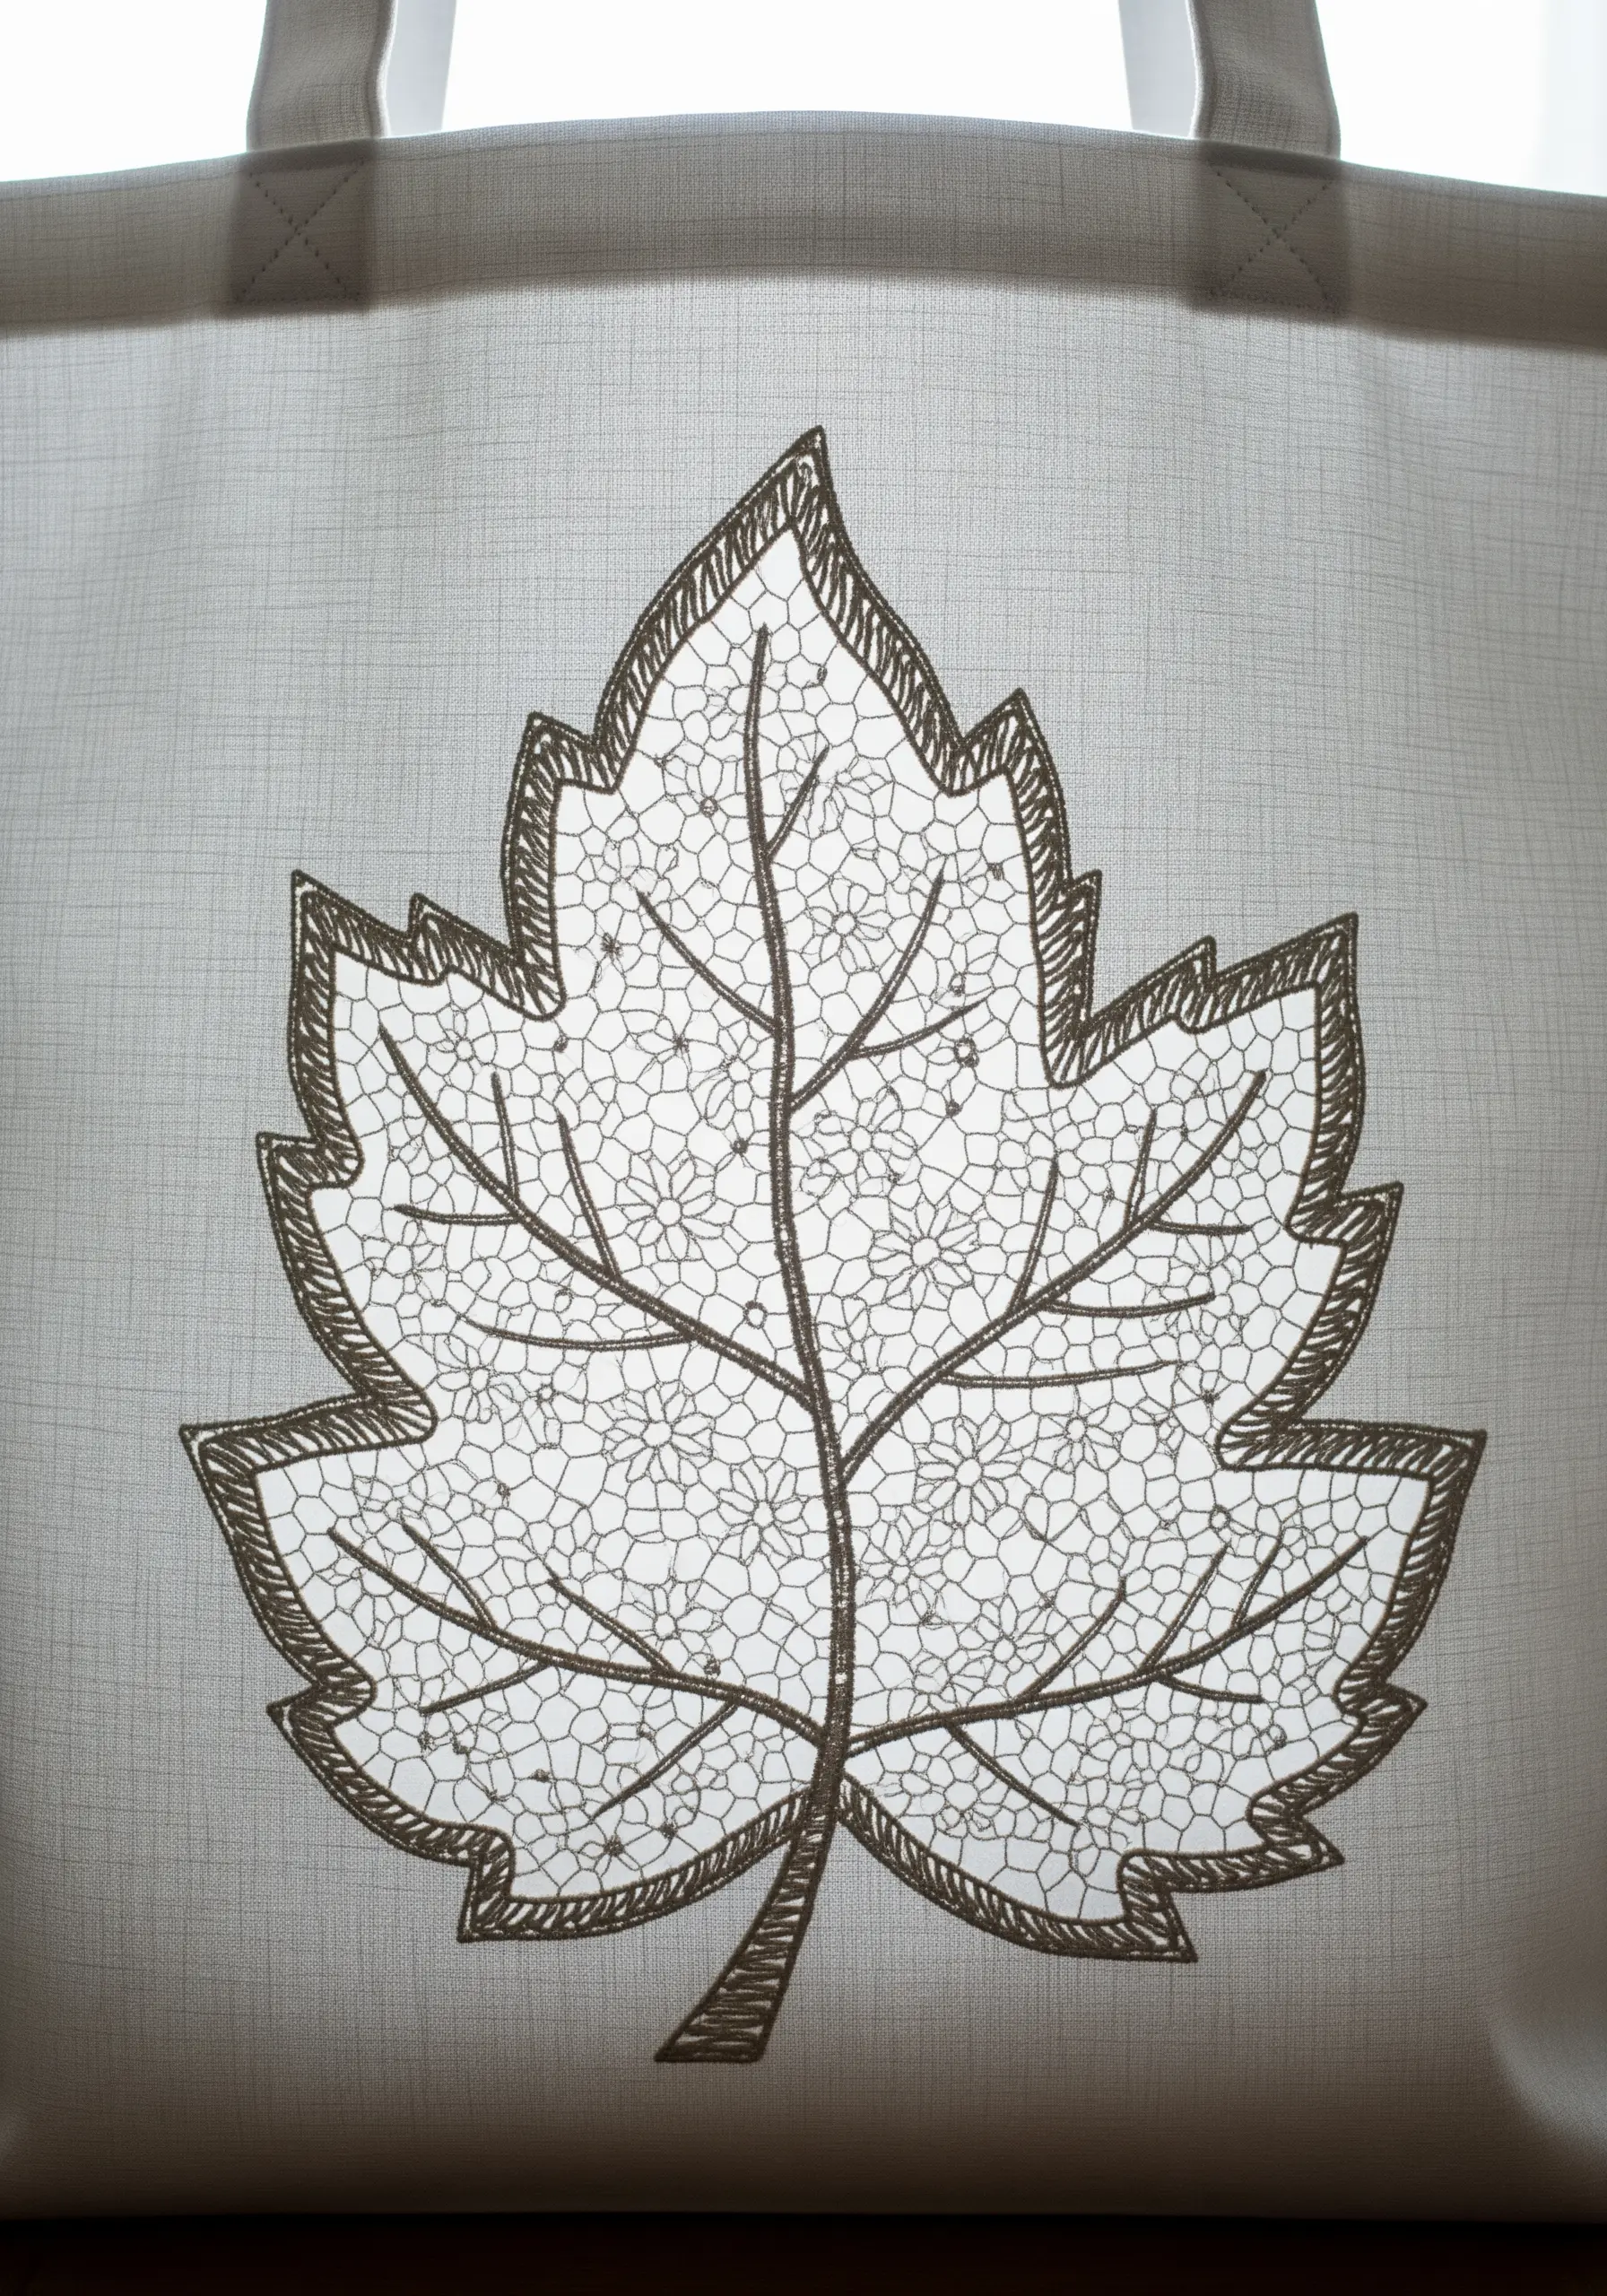
Mimic the delicate structure of lace or a dragonfly’s wing within a bold leaf outline.
First, establish a strong, clean border for your leaf using a satin stitch or a thick chain stitch.
For the fill, use open-work stitches like honeycomb stitch or a series of interconnected fly stitches. You can also create a base grid of threads and then whip or weave them together.
This technique creates a beautiful interplay between solid and void, giving the leaf a light, airy quality that feels intricate and refined.
19. Capturing a Coleus’s Vibrancy with Thread Painting
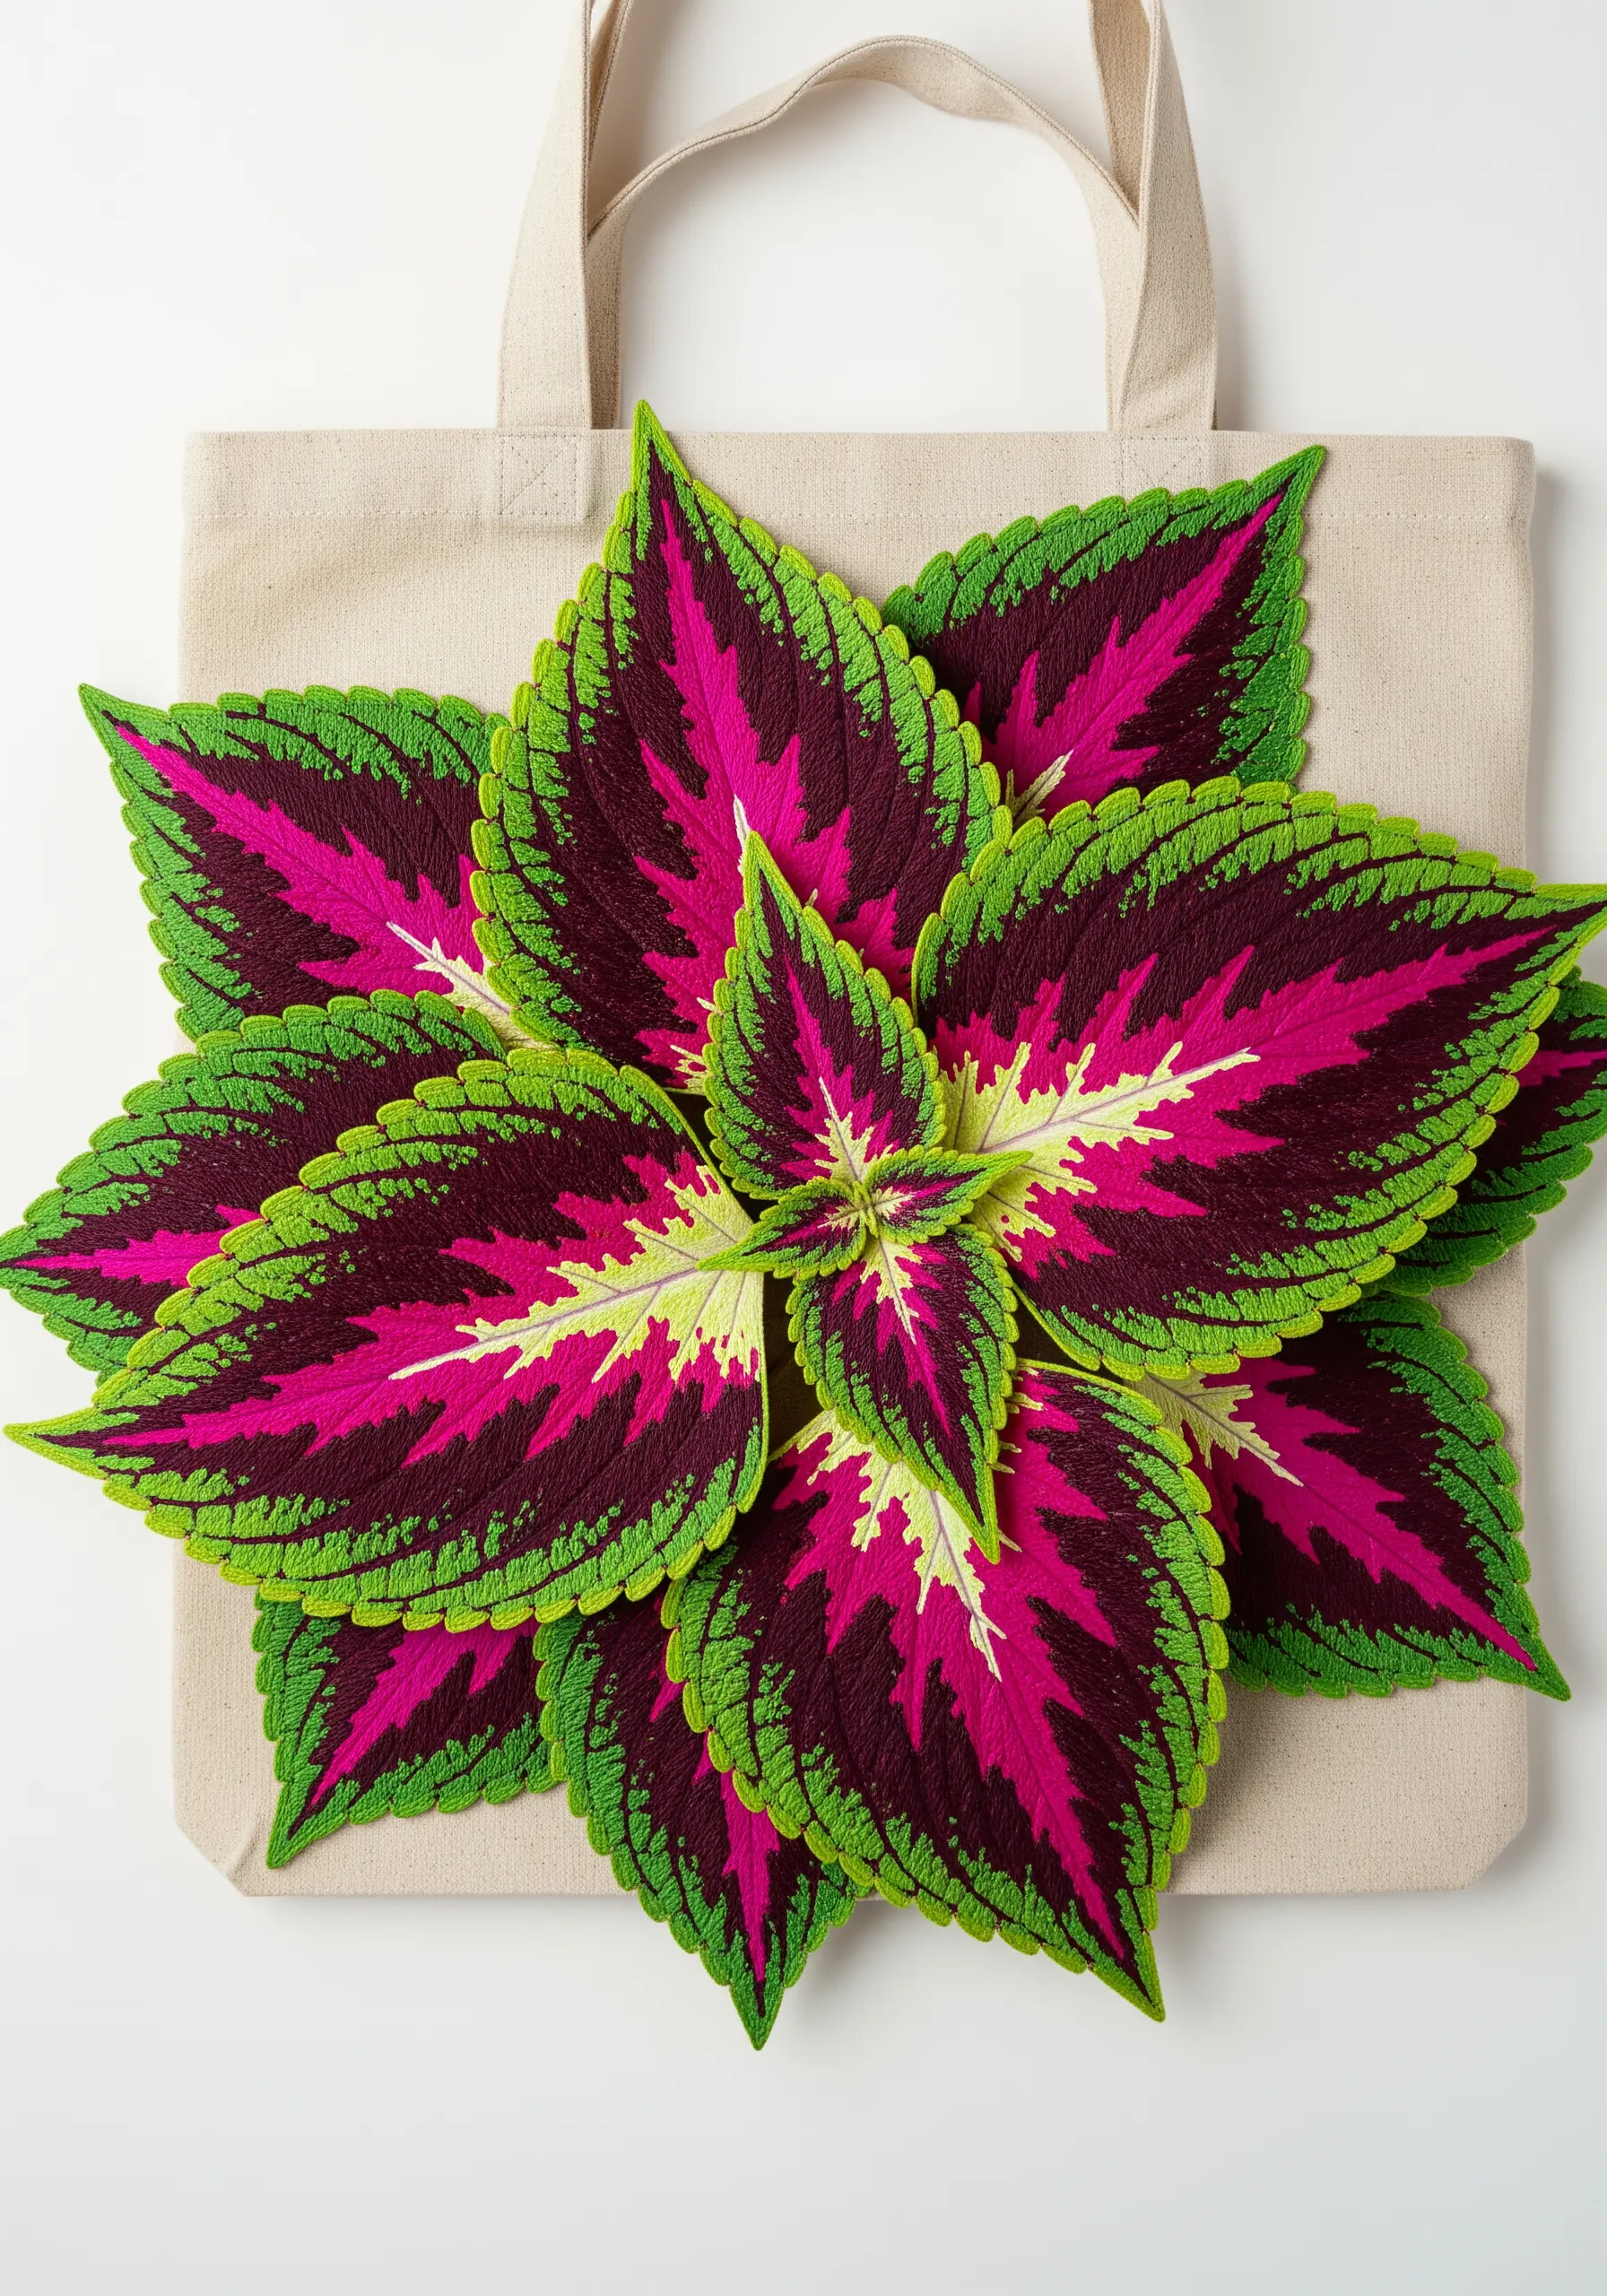
Recreate the complex, painterly patterns of a coleus leaf through advanced thread painting.
This requires careful color mapping. Start with the lightest colors in the center and work your way out, using short, feathered long-and-short stitches to blend the magenta, deep purple, and lime green seamlessly.
Pay close attention to the direction of your stitches, following the natural lines and curves of the leaf’s variegation to enhance realism.
While time-consuming, this technique allows you to achieve stunning, photorealistic results that turn your tote bag into a botanical study.
20. Combining Textures for Festive Holly Leaves

Create a design with distinct tactile qualities by pairing smooth stitches with dimensional ones.
For the holly leaves, use a satin stitch, angling the stitches to create a central vein and a subtle sheen that defines the leaf’s shape.
Contrast this smoothness with tightly packed French knots for the berries. Wrap the thread around your needle three or four times to create plump, round berries that stand out from the surface.
This combination of textures makes the simple motif engaging and is perfect for minimal festive motifs that feel sophisticated.
21. Building an Optical Illusion with Stylized Leaves
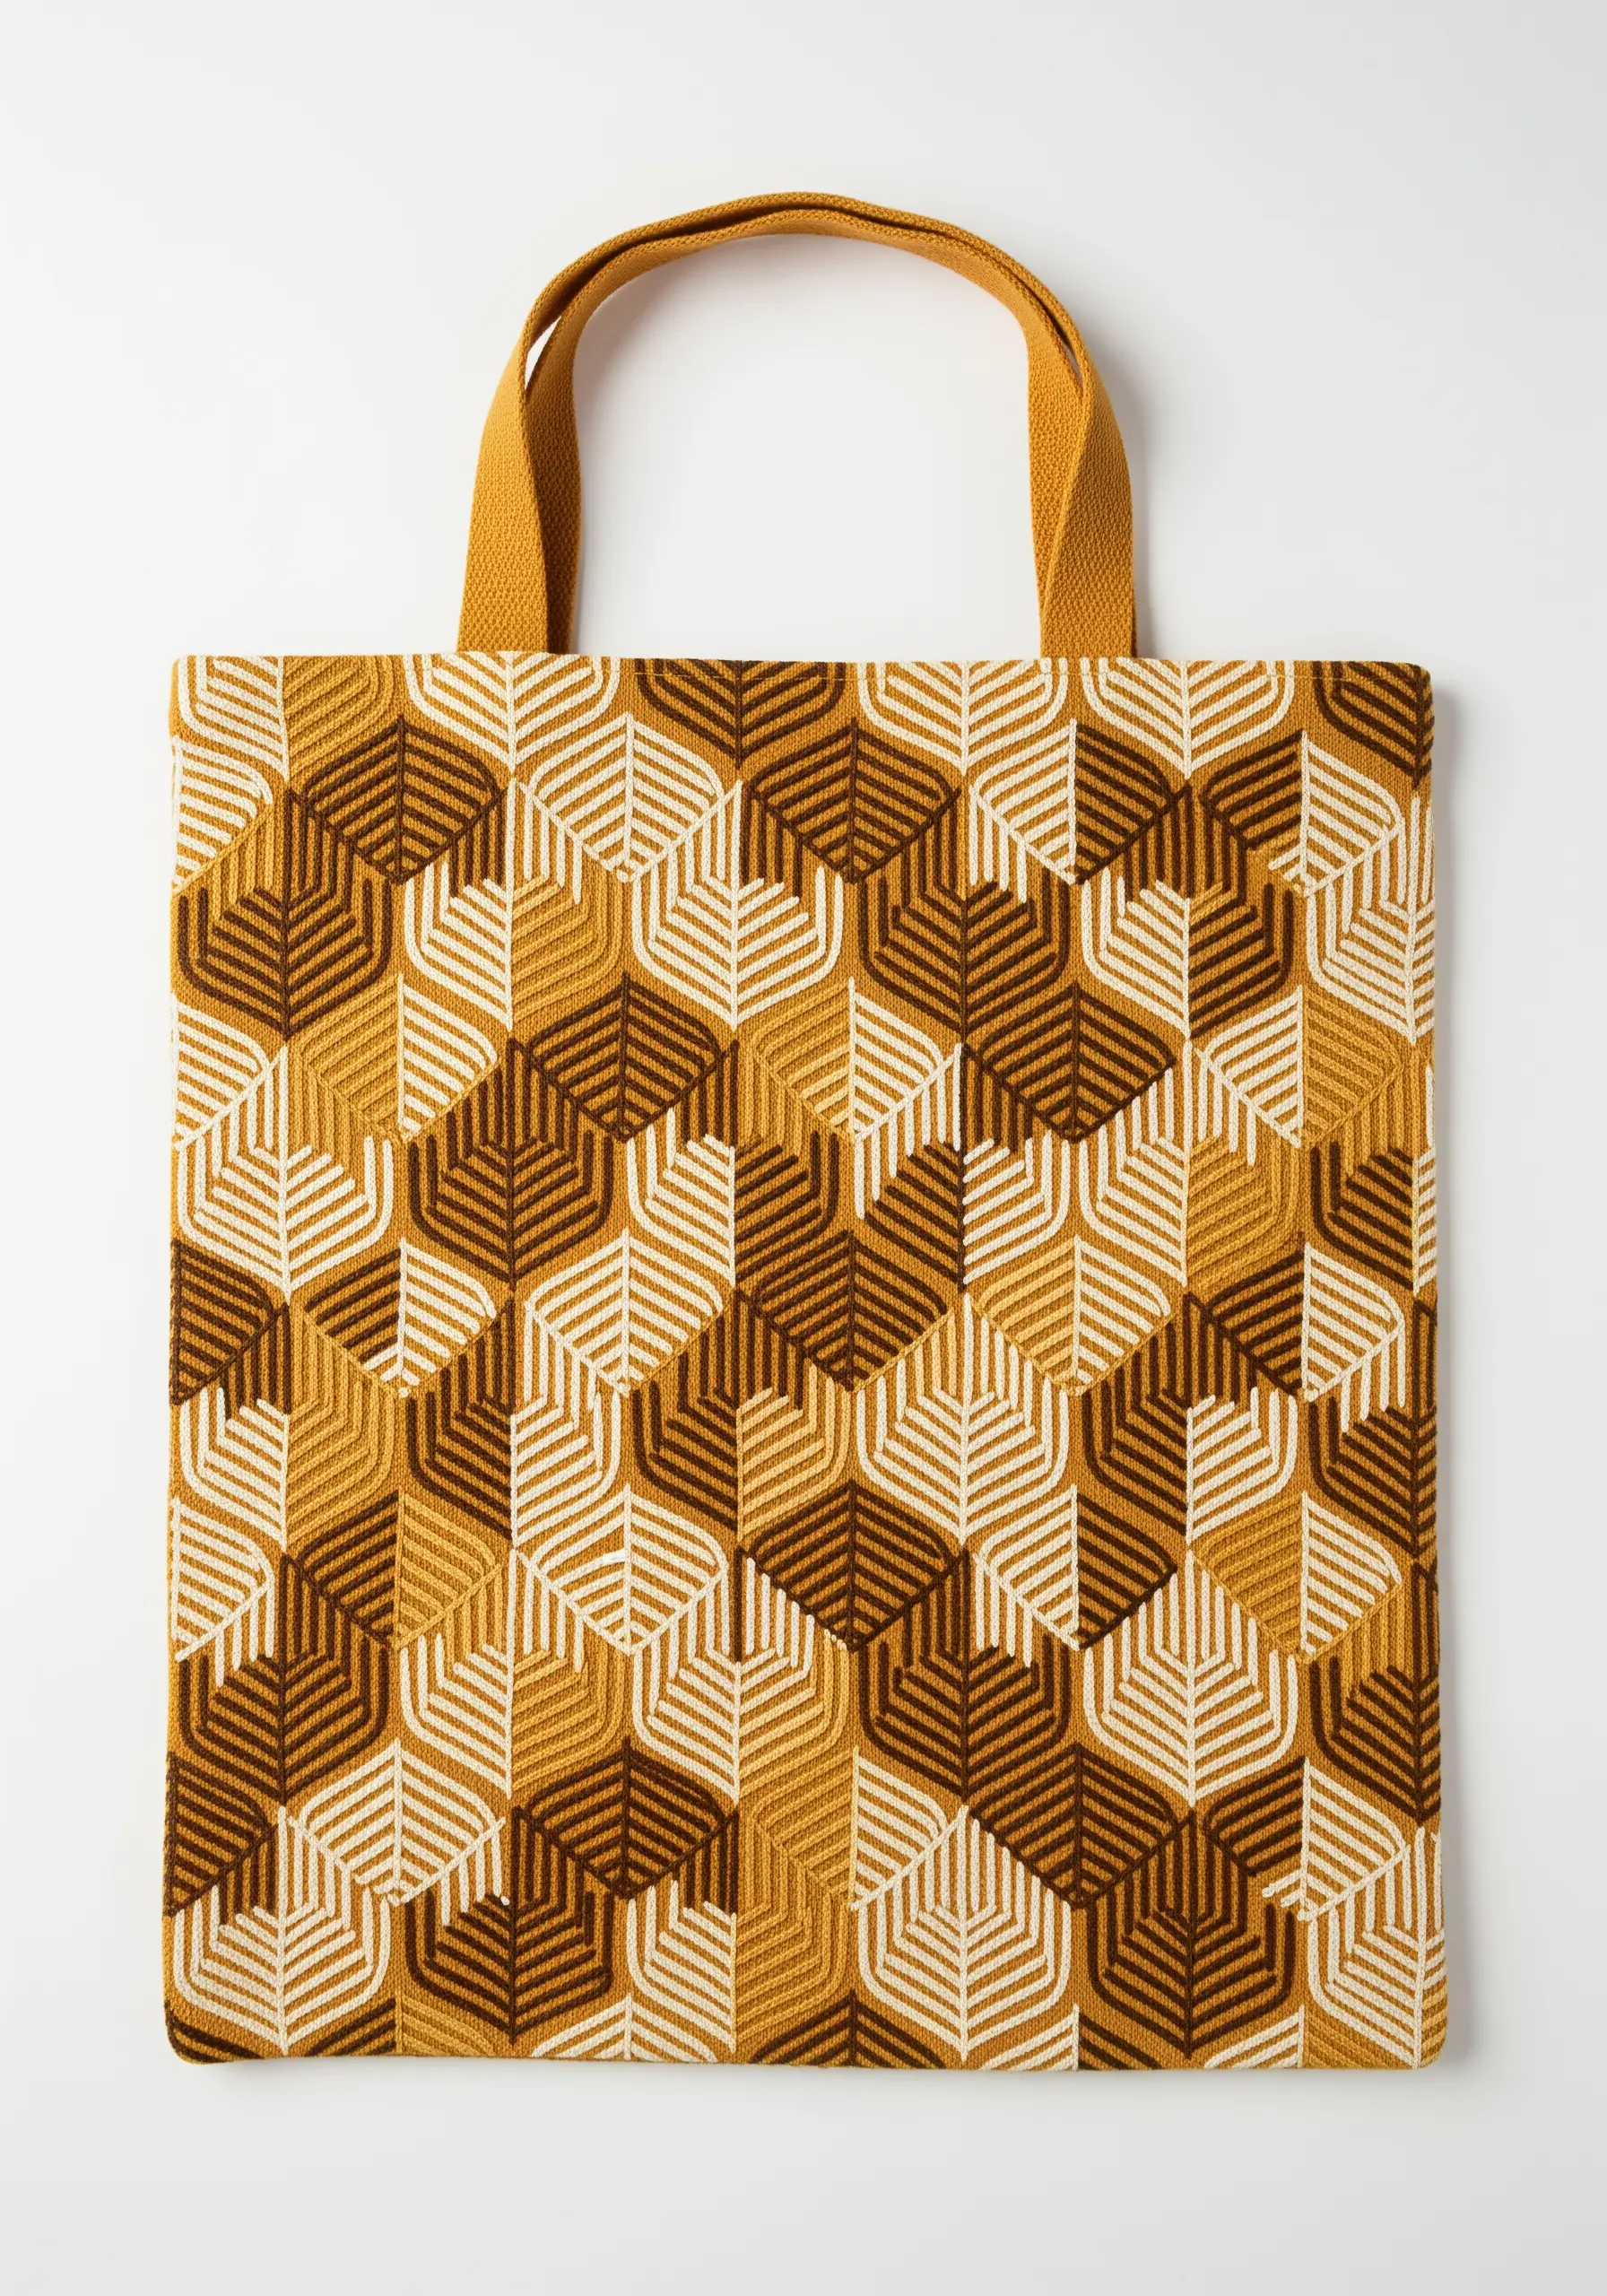
Create a mesmerizing, repeating pattern by simplifying leaves into geometric shapes.
This design uses a simple outline stitch for the leaf shape and straight stitches for the veins, arranged within a grid of interlocking blocks.
The clever use of three colors—white, ochre, and dark brown—creates a 3D, cube-like illusion that draws the eye in.
This is a perfect example of how combining simple botanical elements with strong geometric principles can result in a sophisticated, modern textile design.
22. Exploring Form and Texture in a Monochromatic Palette
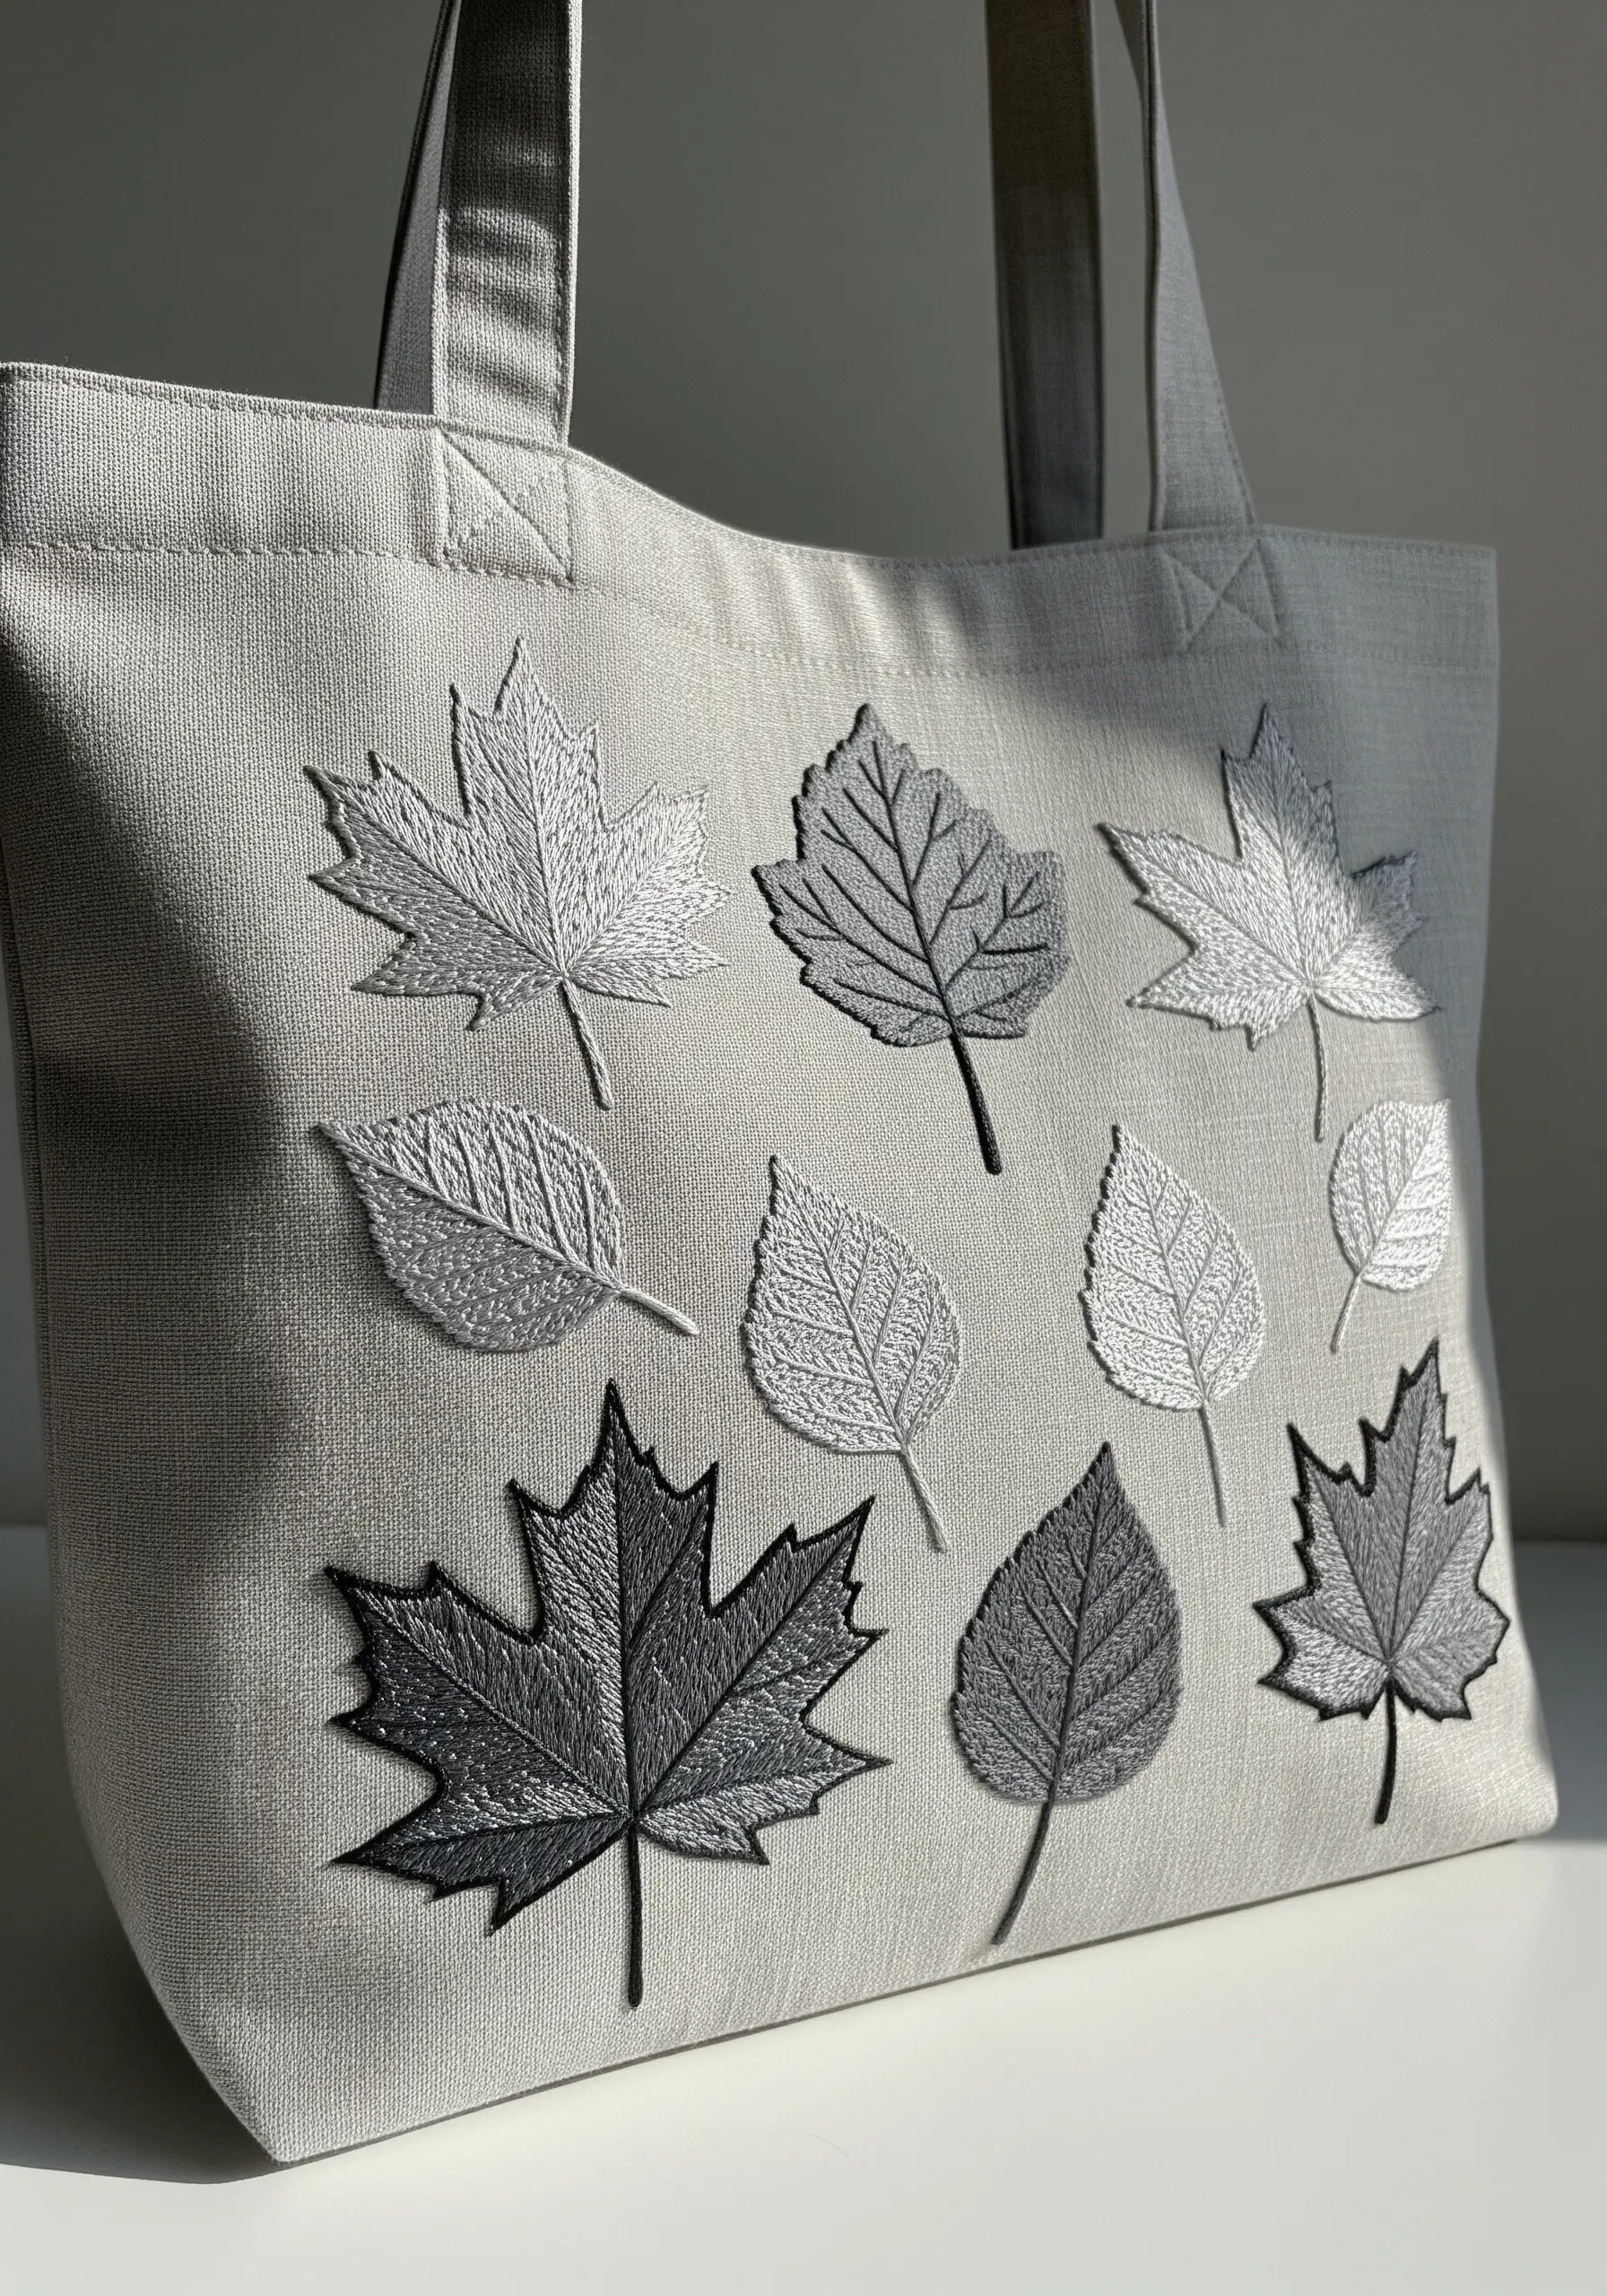
Challenge yourself to focus purely on texture and form by working in a monochromatic color scheme.
Select various leaf shapes and fill each one with a different directional fill stitch—satin stitch, long-and-short stitch, or even a simple seed stitch.
By using shades of grey, from light silver to dark charcoal, you can still create depth and highlight the unique vein patterns of each leaf.
This exercise sharpens your attention to detail and proves that you don’t need a riot of color to create a visually rich and compelling design.
23. The Luxe Appeal of Goldwork Monstera
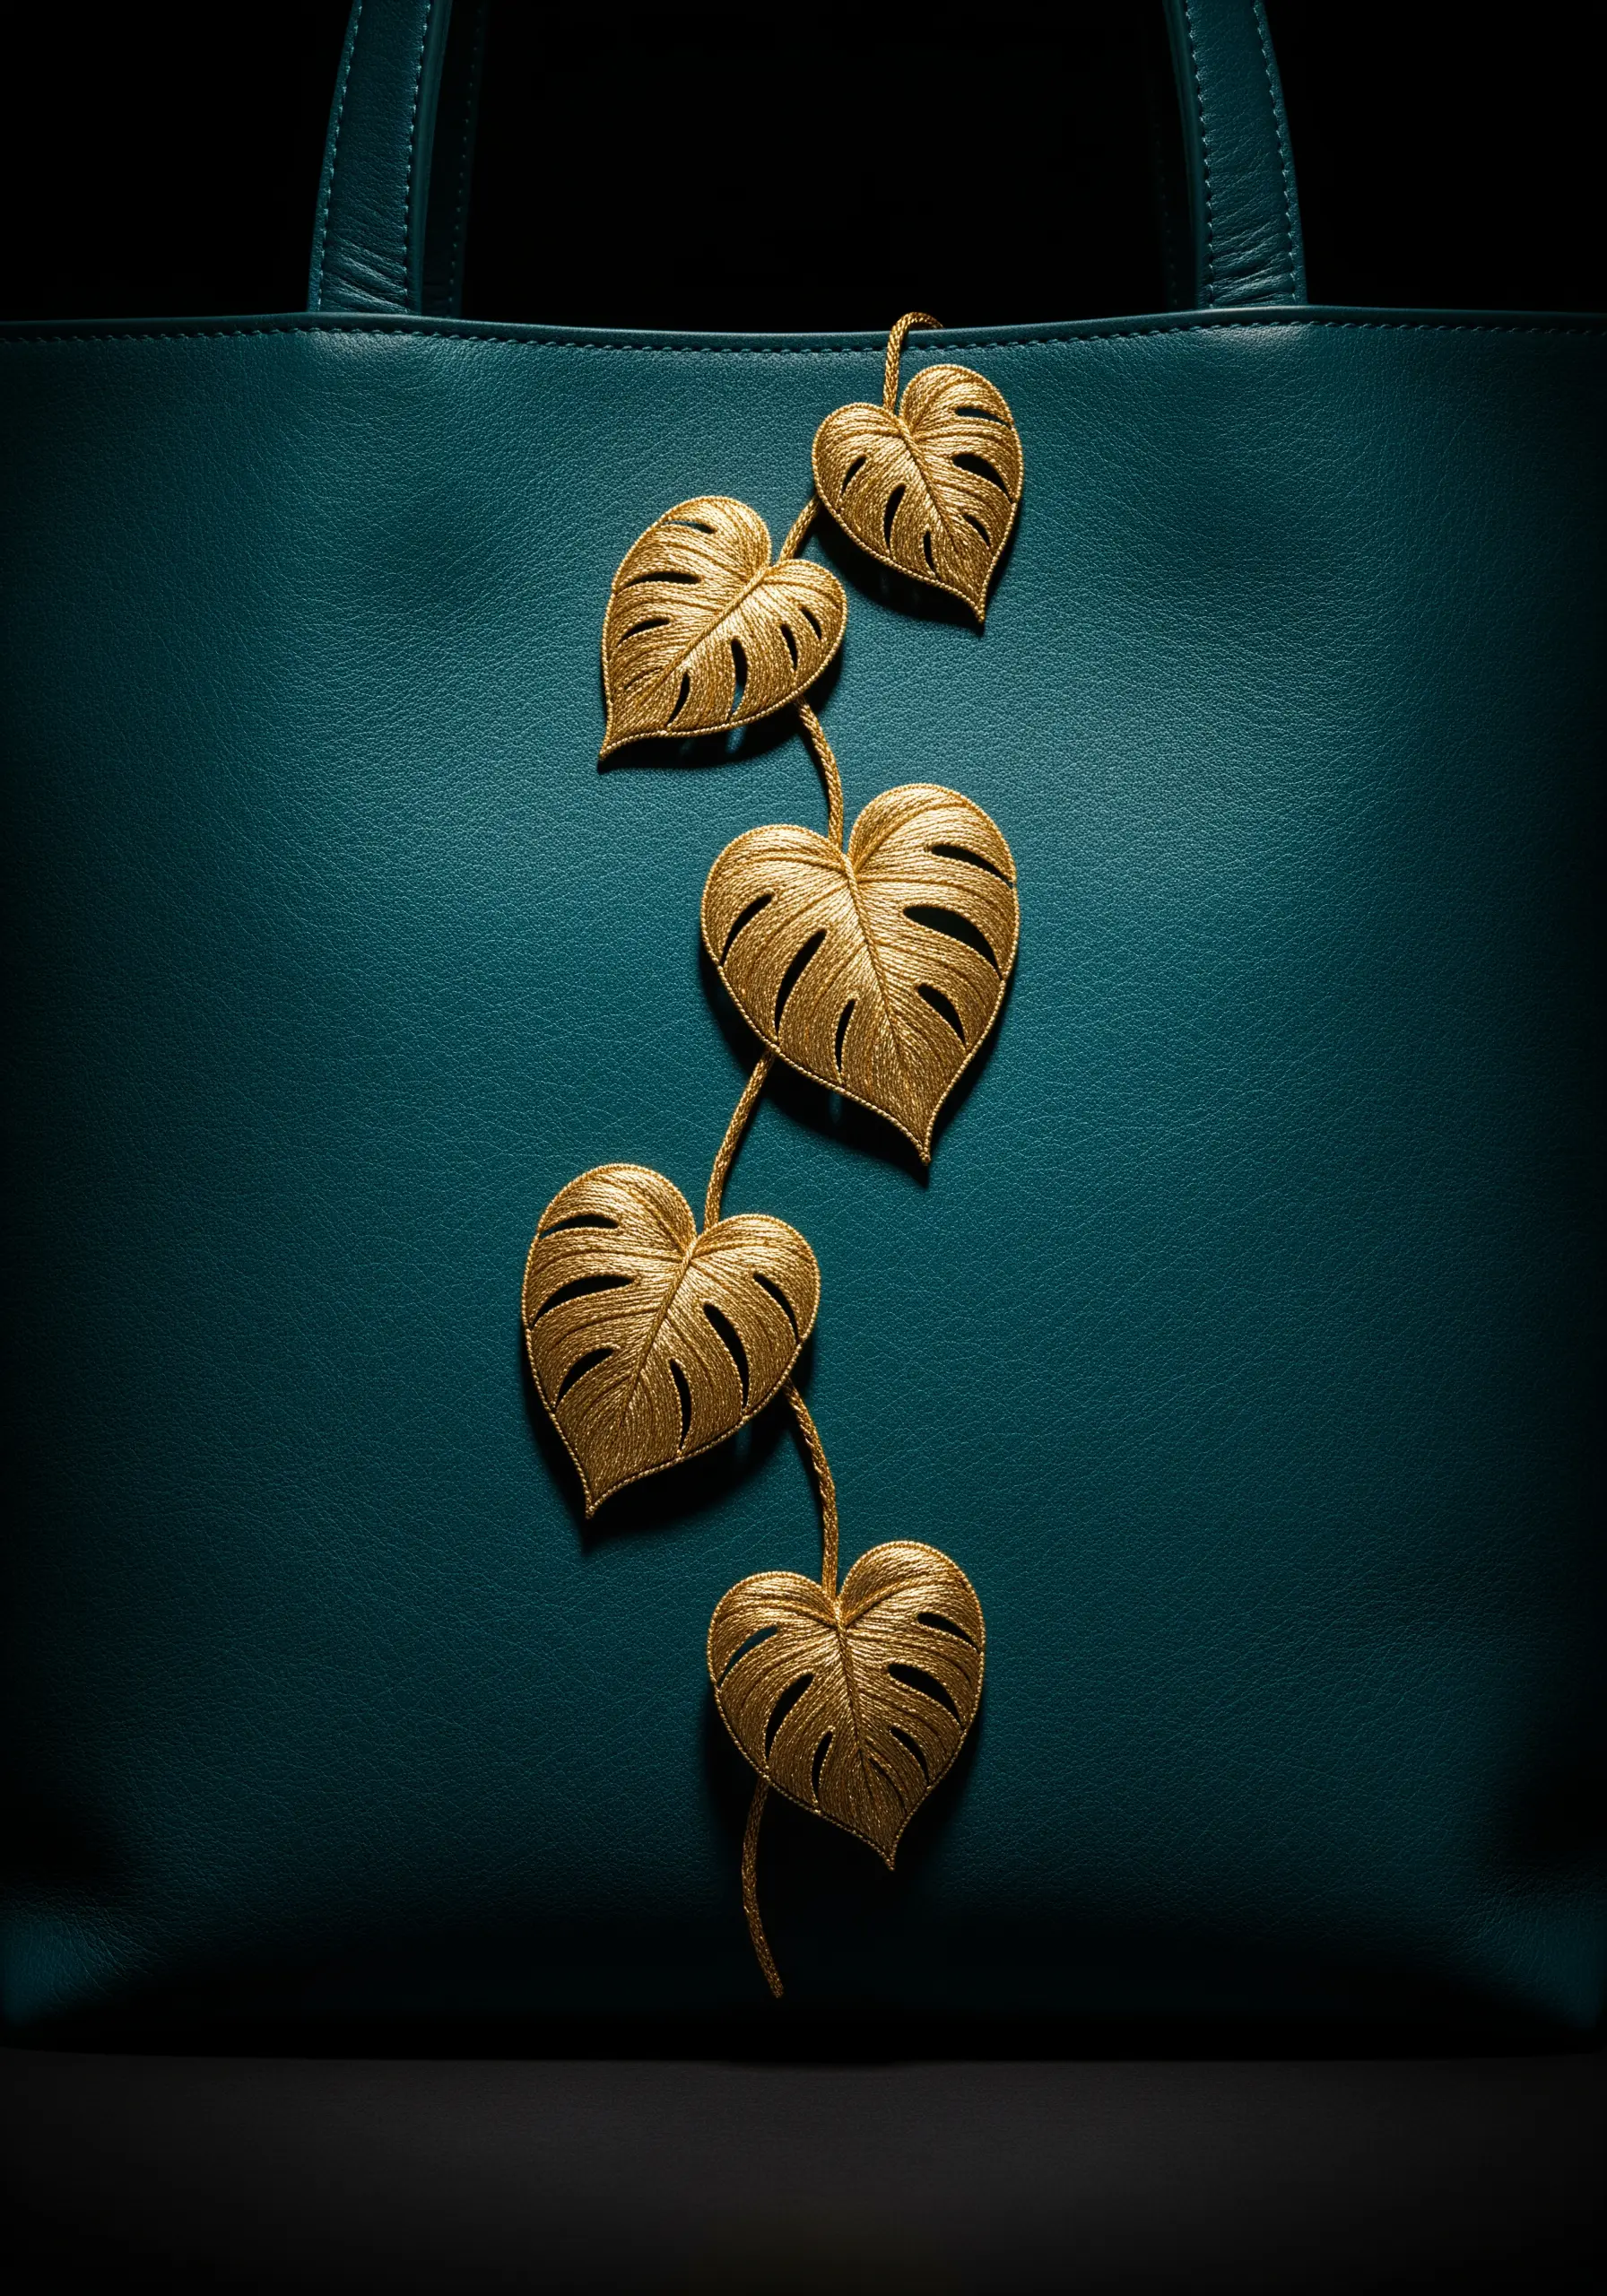
Introduce an element of pure luxury to your tote bag with metallic threads.
To prevent metallic floss from snagging and fraying, use a needle with a larger eye and work with shorter lengths of thread (about 12 inches).
A thread conditioner like beeswax can also make stitching smoother. Use a padded satin stitch to give the golden leaves a raised, almost embossed appearance.
The high shine of the gold thread against the rich teal fabric creates a deeply elegant and glamorous statement piece.


