

A simple tote bag is more than just practical—it’s a blank canvas waiting for a story. If you’ve been looking for a way to move beyond simple patterns and infuse your embroidery with the raw, expressive energy of city life, this is your moment.
Street art and graffiti aren’t just about paint; they’re about line, texture, and bold declarations. We can borrow those same principles for our thread. It’s time to think about how a change in stitch direction can create a 3D effect, how layering threads can mimic the chaos of a tagged wall, or how combining appliqué with free-form stitching can make a design burst with life.
Forget perfection. Instead, focus on intention. Each idea here is a technique designed to elevate your work, giving you the confidence to turn a basic tote into a piece of wearable art that is uniquely, unapologetically you.
1. Render Graffiti Tags with 3D Satin Stitch
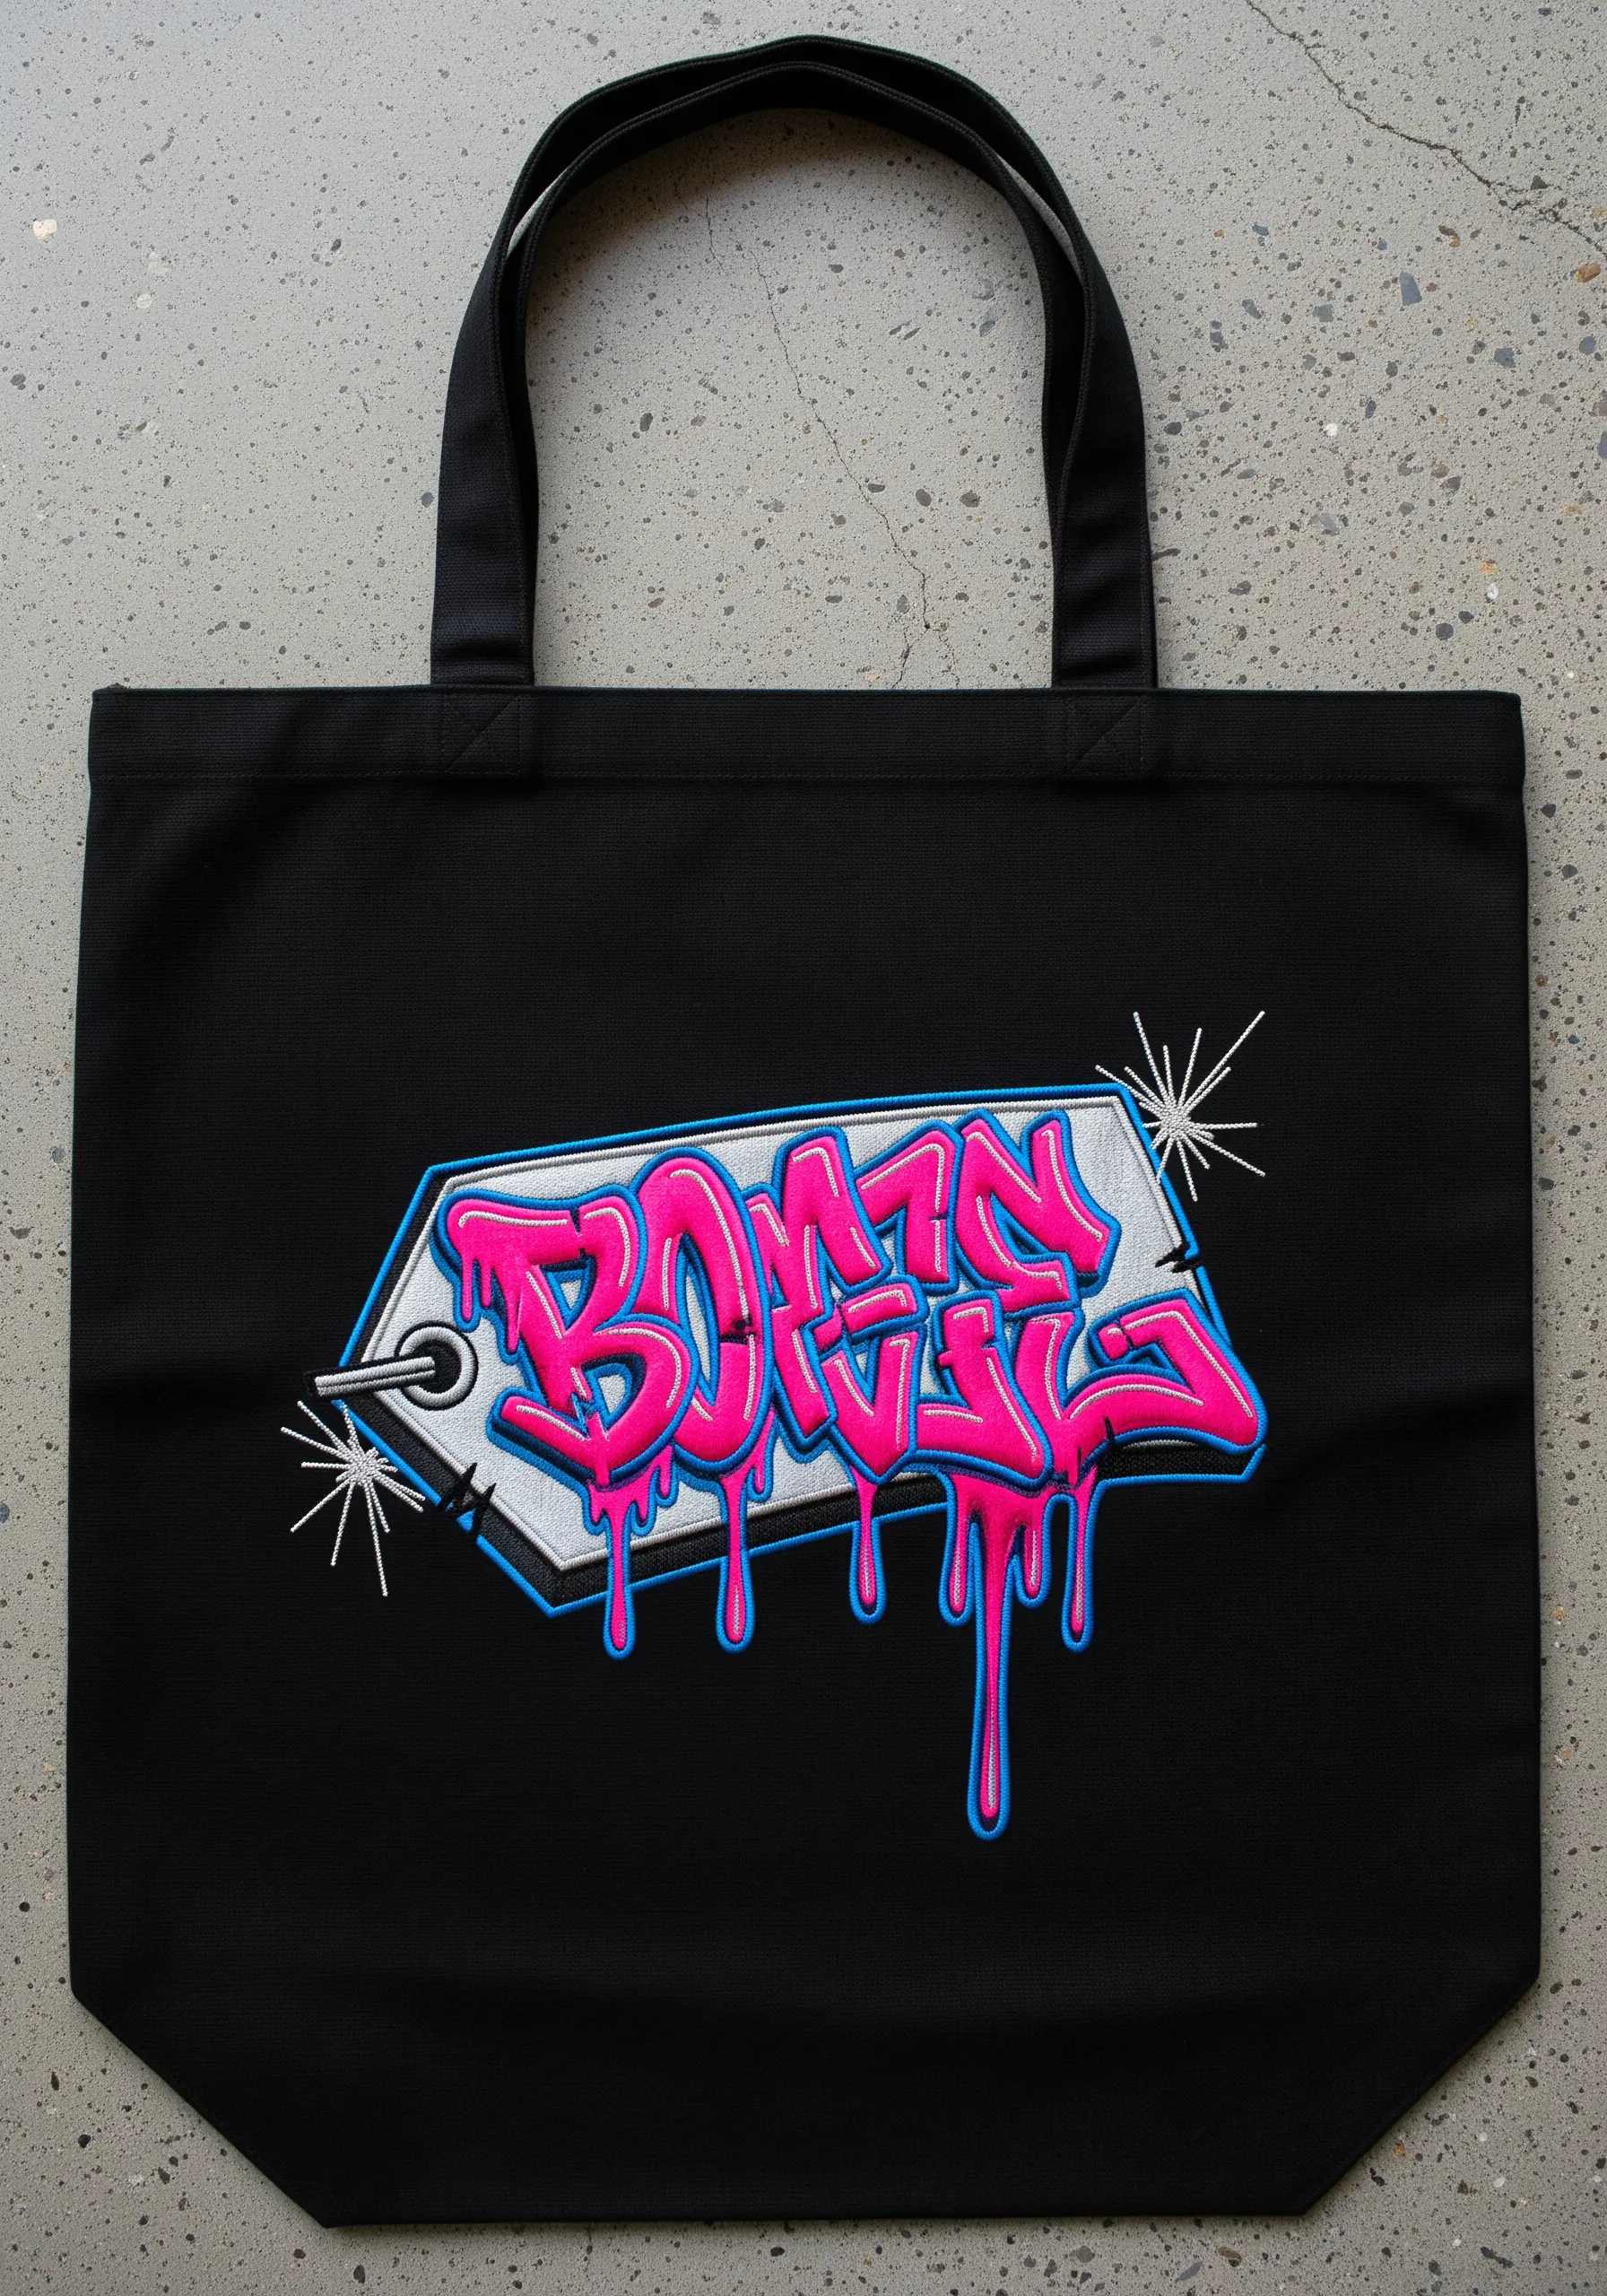
To capture the bubbly, inflated look of graffiti lettering, use a directional satin stitch.
Map out your highlight and shadow areas first, then angle your stitches to follow the curves of each letter, making them look rounded and three-dimensional.
Use a single strand of a contrasting color, like light blue, for a whipped backstitch outline—this will make your edges incredibly sharp and clean.
For the drips, use a vertical satin stitch, ensuring the ends are tapered to a point for a liquid feel.
2. Block Out Portraits with Graphic Thread Painting
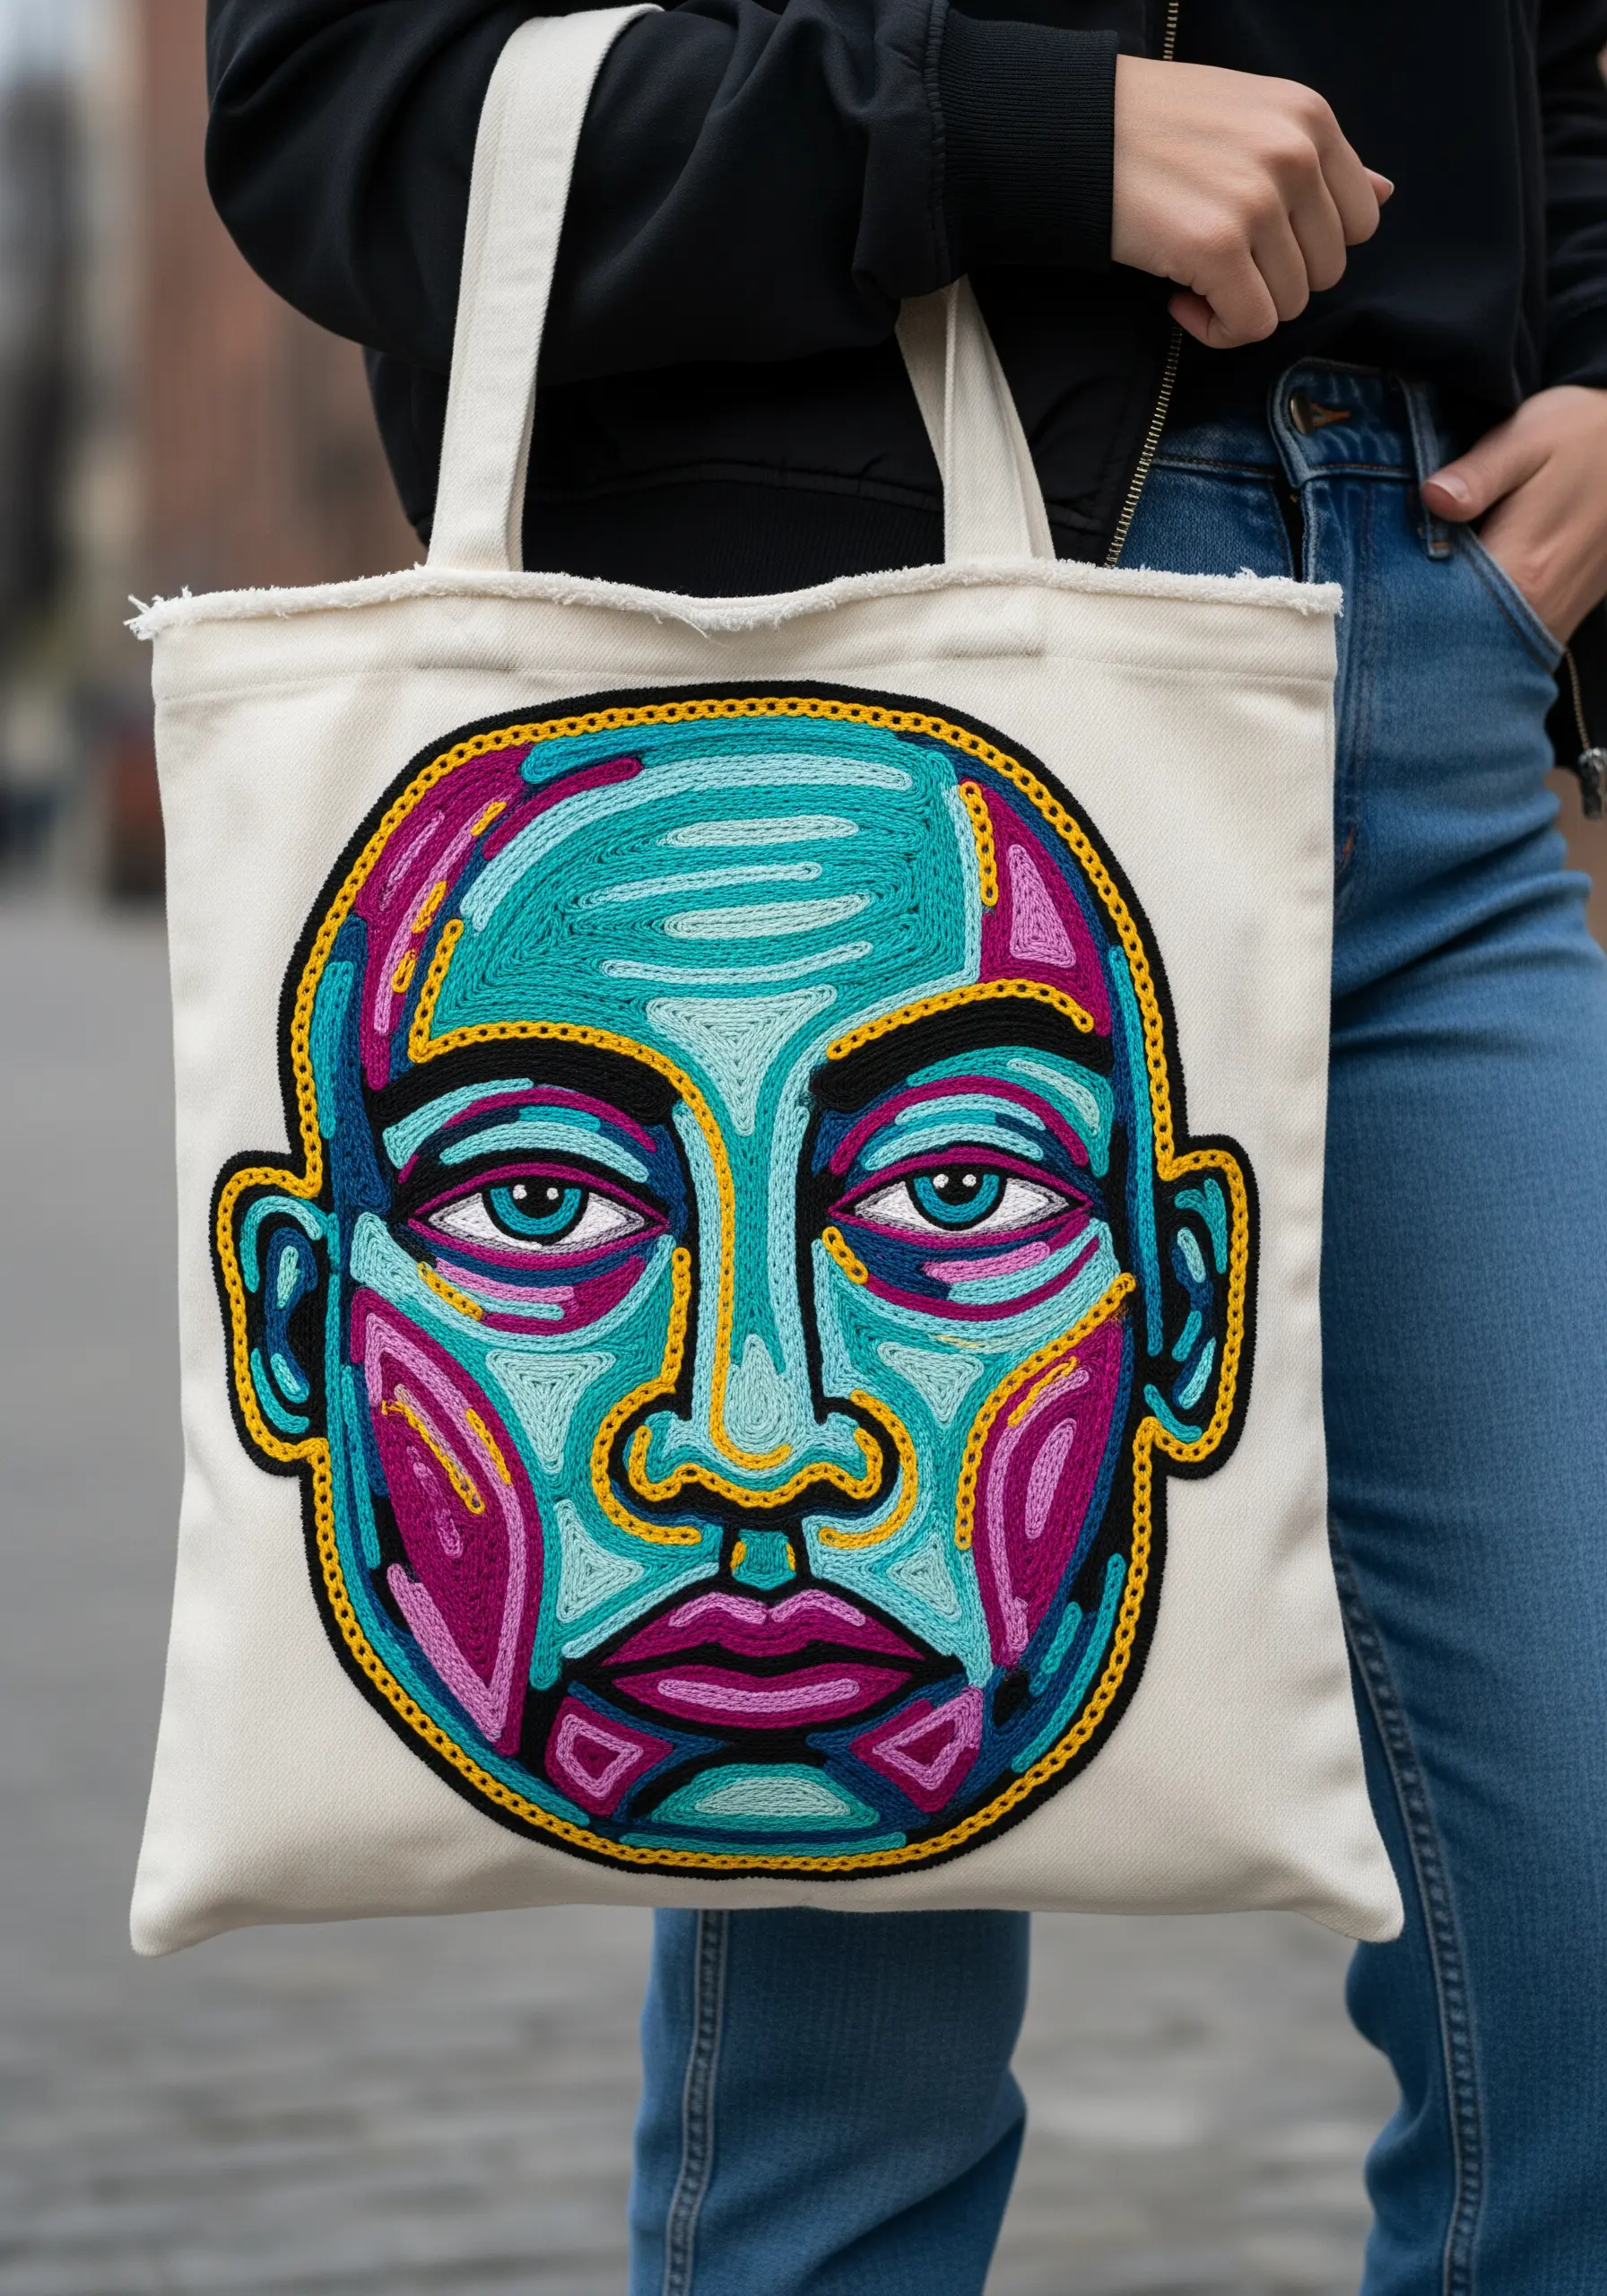
Instead of blending colors smoothly, treat each section of the portrait as a solid color block.
Fill each shape with long-and-short stitches, but vary the stitch direction from one block to the next—this creates a subtle, shifting texture that adds depth without complicating the color palette.
Use a bold, heavy outline with a 6-strand stem stitch or couched perle cotton to define the features and contain the colors, giving it a powerful graphic novel aesthetic.
This technique turns a complex portrait into a manageable and impactful series of shapes.
3. Combine Appliqué and Padded Satin Stitch
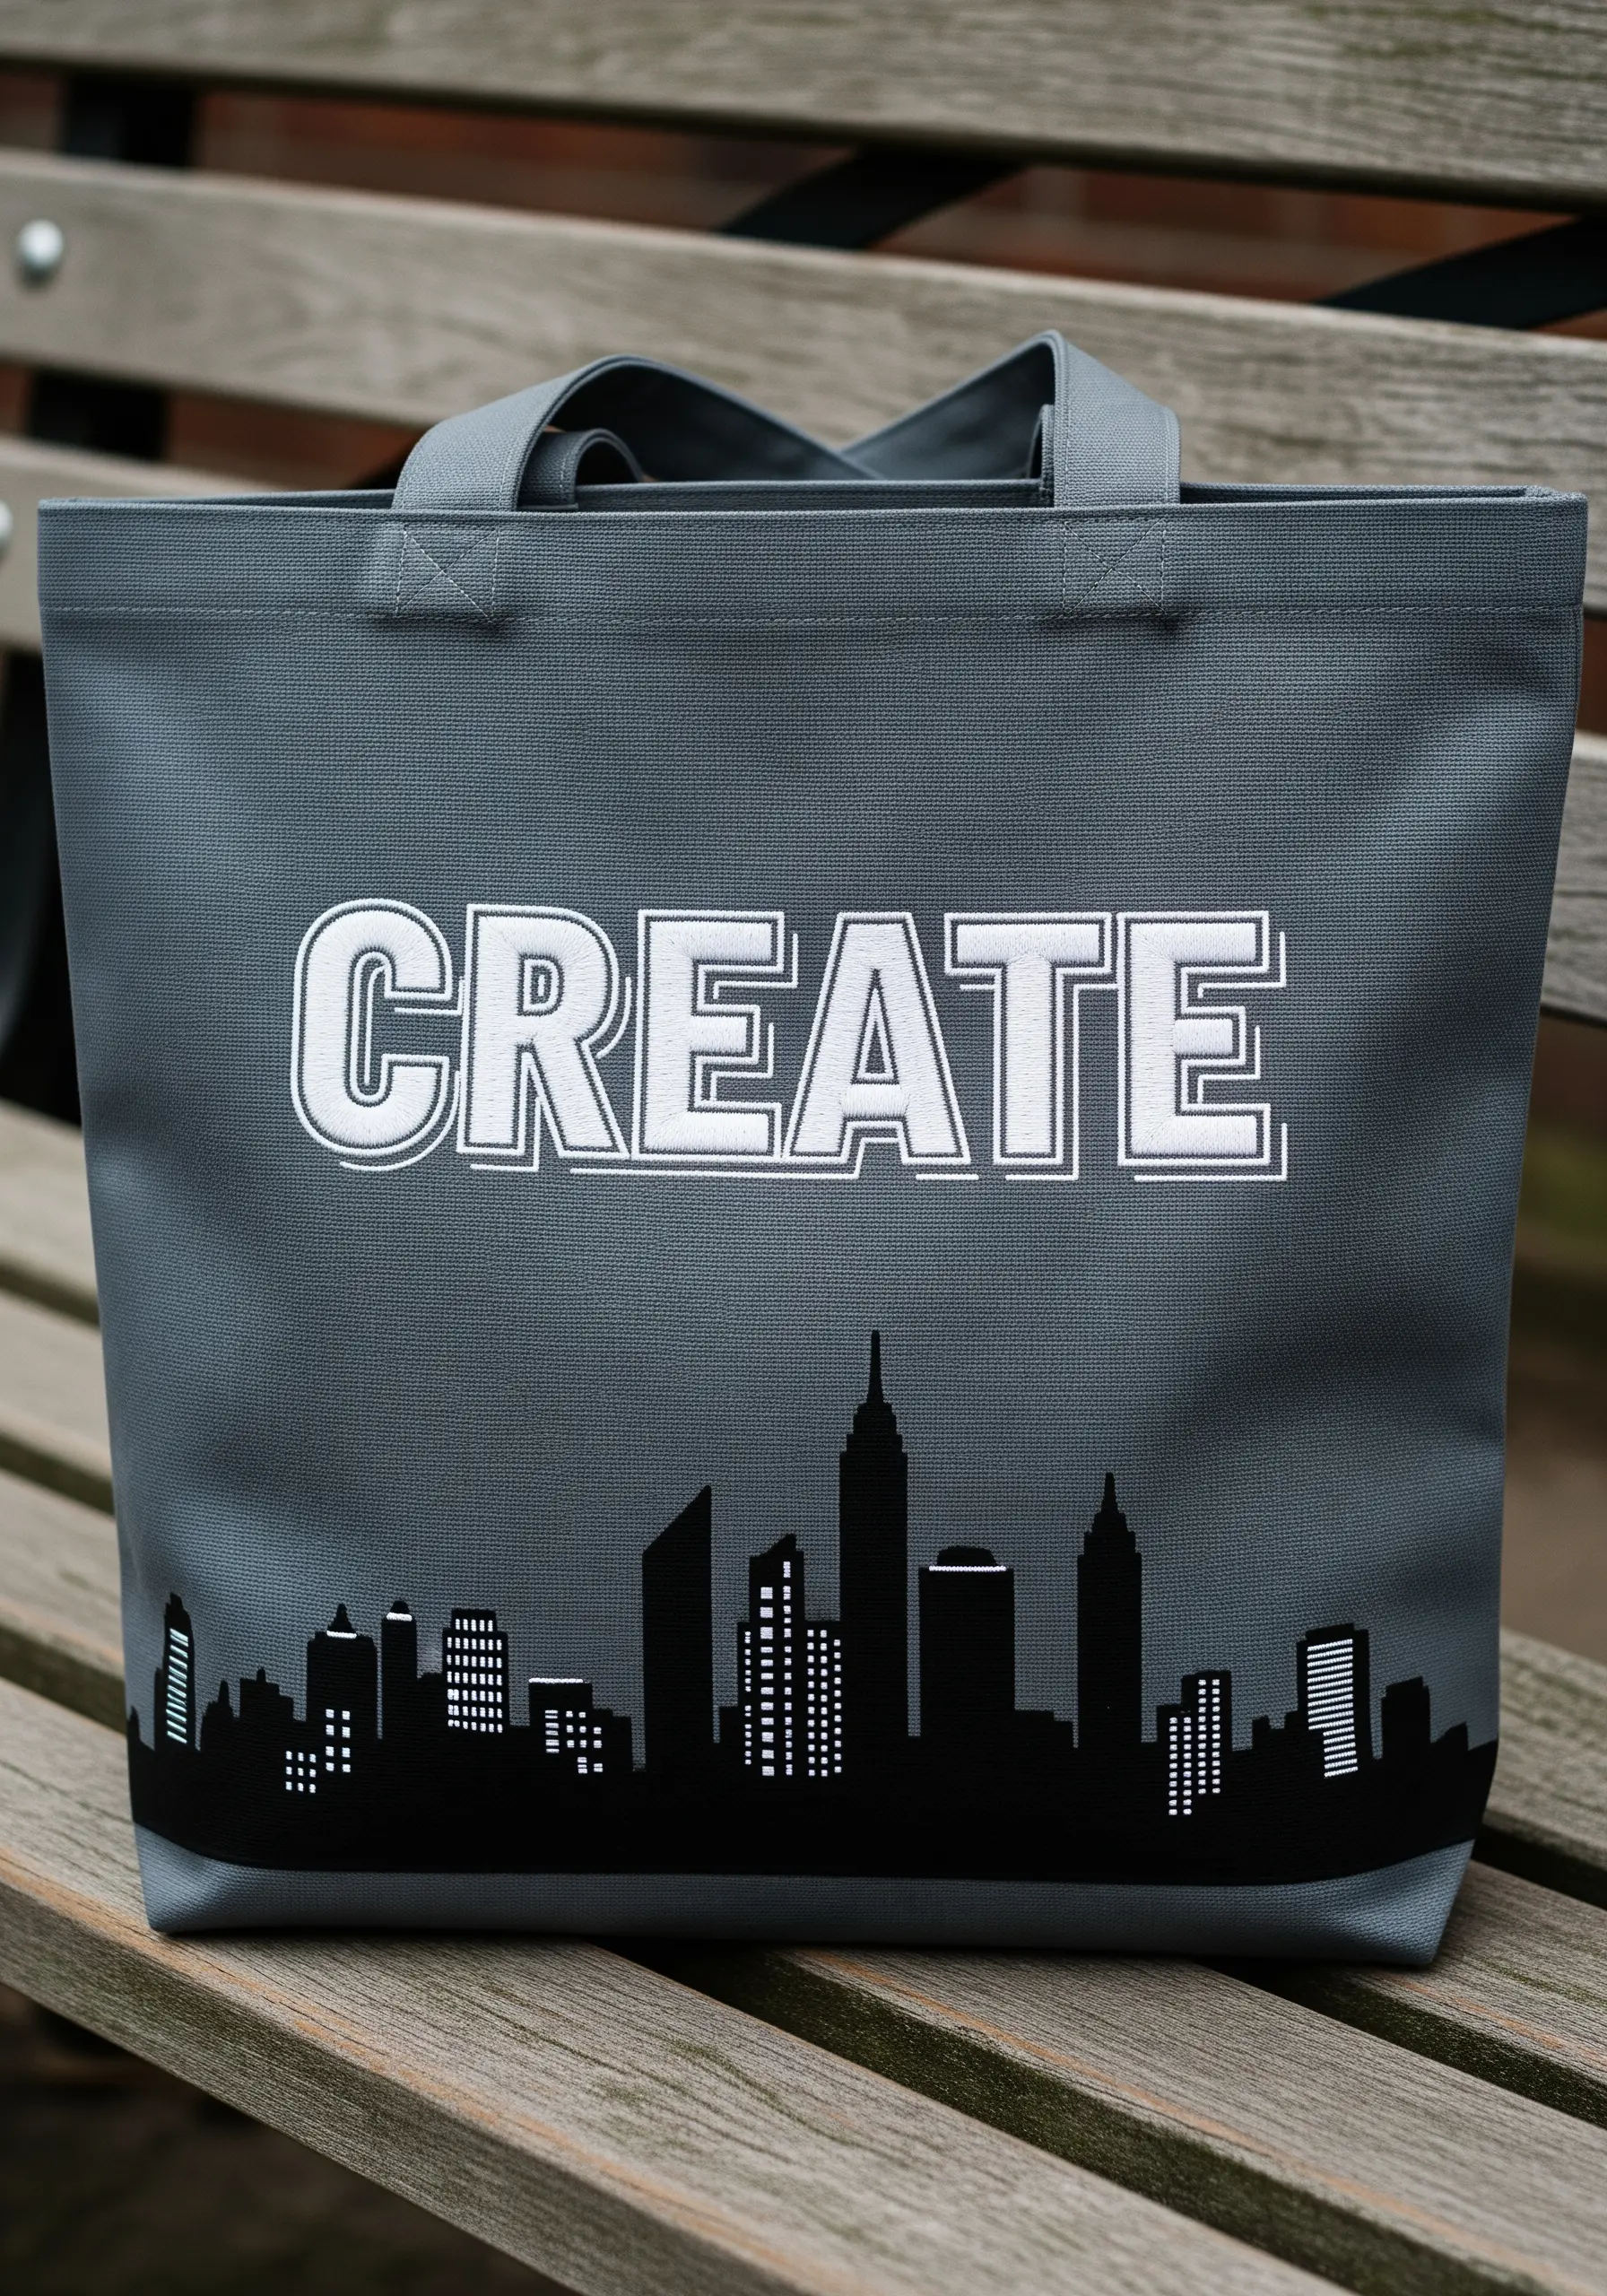
For a high-impact design that combines sharp graphics and raised lettering, merge two techniques.
Create the skyline silhouette using black felt or non-fraying canvas, attaching it with a fusible web before securing the edges with a tiny, neat running stitch.
For the word ‘CREATE,’ give it dimension with a padded satin stitch: first, fill the letter shapes with a base of small seed stitches, then cover them with a smooth, dense satin stitch.
This padding lifts the letters off the fabric, creating a professional, tactile finish that contrasts beautifully with the flat appliqué.
4. Create Paint Splatter with Mixed-Media Texture

Capture the chaotic energy of street art by combining thread with non-traditional materials.
Use long, irregular straight stitches in neon thread for the paint streaks, varying their length and direction.
Create the thick white drip with Turkey work or by couching a thick yarn, which gives it a high-profile, 3D texture.
Finally, scatter sequins and tiny seed beads within the splatter zones—this adds a touch of sparkle that mimics wet paint catching the light, turning a flat design into a tactile art piece.
5. Stitch Bold Icons with a Heavy Stem Stitch
To achieve a bold, marker-drawn look for simple icons, ditch the delicate single-strand outlines.
Use all six strands of embroidery floss and a thick stem stitch or a tight chain stitch.
This creates a weighty, graphic line that stands on its own without needing any fill.
Embrace slight imperfections in your lines—it enhances the hand-drawn, spontaneous feel inspired by street art doodles.
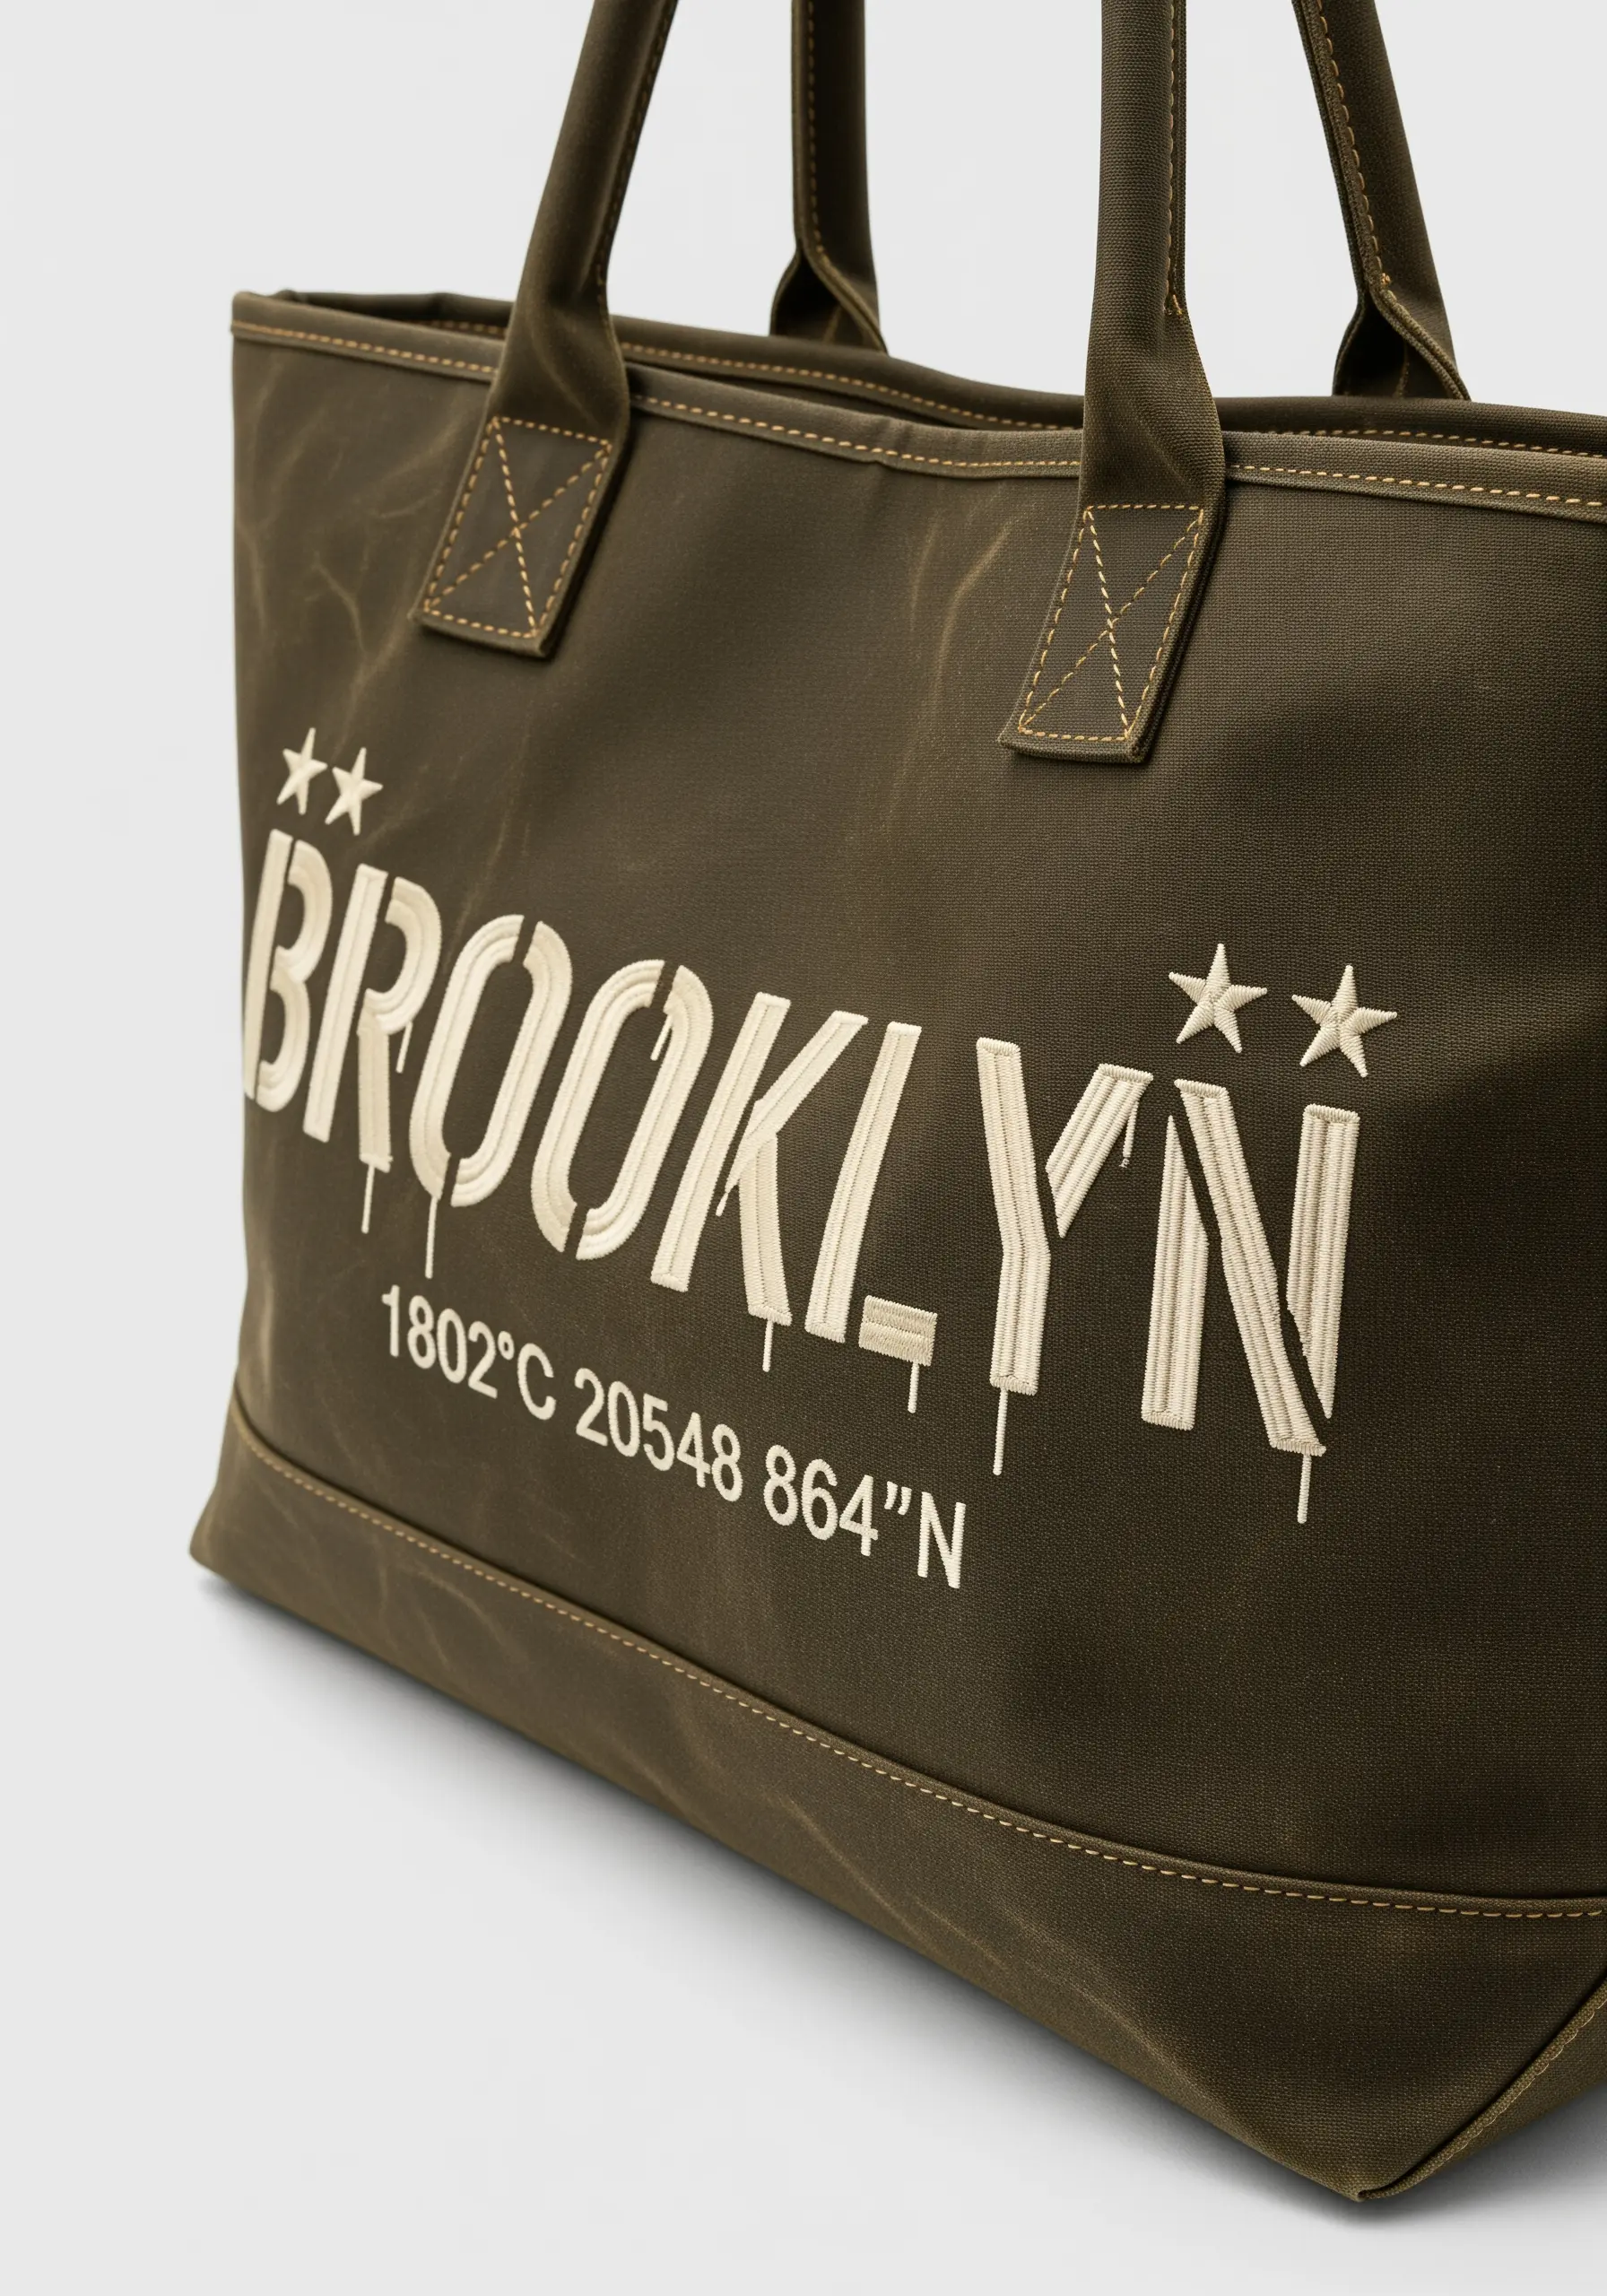
6. Master Script on Faux Leather with a Whipped Backstitch

Stitching on faux leather requires a specific approach for clean results. Use a specialty leather needle to pierce the material without tearing it.
For the elegant script, first lay down a simple backstitch following your design.
Then, whip the stitch with the same thread, passing your needle under each backstitch without piercing the fabric again. This conceals the individual stitches, creating a single, fluid line that looks like calligraphy ink.
7. Combine a Crisp Appliqué with Chaotic Stitches
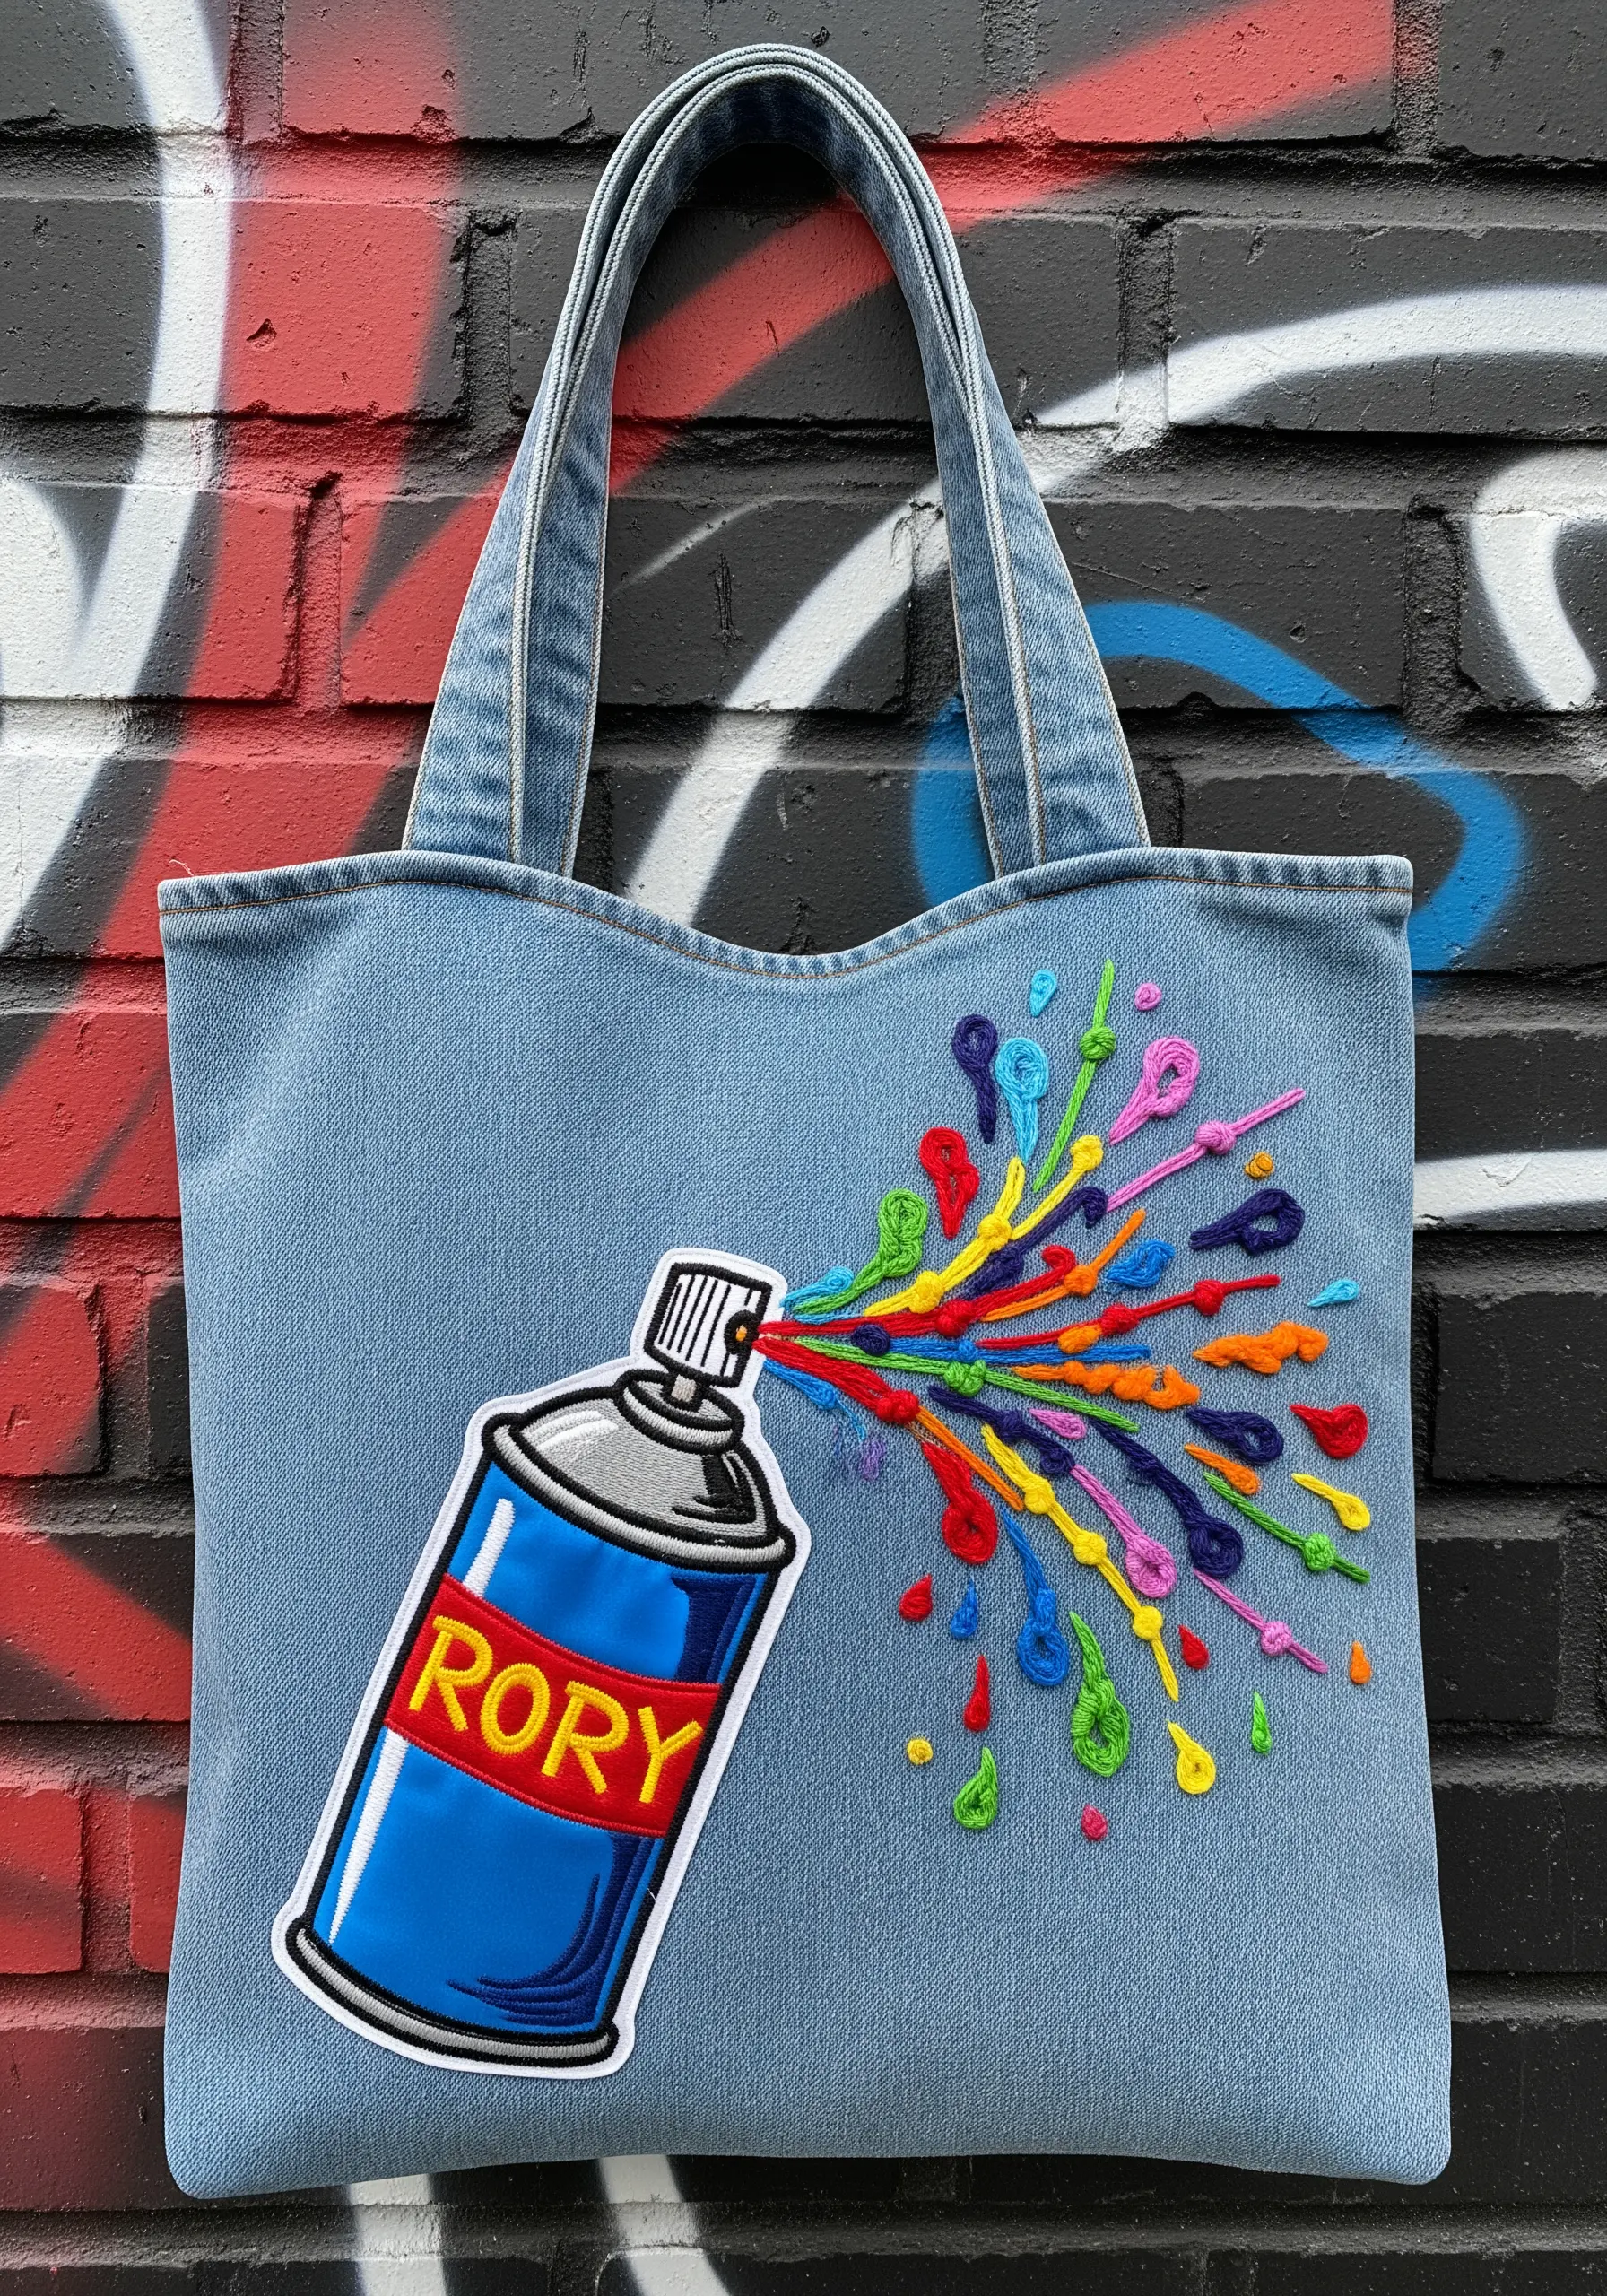
For a design that feels dynamic and controlled at the same time, pair a neat appliqué patch with free-form embroidery.
Create the spray can as a separate fabric patch with clean satin-stitched edges for a polished, sticker-like effect.
For the colorful spray, let loose with a dense explosion of straight stitches and French knots in varying lengths and colors.
This contrast in techniques makes the spray feel genuinely explosive and energetic, bursting from the clean lines of the can.
8. Build a Sampler with Geometric Fill Stitches
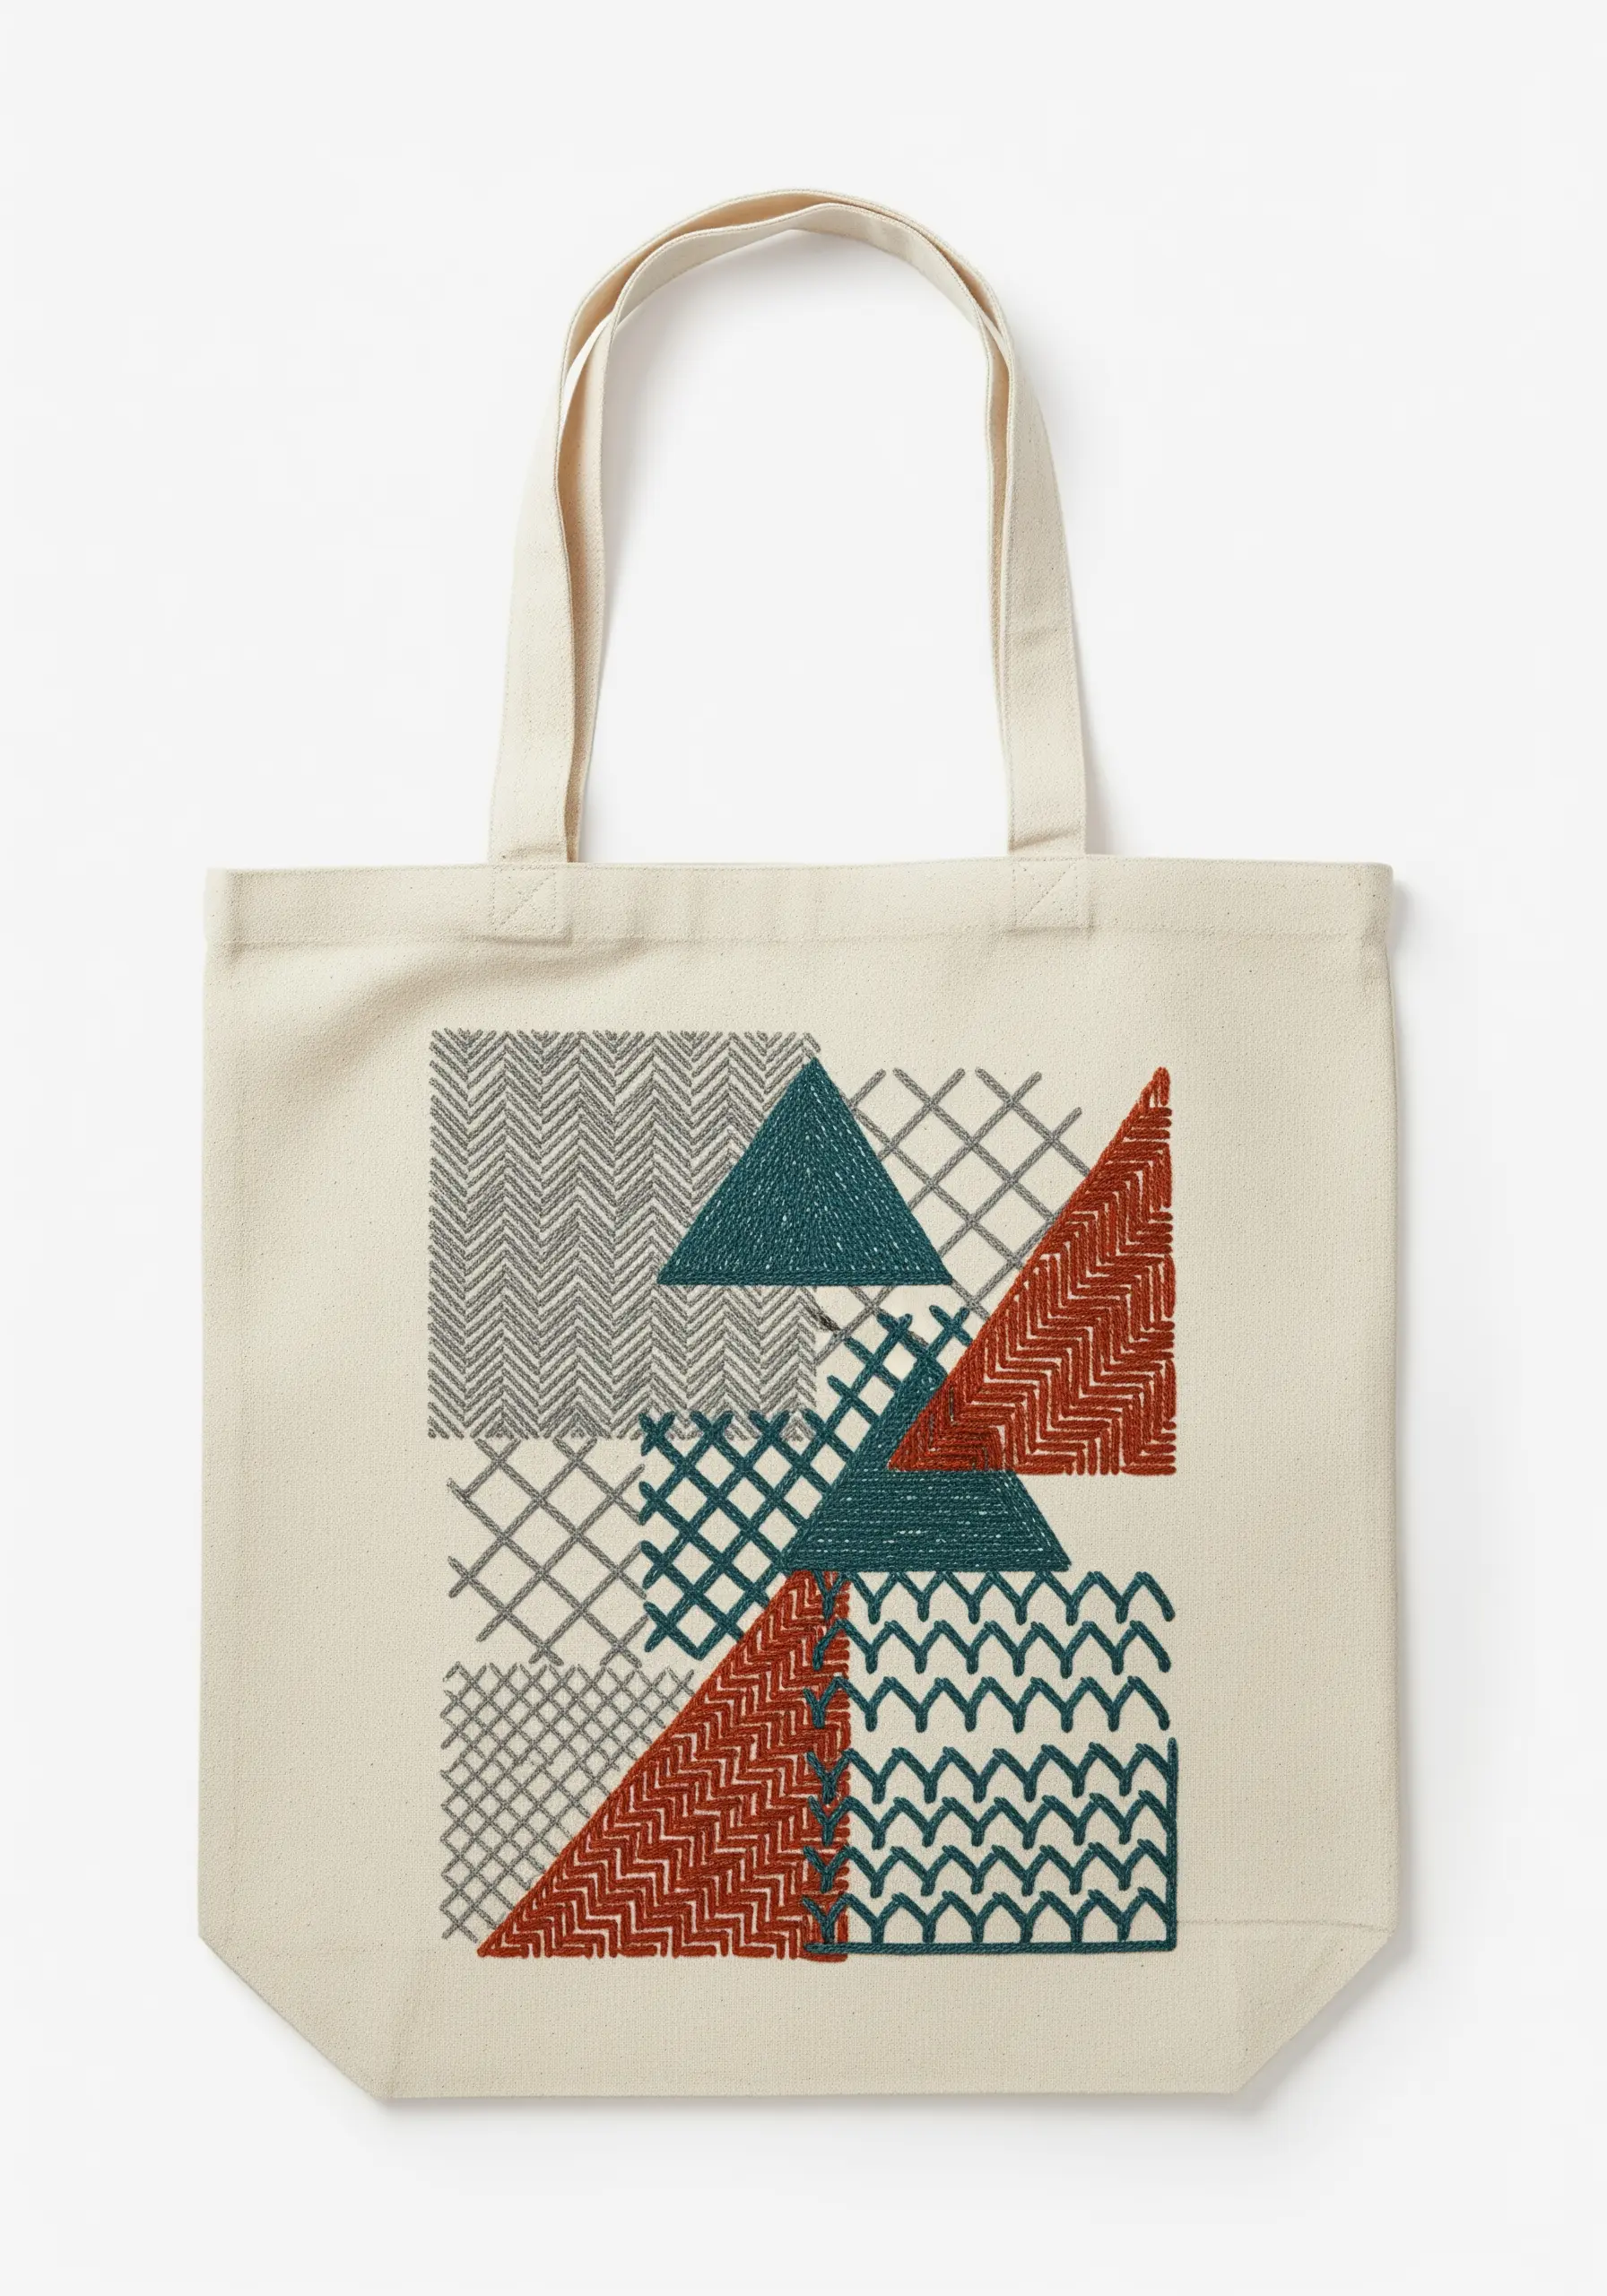
Explore texture by creating a geometric composition filled with different stitch patterns.
Divide your design into triangles and squares, then assign a unique fill stitch to each section—try herringbone, chevron, cross-hatching, and darning stitches.
Stick to a limited, sophisticated color palette to ensure the focus remains on the textural variations.
This approach turns your tote bag into a modern stitch sampler that feels intentional and artistic, showcasing your skills in a cohesive design.
9. Capture Motion with Scribble Stitching
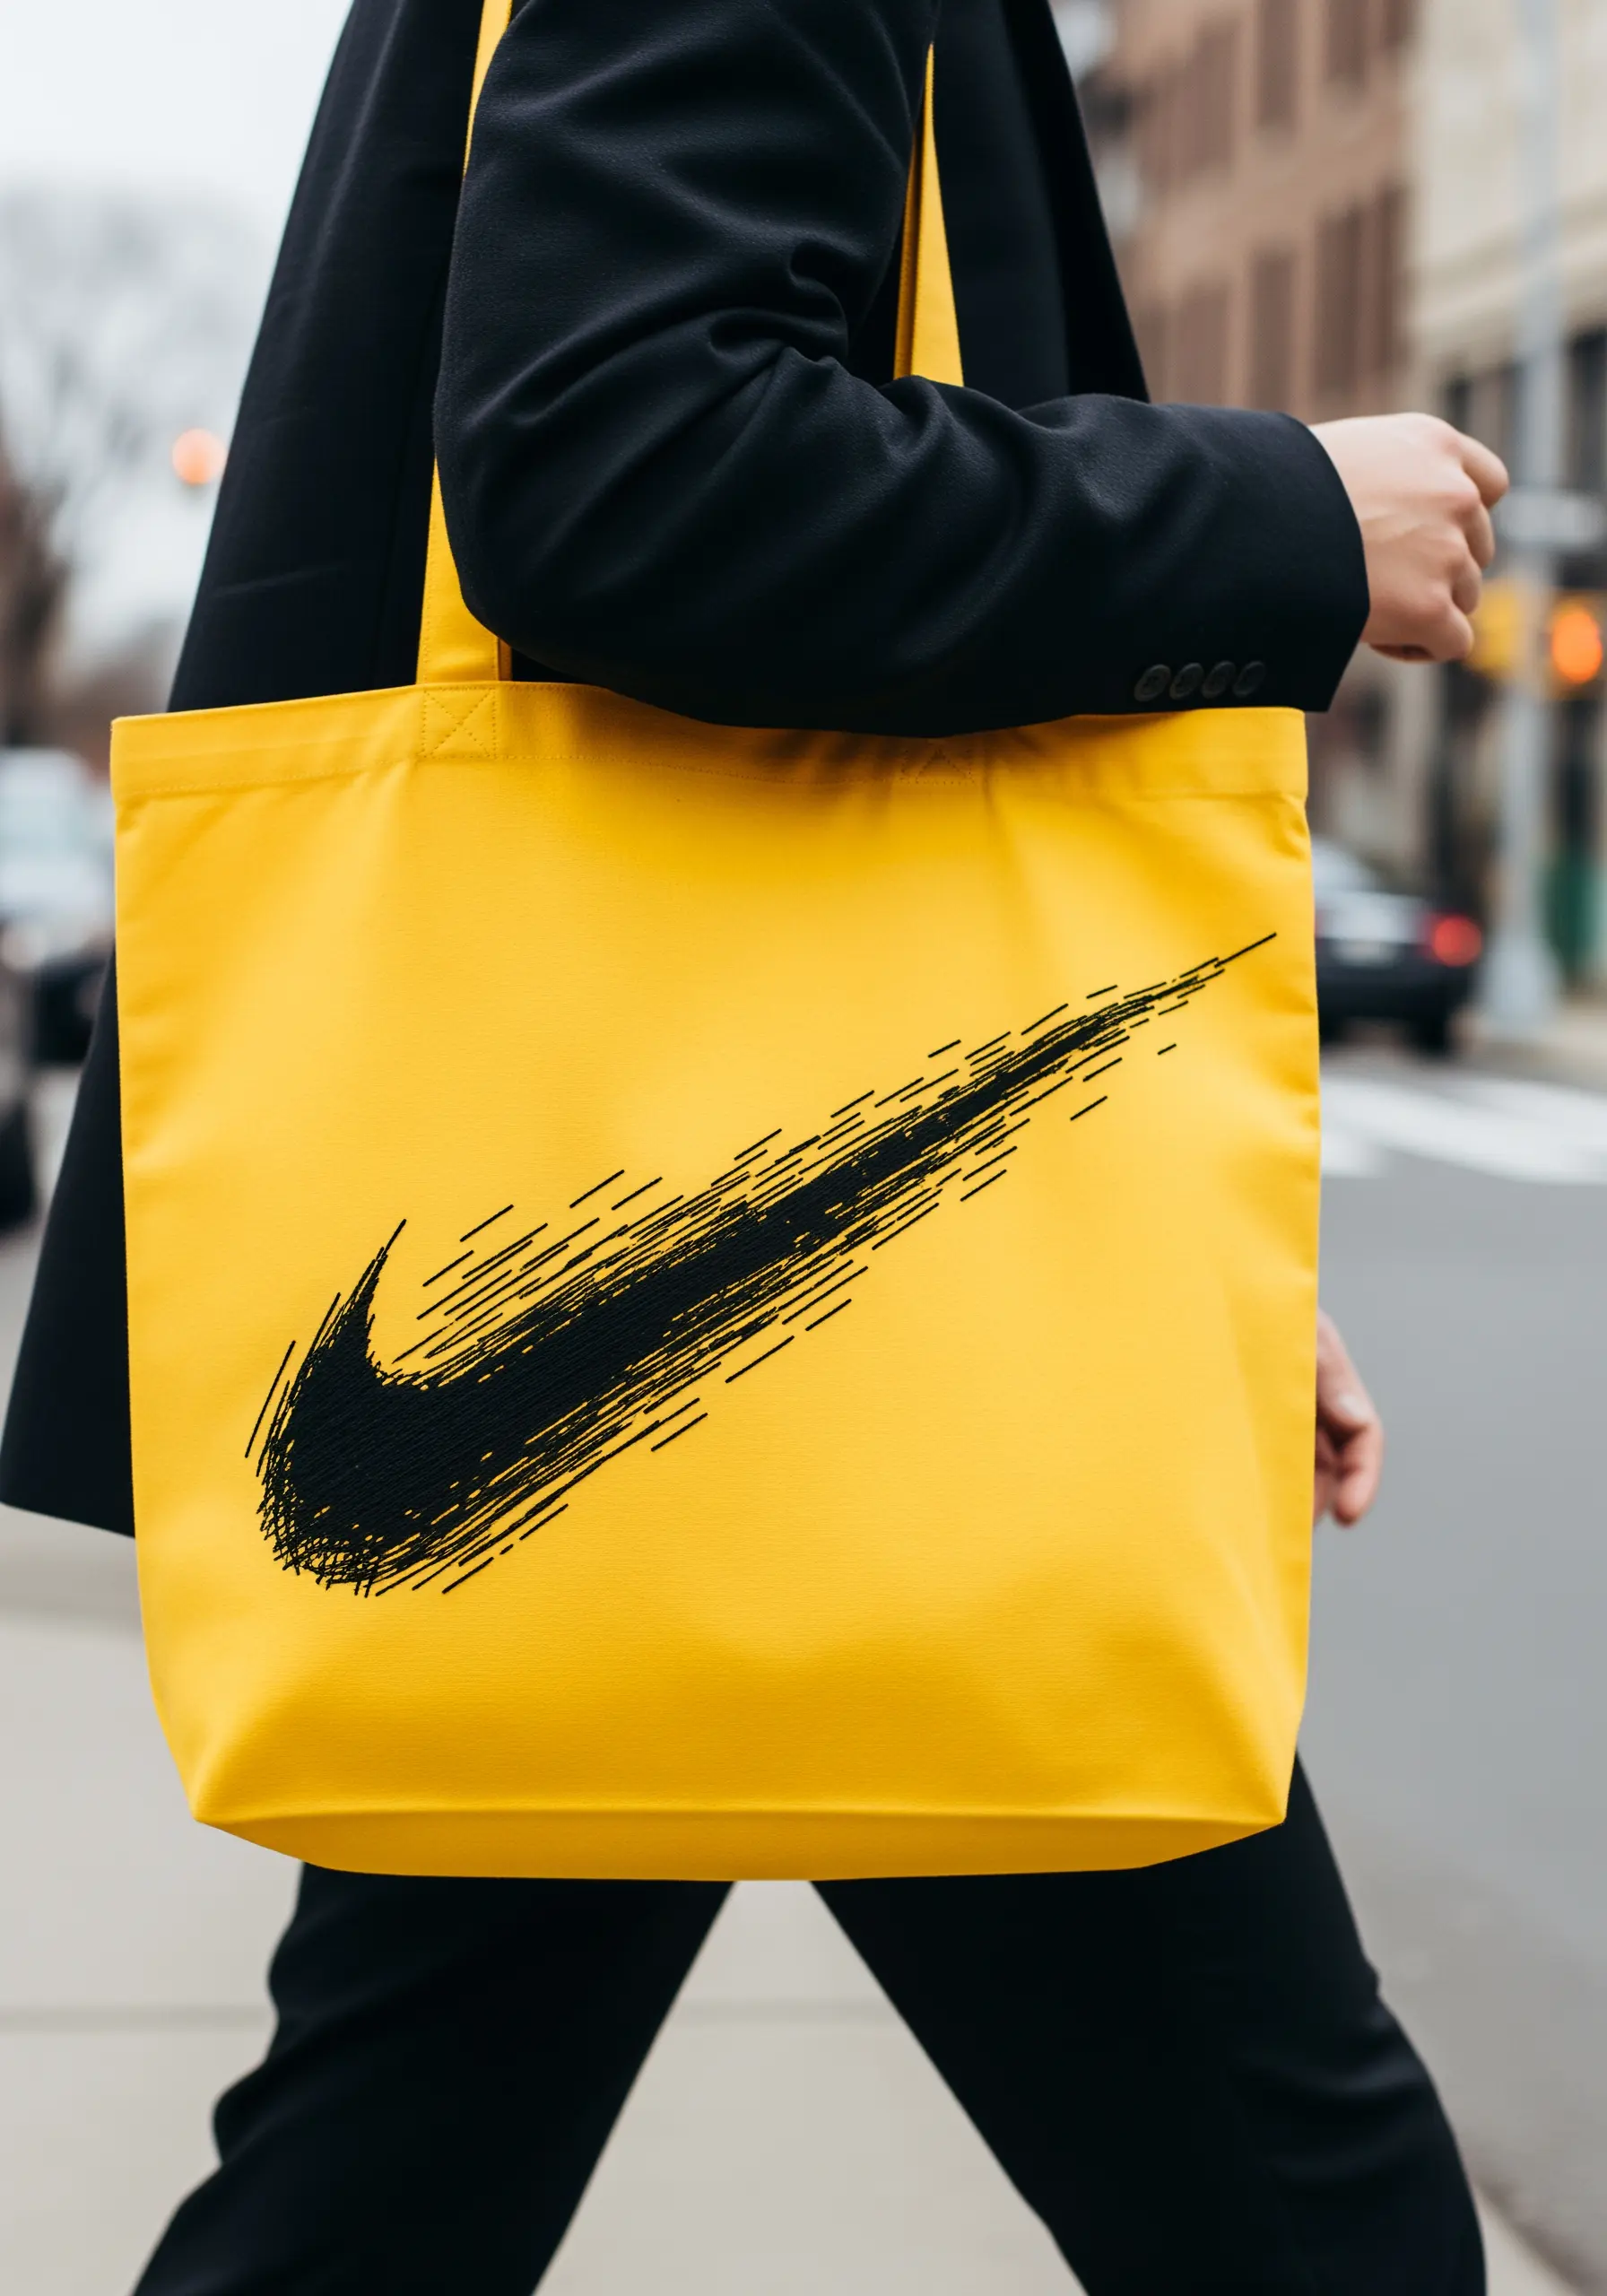
To replicate a sketchy, fast-moving brushstroke, avoid traditional fill stitches.
Instead, use layers of long, dense straight stitches, overlapping them at various angles—a technique often called scribble stitch.
Use a single color, like black, and build up the density in certain areas to create a sense of weight and direction.
This method perfectly captures raw energy and is far more expressive than a simple satin stitch fill, giving the iconic logo a deconstructed, street-style edge.
10. Create Dripping Text with Negative Space
This design cleverly uses negative space to form the letters, making the drips the primary focus.
Outline your letters and then fill the area *around* them with tight, vertical satin stitches.
To create the drips, simply extend some of the vertical stitches downwards at random intervals, varying their lengths.
This technique is visually striking and makes the letters appear as if they are stenciled onto a melting background.
11. Define Form with Geometric Line Work
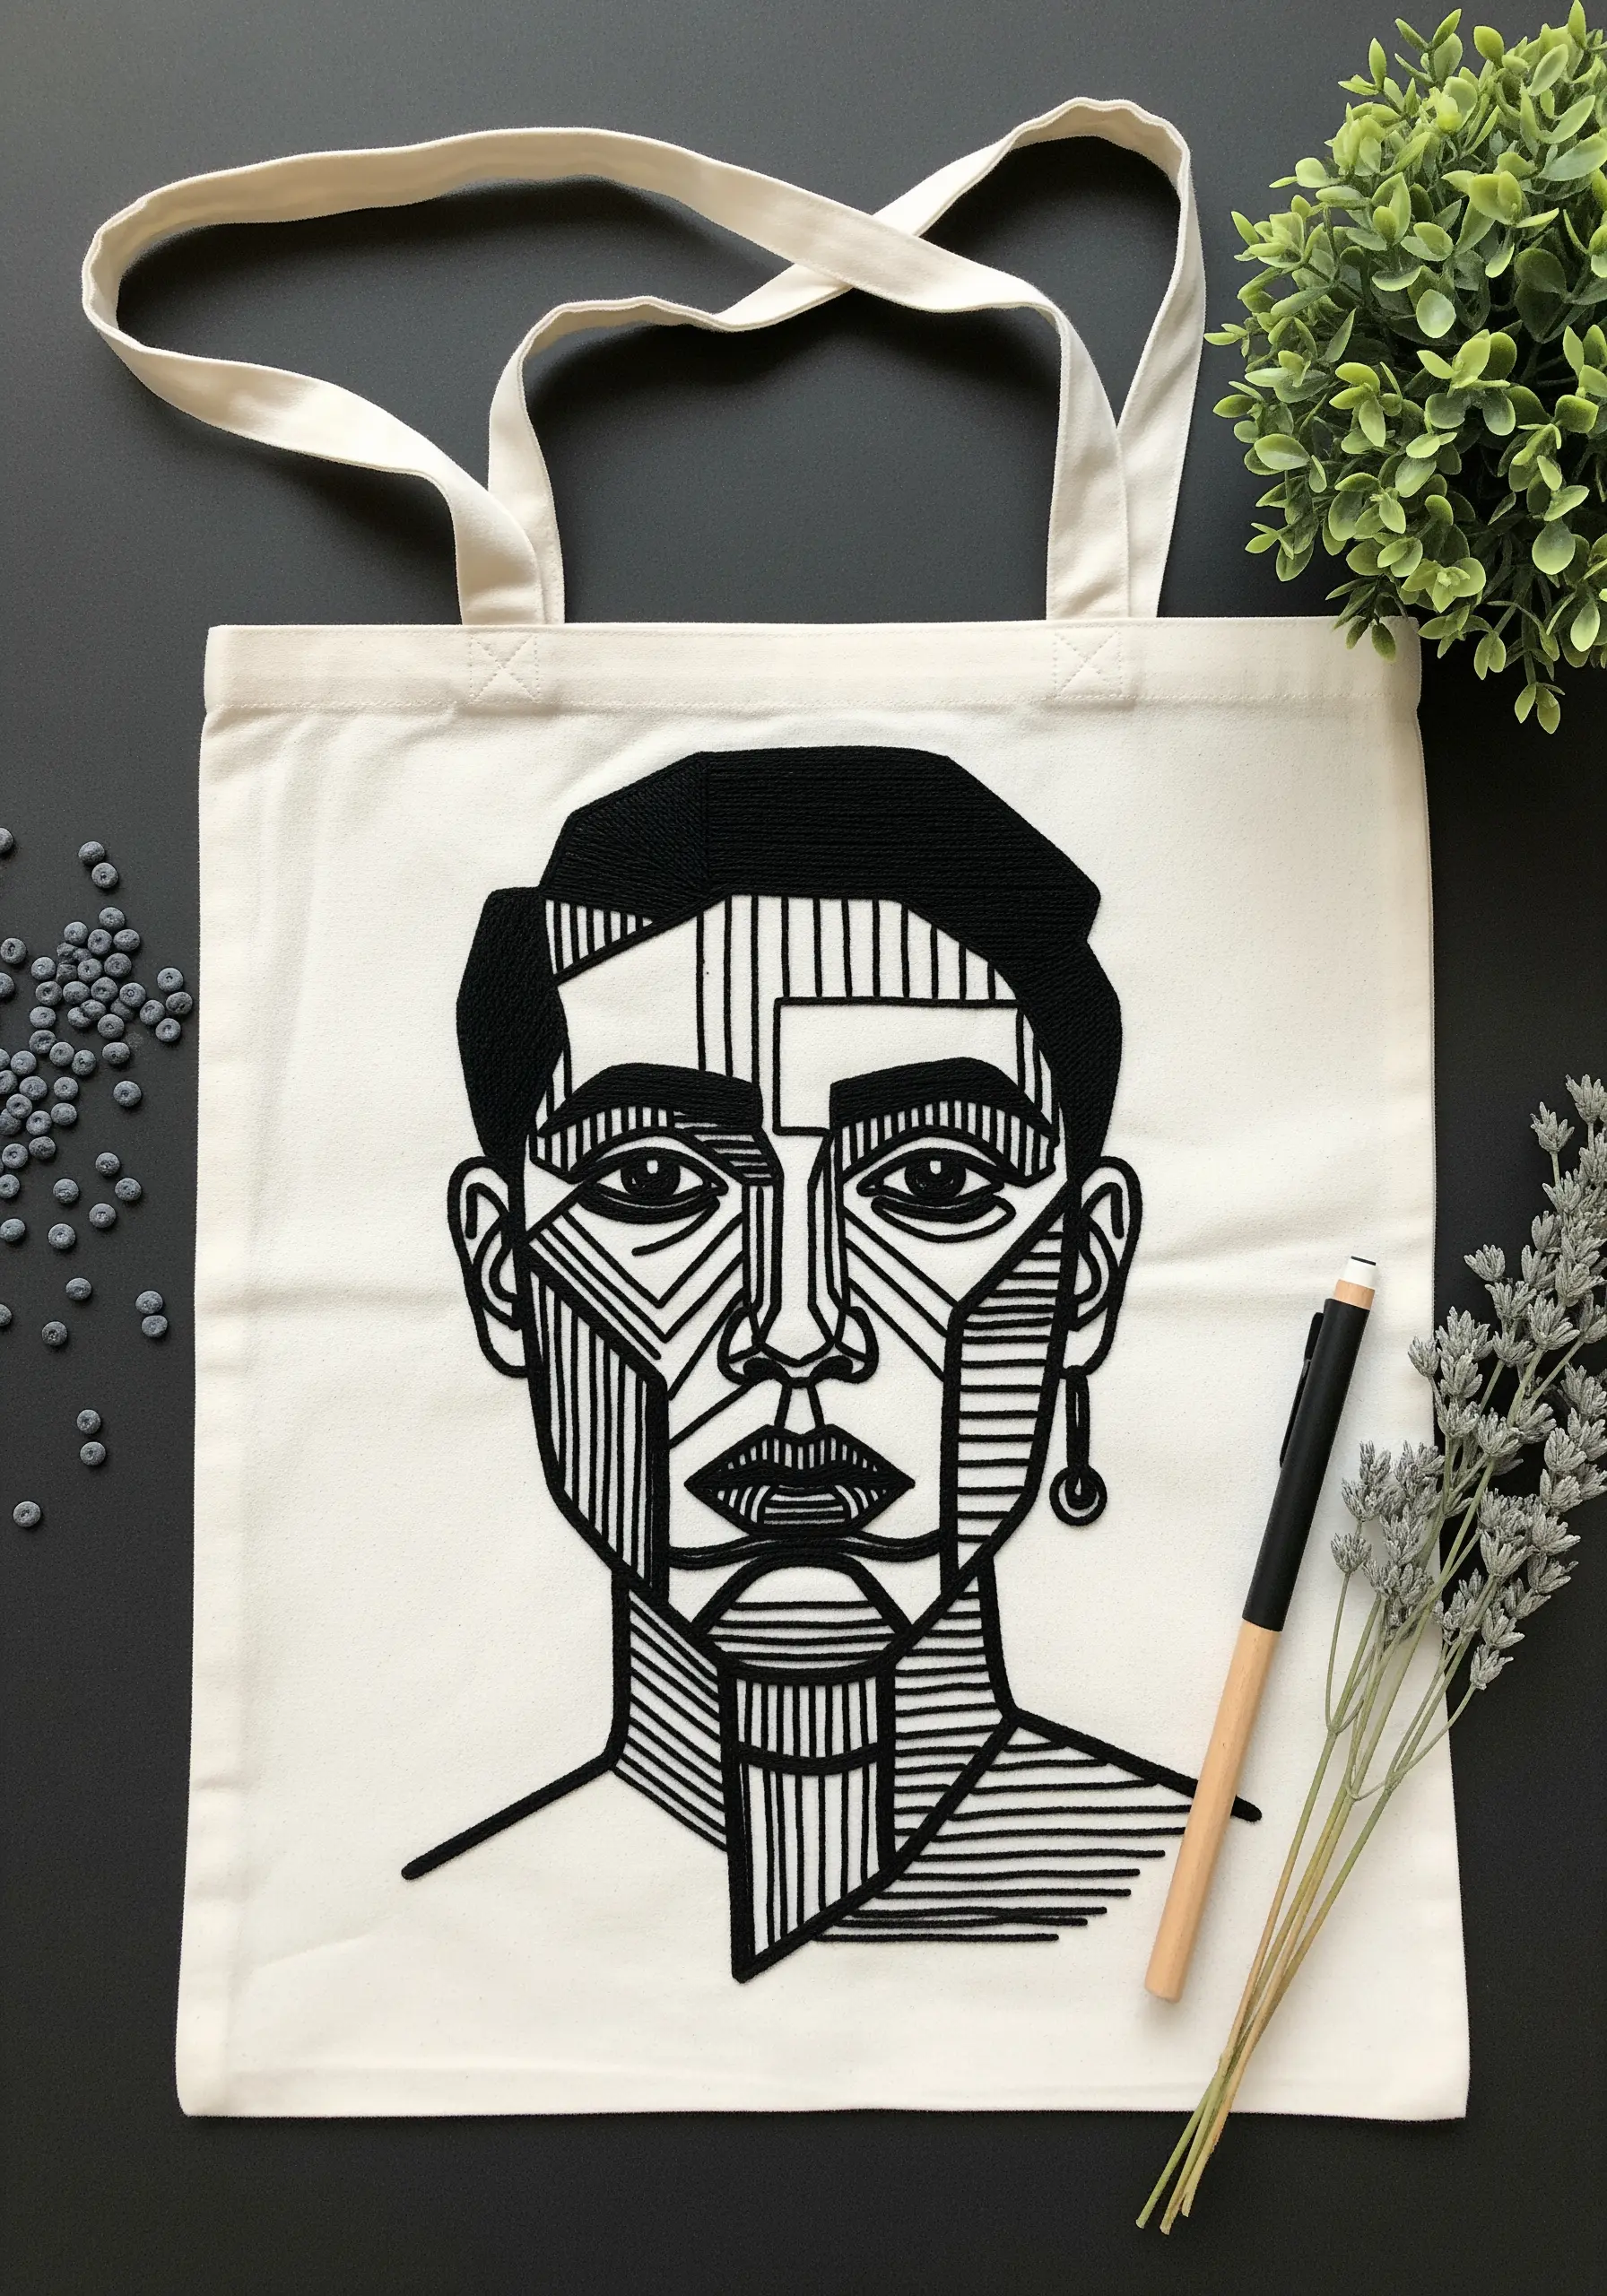
Recreate a cubist-inspired portrait by focusing entirely on line and direction.
Use a consistent 3-strand backstitch to outline every plane of the face. To create the filled-in, shaded areas, simply place your backstitch lines extremely close together.
Pay close attention to the direction of your stitches within each shape; this is what creates the illusion of angles and light.
This meticulous technique results in a design that feels both architectural and artistic, turning simple lines into a complex, dimensional portrait.
12. Layer Neon Outlines for a Tag Wall Effect

Capture the beautiful chaos of a wall covered in graffiti tags by layering simple outlines in vibrant, neon colors.
Use a basic backstitch or stem stitch for each tag, and don’t be afraid to let them overlap and intersect.
The key is the color choice: high-contrast neon threads on a black canvas tote make the design pop and feel electric.
Focus on the overall composition and energy rather than the legibility of each individual word.
13. Add Glossy Highlights for a Hyper-Realistic Effect
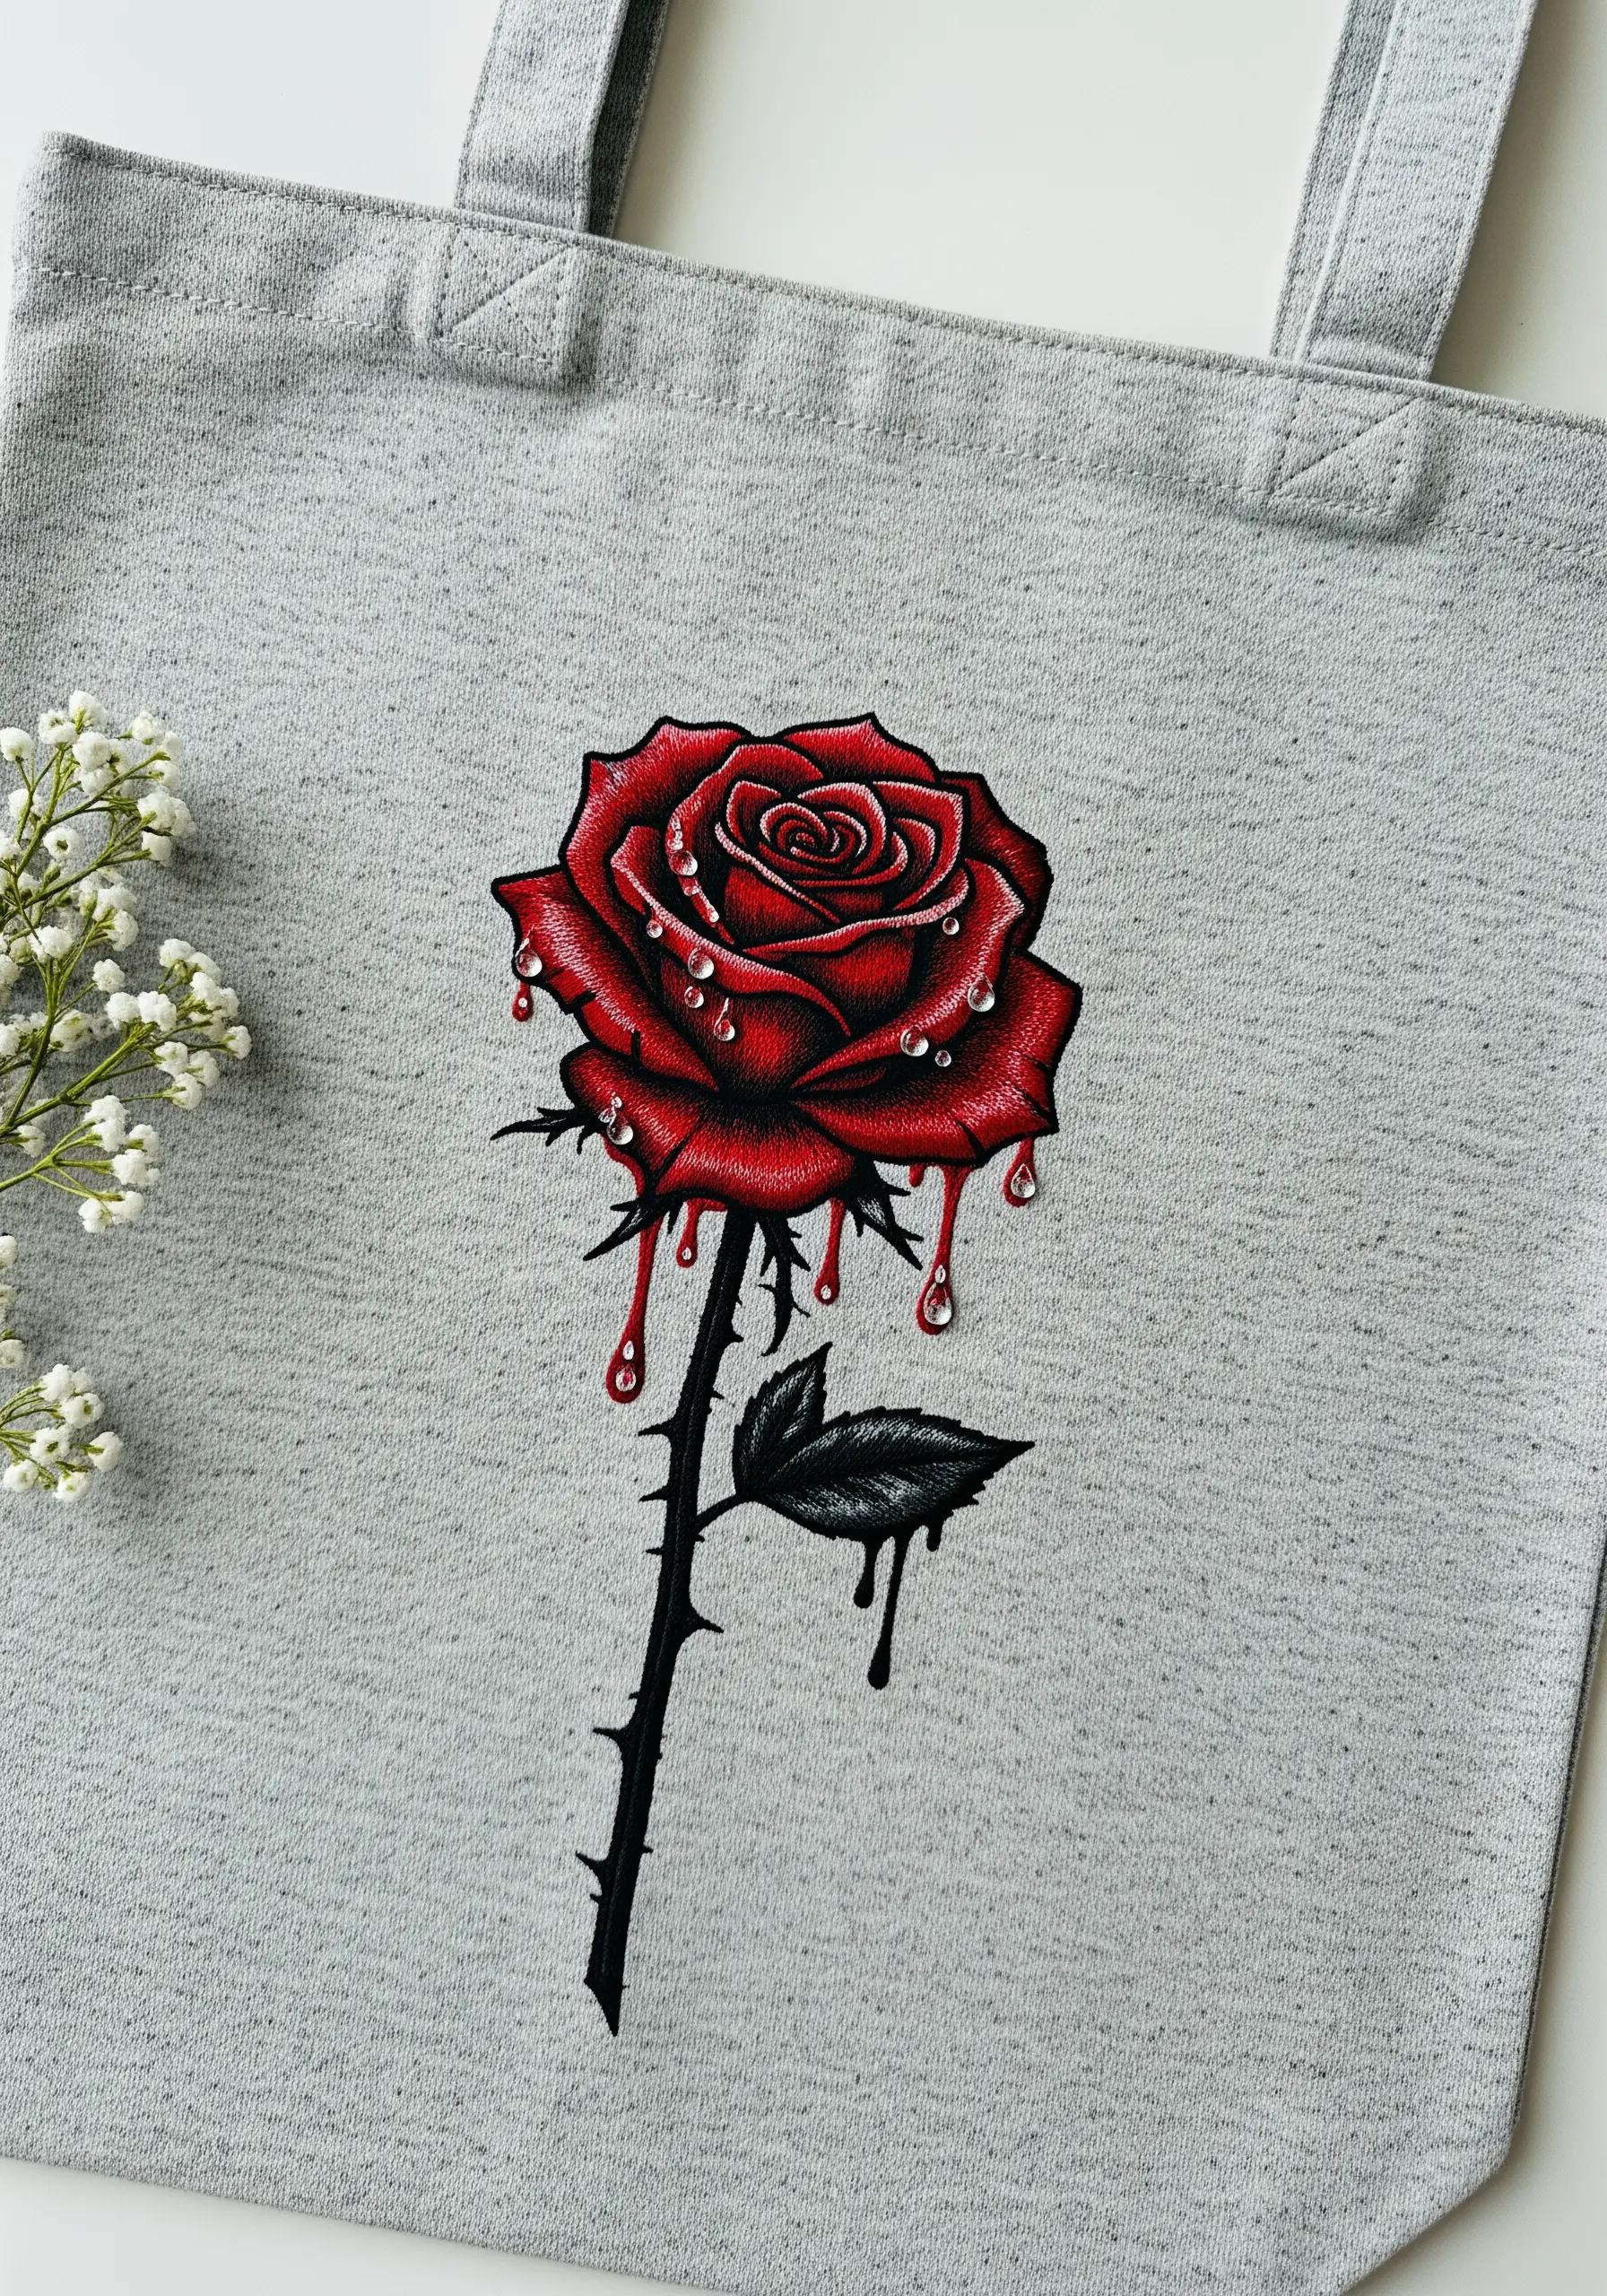
Elevate a classic motif like a rose by focusing on light and texture. Use long-and-short stitch with several shades of red to create smooth, realistic color gradients on the petals.
The magic, however, is in the highlights. After the color is filled, use a single strand of bright white floss to add small, curved stitches on the water droplets and petal edges.
This tiny detail mimics the reflection of light, making the flower and drips look wet and glossy.
14. Achieve Precision with a Simple Backstitch Map
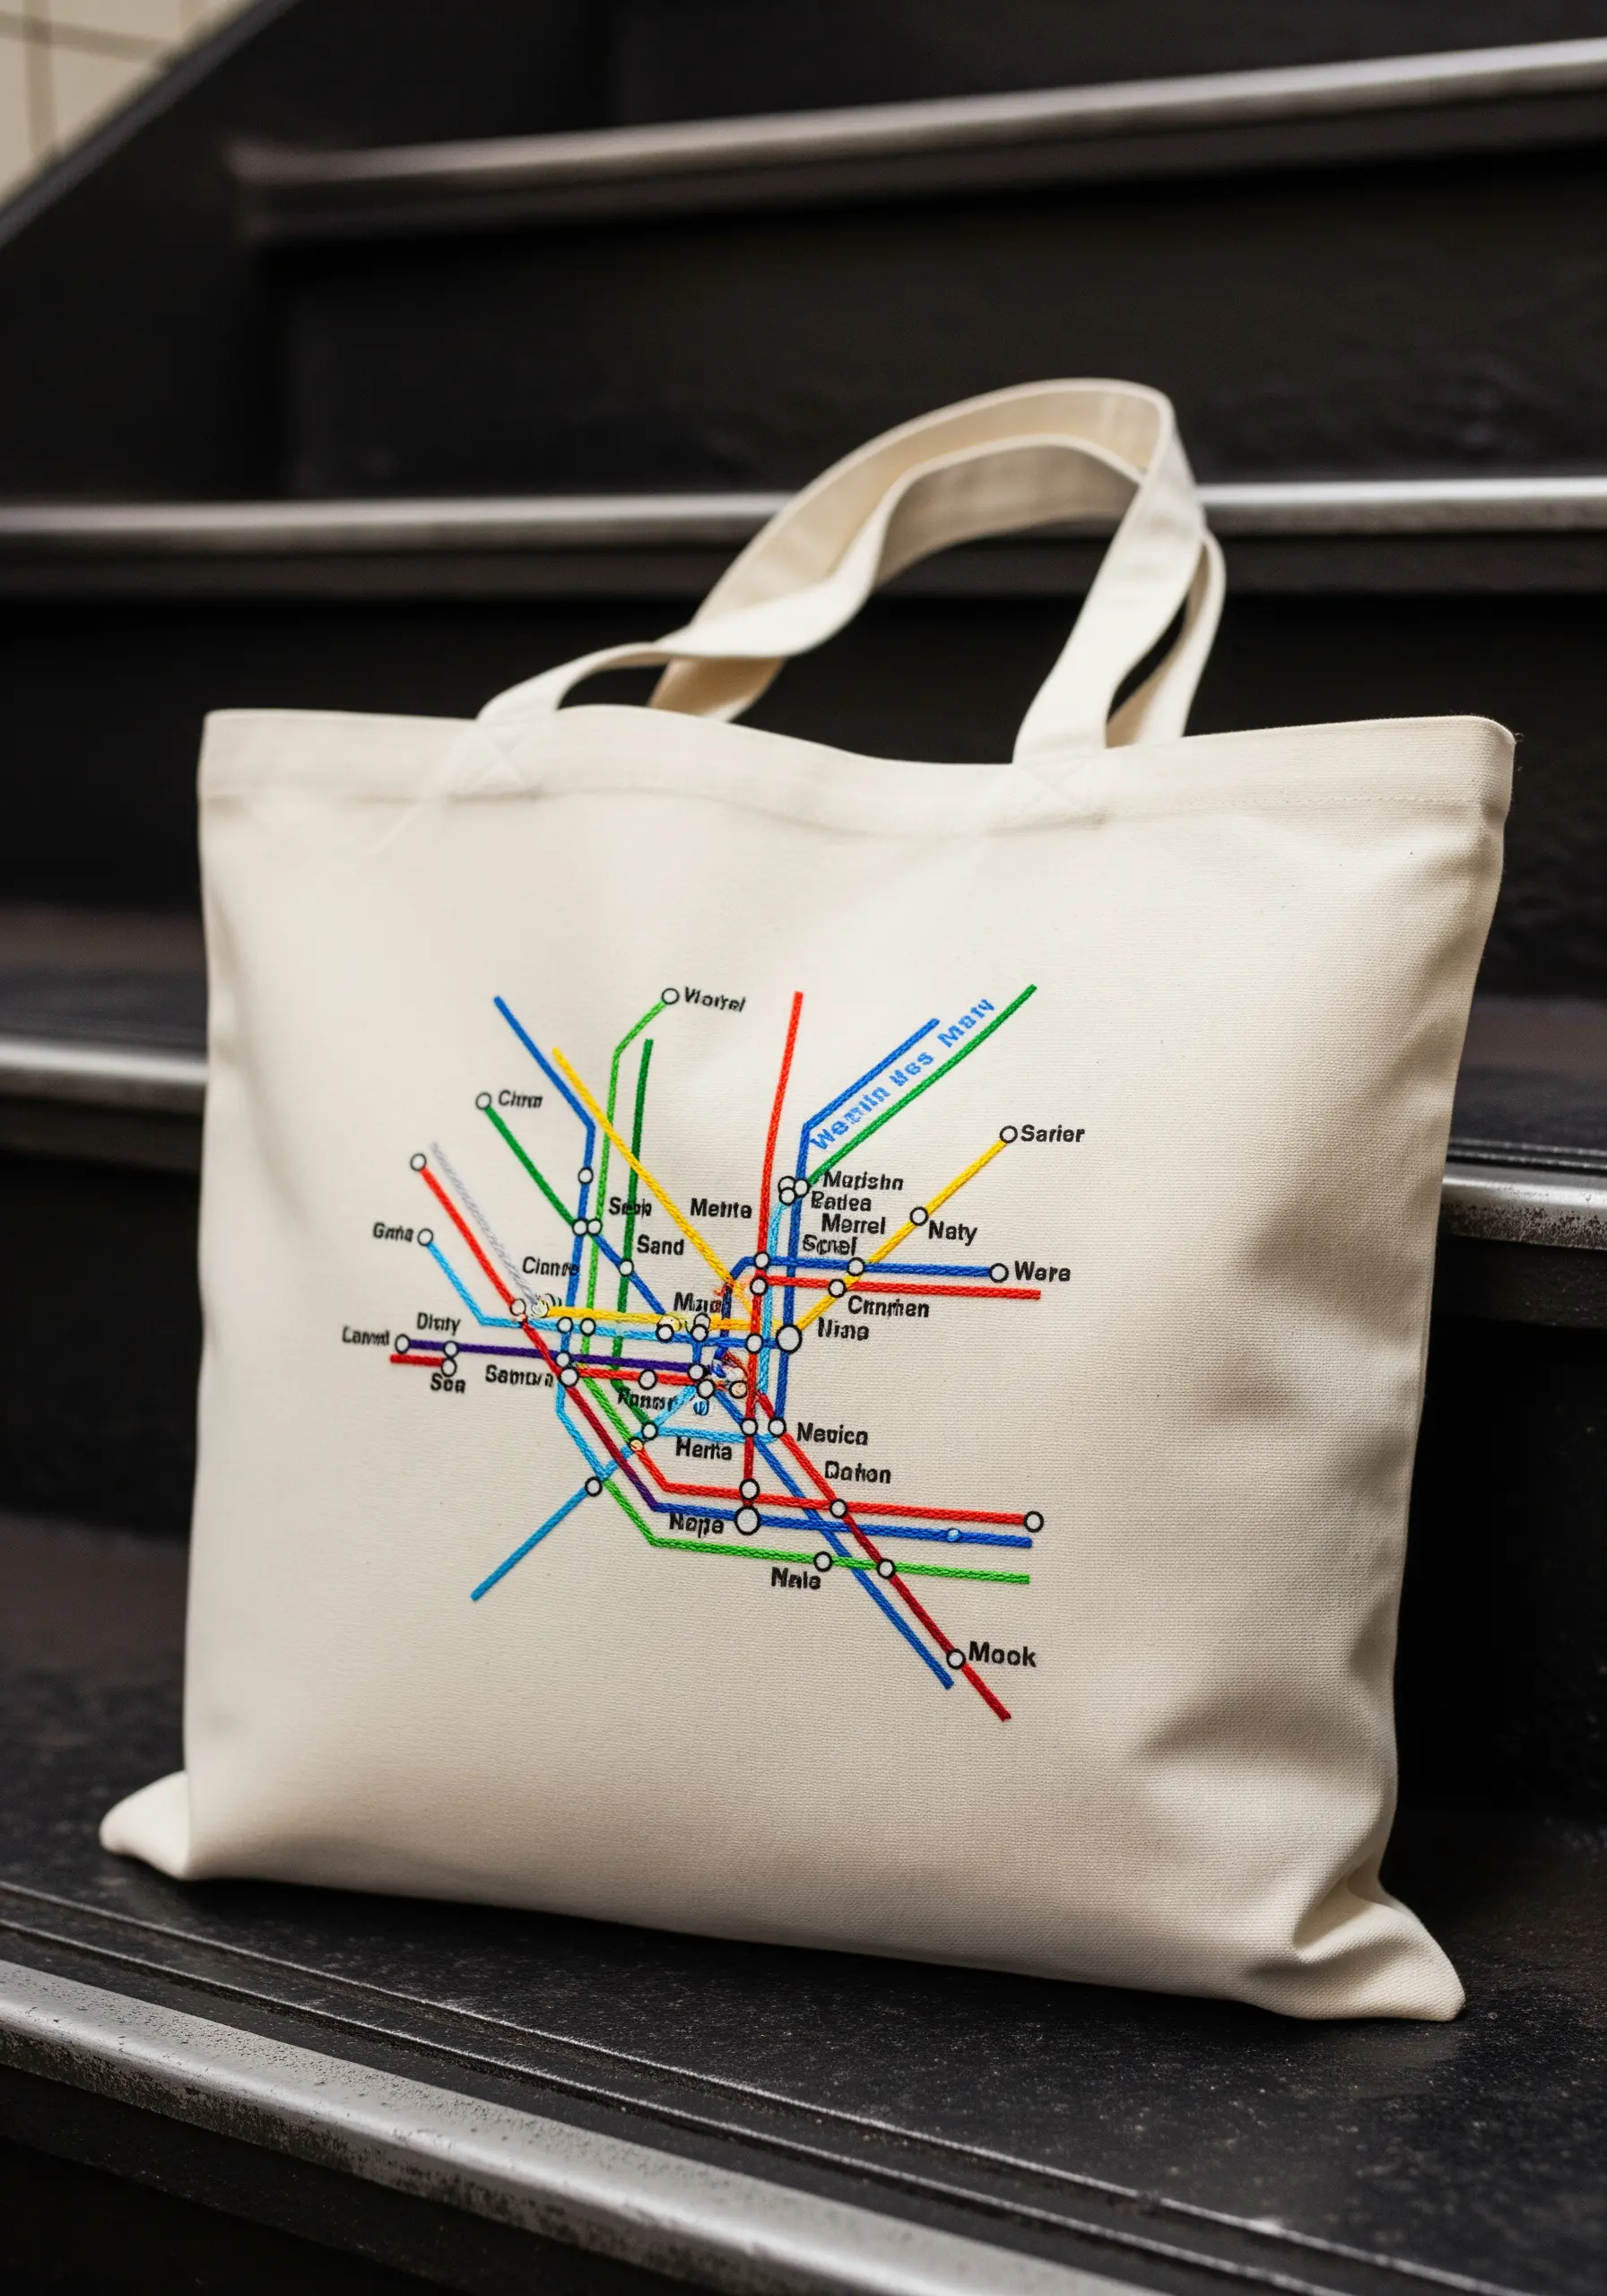
For a design that relies on clean lines, like a subway map, precision is everything. A meticulously executed backstitch is your best tool.
To ensure perfect lines and angles, transfer your pattern using a water-soluble stabilizer—it provides a clear guide and prevents fabric distortion.
Use two strands of floss for a line that is visible but not bulky. This project is a testament to how a fundamental stitch, when done with care, can produce a sharp, modern, and sophisticated result.
15. Create Bold Graphics with Felt Appliqué
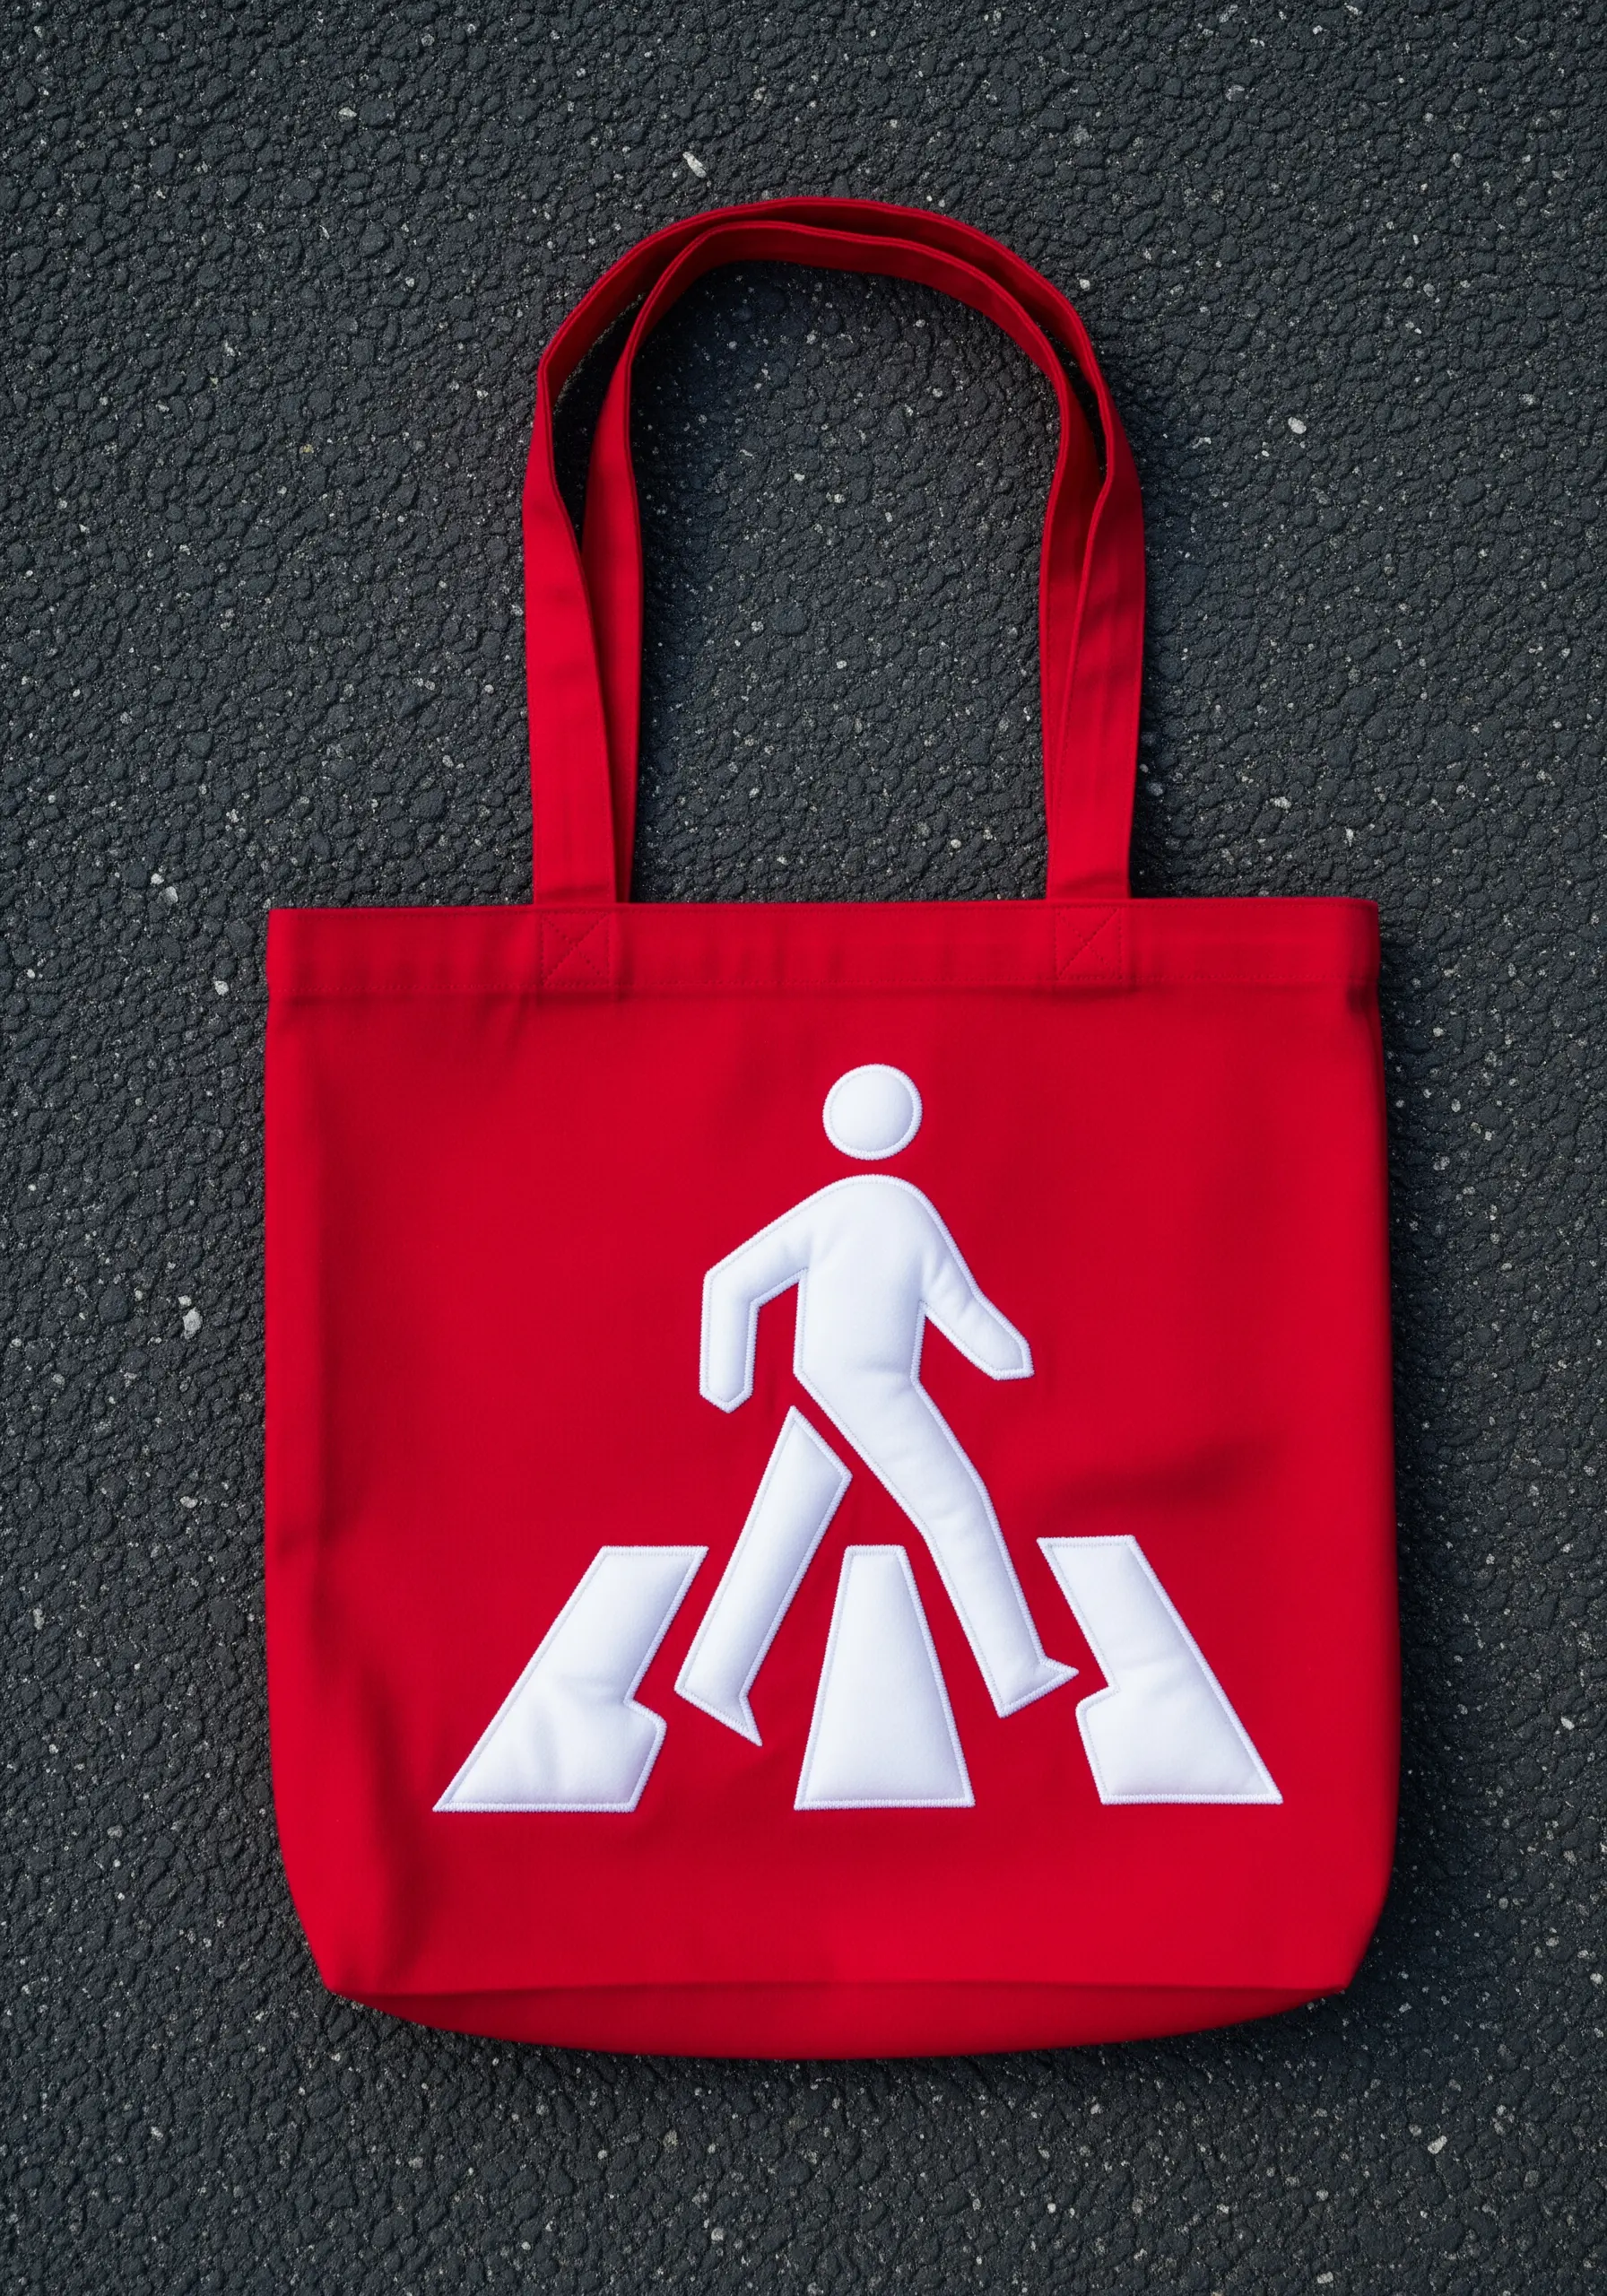
For iconic, solid shapes like a pedestrian crossing sign, appliqué is more impactful than fill stitching.
Cut your shapes from stiff white felt, which won’t fray and provides a slightly raised, dimensional quality.
Adhere the felt pieces to your tote with a temporary fabric glue or fusible webbing, then secure the edges with a neat, tight blanket stitch using matching white thread.
The result is a crisp, clean graphic that pops against the bright red fabric.
16. Combine Patchwork and Graffiti Monograms
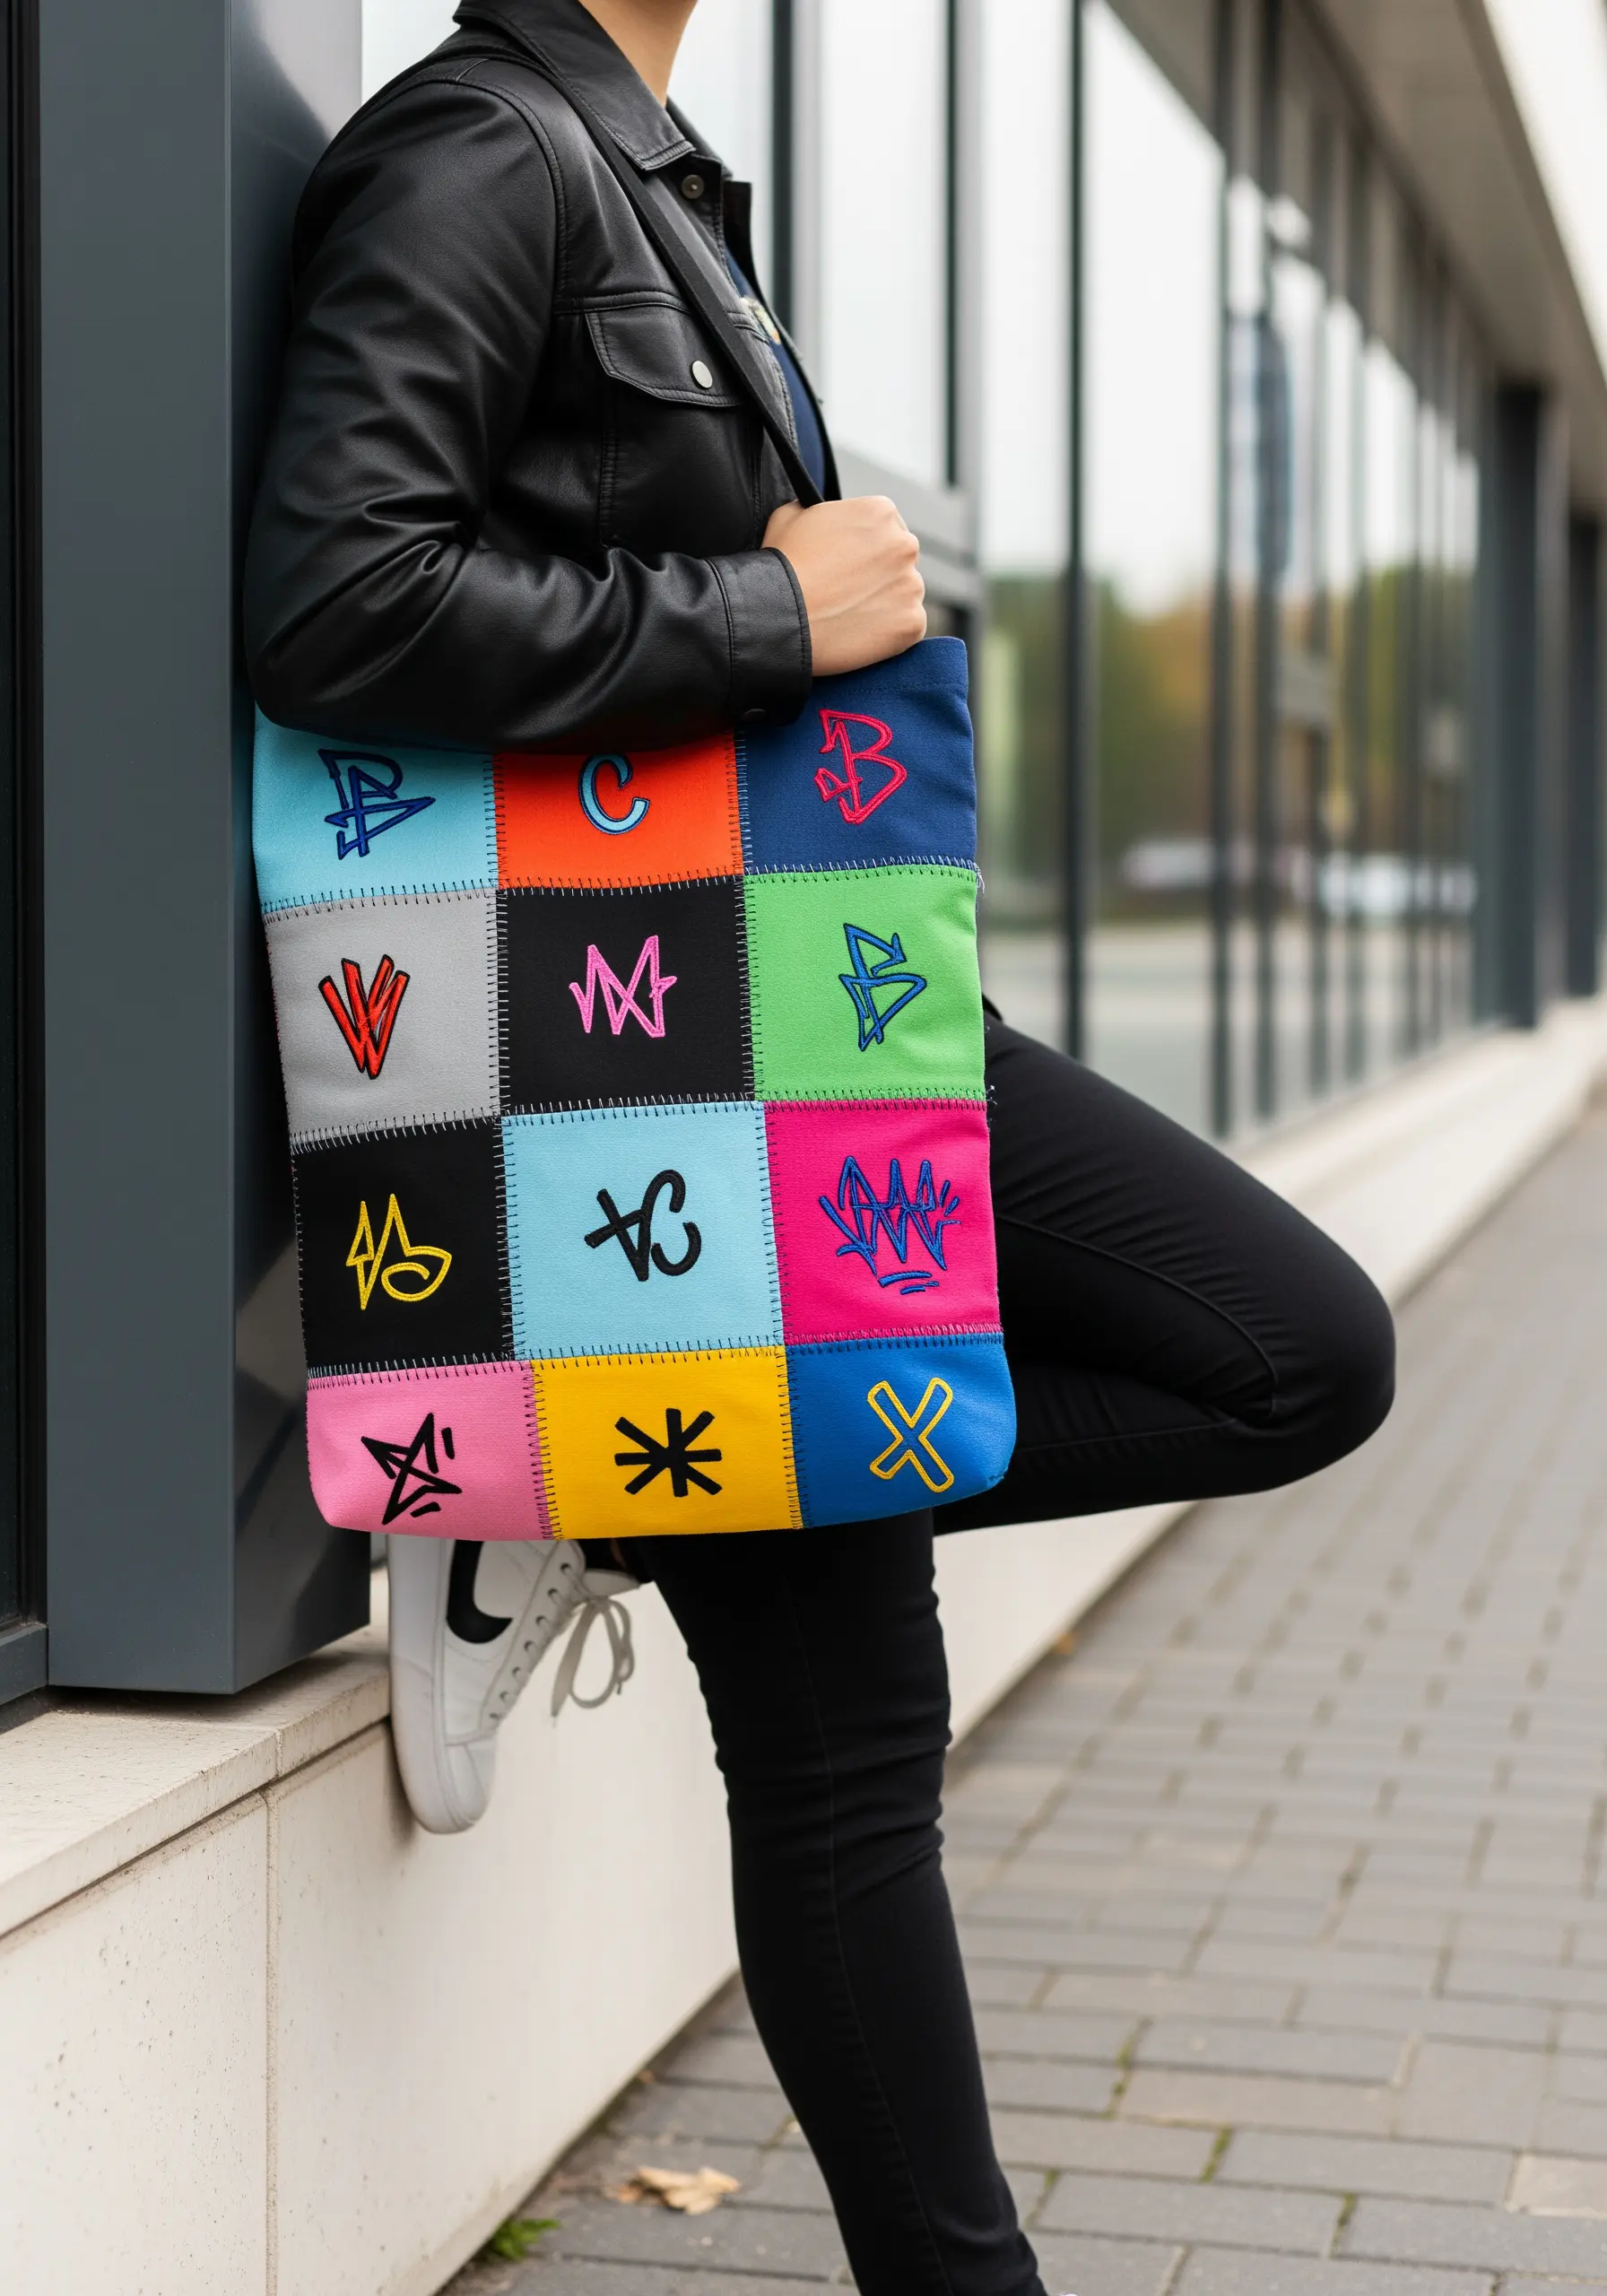
Create a unique textile canvas by first sewing together squares of brightly colored fabric.
Once your patchwork base is complete, treat each square as a mini-canvas for a single graffiti-style letter or symbol.
Use a contrasting, bold satin stitch or chain stitch to make each monogram pop.
The black zigzag stitch used to join the squares adds to the deconstructed, urban aesthetic, making the entire piece feel like a curated collection of street art tags.
17. Juxtapose Harsh and Soft Textures

Tell a story by contrasting your stitch textures. For the barbed wire, use a silver metallic thread and a twisted chain stitch to create a rough, metallic look. Add the barbs with sharp, tight straight stitches.
In contrast, fill the small bird with soft, smooth long-and-short stitches using a gentle, matte cotton floss.
This intentional difference in texture—sharp and shiny versus soft and matte—is what gives the design its emotional impact, highlighting the theme of delicate life within a harsh environment.
18. Mimic Faded Paint with Dense French Knots
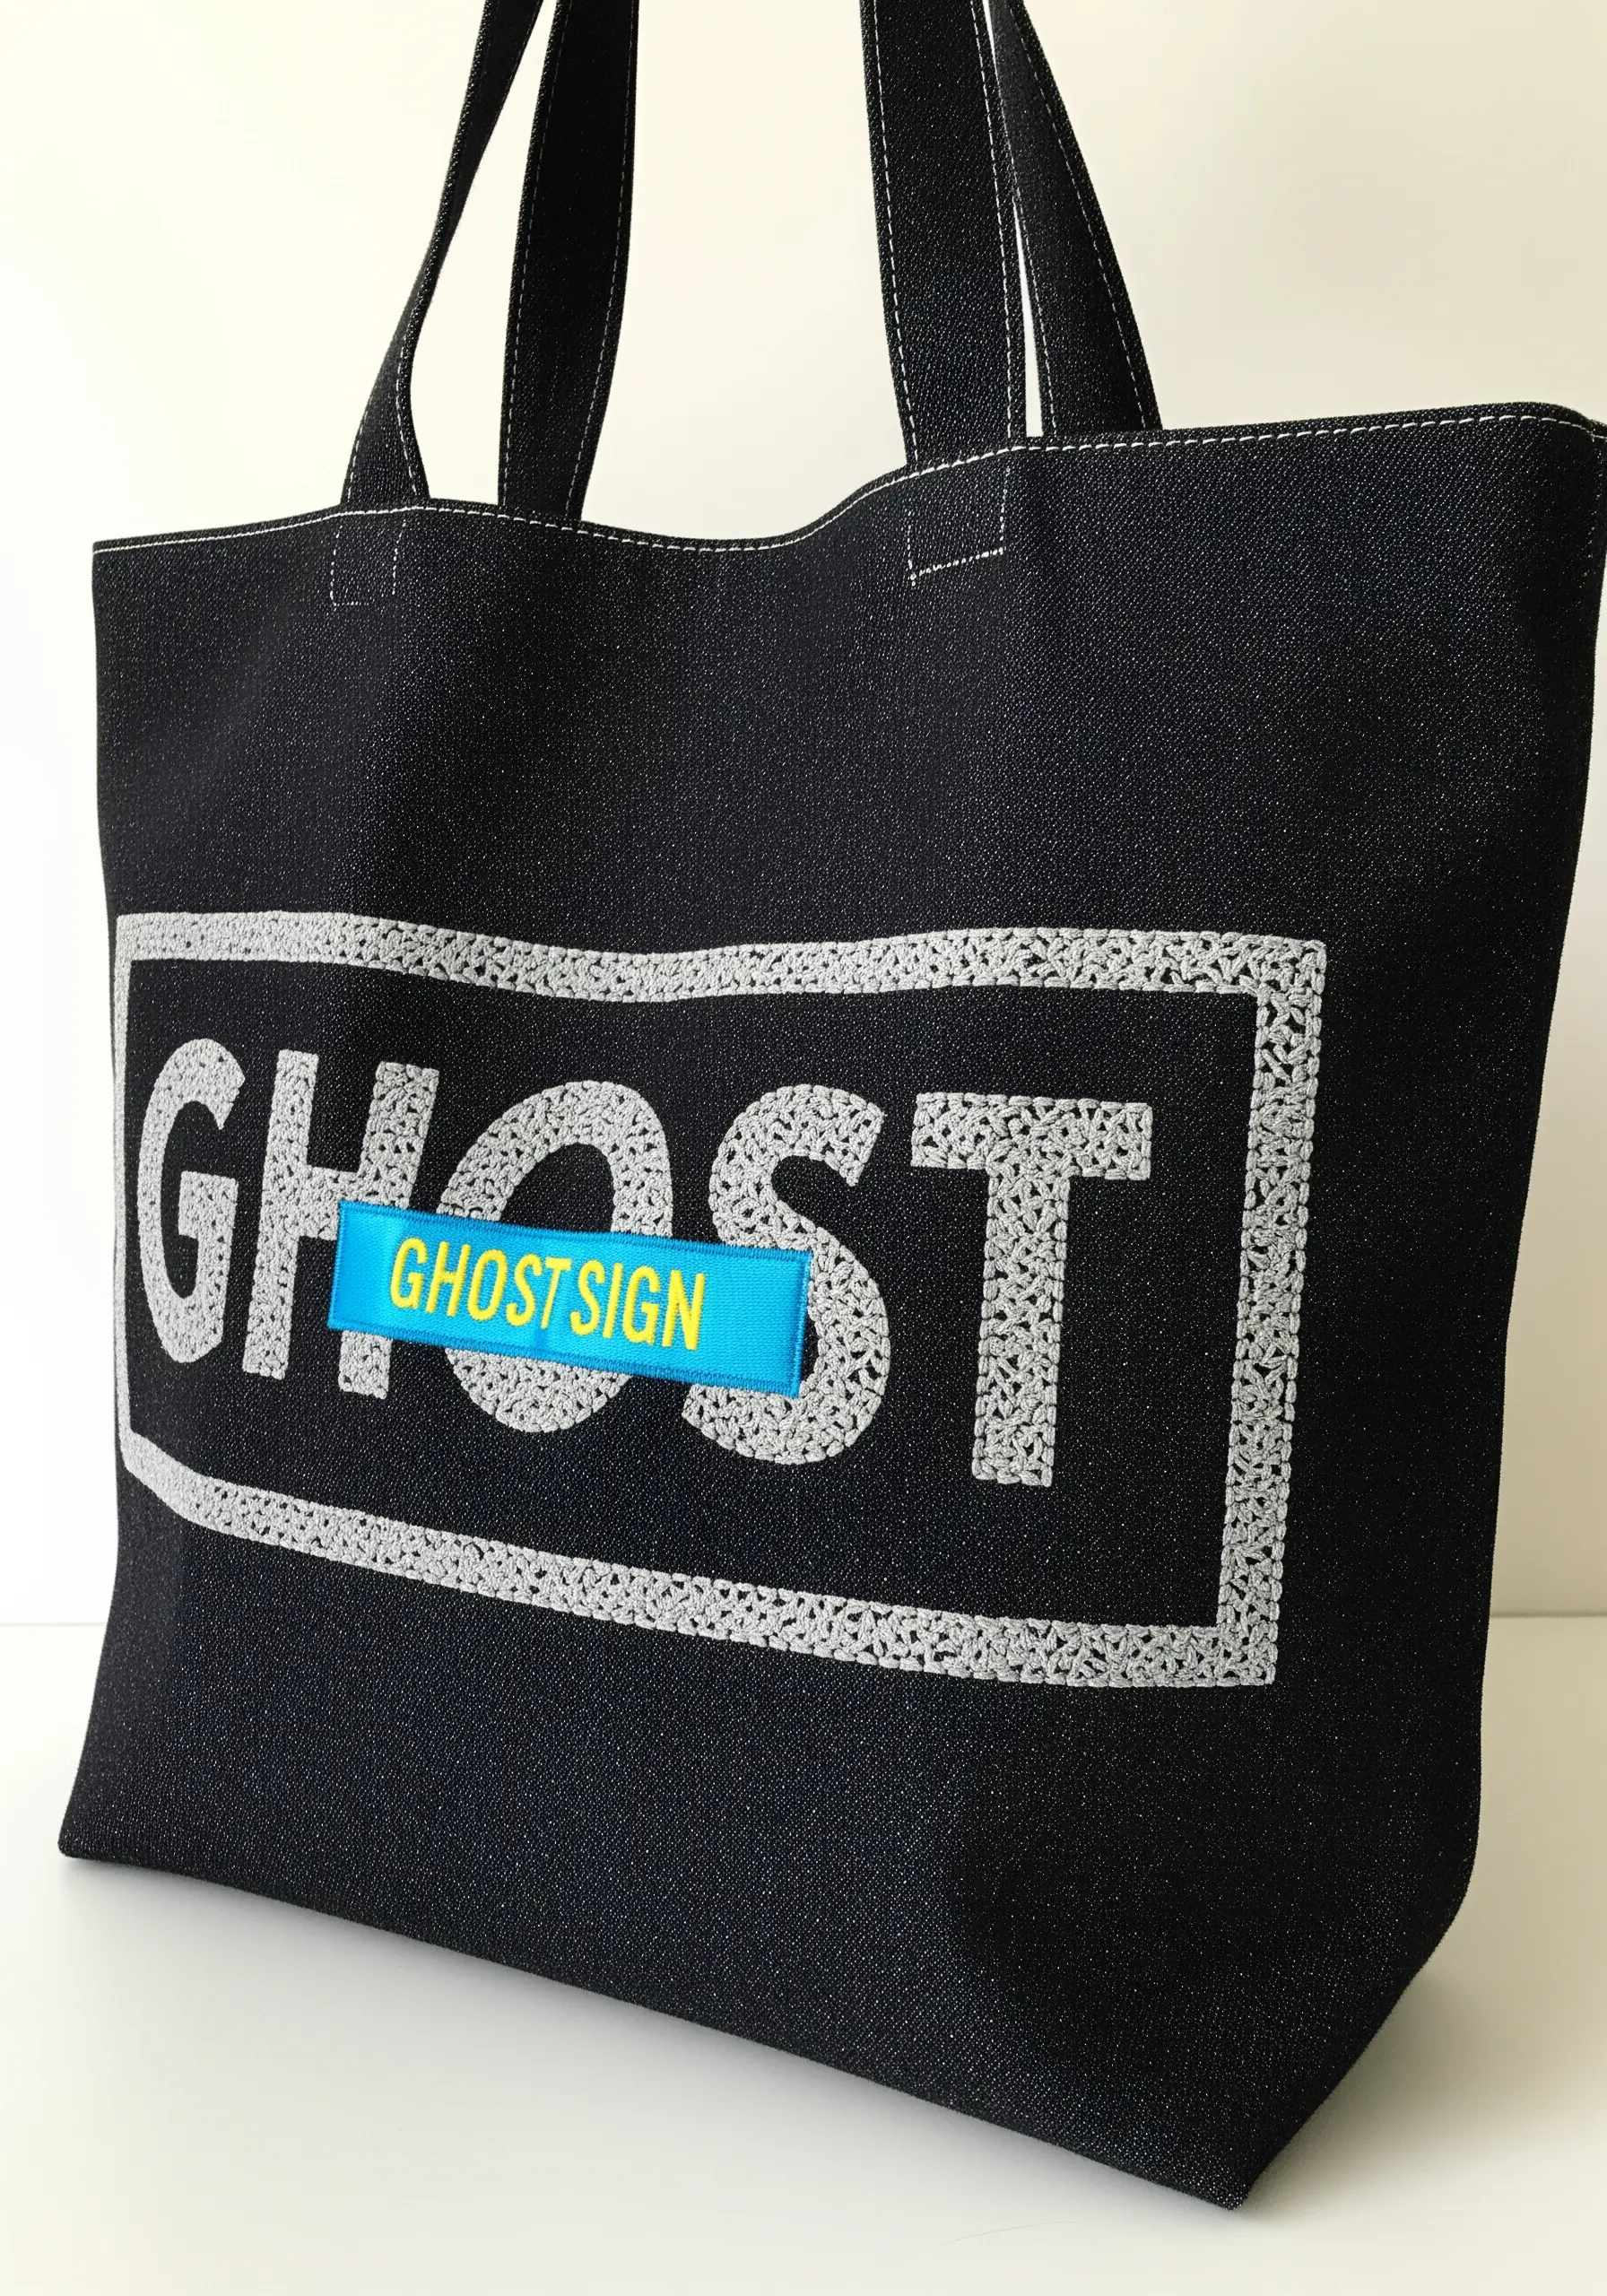
To create the weathered, textured look of a ghost sign, skip smooth satin stitches.
Instead, fill the letters of your main word with thousands of tiny French knots using a light gray or off-white thread. This technique creates a stippled, almost pixelated effect that looks like faded, peeling paint.
Layer a crisp, brightly colored appliqué patch on top for a modern twist that highlights the contrast between old and new.
19. Illuminate a Scene with a Radial Satin Stitch
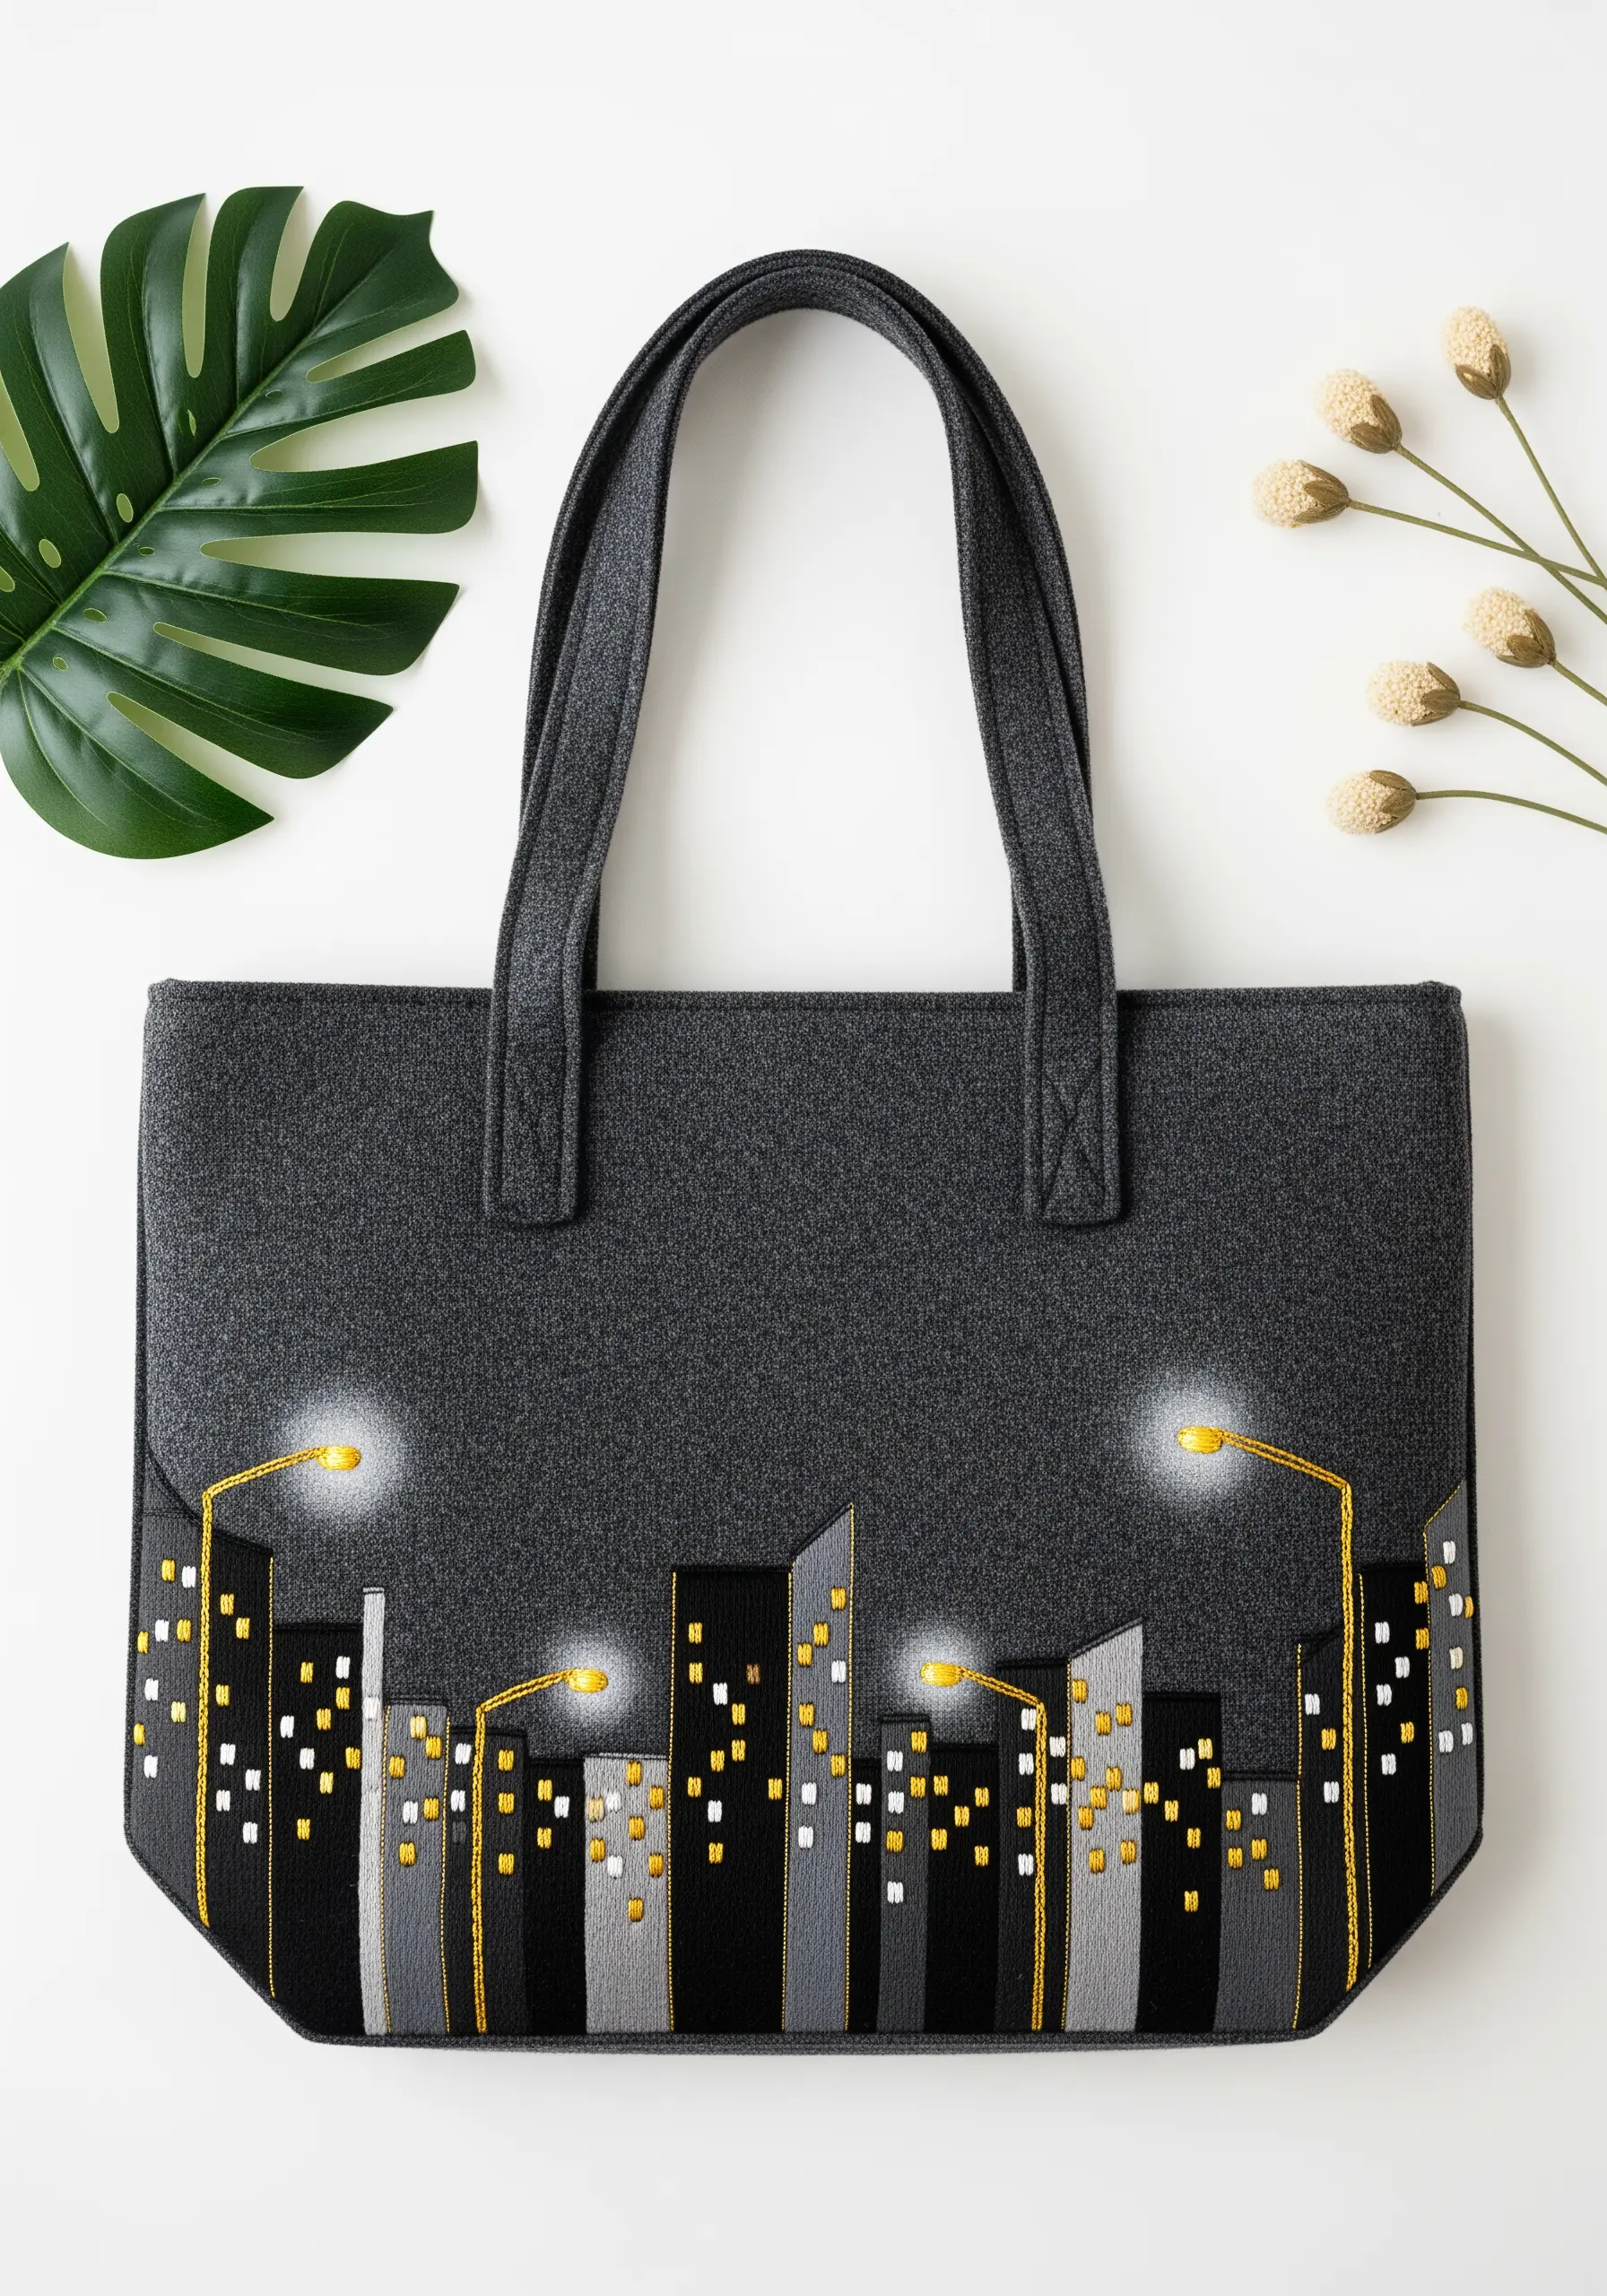
Bring a nightscape to life by creating a realistic glow effect. After creating your buildings with appliqué or fill stitches, focus on the streetlights.
Stitch the lamp itself with a bright yellow satin stitch. Then, using a lighter yellow or pale gold thread, create the ‘glow’ by stitching long, straight stitches that radiate outwards from the lamp.
Finish with a few shorter ‘rays’ in a metallic thread to add a sparkling, halo-like effect that truly sells the illusion of light.
20. Achieve an Abstract Tag Effect with Seed Stitch
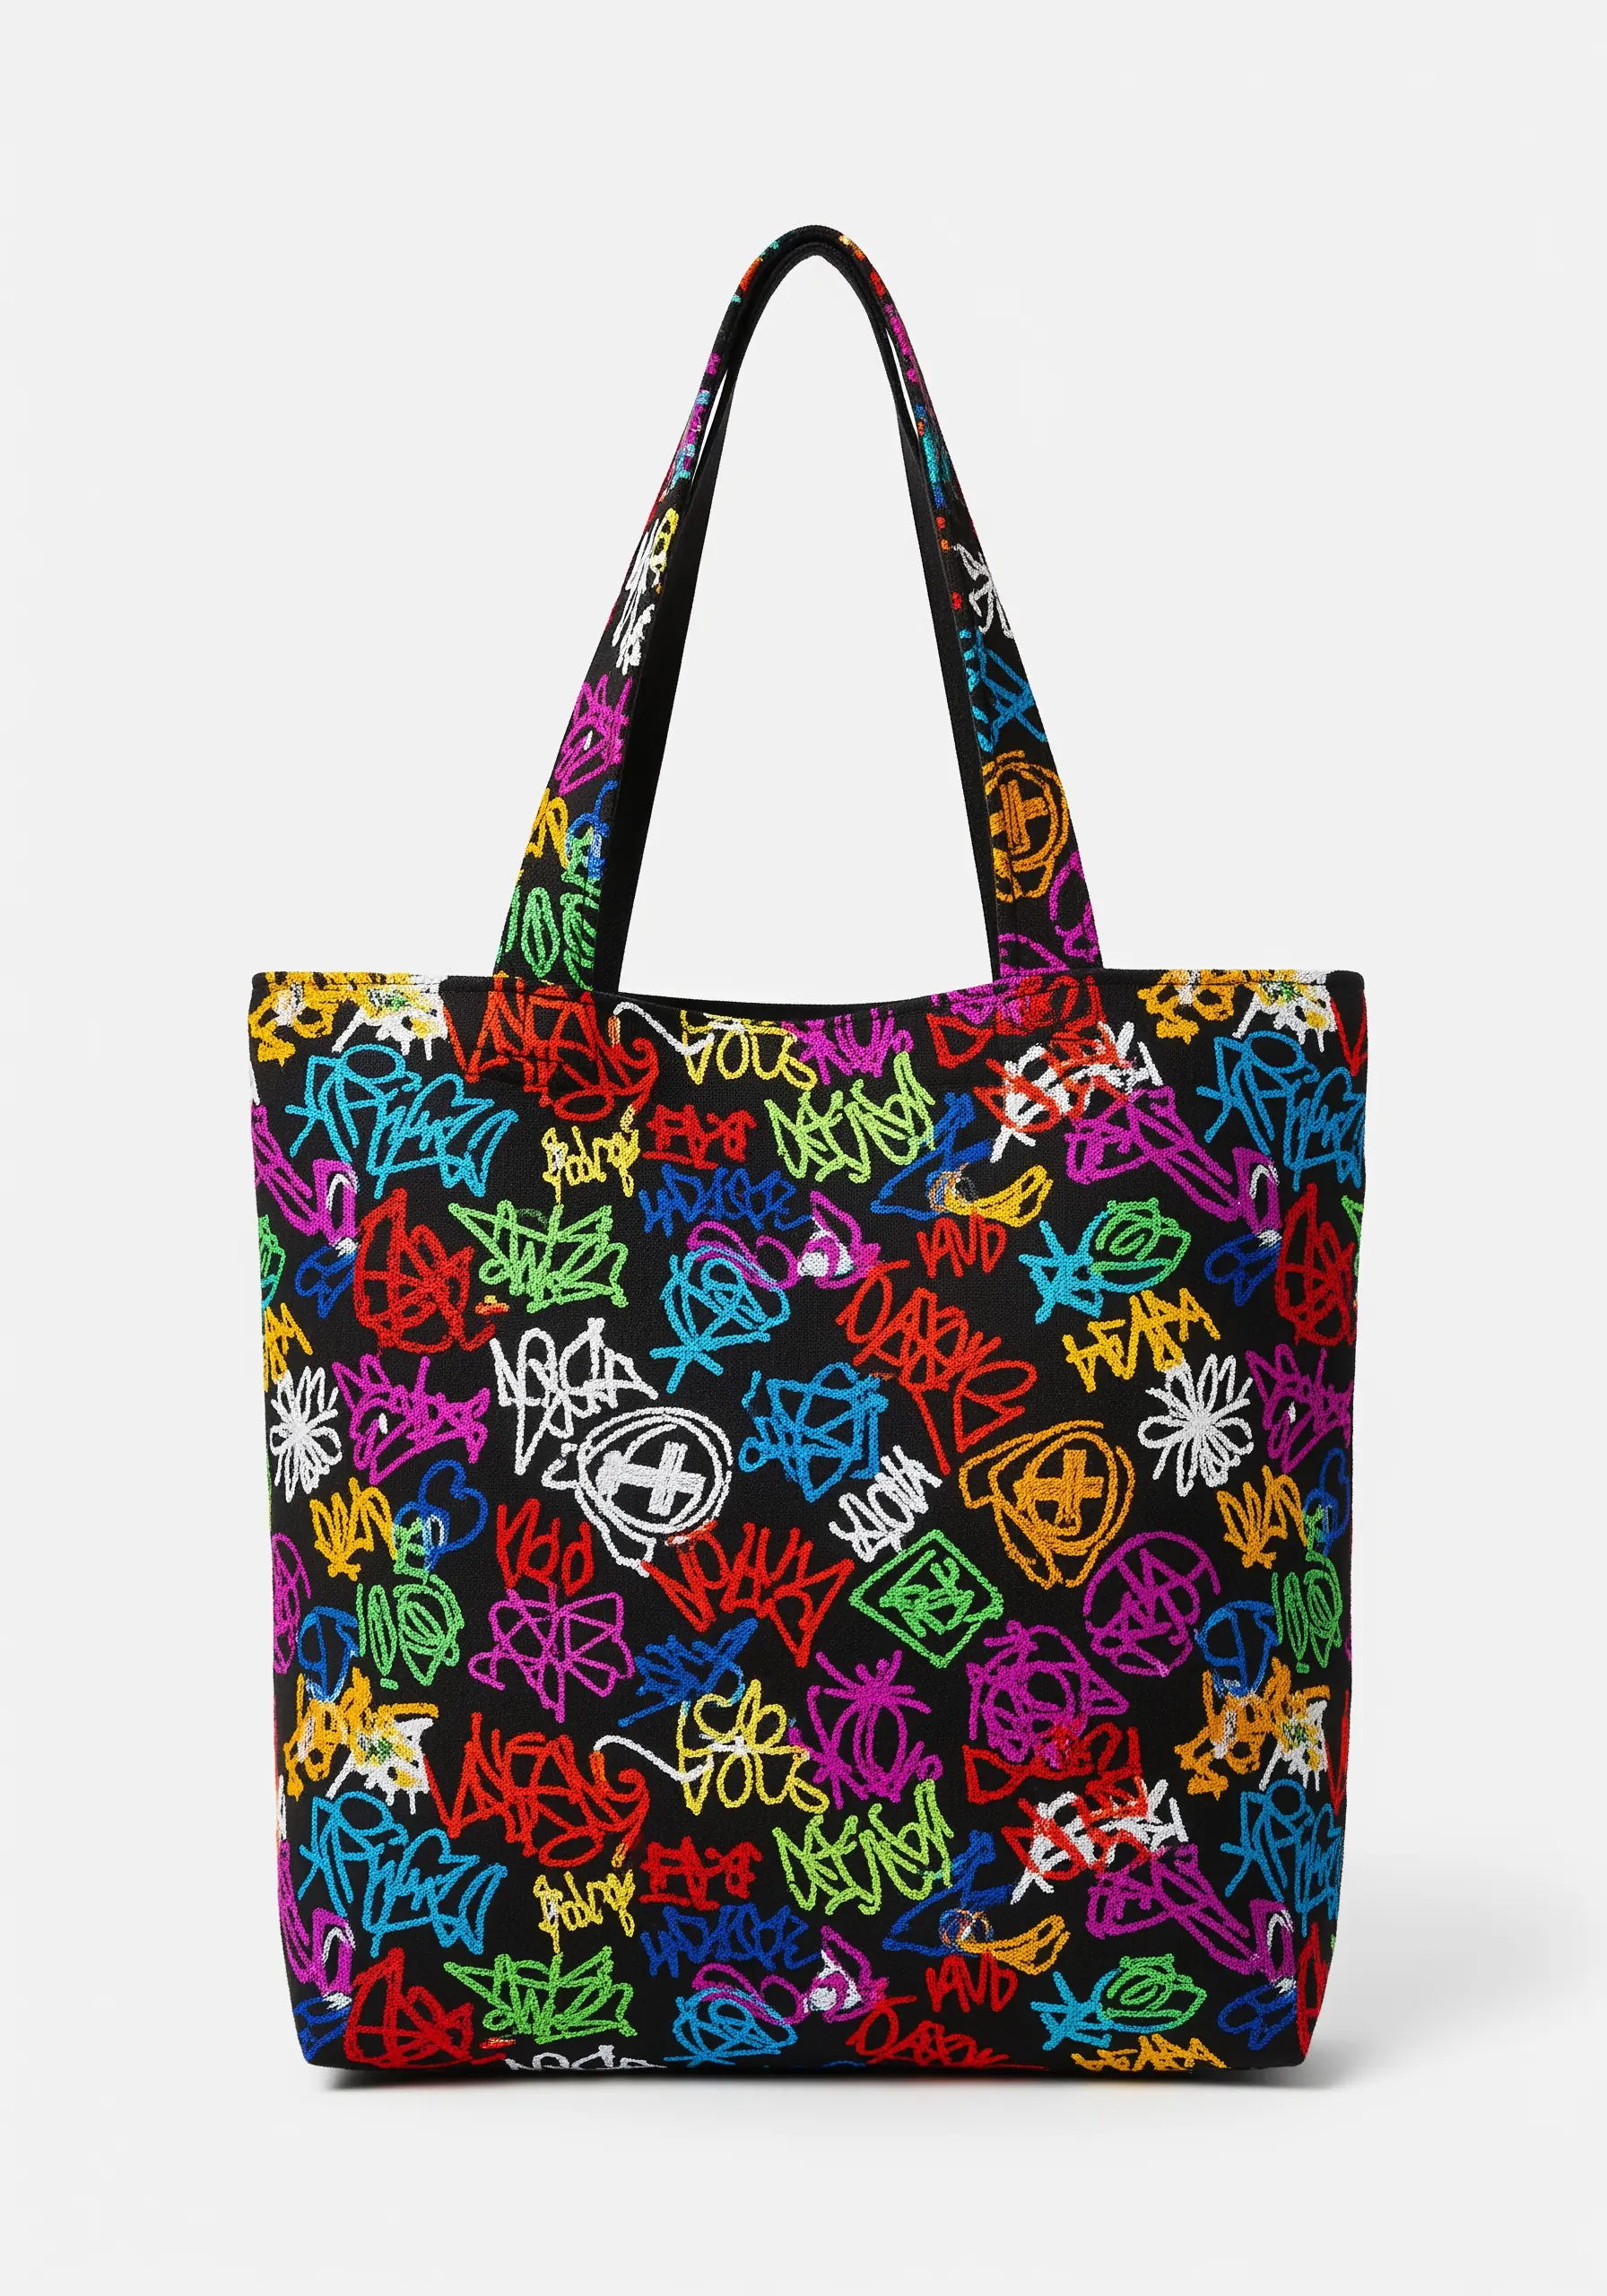
For an all-over pattern that captures the essence of graffiti without literal words, use the seed stitch.
Outline your abstract tag shapes and fill them entirely with tiny, randomly placed straight stitches (seed stitches).
This creates a textural, spray-painted look rather than a solid line.
Use a riot of clashing, bright colors on a dark background to enhance the abstract, energetic feel of a wall layered with years of art.
21. Create an Explosive Burst with Directional Straight Stitches
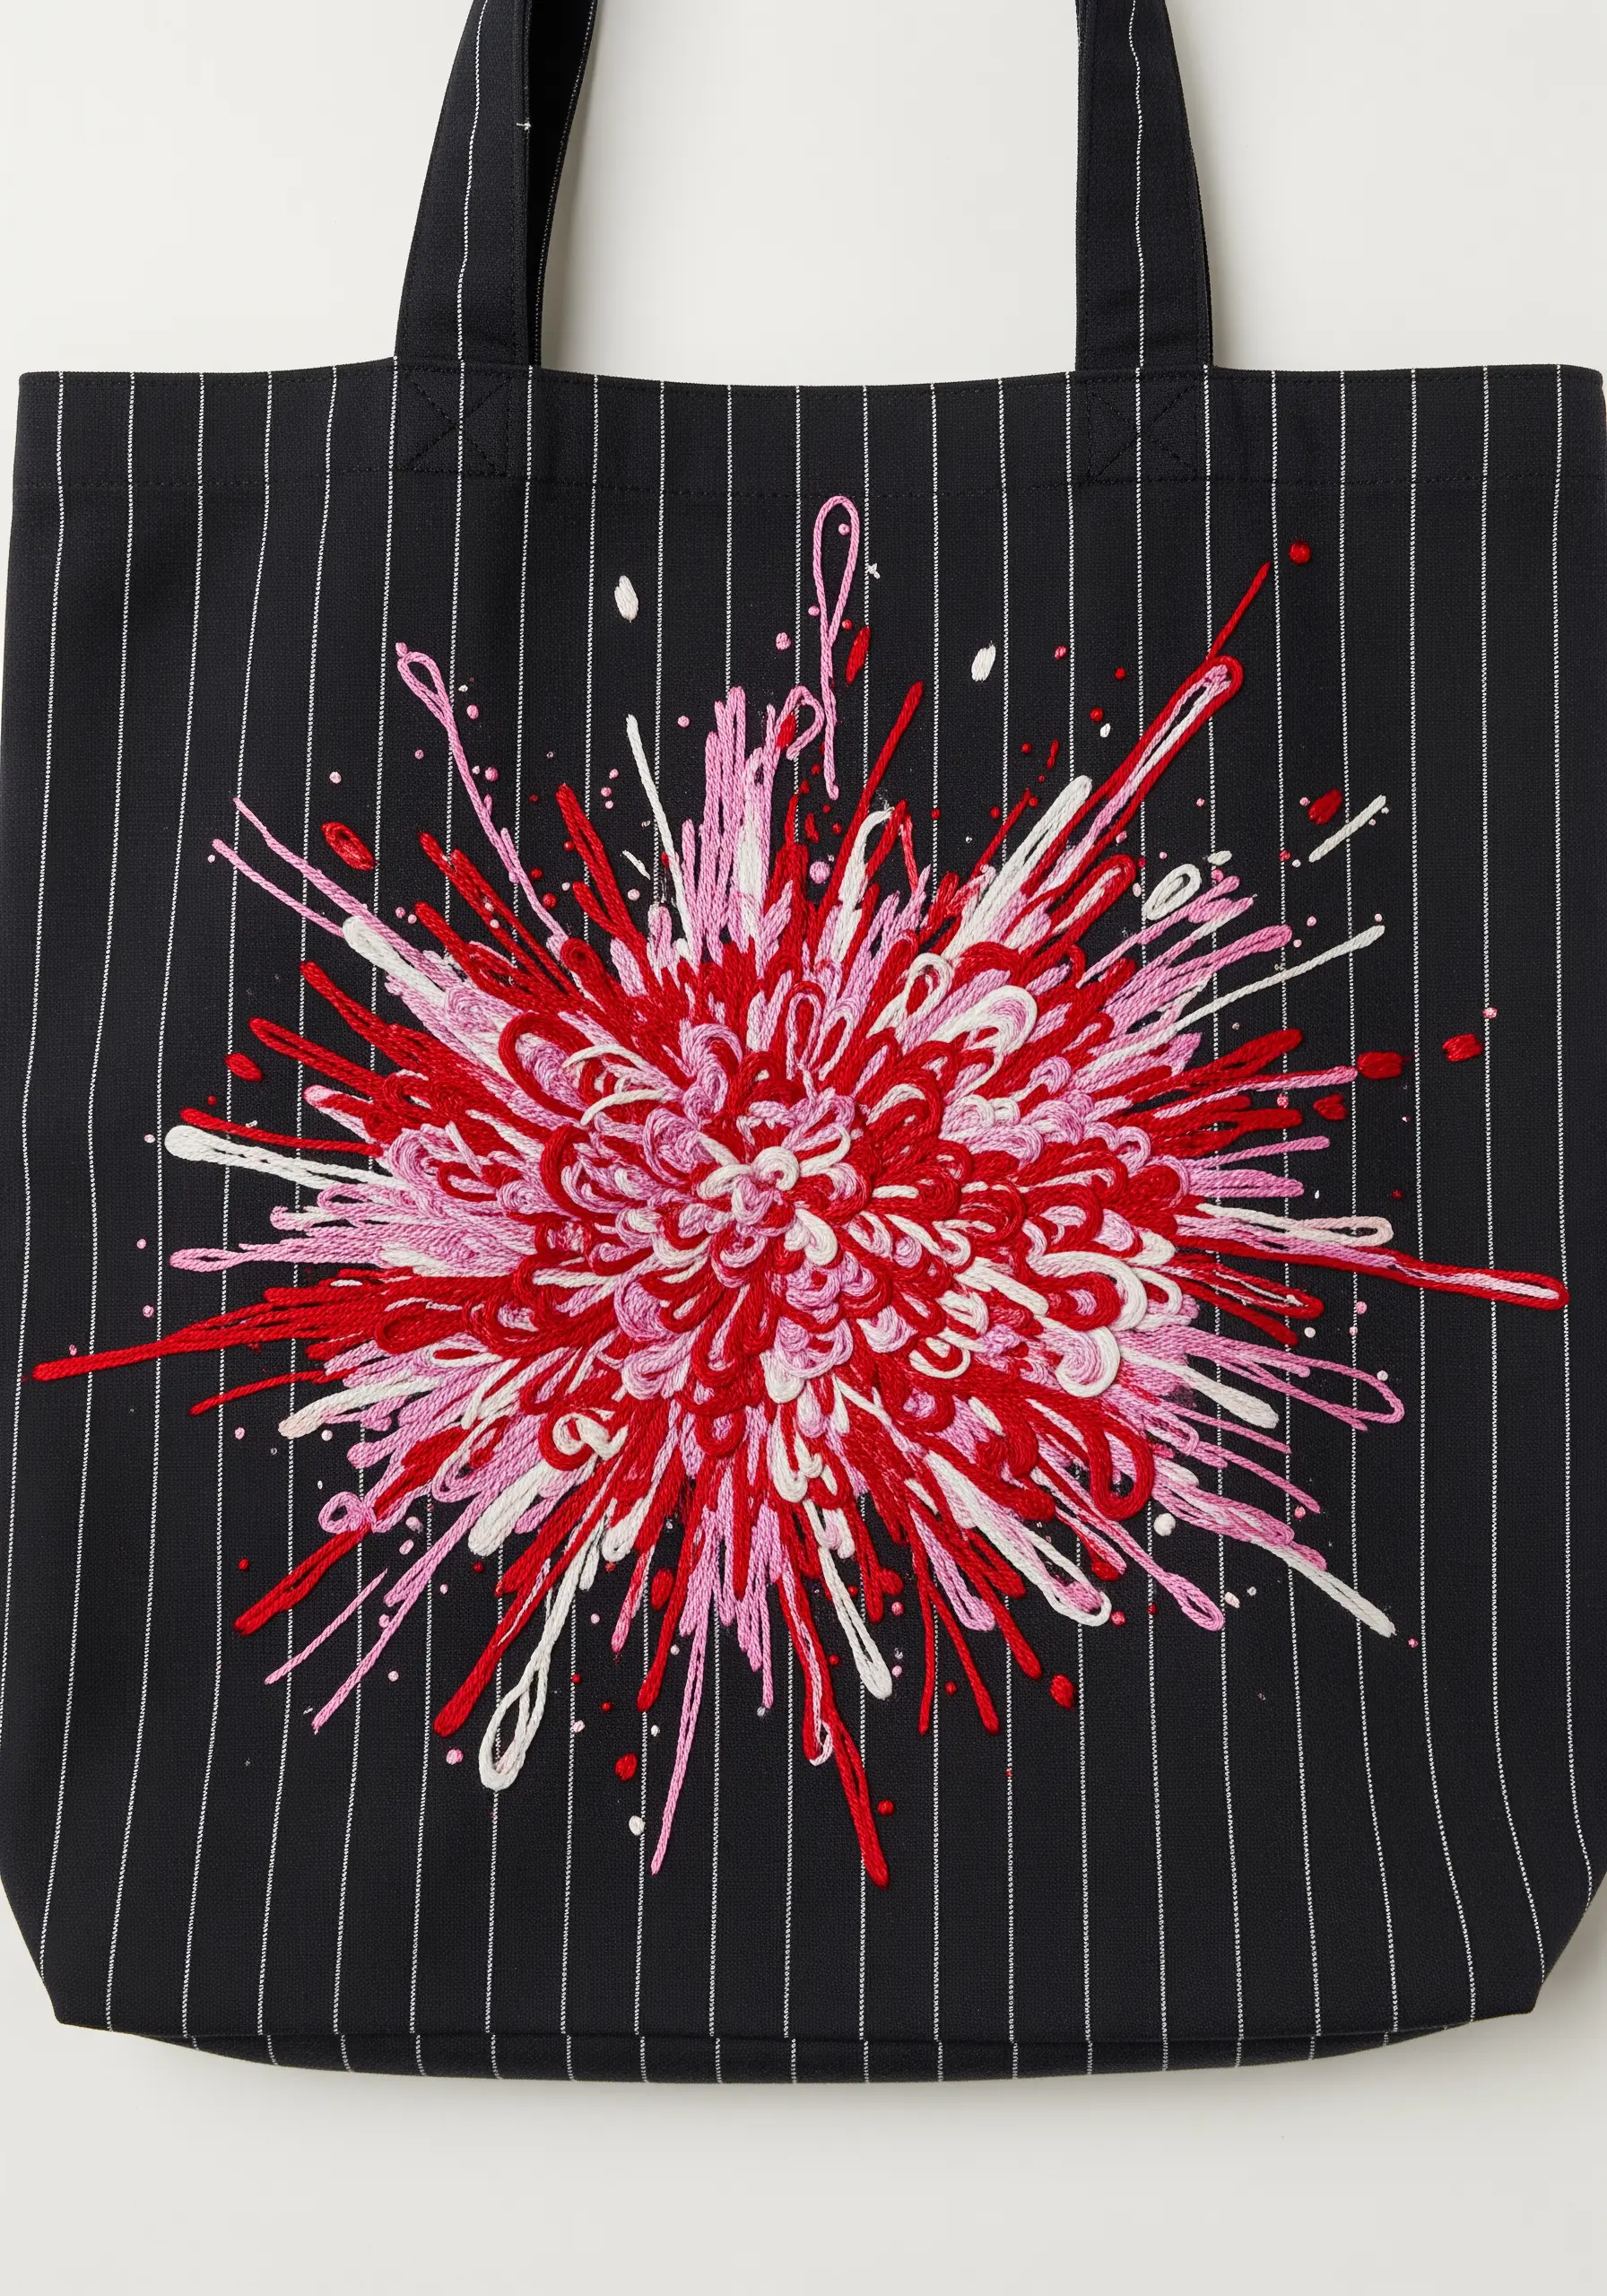
To capture a burst of energy, think in terms of movement. Start with a dense cluster of French knots at the center to act as the core of the explosion.
From this center, stitch long, radiating straight stitches in various lengths, thicknesses, and colors. Overlap them to build dynamic energy.
Add tiny detached chain stitches or single knots at the end of some lines to create a sense of splatter, making the composition feel active and alive against the structured pinstripe background.
22. Use Hatching Stitches for Illustrative Shading

To give your embroidery a classic, hand-drawn look, use hatching and cross-hatching to create shadows and form.
After outlining the hand with a neat backstitch, fill in the shadow areas with fine, parallel straight stitches (hatching). For darker areas, add another layer of stitches going in a different direction (cross-hatching).
This technique provides a beautiful, textural contrast to the smooth, flowing satin stitch of the calligraphic word, making the entire piece feel like a page from an artist’s sketchbook.
23. Achieve Ultra-Clean Lines with Faux Leather Inlay
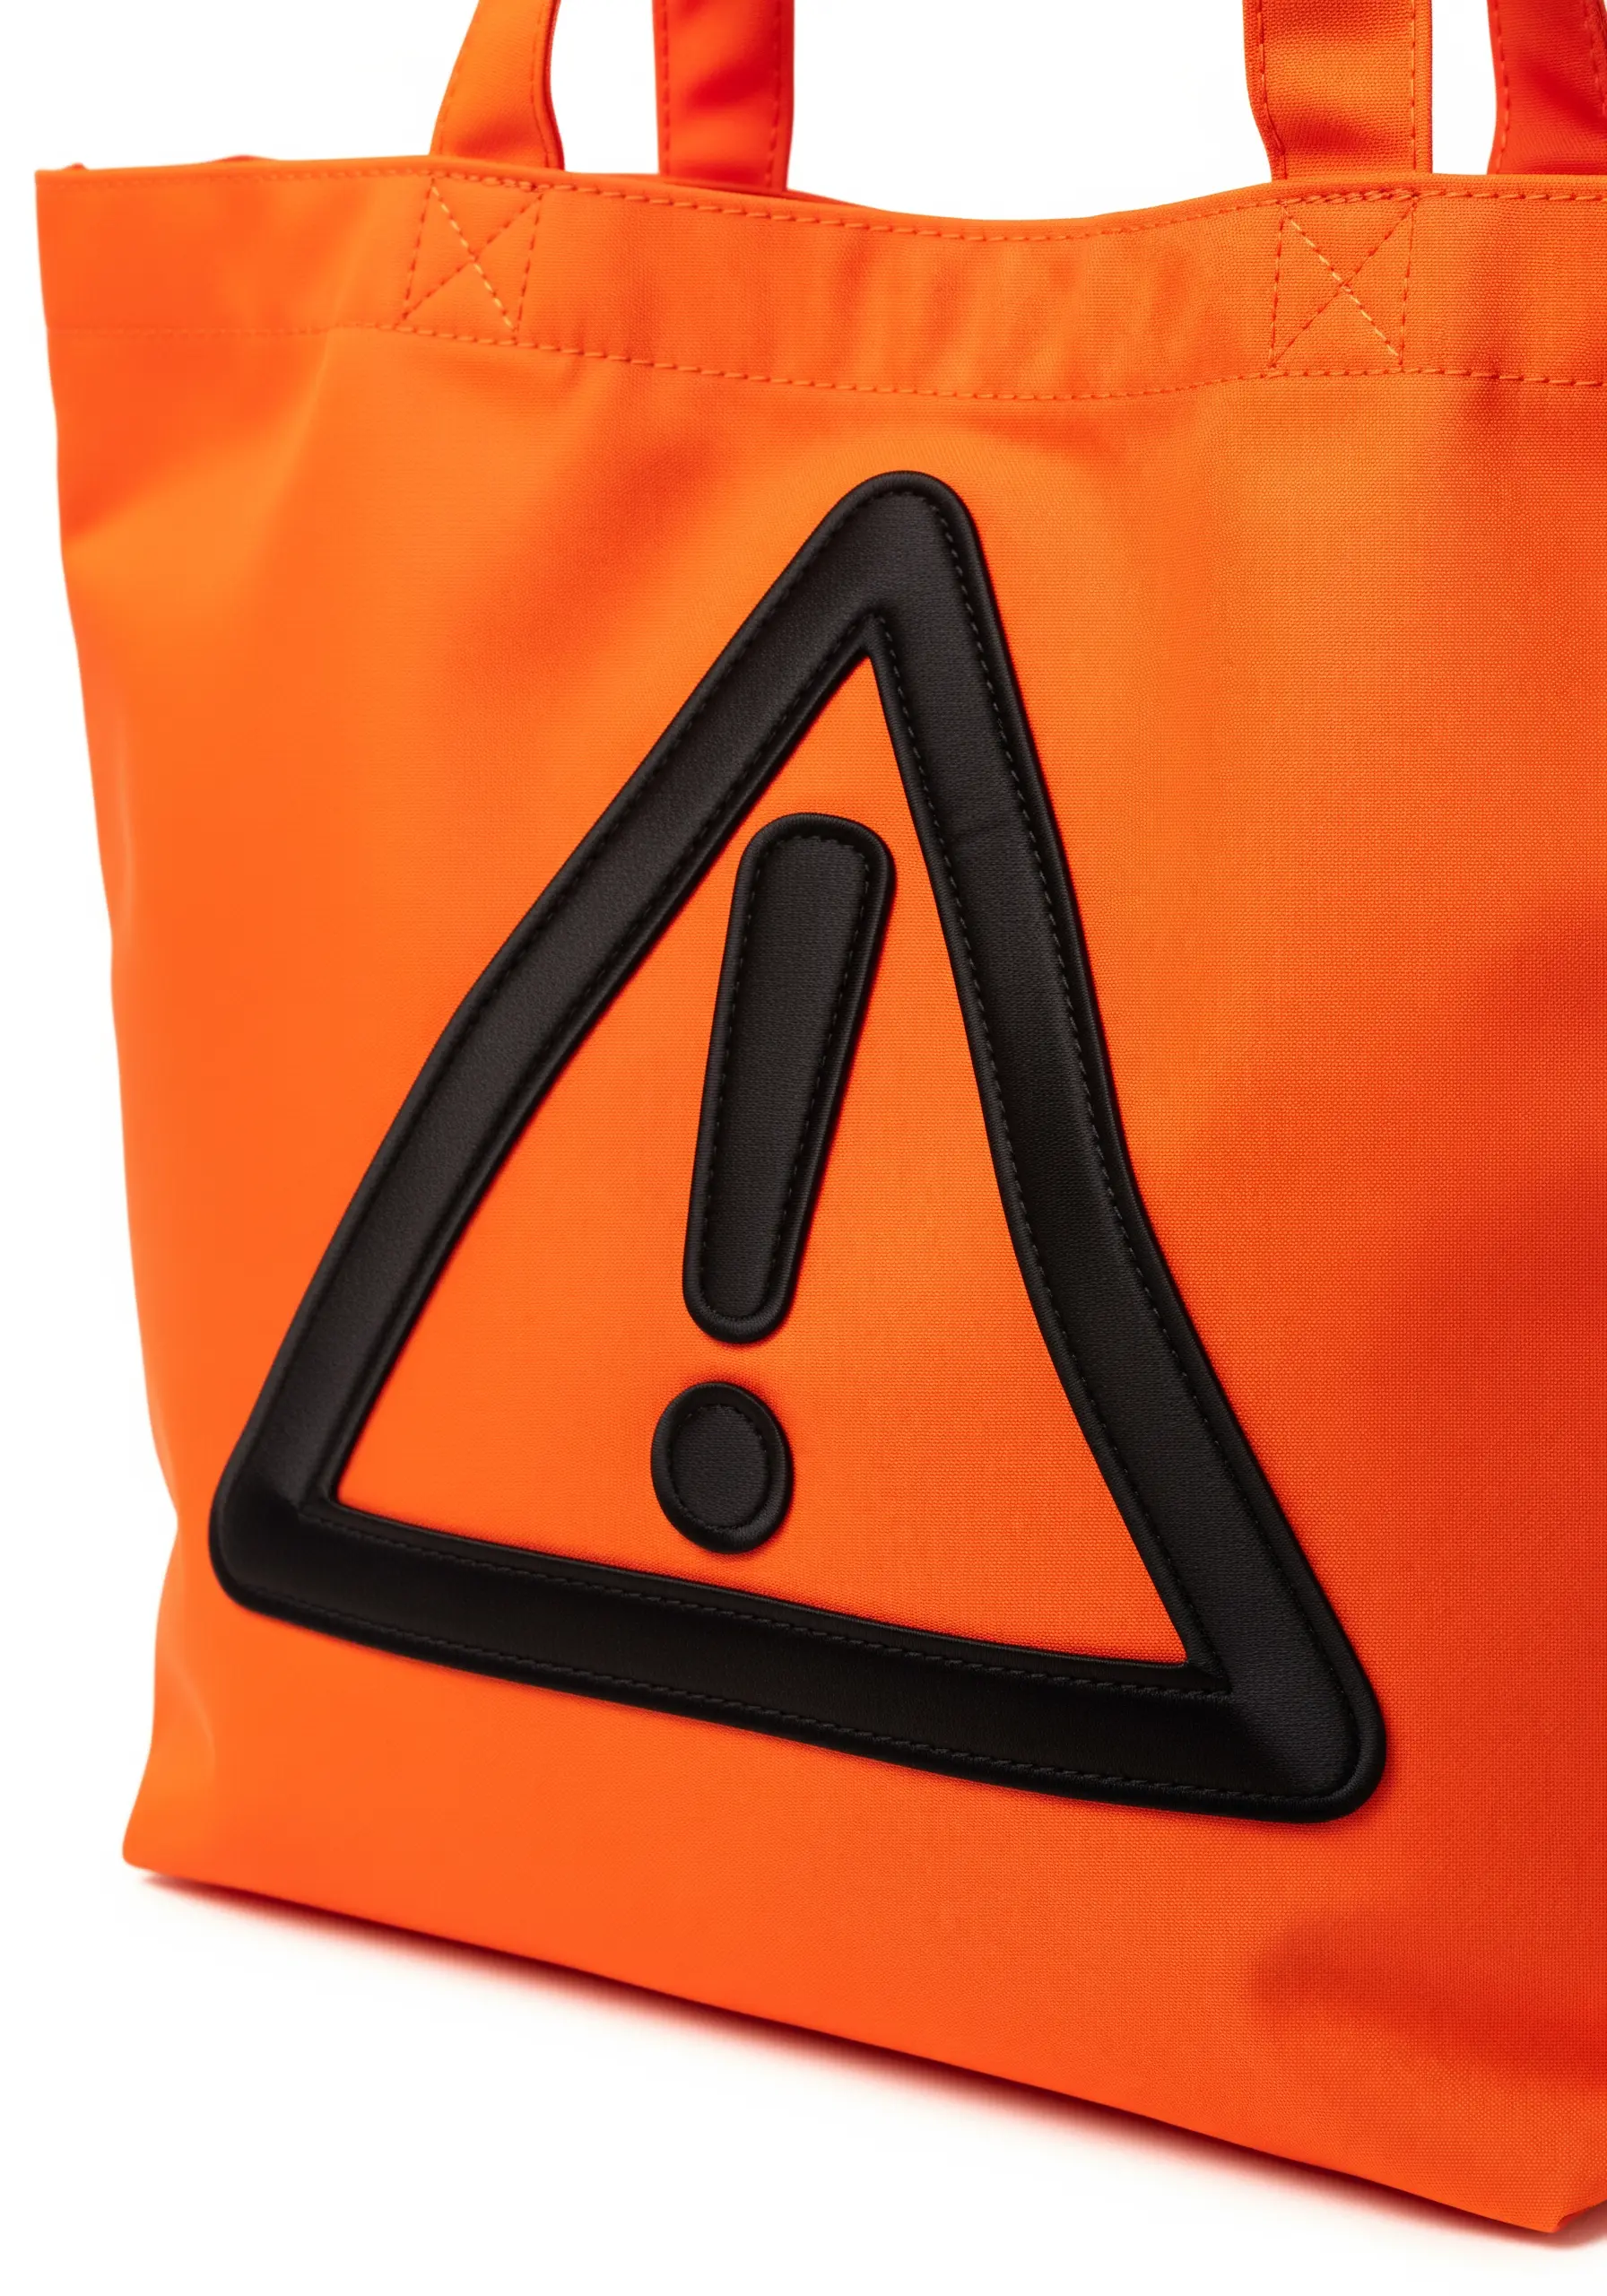
For a crisp, graphic symbol on a synthetic fabric like nylon, traditional embroidery can pucker. Instead, try an inlay or appliqué technique.
Cut the triangular outline and exclamation point shapes from black faux leather or vinyl. Use a strong fabric adhesive to position them perfectly.
Secure the pieces with a machine stitch right along the edge for a flawless, factory-made look. This method ensures perfectly sharp edges and a modern, textural contrast that hand-stitching can’t replicate on this type of material.
24. Replicate Calligraphy with Directional Satin Stitch

To capture the thick and thin strokes of calligraffiti, your satin stitch must change direction and width fluidly.
Before you begin, trace the ‘skeleton’ of the letters and draw guidelines to map the flow of your stitches, just as a calligrapher would plan a stroke.
Use a high-sheen rayon or silk thread against a matte cotton canvas. This enhances the ink-like quality of the lettering, making the form the undisputed hero of the piece. This is one of the more minimal embroidery patterns that look harder than they are.
25. Create a Clean Two-Tone Fill for Repeating Motifs
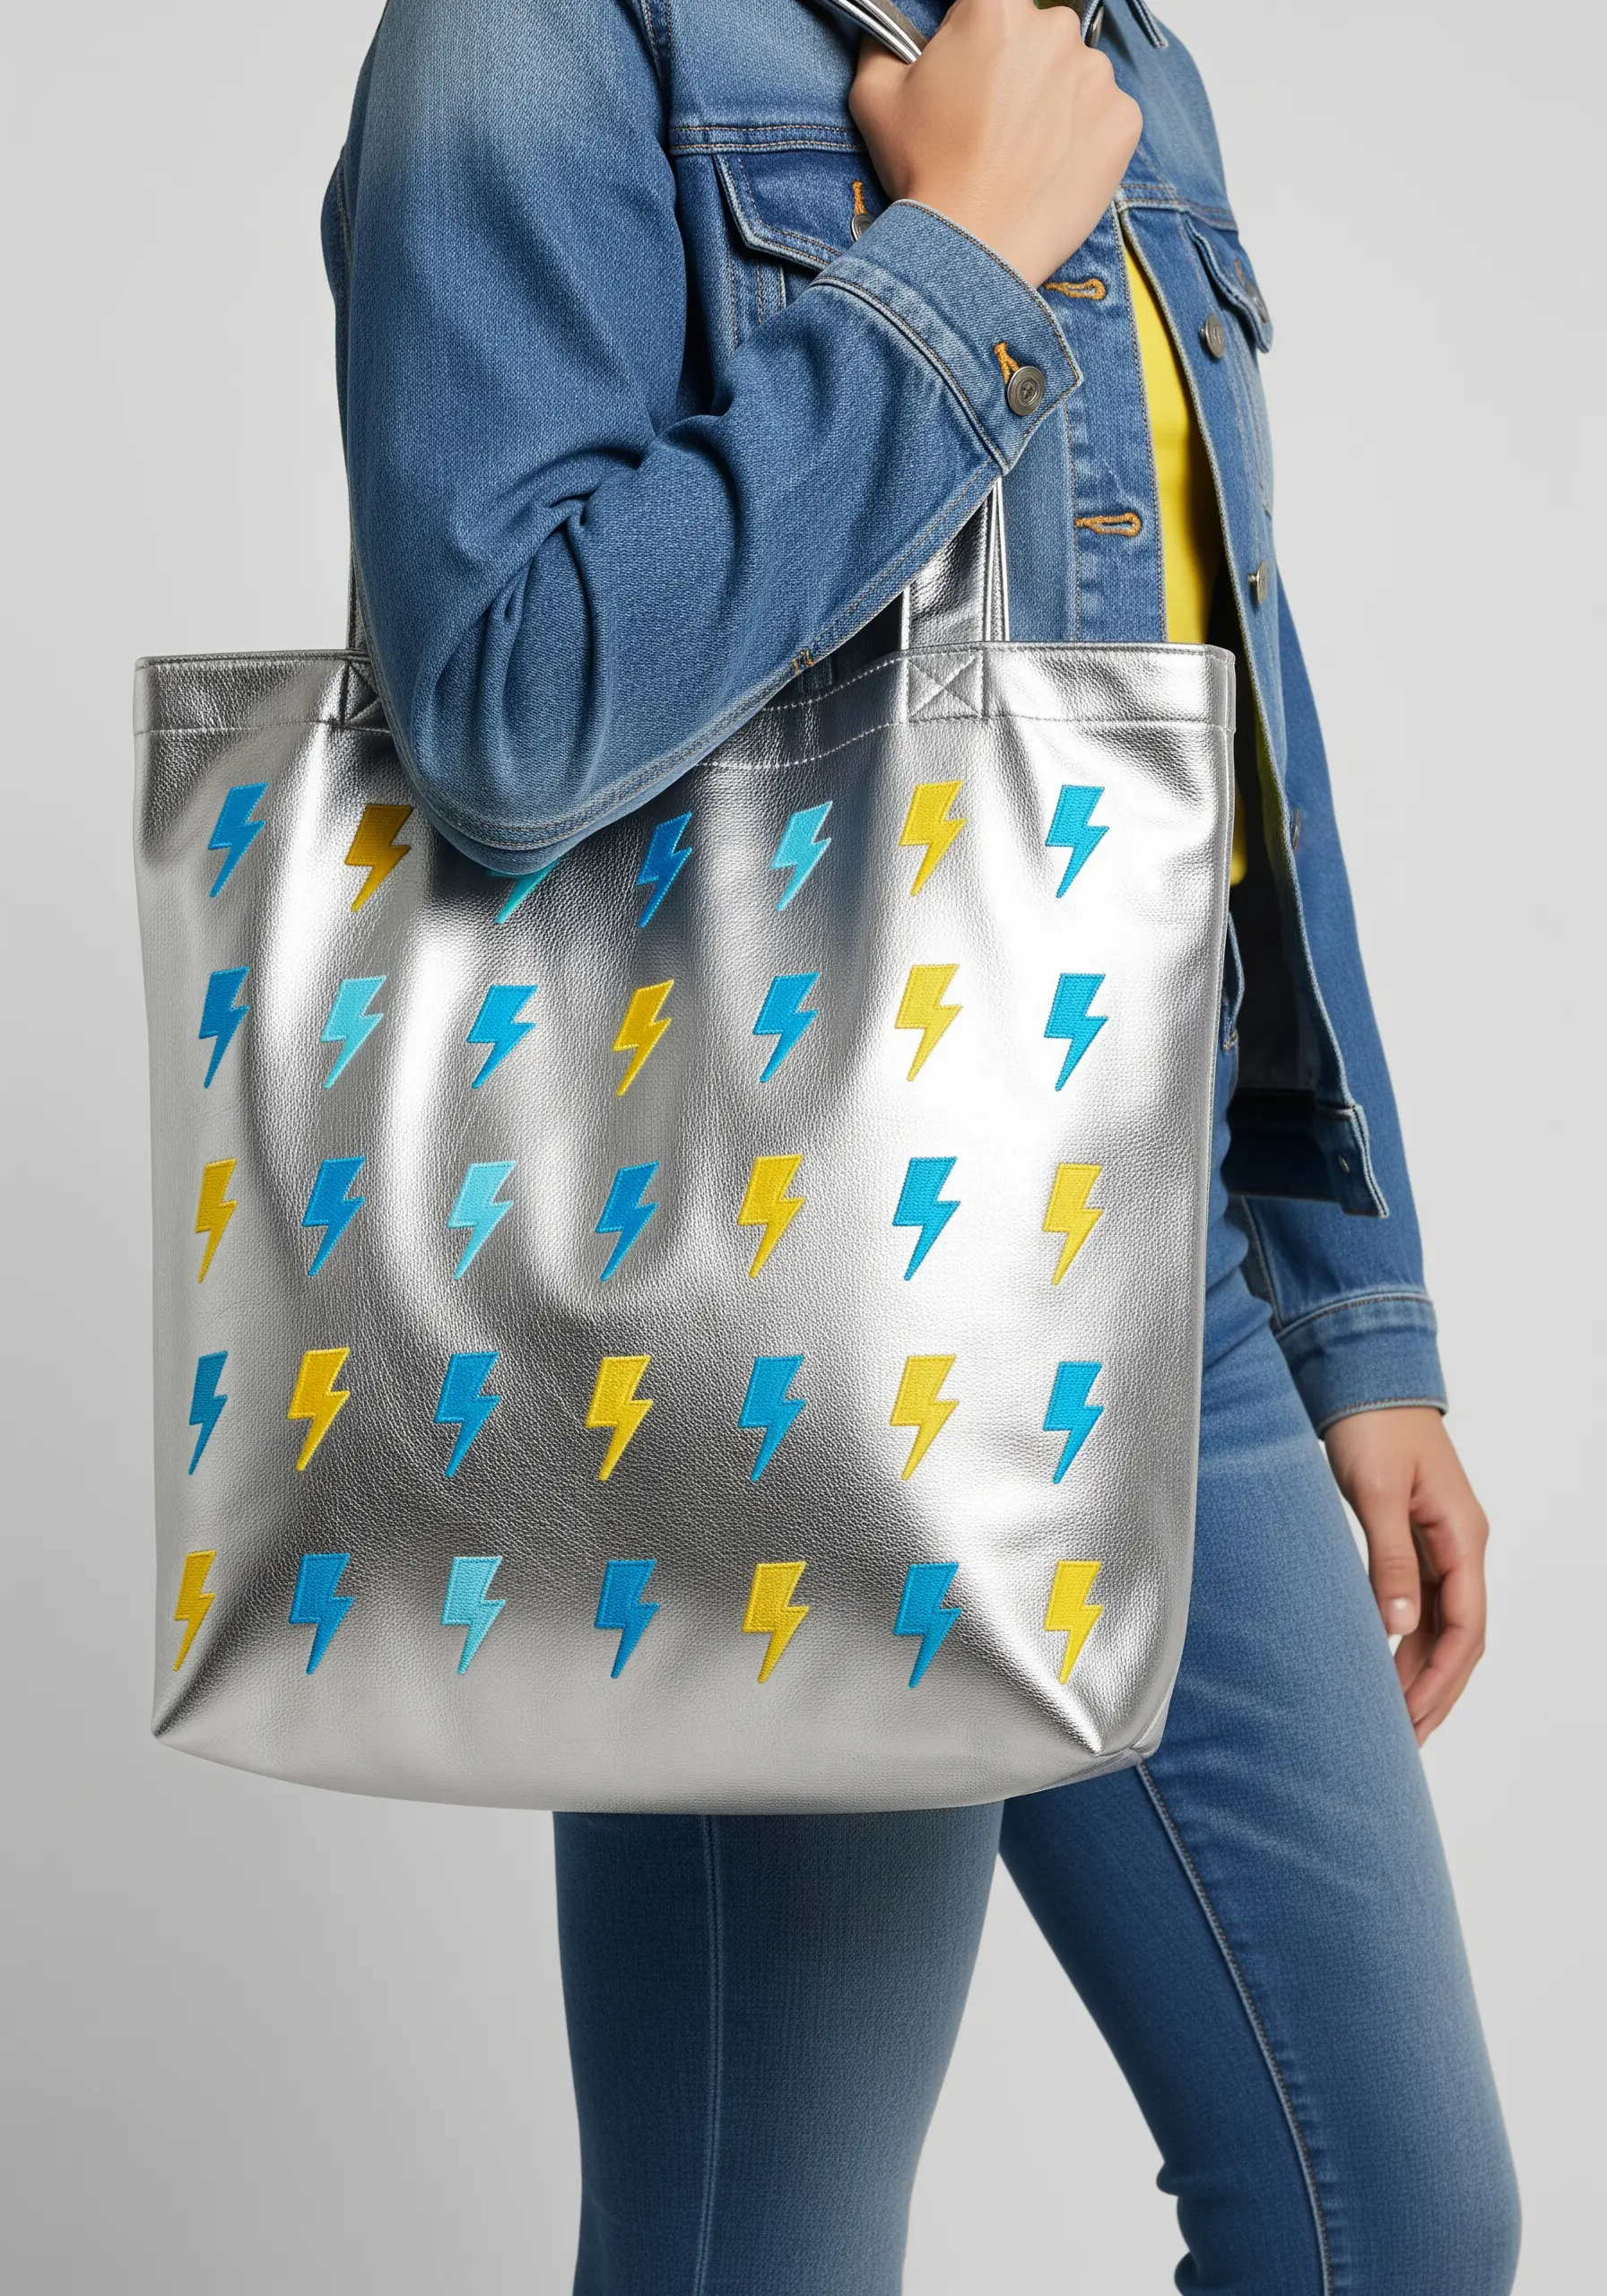
When working with a repeating pattern, consistency is key. For these two-tone lightning bolts, use a directional satin stitch.
Stitch the first color for the top half of the bolt, keeping all stitches parallel. Then, switch to your second color and complete the bottom half, ensuring the stitches meet cleanly in the middle with no gaps.
Using a metallic or faux leather tote provides a reflective, modern backdrop that makes the simple, matte colors of the thread stand out even more.
26. Emulate Impasto Painting with Couched Yarn
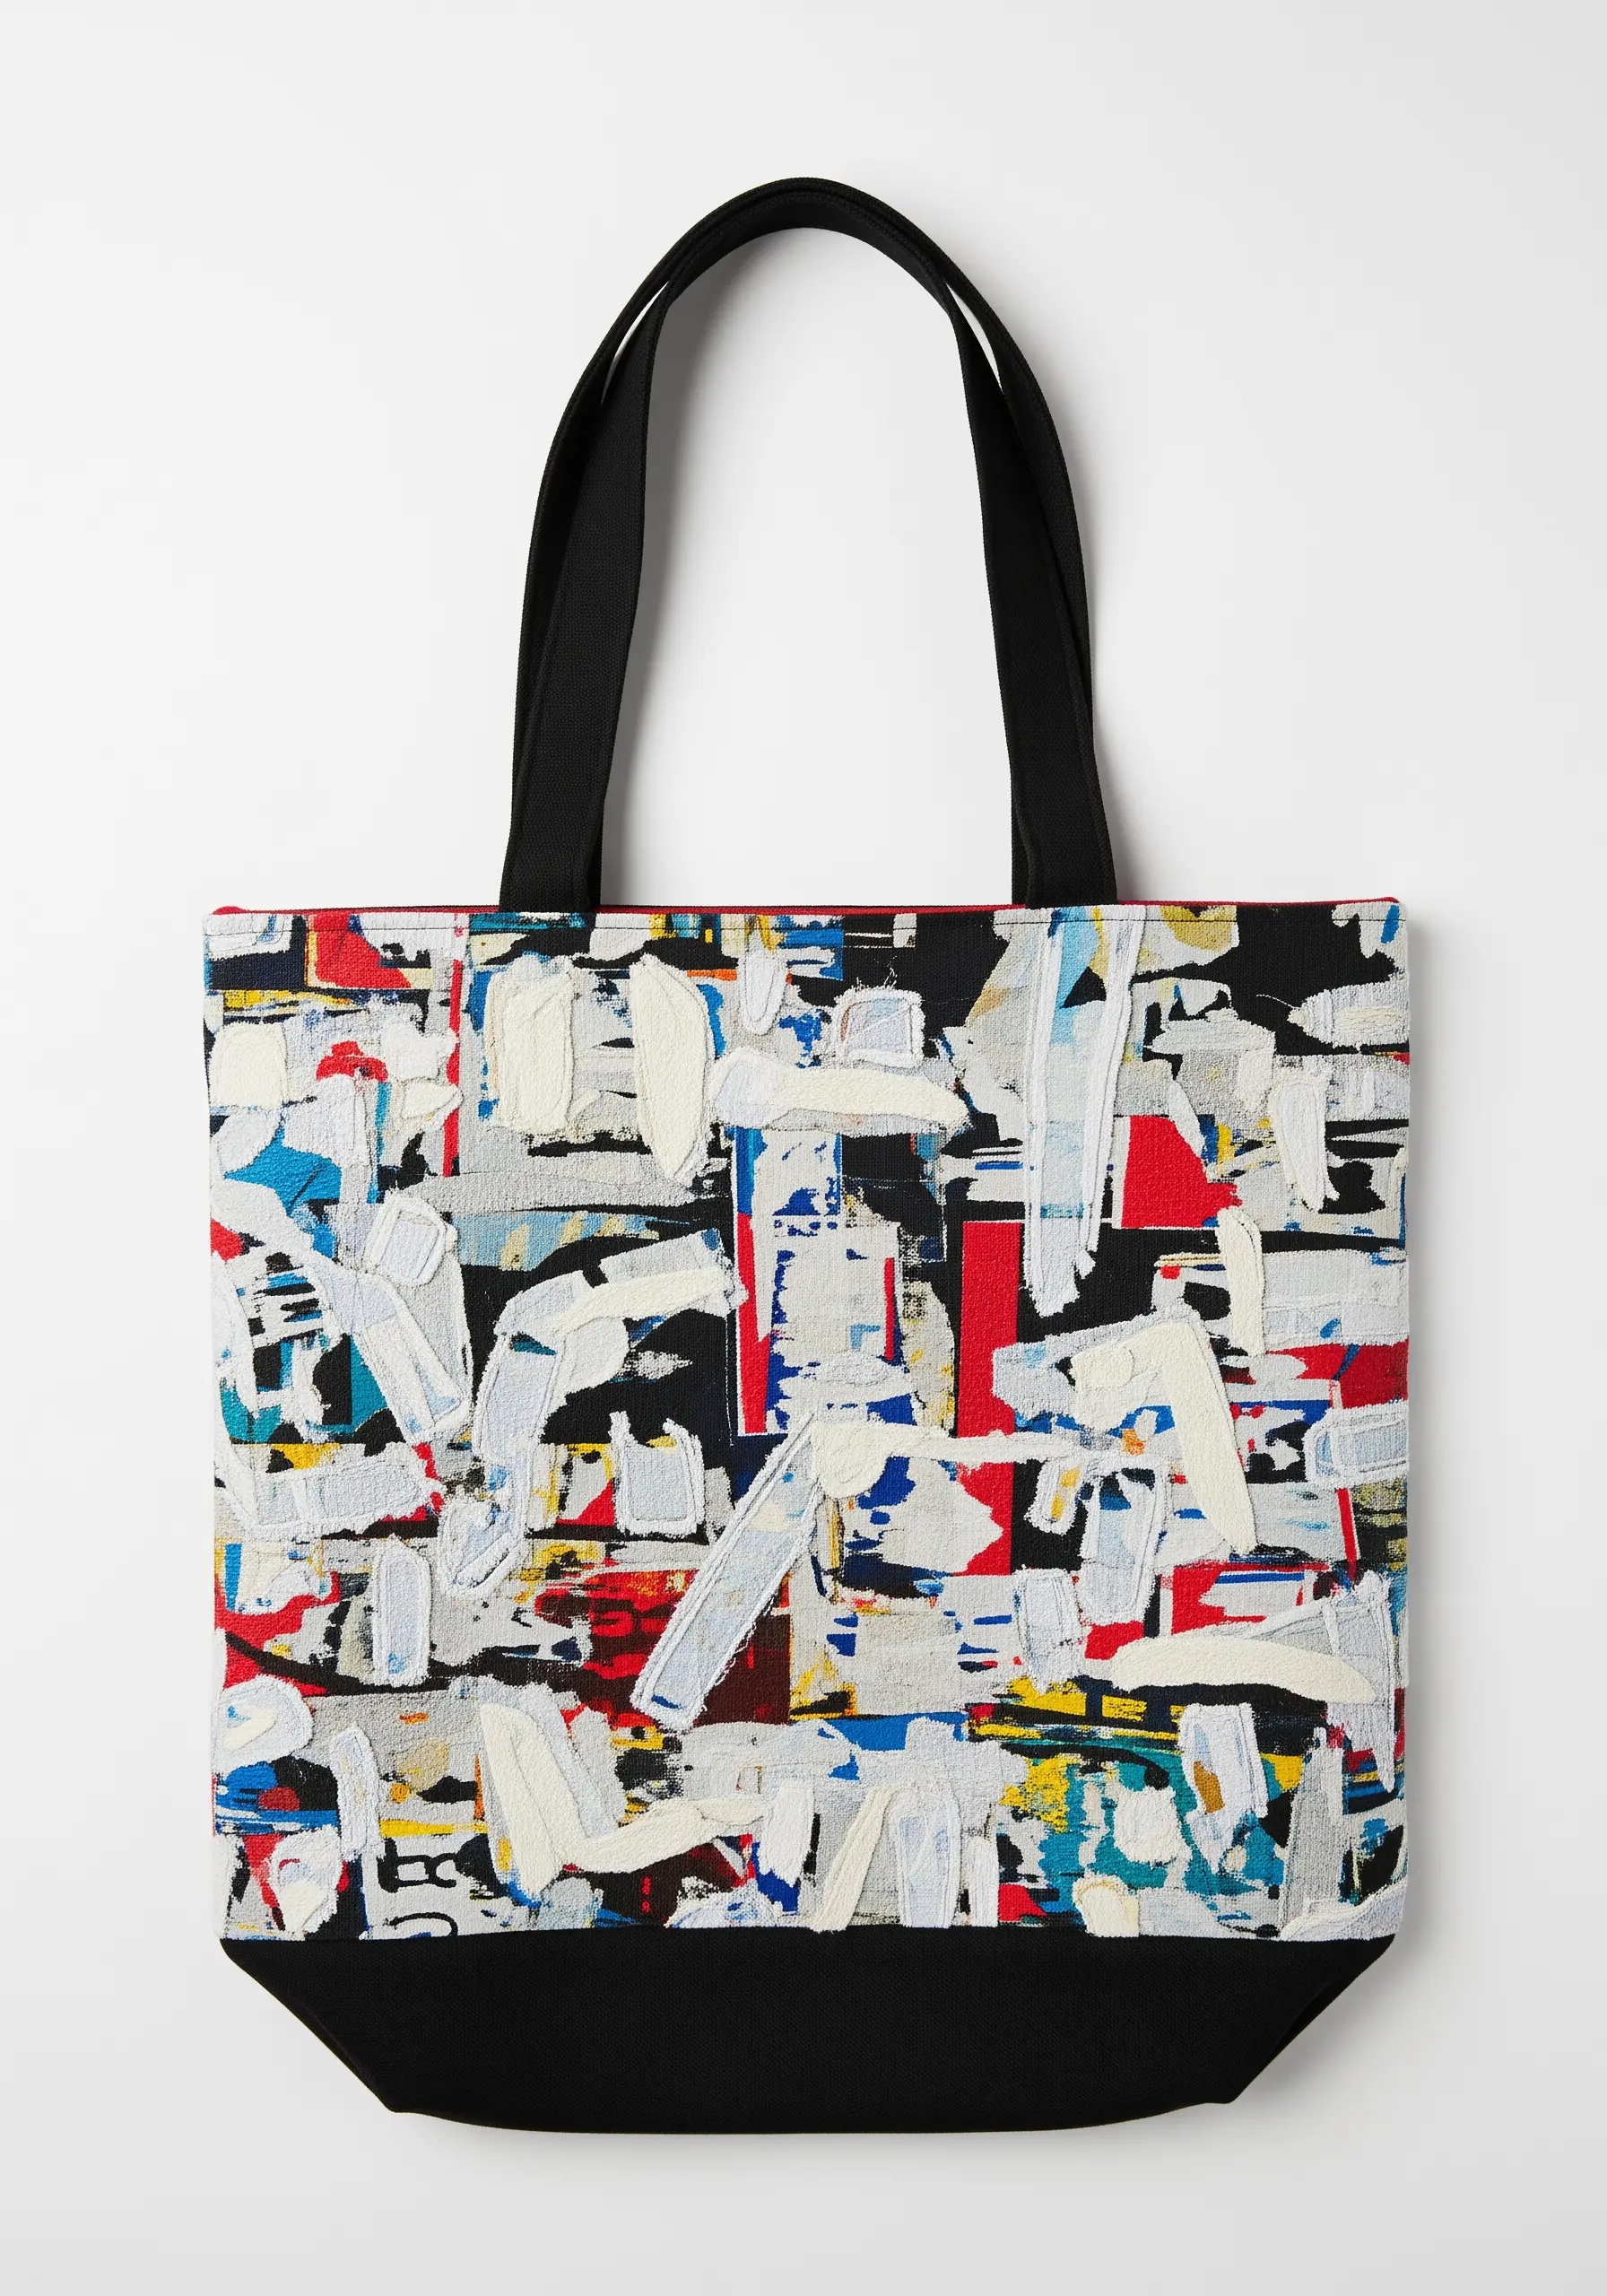
To achieve the thick, textural effect of an impasto oil painting, think beyond standard embroidery floss.
Lay down thick strands of yarn or roving wool onto your tote bag in broad, expressive strokes. Then, use a regular sewing or embroidery thread in a matching color to tack it down with small, discreet couching stitches.
Layer different colors of yarn on top of each other to build up texture and depth. The result is a stunning fiber art installation that you can carry with you, full of painterly movement.
27. Add Tactile Dimension with a Chenille Appliqué
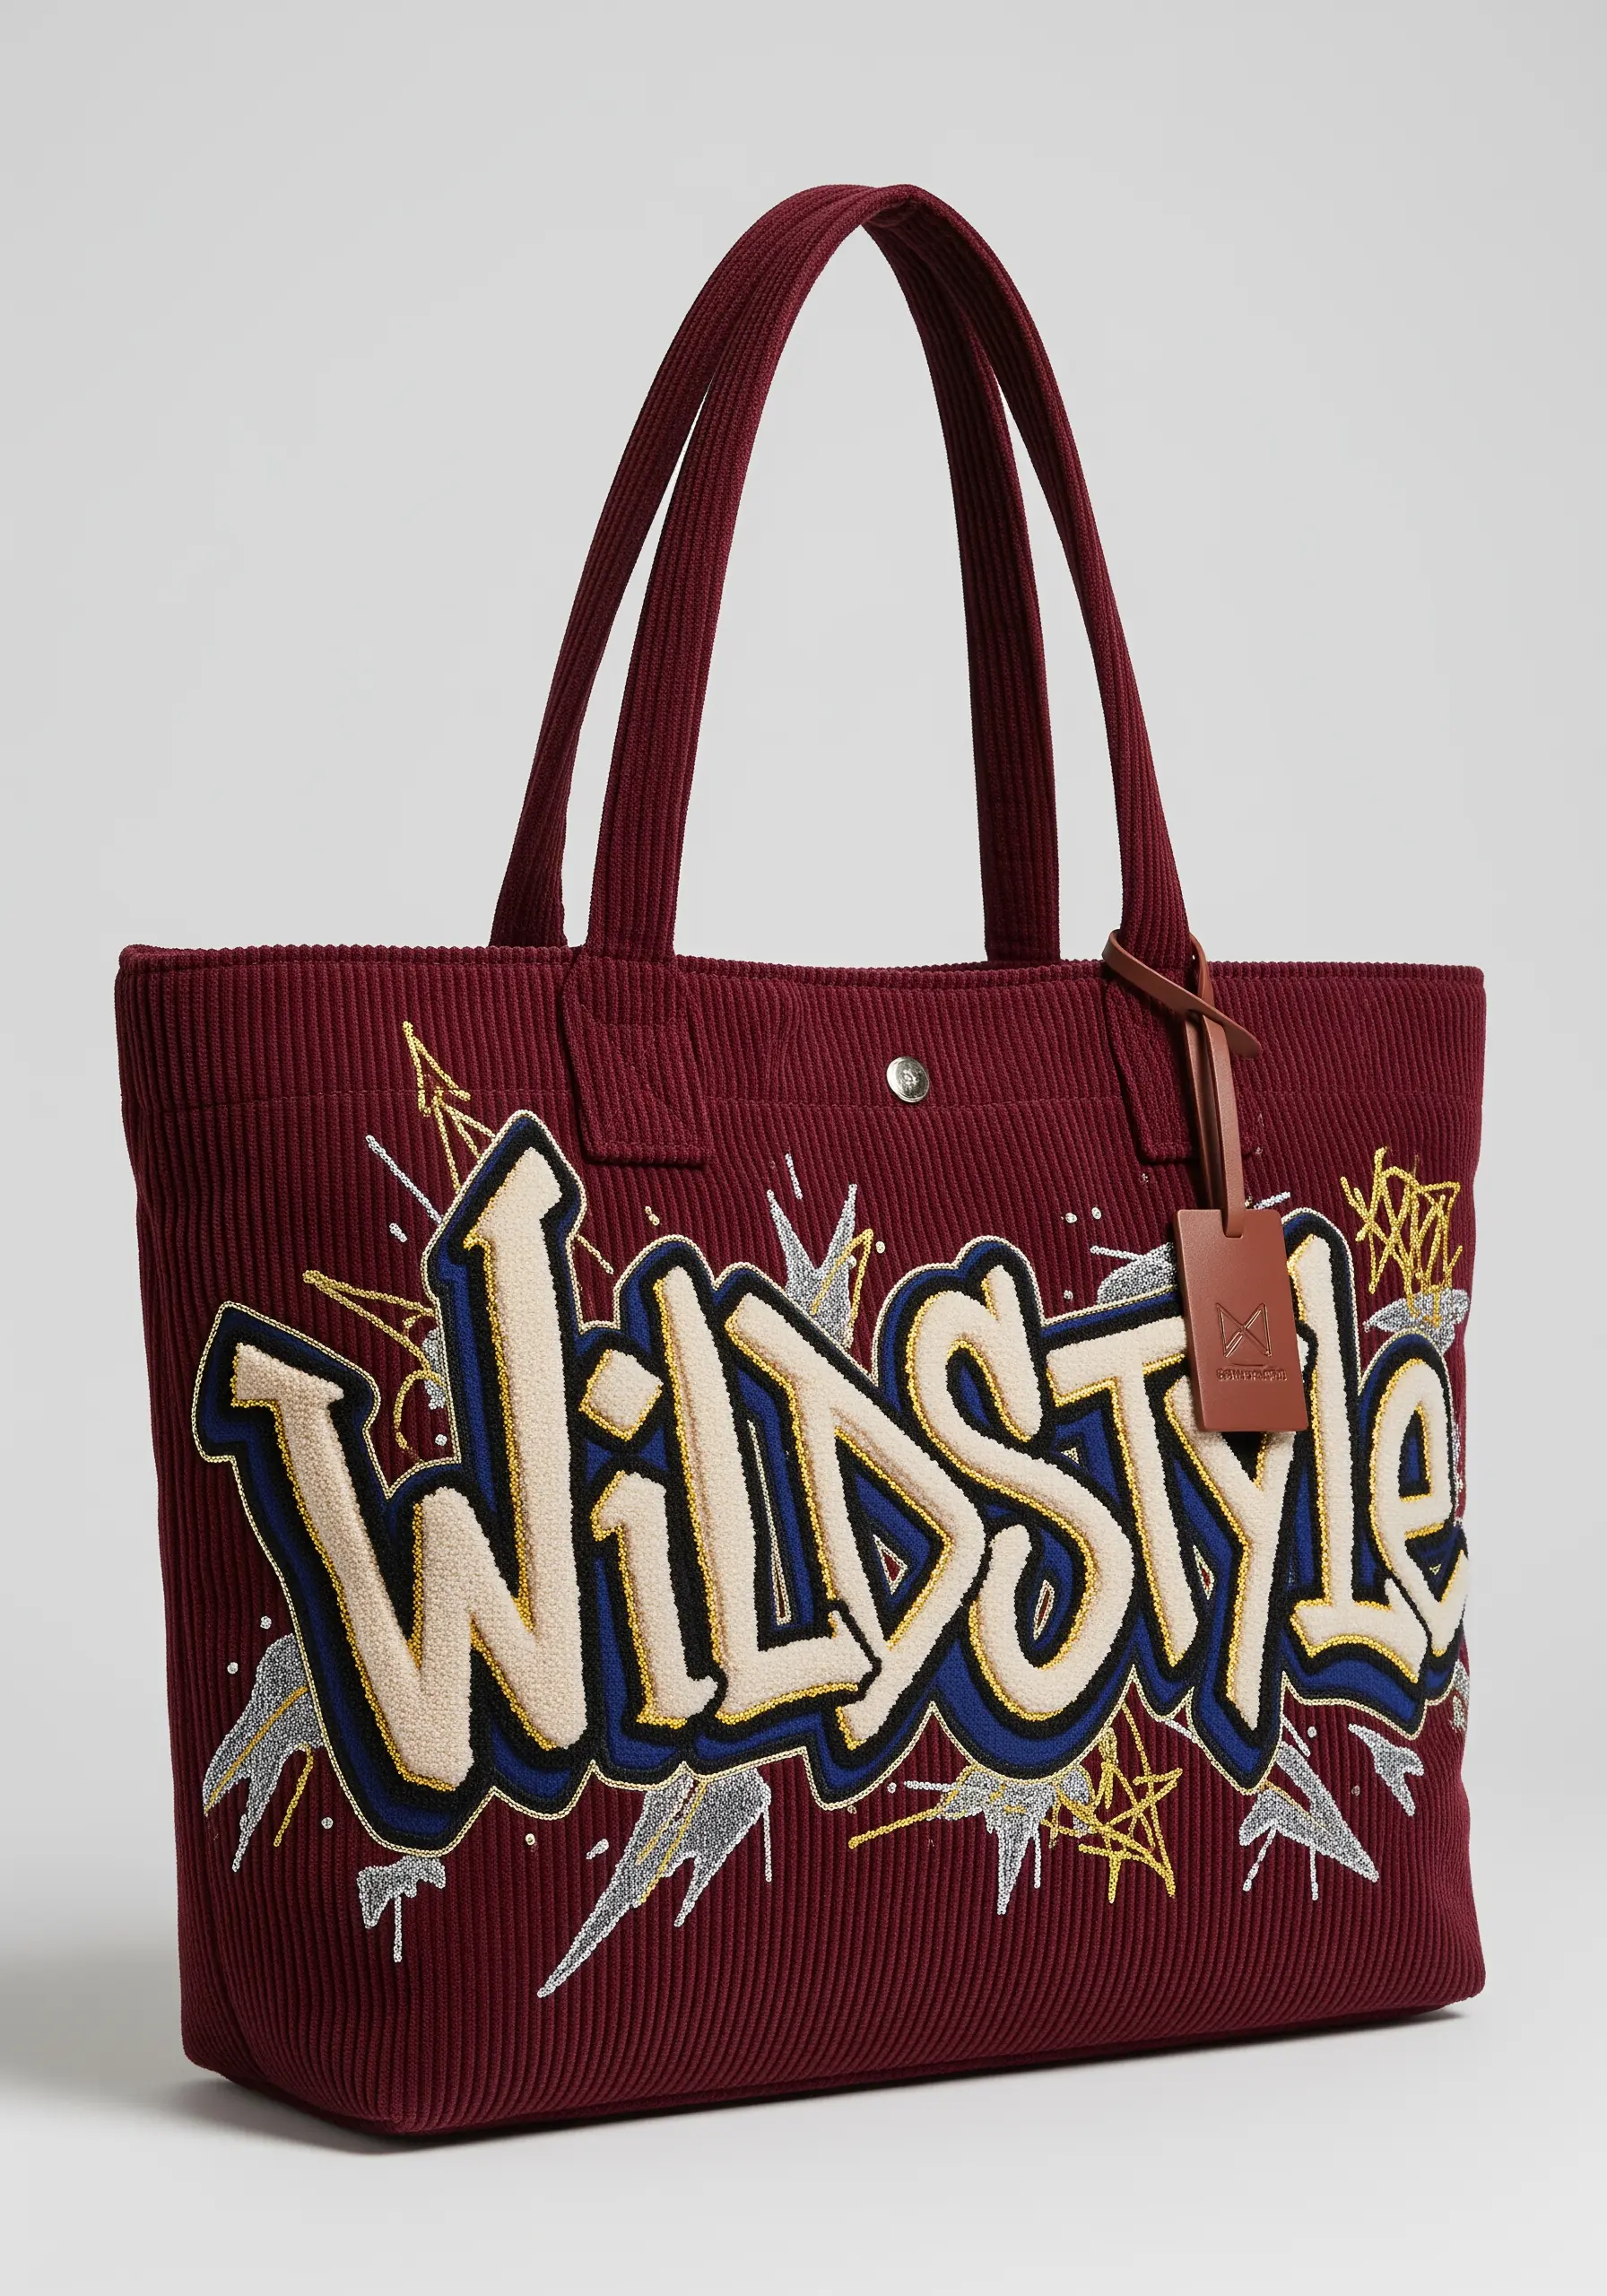
Give your lettering a retro, varsity-jacket feel by using chenille fabric for an appliqué.
Cut your letters from the fuzzy chenille and attach them to the corduroy tote. Secure the edges with a tight, contrasting chain stitch or satin stitch to create a bold, clean border.
The surrounding graffiti elements can be stitched directly onto the corduroy with long straight stitches. This mix of the soft, fuzzy chenille and the sharp, graphic thread creates a rich tactile experience.
28. Create a Torn-Fabric Illusion with Loose Stitches
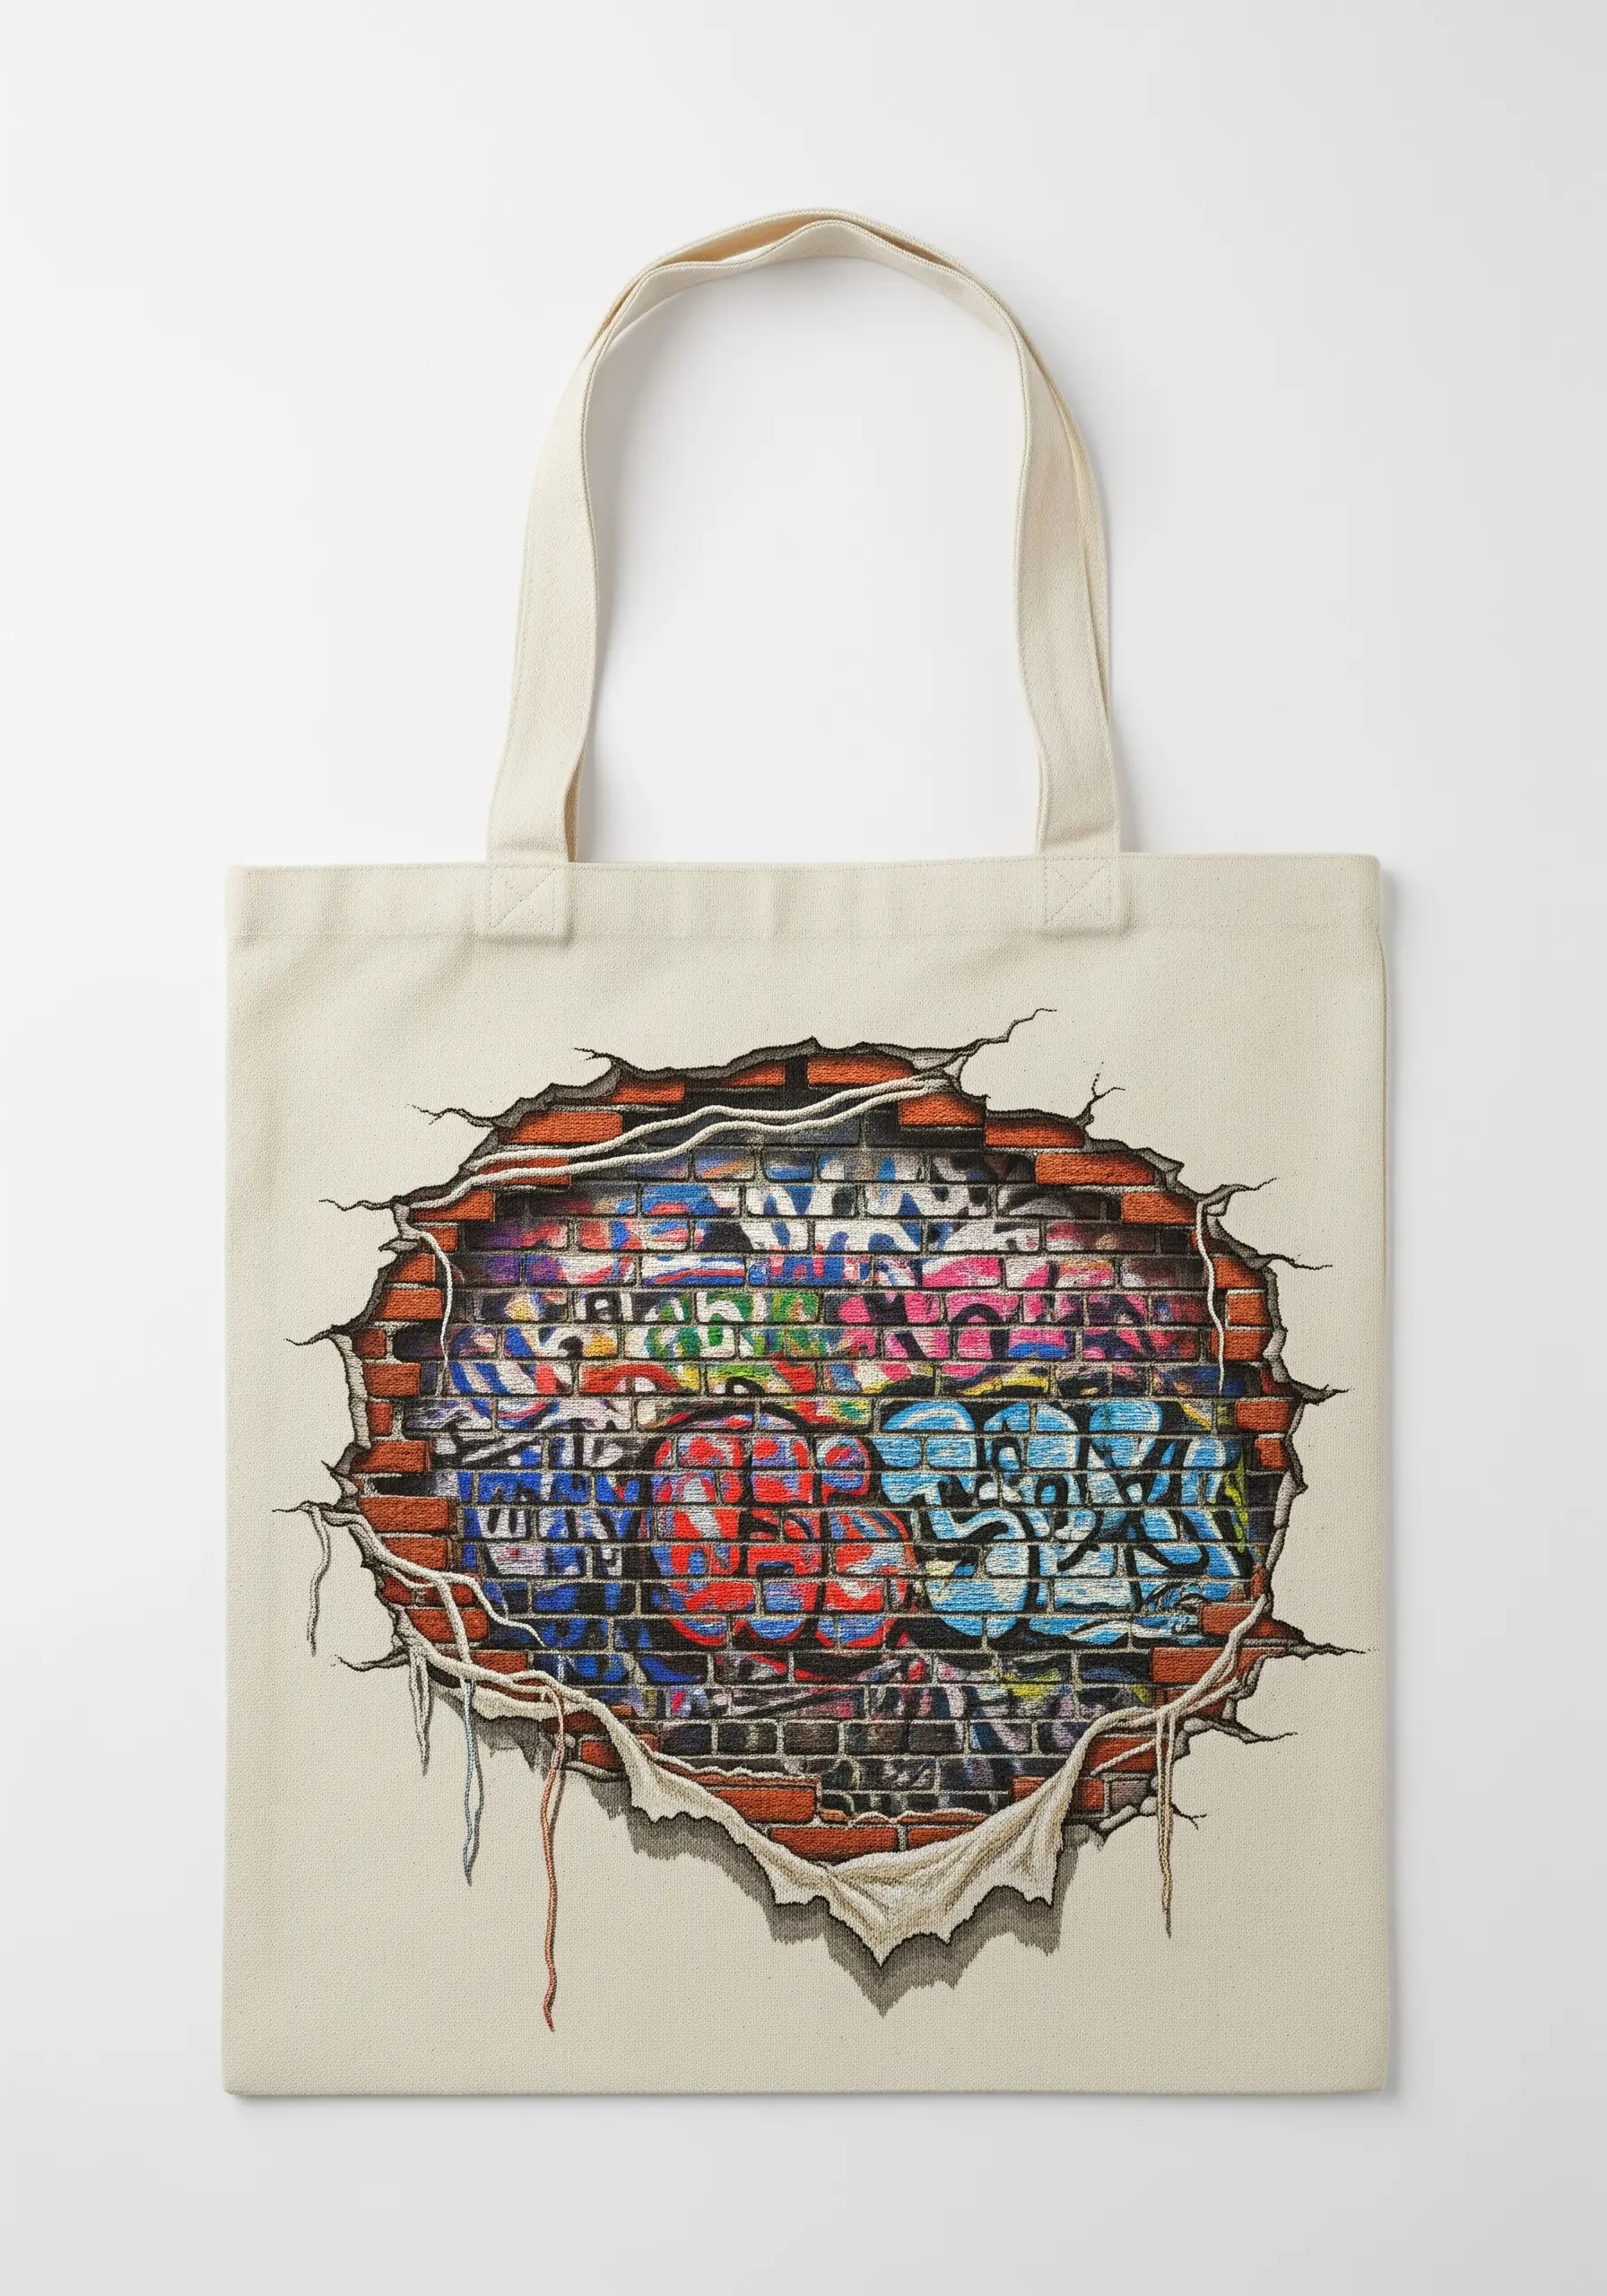
To create a convincing *trompe-l’œil* effect of torn fabric, focus on the edges. After stitching the inner brick and graffiti design, work on the ‘rip’.
Use an off-white or cream thread that matches your tote bag. Create the jagged edges with a chaotic mix of satin stitches and long, loose straight stitches that extend beyond the torn line.
Let a few threads hang completely loose. This imperfection is what sells the illusion of a canvas that has been violently ripped open to reveal the art beneath.
29. Stitch Delicate Data with Variegated Thread
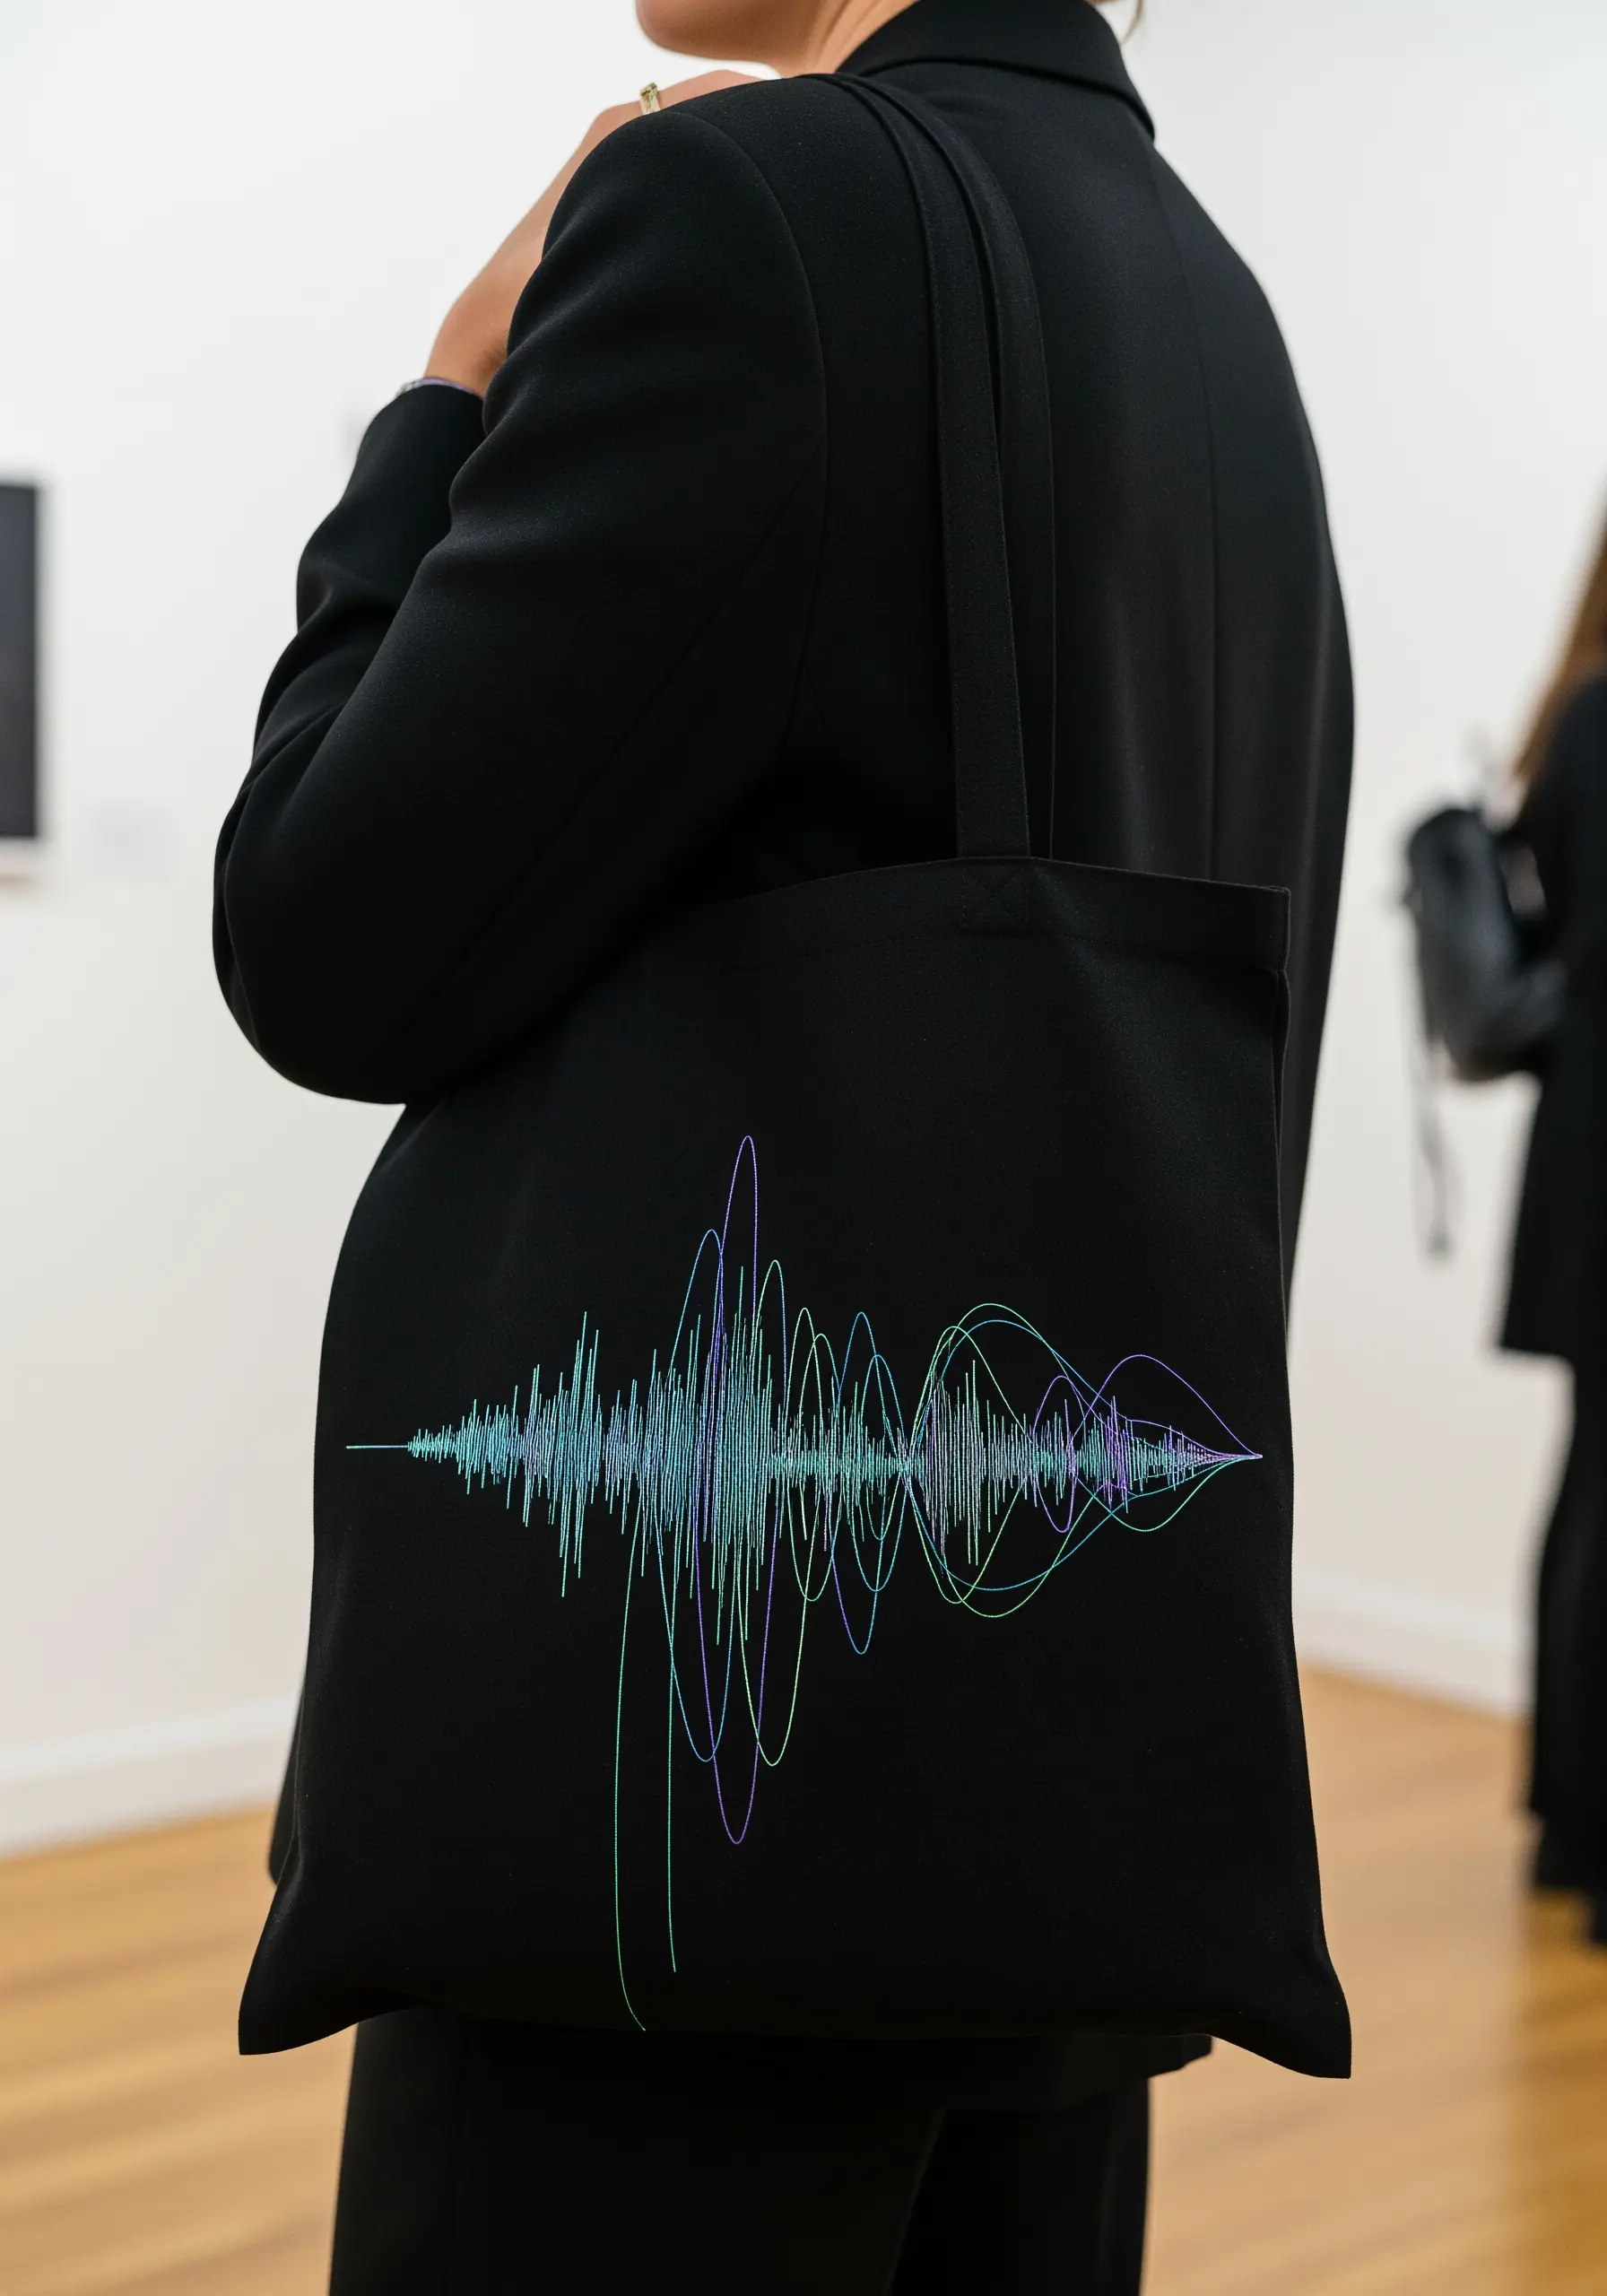
To capture the complex, flowing lines of a soundwave, precision and subtlety are essential.
Use a single strand of variegated embroidery floss—the thread will change color on its own, creating a beautiful, subtle gradient along the length of the wave.
A whipped backstitch or a meticulous stem stitch will give you a smooth, unbroken line. The challenge isn’t the stitch itself, but your patience in following the intricate pattern accurately.
30. Adapt Cross-Stitch for Pixel Art on Any Fabric
You don’t need Aida cloth to create pixel art. To stitch a perfect grid on a woven tote bag, use a waste canvas or a water-soluble canvas grid.
Simply baste the grid onto your bag, follow your pixel chart using simple cross-stitches, and then carefully remove the grid threads or dissolve the canvas in water when you’re done.
This technique allows you to apply the precision of cross-stitch to any fabric, opening up a world of retro, 8-bit design possibilities.
31. Combine Thread Painting with Graphic Color Blocking
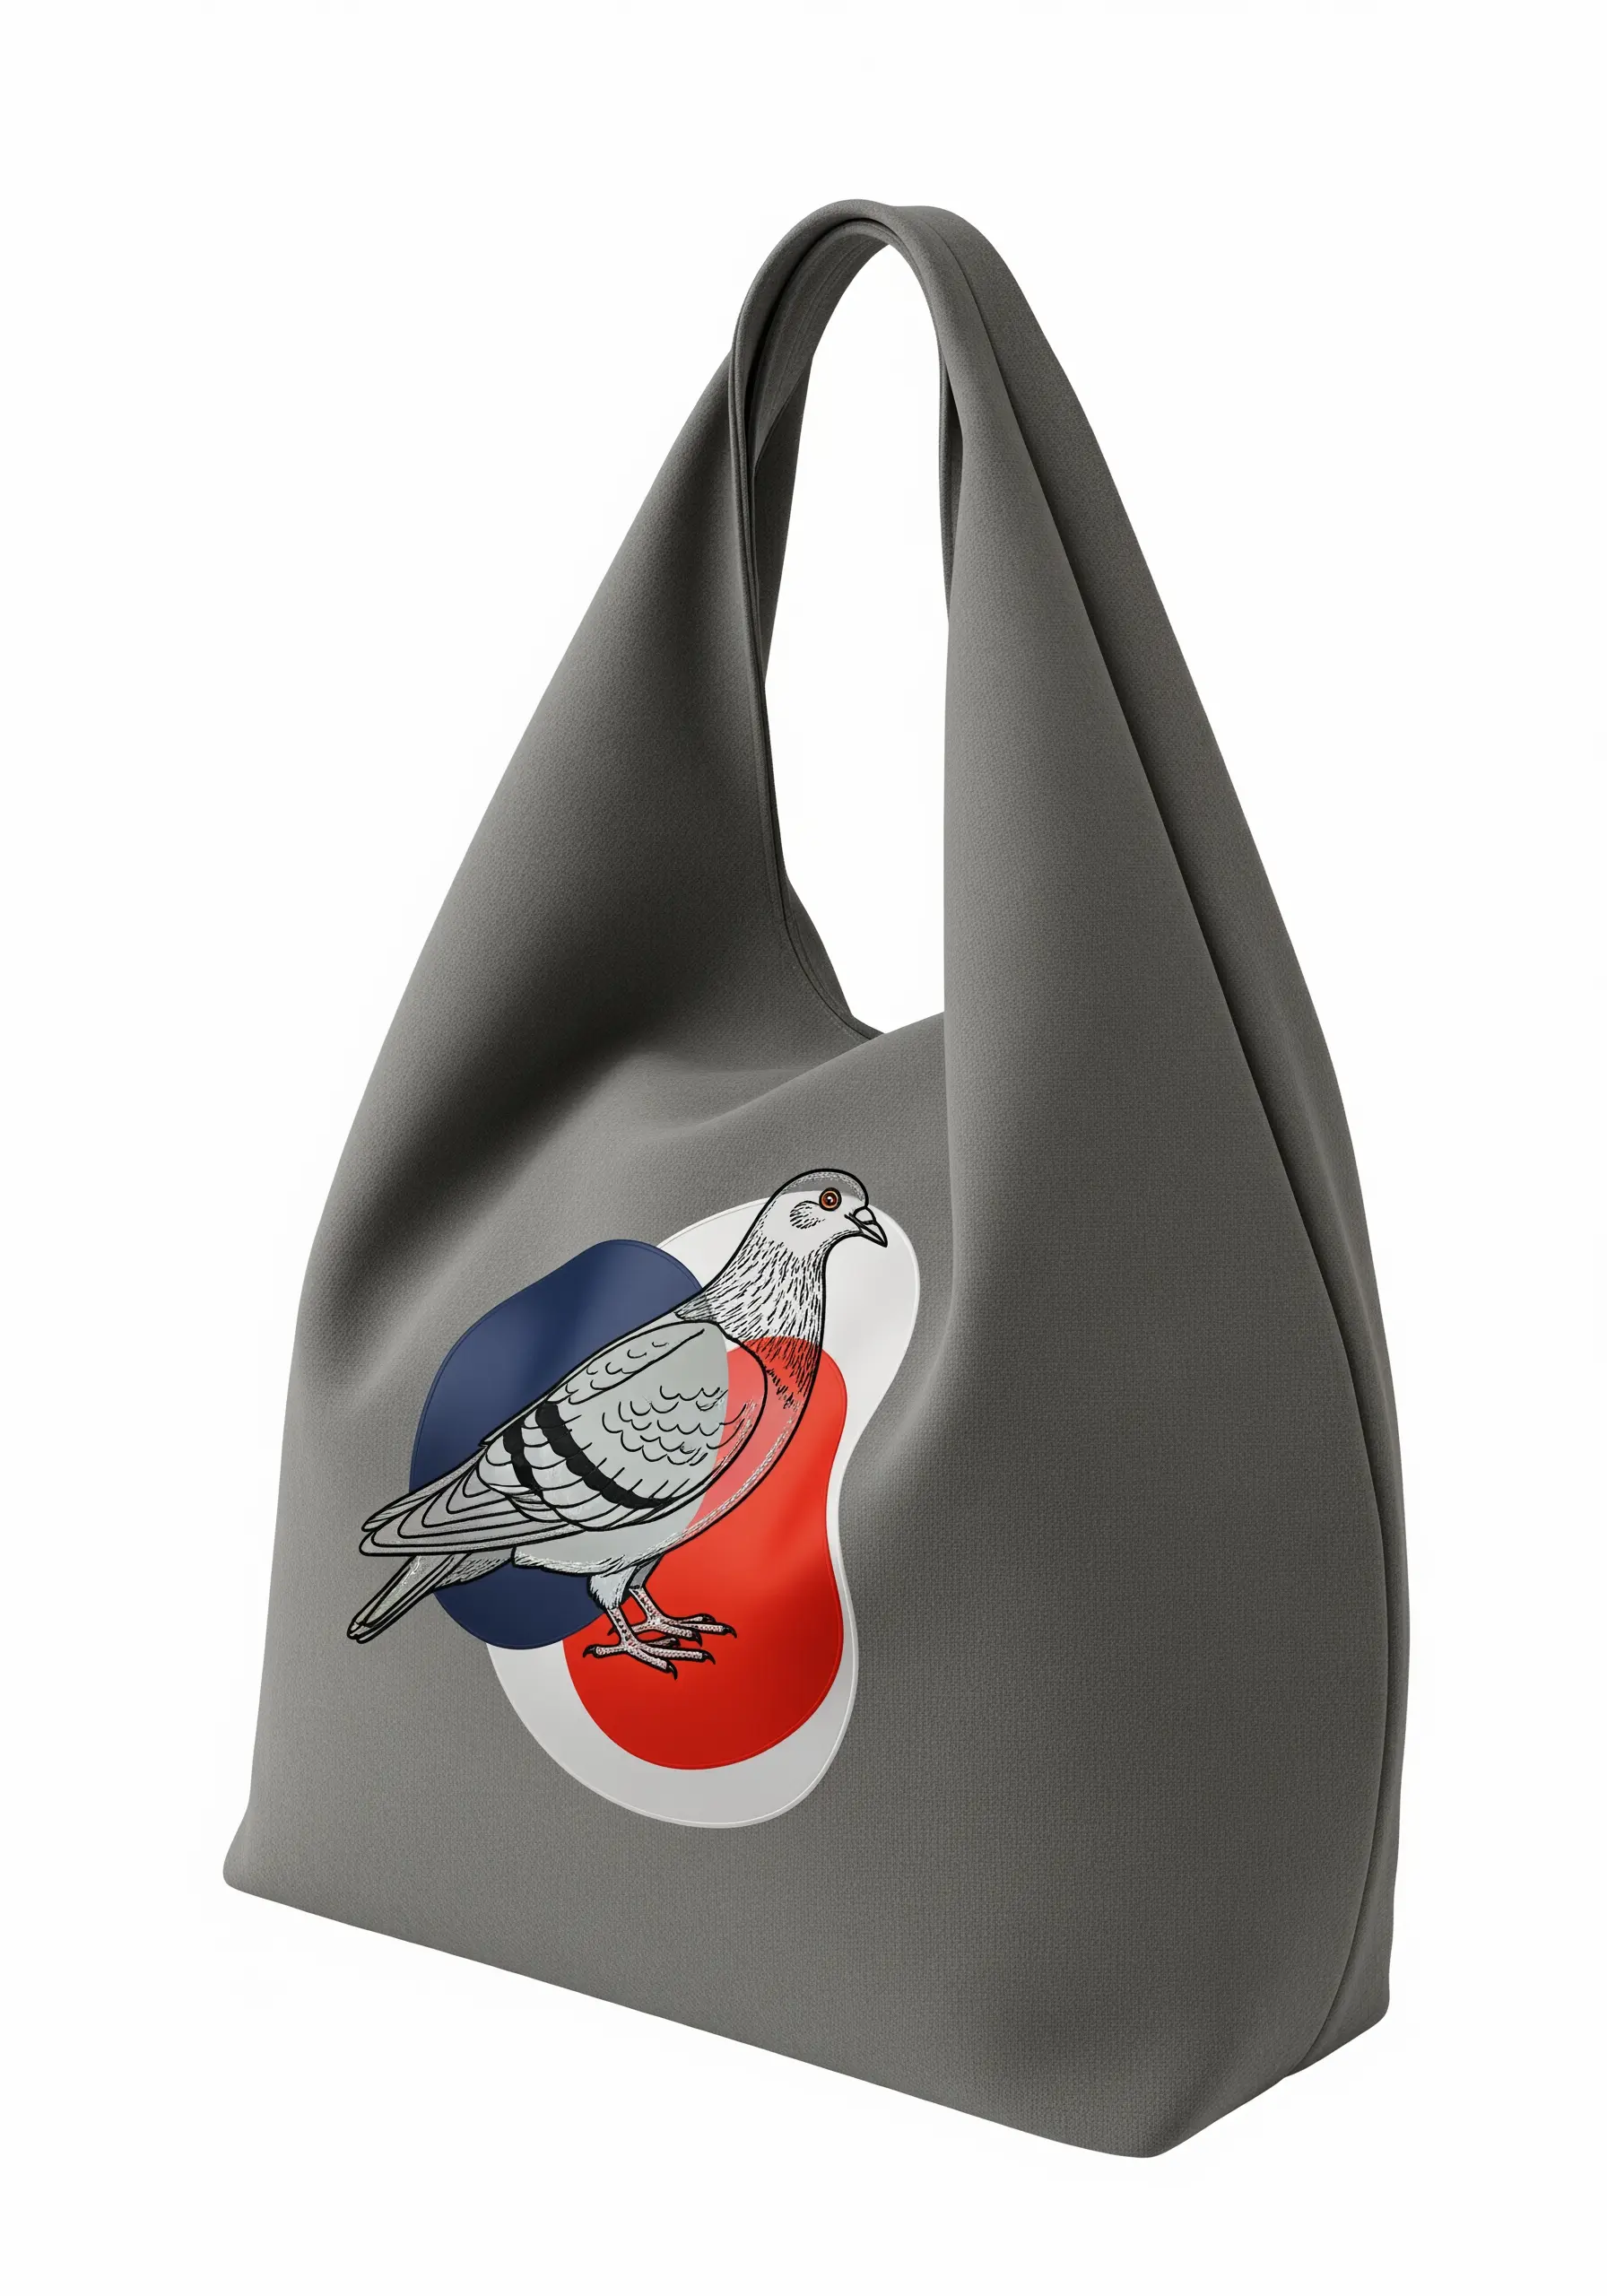
Create a striking, modern wildlife portrait by pairing realistic detail with flat, graphic shapes.
Render the pigeon using the long-and-short stitch technique with multiple shades of gray and white to create soft, feathery textures and realistic shading.
For the background, use a dense, perfectly smooth satin stitch to fill in the abstract color blobs. This contrast between the detailed, textured animal and the flat, solid background makes the subject pop and gives the design a contemporary, illustrative feel.
32. Create Visual Hierarchy with Thread Weight
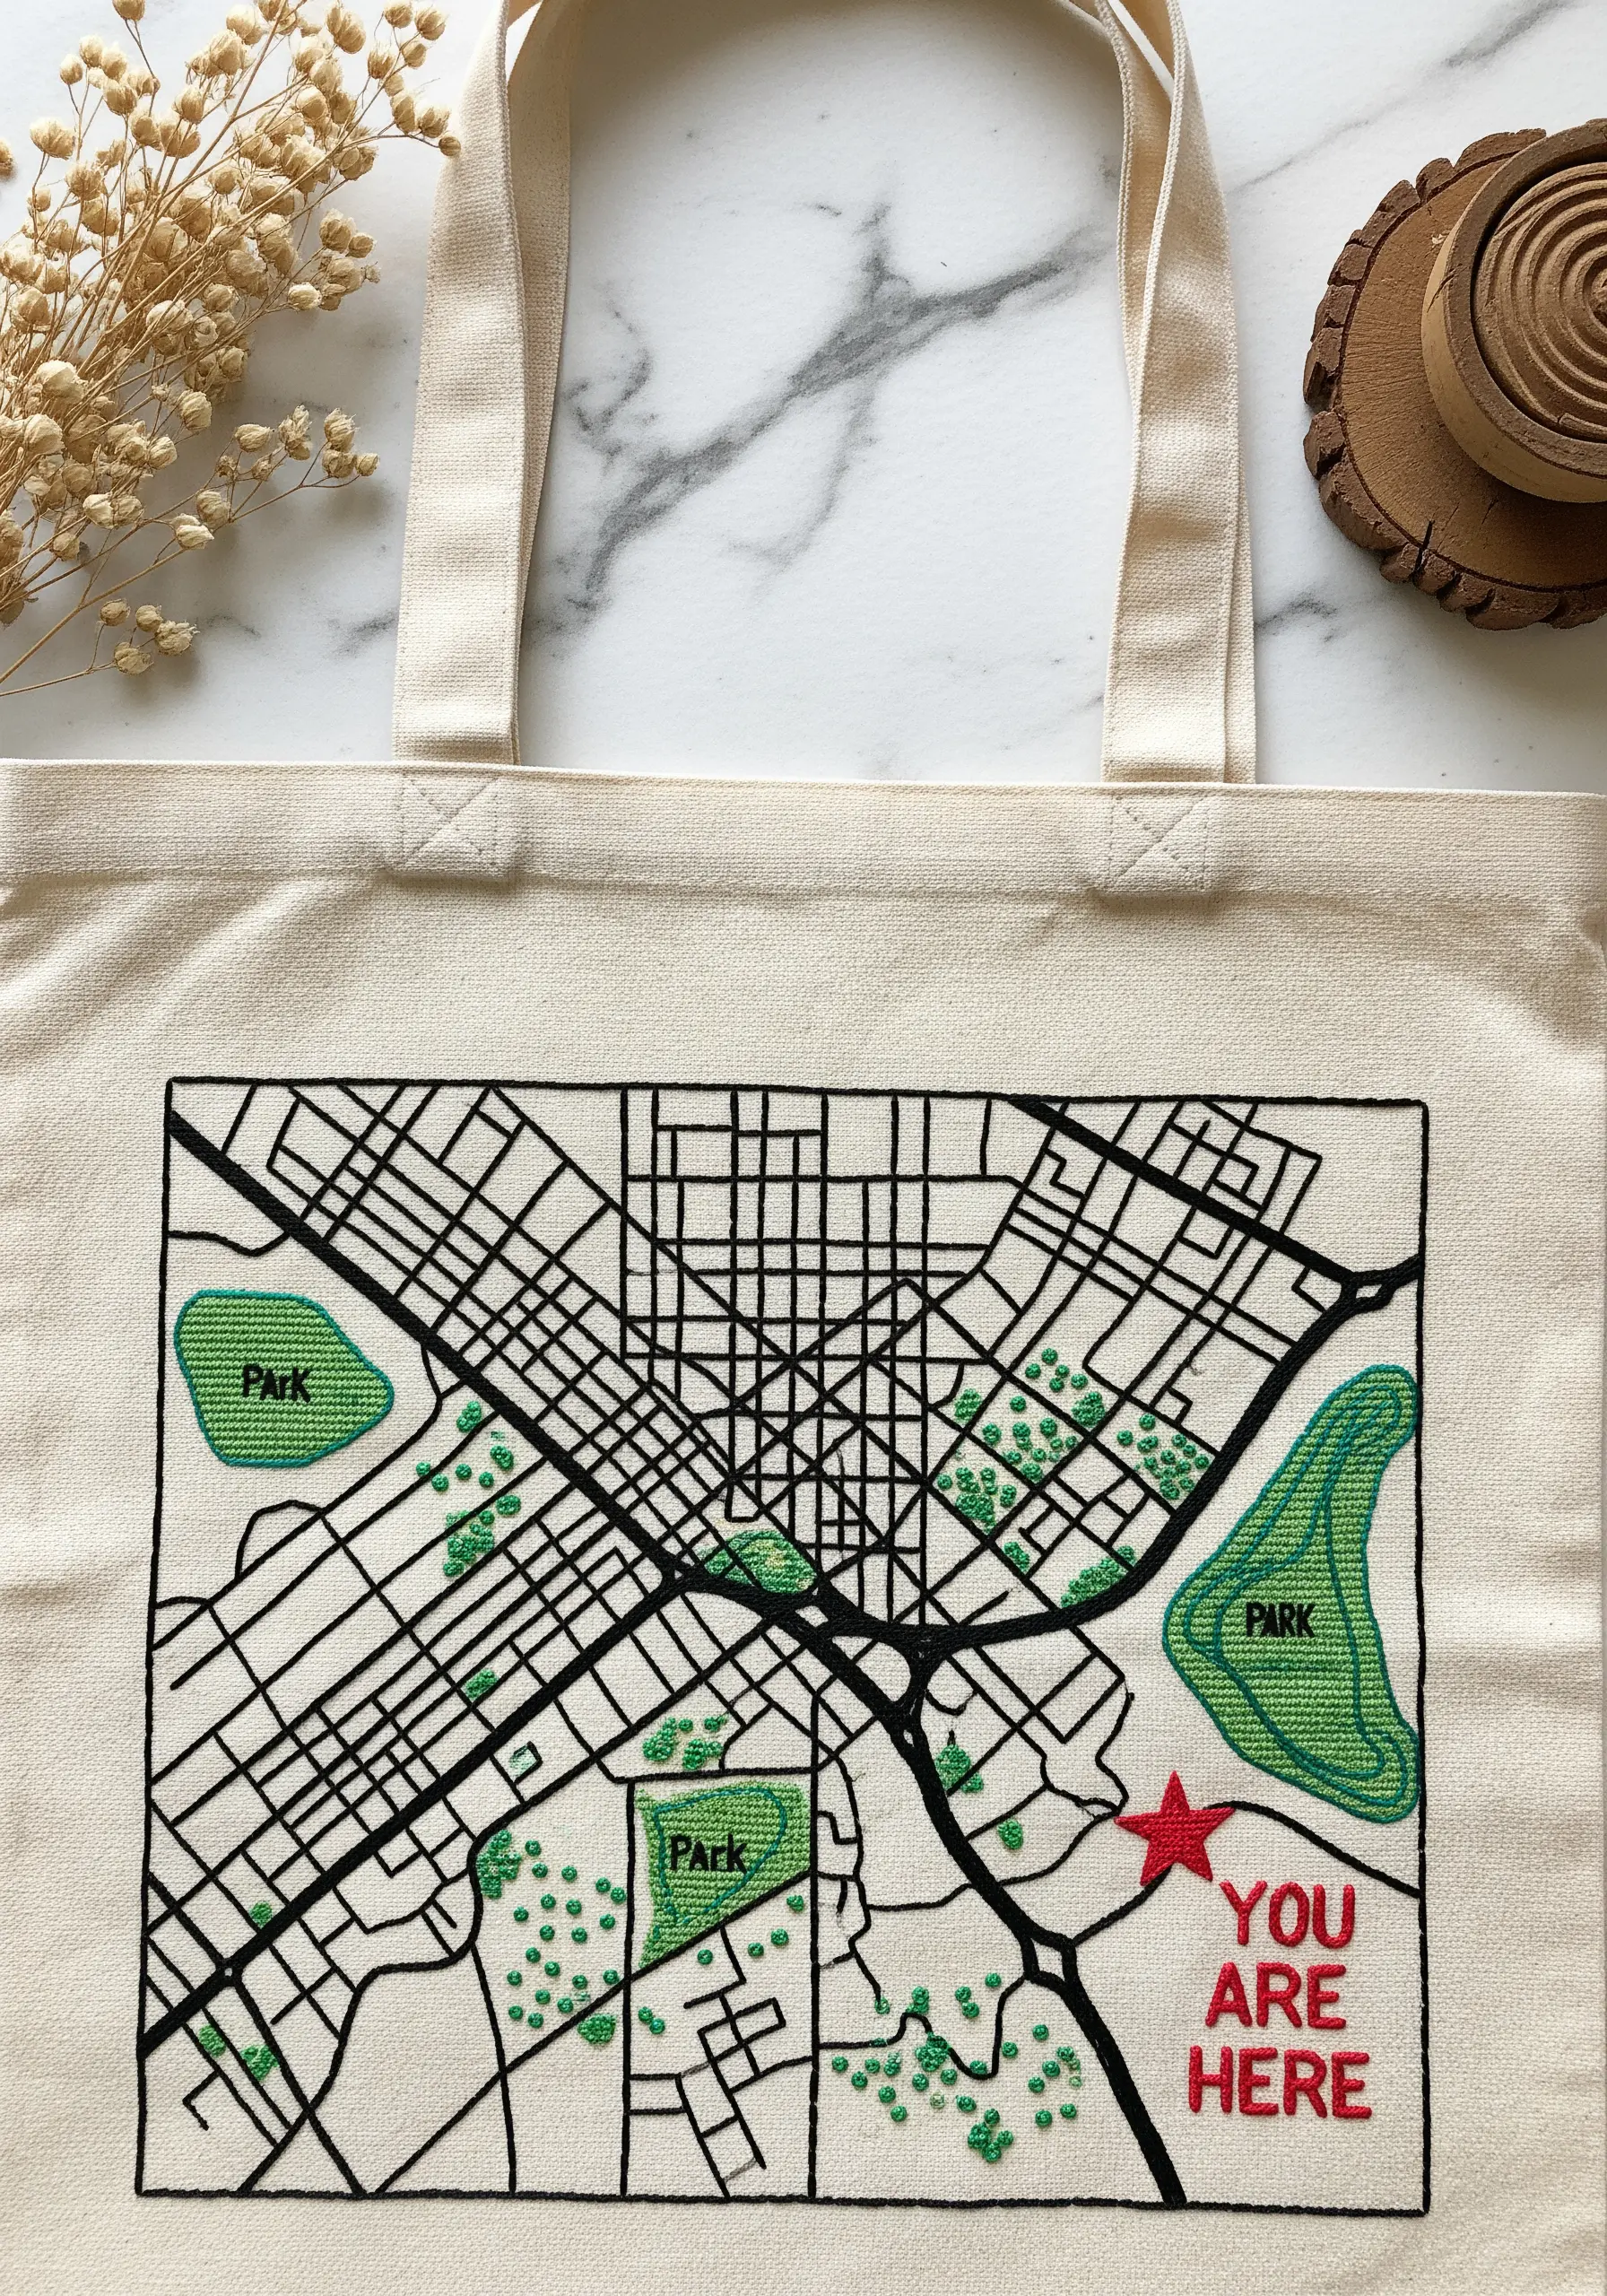
When embroidering a line-heavy design like a map, you can create a sense of depth and importance by varying the thickness of your thread.
Use a 3- or 4-strand backstitch for the main arterial roads to make them stand out.
For smaller, residential streets, switch to a delicate 1- or 2-strand backstitch. This simple adjustment creates a clear visual hierarchy, guiding the viewer’s eye and making the map easier to read and more aesthetically pleasing.
Fill green spaces with scattered French knots to complete the cartographic look.
33. Make Your Design Pop on Patterned Fabric
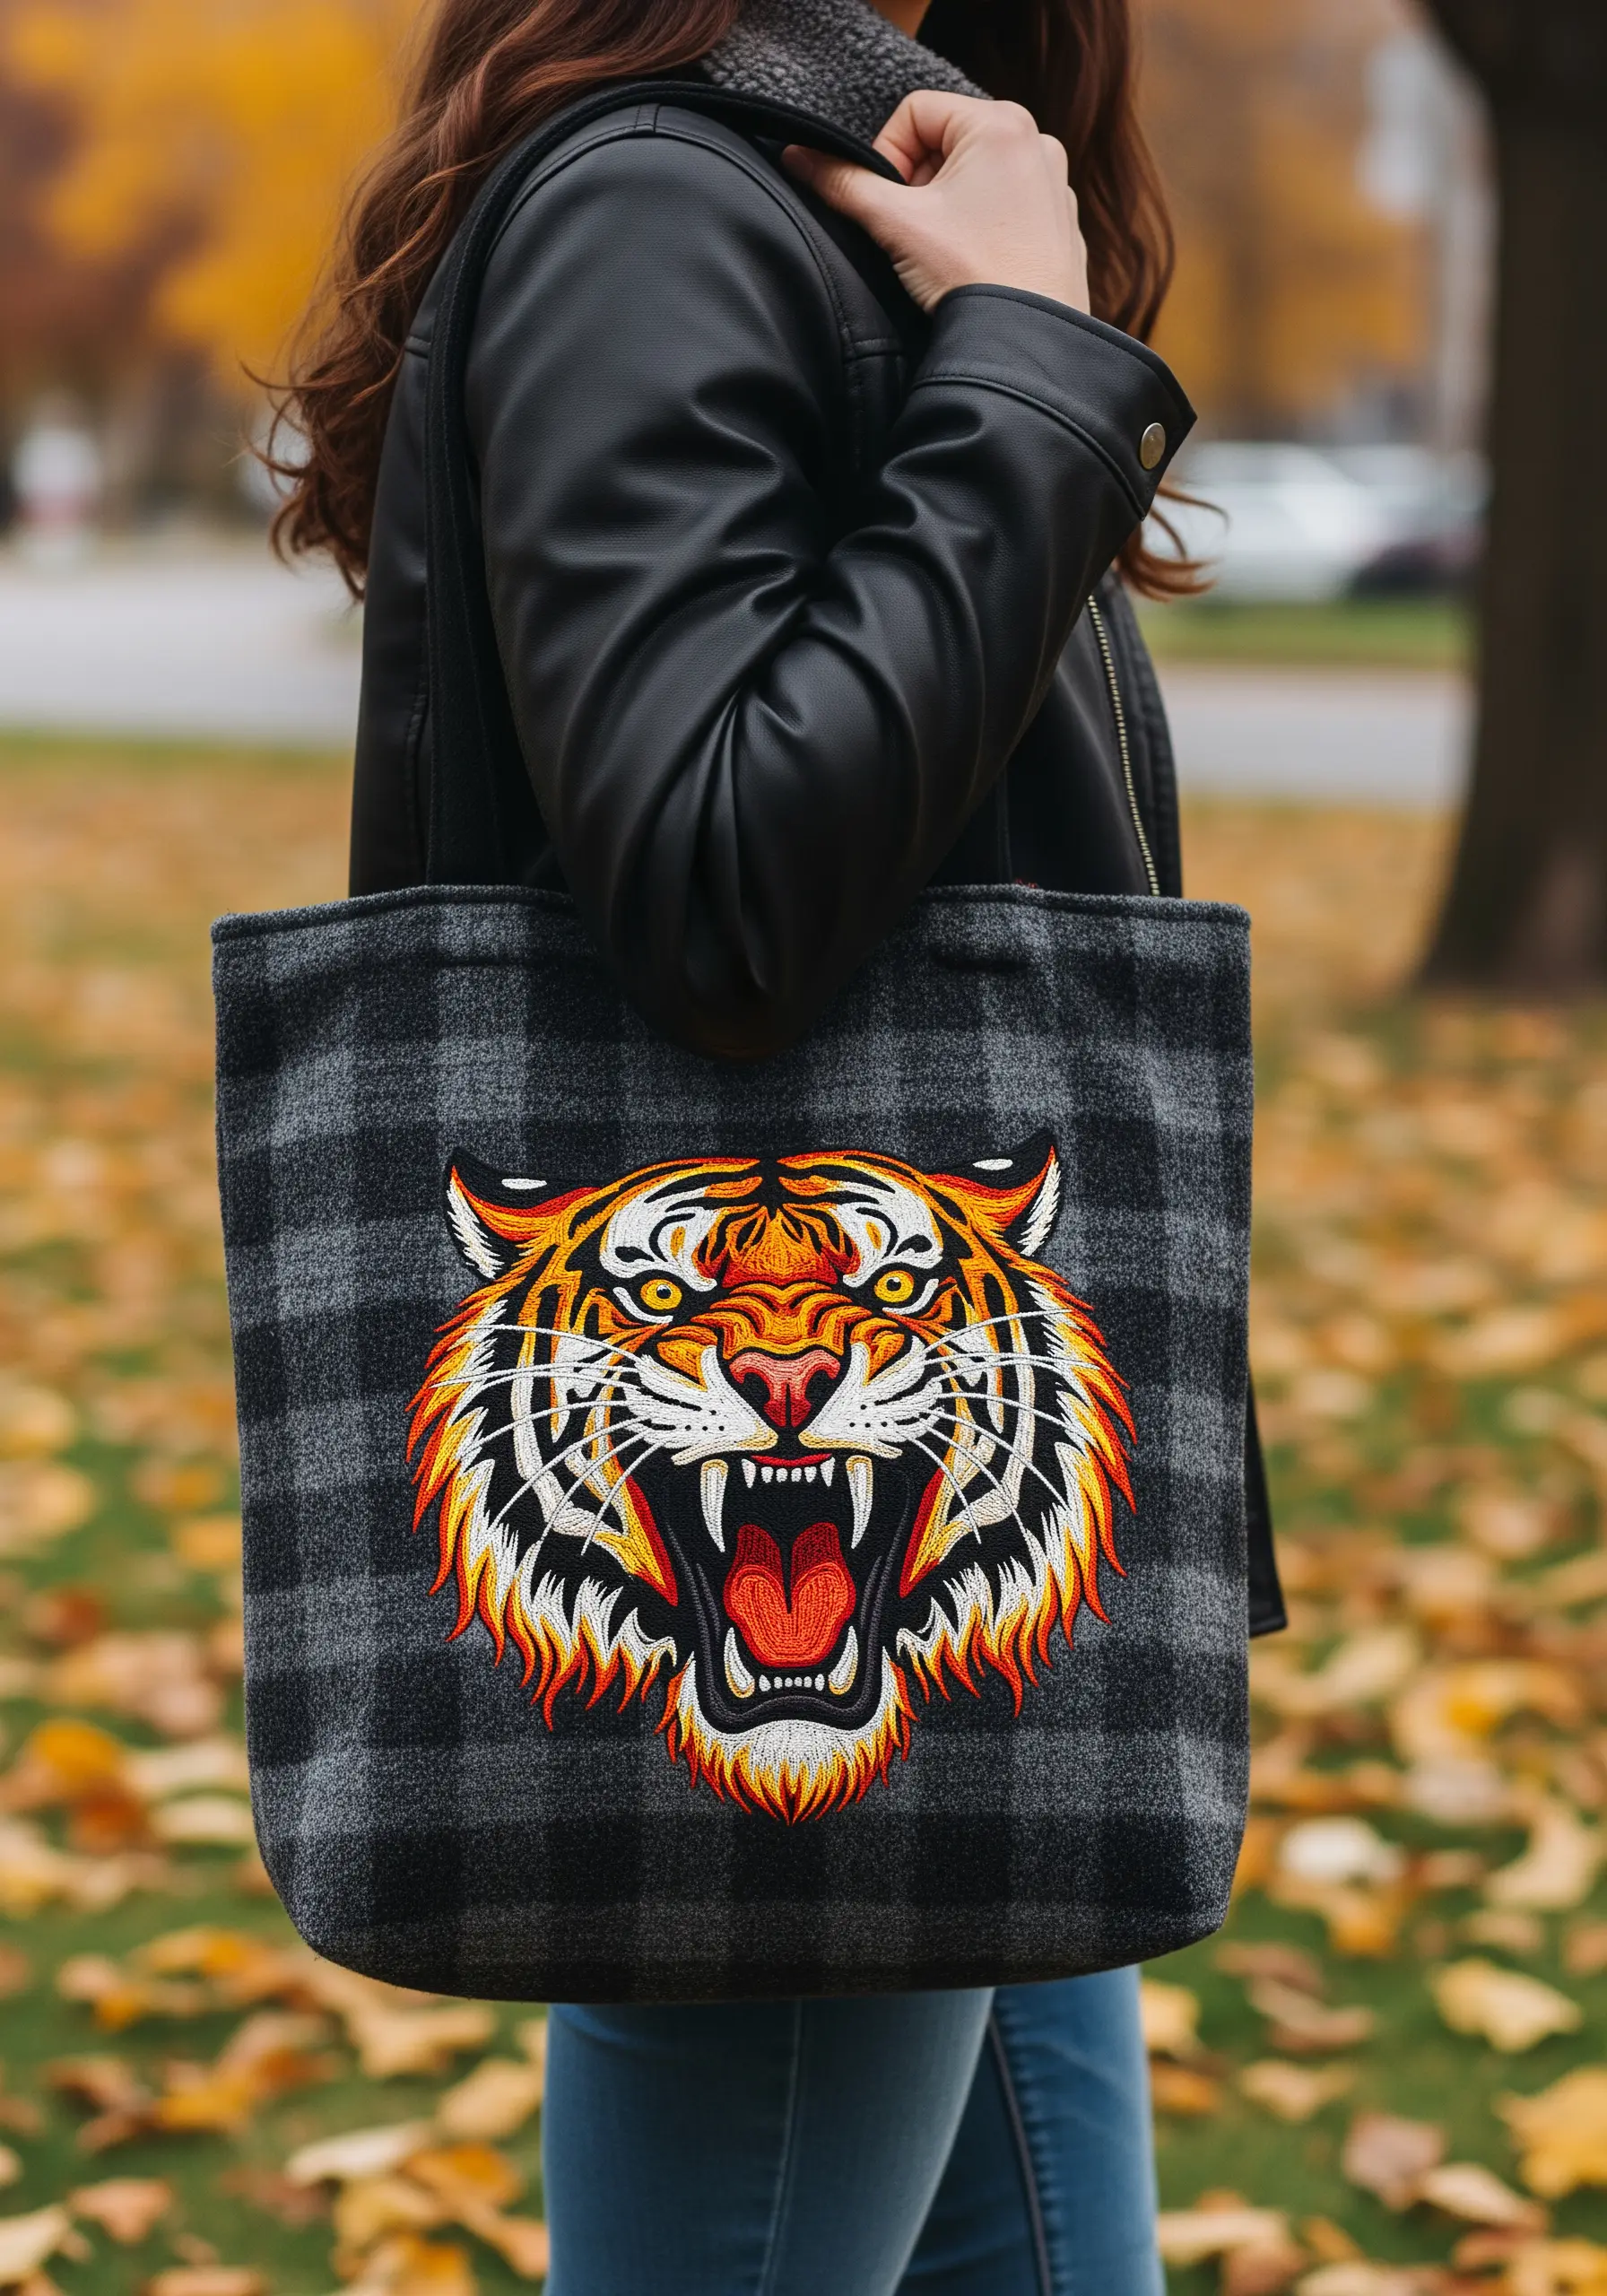
Embroidering on a busy pattern like plaid requires your design to fight for attention. The key is high contrast and dense stitching.
Use vibrant, saturated colors like orange and bright white that don’t appear in the background plaid. Fill every section of the tiger with dense, overlapping long-and-short stitches.
A strong, black outline is non-negotiable—it acts as a containing wall, separating your artwork from the pattern behind it and ensuring your fierce subject is the star of the show.
34. Set the Scene with a Fabric Paint Underlay
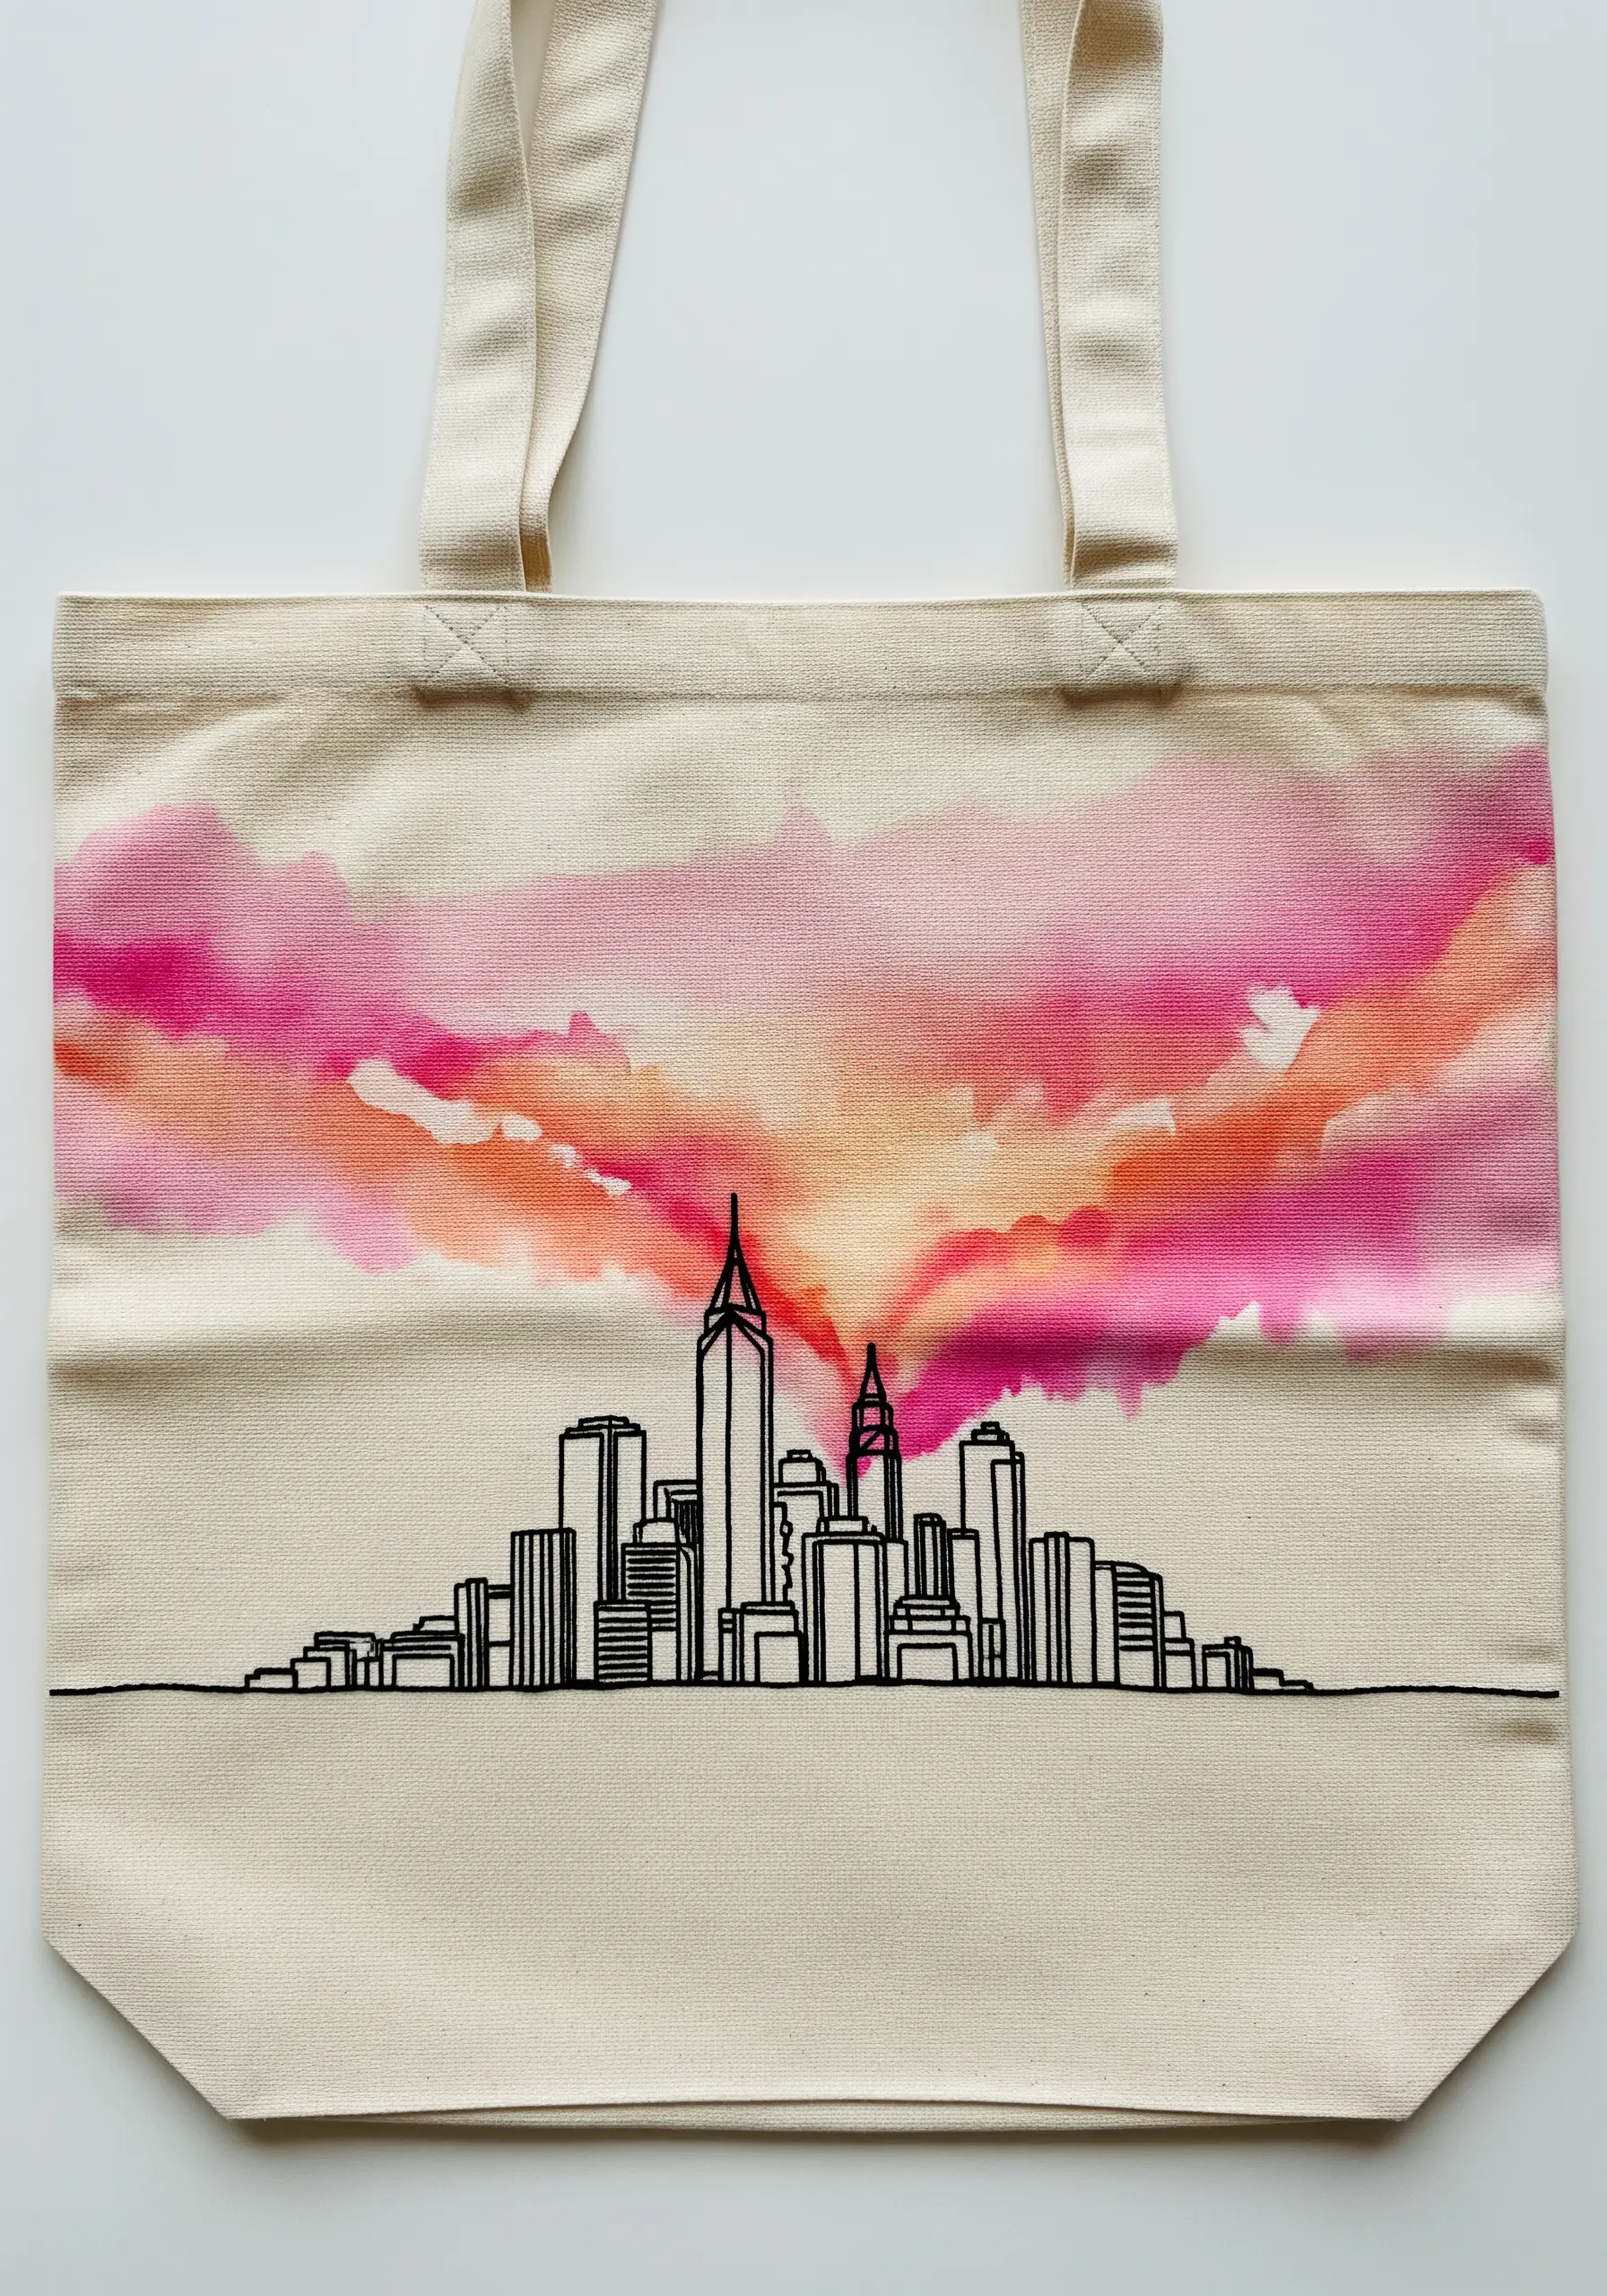
Combine the softness of watercolor with the sharpness of embroidery for a stunning mixed-media piece.
Begin by painting a sunset wash onto your canvas tote using fabric paints or a textile medium. Allow the colors to blend and bleed for a soft, atmospheric effect, then heat-set it according to the paint directions.
Once dry, stitch the clean, simple outline of the city skyline directly on top using a crisp black backstitch. The juxtaposition of the fluid, colorful background and the rigid, graphic line work is incredibly effective.
35. Add Subtle Texture with Tonal Quilting

Elevate a simple bag by adding an all-over texture before you even begin your main embroidery.
Using a sewing machine or by hand with a simple running stitch, create a geometric quilted pattern across the surface of the bag using a thread that matches the fabric color.
This tonal stitching adds a subtle, luxurious dimension and a sturdy structure. Then, your feature embroidery—like this clean white signature—sits on top, creating a sophisticated interplay between the raised texture of the quilting and the smoothness of the script.


