
Your bedroom should be more than just a place to sleep—it’s your sanctuary, a space that reflects who you are and brings you peace. Adding a personal, handmade touch is the most powerful way to make it truly yours.
Forget fleeting trends and complex projects that never get finished. Instead, let’s focus on simple, intentional crafts that offer both a relaxing process and a beautiful result. Whether it’s the texture of a hand-knit throw, the quiet detail of a single embroidered flower, or the calming scent of a candle you poured yourself, these ideas are designed to infuse your space with warmth and character.
Here, you’ll find accessible ways to transform everyday materials into meaningful decor. Let’s create a room that feels not just decorated, but deeply and authentically you.
1. Create a Modern Heirloom Monogram
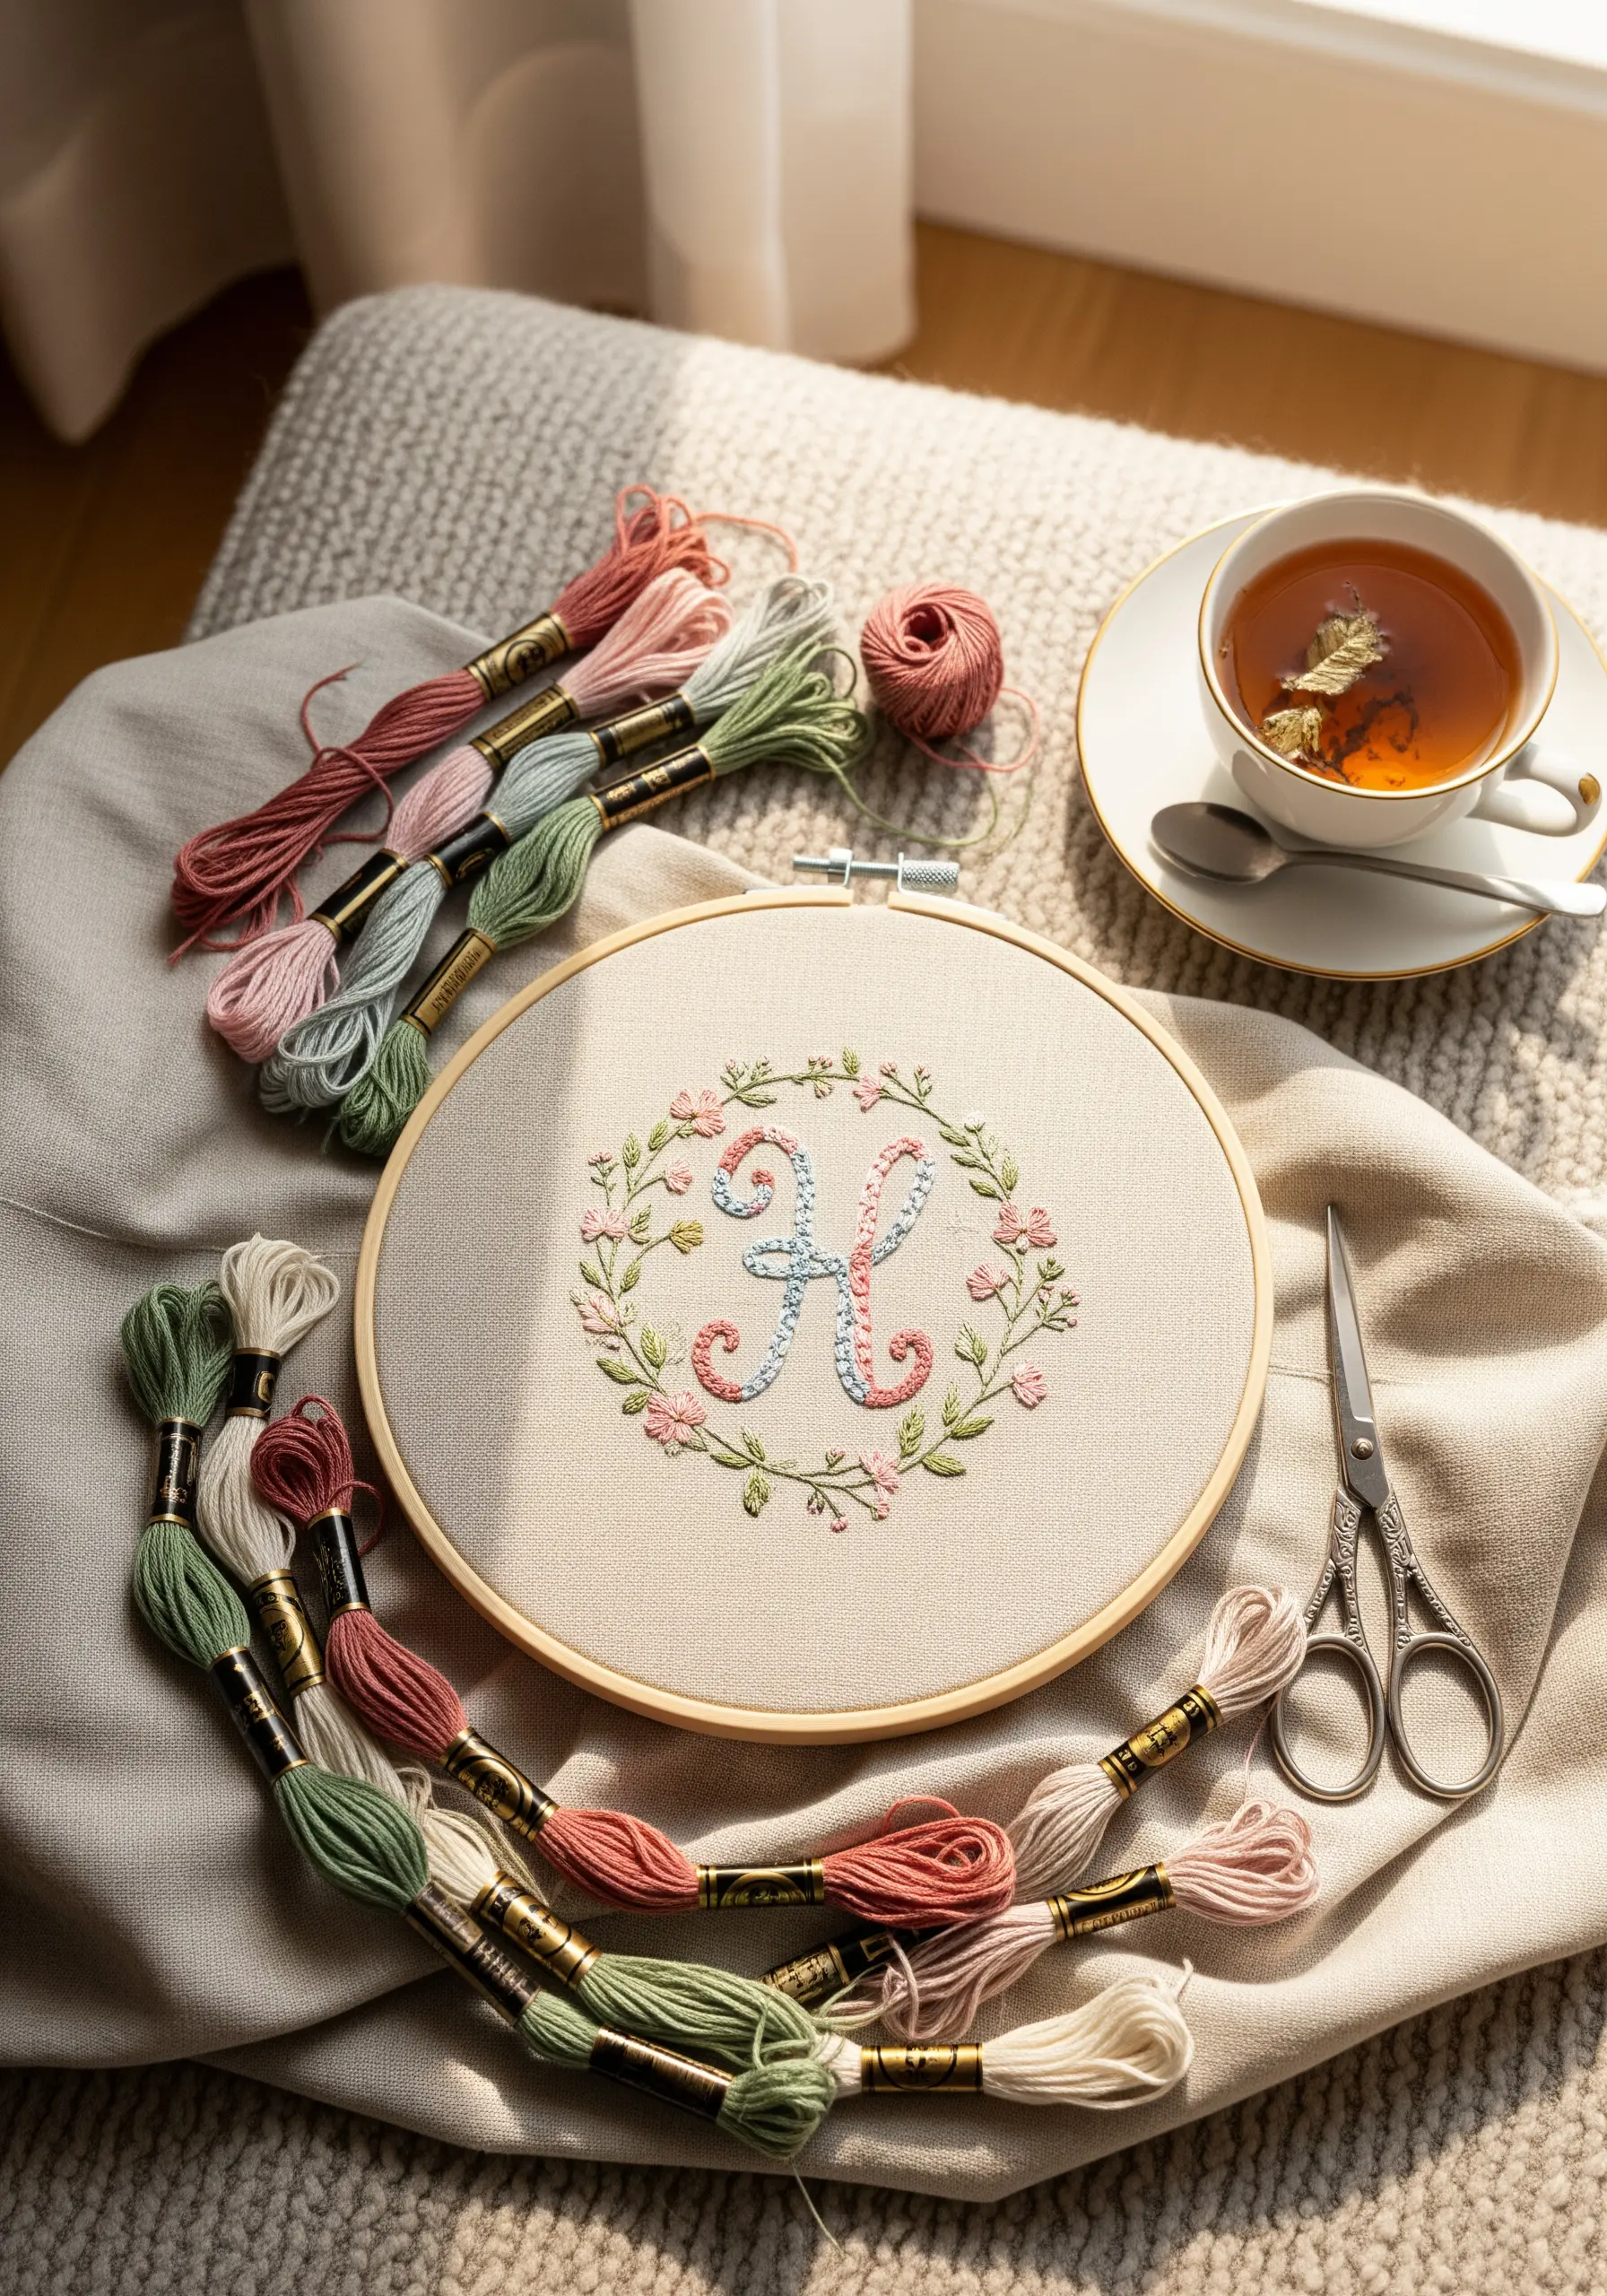
To give your initial a soft, raised texture, use a padded satin stitch.
First, outline the letter with a split stitch, then fill the inside with rows of seed stitches before covering it completely with a smooth satin stitch.
This underlying texture lifts the final layer, creating subtle dimension that catches the light.
For the surrounding wreath, use delicate detached chain stitches for leaves and French knots for blossoms, keeping the scale small to ensure the monogram remains the clear focal point.
A muted, analogous color palette—like dusty rose, sage, and pale blue—maintains a calm, sophisticated feel.
2. Introduce Sculptural Warmth with Arm Knitting
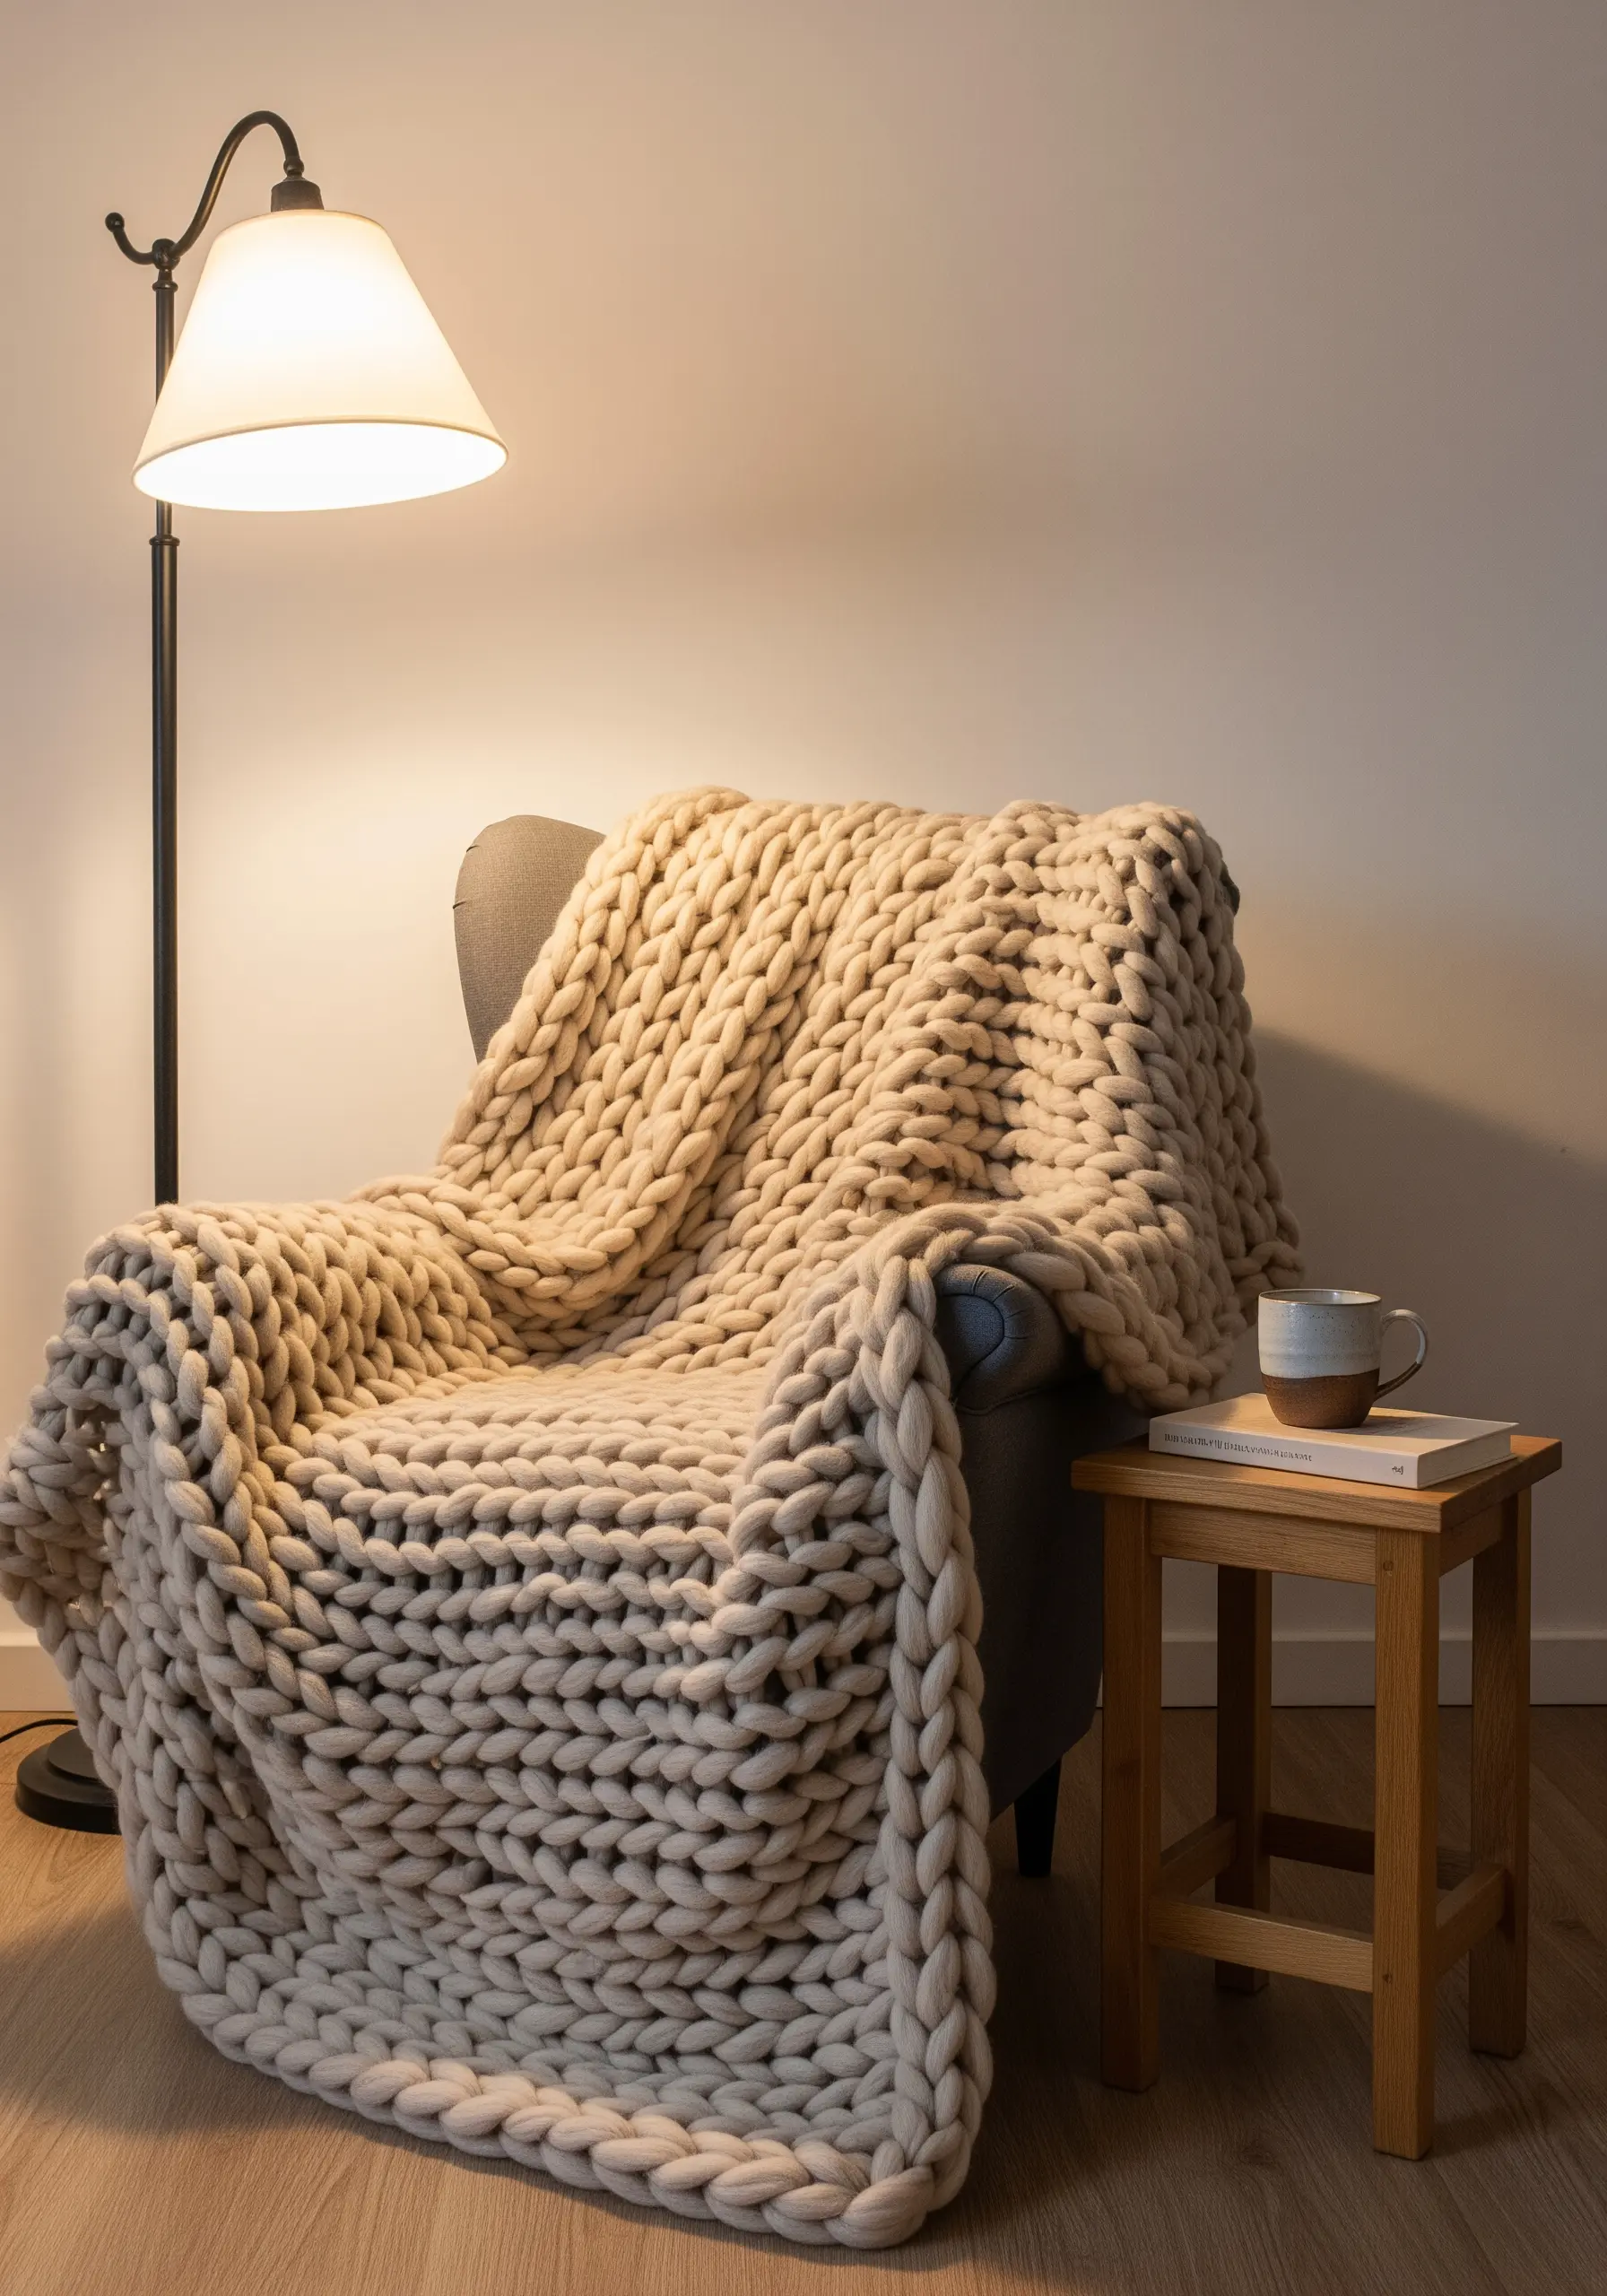
This is not embroidery, but a tactile fiber art that offers immediate gratification and dramatic texture for your bedroom.
Create an oversized chunky knit blanket using just your arms as needles; this technique allows you to work with super-bulky merino wool roving, creating large, plush stitches impossible with traditional needles.
The exaggerated scale of the knit adds a sculptural, modern element to your space while offering unparalleled coziness.
Choose a neutral color like cream or dove grey to let the texture itself be the main design feature.
3. Design a Statement Macrame Headboard
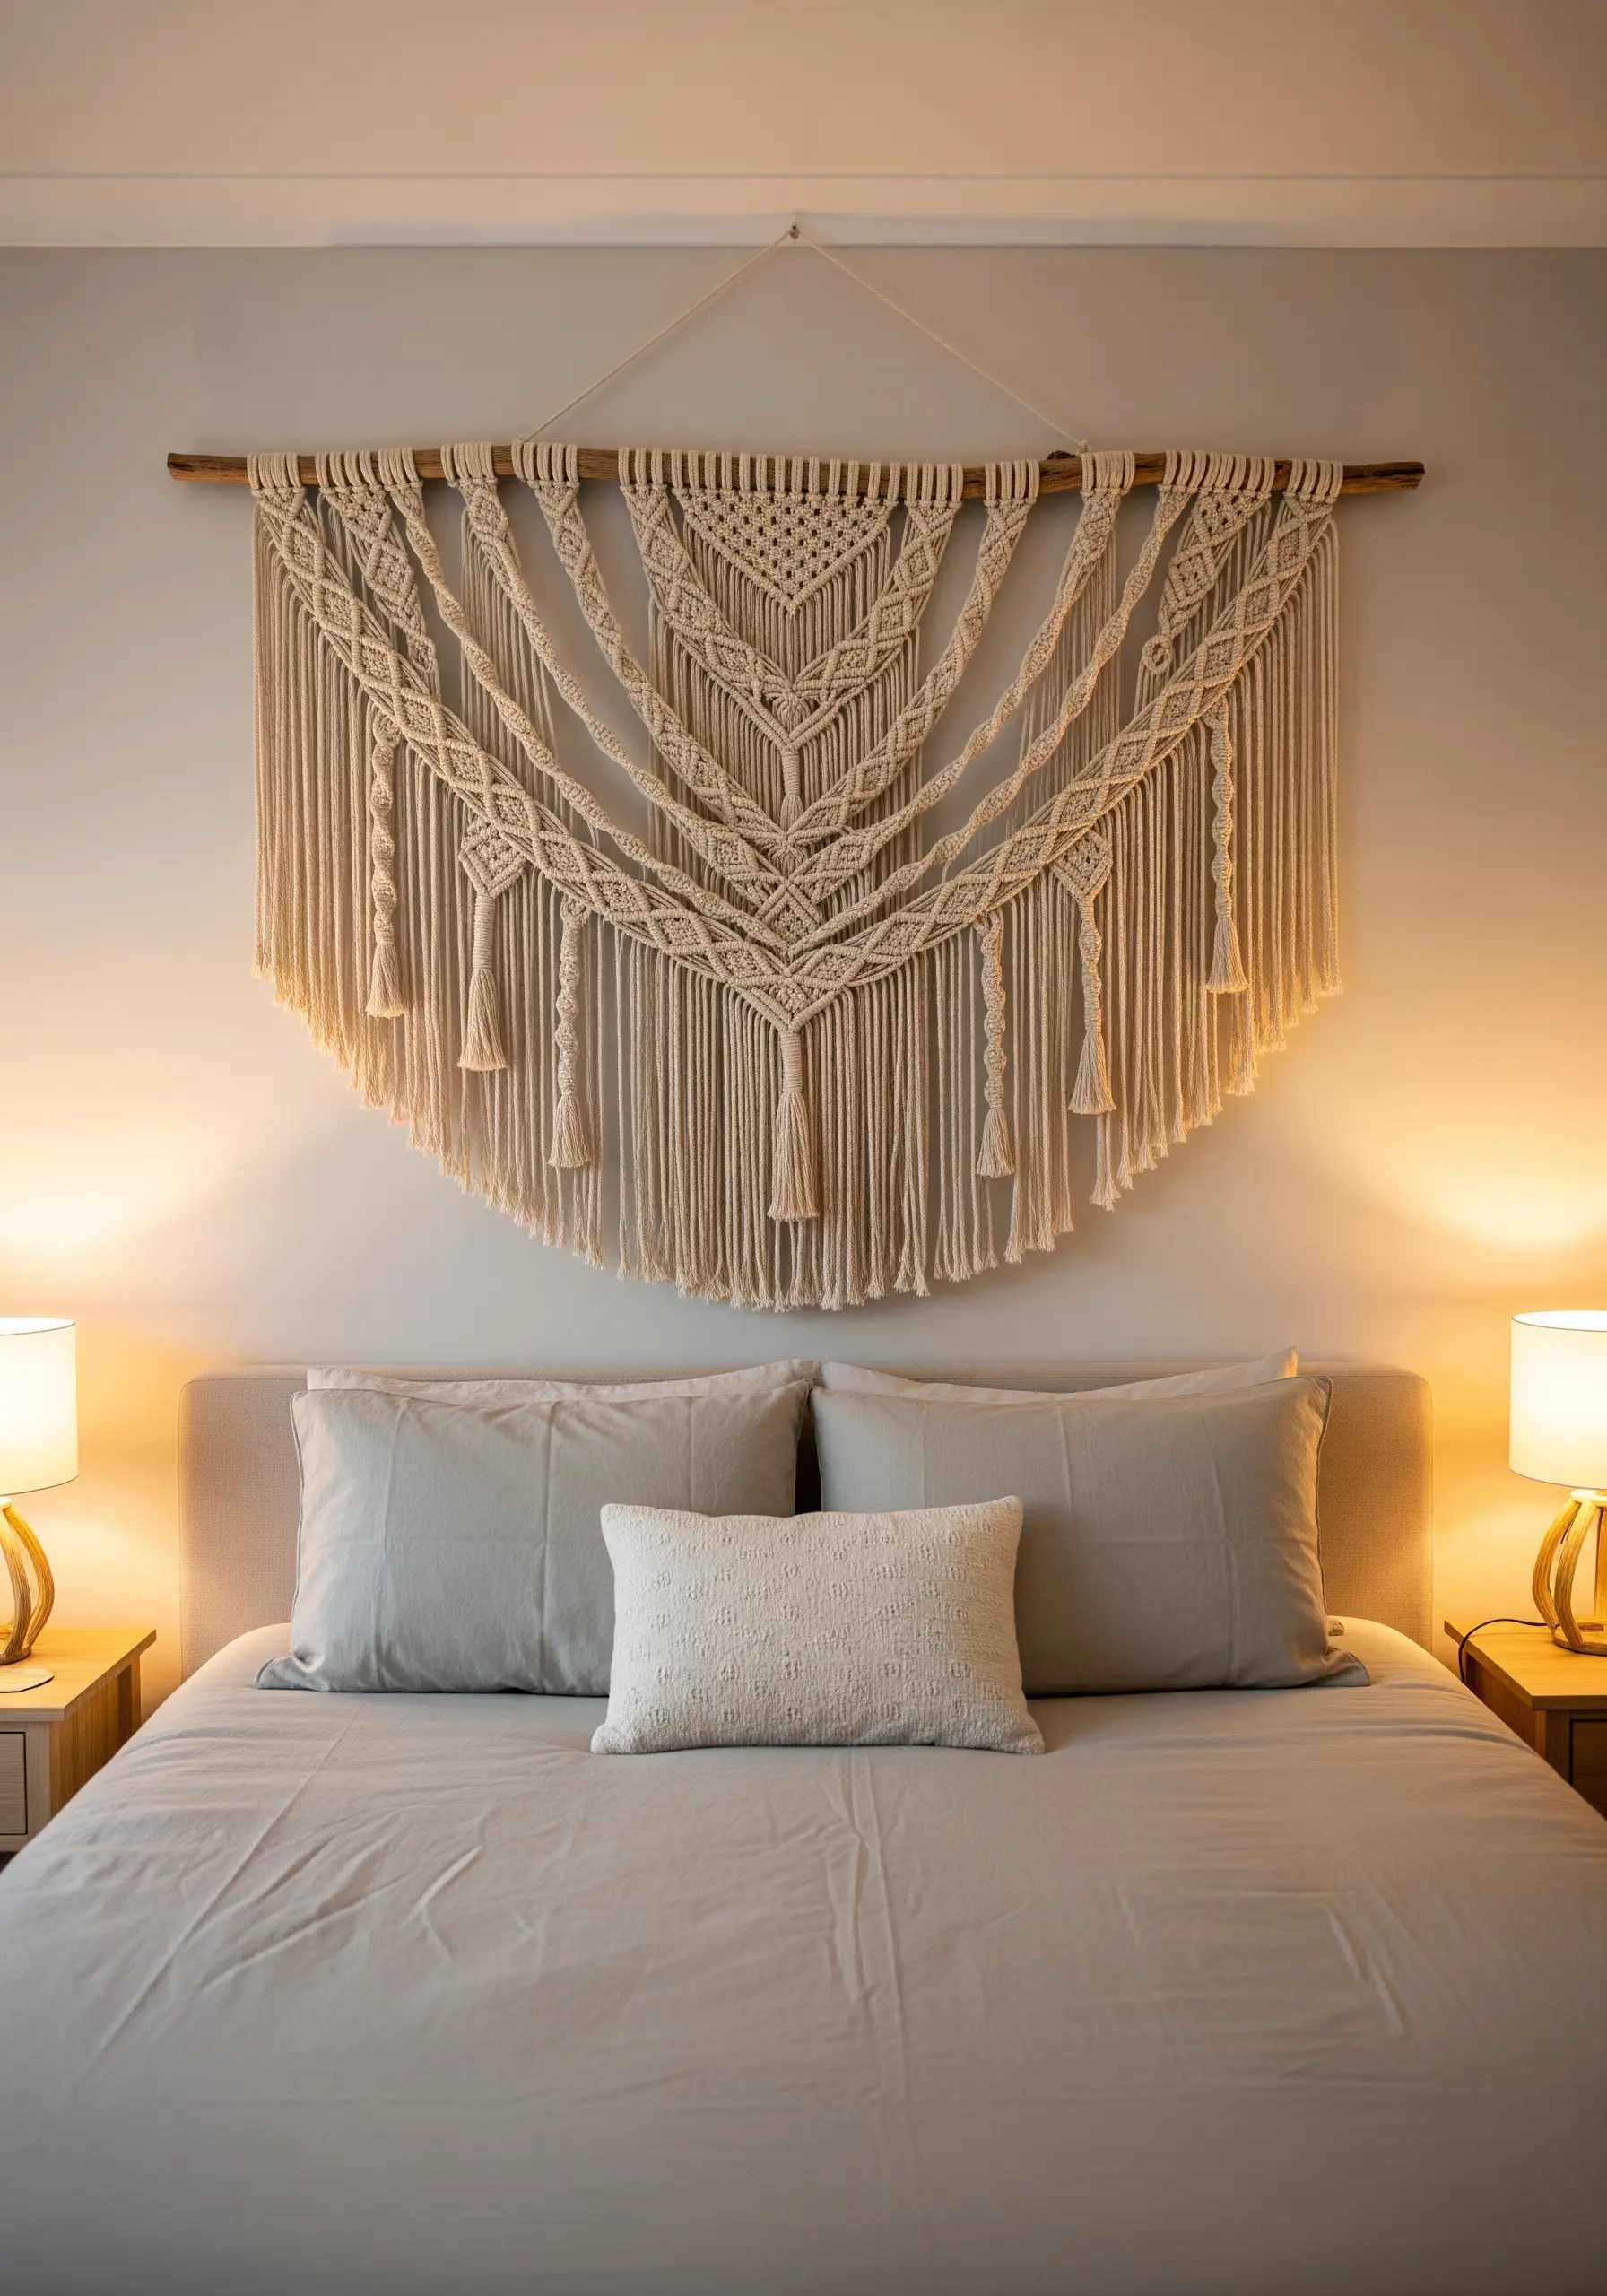
Move beyond small plant hangers and create a large-scale macrame piece to serve as a stunning, textural headboard.
You can build this entire design using just two fundamental knots: the square knot for creating flat, grid-like sections, and the double half-hitch for making sharp, diagonal lines.
By alternating sections of dense knotting with loose, draping cords, you create visual rhythm and flow.
Using a thick, natural cotton rope on a piece of driftwood enhances the organic, calming aesthetic, turning a blank wall into a sophisticated focal point.
4. Frame Botanicals with Stitched Accents
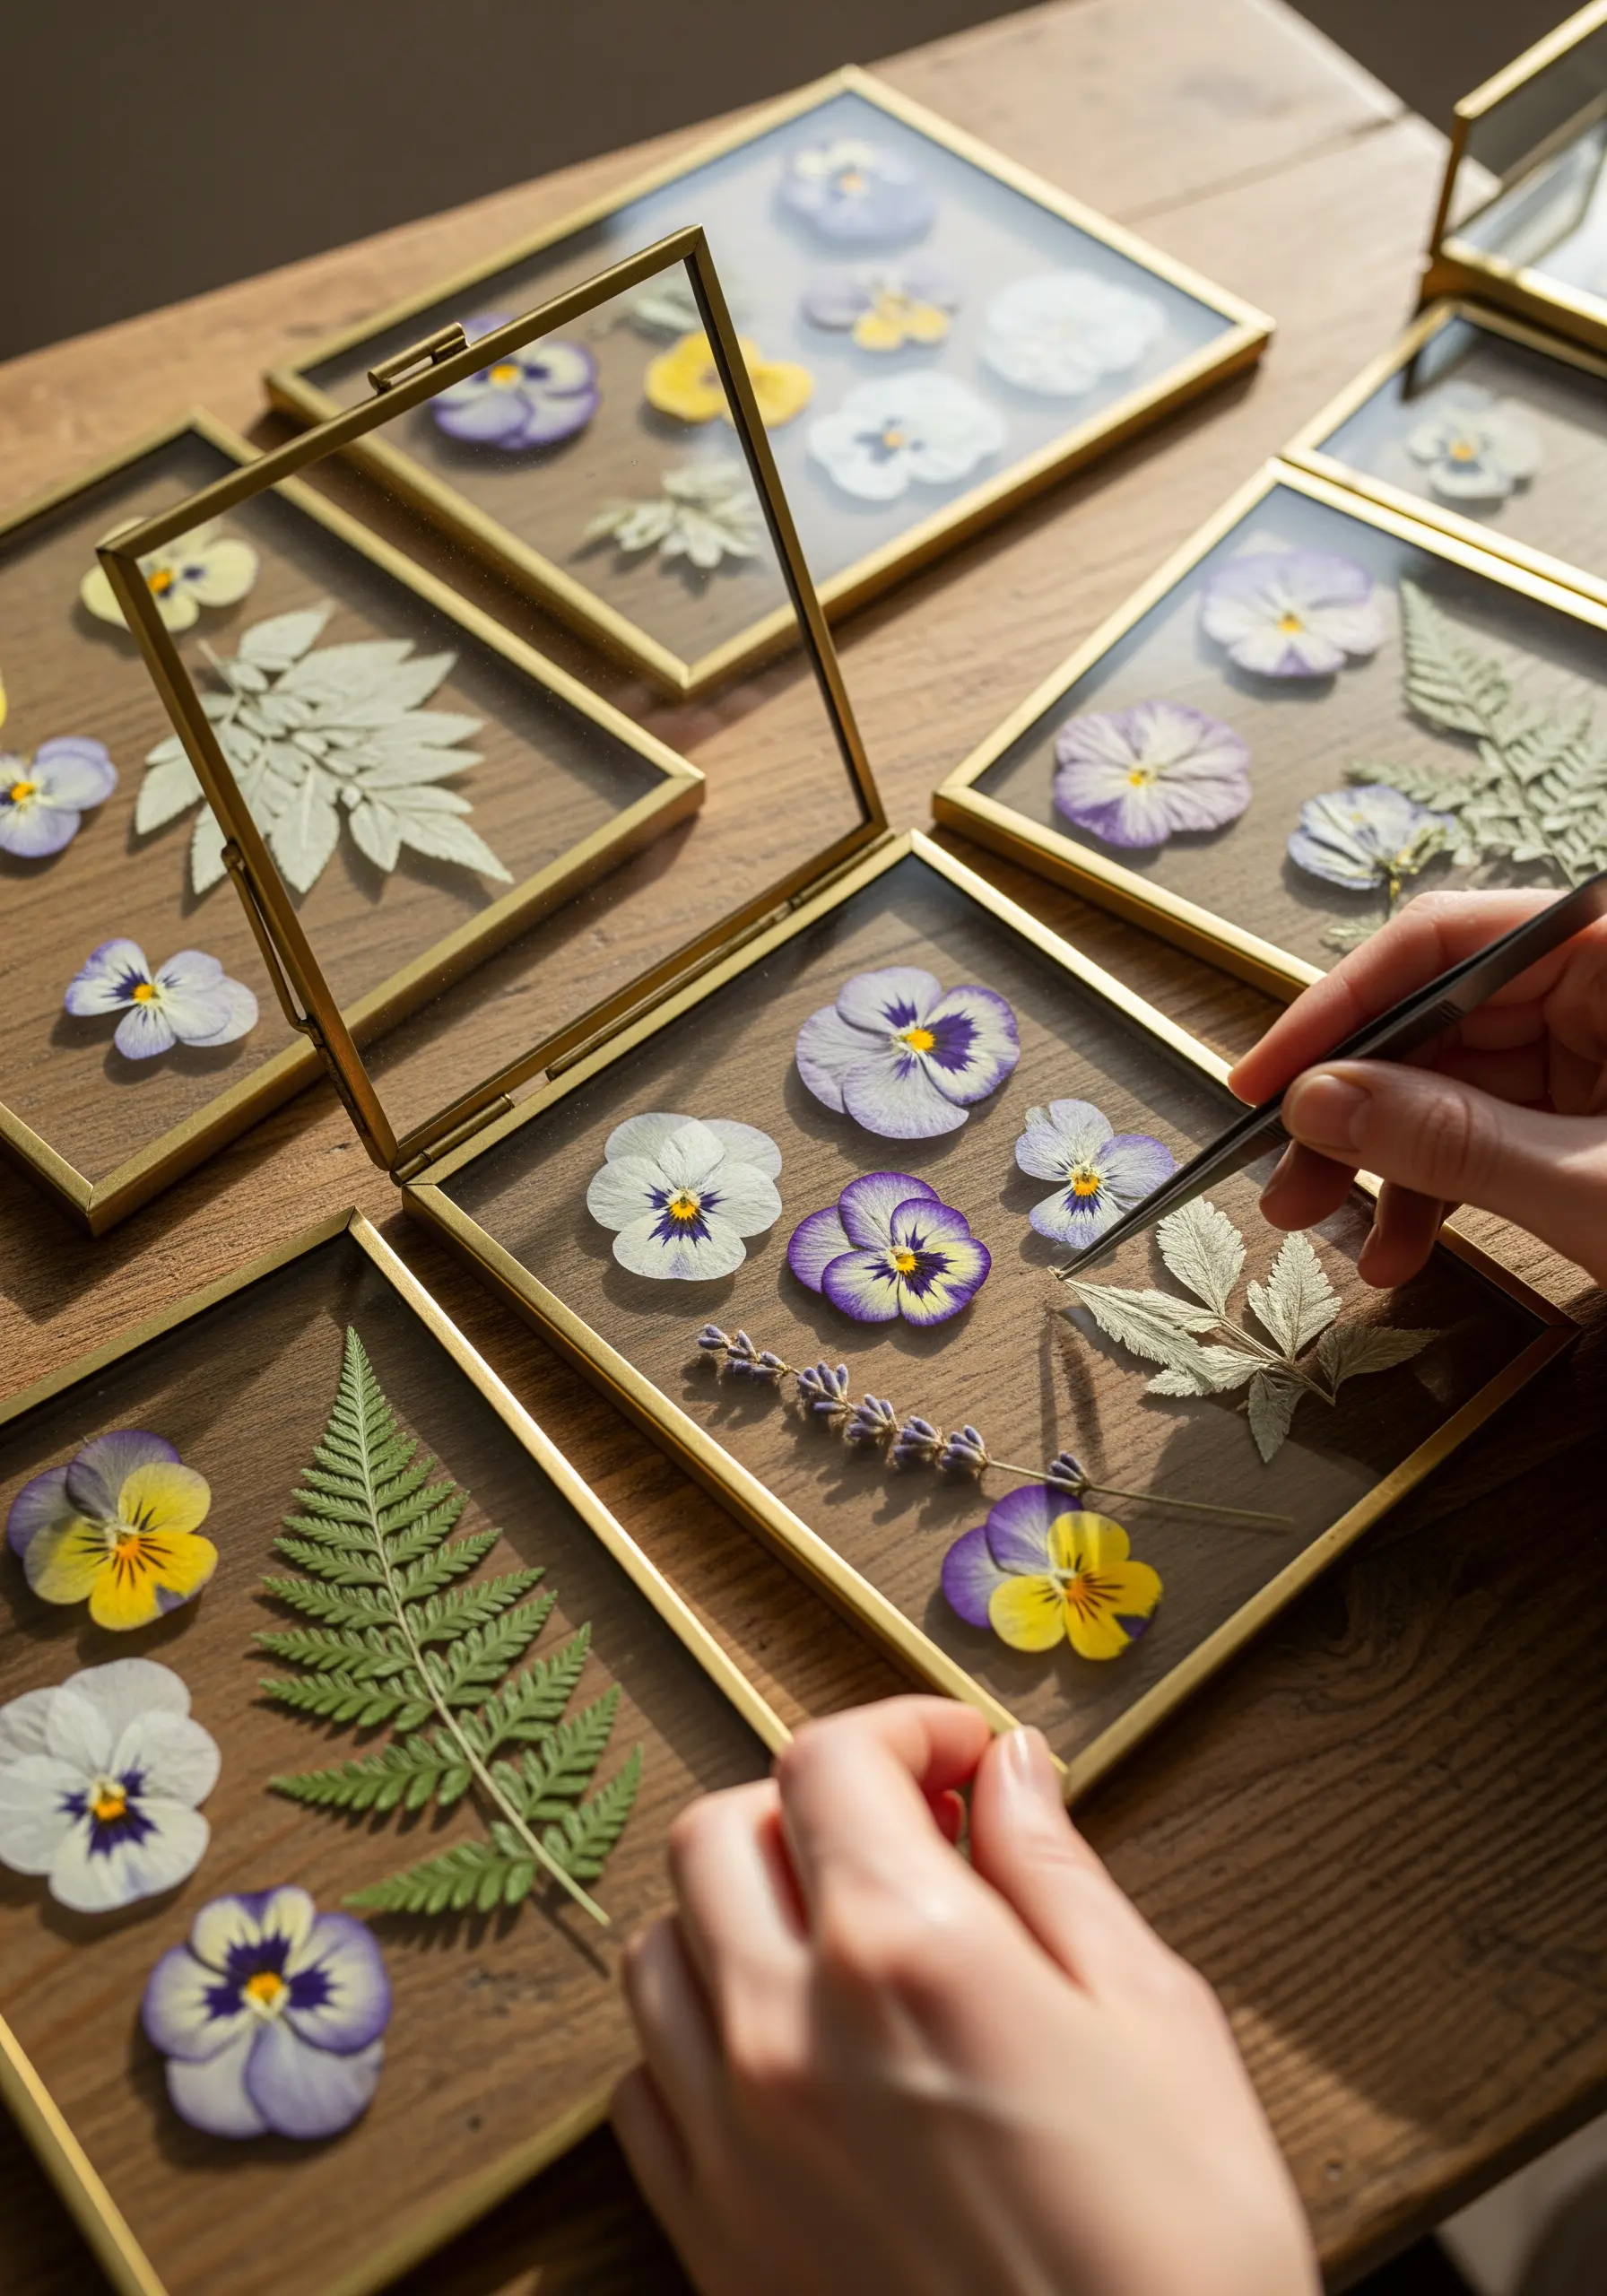
Preserve the delicate beauty of real pressed flowers by framing them between glass, then elevate the composition with subtle embroidery.
Instead of stitching on fabric, you can add tiny, illustrative details directly onto a linen or watercolor paper backing *before* mounting the botanicals.
Use a single strand of thread to stitch a delicate bee, a dotted flight path, or a minimalist border around the edges.
This mixed-media approach adds a layer of handcrafted storytelling that complements the natural forms without overpowering them.
5. Craft a Yarn-Wrapped Monogram for Instant Texture
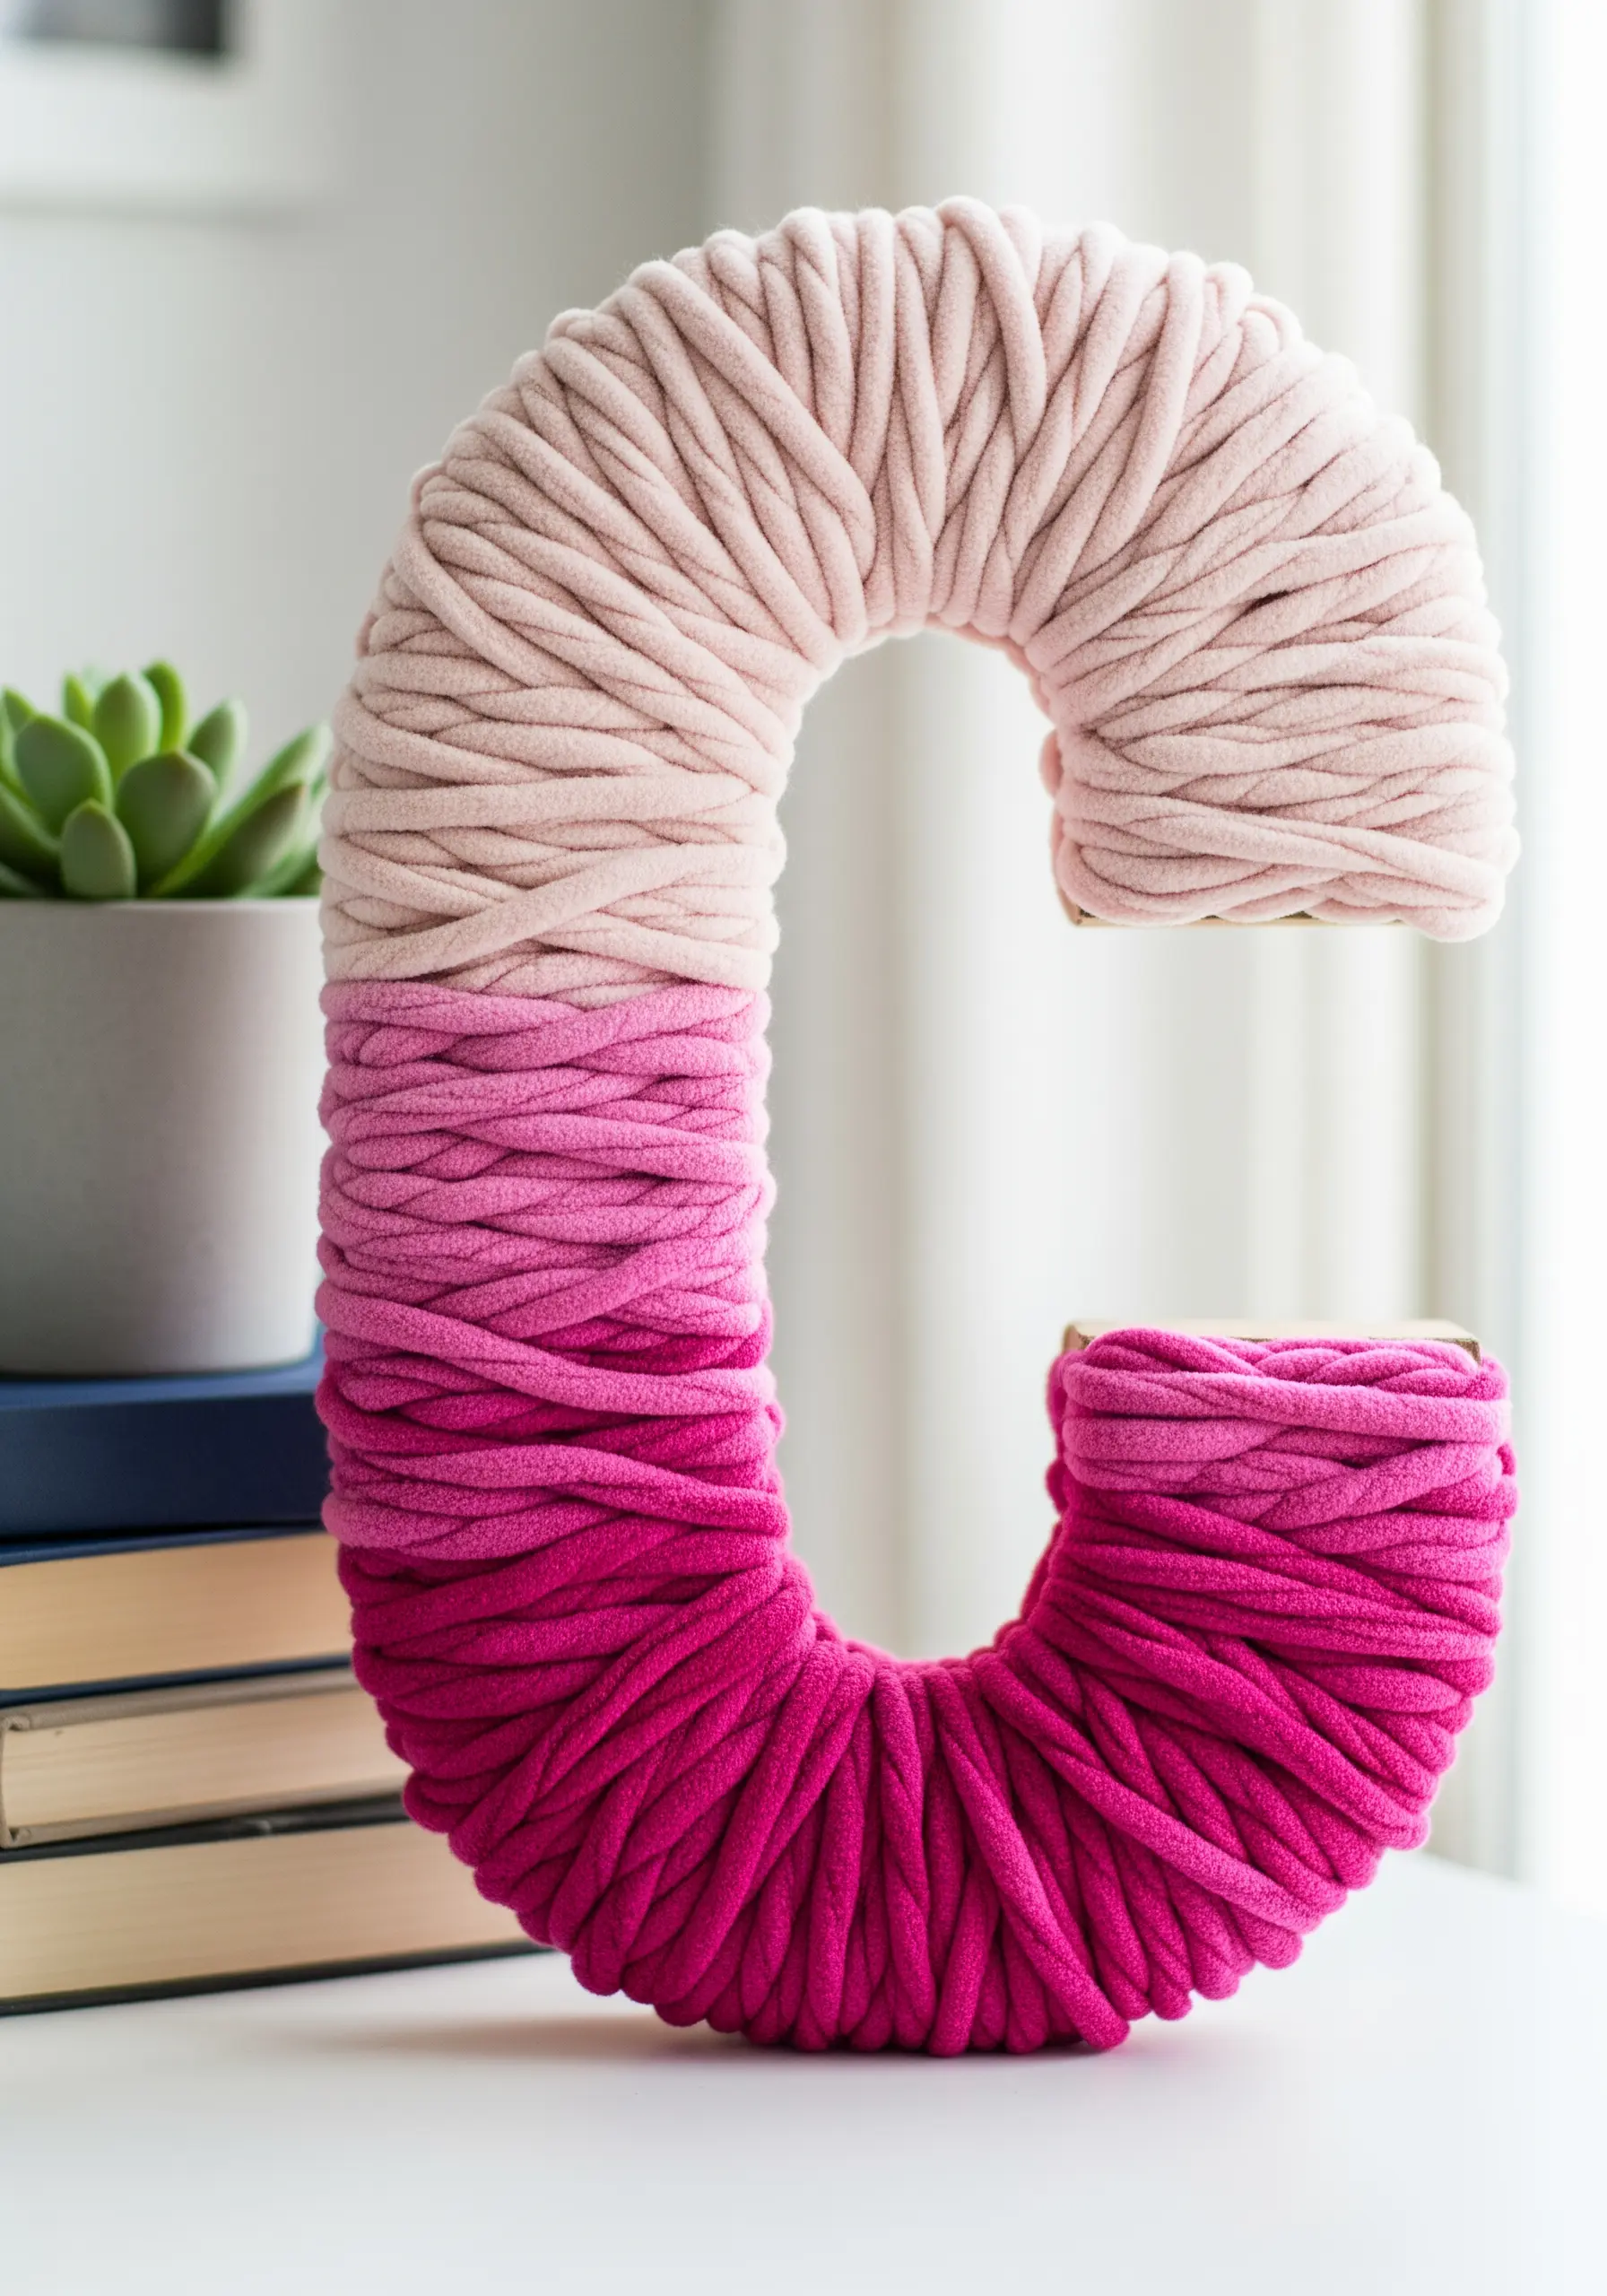
For a quick, no-sew fiber art project, create a yarn-wrapped initial to display on a bookshelf or nightstand.
Start with a cardboard or wooden letter form and wrap it tightly with a soft, chunky yarn.
To achieve a smooth, professional finish, ensure each wrap sits snugly against the last with no gaps showing the base material.
Using a variegated or ombré yarn is a simple way to create a beautiful color gradient without ever switching skeins, adding depth and visual interest effortlessly.
6. Design a Graphic Quilted Bedspread
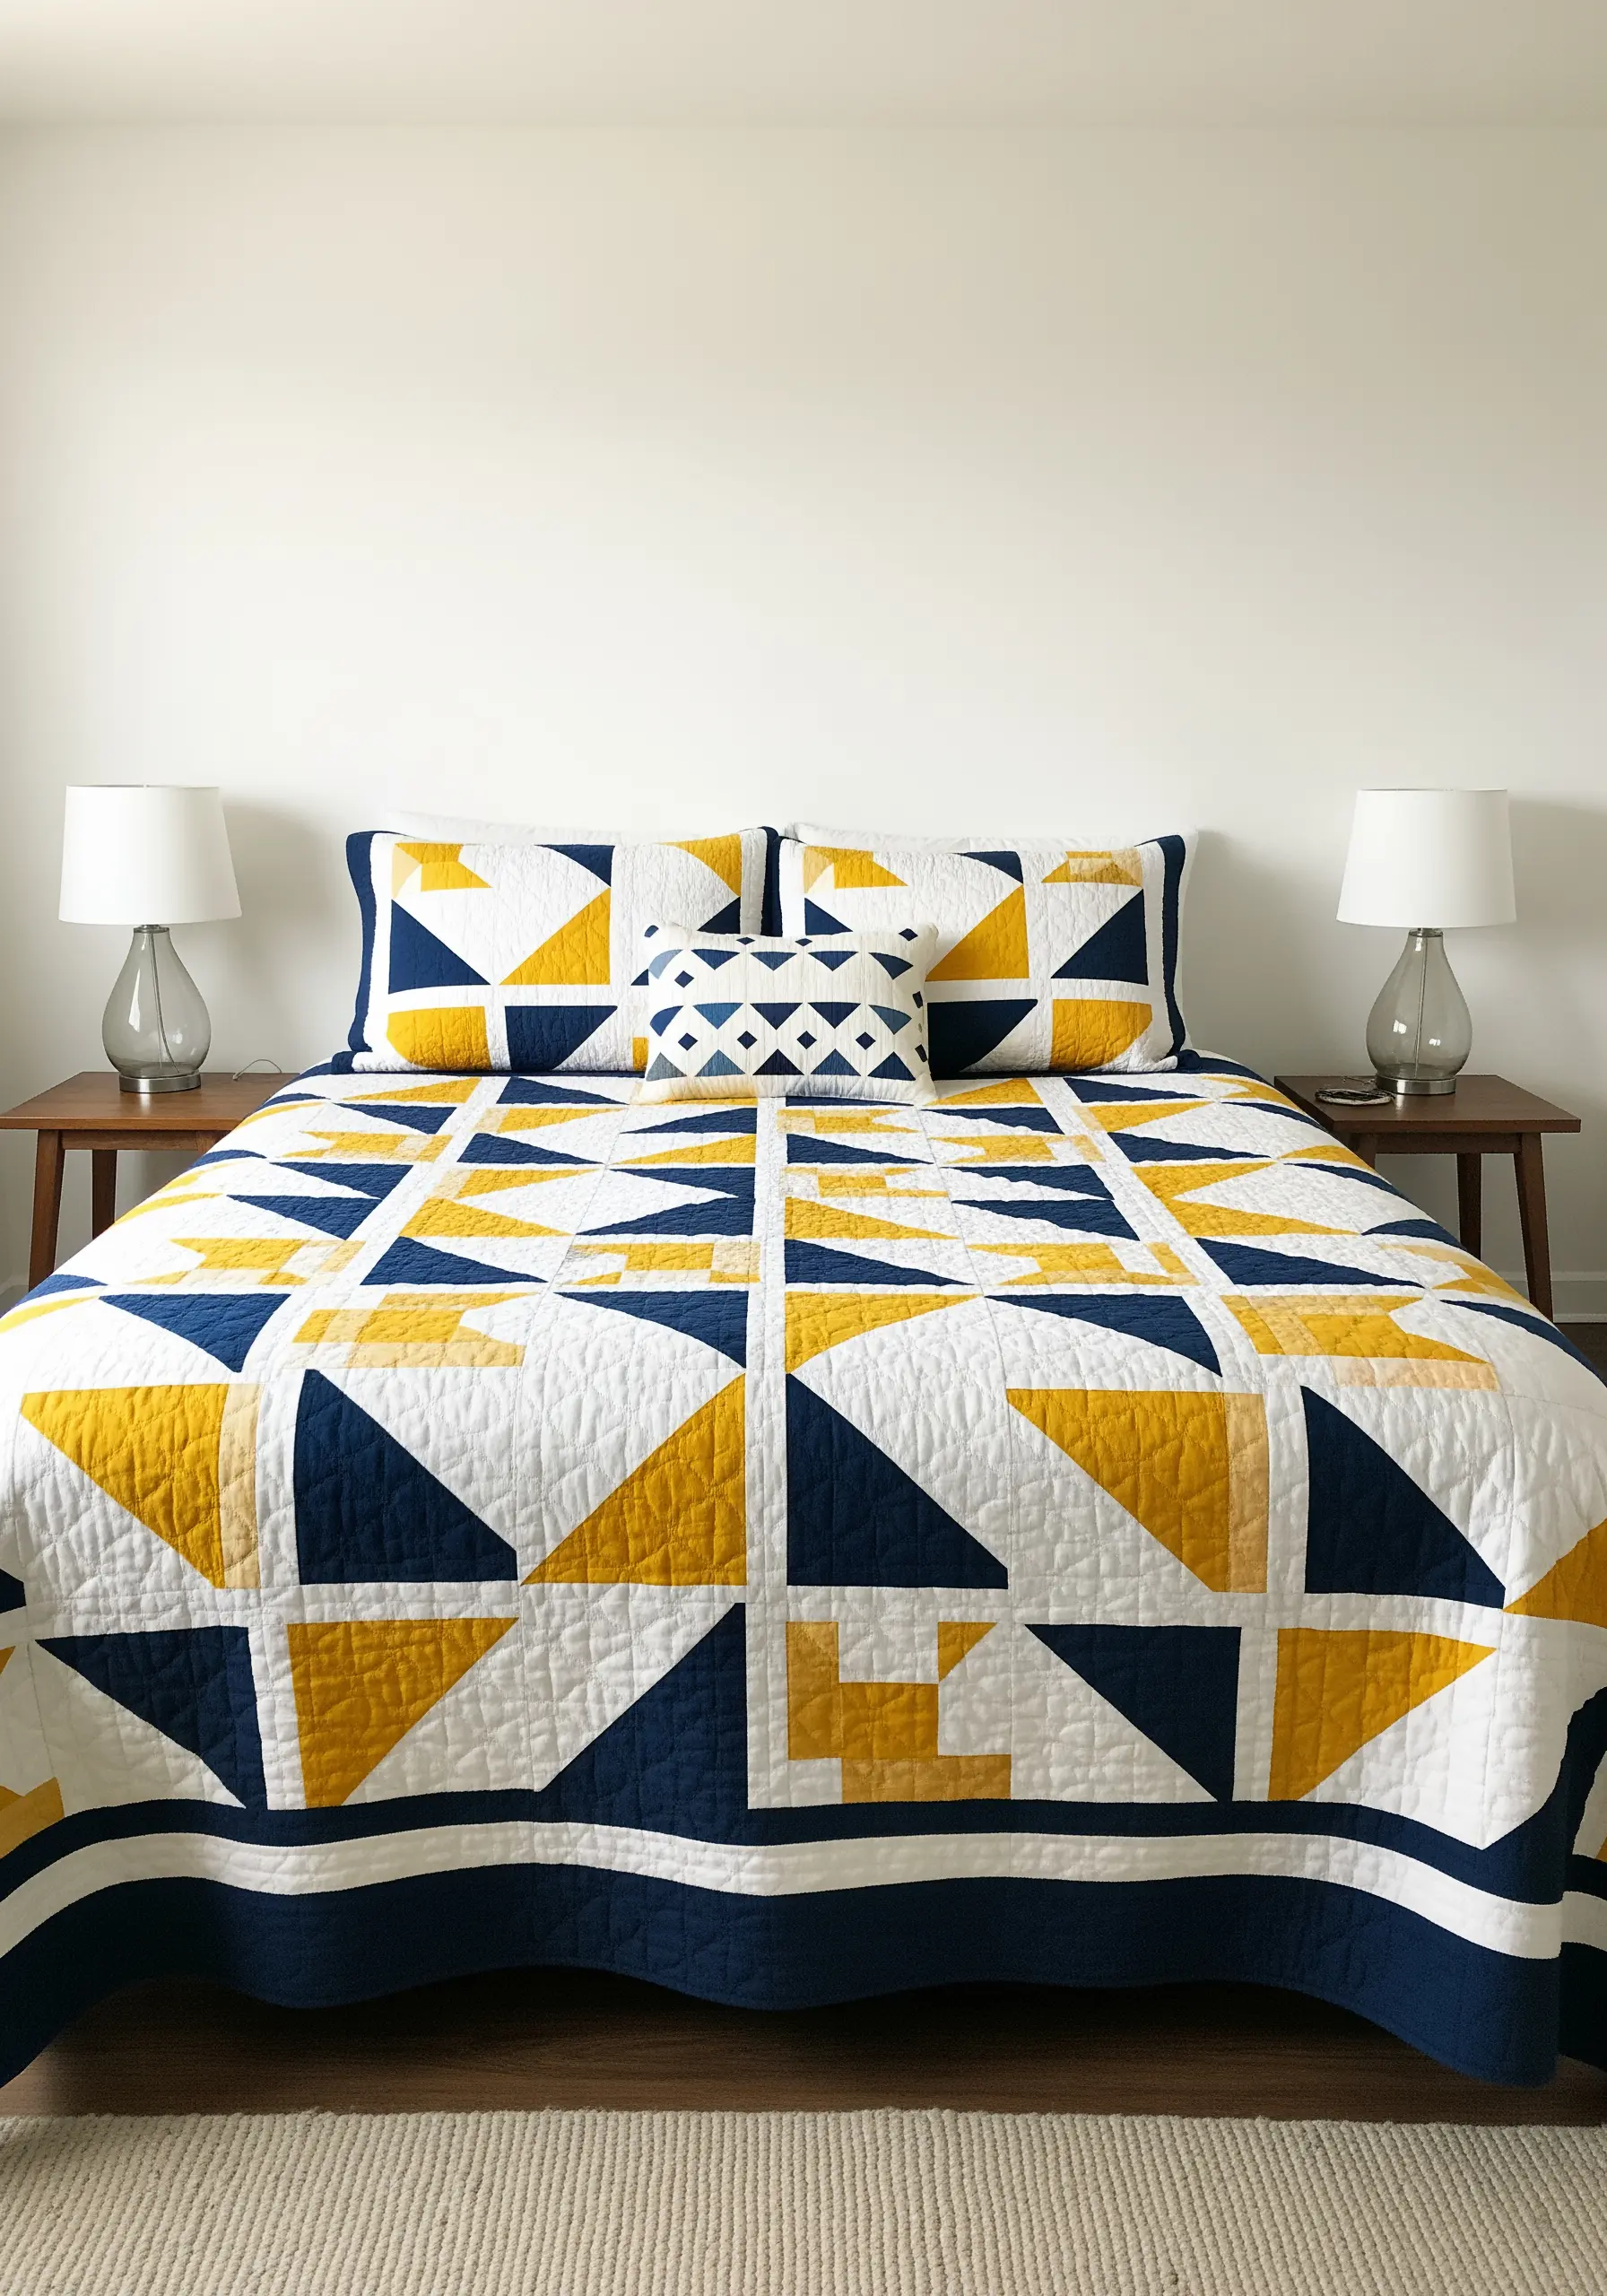
Translate the principles of graphic design into a bold, geometric quilt for your bed.
Use simple shapes like triangles and squares in a high-contrast color palette—such as navy, yellow, and white—to create a dynamic, modern pattern.
The quilting stitches themselves can be used to echo or contrast the geometric shapes, adding another layer of subtle texture.
This project transforms your bed into the central art piece of the room, grounding your decor with clean lines and intentional color blocking.
7. Add Tactile Dimension with Punch Needle
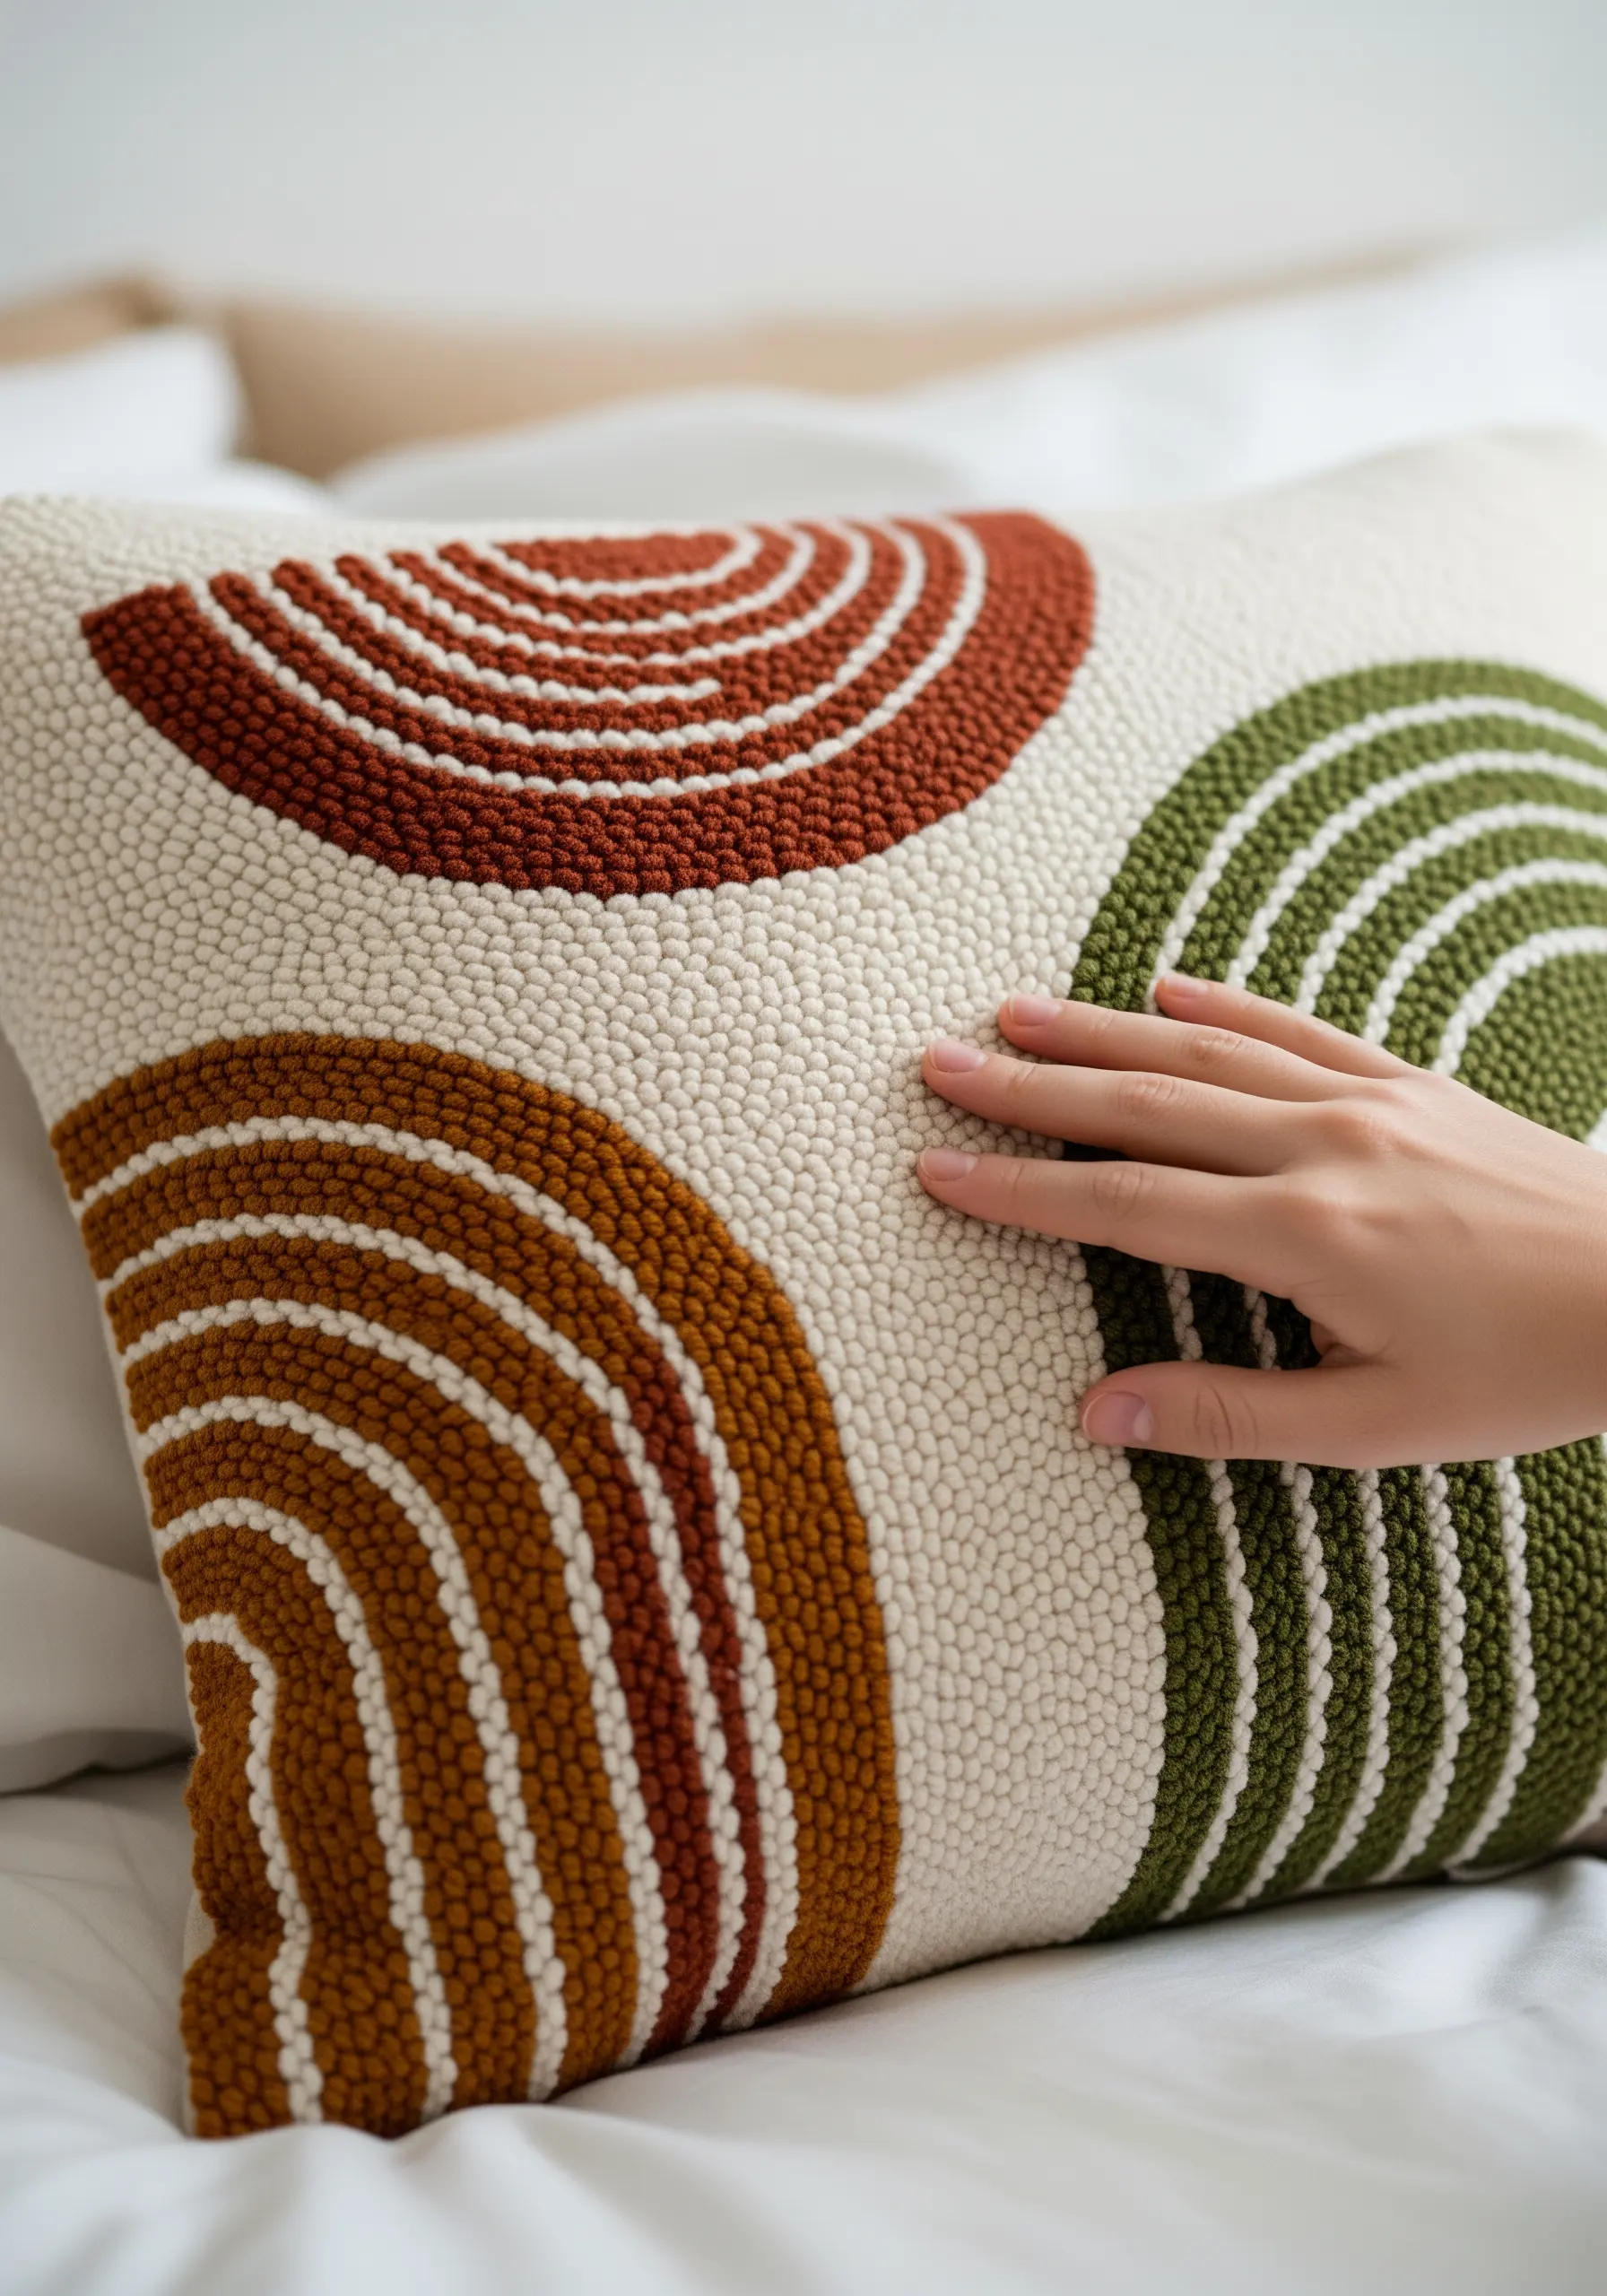
Create a highly textural cushion cover using the punch needle technique, a form of embroidery that builds up loops of yarn for a plush, rug-like surface.
You can control the texture by varying the loop height and the density of your stitches—tighter stitches create a firmer, more defined surface.
Work with simple, abstract shapes and a warm, earthy color palette to create a design that feels both modern and grounded.
The resulting piece invites touch and adds a layer of natural texture that softens the look of your bed or reading chair.
8. Elevate Your Greenery with Macrame Plant Hangers
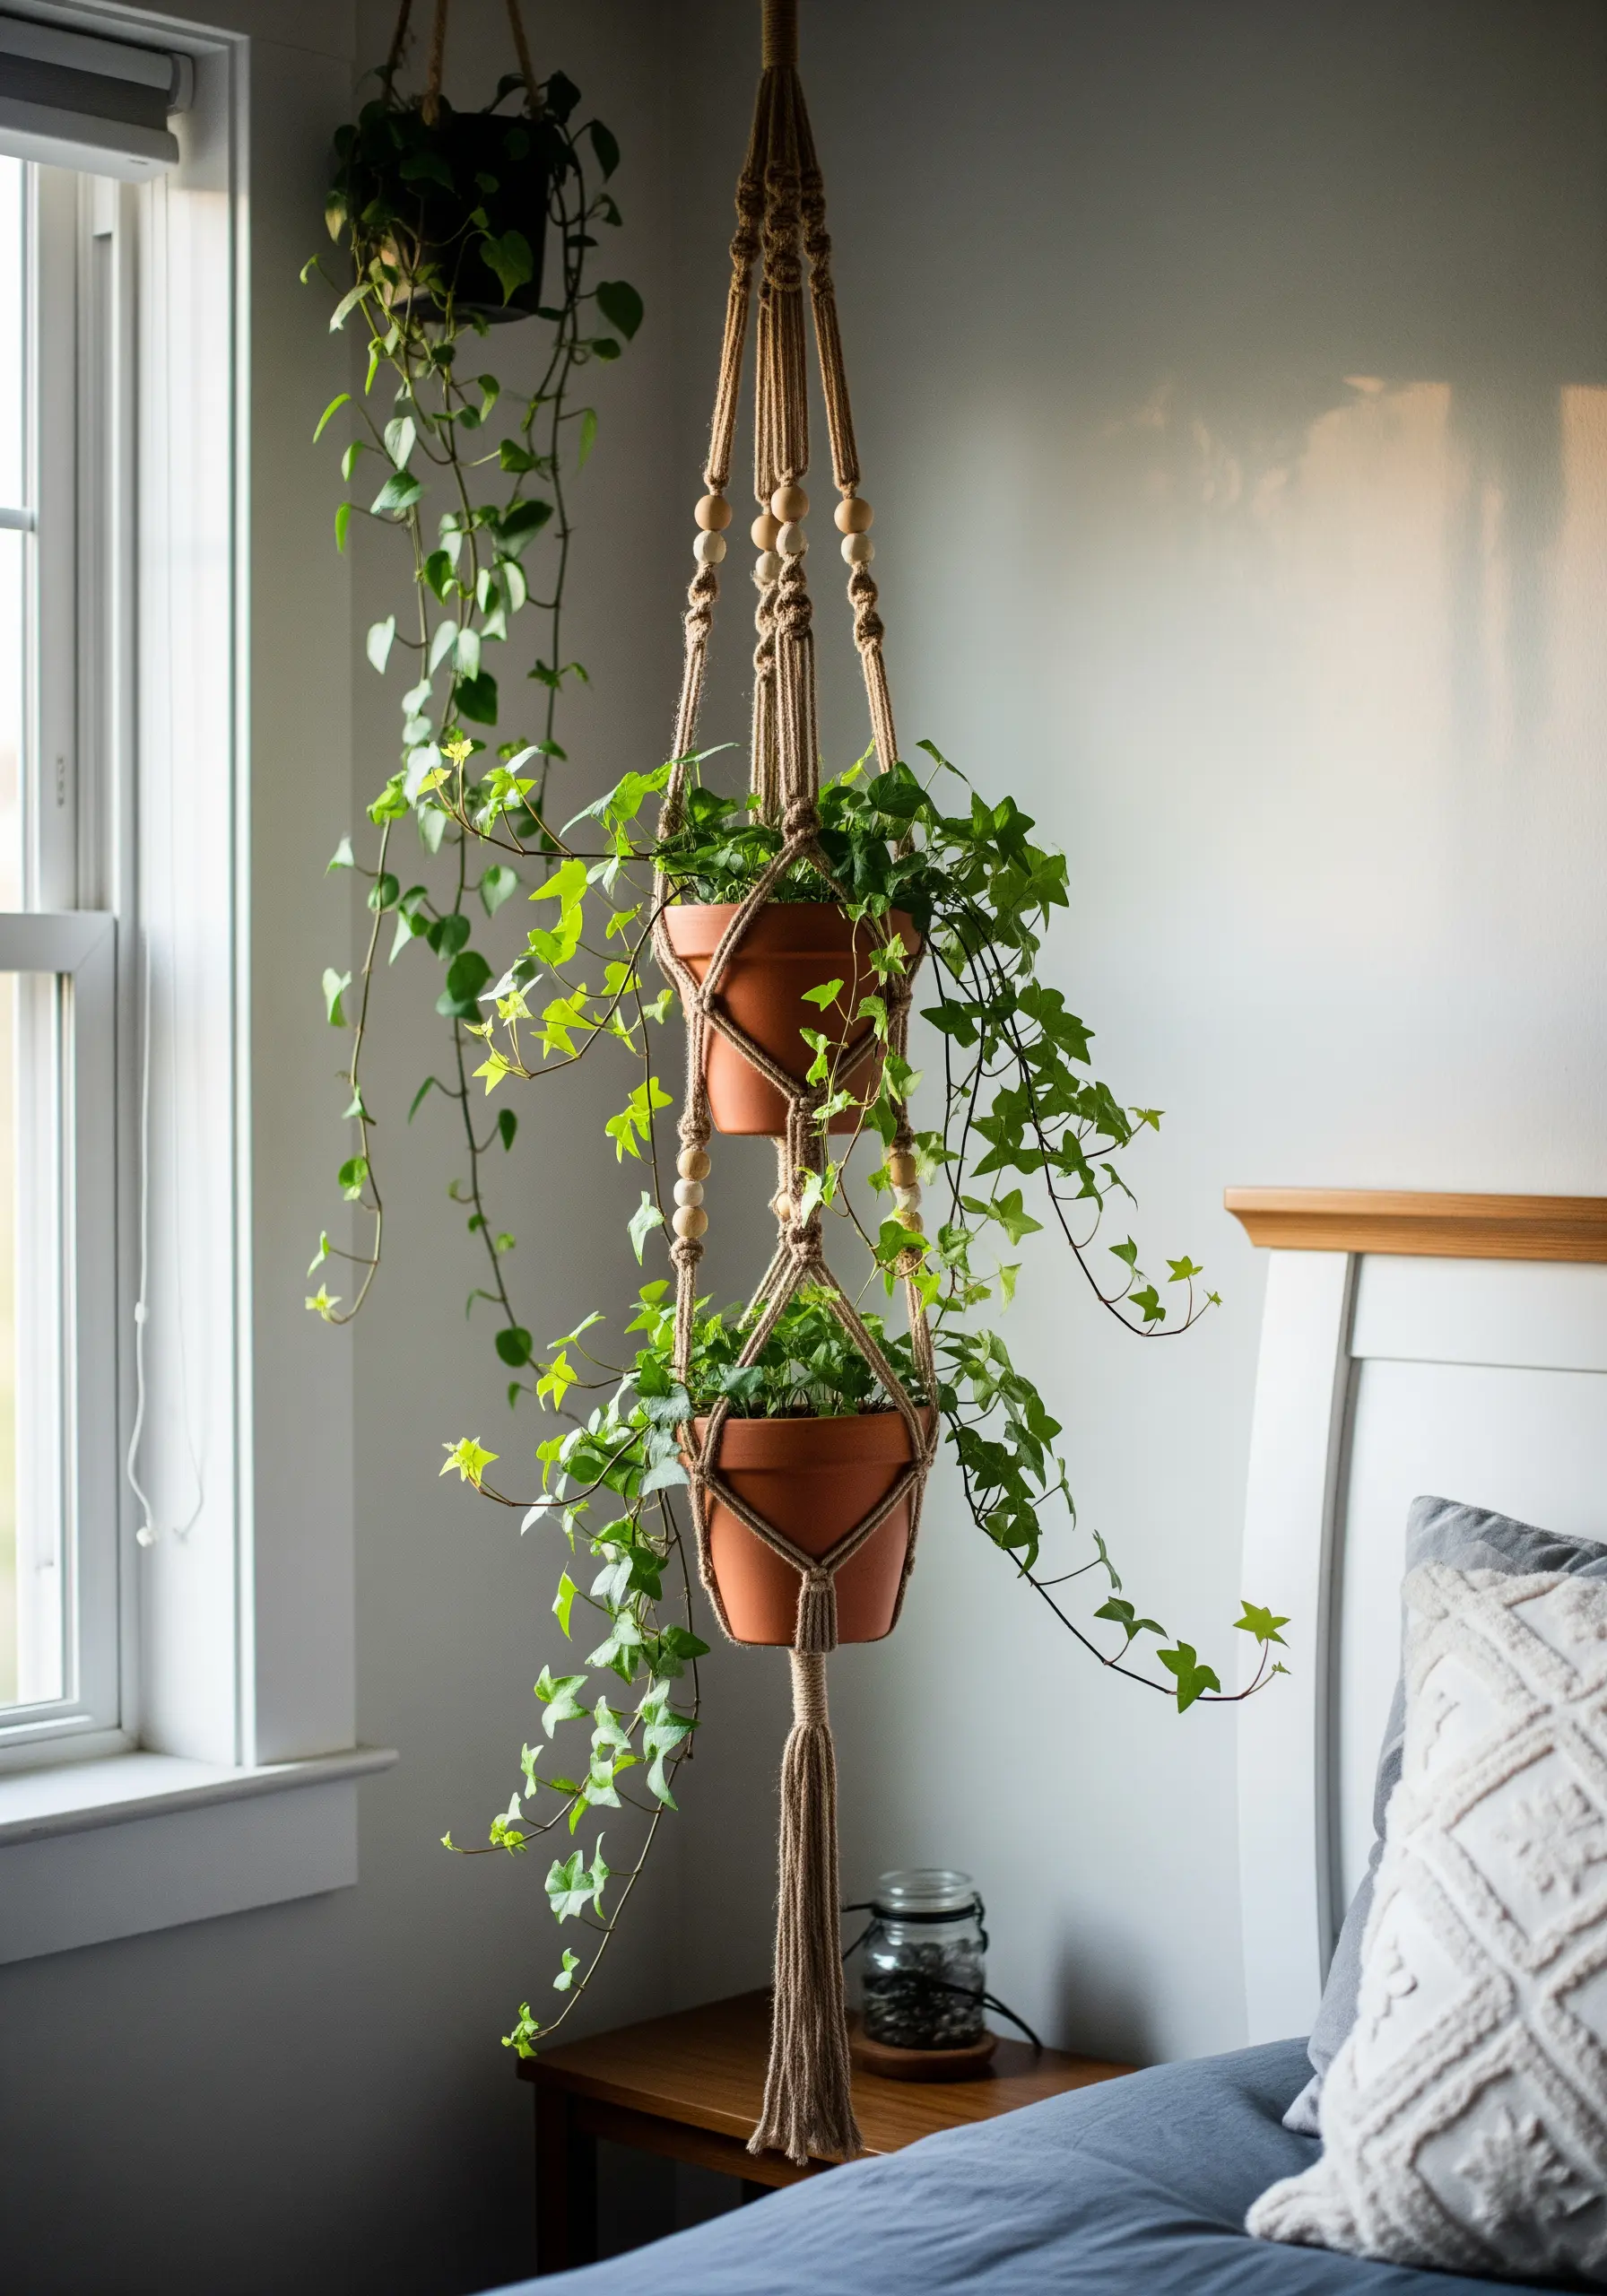
Bring life and height to your bedroom by suspending plants in handmade macrame hangers.
This is a perfect project for mastering foundational knots like the gathering knot to create a secure base and the spiral knot to add decorative, twisting details along the arms.
Incorporate wooden beads into your design for a touch of bohemian warmth and added structure.
Hanging plants at different levels draws the eye upward, making the room feel more spacious and creating a tranquil, indoor garden atmosphere.
9. Create a Luxurious Tufted Headboard
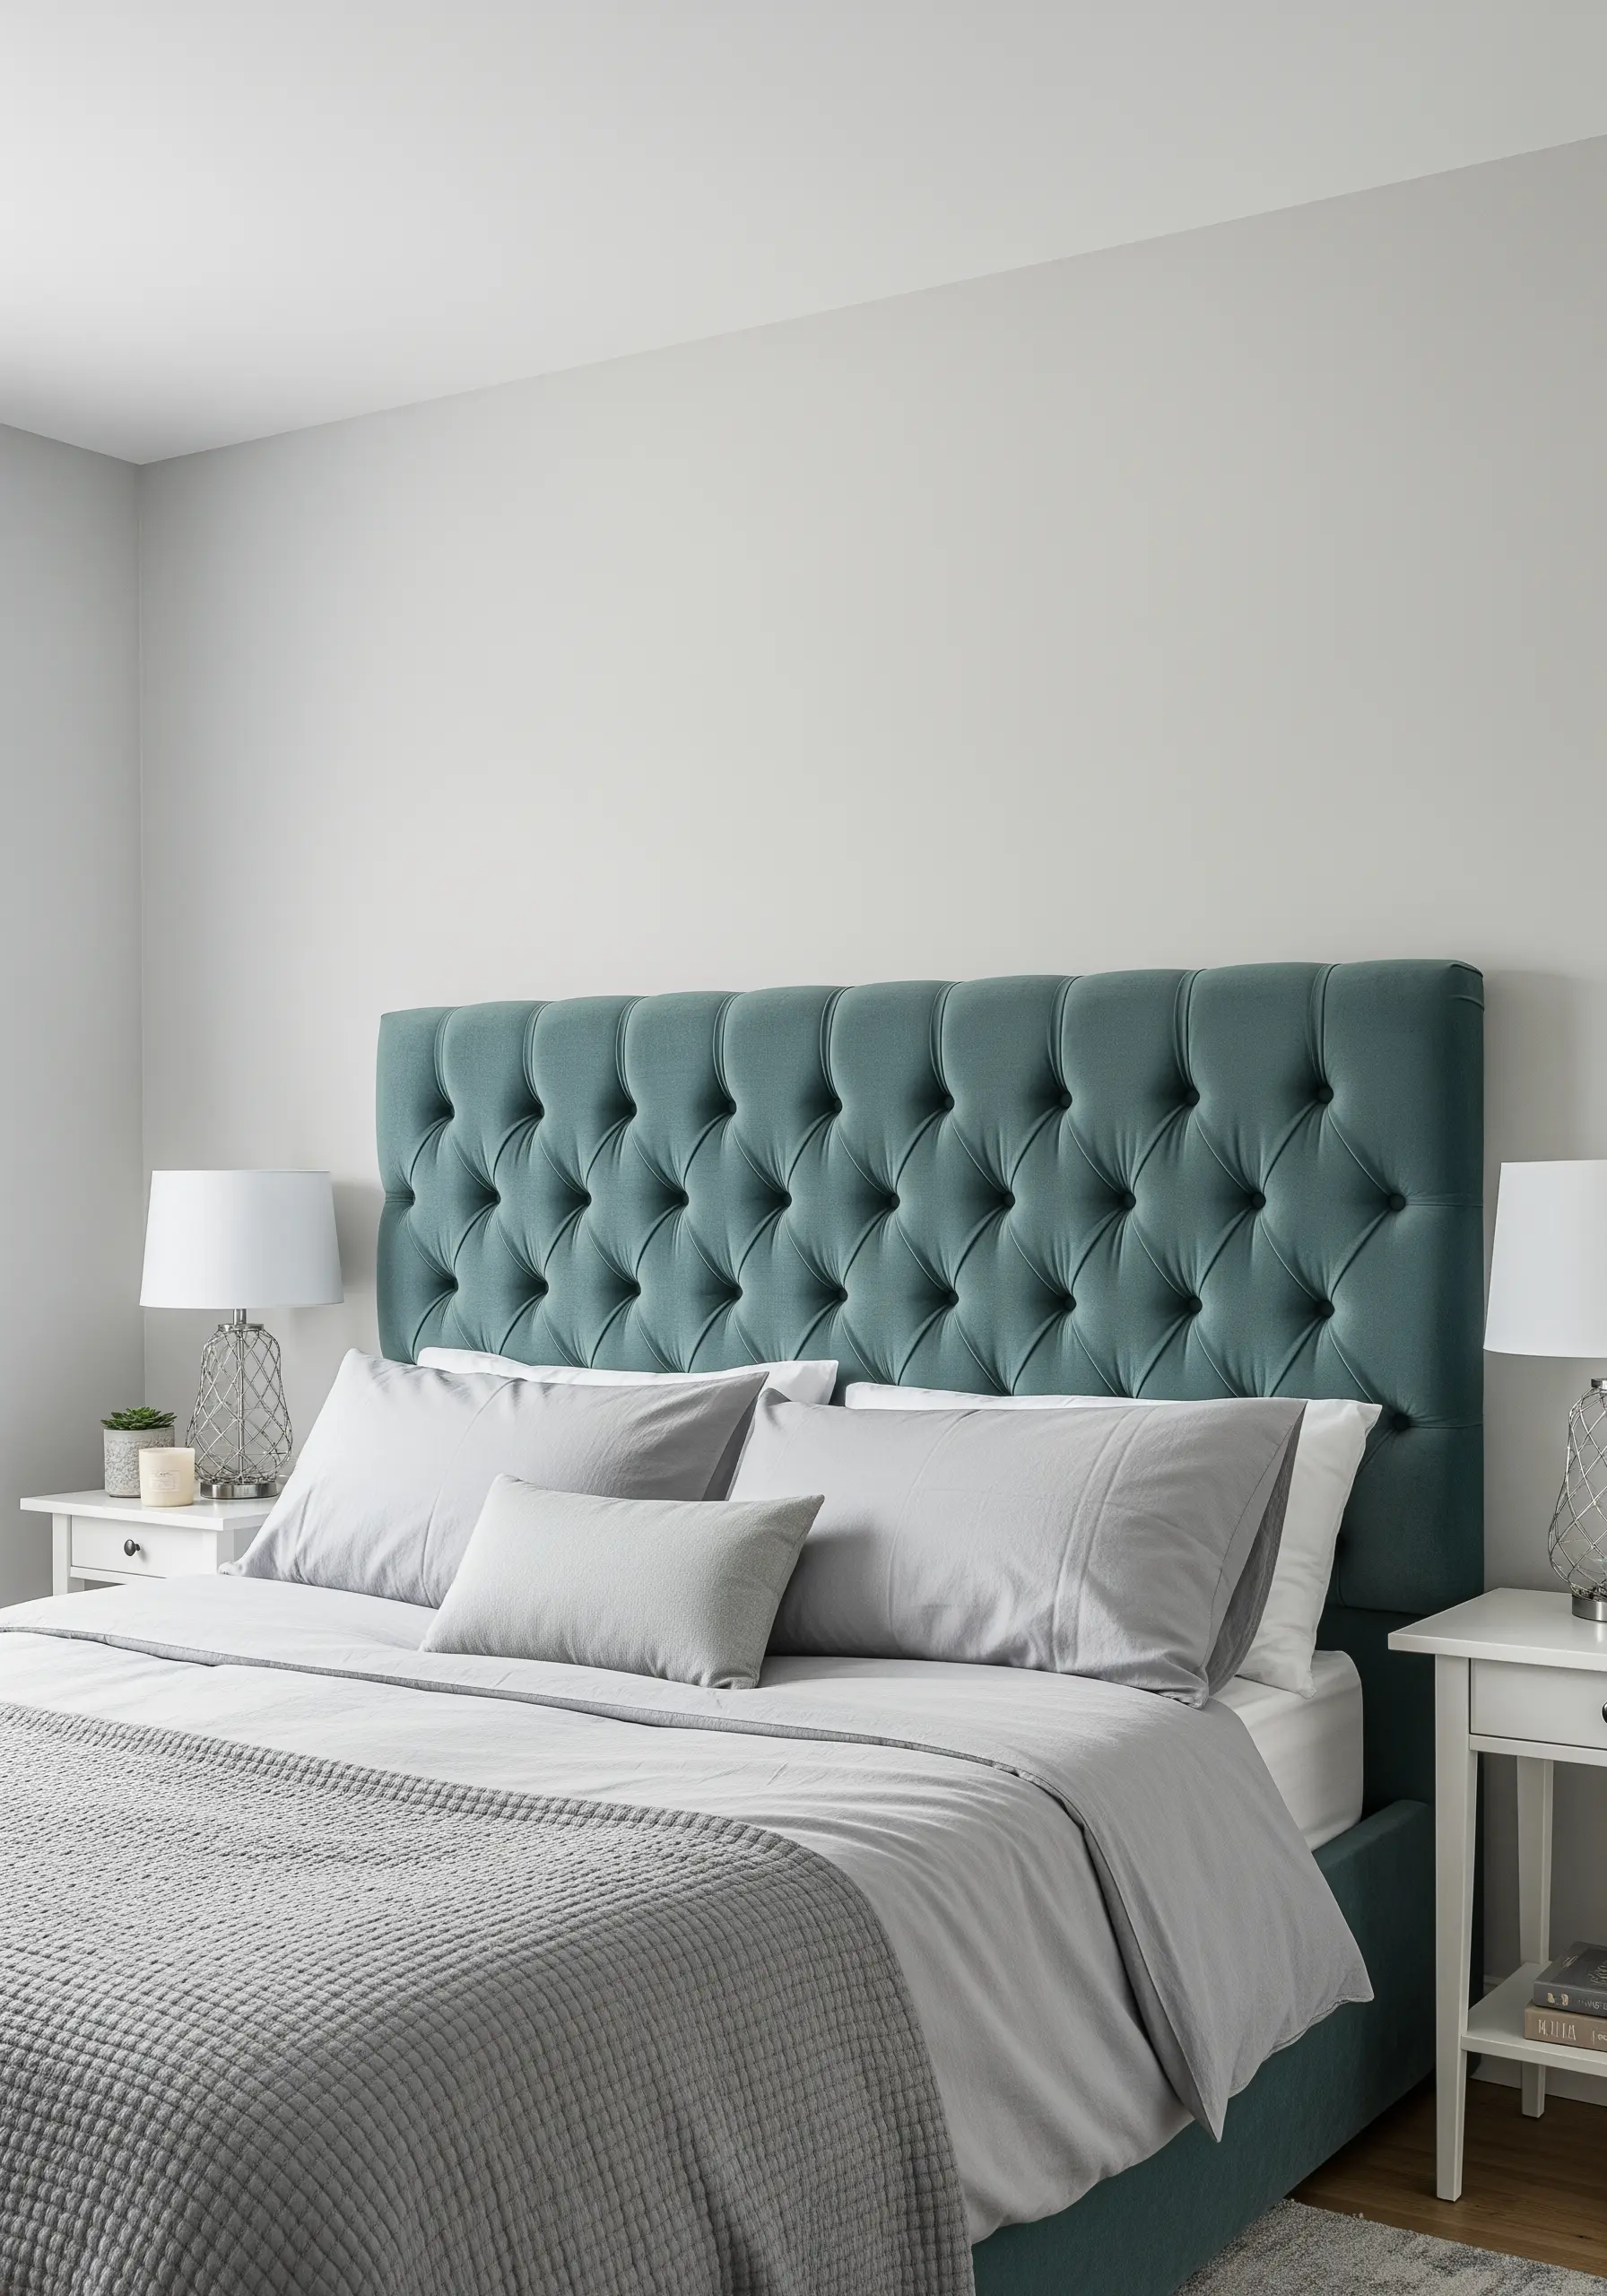
A DIY tufted headboard can become the sophisticated centerpiece of your bedroom, and it’s more achievable than you think.
Start with a plywood base, add a thick layer of foam for comfort, and wrap it in your chosen fabric—velvet or linen work beautifully.
The key to a professional look is precise measuring for your button placement to create a symmetrical diamond or square pattern.
Using a long upholstery needle and strong twine, you can pull the fabric-covered buttons tight to create those deep, luxurious tufts that define the style.
10. Craft a Decorative Tassel and Bead Garland
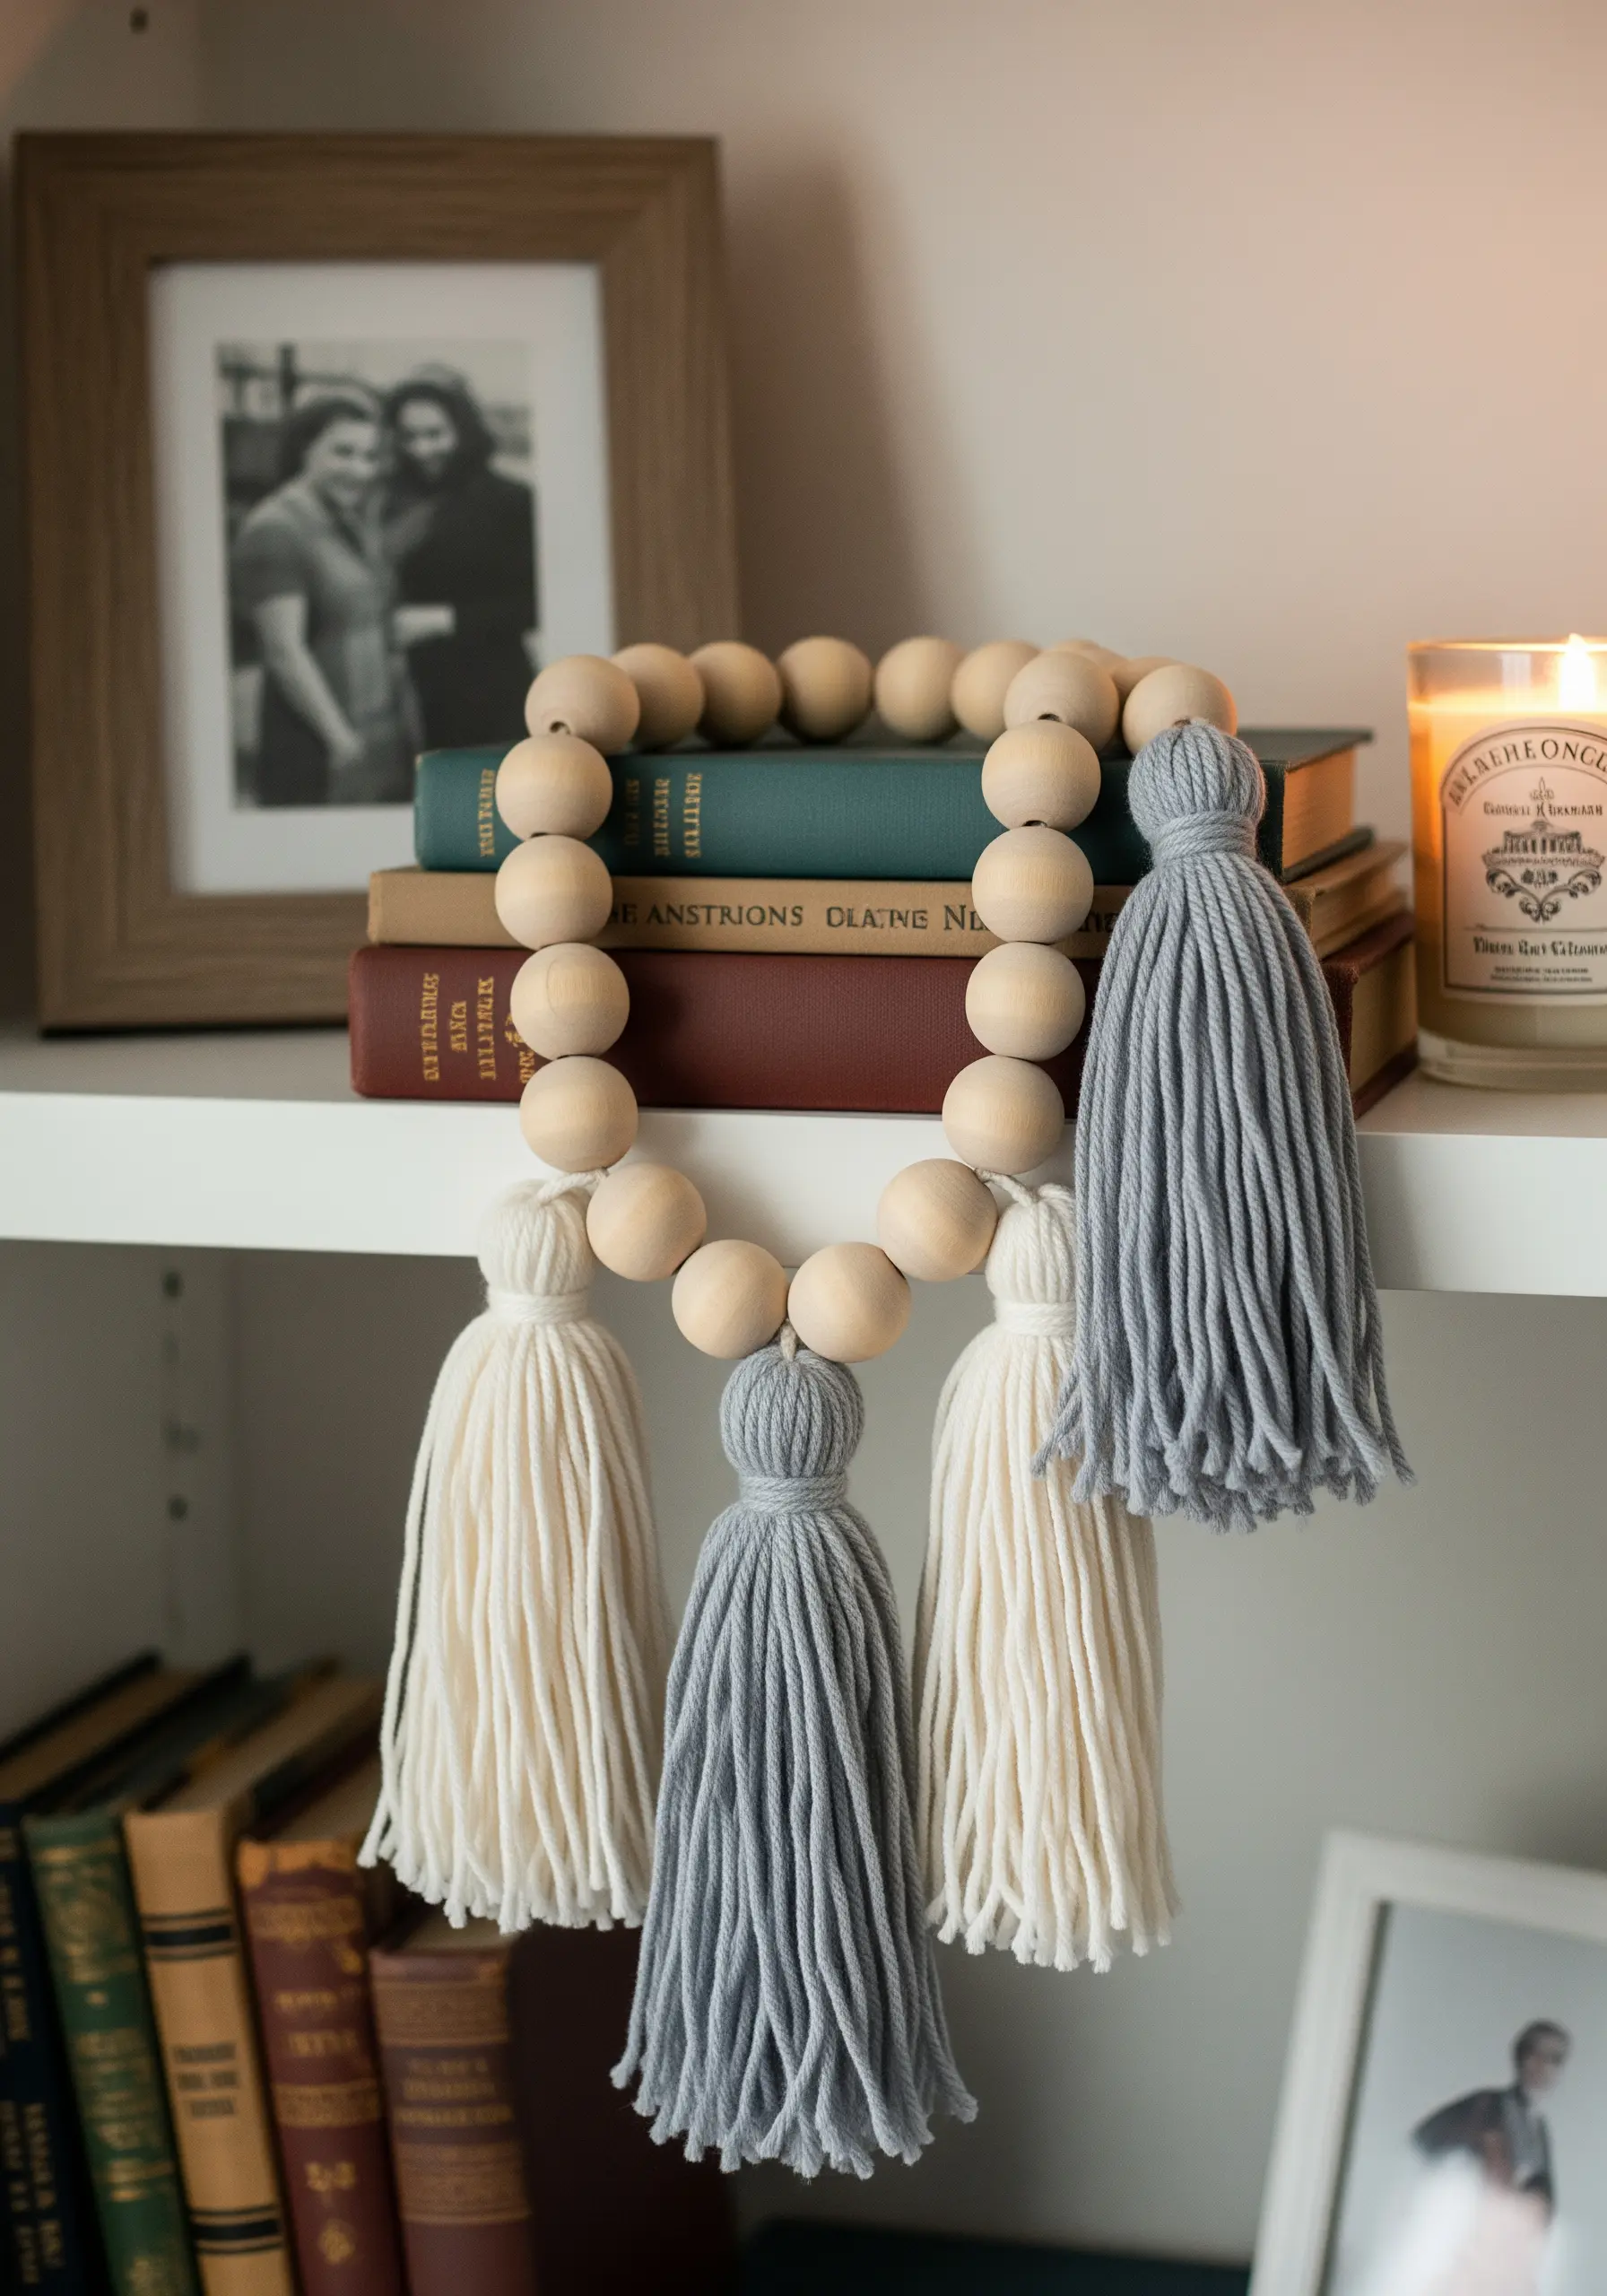
Assemble a simple yet chic garland using wooden beads and handmade yarn tassels to drape over a bookshelf, mirror, or picture frame.
To make full, fluffy tassels, wrap yarn around a piece of cardboard, tie it off at the top, and cut the bottom loops.
The trick to a polished look is trimming the ends evenly for a crisp finish.
Alternate the beads and tassels on a piece of twine, playing with a simple two-tone color scheme for a modern, Scandinavian-inspired decorative accent.
11. Hand-Print Your Own Botanical Fabrics
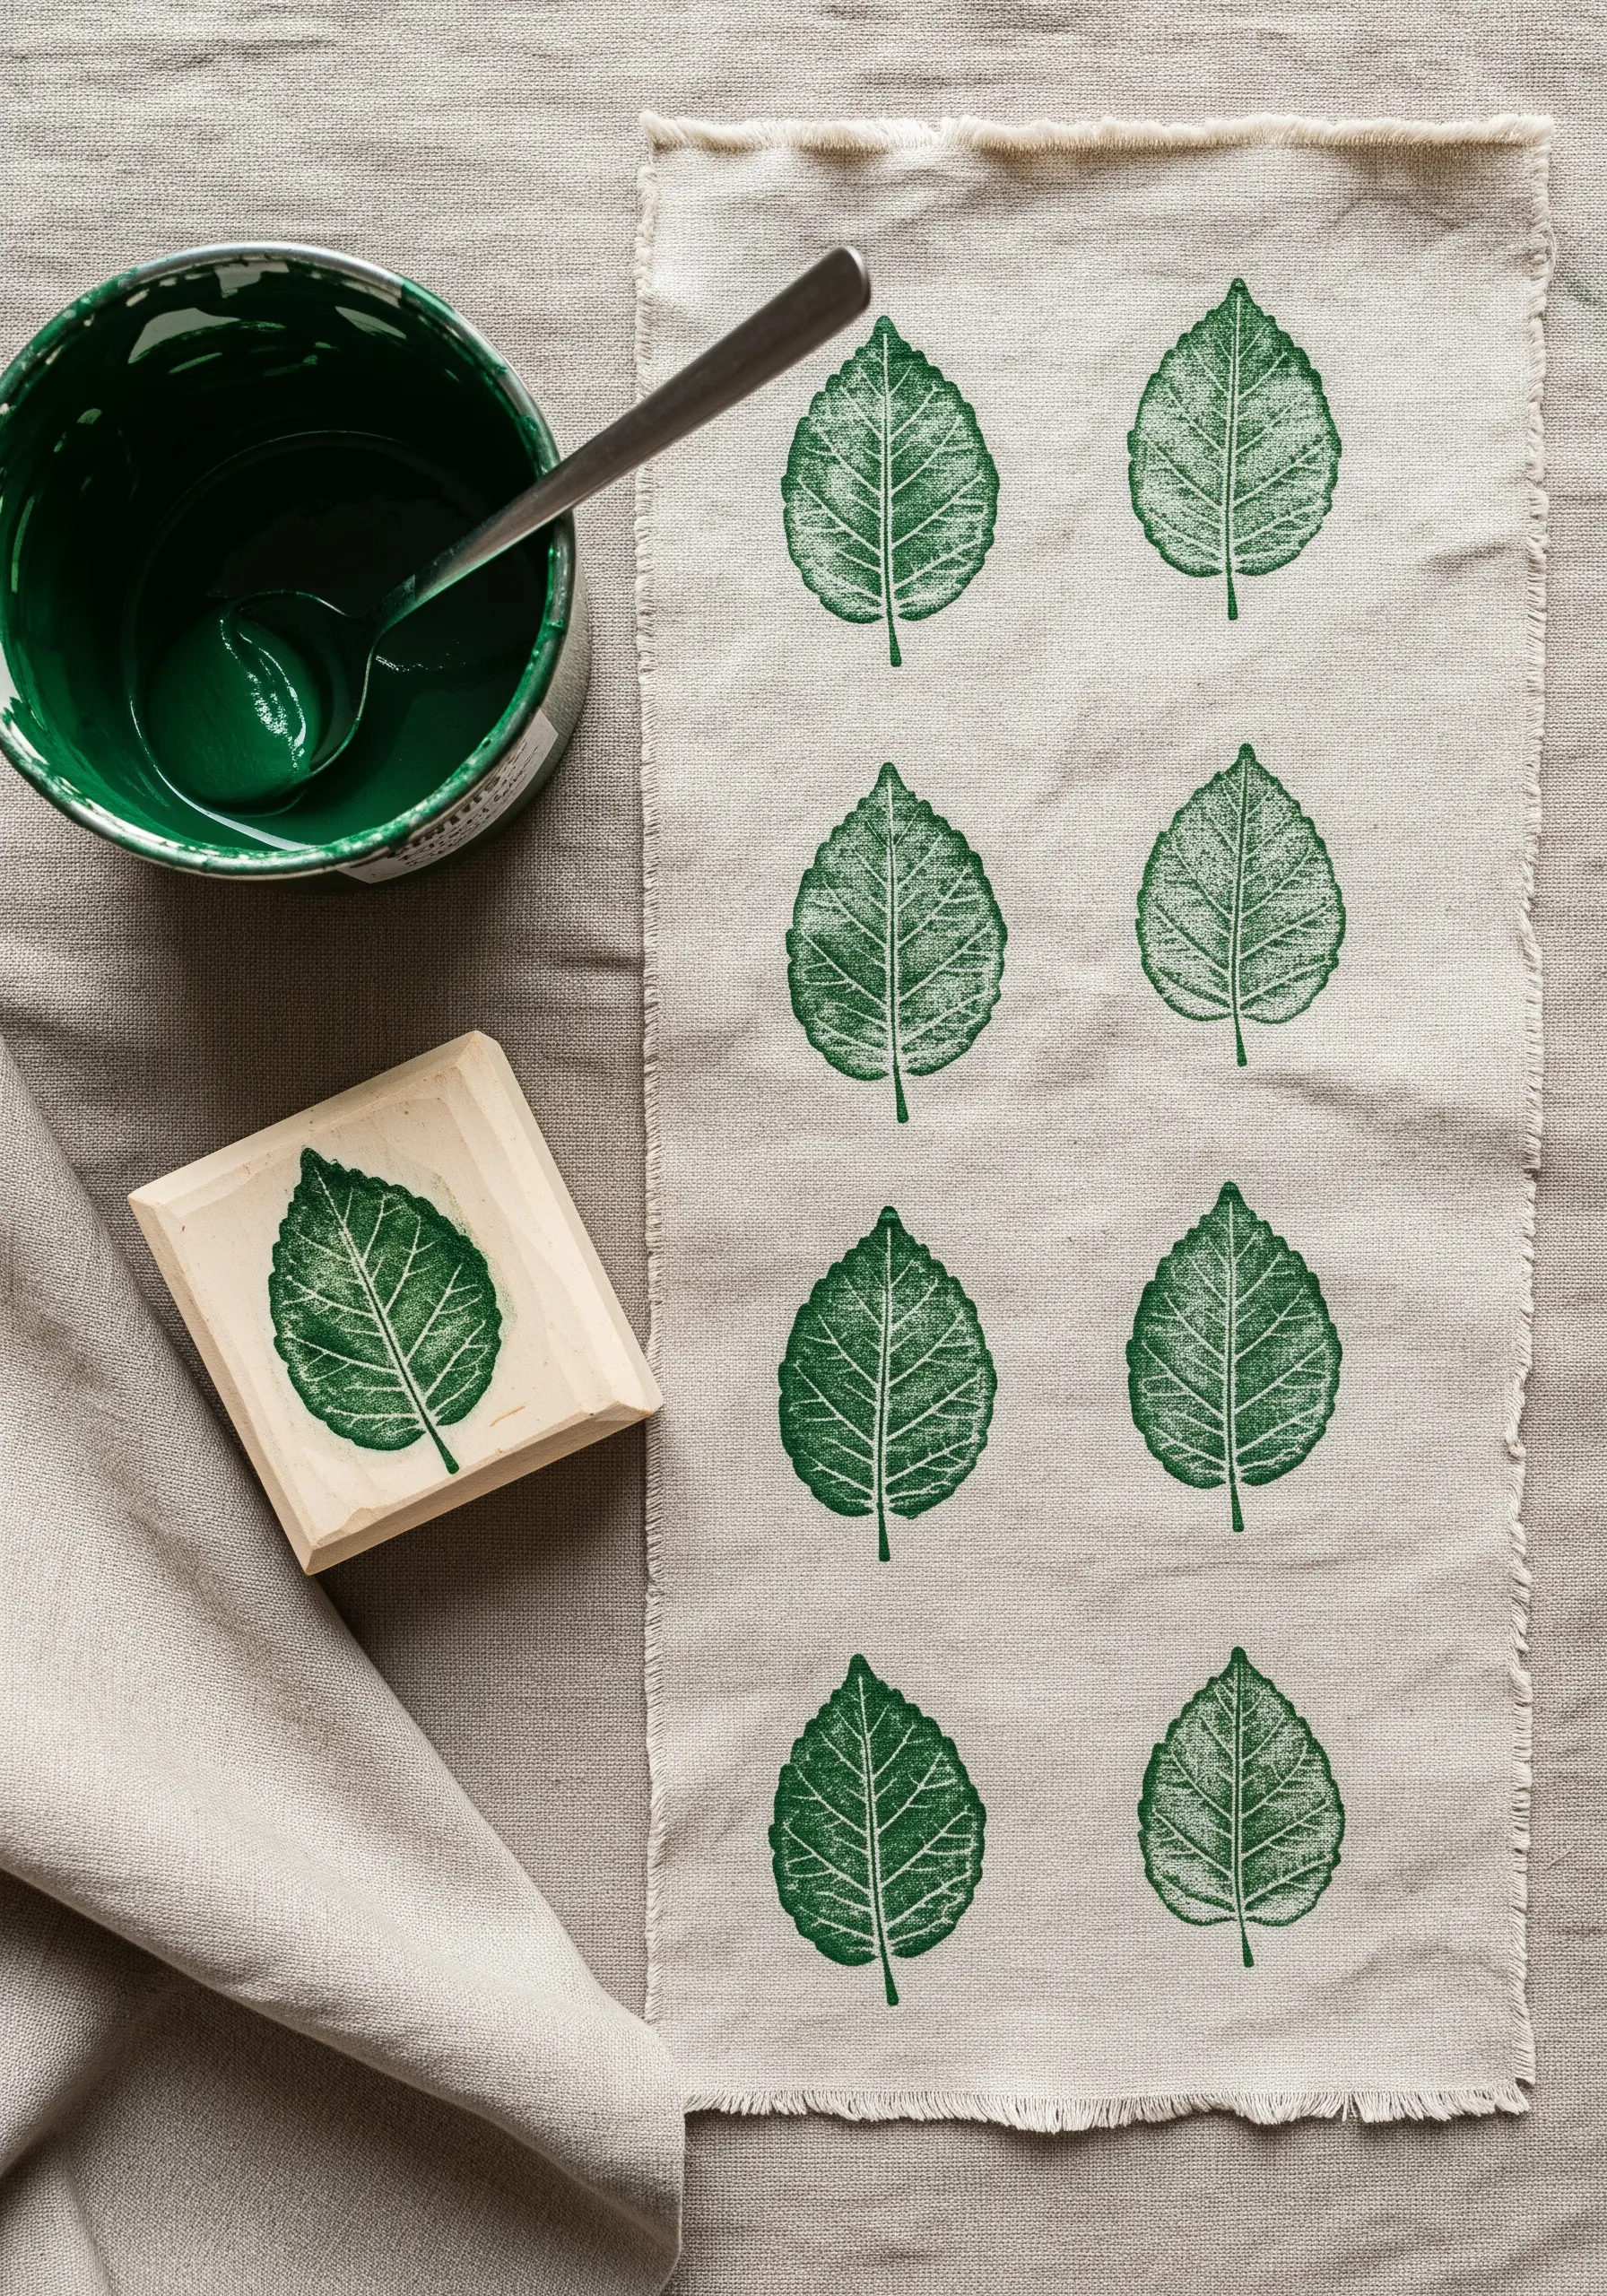
Create custom textiles for pillow covers or small wall hangings by block-printing your own fabric.
Carve a simple leaf design into a rubber or linoleum block, focusing on clean outlines for a crisp print.
Apply a thin, even layer of fabric paint to the block with a brayer and press down firmly onto a natural fabric like linen or cotton.
The slight imperfections of hand-printing add character and an authentic, artisanal quality that machine-printed fabric lacks.
You can later add embroidered veins or outlines to the printed leaves for a beautiful mixed-media effect.
12. Create a Dreamy Bed Canopy with Fairy Lights
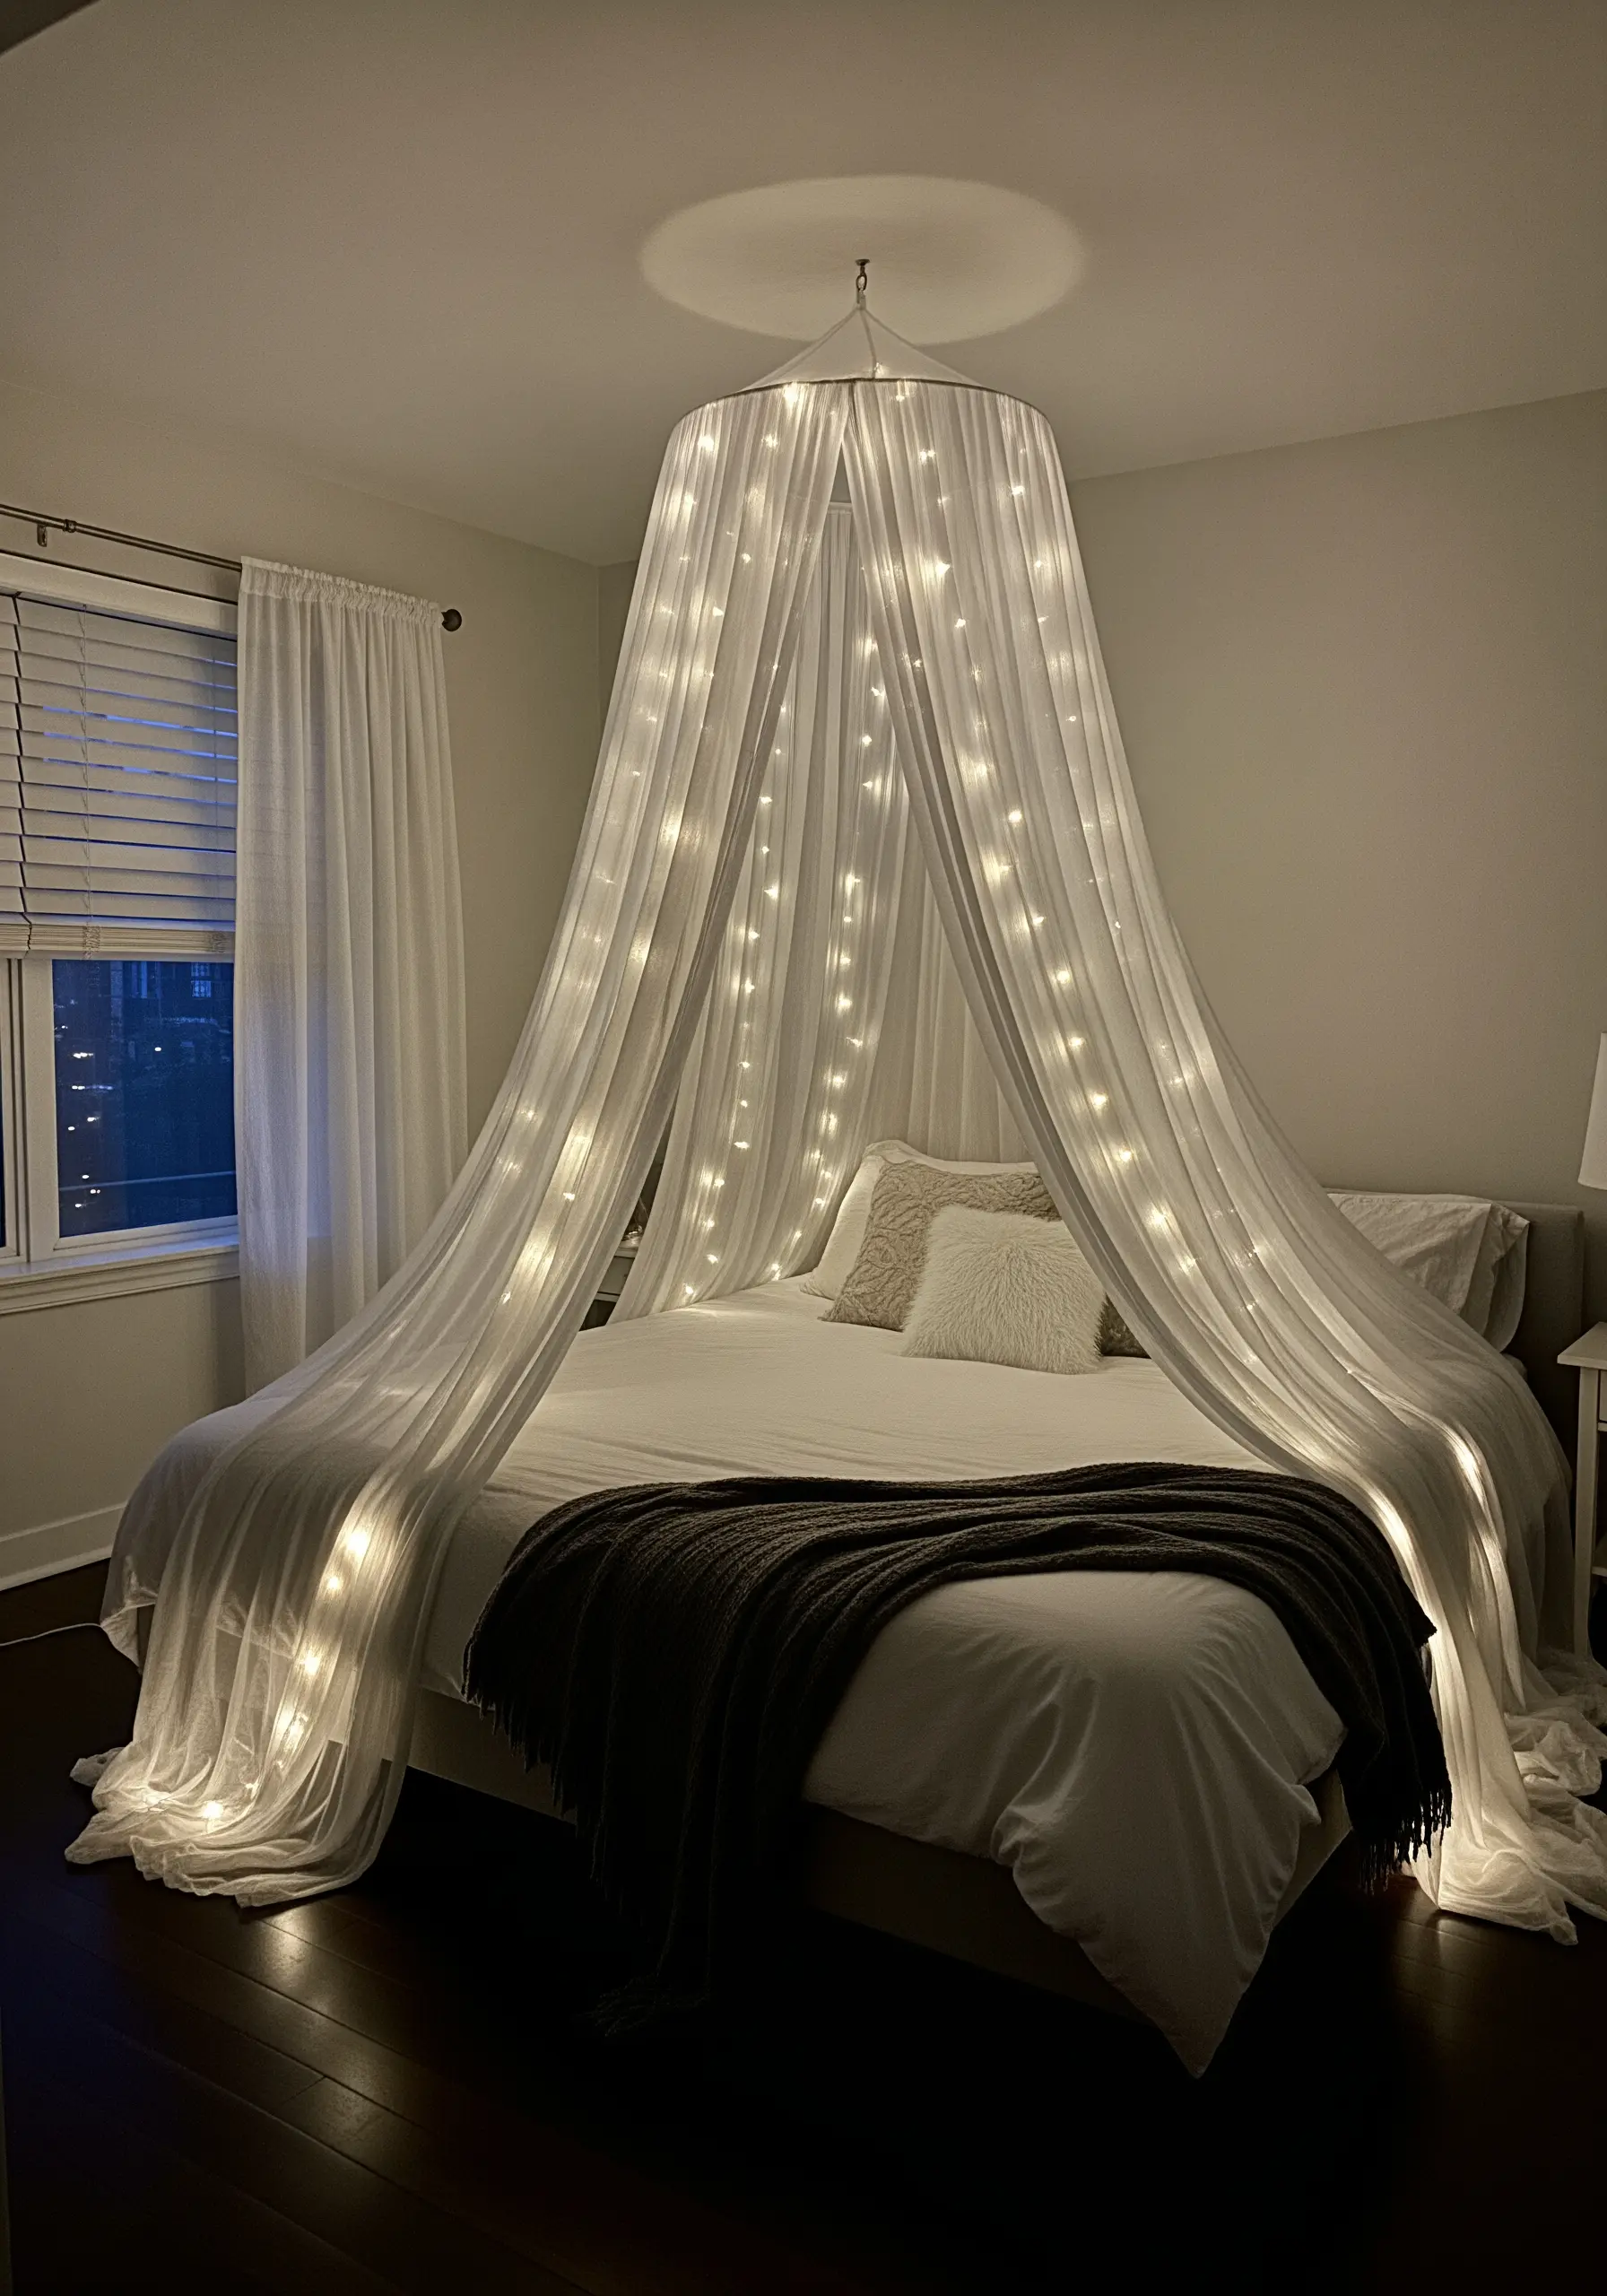
Instantly transform your bed into a cozy, magical retreat by draping sheer fabric from a ceiling hook to create a canopy.
Choose a lightweight, translucent material like tulle or chiffon that will catch the light beautifully without feeling heavy.
Weave strings of warm-white micro LED fairy lights throughout the fabric, securing them with small clips or thread.
This simple addition creates a soft, ambient glow that makes your bed feel like a serene and enchanting escape.
13. Sculpt Minimalist Art with Textured Plaster
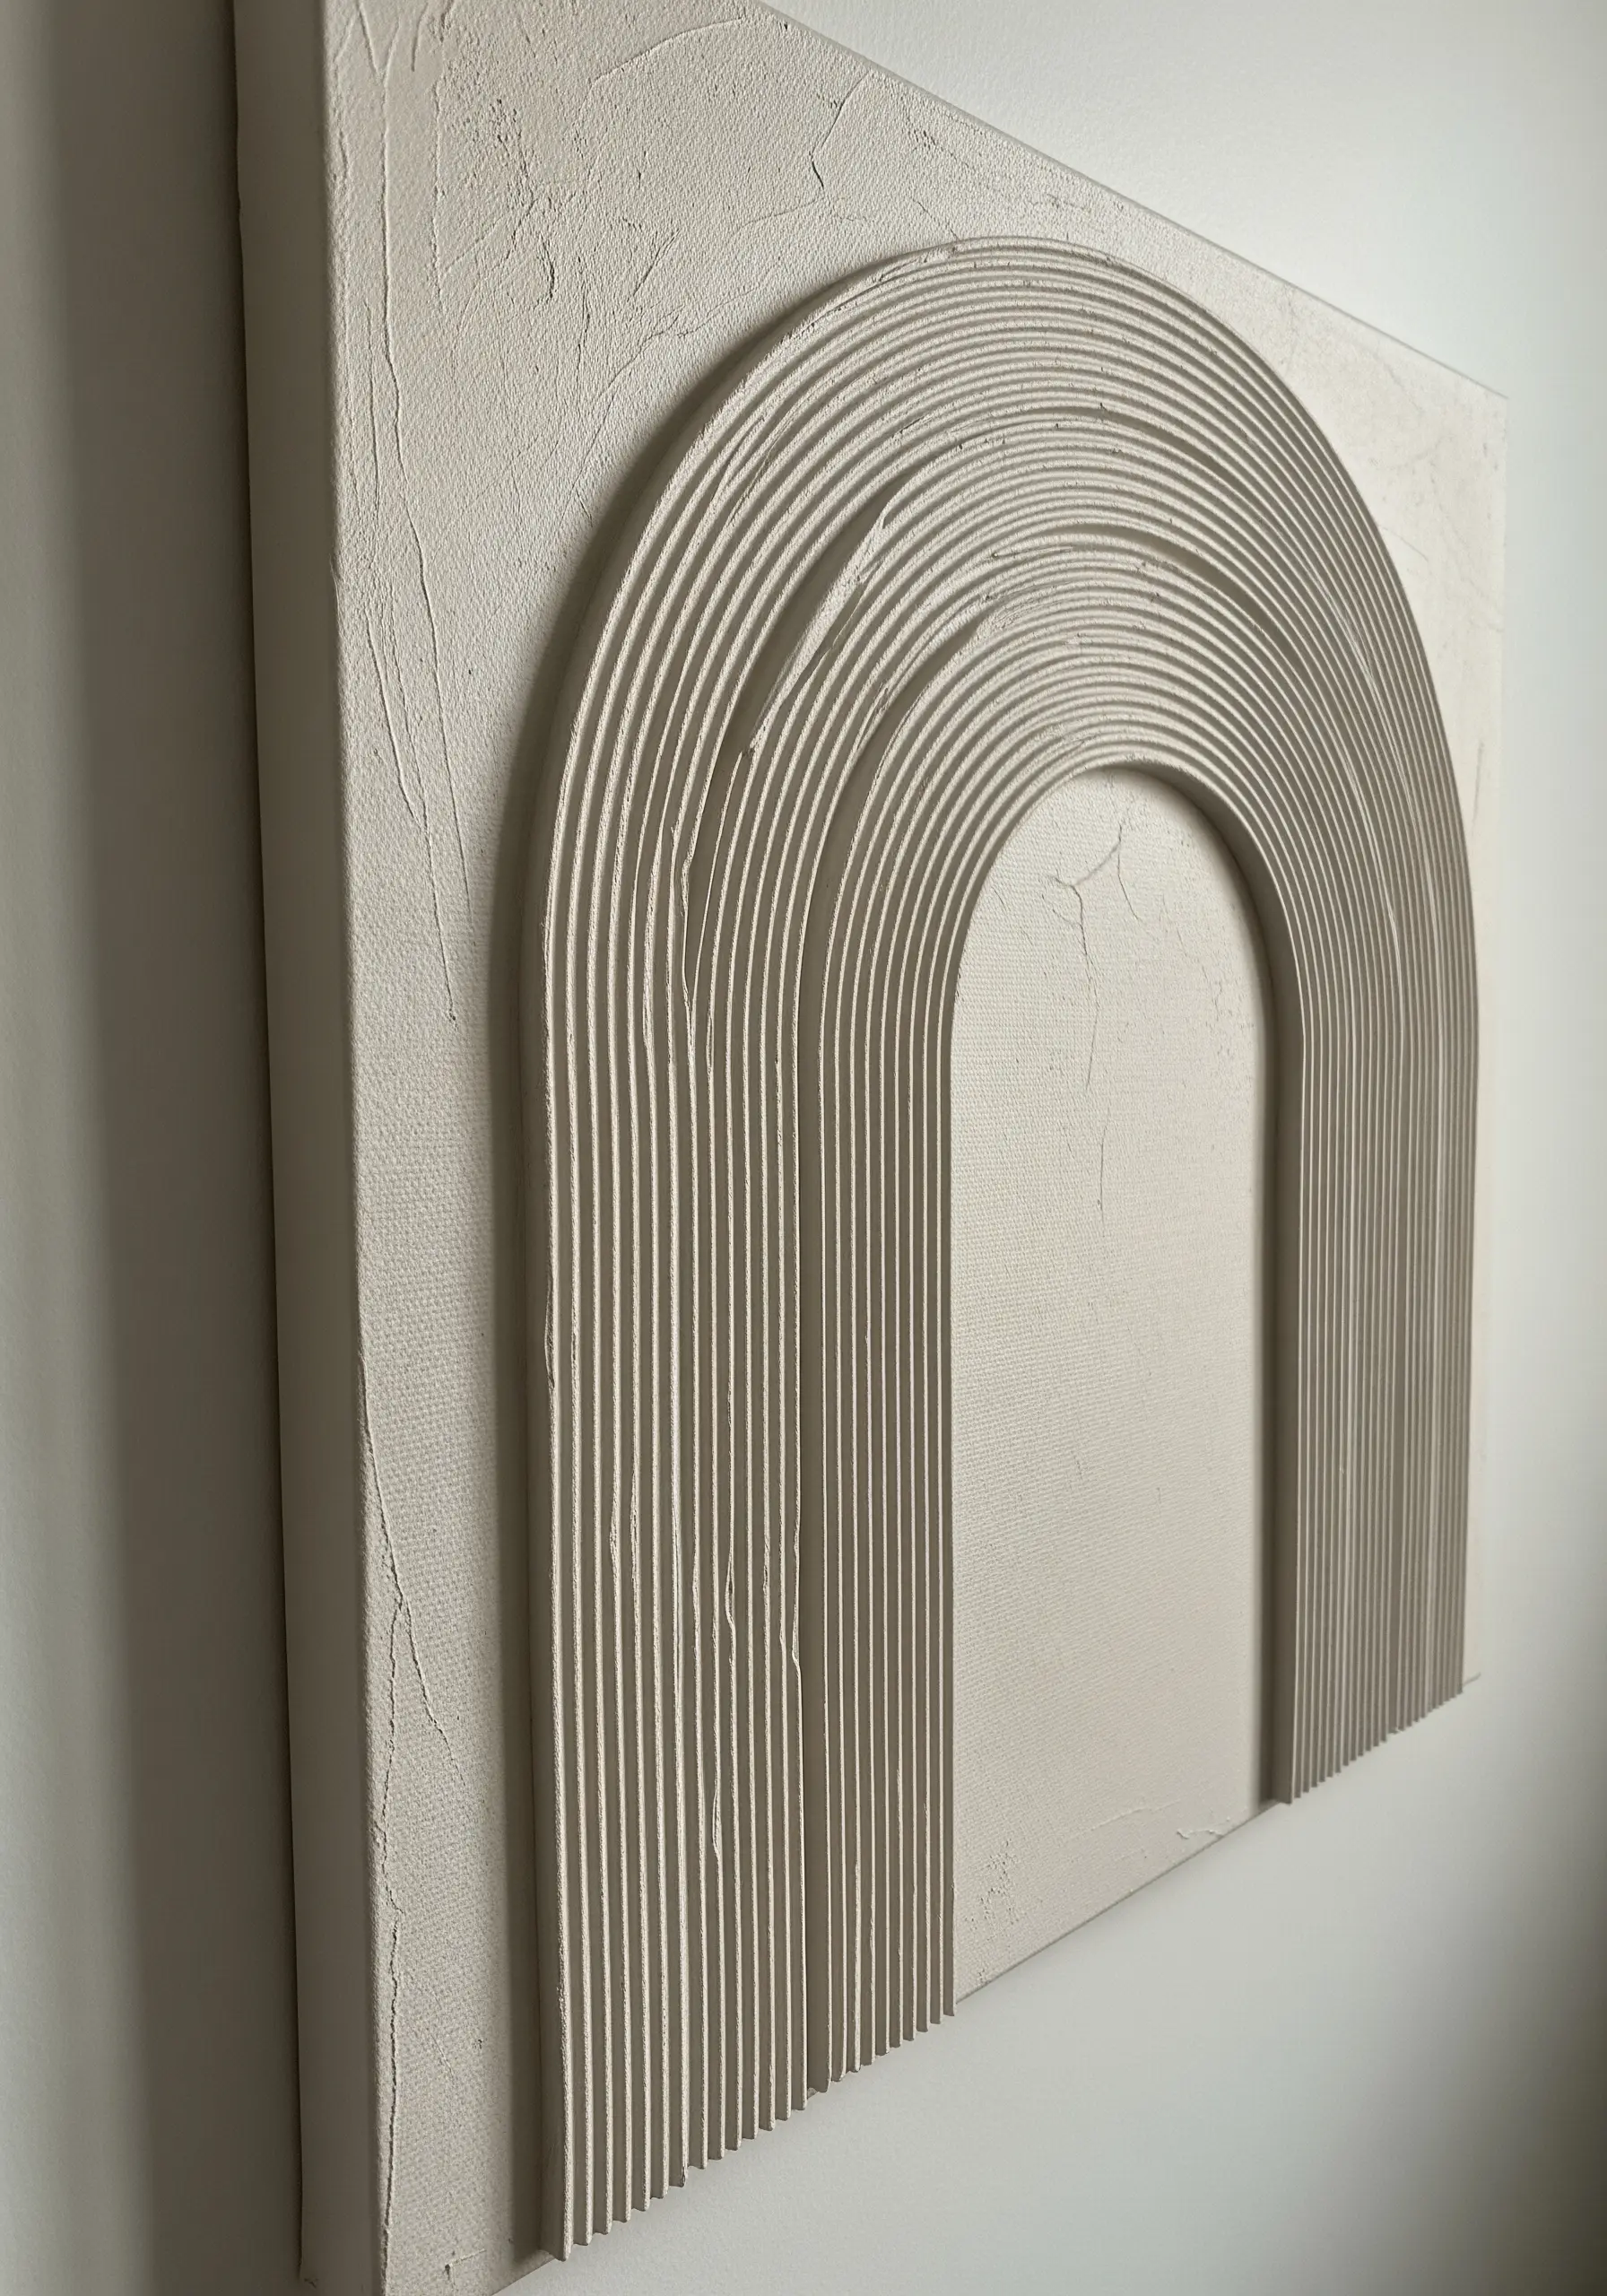
Create a piece of high-end-looking minimalist art for your wall using plaster or joint compound on a canvas.
Apply a thick layer of the compound onto a stretched canvas and use a notched trowel or a cake decorating comb to create rhythmic, arched patterns.
The beauty of this technique is in its simplicity and focus on texture; the clean, repeating lines create a sense of calm and order.
Once dry, you can leave it a natural off-white or paint it a single, muted color to match your decor.
14. Refresh Furniture with a Coat of Chalk Paint
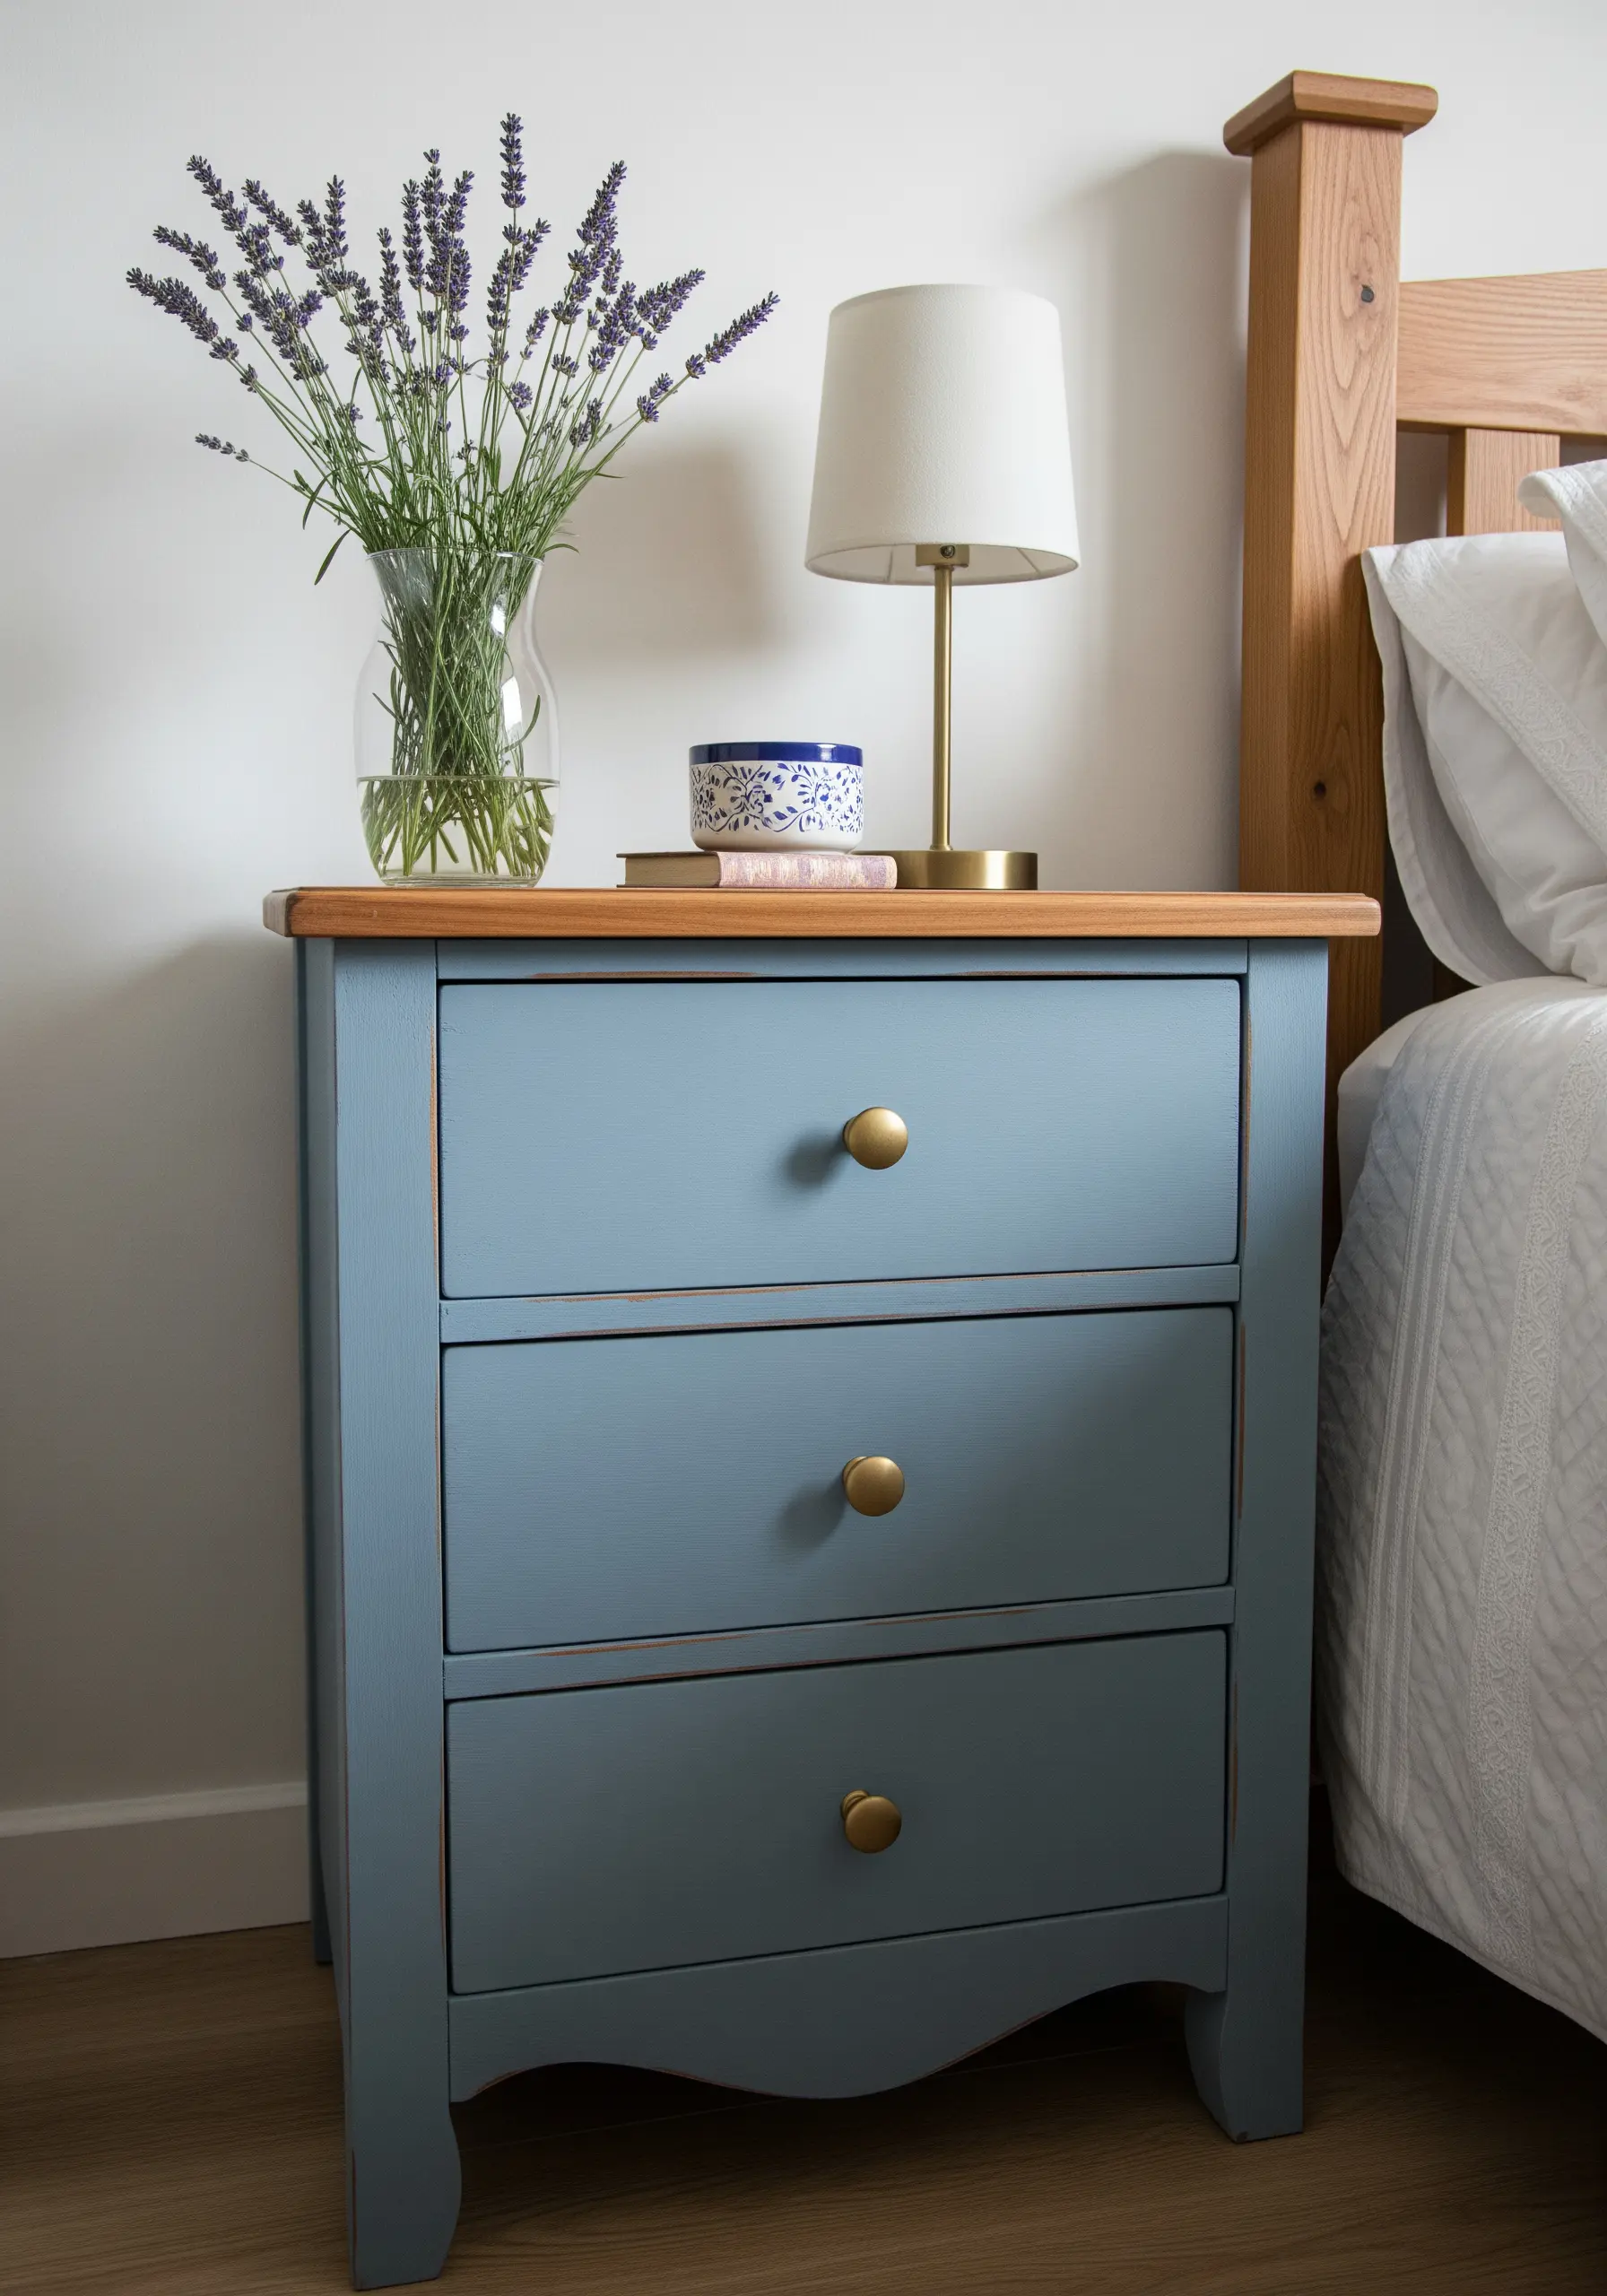
Give a tired wooden nightstand or dresser a modern update with a coat of chalk paint.
This type of paint requires minimal prep work—no extensive sanding needed—and dries to a soft, matte finish that feels contemporary and refined.
For a subtly rustic look, you can lightly distress the edges with fine-grit sandpaper after the paint has dried to let a little of the wood show through.
Finishing the piece by swapping out old hardware for new brass or matte black knobs is a simple final step that makes a huge impact.
15. Hand-Dye Pillows with Shibori Techniques
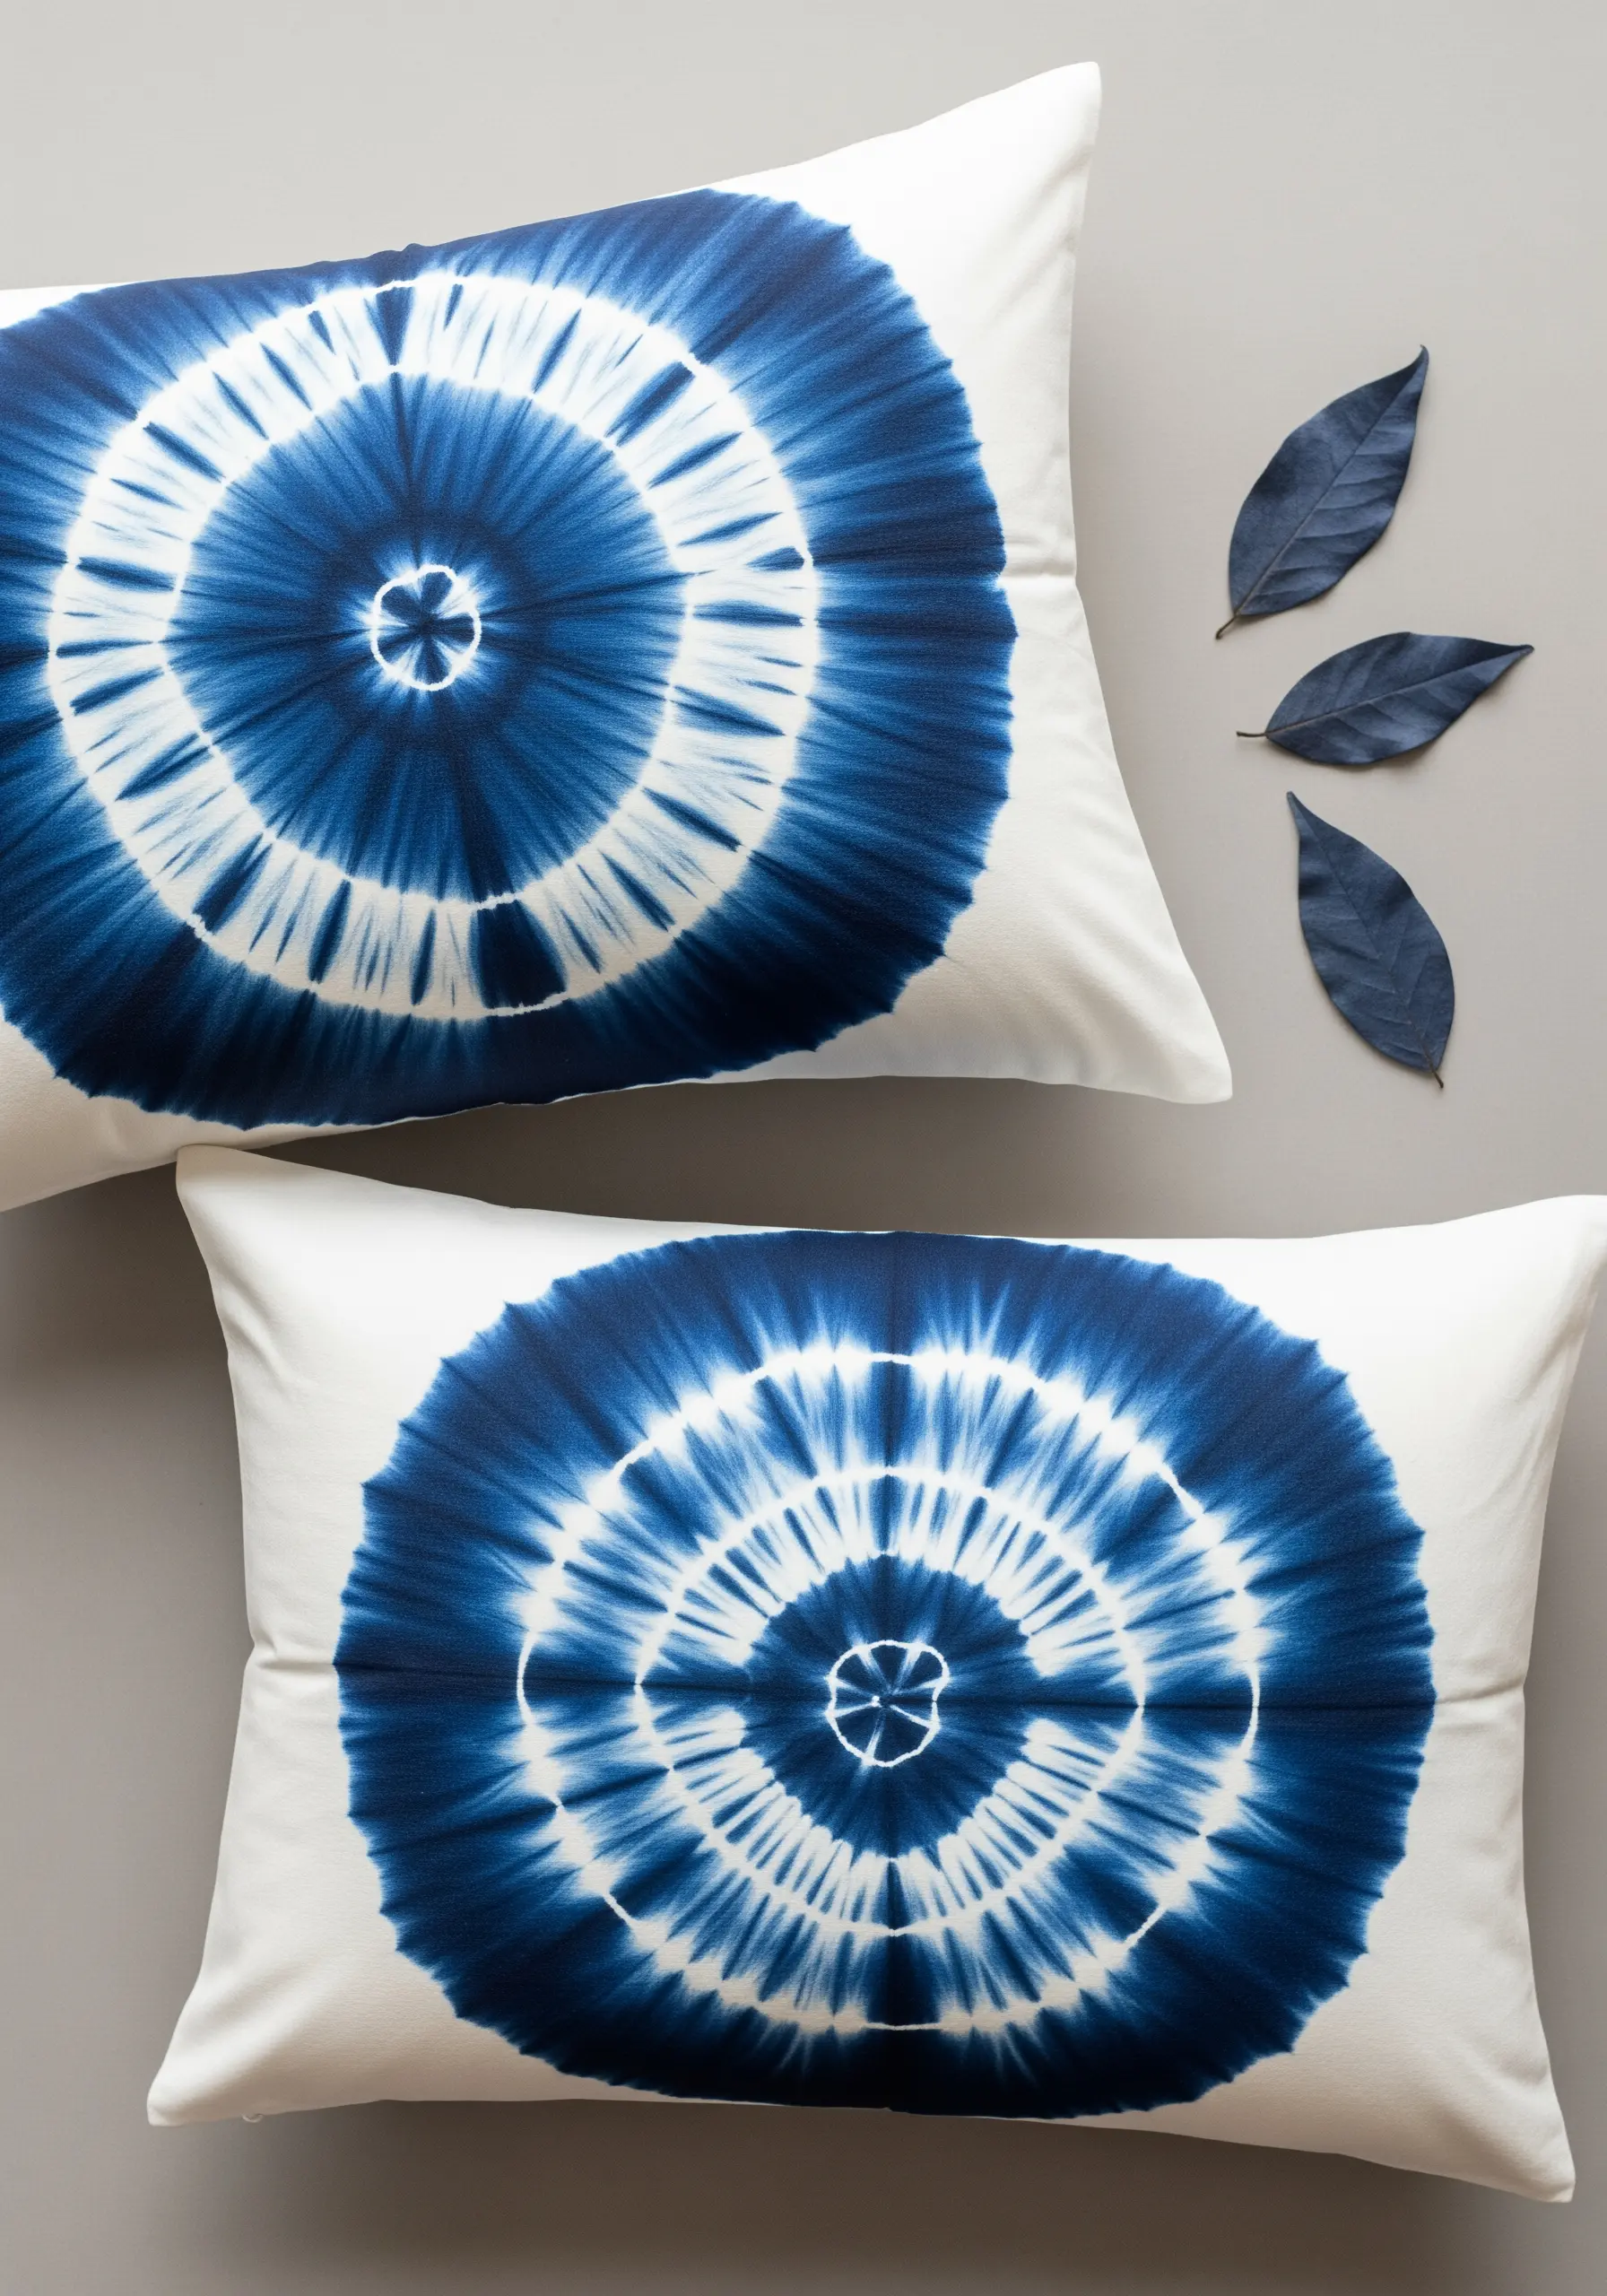
Create your own stunning, one-of-a-kind pillow covers using the Japanese art of Shibori dyeing.
This technique involves folding, twisting, or bunching fabric and binding it before dyeing it in indigo.
For a classic concentric circle pattern, pinch the center of the fabric and bind it with rubber bands at regular intervals.
The bound areas will resist the dye, creating beautiful, graphic patterns that are perfectly imperfect and uniquely yours.
It’s a meditative process that turns a simple white cushion into a piece of bespoke art.
16. Build a Cozy Floor-Level Reading Nook
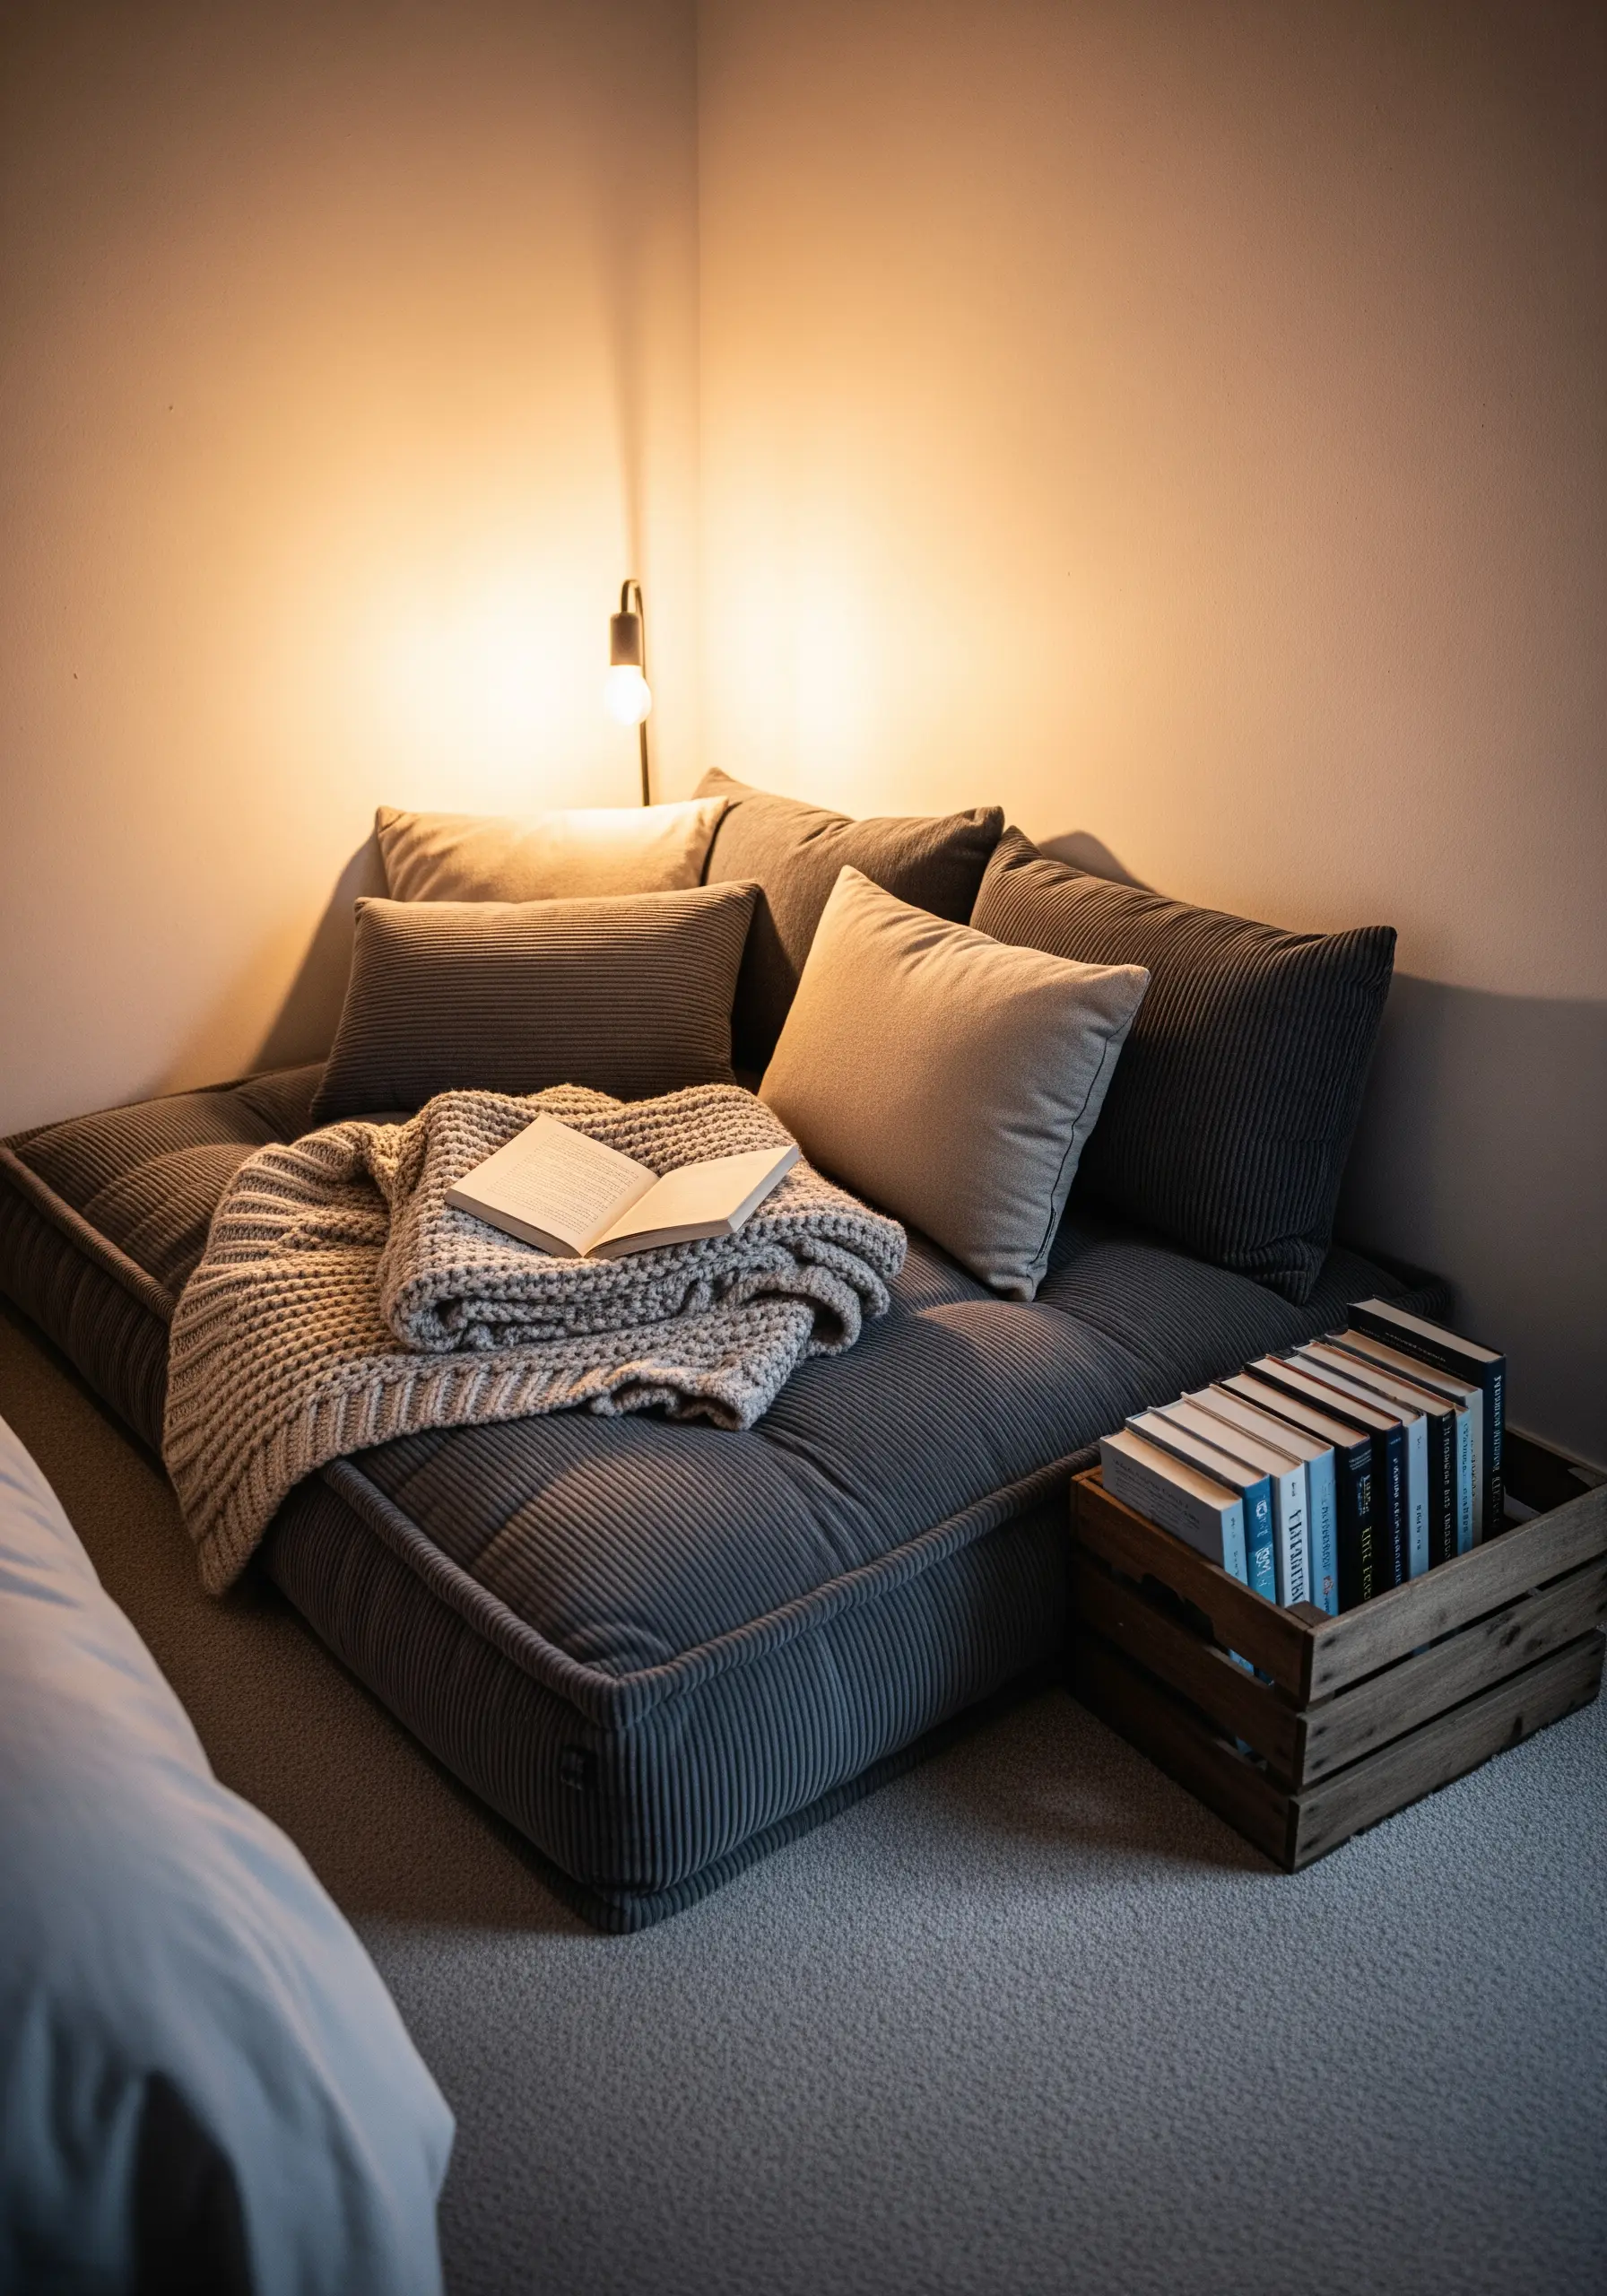
Designate a corner of your bedroom as a dedicated relaxation zone by creating a low-profile reading nook directly on the floor.
Use a large floor cushion or a simple futon mattress as a base, and pile on pillows with varying textures—like corduroy, knit, and linen—to create an inviting and comfortable spot.
A low-hanging pendant light or a simple wall-mounted sconce provides focused lighting for reading without taking up floor space.
This simple setup encourages you to unwind and disconnect, creating a cozy sanctuary within your room.
17. Add Playful Texture with a Pom-Pom Garland
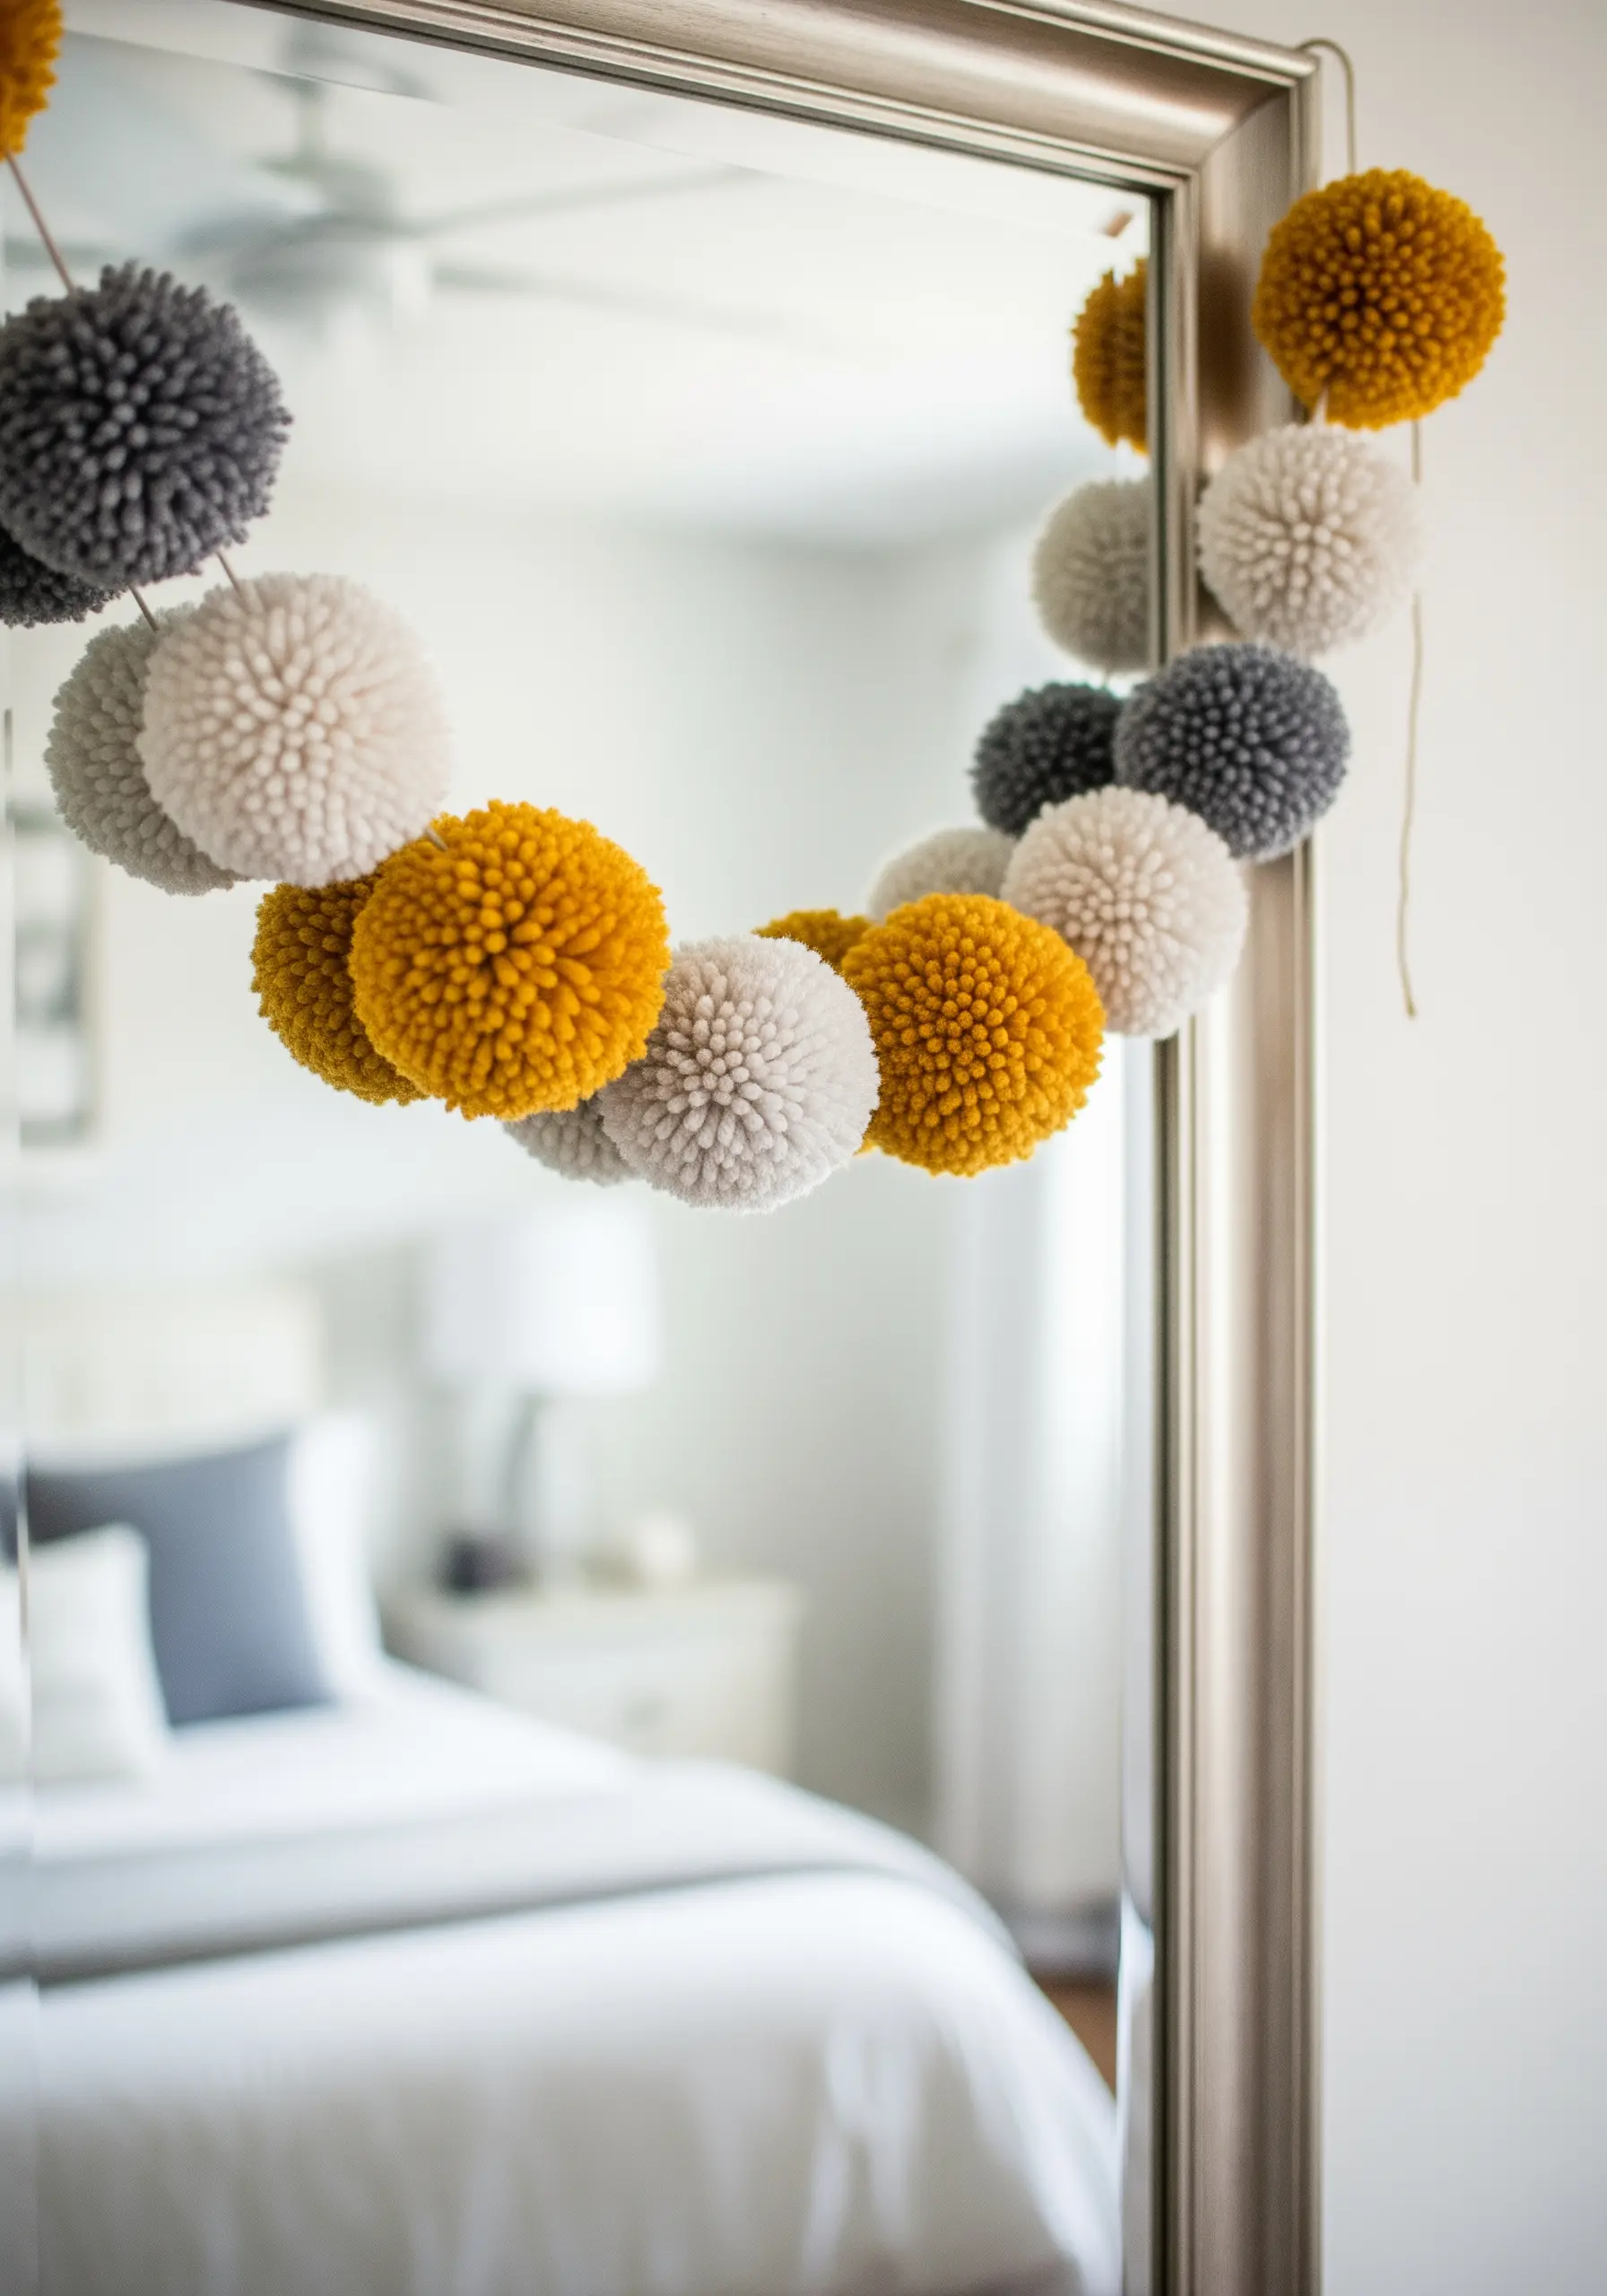
Craft a cheerful pom-pom garland to drape across a mirror, headboard, or window frame for a touch of soft texture and color.
You can easily make dense, fluffy pom-poms using a pom-pom maker tool or even a simple piece of cardboard.
For a more sophisticated look, stick to a limited color palette of three complementary shades, like mustard, grey, and cream.
String them onto a strong thread with a darning needle, varying the spacing and color order to create a playful yet cohesive decorative accent.
18. Personalize a Lampshade with Simple Stitches
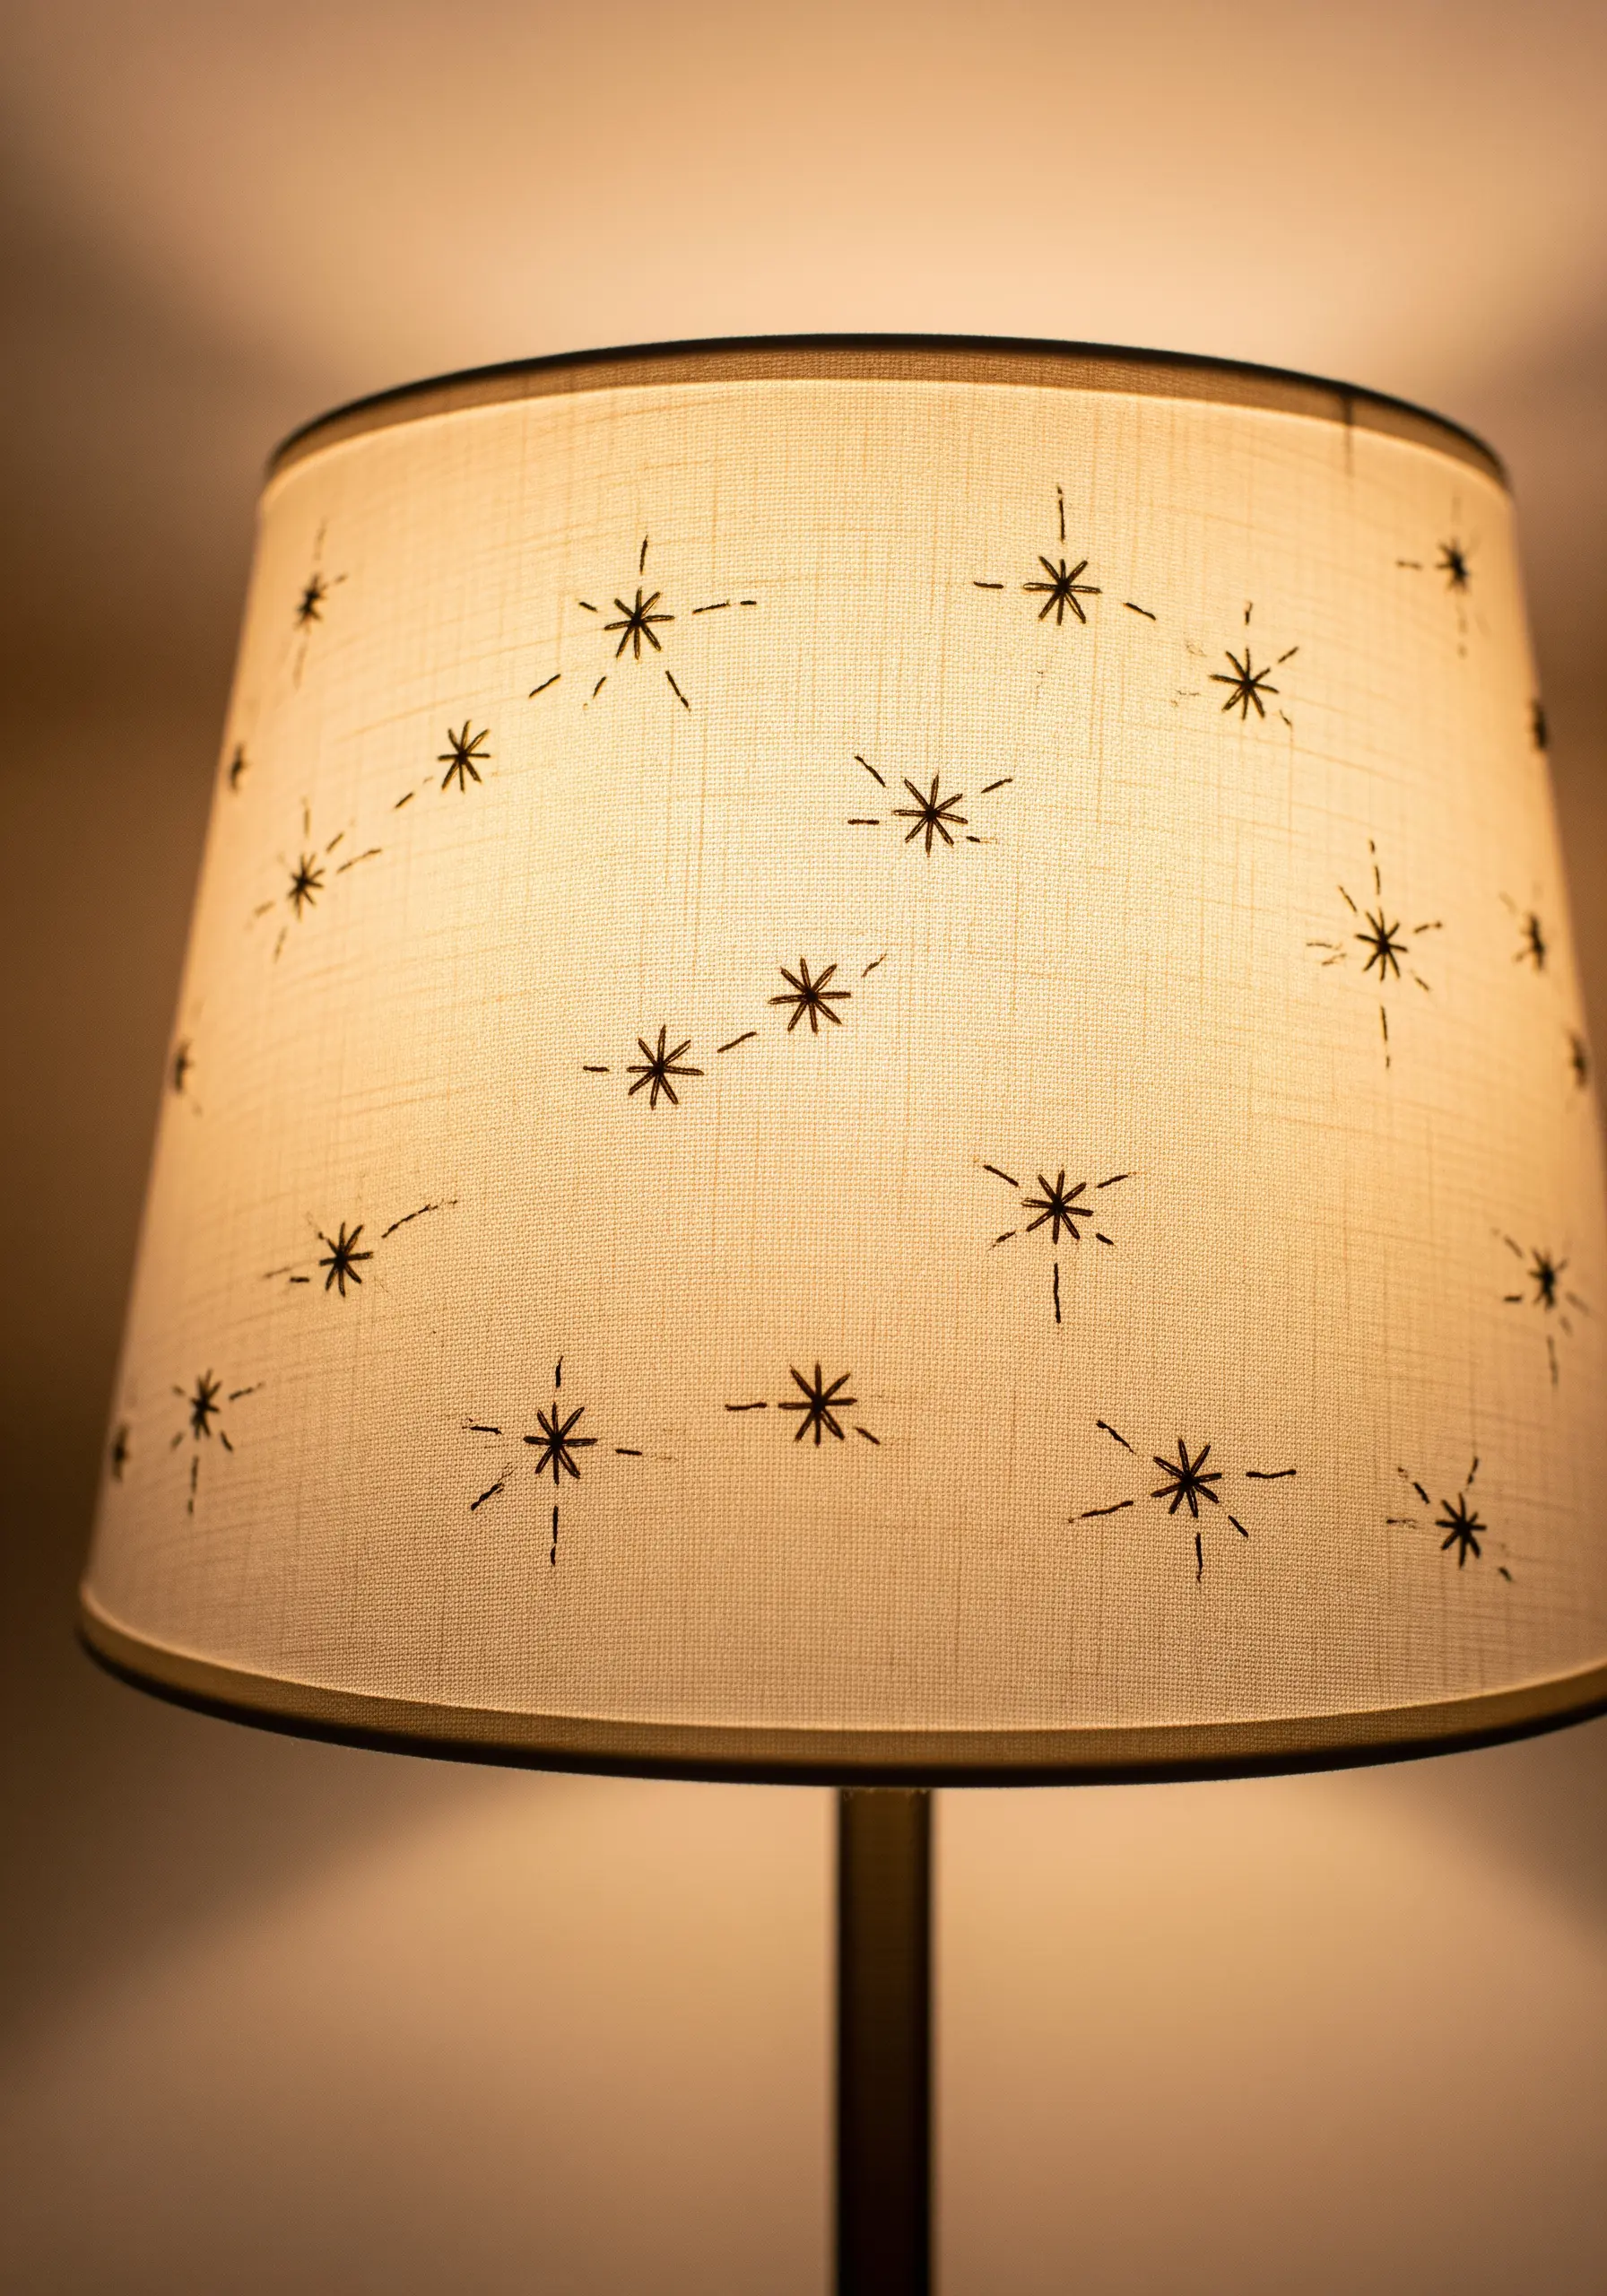
Transform a plain fabric lampshade into a unique piece of decor with minimal embroidery.
Choose a lampshade made from linen or a similar woven fabric that is easy to stitch through.
Using a dark, high-contrast embroidery floss and a simple backstitch, you can create a scattered pattern of starbursts, dots, or simple geometric shapes.
The design will appear subtle during the day but will be beautifully illuminated when the lamp is turned on, casting delicate shadows and creating a cozy, magical ambiance.
19. Organize Jewelry on a Natural Branch Hanger
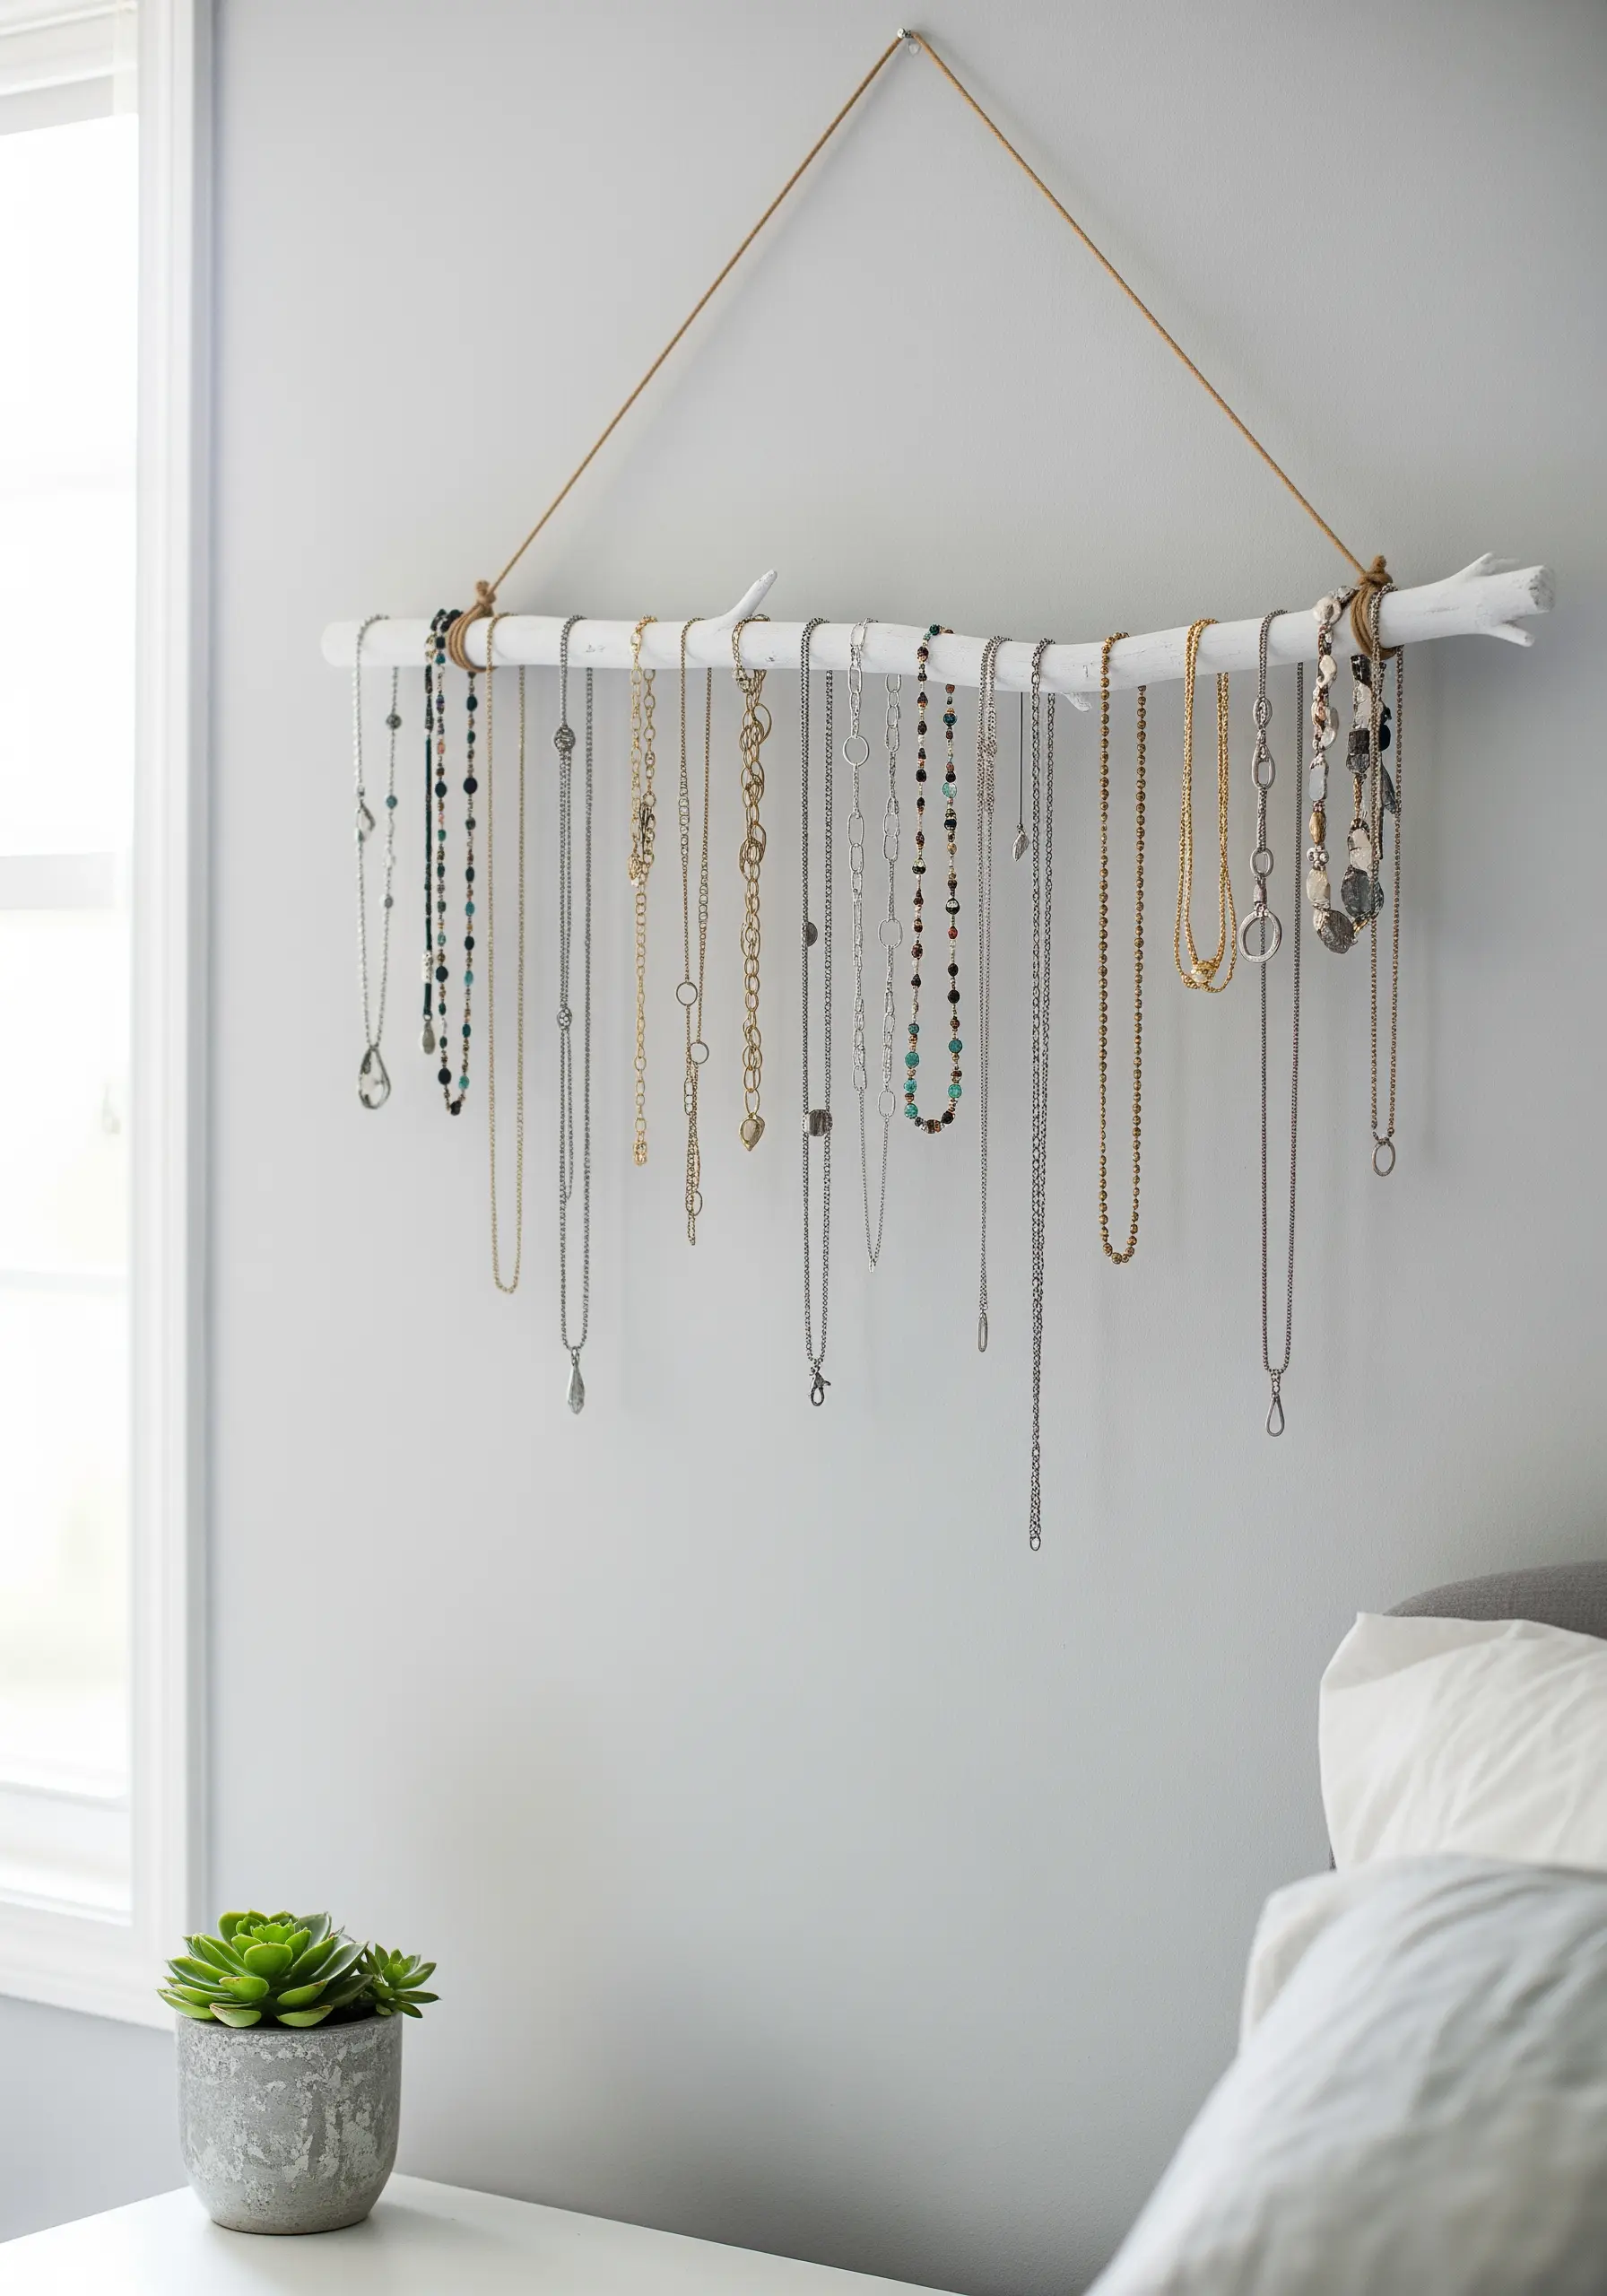
Create a beautiful and functional jewelry organizer using a painted branch for a touch of nature-inspired decor.
Find a sturdy, interesting-looking branch, sand it smooth, and give it a coat of white or metallic paint for a clean, modern look.
Screw small cup hooks along the underside of the branch to hang your necklaces and bracelets from, preventing them from tangling.
Suspend the branch from the wall using two pieces of twine or leather cord for a rustic-chic display that turns your jewelry collection into wall art.
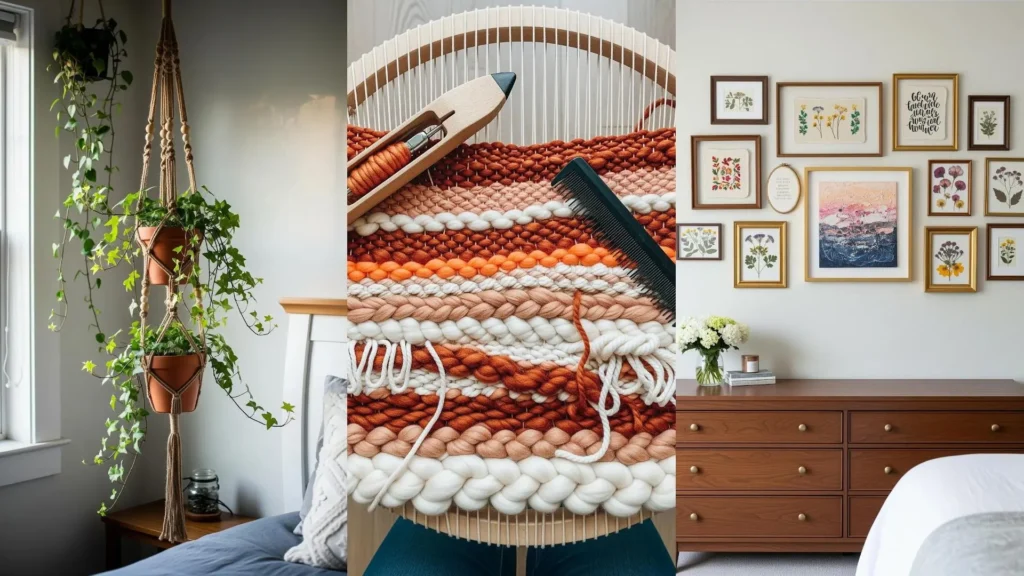
20. Weave a Small, Textured Wall Hanging
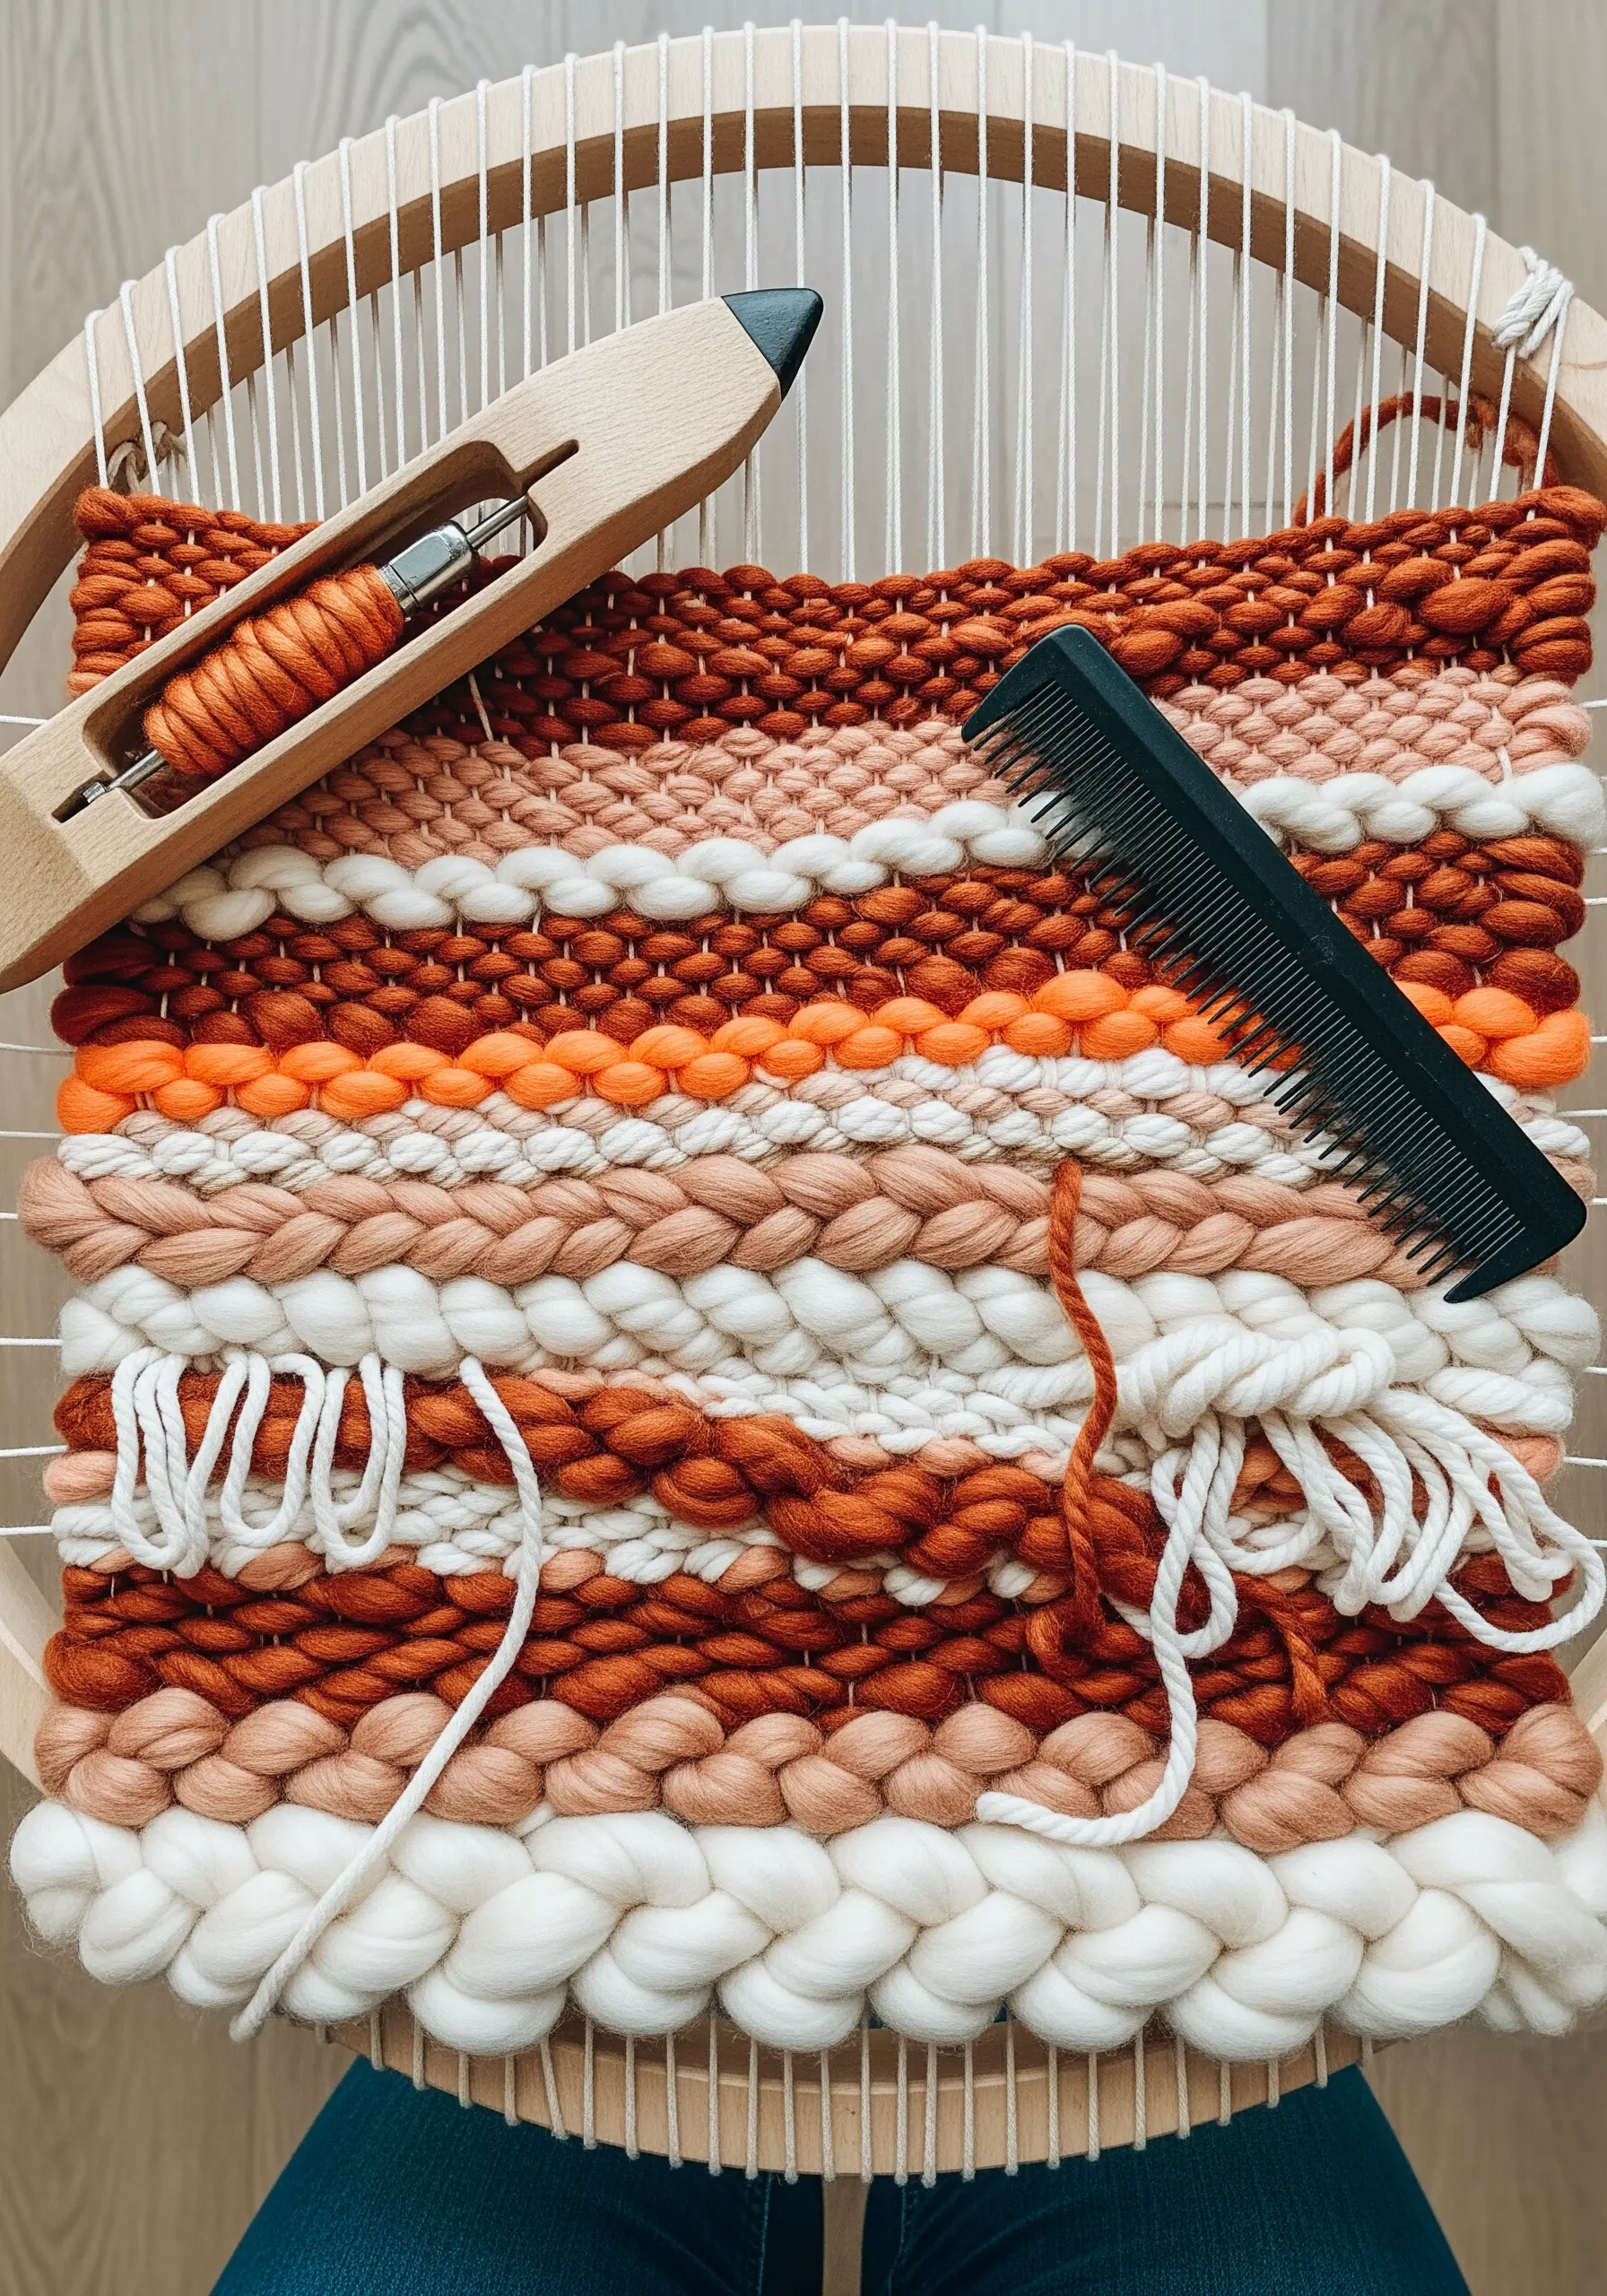
Explore the art of weaving on a small lap loom to create a rich, textural piece for your wall.
This is your chance to experiment with different yarn weights and fibers—combine chunky wool roving, smooth cotton, and silky ribbon in one piece.
Incorporate techniques like soumak stitch for a braided effect or create rya knots for a shaggy, fringed texture.
Even a small woven piece in a warm, earthy color palette can add immense character and a handmade feel to a gallery wall or a small nook.
21. Create a Faux Headboard with a Painted Arch
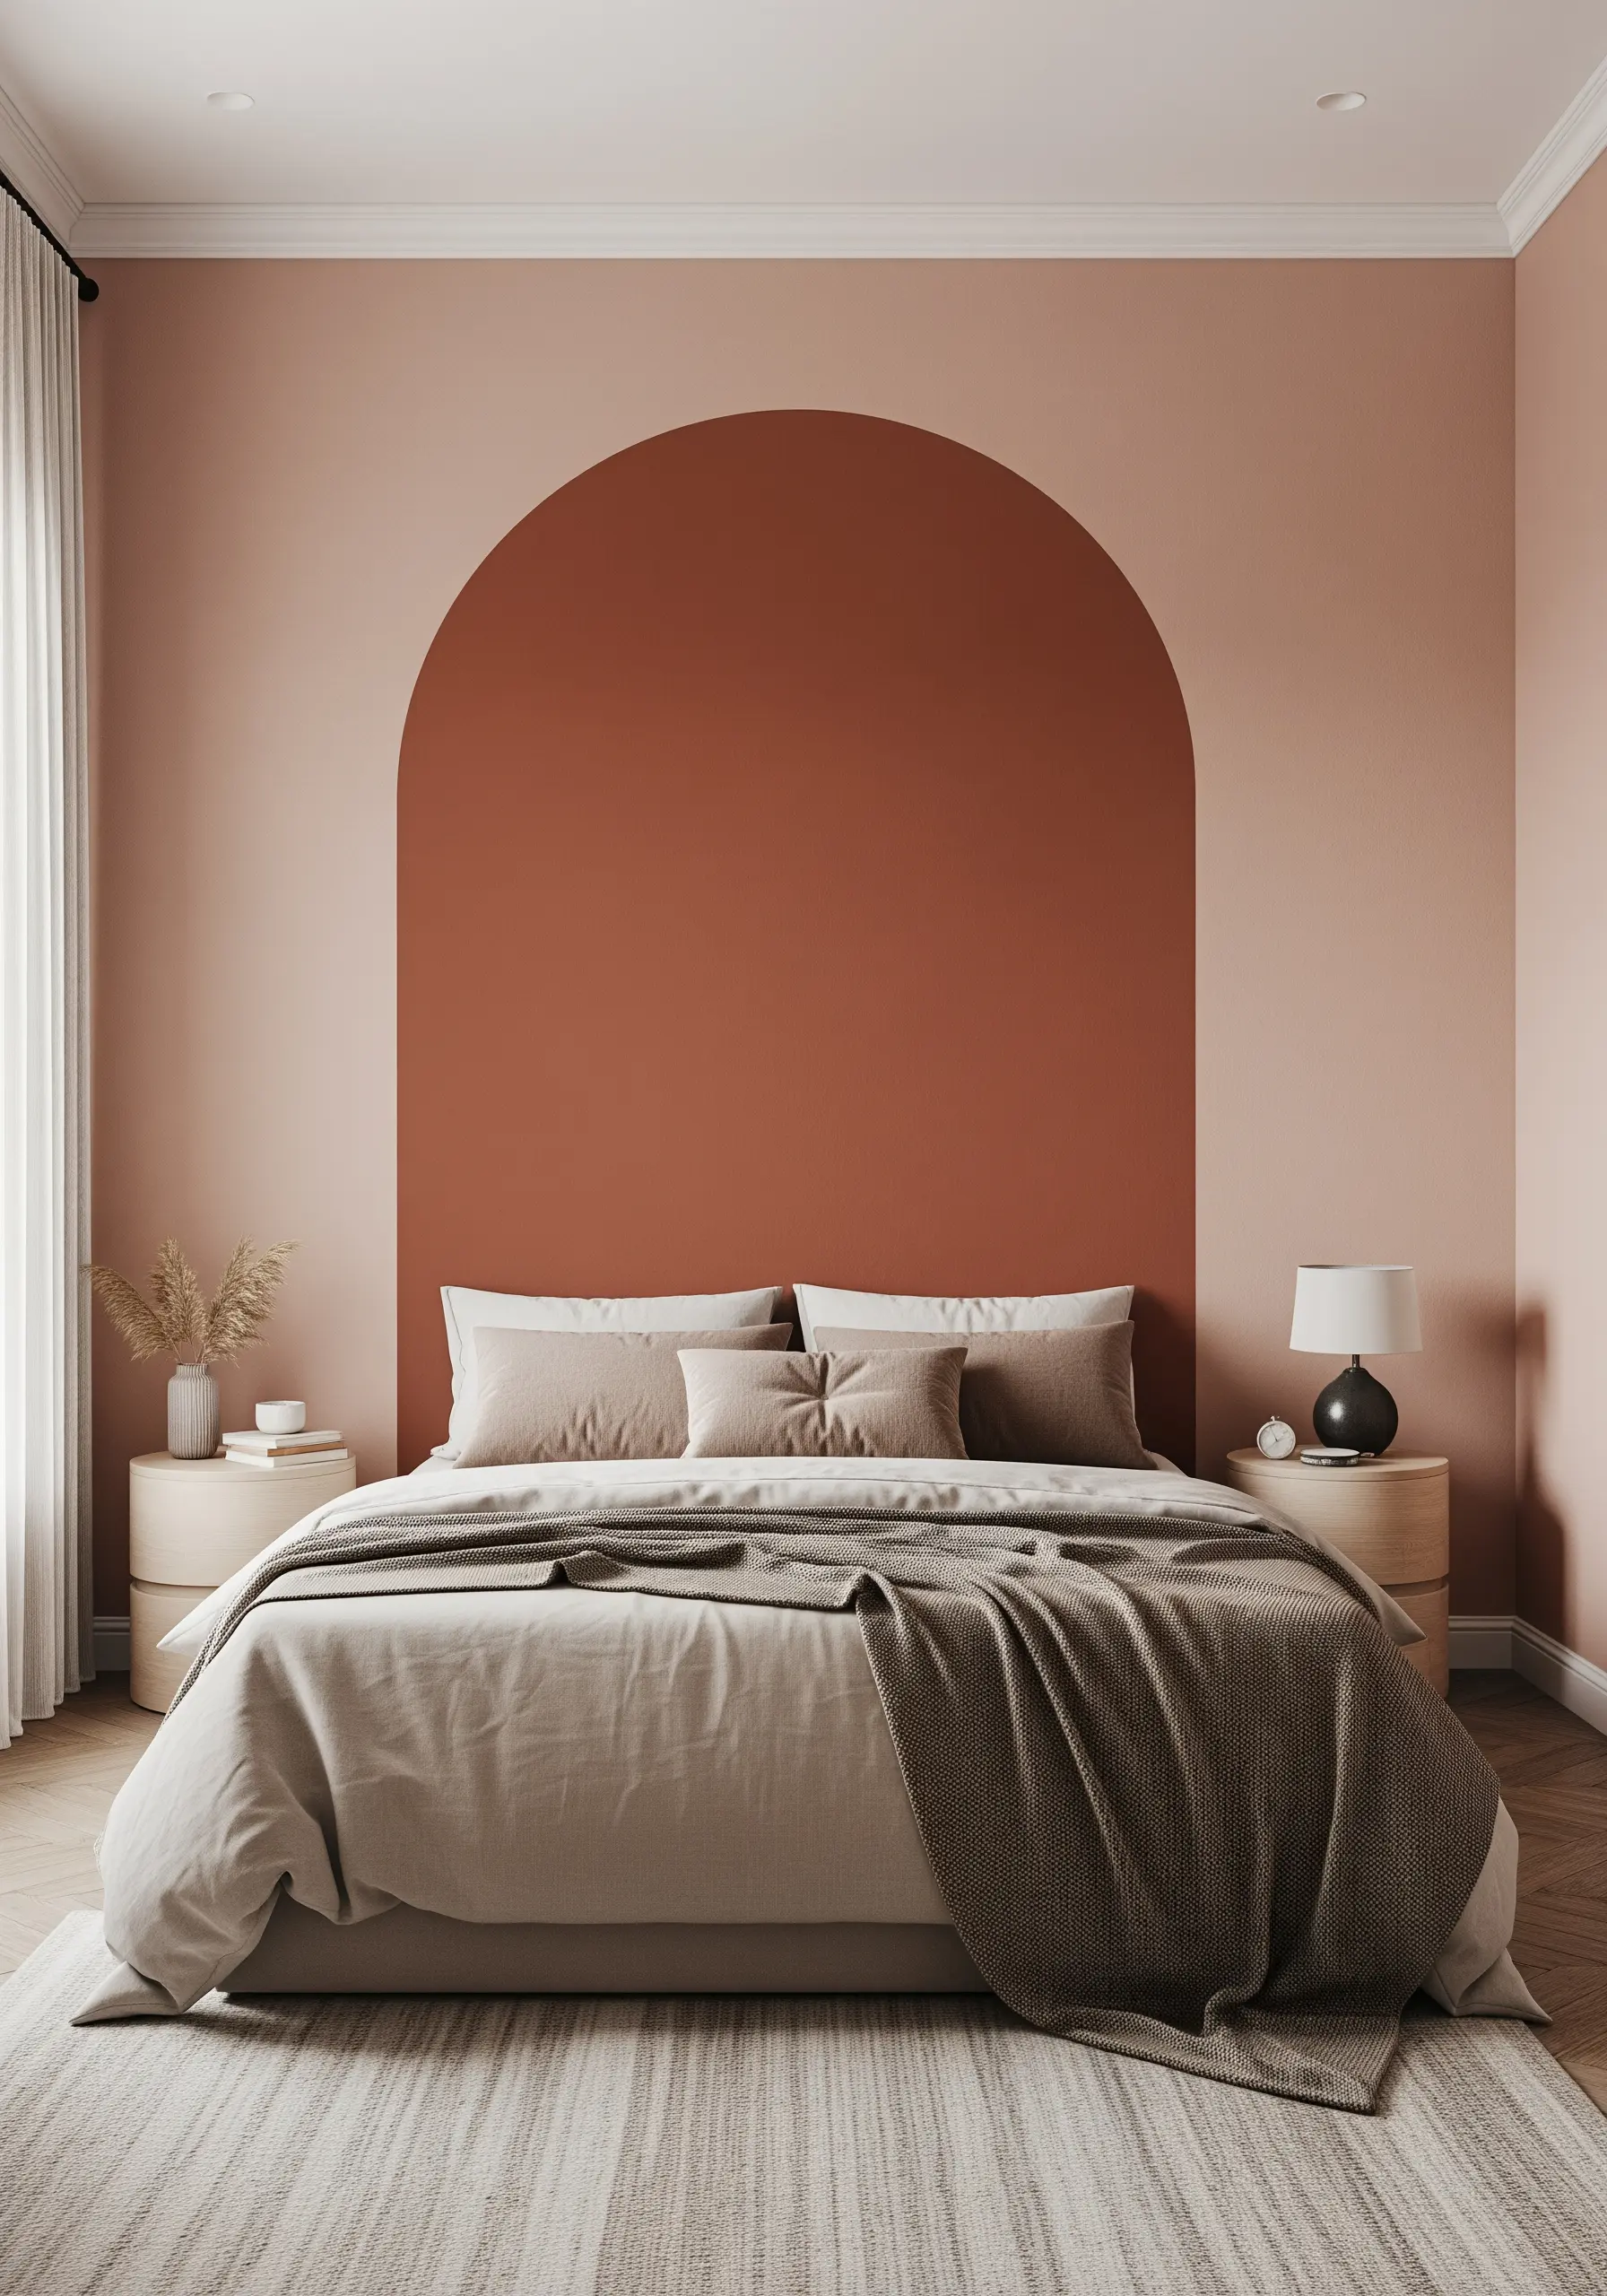
Define your sleeping space and add a bold architectural element without any furniture by painting a large arch on the wall behind your bed.
Use painter’s tape to create the straight sides and a pencil tied to a string tacked to the center of the arch’s base to draw a perfect semi-circle.
Choose a warm, grounding color like terracotta or dusty rose that contrasts with your wall color to make the shape pop.
This simple paint treatment acts as a visual headboard, anchoring the bed and adding a sophisticated, modern touch to the room.
22. Craft a Cozy Felt and Sherpa Storage Basket
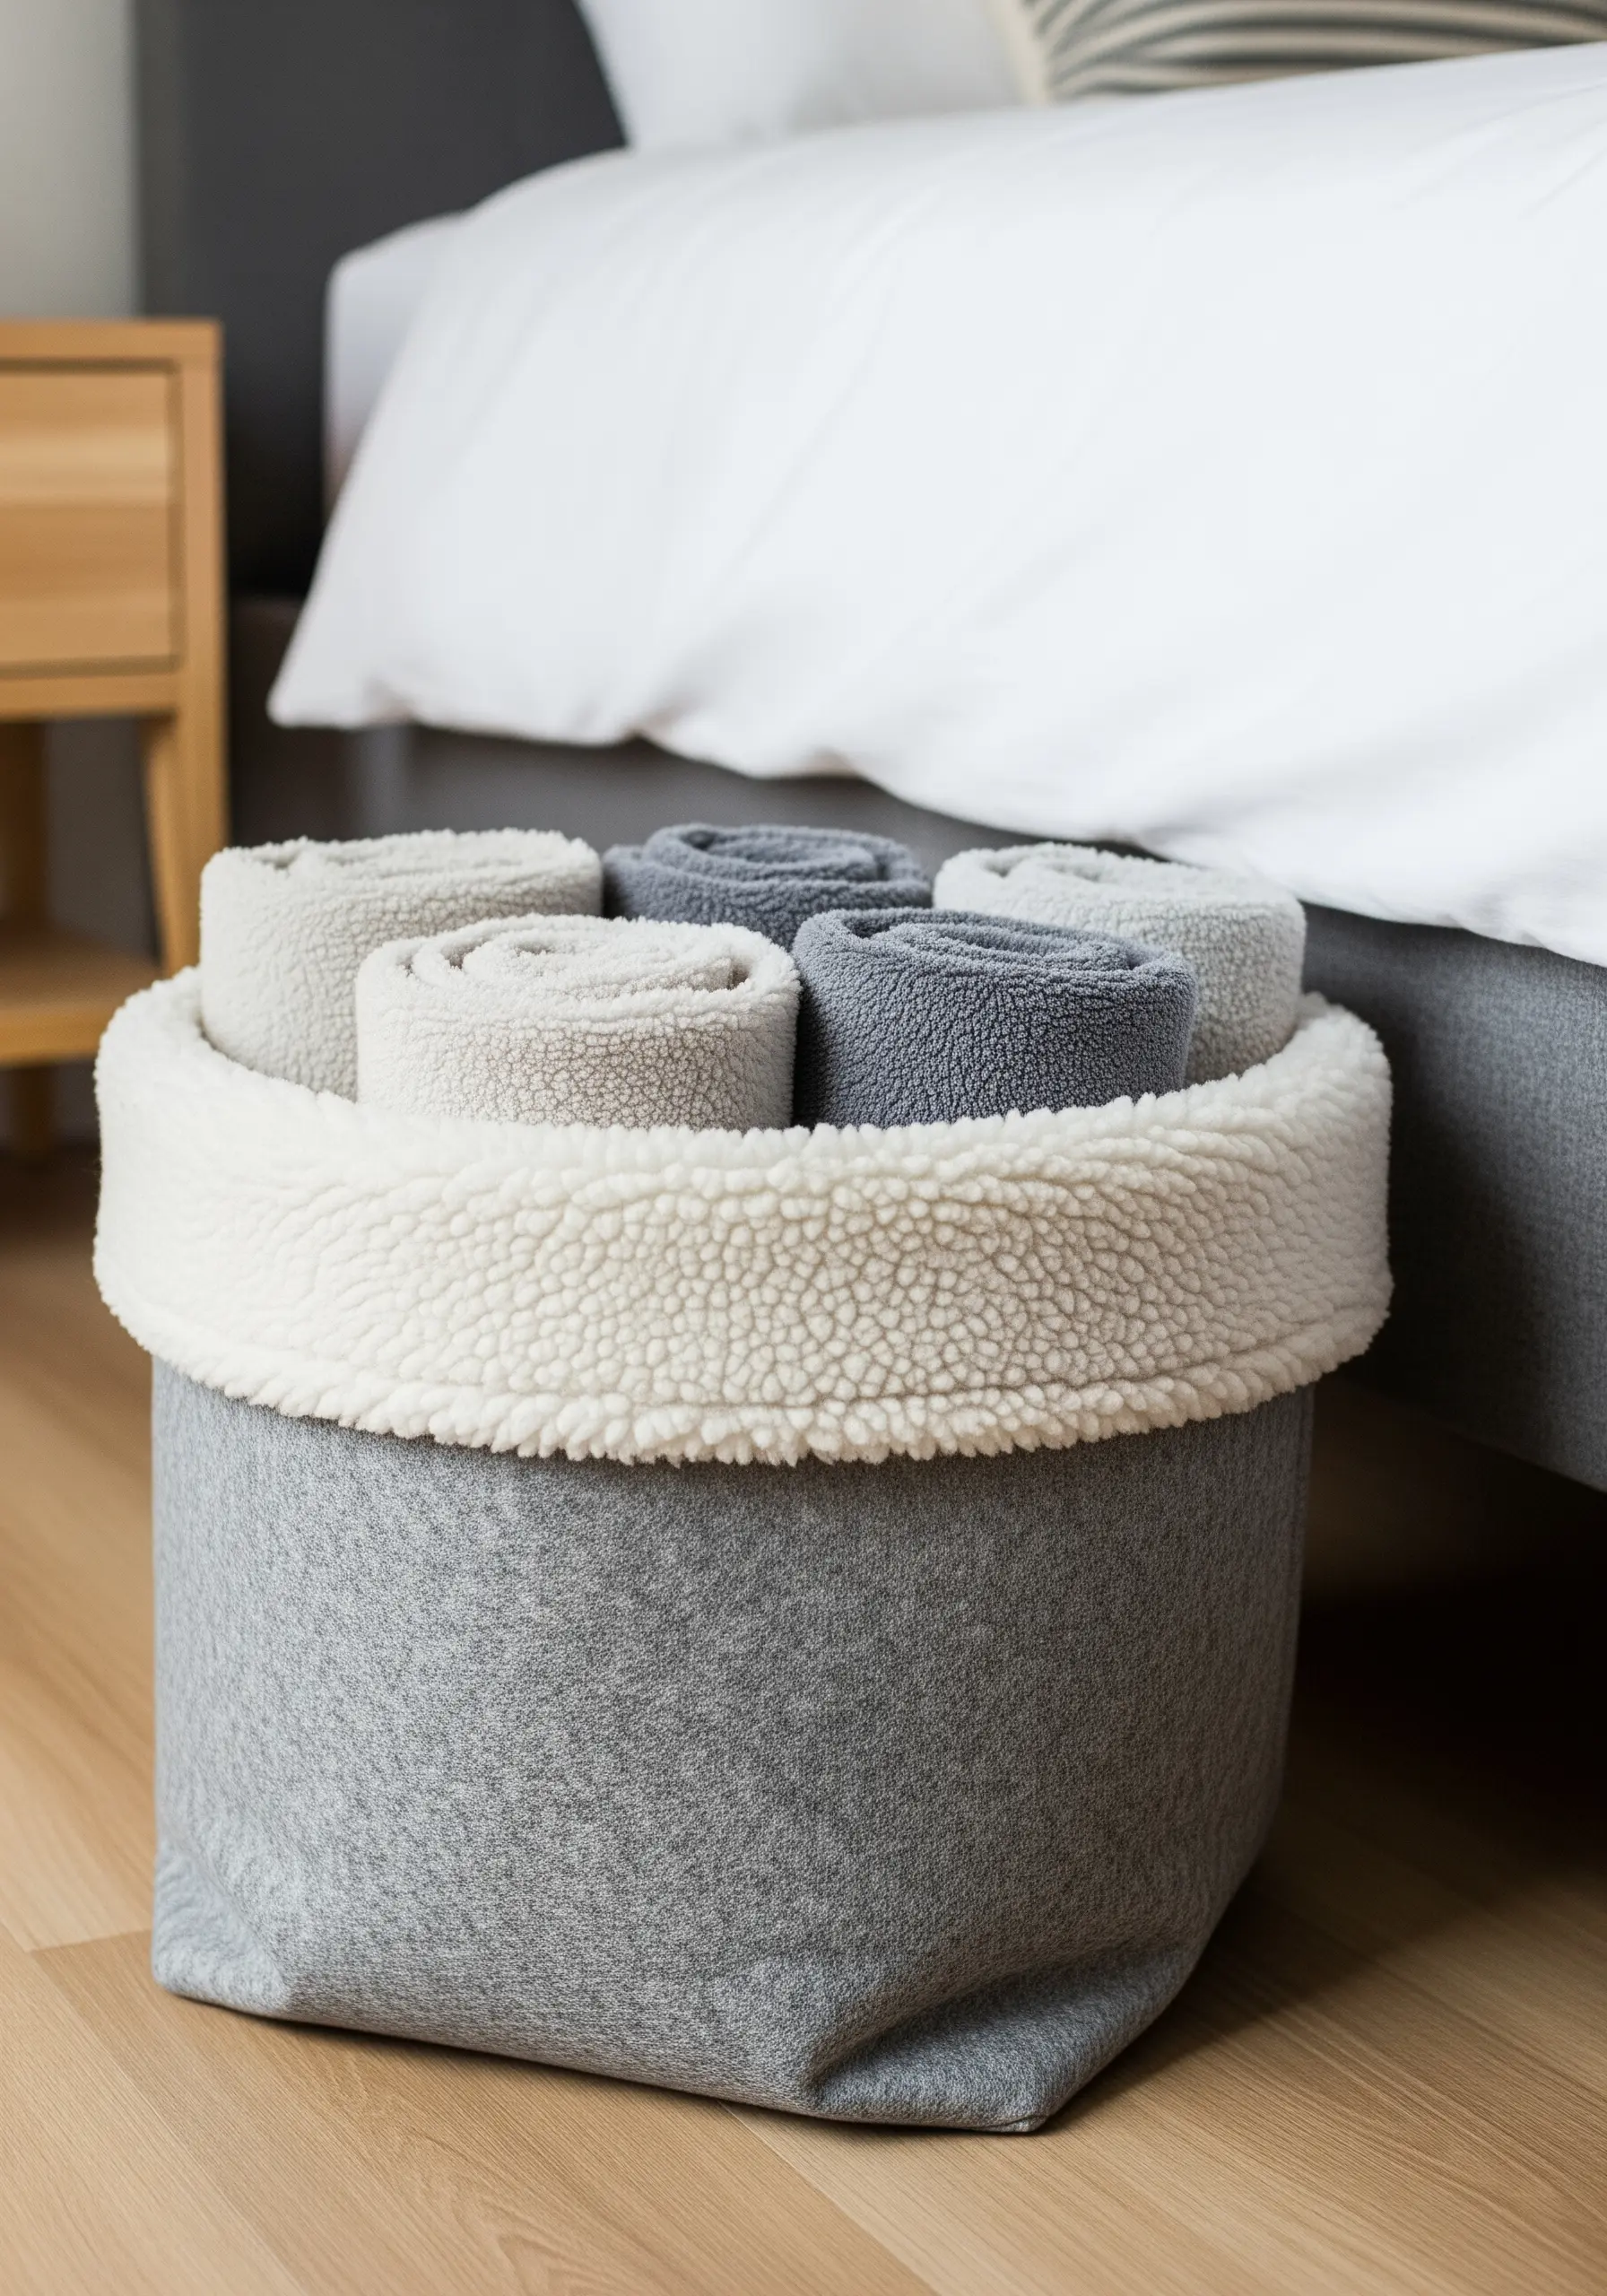
Make a soft, functional storage basket for holding blankets or books using simple felt and cozy sherpa fabric.
Cut two identical circles for the base and two long rectangles for the sides, one from felt and one from sherpa for the lining.
Sew the pieces together to form a simple cylindrical basket, and fold the sherpa over the top edge to create a plush, contrasting cuff.
This project requires minimal sewing skills but results in a stylish and practical piece that adds a touch of softness and organization to your bedside.
23. Embroider a Delicate Detail on a Journal Cover
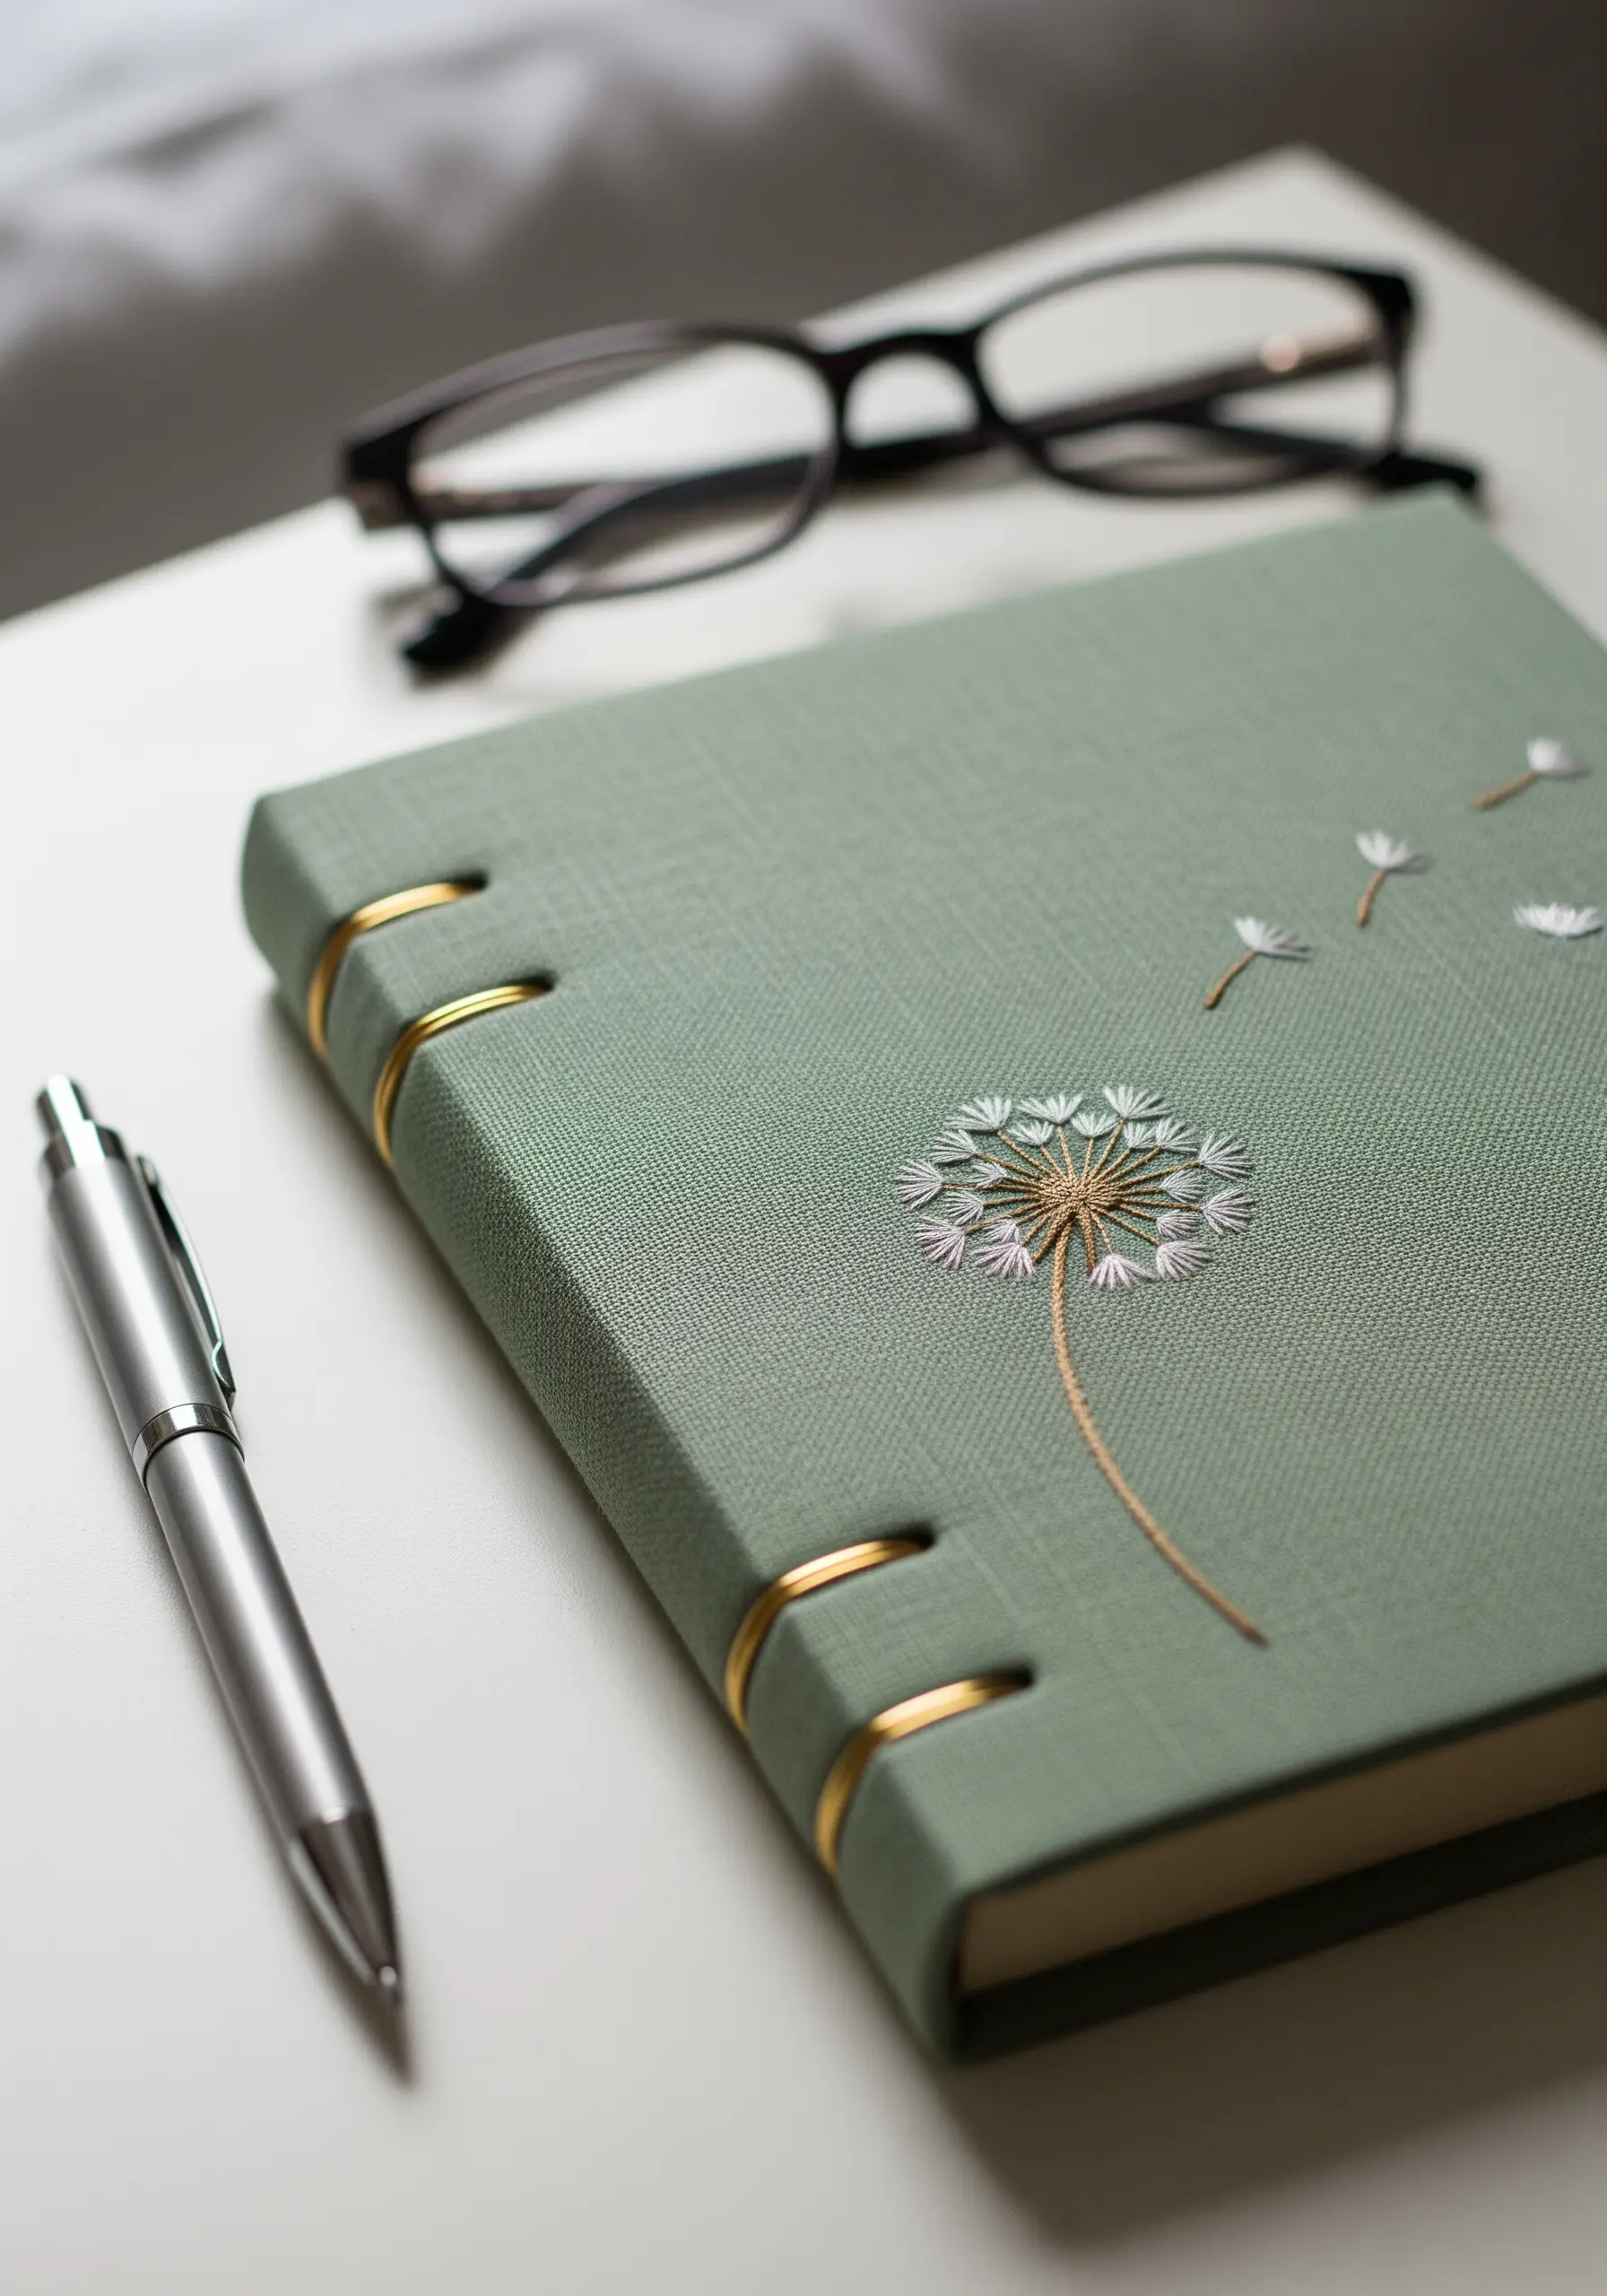
Personalize a fabric-bound journal by adding a small, elegant embroidery motif to the cover.
For hardcovers, it’s essential to pre-pierce your stitching holes with a fine awl or a thick needle to avoid damaging the material or your fingers.
Use a single strand of floss for a delicate design like a dandelion with its seeds blowing away.
Incorporate straight stitches for the stem and detached chain stitches or tiny seed stitches for the pappus, creating a piece that feels both personal and precious.
24. Build a Rustic-Modern Pallet Bed Frame

Construct a low-profile, minimalist bed frame using repurposed wooden pallets for an affordable and stylish DIY project.
Thoroughly sand the pallets to remove any splinters and ensure a smooth surface, then either seal them with a clear varnish to showcase the natural wood or paint them white for a brighter, Scandinavian feel.
Arrange the pallets on the floor to fit the size of your mattress, securing them together for stability.
You can weave fairy lights around the base to add a warm, industrial-chic glow to your room.
25. Sew a Cheerful Fabric Scrap Garland

Give new life to leftover fabric scraps by turning them into a charming garland to hang in a window or above a doorway.
Cut or tear your fabric into strips of similar length and tie them onto a piece of twine or ribbon with a simple knot.
Mix and match different patterns and colors—like florals, ginghams, and polka dots—for a vibrant, eclectic look that adds a touch of cottage-inspired cheer.
This is a wonderfully simple, no-sew project that reduces waste and adds a splash of handmade personality to your space.
26. Pour Your Own Scented Soy Candles
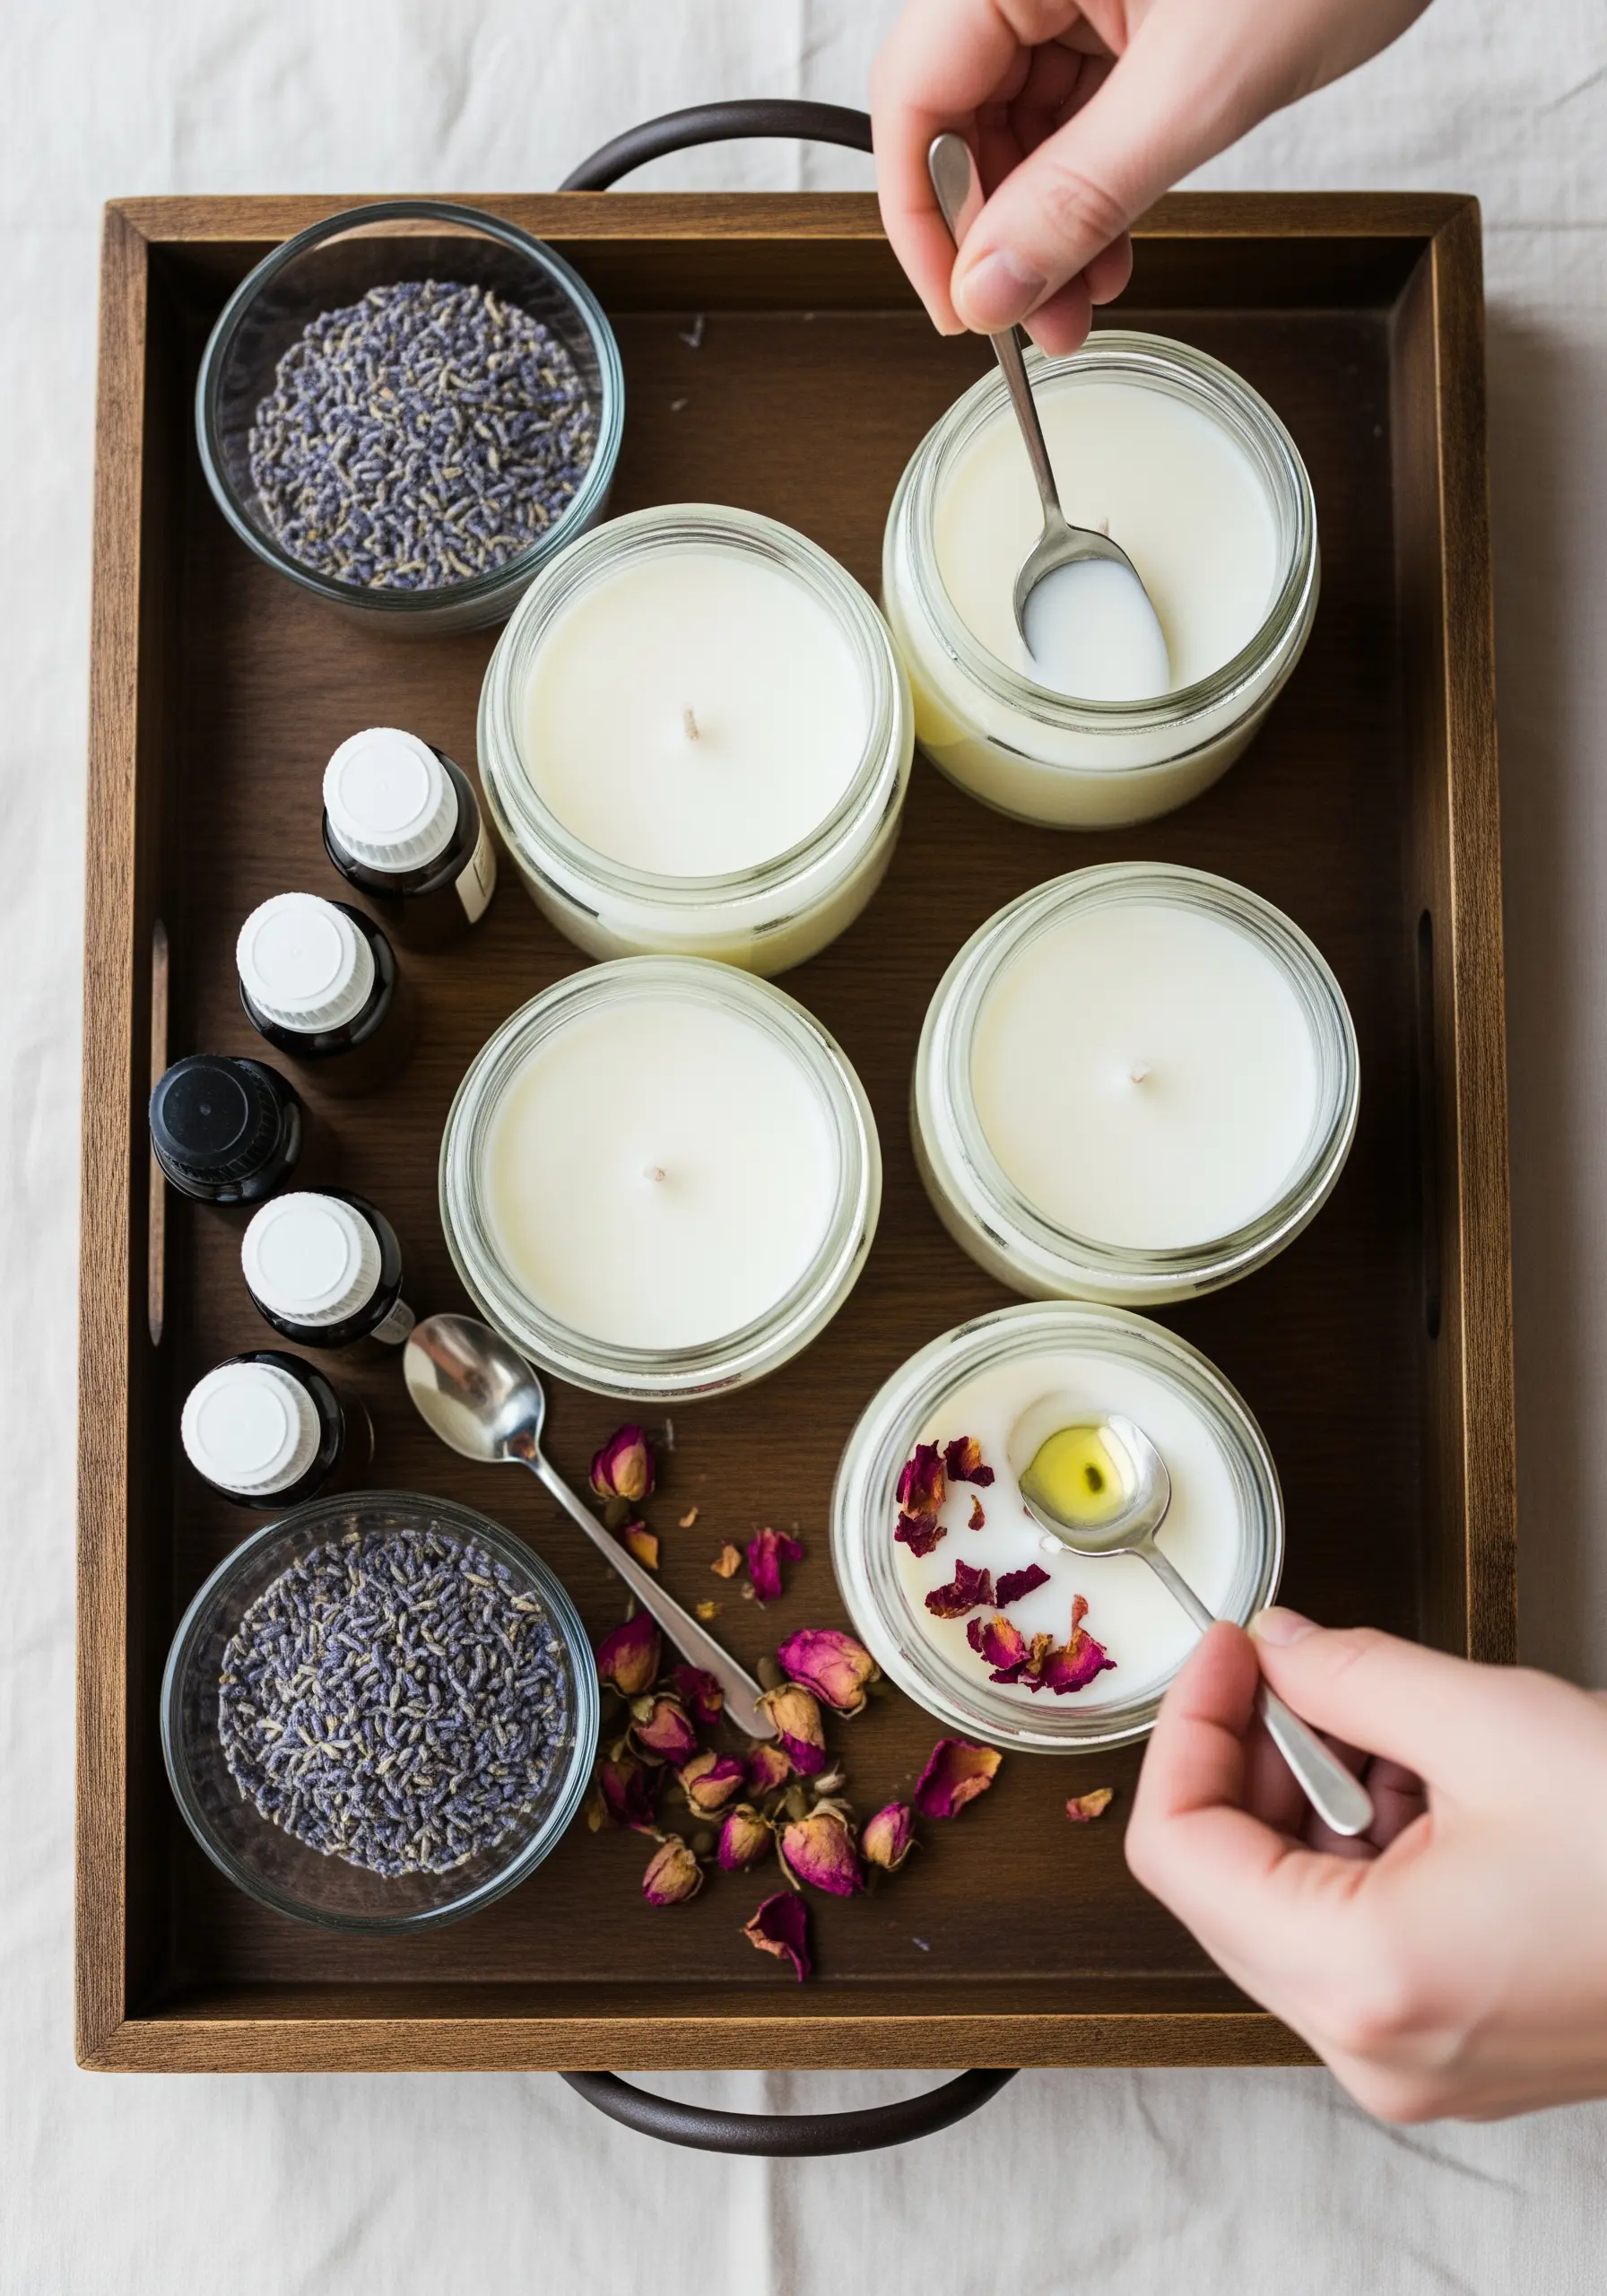
Create a custom ambiance in your bedroom by making your own scented candles with natural soy wax.
Melt the soy wax flakes in a double boiler, stir in your favorite essential oils—like lavender for relaxation or rose for a touch of romance—and pour the mixture into glass jars with a wick centered in the middle.
You can further customize your candles by adding dried flower petals or herbs to the top layer of wax just before it fully sets.
Handmade candles not only smell wonderful but also serve as beautiful, minimalist decor for your nightstand or dresser.
27. Stitch a Celestial Constellation in a Hoop
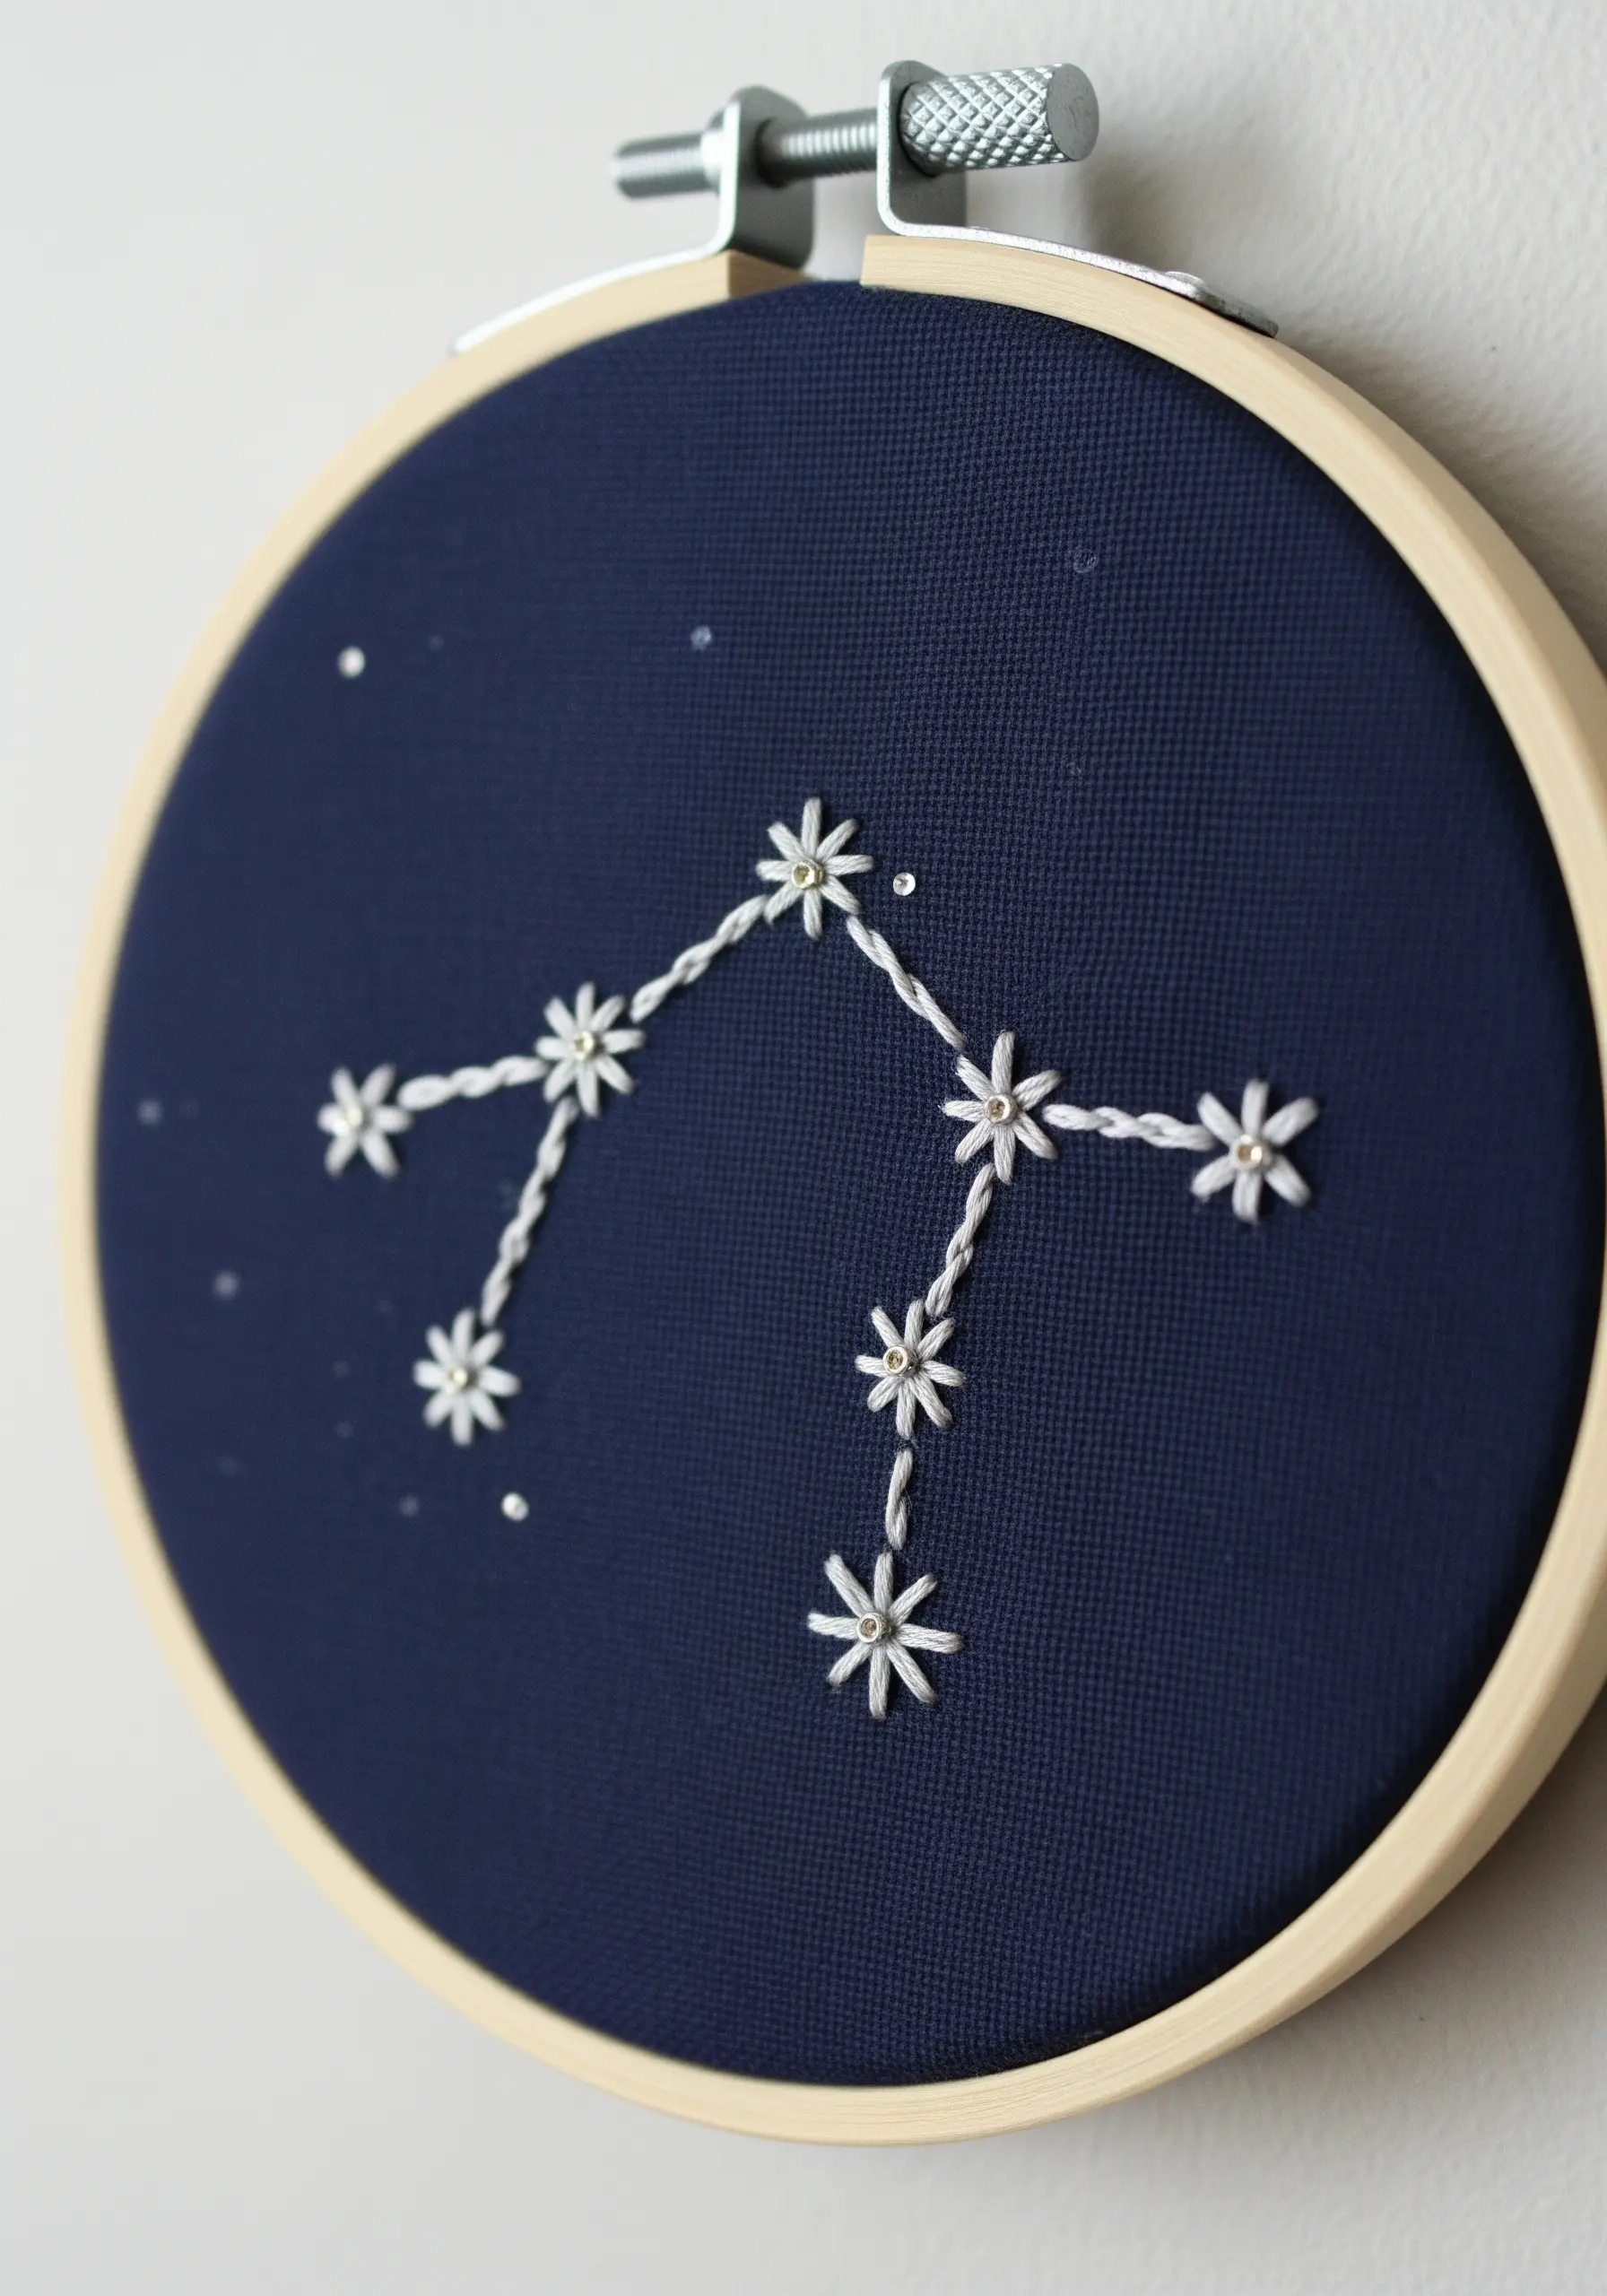
Capture a piece of the night sky by embroidering your favorite zodiac constellation onto dark fabric.
Use a navy or black cotton canvas to create a high-contrast background that makes your stitches pop.
For the stars, use a simple detached chain stitch or a small French knot, and connect them with a clean backstitch or whipped backstitch for smooth lines.
Incorporate a few metallic threads or tiny silver seed beads to mimic the twinkle of real stars, turning a simple hoop into a piece of celestial micro-embroidery.
28. Create a Cozy Knit Pouf for Extra Seating
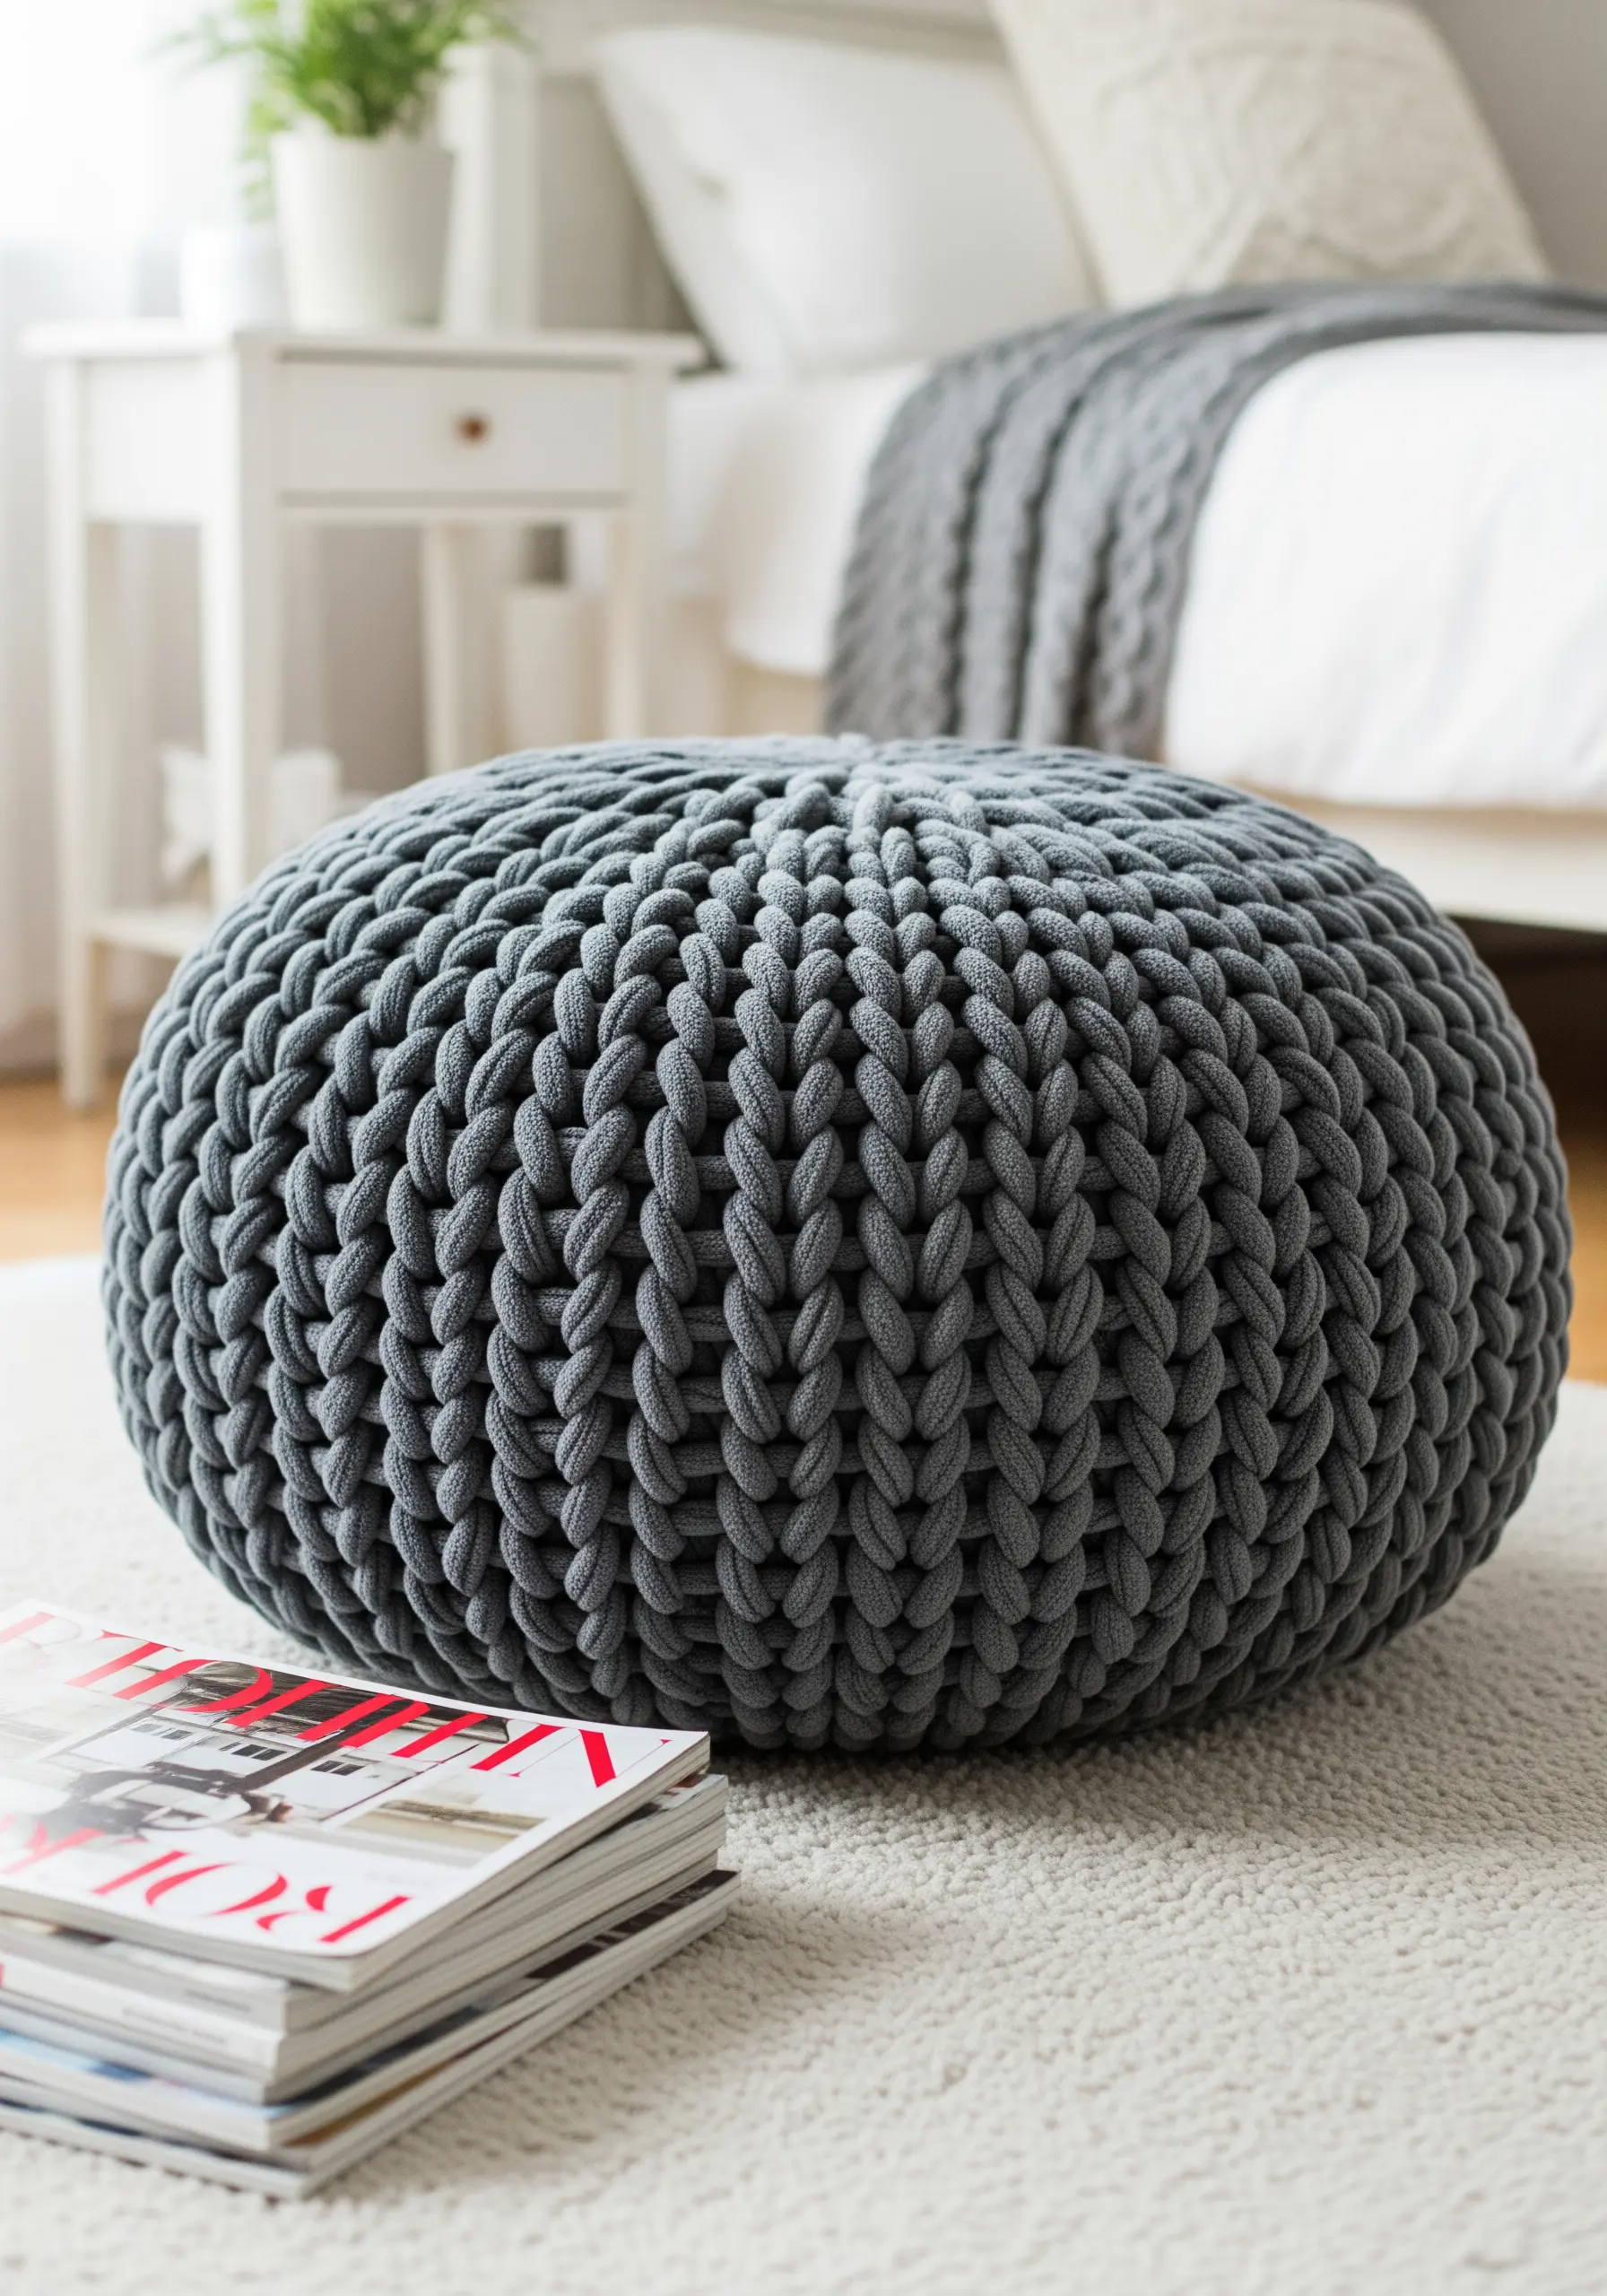
Knit a stylish and functional floor pouf using a thick, durable t-shirt or cotton cord yarn.
By working in the round on large circular needles, you can create a seamless, sturdy fabric with a visually appealing knit texture.
Stuff the finished piece firmly with a pouf insert or a combination of foam and fiberfill to ensure it holds its shape as a comfortable seat or footrest.
This project adds a versatile, soft-structured element to your bedroom that is both practical and beautifully handmade.
29. Curate a Gallery Wall of Your Handmade Art
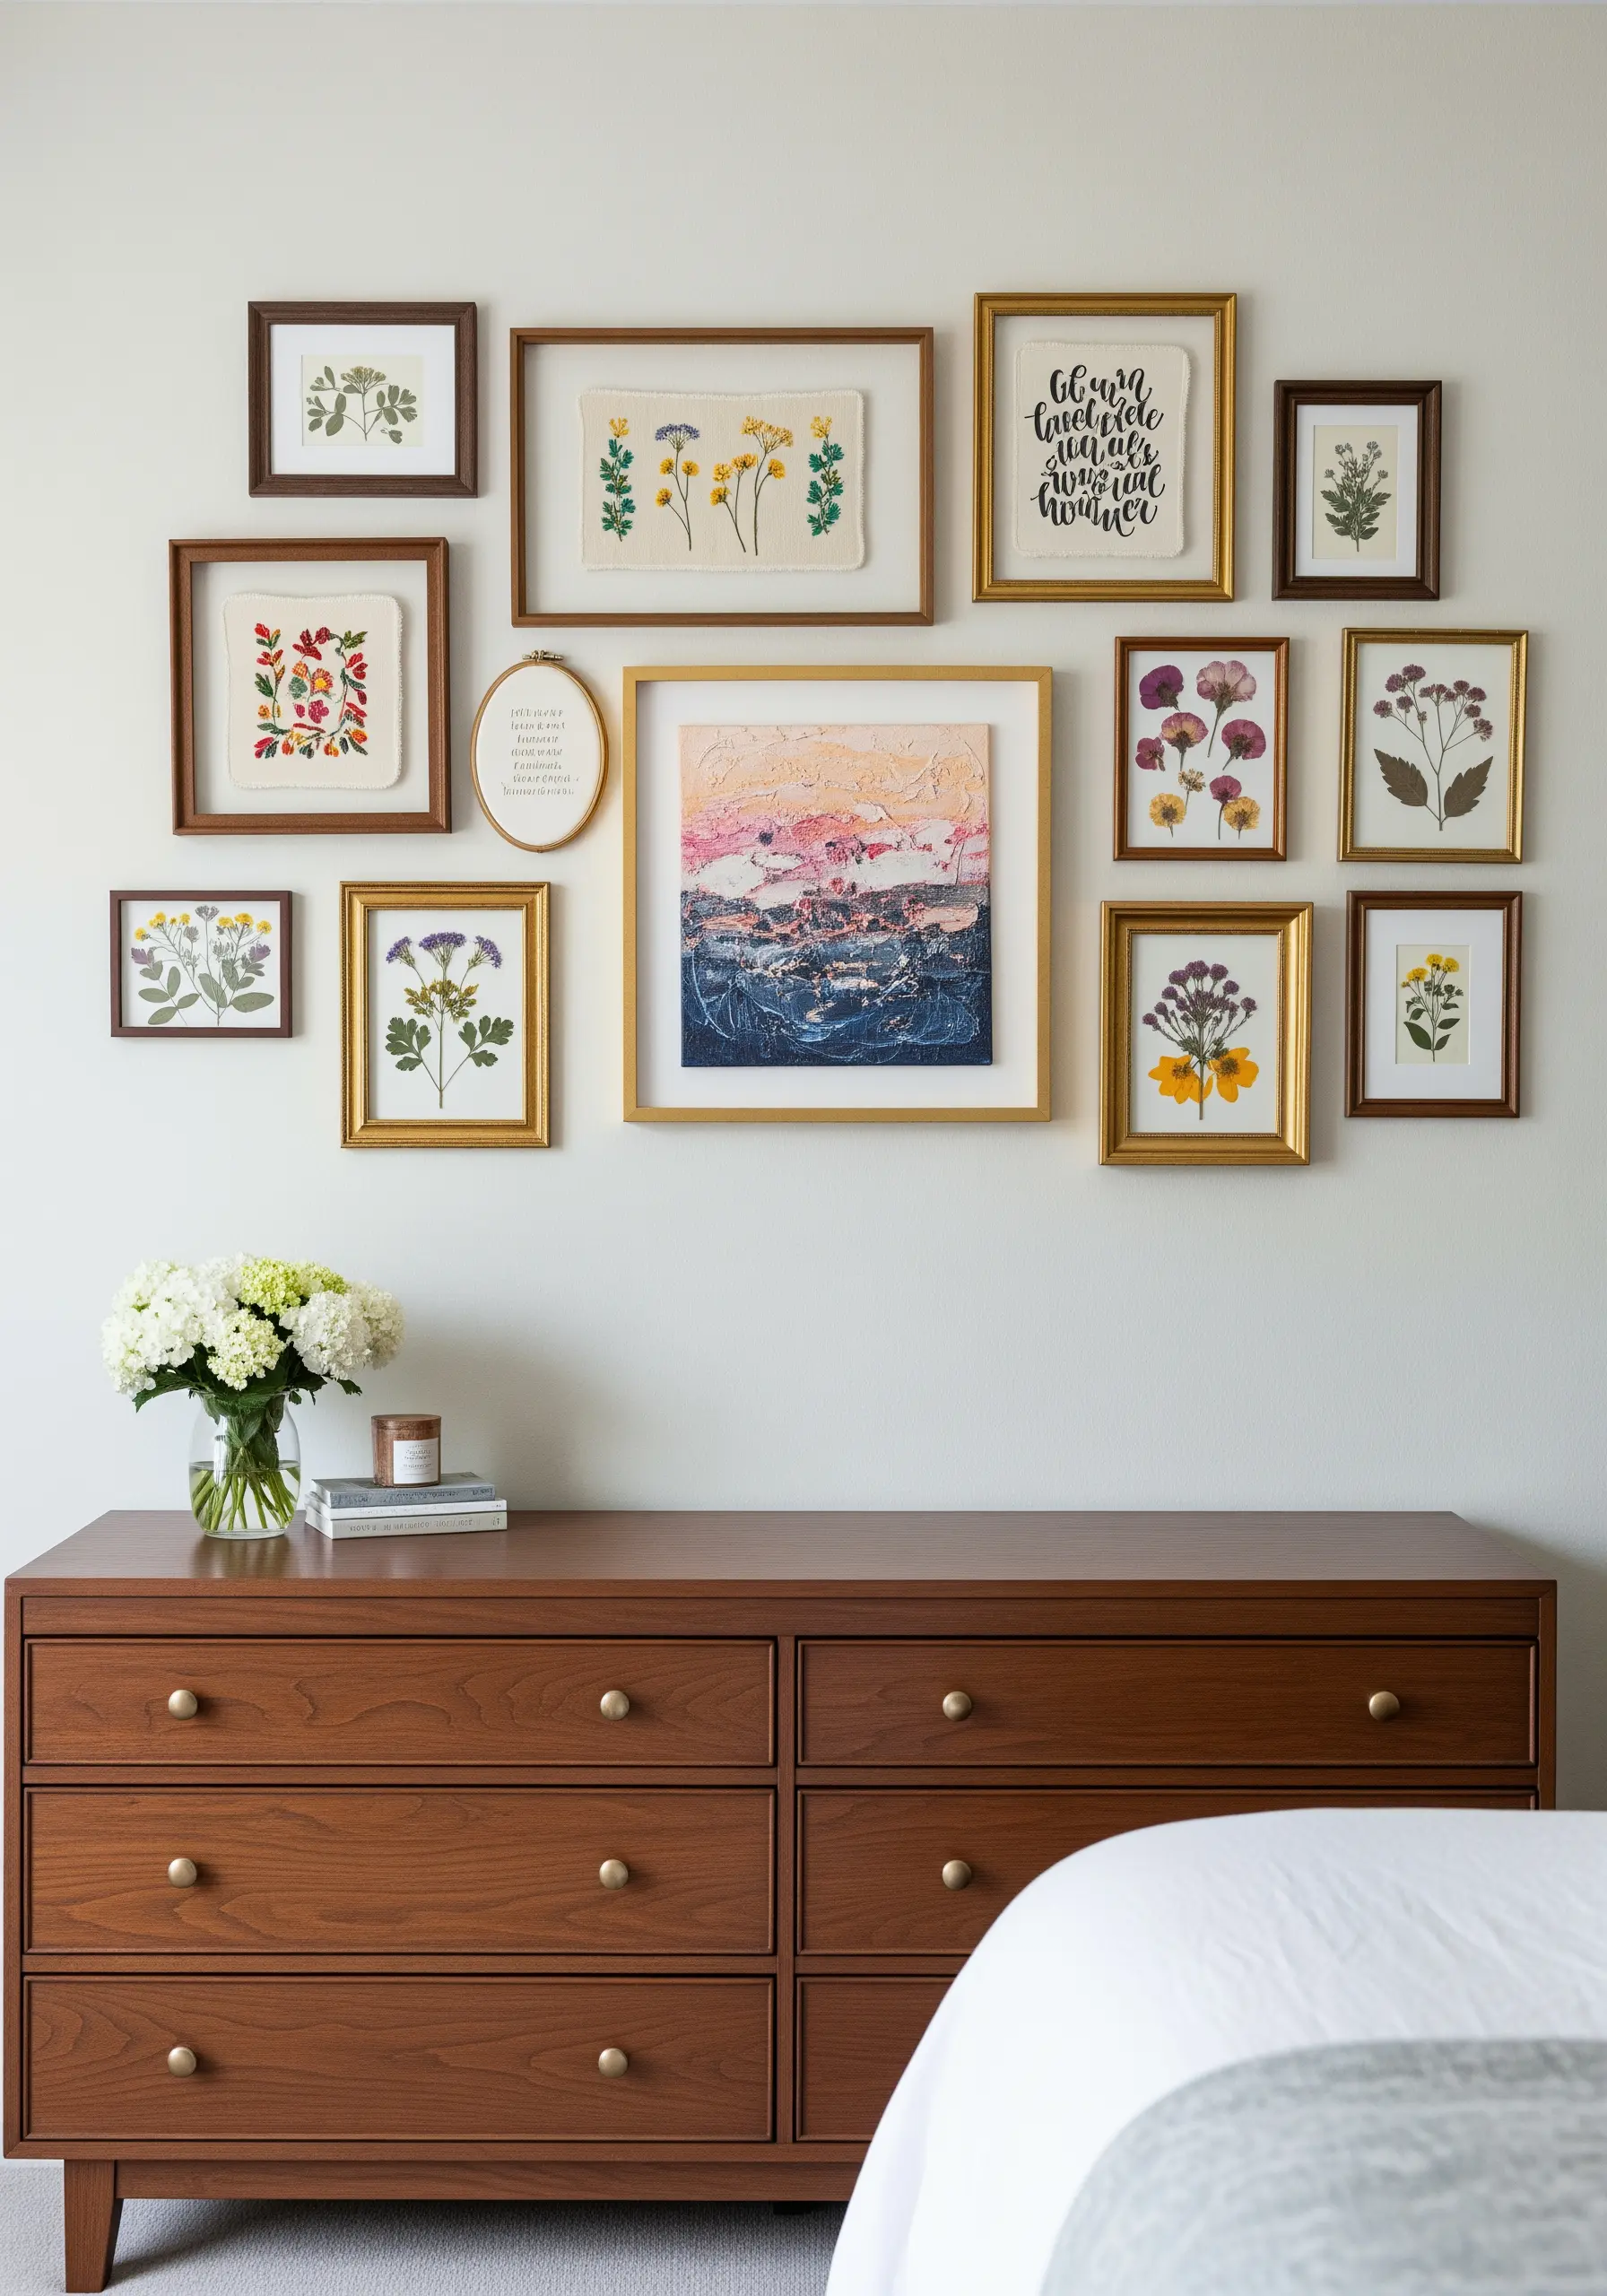
Celebrate your creativity by dedicating a wall to a curated collection of your own handmade pieces.
Combine different mediums and framing styles for a dynamic and personal display: mix your framed embroidery with pressed botanicals, small weavings, and minimalist quote art.
To create a cohesive look, stick to a unified color palette or a common theme, like nature or abstraction.
Arranging your DIY framed embroidery art in a gallery wall turns your bedroom into a personal exhibition space that tells your unique creative story.


