

Perhaps you’ve found that your embroidery, while beautiful, doesn’t always capture the feeling you intended. You have the skills, but you want to create pieces that feel less like a project and more like a quiet, intentional part of your home.
Let’s shift the focus from simply following a pattern to understanding the language of thread and fabric. Serenity in embroidery isn’t about using fewer stitches; it’s about choosing the right ones. It’s in the way a single strand of silk catches the light, the soft gradient of a leaf, or the rich texture of a French knot against raw linen.
Here, you won’t find complex instructions. Instead, you’ll discover techniques and subtle adjustments that will immediately elevate your work. These ideas are designed to help you create pieces that are not only seen, but felt—bringing a sense of organic calm and polished artistry to every stitch.
1. Create Atmospheric Depth in a Forest Tapestry

To achieve a sense of misty distance in a landscape, vary the weight of your thread.
Use a full six strands for the foreground trees and moss to give them texture and presence, then gradually reduce to two or three strands for the mid-ground, and finally a single strand for the farthest trees.
This simple adjustment mimics atmospheric perspective, making your two-dimensional scene feel immersive and vast without changing your stitch style.
Consider making a large-scale embroidery tapestry to transform an entire wall into a serene focal point.
2. Sculpt Tactile Stone Compositions
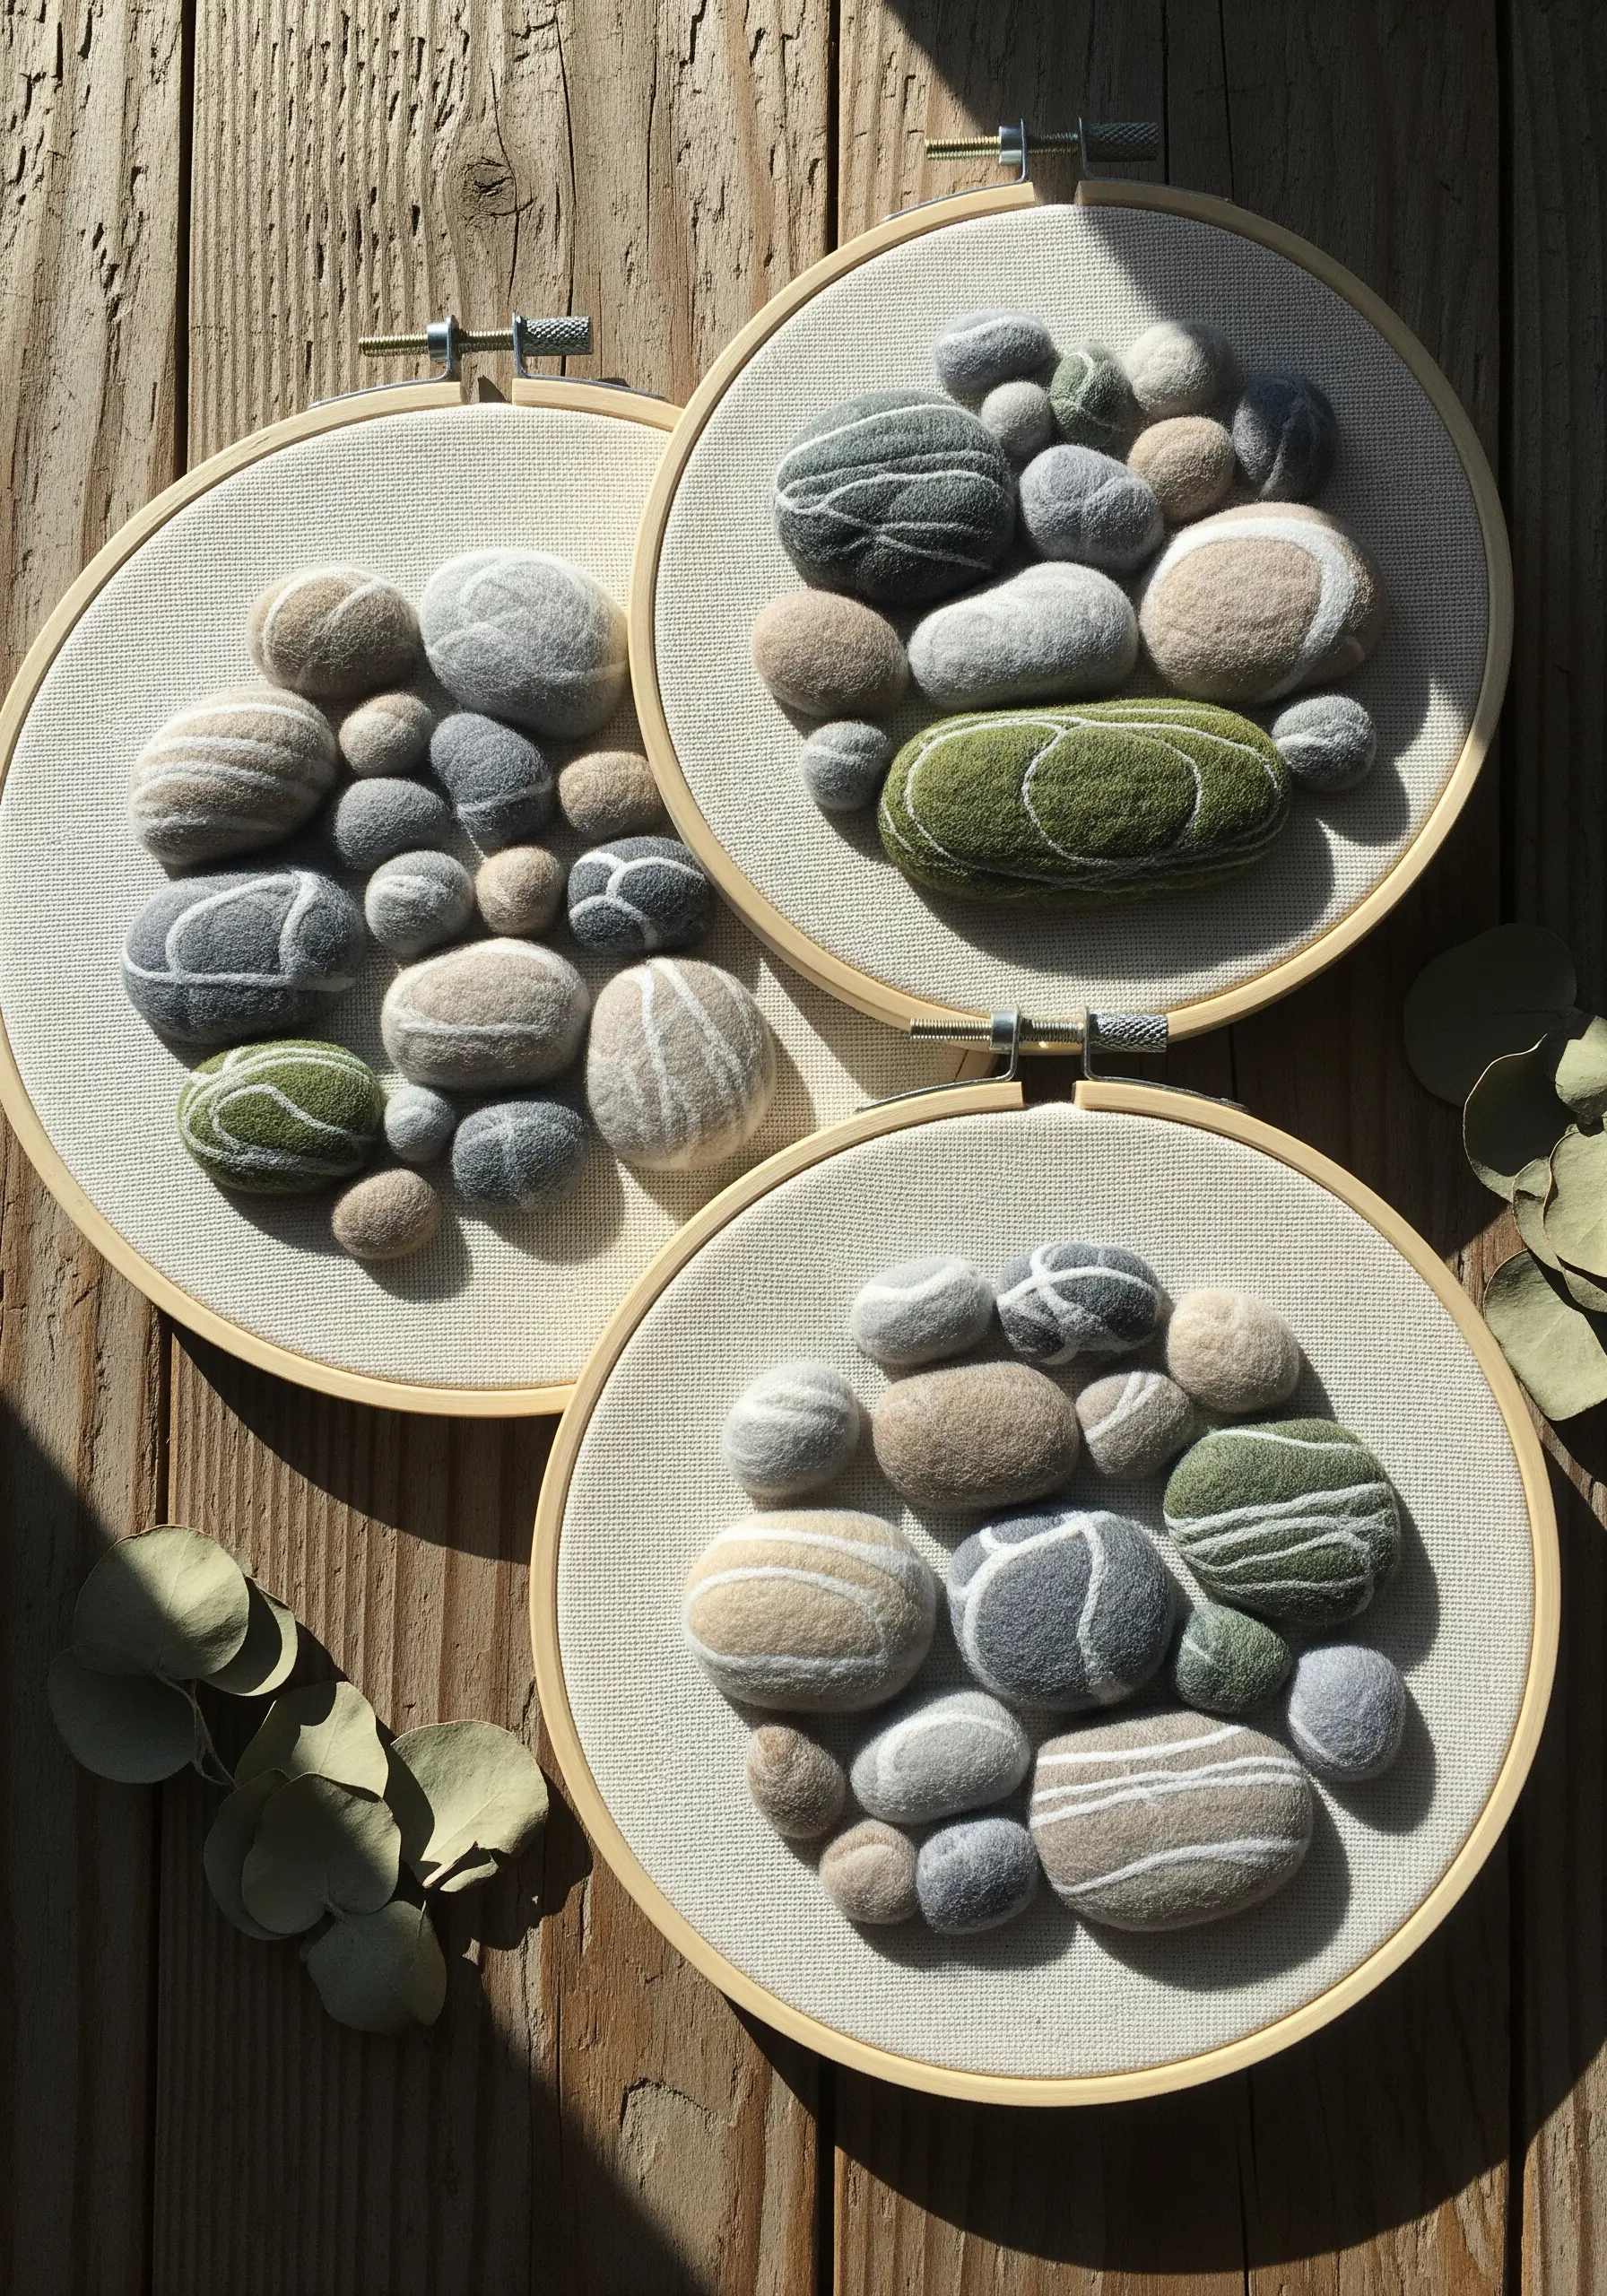
Move beyond thread and explore needle-felted wool to create three-dimensional, organic shapes.
First, form soft stone shapes by felting wool roving, then attach them securely to a taut linen background.
Use a single strand of embroidery floss in a contrasting color to add delicate linear details with a simple running stitch or backstitch.
This technique turns your hoop into a sculptural, high-texture fabric collage that invites touch.
3. Achieve Botanical Precision with Ferns
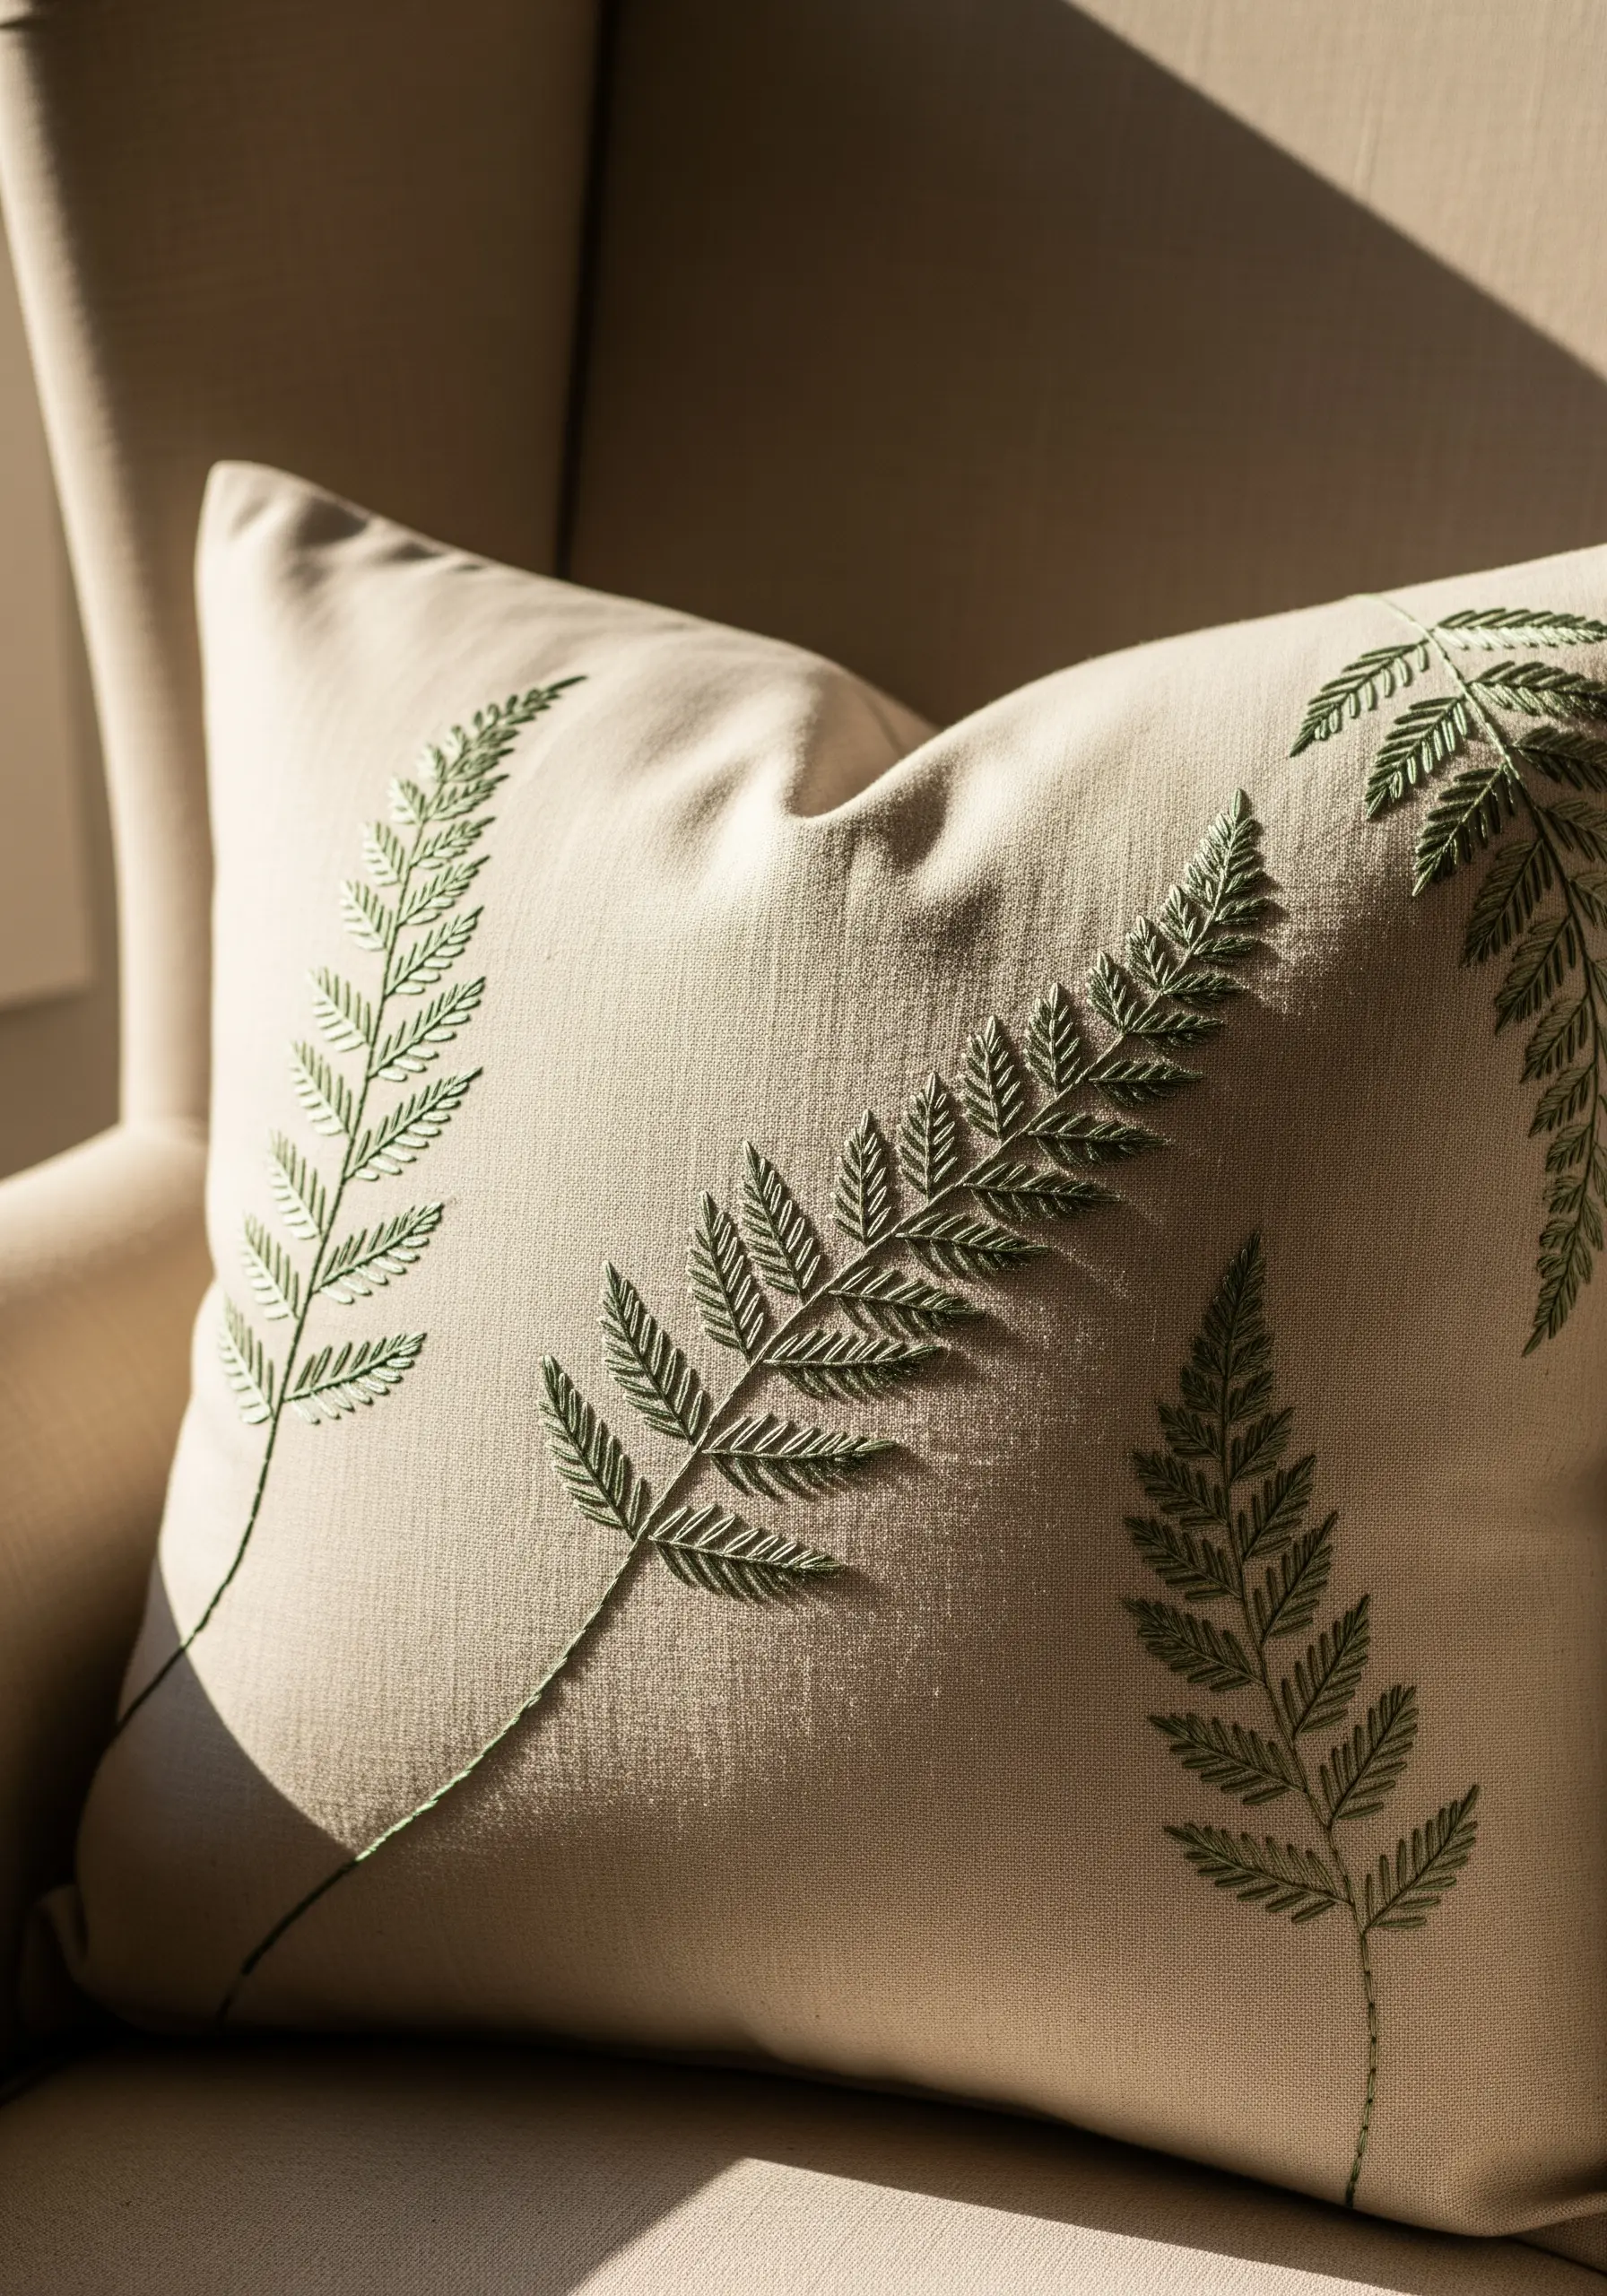
For hyper-realistic foliage, the fishbone stitch is your greatest tool.
It creates the central vein and angled leaves in a single, fluid motion, ensuring perfect symmetry.
Use a rayon or silk floss for a subtle sheen that catches the light, mimicking the natural gloss of a healthy fern.
Pairing this precise stitch with a quality thread elevates a simple motif into a piece of refined botanical art, perfect for fern and foliage stitch variations.
4. Cultivate a Wildflower Meadow on Linen
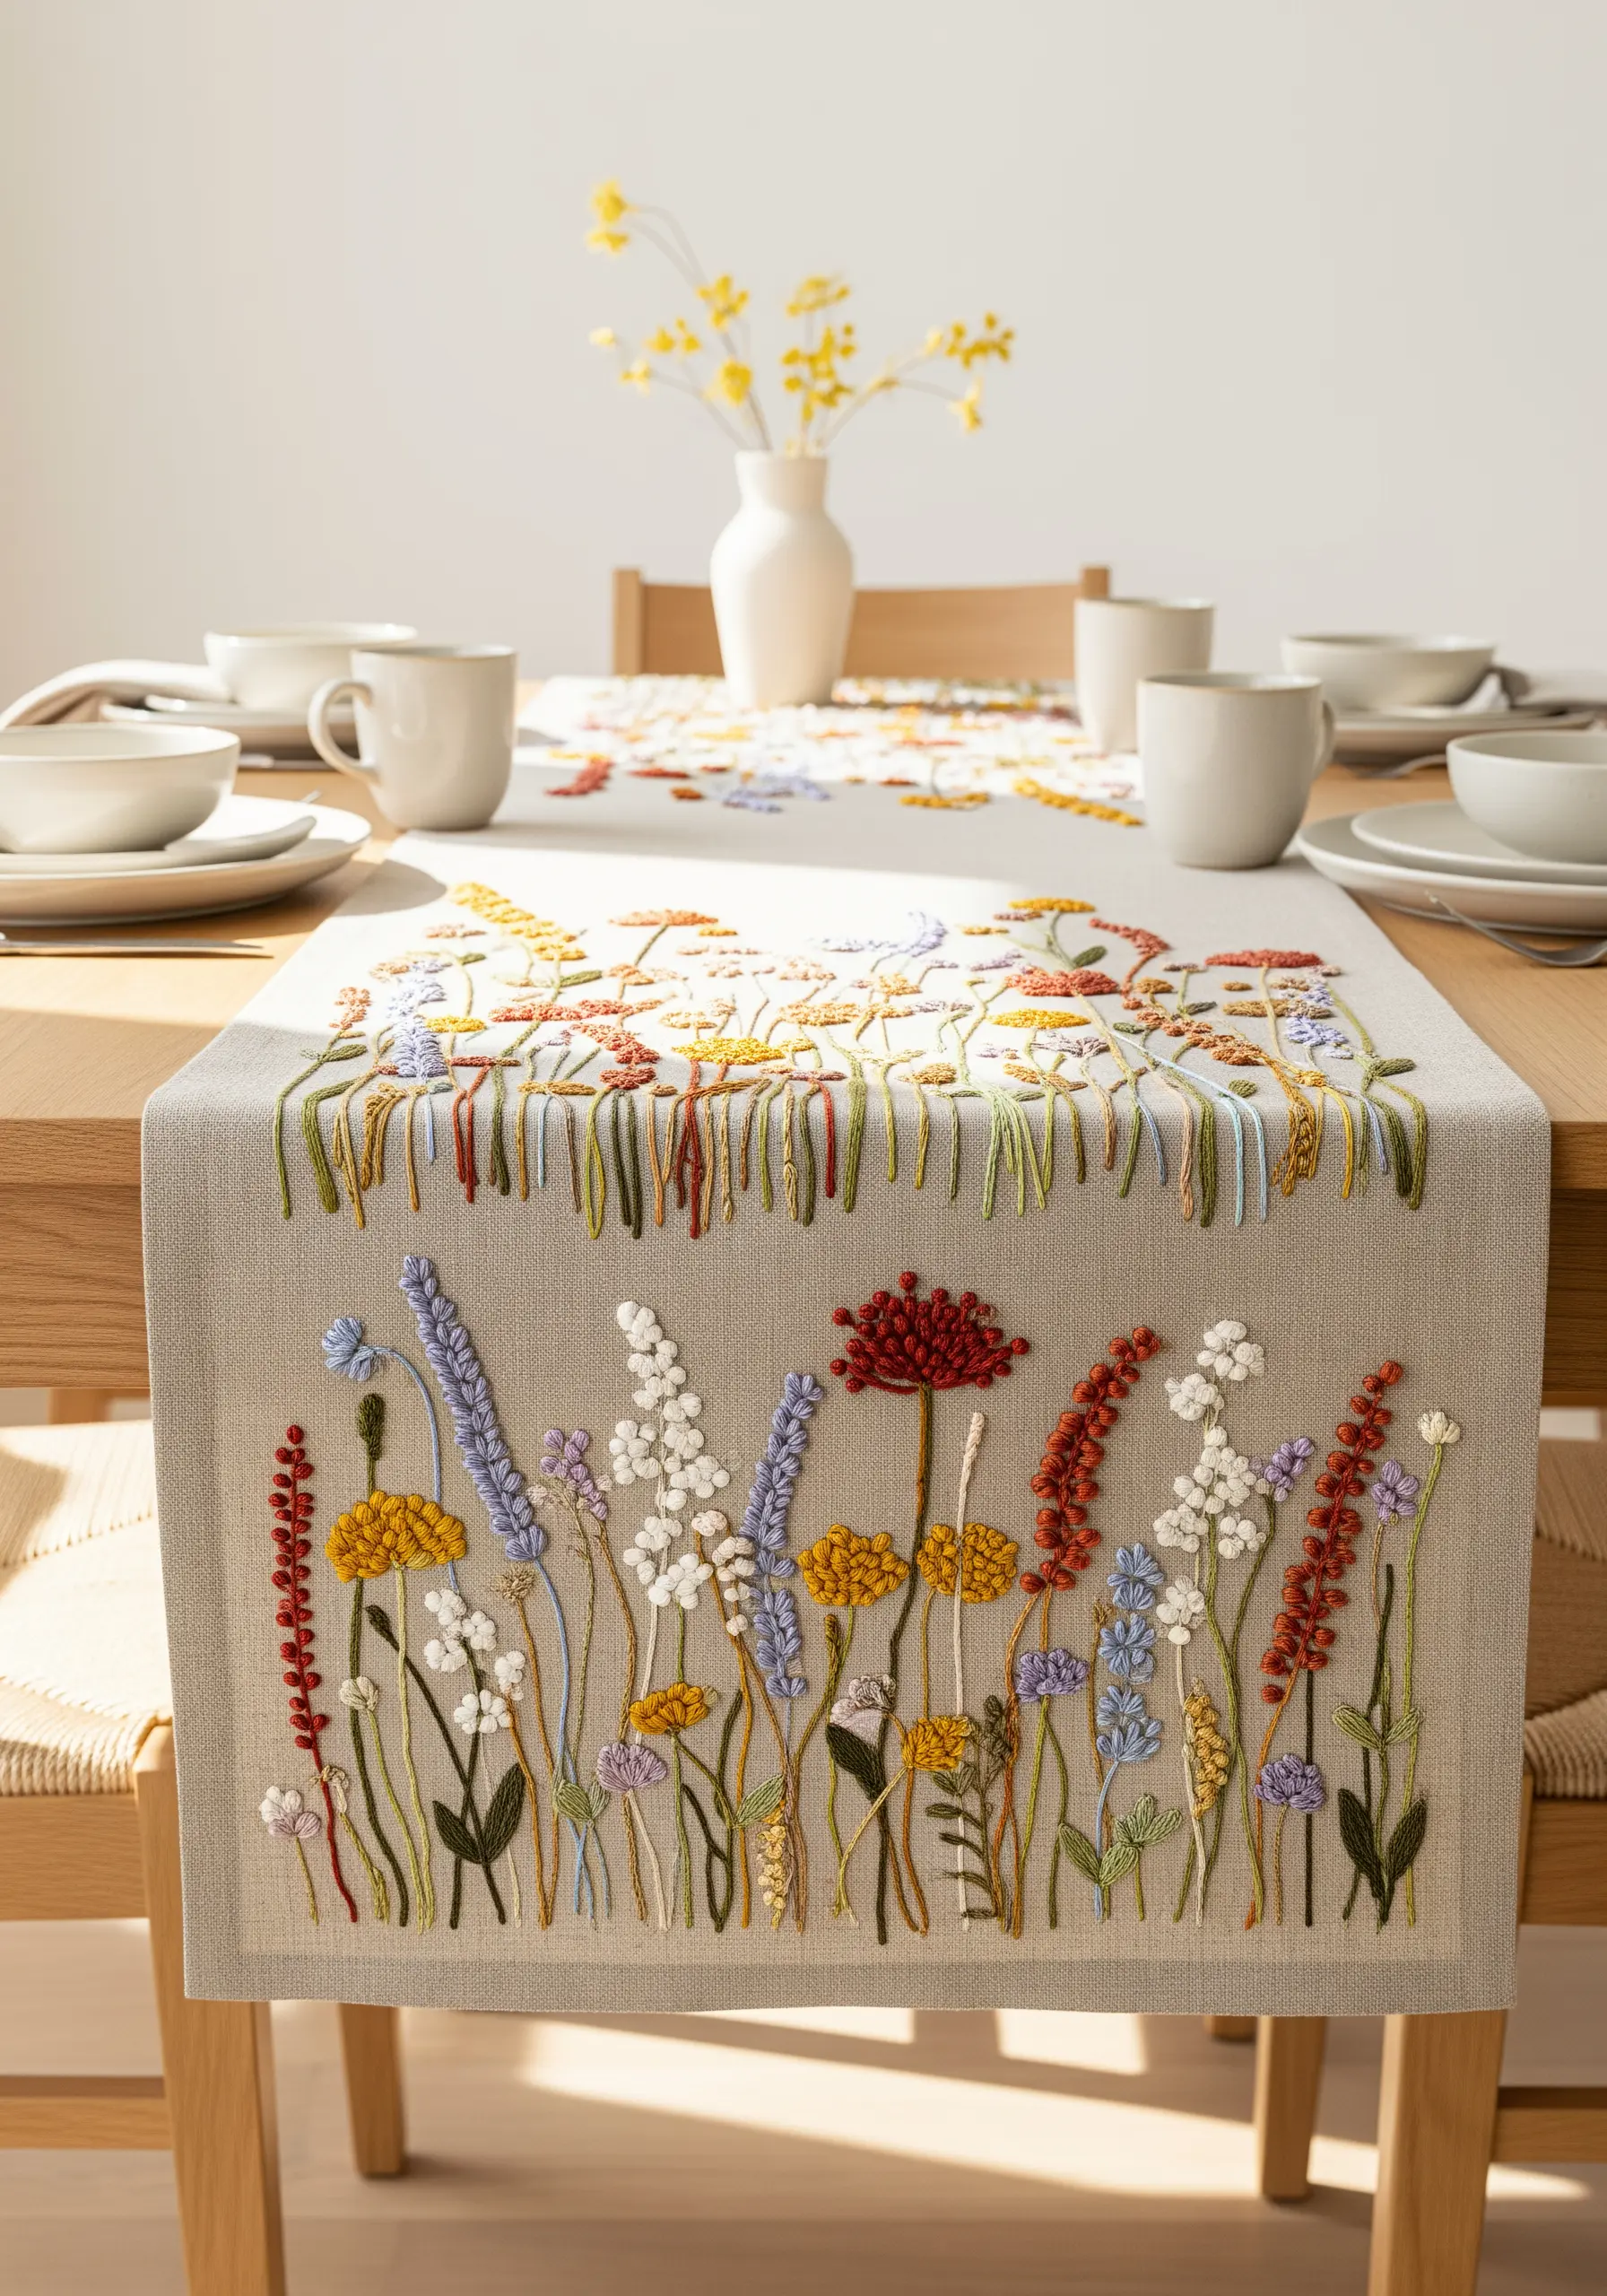
Create the illusion of a spontaneous wildflower field by varying your stitch heights and textures.
Use tall, delicate straight stitches for grasses, dense French knots for clustered blooms, and bullion knots for elongated buds like lavender.
Group your colors in organic drifts rather than scattering them evenly.
This thoughtful composition on a hand-stitched table runner makes the design feel alive and natural, not rigidly patterned.
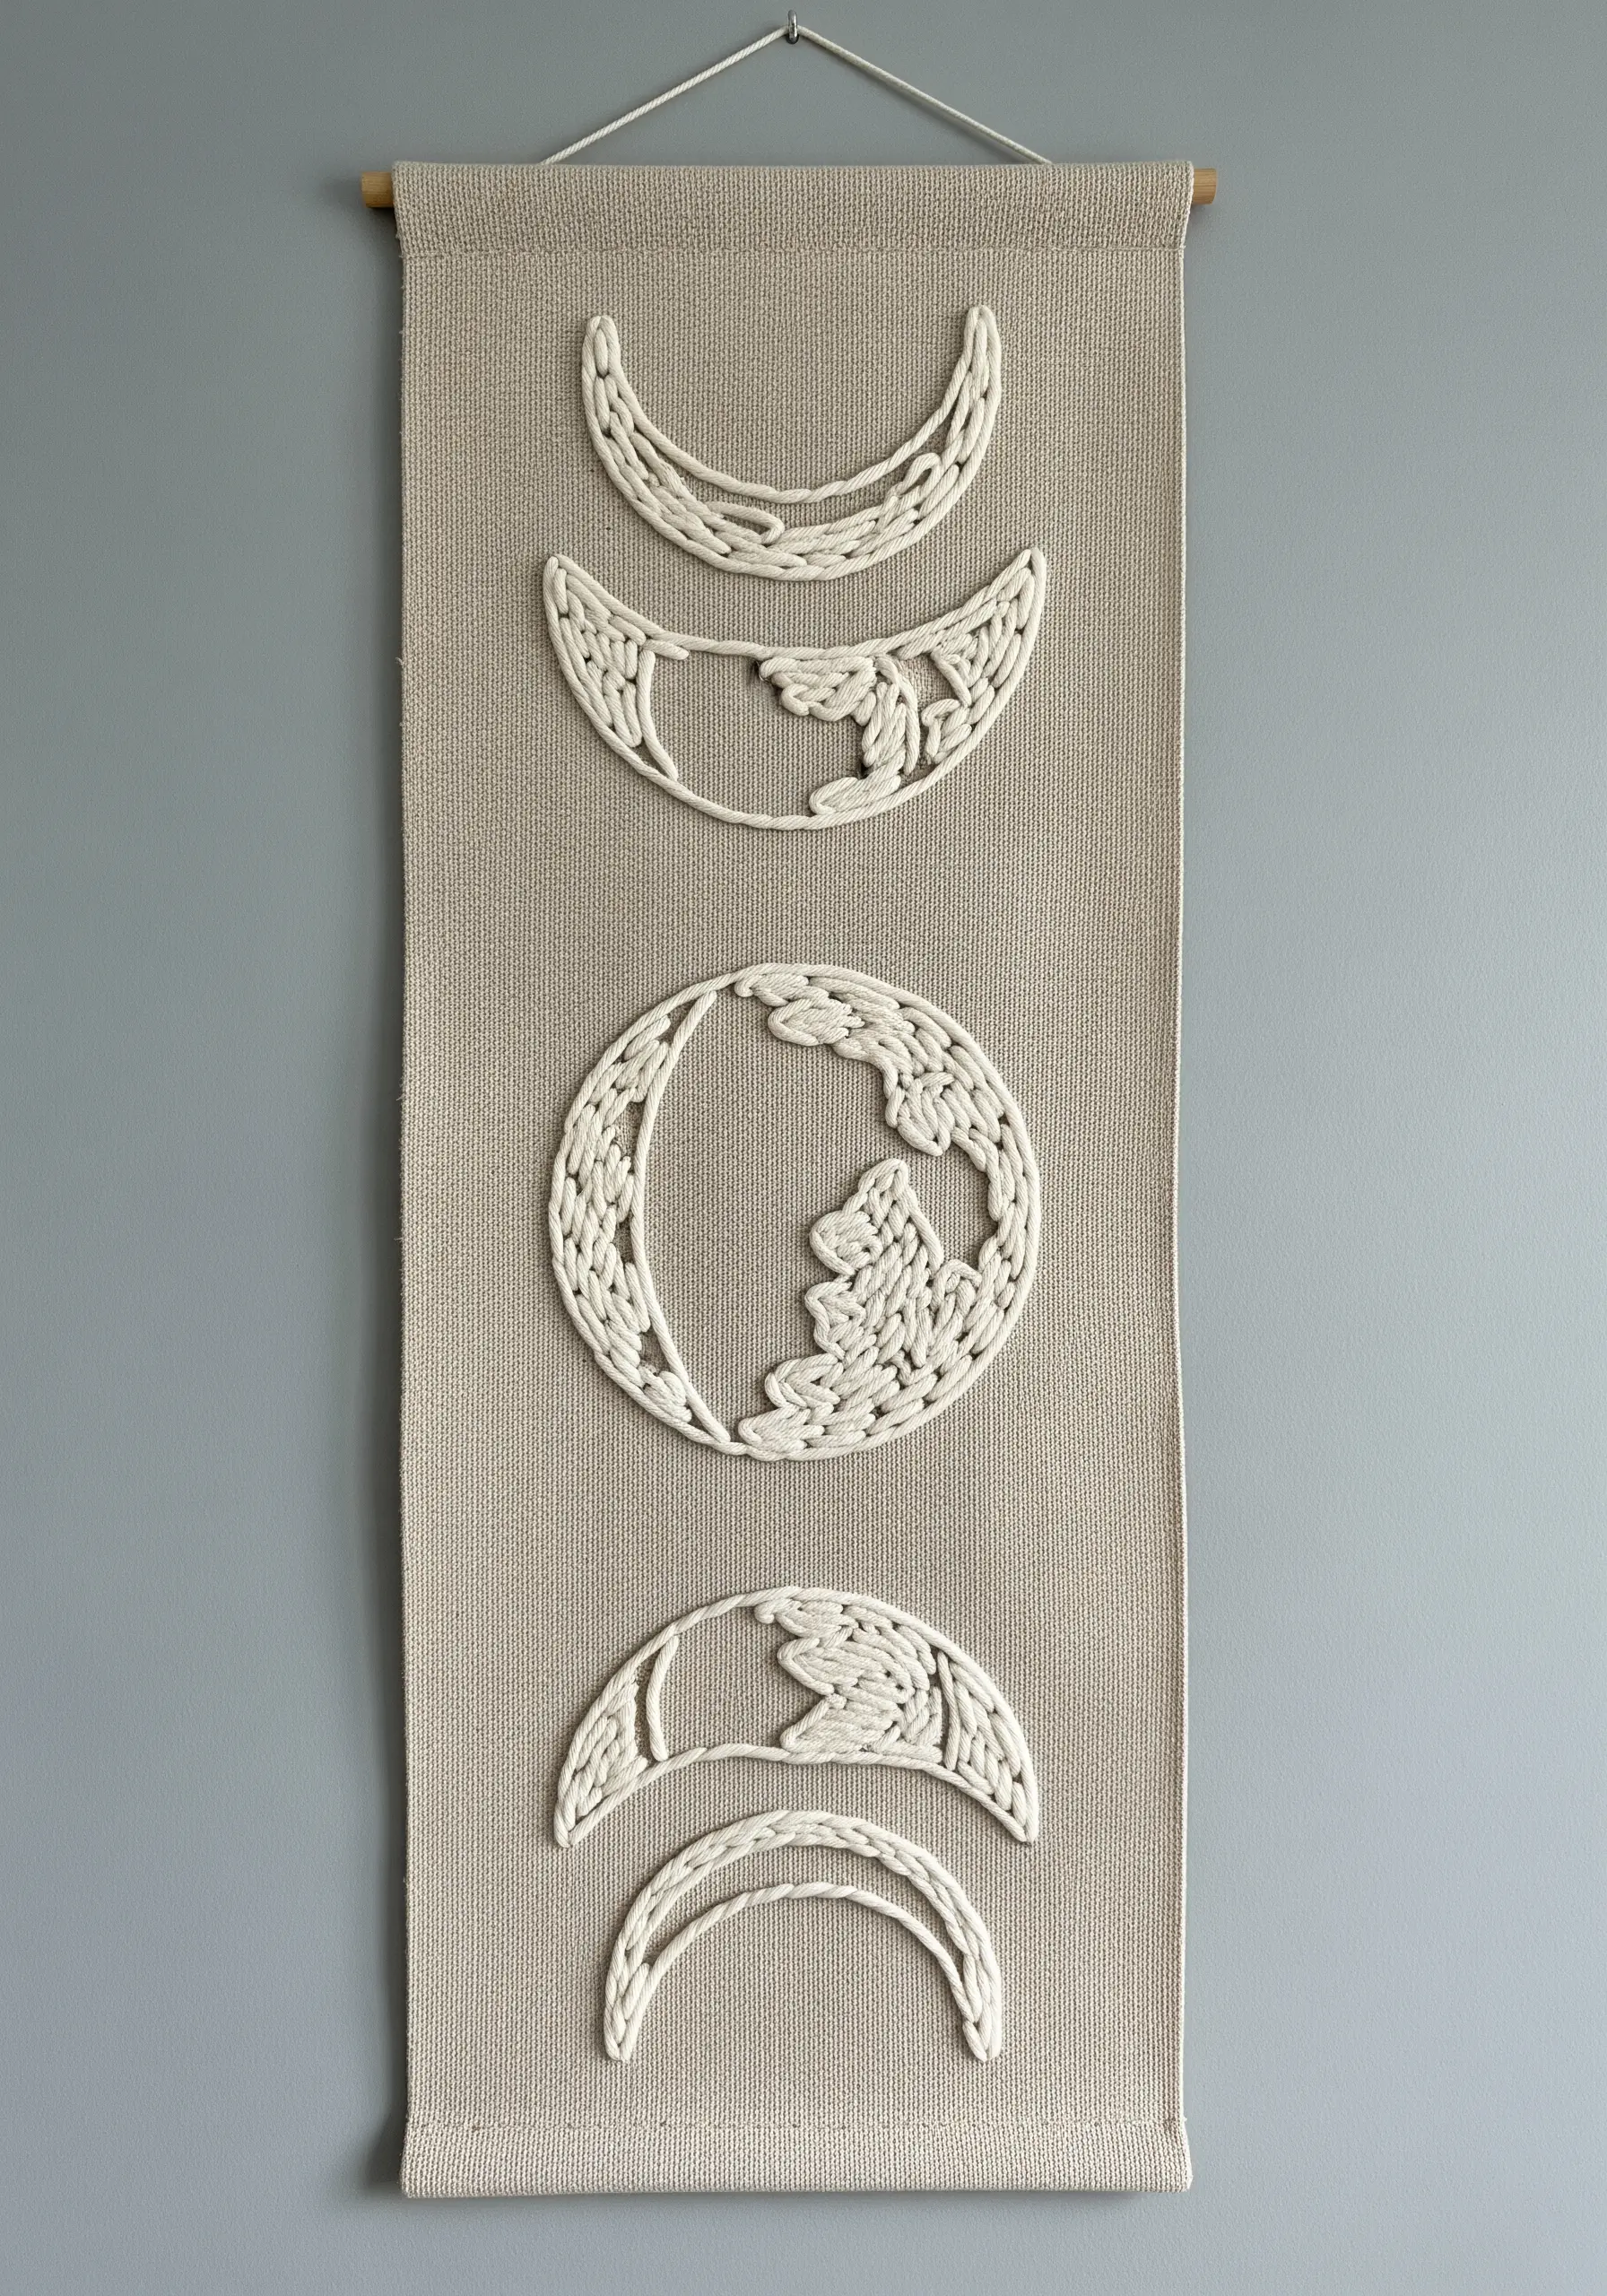
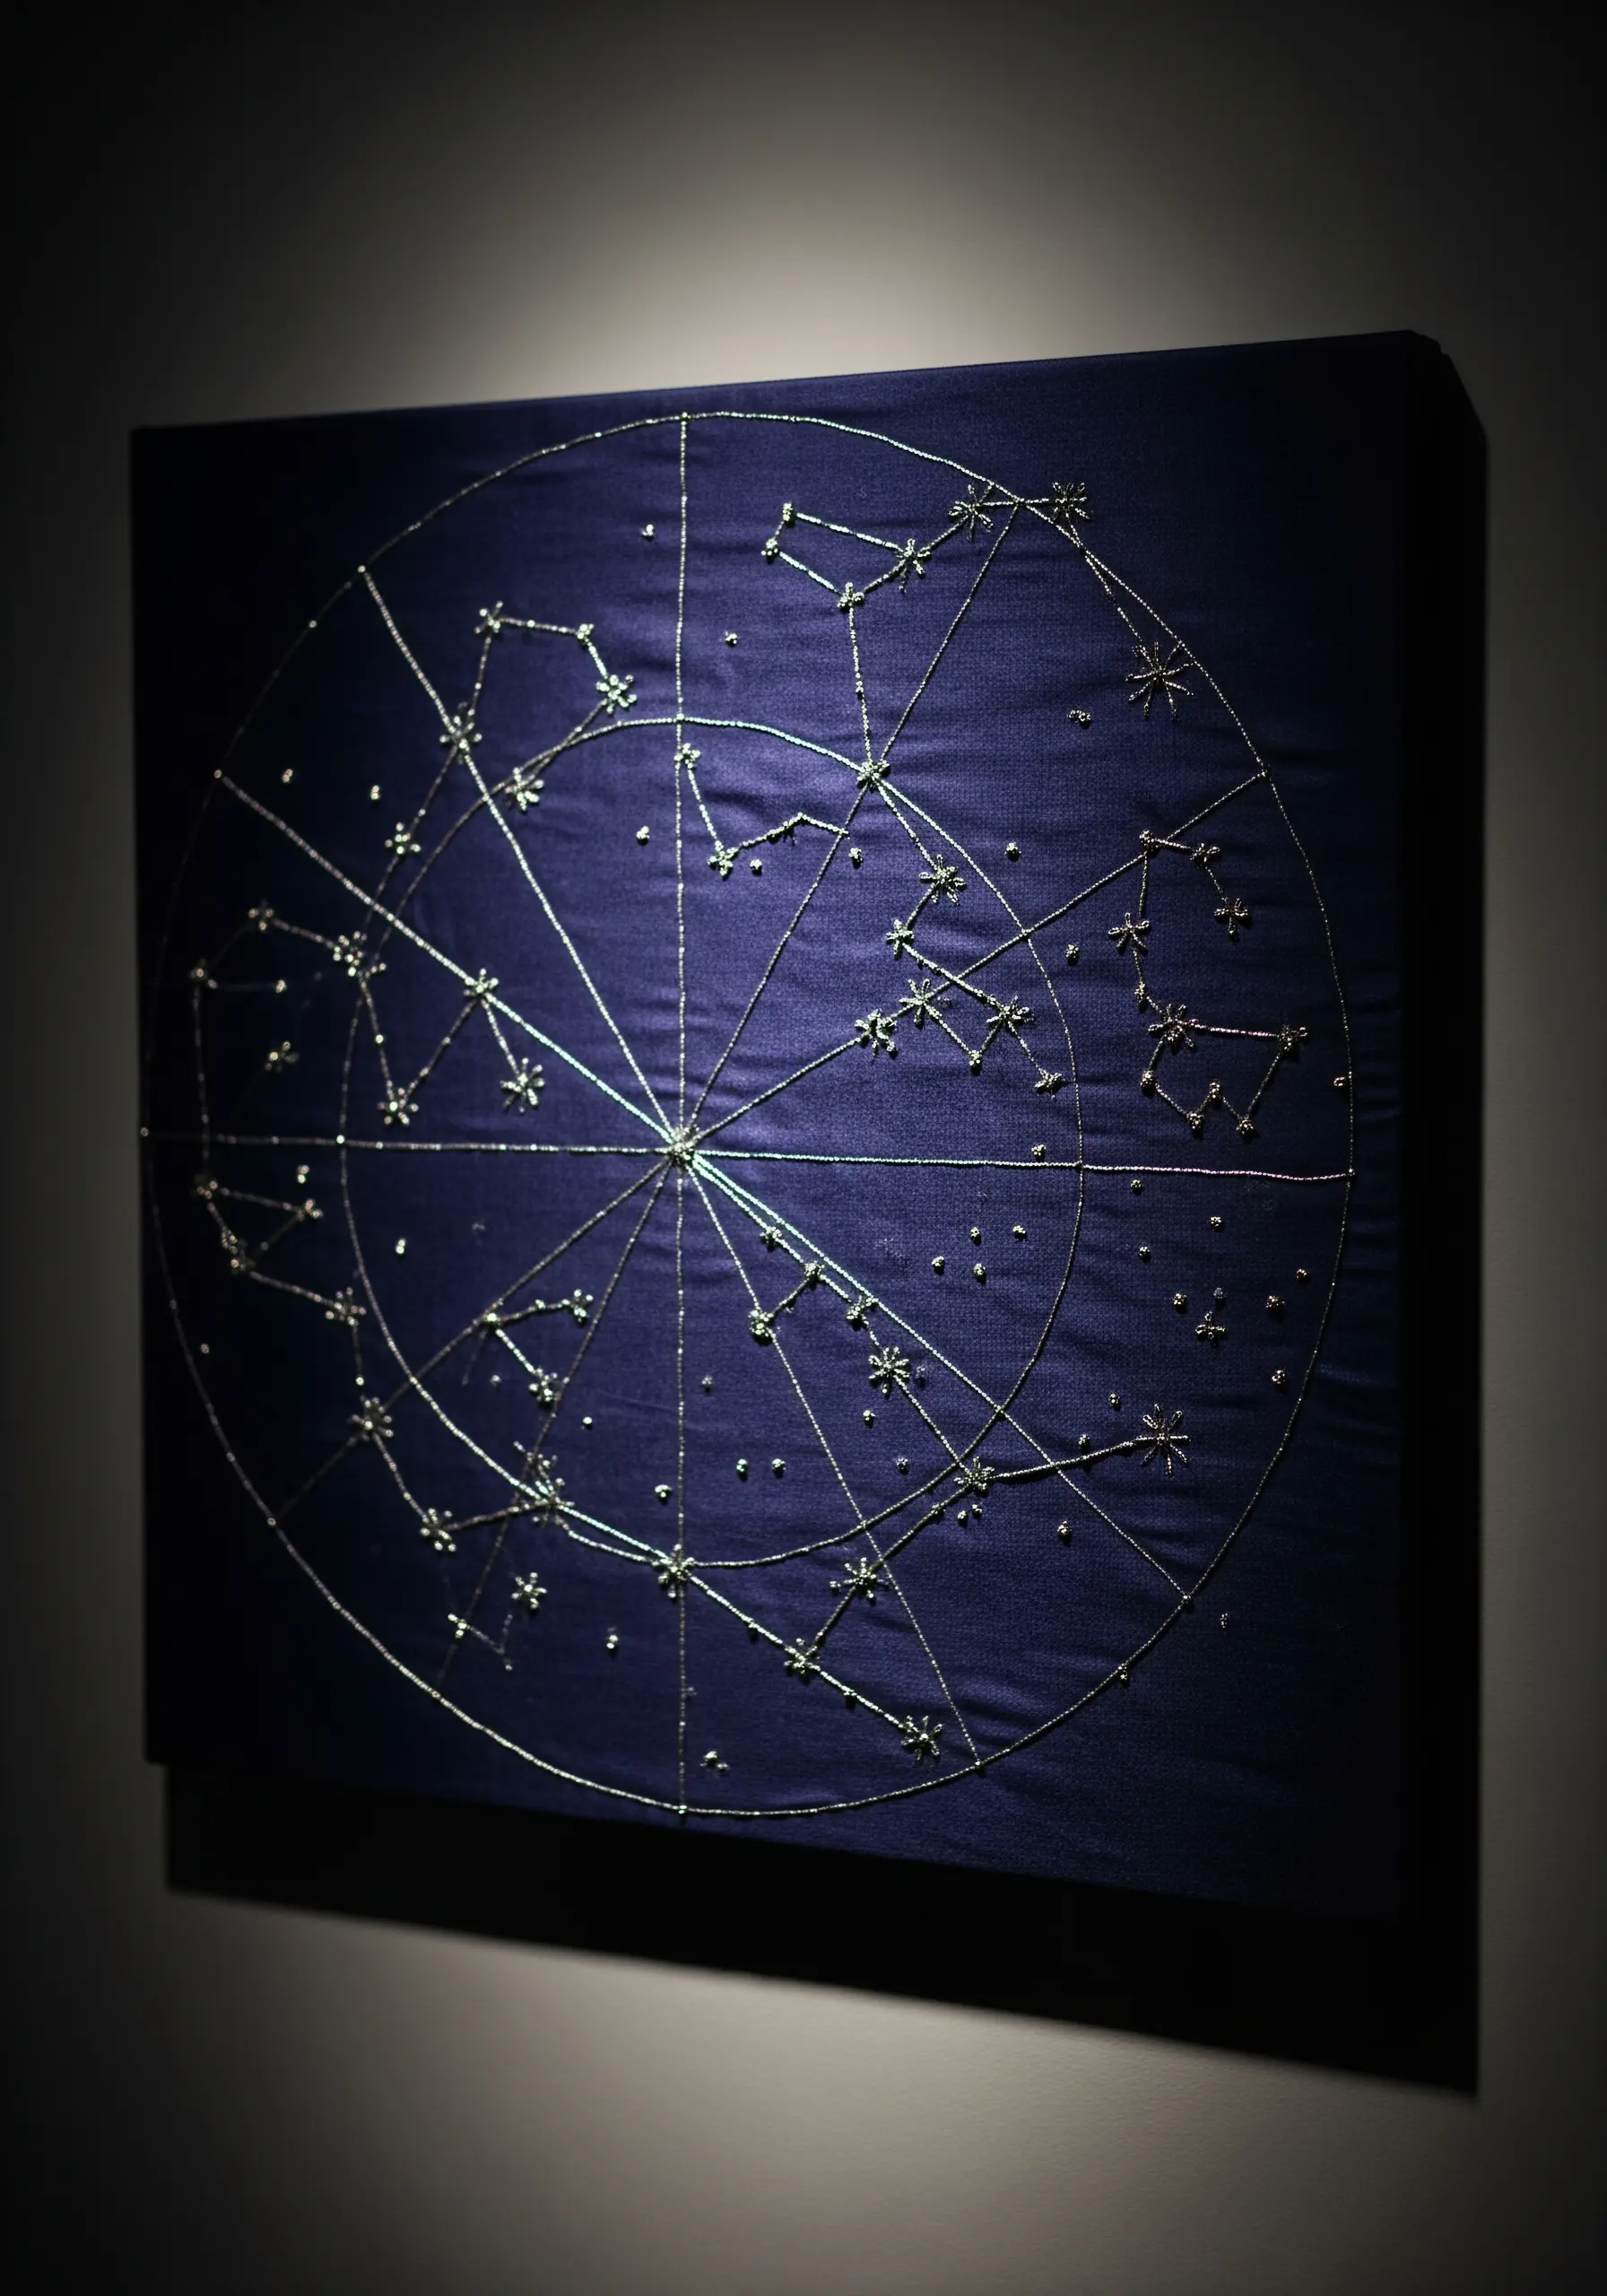
5. Illuminate a Celestial Night Garden
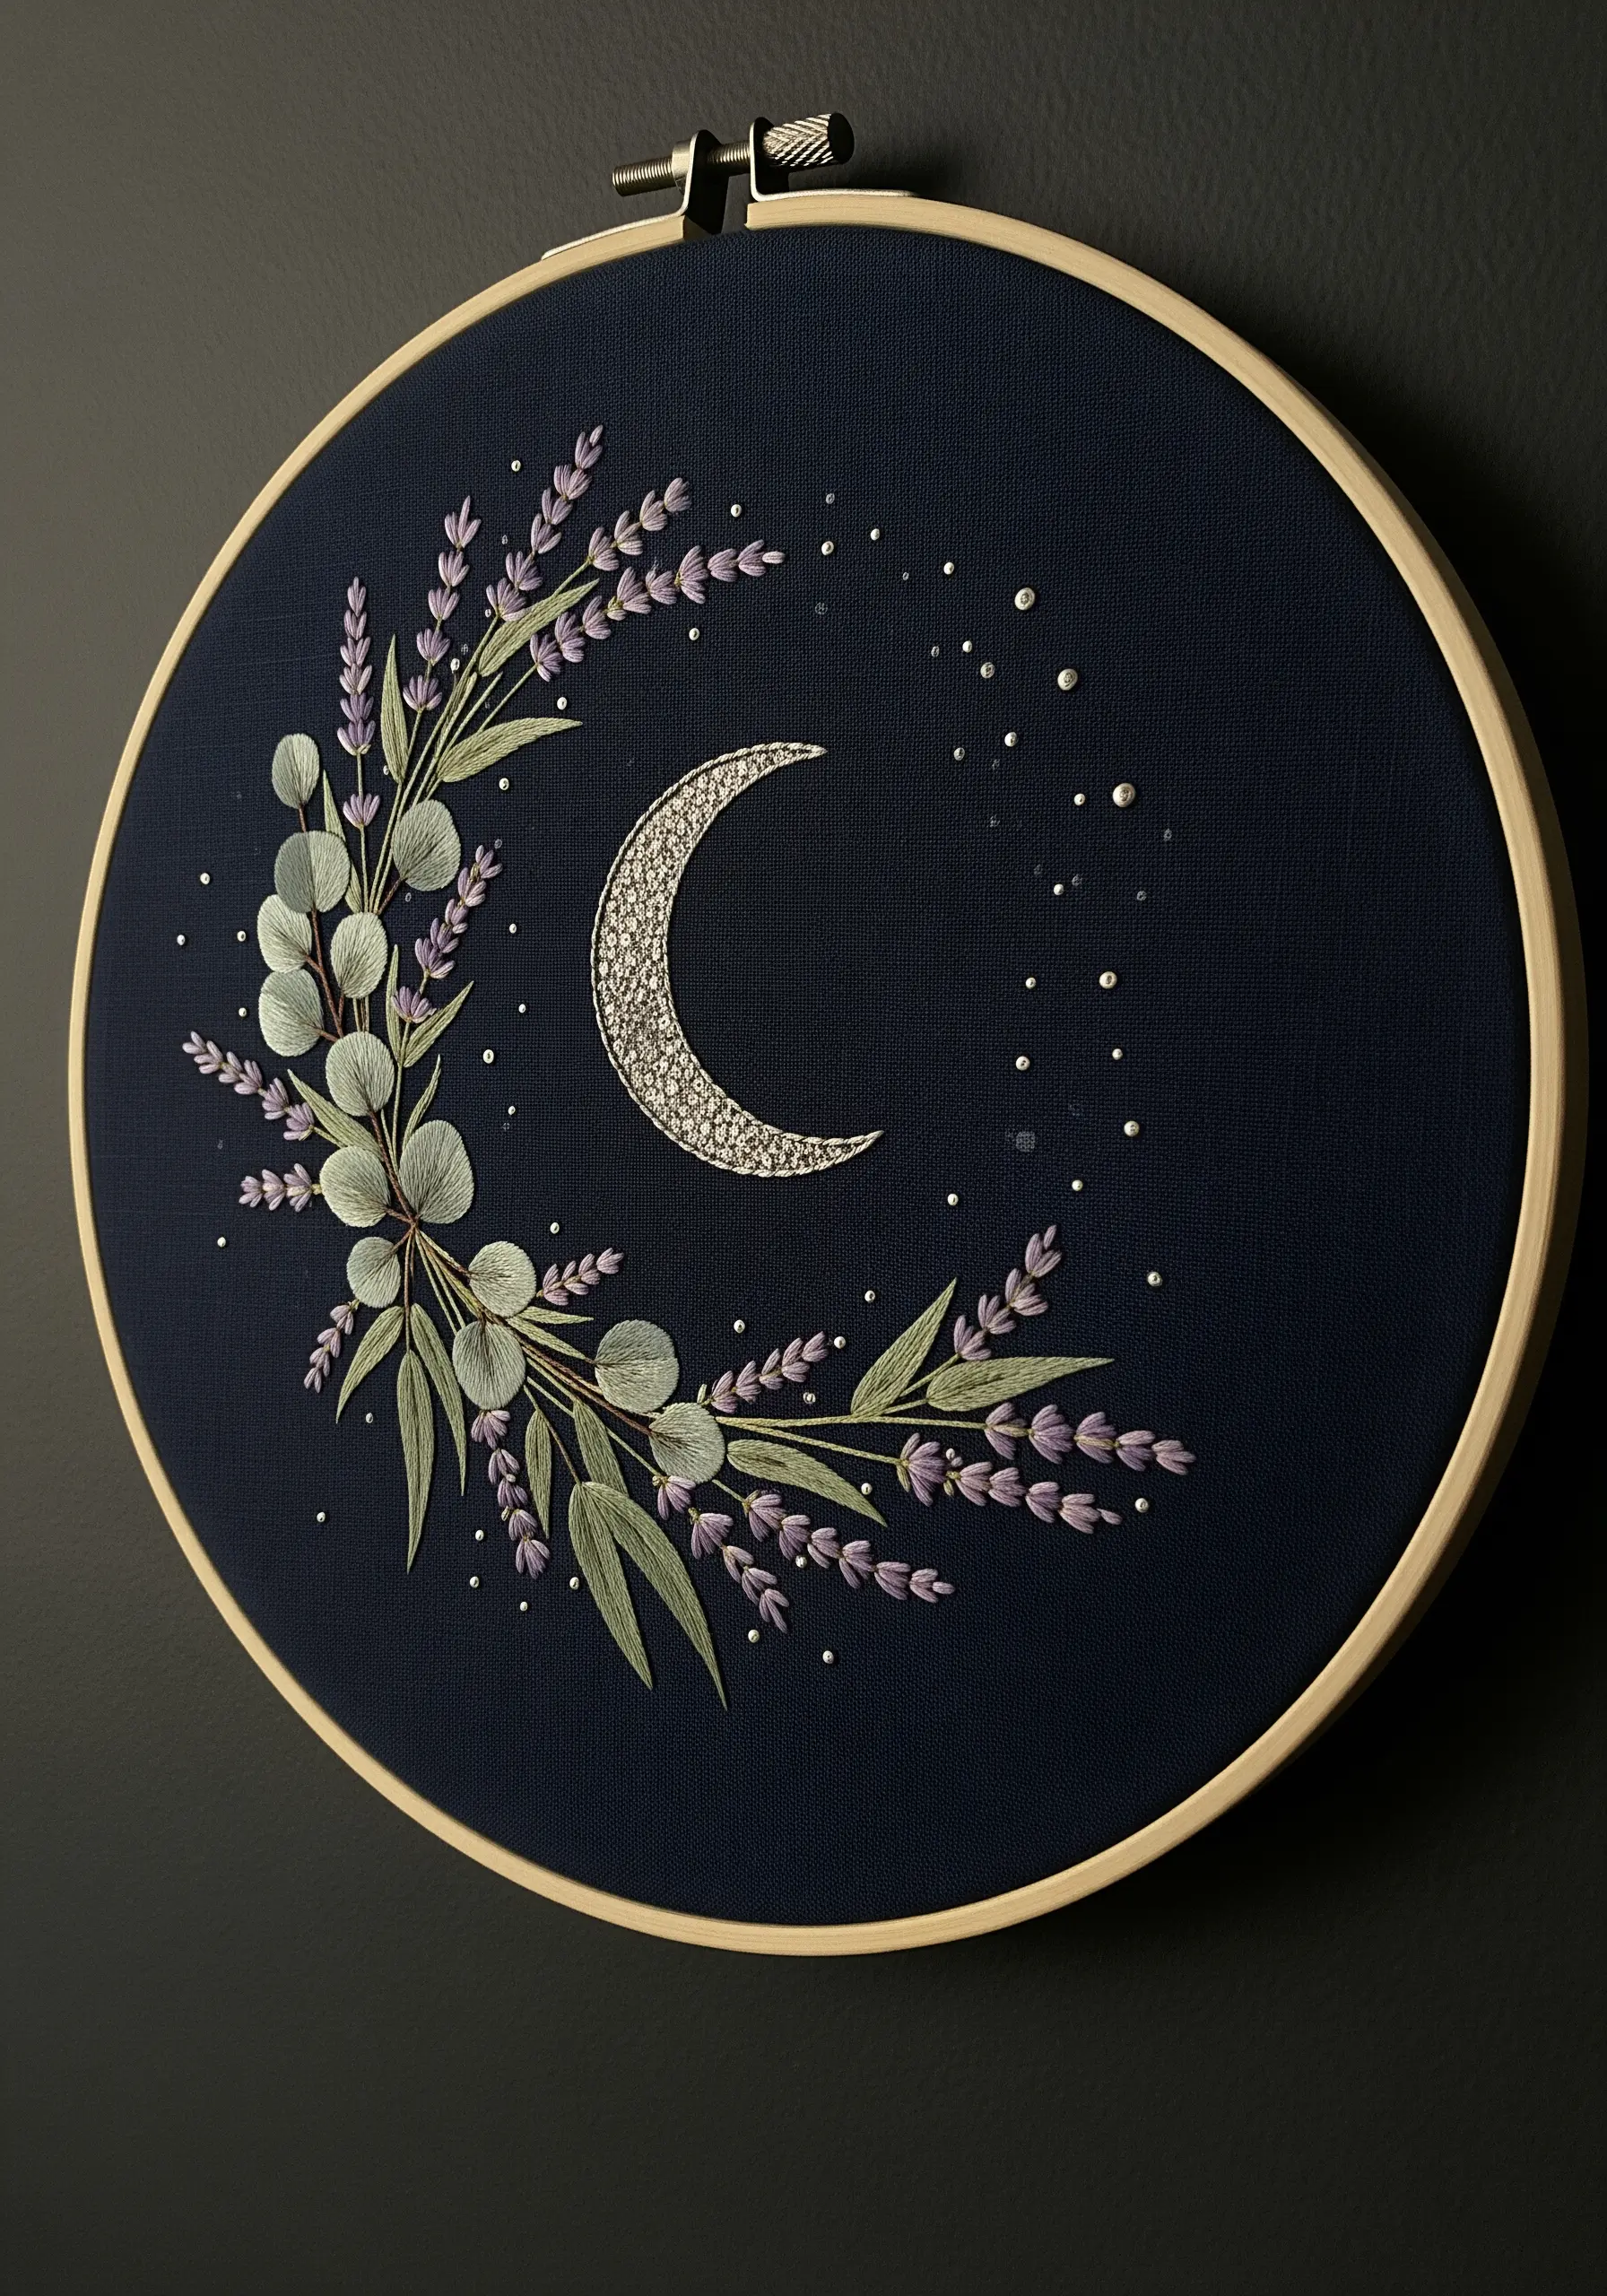
Let your threads shine by choosing a dark, tightly woven cotton or linen as your canvas.
For the crescent moon, couch a silvery metallic cord onto the fabric with a fine, matching thread to create a bold, textured surface that resists tangling.
Contrast this shimmer with the soft matte finish of cotton floss for the lavender and eucalyptus.
This intentional play on light and texture is the secret behind a captivating night garden embroidery piece.
6. Frame Geometric Landscapes
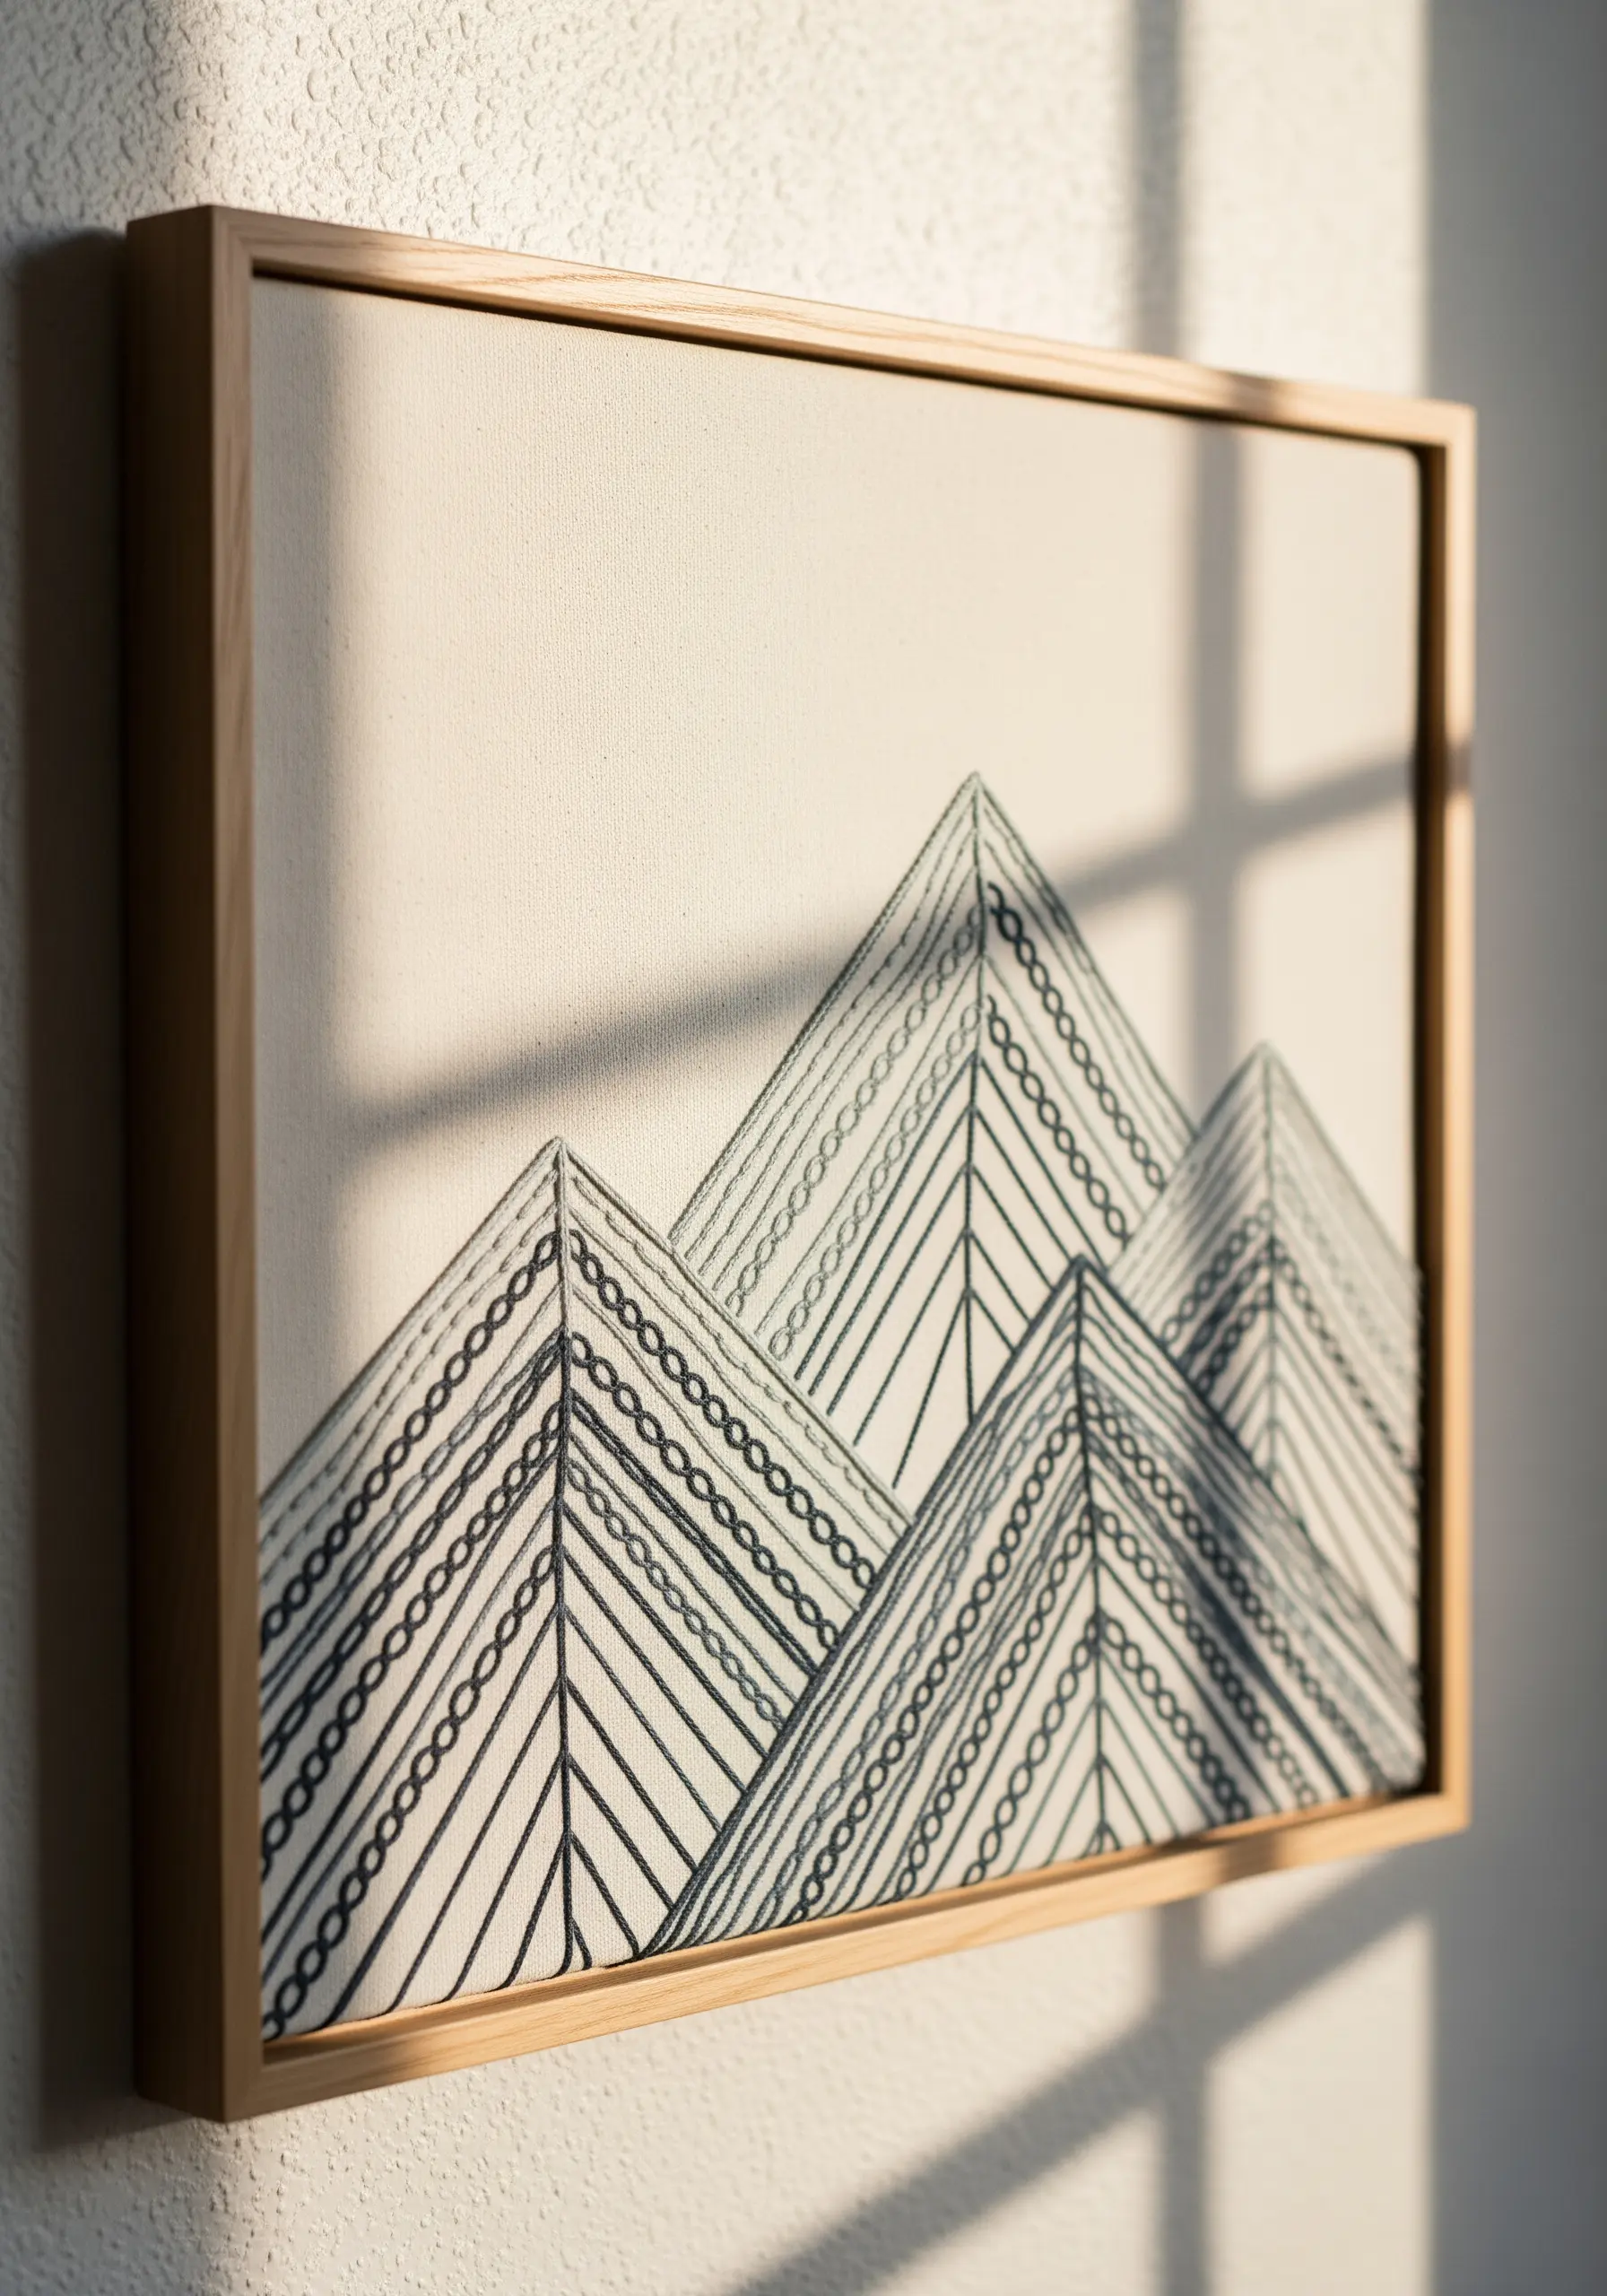
For sharp, clean lines on canvas, always use a stabilizer on the back to prevent fabric puckering and distortion.
Create visual interest within a monochrome palette by assigning a different stitch to each pattern—a smooth backstitch for outlines, a textured chain stitch for fills, and a simple running stitch for delicate shading.
This subtle variation turns a simple line drawing into sophisticated, minimalist embroidery wall art.
7. Build a Woodland Floor with 3D Stitches
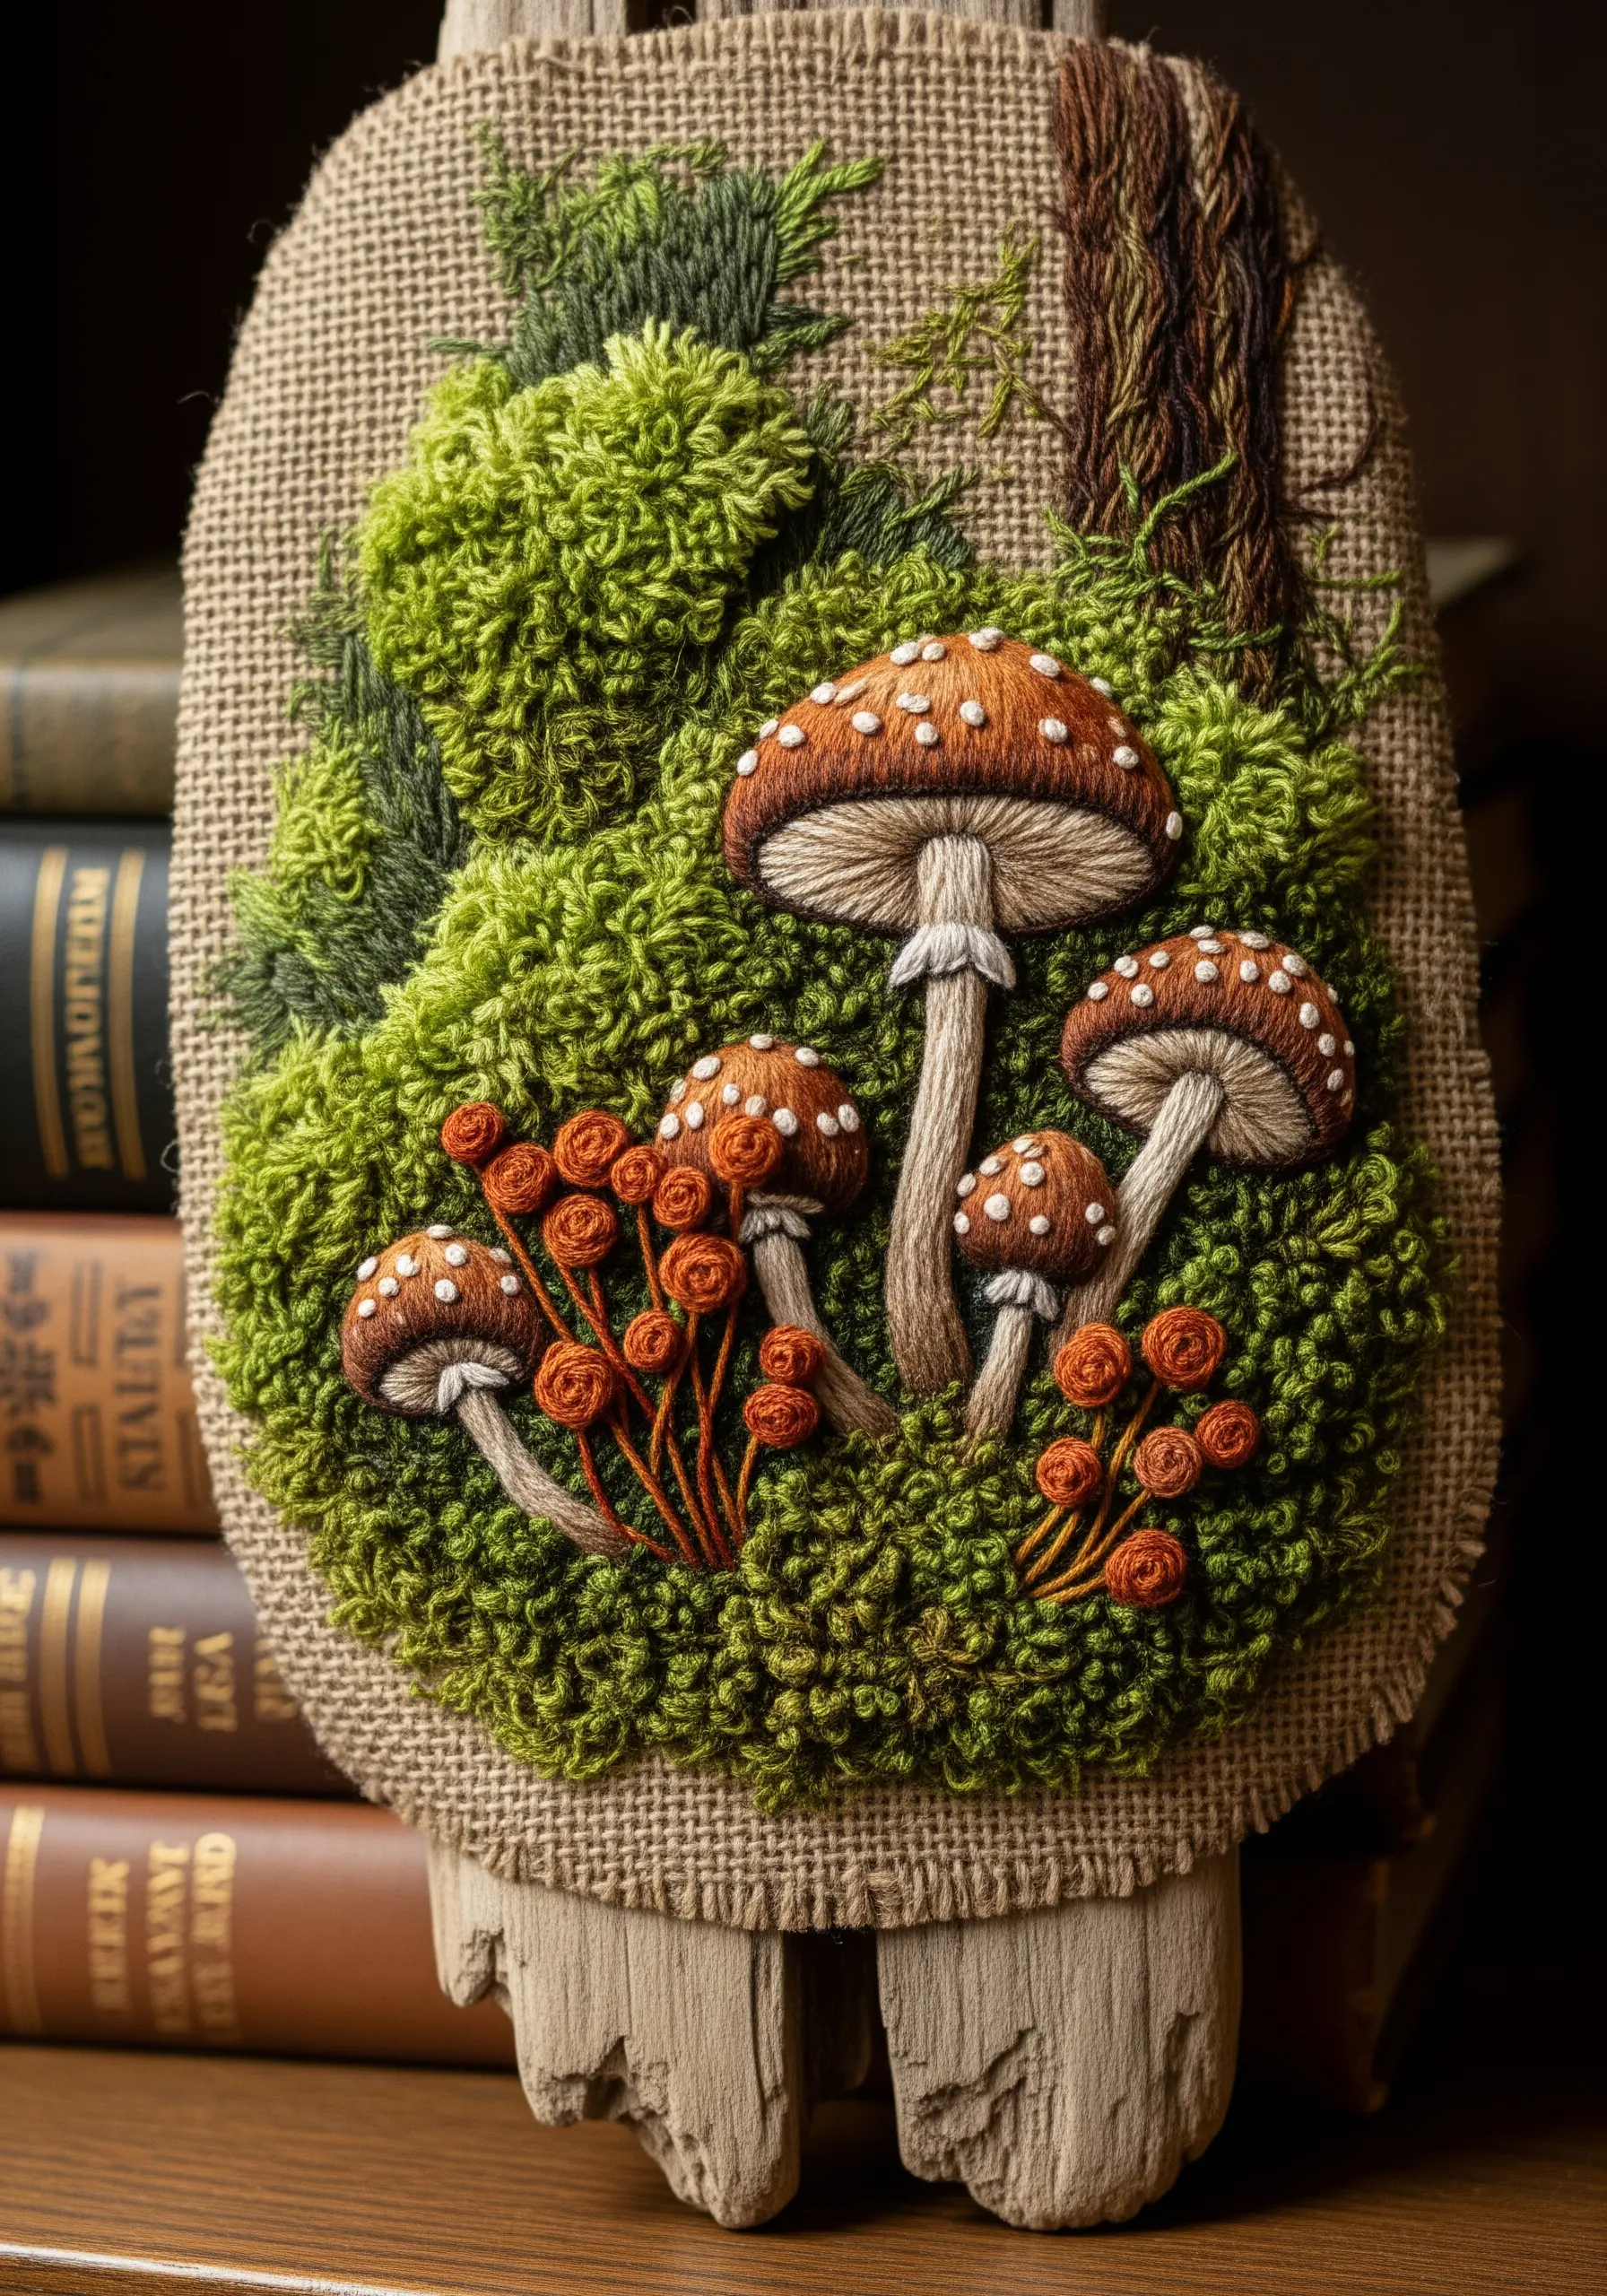
To replicate the lush texture of moss, use the turkey work stitch and trim the loops to varying heights for a natural, uneven surface.
For dimensional mushroom caps, create a padded base with layers of felt before covering it with satin stitch.
This layering of 3D techniques is how you can truly capture nature’s textures in your next embroidery project, turning a flat surface into a miniature ecosystem.
8. Embrace the Art of Wabi-Sabi Mending
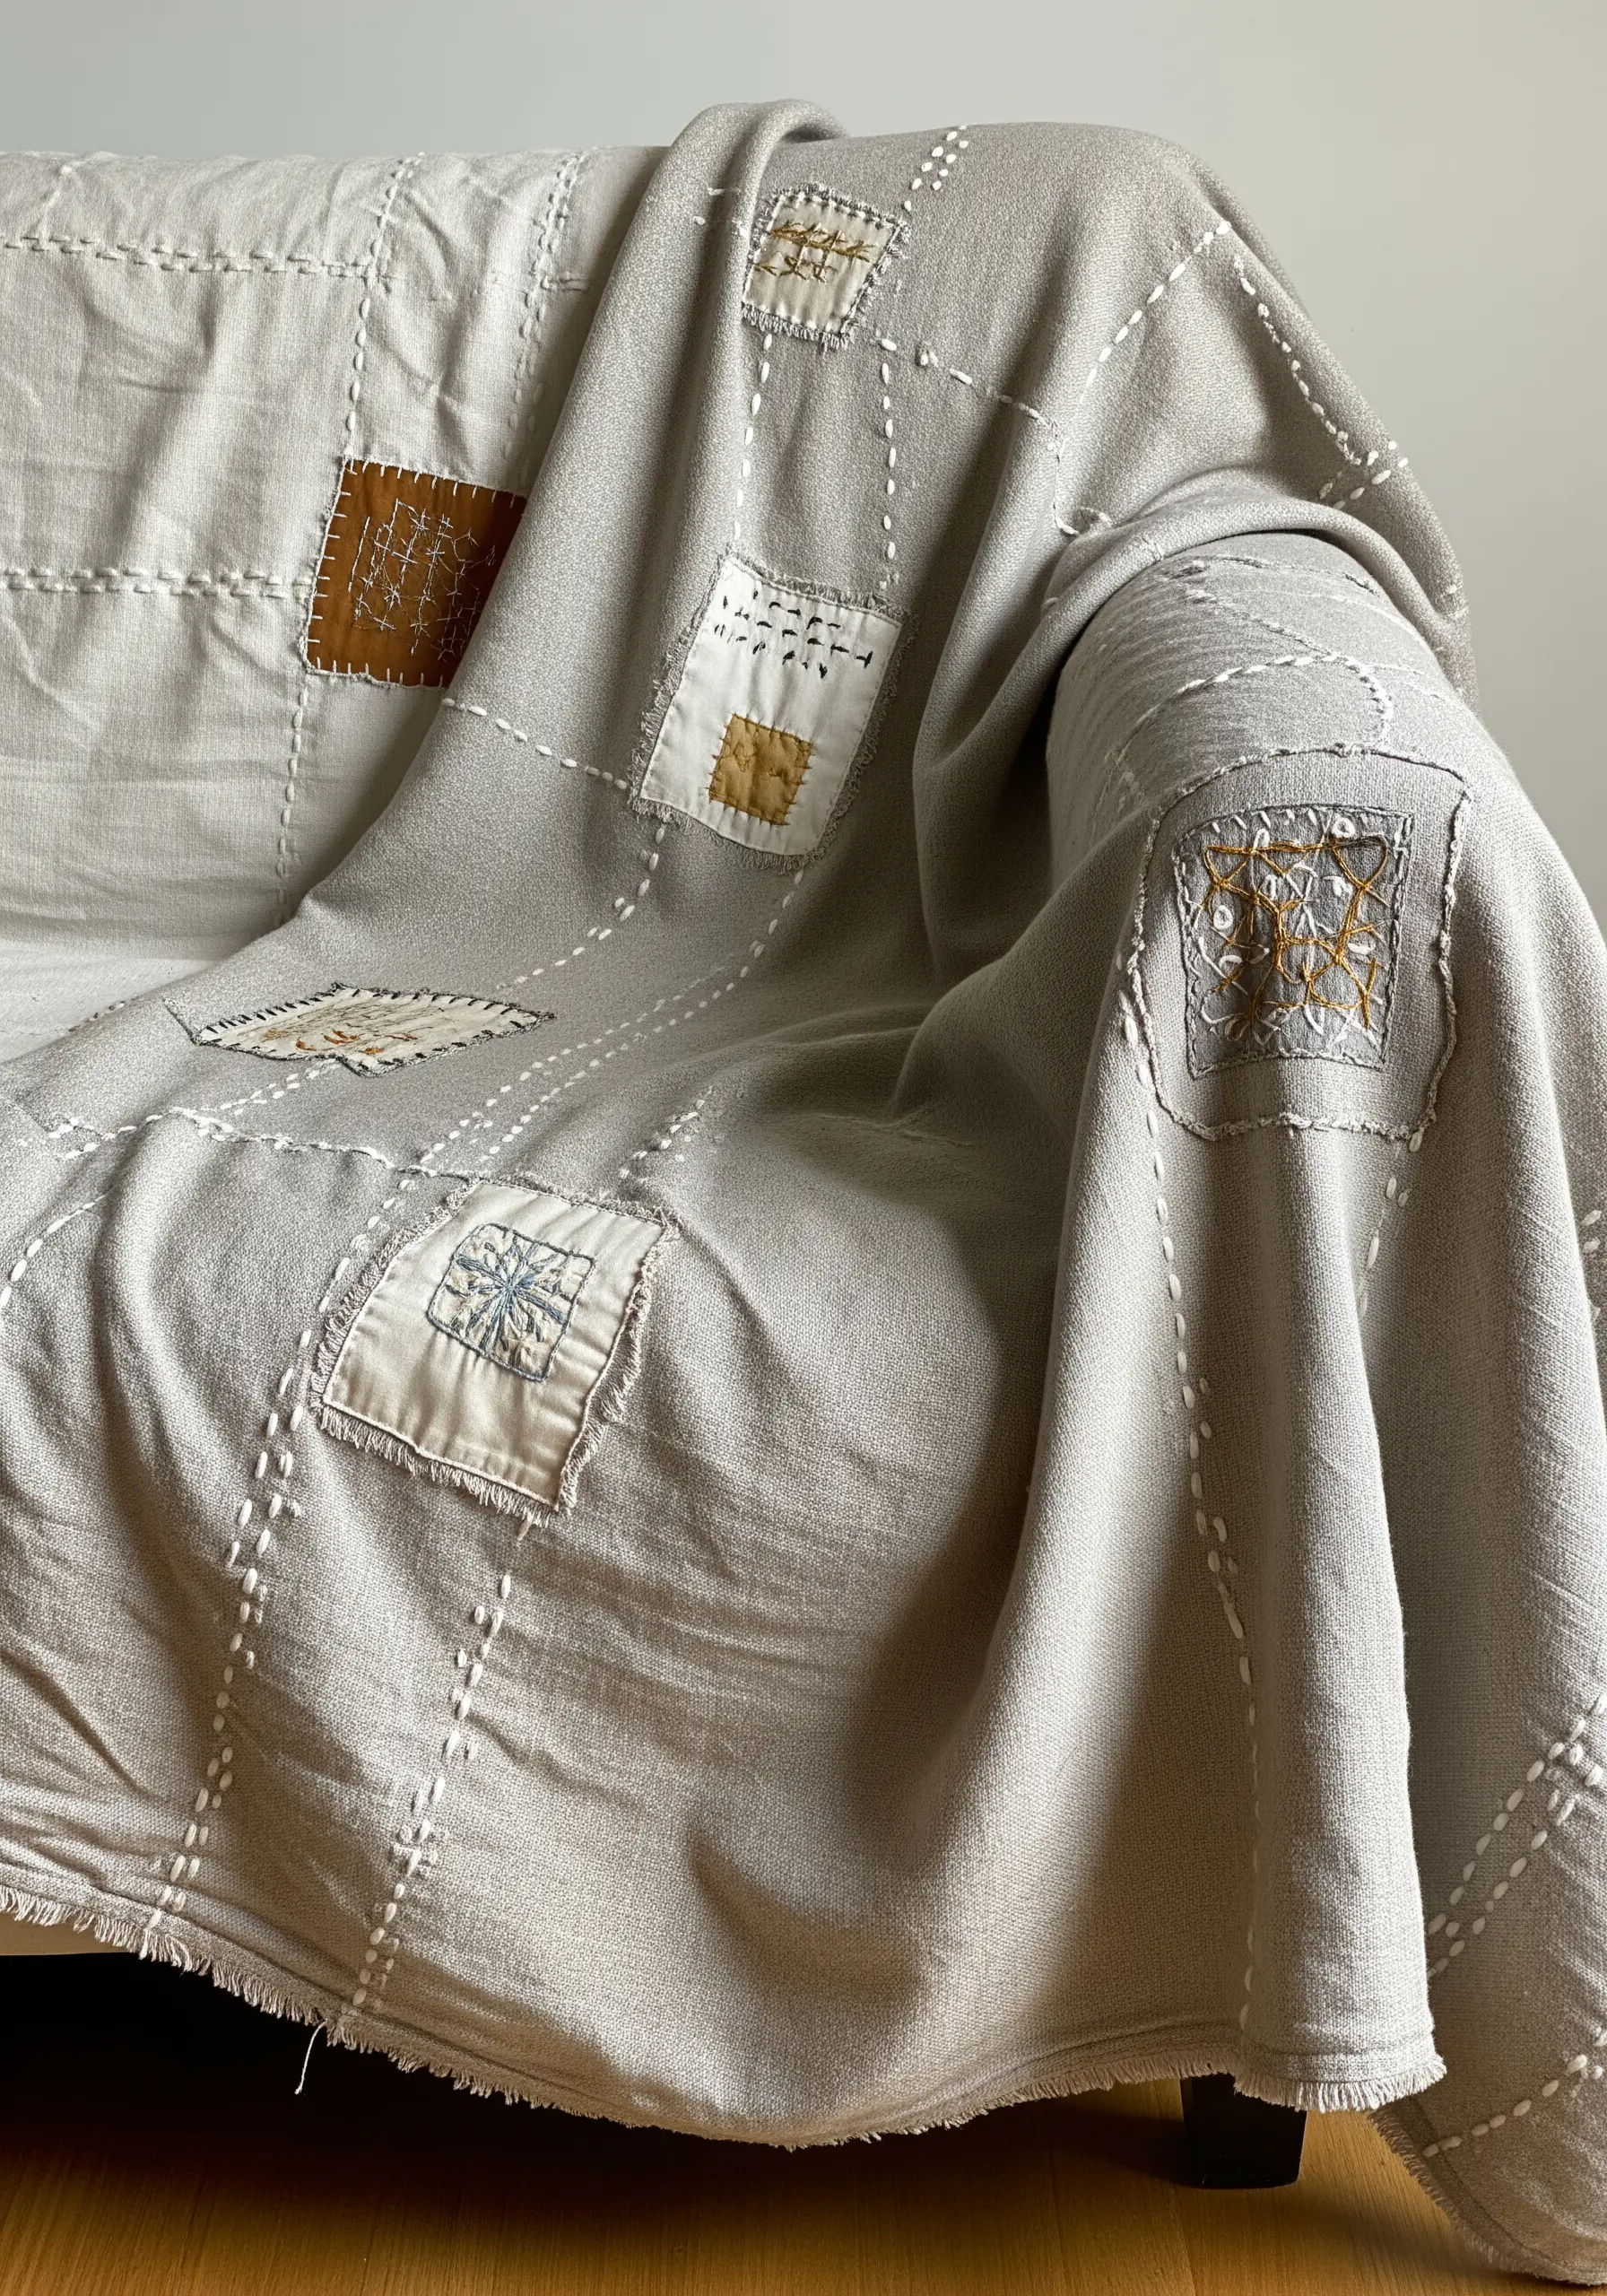
Transform a simple throw blanket with patches and visible mending inspired by Japanese Boro and Sashiko techniques.
Use a thick, soft cotton thread, like perle cotton, for your running stitches to make them a prominent design feature.
Let the stitches create grids and pathways connecting mismatched linen and cotton patches.
This approach celebrates imperfection and adds a personal touch to your decor, telling a story of comfort and care.
9. Capture an Ocean Wave’s Motion
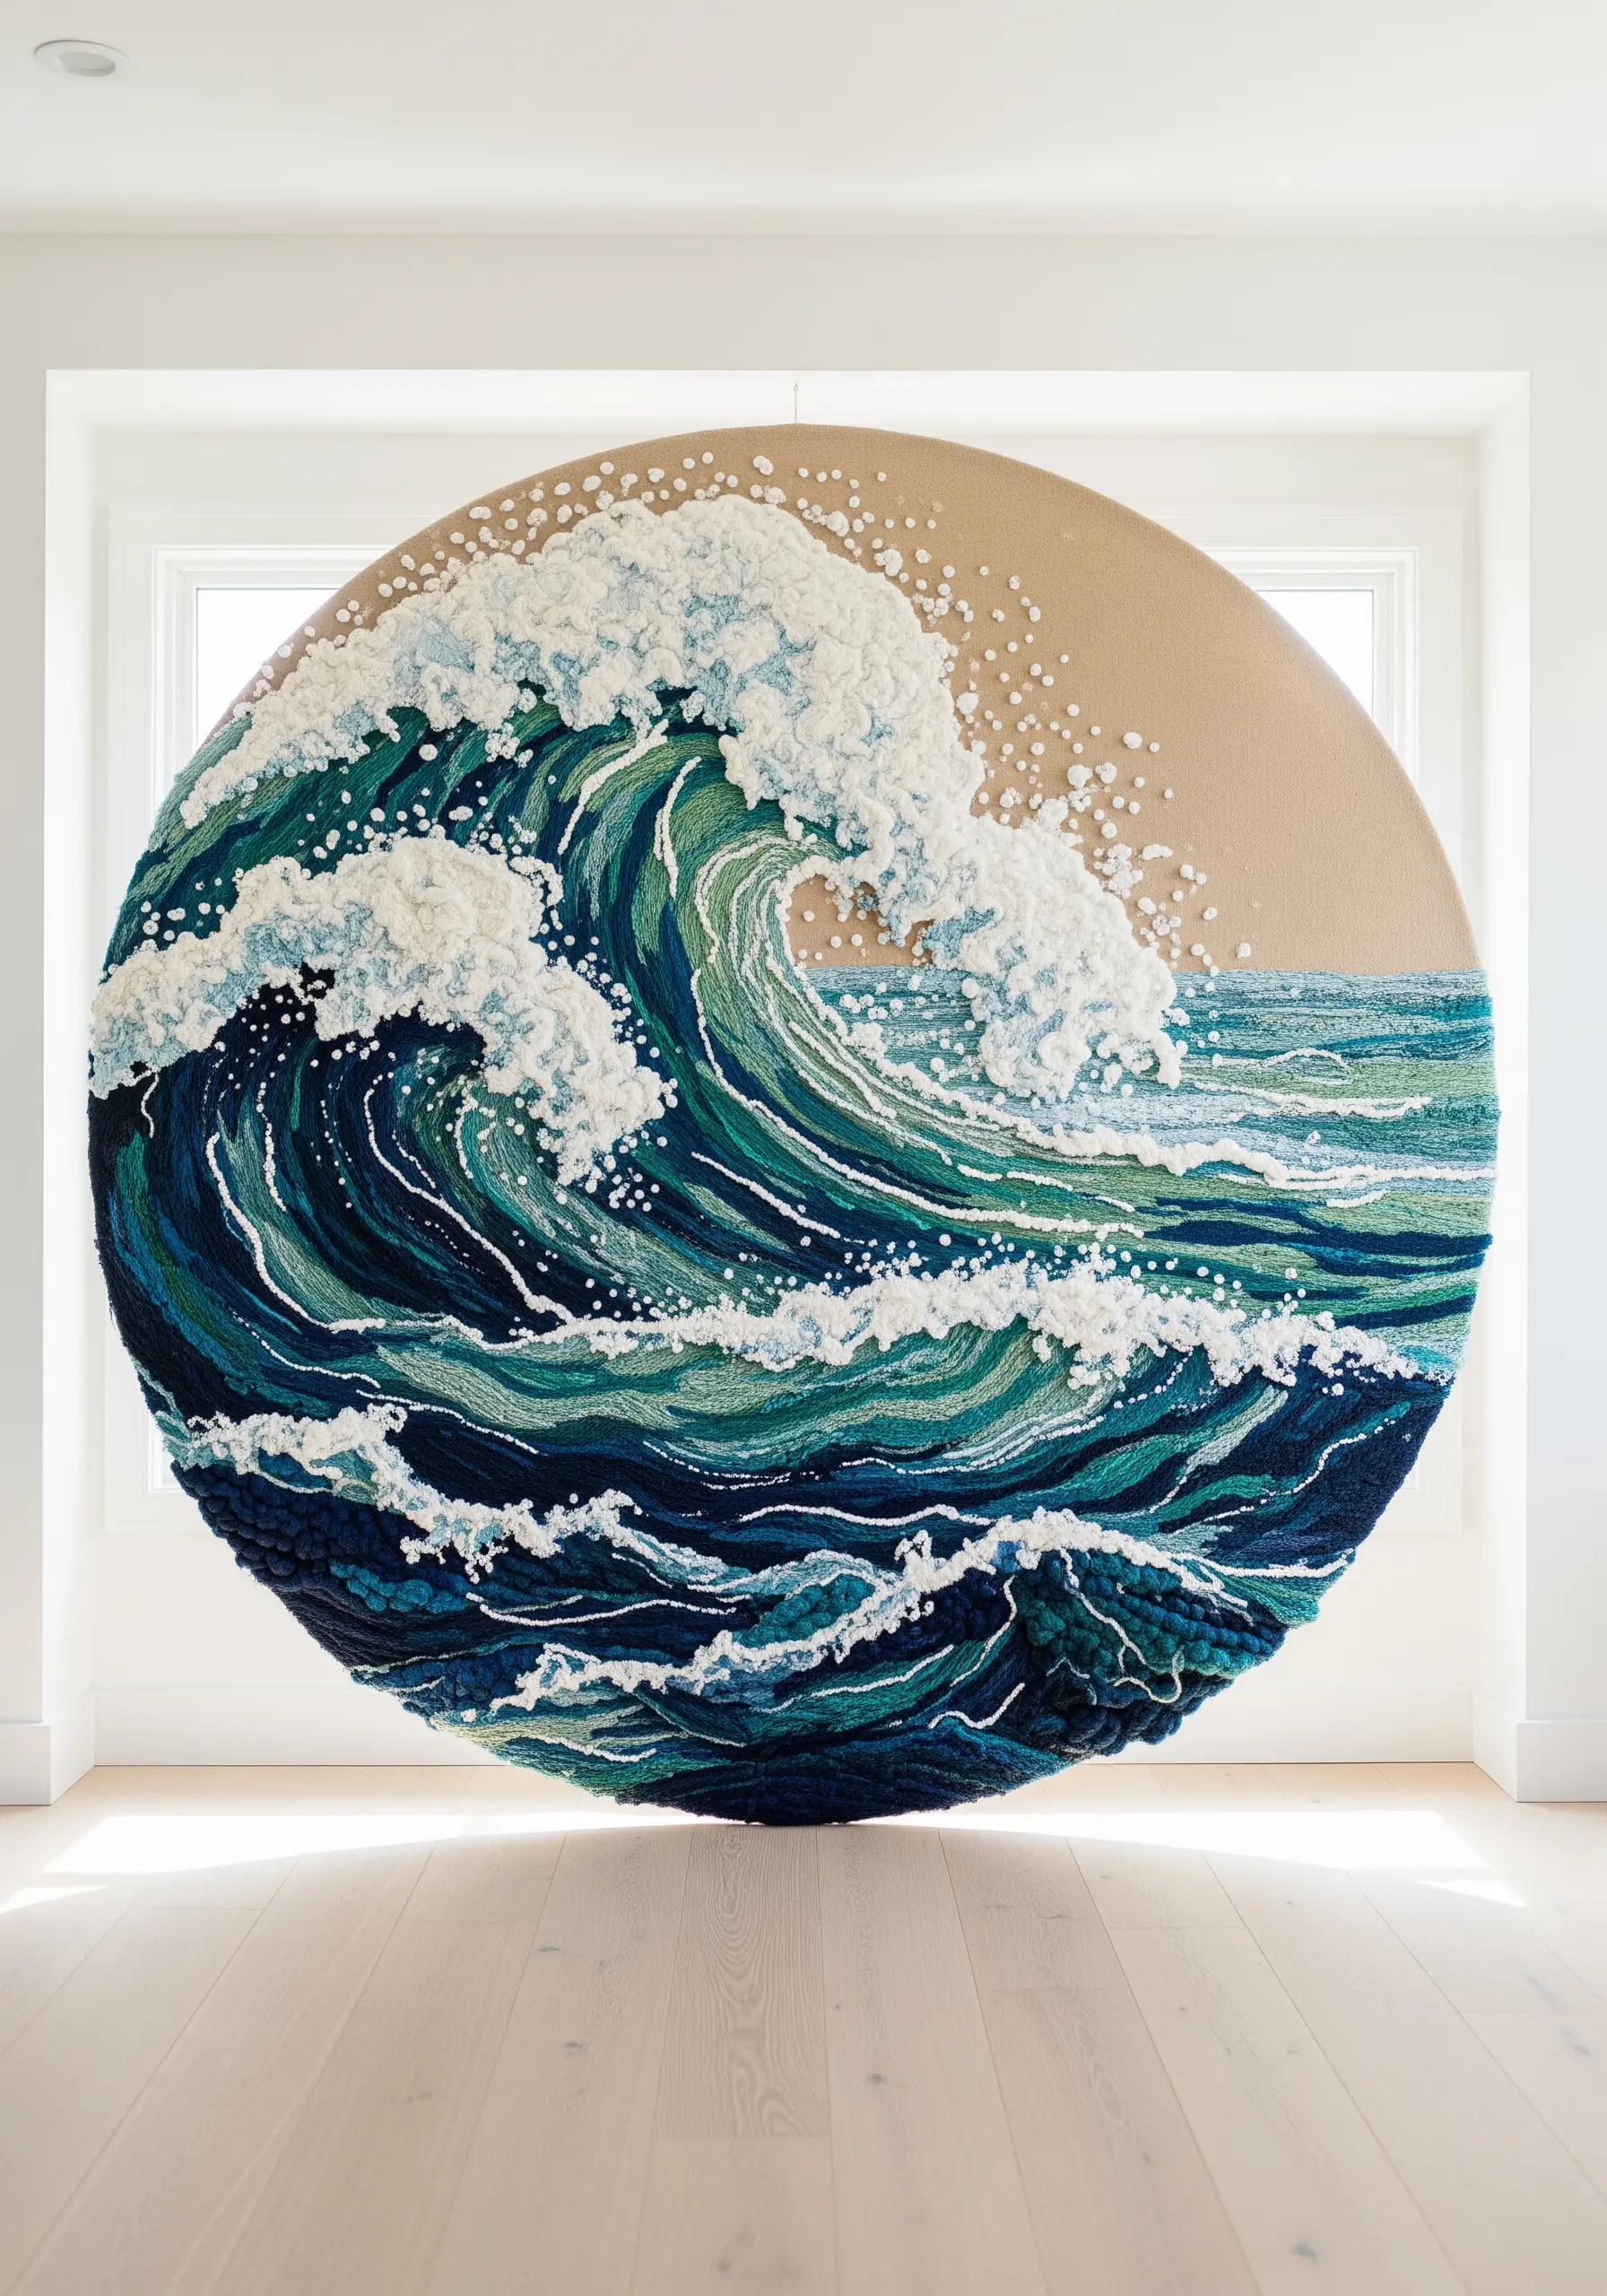
Convey the energy of moving water by paying close attention to the direction of your stitches.
Use a mix of fine threads and thick yarns, layering long and short stitches that follow the curve of the wave.
For the sea foam, build up dense clusters of French knots and turkey stitch loops in white and off-white tones.
This combination of directional stitching and high texture creates a dynamic, powerful fiber art installation.
10. Embroider Light on Sheer Curtains
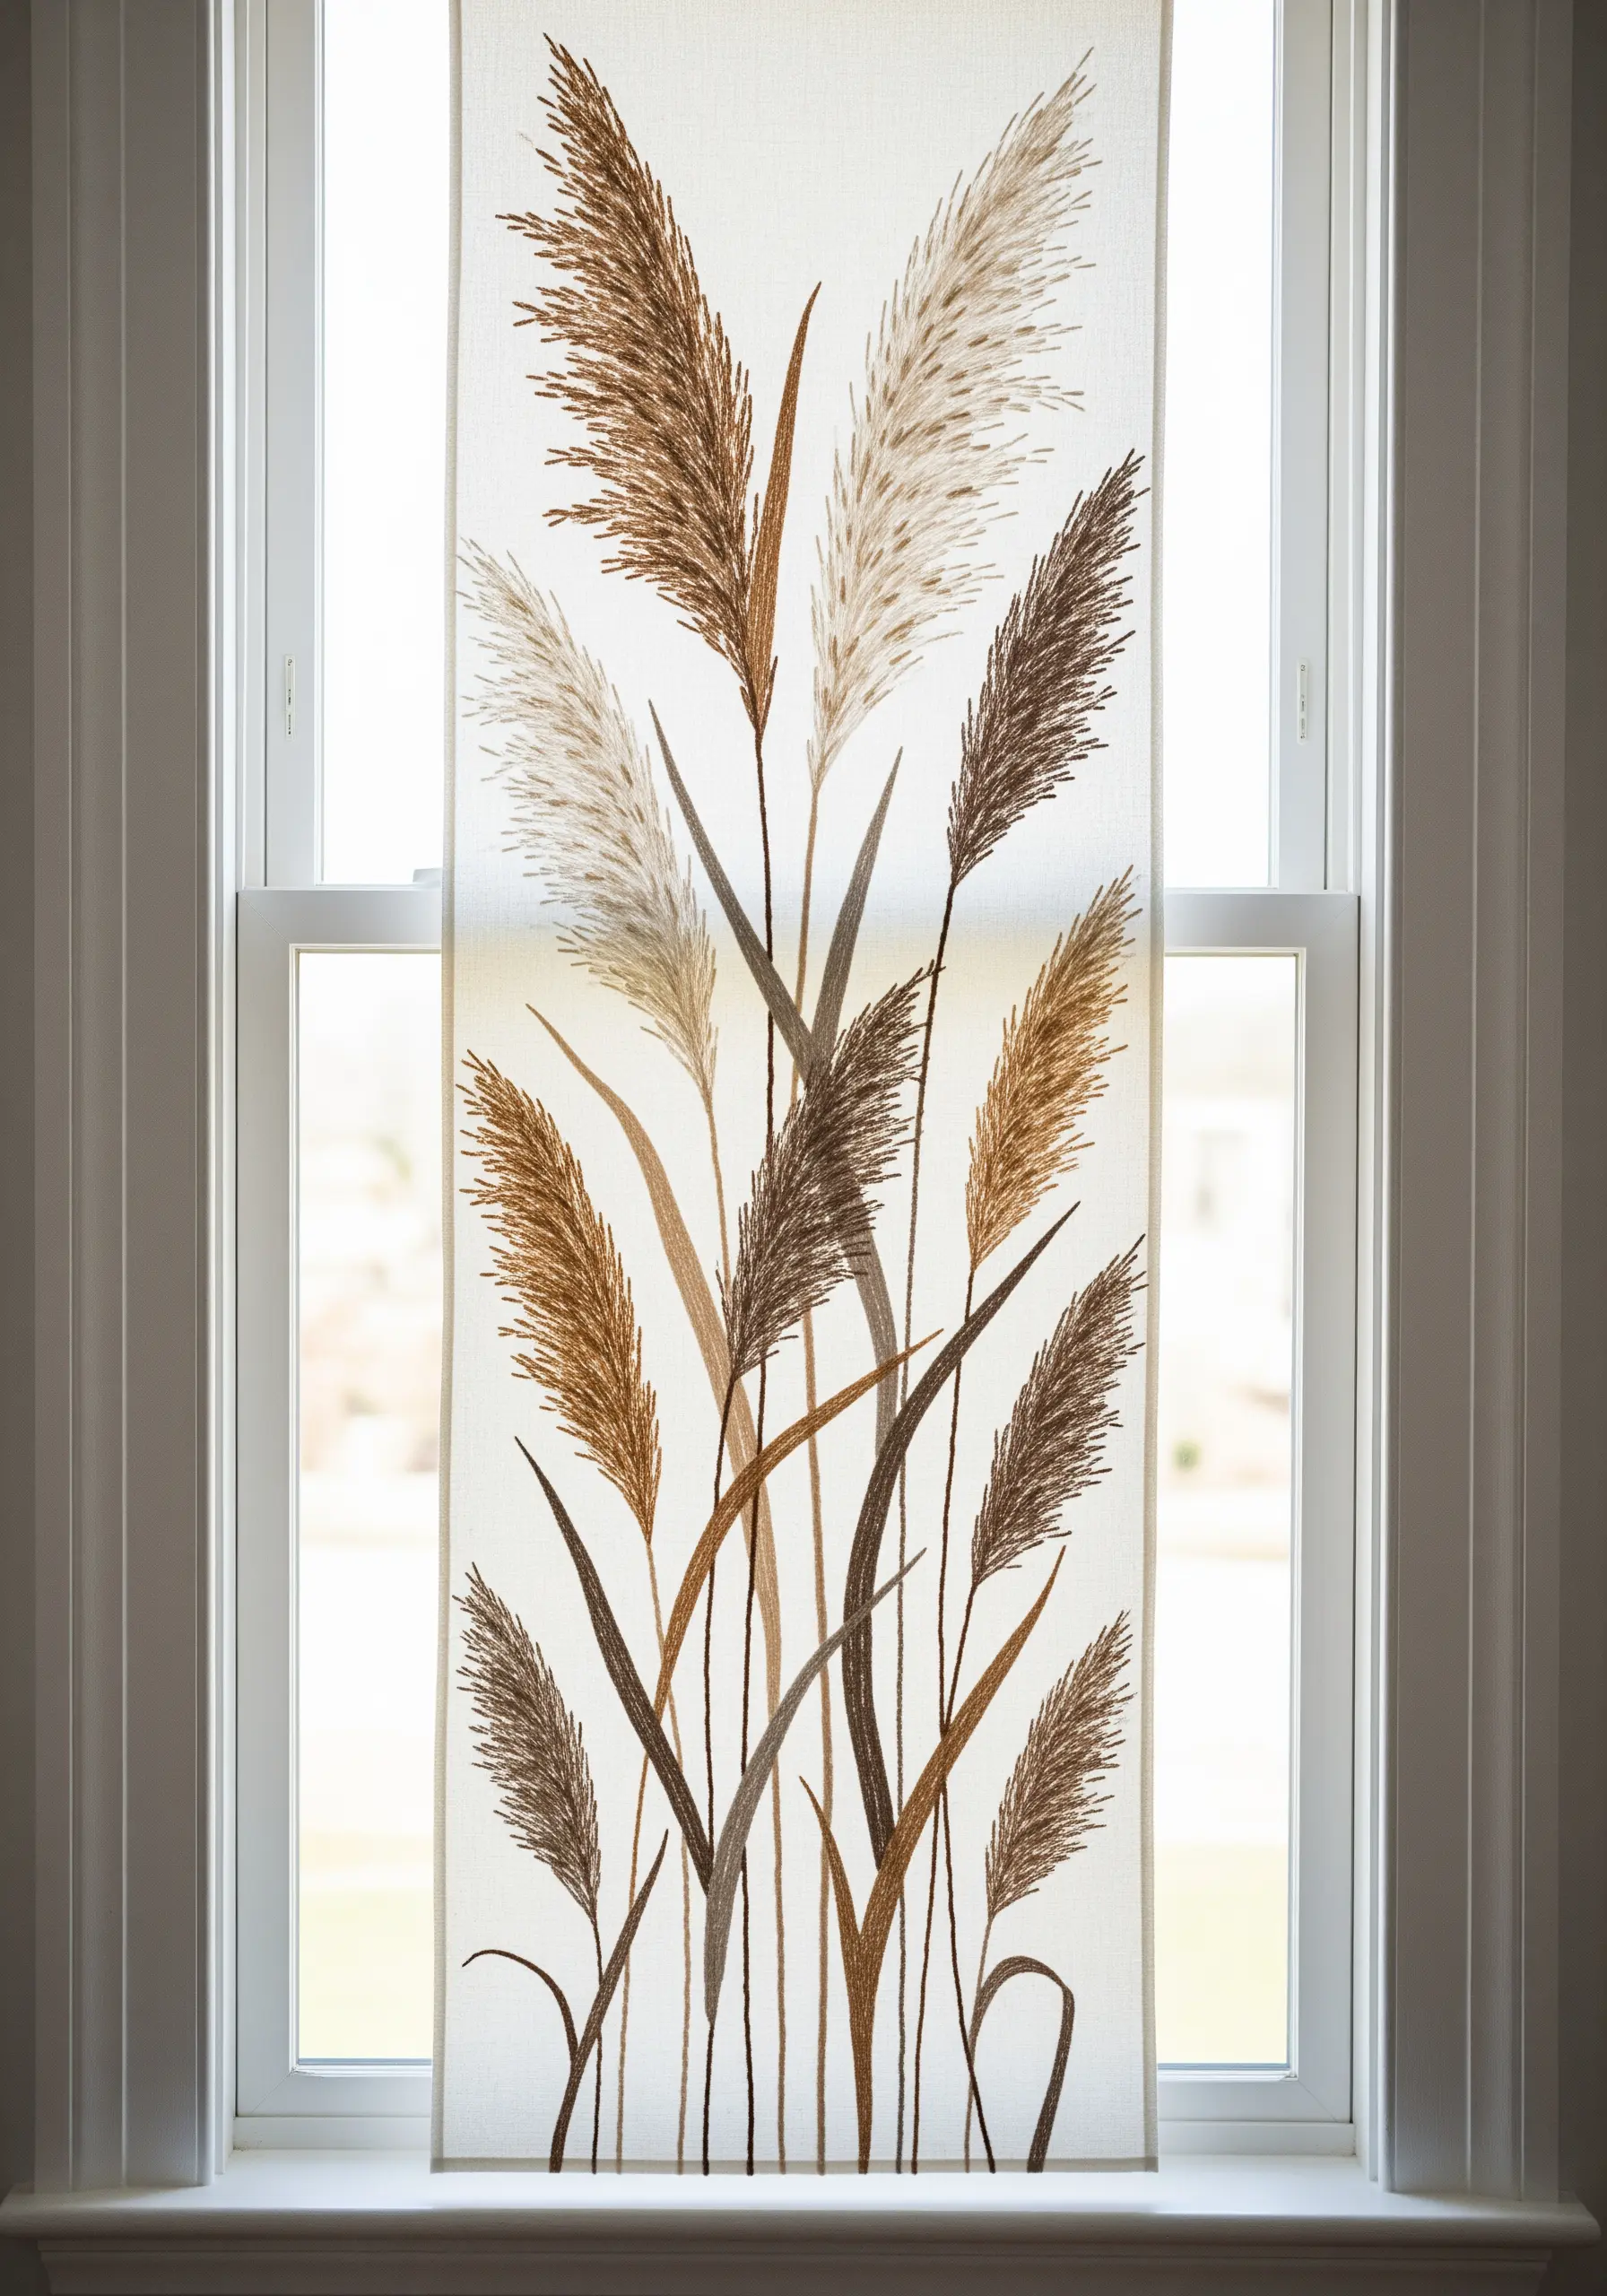
When stitching on sheer fabric like voile or organza, your technique must be flawless, as every thread is visible.
Use a single strand of floss and a wash-away stabilizer to prevent stretching.
Choose an open, airy design that allows light to pass through, making the embroidery a silhouette.
This creates a delicate, watercolor-style embroidery effect where the design seems to float in the window.
11. Master the Art of a Color Gradient Leaf
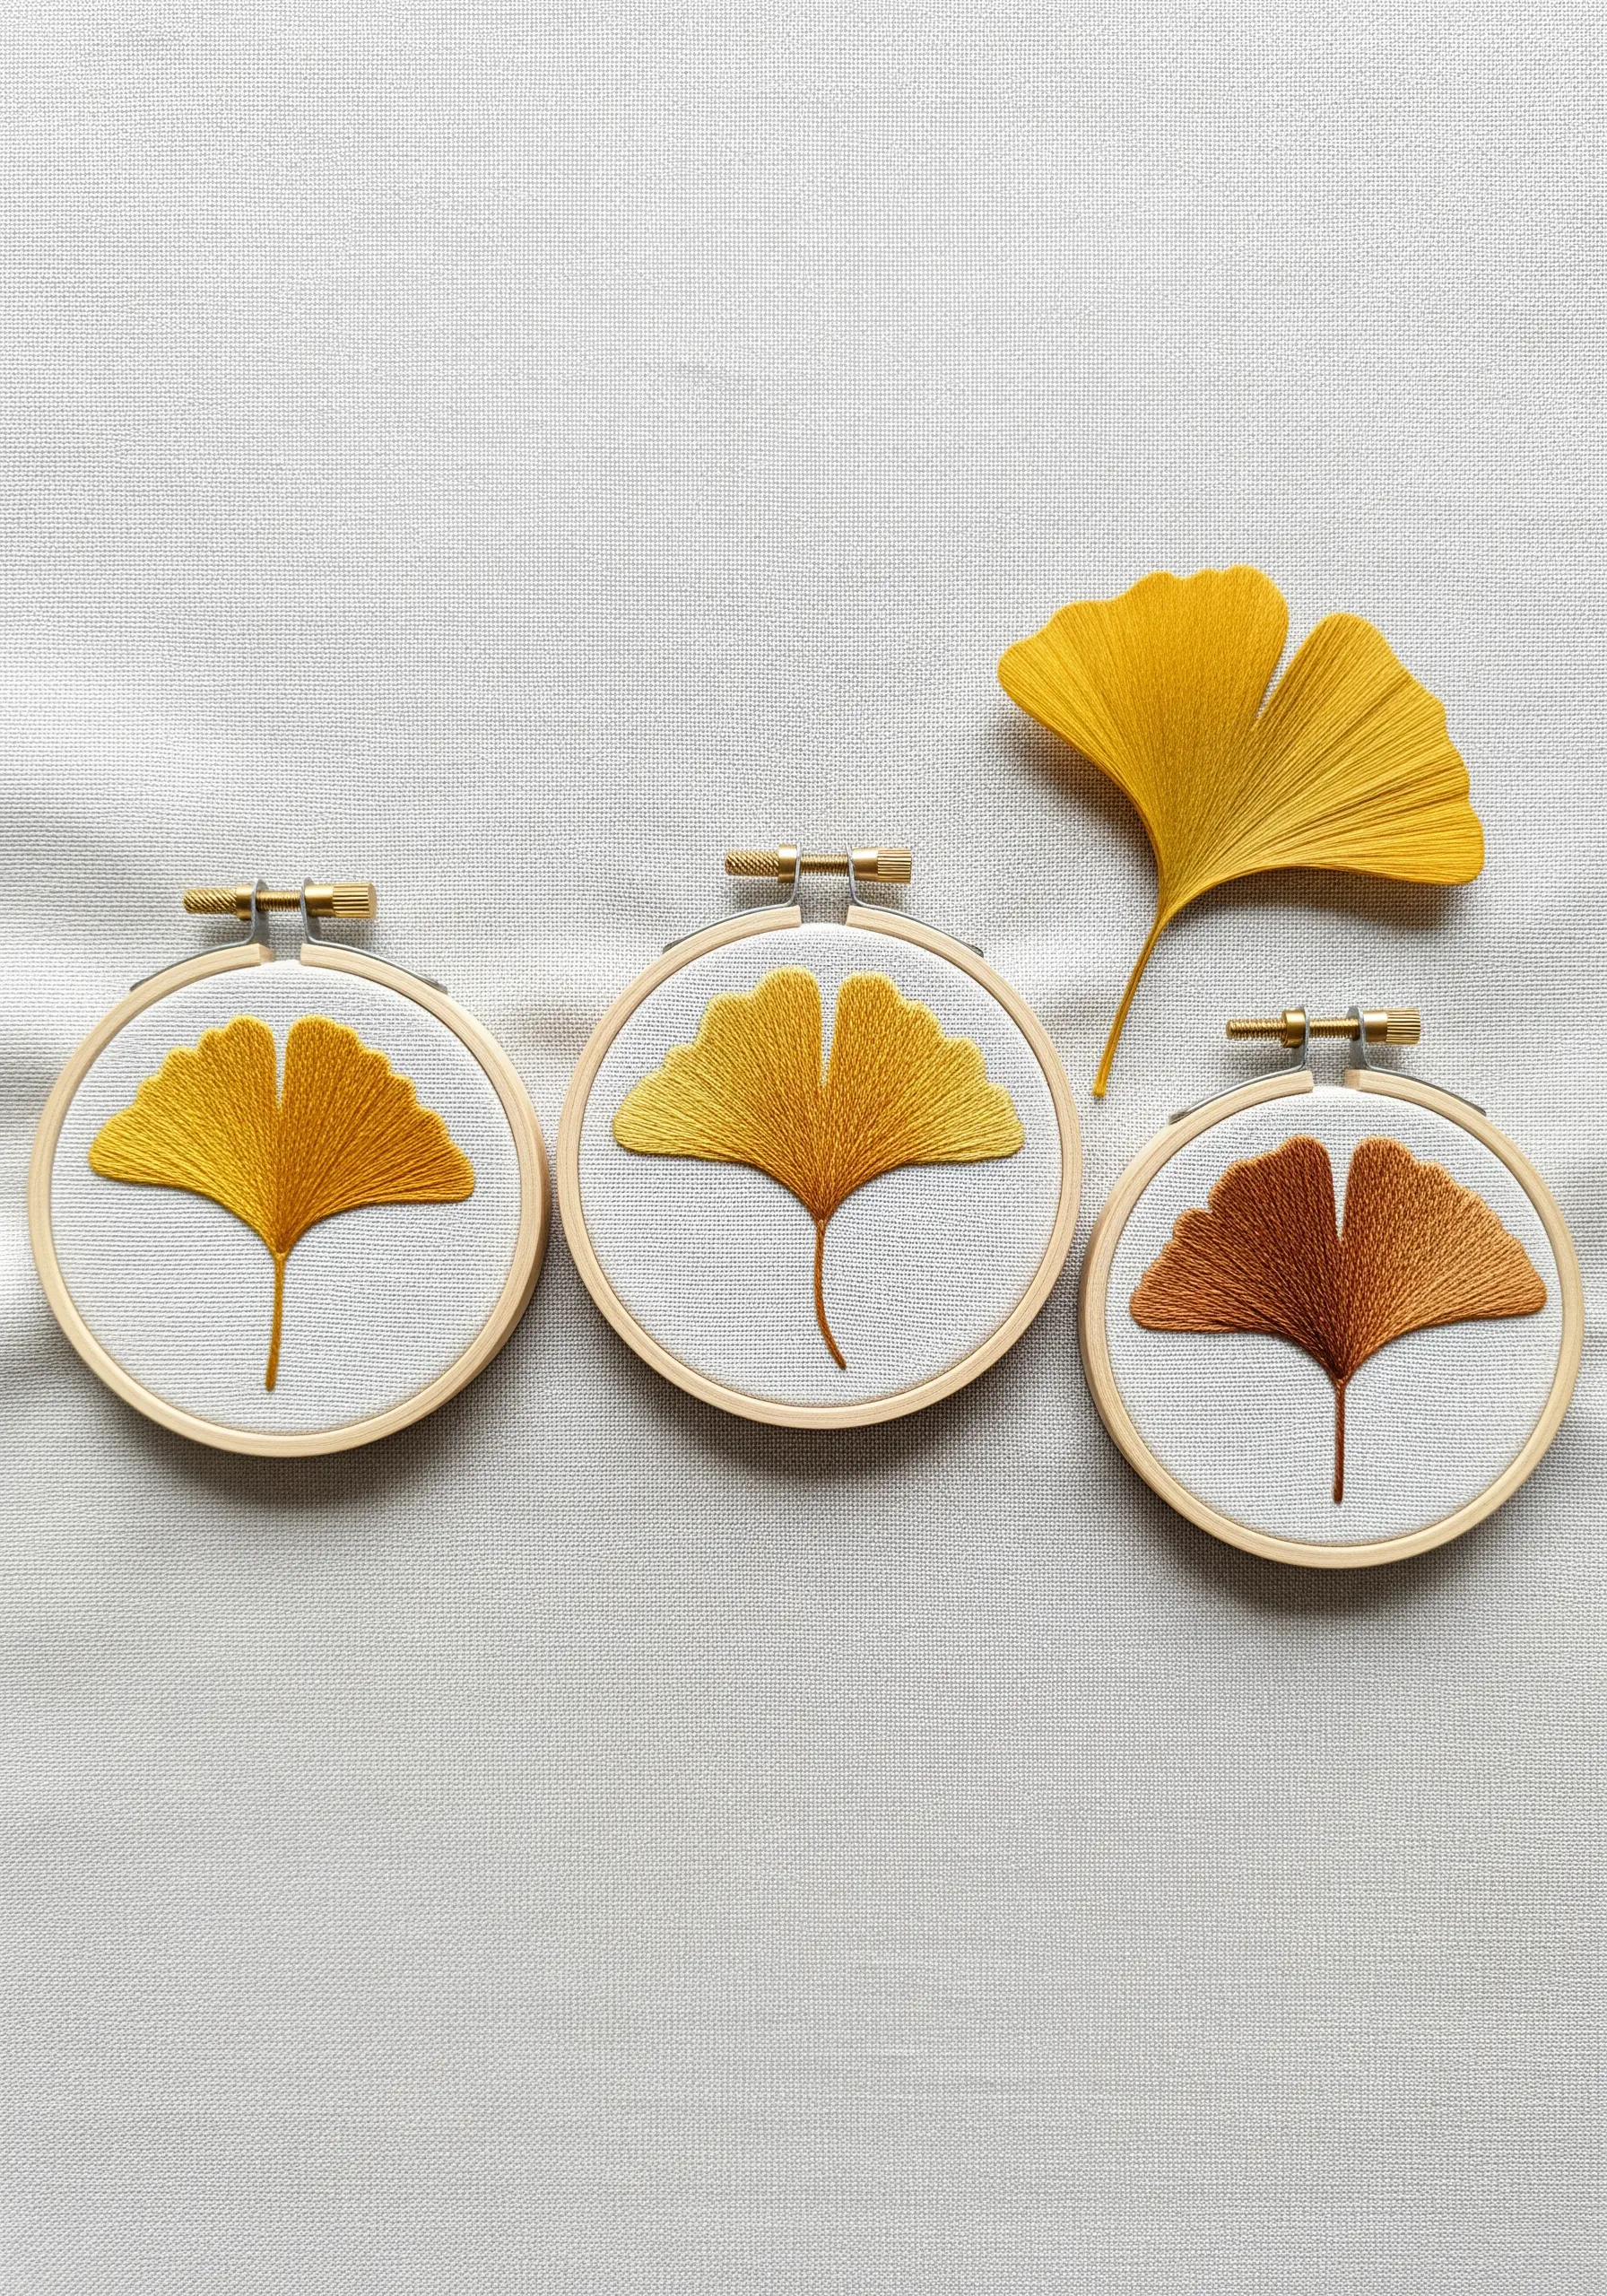
To create a seamless color transition in a leaf, the long and short stitch is essential.
Work with three or four closely related shades, starting with the lightest at one edge.
Blend each new color into the previous one by staggering the length of your stitches, creating a soft, painterly gradient.
Before you begin filling, outline the entire shape with a single line of split stitch; this provides a crisp edge to tuck your fill stitches into for a professional finish.
12. Weave Sculptural Forms onto Canvas
Create bold, graphic designs by couching thick materials like macrame cord or chunky yarn onto your fabric base.
Lay the cord in your desired shape and use a strong, matching embroidery thread to tack it down with small, evenly spaced stitches.
The texture comes from the material itself, not the stitching, allowing you to create impactful modern thread art with minimal embroidery skill.
13. Construct a 3D Succulent Garden
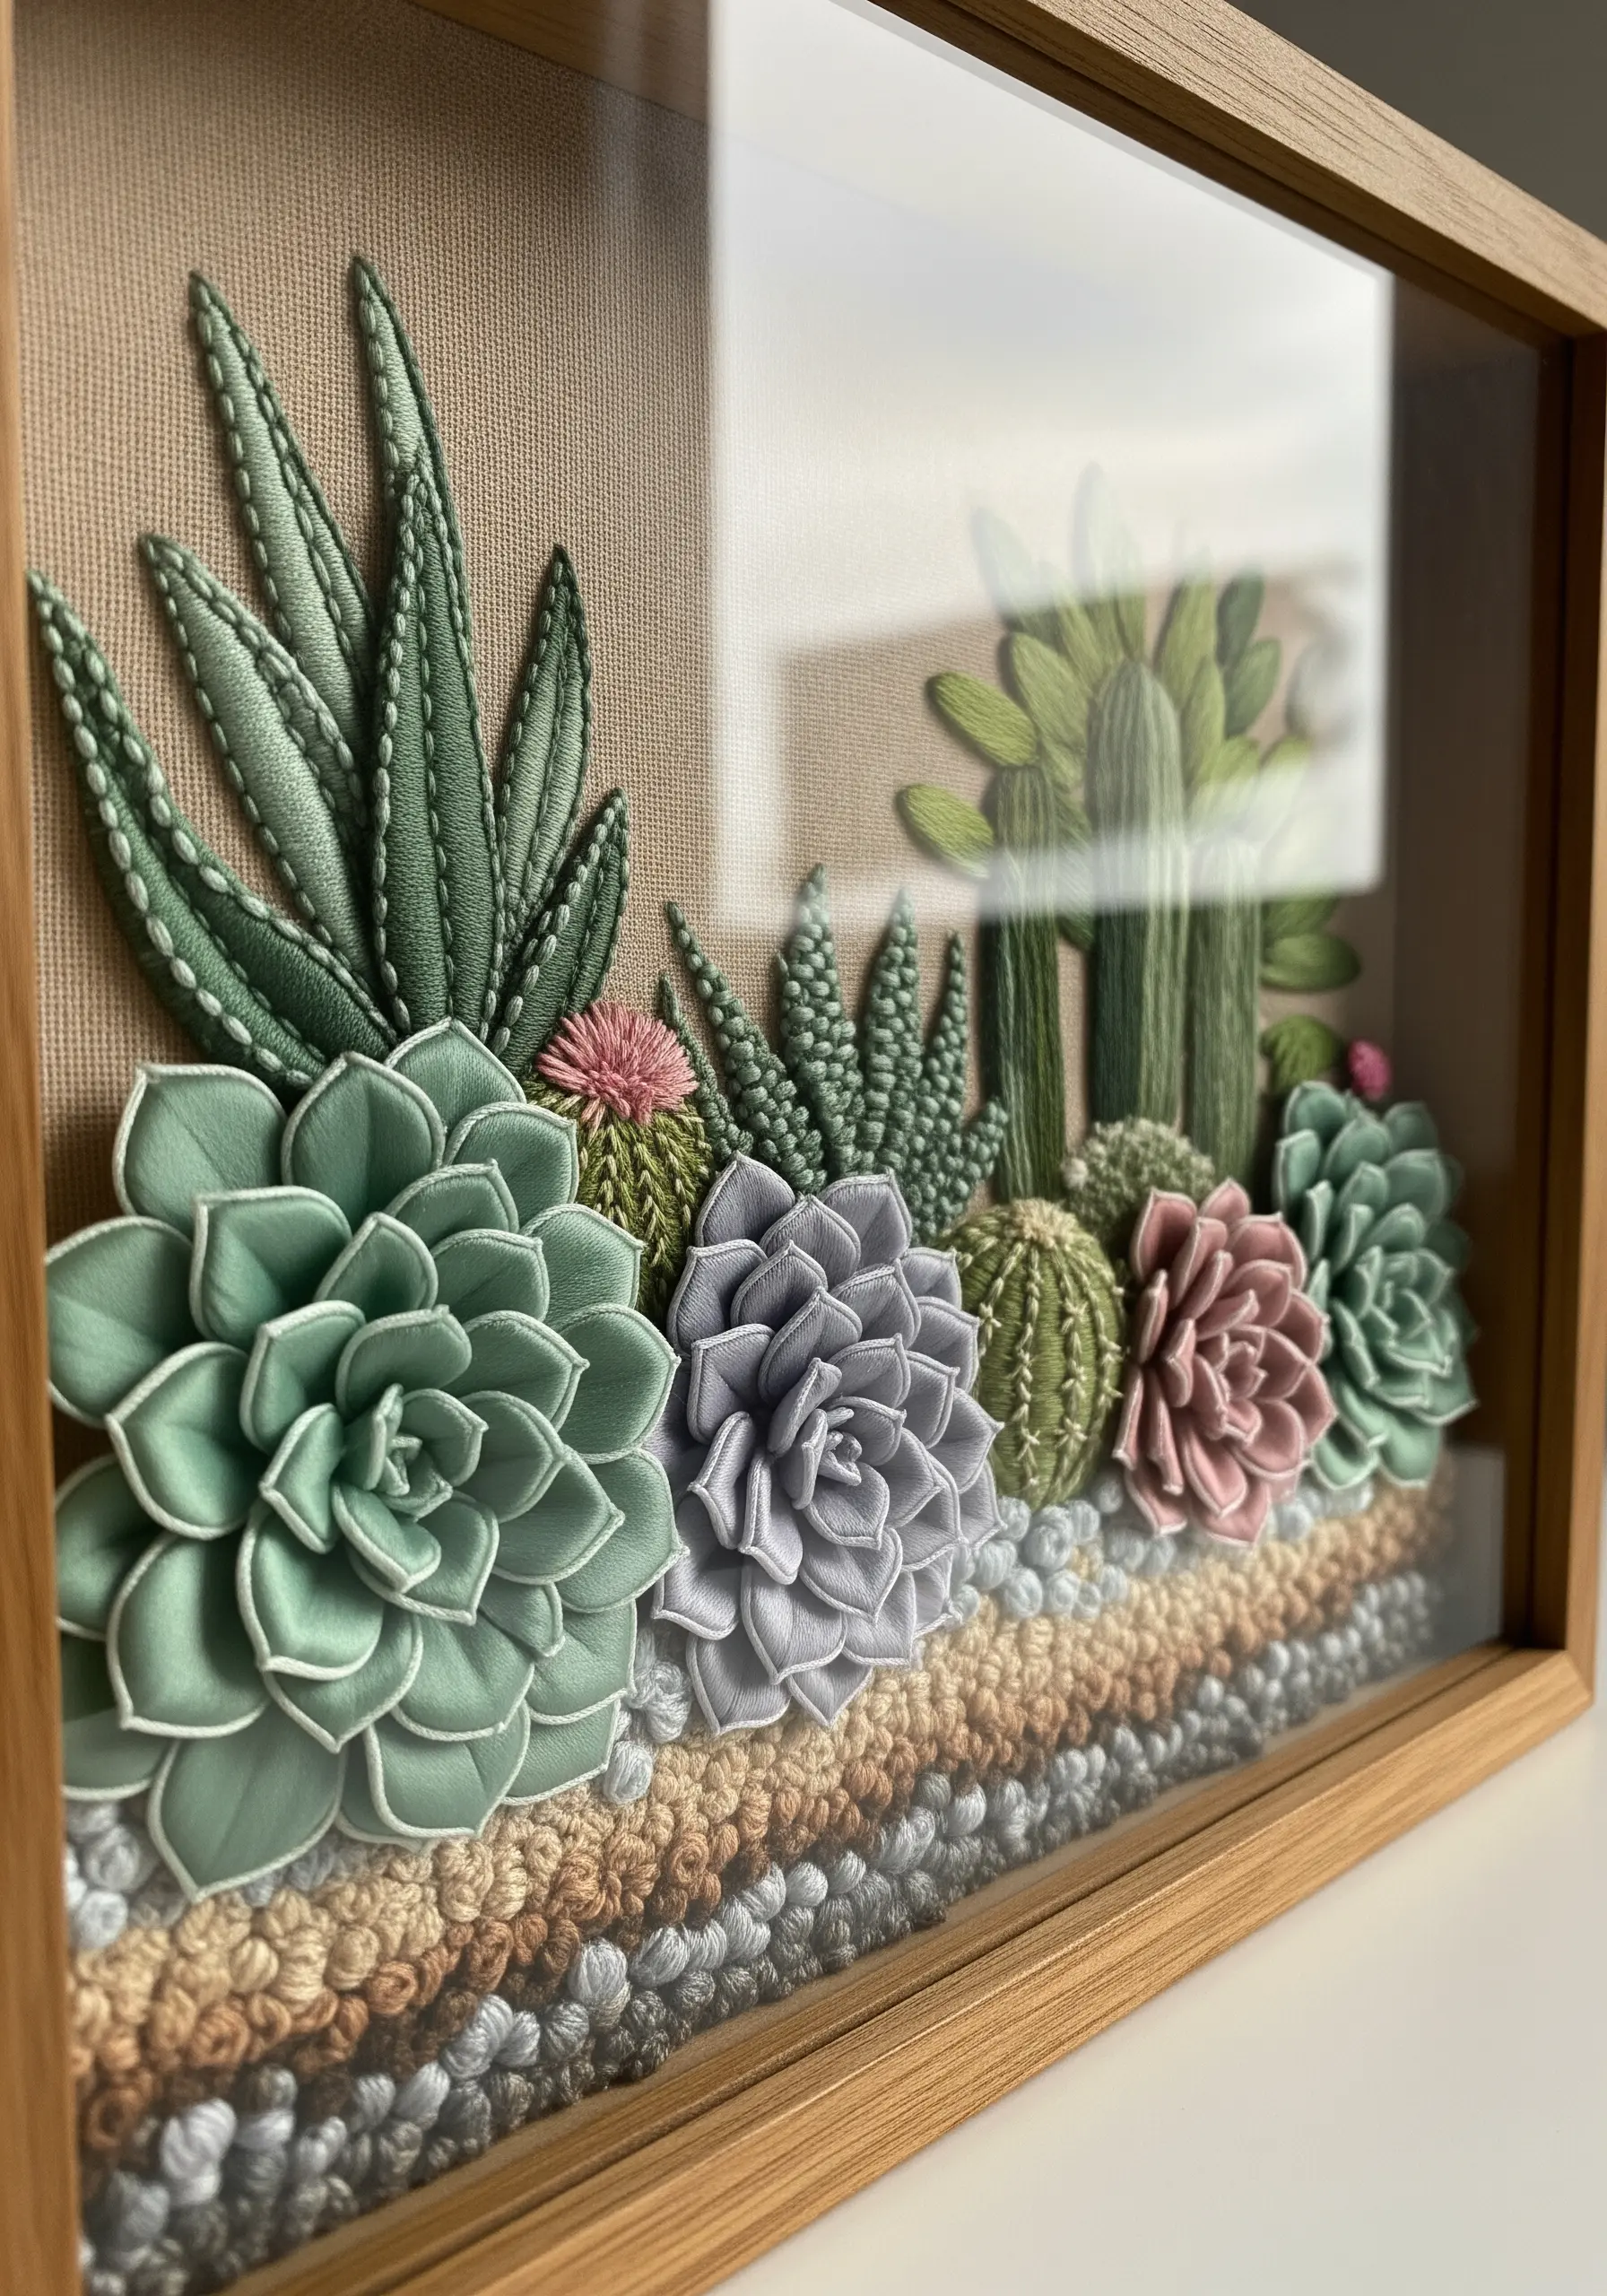
Elevate your work with stumpwork, a technique that brings embroidery into the third dimension.
Create individual succulent petals by wrapping thread around a thin wire frame with buttonhole stitches, then cut them out and shape them.
Assemble the petals and stitch them onto your background fabric, layering them to build realistic plants.
Displaying the finished piece in a shadow box transforms it into one of those framed embroidery artworks that look like they belong in a gallery.
14. Weave a Textural Bird’s Nest
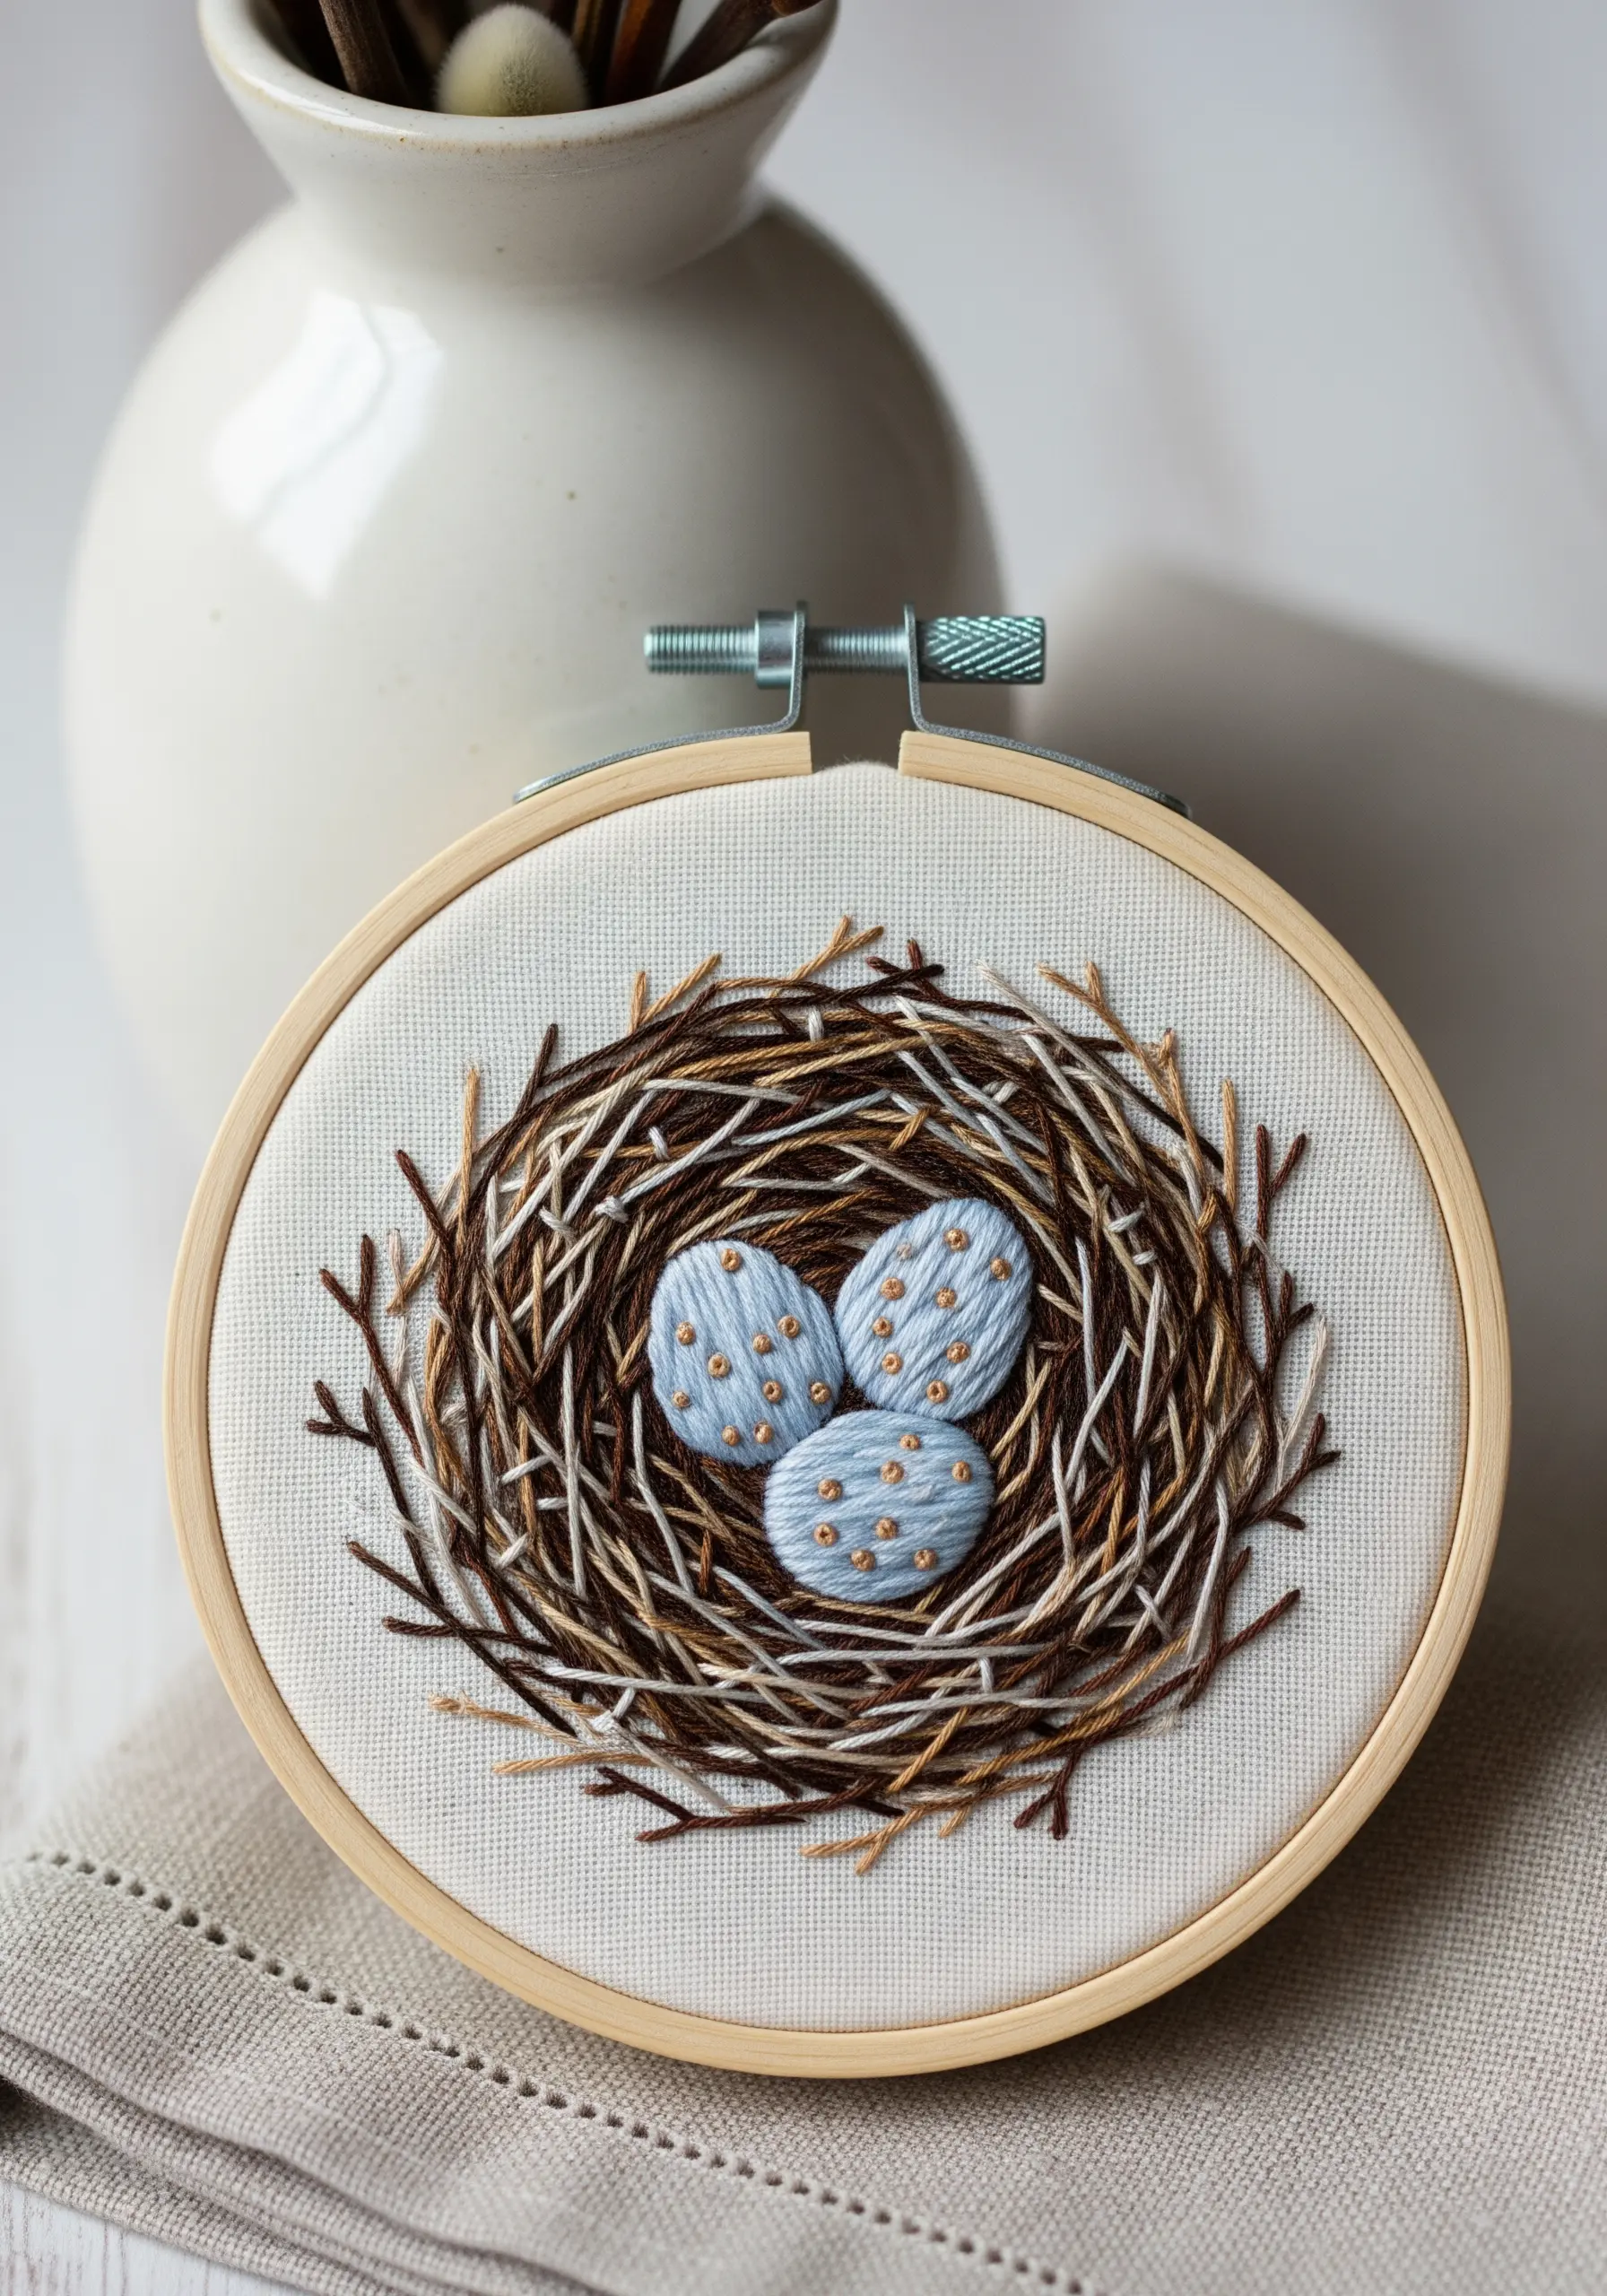
Build a realistic nest not by filling a shape, but by weaving it.
Start with a chaotic base of long, straight stitches in several shades of brown. Then, add more stitches on top, intentionally looping them over and under the existing threads.
This layering technique creates the random, interwoven structure of a real nest.
This is one of the most effective nature texture embroidery projects for capturing authentic organic form.
15. Capture Whimsy with Negative Space
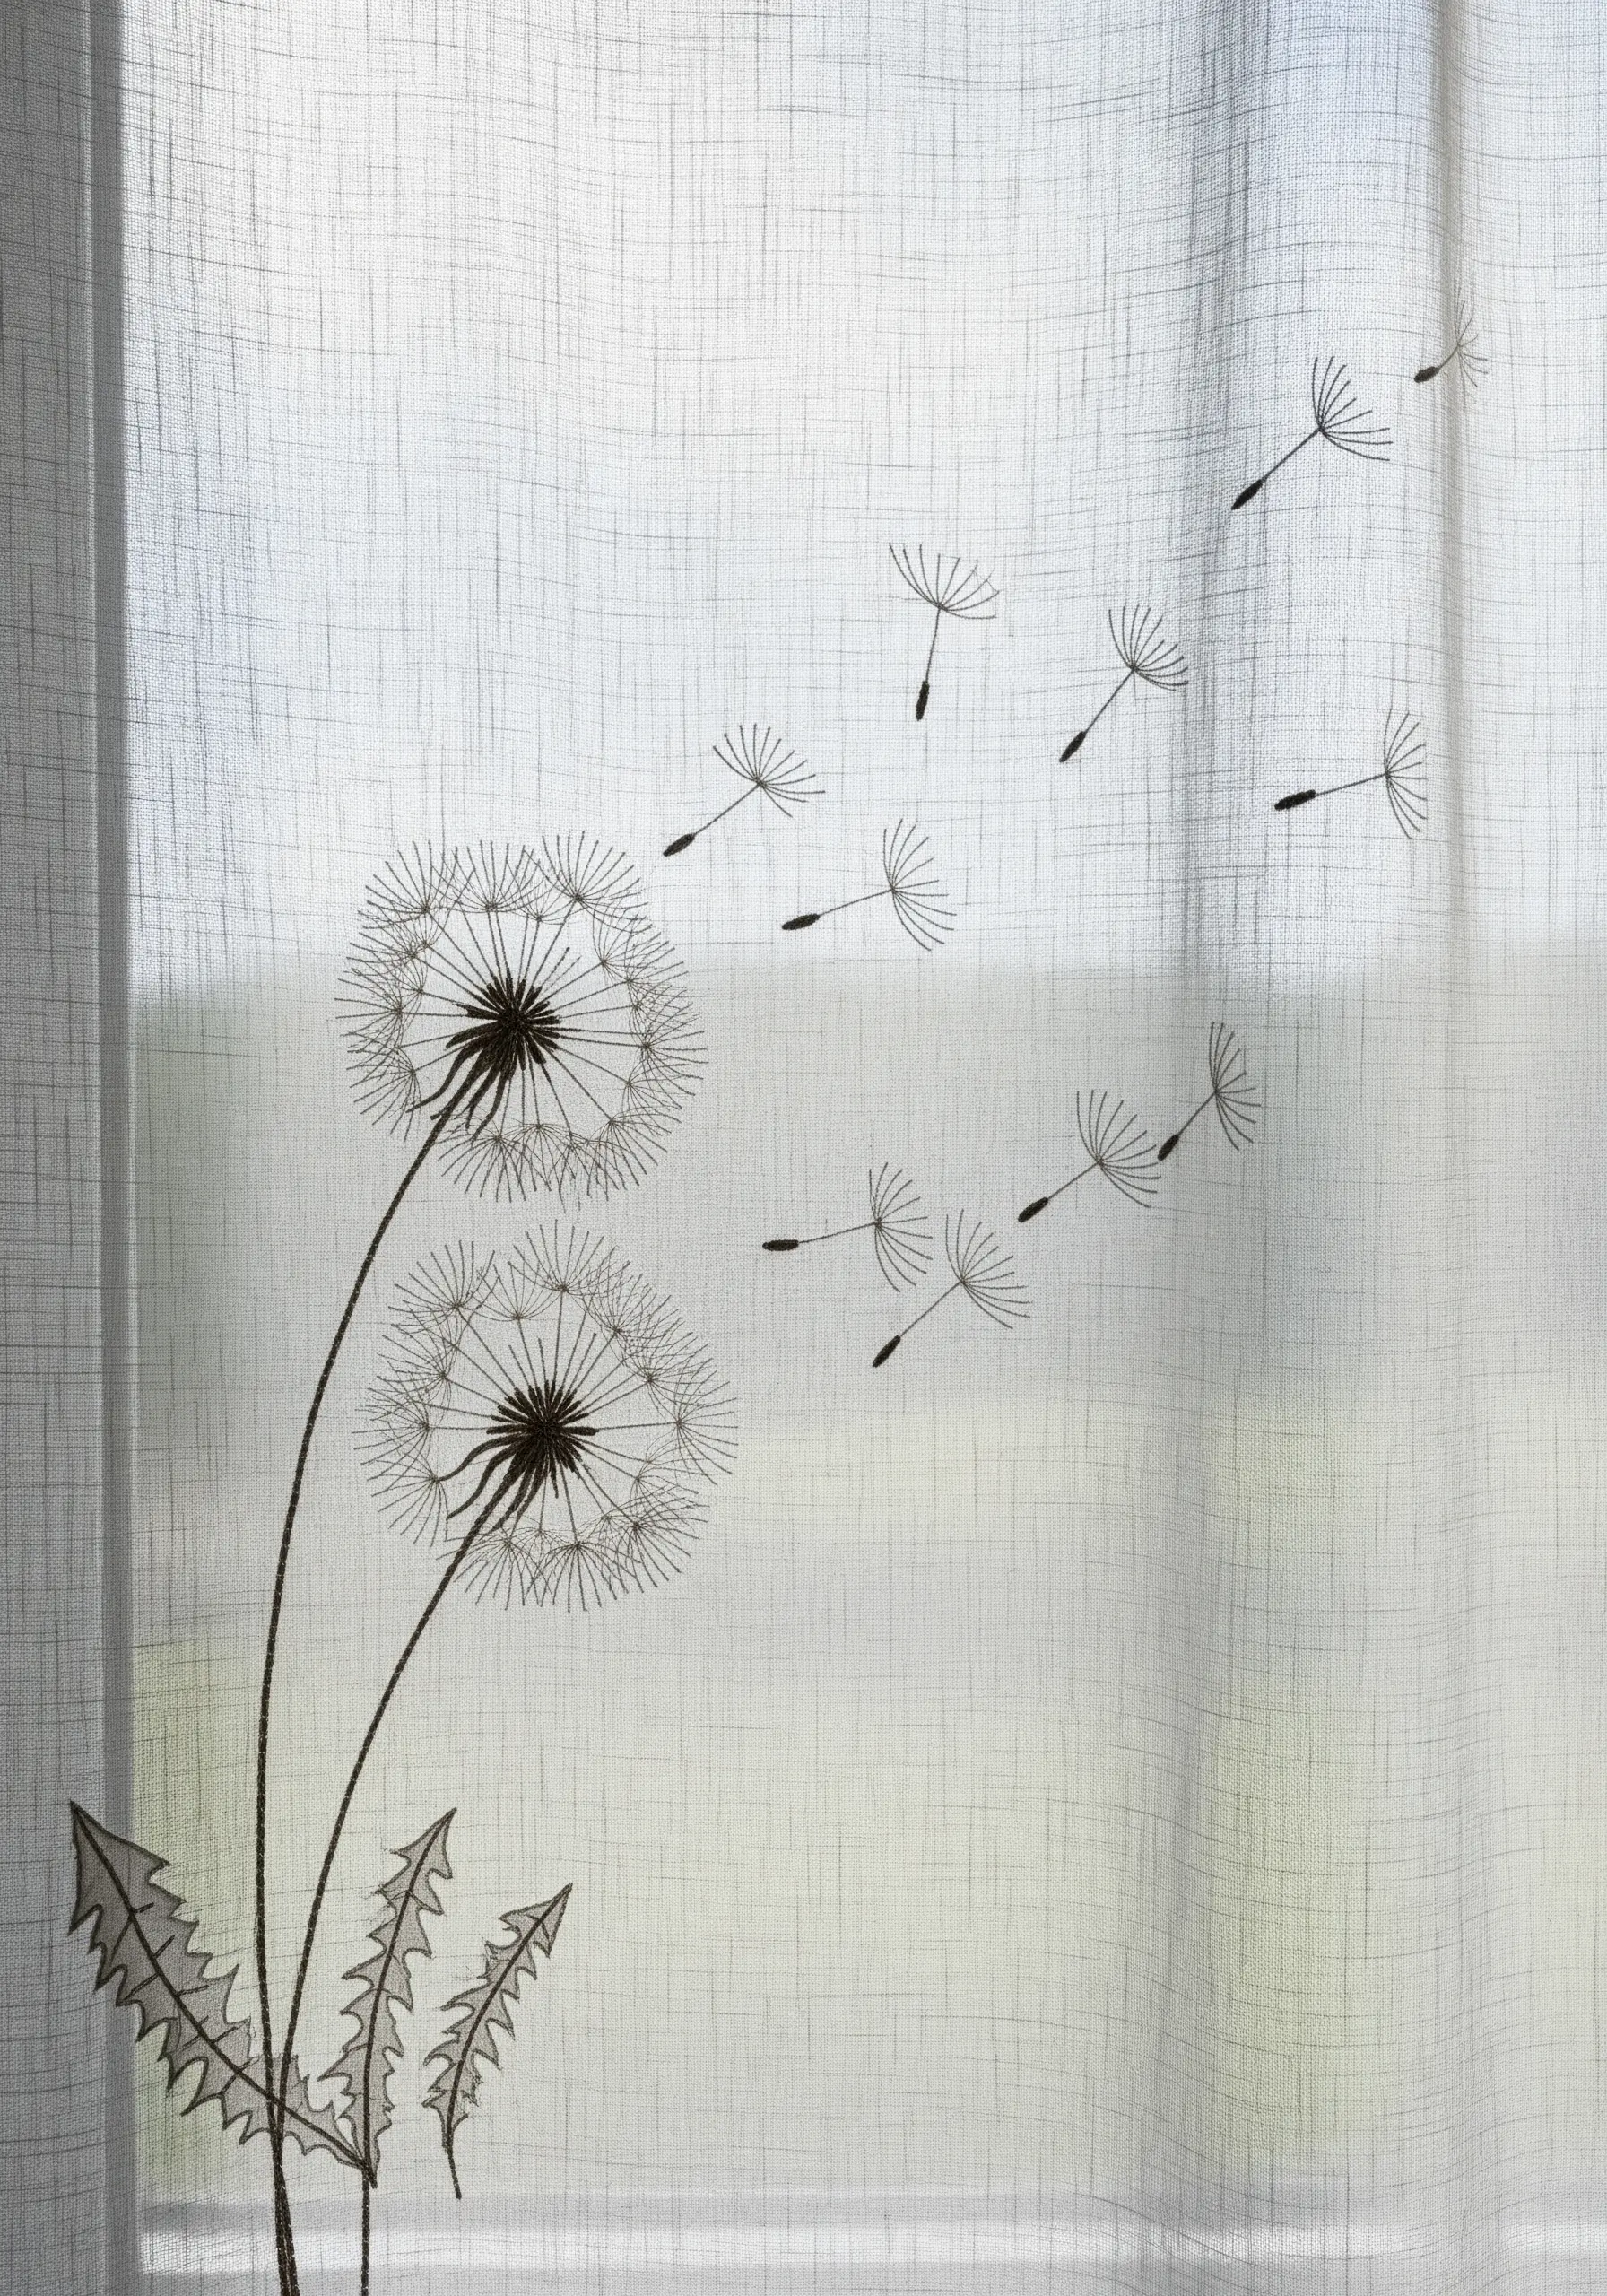
When embroidering delicate motifs like dandelion seeds on a light fabric, the negative space is as important as the stitches.
Use a very fine thread (one or two strands) in a dark, contrasting color to keep the lines crisp and graphic.
Space the floating seeds thoughtfully to create a sense of movement and lightness across the fabric panel.
It’s these tiny embroidery details that make fabric crafts pop with elegance.
16. Combine Appliqué and Stitch for Autumn Leaves
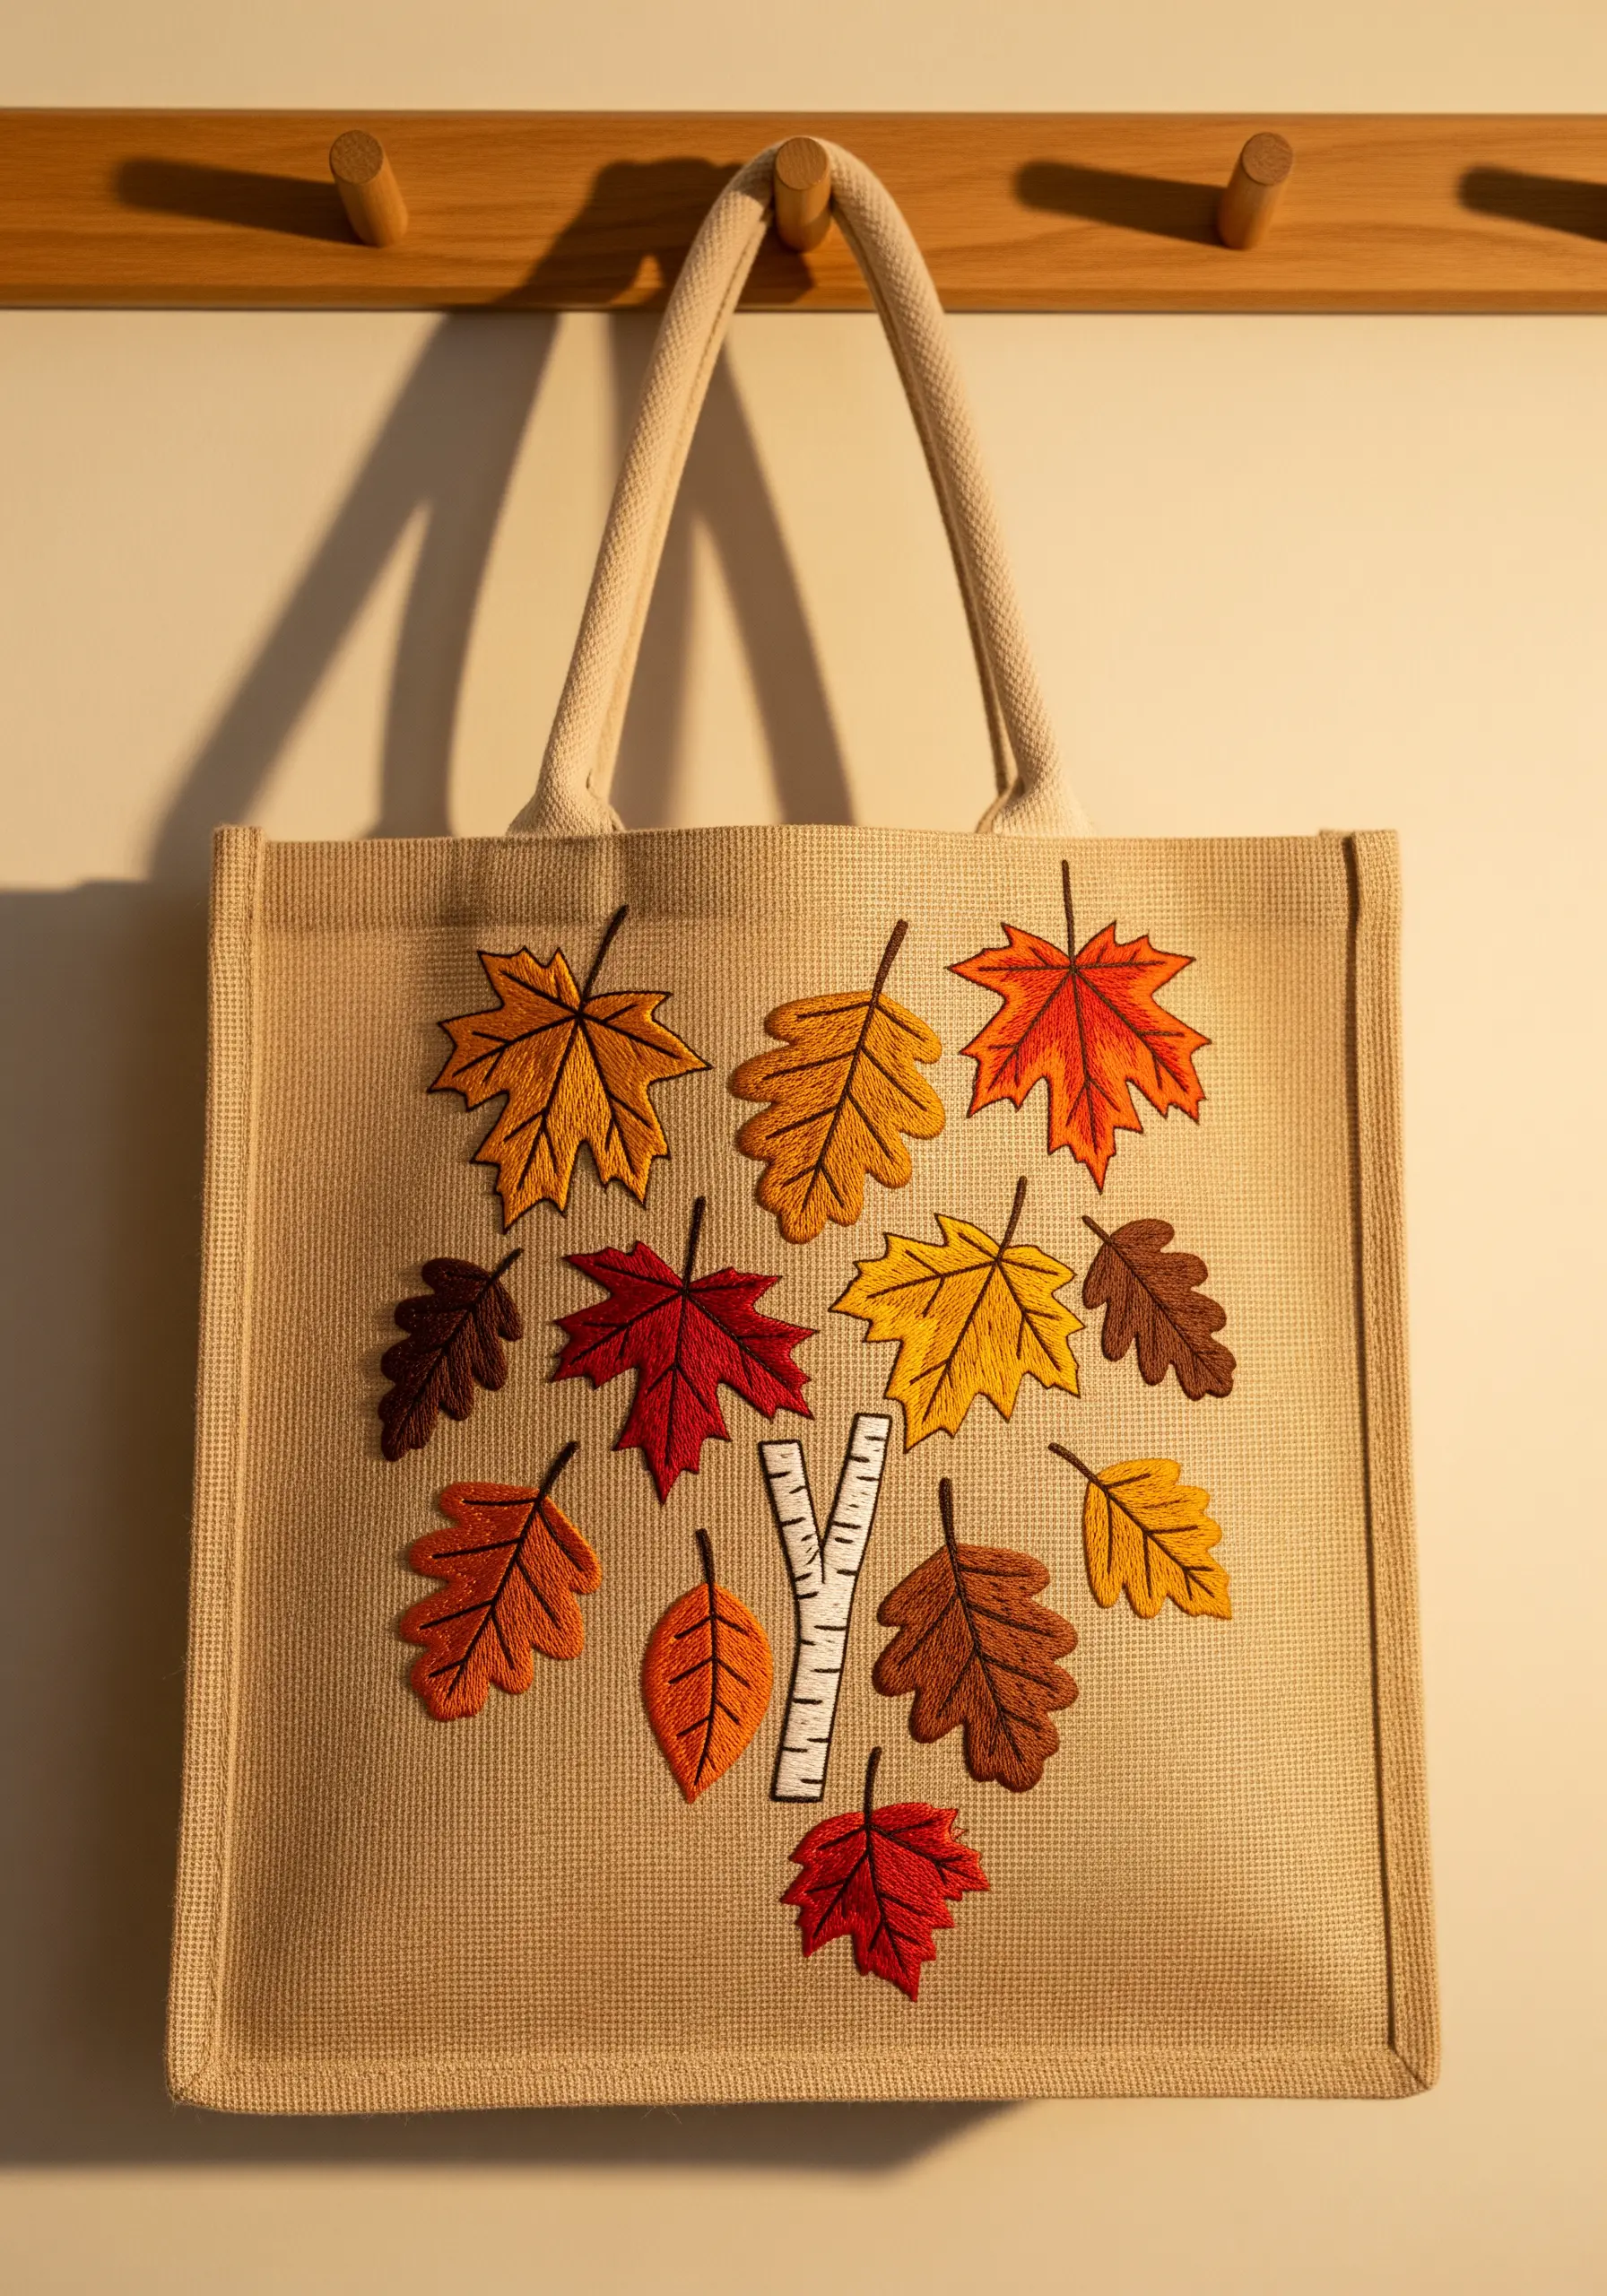
For bold, graphic leaves with rich color, start with appliqué.
Cut leaf shapes from felt or wool-blend fabric, which won’t fray at the edges, and arrange them on your tote bag.
Secure each shape with a simple running stitch around the perimeter, then add the central veins with a contrasting backstitch.
This method is faster than filling the entire shape with satin stitch and creates a charming, layered effect.
17. Animate a Scene with Tiny Details
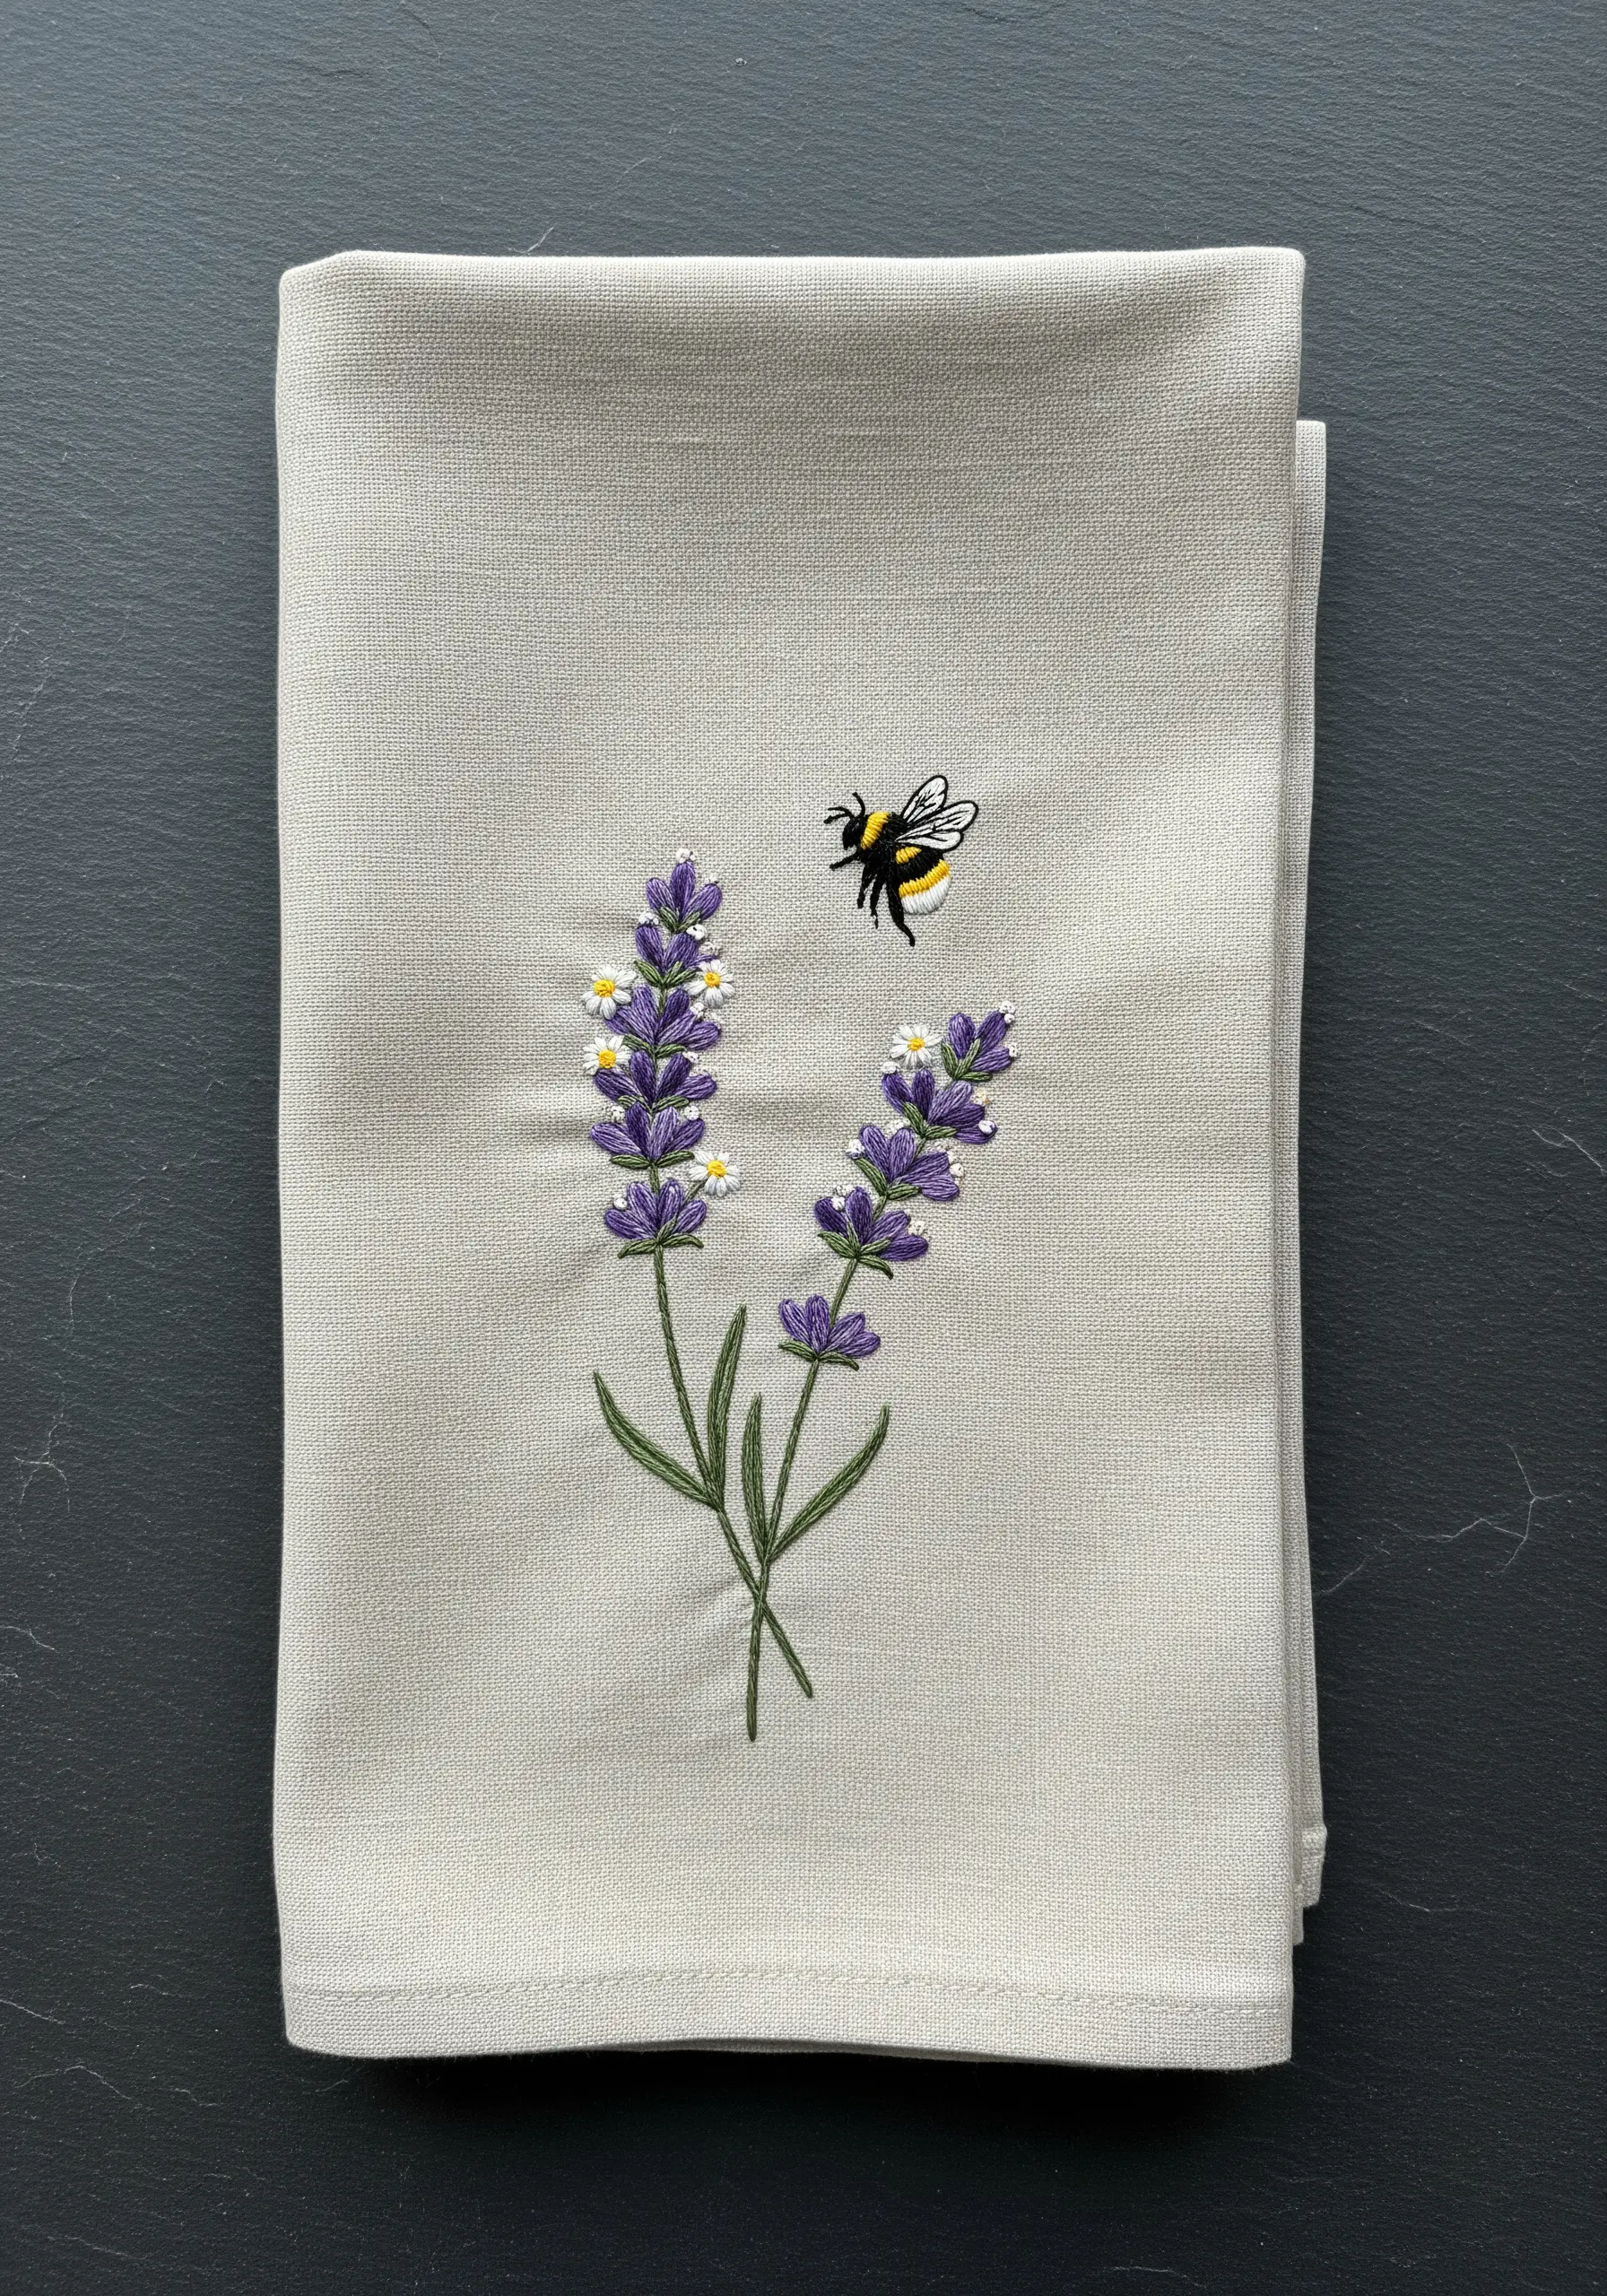
Bring a simple botanical motif to life by adding a tiny, dynamic element like a bee.
For the translucent wings, use a single strand of light grey or off-white floss and create an open fill with just a few straight stitches or a detached chain stitch.
This minimal approach suggests transparency and motion more effectively than a heavy satin stitch would.
These delicate lavender stitch ideas show how one small detail can complete a composition.
18. Chart the Stars with Metallic Thread
When working with metallic floss, which can be prone to fraying, use shorter lengths of thread (about 12 inches) and a needle with a larger eye to reduce friction.
A thread conditioner like beeswax or Thread Heaven can also make it glide more smoothly through the fabric.
Use tiny French knots or colonial knots for the stars to give them a raised, twinkling texture against the dark canvas, turning it into beautiful metallic thread wall art.
19. Integrate Natural Elements into Your Art
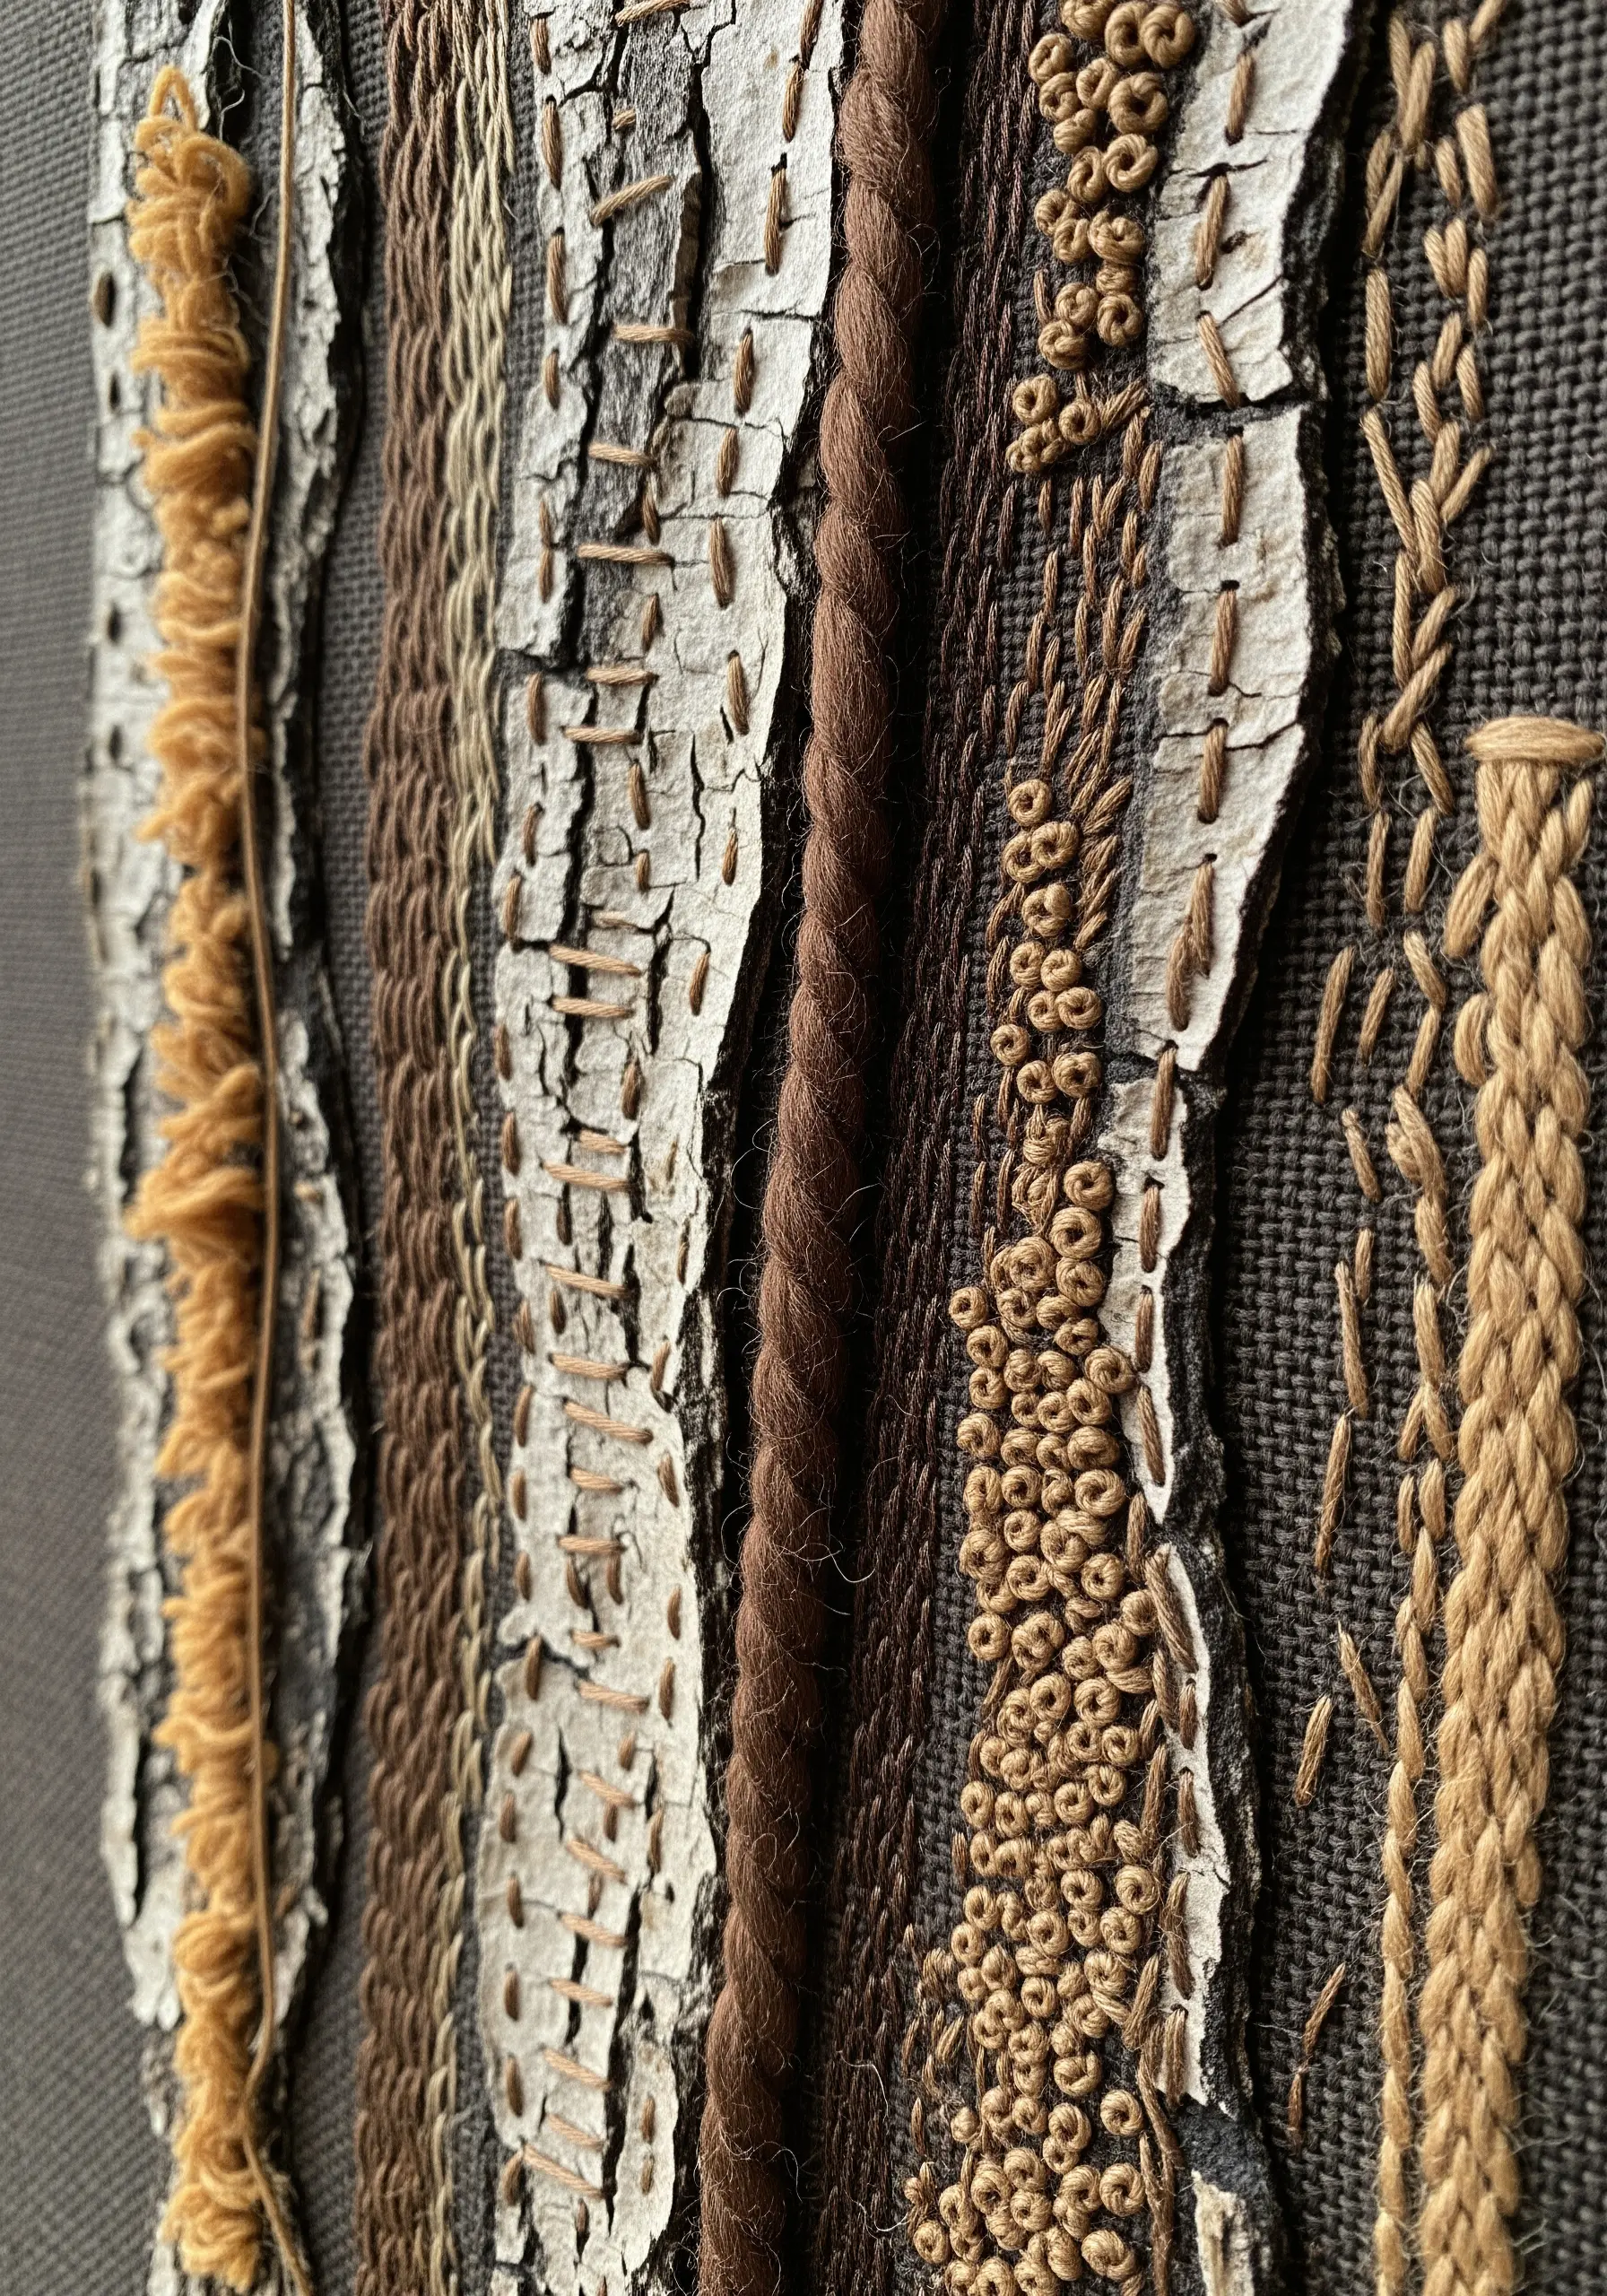
Create a truly organic piece by incorporating found natural objects, like peeling birch bark, into your embroidery.
Secure the pieces to a heavy linen or canvas base with a strong fabric glue, then use your stitches to interact with them.
Stitch over the edges to blend them in, fill the cracks with French knots, or lay lines of couched yarn alongside them.
This turns your hoop into one of those tactile embroidery projects inspired by textures you’d find on a nature walk.
20. Preserve Pressed Flowers Under Tulle
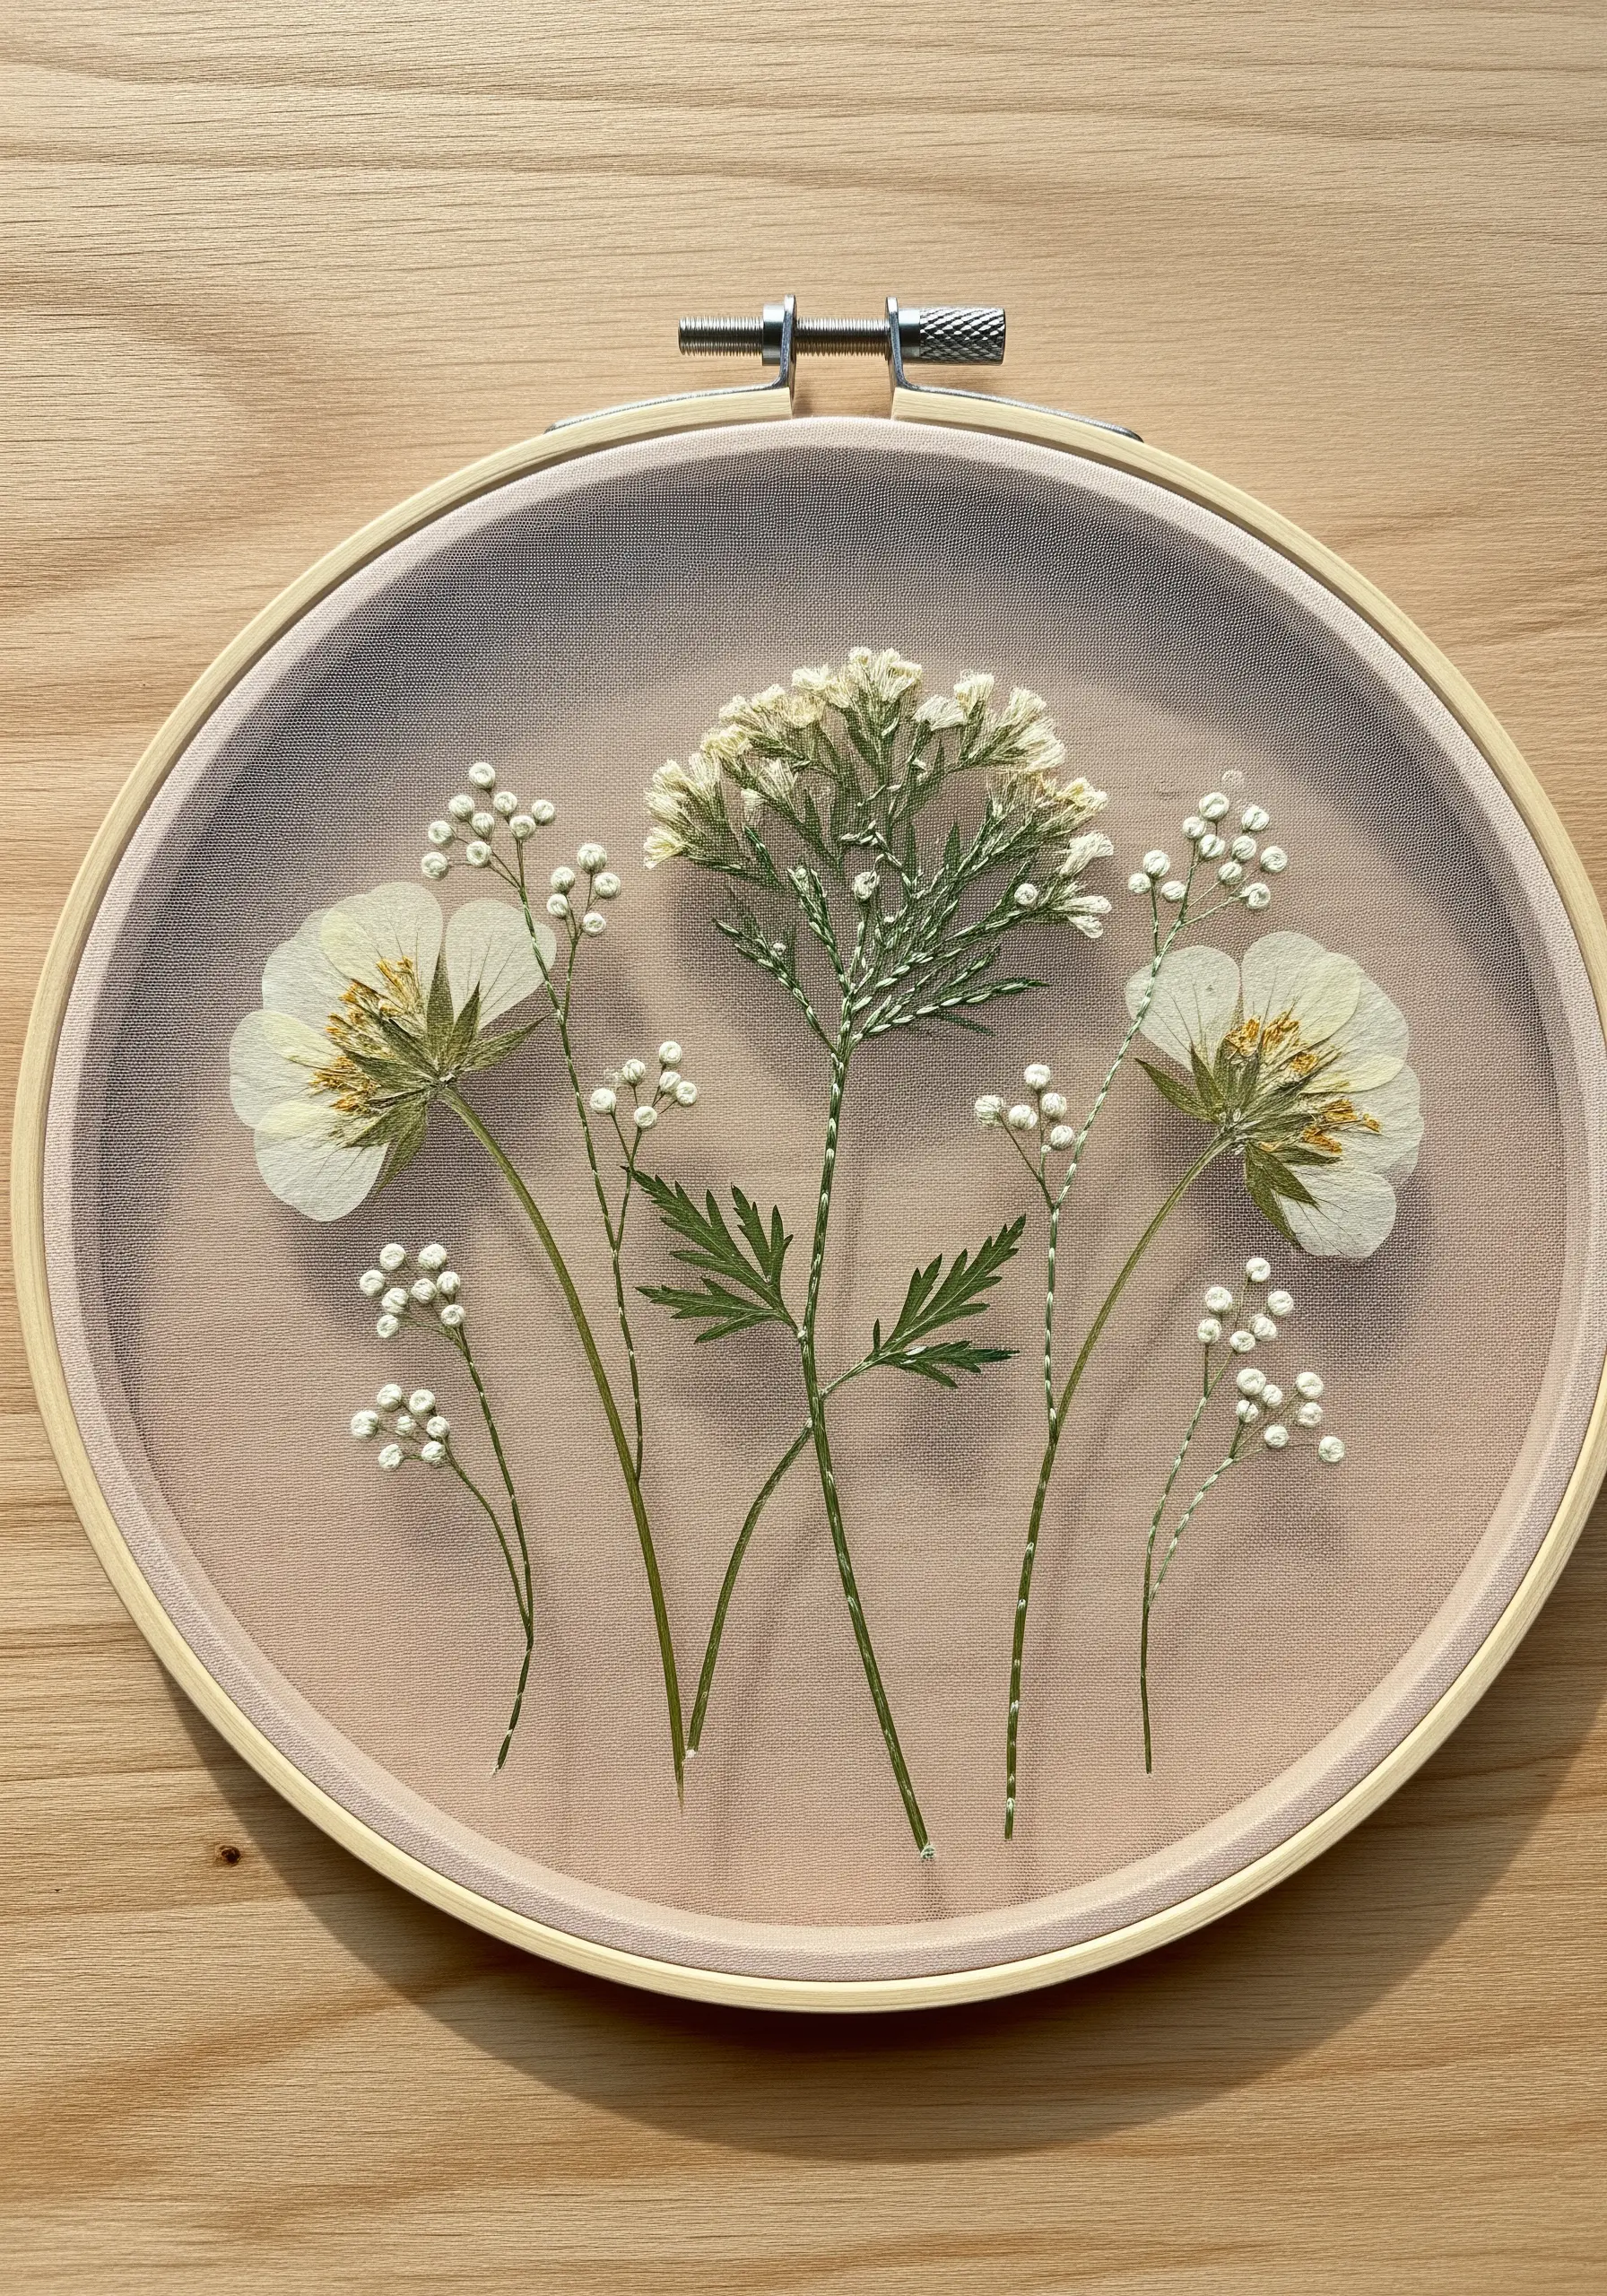
To create the illusion of flowers floating in air, use two layers of sheer tulle stretched together in one hoop.
Carefully arrange your delicate dried flowers between the layers.
Using a single strand of thread that matches the stems and petals, make tiny, almost invisible stitches to secure the botanicals in place.
This transforms fragile blooms into lasting inspiring pressed flower art projects.
21. Adorn Surfaces with Fabric Knots
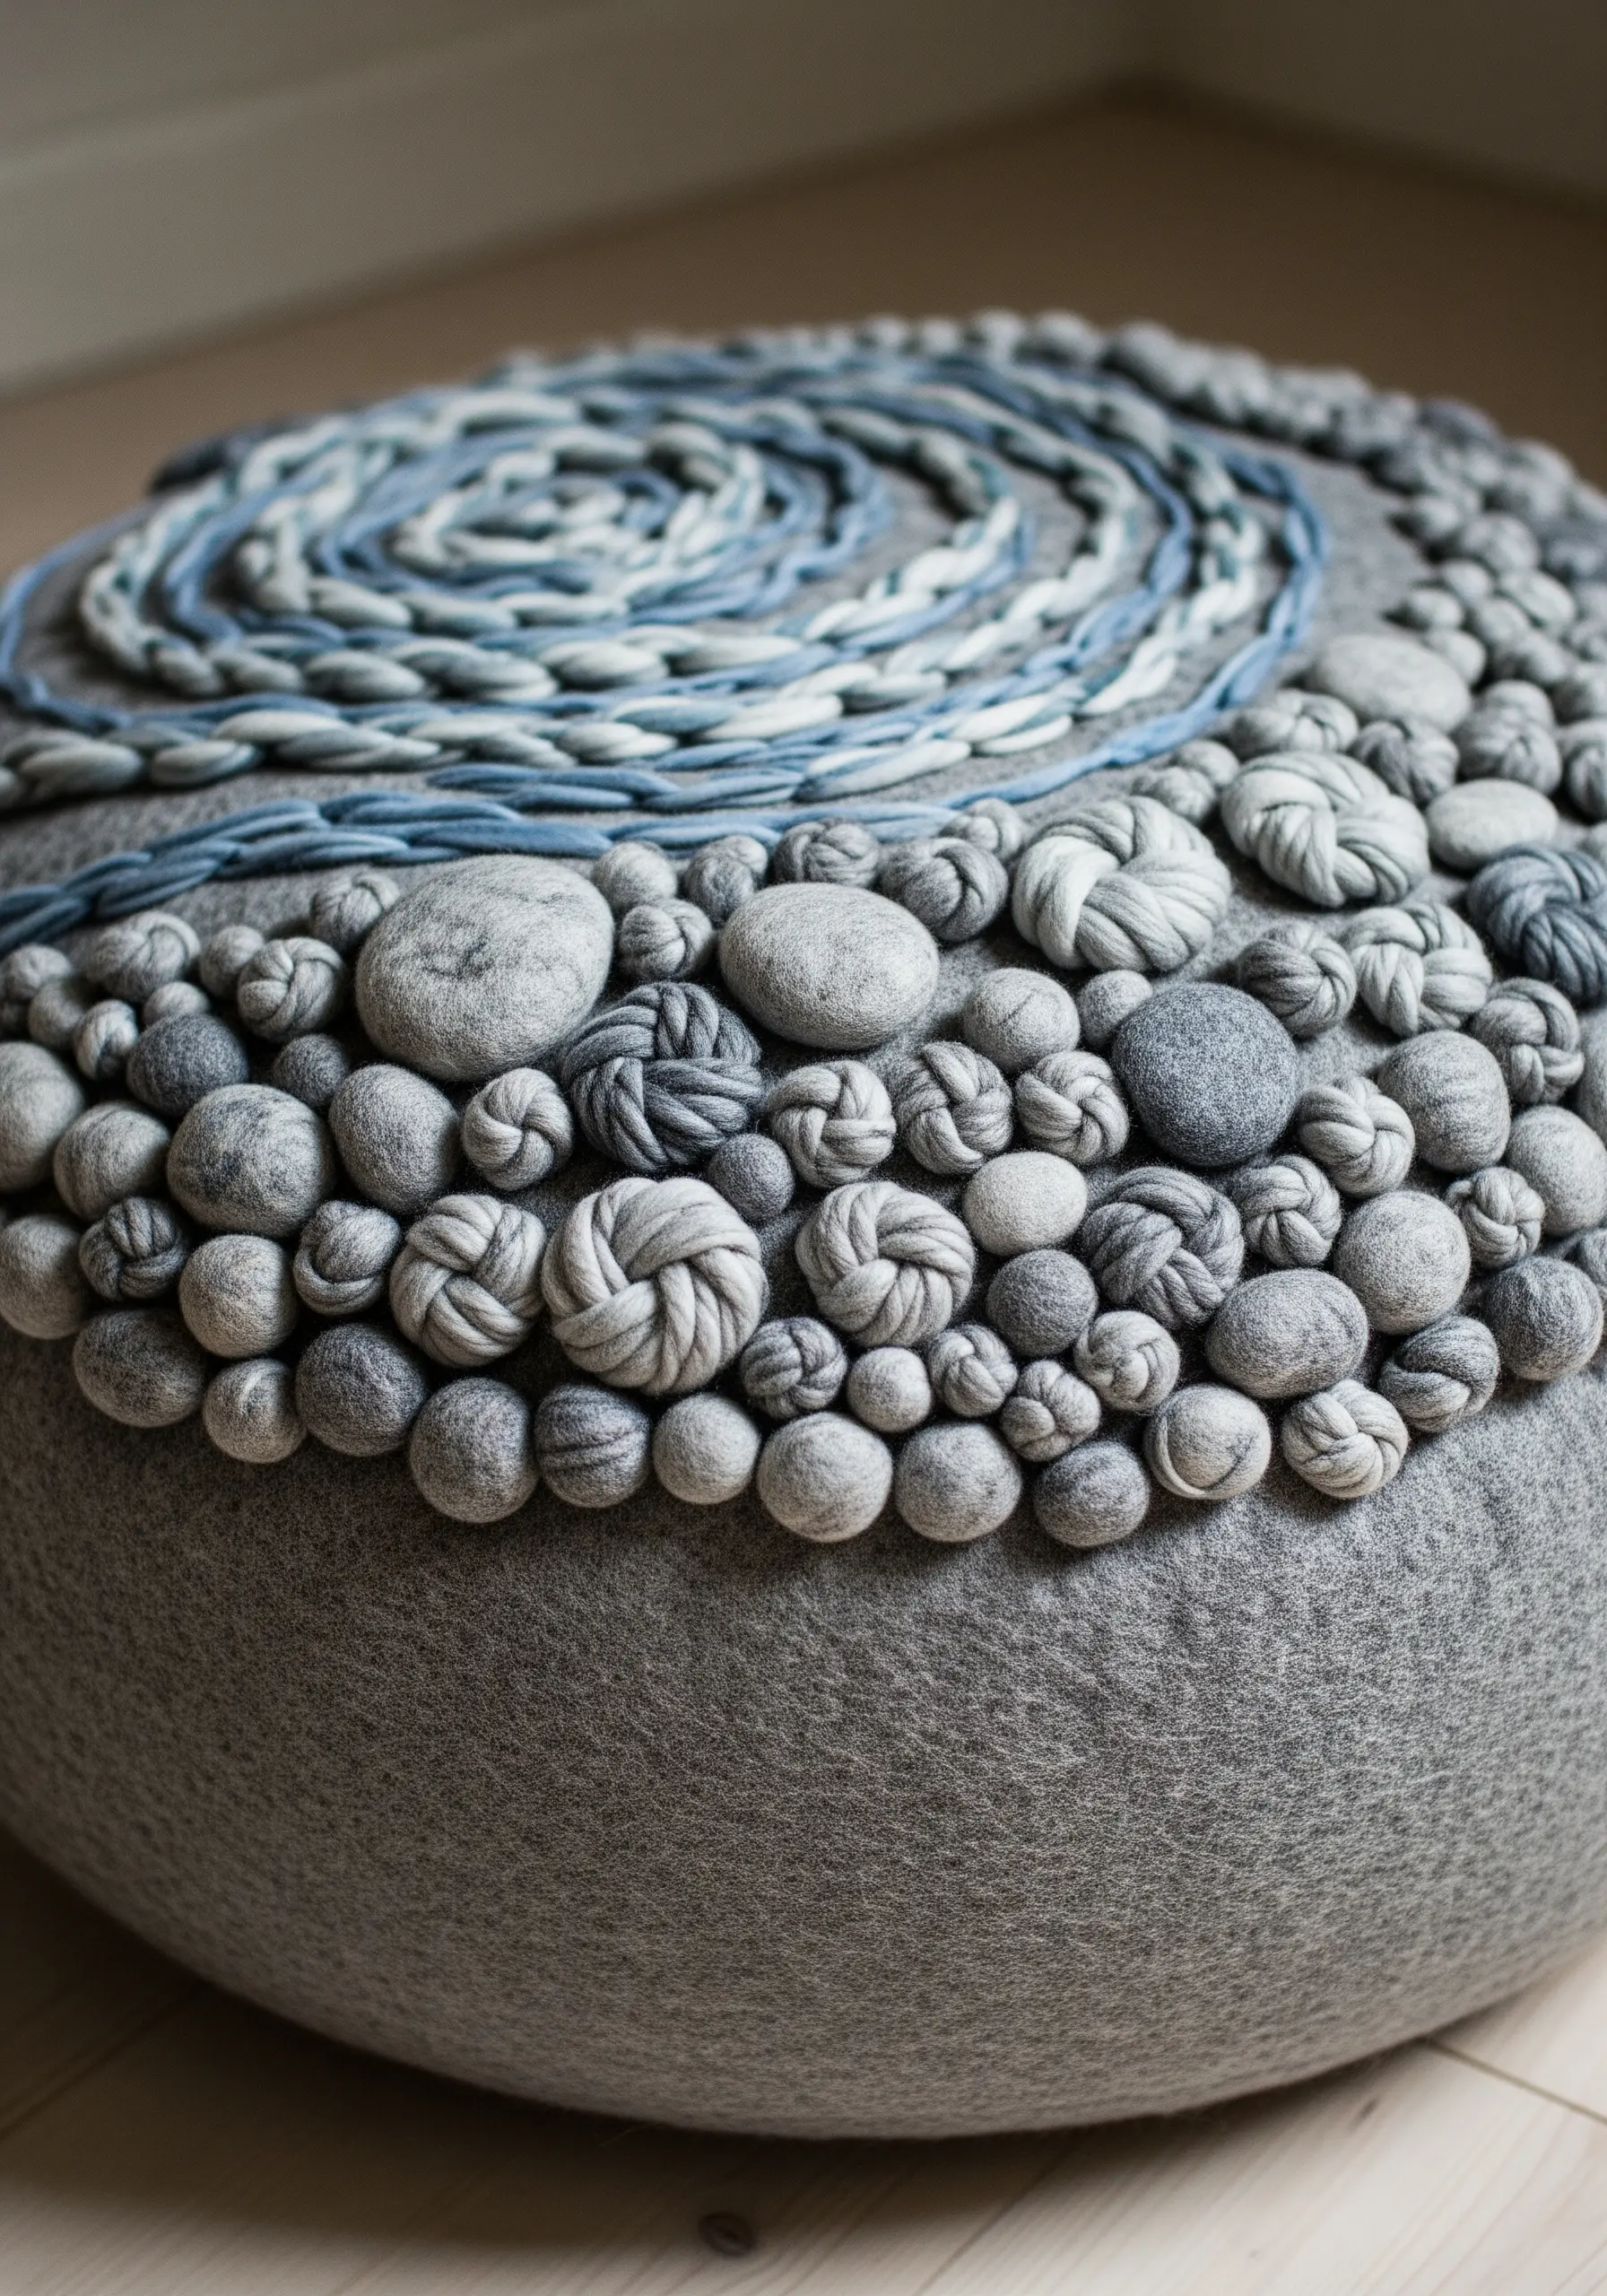
For a highly textural and sculptural surface, cover a pouf or cushion with handmade fabric knots.
You can create these by tying strips of soft jersey or felt fabric into tight knots, or by making Dorset buttons—a traditional technique of wrapping fabric or yarn around a ring.
Arrange the knots in a dense pattern and stitch each one securely to the base from underneath.
The result is one of those handmade art objects that is both visually stunning and wonderfully tactile.
22. Appliqué a Minimalist Birch Forest

Build a serene woodland scene using fabric collage and minimal stitching.
Cut long, irregular strips of white and off-white linen or cotton for the tree trunks and appliqué them onto a neutral grey background.
Instead of dense stitching, use a contrasting dark thread to add the iconic bark details with sparse, horizontal straight stitches.
This fabric collage embroidery composition relies on texture and restraint for its modern, calming effect.


