
You’ve mastered the basic stitches, your lines are neat, and your French knots are consistent. Yet, you might feel that your work is missing a certain spark—that intentional quality that transforms a well-stitched pattern into a piece of art.
The secret to elevating your embroidery isn’t about learning dozens of complex new stitches. It’s about making more thoughtful choices with the skills you already have. It’s in the way you blend two shades of green in a single leaf, the contrast you create between a smooth petal and a textured stem, and the story you tell with the empty space on your fabric.
Think of this collection not as a set of patterns to copy, but as a series of gentle nudges. Each idea offers a specific technique or a new perspective designed to help you stitch with greater confidence and creativity. Let’s explore how small adjustments can make a beautiful difference.
1. Define Form with Minimalist Line Art
Embrace the elegance of negative space by focusing purely on outlines.
Use a single strand of black six-strand floss to achieve a delicate, ink-drawn effect that allows the fabric’s texture to become part of the design.
For crisp, clean lines, choose a whipped backstitch or a stem stitch; the former creates a solid line, while the latter adds a subtle, rope-like texture.
This technique elevates simple sketches into sophisticated minimal DIY embroidery pieces, proving that thoughtful composition is often more powerful than dense stitching.
2. Create Dramatic Depth with High-Contrast Thread Painting
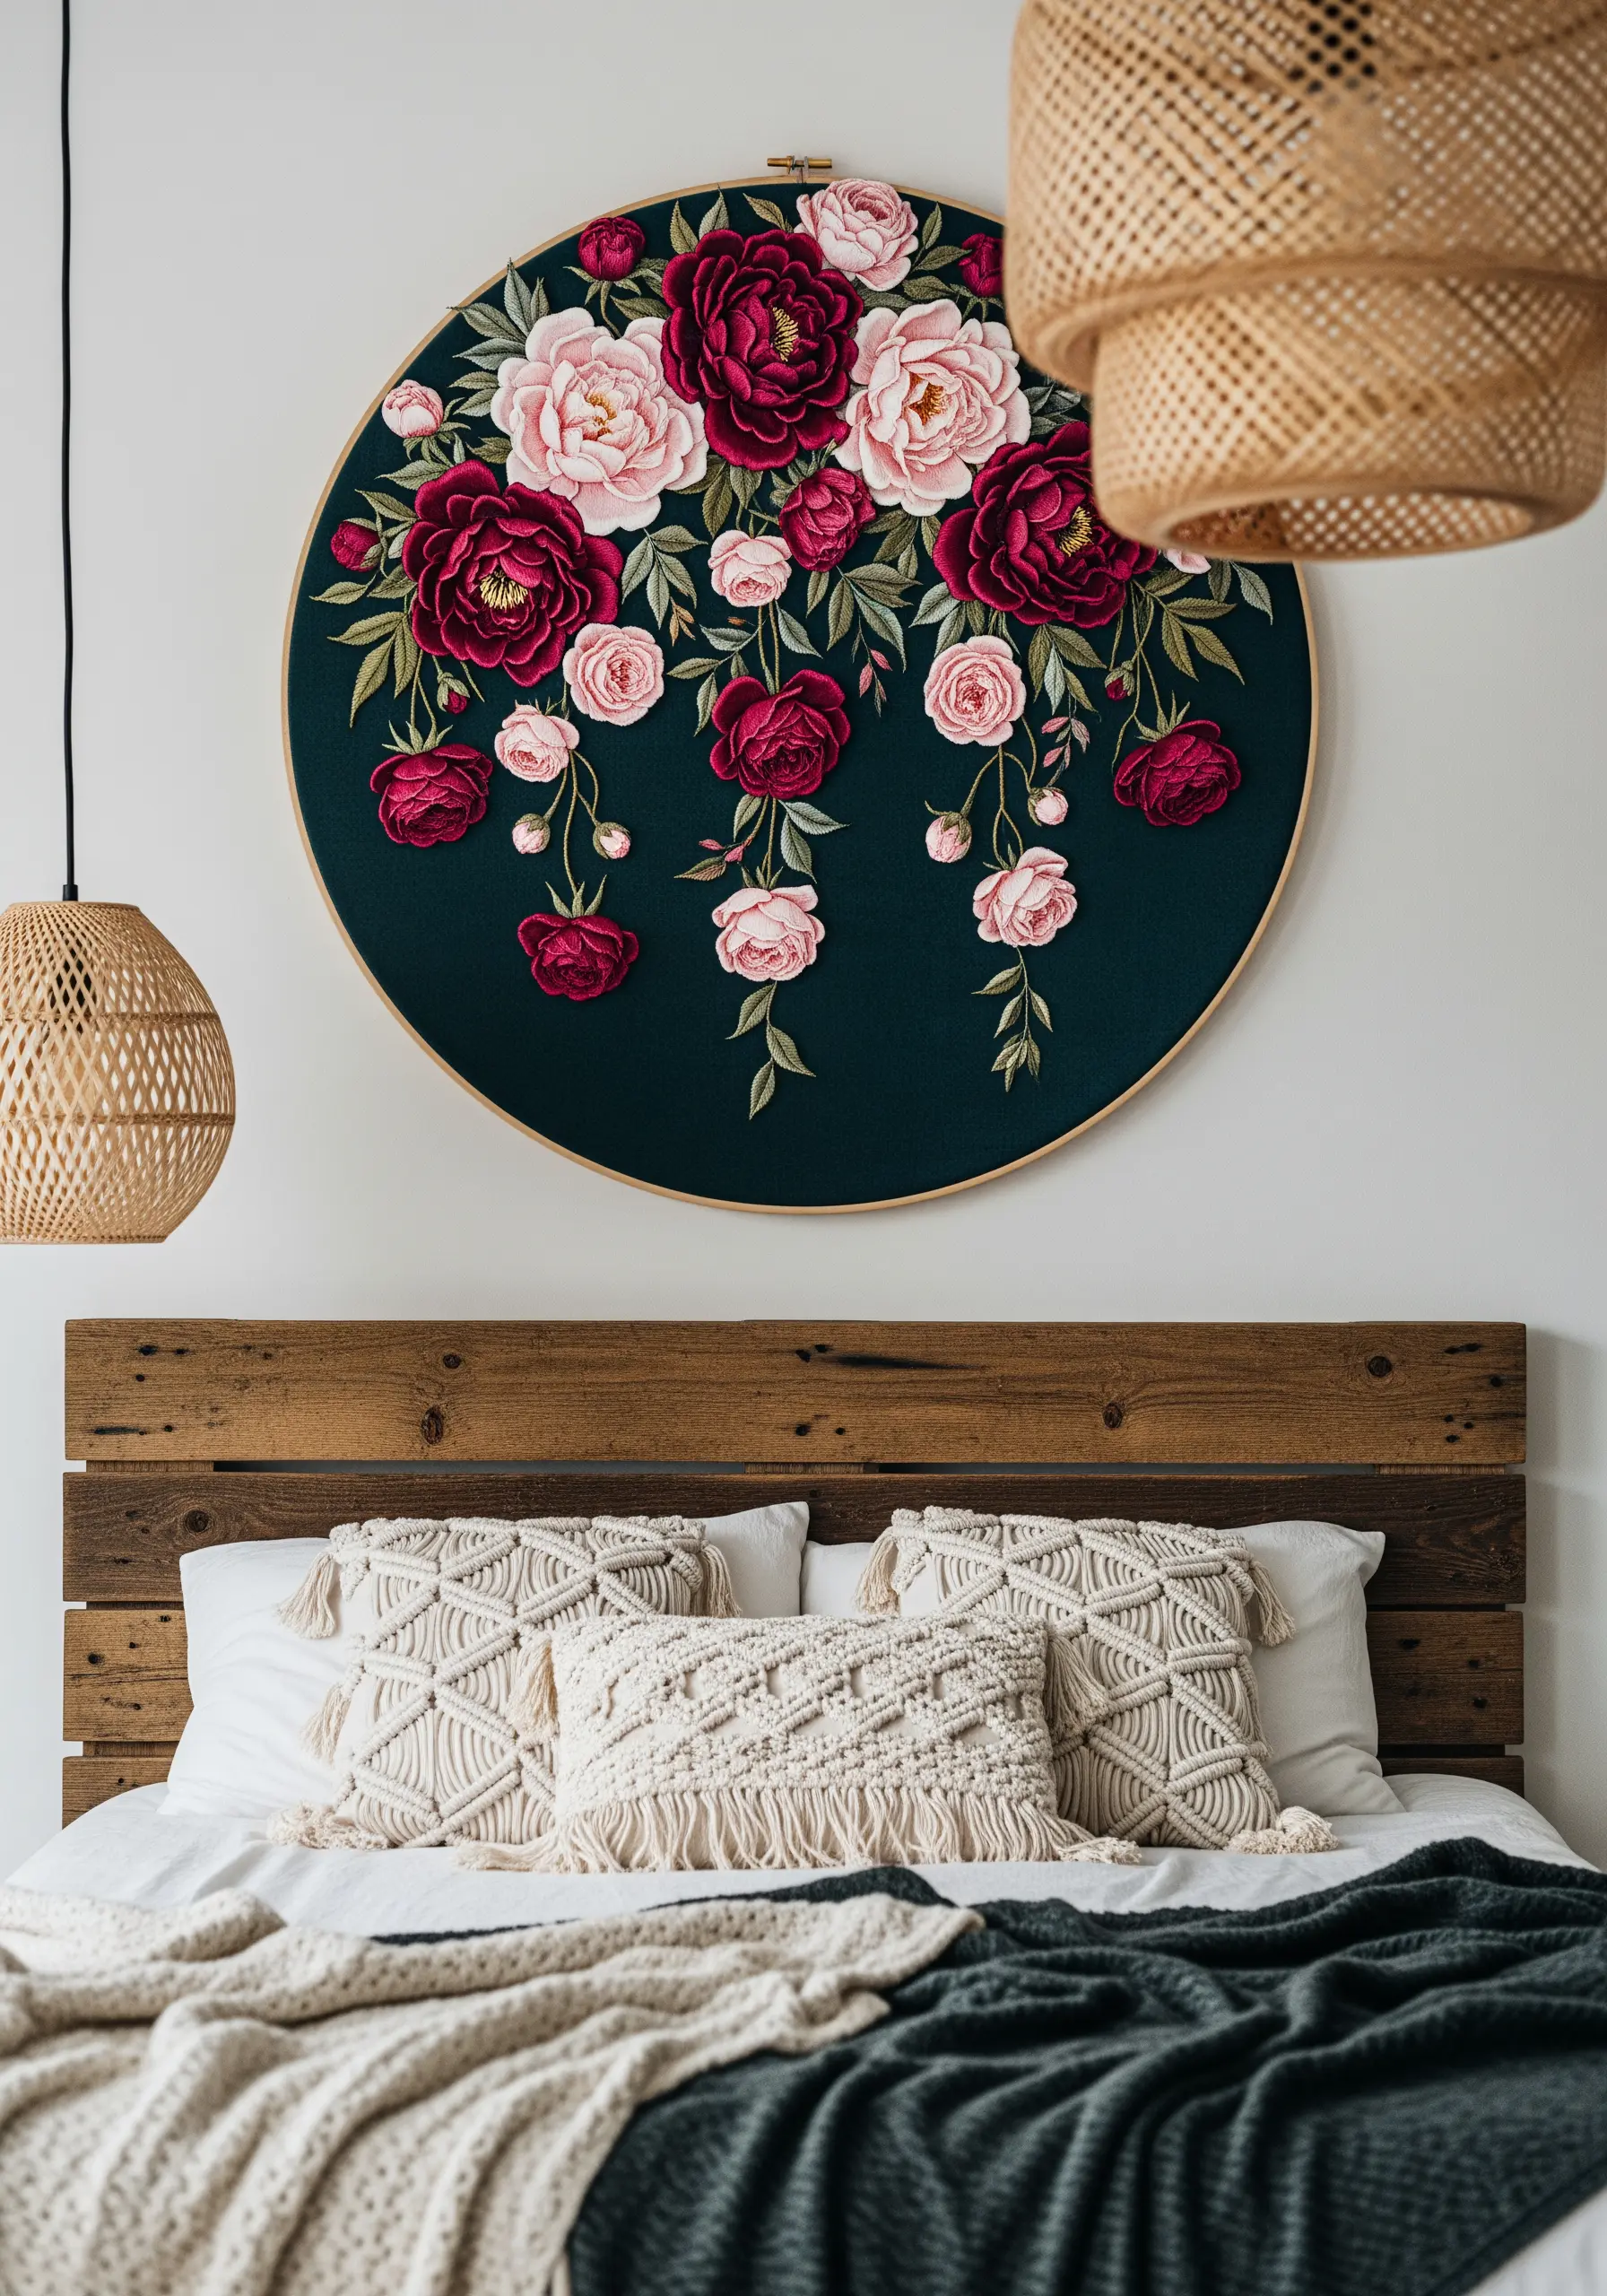
Make your florals leap off the fabric by stitching them on a dark, matte background like black or deep teal linen.
Use the long-and-short stitch to blend shades of magenta, blush, and ruby, creating photorealistic petals with smooth color transitions.
This technique, often called thread painting, works because the dark canvas absorbs light, making your thread colors appear richer and more saturated.
For a final touch of realism, add single-strand veins in a slightly darker shade on top of your satin-stitched leaves to create depth in your embroidery using natural textures.
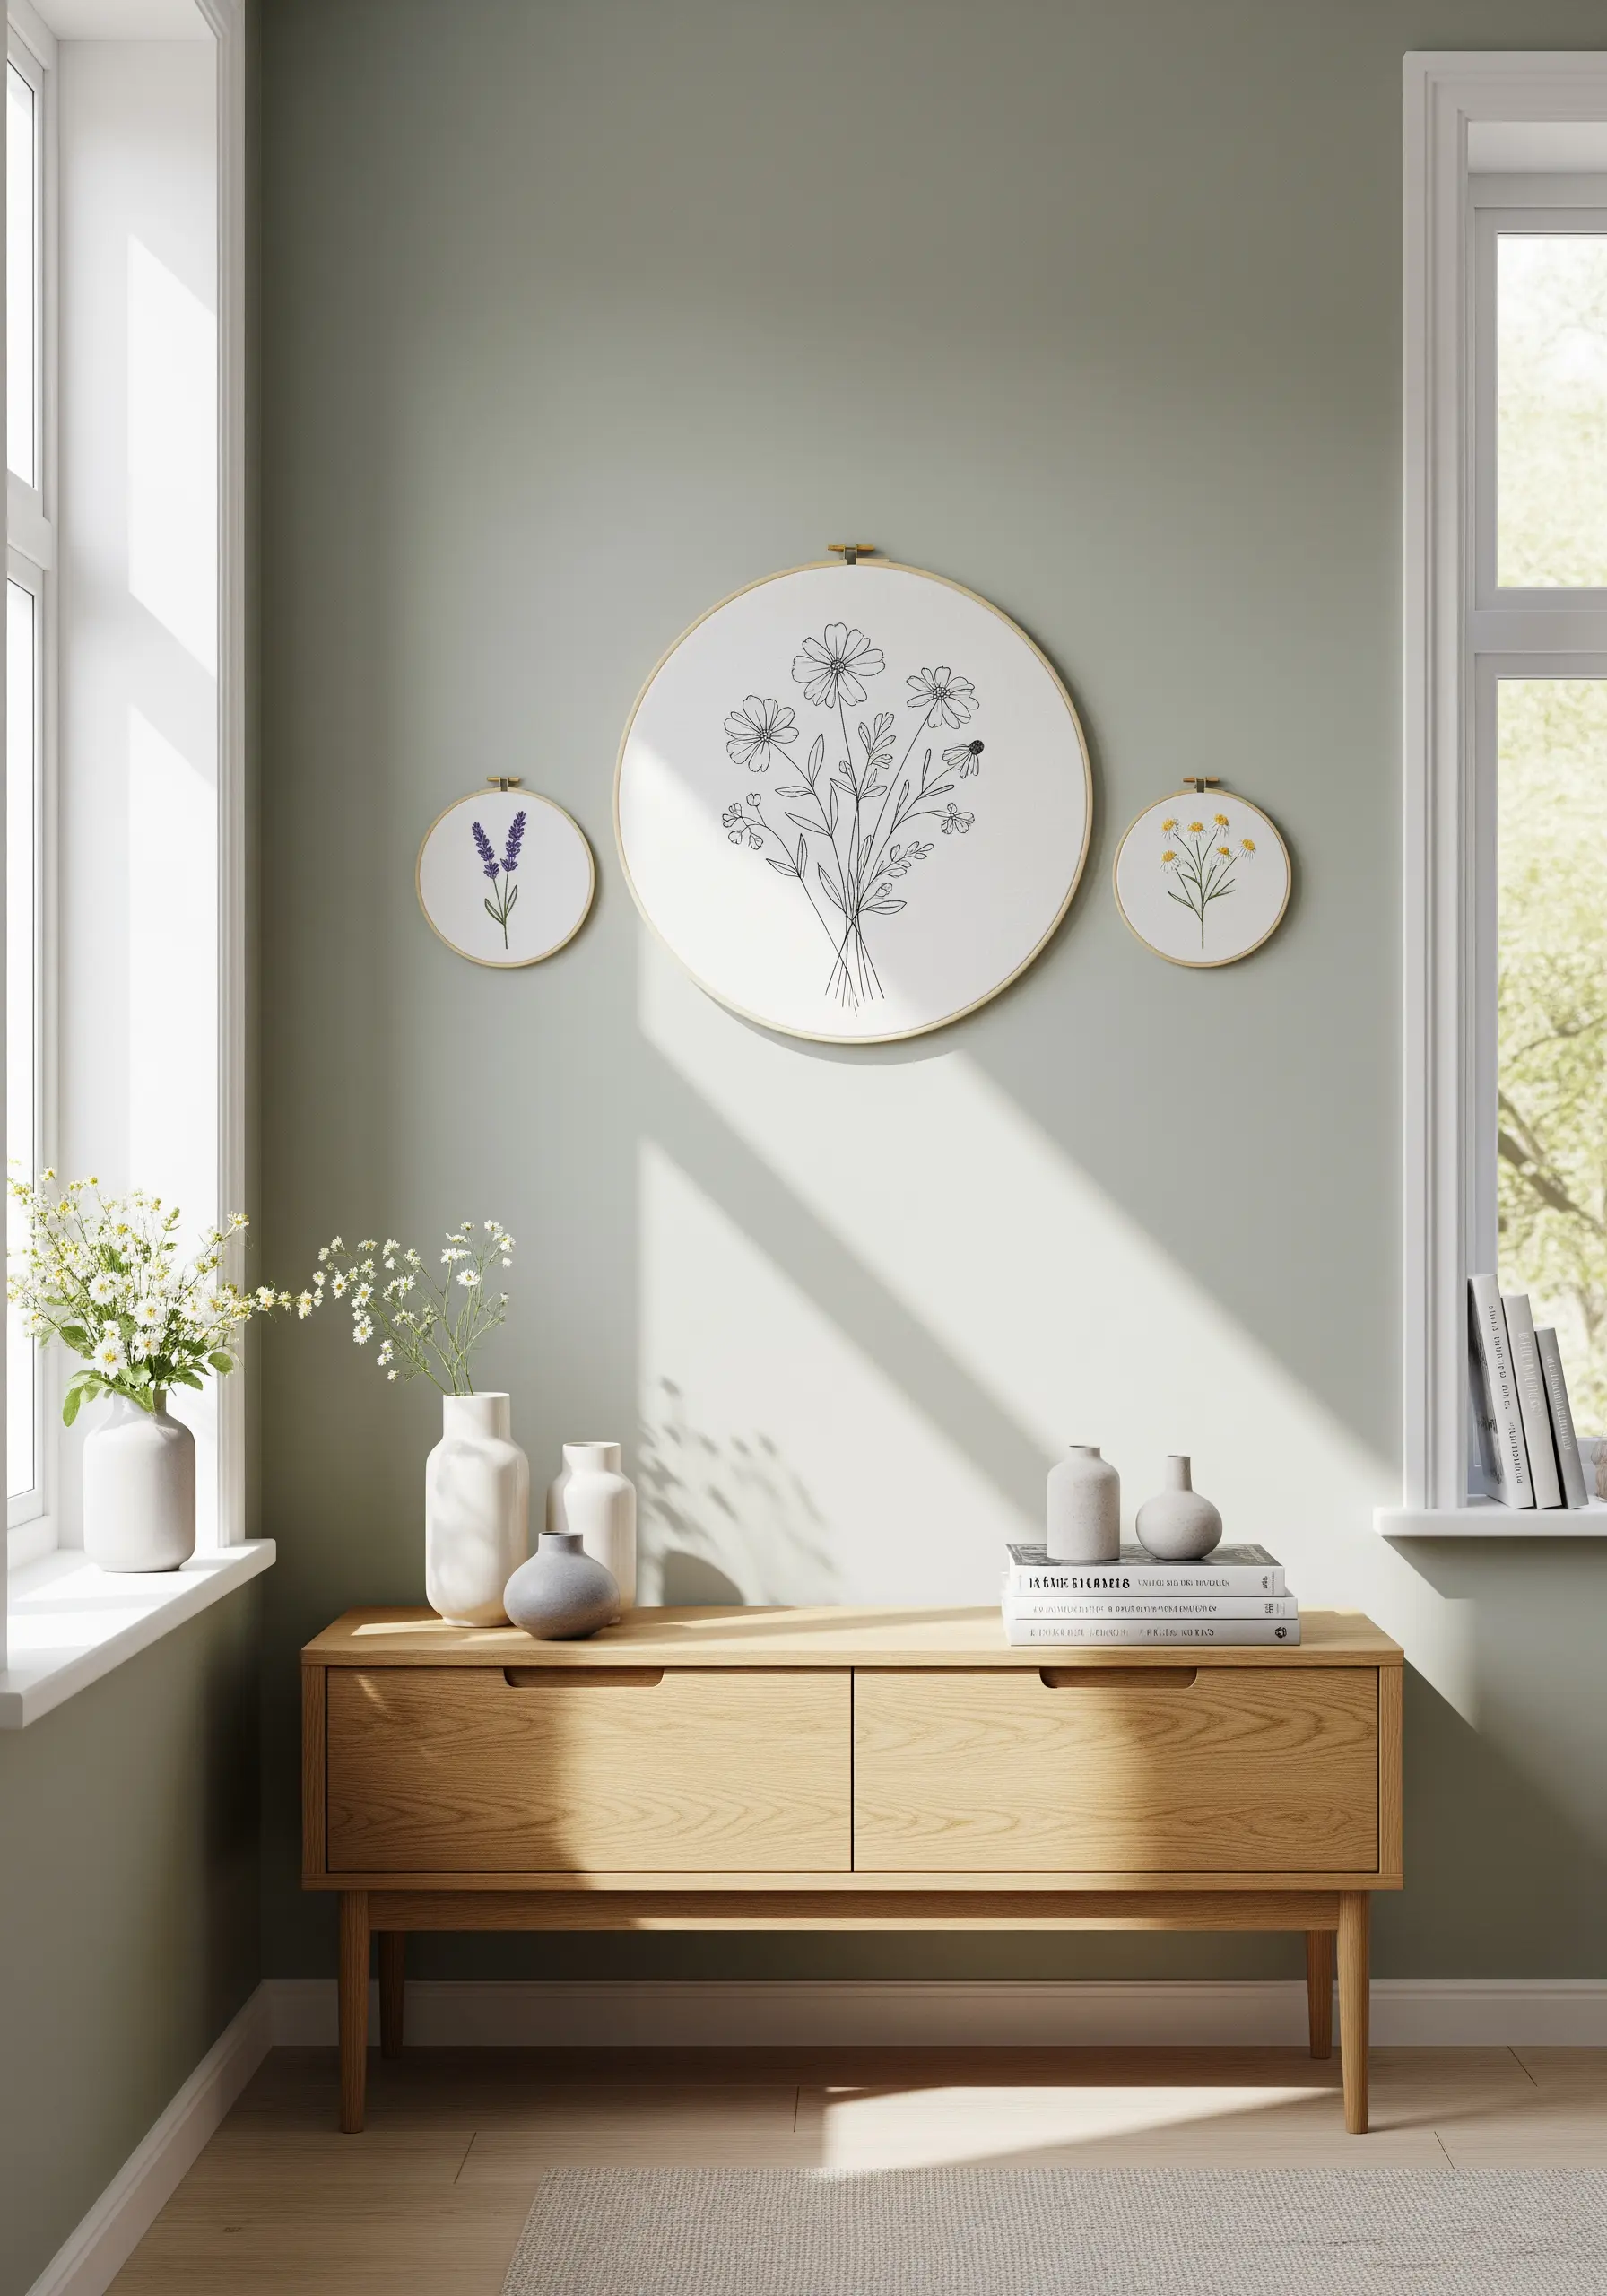
3. Curate a Cohesive Botanical Collection
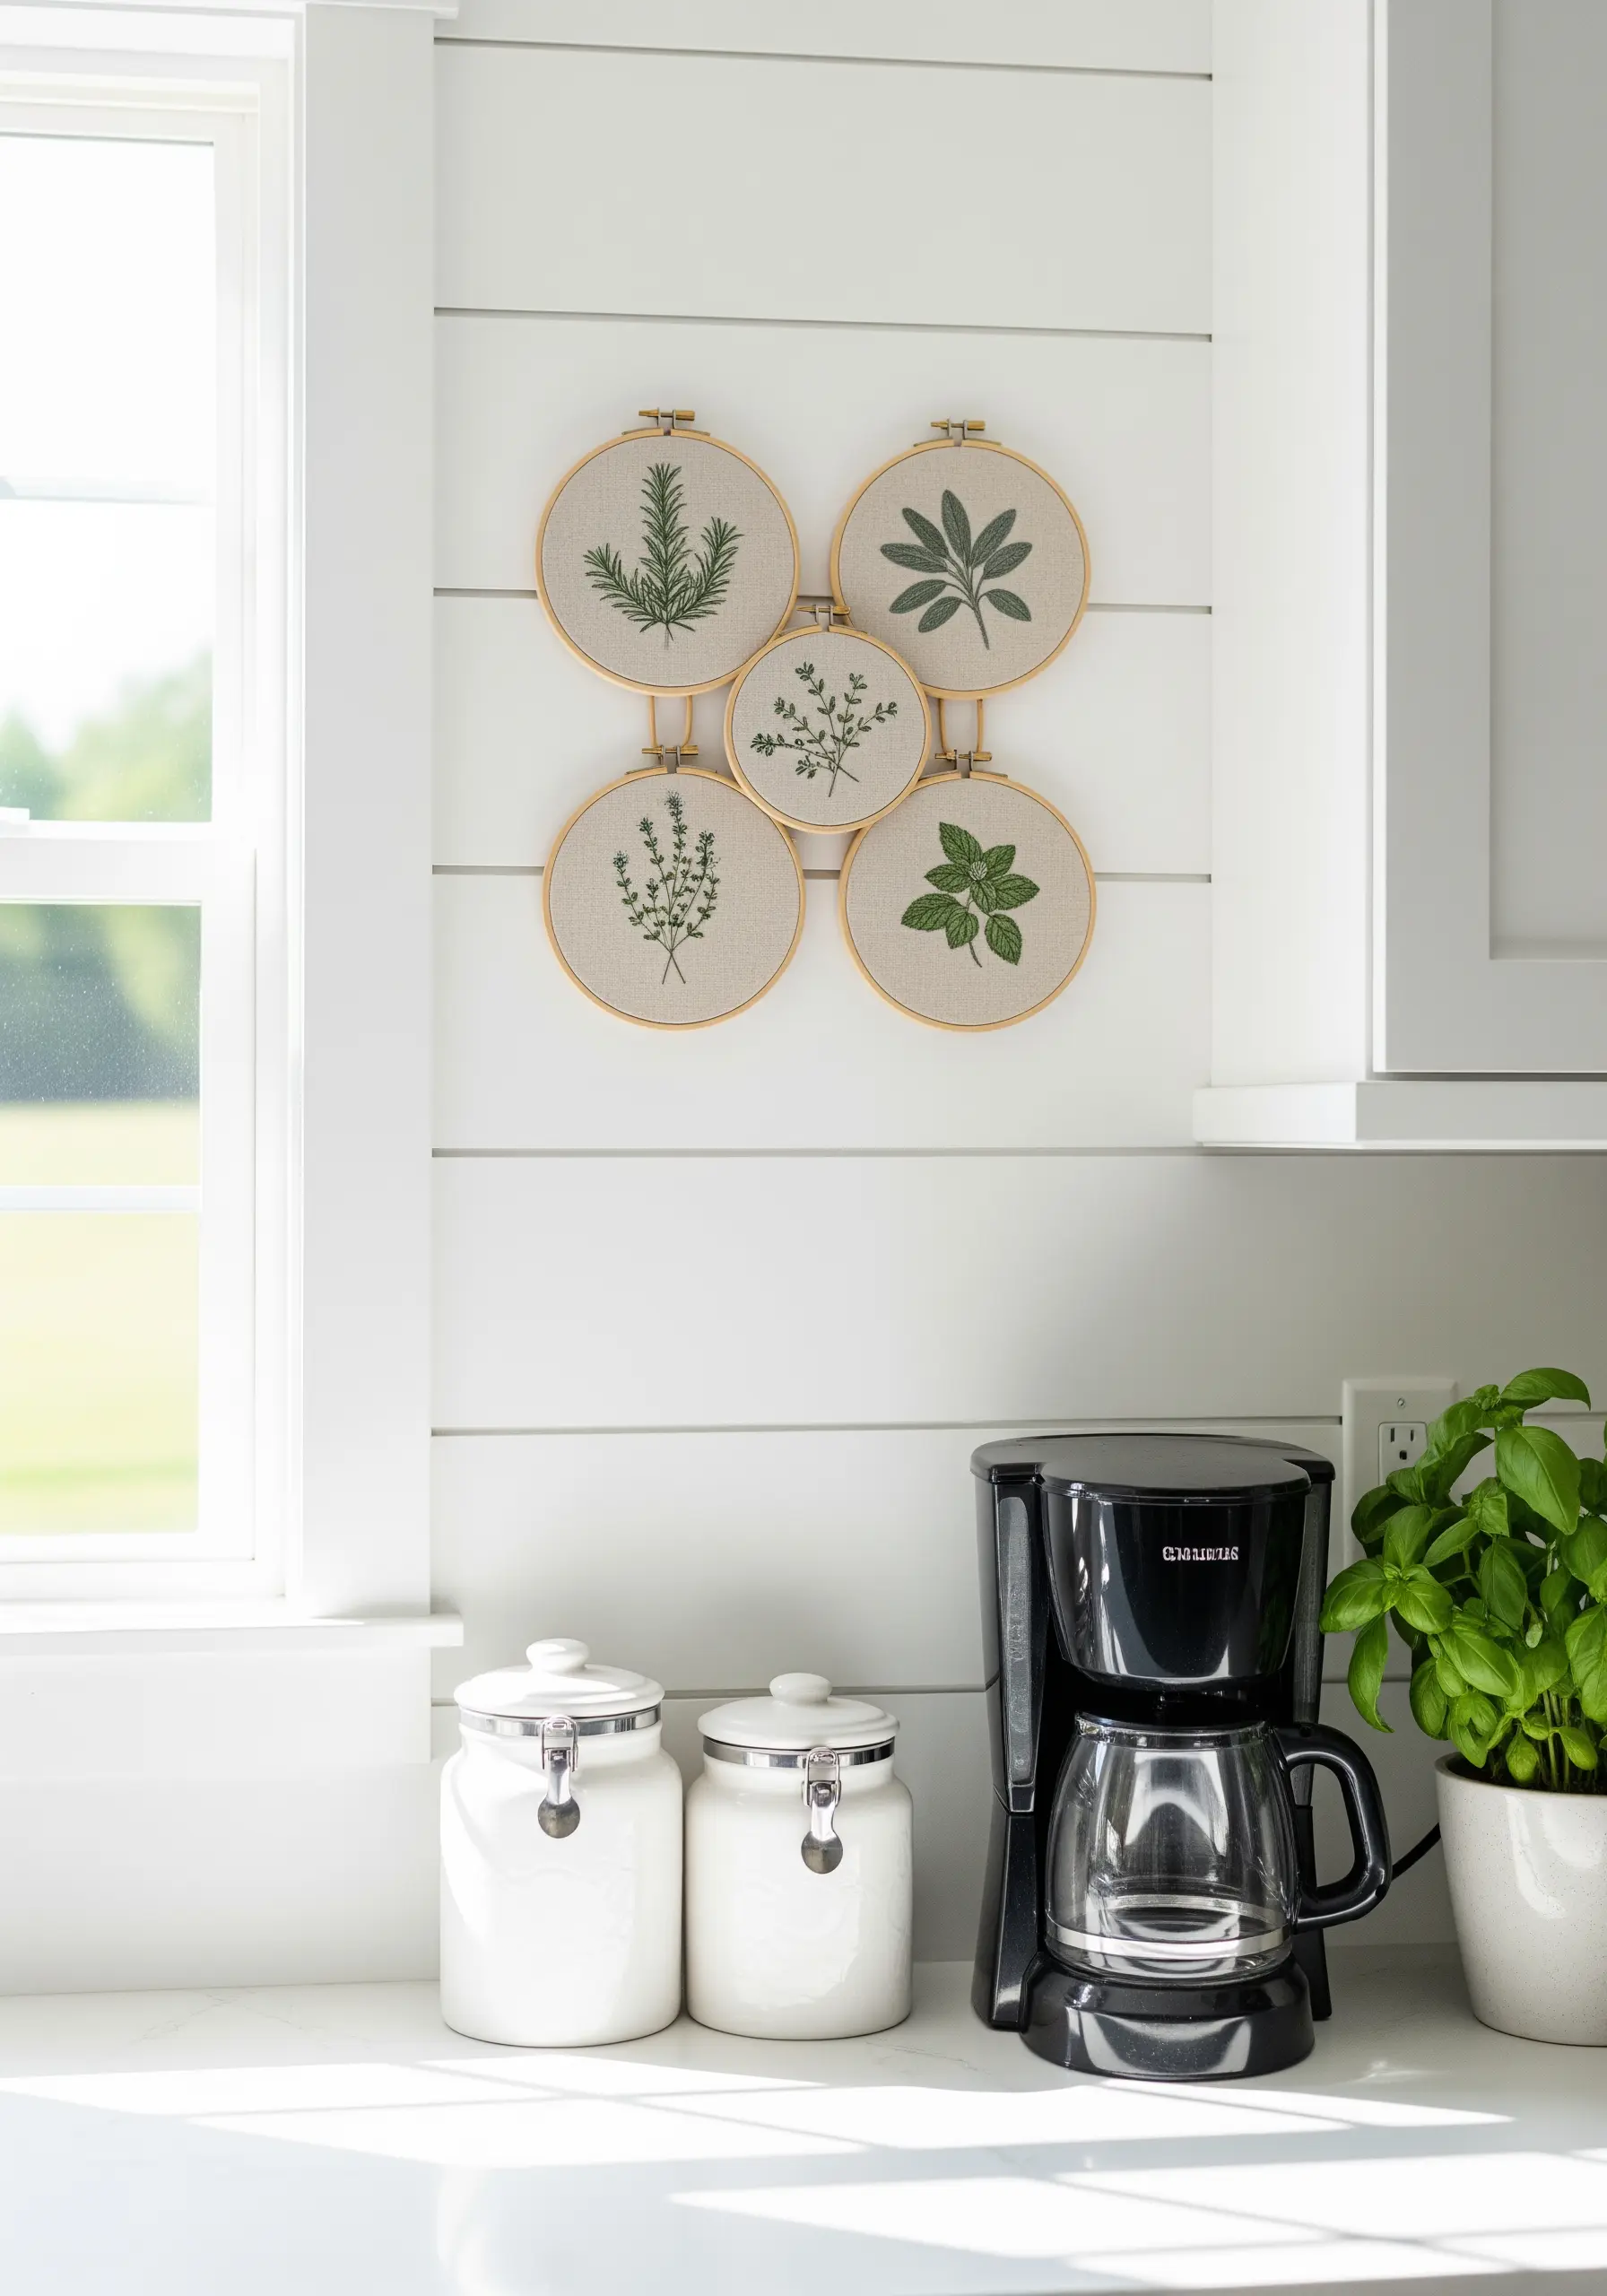
Group single-specimen hoops to create a gallery wall with a unified theme.
To ensure the collection feels cohesive, use the same neutral linen fabric and natural wood hoops for each piece.
Vary the composition within each hoop—some centered, some asymmetrical—to maintain visual interest and encourage the eye to move between them.
This approach transforms simple herb studies into a sophisticated piece of decor, perfect for bringing a touch of green to a kitchen or study.
4. Capture Foliage Variations with Contrasting Stitches
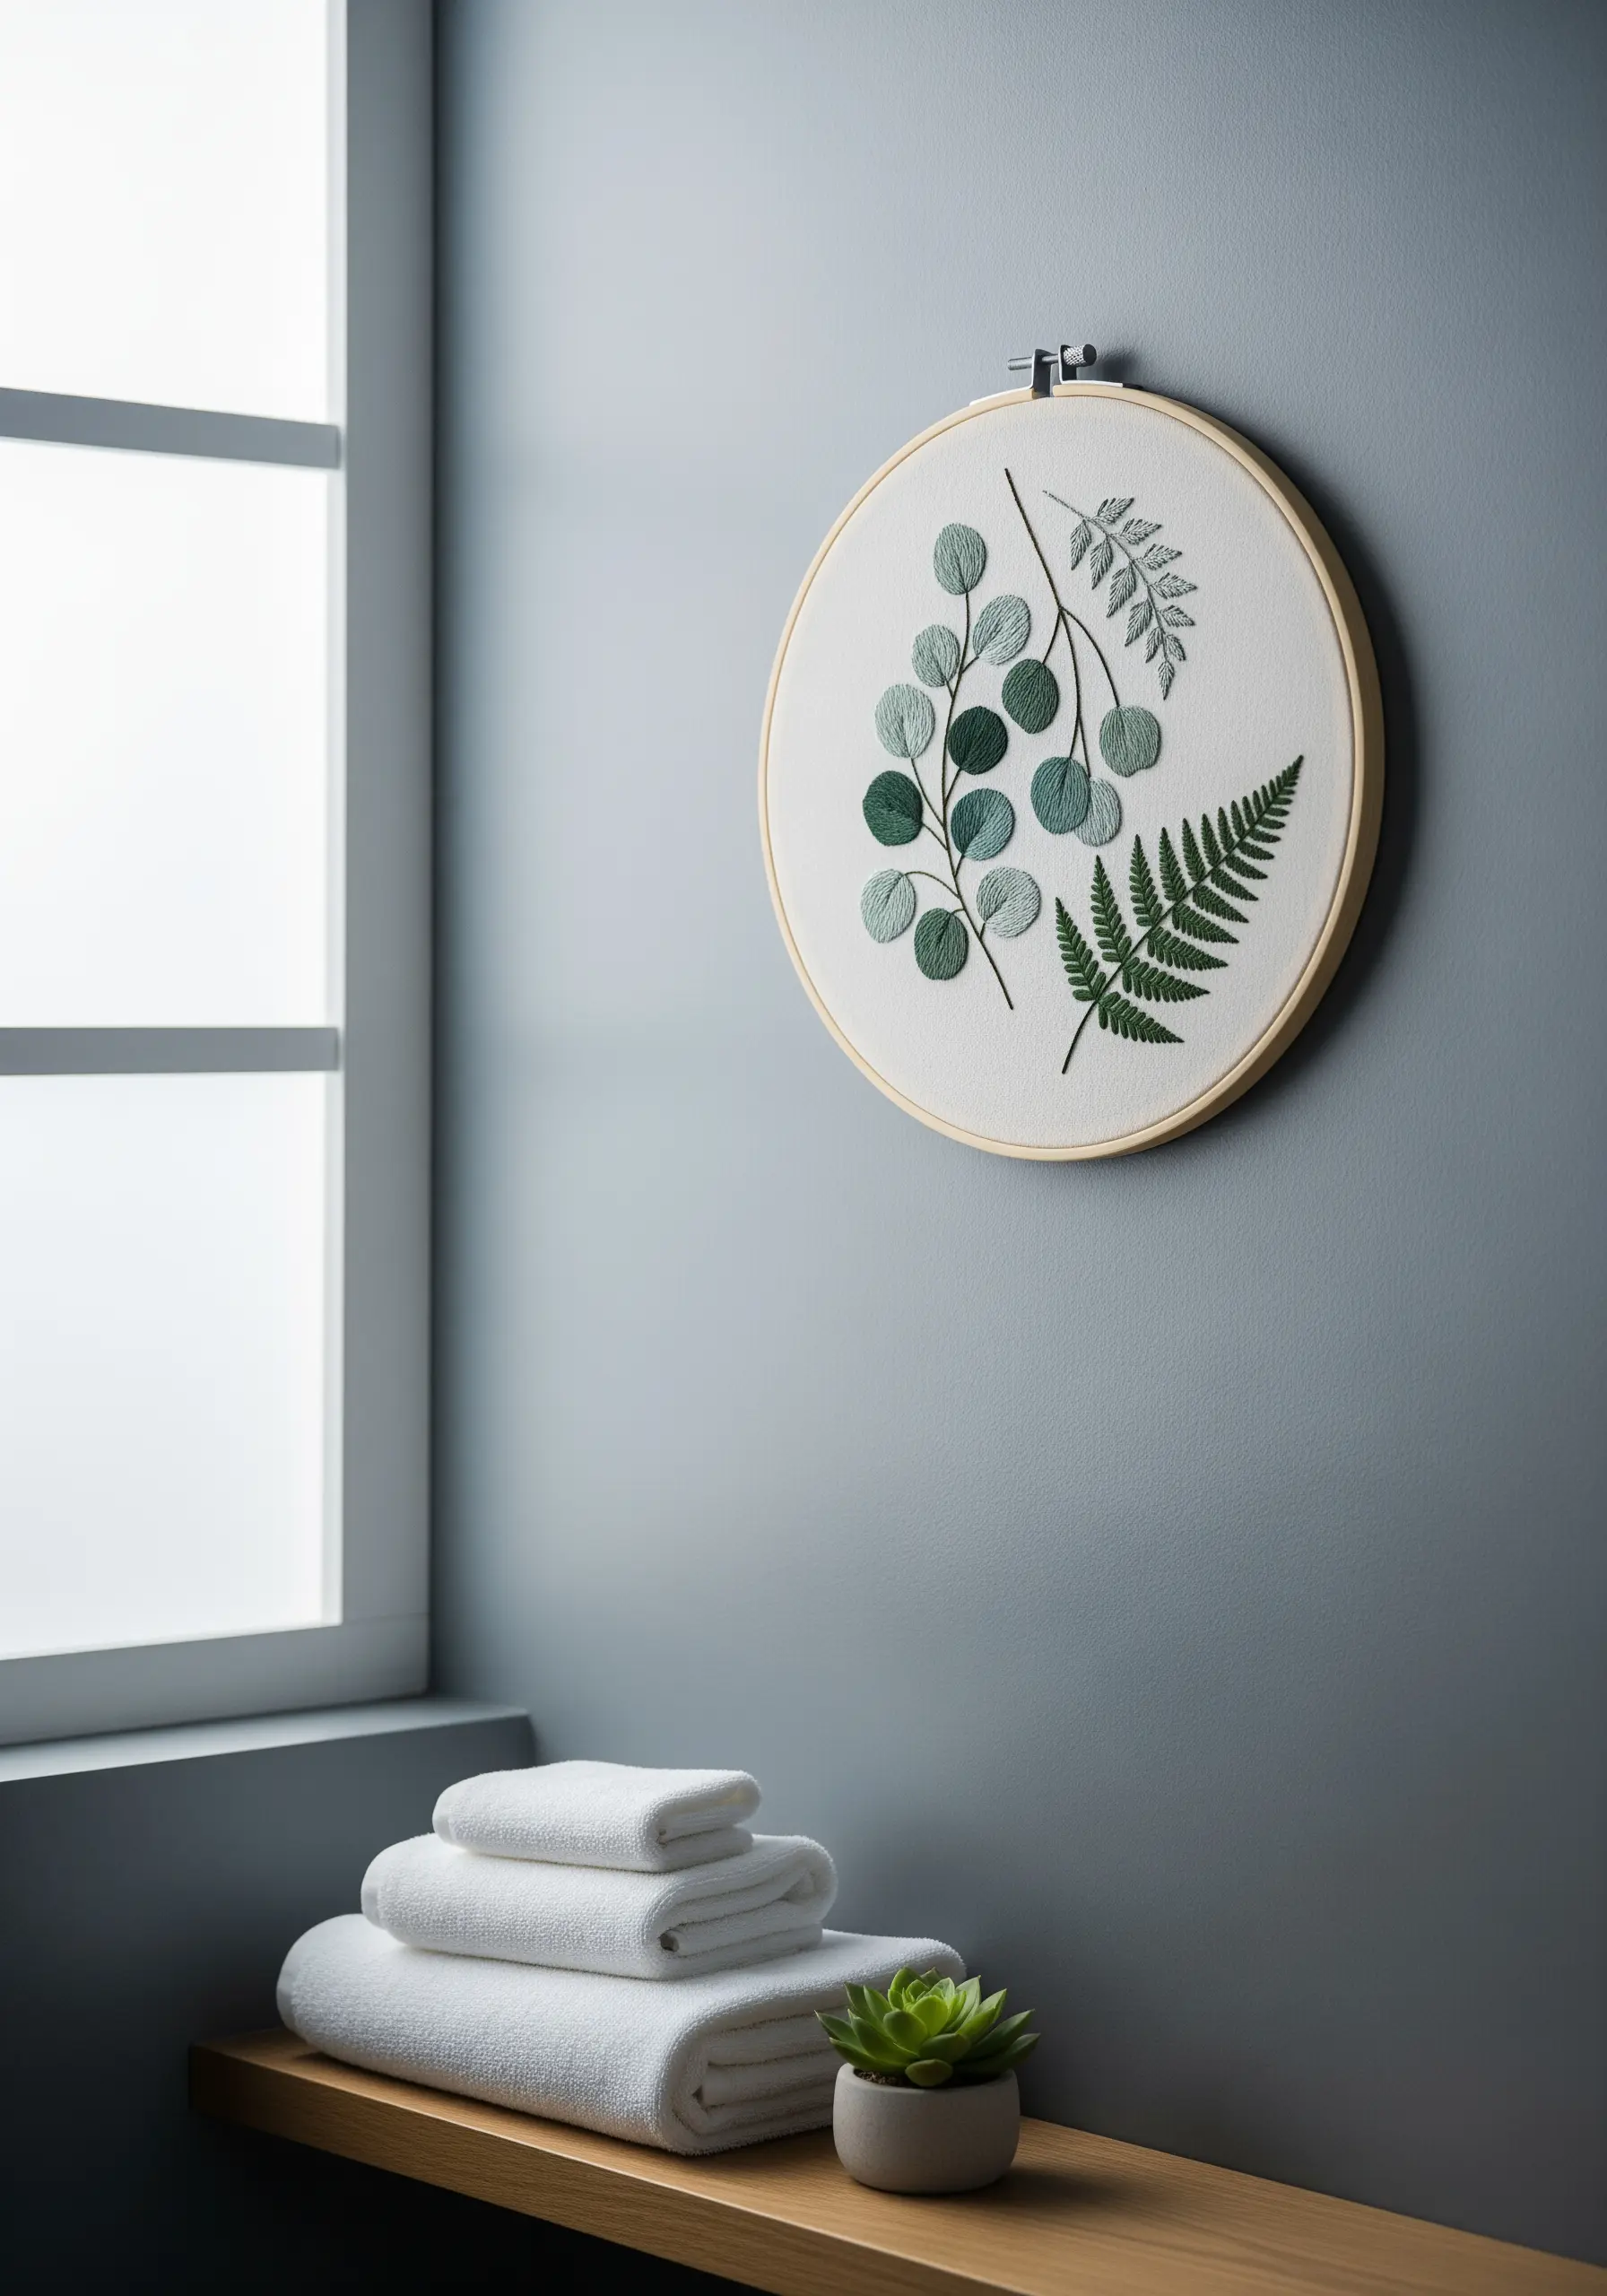
Showcase the unique character of different leaves by assigning them distinct stitch textures.
Use a smooth, dense satin stitch for the rounded eucalyptus leaves to mimic their waxy surface.
In contrast, build your fern fronds with a series of detached chain stitches or fly stitches along a central stem stitch spine. This creates the delicate, feathery texture that defines them.
Pairing these textures in one hoop makes the composition more dynamic and celebrates the diverse forms found in nature.
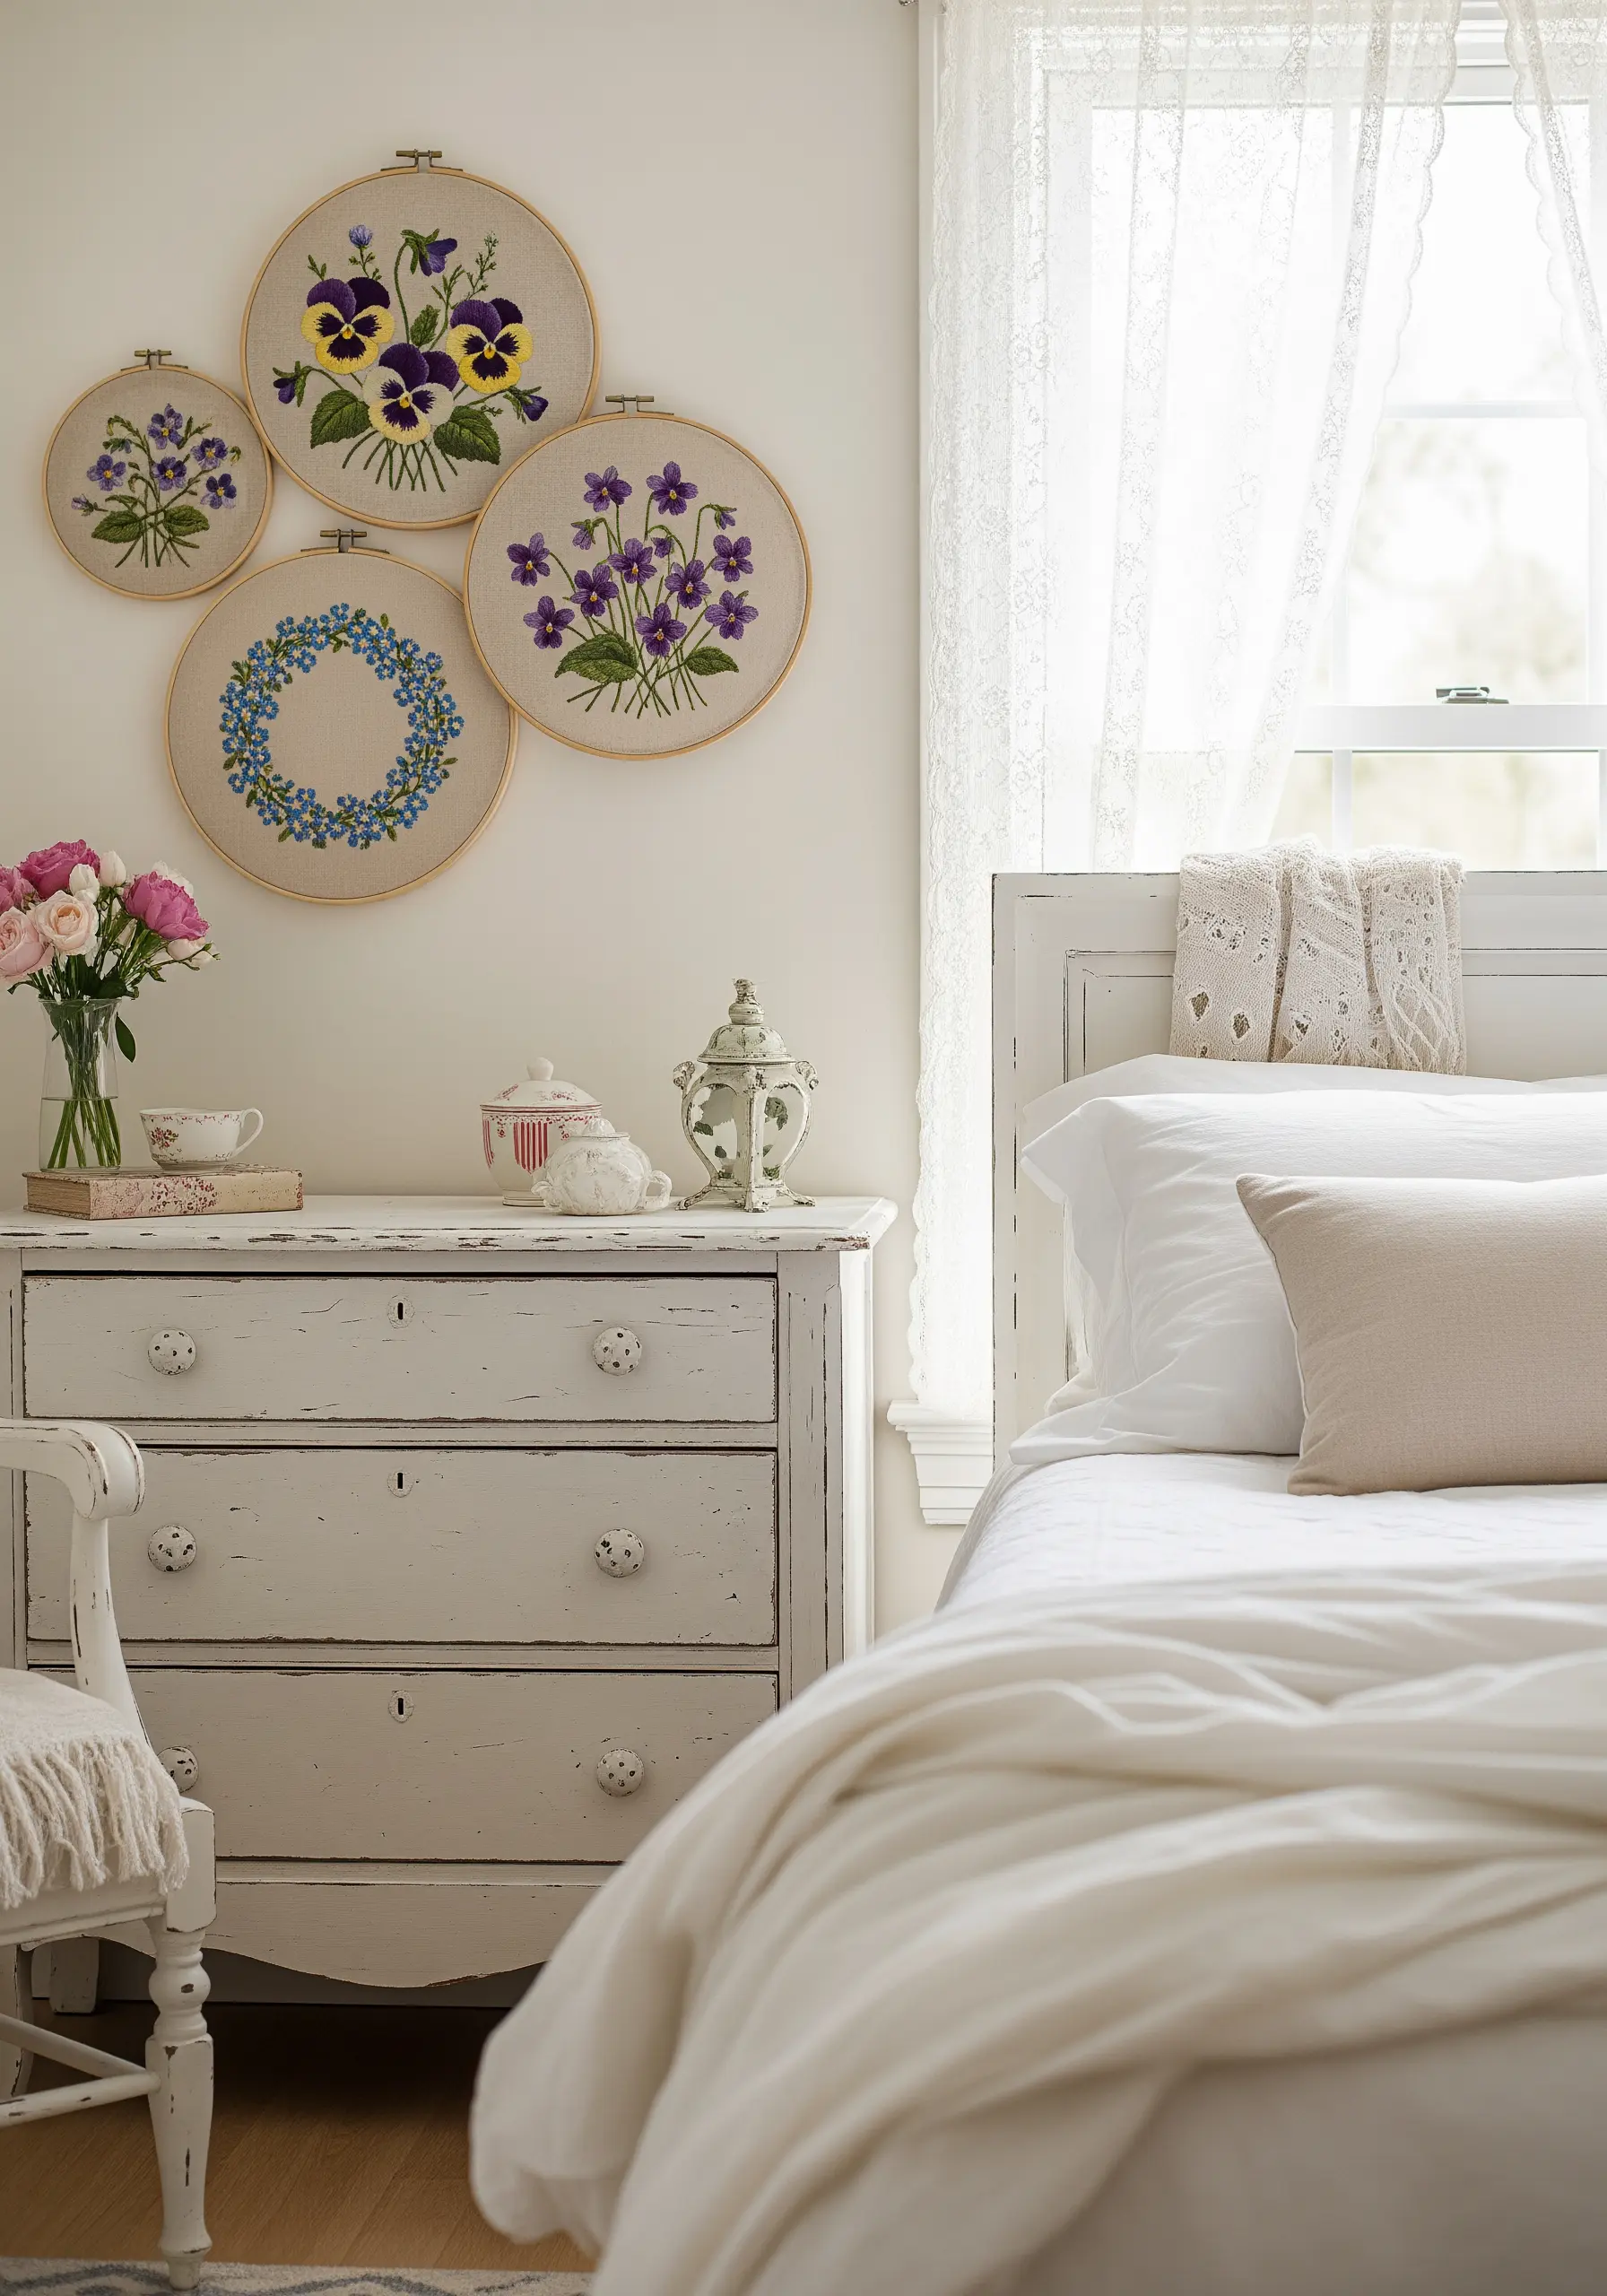
5. Design a Soft Nursery Gallery with Pastels
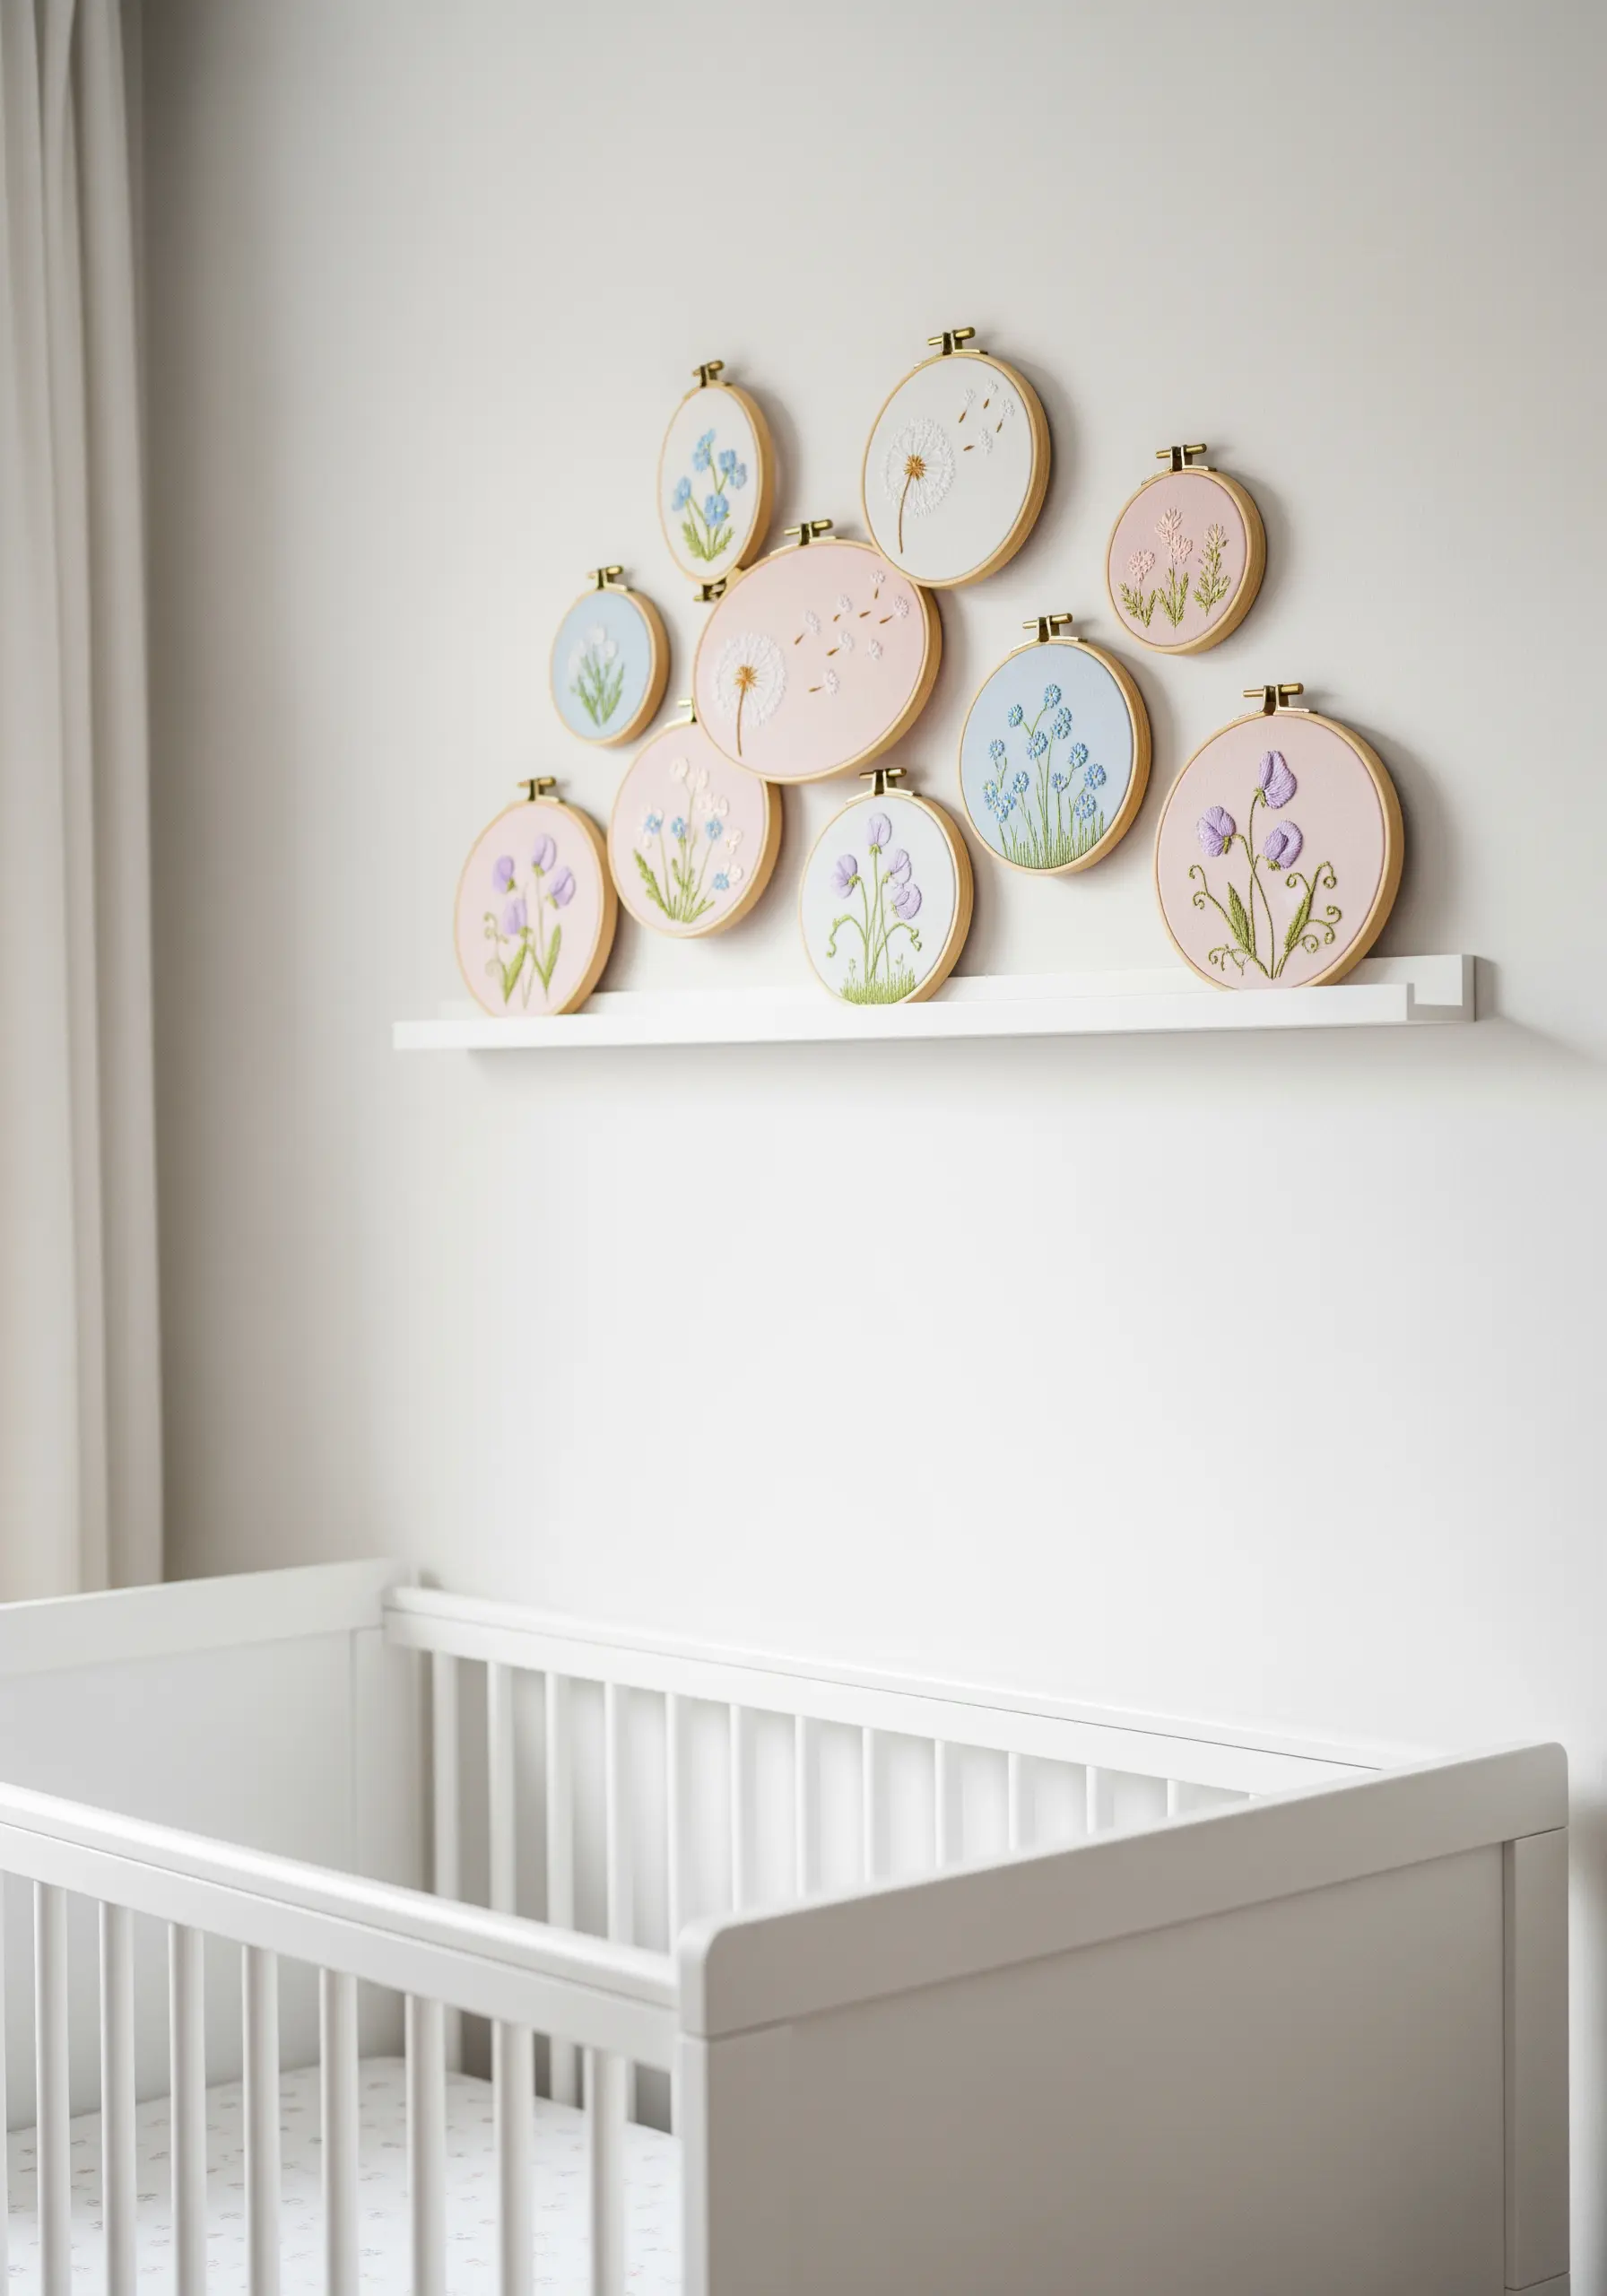
Create a gentle, calming atmosphere by stitching delicate botanicals on soft, pastel-colored cotton.
Use a limited palette of coordinating threads—think muted blues, soft pinks, and creamy whites—to maintain a serene and dreamy aesthetic.
Simple stitches like lazy daisies, French knots, and stem stitch are perfect for these embroidered nursery decor ideas, as they add charm without overwhelming the small compositions.
Display them on a picture ledge to allow for easy rearrangement as your child grows.
6. Build Dimension with Padded Satin Stitch
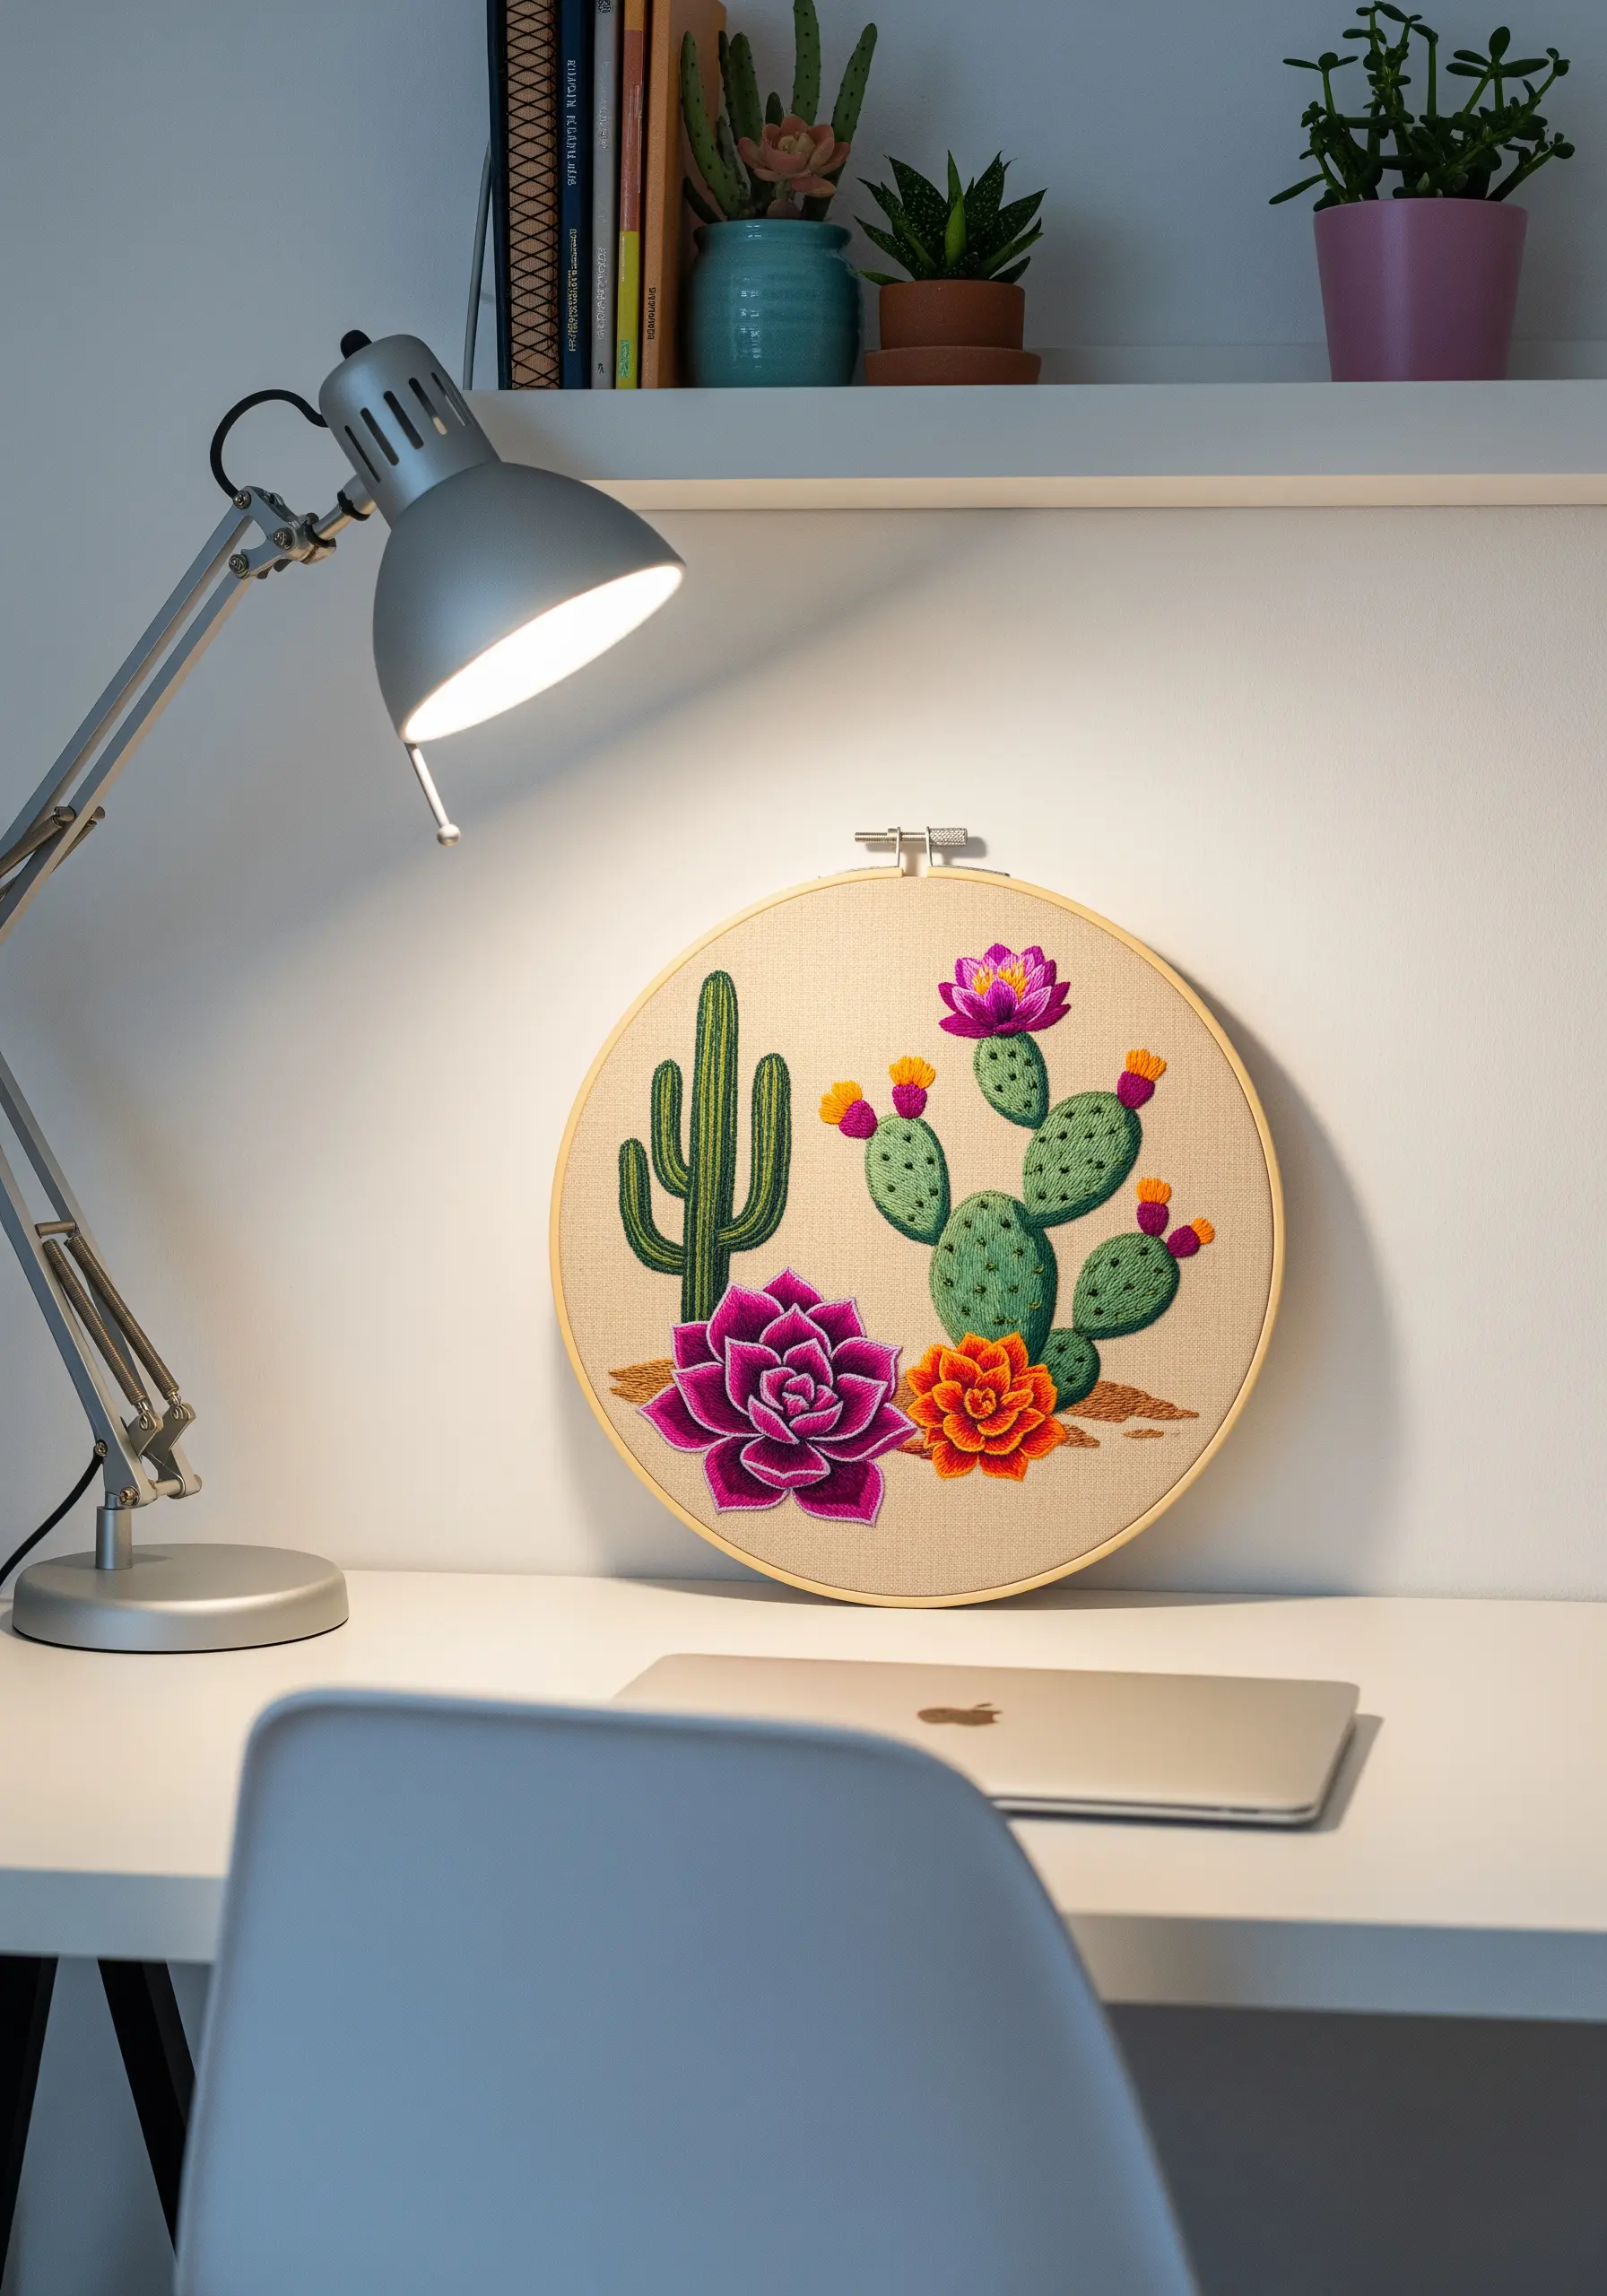
Give succulents and cacti a plump, three-dimensional appearance using padded satin stitch.
Before you lay down your final satin stitches, fill the shape with a base layer of small, straight seed stitches.
Stitch your top layer perpendicular to the foundation stitches; this underlying texture lifts the thread, creating a raised, tactile surface that catches the light beautifully.
This technique is perfect for making botanical elements feel lush and lifelike.
7. Merge Embroidery with 3D Elements
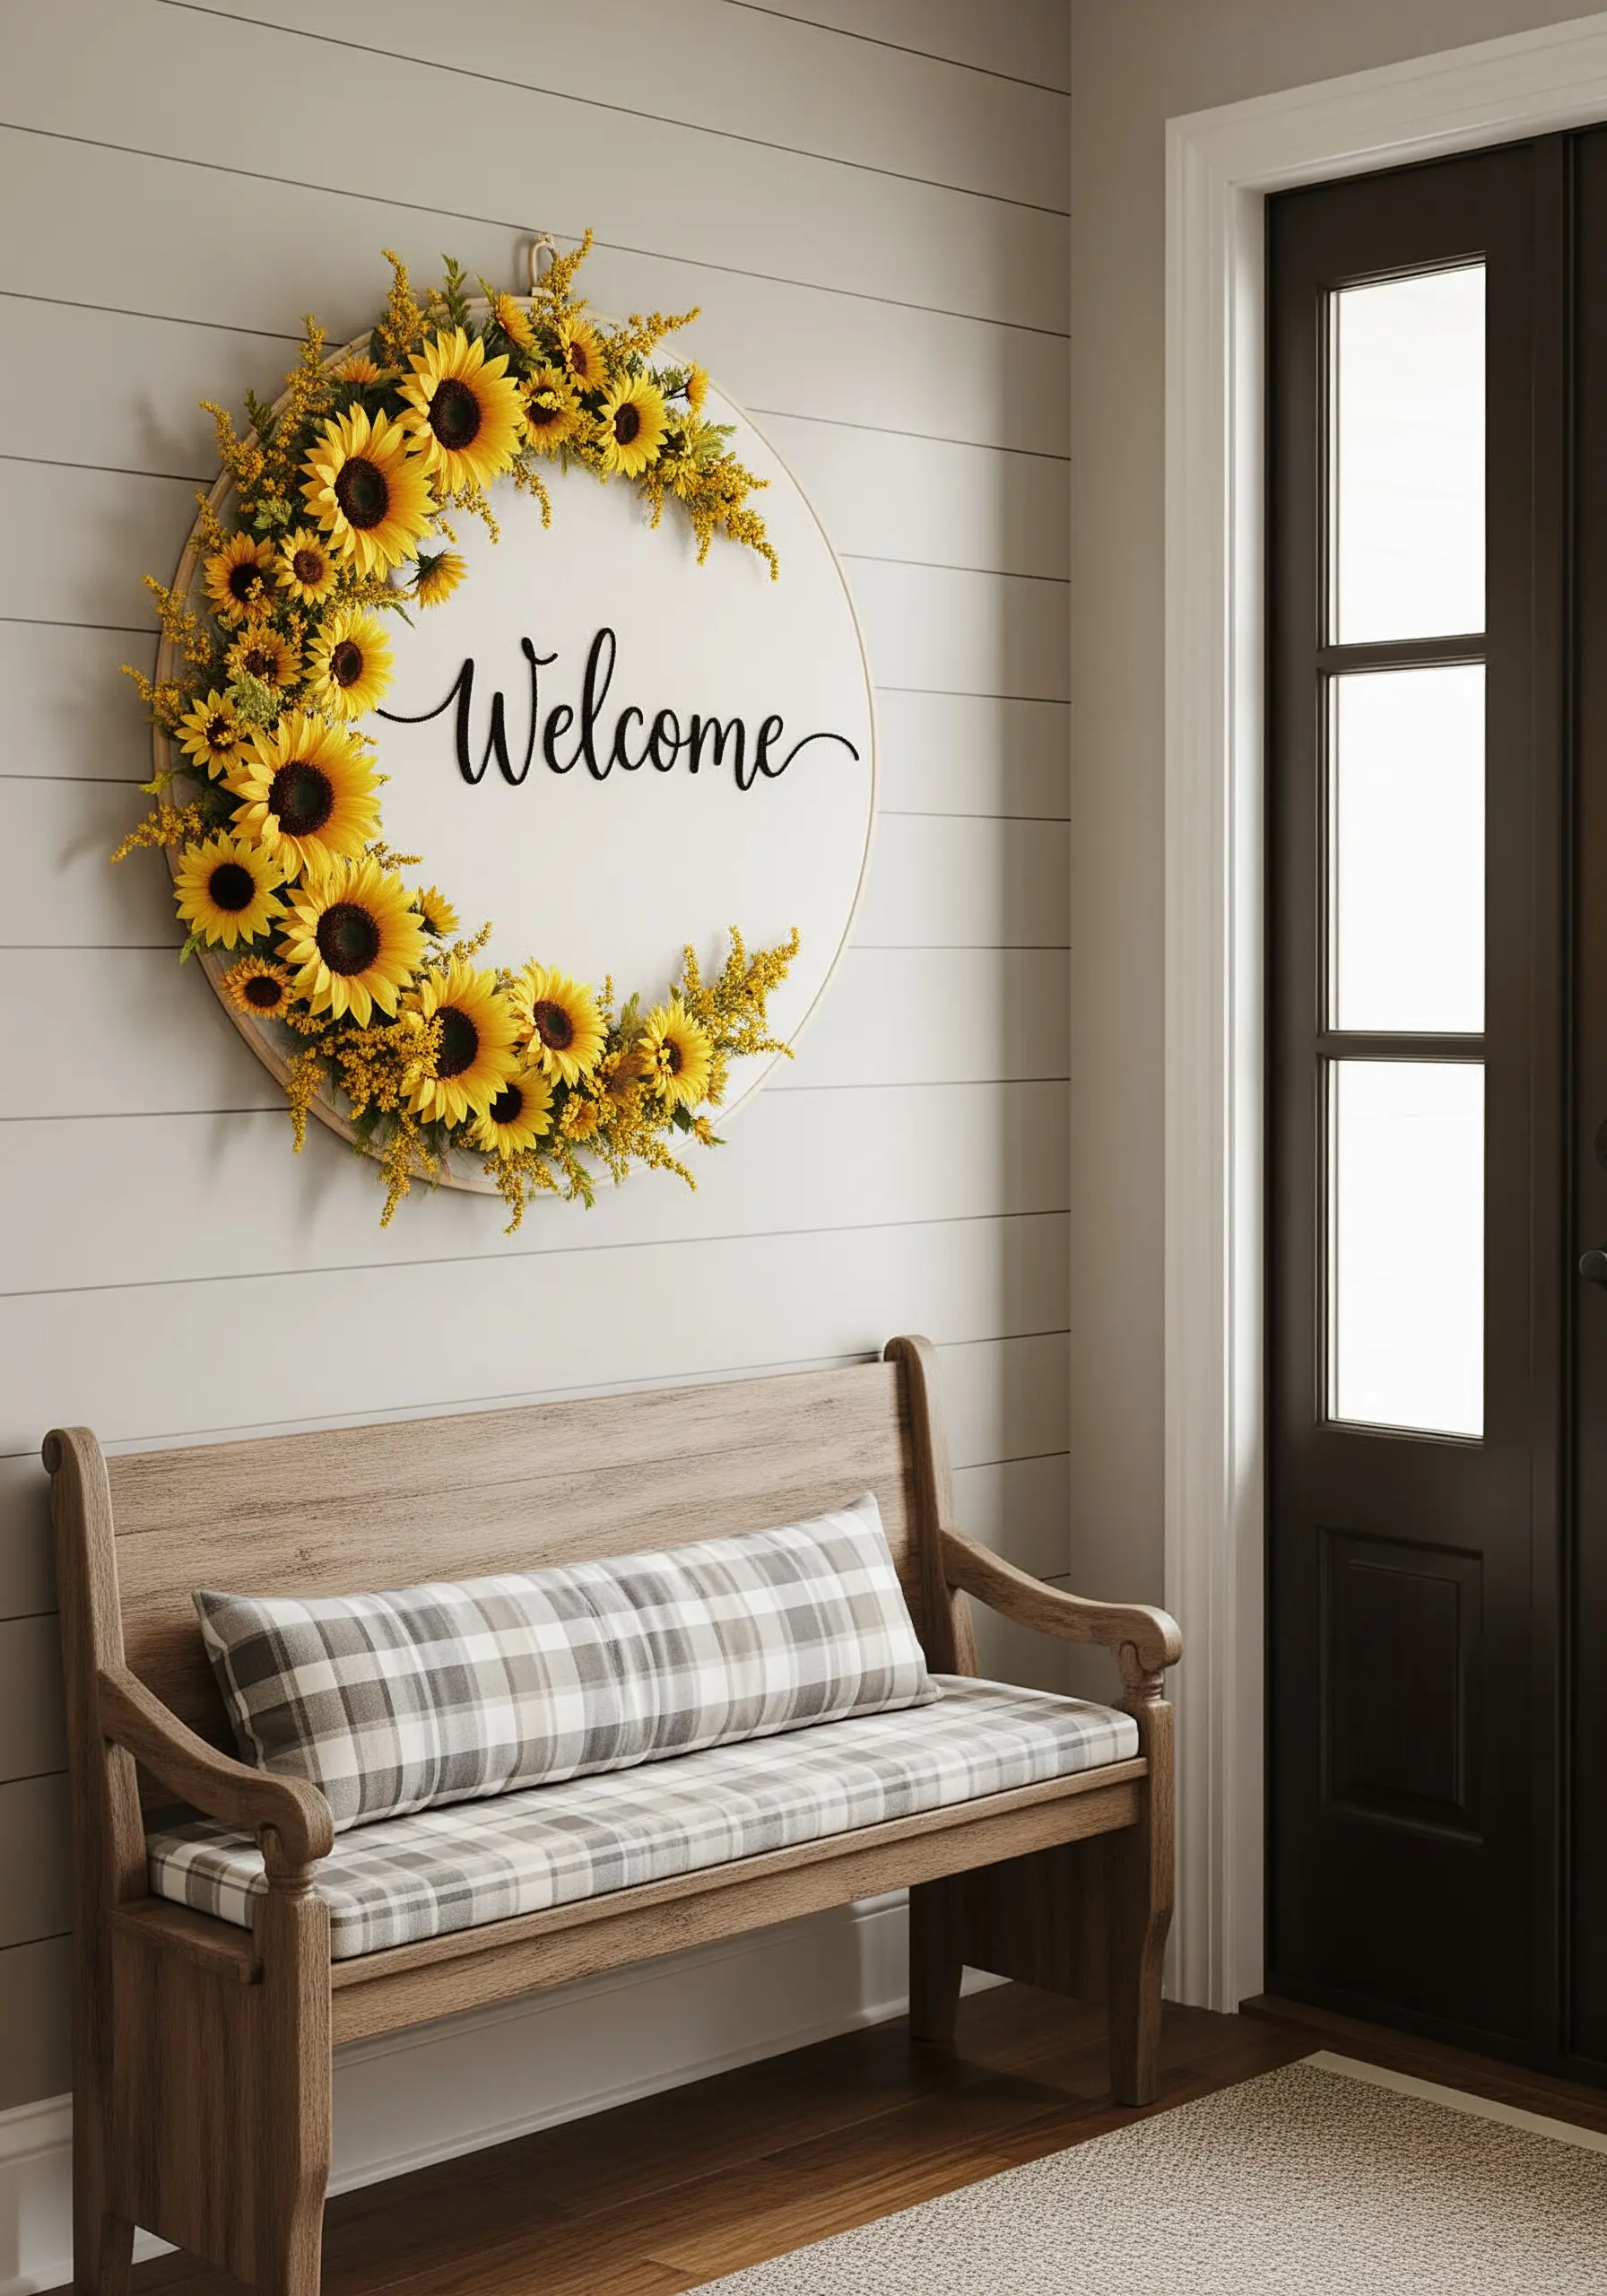
Elevate a classic floral wreath by combining your stitching with other materials.
Embroider a simple greeting or monogram in the center of a large hoop, then frame it with high-quality faux flowers and foliage secured with hot glue or fine wire.
This mixed-media approach adds stunning dimension and texture, turning a simple hoop into a welcoming piece of door or entryway decor.
Ensure your fabric is pulled drum-tight to support the weight of the embellishments without sagging.
8. Tell a Celestial Story with Metallic Threads
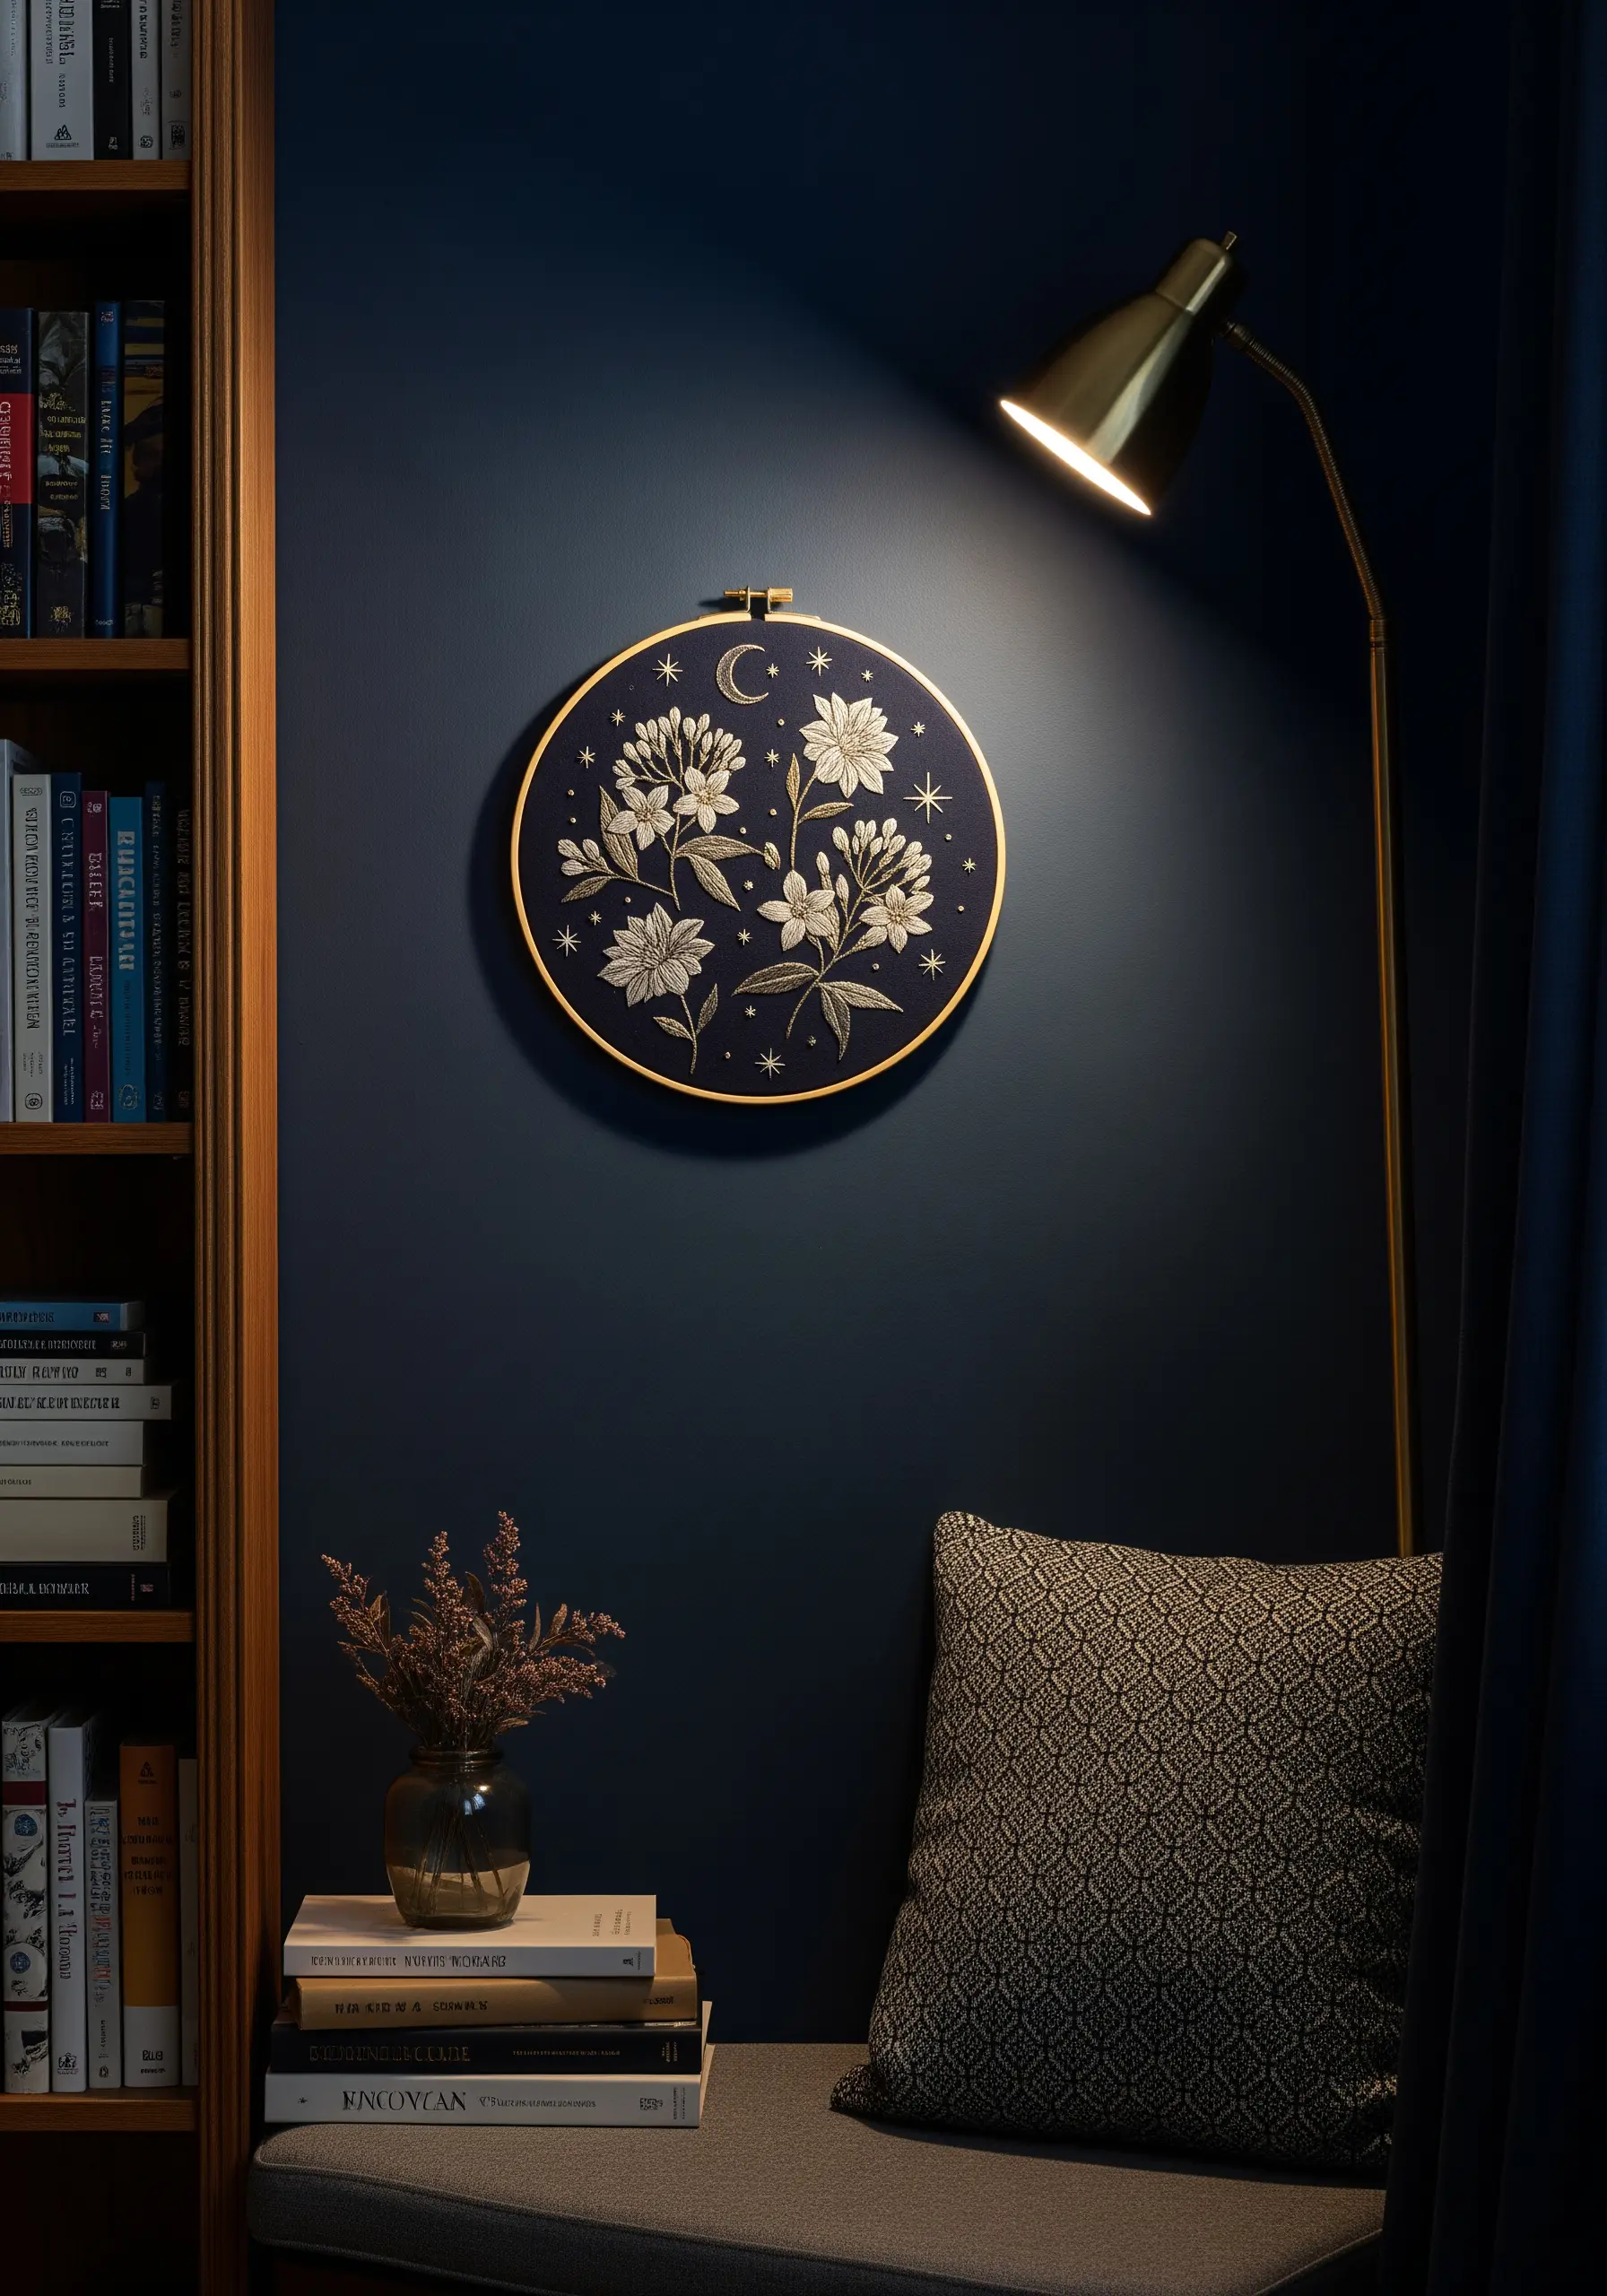
Create a magical night garden embroidery by stitching light-colored florals on navy or black fabric.
Use a single strand of metallic gold or silver thread to scatter tiny stars and a crescent moon throughout the composition.
The metallic thread catches the light, adding a subtle sparkle that contrasts beautifully with the matte cotton floss of the flowers.
This simple addition transforms a botanical design into a piece of celestial art, perfect for a cozy reading nook.
9. Design a Multi-Hoop Botanical Runner
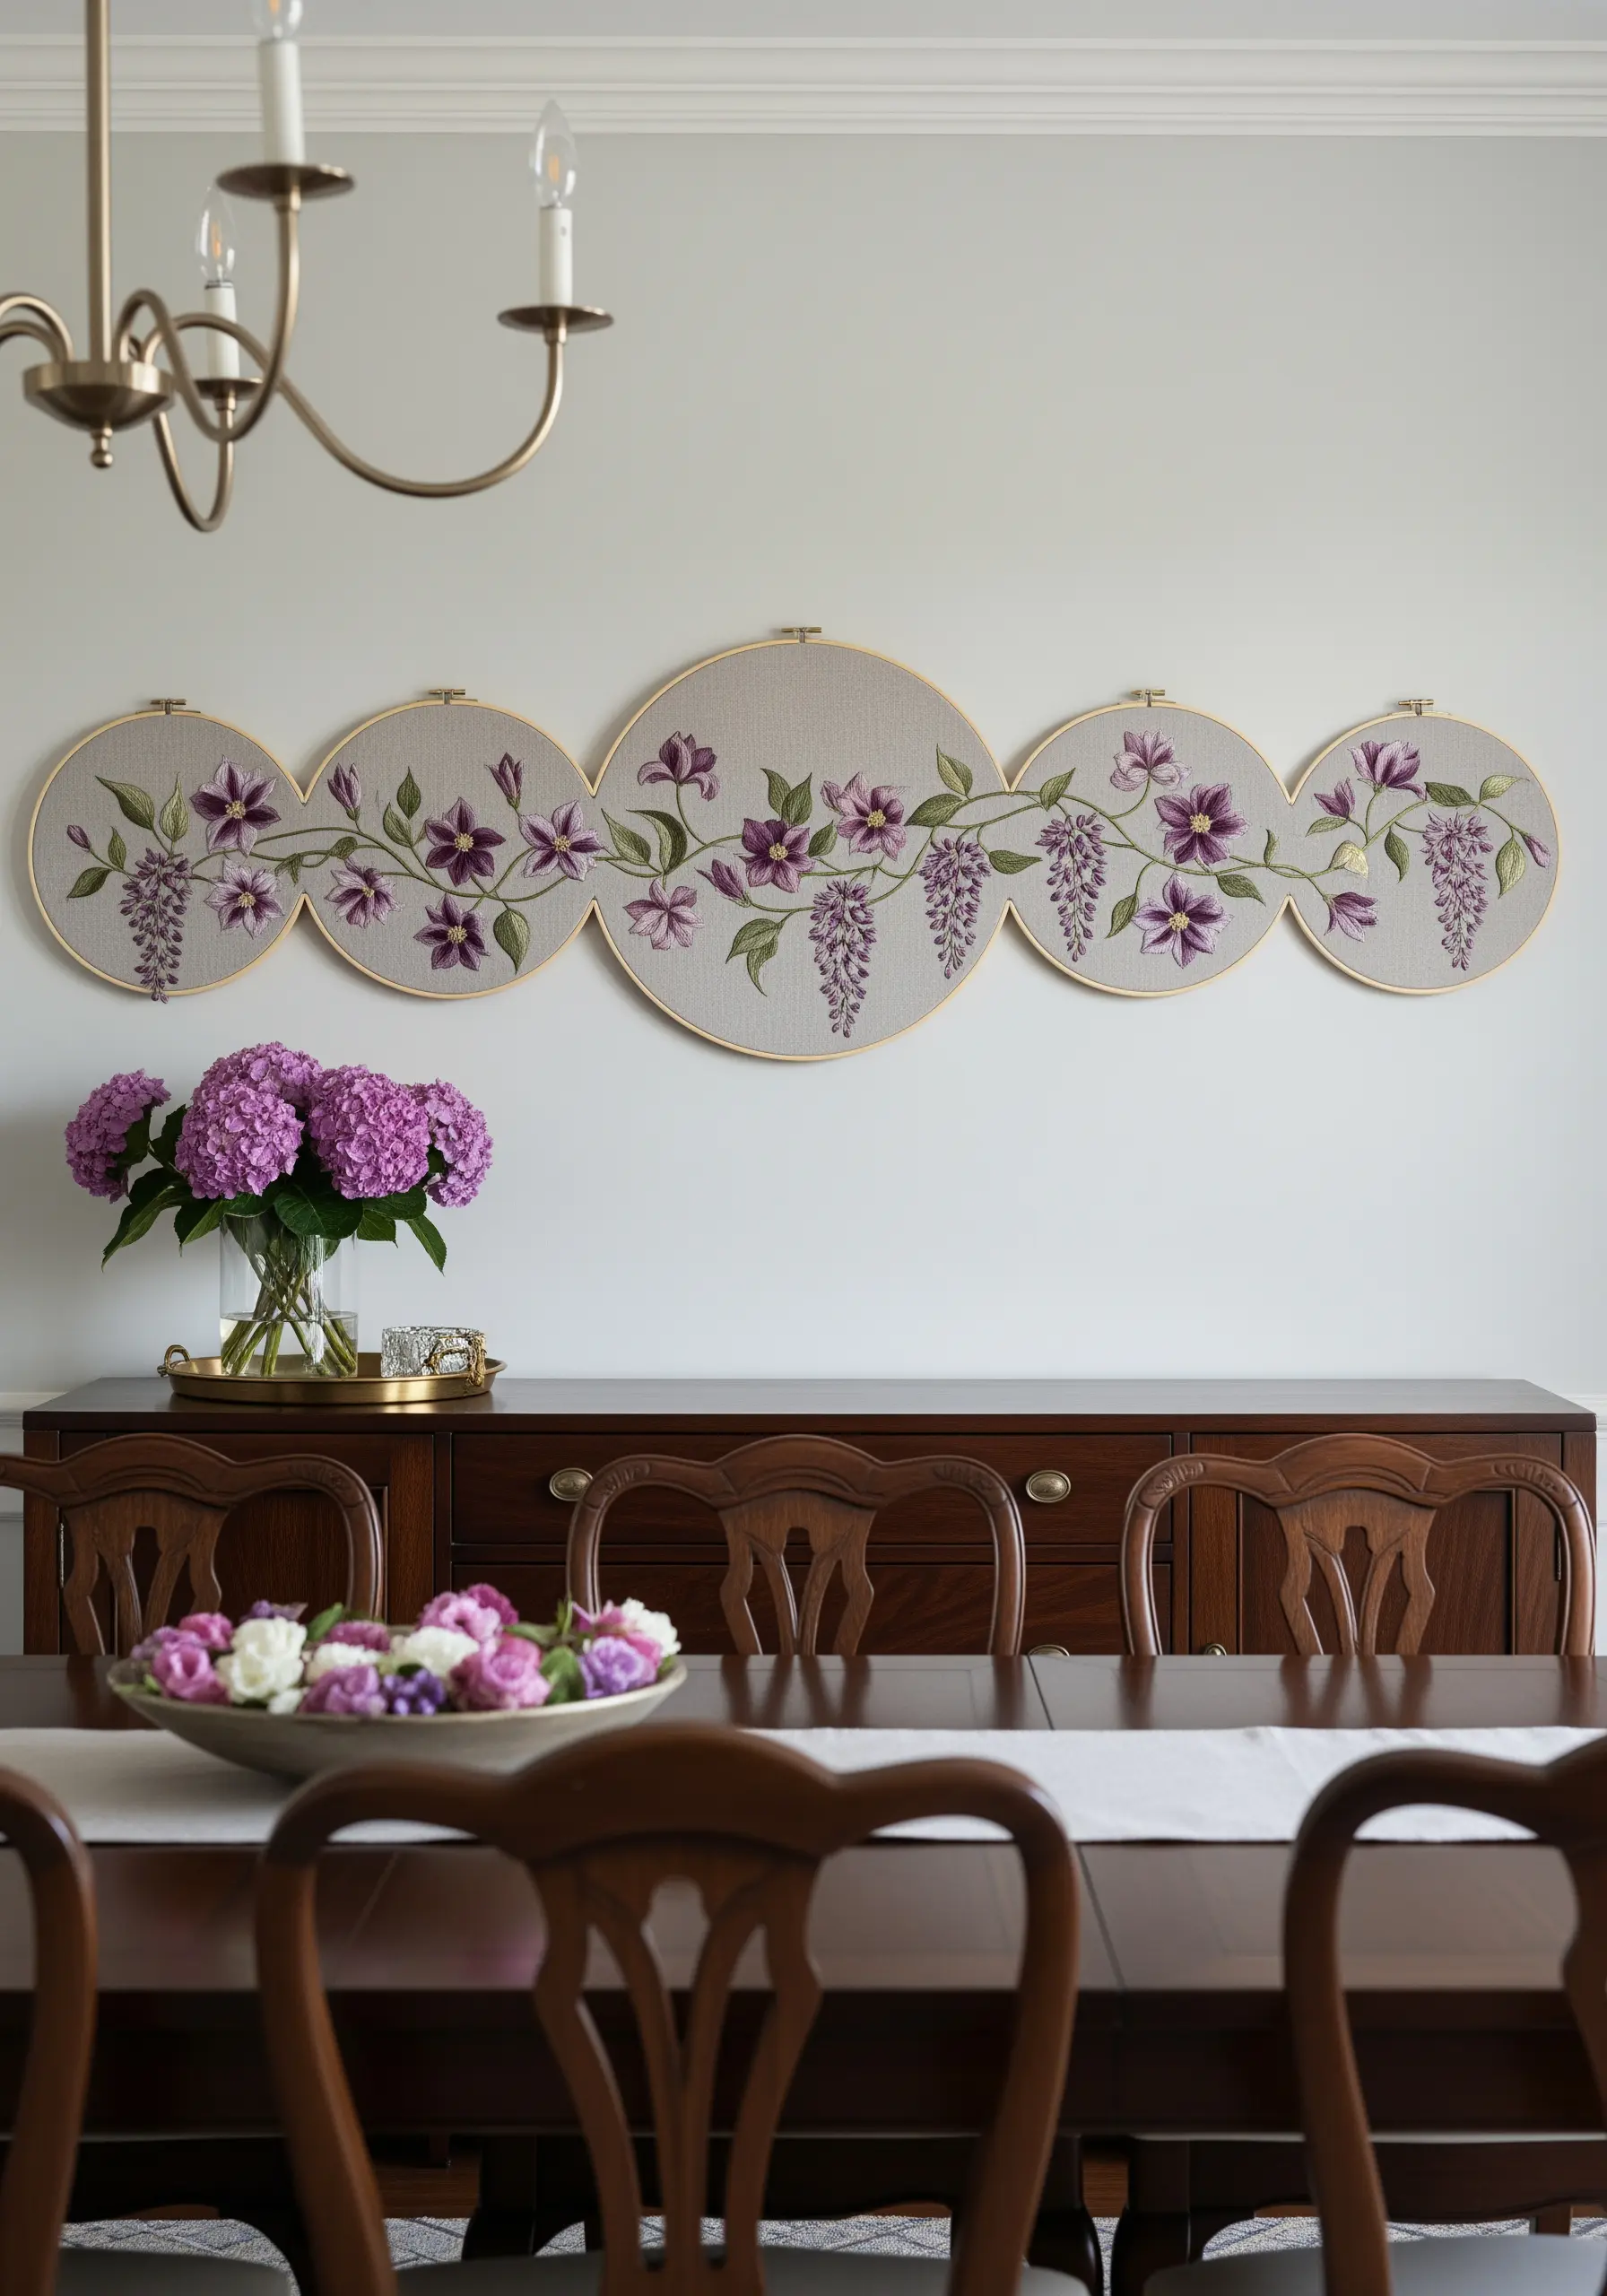
Create a stunning piece of large-scale embroidery by designing a single motif that flows across multiple hoops.
First, sketch your entire design, then place your hoops of varying sizes along the drawing to decide on the composition.
Trace and stitch each section individually, ensuring the connecting vines and leaves line up perfectly when hung together.
This method allows you to create an impressive, panoramic artwork that feels both cohesive and dynamic.
10. Capture Lush Leaves with Directional Stitching
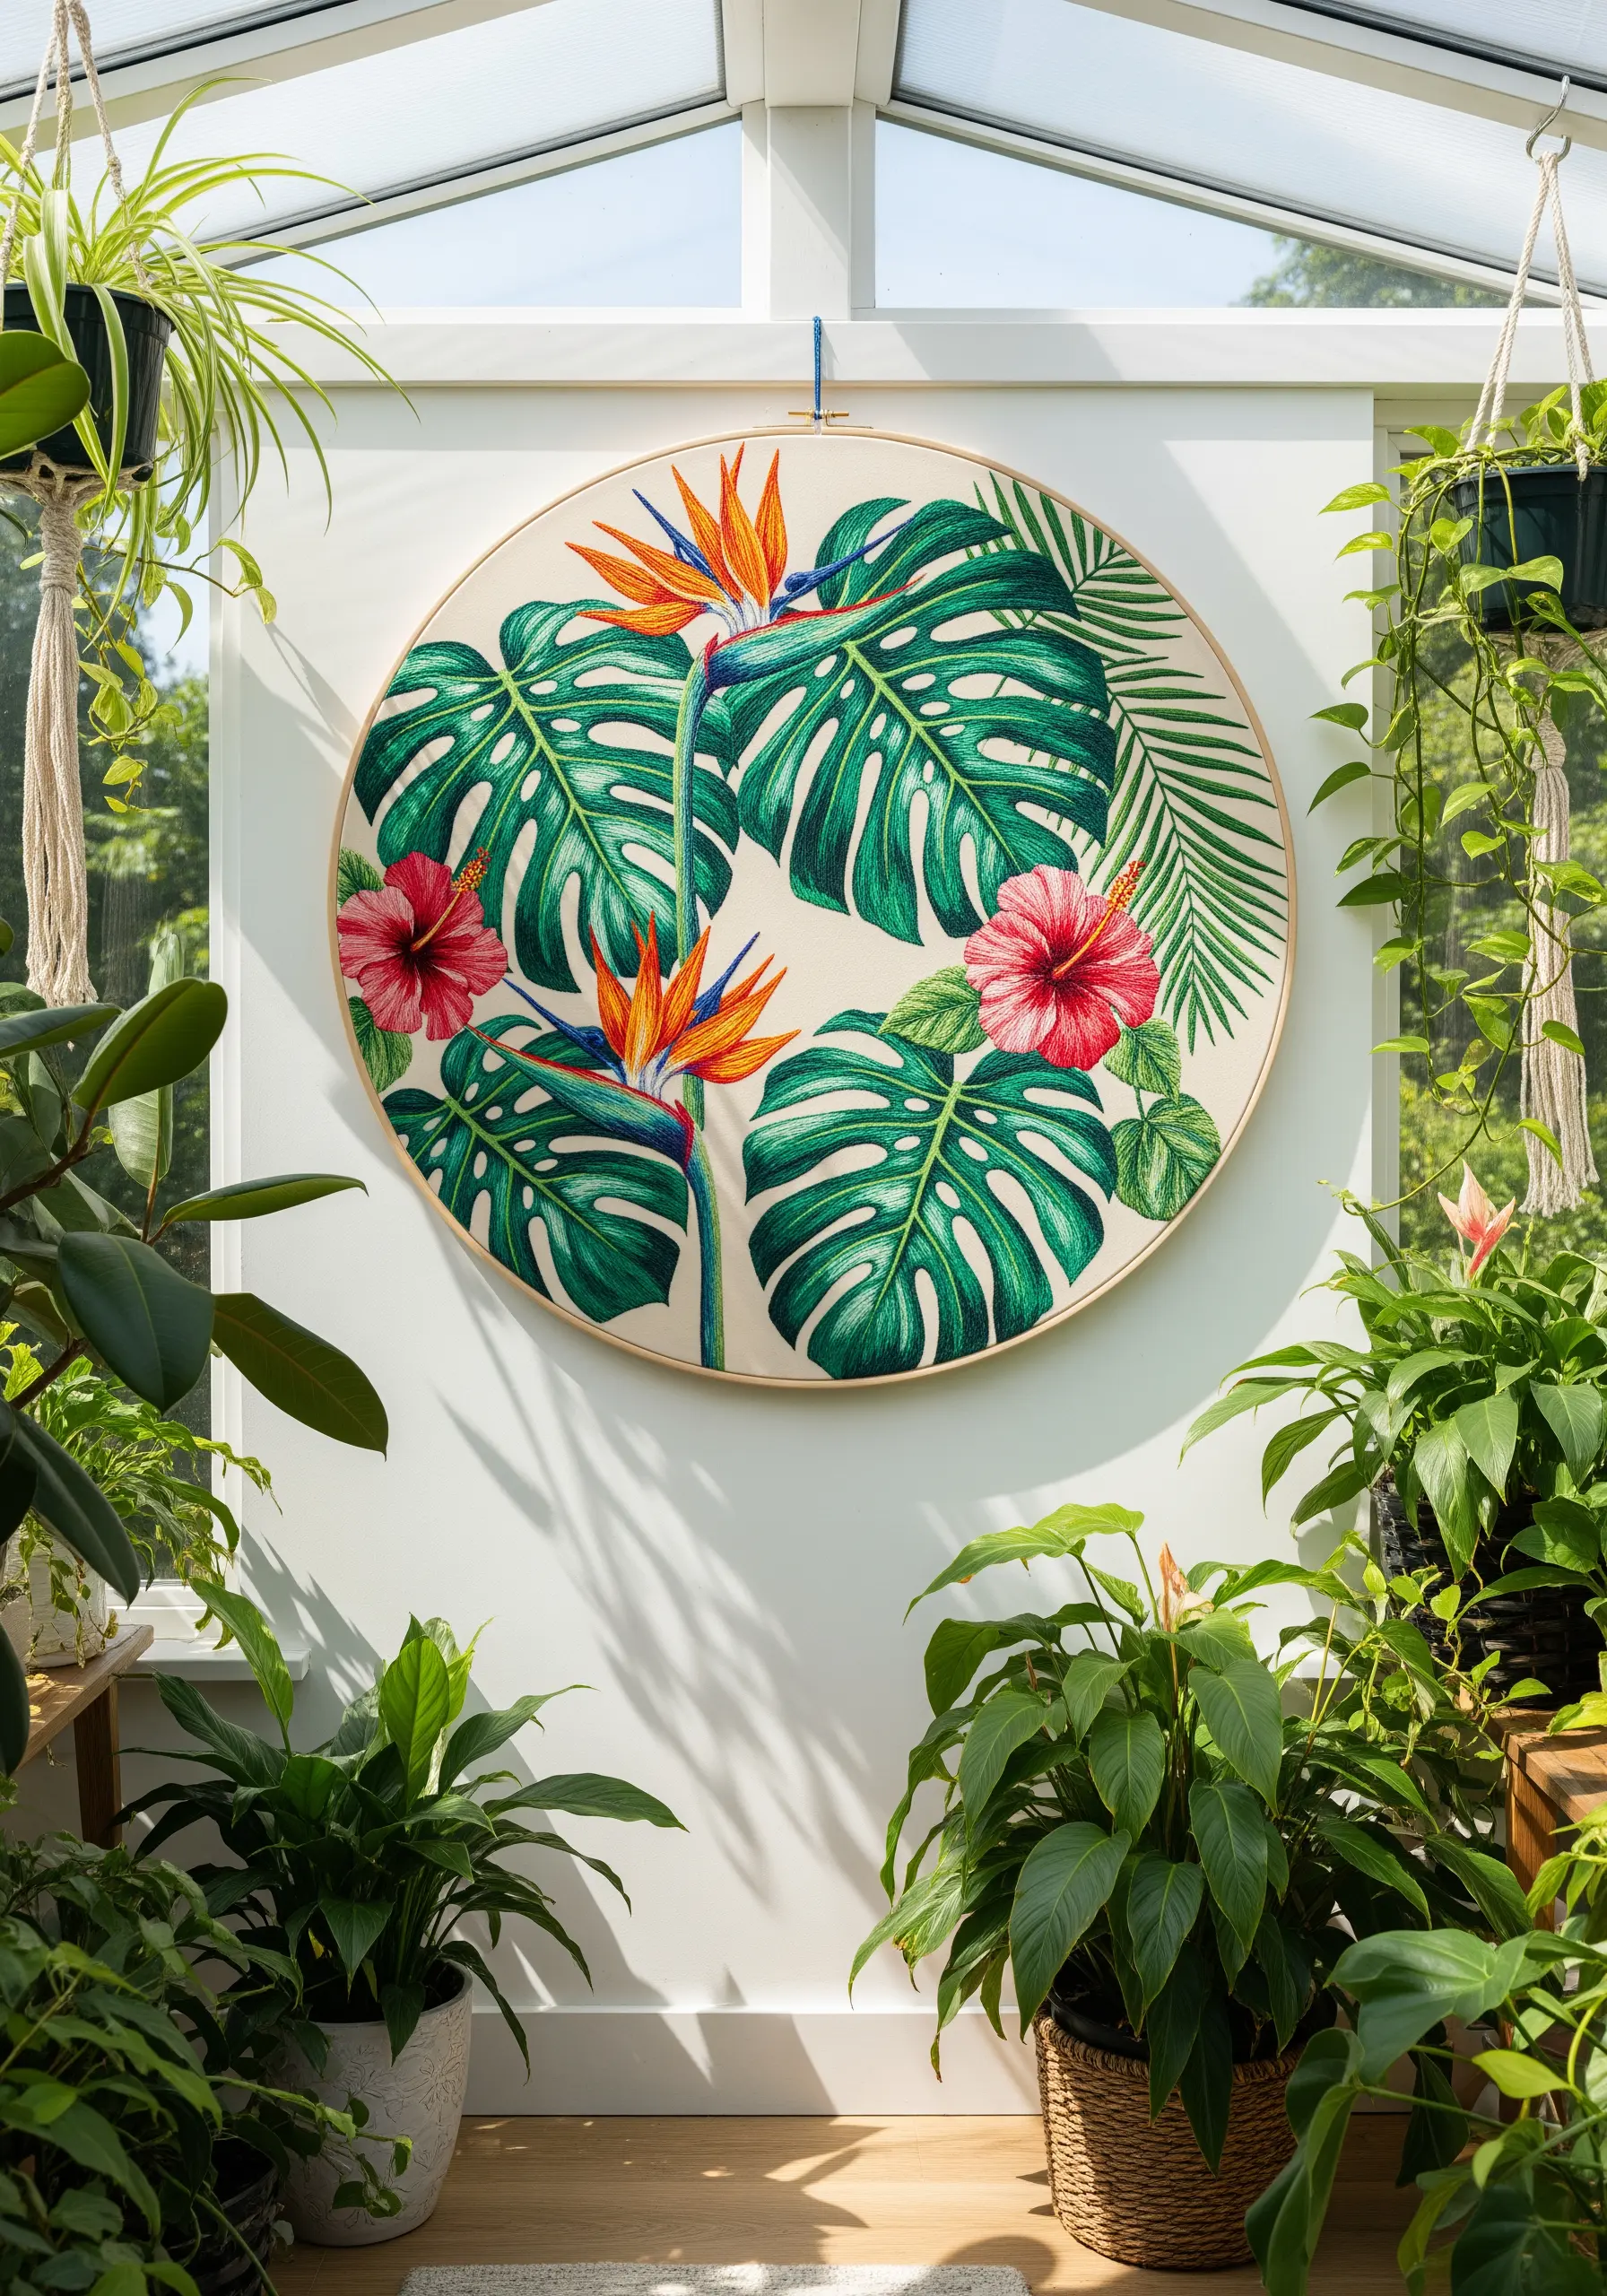
To make large leaves like Monstera look realistic, pay close attention to the direction of your stitches.
Instead of filling the entire leaf with one uniform direction, use long-and-short stitch that radiates outward from the central vein, following the natural lines of the leaf.
This directional stitching mimics how the leaf grows and reflects light, creating movement and realism.
Blending two or three shades of green will further enhance the effect, giving your tropical leaf and flower combinations a vibrant, lifelike quality.
11. Create a Narrative Triptych of a Flower’s Life

Tell a subtle story by dedicating three small, identical hoops to the life cycle of a single flower.
In the first, stitch a closed bud; in the second, a full bloom; and in the third, a dried seed pod.
This minimalist approach creates a powerful narrative of growth and transformation, turning simple botanical studies into a piece of conceptual art.
Hang them in a vertical line in a narrow space, like a hallway, to draw the eye upward and emphasize the progression.
12. Amplify Color with a Vibrant Fabric Base
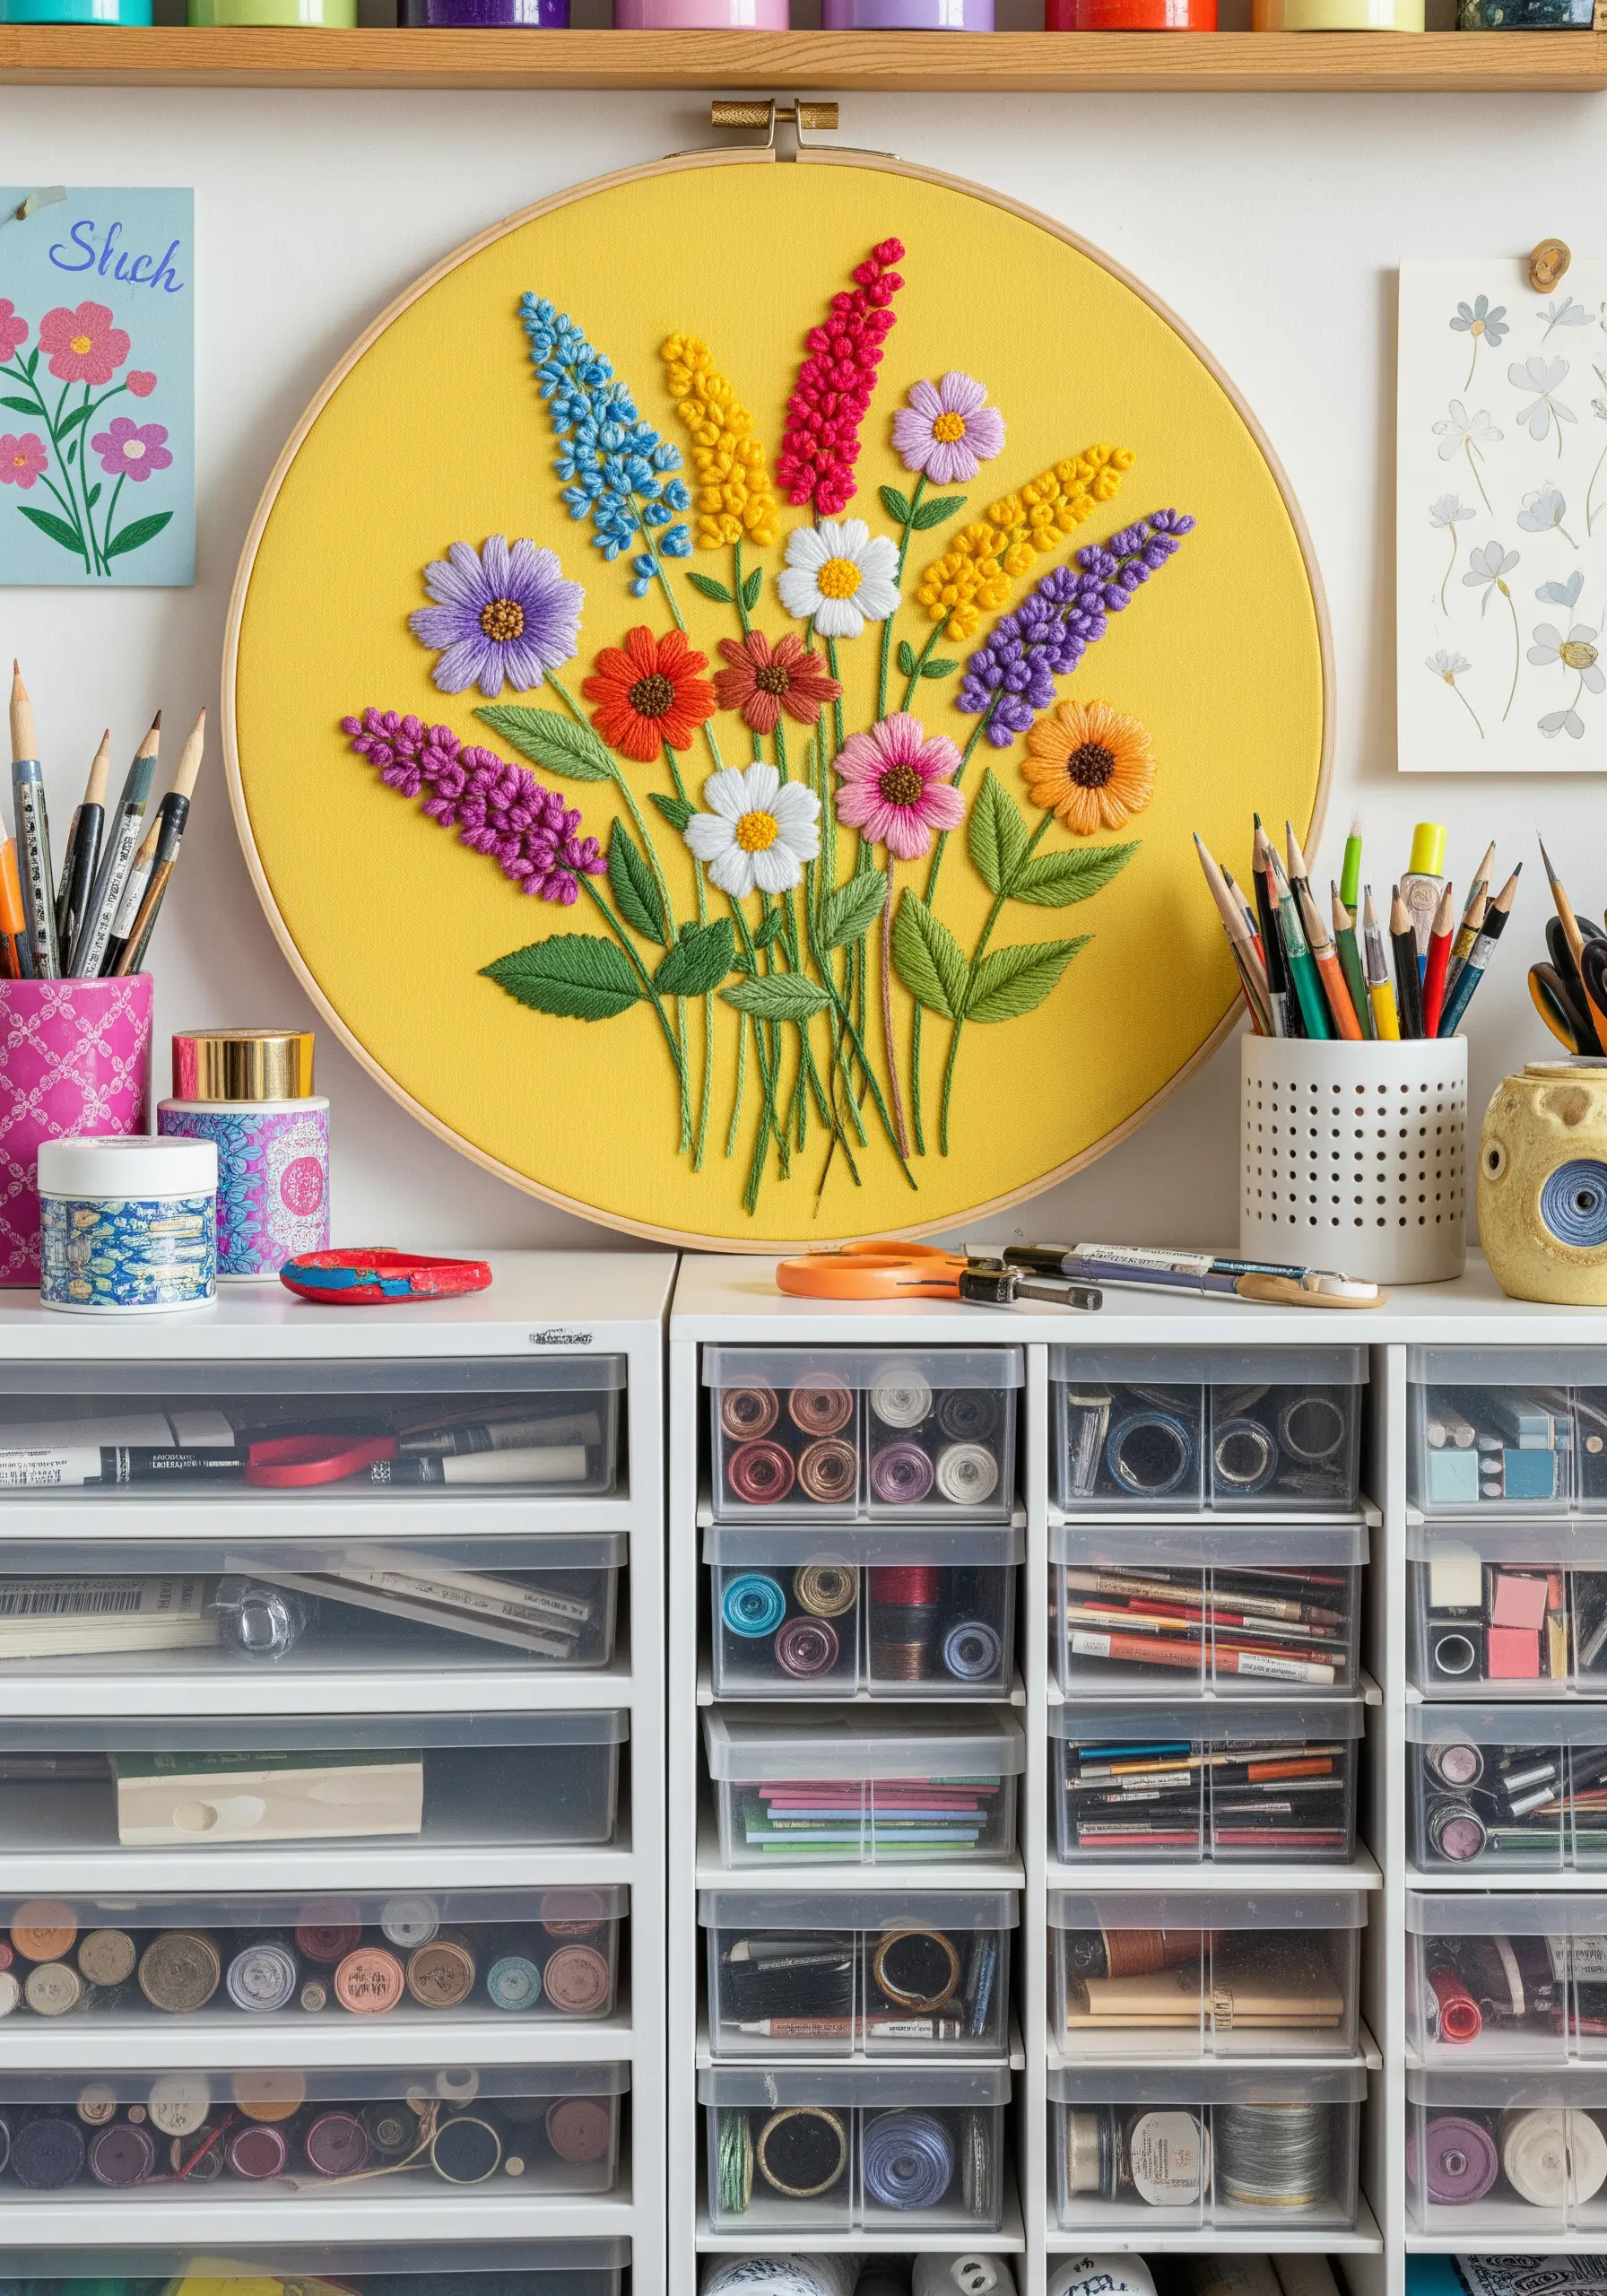
Let your background fabric do some of the work by choosing a bold, cheerful color like marigold yellow.
A vibrant base instantly makes your thread colors pop and unifies the entire piece, creating an energetic and joyful mood.
When stitching on bright fabric, select thread colors with high contrast to ensure they stand out, such as deep purples, bright whites, and rich blues.
Combine dense satin stitch with textural French and bullion knots to create a bouquet that feels abundant and full of life.
13. Evoke Mood with a Gothic Romance Palette
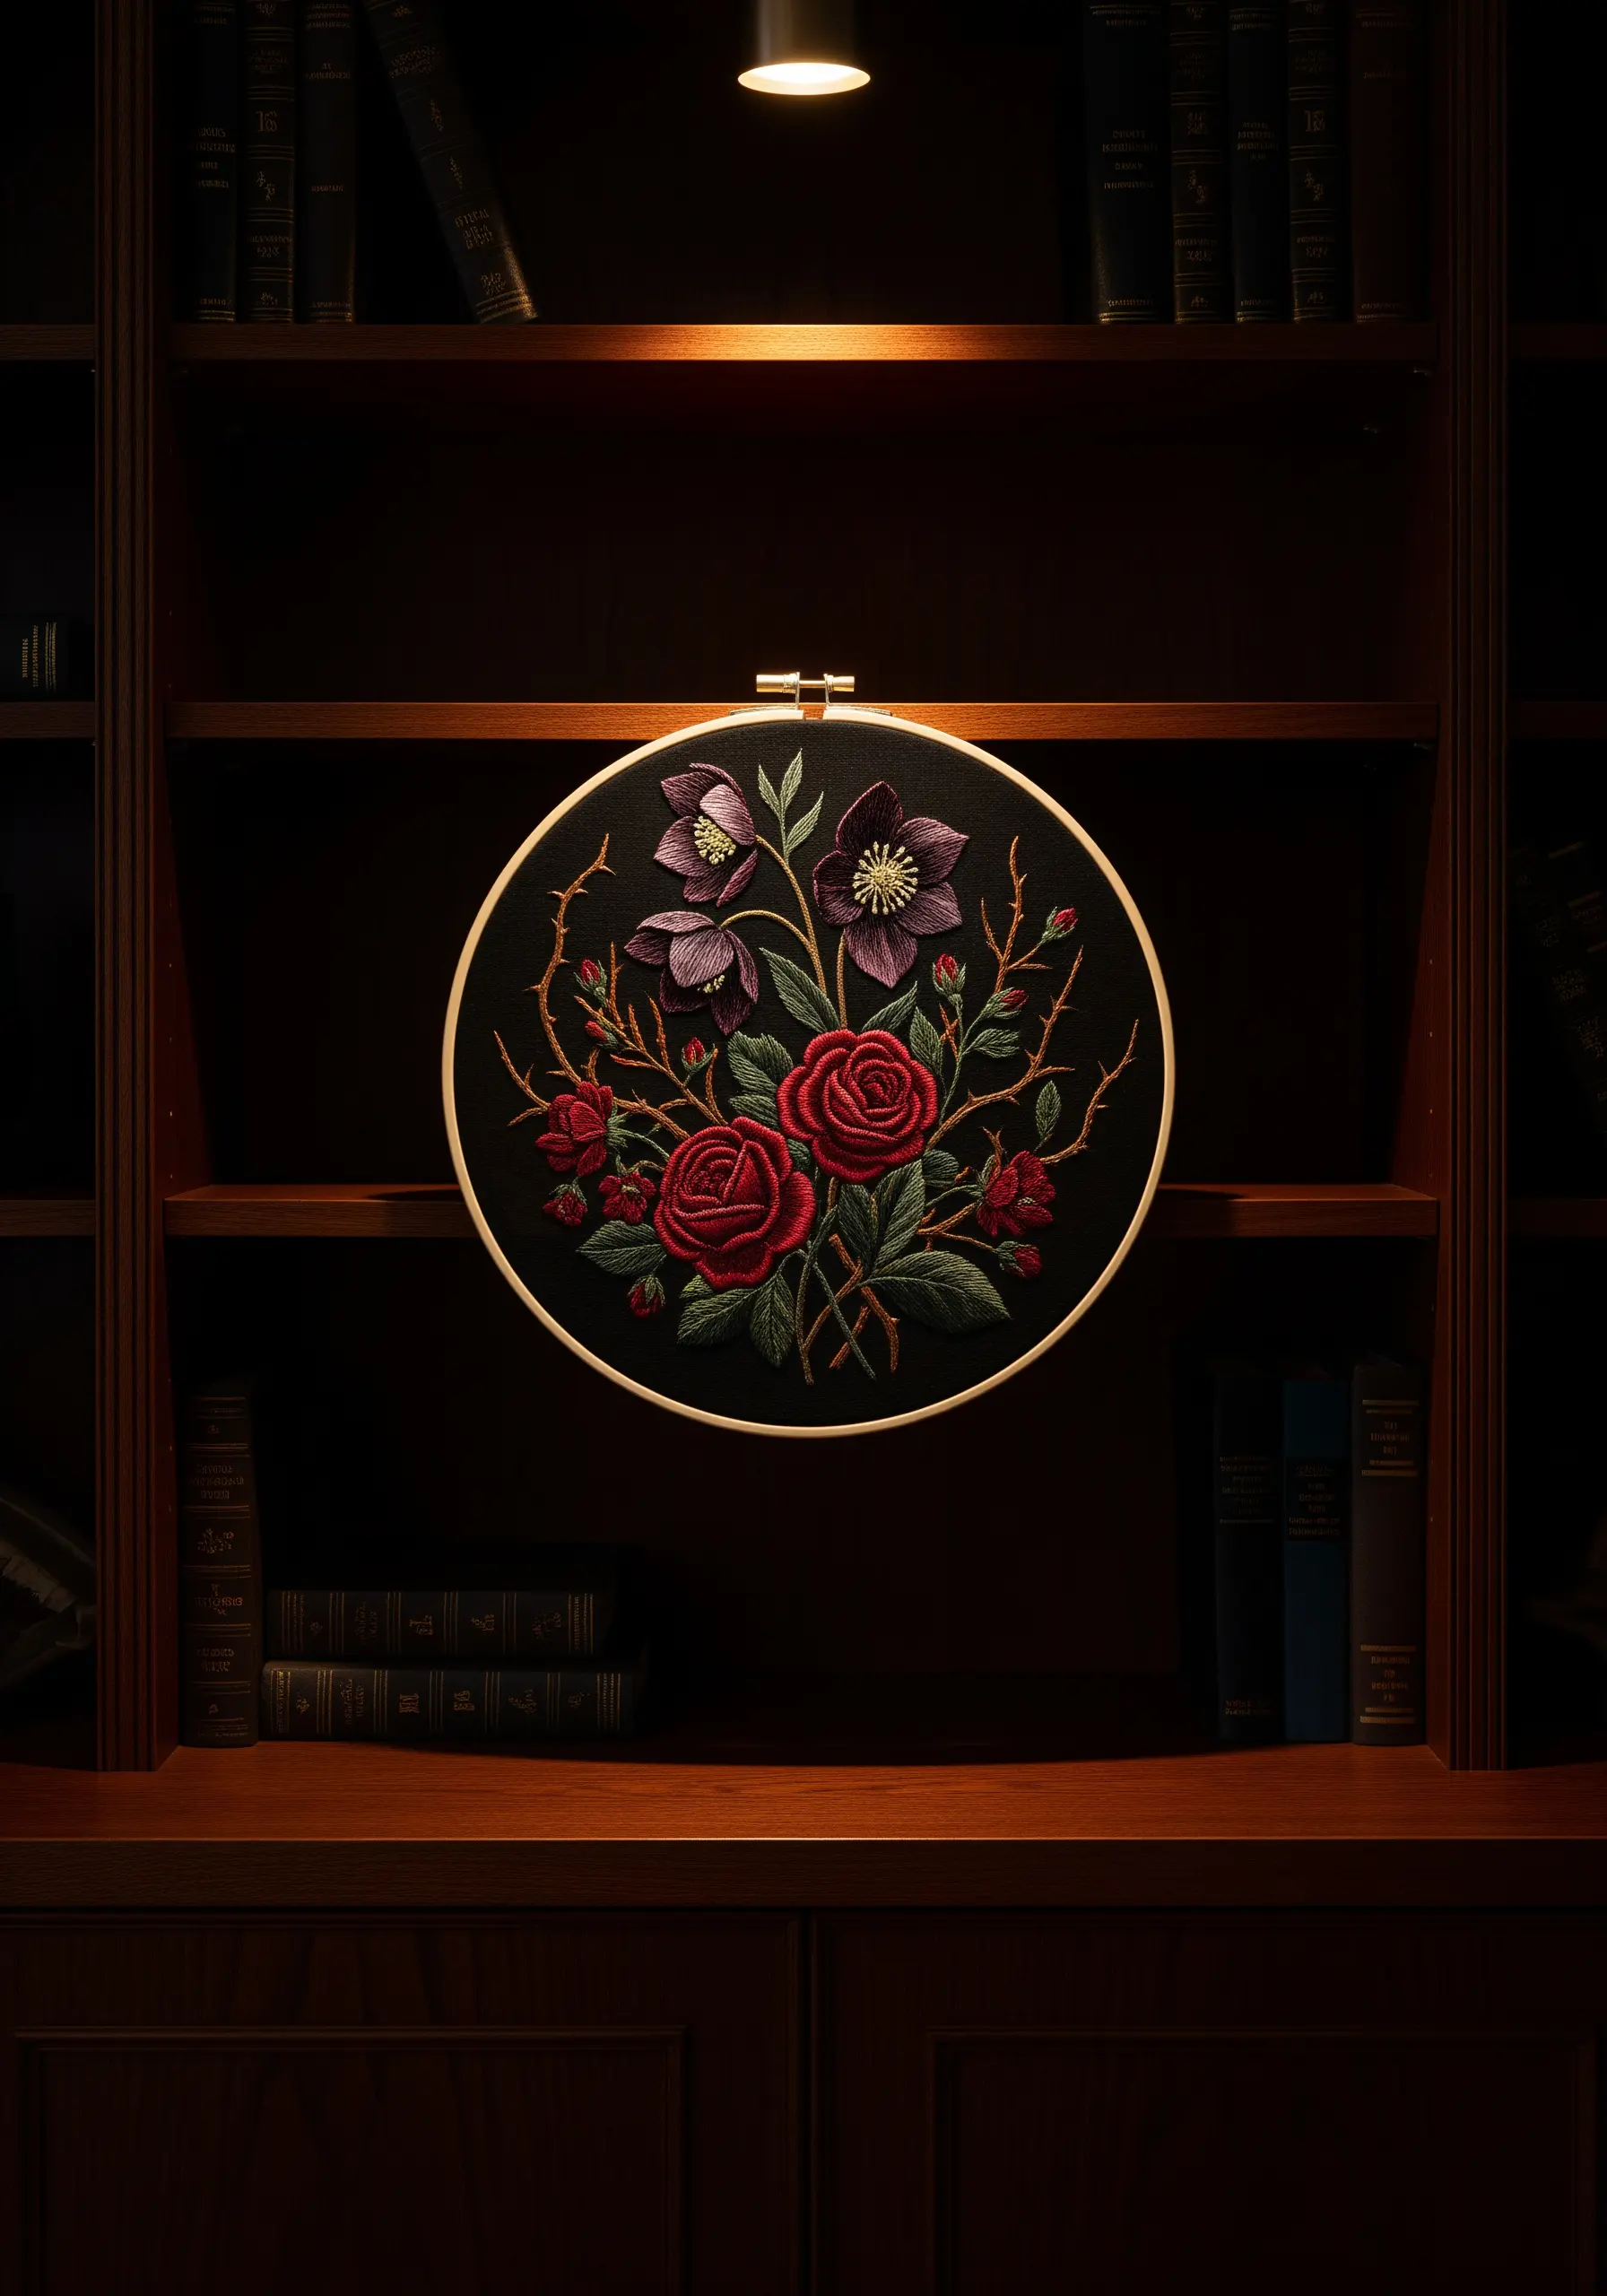
Create a dark, romantic aesthetic by pairing deep red roses with thorny, shadowed leaves on a black linen background.
Use several shades of crimson and burgundy, blended with long-and-short stitch, to give the rose petals a velvety, almost three-dimensional appearance.
For the leaves and thorny stems, use muted olive greens and charcoal grays to create a sense of mystery and depth.
This dramatic color palette is perfect for creating a sophisticated and atmospheric piece that feels timeless and elegant.
14. Master Delicacy with Minimal Stitches
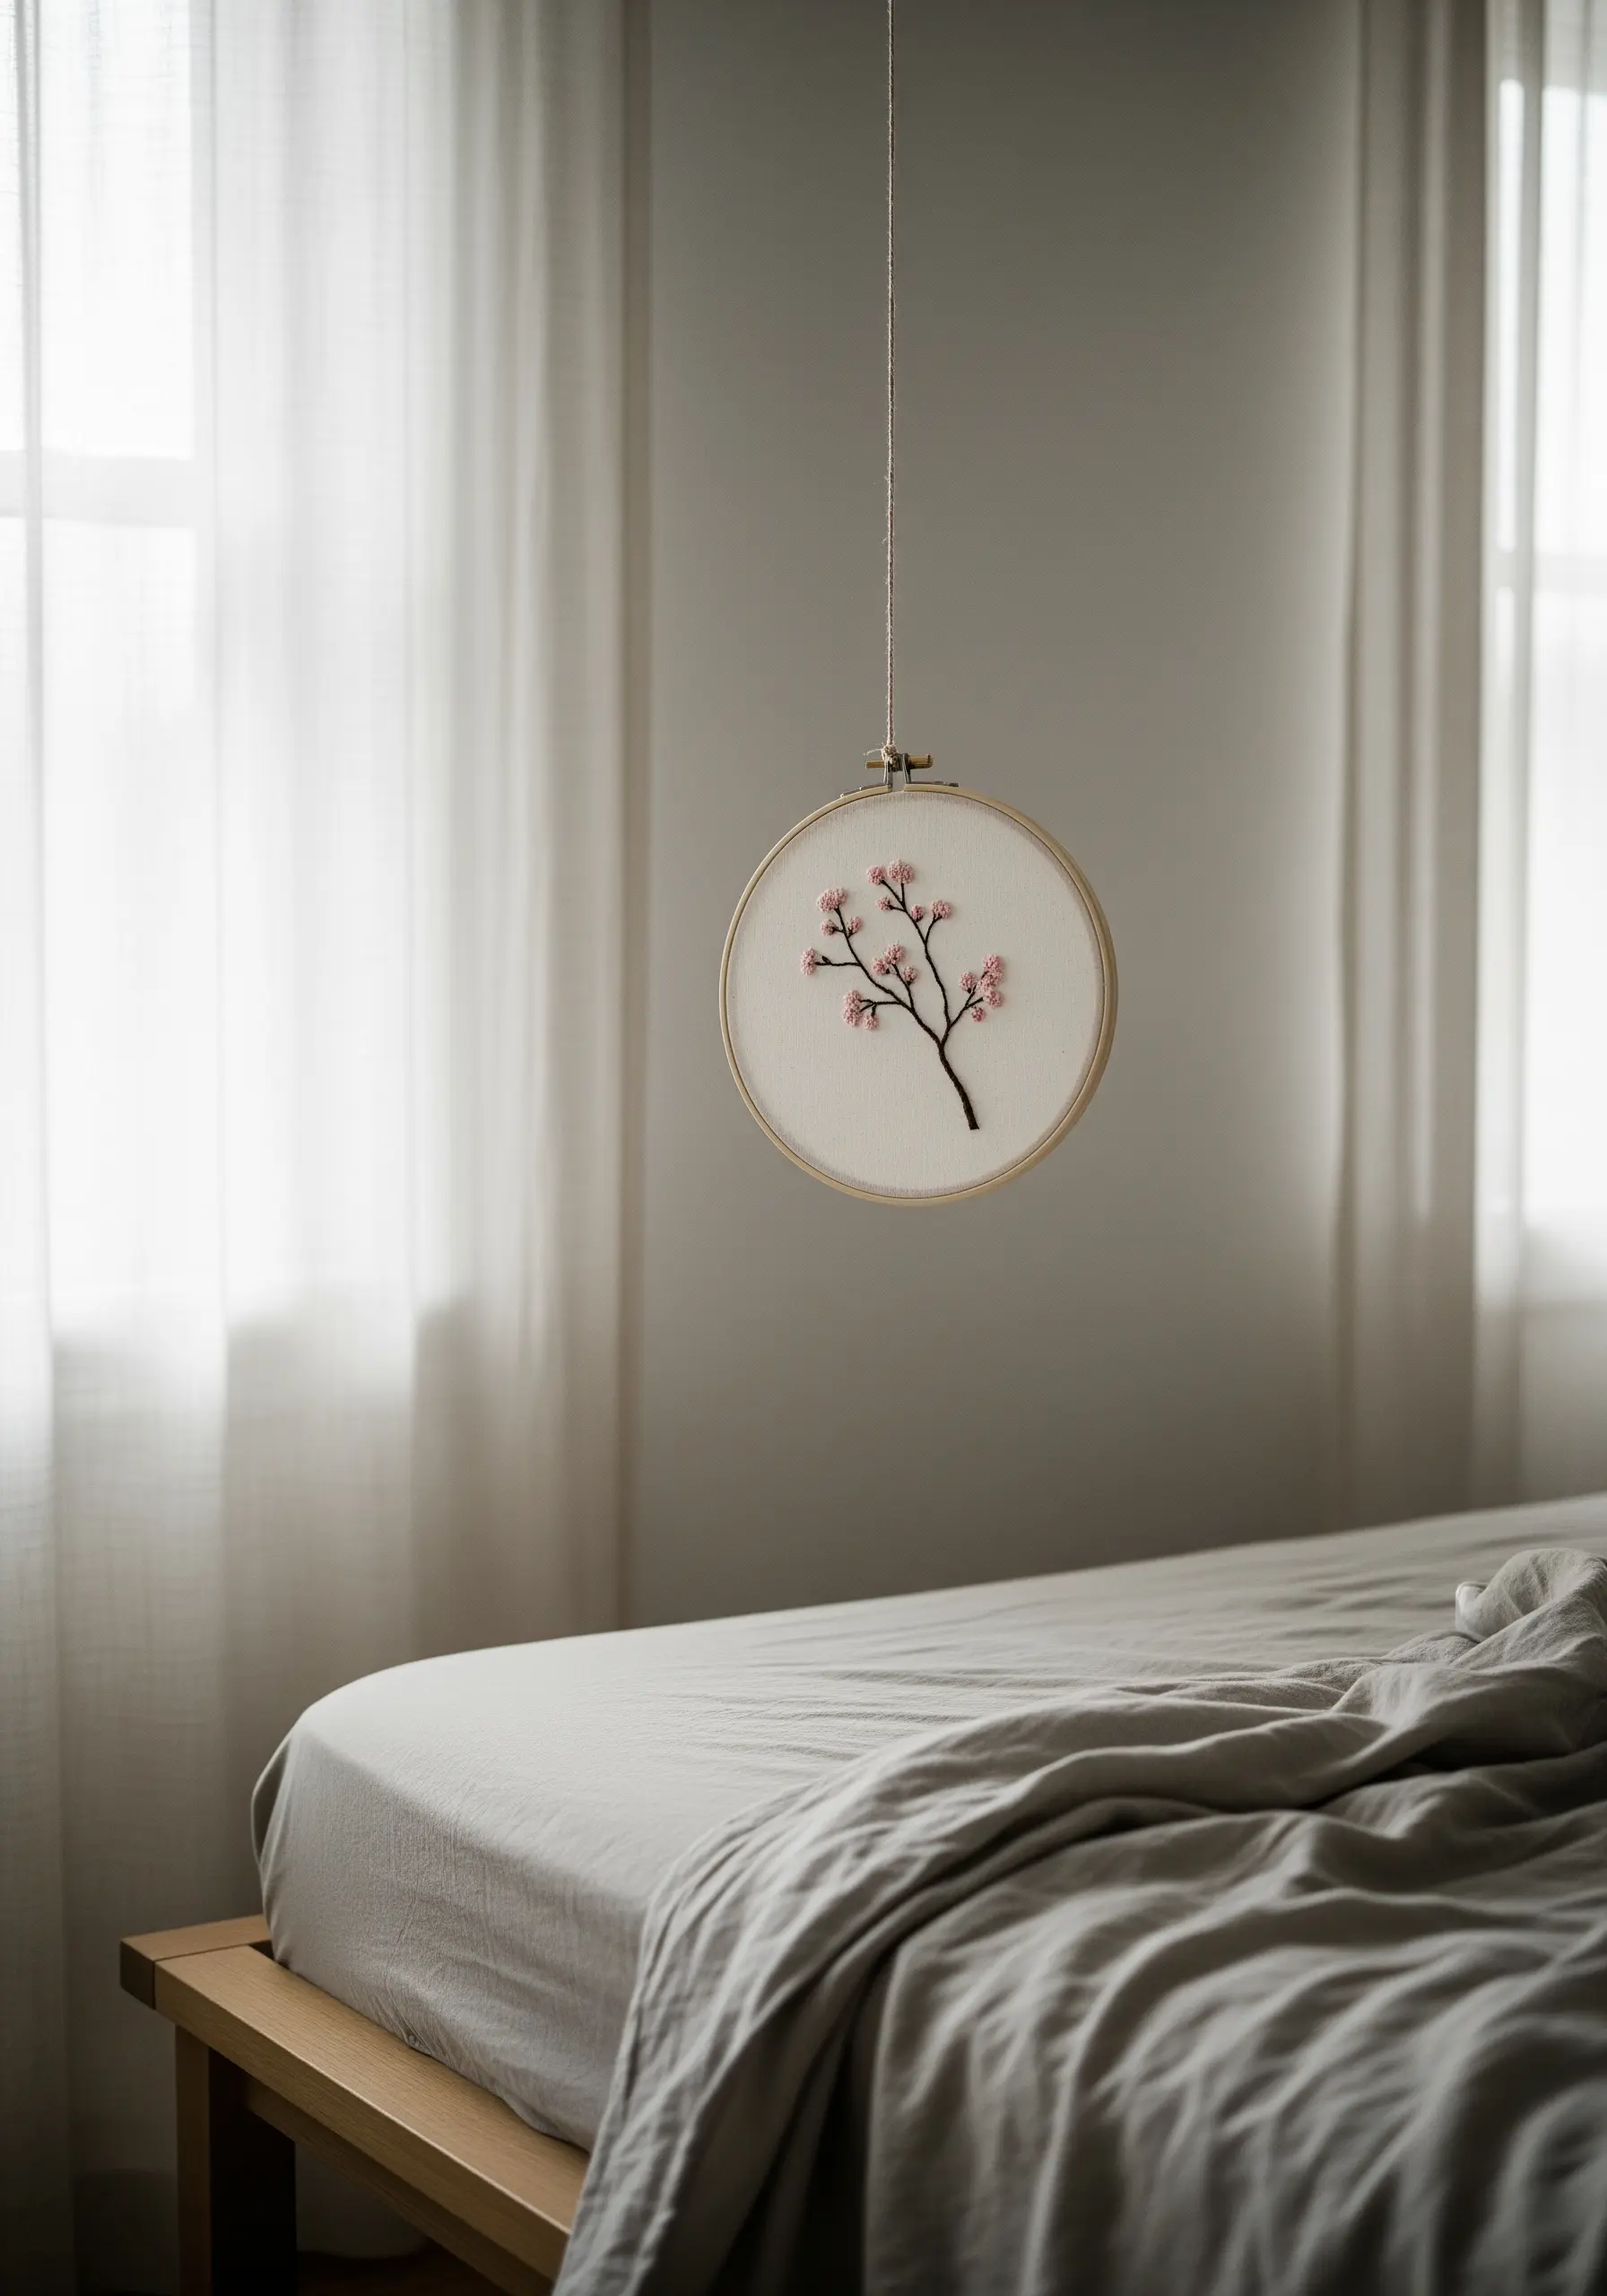
Suggest the form of a cherry blossom branch rather than rendering it in full detail.
Use a textured, gnarled stem stitch for the branch to give it an organic, aged look.
For the blossoms, place just a few strategically scattered French knots and detached chain stitches in shades of pale pink and white.
The beauty of this minimal DIY embroidery project lies in its restraint, where the un-stitched space allows the delicate details to breathe and stand out.
15. Add Cottage Charm by Stitching on Gingham
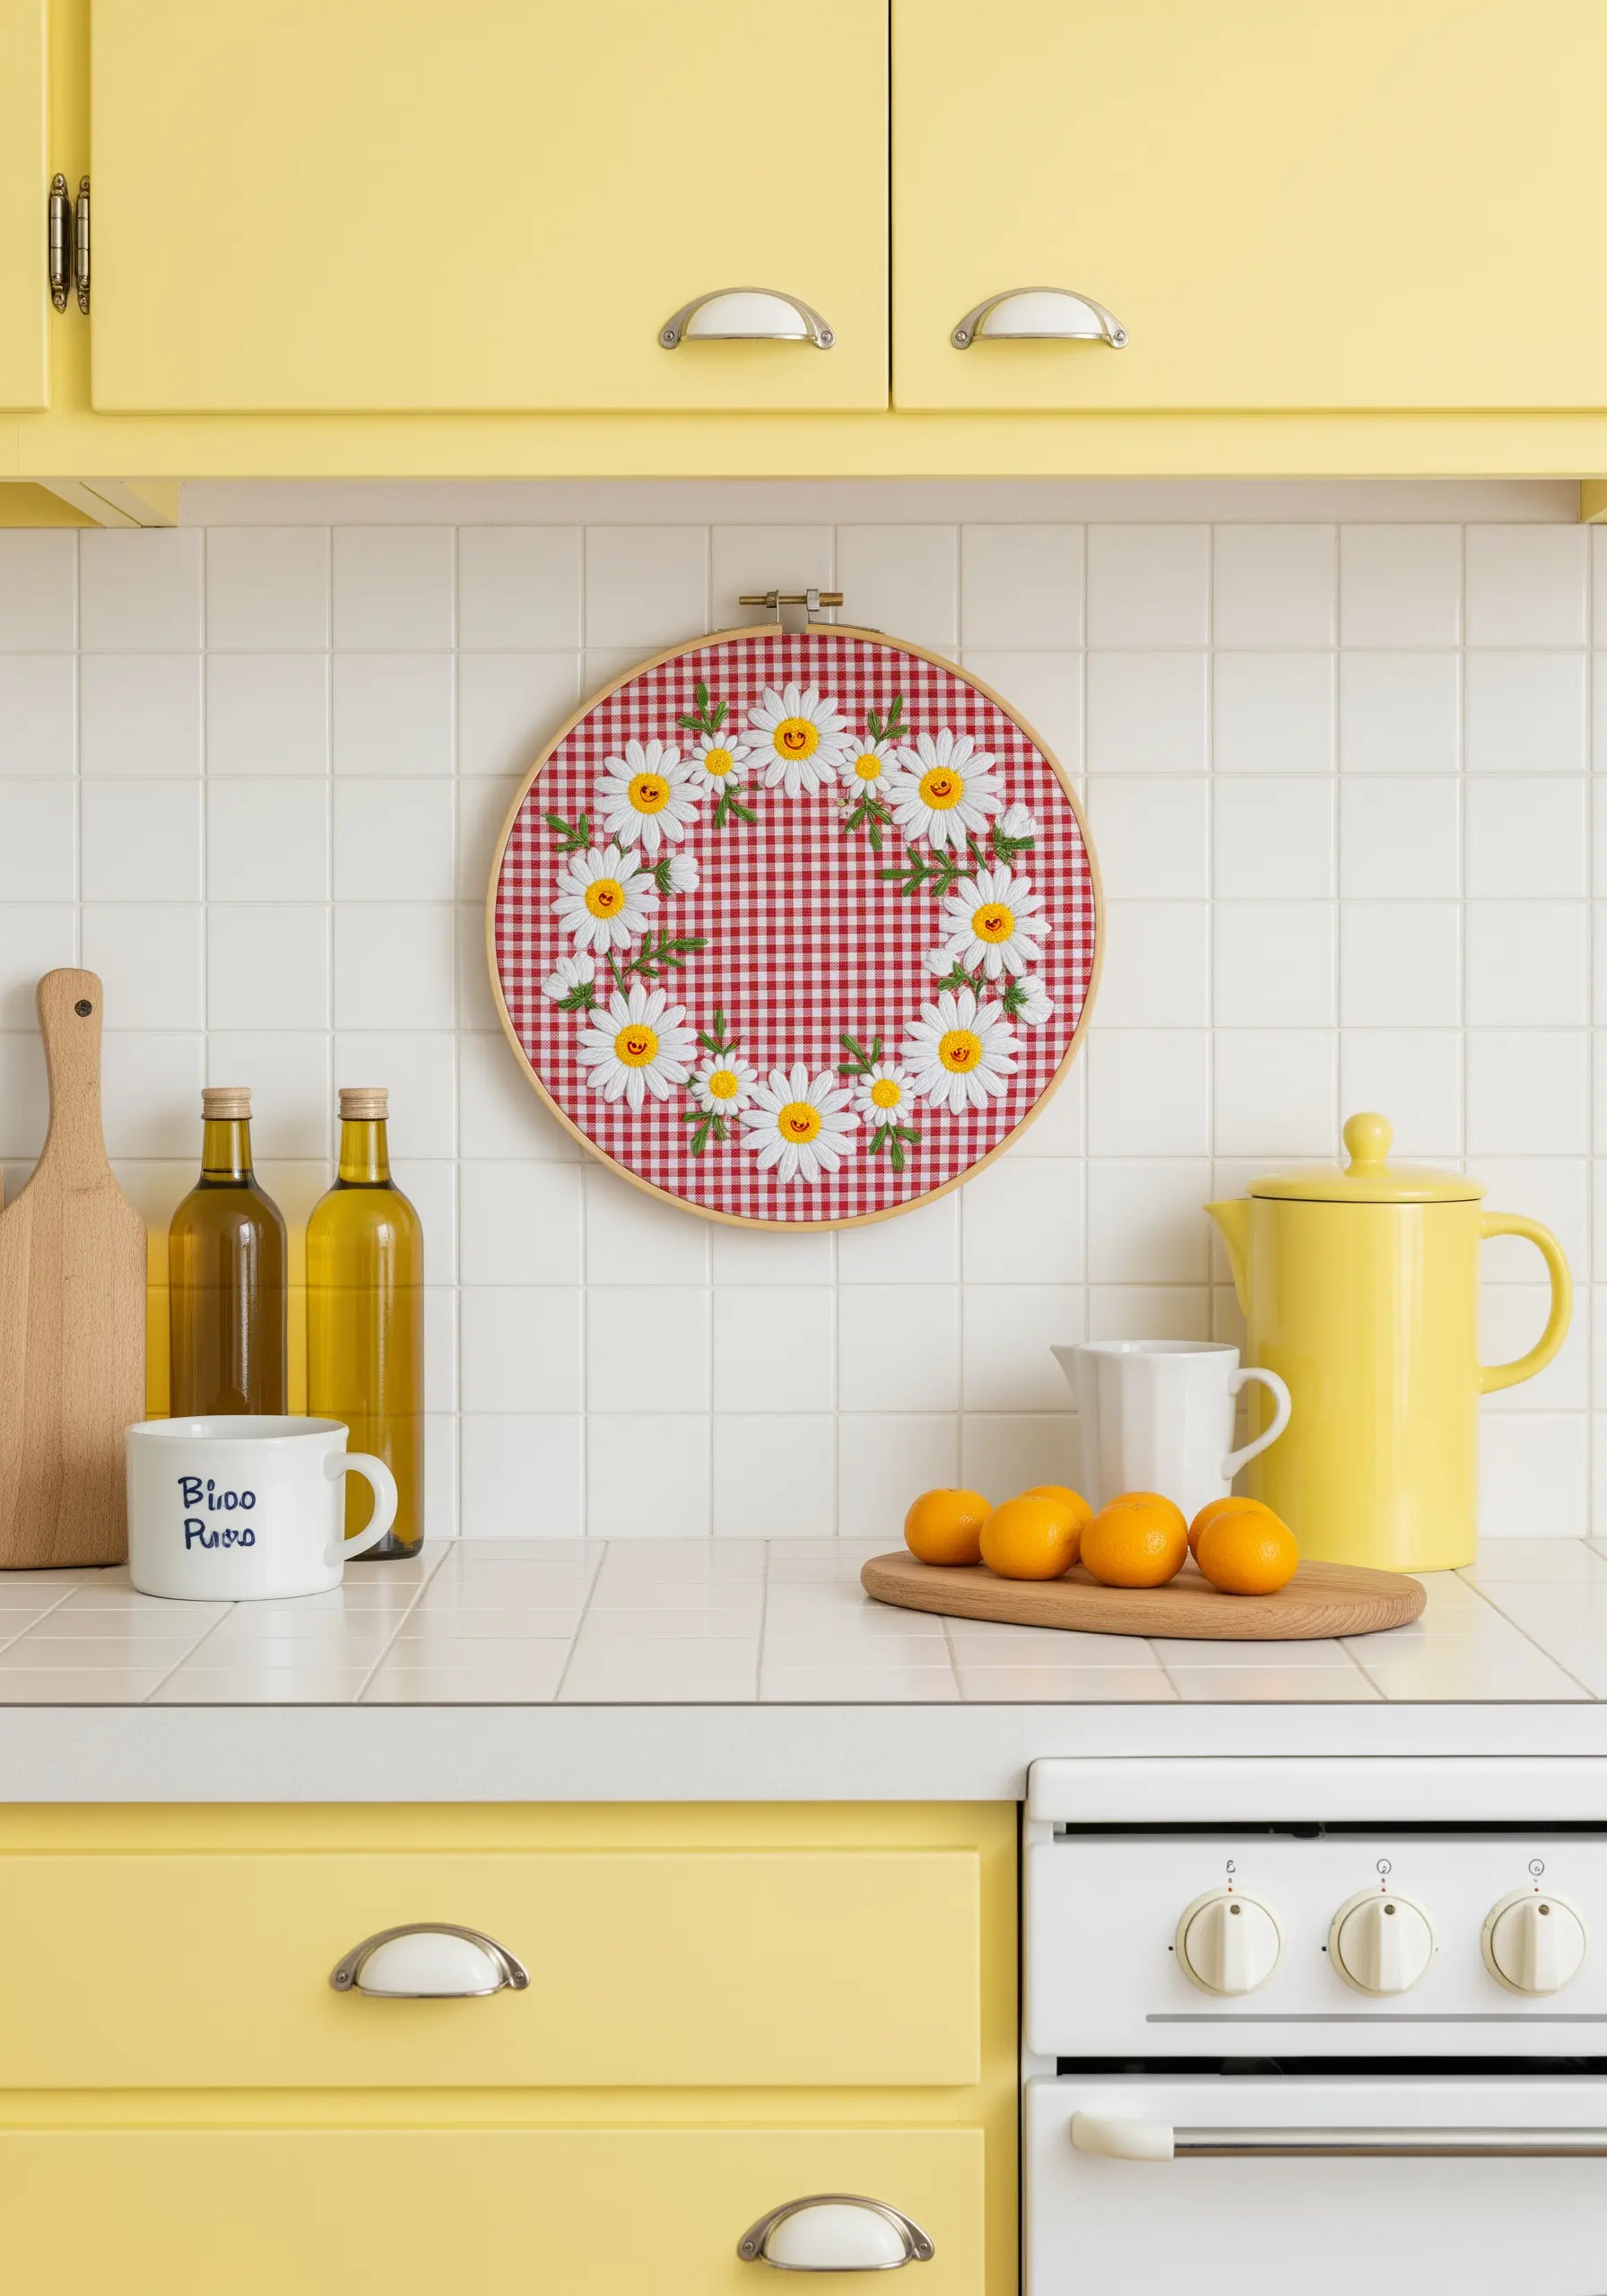
Instead of plain fabric, try stitching on a classic red-and-white gingham for an instant dose of cottage-style warmth.
The grid of the pattern provides a natural guide for centering your design and keeping your stitches even.
Choose a simple, bold motif like a daisy wreath, as intricate designs can get lost in the pattern.
Use a fusible interfacing on the back of the gingham before stitching to stabilize the fabric and prevent puckering.
16. Recreate a Meadow with Textural Stitches
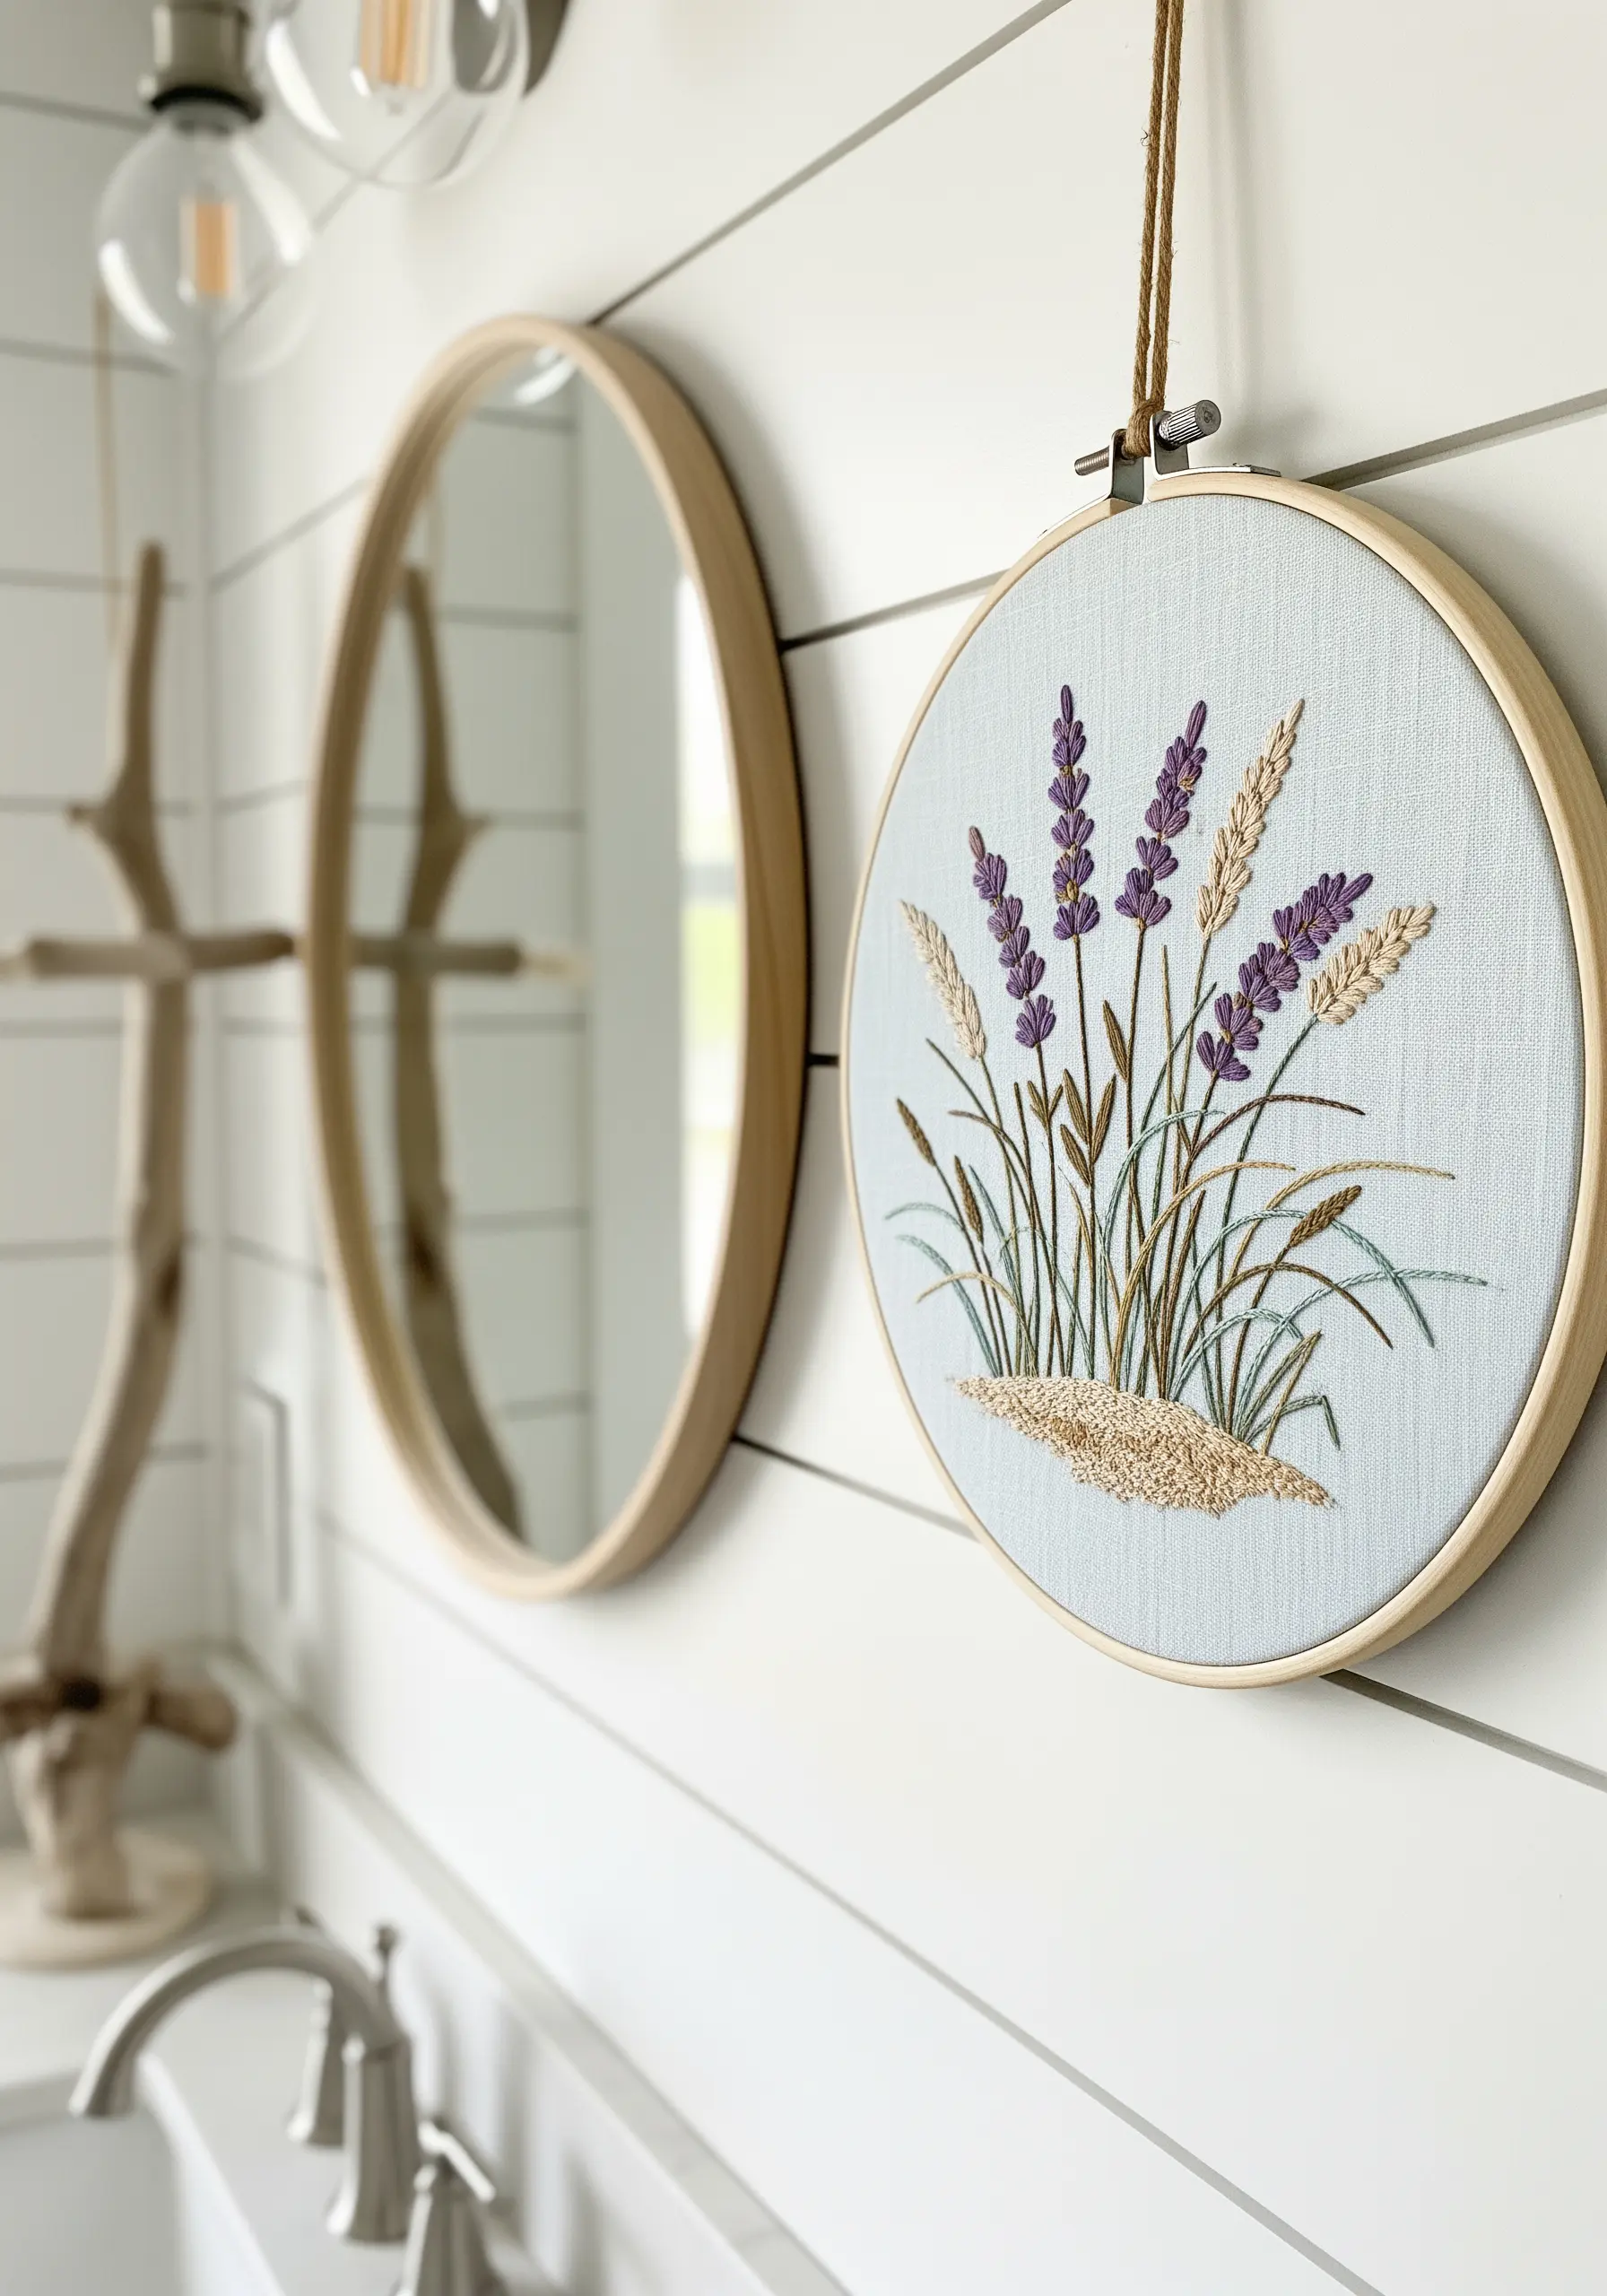
Capture the feeling of a wild meadow by combining different stitches to represent various plants.
Use clusters of purple French knots for lavender, straight stitches bundled together for wheat stalks, and woven wheel stitches for small flowers.
Incorporate different shades of green for the foliage using fishbone stitch and stem stitch to create a layered, natural look.
These delicate lavender stitch ideas help build a composition that is rich in texture and visual interest.
17. Tell a Story with a Themed Gallery Cluster

Arrange a collection of hoops to create a narrative, like a walk through a forest.
Combine different elements of a single ecosystem—ferns, mushrooms, wildflowers, and a buzzing bee—each in its own hoop.
Varying the hoop sizes and orientations adds a playful, organic feel to the arrangement.
This method allows you to explore different realistic mushroom and forest floor embroidery projects within a single, cohesive display that feels curated and personal.
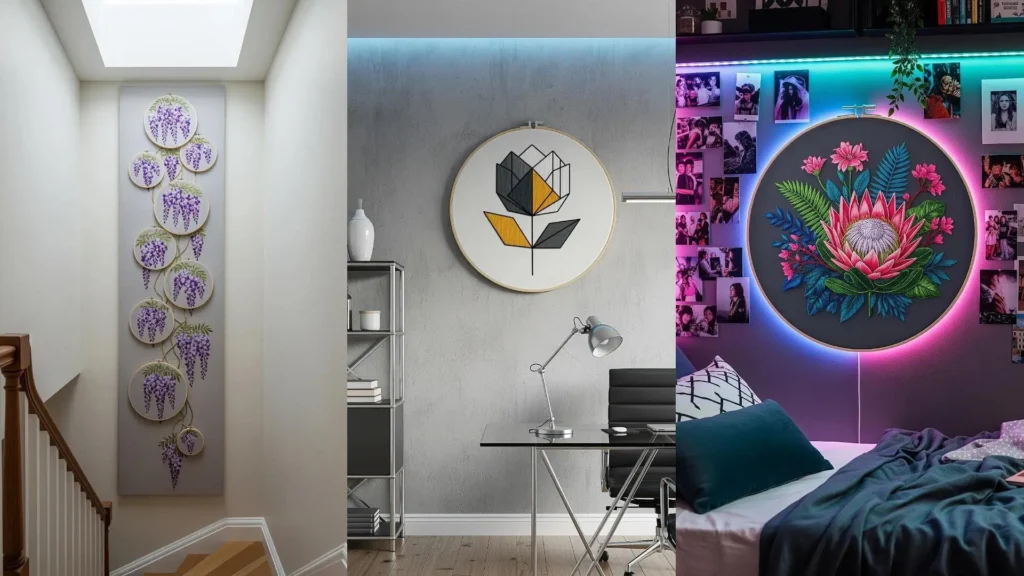
18. Translate Florals into Modern Geometric Art

Deconstruct a flower into its basic shapes and lines for a contemporary, architectural feel.
Use a crisp backstitch for the outlines and fill select facets with blocks of solid satin stitch in a restrained color palette, such as mustard, charcoal, and white.
This style of modern geometric thread art transforms a traditional floral motif into a bold, graphic statement.
The key is precision—ensure your satin stitches are perfectly parallel and your outlines are sharp for a clean, polished finish.
19. Create a Grand Installation with a Fabric Panel
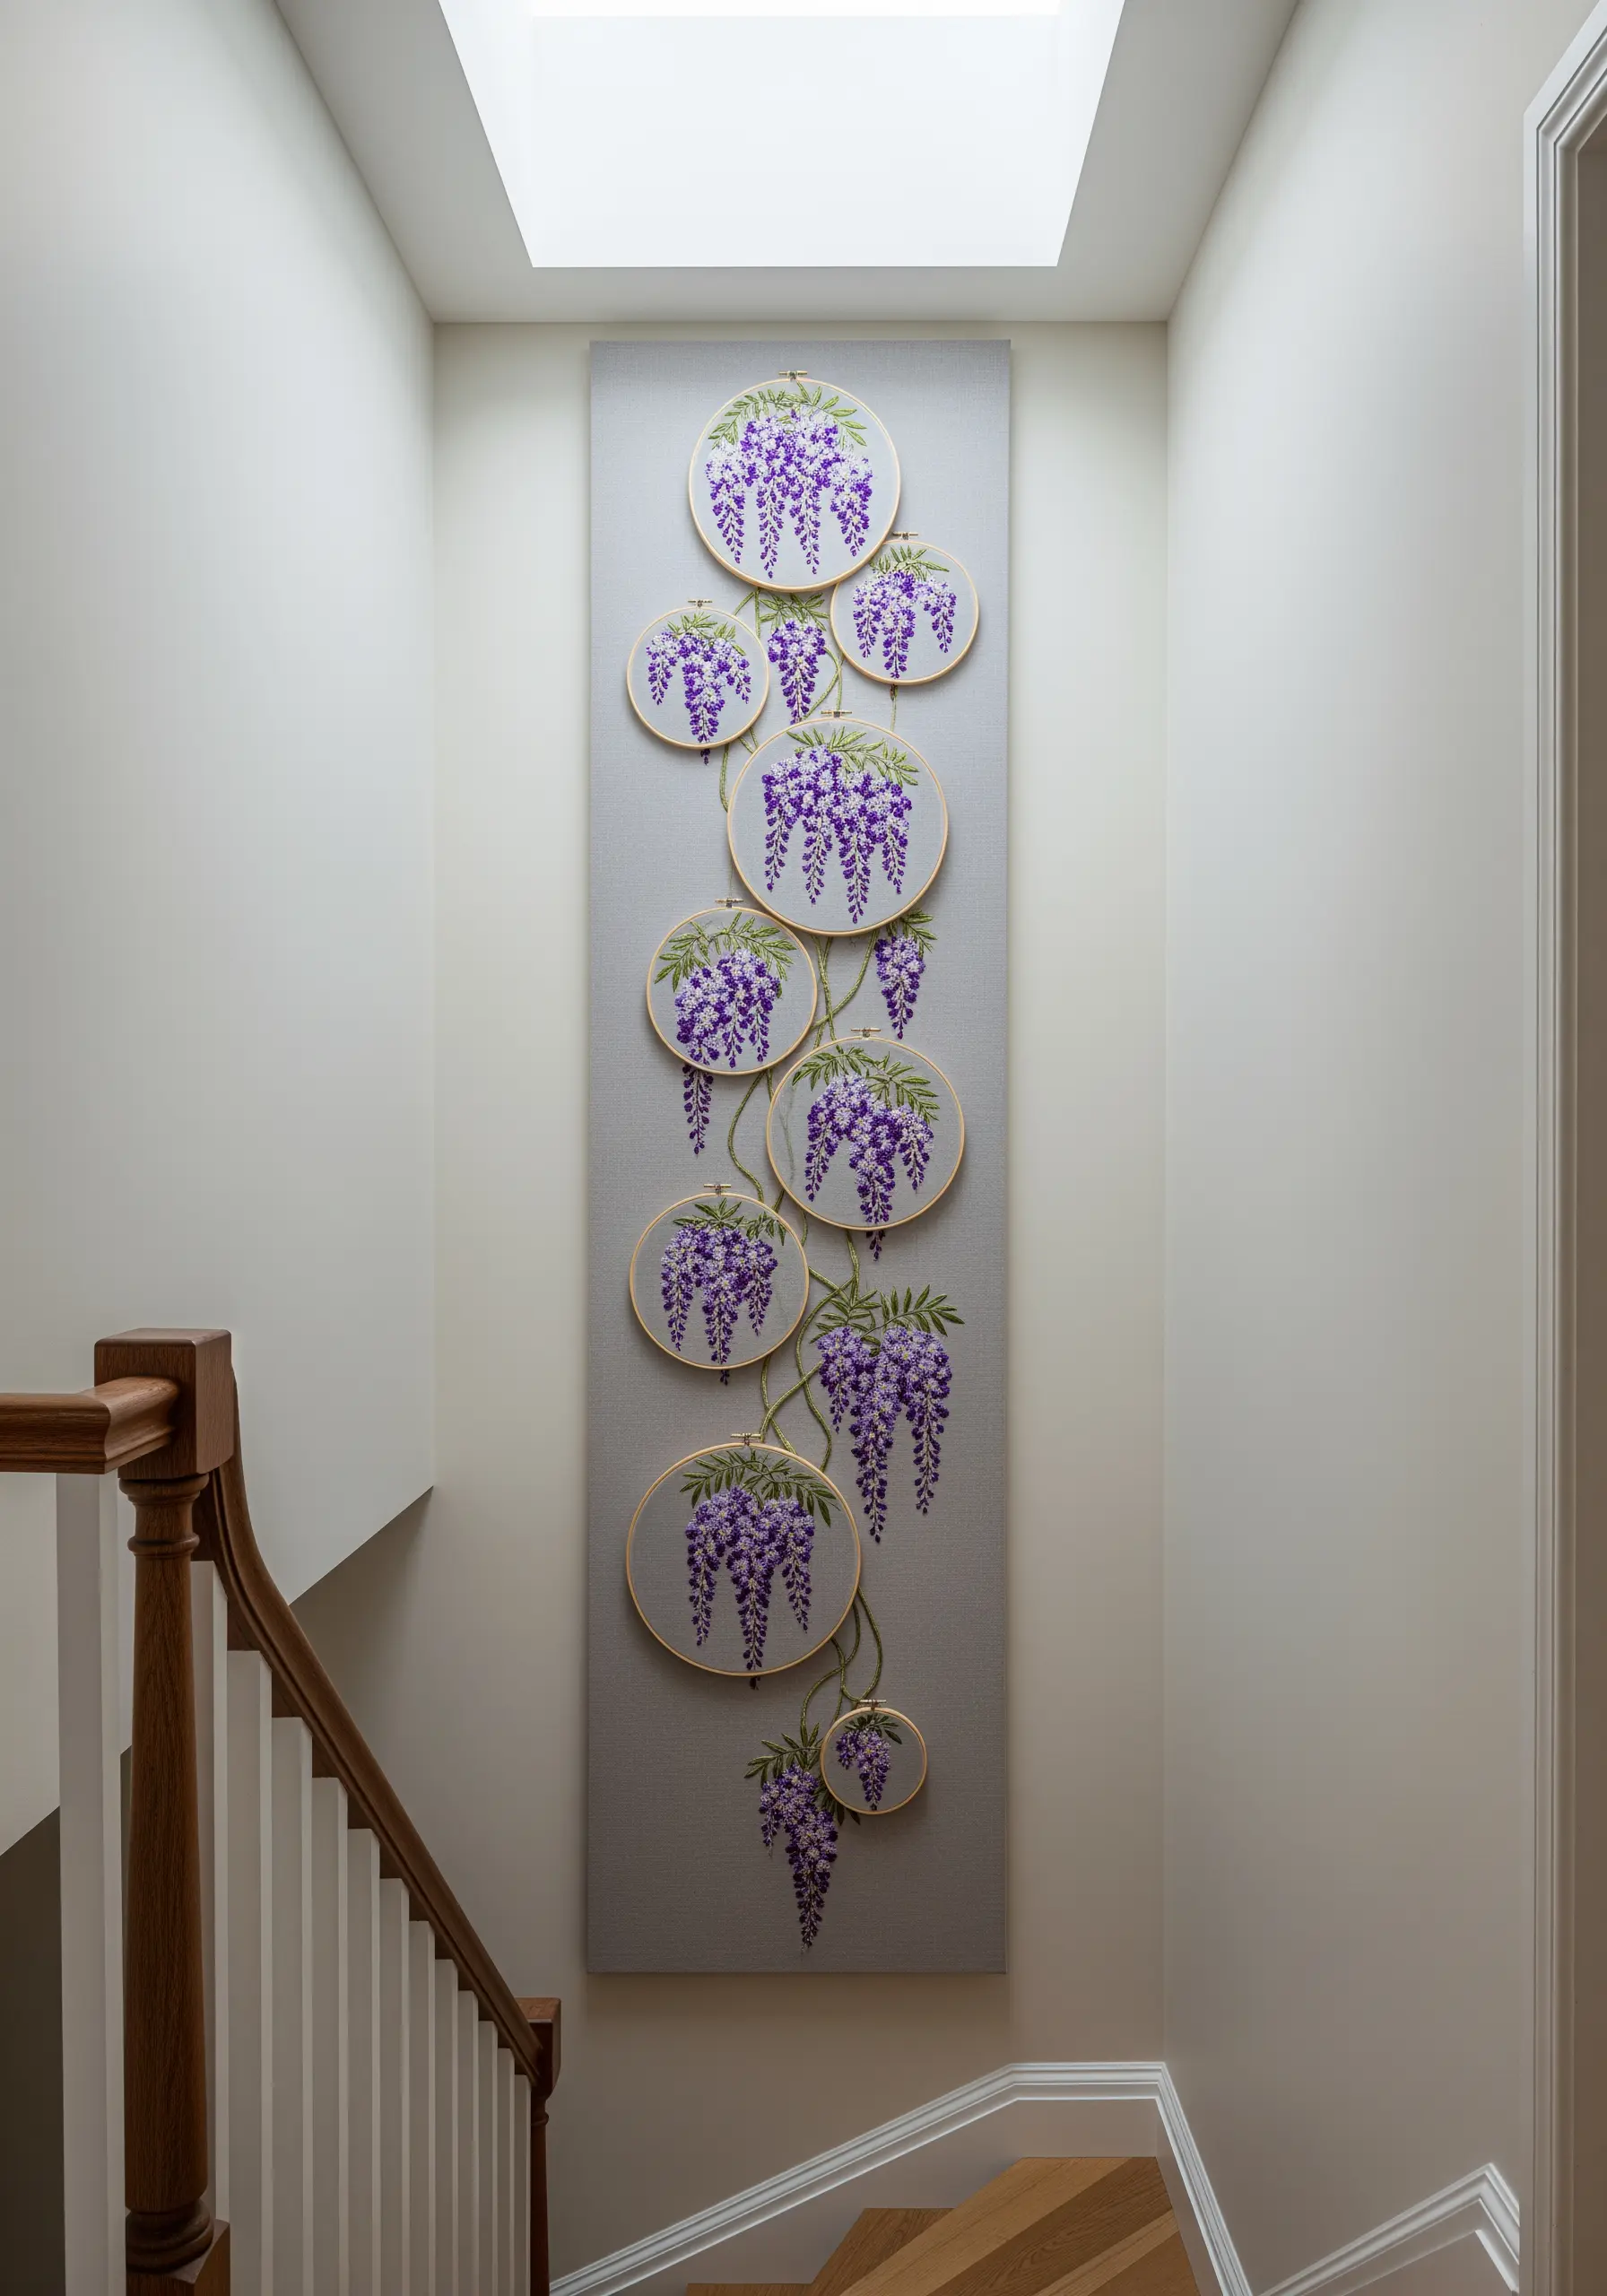
For a truly show-stopping piece, mount your multi-hoop creations onto a single, fabric-wrapped canvas or panel.
This technique turns a collection of individual hoops into one unified work of art, giving it a more permanent and gallery-worthy presence.
Design your wisteria vine to cascade down the panel, using the hoops to frame key clusters of blossoms.
These embroidered textile wall hangings are perfect for making a statement in a tall, narrow space like a stairwell.
20. Add Realistic Texture to Lavender Stems
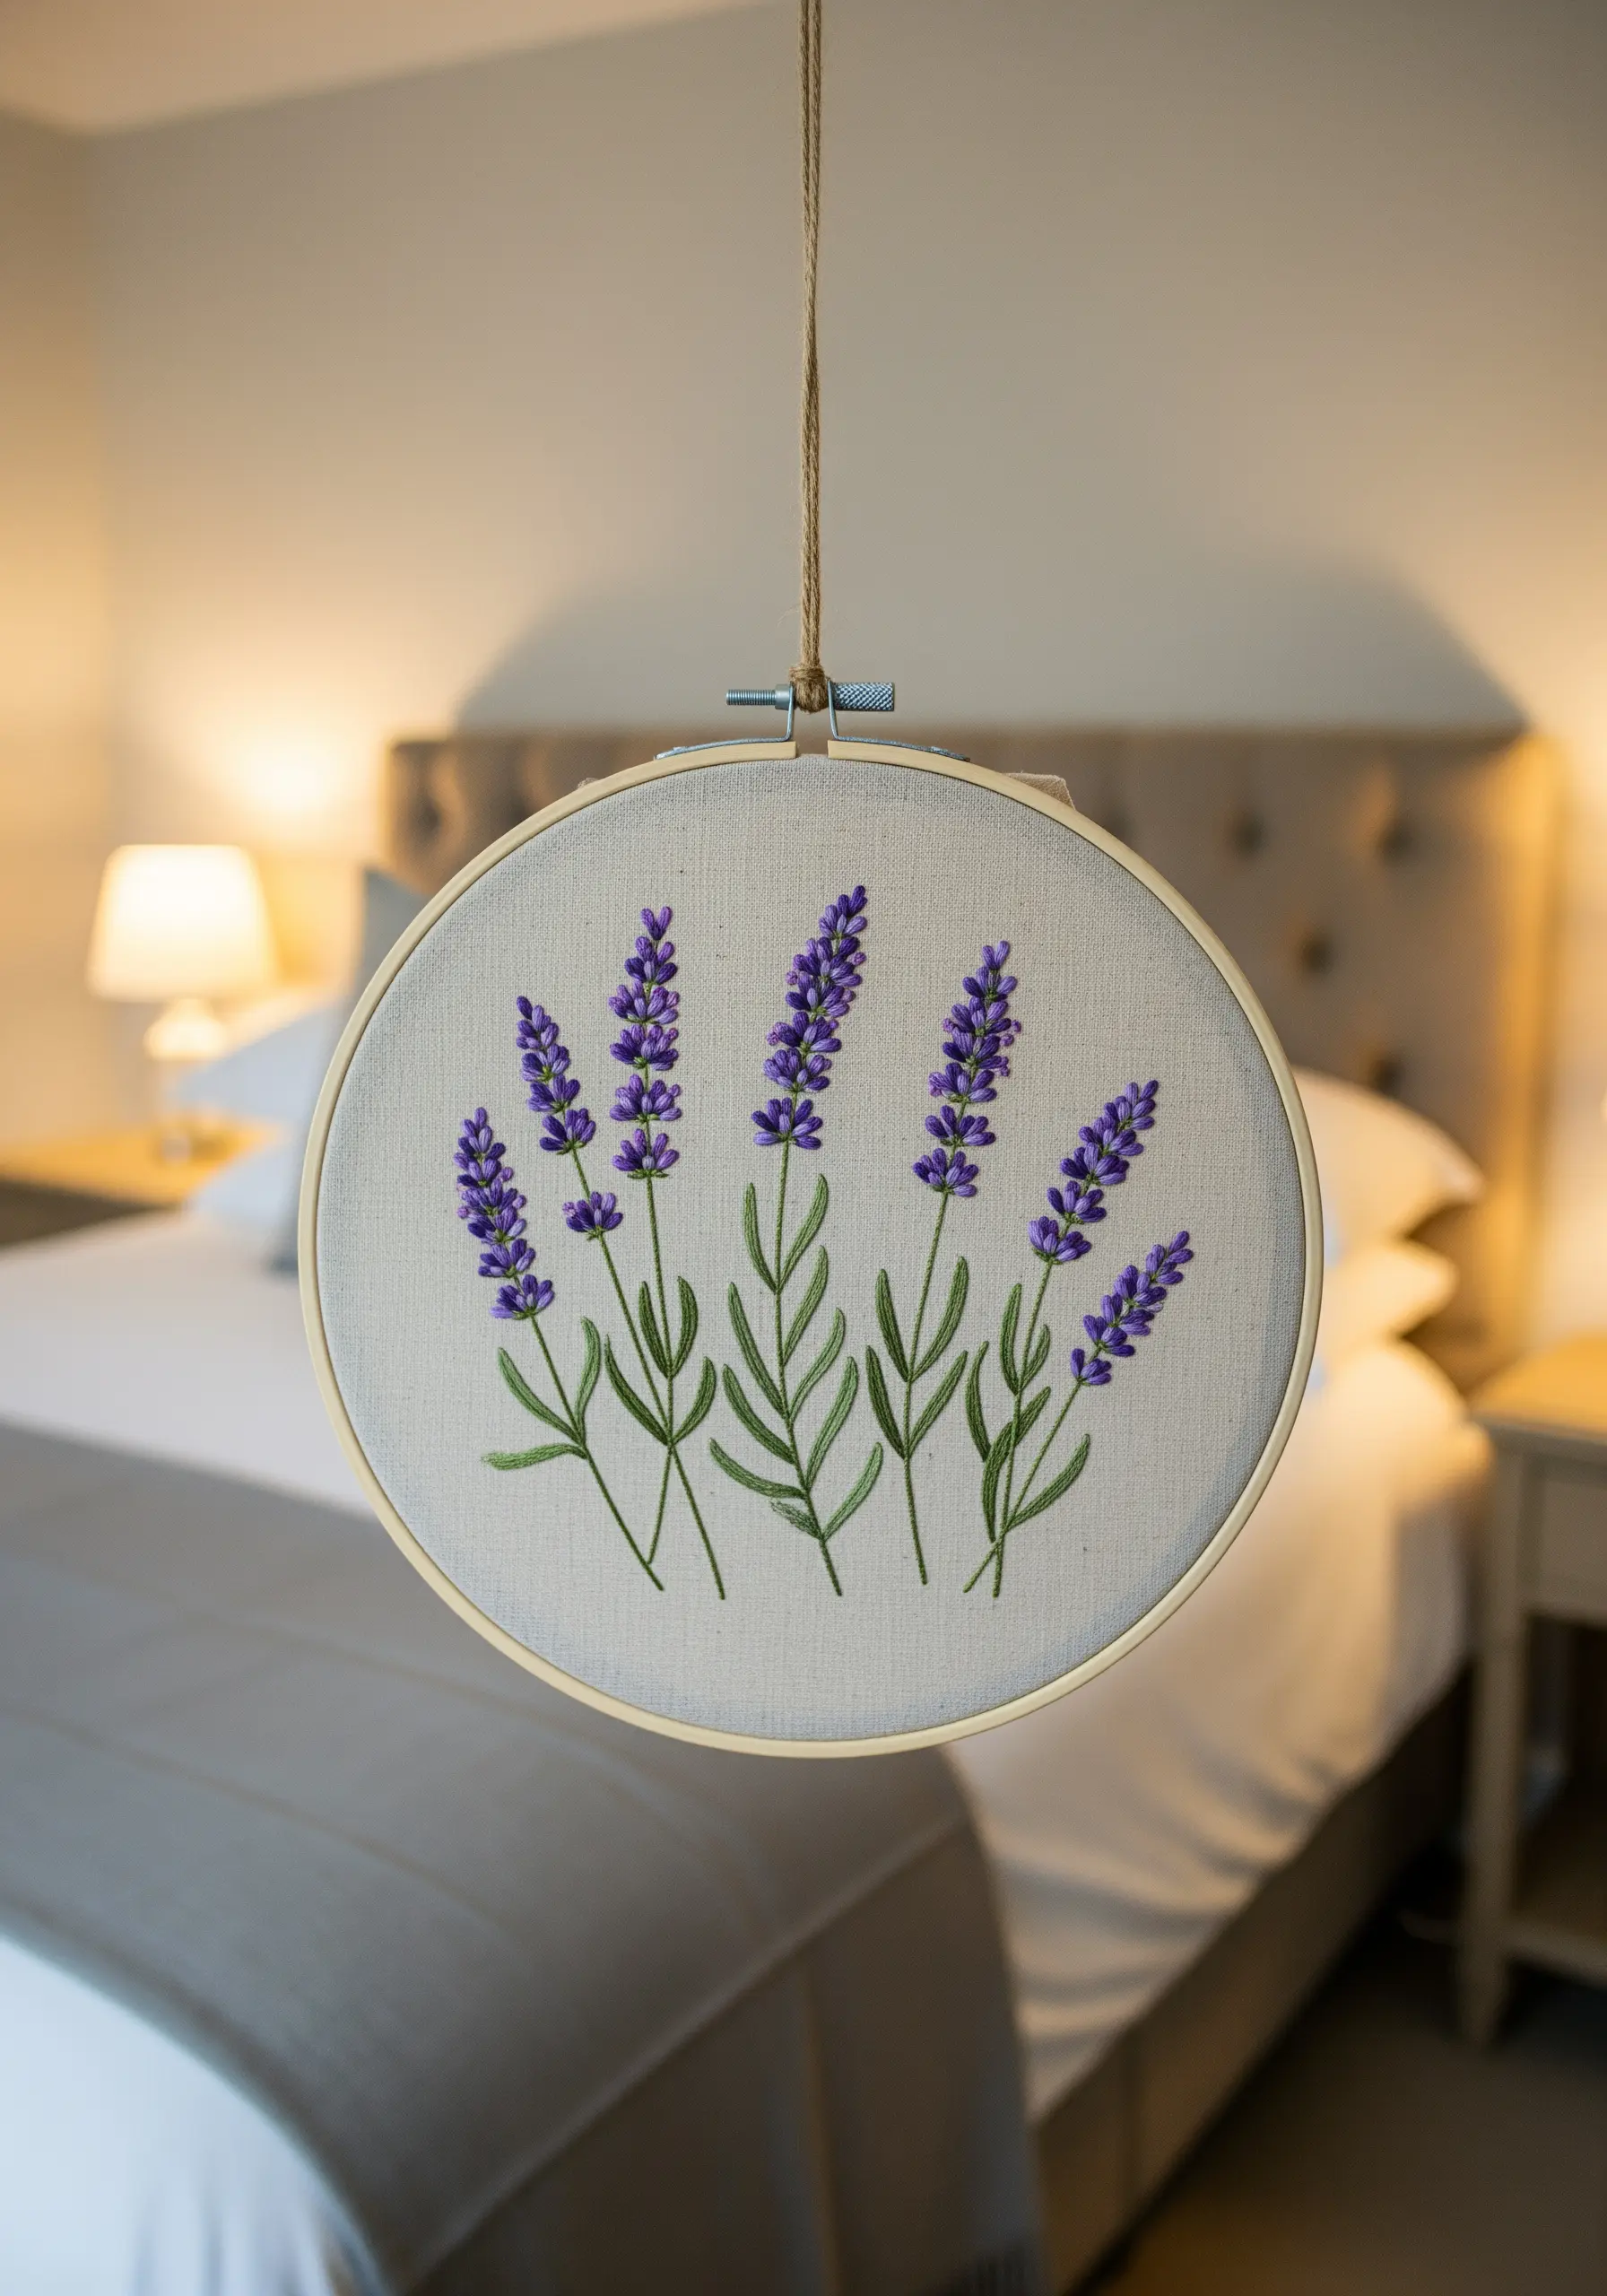
To give your lavender a lifelike, dimensional quality, focus on creating texture with your stitches.
Use two or three shades of purple for the blossoms, placing French knots or short satin stitches closely together.
Vary the tightness and direction of the knots to mimic the organic structure of a real lavender floret.
For the stems, a simple stem stitch in a soft sage green provides the perfect contrast to the fluffy, textured buds, resulting in a piece that feels both delicate and realistic.
21. Integrate Greenery for a Living Artwork
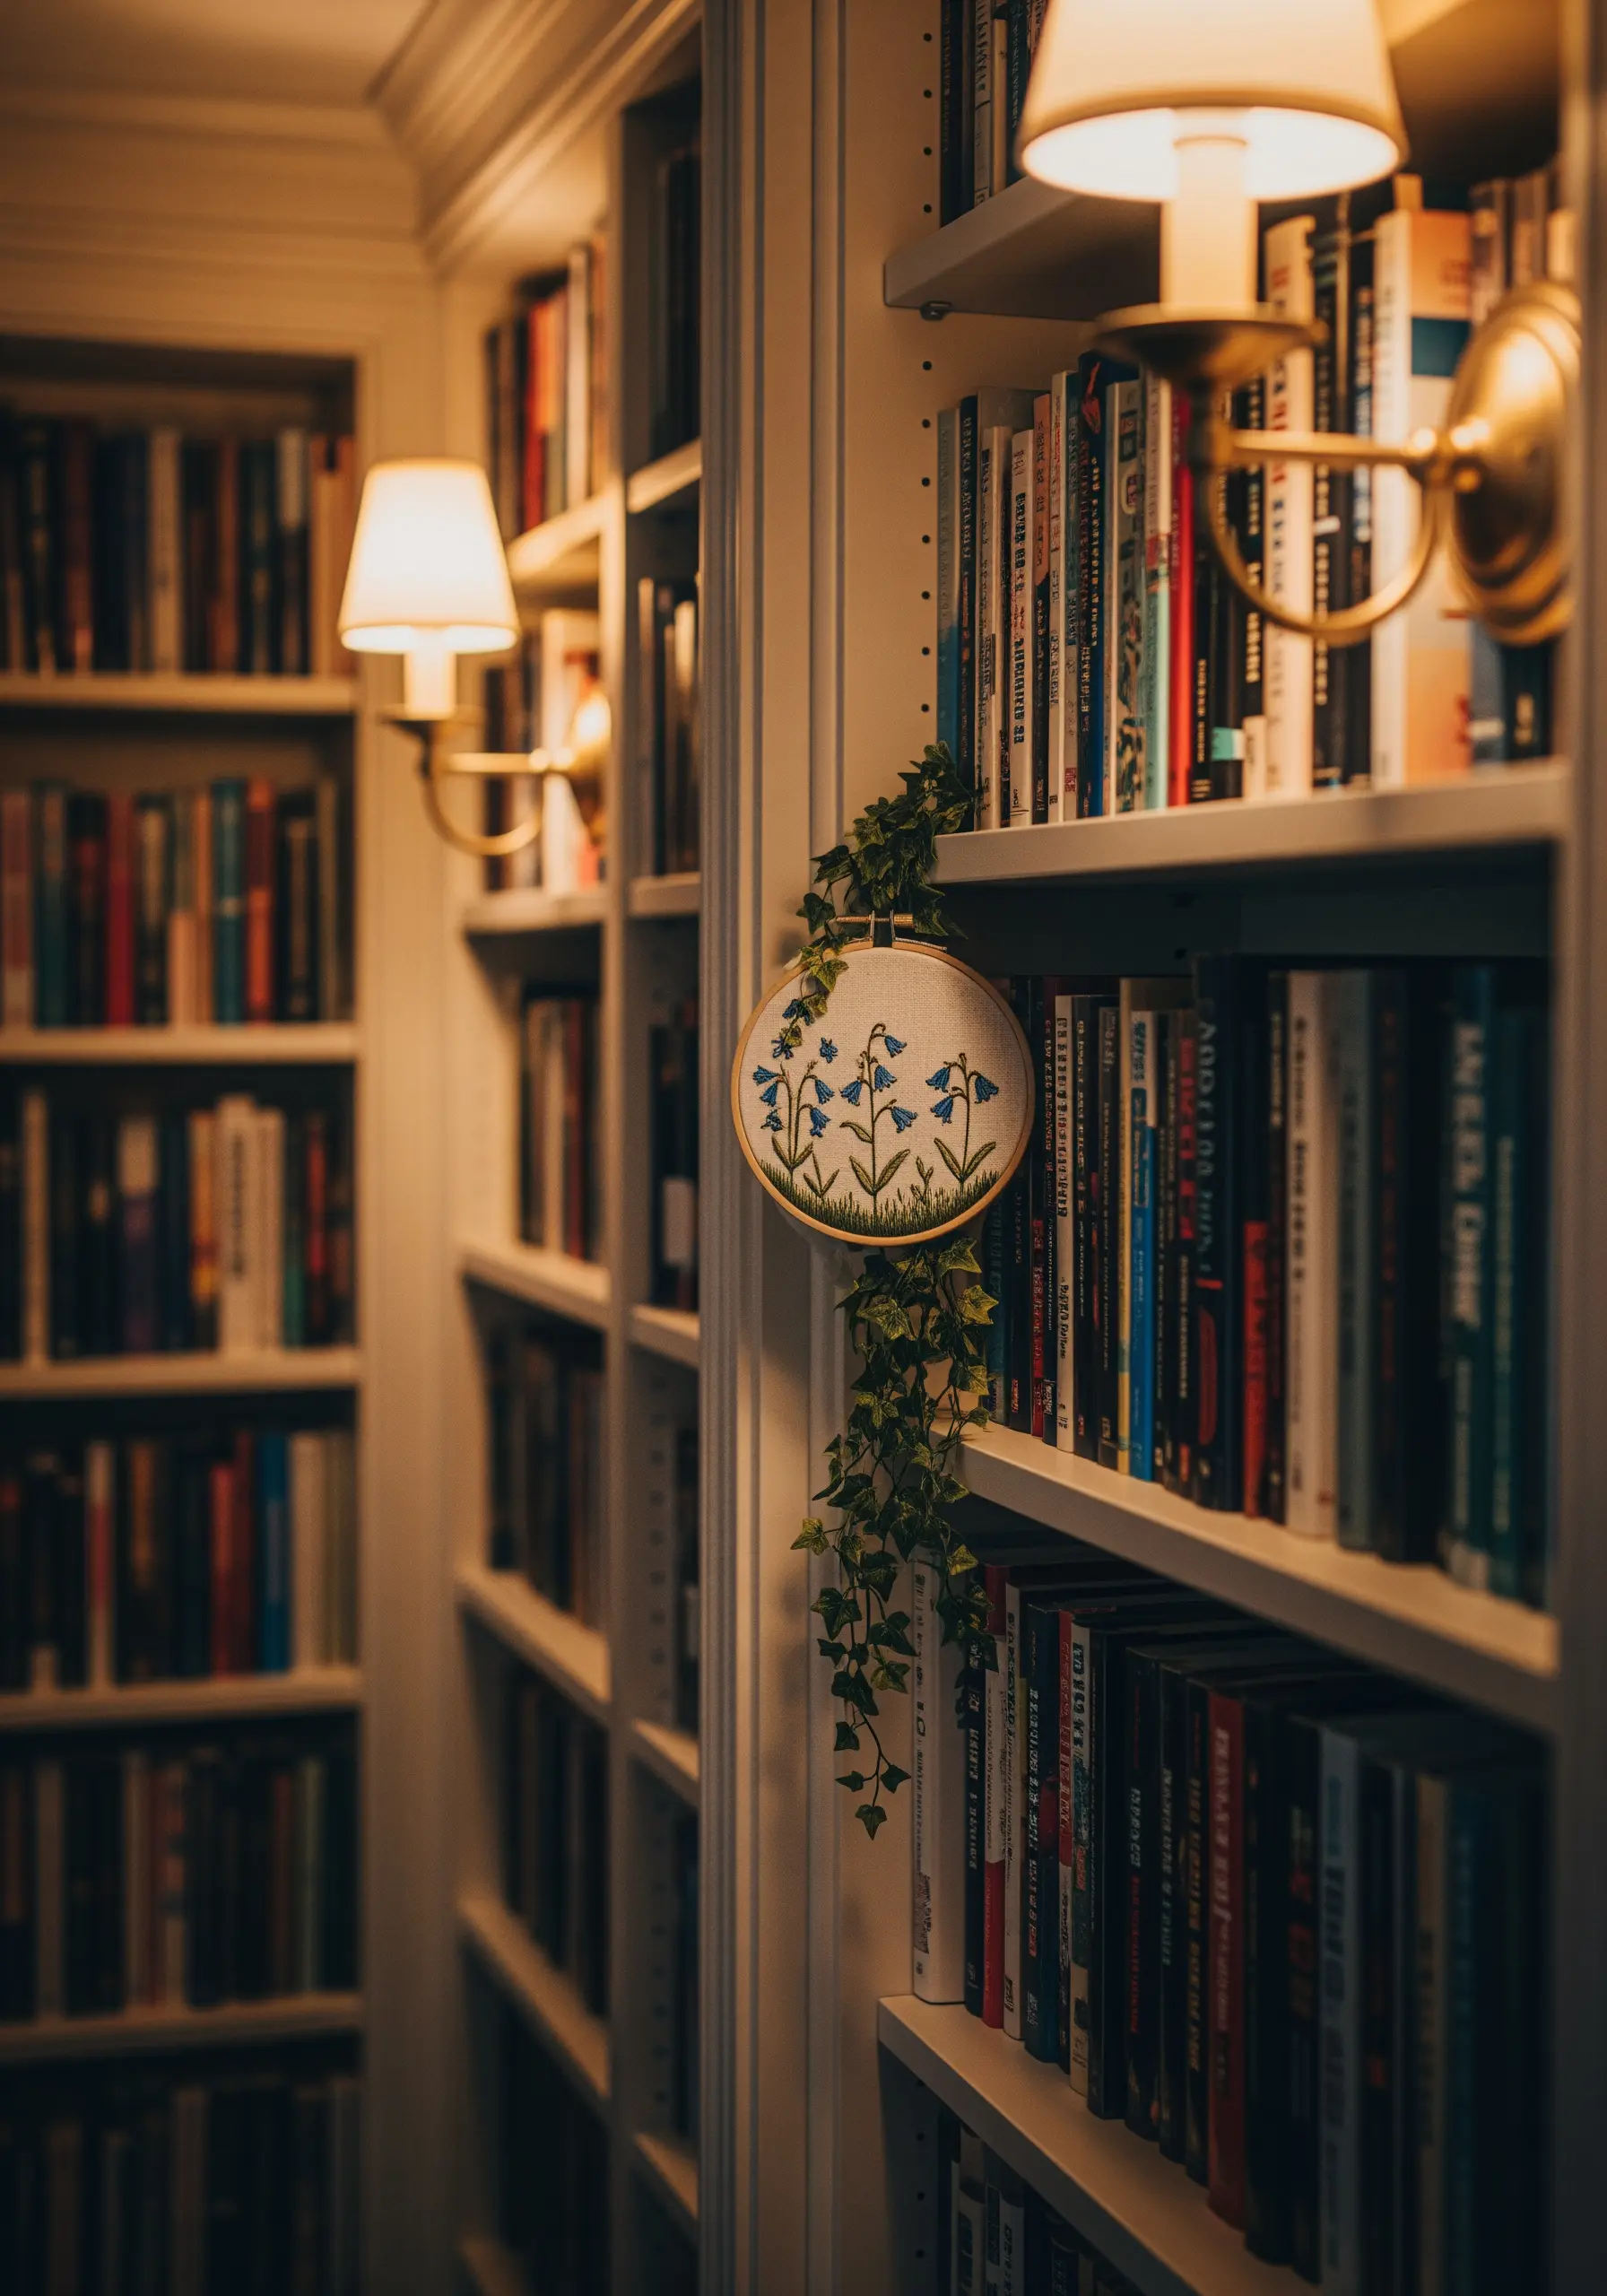
Let your embroidery blend with your home decor by incorporating artificial or preserved foliage.
Tuck a small, simple floral hoop into a bookshelf and allow a strand of faux ivy to trail down from it.
This simple trick breaks the boundary of the hoop and creates a charming, whimsical connection between your textile art and its surroundings.
It suggests that the embroidered garden is growing right off the fabric and into your space.
22. Harness the Power of Complementary Colors
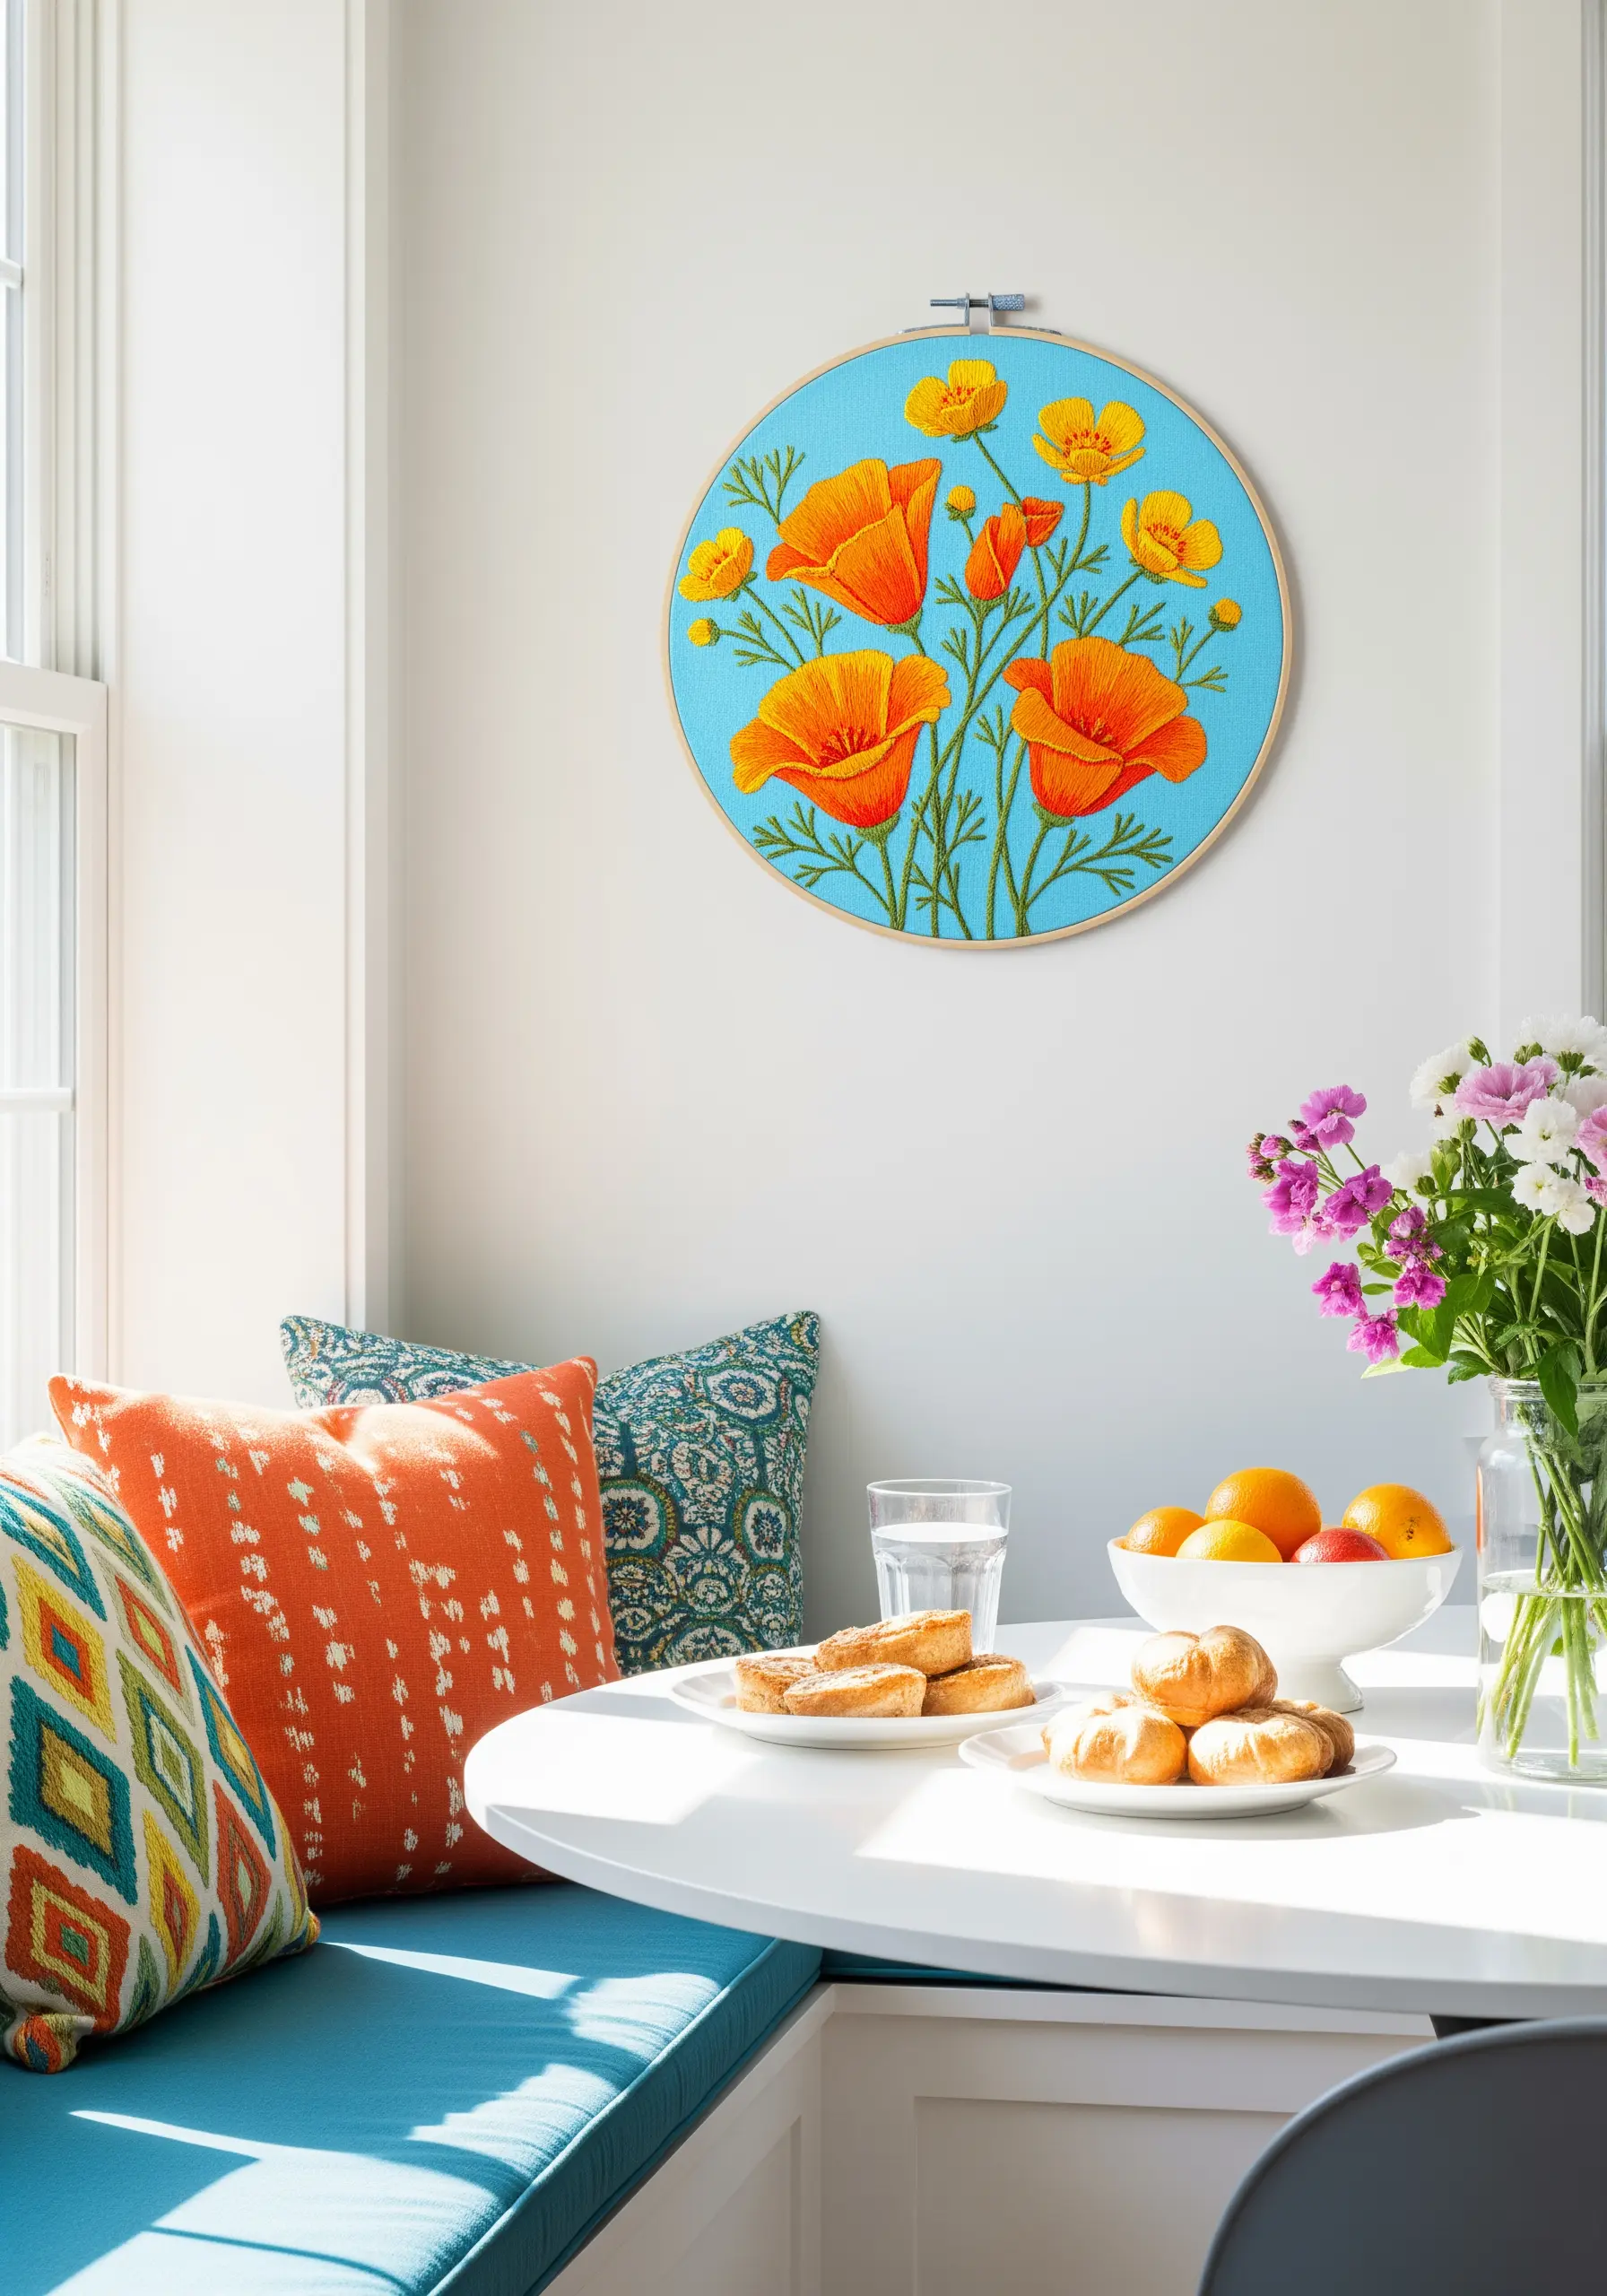
Make your embroidery composition instantly eye-catching by using a complementary color scheme.
The vibrant orange-yellow of the California poppies creates a dynamic visual vibration against the bright sky-blue fabric.
This pairing works because colors opposite each other on the color wheel intensify one another, resulting in a design that feels energetic and full of life.
Use bold satin stitch to fill the petals, ensuring a solid block of color for maximum impact.
23. Achieve Realistic Texture with Unplied Floss

To recreate the soft, fluffy texture of a cotton boll, use a technique that adds true dimension.
Separate all six strands of white embroidery floss and lay them down in a loose bundle on the fabric.
Secure the bundle with tiny, spaced-out couching stitches using a single strand of matching thread.
This method creates a soft, tactile puff that is far more realistic than dense satin stitch, adding a delightful textural surprise to your piece.
24. Create a Floating Effect on Sheer Fabric
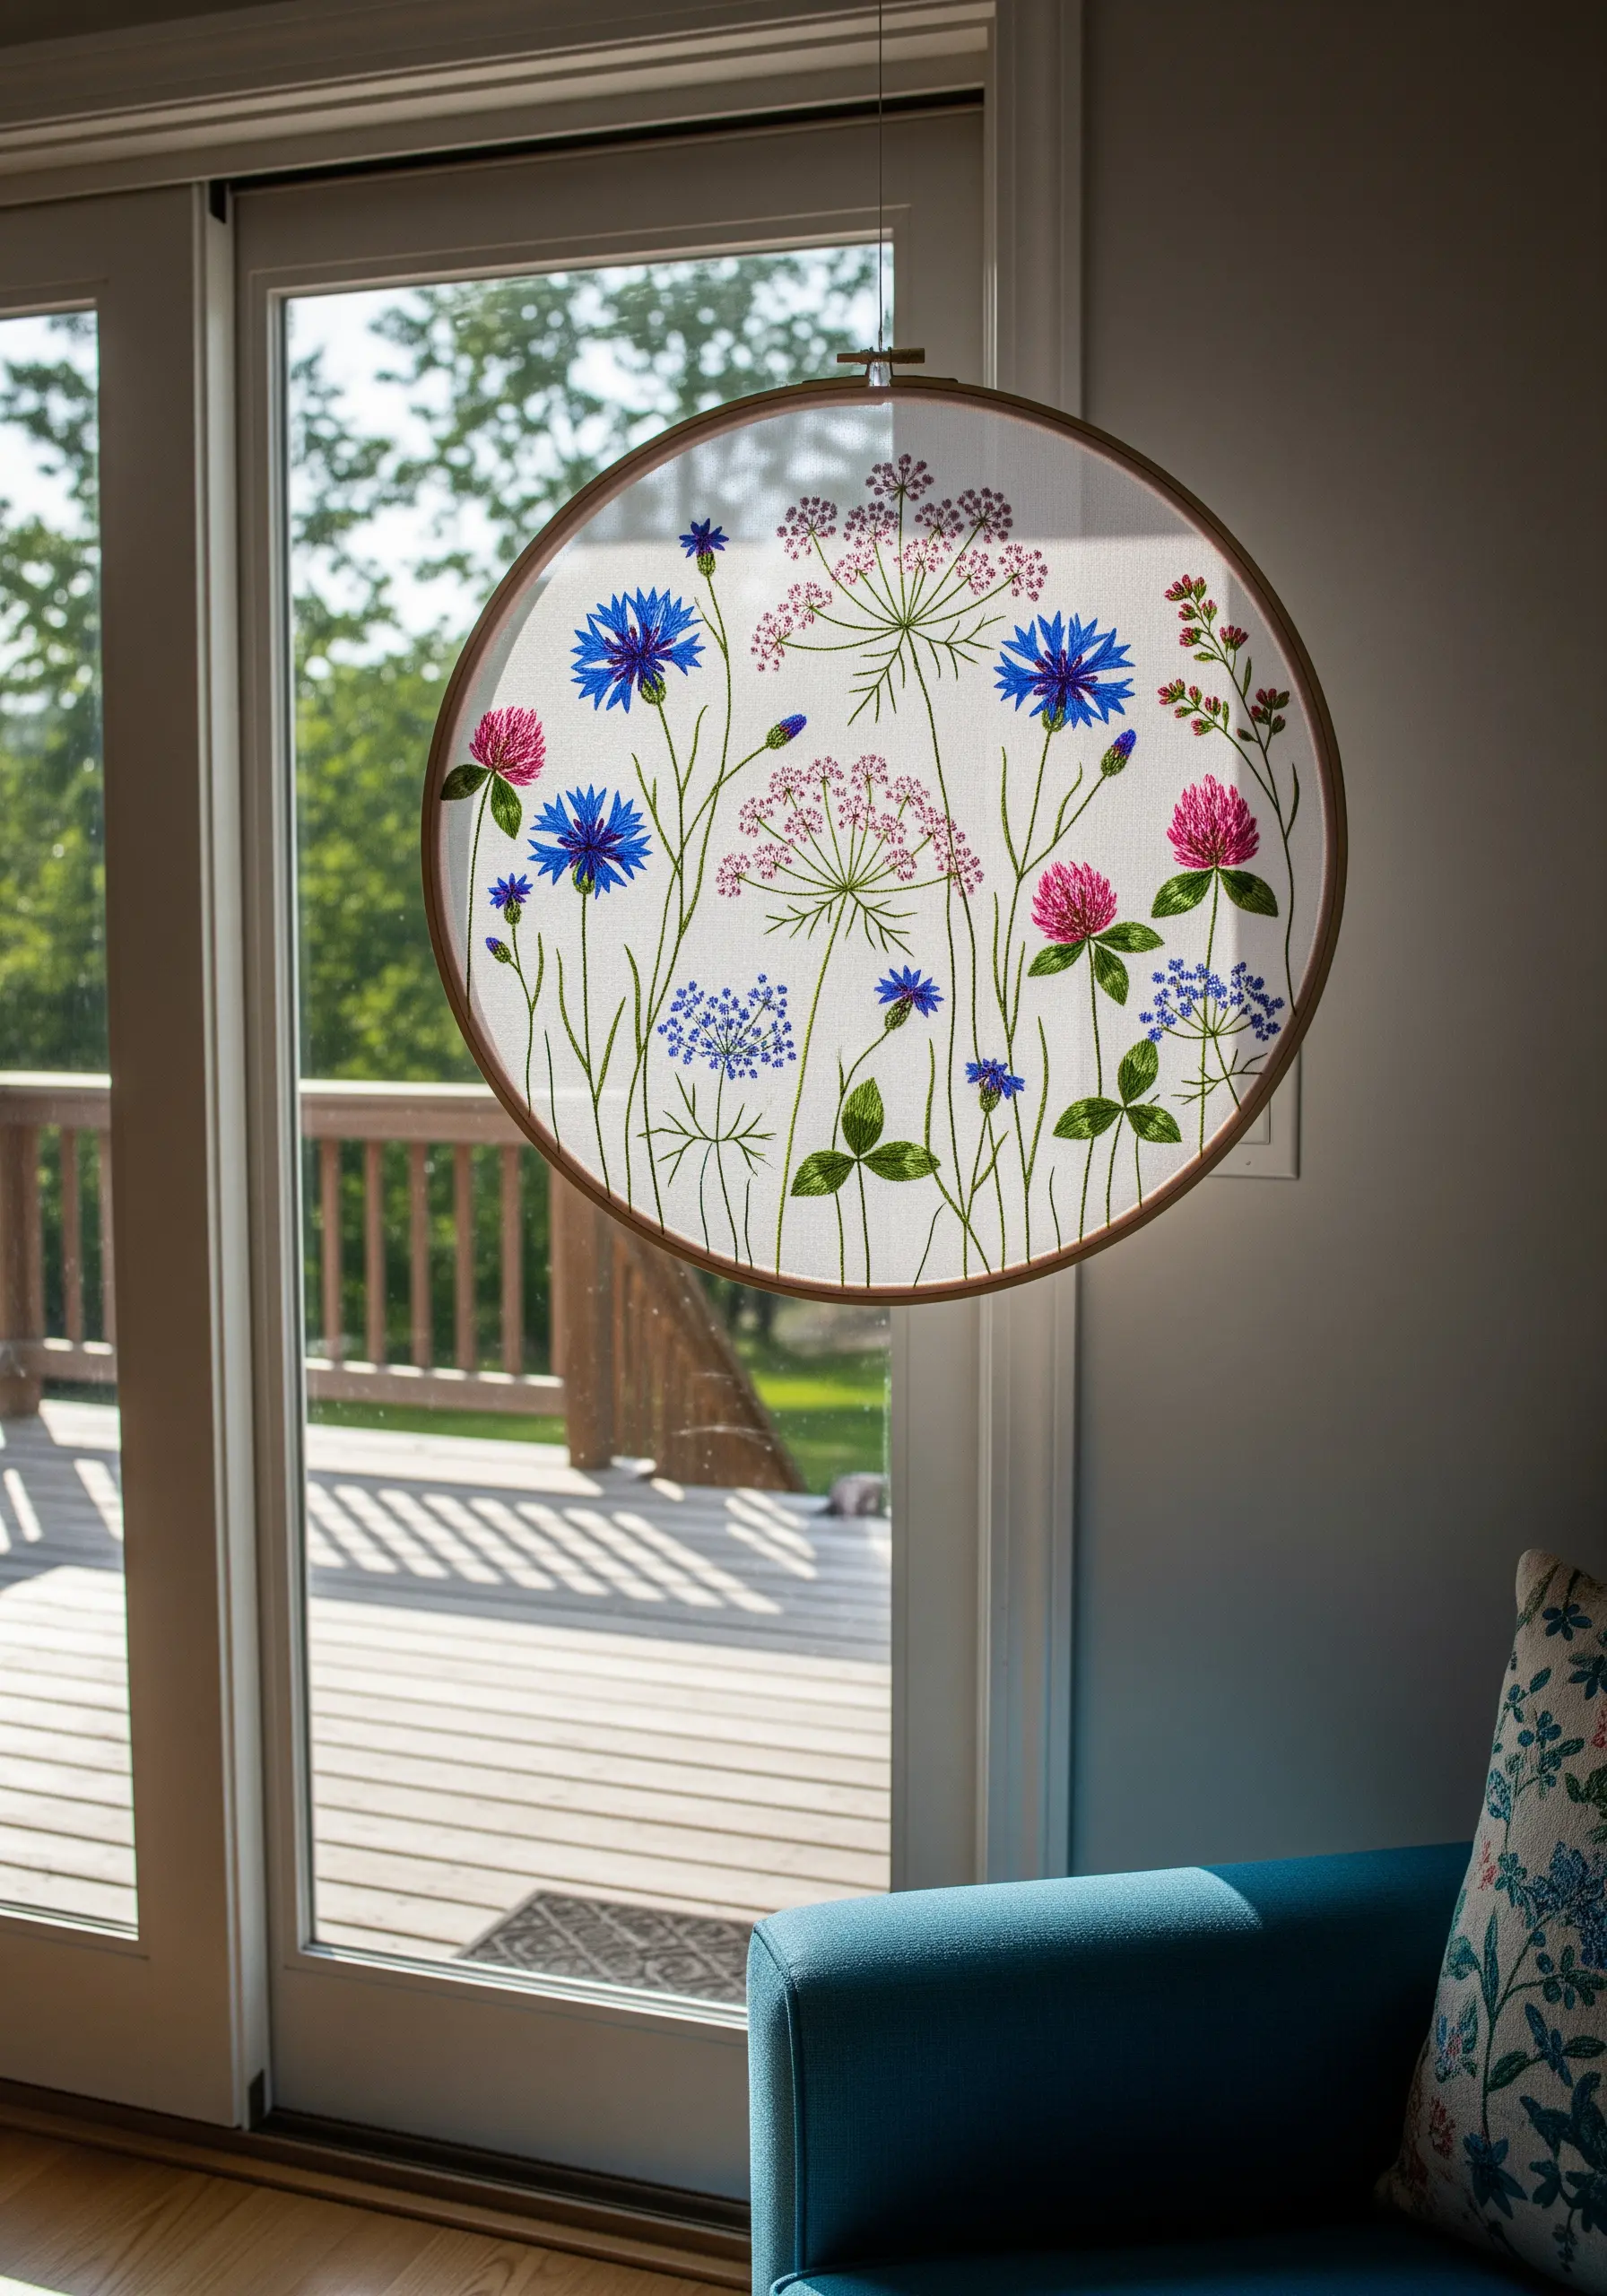
Stitch your wildflowers on a sheer fabric like organza or voile to make them appear as if they are floating in mid-air.
You must use a stabilizer, such as a water-soluble film, on top of or behind the fabric to prevent it from stretching and puckering as you stitch.
Once you dissolve the stabilizer, you’re left with a delicate, ethereal piece where the stitches themselves are the focus.
This technique is perfect for hanging in a window, where the light can filter through the transparent background.
25. Blend Soft Gradients for Delicate Petals
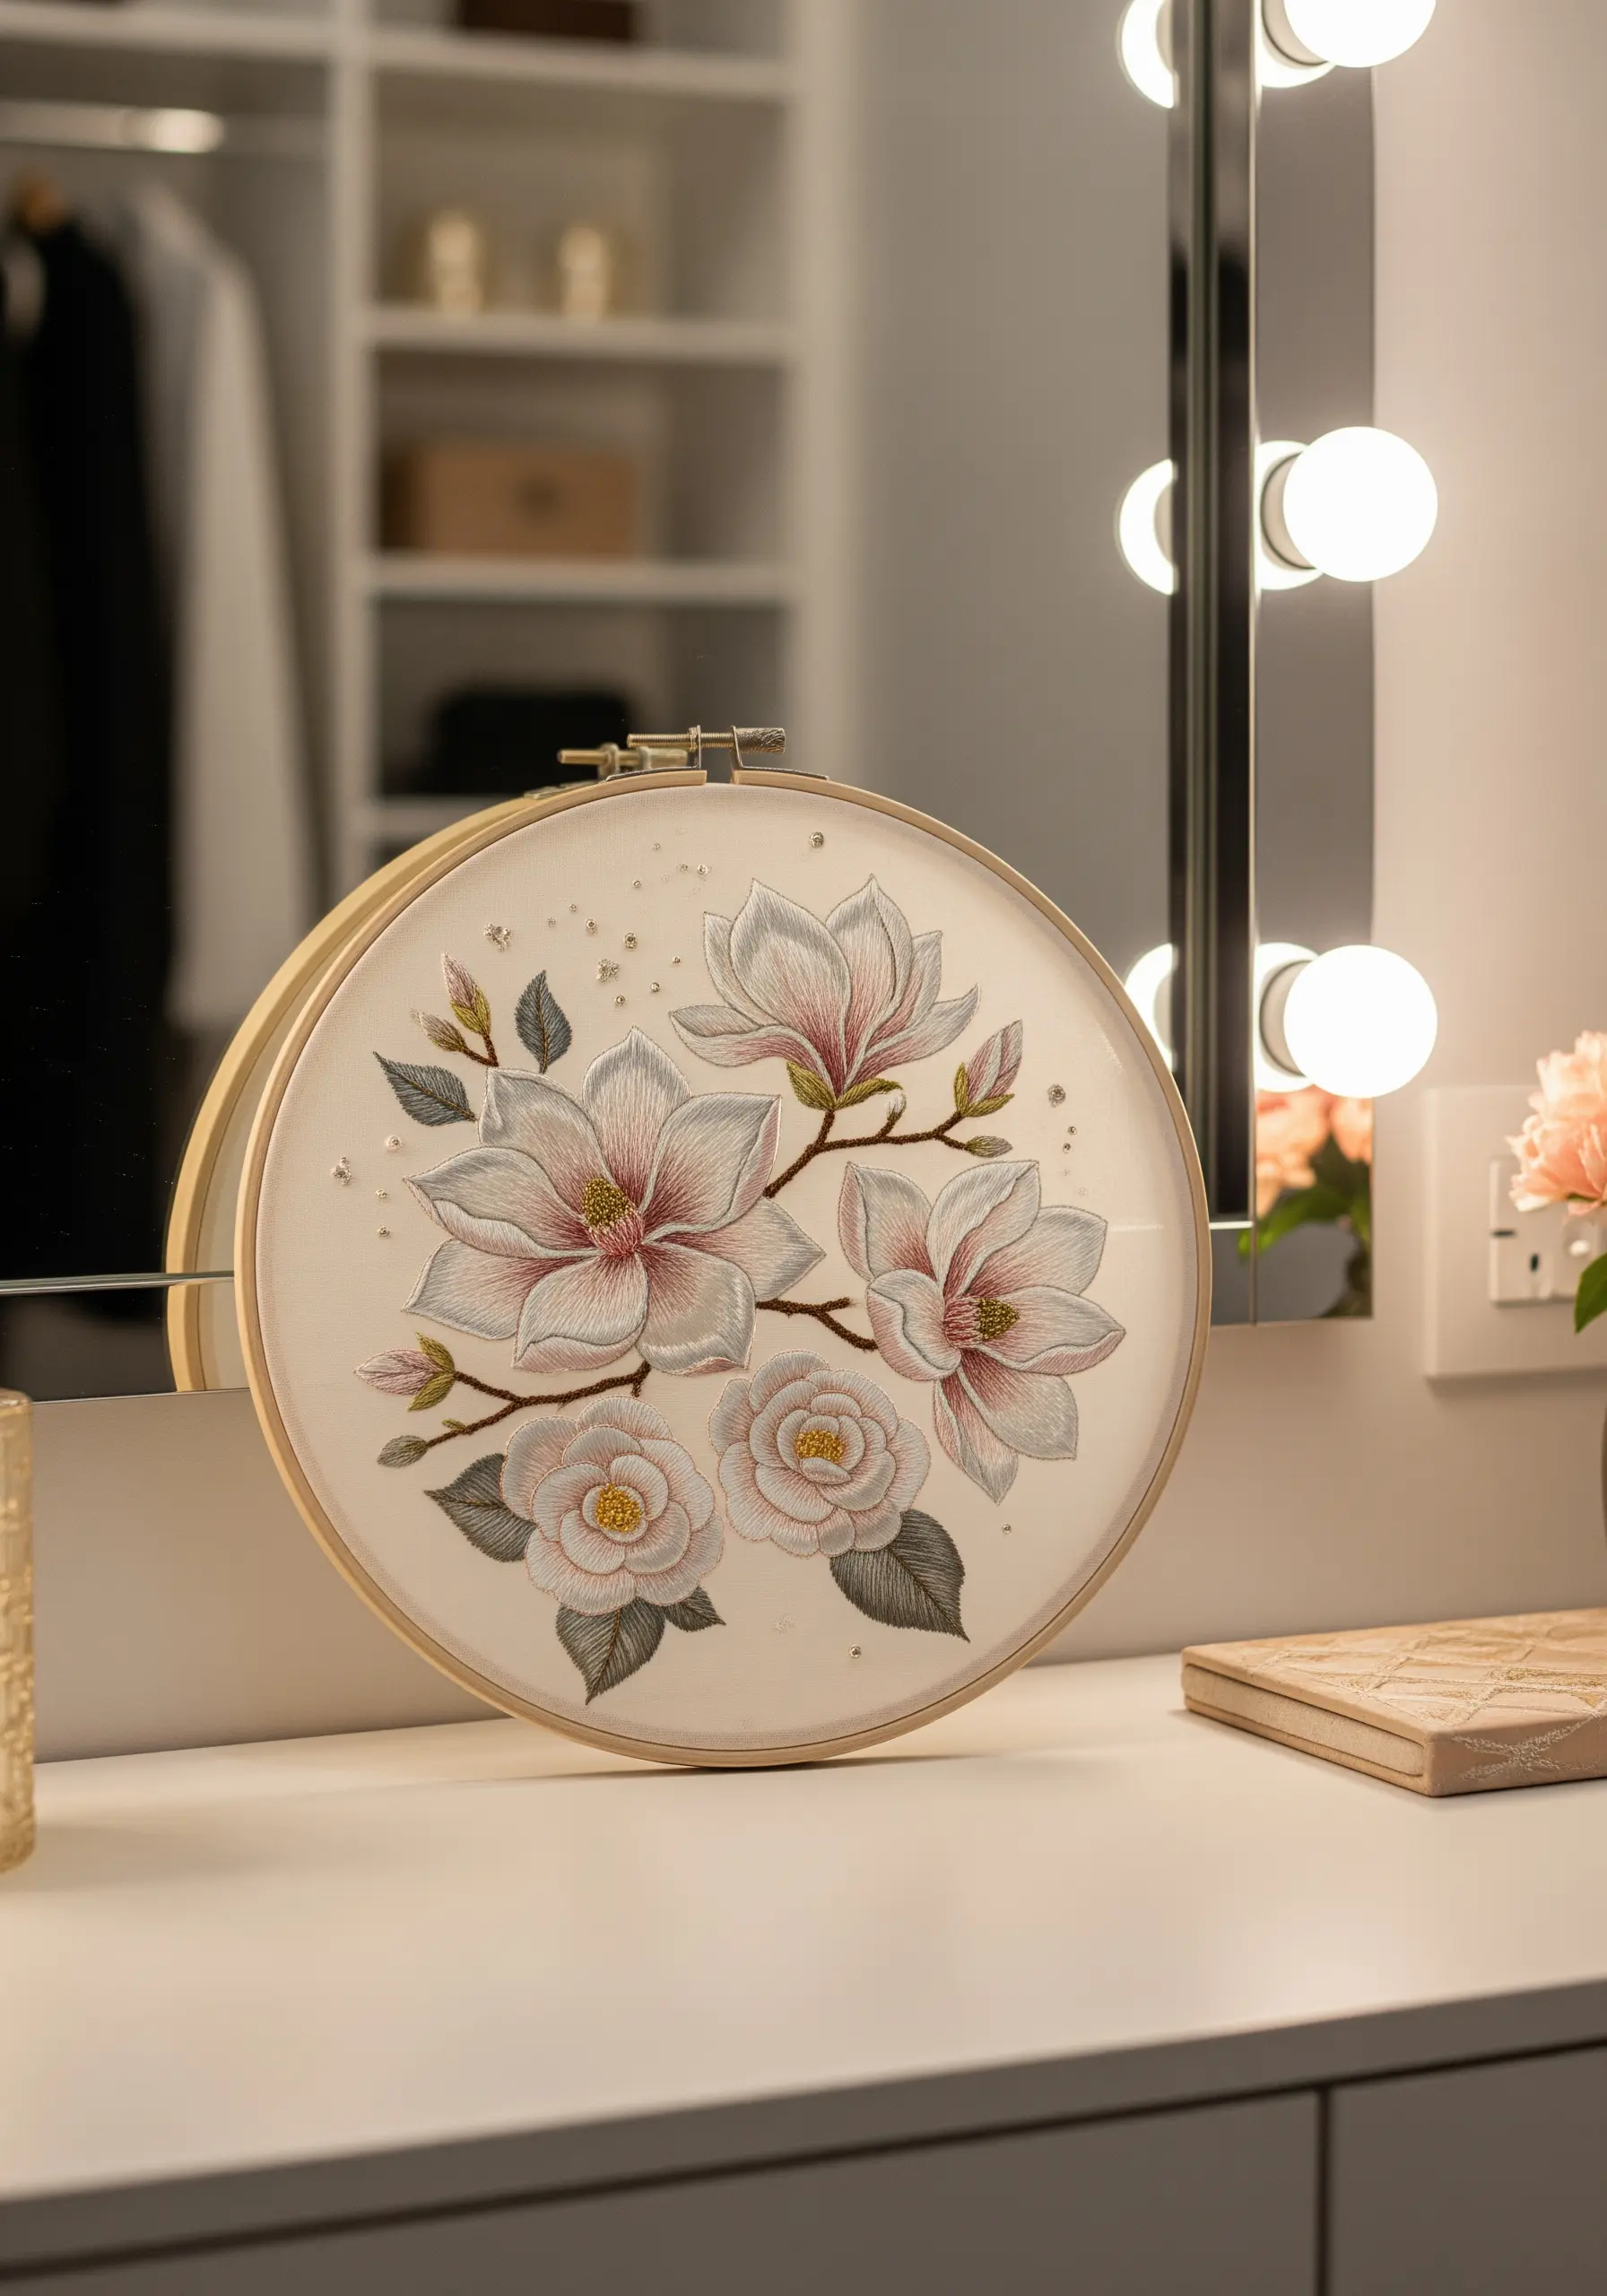
Capture the subtle beauty of magnolia blossoms by using a soft-handed approach to color blending.
Work with single strands of floss in closely related shades—ivory, blush, and a dusty rose—using the long-and-short stitch to create seamless gradients.
The key is to make your stitches blend into one another without harsh lines, mimicking the soft blush on a real petal.
A few strategically placed seed beads can add a touch of sparkle, suggesting morning dew for a final, elegant touch.
26. Use Color Blocking for Painterly Pansies
Replicate the distinct, velvety markings of a pansy using small, targeted sections of color.
Instead of blending, use short, straight satin stitches to block in the dark purples and bright yellows, creating the flower’s signature ‘face’.
Keep the edges of each color block sharp to achieve a graphic, painterly style that celebrates the flower’s unique pattern.
This technique turns your needle and thread into a paintbrush, perfect for capturing the charm of cottage garden embroidery themes.
27. Make a Bold Statement with an Oversized Hoop
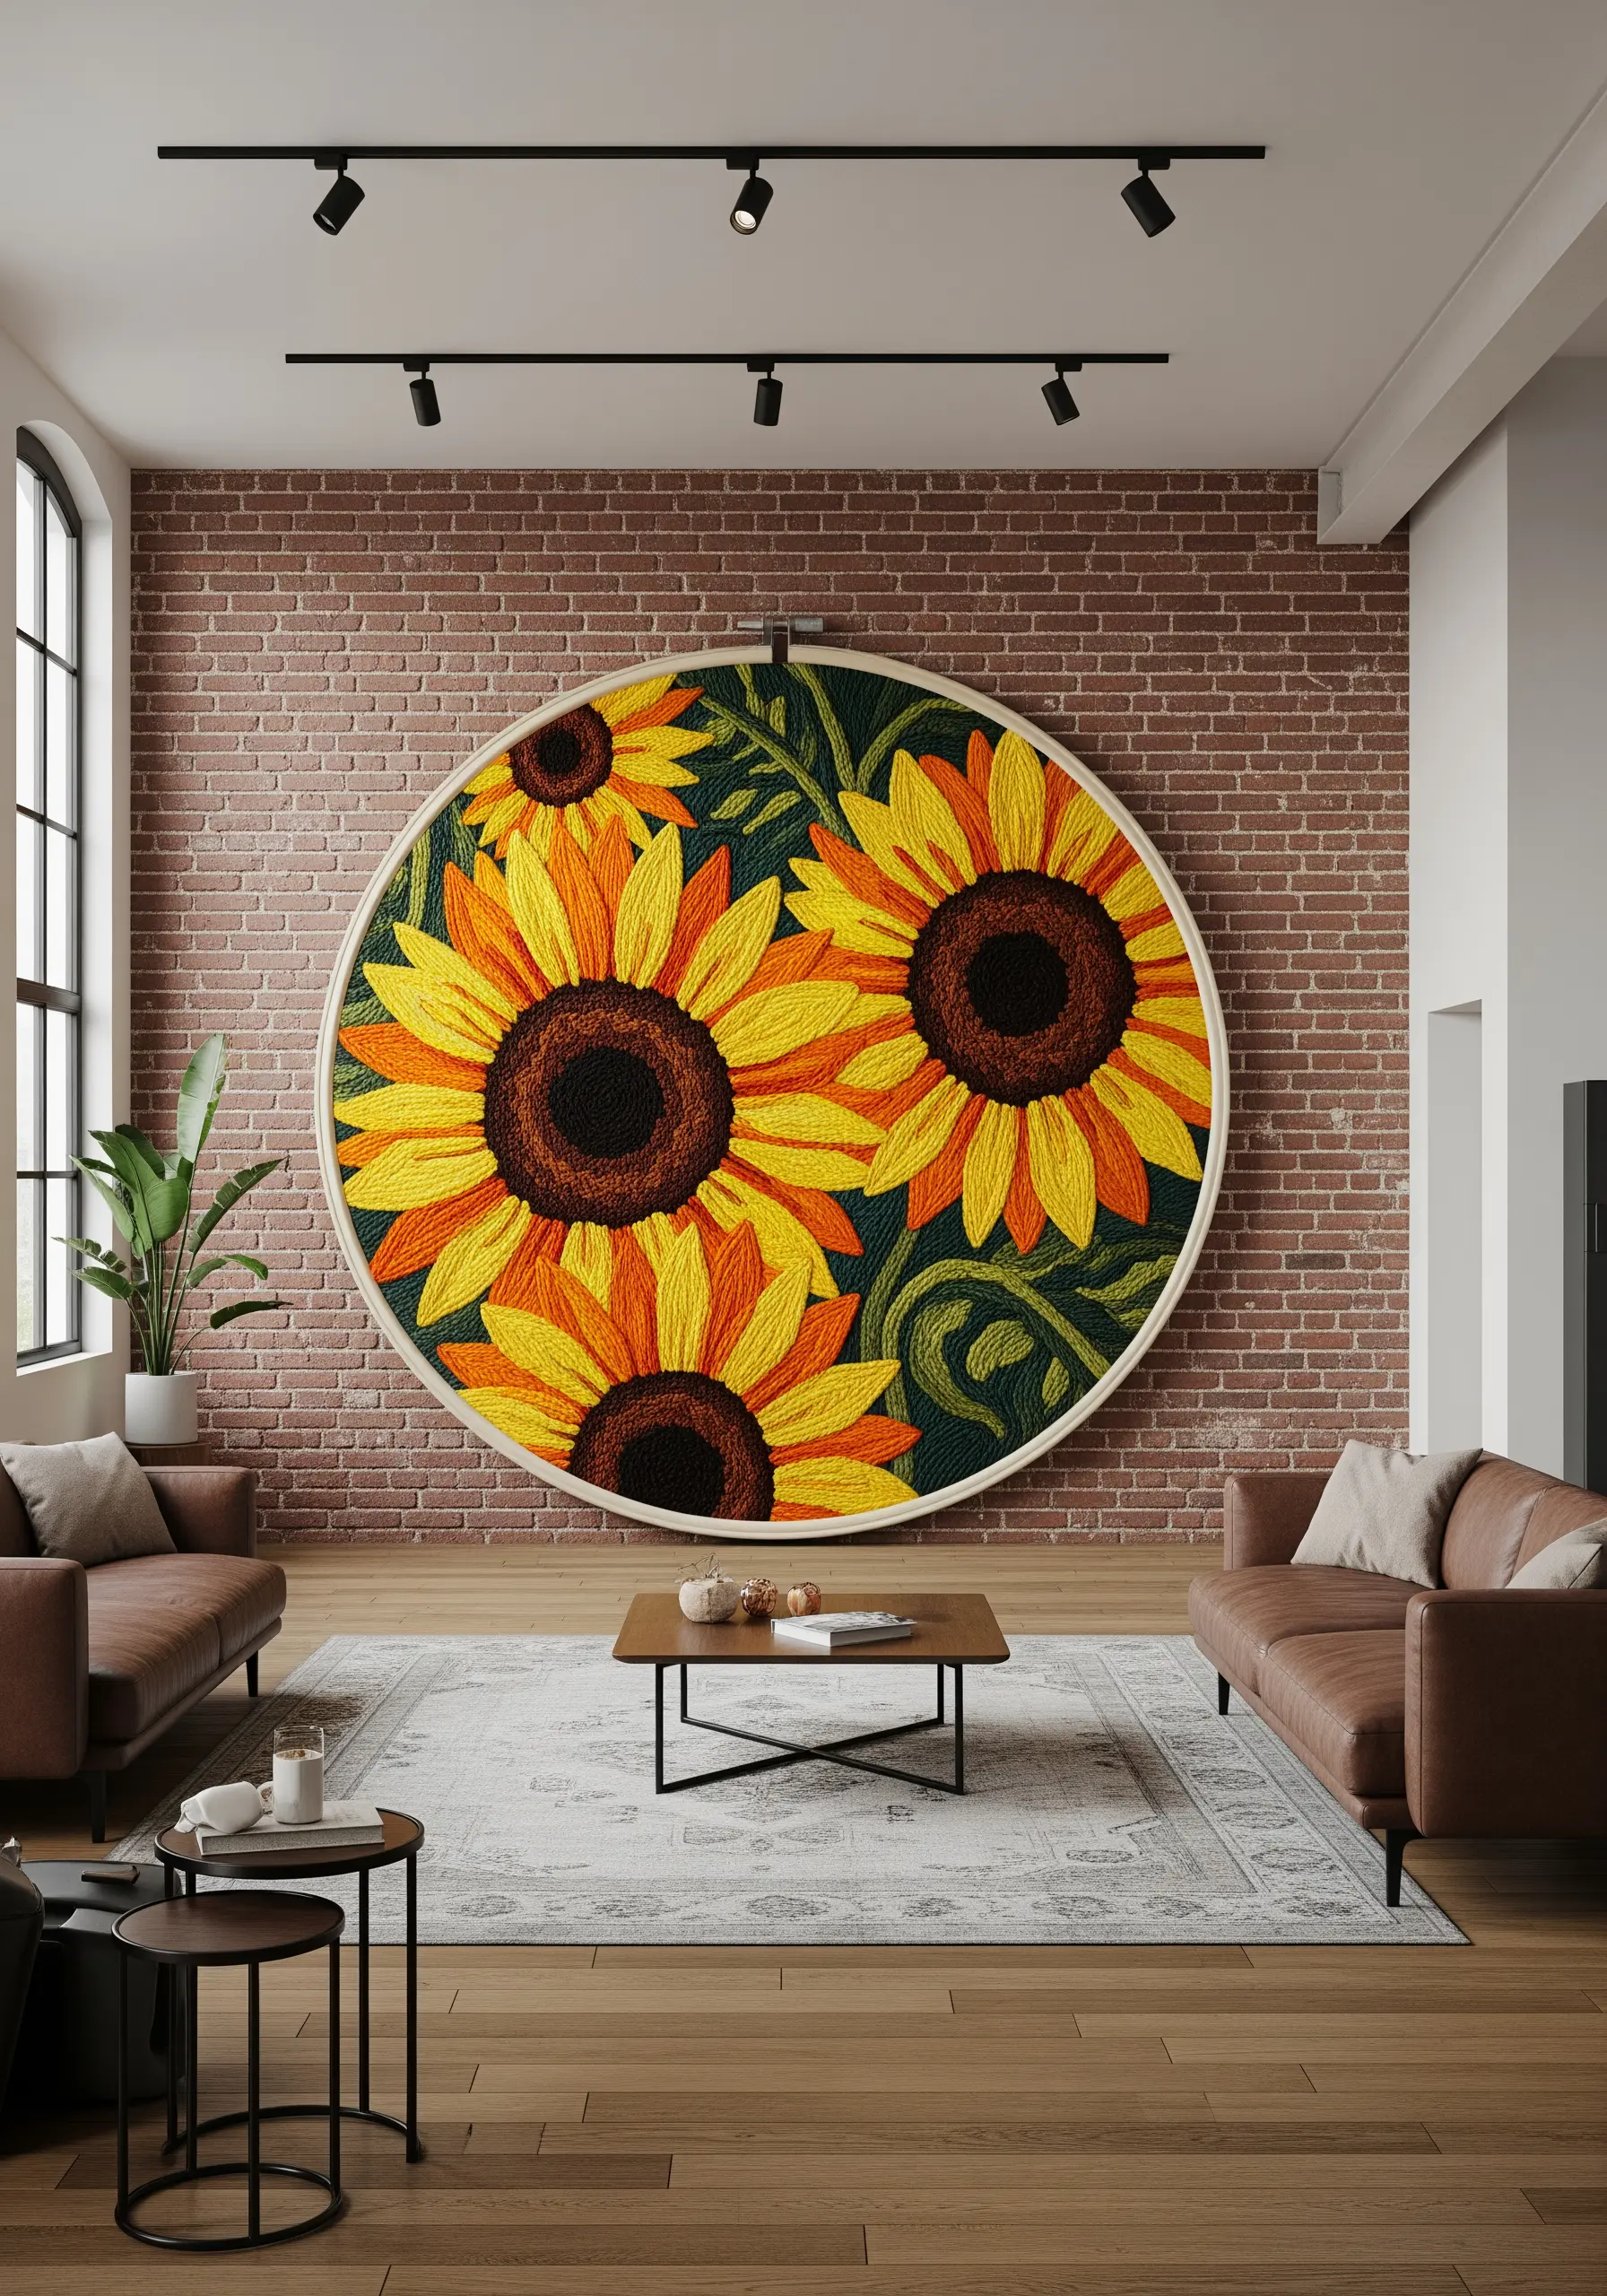
For maximum impact, scale up your design to fill an extra-large embroidery hoop (18 inches or more).
To fill such a large area efficiently without losing texture, use thicker threads like tapestry wool or stitch with all six strands of cotton floss.
Bold, simple shapes like sunflower petals are ideal for this scale, as they create a powerful graphic image that can be appreciated from across the room.
This approach turns your embroidery into a true statement-size wall art piece, commanding attention and becoming the focal point of your space.
28. Add Rustic Texture with Burlap Fabric
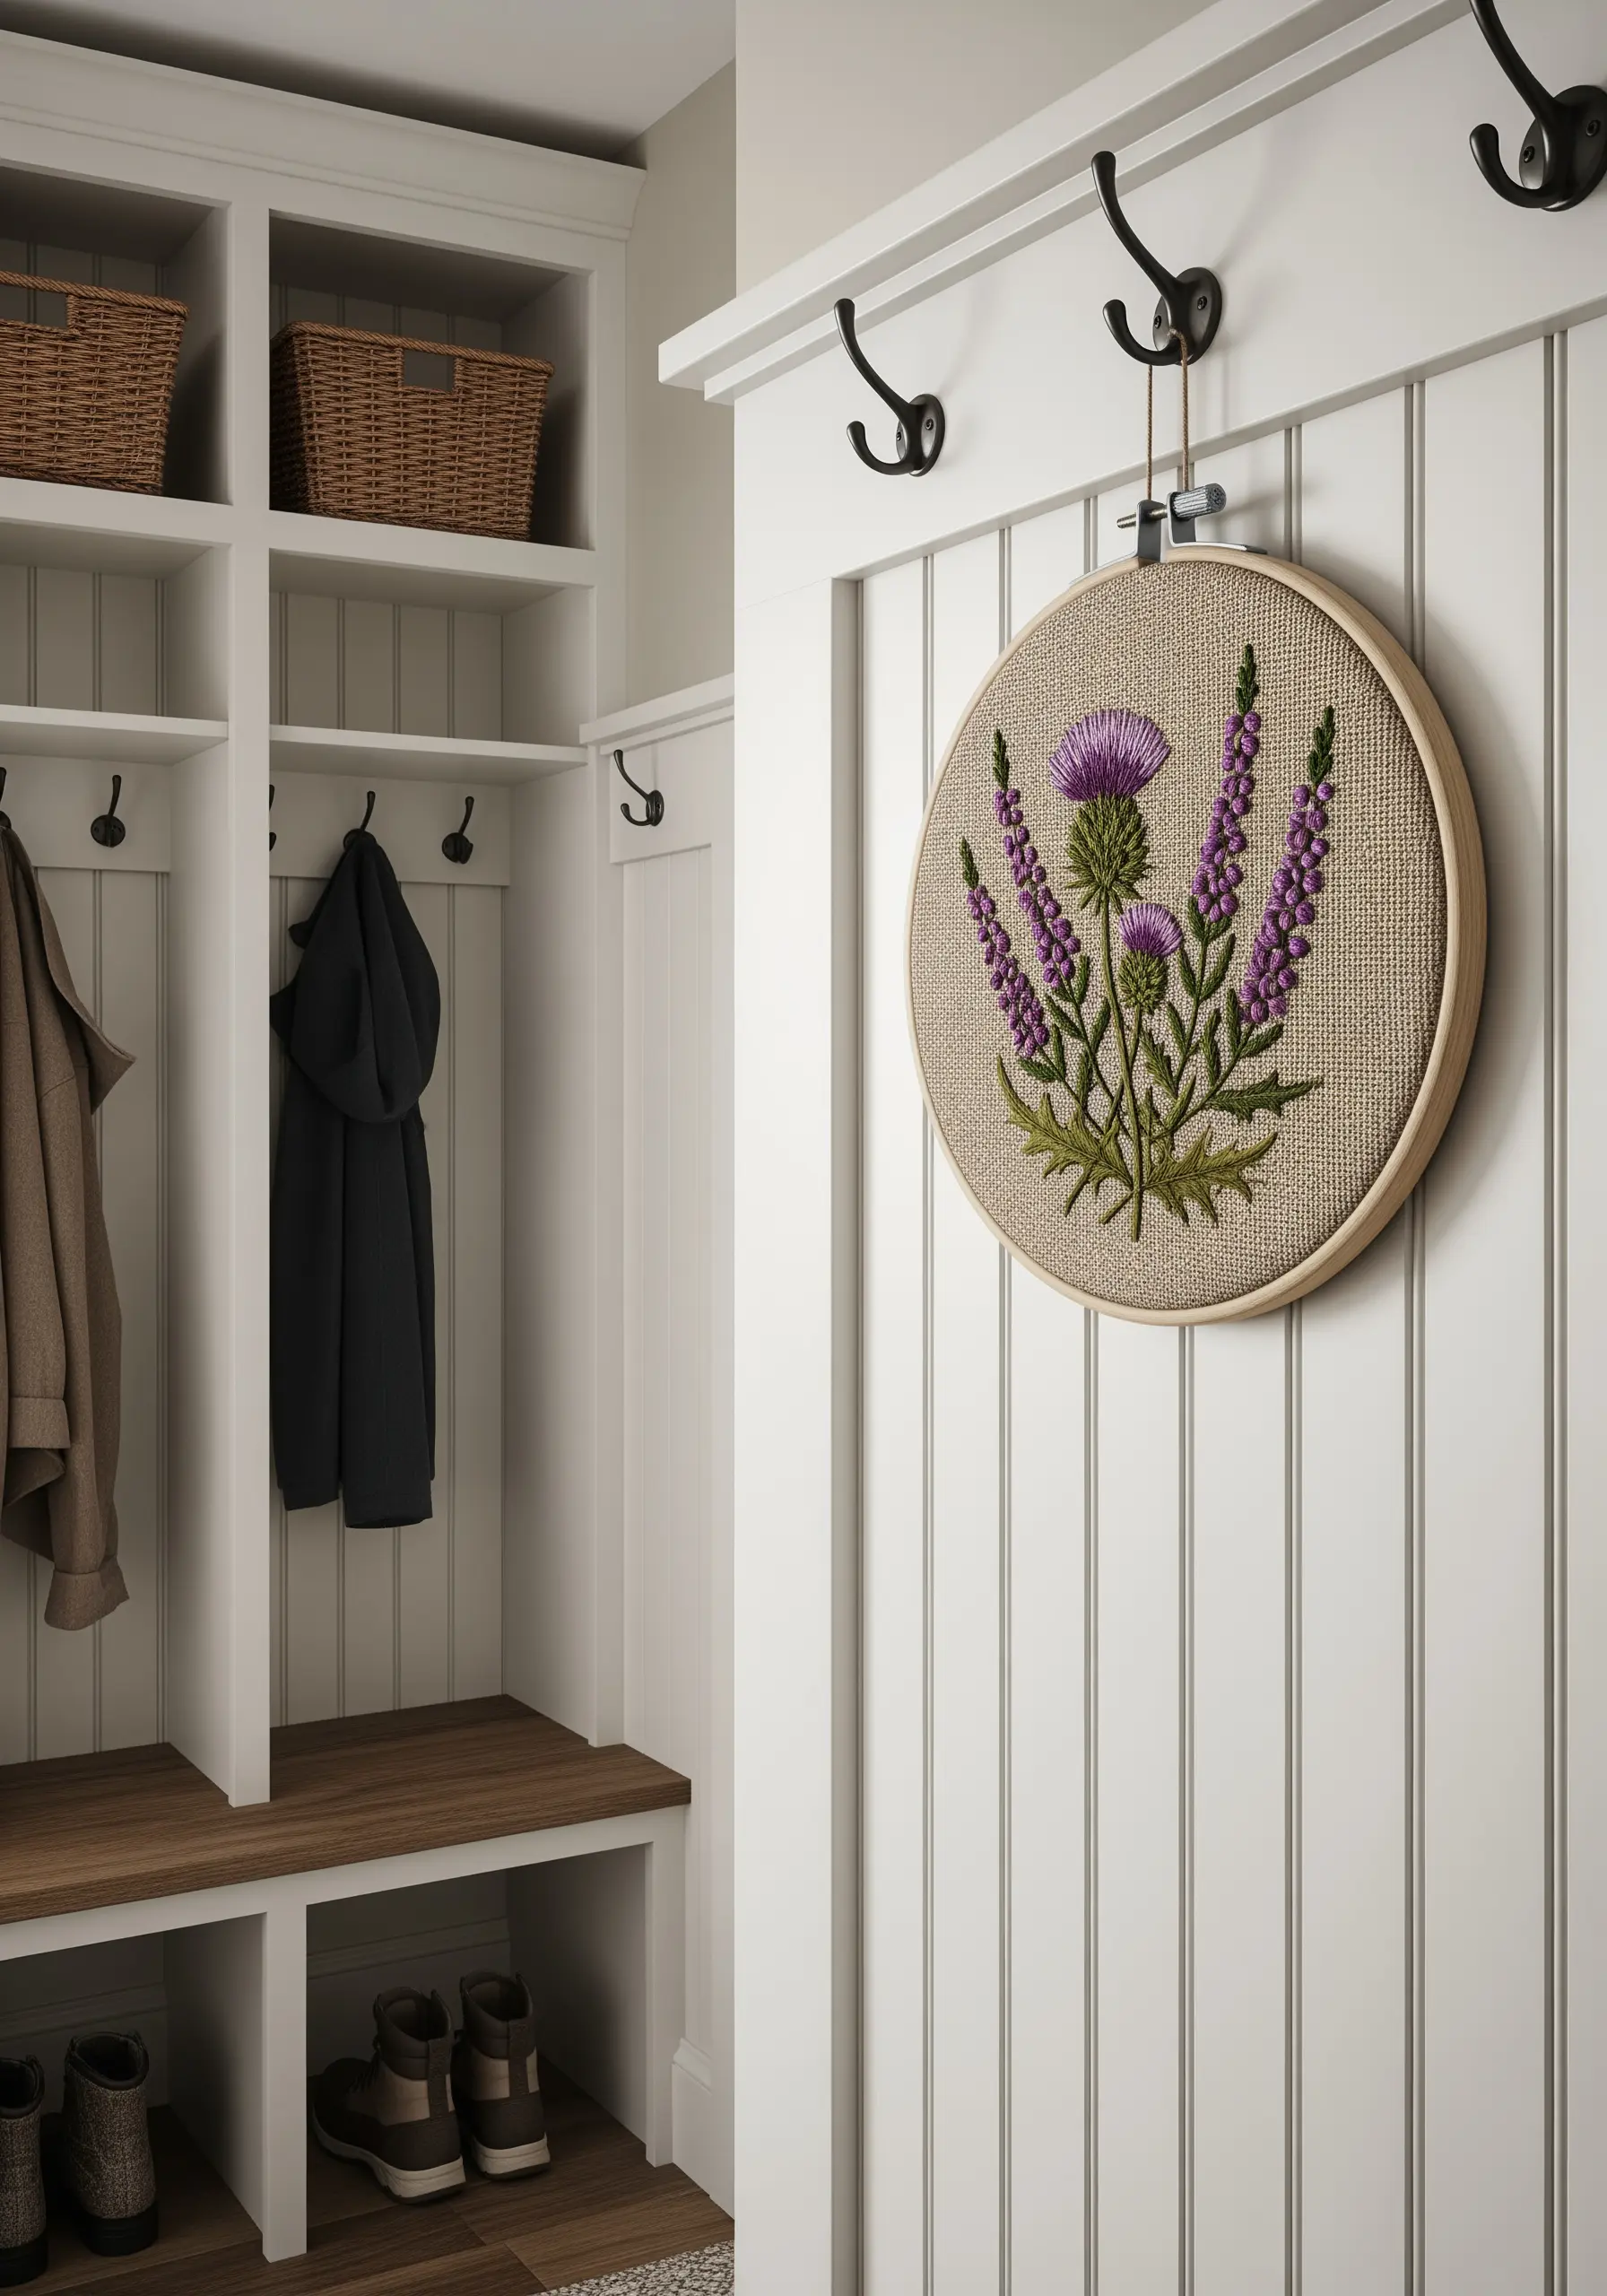
Choose a coarse-weave fabric like burlap or hessian to give your embroidery an instantly rustic, farmhouse feel.
The open weave of burlap requires using a blunt tapestry needle and thicker threads, such as pearl cotton or all six strands of floss, to ensure your stitches are secure and visible.
Simple, bold motifs like thistles and heather work beautifully, as their rugged nature complements the fabric’s earthy texture.
This combination of subject and material creates a piece that is rich in both visual and tactile texture.
29. Illuminate Your Art with Integrated Lighting
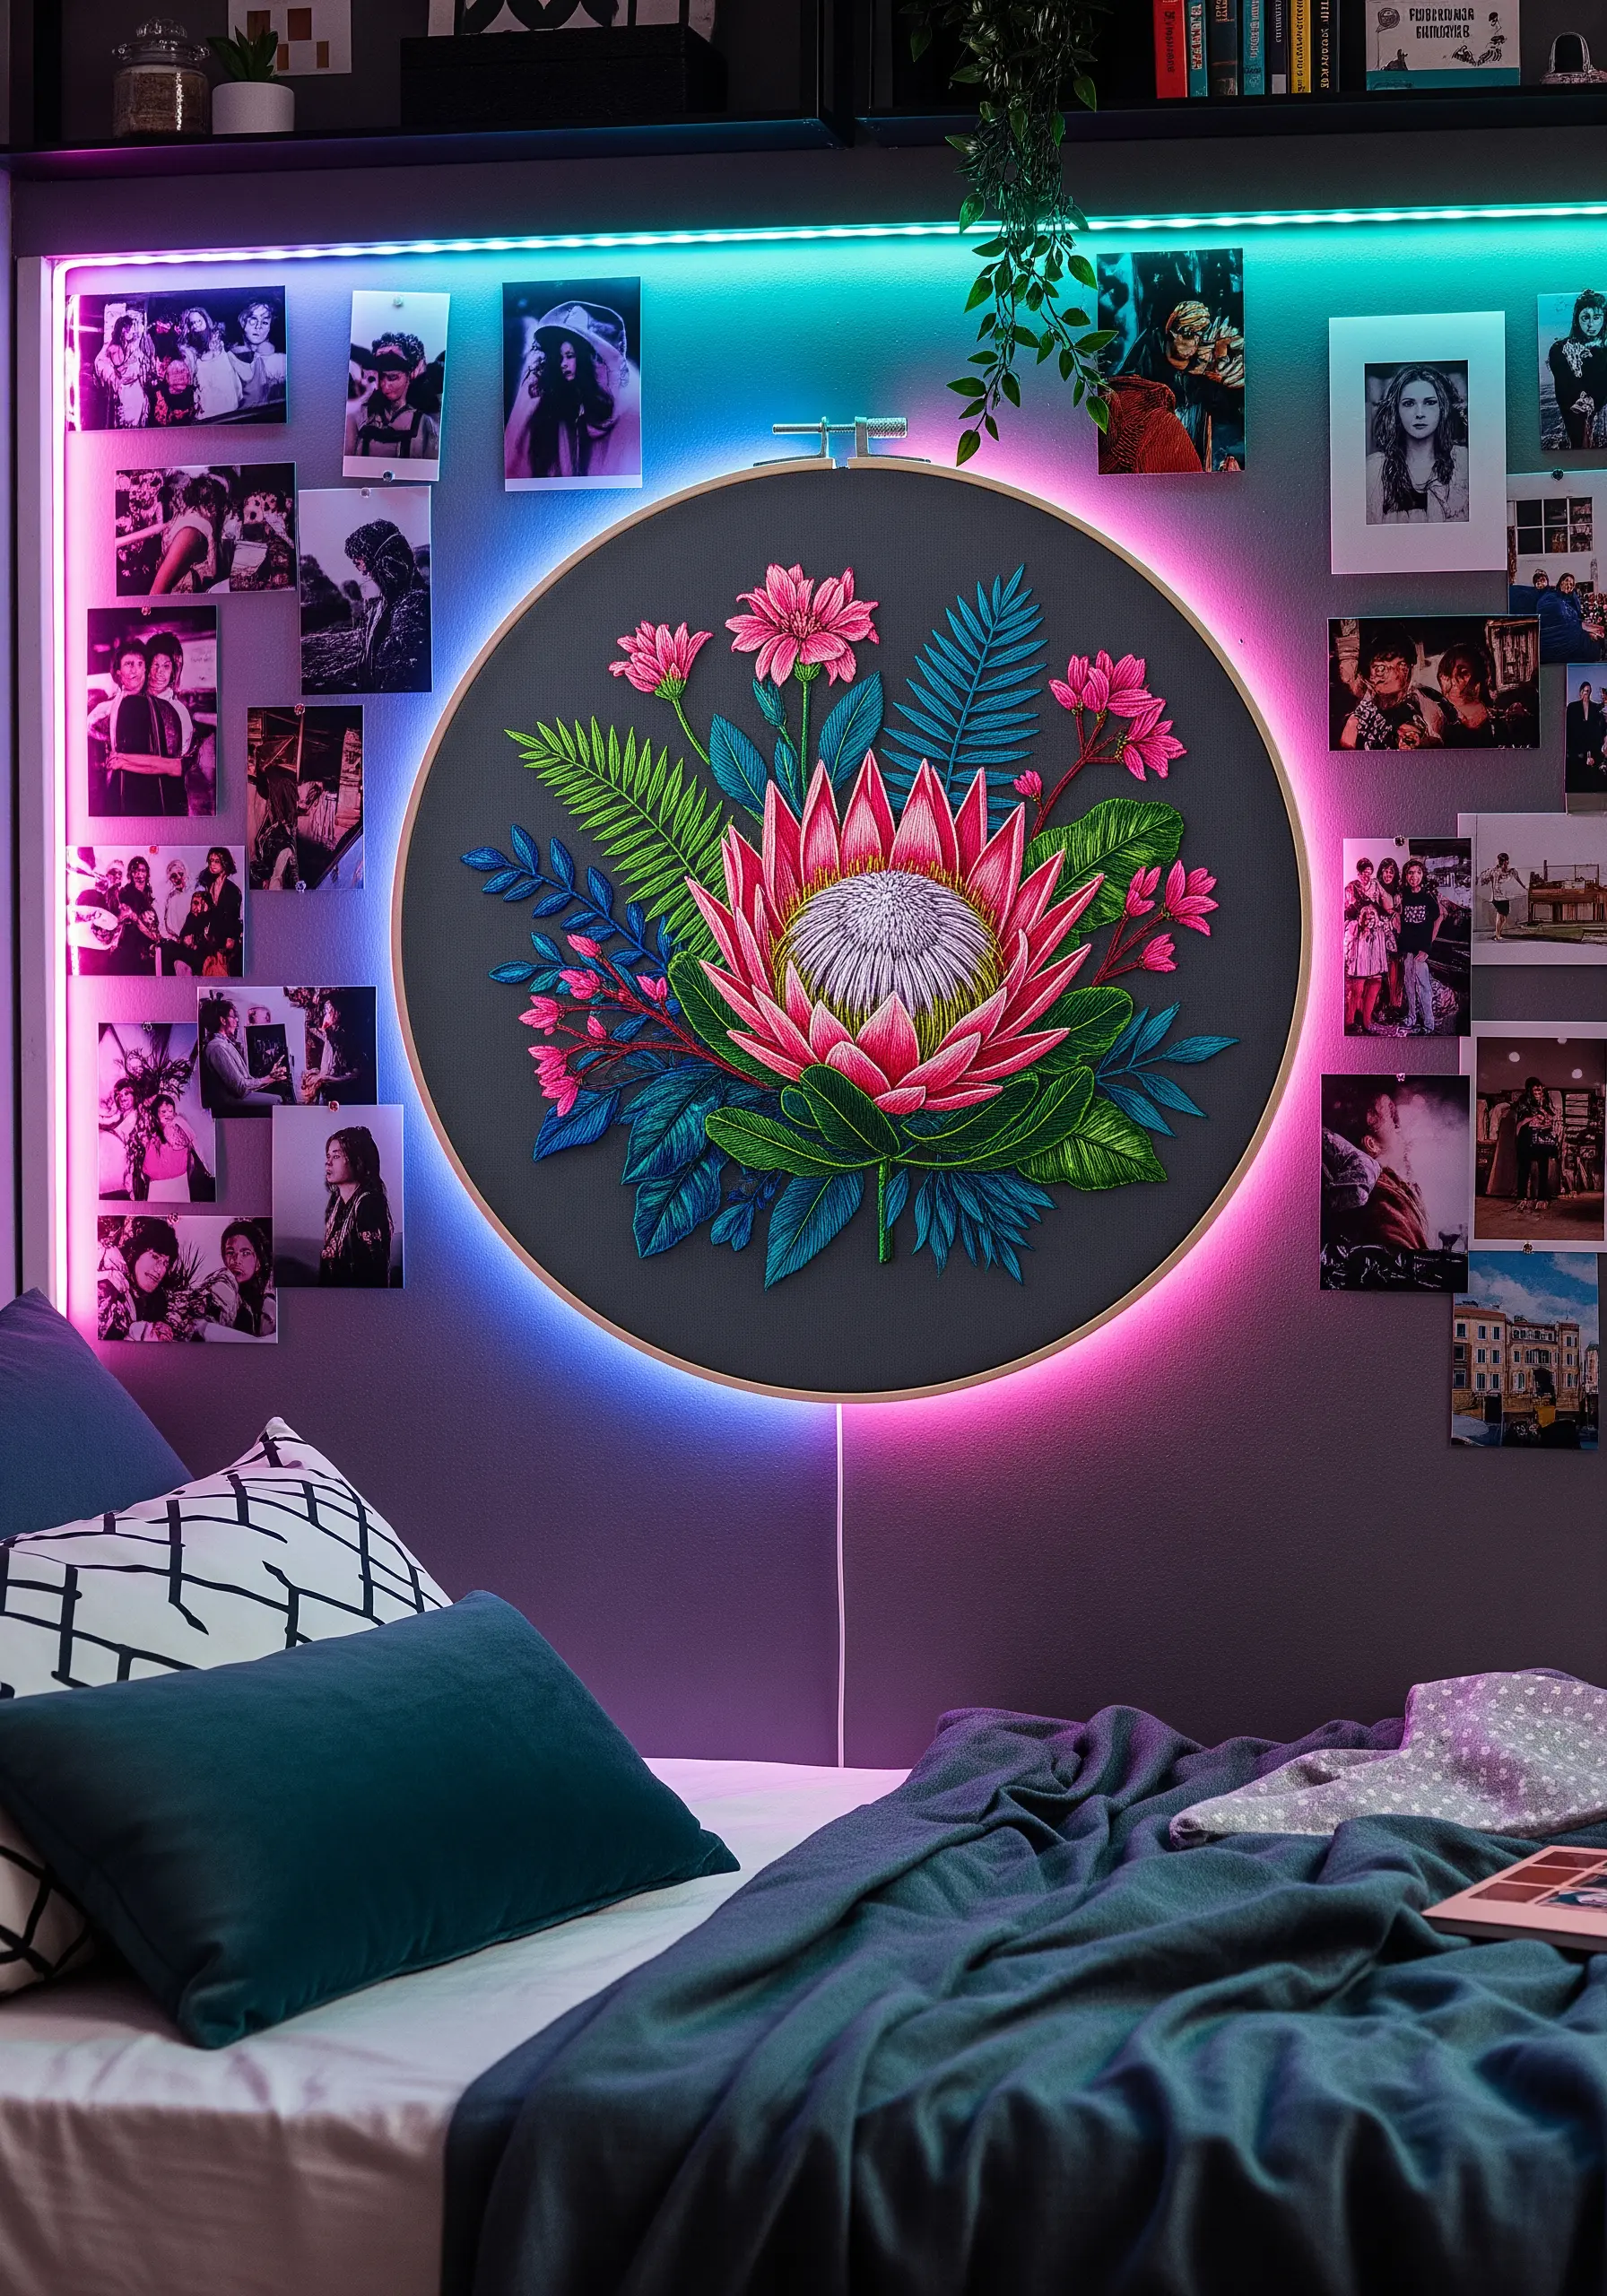
Transform your embroidery hoop into a modern art installation by backlighting it with a flexible LED strip.
Carefully secure the light strip to the inside or back edge of the hoop frame, concealing the wire as much as possible.
The light creates a dramatic halo effect, especially when using dark fabric, which makes the stitched colors of a vibrant flower like a protea appear to glow from within.
This technique merges traditional craft with contemporary technology for a truly unique and eye-catching result.
30. Cultivate Calm with a Minimalist Centerpiece
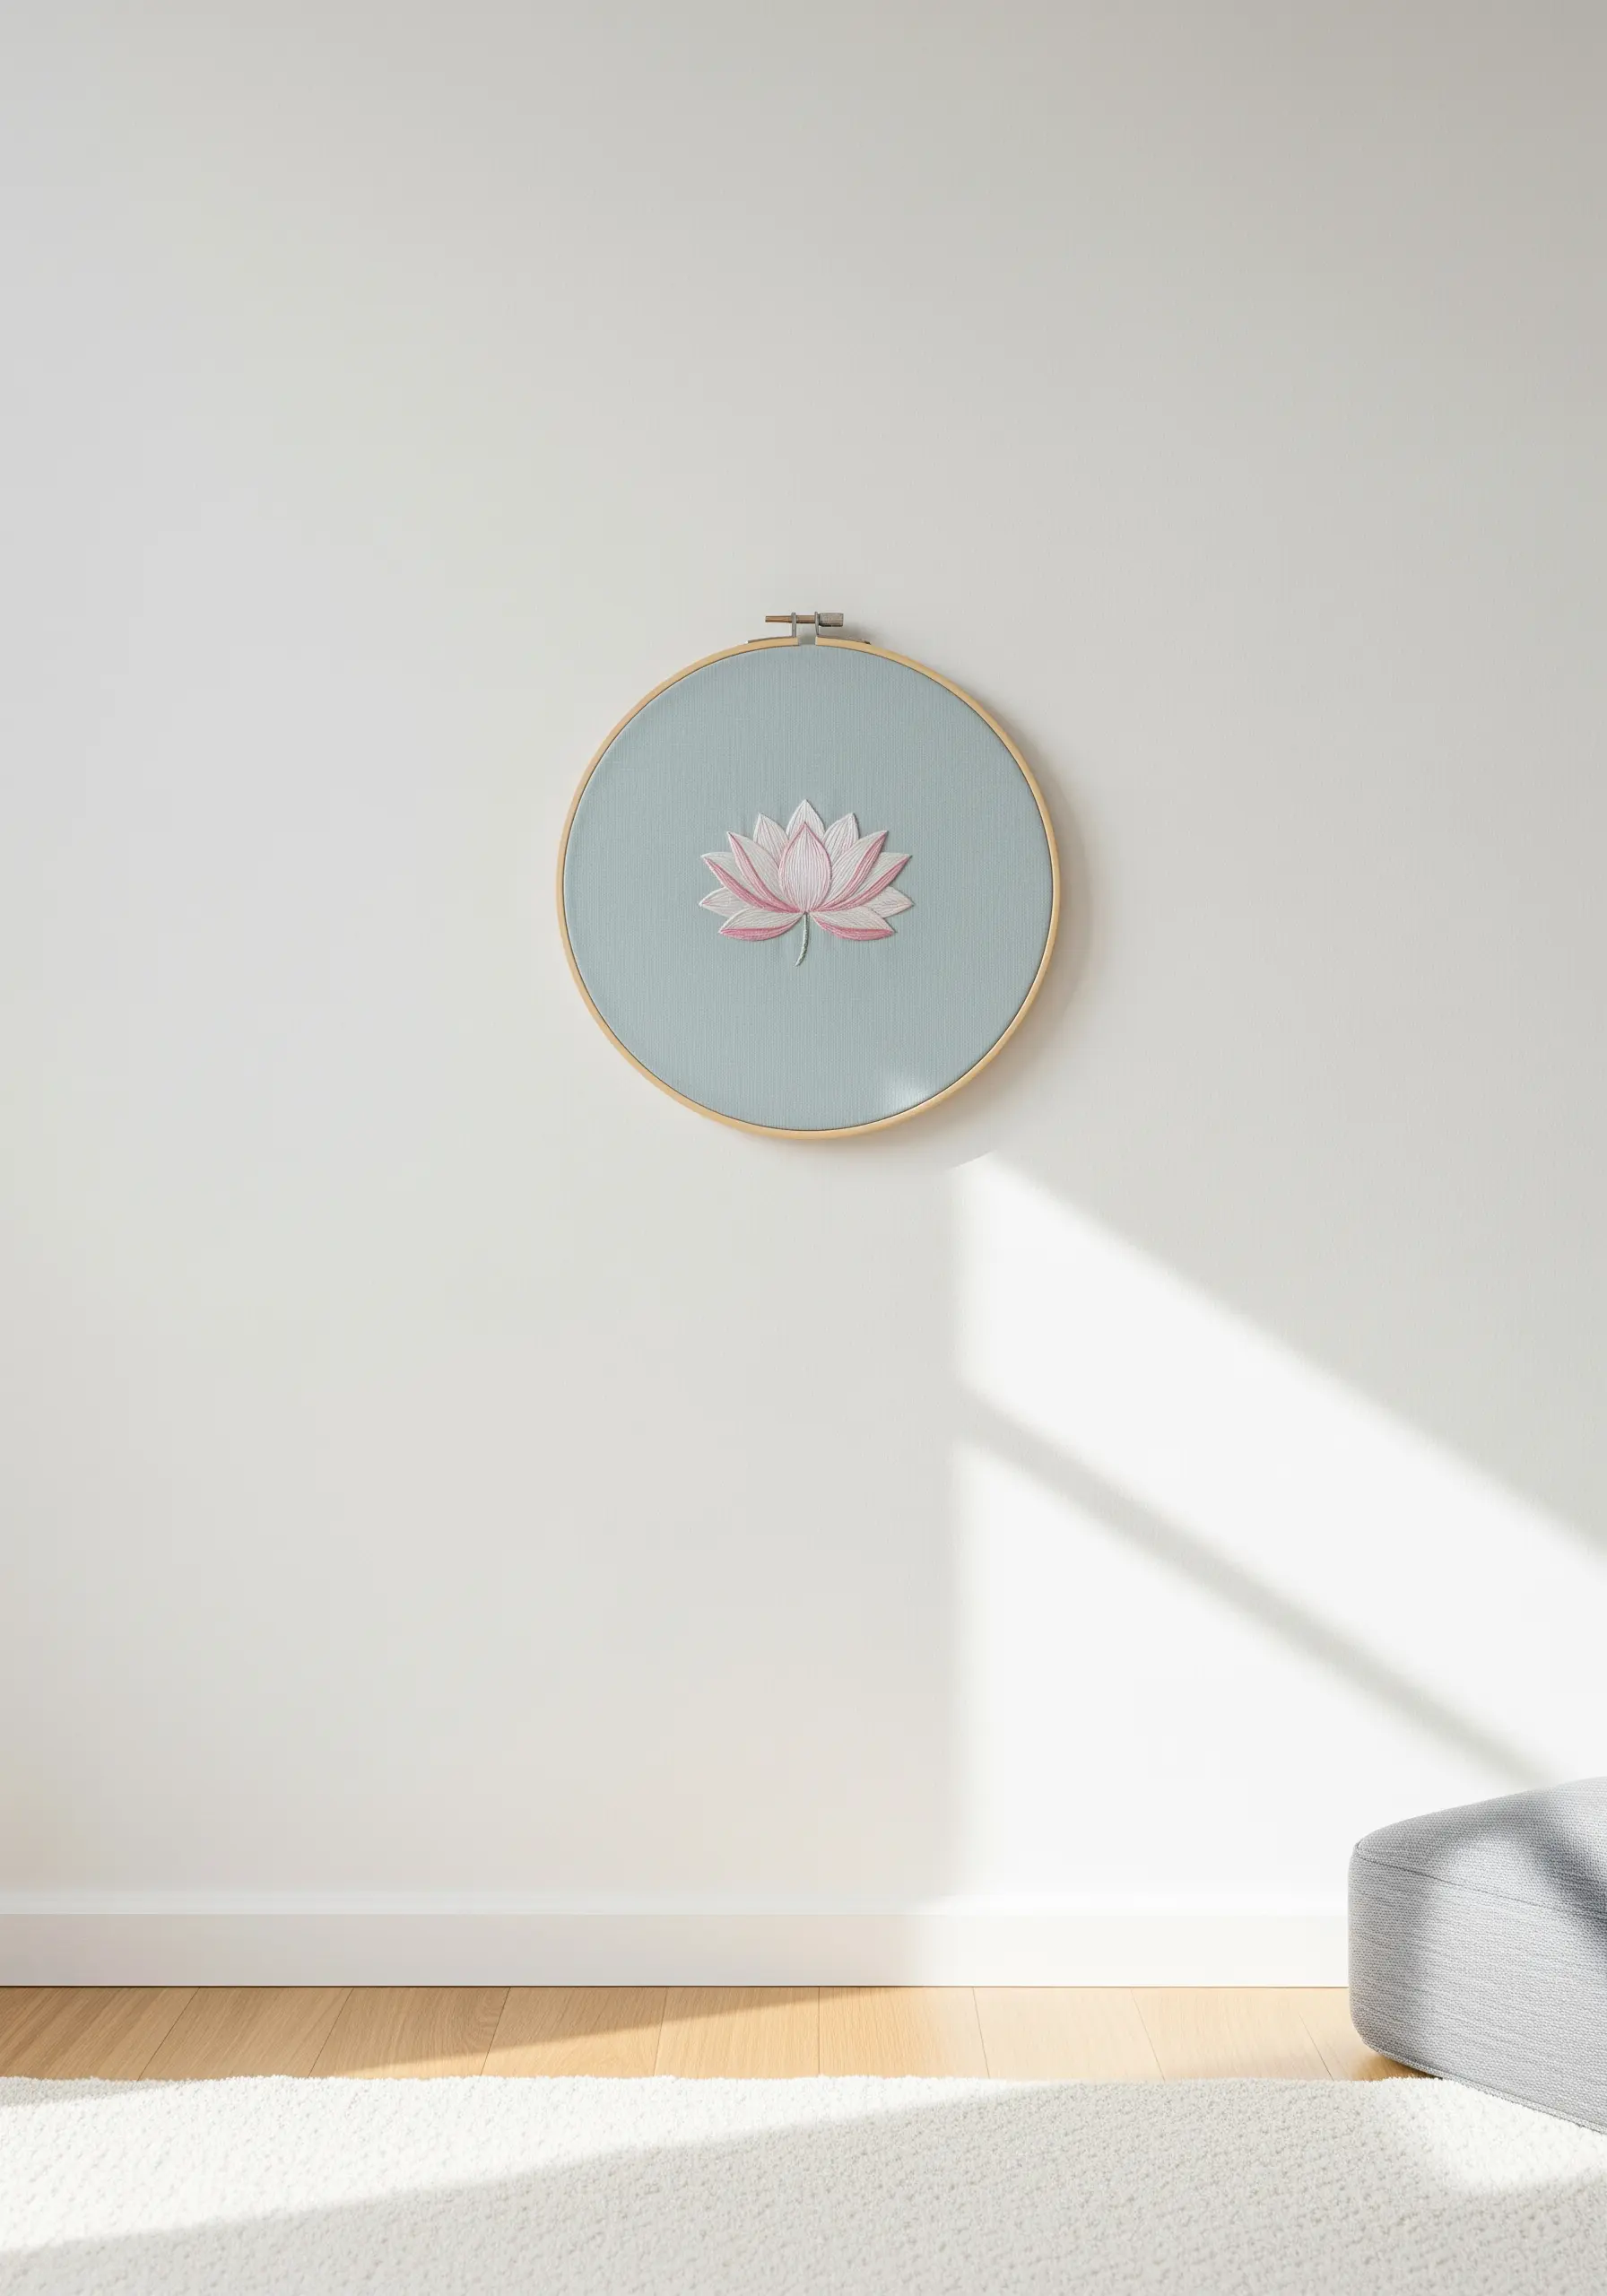
Create a feeling of serenity and focus by placing a single, perfectly stitched motif in the center of your hoop.
A lotus flower, with its clean lines and symbolic meaning, is an ideal subject for this meditative approach.
Use a soft, muted background fabric and a harmonious color palette to maintain a tranquil mood.
This type of minimalist embroidery wall art proves that a simple, well-executed design can have a more profound impact than a busy, crowded one.


