
Embroidery is more than just decoration; it’s a quiet, intentional way to bring order and beauty into your home. Think of your needle and thread not just as tools for art, but as instruments for creating a space that feels both stylish and deeply personal.
These projects are designed to merge function with craft. Instead of adding another piece to your wall, you’ll be transforming everyday objects—a cable organizer, a storage bin, a simple kitchen towel—into items that solve a problem while bringing you joy.
Here, you’ll discover how a simple stitch change can create a cleaner line, how choosing the right thread can add dimension, and how even the most practical item can become a canvas for your creativity. Let’s make your space work for you, beautifully.
1. Render Functional Icons with Bold Simplicity
Transform a simple canvas organizer by stitching clean, graphic icons that communicate function with style.
Use a thick thread, like Perle cotton #8 or all six strands of embroidery floss, to give your backstitch outlines a bold, confident weight that prevents them from looking frail on the heavy fabric.
For the geometric pattern, achieve perfect symmetry by using a waste canvas or a water-soluble grid stabilizer.
This ensures your stitches are perfectly aligned, creating a polished, intentional look that elevates simple storage into minimalist embroidery wall art ideas.
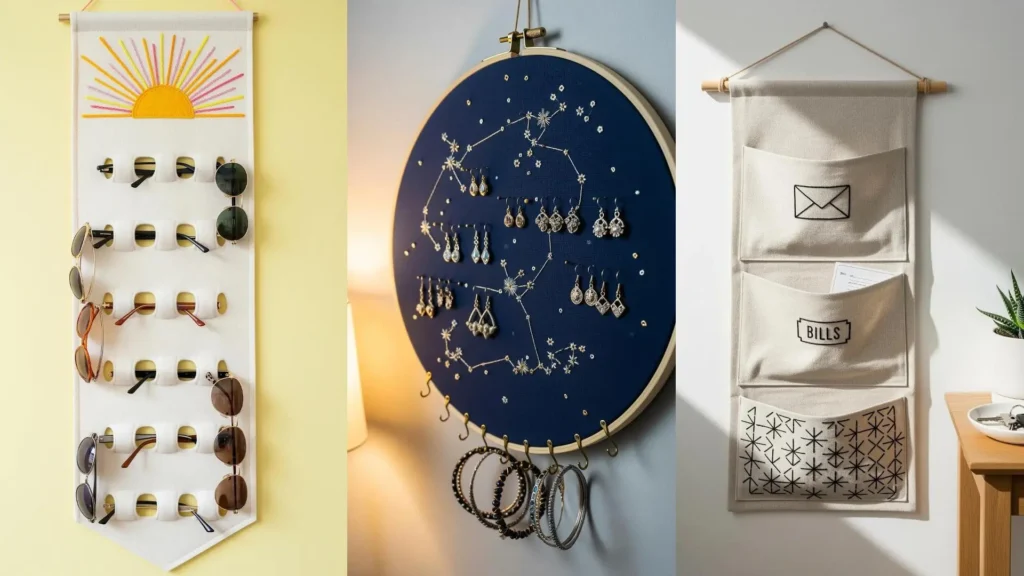
2. Chart a Celestial Jewelry Organizer
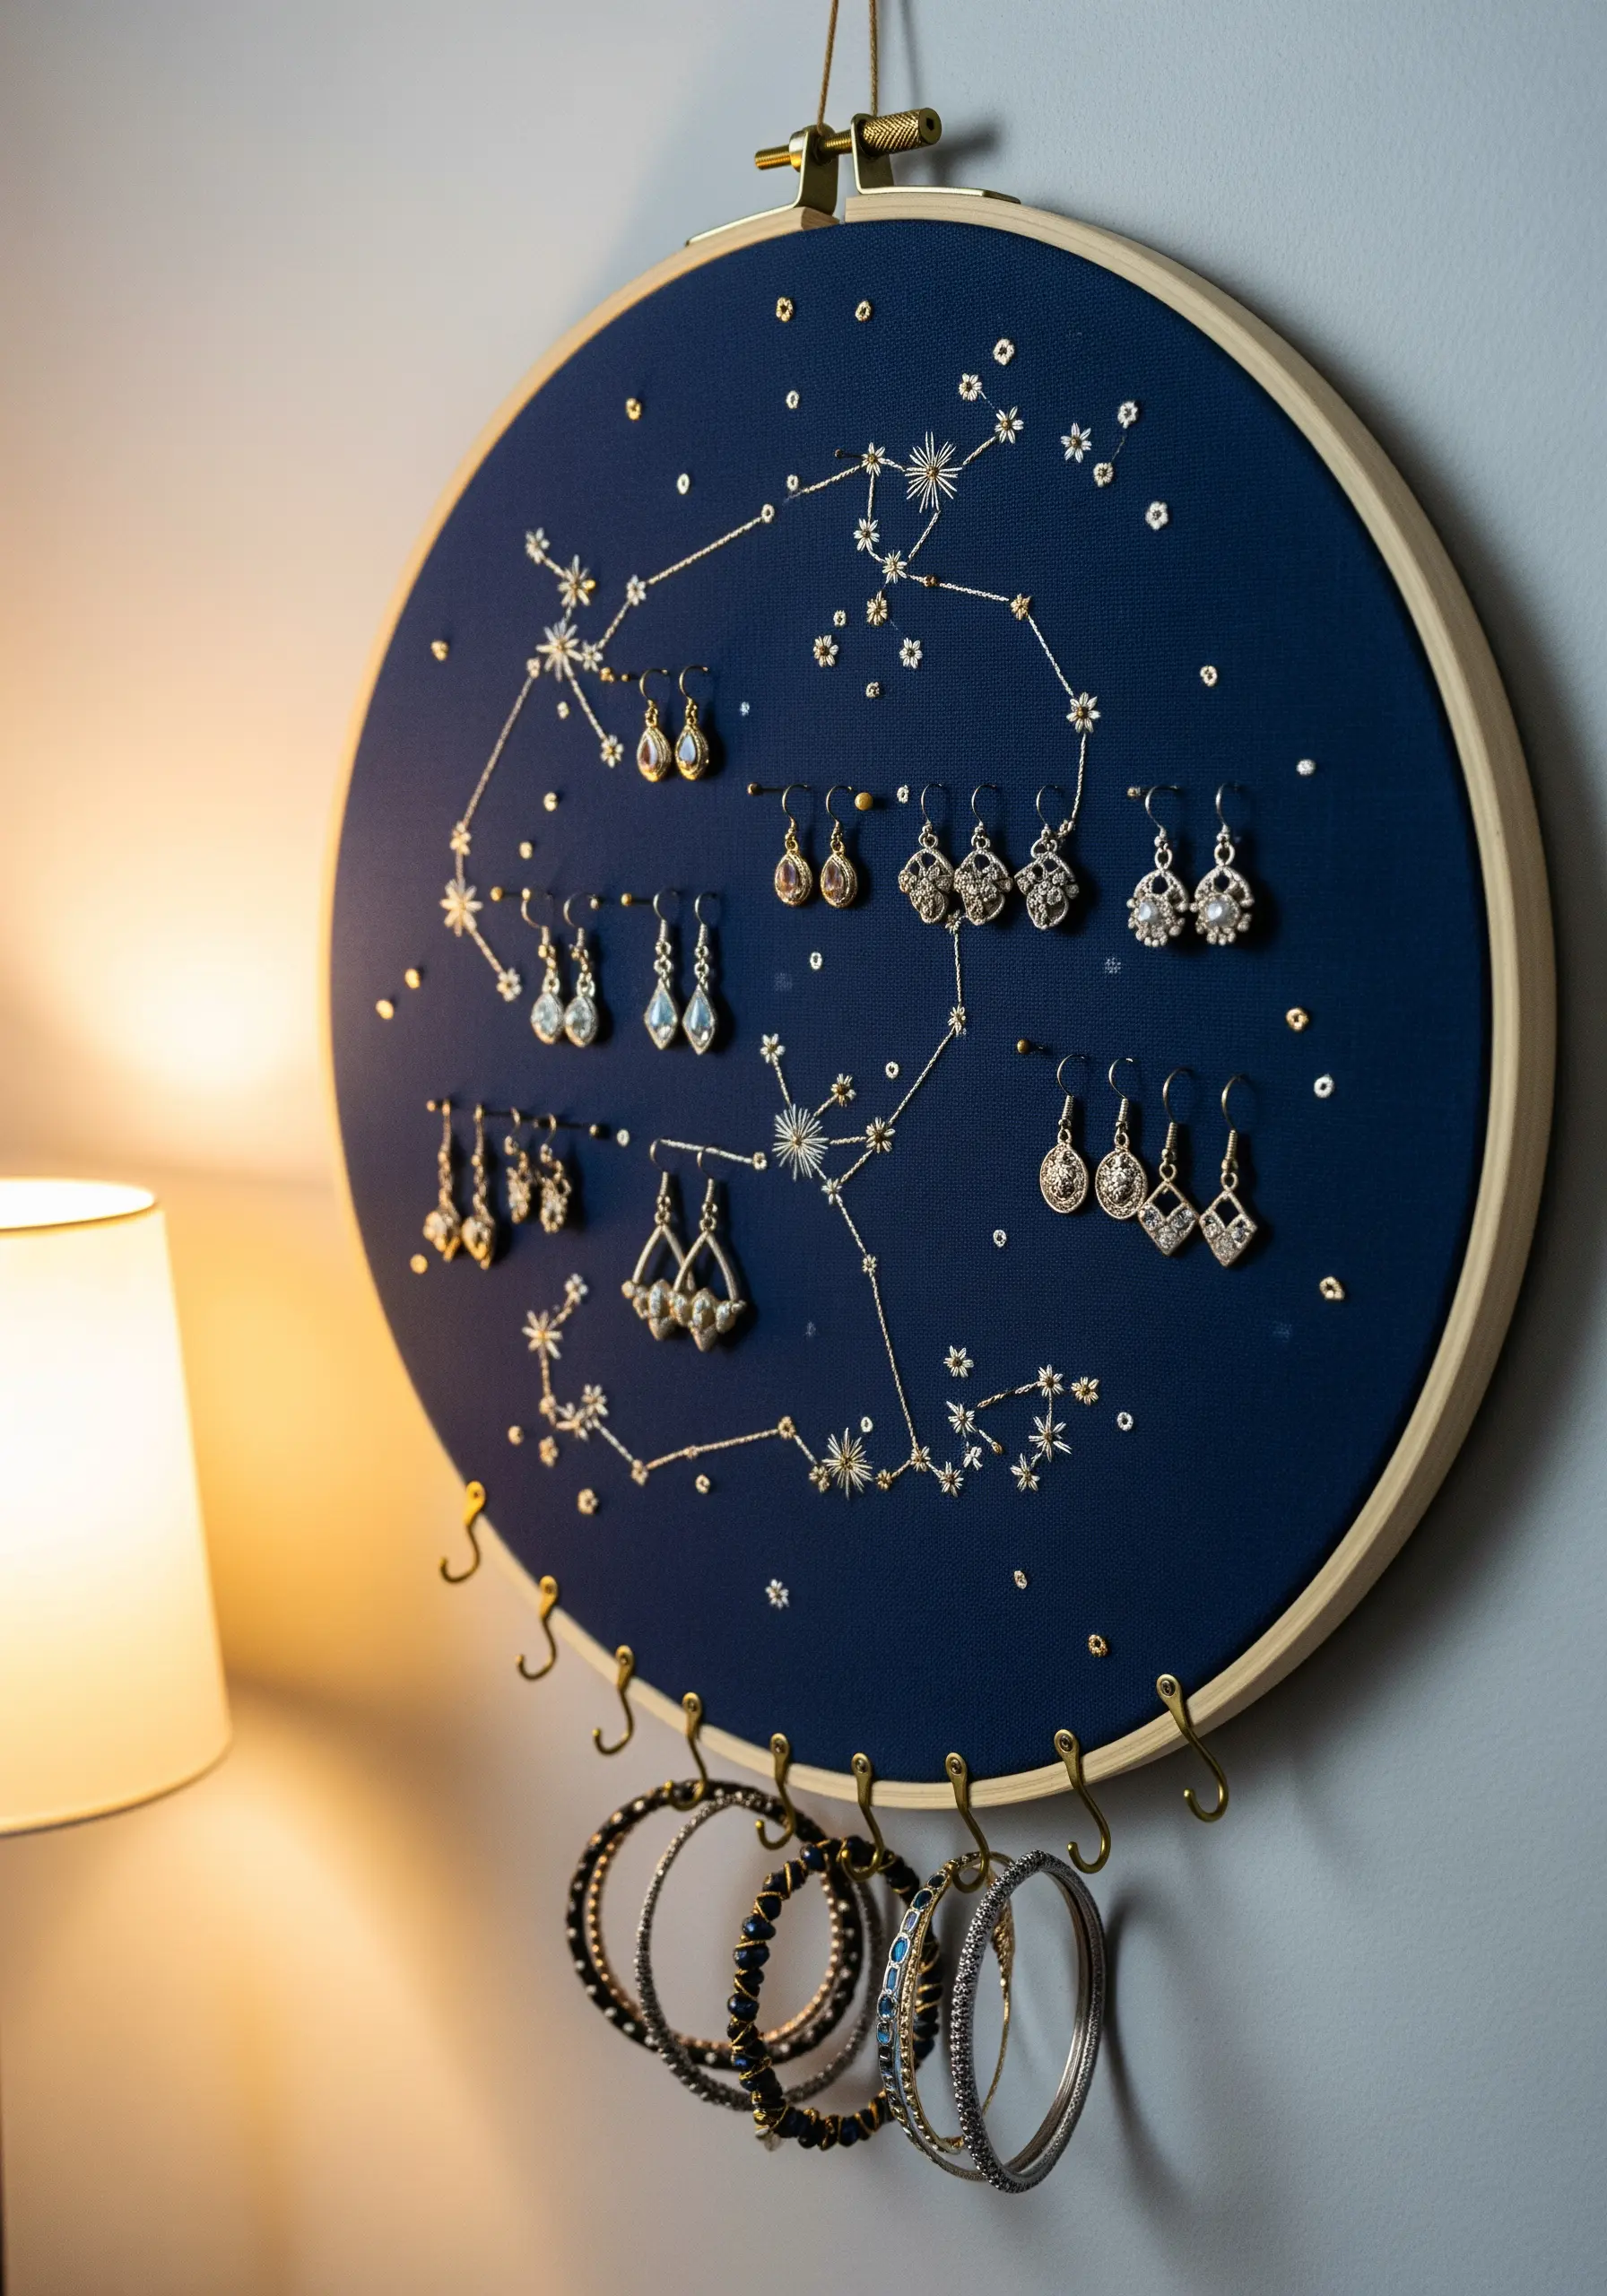
Turn a basic embroidery hoop into a functional piece of art for organizing earrings and bracelets.
Use a deep navy cotton or linen fabric as your night sky, stretching it taut in a large hoop for a stable surface.
Stitch constellations using a single strand of metallic silver or gold thread for a delicate shimmer.
To create a dynamic night sky, vary your star stitches: use single-wrap French knots for distant stars and tiny straight-stitch clusters for brighter ones.
Reinforce the back with felt and screw in small brass cup hooks along the bottom edge to hold heavier items without distorting the fabric.
3. Sculpt a Garden with Ribbon Embroidery
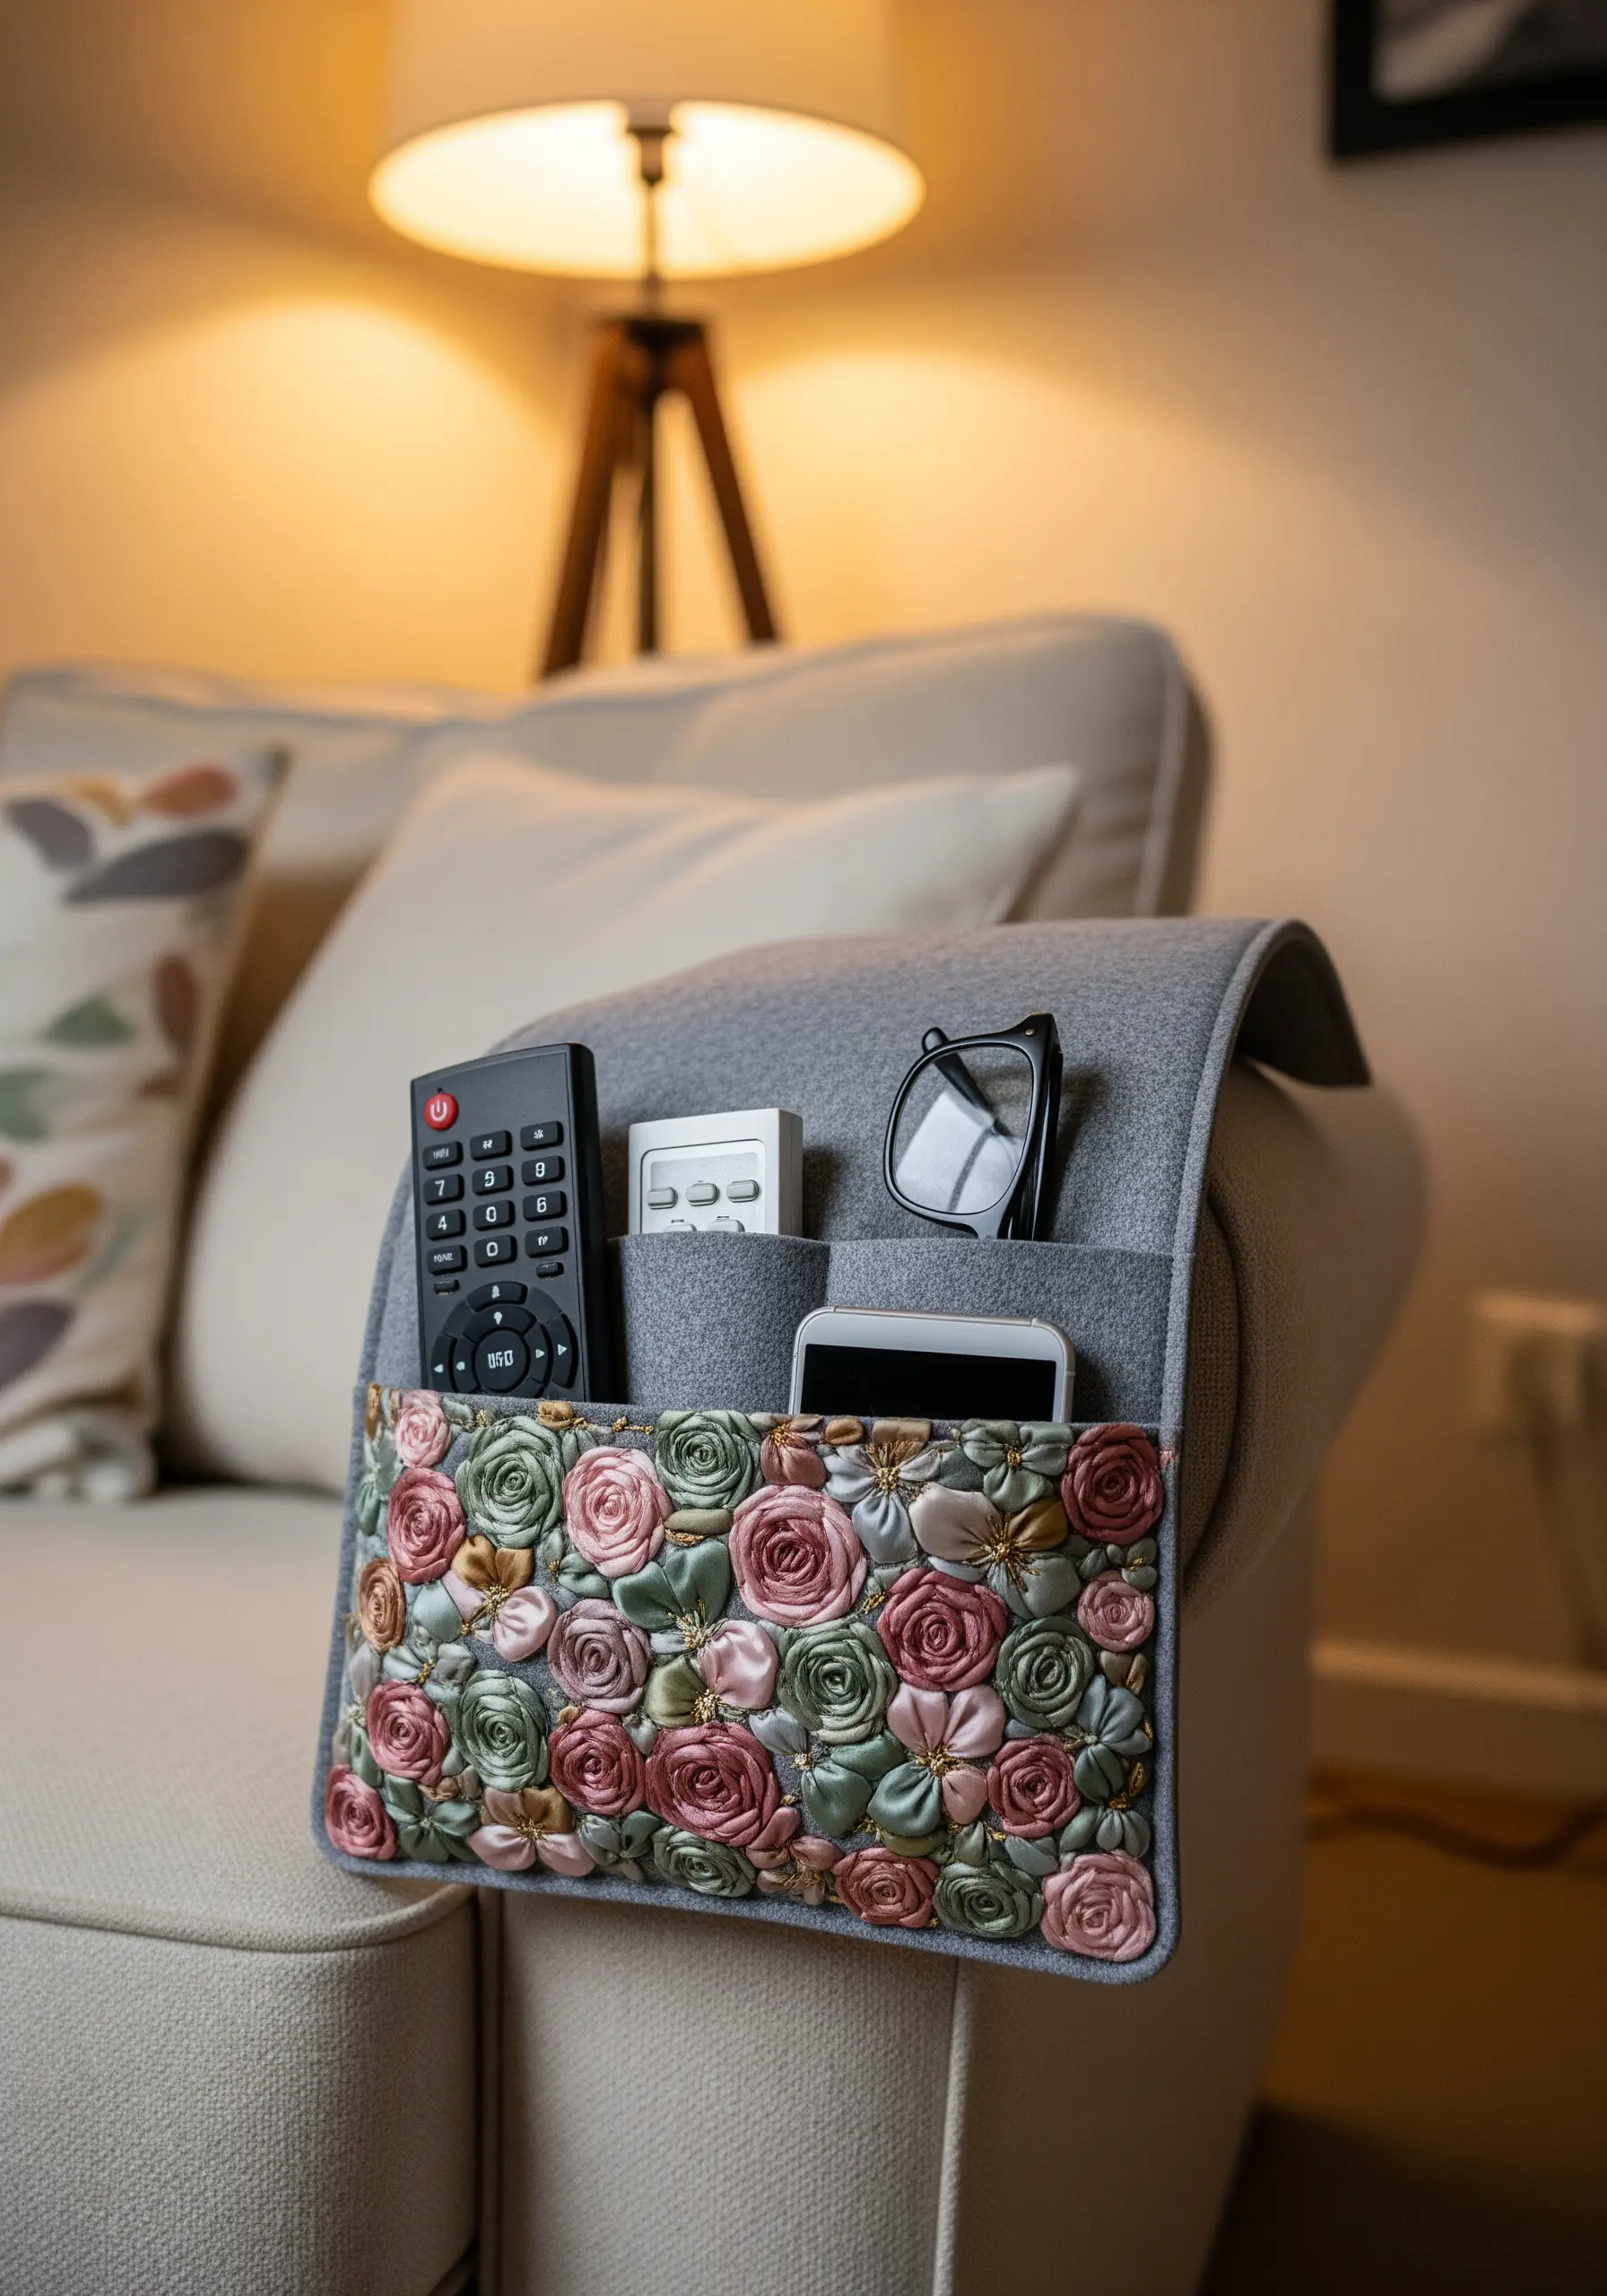
Elevate a simple felt caddy with the high-impact texture of dimensional floral embroidery using silk ribbons.
Create plush, realistic roses using the spider web rose stitch; wrapping the ribbon loosely creates open, blooming petals, while tighter wraps form delicate buds.
Use a variety of ribbon widths—a wider ribbon for statement roses and a thinner one for buds and leaves—to build visual depth.
For the leaves, a simple folded ribbon stitch or Japanese ribbon stitch will create the perfect shape with a single pull of the needle, making this technique much faster than traditional thread painting.
4. Wrap Desk Organizers in Modern Stitches
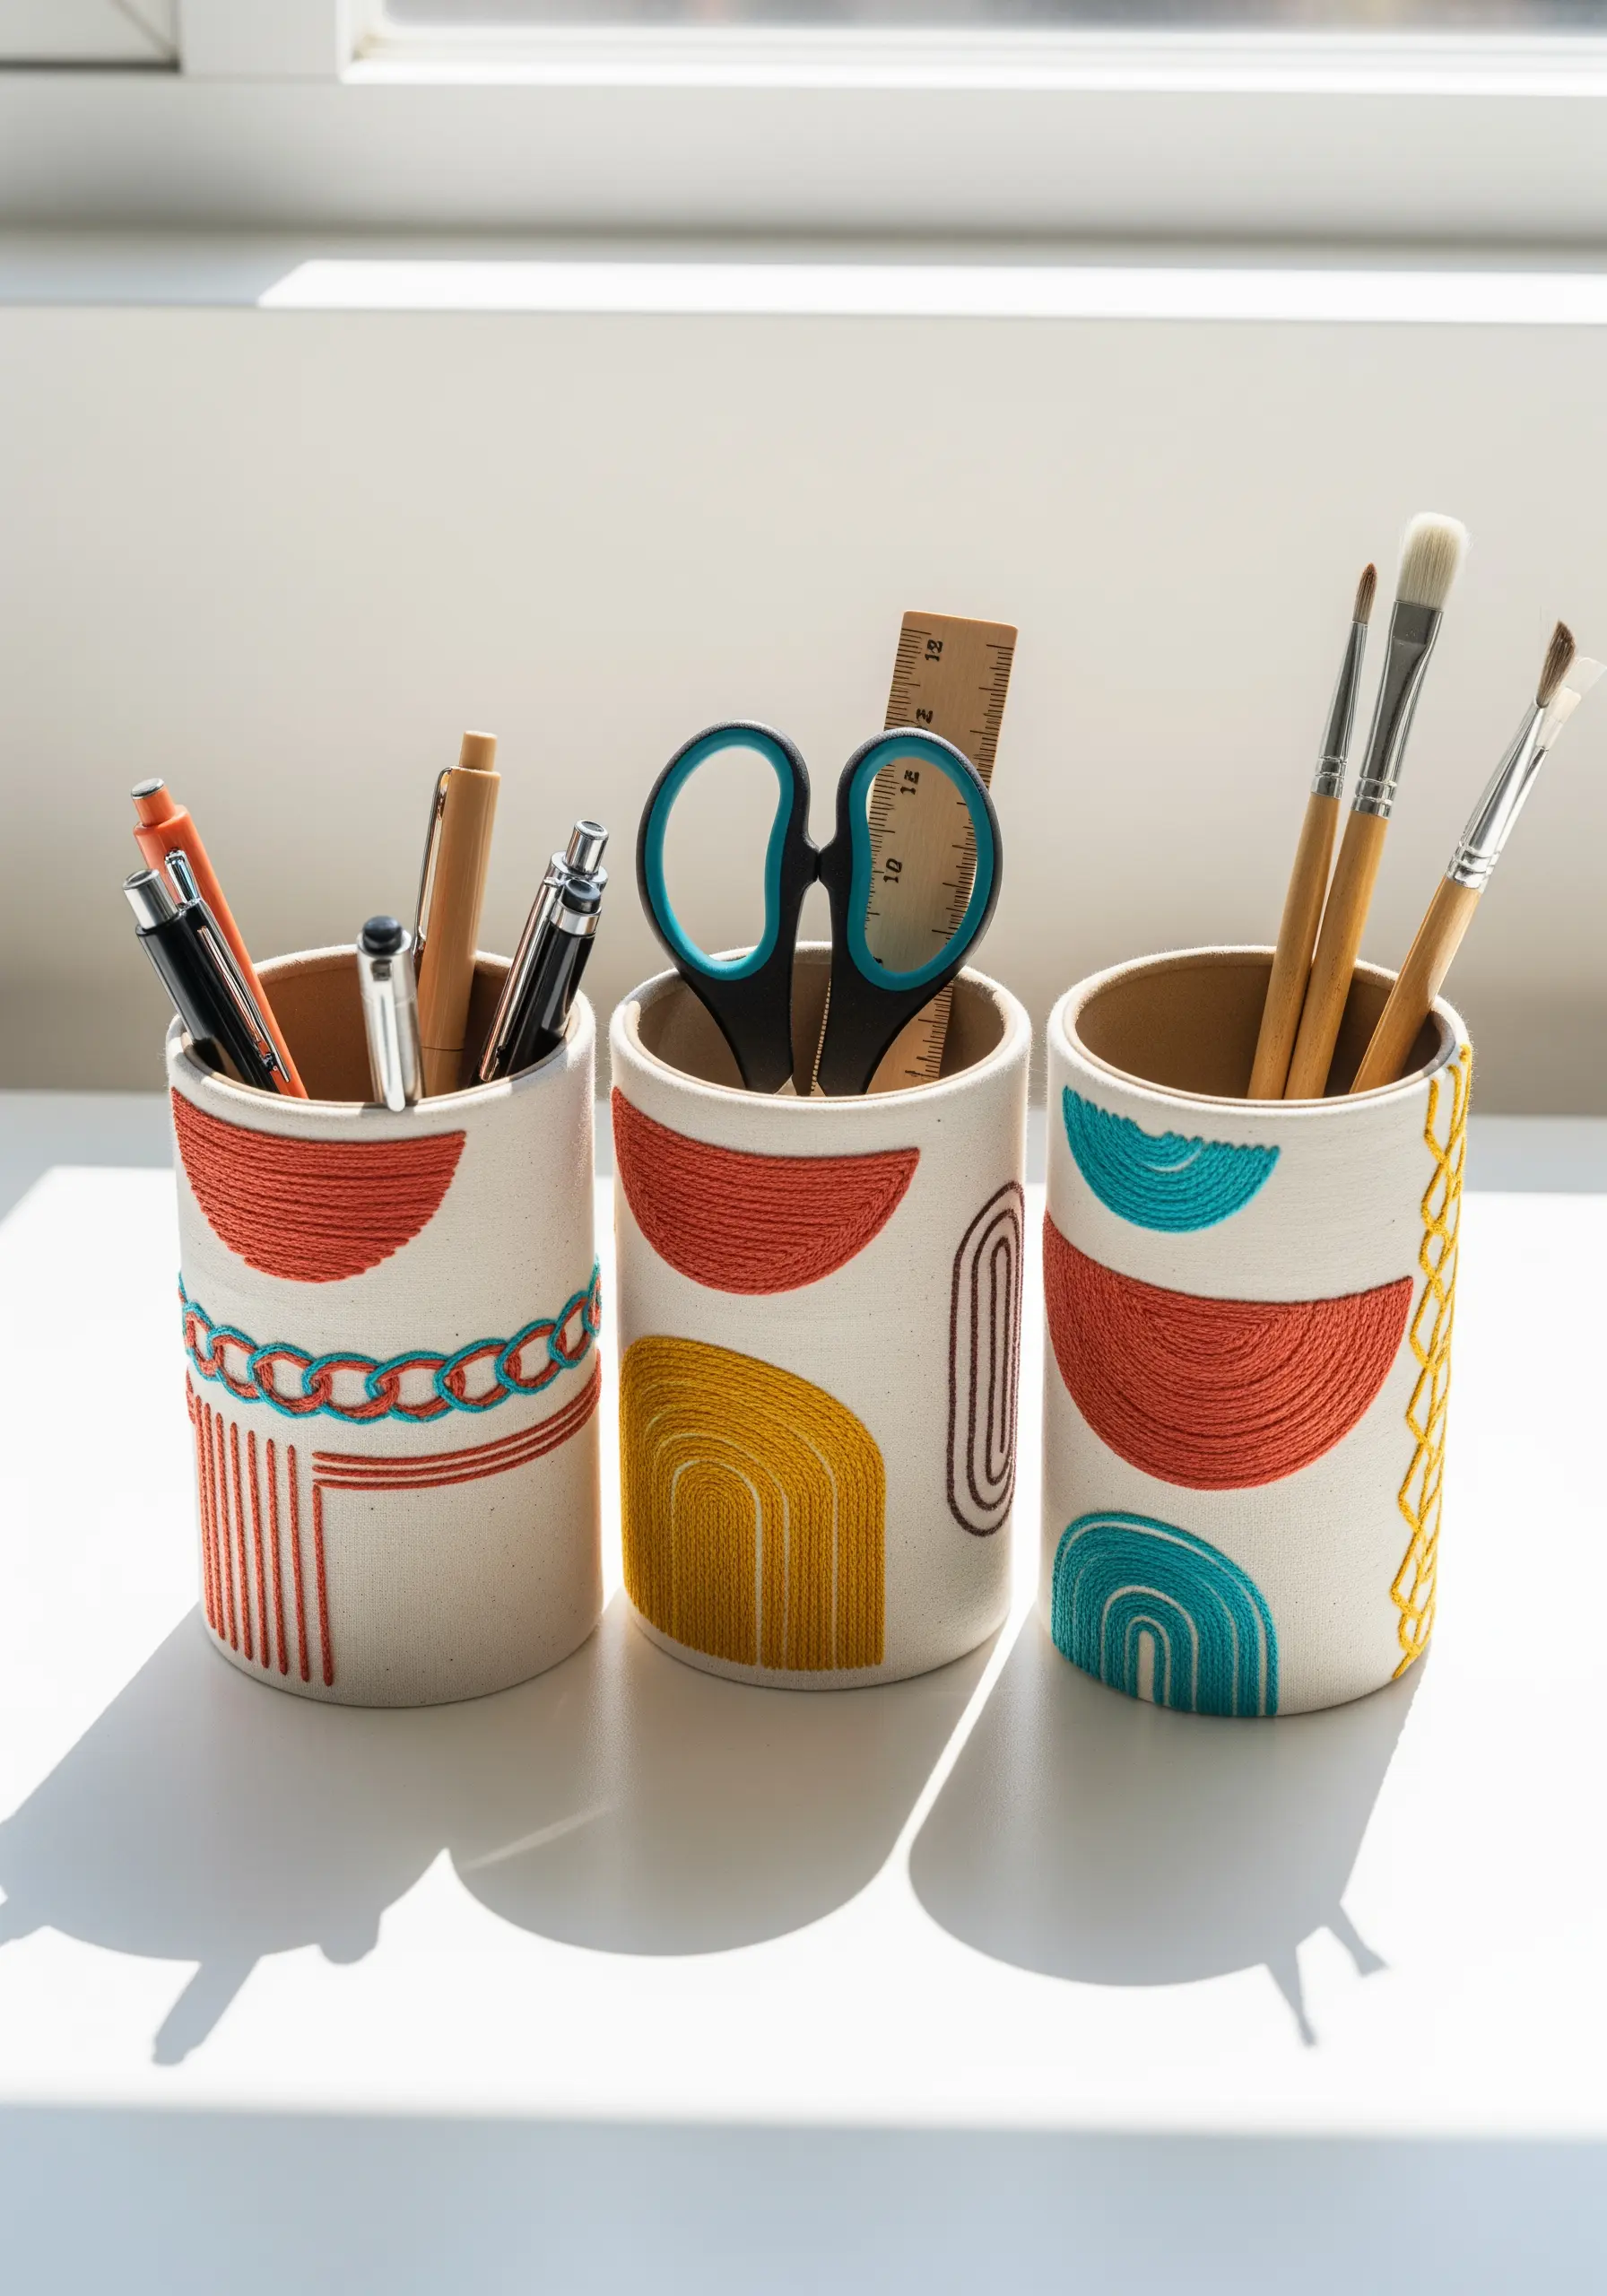
Customize plain pen pots by embroidering on a flat piece of canvas and then wrapping it around the cylinder for a flawless finish.
For the filled semi-circles and arches, use a satin stitch, angling your stitches to follow the curve of the shape for a smooth, light-catching surface.
To create the chain link detail, try couching: lay down a thicker yarn or cord and tack it in place with small, discreet stitches in a contrasting color.
This method allows you to add bold lines and textures that would be difficult to achieve with standard stitches, perfect for modern geometric patterns.
5. Illustrate Your Craft with Crisp Line Art
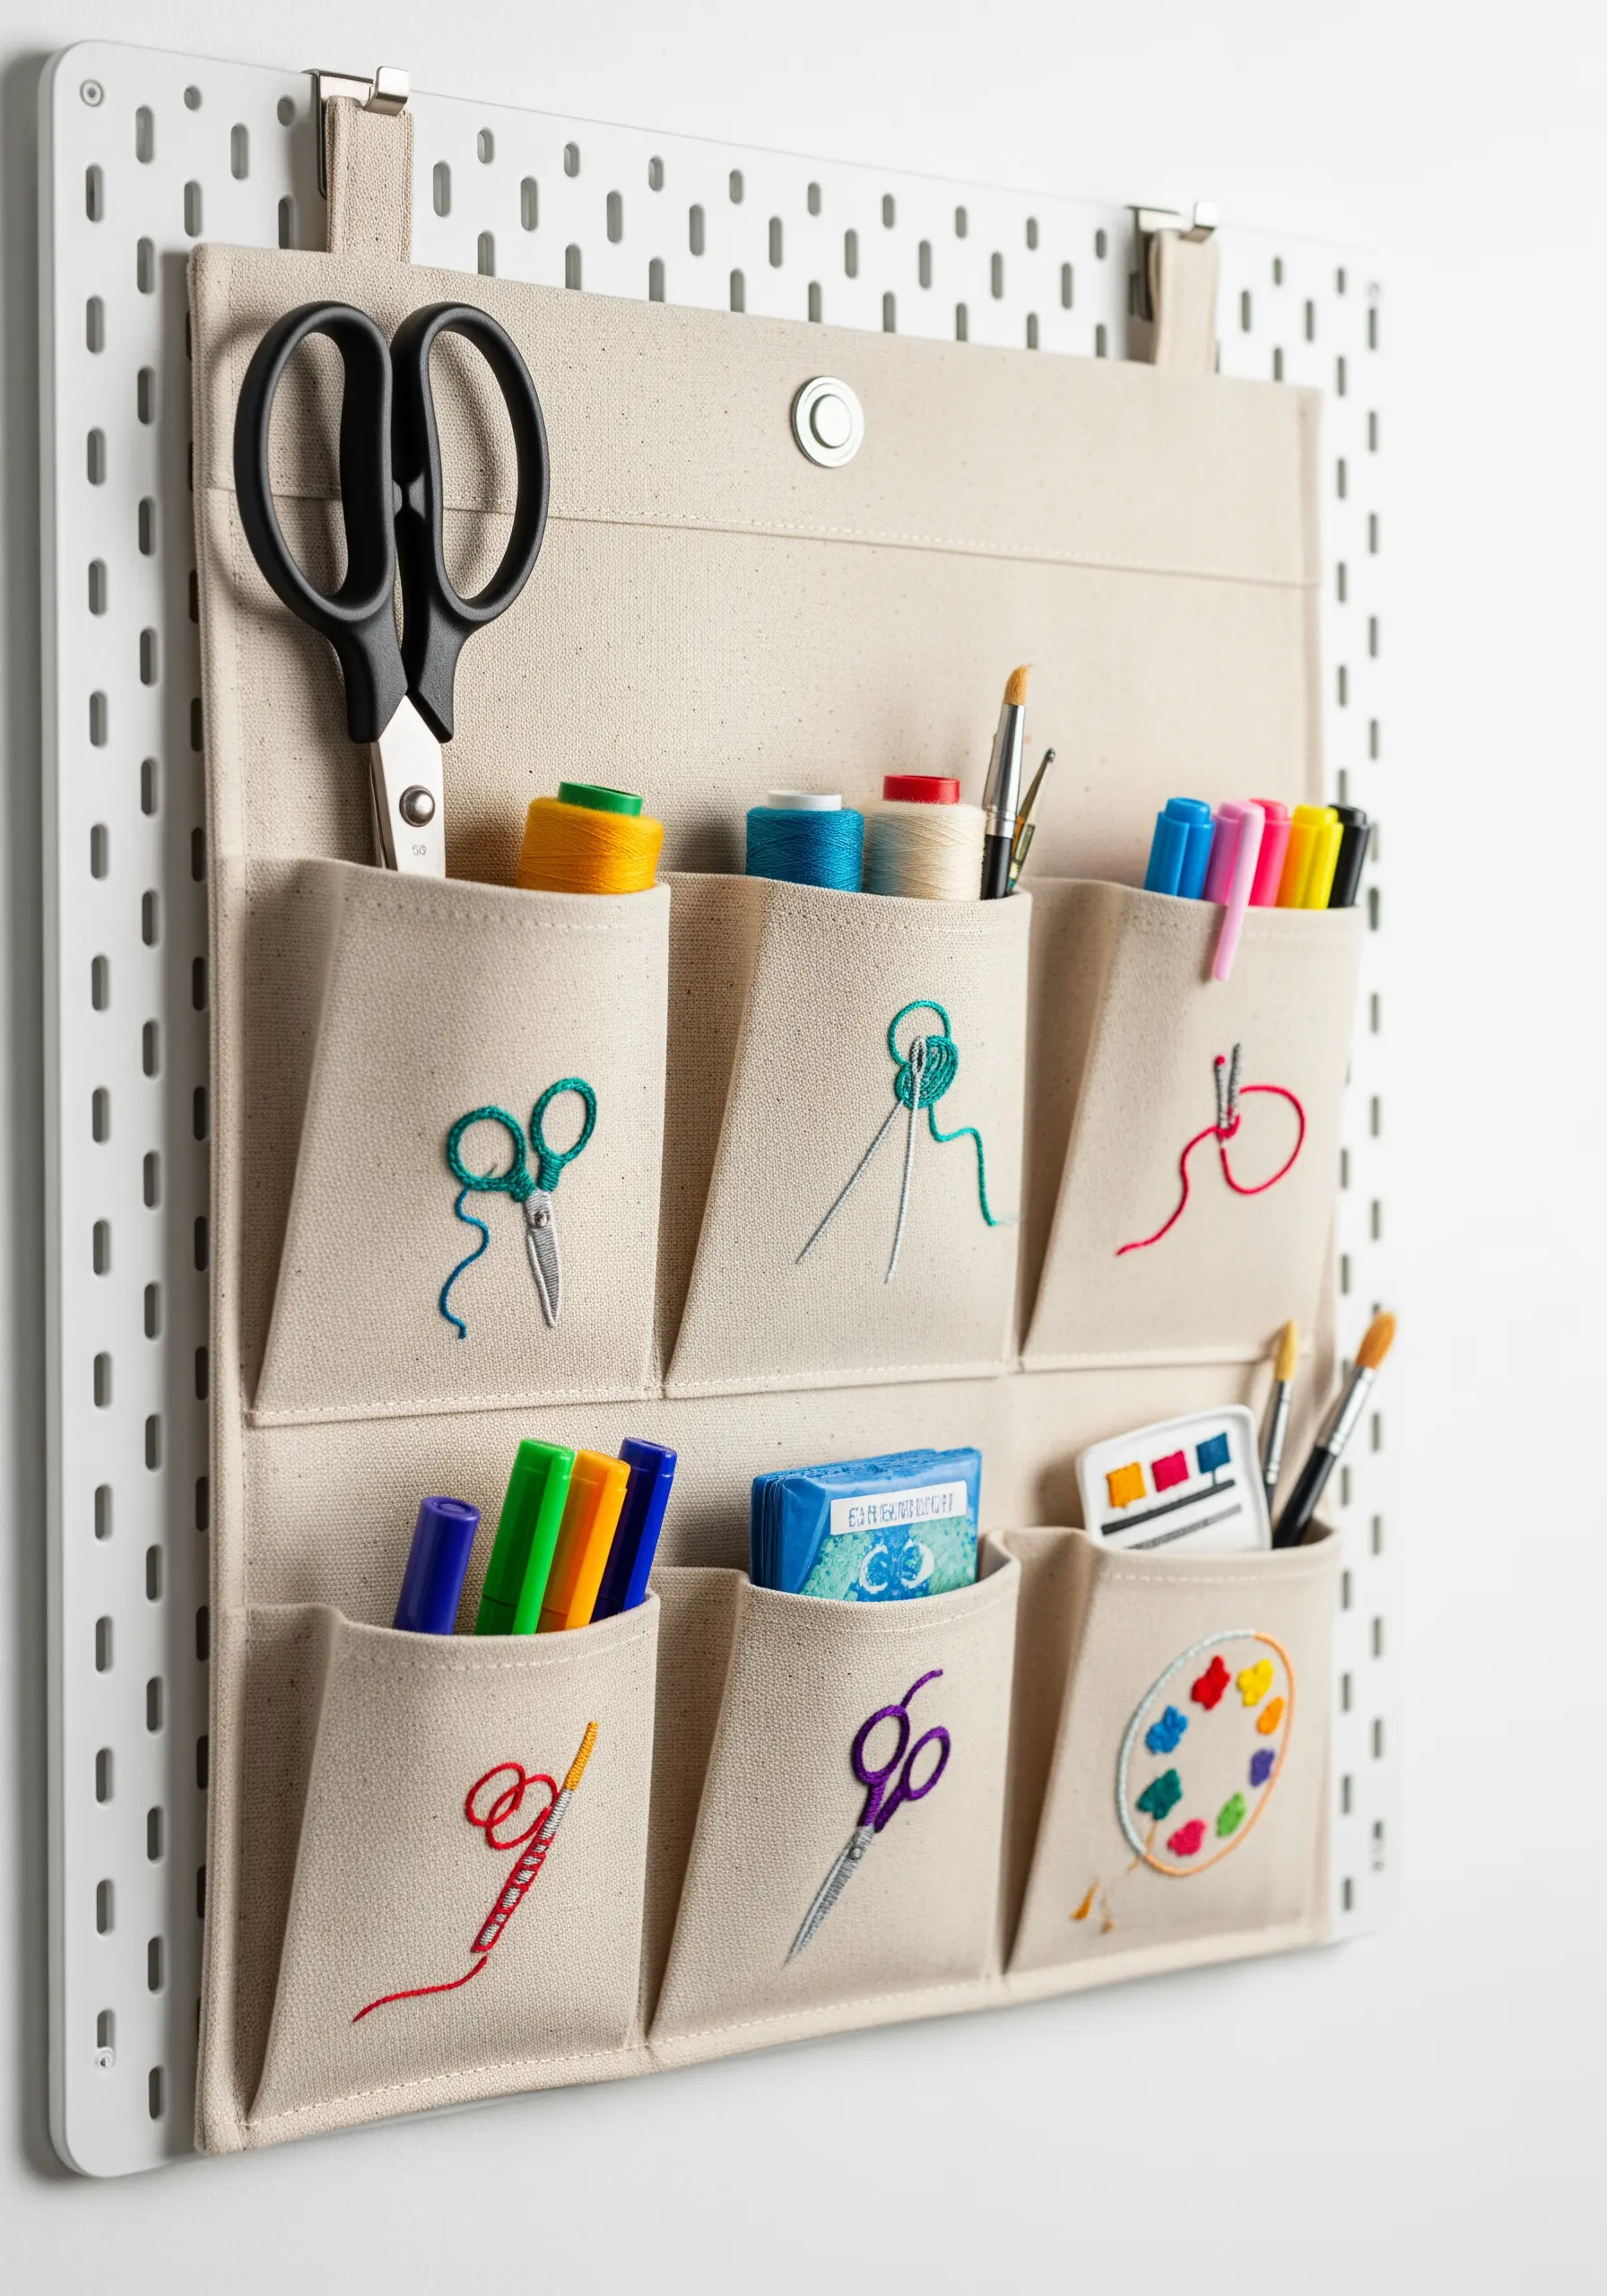
Label a hanging craft organizer with simple icons that represent its contents, turning functional storage into a celebration of your creativity.
To achieve crisp, clean lines for these simple motifs, choose a split stitch over a standard backstitch.
A split stitch creates a continuous, rope-like line that looks more refined and intentional, perfect for minimalist illustrations.
Use three strands of floss to give the lines enough presence without appearing bulky, and stick to a single color for each icon to maintain a clear, uncluttered aesthetic.
6. Design a No-Snag Embellished Hanger
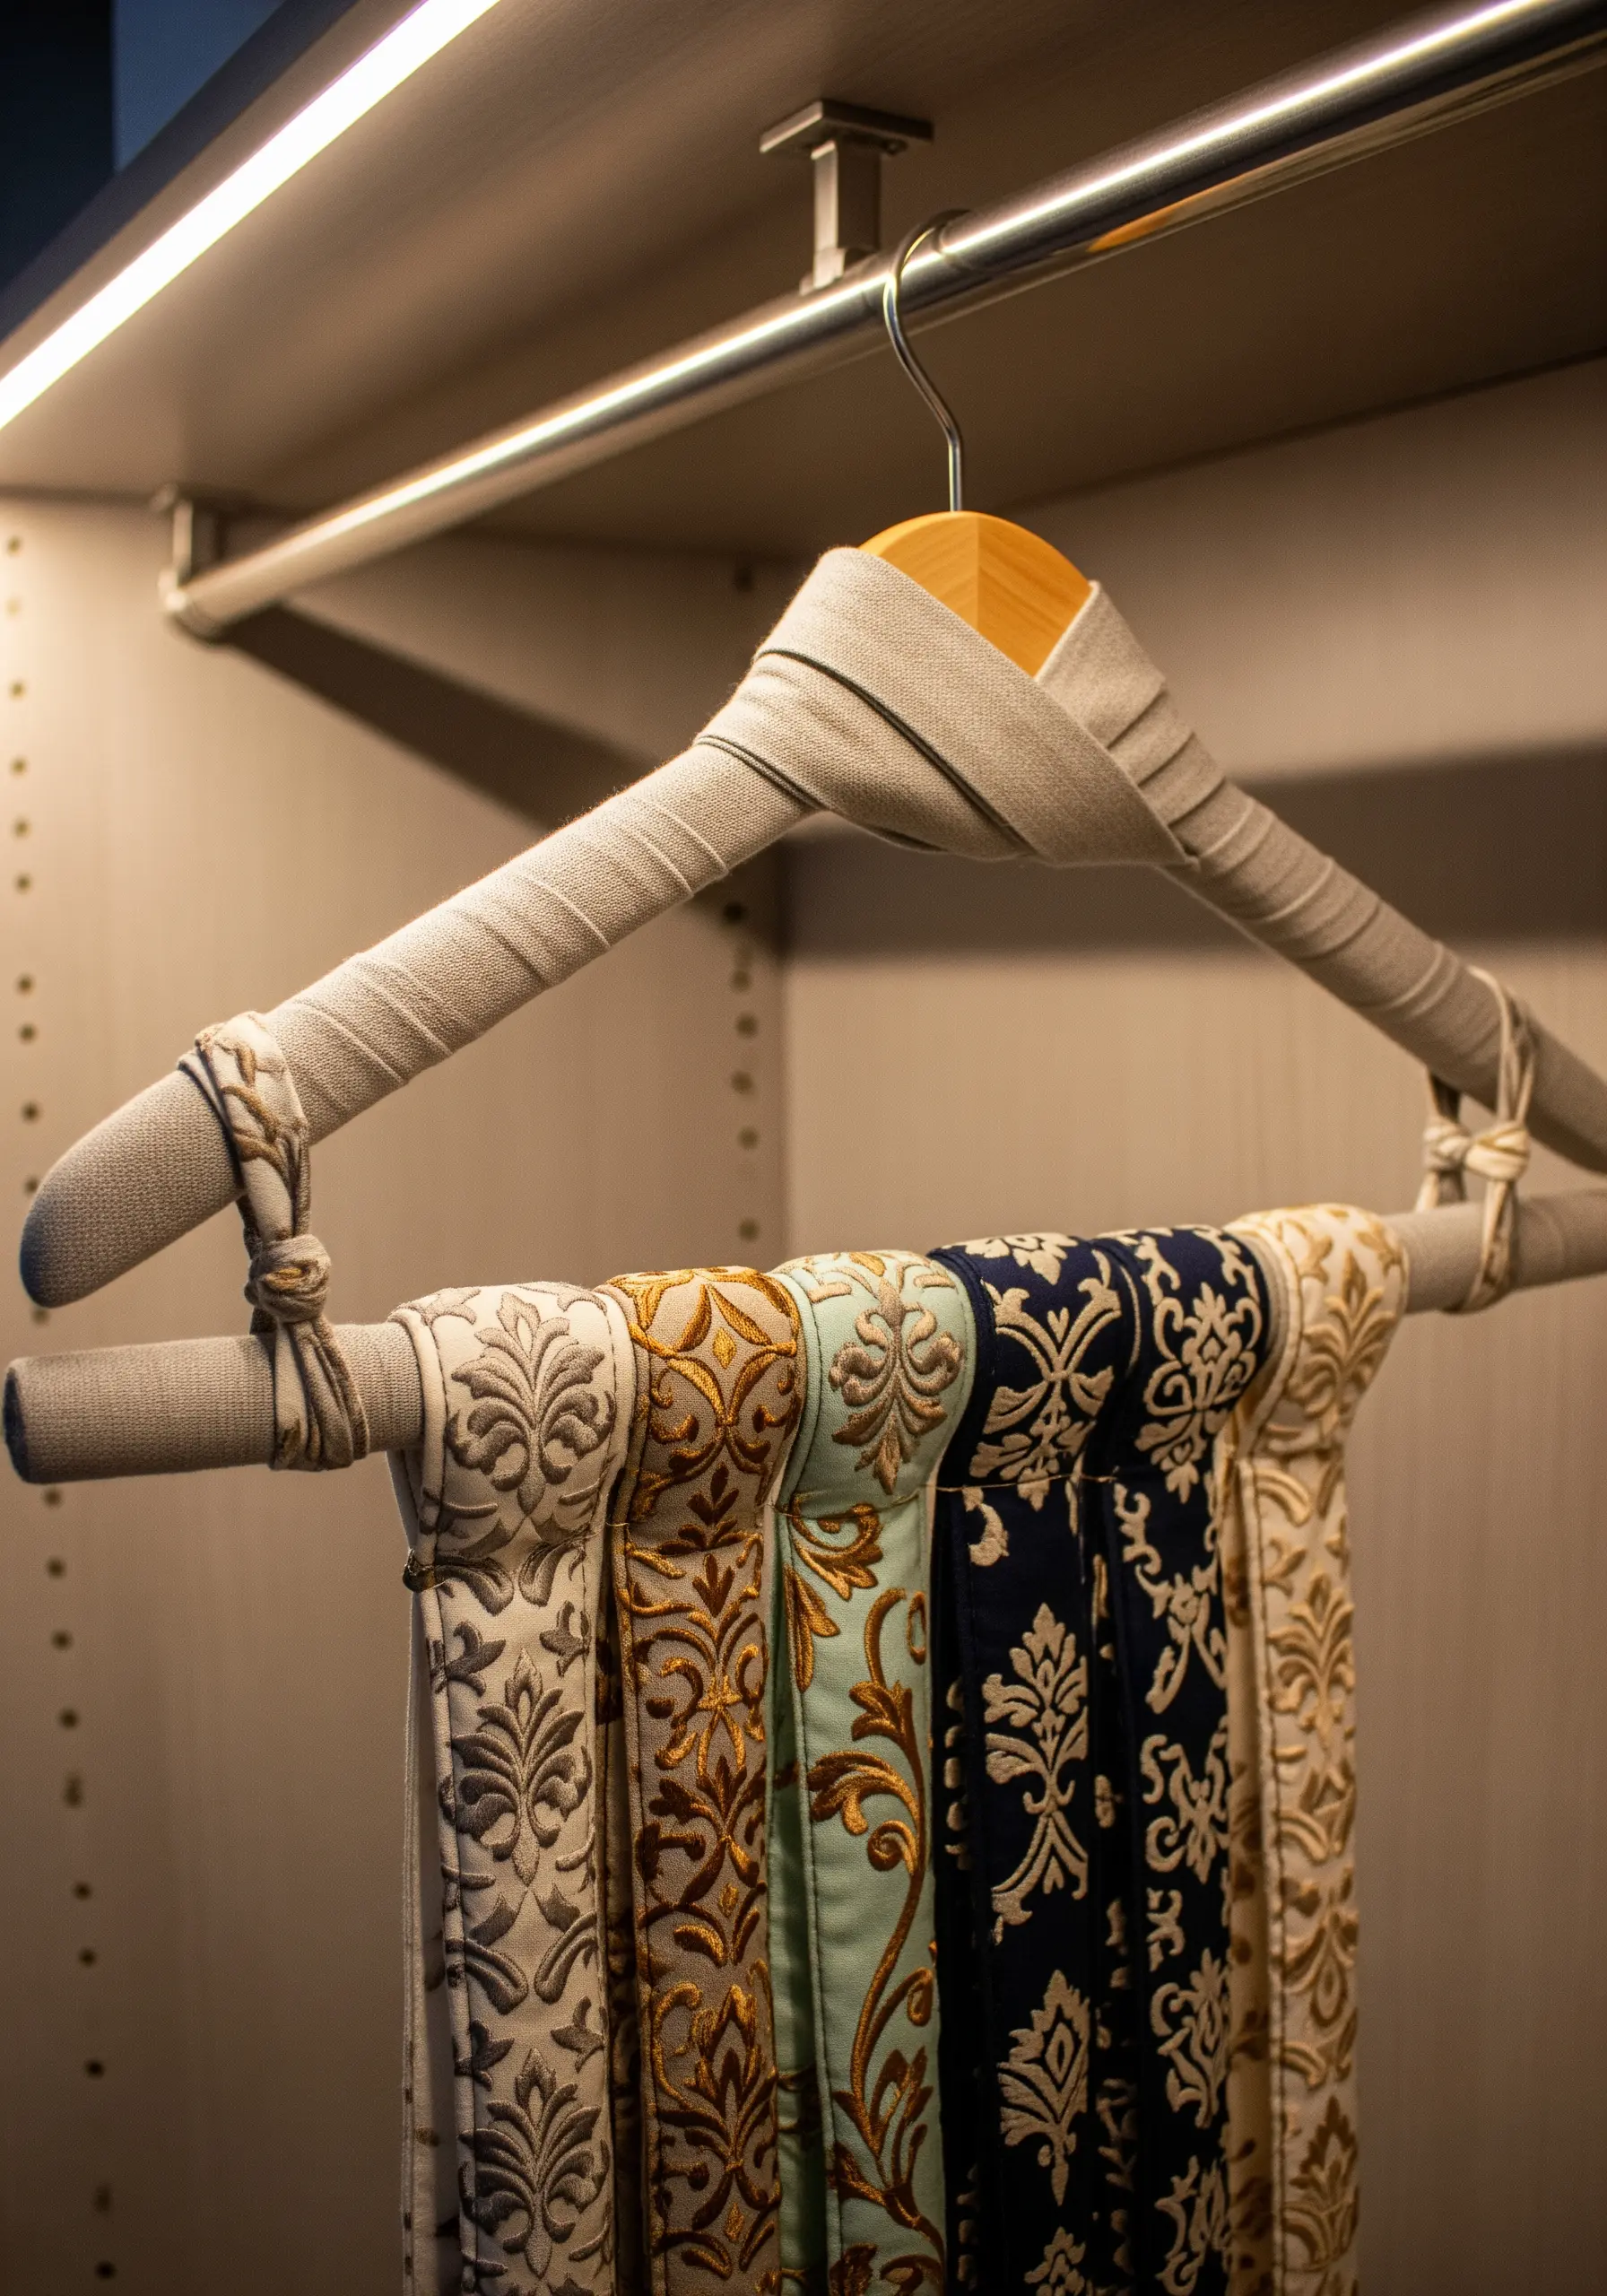
Protect and organize delicate embroidered scarves or belts by creating a custom padded hanger.
Tightly wrap a plain wooden hanger with strips of linen or cotton fabric, securing the ends with a few hidden stitches or a decorative knot.
This soft surface prevents snagging on delicate threads and keeps silky fabrics from slipping off.
For a final touch of polish, add a simple embroidered monogram on the wrapped fabric near the hook, instantly elevating your closet’s organization.
7. Add a Touch of Night Sky Magic

Combine appliqué and embroidery to create a celestial bedside caddy that is both practical and beautiful.
Use a piece of glittery or textured silver fabric for the crescent moon appliqué, securing it with a tight, even satin stitch border in a matching metallic thread for a clean, professional edge.
For the stars, use a bright gold metallic thread to create a dramatic contrast against the dark quilted fabric.
Vary the star designs—some as four-pointed asterisks, others as five-pointed stars—to add visual rhythm and movement to your composition.
8. Organize Cables with Minimalist Felt Icons
Stitch a tech organizer using felt, a forgiving fabric that doesn’t fray and provides a soft, structured home for cables and chargers.
Embroider simple, universally understood symbols on each pocket to identify its contents at a glance.
Because felt has a soft texture, use two or three strands of floss and a simple backstitch for your minimal icons to ensure they remain clear and legible.
Use a heat-erasable pen to trace your designs for perfect placement, ensuring a neat and uniform result.
9. Stitch an Herb Garden on Kitchen Linens
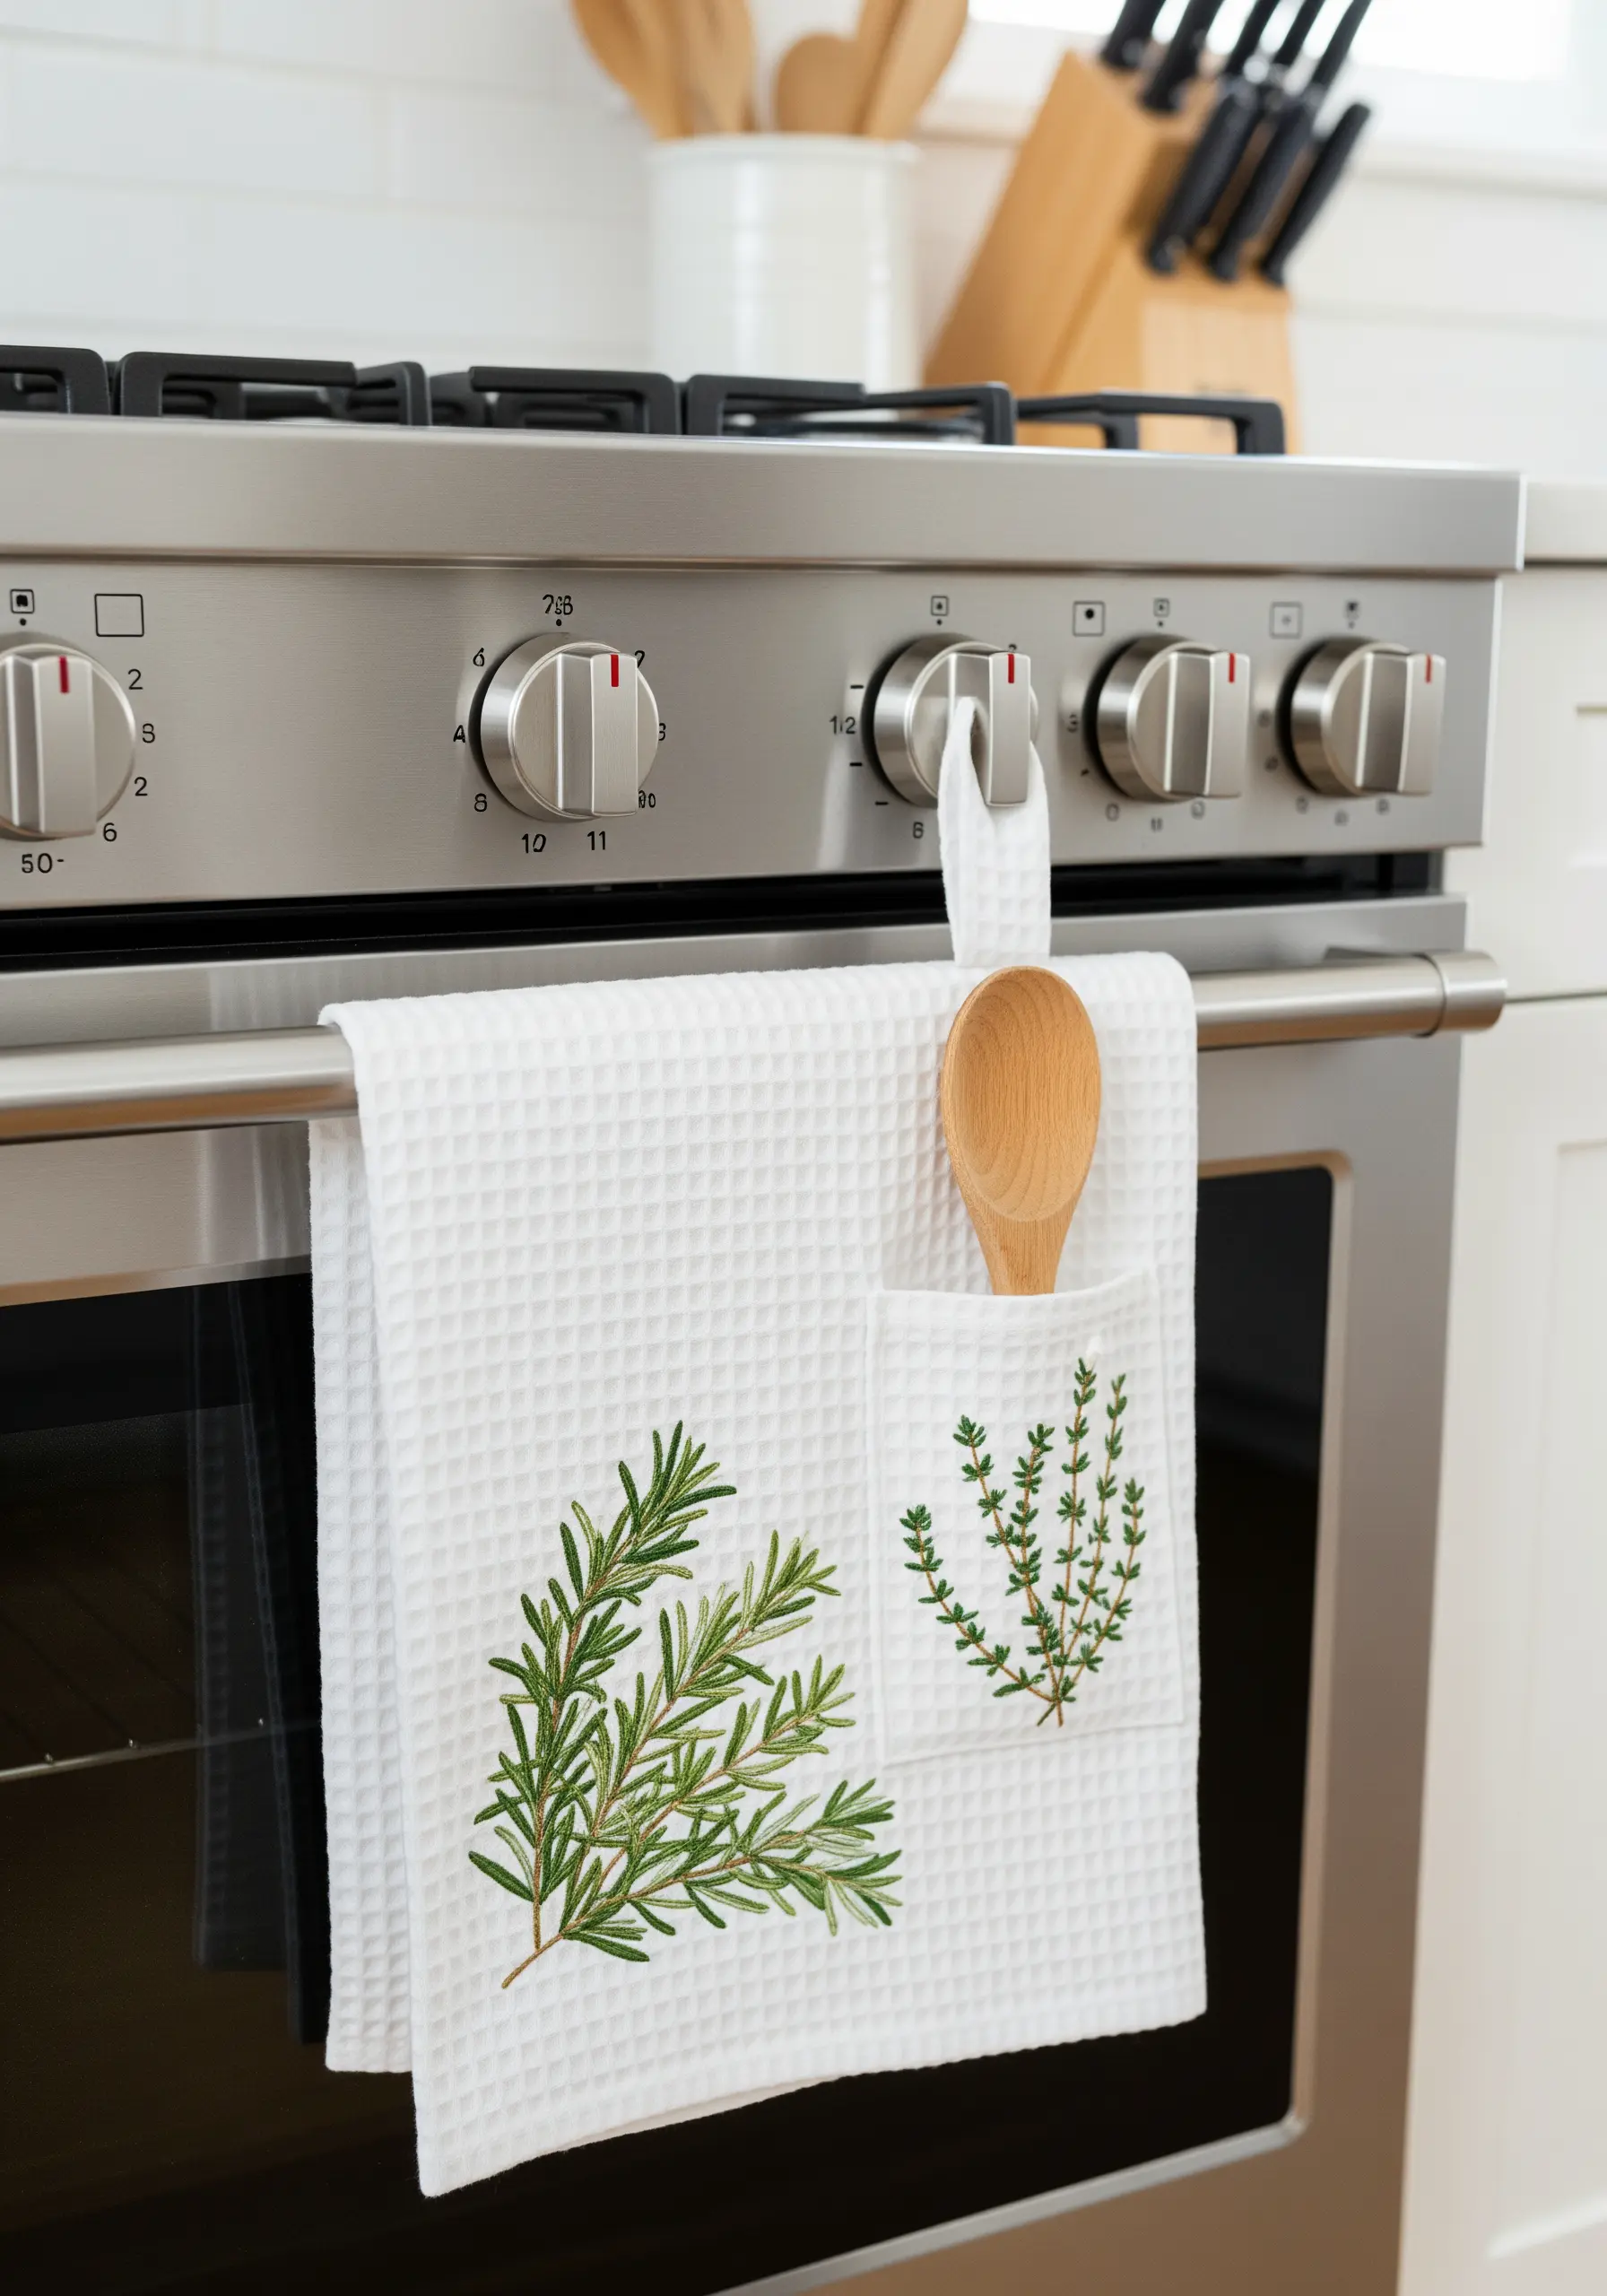
Bring botanical detail to a waffle-weave towel by adding a pocket for kitchen utensils and embellishing both with realistic botanicals.
Stitching on a highly textured fabric like this requires a water-soluble stabilizer on top; it creates a smooth surface for your needle and prevents stitches from sinking into the weave.
For the rosemary and thyme, use a delicate fishbone stitch for the leaves to create a central vein and a natural, dimensional look.
Use only two strands of floss in several shades of green to achieve subtle color blending and realism.
10. Cultivate Calm with Botanical Line Art
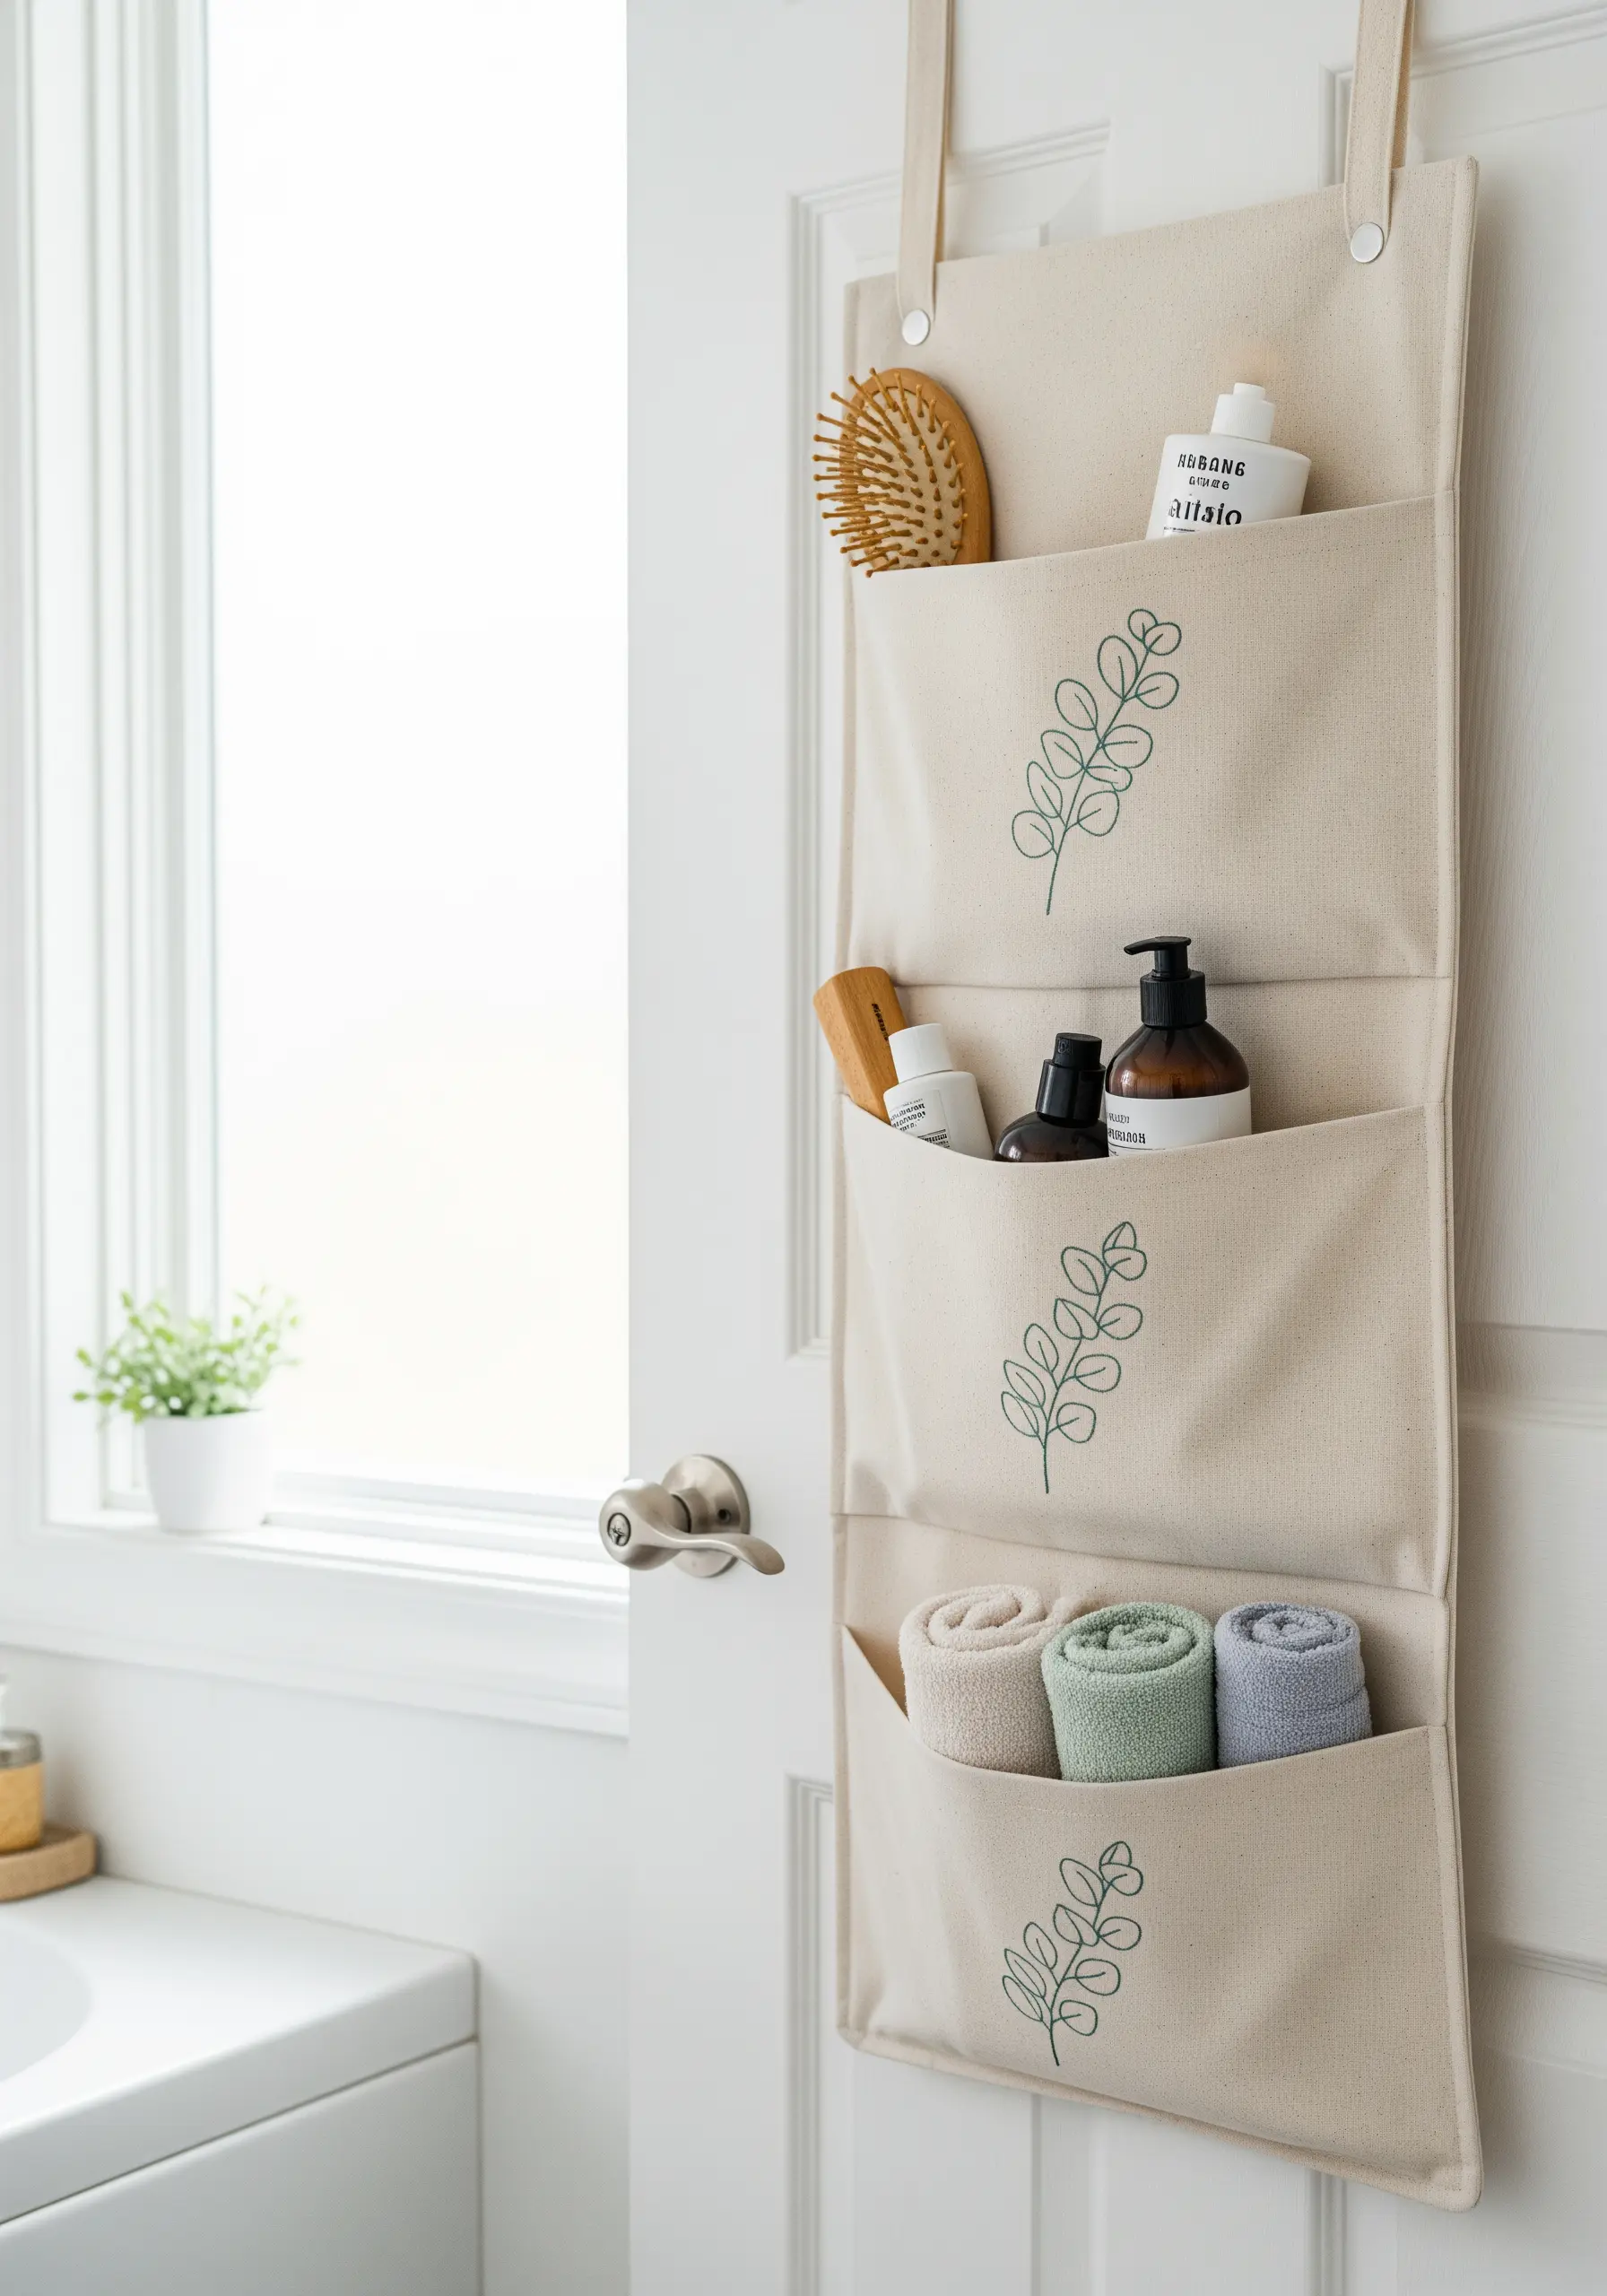
Add a touch of serene, spa-like elegance to a bathroom organizer with minimalist botanical motifs.
The beauty of this design lies in its simplicity and the use of negative space, so focus on creating exceptionally smooth lines.
Instead of a standard backstitch, use a whipped backstitch for your simple foliage; this technique wraps the base stitch, eliminating gaps and creating a raised, cord-like line.
Using a single, calming color like sage green on natural canvas reinforces the tranquil, organic aesthetic.
11. Create Tactile Labels with Yarn
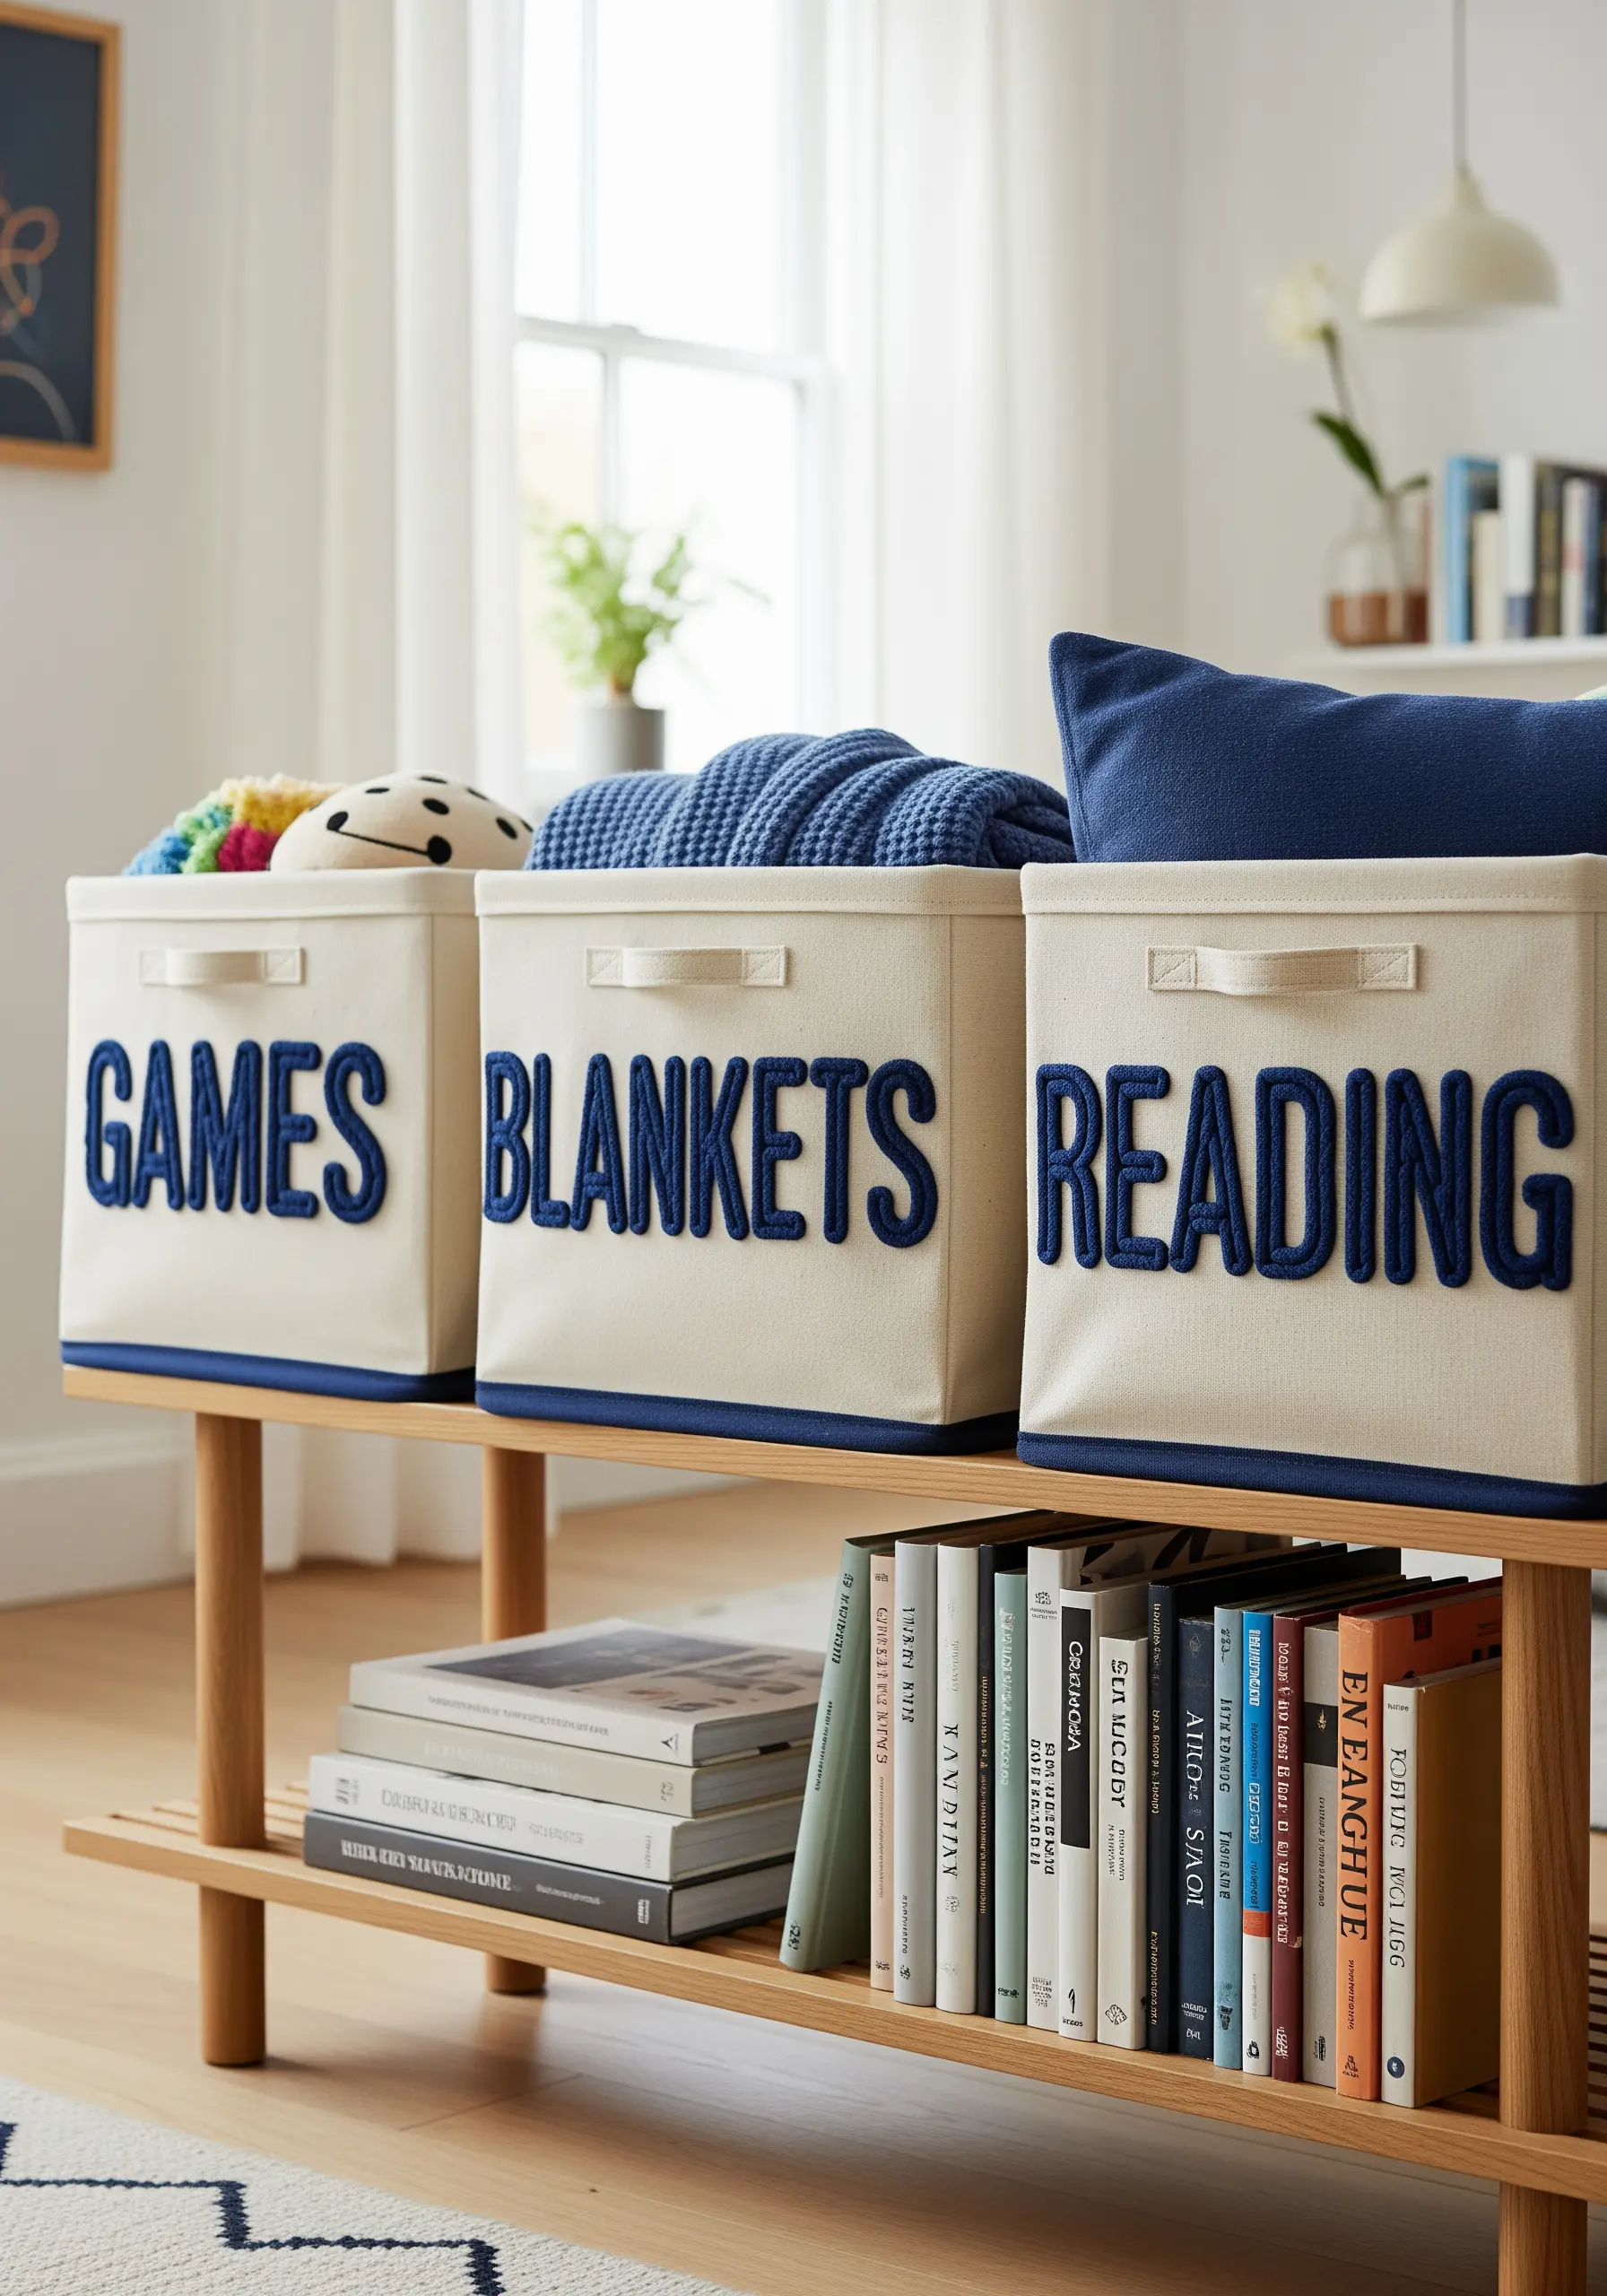
Make storage bins easy to identify with bold, high-texture lettering that invites touch.
To achieve this dimensional, chenille-like effect, use a punch needle with thick yarn, working from the back of the fabric to create loops on the front.
Alternatively, you can couch multiple strands of chunky yarn onto the fabric surface, using a matching color of standard thread to tack them down invisibly.
Sketch your letters with a disappearing ink pen first to ensure consistent size and spacing for a cohesive, professional look.
12. Embellish a Travel Roll with a Floral Vine

Transform a functional makeup brush roll into a personal treasure with a delicate floral border.
Use a stem stitch for the winding vine to give it a smooth, rope-like texture that flows gracefully across the fabric.
For the tiny blossoms, a few lazy daisy stitches for the petals and a single French knot for the center is all you need for a charming, classic look.
To create natural-looking foliage, use a variegated green floss for the leaves; the thread’s subtle color changes will add depth and realism without requiring you to switch colors constantly.
13. Welcome Guests with 3D Lettering
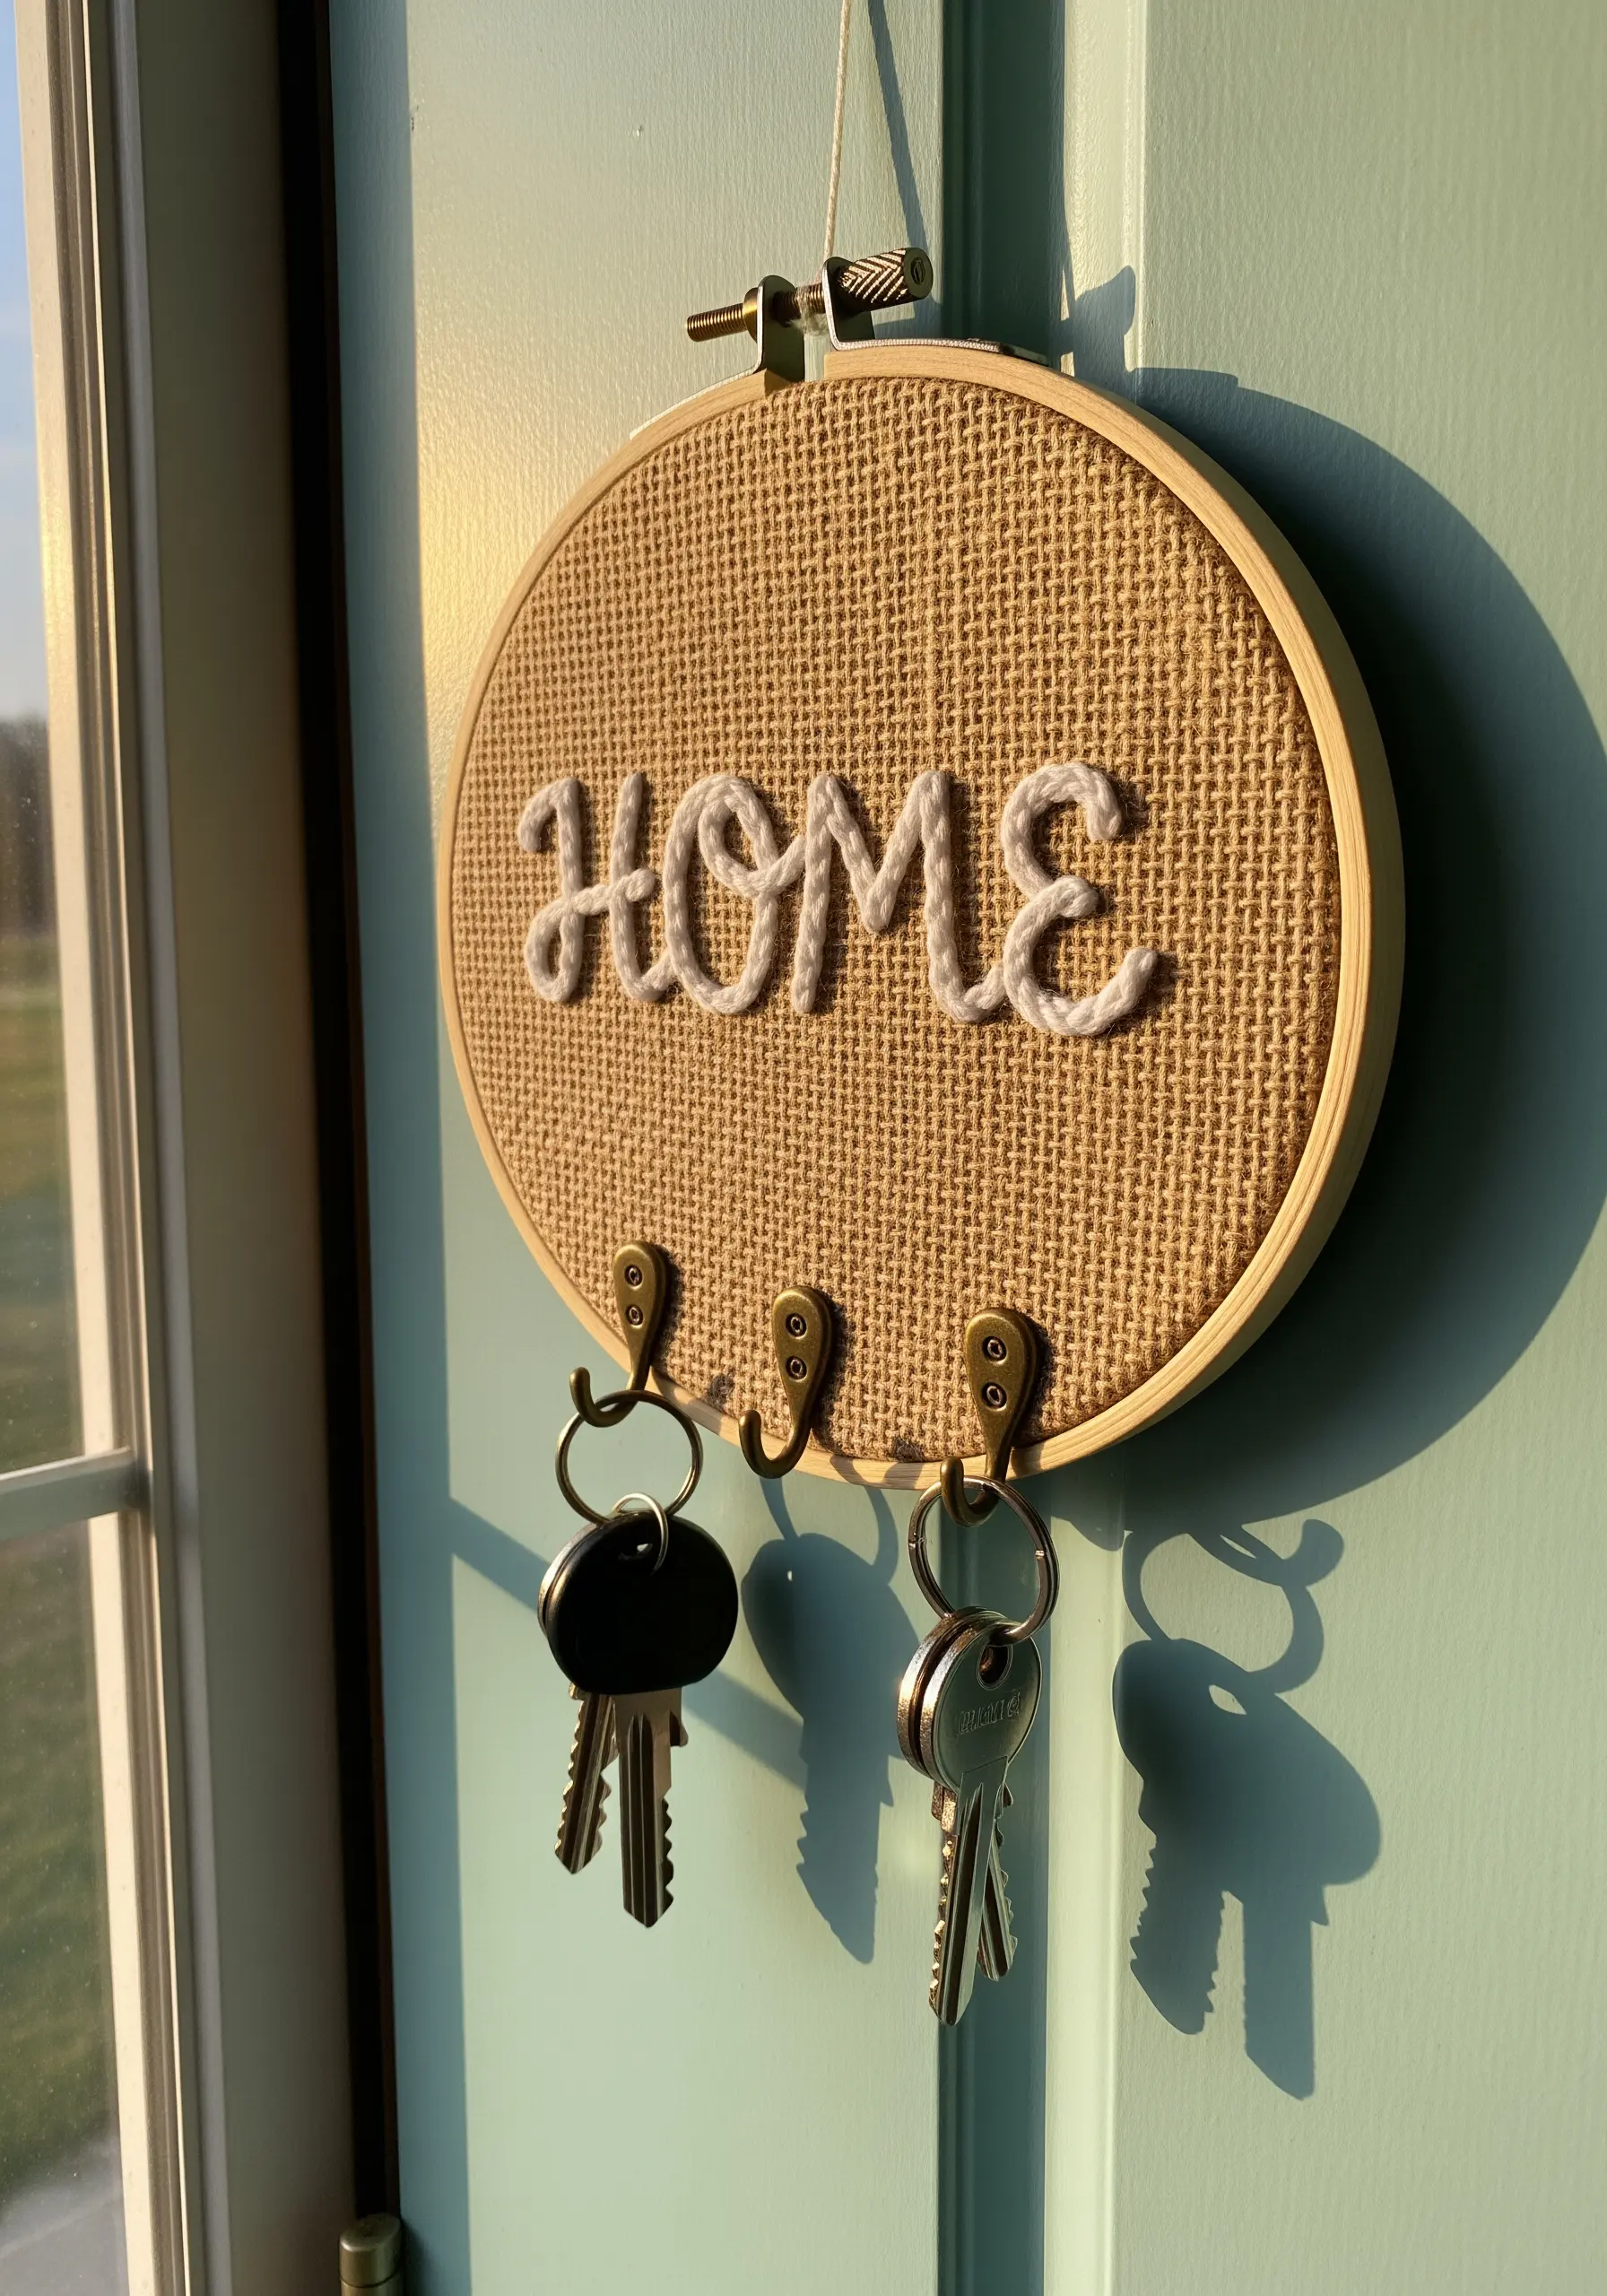
Craft a key holder with textural lettering that stands out beautifully against a rustic burlap background.
Burlap’s open weave can be challenging, so always use a stabilizer on the back to prevent stitches from warping or pulling through.
To get that plush, soft, 3D effect, use a padded satin stitch: first create a foundation of small running stitches within your letter outlines, then cover them completely with satin stitches.
Using a thick, soft cotton yarn instead of floss will enhance the raised texture and give your lettering a cozy, welcoming feel.
14. Make a Statement with Abstract Yarn Couching
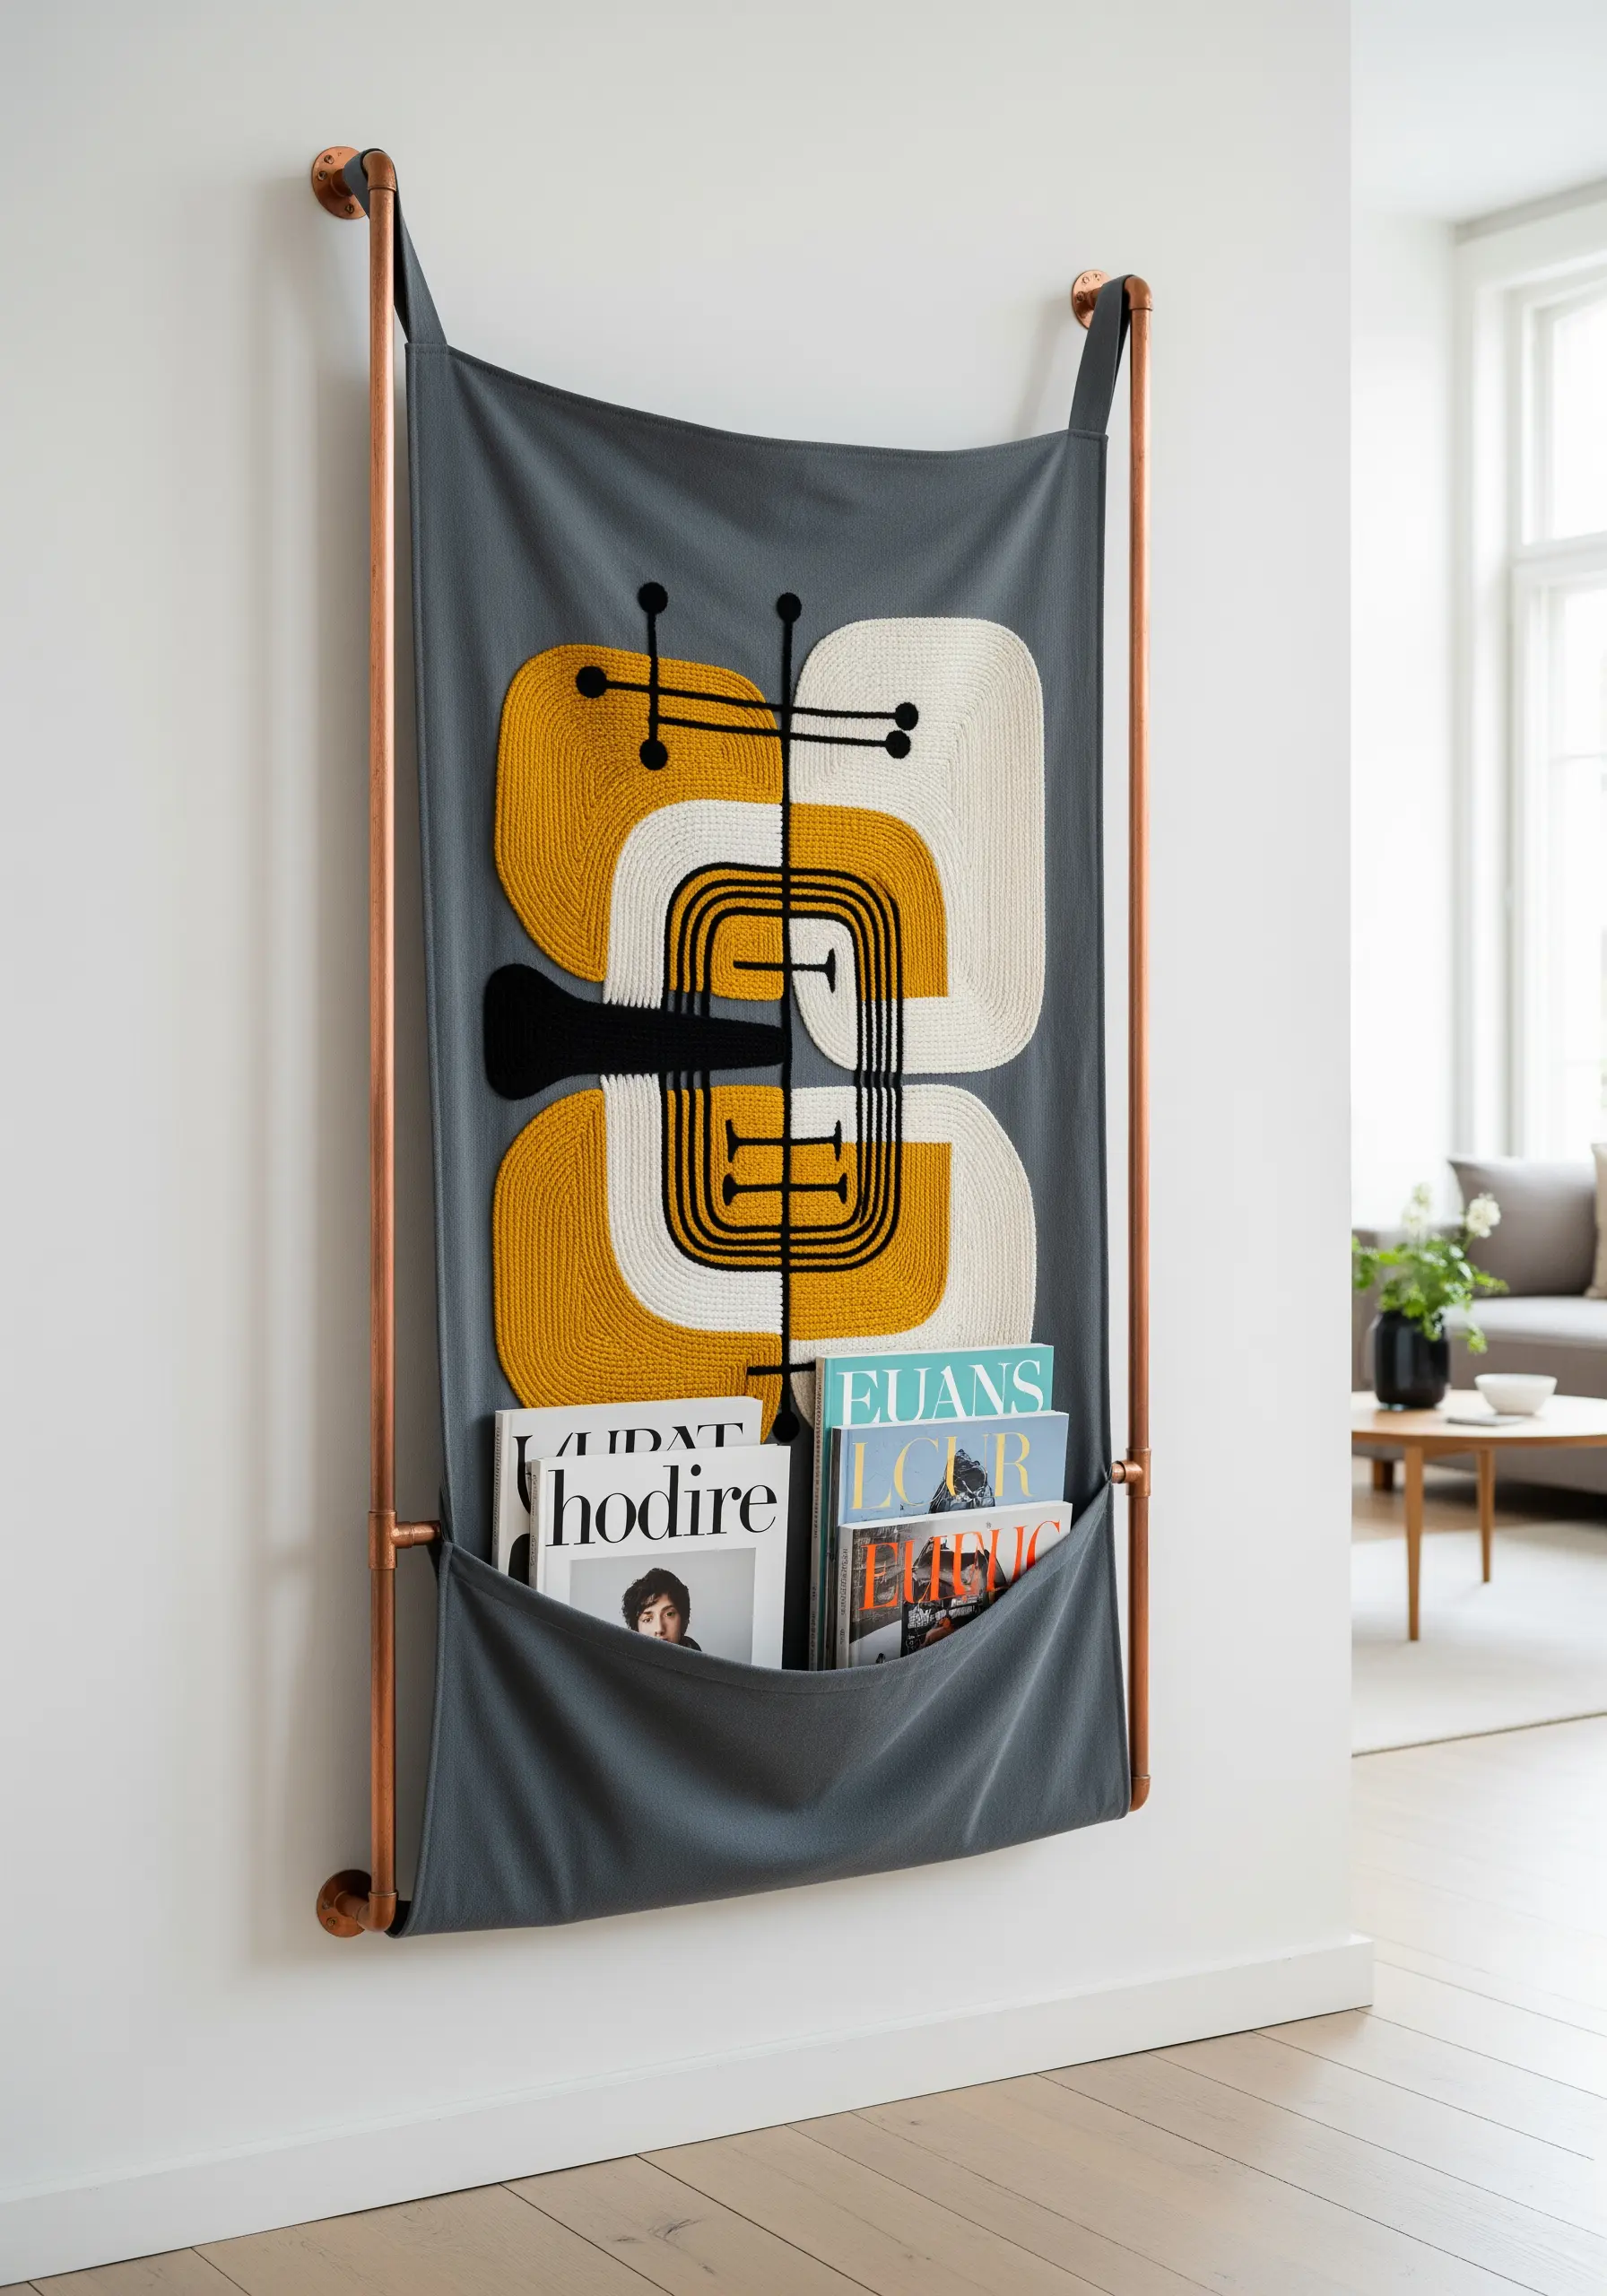
Design a magazine holder that doubles as a piece of modern fiber art with large-scale abstract embroidery.
This technique relies on couching—laying down thick yarn or rope along your design lines and securing it with a thinner, matching thread.
Work on a heavy-duty fabric like duck canvas that can support the weight of the yarn and the magazines without sagging.
The key to a successful abstract piece is balancing color and texture; pair bold, saturated yarns with neutral ones and vary the density of your lines to create visual interest and rhythm.
15. Label Pantry Staples with Elegant Simplicity
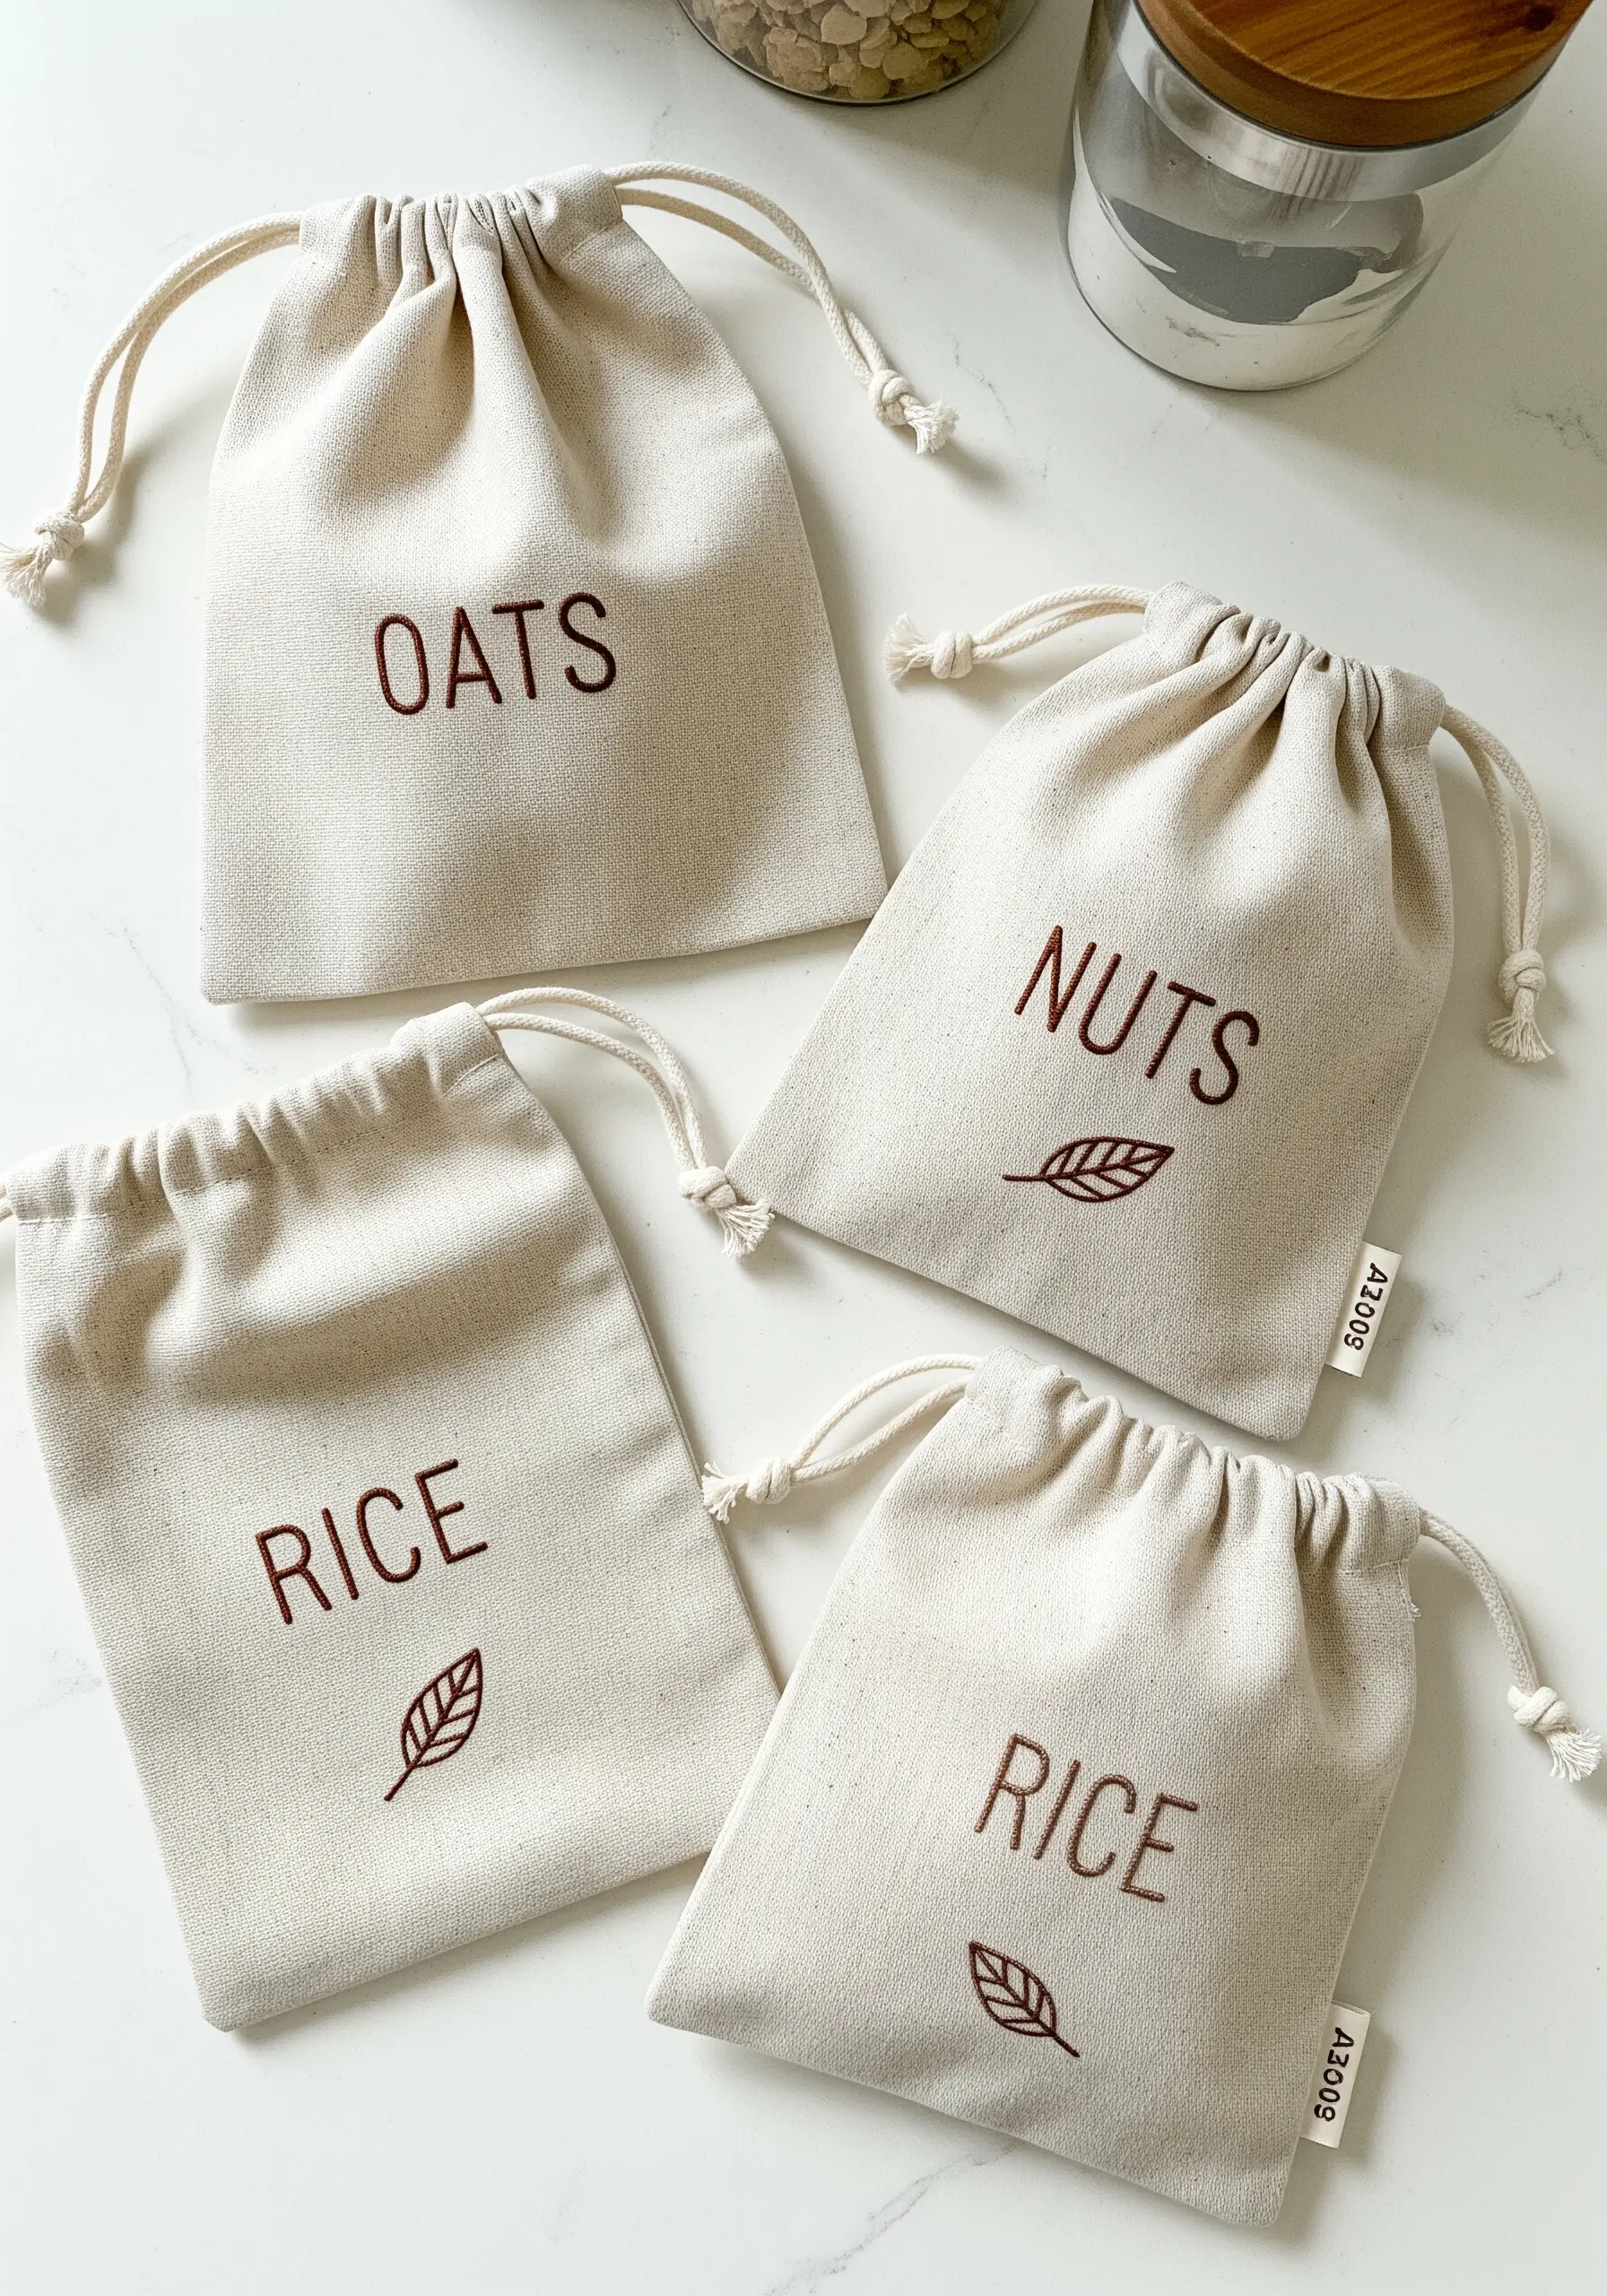
Organize your pantry with reusable drawstring bags featuring refined, stitched labels.
For exceptionally crisp lettering on woven canvas, opt for a two-strand split stitch or a tiny backstitch, ensuring each stitch is small and consistent in length.
This precision prevents the letters from looking jagged and gives them a polished, almost printed quality.
Pairing the clean, minimalist typography with a single, delicate leaf motif adds a touch of organic charm without creating clutter.
16. Craft a Radiant Sunglasses Display
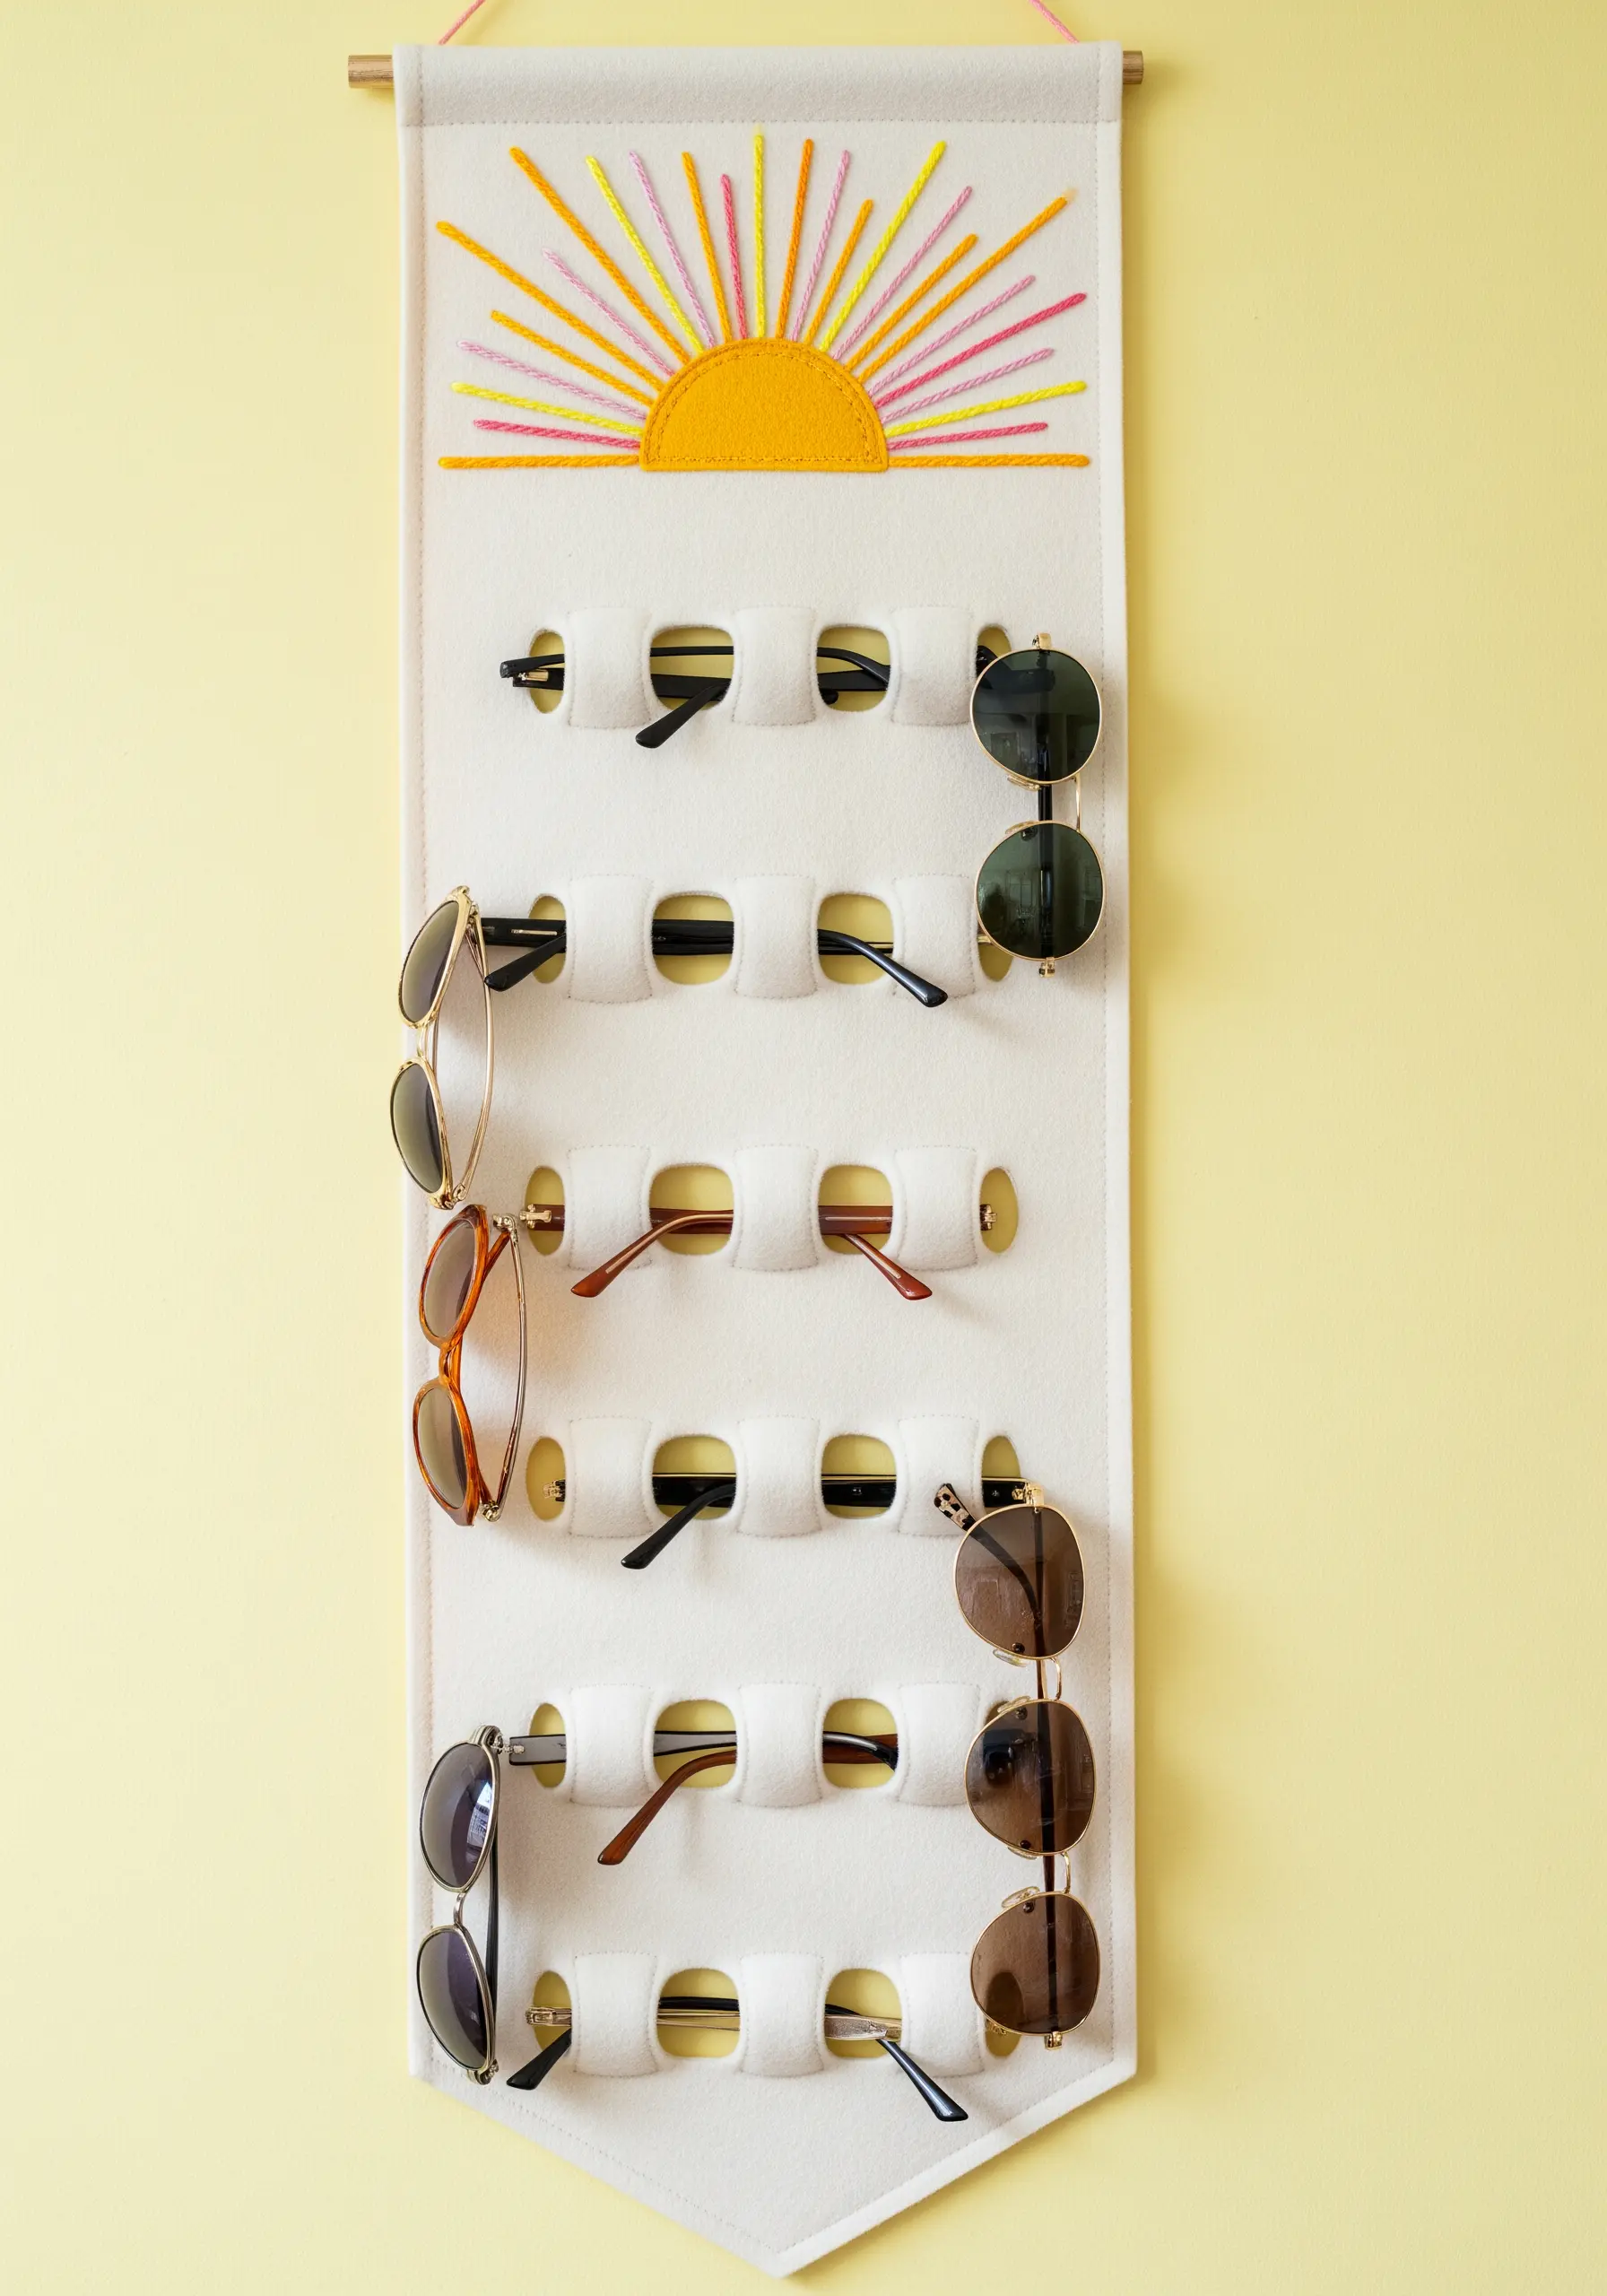
Build a cheerful and practical sunglasses holder using felt appliqué and radiating stitches.
Create a dynamic sunburst effect by stitching long, straight lines outward from a central point, alternating colors and varying the lengths of your stitches to create a sense of vibrant energy.
The sun itself is a simple circle of yellow felt appliquéd onto the background, which provides a clean focal point.
For the holders, stitch down strips of felt at both ends to form secure loops, ensuring your stitches are strong enough to hold the weight of the glasses.
17. Illustrate a Charming Recipe Holder
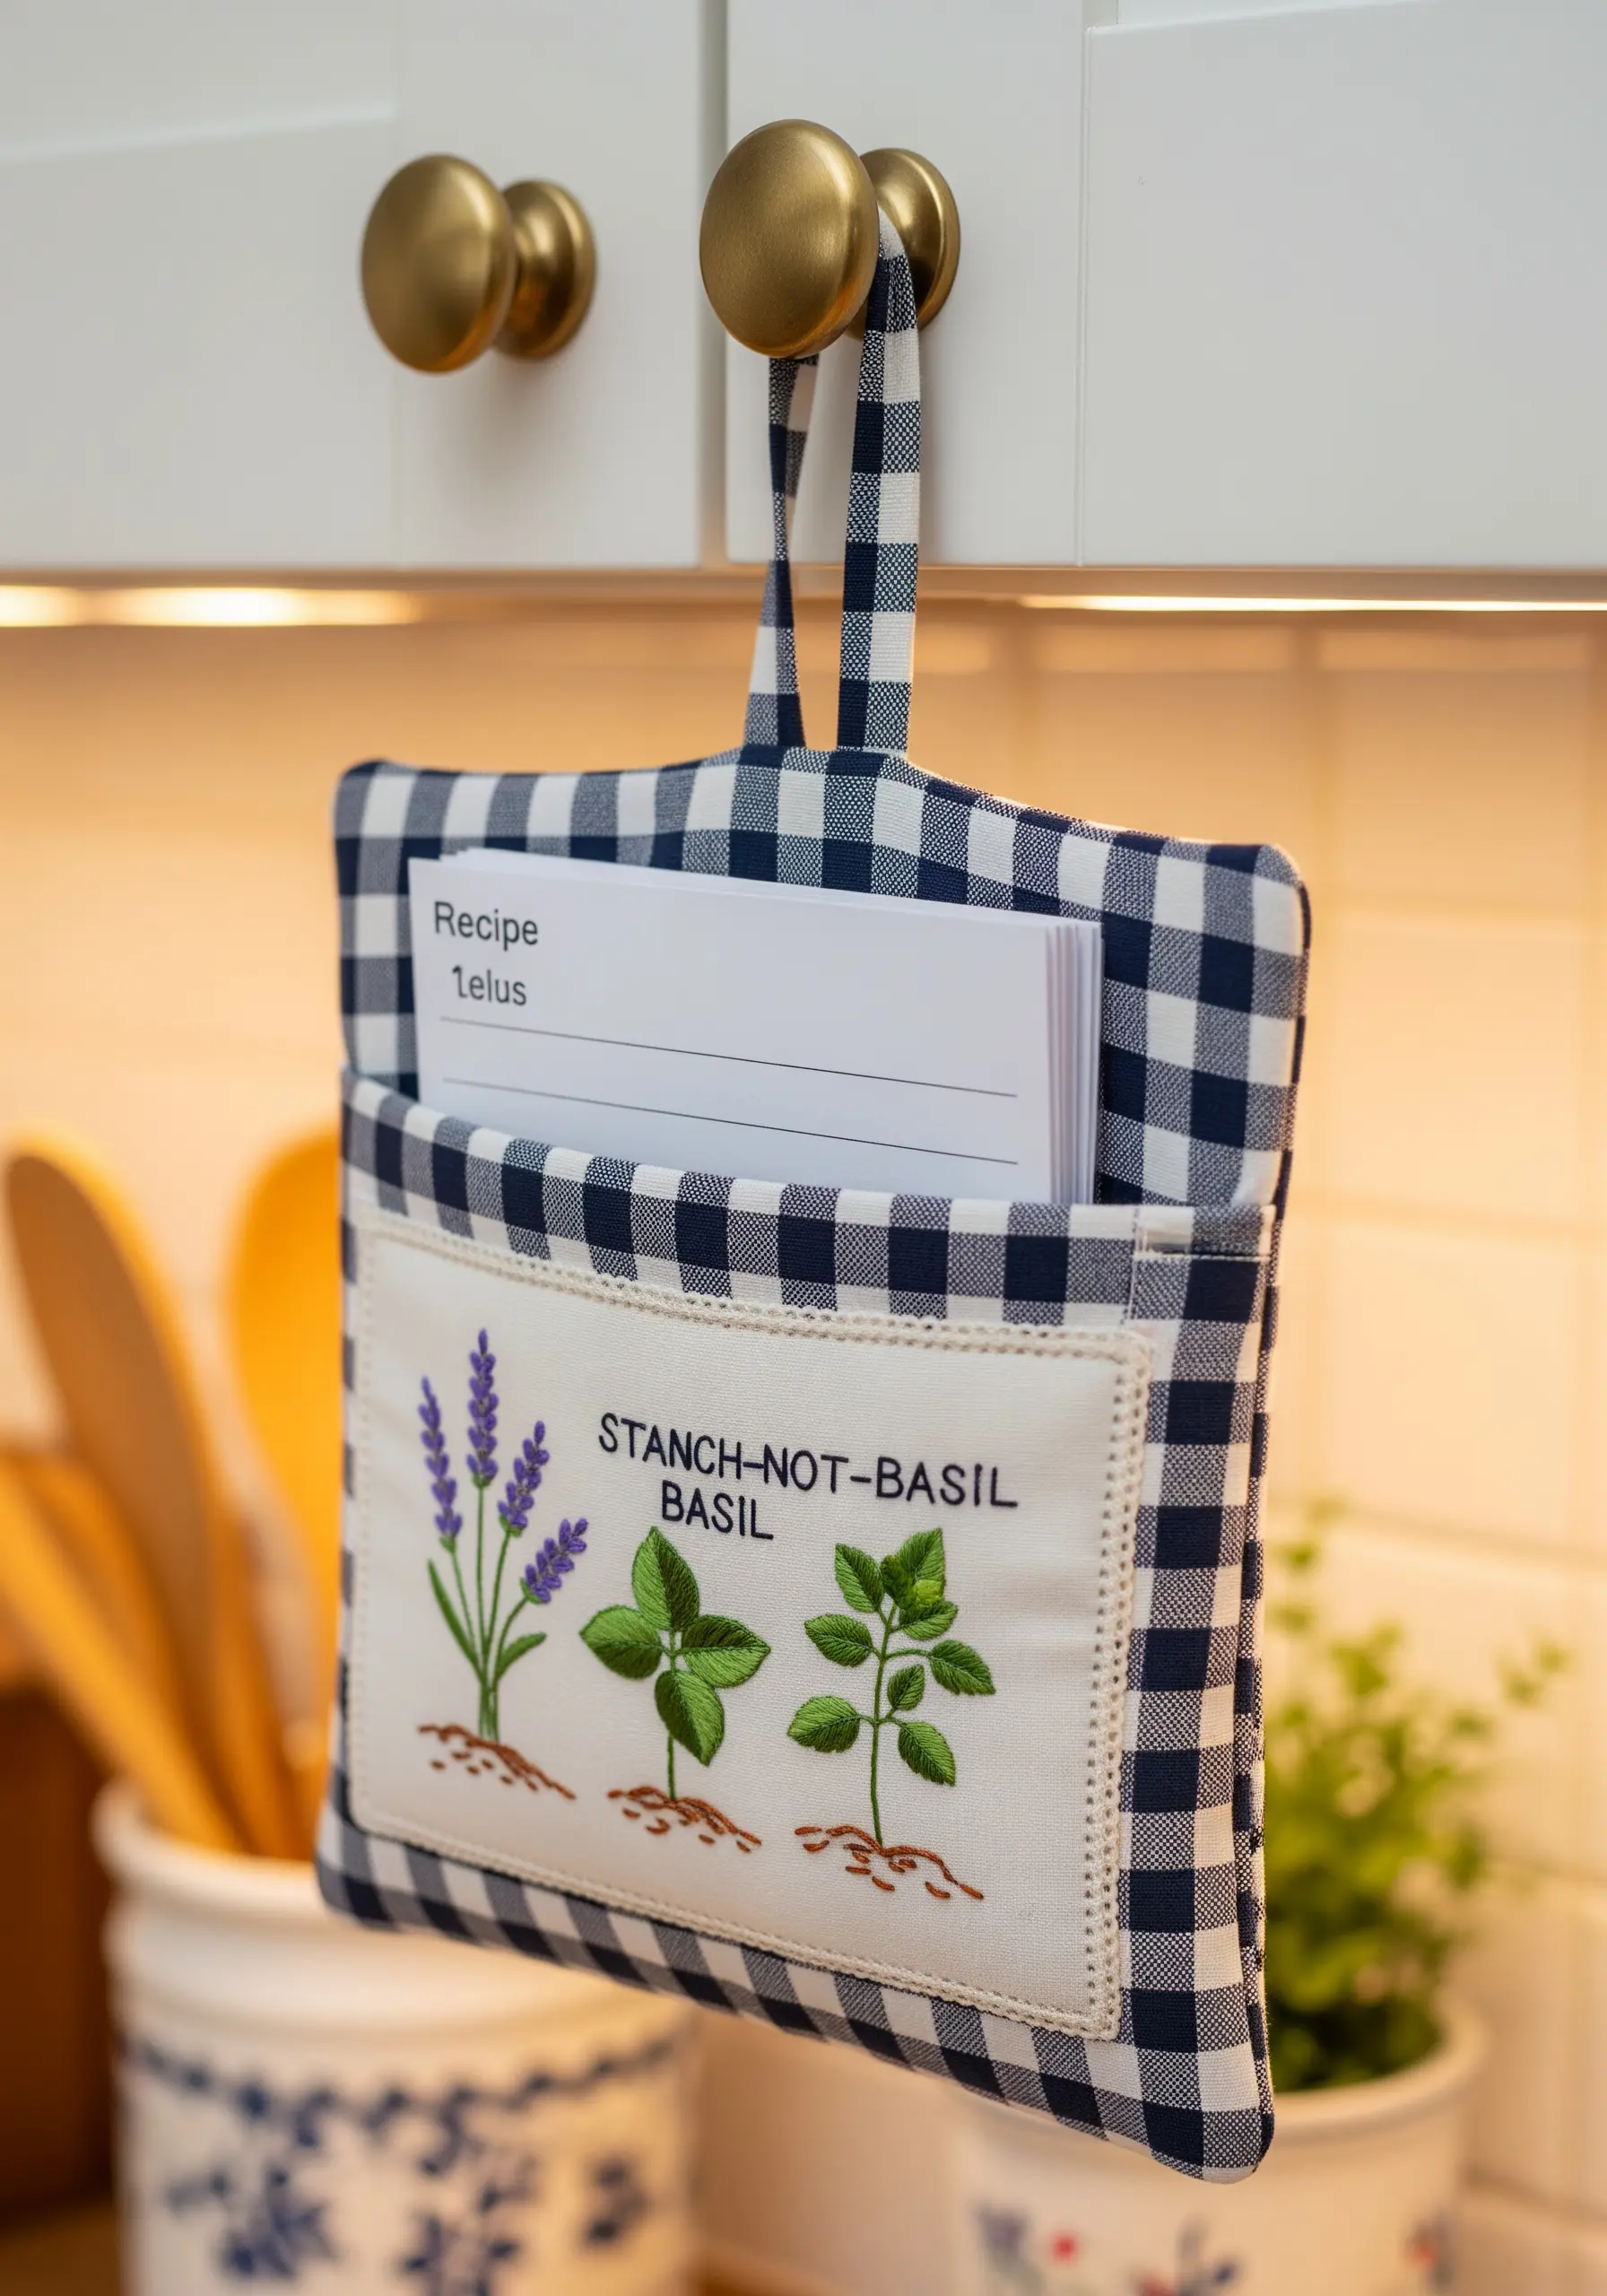
Elevate a simple recipe card holder from a functional object to a piece of kitchen art with detailed, realistic herbal illustrations.
To capture fine detail on this small scale, work with a single strand of embroidery floss, which allows for greater precision and subtle shading.
Use a combination of stitches: French knots and short straight stitches for the lavender, and satin stitch or long-and-short stitch for the basil leaves to create a smooth, solid appearance.
This project proves that even the most practical items can become beautiful when treated with artistic intention.


