
A name or a monogram is more than just letters—it’s an identity, a connection, a piece of a story. When you stitch one for someone you care about, you are creating something deeply personal. But how do you ensure the final piece feels as special as the intention behind it?
The answer isn’t in learning dozens of complex stitches. It’s in the thoughtful choices you make: the way you use texture to add warmth, the contrast you create between a bold letter and a delicate flower, or the specific direction of a stitch that gives a design life and movement.
Here, you’ll find ideas that focus on that intention. Think of them not as rules, but as gentle guidance to help you see how a small adjustment in technique or a careful consideration of materials can transform your embroidery into a truly heartfelt work of art. Let’s begin.
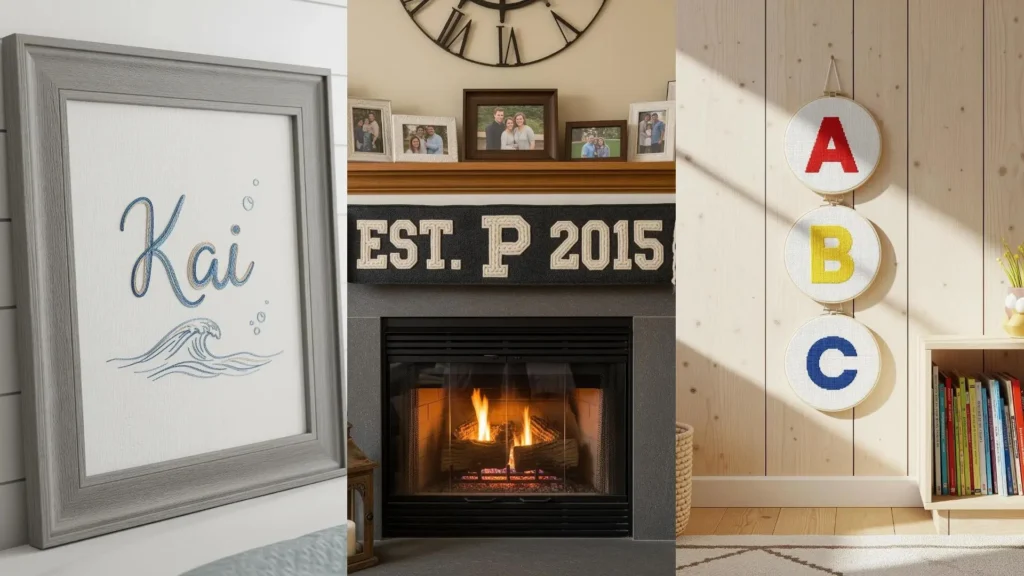
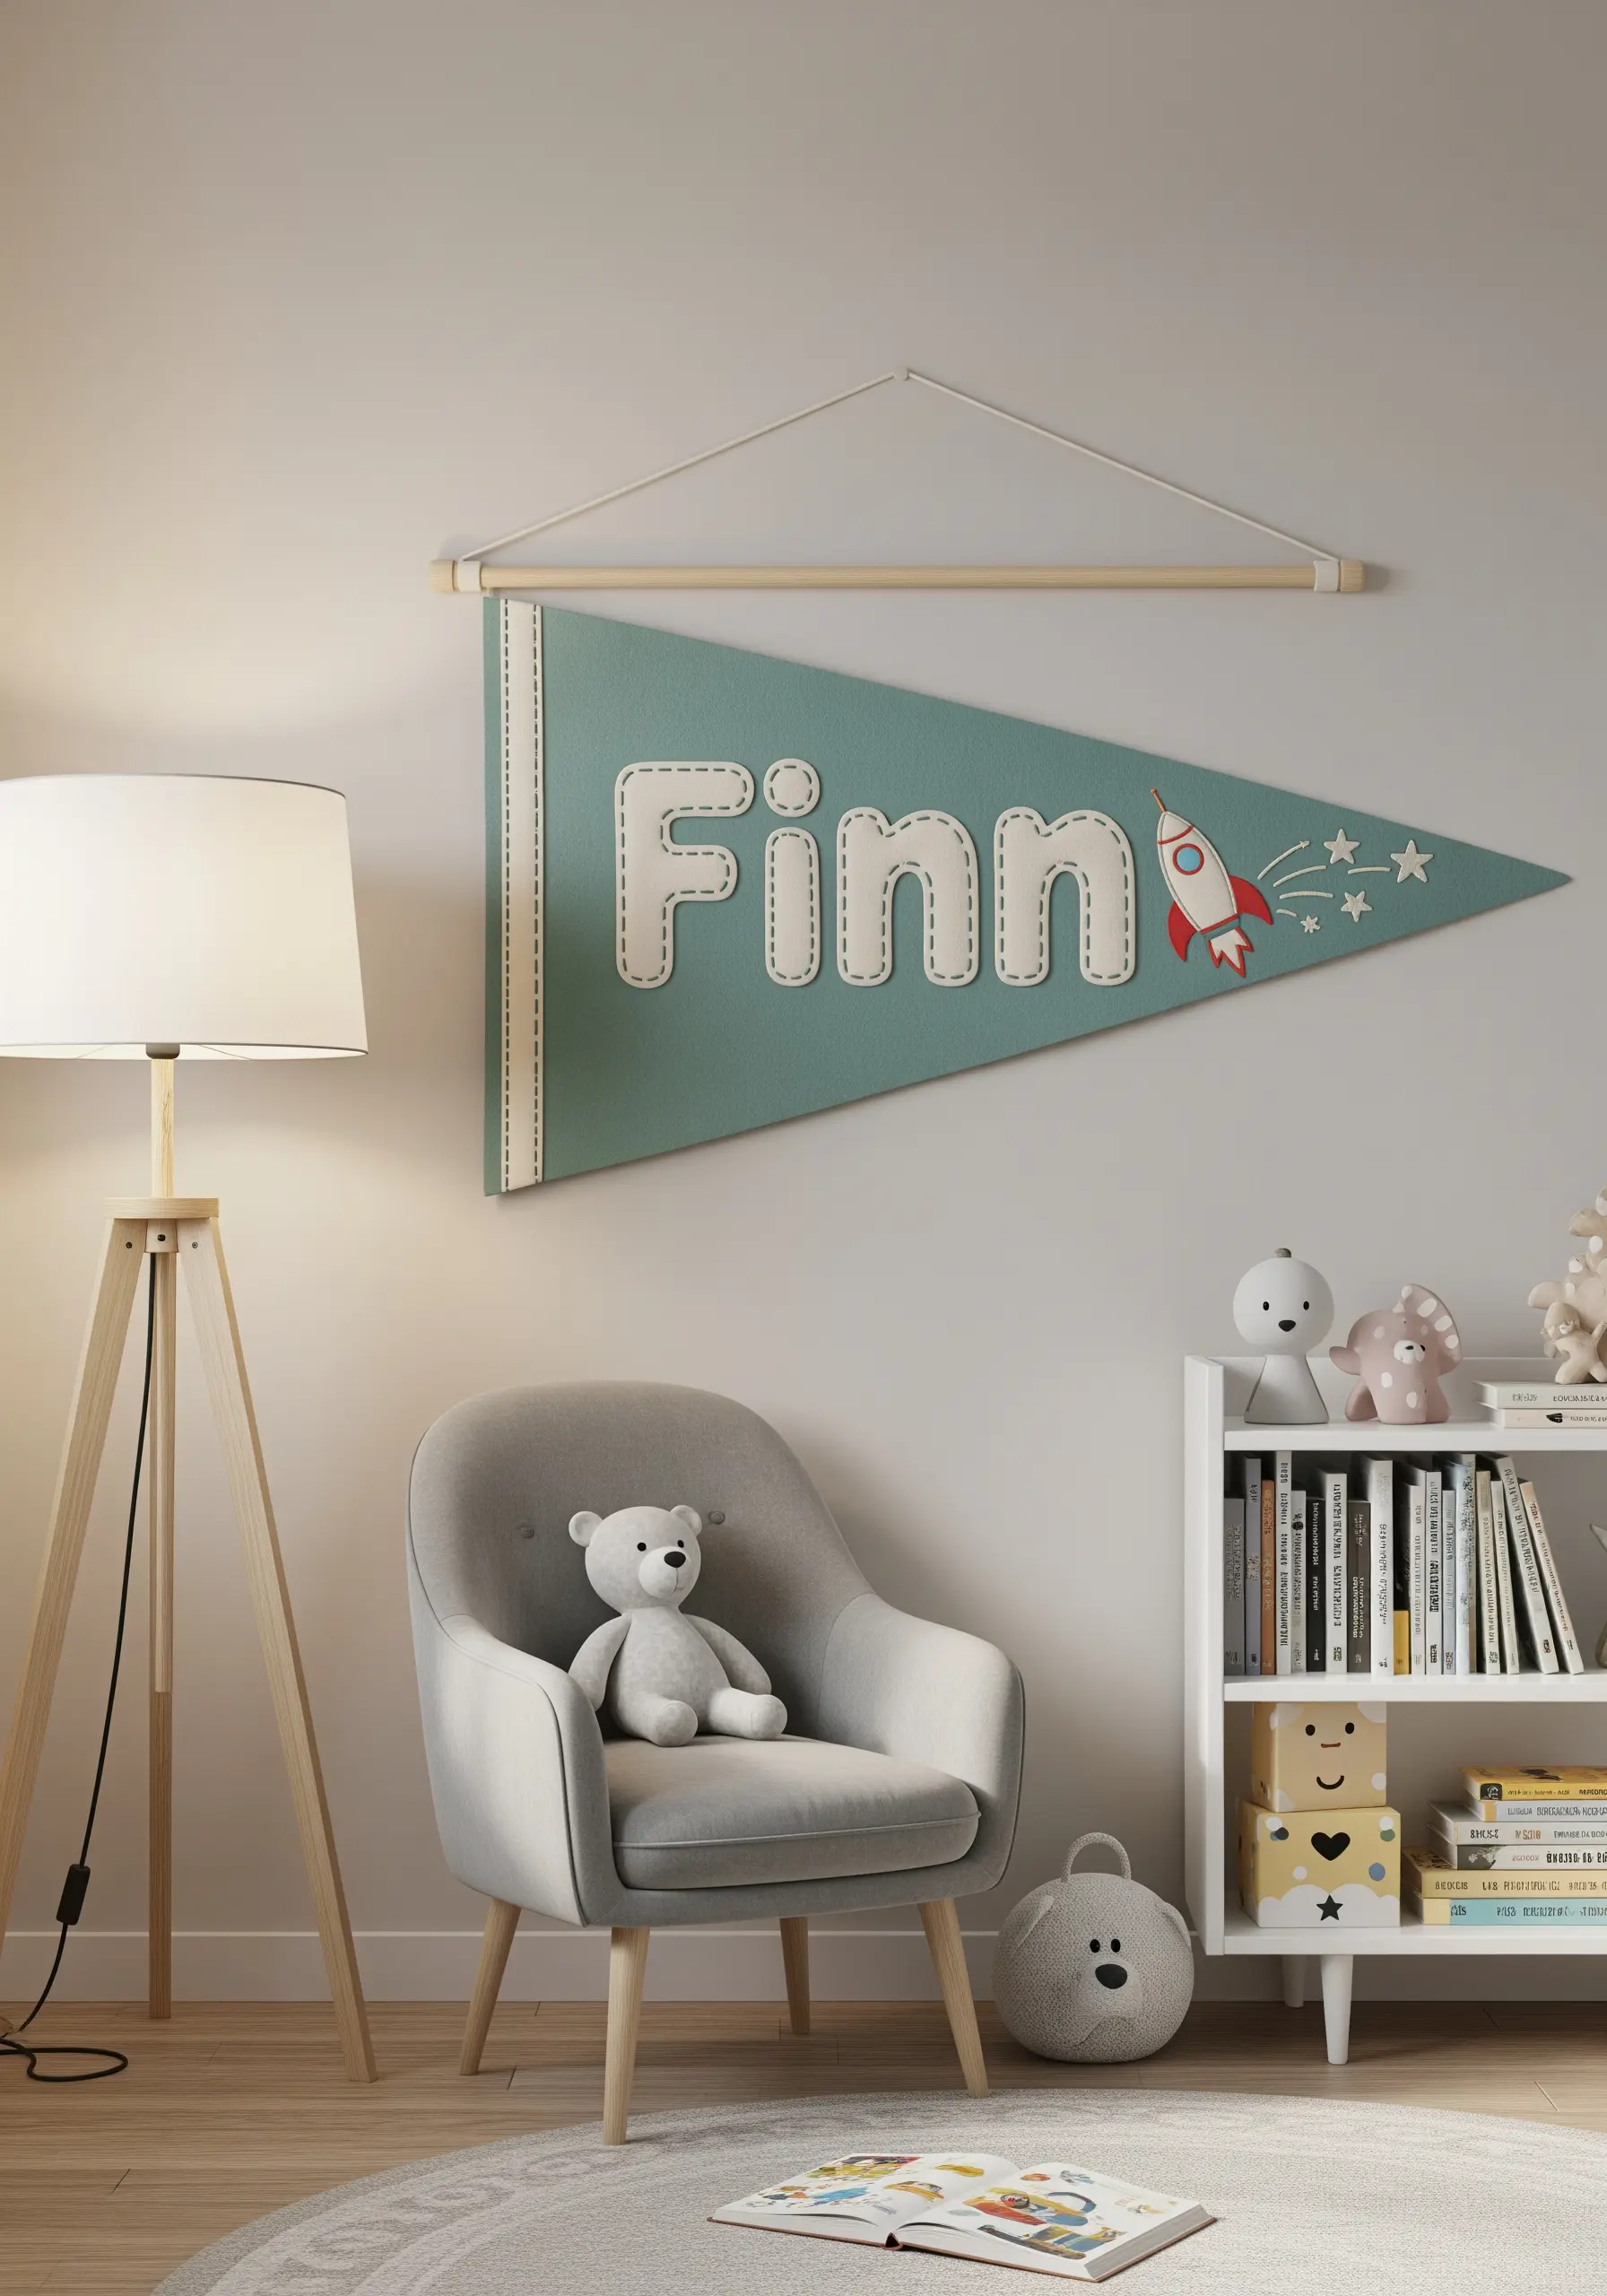
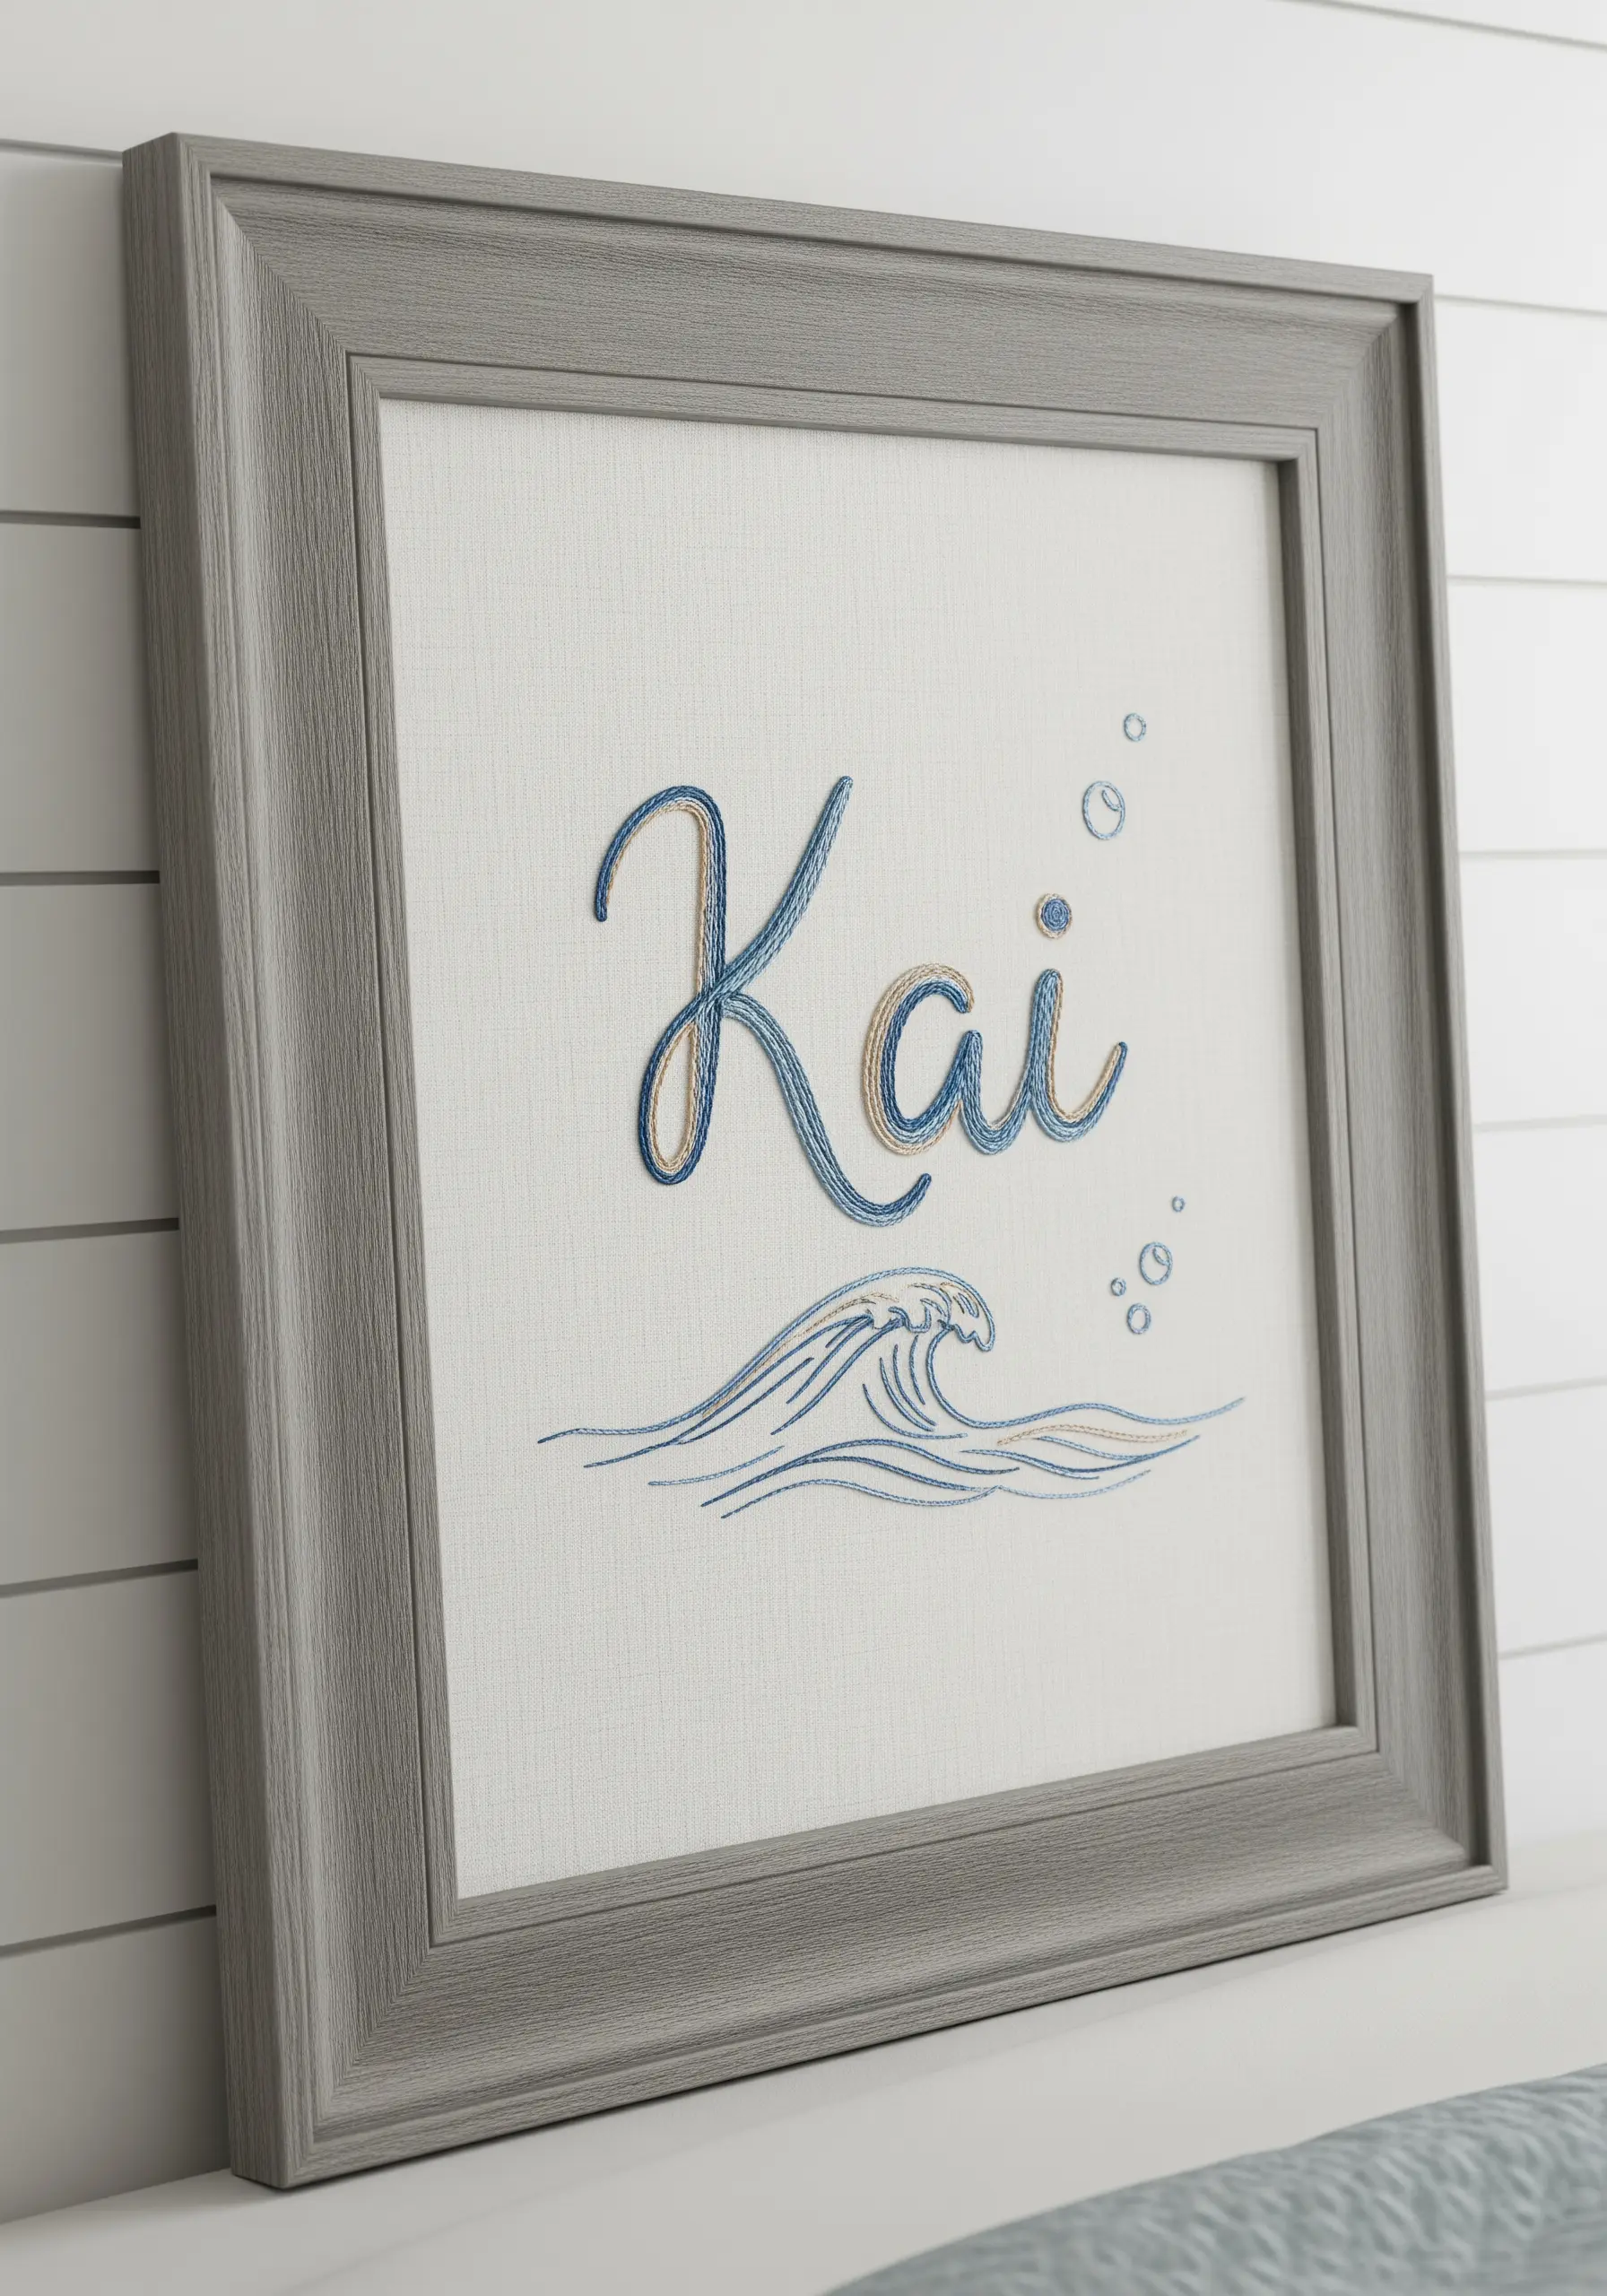
1. Create Tactile Dimension with Chunky Yarn Lettering
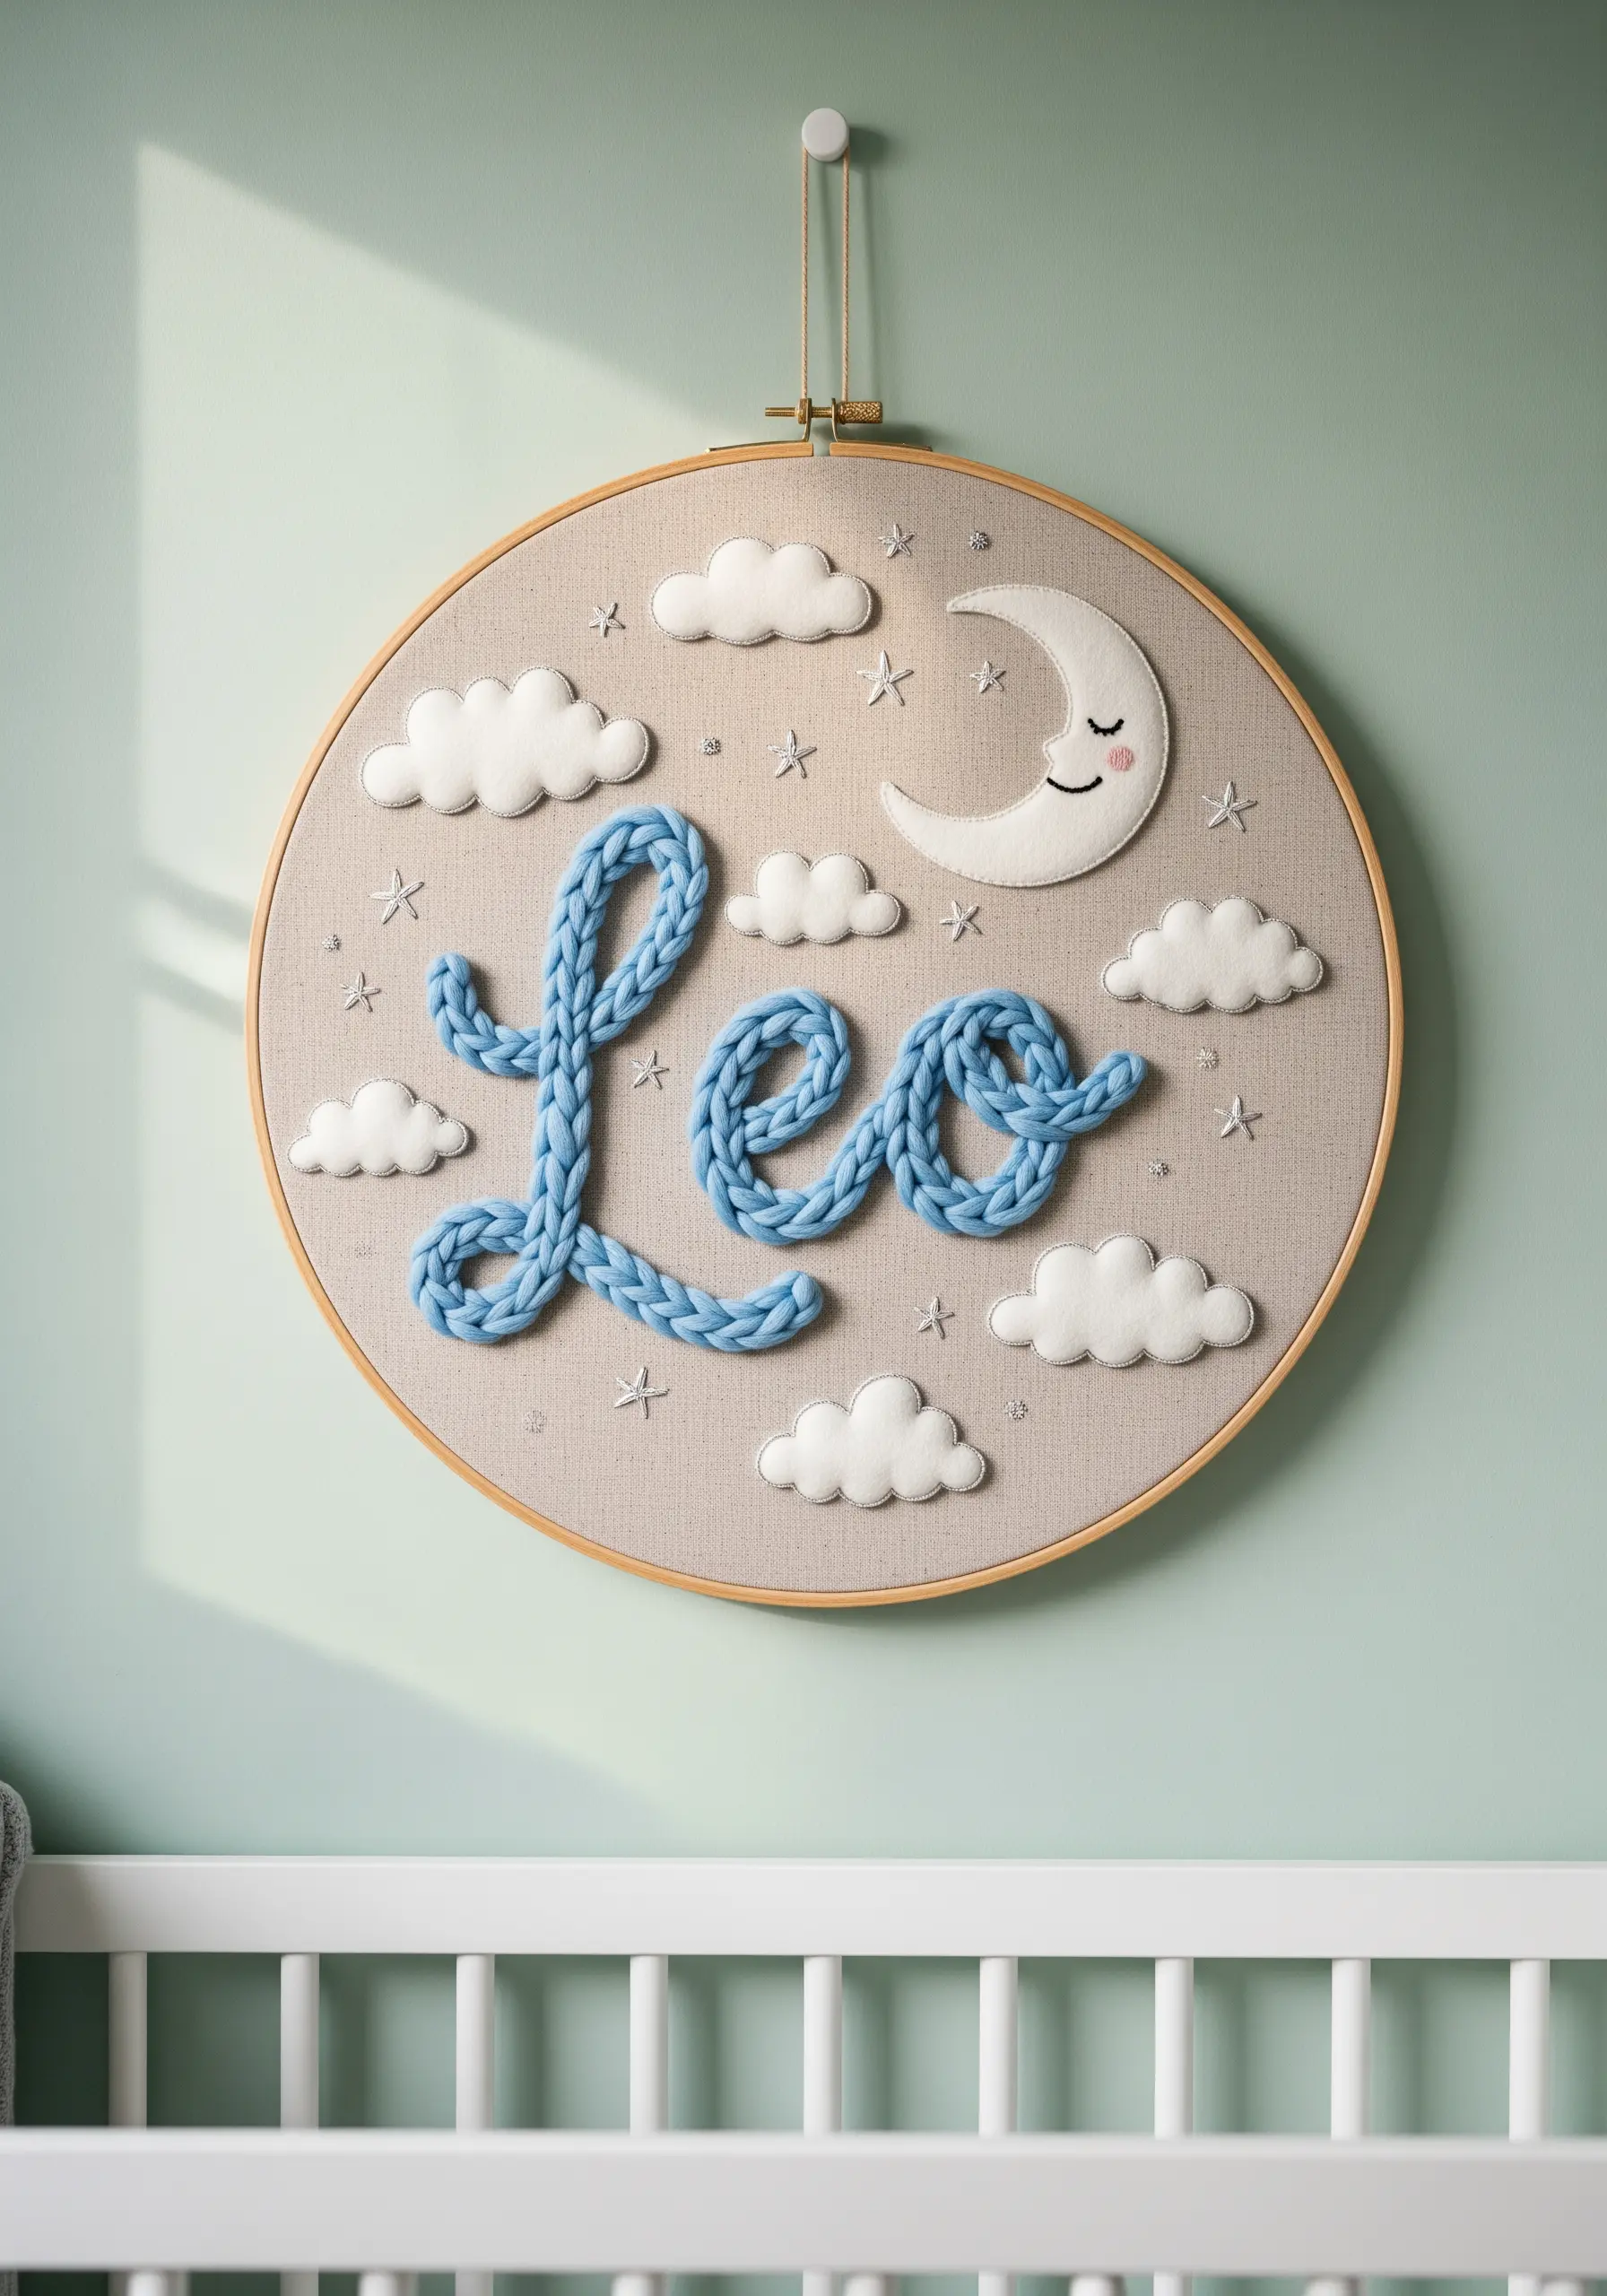
For a soft, high-dimension effect perfect for a nursery, couch thick, chunky yarn onto your fabric.
Lay the yarn along your drawn letters and use a matching, standard embroidery floss to make small tacking stitches over it, securing it firmly to the base.
This method is faster than filling with stitches and provides a wonderful, touchable texture.
Contrast the plush yarn with delicate, flat details like tiny star stitches to create visual depth and sensory appeal in your embroidered nursery decor.
2. Blend Satin Stitch with Delicate Stem Stitch Foliage
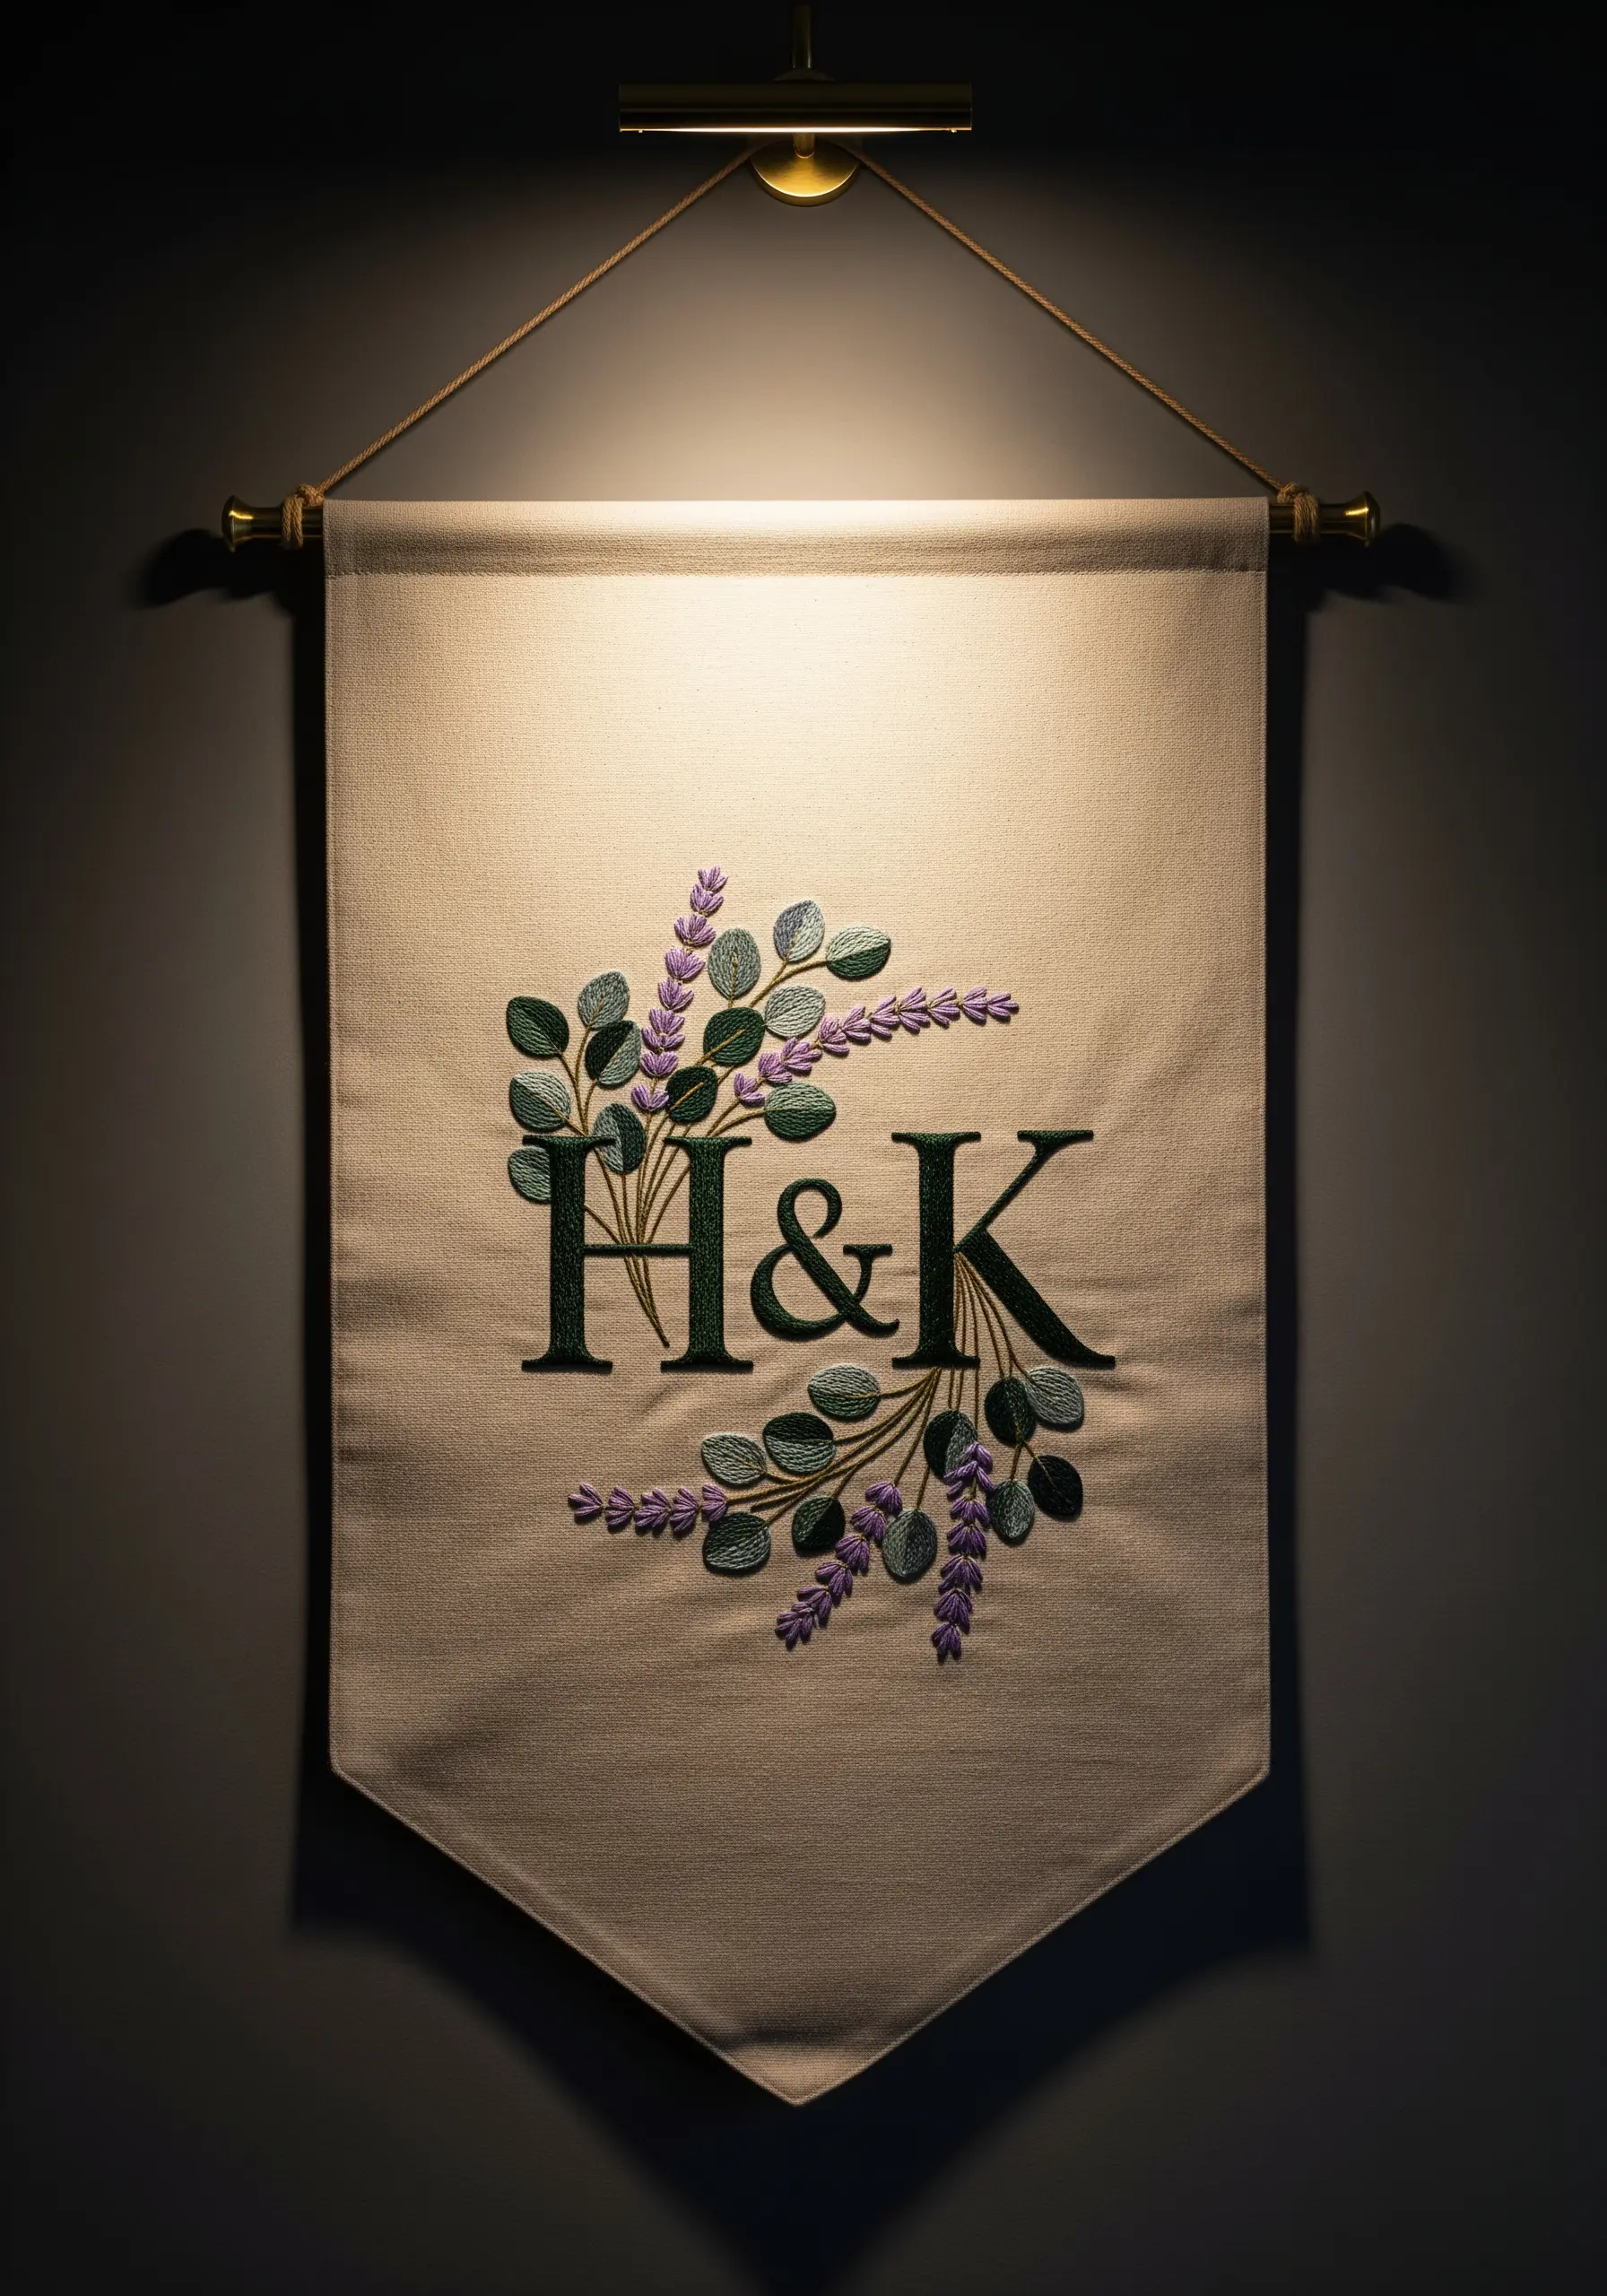
To achieve bold, elegant monograms, fill the letters with a dense, smooth satin stitch.
For a truly polished look, first outline the letters with a split stitch; this raised edge will help you keep your satin stitches neat and contained.
Contrast the solid weight of the initials with lighter botanical details, using a delicate stem stitch for lavender stalks and a fishbone stitch for eucalyptus leaves.
This variation in stitch density creates a balanced composition, perfect for handmade embroidery ideas celebrating couples.
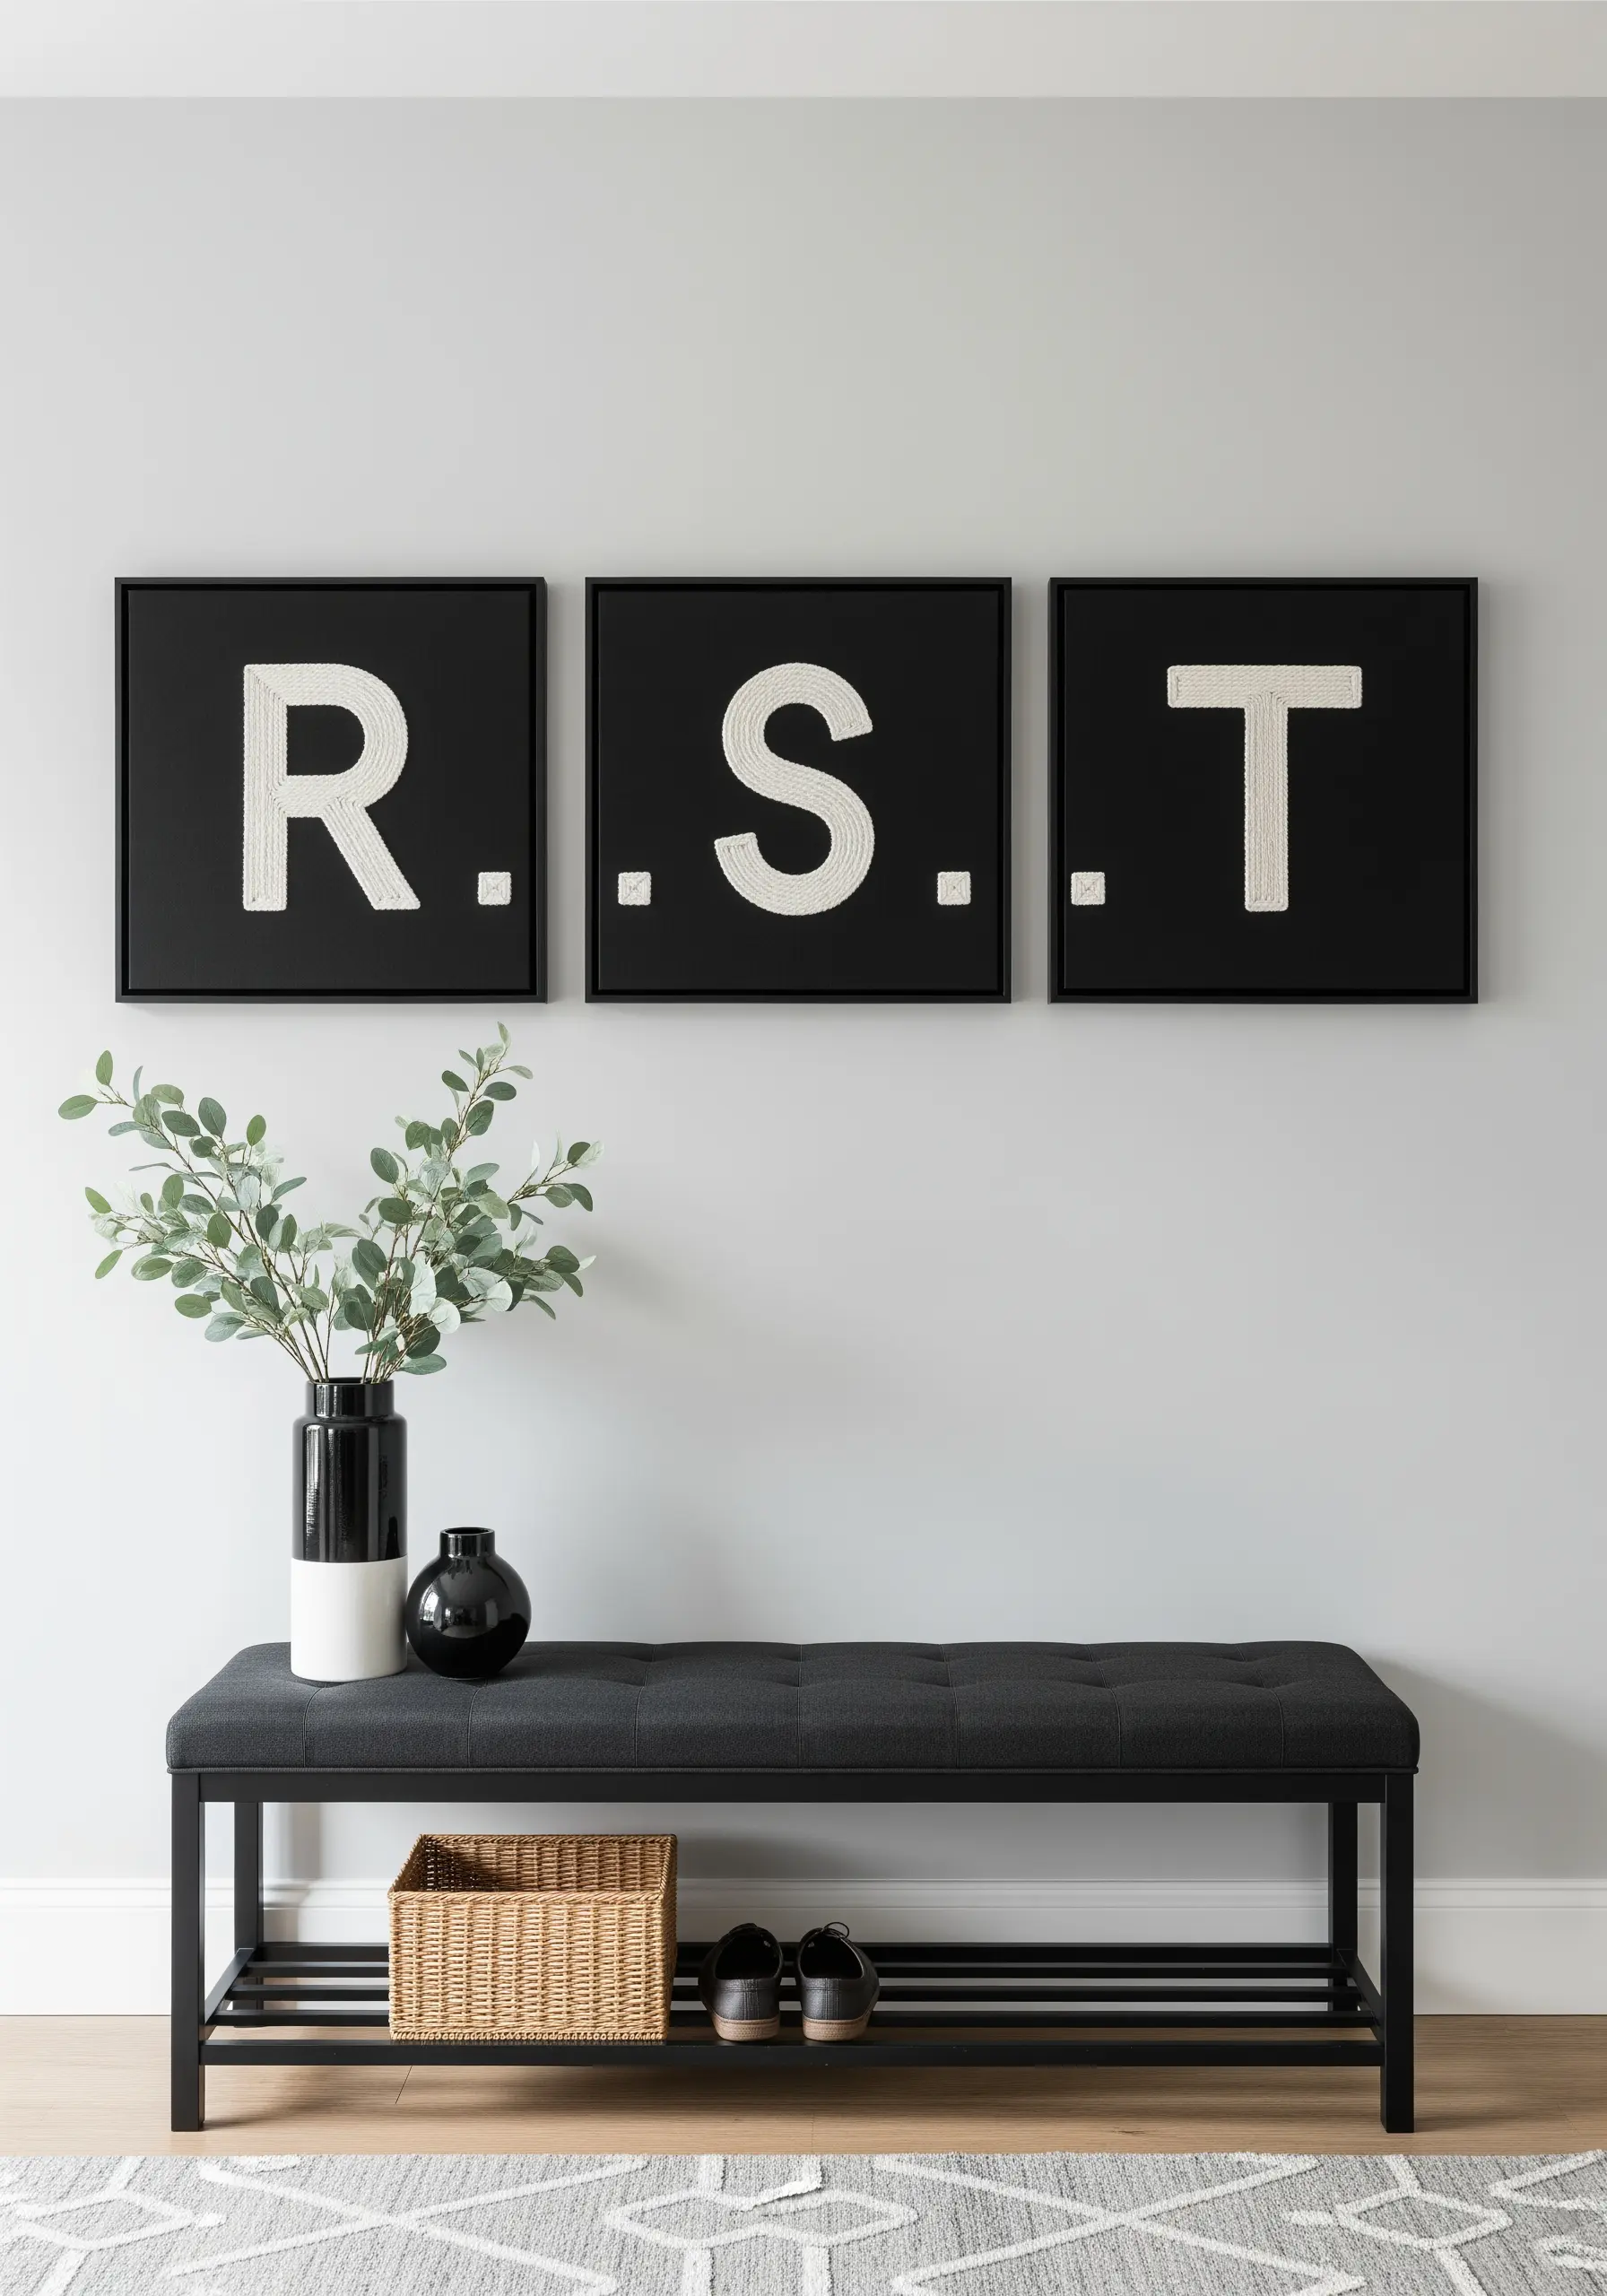
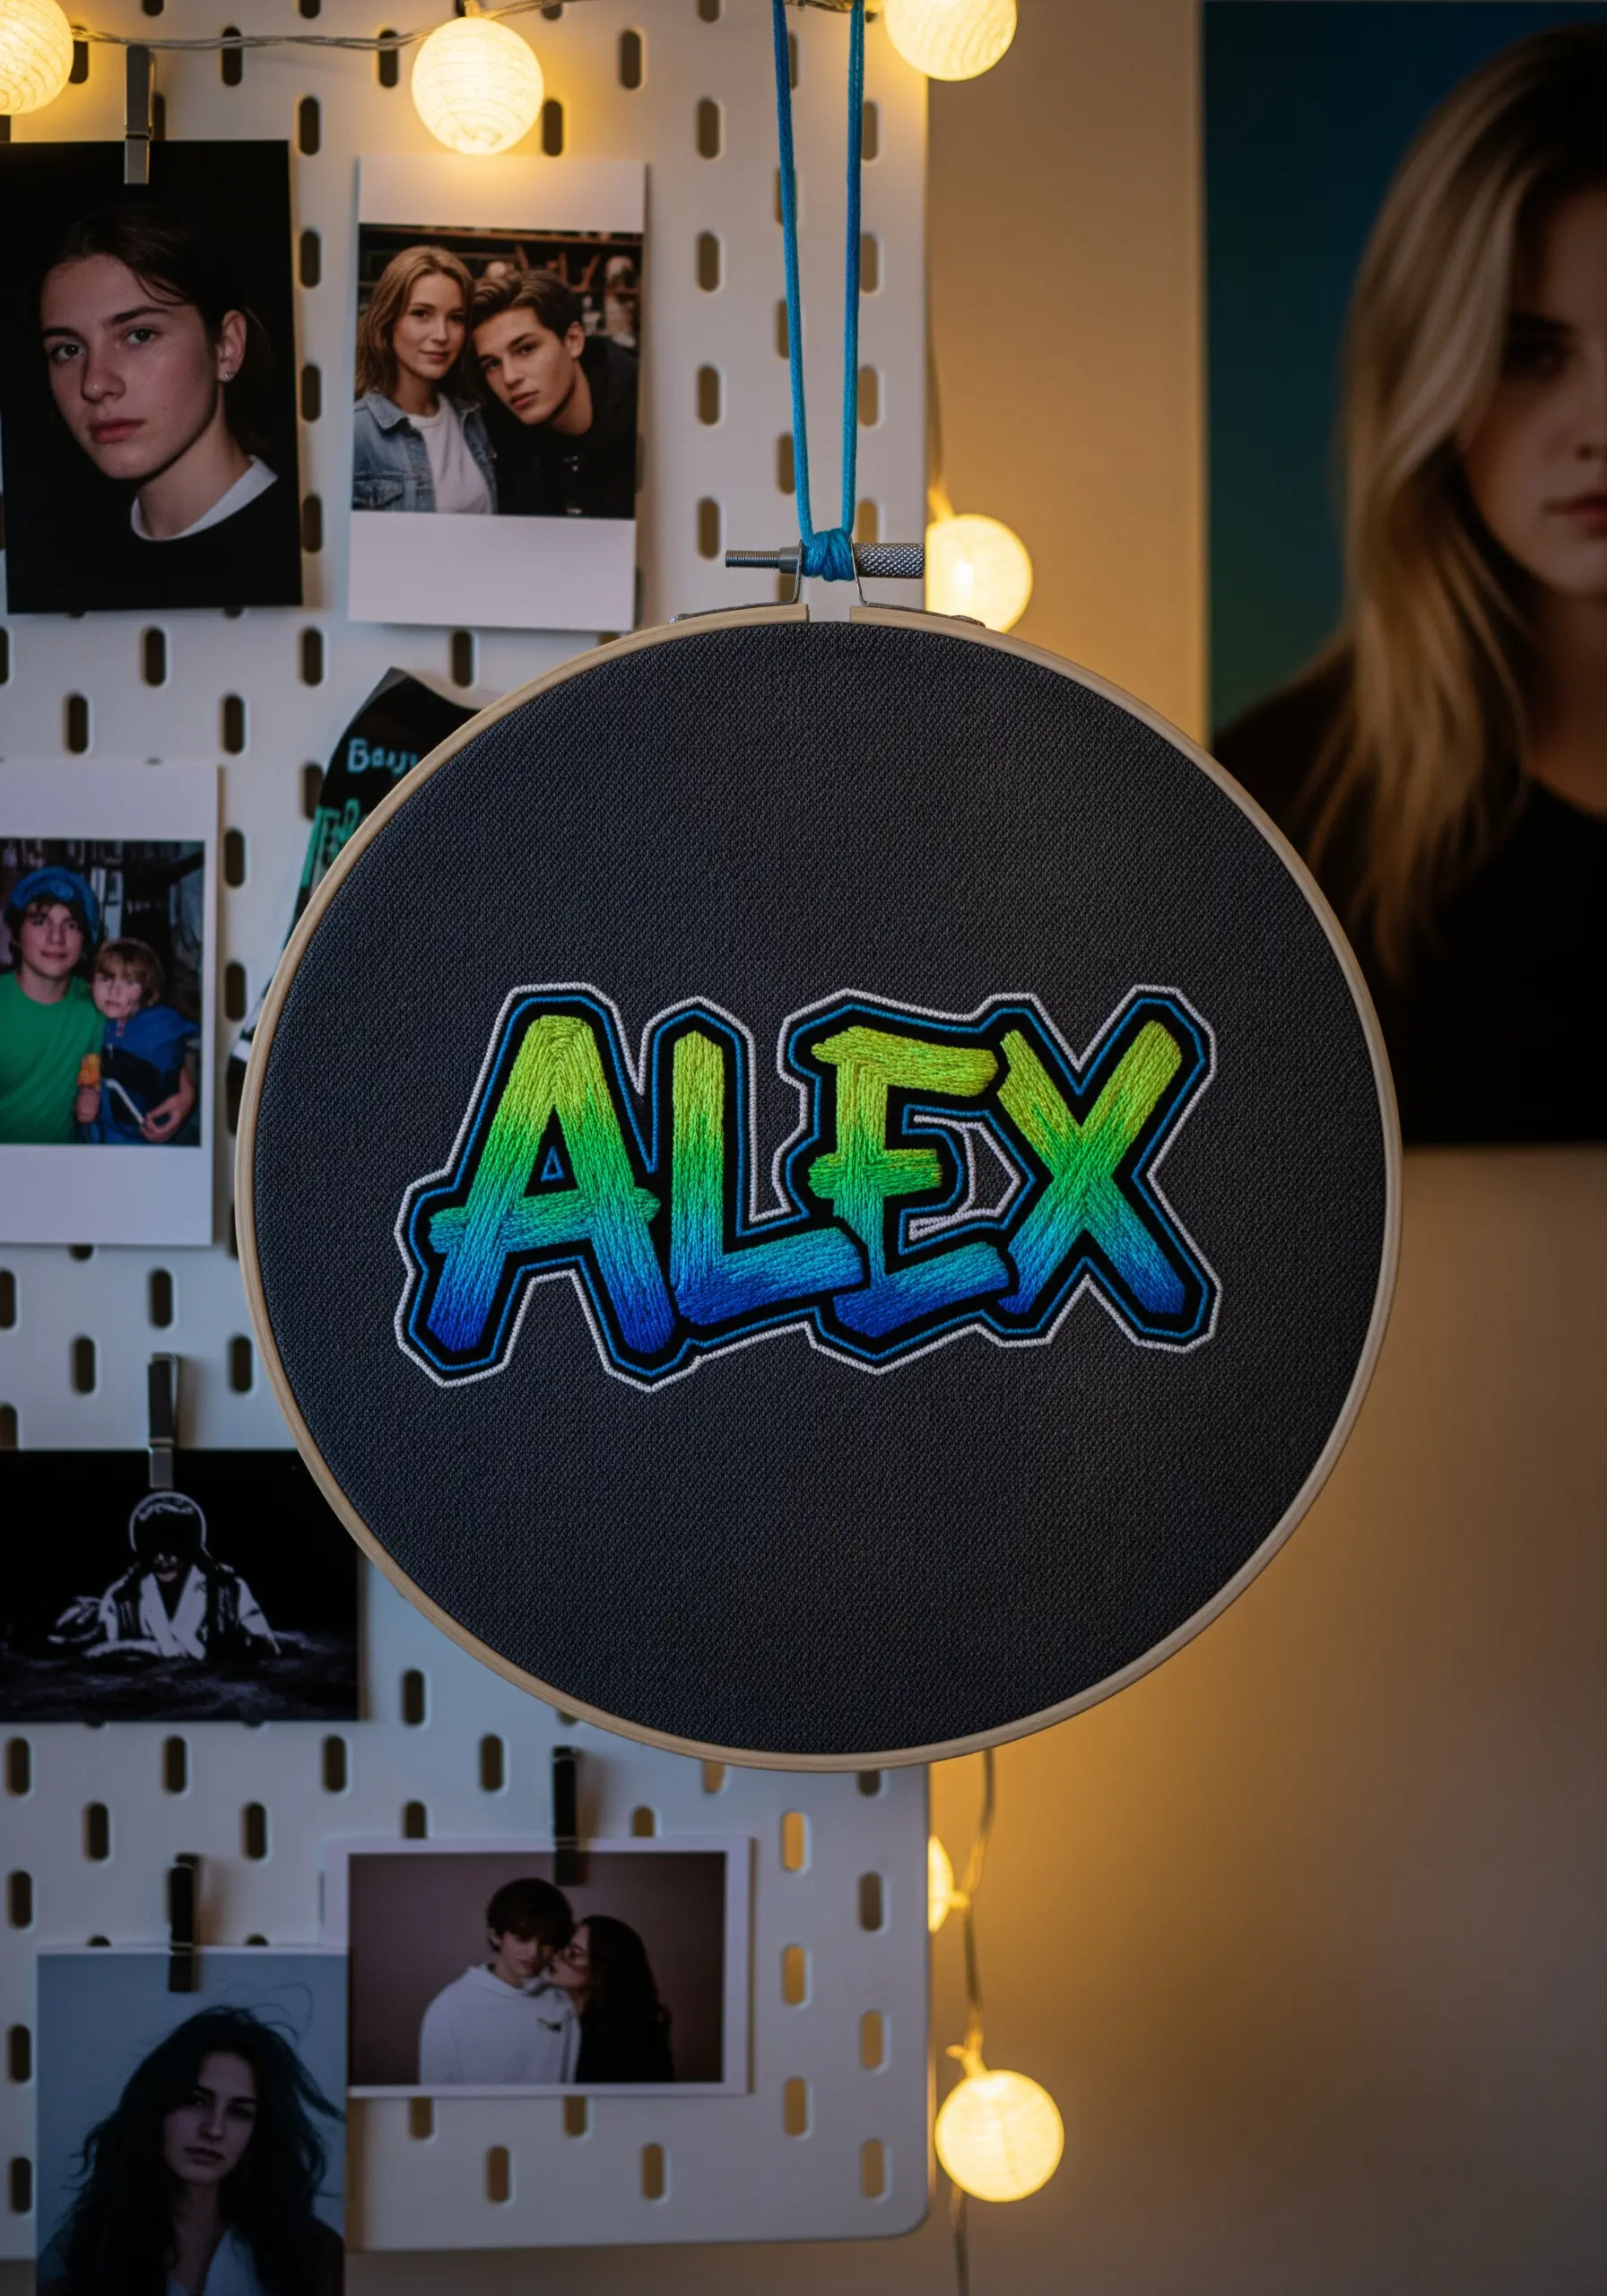
3. Modernize Alphabets with Bold, Minimalist Cross-Stitch
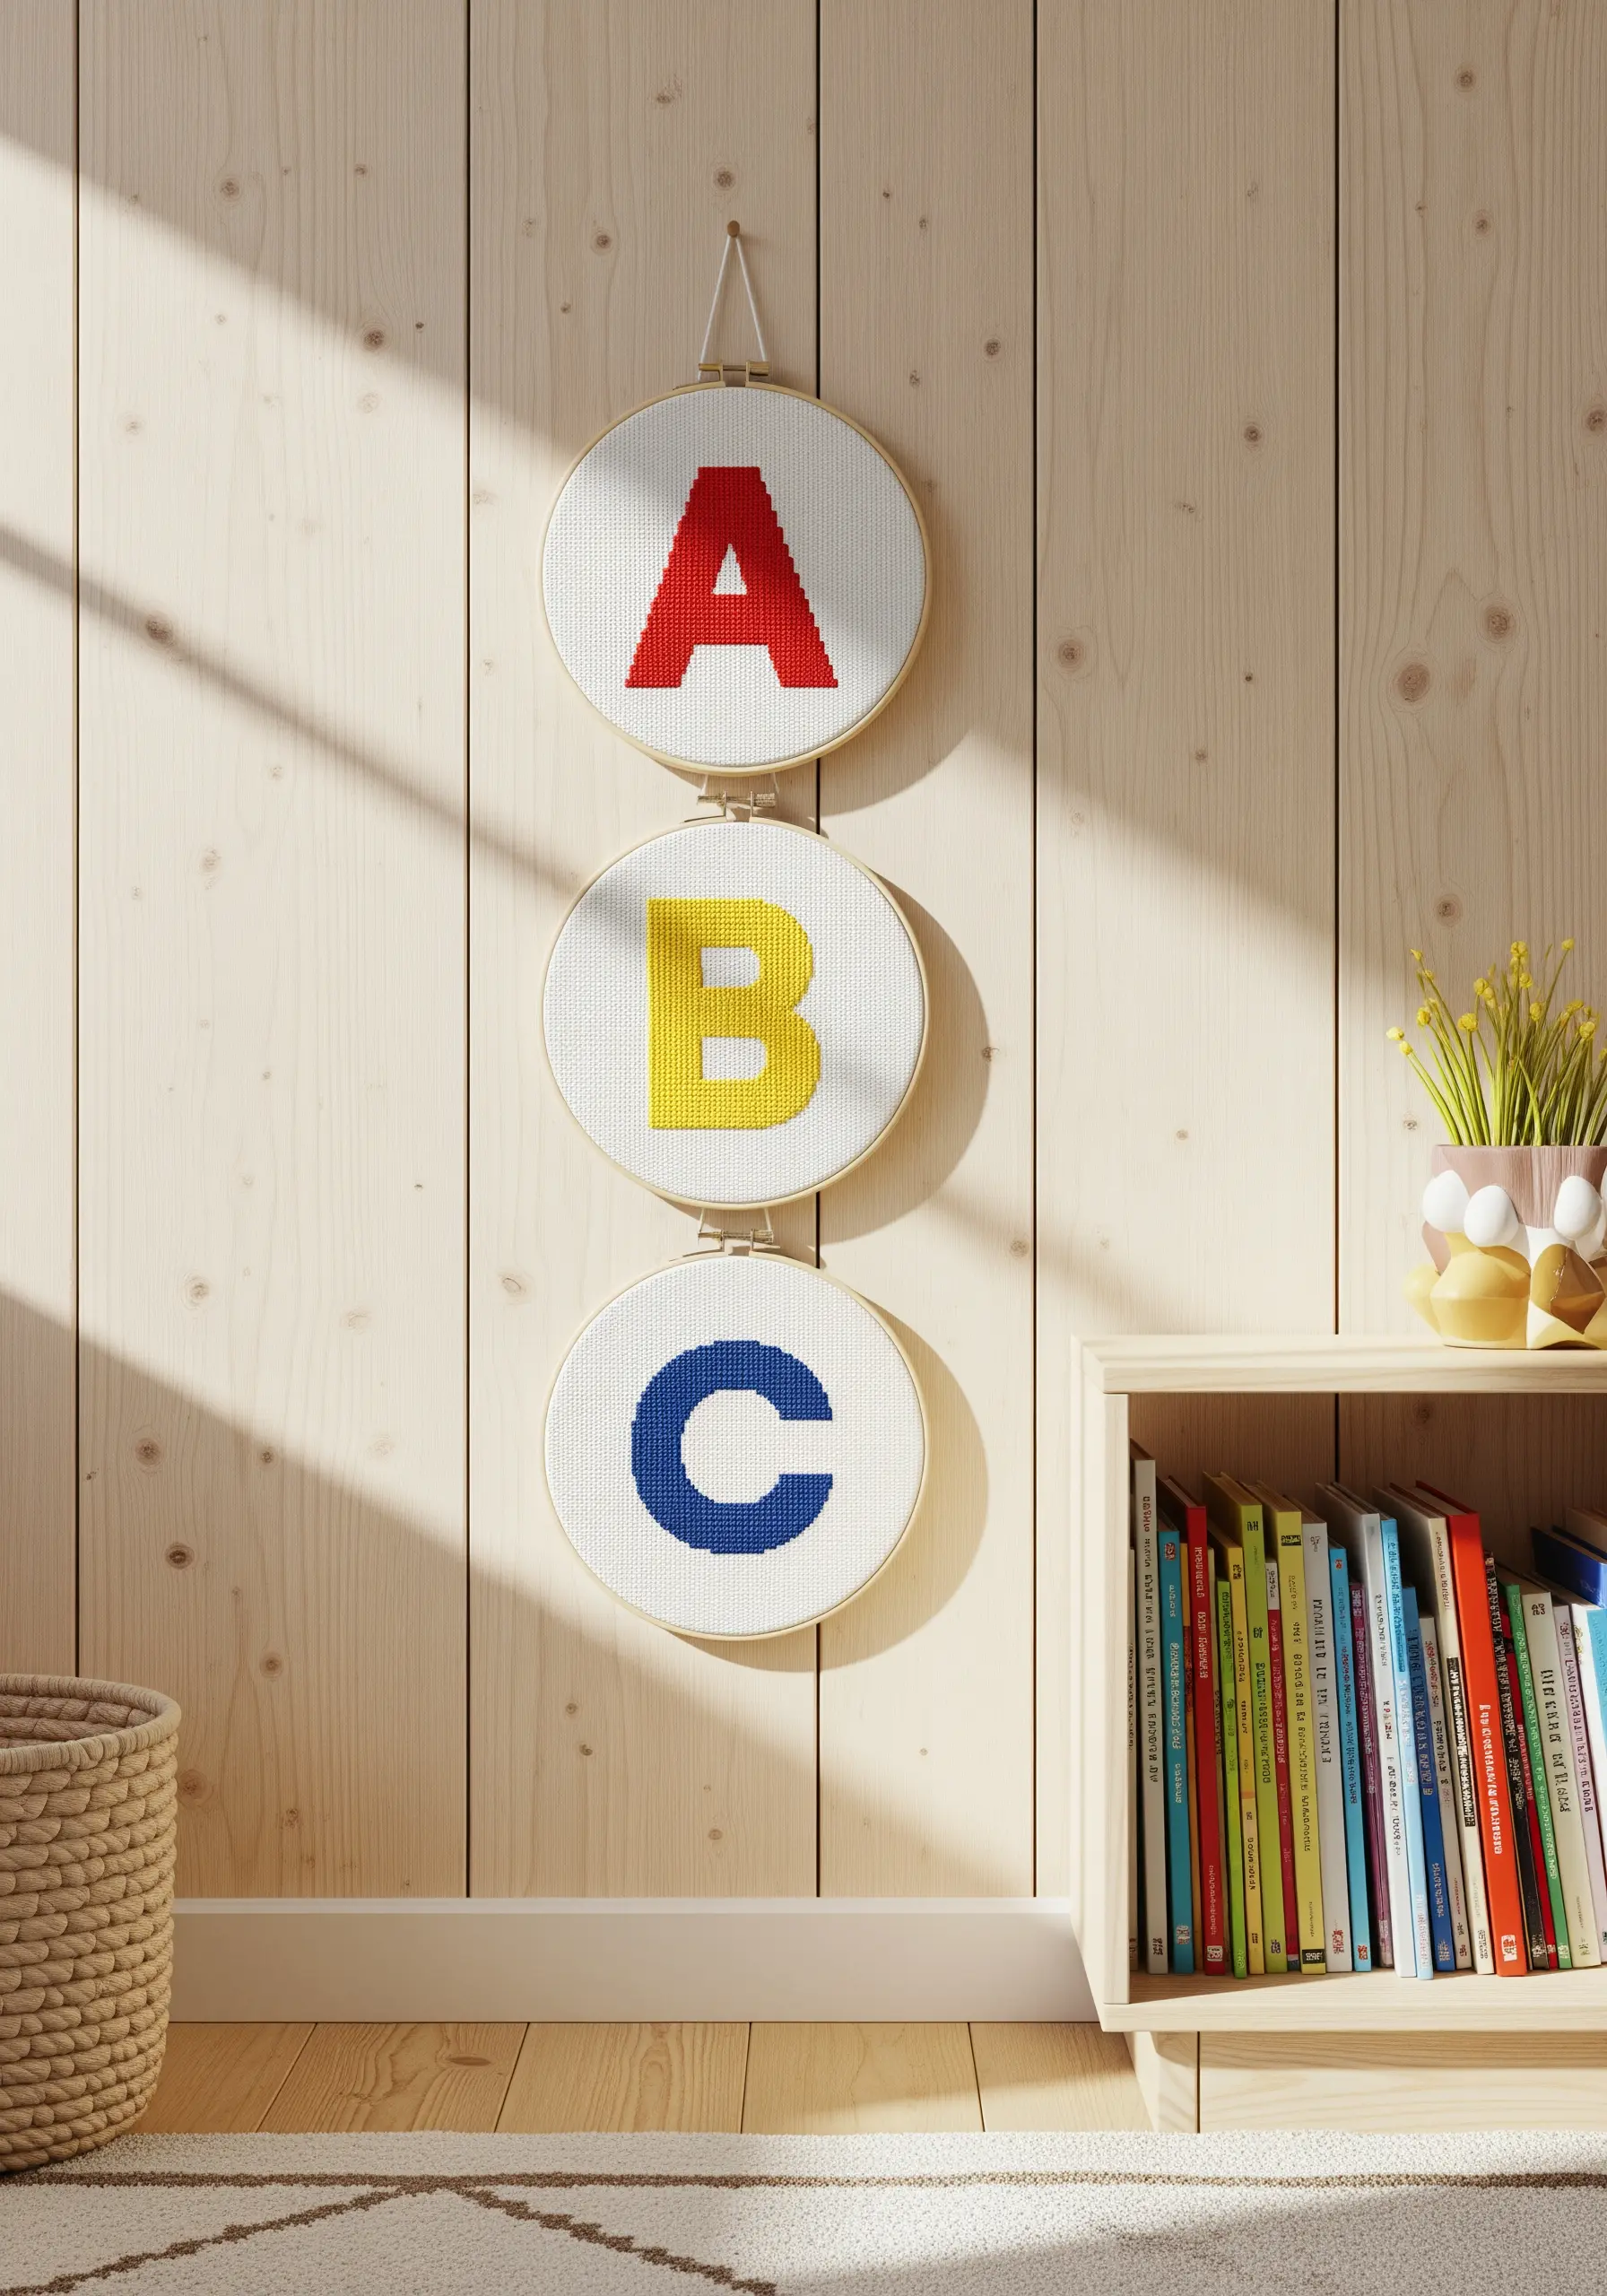
Transform simple cross-stitch into a graphic art statement by maximizing contrast and negative space.
Use all six strands of embroidery floss on a larger-count Aida cloth (like 11 or 14) to create solid, impactful letters.
By keeping the background fabric clean and white, you allow the bold primary colors to become the undisputed focus.
Stacking the hoops vertically turns individual letters into a cohesive piece of wall art, ideal for minimalist embroidery DIYs in a modern playroom or study.
4. Frame a Family Name with an Autumnal Leaf Wreath
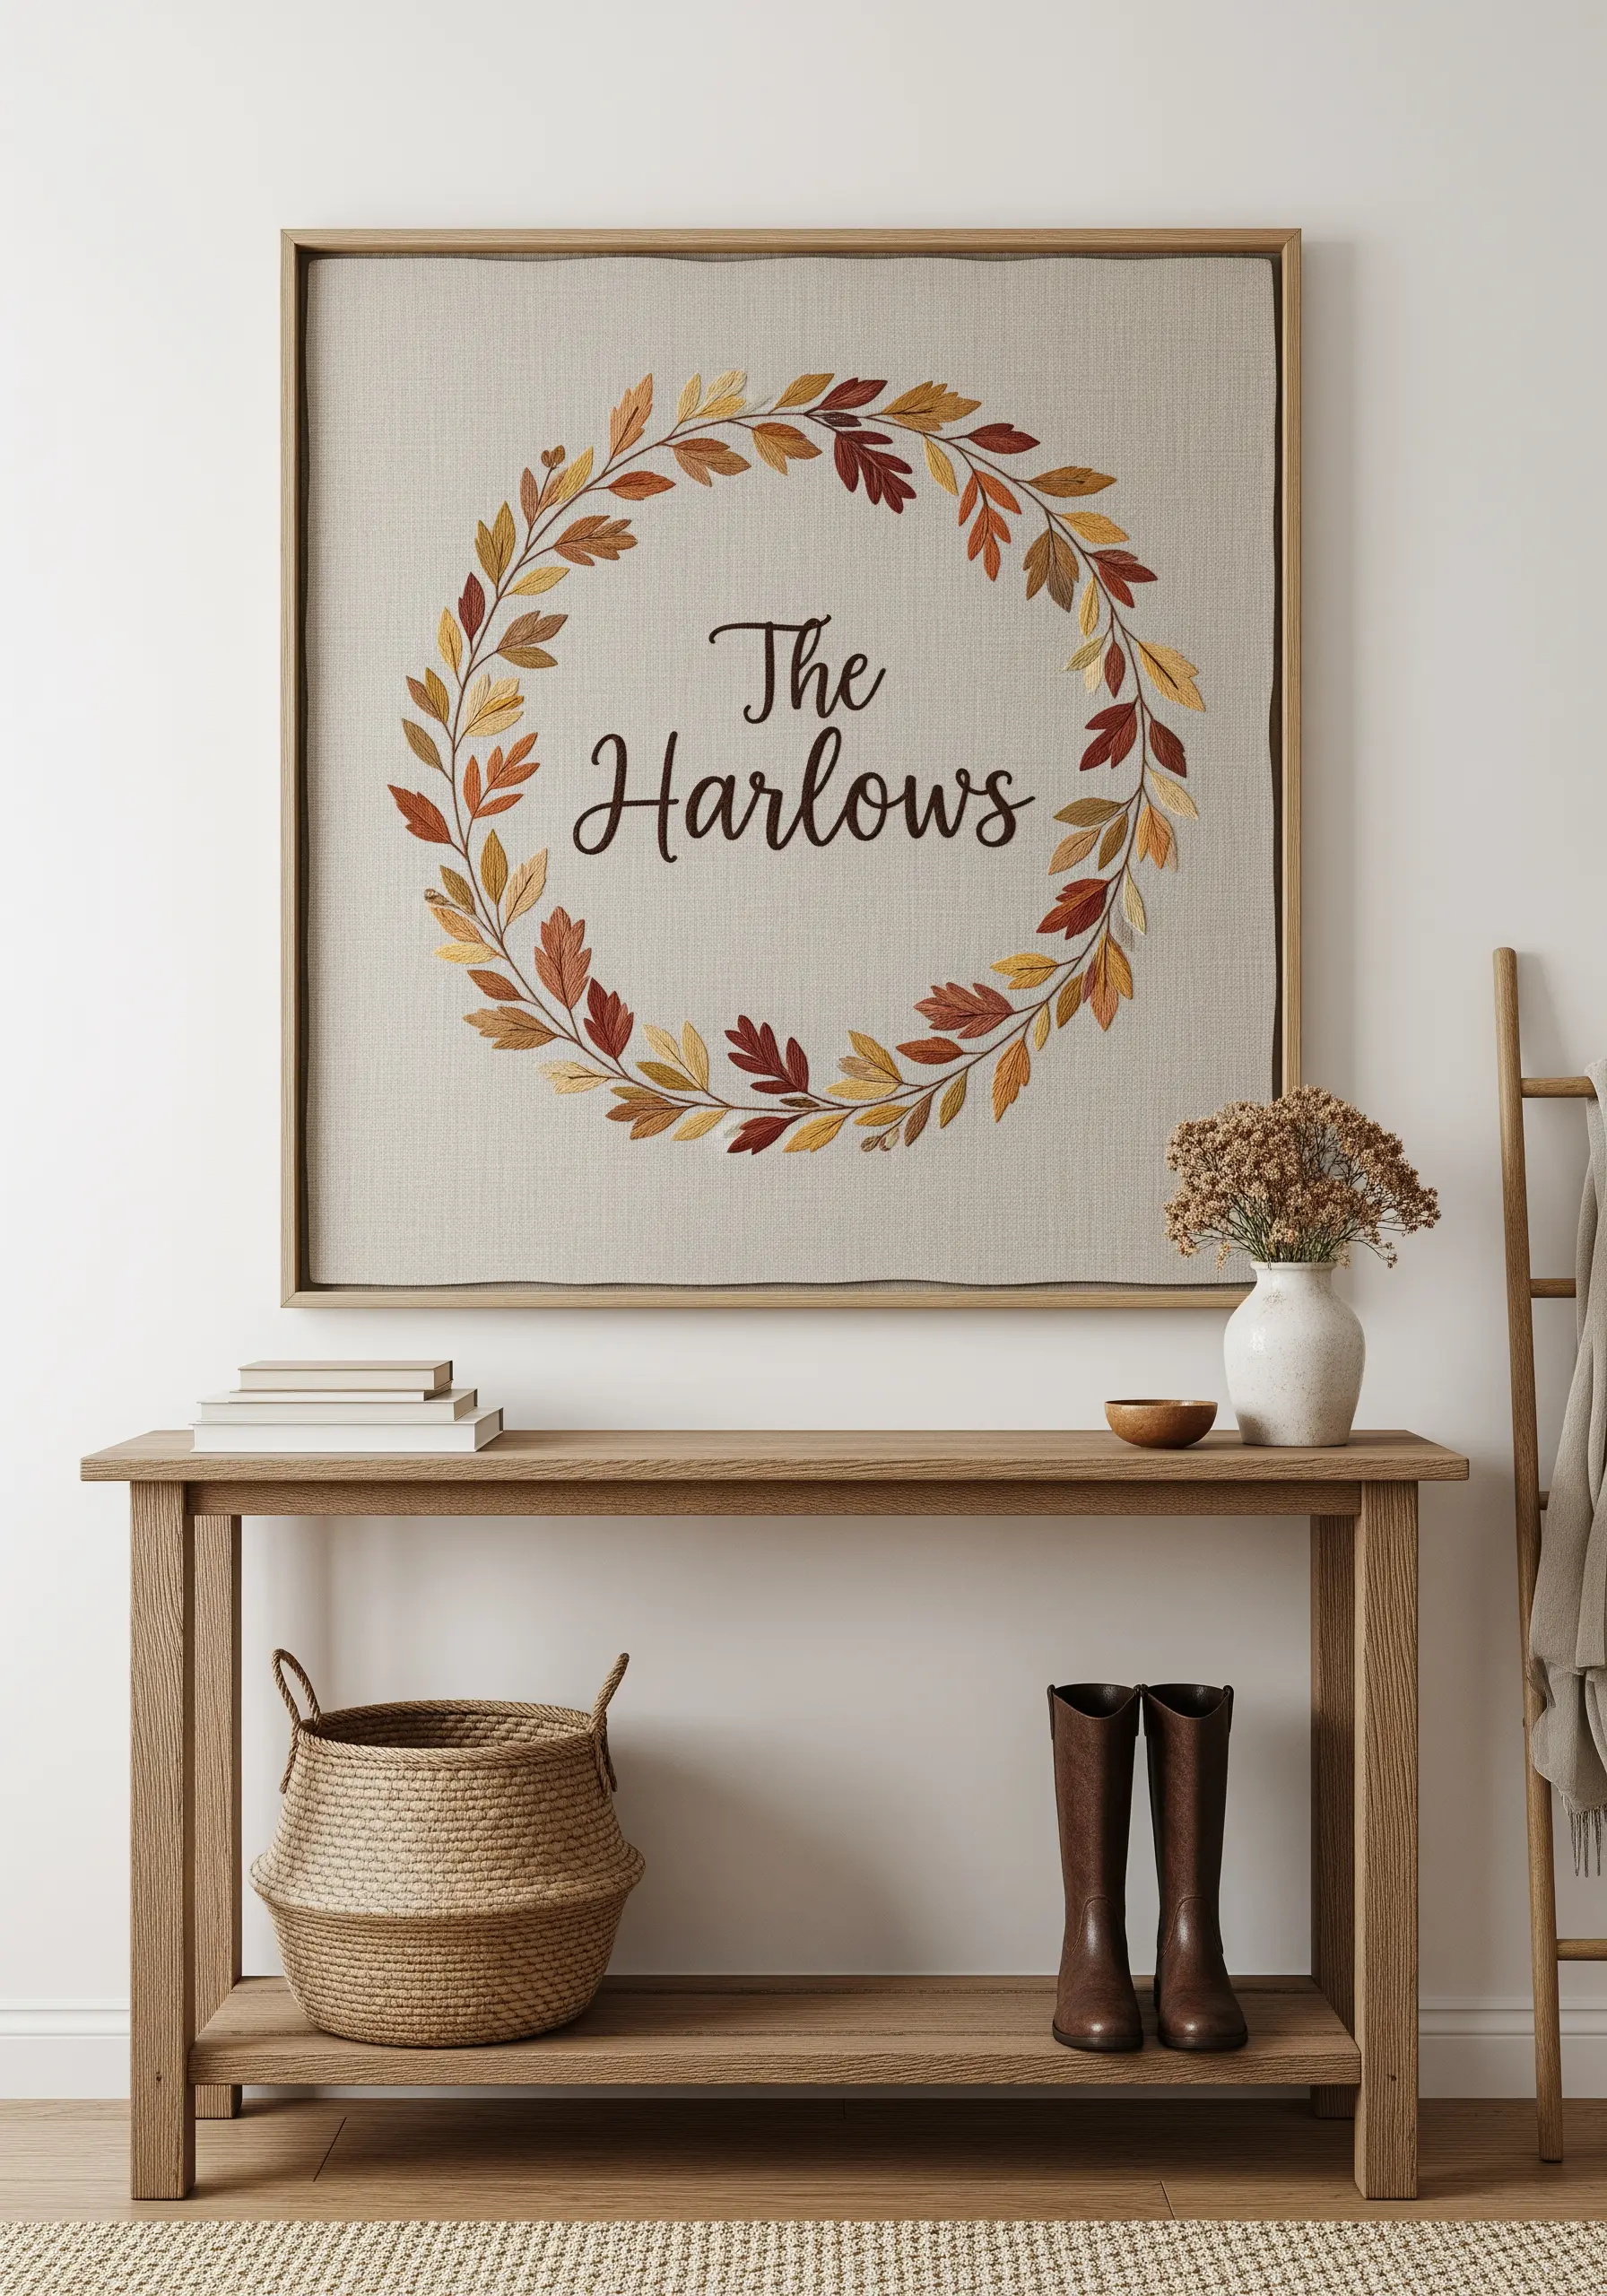
Create a realistic, painted look in your leaves by using the long-and-short stitch technique instead of a flat satin stitch.
Blend three to four complementary shades of thread within each leaf—like gold, rust, and deep red—to achieve a natural, subtle gradient.
For the family name, choose a simple, clean script and execute it with a two-strand backstitch to ensure it remains legible without competing with the detailed wreath.
This composition creates warm, welcoming framed embroidery ideas perfect for an entryway.
5. Achieve a 3D Effect with Architectural Block Lettering
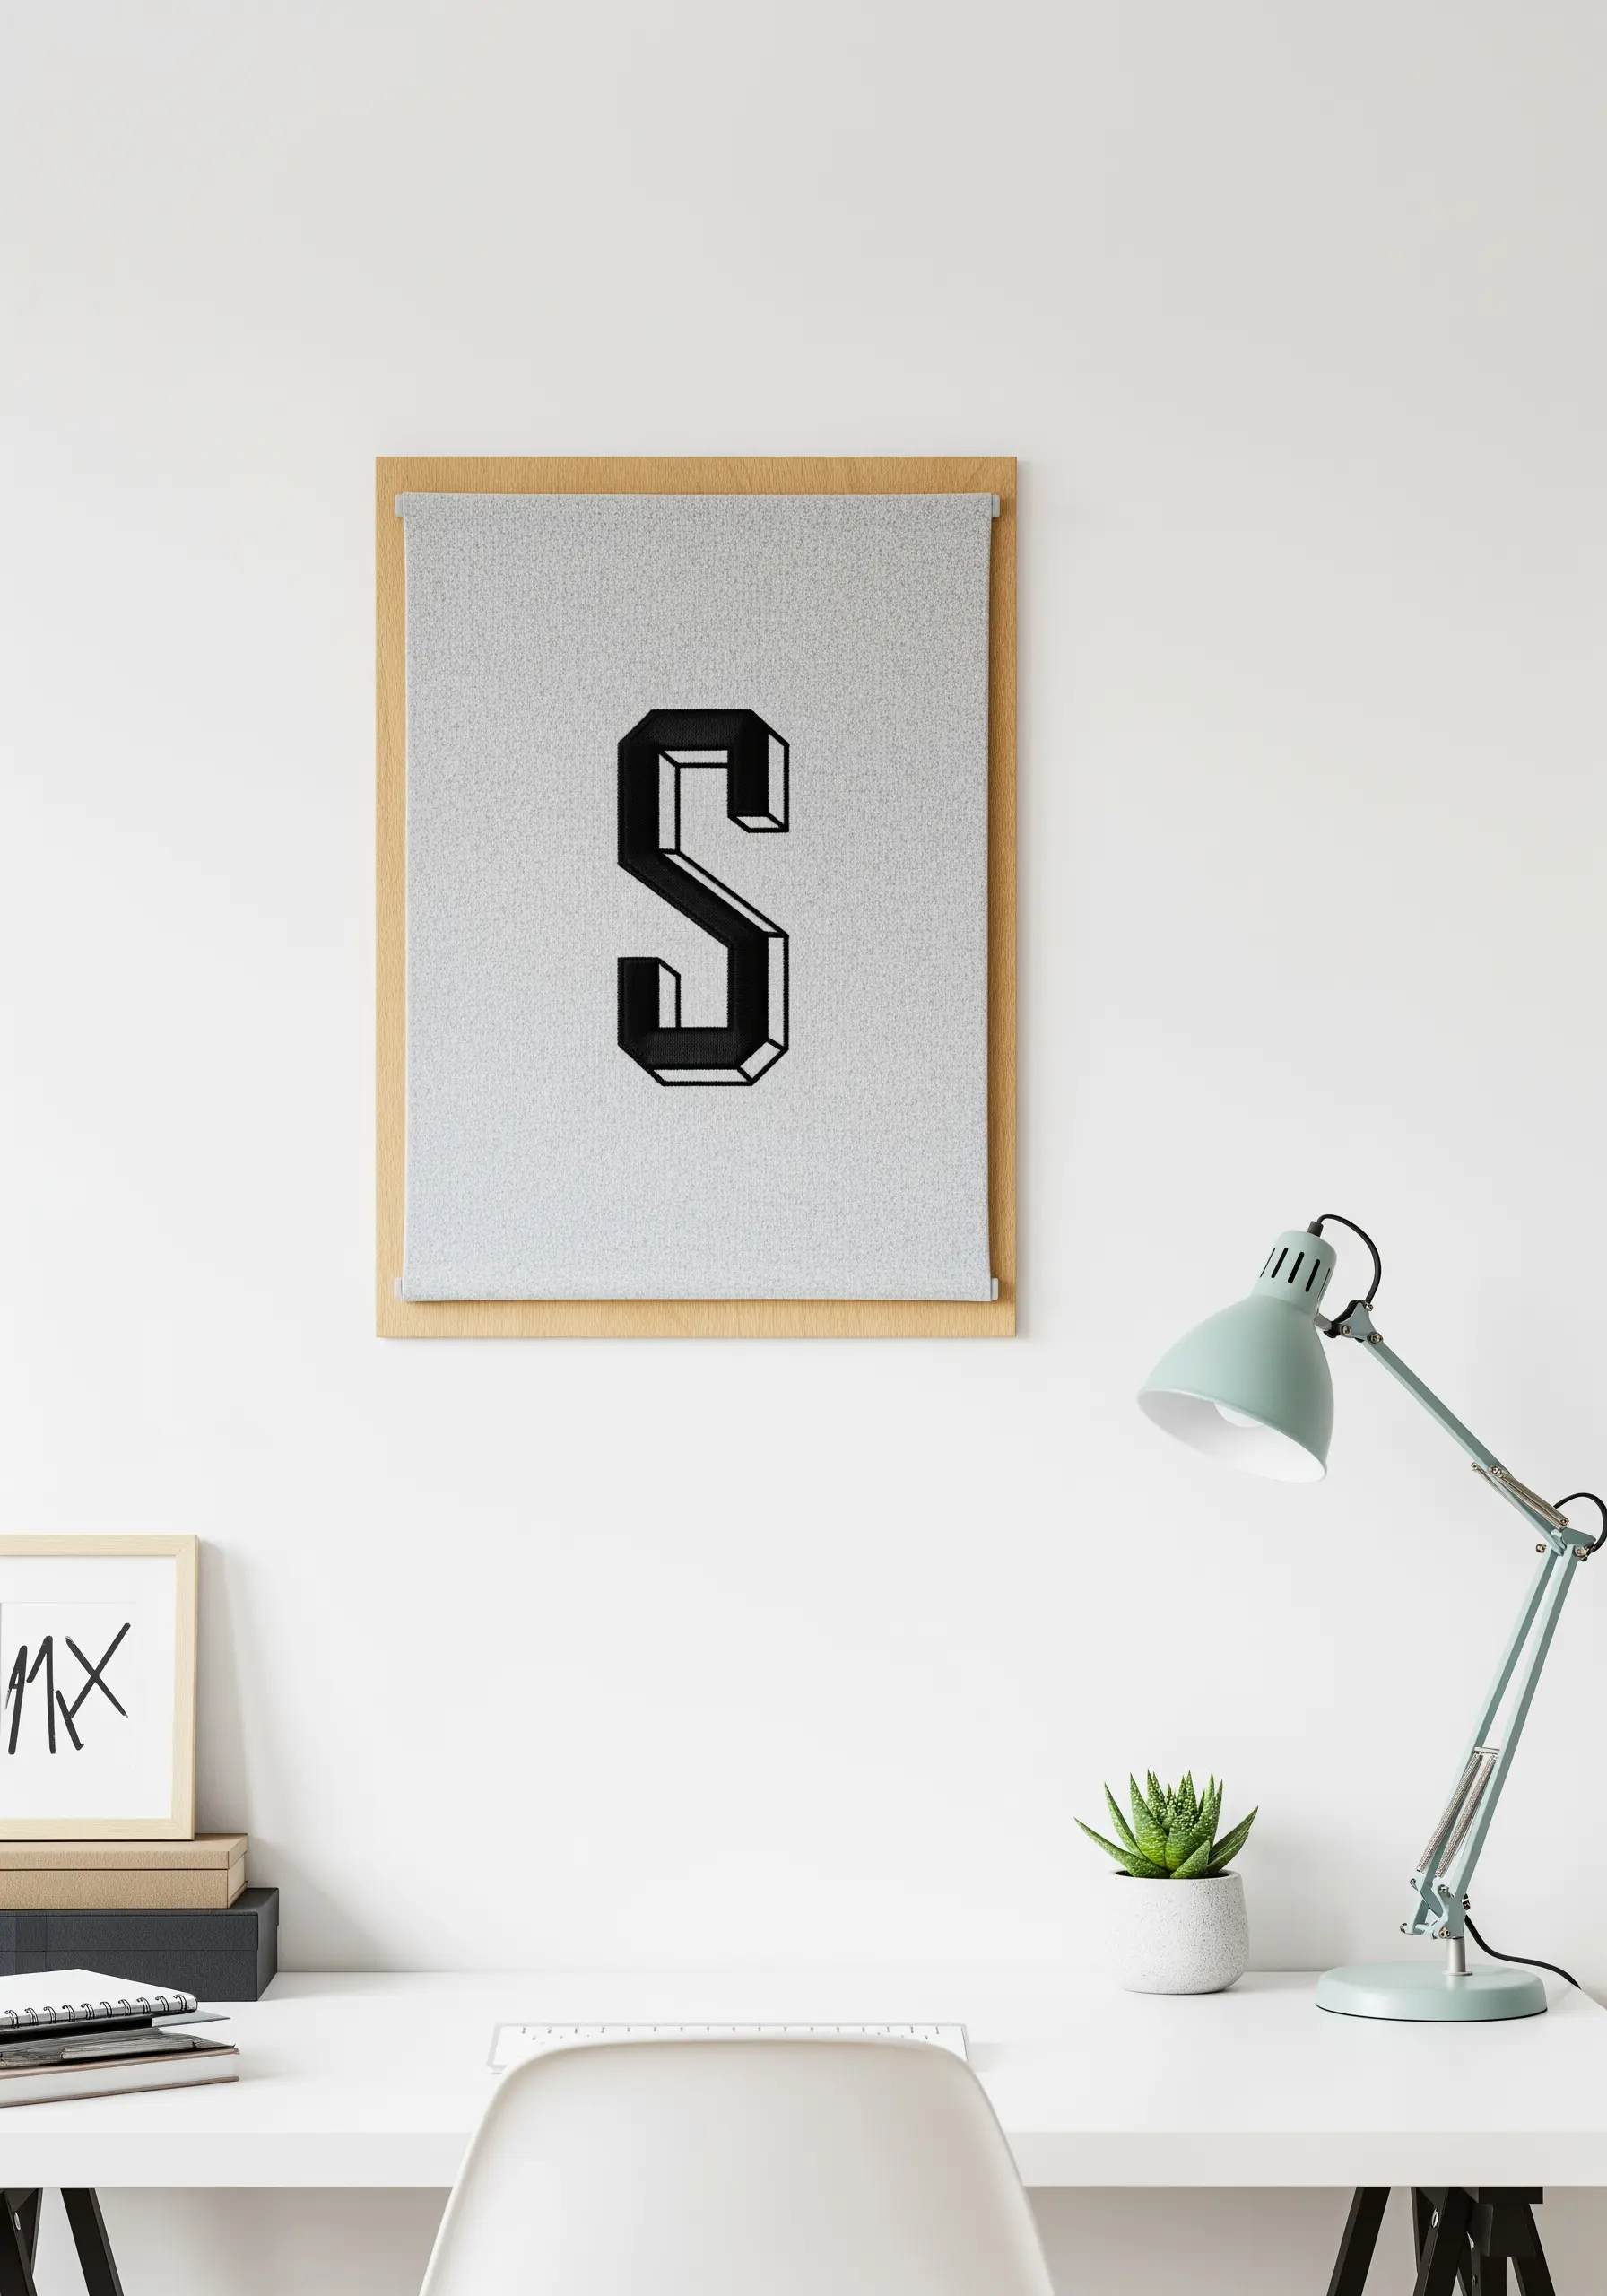
To create the illusion of three-dimensional form, rely on directional satin stitch and color value.
Fill the front face of the letter with stitches going in one uniform direction (e.g., vertical), using your main color.
For the shadow or side planes, switch to a slightly lighter or darker shade and angle your stitches consistently (e.g., at 45 degrees).
This disciplined approach to stitch direction is what convinces the eye of depth, creating sharp, minimal monogram styles that make personalized gifts look high-end.
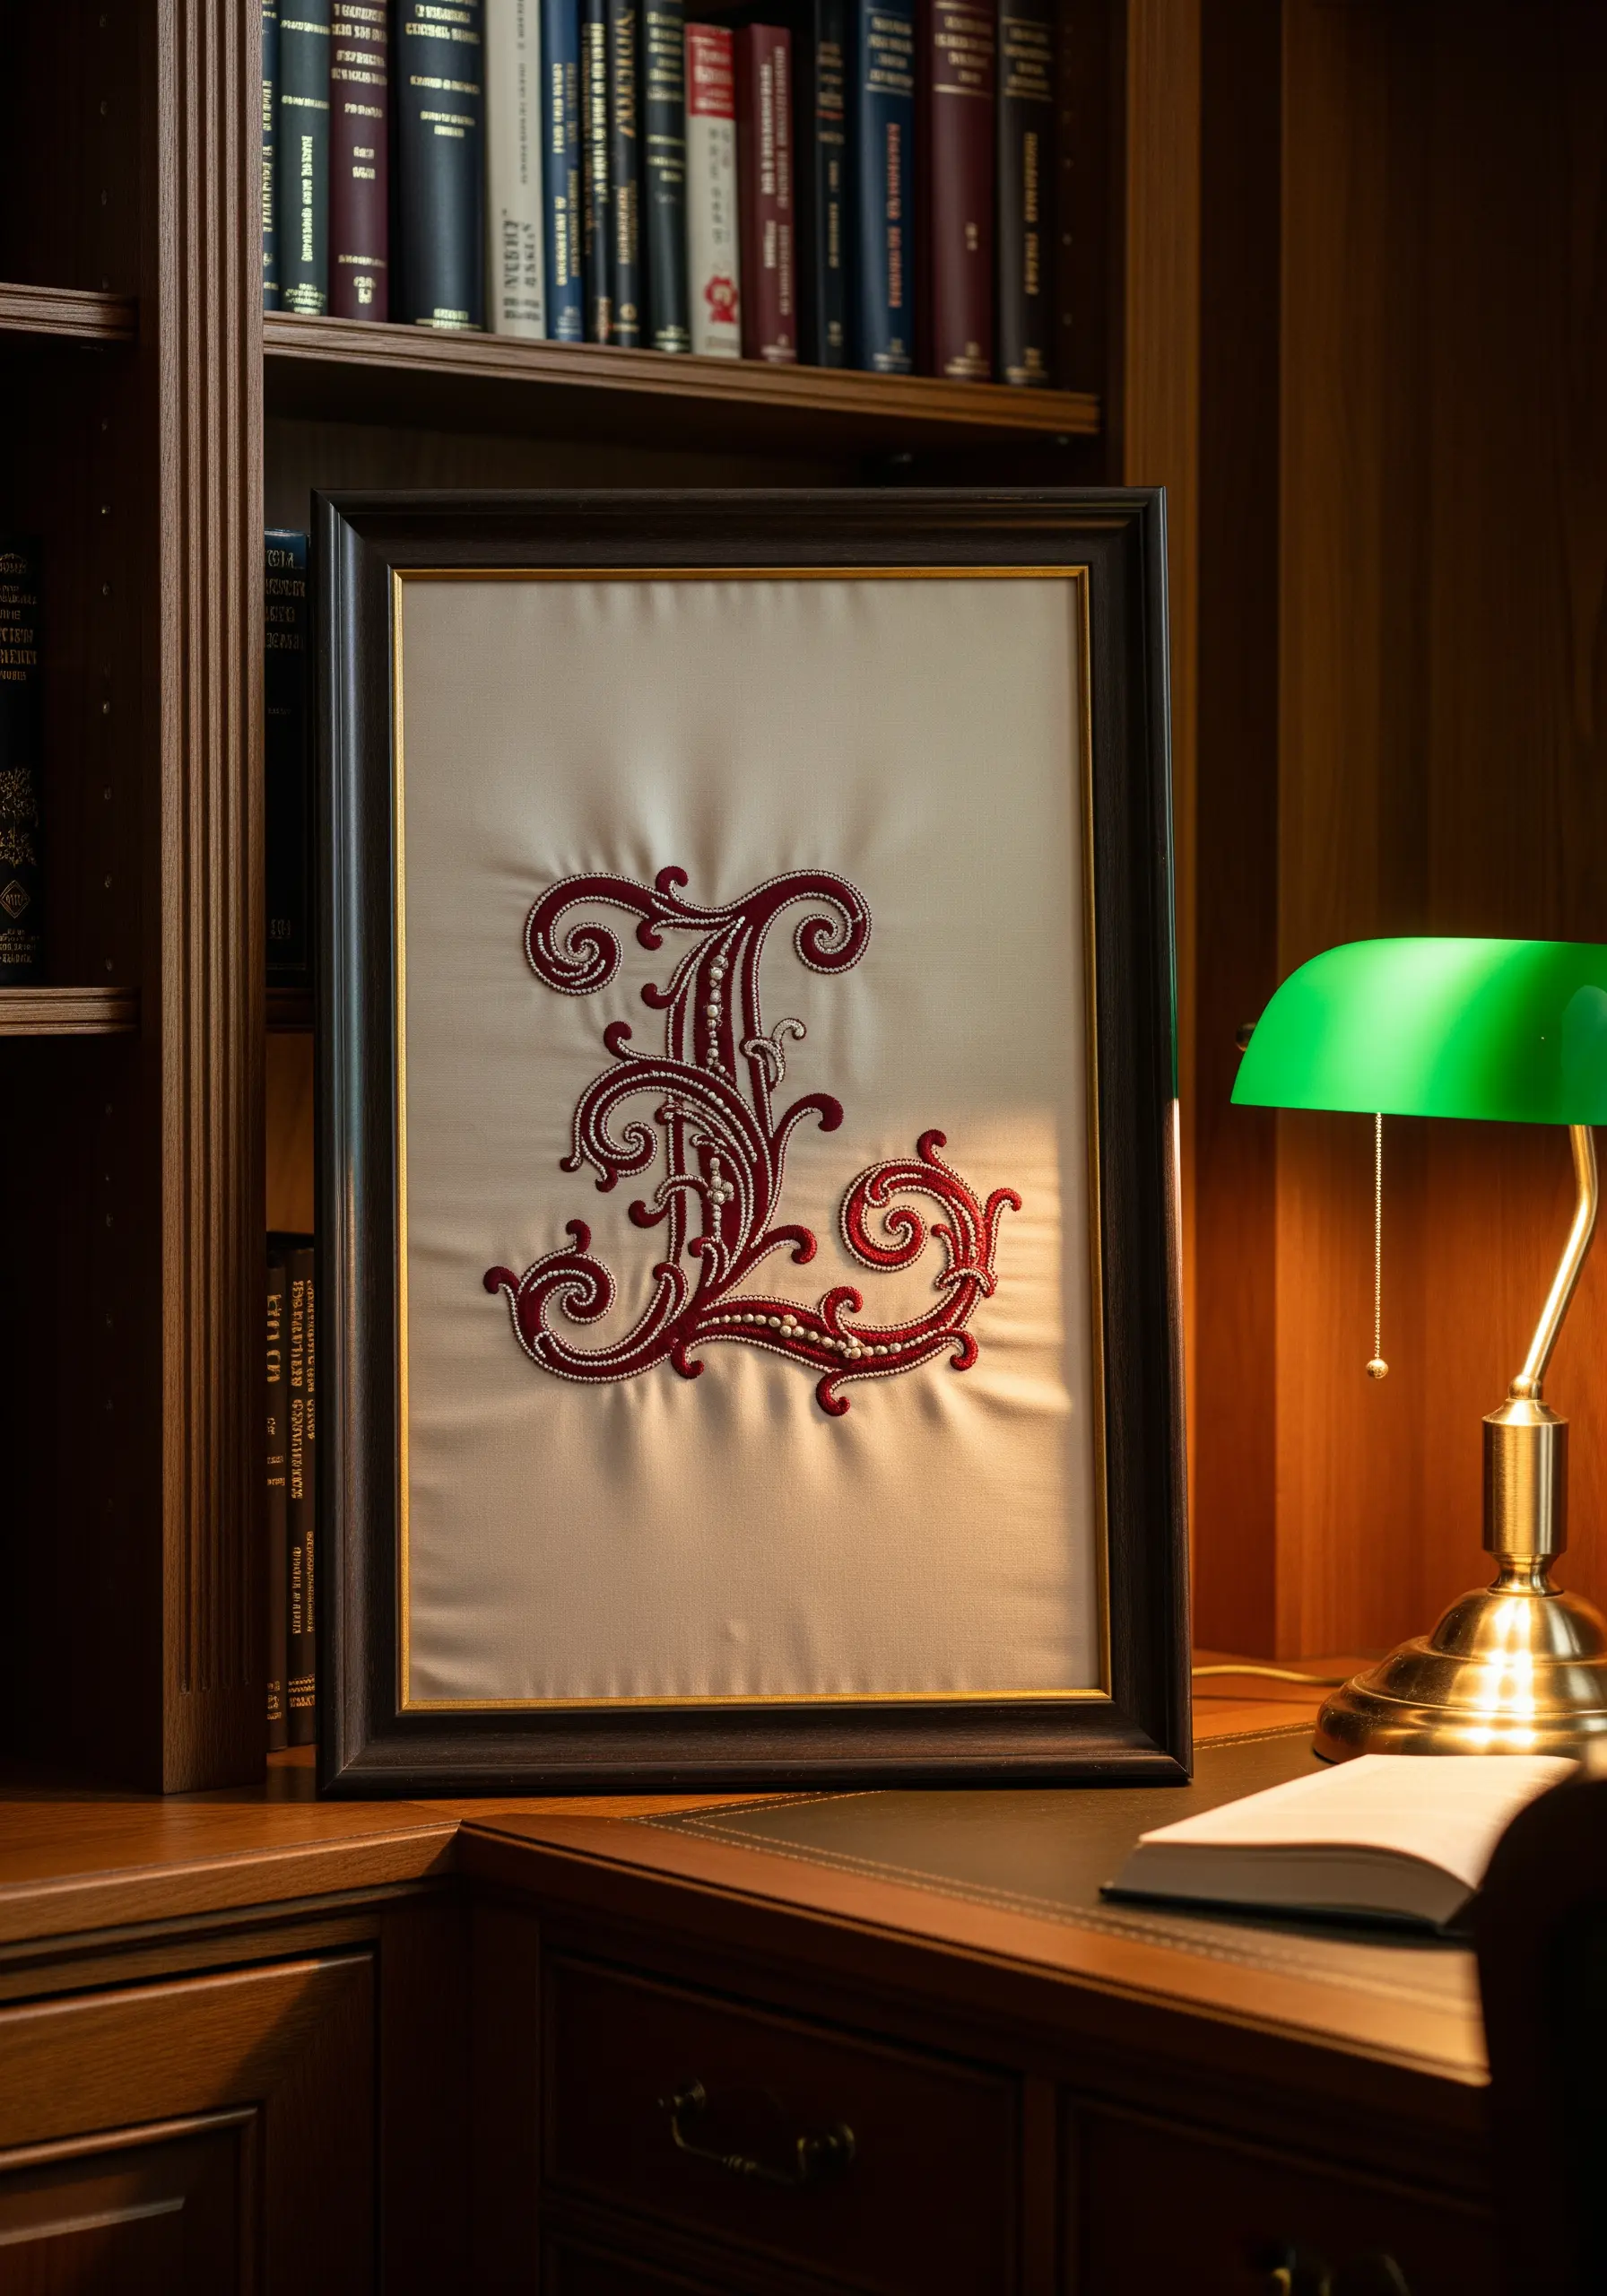
6. Add Subtle Glamour with Metallic Thread Script
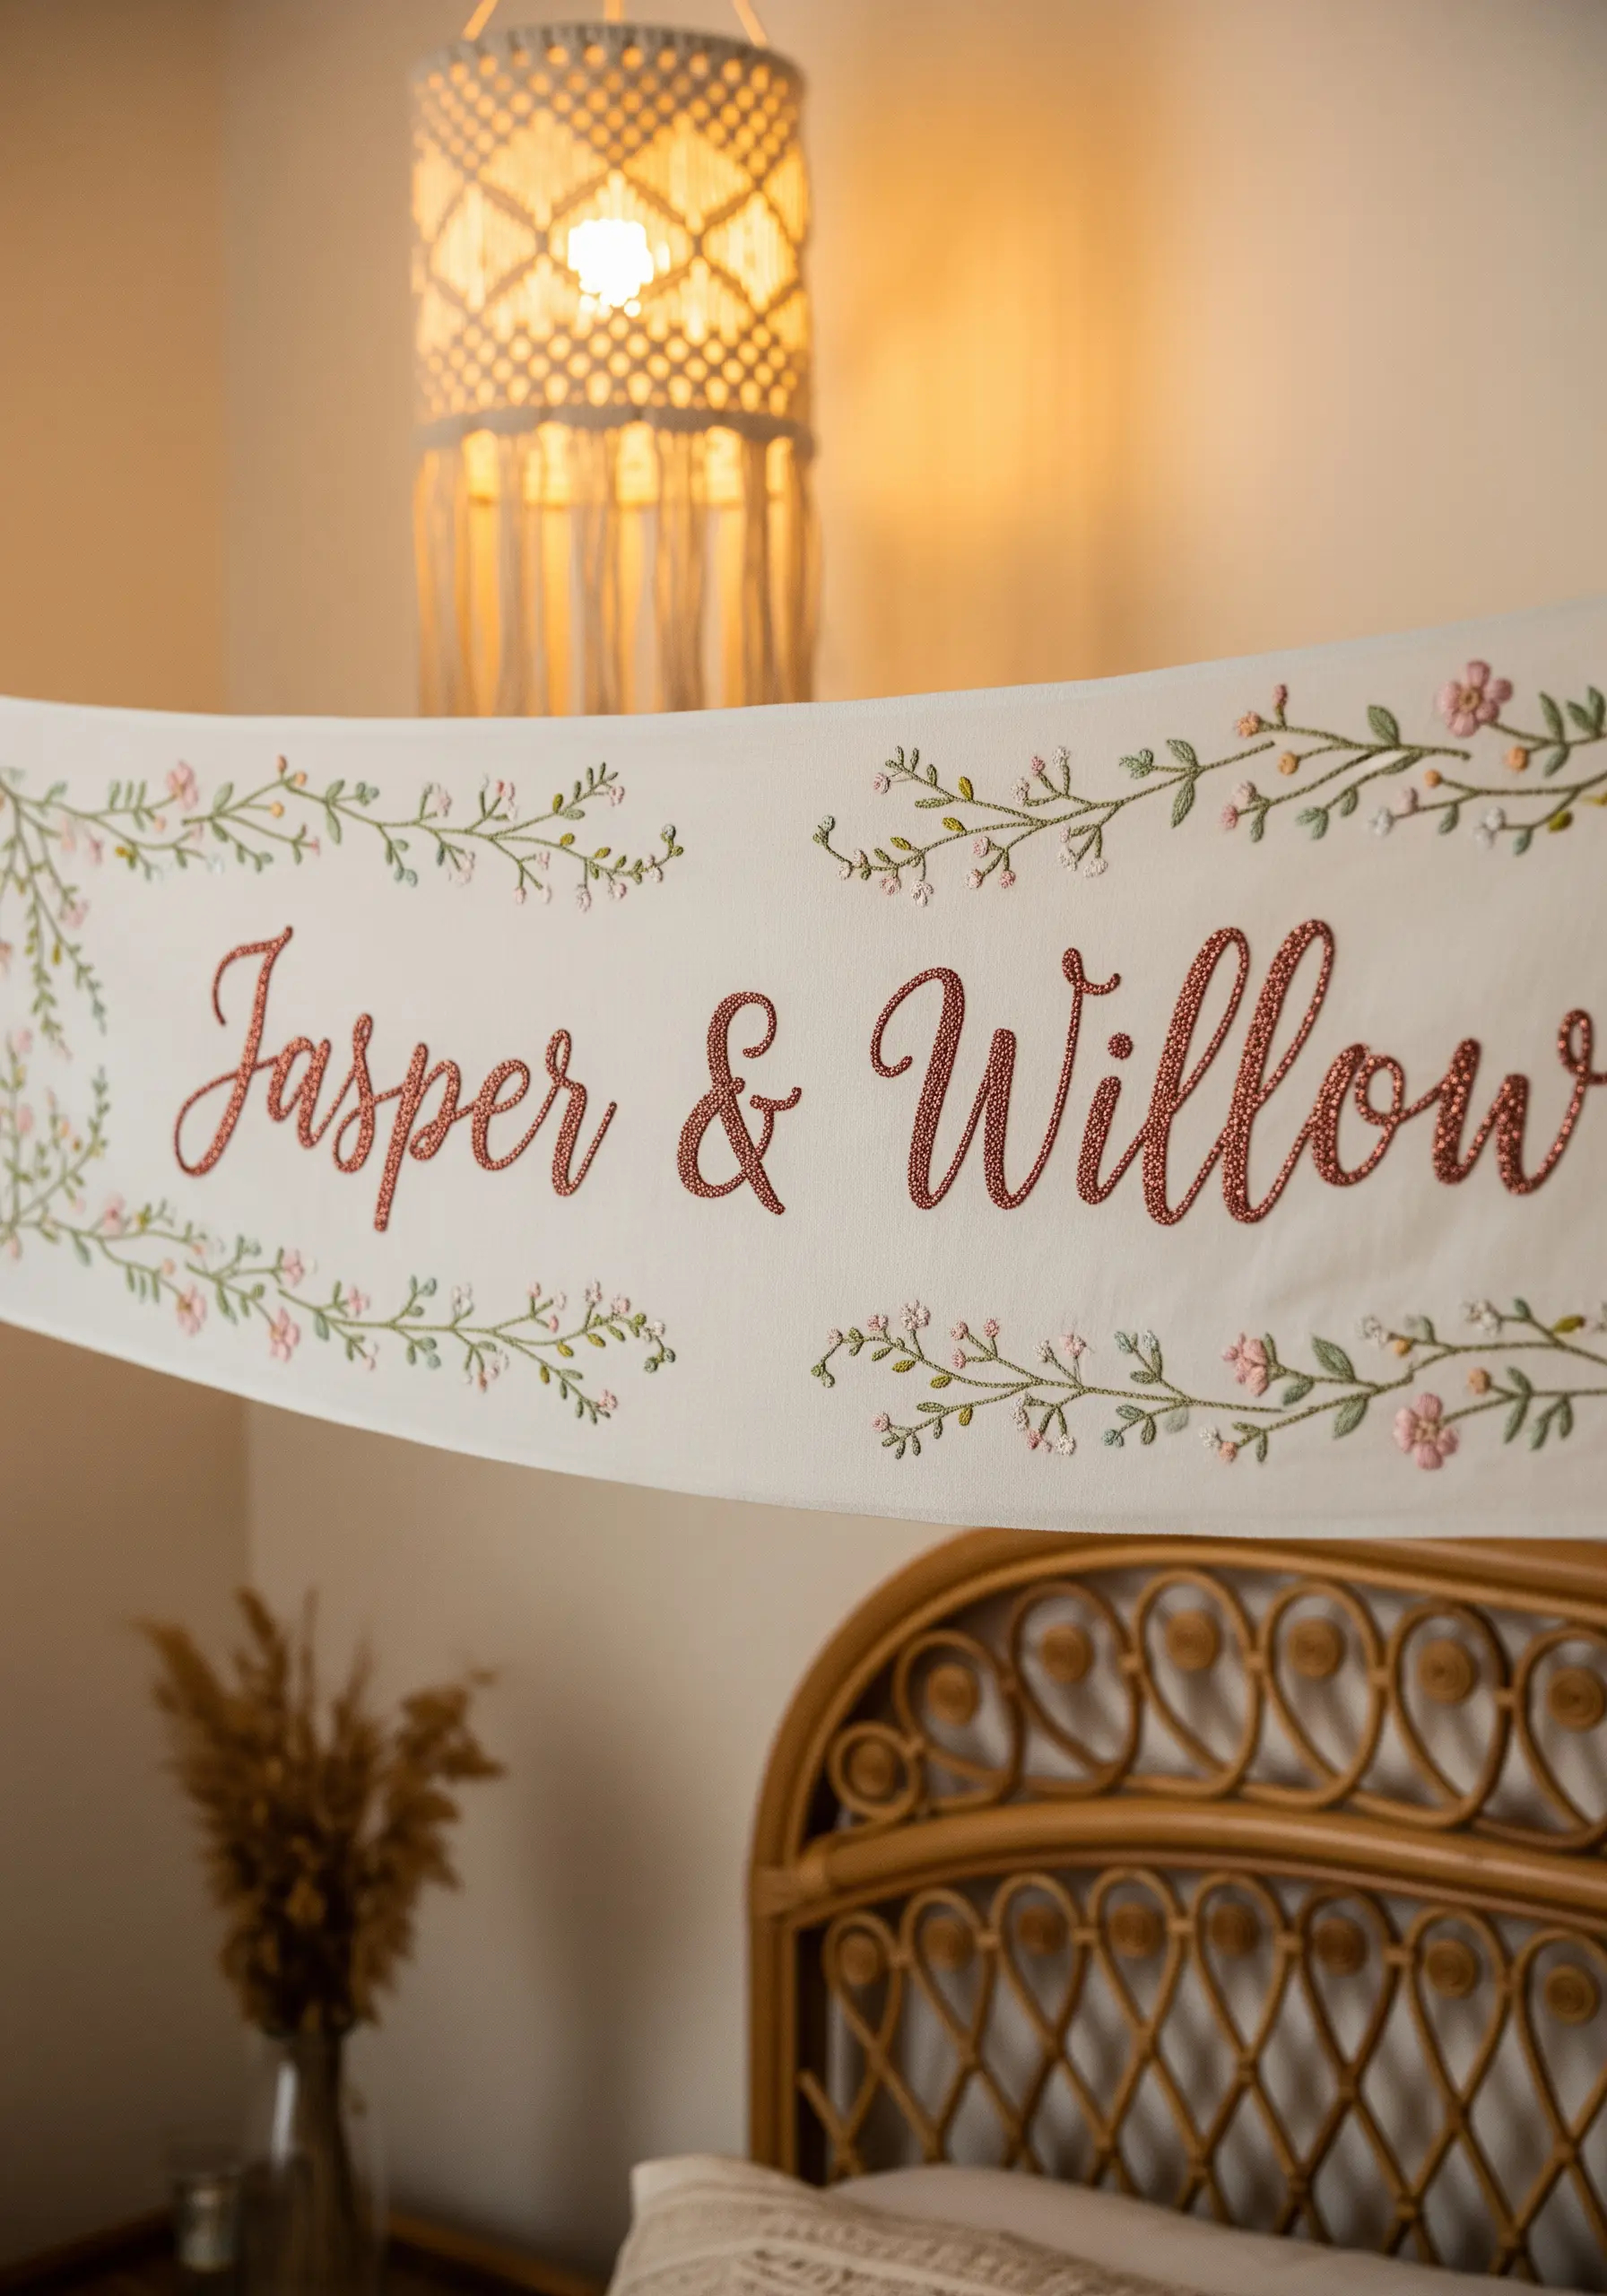
Working with metallic thread is easier when you use a thread conditioner and shorter strands (about 12 inches) to prevent tangling.
To give the script a raised, luxurious feel, first outline the letters with a split stitch foundation.
Then, cover this padding with satin stitches using your metallic thread.
The contrast between the shimmering, bold names and the delicate, matte florals in simple backstitch creates a beautiful focal point, turning a simple banner into elegant bedroom embroidery accents.
7. Use Patterned Fabric as a Dynamic Background
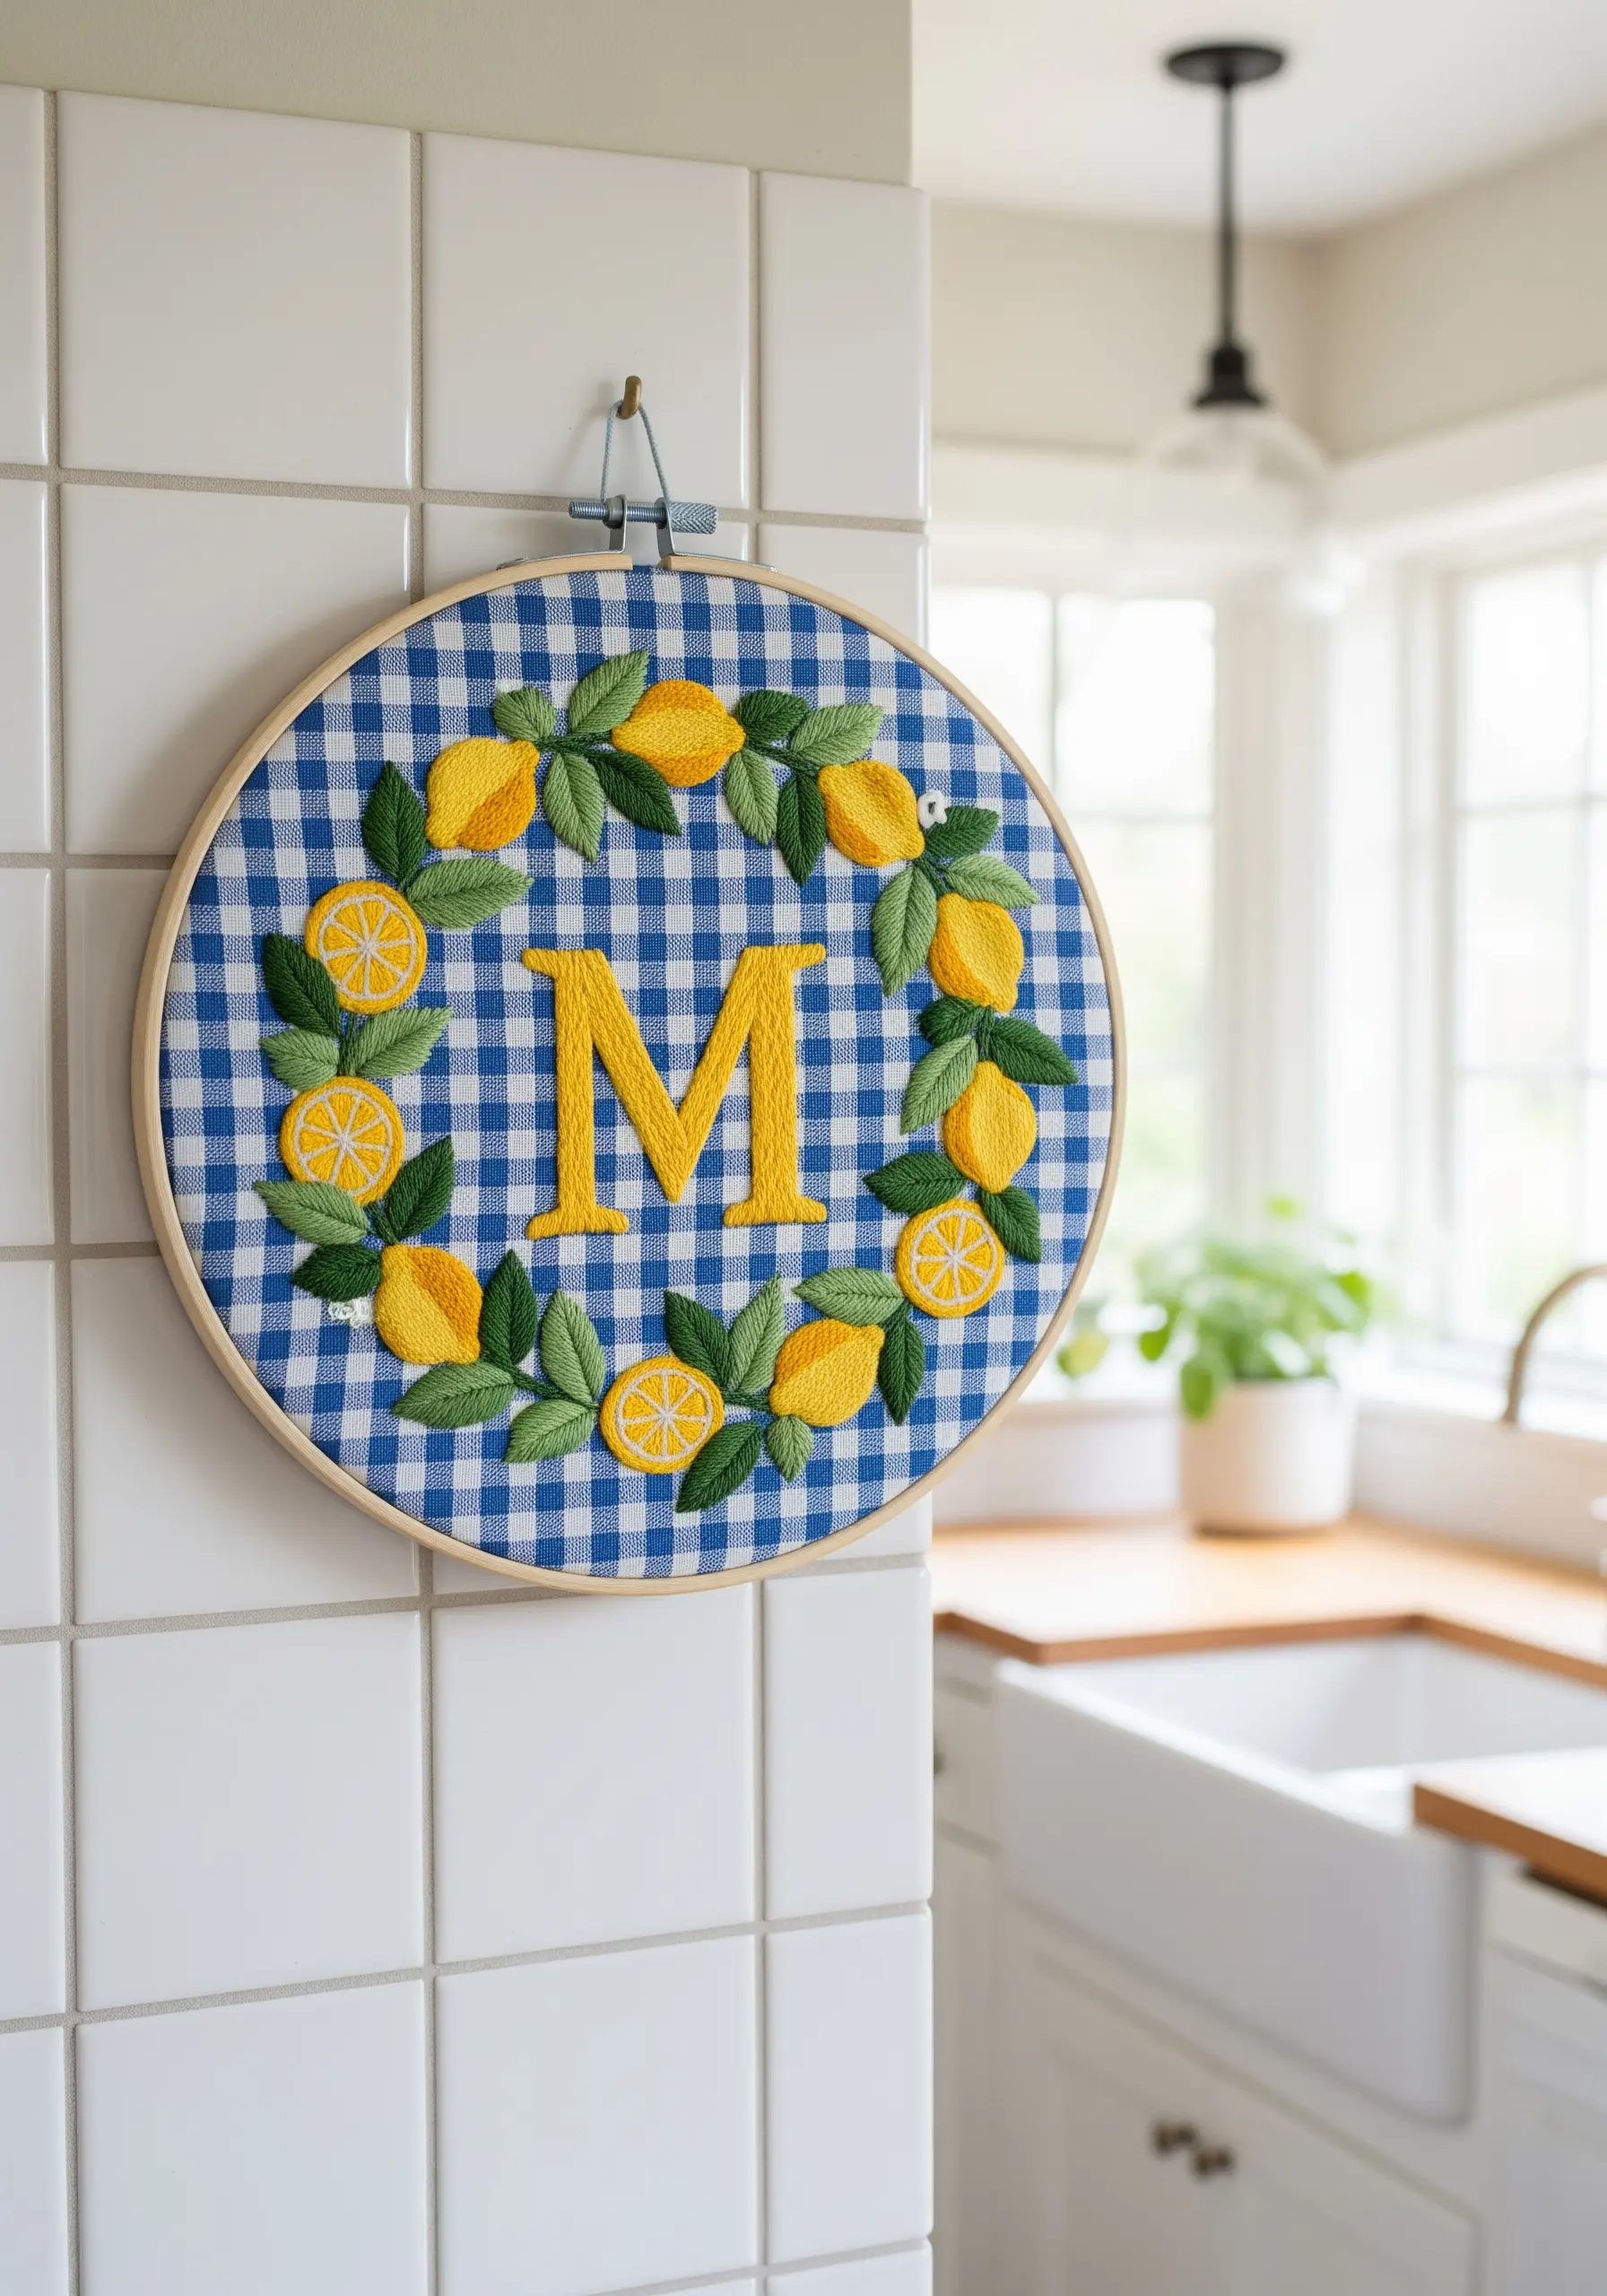
Allow a patterned fabric, like gingham, to become an integral part of your design.
The grid of the pattern provides a natural guide for centering your work and adds instant visual texture.
Choose high-contrast thread colors—like this vibrant yellow and deep green against blue—to ensure your embroidered motifs stand out clearly.
Fill the lemons with a dense satin stitch to make them appear solid and plump against the flat pattern, creating cheerful kitchen decor.
8. Achieve Regal Detail with Metallic Thread and Silk Shading
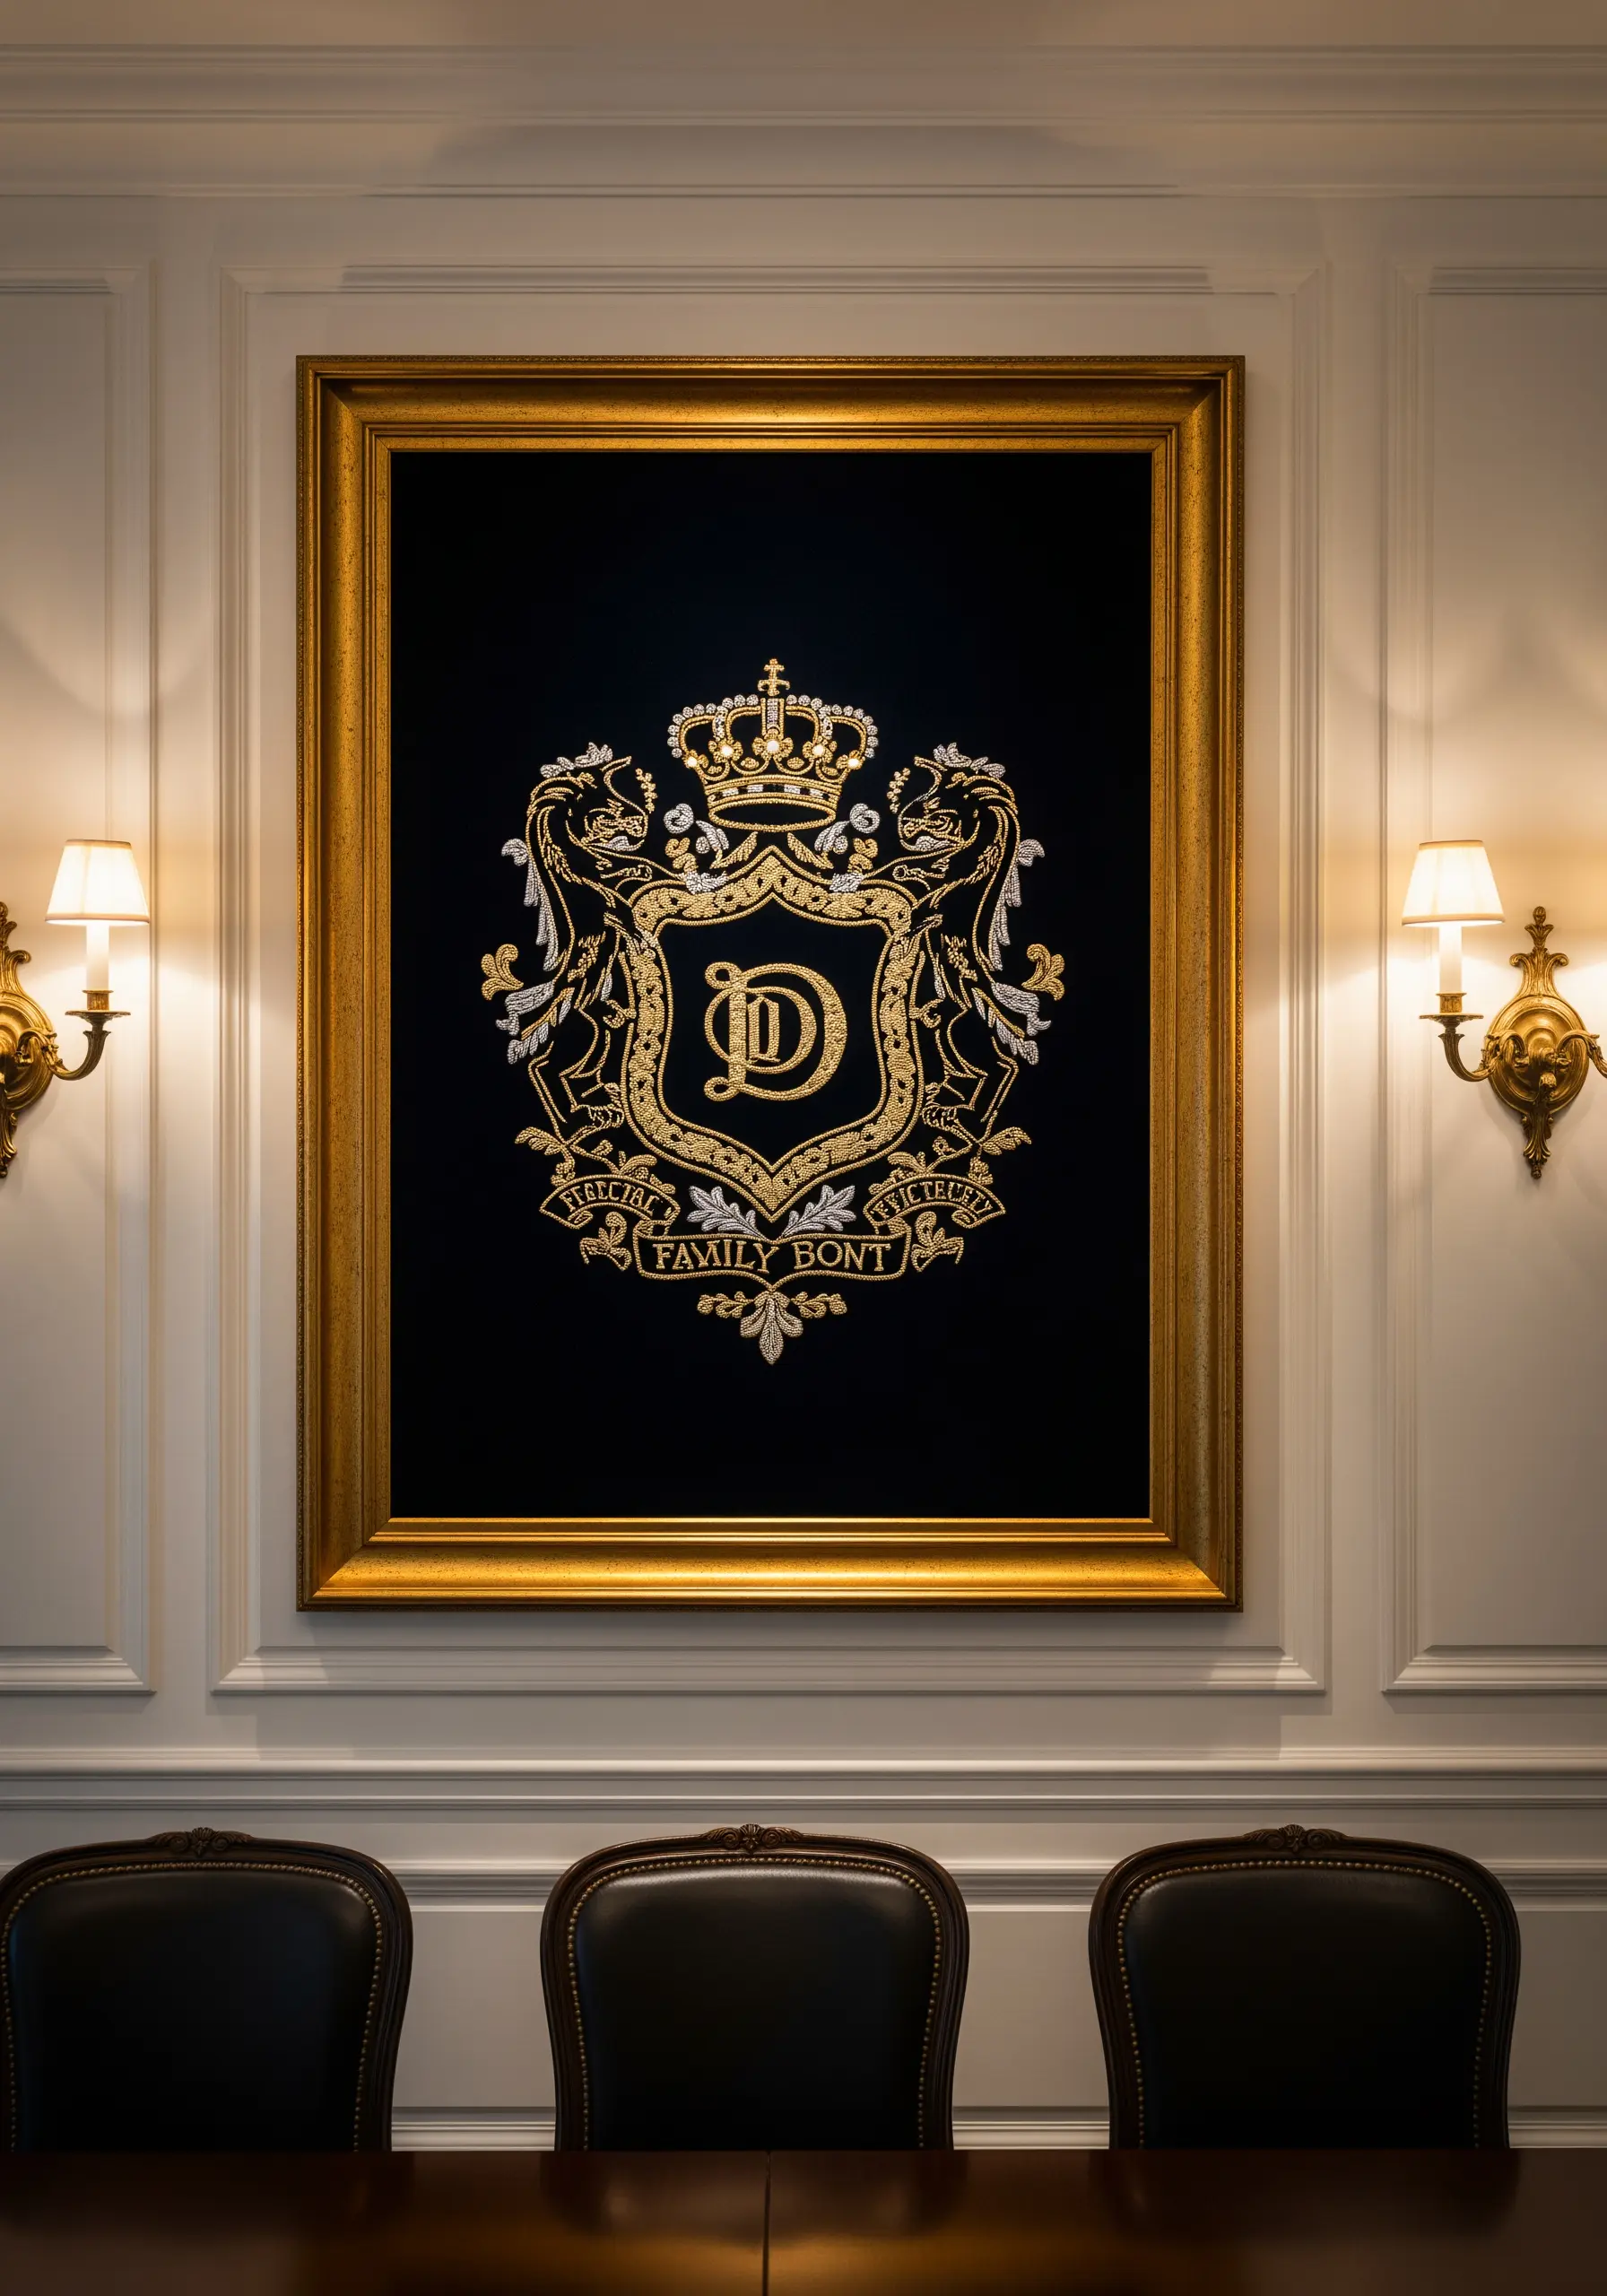
For an intricate family crest, combine textures for a truly heirloom effect.
Use a fine metallic thread for outlines and filigree, applying it with a couching stitch to achieve perfectly smooth curves without pulling the thread through the fabric repeatedly.
For filled areas and gradients, use the silk shading (long-and-short stitch) technique with single strands of floss.
The play of light between the metallic shimmer and the soft sheen of silk on a dark velvet creates decadent, handmade art pieces that tell a story through texture.
9. Combine Felt Appliqué with Simple Outline Stitches
For clean, bold lettering that is quick to complete, use felt appliqué.
Cut your letters from high-quality felt and secure them to the base fabric with a thin layer of fabric glue or fusible webbing.
Add a charming, handmade detail by outlining the letters with a simple running stitch or backstitch in a contrasting color.
This technique provides a playful, graphic look and is an excellent way to add a personal touch to your bedroom decor without hours of dense stitching.
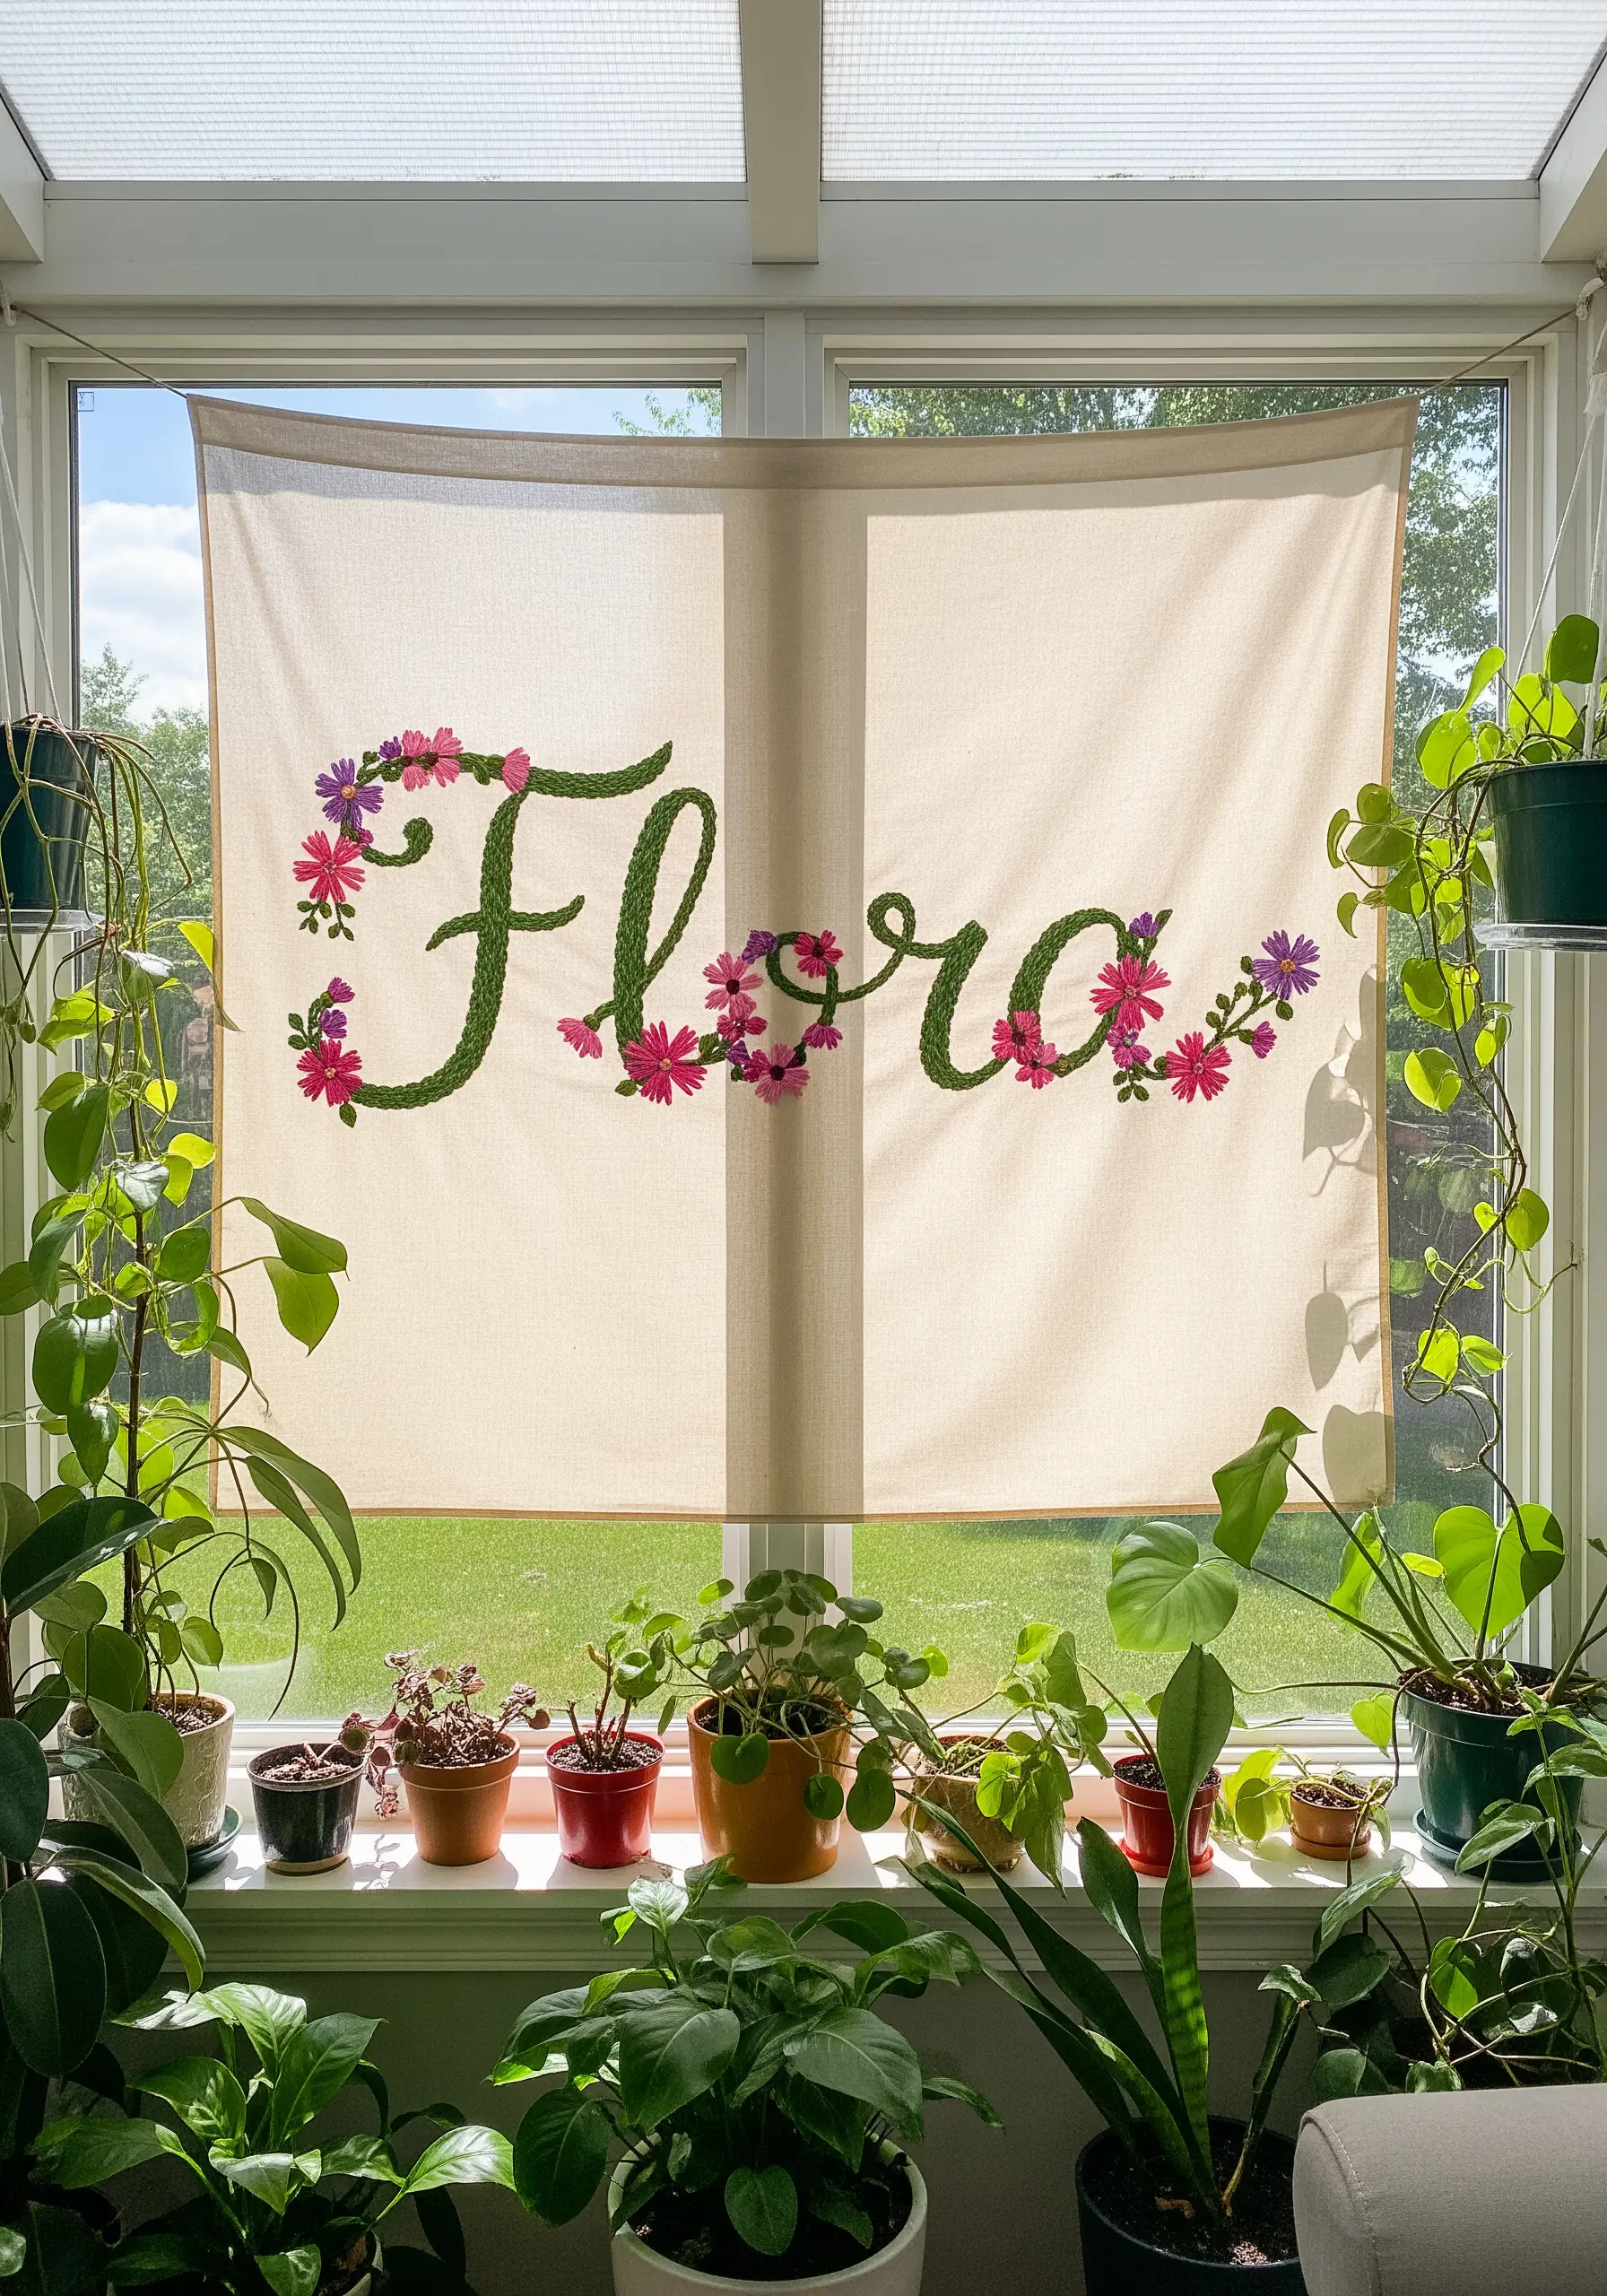
10. Create a Monogram with Dense Floral Thread Painting
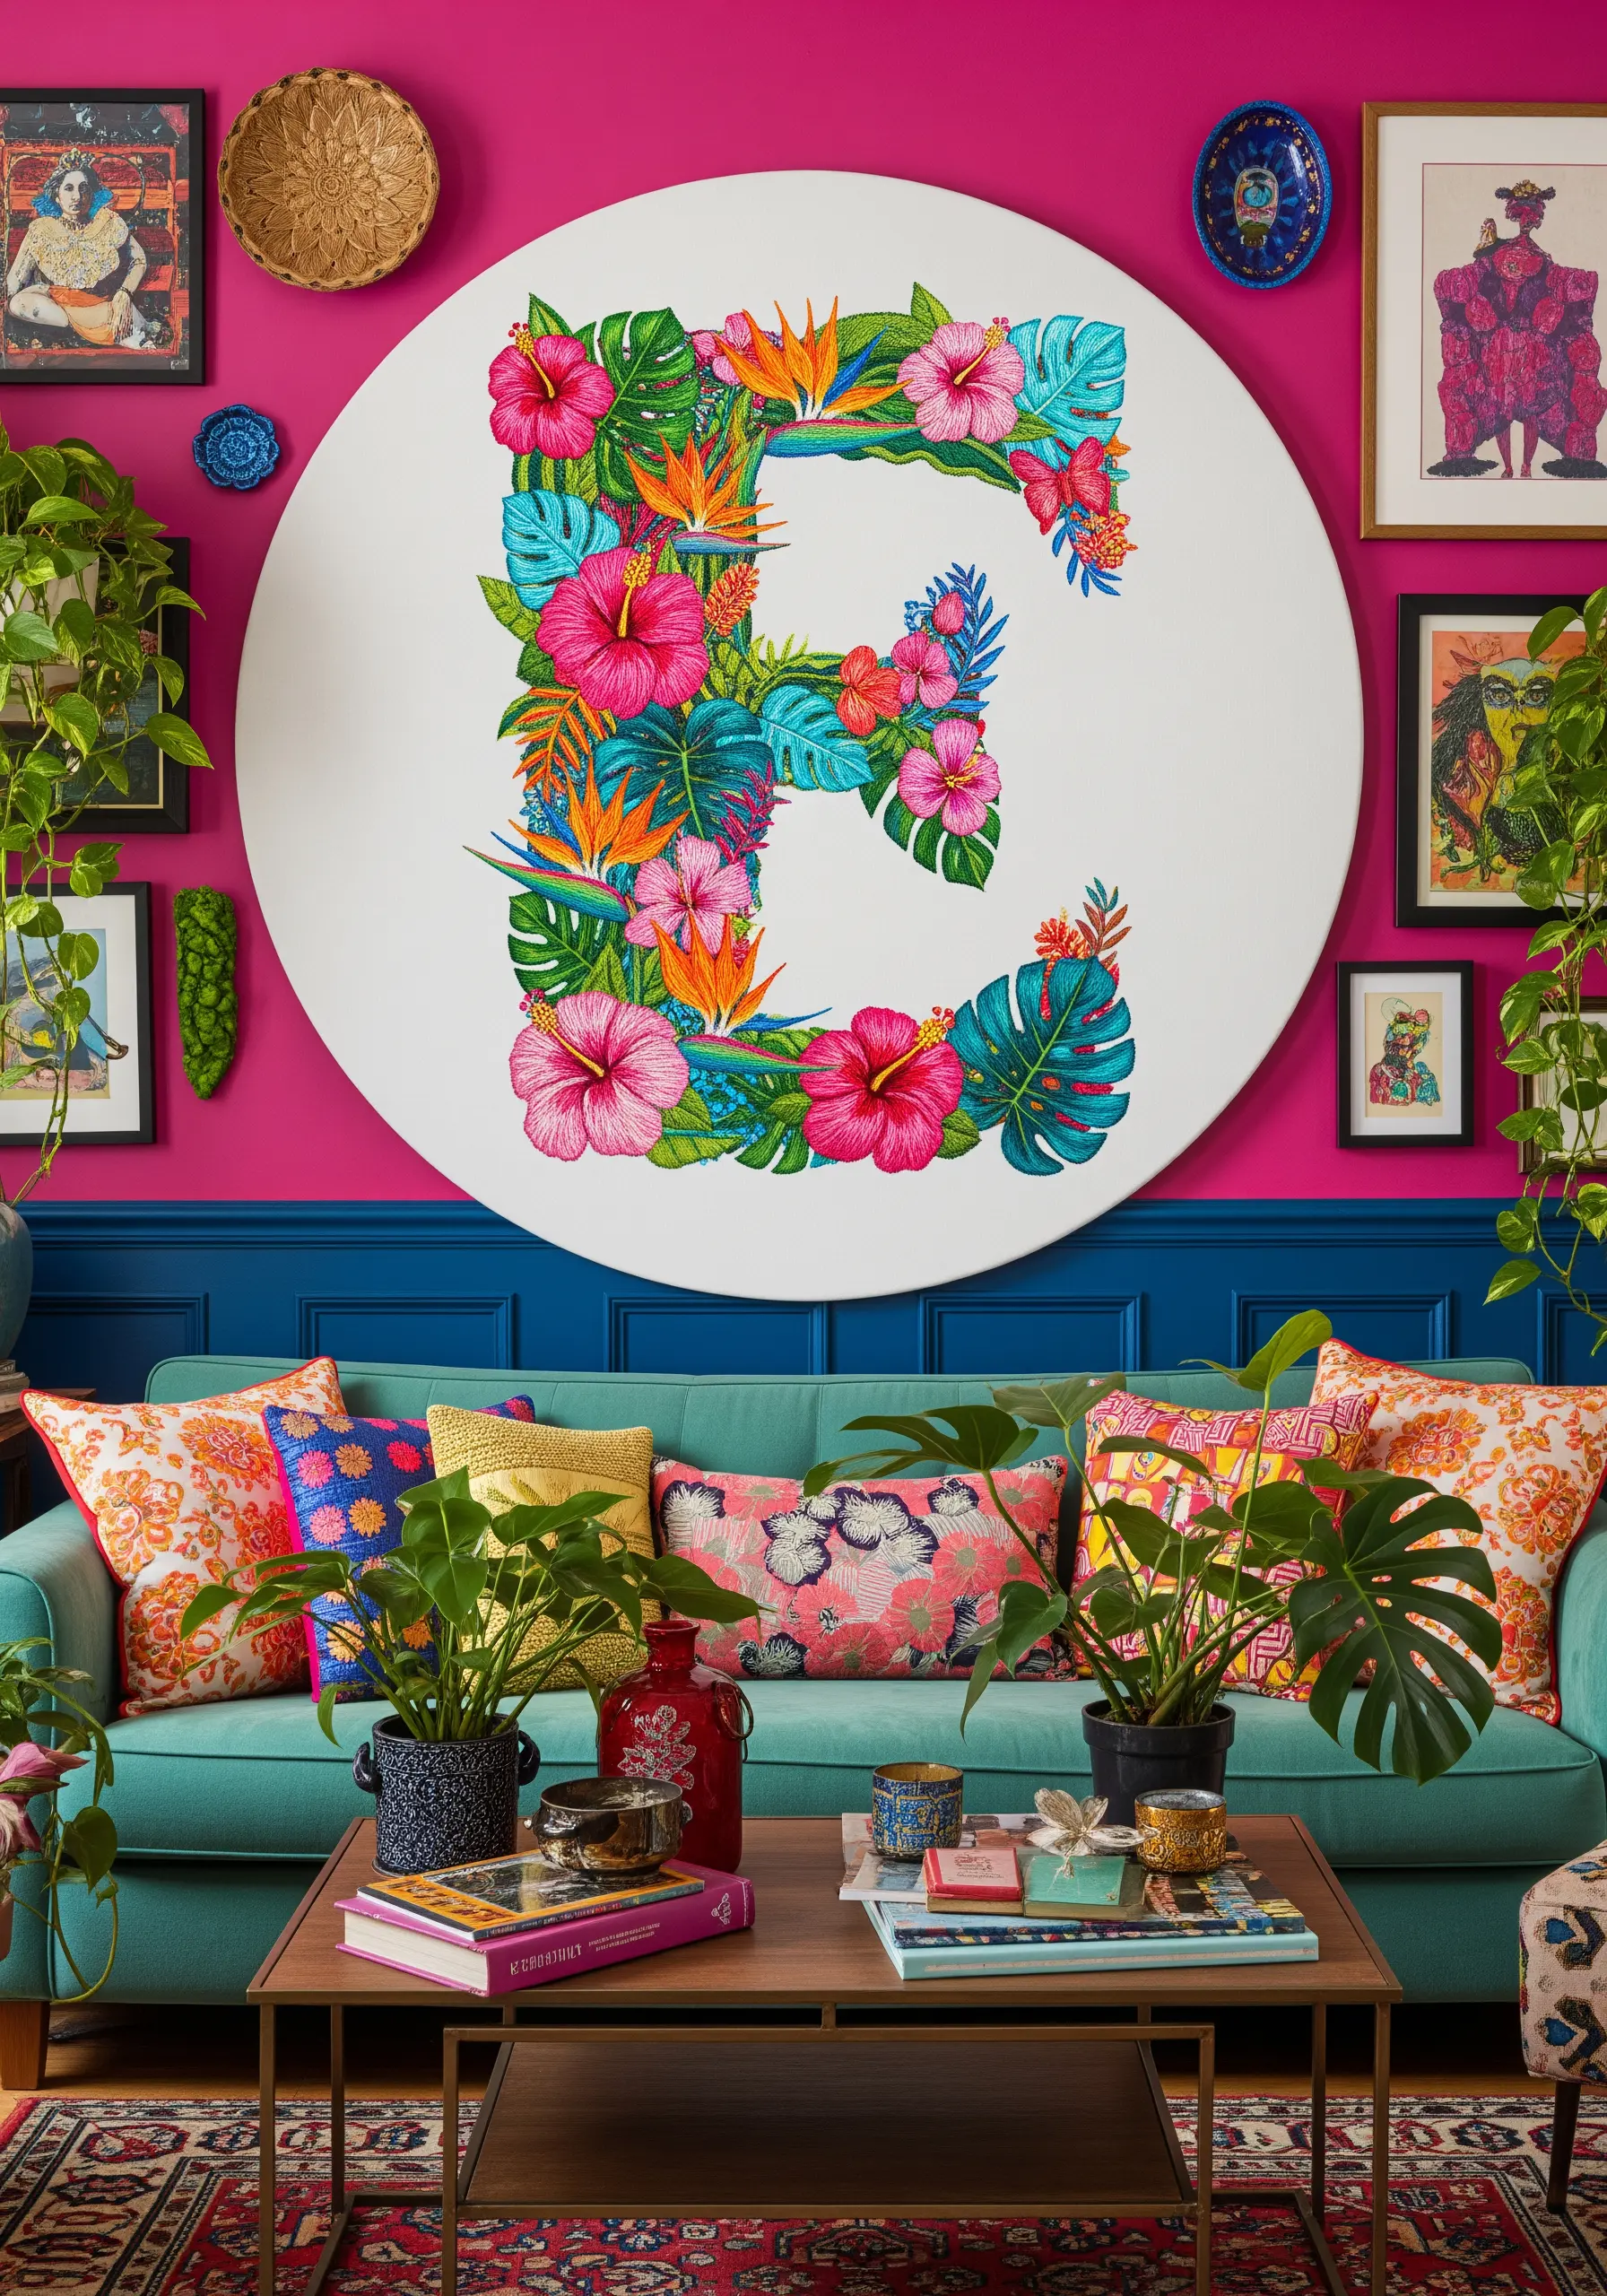
Treat the outline of a large letter as your canvas for a lush botanical scene.
Use long-and-short stitch as your primary tool to blend colors seamlessly, creating realistic gradients on petals and leaves.
Don’t be afraid to allow flowers and leaves to overlap slightly to build a sense of depth and abundance.
This technique transforms a simple monogram into a vibrant, statement piece, perfect for large-scale embroidery tapestries.
11. Master Delicate Lettering with a Whipped Backstitch
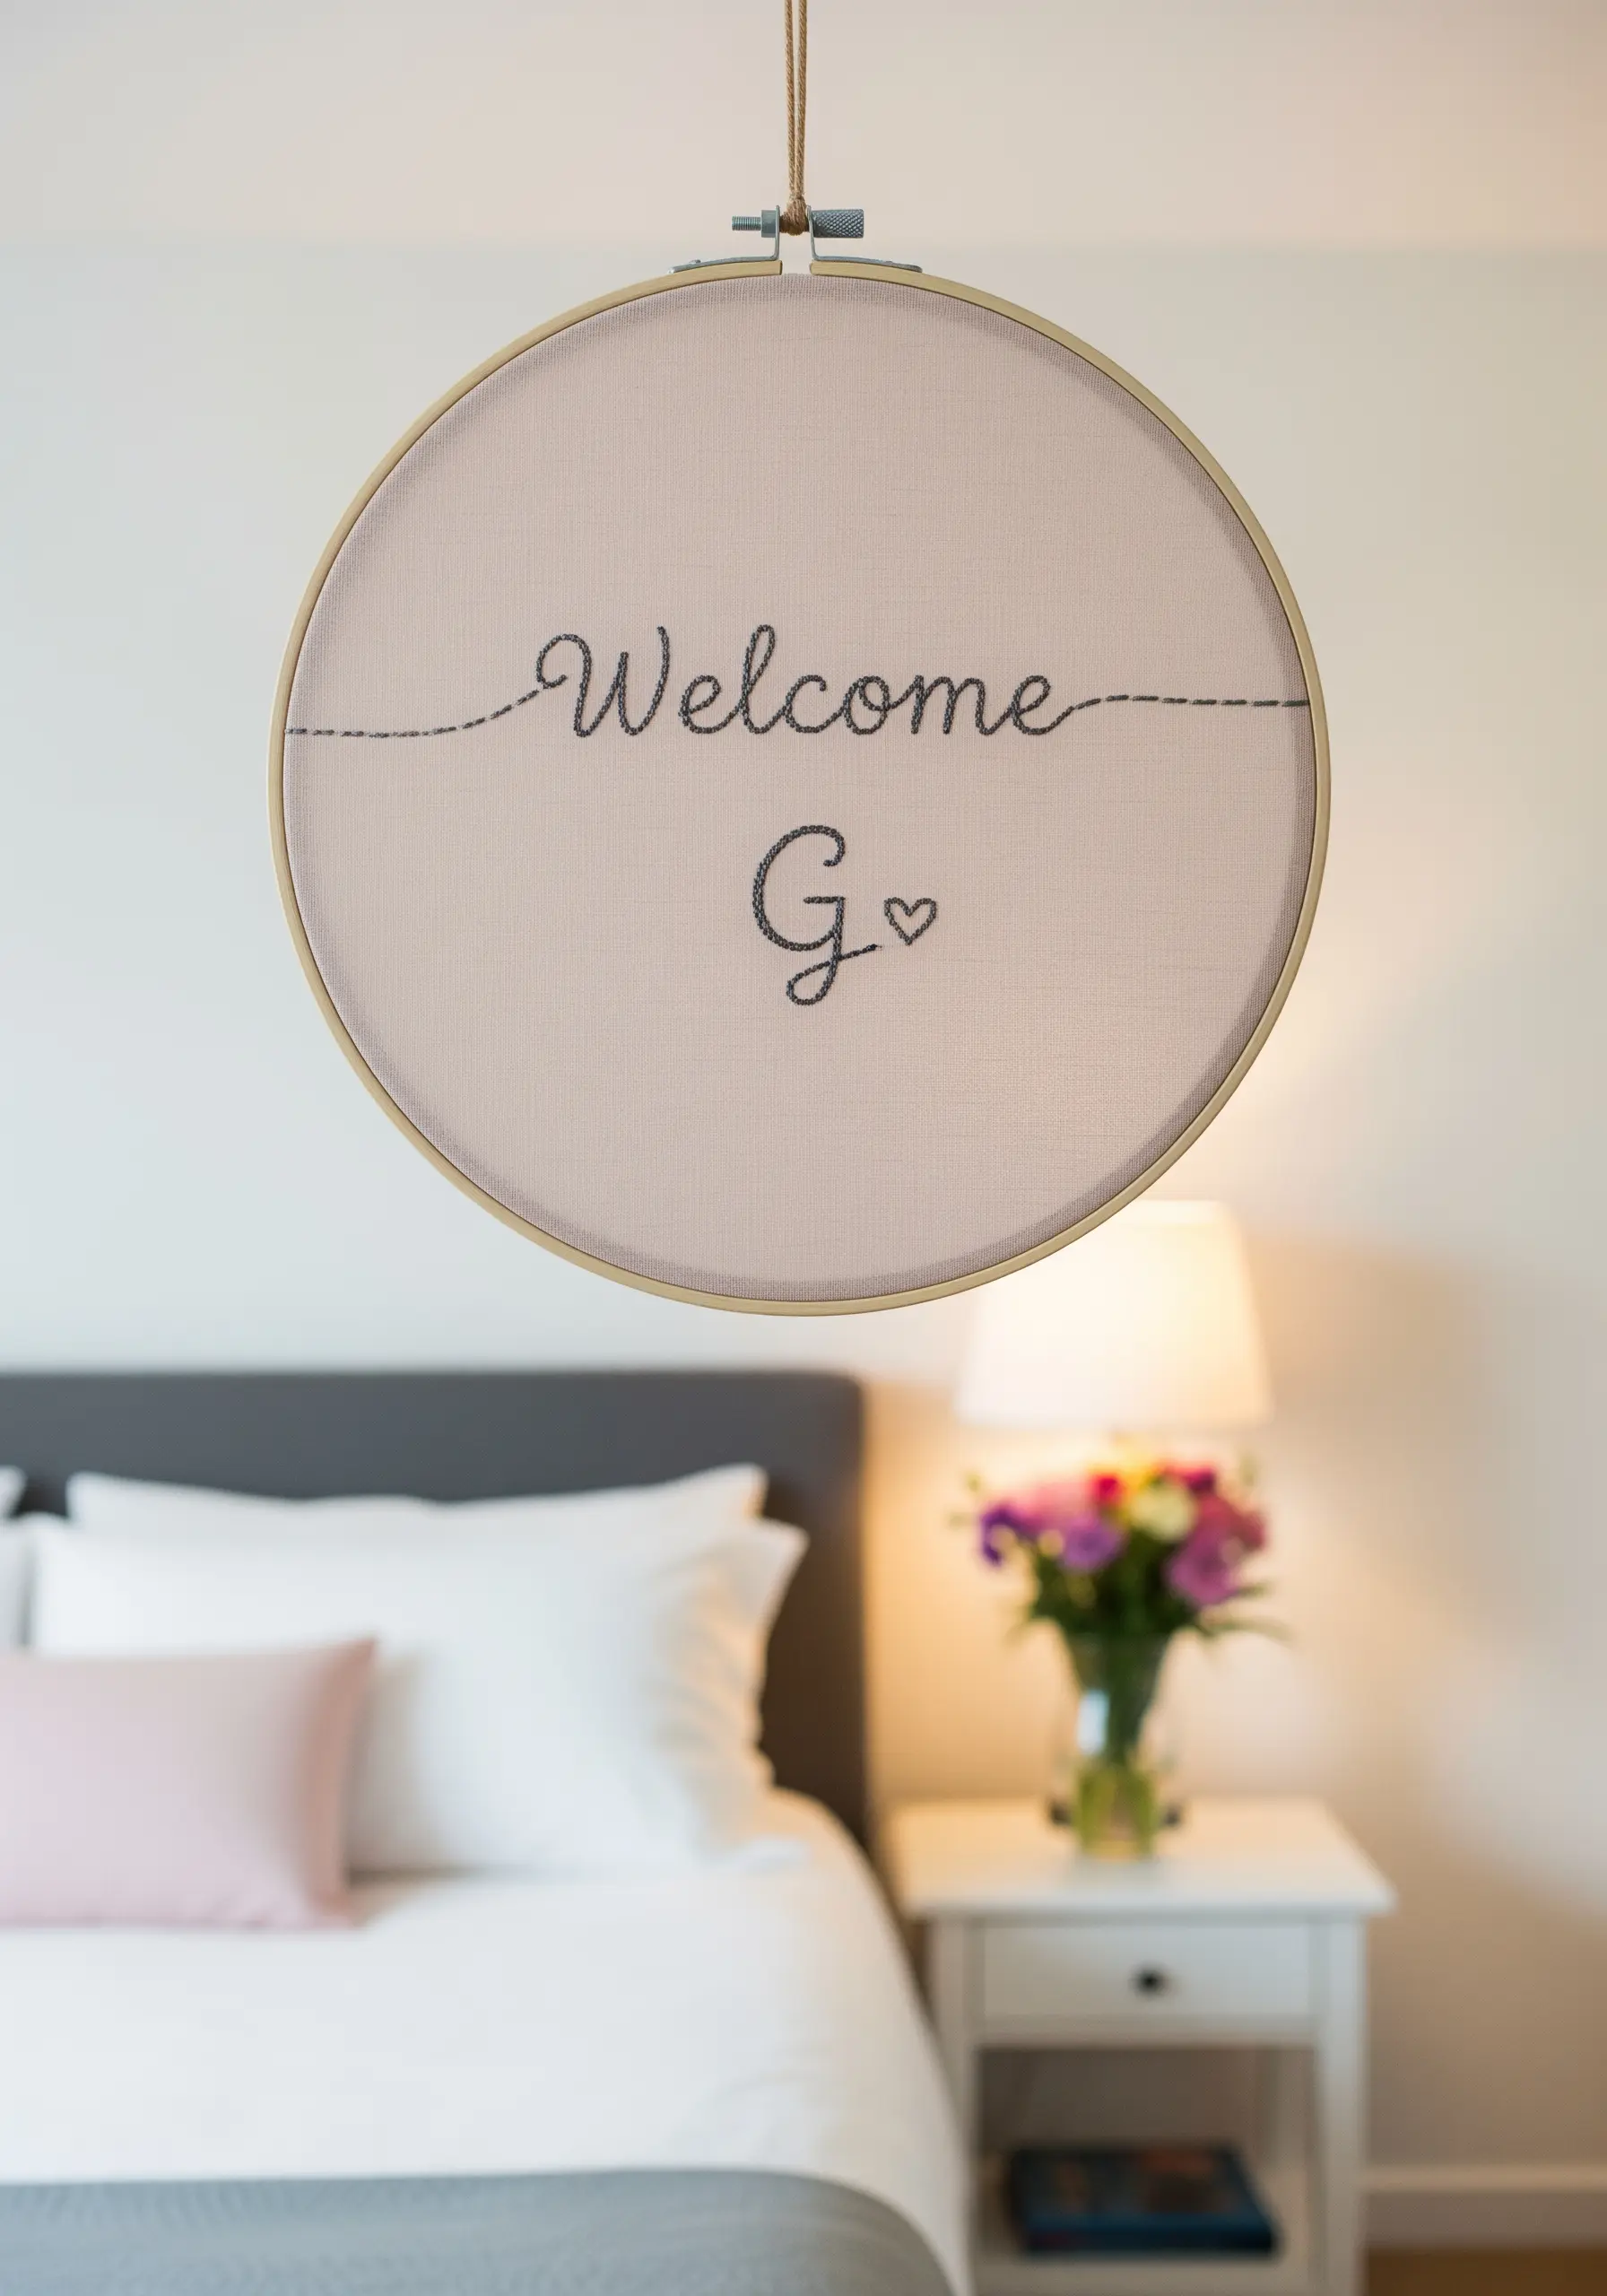
For a fine, continuous script that mimics the grace of calligraphy, the whipped backstitch is your strongest technique.
First, lay down a foundation of simple backstitches along your text outline.
Next, using a second length of thread, pass the needle under each backstitch without piercing the fabric, ‘whipping’ around the foundation.
This action smooths the segmented look of the backstitch, creating a single, fluid line that elevates delicate line art embroidery.
12. Embellish Ornate Monograms with Beading and Knots
To add sophisticated texture to a vintage-style monogram, incorporate beadwork and French knots.
Use couching to create the main, smooth outlines of the letterform.
Then, accentuate the curves and flourishes by stitching tiny seed beads along the edges.
Fill the wider sections of the letter with clusters of French knots to create a rich, tactile contrast.
This layering of smooth lines and dotted textures results in stunning, gallery-worthy framed embroidery patterns.
13. Build Textural Letters with French Knot Filling
To create a lush, moss-like effect, fill your entire letter shapes with tightly packed French knots.
Using a variegated green thread, or alternating between two or three similar shades, will add natural-looking depth and dimension to the texture.
Work in dense rows to ensure no fabric shows through.
This high-impact technique is a beautiful way to capture nature’s textures in your next embroidery project, making the name itself a tactile focal point.
14. Achieve High Contrast with Negative Space Stitching
This advanced technique involves stitching the background to reveal the letter in un-stitched fabric.
Carefully trace your letter onto a dark fabric, then fill the entire area around it with a uniform stitch, such as seed stitch or even simple running stitches.
The key is consistency in stitch length and density to create an even texture.
This reversal of positive and negative space results in powerful, monochrome designs that make minimalist statements pop.
15. Combine Padded Satin Stitch with Playful Scatter Motifs
To give your central word a raised, three-dimensional quality, use a padded satin stitch.
First, fill the letter shapes with an underlay of split stitches or running stitches.
Then, cover this padding with smooth, vertical satin stitches using your final color.
Surround your dimensional word with small, whimsical motifs, and consider adding real buttons or beads to create fun and inspirational designs for a craft room.
16. Convey Movement with Directional Line Stitches
You can create a sense of energy and flow just by controlling the direction of your stitches.
For the wave, use rows of split stitch or backstitch that arc and curve to mimic the motion of water.
Using a variegated thread or blending two similar shades of blue will enhance the illusion of movement and depth.
This technique allows you to capture motion and flow in your embroidery with very simple stitches.
17. Layer Fabric Appliqué for a Rustic, Textured Monogram
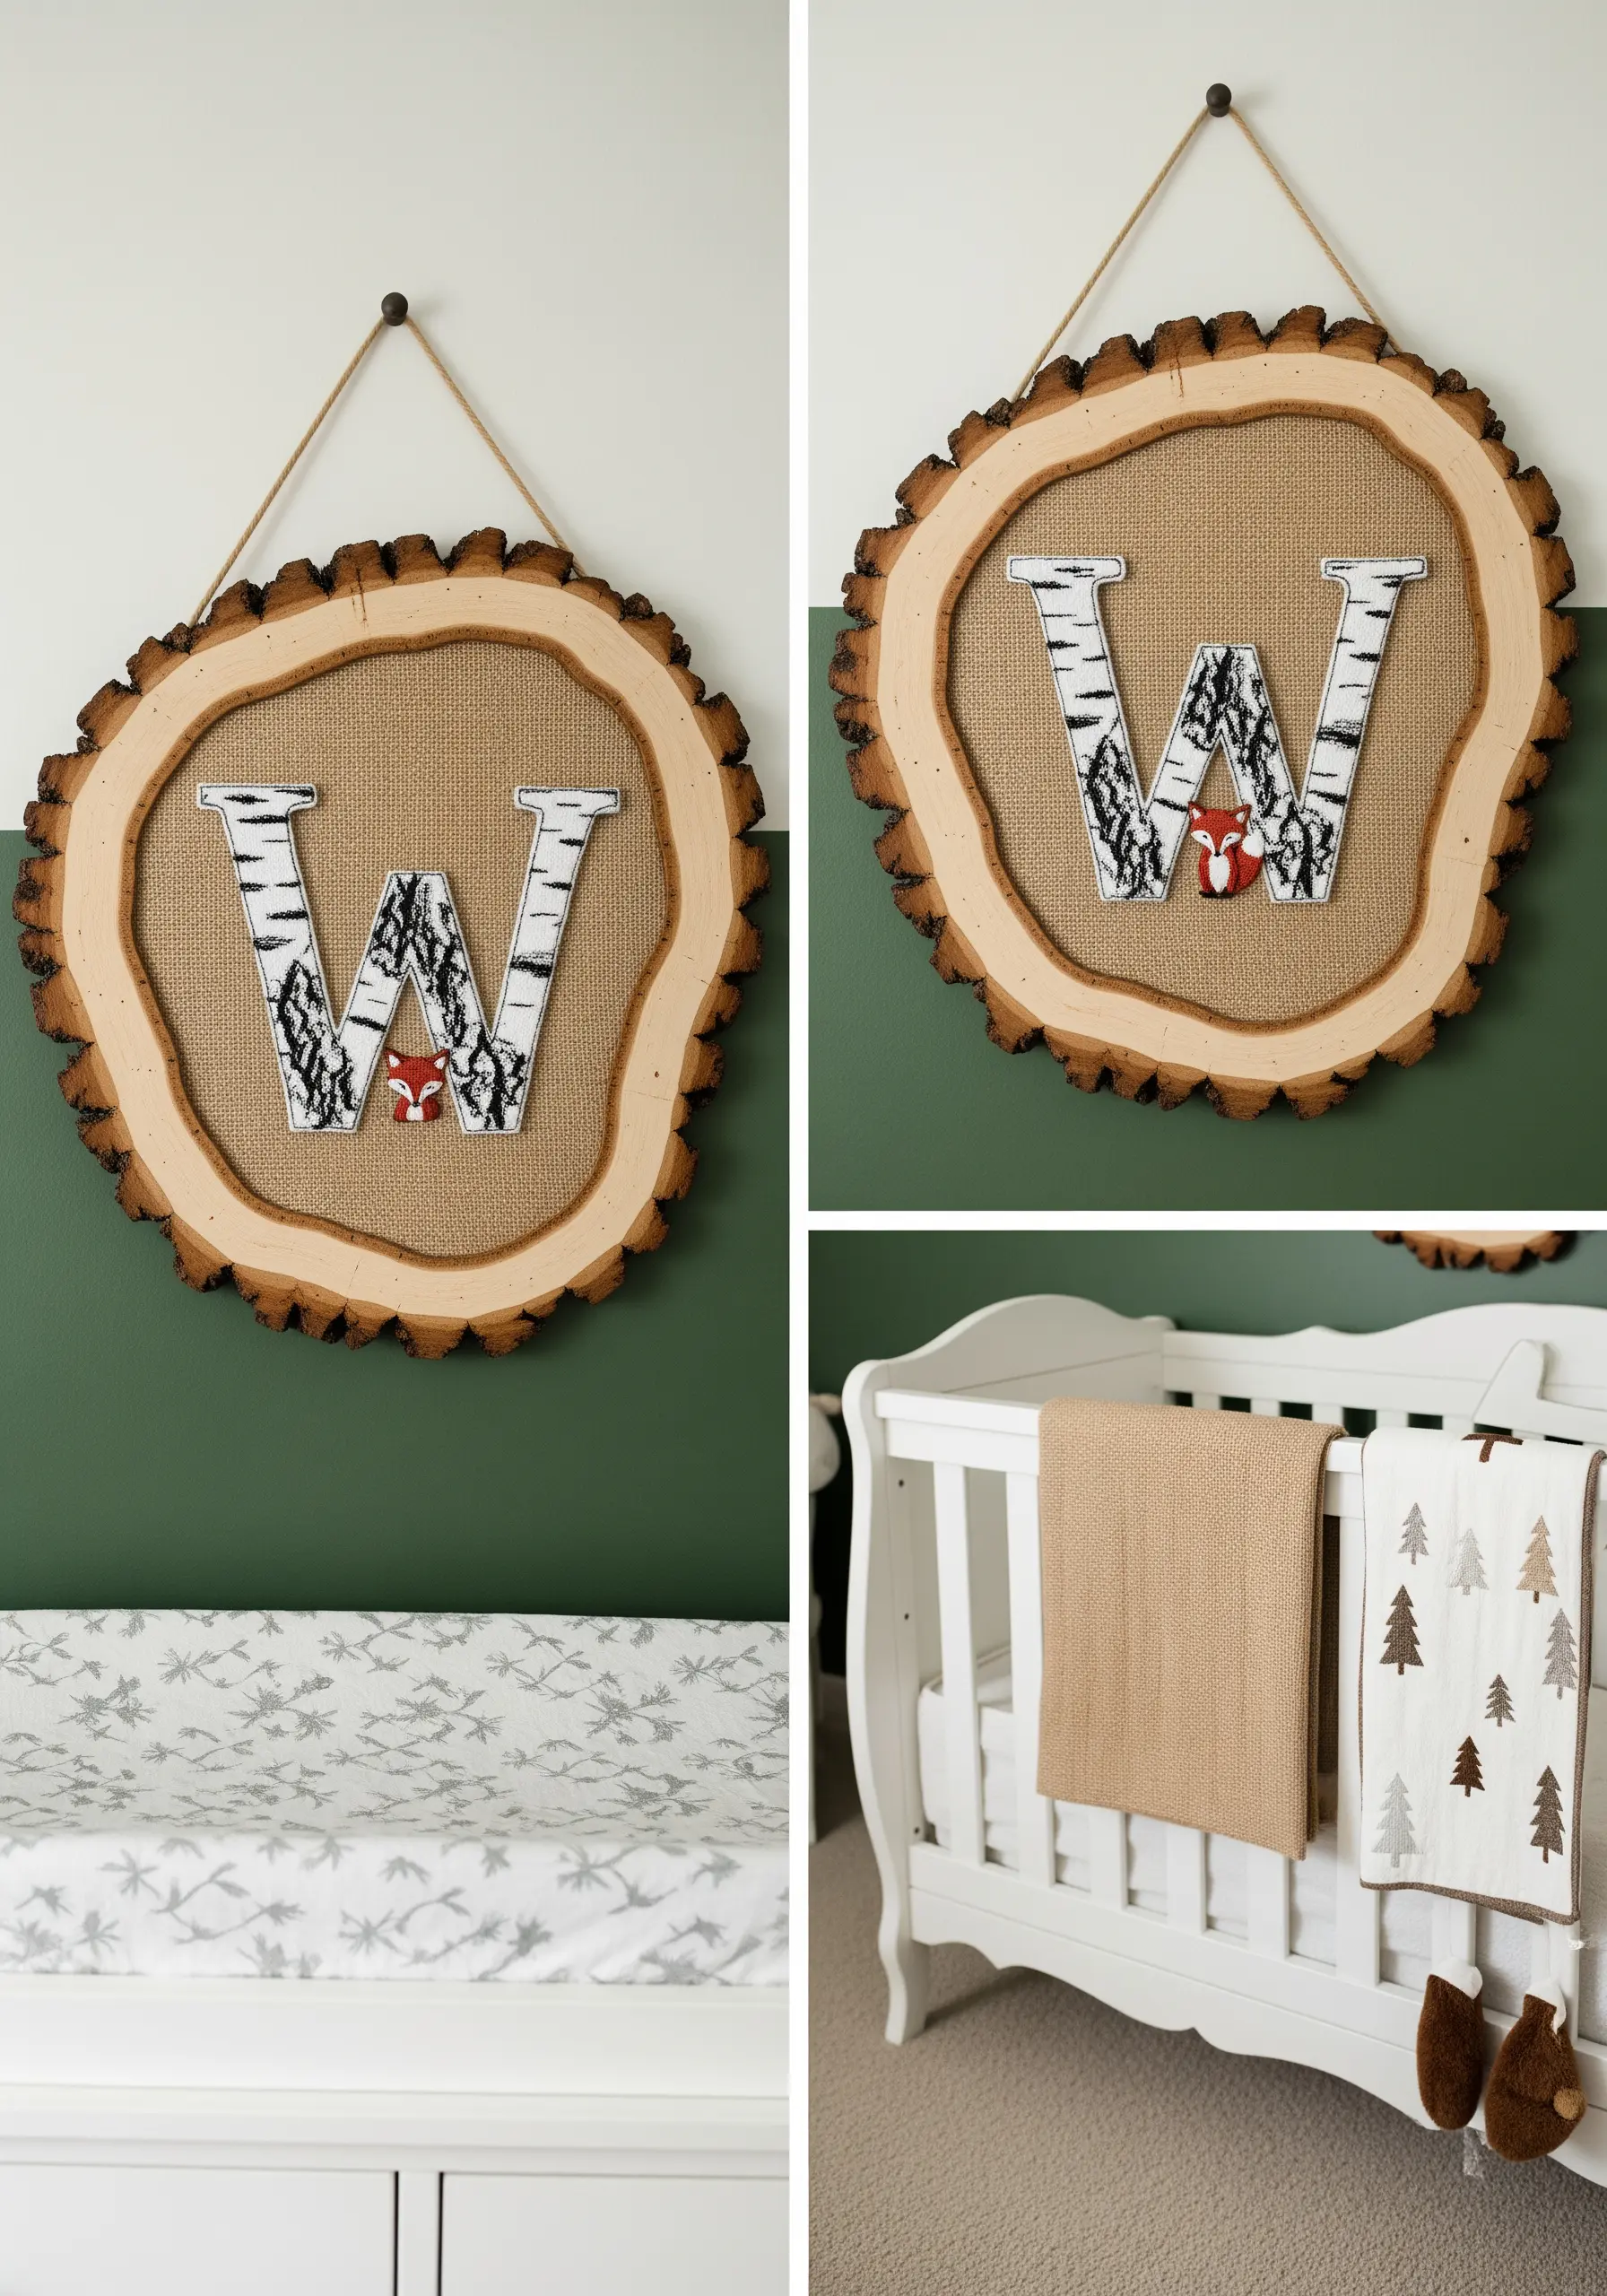
Create a charming woodland theme by layering different fabrics and textures.
Start with a burlap base for a rustic feel, then appliqué a letter cut from a patterned fabric, like this birch bark print.
Secure the edges of your appliqué with a neat satin stitch border.
Adding a tiny, detailed embroidered motif inside the letter adds a storytelling element, perfect for creating rustic woodland cottage themes.
Mounting the finished piece on a wood slice enhances the natural aesthetic.
18. Create Luxurious Lettering with Solid Gold Beading
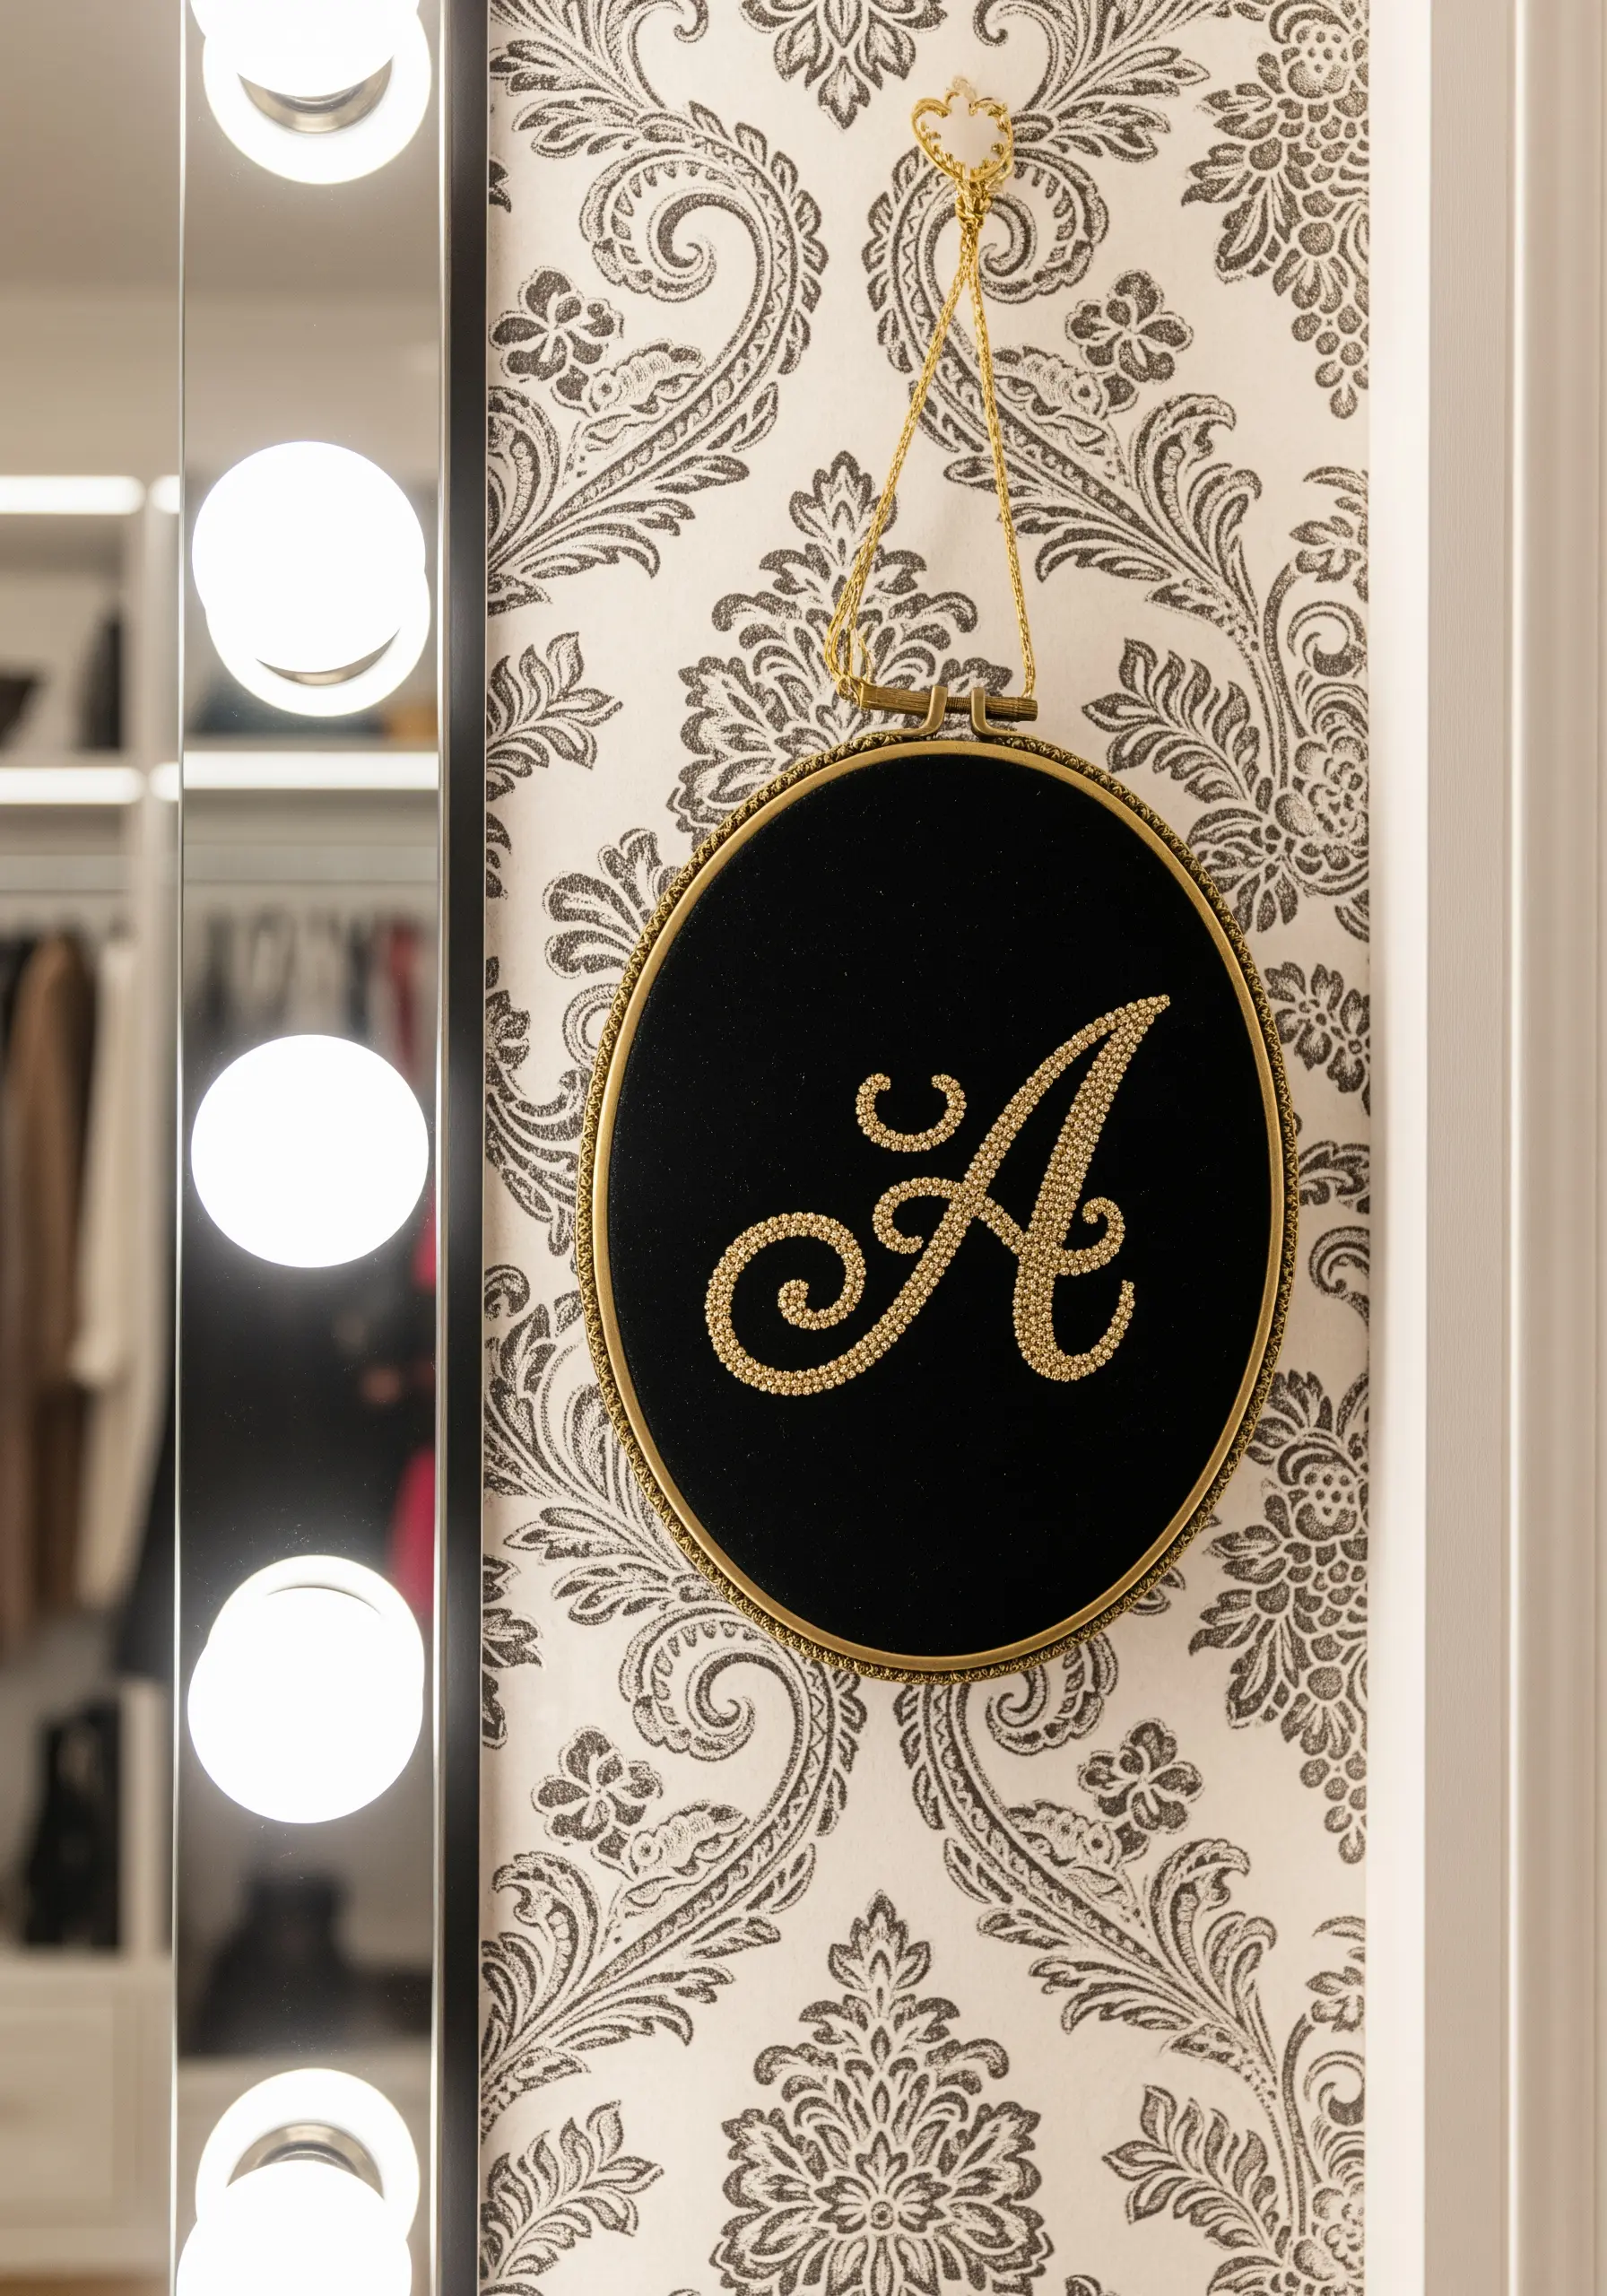
For an unapologetically glamorous effect, fill an entire monogram with seed beads.
Use a backstitch beading technique, picking up two or three beads per stitch to ensure they lie flat and secure.
Work in concentric rows from the outside in to maintain the letter’s shape.
The way the beads catch and reflect light, especially against a rich black velvet, is perfect for metallic, light-reflecting interiors.
19. Capture Botanical Delicacy with Precise Stitching
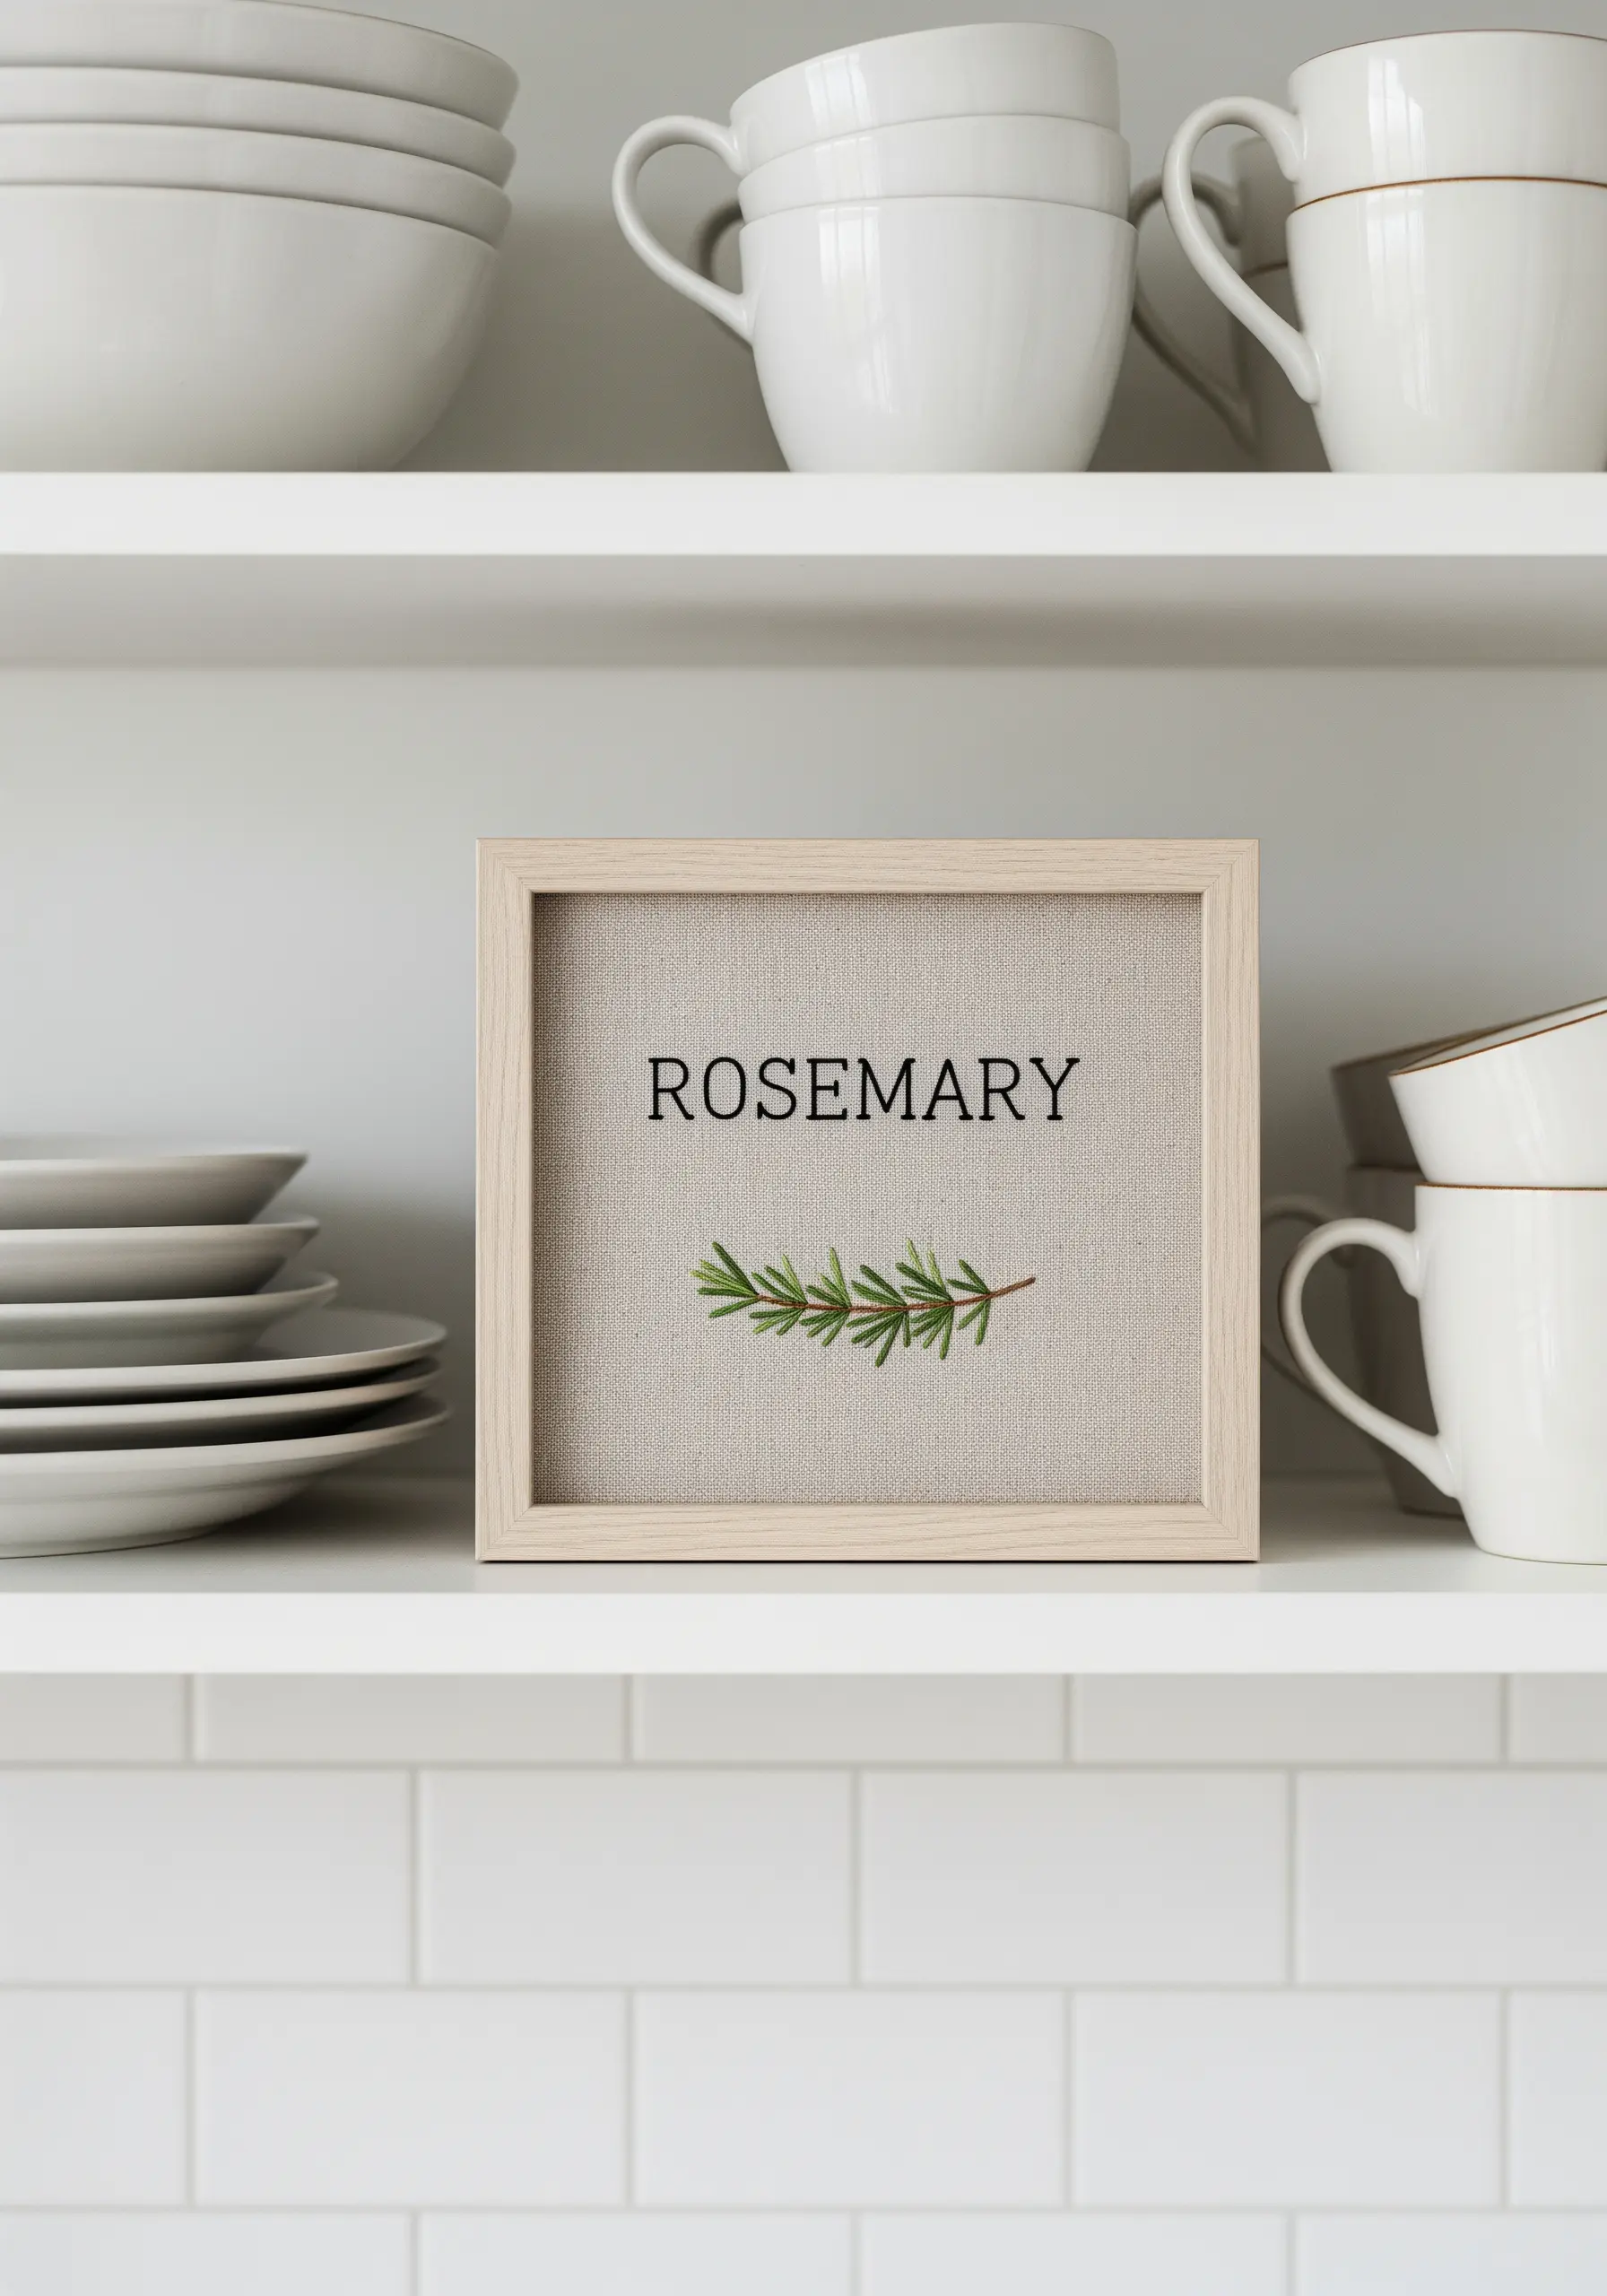
To realistically render a fine herb like rosemary, focus on precision and using the right stitch for each part.
Use a single strand of thread in a simple stem stitch for the woody stalk to keep it thin and defined.
For the needles, use individual, tiny straight stitches angled upwards from the stem.
Using a variegated green floss will add subtle color variation, making your medicinal herb embroidery designs look more lifelike.
20. Achieve Bold Texture with Yarn Couching
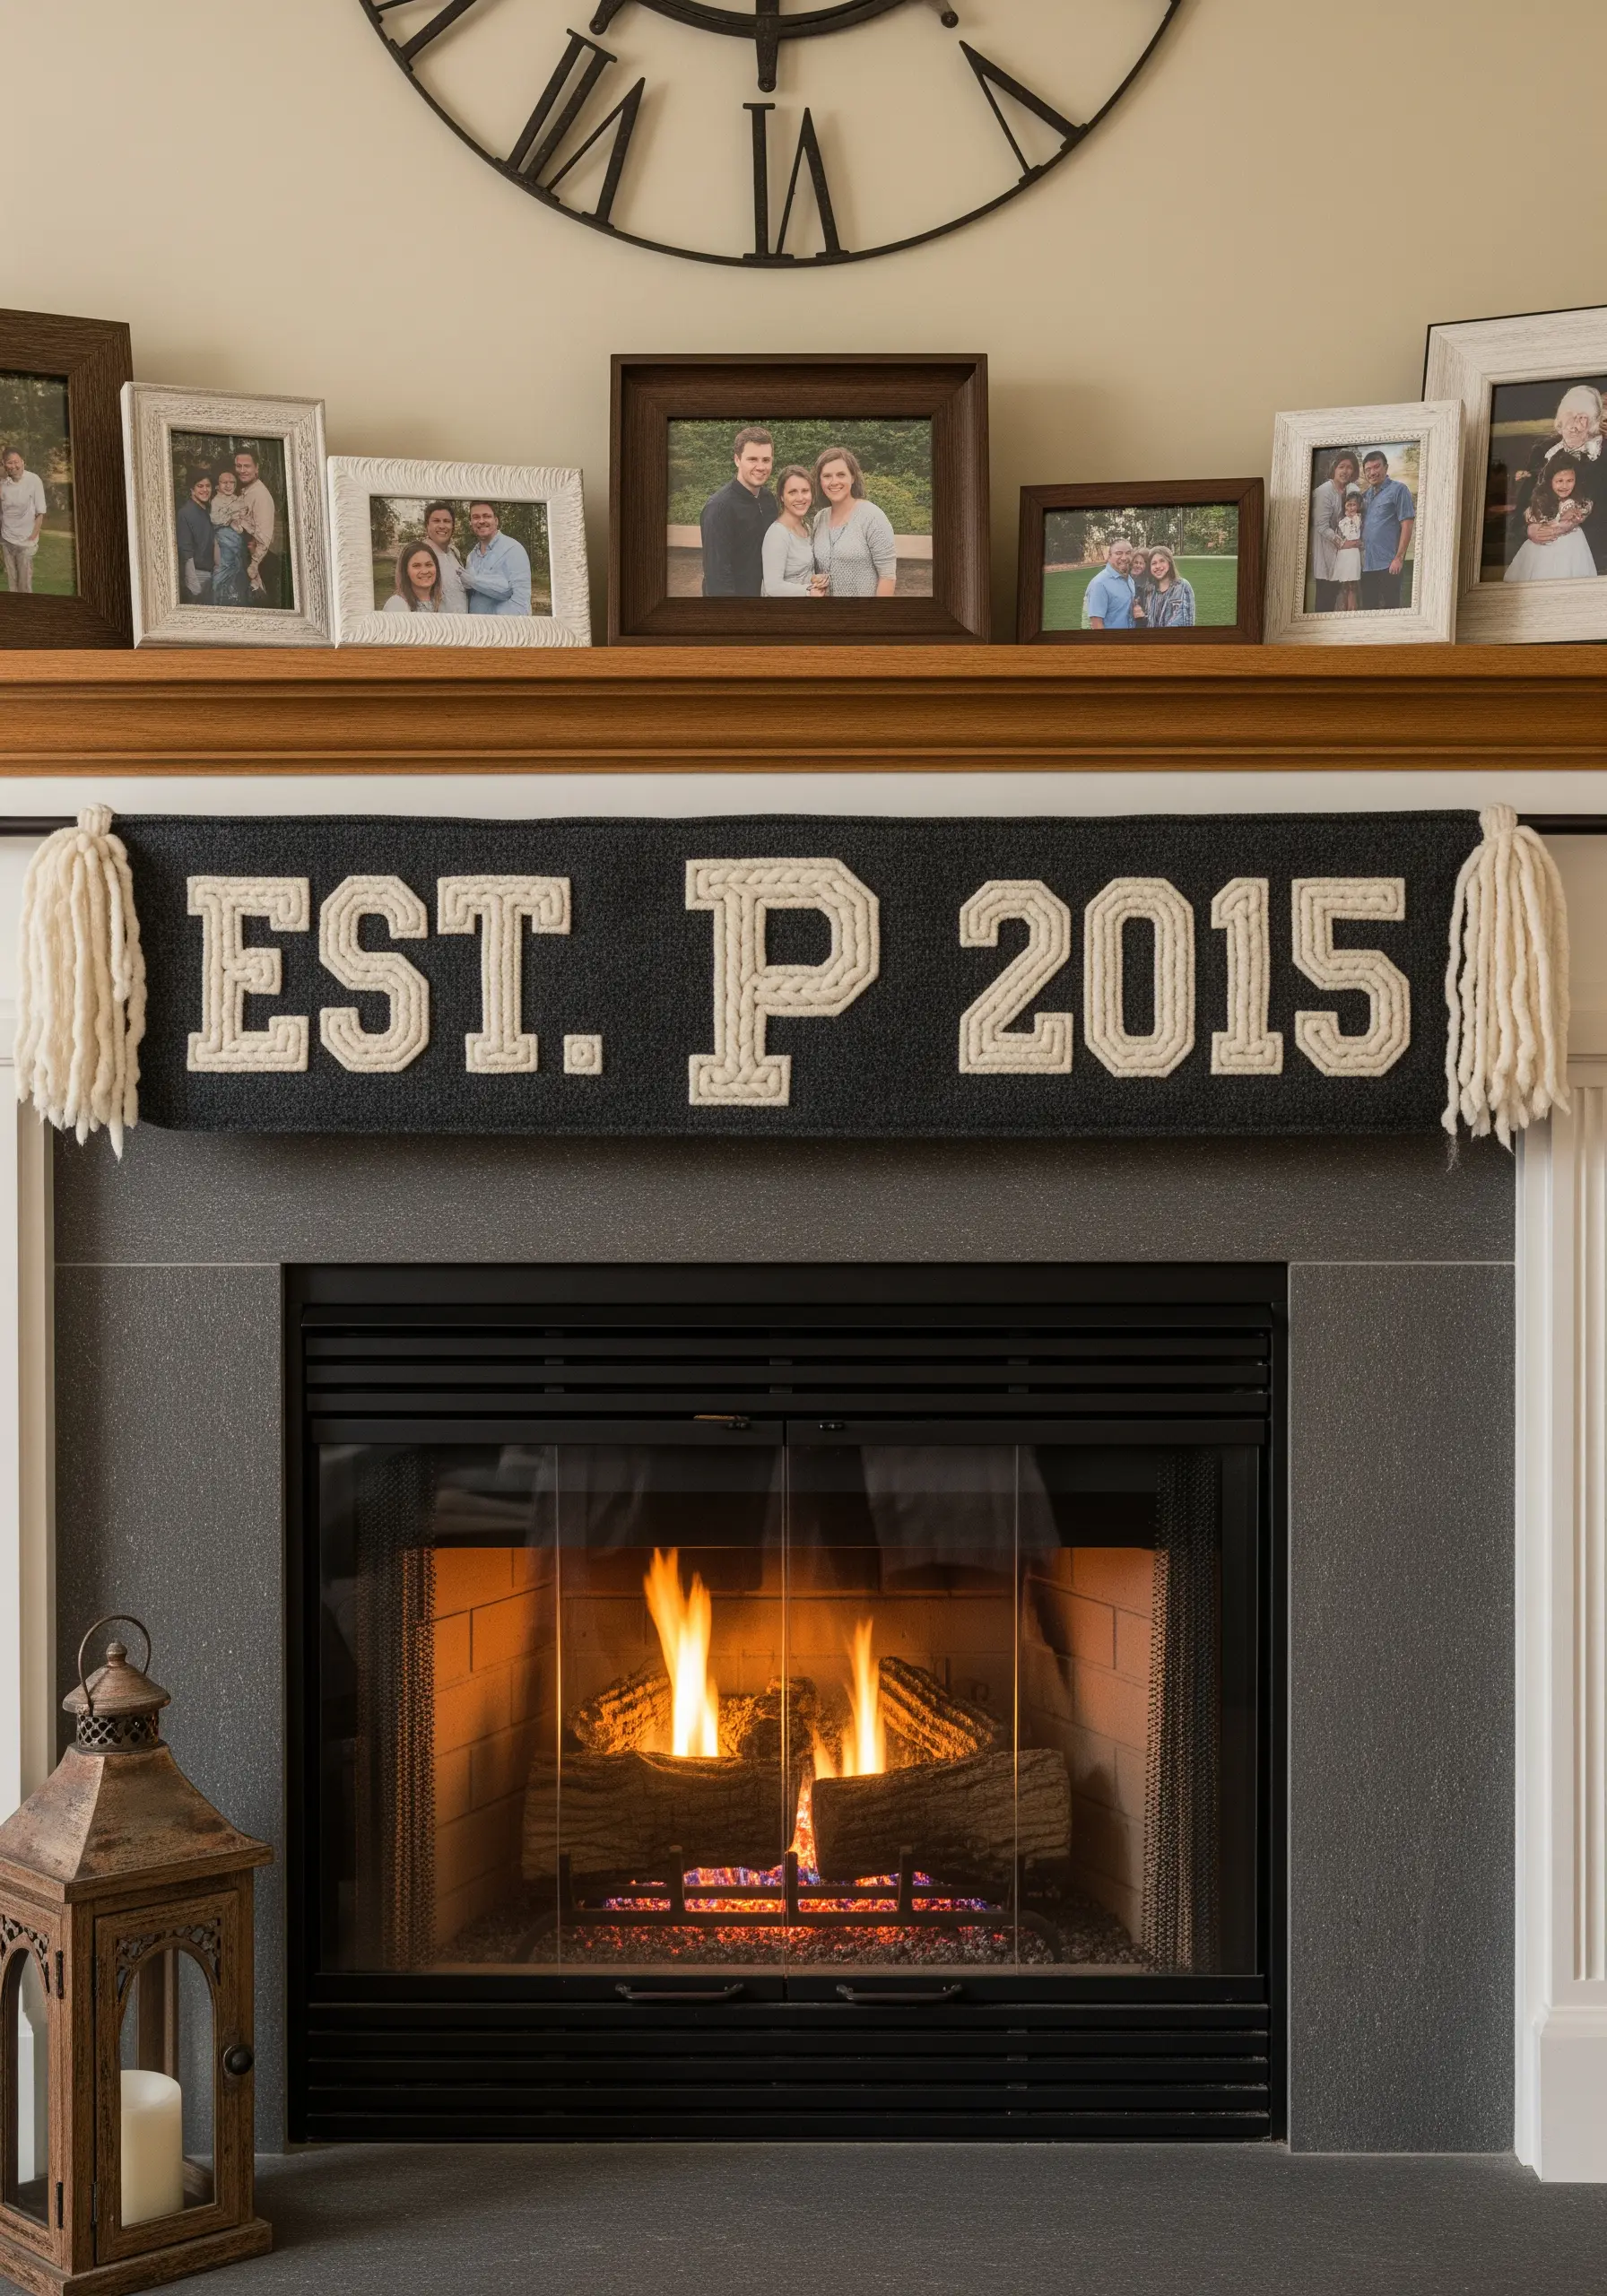
When you need lettering that makes a big impact from across the room, yarn couching is the perfect technique.
Simply lay down a thick, chunky yarn along your design lines.
Then, using a standard embroidery floss in a matching color, make small, discreet tacking stitches over the yarn to secure it to the fabric.
This method adds incredible texture and is much faster than stitching, making it ideal for large-scale cozy mixed-fiber projects like mantel banners.
21. Simulate a Neon Glow with Strategic Thread Choices
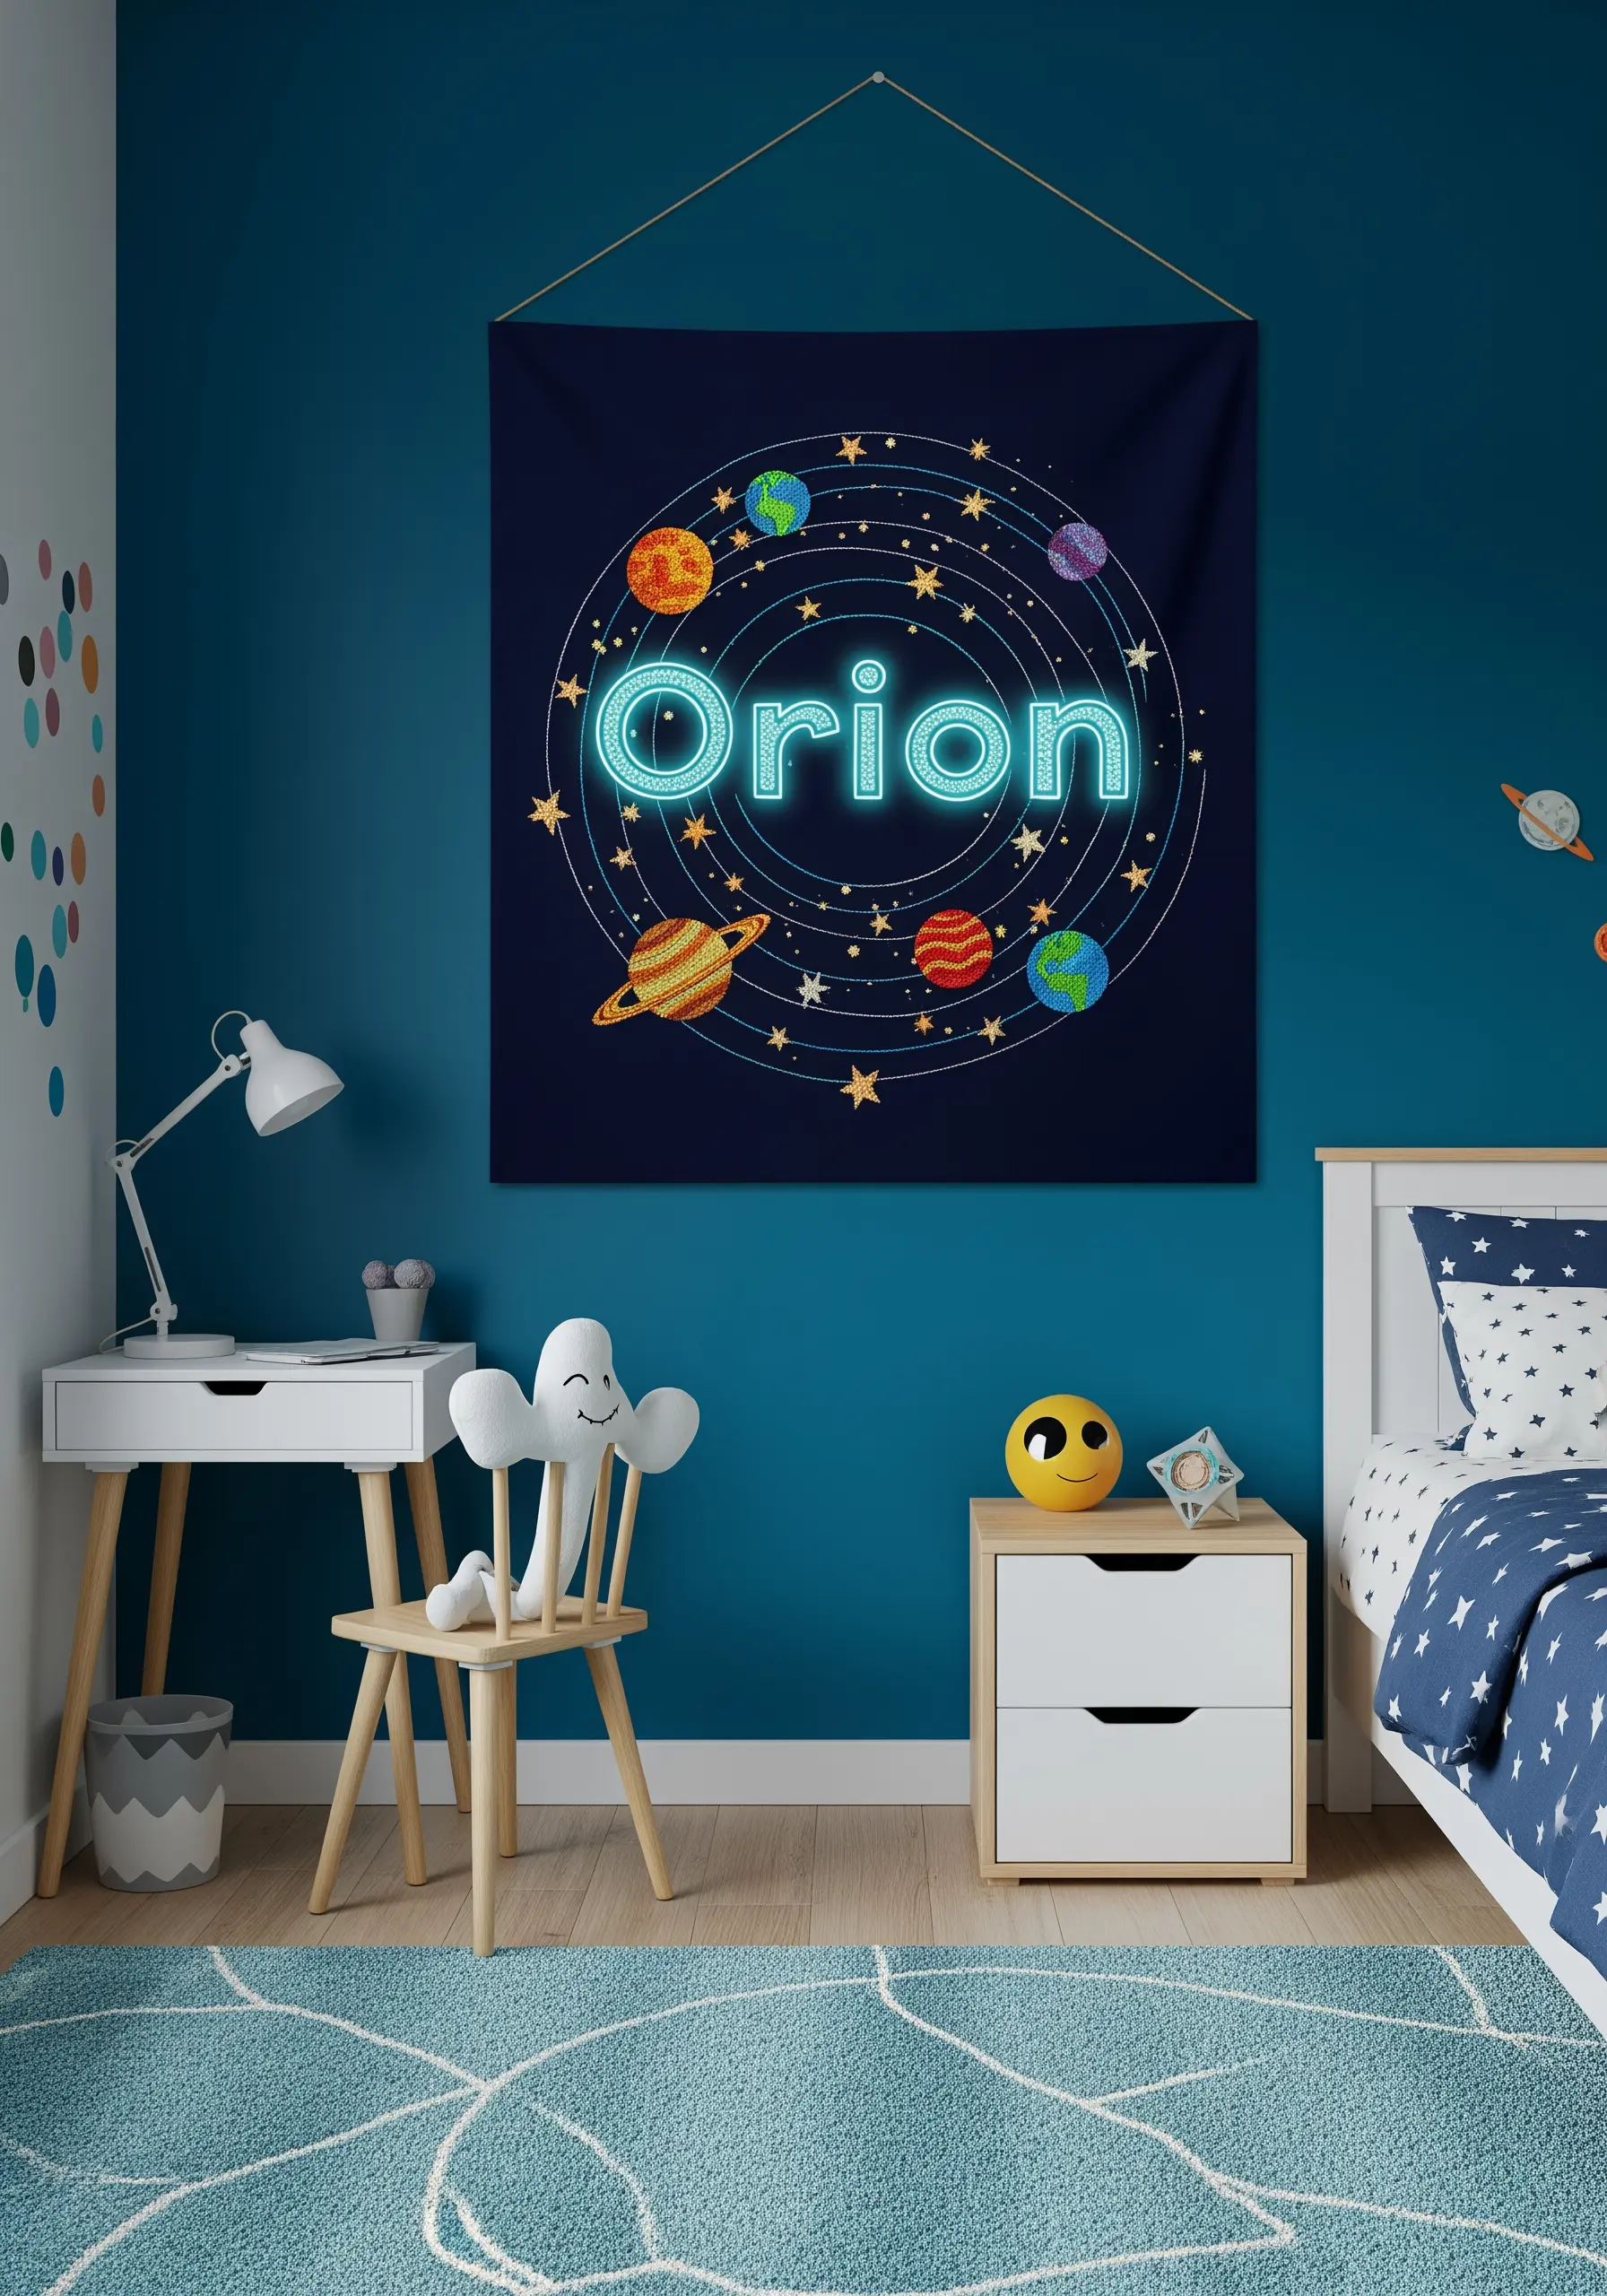
To make letters appear to glow, outline them with a bright, fluorescent thread using a padded satin stitch for dimension.
On a dark fabric background, this intense color creates a strong contrast that mimics light.
Enhance the illusion by adding a fine highlight of white or metallic thread along one edge of each letter.
Surrounding the name with scattered metallic stars completes the effect, perfect for creating magical celestial embroidery ideas.
22. Define Geometric Shapes with Crisp Outlines
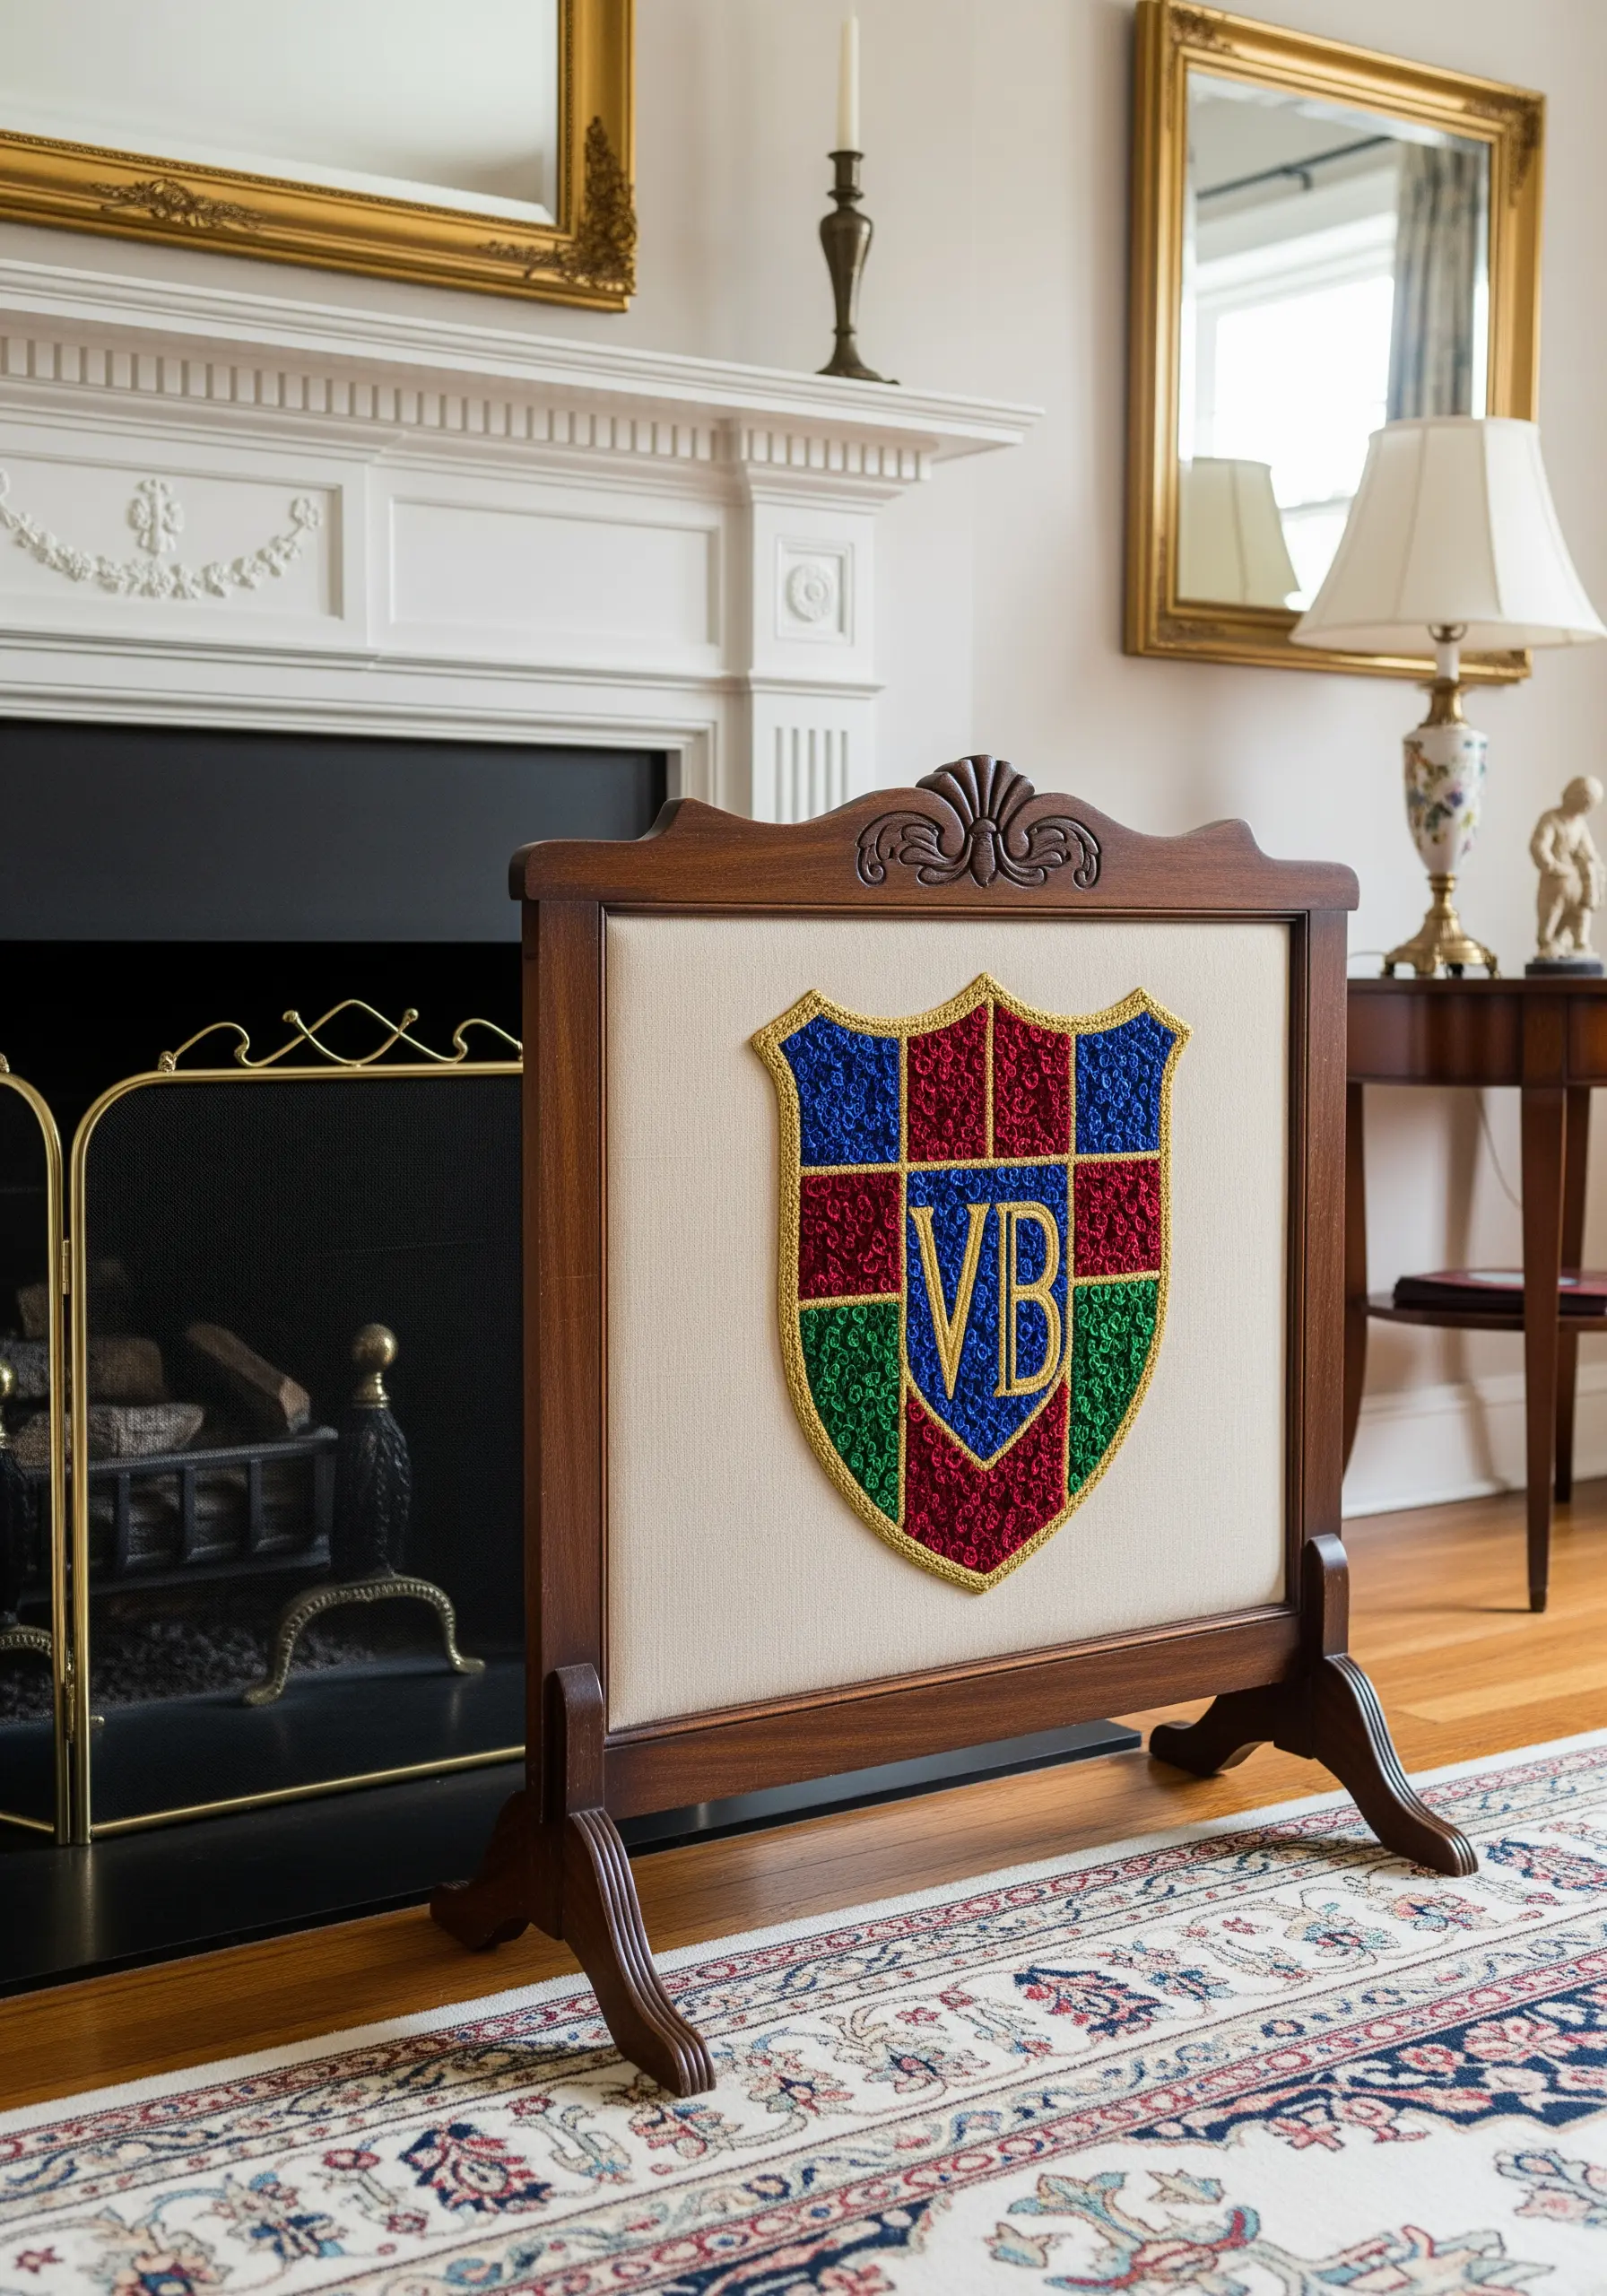
For a crest with bold color-blocking, precision is paramount.
Before filling each colored section with satin stitch, outline it completely with a tight split stitch.
This raised edge acts as a ‘dam,’ giving you a firm boundary to stitch against and ensuring your satin stitches are perfectly contained, resulting in crisp, clean lines between colors.
This technique elevates graphic DIY wall art projects from homemade to professionally finished.
23. Integrate a Monogram into a Delicate Mandala Design
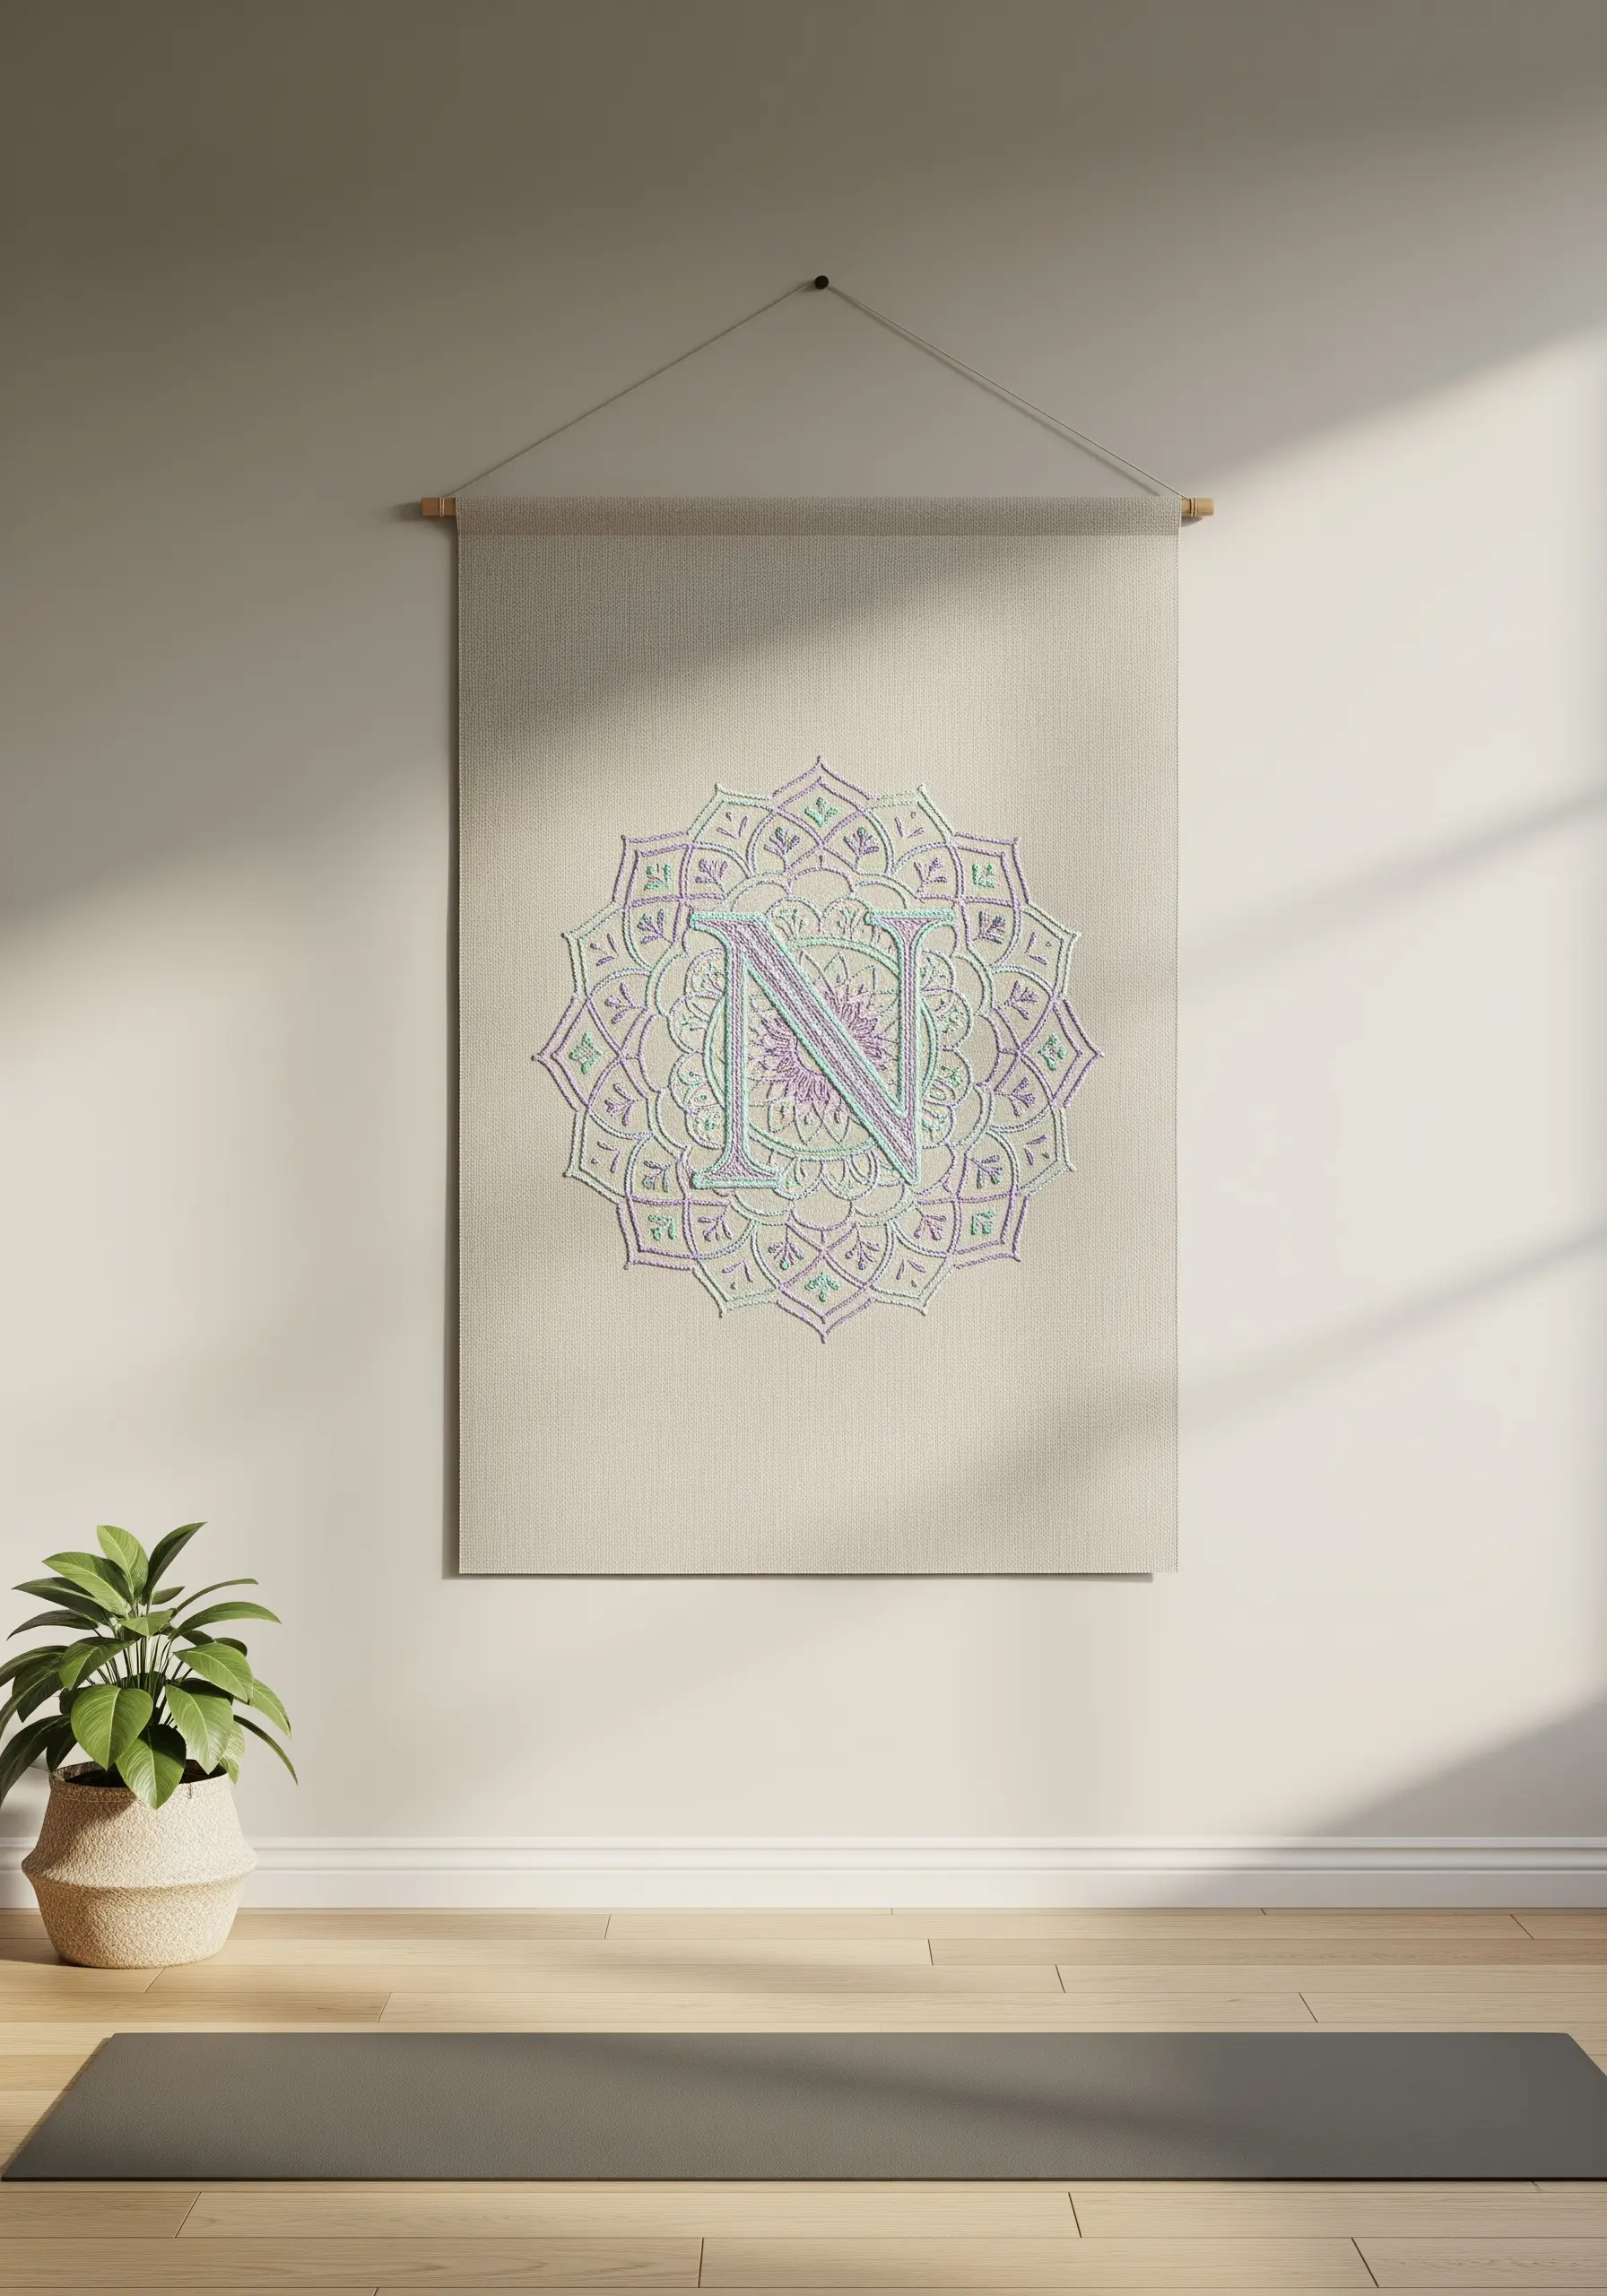
To create a harmonious composition, ensure the monogram and the surrounding mandala feel like a single entity.
Stitch the letter first, then build the mandala pattern outwards, allowing its shapes to echo the curves of the initial.
Using the same thread weight and a cohesive, limited color palette for the entire piece creates a unified, serene look.
This is a meditative approach perfect for creating mindful stitching for zen decor.
24. Combine Appliqué and Stitching for Graphic Clarity
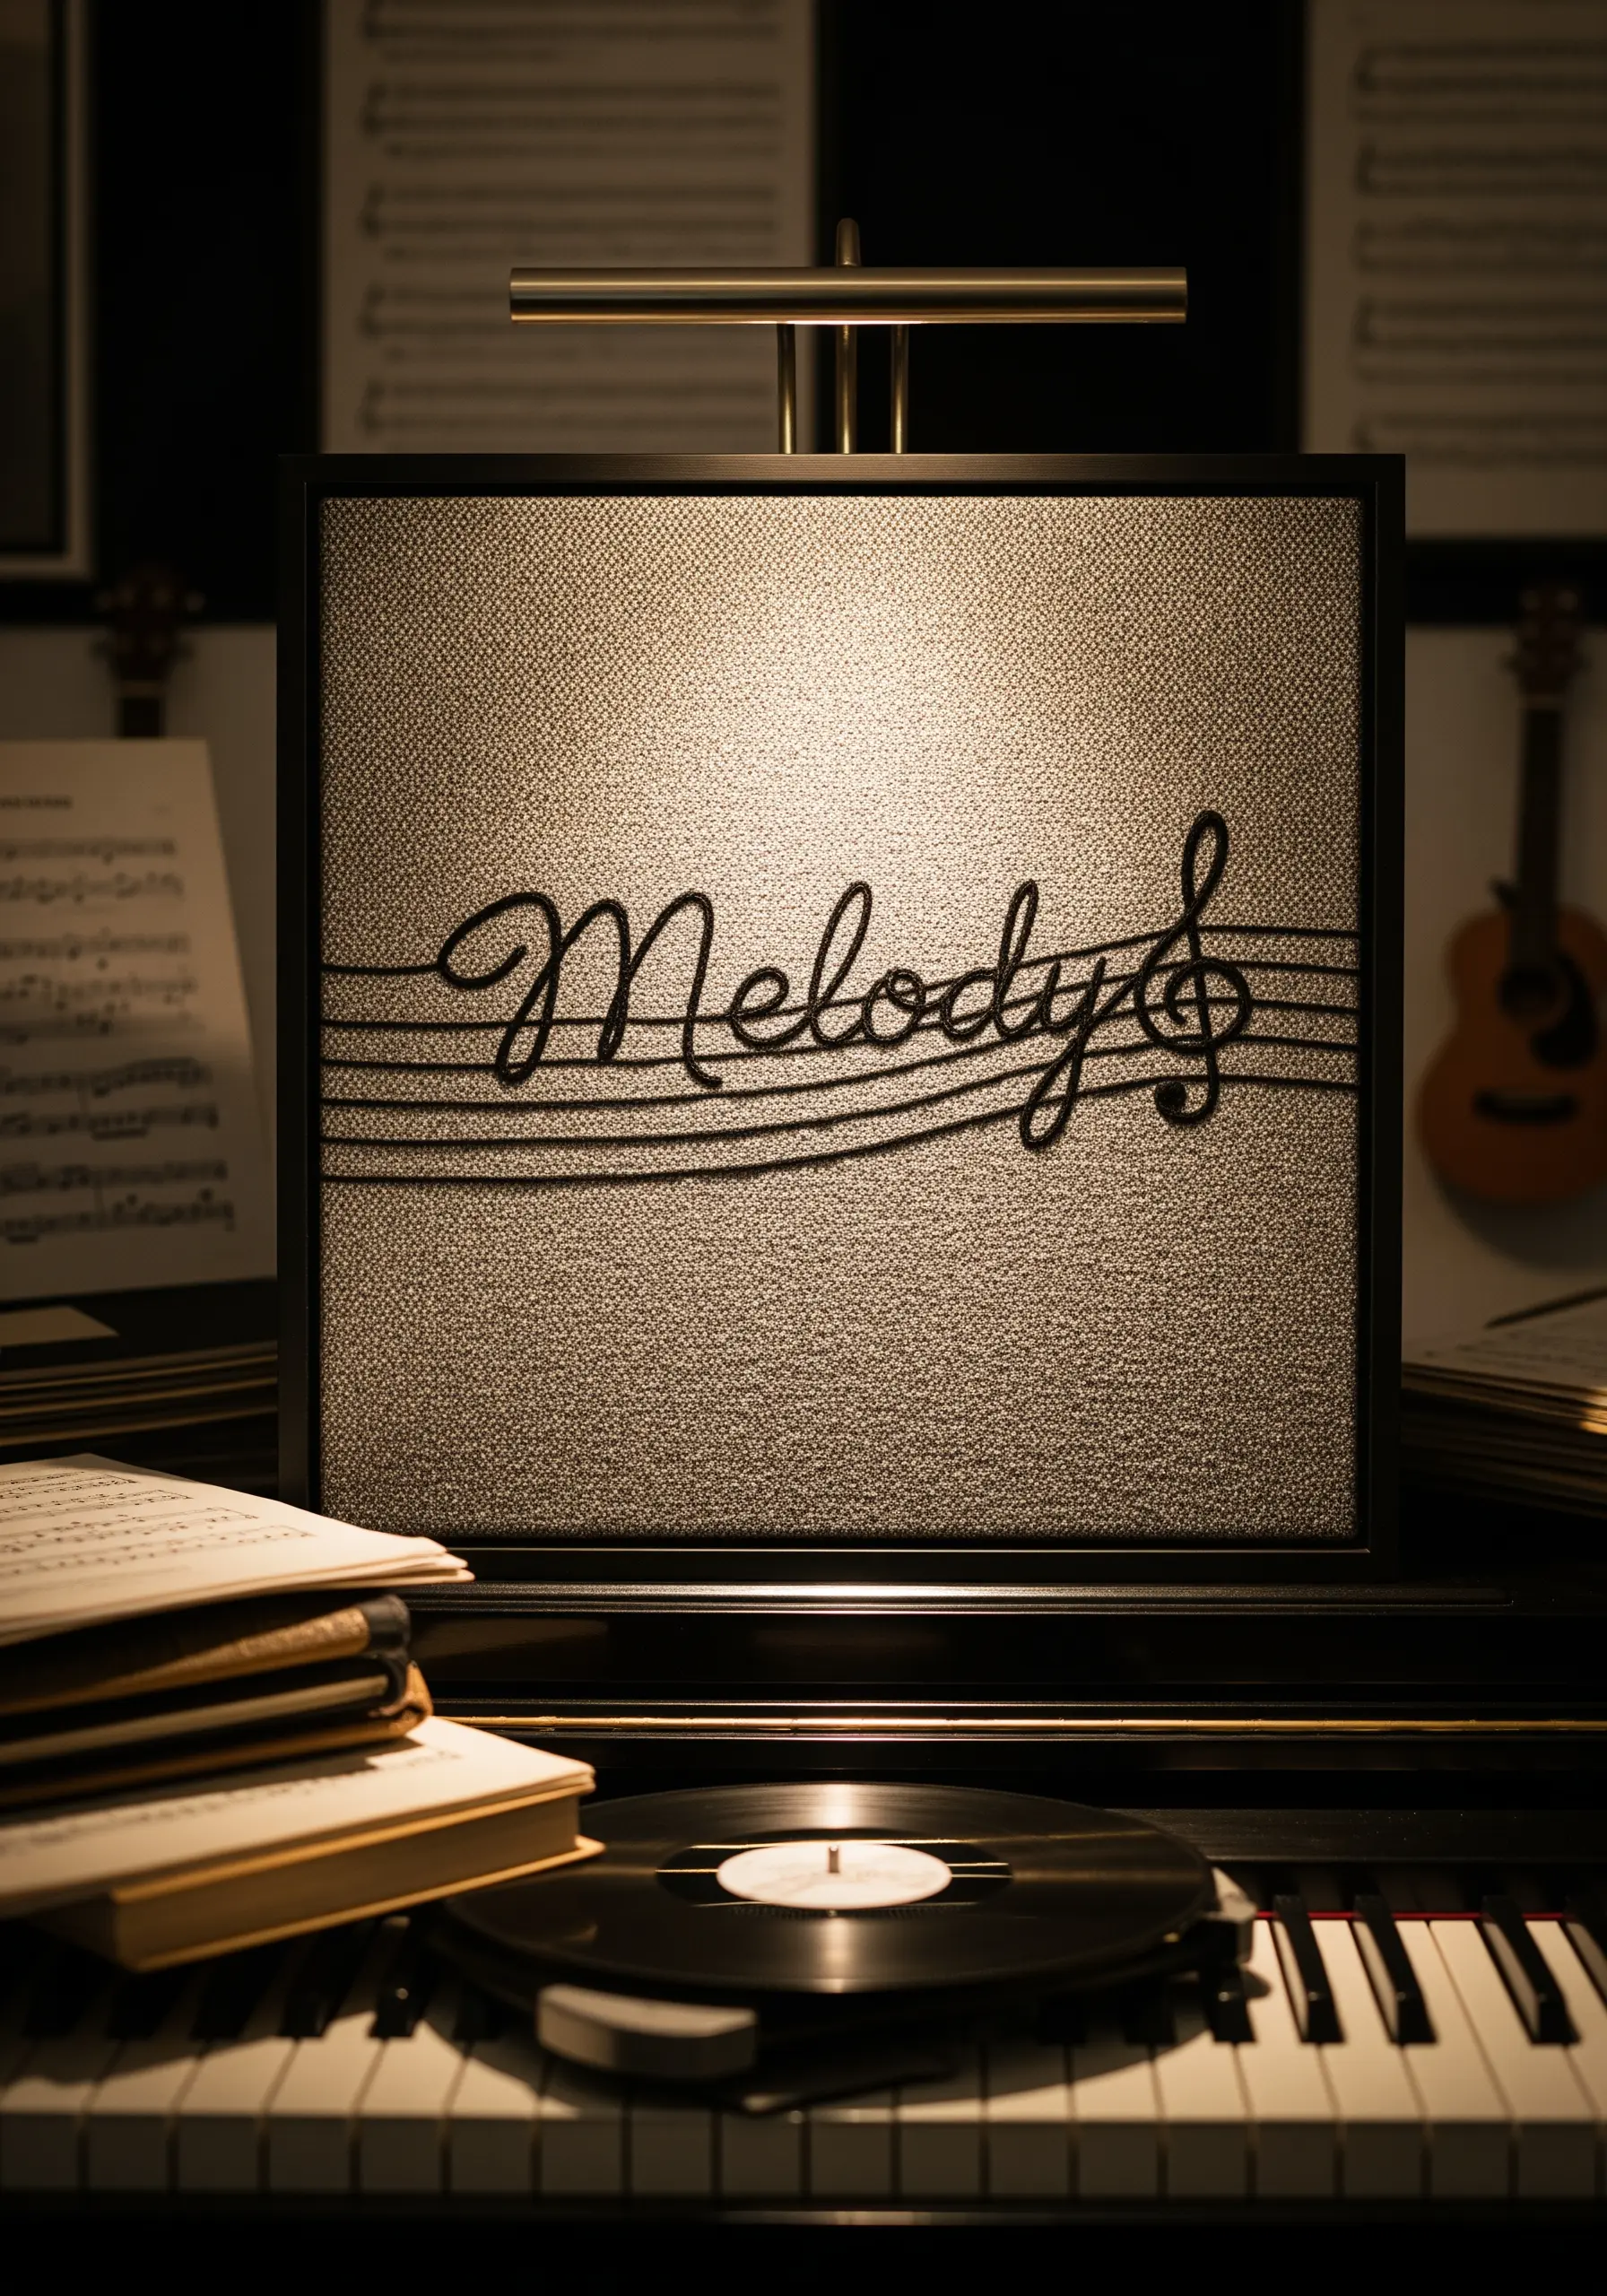
When a design requires perfectly straight, bold lines, fabric appliqué can be more effective than stitching.
Cut thin strips of felt or non-fraying fabric for the musical staff and secure them neatly to your base.
Contrast these flat, sharp lines by stitching the name with a raised technique, like a padded stem stitch or couched cord, to give it dimension and prominence.
This mix of methods ensures every element is crisp and intentional in your framed embroidery ideas.
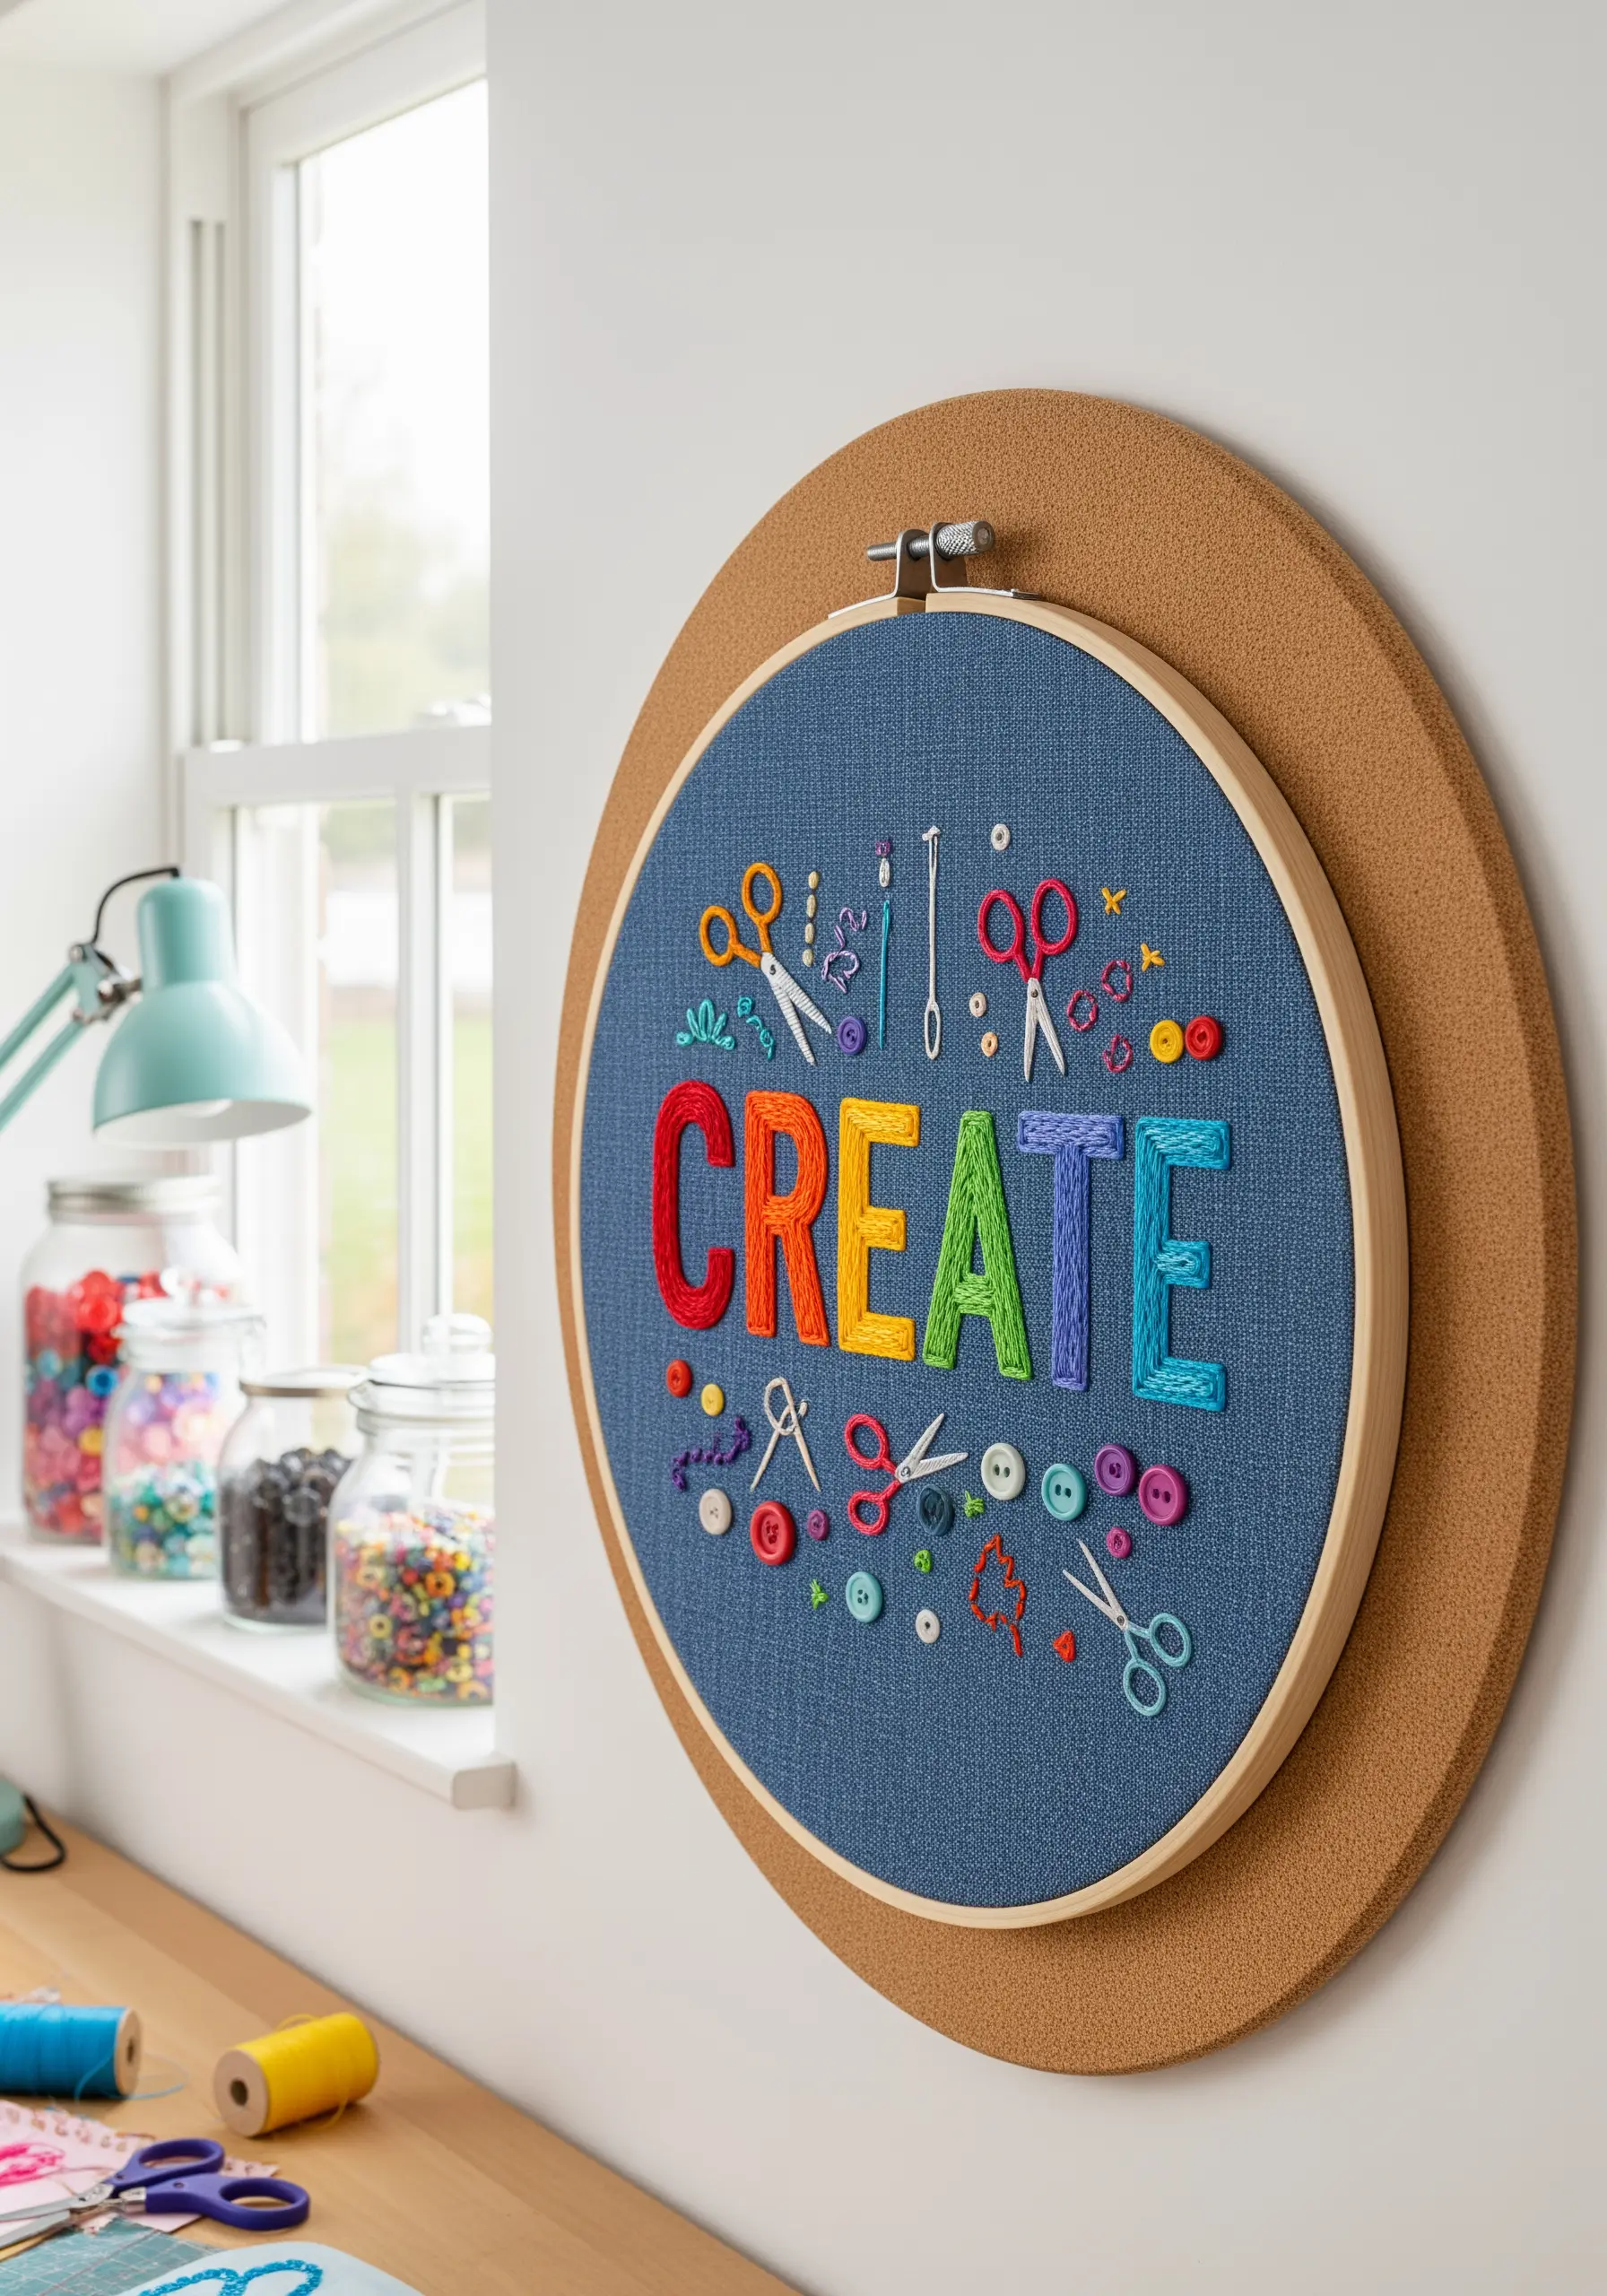
25. Elevate Functional Objects with Simple Icon Embroidery
Transform an everyday item into a piece of personalized art with clean, minimalist icons.
Use a simple backstitch with three strands of floss to create clear, readable line drawings.
The key to a modern look is simplicity and consistency in line weight.
Choosing a single, high-contrast color ensures the design remains uncluttered and functional, turning a utility item into a thoughtful custom embroidery gift.
26. Stitch a Graffiti-Style Gradient with Thread Blending
To create a smooth spray-paint effect, use long-and-short stitch to blend multiple colors seamlessly.
Start with your first color, then introduce the next by staggering the lengths of your stitches and overlapping the shades where they meet.
For that classic graffiti look, outline the entire word in a bold, dark color using a tight satin stitch.
This sharp border contains the vibrant blend and makes the gradient color effects pop against the fabric.


