
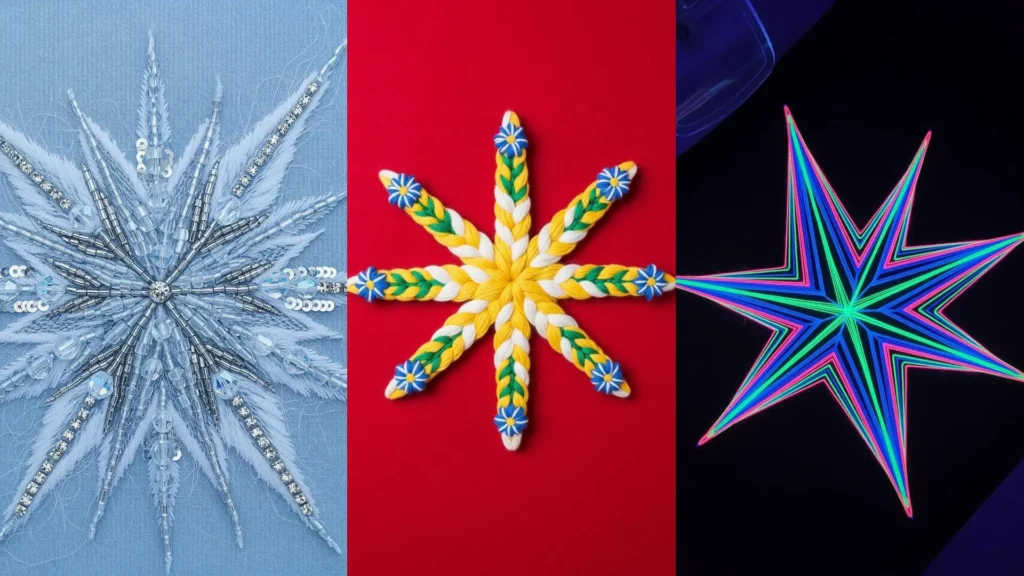
You’ve mastered the basic stitches, and now you find yourself pausing, needle in hand, wondering how to make your work feel truly your own. How do you move from simply following a pattern to creating a piece that has depth, drama, and a distinct point of view?
The answer often lies in focusing your creative energy. A single, dramatic centerpiece, like a starburst, can serve as the perfect canvas for experimentation. It’s a simple, universal shape that can contain infinite complexity, allowing you to explore texture, color, and technique in a concentrated, impactful way.
Think of these 24 techniques not as rigid rules, but as invitations. They are prompts to mix materials you hadn’t considered, to layer stitches in new ways, and to see how a simple shift in thread weight or tension can transform the entire feel of a design. This is where your unique artistic voice begins to emerge.
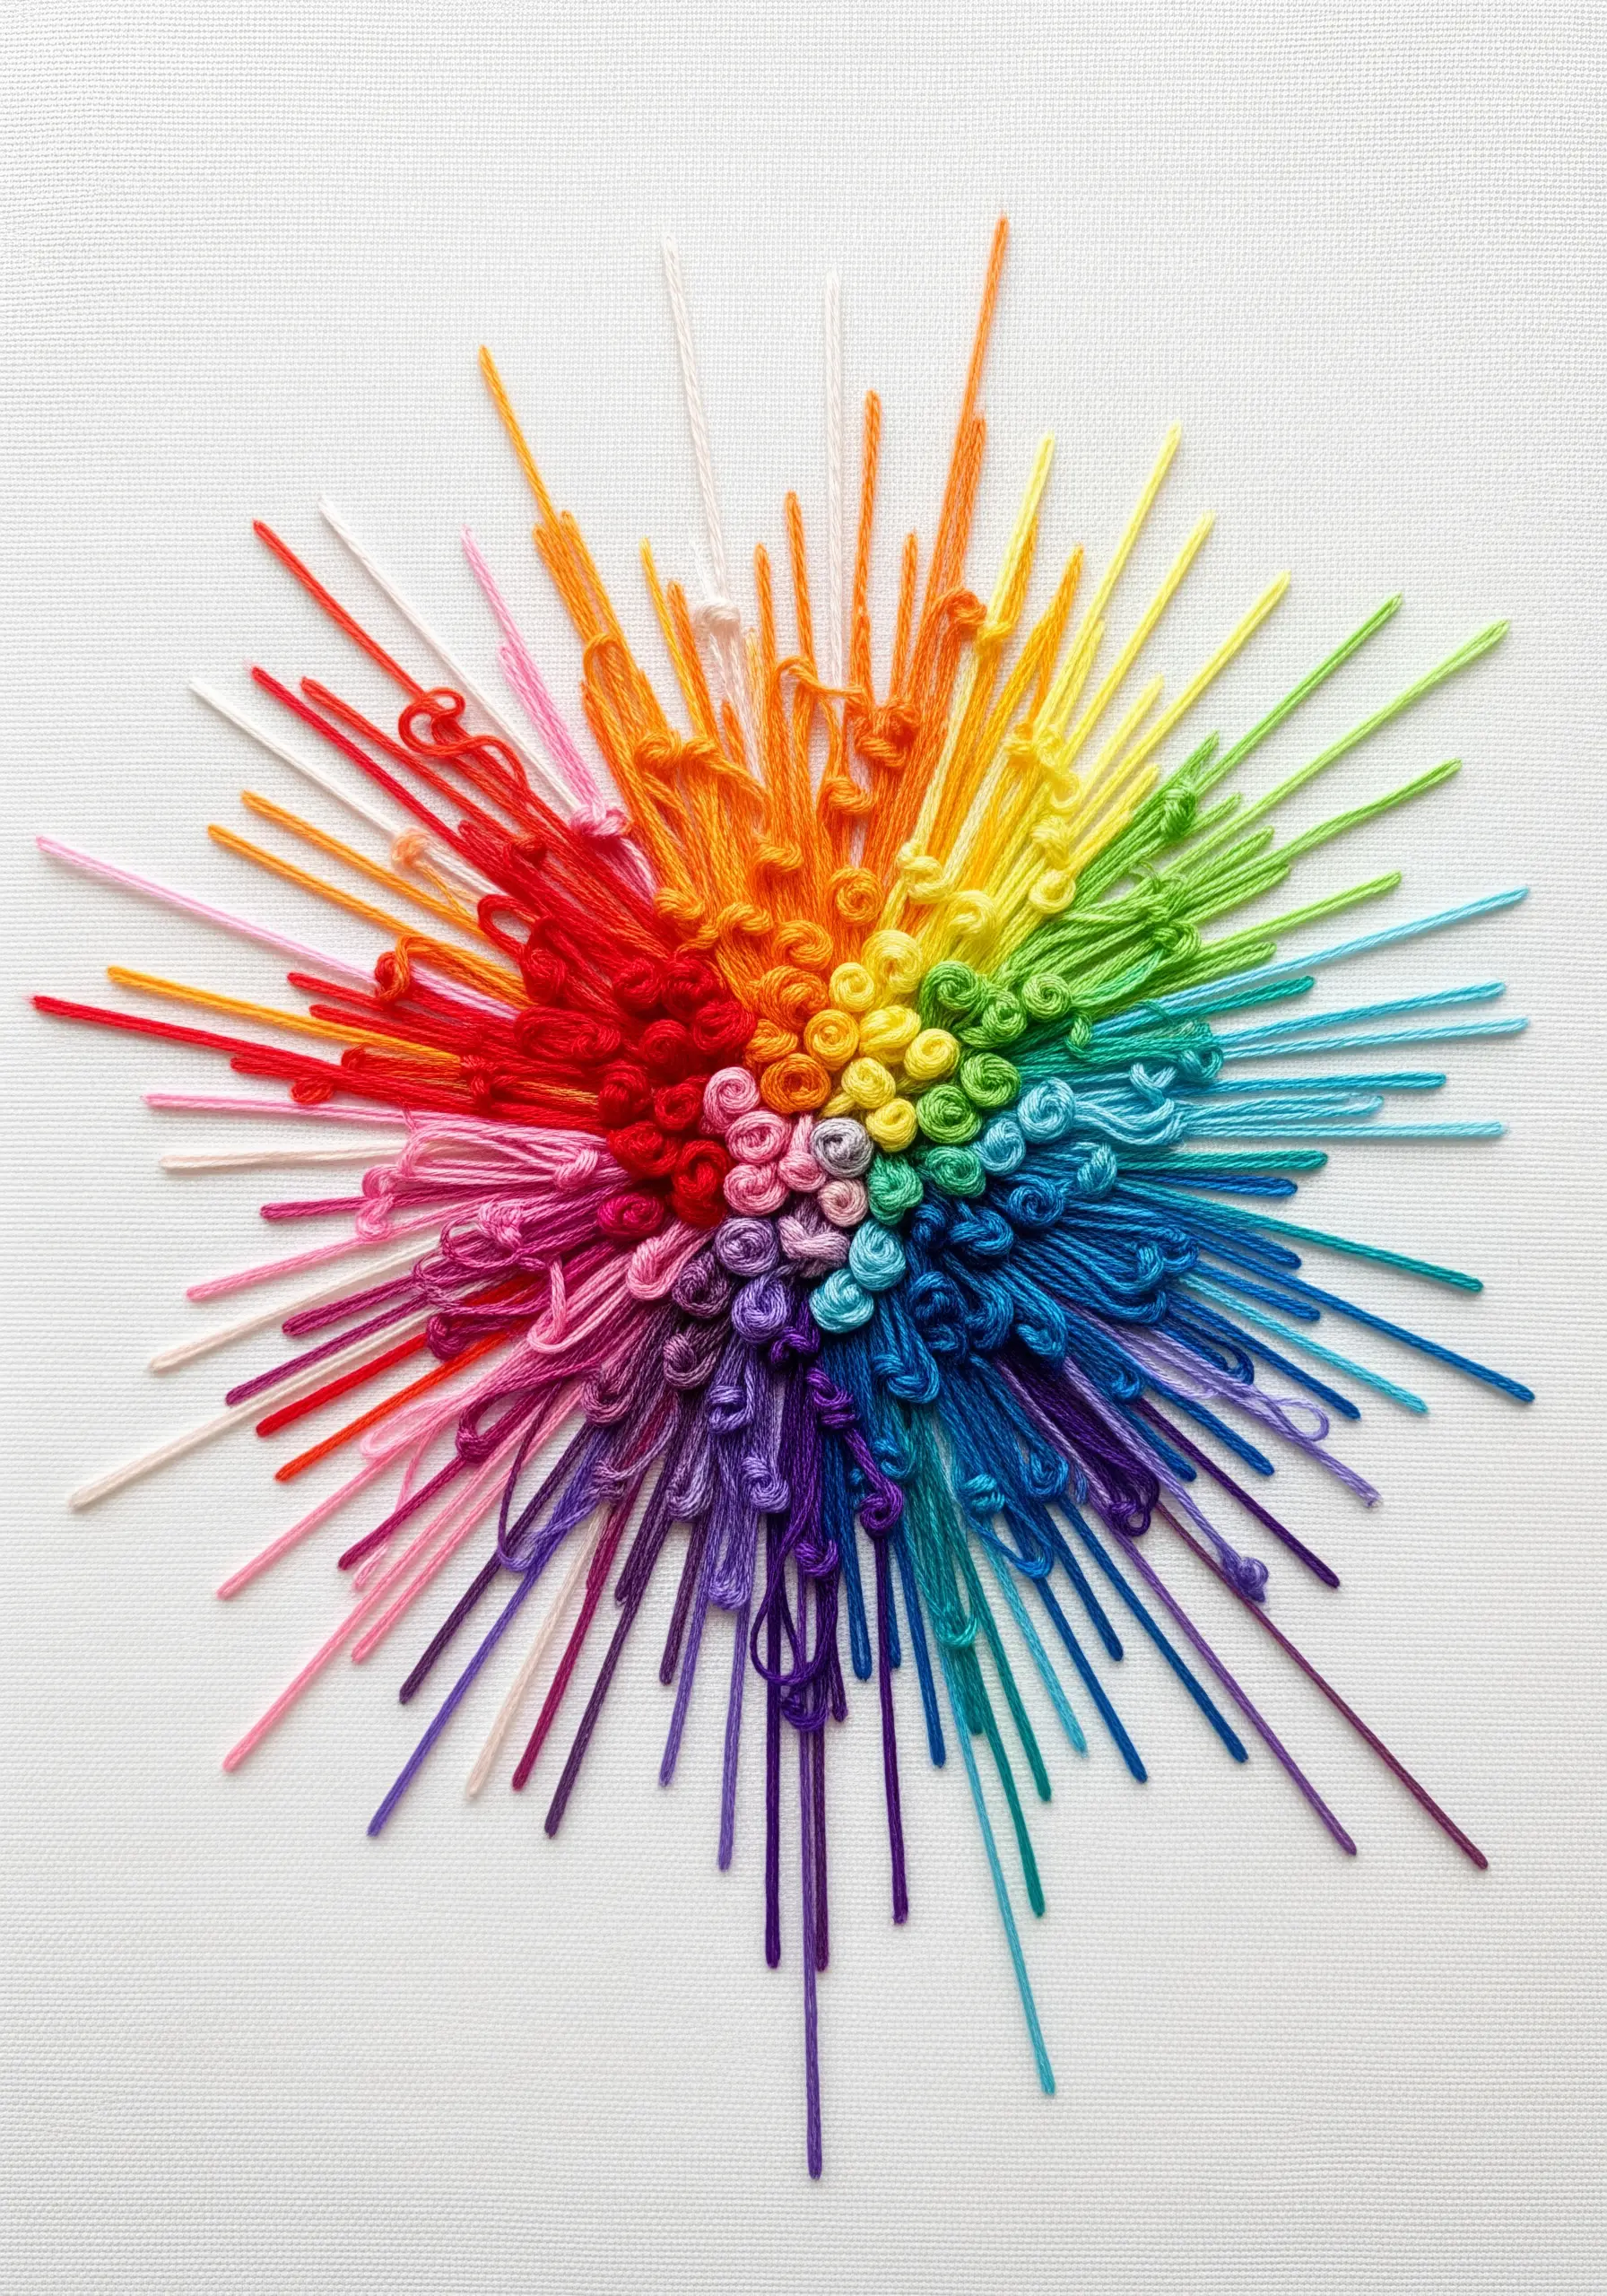
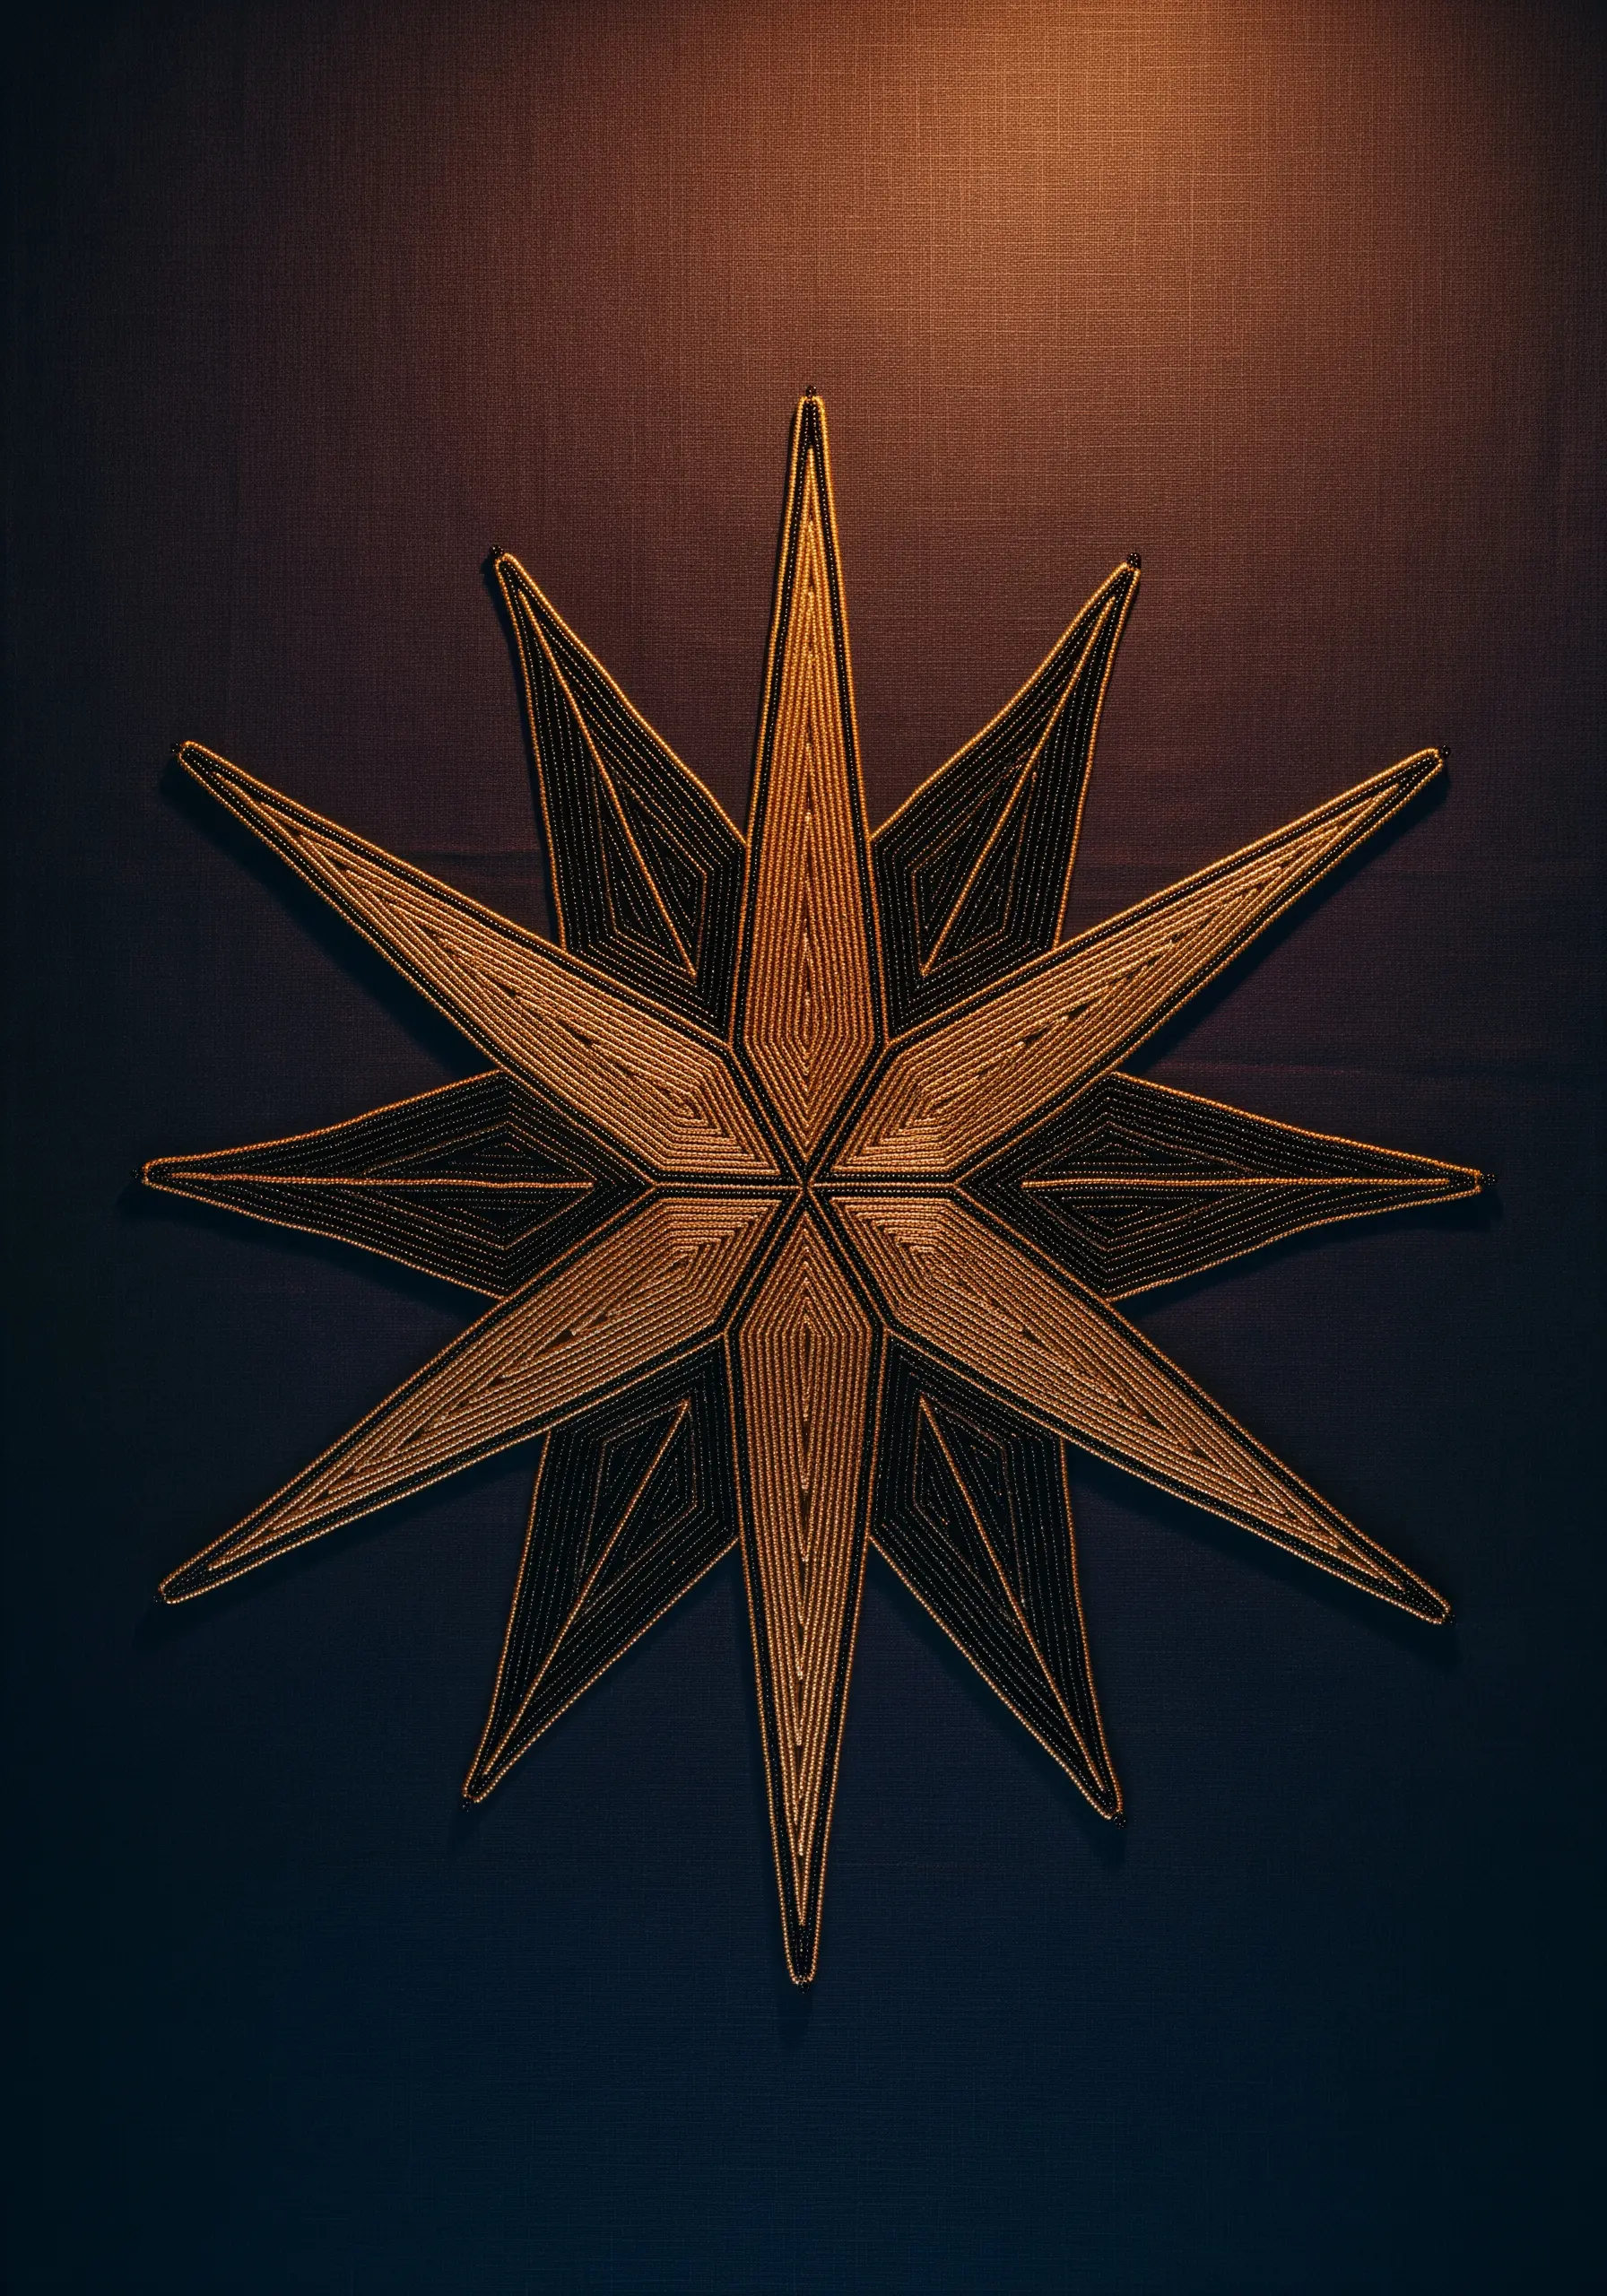
1. Braided Rays with Cosmic Dust
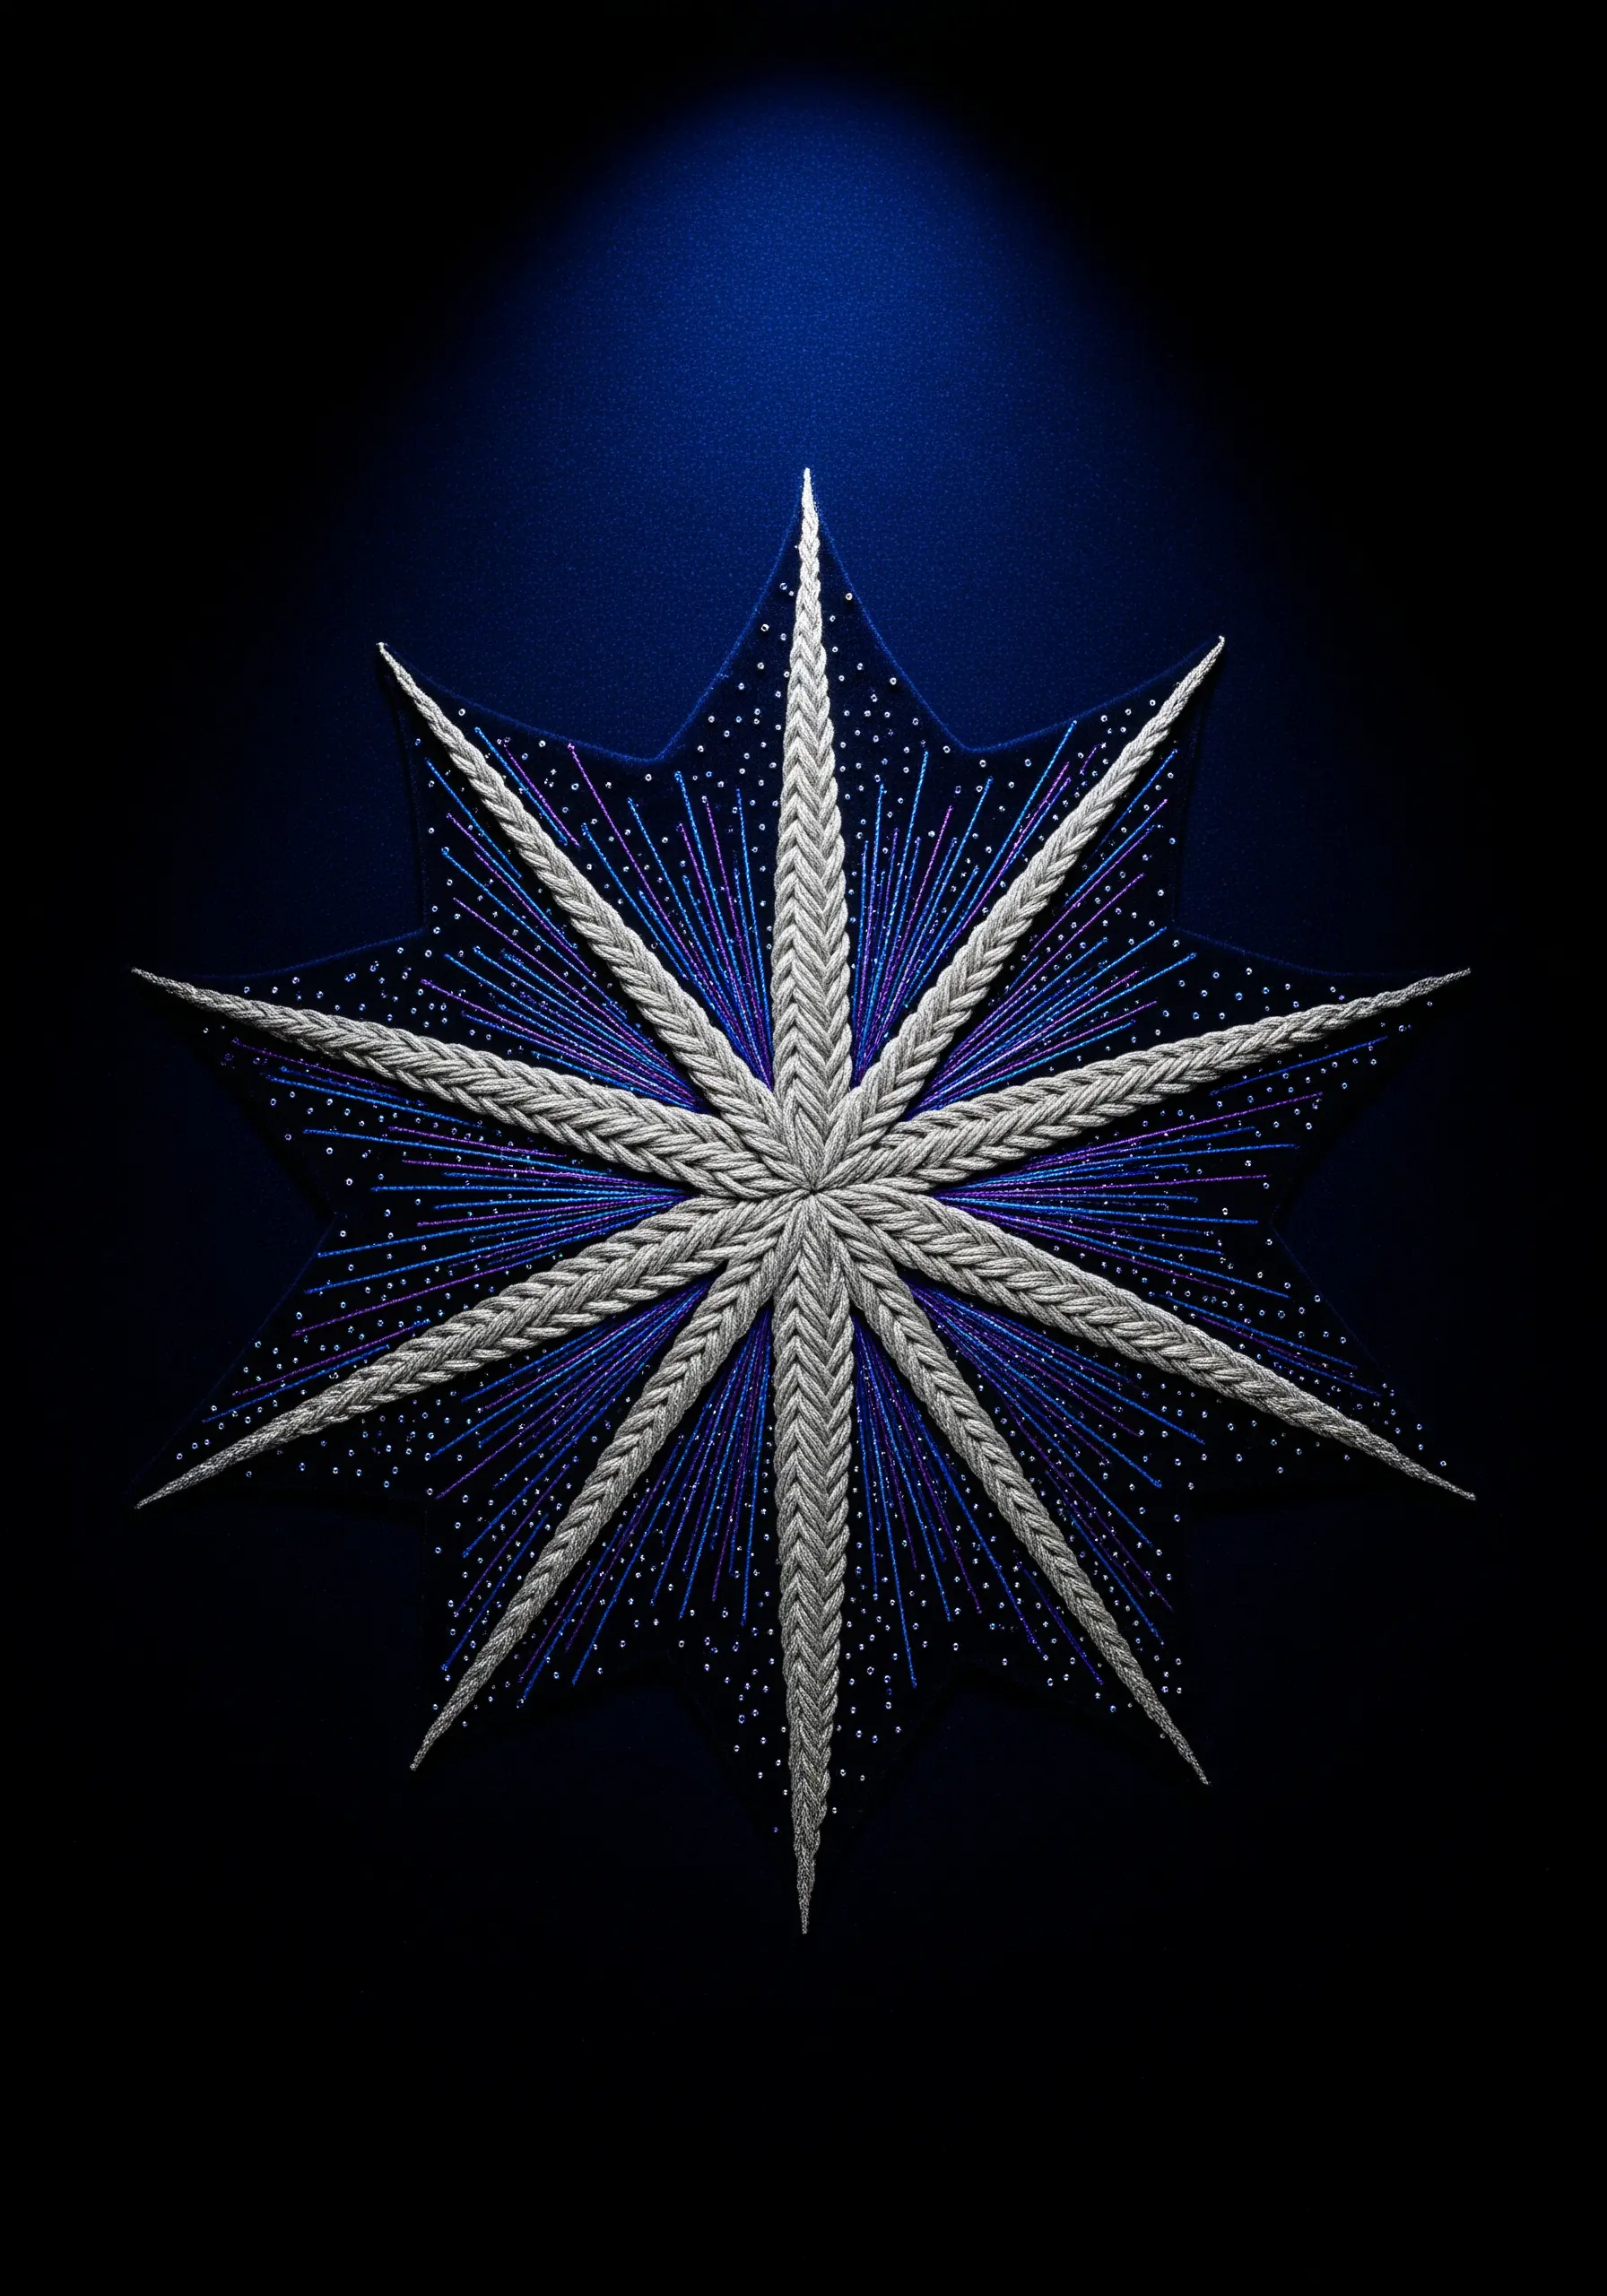
Create a foundation of dramatic, high-relief rays using a padded satin stitch or by couching a thick, silky cord.
For the ethereal background, scatter tiny, individual seed stitches using a single strand of metallic or iridescent thread.
The power of this design comes from the stark contrast between the heavy, sculptural rays and the delicate, shimmering ‘dust’ particles.
Working on a dark, matte fabric like velvet or moleskin will absorb light and make your metallic threads appear even more luminous.
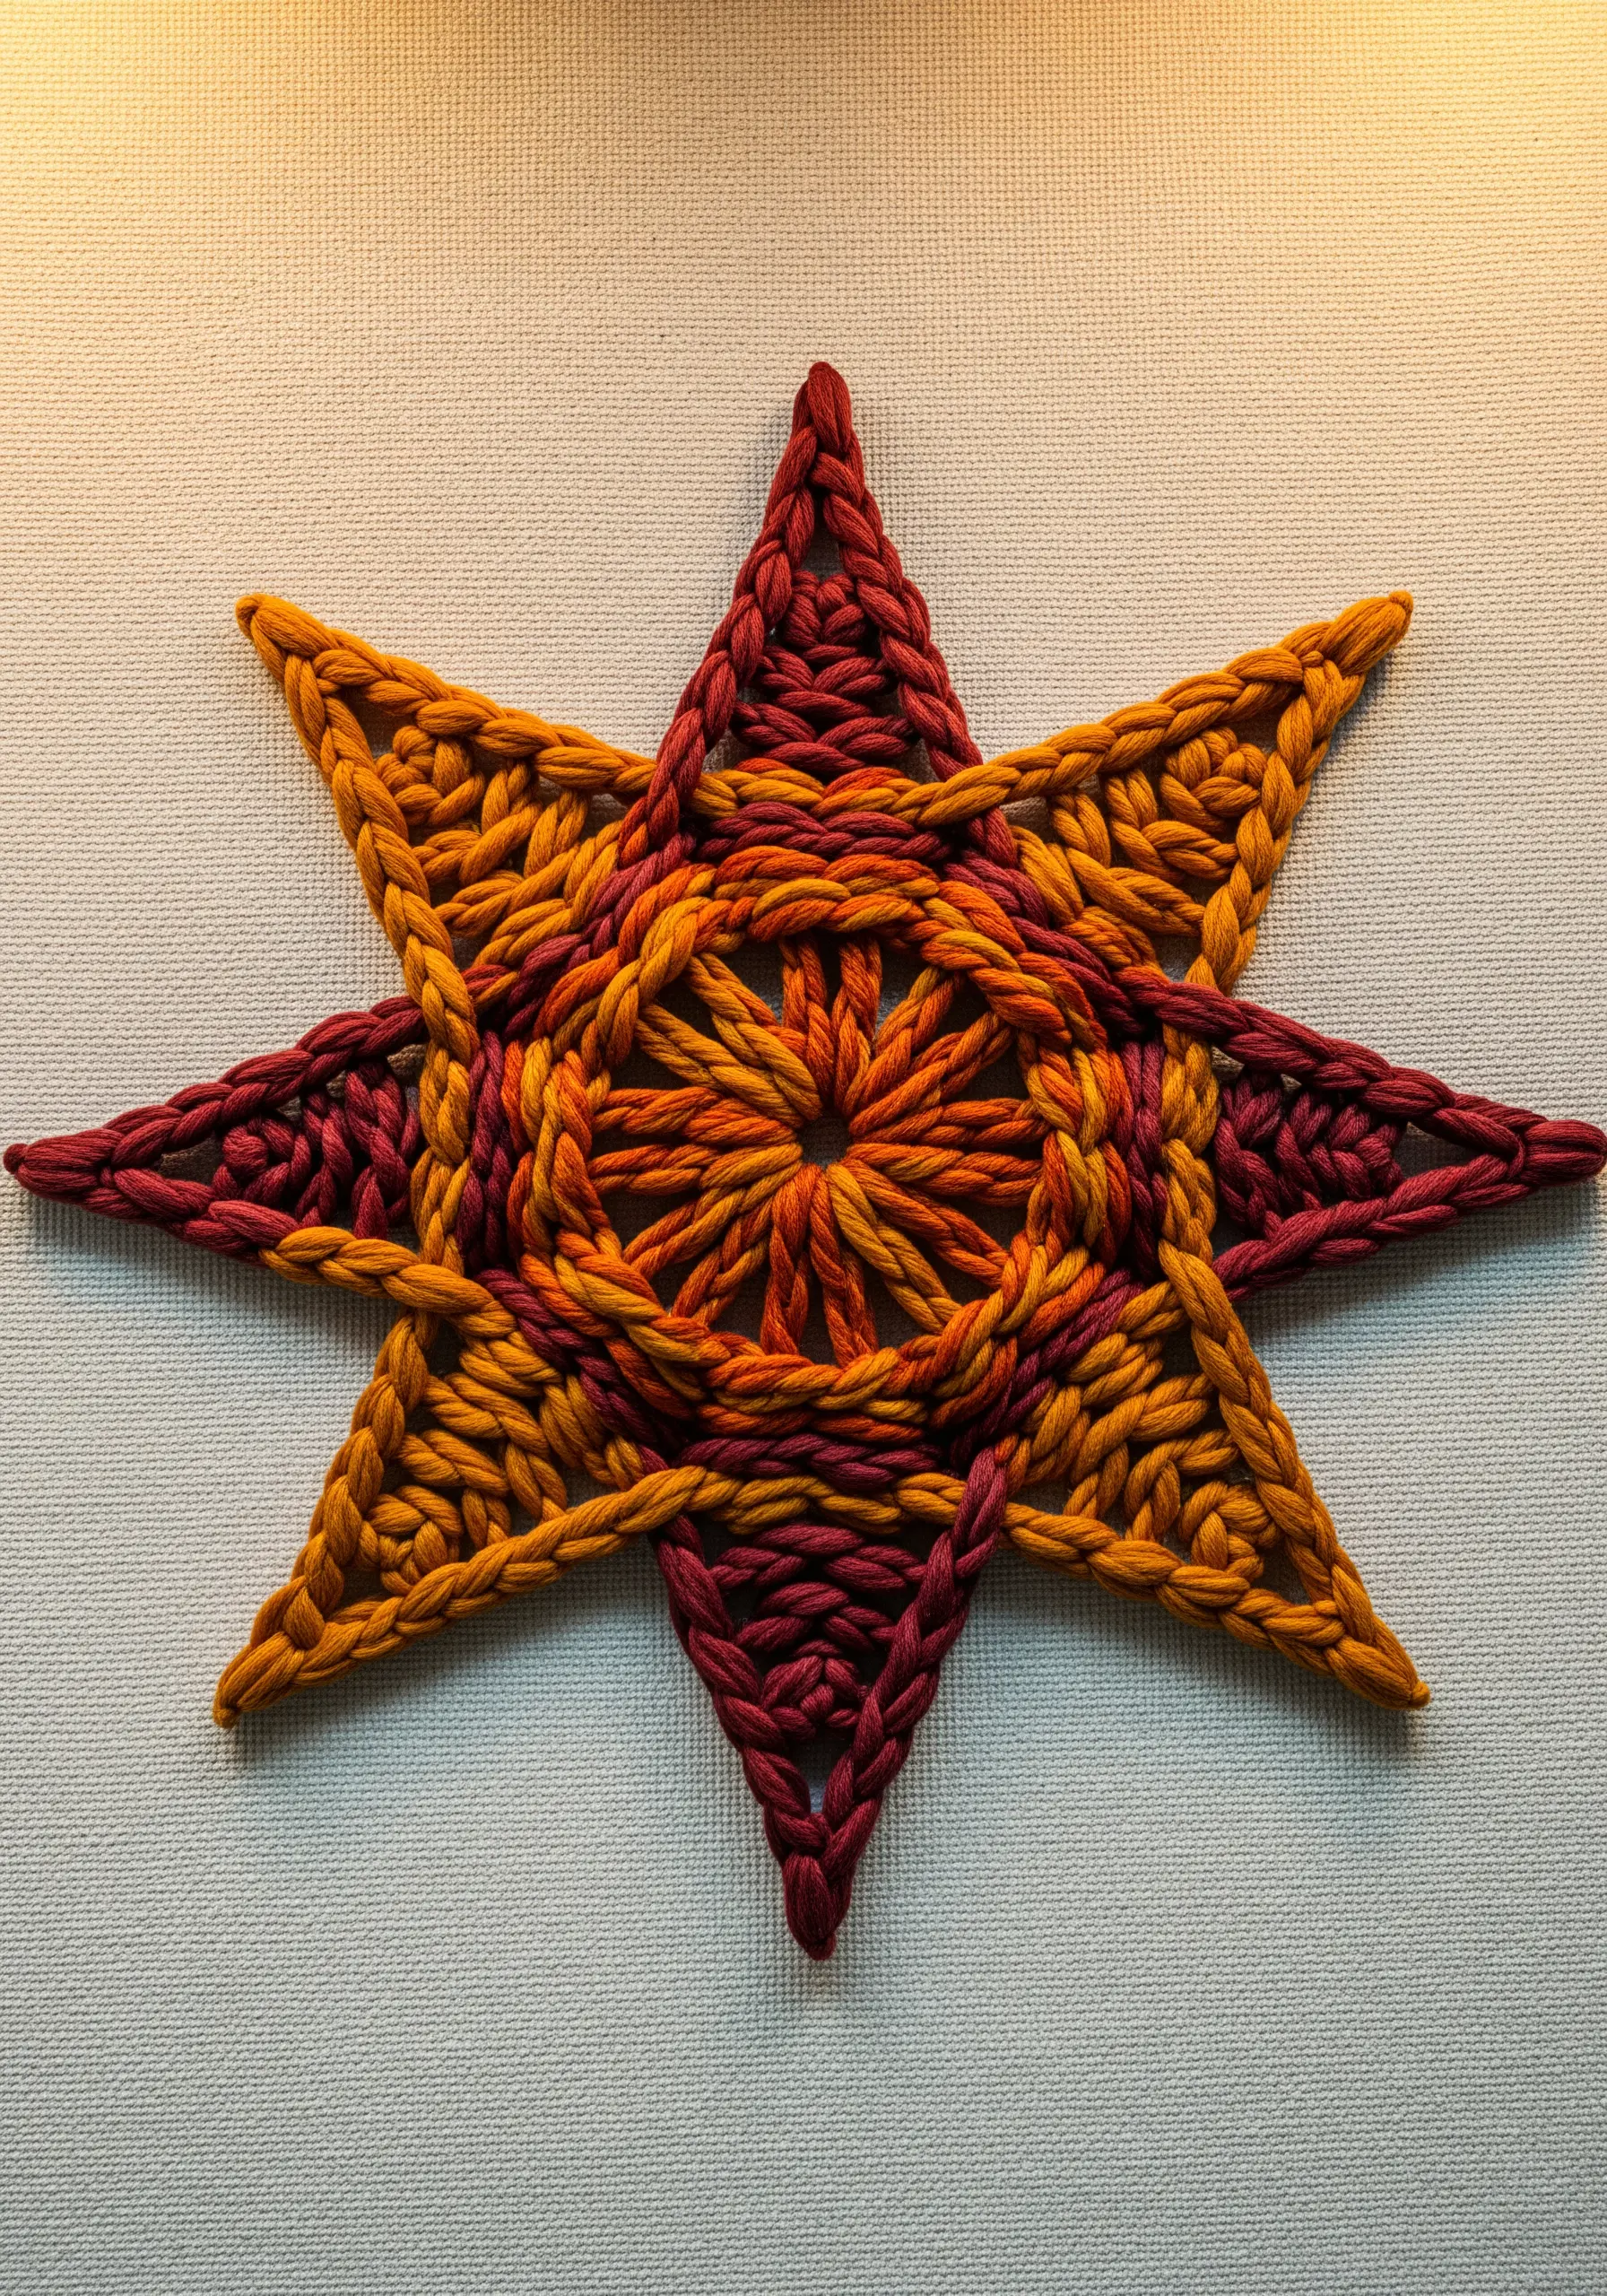
2. Woven Center with Knotted Rays
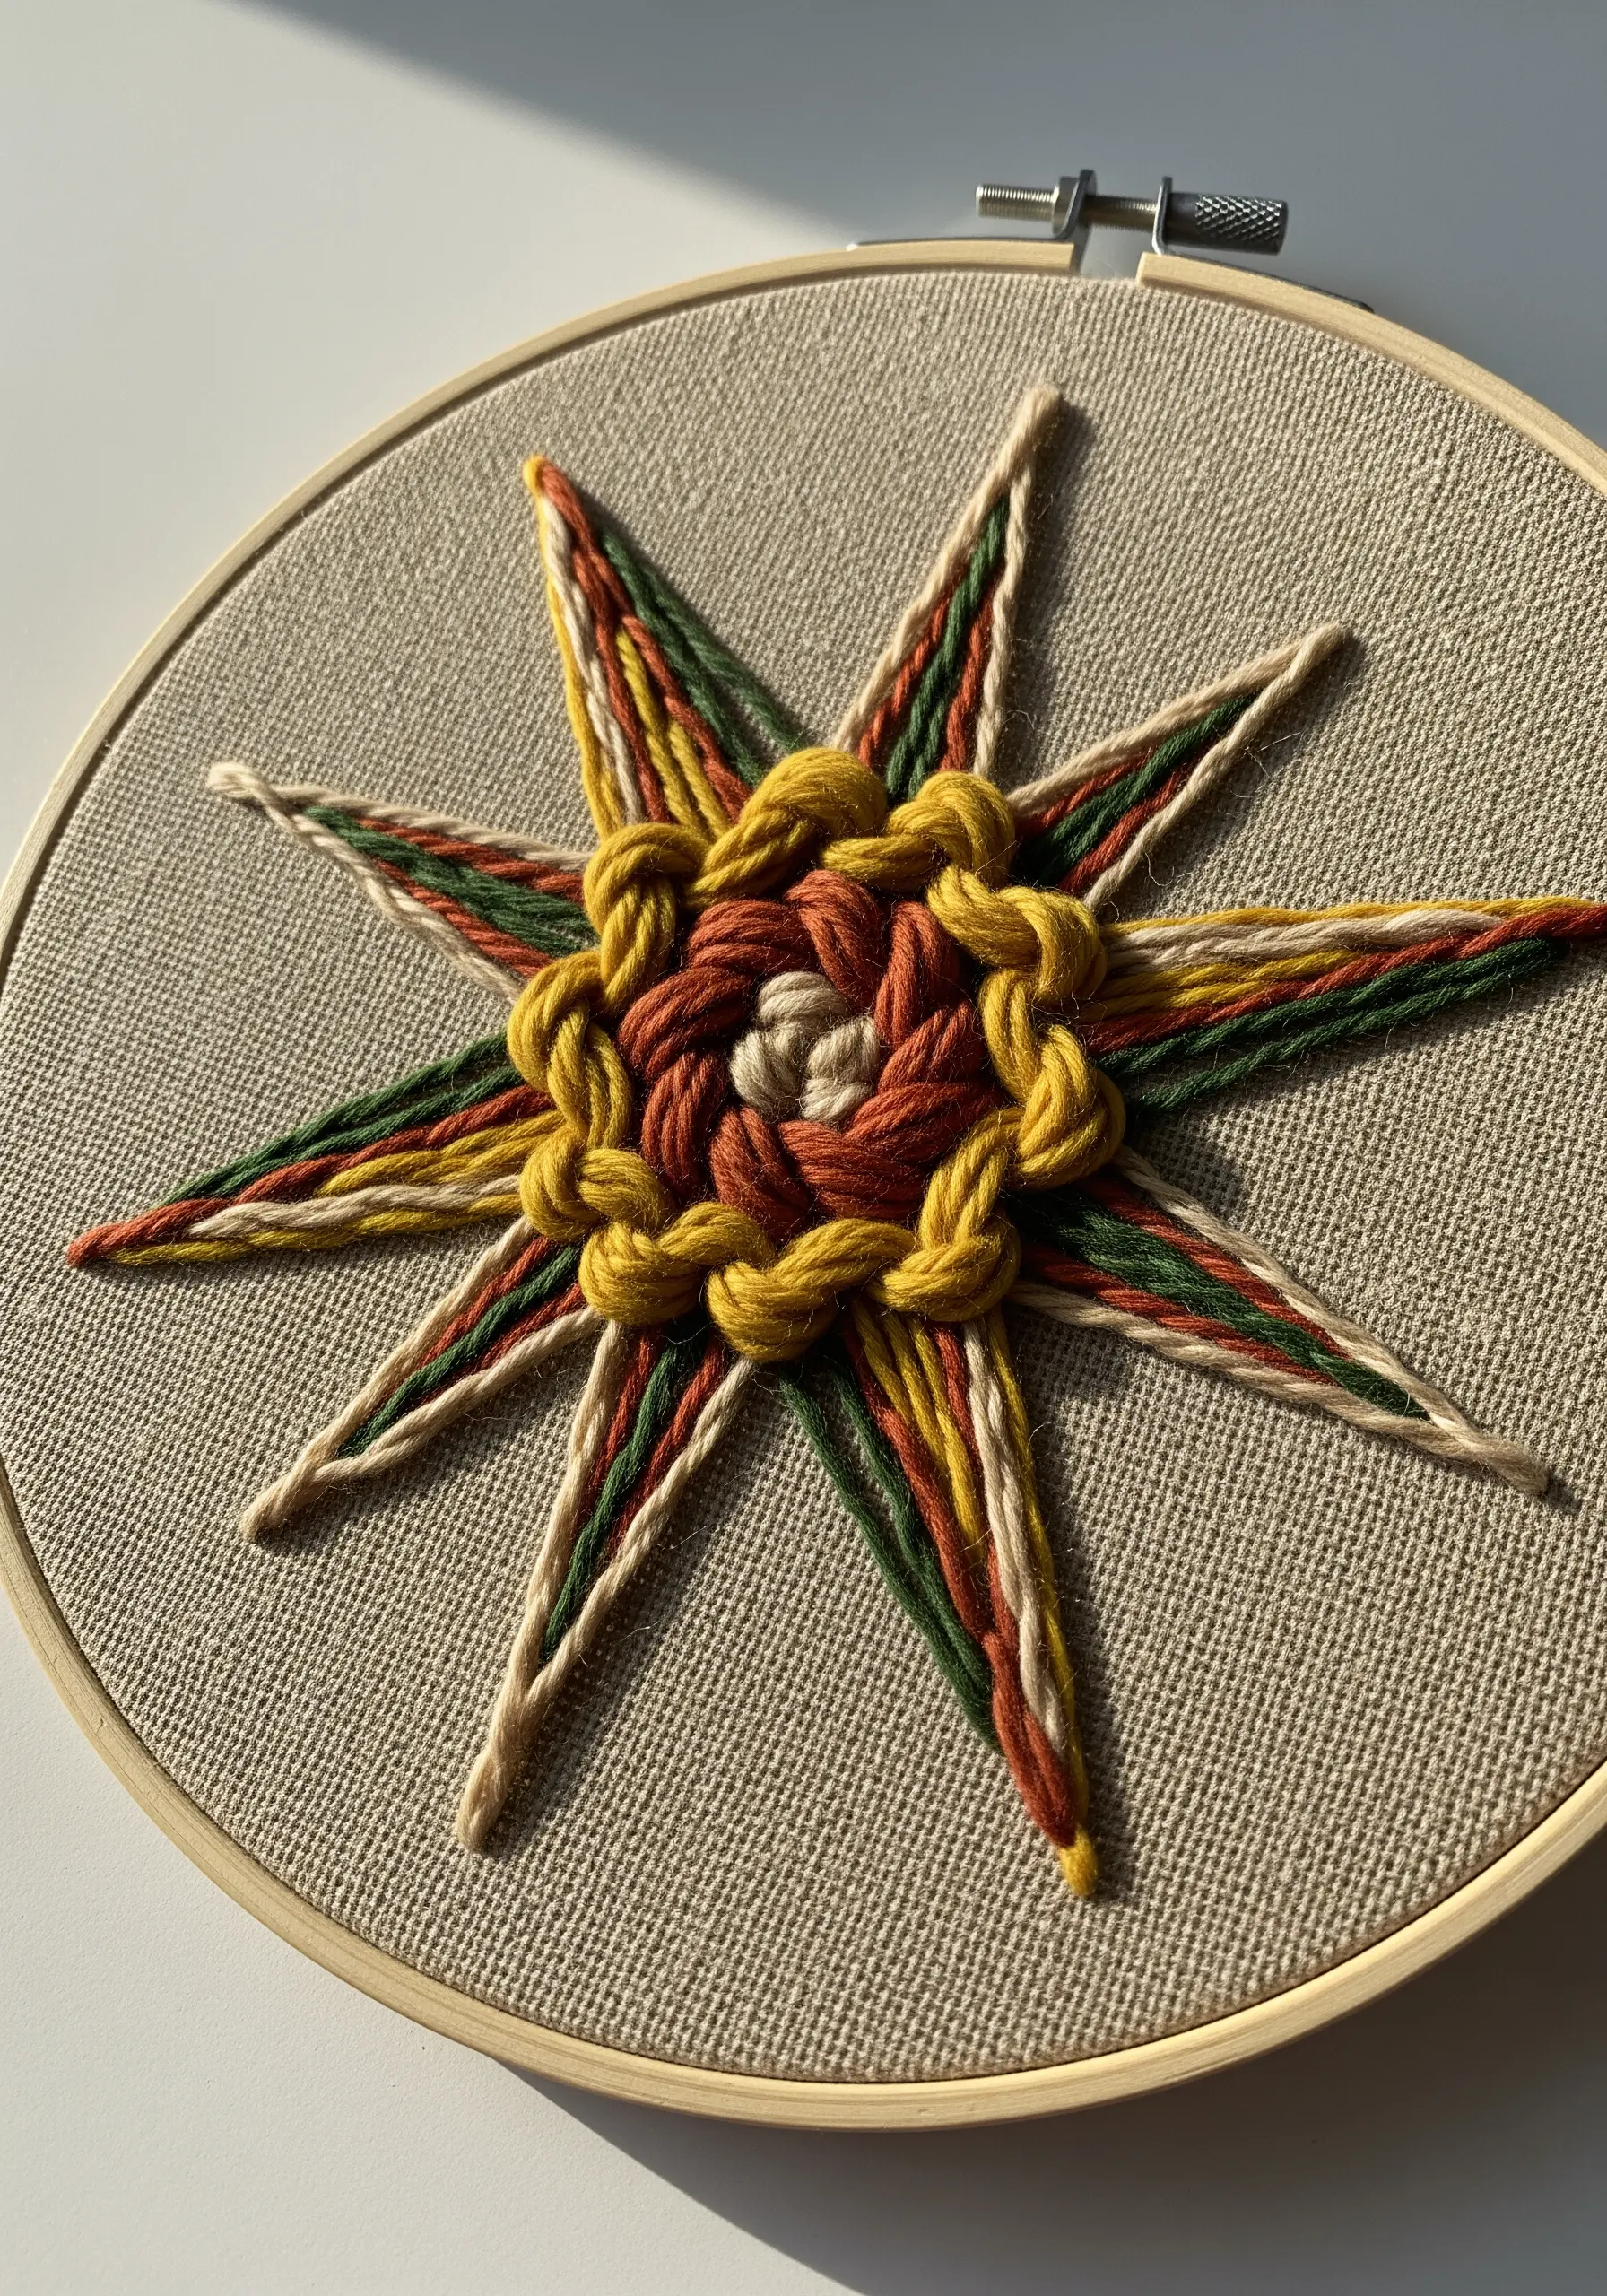
Build a rustic, dimensional centerpiece using thick yarn or multiple strands of six-strand floss held together.
Start with a woven wheel stitch in the center, then extend the rays outward, securing them with simple, chunky knots like the overhand or Josephine knot.
To achieve the marled, multi-tonal effect in the thread, combine two or three different colored strands in your needle at once.
This technique is less about precision and more about celebrating the bold, tactile quality of the fibers themselves.
3. Layered Straight Stitches for a Fireburst Effect
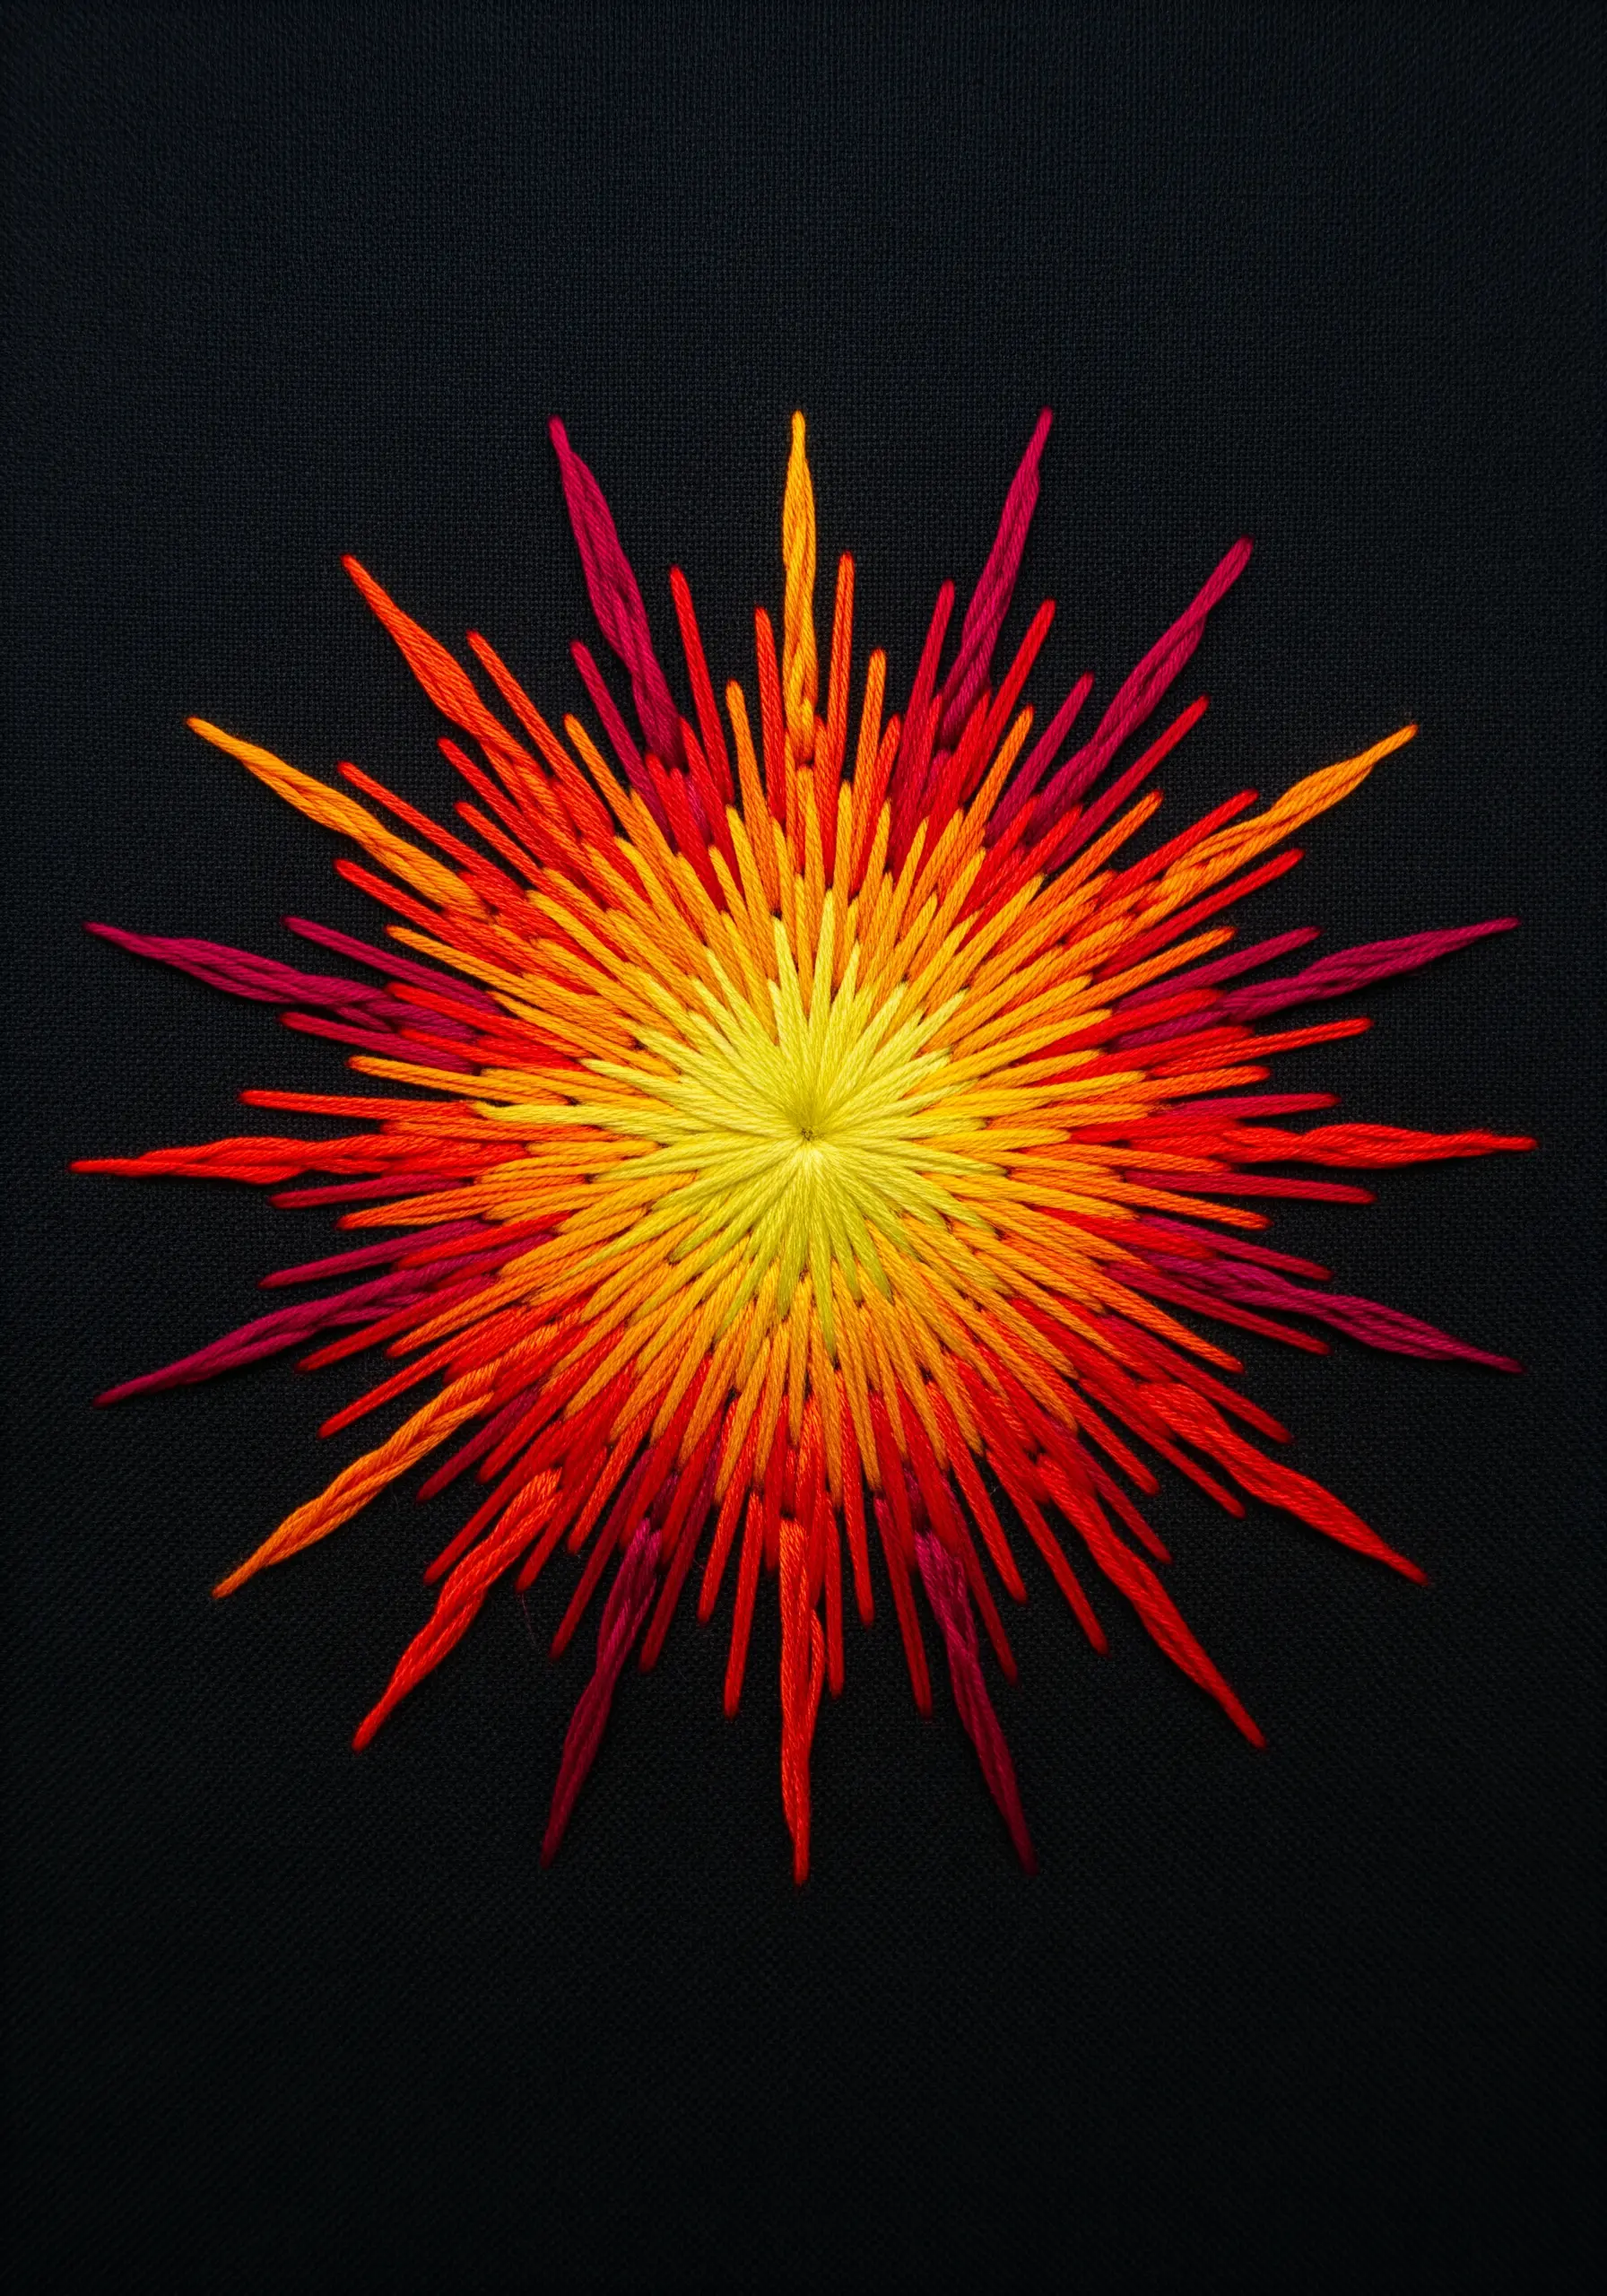
To create this explosive effect, you will rely on strategic color layering and varied stitch length.
Begin with a dense core of the lightest color—in this case, a bright yellow satin stitch circle.
Work outwards in concentric rings of increasingly warmer colors, using long straight stitches that overlap and intersect.
Vary the length and angle of each stitch to avoid a uniform look; the goal is controlled chaos that mimics the energy of a solar flare.
4. Minimalist Tension Lines on Delicate Fabric

This technique turns the fabric itself into a sculptural element by strategically manipulating thread tension.
Choose a lightweight, fluid fabric such as silk, rayon, or a loose-weave linen.
Using a strong, fine thread, create your radiating straight stitches, pulling each one just taut enough to create a gentle pucker in the fabric.
The resulting delicate distortion adds dimension and shadow, transforming a simple line drawing into a piece of minimalist art.
5. Rainbow Knot Cluster with Unruly Rays
Combine two distinct textures to create a design that feels both orderly and joyfully chaotic.
In the center, build a dense cluster of French knots or bullion knots, arranging them in a smooth rainbow gradient for a satisfying visual flow.
From this textured core, extend long, straight stitches in corresponding colors.
Allow a few of these straight stitches to loop, twist, or curl back, adding an element of playful spontaneity to the composition.
6. Geometric Layering with Fly & Fern Stitches

Build an intricate, snowflake-like star by layering simple stitches to create a complex pattern.
First, establish the primary structure with long straight stitches to form the main rays of the star.
Next, work over this framework using fly stitches to form the internal chevron shapes and fern stitches to add feathery, delicate texture along the arms.
Using a variegated thread in a cool palette will introduce subtle color variations, adding depth without the need to constantly change your floss.
7. High-Contrast Weaving and Whipped Stitches
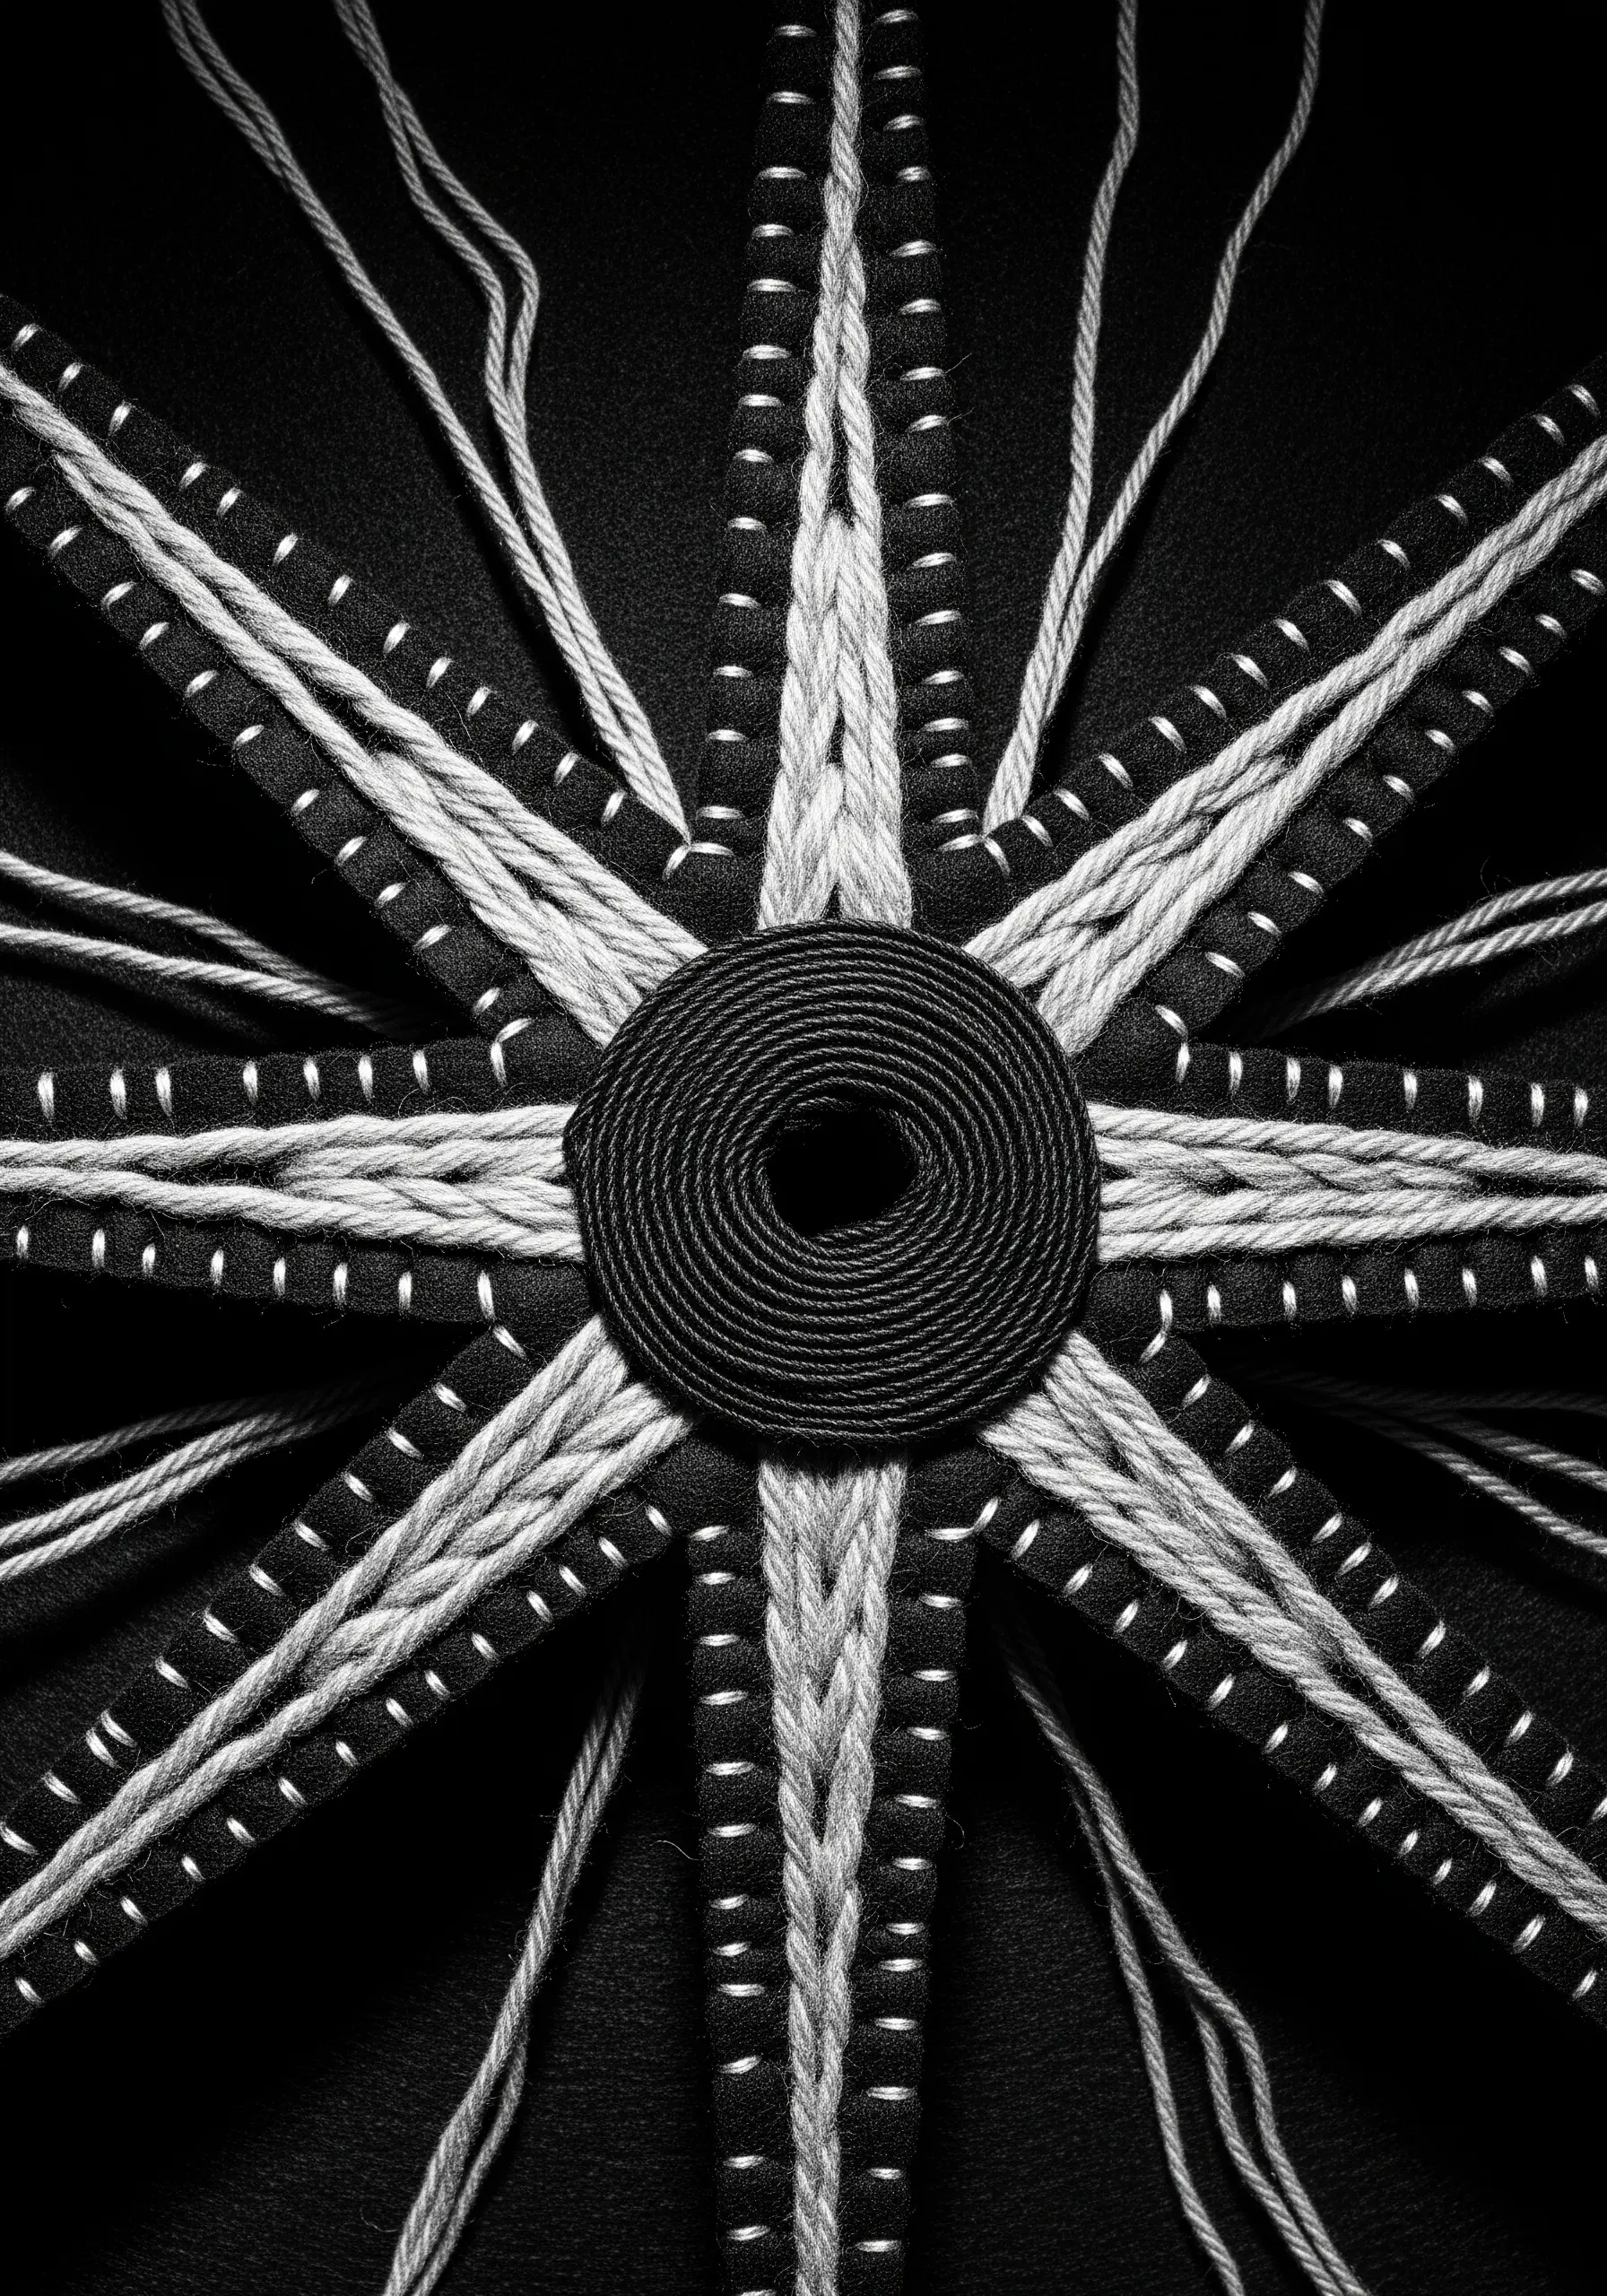
This design is a masterclass in creating powerful graphic impact with a limited color palette.
Create the solid center by couching a thick black cord in a tight spiral.
For the rays, alternate between two techniques: appliquéing strips of black fabric with a contrasting running stitch, and laying down thick, braided cords.
This exploration of material and texture is perfect for striking monochrome thread embroidery that commands attention.
8. Folk-Art Braids with Lazy Daisy Accents
Achieve a charming, handcrafted look by combining a bold braid with delicate floral details.
Use a plaited braid stitch or a heavy chain stitch for the rays, which creates a substantial, woven texture that stands out from the fabric.
Alternate thread colors within the braid for a striped, festive appearance.
Finish the tips of each ray with a small, cheerful bouquet of lazy daisy stitches, adding a soft, organic counterpoint to the structured braids.
9. Opulent Beadwork with a Gemstone Center
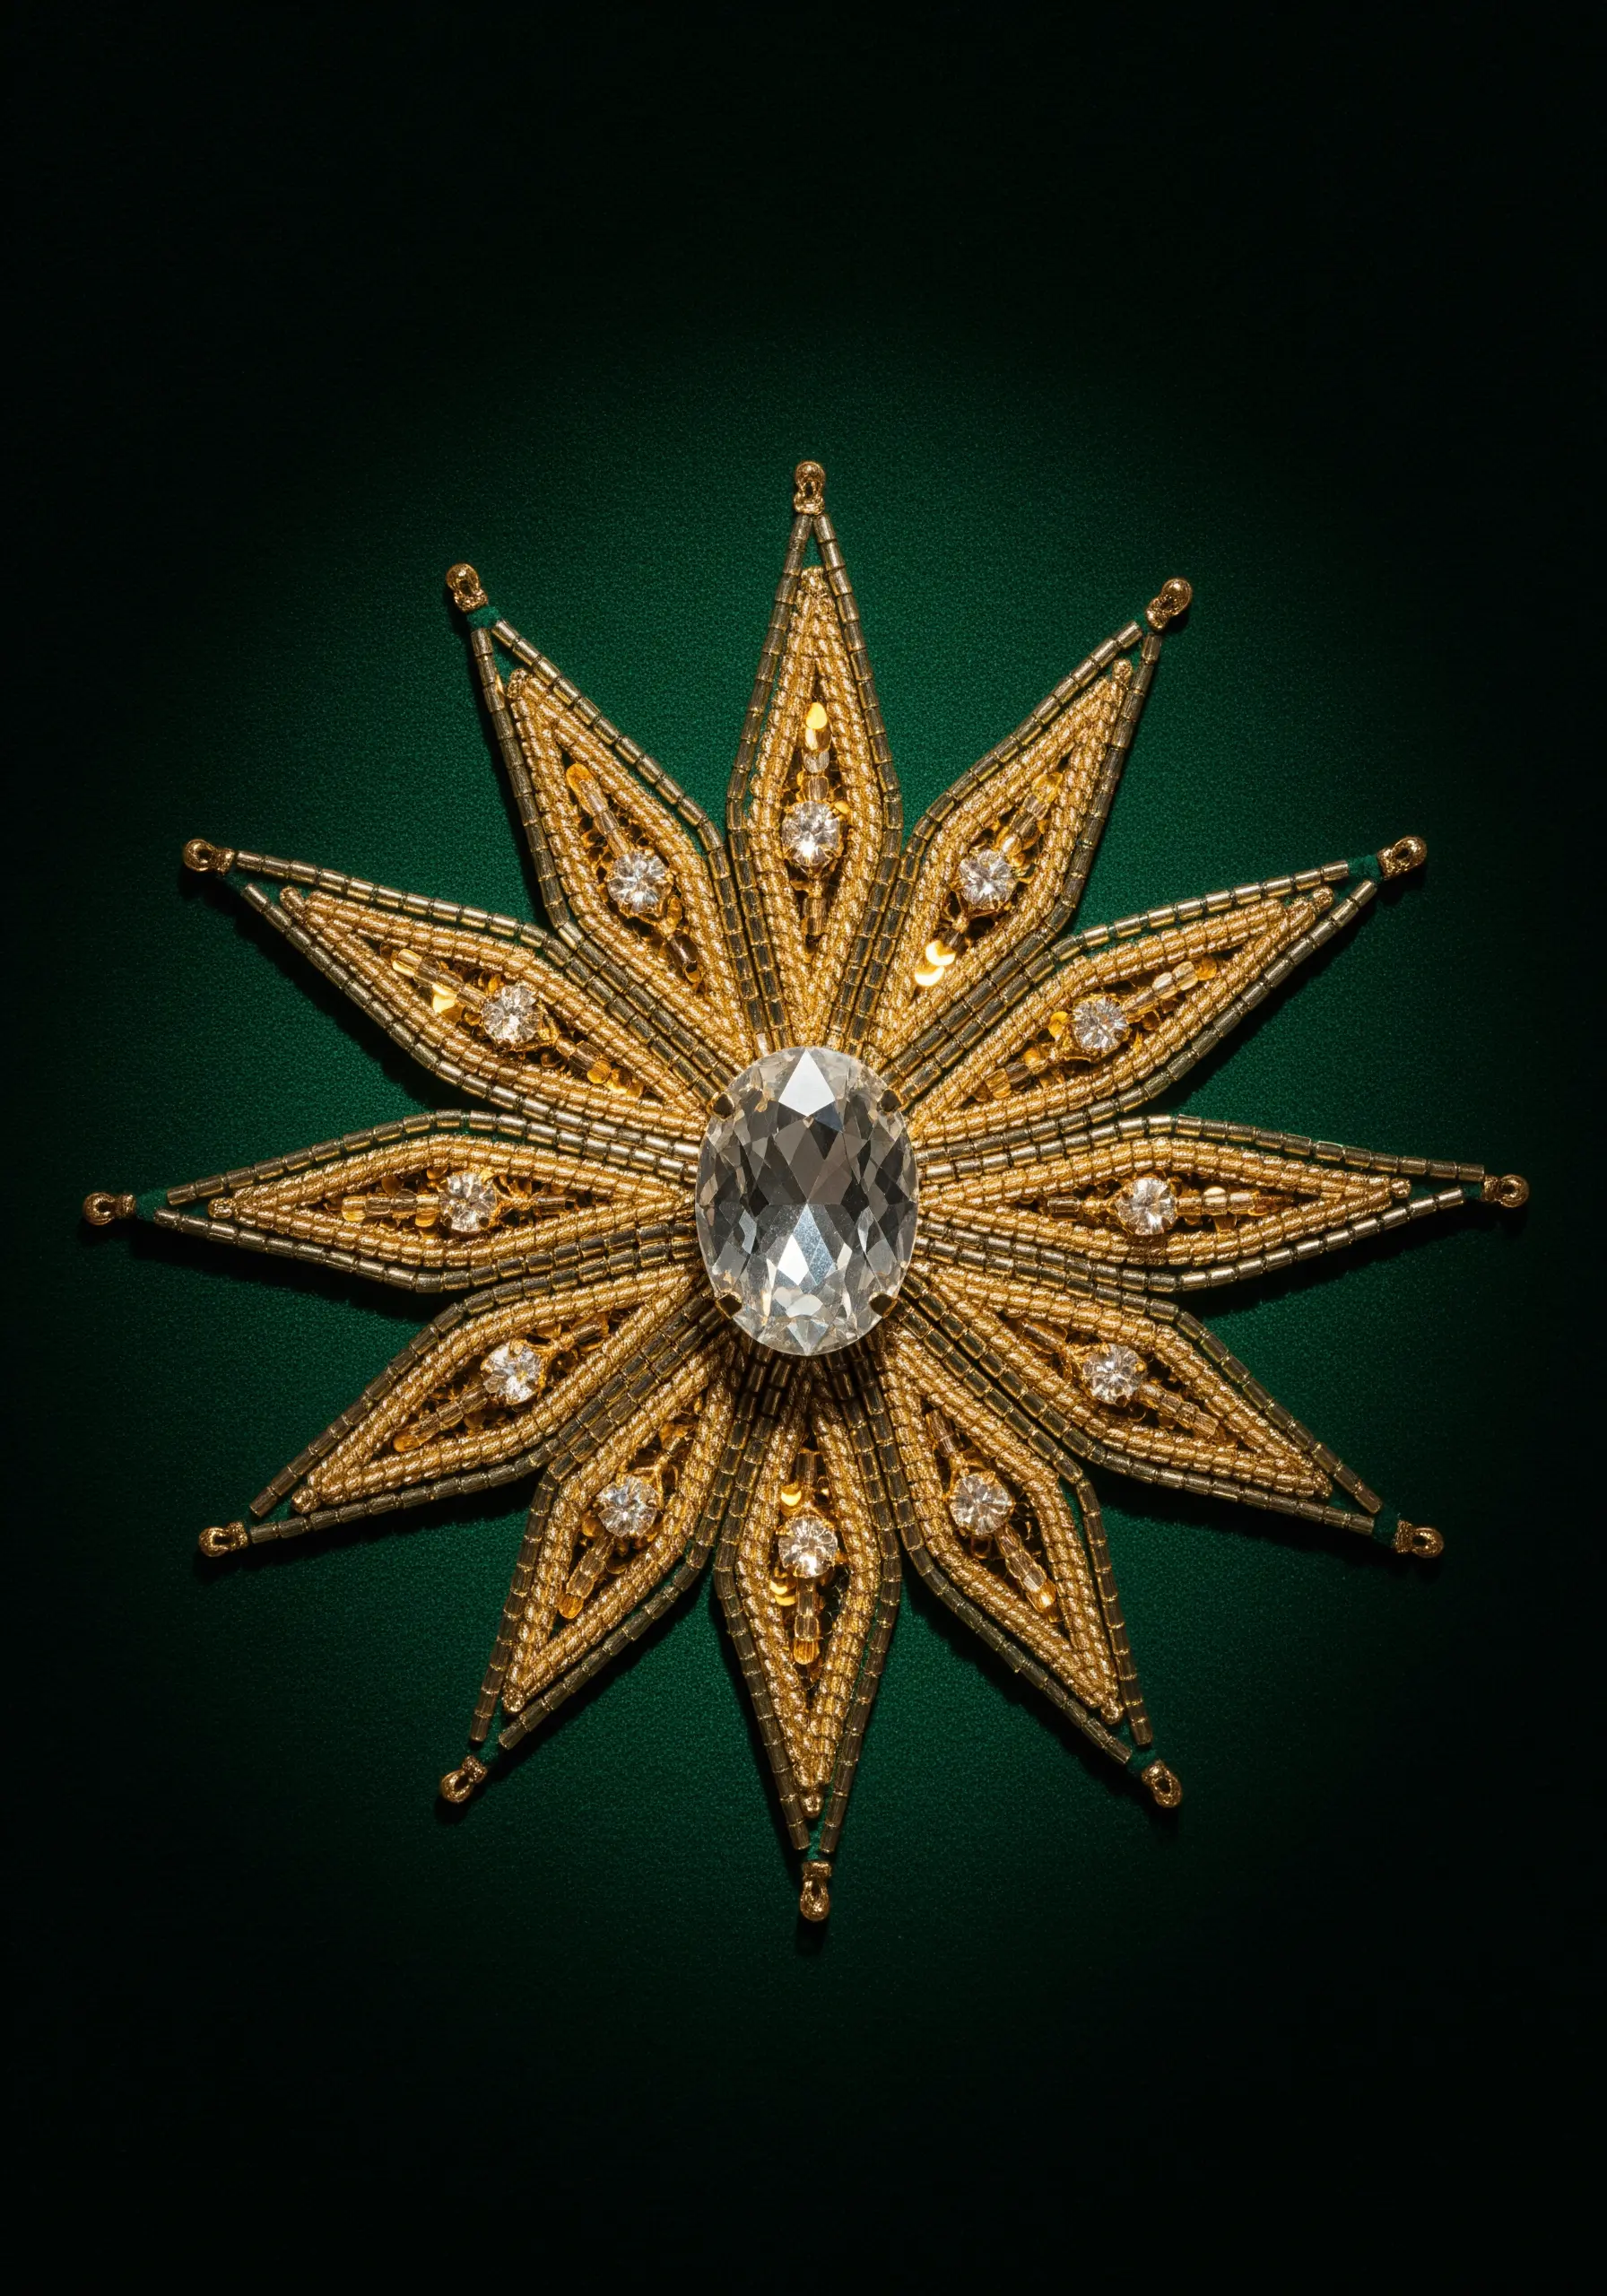
Transform your fabric into a piece of jewelry by swapping thread for beads and crystals.
Anchor the design with a large central gemstone or cabochon, securing it with a bezel of tiny seed beads.
Fill the rays with meticulous rows of seed beads applied with a backstitch, and use bugle beads to create sharp, defined outlines.
Strategically placed sequins and larger crystals will catch the light, adding a luxurious sparkle that thread alone cannot replicate.
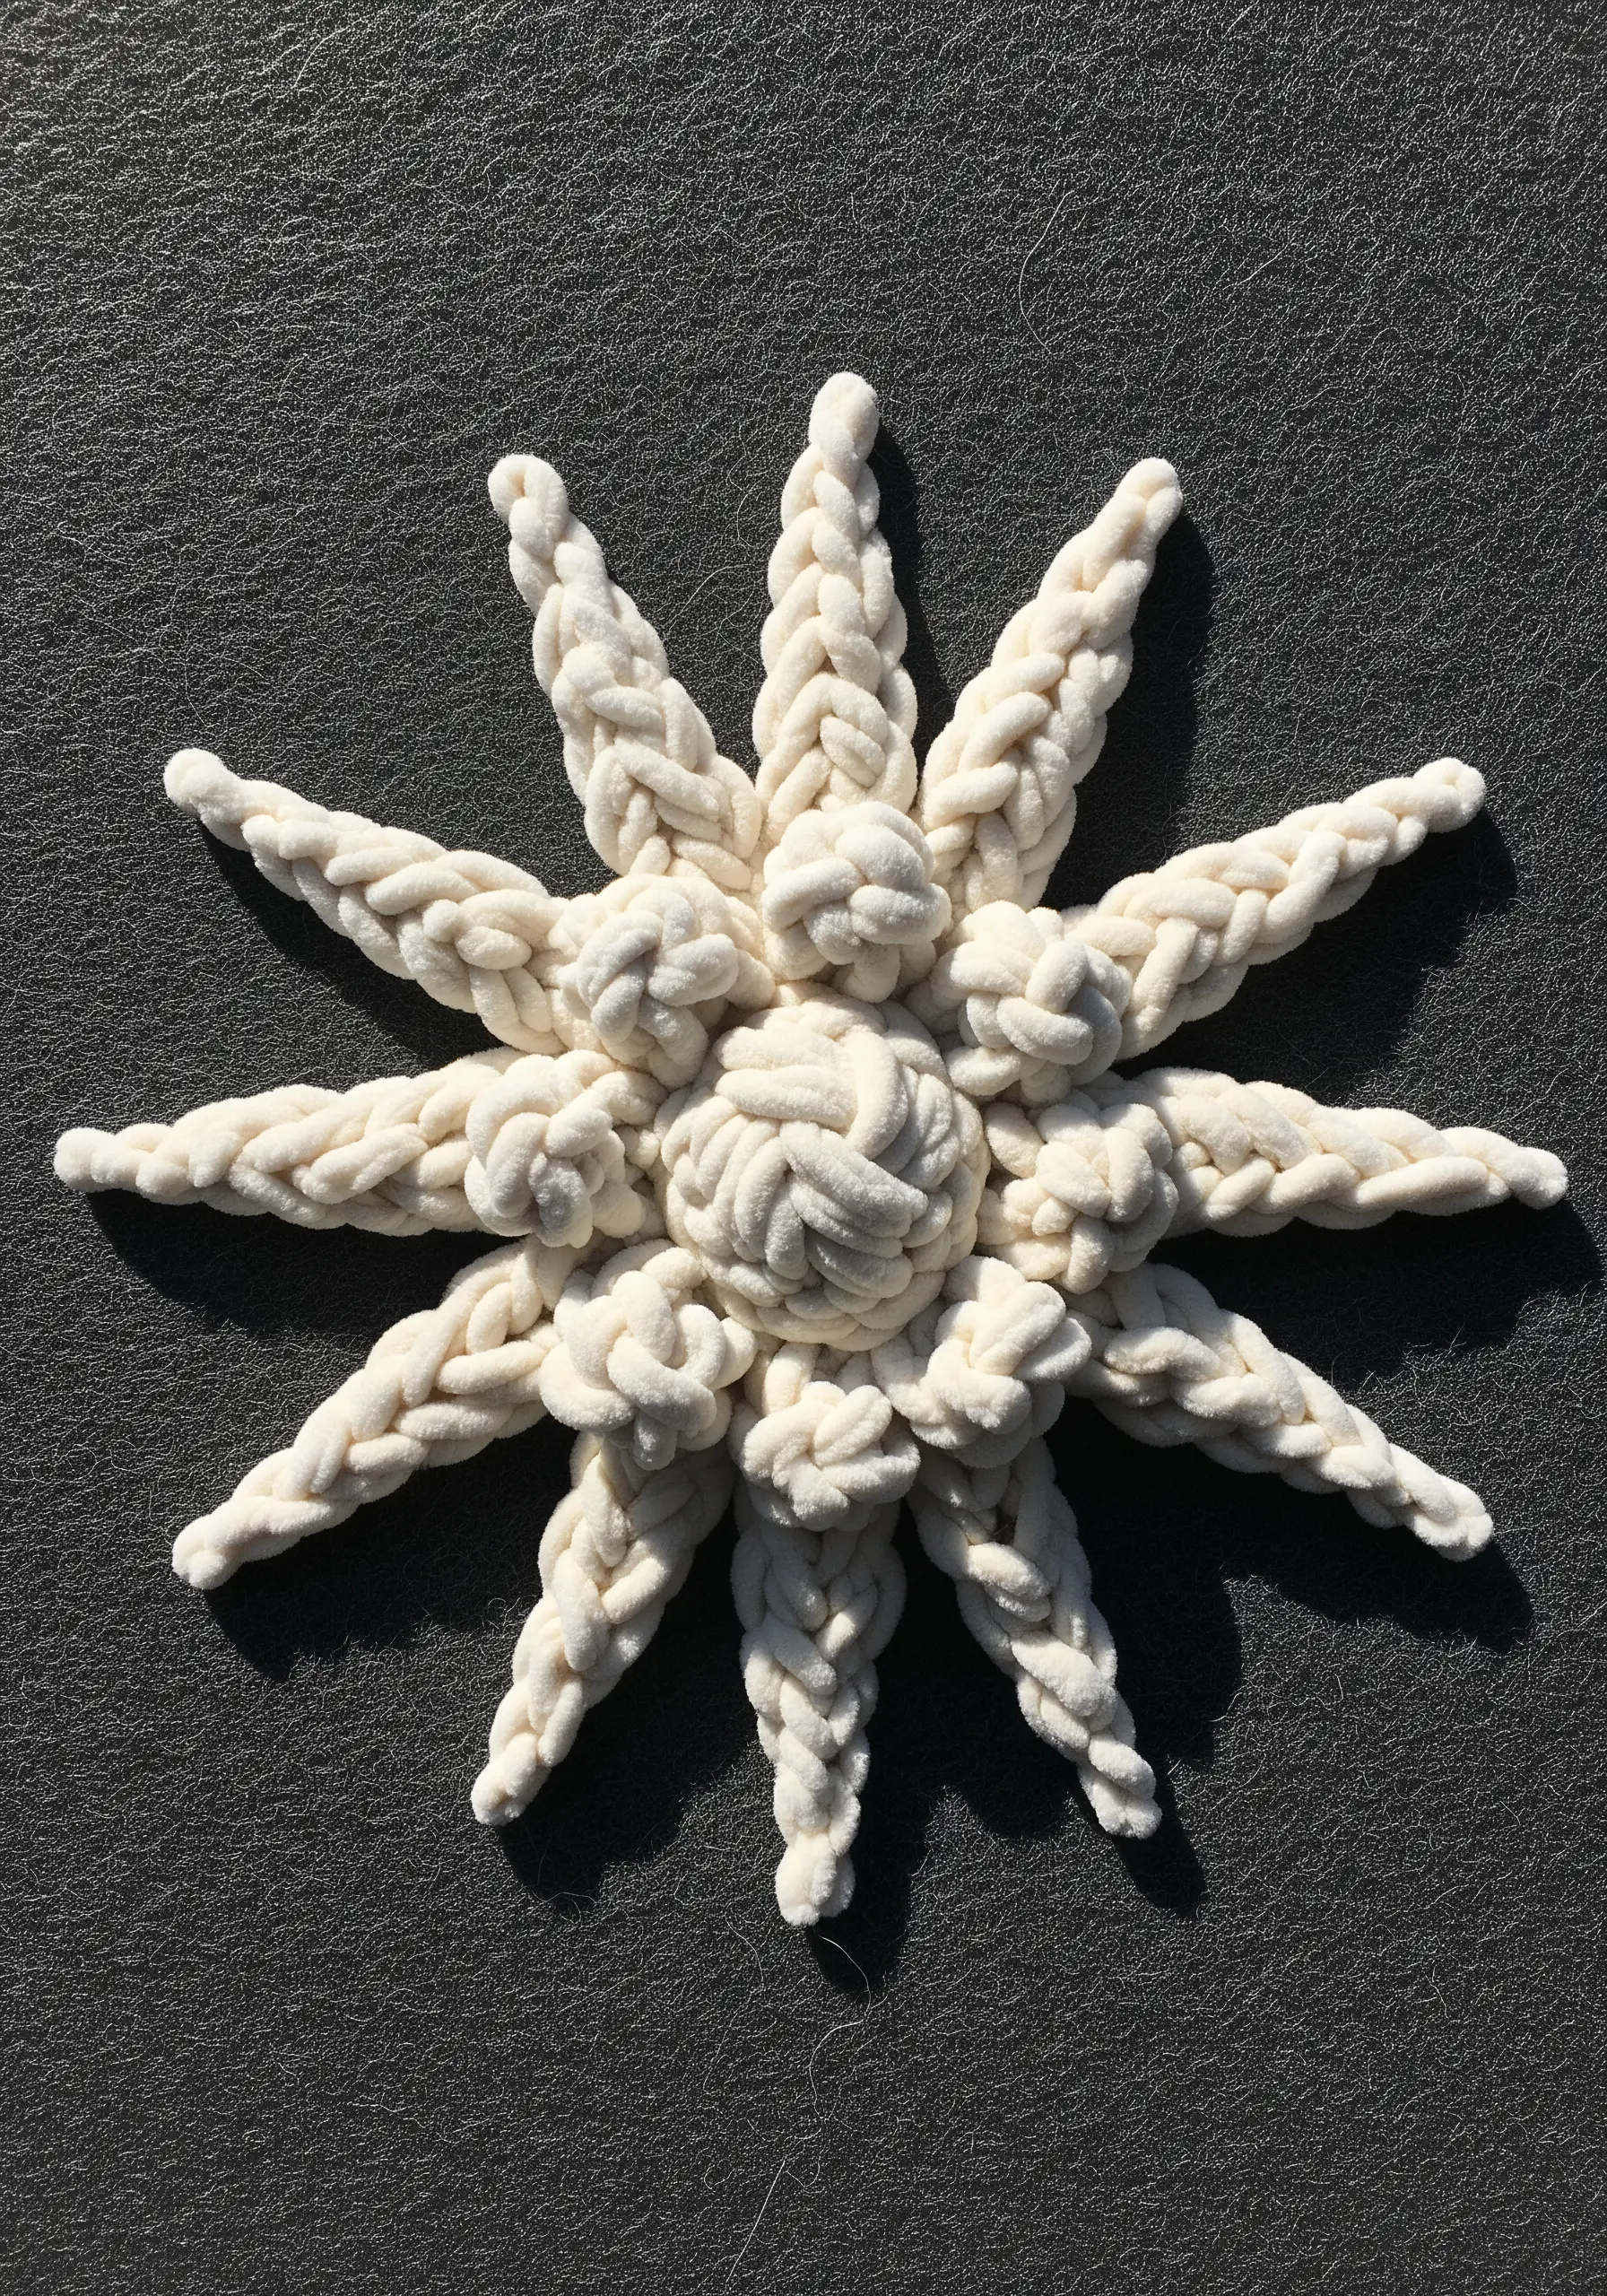
10. Sculptural Macrame Knots on Fabric

Incorporate macrame techniques to achieve a bold, three-dimensional effect with minimal stitching.
Use a soft, thick cord like cotton rope or jersey yarn.
Form the radiating arms by tying a series of simple knots—like overhand or figure-eight knots—and secure the cord to the fabric only at the beginning, end, and perhaps once in the middle of each ray.
Graduating the size of the knots from largest to smallest creates a beautifully tapered, organic shape.
11. Neon String Art Outlines
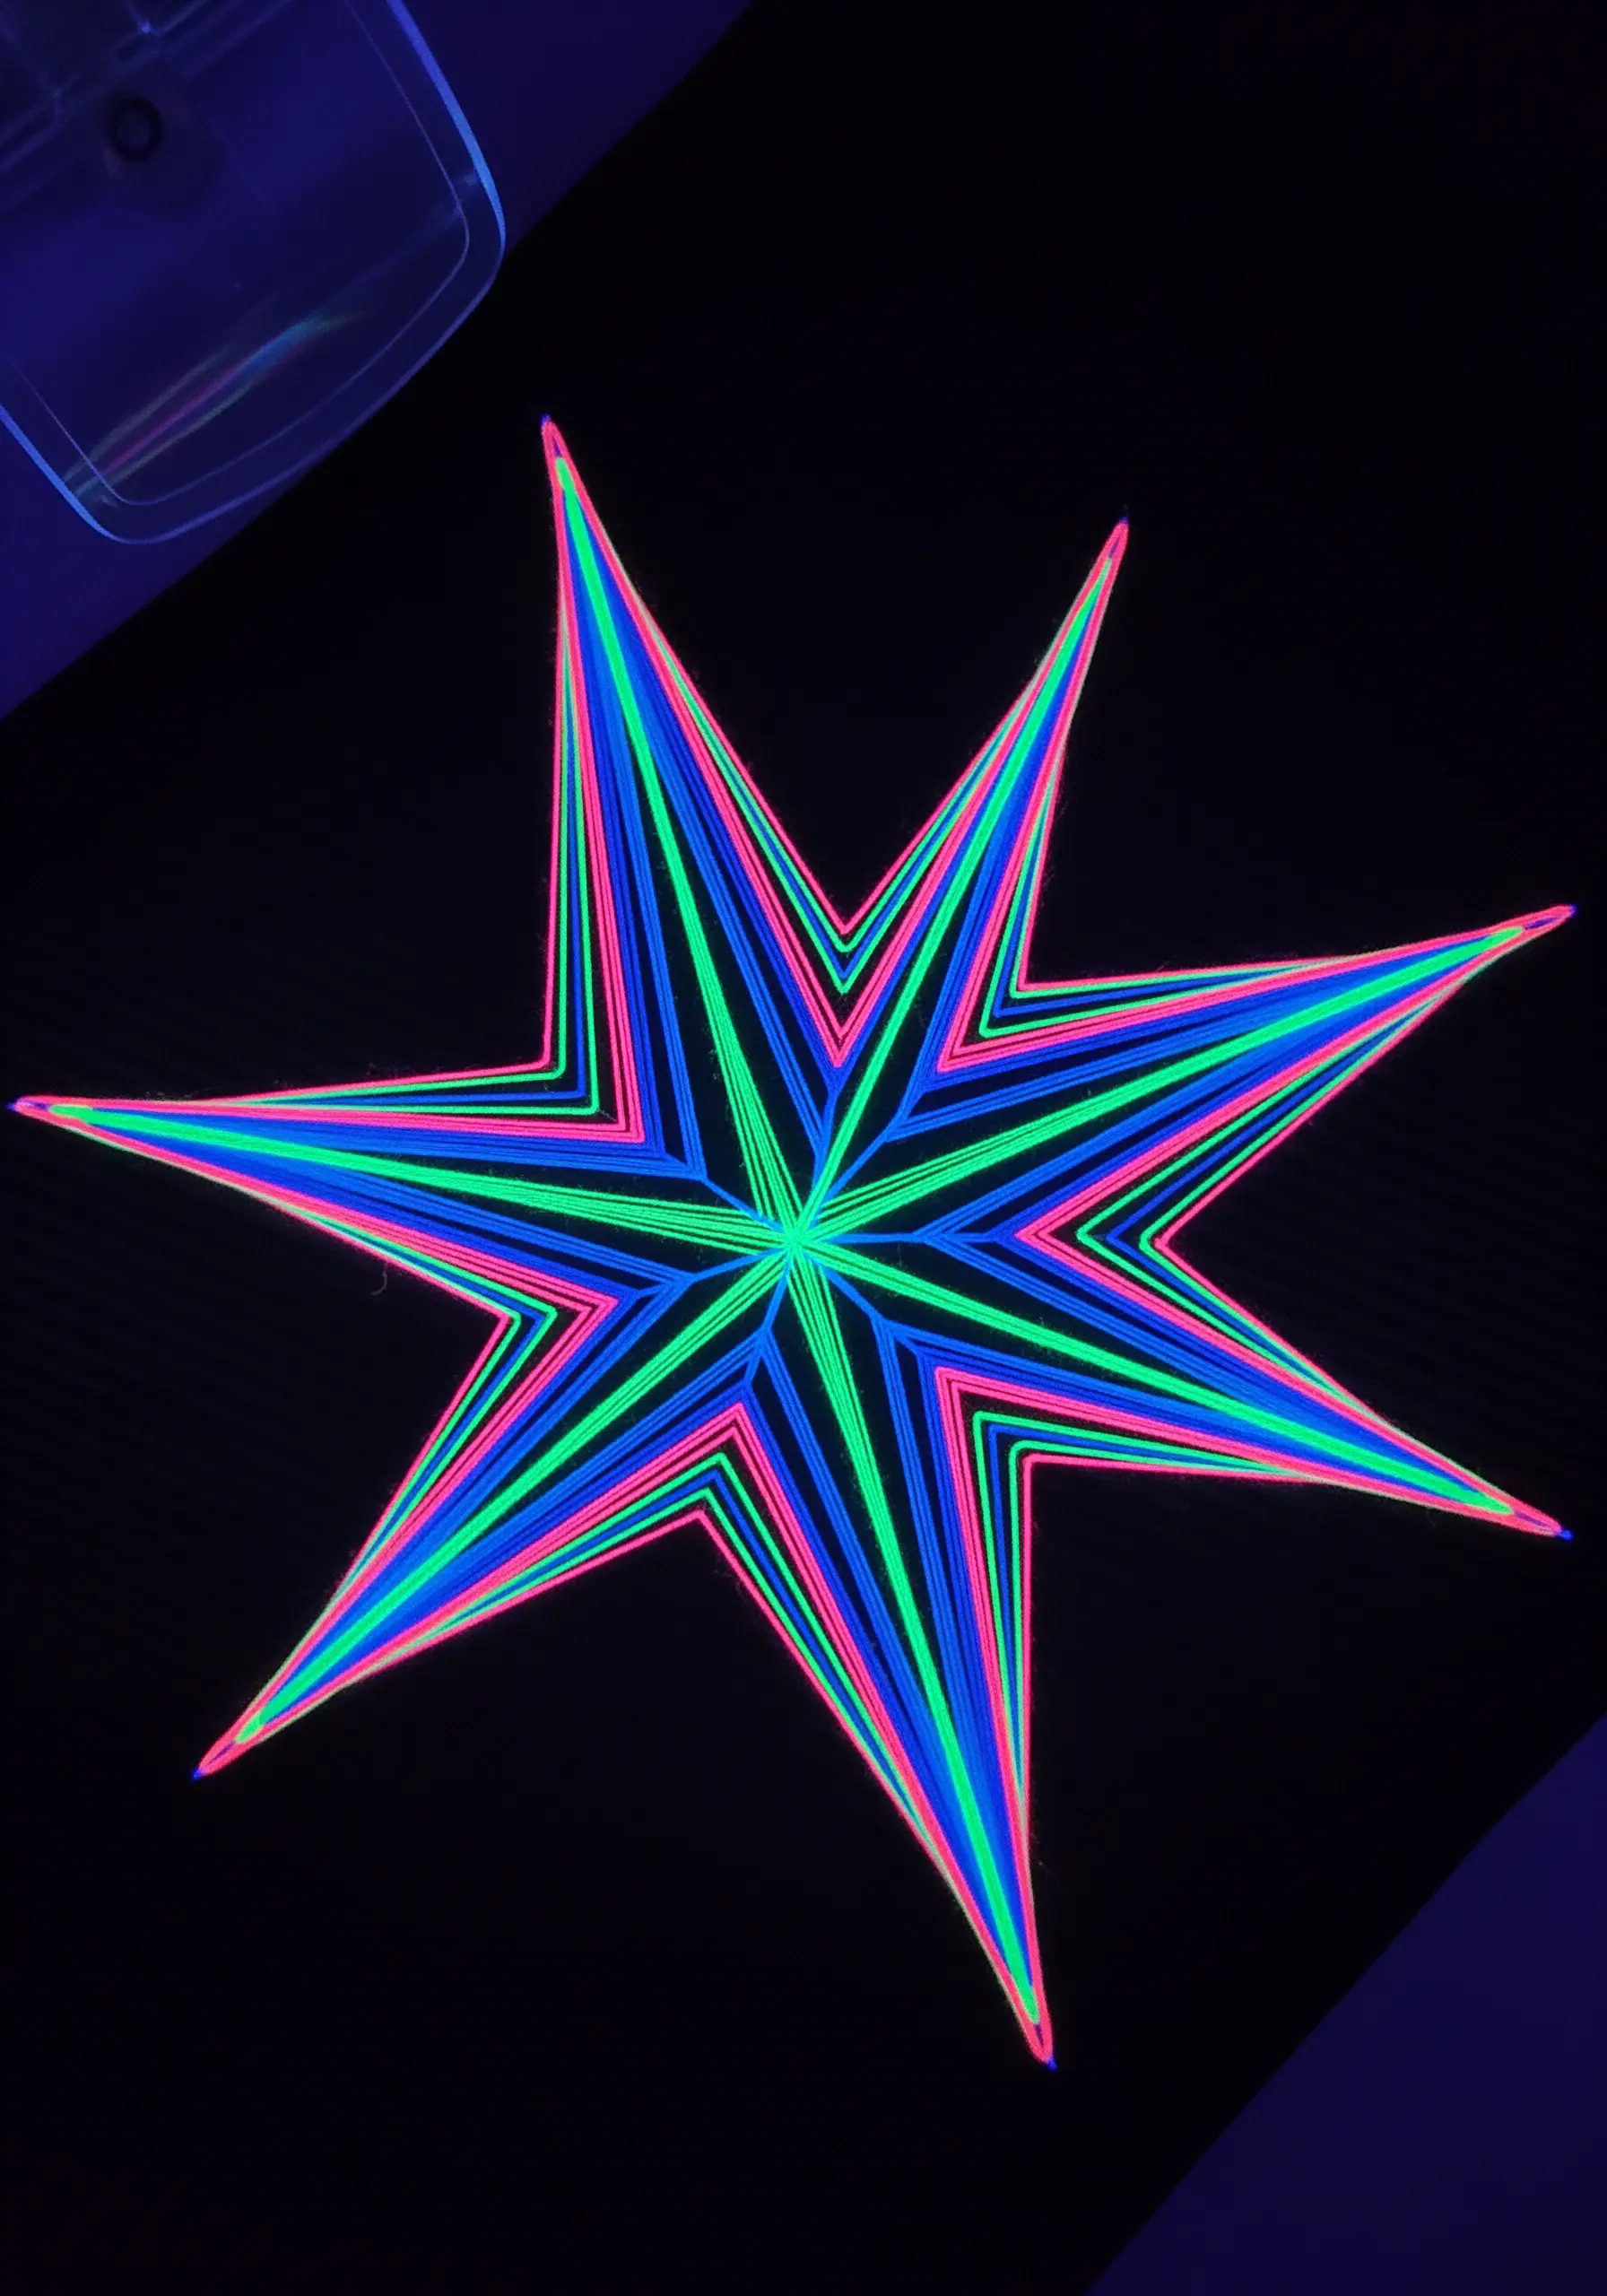
This technique borrows from string art to create vibrant, geometric designs with an electric feel.
Instead of stitching through the fabric, create a series of anchor points around the perimeter of your star shape.
Wrap neon thread between these points, layering different colors to build up a sense of depth and vibration.
The sharp, clean lines and overlapping colors give this a dynamic, graphic quality reminiscent of retro string art patterns.
12. Variegated Thread on a Watercolor Background

For a soft, painterly effect, let your materials do the heavy lifting.
Begin with a fabric that already has a soft pattern, such as a tie-dye, shibori, or watercolor print.
Select a variegated embroidery floss with colors that complement the fabric background.
Use simple, long satin stitches for the rays; the thread’s natural color transitions will create a gentle, blended gradient that harmonizes beautifully with the fabric.
13. Woven & Interlaced Yarn Star
Move beyond surface stitching into the realm of weaving to create this highly textural piece.
Create a foundation of ‘spokes’ with a sturdy yarn, stretching it across the hoop to form a star shape.
Then, use a tapestry needle to weave your contrasting colors over and under these spokes, building up the pattern from the center outwards.
The braided edge can be created separately and then stitched on, framing the piece and giving it a clean, finished look.
14. Icy Embellishments with Sequins and Eyelash Yarn
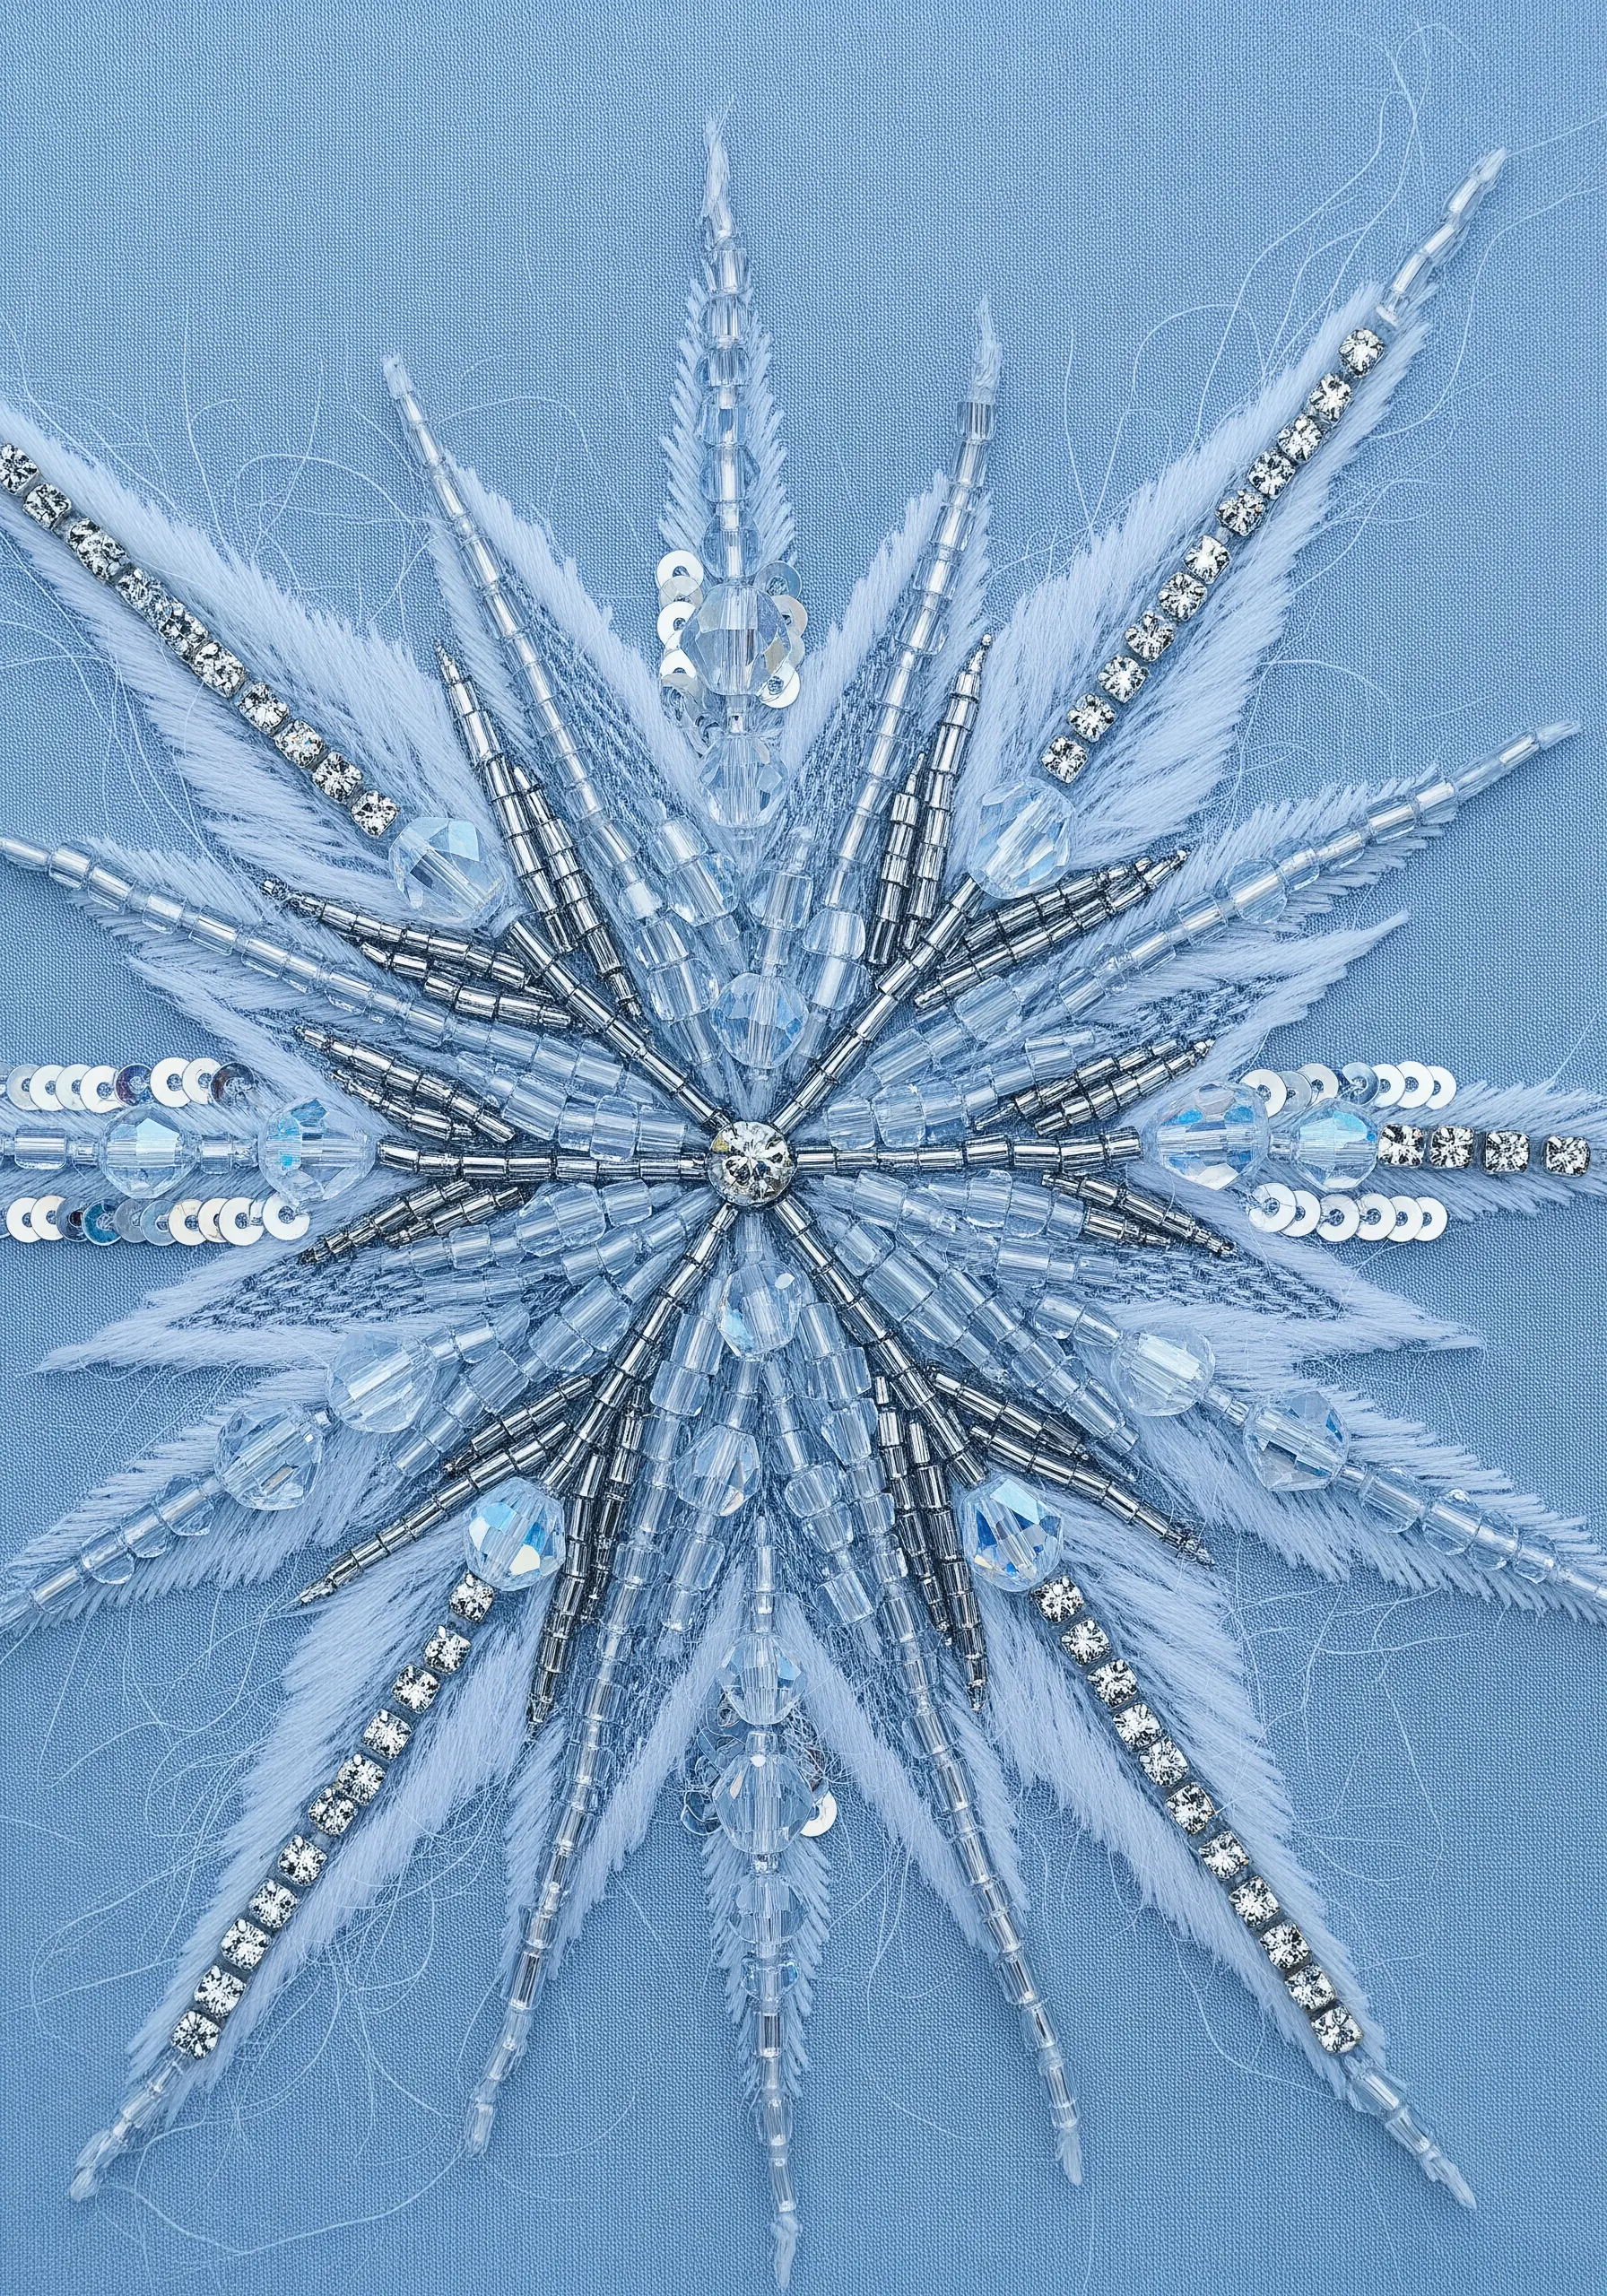
Evoke the shimmer of ice and snow by combining a mix of hard and soft textures.
Use long, silver bugle beads to create the sharp, crystalline structure of the rays.
Intersperse clear sequins and faceted crystal beads to reflect light like frost.
For the soft, frosty bloom, couch down small pieces of white eyelash yarn or fluffy mohair with a fine, nearly invisible metallic thread.
15. Backlit Neuron Burst with Twisted Cords

Create a design that truly glows by combining embroidery with a hidden light source.
Use a thick, twisted cord or chunky yarn to stitch the branching, neuron-like arms of the star.
Fill the center with a dense nest of bright, fiery threads to act as the core.
Finally, stitch your piece on a semi-sheer fabric and mount it in a deep shadowbox frame with a small LED puck light placed behind the center to create a stunning, backlit effect.
16. Deconstructed Appliqué with Raw Edges

Challenge traditional appliqué with this modern, deconstructed approach that celebrates texture and negative space.
Cut your star points from a separate, coarse-weave fabric like linen or osnaburg, and pull a few threads from the edges to encourage fraying.
Arrange the pieces on your base fabric, leaving a clean, empty space in the middle.
Secure each piece with a simple, visible stitch, like a cross-stitch or running stitch, turning the construction into a design element. This is a perfect use for abstract fabric collage embroidery.
17. Galactic Swirl with Whipped Cords

Instead of fighting a patterned fabric, use its design as a roadmap for your stitching.
On a galaxy-print fabric, lay down thick cords in curved lines that echo the cosmic swirls.
Secure these cords with a whipping stitch, using a contrasting metallic thread to create a dynamic, striped texture.
A simple satin-stitched flower provides a calm focal point, while scattered French knots mimic distant stars, integrating the embroidery seamlessly with the print.
18. Architectural String Art with Gradient Fills
This technique uses the precision of geometry and color theory to create a stunning illusion of depth.
Each ray is filled with meticulously spaced straight stitches running from an outer anchor point to an inner anchor point.
By methodically shifting these anchor points stitch by stitch, you create the appearance of a shaded, three-dimensional surface.
Amplify this effect by using a smooth gradient of thread colors, moving from dark to light to mimic shadow and highlight, resulting in mesmerizing abstract optical illusion stitches.
19. Sculptural 3D Braid and Knot Work
Take your embroidery off the surface of the fabric by creating a fully three-dimensional appliqué.
Construct this piece separately using a soft, thick cord like velvet tubing or cotton jersey yarn.
The rays are formed from folded braids, and the center is a dense, sculptural knot like a monkey’s fist or Turk’s head.
Once the object is complete, stitch it securely to your background fabric for a high-impact, dimensional artwork.
20. Soft-Focus Chenille Stem Burst

For a quick project with immense textural payoff, incorporate chenille stems (pipe cleaners) into your work.
Cut the stems into various lengths and arrange them in a radial burst, using a few simple stitches at the base of each stem to secure them to the fabric.
The velvety, plush texture of the chenille creates an instant soft-focus effect and adds playful volume.
Scatter a few iridescent sequins throughout to provide a subtle sparkle that contrasts with the matte finish of the stems.
21. Layered Felt Appliqué with Echo Stitching
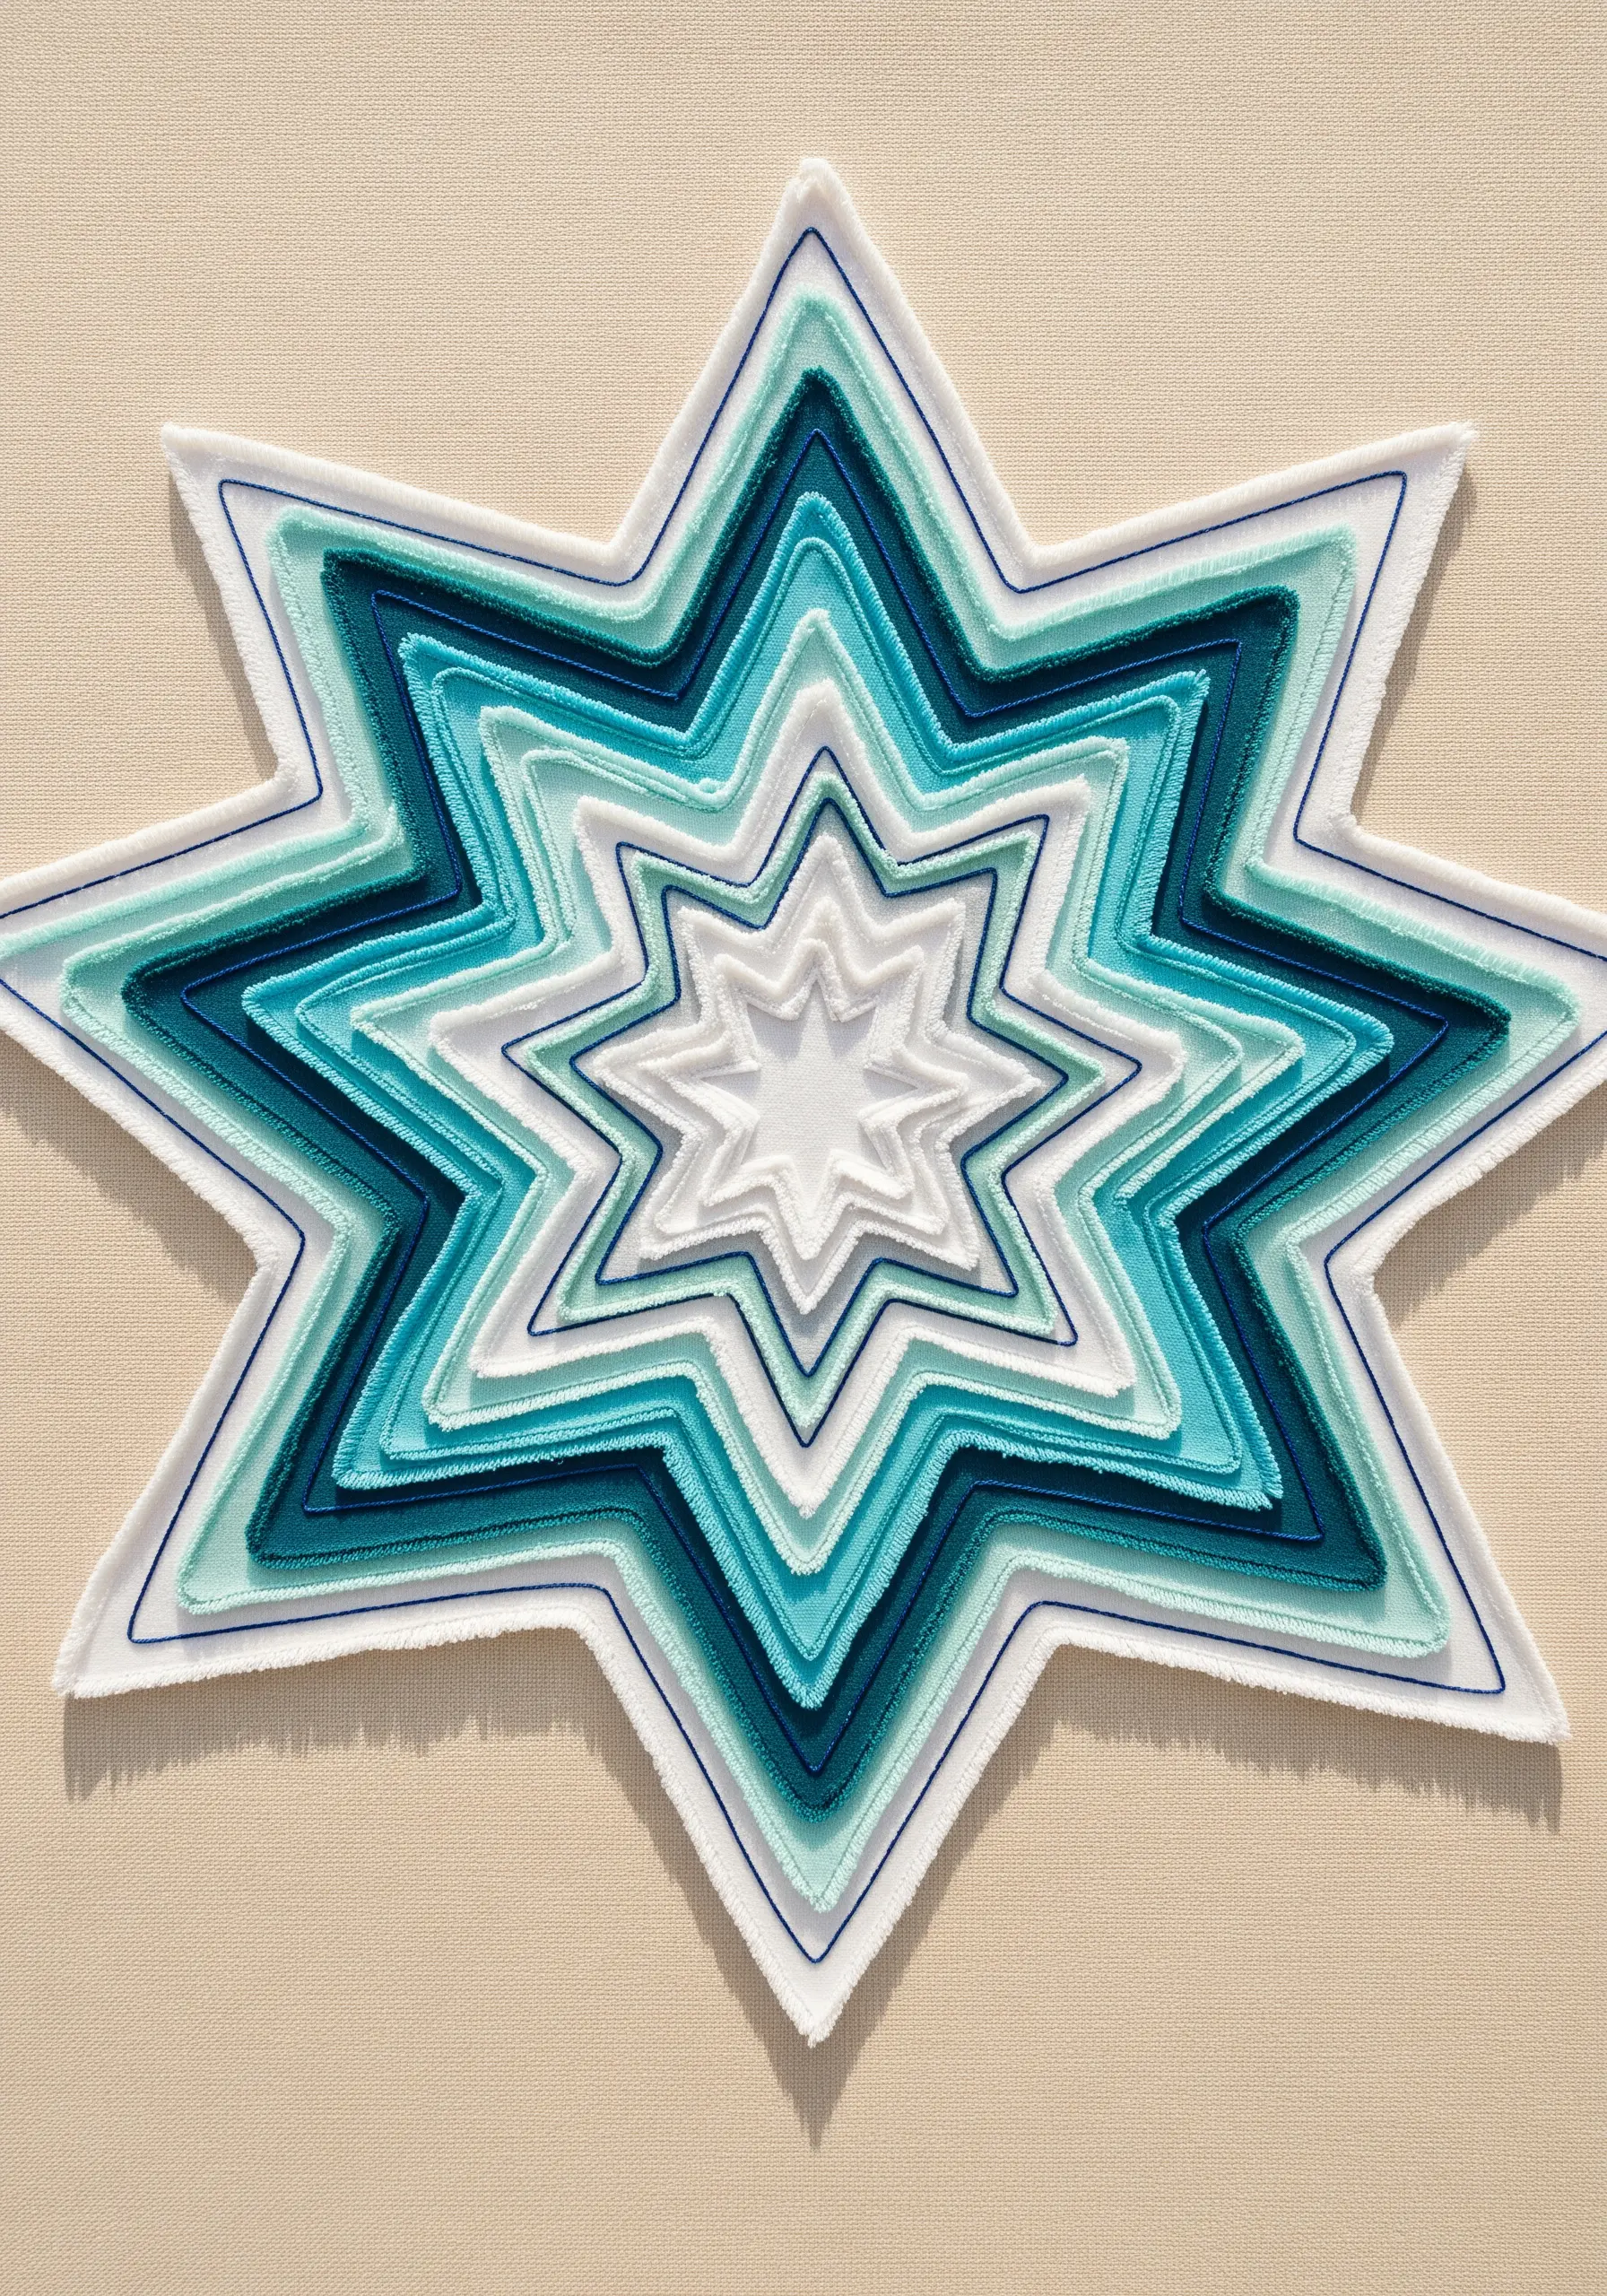
Build a clean, graphic star with incredible depth using simple layers of felt.
Cut concentric, nesting star shapes from several colors of felt or another non-fraying fabric.
Carefully stack them from largest to smallest, ensuring even spacing around the edges.
Secure the layers with a simple, visible running stitch or backstitch just inside the edge of each shape. This ‘echo stitching’ not only holds the piece together but also adds a subtle, handcrafted outline to each layer.
22. Free-Motion Scribble Embroidery

Unleash your creative energy with an expressive, scribbled texture that prioritizes movement over precision.
Whether using a free-motion sewing machine foot or stitching by hand, think of your needle as a pencil.
Work within a simple star outline, rapidly filling the space with chaotic, overlapping lines of thread.
Build up the density in certain areas to create shadow and dimension. The beauty of this technique lies in its raw, unfiltered energy.
23. Ornate Goldwork with Couching and French Knots

Achieve a look of regal opulence by exploring traditional goldwork techniques that focus on texture.
Create the smooth, defined rays by couching down metallic passing thread or pearl purl.
For more textured rays, wrap a thick cord with a finer thread before stitching it down.
The central medallion combines raised loops, couched cords, and a dense filling of French knots to create a rich, tactile centerpiece that is as much about feel as it is about shine.
24. Op-Art Chevron Lines
Harness the power of optical illusion with nothing more than simple straight stitches and a strong sense of rhythm.
Fill each point of the star with a series of repeating V-shapes, or chevrons.
The key to the hypnotic effect is maintaining consistent spacing and stitch length throughout the pattern.
Using a high-contrast color scheme, like black on white, maximizes the visual vibration and creates a design that seems to pulse with energy.


