
Have you ever felt that your stitches, no matter how neat, are missing a certain something? You’ve mastered the basics, but your work still feels flat, predictable. You’re ready to move beyond just filling in shapes and start creating art that feels truly alive.
The secret isn’t about learning hundreds of complicated new stitches. It’s about rethinking your relationship with thread, fabric, and dimension. It’s about understanding that texture isn’t just an embellishment—it’s a language. It’s how you guide the eye, create emotion, and turn a simple surface into a dynamic world.
Here, you’ll find twenty ways to push your thread in new directions. These aren’t just techniques; they are invitations to experiment. To build, to deconstruct, to sculpt, and to see your materials not for what they are, but for all they can become.
1. Achieve Ethereal Depth with Layered Organza
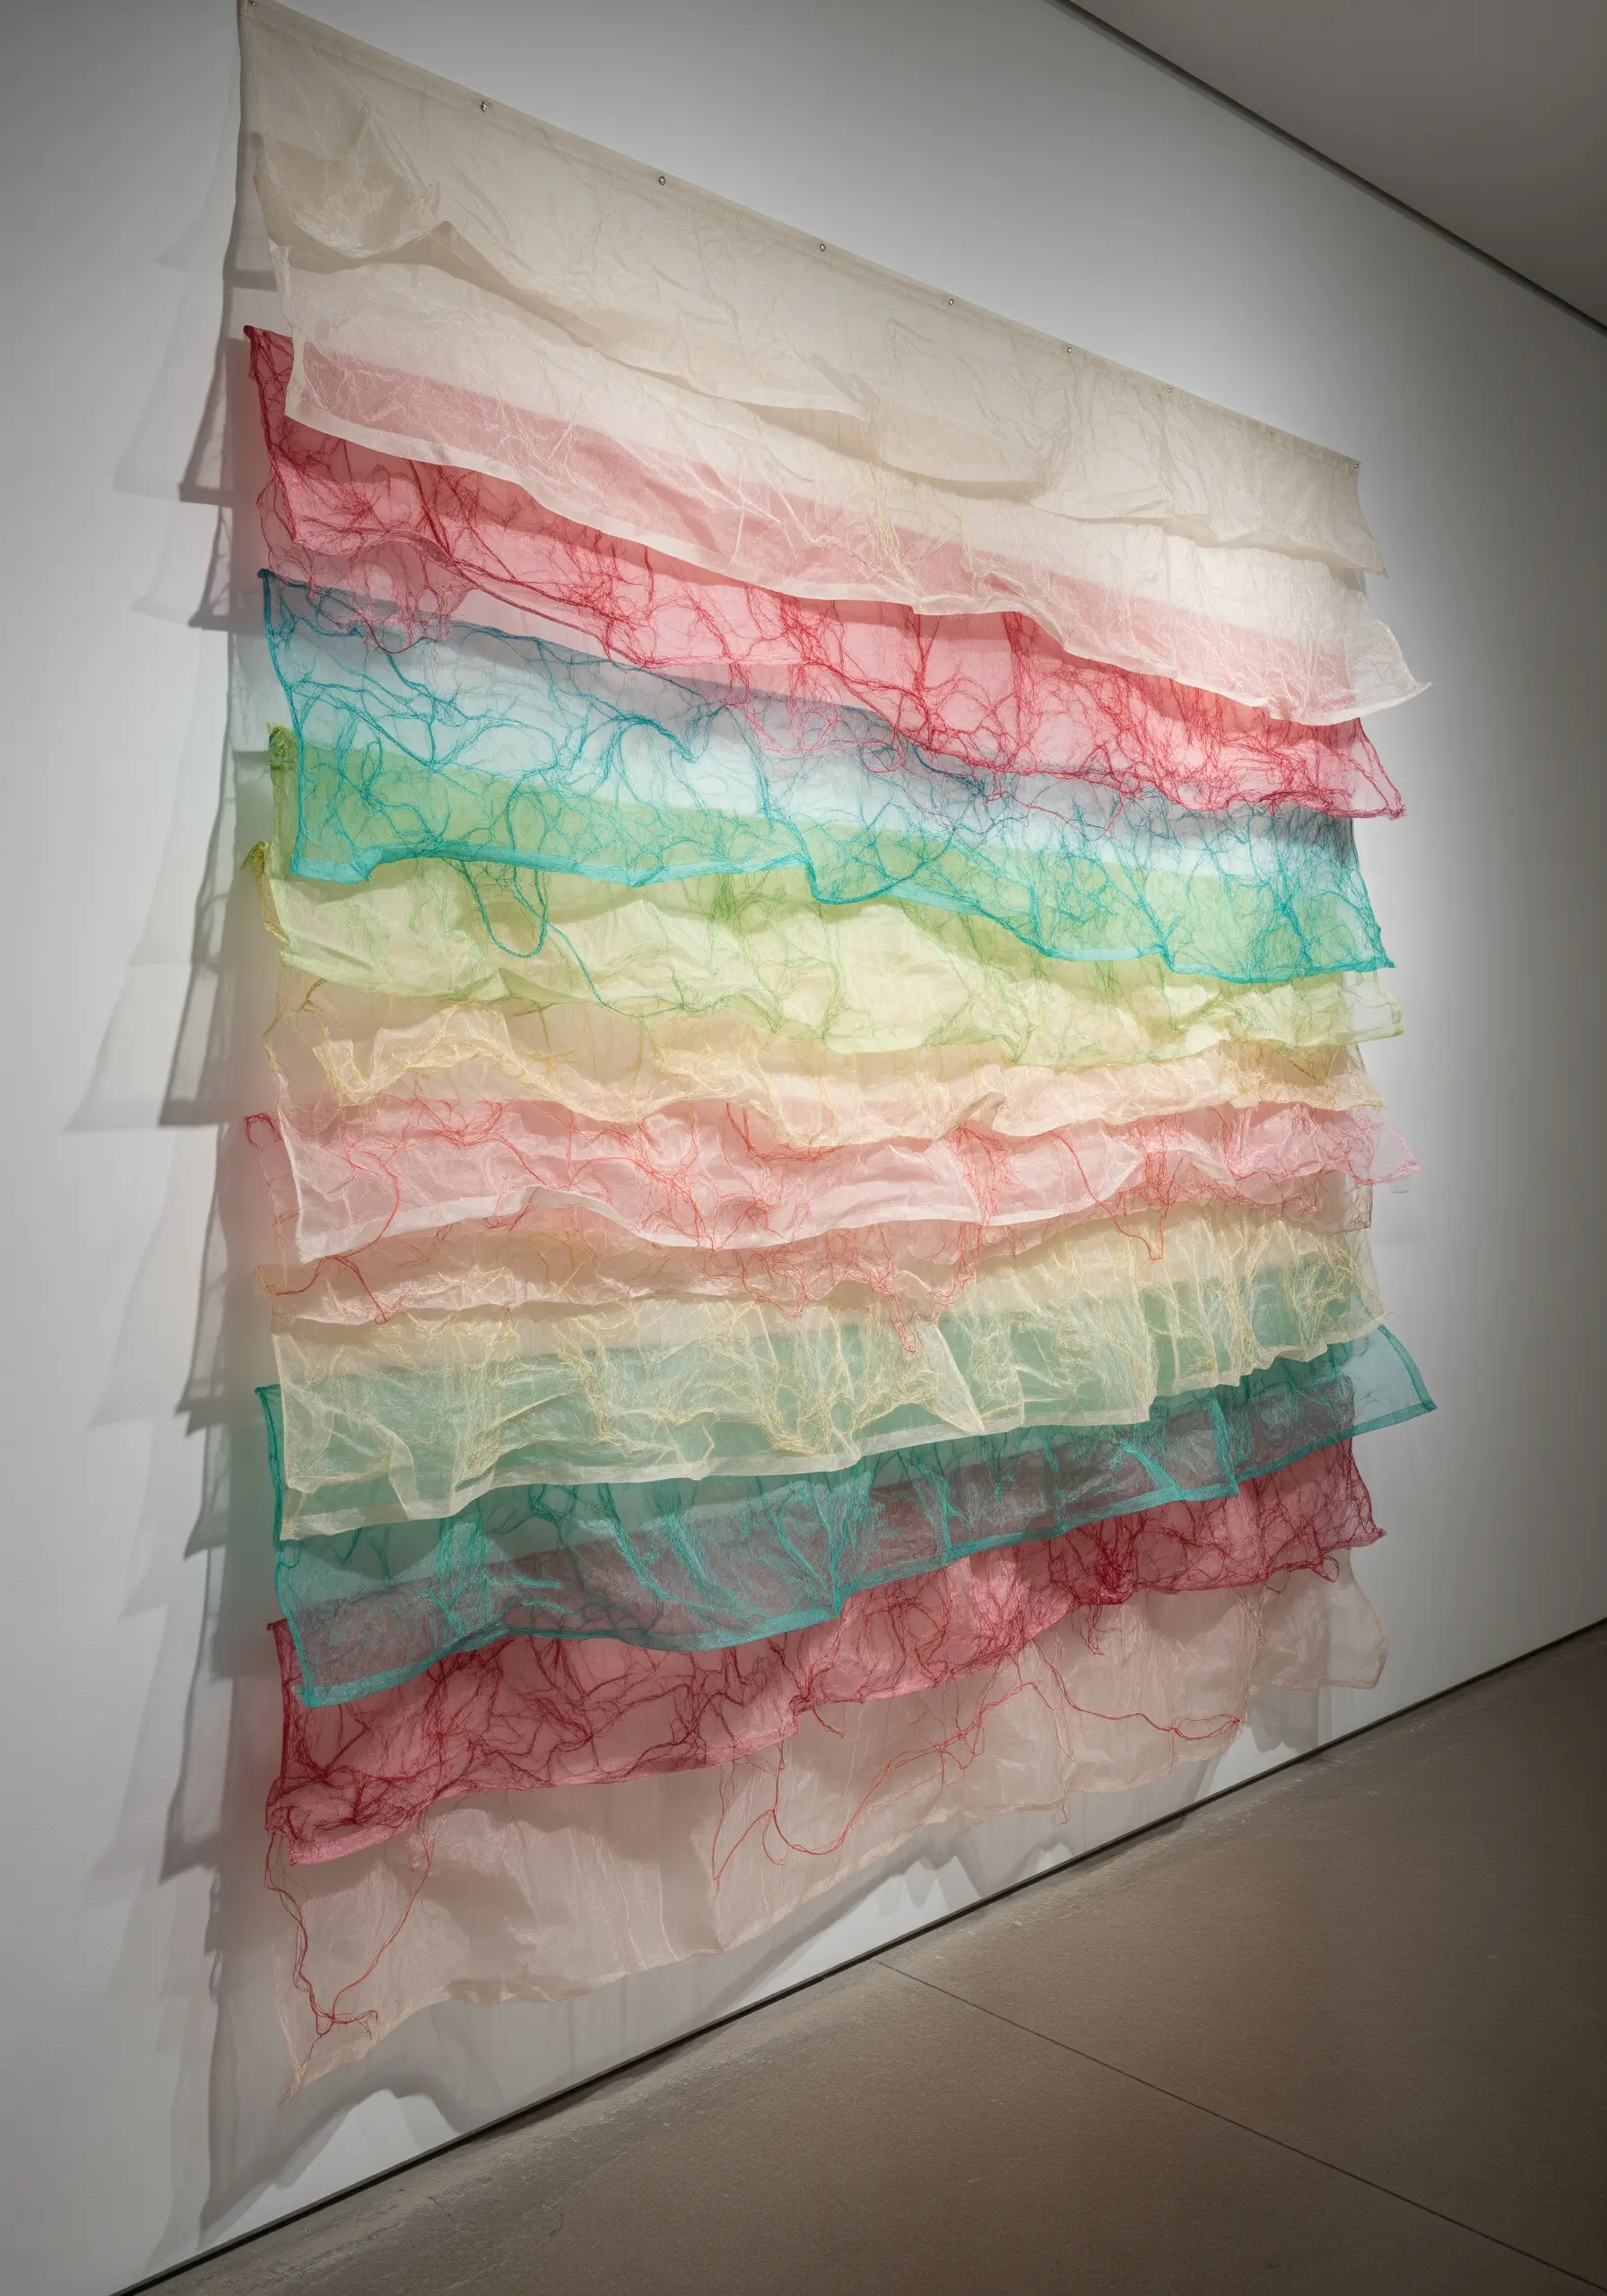
Work with sheer fabrics like organza, tulle, or chiffon to build up translucent color fields.
Instead of stitching on a single opaque surface, layer several pieces of sheer material and stitch through them all at once.
Use free-motion machine stitching or a meandering hand running stitch to create organic, web-like patterns that secure the layers and add delicate texture.
This technique allows colors to blend optically, creating a soft, watercolor effect that feels incredibly light and atmospheric.
2. Couch Thick Roving for Sculptural Volume
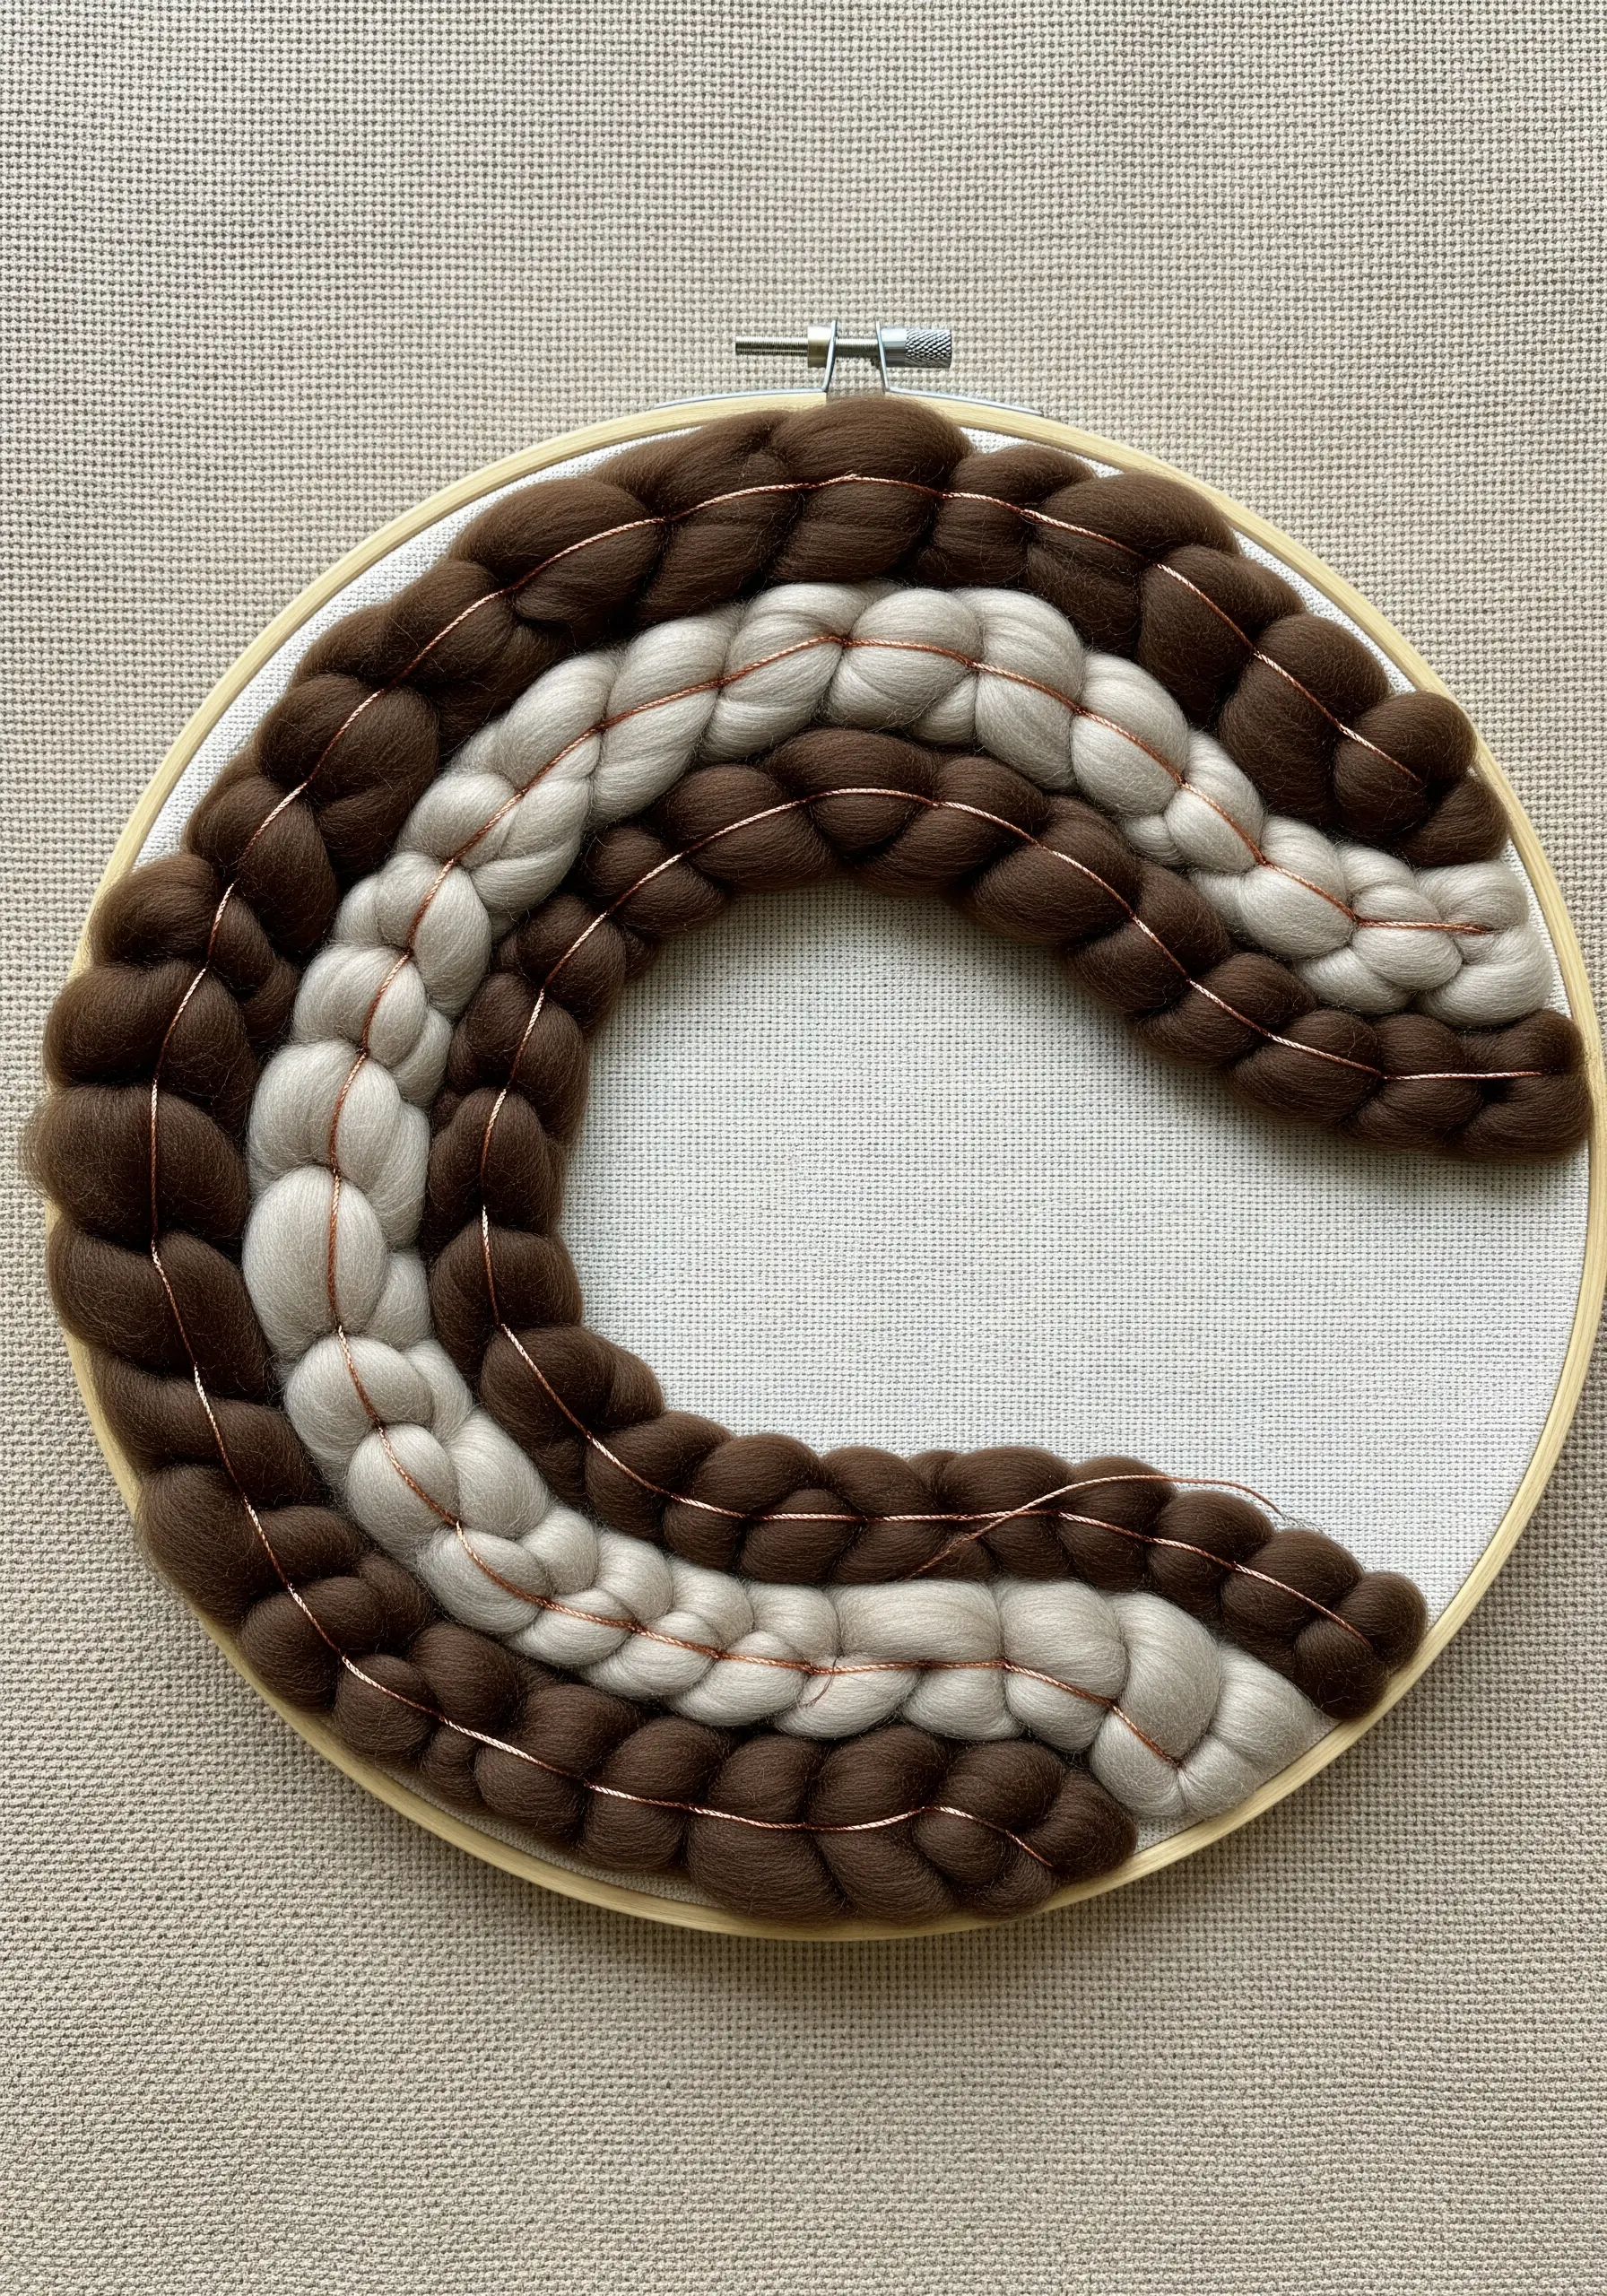
To create bold, dimensional lines, lay thick fibers like wool roving or chunky yarn onto your fabric surface.
Then, use a contrasting, finer thread—like a thin metallic or a single strand of floss—to tack it down with small, evenly spaced stitches.
This technique, called couching, allows you to incorporate materials that are too thick to pass through the fabric itself.
The visual tension between the soft, bulky roving and the delicate couching stitch adds a layer of sophisticated detail.
3. Suspend Threads to Build Architectural Form
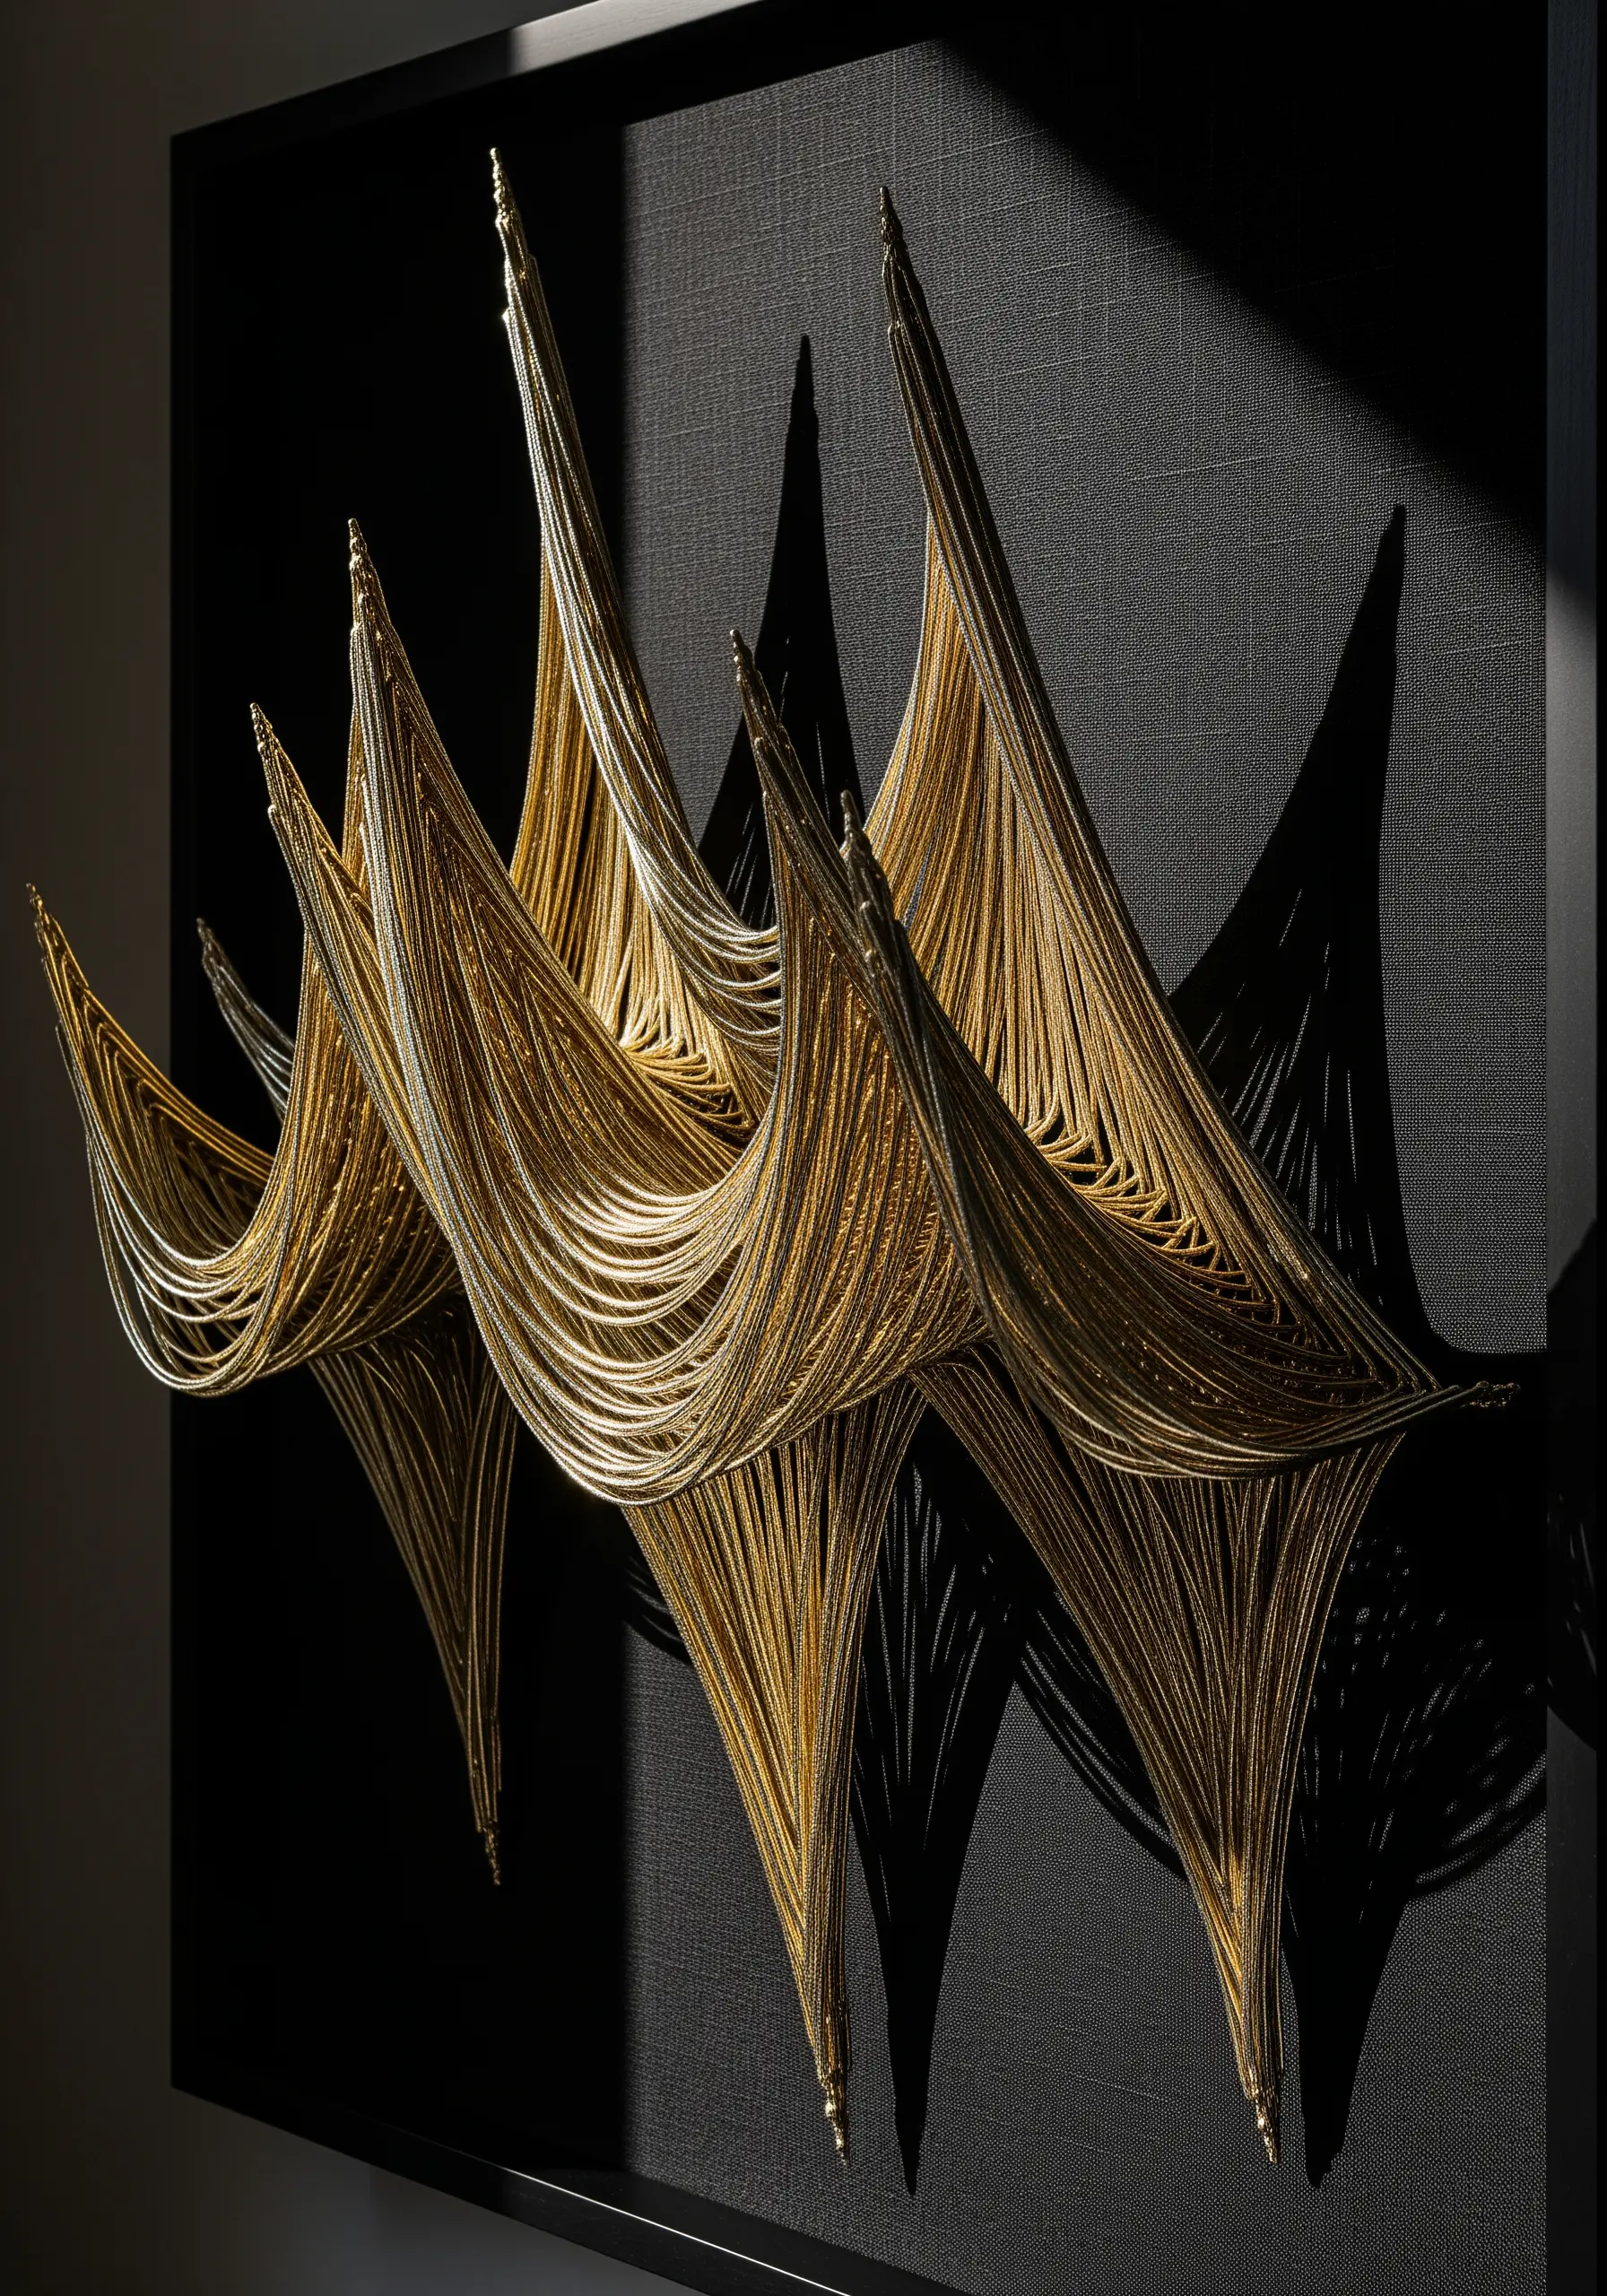
Move your embroidery off the flat plane and into the third dimension by working with a deep frame or stretched canvas.
Instead of stitching *through* the fabric, install small pins or nails along the inside edges of the frame and stretch your thread between them.
By layering threads at different angles and tensions, you can build complex, architectural shapes that interact with light and shadow.
Use a strong, smooth thread like pearl cotton, silk, or even fine wire to ensure your lines remain crisp and defined.
4. Deconstruct Your Fabric with Open-Weave Netting
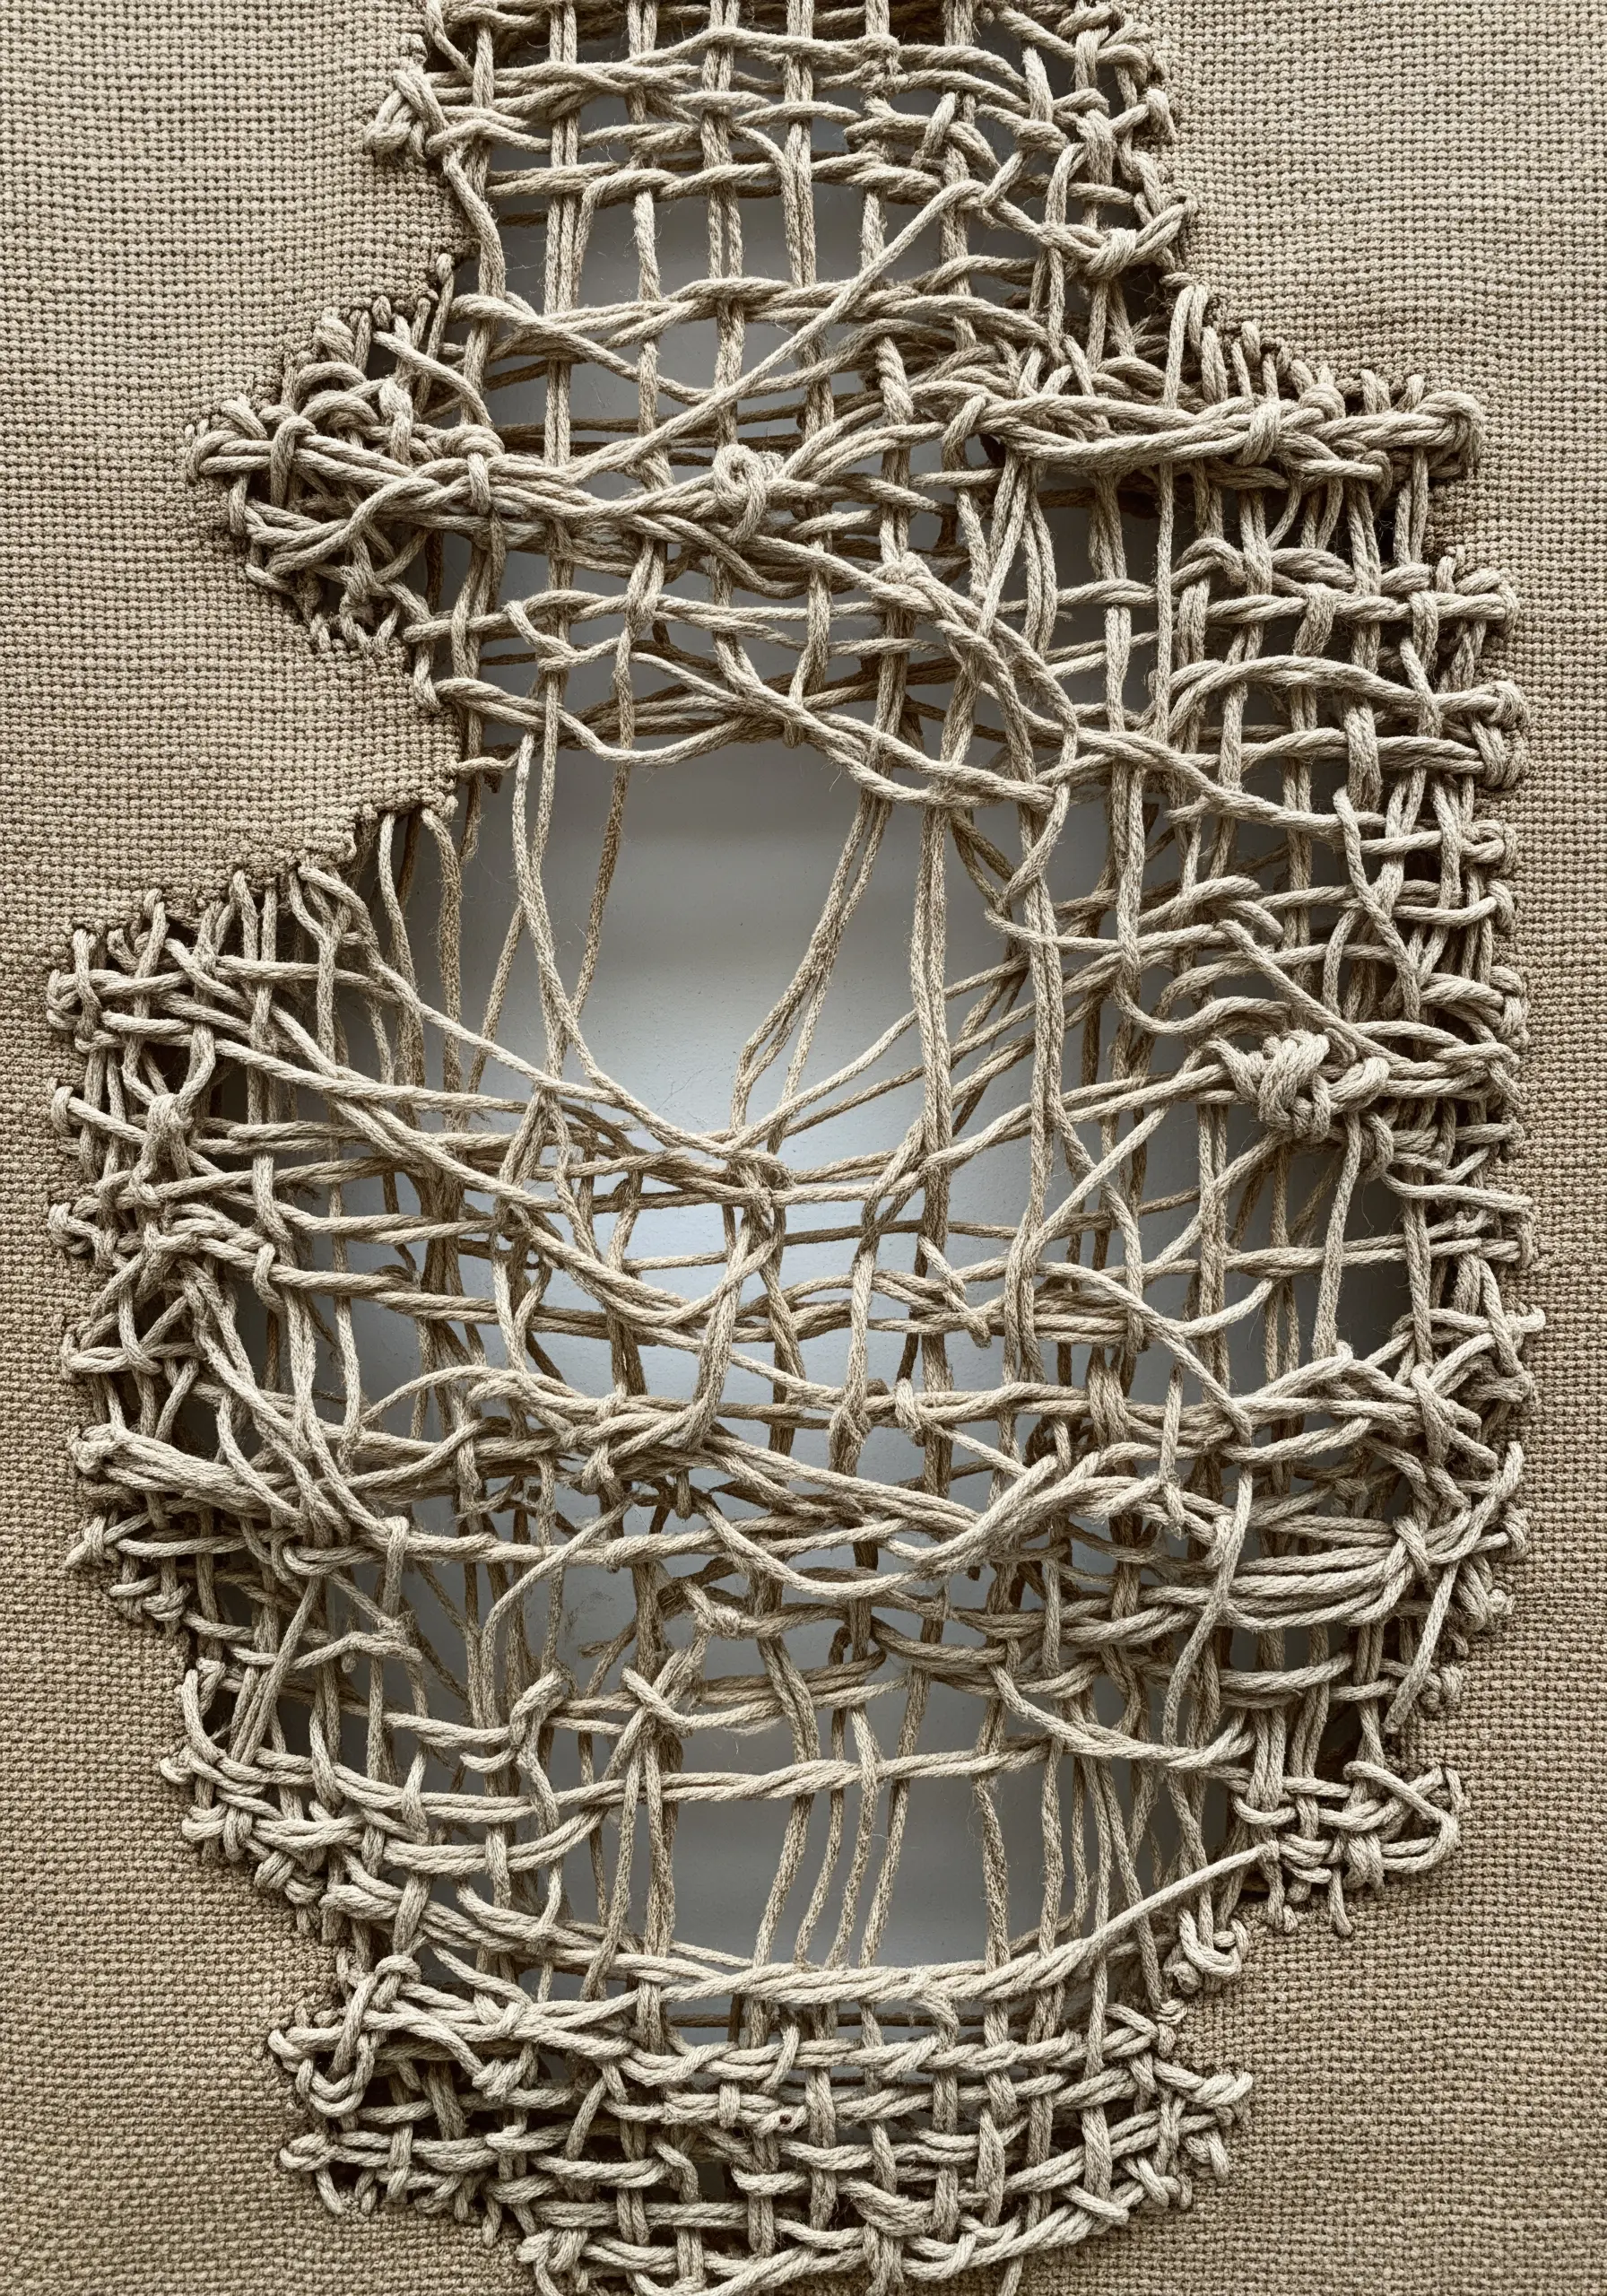
Create texture not by adding thread, but by strategically removing the fabric itself.
On a coarse-weave base like burlap or linen, carefully cut and remove sections of the weft (horizontal) threads, leaving the warp (vertical) threads exposed.
You can then use these exposed warp threads as a loom, weaving, wrapping, or knotting them with a contrasting yarn to create intricate, net-like structures.
This method creates a powerful dialogue between the solid fabric and the delicate negative space you’ve engineered.
5. Create Pointillist Fields with Dense French Knots
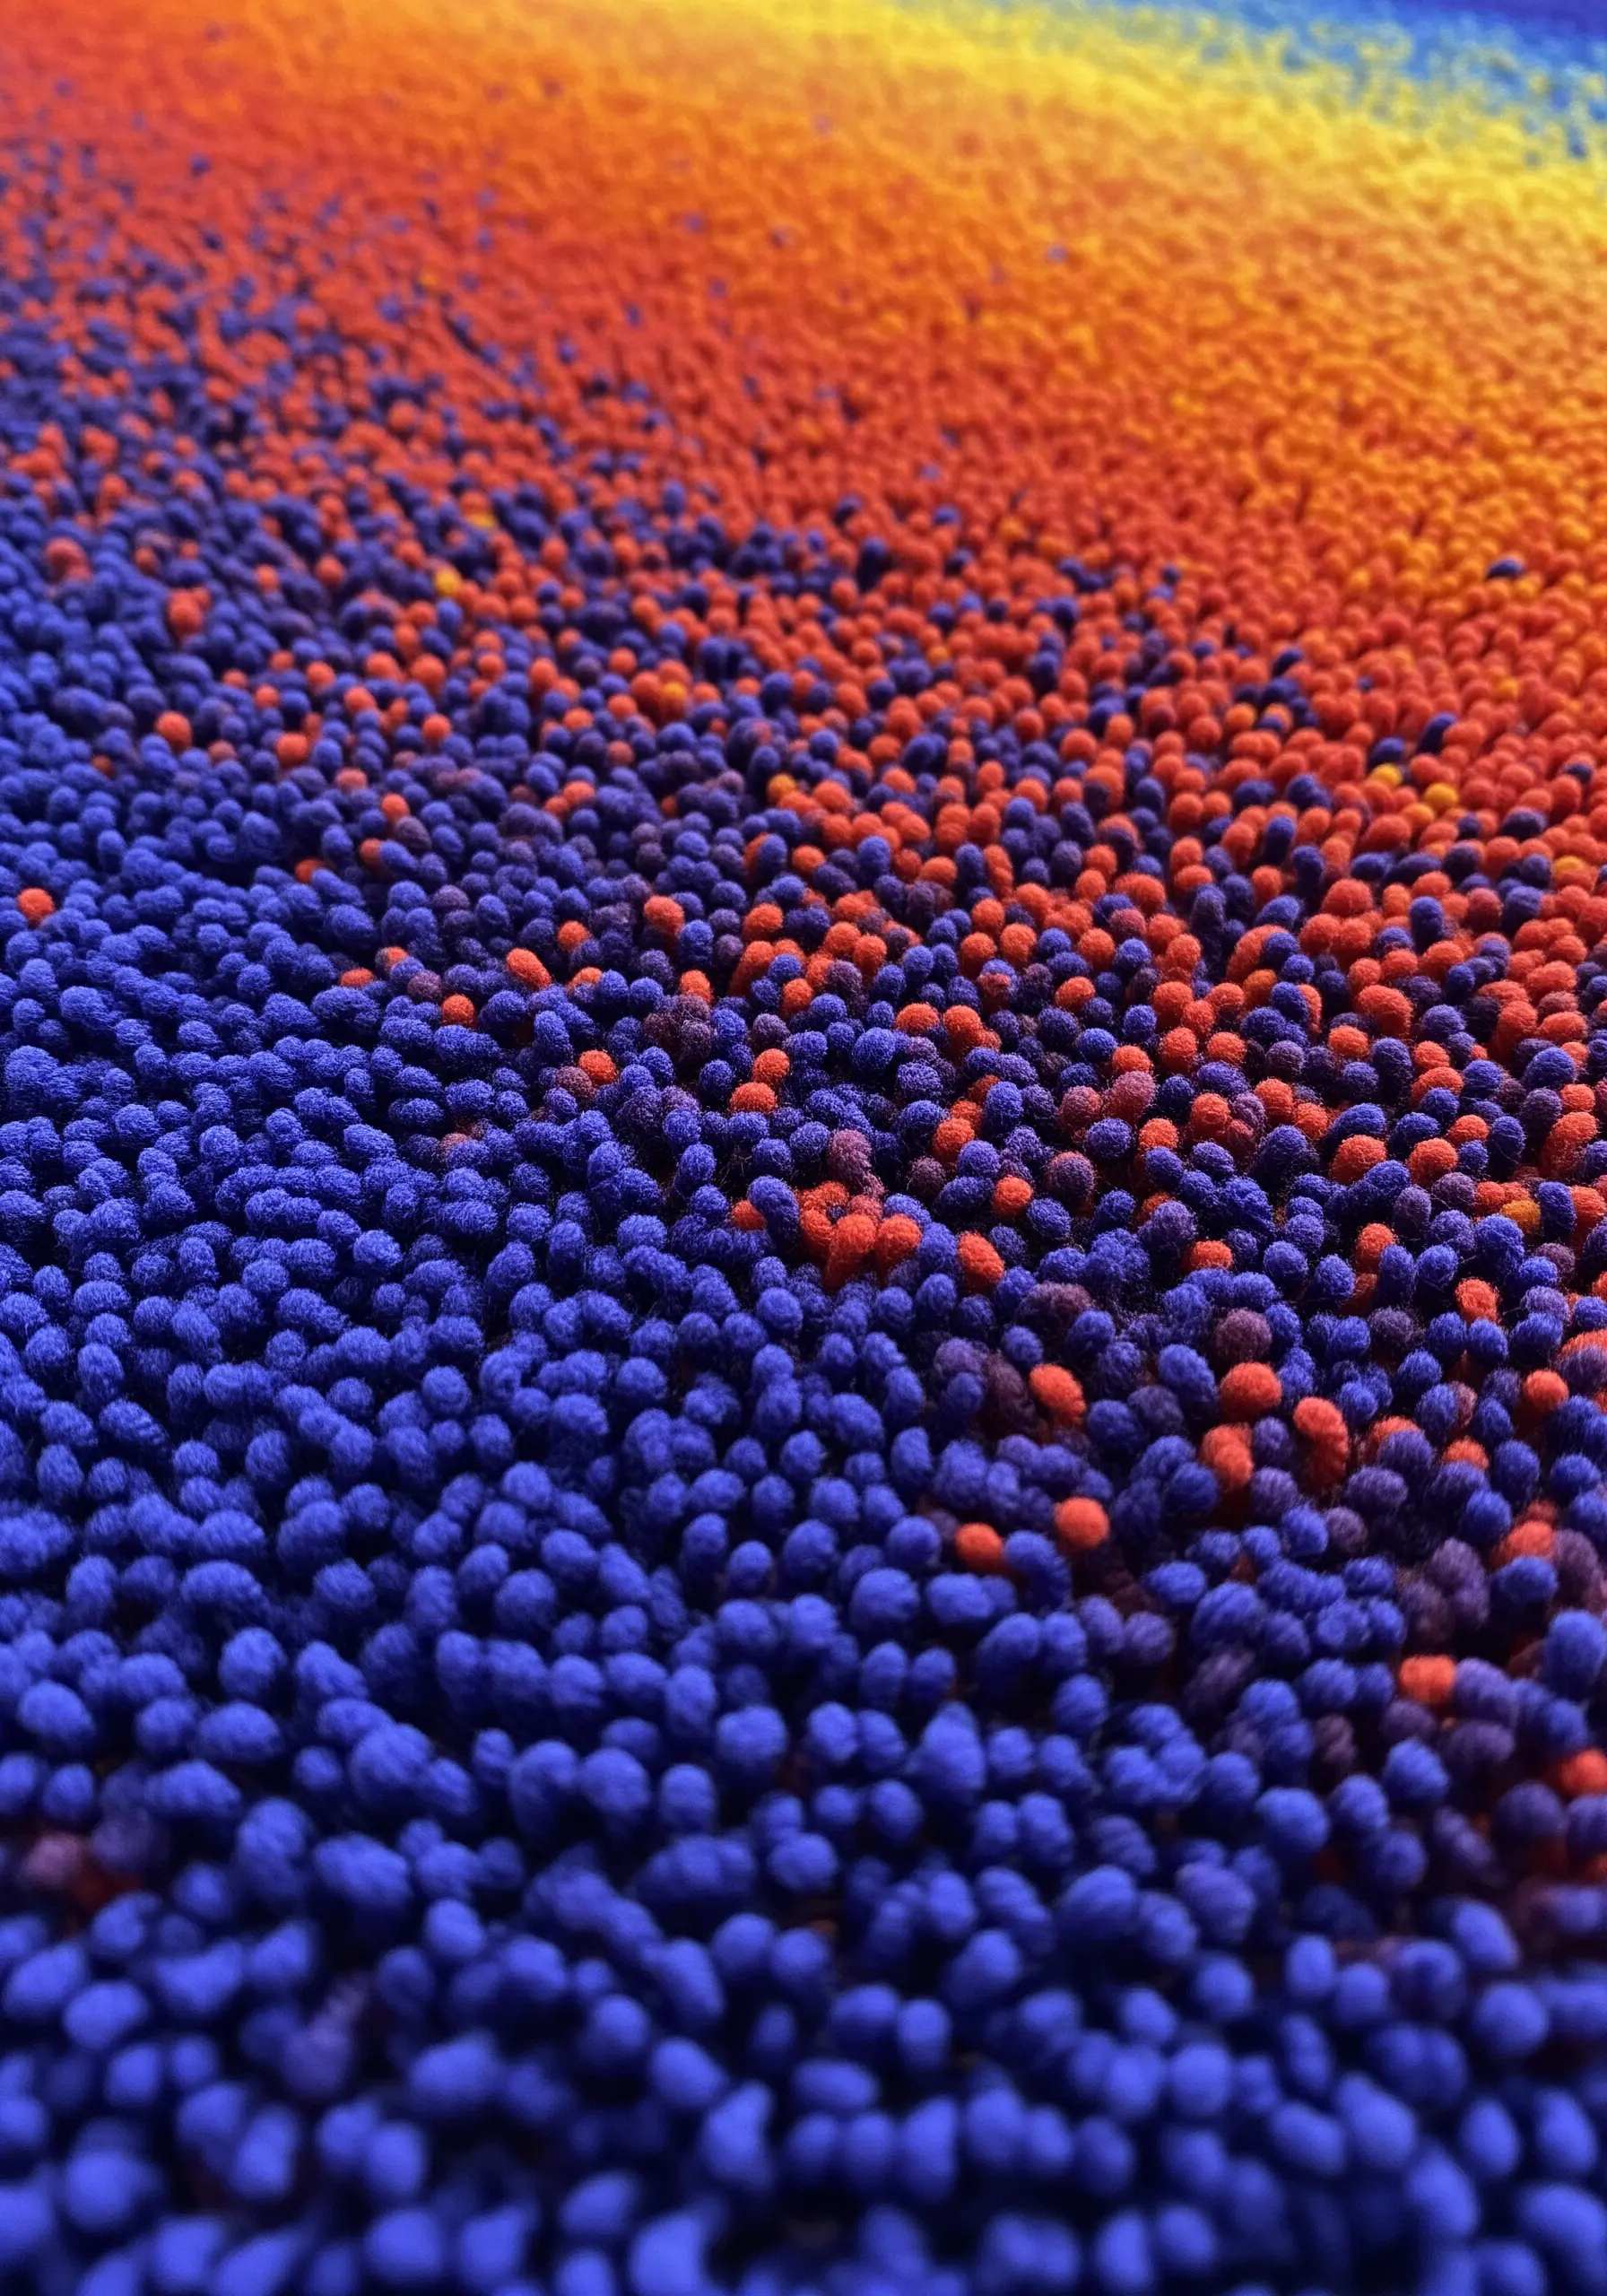
Use French knots as a primary fill stitch, rather than just a decorative accent, to build a plush, highly tactile surface.
By packing them tightly together, you can create dense fields of color that have a rich, velvety appearance.
Vary the number of times you wrap the thread around the needle (one, two, or three) to subtly alter the size and texture of the knots, adding another layer of complexity.
This technique is perfect for creating abstract color blends that feel immersive and dynamic.
6. Imply Digital Networks with Geometric Grids
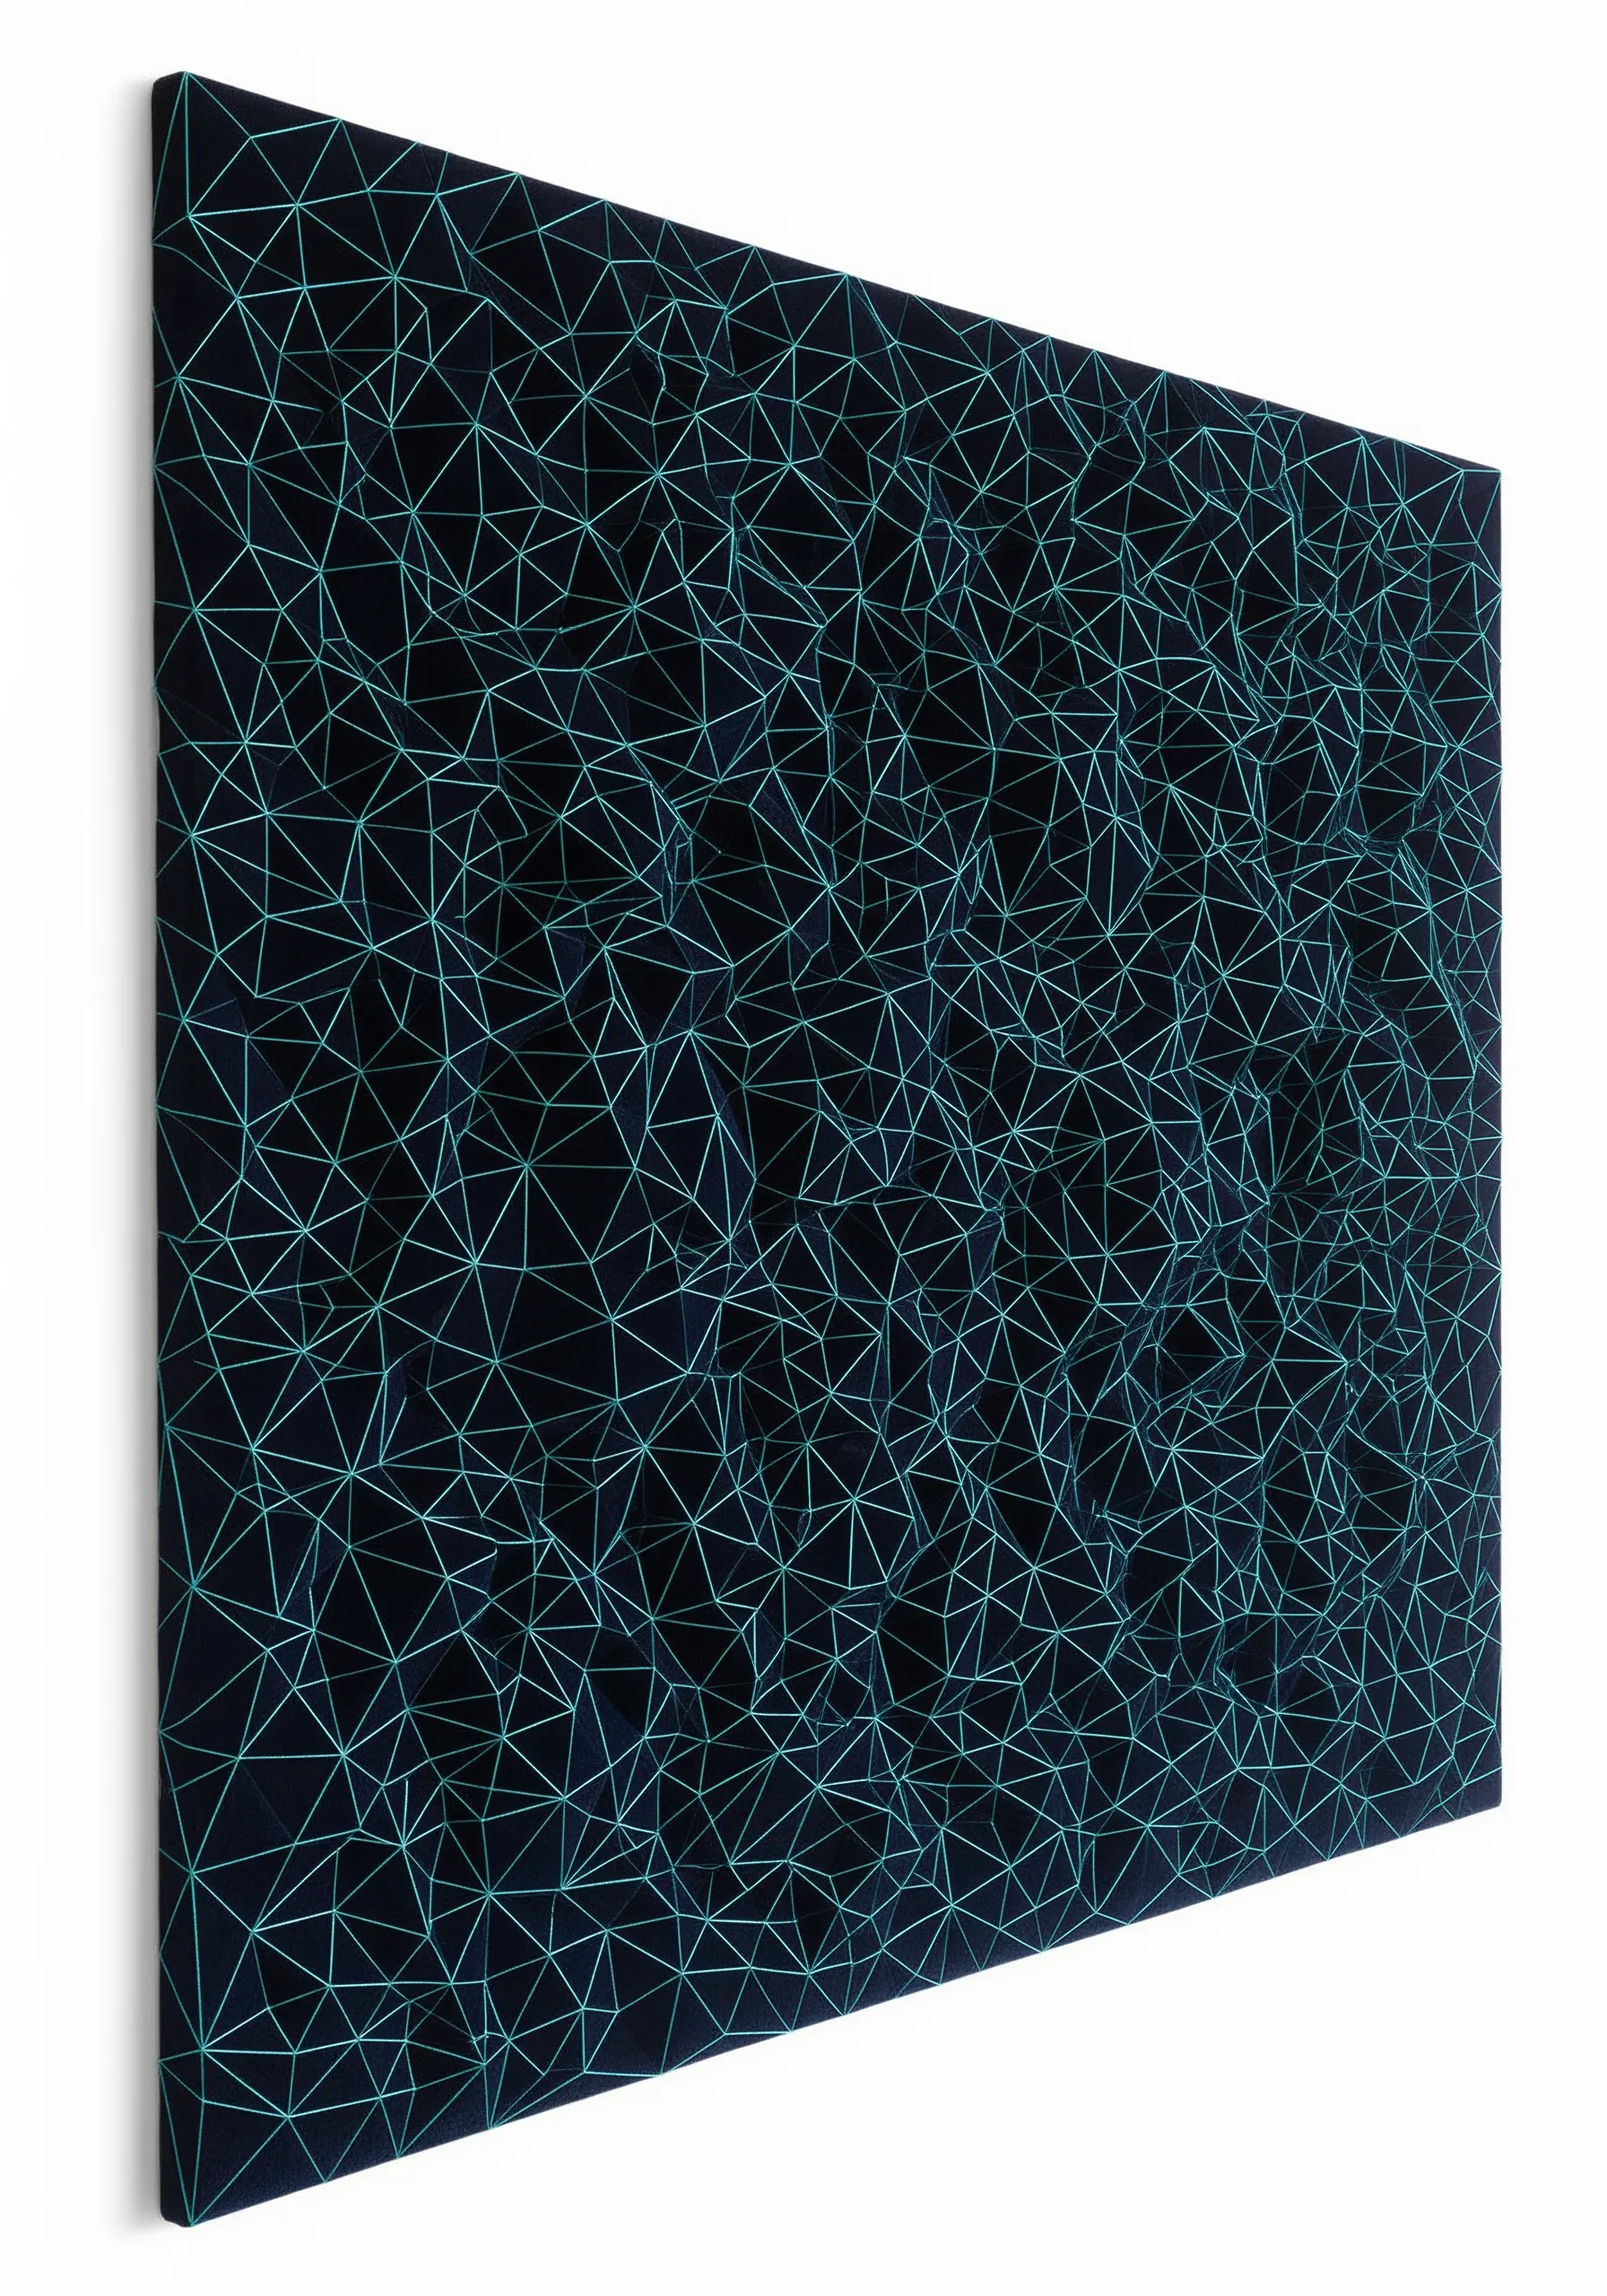
Evoke a modern, technological aesthetic by stitching precise geometric grids on a high-contrast background.
Use a single strand of bright thread on a dark, flat-weave fabric like cotton twill or canvas for maximum visual impact.
The key to this technique is precision; use a disappearing ink pen and a clear ruler to mark your points before stitching with a simple backstitch or running stitch.
This method beautifully merges the handmade quality of embroidery with the clean logic of digital design.
7. Sculpt Mosaics with Raised Bullion Knots
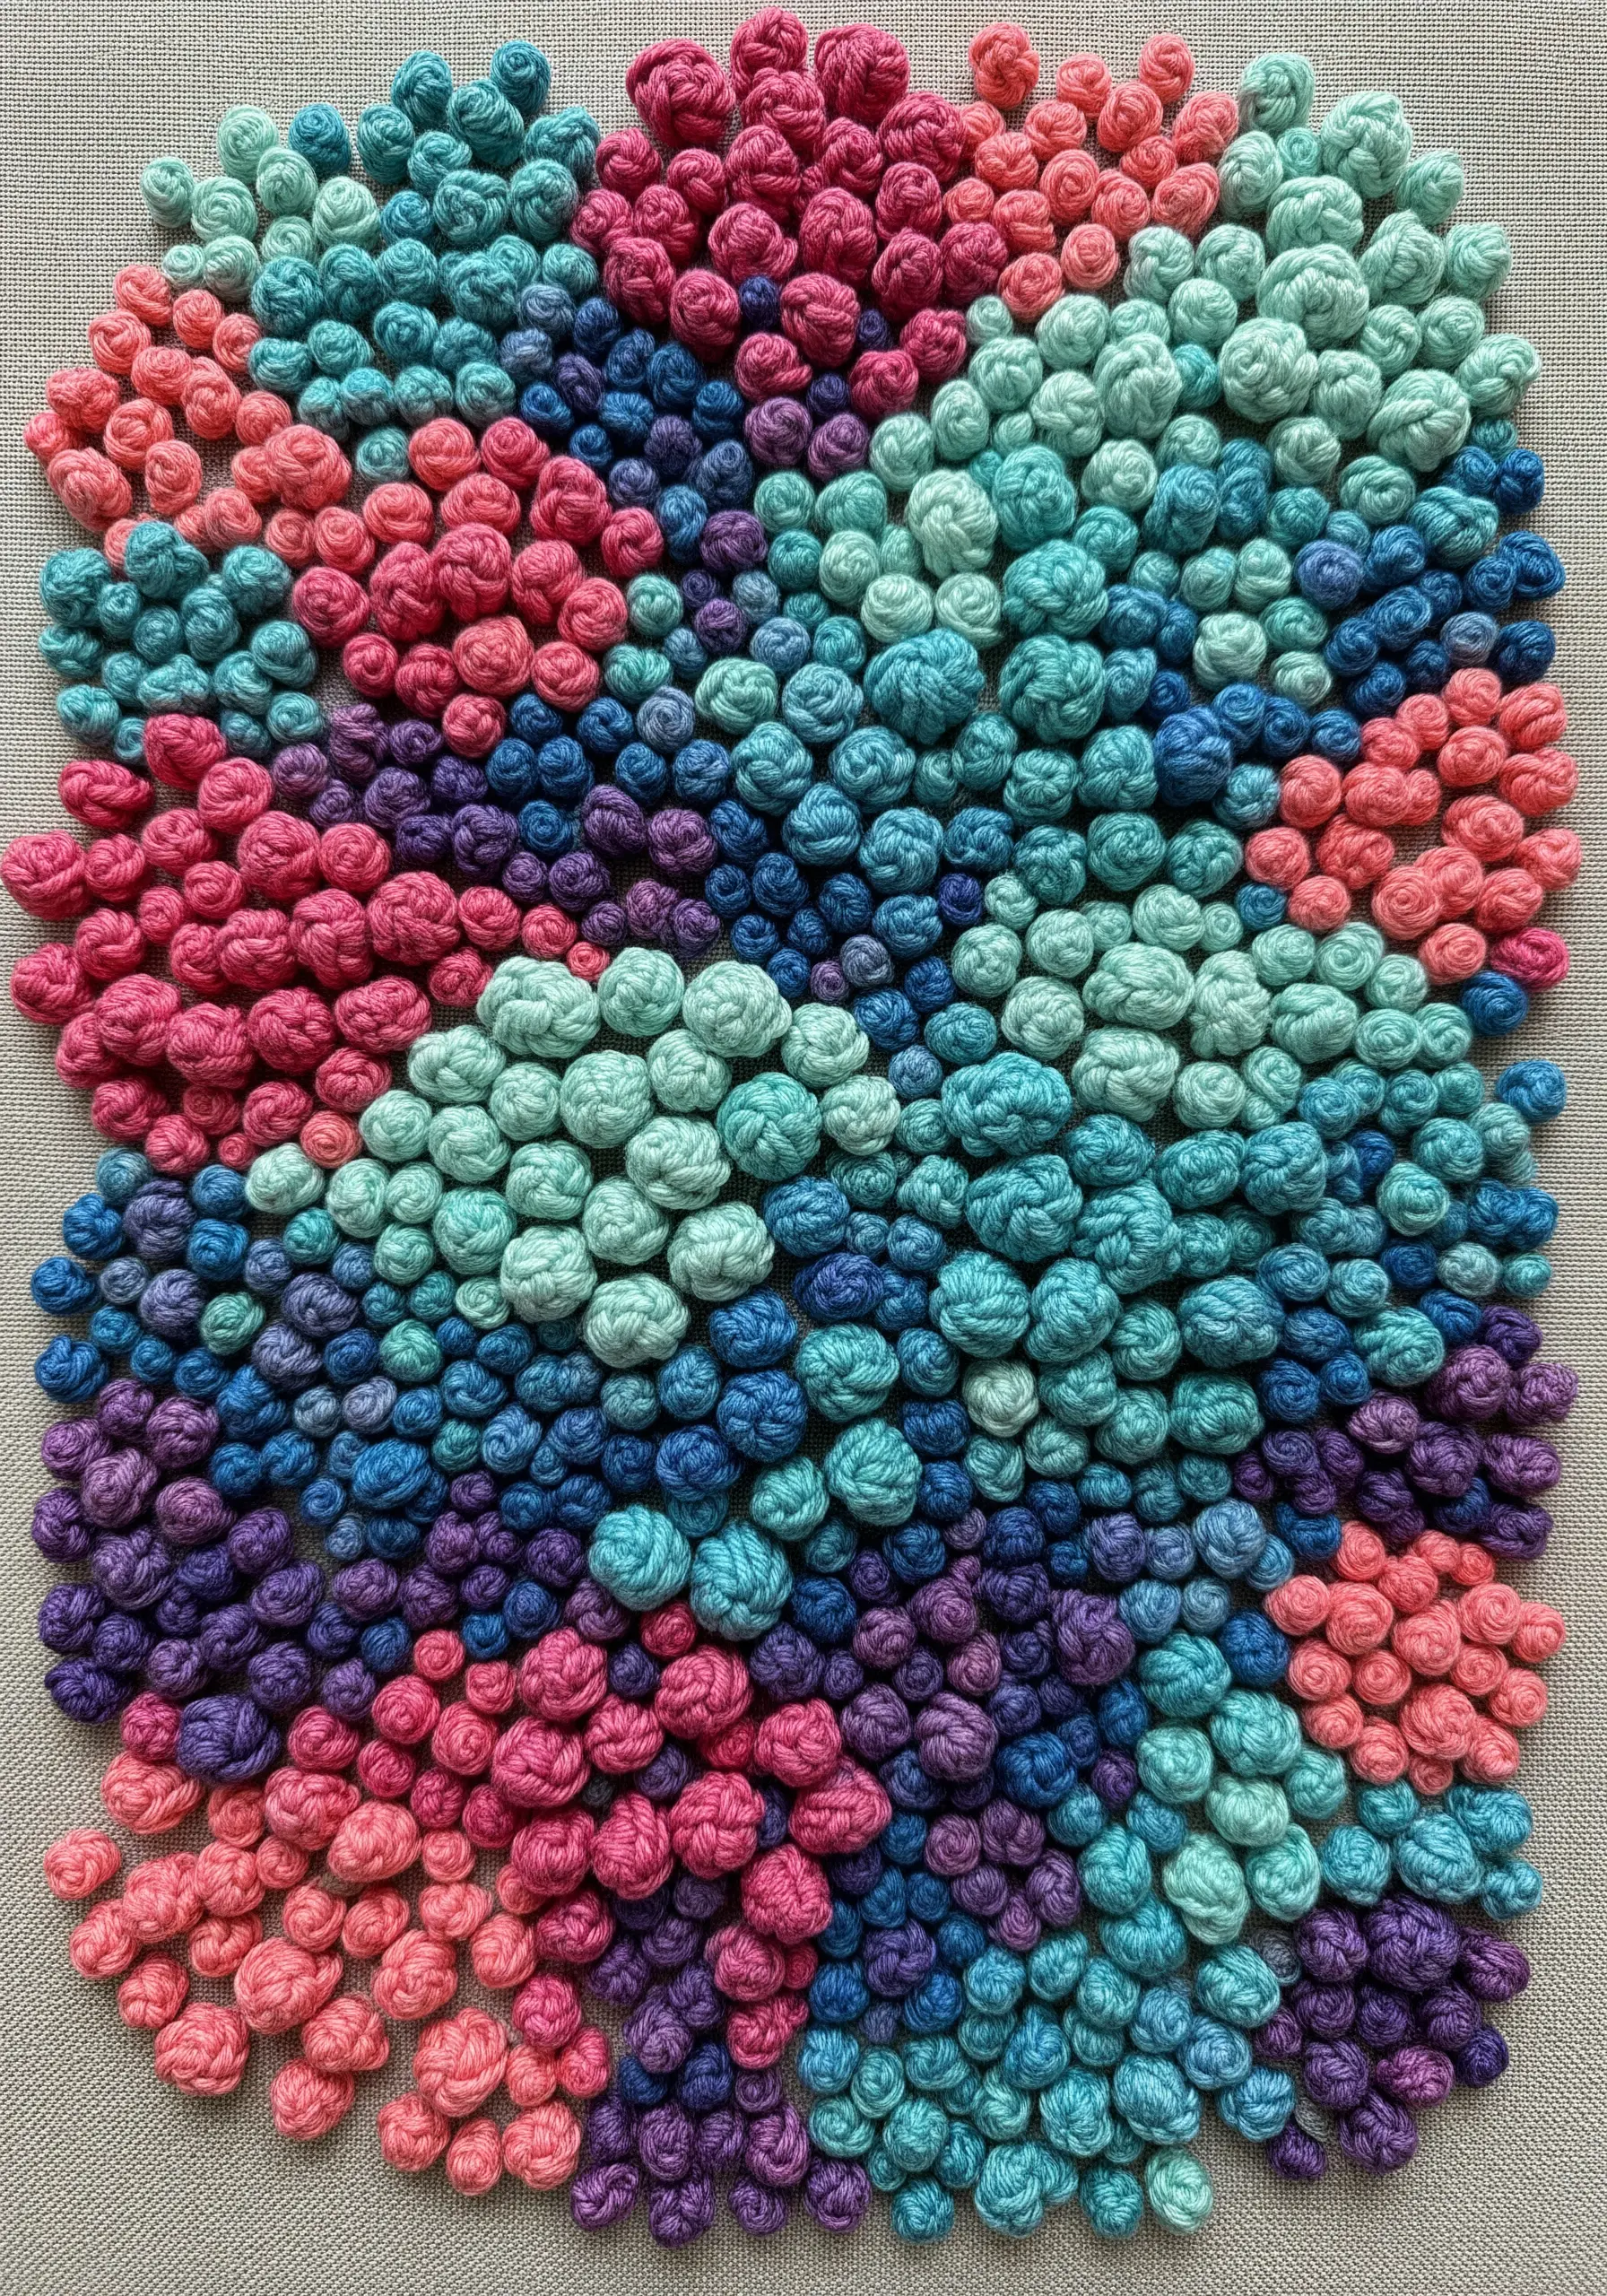
Move beyond flat stitches and sculpt directly on your fabric using the bullion knot.
By varying the length and tightness of the wraps around your needle, you can create raised, caterpillar-like stitches that can be arranged in any direction.
When packed together tightly, they form a dense, coral-like texture that is visually complex and invites touch.
Using a milliner’s needle, which has a consistent thickness from eye to tip, will make sliding the wraps off much smoother.
8. Define Form with Minimalist Running Stitches
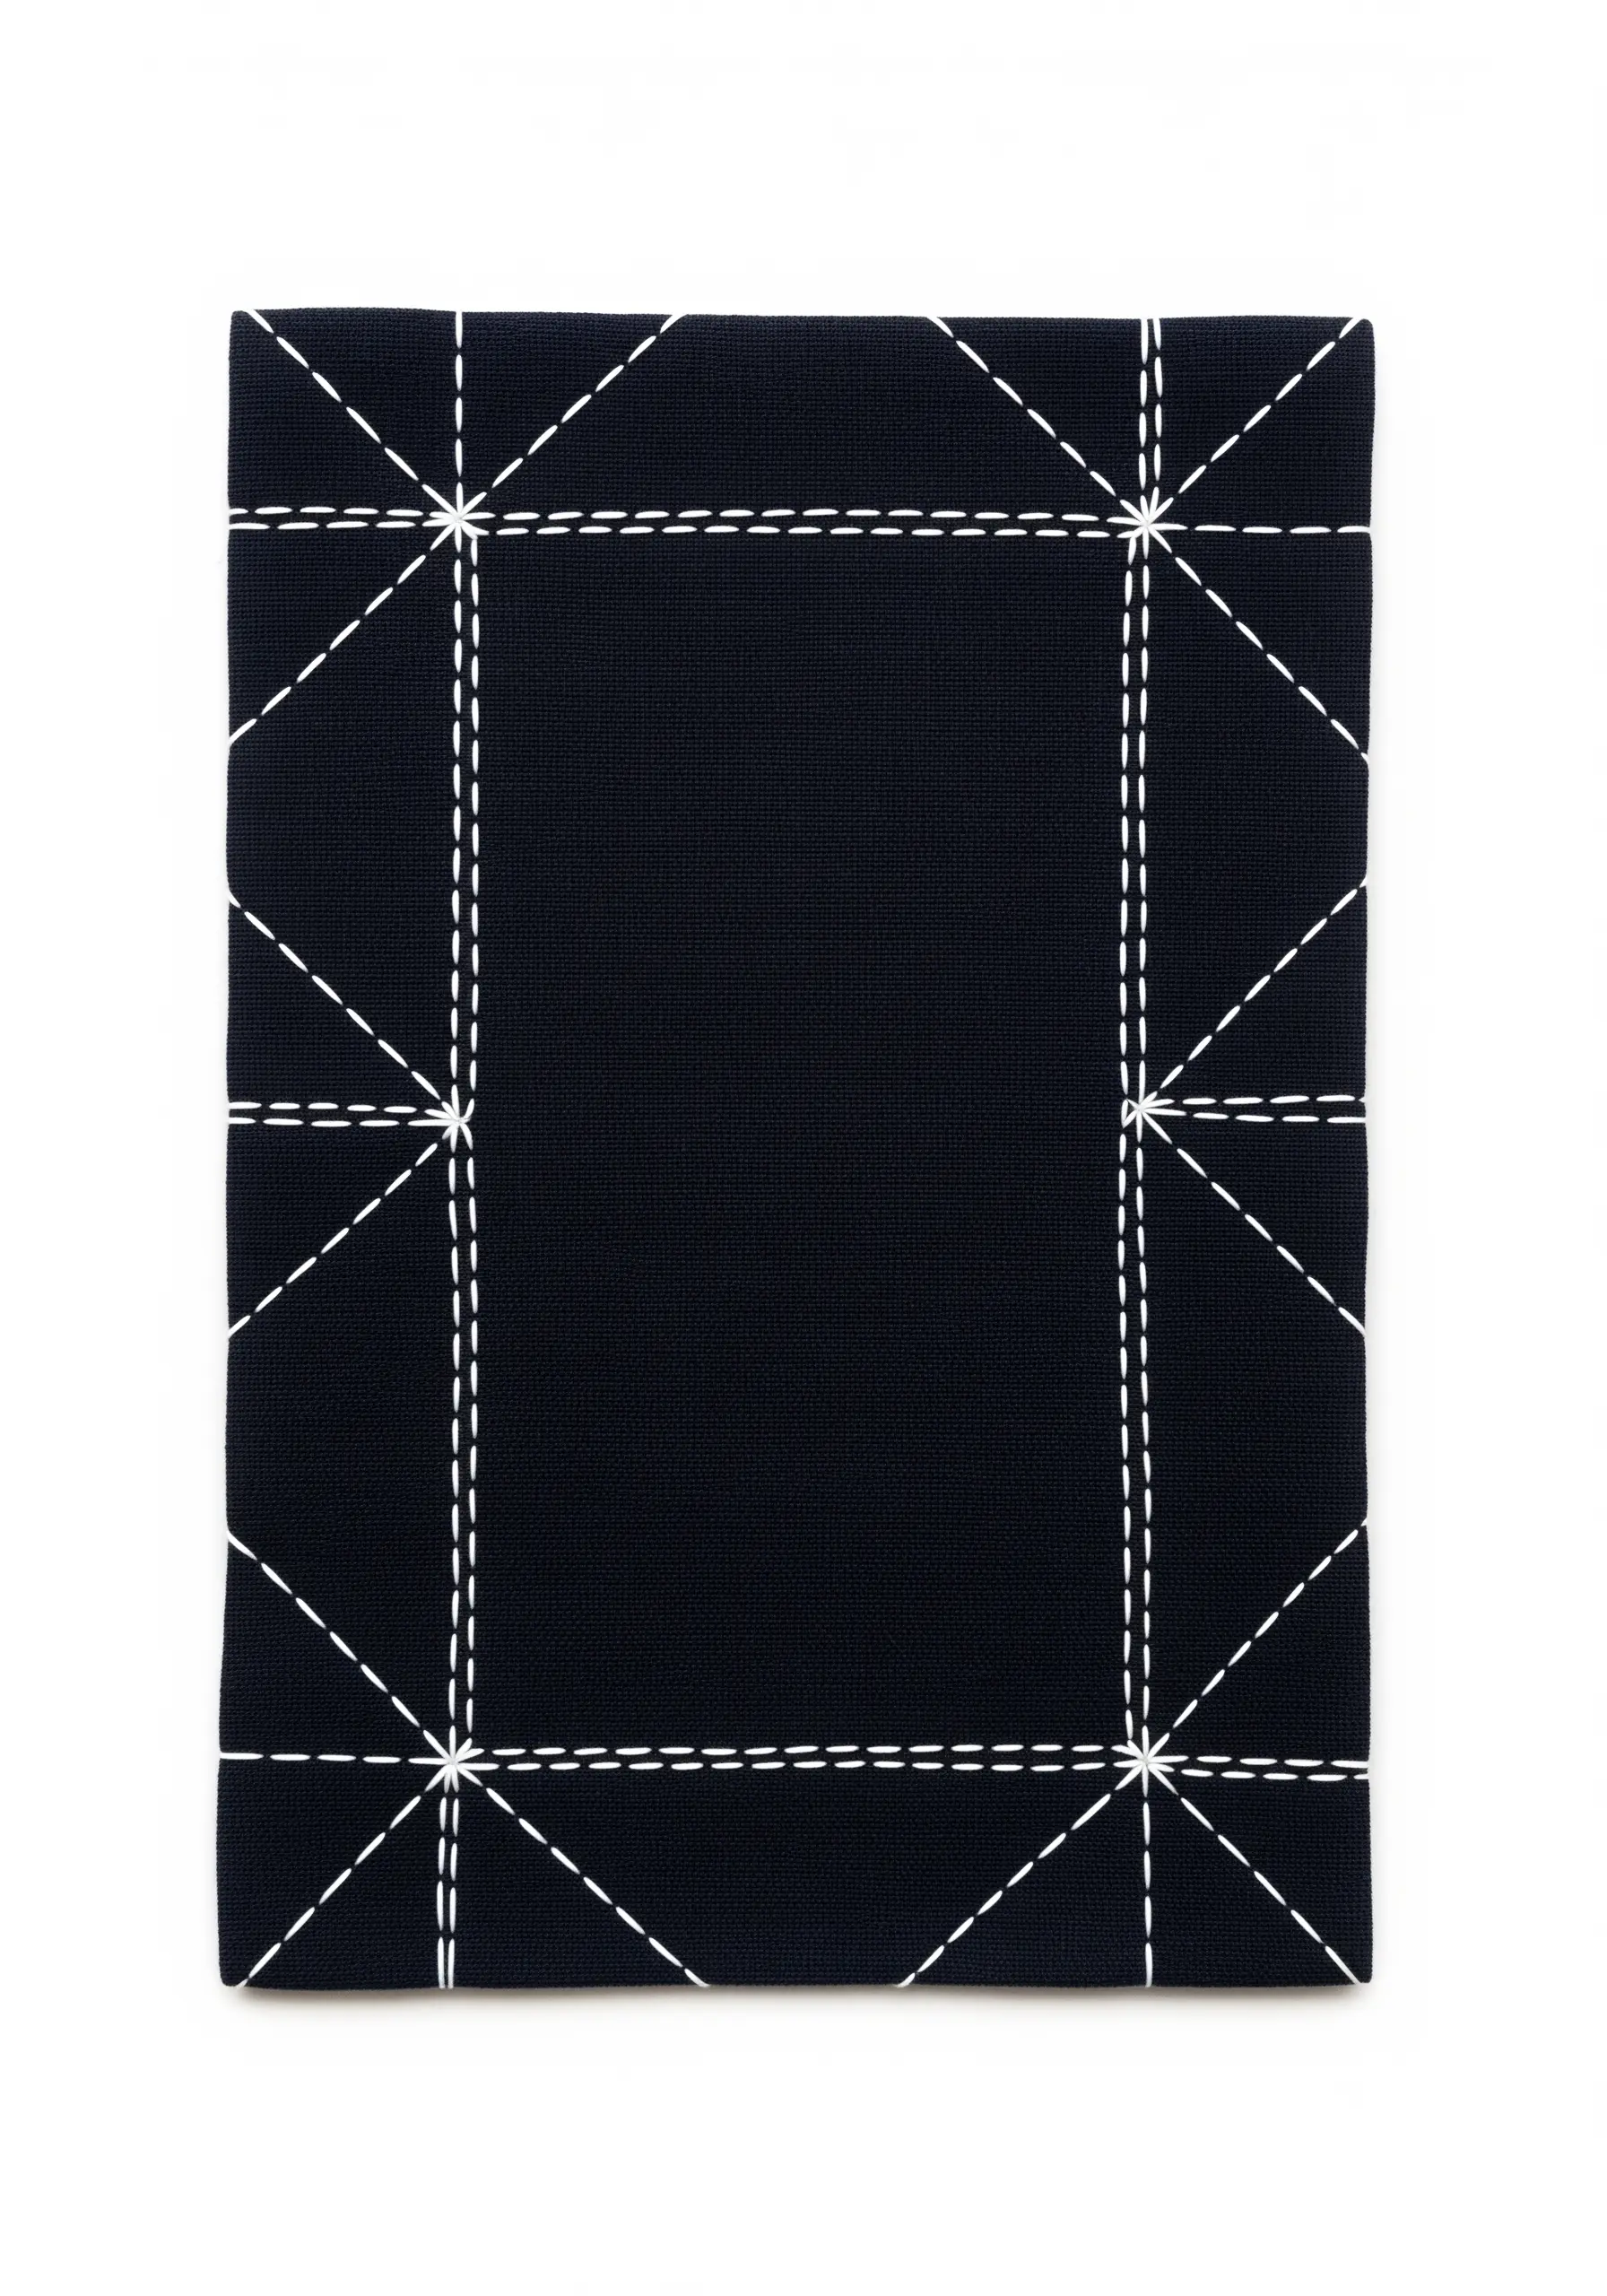
Harness the power of simplicity by using the humble running stitch to create sophisticated graphic patterns.
The success of this technique lies in consistency and contrast. Use a slightly thicker thread, like a sashiko thread or #8 pearl cotton, on a plain, dark fabric.
Focus on creating a perfect rhythm in your stitch length and the spaces between them. This is a meditative practice where negative space is just as important as the thread itself.
9. Frame Voids with Deconstructed Satin Stitch
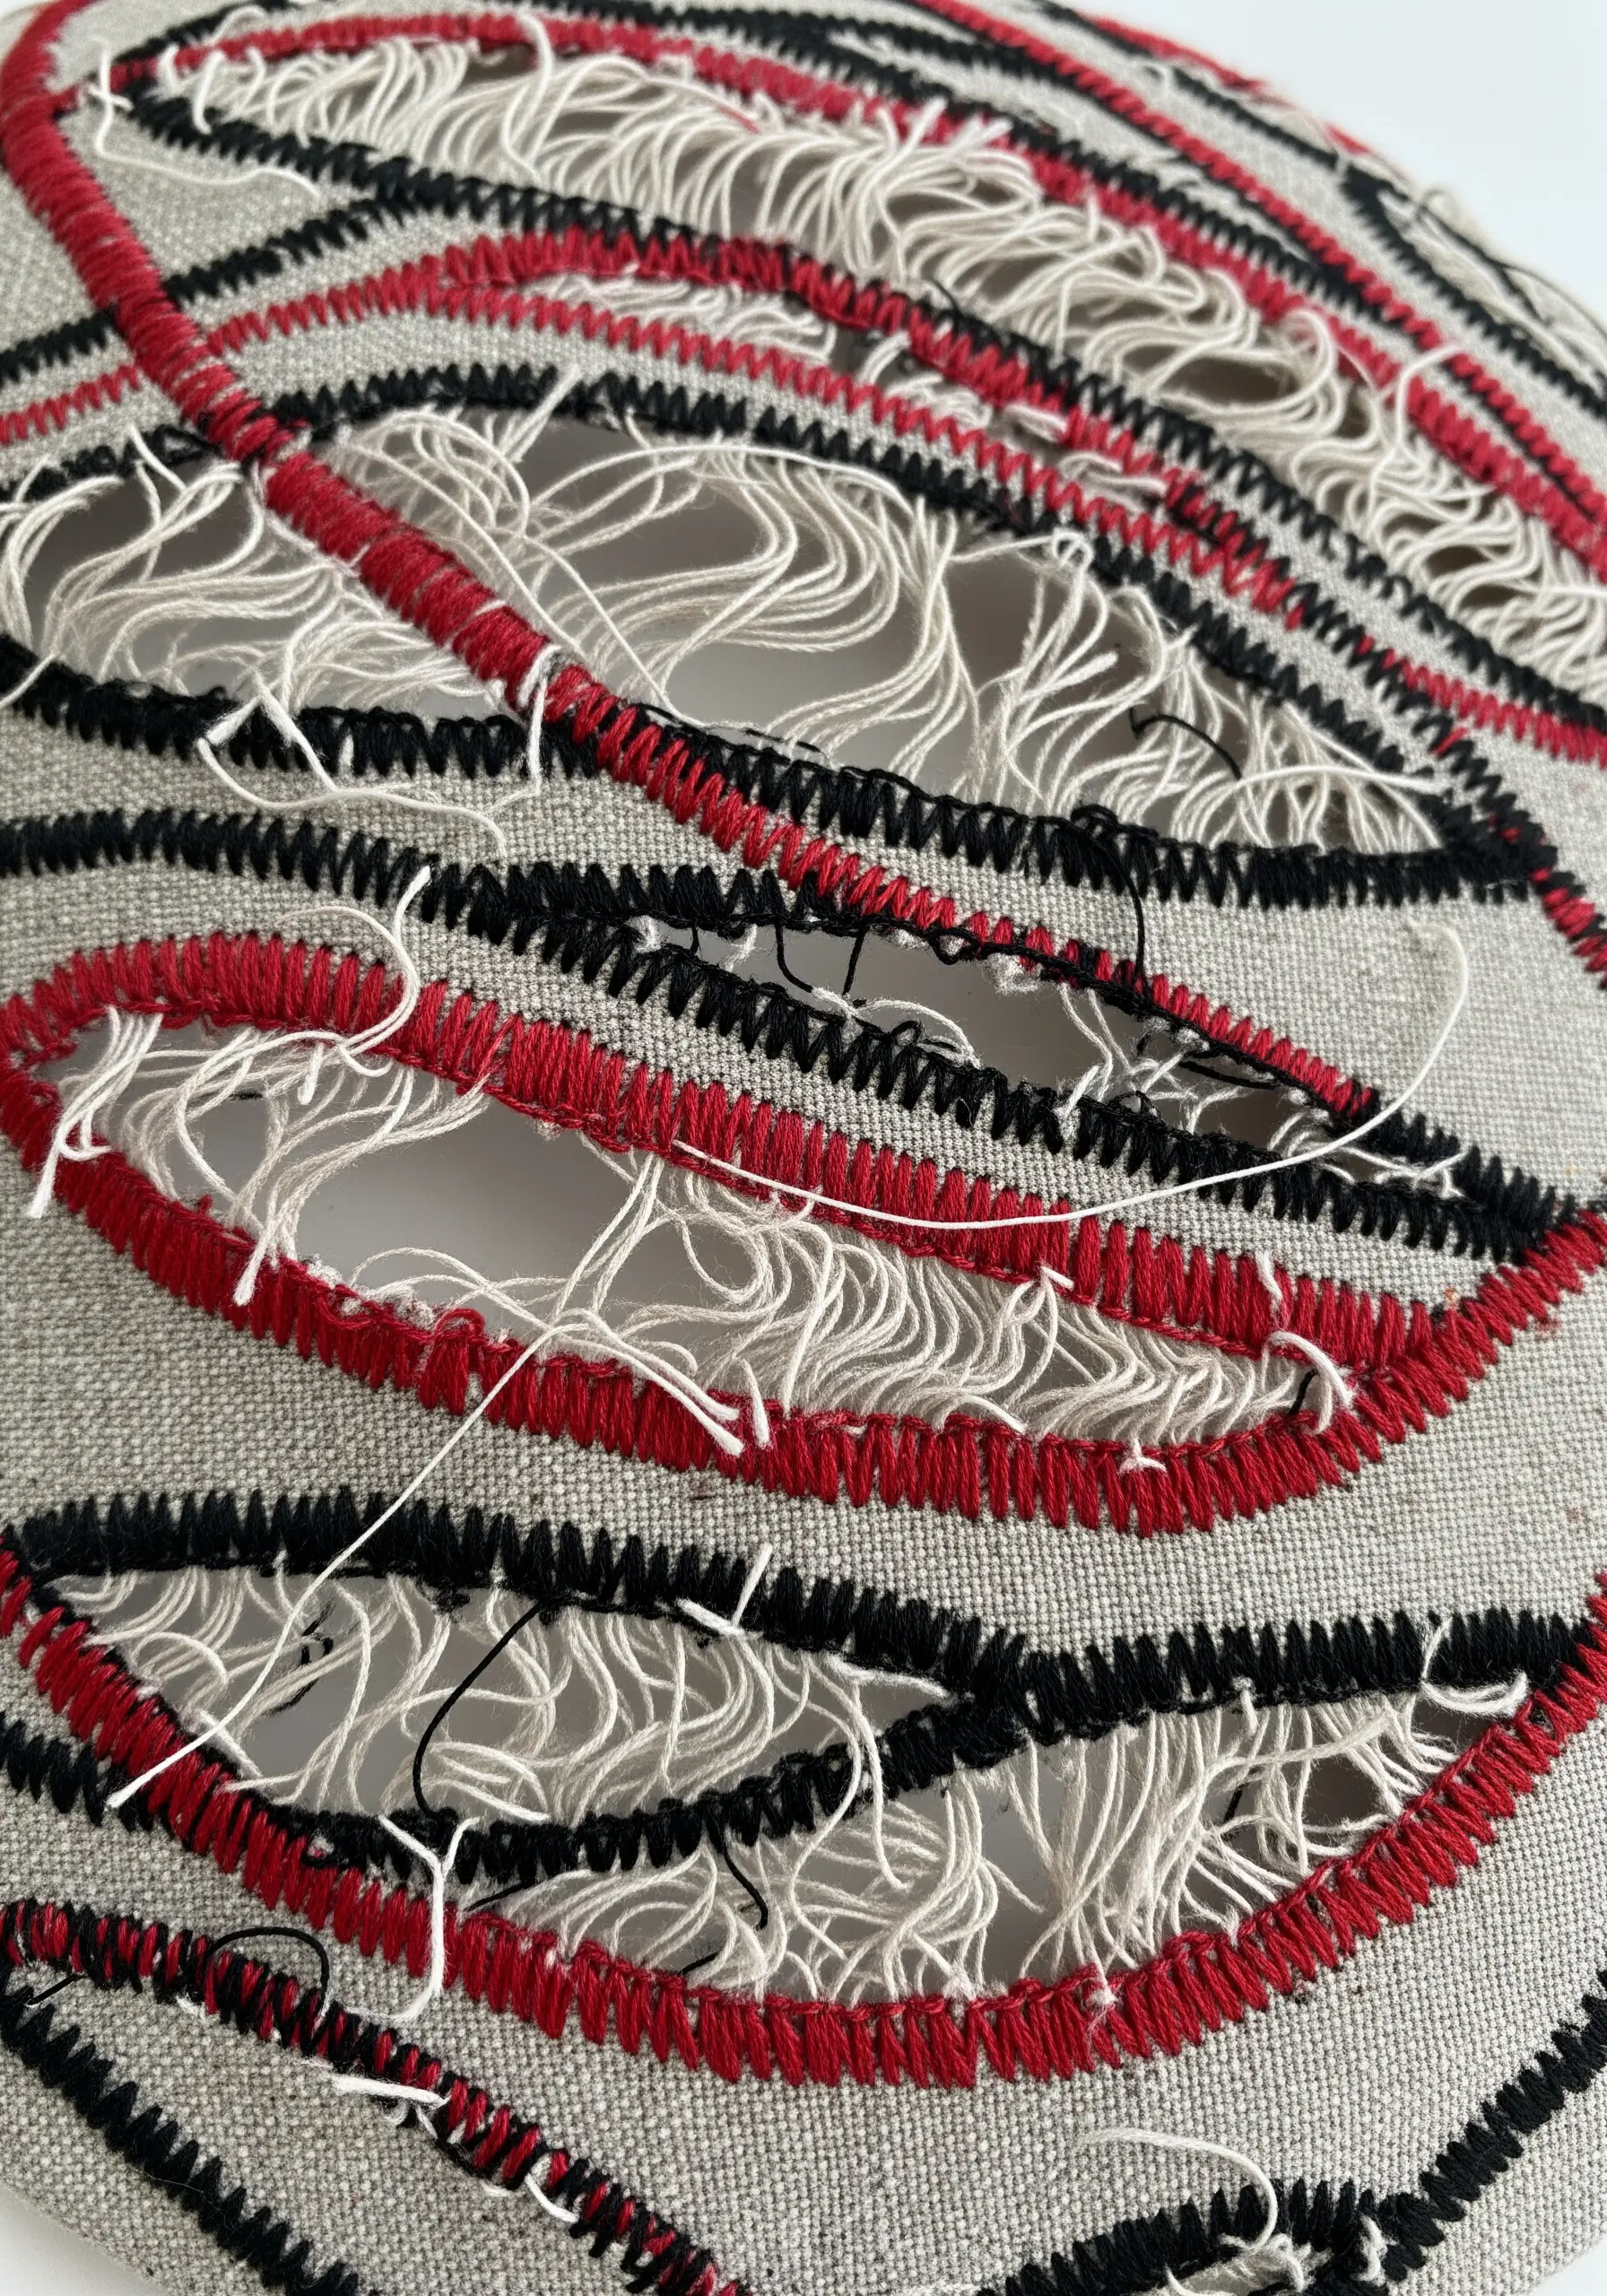
Explore the beauty of deconstruction in a controlled, intentional way.
First, outline a shape with a clean, dense satin stitch border. This border acts as a frame and prevents the fabric from unraveling.
Next, carefully cut out the fabric inside this stitched boundary. You can then selectively pull out the weft threads to expose the raw warp threads.
The result is a striking contrast between the polished, solid edge and the fragile, linear threads within.
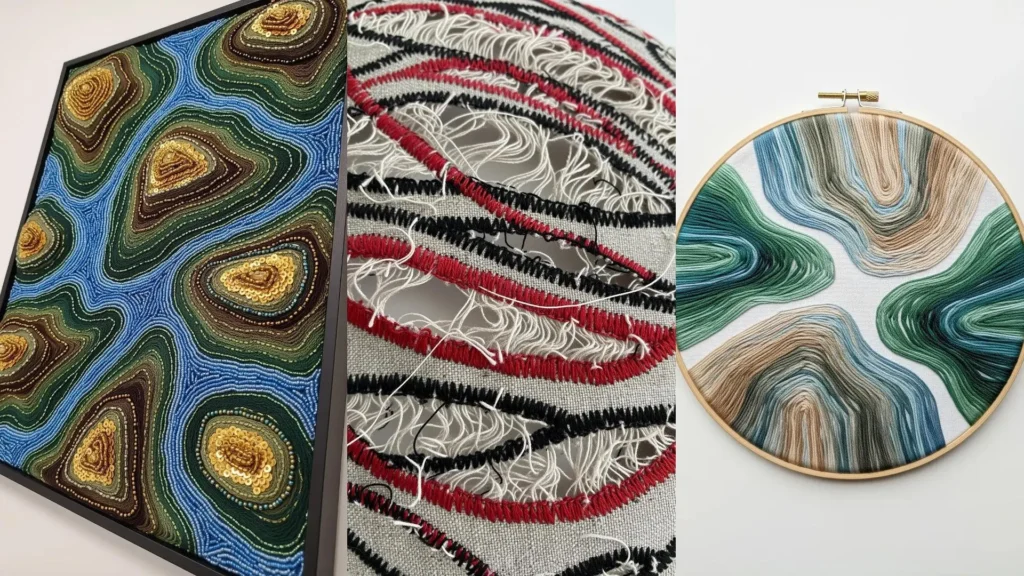
10. Map Topography with Couching and Beads
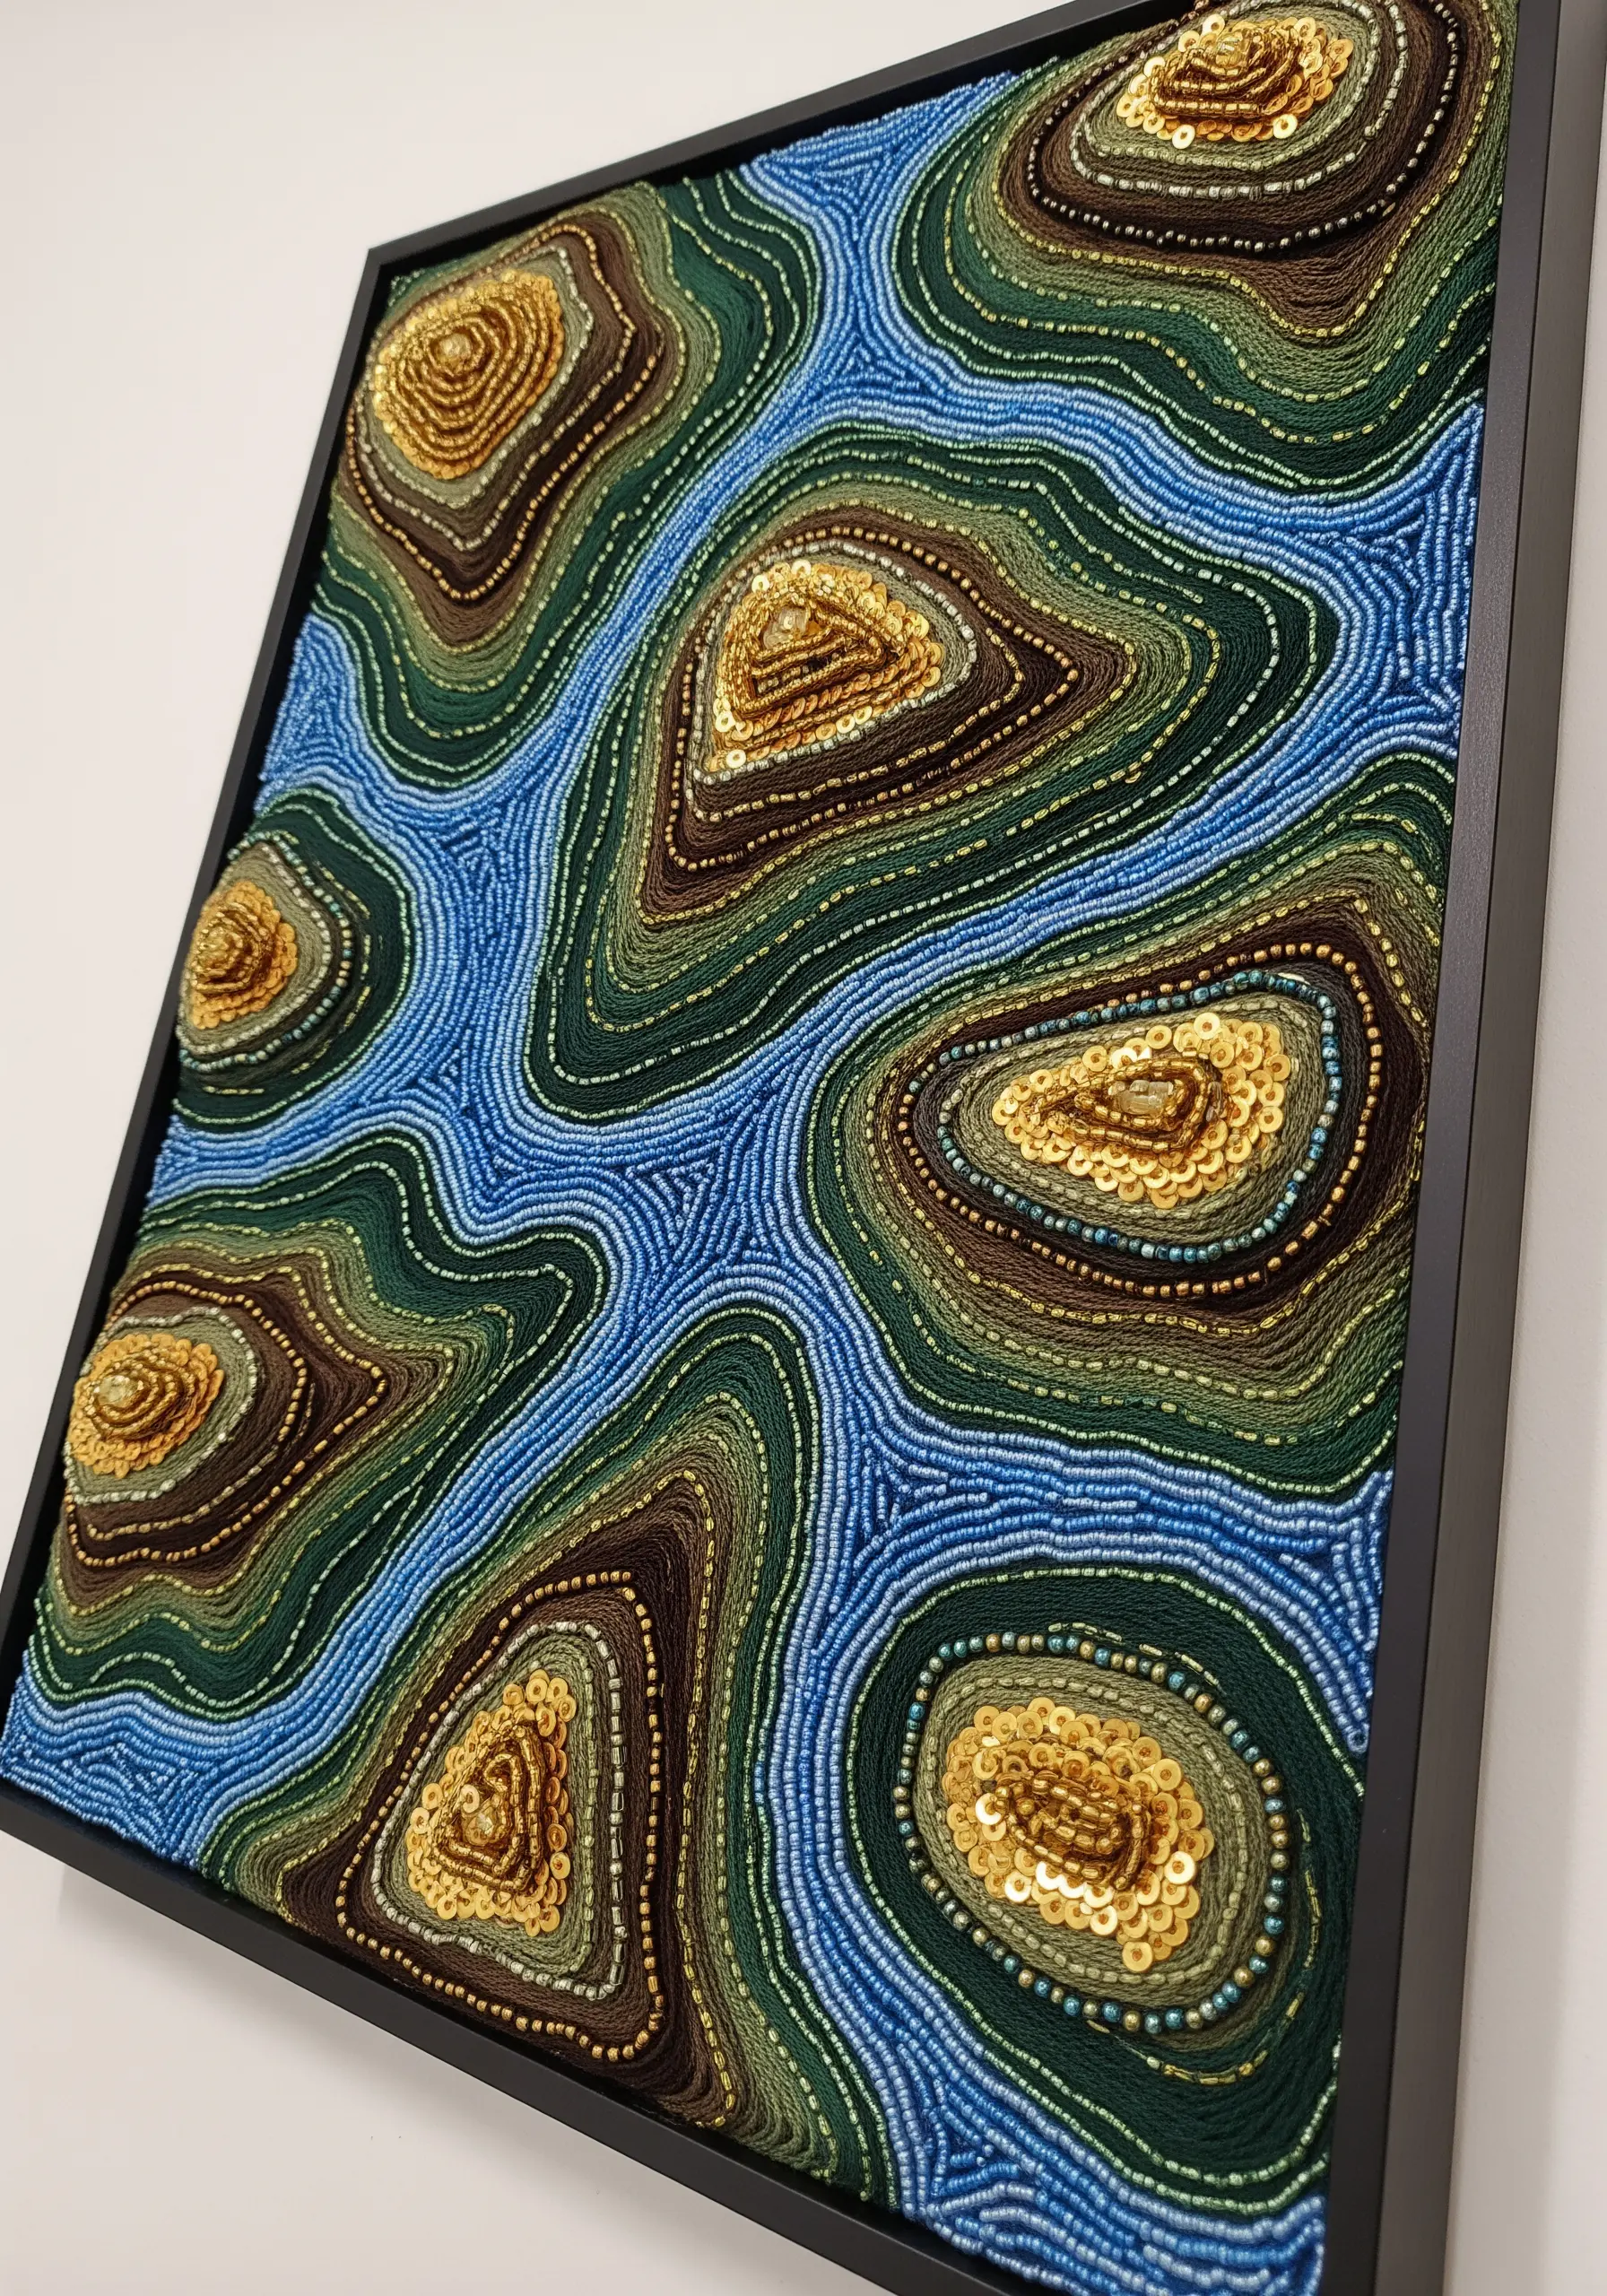
Build organic, landscape-like contours by couching down bundles of thread laid side-by-side.
To introduce a new texture and capture light, integrate rows of tiny seed beads or flat sequins into your design.
Alternate a row of couched thread with a row of stitched beads to mimic the shimmer of water or mineral deposits in rock formations.
This adds not only texture but also a subtle luminosity that elevates the entire piece.
11. Integrate Sculptural Objects for Mixed-Media Depth
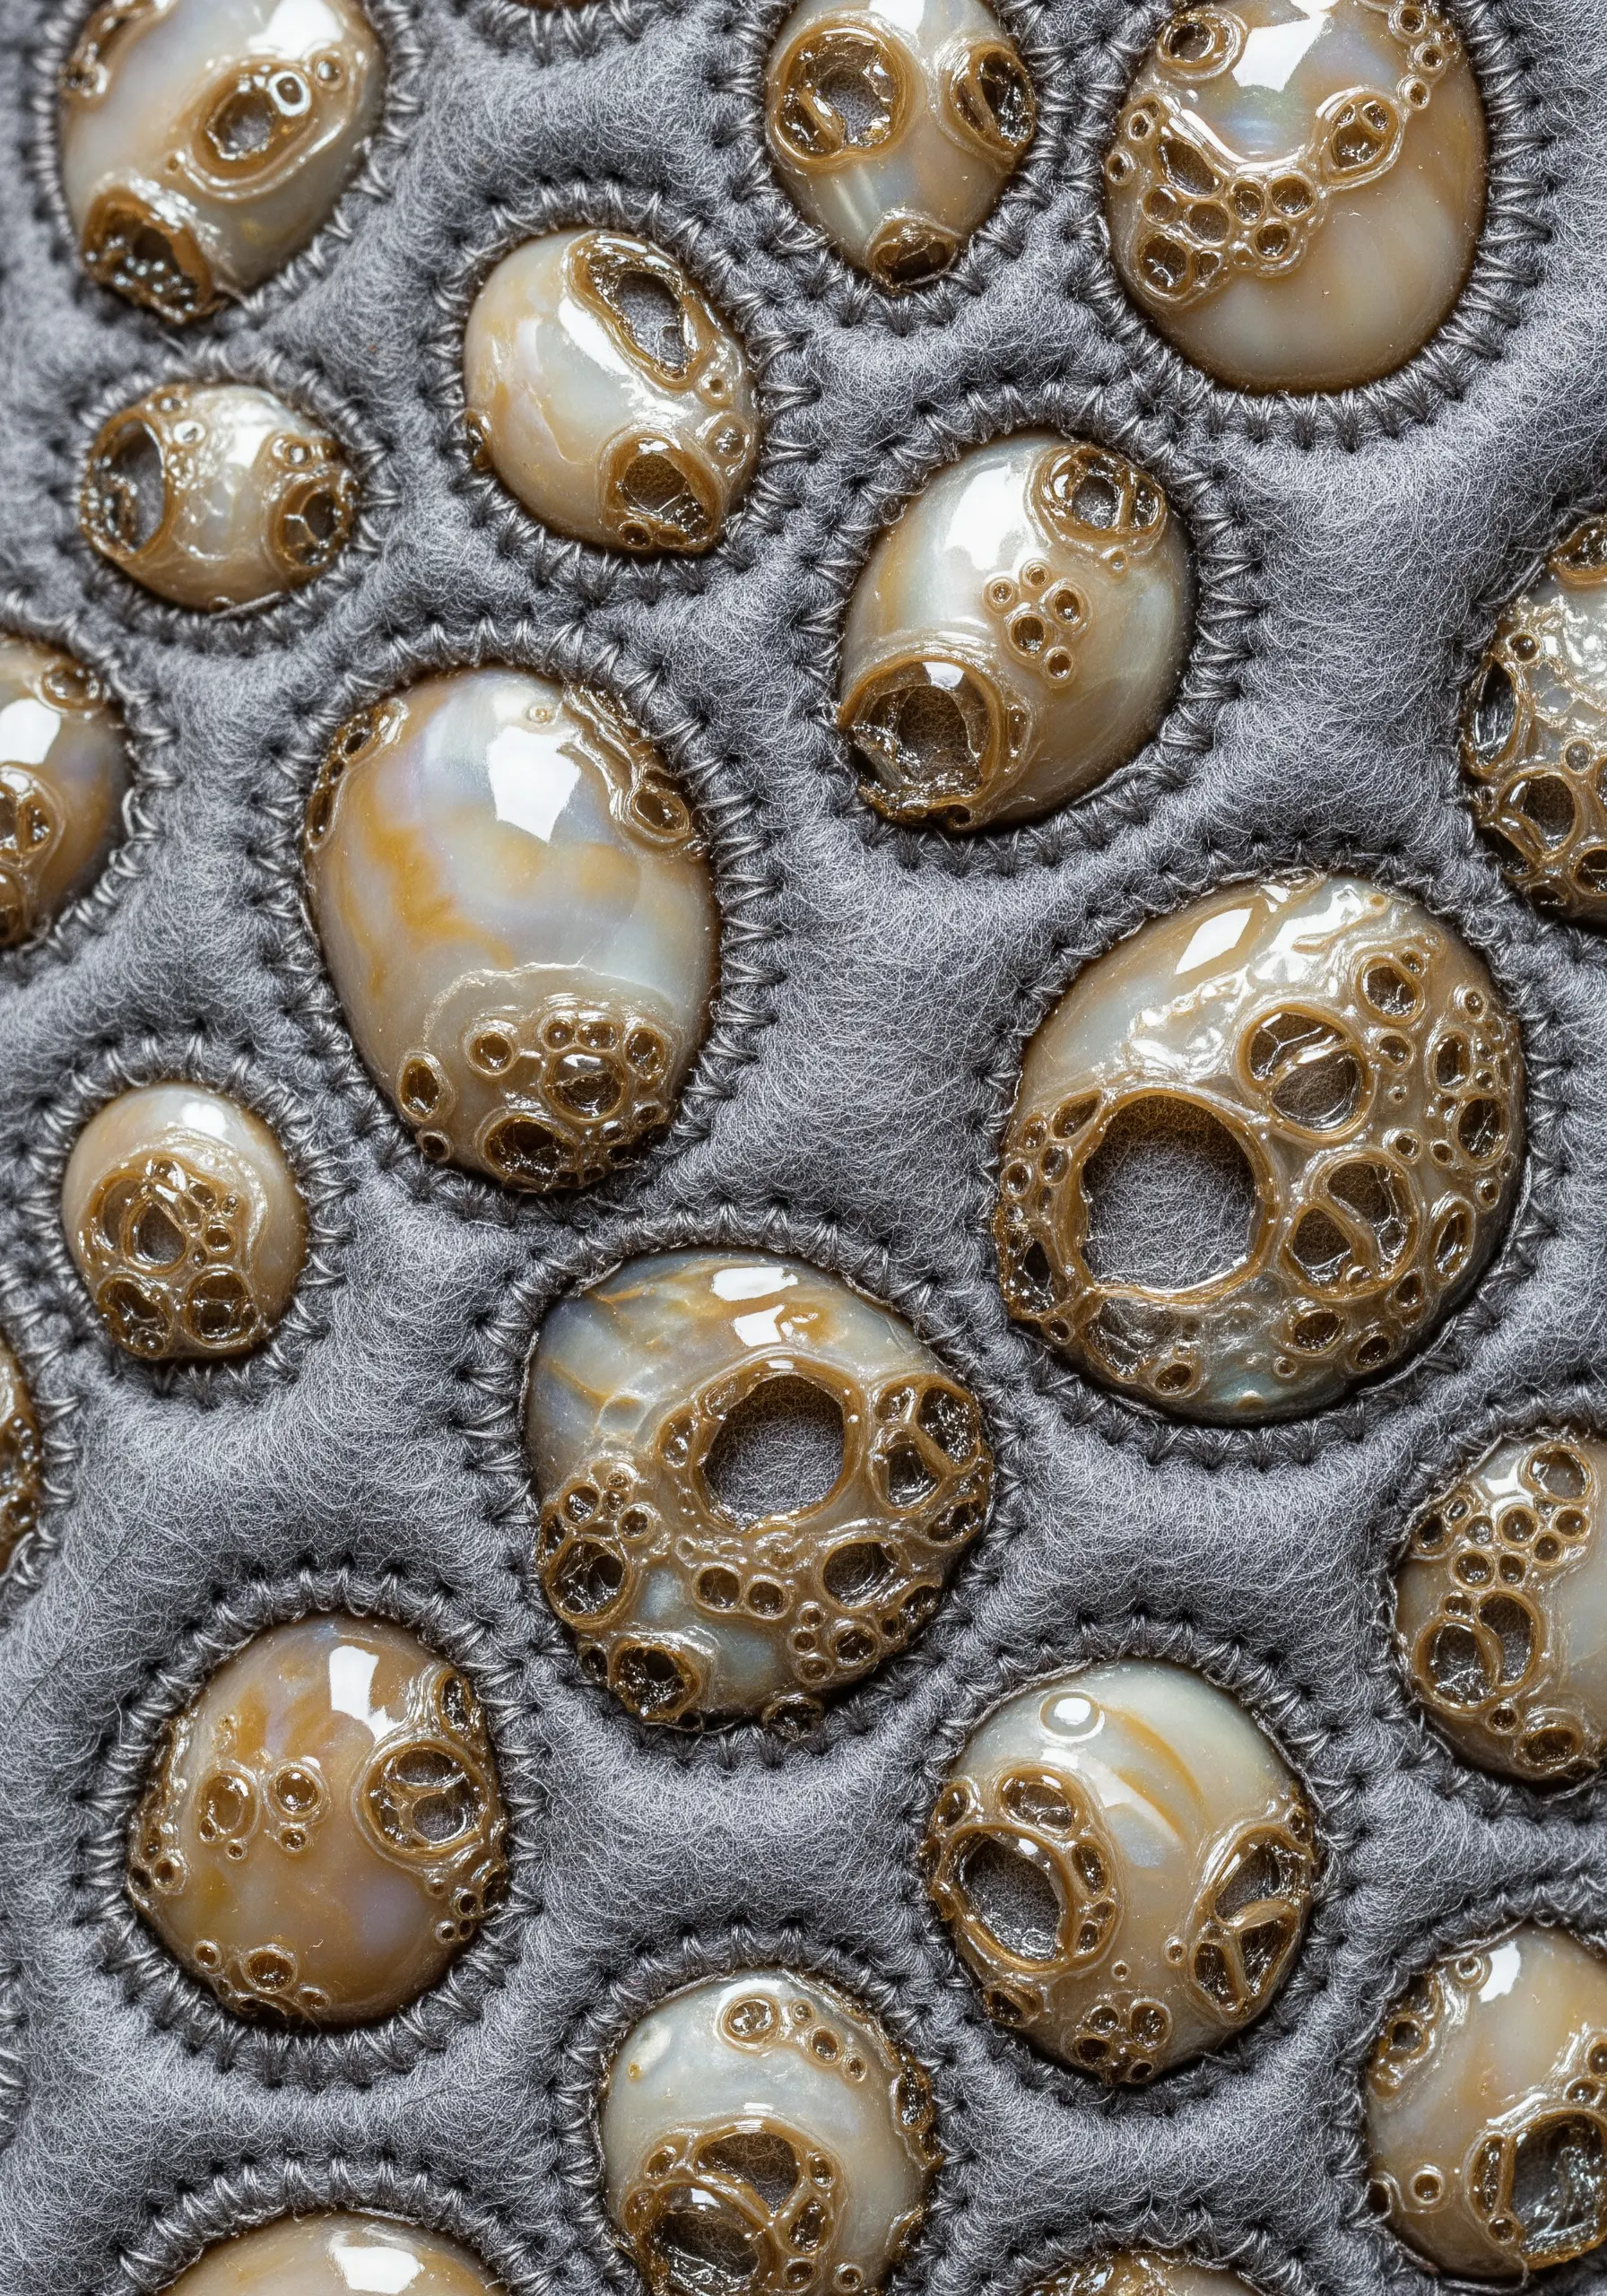
Transform your embroidery into a low-relief sculpture by incorporating three-dimensional elements.
Source or create small objects from polymer clay, ceramic, resin, or even natural elements like smooth pebbles or shells.
Secure them to a sturdy fabric base, like thick felt or canvas, by stitching tightly around their perimeter with a blanket stitch or couching stitch.
This mixed-media approach adds unexpected depth and texture that thread alone cannot achieve.
12. Capture Energy with Large-Scale Thread Scribbling
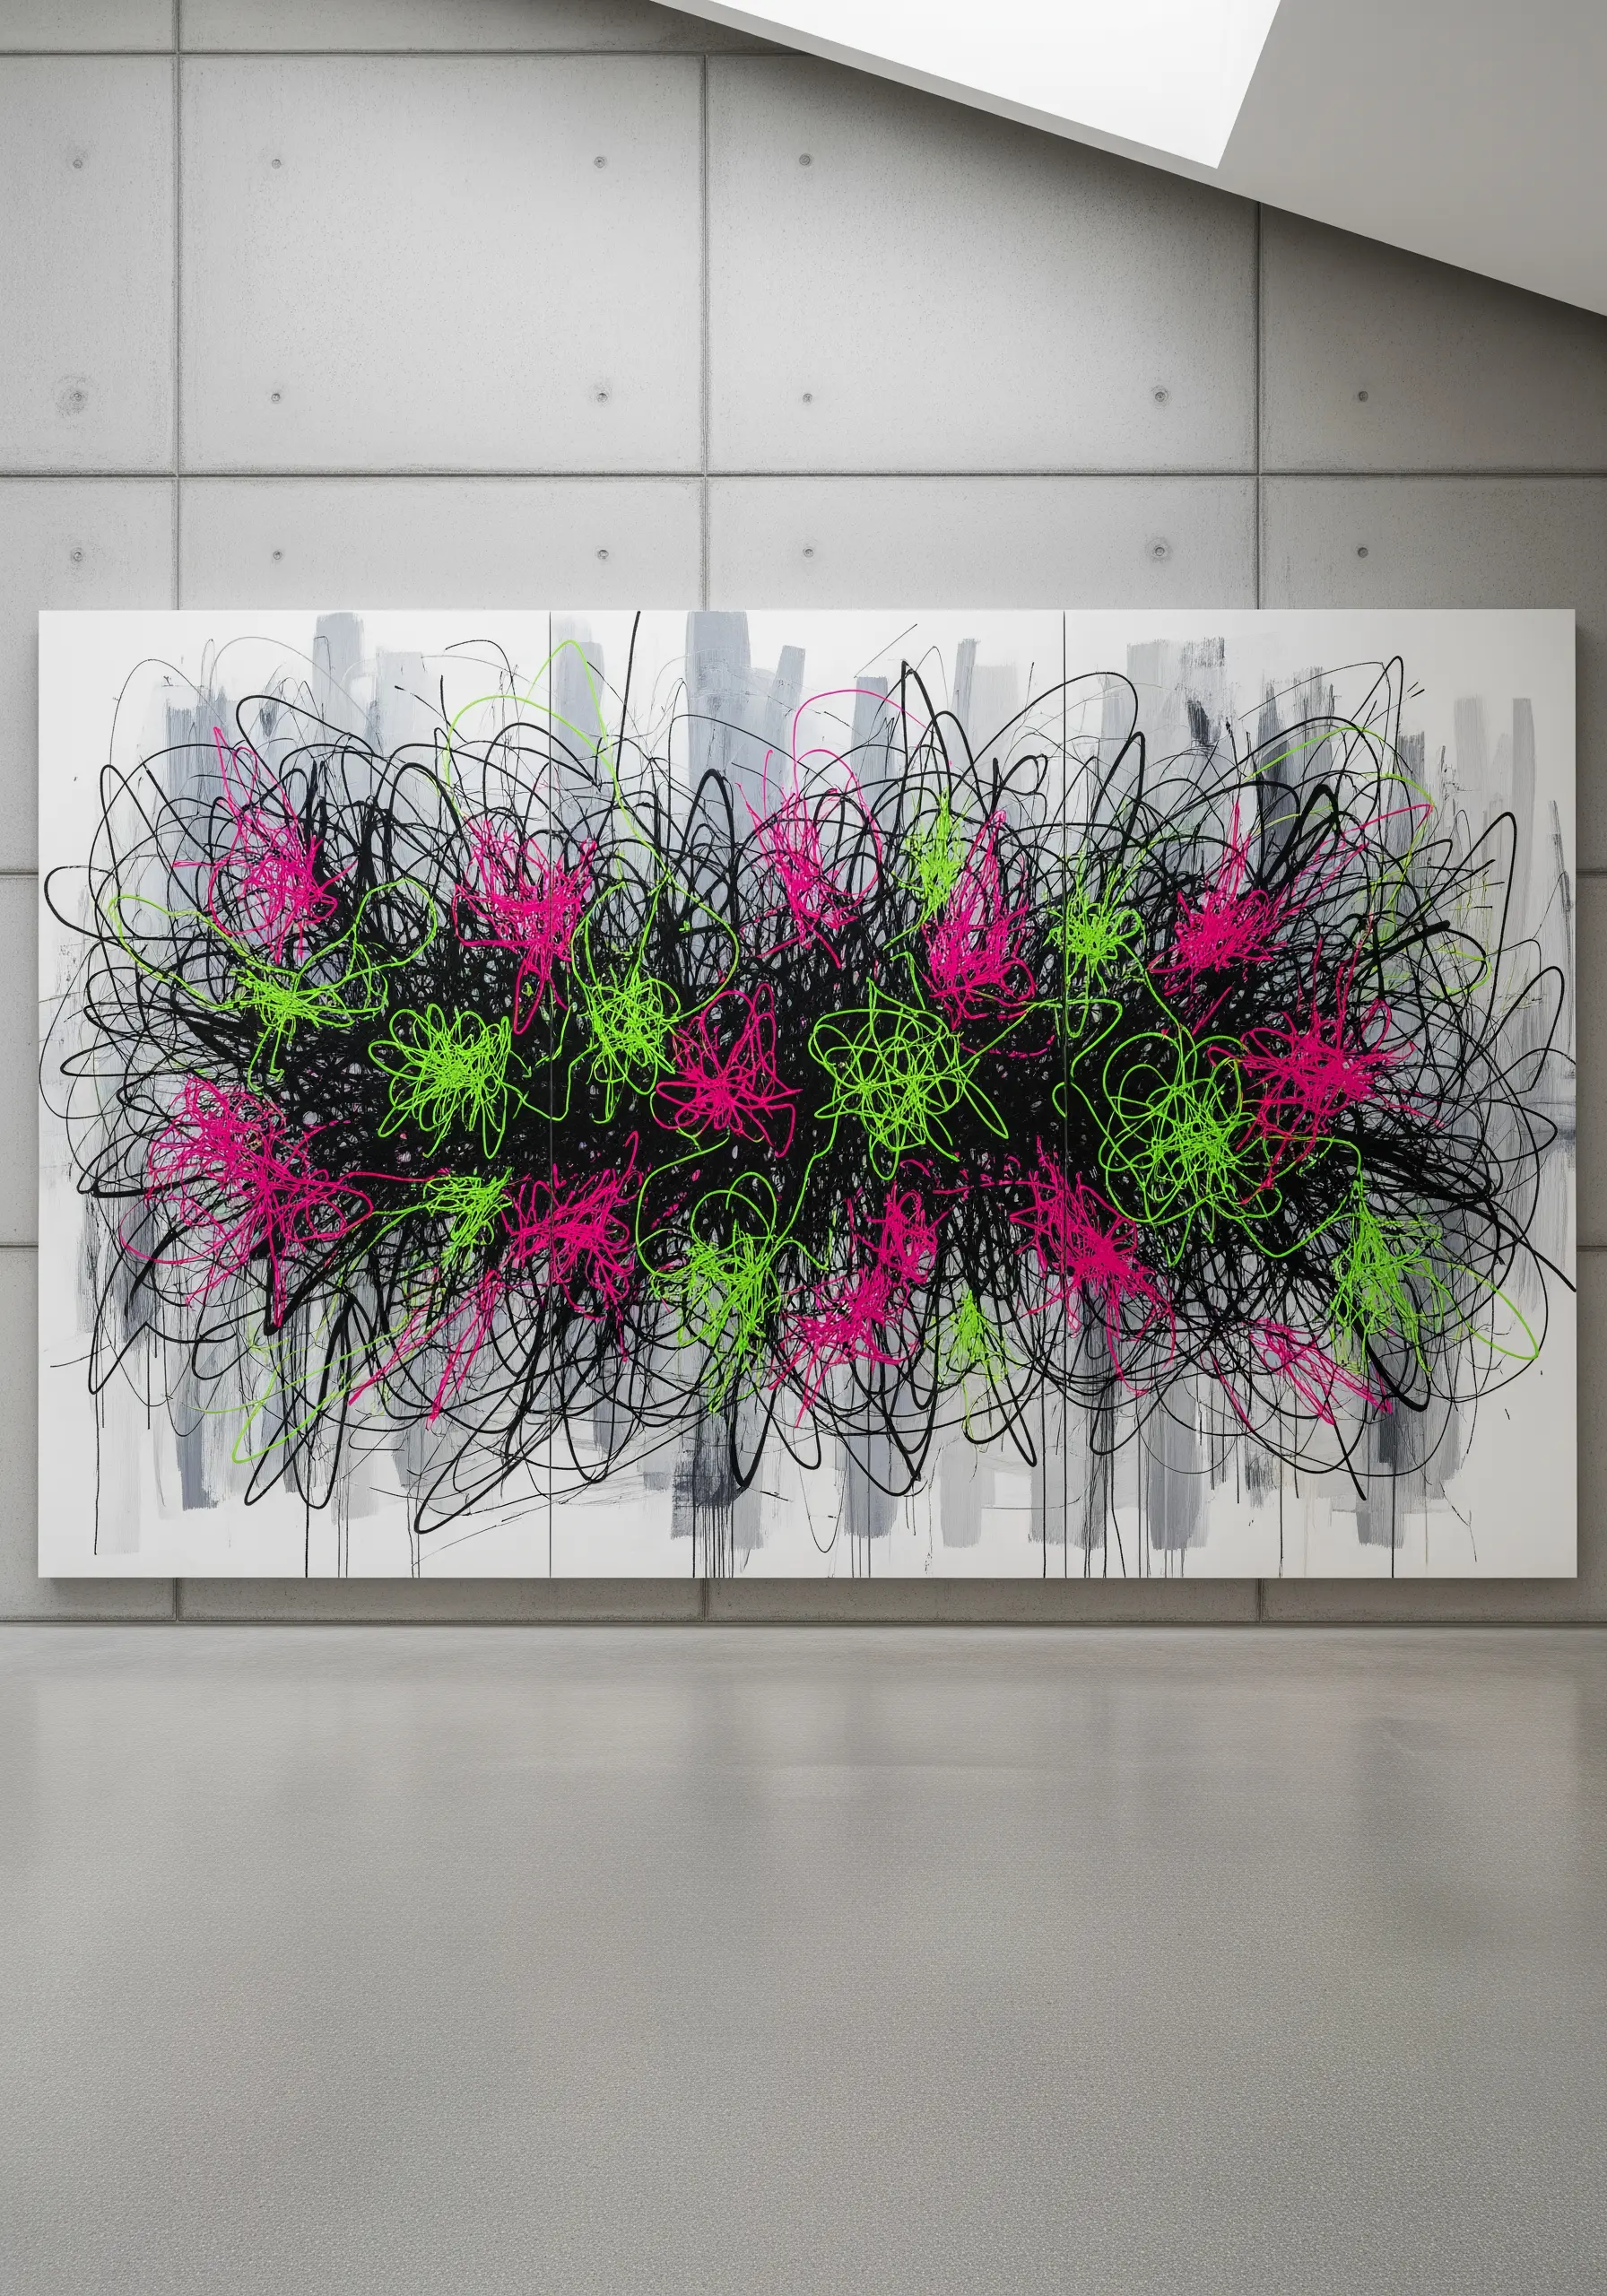
Think of your sewing machine needle as a pen and the canvas as your paper.
Using a darning or free-motion embroidery foot, drop the feed dogs on your machine and move the fabric freely in all directions to create energetic, scribbled lines.
Work on a large scale to allow for broad, gestural movements. Layering different thread colors builds up incredible density and visual rhythm, capturing a sense of raw, untamed energy.
13. Paint with Directional Long-and-Short Stitch
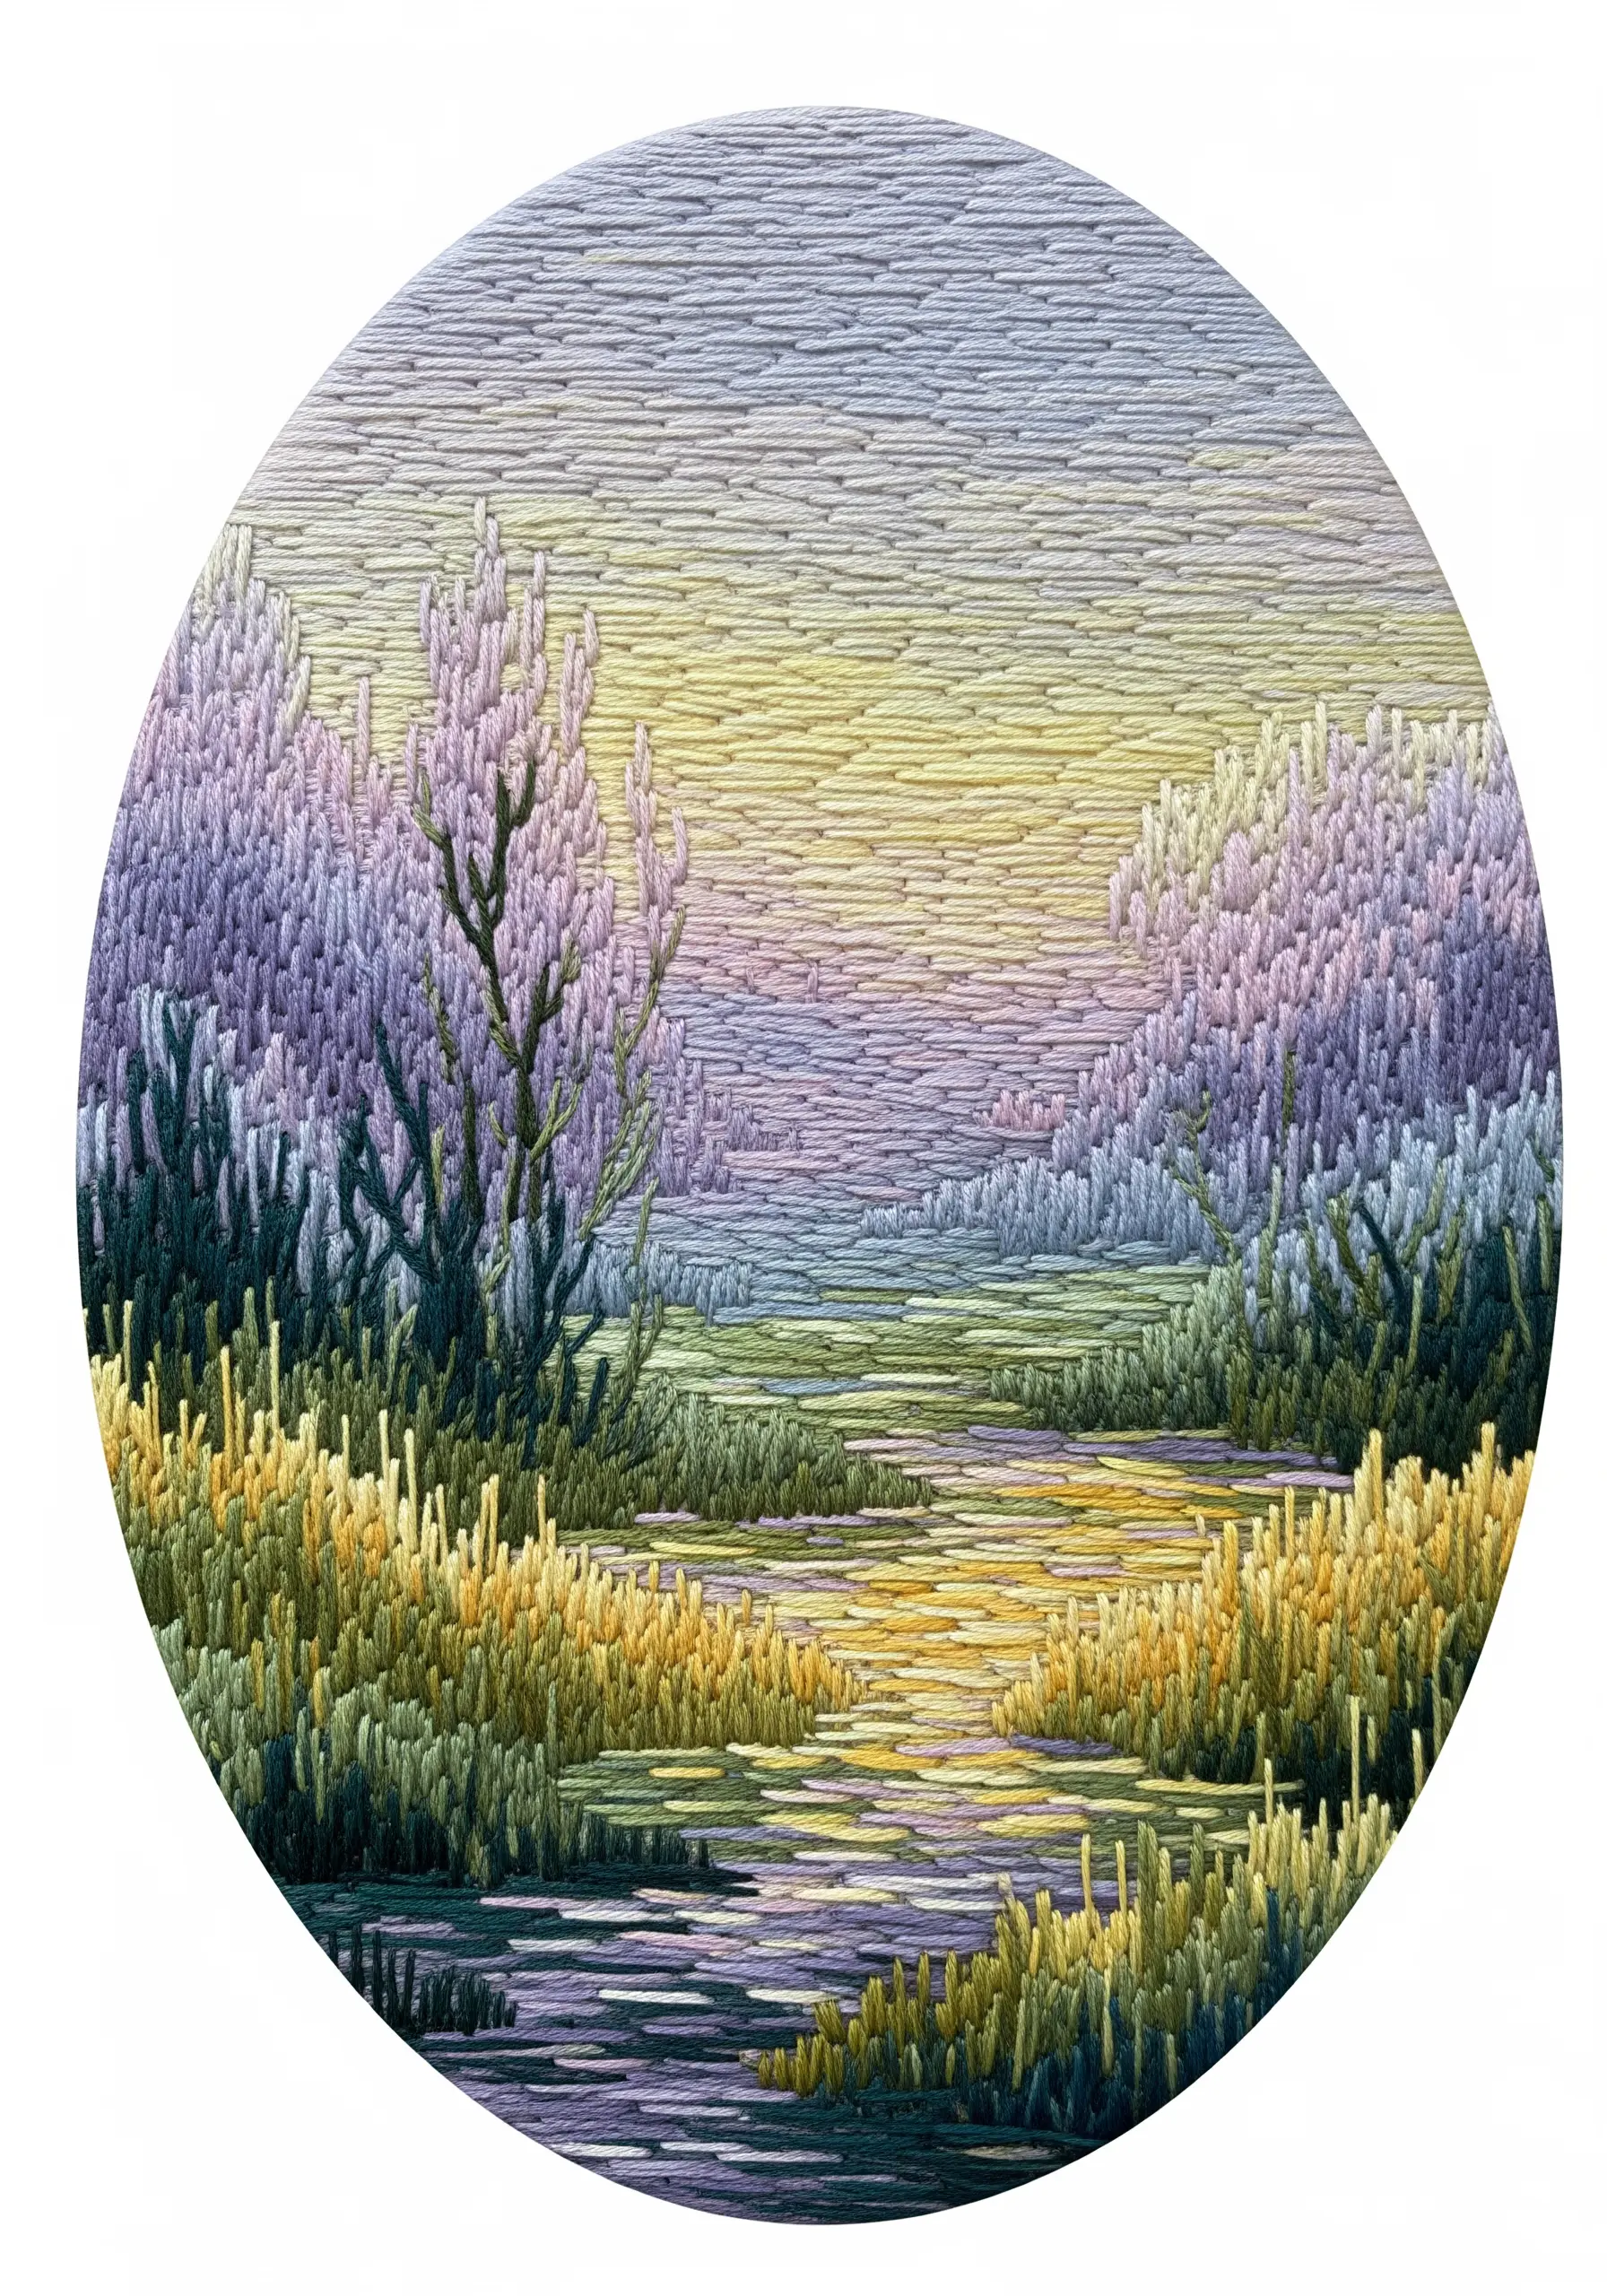
Achieve a painterly, impressionistic effect by letting the direction of your stitches define the form.
Instead of filling a shape with uniform satin stitches, use a long-and-short stitch that follows the natural contours of your subject.
Use vertical stitches for grasses, short, angled stitches for leaves, and smooth horizontal stitches for water. This technique allows you to blend colors seamlessly and creates a beautiful sense of light and movement in your thread painting.
14. Create Soft Relief with Padded Trapunto
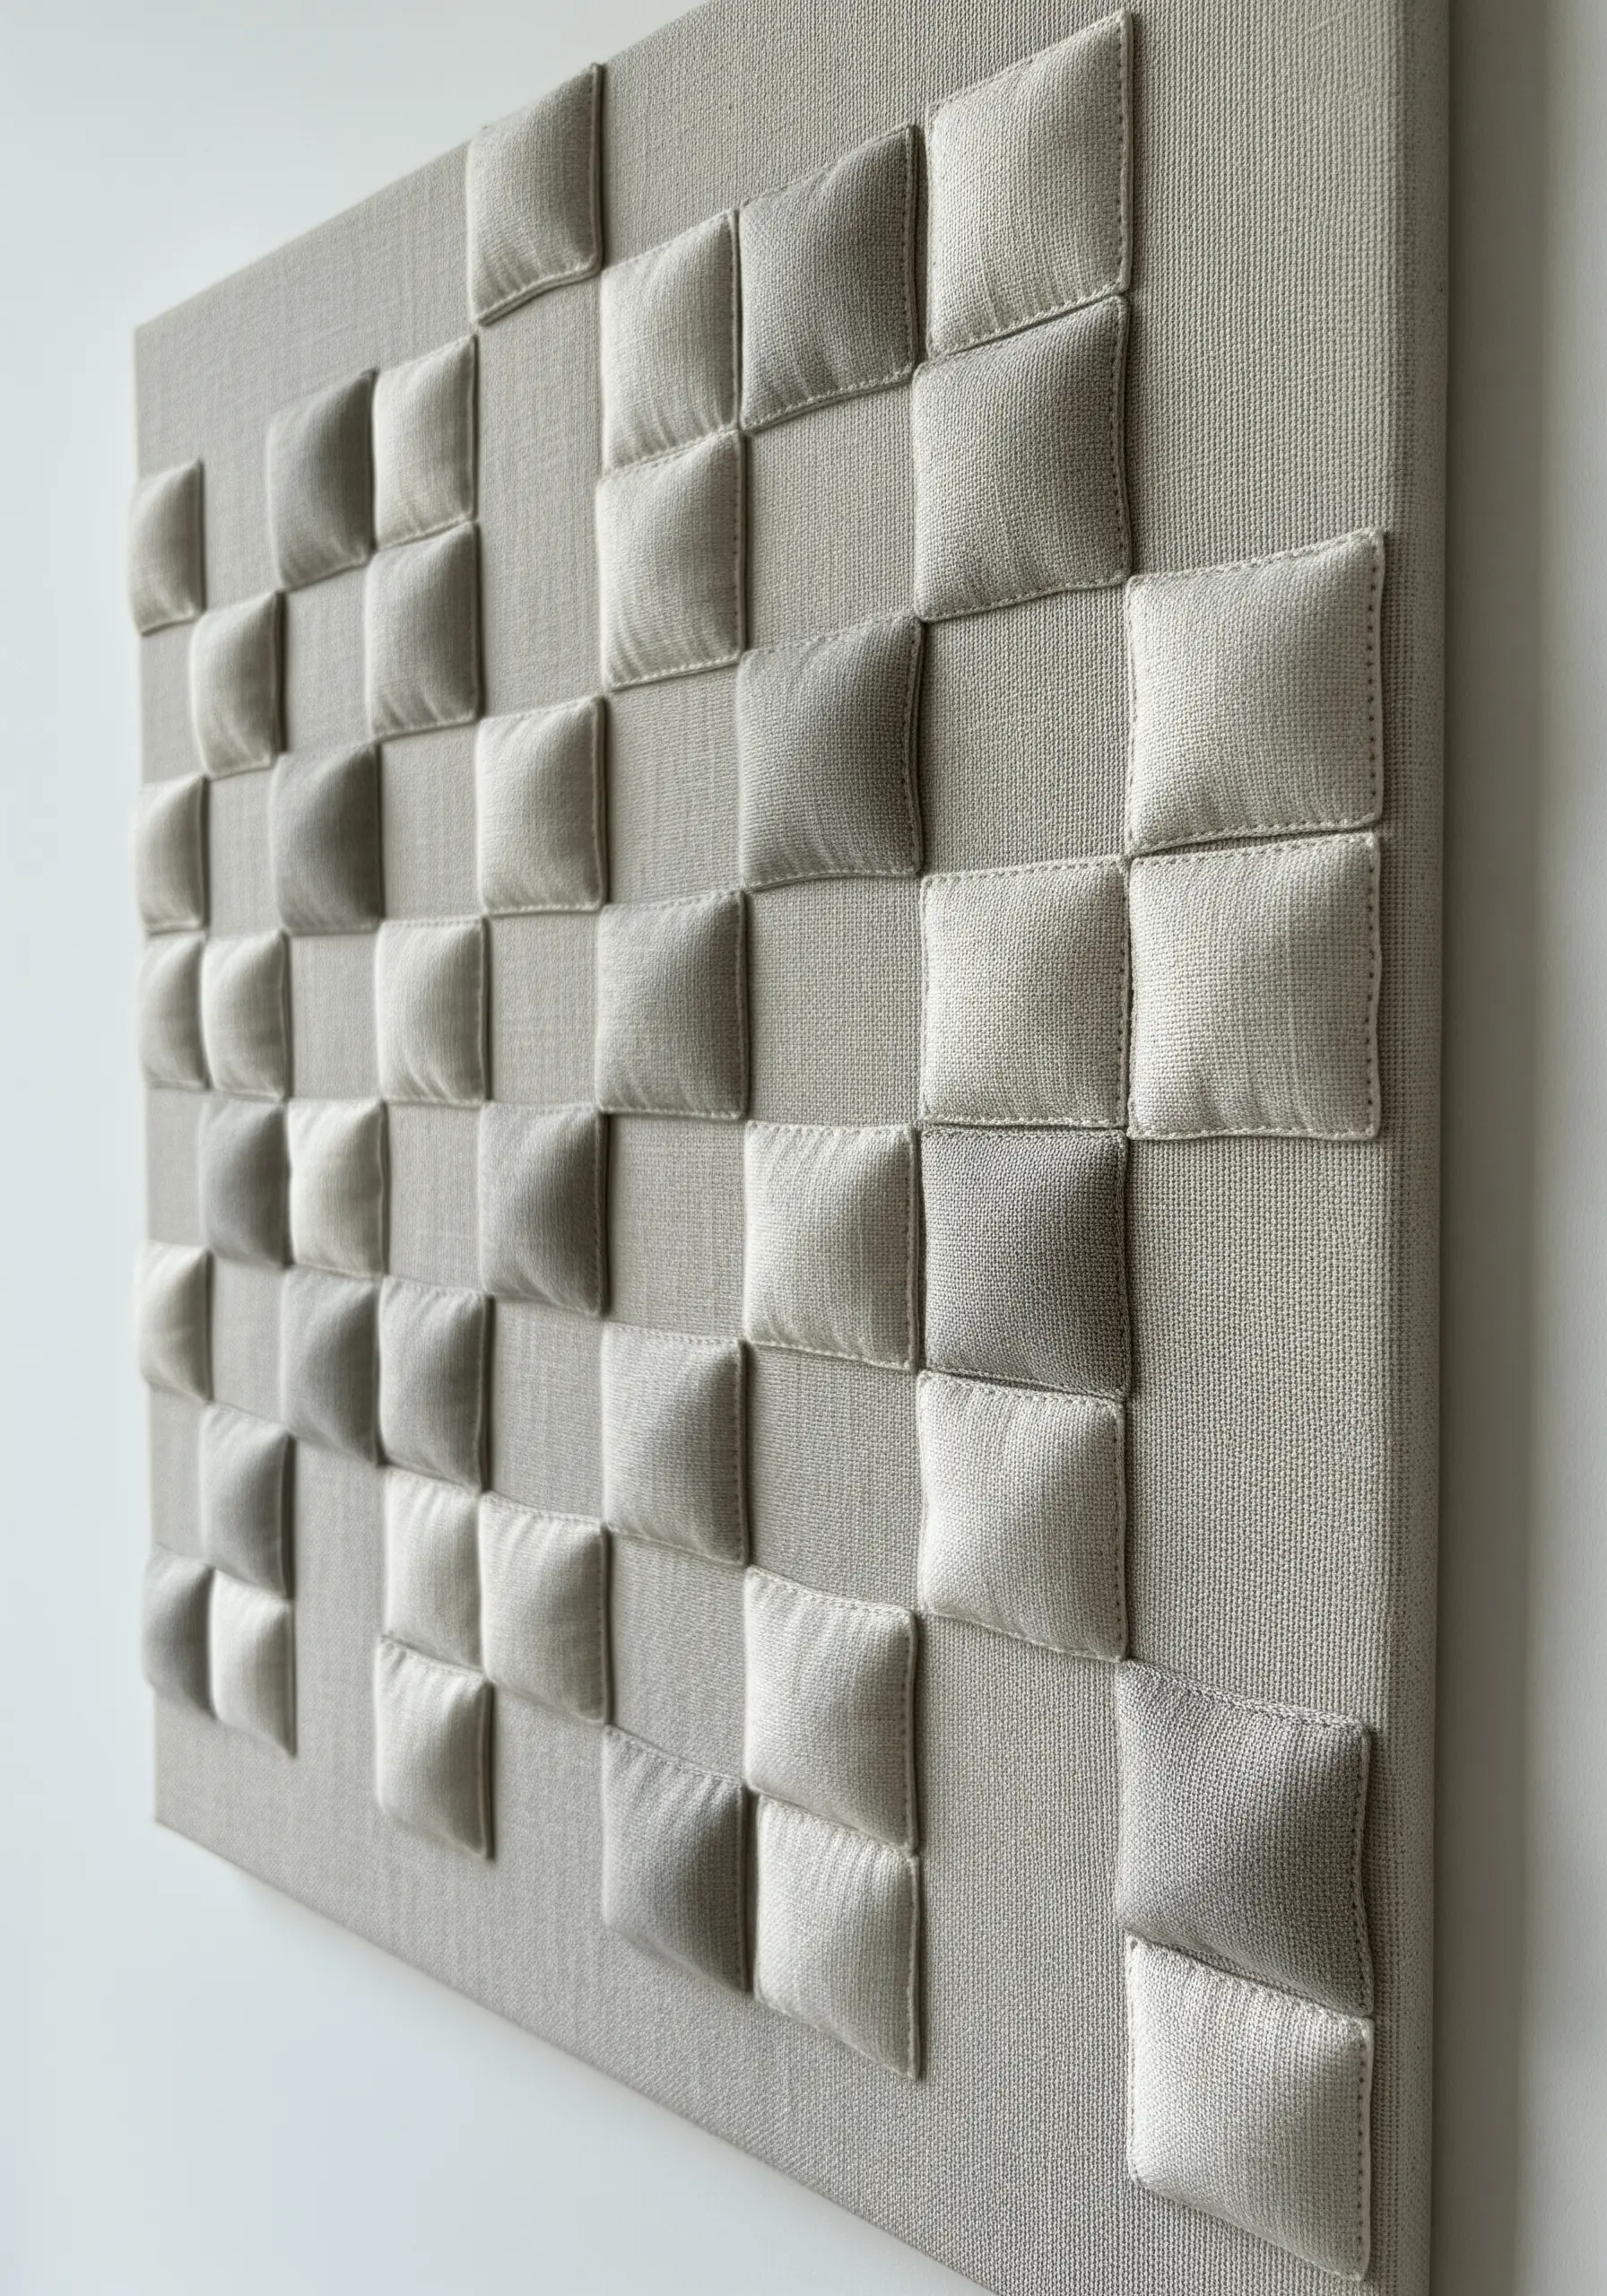
Add subtle, pillowy dimension to your work using a technique called trapunto, or stuffed work.
Stitch the outline of your desired shape onto two layers of fabric. Make a small slit in the backing fabric and gently push a small amount of batting or stuffing into the shape.
Once filled, stitch the slit closed. The result is a raised, sculptural surface that adds a soft, architectural quality to minimalist designs.
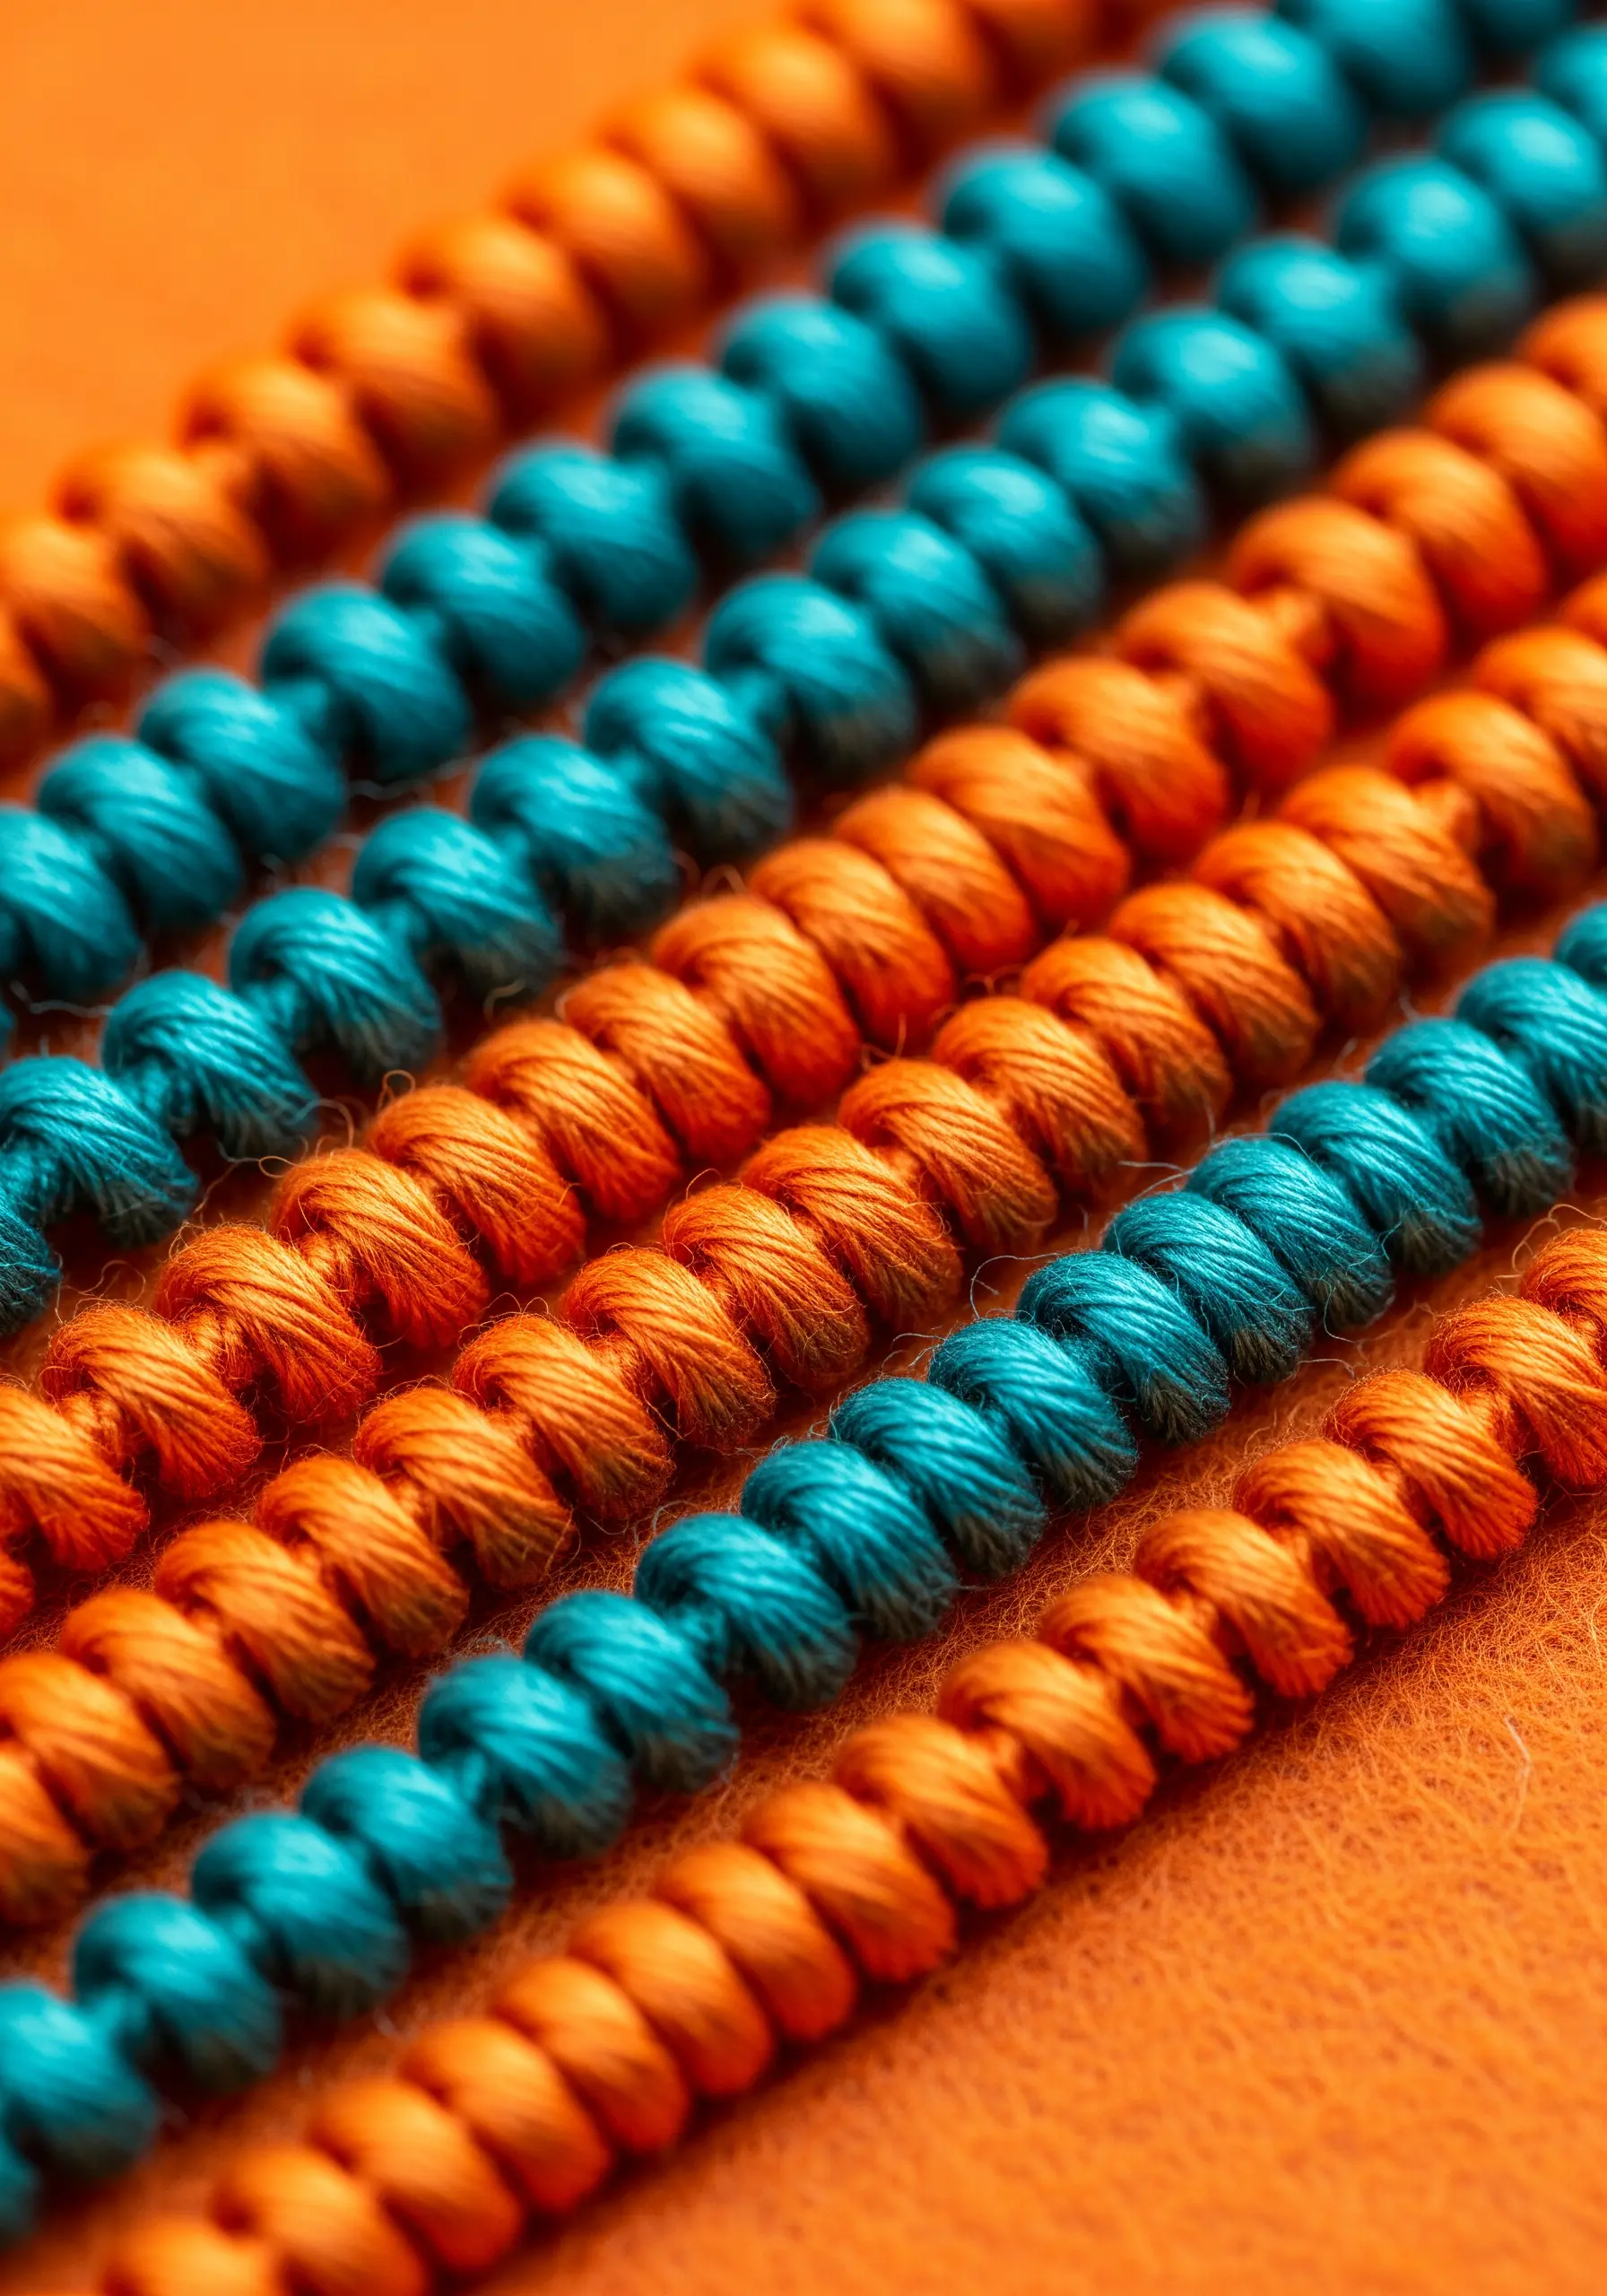
15. Build Bold Lines with Wrapped Cord
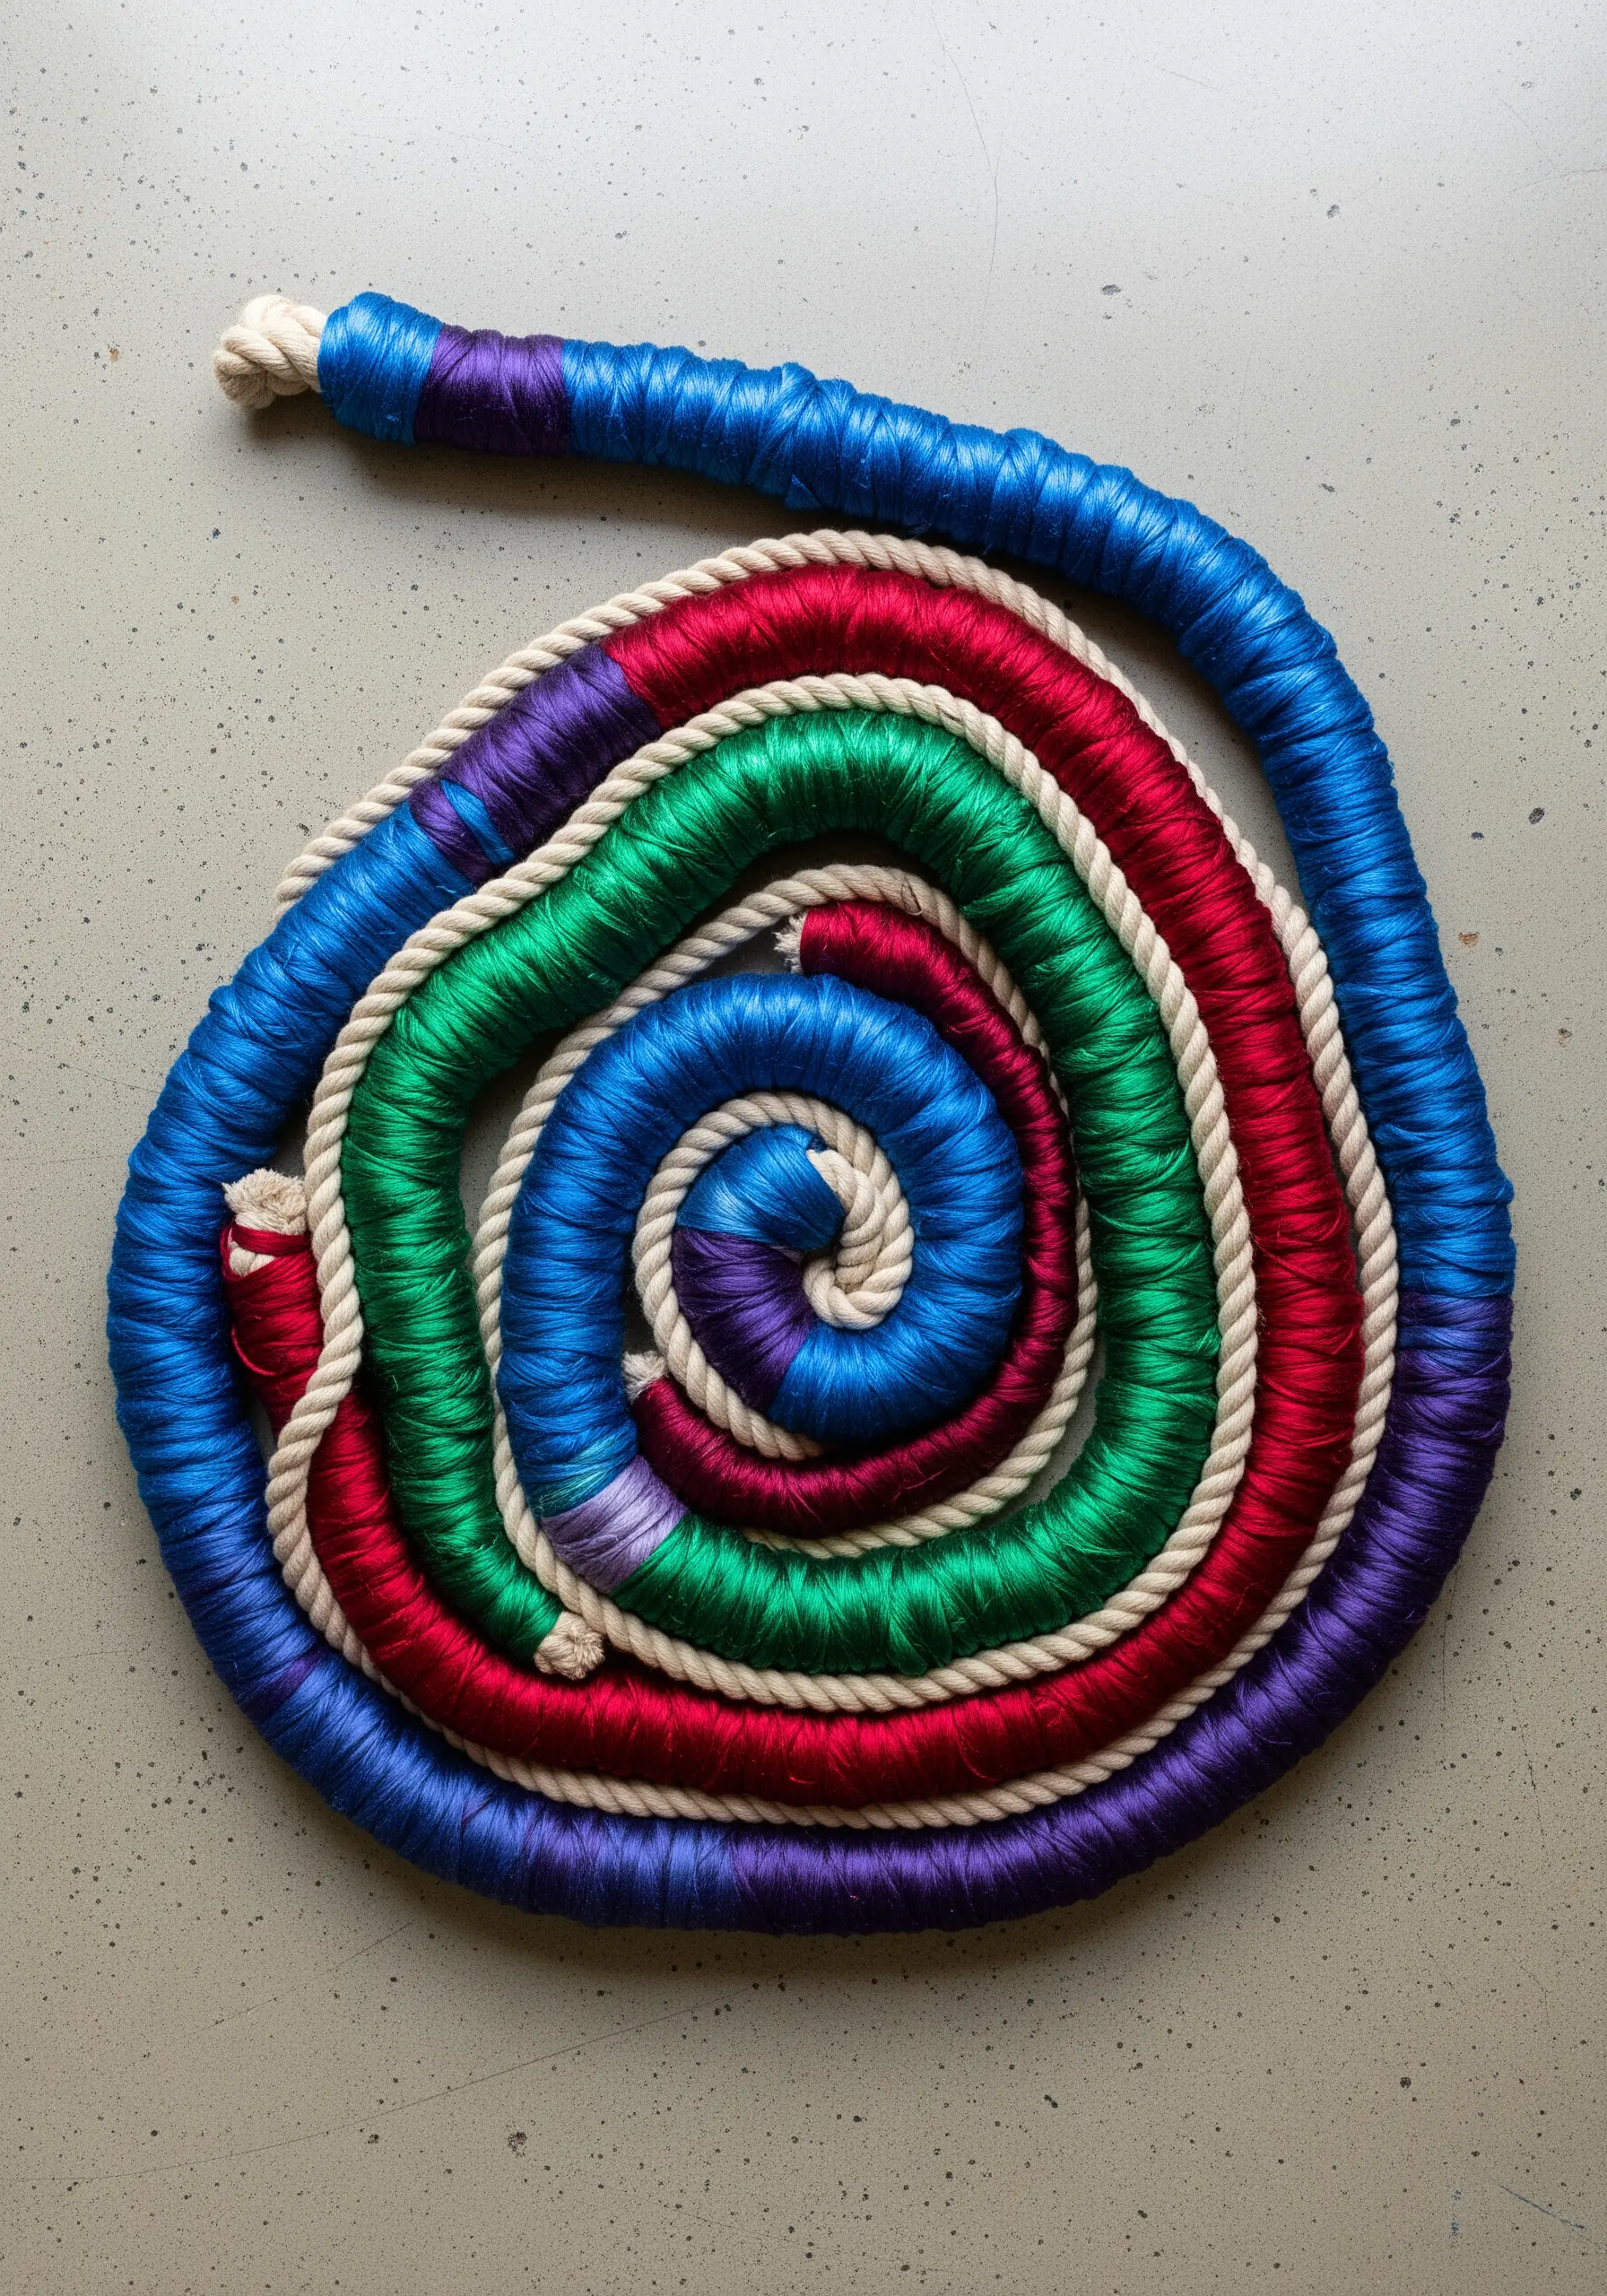
When you need a line with more substance and presence than thread can offer, start with a thicker core material like cotton rope or cord.
Tightly wrap the cord with embroidery floss, changing colors as desired to create graphic blocks or patterns.
Once your cord is wrapped, you can arrange it on your base fabric in any shape you like, securing it with small, discreet tacking stitches.
This method produces perfectly uniform, high-impact lines with a clean, sculptural quality.
16. Stitch into Air with Water-Soluble Stabilizer
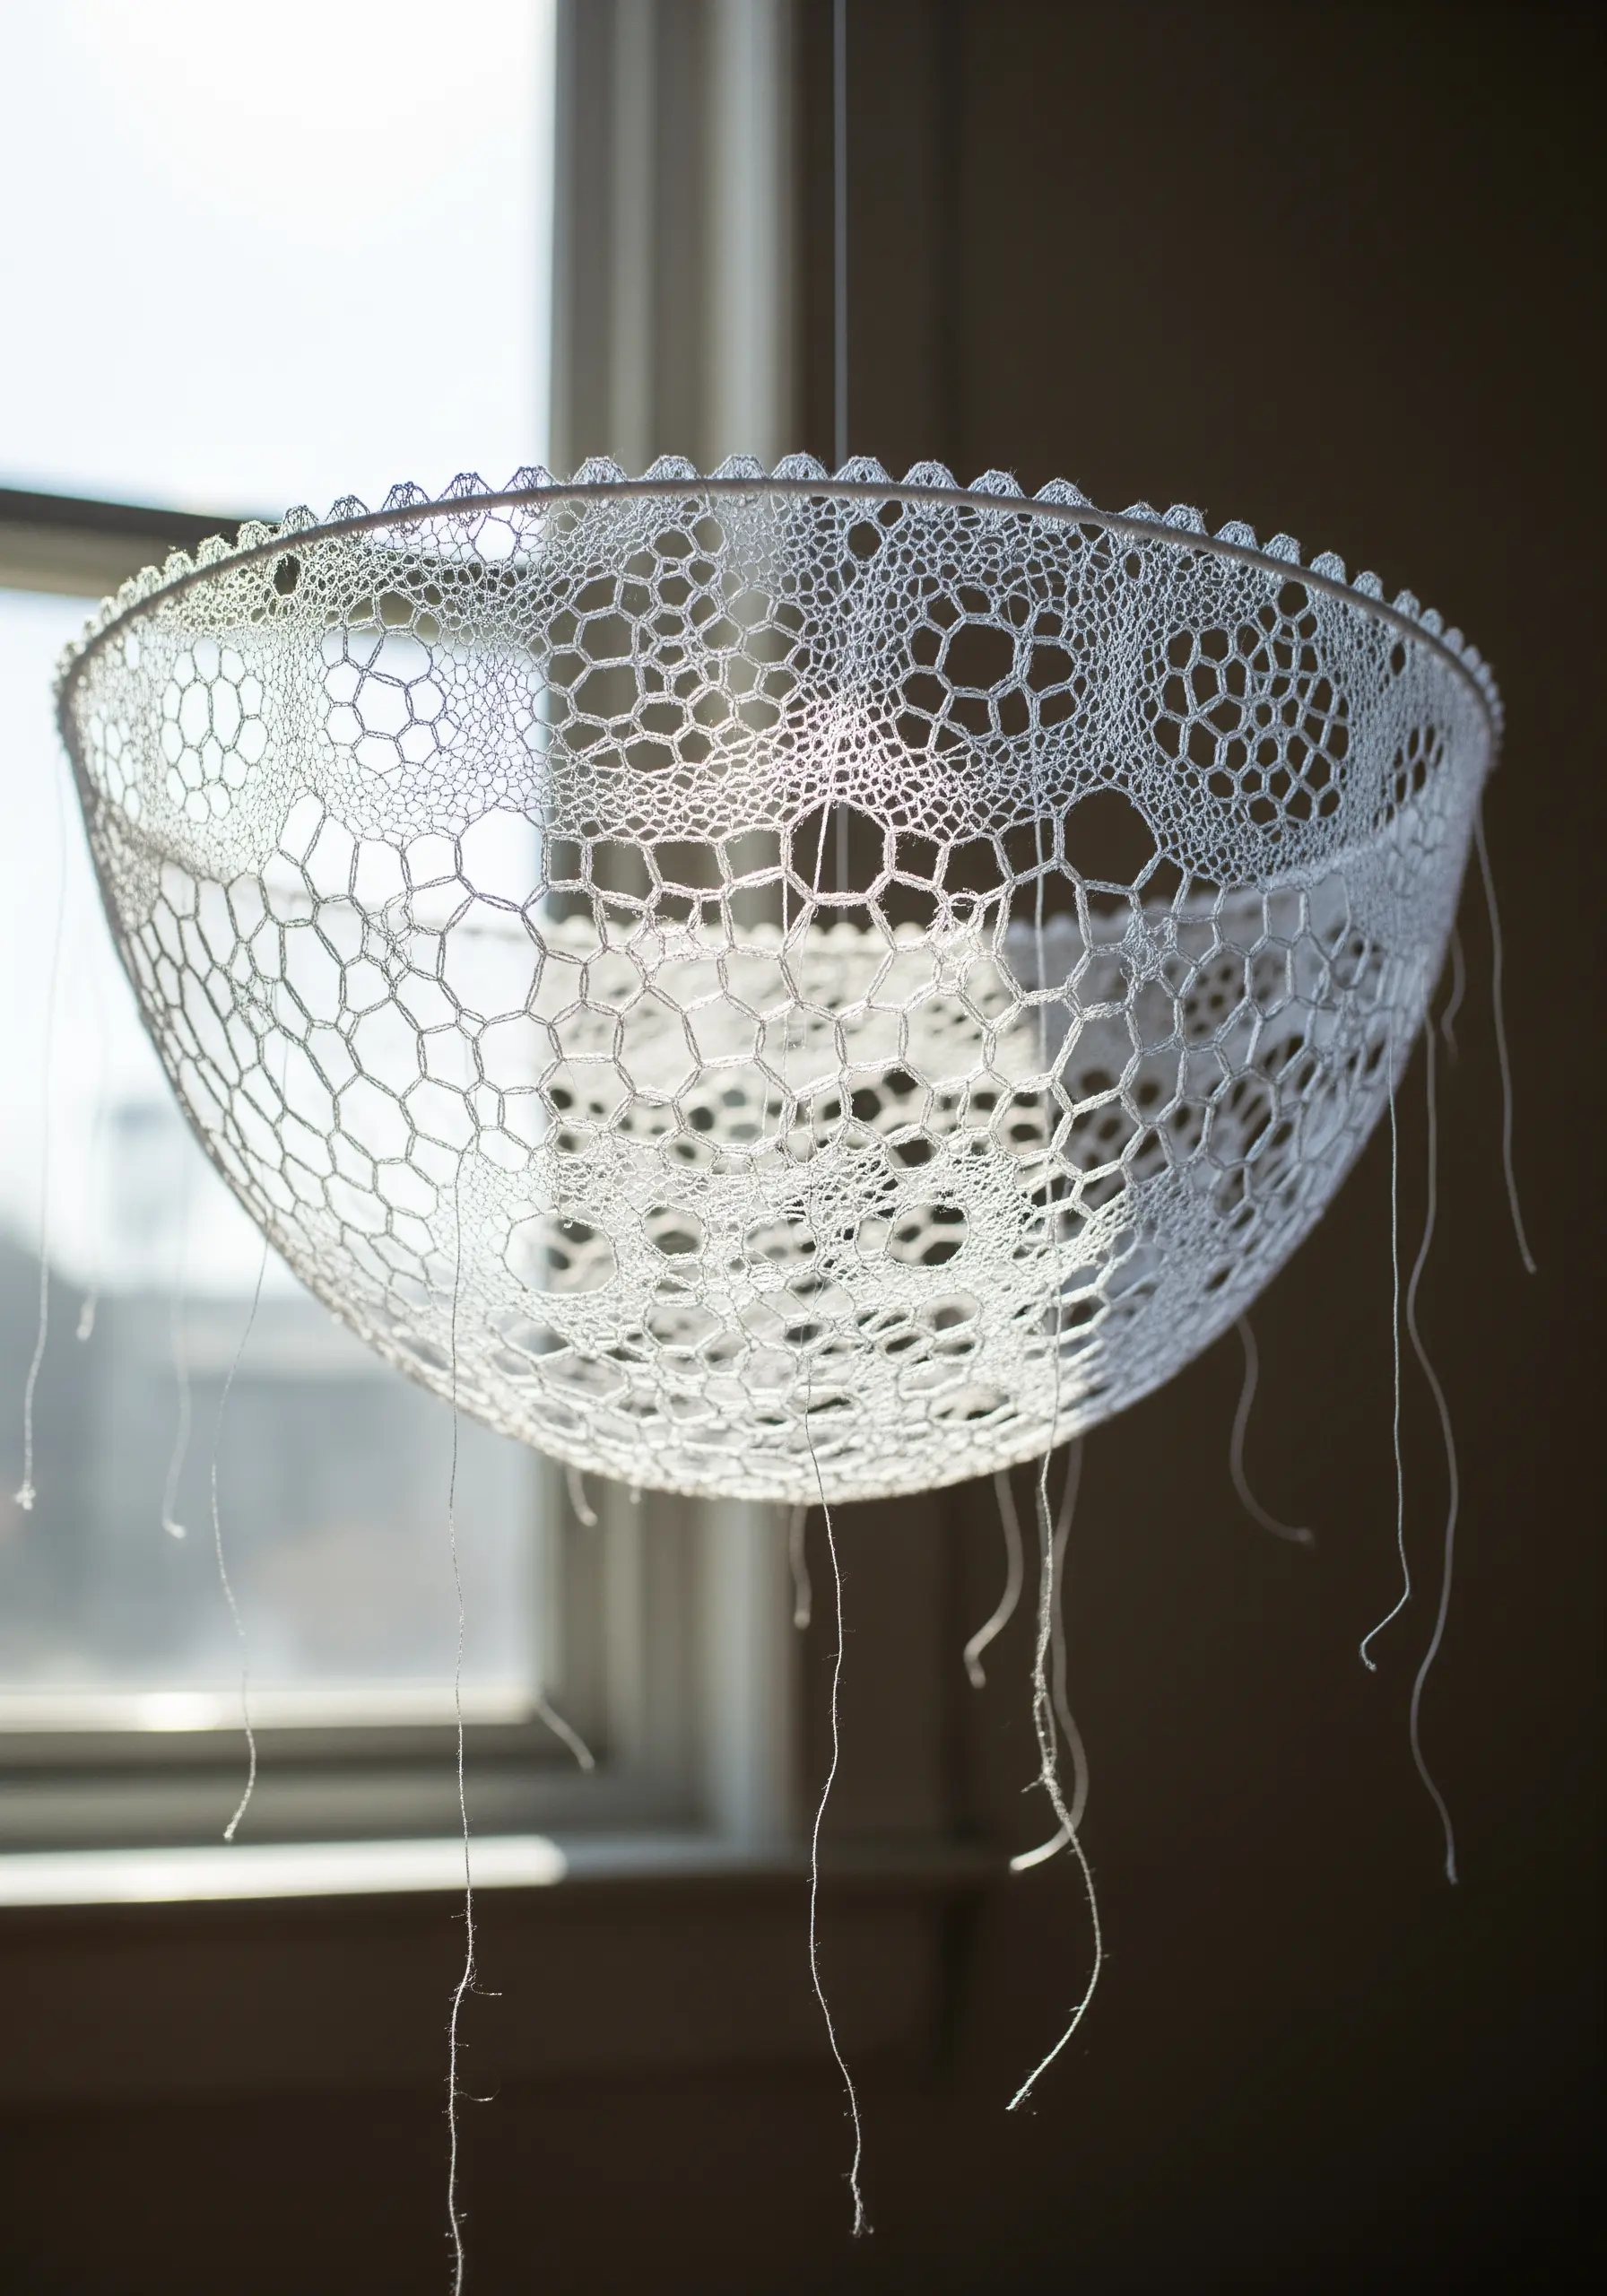
Create freestanding lace, delicate mesh, and three-dimensional thread sculptures by stitching onto a magical disappearing canvas.
Hoop a piece of water-soluble stabilizer and stitch your design directly onto it, ensuring all your stitch lines connect to create a self-supporting structure.
When your embroidery is complete, simply dissolve the stabilizer in water. All that remains is your pure thread structure, transforming your stitching into delicate, handmade sculptures.
17. Juxtapose Thread and Mirror for Dynamic Reflection
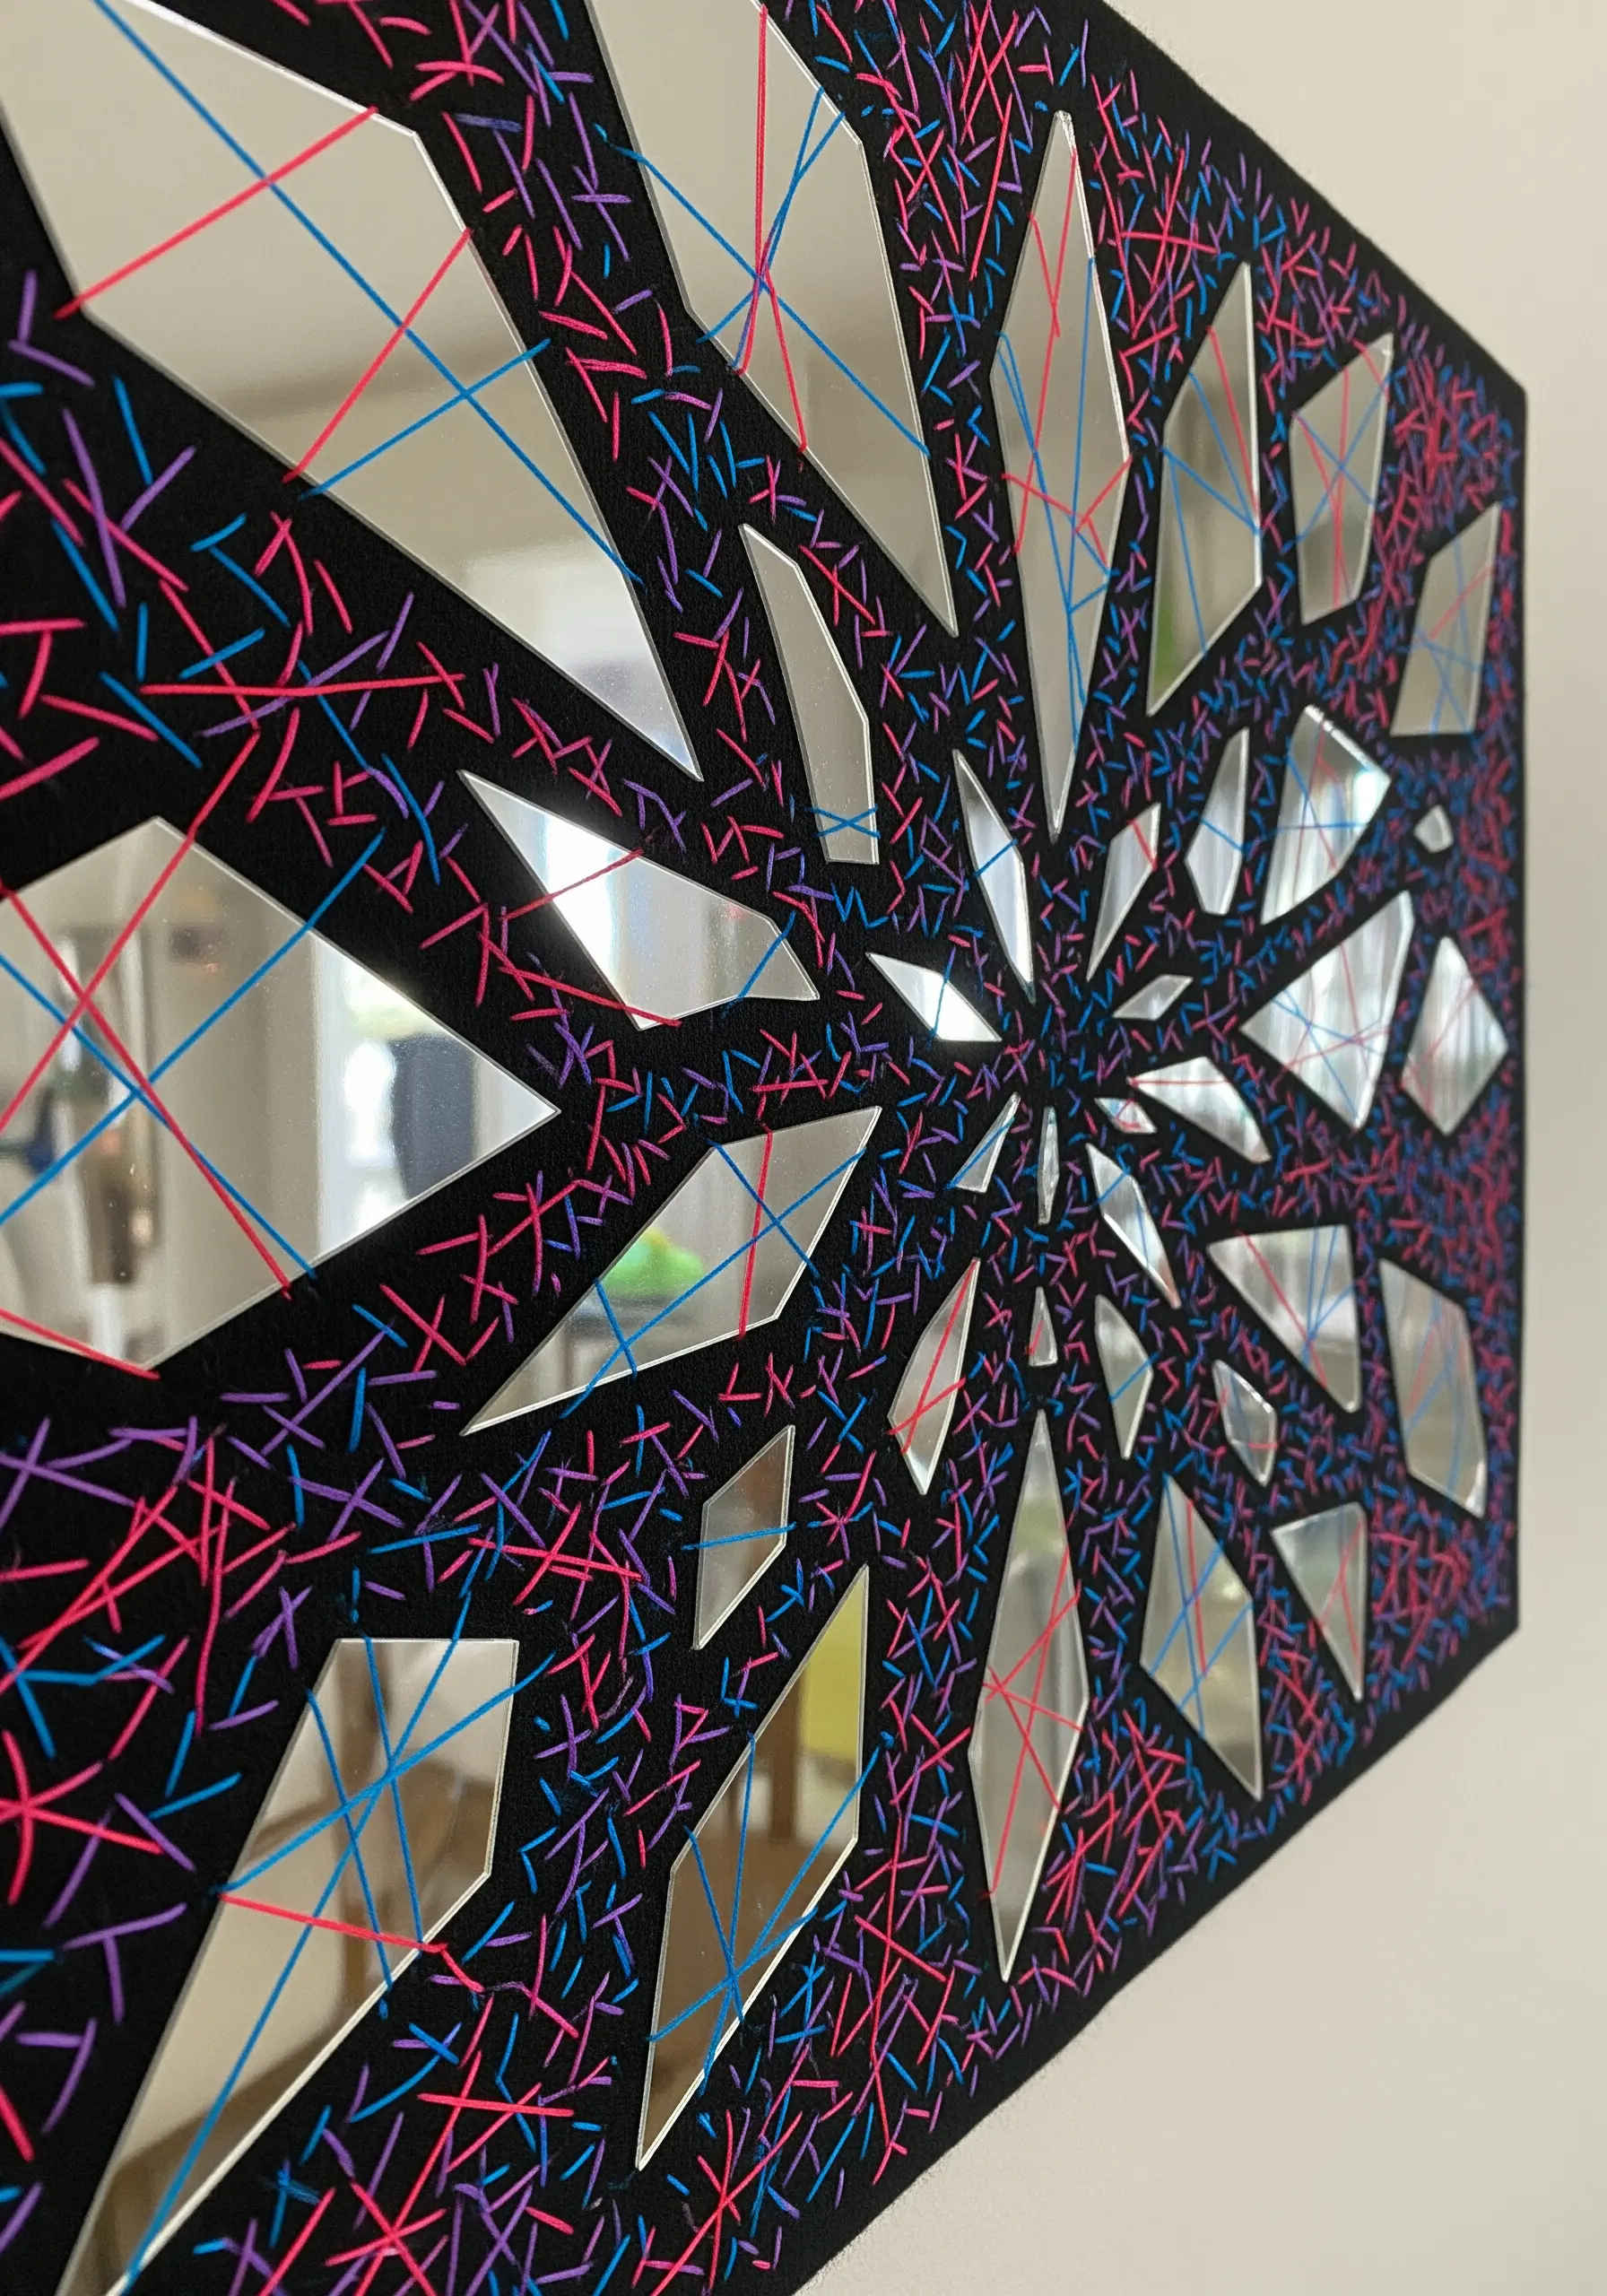
Introduce light and reflection into your work by combining soft thread with hard, reflective surfaces.
Adhere small shards of mirror or metallic acrylic onto a sturdy base. Then, use the surrounding fabric as an anchor for your stitches, creating sharp, graphic lines that interact with the mirrored pieces.
You can also stretch threads across the gaps between the mirrors, creating a web of color that is reflected and fractured in the surfaces below.
The piece changes constantly depending on the viewing angle and the light in the room.
18. Craft Raised Lines with Whipped Stitches
Elevate a simple line of backstitch into a textured, cord-like rope by whipping it.
First, create a foundation of even backstitches. Then, take a second thread on a blunt tapestry needle and weave it under and over each backstitch without piercing the fabric.
For even more dimension, try a whipped chain stitch or a raised stem band. This technique adds significant volume and a smooth, twisted finish that makes your outlines pop.
19. Sculpt with the Flow of Contoured Stitches
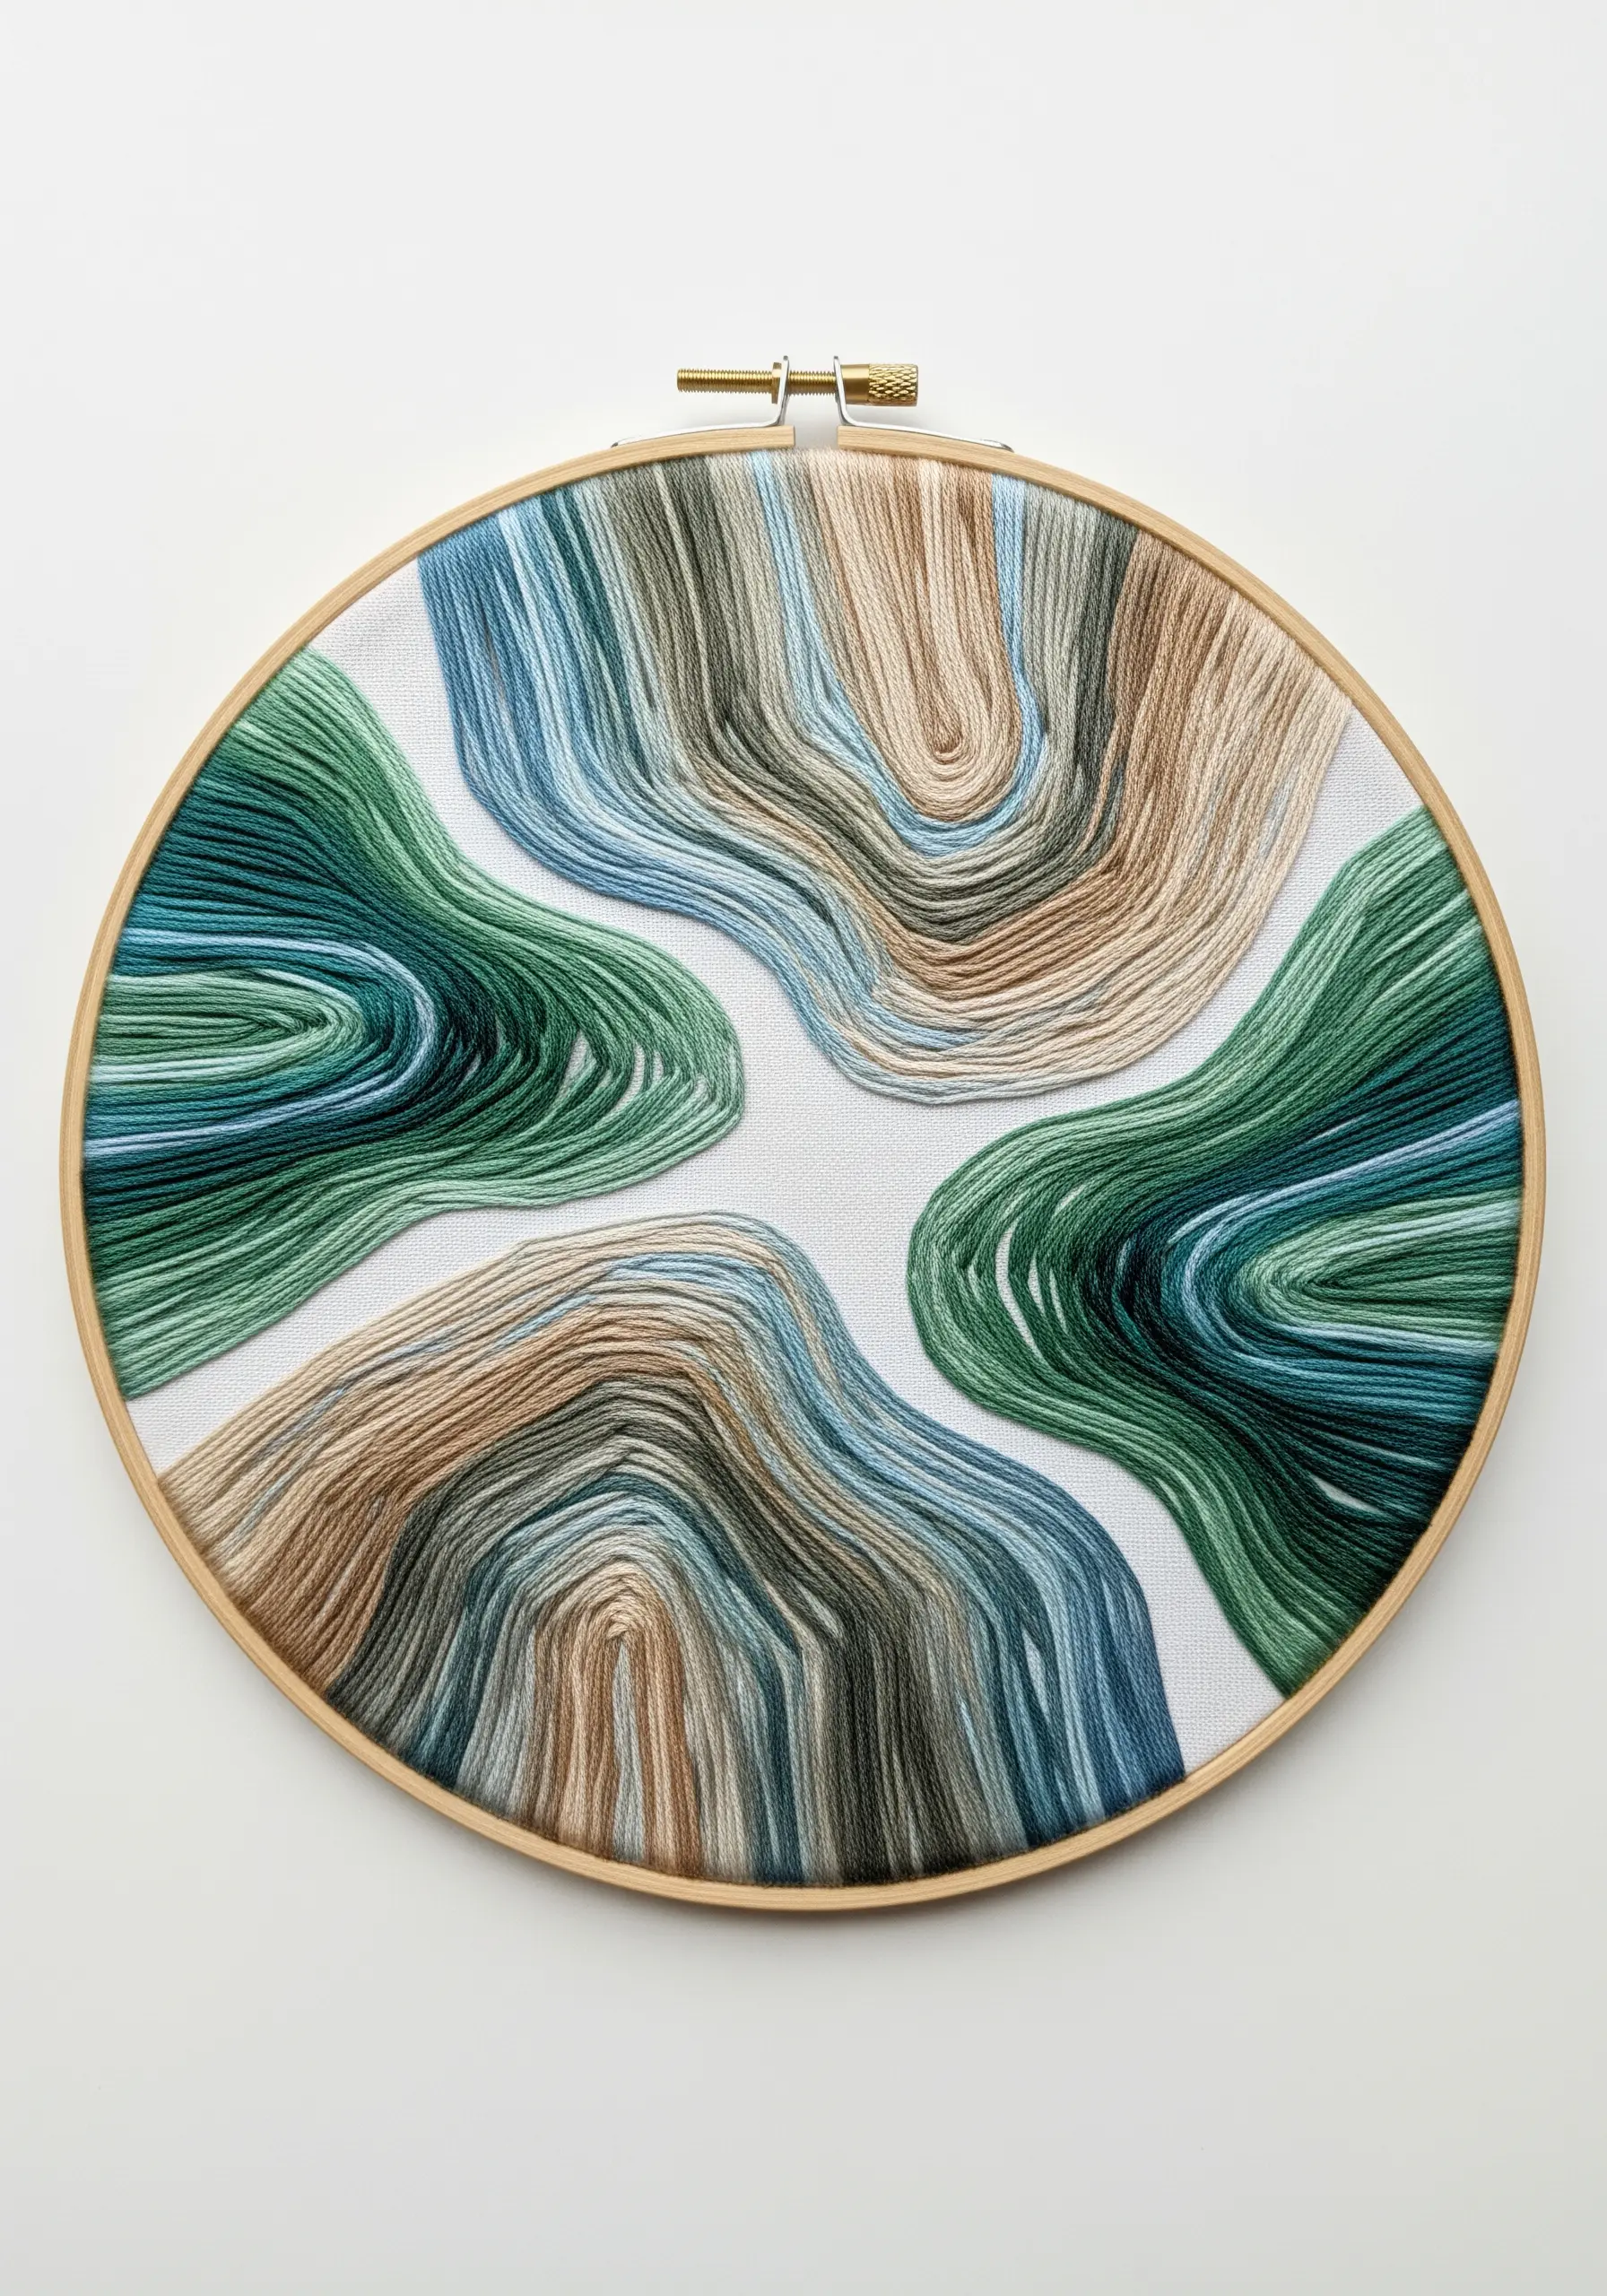
Use the direction of your stitches as a primary design element to convey movement and form.
When filling an abstract shape, lay your satin stitches to follow its curves, almost like topographical lines on a map.
This approach transforms a flat area of color into a dynamic, flowing form with its own implied landscape. Using variegated thread or blending several shades will further enhance this sense of depth and organic motion, creating beautiful abstract thread landscapes.
20. Explore Minimalism on Translucent Surfaces
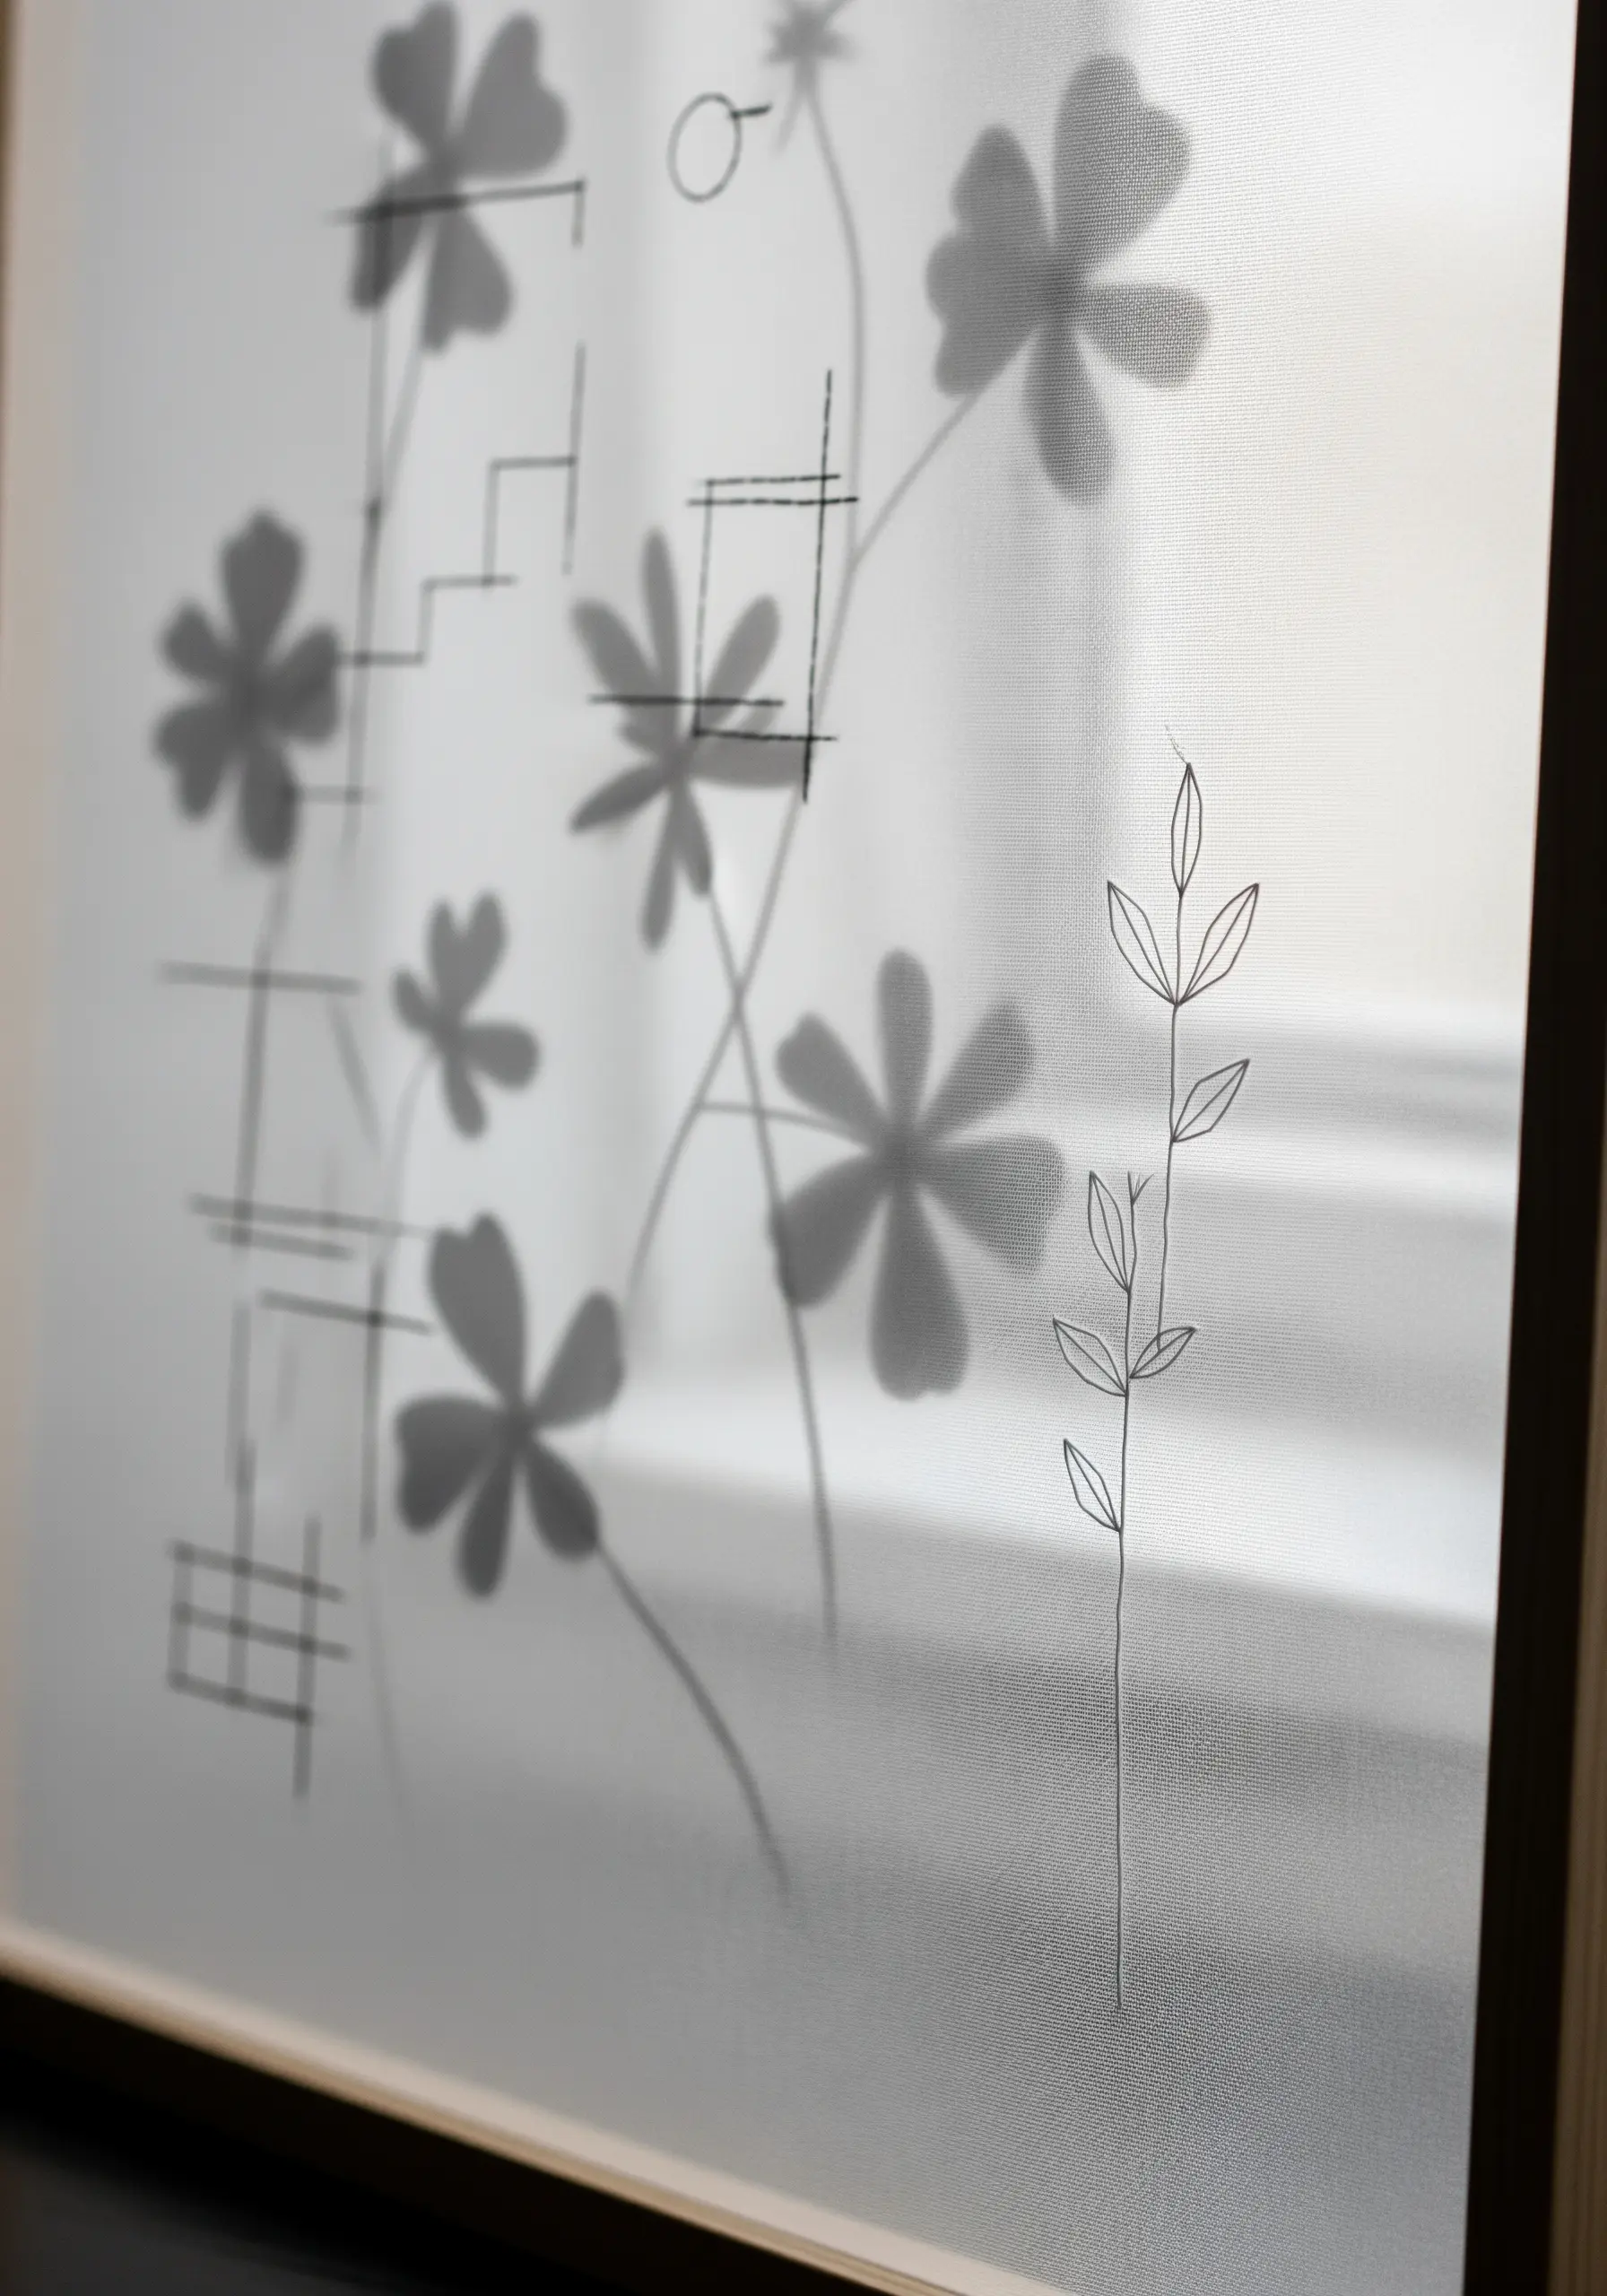
Stitching on semi-transparent materials like vellum, fine silk, or organza creates an ethereal, layered effect where the work seems to float.
Use minimal line art and a single, fine thread to emphasize the delicate nature of the surface.
The magic of this technique is how it interacts with light. The shadows cast by your stitches on the wall behind become an integral, ever-changing part of the composition.
It’s a powerful lesson in subtlety and restraint.


