

The embroidery hoops you finish don’t have to be solitary objects, tucked away on a shelf. Imagine them together, transforming a blank wall into a personal gallery that tells a story—your story, stitched in thread.
Creating a collection isn’t about complexity; it’s about connection. It’s about choosing a theme, a color palette, or a specific stitch and exploring it with intention. It’s how you move from making individual pieces to curating a cohesive work of art.
Here, you’ll find thirty-two ways to think about your embroidery not just as a craft, but as a medium for interior design. You’ll learn how to group your work, play with texture, and use color to create a space that feels uniquely and beautifully yours. Let’s begin.
1. Build a Cohesive Desert Sun Gallery
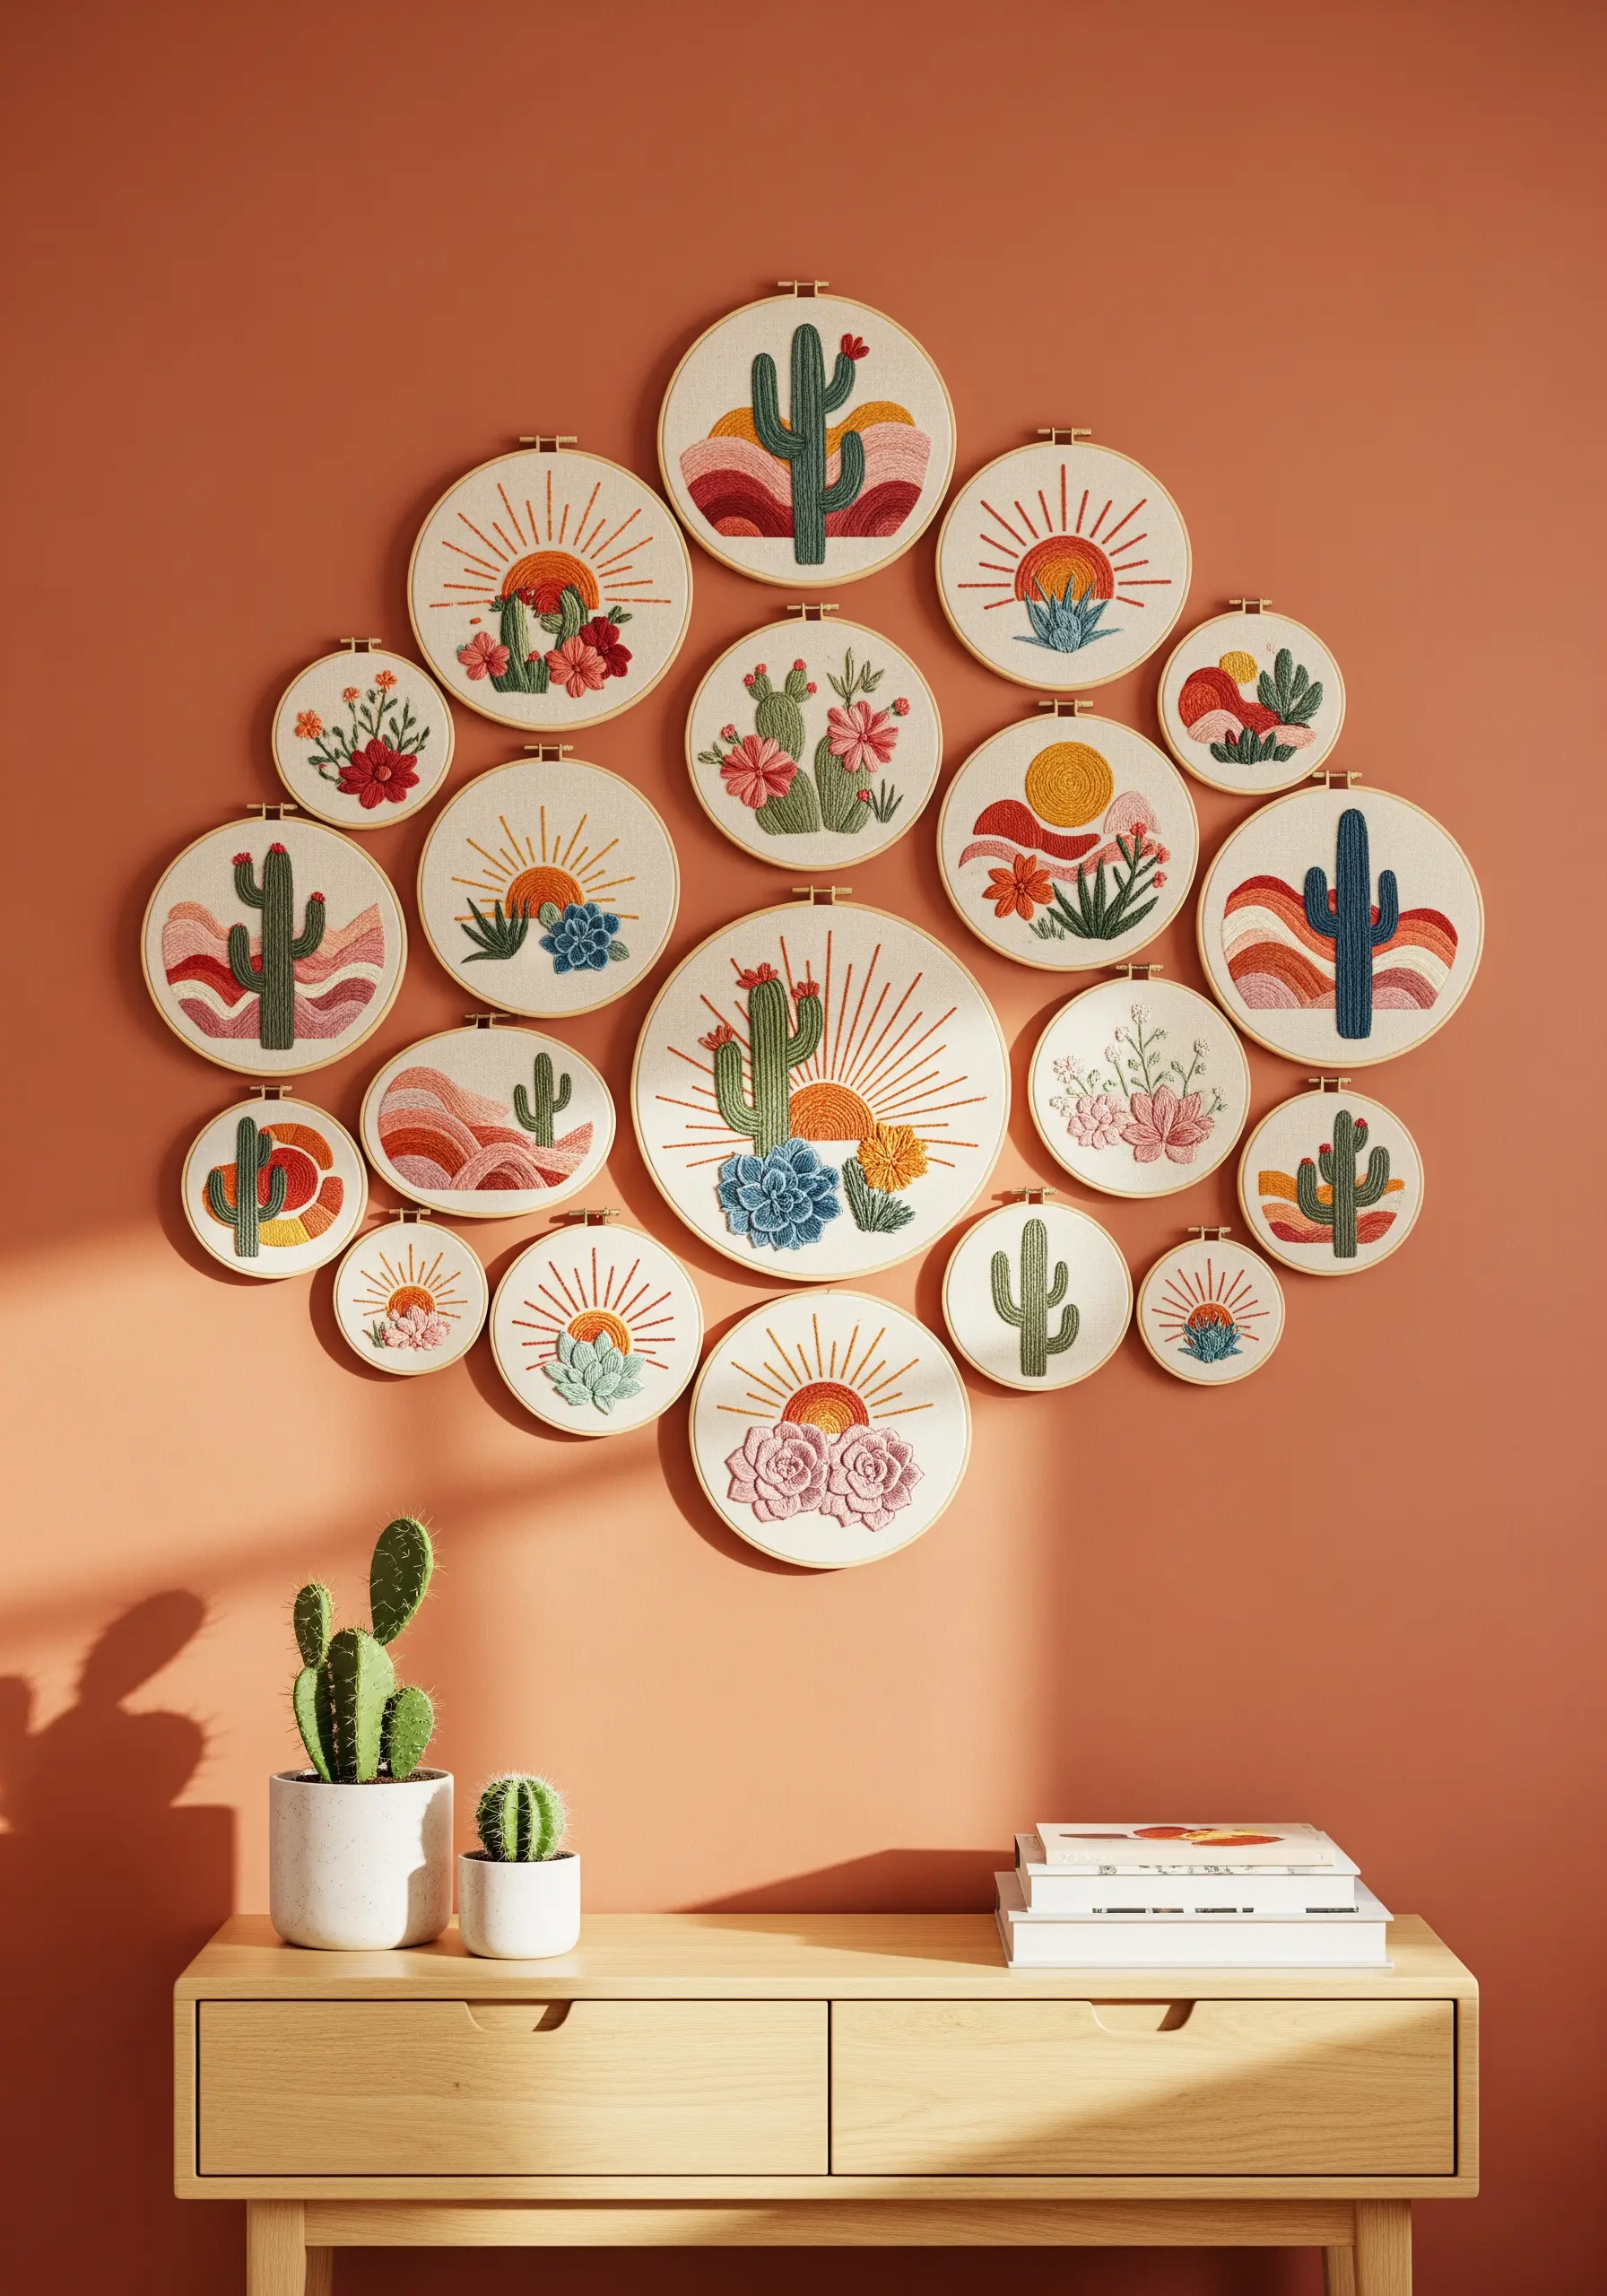
To create a unified gallery wall, start with a core color palette—like terracotta, sage, and sunshine yellow—and use it across all your hoops.
Vary the complexity between pieces.
Combine larger, detailed focal points with smaller, simpler motifs like a single cactus or sunburst.
This creates visual rhythm and prevents the display from feeling overwhelming.
Use a consistent fabric, like a natural linen or unbleached cotton, to tie the entire collection together.
2. Stitch the Stars with High-Contrast Thread
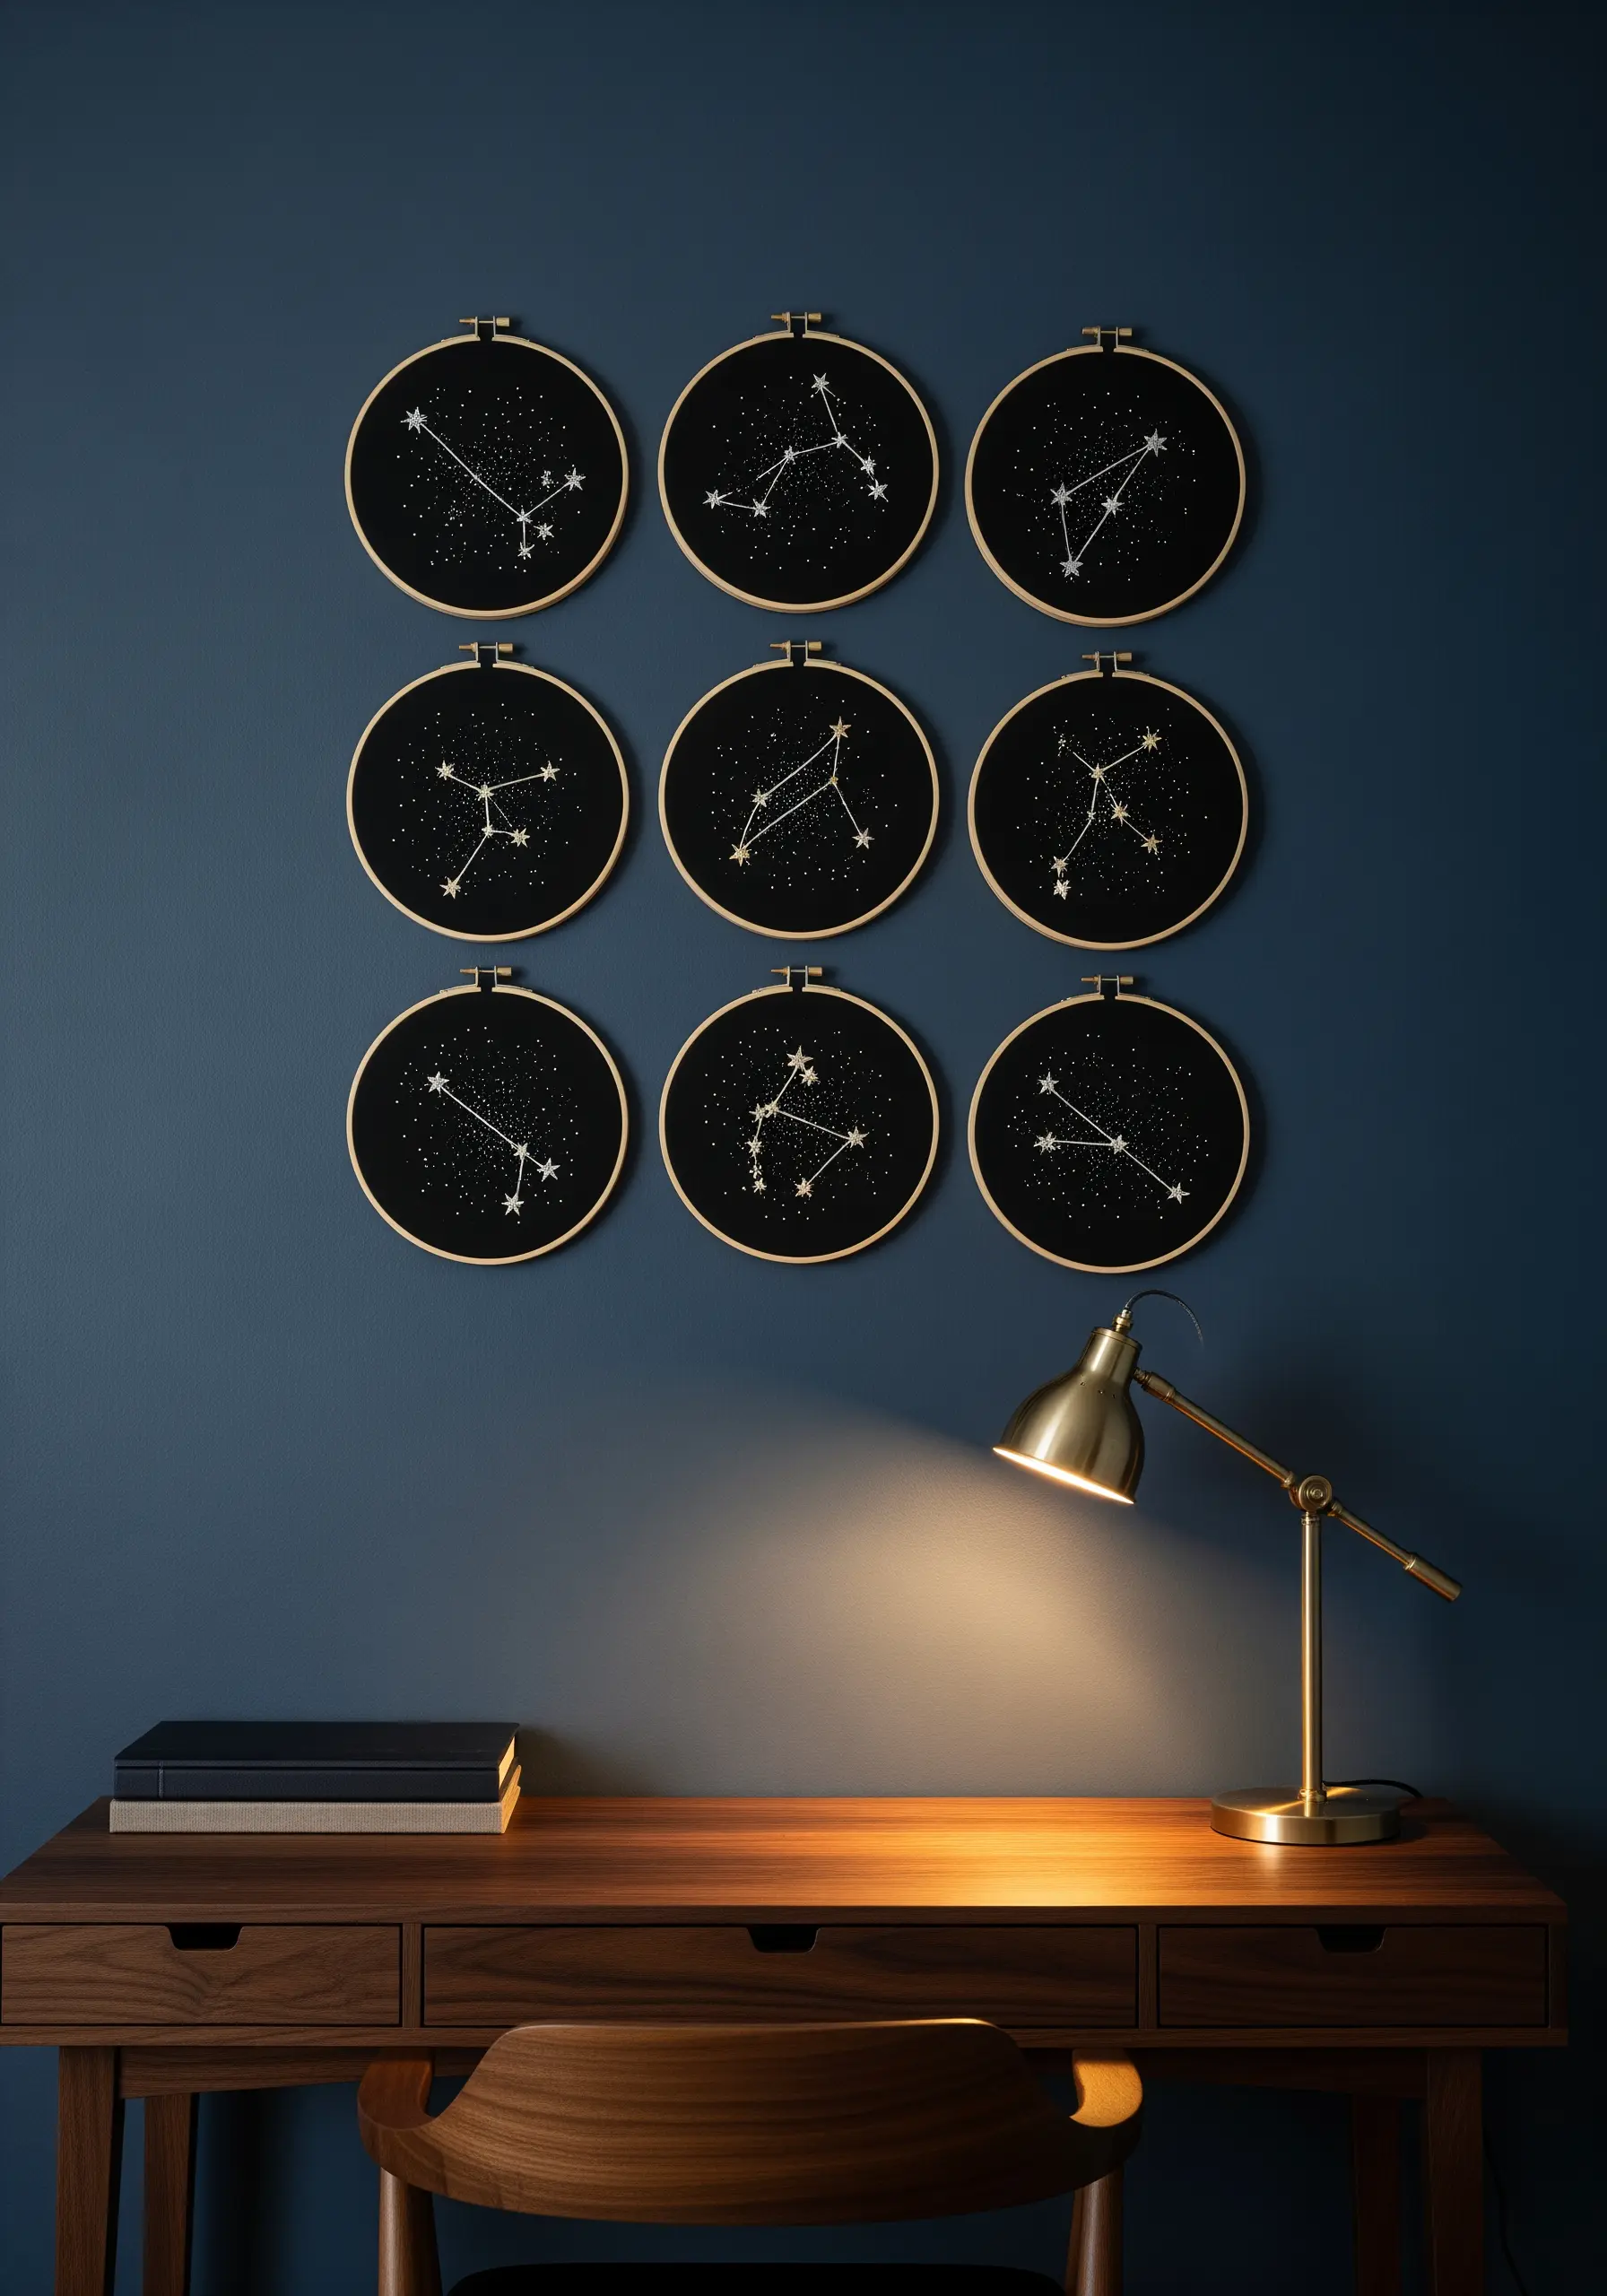
Make constellations pop by stitching with a bright, metallic, or glow-in-the-dark thread on dark navy or black fabric.
For pinpoint stars, use single French knots, pulling each one tight for a crisp, tiny dot.
Connect them with a delicate, single-strand backstitch to maintain the elegance of the star chart.
This minimalist approach ensures your work looks more like astronomy and less like a craft project.
3. Create Soft Woodland Textures for a Nursery

Give stitched animals a soft, pettable appearance using the long-and-short stitch to mimic fur.
Work in sections, angling your stitches to follow the natural direction of the animal’s coat—outward from the nose, down the back.
Blend two or three closely related shades of thread to add depth and realism without complicating the design.
Intersperse your hoop art with tiny felt leaves or branches attached directly to the wall to create a gentle, storybook feel.
4. Design a Retro Kitchen Gallery with Graphic Fills
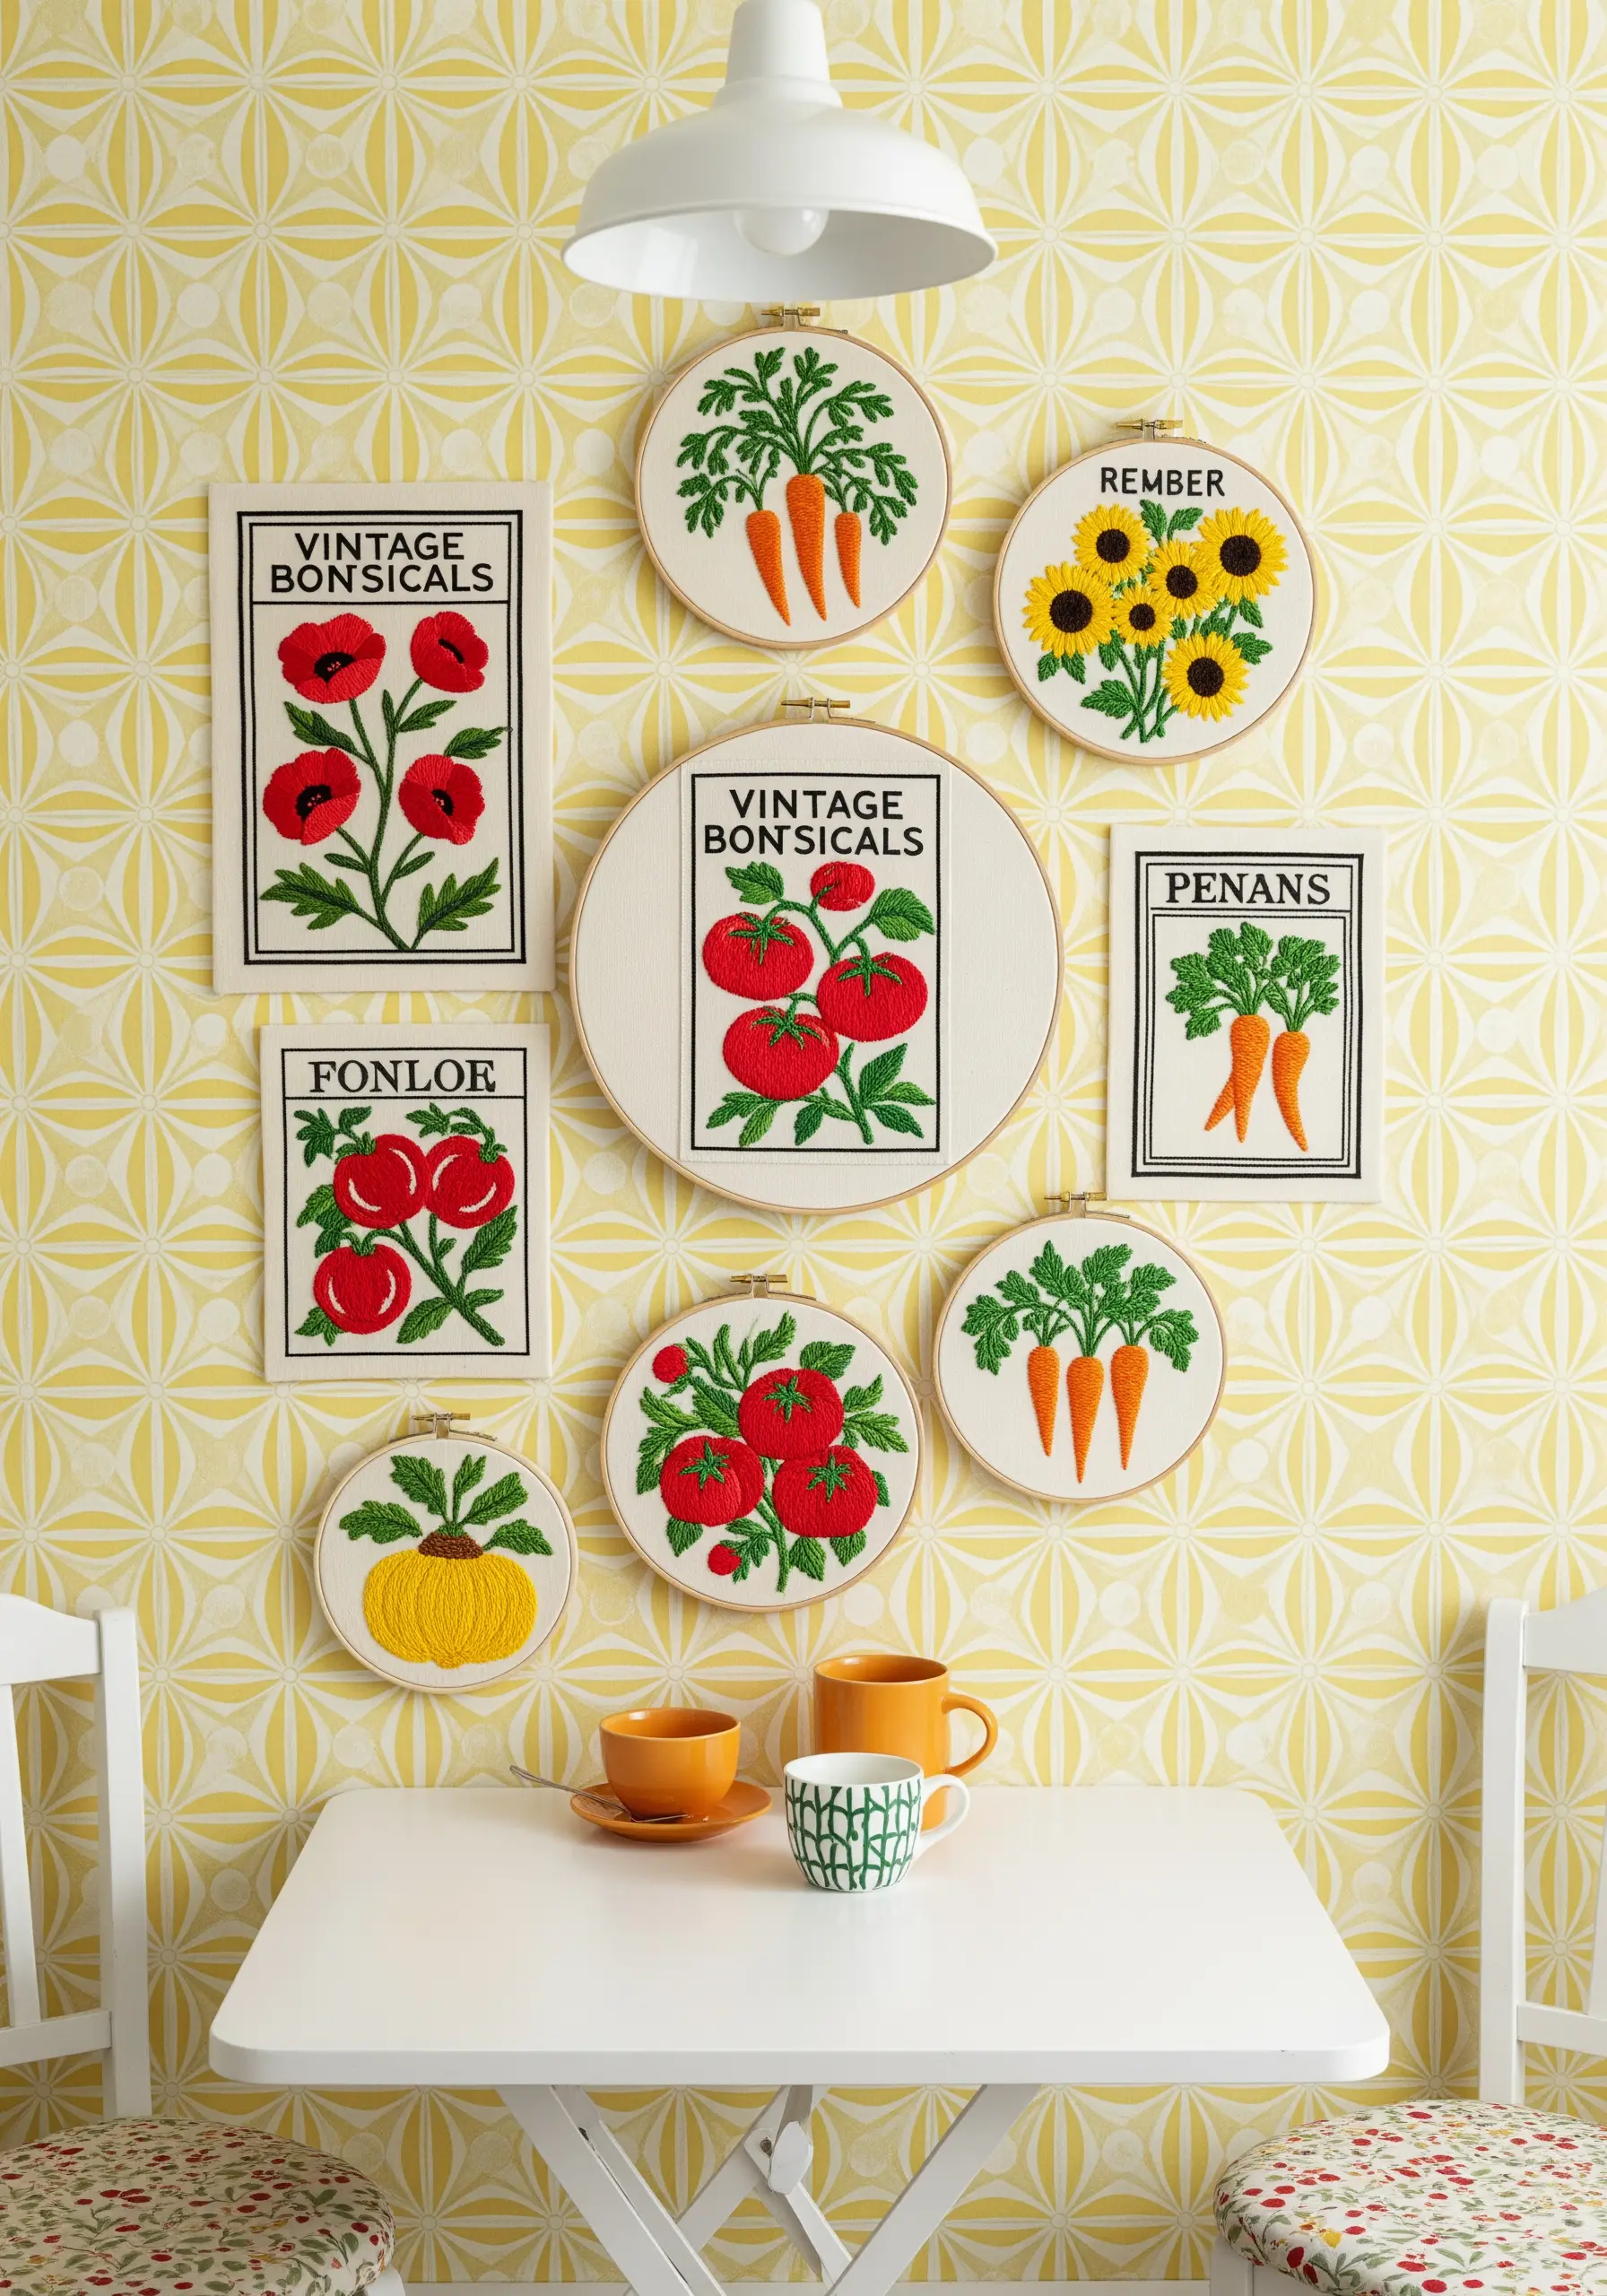
Capture a vintage seed packet aesthetic by outlining your shapes with a dark, clean backstitch and filling them with dense satin stitch.
To keep your satin stitches perfectly smooth, use fewer strands of floss (2-3 is ideal) and ensure your stitches lay flat without overlapping.
For the text, a simple, all-caps backstitch font provides clarity and reinforces the retro poster style.
Frame some designs in rectangular hoops to break the circular repetition and enhance the poster illusion.
5. Craft a Serene Mountain Panorama Across Hoops

Create a single, continuous landscape by stretching the design across multiple hoops of varying sizes.
Use a central, larger hoop as the focal point and arrange smaller ones on either side to extend the mountain range.
Achieve atmospheric depth by using a monochromatic palette.
Work with 4-5 shades of a single color to create depth, using the darkest tones in the foreground and the lightest in the back to mimic distance.
6. Master Moody Florals with Thread Painting
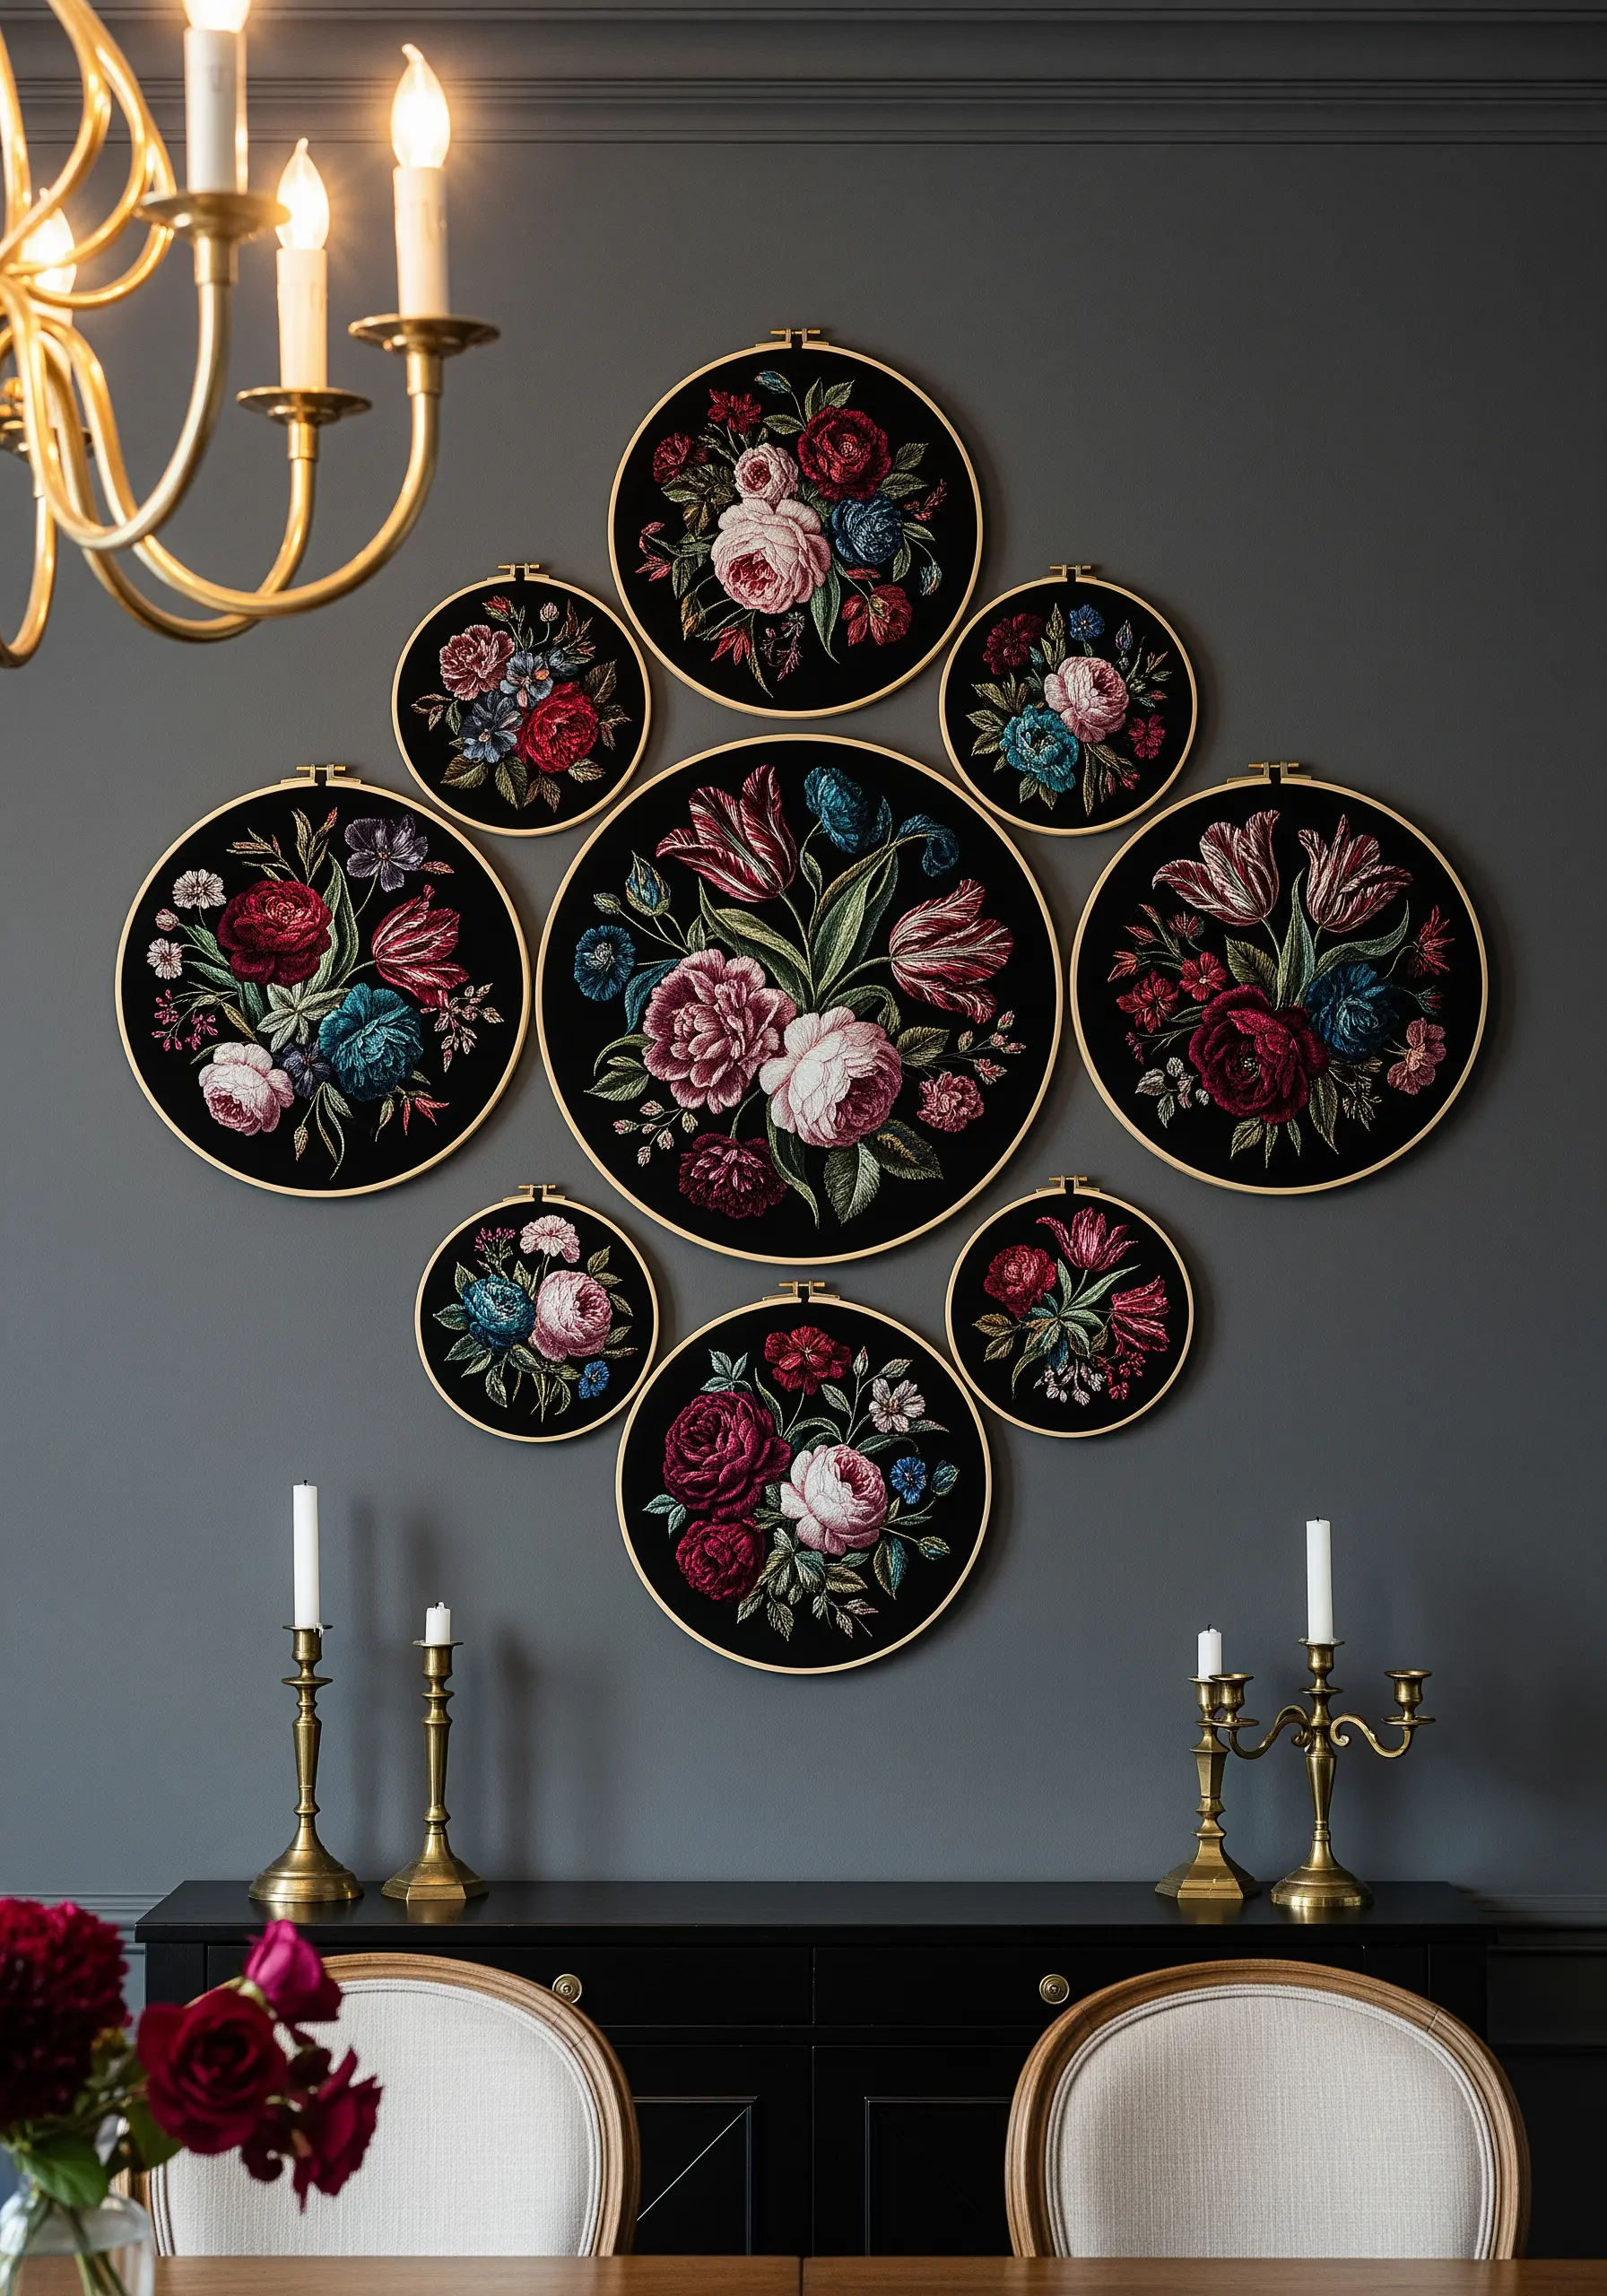
Achieve the dramatic look of a Dutch Masters painting by using dense thread painting on black or dark charcoal fabric.
The dark background absorbs light, making your thread colors appear exceptionally rich and saturated.
Focus on blending—use long-and-short stitches to transition smoothly from deep reds to bright pinks within a single petal.
This technique creates a sense of light and shadow, giving your florals a breathtaking, velvety realism.
7. Curate a Joyful Gallery of Stitches and Textures

Transform a wall into a celebration of craft by dedicating each hoop to a different stitch, texture, or color story.
Fill one hoop entirely with French knots, another with woven wheel stitches, and a third with radiating straight stitches.
This approach turns your stitch practice into a finished art piece.
Incorporate a central hoop with a single word like ‘Create’ to anchor the collection and give it a clear, inspiring theme.
8. Add Sculptural Waves to an Oceanic Theme
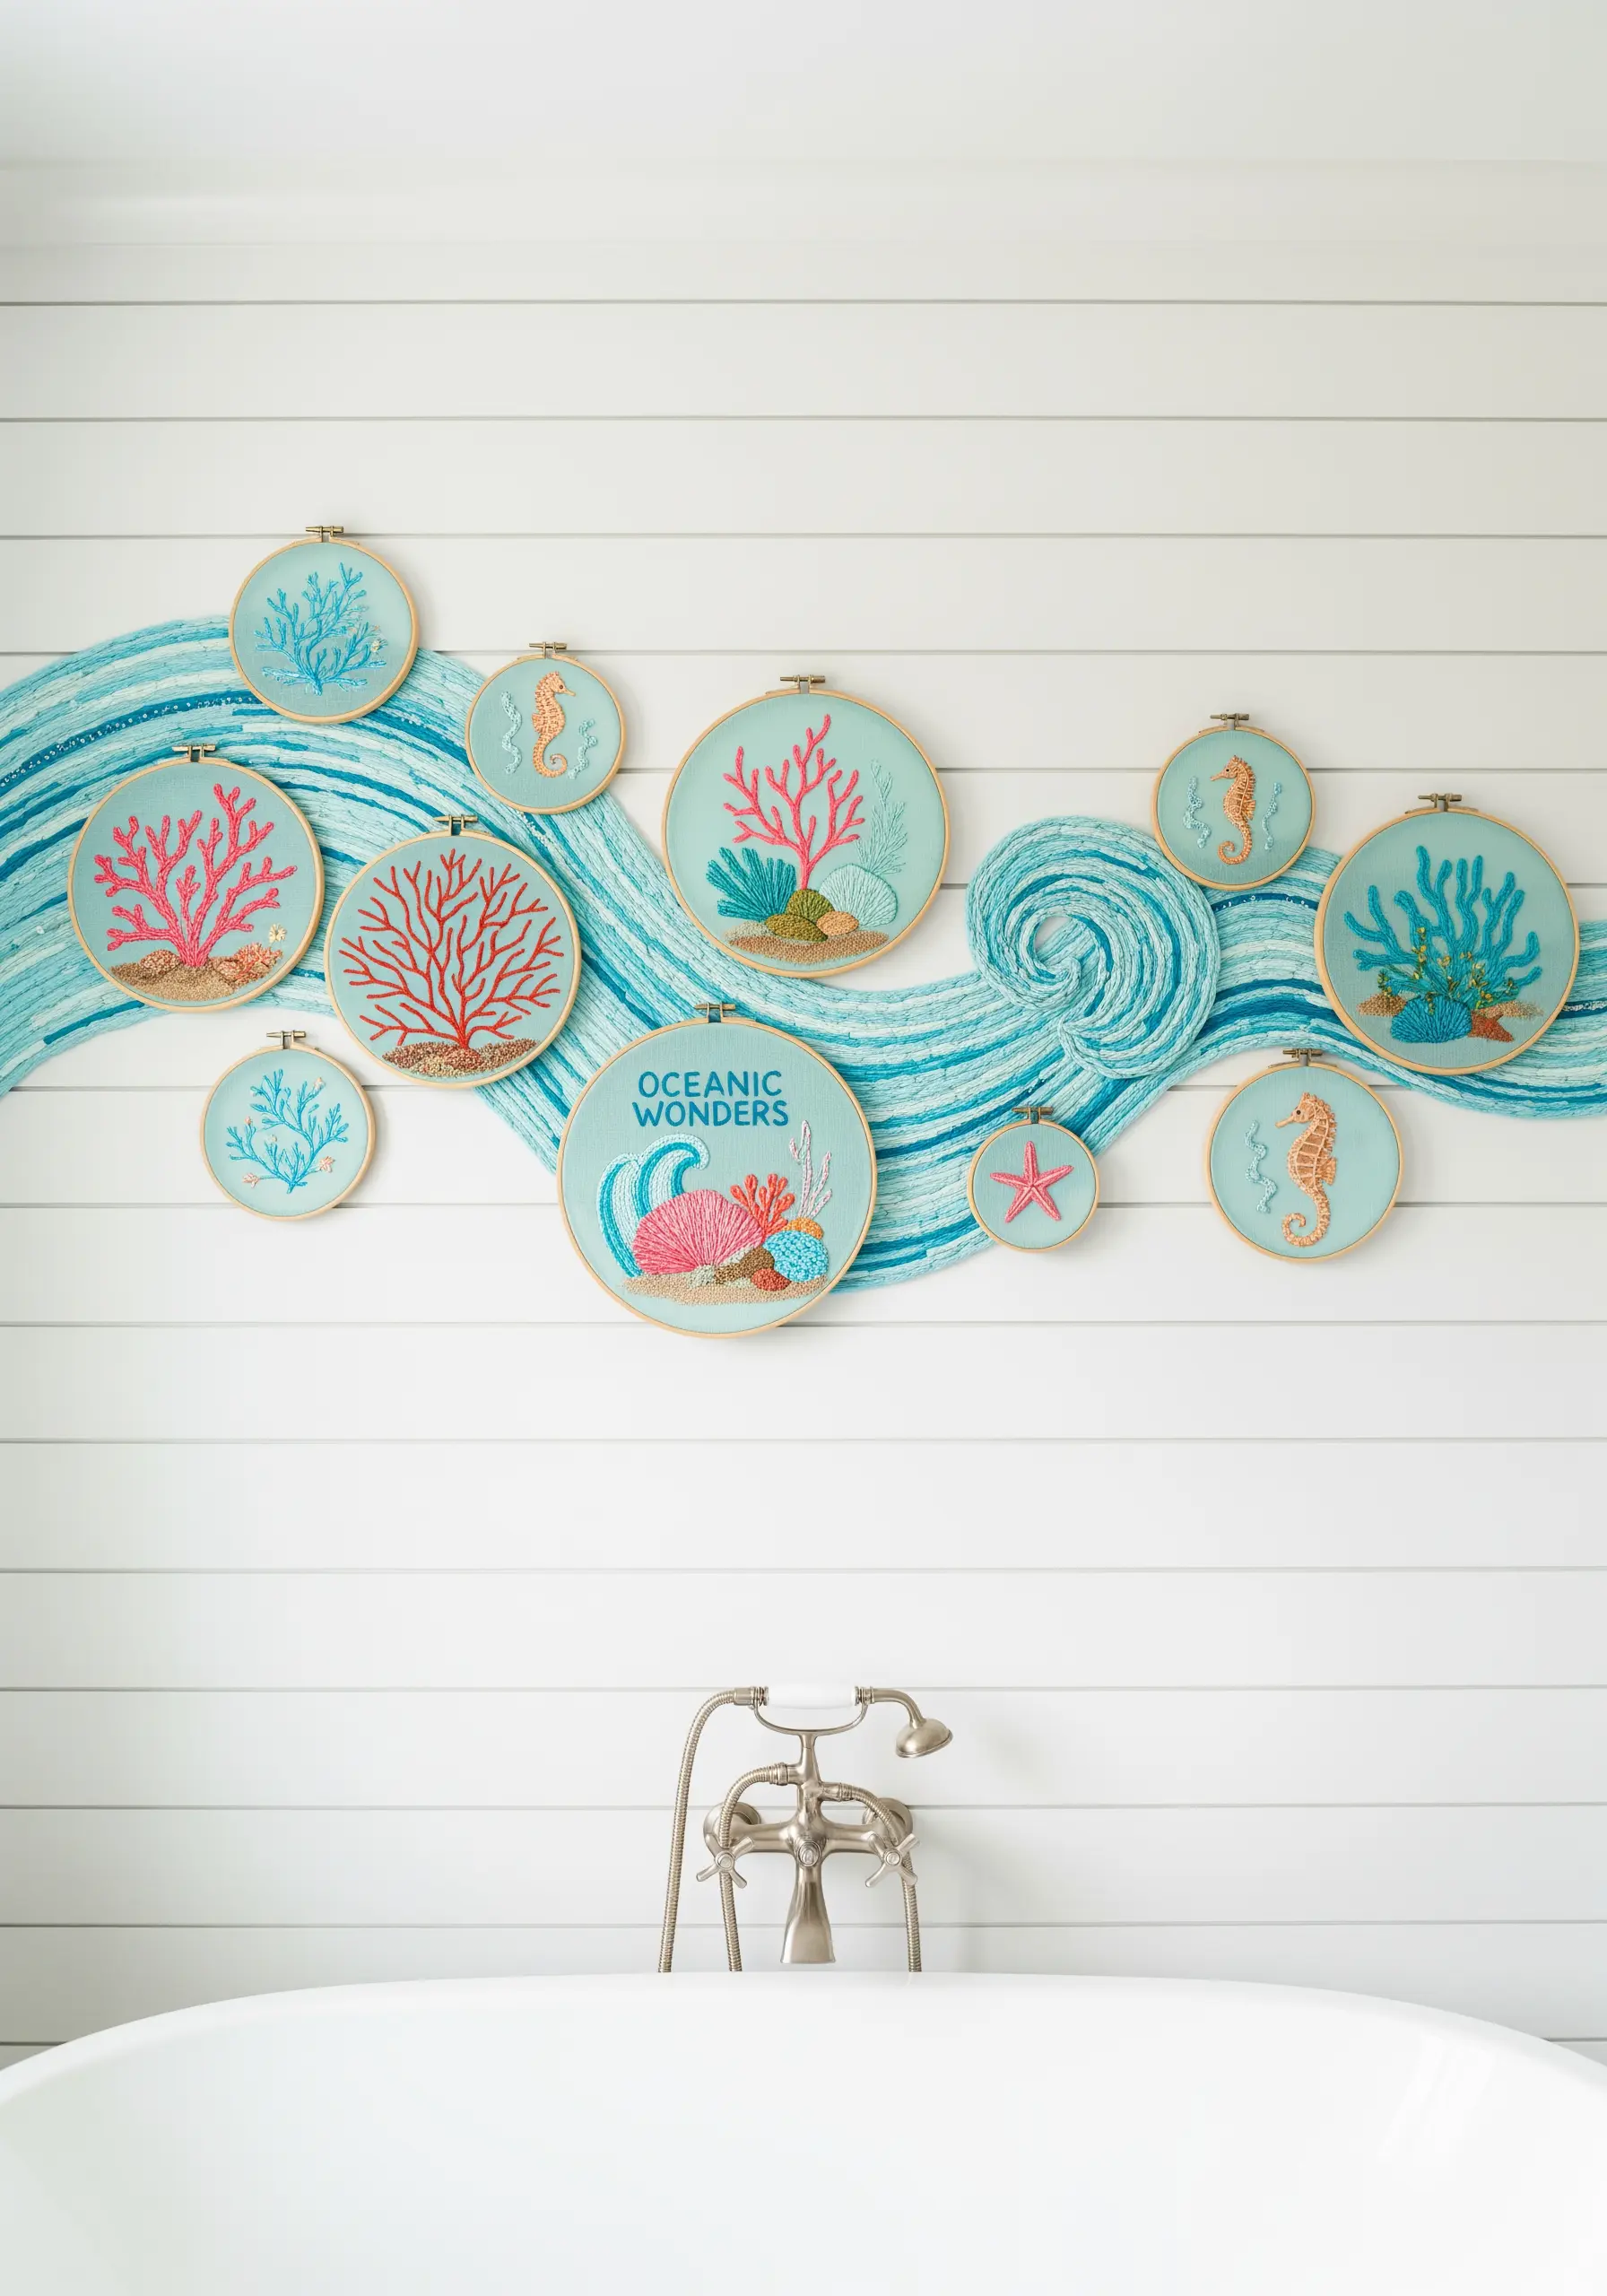
Elevate your embroidery by adding a mixed-media element that flows between the hoops.
Create gentle waves by wrapping thick, multi-toned blue yarn around a flexible wire or rope and tacking it to the wall behind your hoops.
This technique physically connects your individual pieces, transforming them from a simple collection into a single, immersive installation.
For the coral, use knotted stitches like French knots and bullion knots to build up realistic, tactile textures.
9. Embrace Minimalism with Geometric Abstraction
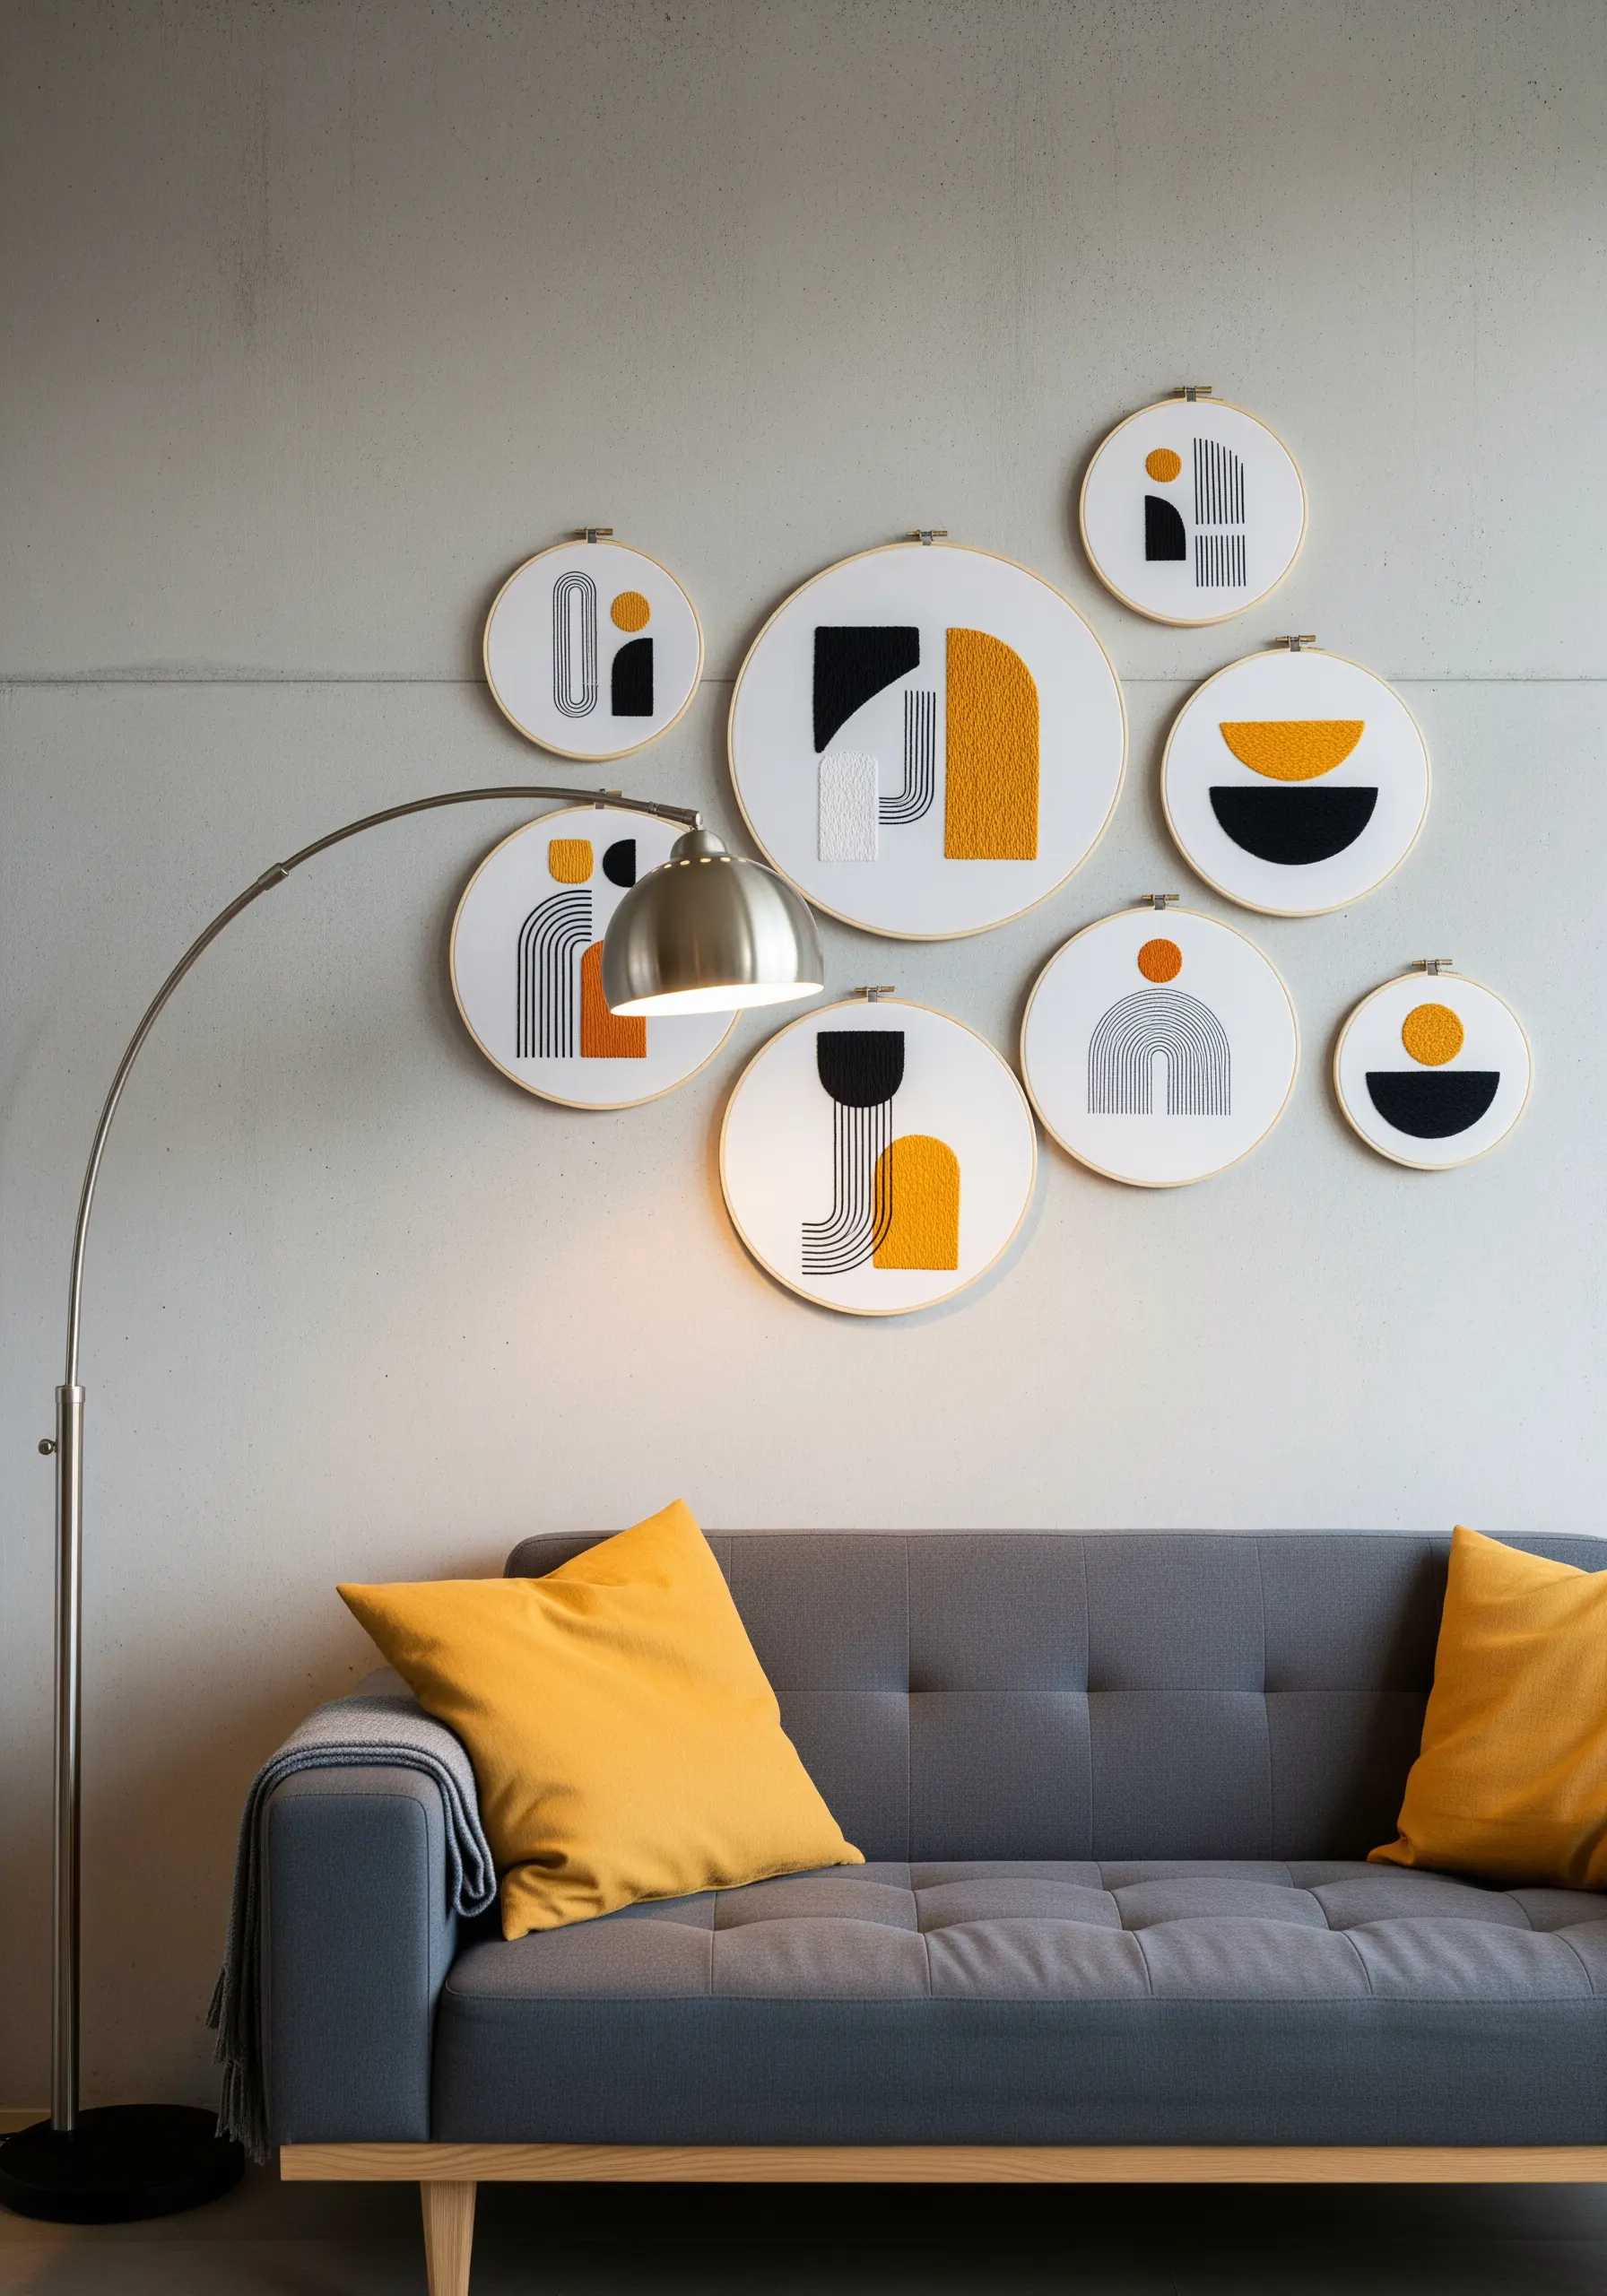
For a modern, graphic statement, focus on the interplay of clean lines, bold shapes, and negative space.
Use a limited color palette—like mustard yellow, black, and white—to maintain a sophisticated, uncluttered look.
Execute your shapes with a perfectly smooth satin stitch, ensuring each stitch is laid parallel to the last for a flawless, fabric-like fill.
This precision is what gives minimalist embroidery its power and elegance.
10. Illustrate a Theme with Delicate Botanicals

Tell a story on your wall by building a collection around a single concept, like a ‘Literary Garden’.
Keep the motifs delicate and illustrative, using fine stitches like the stem stitch, lazy daisy, and tiny French knots.
Unify the collection with a consistent font for any text, stitched with a single strand of floss for maximum clarity.
A central, larger hoop can establish the theme, while smaller surrounding hoops explore individual elements.
11. Create a Lush Jungle with Layered Stitches
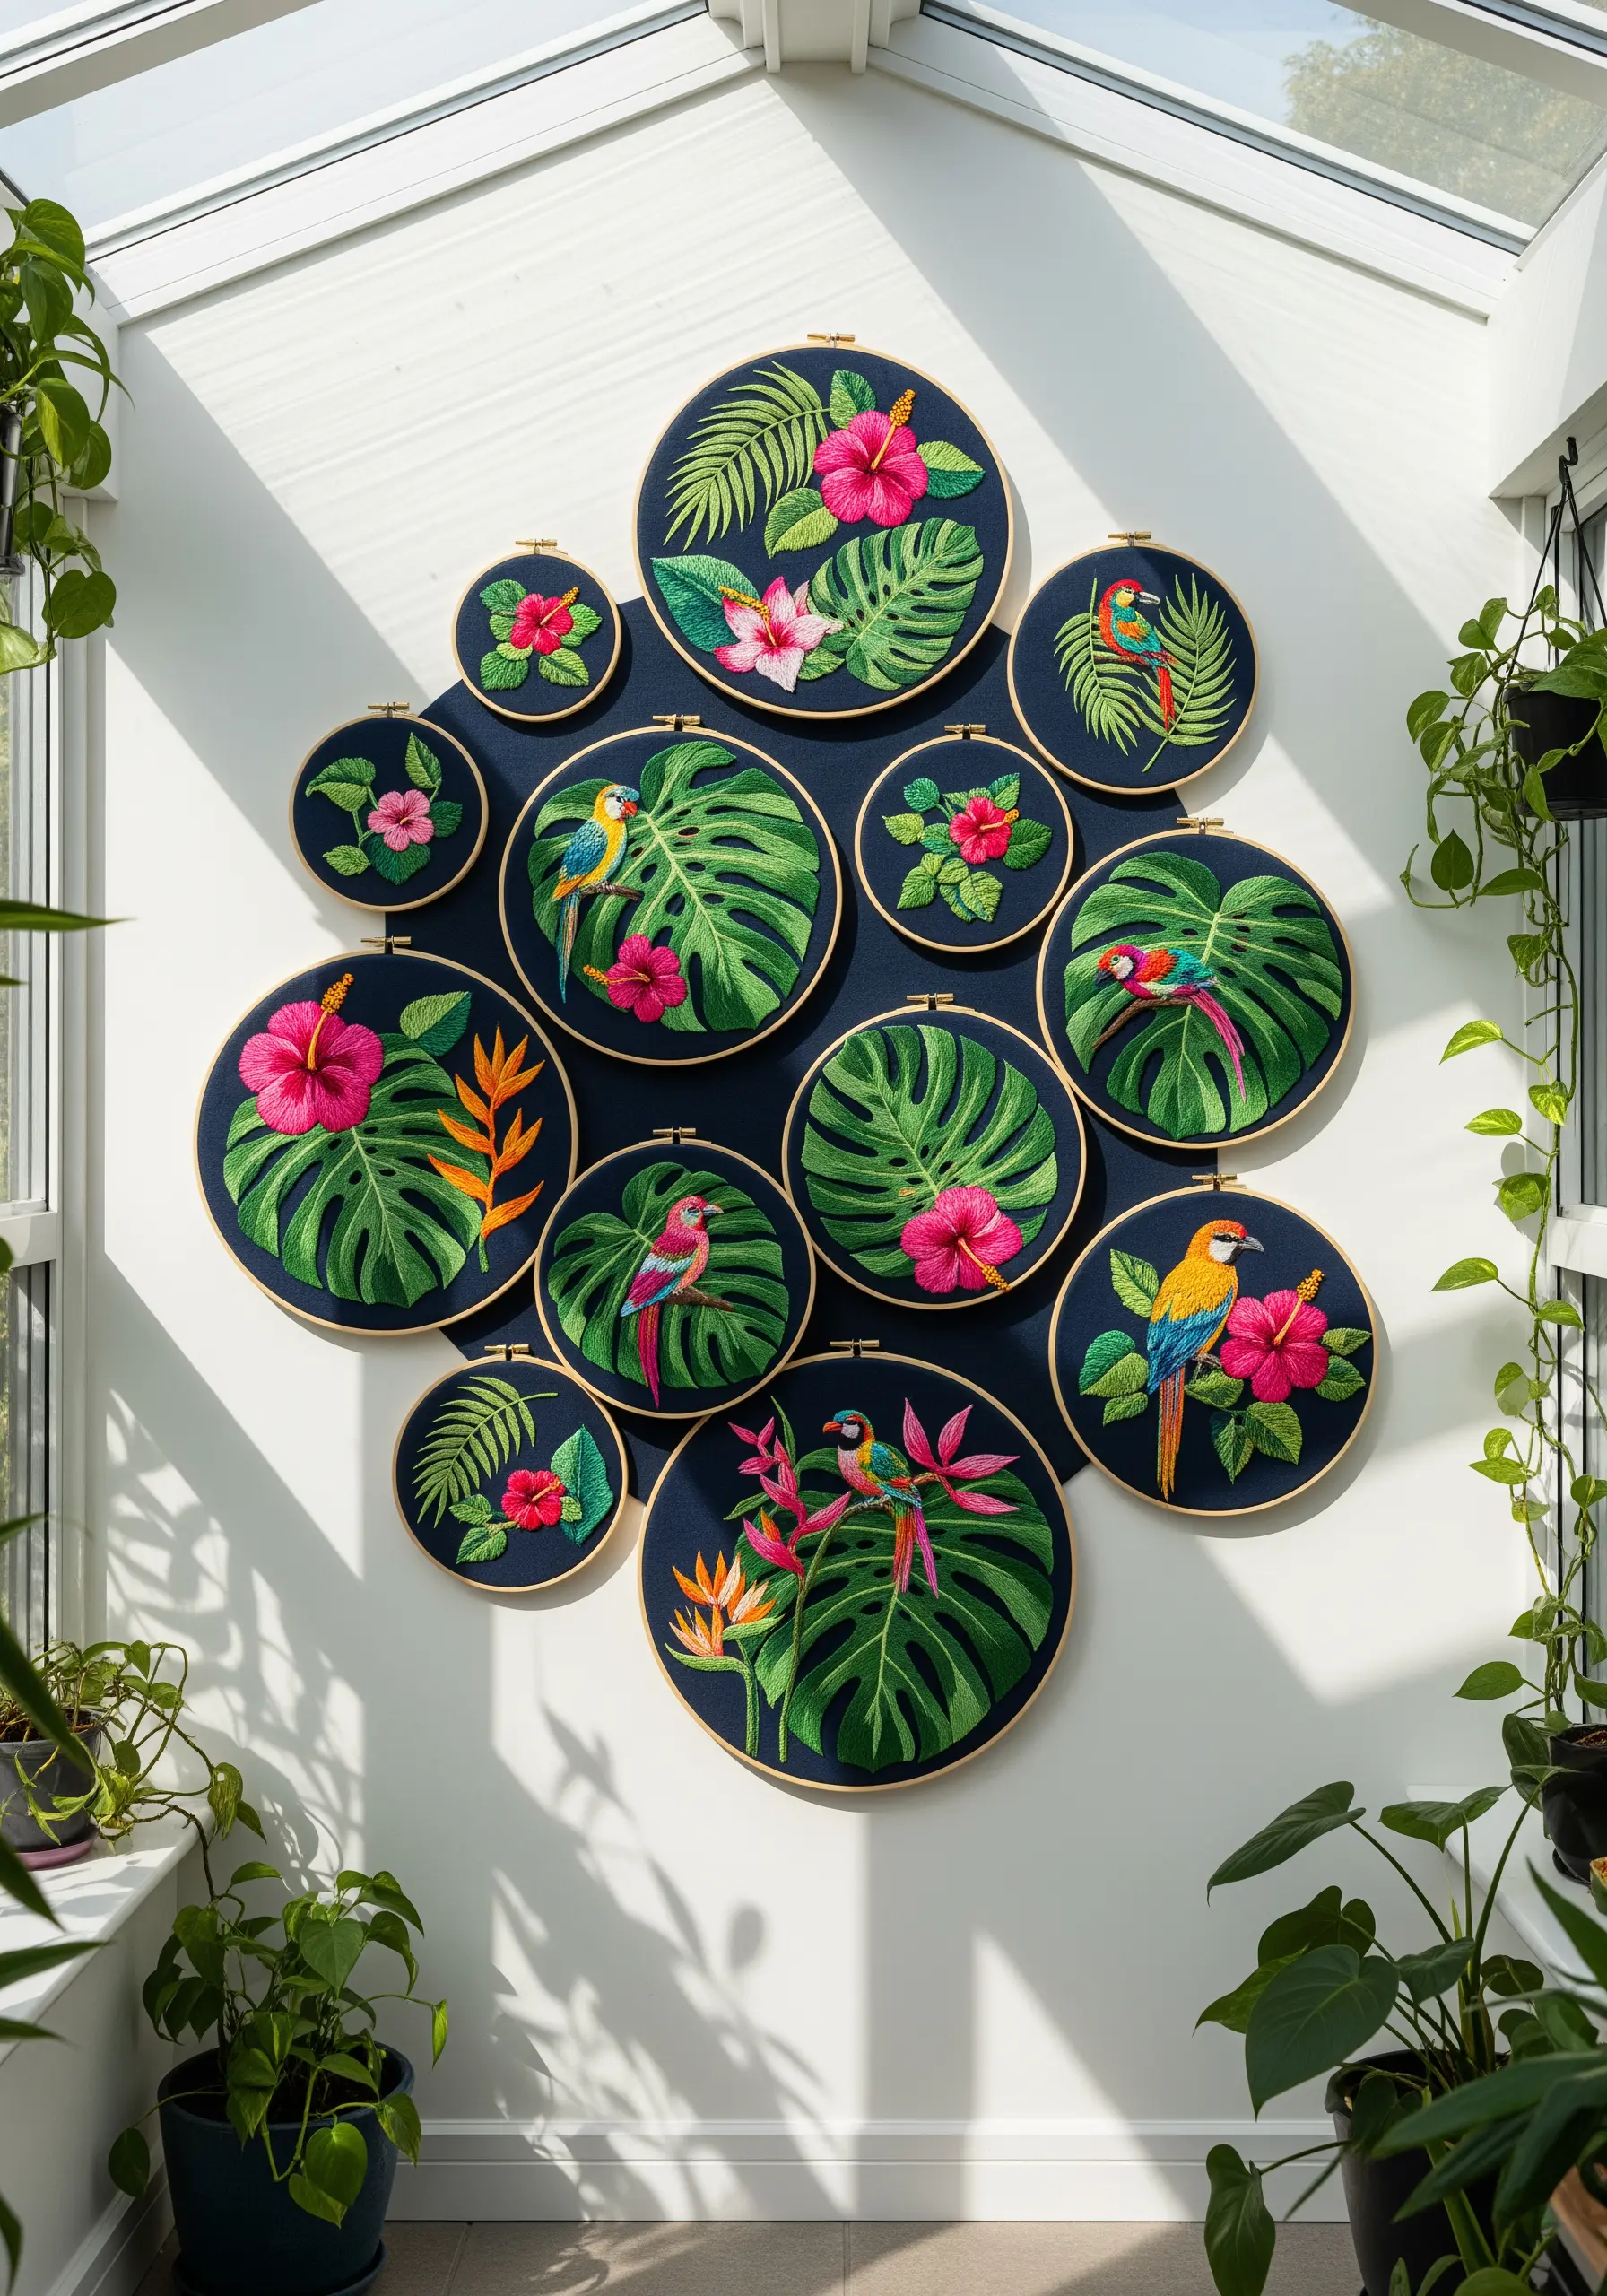
Give your tropical leaves a sense of dimension by layering satin-stitched leaves on top of one another.
Stitch the leaves in the background first, then work forward, allowing the foreground elements to slightly overlap those behind them.
Use at least three different shades of green within each monstera leaf, blending them with long-and-short stitches to mimic natural variegation.
Stitching on navy blue fabric makes the vibrant pinks, oranges, and greens of your flora and fauna appear even more brilliant.
12. Design a Dynamic Autumn Leaf Cascade
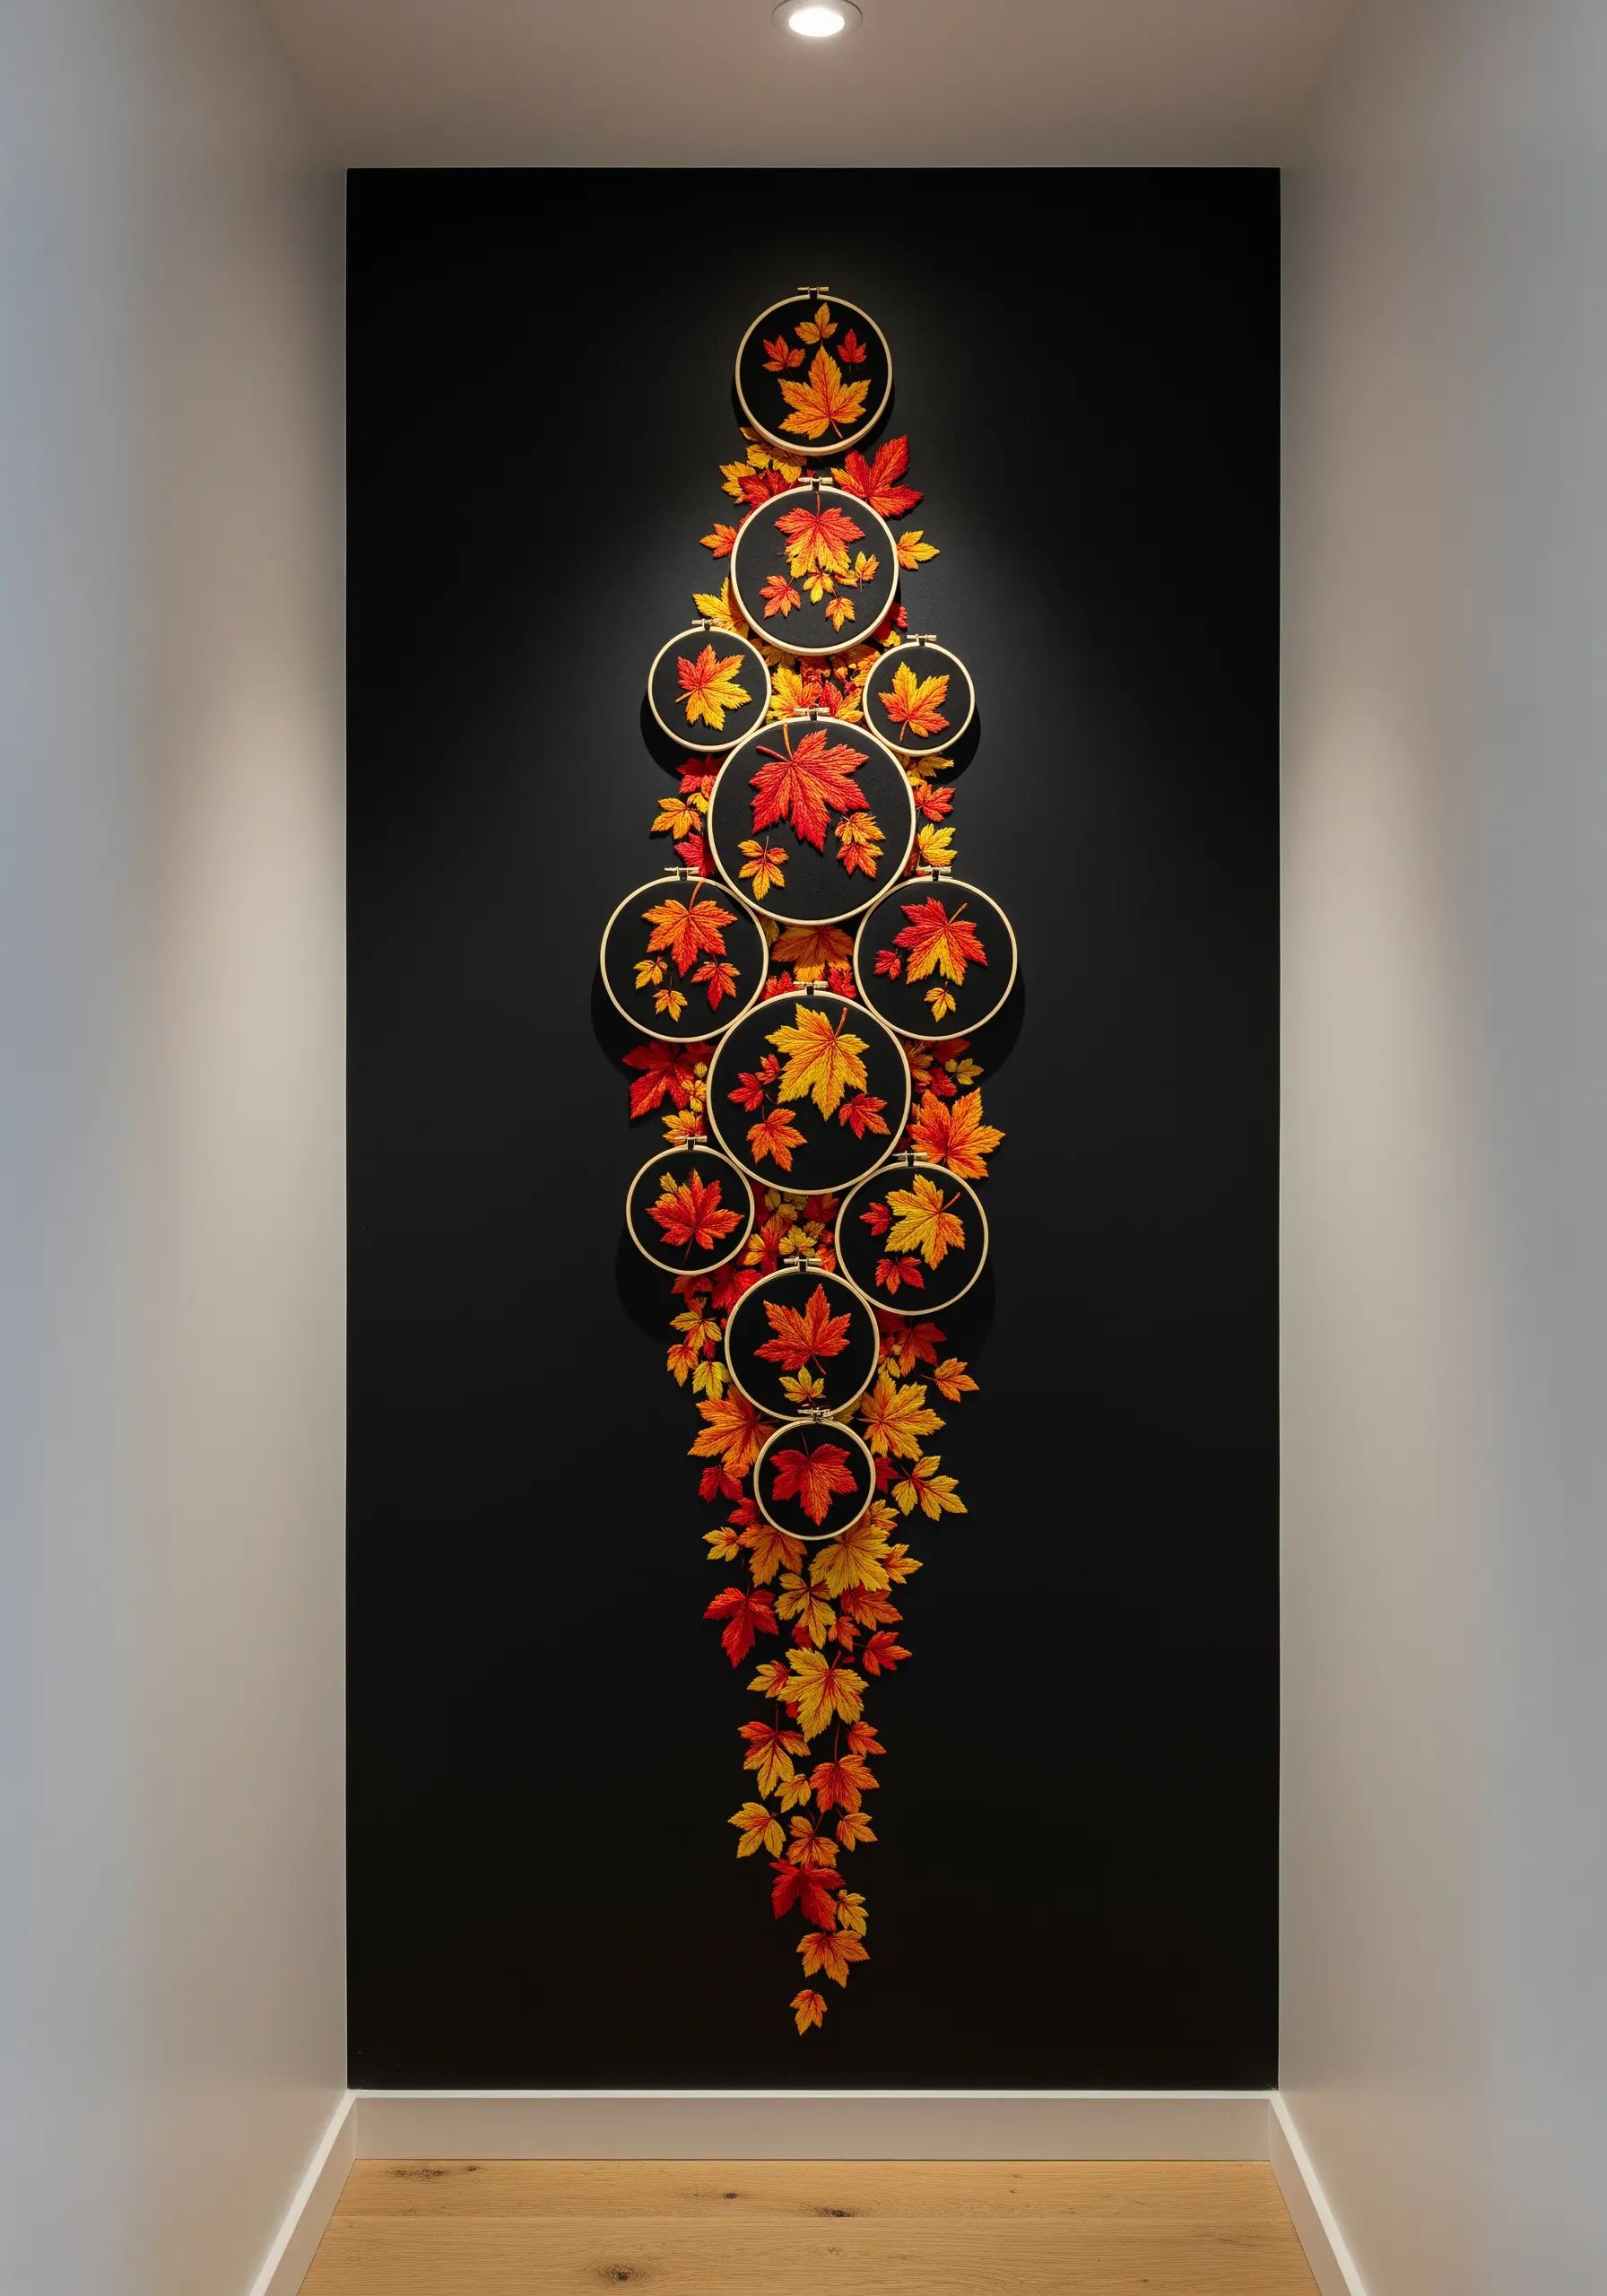
Break the boundaries of the hoop by creating an installation that appears to spill down the wall.
Stitch individual autumn leaves on fabric, then cut them out, leaving a small fabric border.
Treat the fabric with a stiffening agent and attach the leaves to the wall below your hoops to create a falling effect.
Arrange the hoops in a tall, organic cluster, allowing the embroidered leaves to flow beyond the frame for a truly dynamic and sculptural display.
13. Capture Art Deco Glamour with Metallic Thread
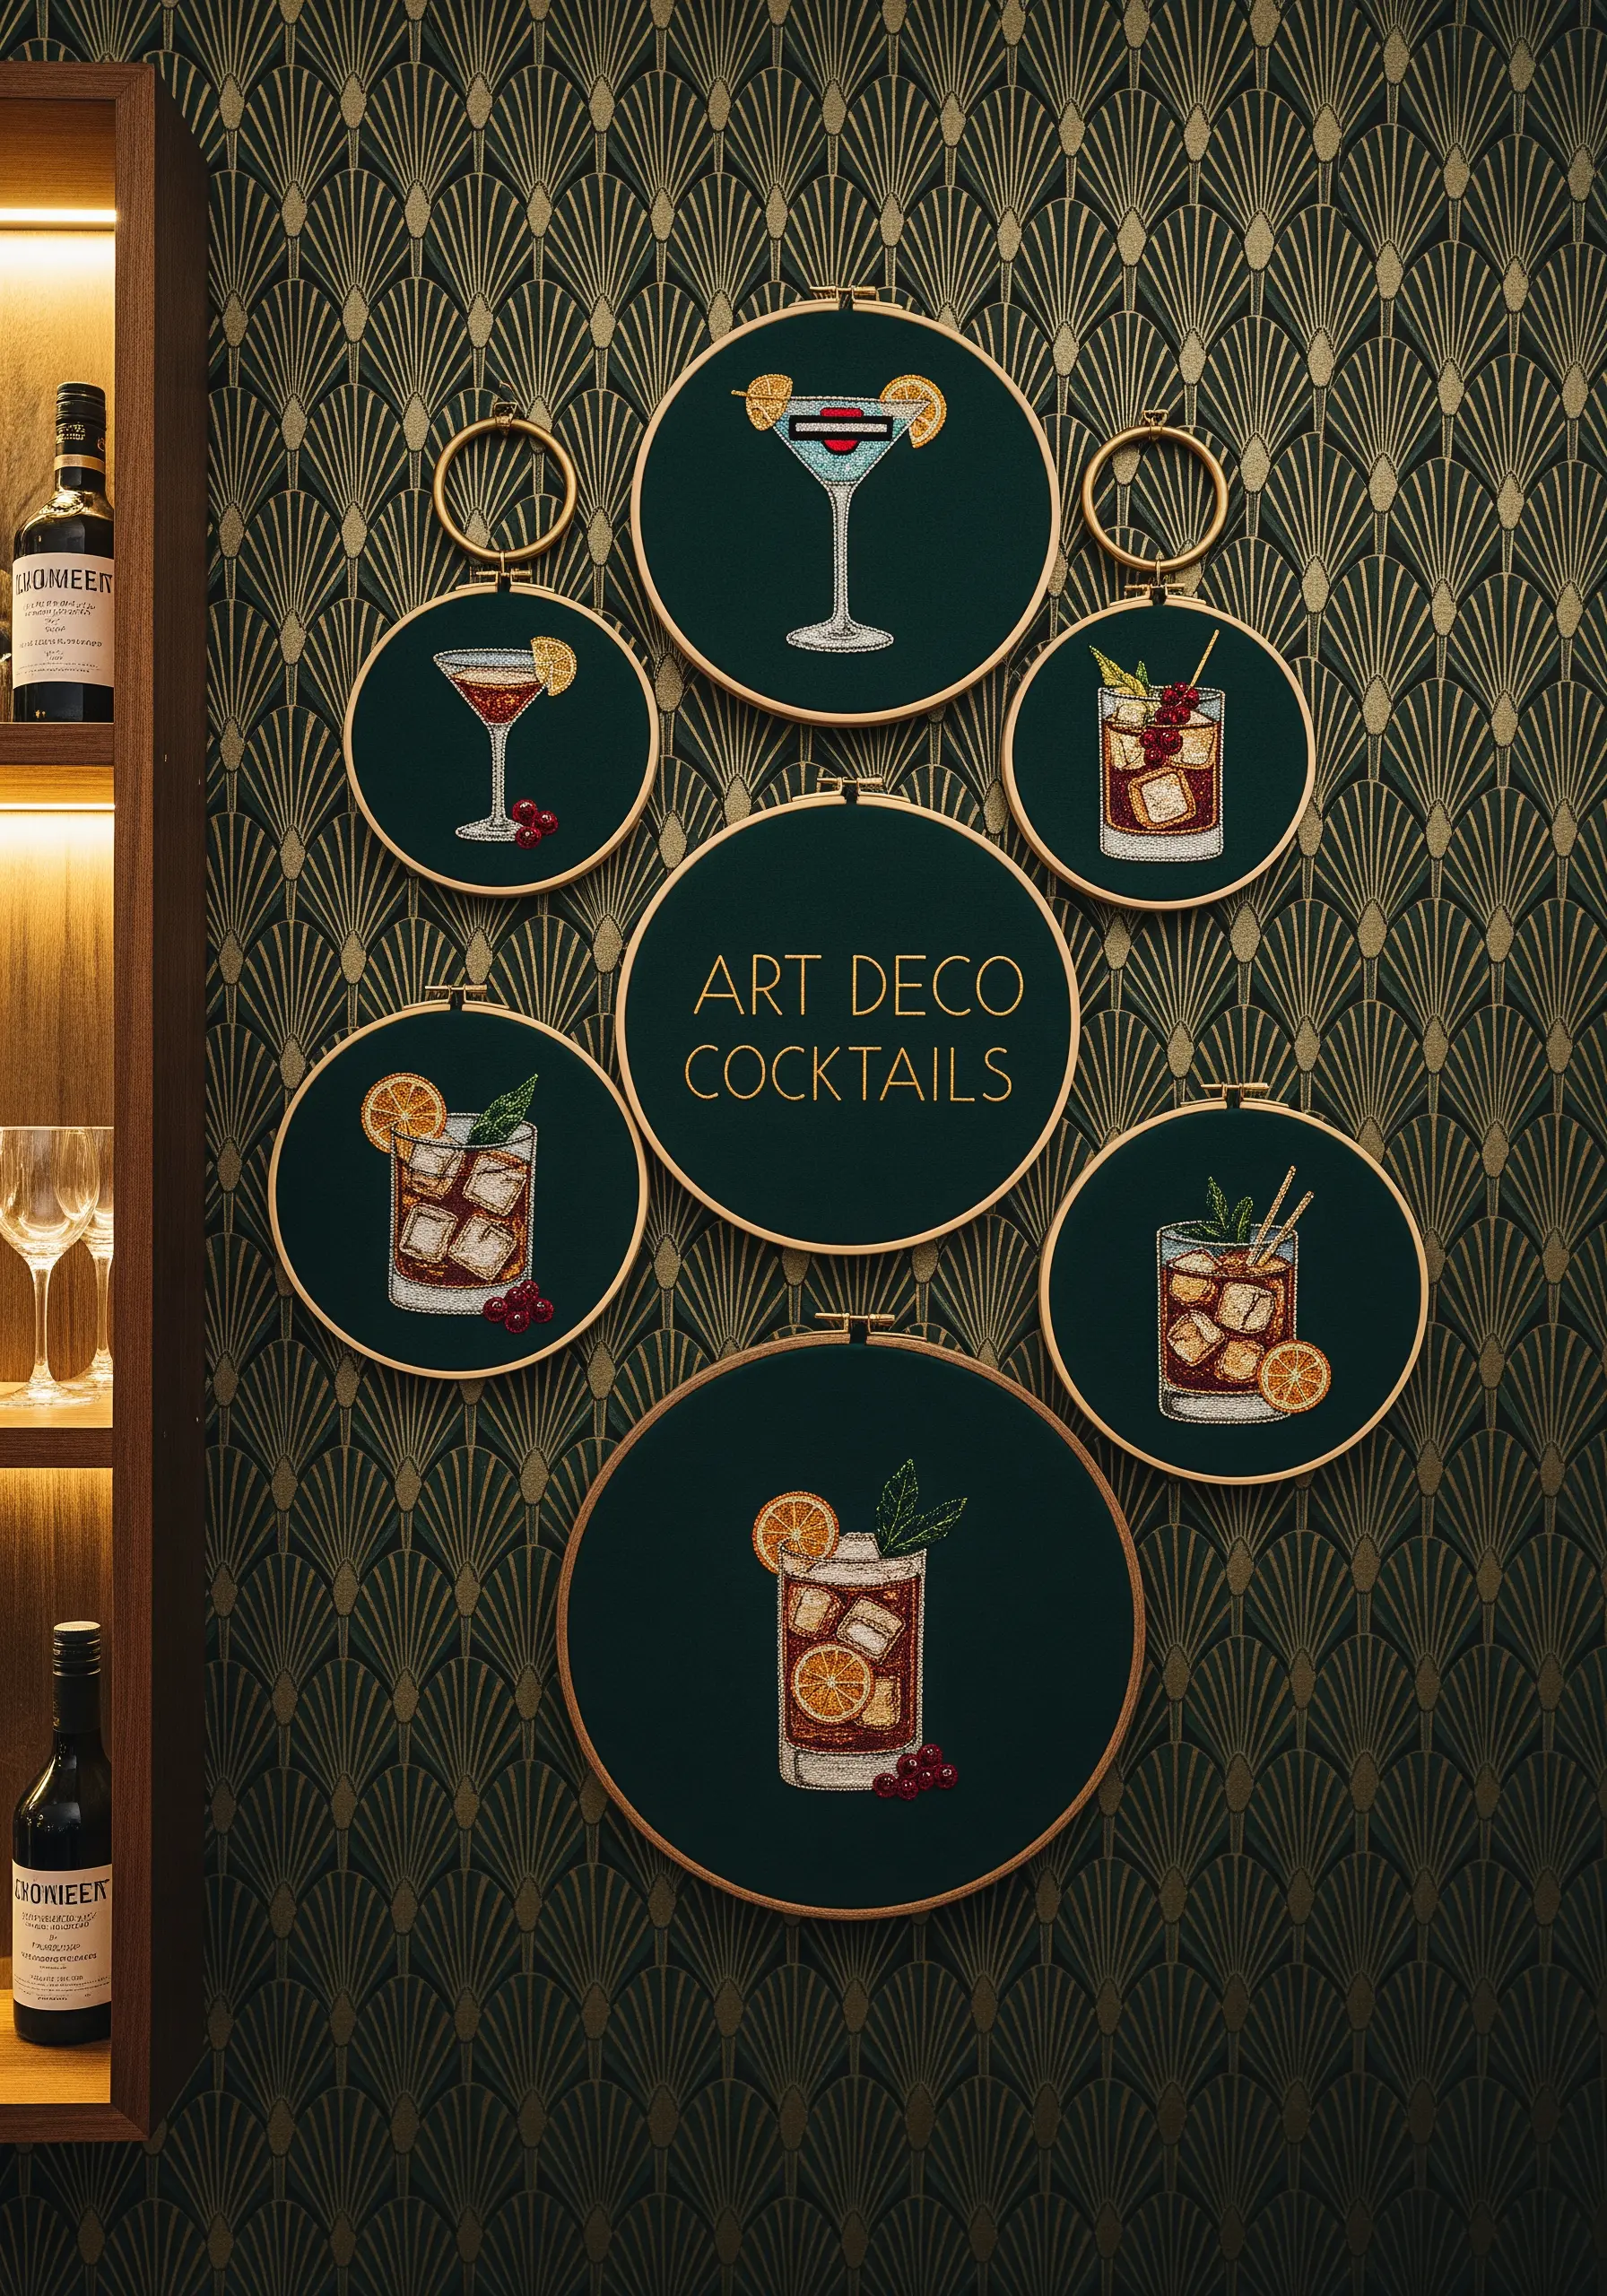
Evoke the sophistication of the Art Deco era by stitching classic cocktails on a deep, jewel-toned fabric like emerald or navy velvet.
Use single-strand metallic threads for highlights on glassware and ice cubes to create a subtle sparkle that catches the light.
For a clean, graphic look, outline your shapes with a precise split stitch and use a smooth satin stitch for the liquid.
The combination of rich fabric and metallic detail feels instantly luxurious.
14. Cultivate an Herb Garden with Line Art Embroidery

For a clean, minimalist kitchen display, focus on the elegant forms of herbs using fine-line botanical embroidery.
Use just one or two strands of floss in a single color—like dark green or black—on a neutral linen background.
Simple stitches like the stem stitch for stalks and detached chain stitches for leaves are all you need.
This technique highlights the delicate anatomy of each plant, creating a look that is both timeless and modern.
15. Weave a Cosmic Scene with Blended Colors

Create the swirling depths of a galaxy by blending threads directly in your needle.
Use one strand of dark blue and one strand of purple together to stitch a section, then transition to purple and pink for the next.
This easy marling technique produces soft, painterly transitions that look incredibly complex.
Scatter French knots and star stitches using white or metallic silver thread to represent distant stars against your colorful nebula.
16. Build a Forest Floor Installation with Natural Textures
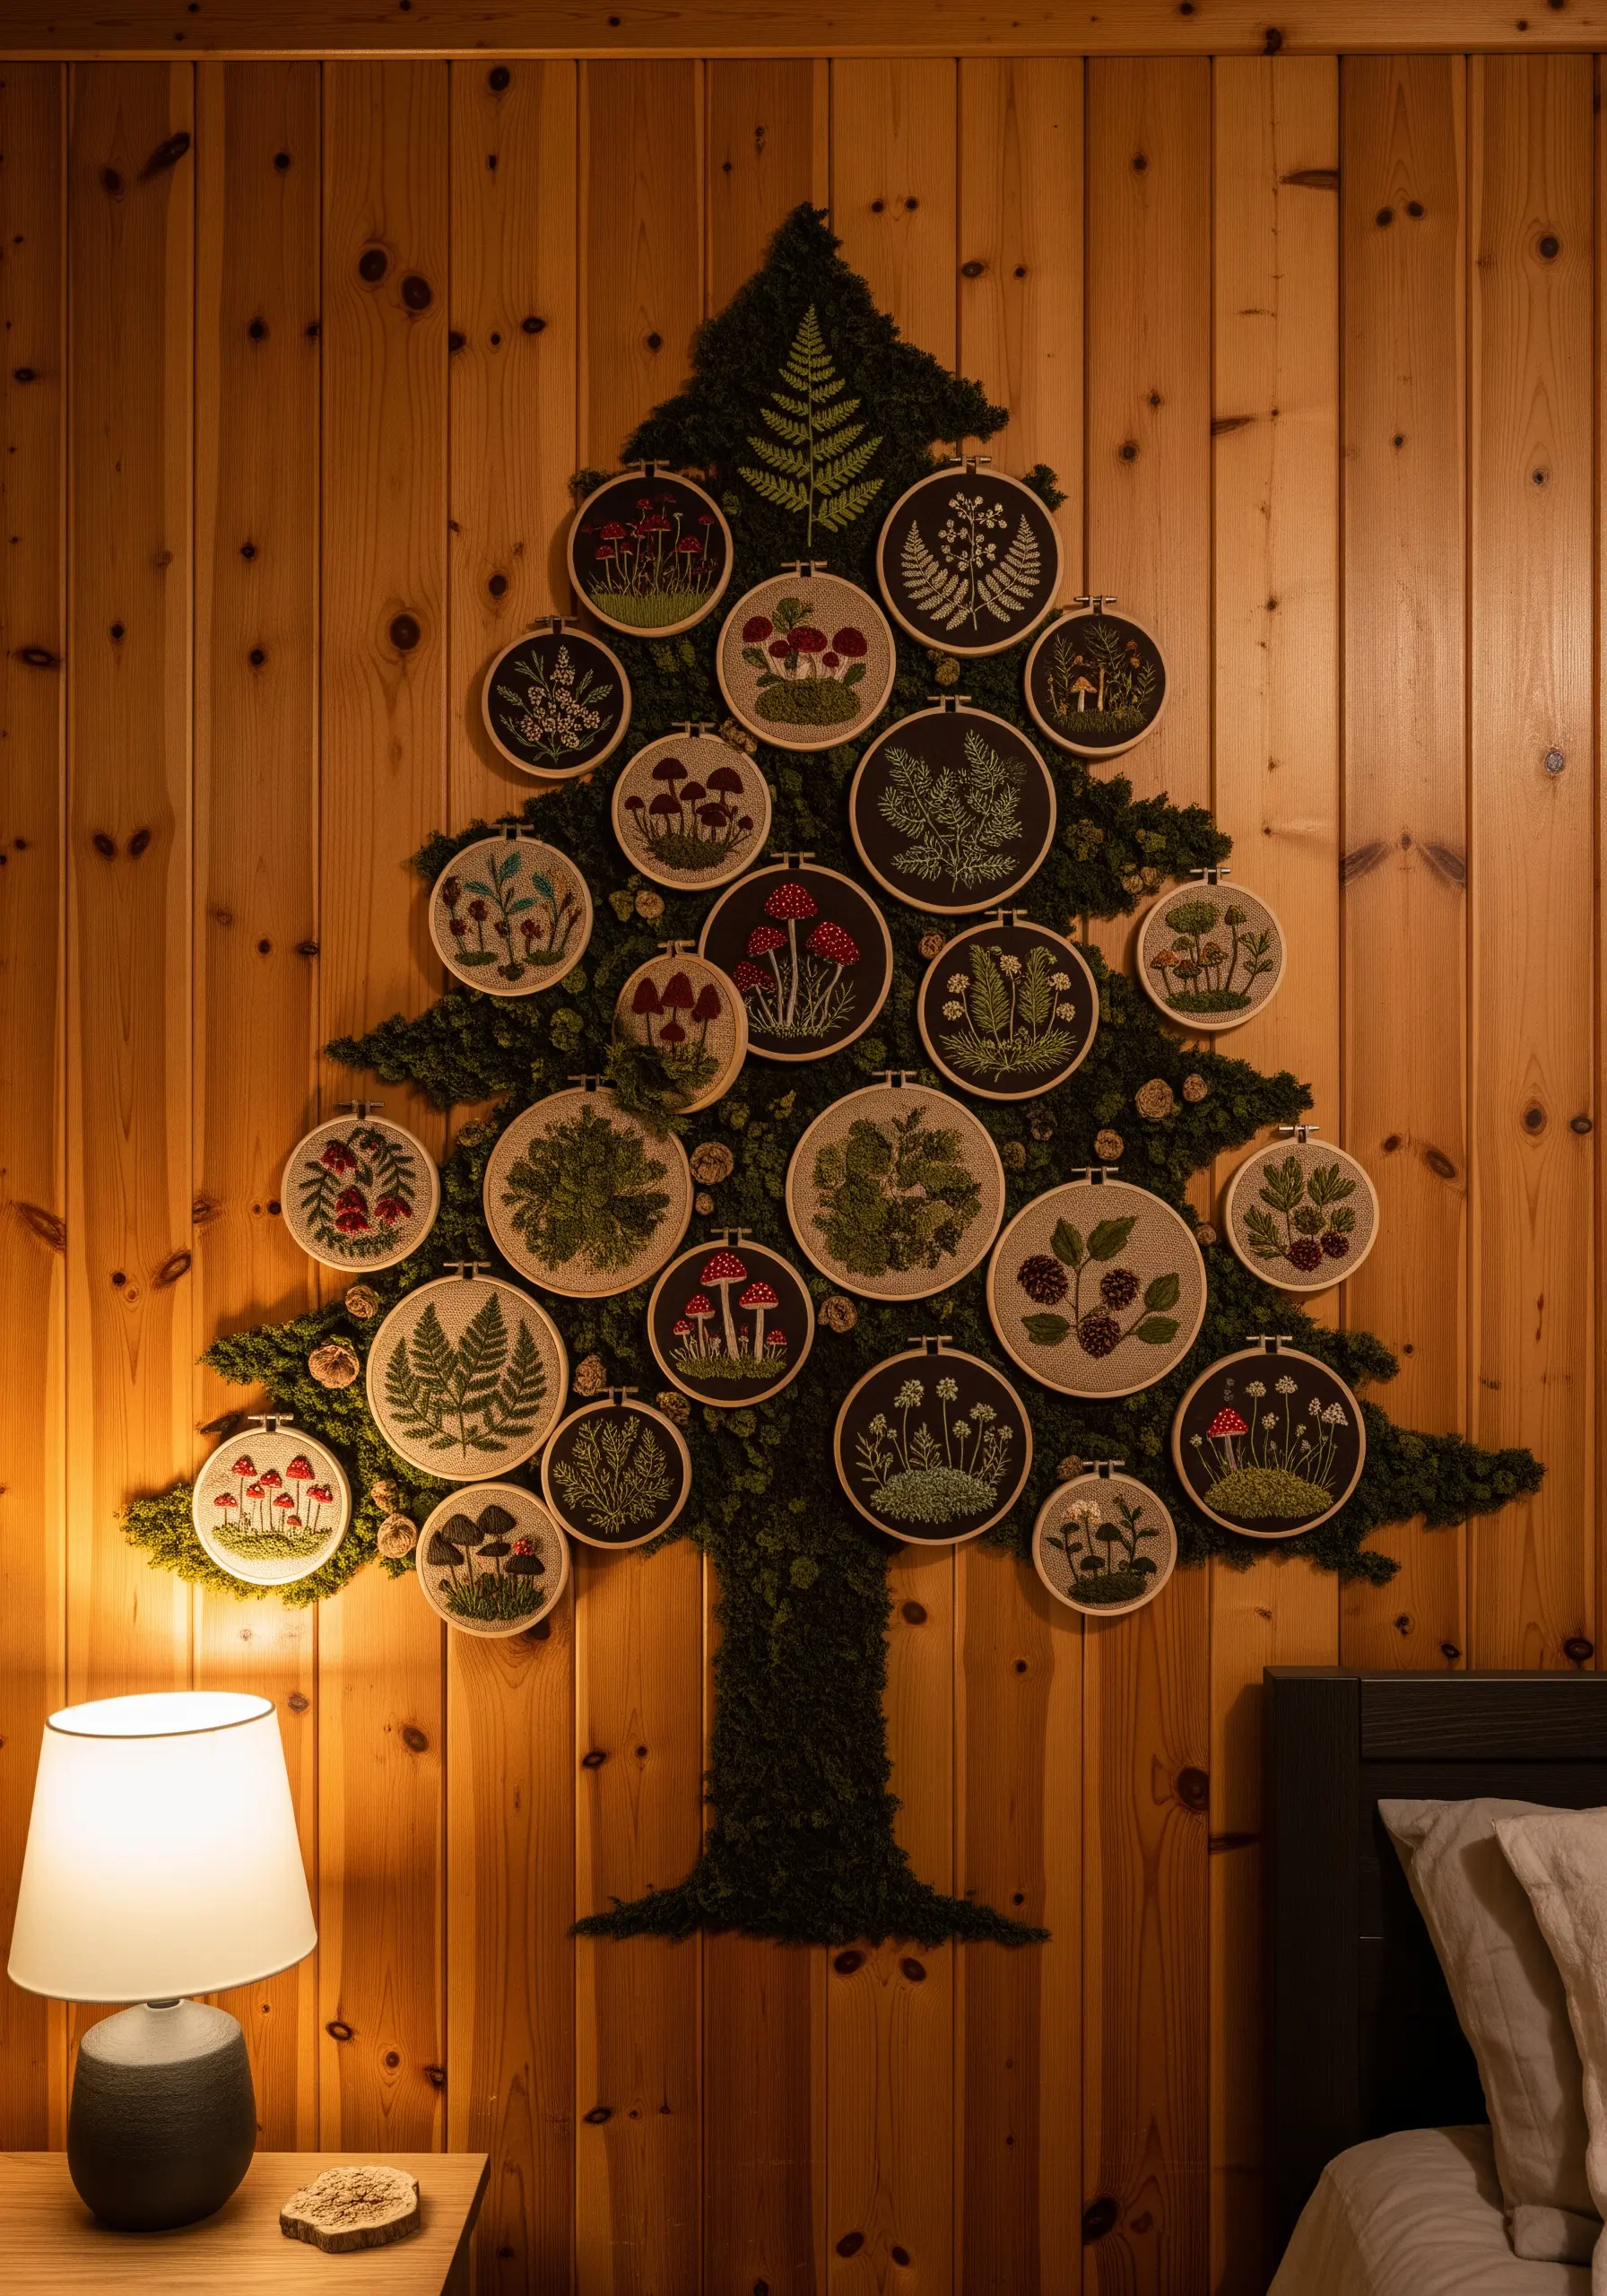
Create an immersive woodland scene by mounting your hoops on a shaped background of preserved moss and faux foliage.
First, cut a tree silhouette from a sturdy foam board and cover it with your greenery.
Then, arrange your hoops of embroidering botanical elements like ferns, mushrooms, and wildflowers across the ‘branches’.
This multi-layered approach turns a simple hoop collection into a breathtaking piece of textile art.
17. Sculpt Elegant Cameos with Padded Stitching

Recreate the classic beauty of carved cameos using padded satin stitch to give your portraits a raised, three-dimensional effect.
First, create a base layer of small, underlying stitches (like seed stitches) within your silhouette’s outline.
Then, cover this padding with a smooth layer of satin stitches, working in a consistent direction.
Using a single thread color, like ivory on a dusty blue or pink background, enhances the sculptural quality and creates a timeless, elegant finish.
18. Make Your Walls Pop with Comic Book Art
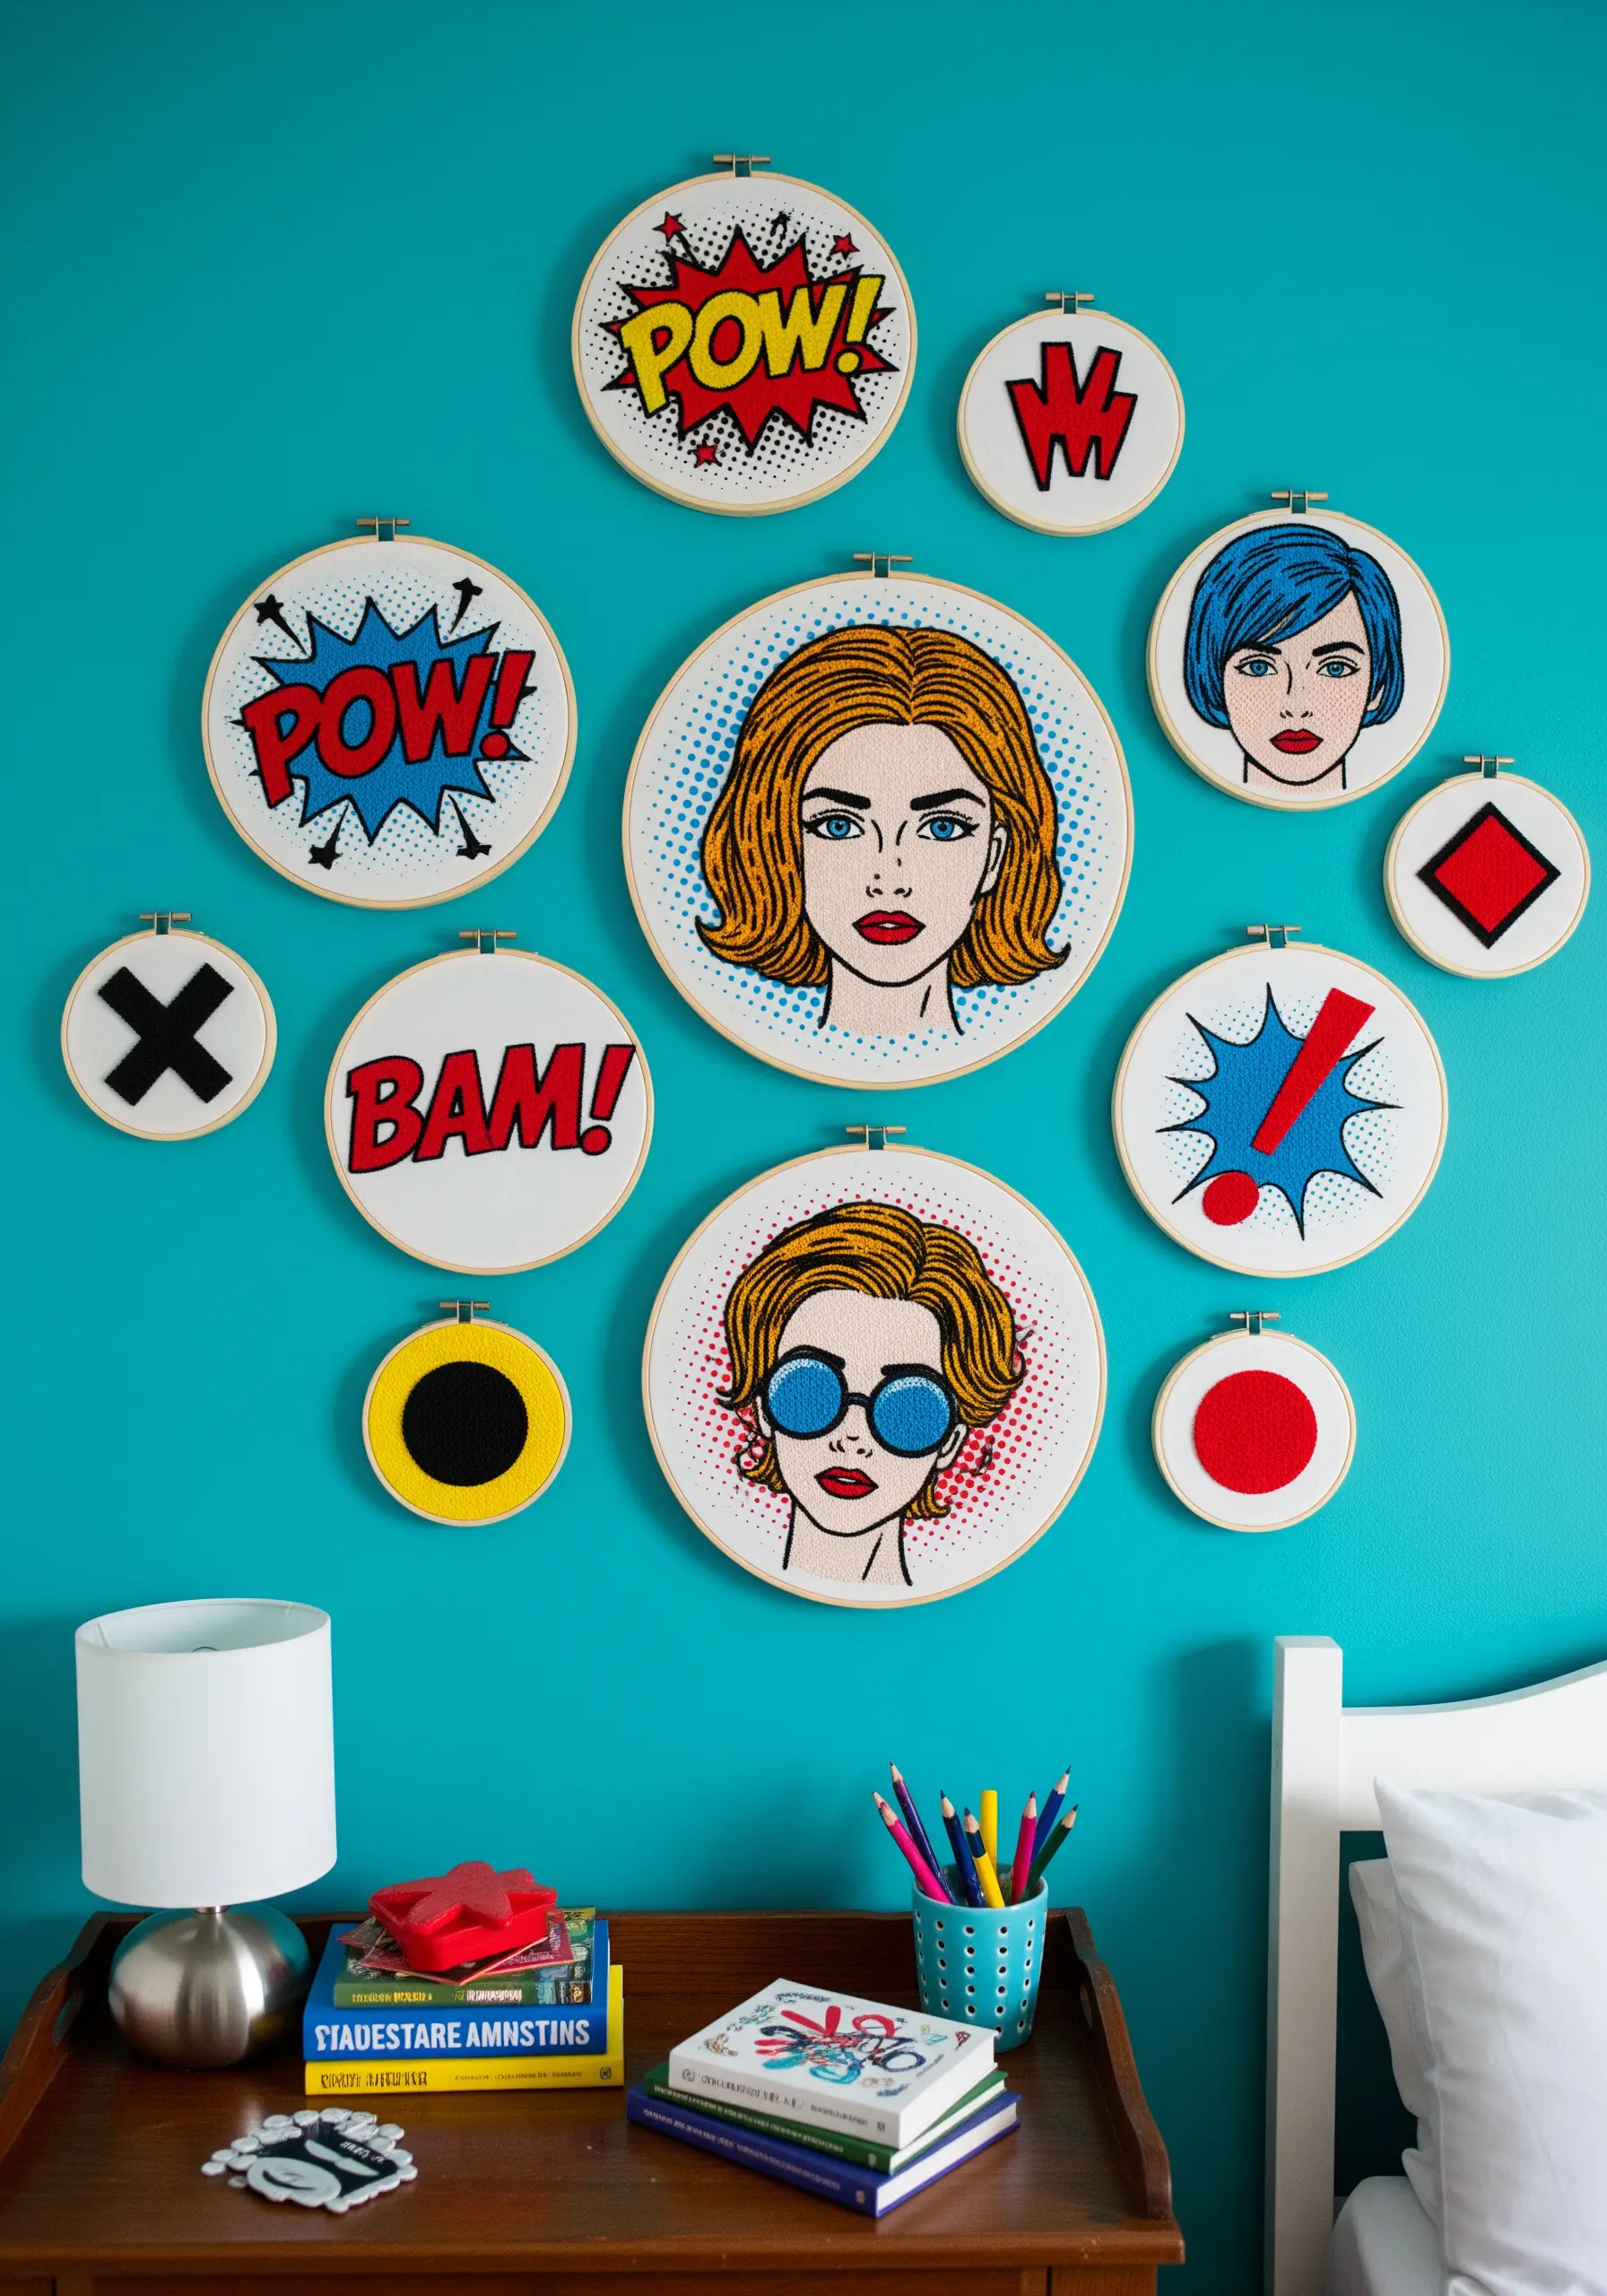
Capture the bold energy of pop art with crisp, graphic stitches and a vibrant color palette.
Use a thick, dark outline for all your shapes—a two-strand stem stitch or split stitch works perfectly.
Fill in areas of color with a neat satin stitch.
To replicate the Ben-Day dots used in old comics, fill a section with a grid of evenly spaced French knots in a contrasting color.
This detail adds authenticity and visual interest to your piece.
19. Find Calm with a Minimalist Zen Triptych

Convey a sense of tranquility by focusing on the ‘less is more’ principle of Japanese aesthetics.
In a series of three hoops, explore different elements: the sweeping brushstroke of an Enso circle, the delicate asymmetry of a cherry blossom branch, and the rhythmic lines of flowing water.
Use a limited palette and embrace the negative space on your neutral linen fabric.
The uncluttered composition allows each element to breathe, creating a powerful sense of peace and balance.
20. Translate Quilt Patterns into Threaded Art
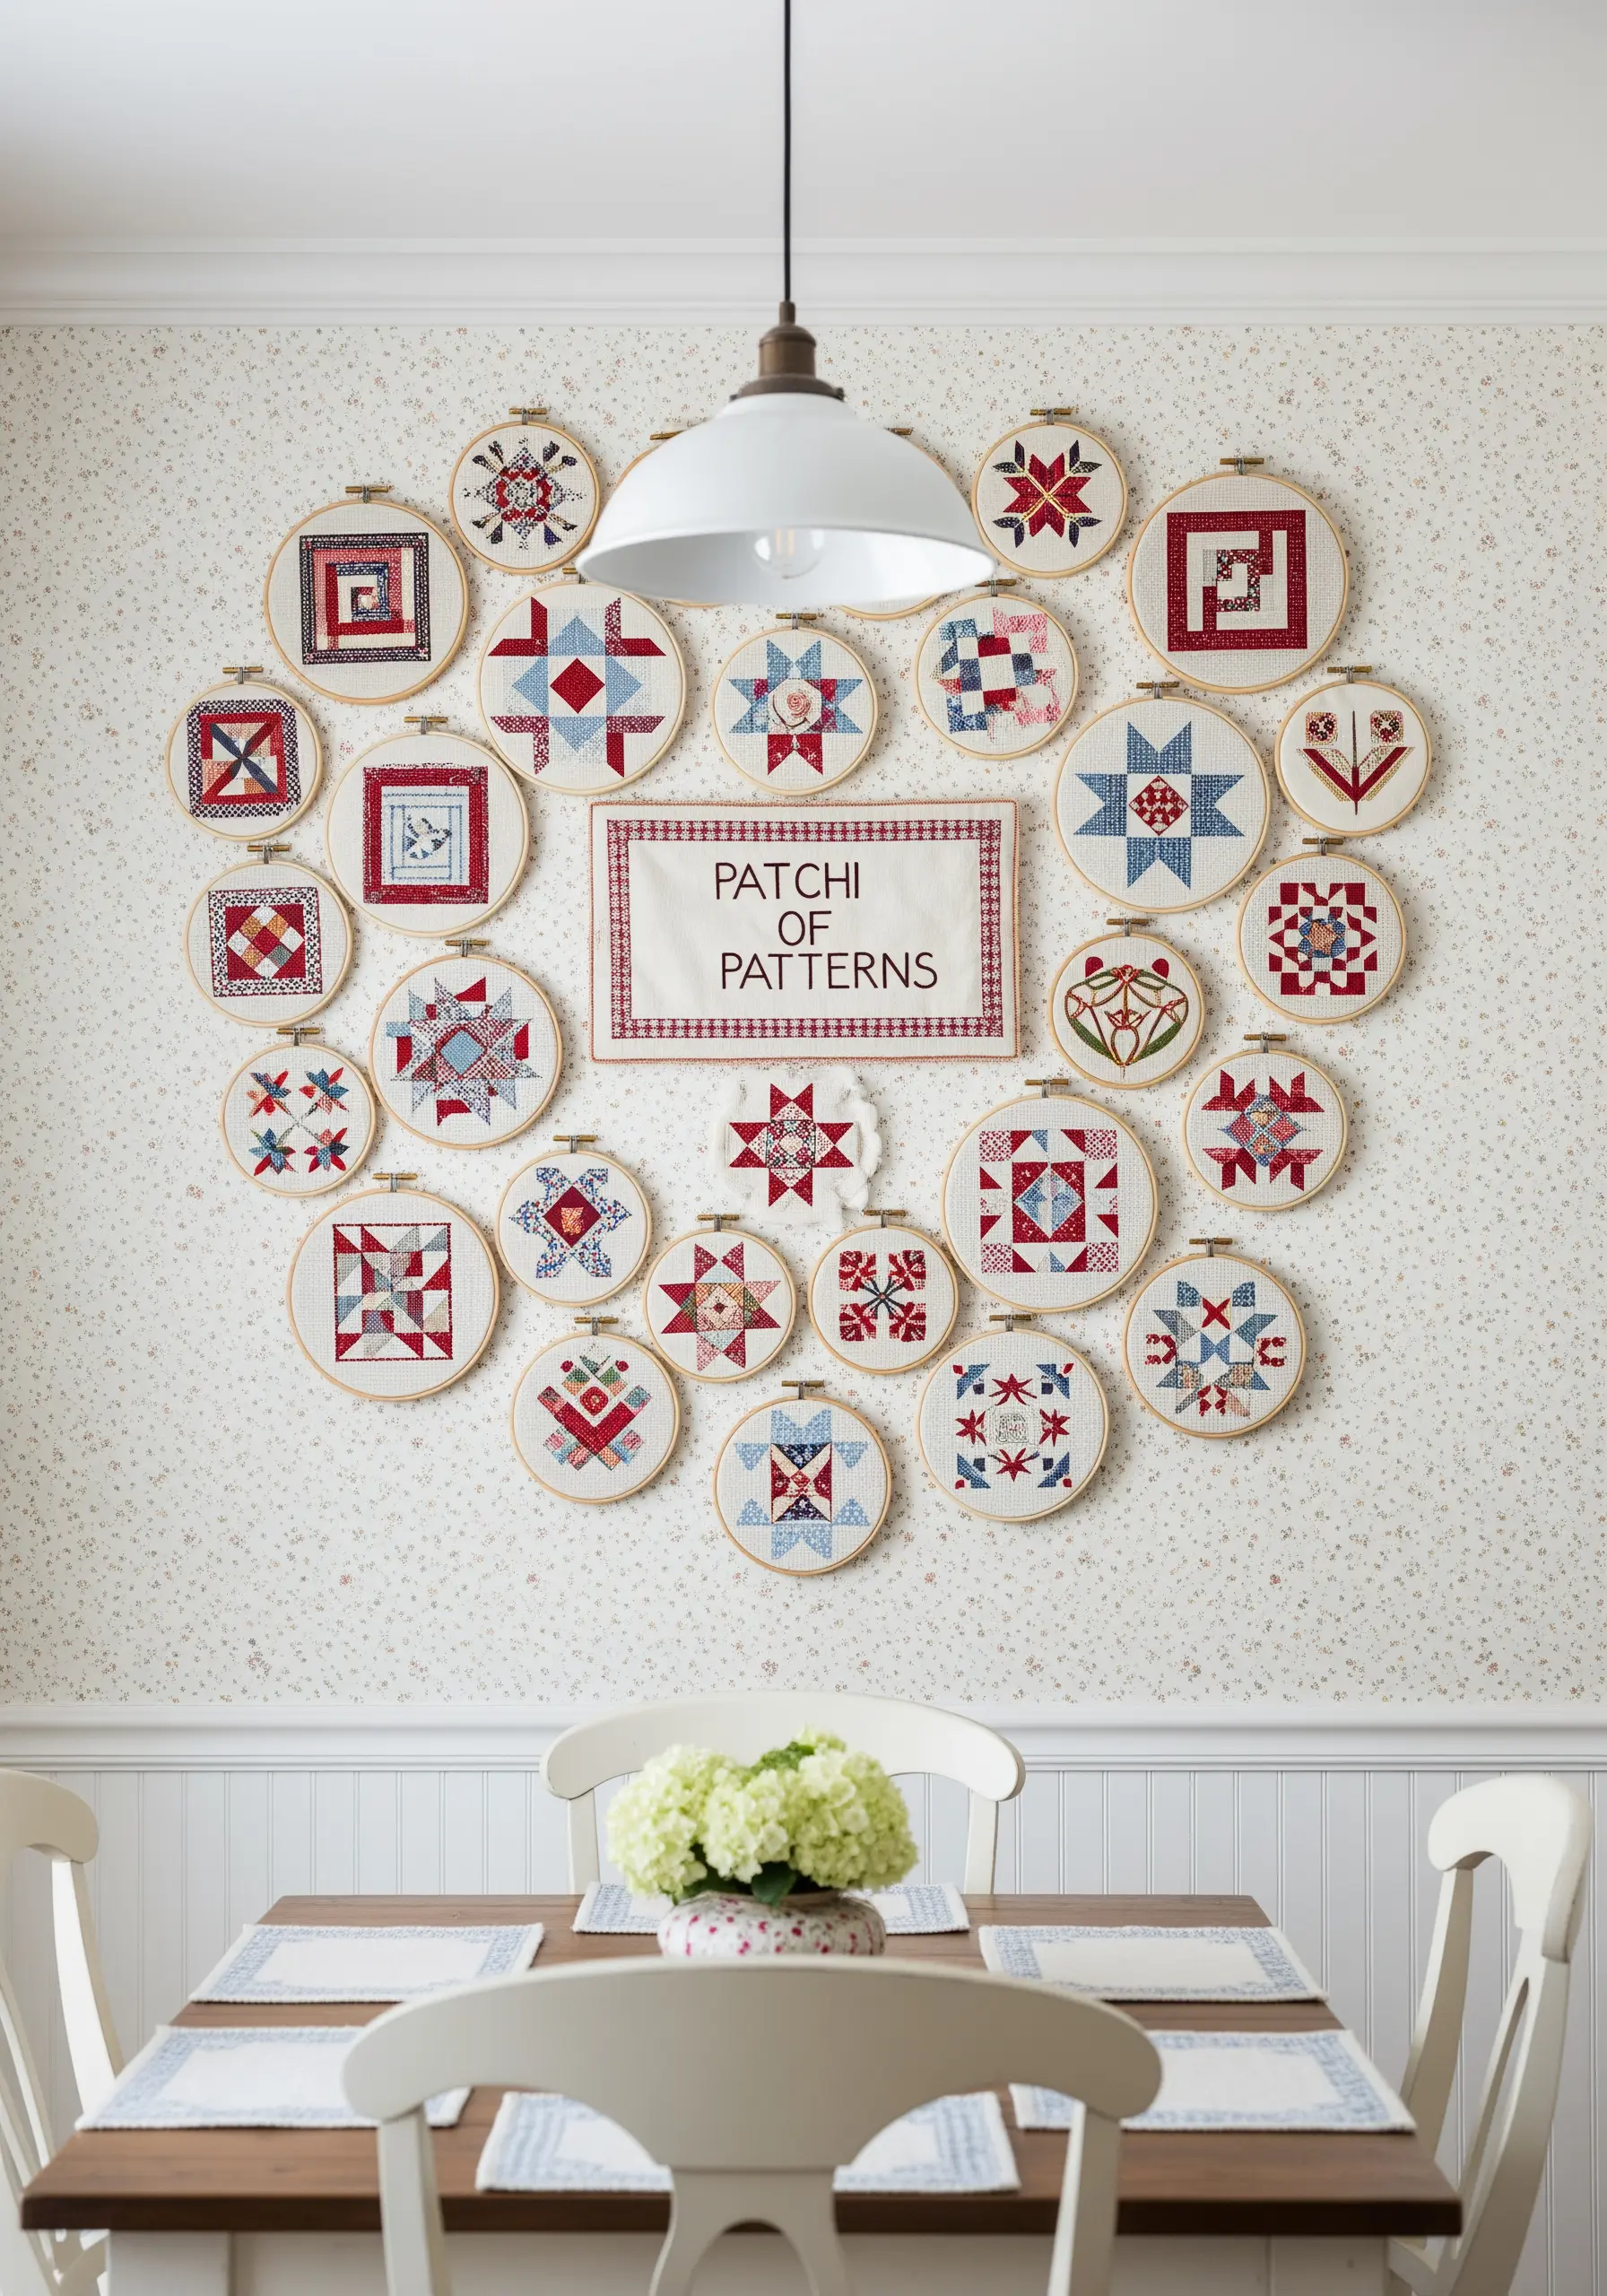
Celebrate the heritage of textile arts by recreating traditional quilt block patterns in embroidery.
Use satin stitch to fill in the geometric shapes, paying close attention to the direction of your stitches to create subtle texture and sheen.
A limited palette of classic Americana colors—like barn red, navy blue, and antique white—will give your collection a cohesive, heirloom feel.
This is a wonderful way to honor quilting traditions with your needle and thread.
21. Visualize Music with Line and Rhythm

Translate sound into stitches by combining literal and abstract representations of music.
Use a thick, couched black thread or yarn to create a bold musical staff that flows across the wall, connecting your hoops.
Inside the hoops, stitch clean, graphic musical notes or use a fluid whipped backstitch to create abstract waveforms that visualize sound.
This abstract sound visualization transforms your wall into a silent symphony, full of movement and energy.
22. Chart Your Travels with an Embroidered Map

Create a living piece of art that documents your adventures by stitching tiny landmarks or symbols for places you’ve visited.
Embroider each miniature icon in a small hoop, then pin it to its corresponding location on a large wall map.
This unique display turns a gallery wall into a dynamic, personal story that you can add to over time.
It’s a beautiful, handcrafted alternative to pinning photos on a corkboard.
23. Stitch Juicy Fruits with Realistic Blending

Make your embroidered fruit look good enough to eat by mastering the art of color blending.
Use the long-and-short stitch to seamlessly transition between shades of red on a strawberry or green on a watermelon rind.
To create a subtle highlight that suggests ripeness and light, blend in a single strand of a much lighter color, like pale yellow or white.
Adding tiny black or brown French knots as seeds is the final touch for texture and realism.
24. Capture High Fashion with Line Art and Color

Emulate the elegance of fashion illustration by combining delicate line work with strategic pops of color.
Use a single strand of black thread and a precise backstitch to create the clean, continuous lines of the figure and dress.
Then, choose one or two elements—a shoe, a handbag, a dress—to fill with bold, solid satin stitch.
This contrast between minimal lines and saturated color creates a sophisticated, high-impact design that feels effortlessly chic.
25. Create a Seasonal Clock with Thematic Motifs
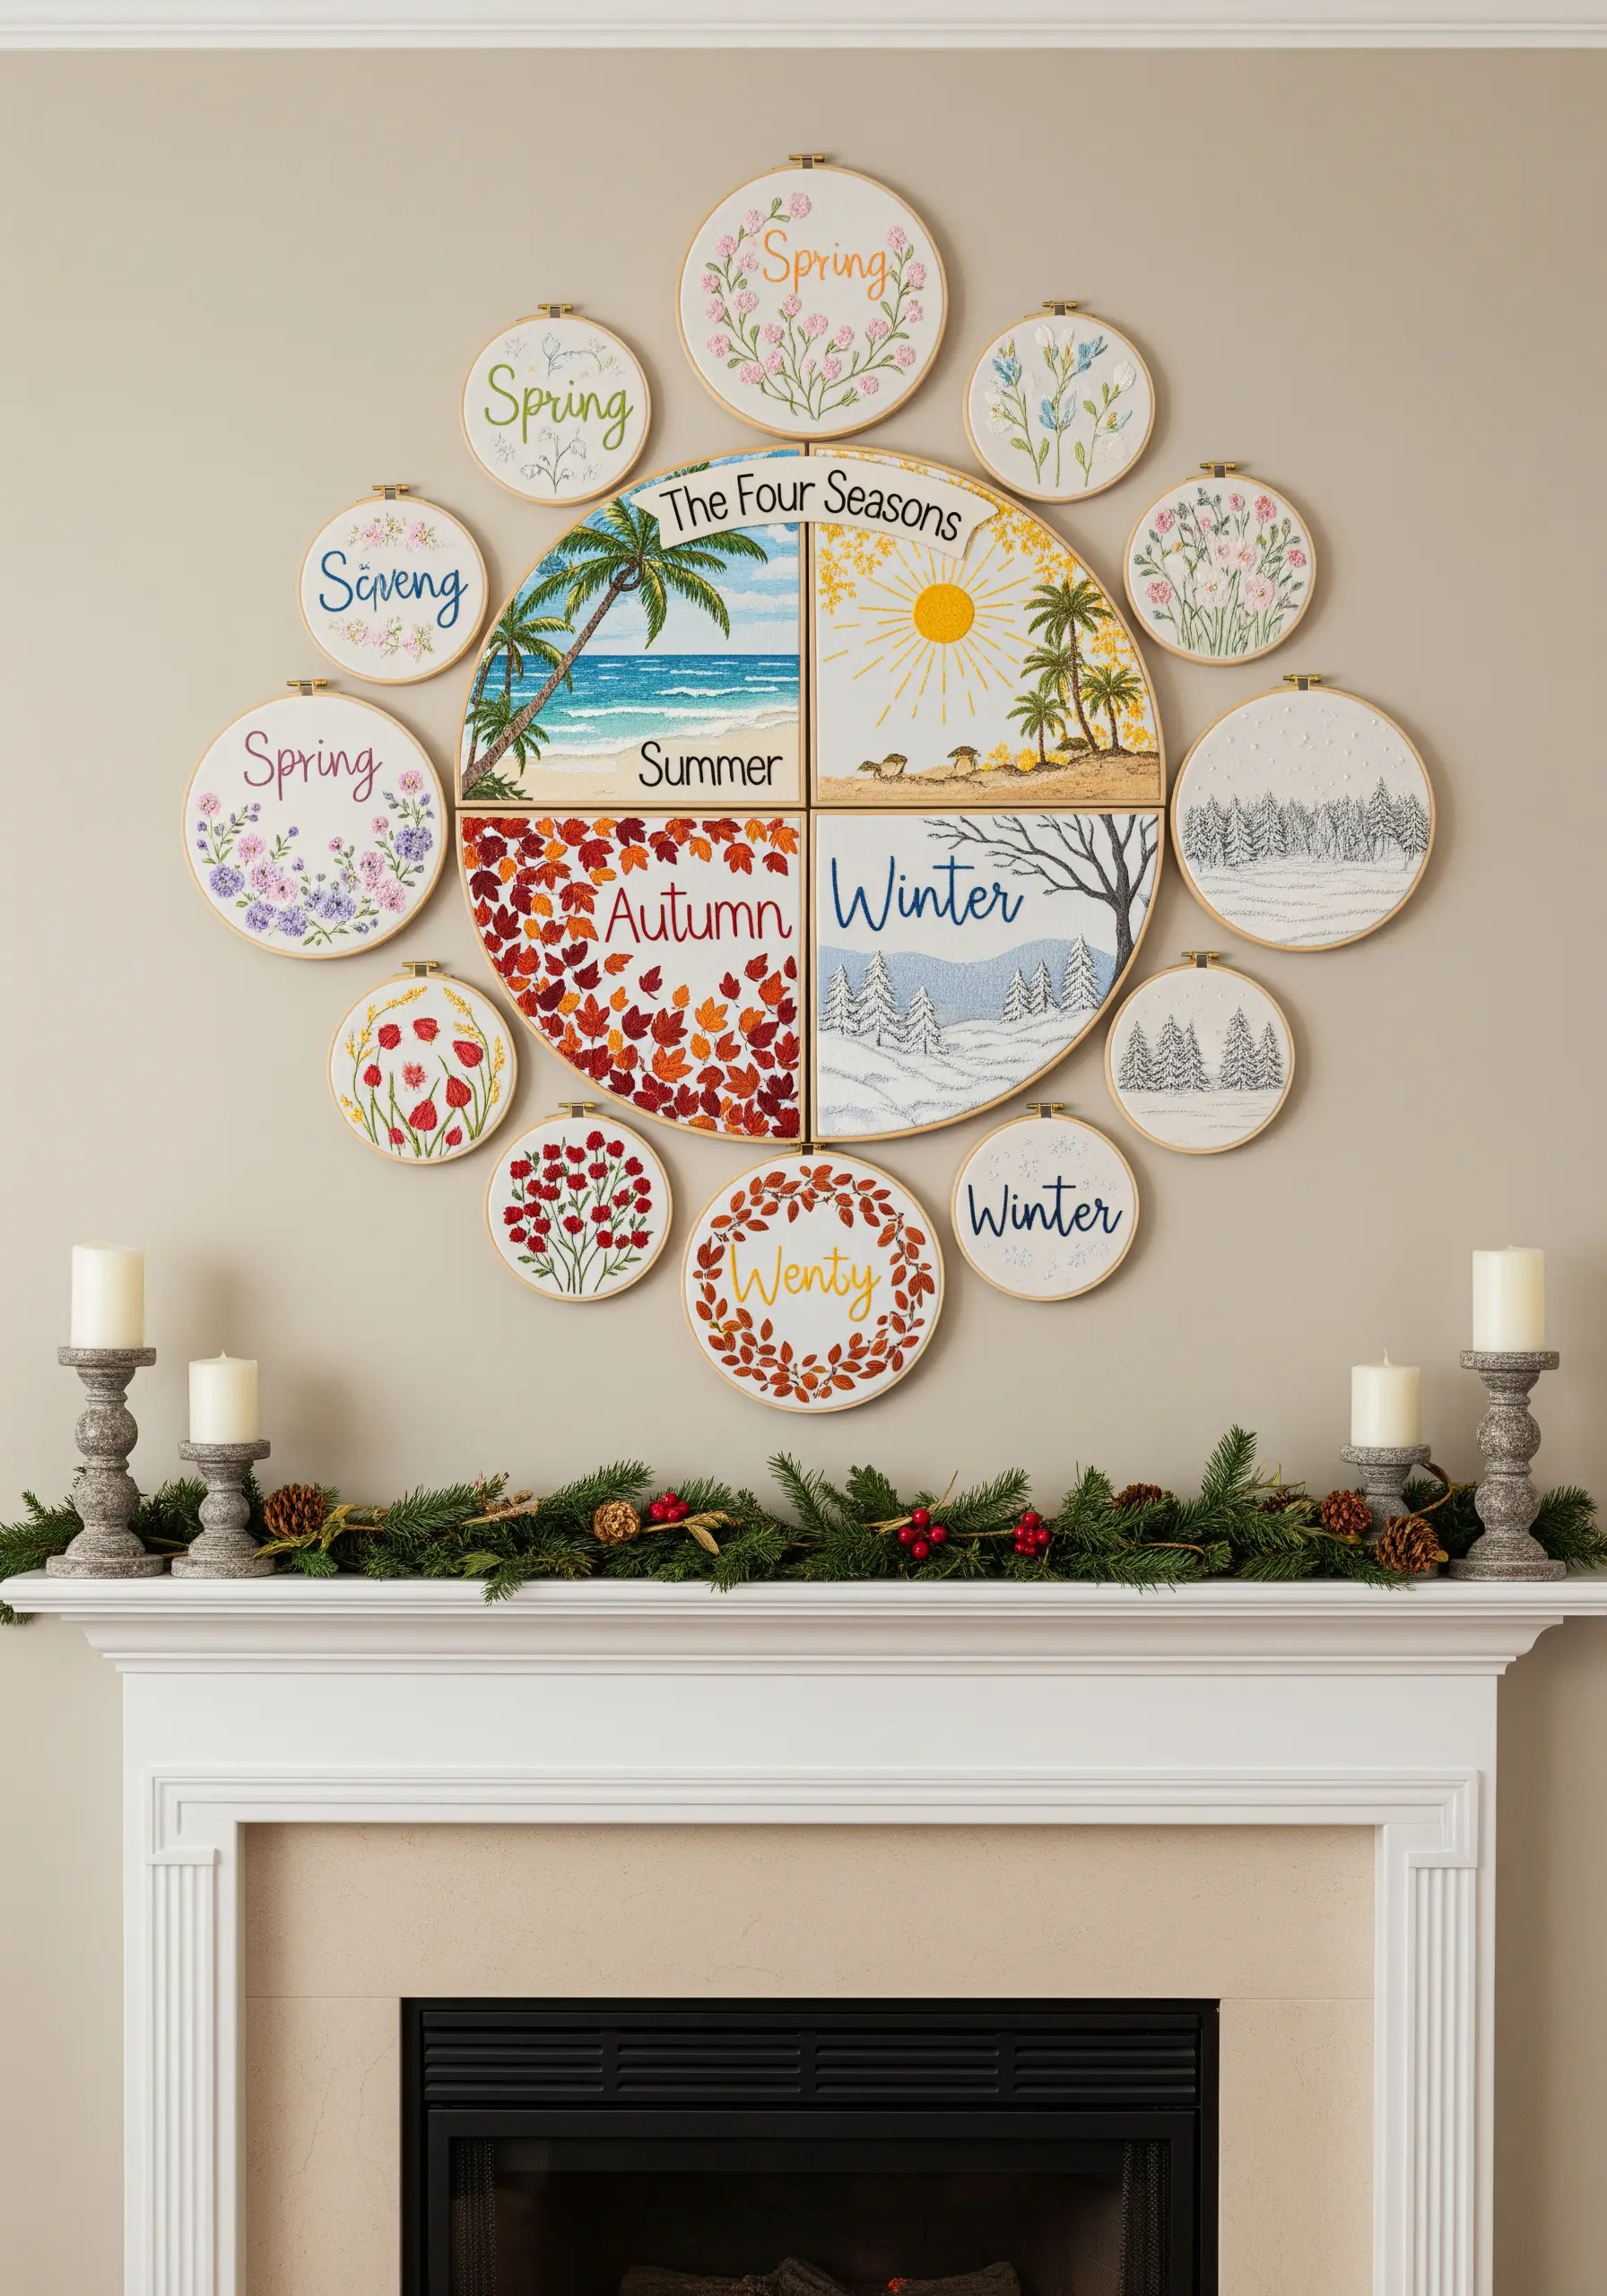
Design a beautiful ‘Four Seasons’ display by arranging your hoops in a circular, clock-like formation.
Use a large central hoop, divided into four quadrants, to depict a signature landscape for each season.
Surround this centerpiece with smaller hoops that feature specific seasonal motifs—spring florals, autumn leaves, summer sun, and winter snowflakes.
This creates a wonderfully cohesive and meaningful collection that tells the story of the year.
26. Illustrate Architecture with Precision Line Work
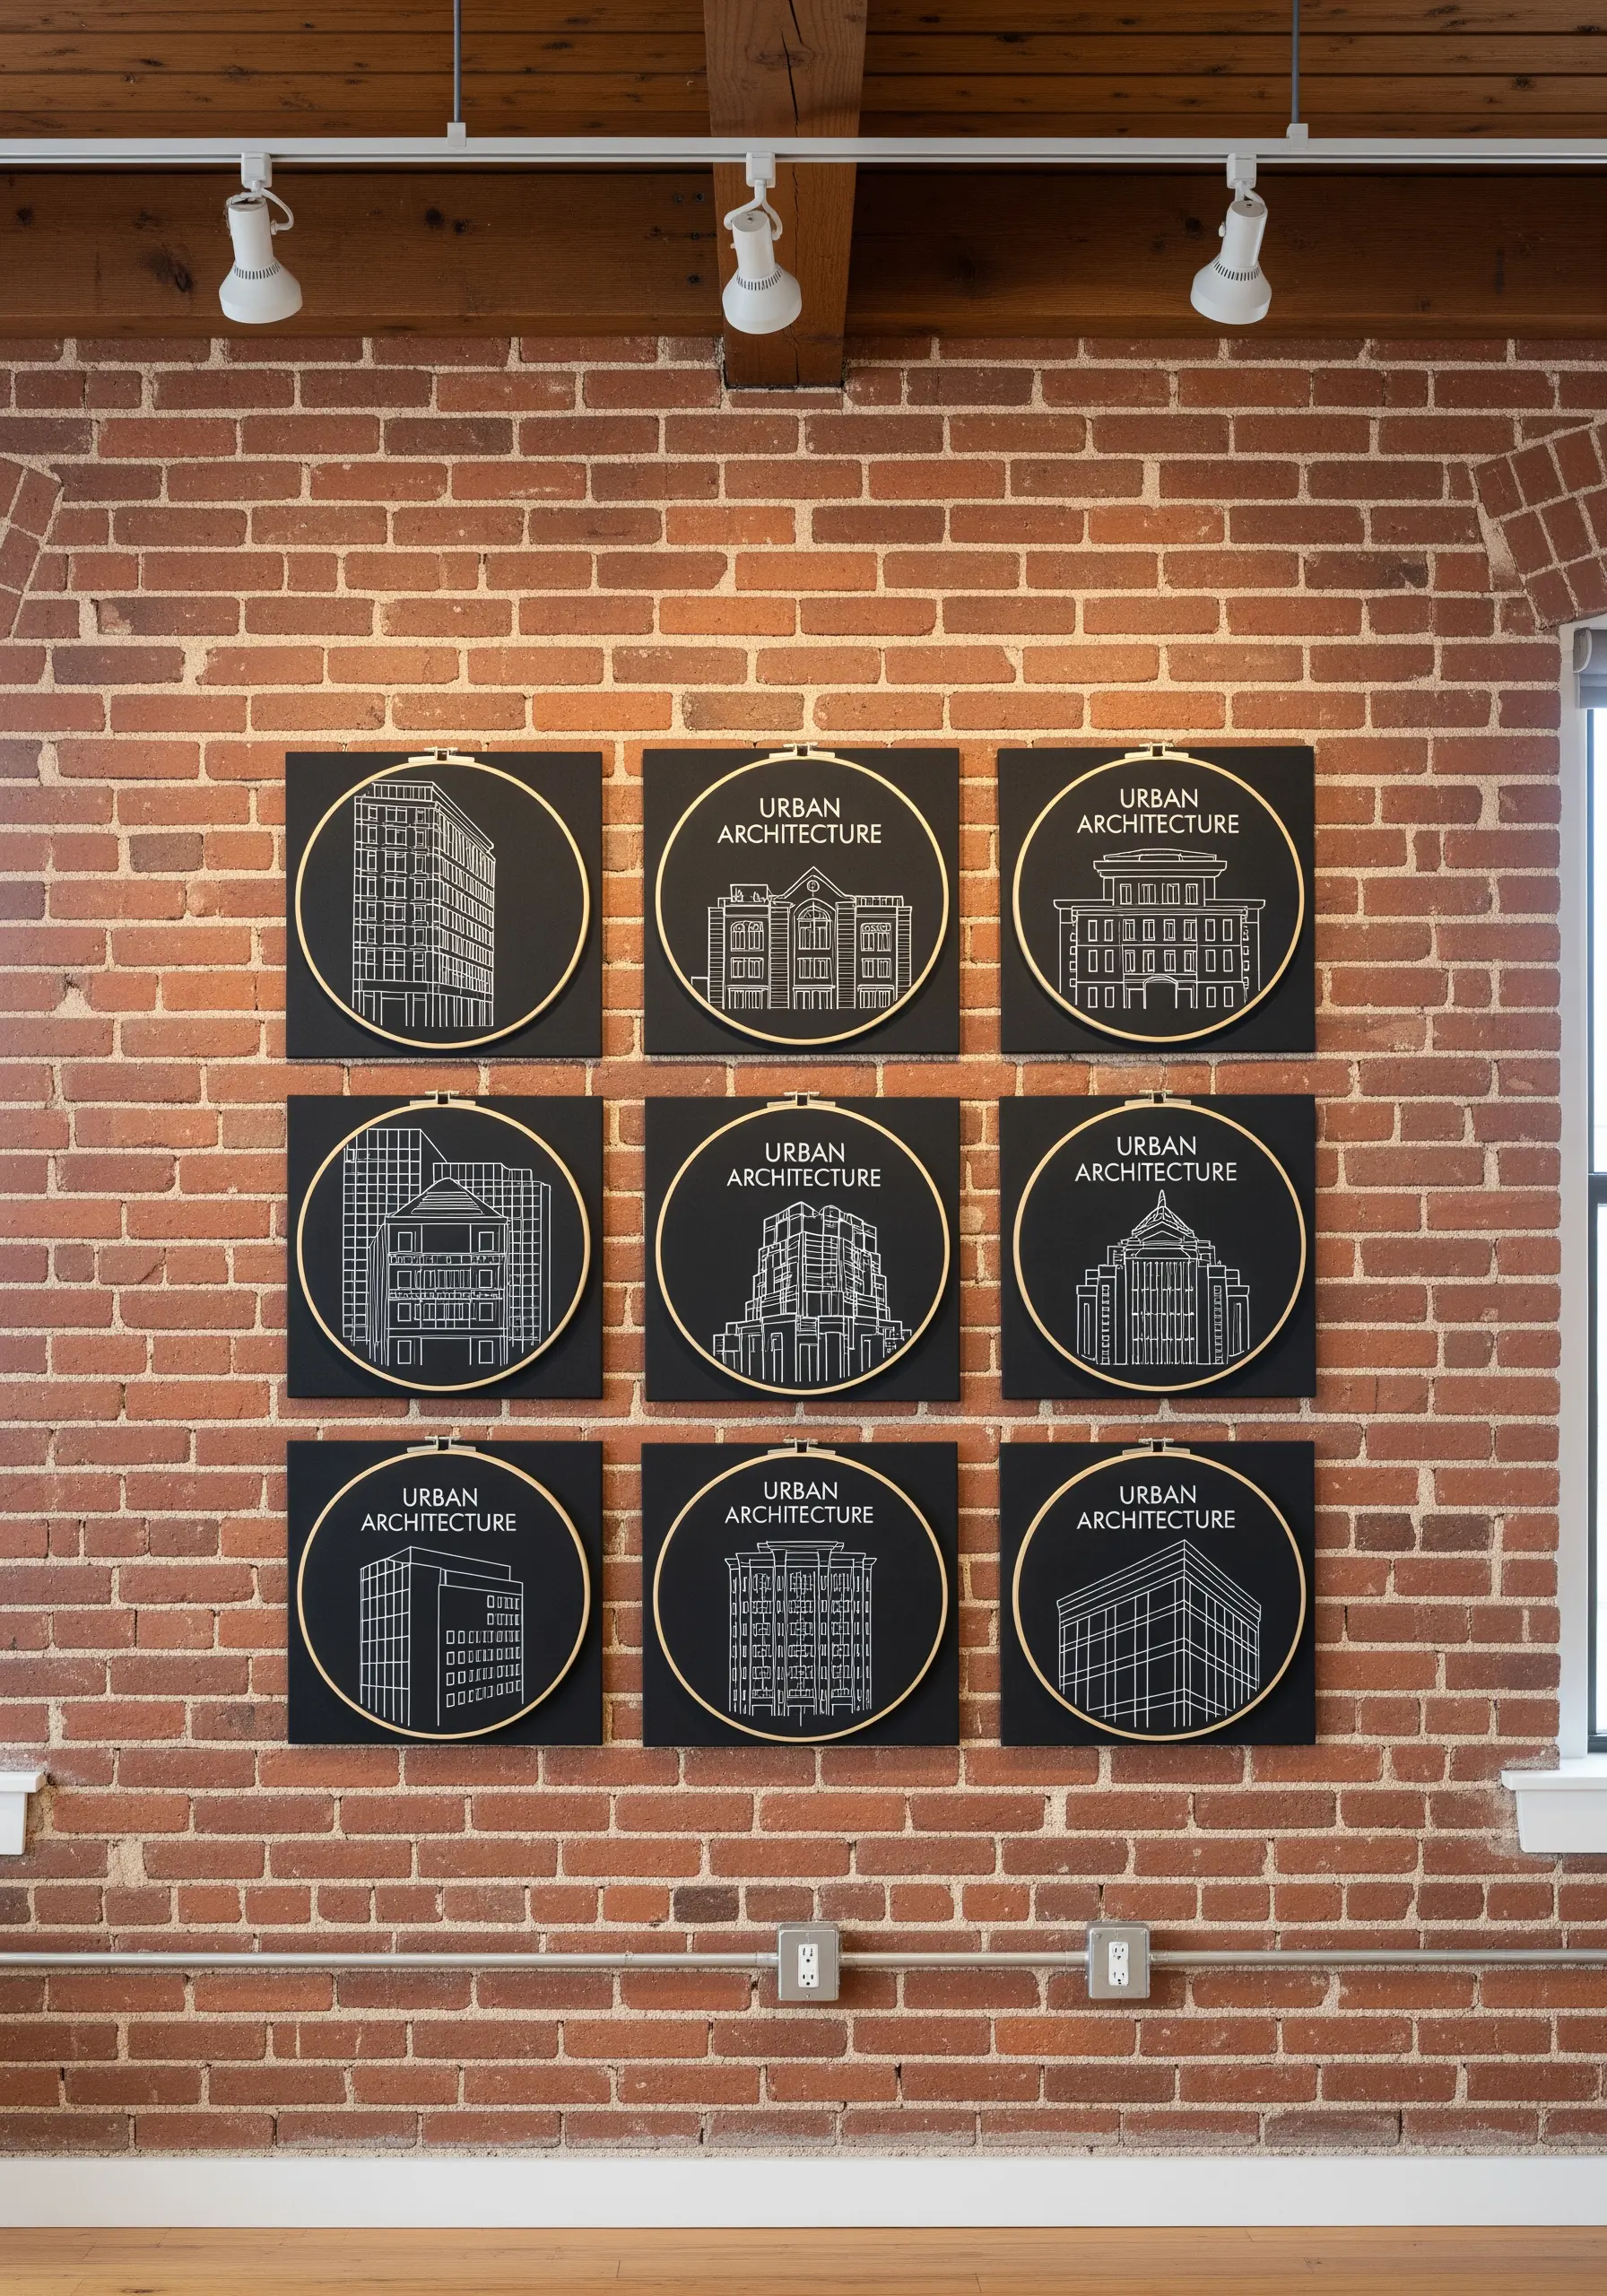
Create a striking ‘blueprint’ effect by stitching architectural illustrations with white thread on black fabric.
The key to this style is precision.
Use a single strand of floss and a tiny backstitch or split stitch to achieve sharp, clean lines.
Choose buildings with interesting geometric shapes and patterns.
The high contrast and detailed line work will result in a sophisticated, gallery-worthy collection that celebrates urban design.
27. Explore Geology with a Textured Strata Display

Turn a science lesson into art by representing geological layers with a variety of stitches and threads.
Create a visual timeline that flows down the wall, with each hoop depicting a different stratum or fossil.
Use smooth satin stitches for clay, dense French knots for sand or gravel, and couched, variegated yarn for mineral veins.
This is a creative way to explore how depth in your embroidery using natural textures can tell a compelling story.
28. Craft a Serene White-on-White Texture Study
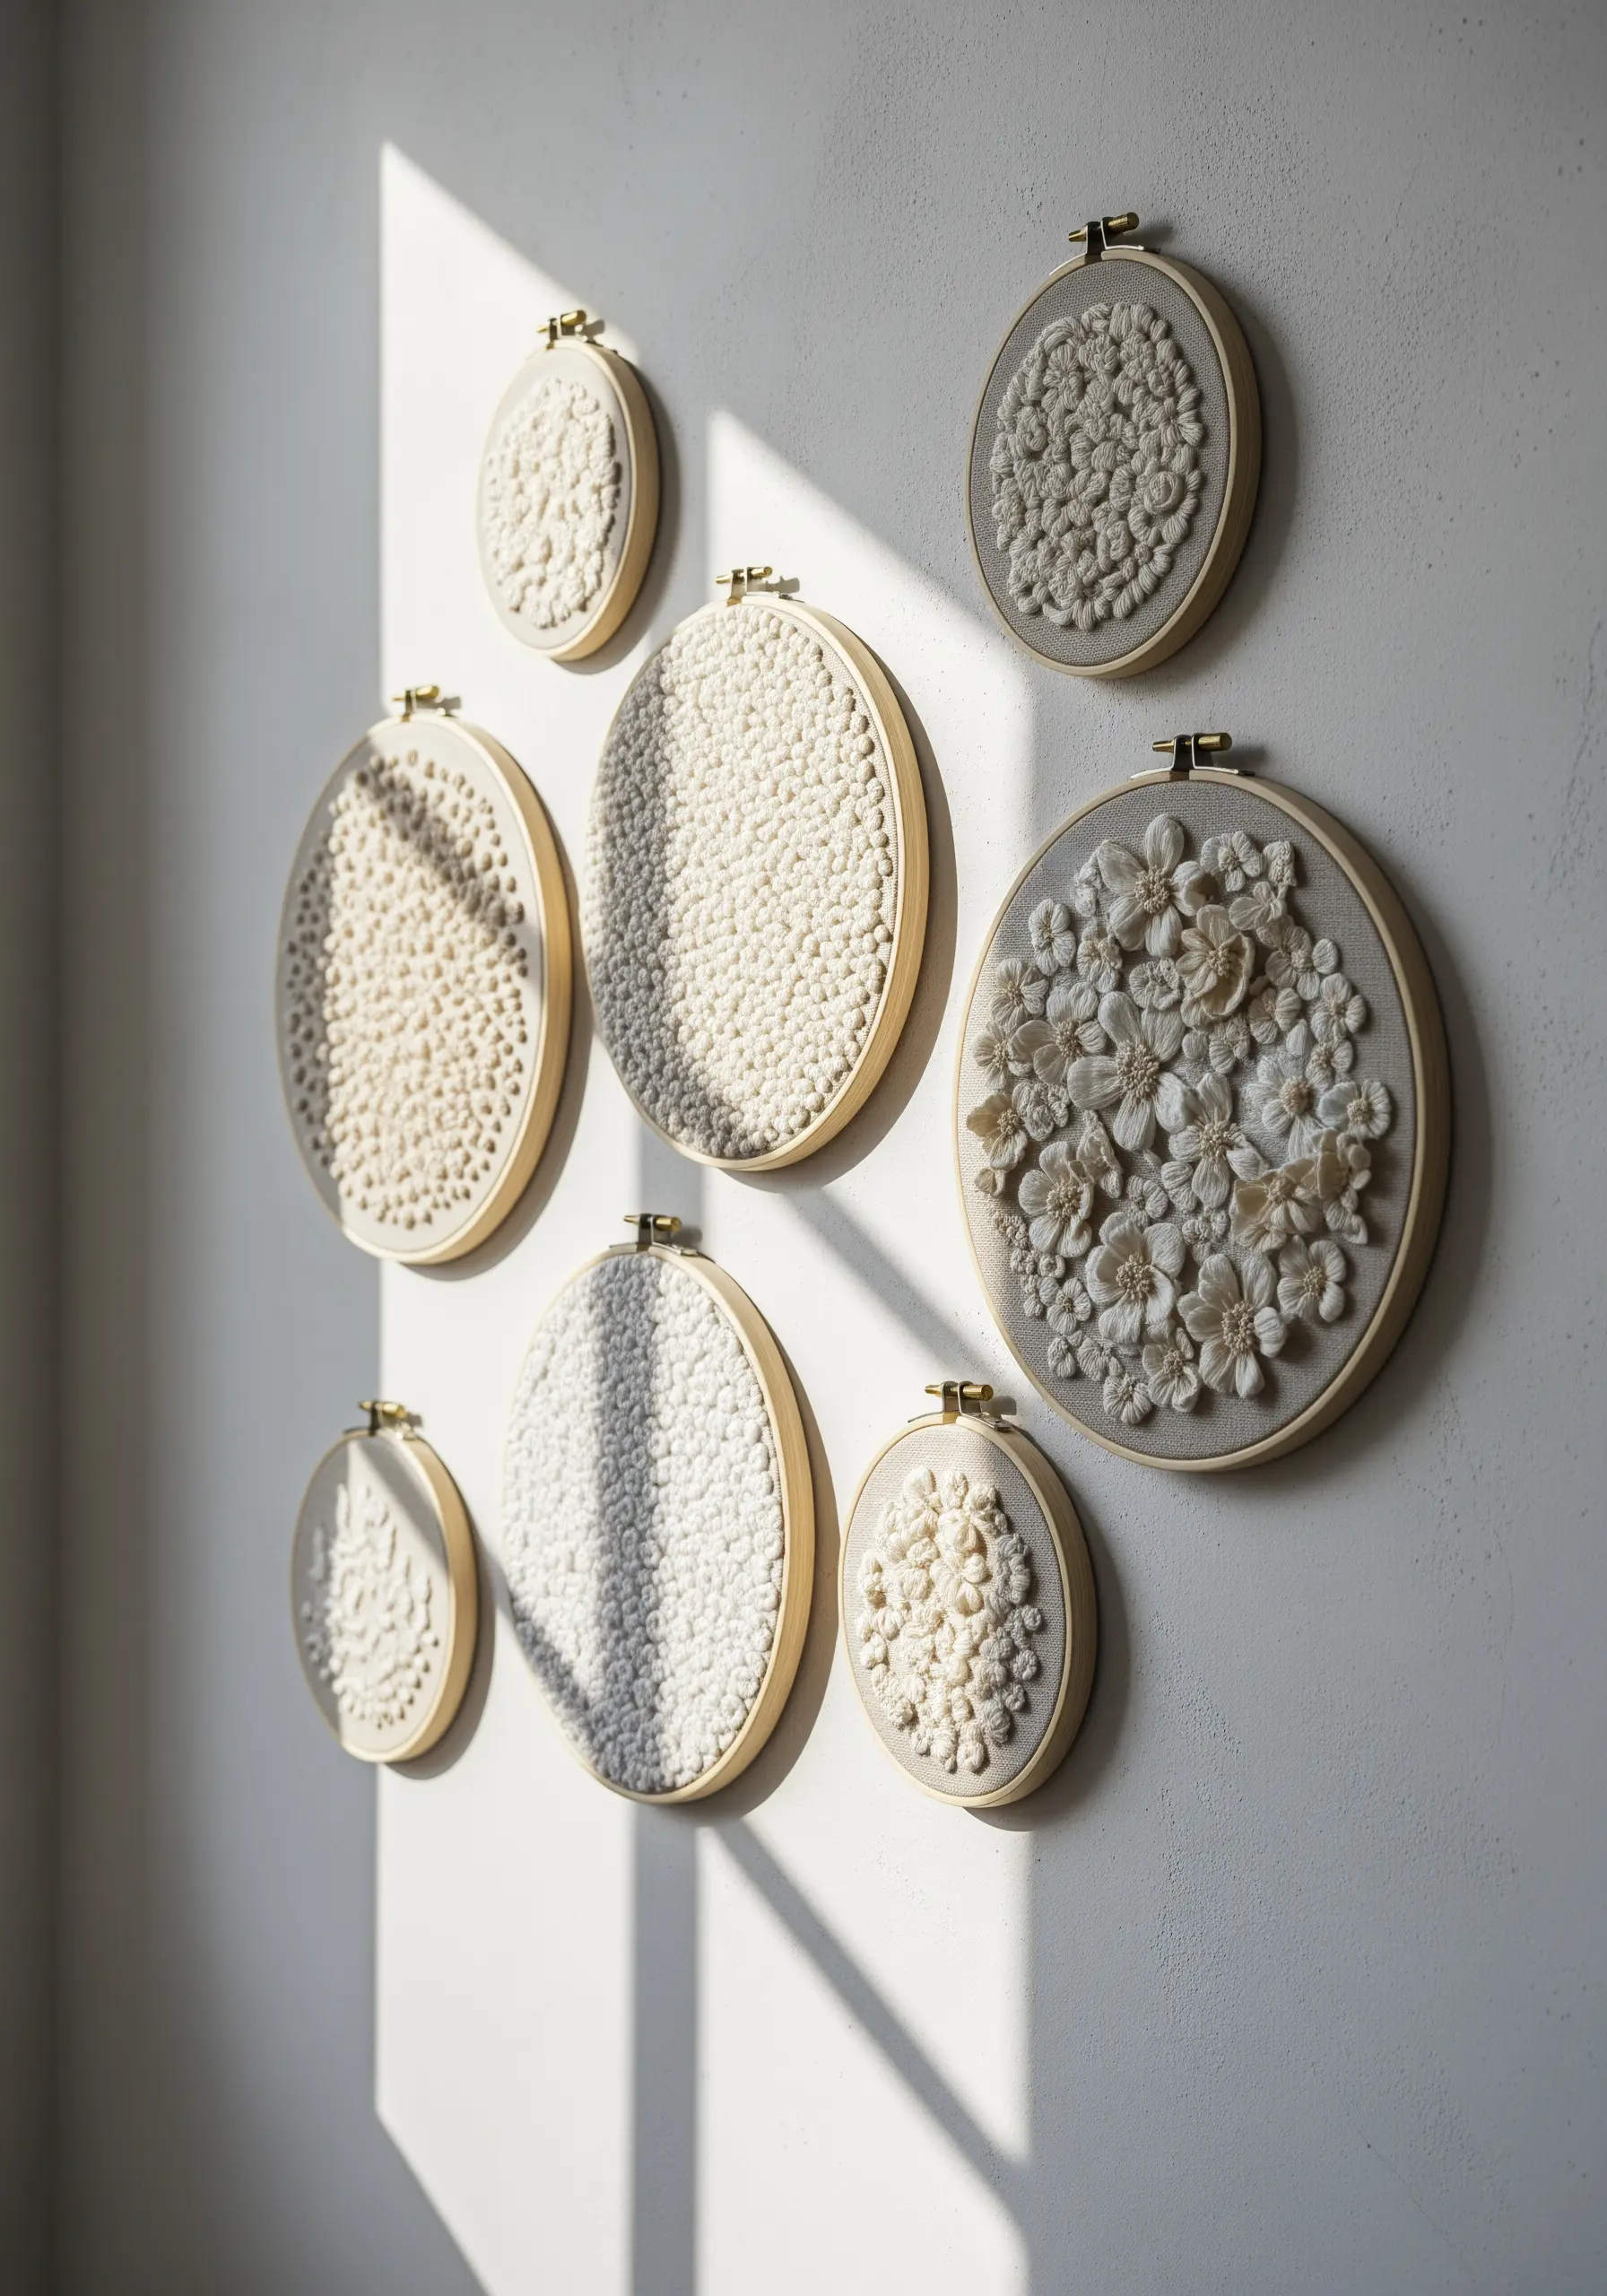
Explore the beauty of pure texture by creating a white-on-white elegance collection.
Working with only white or cream thread on a neutral fabric forces you to focus on the sculptural quality of your stitches.
Fill hoops with dense fields of French knots, intricate patterns of bullion knots, or delicate 3D woven picot flowers.
The way light and shadow play across the different textures creates a subtle, sophisticated, and deeply calming visual effect.
29. Signal Your Style with Graphic Nautical Motifs

Create a crisp, coastal gallery wall with classic nautical symbols.
The success of this style lies in flawless execution.
Use a dense, perfectly smooth satin stitch to fill in the bold shapes of anchors and maritime signal flags.
To achieve sharp, clean edges, outline each shape with a split stitch before you begin filling it in.
A tight color palette of navy blue, signal red, and sailcloth white keeps the look classic and cohesive.
30. Design an Ethereal Display with Floating Fabrics

Create an incredibly delicate and dimensional effect by incorporating real fabric elements into your hoops.
Instead of stitching a full illustration, use minimal embroidery to outline a shape or add a small detail.
Then, carefully position and hand-tack a piece of lace, tulle, or sheer fabric within the hoop to complete the design.
This mixed-media approach plays with transparency and negative space, resulting in a light, airy, and truly unique piece of art.
31. Pay Homage to Literature with Embroidered Book Covers

Turn your bookshelf into an art gallery by recreating the covers of your favorite classic novels.
This technique challenges you to translate graphic design and typography into thread.
Use a single-strand backstitch for small text and a tidy satin stitch for color blocking.
Focus on capturing the key elements that make each cover iconic.
Displaying the finished hoops alongside the actual books creates a thoughtful and personalized literary vignette.
32. Emulate Stained Glass with Bold Lines and Jewel Tones

Capture the luminous quality of stained glass by using thick, dark outlines and rich, jewel-toned fills.
Create your ‘leading’ by using a padded stem stitch or by couching thick black yarn to create a raised, defined line.
Fill the sections between the lines with vibrant satin stitches in colors like ruby red, sapphire blue, and emerald green.
The contrast between the heavy outlines and the silky, light-reflecting fills beautifully mimics the effect of light shining through glass.


