
Sometimes, the space between the stitches you know and the art you want to create can feel vast. You have the threads, the fabric, the desire—but the path to making something that feels truly finished, truly *yours*, isn’t always clear.
The secret isn’t in learning hundreds of complex new stitches. It’s in the thoughtful application of the ones you already love. It’s about choosing the right thread for the right texture, understanding how the direction of a single stitch can create light and shadow, and seeing everyday objects not just as they are, but as canvases for tiny, beautiful stories.
Here, you’ll find ideas that are more than just patterns; they are invitations to explore technique and material. These are small, manageable trinkets, each one a chance to build your skills and, more importantly, your confidence. Let’s turn ordinary items into extraordinary keepsakes, together.
1. Sculptural Thread Painting on Velvet
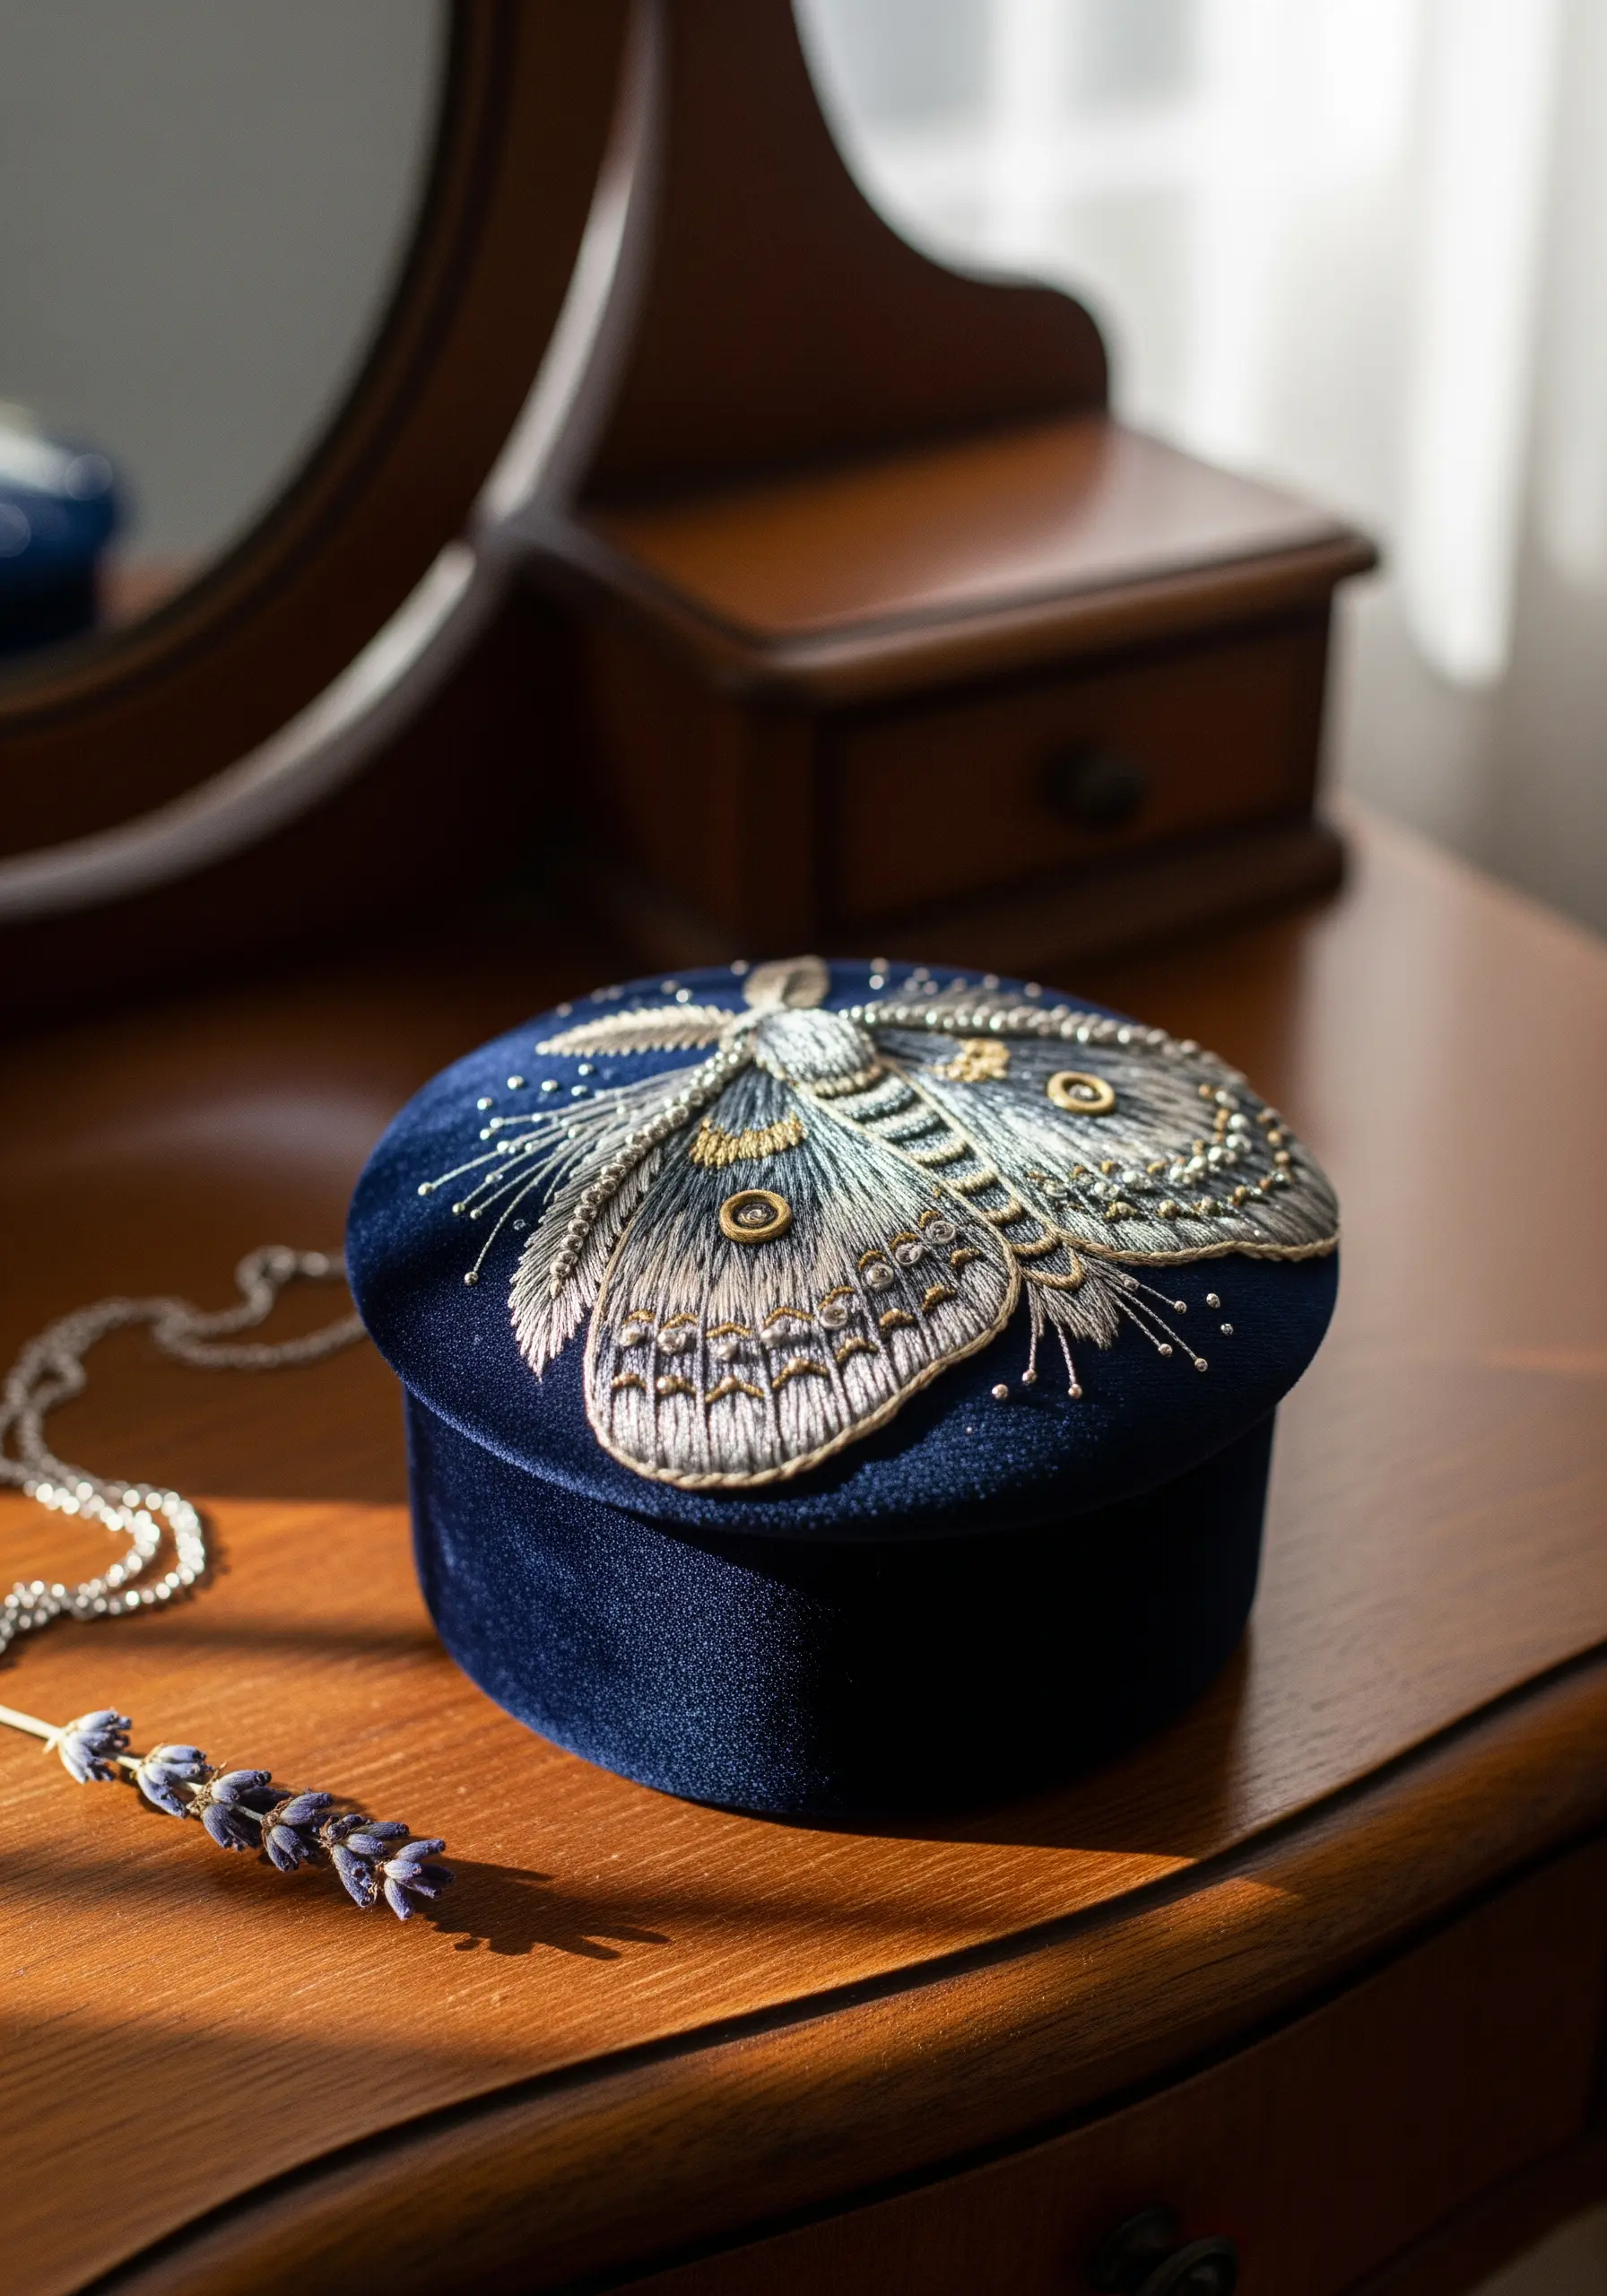
To embroider on a plush fabric like velvet, first use a water-soluble stabilizer on top to prevent the pile from swallowing your stitches.
Create a raised, 3D effect for the moth’s wings using the stumpwork technique; a layer of felt padding underneath, covered with a smooth long-and-short stitch, gives it lifelike dimension.
Choose high-sheen rayon or silk threads against the matte velvet to create a dramatic textural contrast, and use fine metallic filament for the antennae to catch the light.
2. Composing a Narrative Bookmark
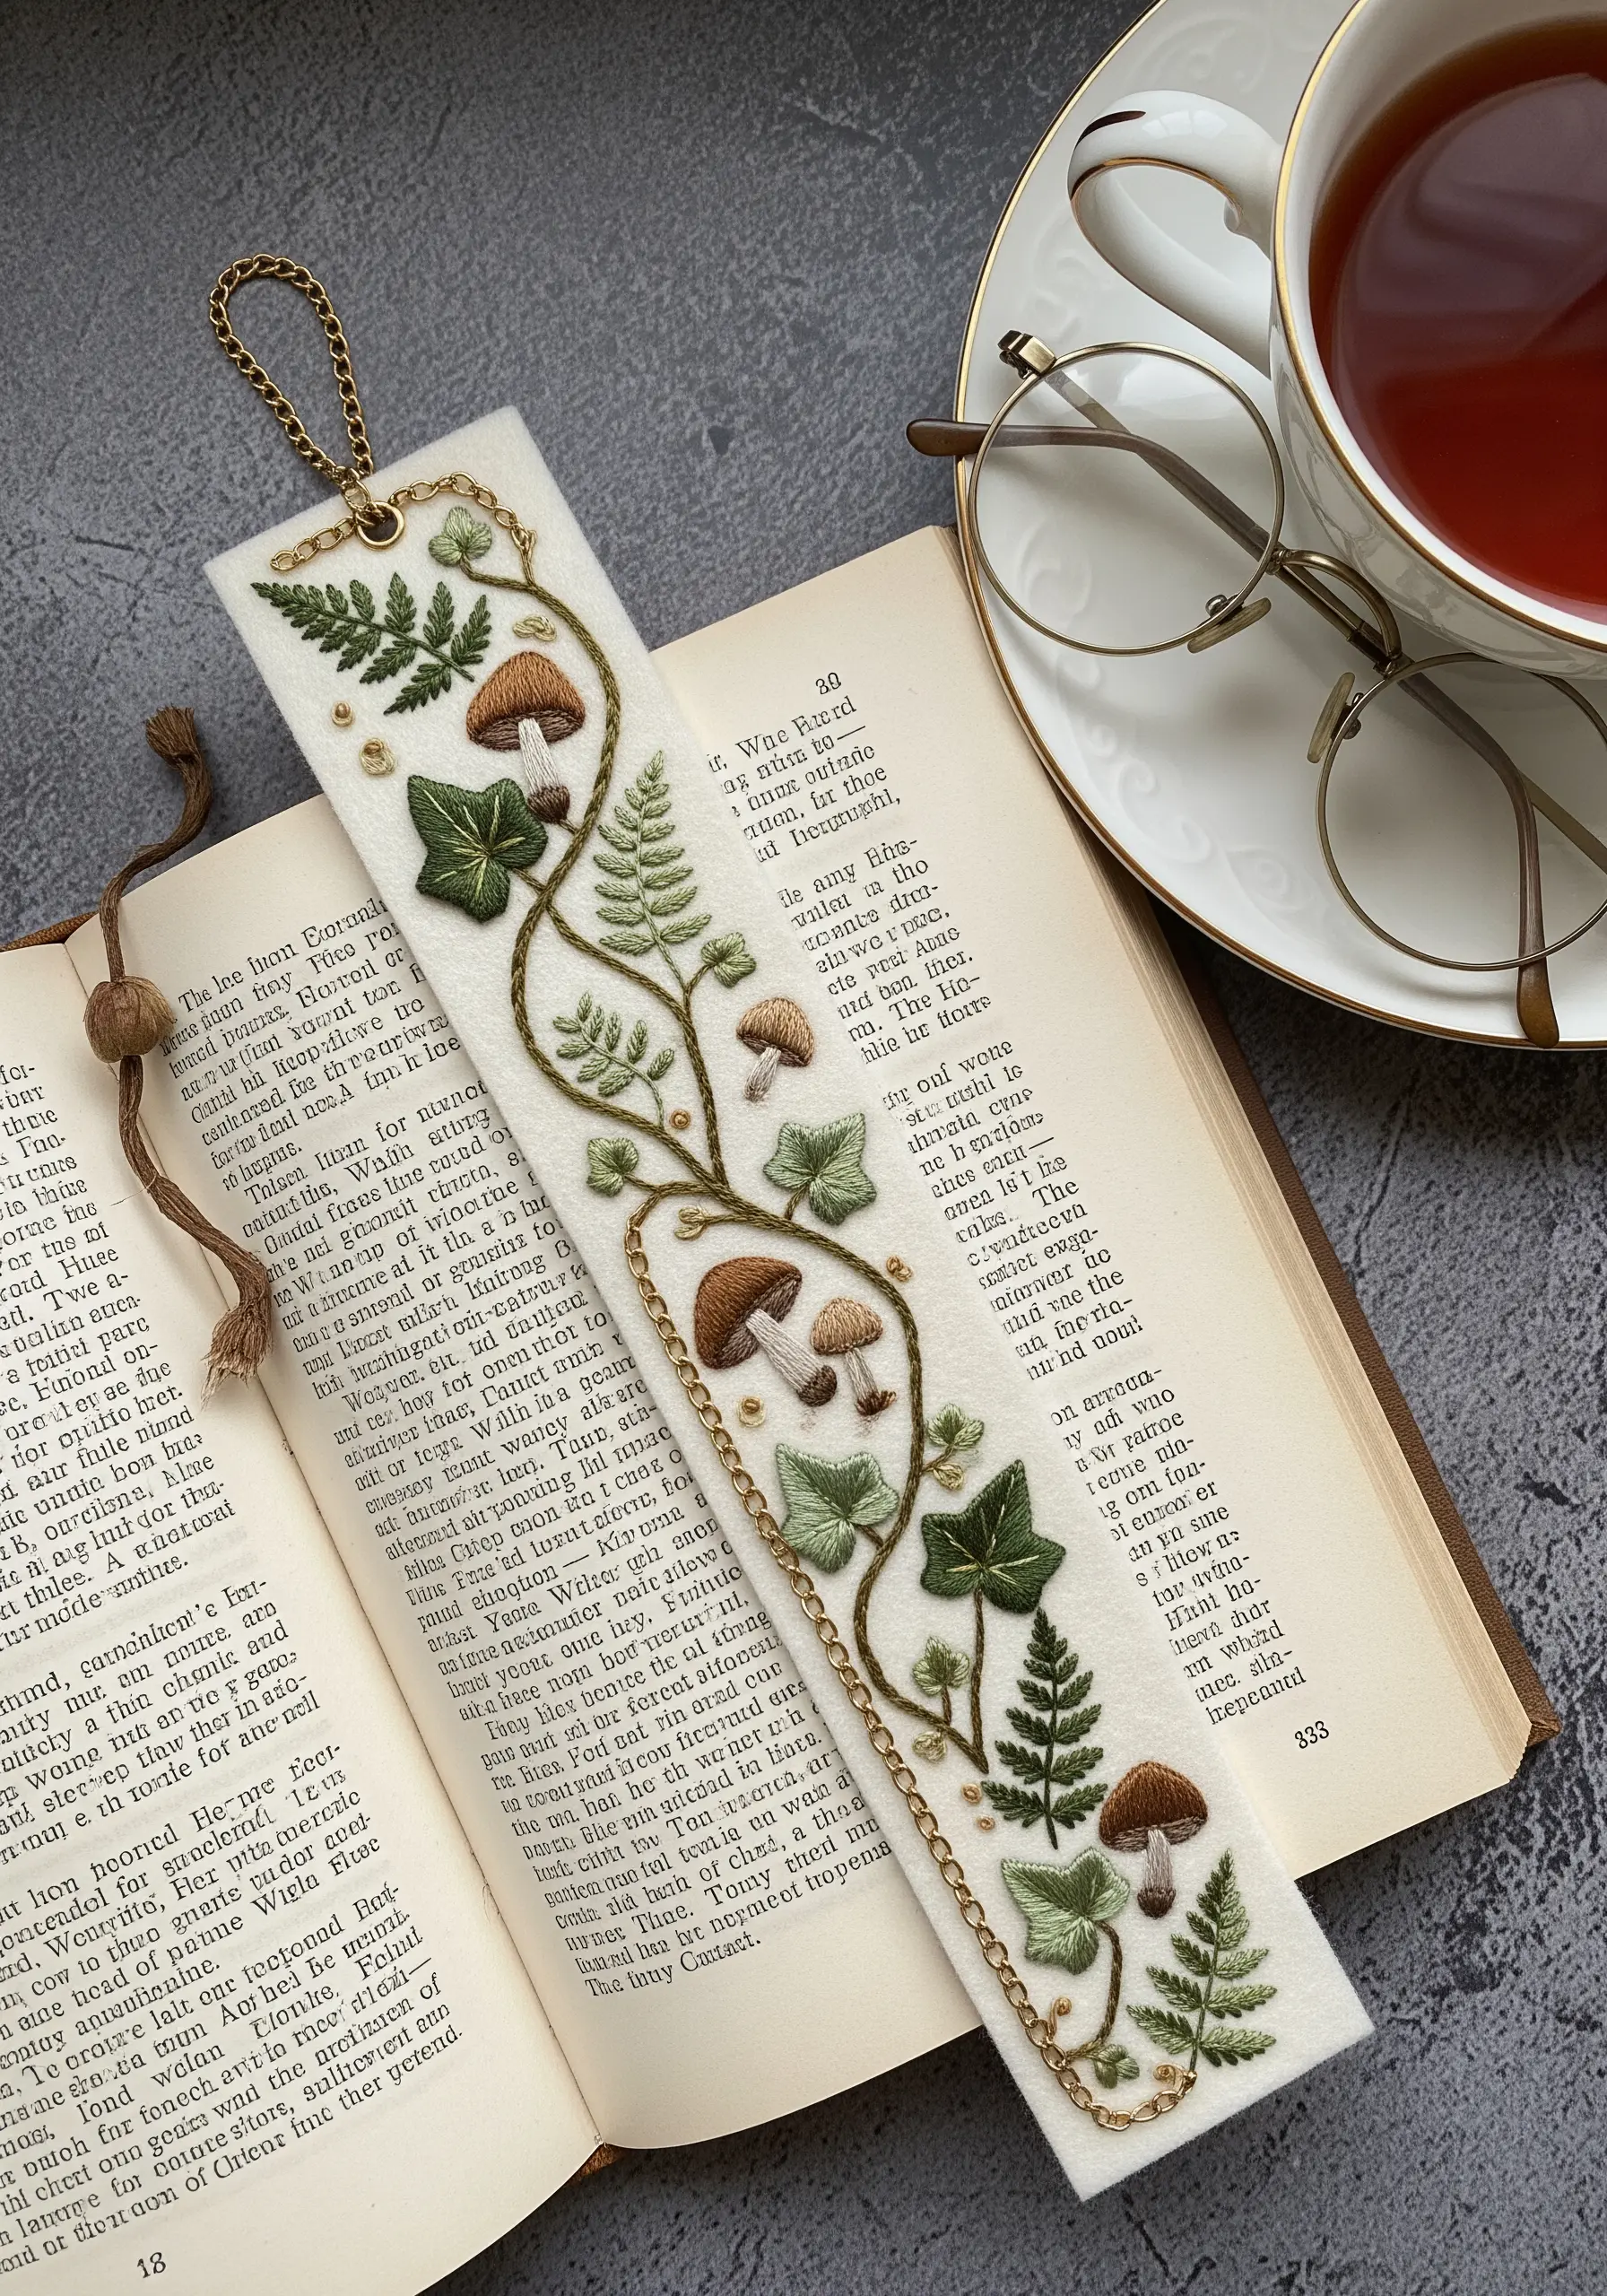
When designing a long, narrow piece like a bookmark, guide the viewer’s eye with a meandering composition rather than a static, straight line.
Introduce variety and realism by using distinct stitches for different plants; try a fishbone stitch for delicate ferns, padded satin stitch for mushroom caps, and a simple satin stitch for ivy leaves.
For a final touch of elegance, couch a fine metal chain along the vine’s path. This not only adds a beautiful, non-thread texture but also gives the bookmark a pleasant weight, helping it stay in place.
3. Painting Skies with Thread Gradients
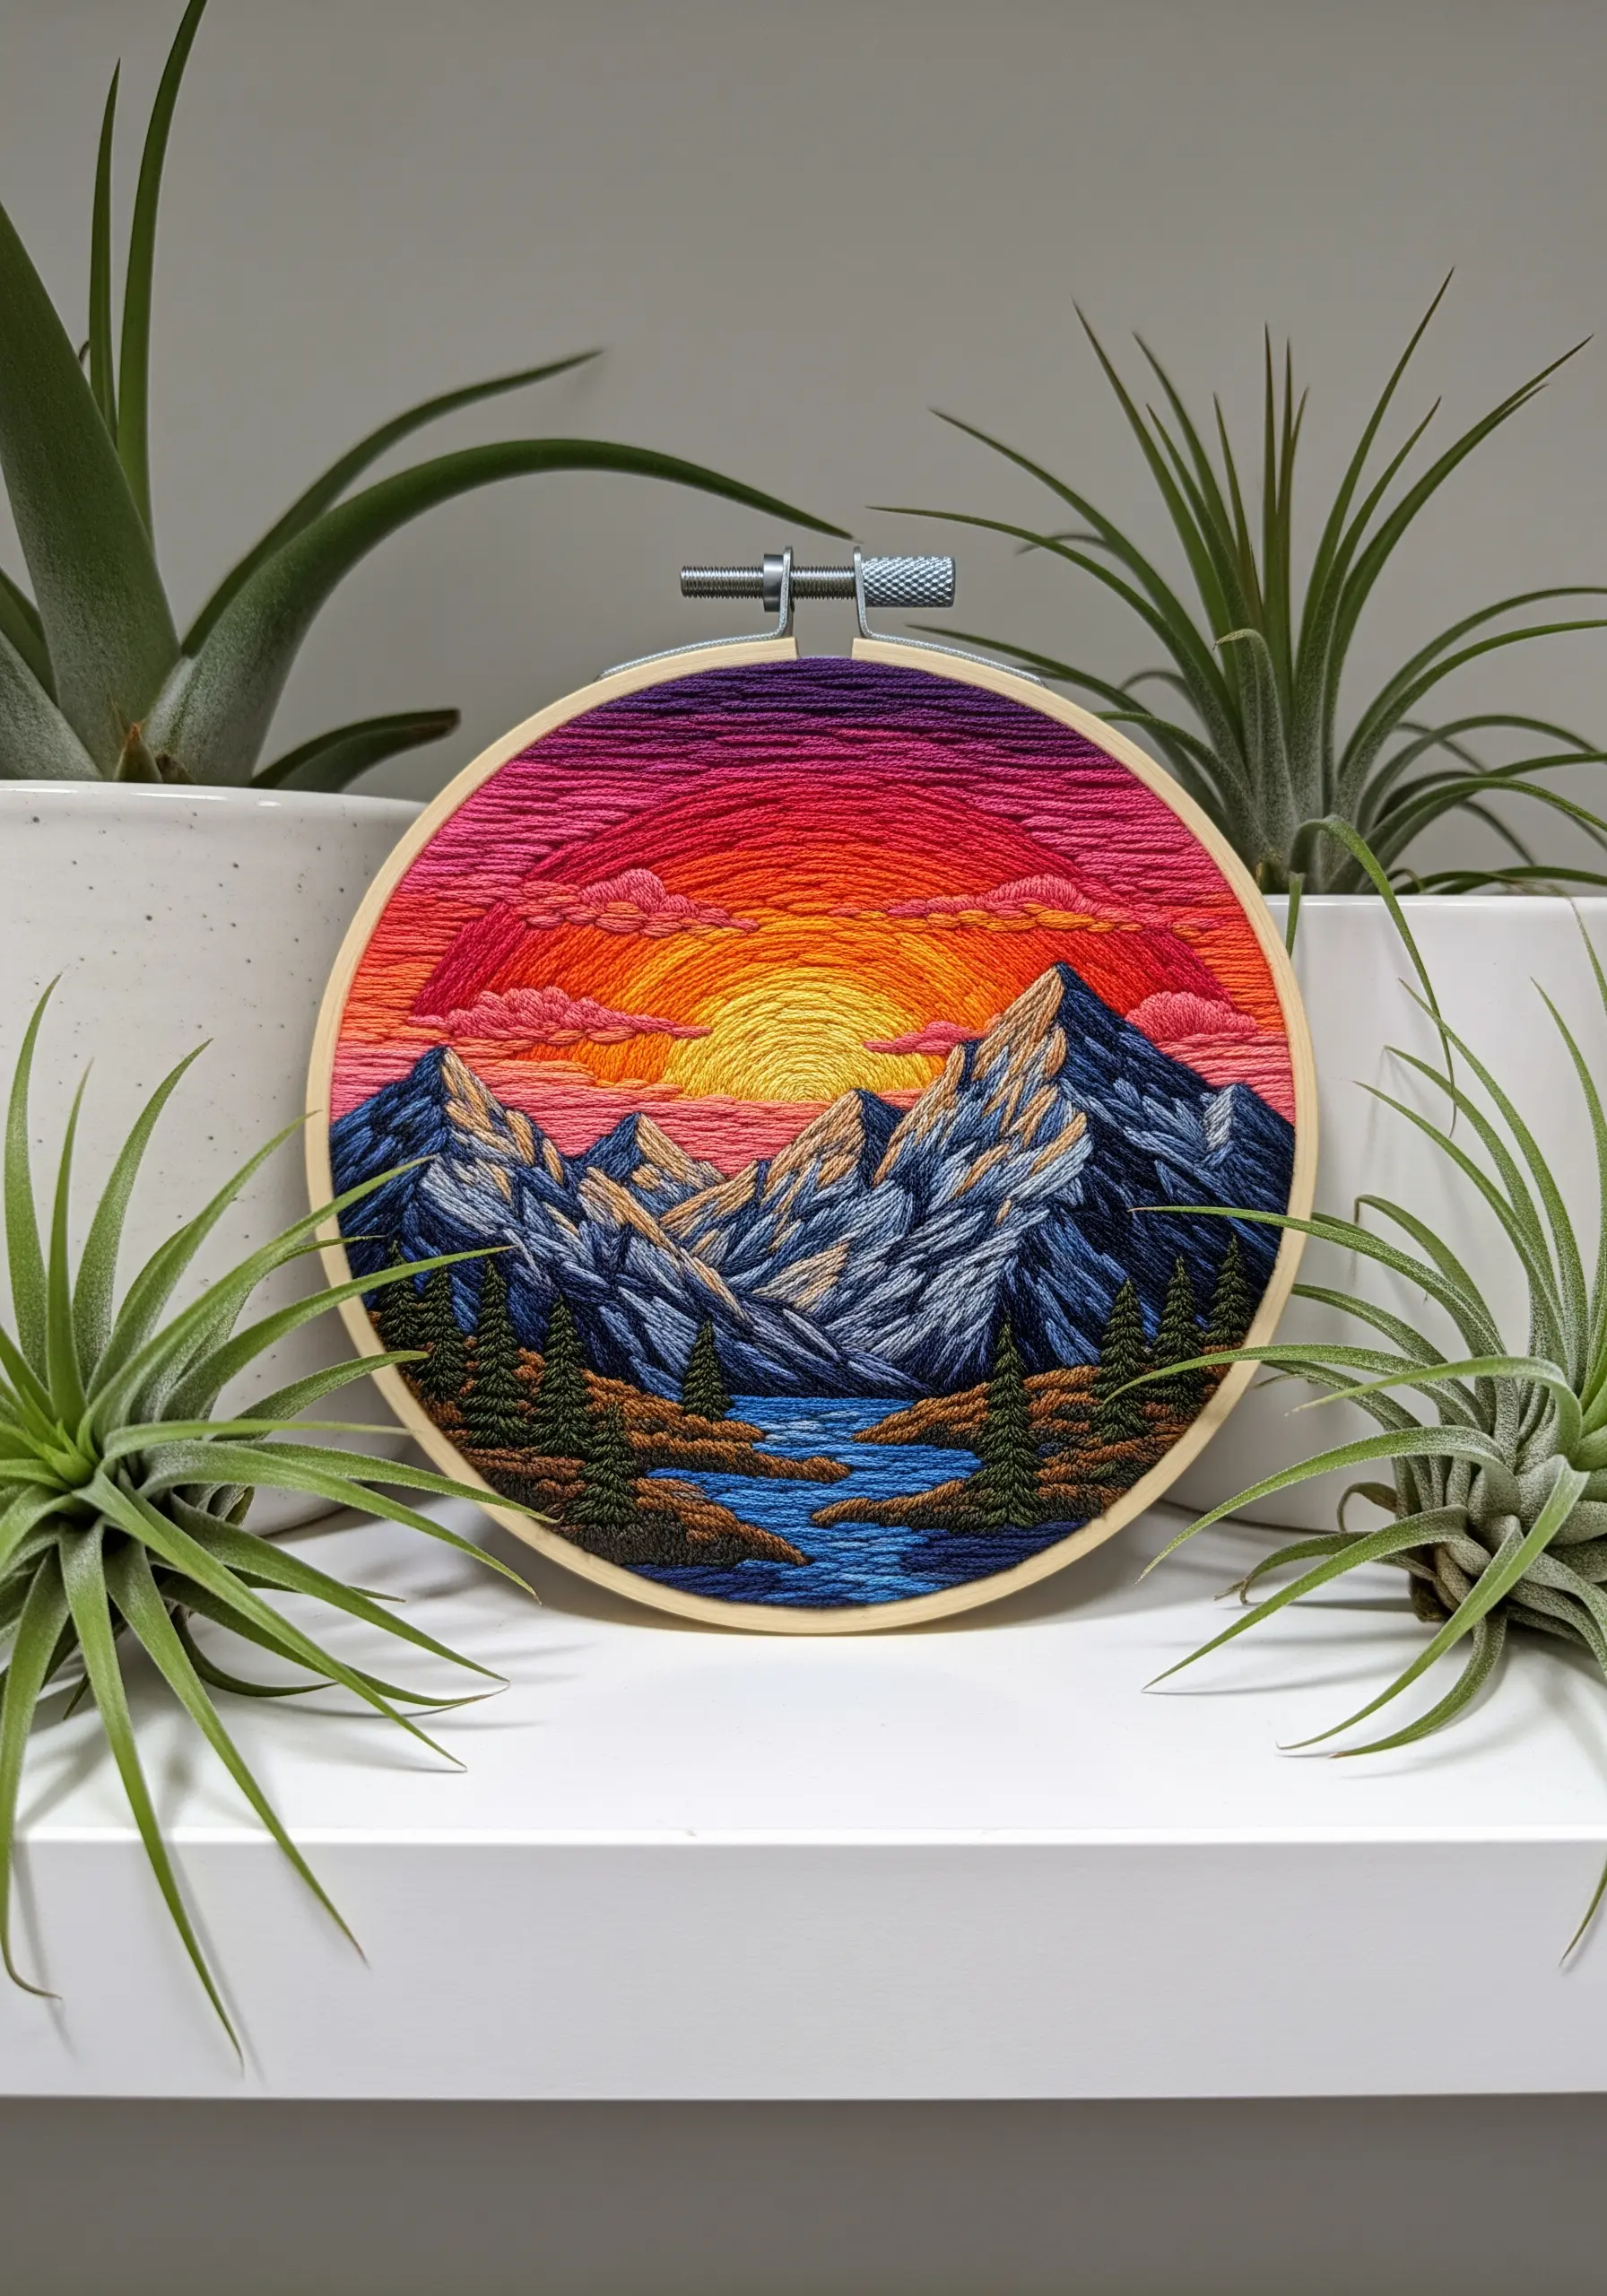
Achieve a seamless sunset by blending at least five shades of thread using the long-and-short stitch, creating what’s known as thread painting.
The key is to avoid hard lines; stagger the length of your stitches and allow them to overlap irregularly, just as colors bleed together in a real sky.
Contrast the horizontal flow of the sky with vertical satin stitches for the mountains. This simple change in stitch direction instantly creates the illusion of rocky faces and adds powerful depth to your mountain landscape.
4. Creating Illusions with Layered Organza
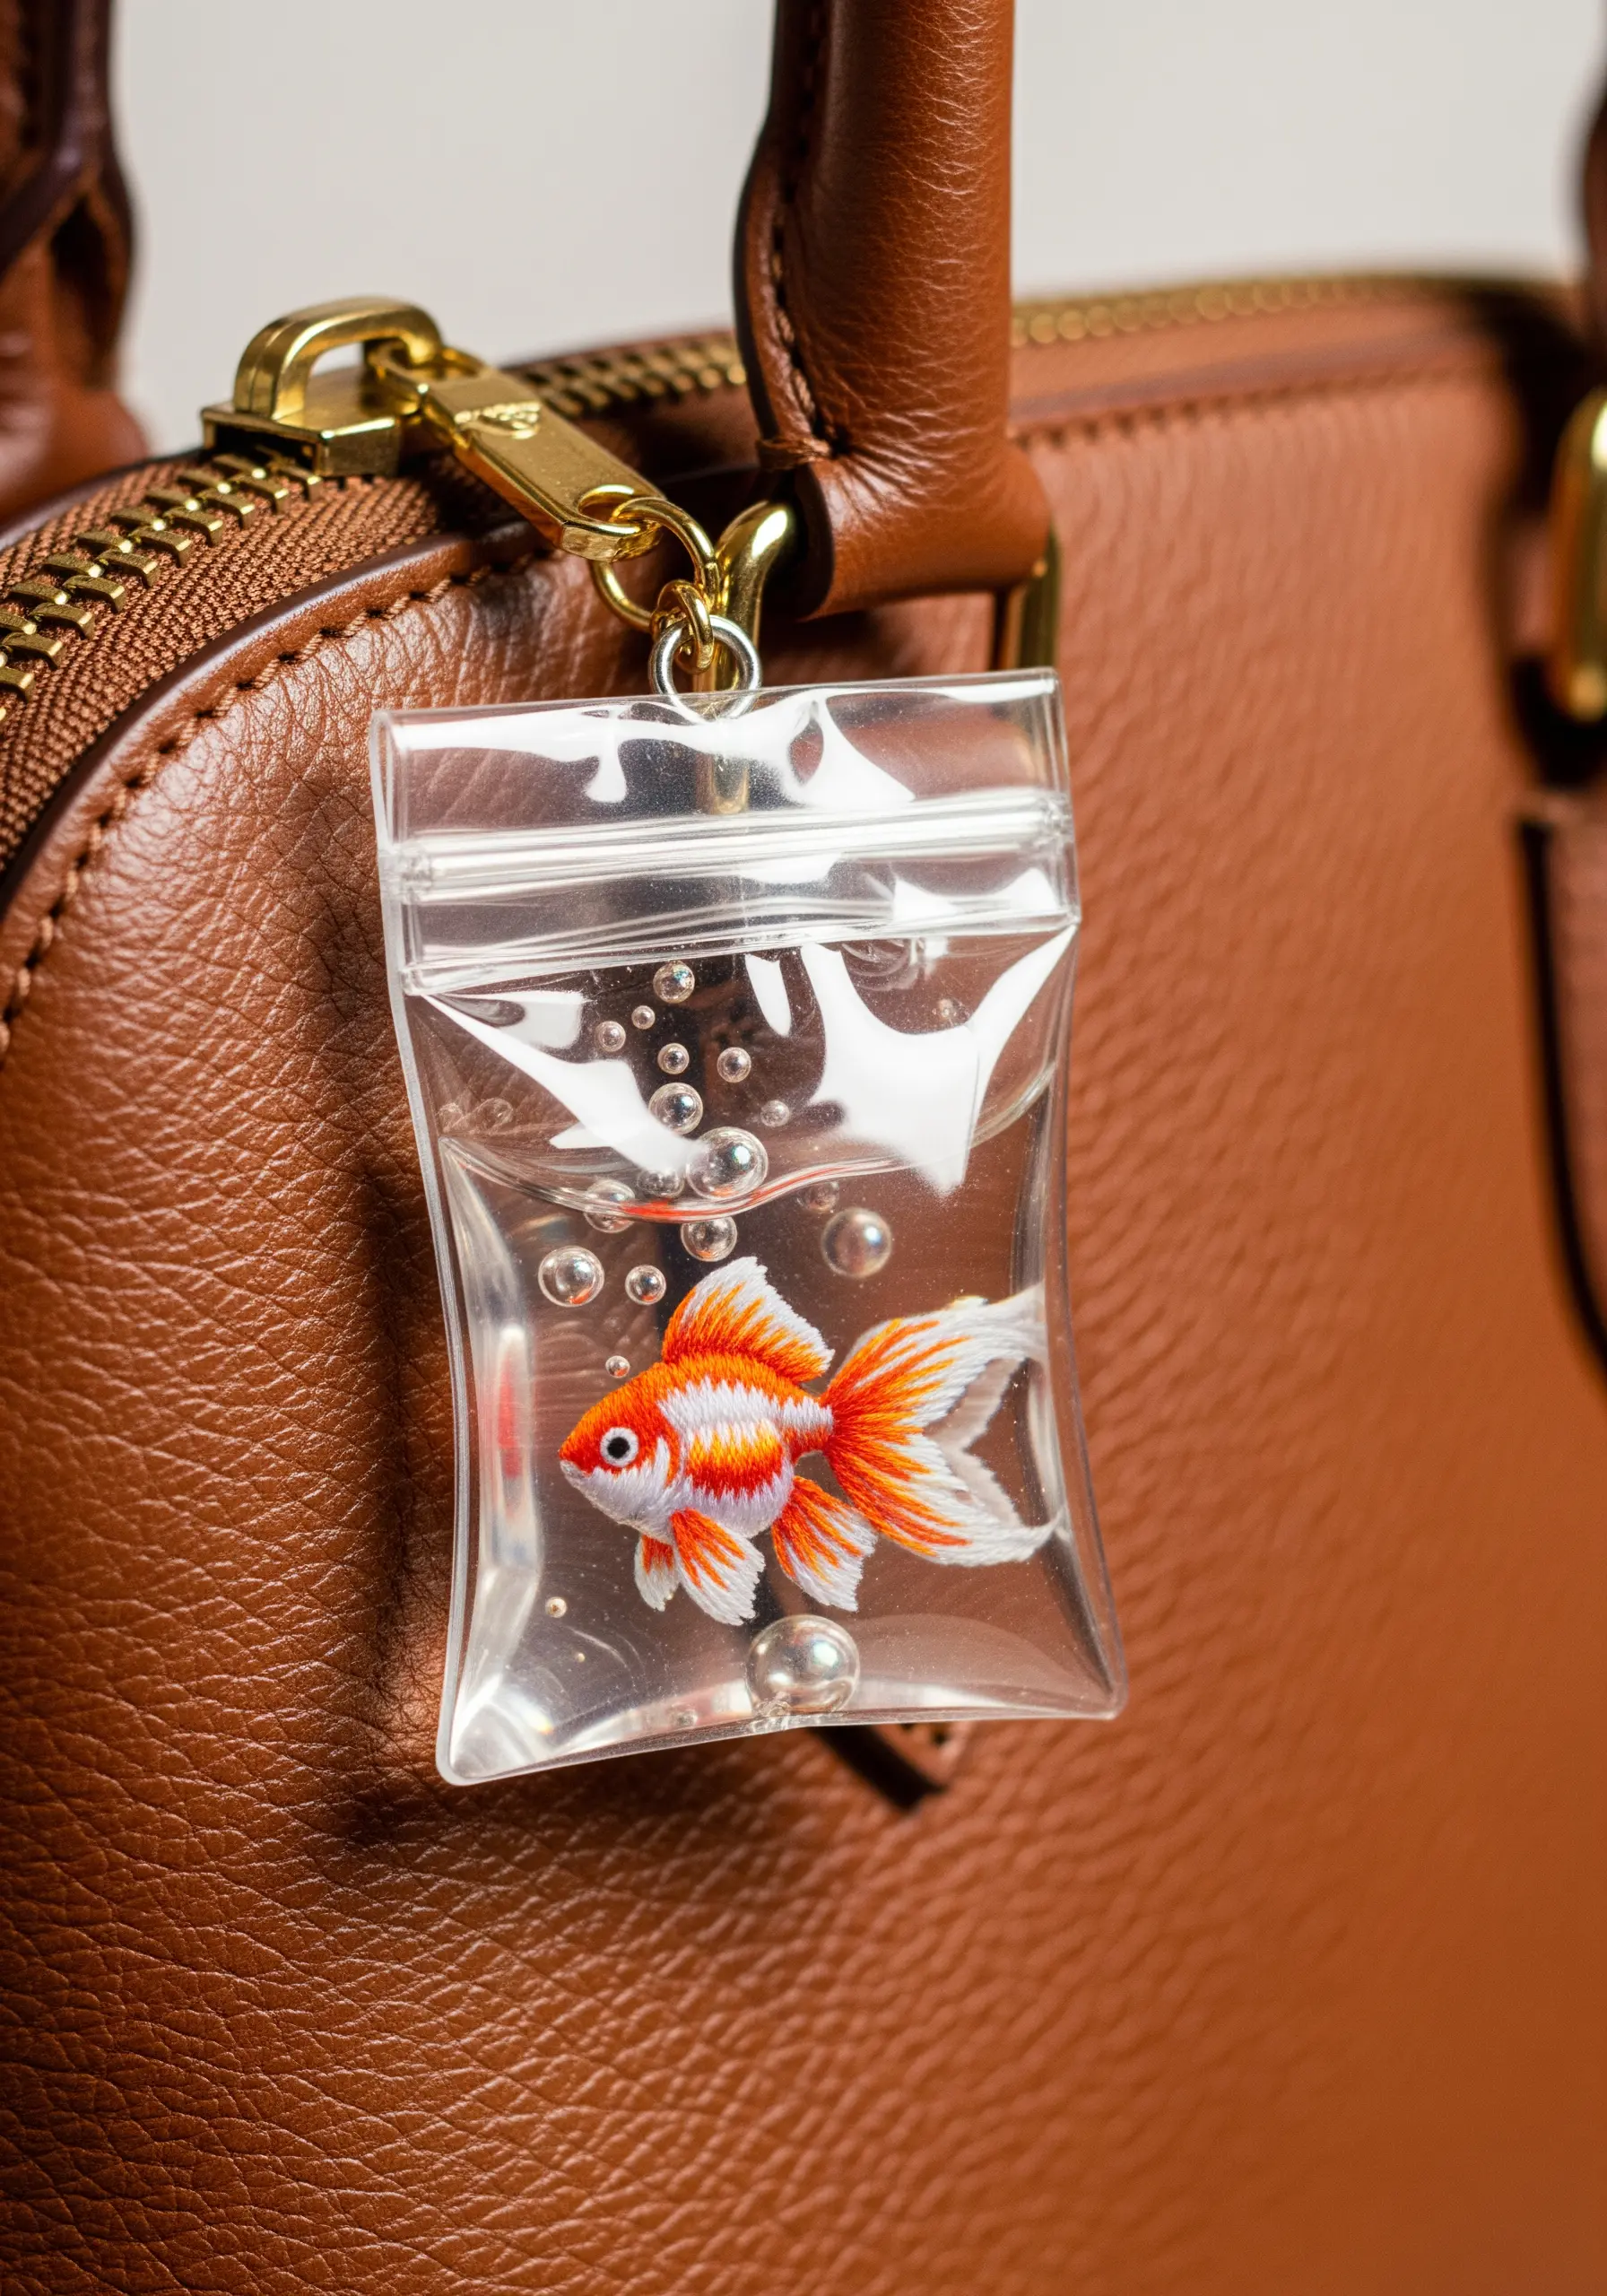
This magical effect relies on layering. You will stitch the goldfish onto one piece of sheer silk organza and the bubbles onto a second, separate piece.
When you place them together inside a clear vinyl pouch (found at craft or fabric stores), you create a convincing illusion of depth and movement.
Use a single strand of high-sheen rayon floss for the fins to mimic their delicate transparency and fluidity, making the fish appear to float.
5. Mastering Art Deco Goldwork Precision
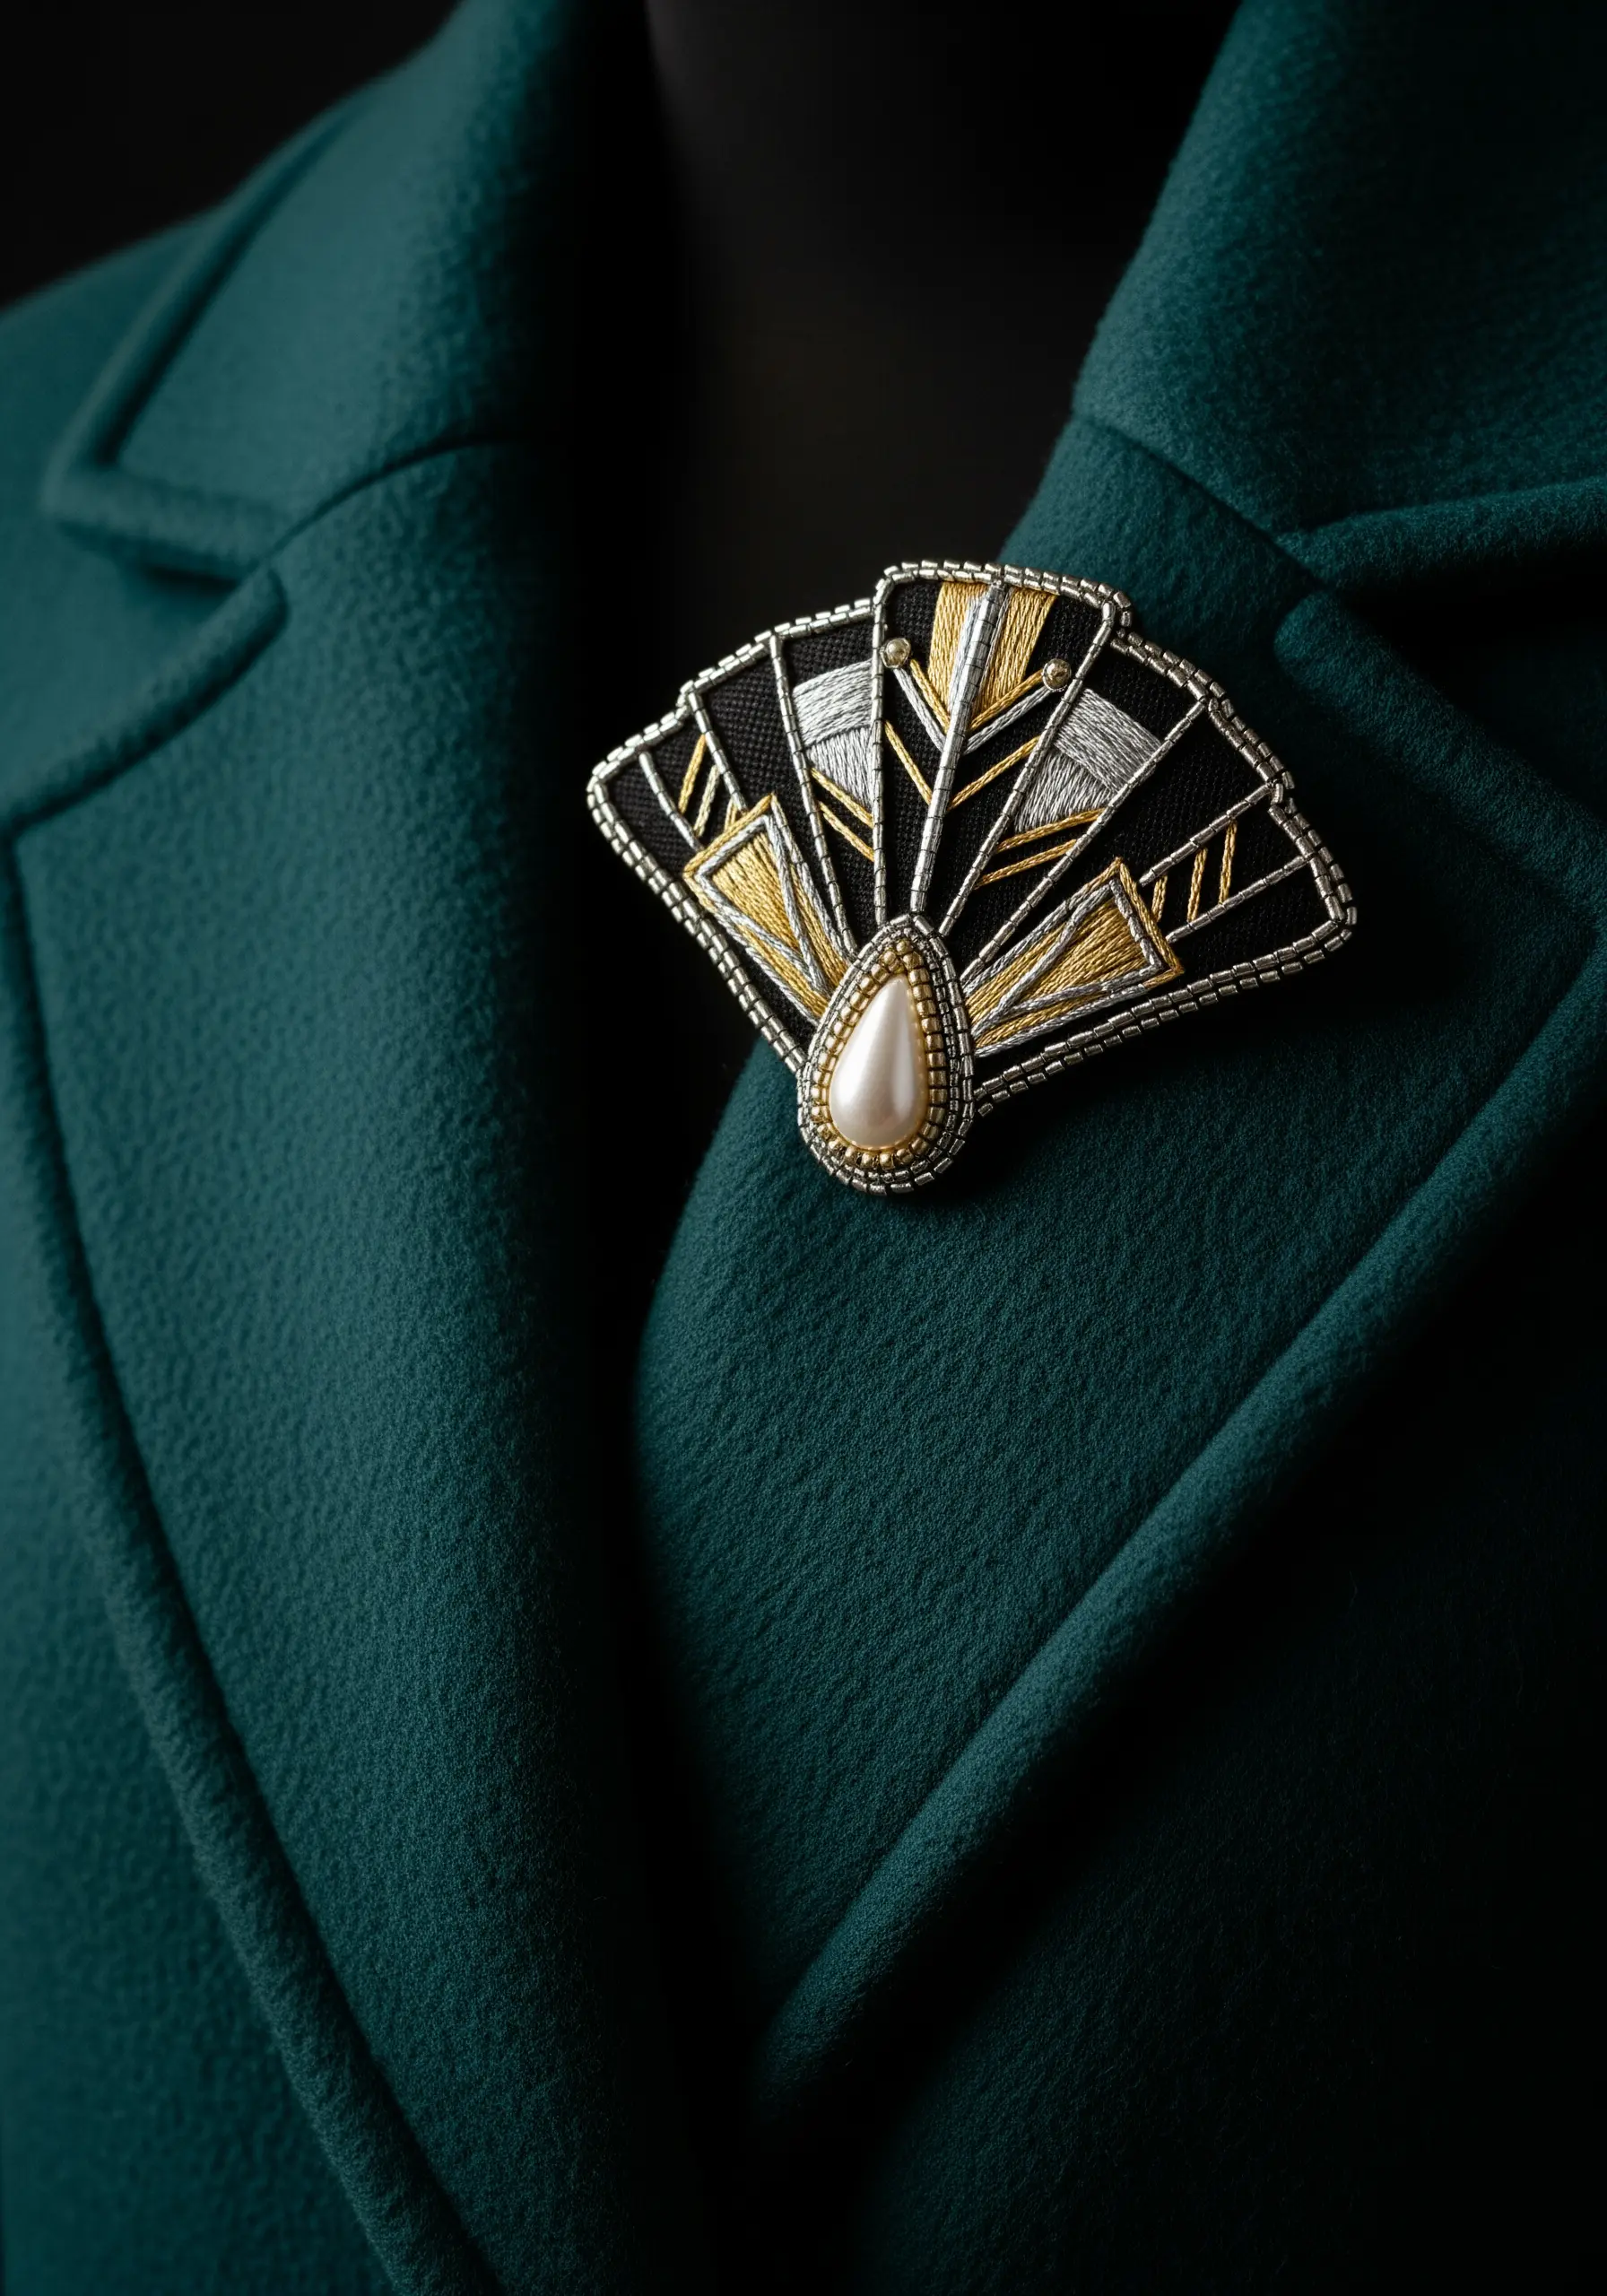
To create a sturdy brooch, work on a stiff felt foundation. Outline each geometric section with a metallic passing thread, couching it down with a single strand of matching sewing thread for perfectly sharp lines.
Fill adjacent sections with satin stitches angled in opposing directions—this technique makes the areas catch the light differently, enhancing the geometric effect.
Finish by edging the entire piece with a row of tiny seed beads to conceal the felt edge and provide a clean, professional border.
6. Engineering a 3D Cactus Trinket
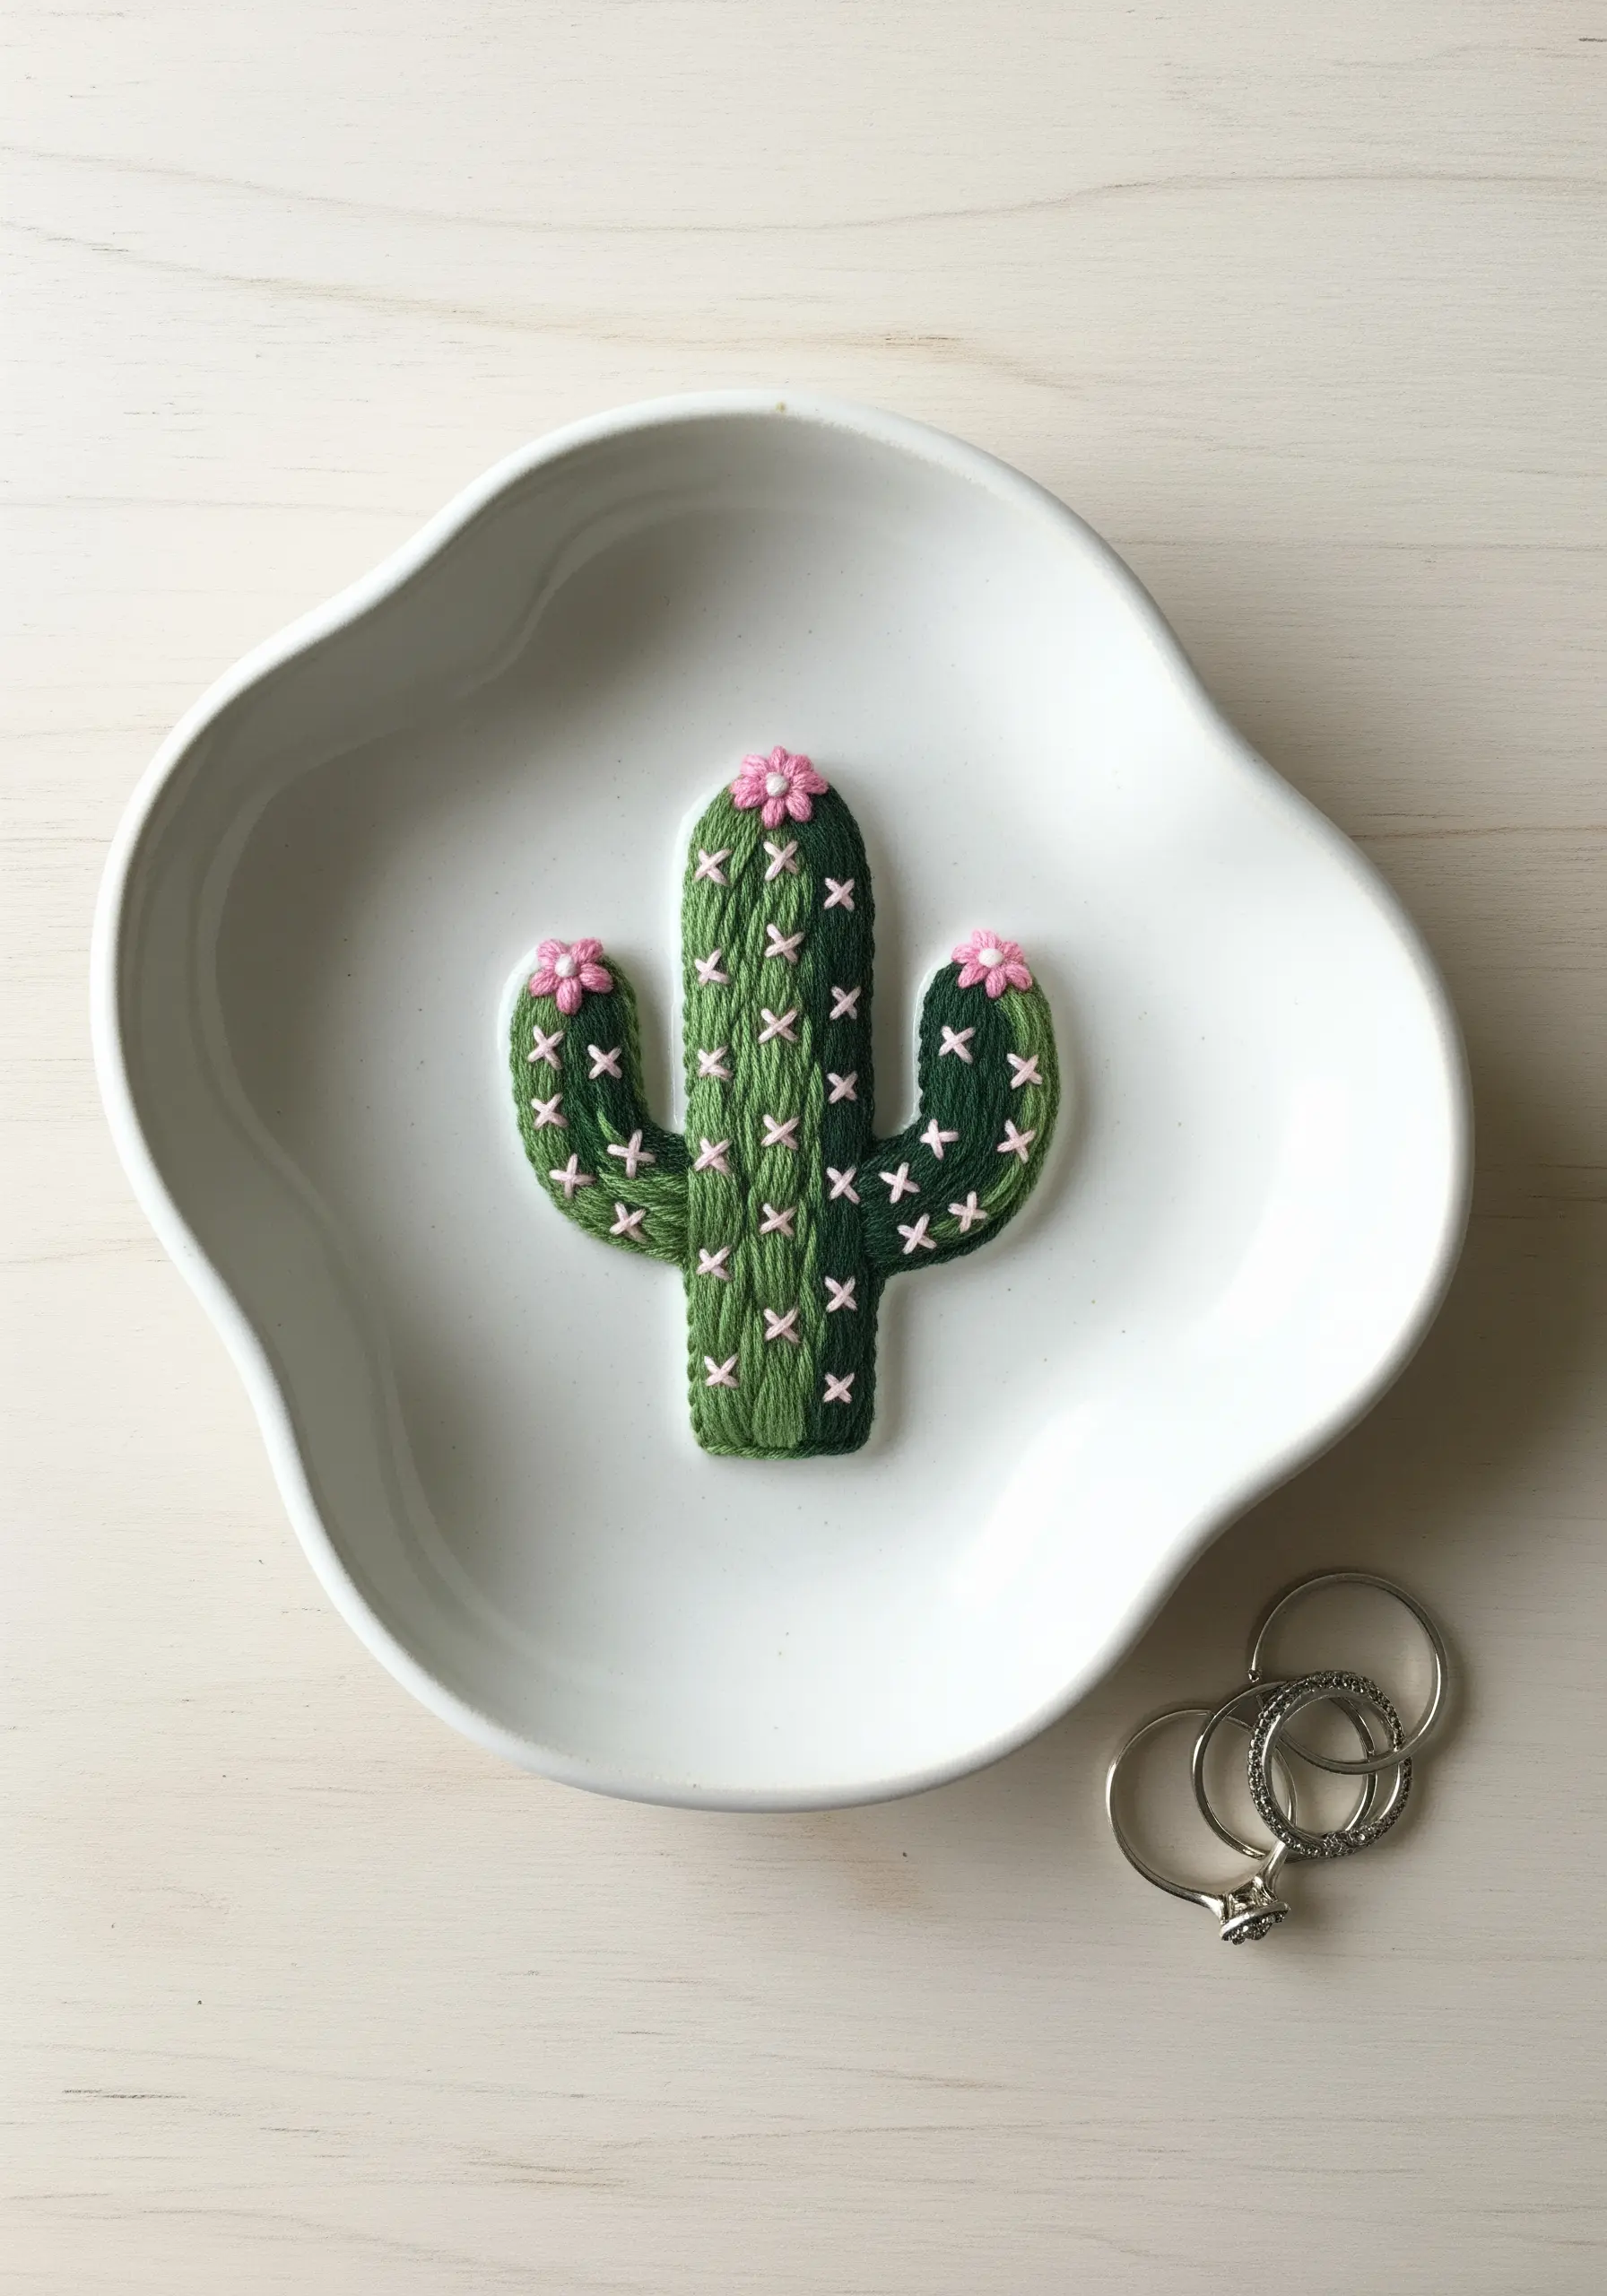
This is a freestanding embroidery piece, also known as stumpwork. First, stitch the cactus shape onto a tightly hooped piece of fabric, using padded satin stitch to give it a plump, rounded form.
Before cutting it out, glue a piece of felt to the back for stability and neatly trim the edges. The small cross-stitches for the spines not only add detail but also help secure the padding within.
You can then mount this piece in a dish or use it as a standalone ornament—one of many handmade mini decor pieces that command attention.
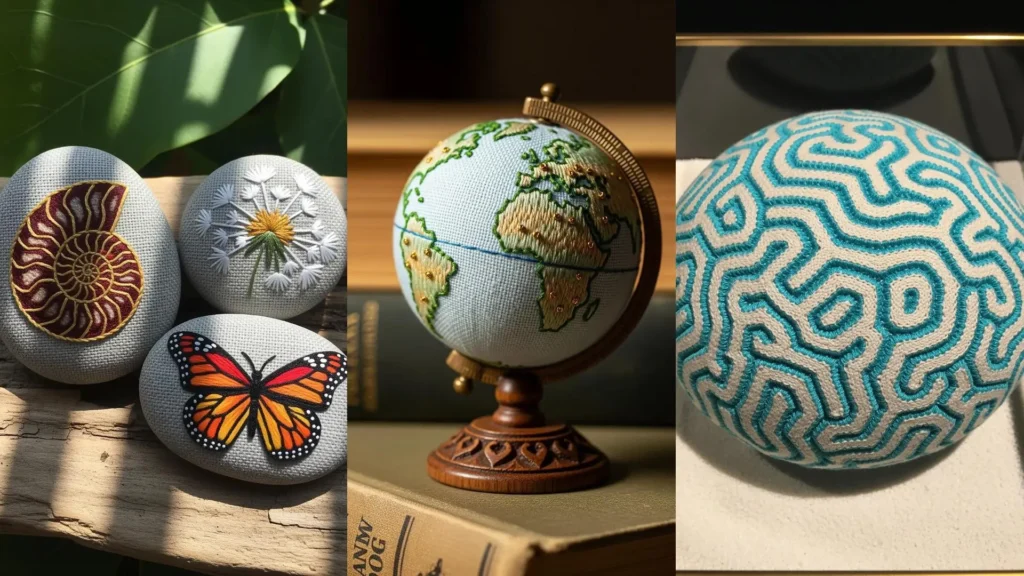
7. Applying Embroidery to Natural Forms
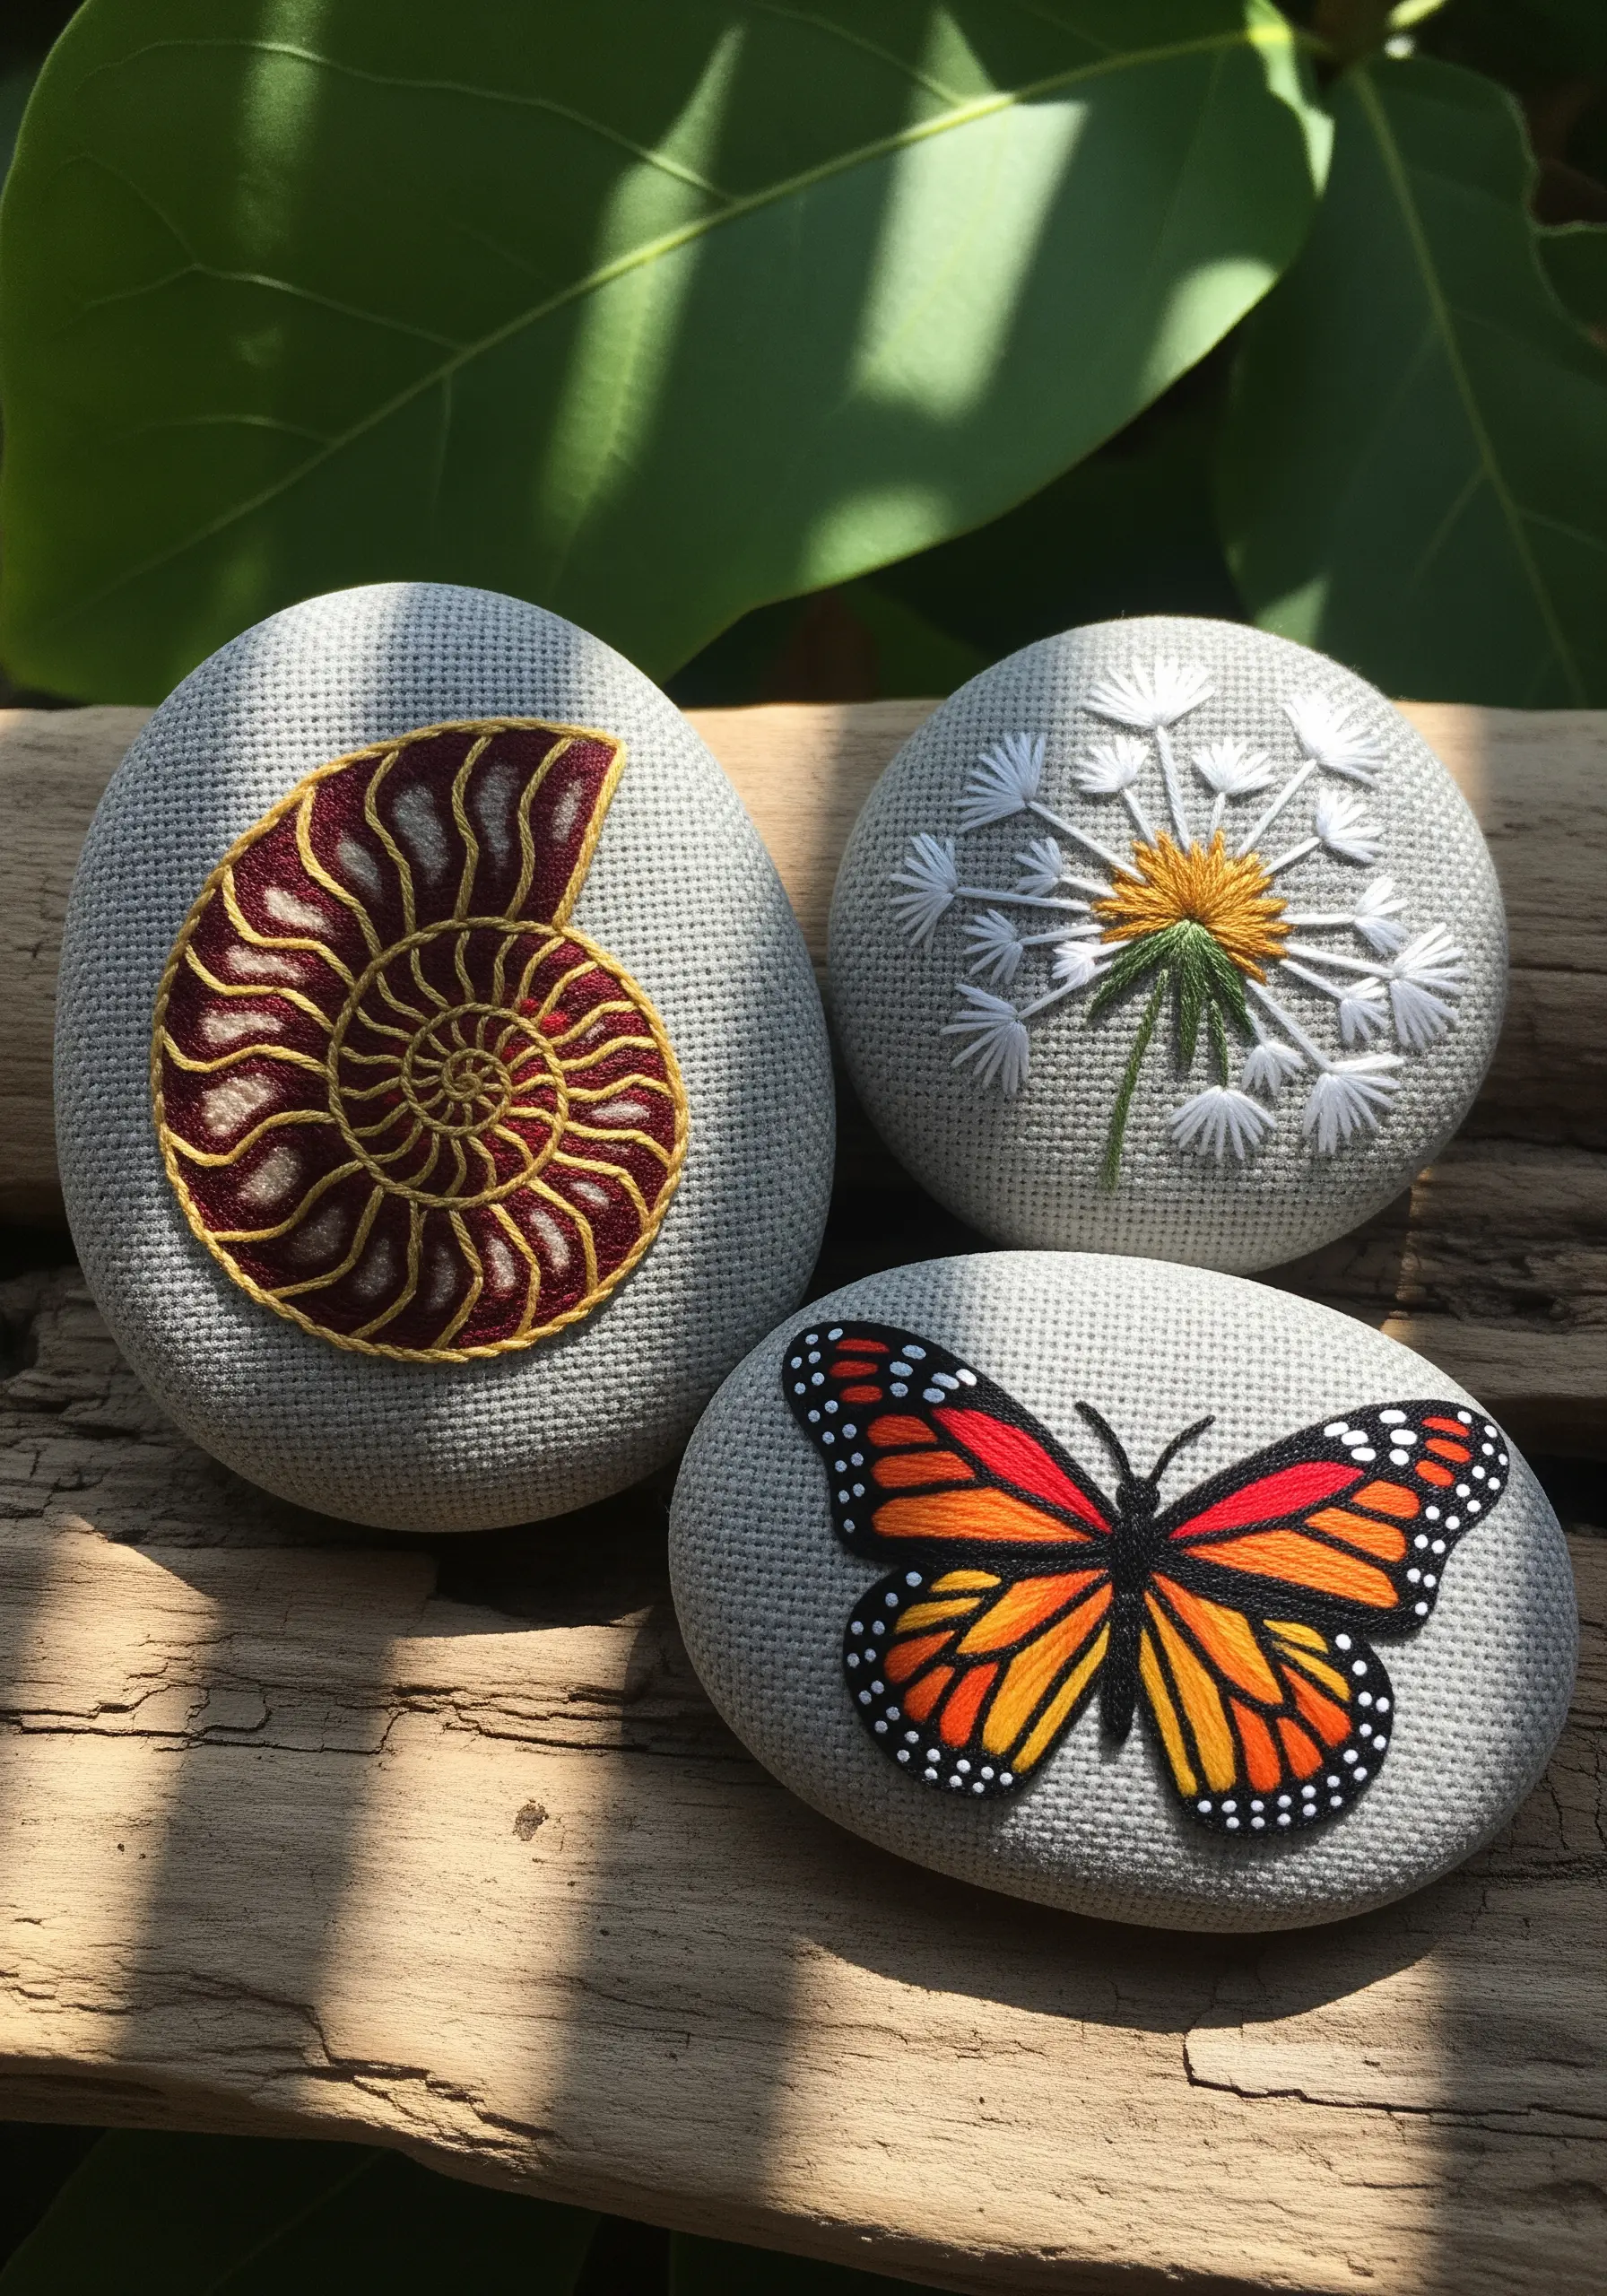
To create these embroidered stones, you don’t stitch directly into the rock. Instead, embroider your design on a piece of evenweave linen that is slightly larger than the stone’s surface.
Once finished, trim the fabric, leaving a small margin. Use a strong fabric glue to wrap and secure the embroidered panel smoothly around the stone, pulling the edges taut underneath.
The tight weave of the fabric and a crisp outline stitch, like a split backstitch, are crucial for a clean, seamless look.
8. Building a Miniature Terrarium Pendant
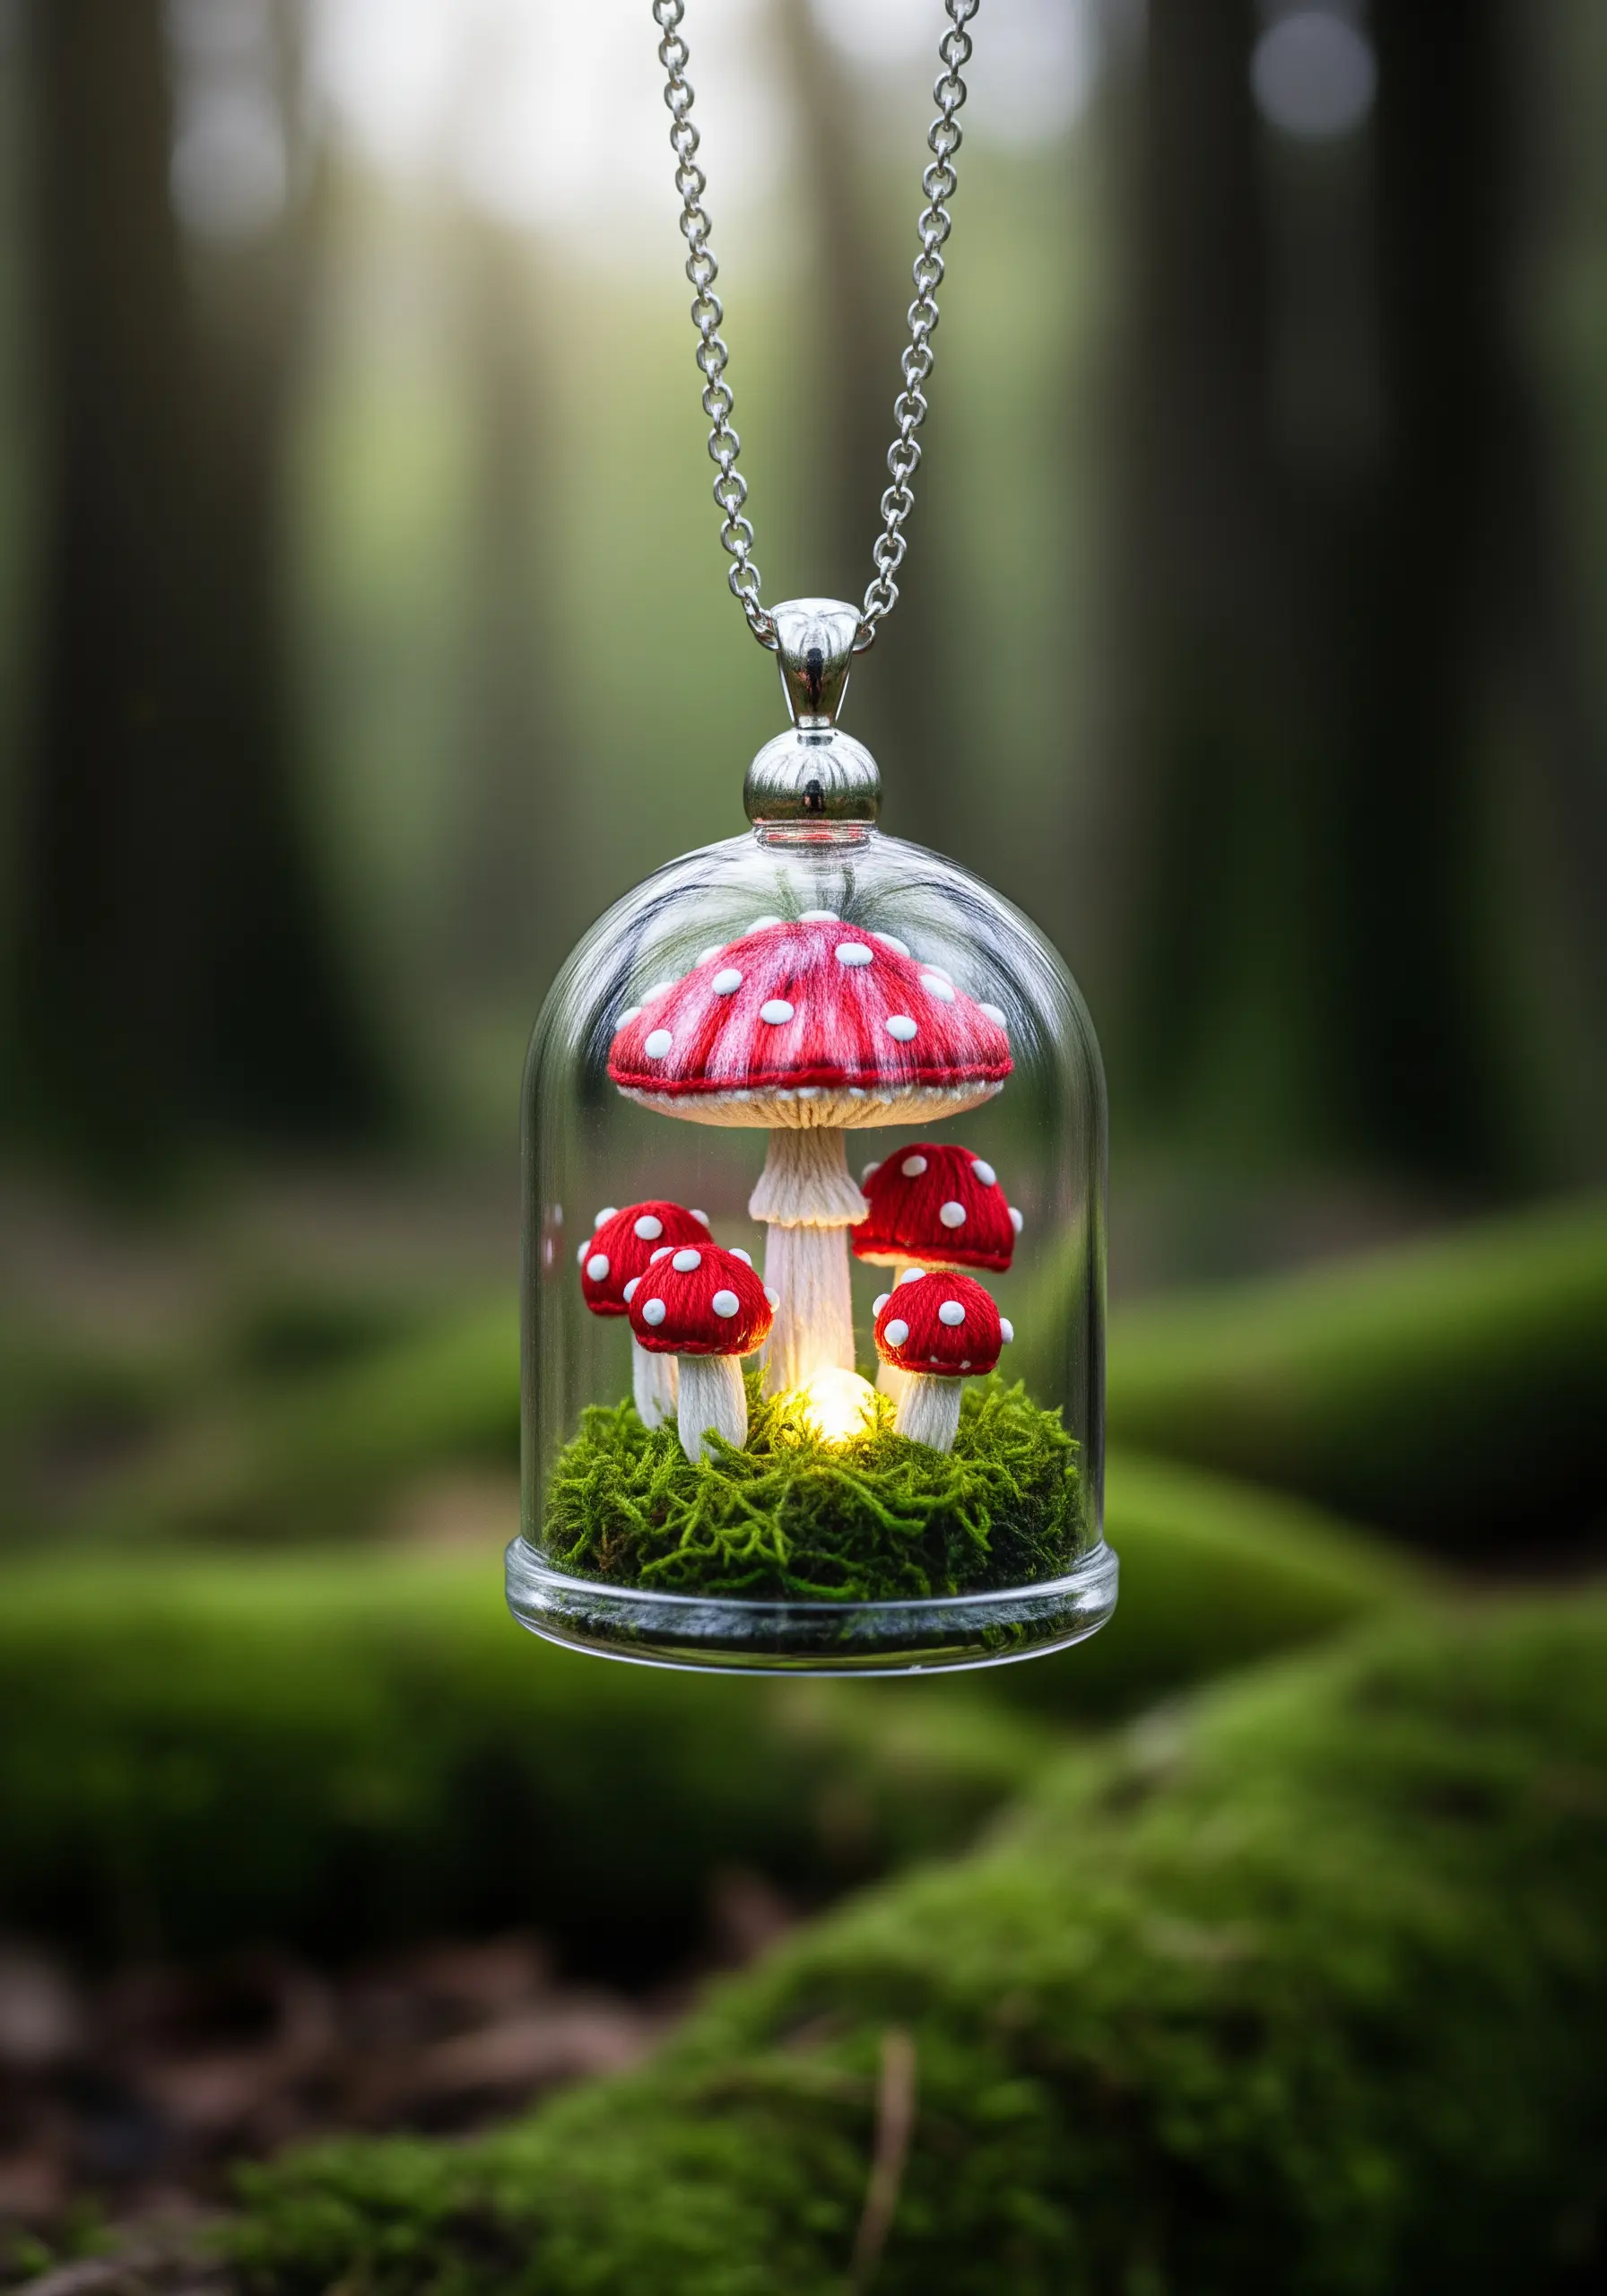
This enchanting piece combines miniature stumpwork with model-making. Create the tiny mushrooms by wrapping thread around a padded form or by using knotted stitches like French knots for the caps.
Anchor them securely onto a small disc of preserved moss inside a miniature glass cloche, available from jewelry-making suppliers.
A tiny LED light hidden within the moss can elevate this from a simple trinket to a magical, glowing diorama.
9. Minimalist Constellation Stitching
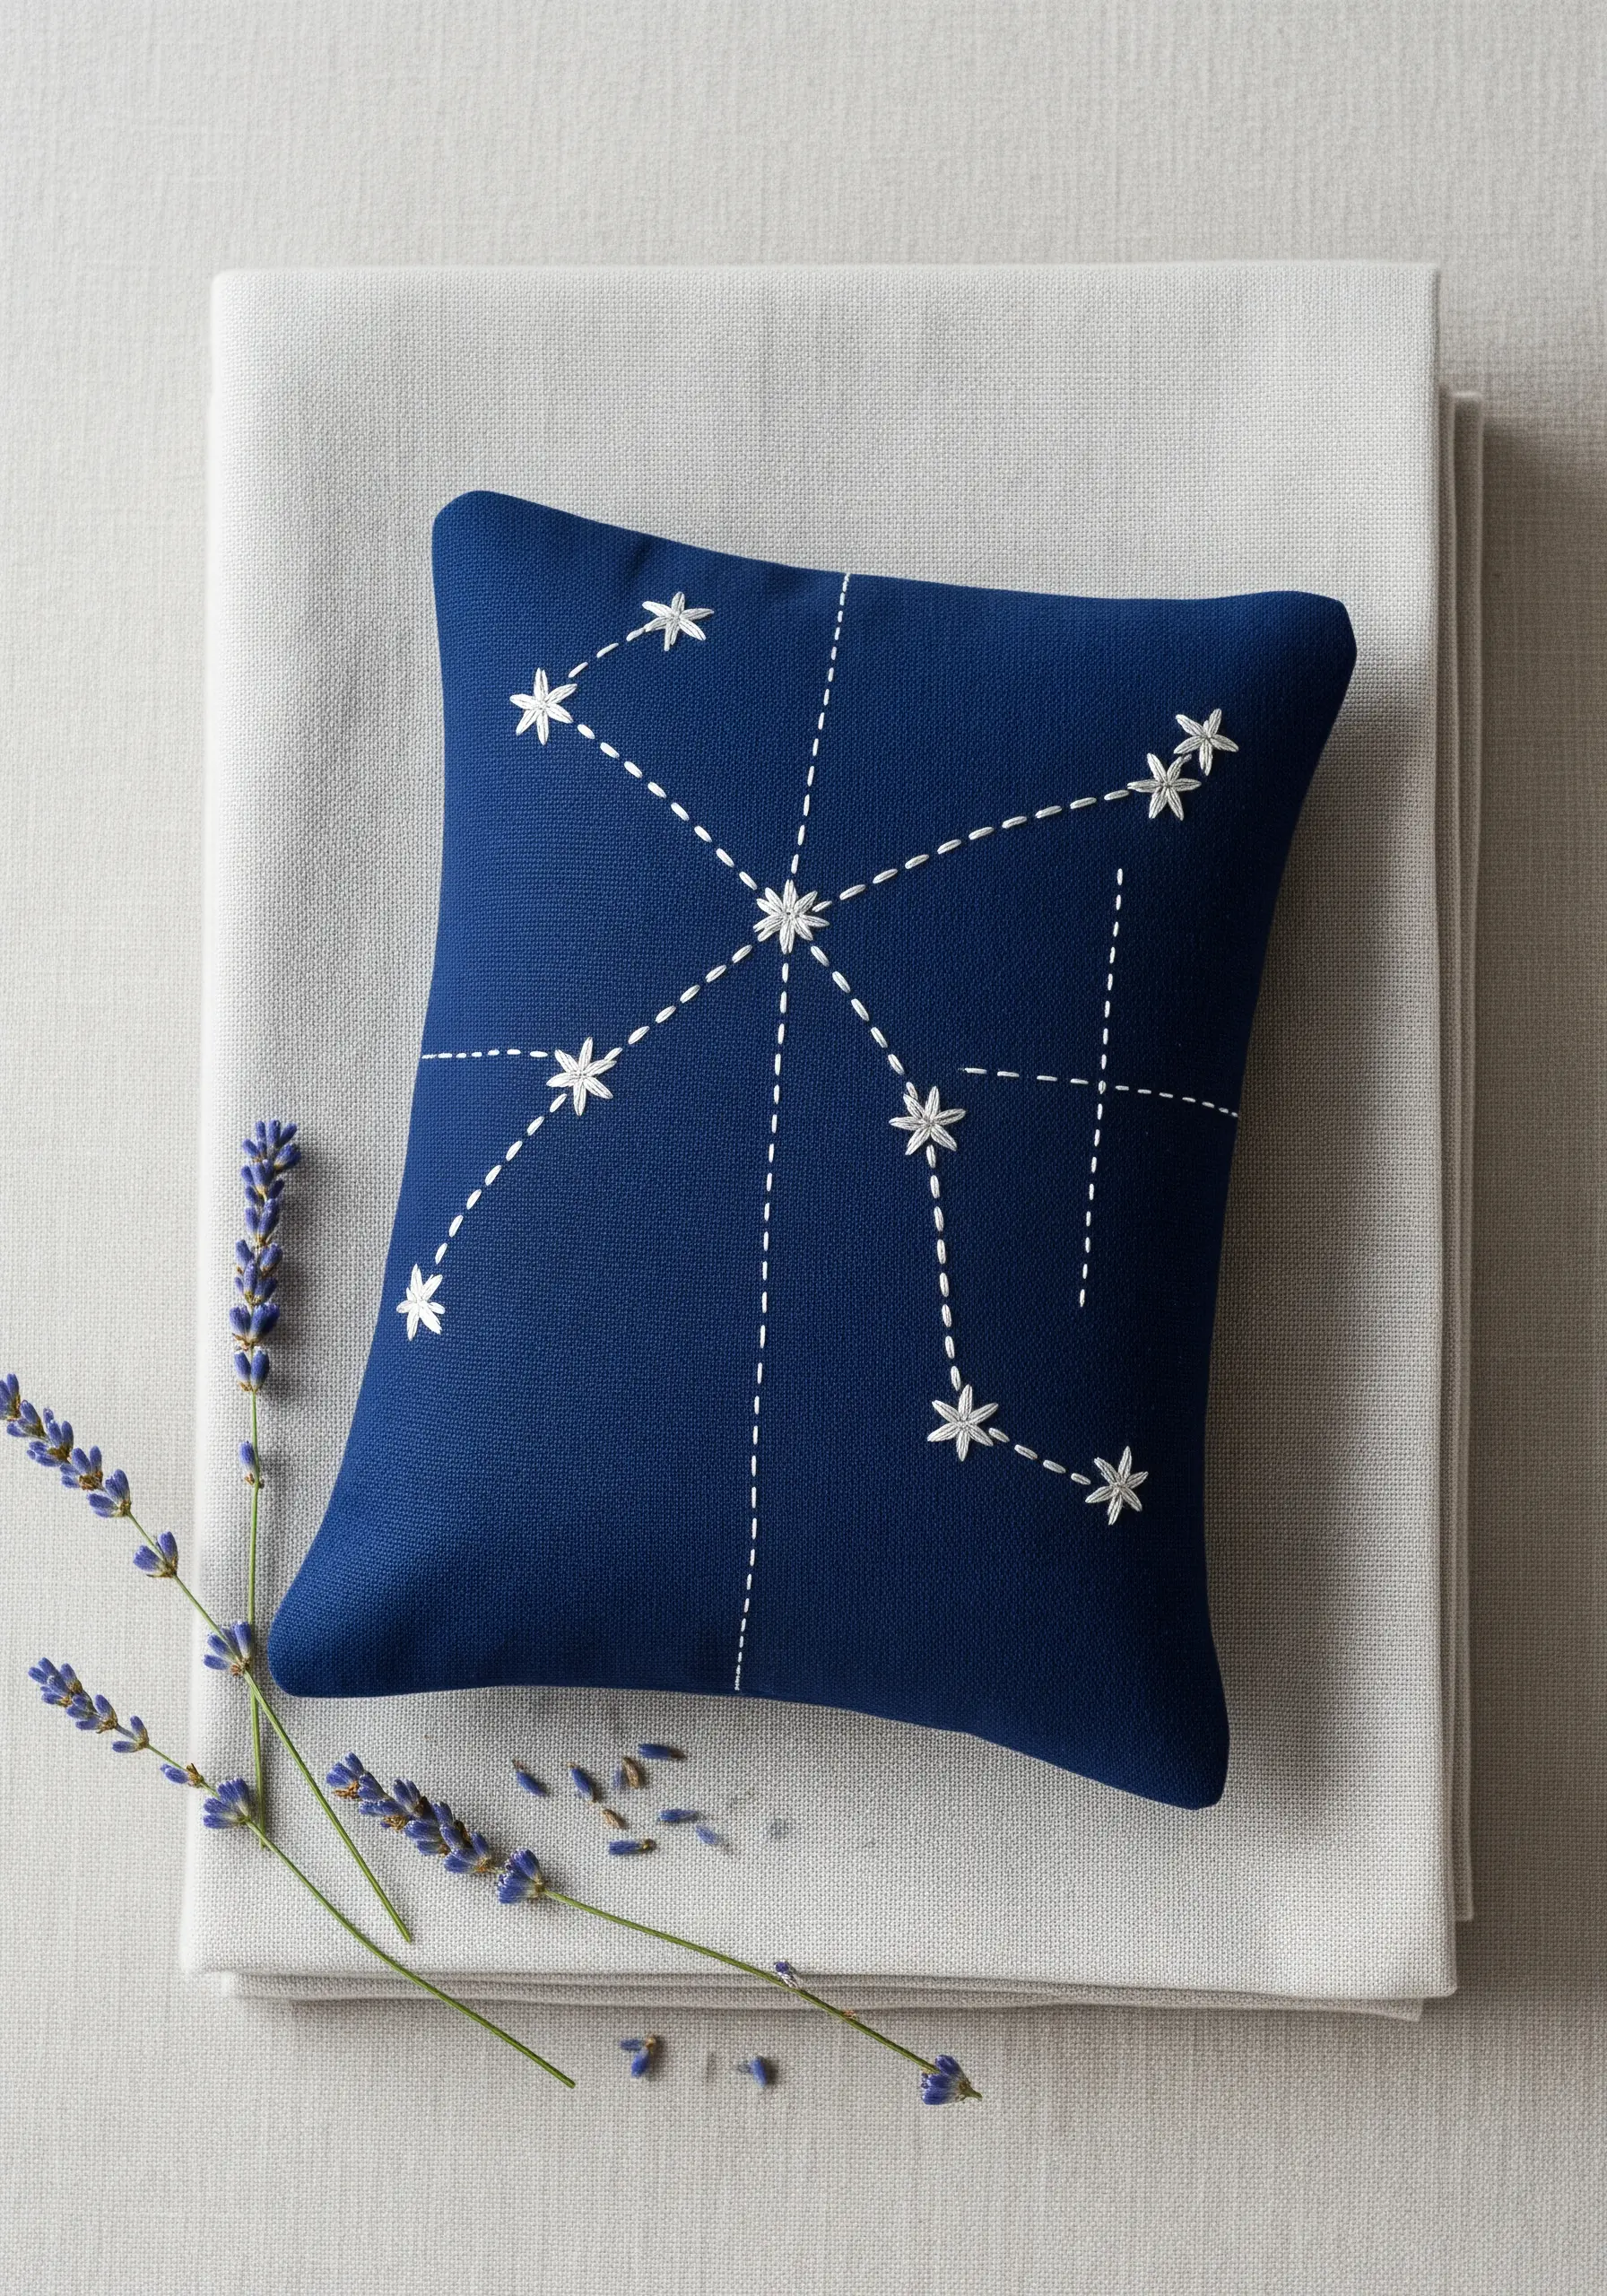
For high-impact minimalist designs, contrast is everything. Use a bright white or silver metallic thread on a dark navy or black linen.
Keep your lines clean and sharp by using a simple backstitch for the constellation paths. For the stars, a small star stitch or even a single French knot is all you need.
This is one of those monochrome thread embroidery ideas where the negative space is just as important as the stitches themselves, creating a serene and sophisticated look.
10. Crafting a Statement Tassel
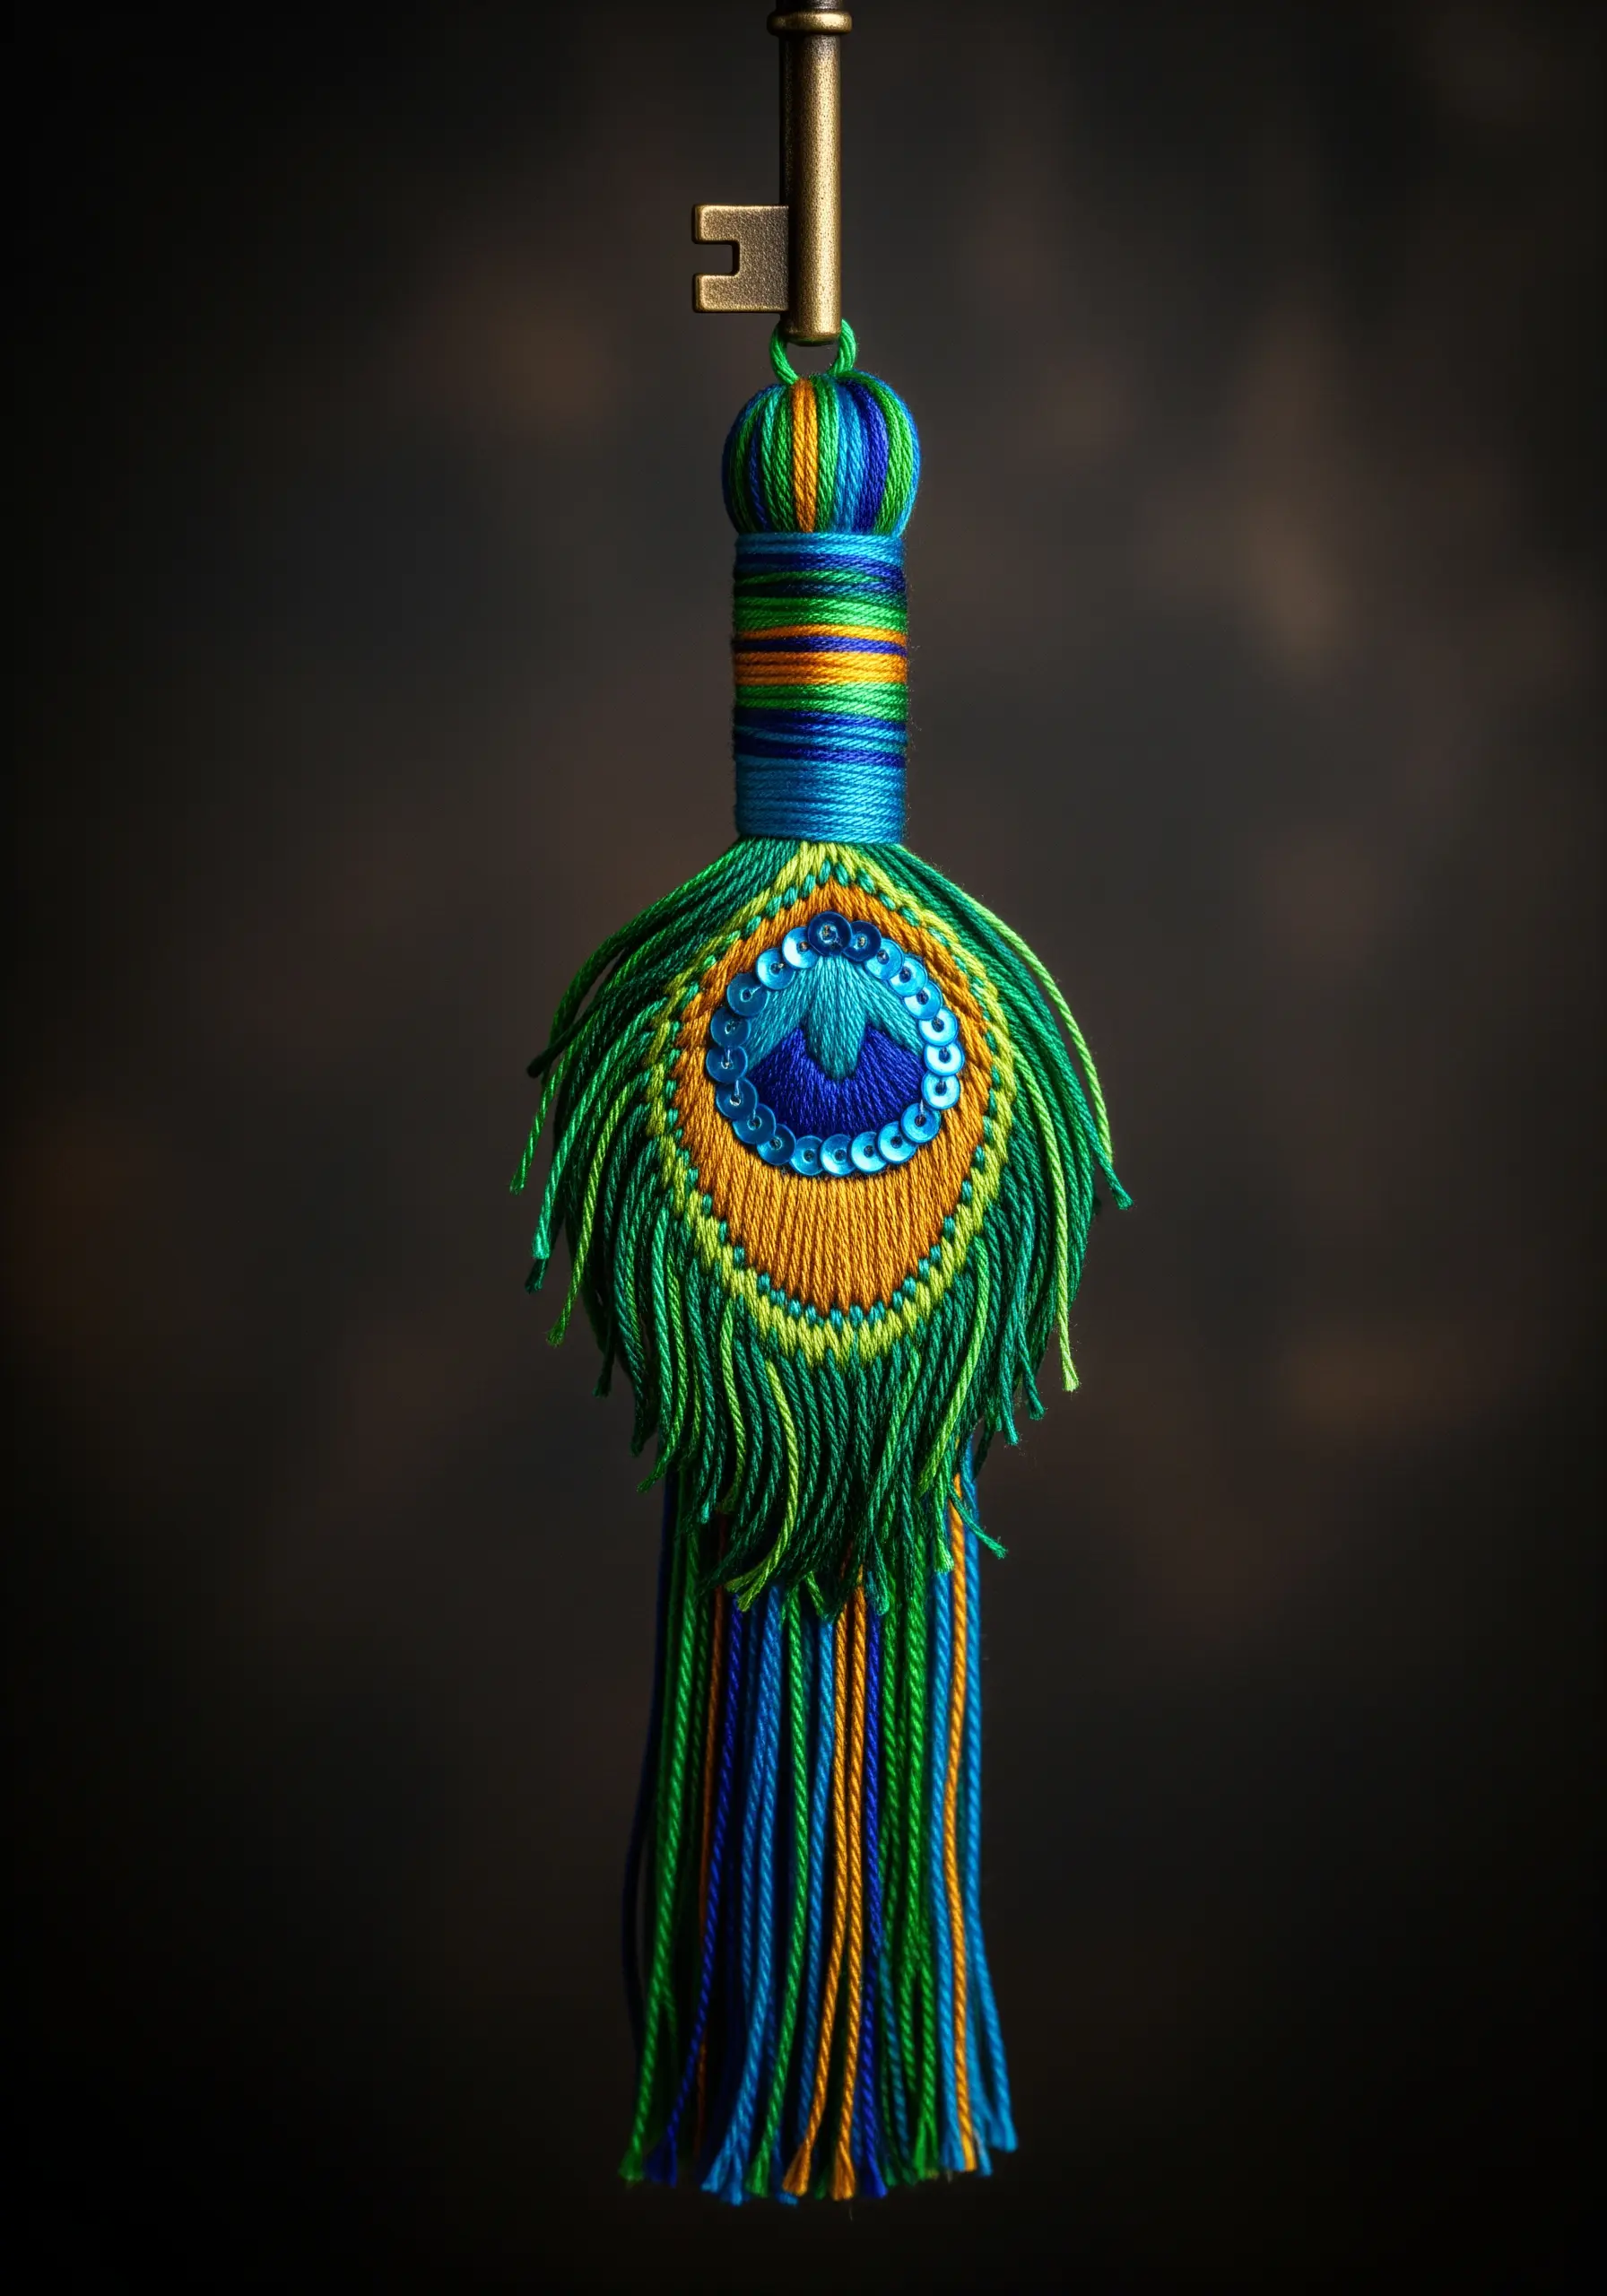
Elevate a simple tassel by building it in layers. Create the base form by wrapping embroidery floss tightly around a cardboard guide, then add a decorative top section using contrasting colors.
Embroider a small centerpiece on felt—like this peacock feather motif using satin stitch and sequins—and glue it onto the tassel before adding the fringe.
This combines two fiber arts into one cohesive, texture-rich object.
11. Folk Art Ornaments with Felt Appliqué

For this charming folk-art style, use felt as your base. Its stiffness provides structure, and the edges won’t fray, making it perfect for appliqué.
Cut out your main bird shape, then layer smaller felt pieces for the wing details. Secure the edges with a decorative blanket stitch.
Use bold, contrasting colors and simple stitches like satin stitch, daisy stitch, and French knots to fill in the floral motifs, giving it a cheerful, handcrafted appeal.
12. Embroidering on Leather Goods
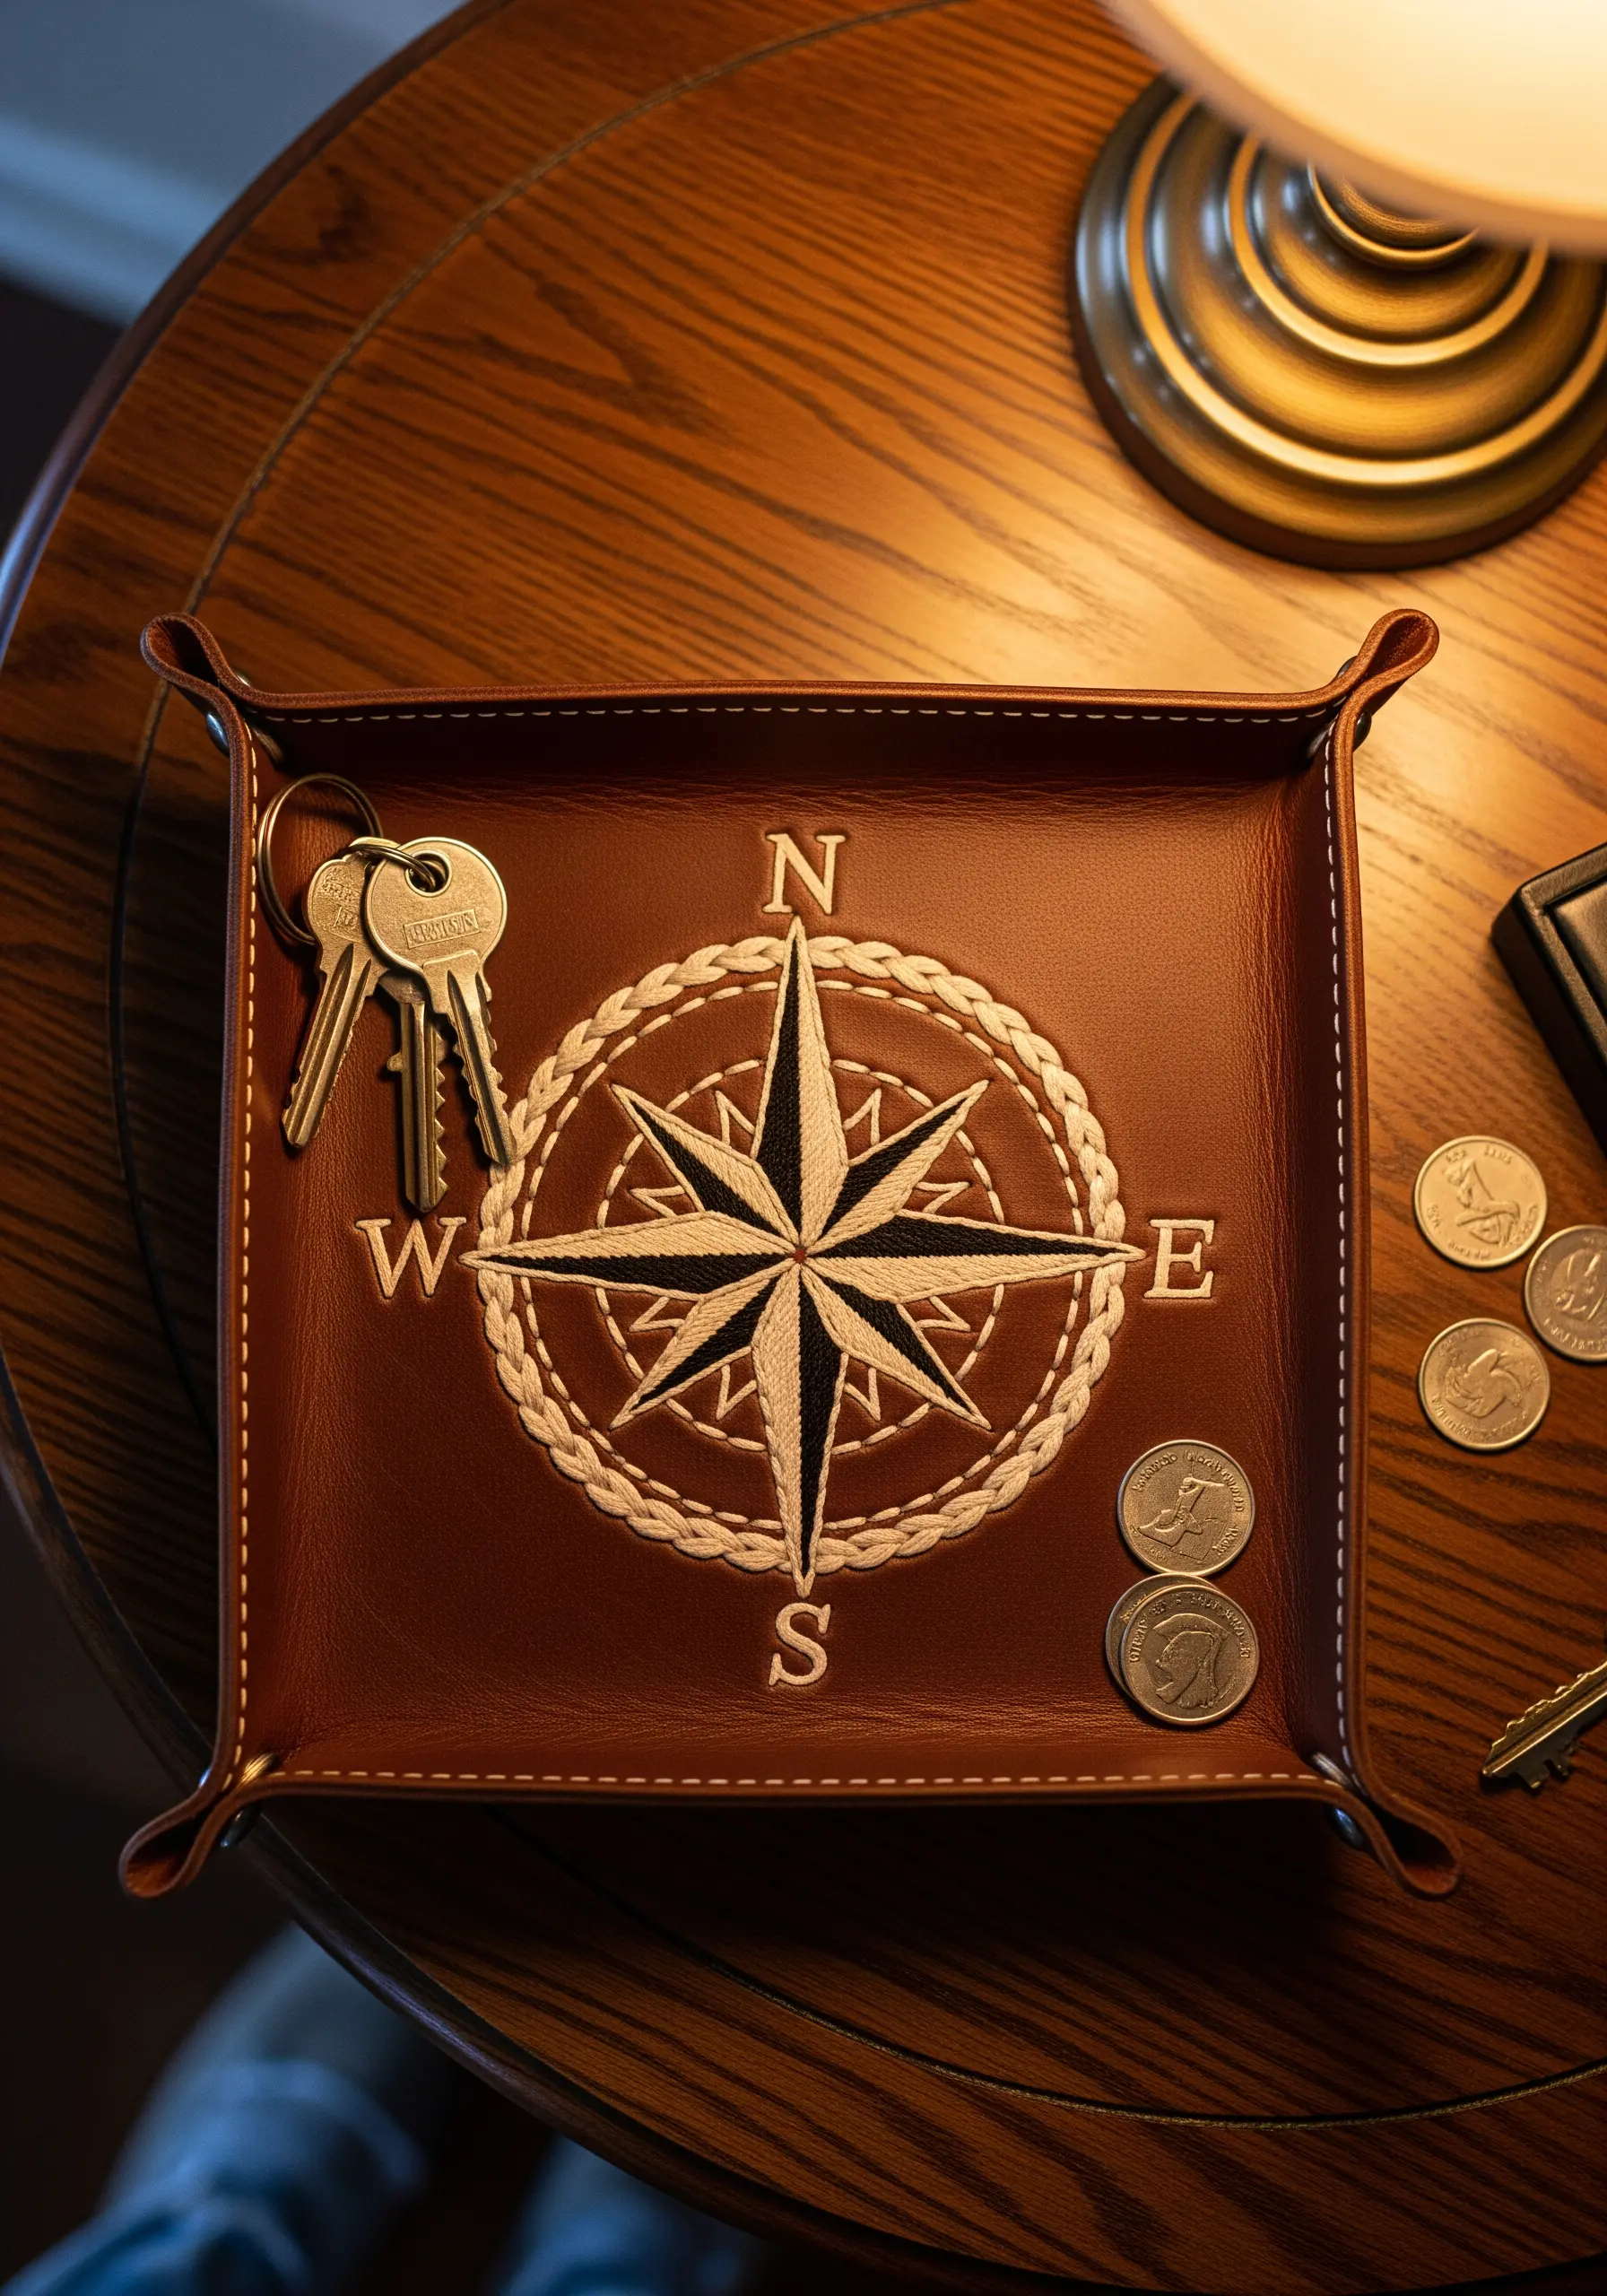
Stitching on leather or high-quality faux leather requires a few adjustments. Use a sharp, strong needle specifically designed for leather to pierce the material cleanly.
Space your stitches slightly farther apart than you would on fabric to prevent perforating and weakening the leather.
A dense satin stitch for the compass rose and a thick, rope-like chain stitch for the border create a beautiful textural contrast against the smooth surface of this valet tray.
13. Mapping the World in Thread

To create an embroidered globe, you’ll need to cover a small polystyrene ball with a light-colored, evenweave fabric like linen or Aida cloth.
Use a stem stitch or split stitch in a dark green to outline the continents for a crisp, map-like feel. Fill the landmasses with a light seed stitch fill, which adds texture without puckering the curved surface.
Adding tiny gold beads or French knots to mark cities provides a final touch of detail and dimension.
14. Simulating Crystals with Beads and Thread
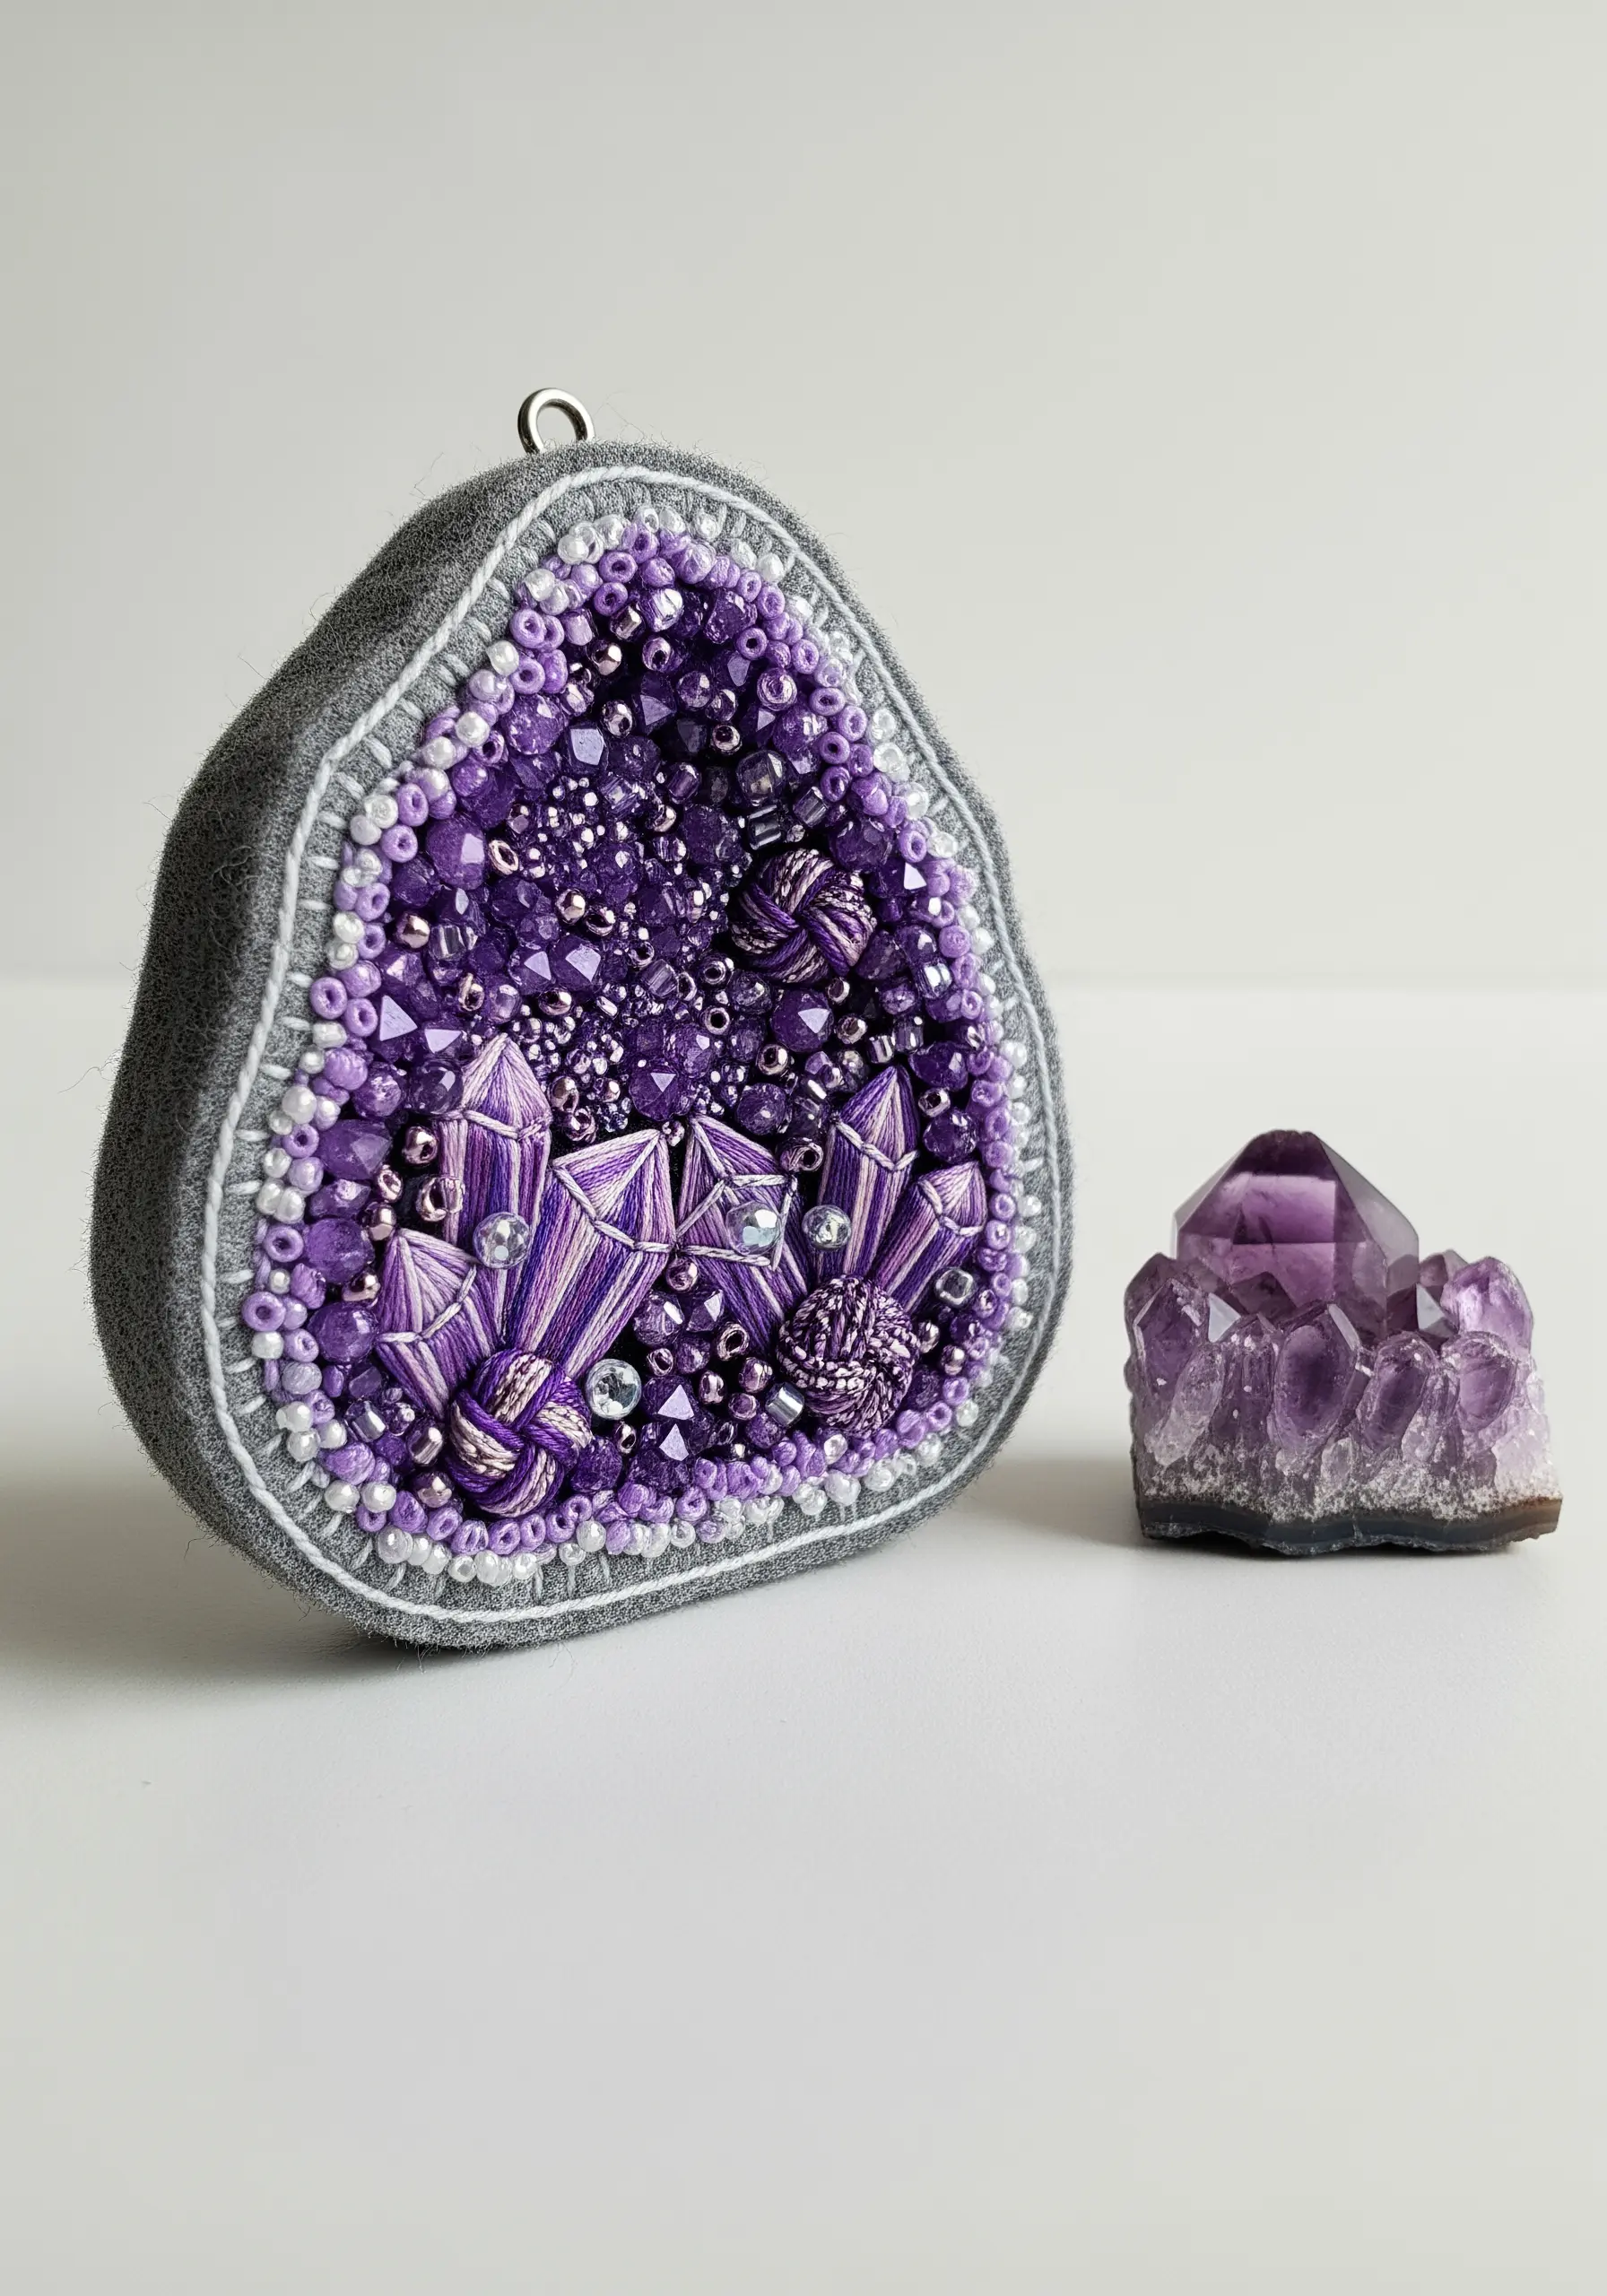
Recreate the texture of a geode by combining advanced embroidery and beading techniques. Use vertical satin stitches with high-sheen purple thread to mimic the larger amethyst crystal structures.
Fill the dense inner areas with a mix of purple and lilac seed beads, bugle beads, and French knots to create a sparkling, irregular texture.
Outlining the entire piece with a clean row of white beads gives it a polished edge and defines the geode’s form against the felt background.
15. Miniature Thread Painting for Jewelry
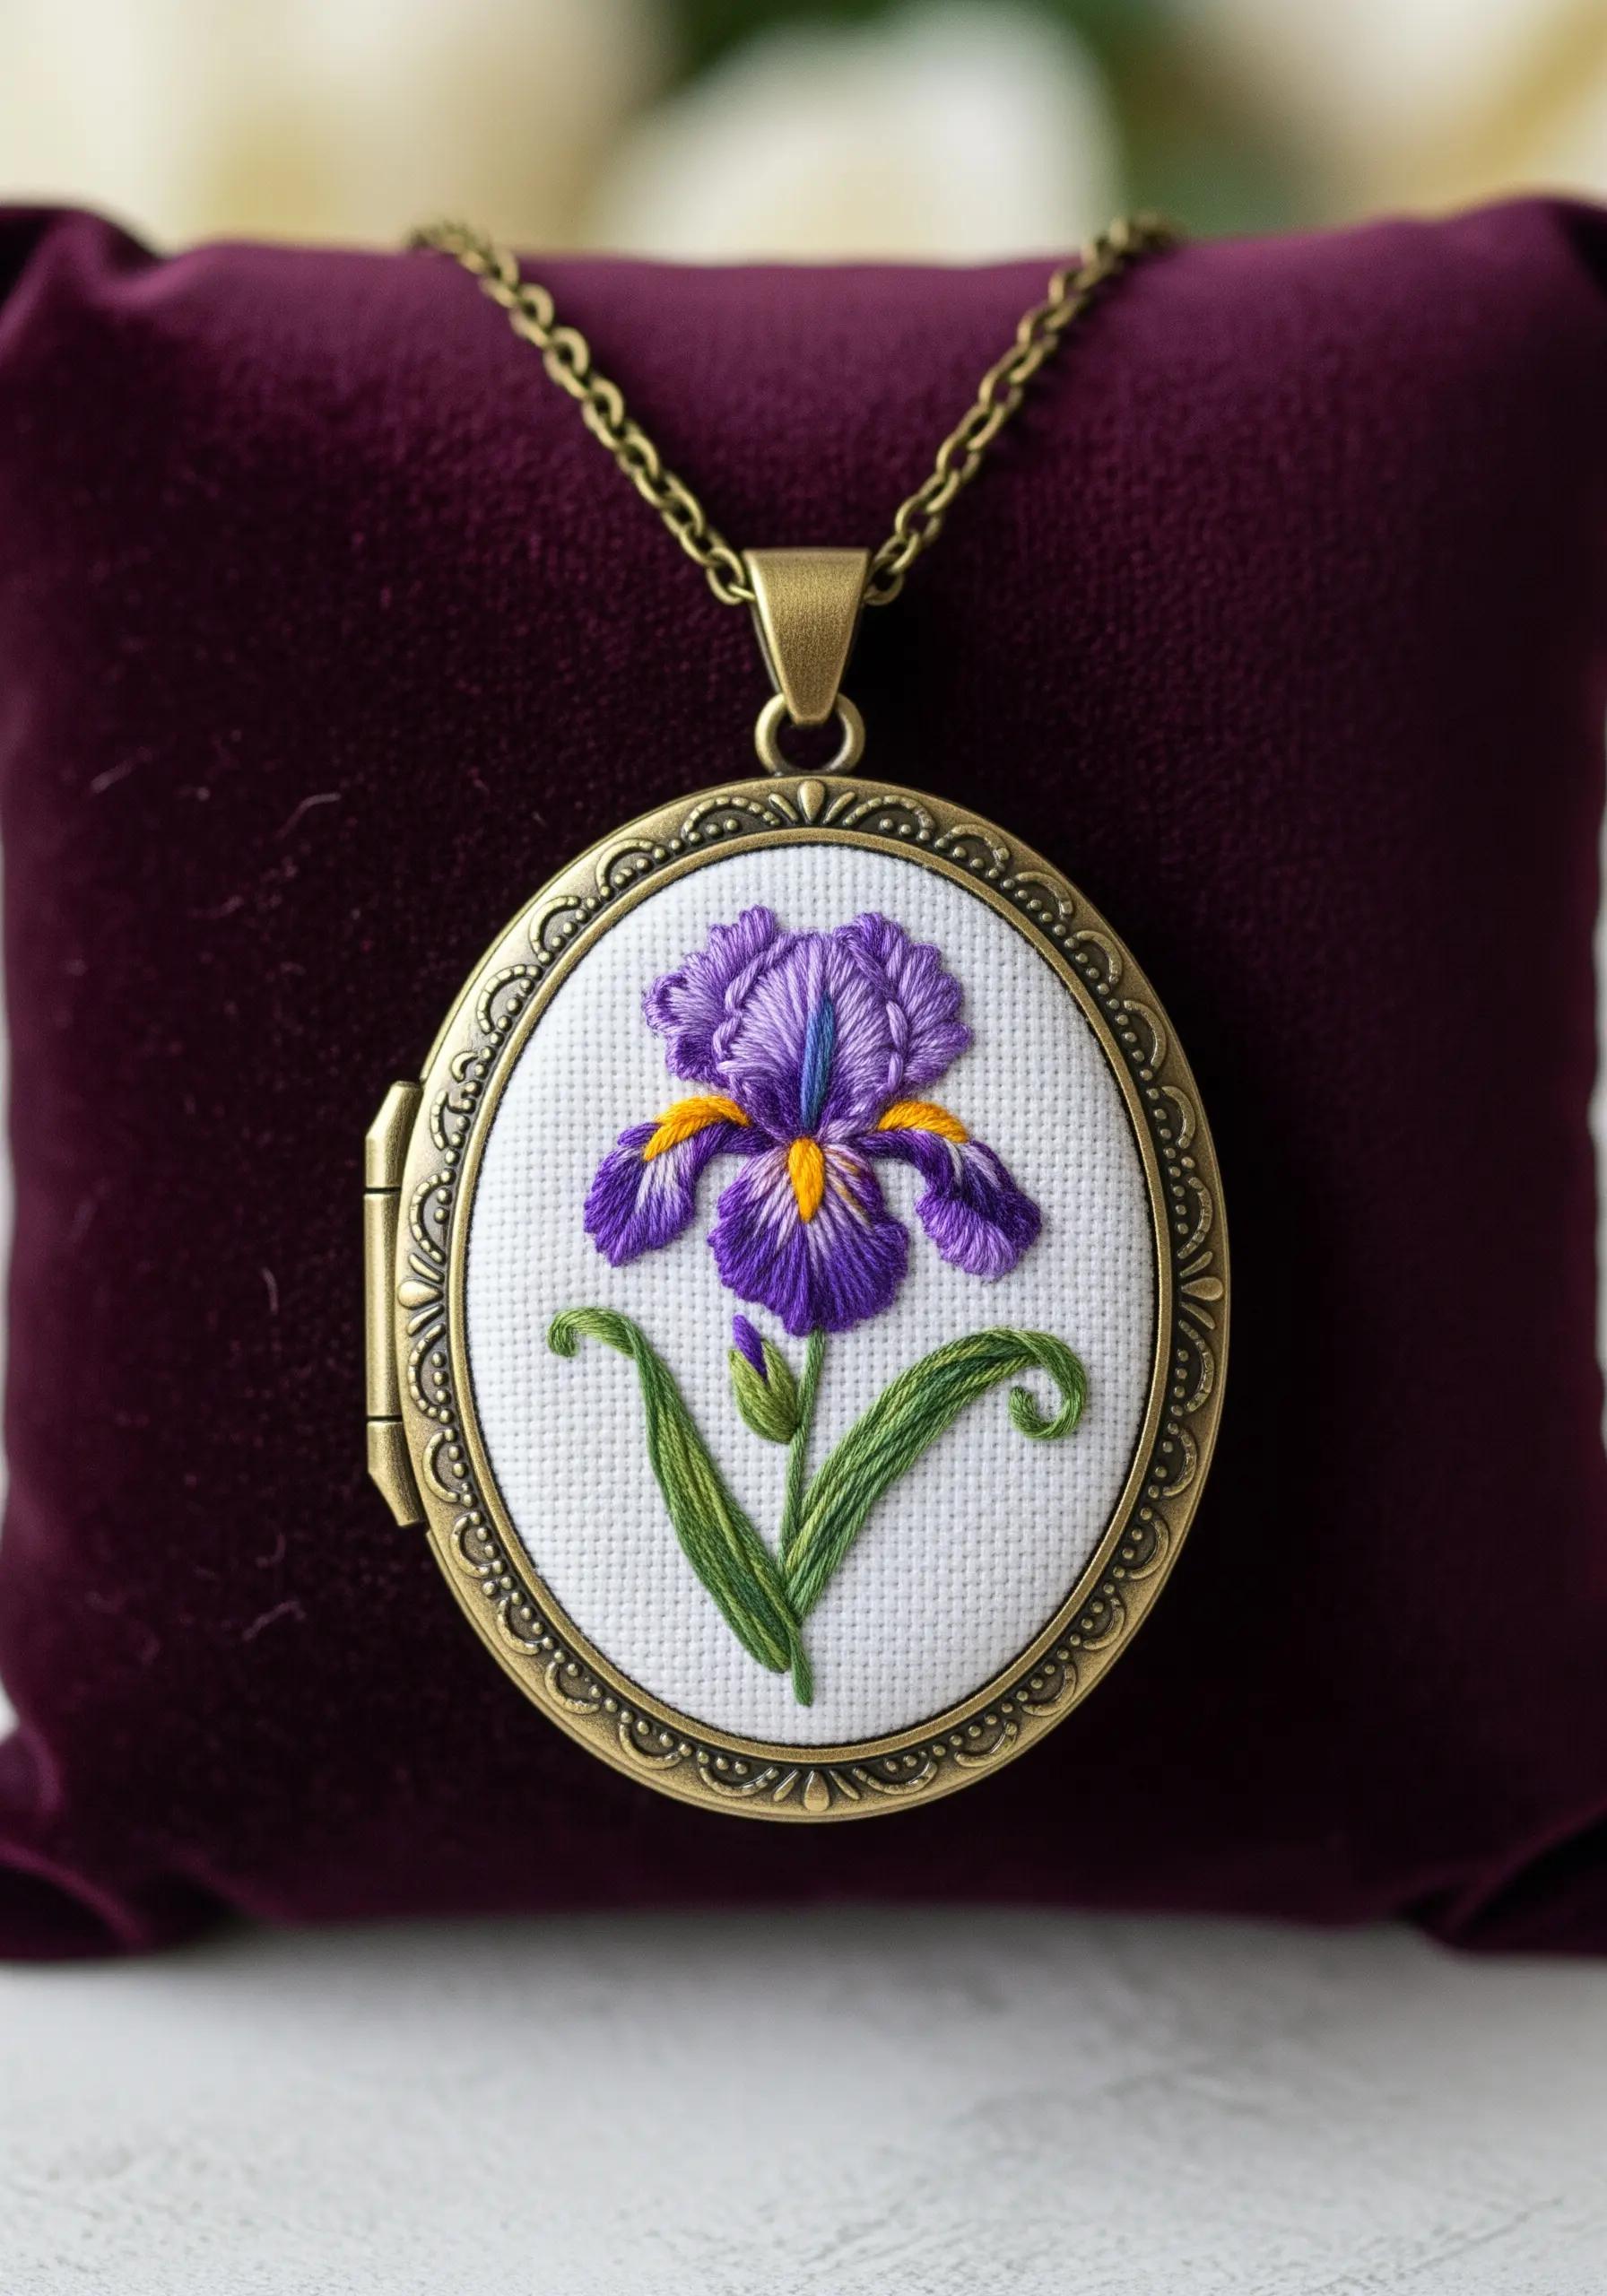
When working on a miniature scale, like for a locket, every stitch counts. Use only a single strand of embroidery floss to achieve the finest detail.
Employ the long-and-short stitch to blend colors seamlessly on the iris petals, creating a realistic, painterly effect. A fine split stitch for the outlines will define the shape without adding bulk.
These adorable mini embroidery ideas transform jewelry into personalized art.
16. Crafting a Sculptural Succulent Garden
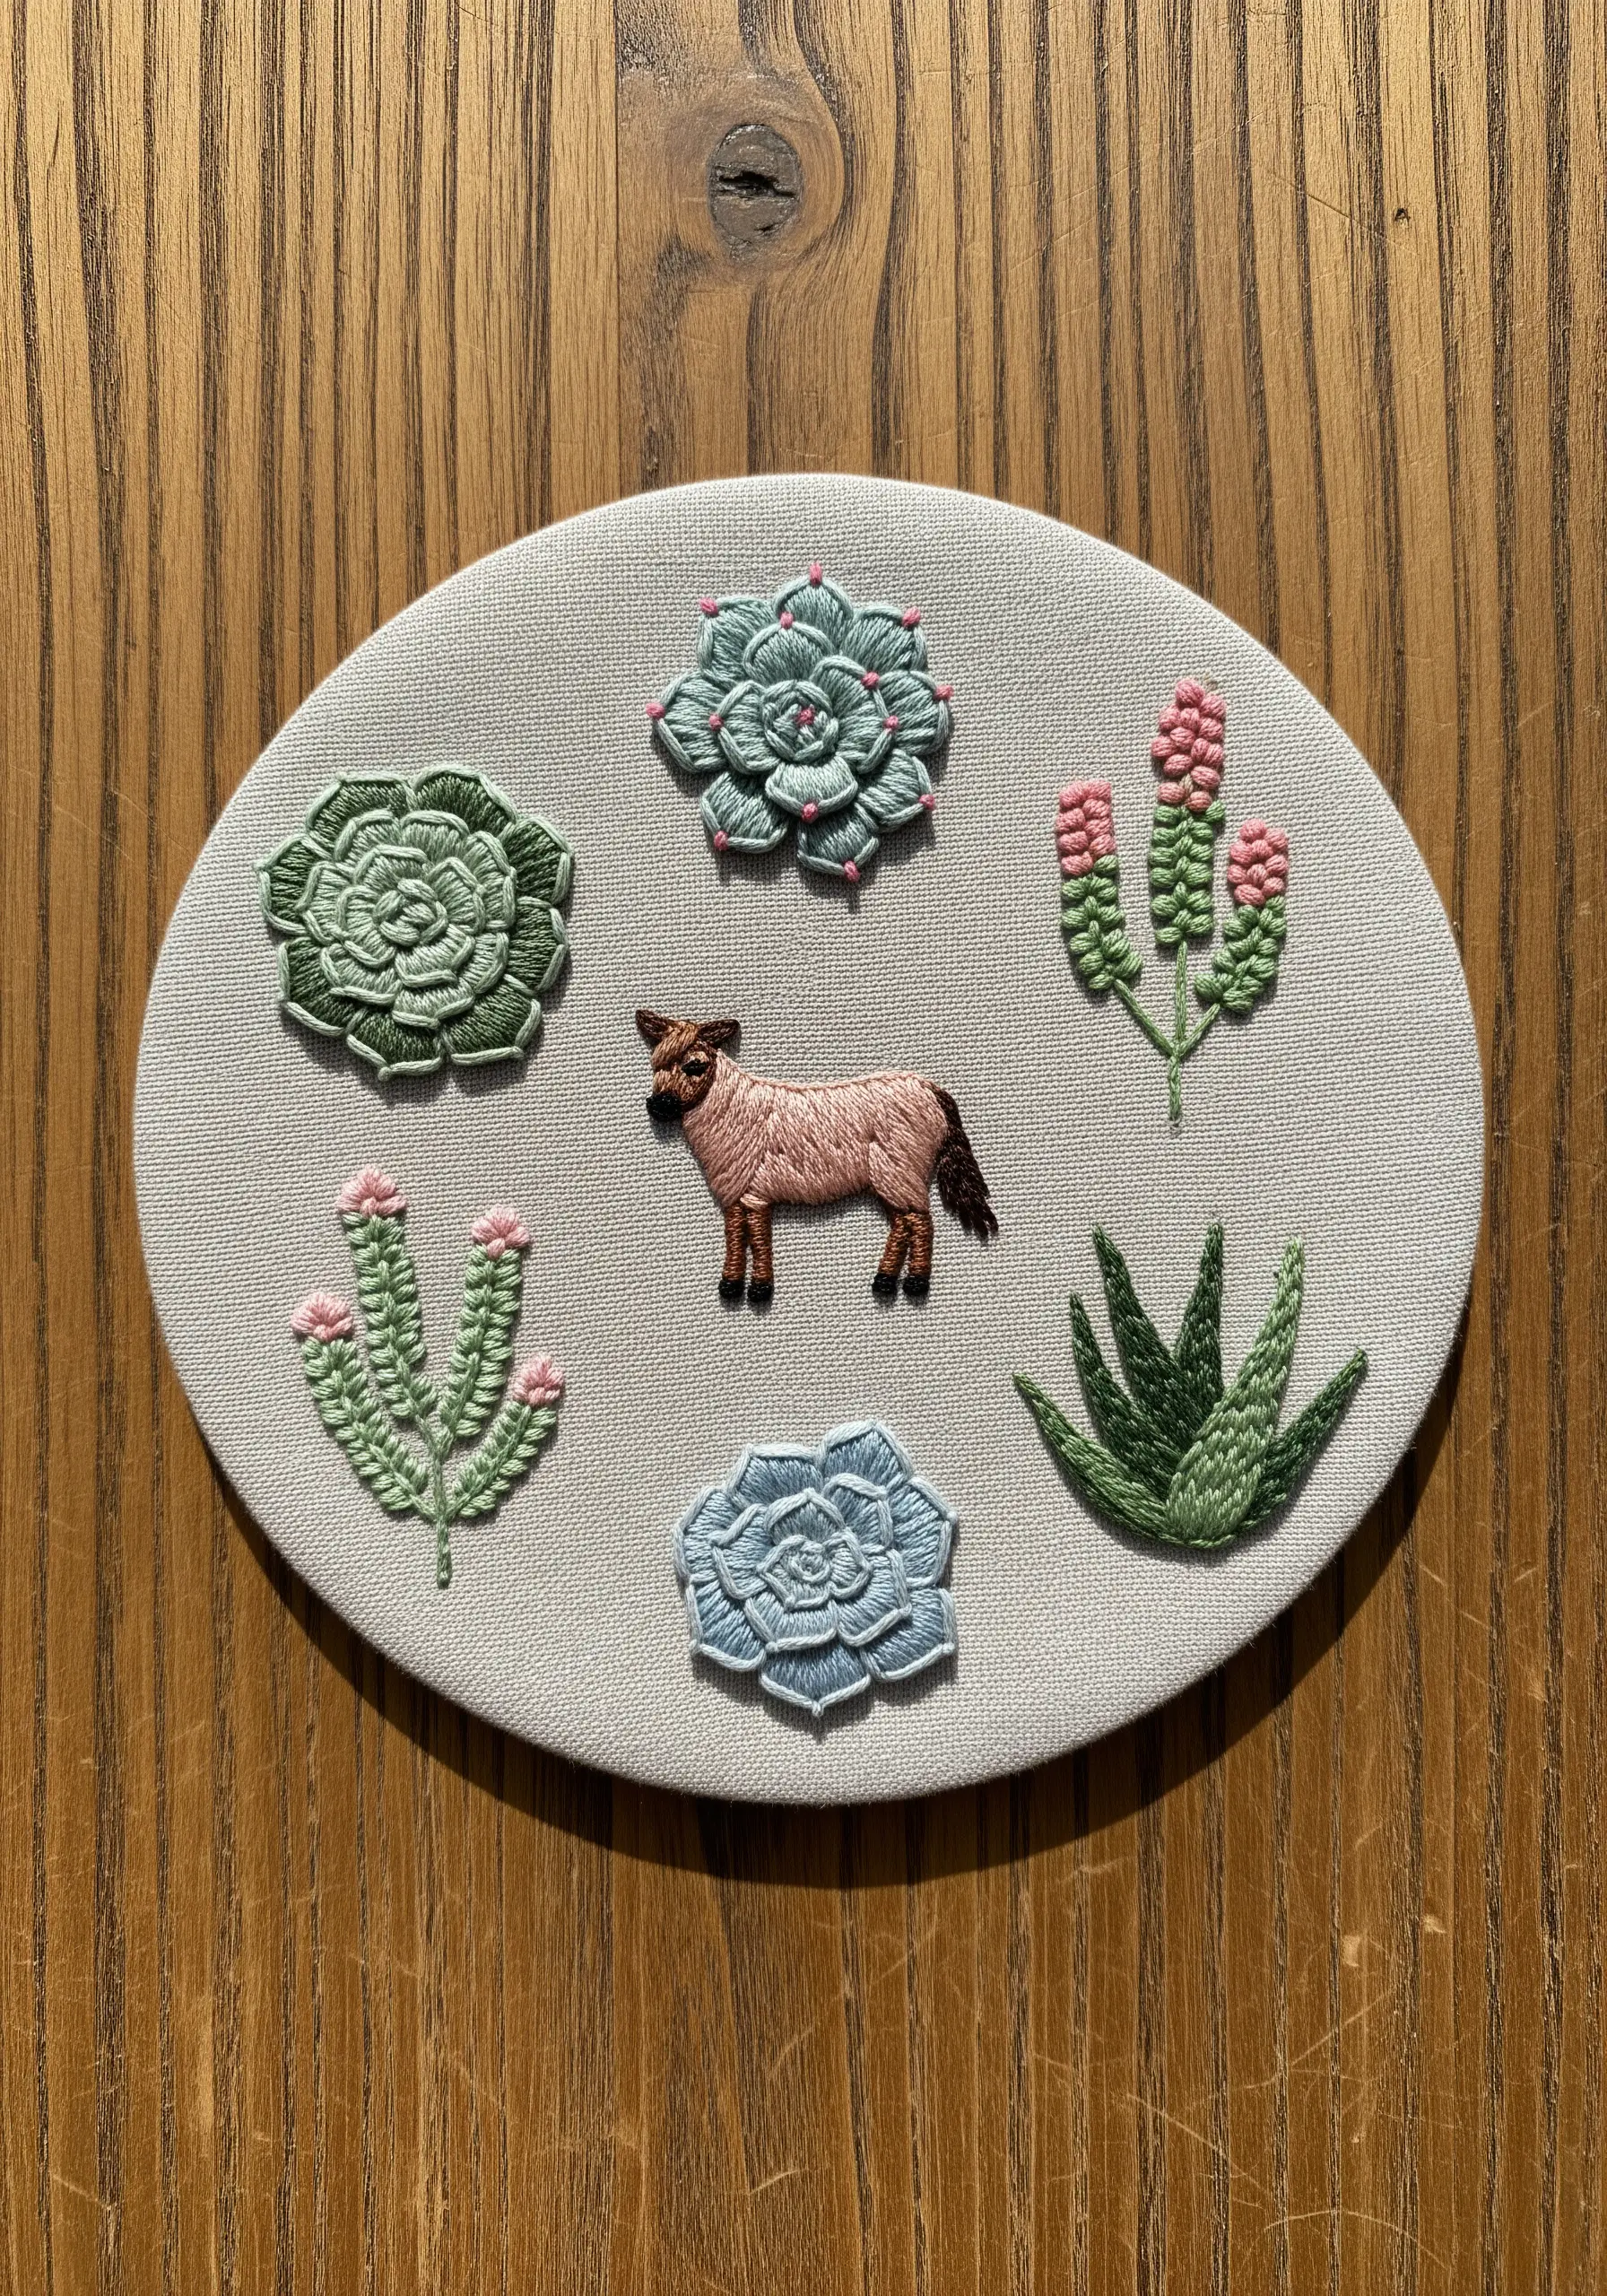
Bring your botanicals to life with dimensional stitches. Use woven wheel stitches (or woven spider web stitches) for the rosette-shaped succulents; the more you wrap the thread, the fuller the bloom will be.
For taller plants, cast-on stitches or bullion knots create plump, textured forms. By varying your stitch choices, you can create a diverse and tactile embroidered garden that pops off the fabric.
17. Entomological Art with Raised Goldwork
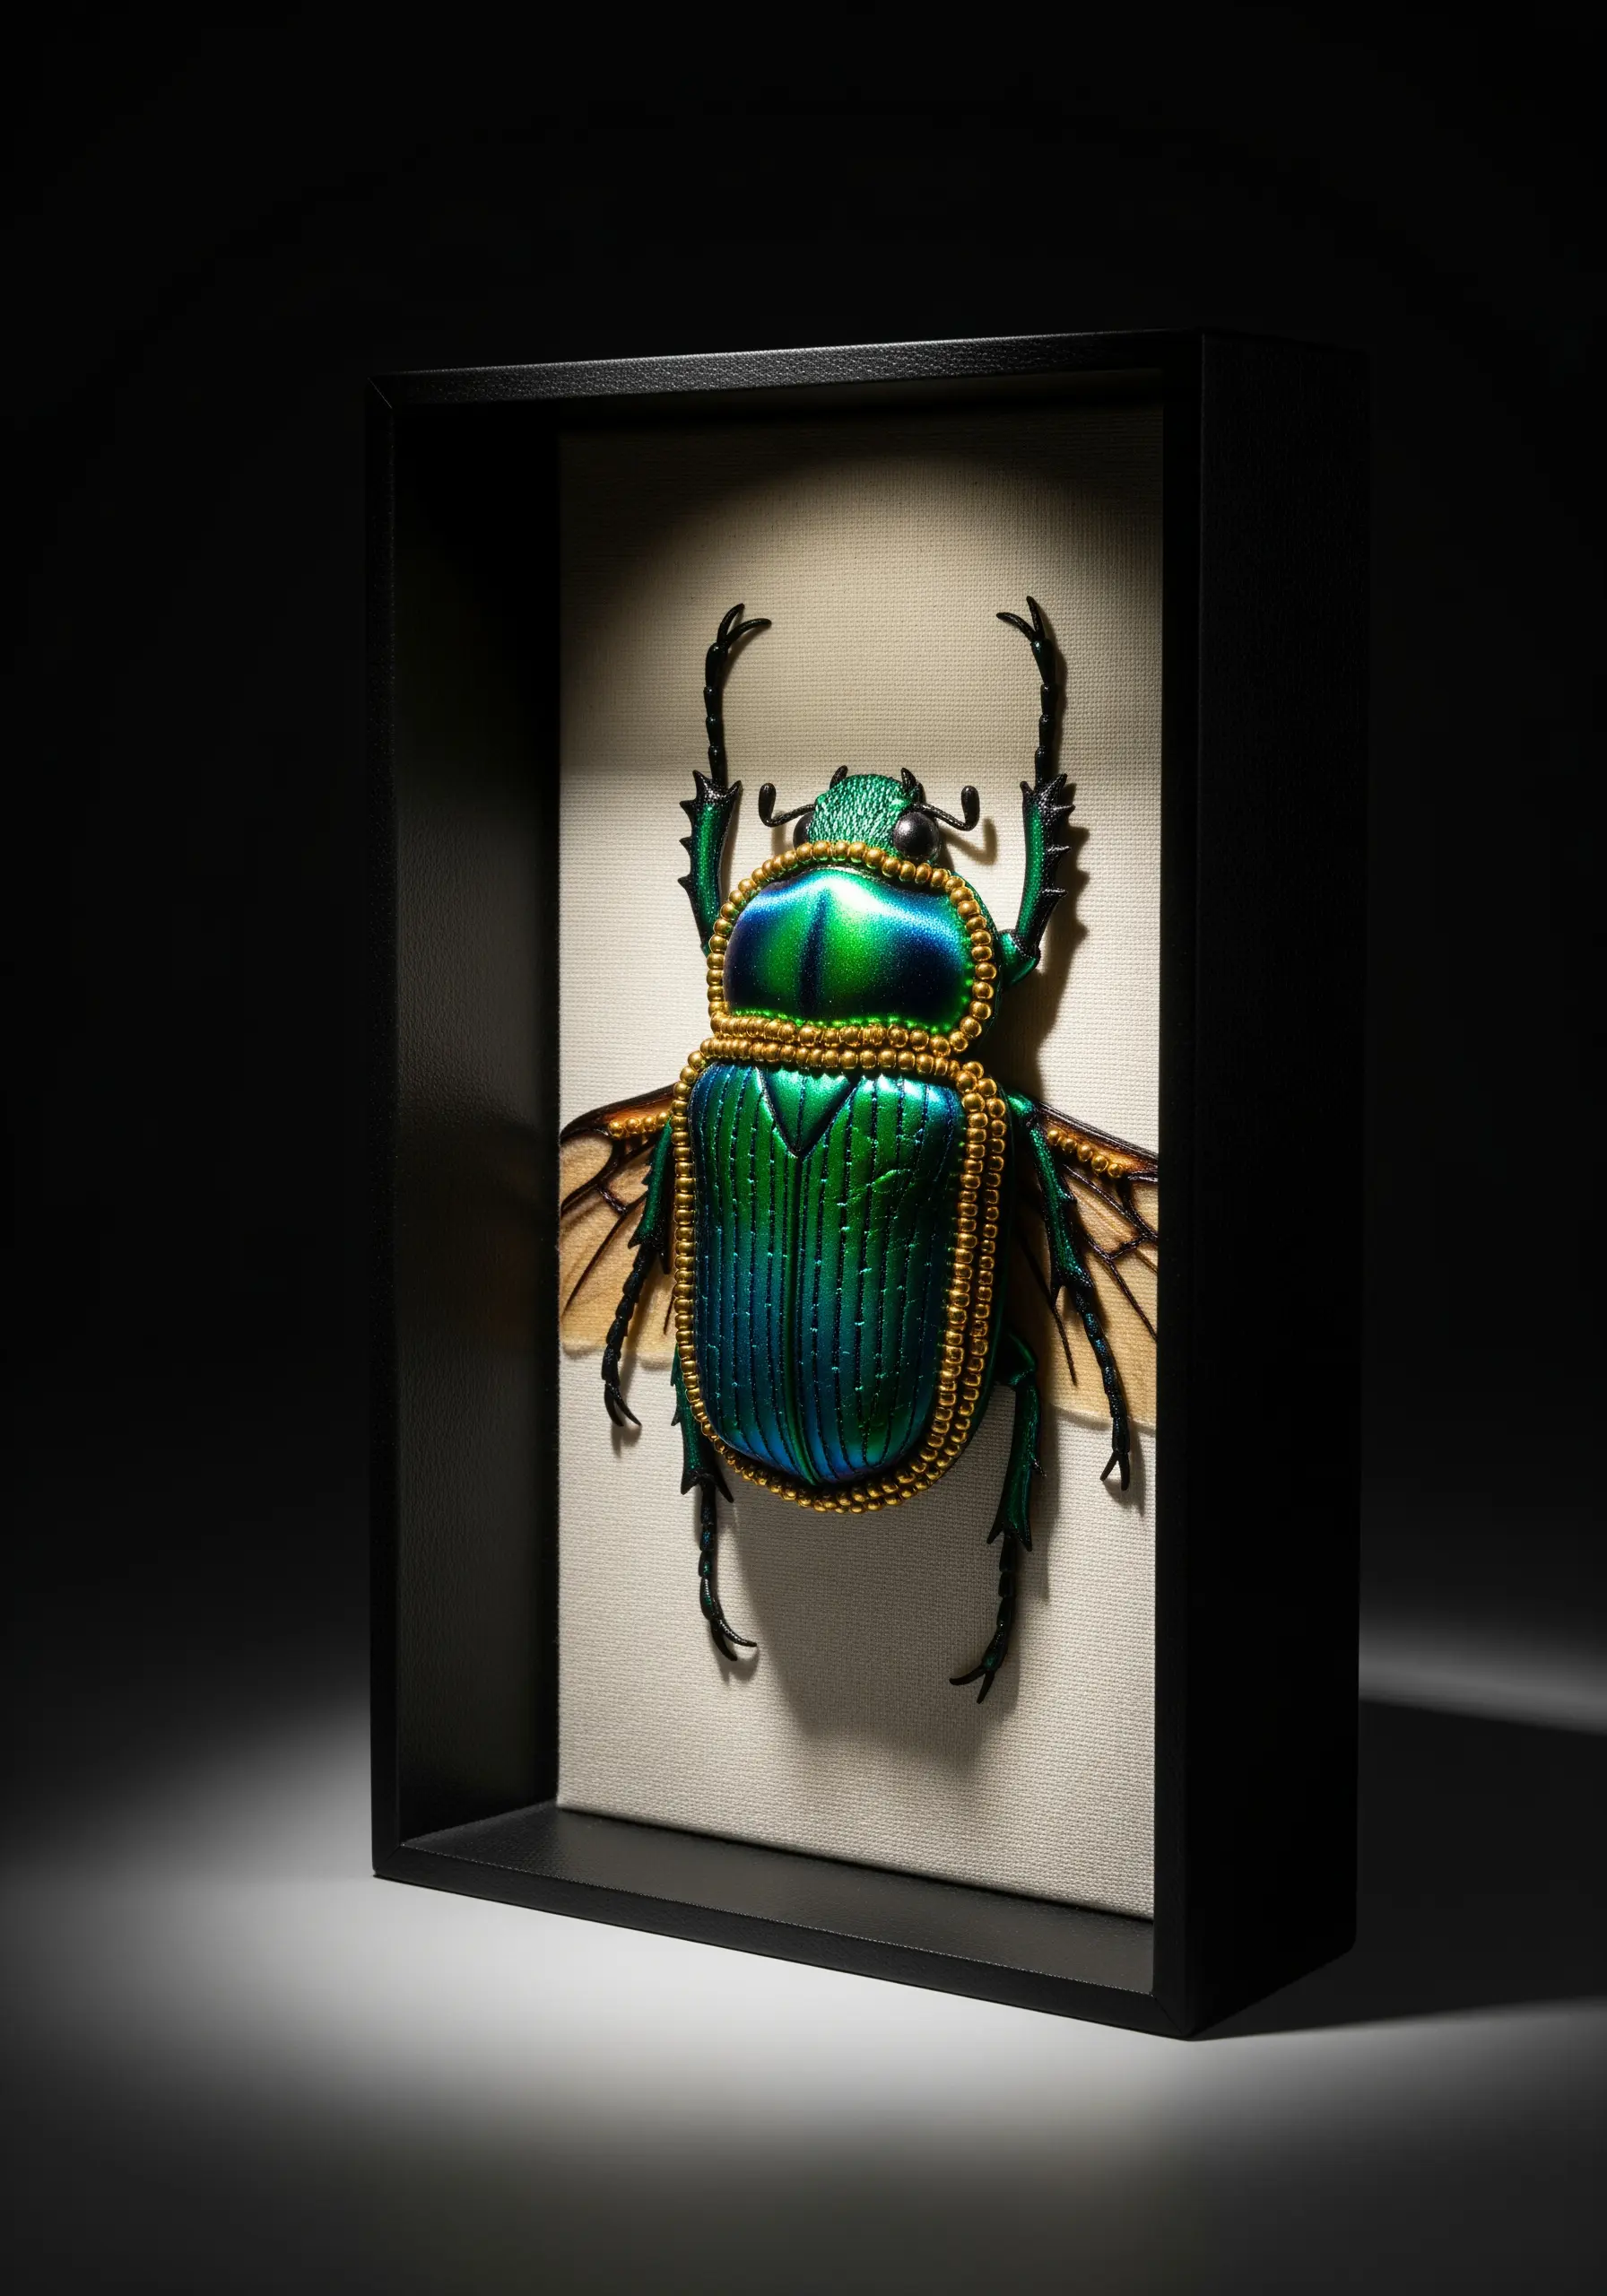
This stunning beetle is a masterclass in stumpwork and goldwork. The iridescent body is created with long, perfectly parallel satin stitches using a metallic or silk thread over felt padding for a high dome.
The gold border is achieved by couching a stiff metallic cord around the shape. The wings, made separately on a wire frame with sheer fabric, are then attached underneath the body to complete the realistic, multi-layered insect.
18. Capturing Movement in a Famous Artwork
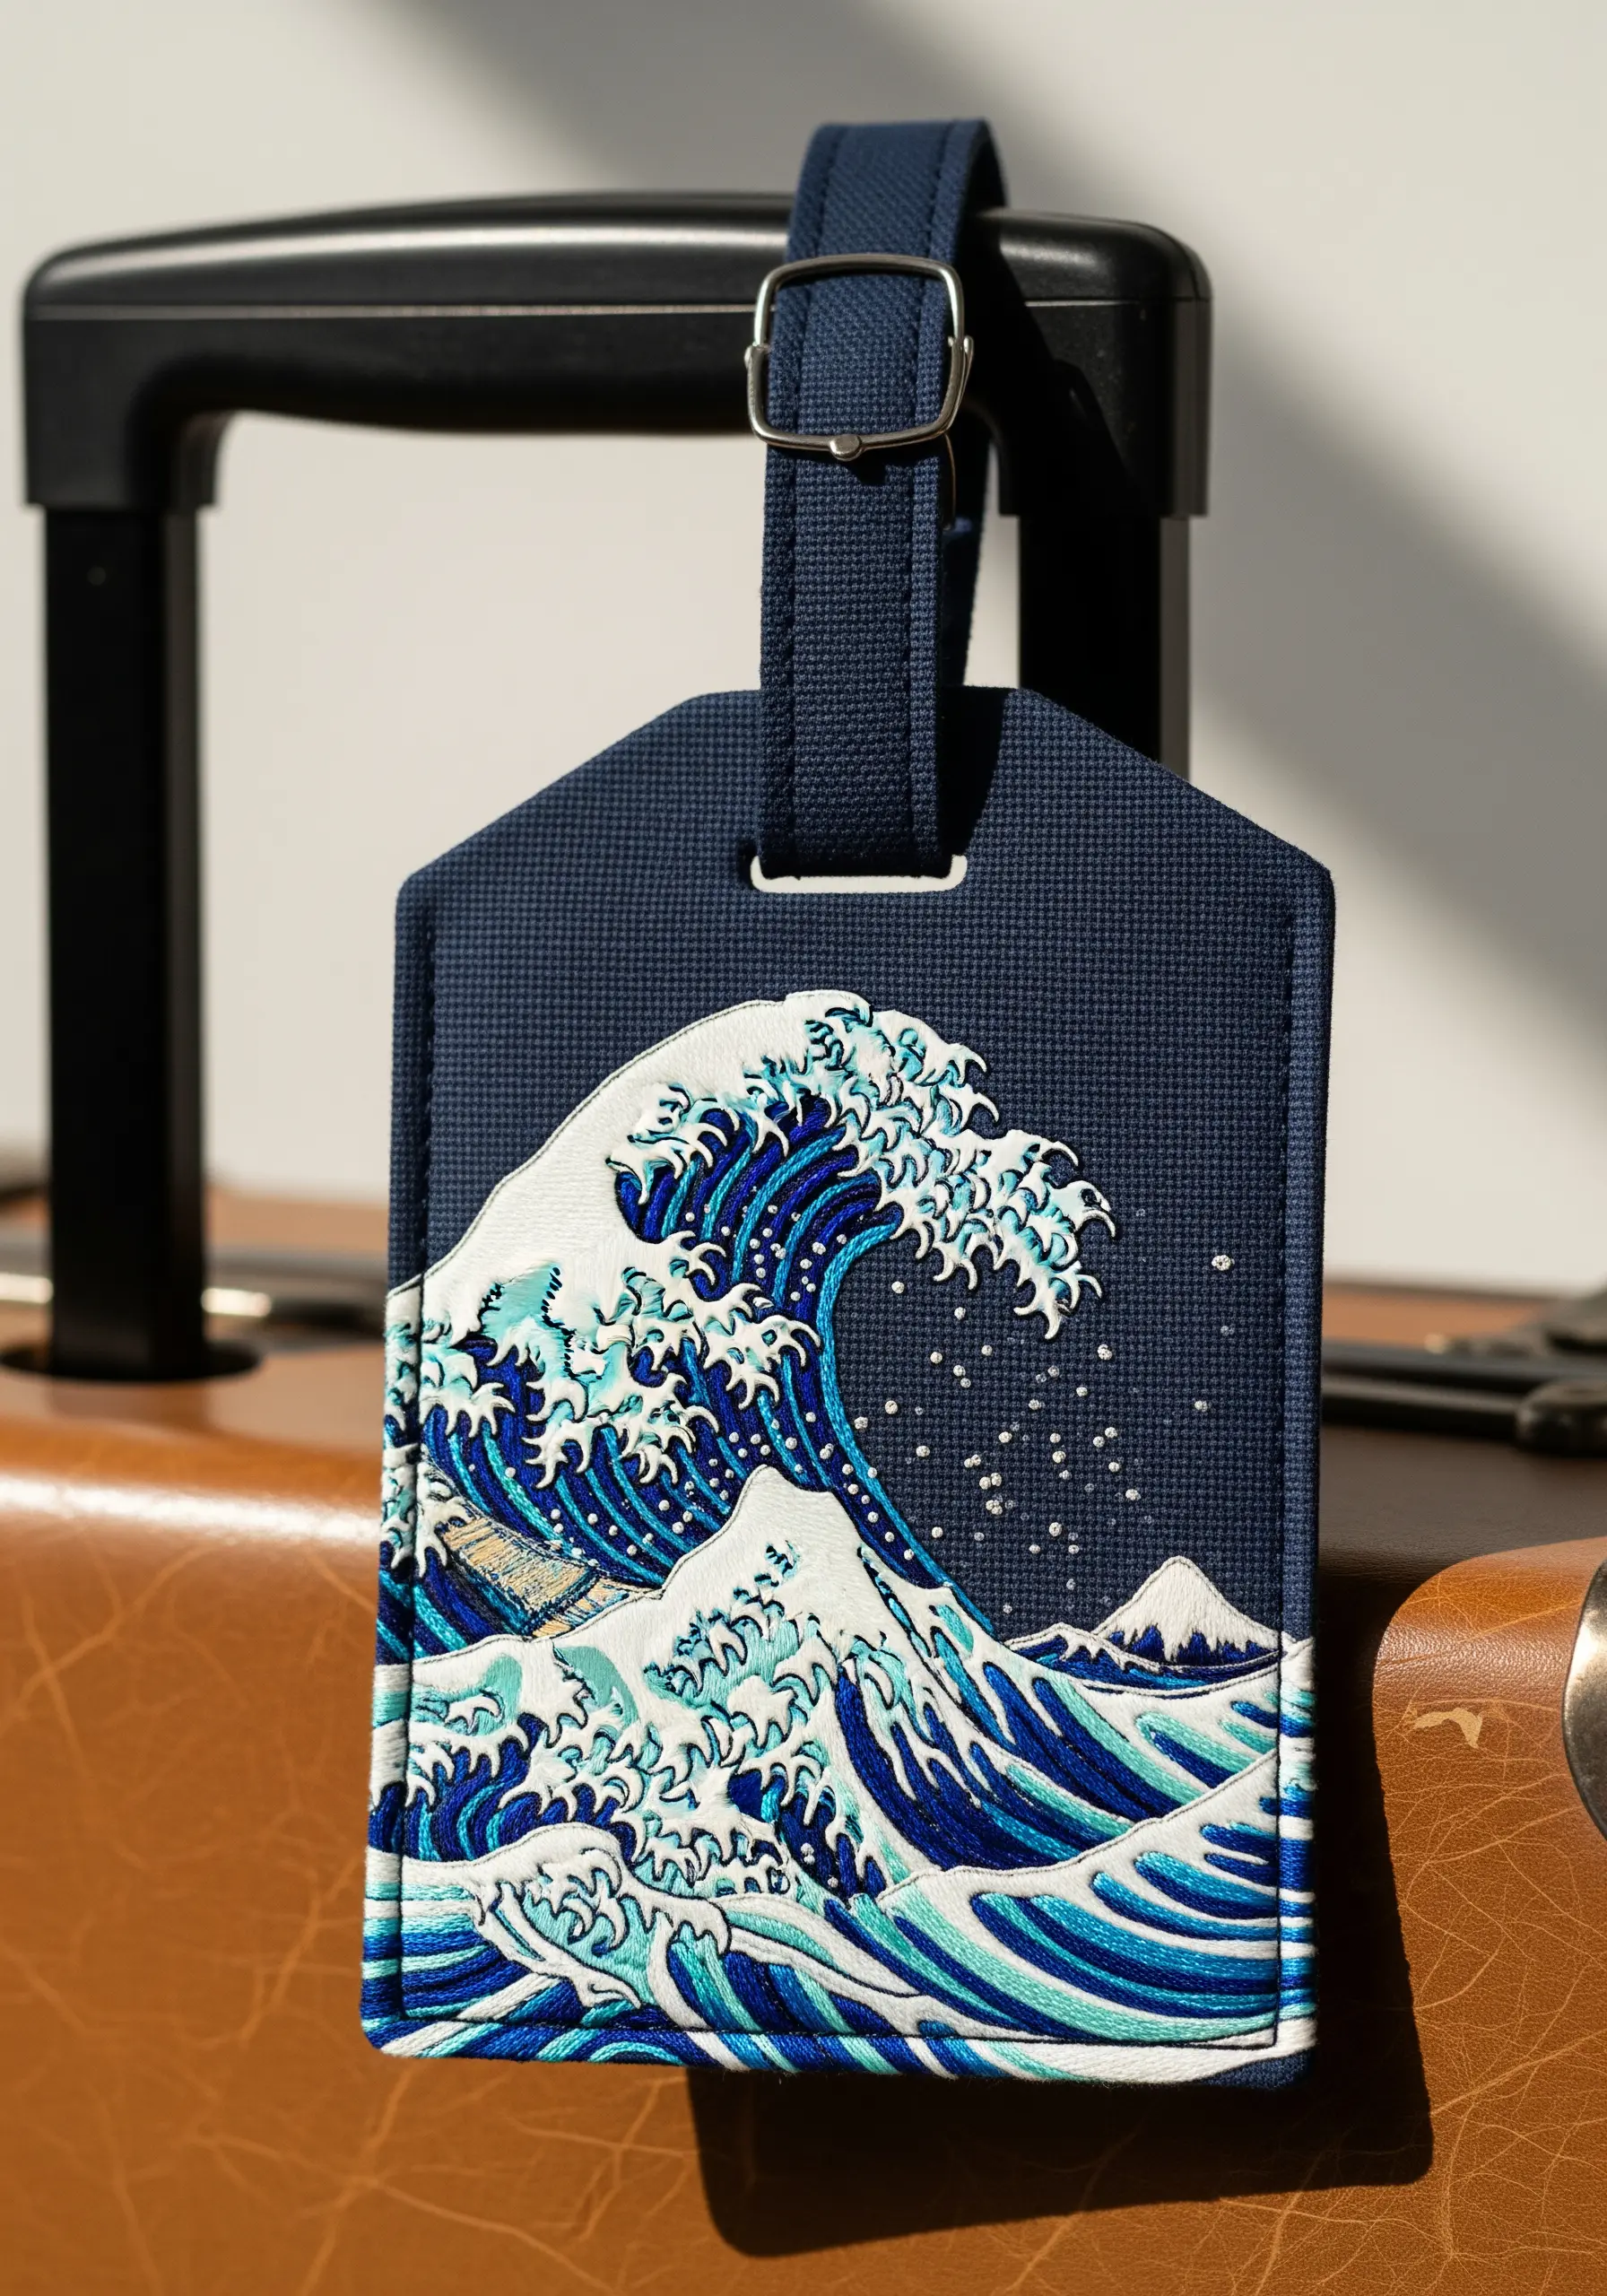
When translating a painting like ‘The Great Wave’ into embroidery, focus on conveying motion. Use the direction of your stitches to follow the curves of the water.
Employ a mix of long-and-short stitch for the larger areas of color and thousands of tiny French knots for the sea foam to create a frothy, chaotic texture.
This contrast between smooth, flowing stitches and dense, bumpy knots is what brings the iconic image to life.
19. Achieving Perfect Circles in Hoop Art
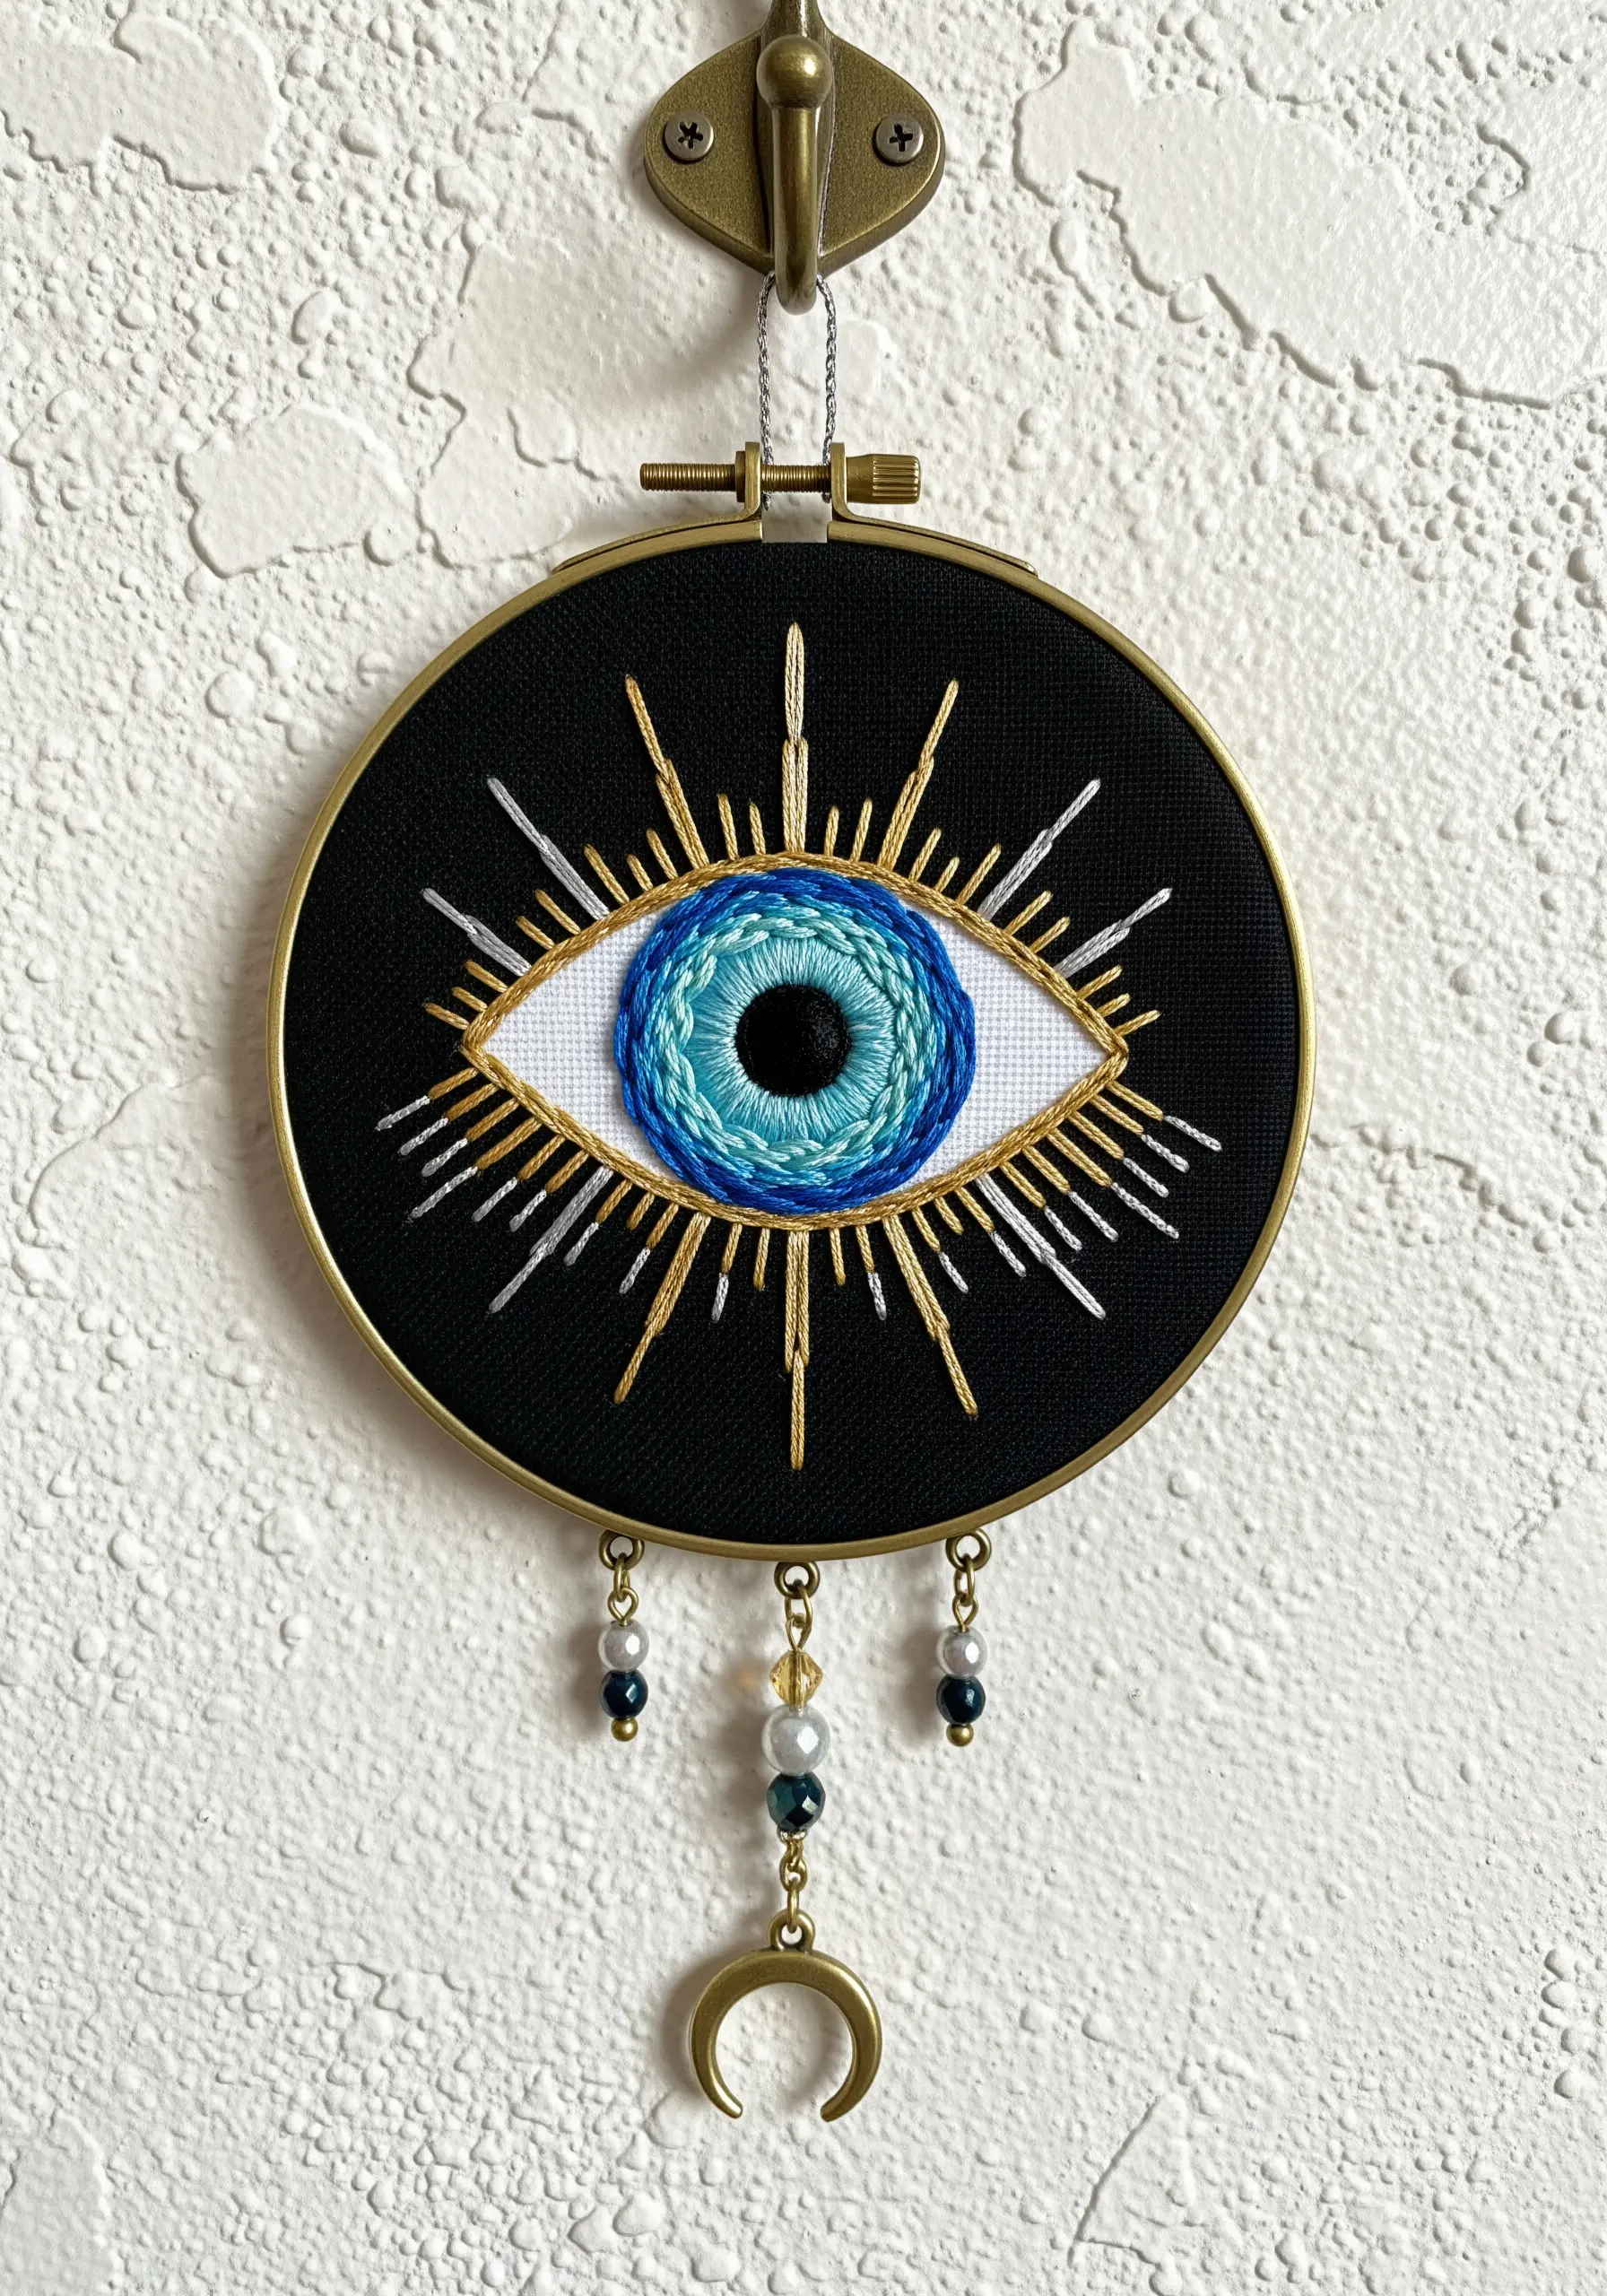
The key to a perfect satin stitch circle, like the iris of this eye, is to work from the inside out and use a split stitch outline as a guide.
Your satin stitches should be perpendicular to the outline, creating a smooth, radiant effect. For the gradient, switch thread colors every few rows, subtly blending them to create depth.
Adding abstract metallic thread rays gives the piece a dynamic energy that catches the light beautifully.
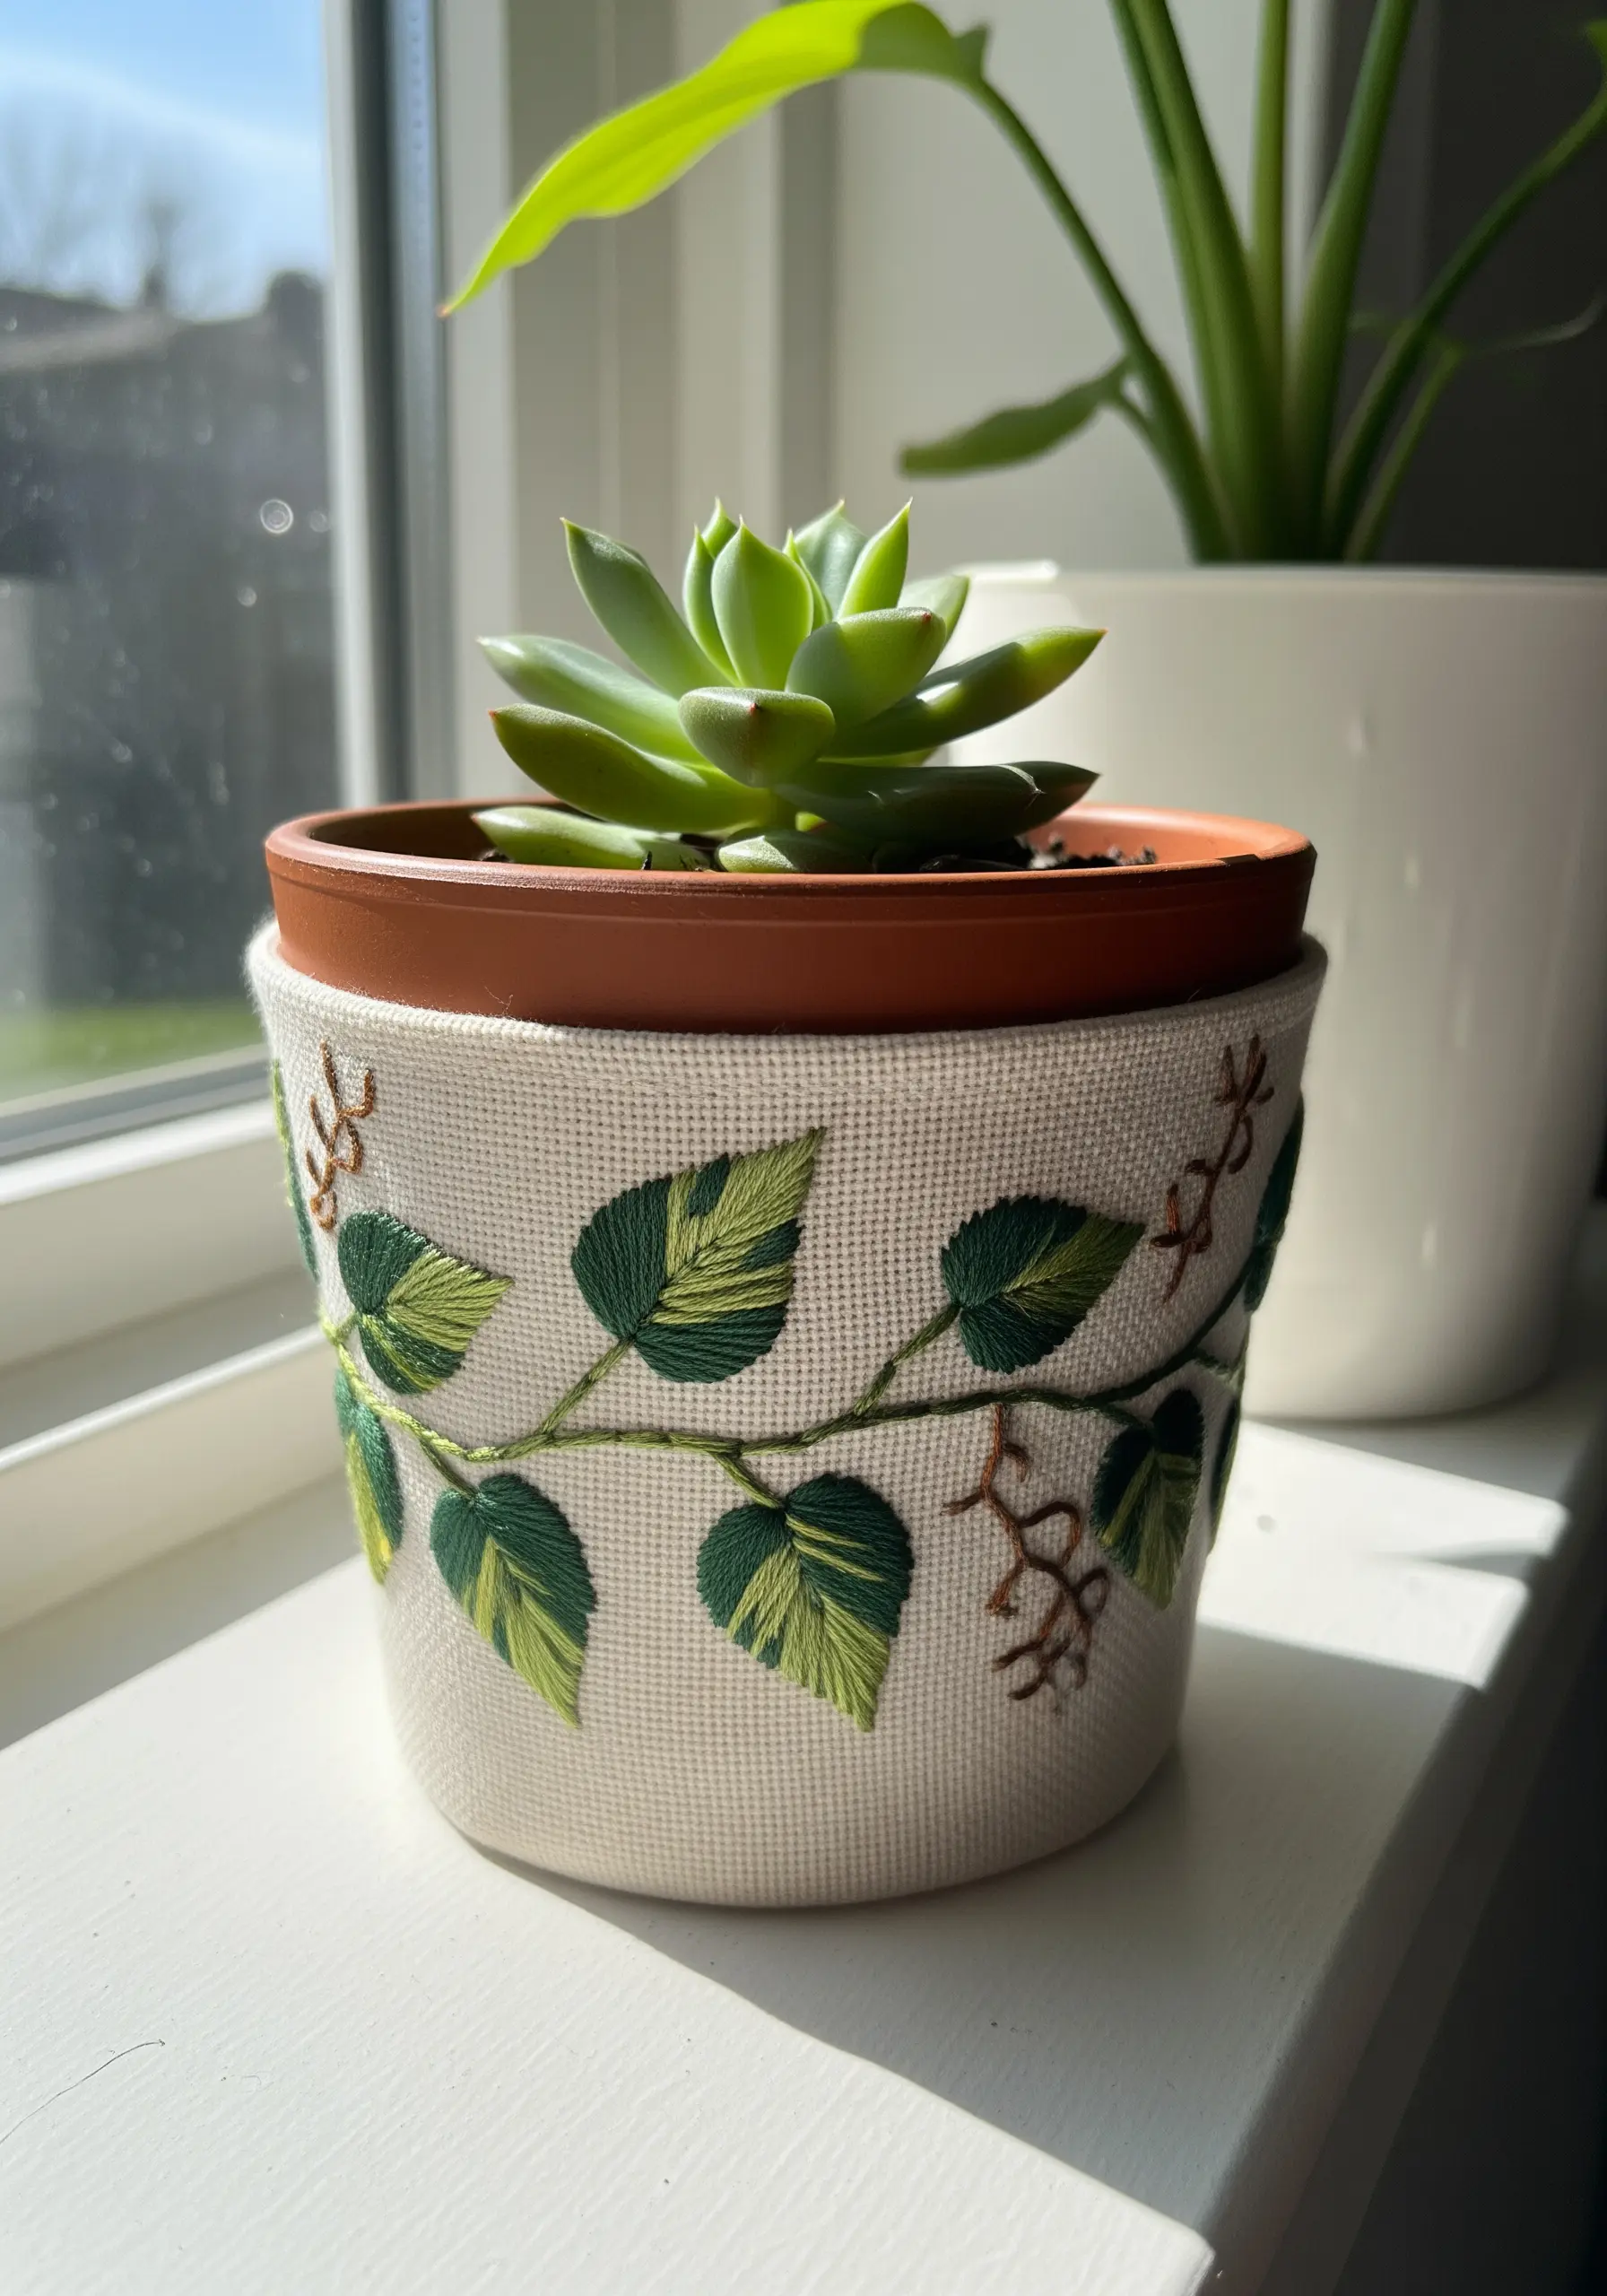
20. Fabric Paneling for Embellished Notebooks
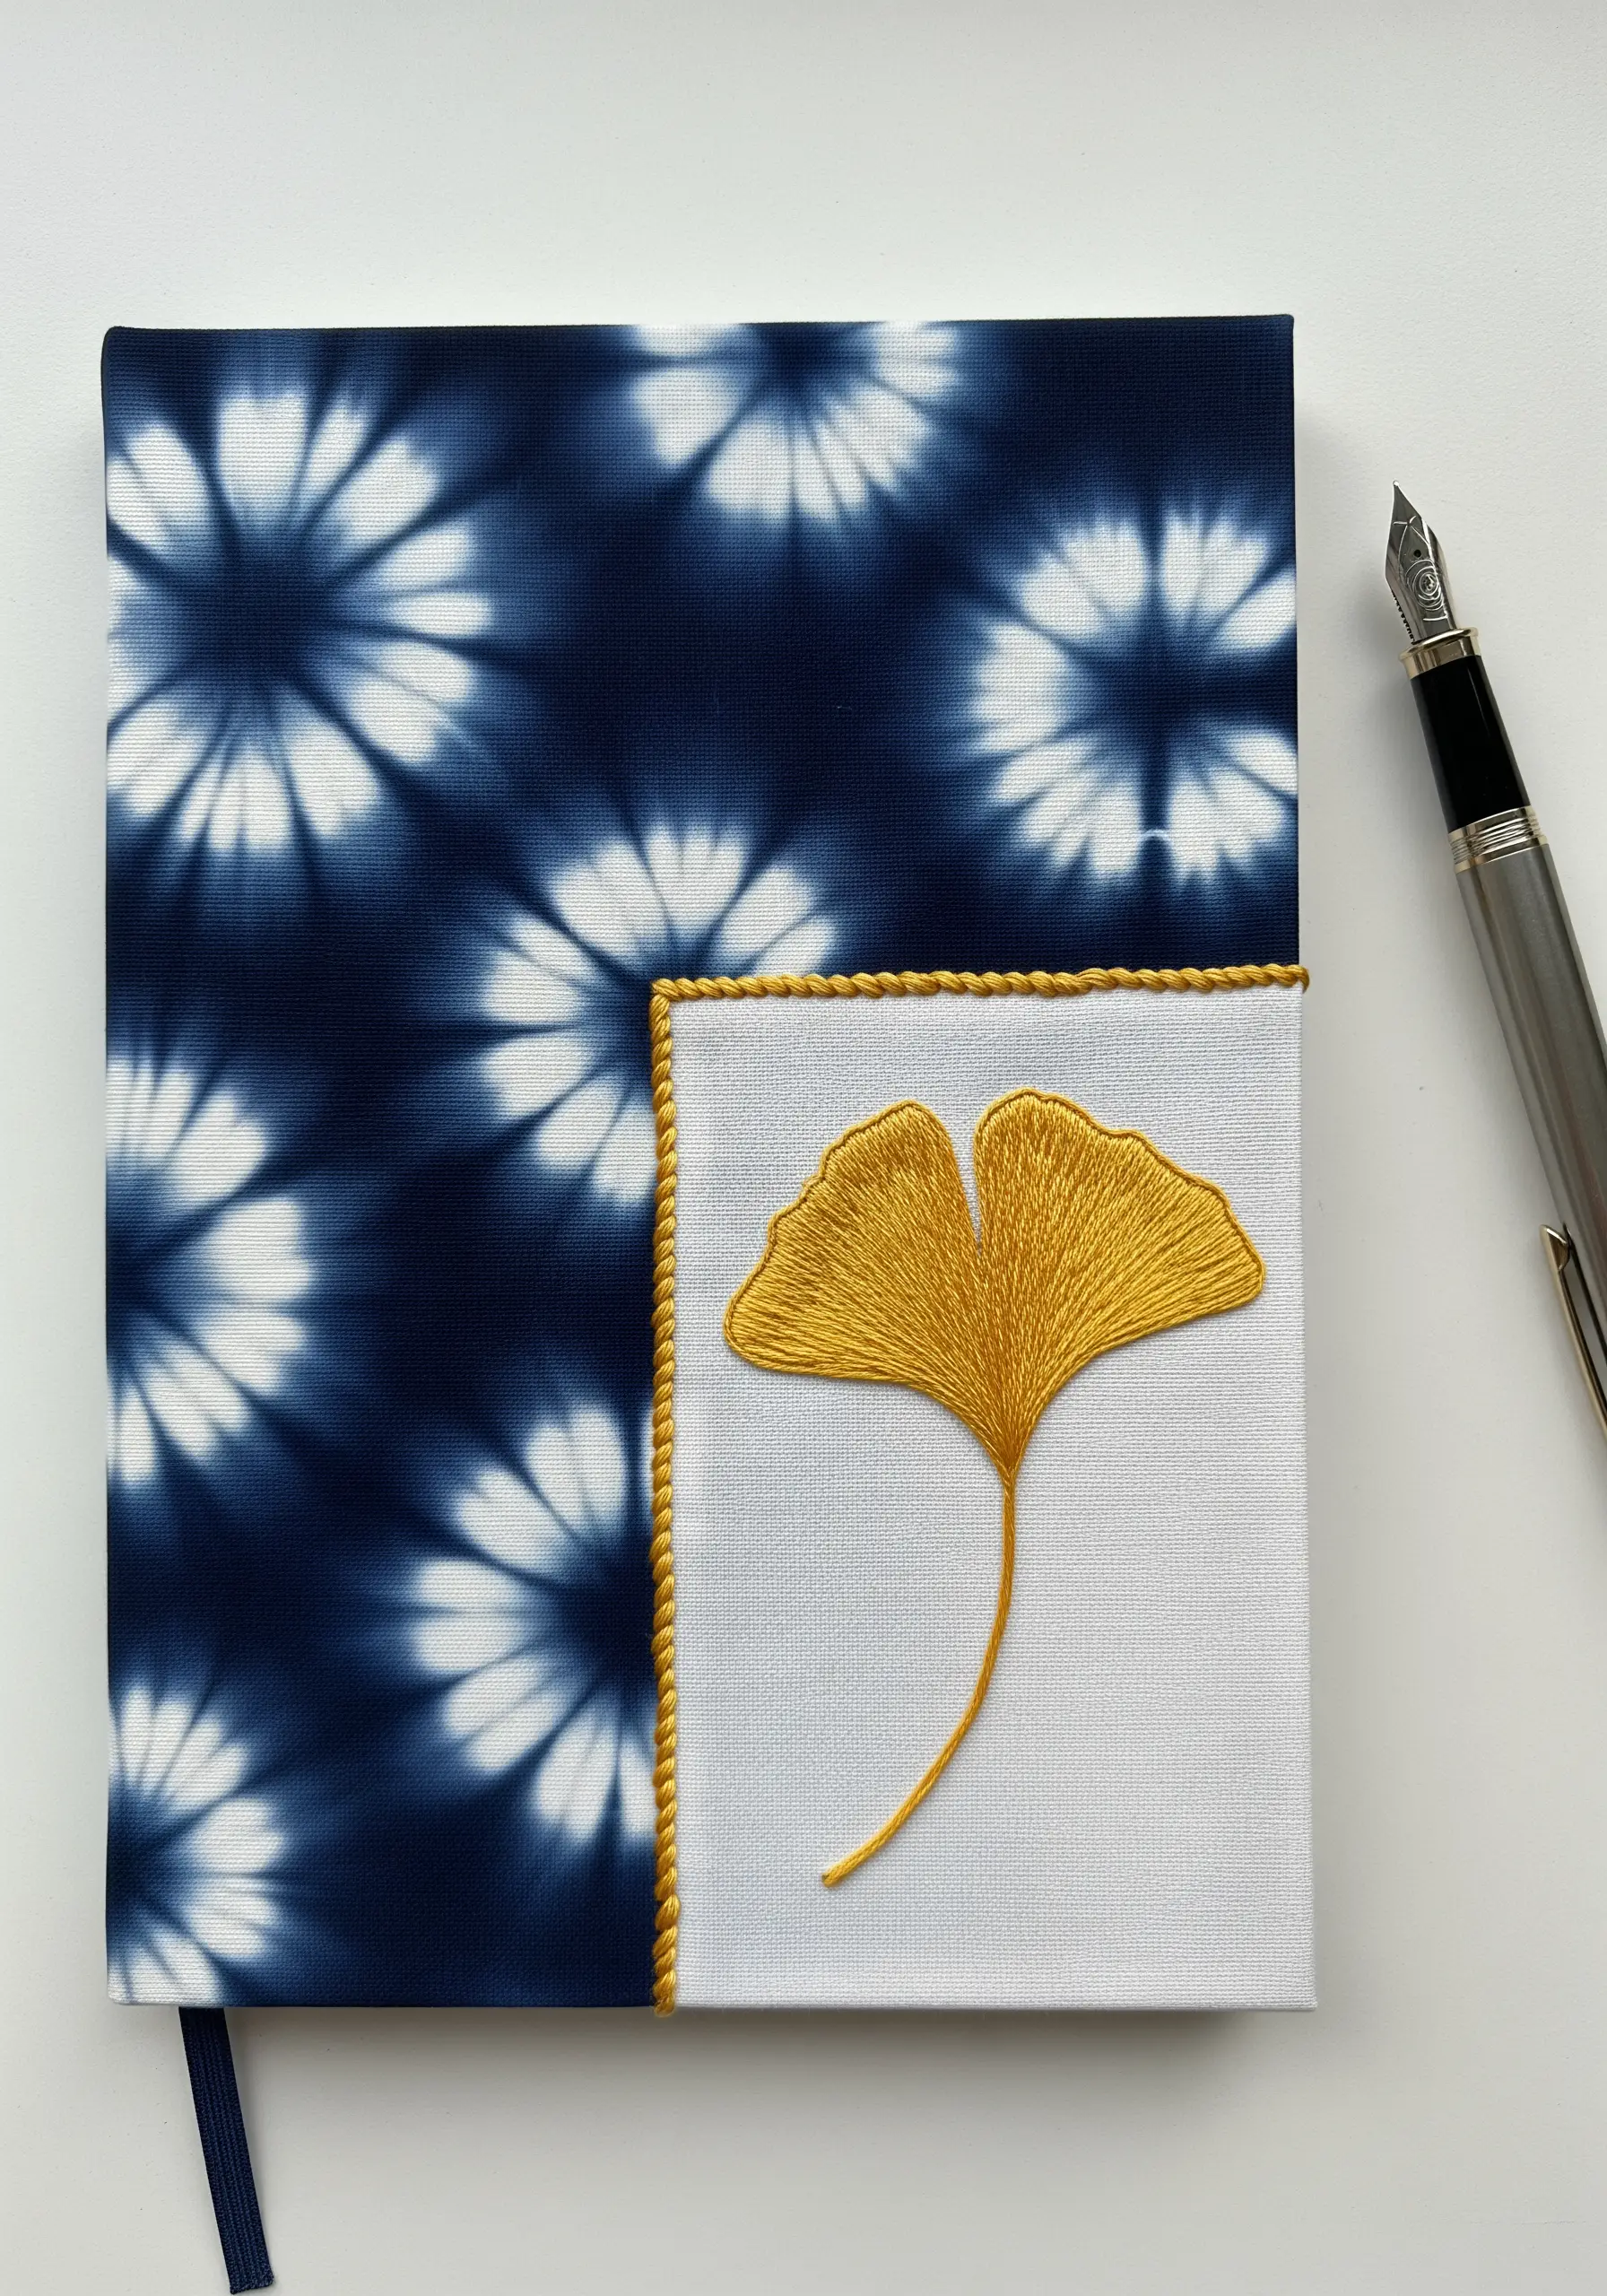
Instead of trying to stitch directly through a thick notebook cover, embroider your design on a separate panel of fabric.
Here, a simple ginkgo leaf is rendered in a smooth satin stitch on white canvas. This panel is then neatly glued or stitched onto the main shibori-dyed fabric cover.
Edge the panel with a contrasting couched cord to hide the raw edges and create a clean, intentional transition between the two fabrics.
21. Wire-Frame Embroidery for Delicate Forms
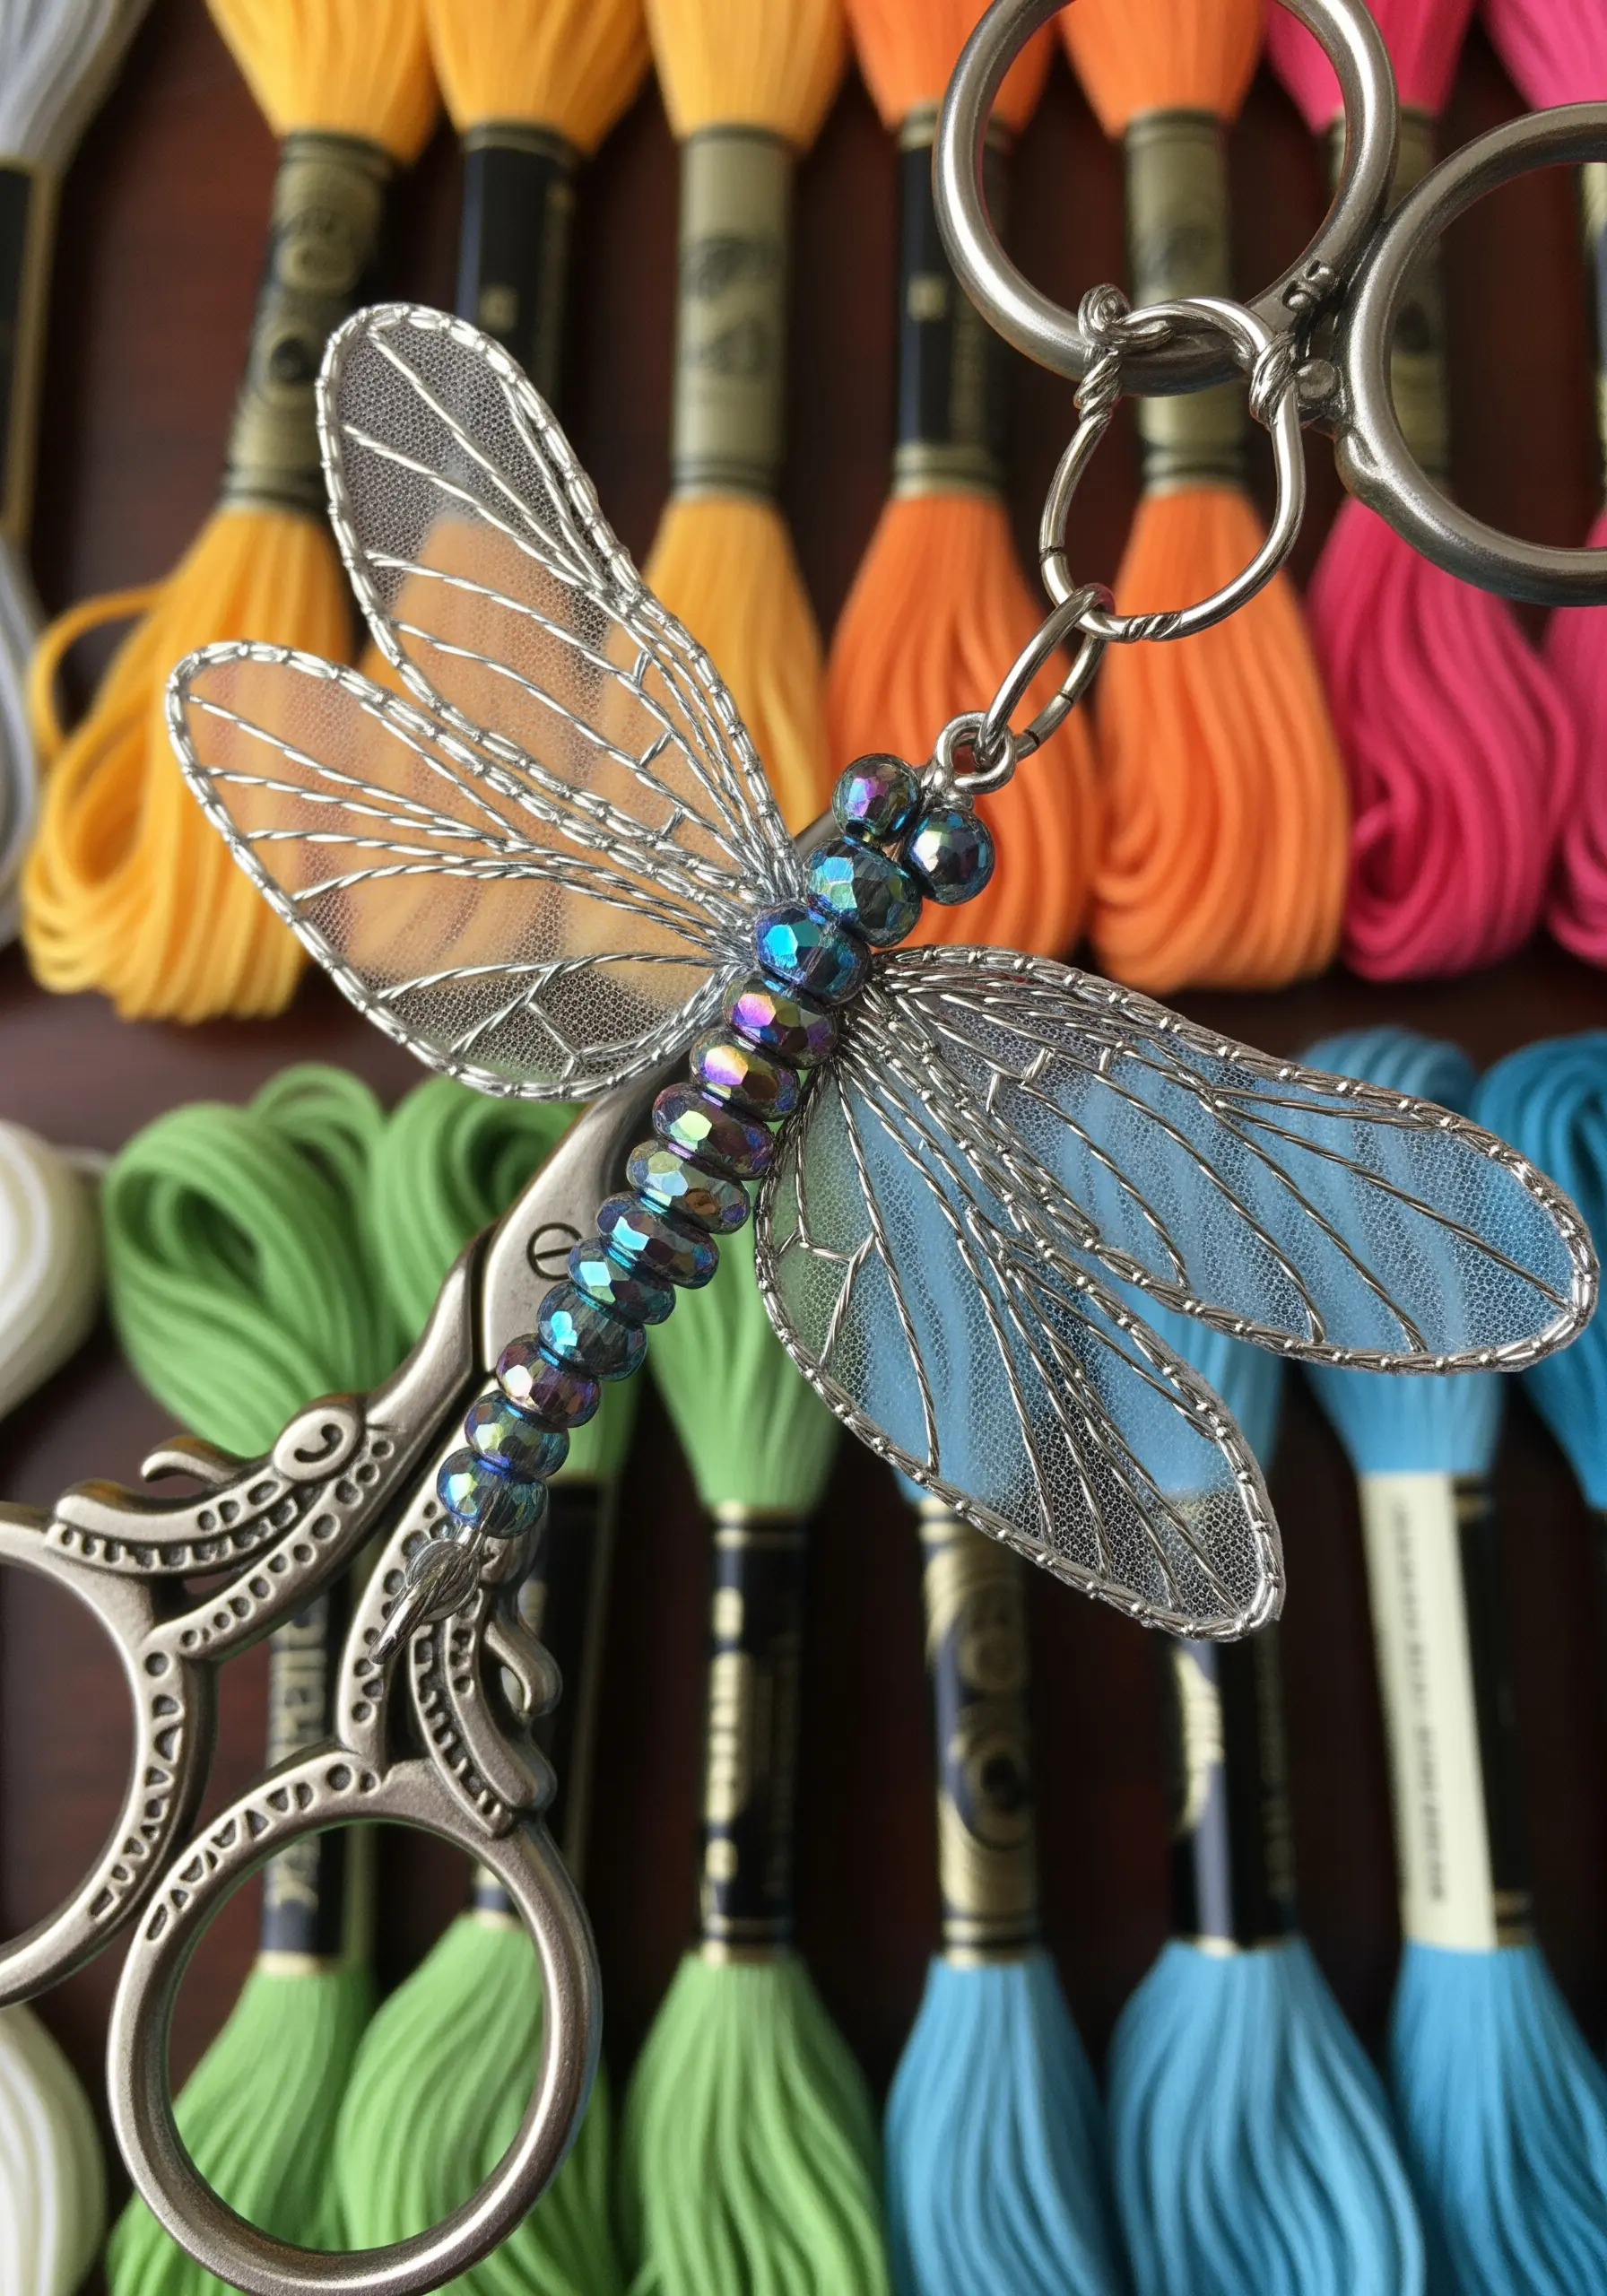
To create delicate, transparent wings like those on this dragonfly, you’ll use a stumpwork technique involving a wire frame.
Shape a fine-gauge wire into the wing outline and secure it to your background fabric. Stitch over the wire with buttonhole stitches, then fill the interior with an open, web-like pattern on a layer of water-soluble stabilizer.
Once you dissolve the stabilizer, you are left with a freestanding, lace-like wing that is both strong and ethereal.
22. Thread Painting Skin Tones

To embroider realistic hands, use the long-and-short stitch with several closely-matched, neutral shades to create subtle contours and shadows.
Use a single strand of a slightly darker color to add fine lines for knuckles and veins, which brings the hand to life. For the lace cuff, switch to a delicate openwork stitch like fagoting or a simple daisy chain to contrast the dense stitching of the hand.
This is a true example of handmade art pieces that tell a story through texture.
23. Crafting a Whimsical Tea Tag

Even the simplest objects can become canvases for storytelling. This tiny house-shaped tea tag is stitched on Aida cloth or a high-count linen, which provides a natural grid for small, neat stitches.
Use just one or two strands of floss to keep the details—like the window panes and tiny flowers—from becoming bulky. A simple backstitch for the outlines and a few satin stitches for color are all that’s needed for this charming micro-embroidery.
24. Simple Garland with Felt and Backstitch

Felt is an ideal material for garlands because it’s sturdy, colorful, and doesn’t fray when cut. Trace and cut out your leaf and birch bark shapes using sharp scissors for crisp edges.
Use a contrasting color of thread and a simple backstitch or stem stitch to add the leaf veins and bark details. This quick project is perfect for beginners and adds a touch of handmade earth-tone charm to your home.
25. Architectural Embroidery with Minimal Stitches
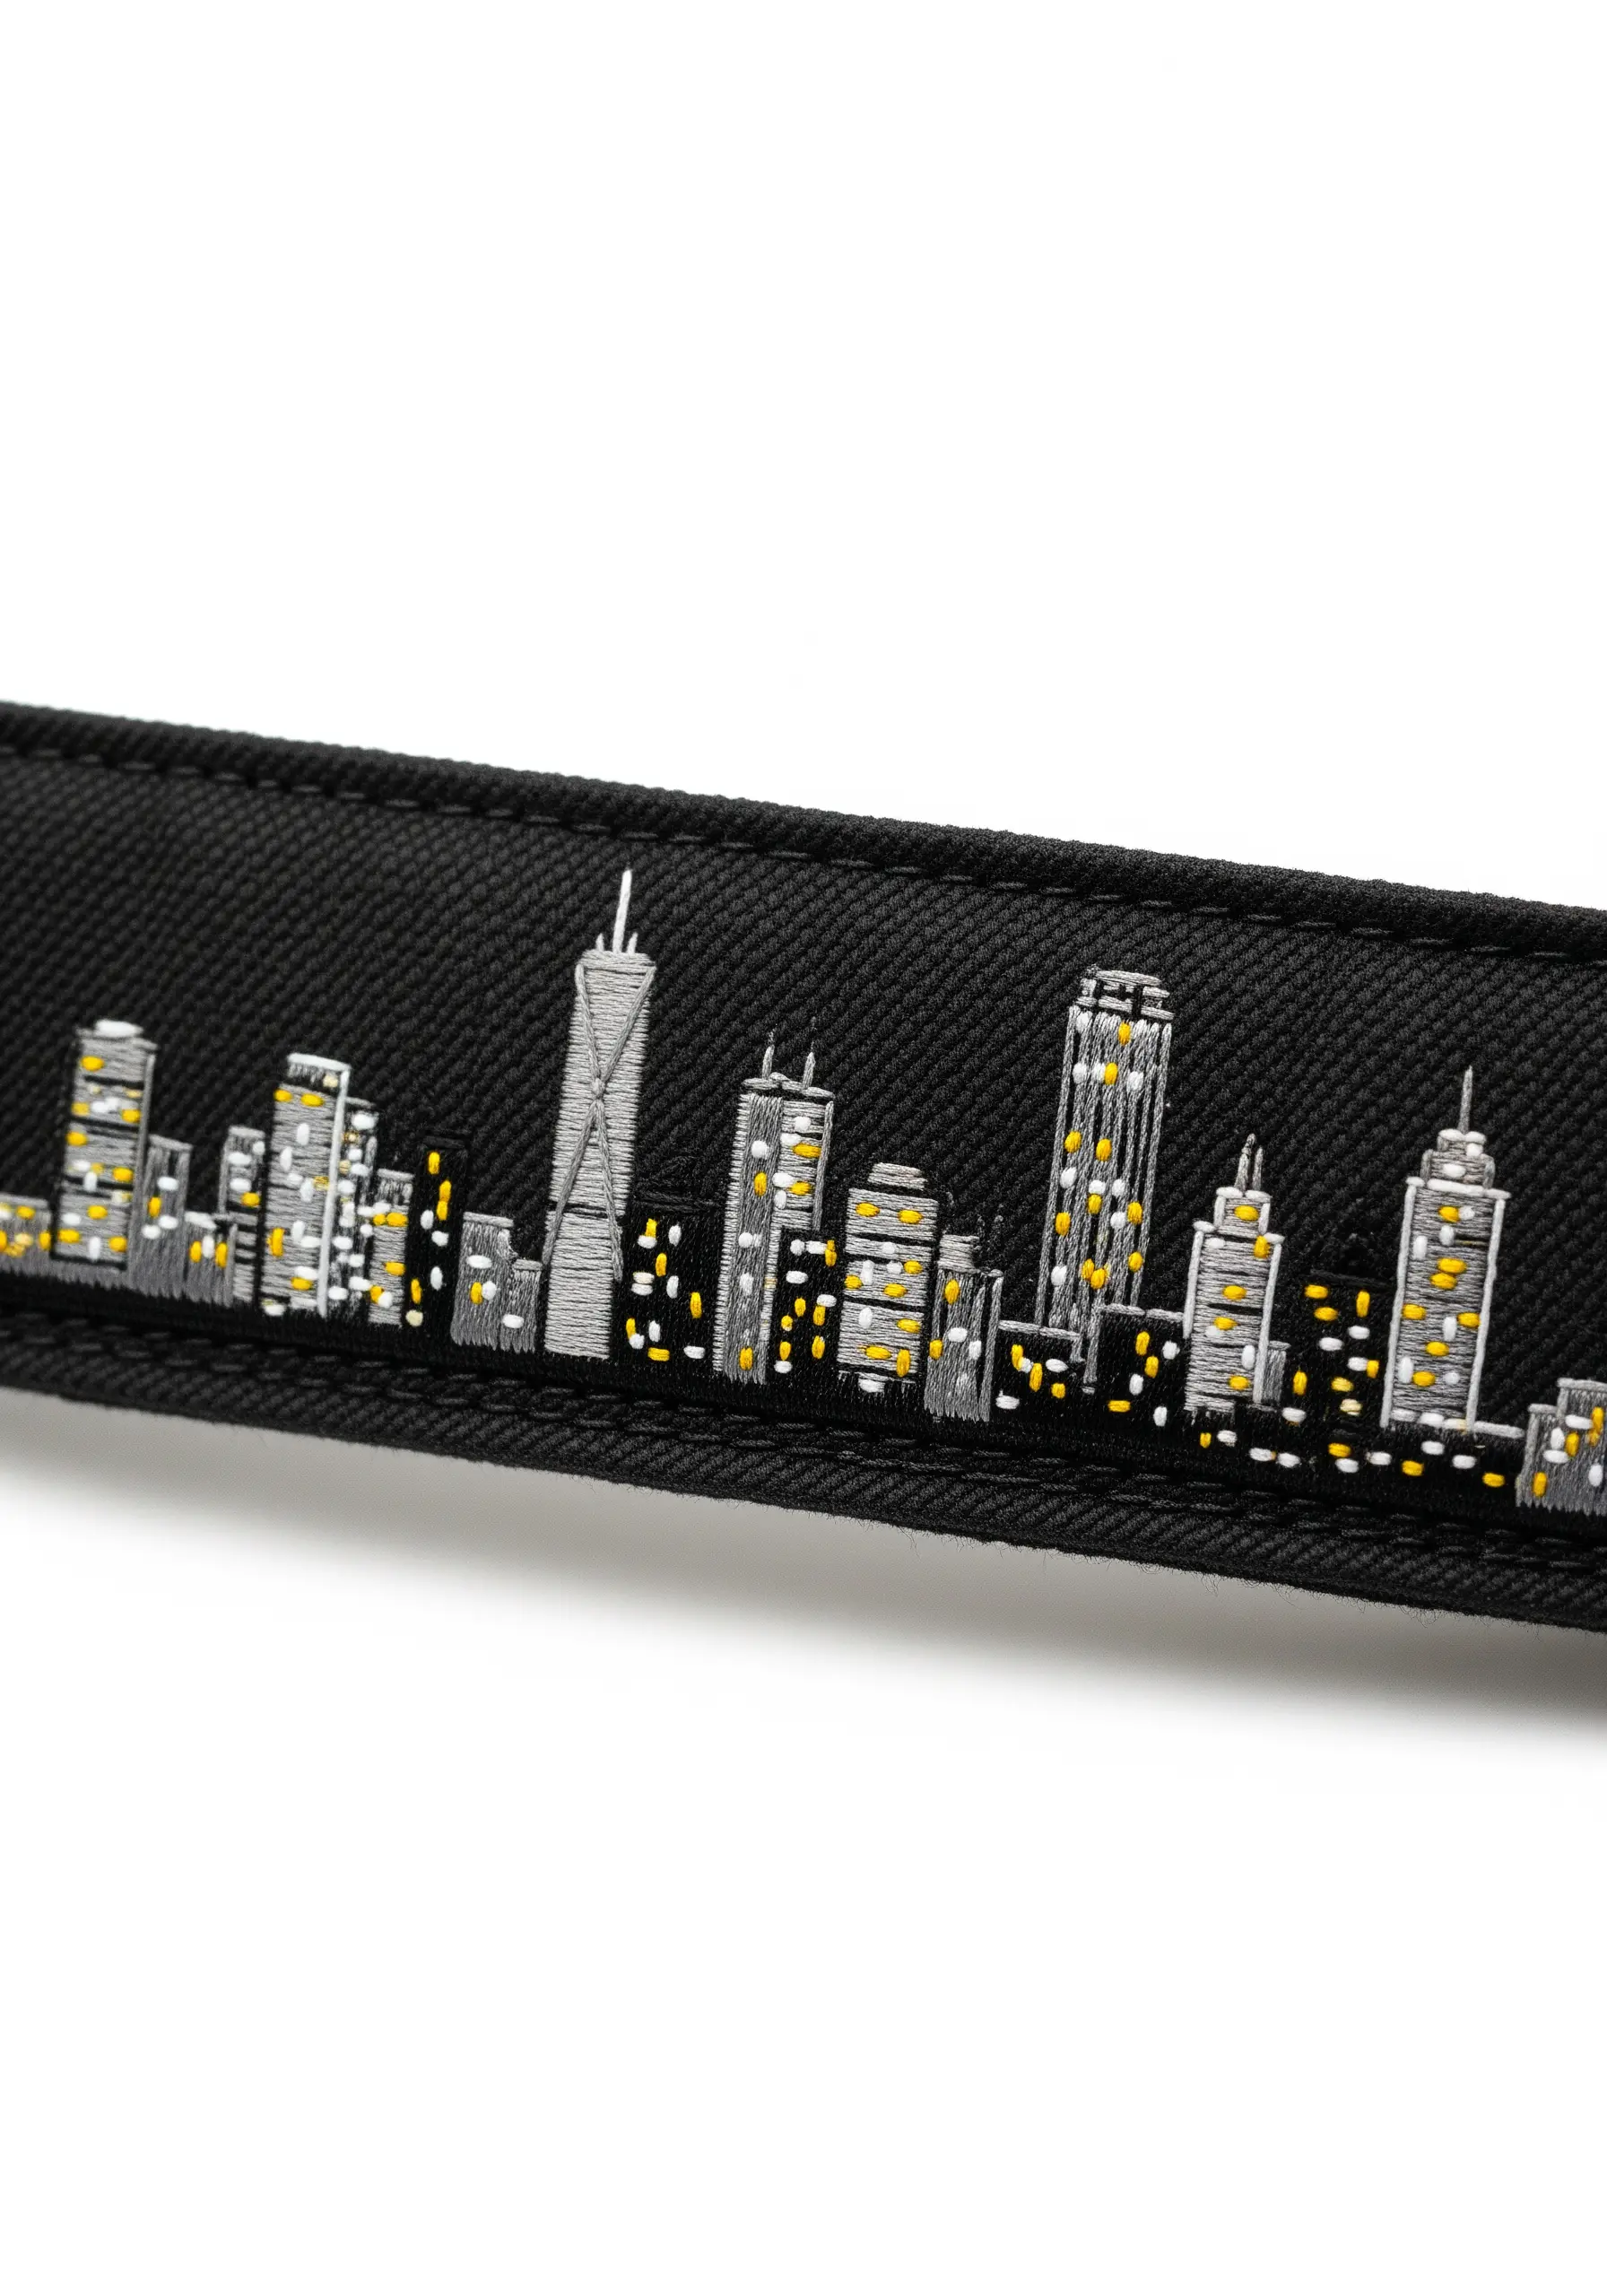
To depict a cityscape, focus on clean lines and contrast. On a dark fabric base, use white and grey threads for the building structures, rendered in simple vertical satin stitches.
Suggest the glow of windows with tiny, scattered stitches of bright yellow. The simplicity of the technique allows the graphic quality of the architecture to stand out, proving that complex scenes don’t always require complex stitches.
26. Constructing 3D Objects from Stitched Panels
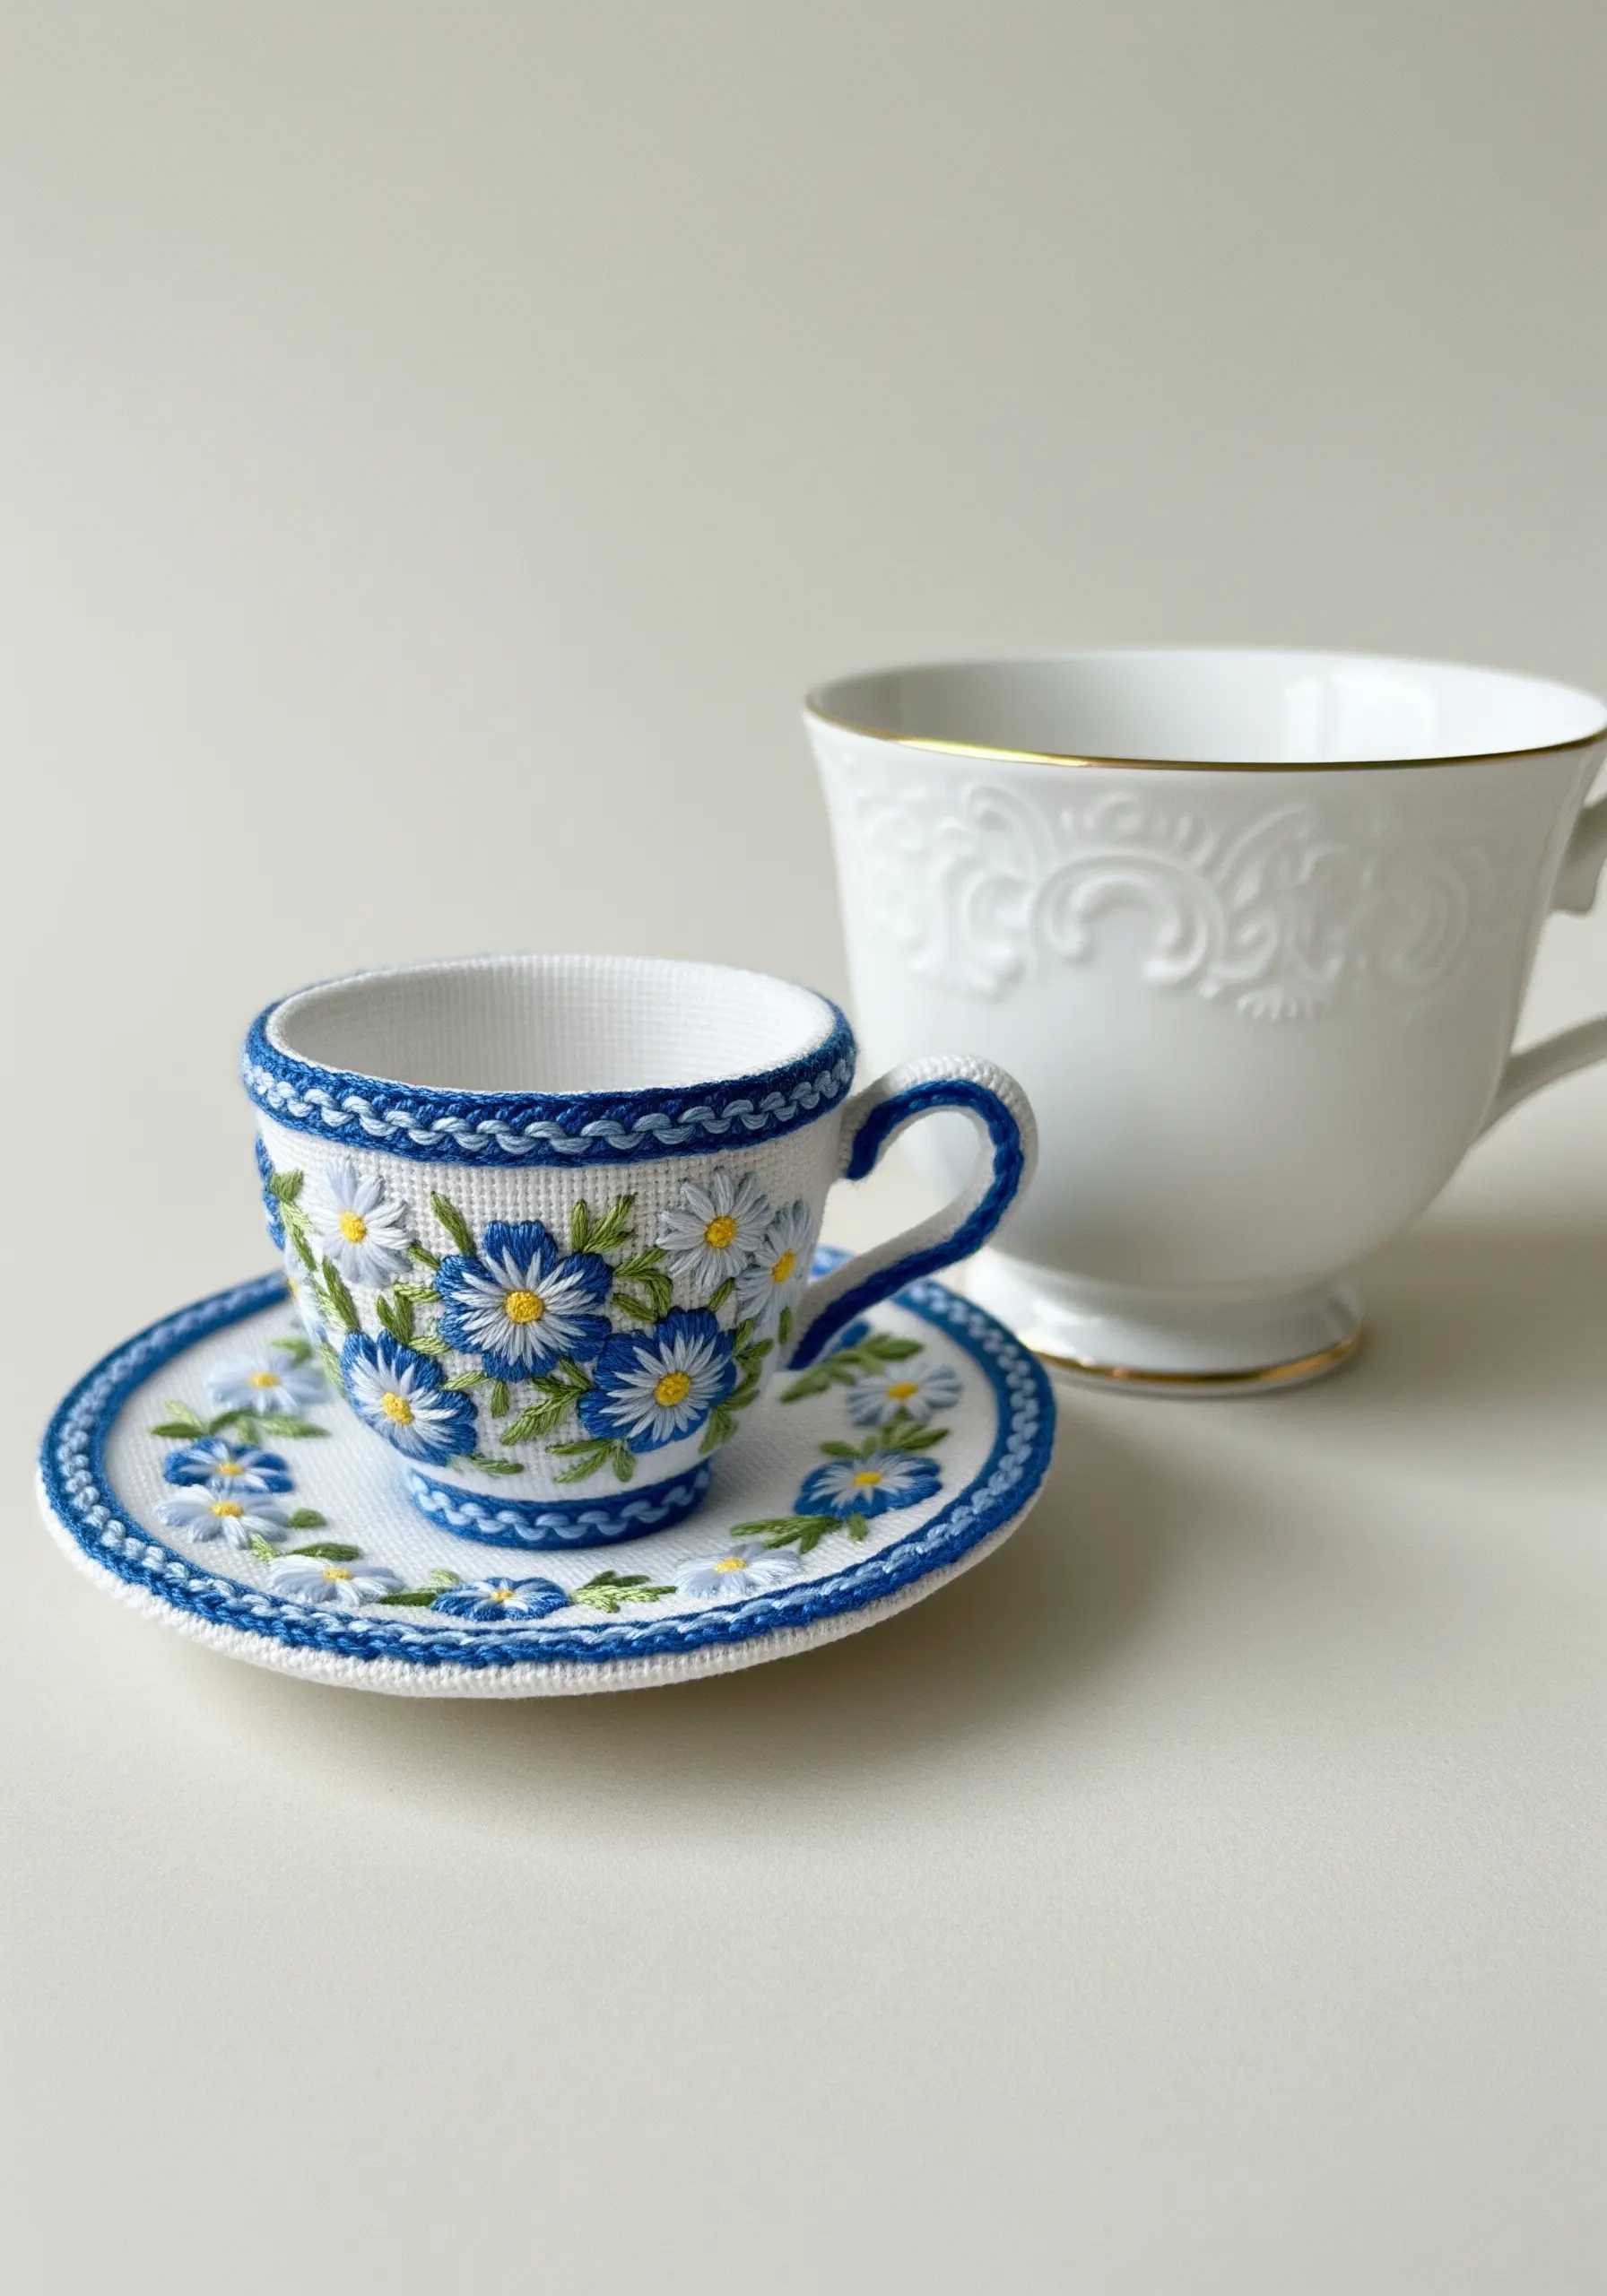
This incredible teacup is not stitched onto a pre-made form; it’s constructed entirely from embroidered fabric panels. Each piece is stitched flat on a fabric like Aida cloth, which provides structure.
The panels are then cut out, and their edges are carefully joined with an overcast stitch to build the three-dimensional shape. This advanced technique, a form of stumpwork, allows you to create hollow, freestanding objects.
27. Merging Macrame and Embroidery
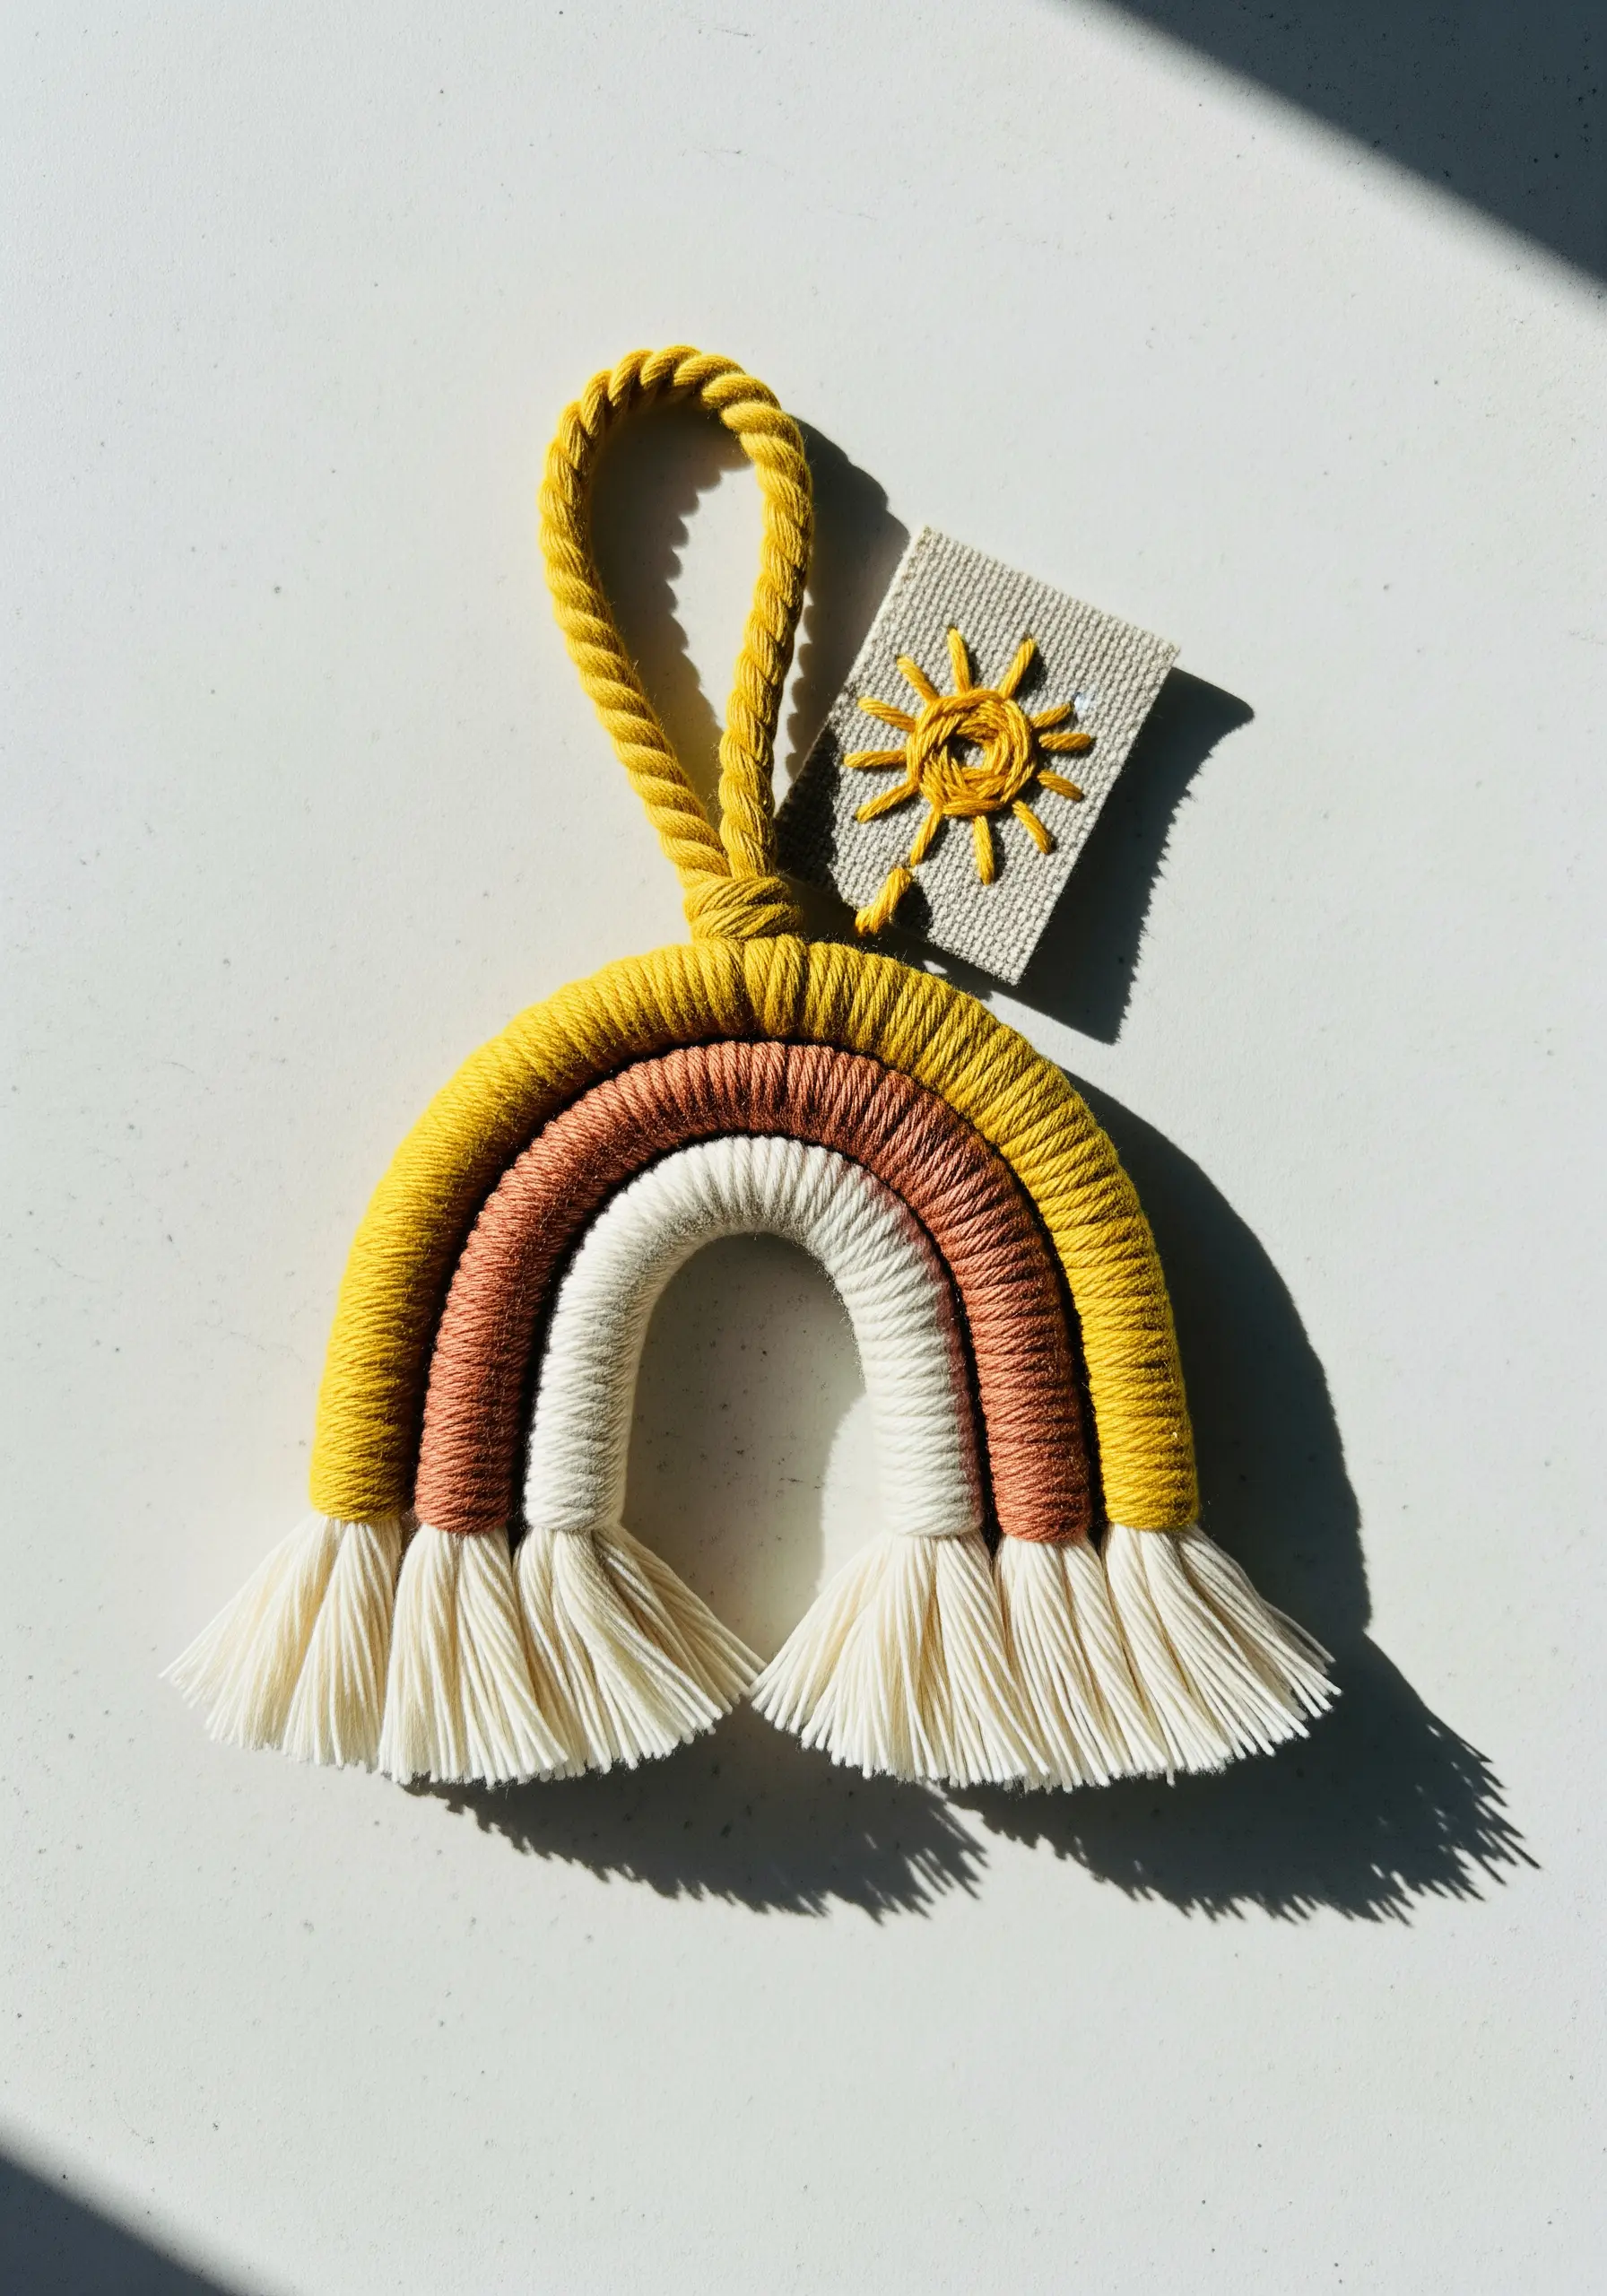
Combine the soft, chunky texture of macrame with the fine detail of embroidery for a unique piece. After creating your wrapped rope rainbow, stitch a small, complementary motif on a separate piece of canvas or linen.
A simple sun, rendered with a woven wheel stitch and straight stitch rays, ties into the theme perfectly. Attaching it as a tag adds a layer of handcrafted detail and makes the entire piece more personal and special.
28. Ornate Goldwork for Functional Art
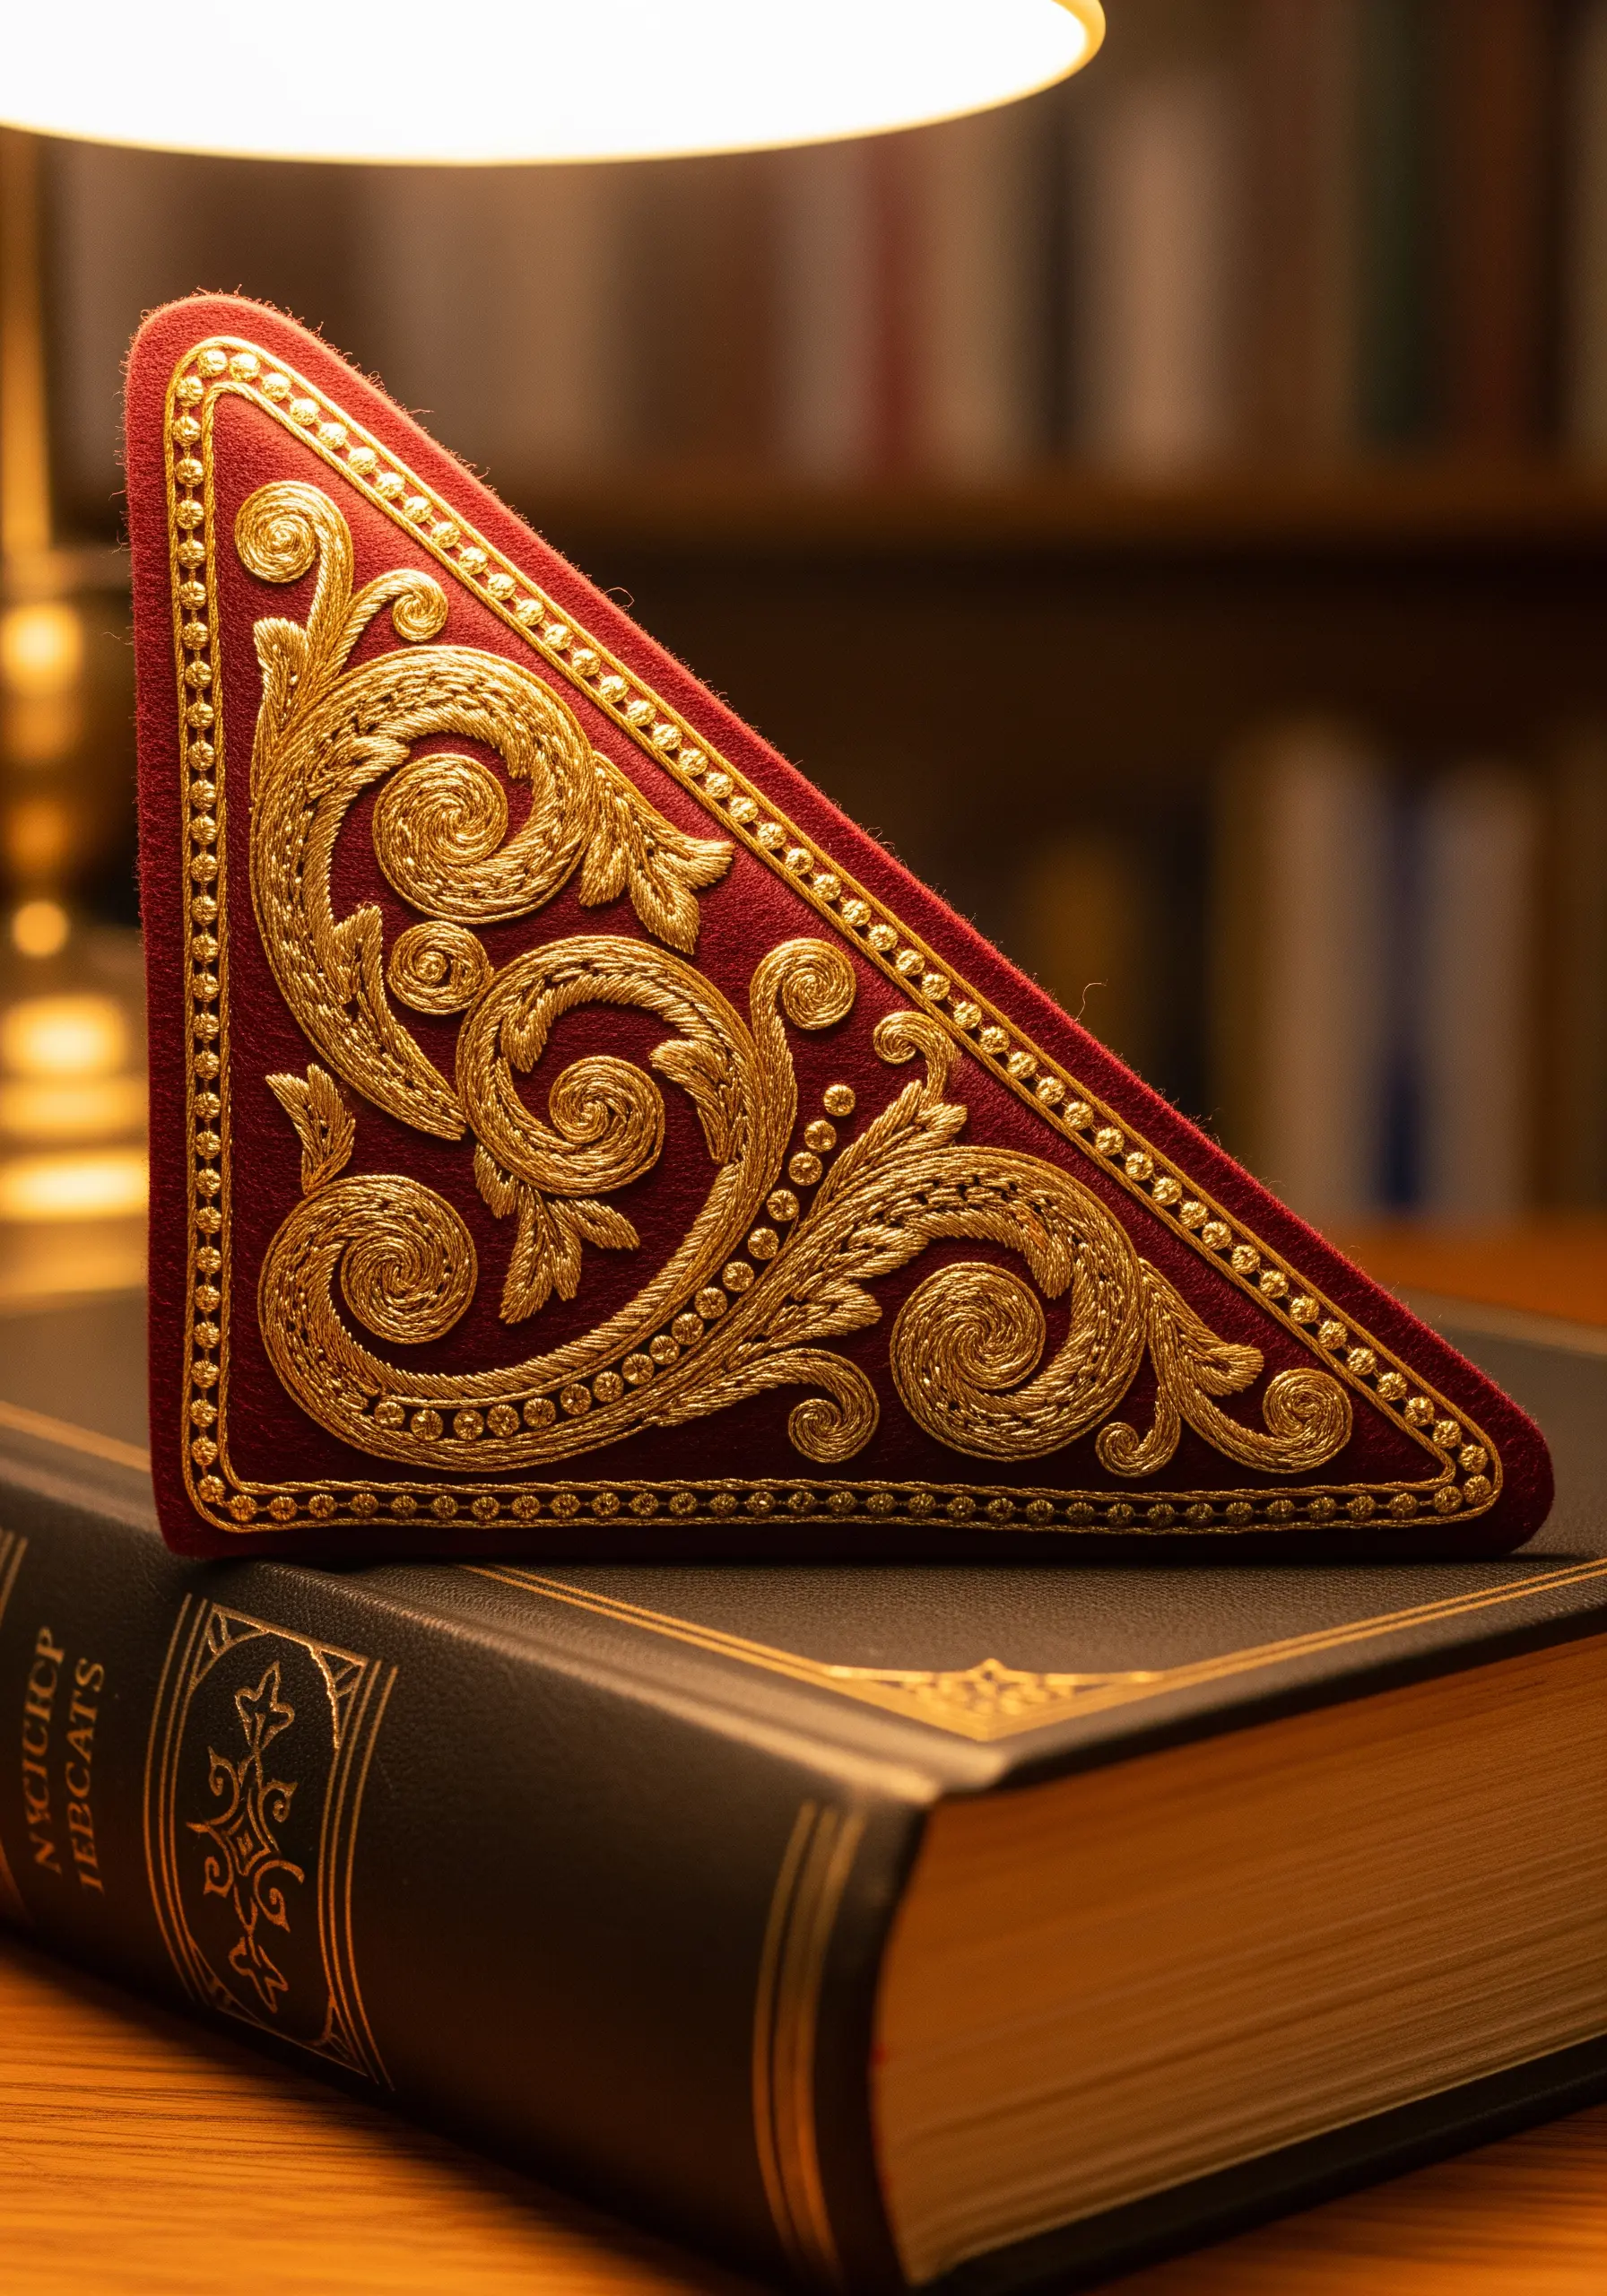
Transform a simple book corner into a luxurious artifact with goldwork embroidery. Use a technique called padded couching for the bold swirls: lay down a thick cord or felt padding and then couch metallic passing thread over it for a highly raised, opulent effect.
Fill the surrounding areas with tiny gold seed beads or French knots. This project demonstrates how ancient, couture techniques can be applied to create beautiful, everyday objects.
29. Building a Greenhouse with Sheer Fabric

This delicate greenhouse is a marvel of construction. The ‘glass’ panels are made from silk organza or fine netting, stretched taut within a balsa wood frame.
The tiny flowers and vines are carefully embroidered directly onto the sheer panels before assembly. This requires a very light touch and a small needle to avoid distorting the delicate fabric. It is the epitome of artistic embroidery projects.
30. Appliqué and Stitching on Silk
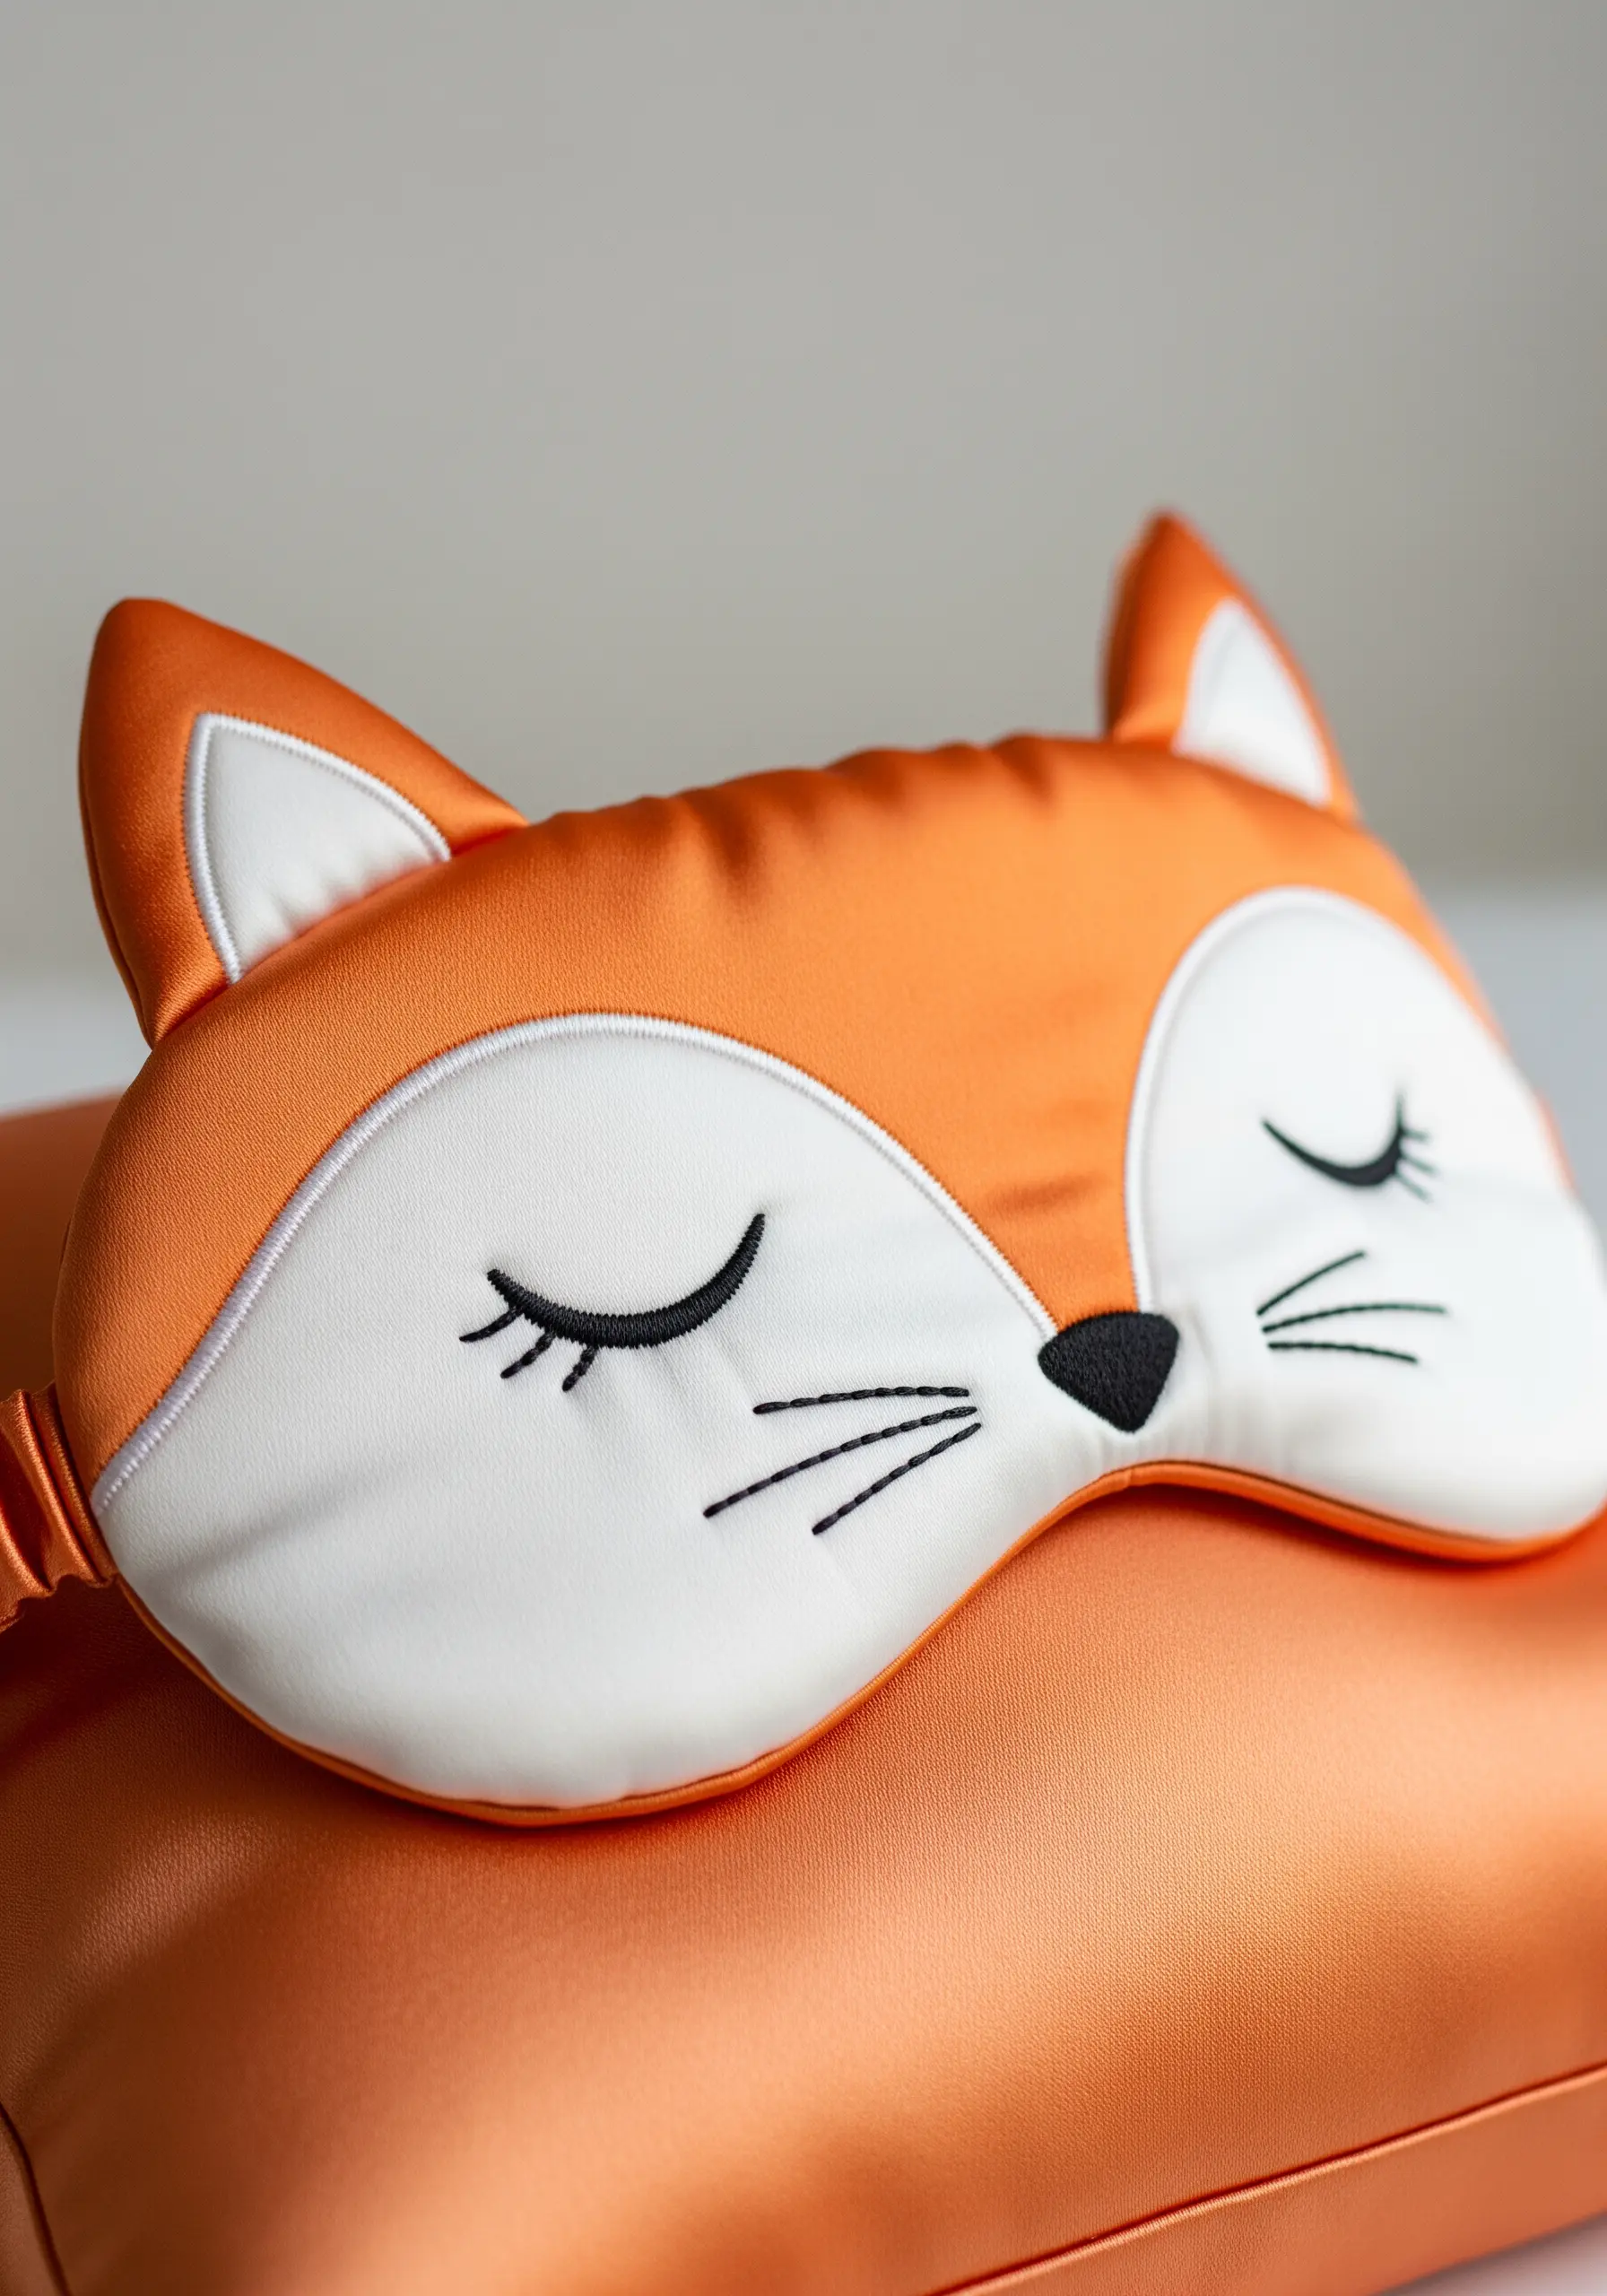
When working with a slippery fabric like satin or silk for a sleep mask, use an iron-on fusible webbing to secure your appliqué pieces (the white face and ears) before stitching.
This prevents the fabric from shifting and ensures clean edges. A simple backstitch for the eyelashes and whiskers provides a delicate, graphic detail that complements the smooth surface of the satin without puckering it.
31. Creating a Functional Pincushion
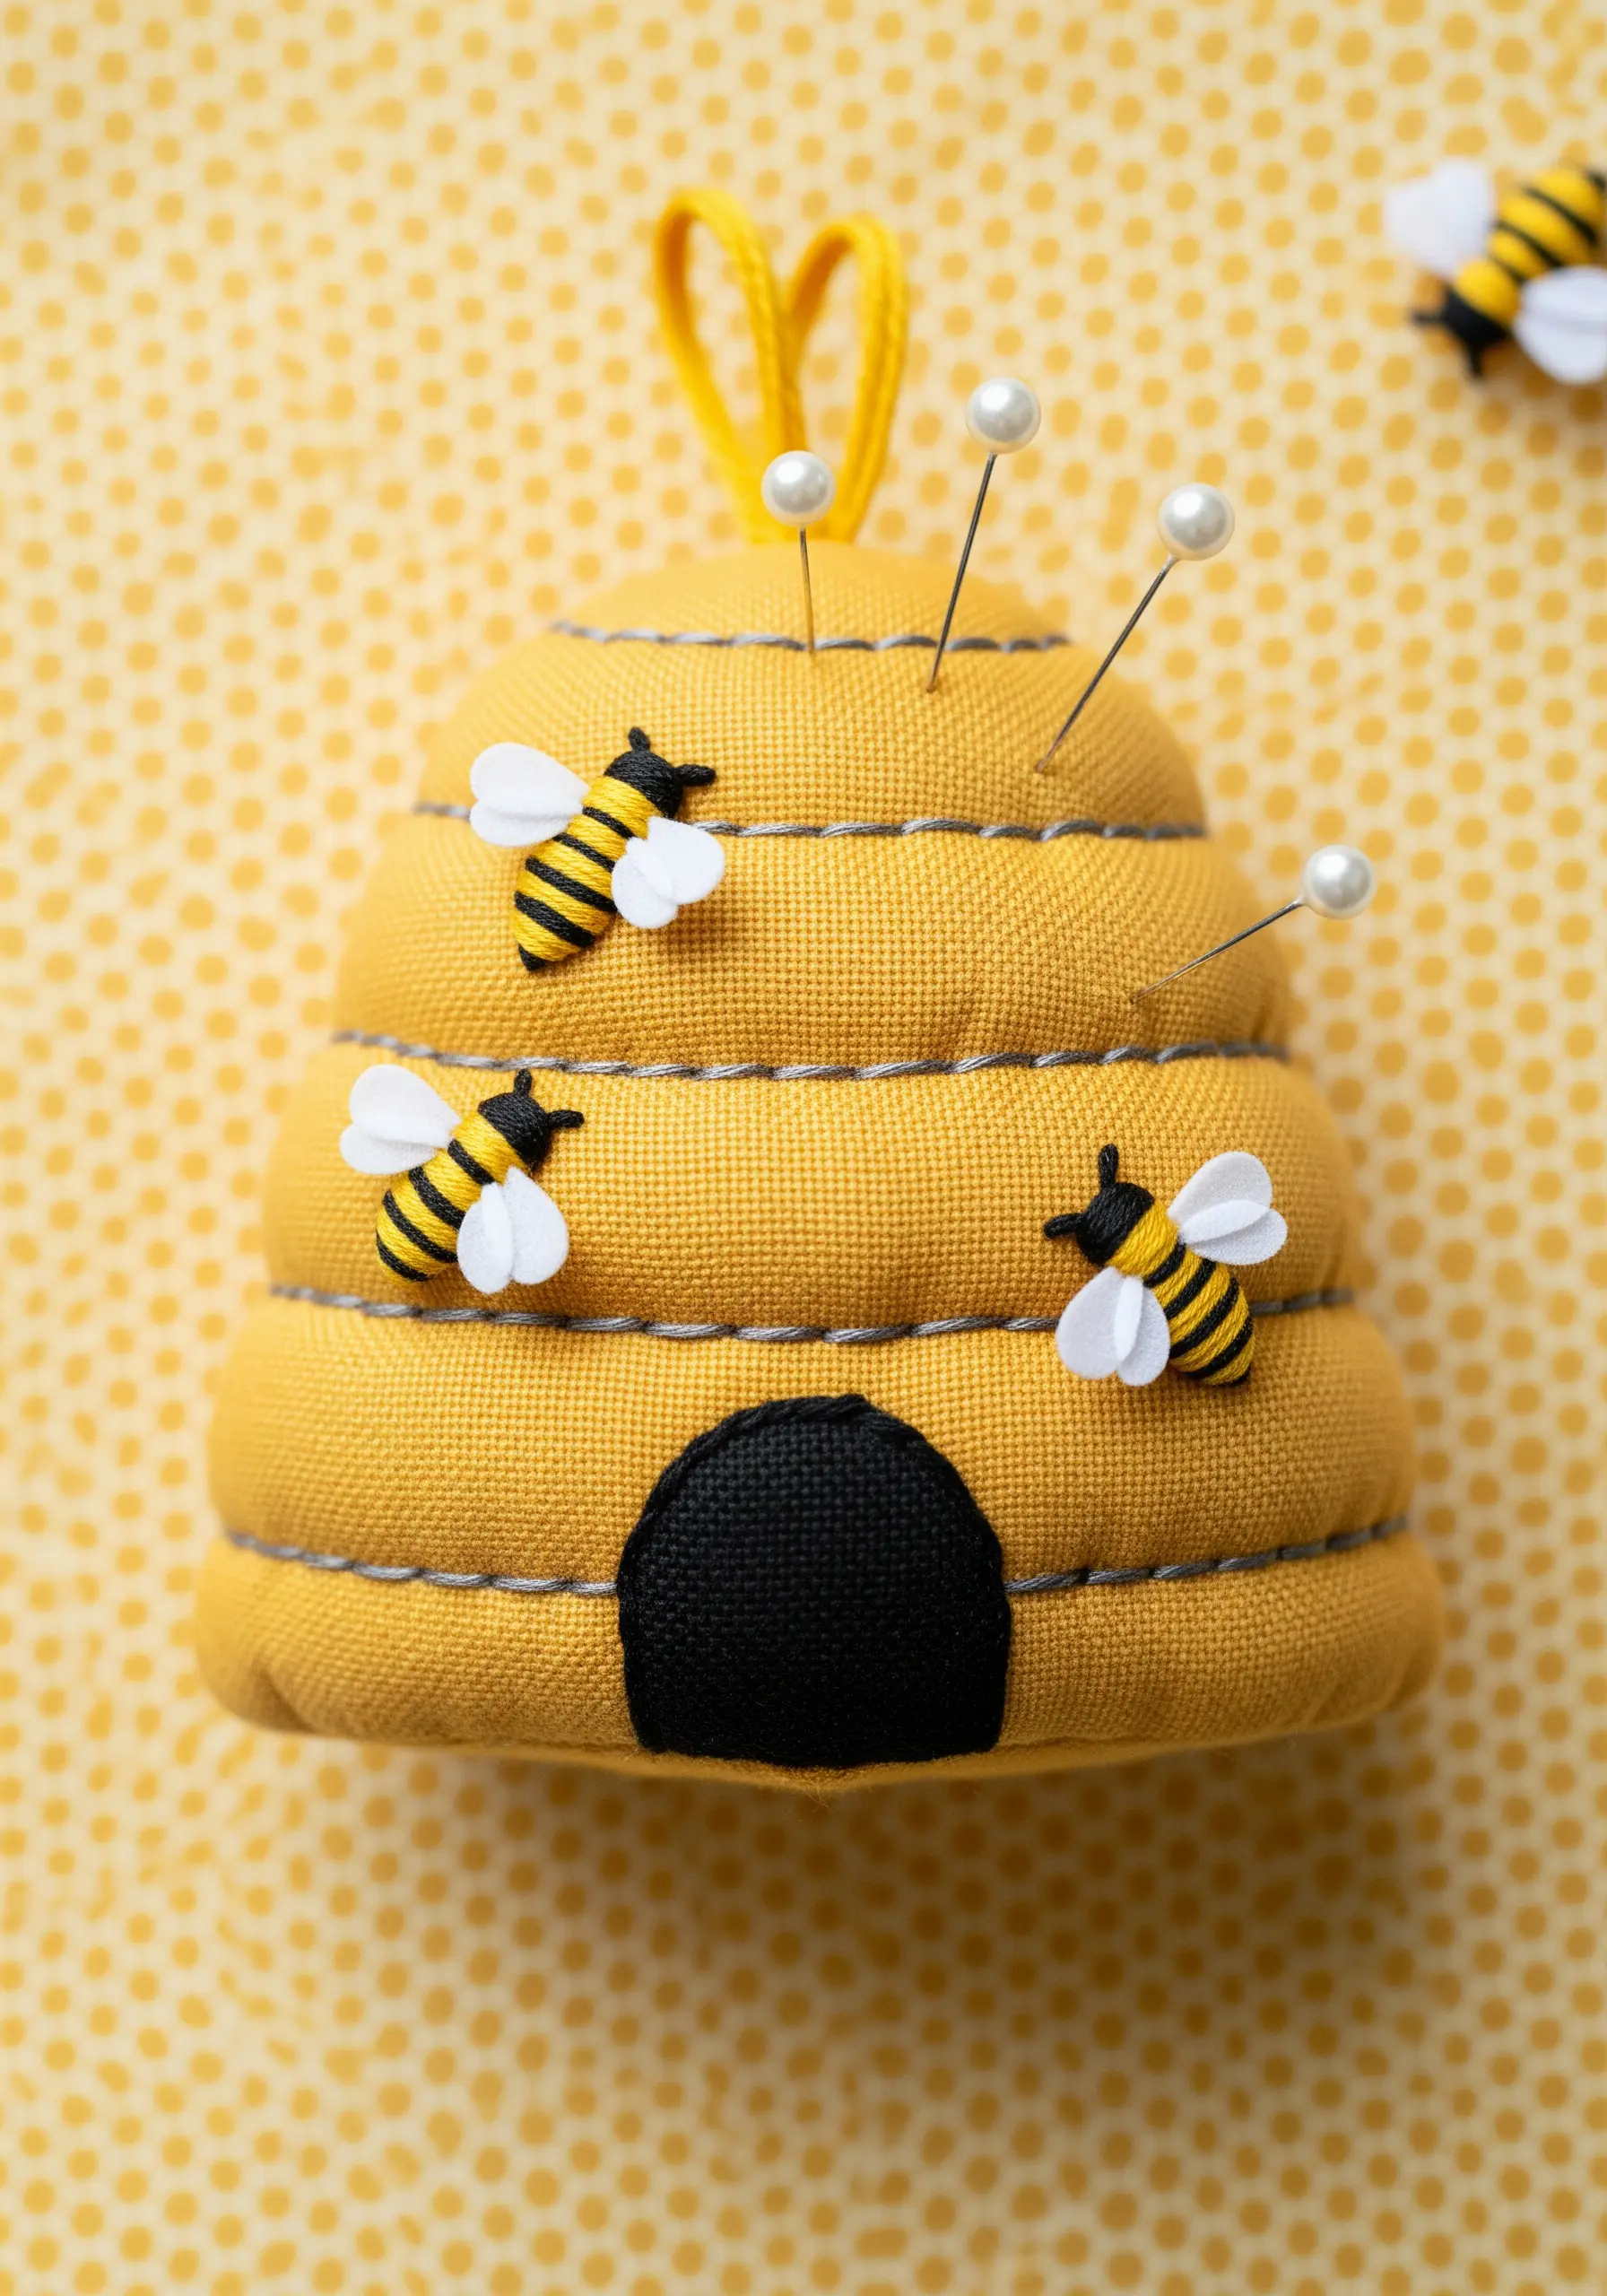
To make a sculptural pincushion like this beehive, you’ll create a stuffed form from fabric panels. The tiered shape is achieved by sewing stuffed fabric rolls together in decreasing sizes.
Use a heavy-duty thread and a running stitch to create the indented lines, pulling tightly to define the hive’s segments. Adding tiny pre-made bee embellishments is a quick way to complete the theme, but you could also embroider them with a few simple stitches.
32. Embroidering on Faux Leather
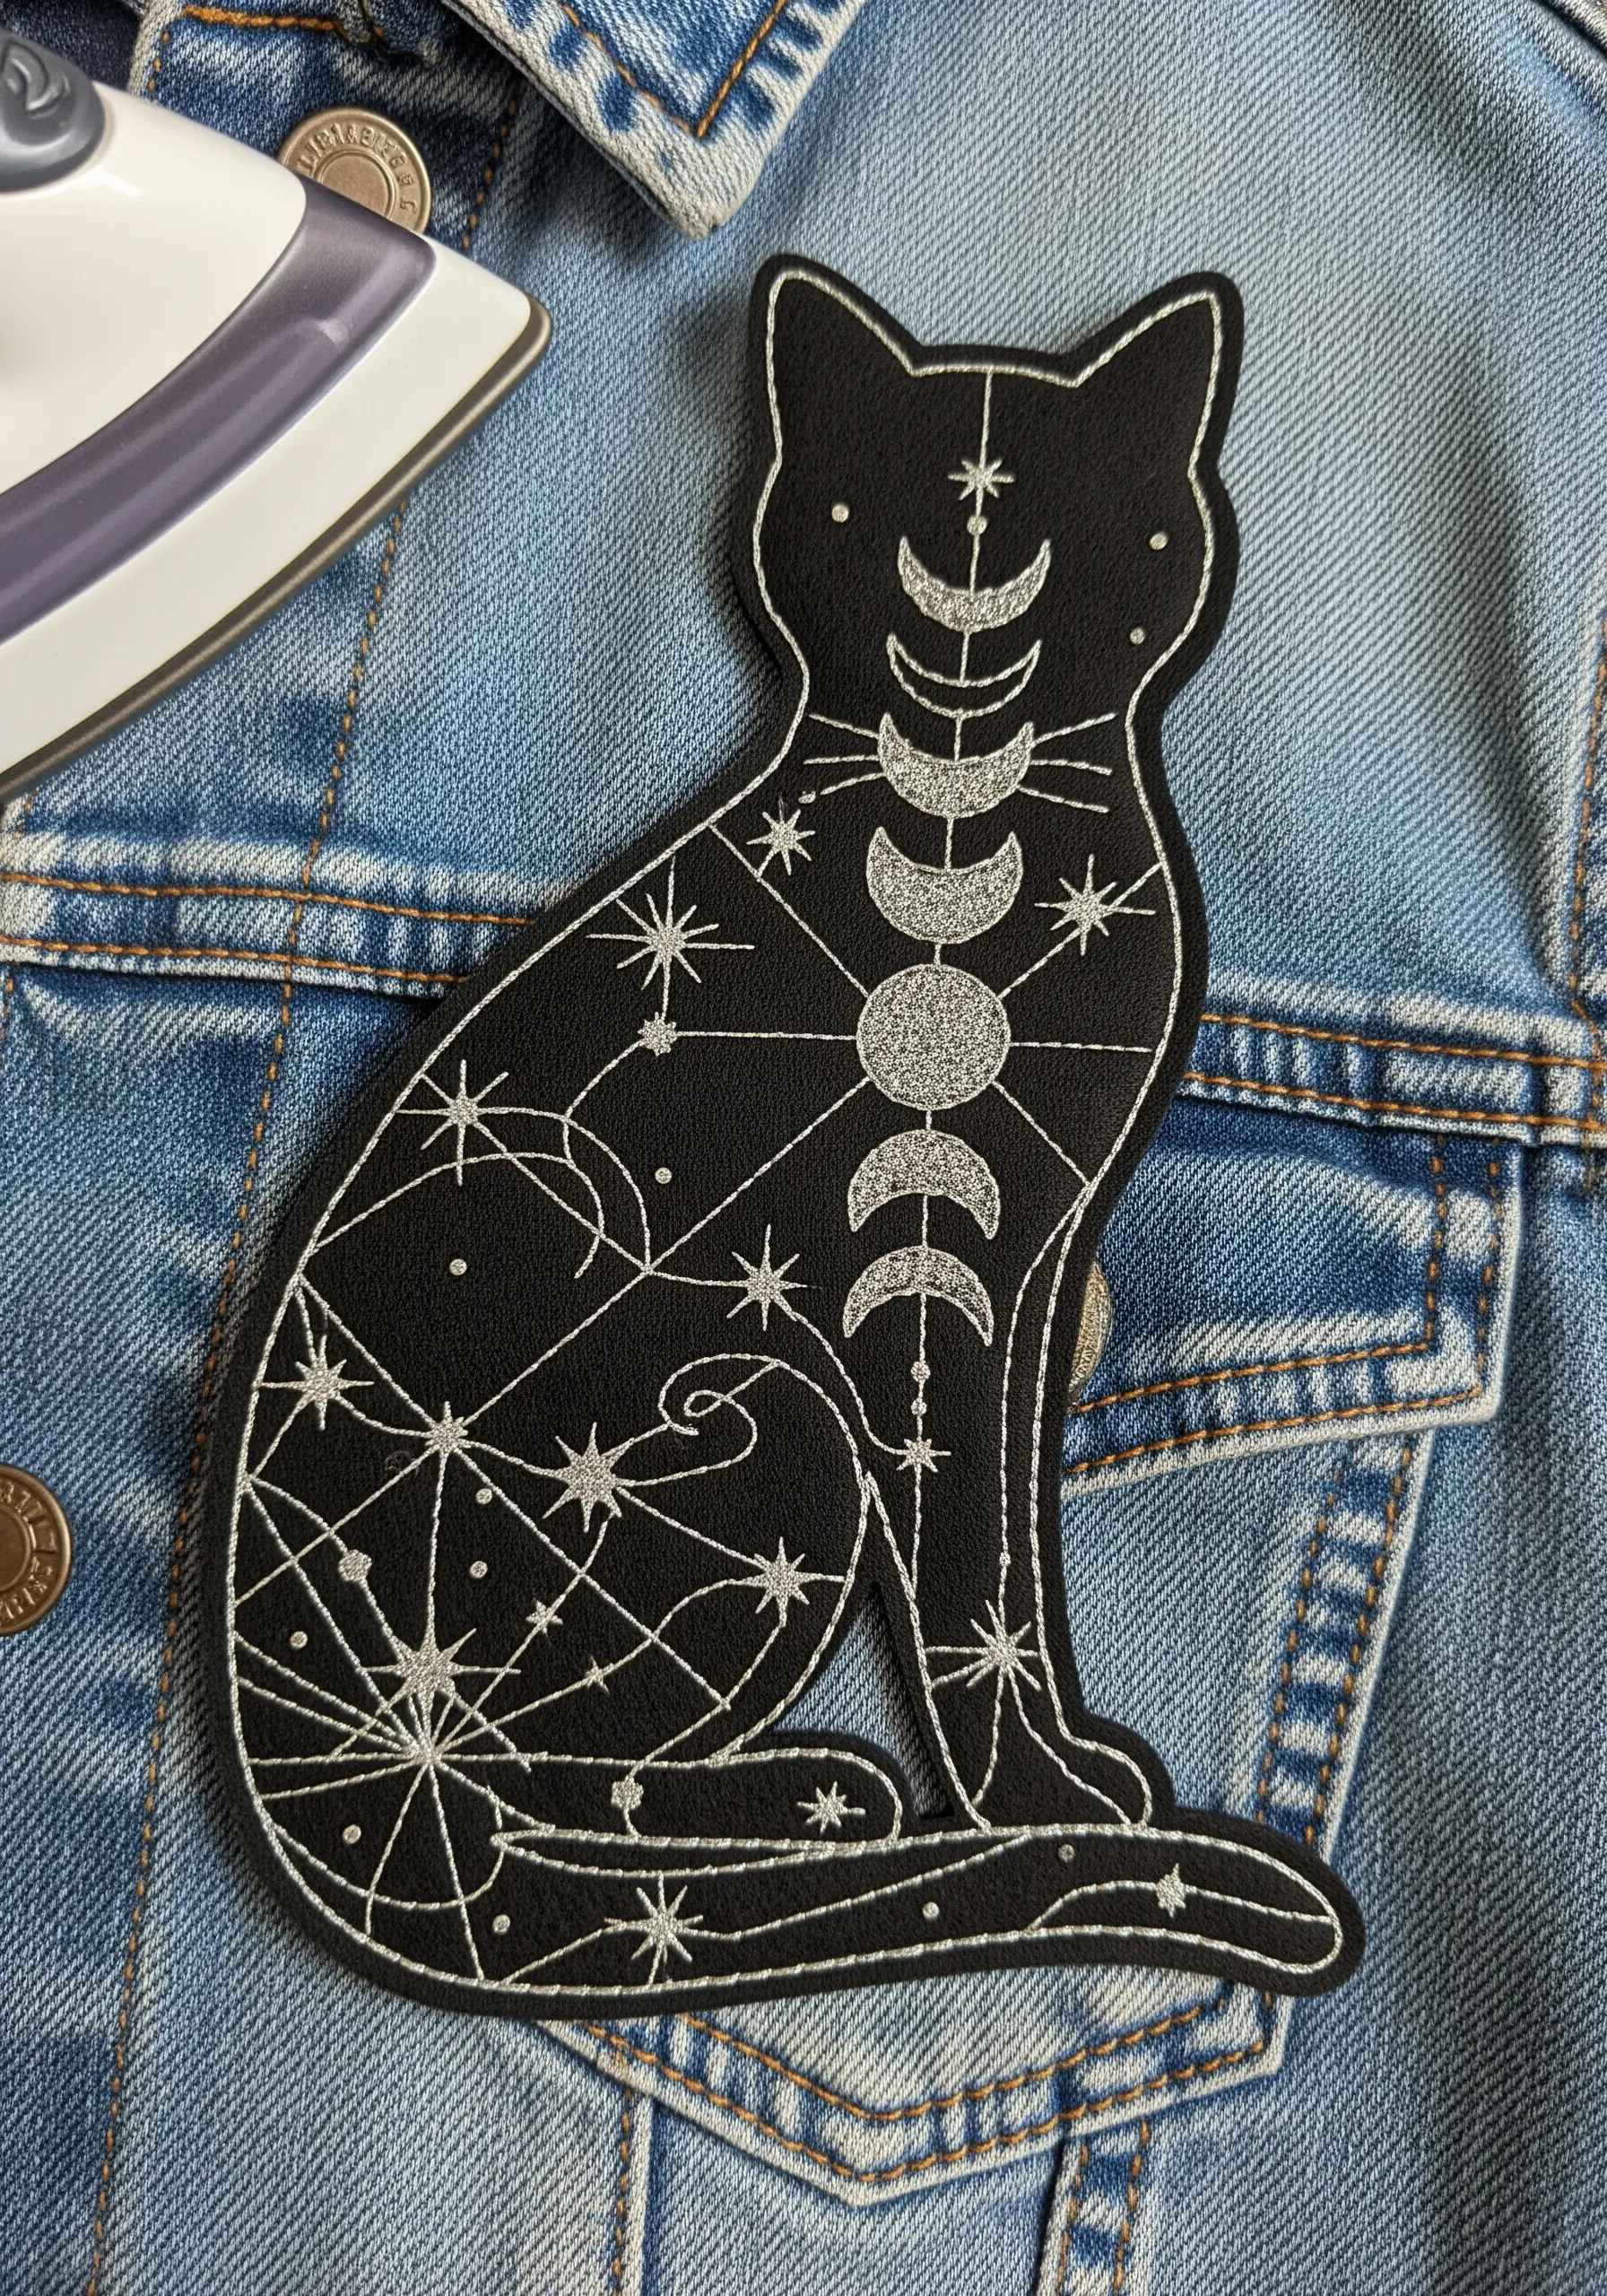
Faux leather is an excellent base for patches as it’s durable and doesn’t fray. To transfer your design, use a chalk pencil or a water-soluble marker that will show up on the dark surface.
A simple backstitch is effective for line art, but consider using a thread with a bit of sparkle, like a glitter or metallic floss, to make the celestial design pop against the matte black background. This turns a simple patch into a piece of funky streetwear embroidery.
33. Variegated Threads for Natural-Looking Leaves
To create realistic, multi-toned leaves without constantly changing your thread, use a variegated floss.
A fishbone stitch is the perfect choice here, as its structure allows the color changes in the thread to naturally form the highlights and shadows of the leaf. Each leaf you stitch will be unique, just like in nature. It’s a simple way to add complexity and visual interest to your leaf embroidery stitches.
34. Composing Dense Floral Monograms
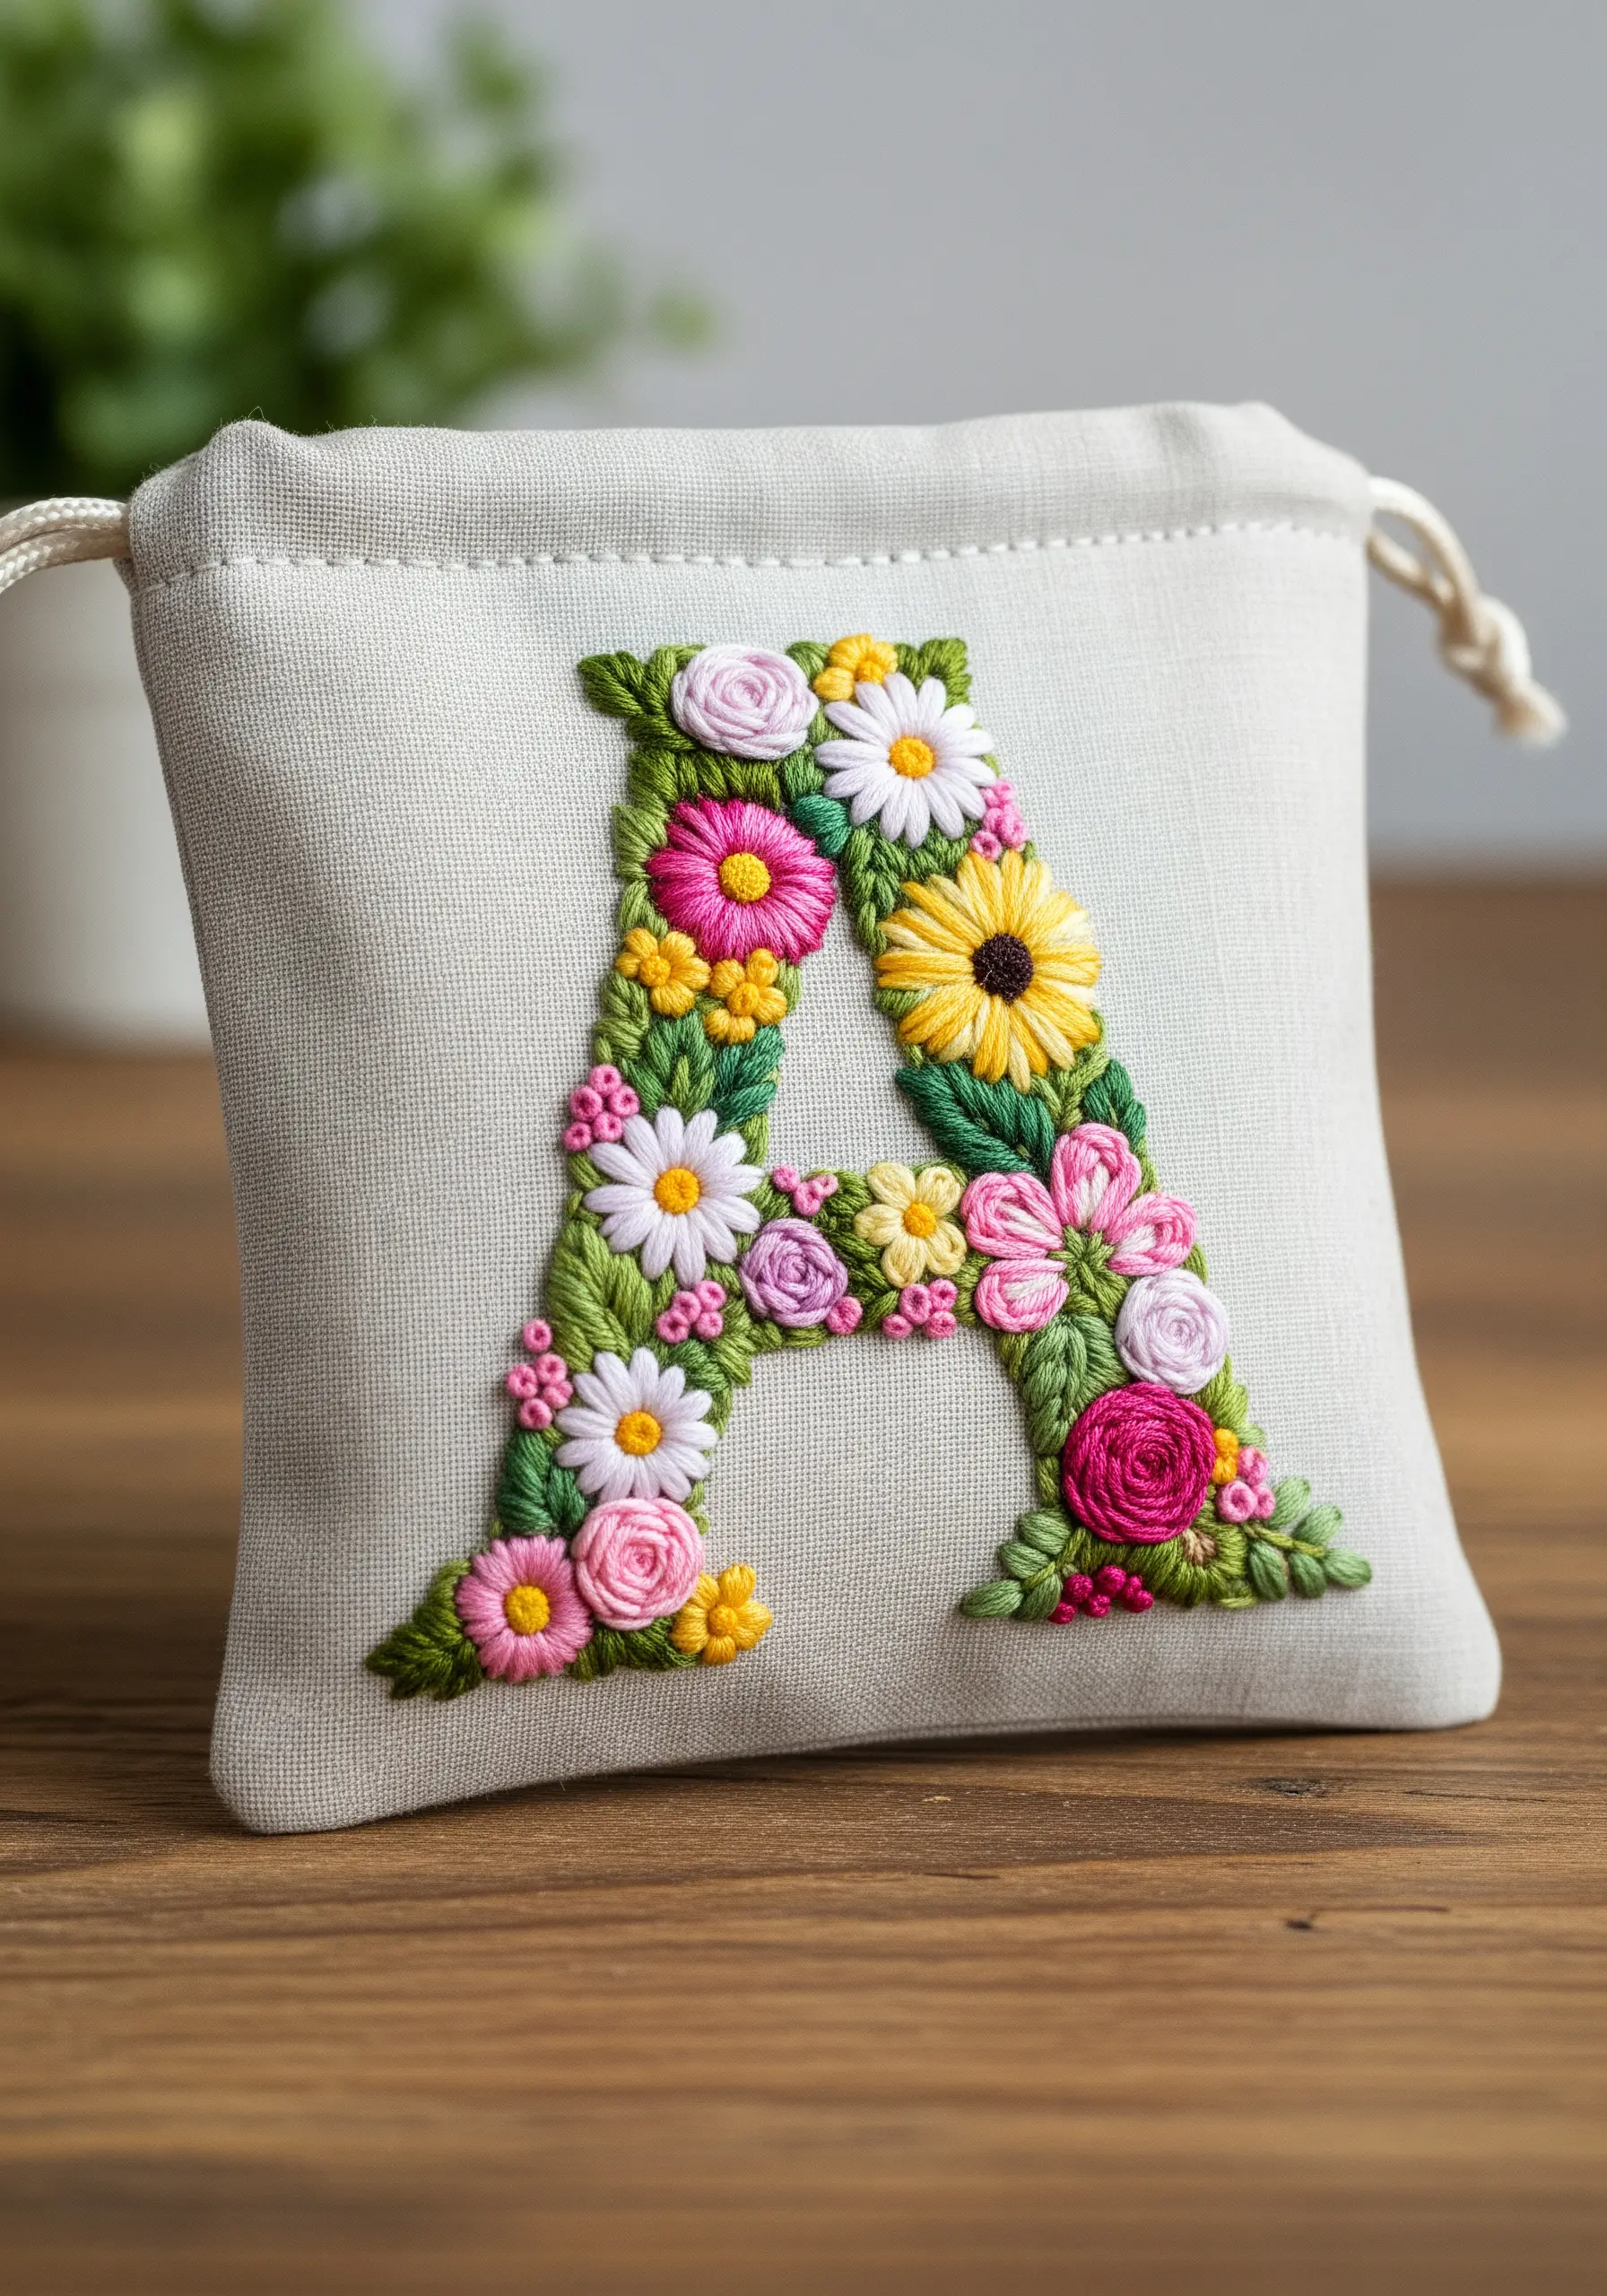
To fill a letter shape with florals, start by stitching the largest flowers first to act as focal points. Use dimensional stitches like woven wheels for roses and padded satin stitch for daisies.
Then, fill in the gaps with smaller elements: French knots for tiny buds, lazy daisy stitches for petals, and small satin-stitched leaves. Working from largest to smallest ensures a balanced, lush composition that holds its shape.
35. Capturing Organic Patterns with Couching
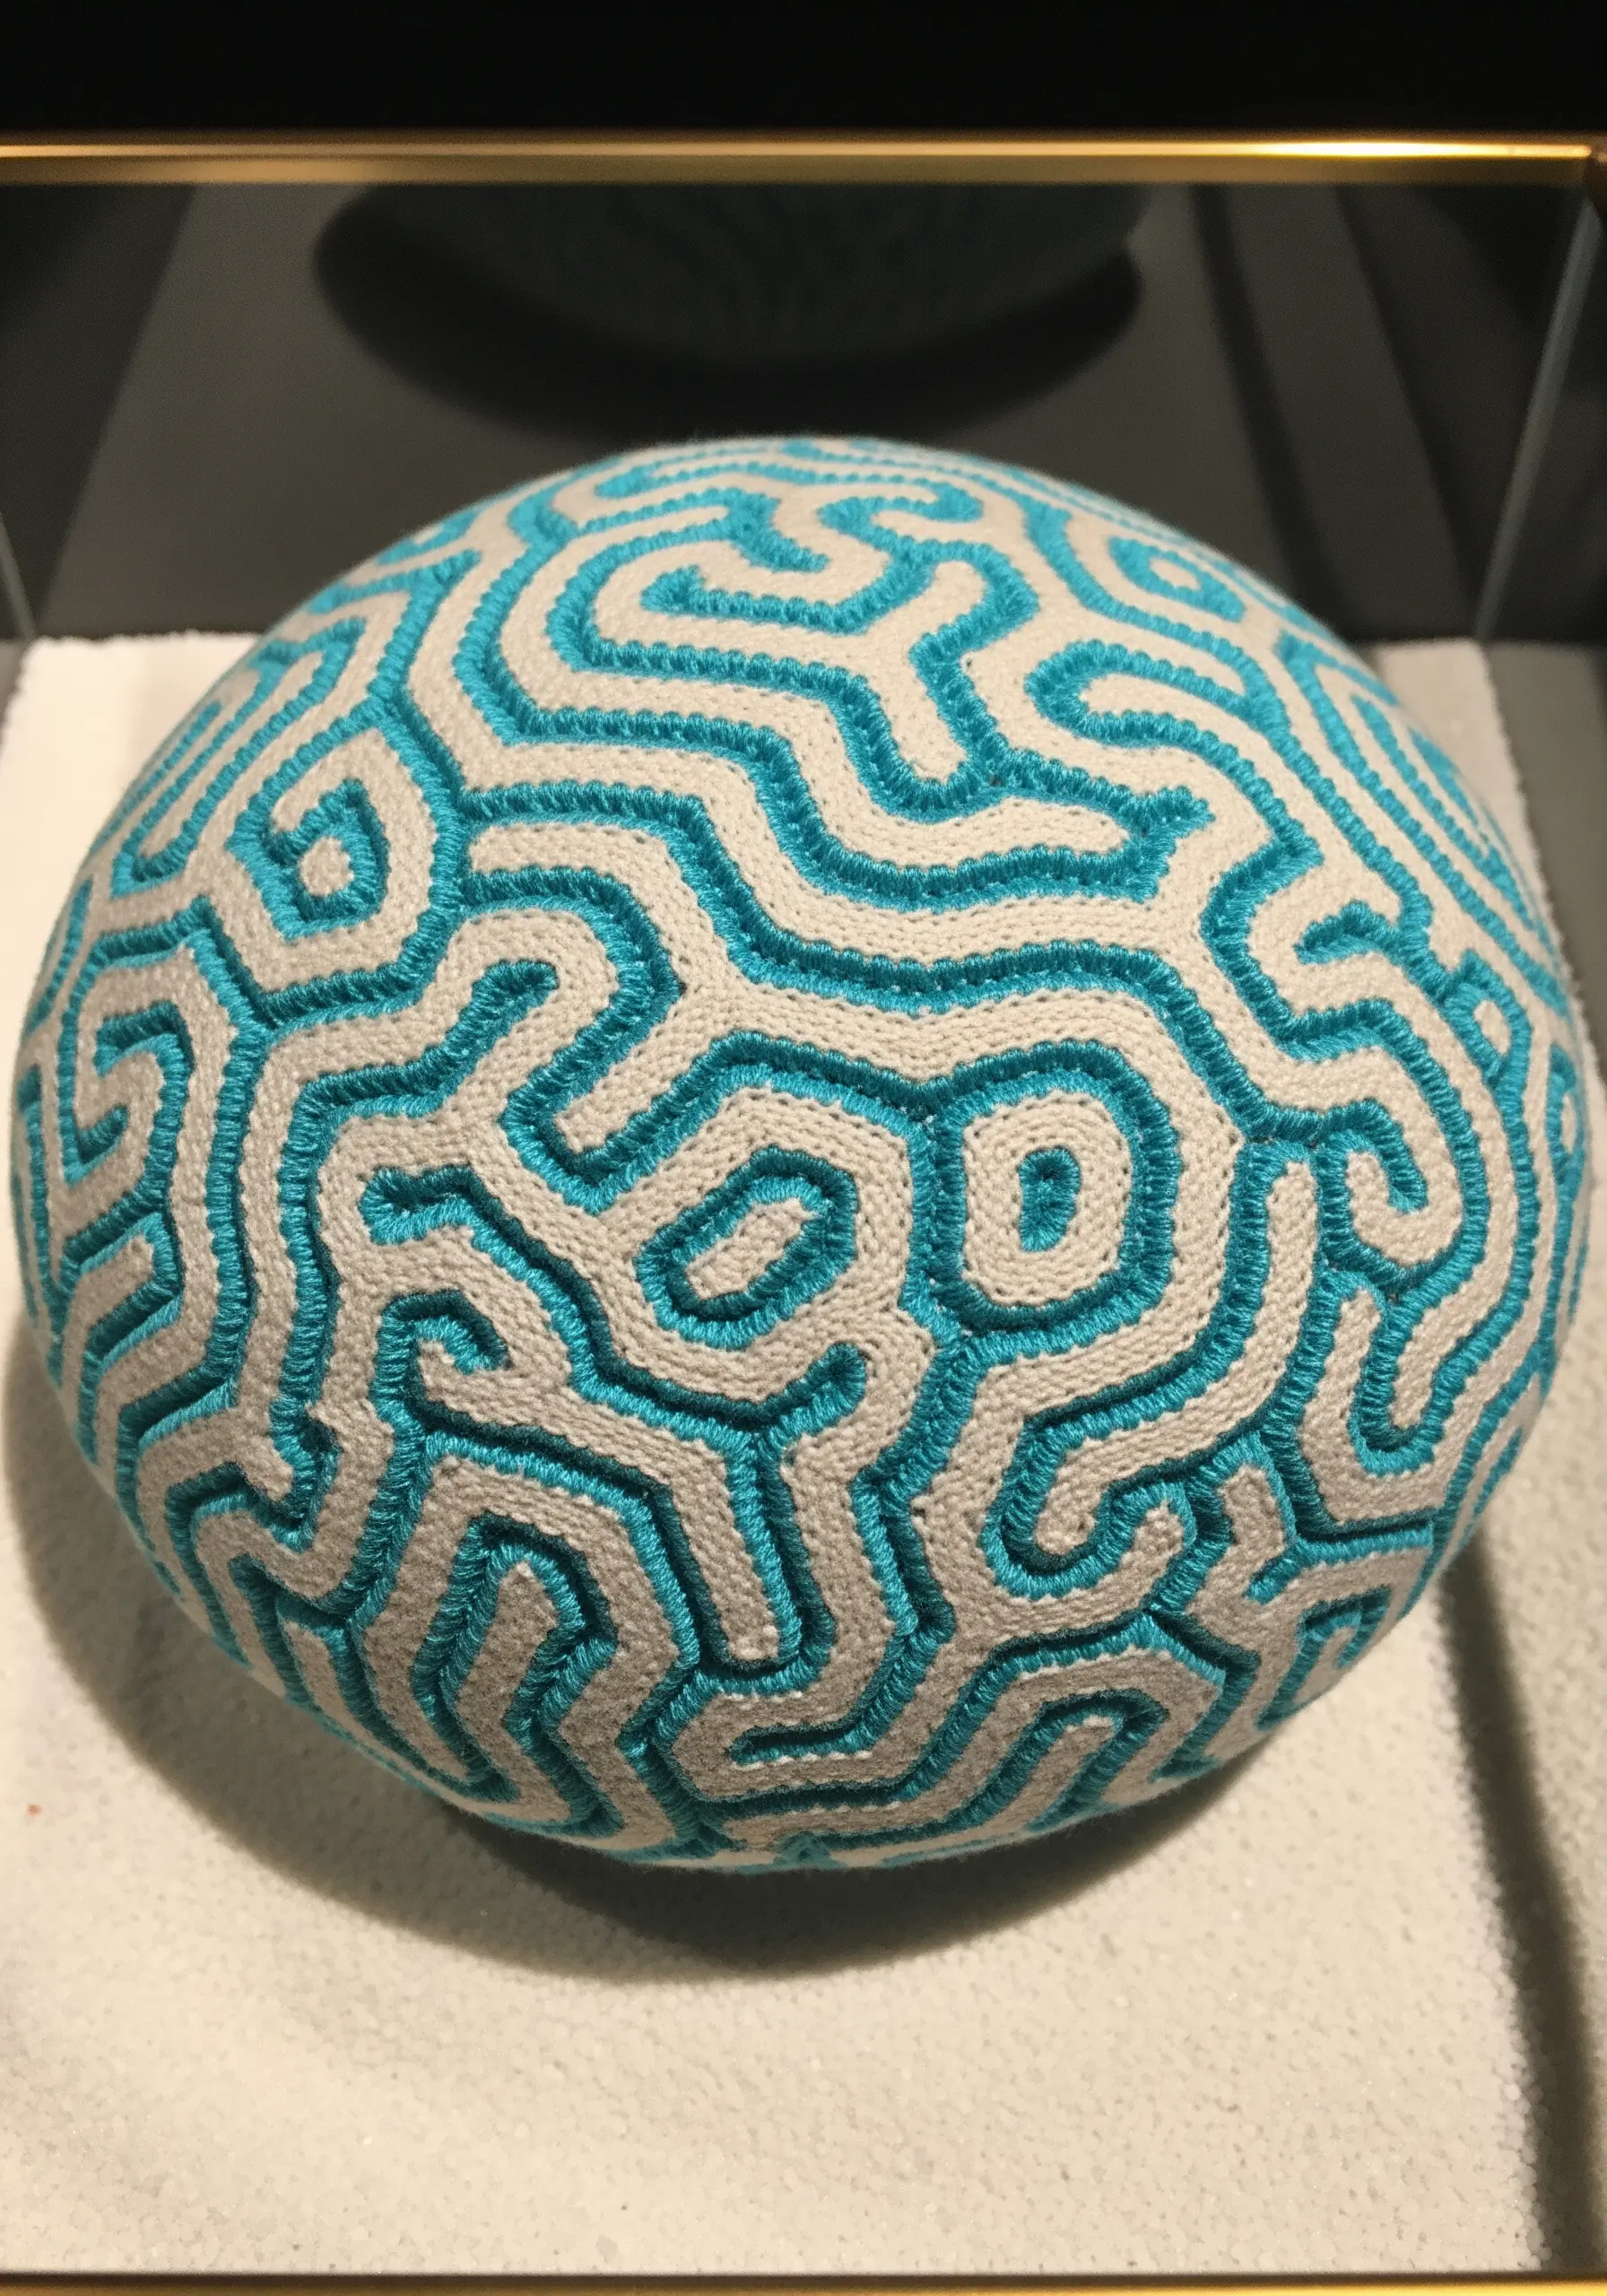
To replicate the maze-like pattern of brain coral, couching is the ideal technique. Lay down a thicker thread (like a pearl cotton) along your pattern lines, and then use a thinner, single strand of floss to tack it down at regular intervals.
This method allows you to create smooth, continuous curves that would be impossible to achieve with a standard stitch, perfectly capturing the design’s organic flow.
36. Geometric Embroidery on Felt
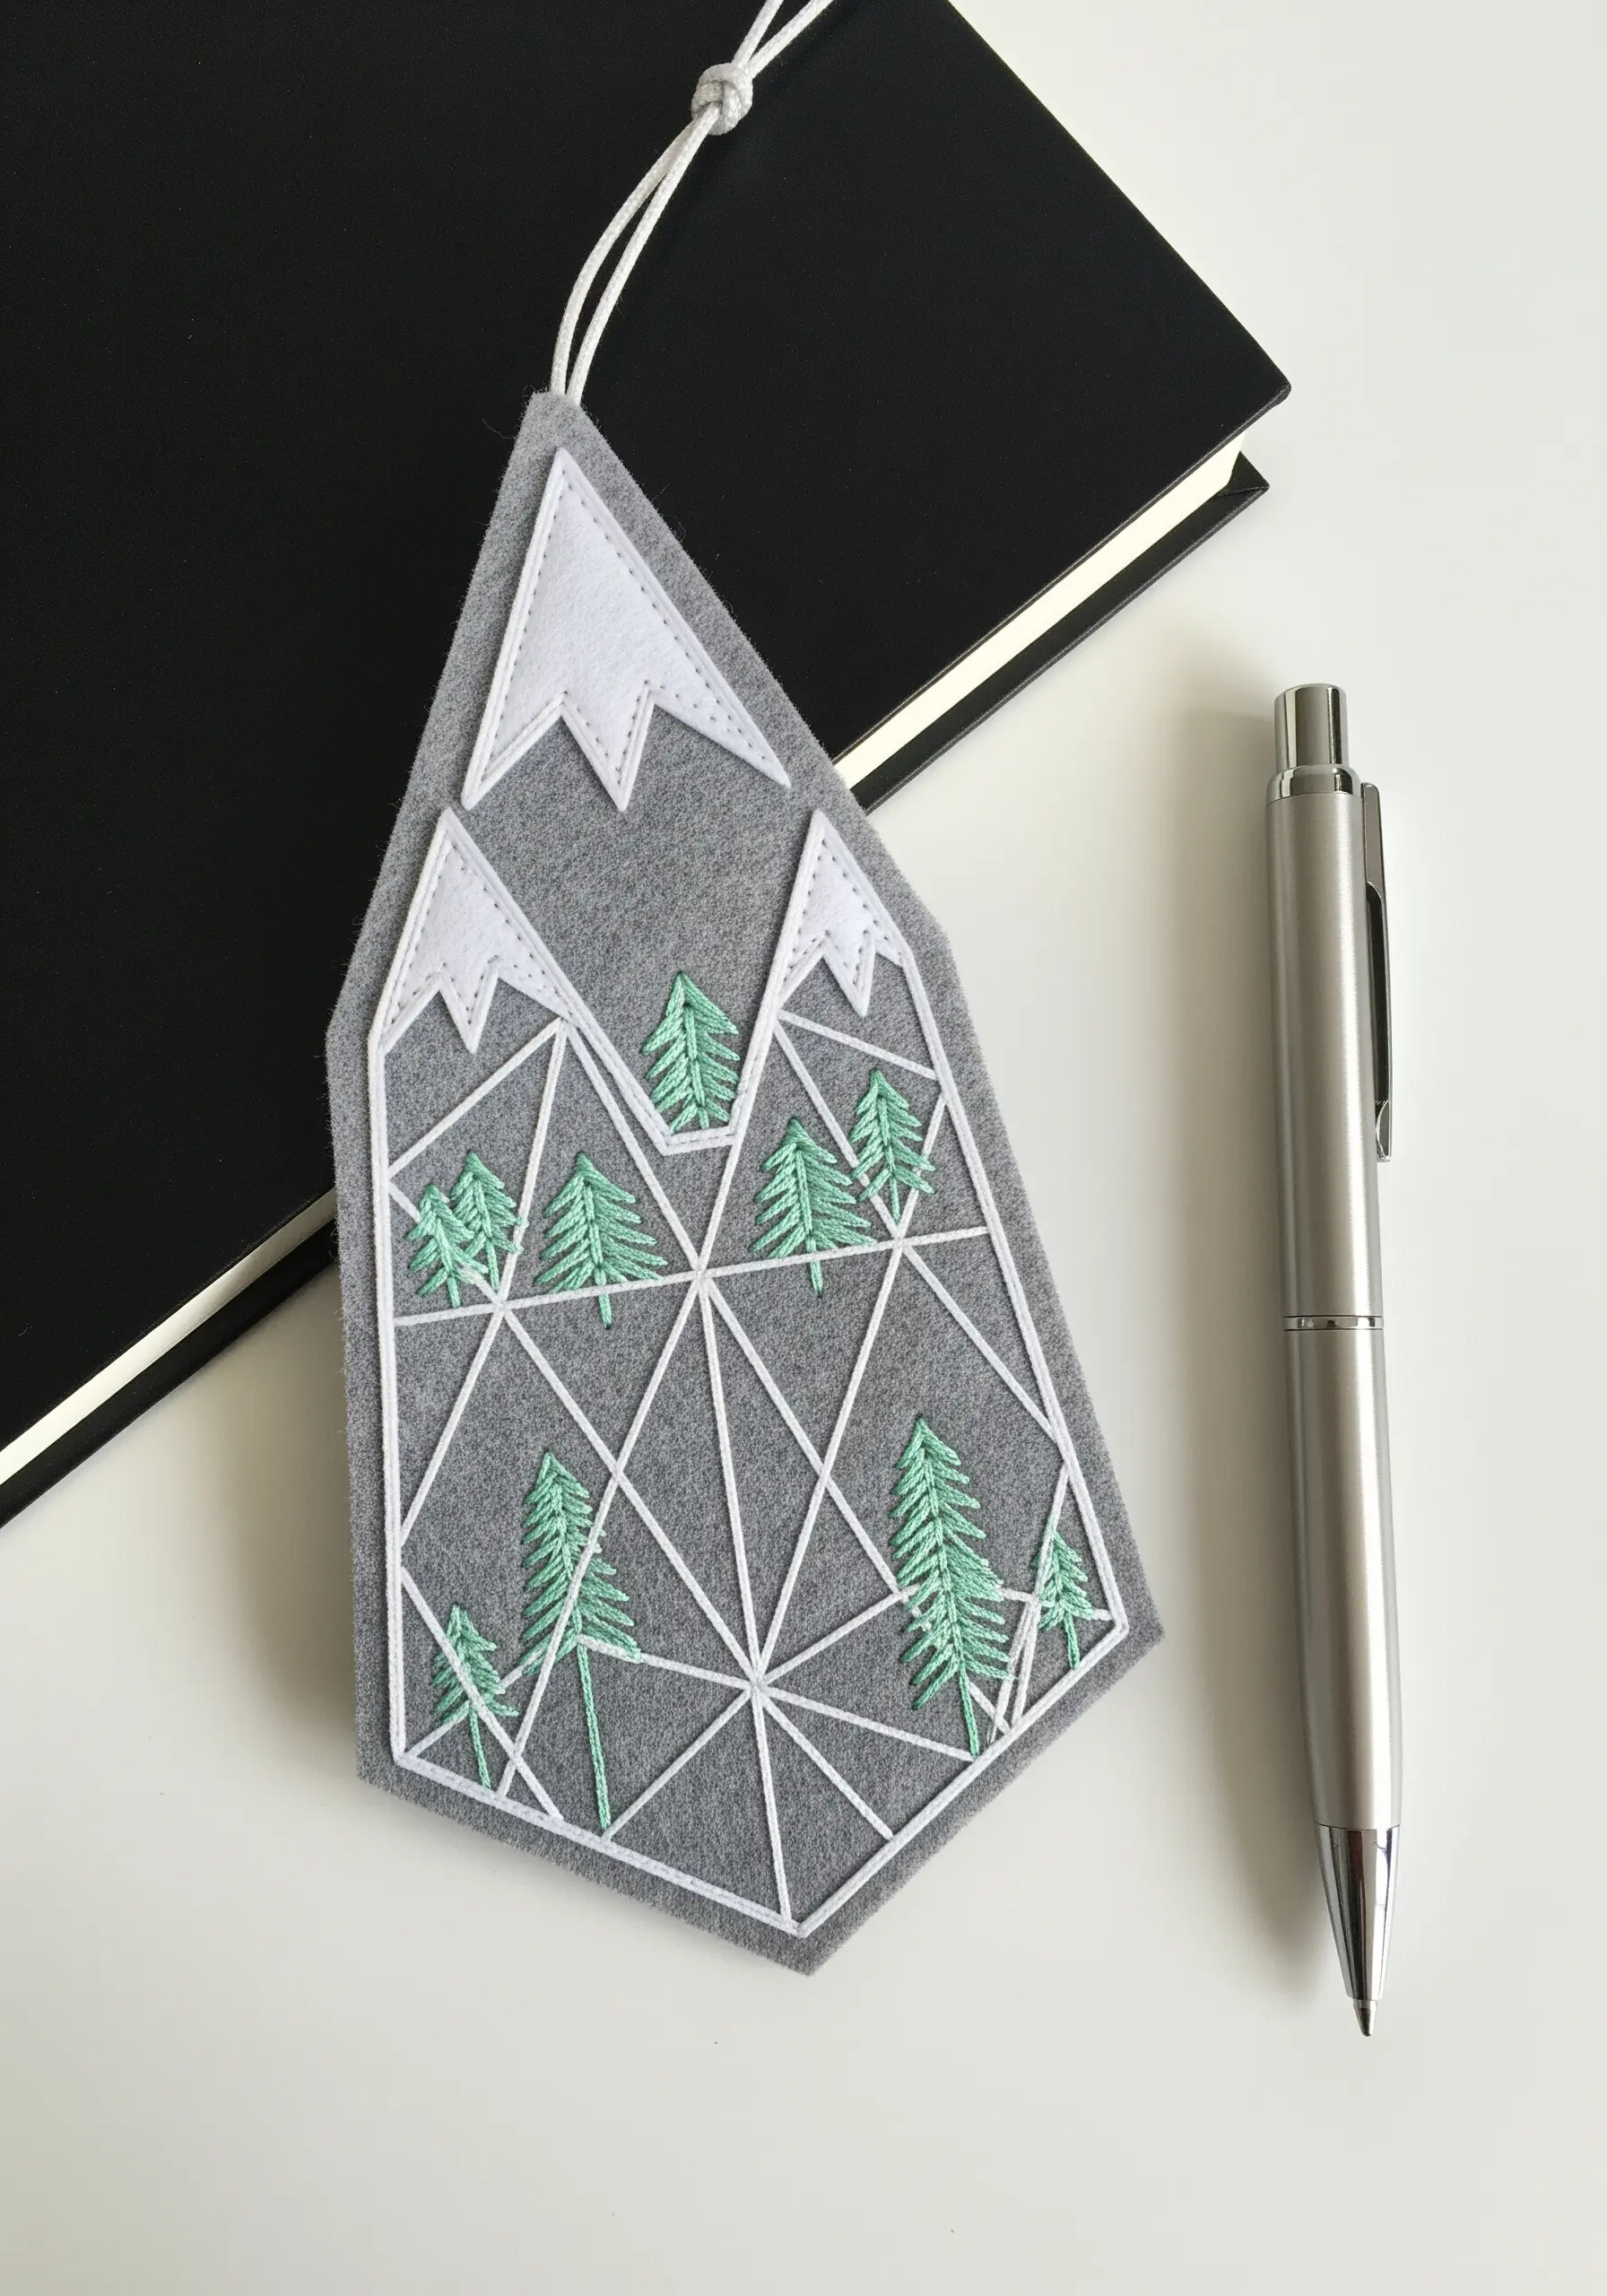
This modern bookmark uses felt as a structural canvas. The geometric mountain outlines are created with a simple backstitch in a contrasting white thread, allowing the clean lines to define the design.
The small trees are filled with satin stitches, providing a pop of color and a different texture. This project shows how combining simple stitches with a non-woven fabric can result in a crisp, contemporary, and functional piece of art.


