

You’ve mastered the basic stitches, and you enjoy the calm rhythm of pulling thread through fabric. But now you find yourself looking at your finished hoops and thinking, “What’s next? How do I make this feel less like a craft project and more like a piece of art?” That desire for elevation is where true artistry begins.
The secret isn’t in learning dozens of impossibly complex stitches. Instead, it lies in thoughtful choices about texture, composition, and materials. It’s about knowing when to use a single strand of floss for delicate detail and when to use chunky yarn for dramatic impact. It’s about seeing fabric not just as a background, but as an active part of your design.
Here, you won’t find generic advice. You will find nineteen specific, actionable ideas designed to shift your perspective. Each one offers a technique or a concept that will make a visible difference in your work, empowering you to create wall art that is not only handmade, but deeply intentional and expressive.
1. Mastering Botanical Realism with Layered Stitching
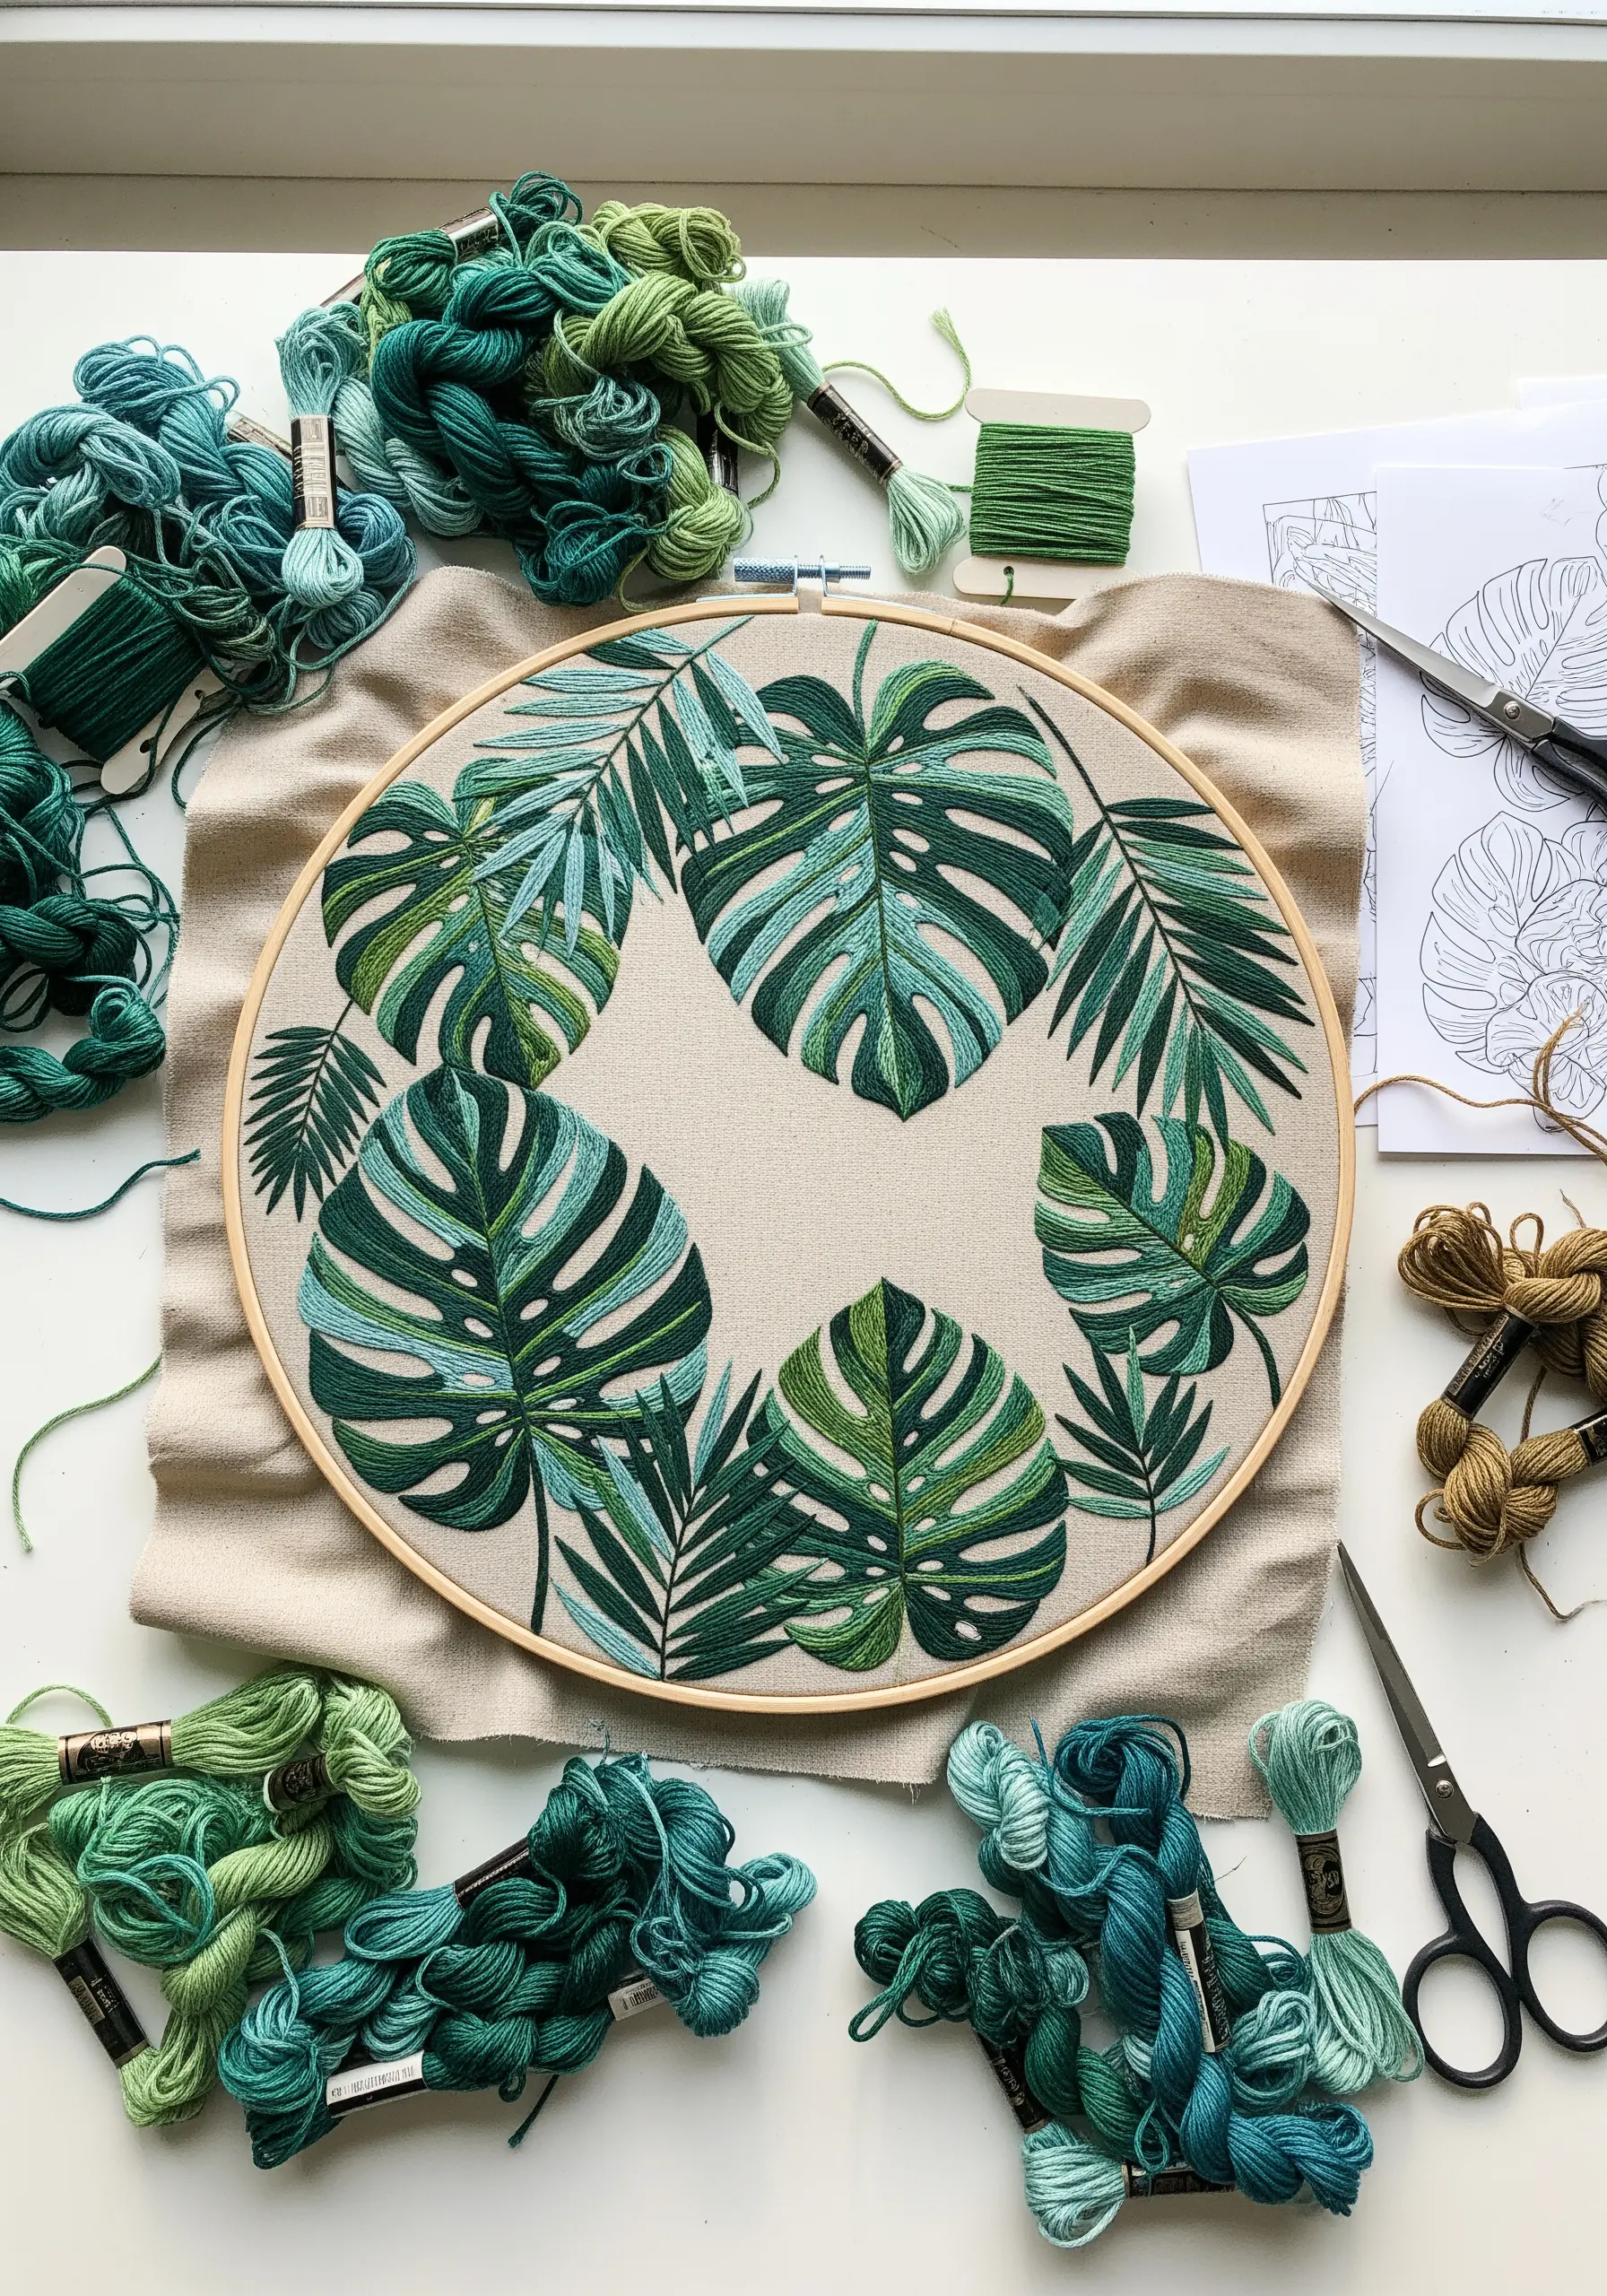
To achieve this lush, layered look, focus on creating depth rather than just filling in shapes.
Use a long-and-short stitch to fill the sections of each leaf, allowing you to blend different shades of green seamlessly and mimic the natural play of light.
Overlap the leaves slightly, stitching the ones in the background first to build a realistic composition.
For the central veins, use a darker thread and a crisp split stitch to create a defined line that draws the eye.
Working with just one or two strands of floss for the finer details is crucial—it keeps the foliage looking delicate and detailed, not bulky.
2. Achieving Graphic Precision with Color Blocking
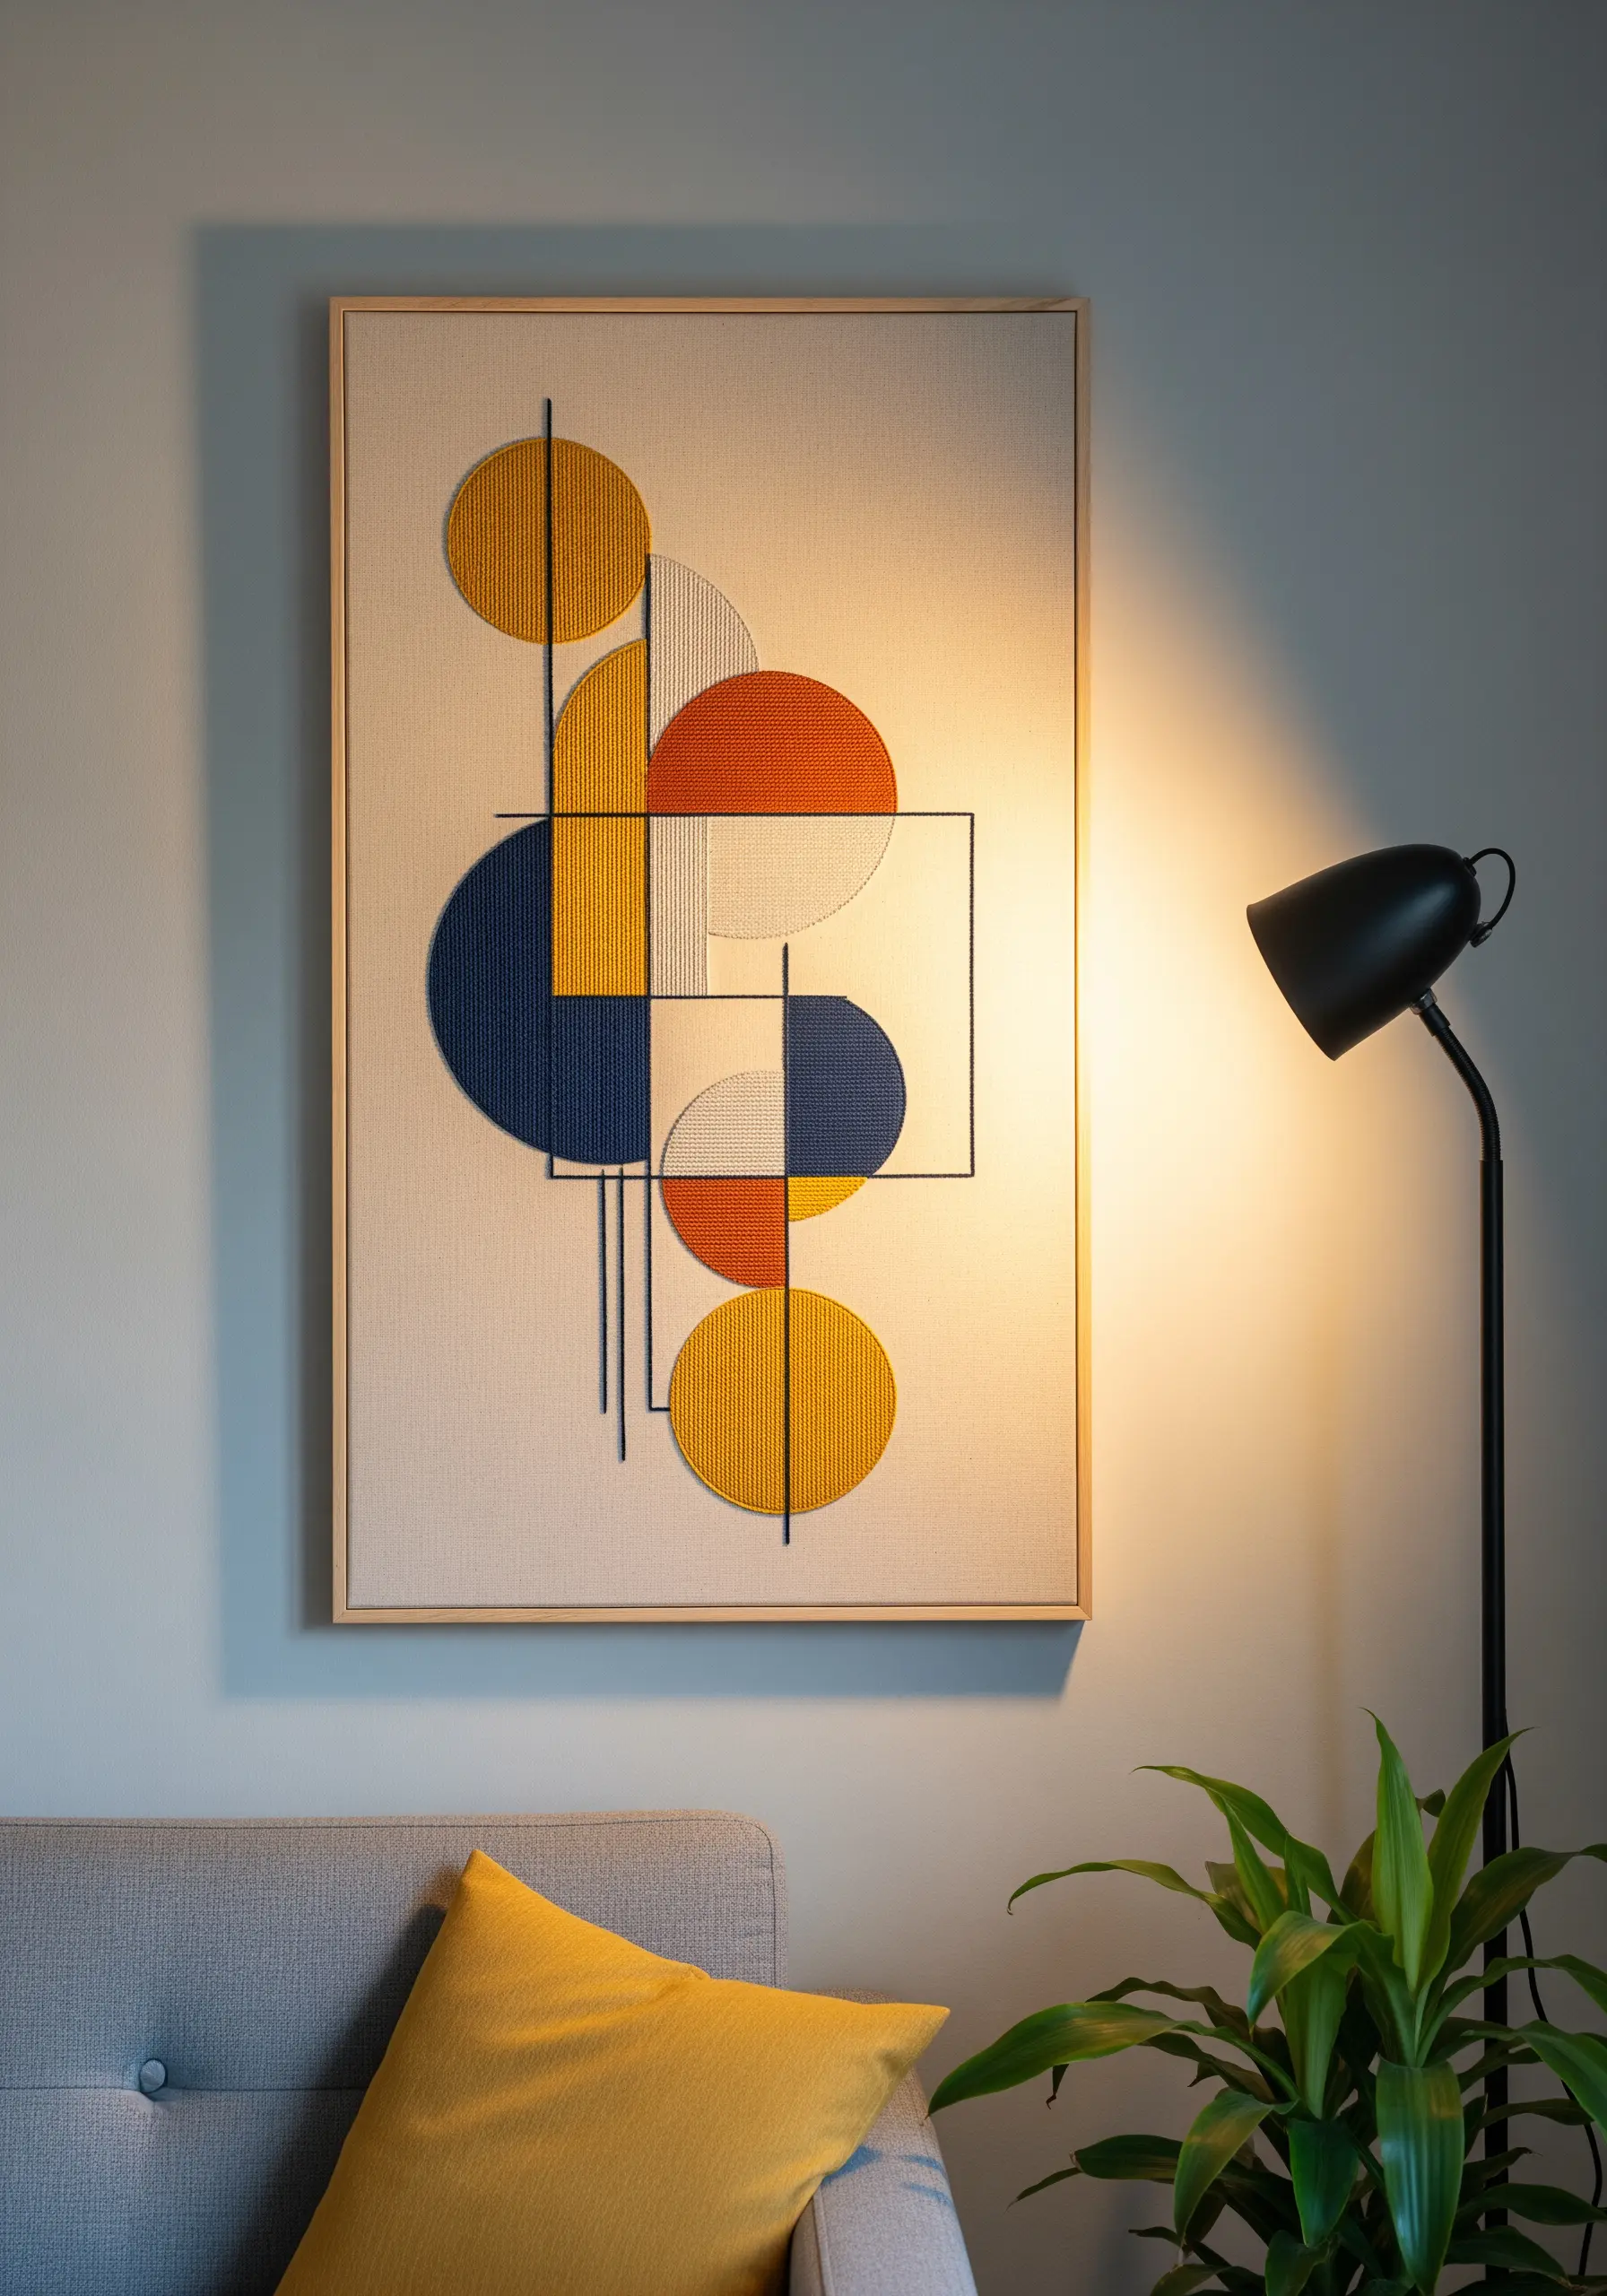
To get those perfectly clean edges, outline each geometric shape with a single backstitch before you begin filling it.
This simple step creates a raised border, or “dam,” that keeps your satin stitches contained and uniform.
Choose a high-count linen or evenweave fabric; its tight, stable weave prevents gaps and ensures your stitches lay smooth and flat.
For the bold black lines that intersect the shapes, couch a thicker thread like pearl cotton onto the surface—this adds a contrasting raised texture that makes the design pop.
3. Creating Celestial Drama on Dark Fabric
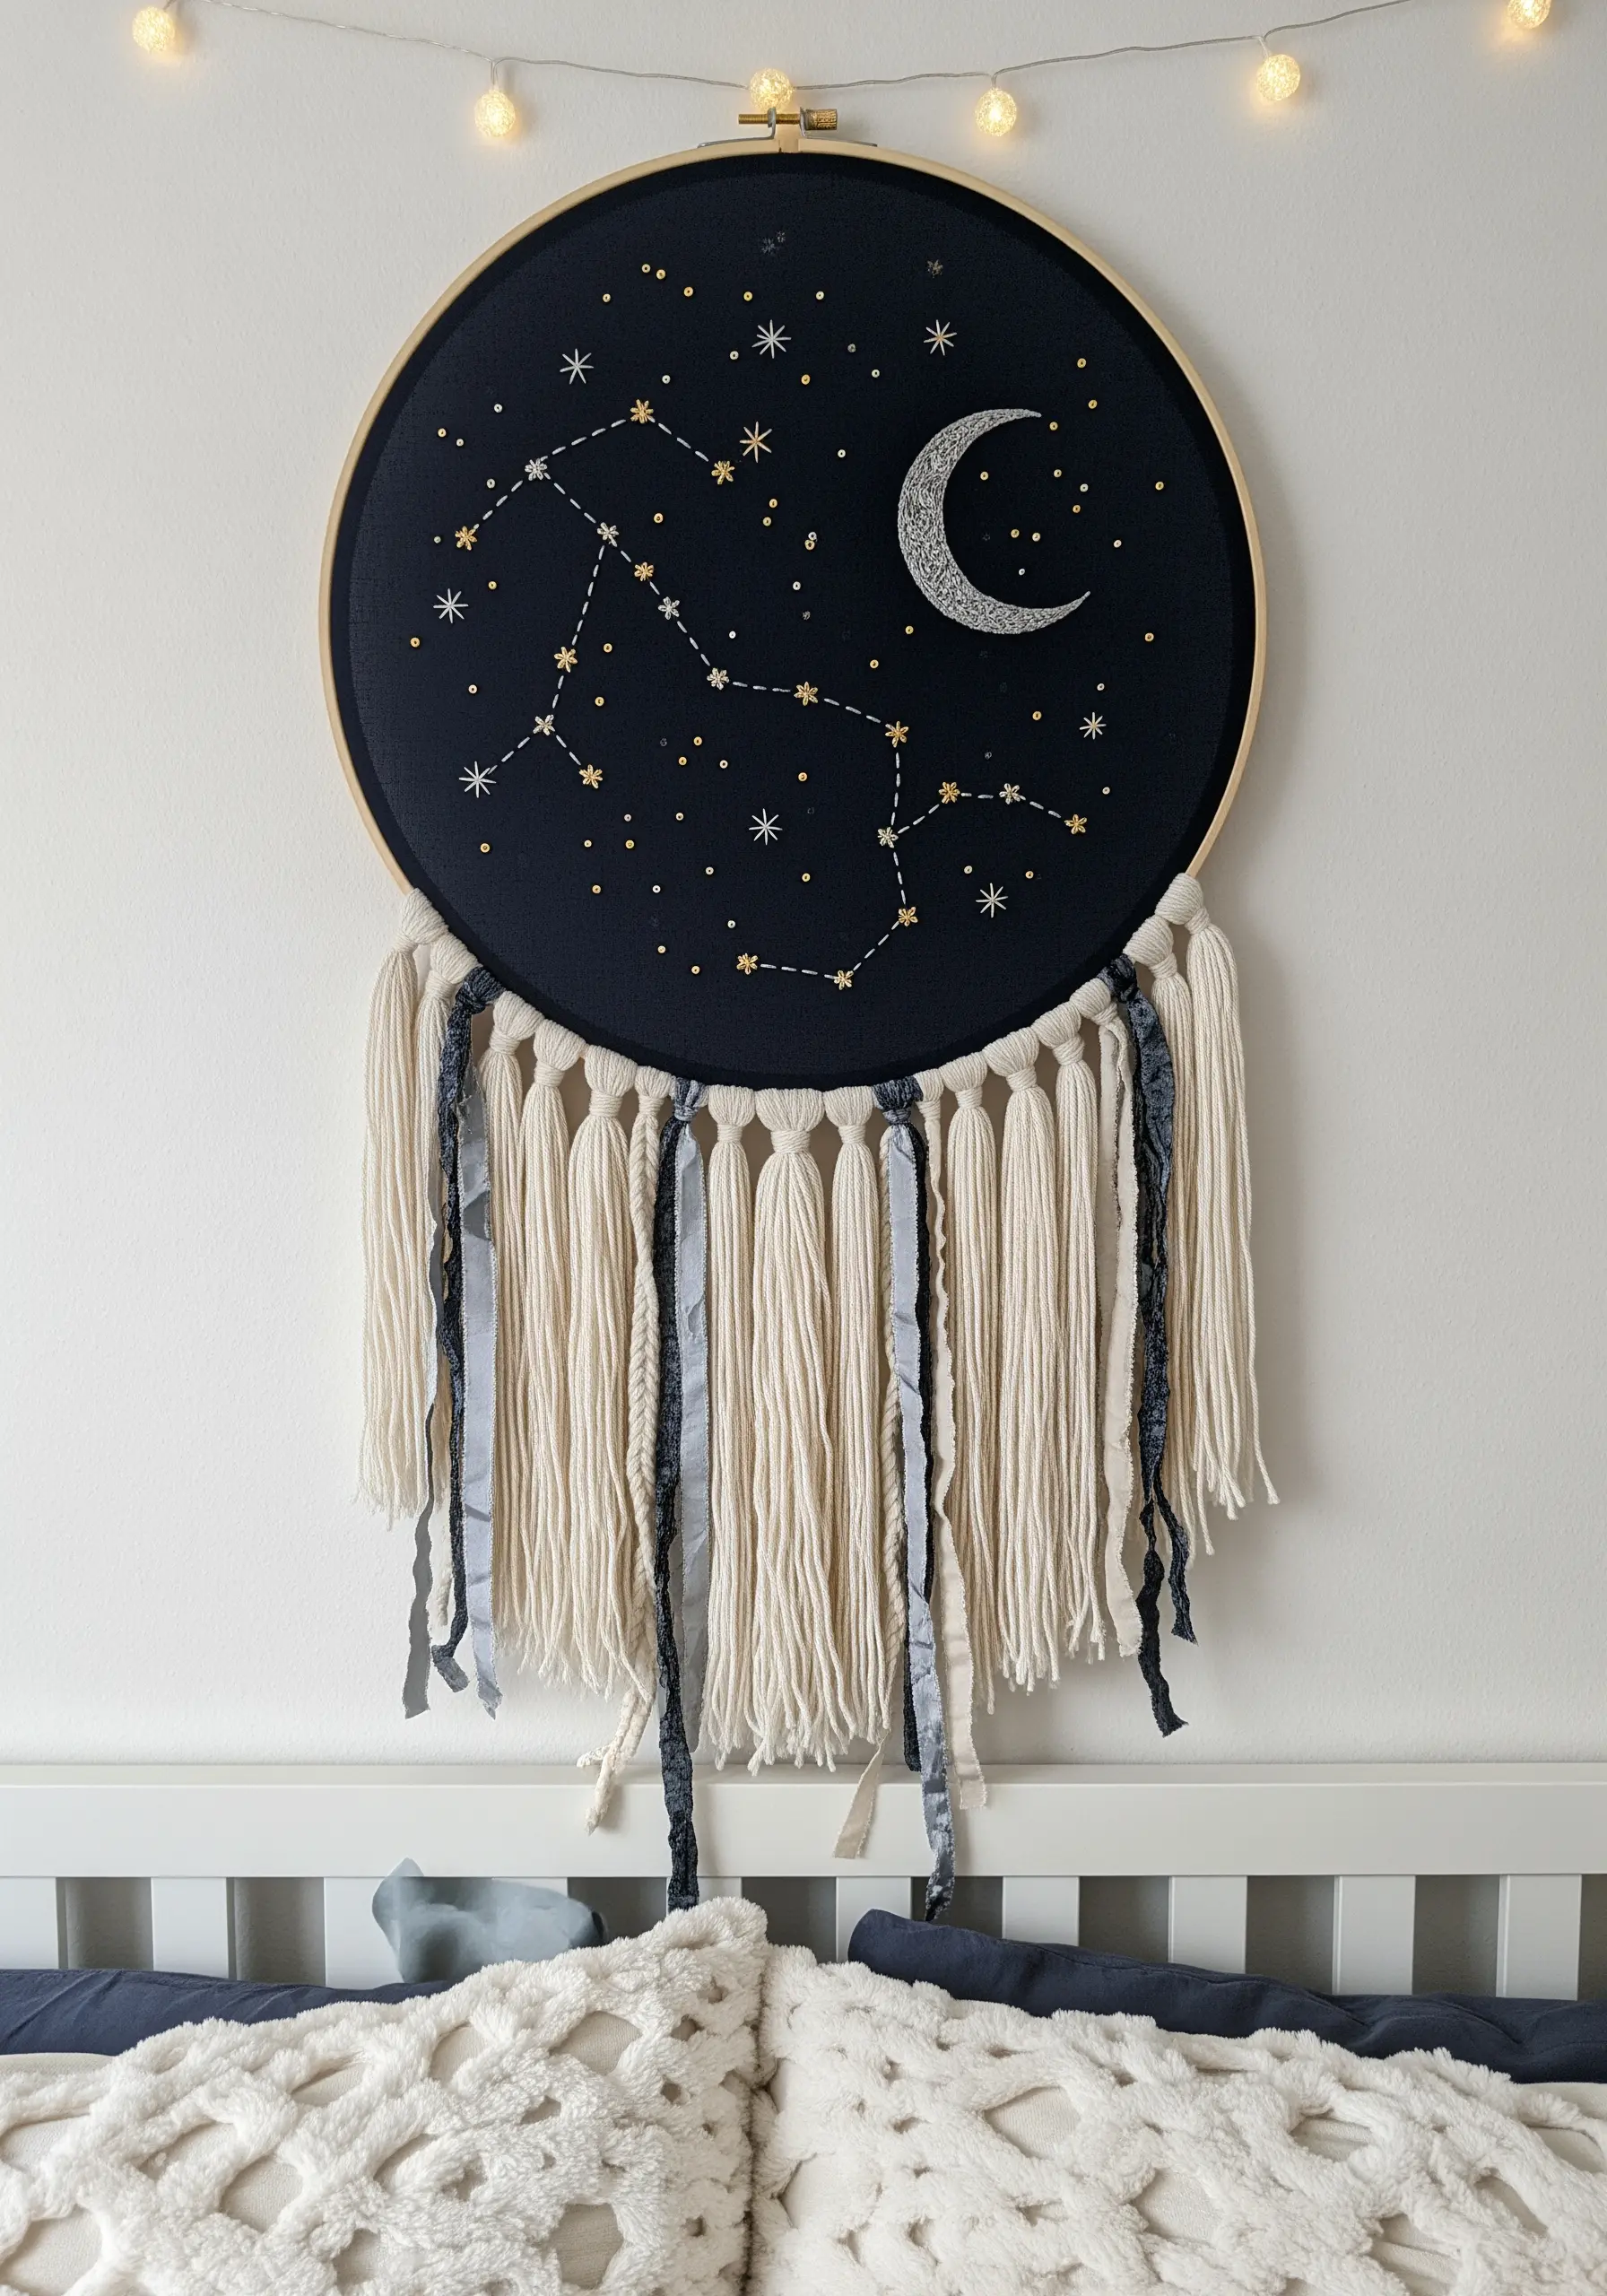
Stitching on dark fabric magnifies the impact of every thread, making color and texture choices critical.
Use a white or silver transfer pencil to ensure your pattern is clearly visible.
For the stars, create a dynamic night sky by combining French knots of varying sizes (one, two, and three wraps) with tiny, scattered straight stitches.
To make the moon truly shimmer, use a metallic silver thread in a dense satin stitch, ensuring each stitch lies flush against the next for maximum light reflection.
4. Sculpting Letters with Gradient Thread
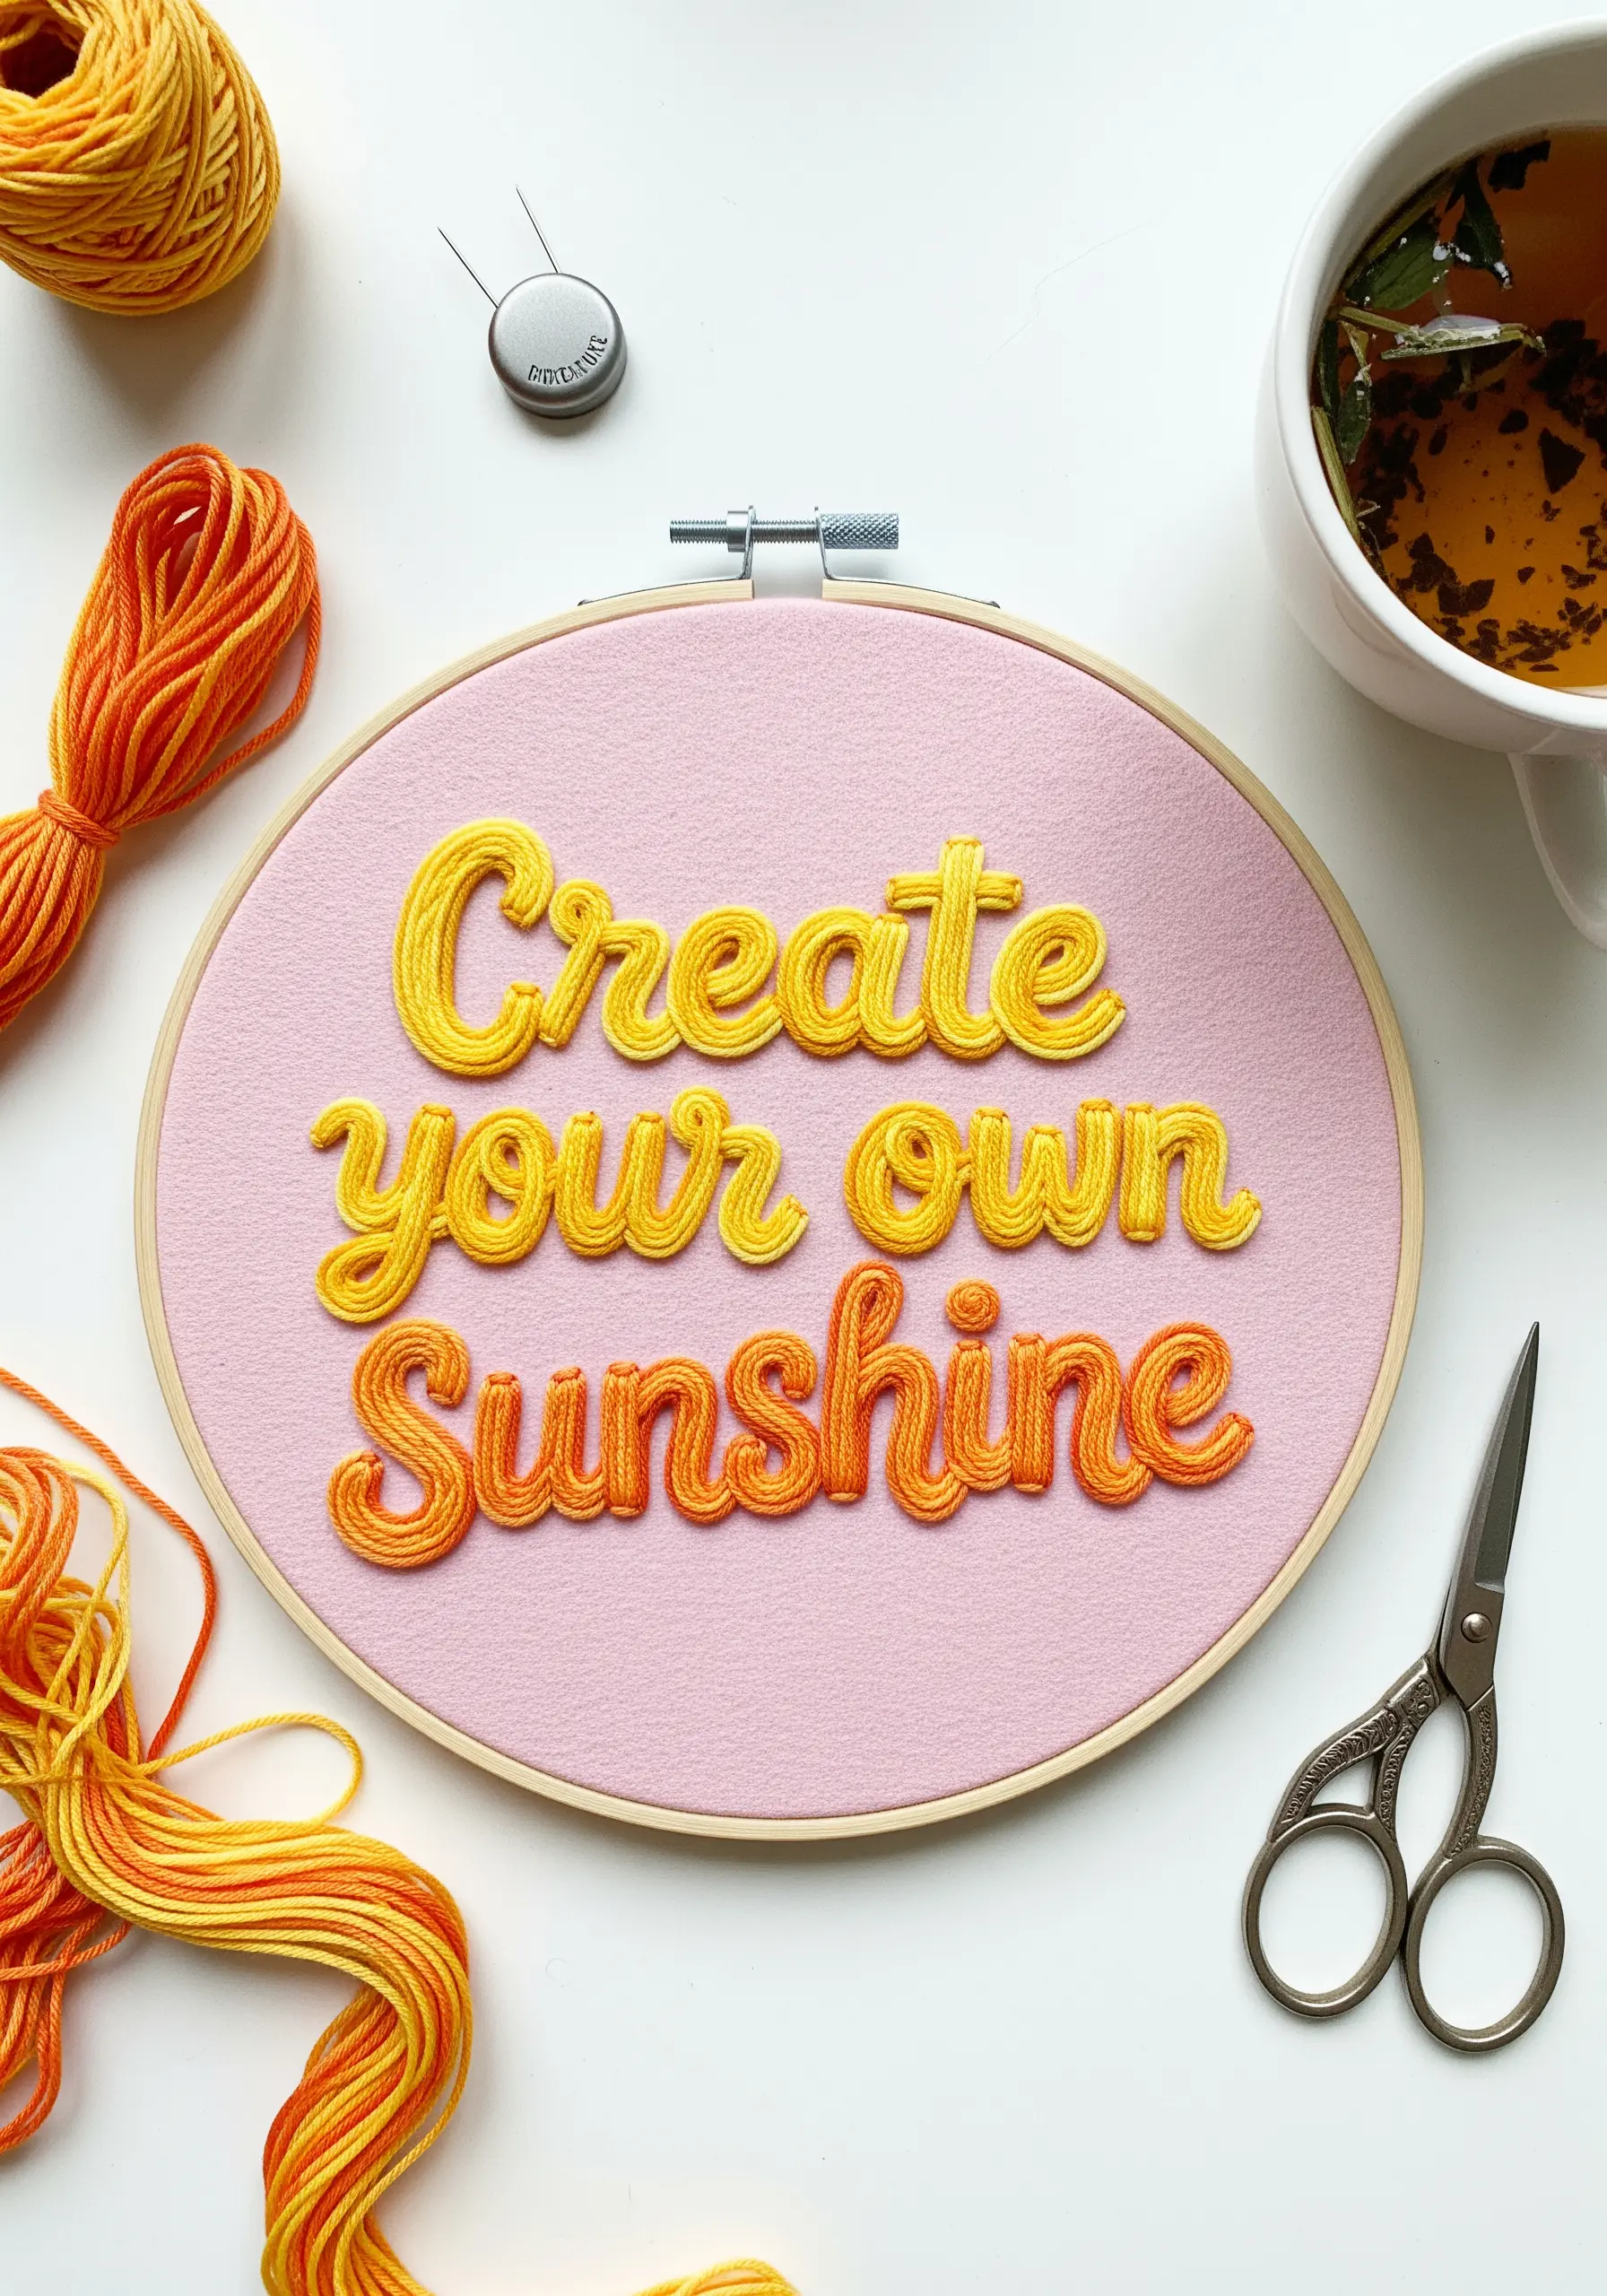
To give your lettering a plush, three-dimensional feel, use a padded satin stitch.
First, create a foundation by outlining the letters with a split stitch, then fill the interior with a light layer of seed stitches.
Cover this entire base with satin stitches laid perpendicular to the direction of the letterform.
Using a variegated thread is a brilliant shortcut; it creates a smooth color gradient automatically, saving you the effort of blending multiple shades.
The padding underneath is what elevates the letters, giving them that satisfying, sculptural pop.
5. Building Dimensional Florals with Woven Stitches

This bouquet gets its incredible texture from 3D stitches that lift off the fabric.
Create the roses using a woven wheel stitch—the more you wrap the thread around the stitch spokes, the fuller and more realistic your bloom will become.
For the lavender stalks, use bullion knots, varying their length and tightness to mimic a natural cluster.
The key is to layer these elements strategically: stitch the flatter background foliage first, then add the dimensional flowers on top to create depth and shadow.
6. Composing Abstract Art with Fabric and Thread
Think beyond thread and begin composing with fabric itself.
Start by cutting abstract shapes from different textiles like linen, felt, or raw cotton to create a varied textural palette.
Use a lightweight fusible web to temporarily adhere the shapes to your background fabric, which holds them in place while you stitch.
Secure the edges with a neat blanket stitch for a clean finish, or a simple running stitch for a more rustic feel.
The beauty of these abstract fabric collage embroidery ideas that feel like modern paintings is the interplay between soft fabric and sharp stitches.
7. Illustrating the Cosmos with a Mix of Textures
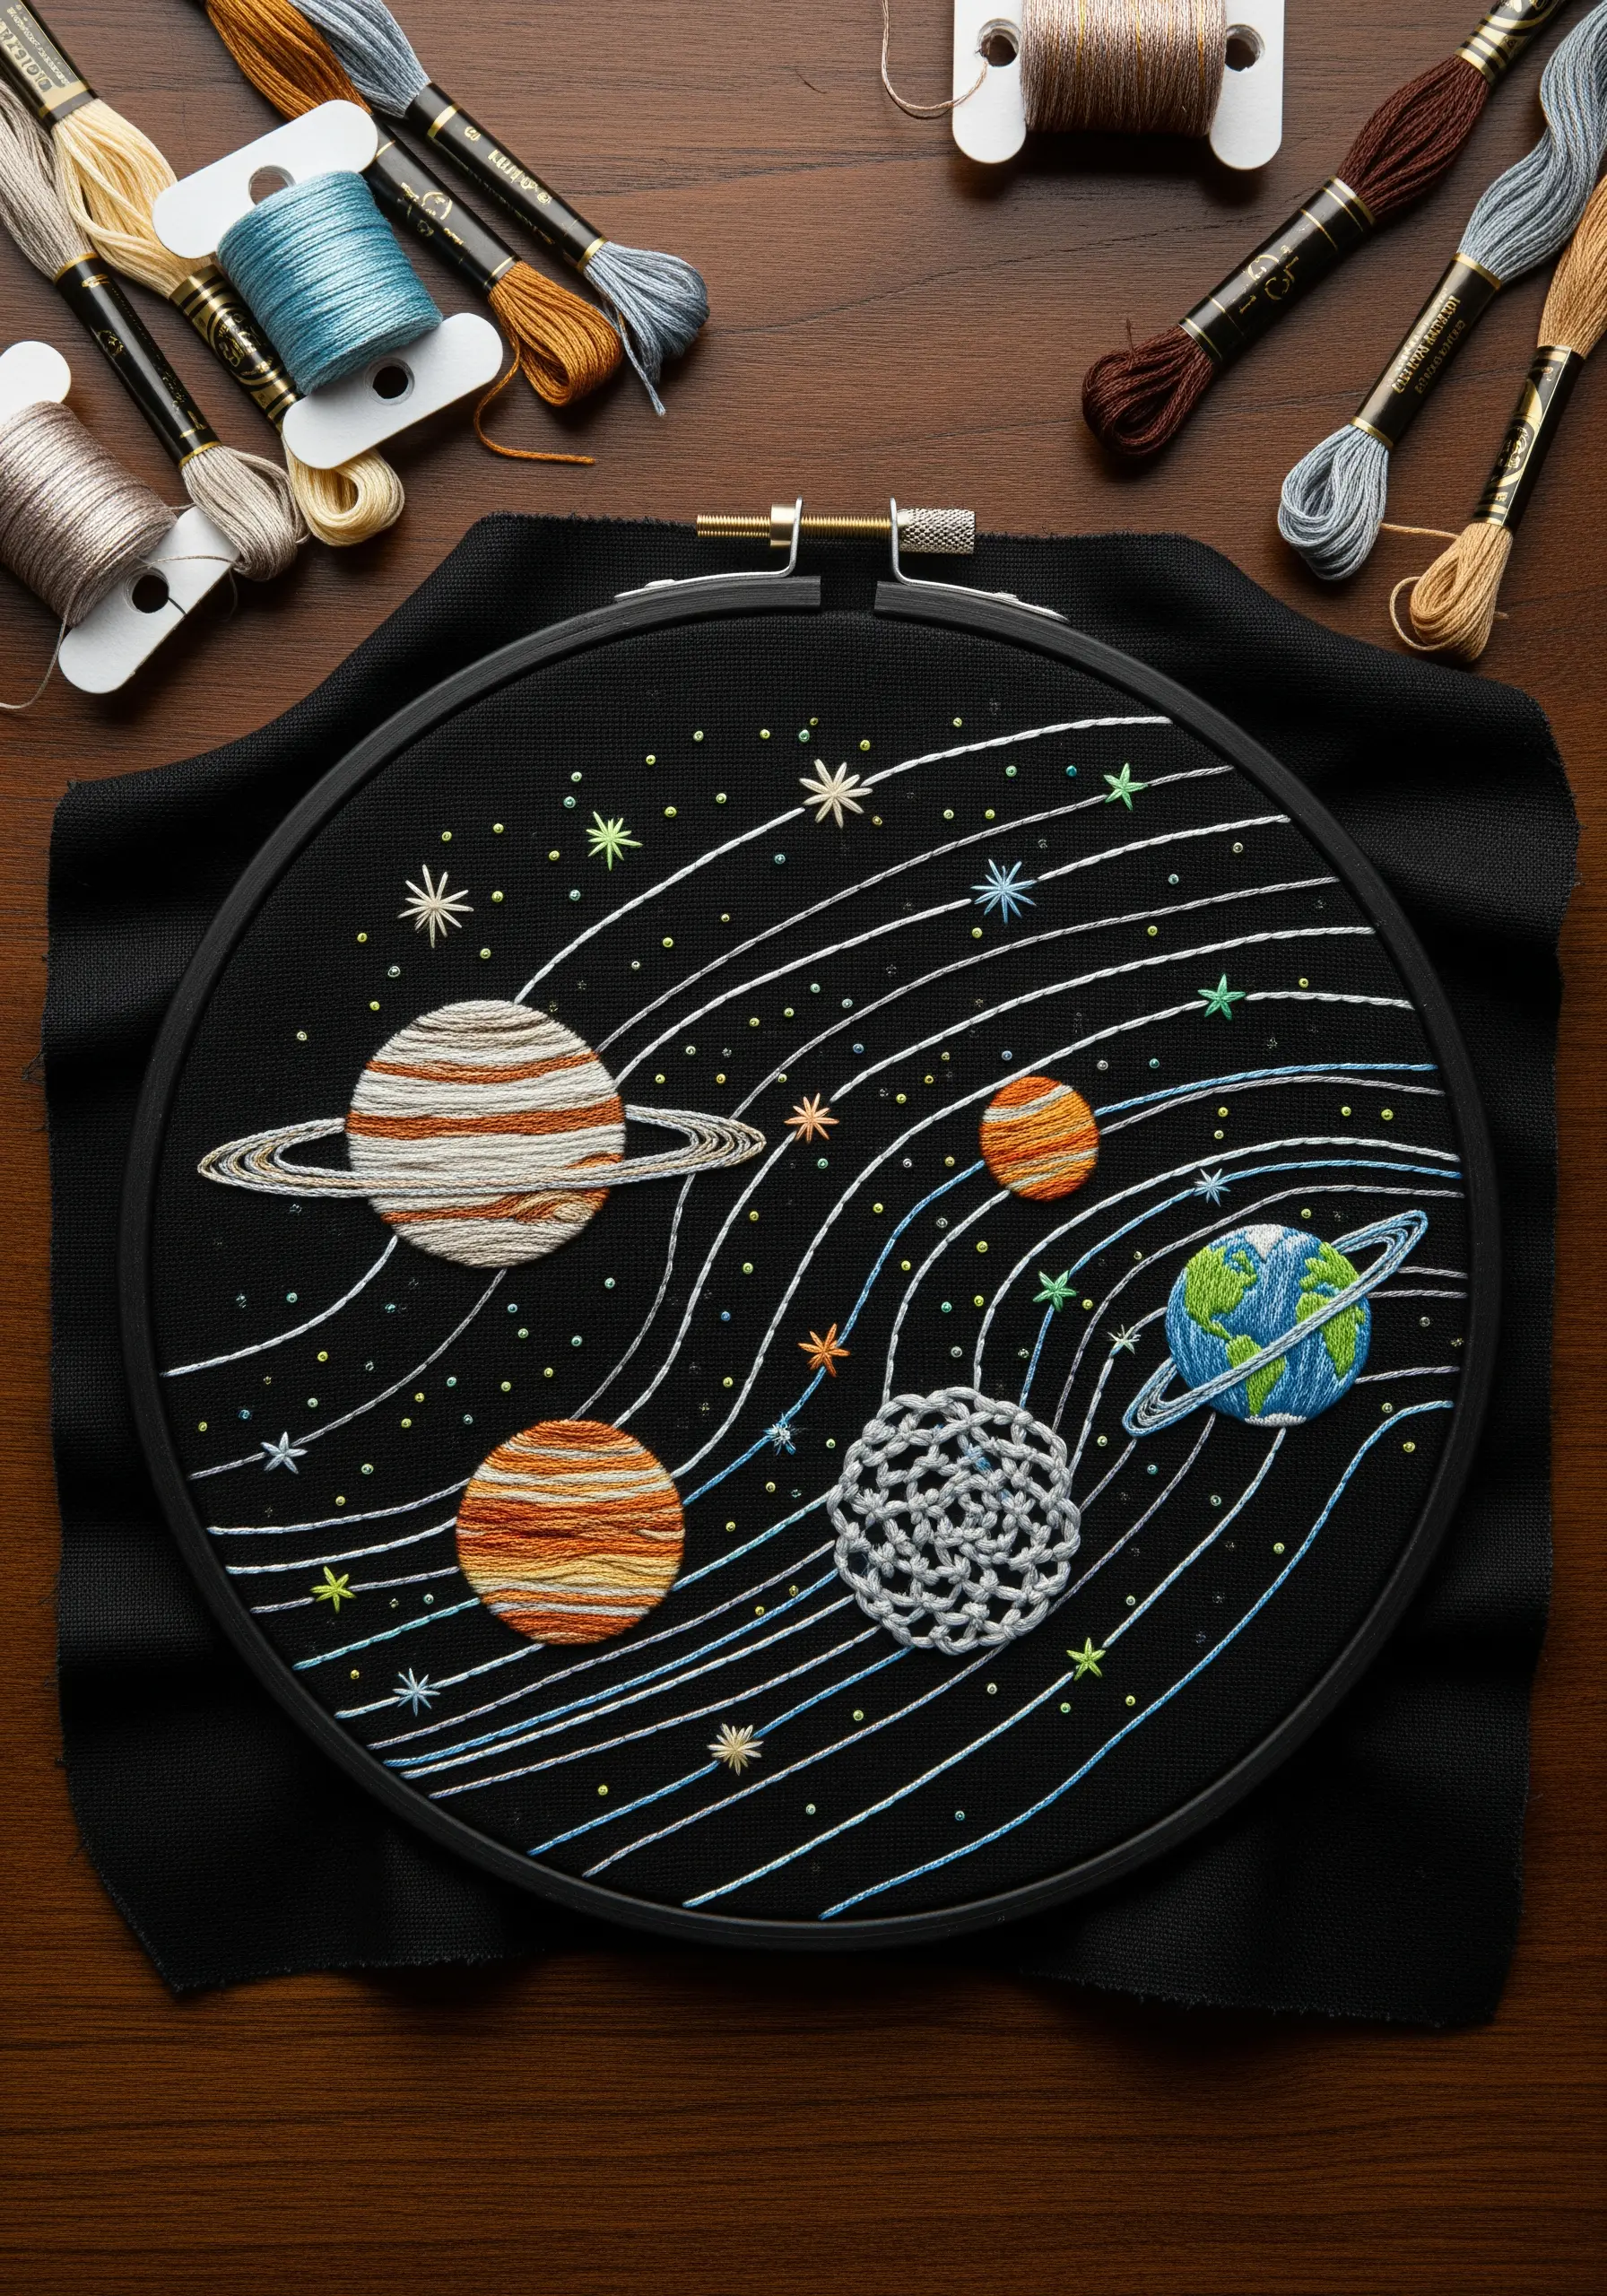
To create a dynamic solar system, assign a unique stitch texture to each celestial body.
Use long-and-short stitch with variegated thread for Jupiter’s gaseous stripes, and tightly packed French knots for a cratered, moon-like surface.
Form the rings of Saturn with long, elegant straight stitches using a metallic thread that catches the light.
For the orbital lines, couch a single strand of silver thread onto the fabric—this creates a clean, graphic line that contrasts beautifully with the textured planets.
8. Capturing Architectural Detail with Precise Line Work
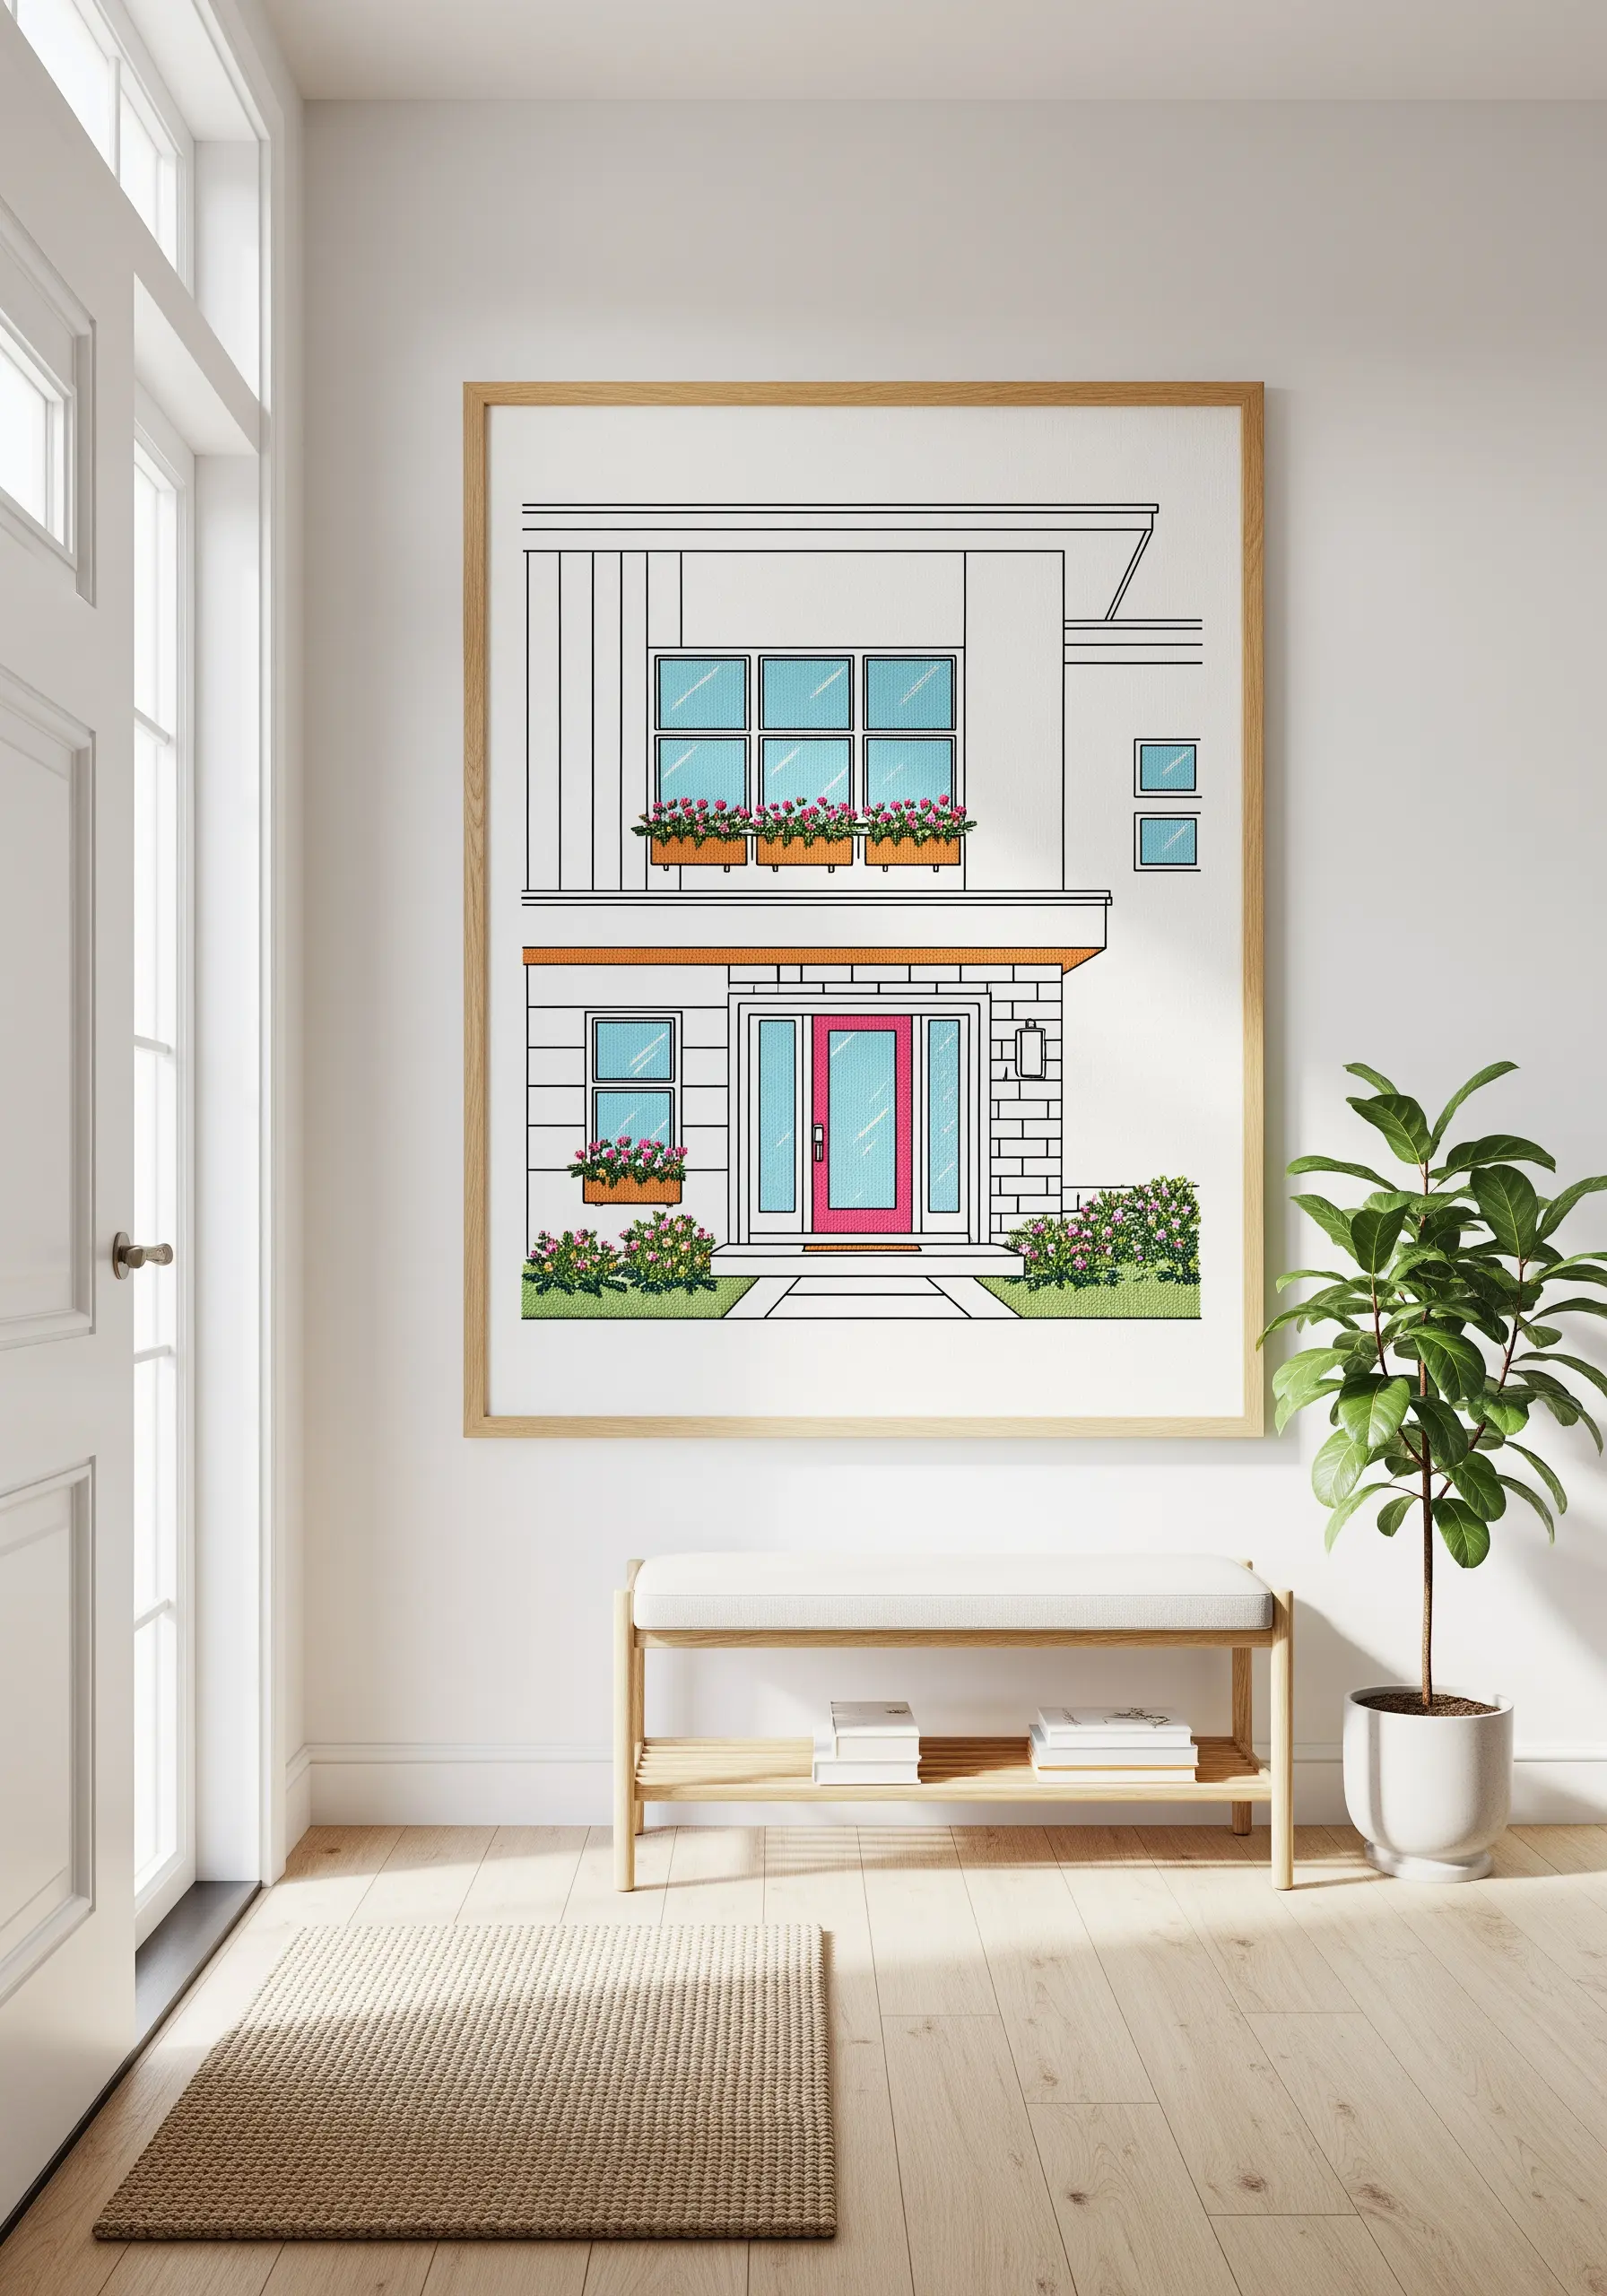
When embroidering architecture, precision is everything.
Use a fine-tipped, heat-erasable pen to transfer your design flawlessly onto the fabric.
A simple backstitch or stem stitch, using just two strands of floss, is ideal for creating crisp, consistent lines that define the structure.
For filled-in areas like window boxes or shrubbery, switch to a dense seed stitch.
This creates a subtle texture that reads as color and shading from a distance, without overwhelming the delicate line work of the building itself.
9. Weaving Mountainscapes with Chunky Fibers
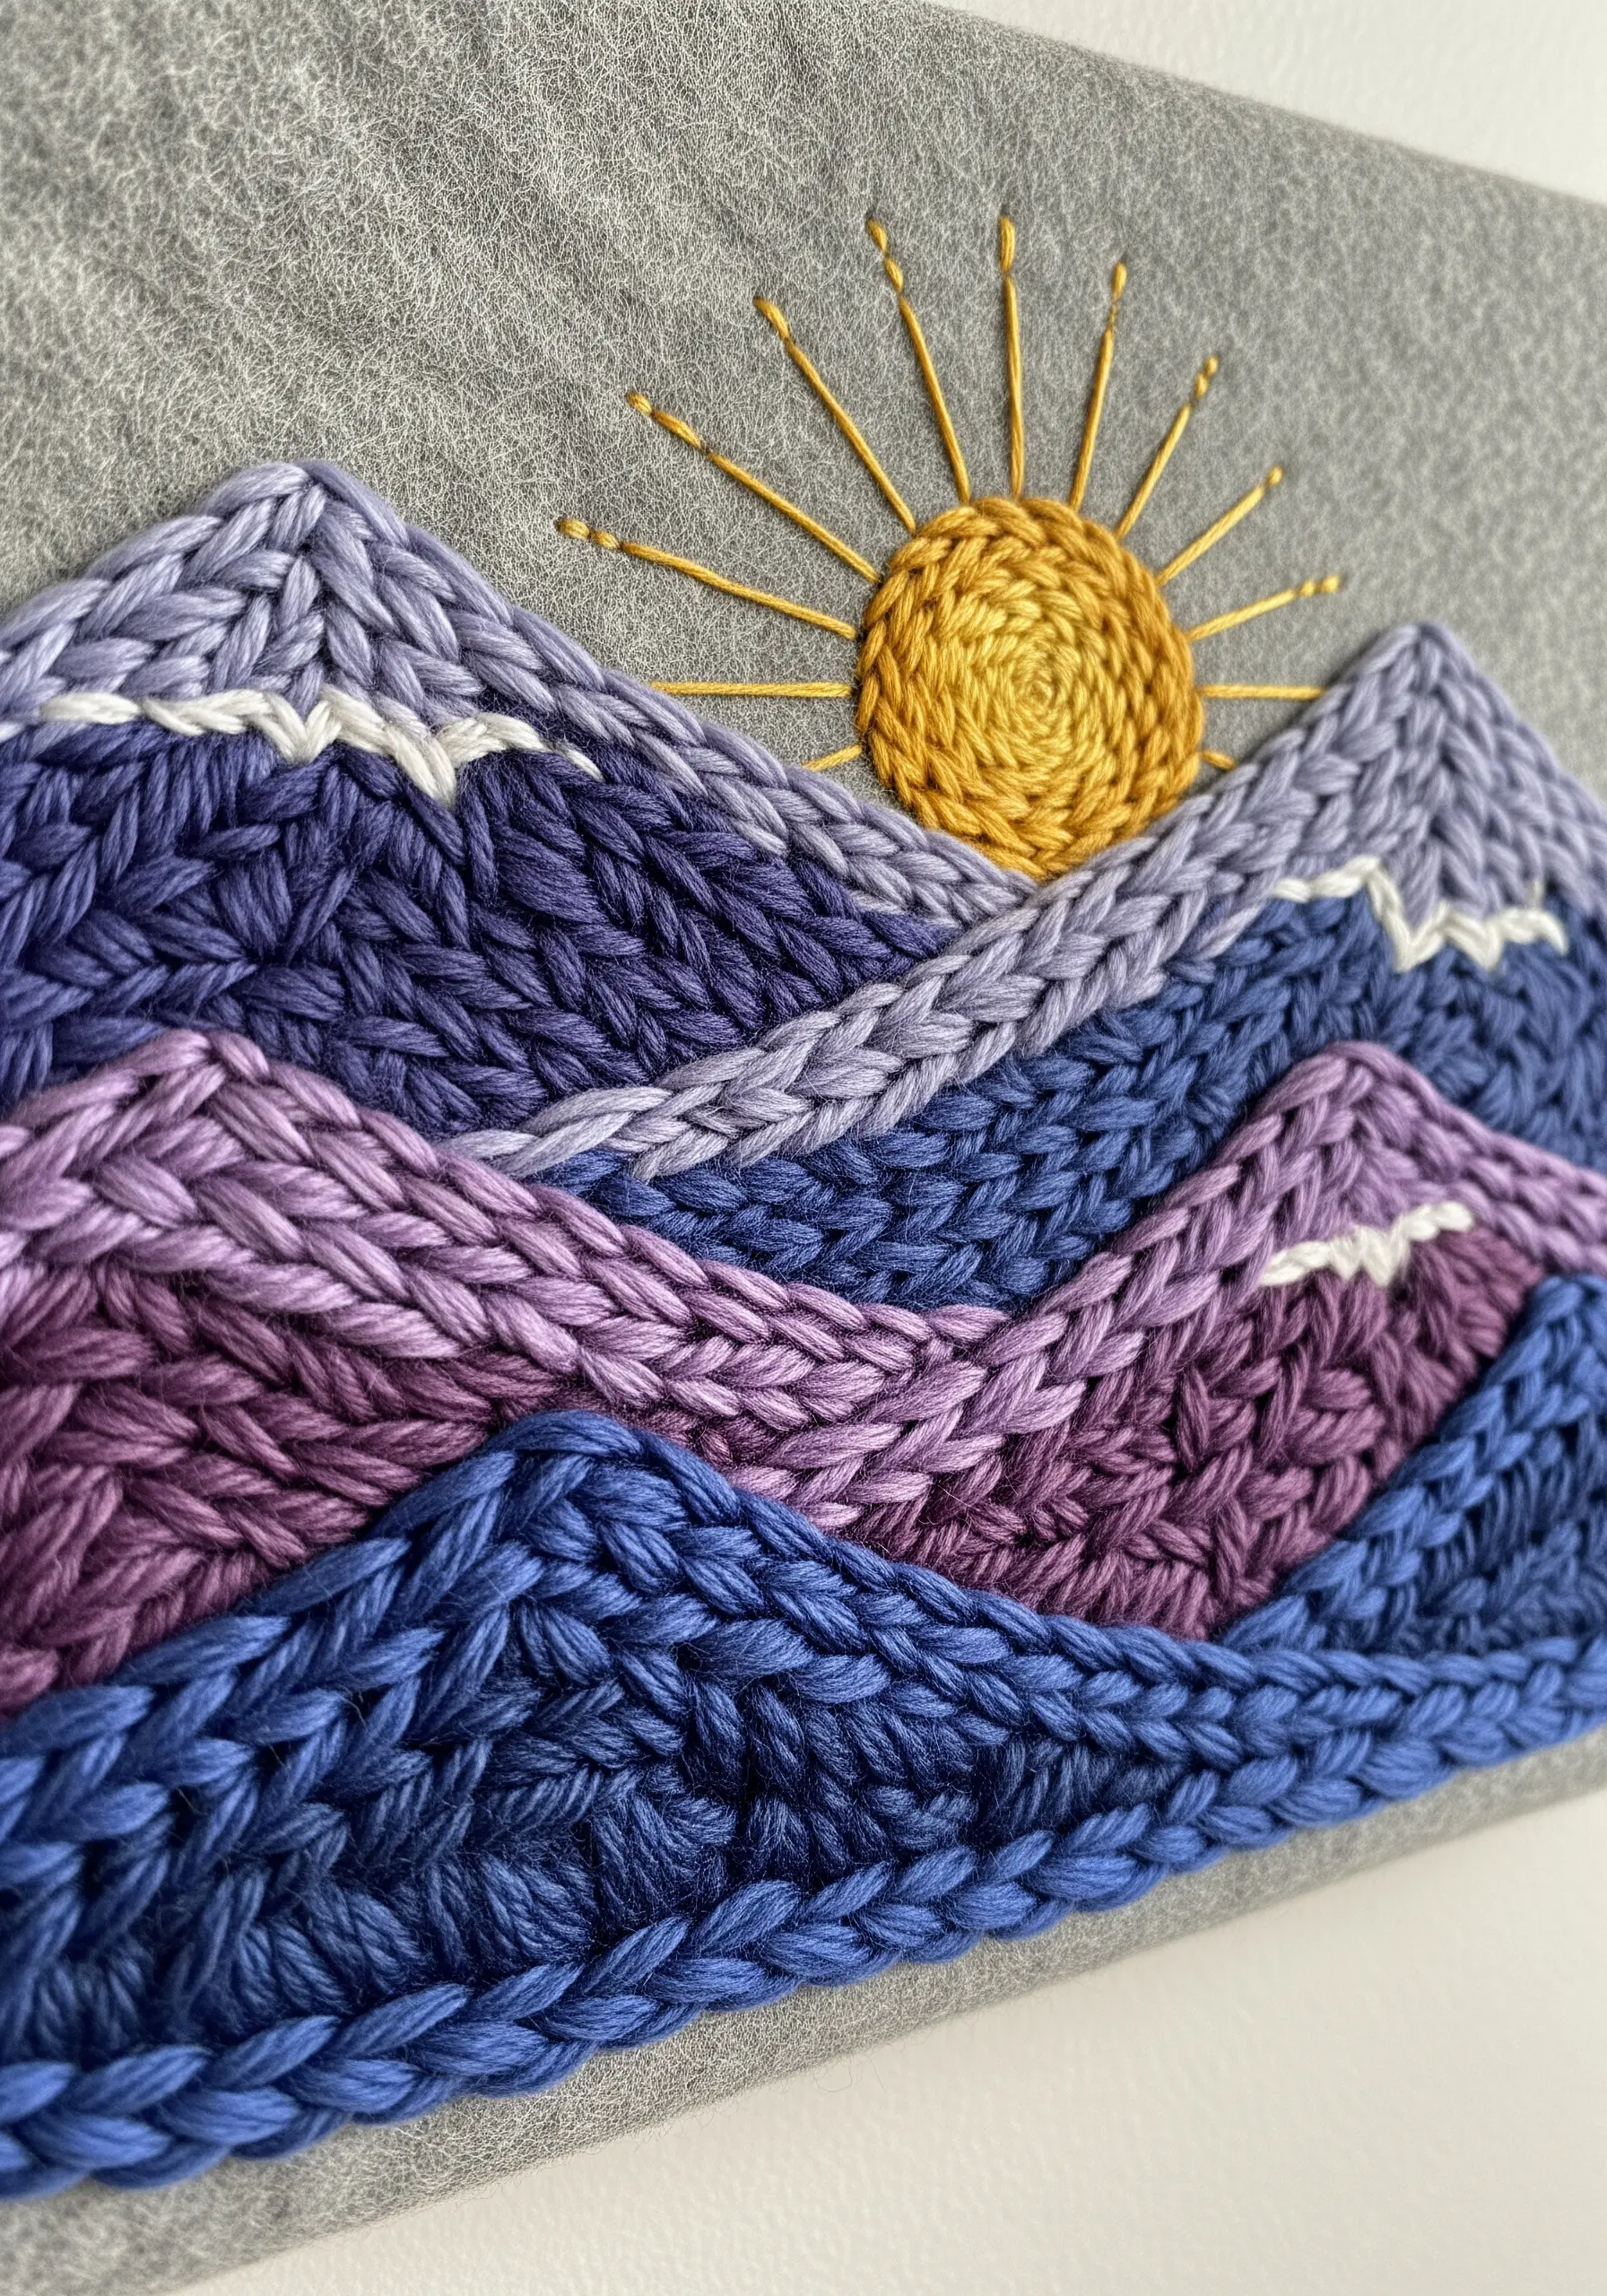
Move beyond standard floss and incorporate thick yarns to create dramatic, tactile landscapes.
This piece uses a heavy chain stitch worked in chunky wool to form the braided texture of the mountain ranges.
To work with such thick fiber, you’ll need a needle with a large eye and a sturdy backing fabric like felt or heavy canvas, which can support the weight without puckering.
The contrast between the fine metallic sun and the hefty, touchable mountains is what gives this piece its unique power.
10. Merging Watercolor and Thread for Ethereal Art
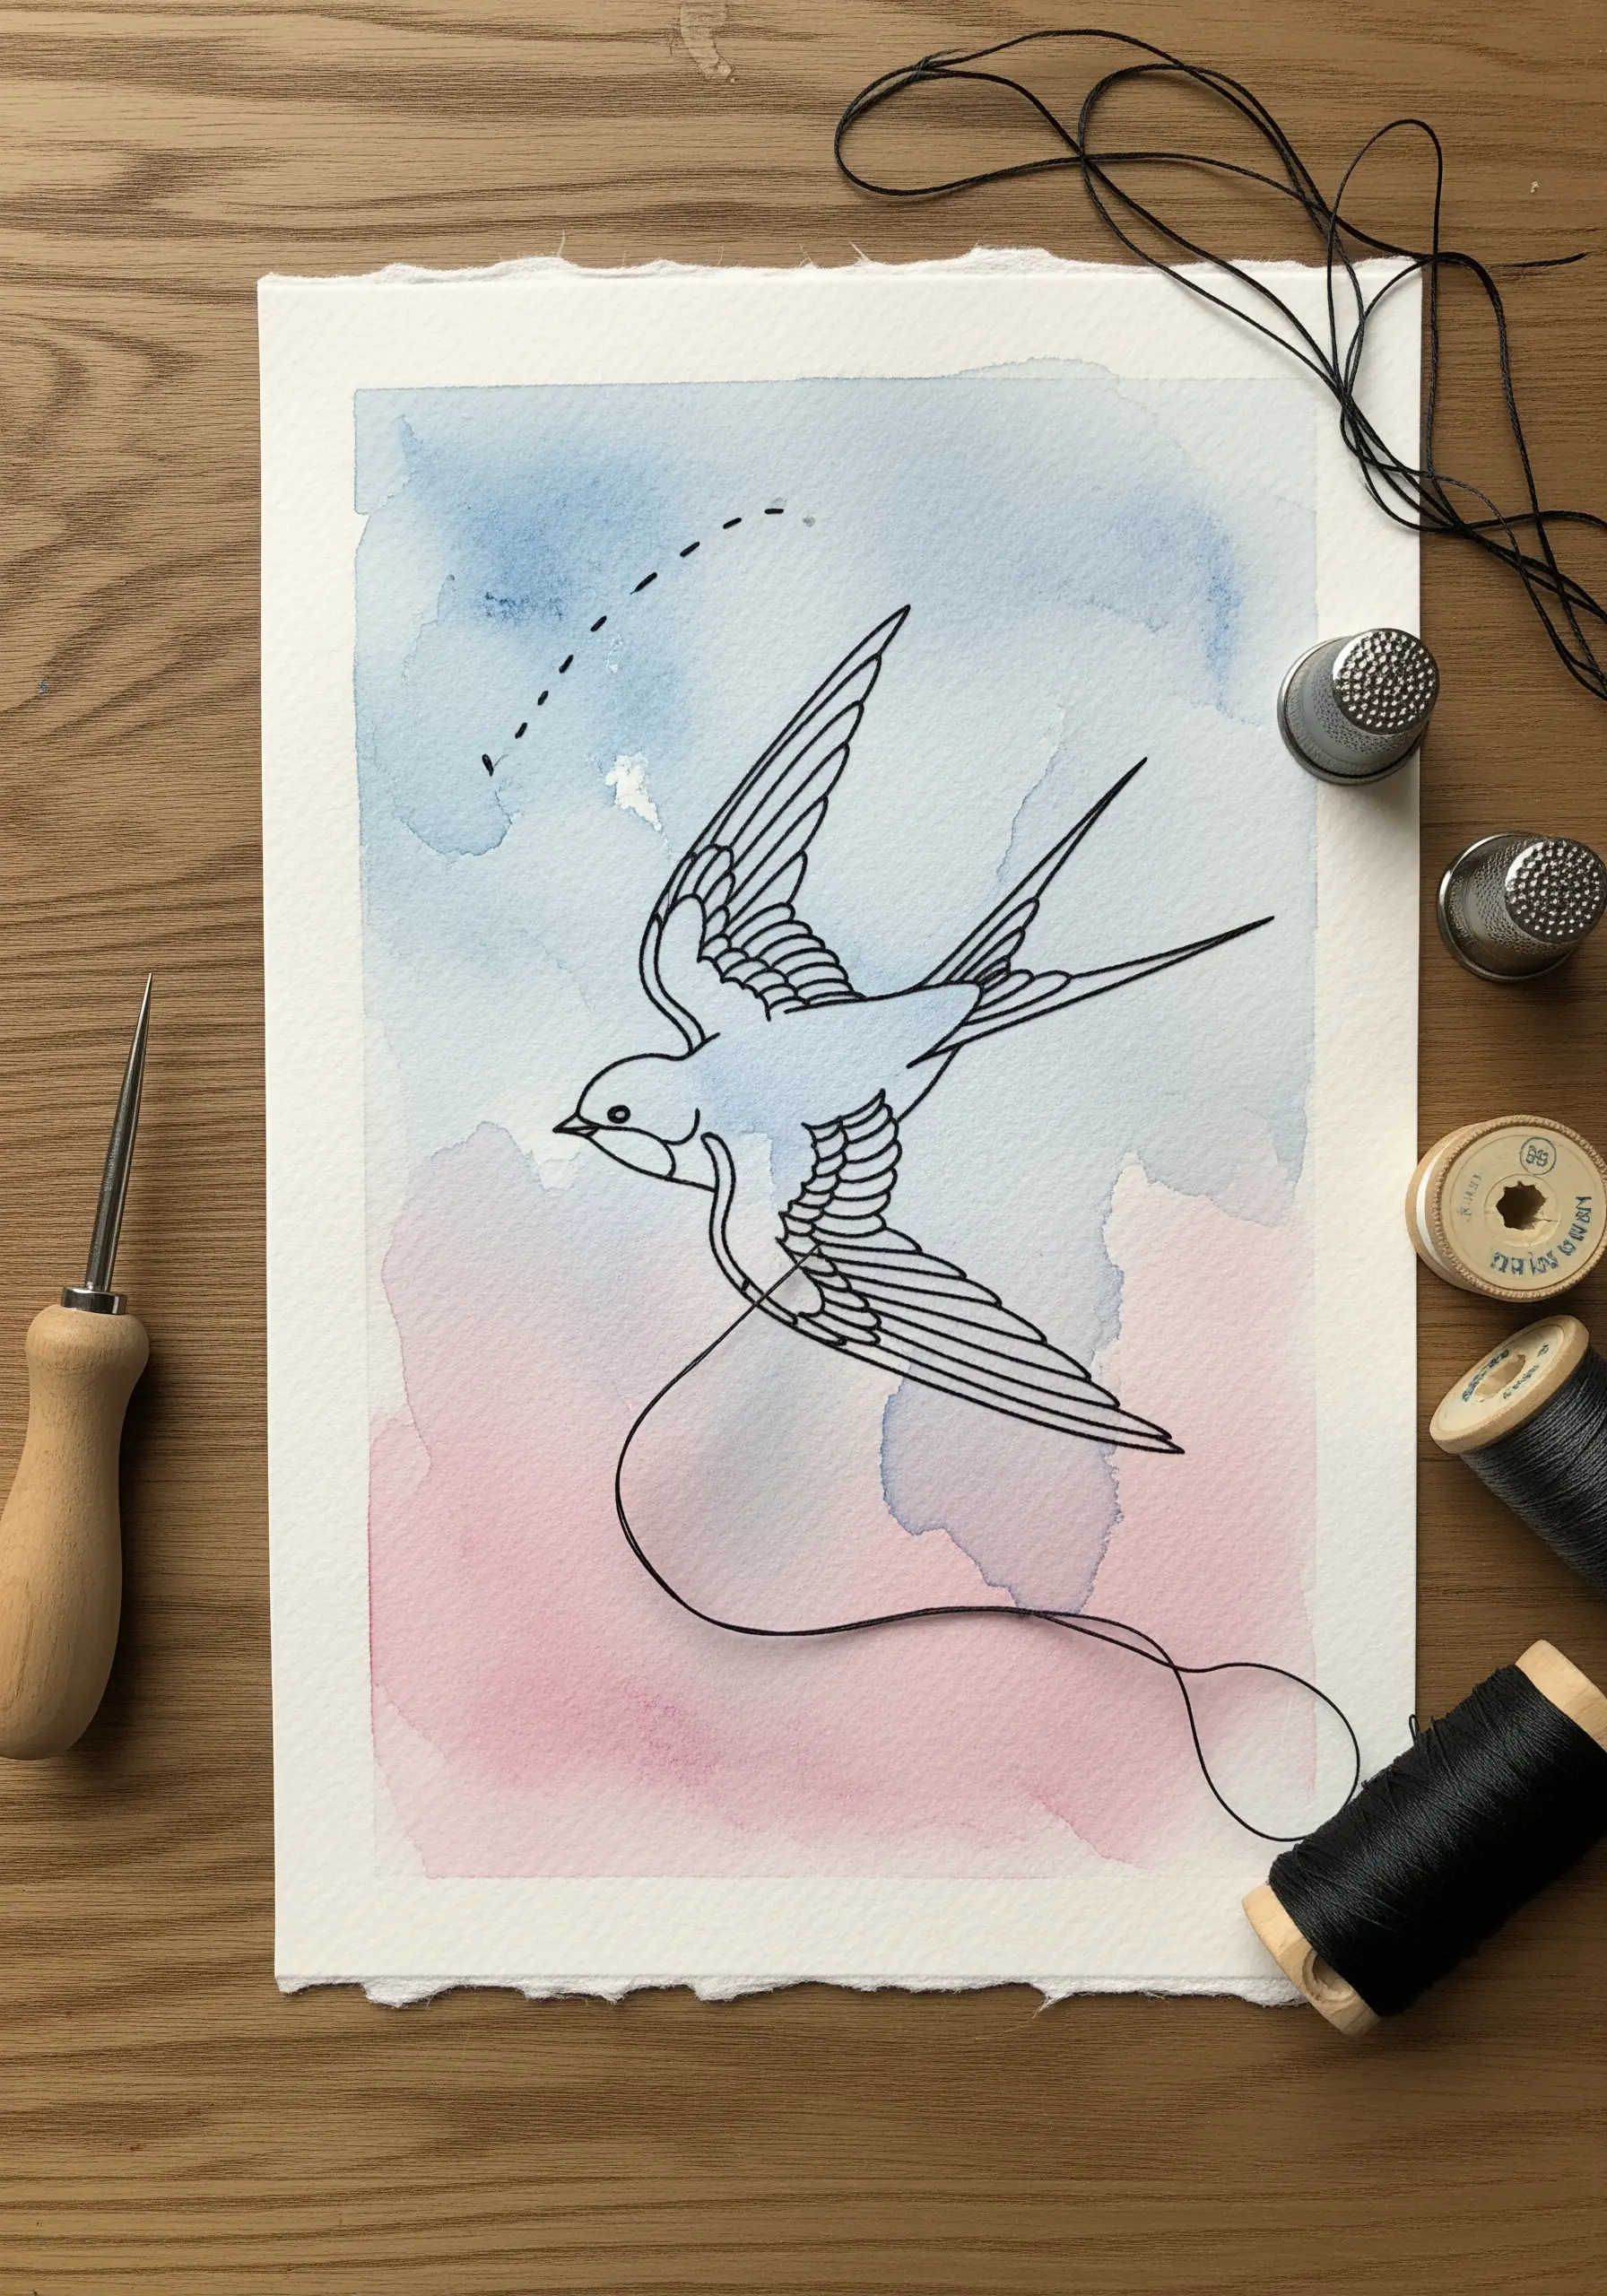
Combine two art forms by stitching directly onto painted paper.
Start by creating a soft watercolor wash on heavy watercolor paper (at least 140 lb/300 gsm) and let it dry completely.
Crucially, you must gently pre-pierce the stitching holes along your design lines with an awl or a thick needle *before* you begin to sew; this prevents the paper from tearing.
Use a simple backstitch to trace the illustration, allowing the painted background to create a dreamy, atmospheric quality that fabric alone cannot achieve. This paper art approach adds a whole new dimension to your work.
11. Capturing Ephemeral Beauty on Sheer Fabric
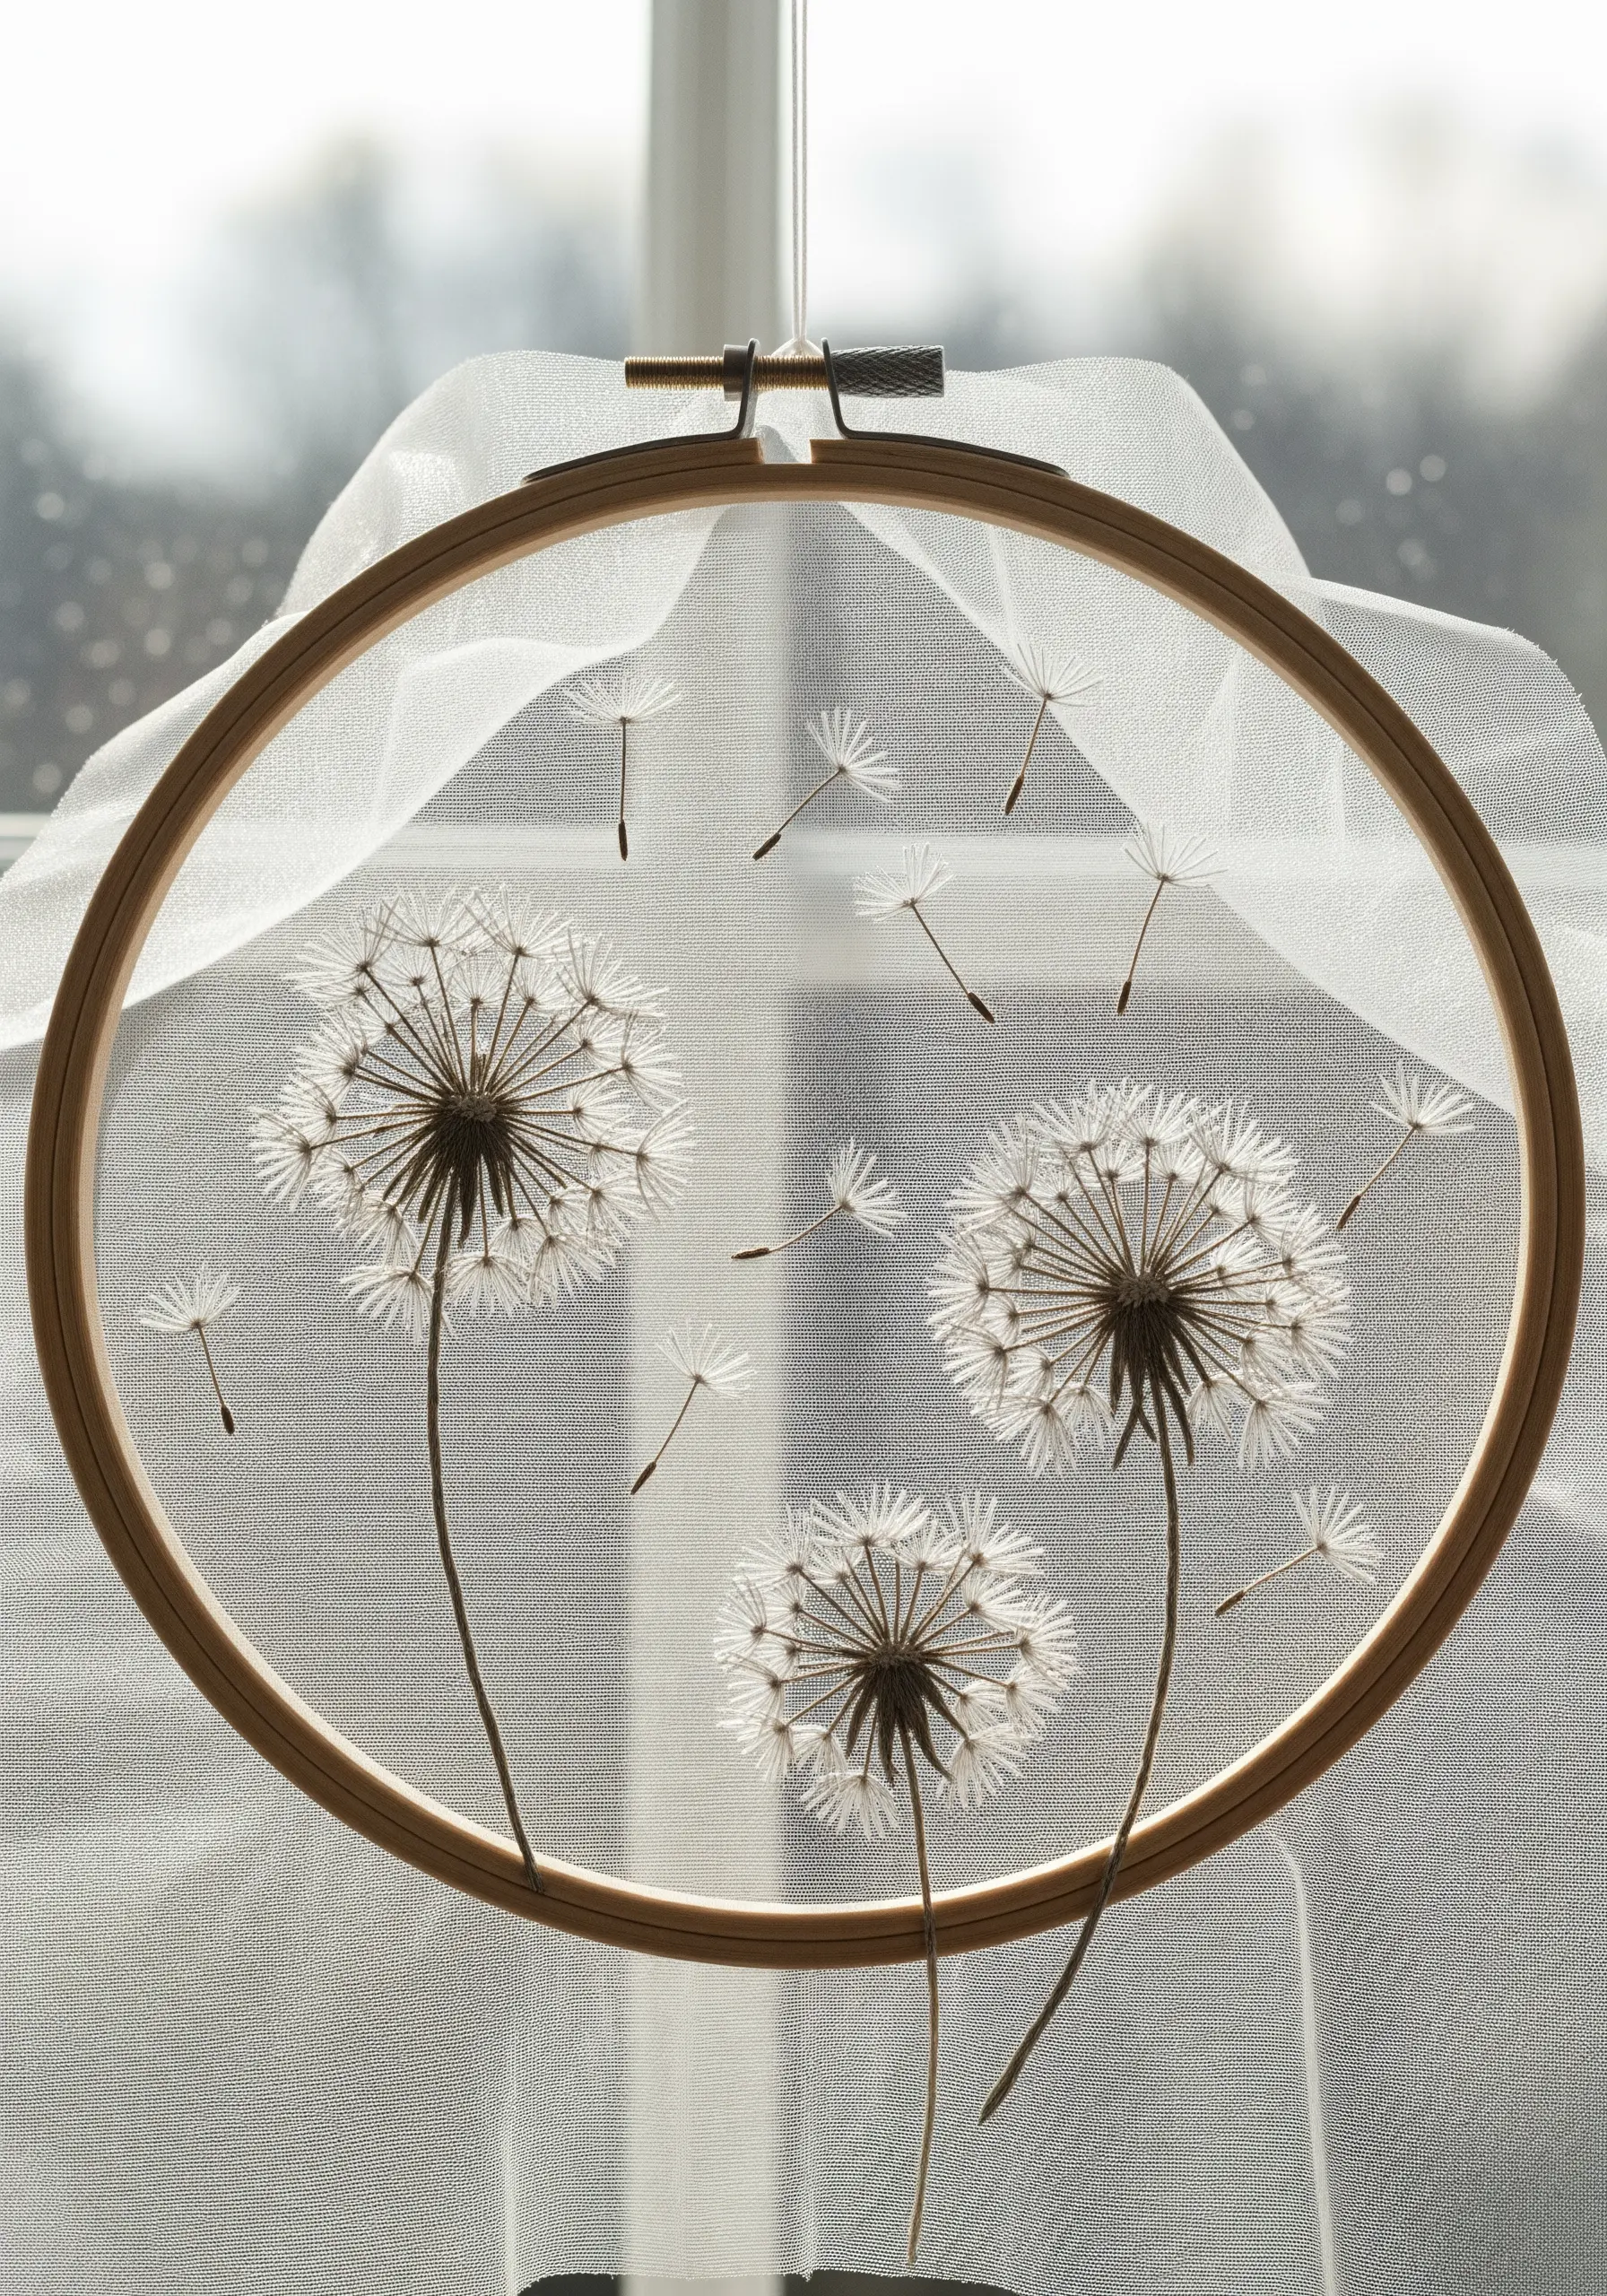
Stitching on a transparent fabric like tulle or organza creates a magical, floating illusion.
The secret is to use a water-soluble stabilizer to support the delicate fabric while you work.
Hoop the stabilizer and fabric together, complete your stitching, and then simply wash the stabilizer away, leaving only your design suspended in transparency.
Use whisper-light stitches like single straight stitches and tiny seed stitches to enhance the ethereal quality.
12. Defining Form with Negative Space Embroidery
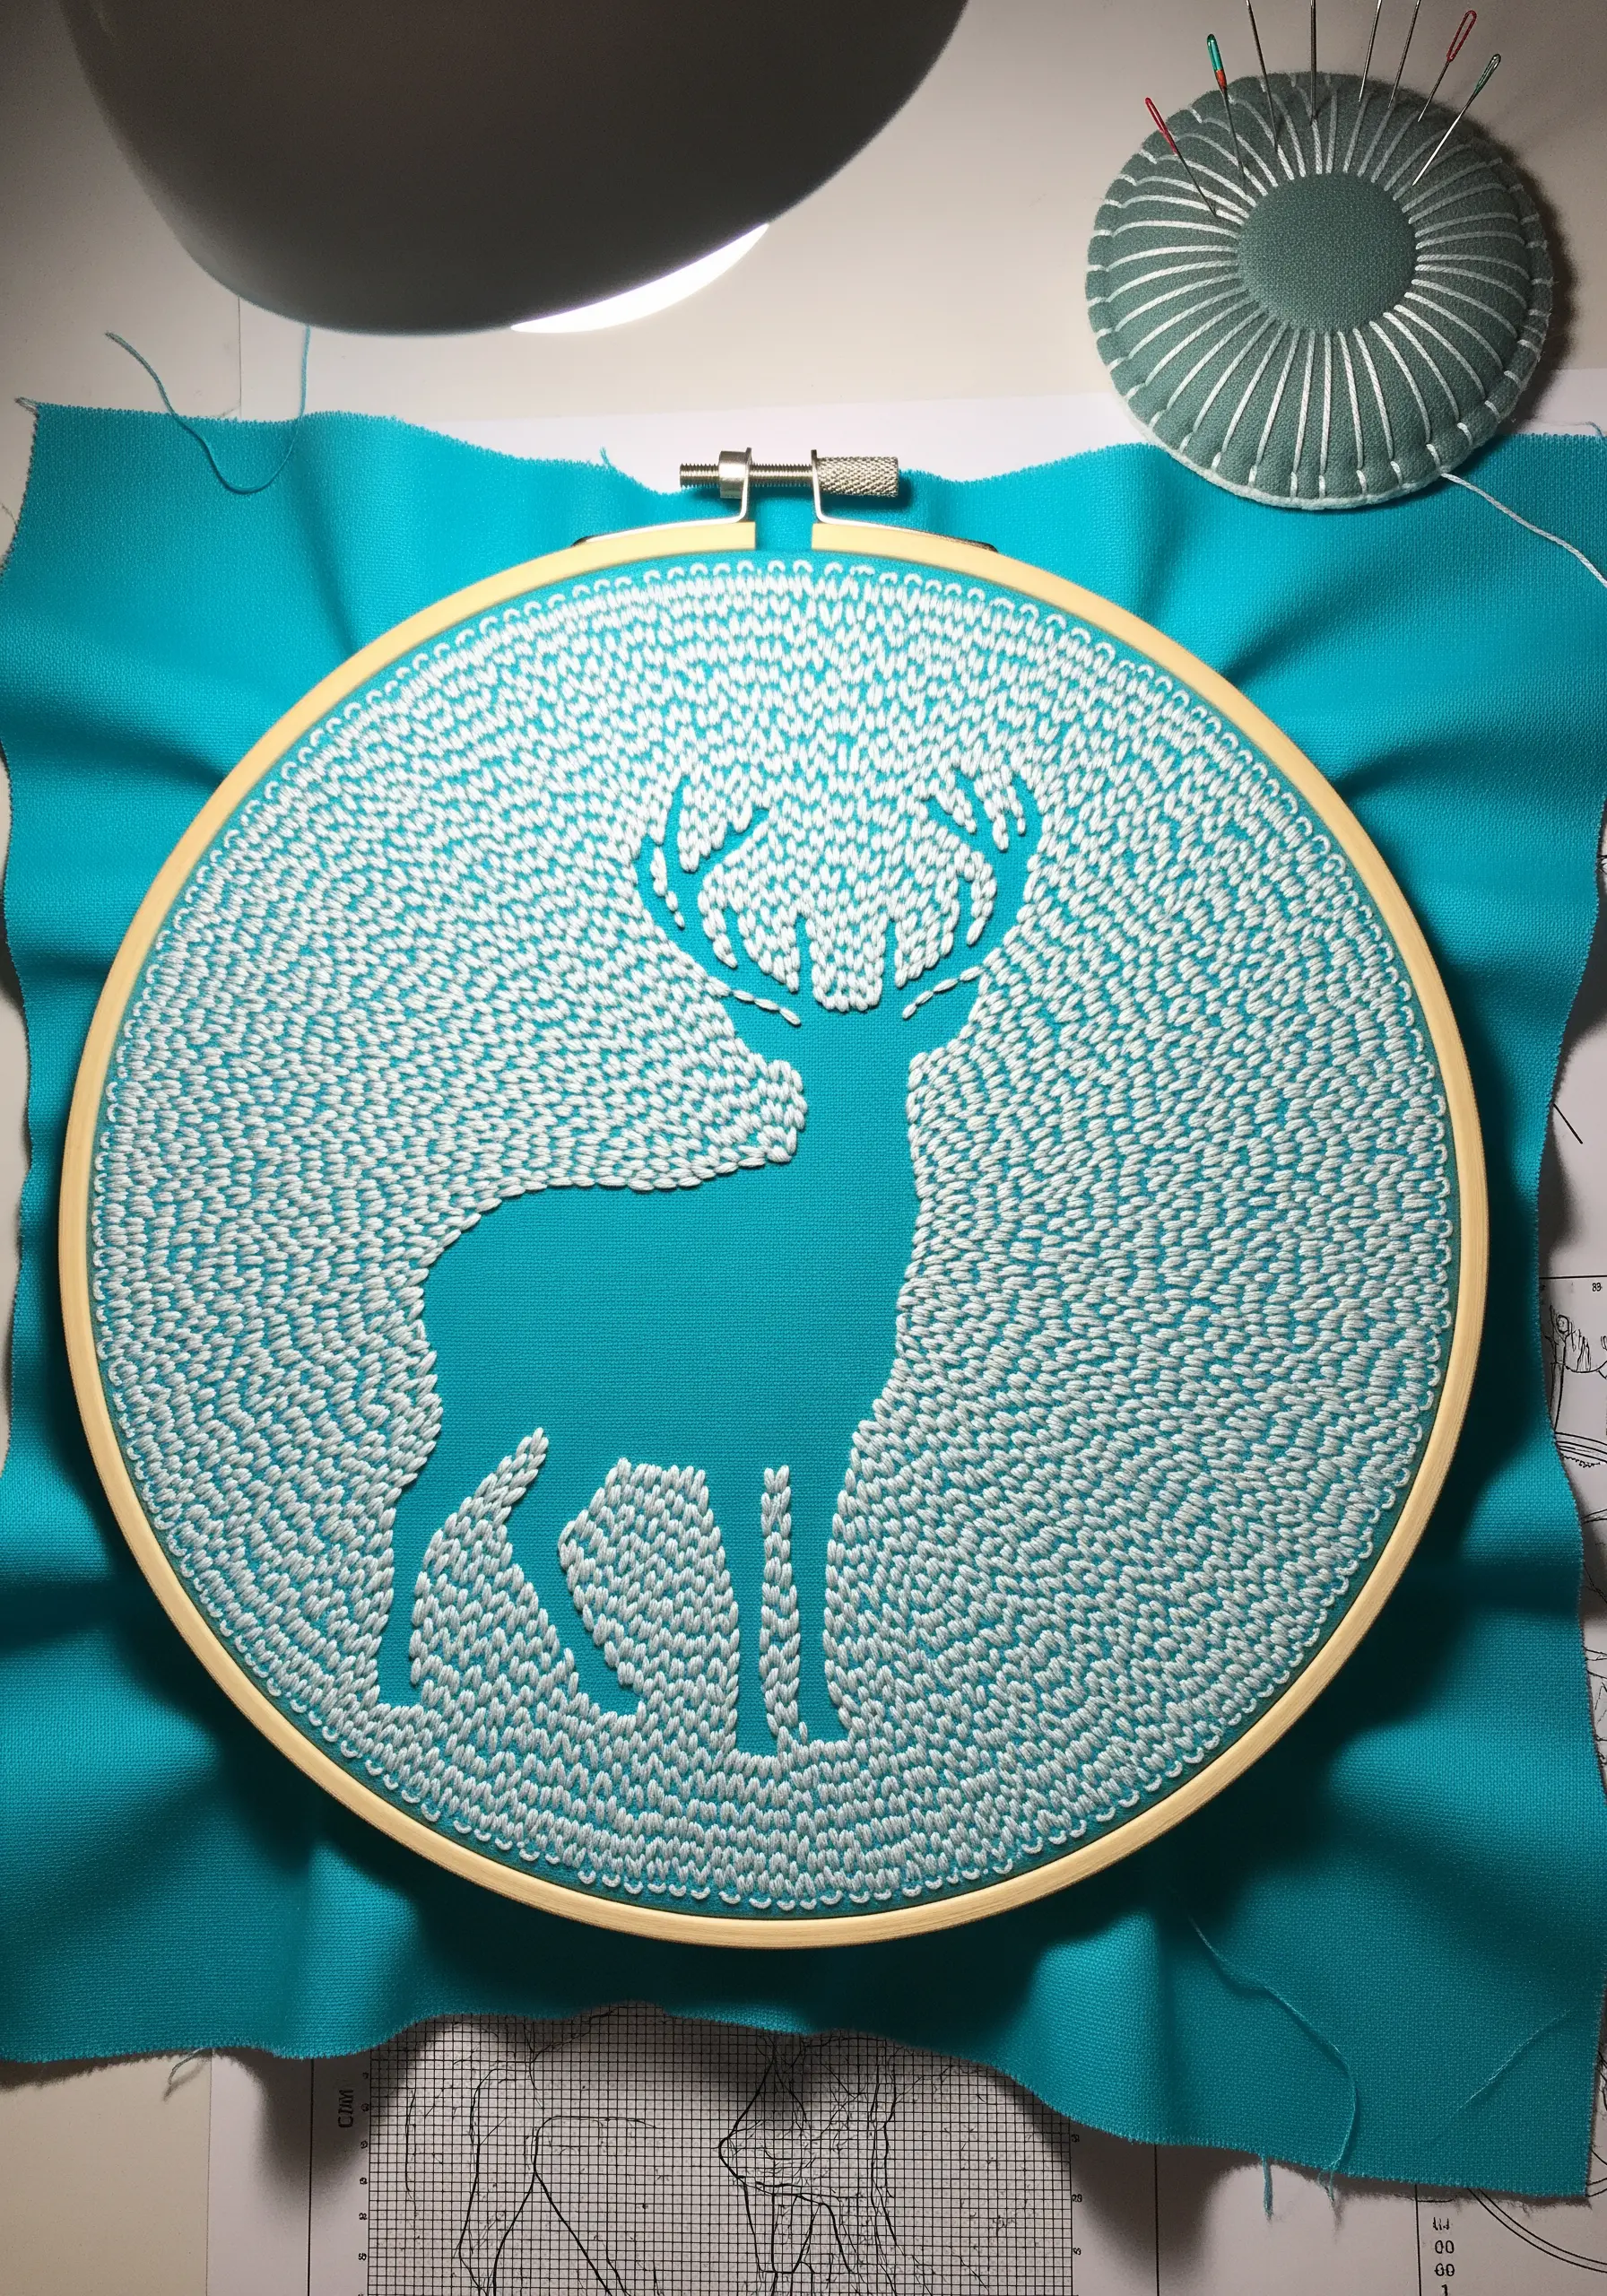
This powerful technique asks you to stitch the background, not the subject.
By filling the area around your central motif, you use texture to carve out a shape from the void.
A dense, chaotic fill like the seed stitch is perfect for this; vary the direction and length of your stitches to create a sense of movement and energy.
The sharp contrast between the busy, textured background and the calm, untouched silhouette makes the central image incredibly striking.
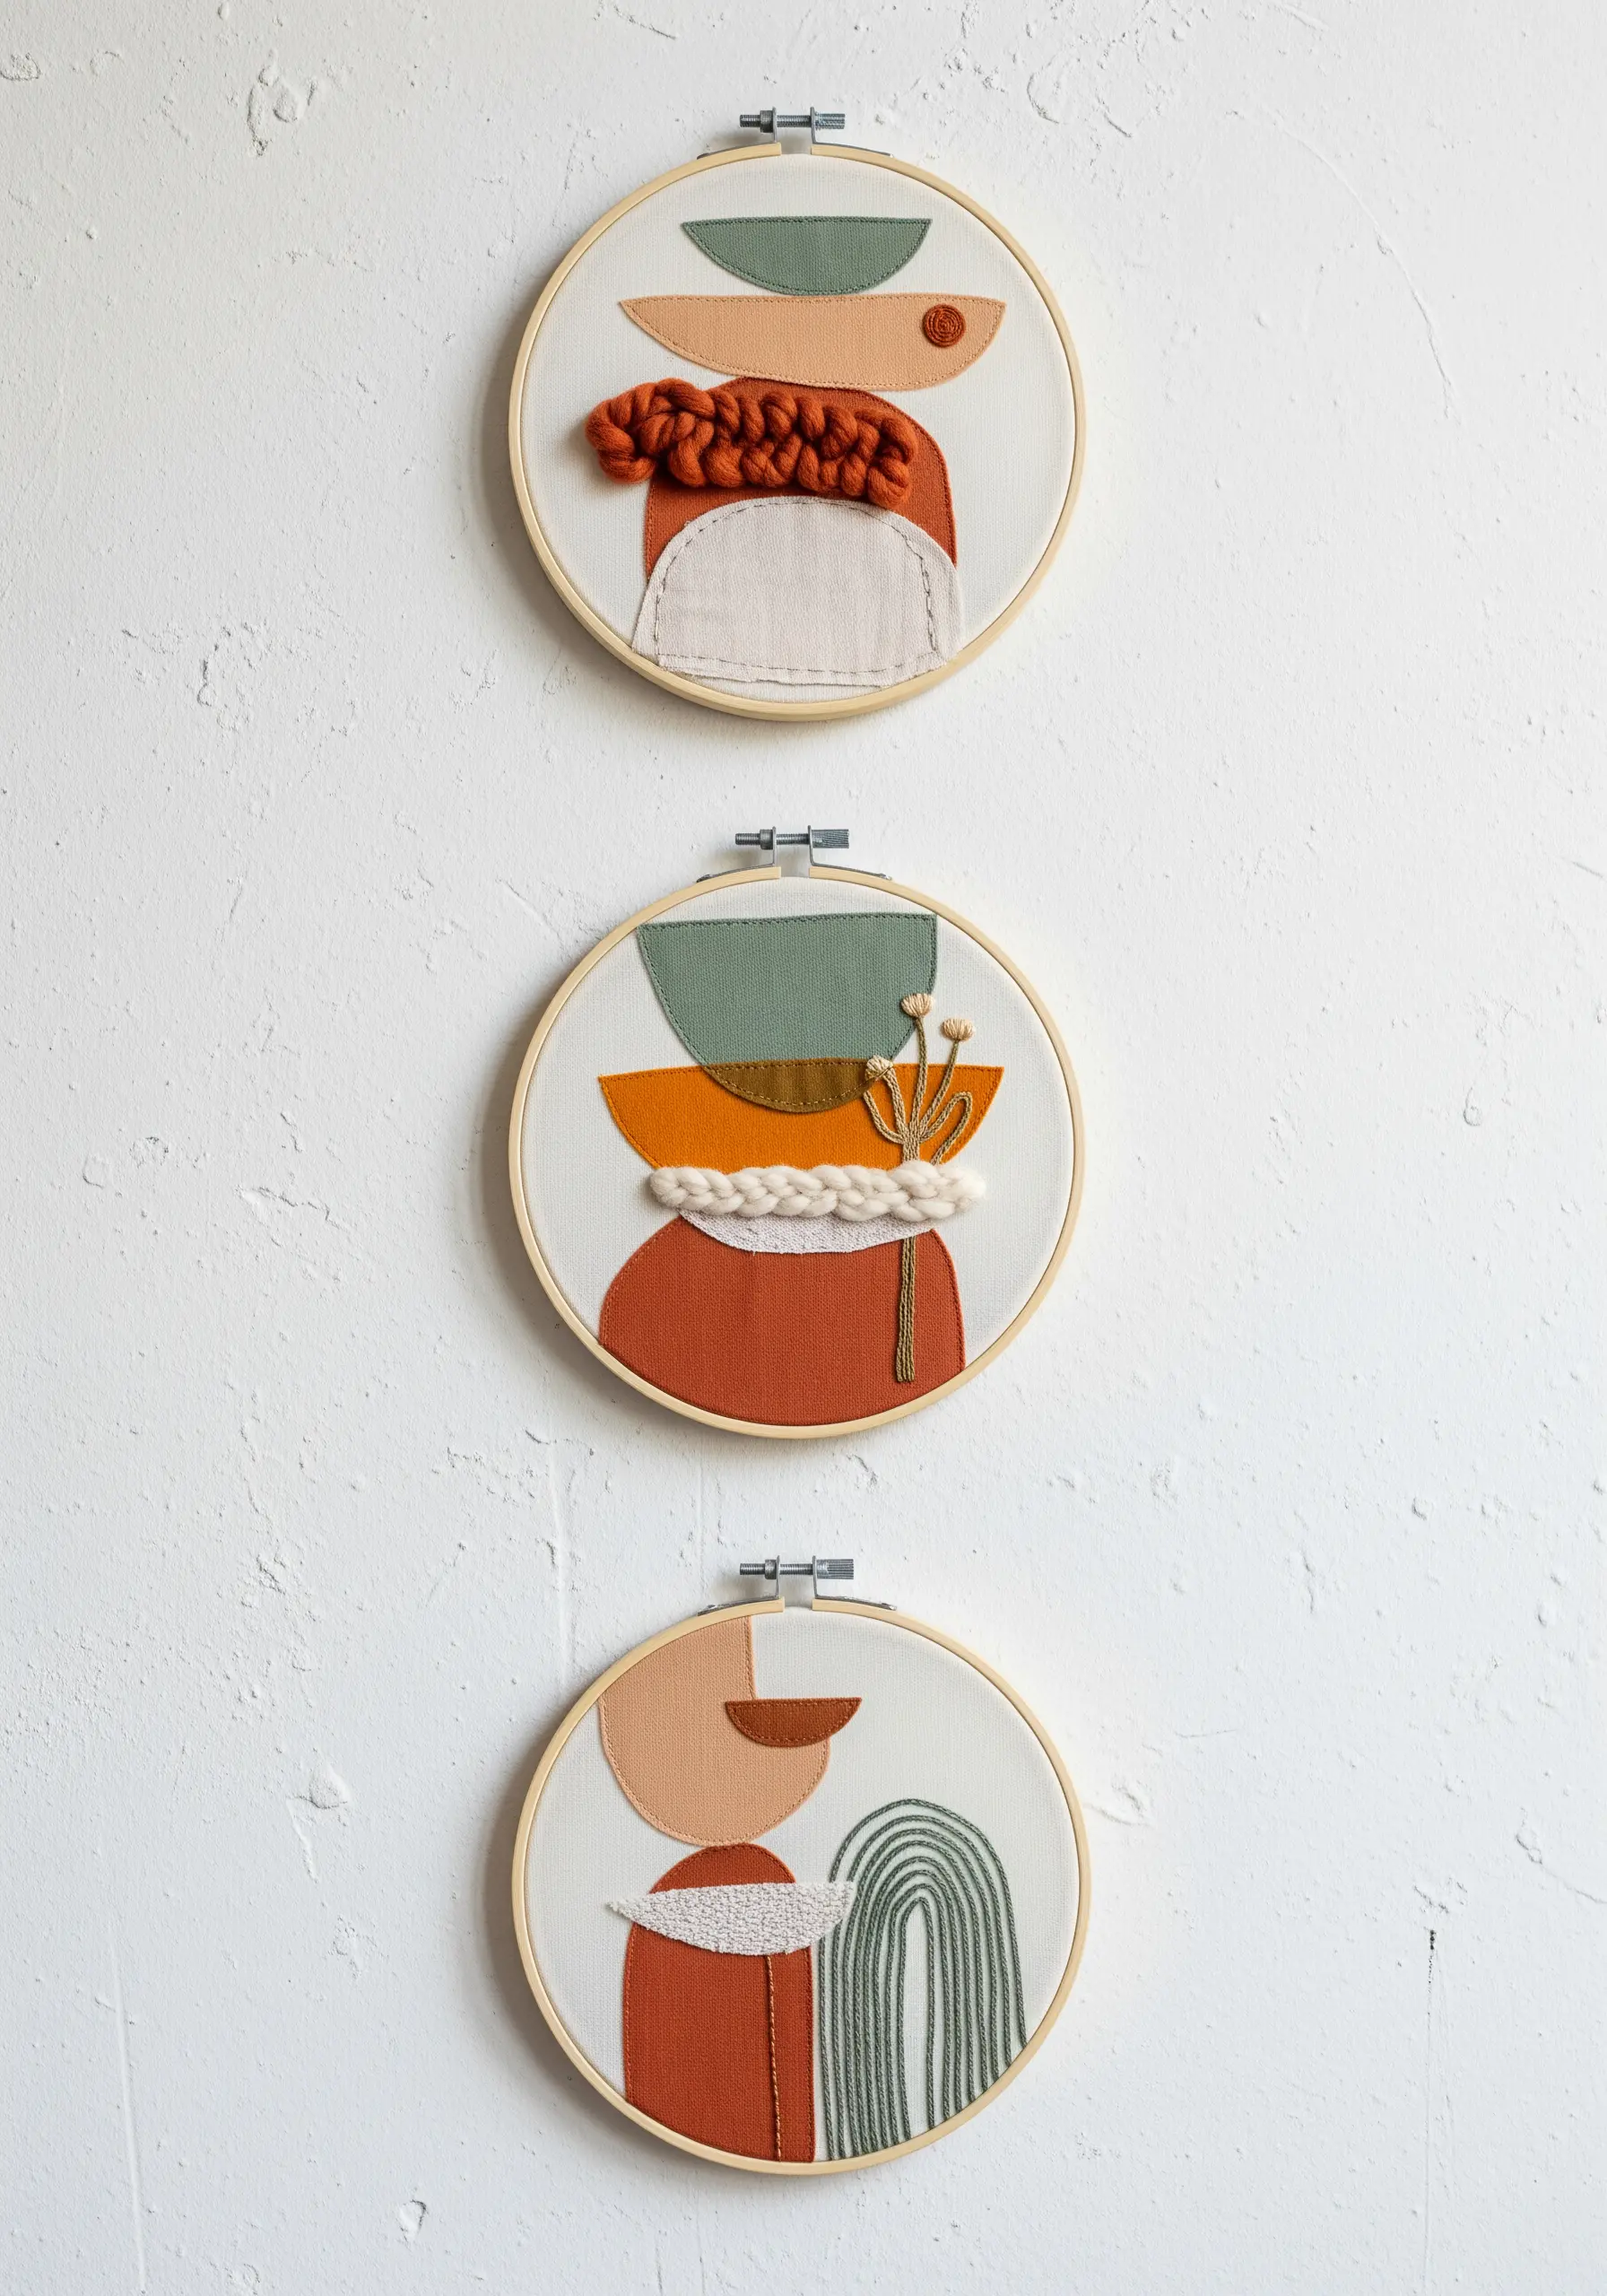
13. Designing a Thematic Gallery Wall with Small Hoops
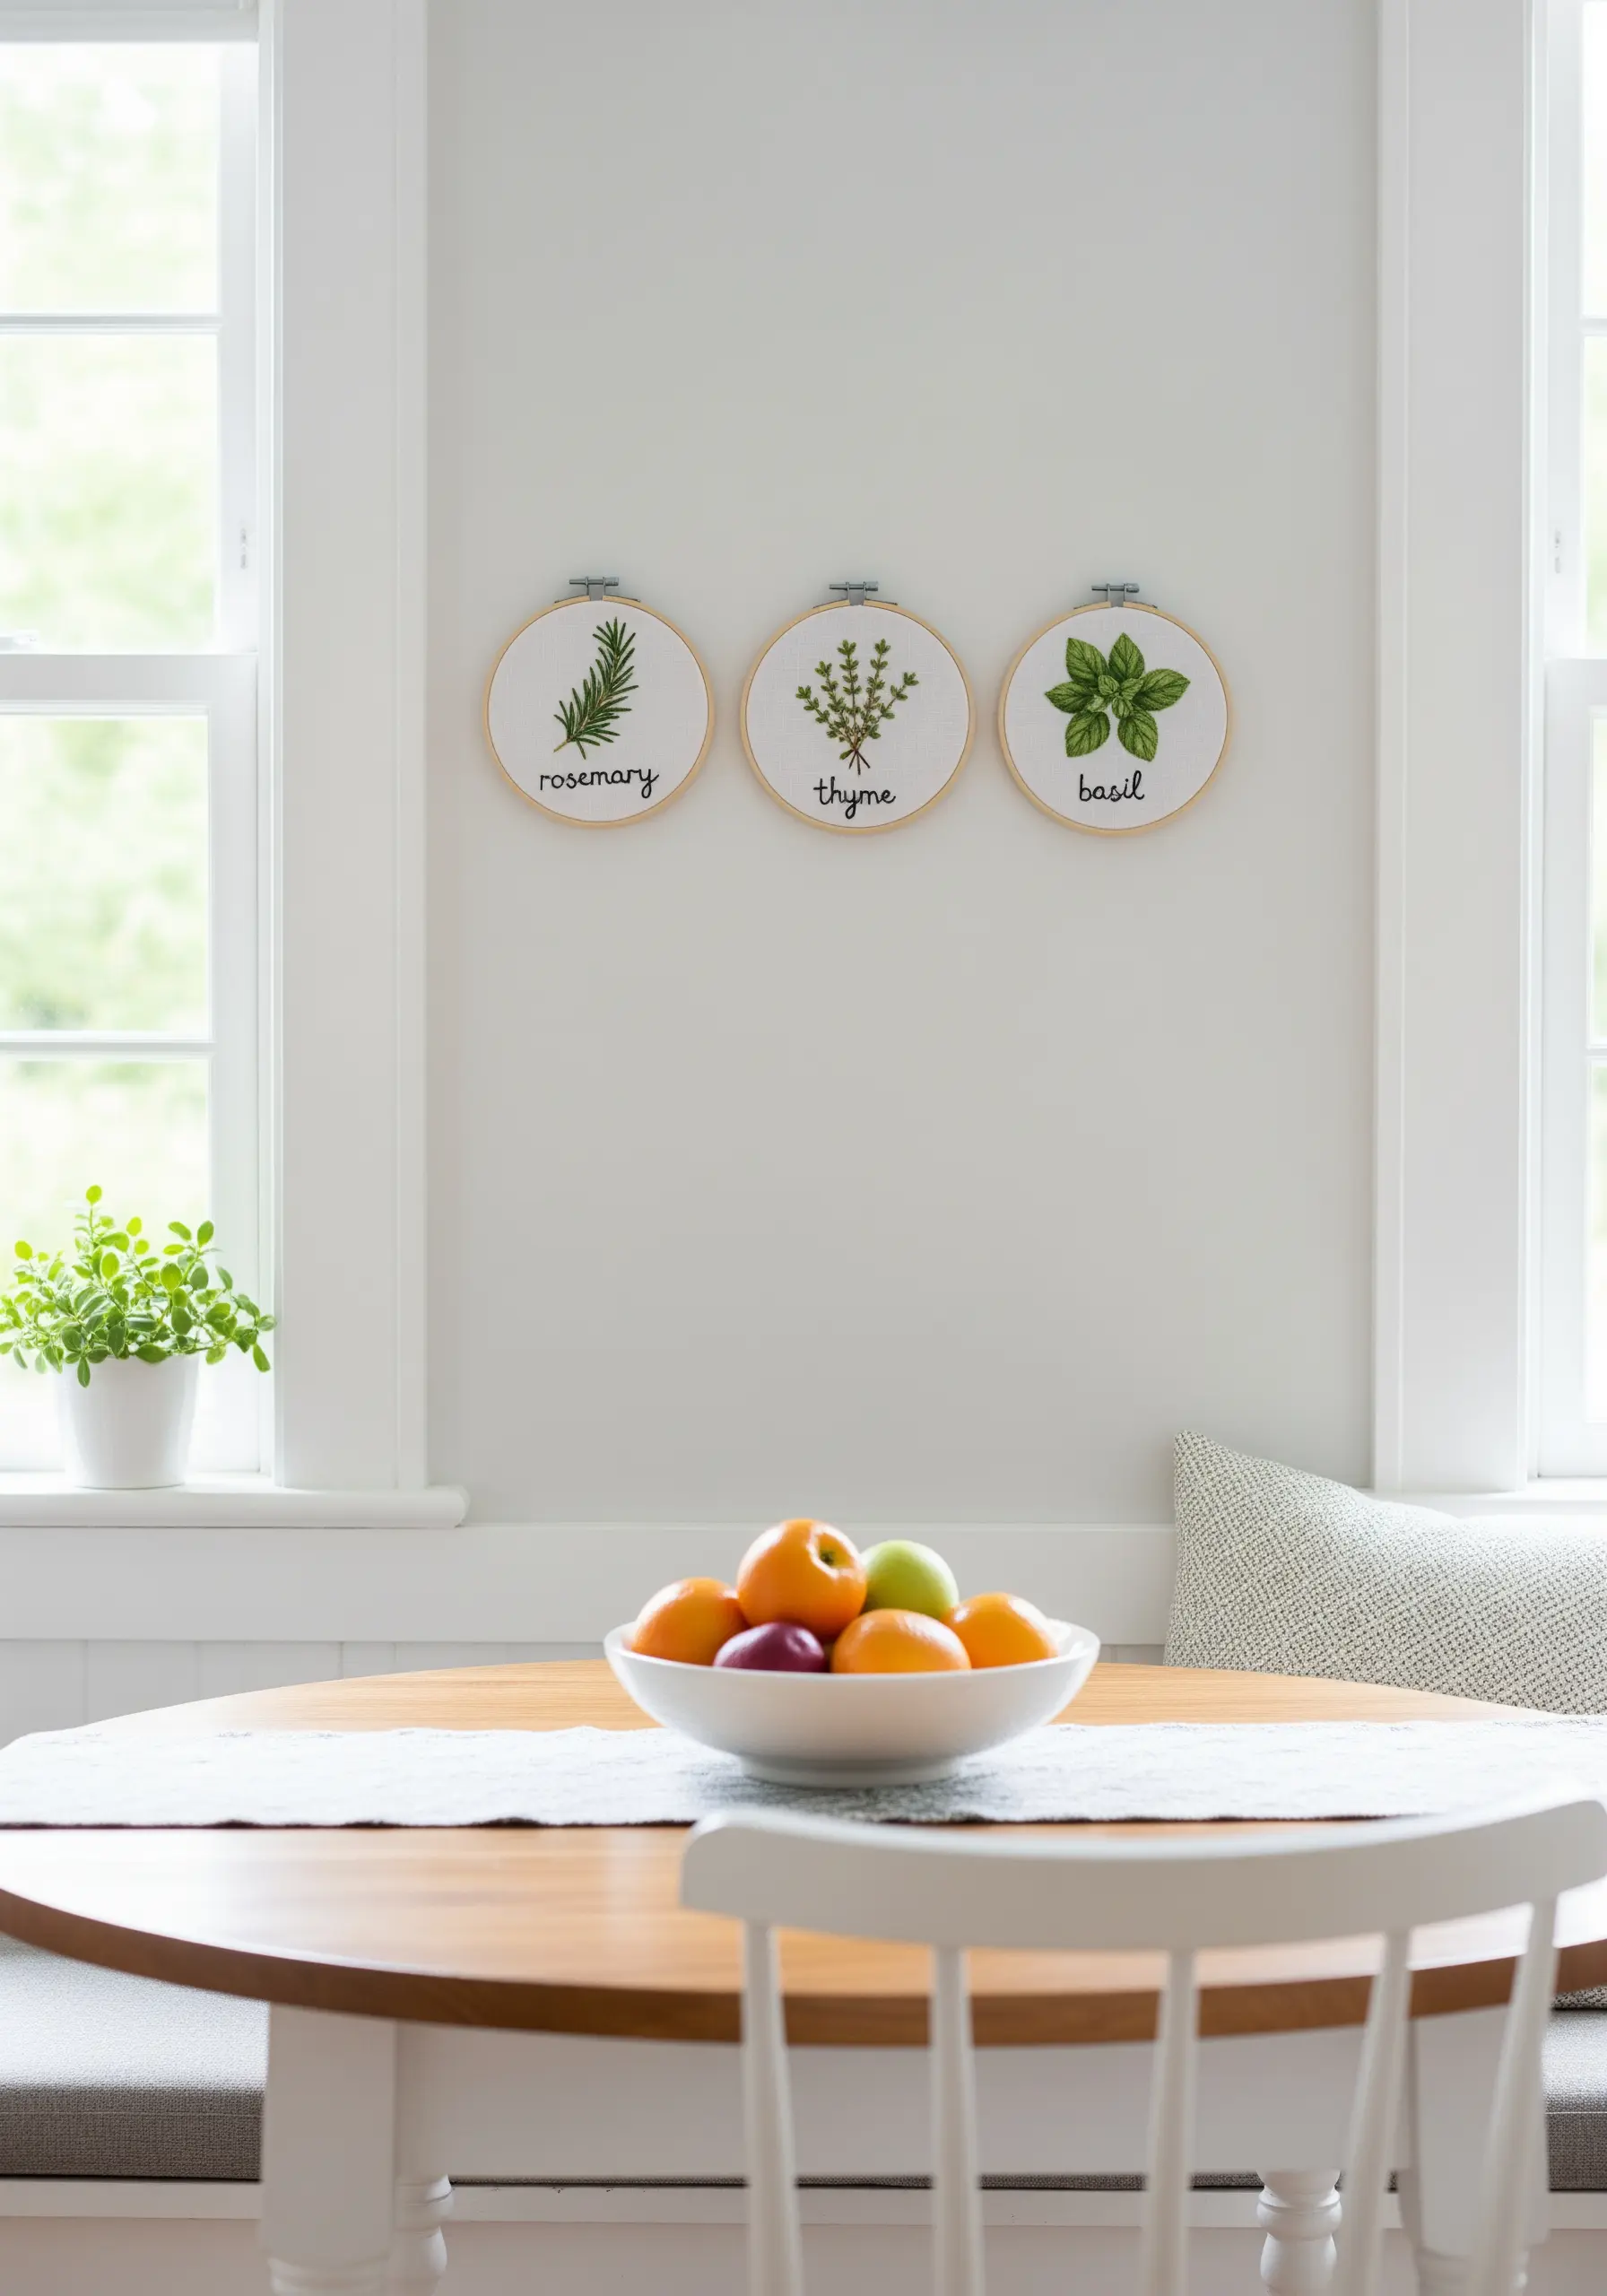
A series of small, related hoops can create more visual impact than a single large piece, especially in smaller spaces.
Choose a cohesive theme, like culinary herbs, and use a consistent style across all pieces to tie them together.
A simple backstitch for the lettering and a stem stitch for the foliage maintains a clean, illustrative aesthetic.
Displaying them as a triptych turns simple motifs into a thoughtful piece of decor. These small hoop embroidery ideas are perfect for adding personality to functional spaces.
14. Translating Line Art into Expressive, Fluid Stitching
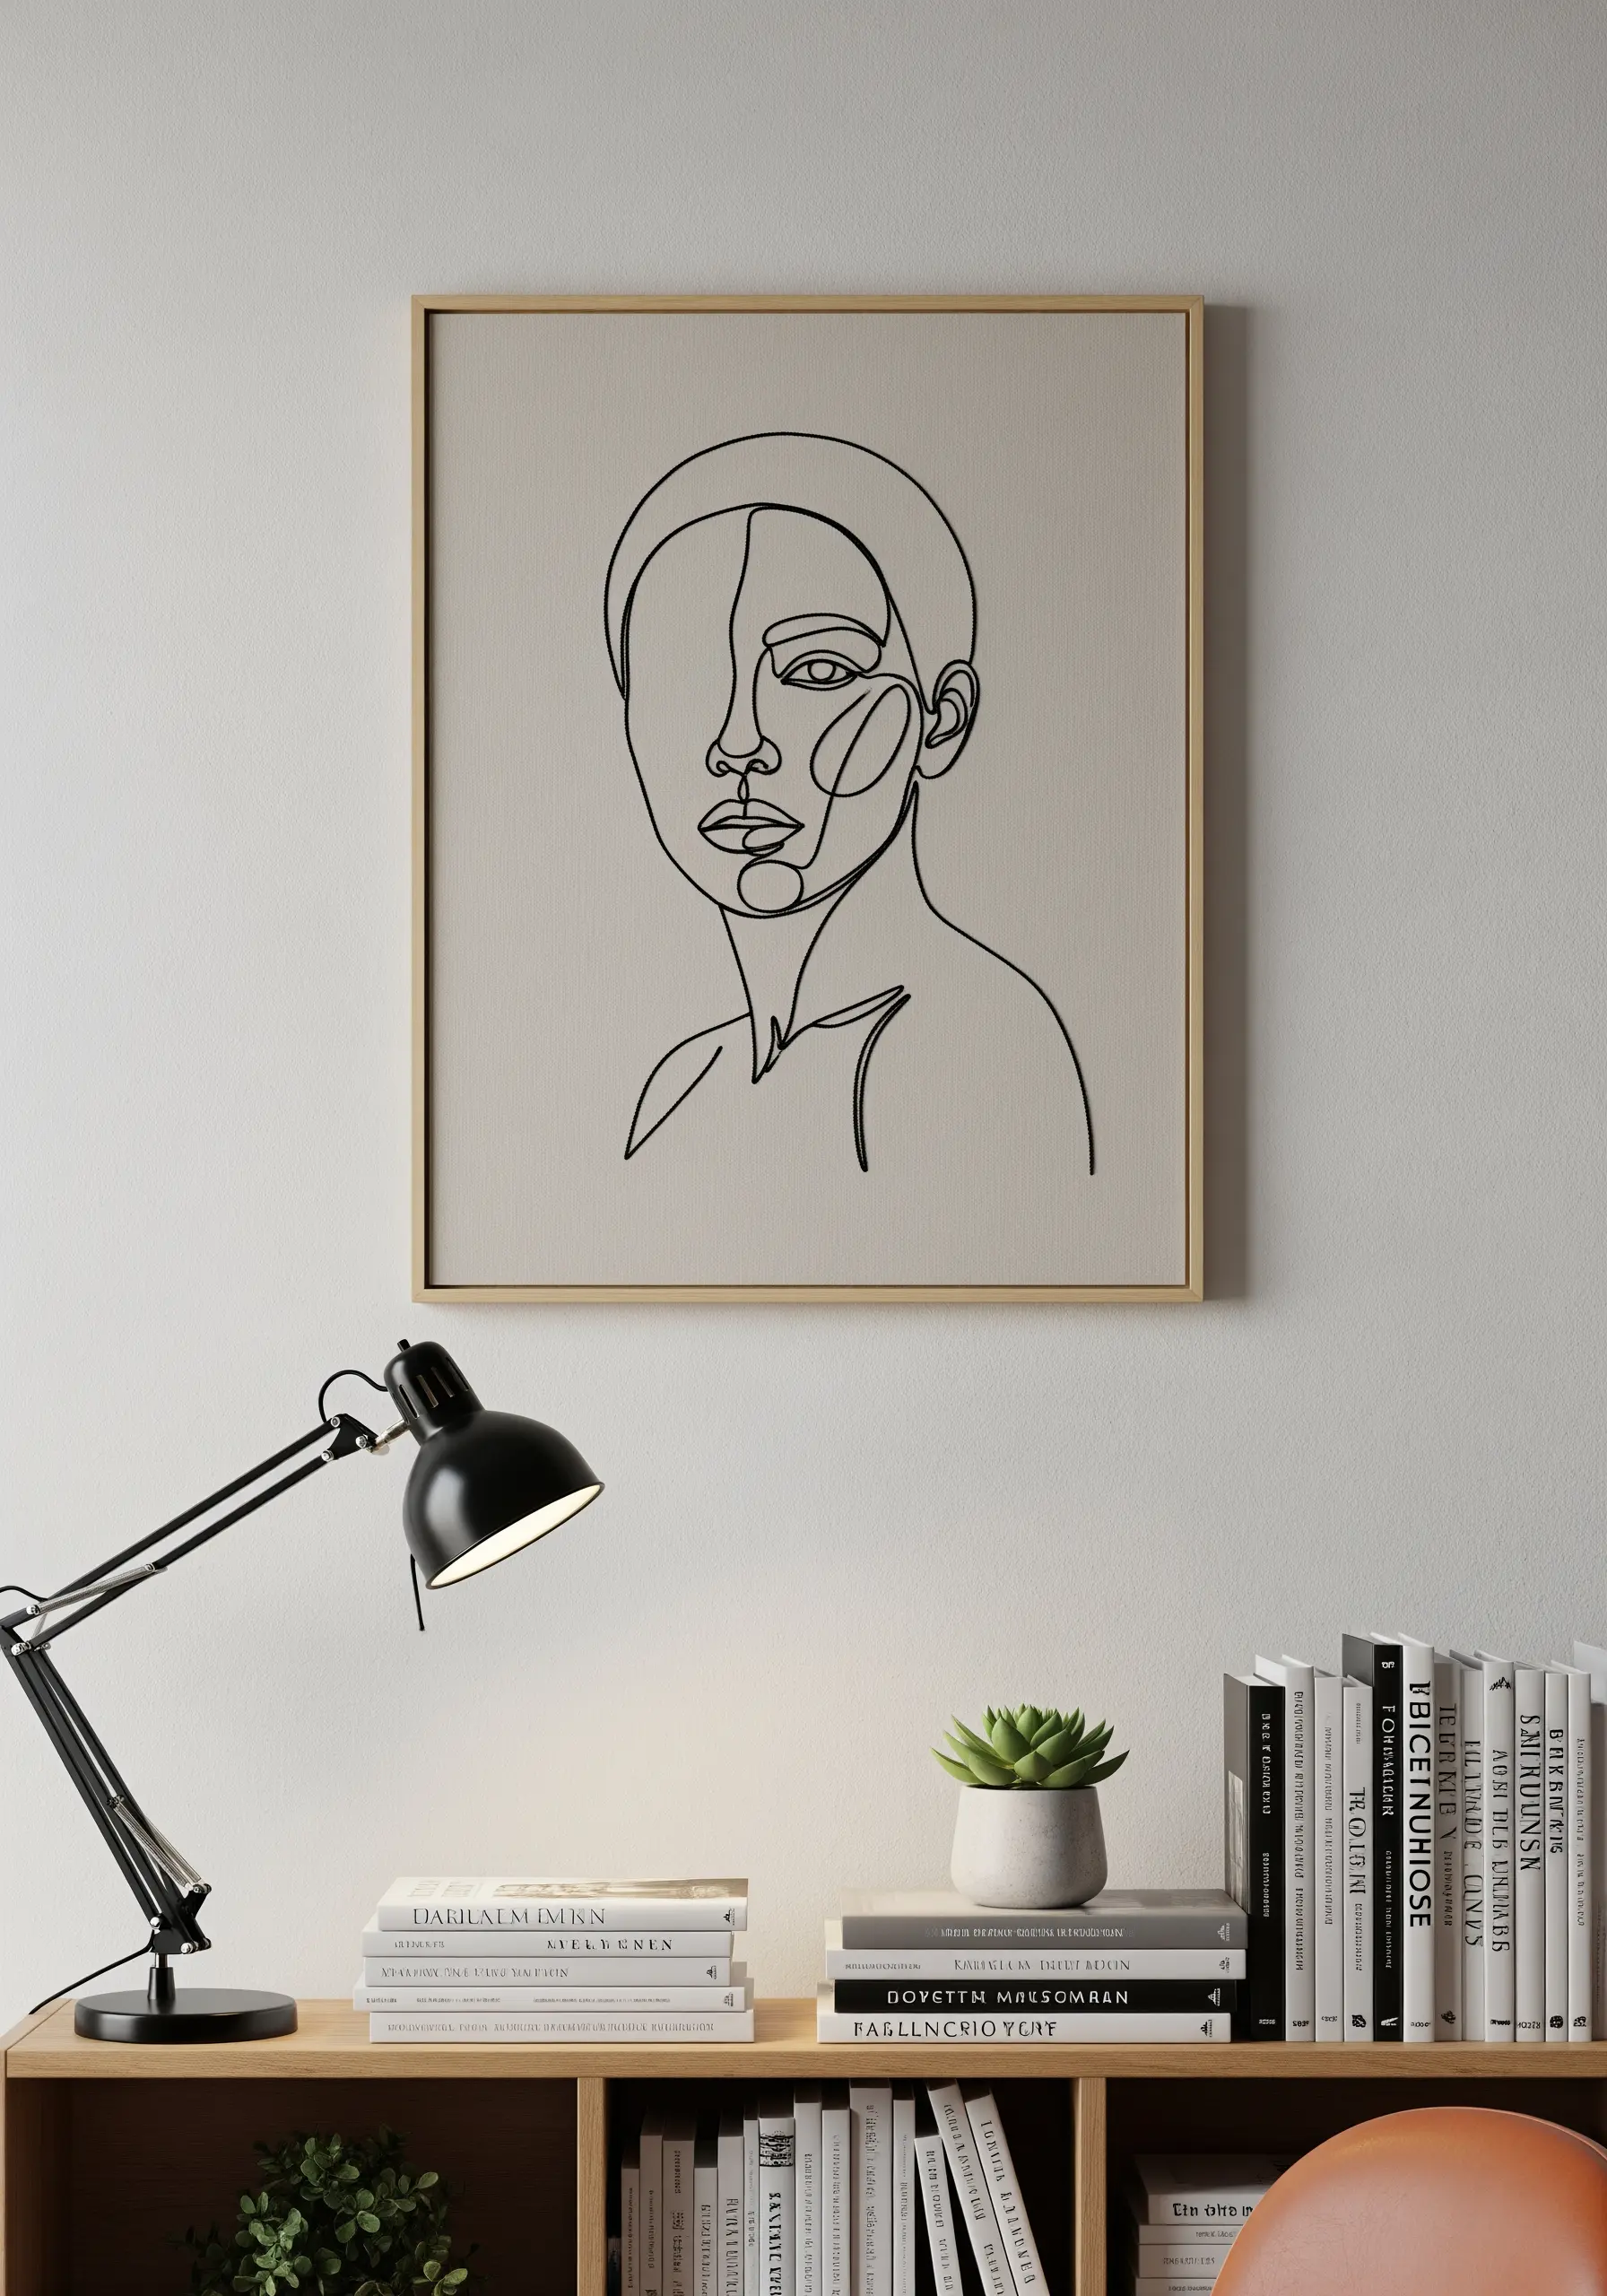
To capture the fluid motion of a continuous line drawing, your stitch choice is paramount.
Instead of a standard backstitch, which can appear segmented on curves, use a whipped backstitch.
This technique involves wrapping a second thread around your initial backstitch, smoothing its edges and creating the illusion of a single, unbroken line.
Use a high-contrast thread on a neutral linen to allow the purity and elegance of the line itself to take center stage. This technique is perfect for single line face profiles that create gallery-style hoop art.
15. Exploring Bold Texture with Punch Needle
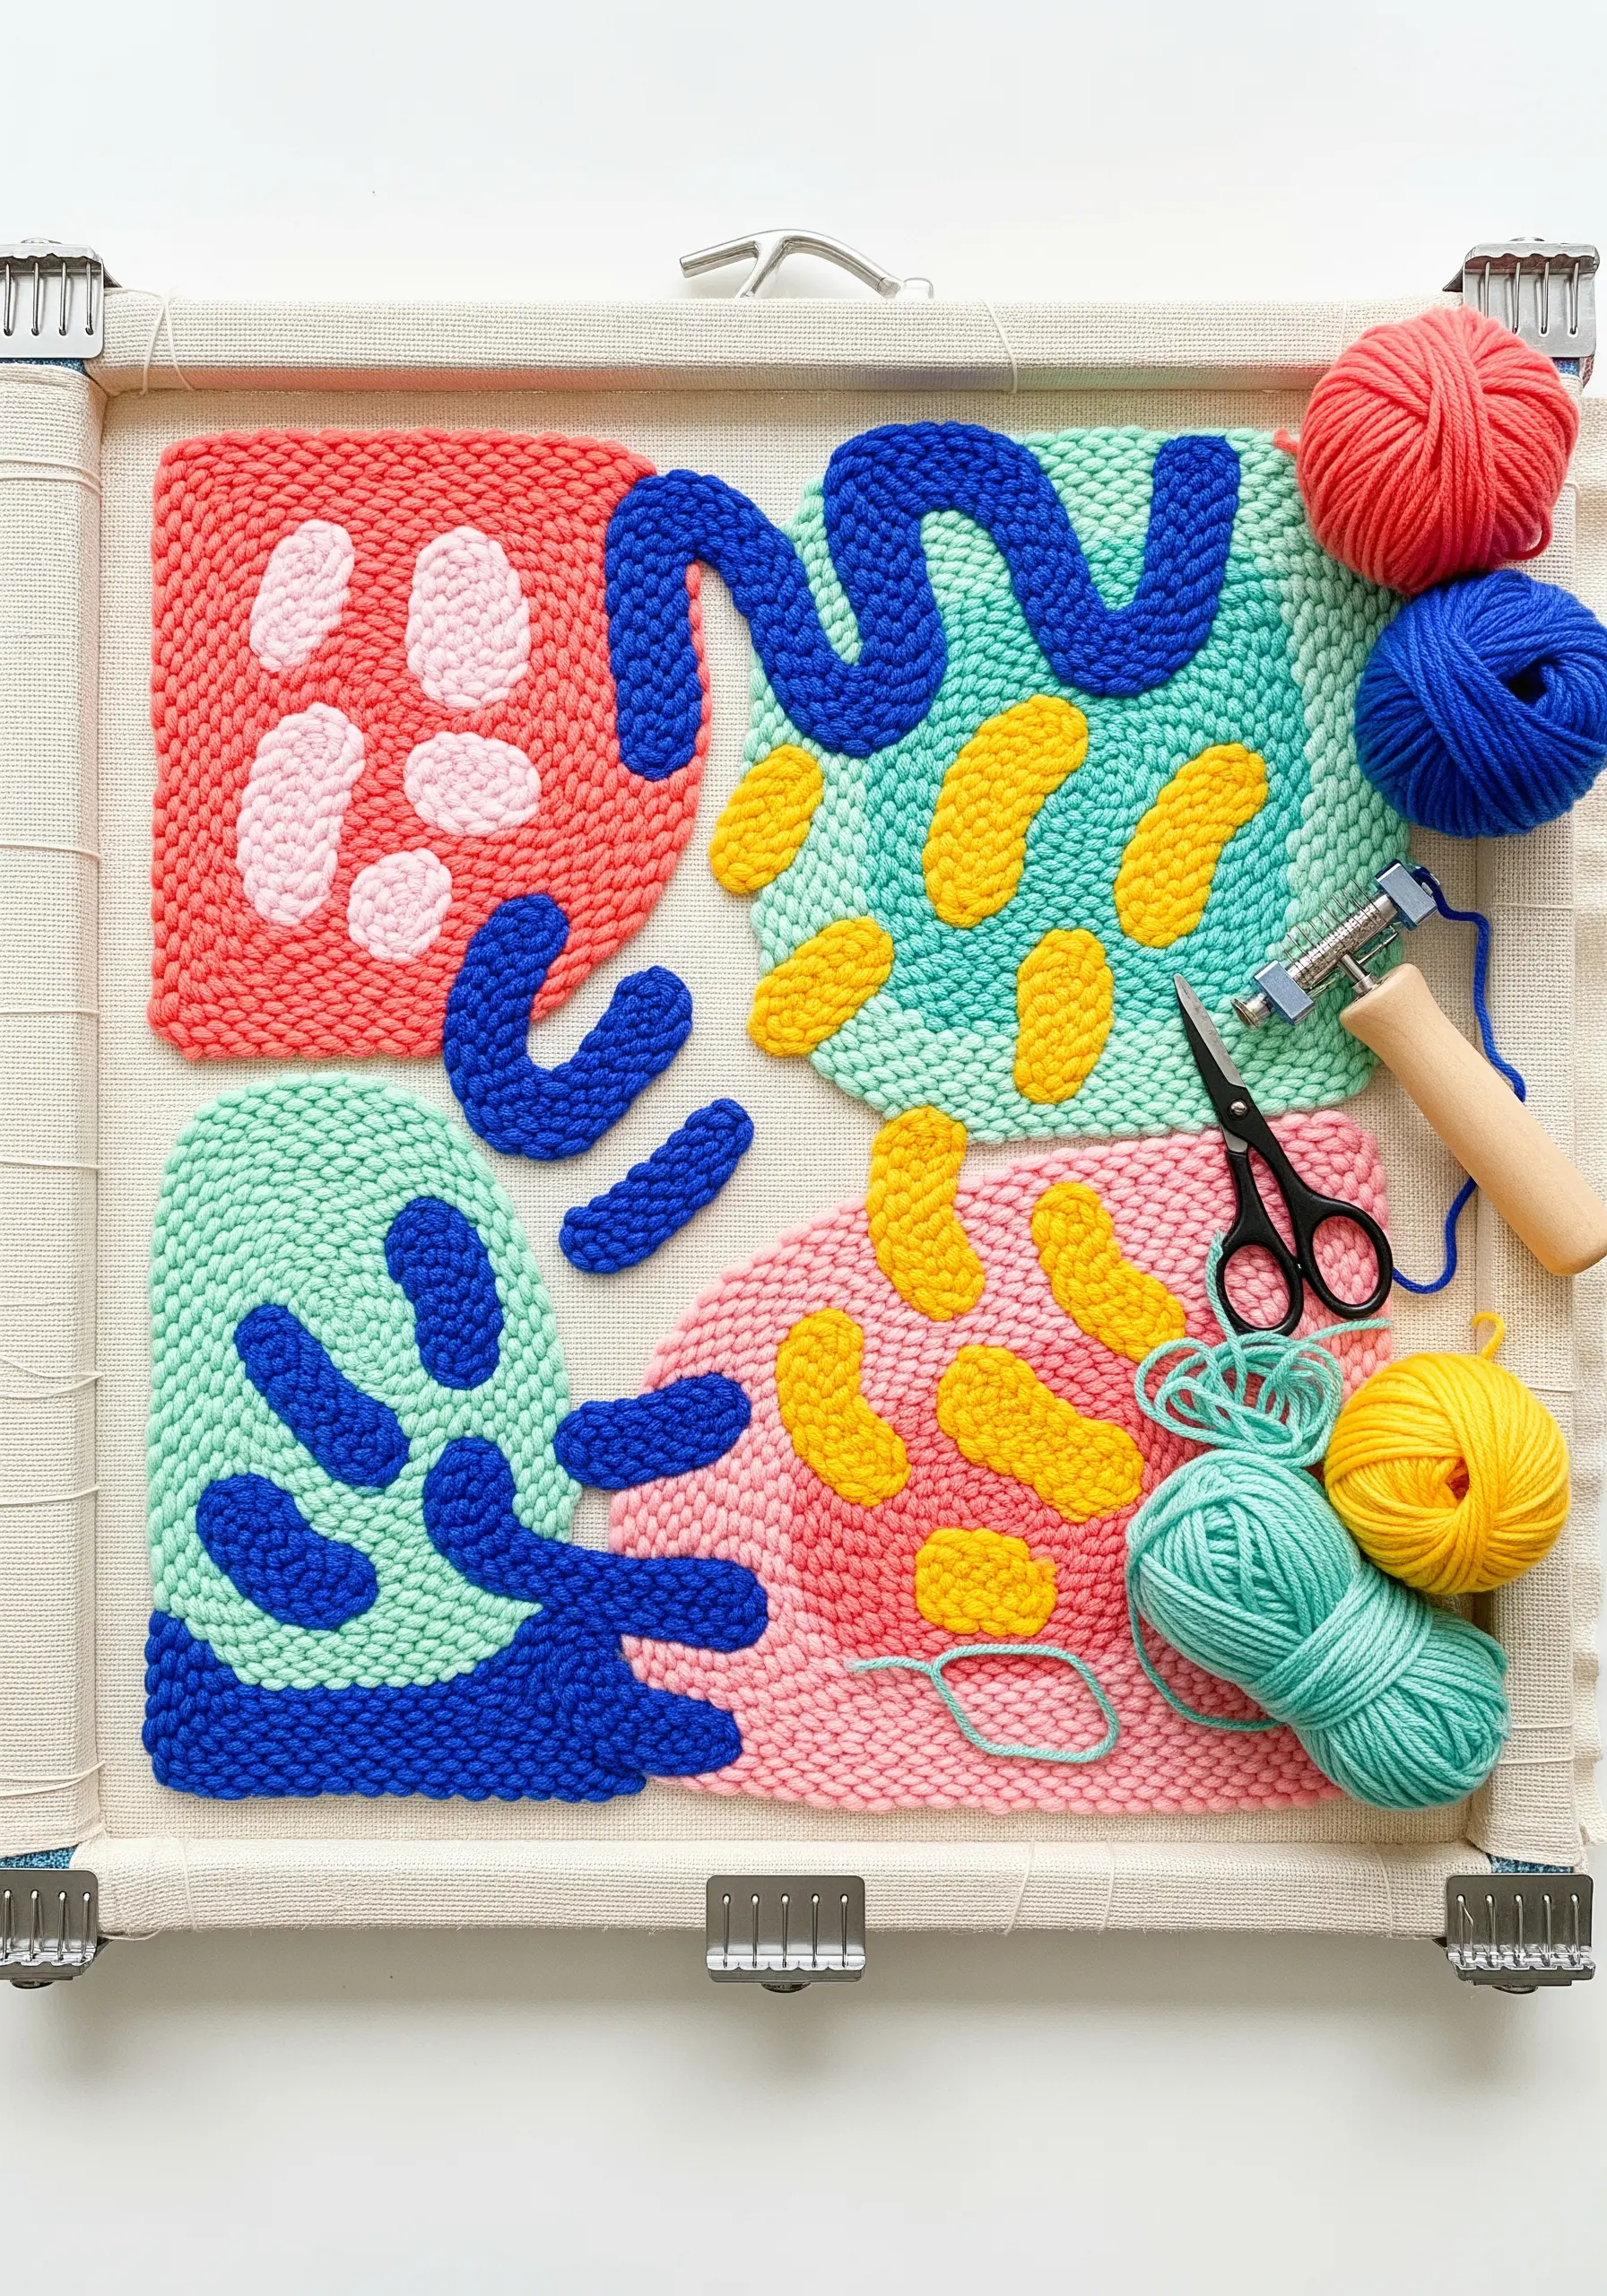
Punch needle offers a uniquely satisfying way to create lush, textured wall art with the feel of a miniature rug.
You can control the height of the loops with your needle’s settings, allowing you to play with dimension and create high-low pile effects.
For clean divisions between colors, always work your outlines first, then fill in the larger shapes.
A tightly stretched monk’s cloth on a gripper frame is essential—it provides the tension needed for even, consistent loops.
16. Crafting Statement-Scale Embroidered Tapestries
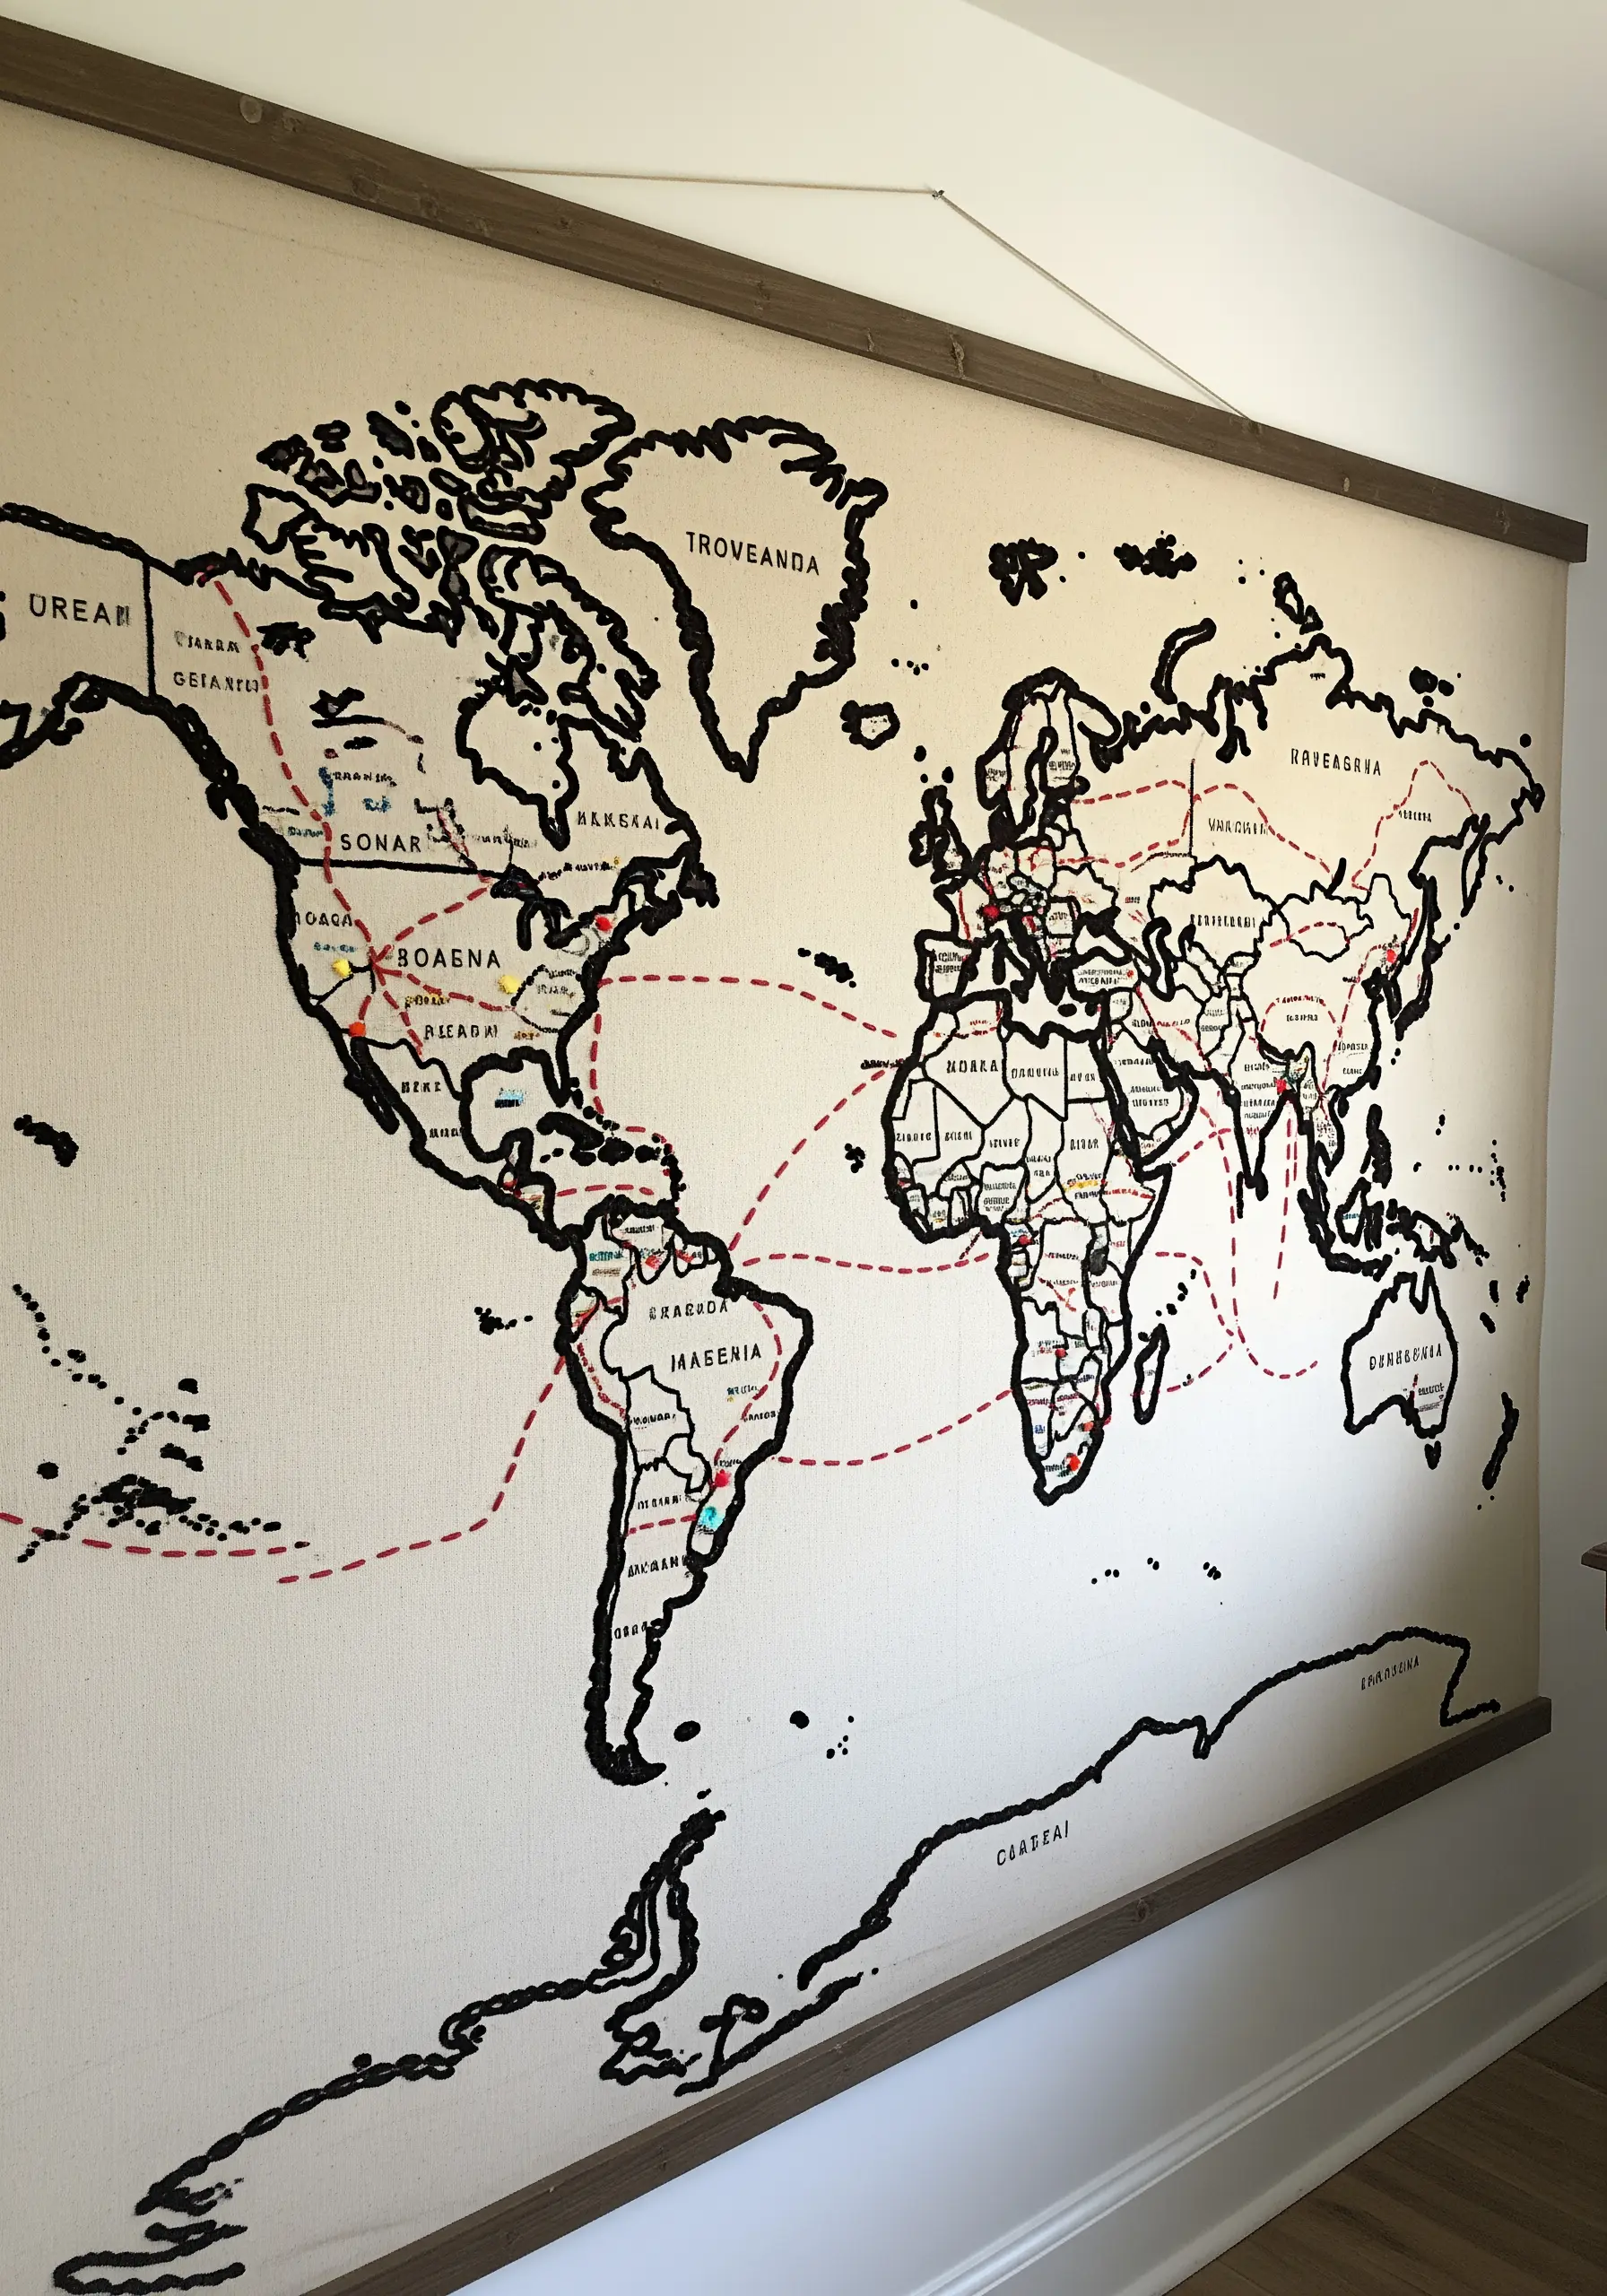
When working on a large scale, choose stitches that offer good coverage without being excessively time-consuming.
A thick chain stitch or a stem stitch using all six strands of floss—or even a heavier pearl cotton—works beautifully for bold outlines like continents.
For details like travel routes, a simple running stitch is quick and effective.
The key to a professional finish is mounting the canvas on wooden dowels to create a hanging scroll; this prevents sagging and gives your work a polished, intentional presence in the room.
17. Building 3D Forms with the Woven Picot Stitch
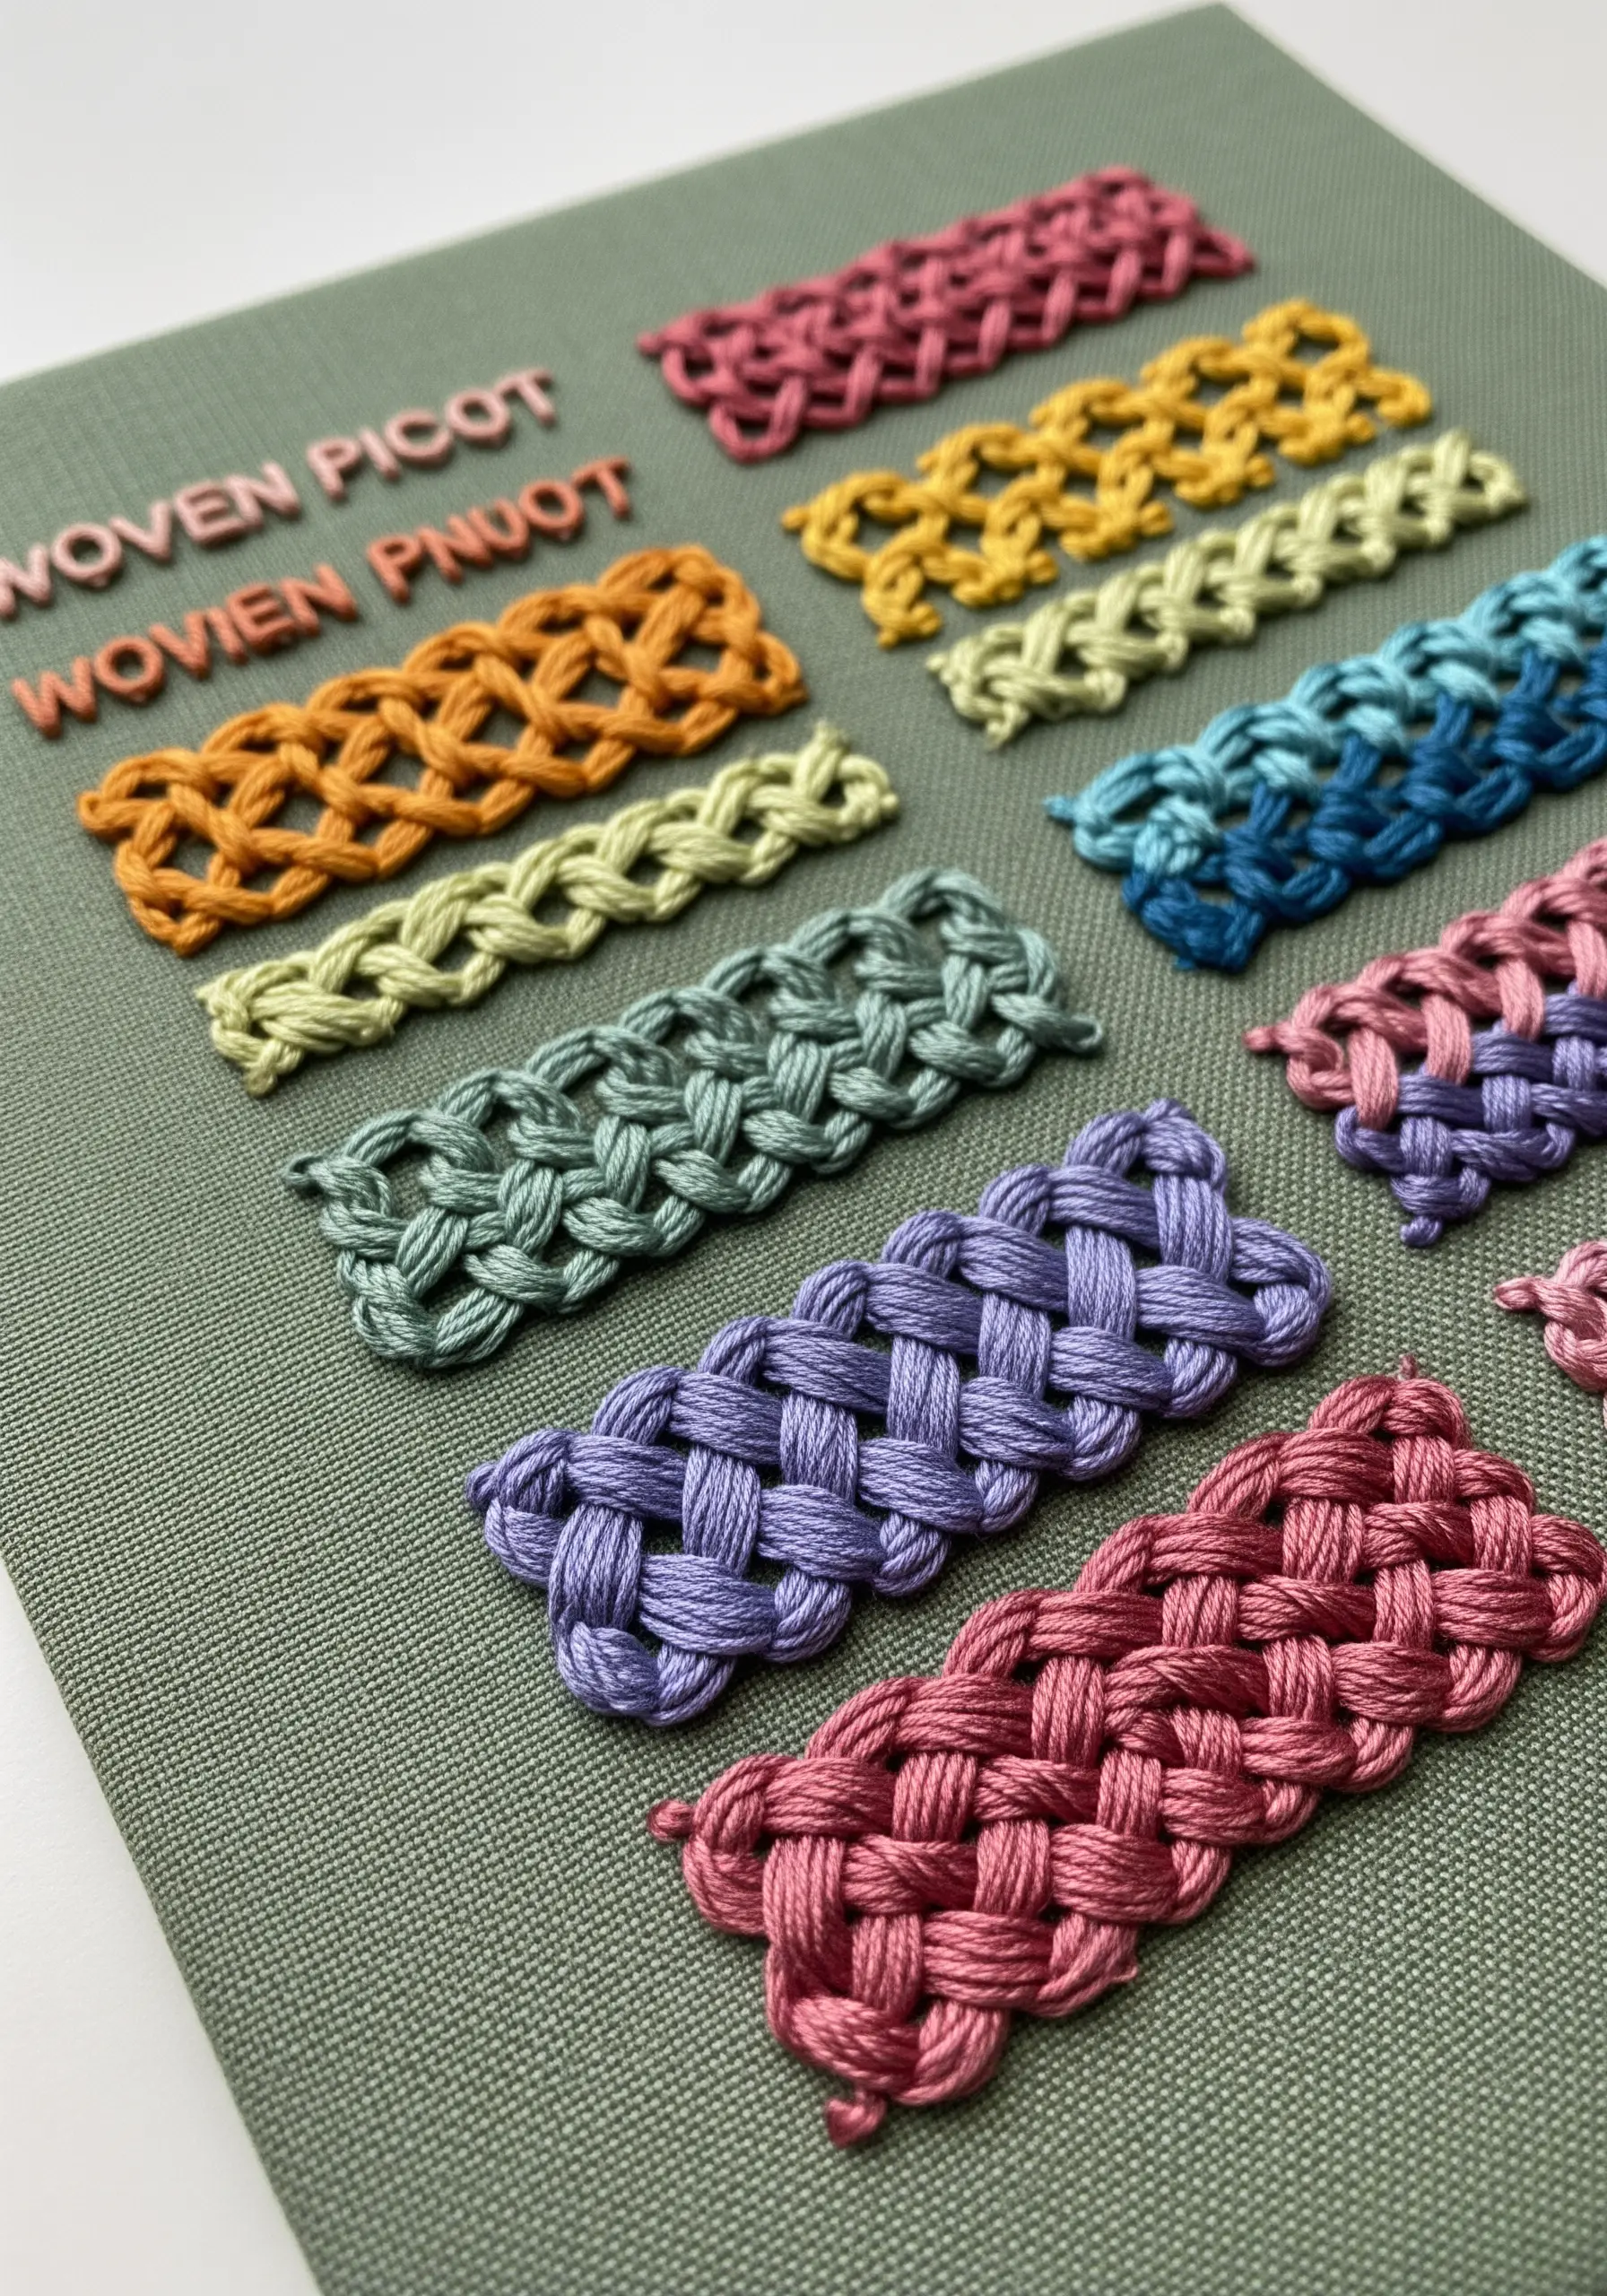
The woven picot stitch is a gateway to sculptural embroidery, creating raised, three-dimensional bars that can be shaped into petals, leaves, or abstract patterns.
You first create a scaffold of three simple straight stitches, then weave your working thread over and under them without piercing the fabric.
The tension of your weave dictates the final look: a tight weave creates a dense, solid bar, while a looser weave results in a more open, lattice-like effect.
18. Painting with Thread for Photorealistic Portraits
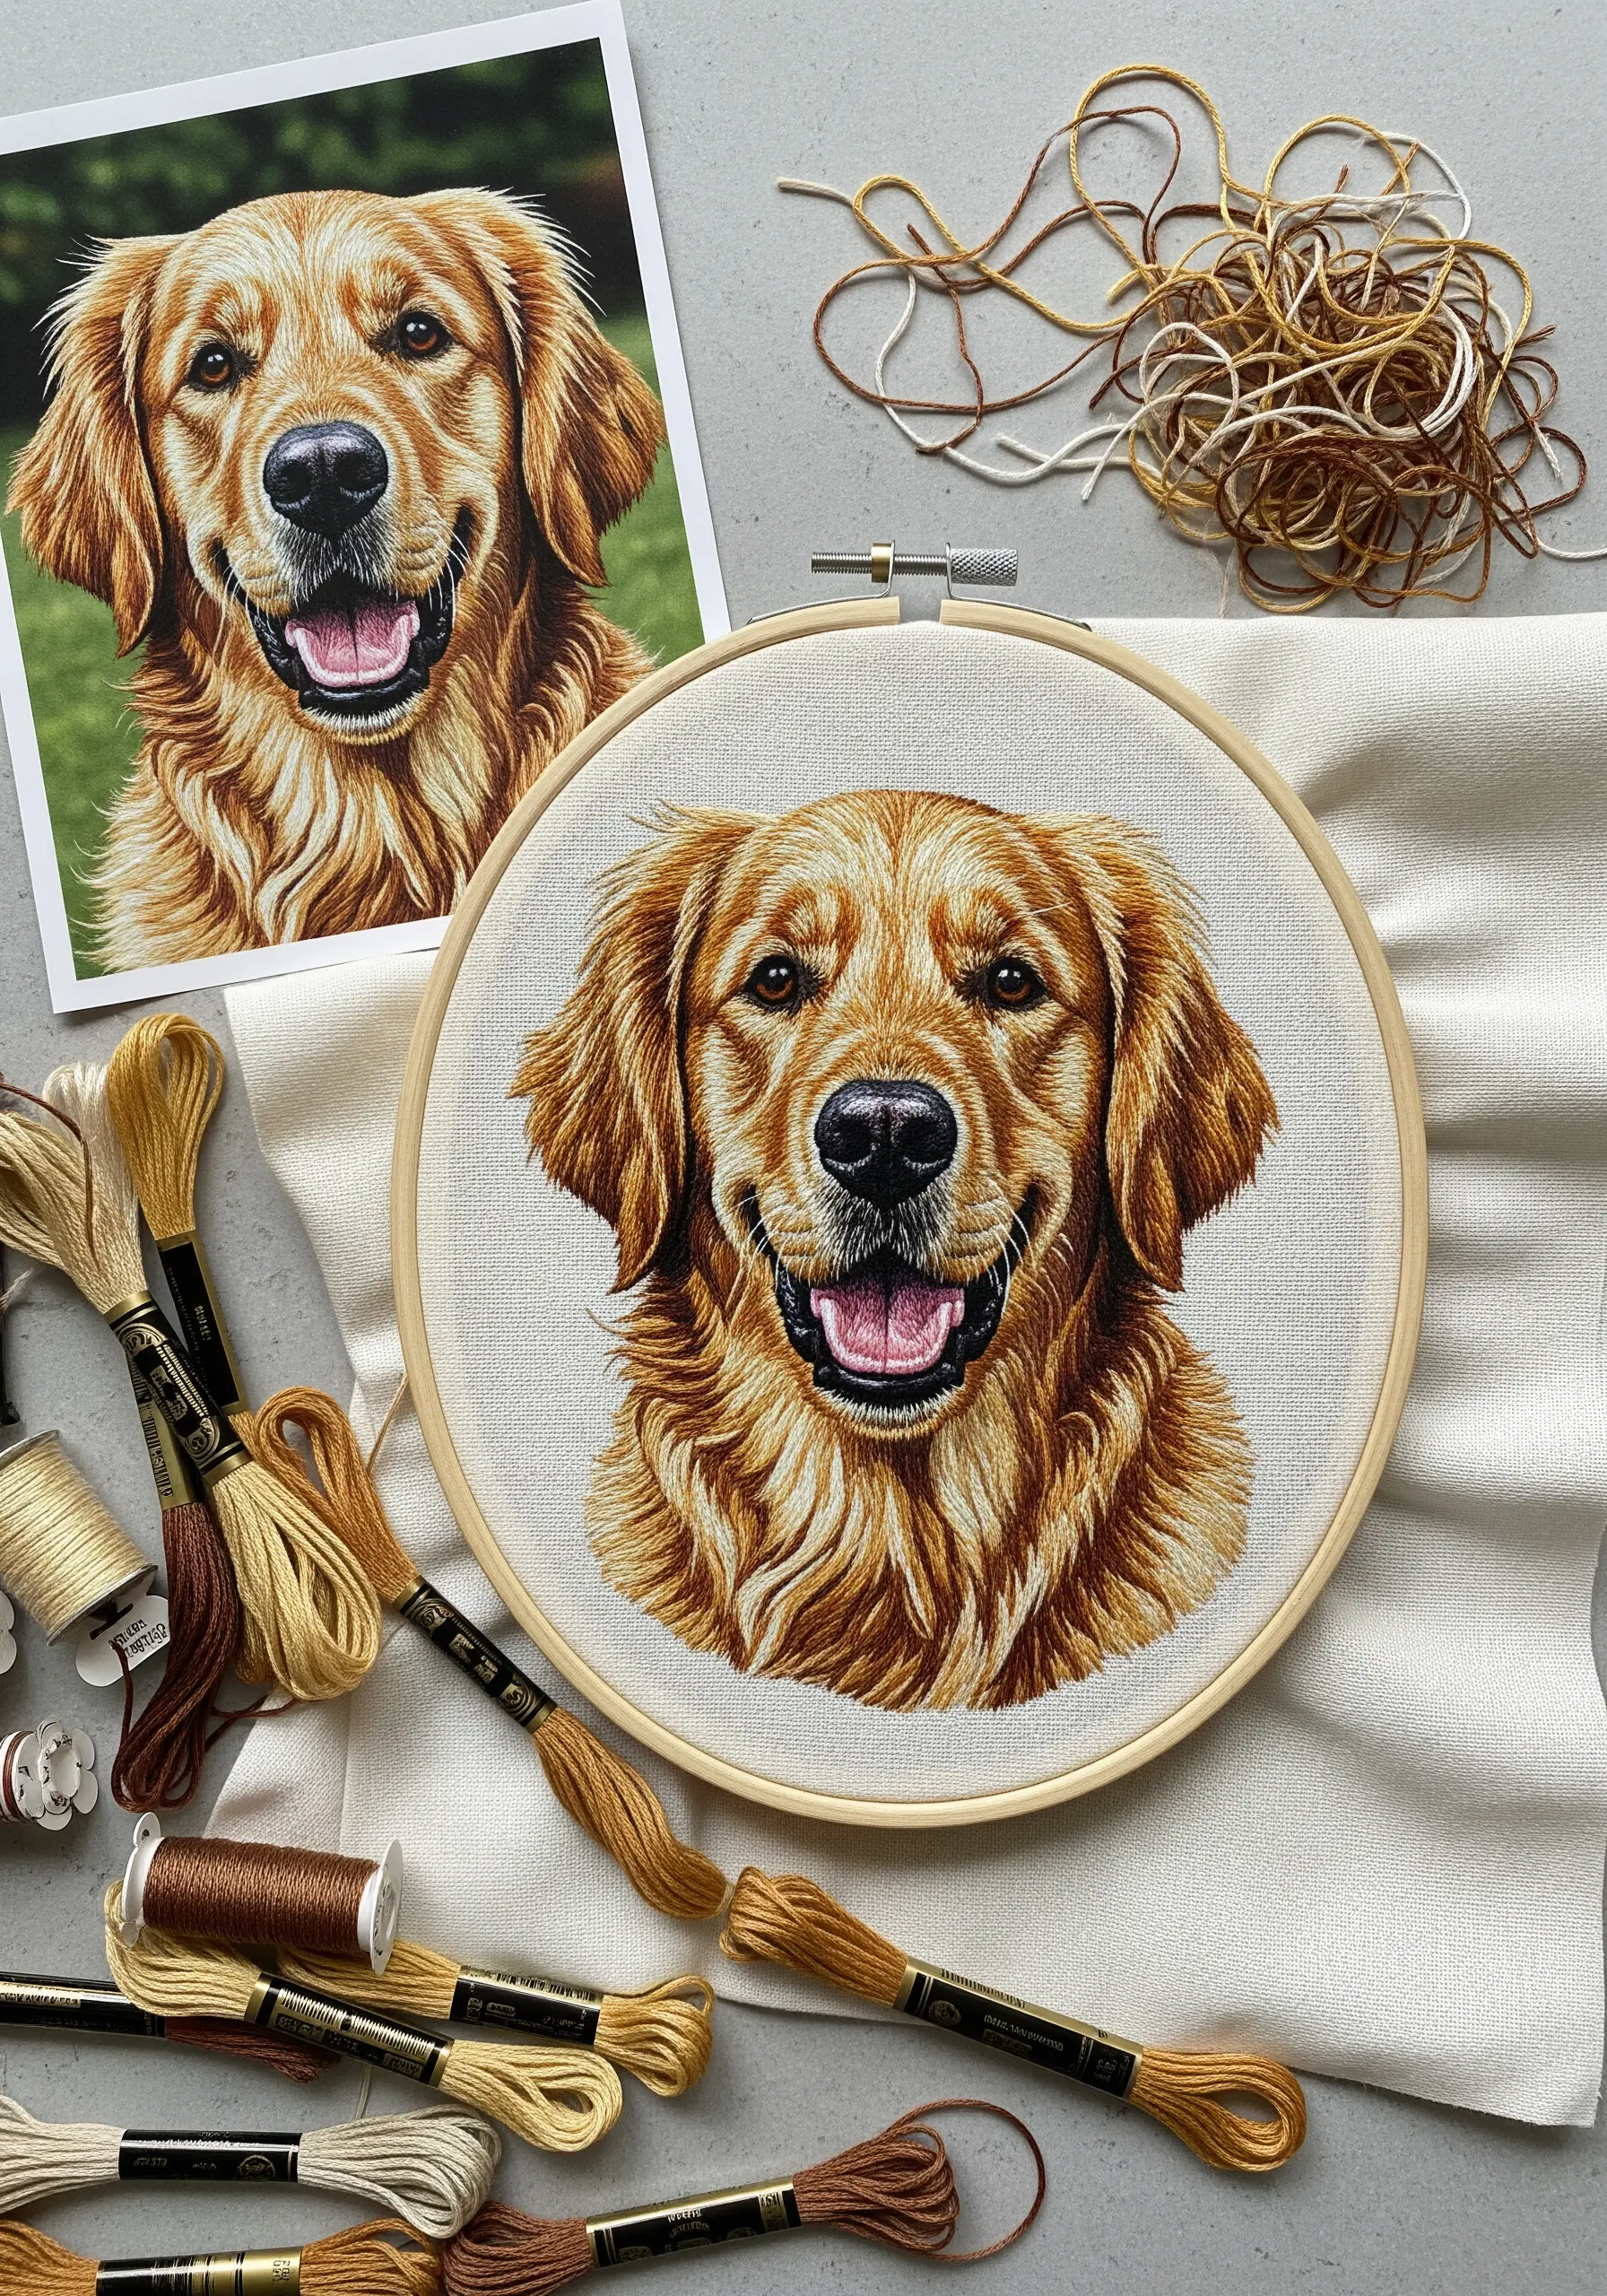
This advanced technique, often called “thread painting,” uses the long-and-short stitch to create seamless, painterly color blends.
You work with only a single strand of floss and treat your needle like a fine paintbrush, laying down stitches that follow the natural direction of fur or hair growth.
The secret is to work with a broad palette of closely related shades, gradually building up highlights, mid-tones, and shadows to achieve stunning realism.
It is a slow, meditative process that yields breathtaking results.
19. Creating a Tactile World with Turkey Work and Padding
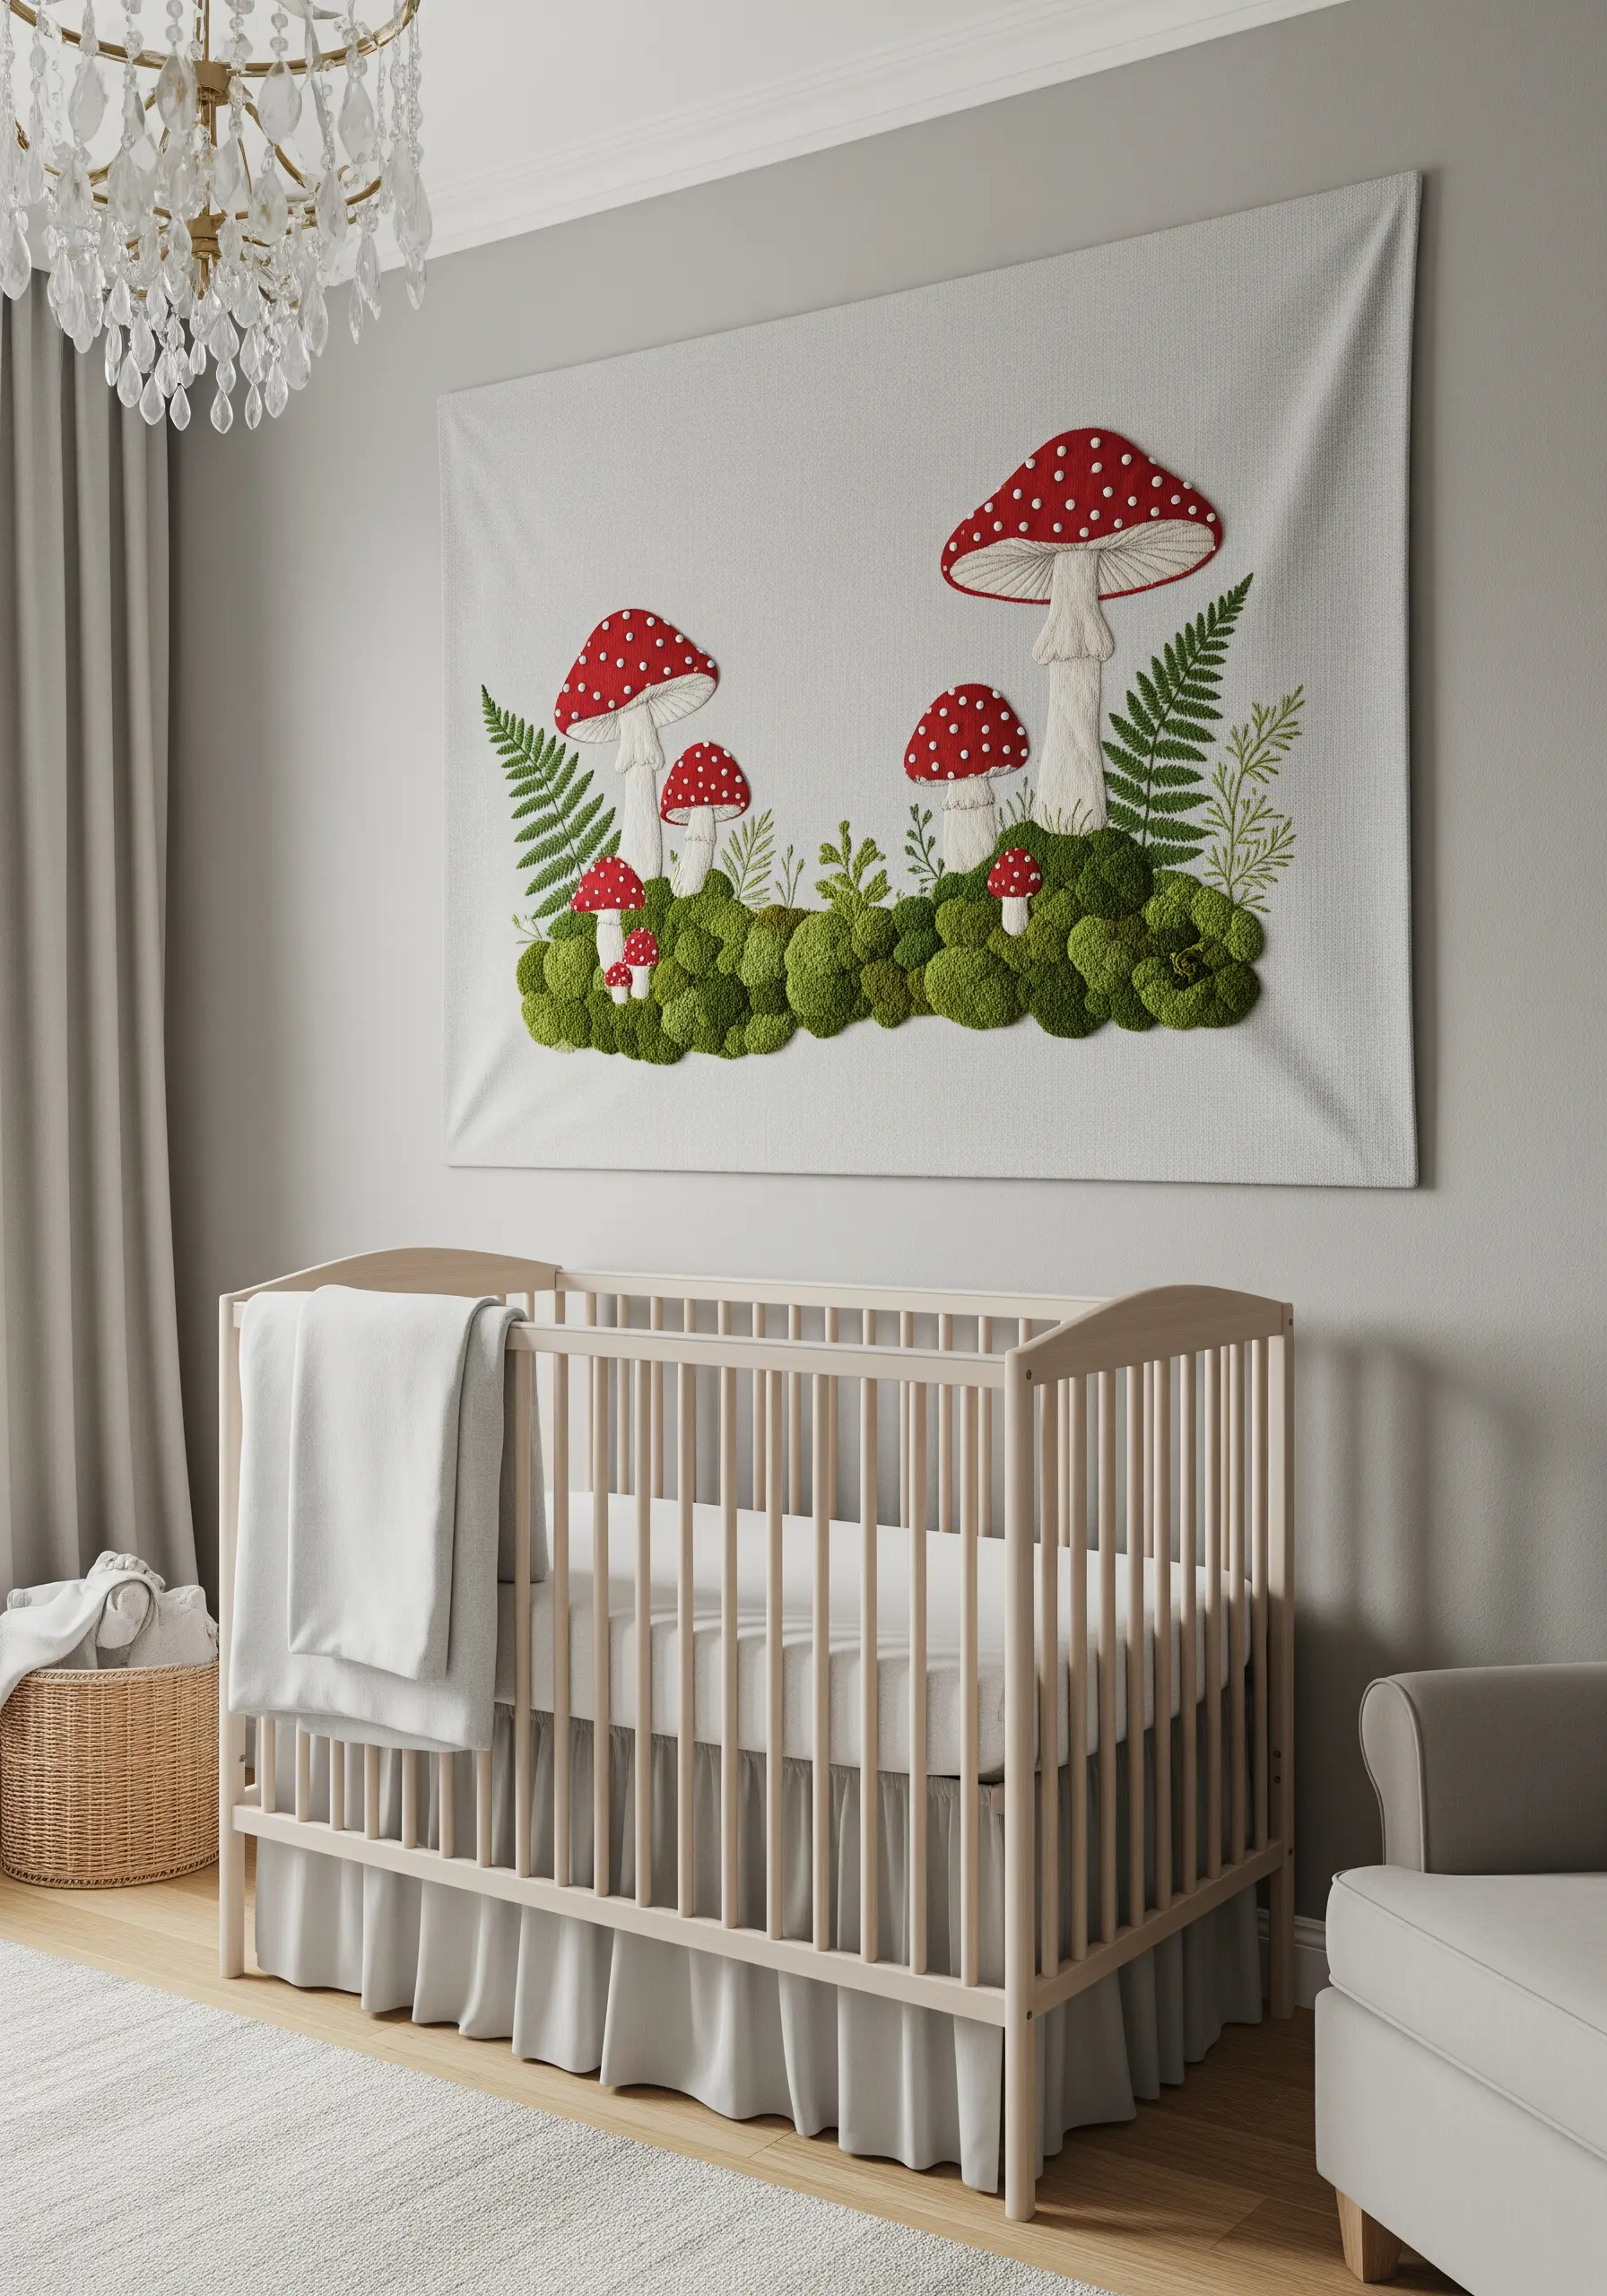
To create the fuzzy, dimensional moss, use the Turkey work stitch.
This involves making loops of thread on the surface of your fabric, securing them with a tiny tacking stitch, and then snipping the loops to create a plush, carpet-like texture that you can trim to your desired length.
For the mushrooms, use padded satin stitch to give them a plump, rounded shape that stands out from the background.
This combination of textures creates a truly tactile art experience, perfect for a whimsical and interactive piece.


