

You don’t need complex tools or years of practice to create yarn art that feels intentional and beautifully designed. Often, the most stunning pieces come from a simple, well-executed idea—a focus on texture, a thoughtful color choice, or a unique composition.
Think of yarn not just as a line of color, but as a sculptural material. How does it catch the light? How does it feel? What happens when you place a thick, soft roving next to a thin, tightly spun cord?
This collection is here to show you how to shift your perspective. Move beyond merely following a pattern and start making design choices that elevate your work. You have everything you need to begin right now.
1. Architectural Macrame: Structure Meets Flow
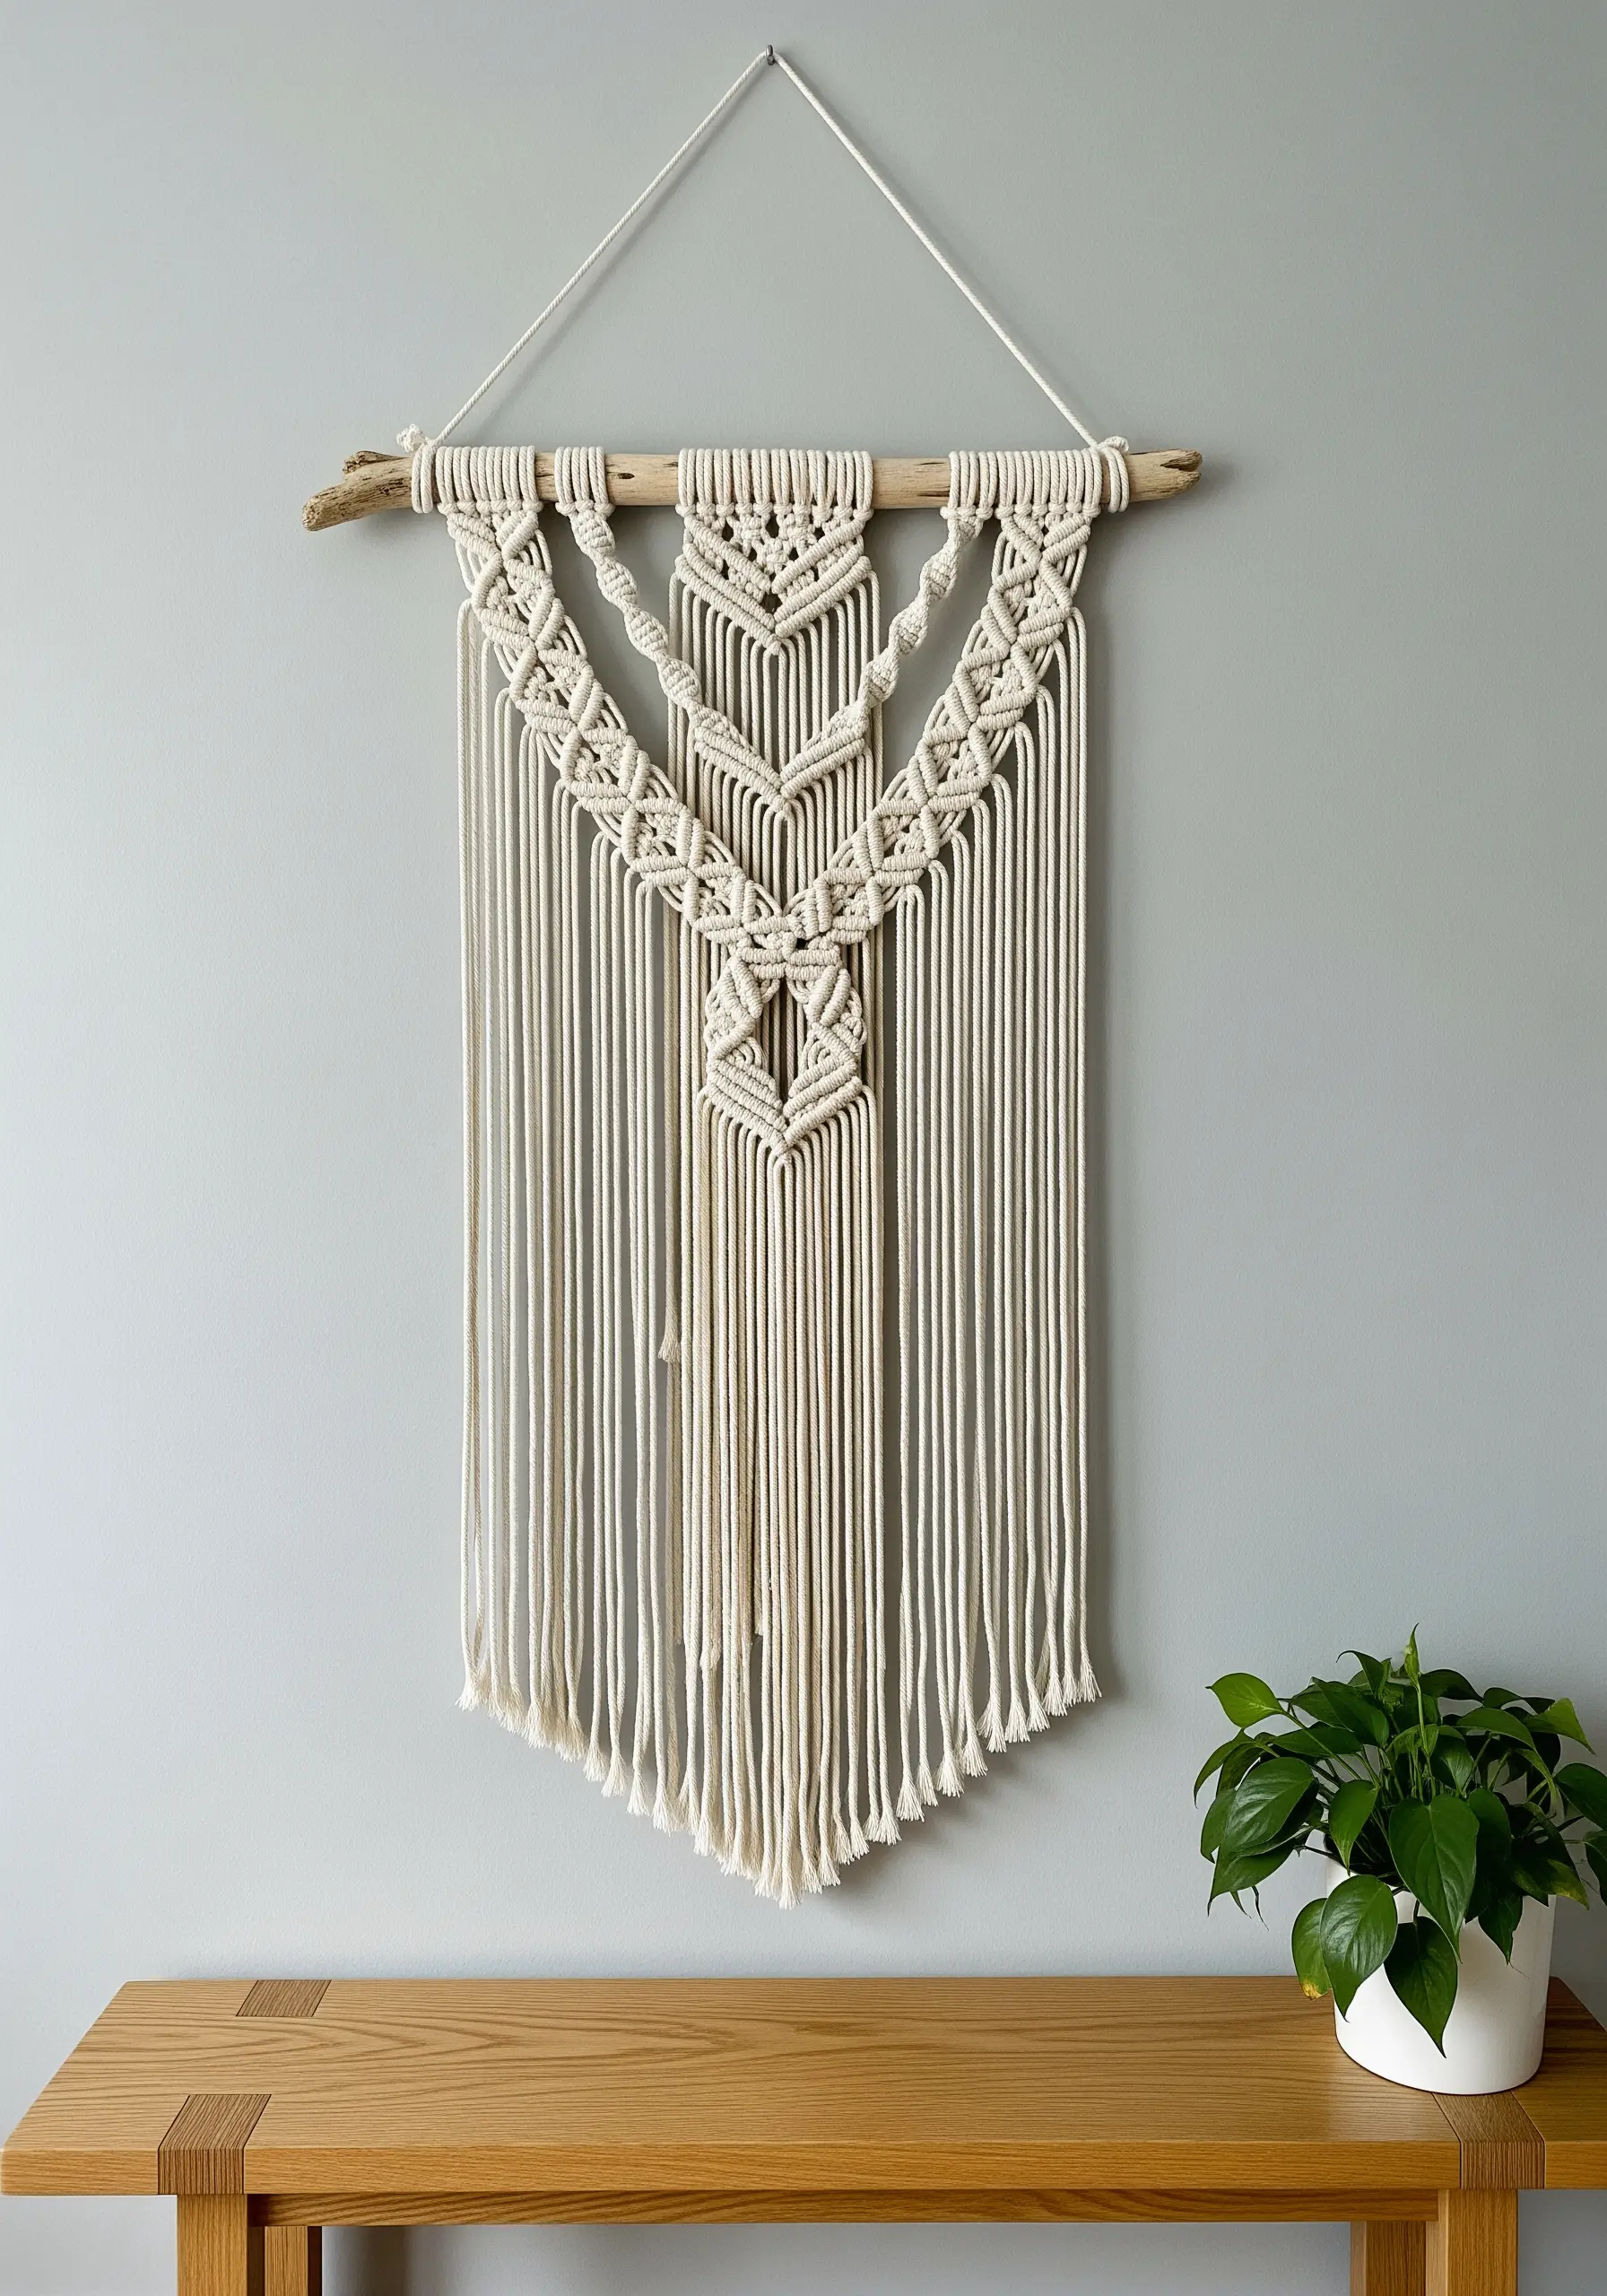
Create visual tension by contrasting structured, tight knotwork with long, flowing cords.
Use a substantial 4-5mm single-strand cotton cord for the knotted sections to give them weight and definition.
For the hanging fringe, allow the cords to remain unbrushed and straight; this preserves a clean, minimalist line that feels intentional.
Mounting your work on a piece of found driftwood rather than a dowel introduces an organic element that softens the geometric precision of the knots.
2. Woven Topography: Blending Textures and Weights
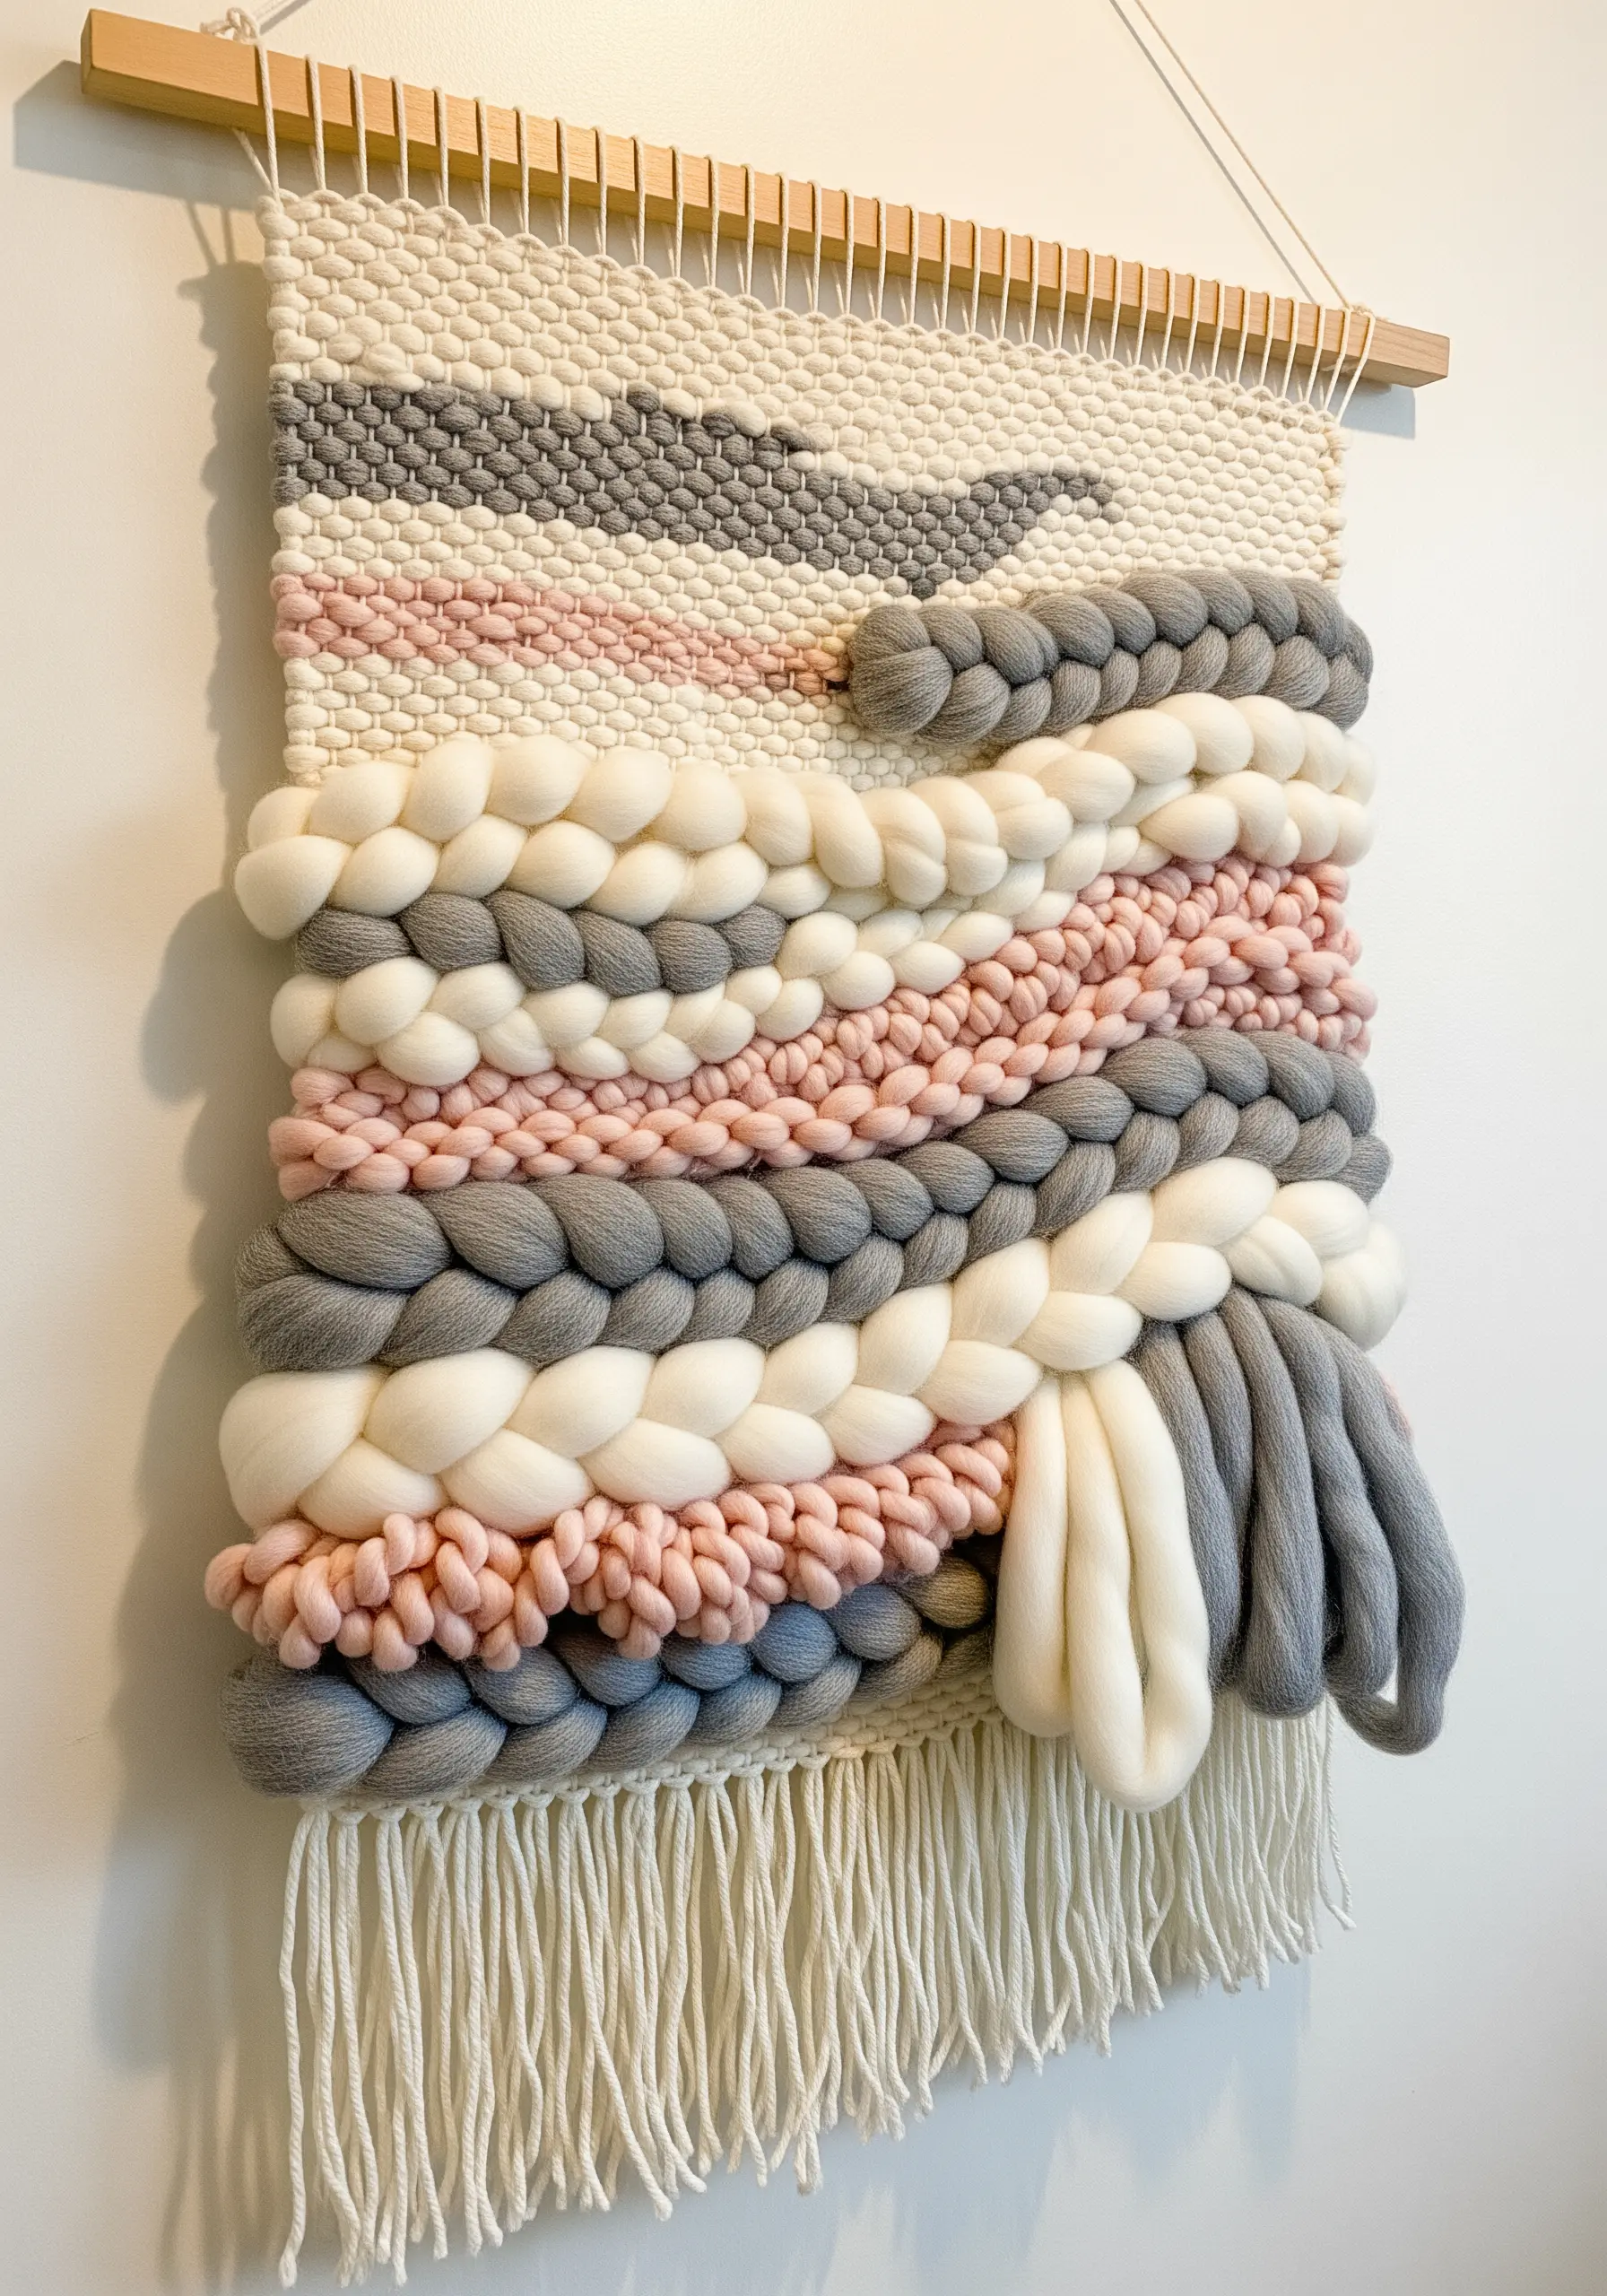
Build a landscape of texture by weaving with yarns of dramatically different weights in a single piece.
Alternate rows of fine tabby weave with thick, unspun wool roving to create peaks and valleys across the surface.
Introduce braided or soumak-stitched sections using a medium-weight yarn to add another layer of rhythmic detail.
This method of creating contemporary texture techniques moves beyond color and pattern, making the piece compelling to both see and touch.
3. Geometric Thread Blocking: Precision and Tension
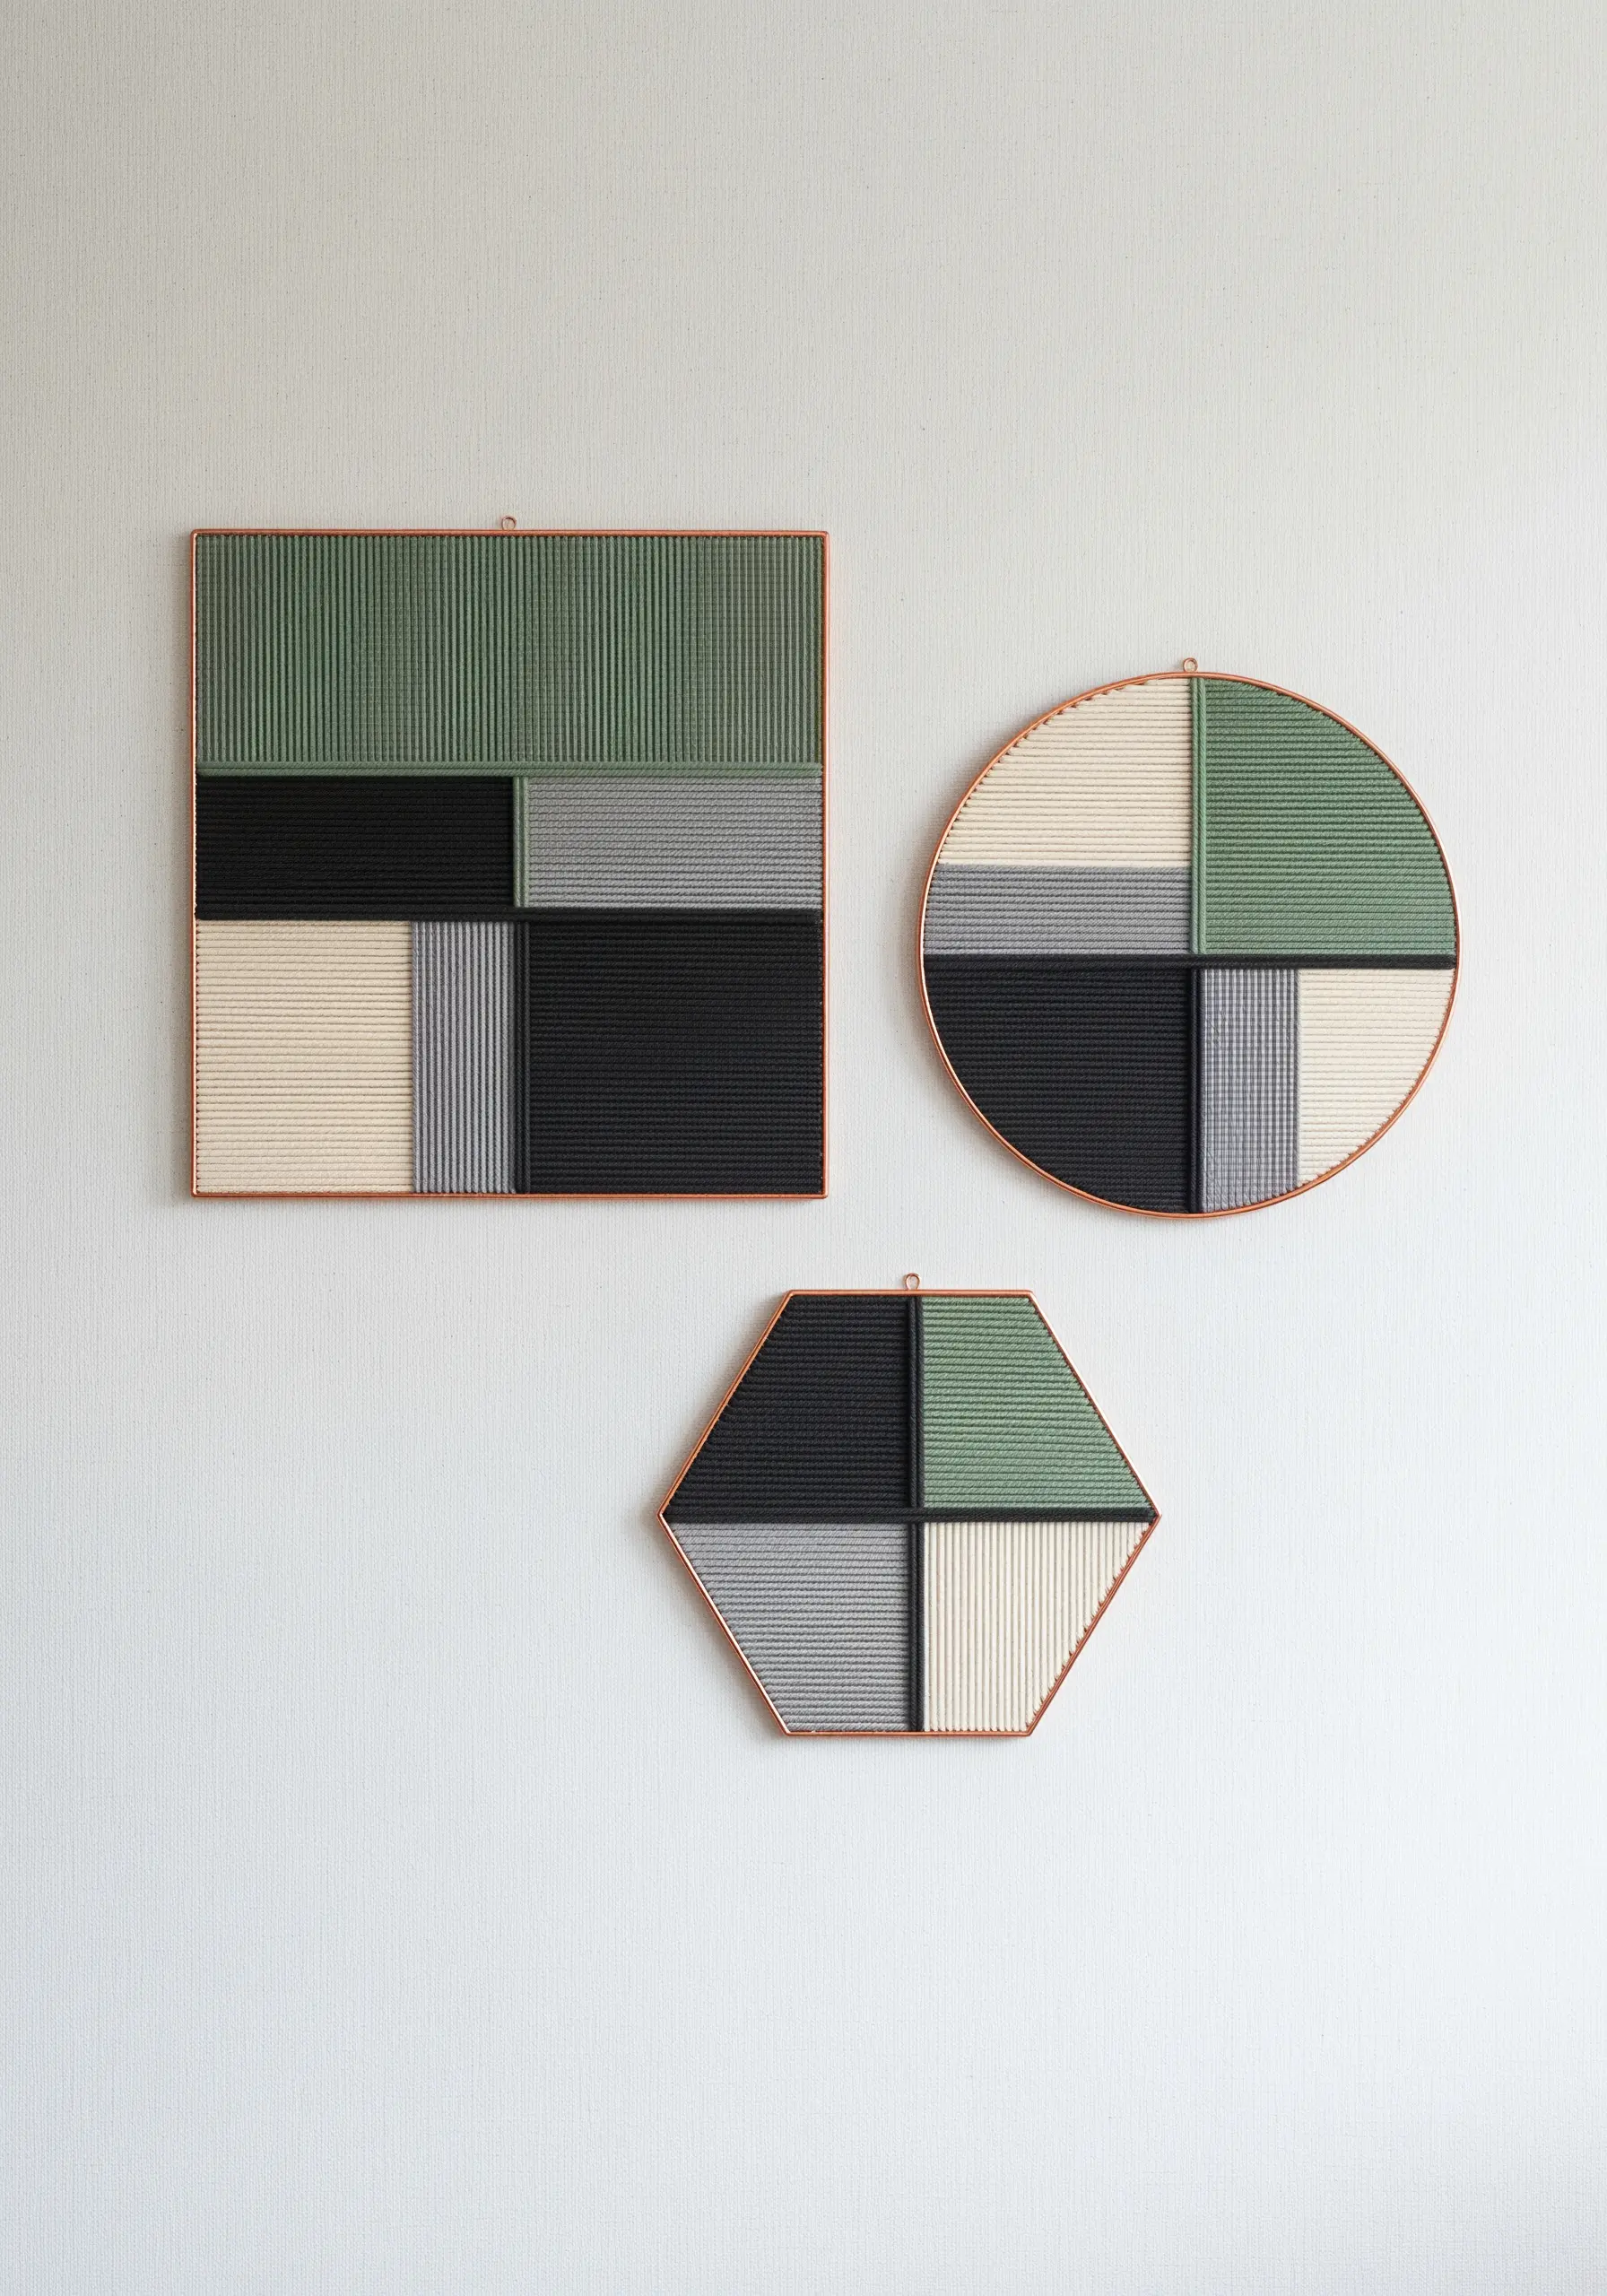
Achieve a clean, graphic look by wrapping sections of a frame with thread, focusing on perfect tension and flawless alignment.
Use a sturdy metal frame—square, round, or hexagonal—to prevent warping under the tension of the wrapped yarn.
Work with a smooth, tightly spun yarn to ensure each wrap lays flat against the next without gaps or overlaps.
This style of minimalist thread art ideas relies on the interplay of color blocks and the crispness of the dividing lines for its modern impact.
4. Monochrome Gradient Weaving
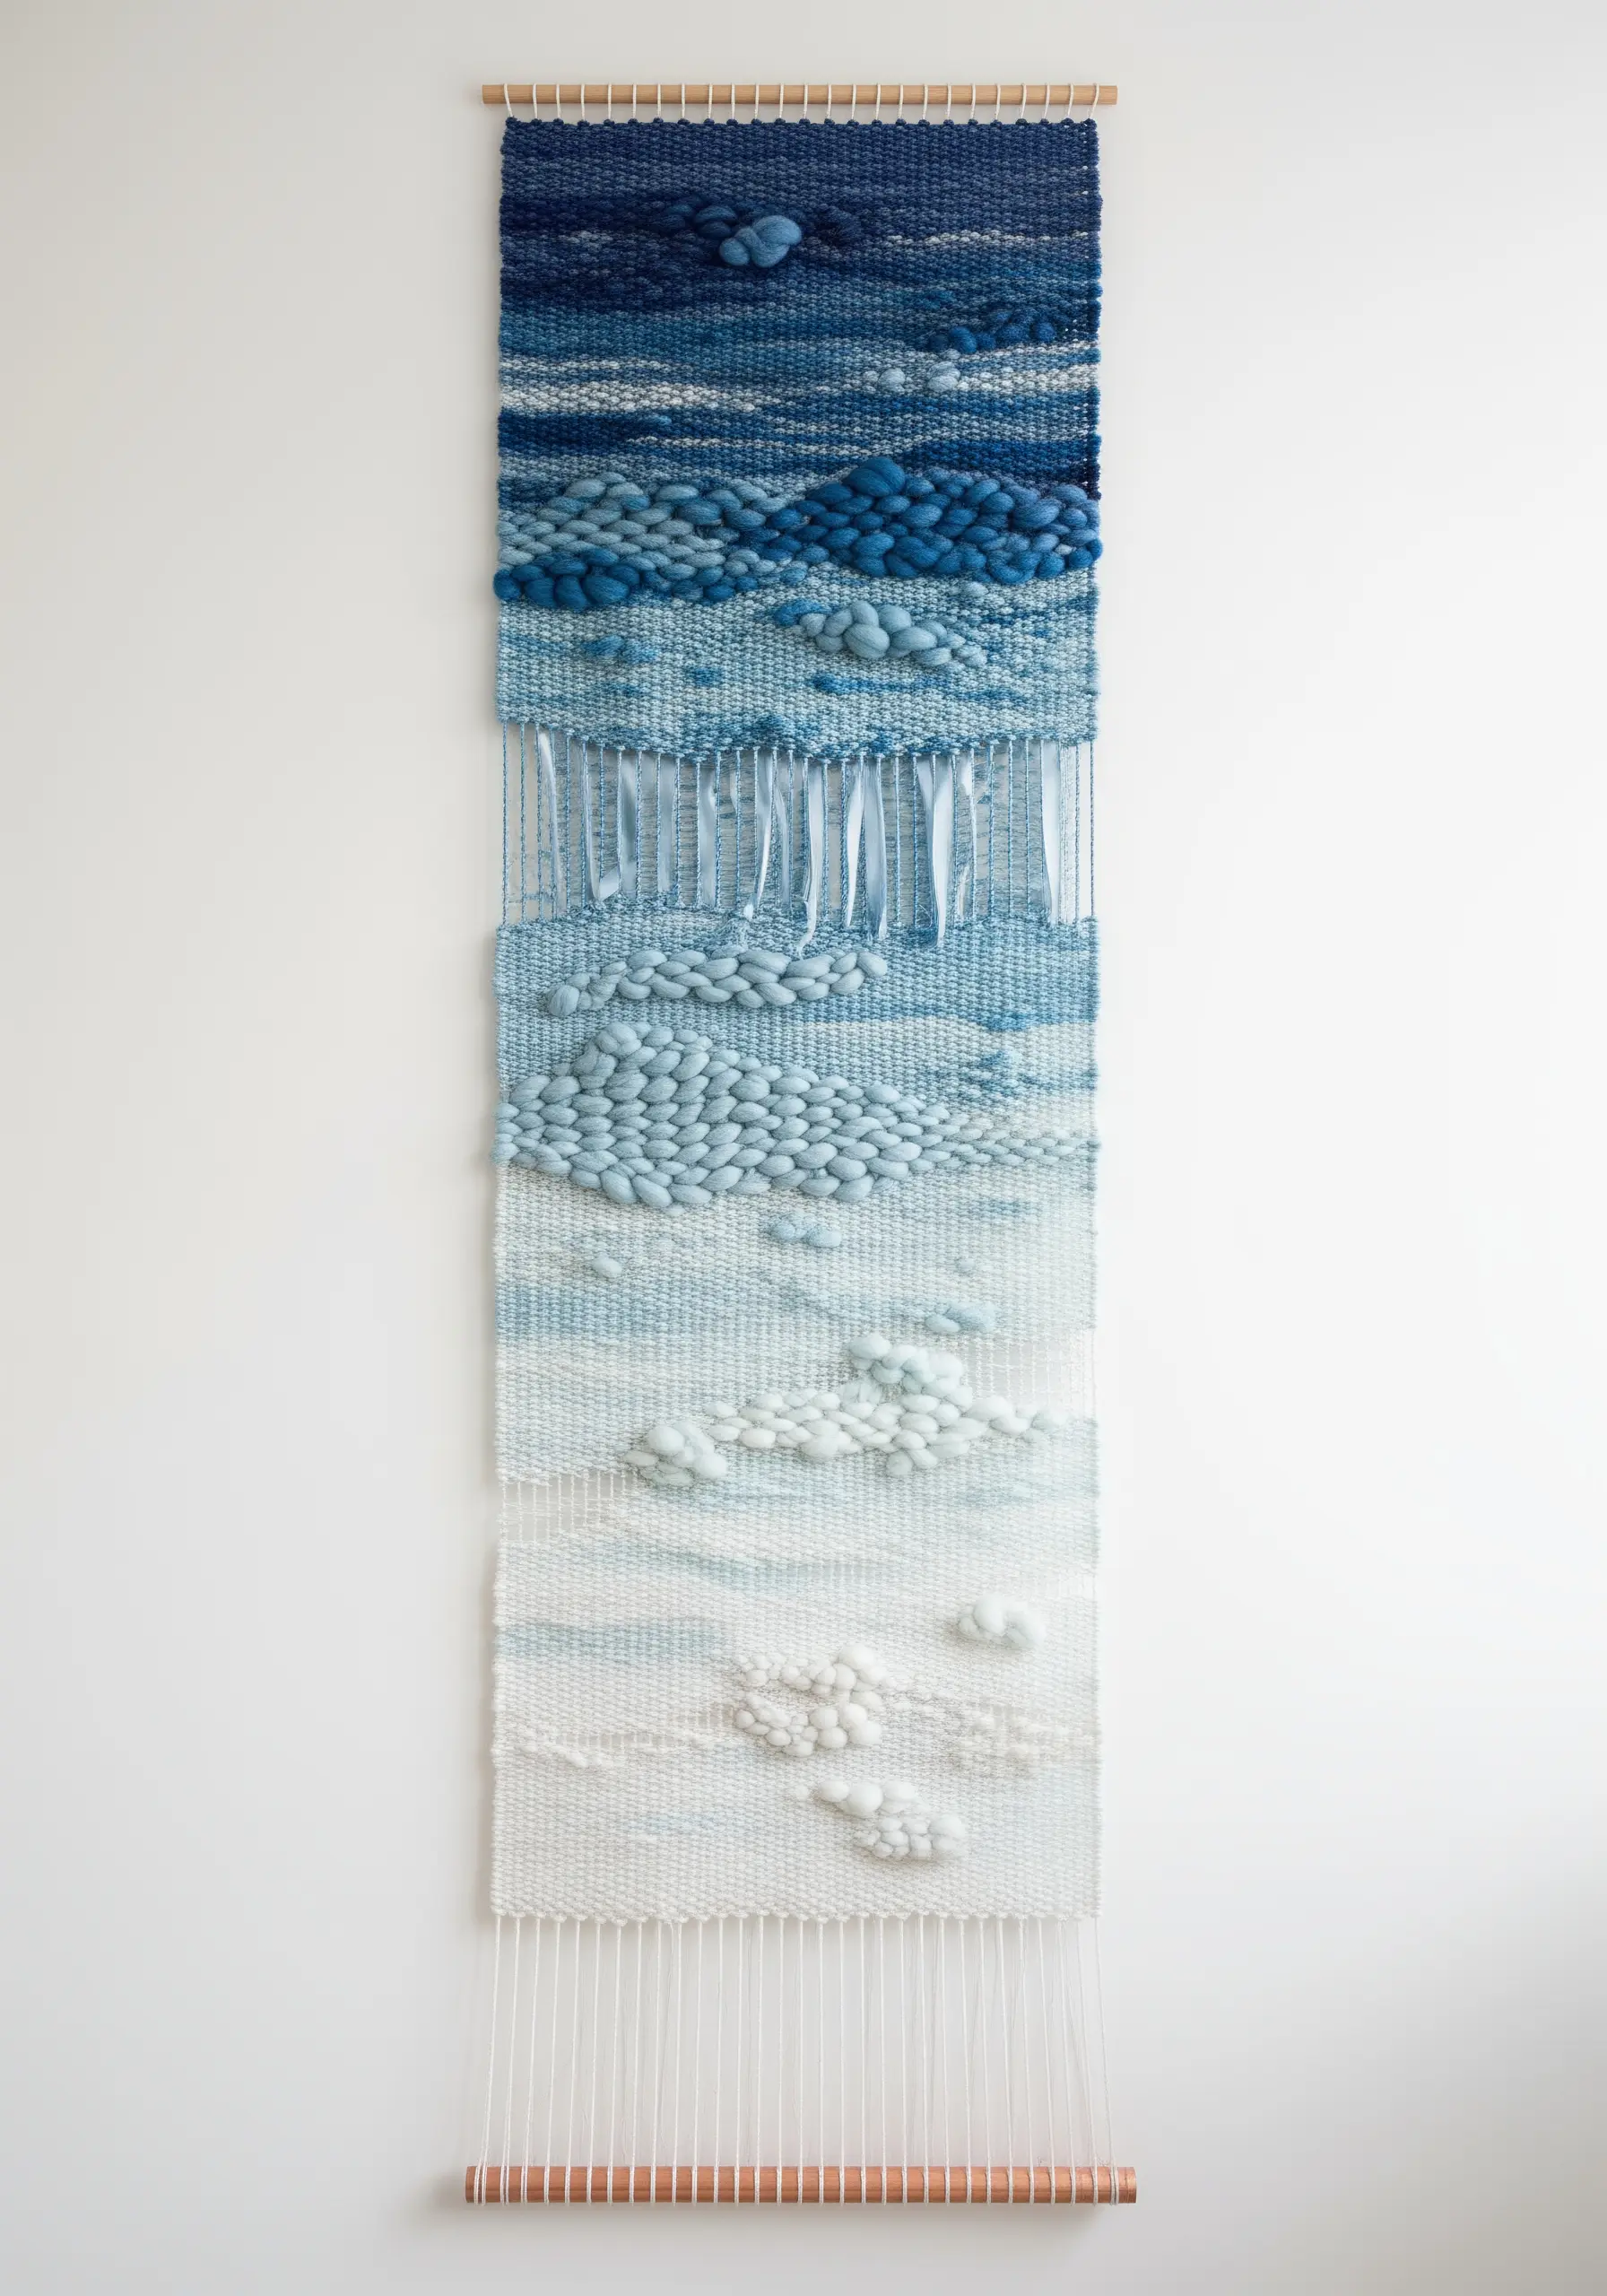
Explore the depth of a single color by creating a tonal gradient from dark to light.
Dye your own yarn or purchase a set with multiple shades of the same hue to ensure a smooth, harmonious transition.
Incorporate different weaving techniques within each color band—like looped rya knots or bubbly pile weaves—to add texture that prevents the monochrome palette from feeling flat.
This approach creates a sophisticated piece that feels both cohesive and dynamic, capturing the essence of a waterscape or a shifting sky.
5. The Radial Weave: Working in the Round
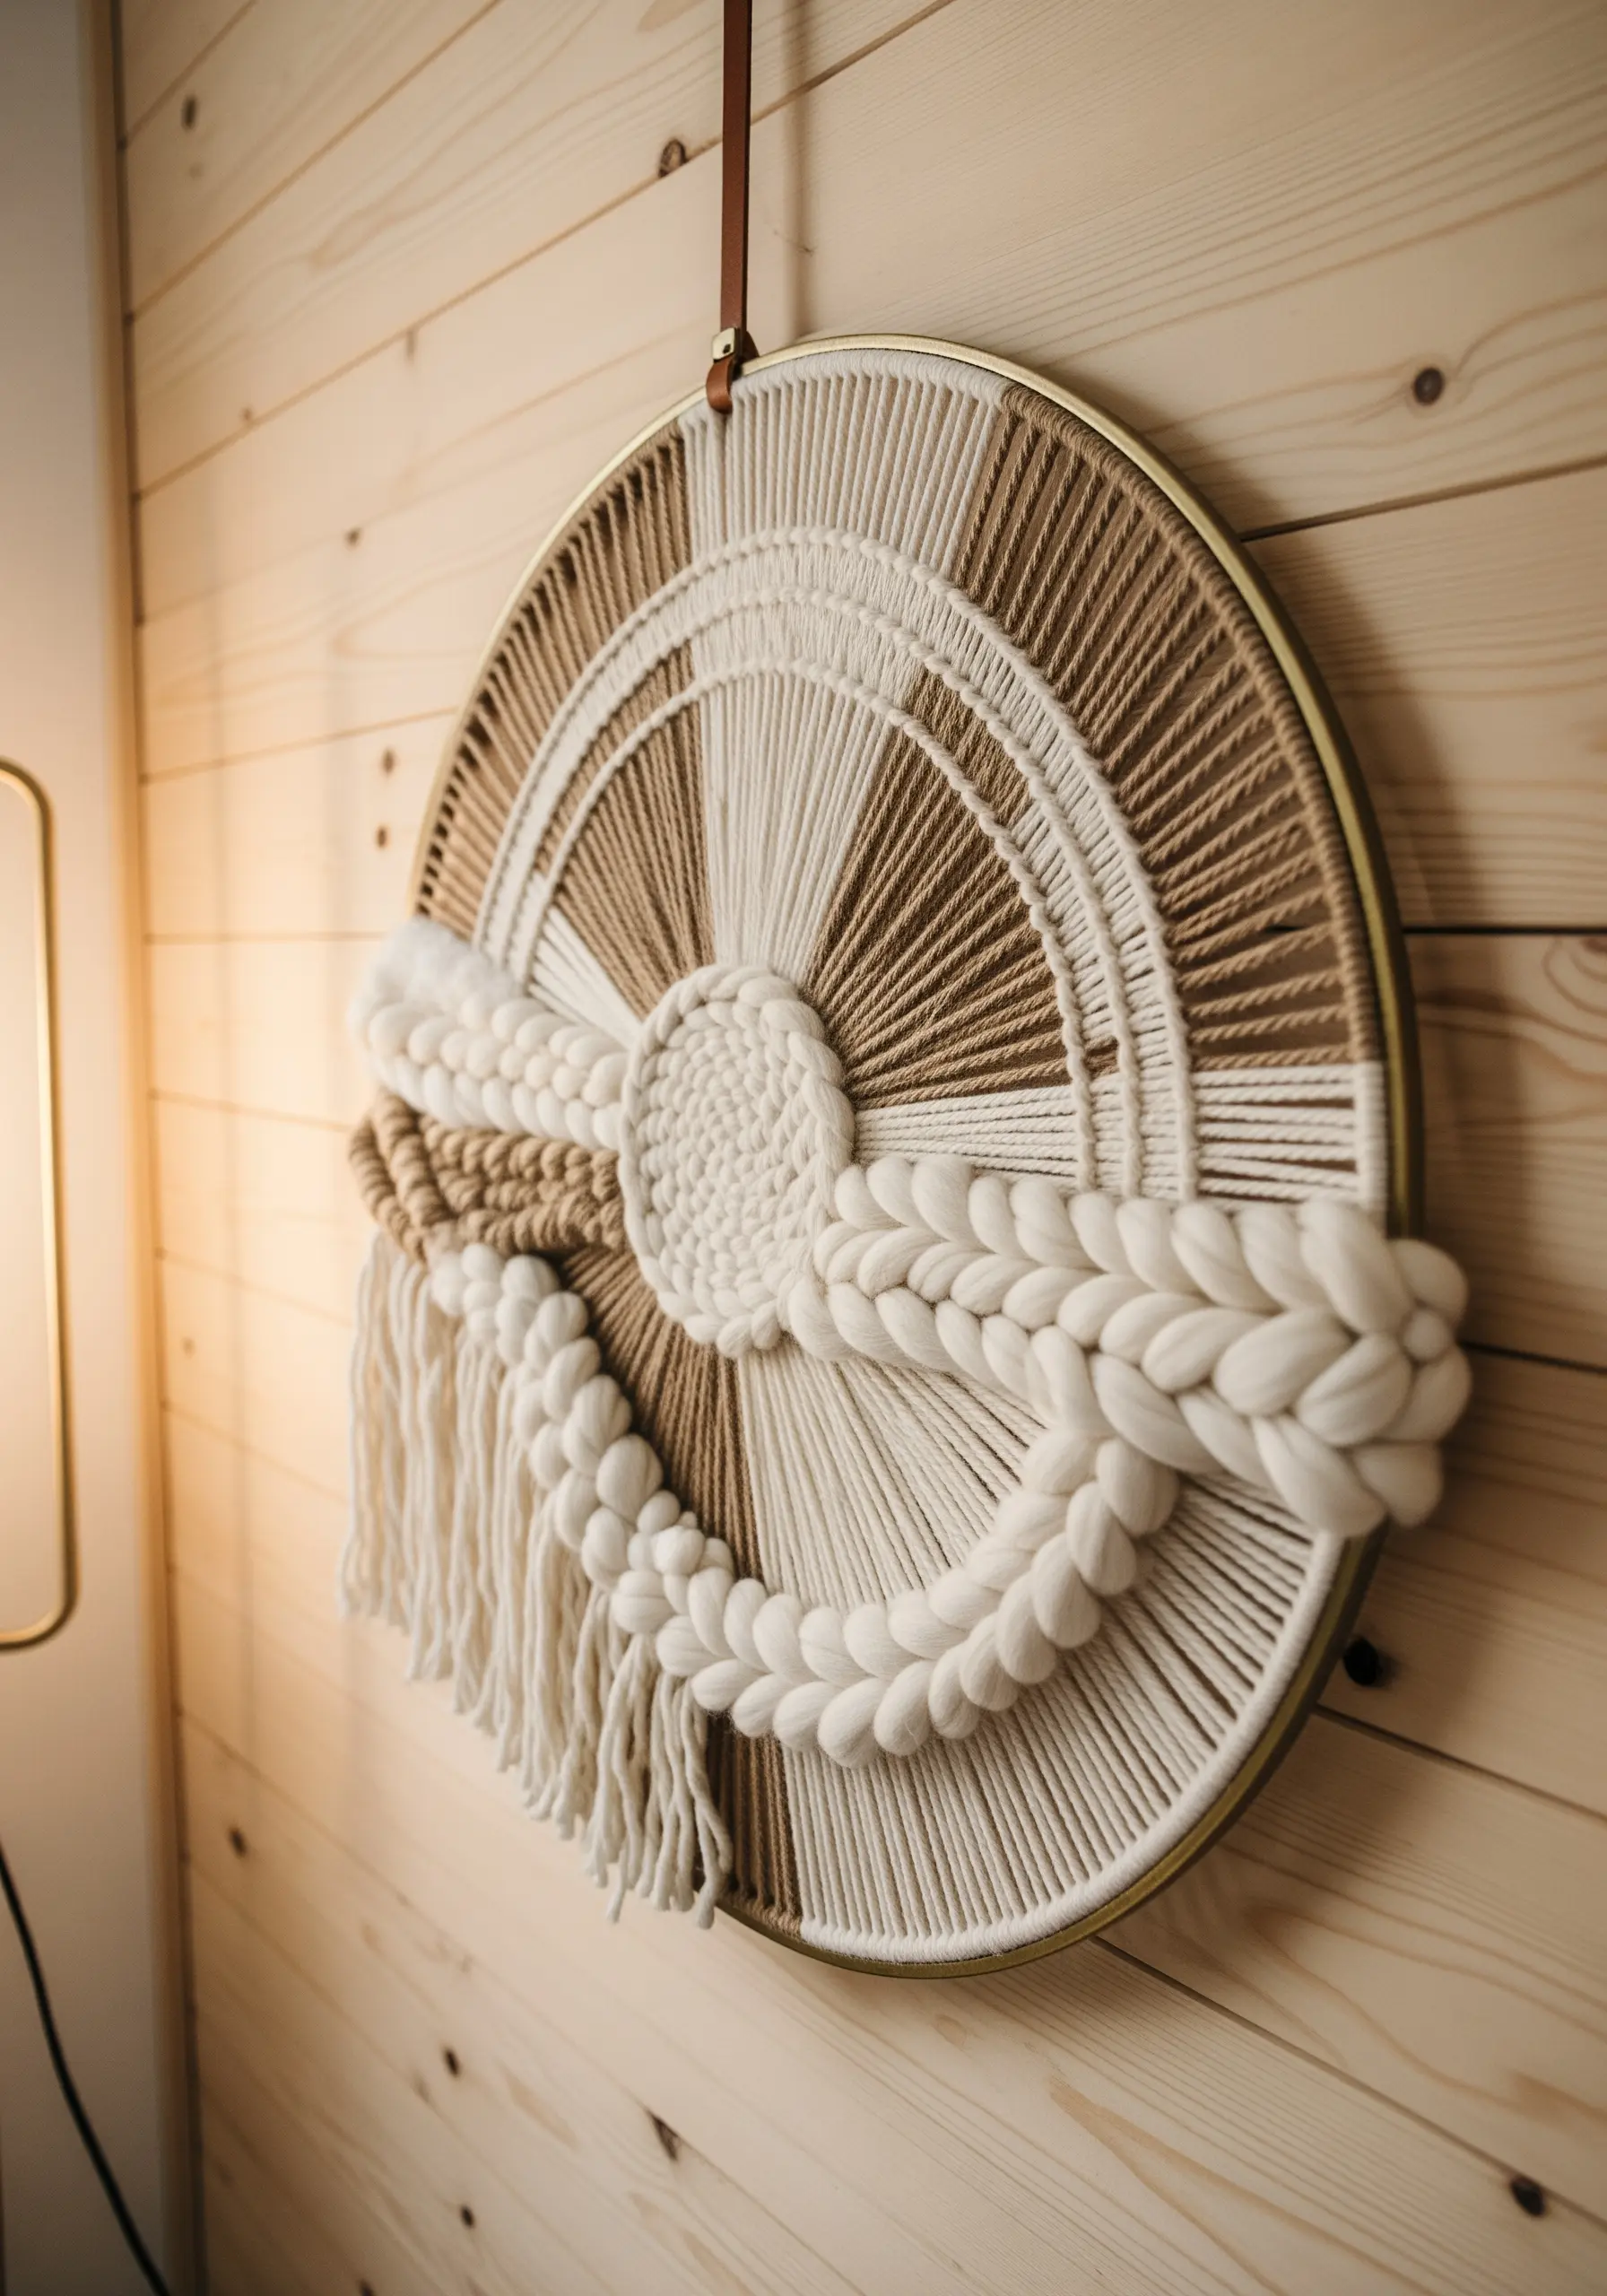
Adapt your weaving skills to a circular frame, like a metal or wooden hoop, for a softer, more organic composition.
Start your warp by creating spokes from a central point, ensuring they are evenly spaced for balanced tension.
Weave from the center outwards, using the radial warp threads as your guide.
Incorporate a bold, braided element that follows the curve of the hoop to act as a focal point and add sculptural dimension.
6. Graphic Punch Needle Forms
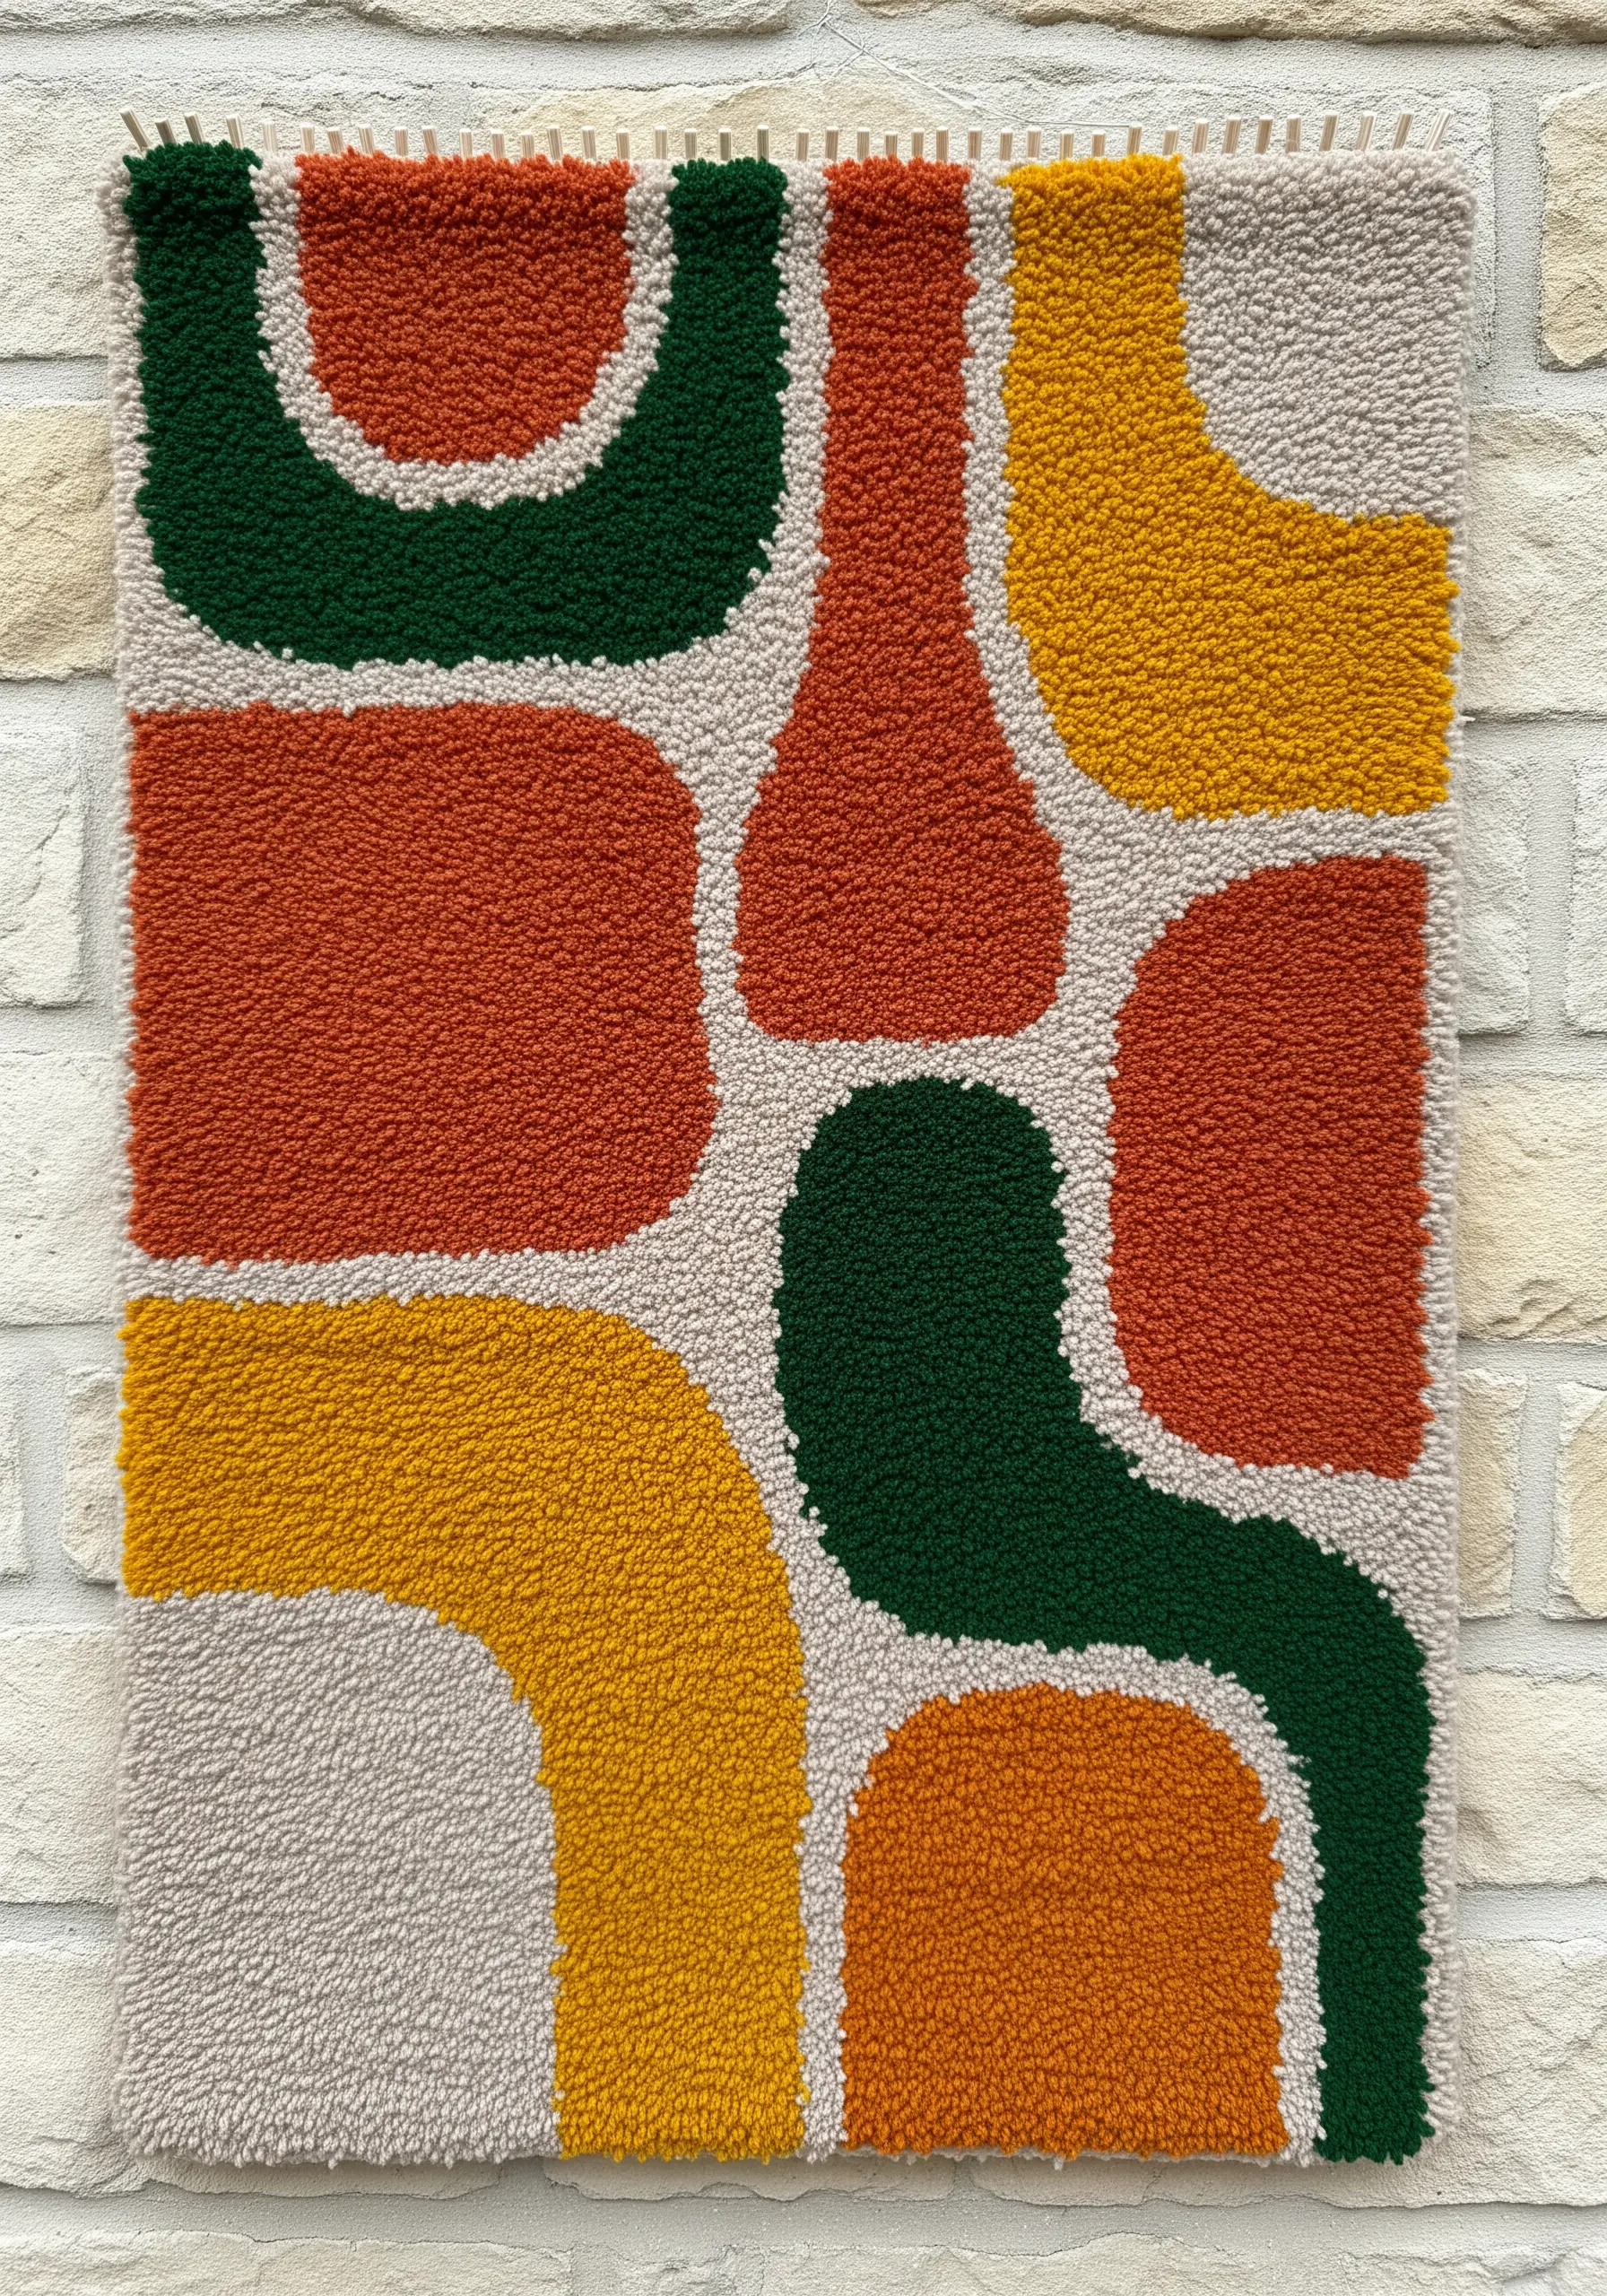
Create bold, abstract shapes with the punch needle technique by focusing on clean edges and uniform loop height.
To achieve crisp outlines, punch the border of each shape first, then fill in the center. This creates a defined edge that makes each color block pop.
Use a chunky wool or rug yarn; its thickness helps create a dense, plush pile that fills the fabric completely and enhances the graphic quality.
This technique is perfect for creating abstract embroidery motifs that feel both playful and highly designed.
7. Minimal Roving on Felt
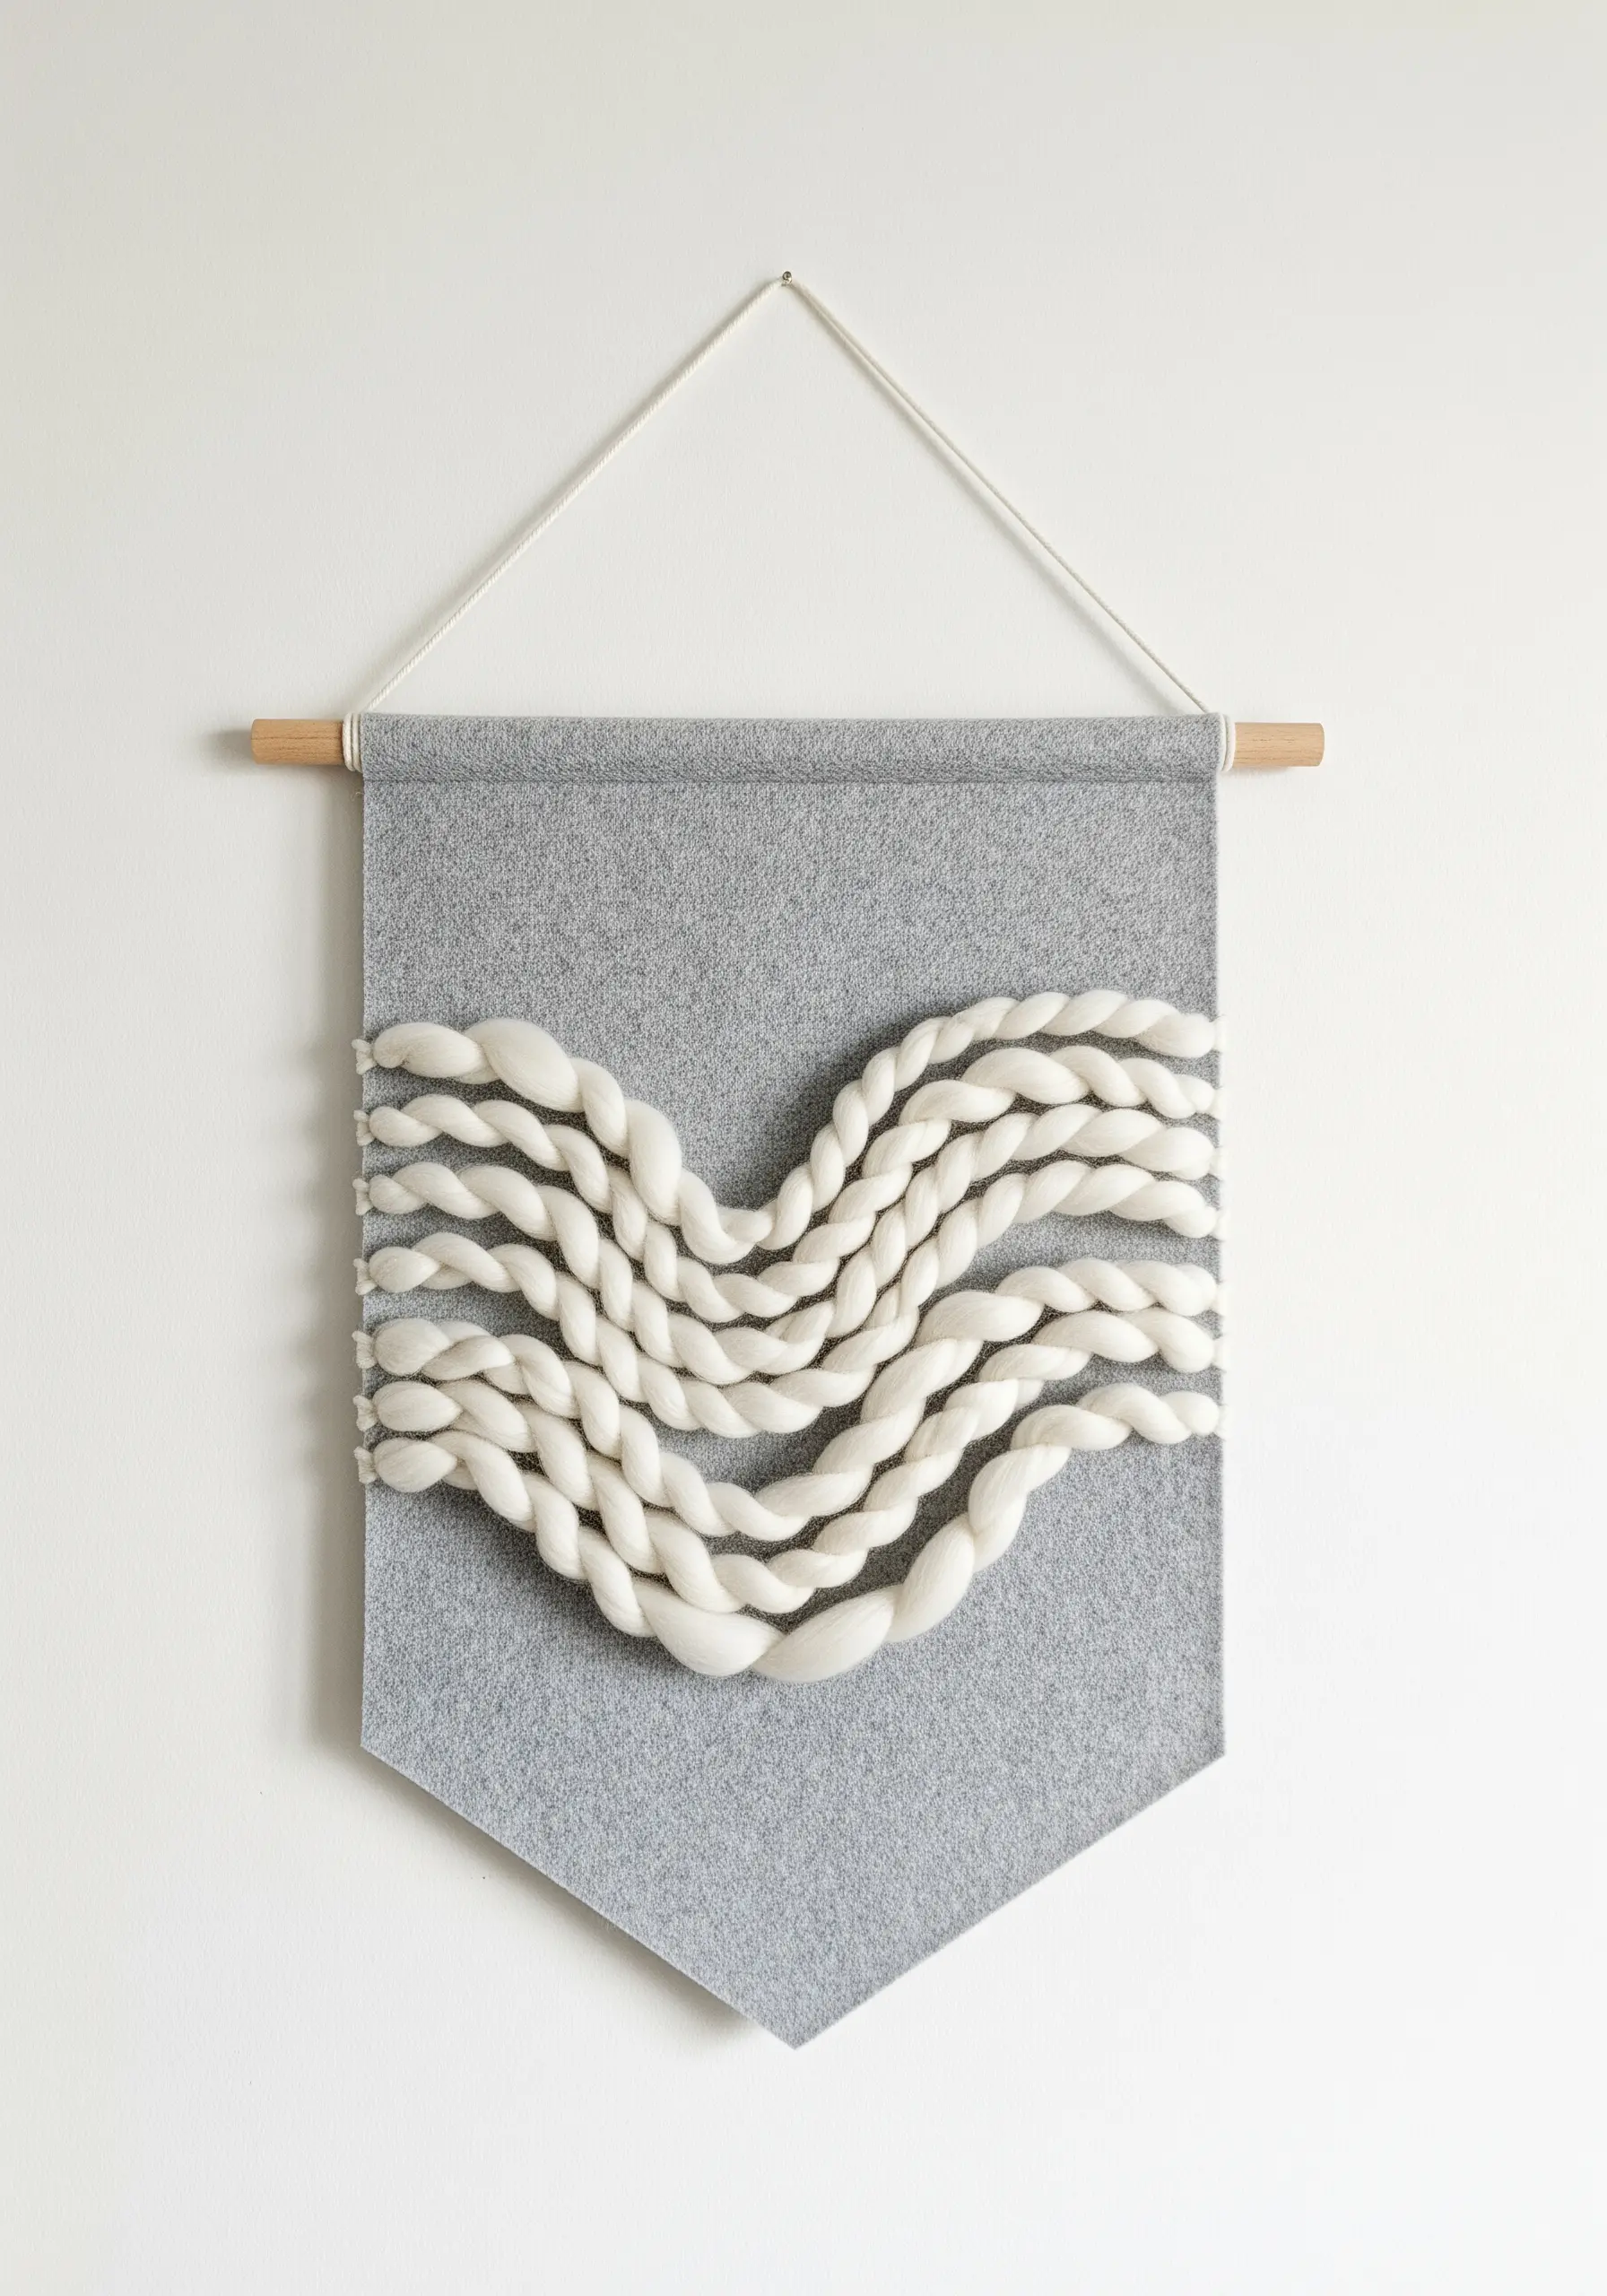
Create a high-impact piece with minimal effort by couching thick wool roving onto a simple felt background.
Choose a high-quality wool felt panel for your base—its dense structure provides a stable and luxurious backdrop that won’t pucker.
Gently twist thick strands of unspun merino roving and arrange them in a simple, flowing wave pattern.
Use a matching thread to tack the roving down with small, invisible stitches on the underside, preserving the clean look of the sculptural yarn.
8. The Tassel Cascade
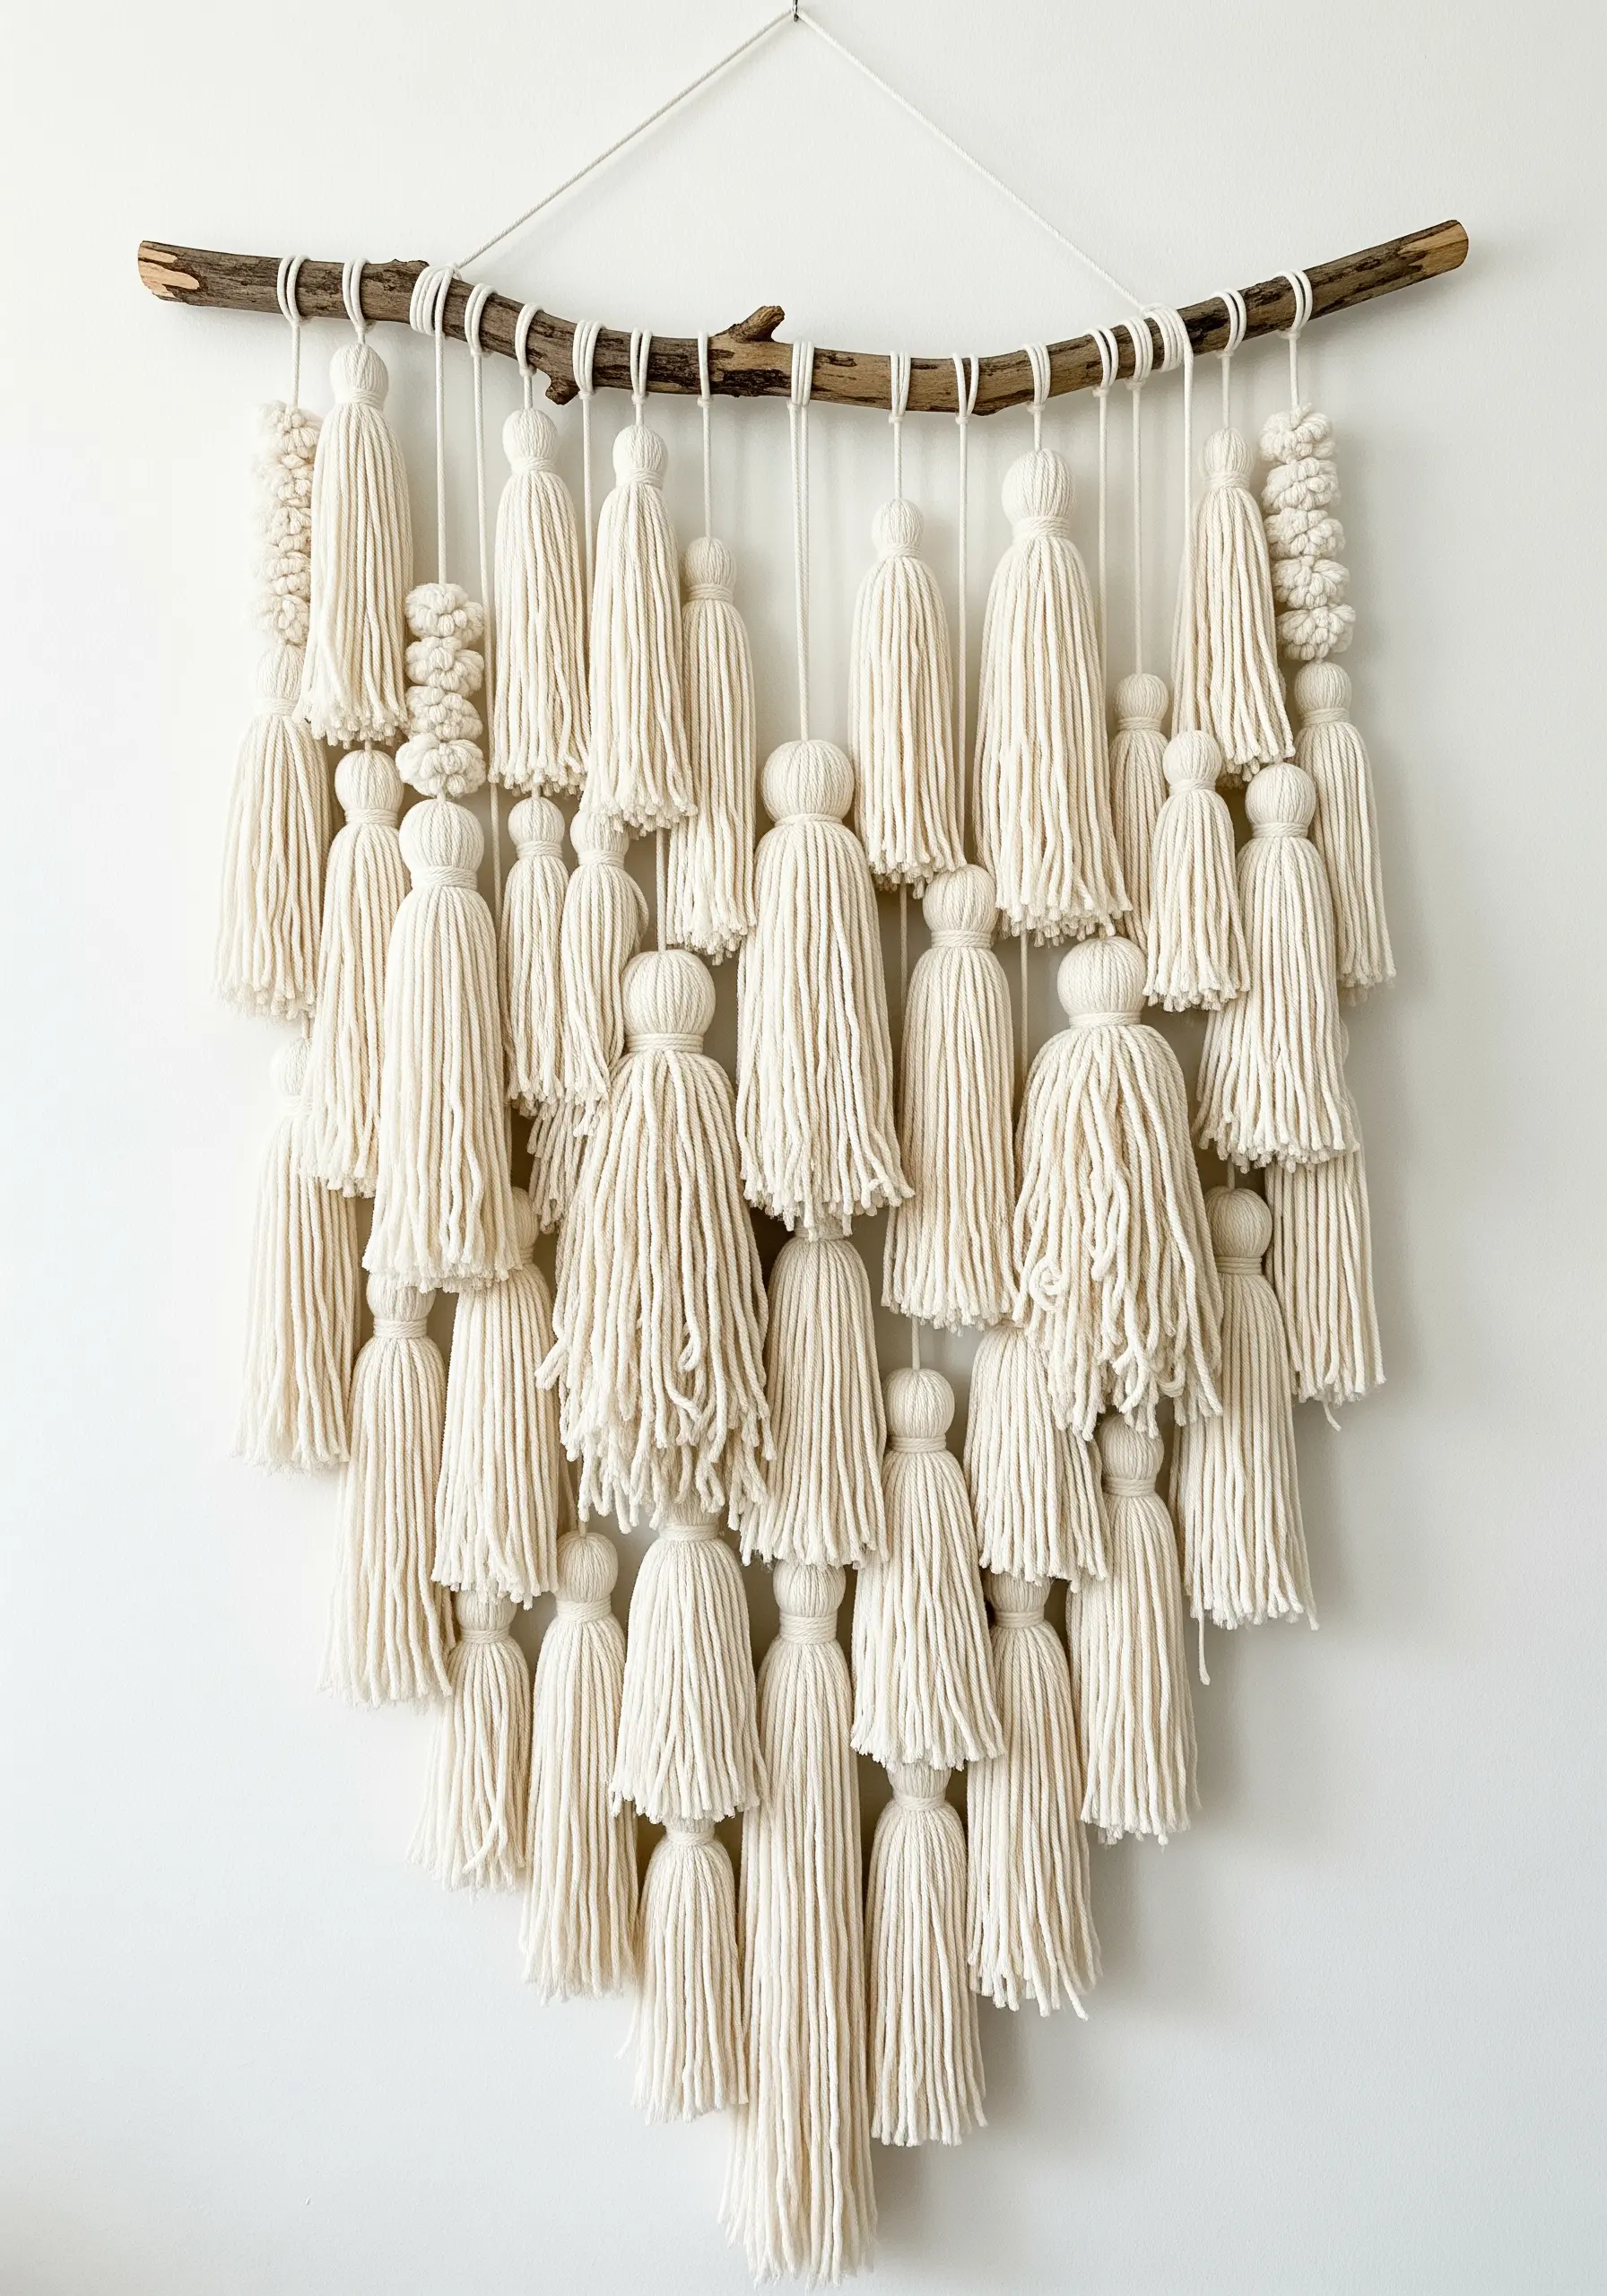
Build a wall hanging entirely from tassels, focusing on consistency and arrangement to create a sense of movement.
Make all your tassels using a template (like a piece of cardboard) to ensure they are uniform in length and fullness.
Vary the hanging height of each tassel, arranging them in a V-shape or an organic cascade to guide the eye downwards.
Adding a few knotted beads to the suspension cords introduces a subtle detail that breaks up the texture and adds a touch of refinement.
9. Punch Needle Landscapes: Depth Through Texture
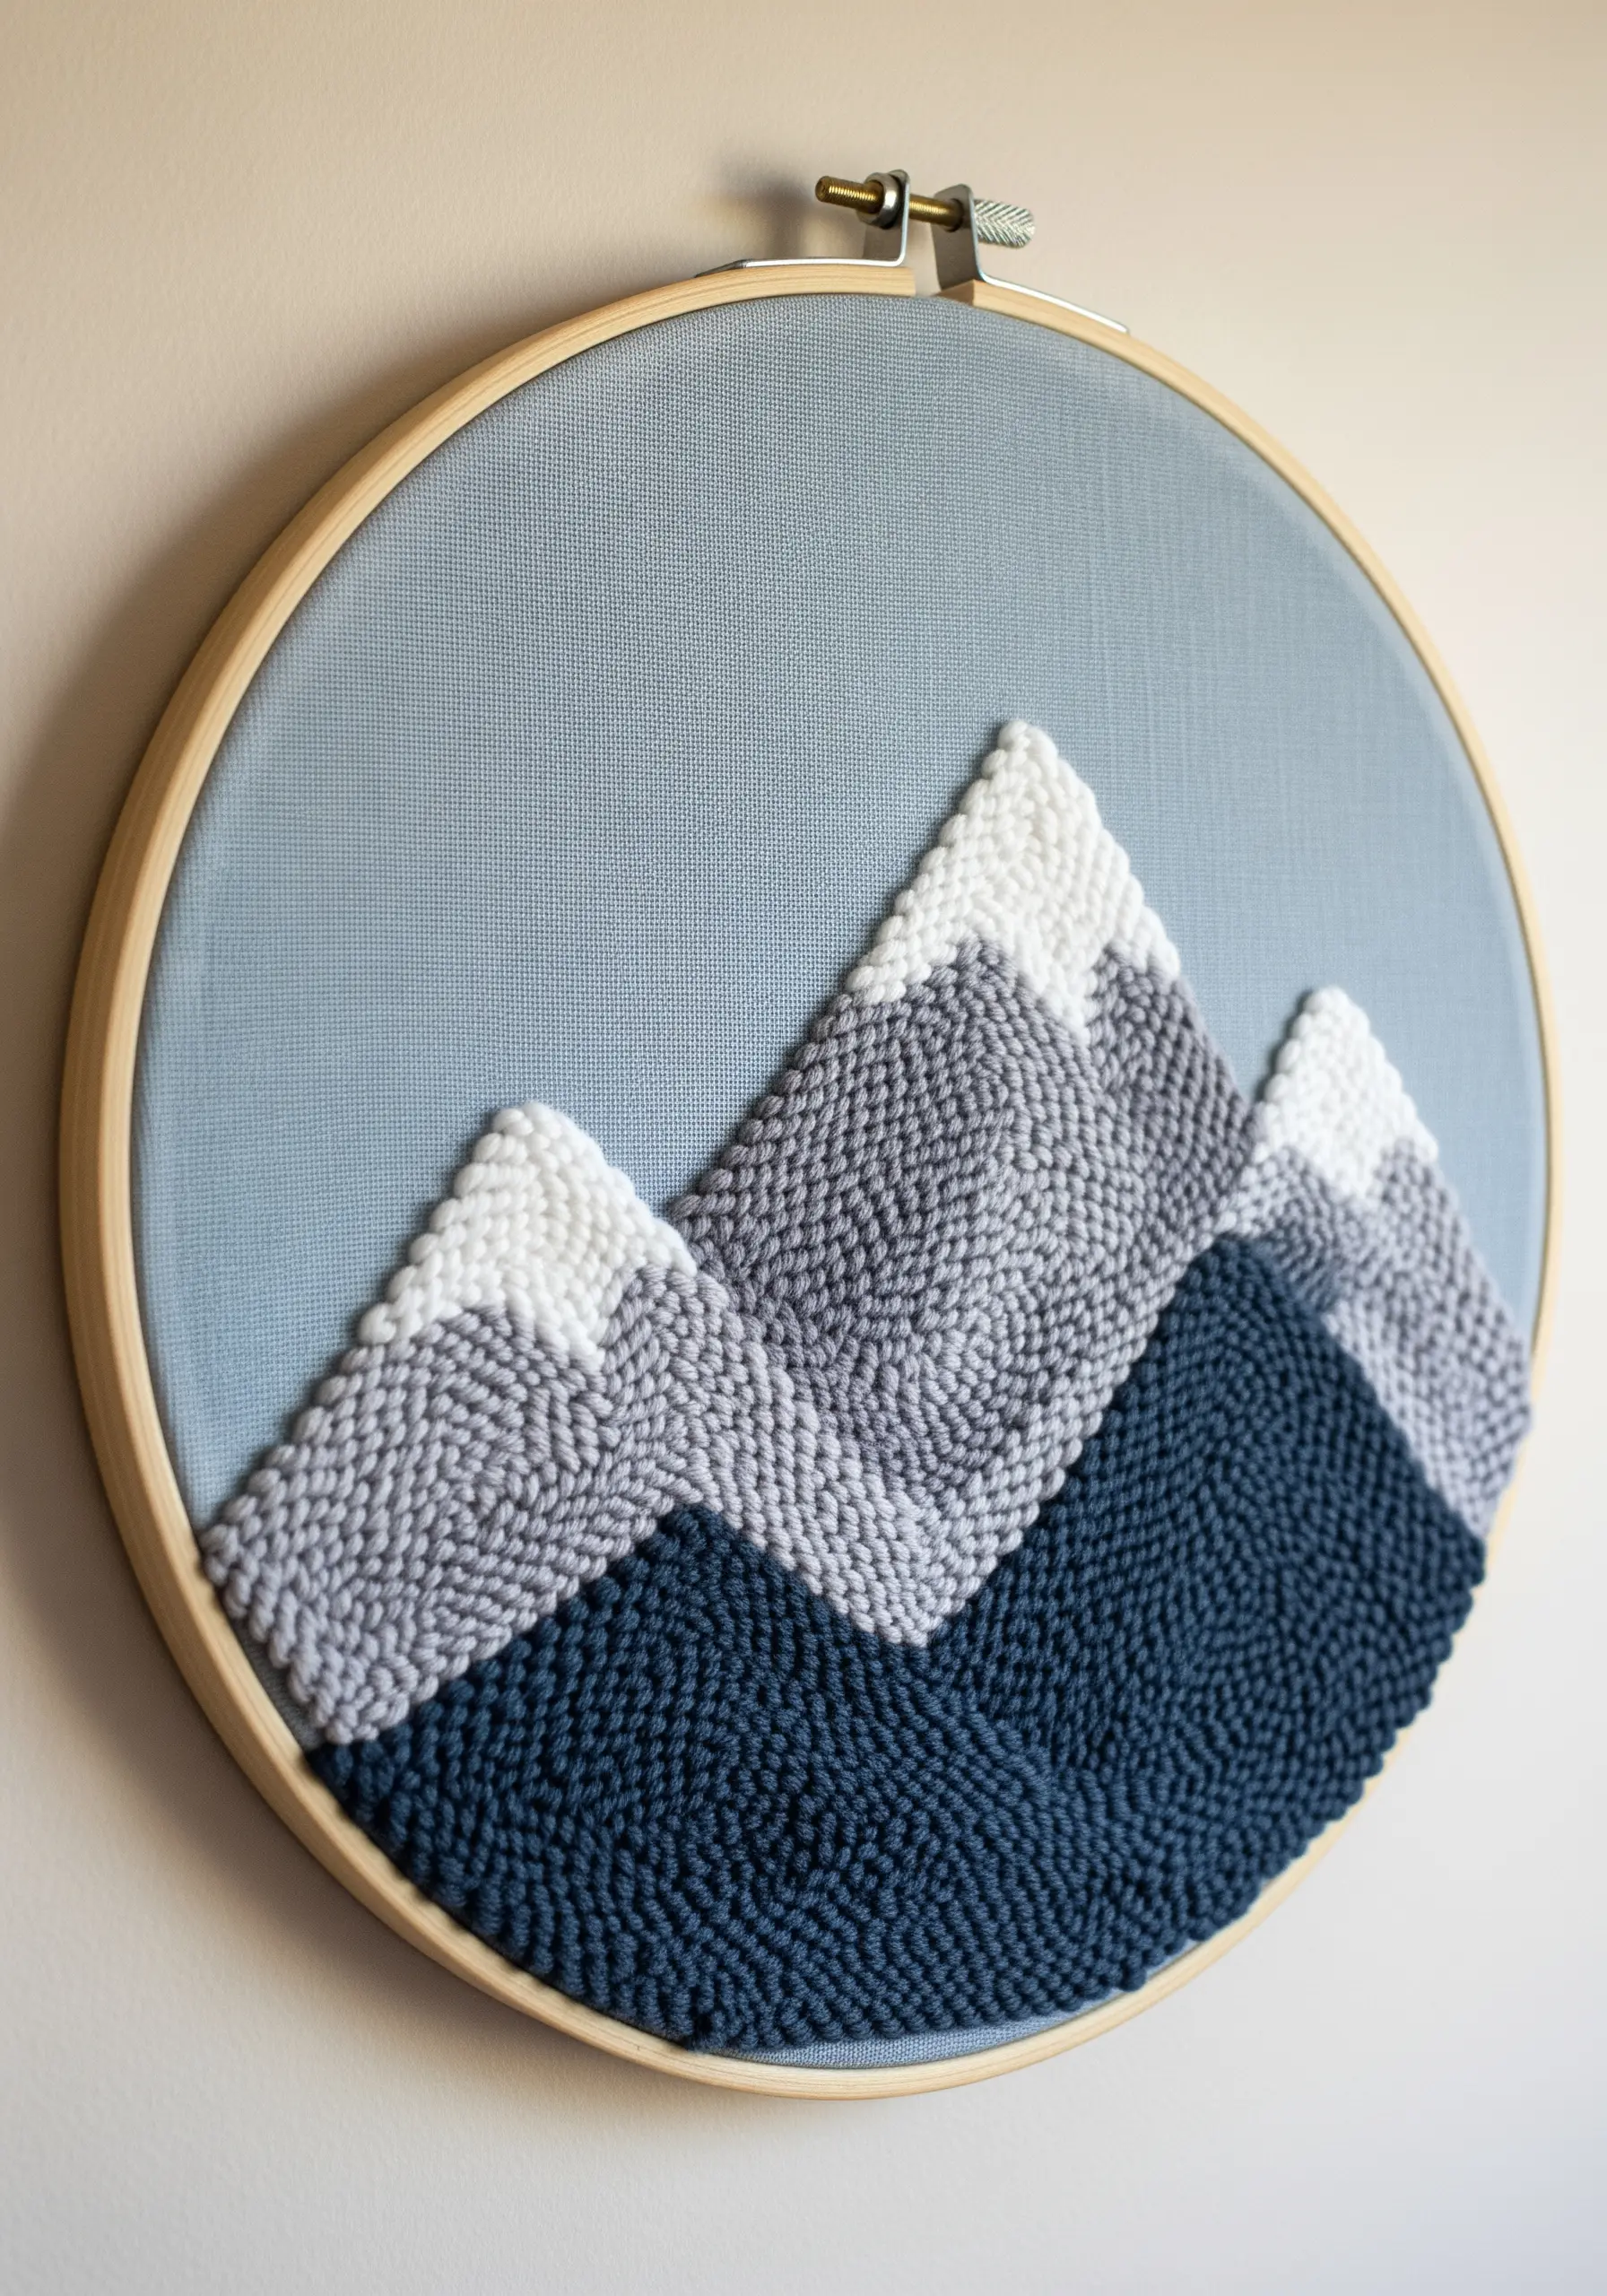
Use the punch needle to create a stylized landscape, employing texture and color to suggest depth and distance.
Work your design on a tightly woven fabric like monk’s cloth, stretched taut in a hoop to ensure even loops.
Create a sense of perspective by using a darker, denser yarn for the foreground mountains and lighter shades for those in the distance.
The uniform, nubby texture of the punch needle loops gives the simple geometric shapes a tactile quality that feels both modern and cozy.
10. The Hybrid Weave: A Sampler of Stitches

Combine multiple fiber techniques into one cohesive wall hanging to showcase a range of textures.
Divide your piece into horizontal bands, dedicating each section to a different craft: macrame knots at the top, a woven center, and a long, fringed finish.
Stick to a tight, neutral color palette—like cream, beige, and tan—to unify the different textures and prevent the design from looking too busy.
This sampler approach results in sophisticated mixed-fiber wall hangings that are rich in detail and craftsmanship.
11. Raw Roving Display
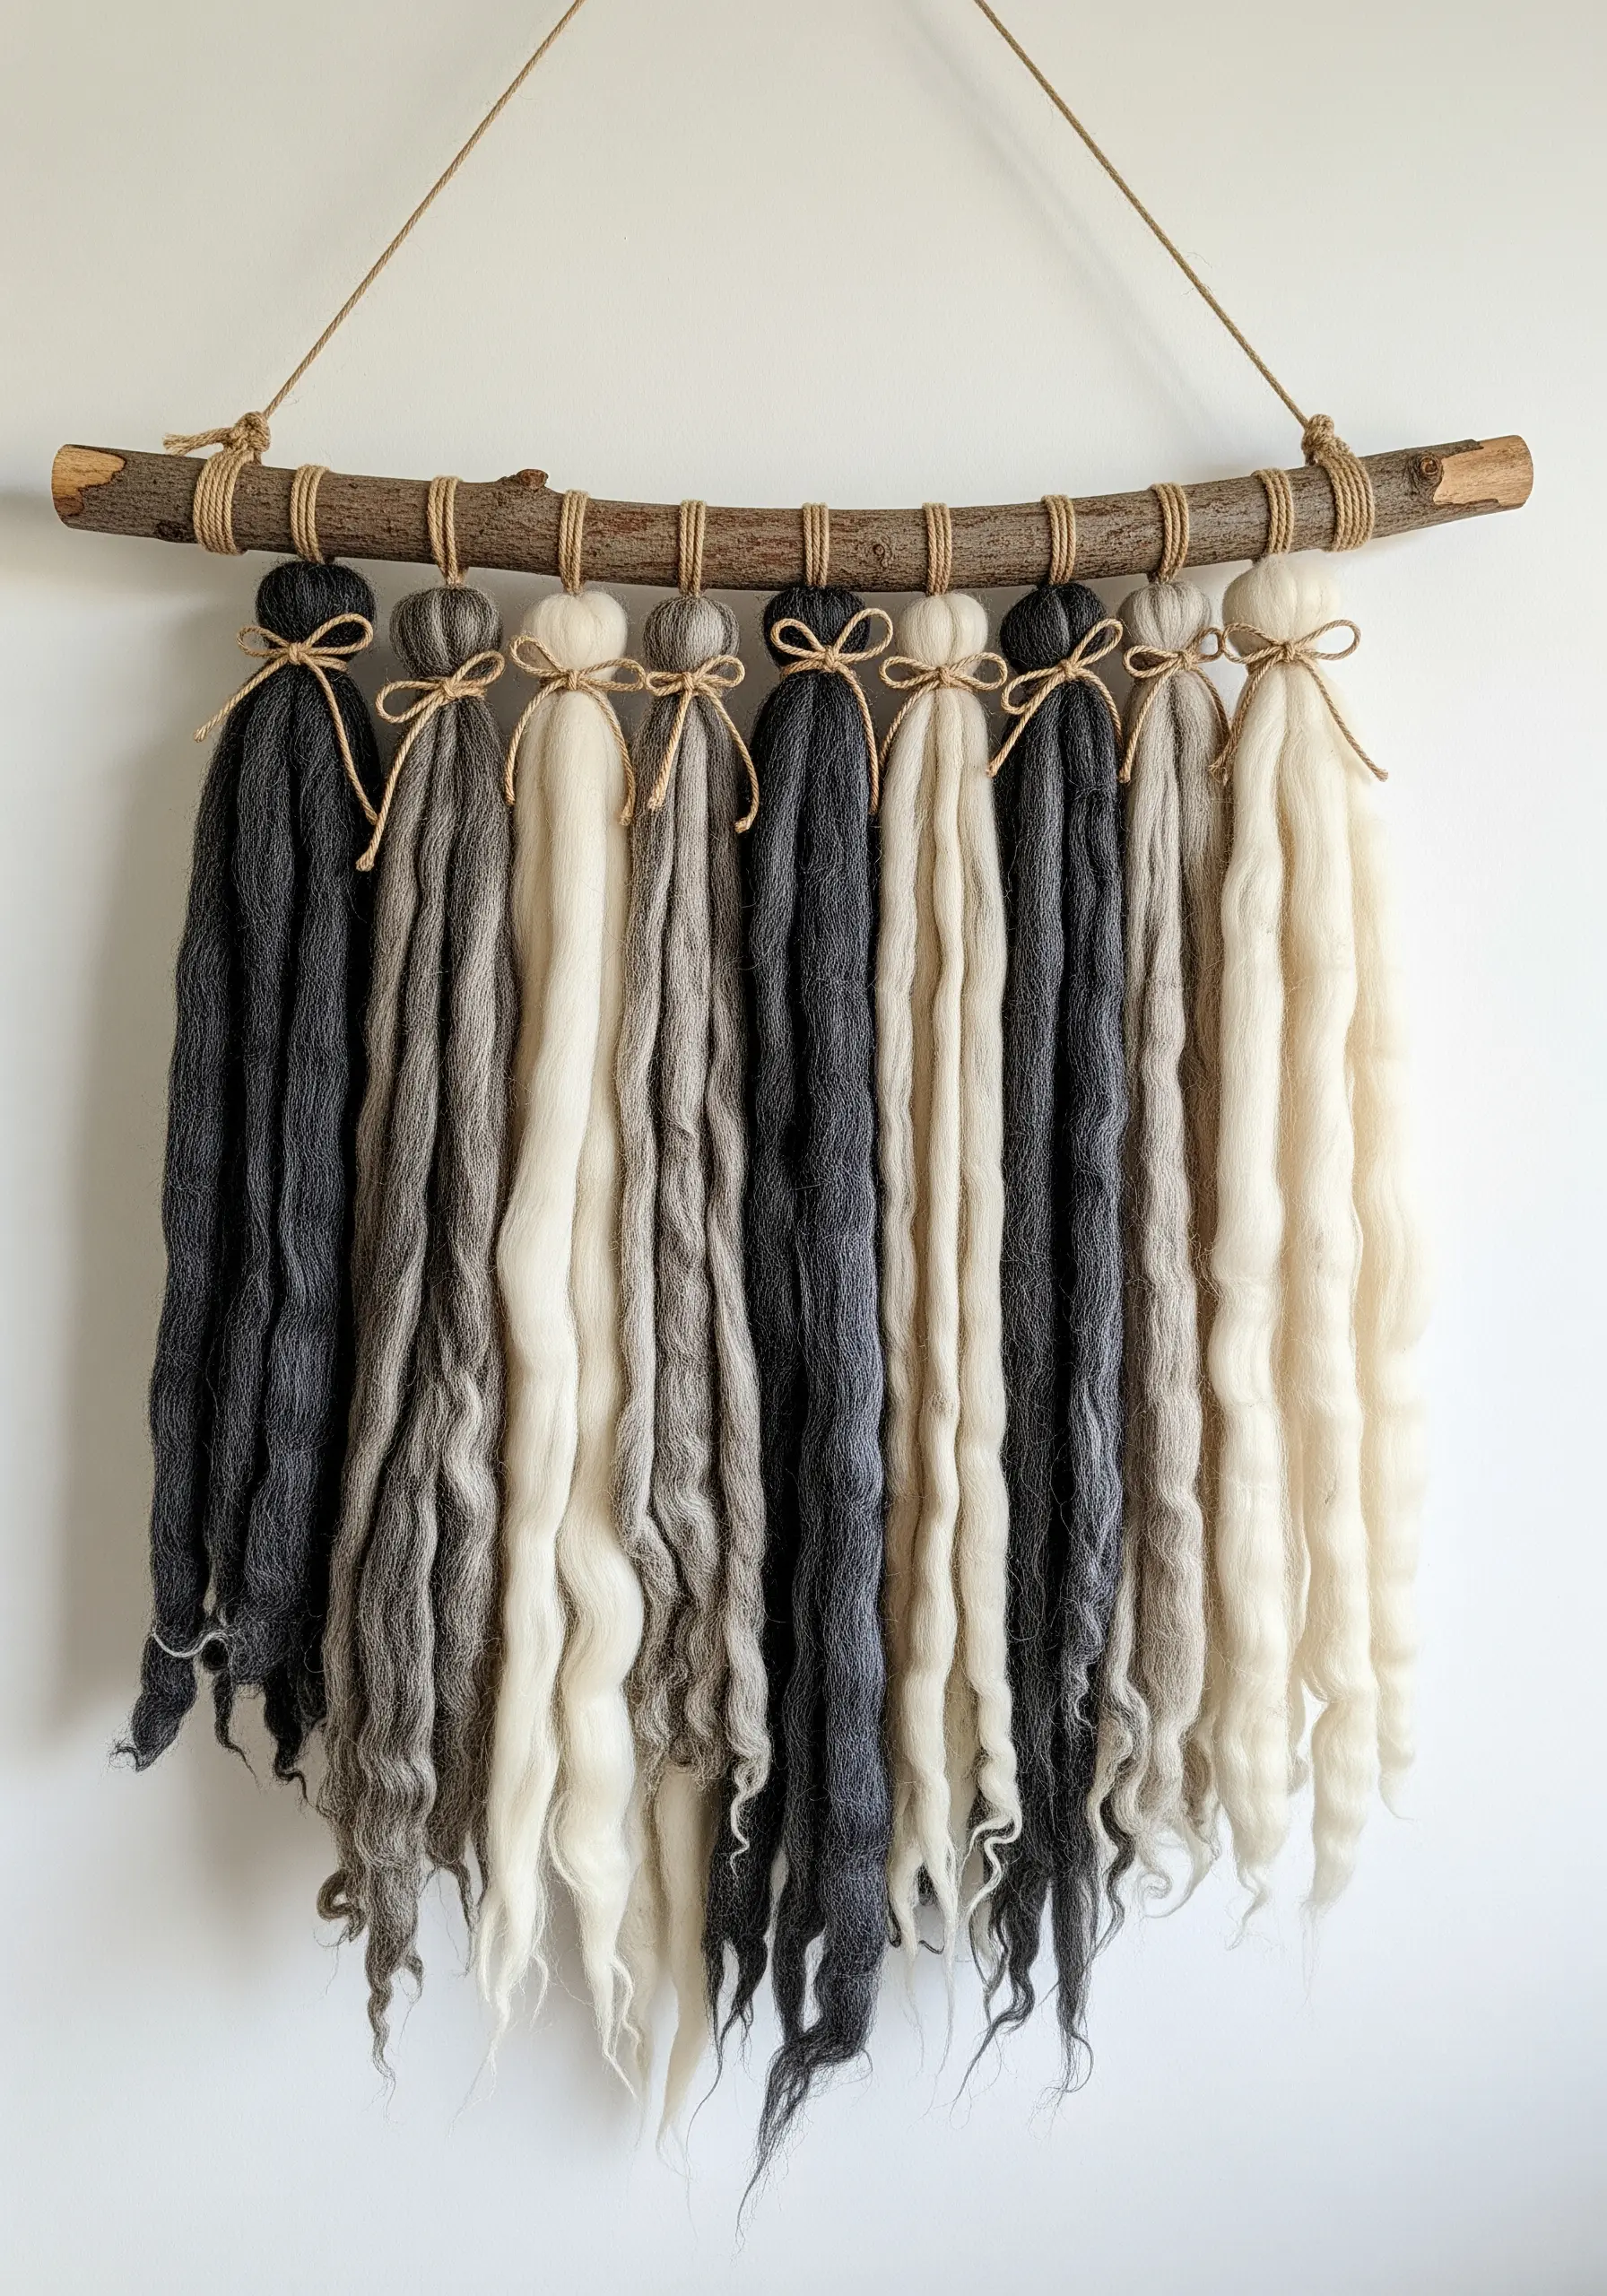
Celebrate the beauty of the material itself by creating a wall hanging from pure, unspun wool roving.
Source high-quality merino or Corriedale wool roving in a blended, tonal colorway for natural depth and variation.
Simply loop generous hanks of the roving over a rustic branch, securing each with a simple knot or a wrap of twine.
There’s no complex technique here; the art lies in the organic texture and the gentle drape of the raw fibers, creating one of those perfect handmade organic pieces.
12. Sculptural Wrapped Dowels
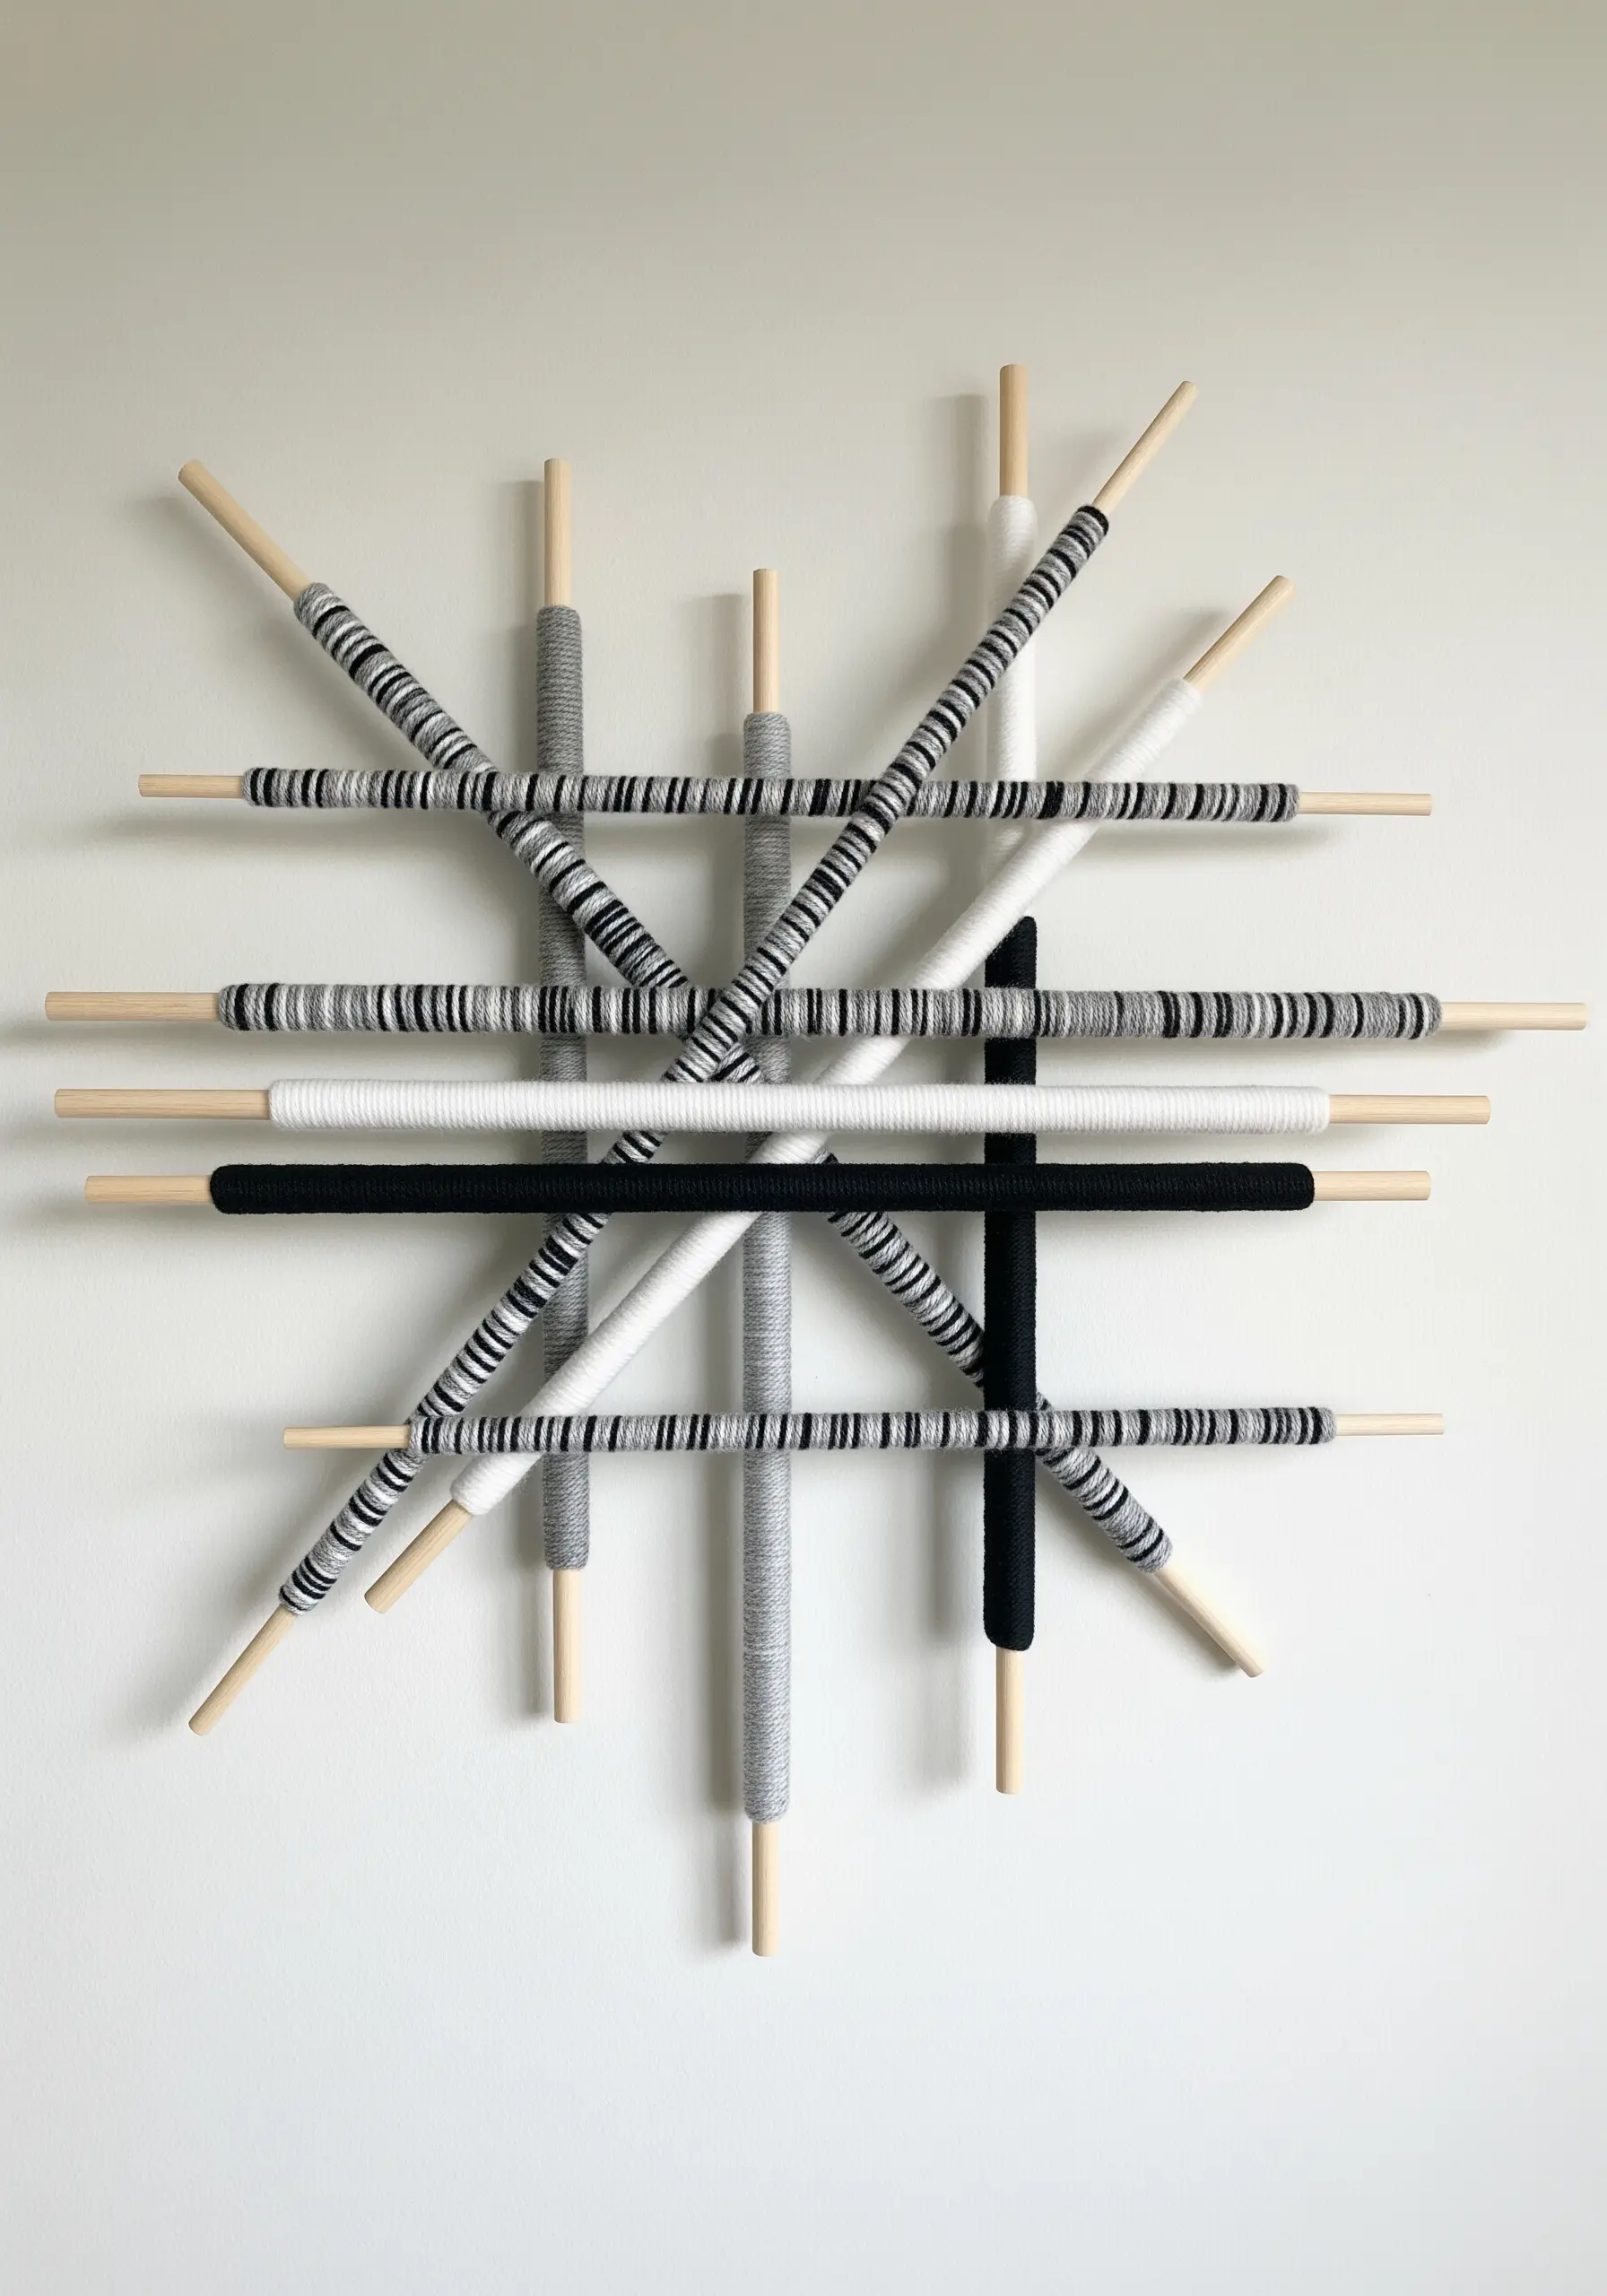
Construct a modern, geometric sculpture by wrapping wooden dowels with yarn and arranging them in an interlocking composition.
Wrap each dowel tightly and evenly with yarn, changing colors to create striped patterns for added visual interest.
Secure the ends of the yarn with a small dab of fabric glue for a clean, professional finish.
Arrange and attach the wrapped dowels in a grid or starburst formation to create a three-dimensional piece that plays with line, color, and shadow.
13. The Minimalist Fringe Curtain

Create a dramatic, large-scale statement piece using nothing but fringe for a powerful yet simple effect.
Choose a fine, silky cord with a good weight and drape, like a 2-3mm braided cotton or viscose rope.
Attach the cords to a curved metal frame using a simple lark’s head knot, ensuring they hang straight and close together.
Trim the bottom in a clean, asymmetrical line. This transforms it from a simple curtain into a modern, sculptural modern embroidered tapestry.
14. Graphic Knitted Panels
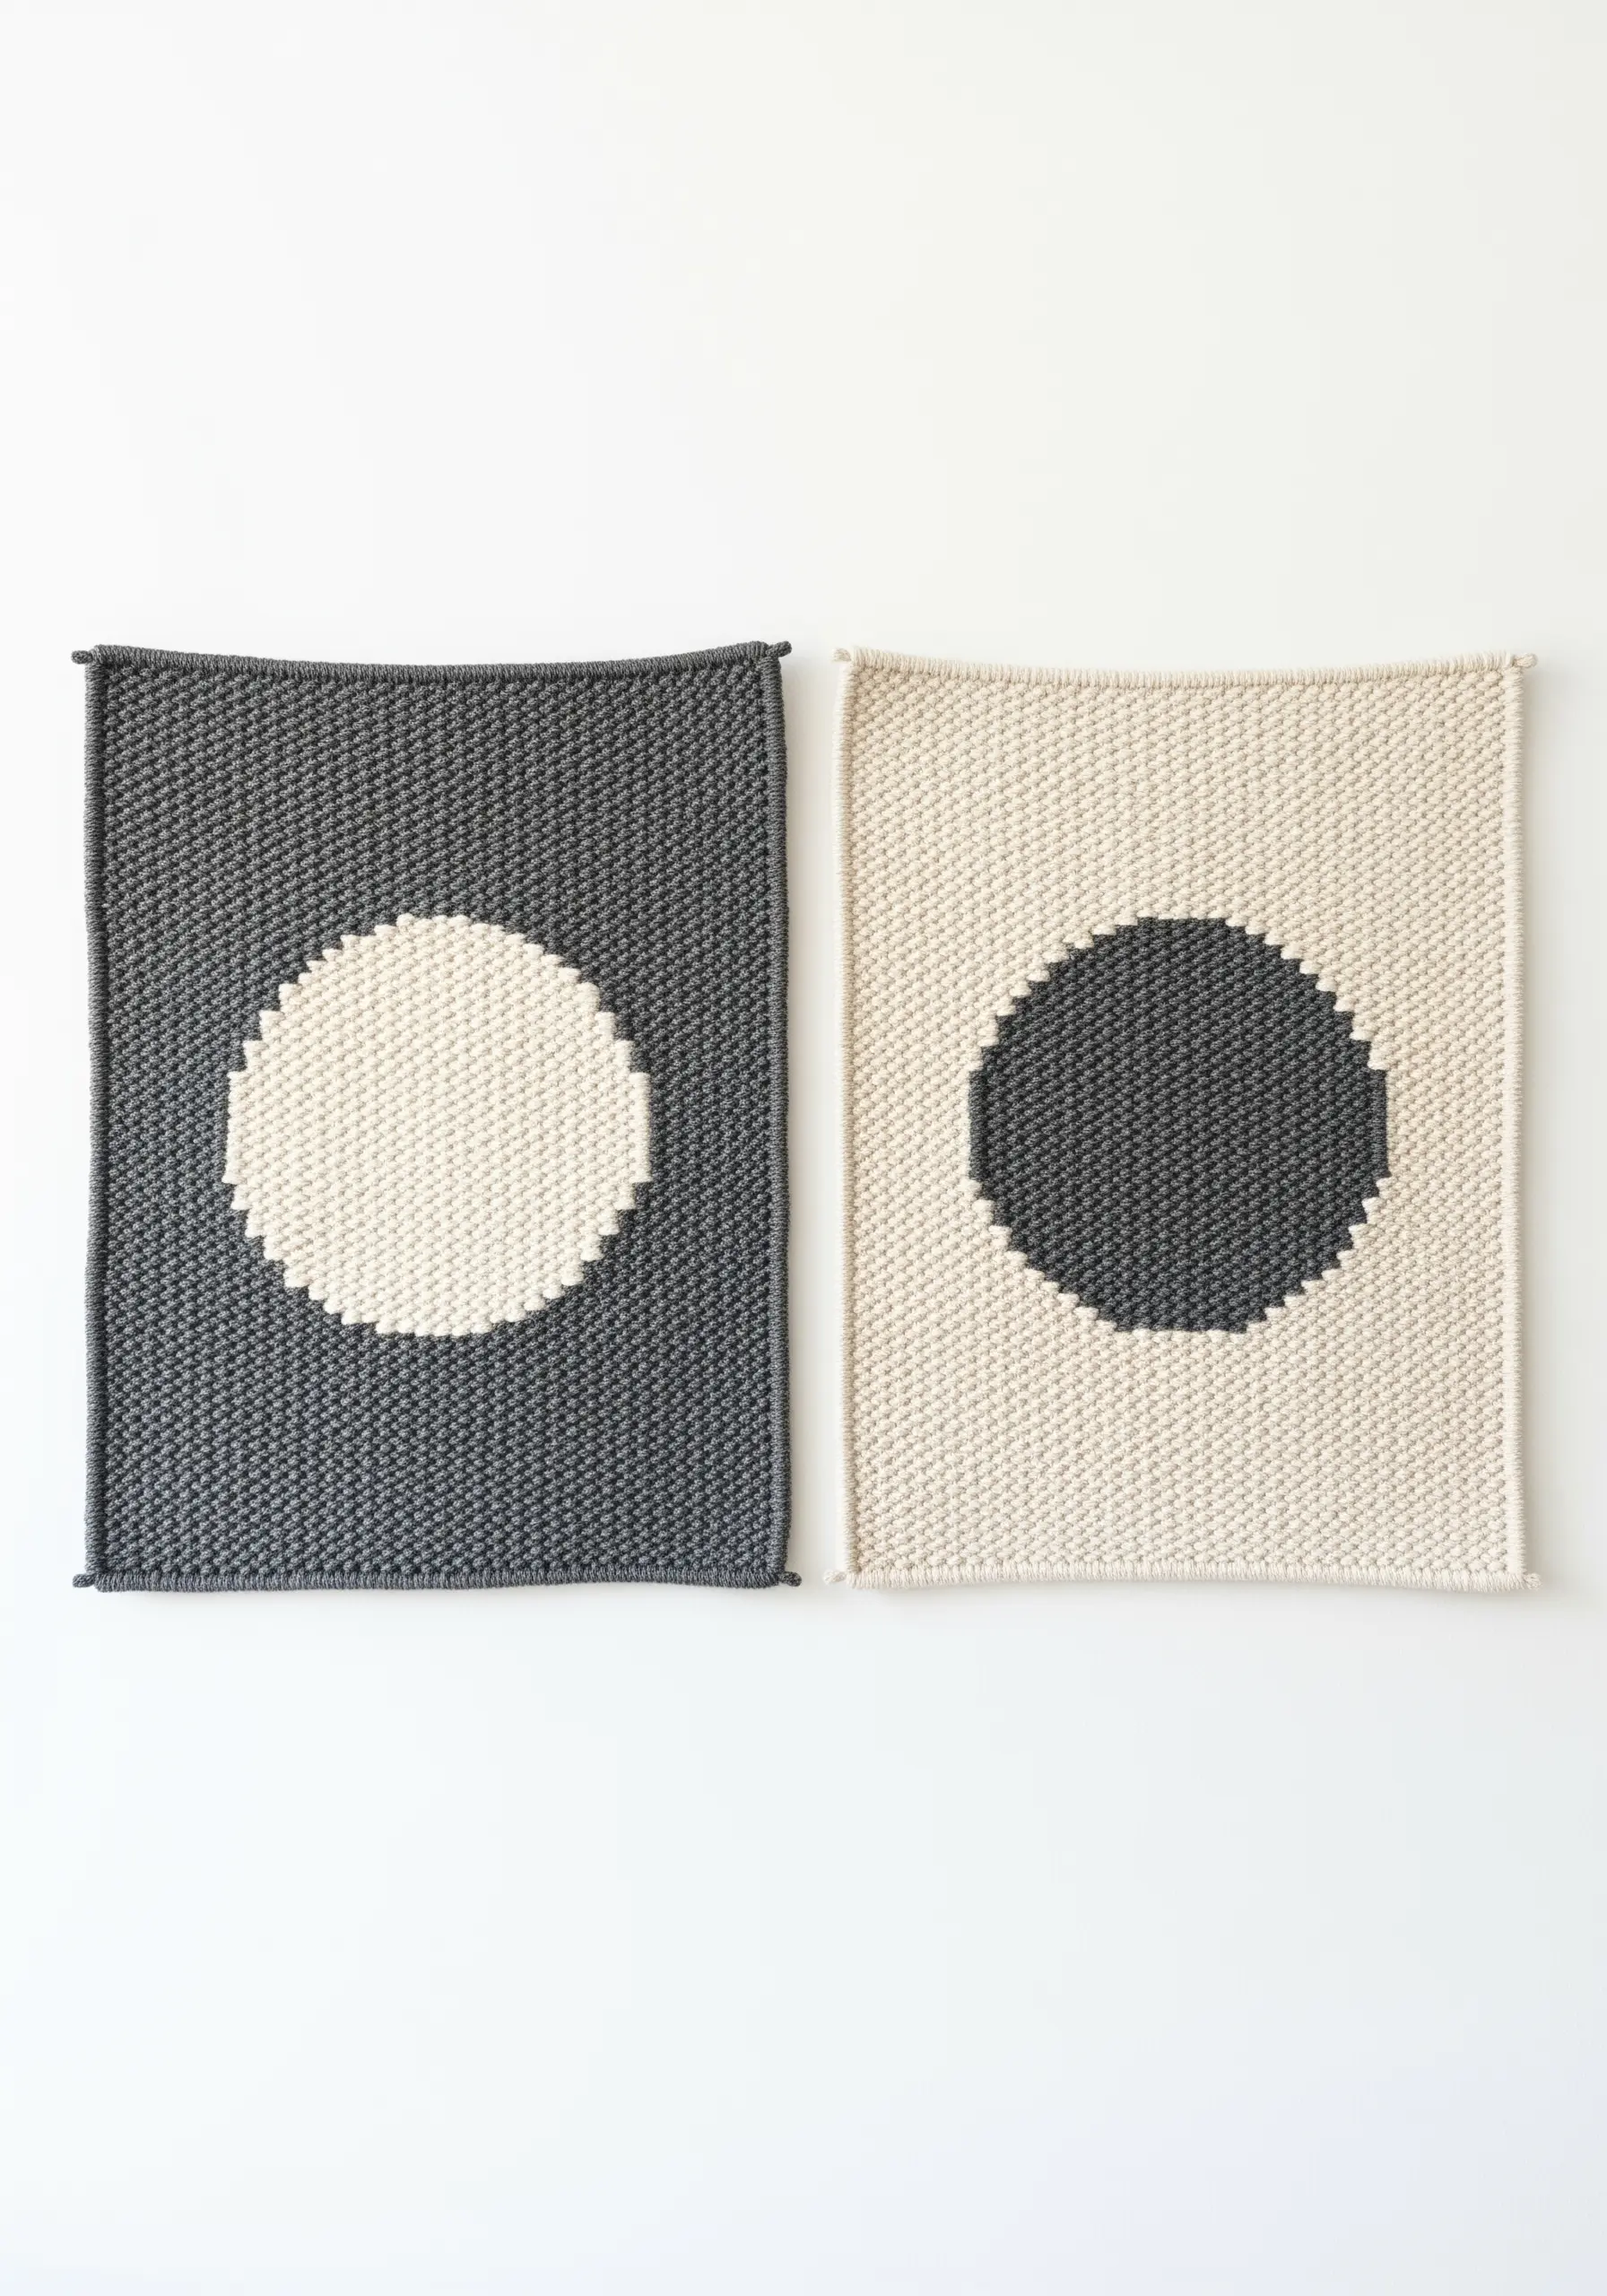
Use basic knitting stitches to create graphic wall art with a soft, tactile feel.
A simple garter stitch (knitting every row) is all you need; its inherent bumpy texture provides a pleasing, grid-like surface.
Create a pair of complementary panels using intarsia knitting for the color blocking, reversing the colors for a diptych effect.
This is a wonderful way to translate graphic design principles into a textile medium, resulting in cozy, modern art.
15. The Felt Ball Mobile
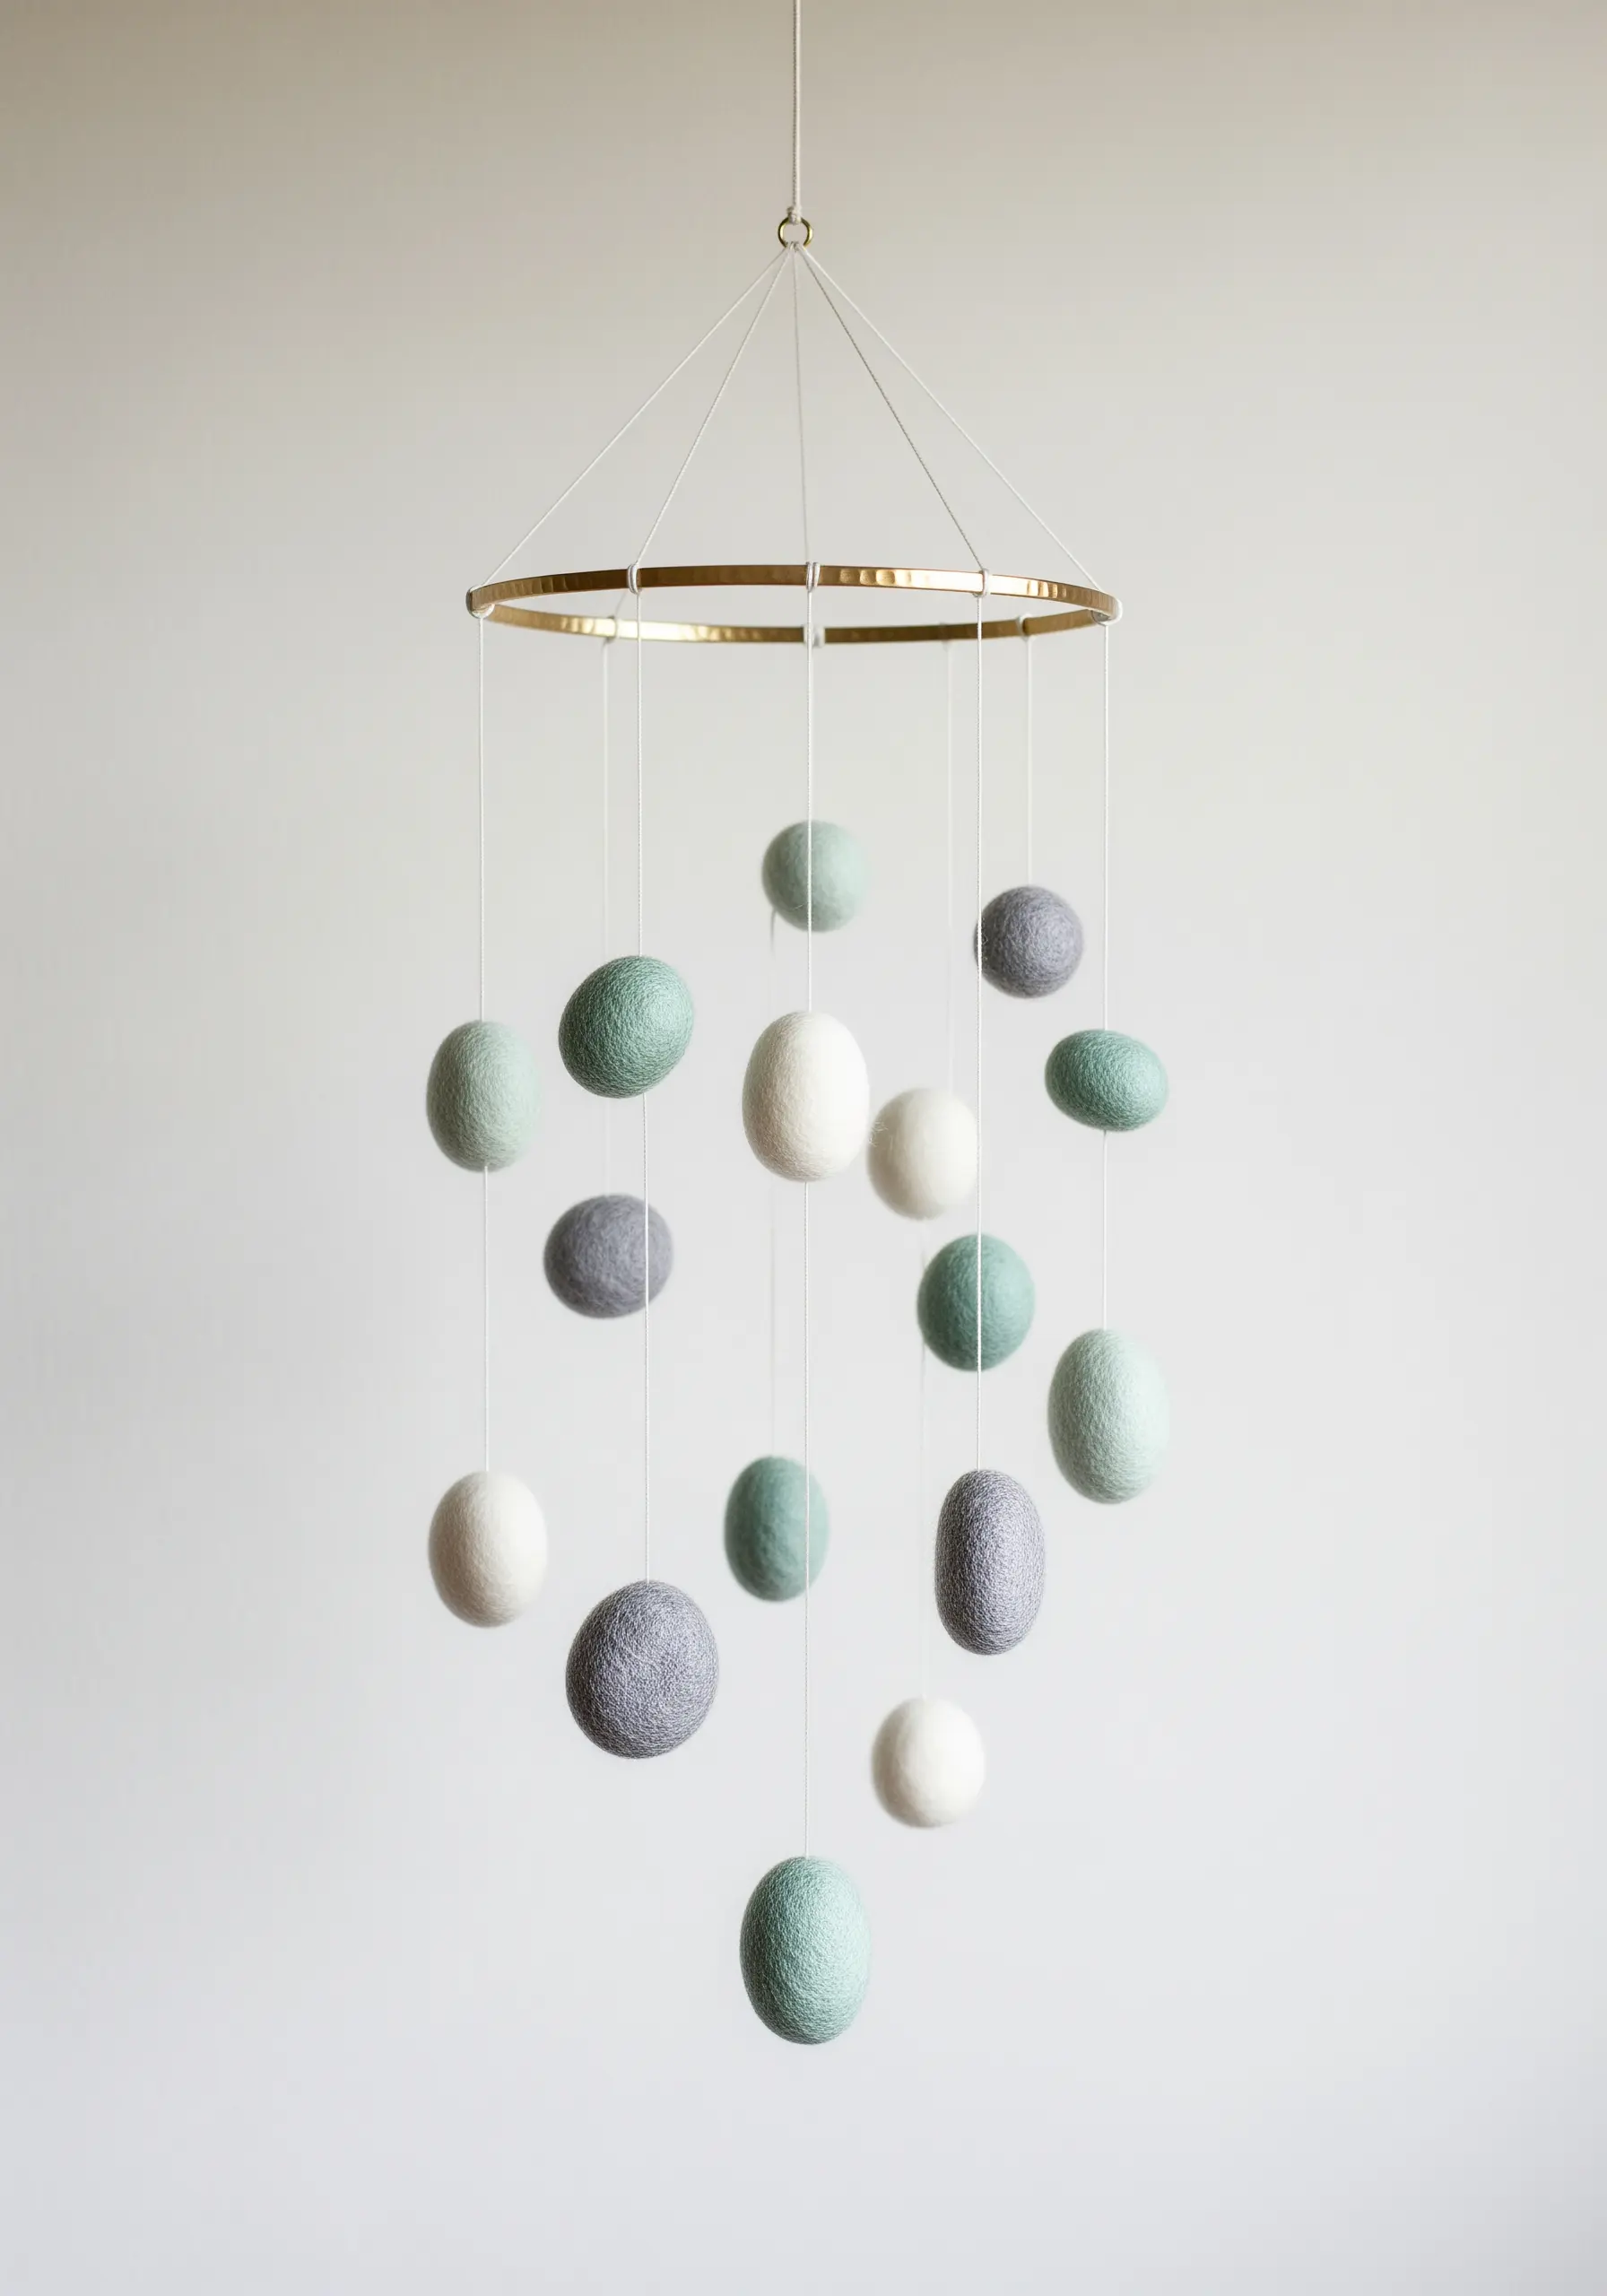
Construct an elegant, lightweight mobile that adds a gentle touch of color and movement to a room.
Use 100% wool felt balls; their texture is warm and natural, absorbing light beautifully.
Suspend the balls from a brass hoop using a fine but strong thread, like nylon beading cord, which will be nearly invisible.
Create a sense of gentle motion by varying the lengths of the threads and the spacing between the balls, allowing them to float at different levels.
16. The Modern Felt Garland
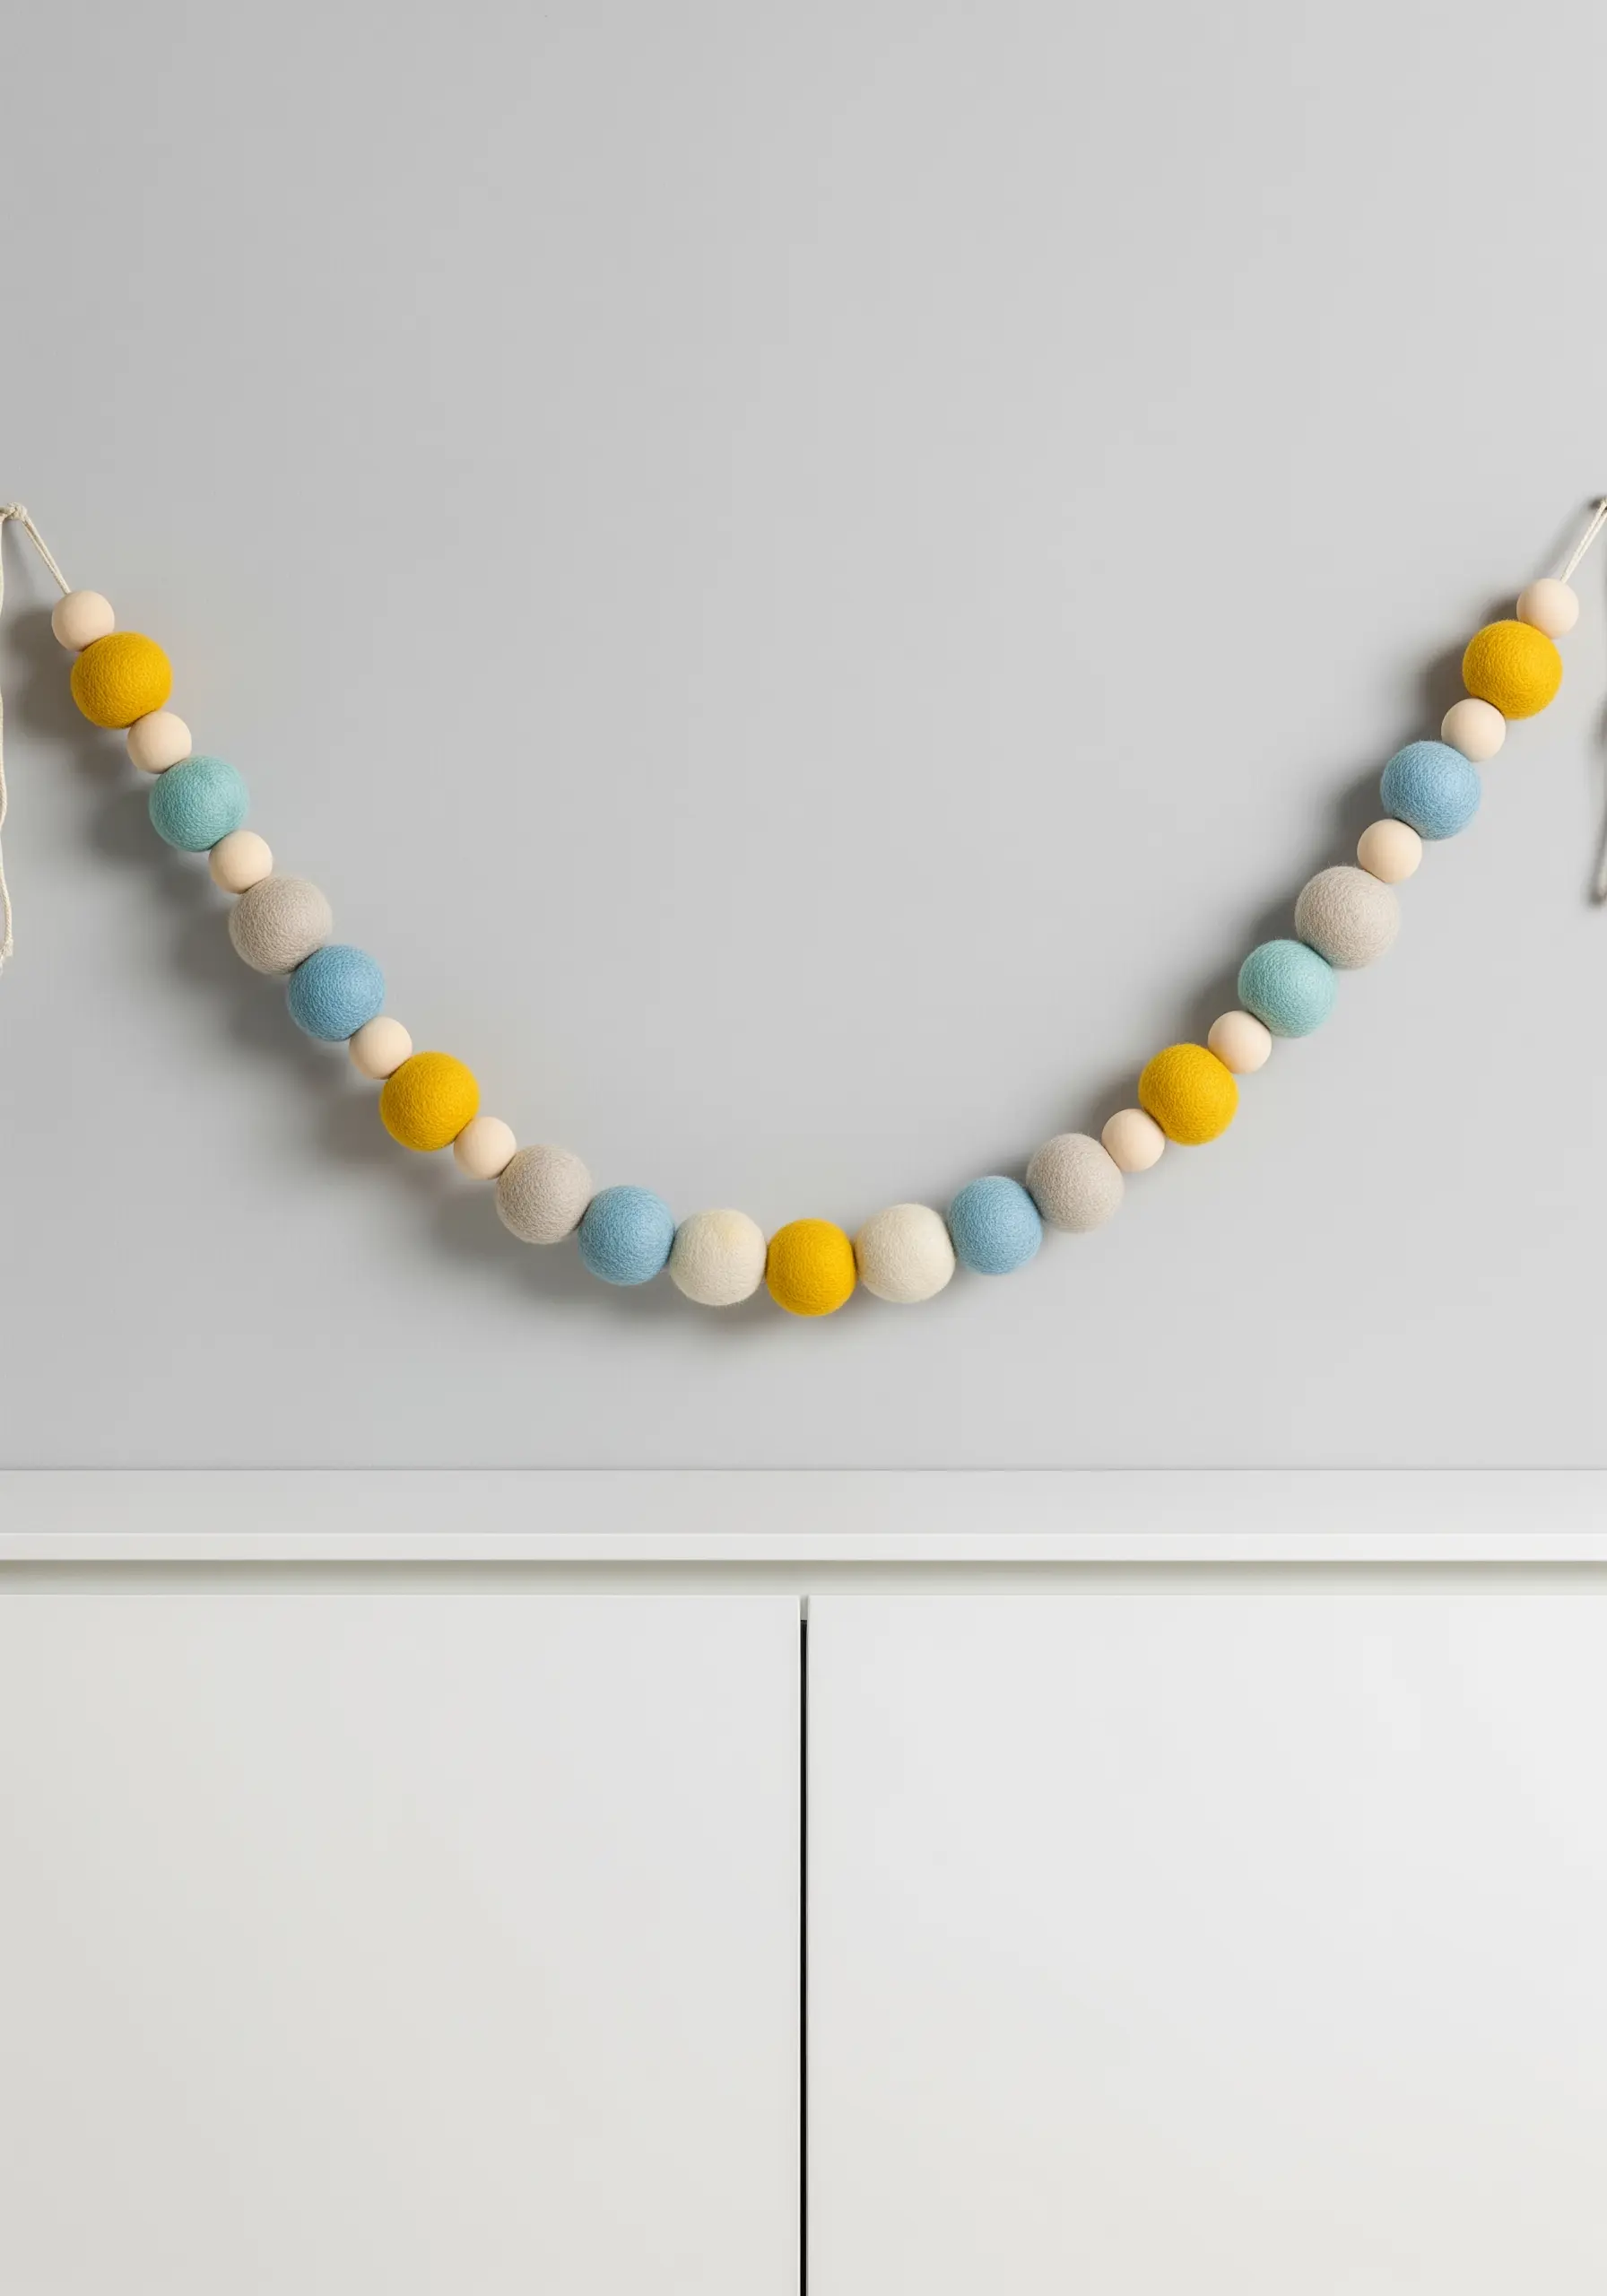
Elevate the simple garland by focusing on a sophisticated color palette and the rhythm of its components.
Thread wool felt balls onto a simple cotton cord, interspersing them with unfinished wooden beads.
The natural wood adds warmth and acts as a spacer, giving each felt ball breathing room and highlighting its color.
Choose a curated color story—like muted blues, mustard yellow, and grey—to ensure your garland feels like intentional decor, not a party decoration.
17. The Sculptural Statement Knot
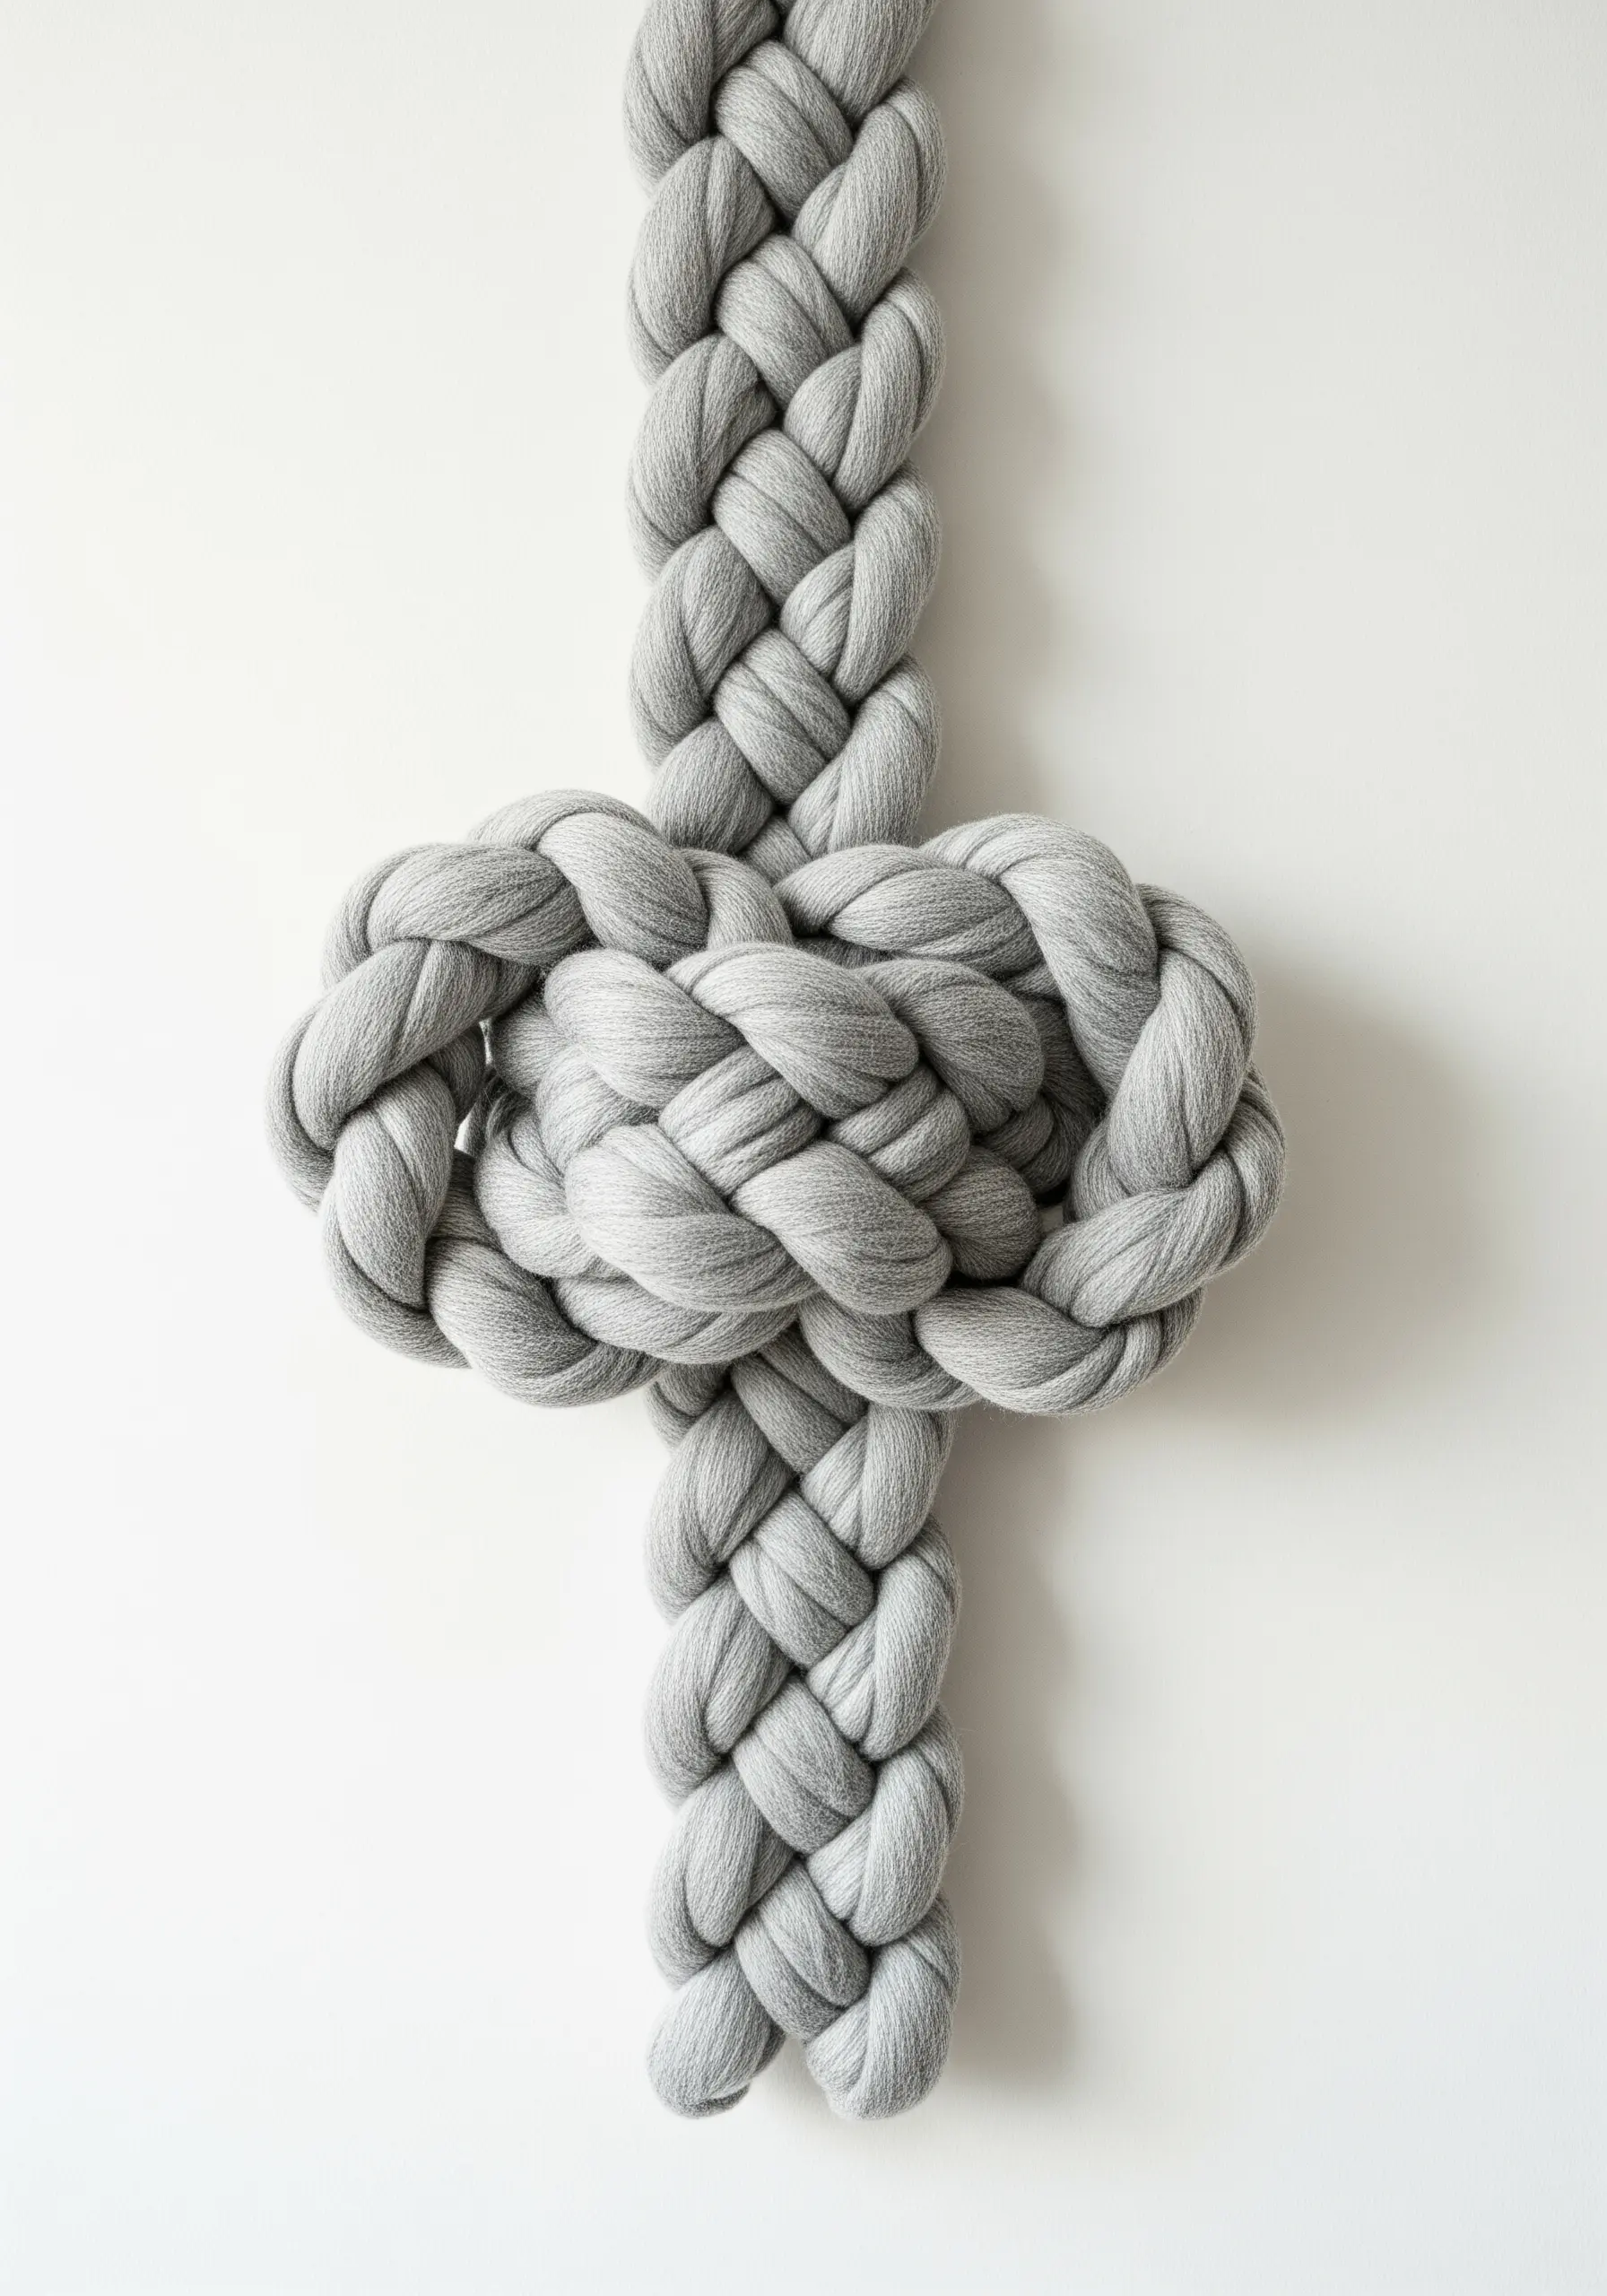
Focus on a single, large-scale knot to create a powerful and sculptural wall piece.
Use an ultra-chunky material like merino wool arm-knitting yarn or cotton tube yarn to give your knot impressive volume and definition.
First, create a long, four-strand braid. Then, tie the entire braid into a complex form like a cruciform knot or a decorative stopper knot.
This technique elevates a simple craft into a piece of abstract fiber sculpture, focusing on form and texture alone.
18. Weaving with Negative Space
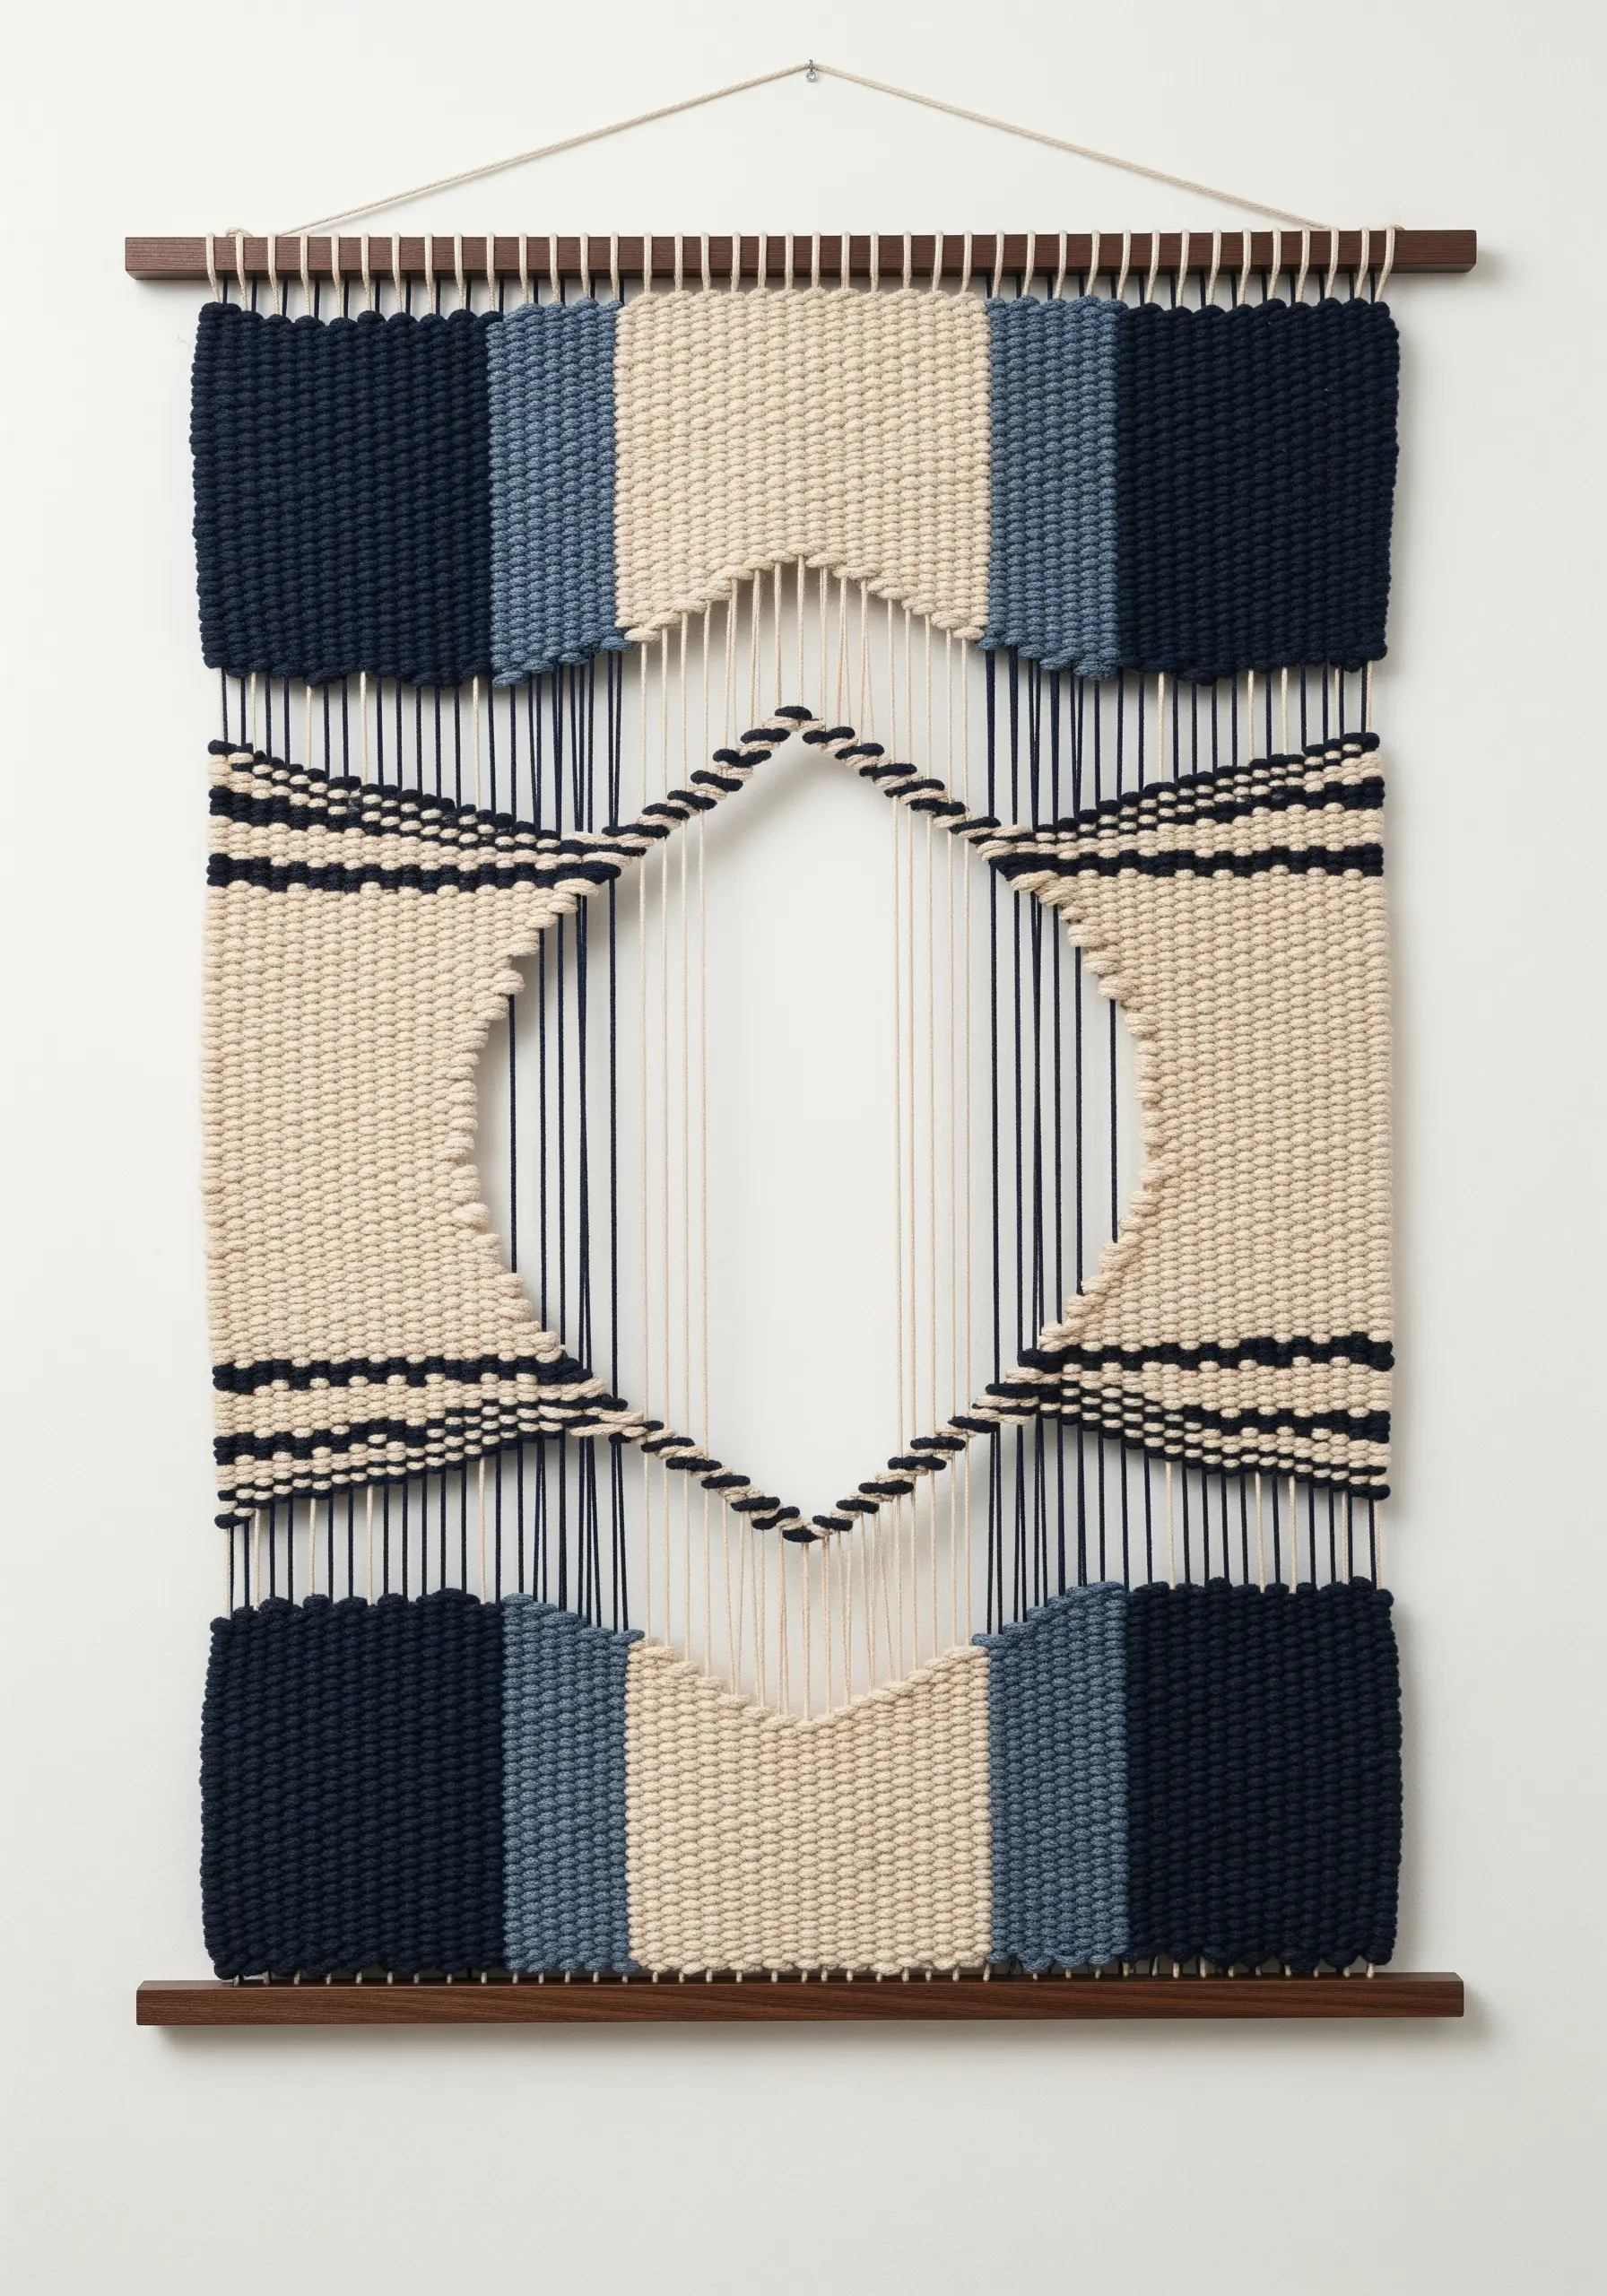
Incorporate the empty space of your loom into the final design for a light, architectural effect.
Instead of weaving from edge to edge, create distinct woven blocks, leaving sections of the vertical warp threads exposed.
This technique draws attention to the structure of the weaving itself, turning the fundamental elements of the craft into a key design feature.
Using negative space for a minimal chic look creates a piece that feels airy and modern, perfectly blending substance and void.


