
Before the light changes and the air cools, there’s a unique language in nature that your needle and thread can translate. It’s found in the texture of bark, the soft fade of a petal, or the sharp glow of a summer sunset.
You don’t need to master hundreds of stitches to capture it. Instead, you need only to shift your focus from just filling a shape to understanding its form and energy. How does light hit it? What is its texture? Where are the shadows?
This collection is an invitation to look closer. Choose one idea that speaks to you. Let it be a meditation on a single texture or a simple gradient. You’ll find that this intentional way of stitching is what transforms your work from a craft into a quiet, personal art form.
1. Build a Wildflower Meadow with Layered Texture
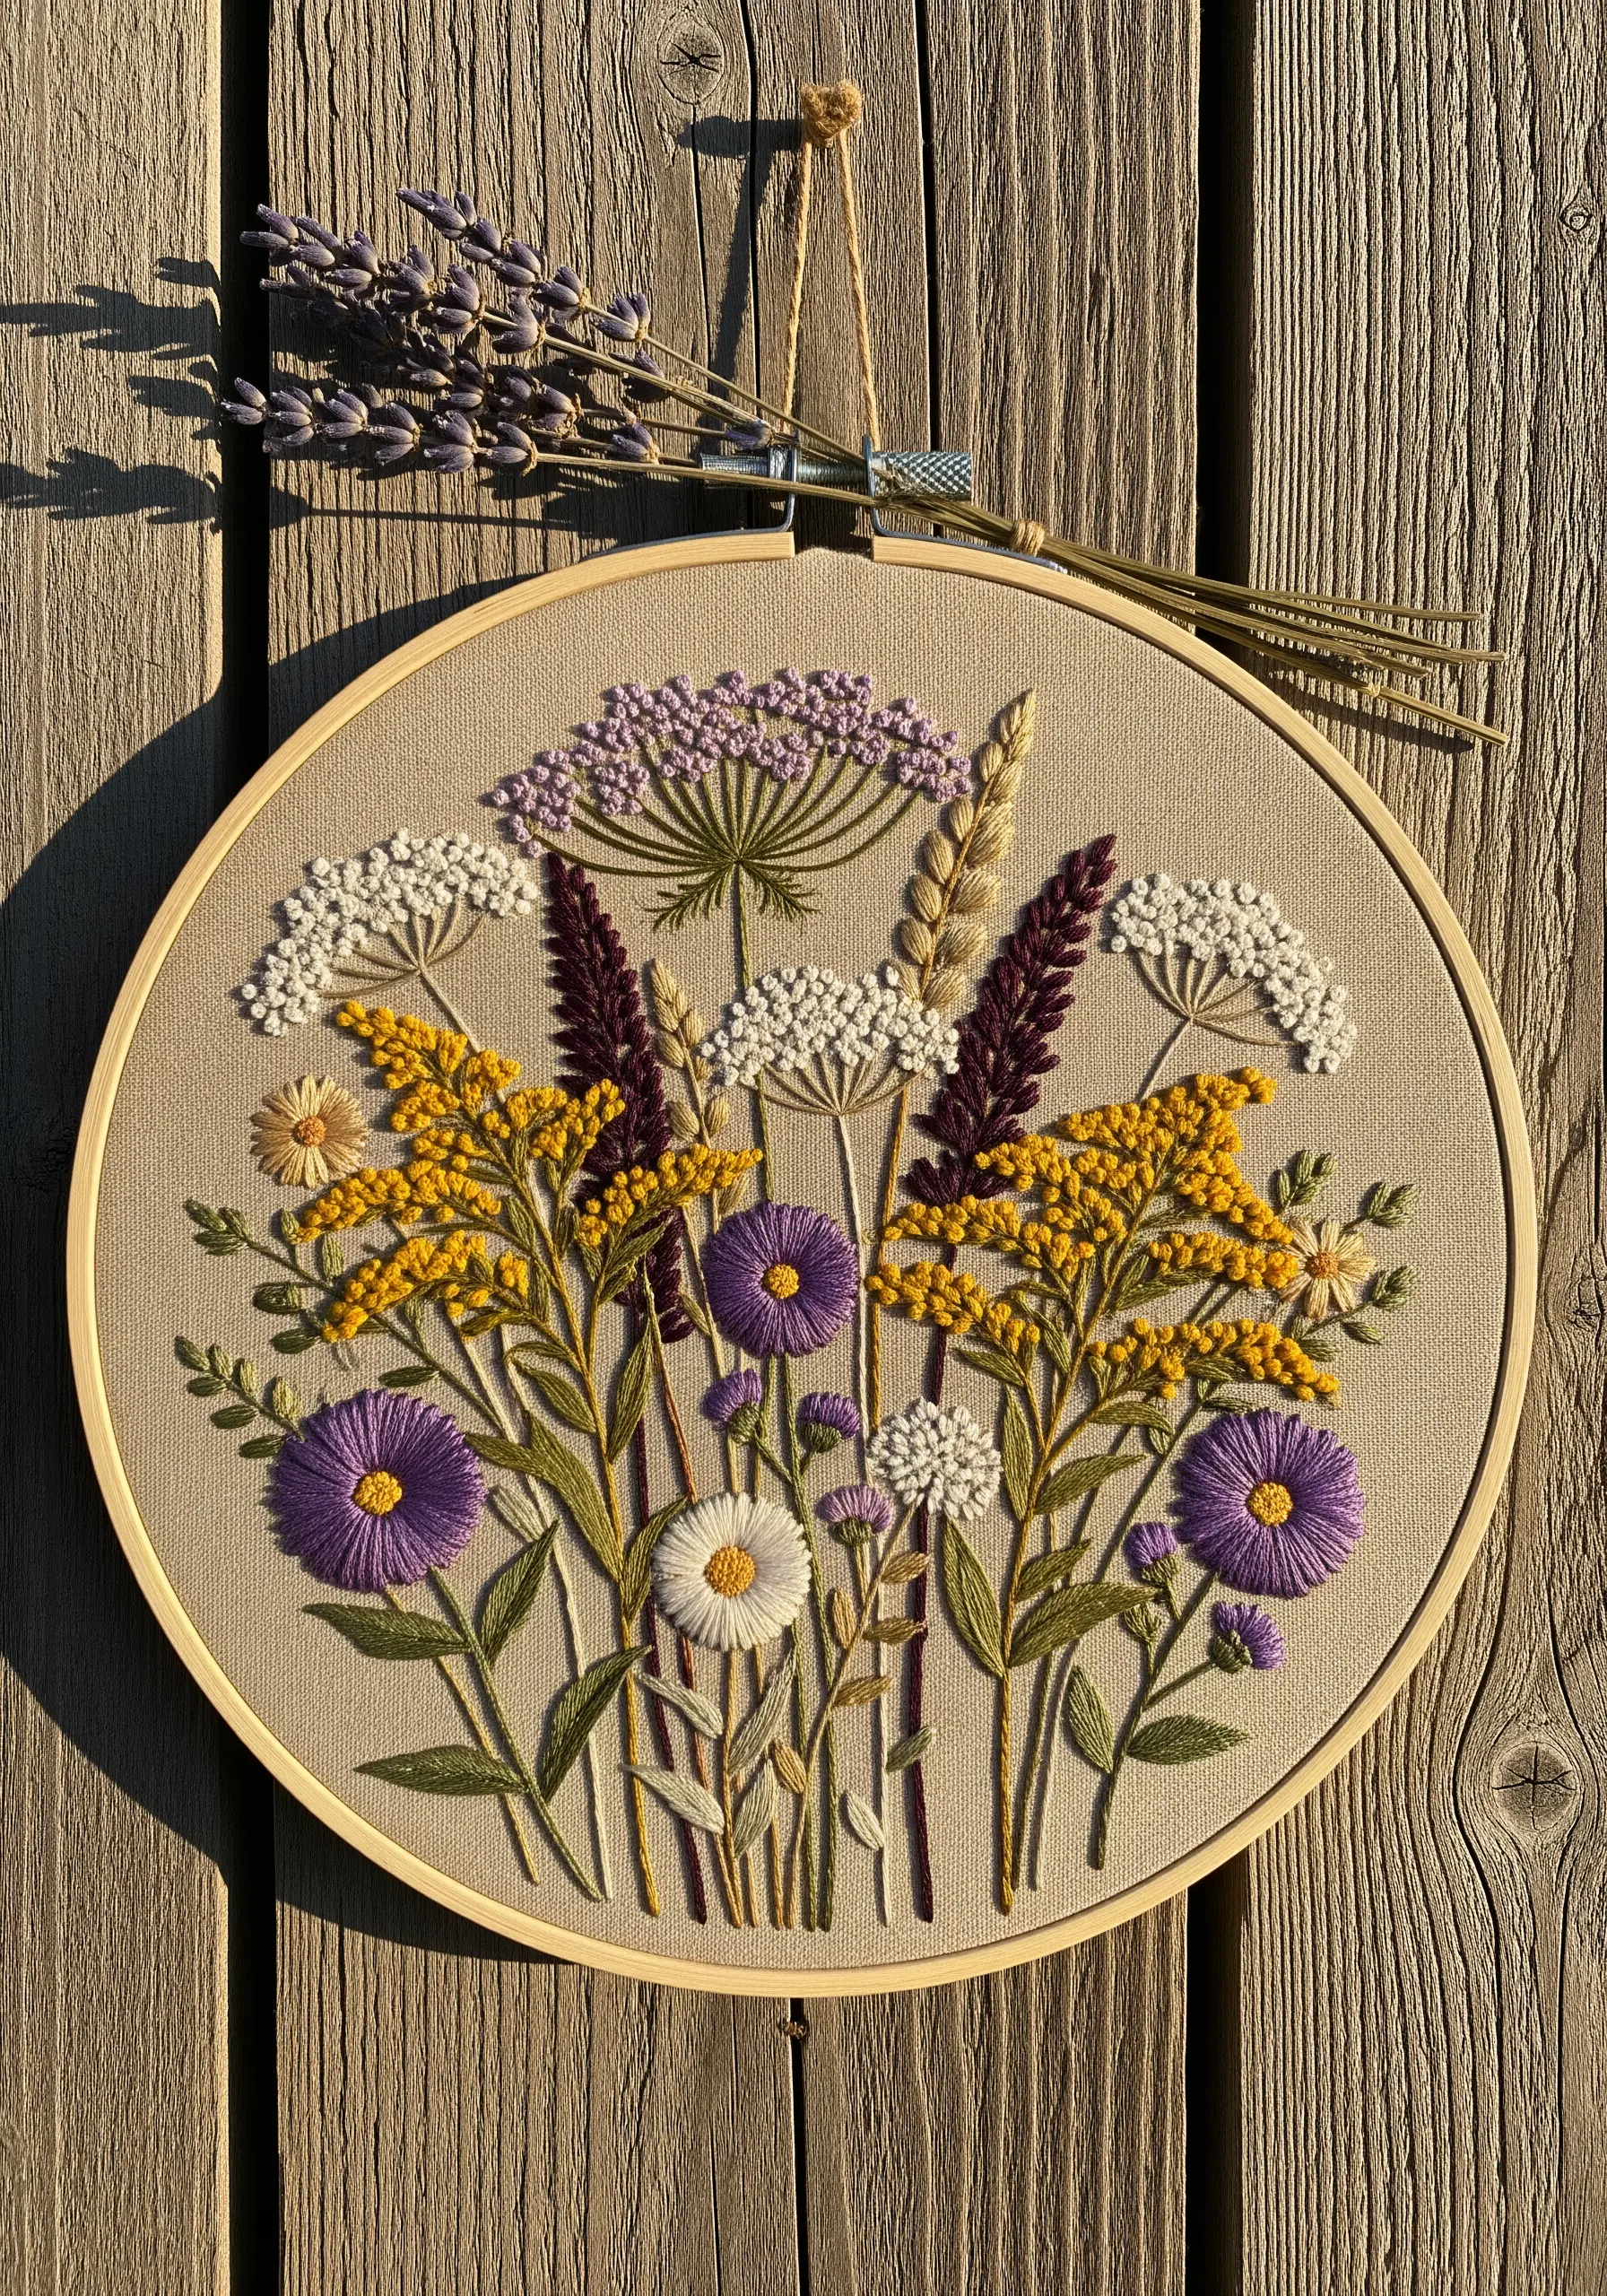
Create depth in your floral pieces by layering stitches and varying thread weights.
Use dense French knots with three strands for fluffy Queen Anne’s lace, contrasting them with smooth, flat satin-stitched petals for the purple asters.
For the goldenrod, try couching a thicker, textured yarn with a single strand of matching floss to achieve a bumpy, organic feel without tedious stitching.
Let your stems overlap naturally; use a single-strand backstitch for those in the background and a two-strand stem stitch for foreground elements to create a subtle illusion of perspective.
This technique transforms a flat design into a dreamy bedroom aesthetic with tangible dimension.
2. Paint a Sunset with Thread Gradients
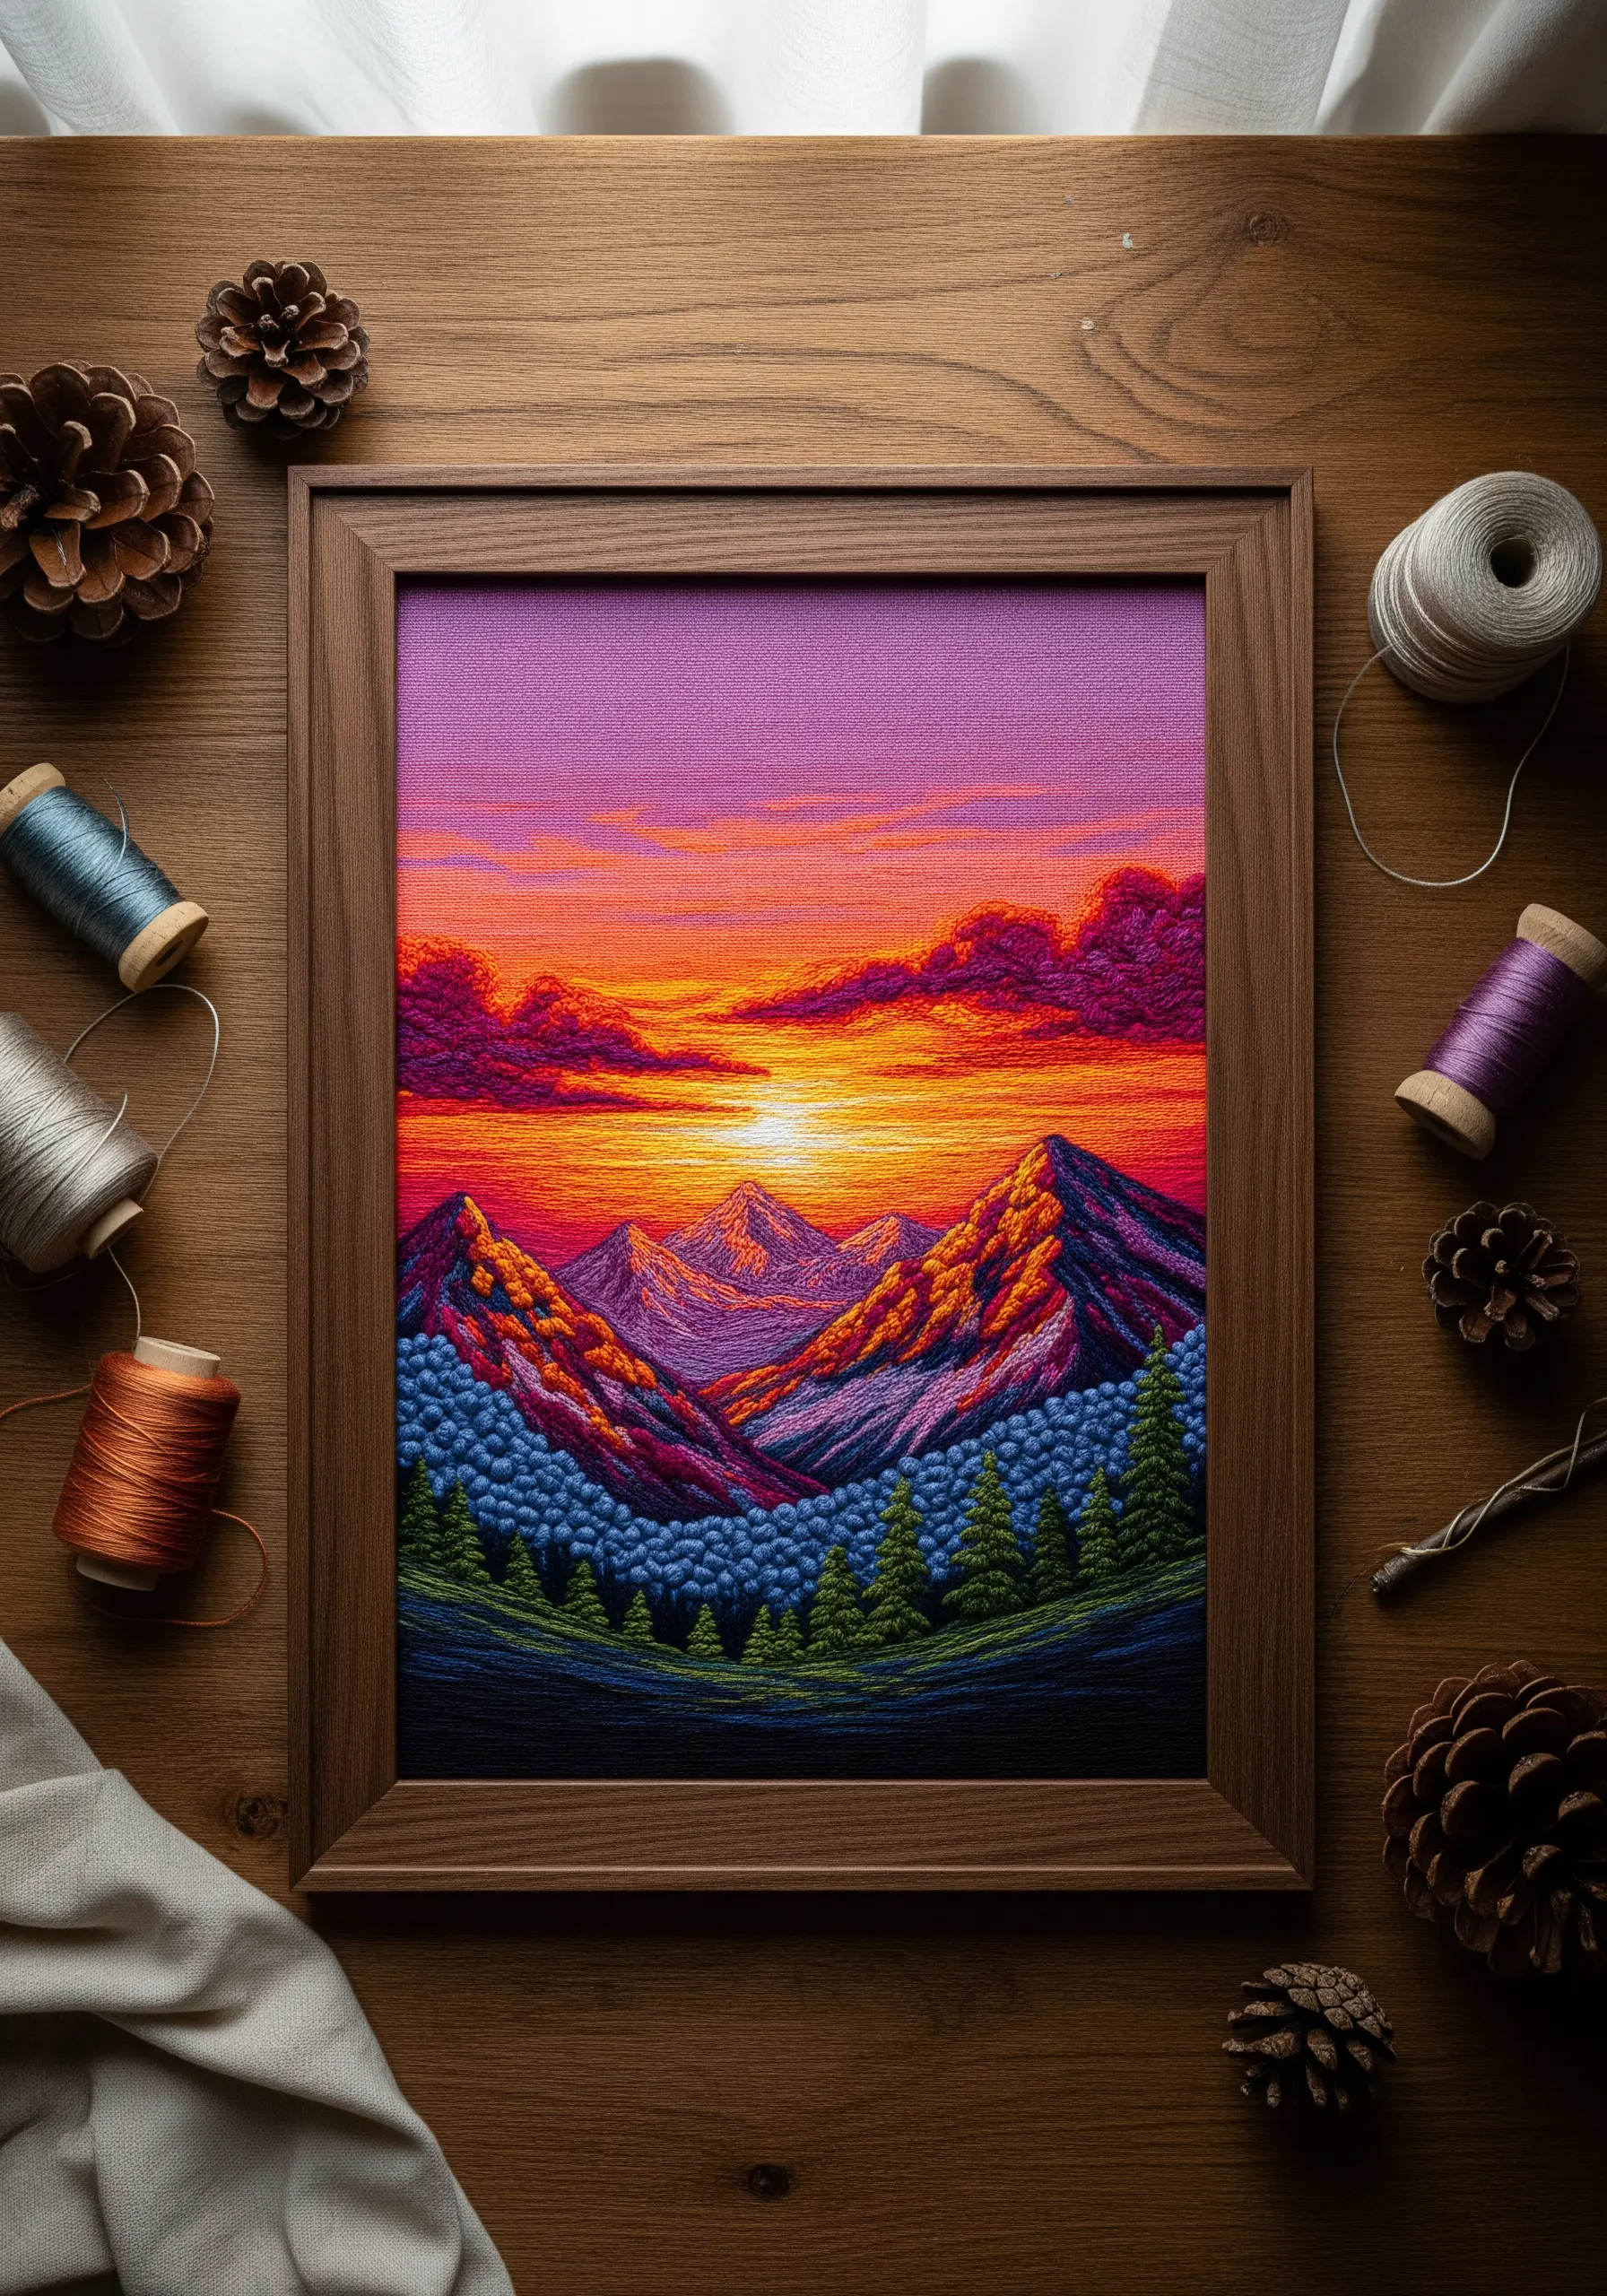
To achieve a painted effect for skies and landscapes, abandon outlines and embrace thread painting with long-and-short stitches.
Work with a single strand of floss to ensure the smoothest possible color transitions.
Map out your color zones first, then fill them by angling your stitches to follow the contours of the clouds and mountains.
For the sun’s glow, blend from pure white to pale yellow, then to orange, using stitches that radiate outward from the light source.
This method requires patience, but it’s the secret to creating abstract thread landscapes that feel atmospheric and full of light.
3. Contrast Geometric Fills with Delicate Details
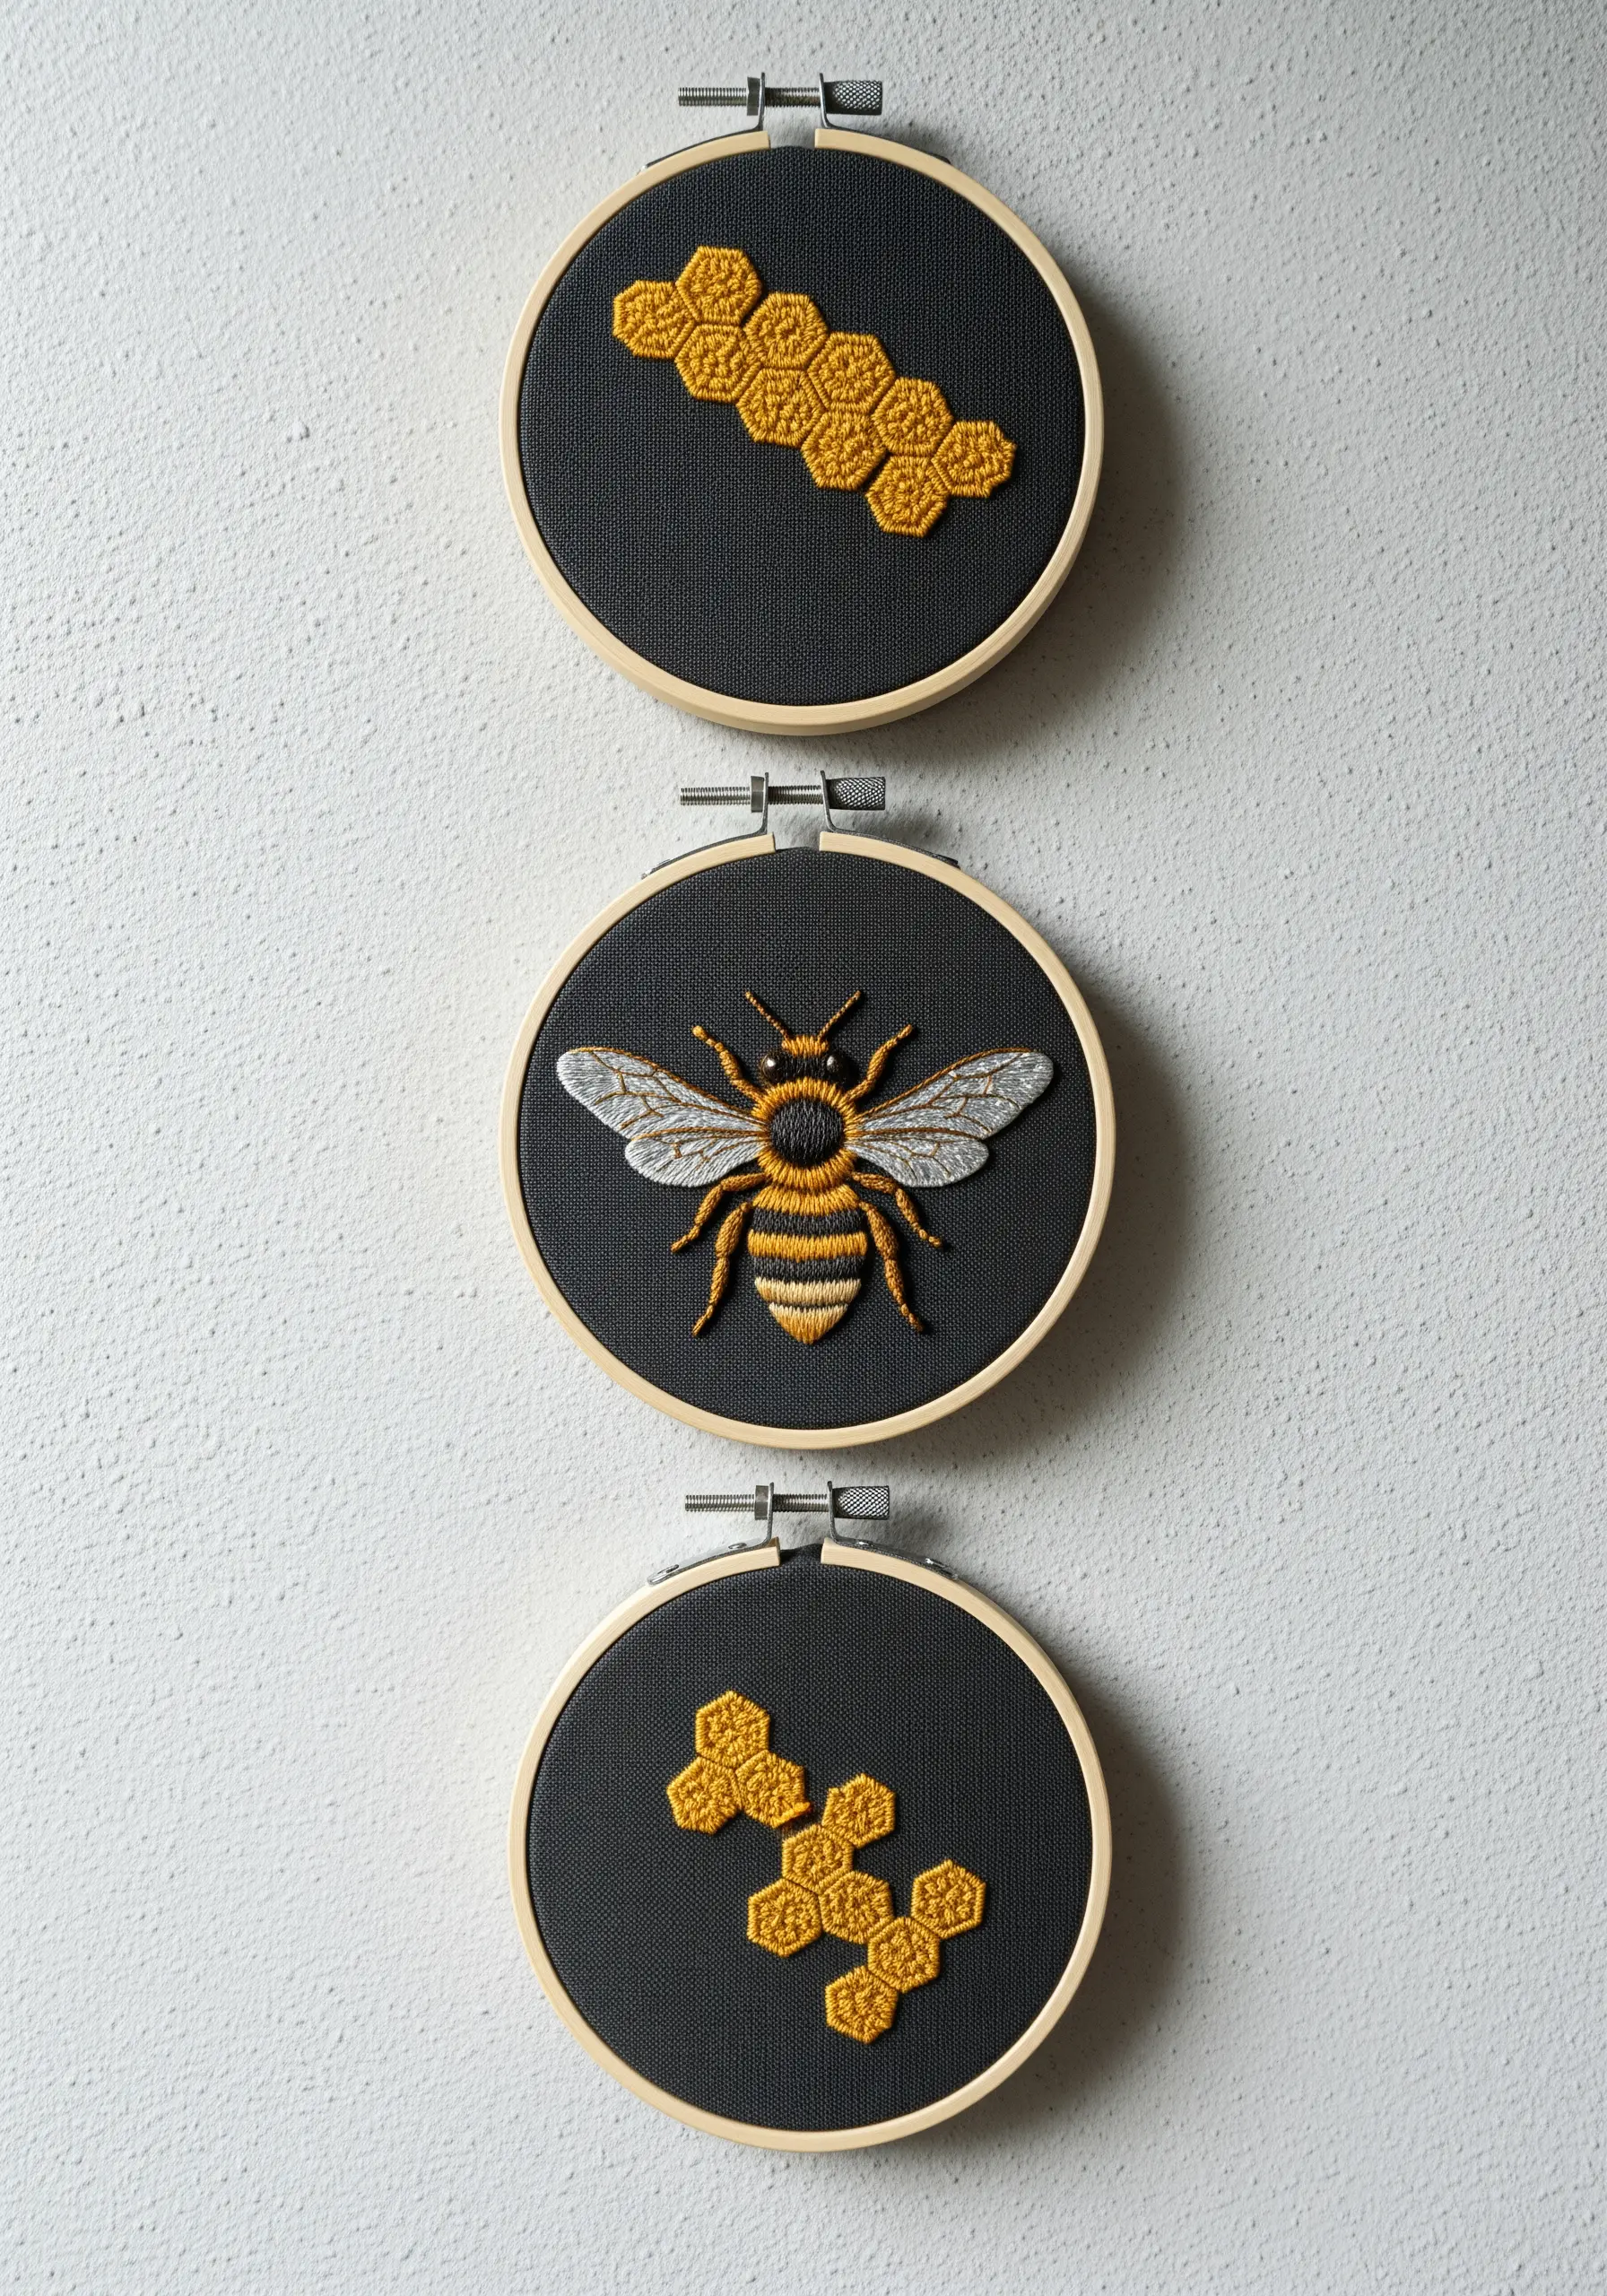
Elevate simple motifs by pairing a bold, geometric fill with fine, detailed line work.
For the honeycomb, use a padded satin stitch to give each hexagon a raised, 3D effect. Create the padding with underlying layers of straight stitches before covering it with your final gold thread.
For the bee’s wings, switch to a single strand of light gray or silver metallic thread. Use an open fill, like sparsely placed seed stitches, to create a sense of translucency.
This contrast in texture and density makes the bee feel delicate and alive against its solid, architectural home.
4. Achieve Realism with Directional Shading
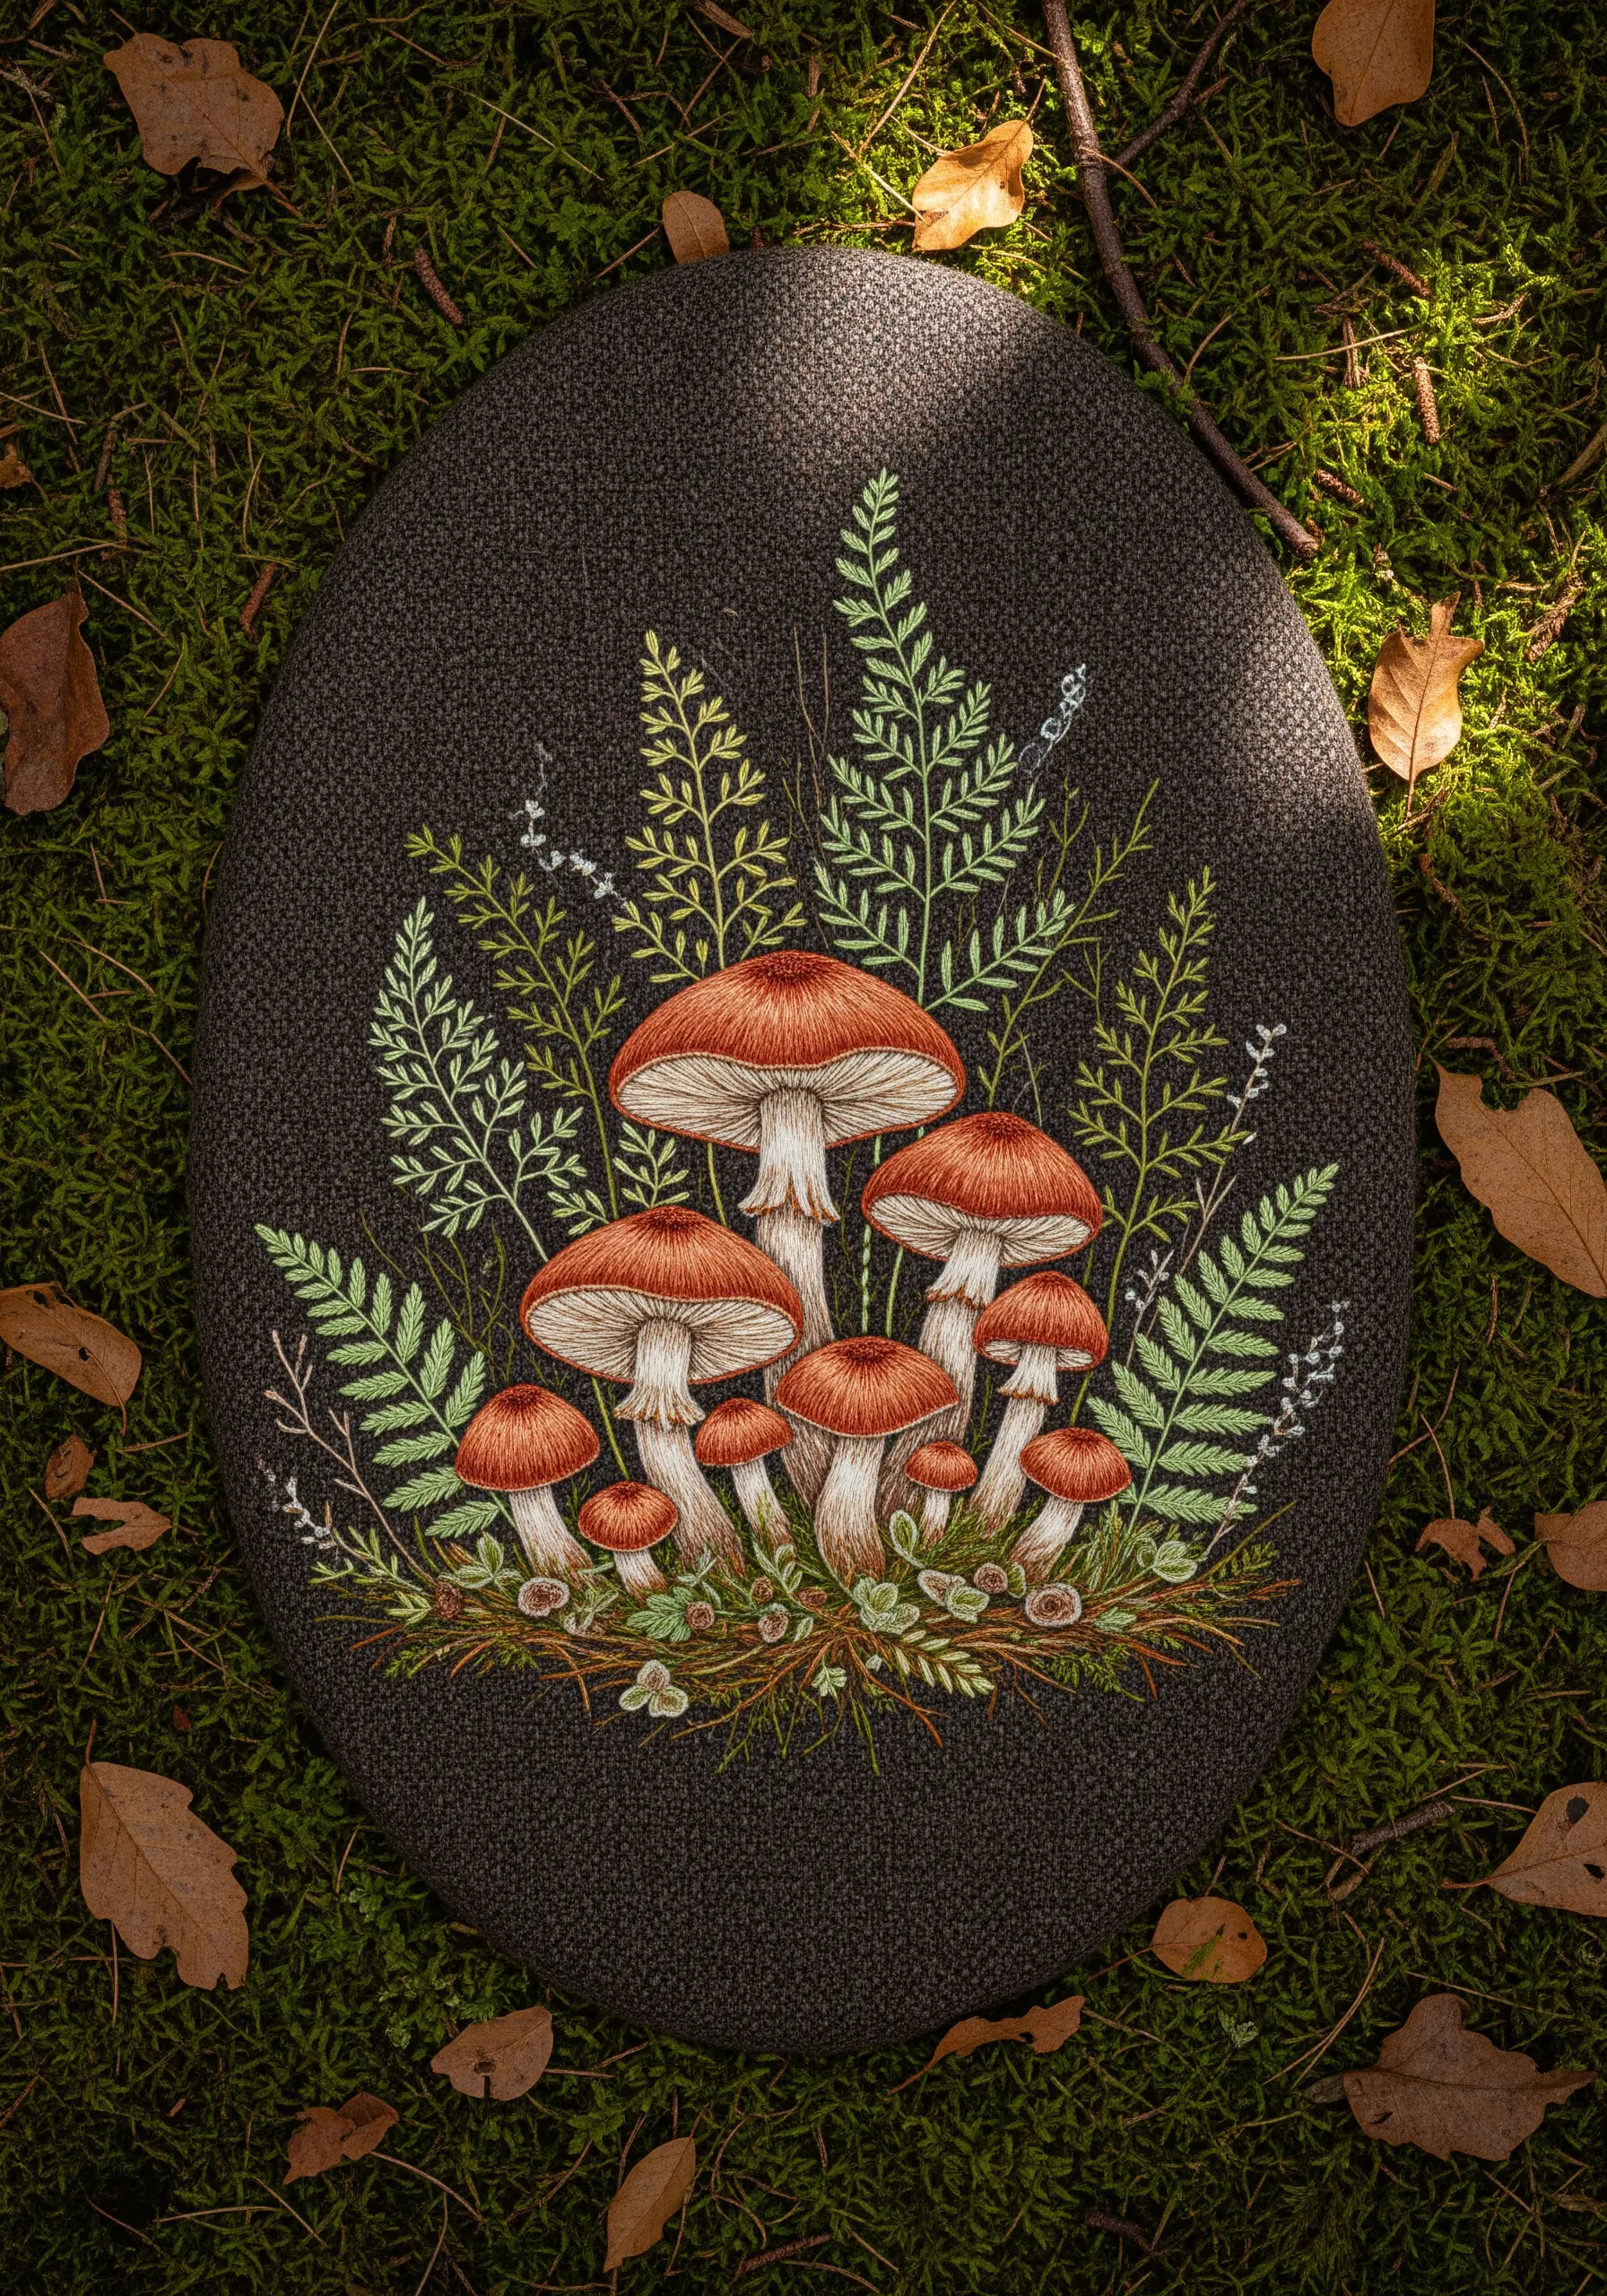
Bring mushrooms and other natural forms to life by paying close attention to the direction of your stitches.
For the mushroom caps, use long-and-short stitches that radiate from the center outwards, following their natural curve. Blend at least three shades of brown to create a smooth, rounded look.
Underneath, stitch the gills with fine, vertical straight stitches in a darker color to imply shadow and depth.
Stitching on dark, textured fabric like charcoal linen makes your earthy tones appear richer and more saturated, creating a moody, woodland atmosphere.
5. Sculpt a Seascape with Mixed Fibers
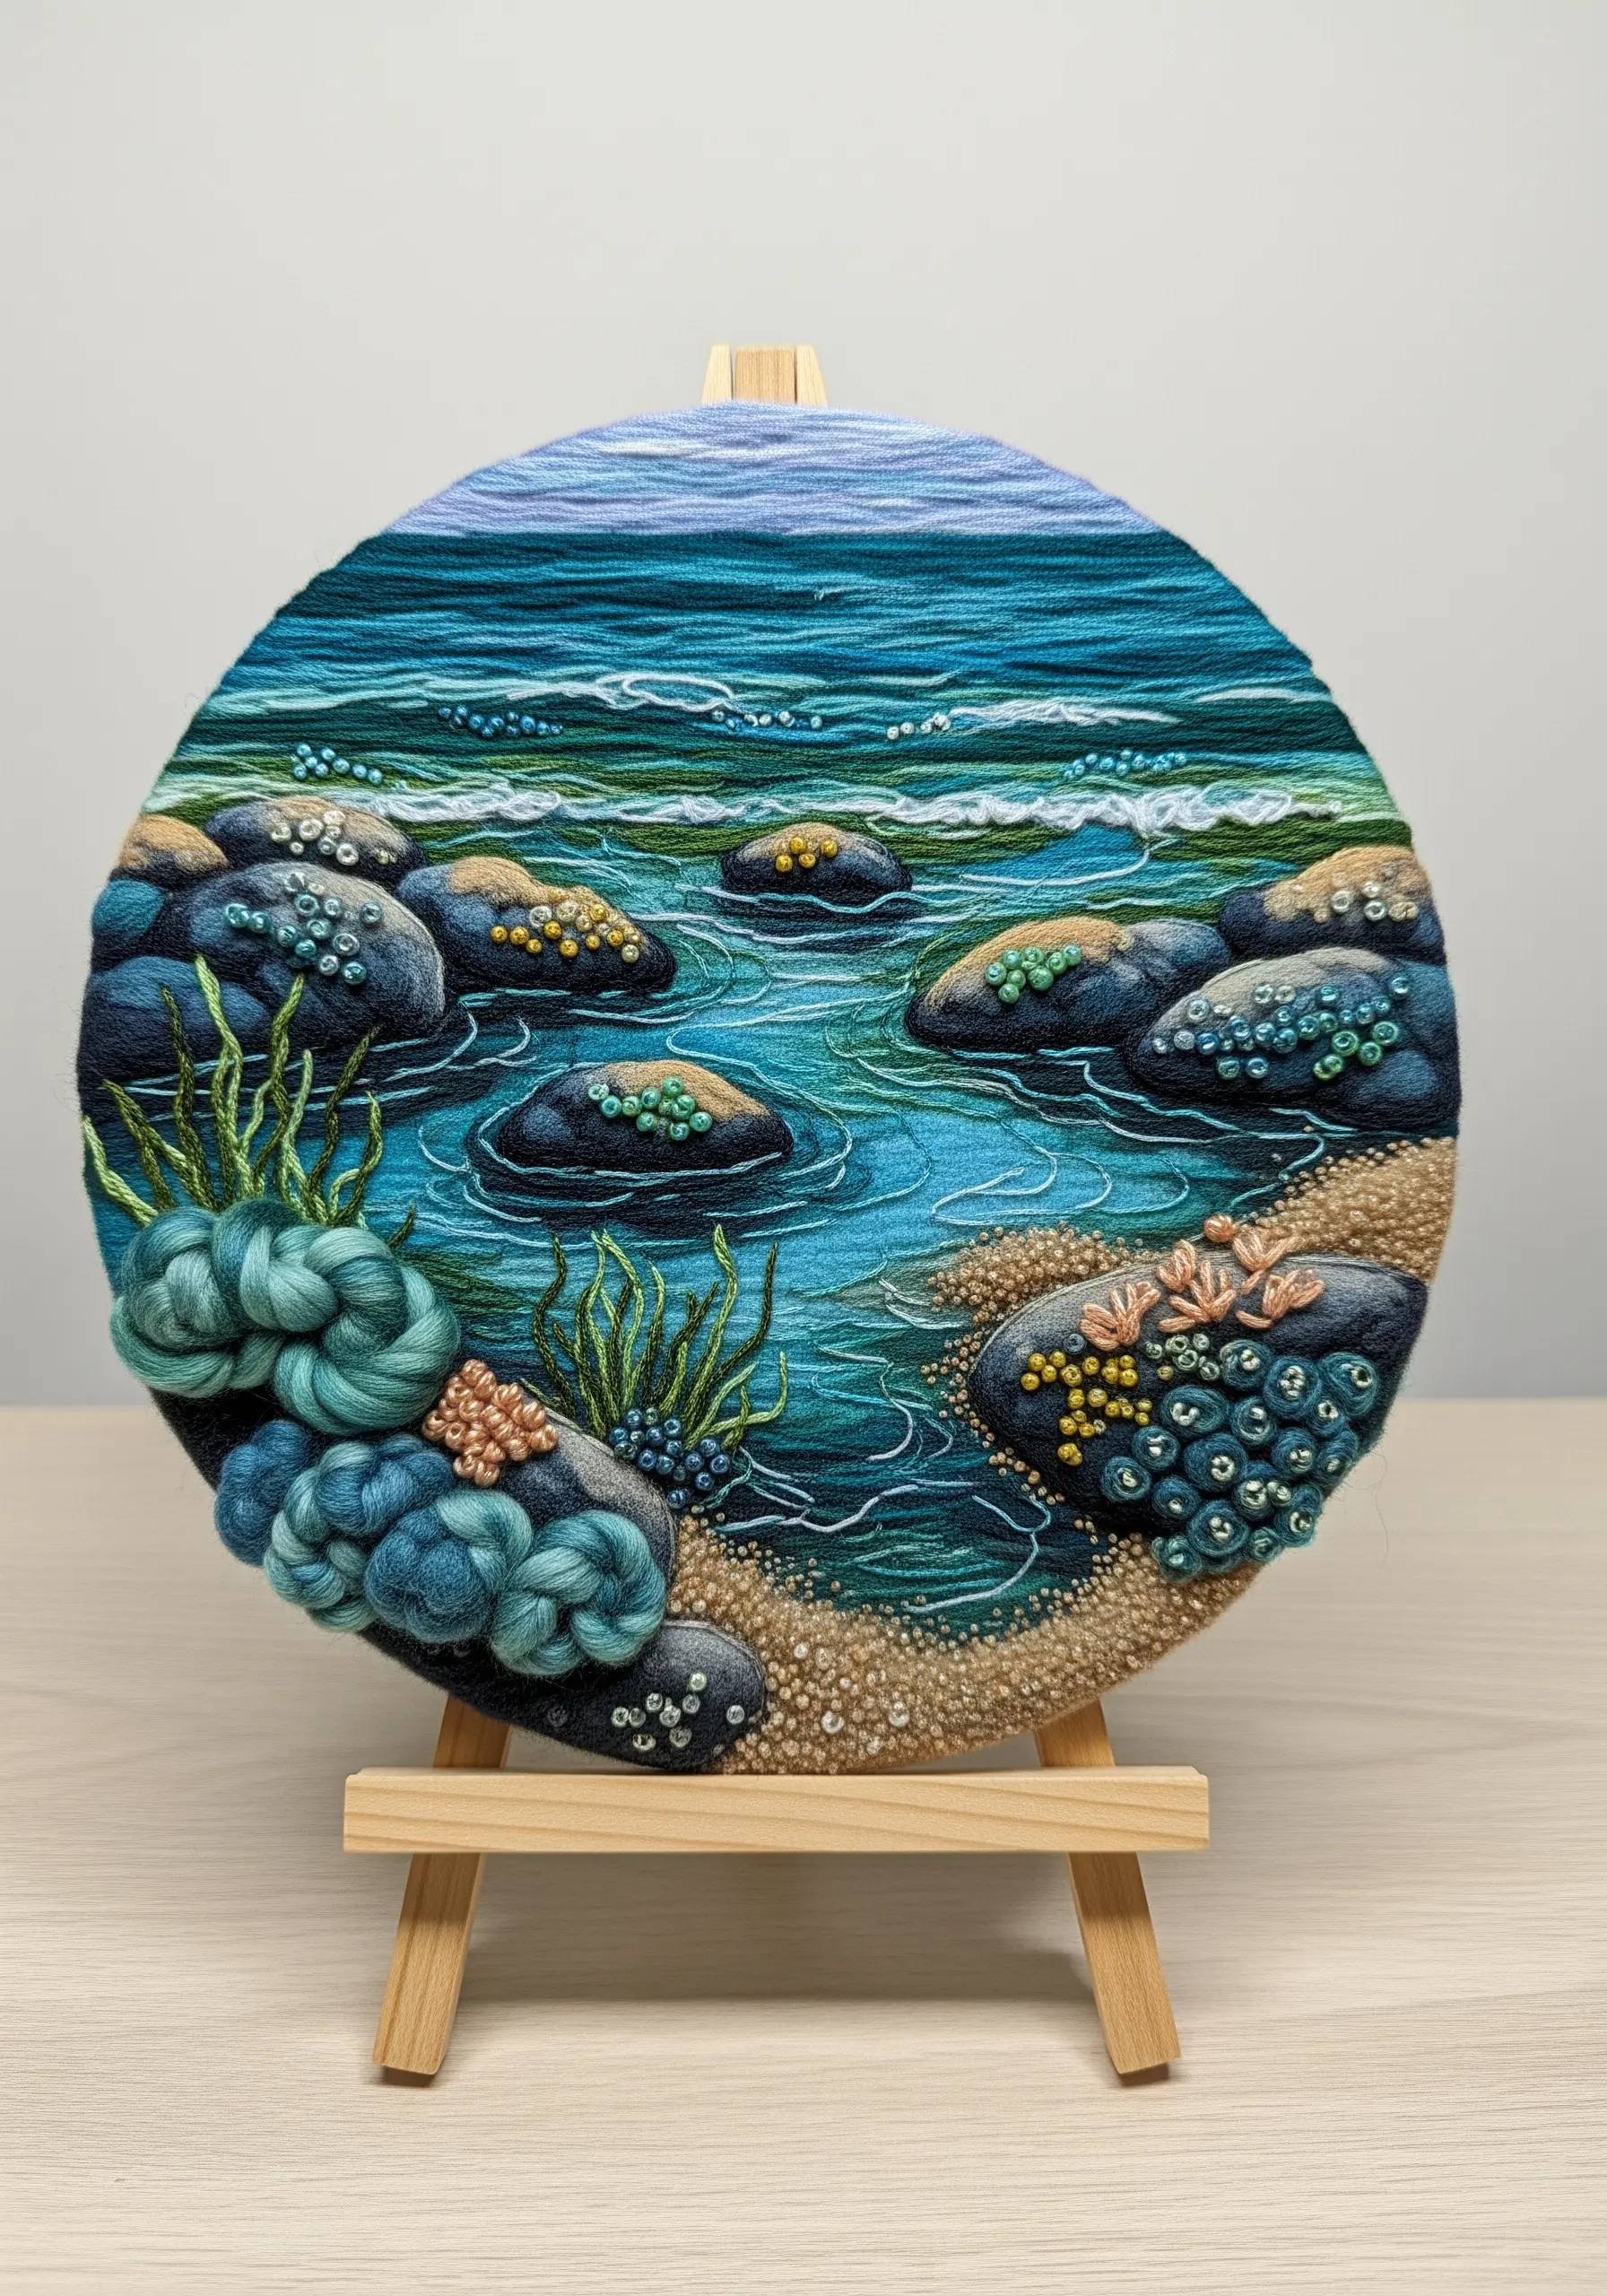
Move beyond floss to capture the complex textures of a rocky shoreline.
Incorporate chunky wool yarn or roving for the clustered algae, securing it with the couching technique for a wonderfully plush, three-dimensional effect.
Use variegated blue thread for the water, stitched in long, wavy lines of stem stitch to mimic the ocean’s movement and color shifts.
Finally, add clusters of French and colonial knots on the rocks to represent barnacles or sea spray. It’s these tactile details that make the scene feel immersive.
6. Create Luminous Surfaces with Random Stitches
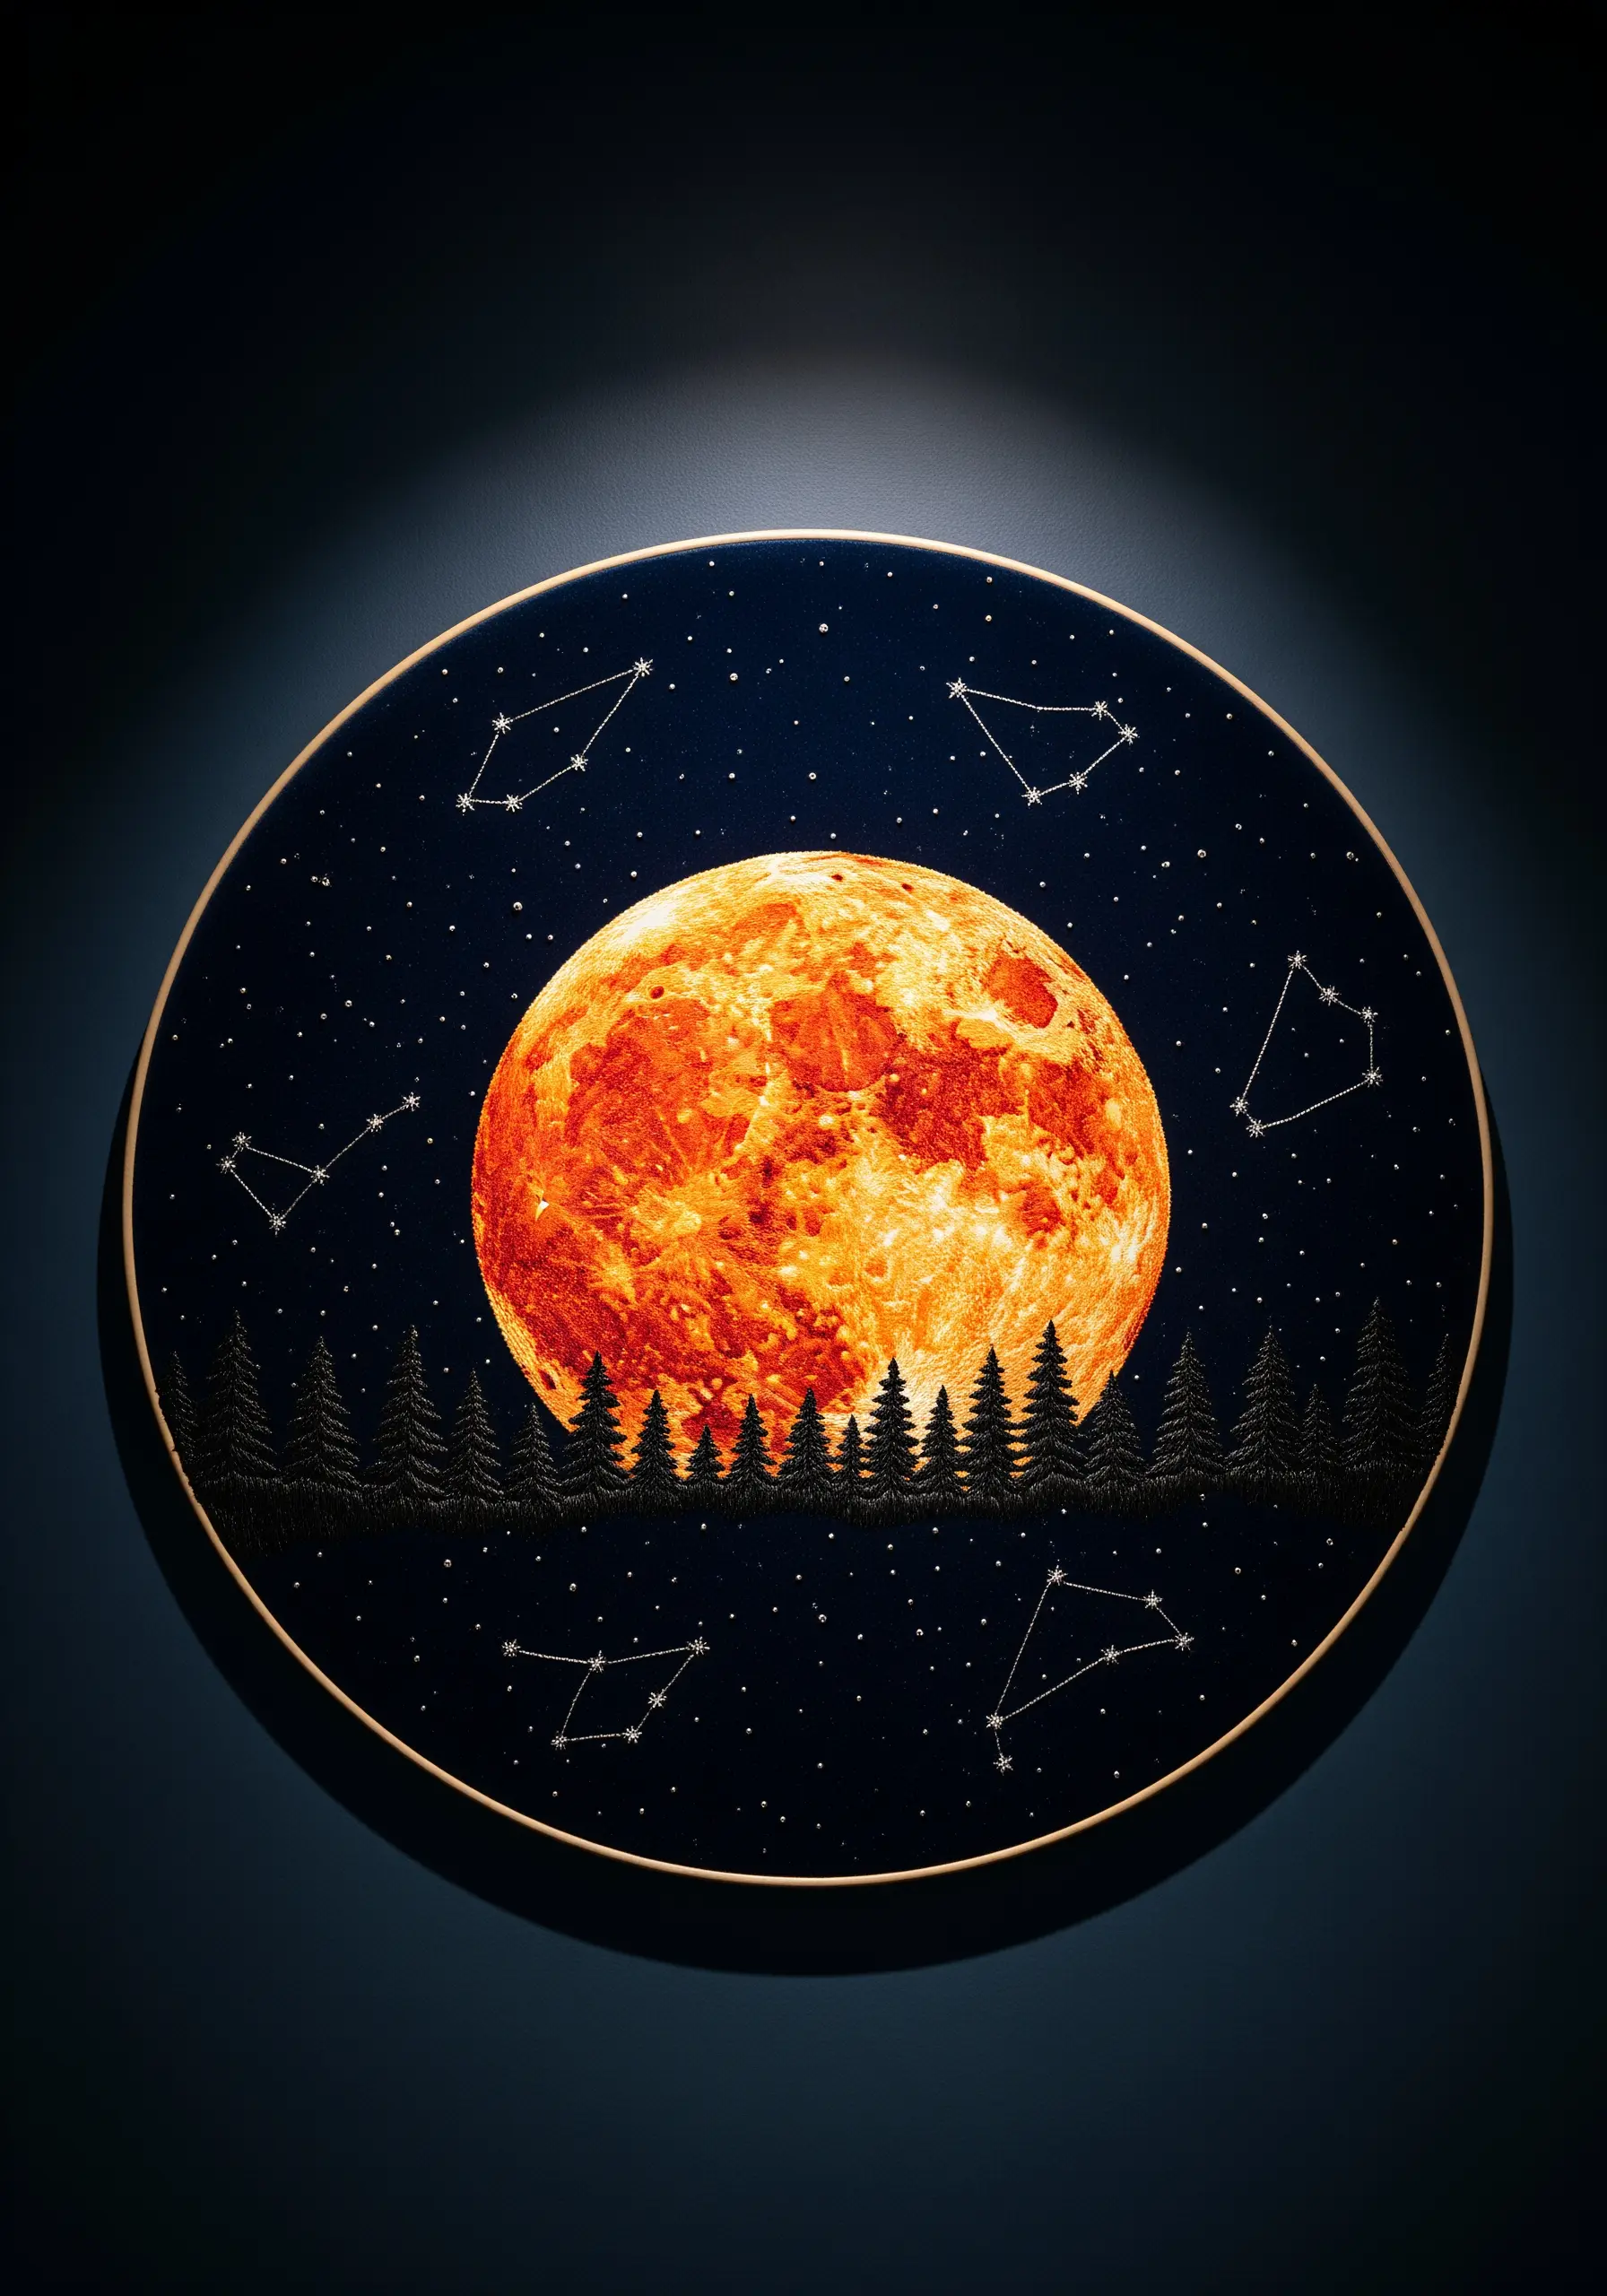
To embroider a textured surface like a harvest moon, avoid uniform fills like satin stitch.
Instead, use a dense, chaotic mix of seed stitches, straight stitches of varying lengths, and French knots, all worked in closely related shades of orange, yellow, and white.
Layer your stitches randomly, allowing them to overlap and build up texture organically. This technique beautifully mimics the craters and shadows of the lunar surface.
For the stars, use single, sharp straight stitches or tiny French knots with a bright white or metallic thread to make them pop against the dark fabric.
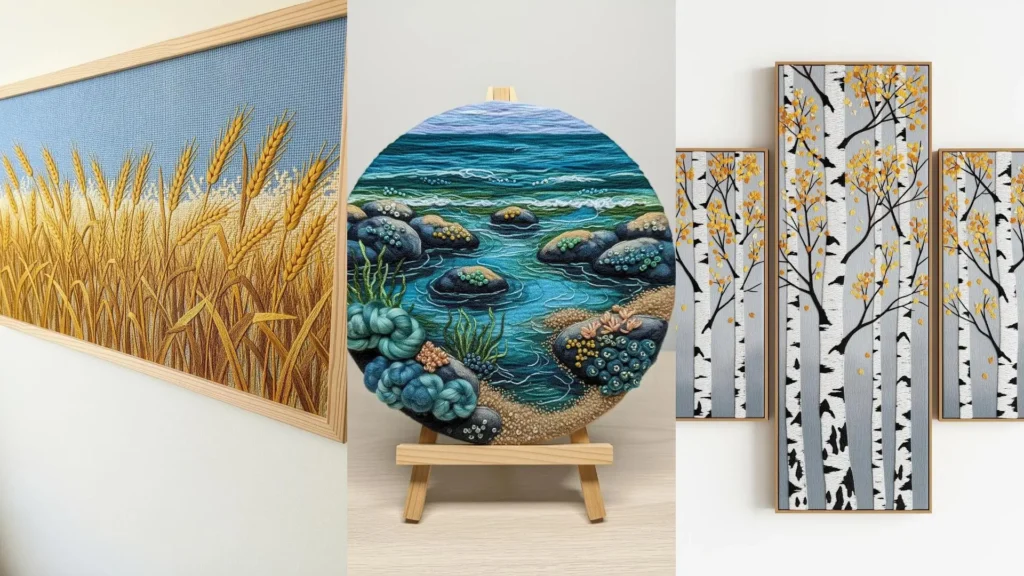
7. Imply Depth in a Field of Wheat
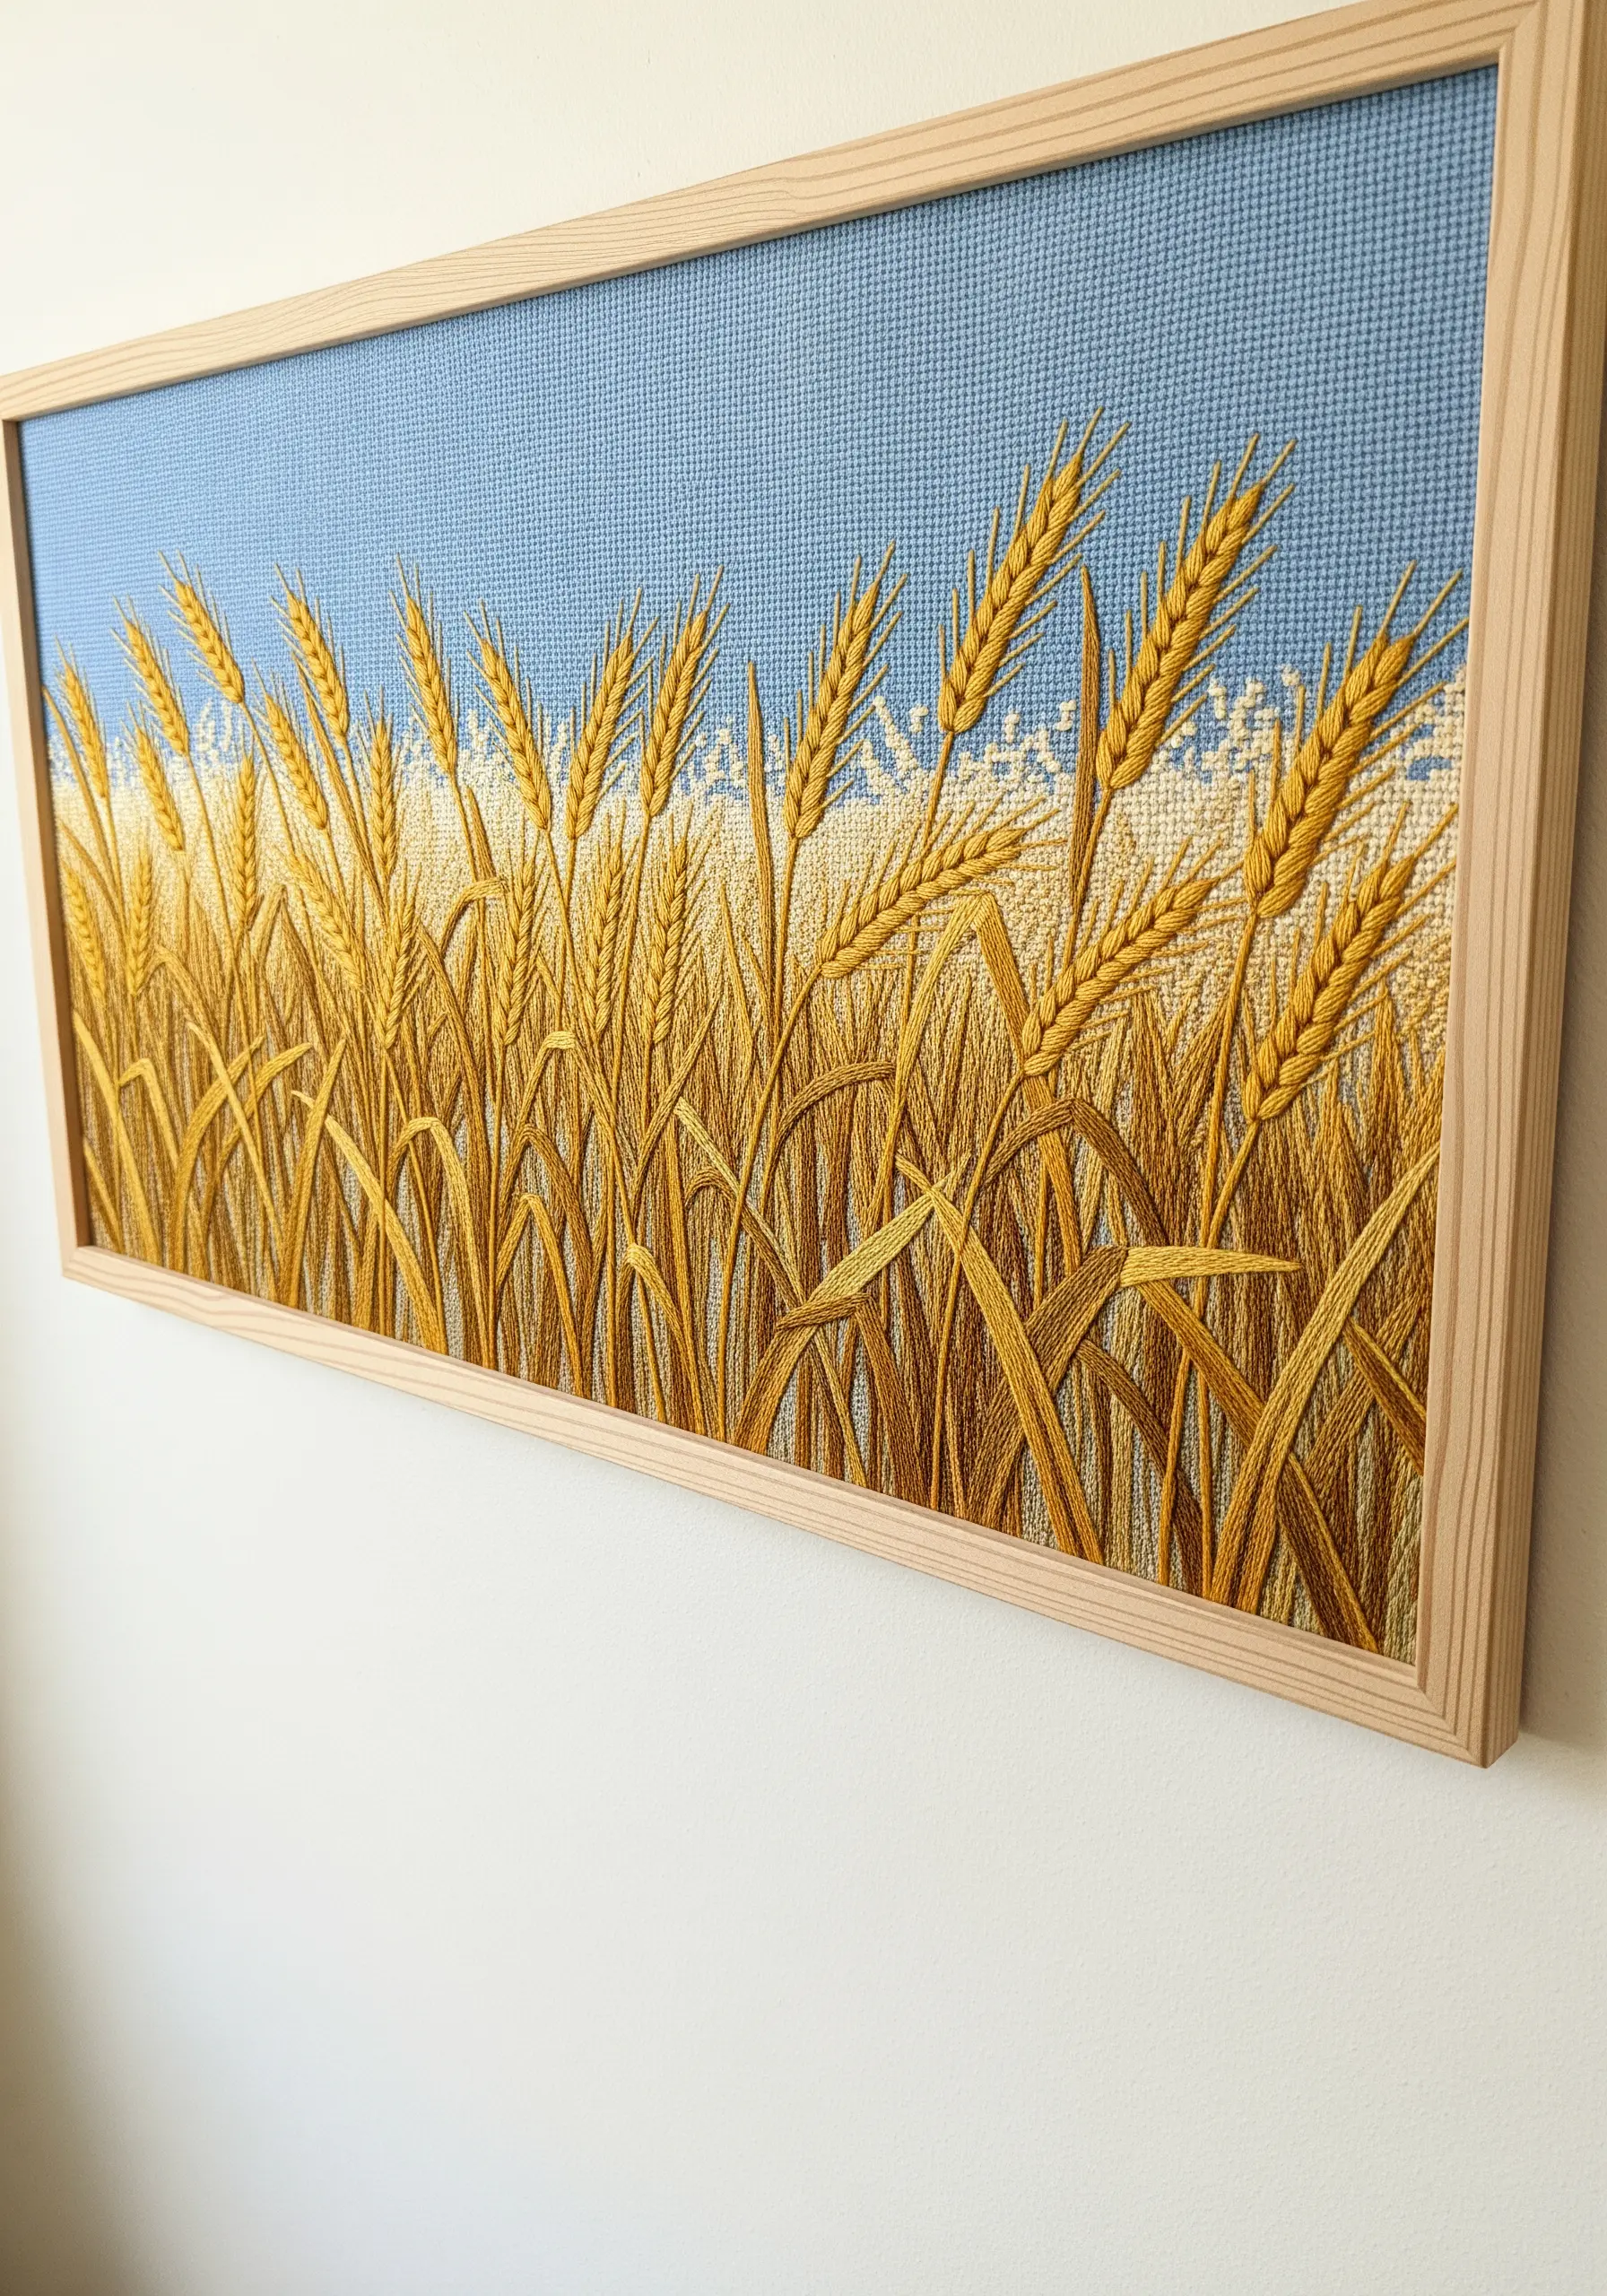
Create the illusion of a deep, layered field without stitching every single stalk.
First, stitch the background wheat in a lighter shade of gold using simple straight stitches. Keep them less detailed and slightly out of focus.
Next, bring the foreground stalks forward by stitching them in a richer, darker gold with more detail, using fishbone stitch for the wheat heads.
Let the foreground stalks overlap the background layer. This simple layering technique adds instant depth and makes the composition feel expansive and realistic.
8. Abstract Nature with Layered Whipped Stitch
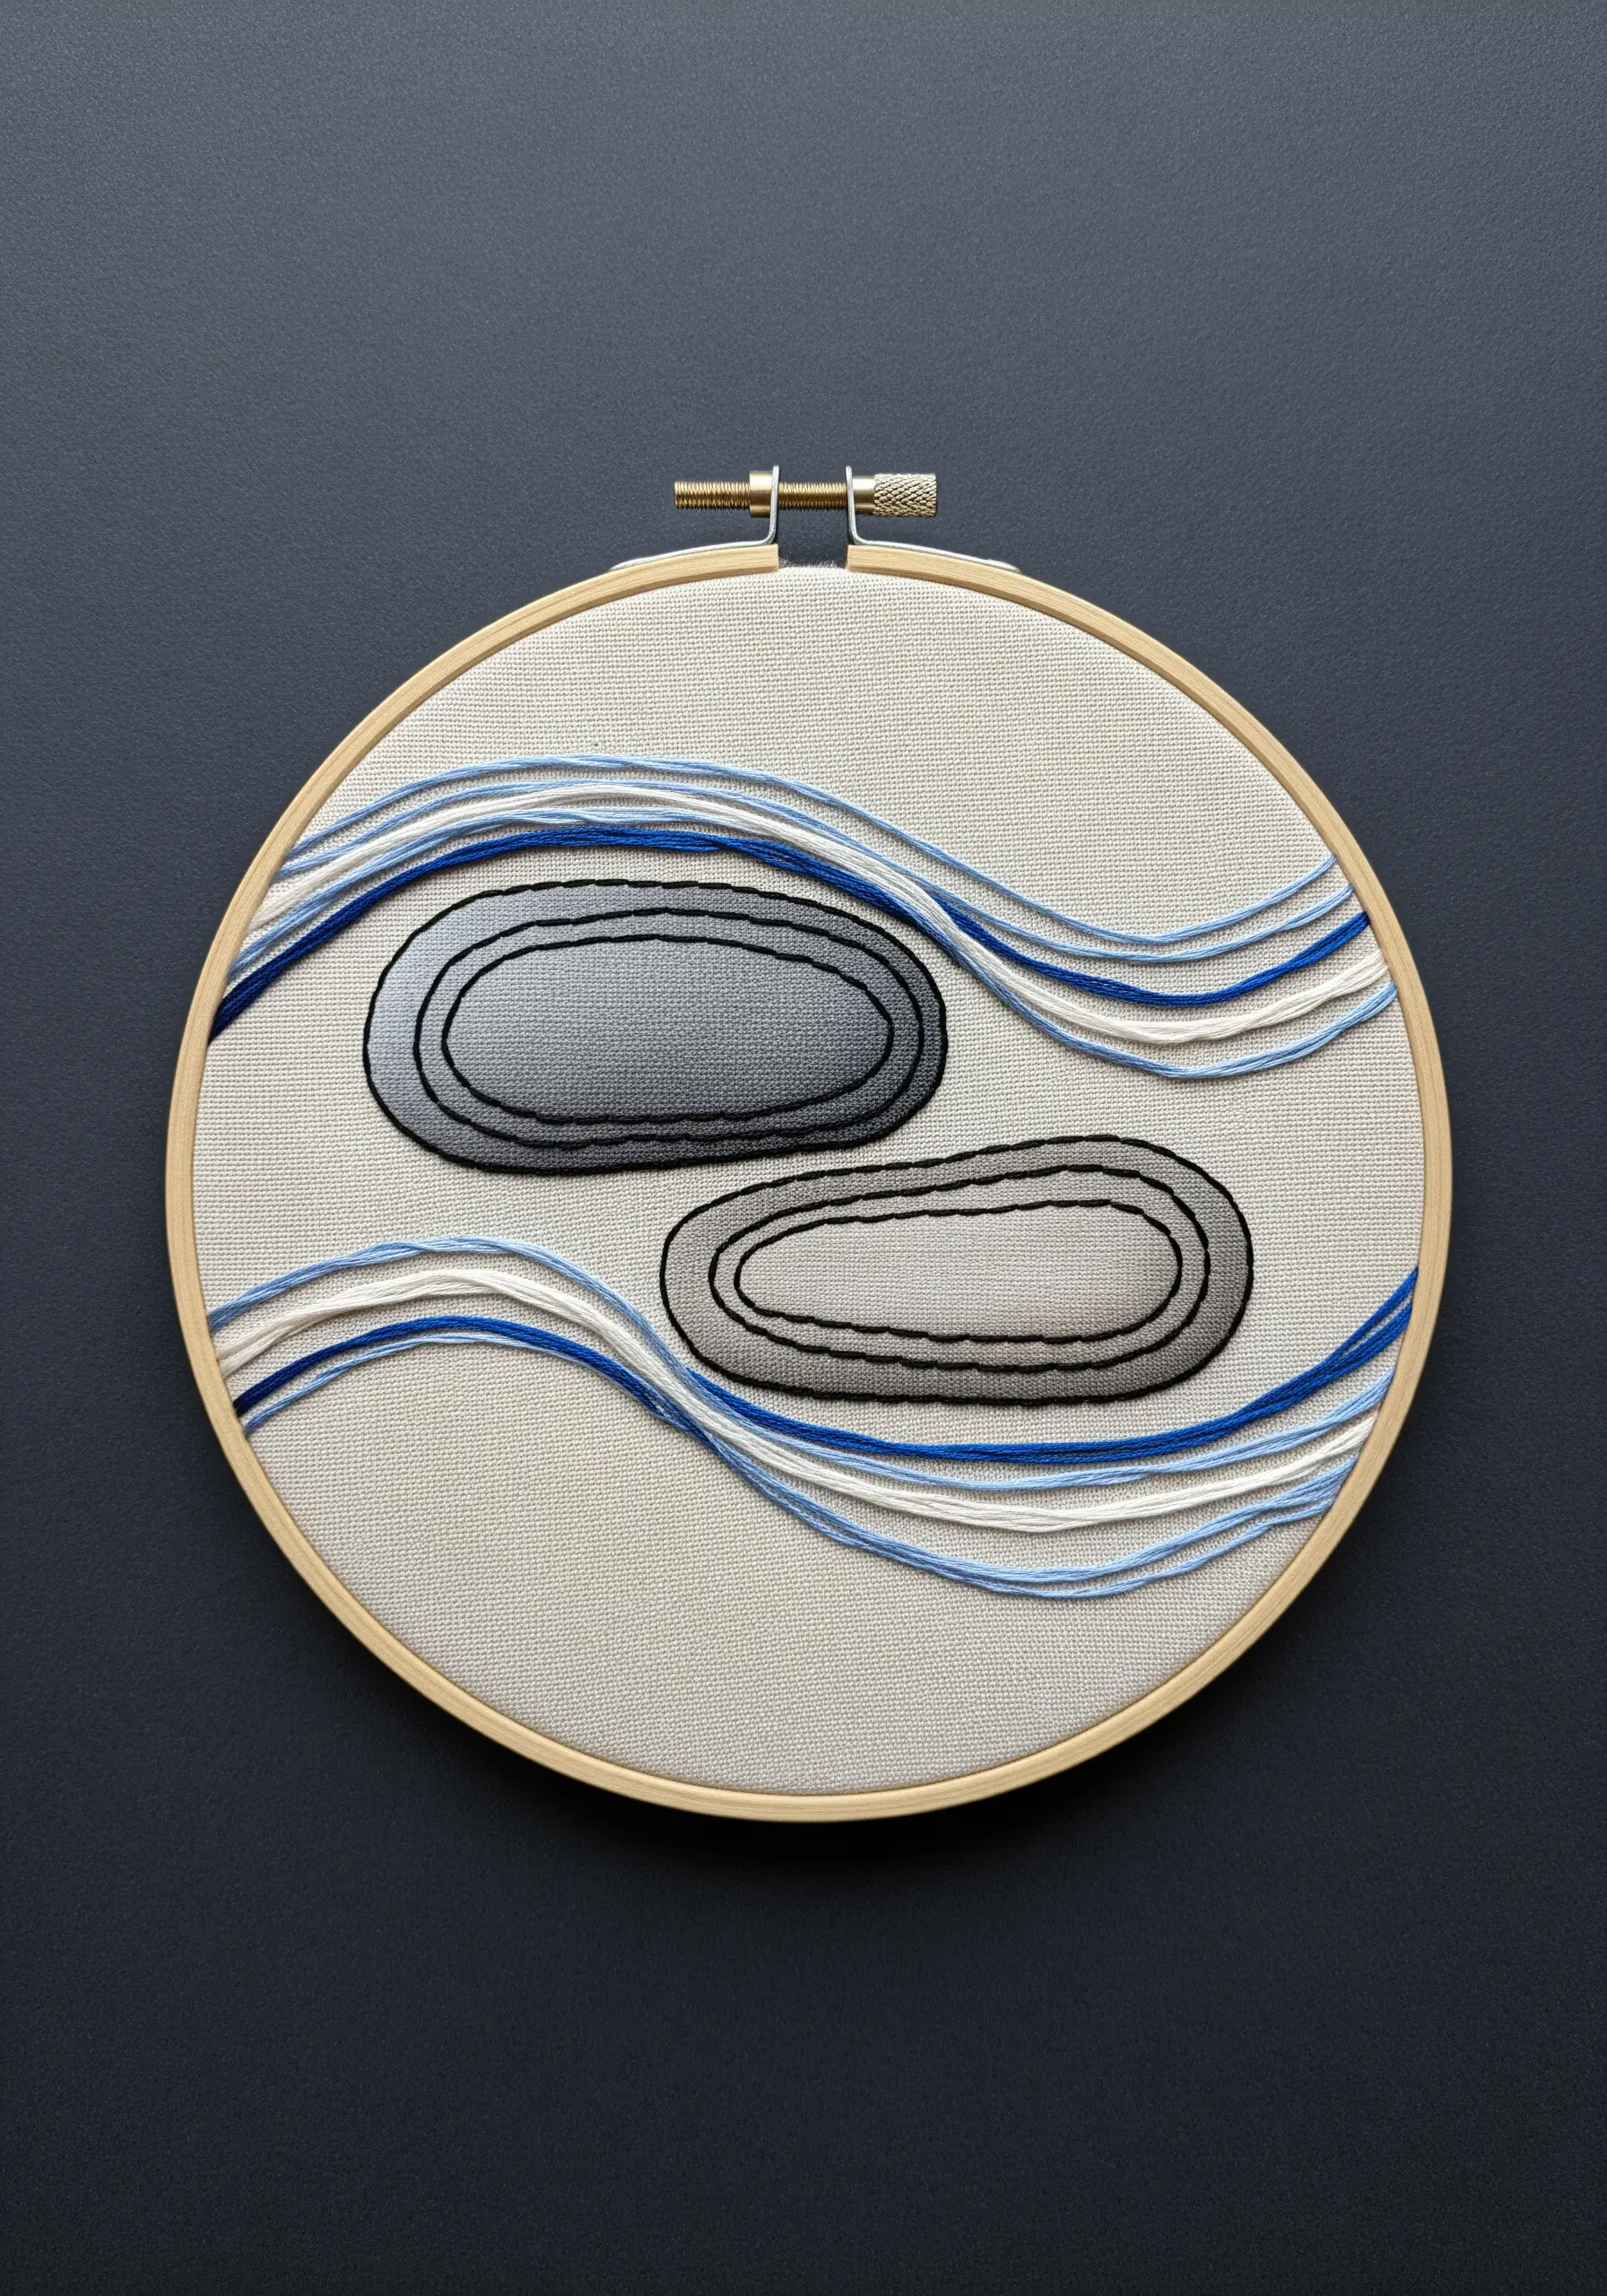
Transform simple backstitches into flowing, sculptural lines that evoke water or wind.
First, lay down parallel rows of backstitch in your chosen colors. Then, using a tapestry needle to avoid piercing the fabric, whip each line with a contrasting or complementary thread.
For a more dynamic look, layer multiple strands of whipped thread over a single backstitch foundation. Varying the tension of your whipped stitches creates gentle waves and movement.
This approach turns a basic stitch into an abstract element of flow, perfect for minimalist designs.
9. Define Crisp Edges with a Split-Stitch Outline
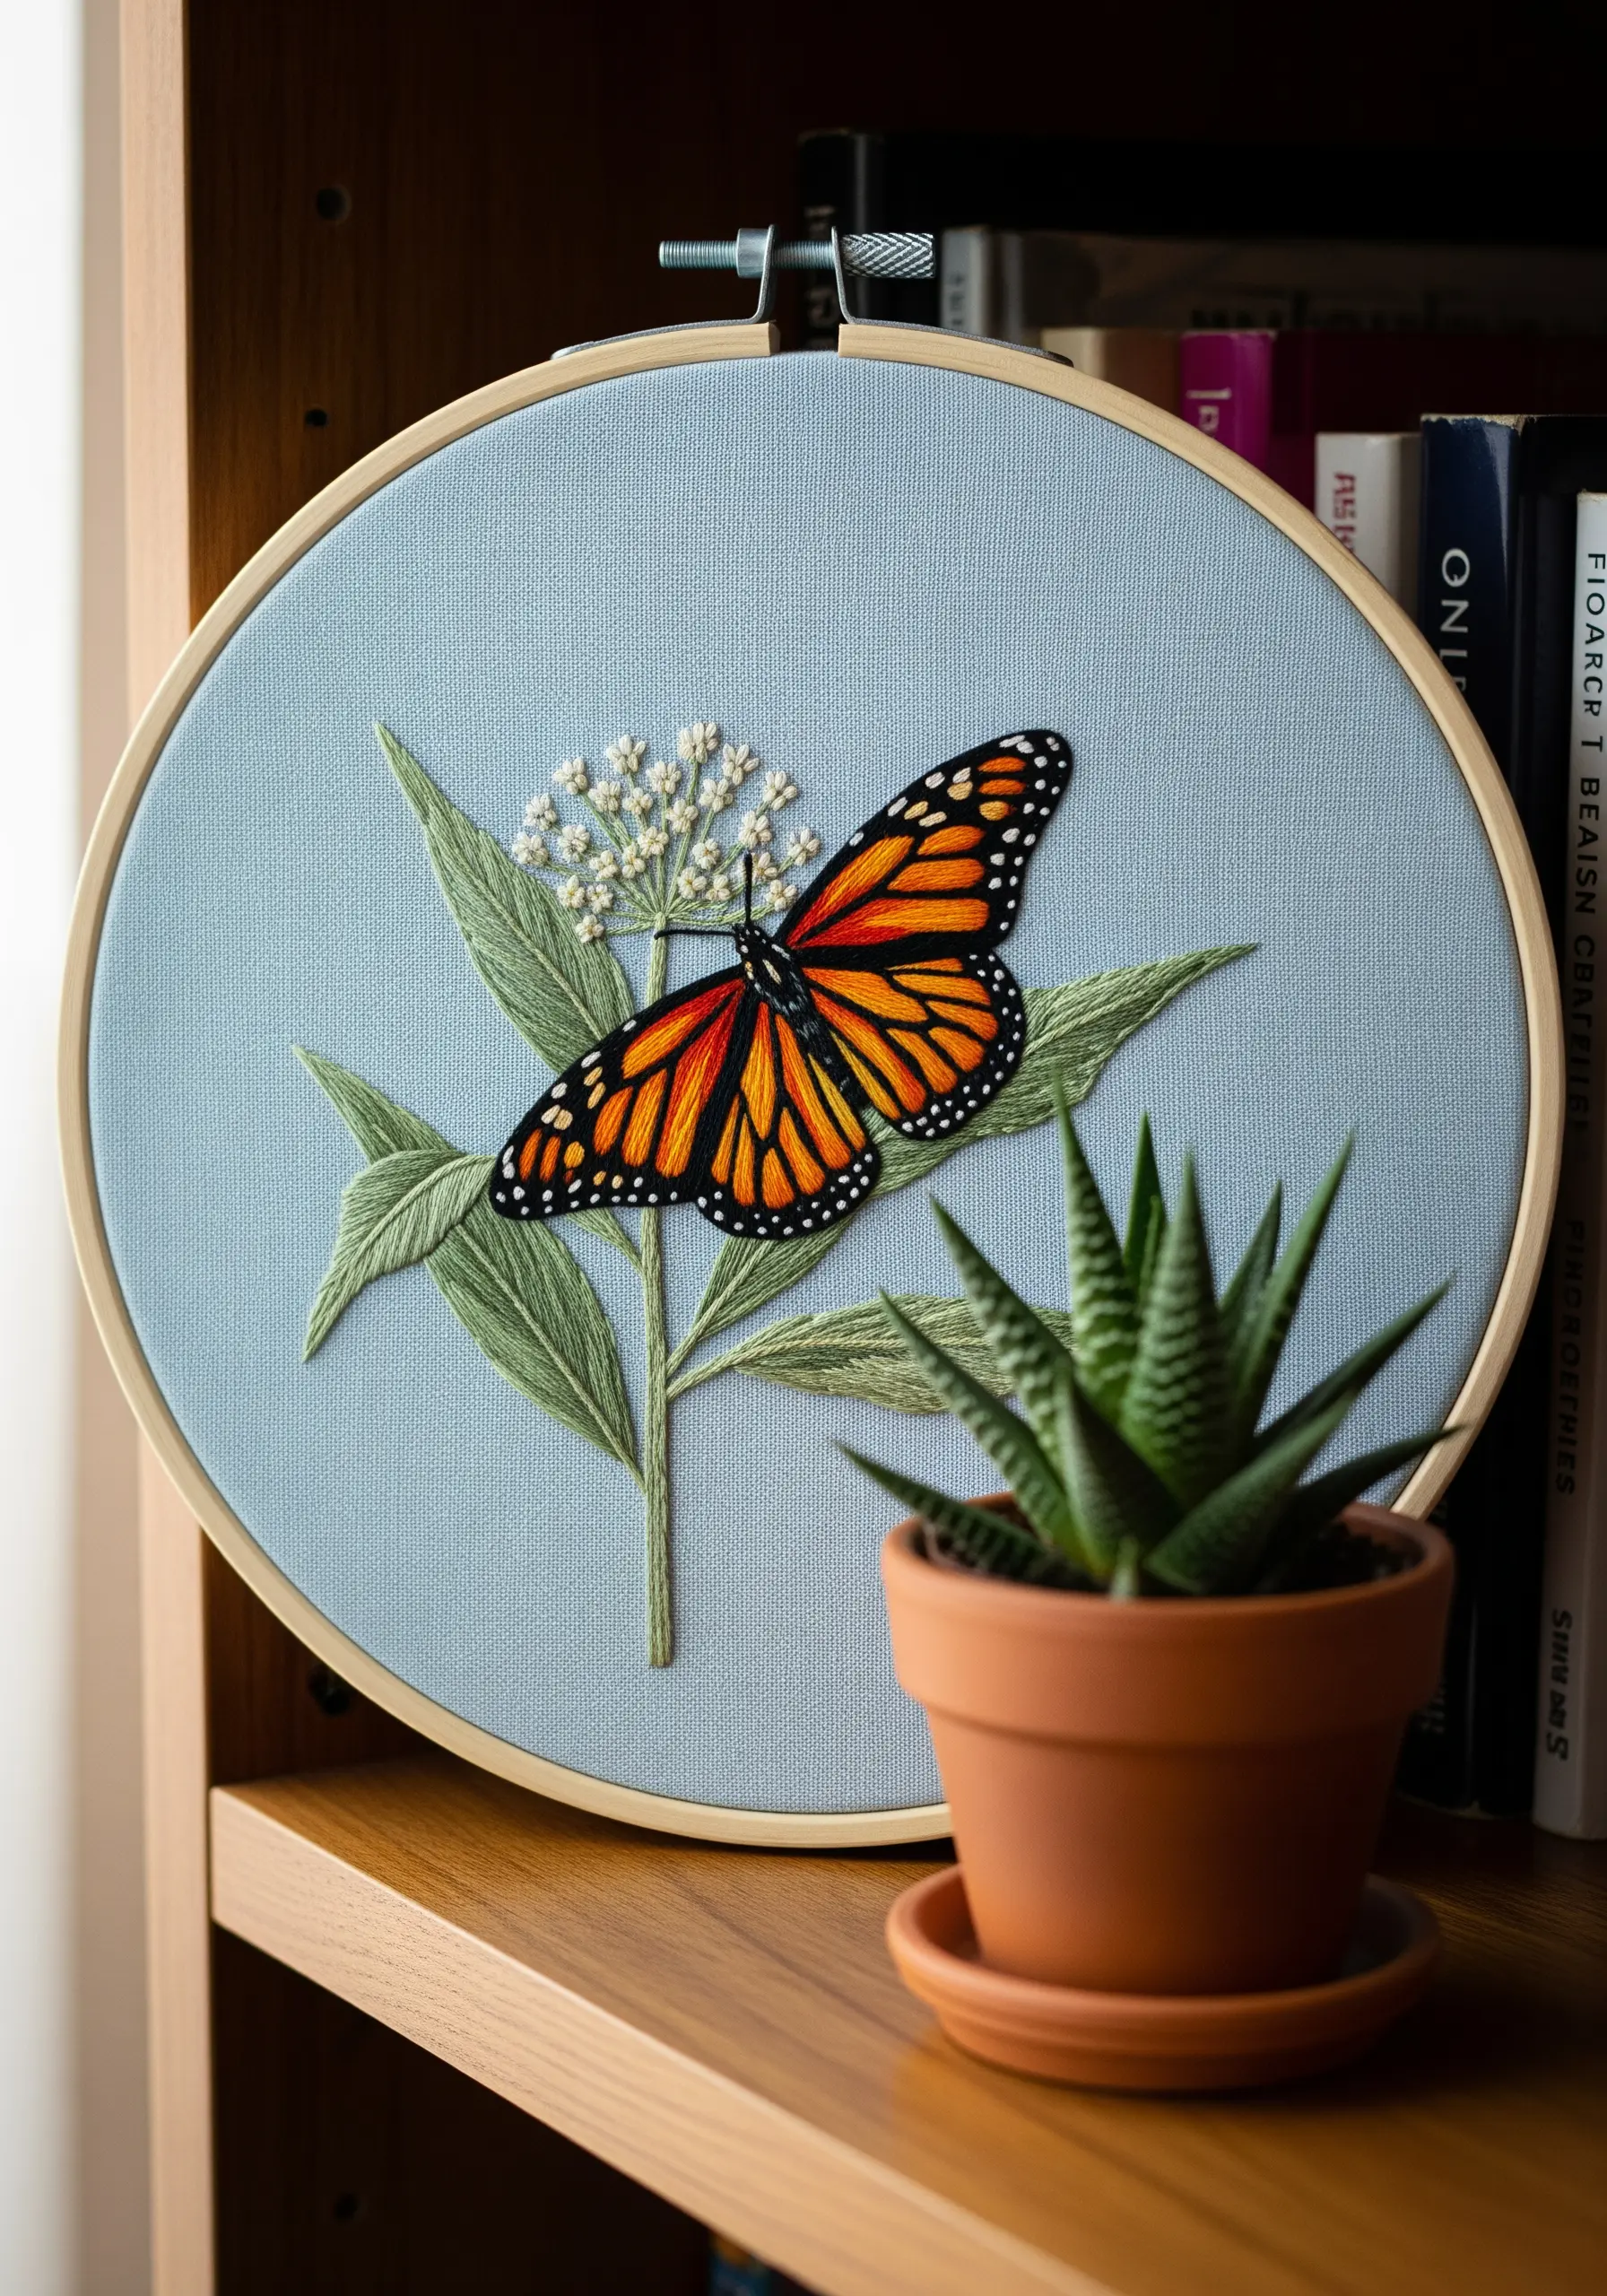
For sharp, clean shapes like butterfly wings, outline your design first before filling it.
Use a single strand of black thread and a tiny split stitch to create a stable, non-stretchy border. This foundation prevents your fill stitches from pulling the fabric and blurring the edges.
When you fill the shape with satin stitch or long-and-short stitch, bring your needle up just inside the outline and down just outside it, encasing the split stitch.
This simple preparation step is the key to achieving professional, gallery-worthy precision in your work.
10. Combine Geometric Lines with Organic Shapes
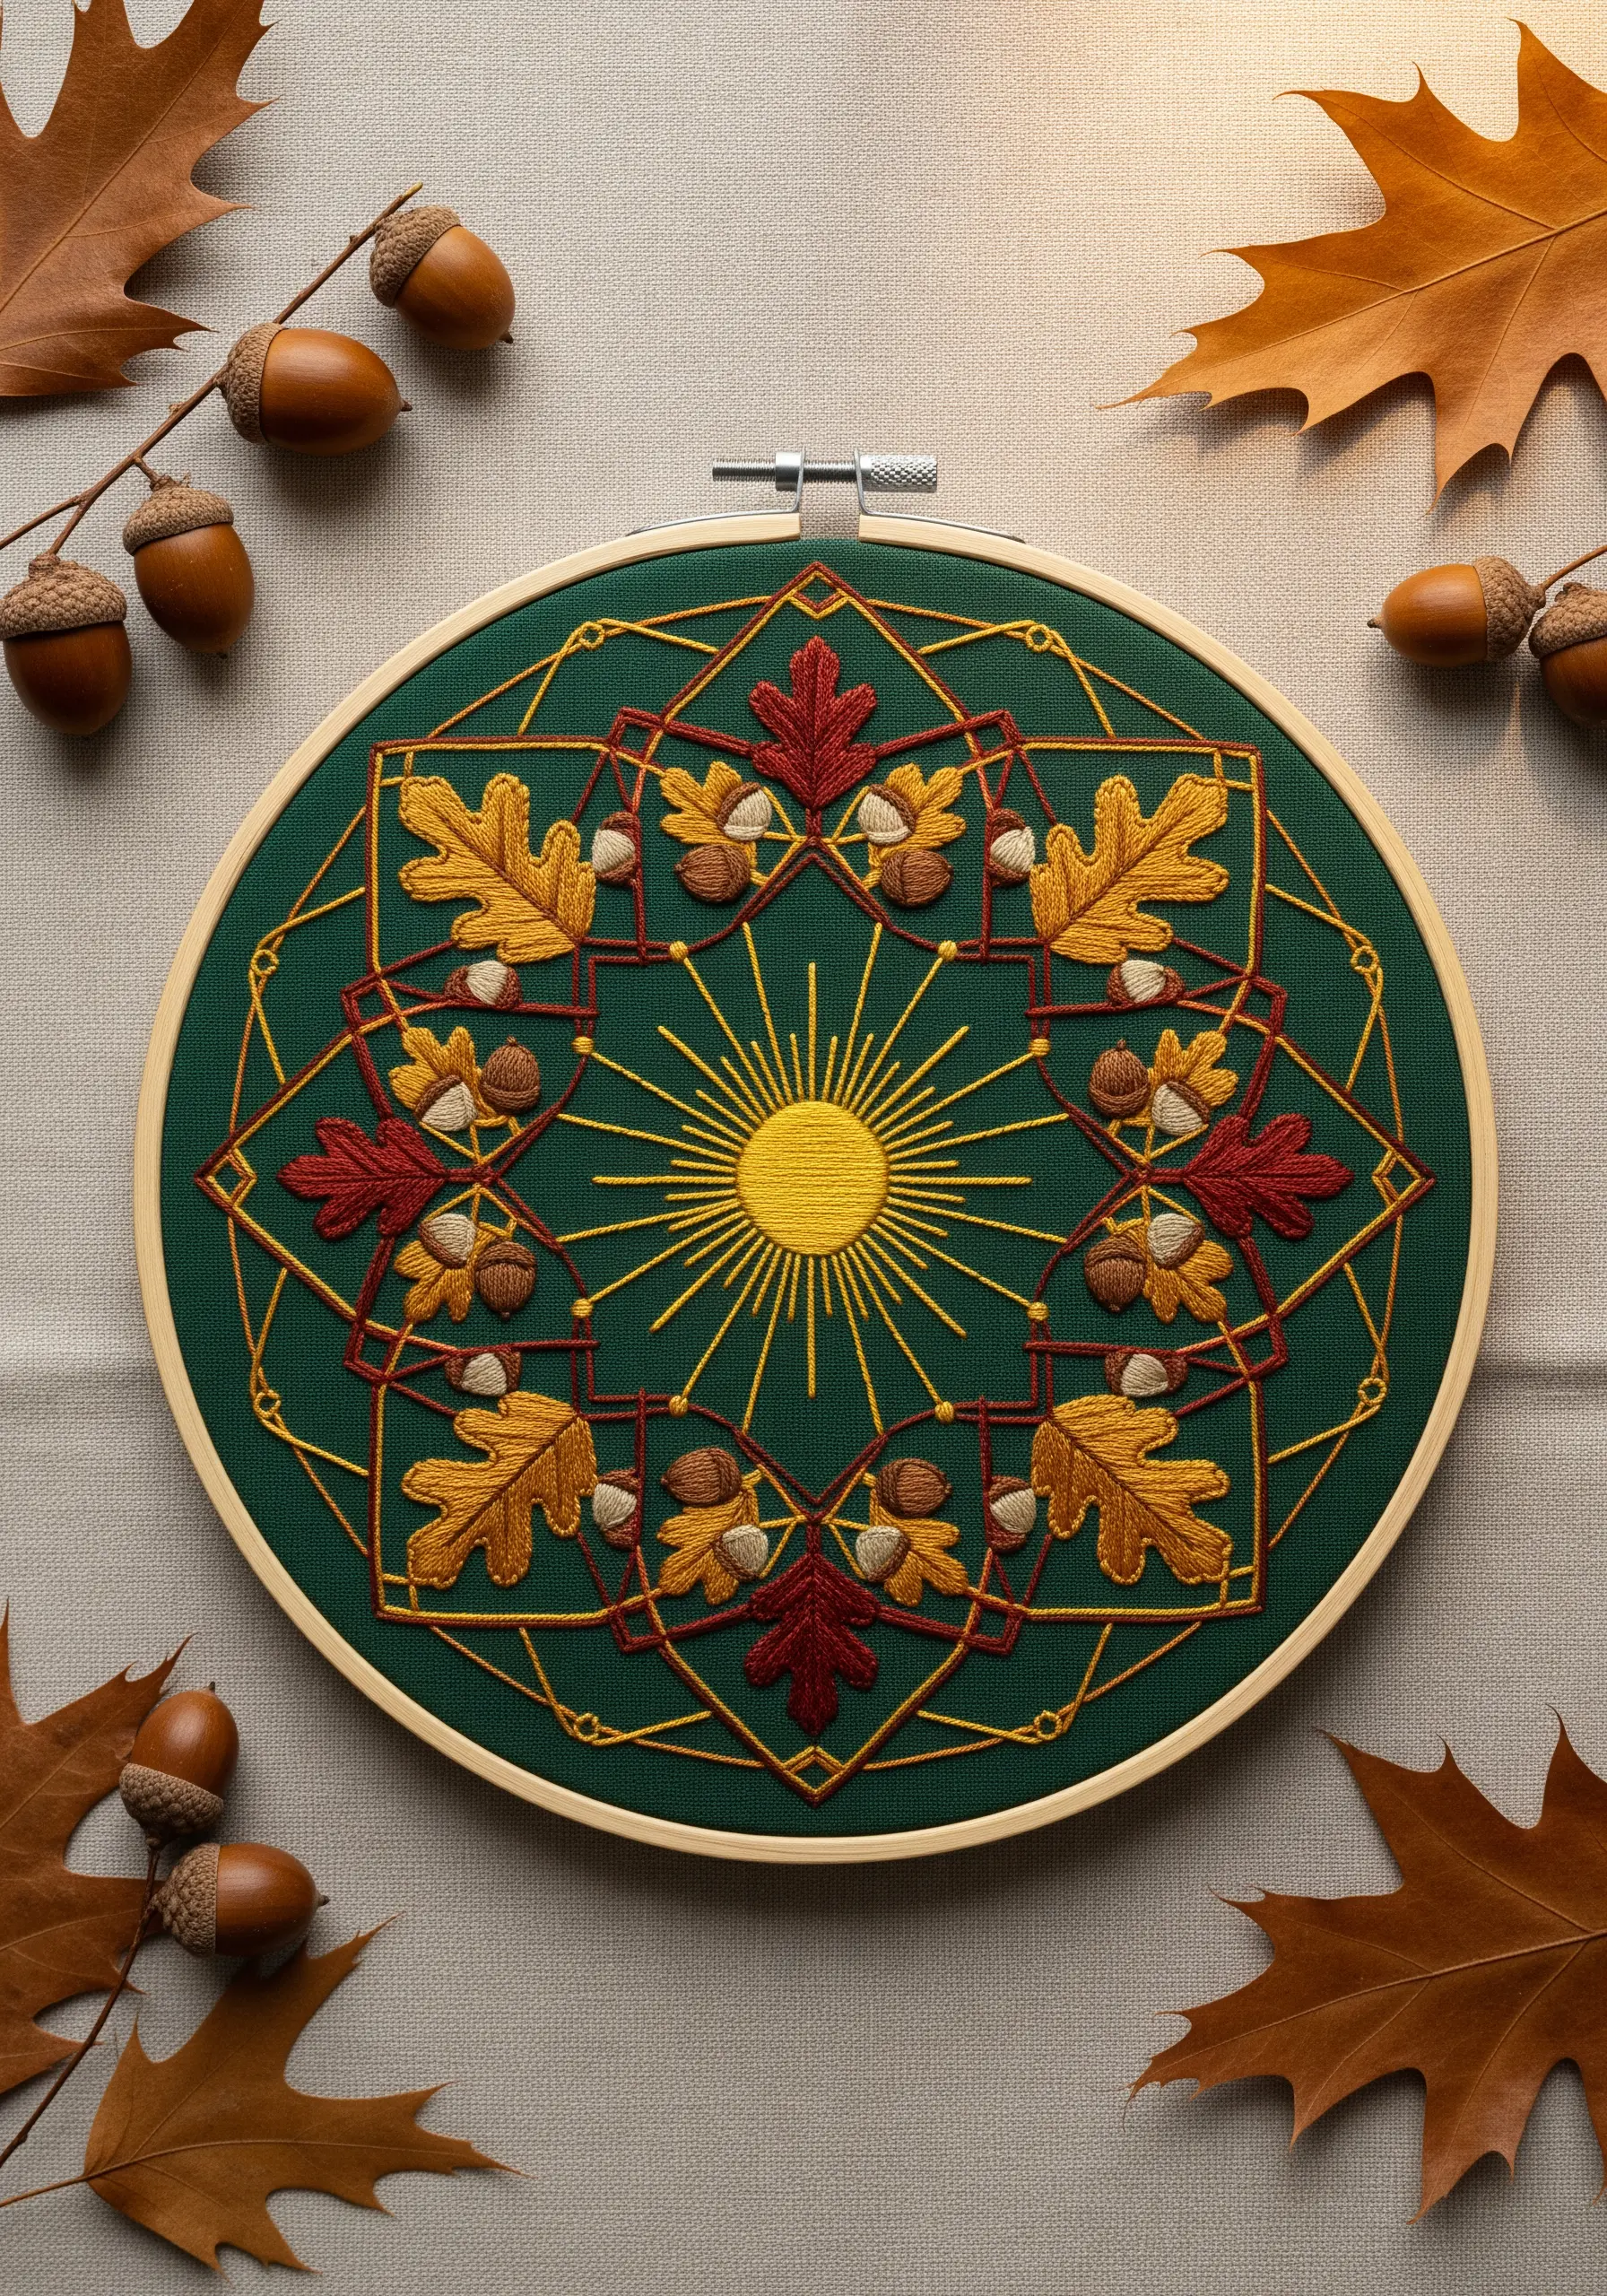
Create a modern, balanced composition by framing soft, natural motifs within a crisp geometric structure.
Use a single, bright thread for the geometric lines—a simple backstitch or stem stitch works perfectly. Ensure your lines are taut and precise.
Fill the organic leaf shapes with a softer stitch, like a fishbone or satin stitch, using earthy, muted tones that contrast with the bright framework.
This juxtaposition of hard and soft lines creates a dynamic visual rhythm, turning a simple collection of leaves into a sophisticated zen-inspired mandala.
11. Sculpt with French Knots and Textured Yarn
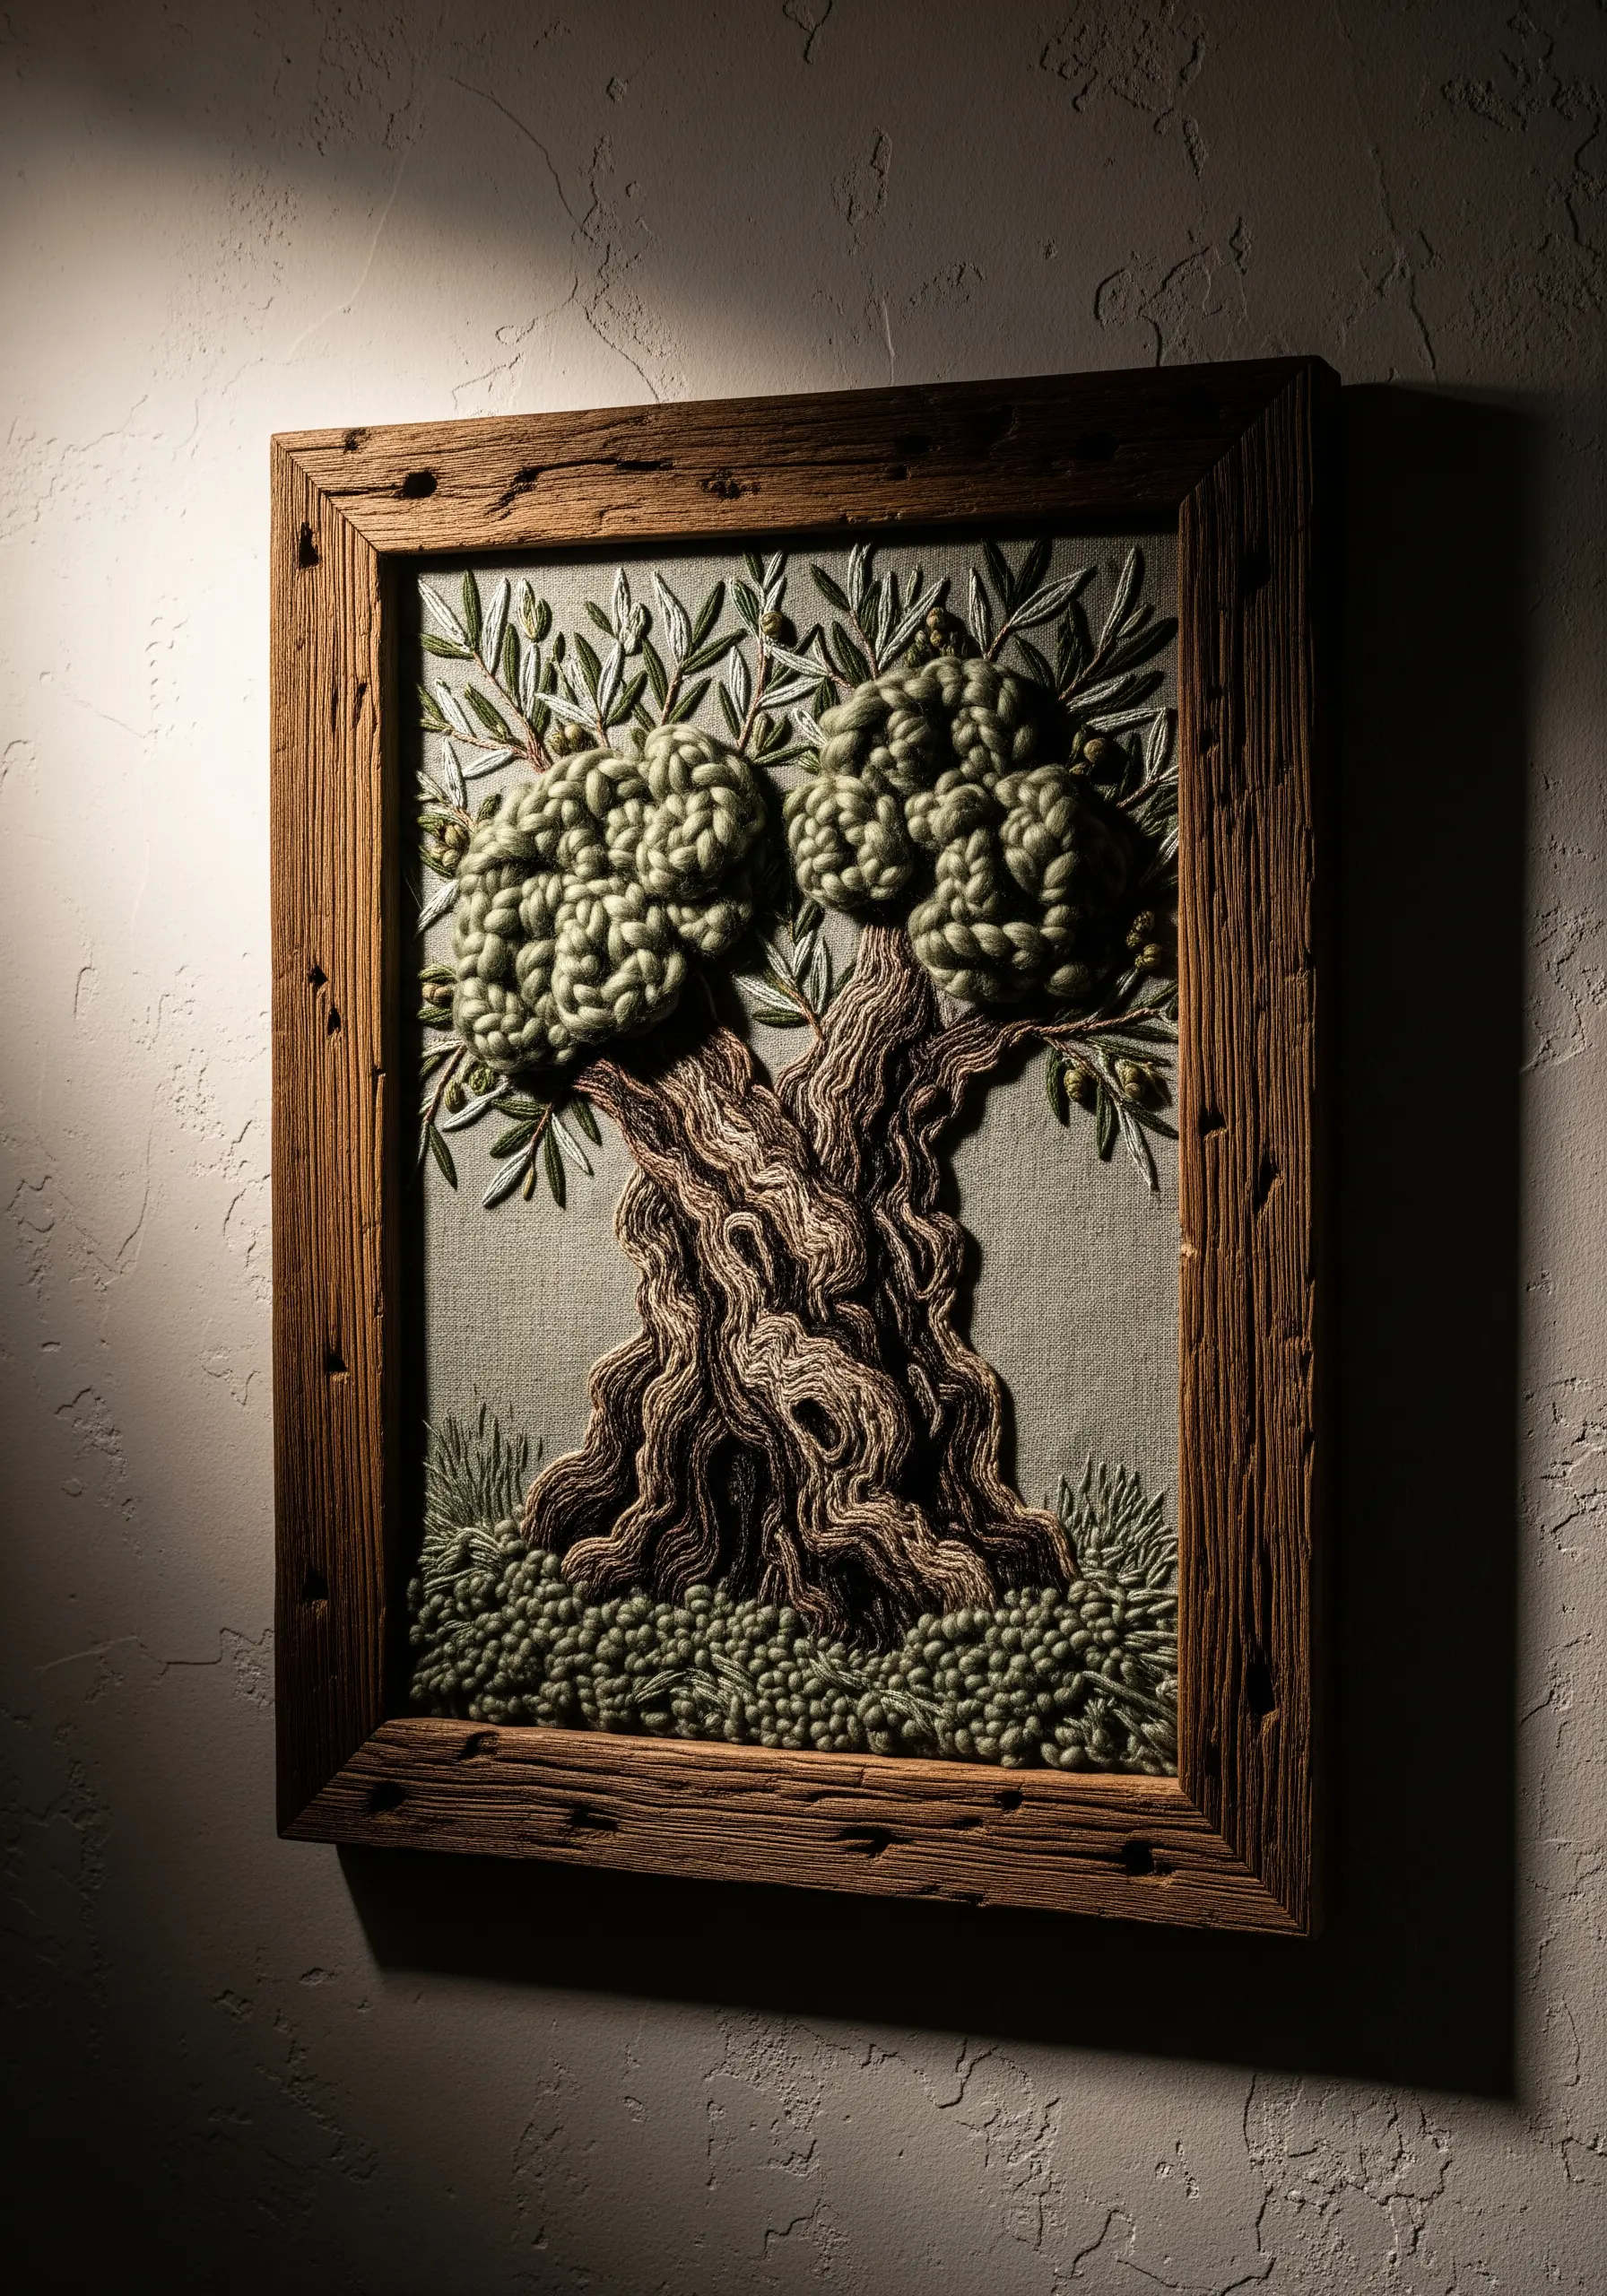
Build highly dimensional, sculptural forms by combining traditional stitches with thicker fibers.
To create the gnarled bark of an ancient tree, use a mix of stem stitch and long straight stitches in various shades of brown, allowing them to twist and overlap.
For the dense foliage, switch to a chunky, nubby wool yarn in mossy green. Fill the canopy areas with densely packed French knots, wrapping the thick yarn just once around the needle.
This creates a wonderfully tactile, almost topographical, surface that invites touch and adds dramatic depth.
12. Find Elegance in Simplicity with Cross-Stitch
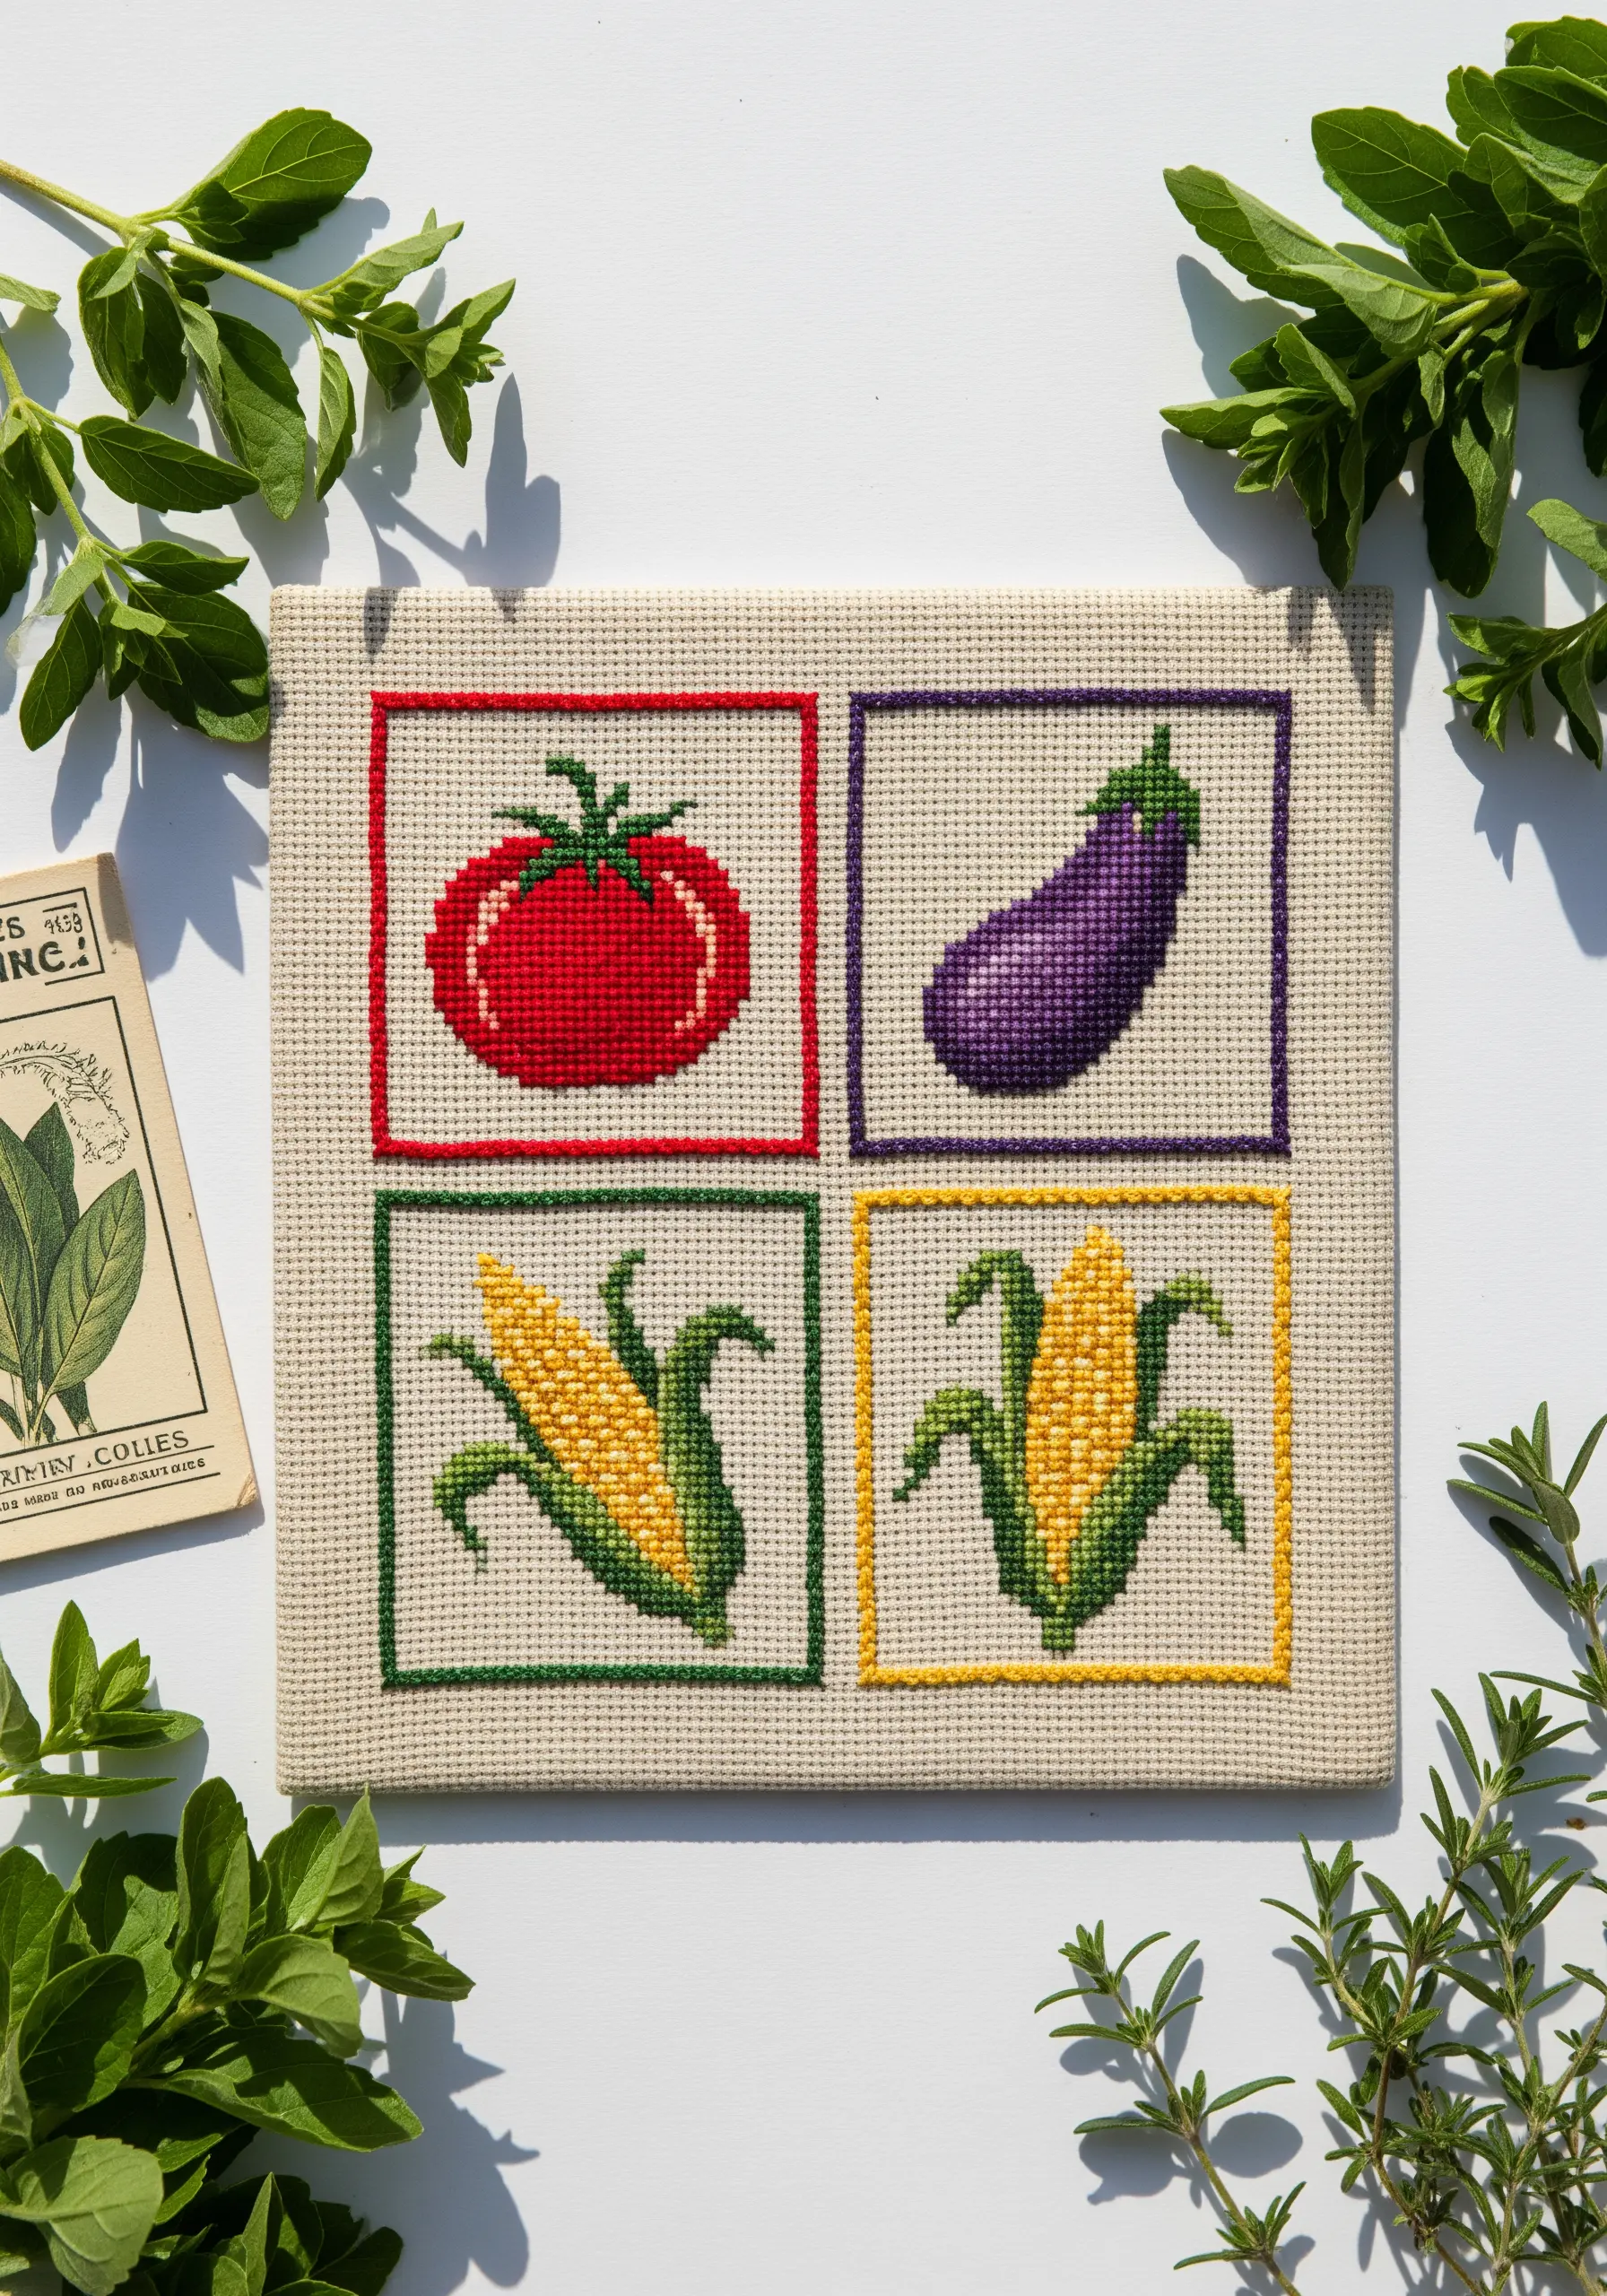
Elevate simple subjects by focusing on clean execution and a balanced layout.
When working on Aida cloth, ensure every cross-stitch is formed the same way—with the top leg always crossing in the same direction (e.g., bottom-left to top-right).
This consistency creates a uniform, professional sheen across the entire piece.
Arrange your simple motifs in a clean grid format. This modern presentation turns everyday subjects, like garden vegetables, into a chic, graphic statement piece perfect for kitchen decor.
13. Master Illusion with Sheer Fabric Appliqué
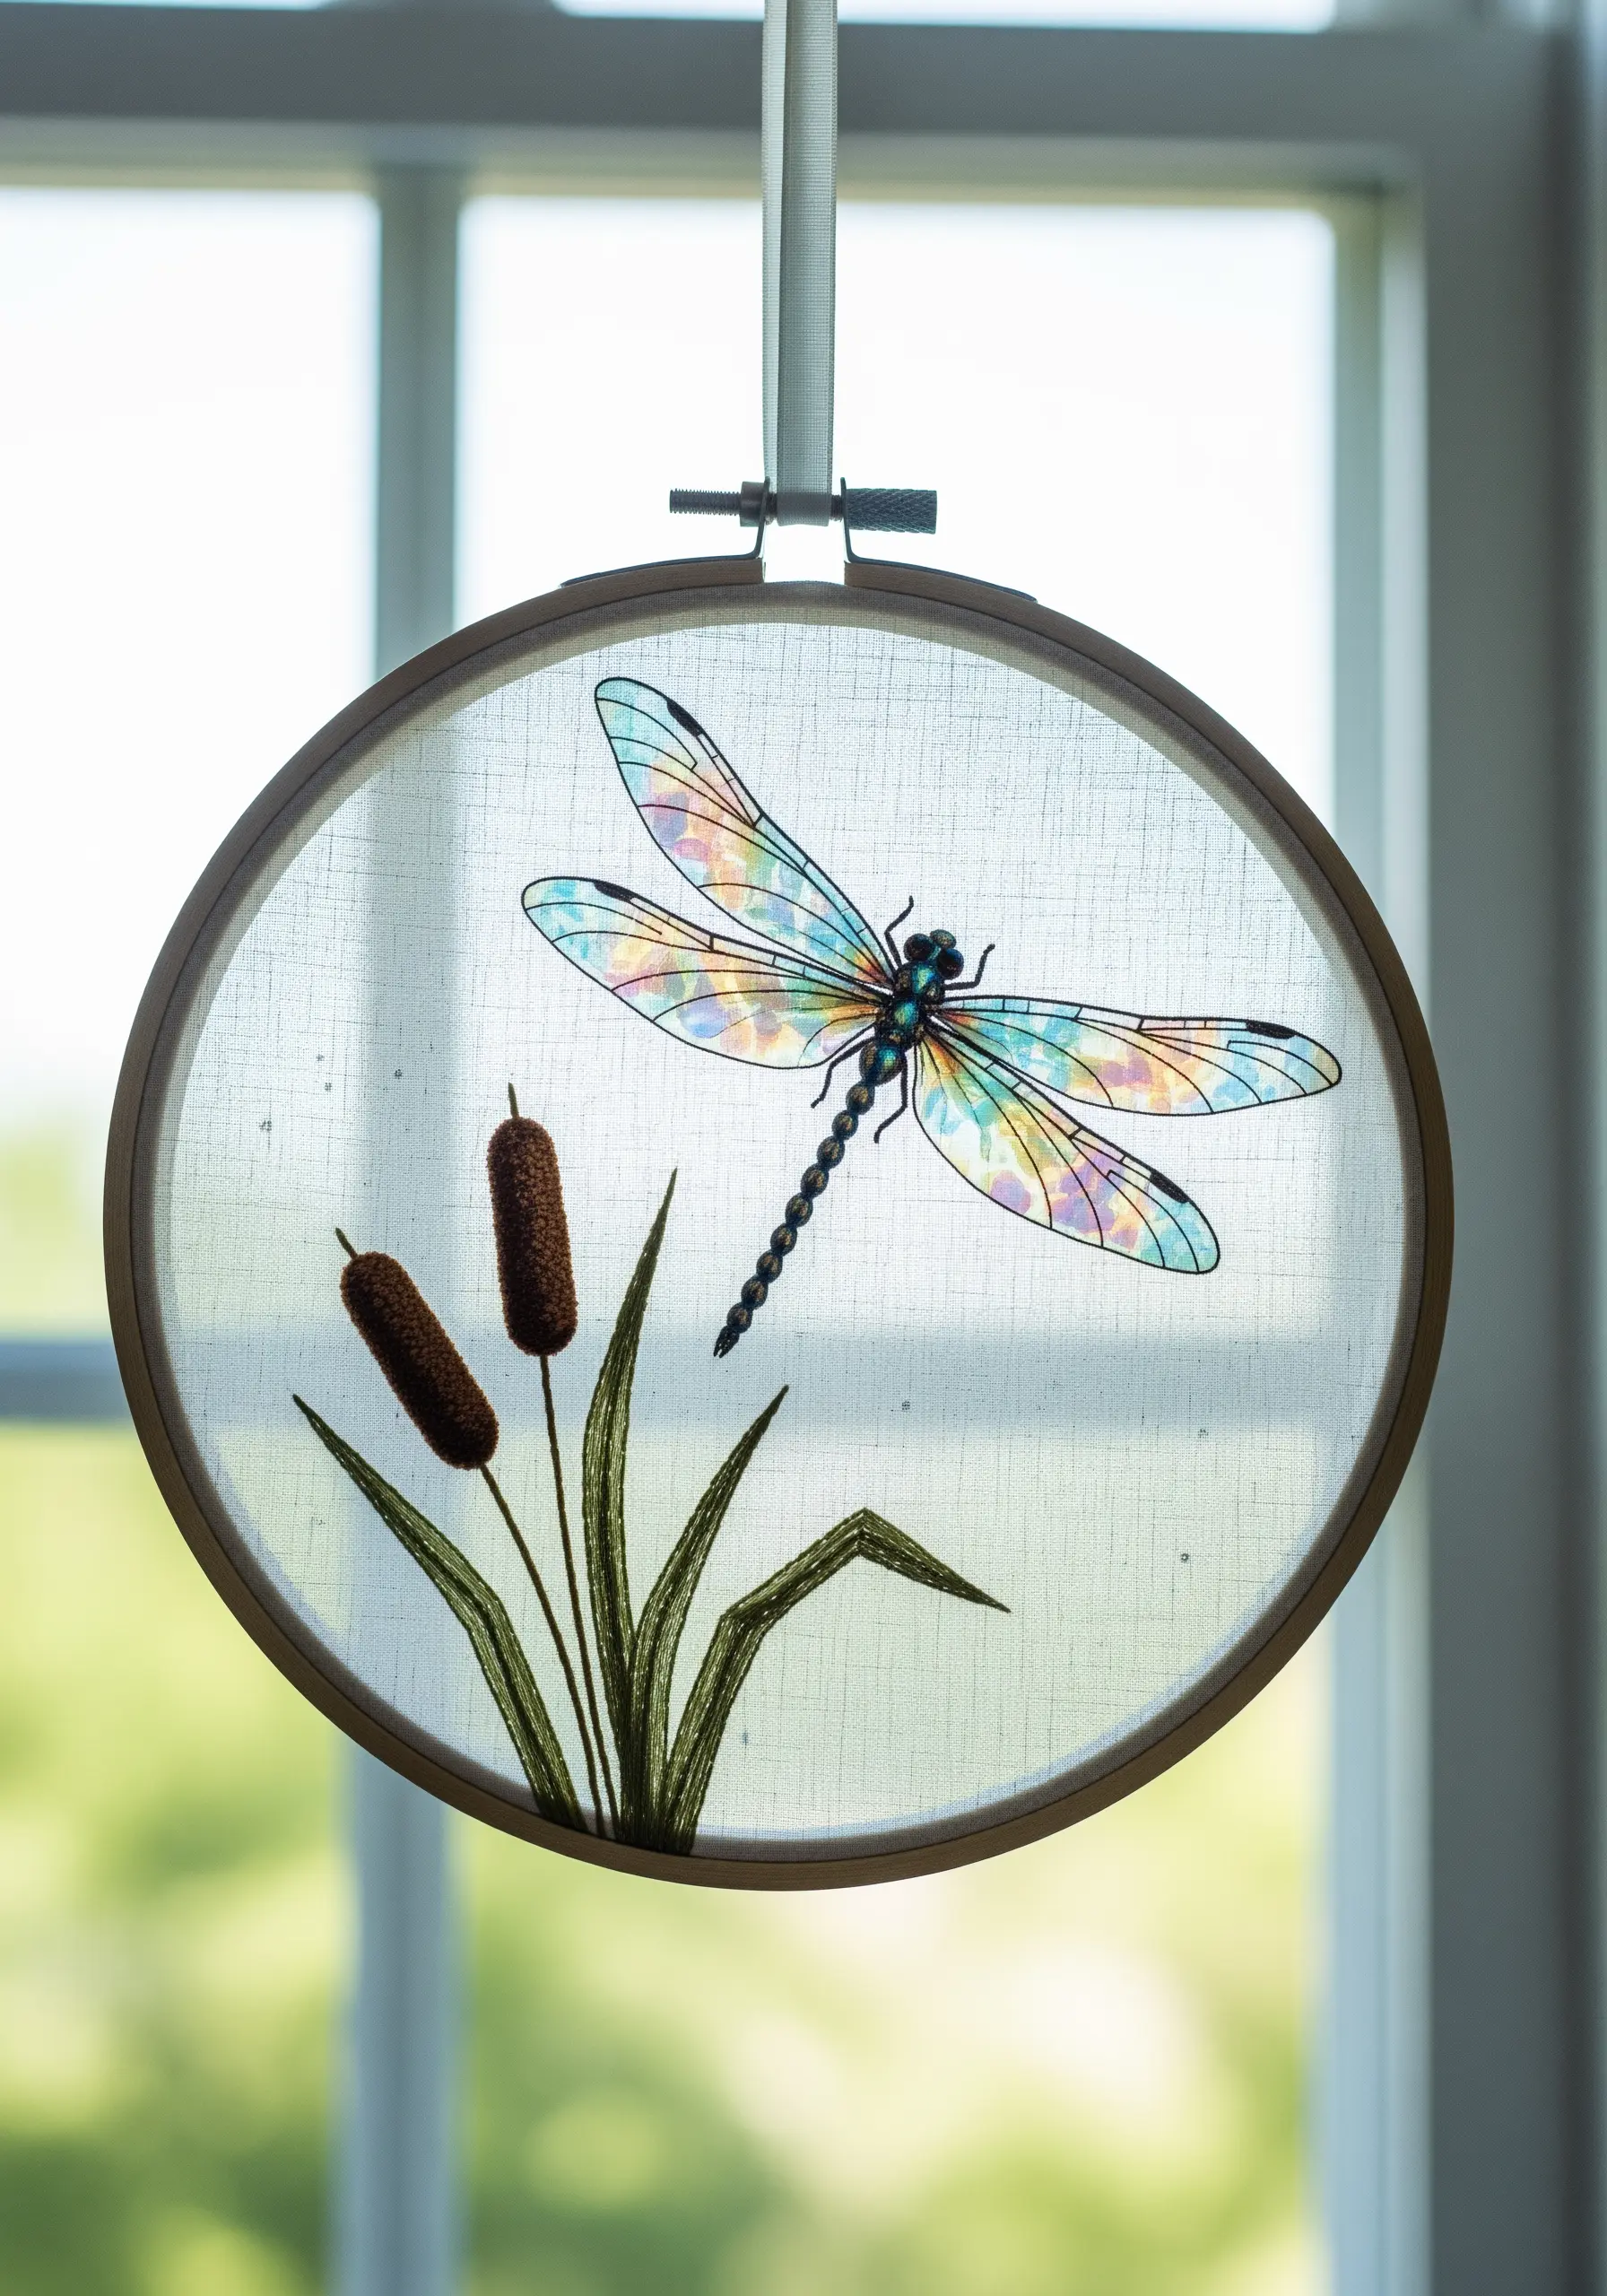
Create the delicate, iridescent look of dragonfly wings by stitching on organza before applying it to your main fabric.
First, embroider the wing details onto a piece of sheer organza stretched in a separate hoop. Then, carefully cut out the wing shape, leaving a tiny margin.
Position the organza wing on your primary fabric (the one with the dragonfly body and cattails) and secure it with tiny, nearly invisible appliqué stitches around the edge.
This layering technique creates a beautiful illusion of transparency and delicacy that a simple fill stitch cannot replicate.
14. Transform a Canvas with Thread and Beads
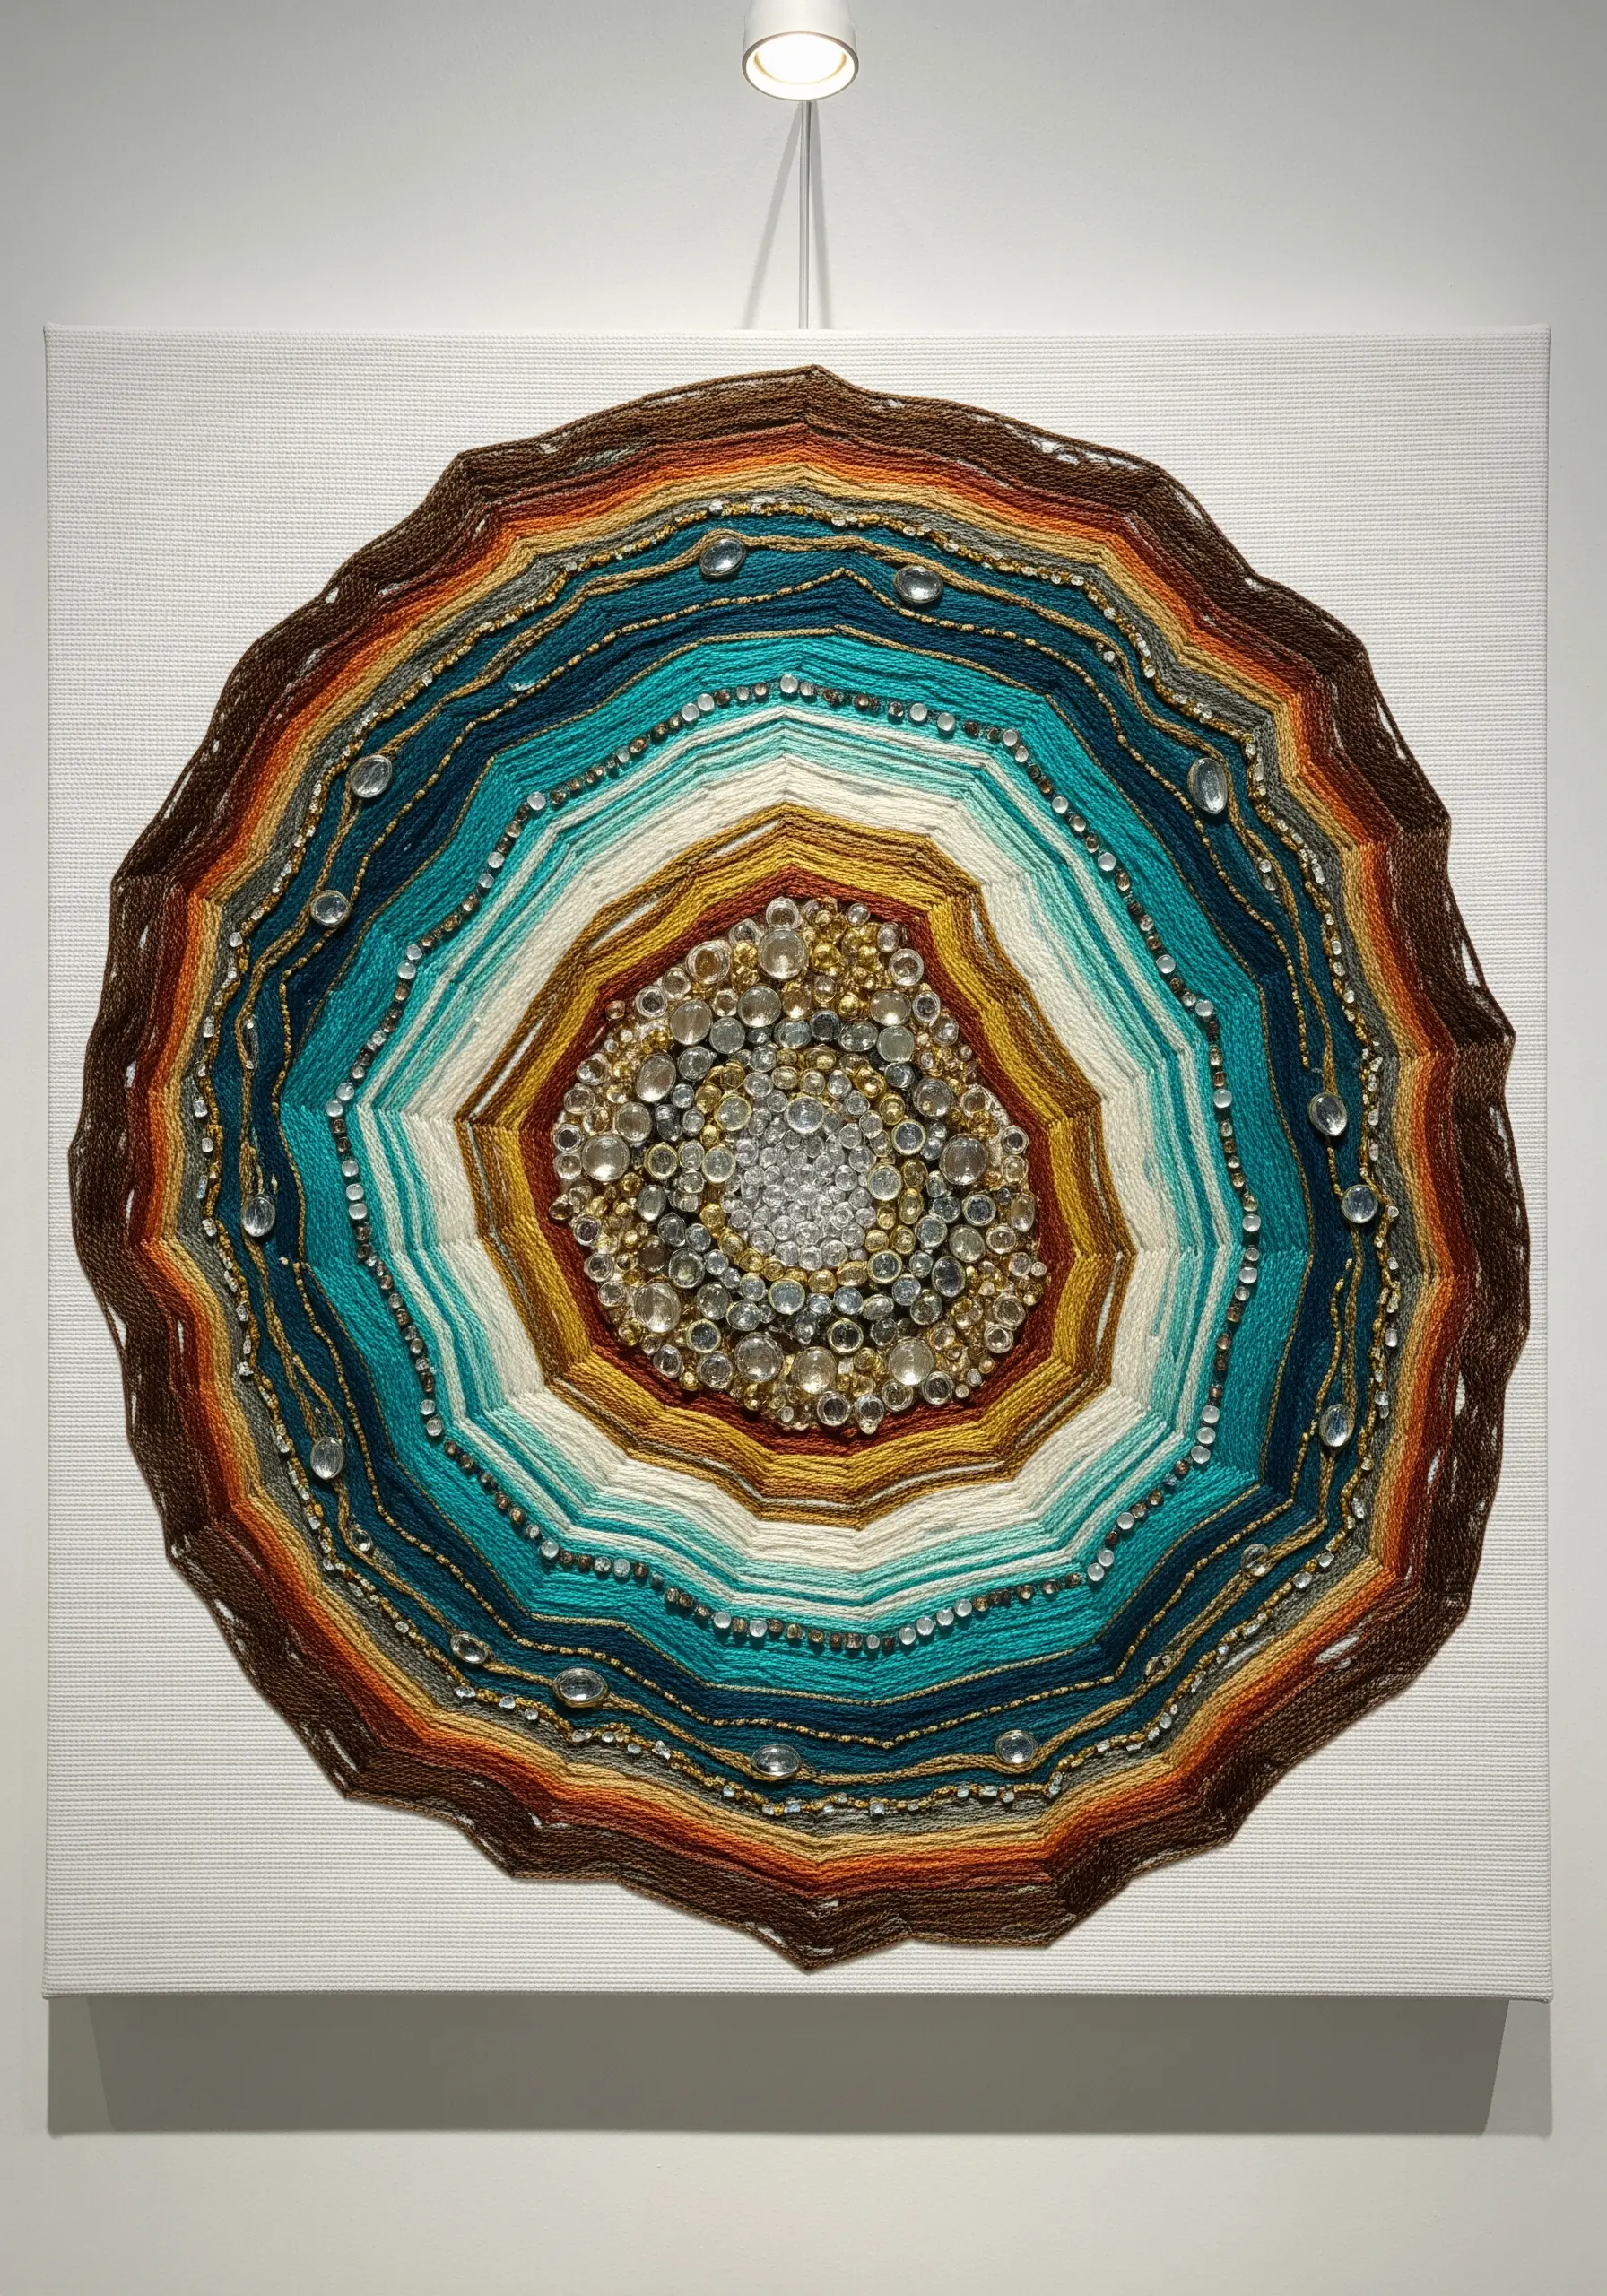
Elevate a simple concentric design by integrating beads for light-reflecting texture.
Instead of filling the entire center with thread, leave space for a dense cluster of clear and silver seed beads. This creates a brilliant focal point that catches the light.
To create the radiating lines, couch down metallic threads at regular intervals. This is faster than stitching and adds a defined, graphic quality.
This project shows how stitching on canvas can create large-scale, impactful wall art.
15. Replicate Rough Bark with Turkey Work
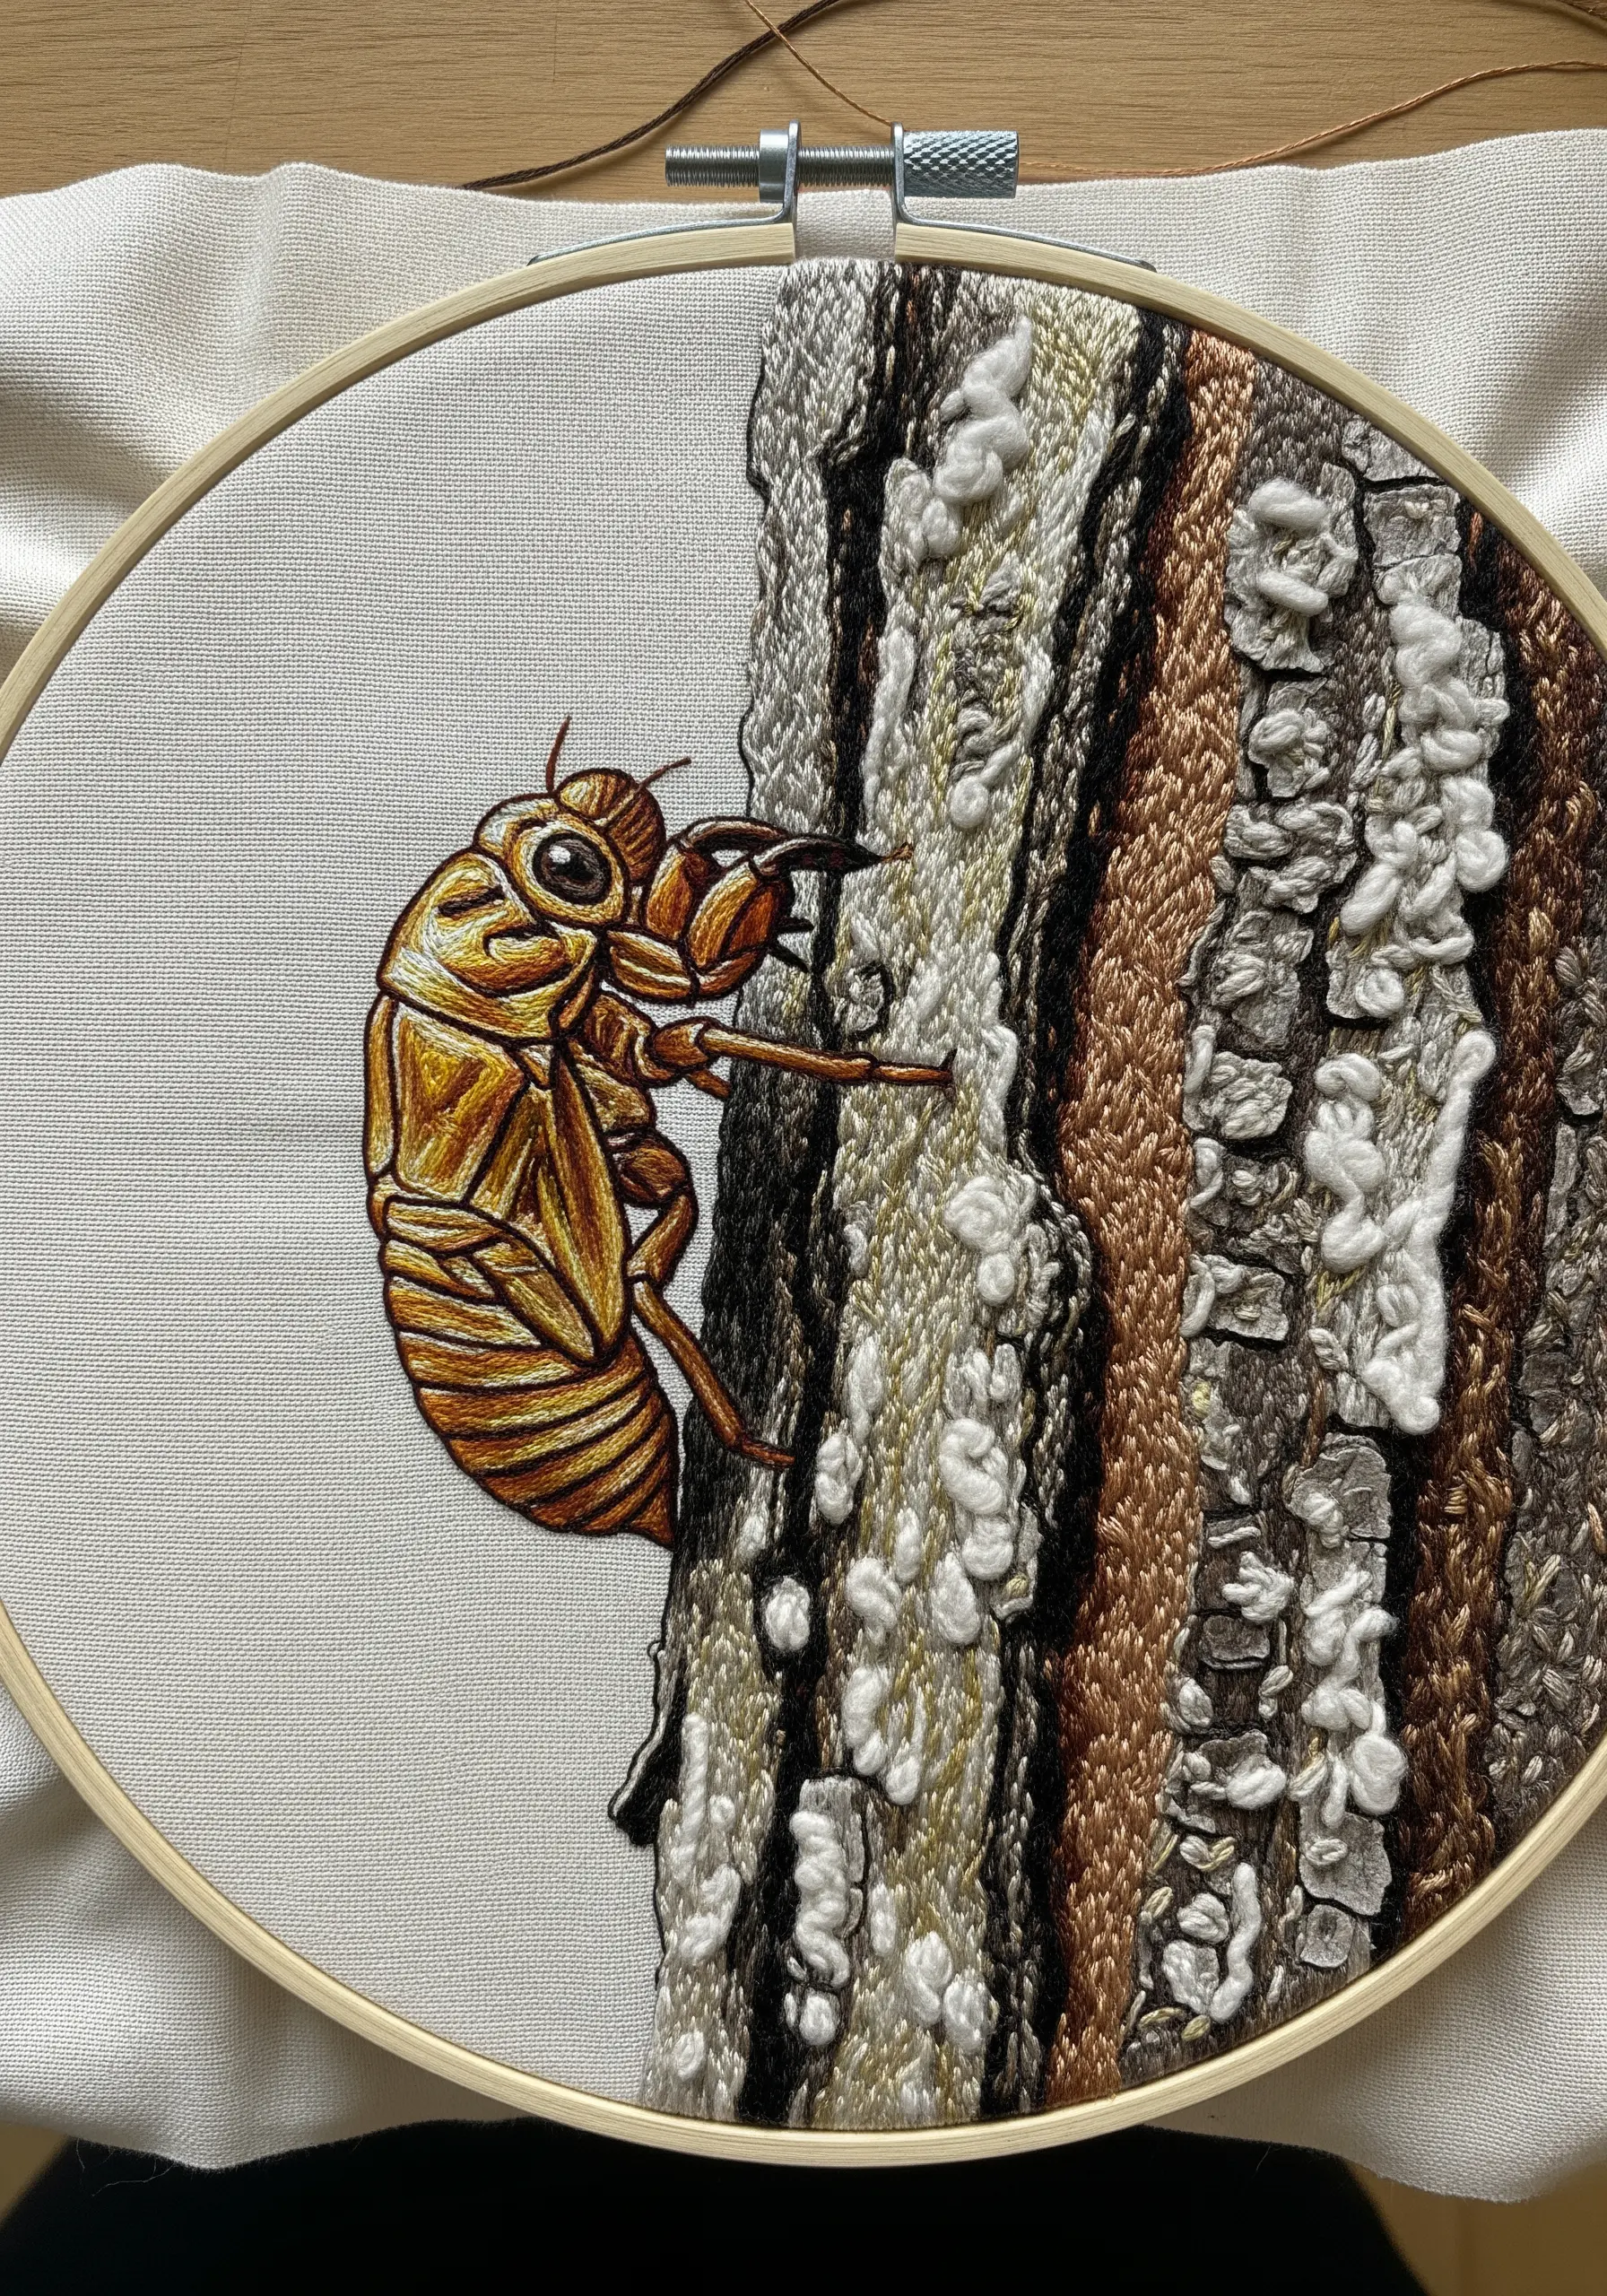
To capture the shaggy, peeling texture of tree bark, the turkey work stitch is your best friend.
Work rows of turkey work stitches using a mix of textured, variegated, and fuzzy threads in shades of brown, grey, and white.
Once you have filled an area, trim the loops to varying heights. Shorter loops create a dense, rough feel, while longer, untrimmed loops can mimic peeling bark or lichen.
This highly tactile stitch adds incredible realism and is a perfect contrast to the smooth satin stitch of the cicada’s body.
16. Give Petals a Lifelike Wilt with Shading
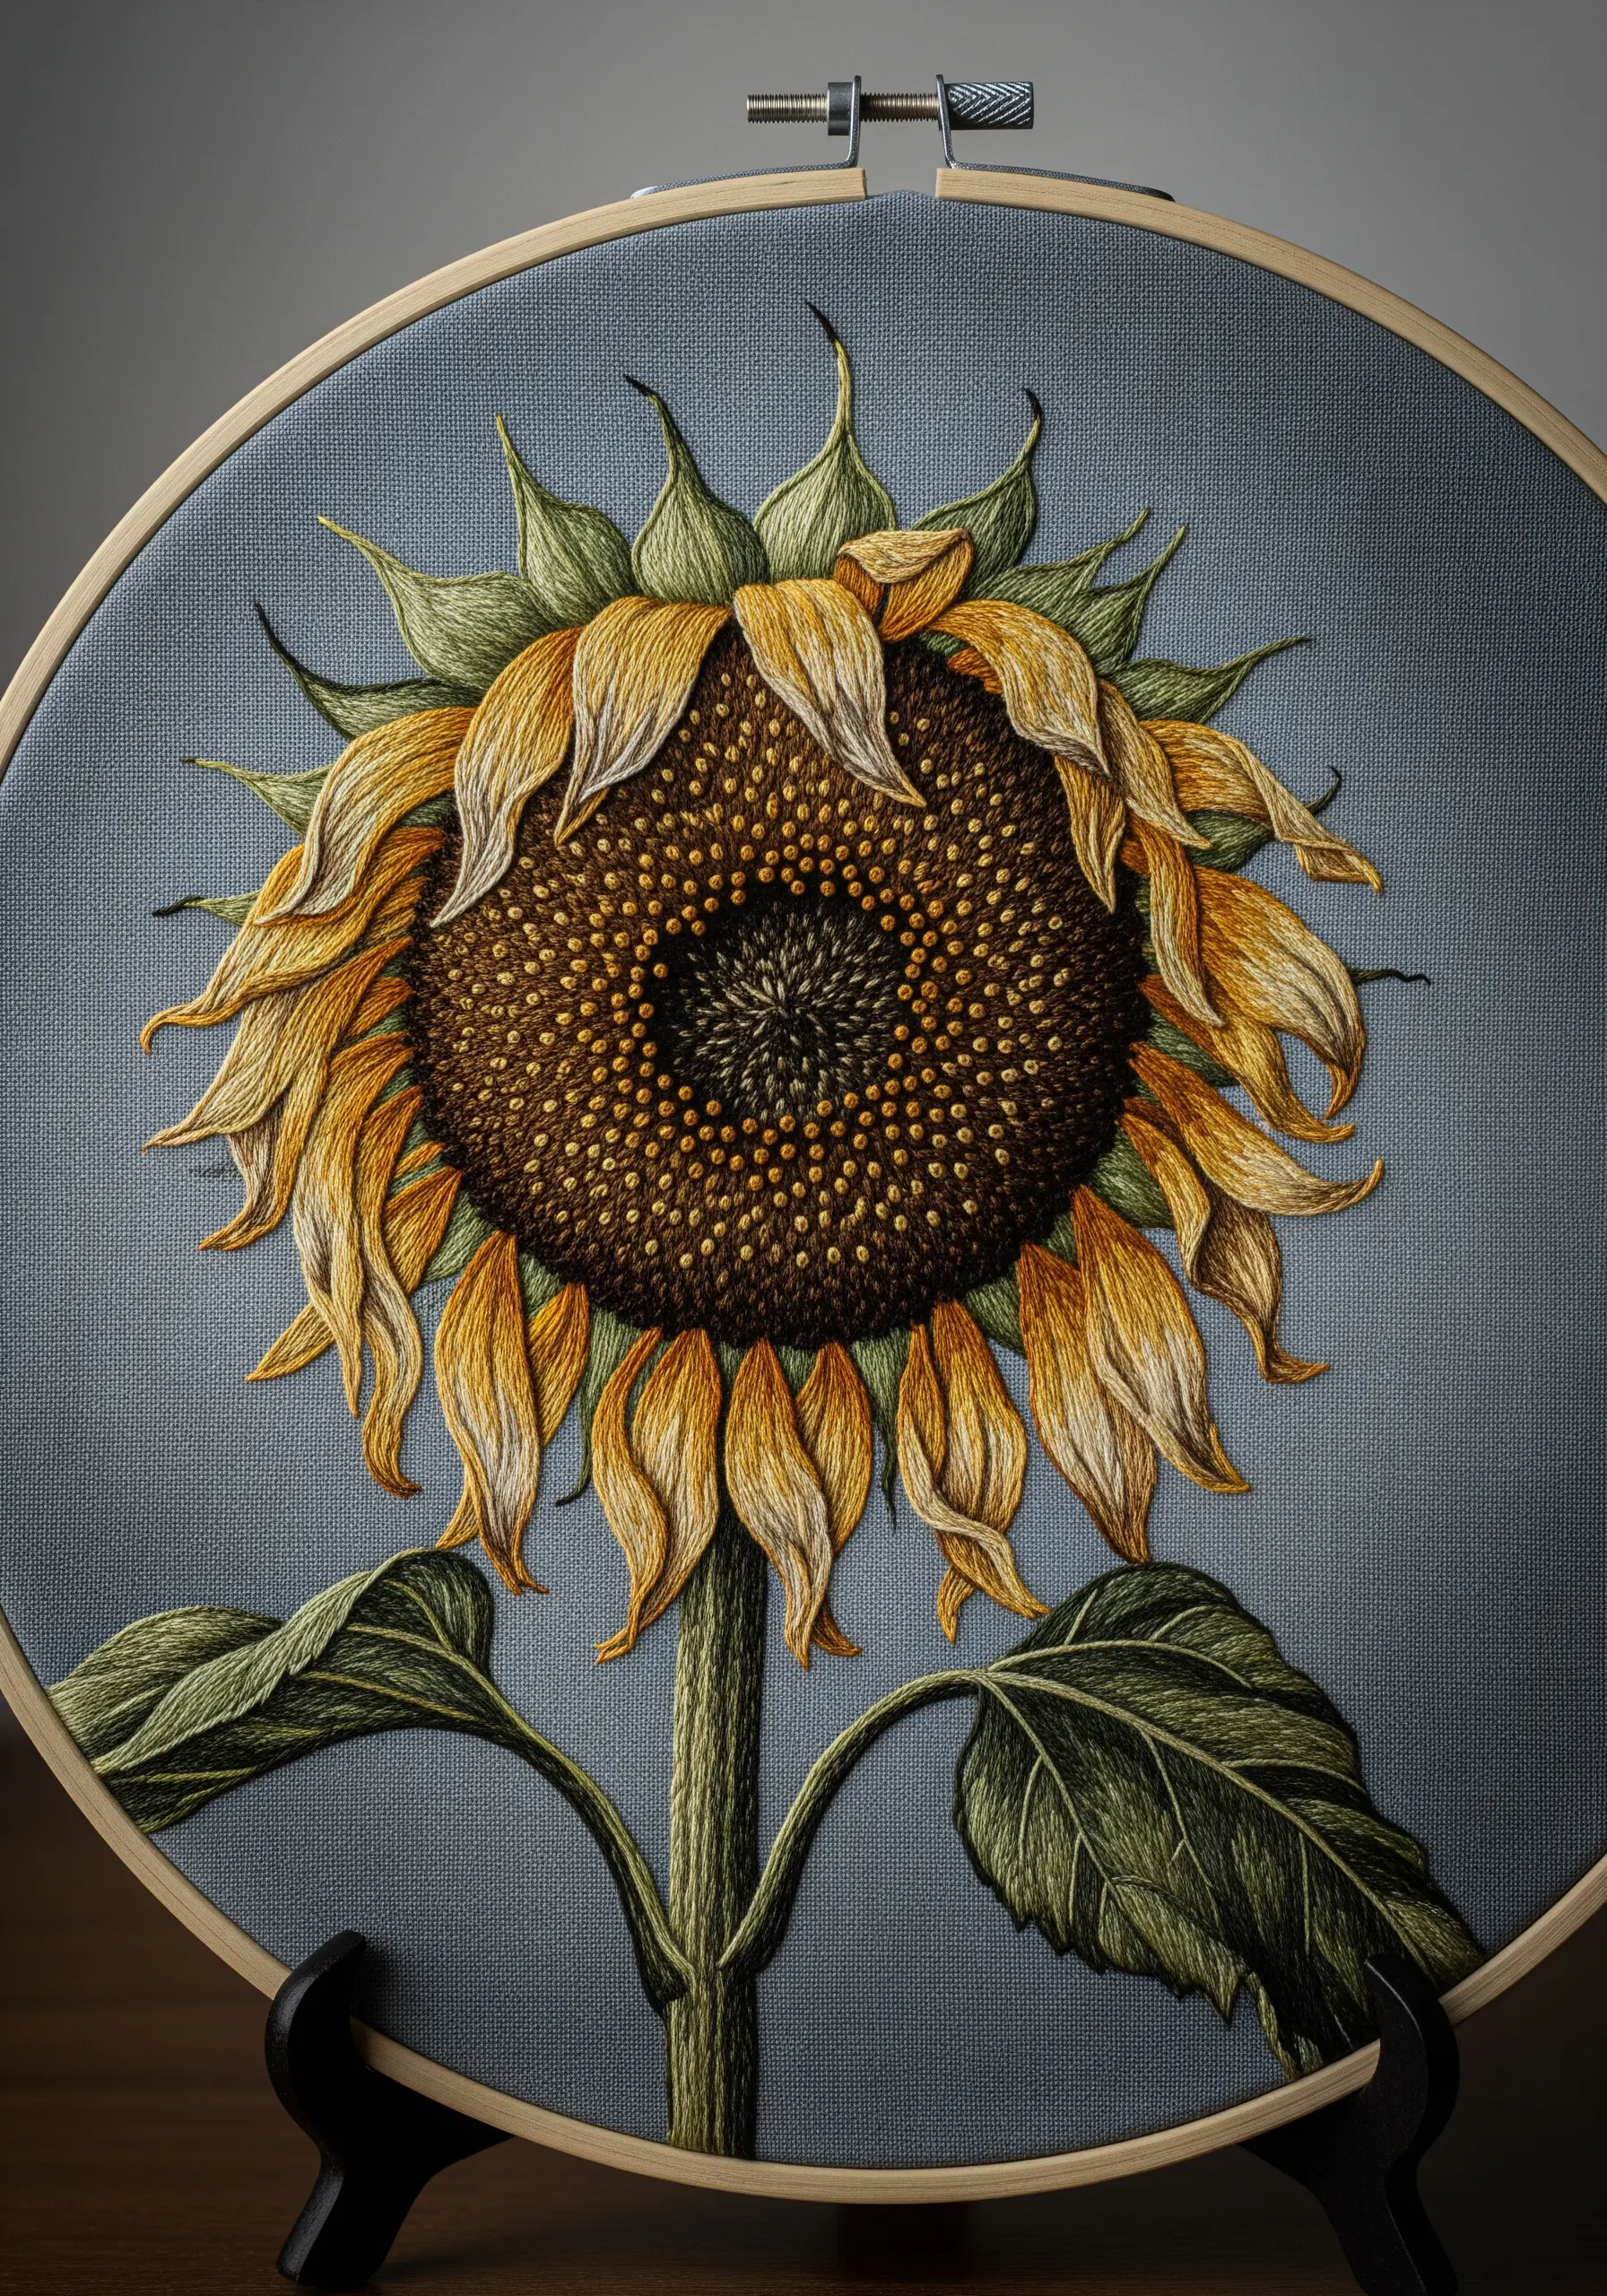
To make flower petals look like they are curling and aging, strategic color placement is essential.
Use long-and-short stitch, placing your darkest shades of gold and brown along the edges and tips where a petal would naturally dry and curl.
Blend these darker tones into the lighter, vibrant yellows toward the base of the petal. This gradient tricks the eye into seeing dimension and form.
Vary the direction of your stitches slightly for each petal to enhance the feeling of natural, imperfect movement.
17. Capture a Fiery Sky with Directional Fills
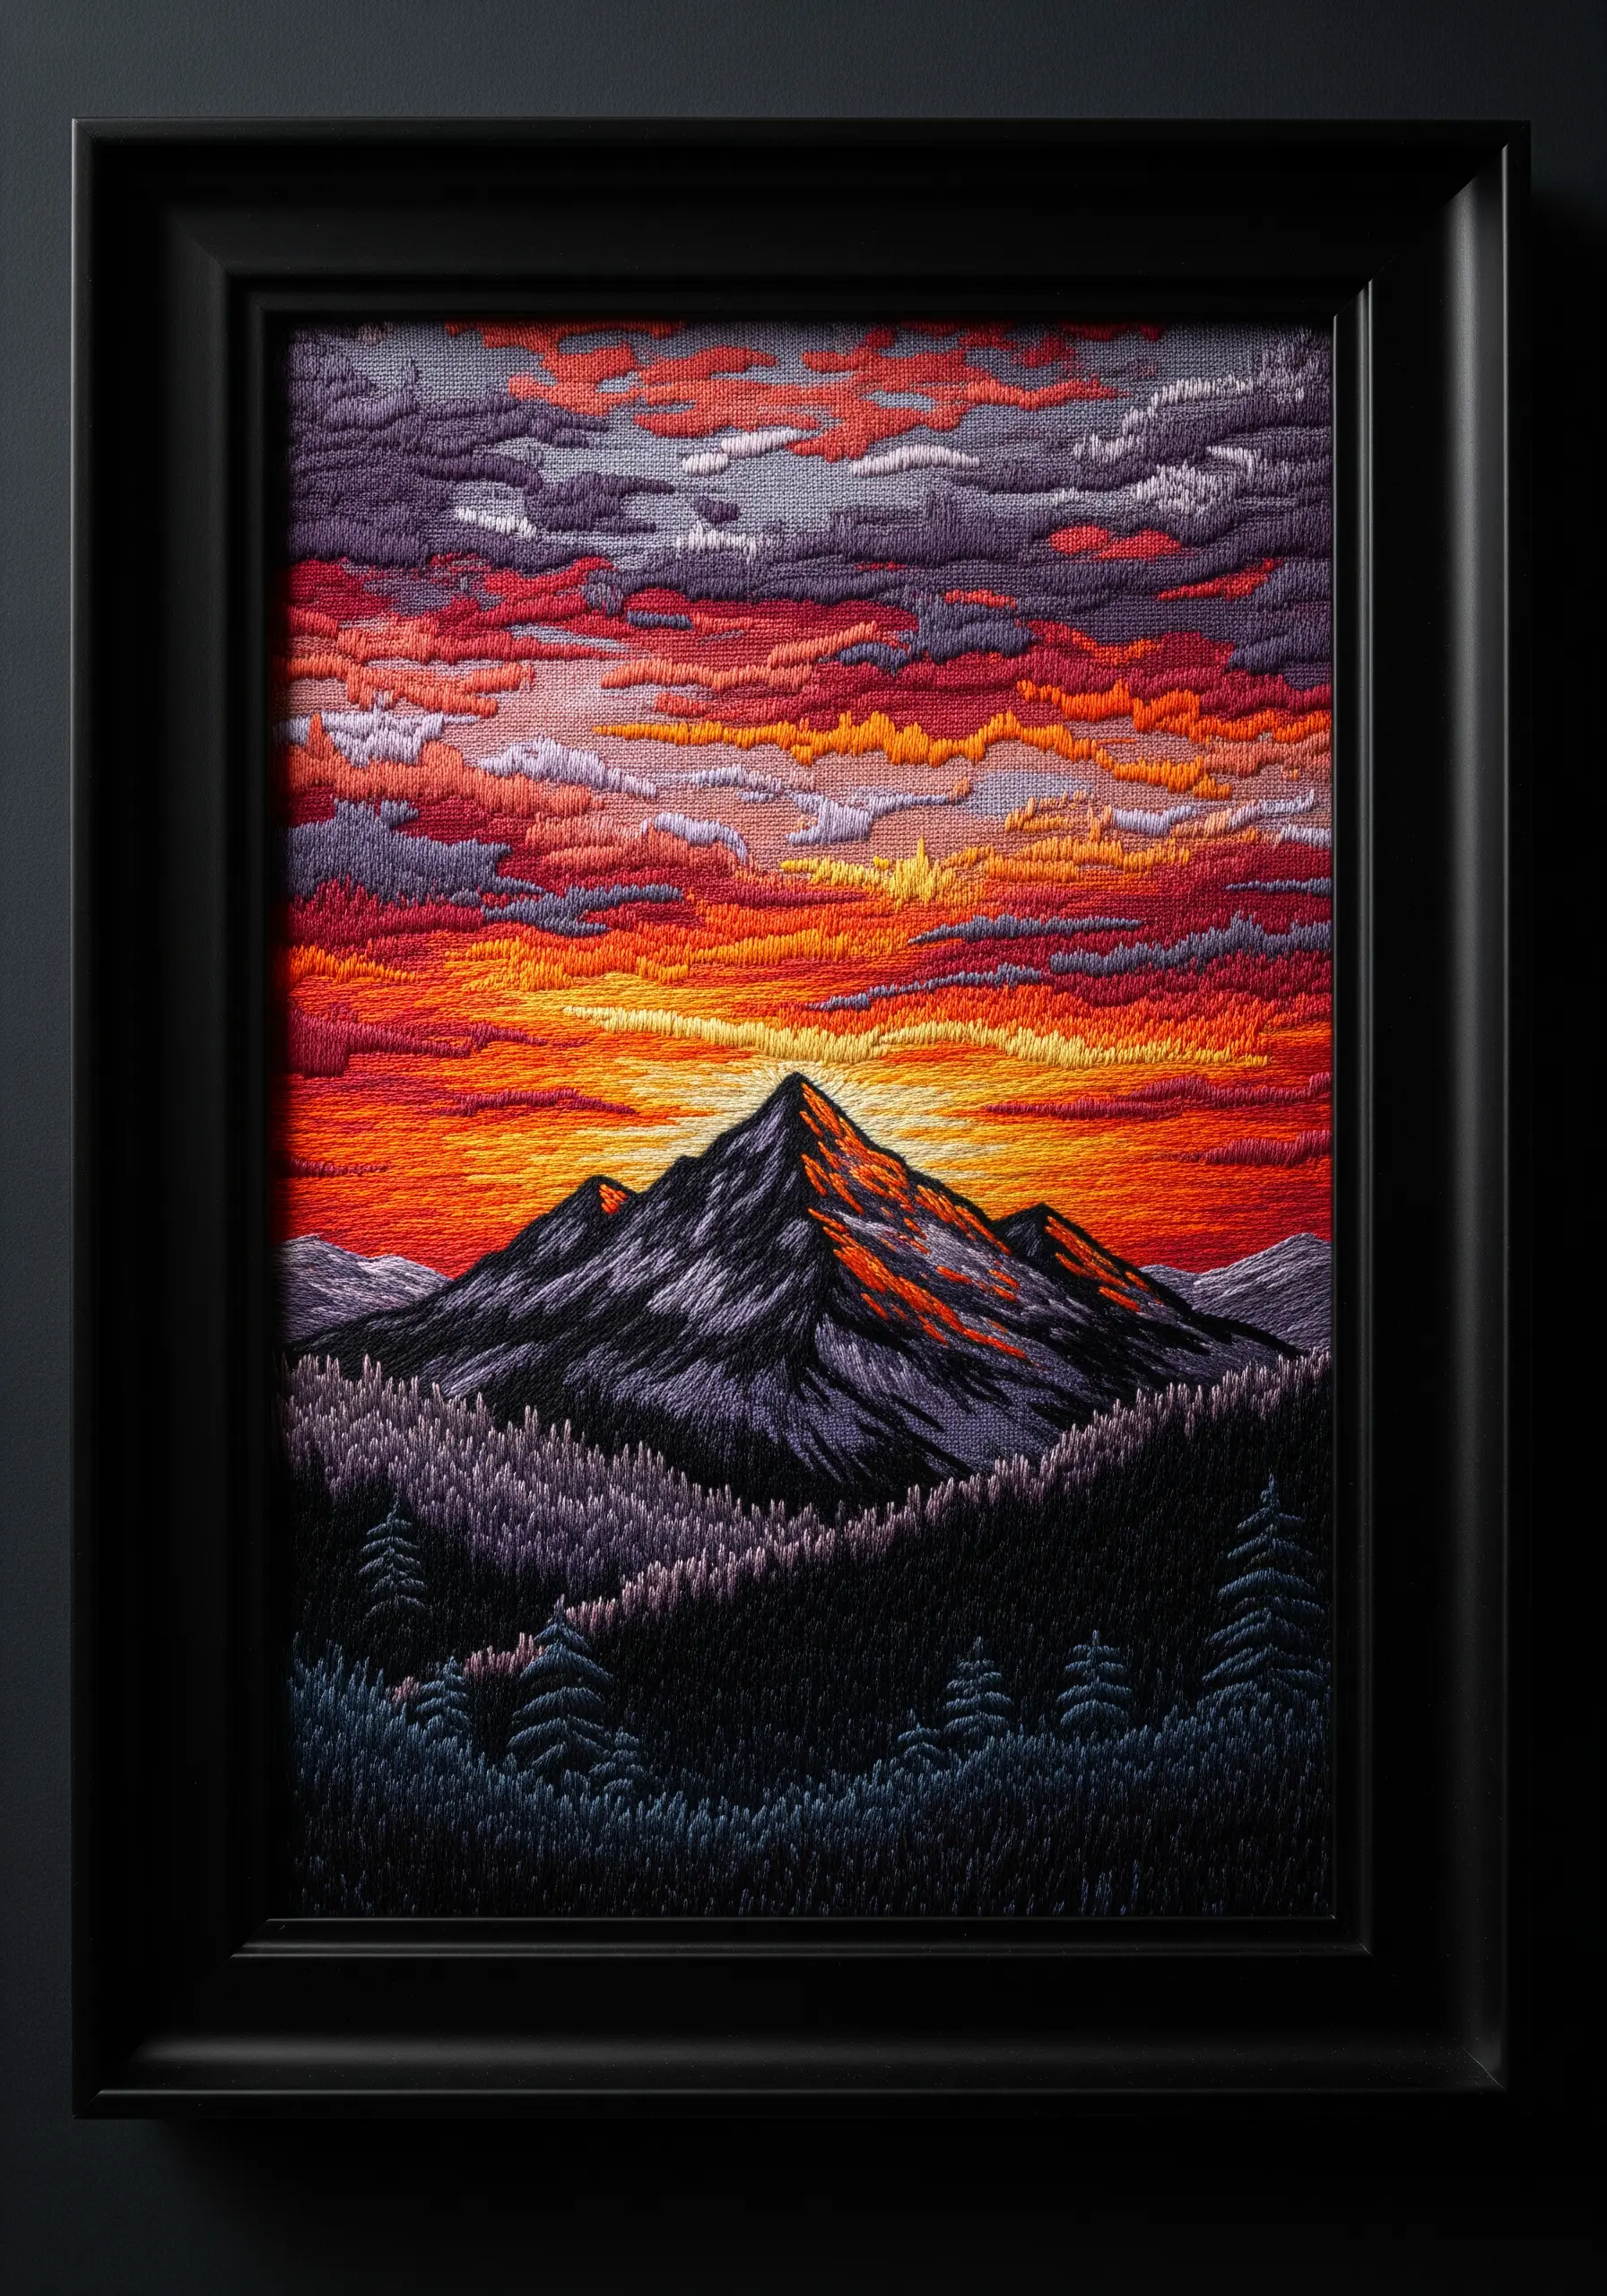
When embroidering dramatic skies, let the direction of your stitches define the energy and movement of the clouds.
Instead of a uniform fill, use blocks of satin stitch or long-and-short stitch angled in different directions.
Lay down horizontal stitches for calm, distant clouds, but switch to diagonal or slightly curved stitches for the more dynamic, fiery clouds in the foreground.
This intentional variation in stitch direction is a subtle but powerful way to infuse your embroidered landscapes with emotion and energy.
18. Preserve Nature with Direct Leaf Stitching

For hyper-realistic leaves, use the actual leaf as your template and stitch directly over it.
Secure a dried, pressed leaf to your fabric with a temporary fabric adhesive. Then, using a single strand of thread, stitch over the veins with a simple backstitch.
Fill in the sections with fishbone stitch or long-and-short stitch. Once complete, you can gently flake away the dried leaf material from underneath, leaving a perfect stitched replica.
This technique is a beautiful way to create embroidery that honors real botanicals.
19. Sculpt Ocean Waves with French Knots
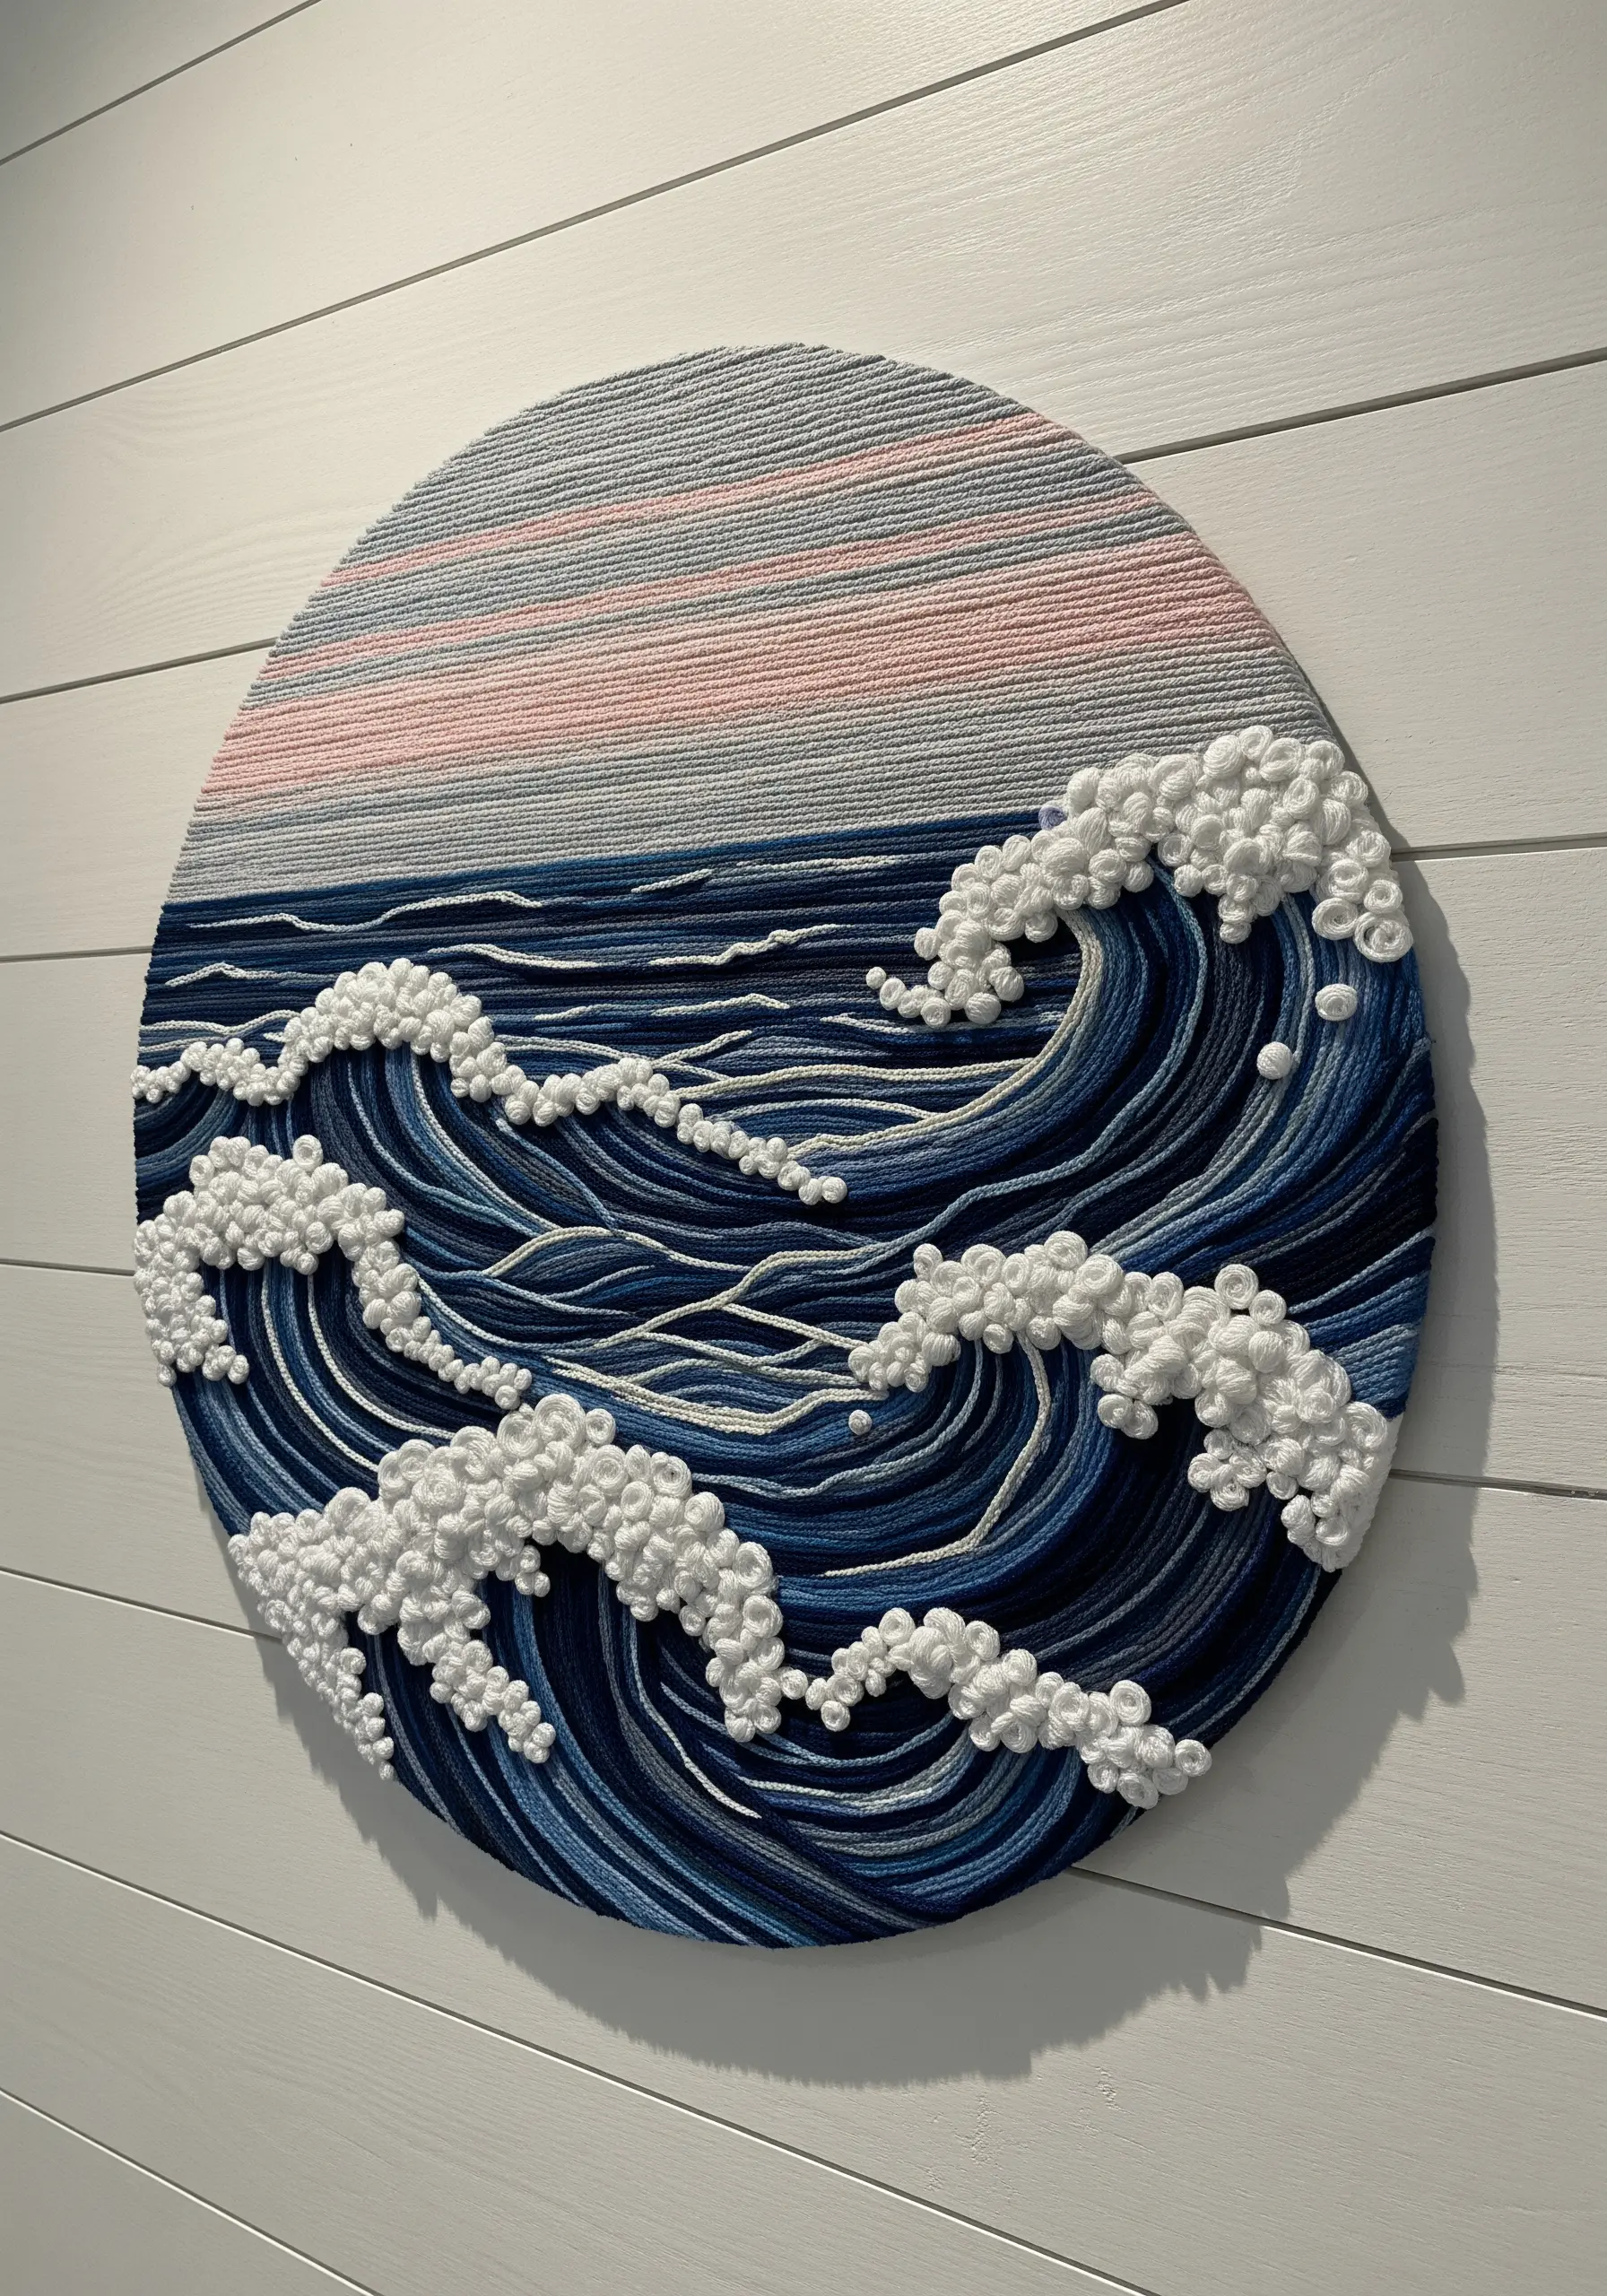
To create the frothy foam of crashing waves, nothing works better than densely packed French knots.
First, fill the main body of the waves with long, contoured satin stitches using various shades of blue to create depth.
Then, where the waves crest, switch to a thick white or off-white pearl cotton thread. Create clusters of French knots, packing them tightly together to build up a raised, bubbly texture.
Vary the size of the knots by wrapping the needle once or twice, mimicking the random nature of sea foam.
20. Weave a Web with Metallic Thread and Beads
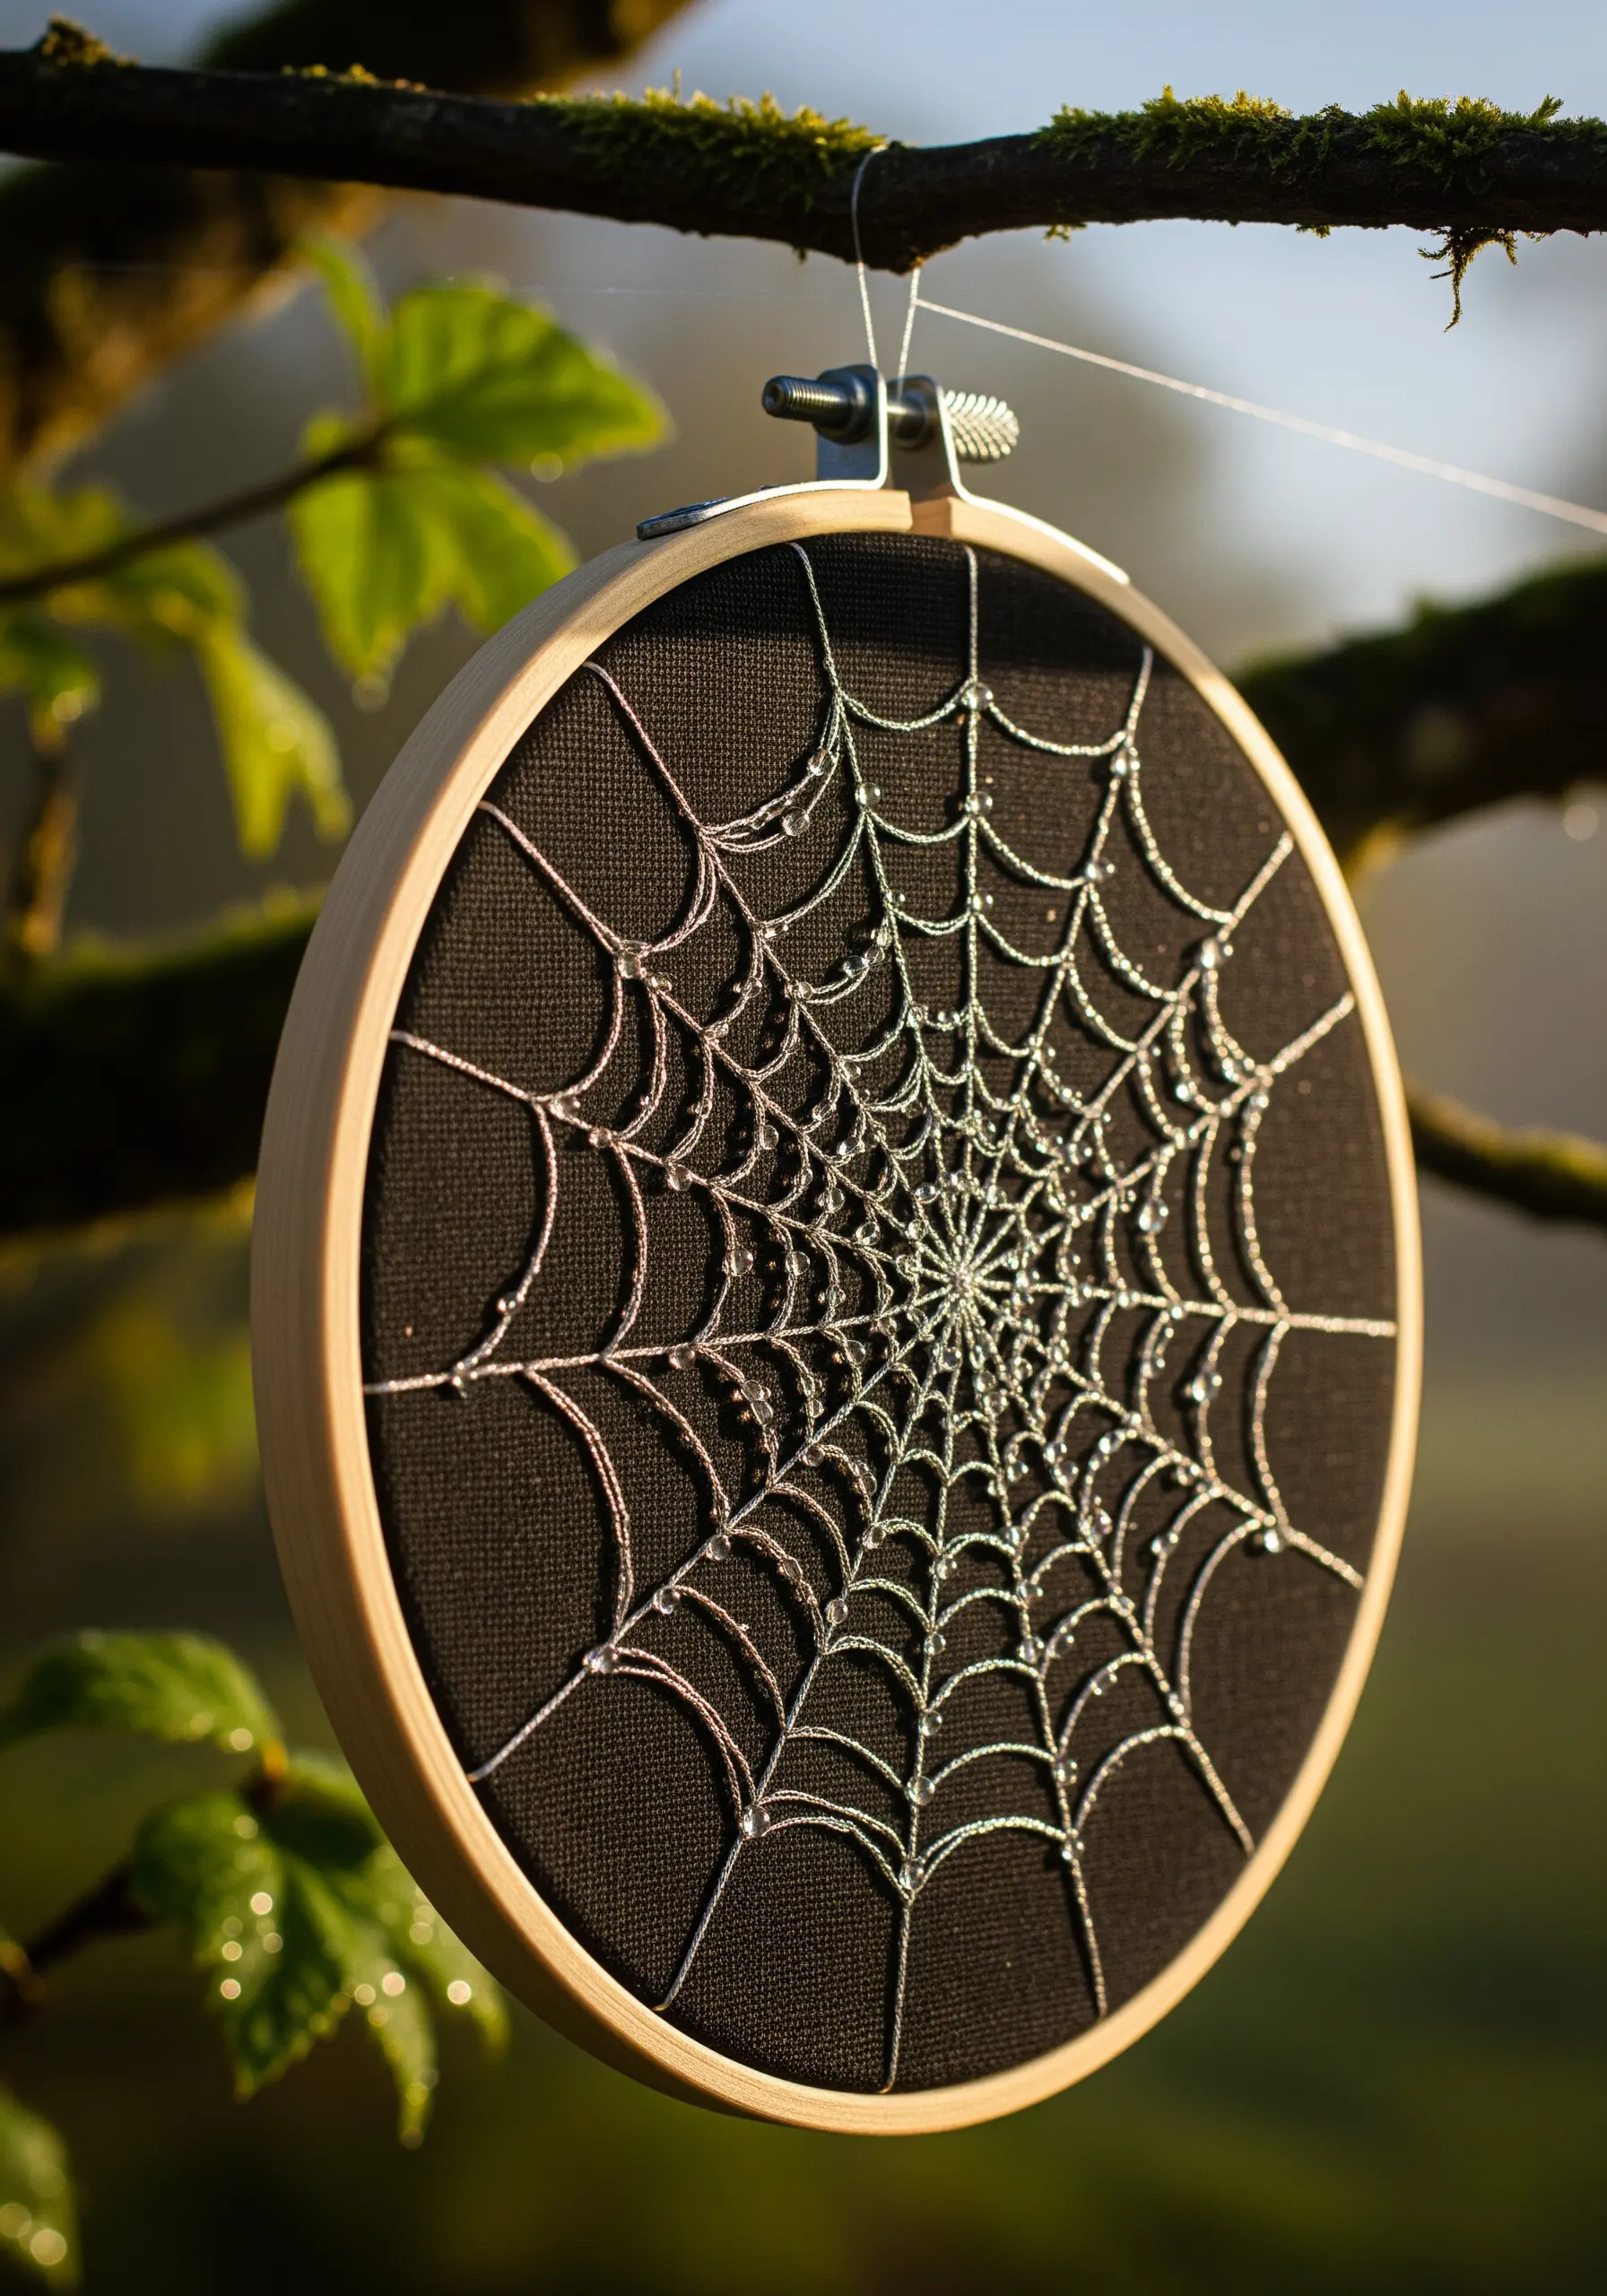
Create a glistening spiderweb that looks like it’s covered in morning dew.
Use a silver metallic thread for the web itself. To prevent fraying, work with shorter lengths of thread and consider using a thread conditioner.
First, create the radial anchor lines with straight stitches. Then, weave the spiral by couching a second thread over the top of the anchor lines, which adds dimension.
For the finishing touch, stitch tiny clear or silver seed beads randomly along the spiral to catch the light and mimic water droplets.
21. Create a Triptych for a Modern Art Display
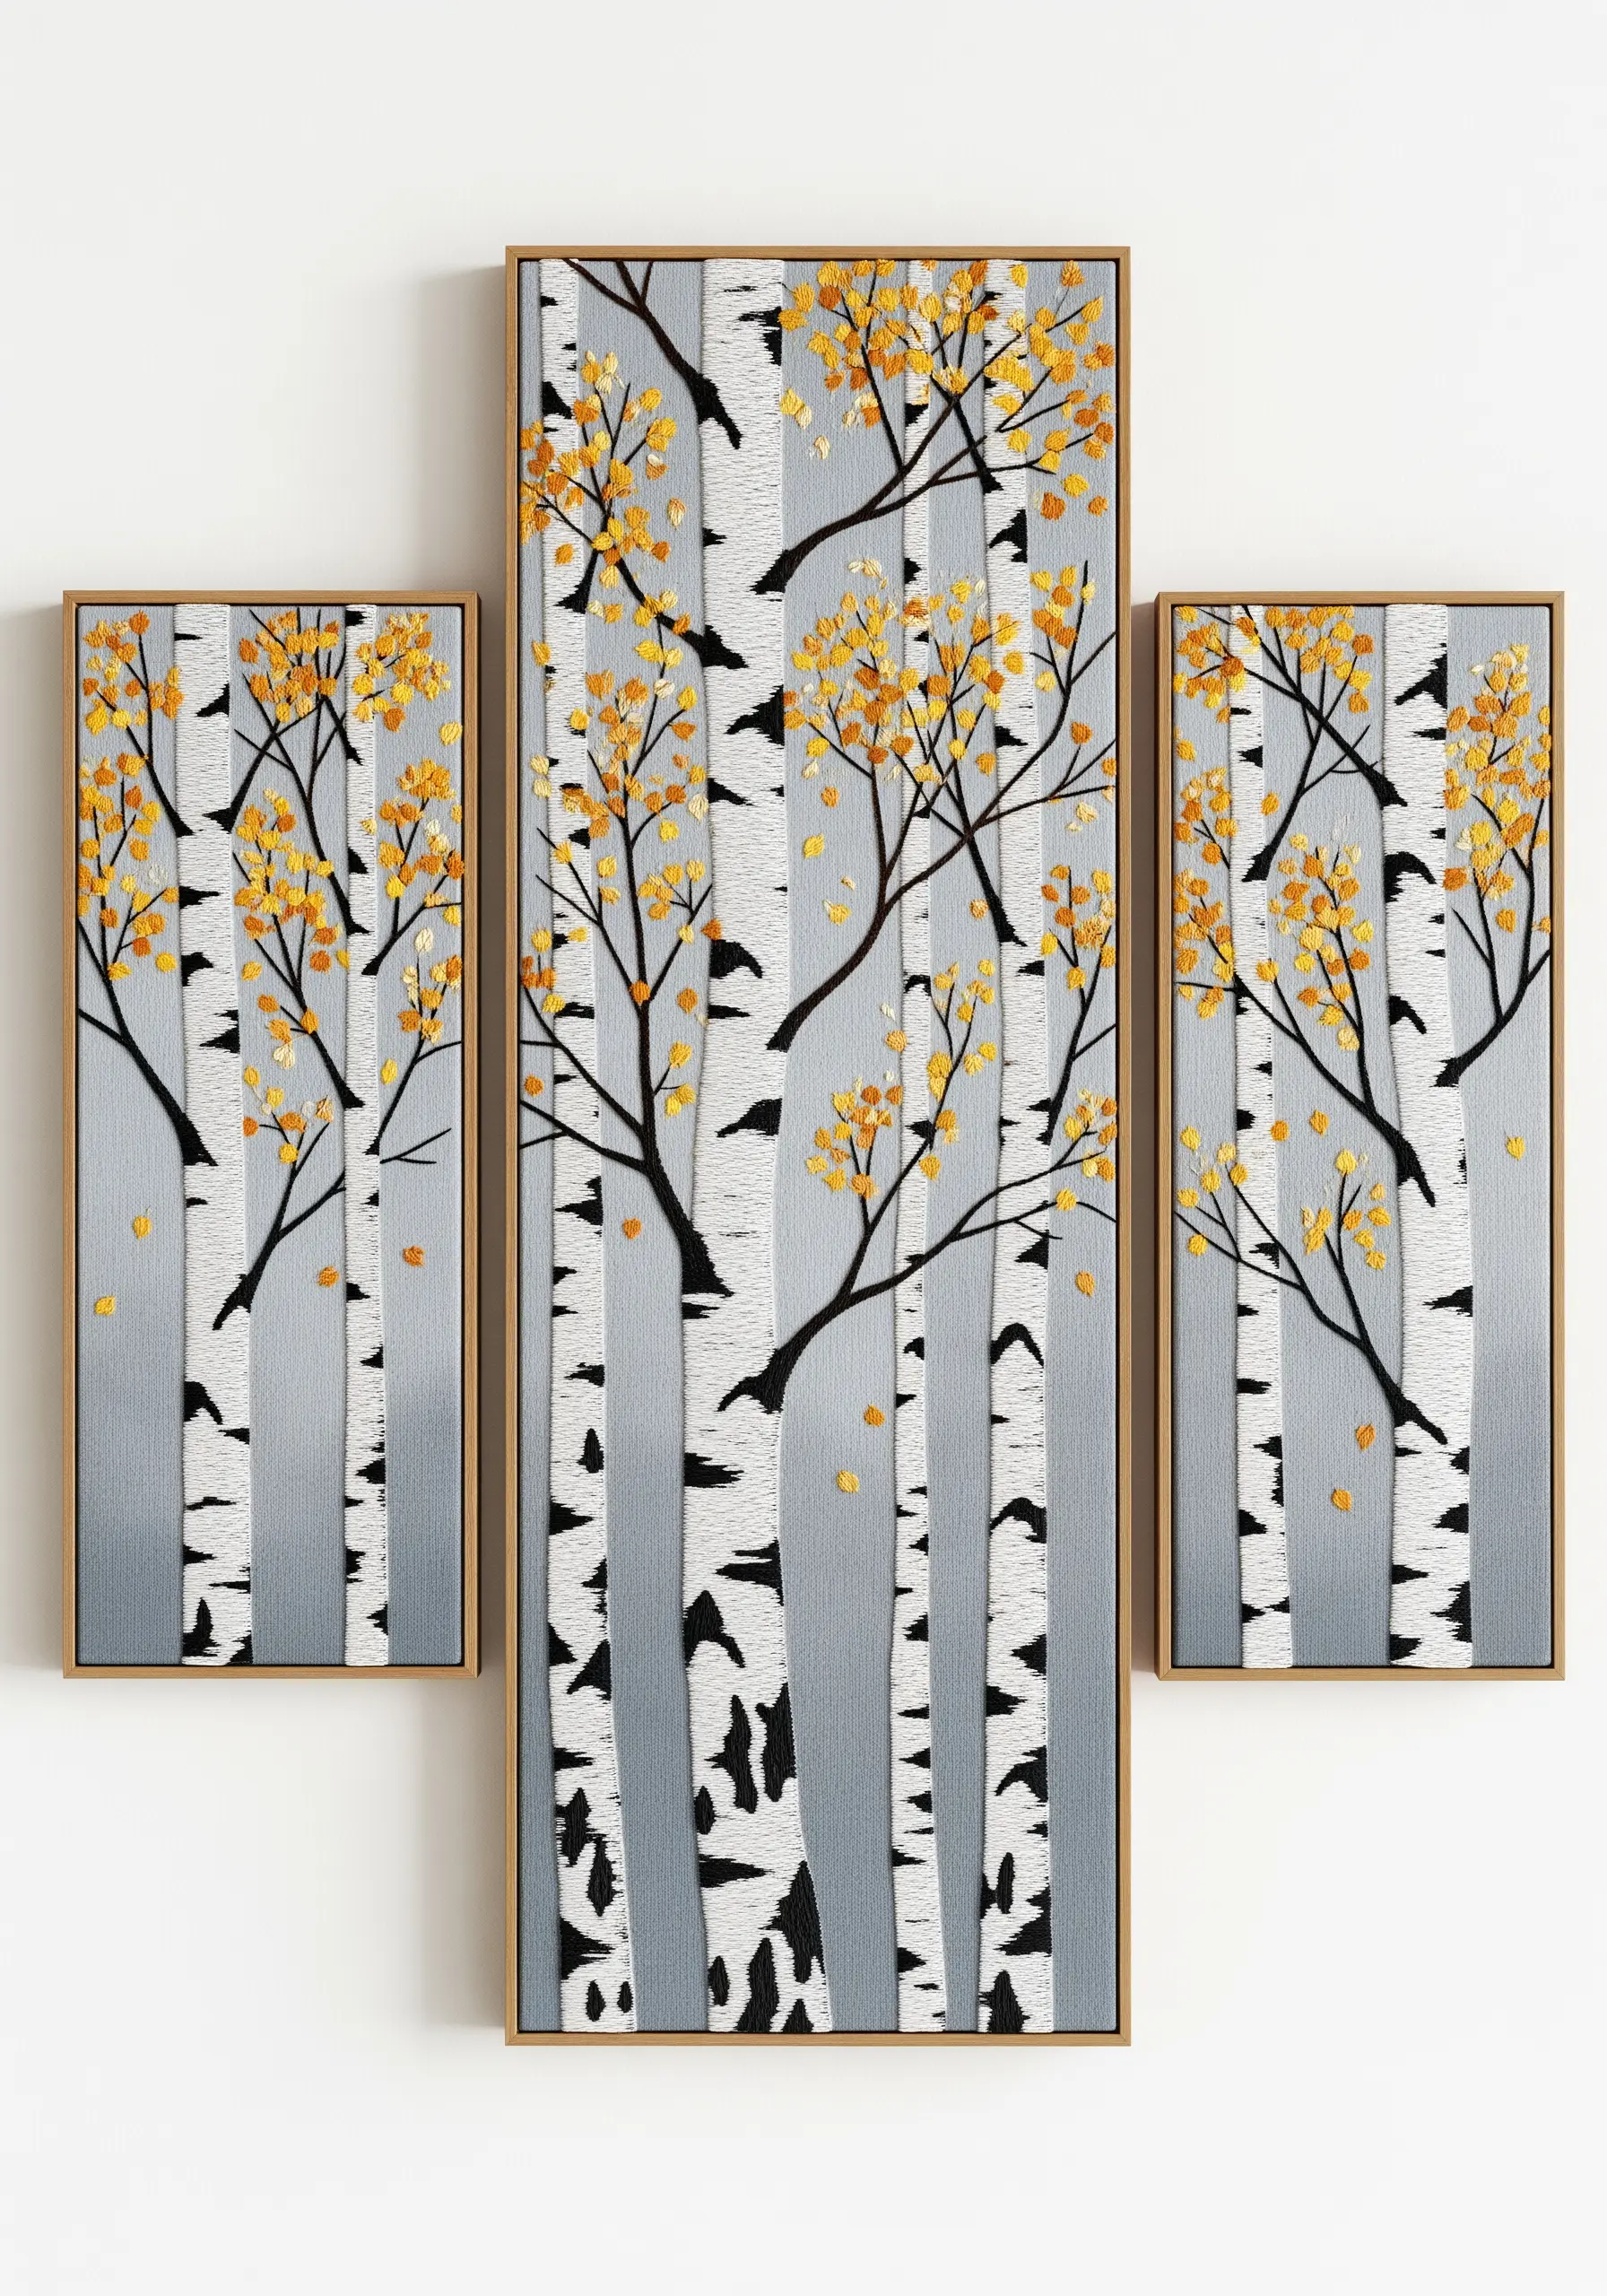
Elevate your embroidery by thinking beyond a single hoop and creating a multi-panel piece.
Design your composition—like these birch trees—to flow across three separate, vertically oriented canvases or frames. This creates a sophisticated, gallery-like impression.
To get the textured look of birch bark, use a satin stitch with light gray and white threads, adding small, horizontal black stitches for detail.
Displaying your work as a triptych gives it more visual weight and turns it into a true statement wall hanging.
22. Stitch a Canyon with Fabric Appliqué

Capture the layered, geological feel of a canyon by combining embroidery with fabric collage.
Cut out shapes from various fabrics in earthy reds, oranges, and purples. Arrange and layer them on your base fabric to map out the canyon’s major forms and shadows.
Secure the fabric pieces with an iron-on adhesive, then stitch over the top to add detail, texture, and contour lines. A simple running stitch or backstitch is perfect for defining the edges and strata.
This mixed-media approach adds incredible depth and is a fantastic way to use up fabric scraps.
23. Embellish with Beads for a Touch of Magic
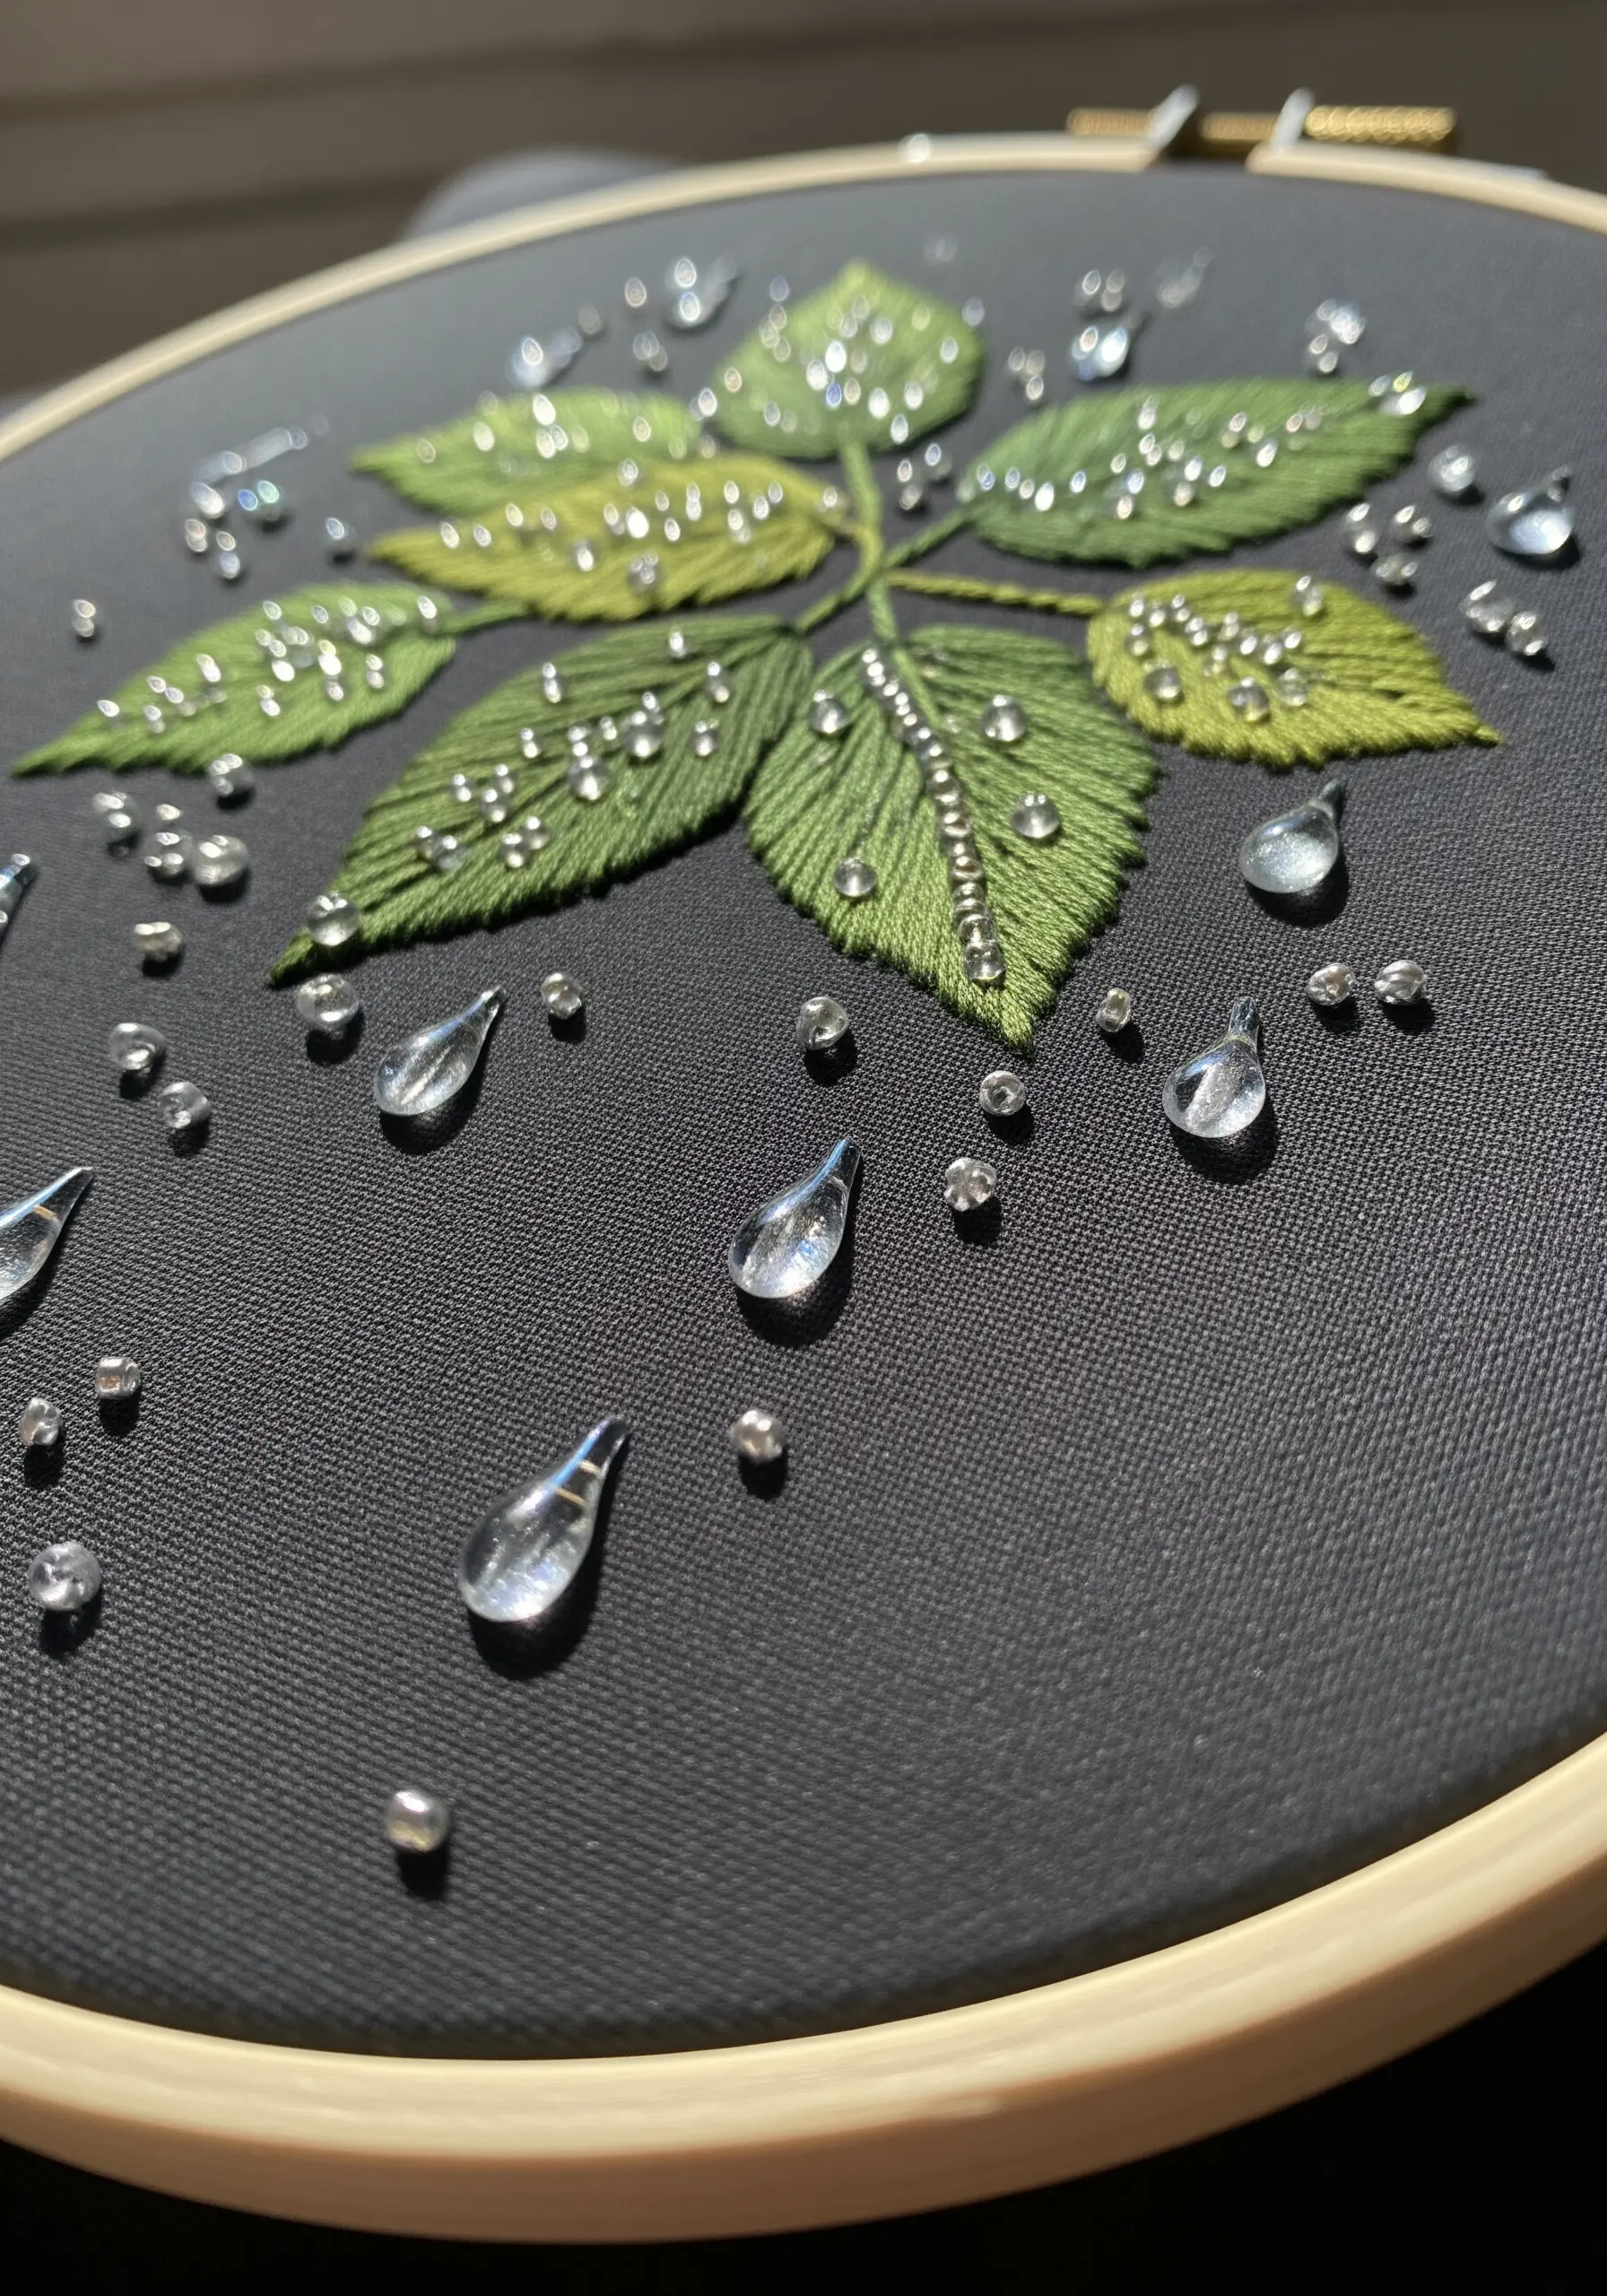
Simulate the glistening effect of raindrops on leaves by incorporating small, transparent beads into your stitching.
After completing your leaf embroidery—using a simple long-and-short stitch for a soft gradient—scatter clear seed beads and teardrop-shaped beads across the surface.
Secure each bead with a tiny stitch using a thread that matches your fabric, passing through each bead twice for security.
This simple addition transforms a beautiful botanical piece into a magical scene, capturing a fleeting moment in nature.
24. Capture a Summer Night with Glow-in-the-Dark Thread

Add a hidden layer of magic to your embroidery by strategically using glow-in-the-dark thread.
Stitch your main design, like the mason jar, in a standard white or light-colored floss. For the fireflies, switch to a specialty glow-in-the-dark thread.
Use small French knots or star stitches to represent the glowing insects. The design will look like a simple, charming line drawing in the daylight.
At night, the fireflies will come to life, creating a secret, delightful surprise that perfectly captures the feeling of a warm summer evening.
25. Sculpt 3D Forms with Yarn Wrapping
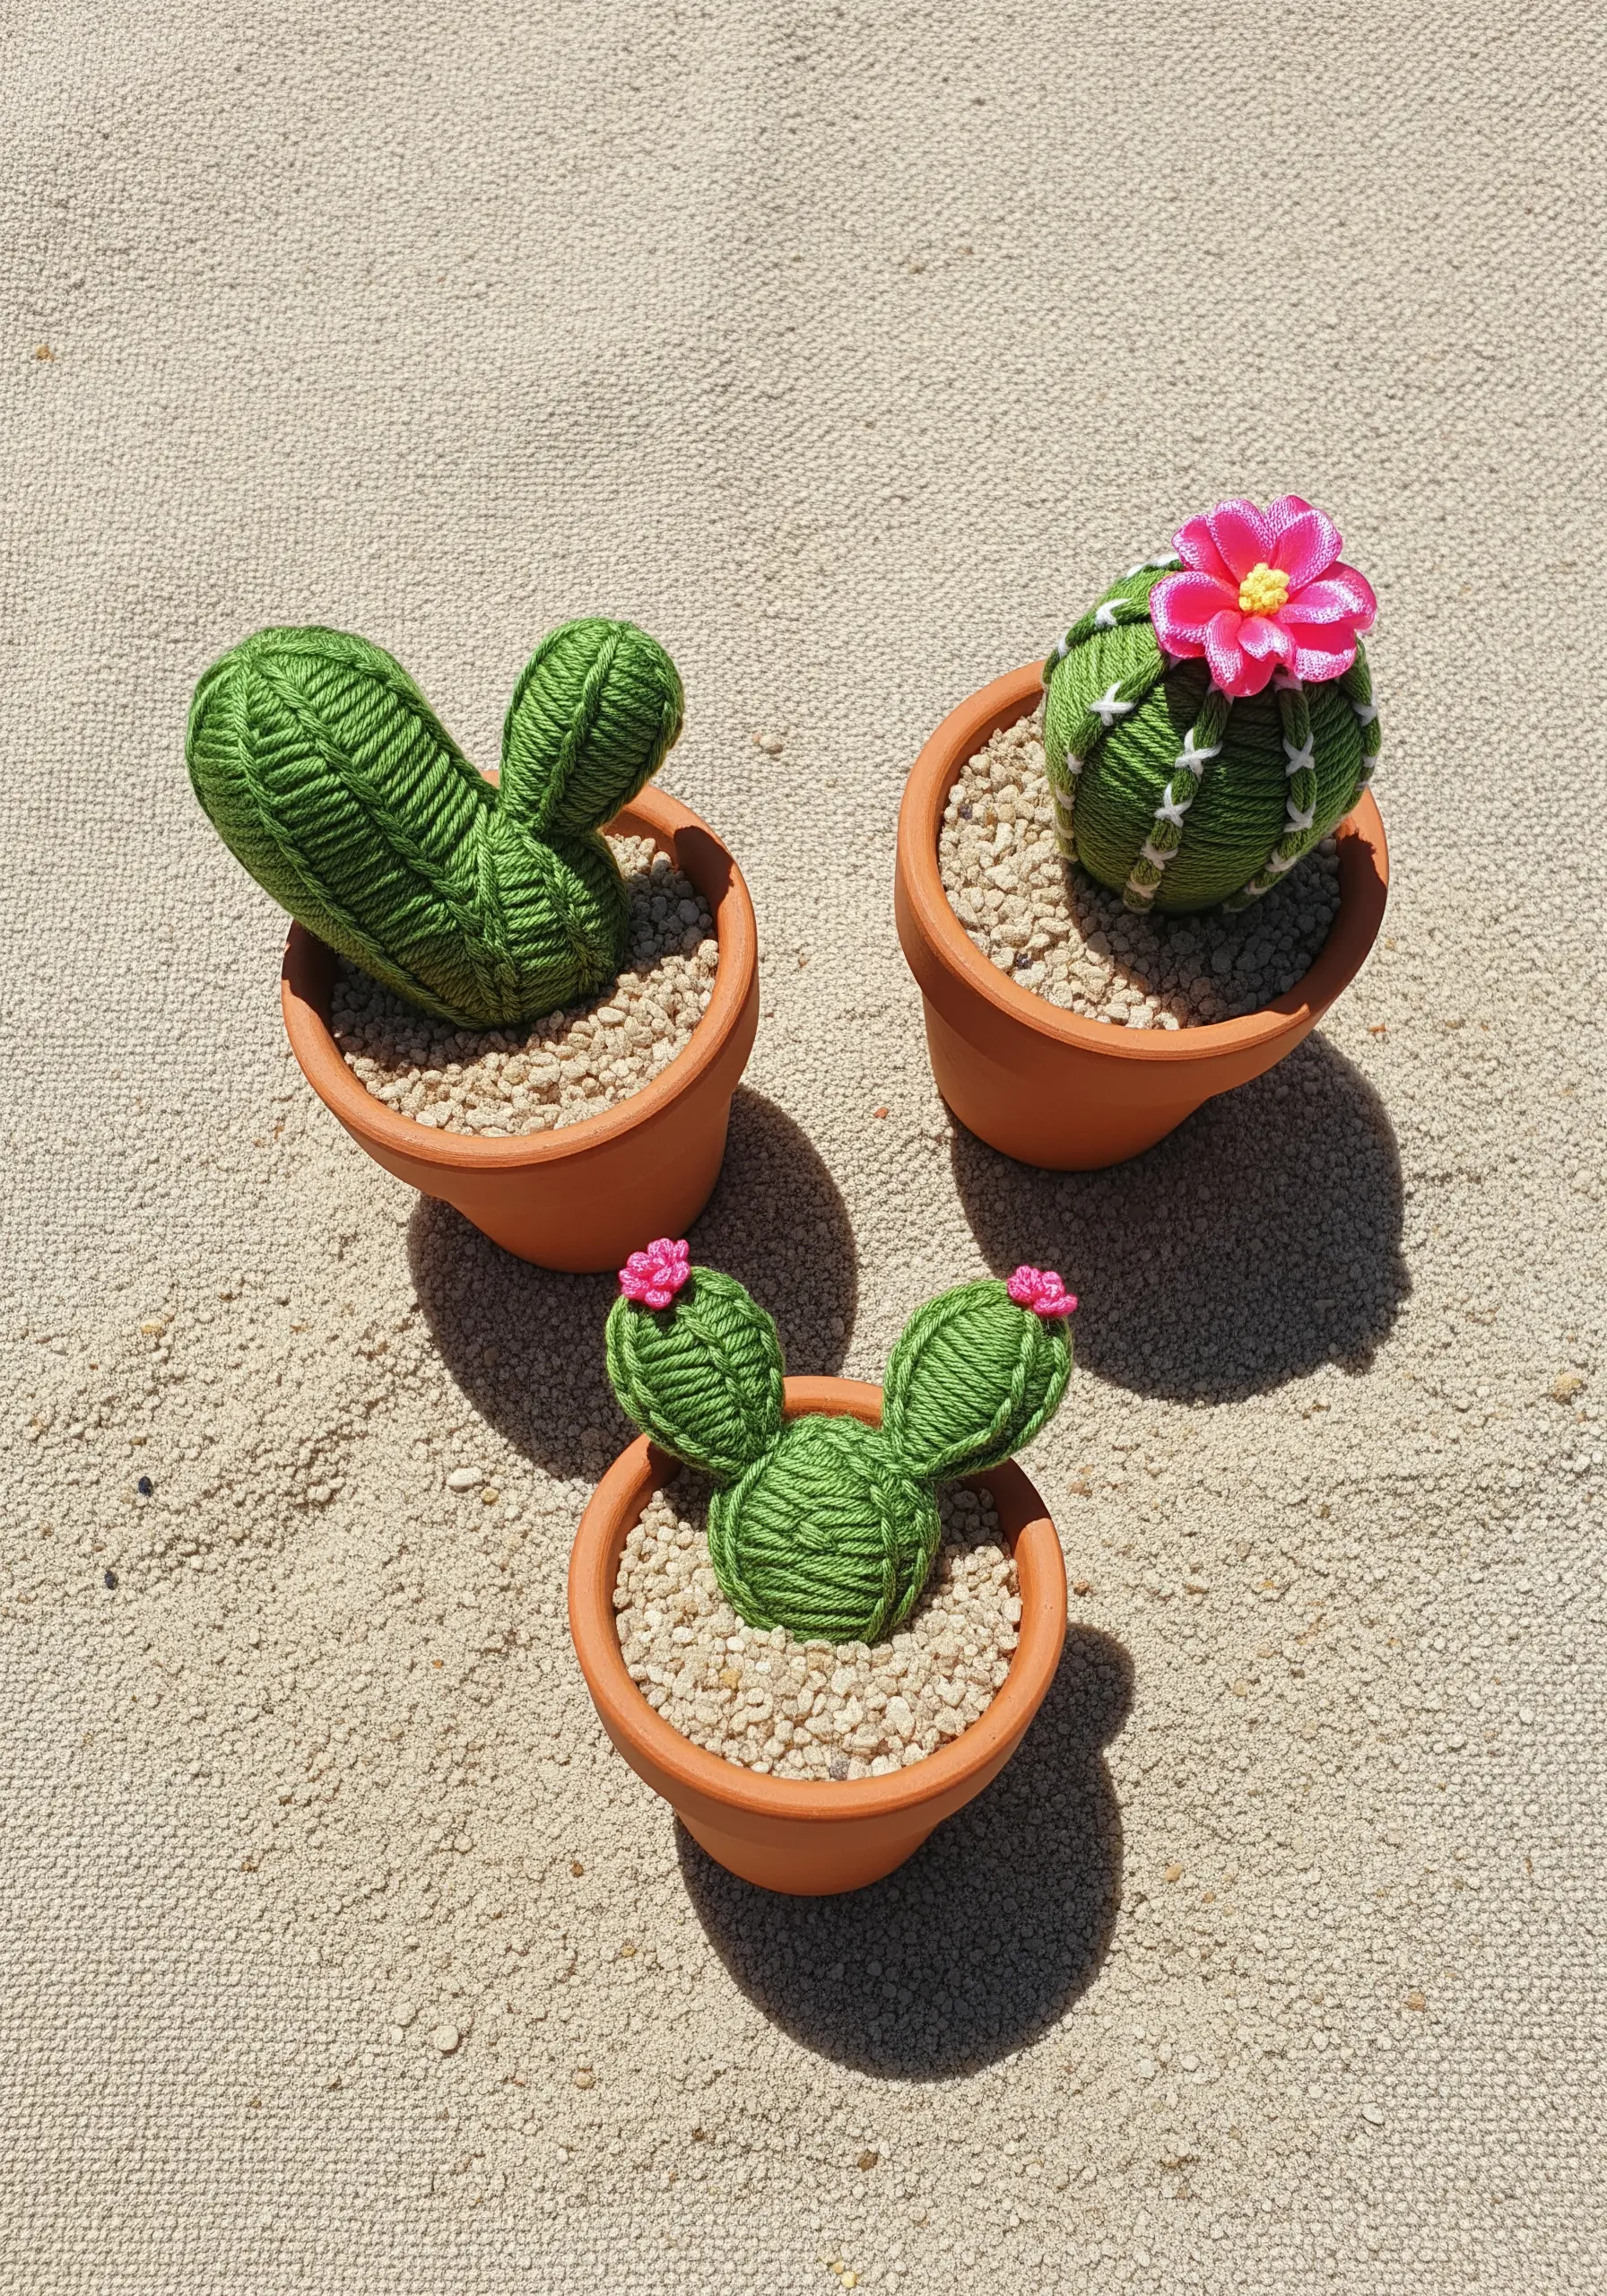
Create charming, three-dimensional objects by moving beyond the hoop and incorporating sculptural techniques.
Form the basic shape of a cactus pad from a sturdy material like cardboard or foam. Then, tightly and neatly wrap the shape with green yarn, securing the ends with glue.
Assemble the wrapped pieces to build your cactus. You can add embroidered details like tiny pink French knot flowers directly onto the yarn-wrapped surface.
This method allows you to create playful, tactile handmade decor objects that stand on their own.
26. Frame Your Fiber Art with Natural Elements

Enhance the earthy, organic feel of your textural embroidery by mounting it on or framing it with natural materials.
Instead of a traditional hoop or frame, mount your finished piece on a solid piece of wood or stretch it between two pieces of driftwood.
This works especially well for abstract pieces that mimic natural textures, like wood grain or rock strata.
The natural frame becomes an extension of the artwork itself, reinforcing the theme and creating a cohesive, rustic display.
27. Achieve Photorealism with Cross-Hatching
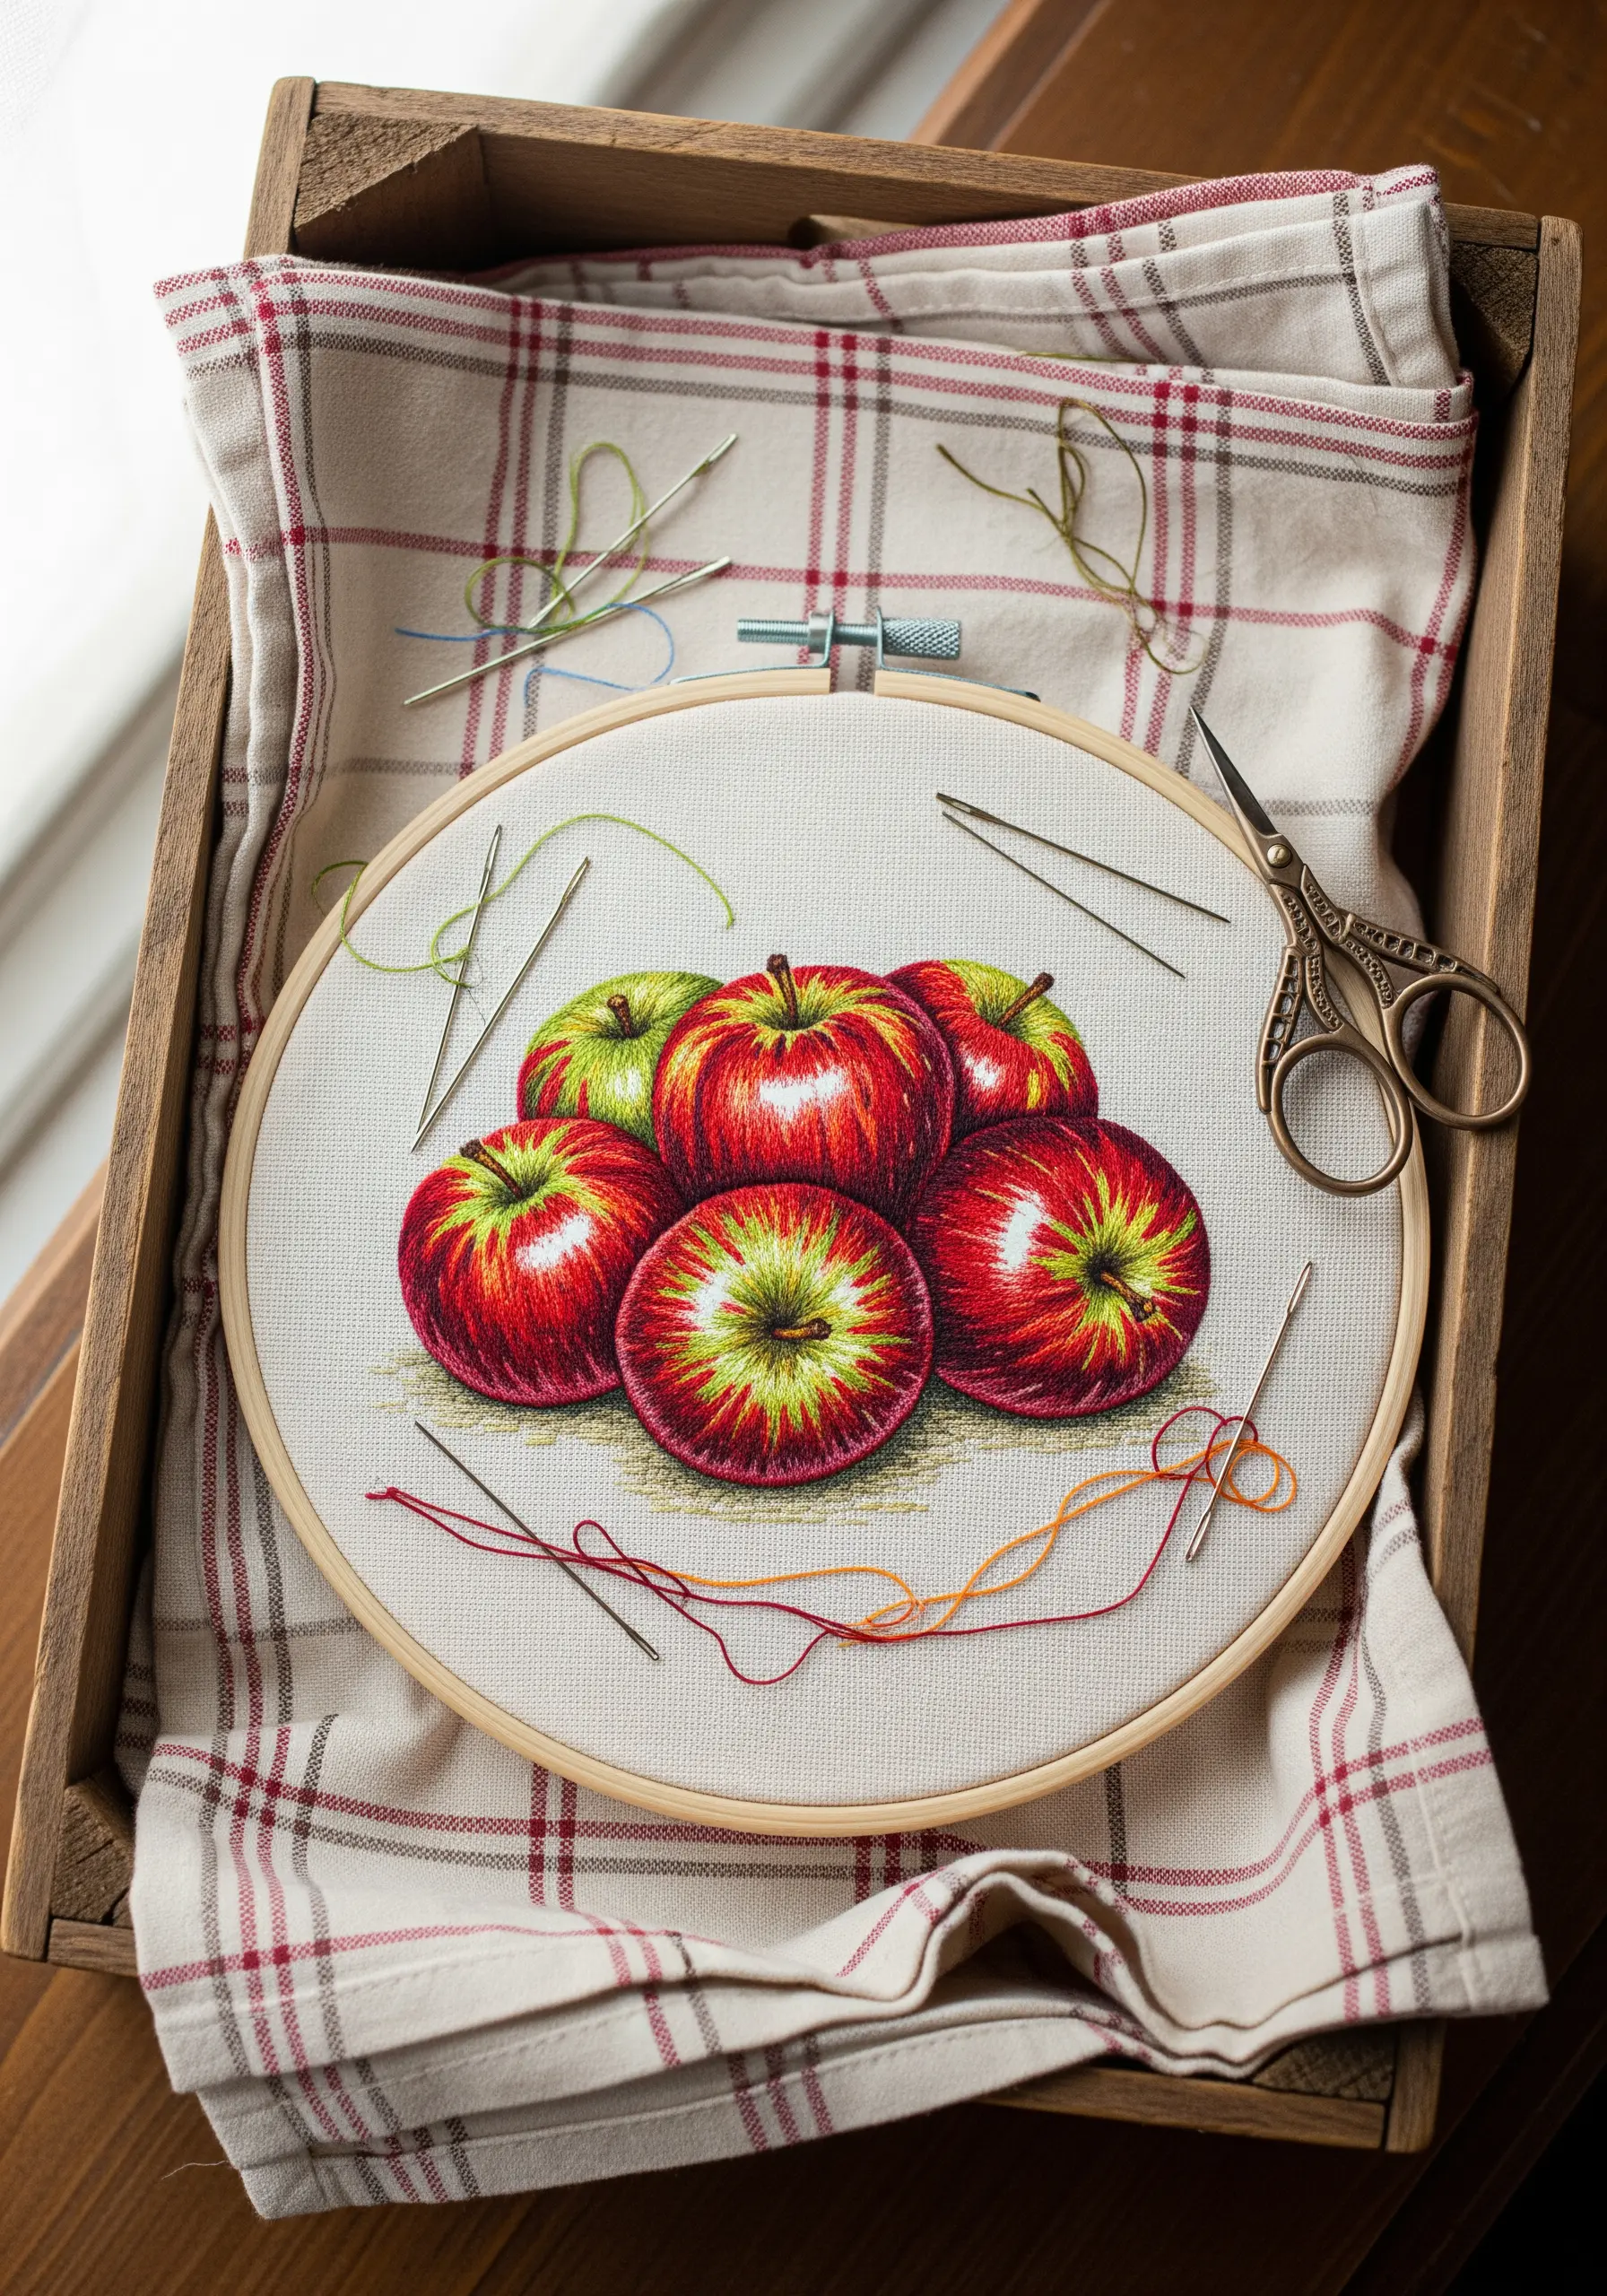
To create the subtle color variations and shiny skin of an apple, use a thread-painting technique called cross-hatching.
Instead of uniform long-and-short stitches, lay down an initial layer of stitches in one direction. Then, add subsequent layers of different colors on top, stitched at a slight angle.
This layering of angled stitches allows the underlying colors to peek through, creating a complex, blended effect that mimics light reflecting off a curved surface.
Use a single strand of floss for the most delicate and realistic blending.
28. Give Fuzzy Creatures a Soft Texture

To replicate the fuzzy body of a bumblebee, use a combination of turkey work and long-and-short stitch.
For the fluffiest parts of the bee’s thorax, use the turkey work stitch with yellow and black thread, then trim the loops very short to create a dense, velvety pile.
Transition to a smooth long-and-short stitch for the bee’s head and abdomen to create a contrast between the fuzzy and sleek parts of its body.
This textural variation is what makes the creature feel so lifelike and engaging.
29. Mimic Tree Rings with Couching and Coiling

Create the organic, concentric pattern of tree rings using a combination of yarn coiling and couching.
Start in the center and begin coiling a thick yarn or multiple strands of floss held together. As you coil, use a single, thinner thread to stitch the coil down to the fabric.
Vary the colors and textures of the yarns you use for each ring to represent the different growth periods. This technique is meditative and results in a highly tactile piece that tells a story of time.
30. Suggest Movement with Negative Space
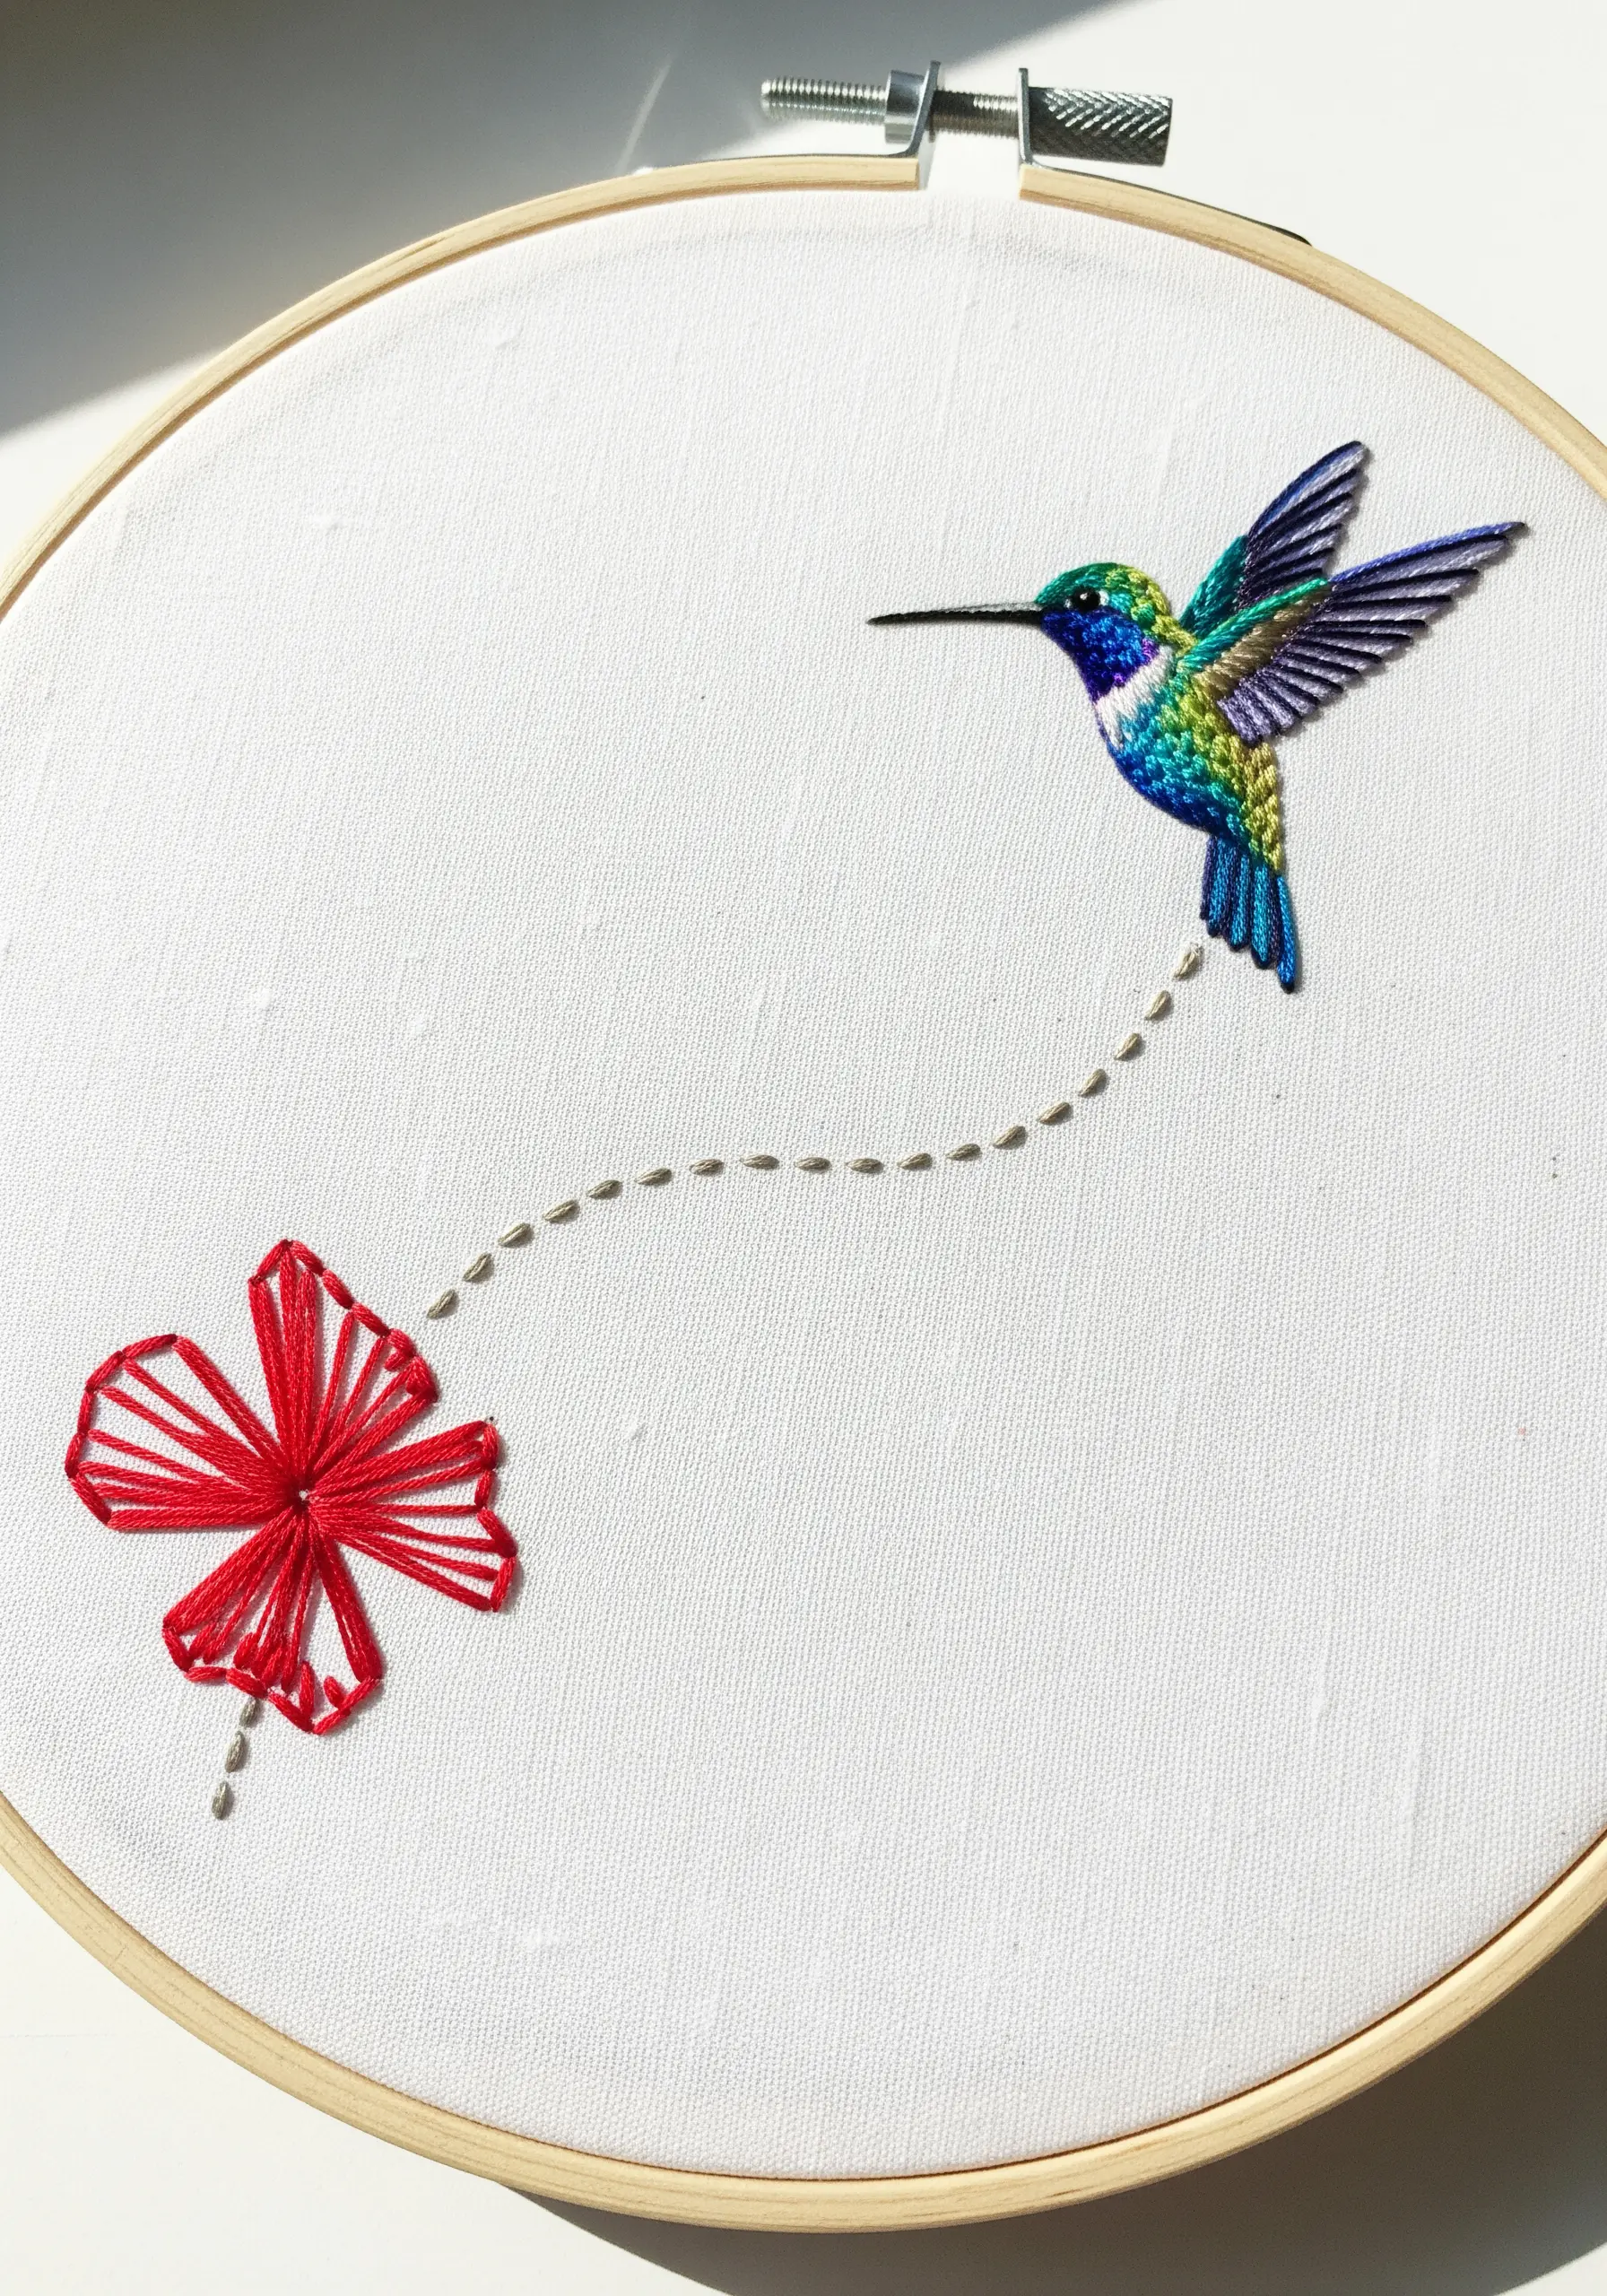
You don’t always need to stitch every detail; sometimes, what you leave out is most powerful.
To create a sense of motion, like a hummingbird’s flight path, use a simple trail of small, evenly spaced seed stitches or running stitches.
This minimalist approach guides the viewer’s eye from one element to another, creating a dynamic connection across the empty fabric.
The negative space becomes an active part of the composition, making the design feel light, airy, and full of life.
31. Build Dimension with Padded Satin Stitch Knots
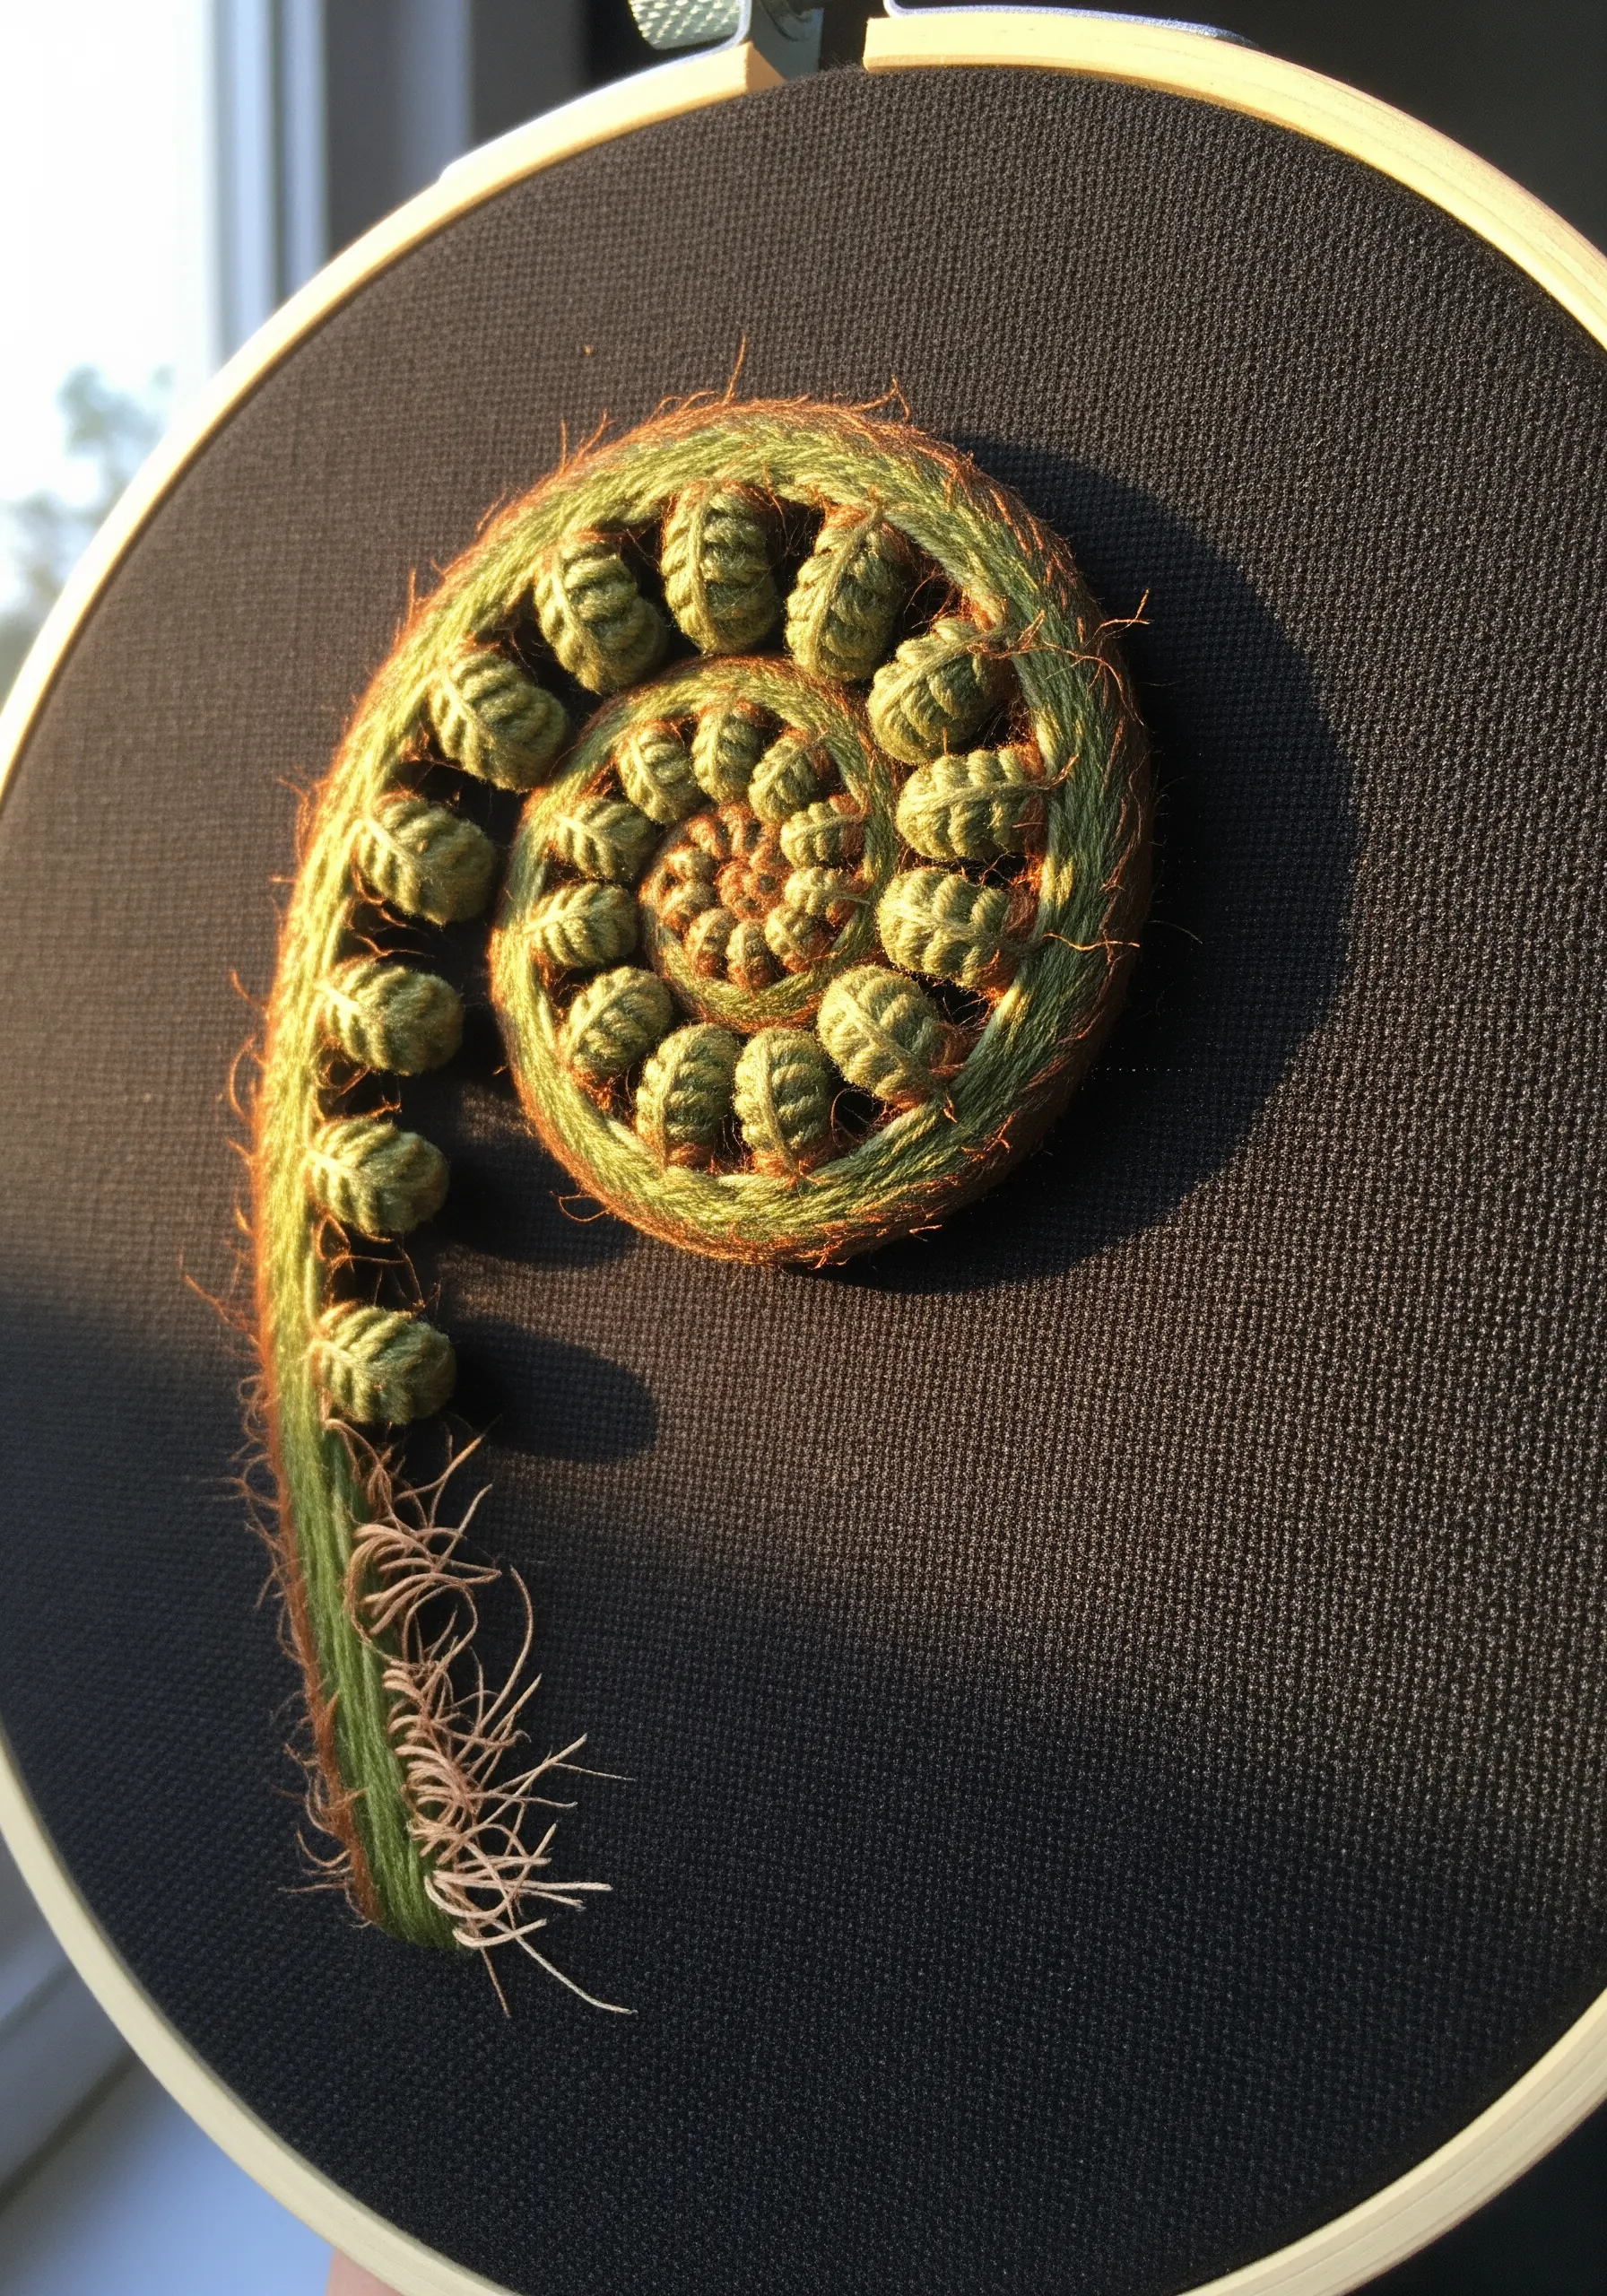
For a highly sculptural and organic texture, like a fiddlehead fern, use padded satin stitch in a unique way.
Create small, raised pads using layers of felt or foundation stitches. Then, cover each pad with a satin stitch, creating a series of small, smooth bobbles.
Arrange these bobbles in a spiral to form the fern. To add a fuzzy, natural touch, wrap the stem in a fuzzy yarn and couch it down, letting the fibers fray slightly.
This technique creates incredible dimension and a surprisingly realistic botanical form.
32. Create an Abstract Landscape with French Knots
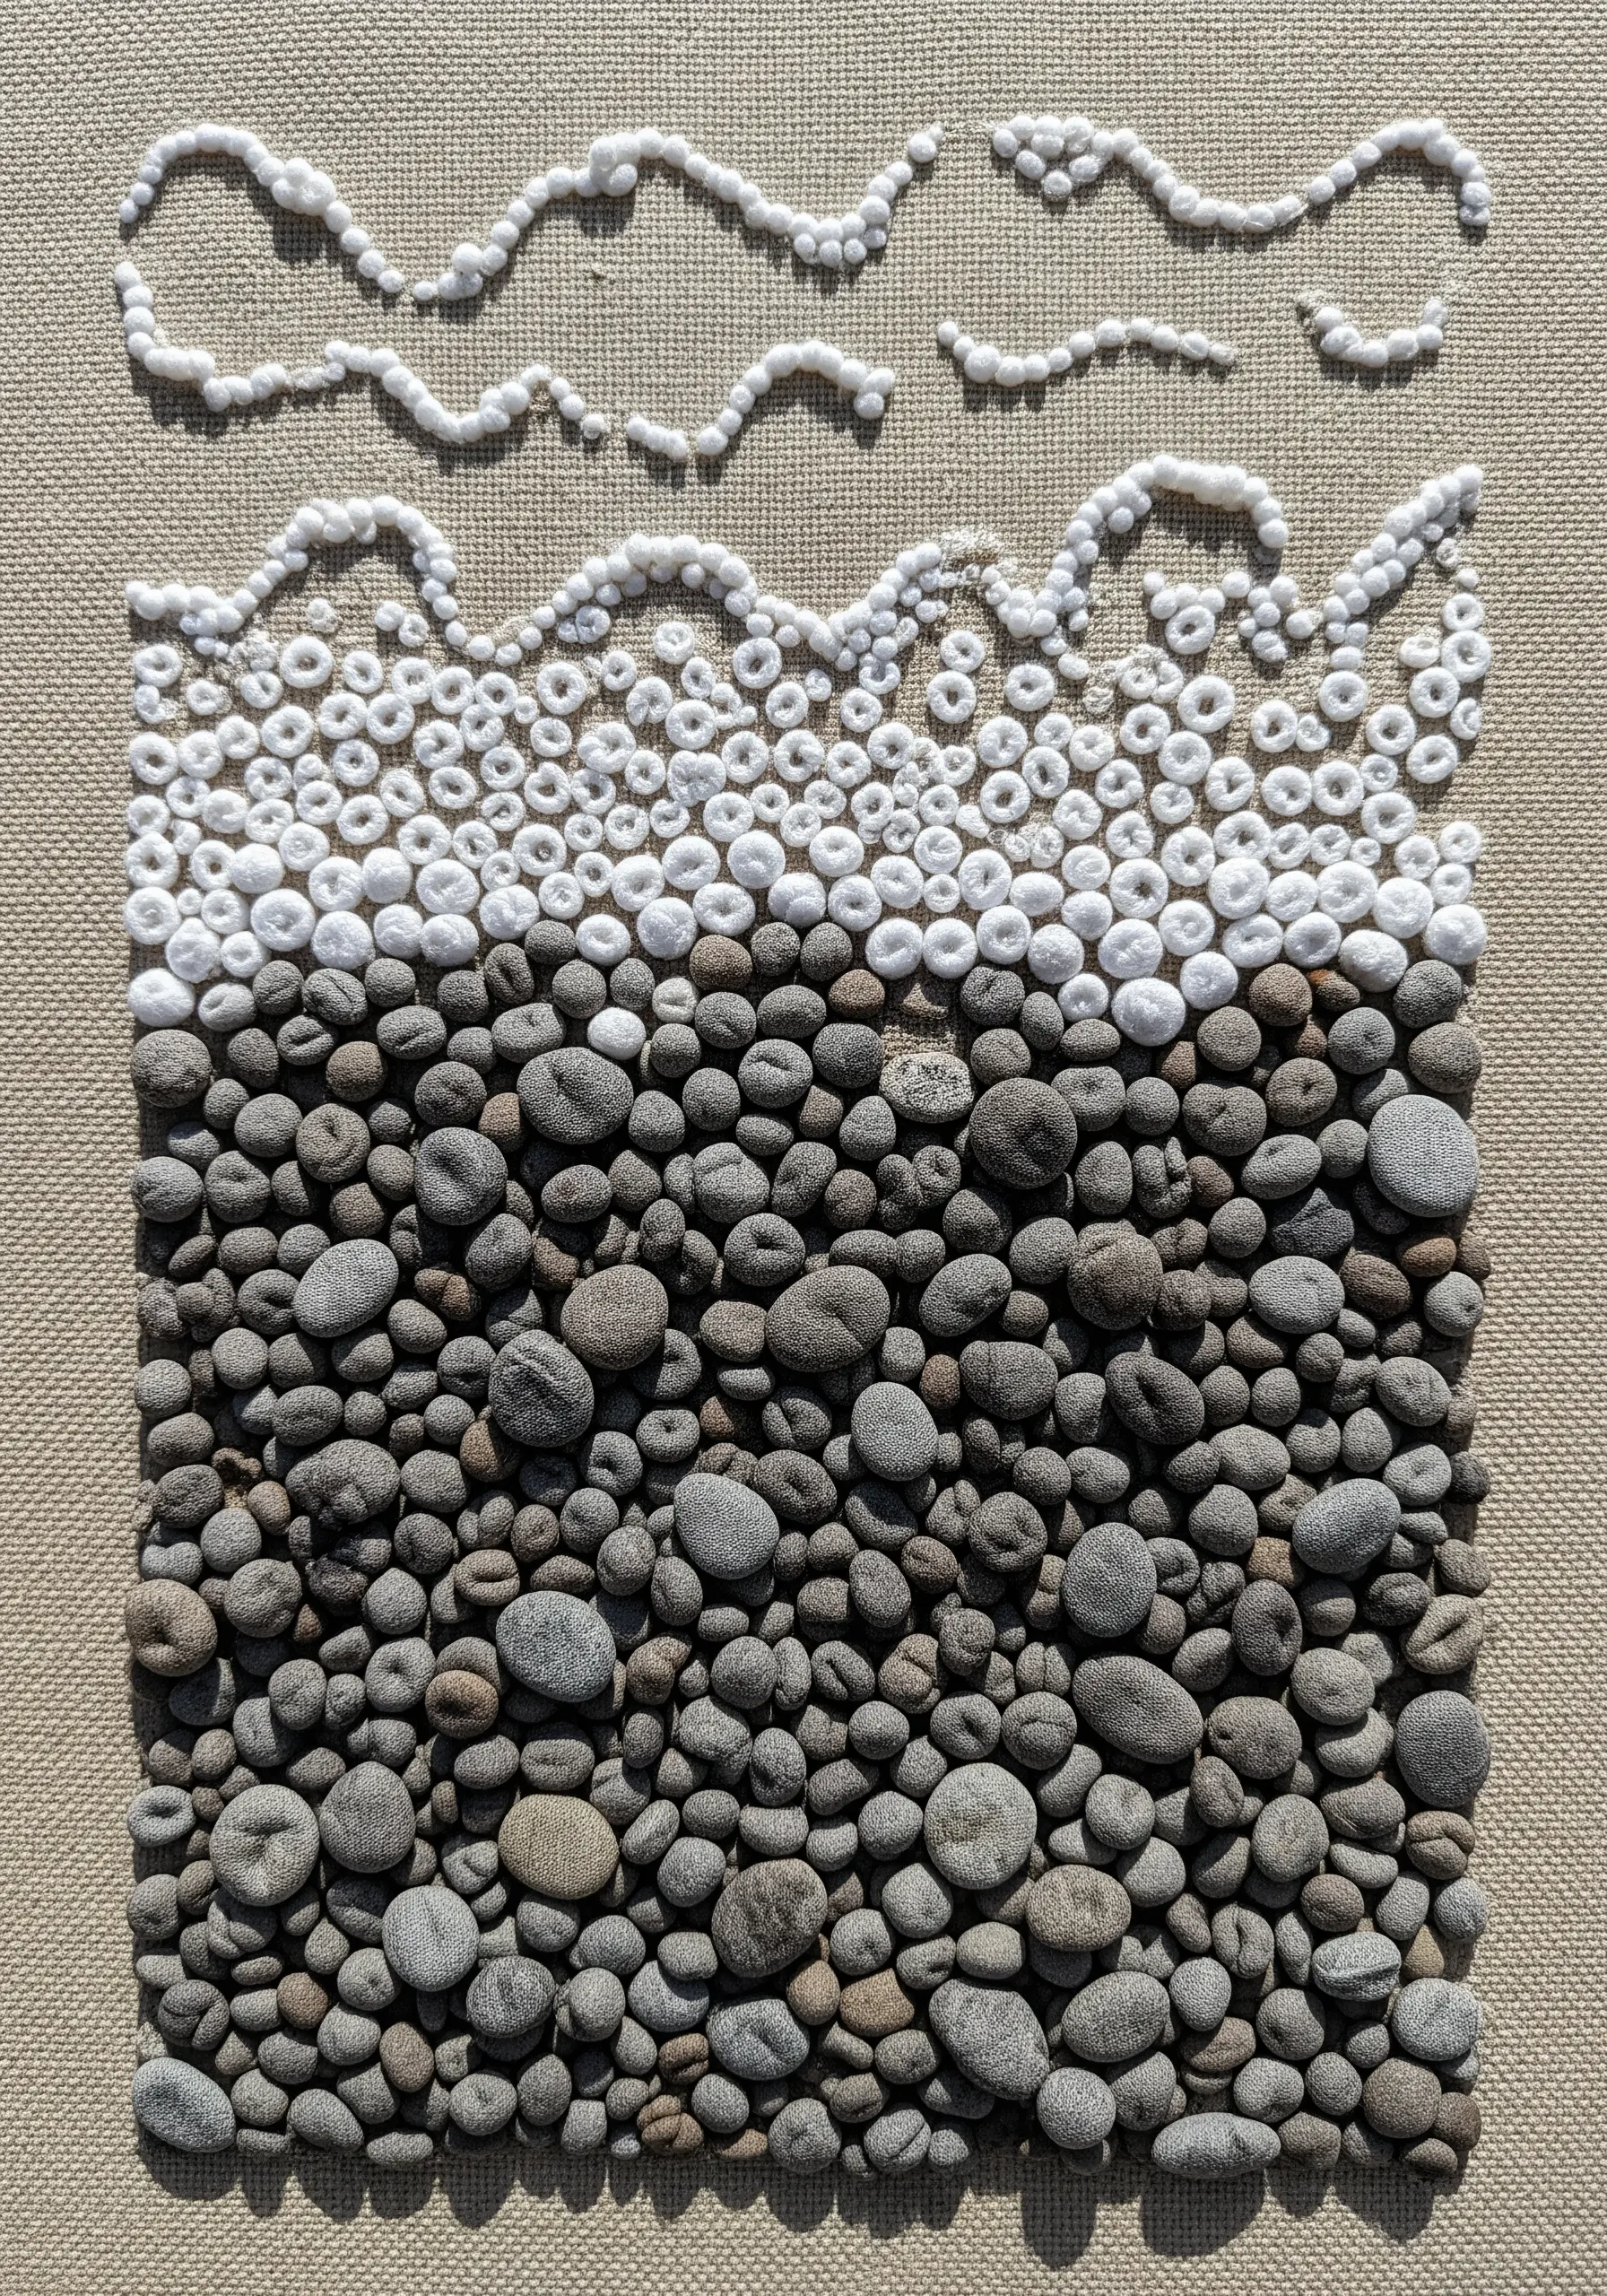
Translate a landscape into pure texture by representing different elements with clusters of French knots.
Use grey and black knots for a pebbled shore, white knots for sea foam, and blue knots for water. The beauty of this technique is in its simplicity and tactile quality.
Vary the number of thread strands and the times you wrap the needle to create knots of different sizes, mimicking the random assortment of pebbles on a beach.
This approach transforms a realistic scene into a captivating abstract textile piece.
33. Capture Delicate Motion with Detached Stitches

To give dandelion seeds the appearance of floating away, use a detached straight stitch for the parachute-like pappus.
Bring your needle up at the base of the seed and make a single, long straight stitch. Before pulling it tight, bring the needle back up next to your starting point and make a tiny stitch to tack the long loop down.
This allows the threads to remain slightly loose and dimensional. For the seeds that have floated off the fabric, stitch them directly onto the wall or background for a whimsical, immersive effect.
34. Use Negative Space in Fabric Collage
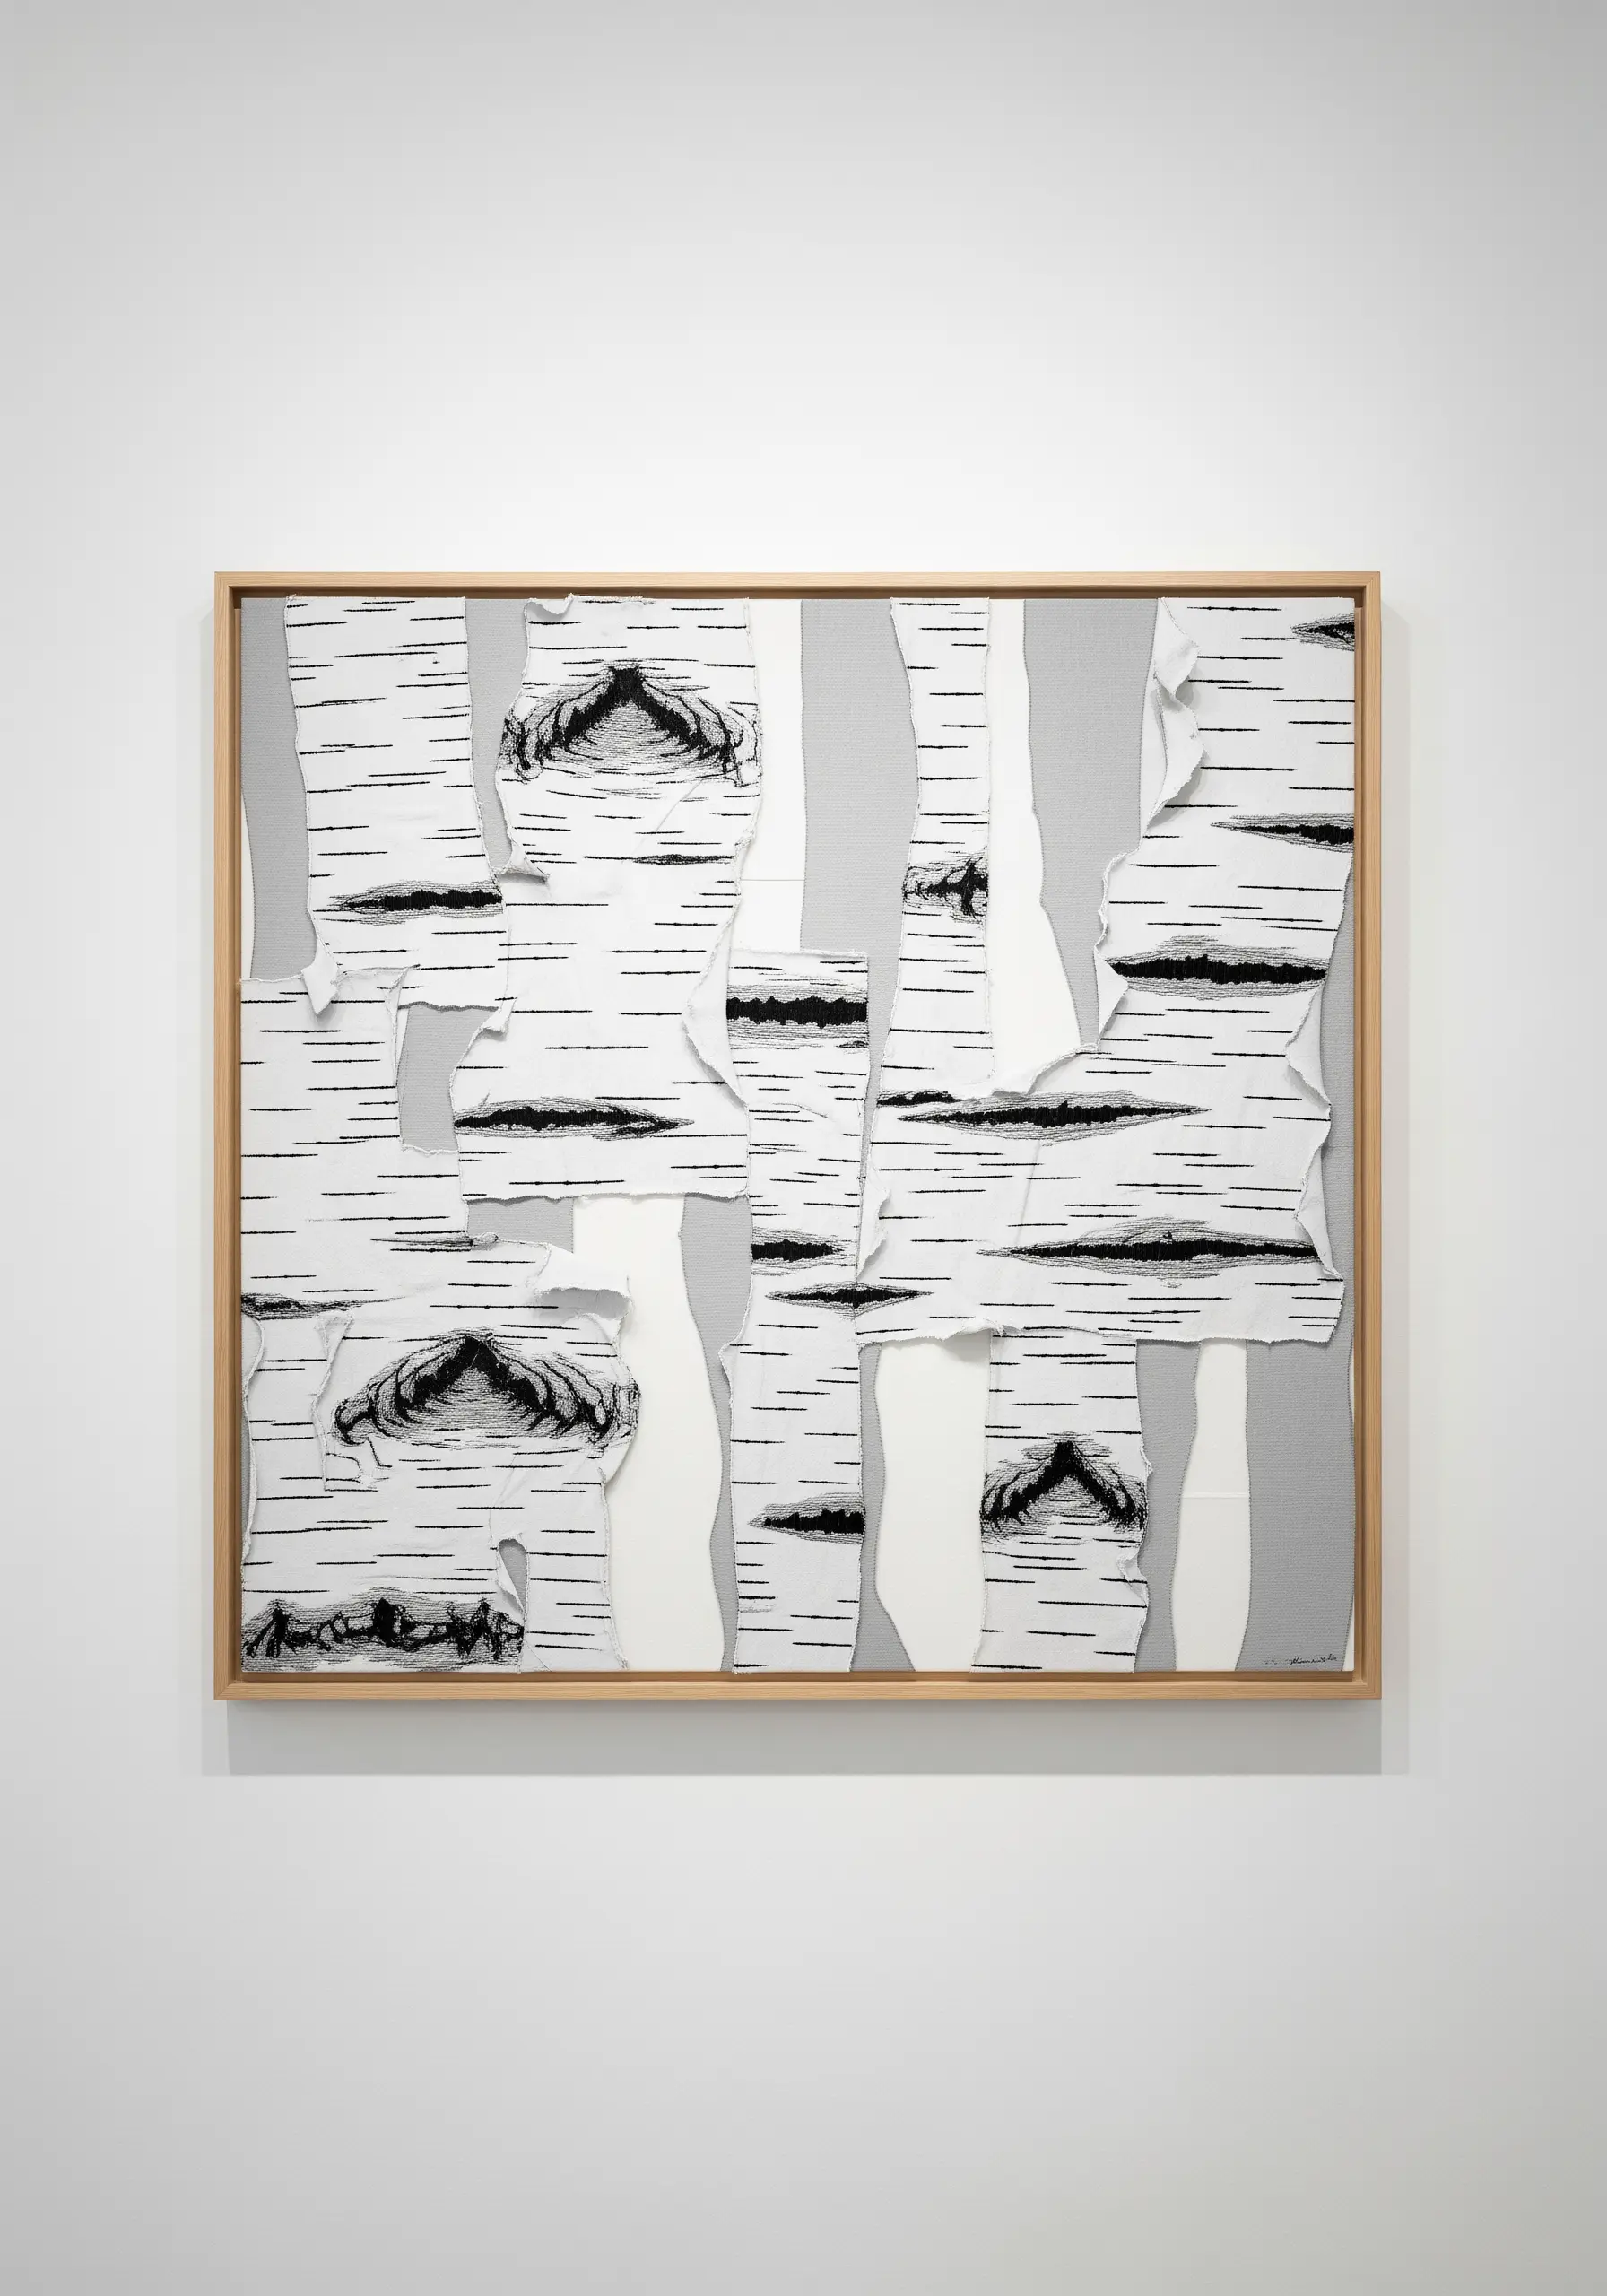
Create a striking, graphic representation of birch trees by focusing on negative space.
Start with a gray background fabric. Then, apply torn strips of white fabric that have been pre-stitched with the black, horizontal bark details.
Arrange the strips so that the gray background shows through, creating the illusion of tree trunks and branches without having to stitch them directly.
This innovative use of fabric collage is a fast, effective way to build a complex scene with minimal stitching.
35. Sculpt Realistic Moss with French Knots

To achieve the clumpy, dense texture of moss growing on a log, rely on the humble French knot.
Use a variegated green thread, or hold two different shades of green floss together in your needle. This will give your moss a natural, multi-tonal appearance automatically.
Pack the knots closely together, varying the tightness and number of wraps to create an uneven, organic surface.
Contrast the soft moss with smooth, long straight stitches for the wooden log to make the texture pop even more.
36. Illuminate Flames with Careful Color Blending
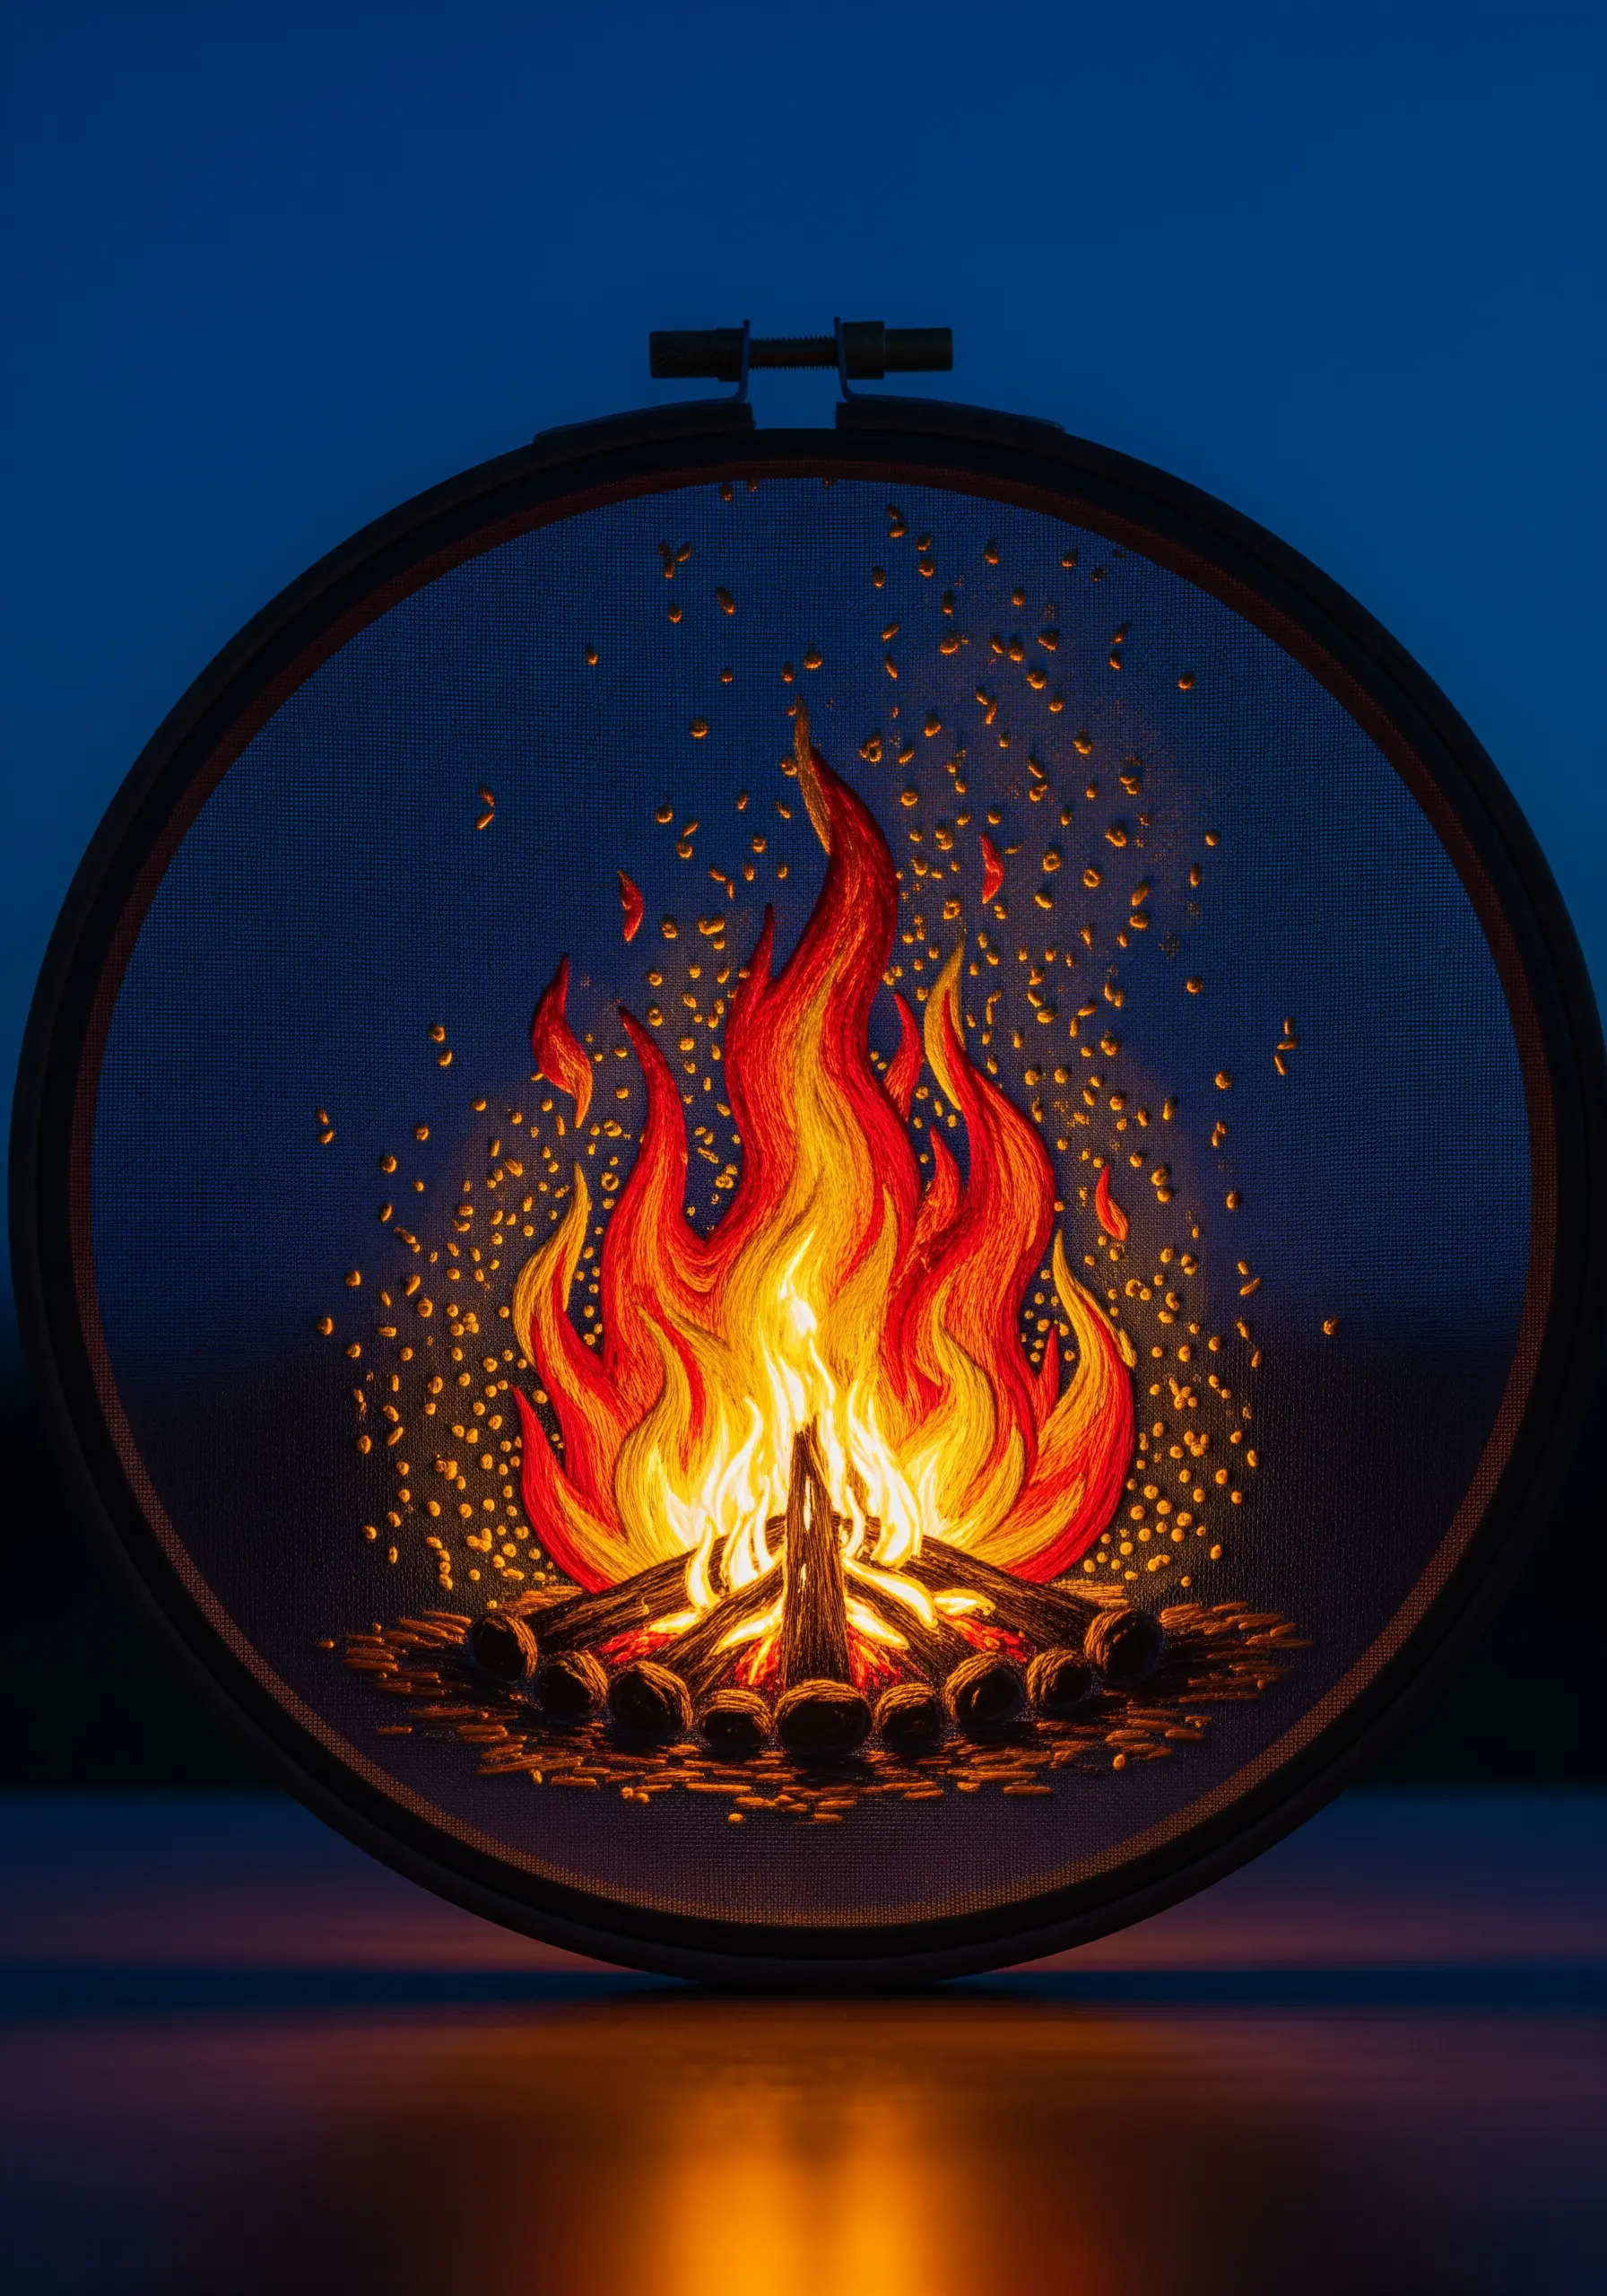
To make embroidered flames appear to glow, your color choice and placement are everything.
Start with the brightest color—white or pale yellow—at the very heart of the fire, right above the logs. Use short, vertical satin stitches.
Gradually blend outwards, moving from yellow to orange, then to red, and finally to a deep crimson at the tips of the flames.
For the flying embers, use tiny, scattered French knots in bright yellow and orange. This careful gradient is what creates the convincing illusion of light and heat.


