

Let’s set aside the idea of simply following a pattern. Instead, let’s look to the earth as our design guide. The true artistry in embroidery begins when you start translating the world around you—not just its shapes, but its textures, its light, and its feeling—into thread.
This isn’t about achieving perfect realism. It’s about observation. It’s noticing how the texture of tree bark can be captured with clusters of French knots, or how the subtle color shift in a petal is best achieved with a single strand of floss in a long-and-short stitch. Your needle becomes a tool for interpretation.
These ideas are designed to be starting points for your own exploration. Use them to build your technical confidence, but more importantly, to train your eye to see the endless embroidery inspiration that nature offers. This is how you develop a style that is uniquely and beautifully your own.
1. Sculpt a Forest Floor with Dimensional Stitches
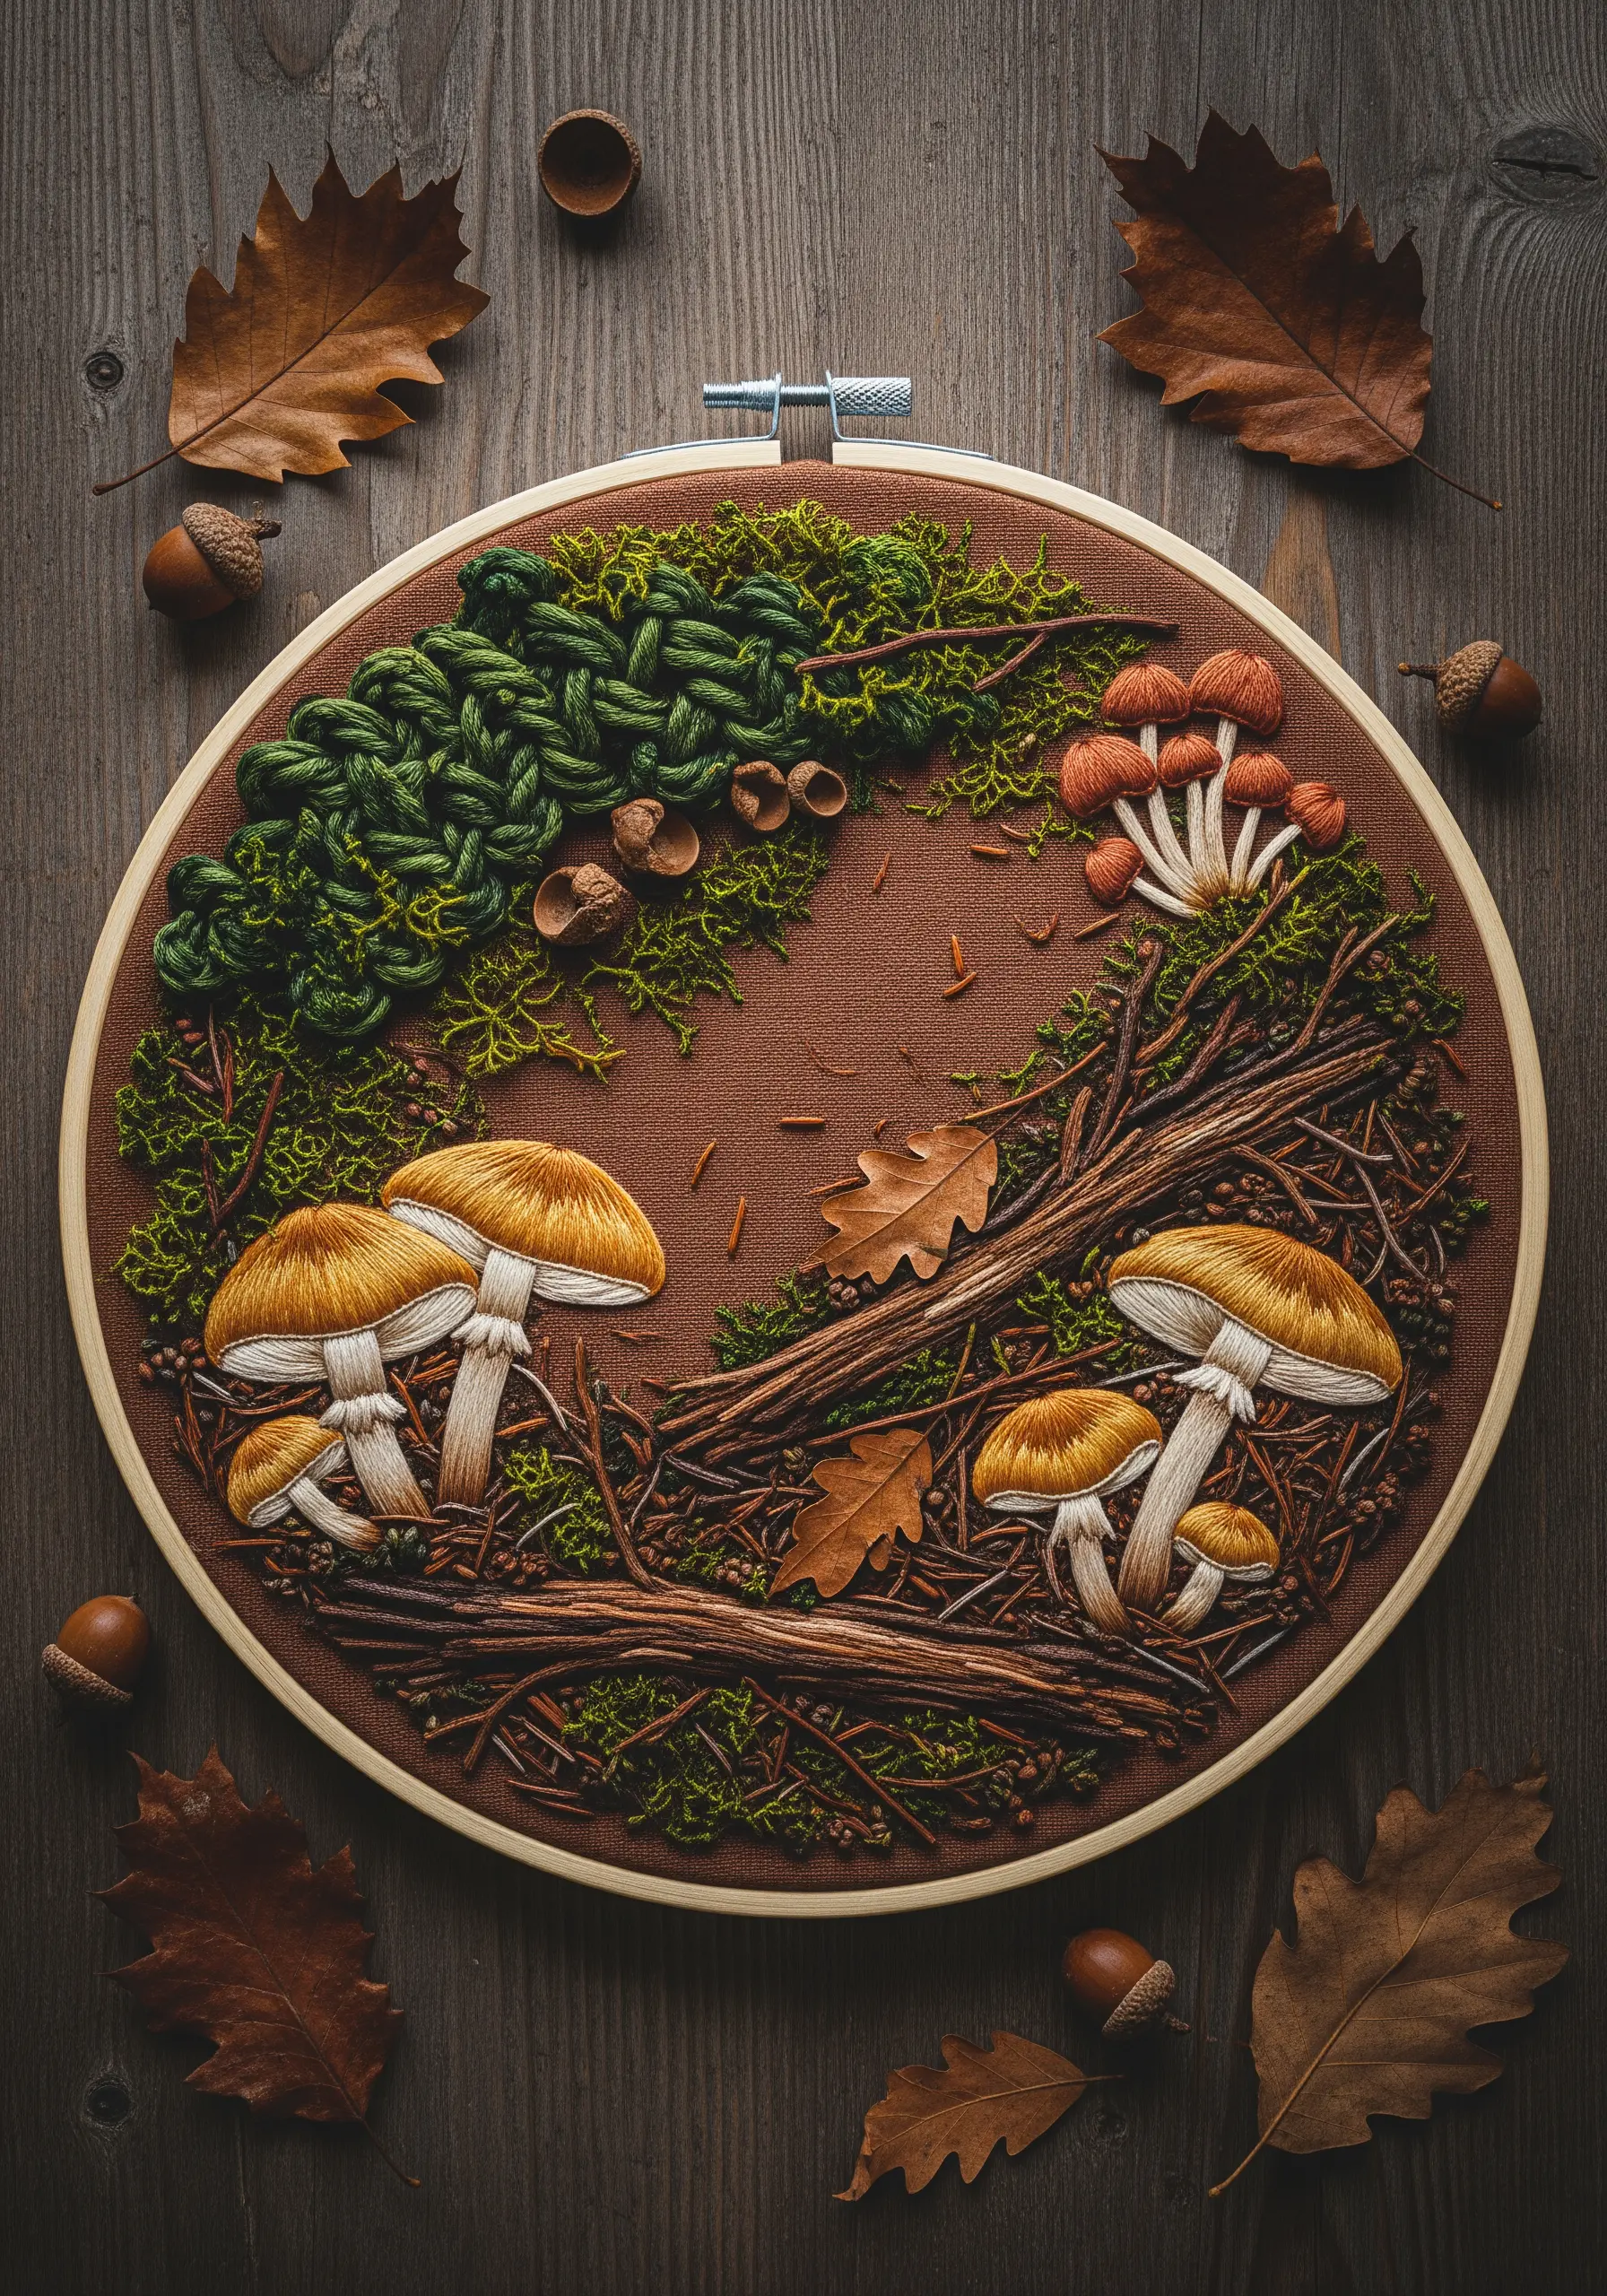
Create a truly tactile scene by moving beyond flat stitches.
Use turkey work with a variegated green yarn for a plush, mossy groundcover, then trim the loops at different heights for a more natural look.
Form fallen branches by couching down twisted strands of brown wool or thick cotton floss, which gives them a woody, three-dimensional presence.
For mushrooms, use a padded satin stitch for the caps and a ribbed stem stitch for the stalks to create realistic volume and form.
This approach transforms your hoop from a picture into a miniature, touchable world, making it one of those embroidery designs that turn everyday nature into stunning art.
2. Paint a Desert Vista with Thread
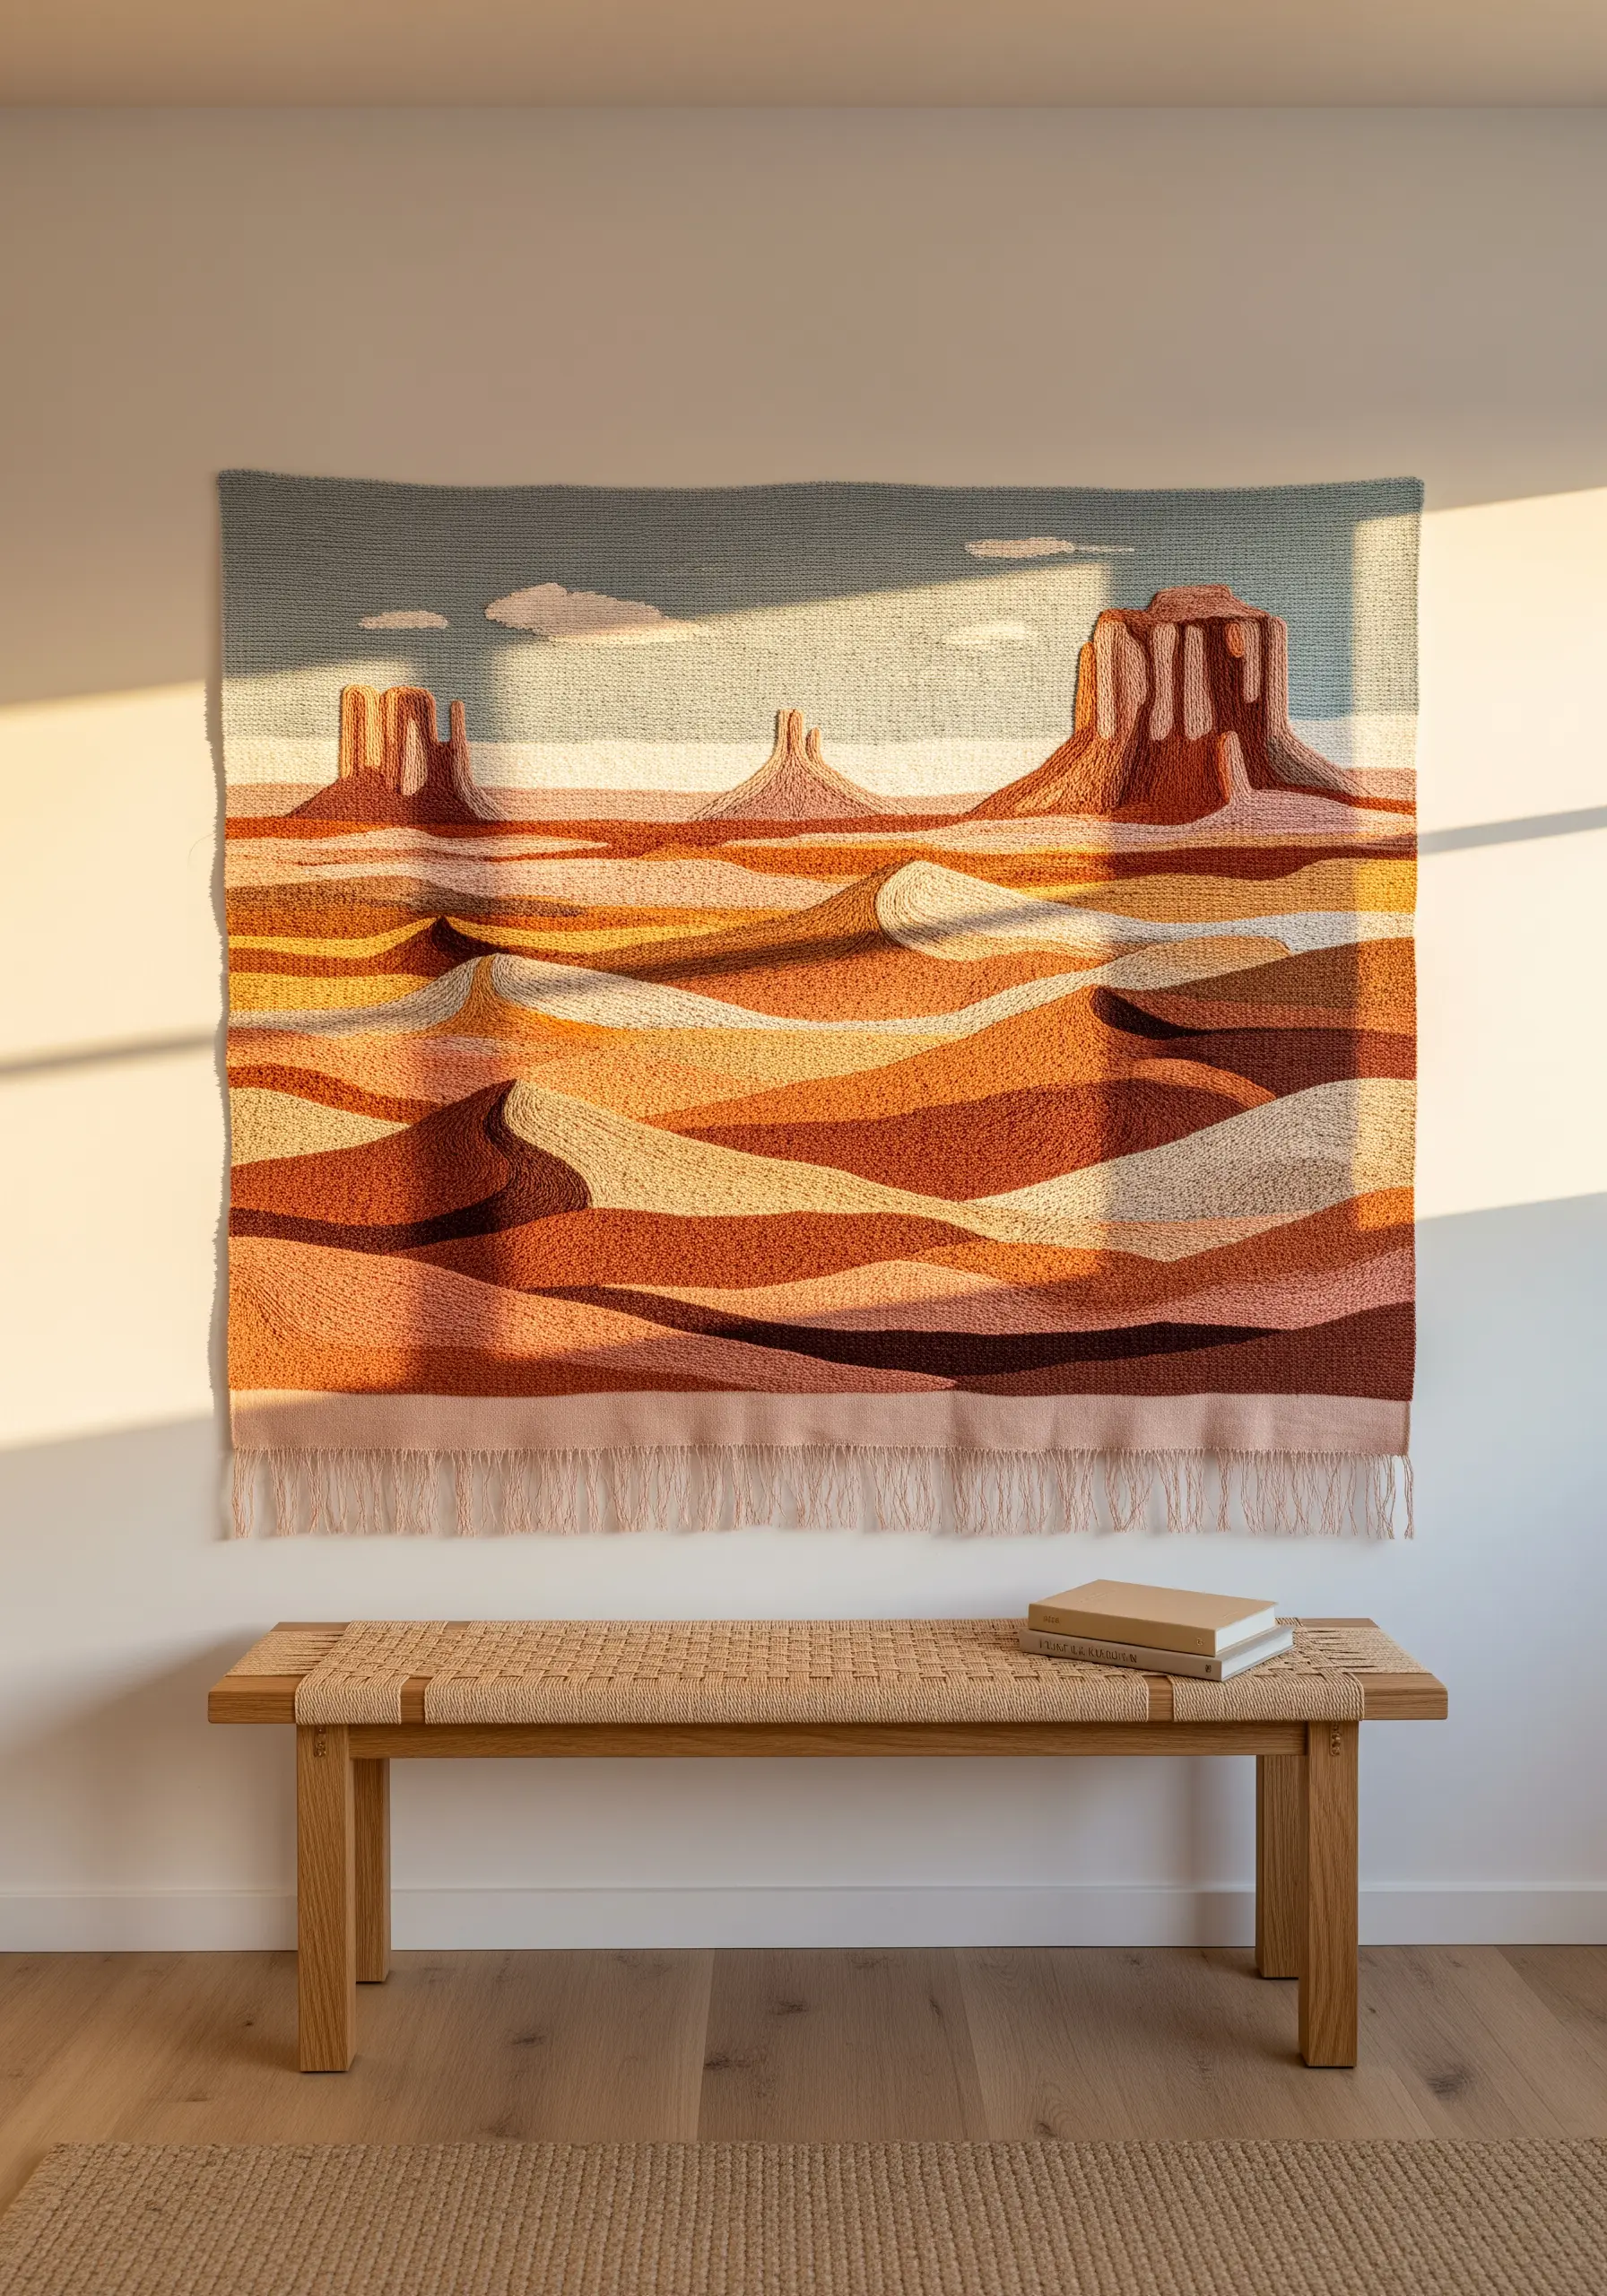
When tackling a large-scale landscape, treat your thread like paint and your needle like a brush.
Use long-and-short stitch to fill large blocks of color, allowing you to blend hues seamlessly at the edges where dunes meet.
Vary the direction of your stitches within each colored section to mimic the natural contours of the land and the way light creates shadows.
This painterly approach is perfect for large-scale embroidery tapestries, turning a simple fill stitch into a sophisticated tool for creating depth and atmosphere.
3. Arrange a River Stone Composition

To capture the smooth, varied texture of river stones, think in terms of outline and fill.
Outline each pebble shape by couching a thick yarn or multiple strands of floss; this immediately defines the form with a raised edge.
For the fill, create variety: use dense seed stitches in one, concentric circles of backstitch in another, and a variegated thread in a third to suggest mineral patterns.
This combination of bold outlines and varied textures makes your design visually dynamic and turns a simple cushion into a piece of tactile art.
4. Capture Mountain Majesty in a Single Line
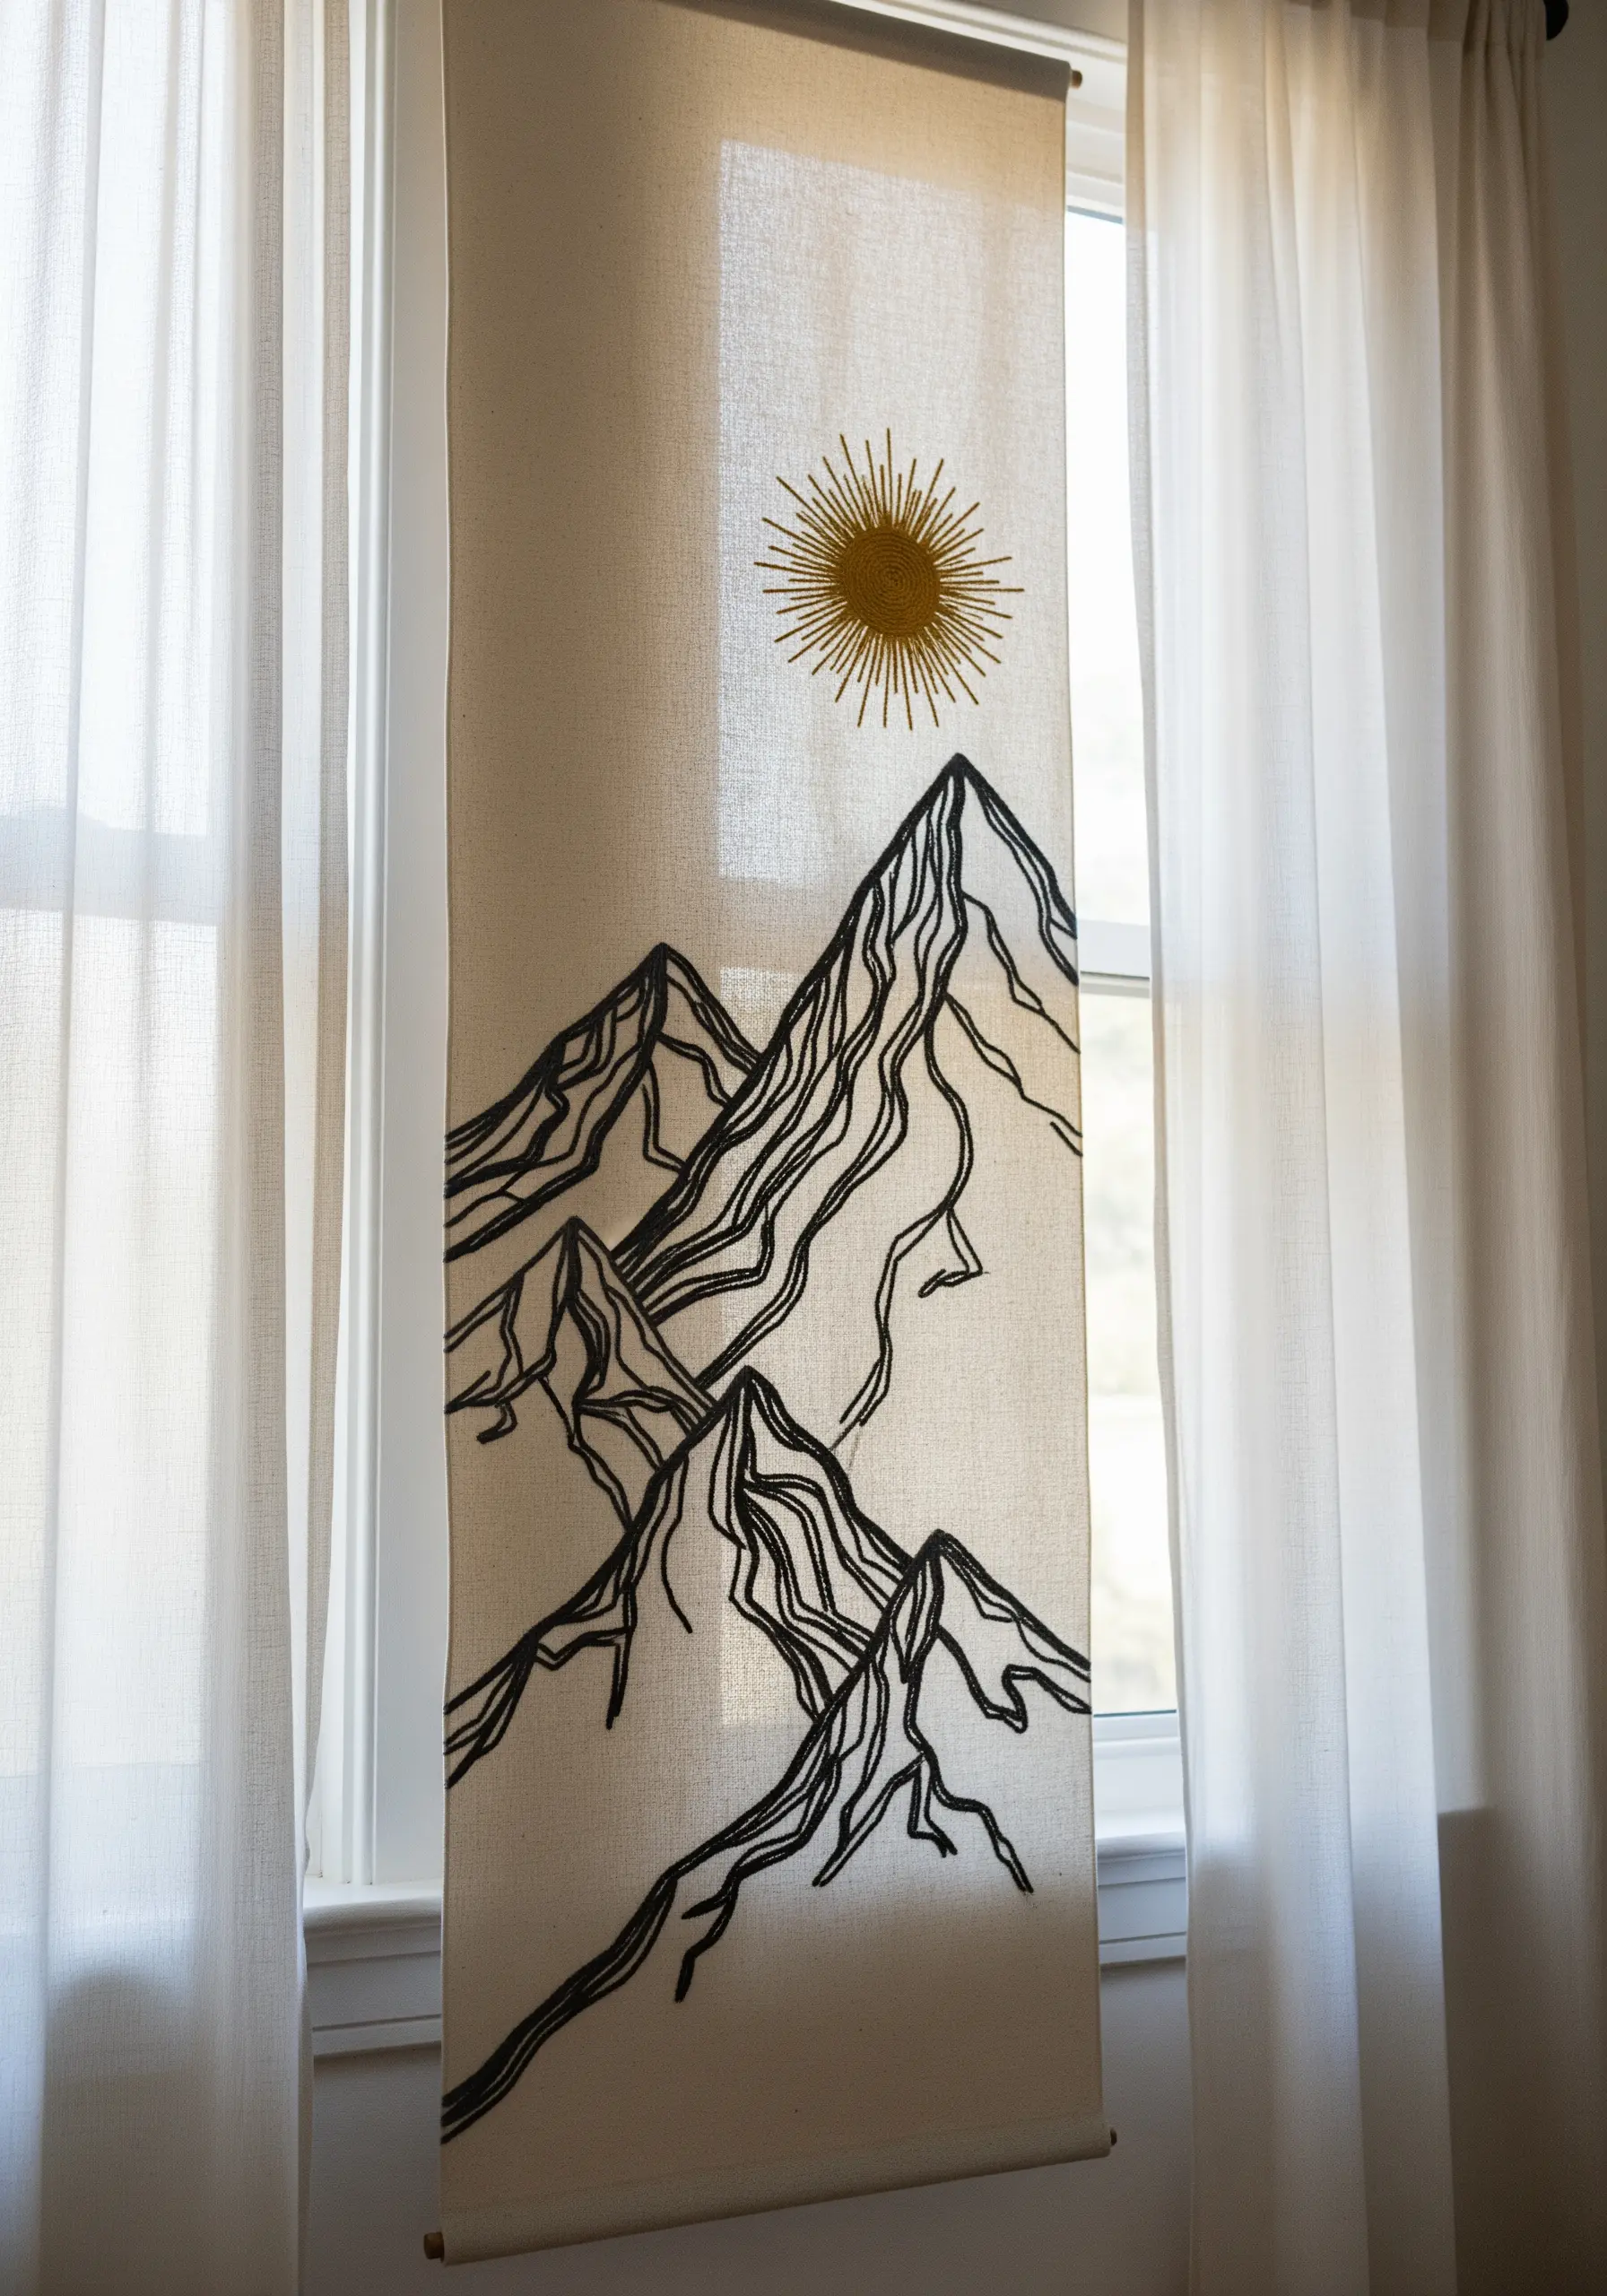
You don’t need complex stitches to create a dramatic impact; sometimes, the simplest line is the most powerful.
Choose an open-weave fabric like linen, where the natural texture of the material becomes part of the artwork.
Use a single, bold color—like black or deep indigo—and a thicker thread weight (all six strands of floss) to give your lines presence.
A simple backstitch or stem stitch is all you need to trace the peaks, allowing the negative space to define the scale and grandeur of the mountains.
5. Emulate Agate Slices with Thread and Beads
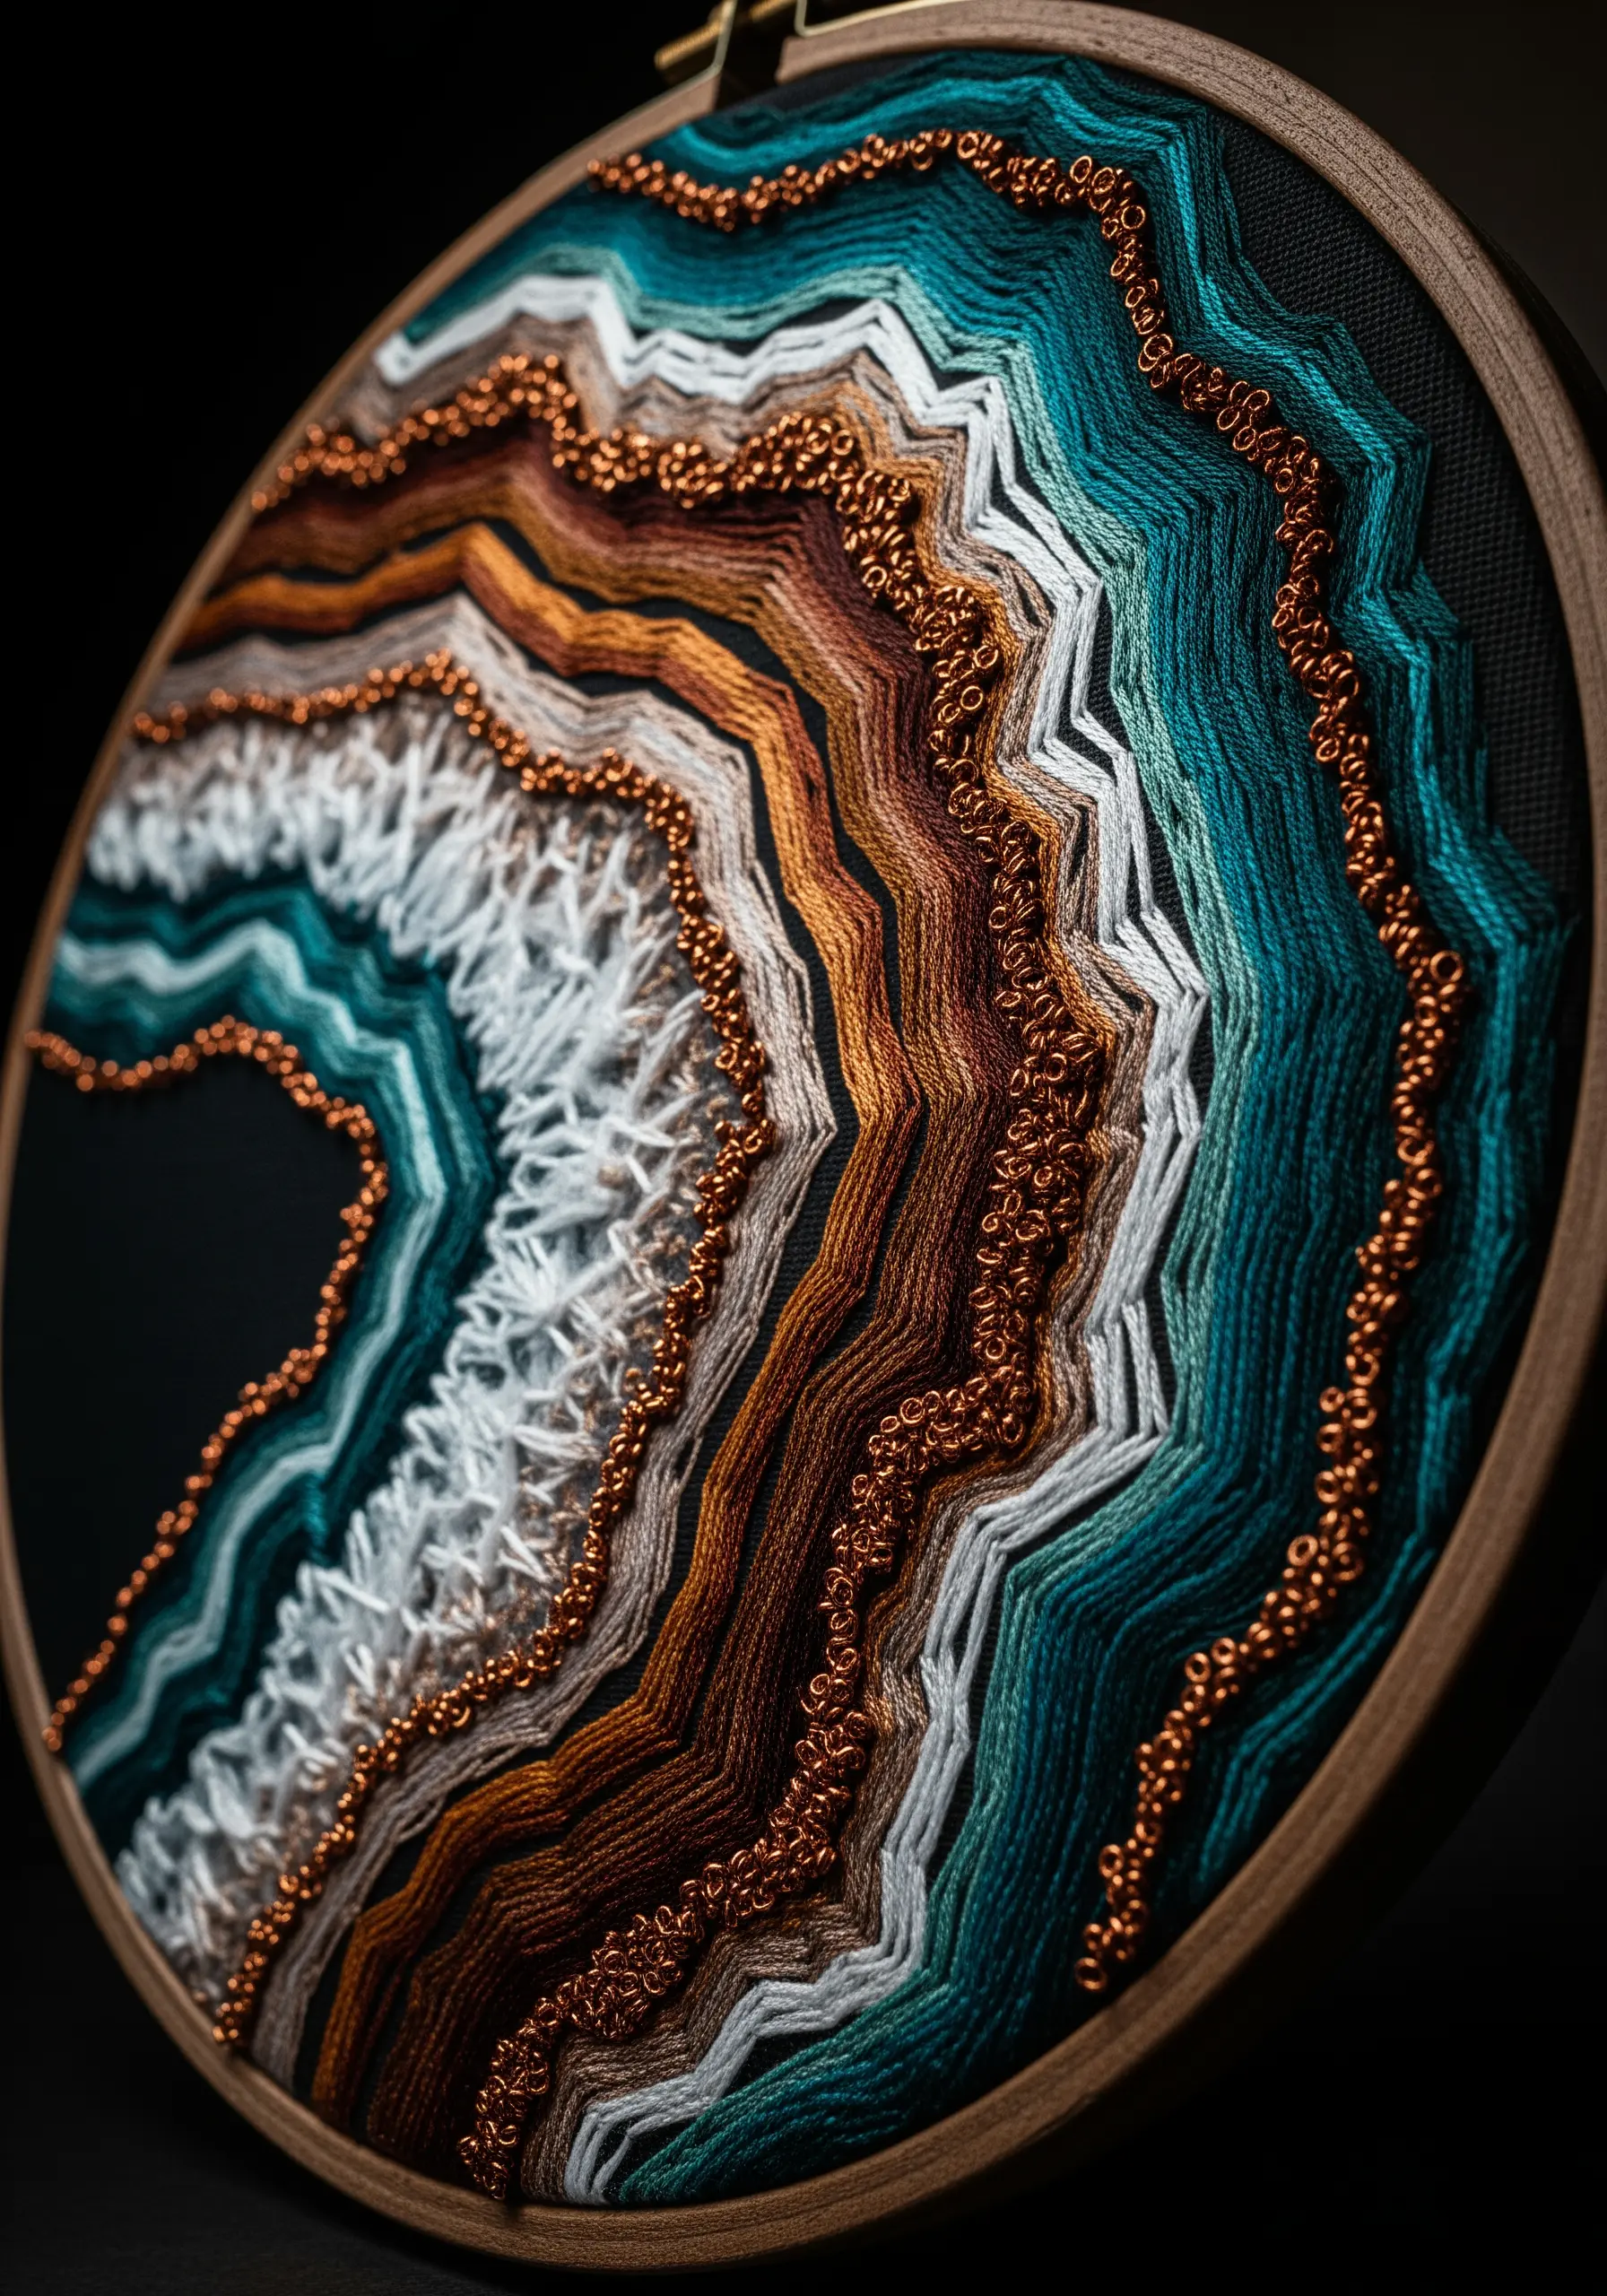
Recreate the mesmerizing layers of a geode by combining matte thread with reflective beads.
Work in concentric bands of satin stitch, using an analogous color palette to create a smooth, flowing gradient from one layer to the next.
Introduce a thin line of metallic seed beads between two of the color bands.
This interruption of texture is key—it mimics the crystalline structure found in real agate and catches the light in a way that thread alone cannot, adding a touch of geological magic.
6. Illustrate Underwater Motion with Ribbon
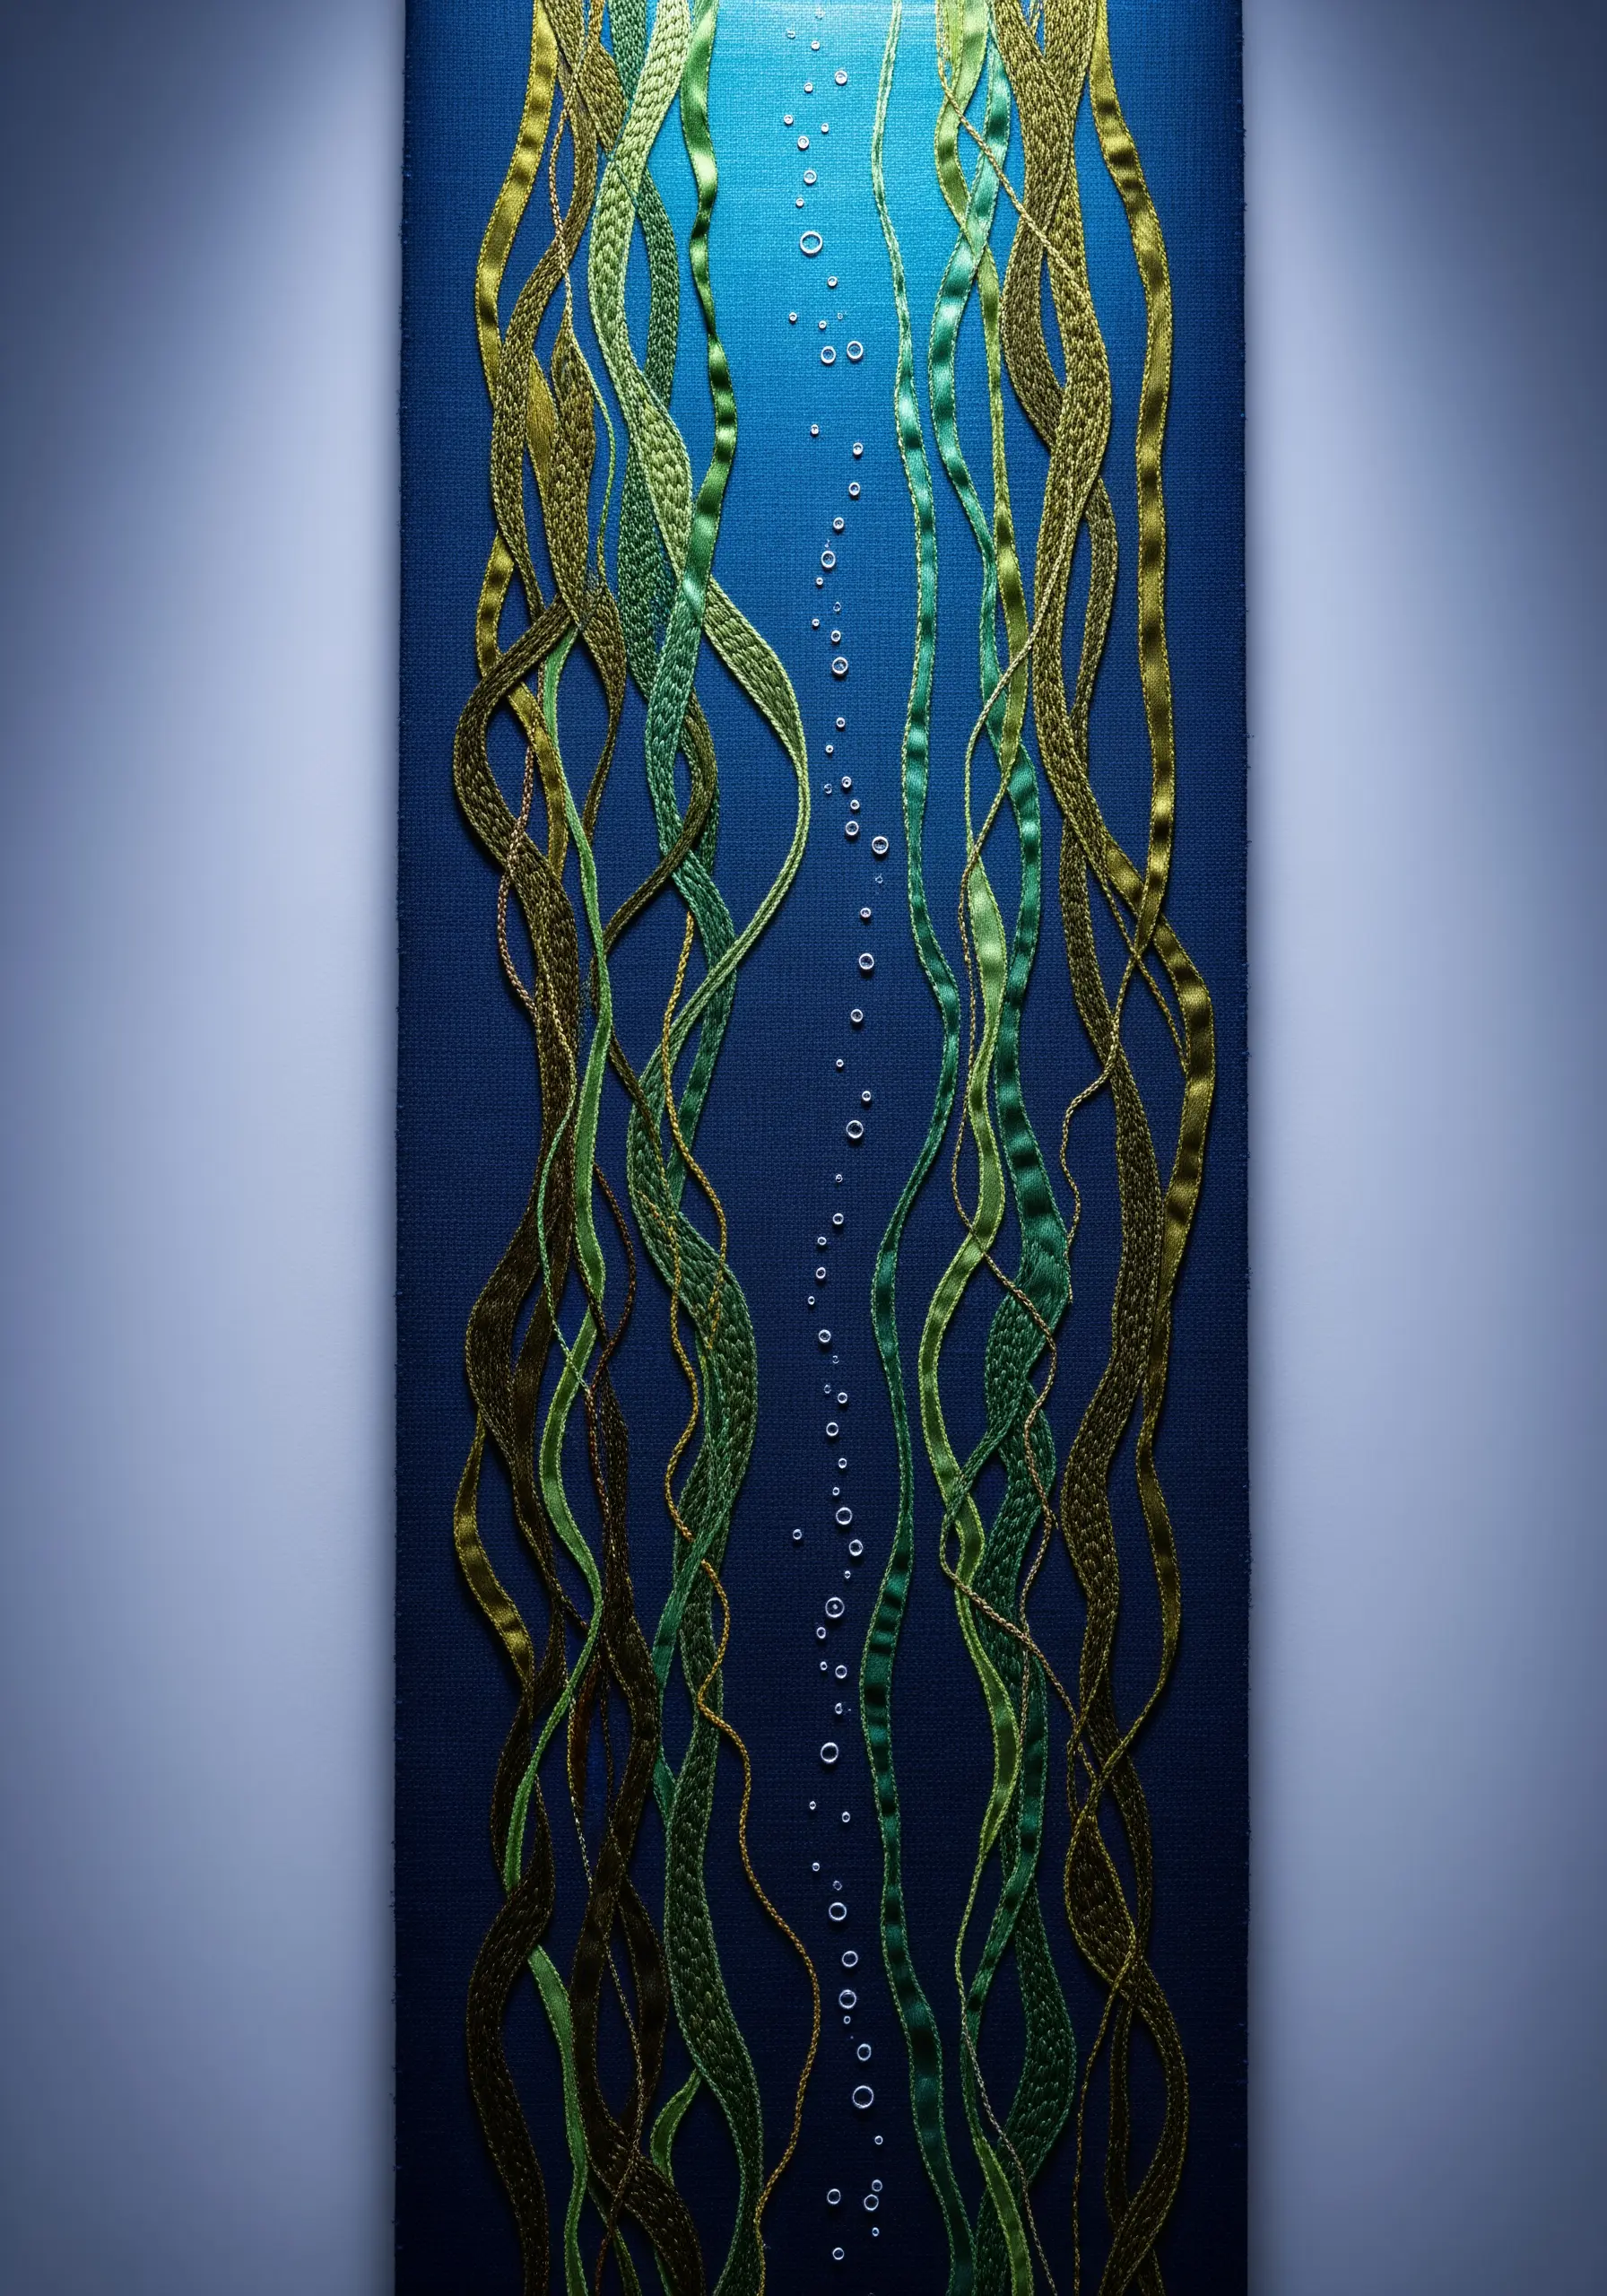
To capture the fluid, graceful movement of seaweed, swap your thread for silk ribbon.
Lay the ribbon on your fabric in gentle, undulating curves, pinning it in place as you go.
Then, use a single strand of matching or contrasting embroidery floss to couch it down with tiny, evenly spaced stitches.
This technique allows you to create broad, flowing lines that have a natural luster and dimension, perfectly conveying the sense of being underwater.
7. Master the Autumnal Leaf Gradient
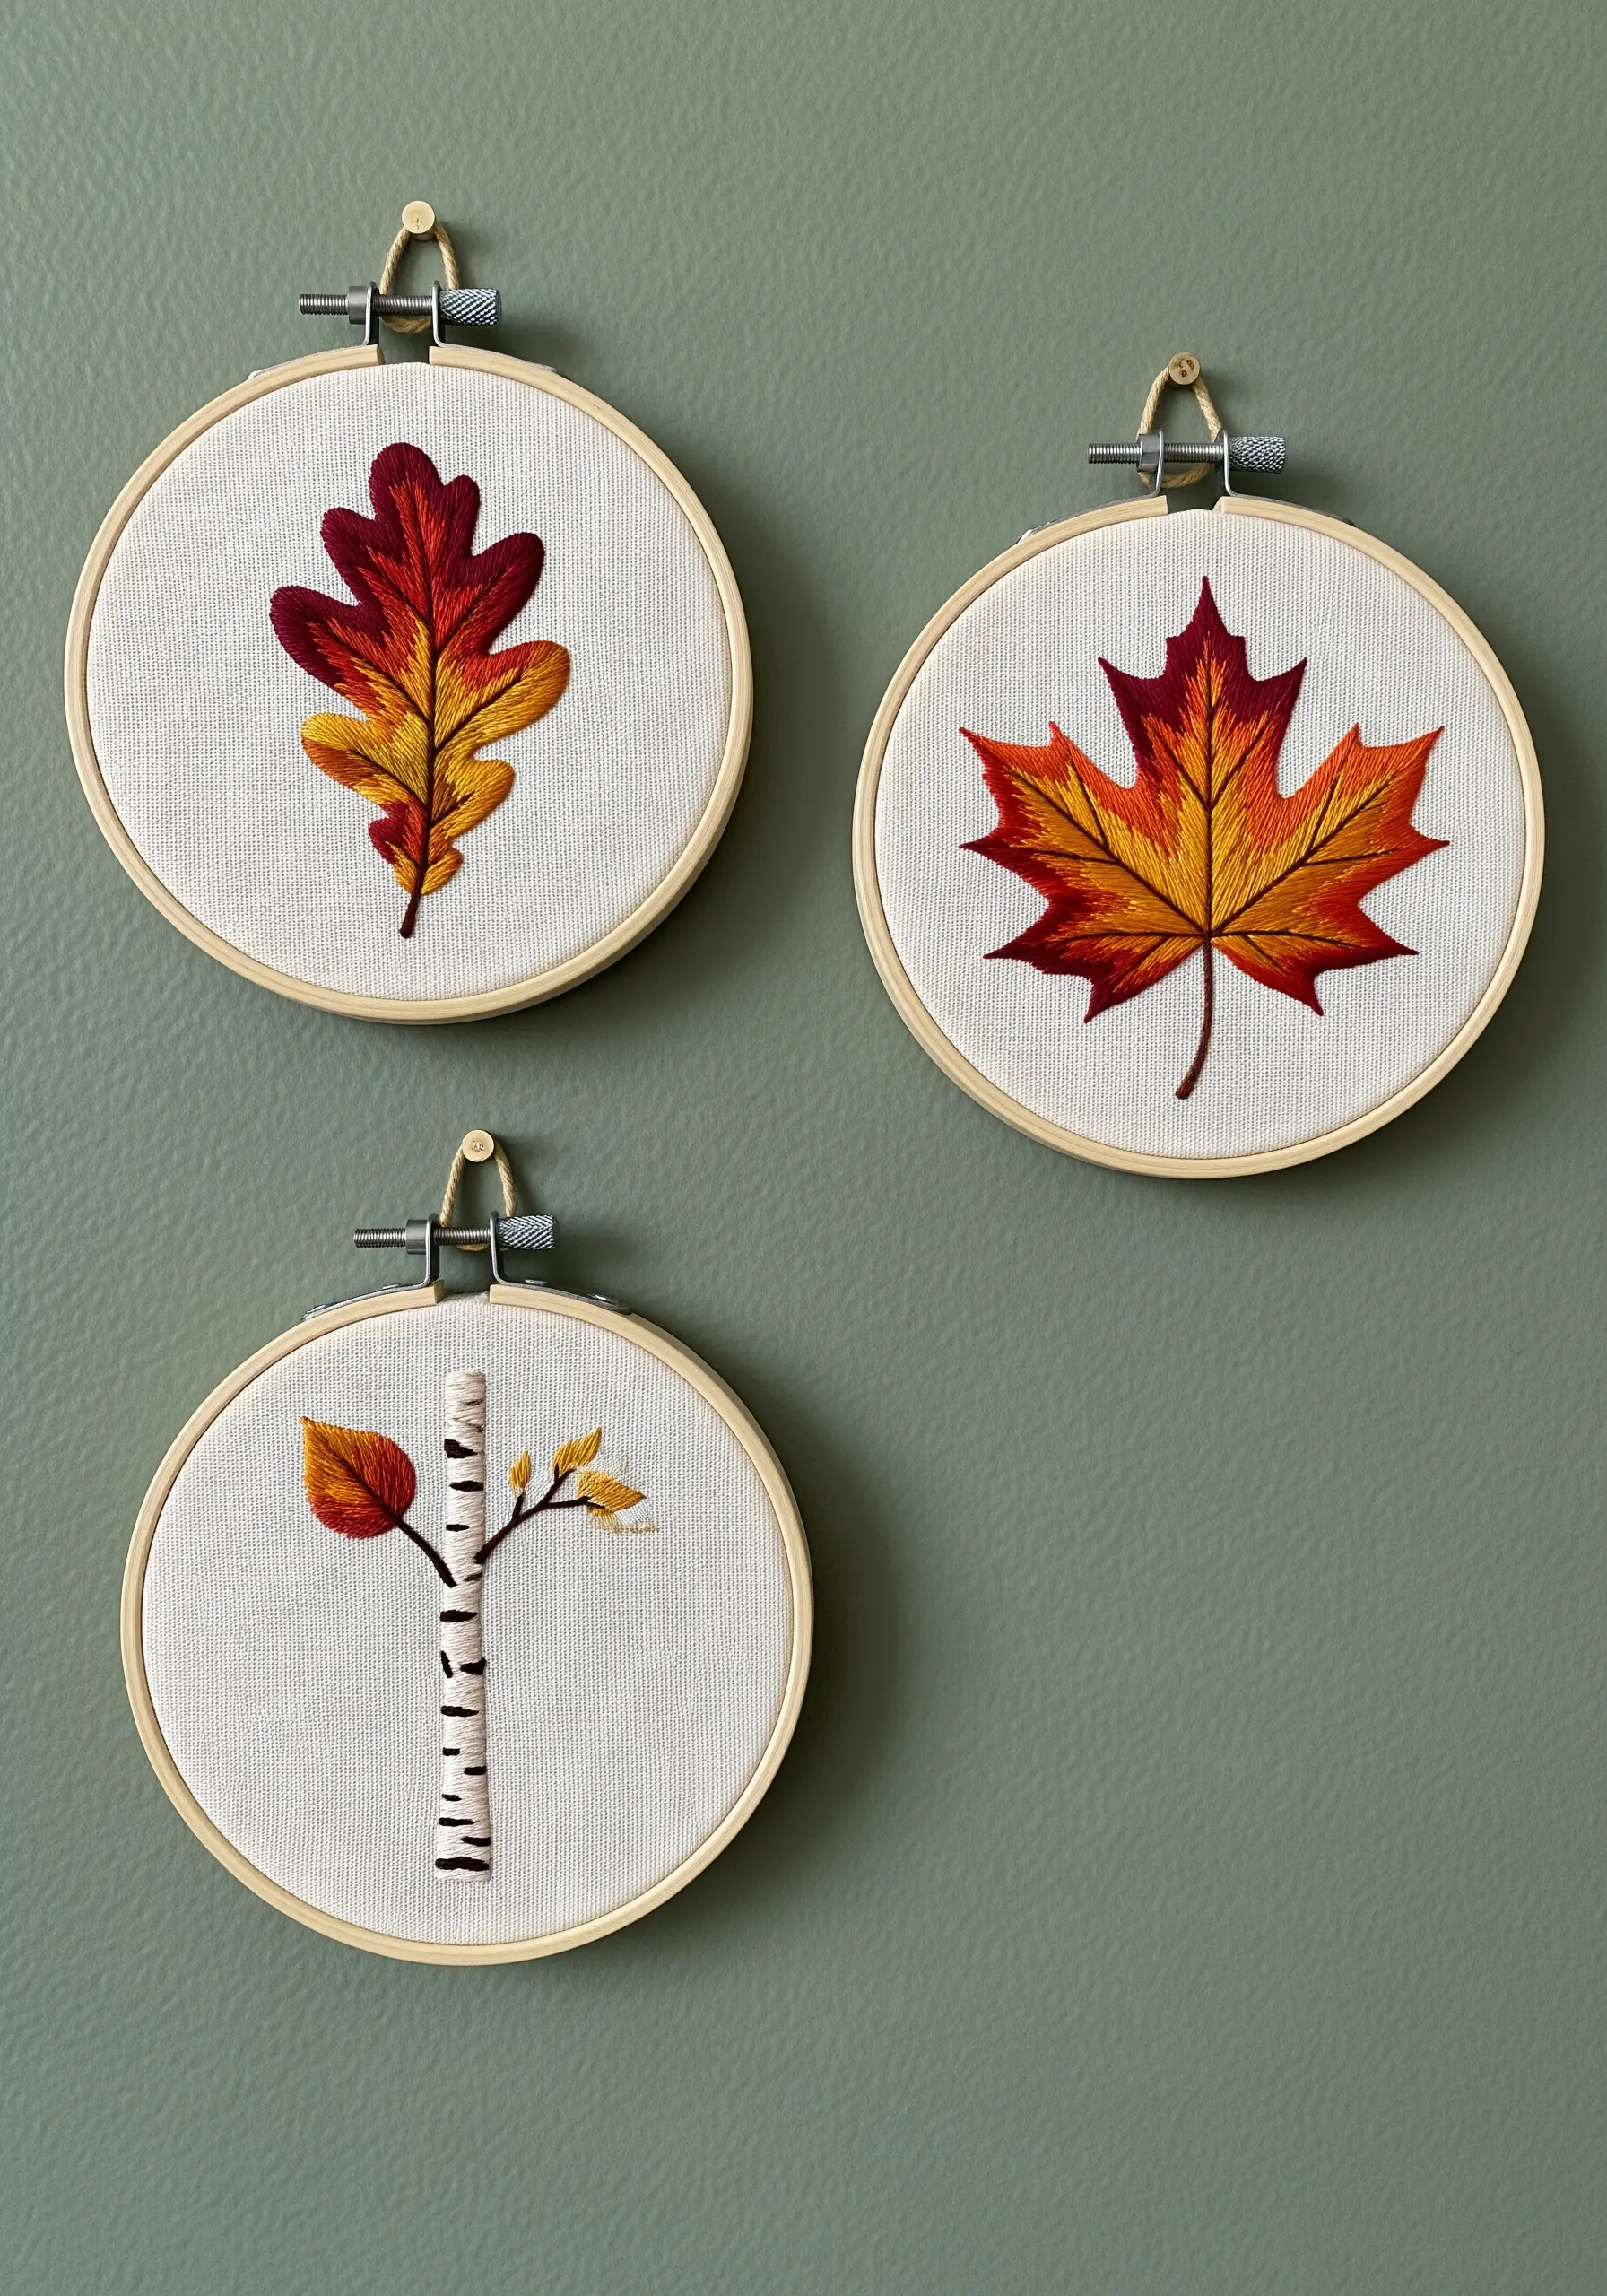
The secret to a realistic leaf is a flawless color blend.
Use the long-and-short stitch with only one or two strands of floss at a time for the smoothest possible transition between reds, oranges, and golds.
Always angle your stitches to follow the natural direction of the leaf’s veins, starting from the center and working outwards.
This directional stitching not only looks more realistic but also subtly guides the viewer’s eye through the color shifts, making your work feel alive. This is a crucial way to capture nature’s textures.
8. Build Abstract Textural Landscapes
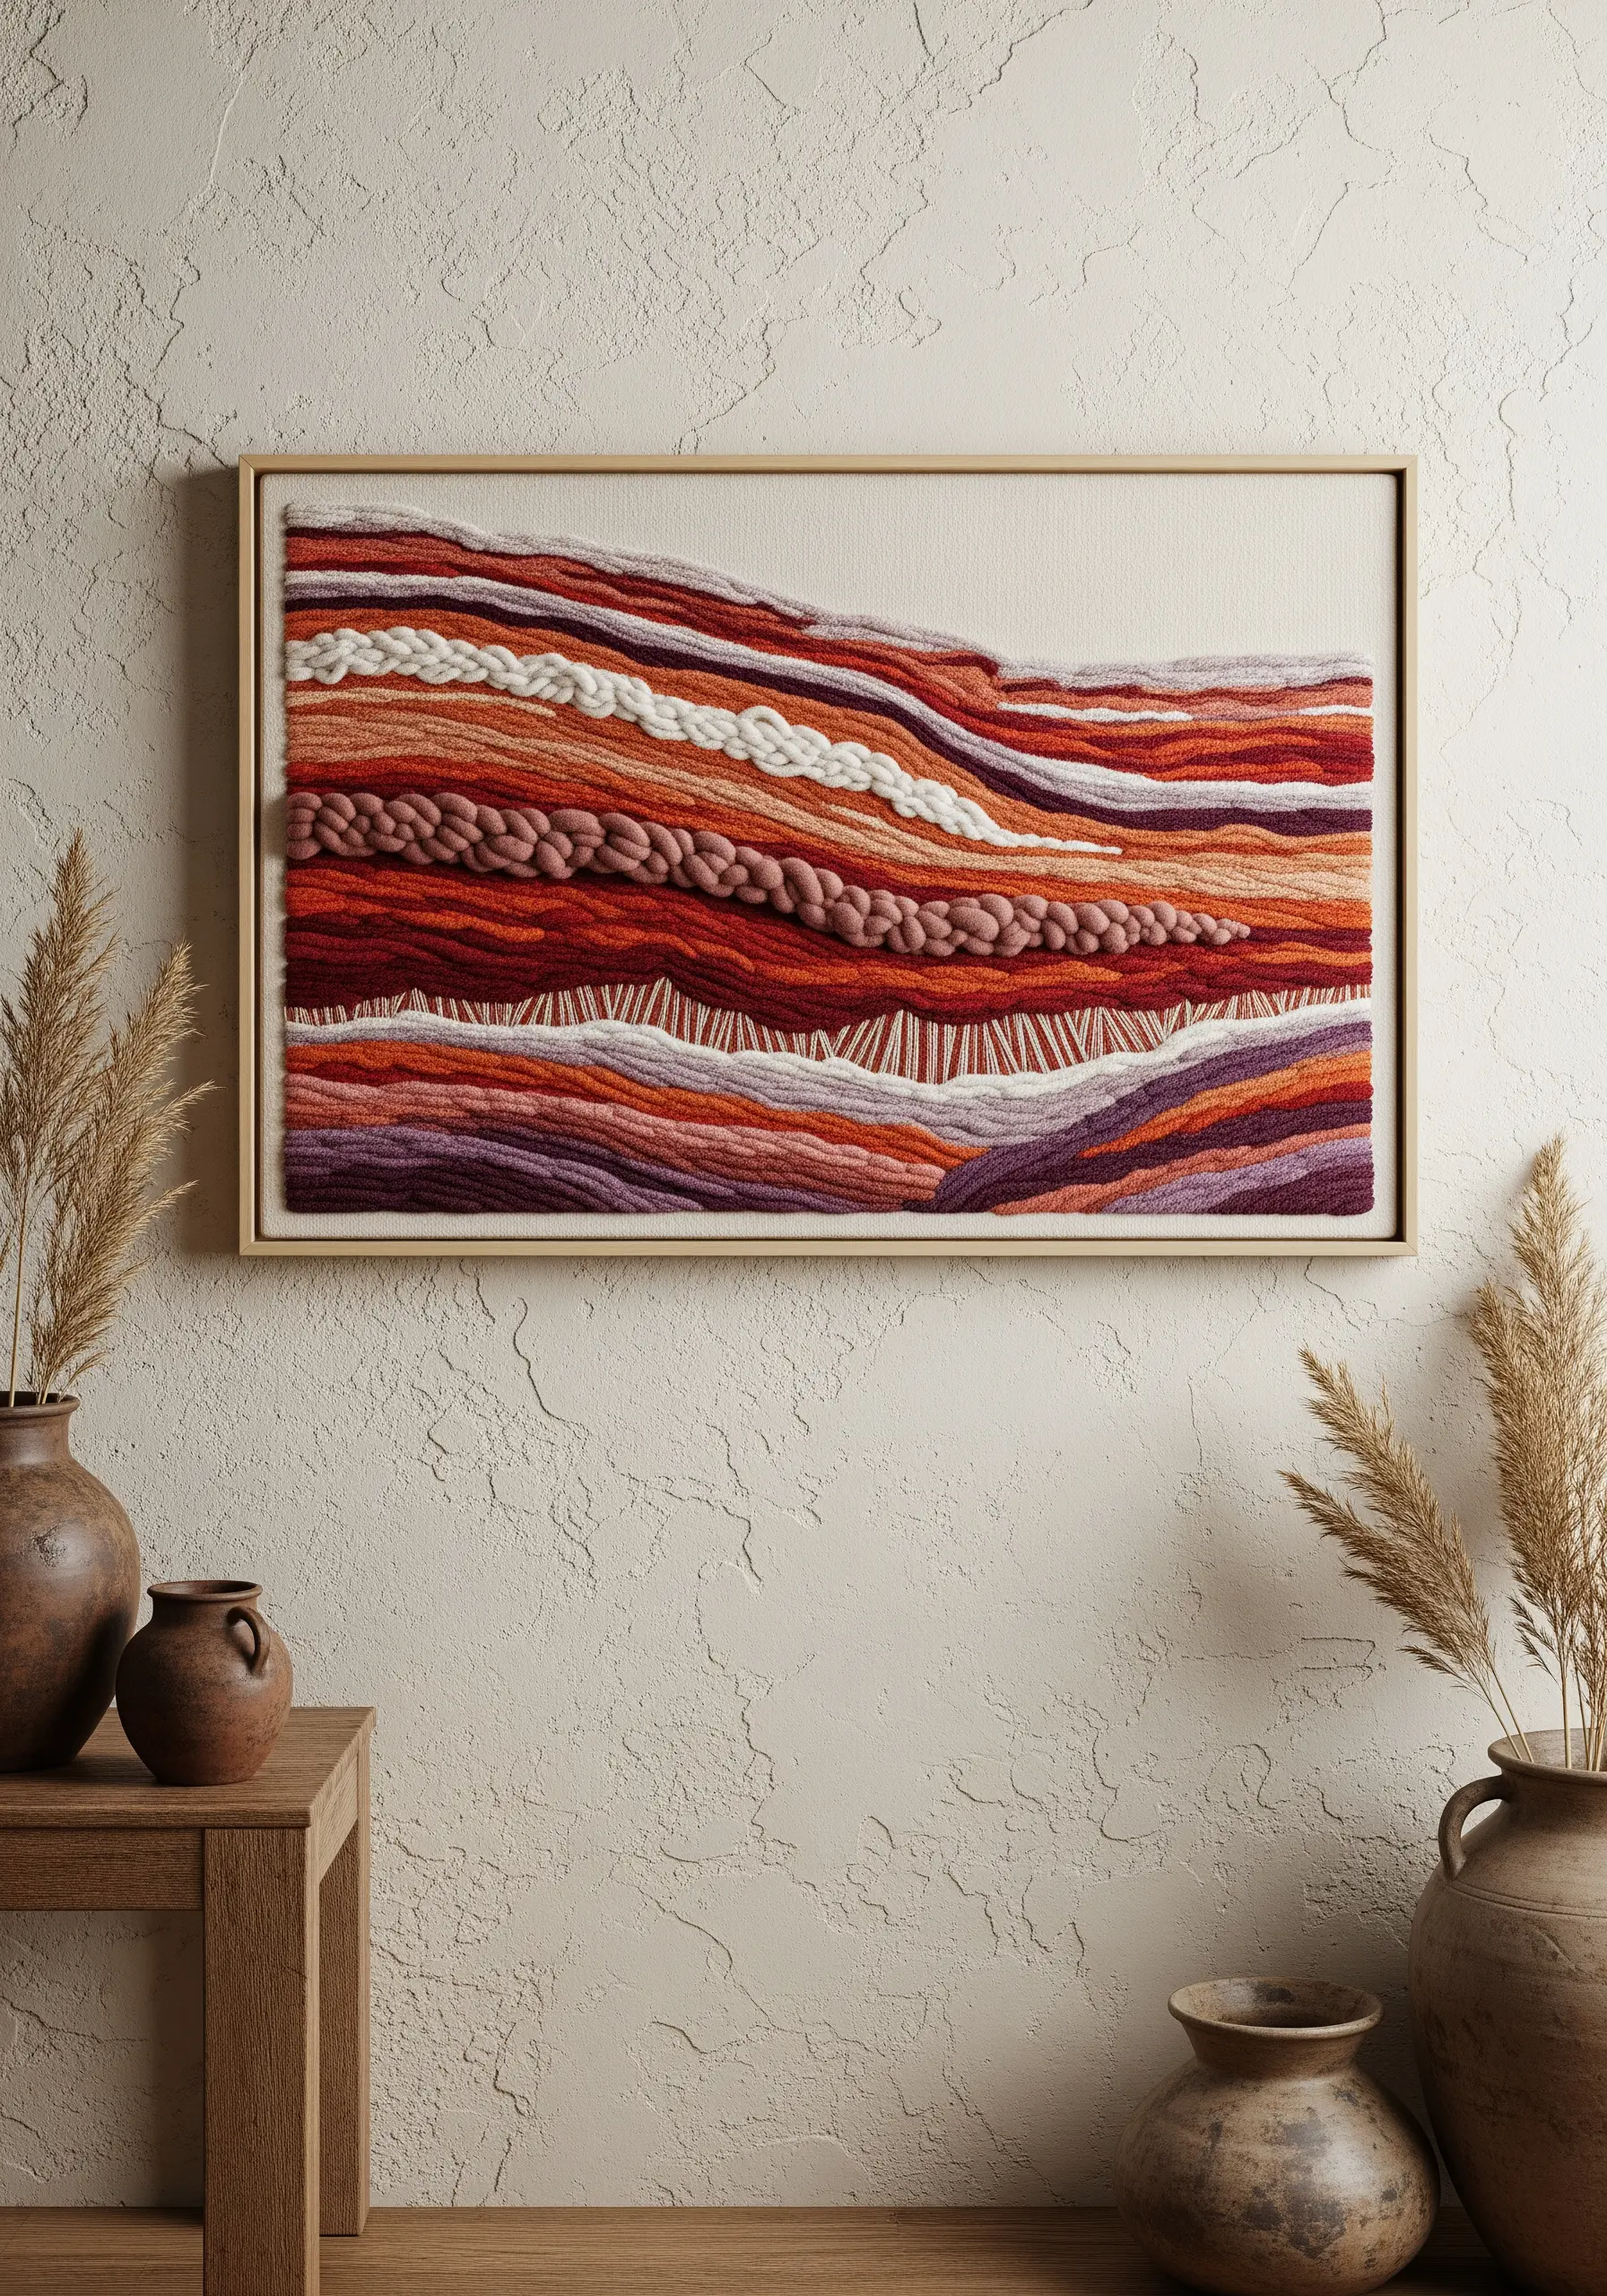
Translate the layered feeling of geological strata into pure texture.
Create distinct horizontal bands using different high-volume stitches: a thick layer of French knots, a row of couched bulky yarn, and a tightly packed section of bullion knots.
Stick to an earthy, analogous color palette to keep the focus on the textural differences, not the color contrast.
This method allows you to create abstract thread landscapes that feel both powerful and deeply connected to the earth.
9. Achieve Botanical Realism with Stumpwork
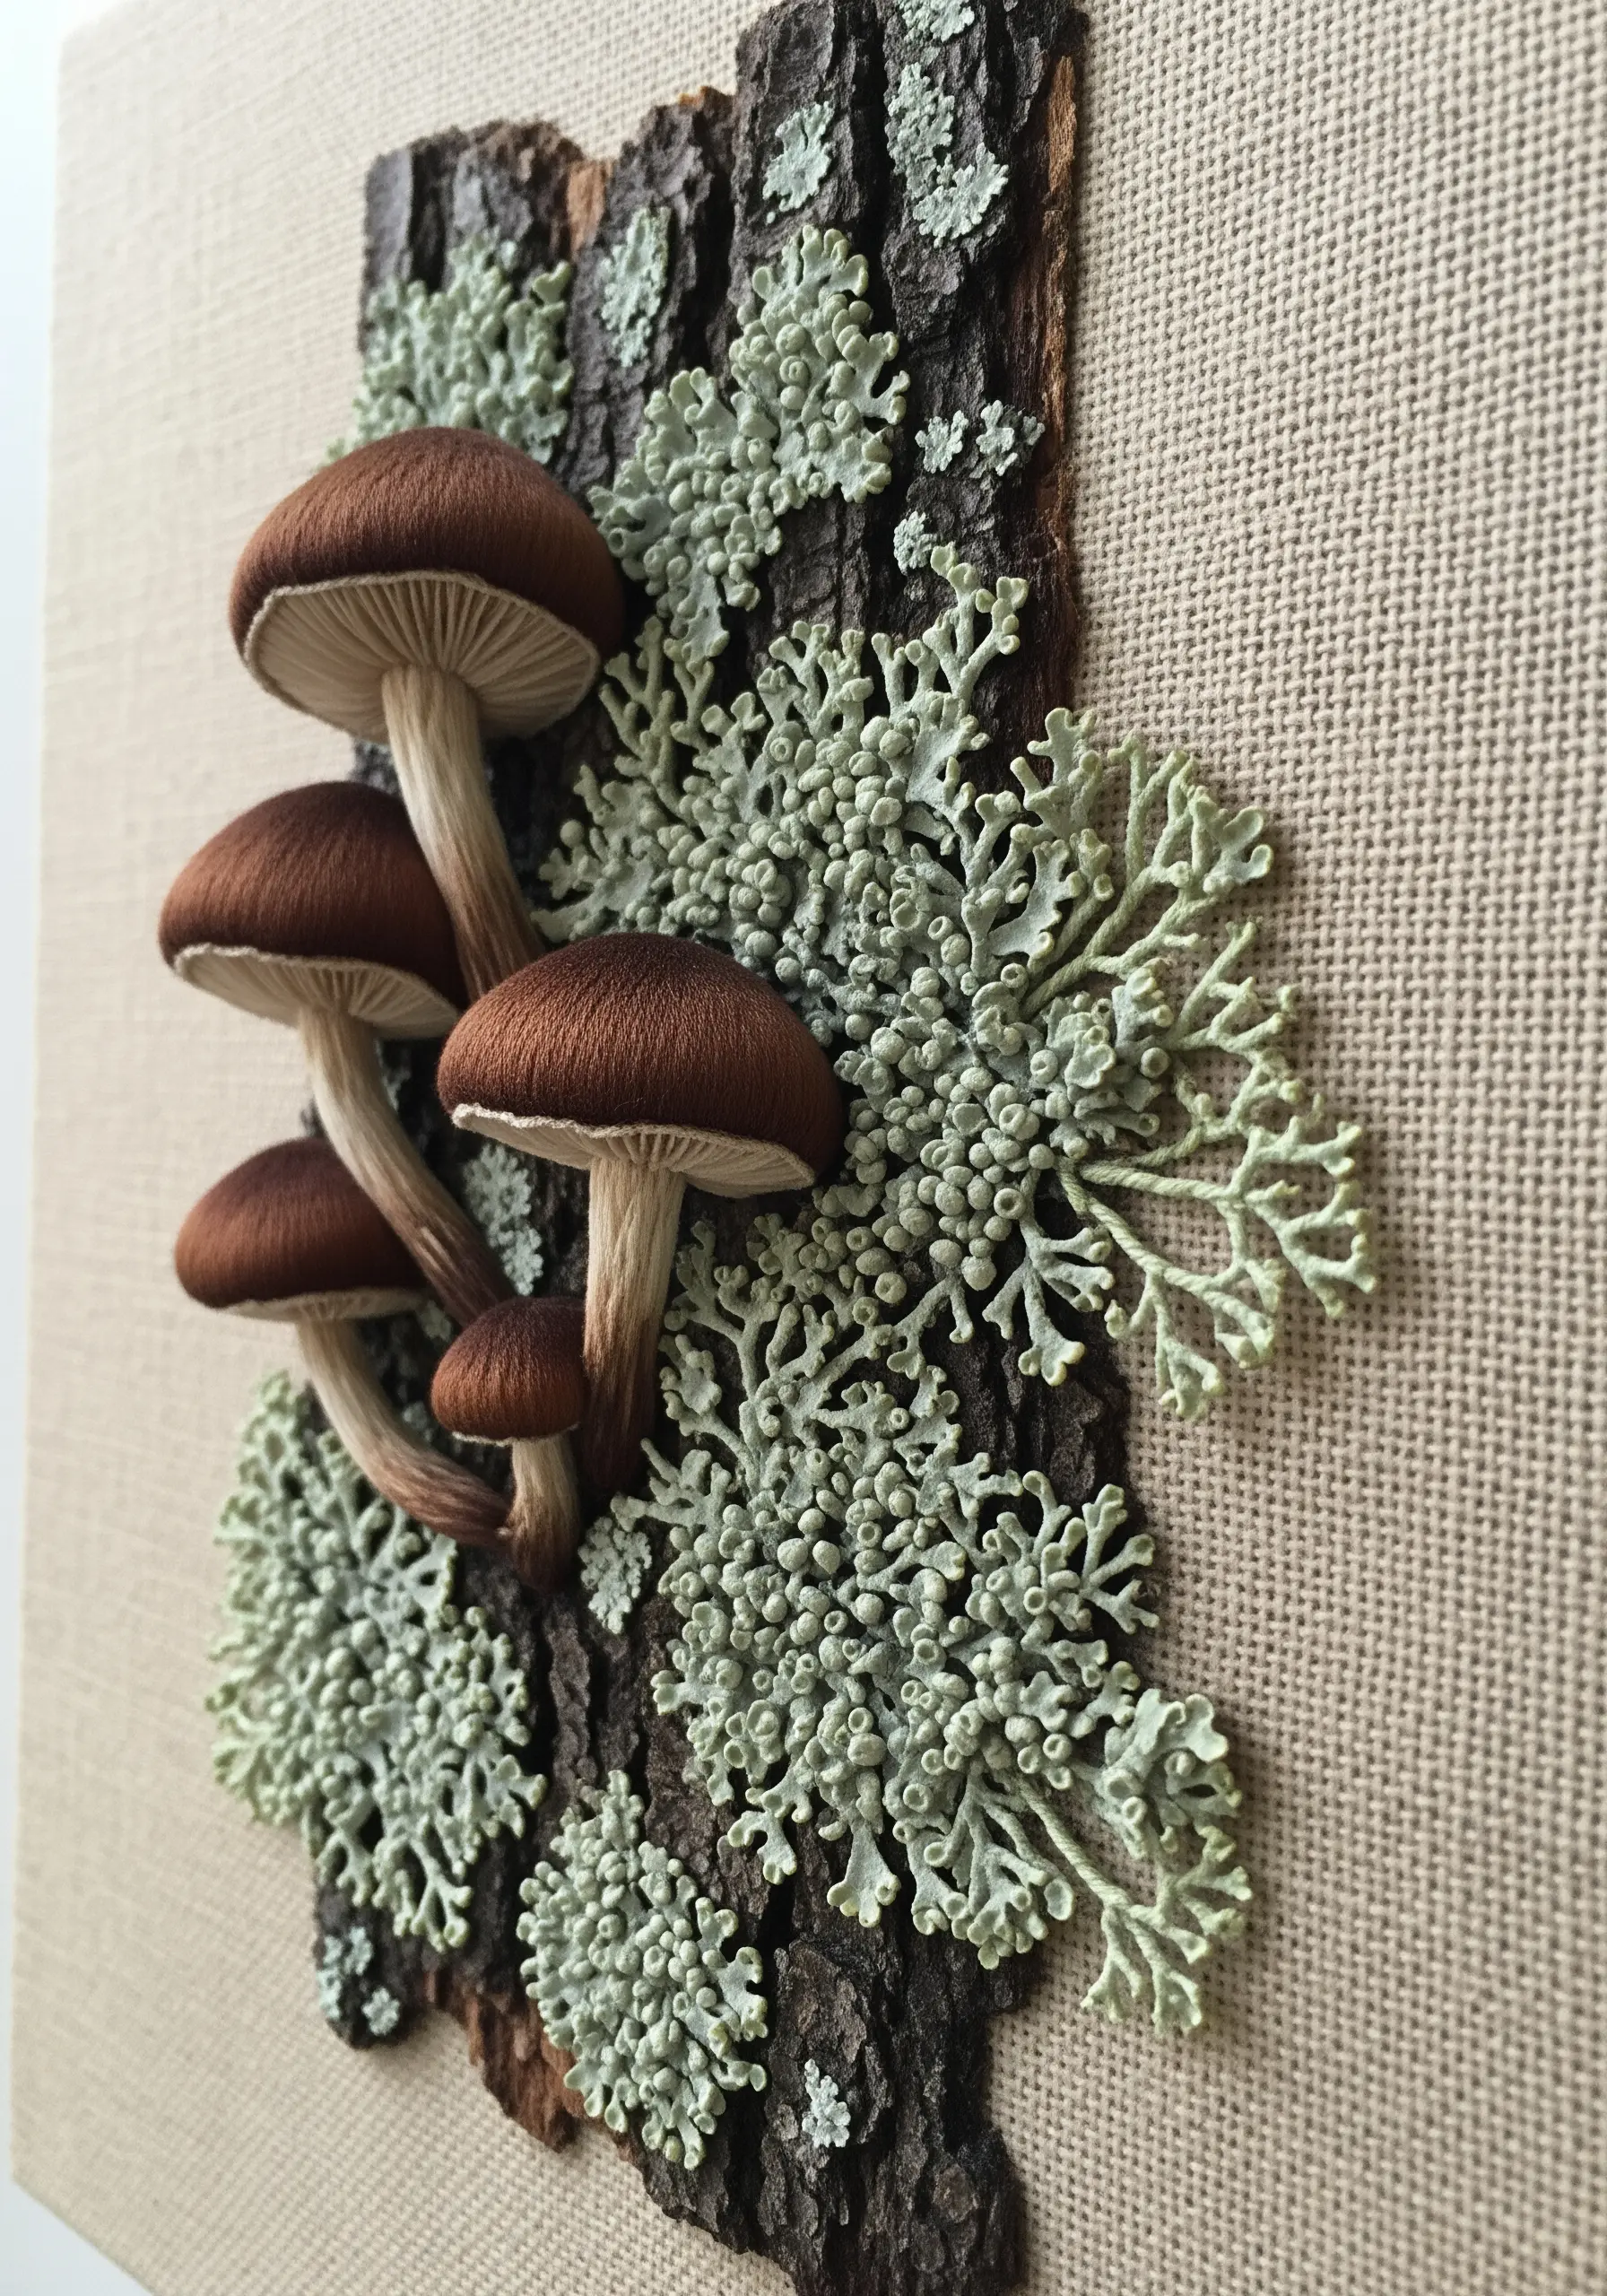
To make your embroidery truly three-dimensional, you need to lift it off the fabric.
For the mushroom caps, create detached elements by stitching over a wire outline on a separate piece of fabric, then cut them out and attach them to your main piece.
For the delicate lichen, use a dense field of colonial knots—they are sturdier and more uniform than French knots, giving you that perfect coral-like texture.
This technique turns your embroidery into a botanical sculpture.
10. Design a Wildflower Bouquet with Varied Stitches
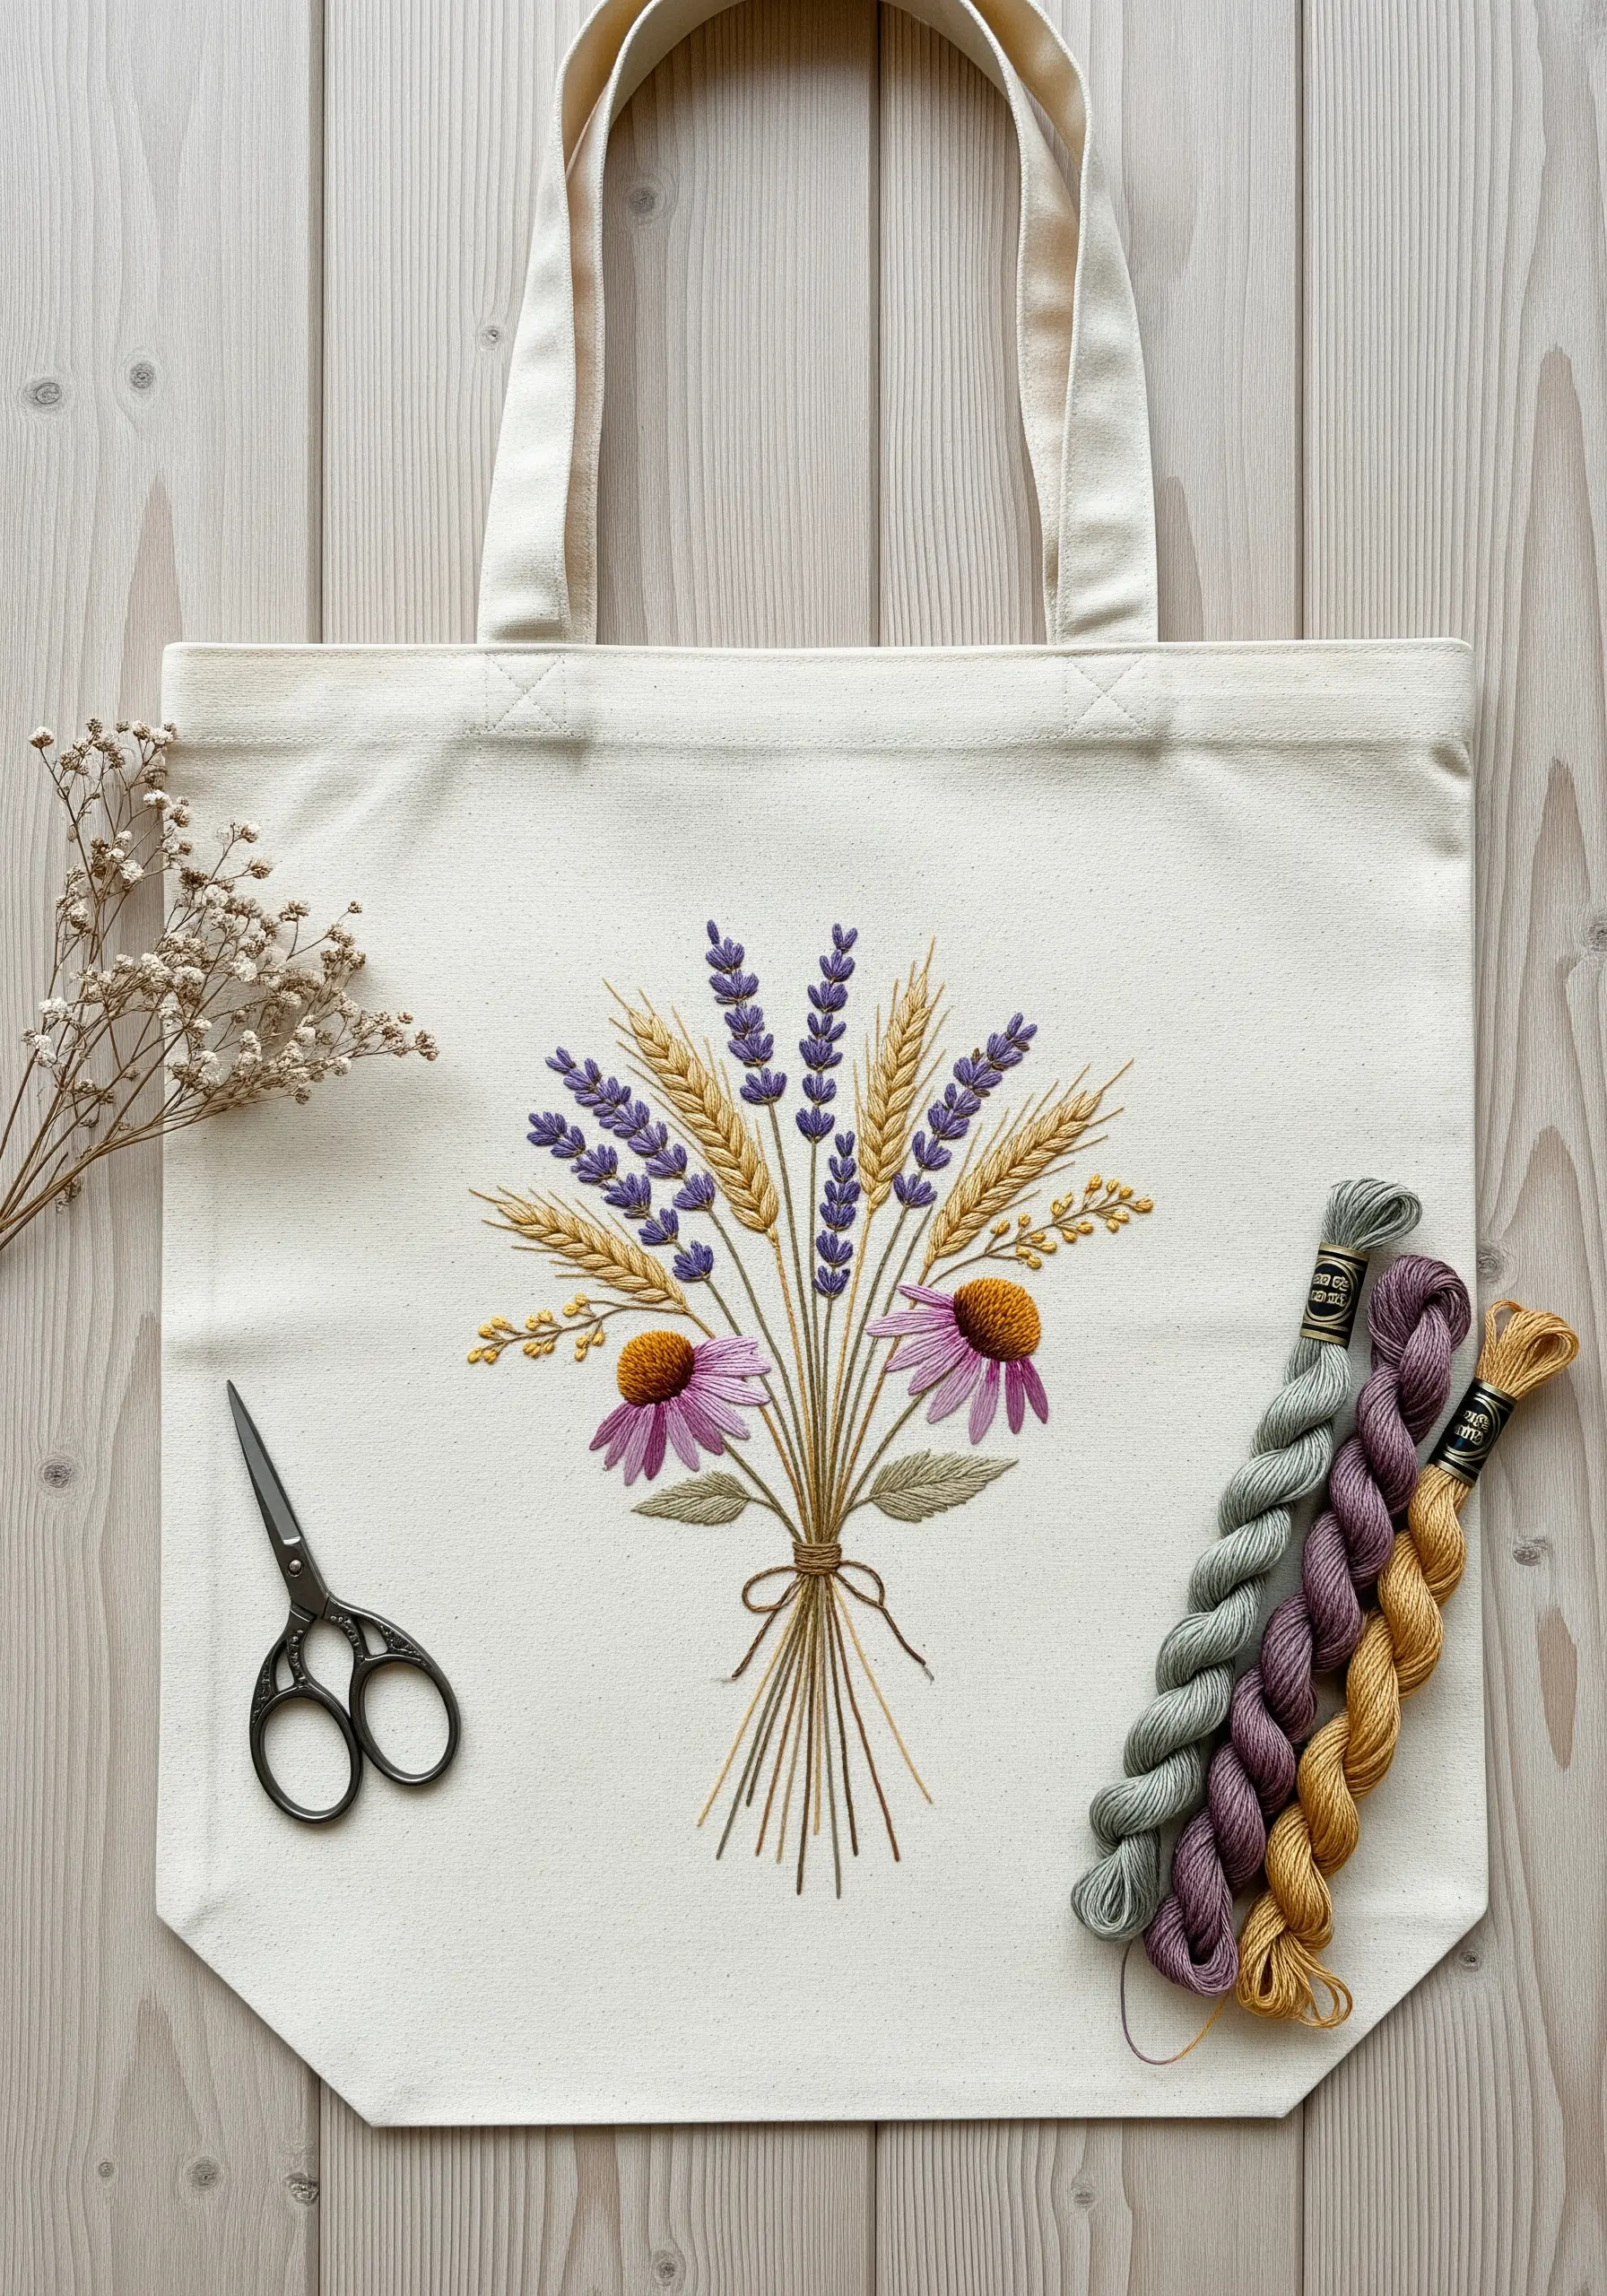
A successful embroidered bouquet relies on textural variety to distinguish each flower.
Instead of using satin stitch for everything, assign a unique stitch to each type of bloom: woven wheels for the full heads of echinacea, bullion knots for lavender sprigs, and lazy daisy stitches for delicate filler flowers.
This simple strategy ensures that even flowers of a similar color will stand out, making your composition more lifelike and visually engaging. It’s perfect for modern tote bag embroidery designs.
11. Stitch a Celestial Map with Metallic Thread
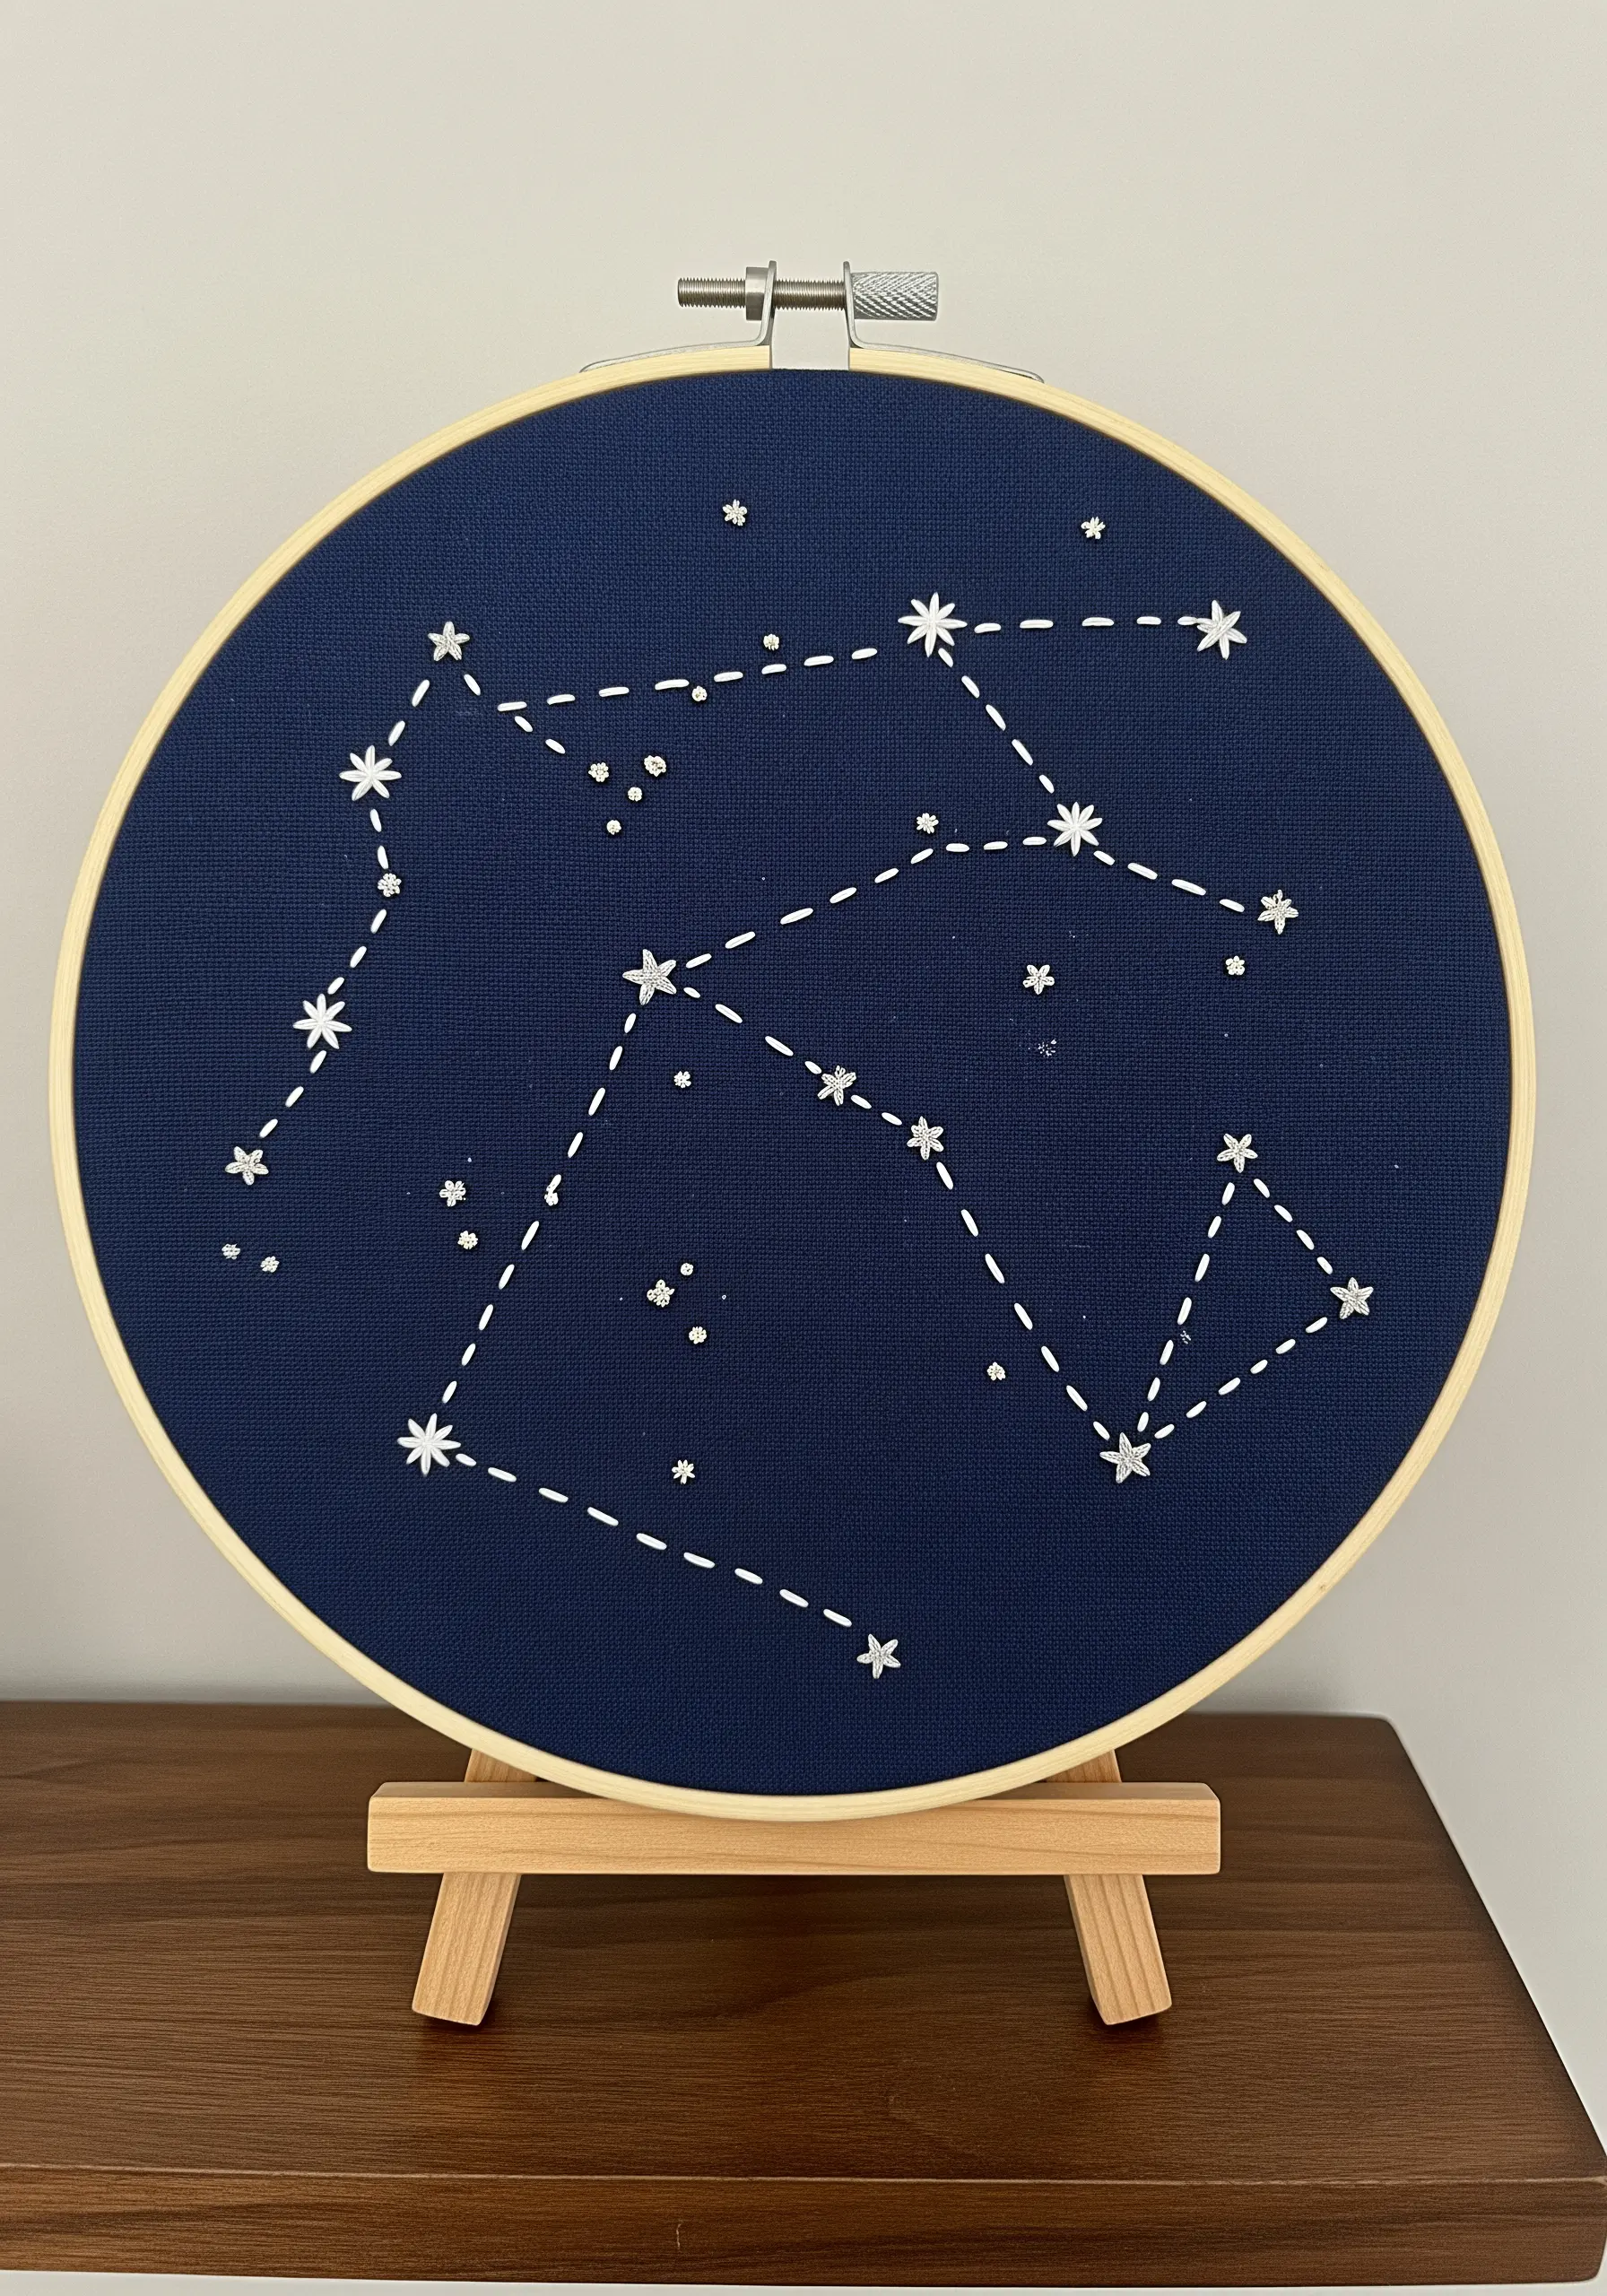
When embroidering the night sky, your thread choice makes all the difference.
Use a single strand of a high-quality metallic silver or pearlescent white thread to ensure your constellation lines are crisp and fine.
For the stars themselves, vary your stitch: use a tiny French knot for brighter stars and a simple seed stitch (a single, small straight stitch) for fainter ones.
This subtle variation in size and texture creates a sense of depth and cosmic scale against the dark fabric background.
12. Explore Monochrome Coral Textures

You can create incredible depth and visual interest without a wide color palette.
Working in shades of cream and off-white, build an underwater world using only texture as your guide.
Pack French and colonial knots into dense clusters, create fan shapes with buttonhole stitches, and use straight stitches to suggest linear sea grasses.
The play of light and shadow across the different stitch heights and densities is what brings the piece to life, proving that texture can be more powerful than color. It’s a key principle in using neutral colors in embroidery.
13. Trace the Rings of a Tree with Couching
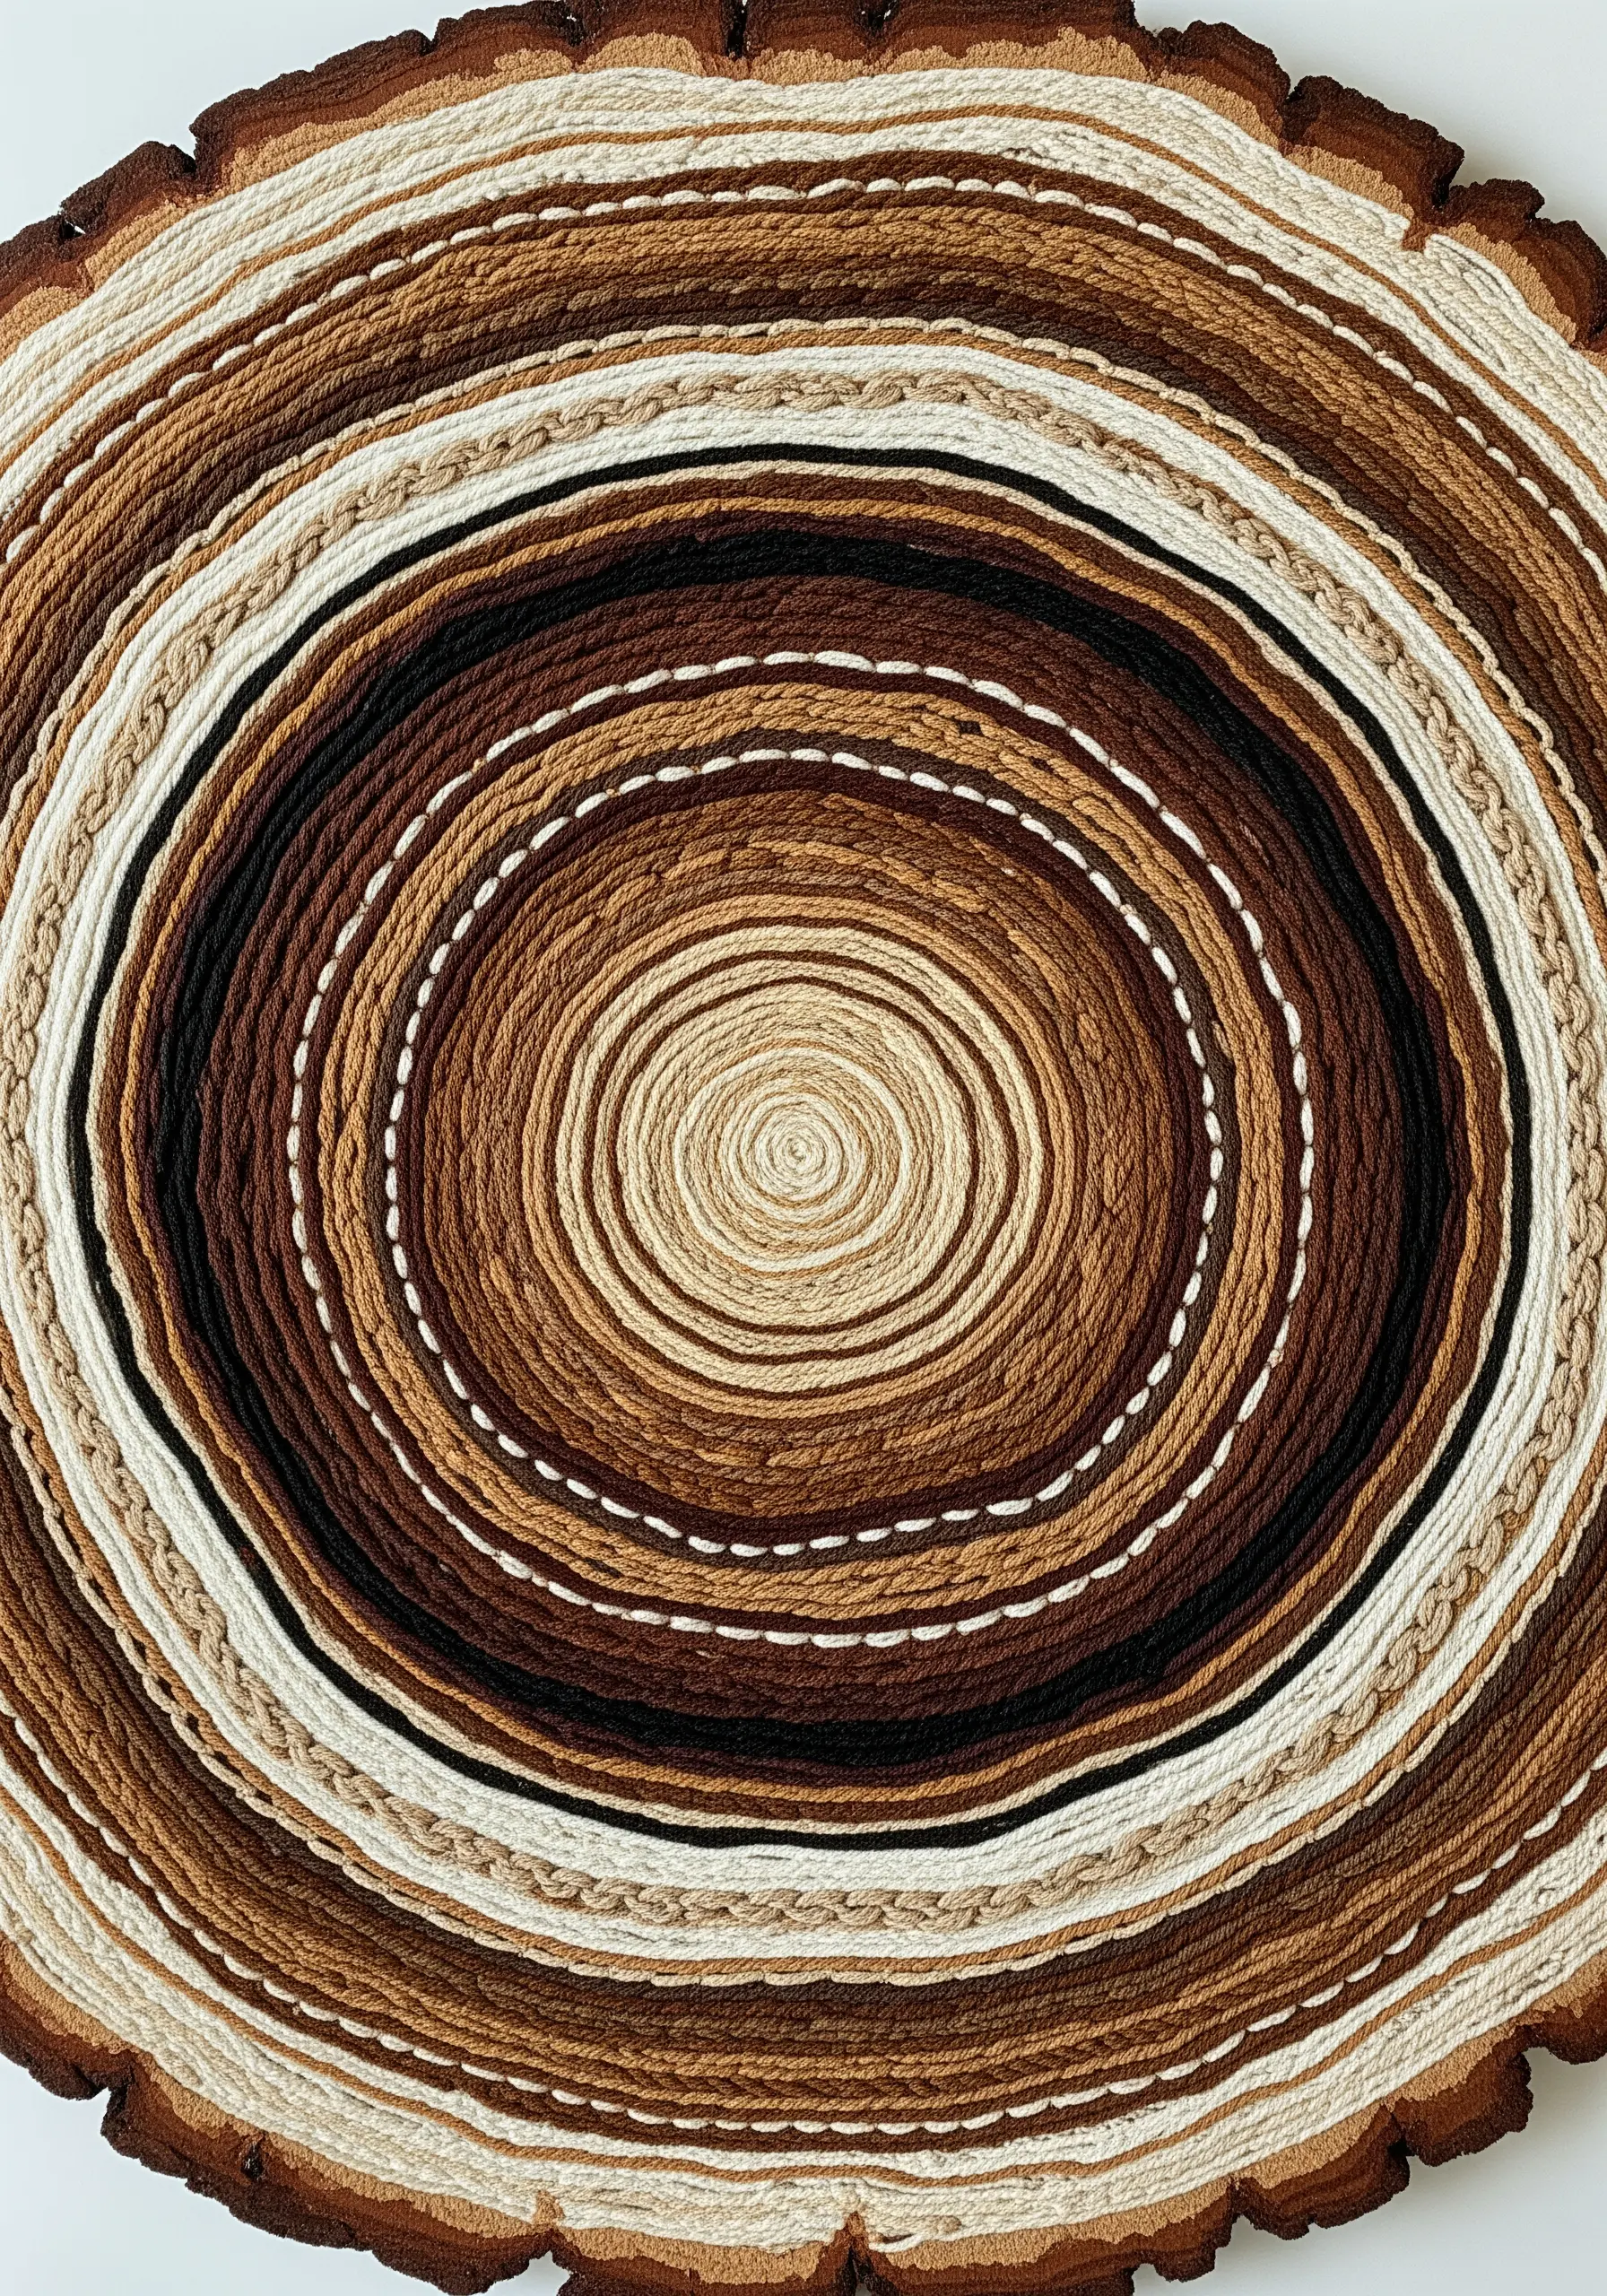
Recreate the organic, concentric pattern of tree rings by focusing on line and material weight.
Instead of trying to fill the area, define it with lines of couched fibers in a spiral pattern.
Alternate between different materials: a thick, soft wool yarn for a wide ring, a thin, smooth cotton floss for a narrow one, and a variegated thread to add subtle color shifts.
This technique is a beautiful and meditative way to explore pattern and texture, turning a simple circle into a story of growth.
14. Create a Crystalline Geode Mandala
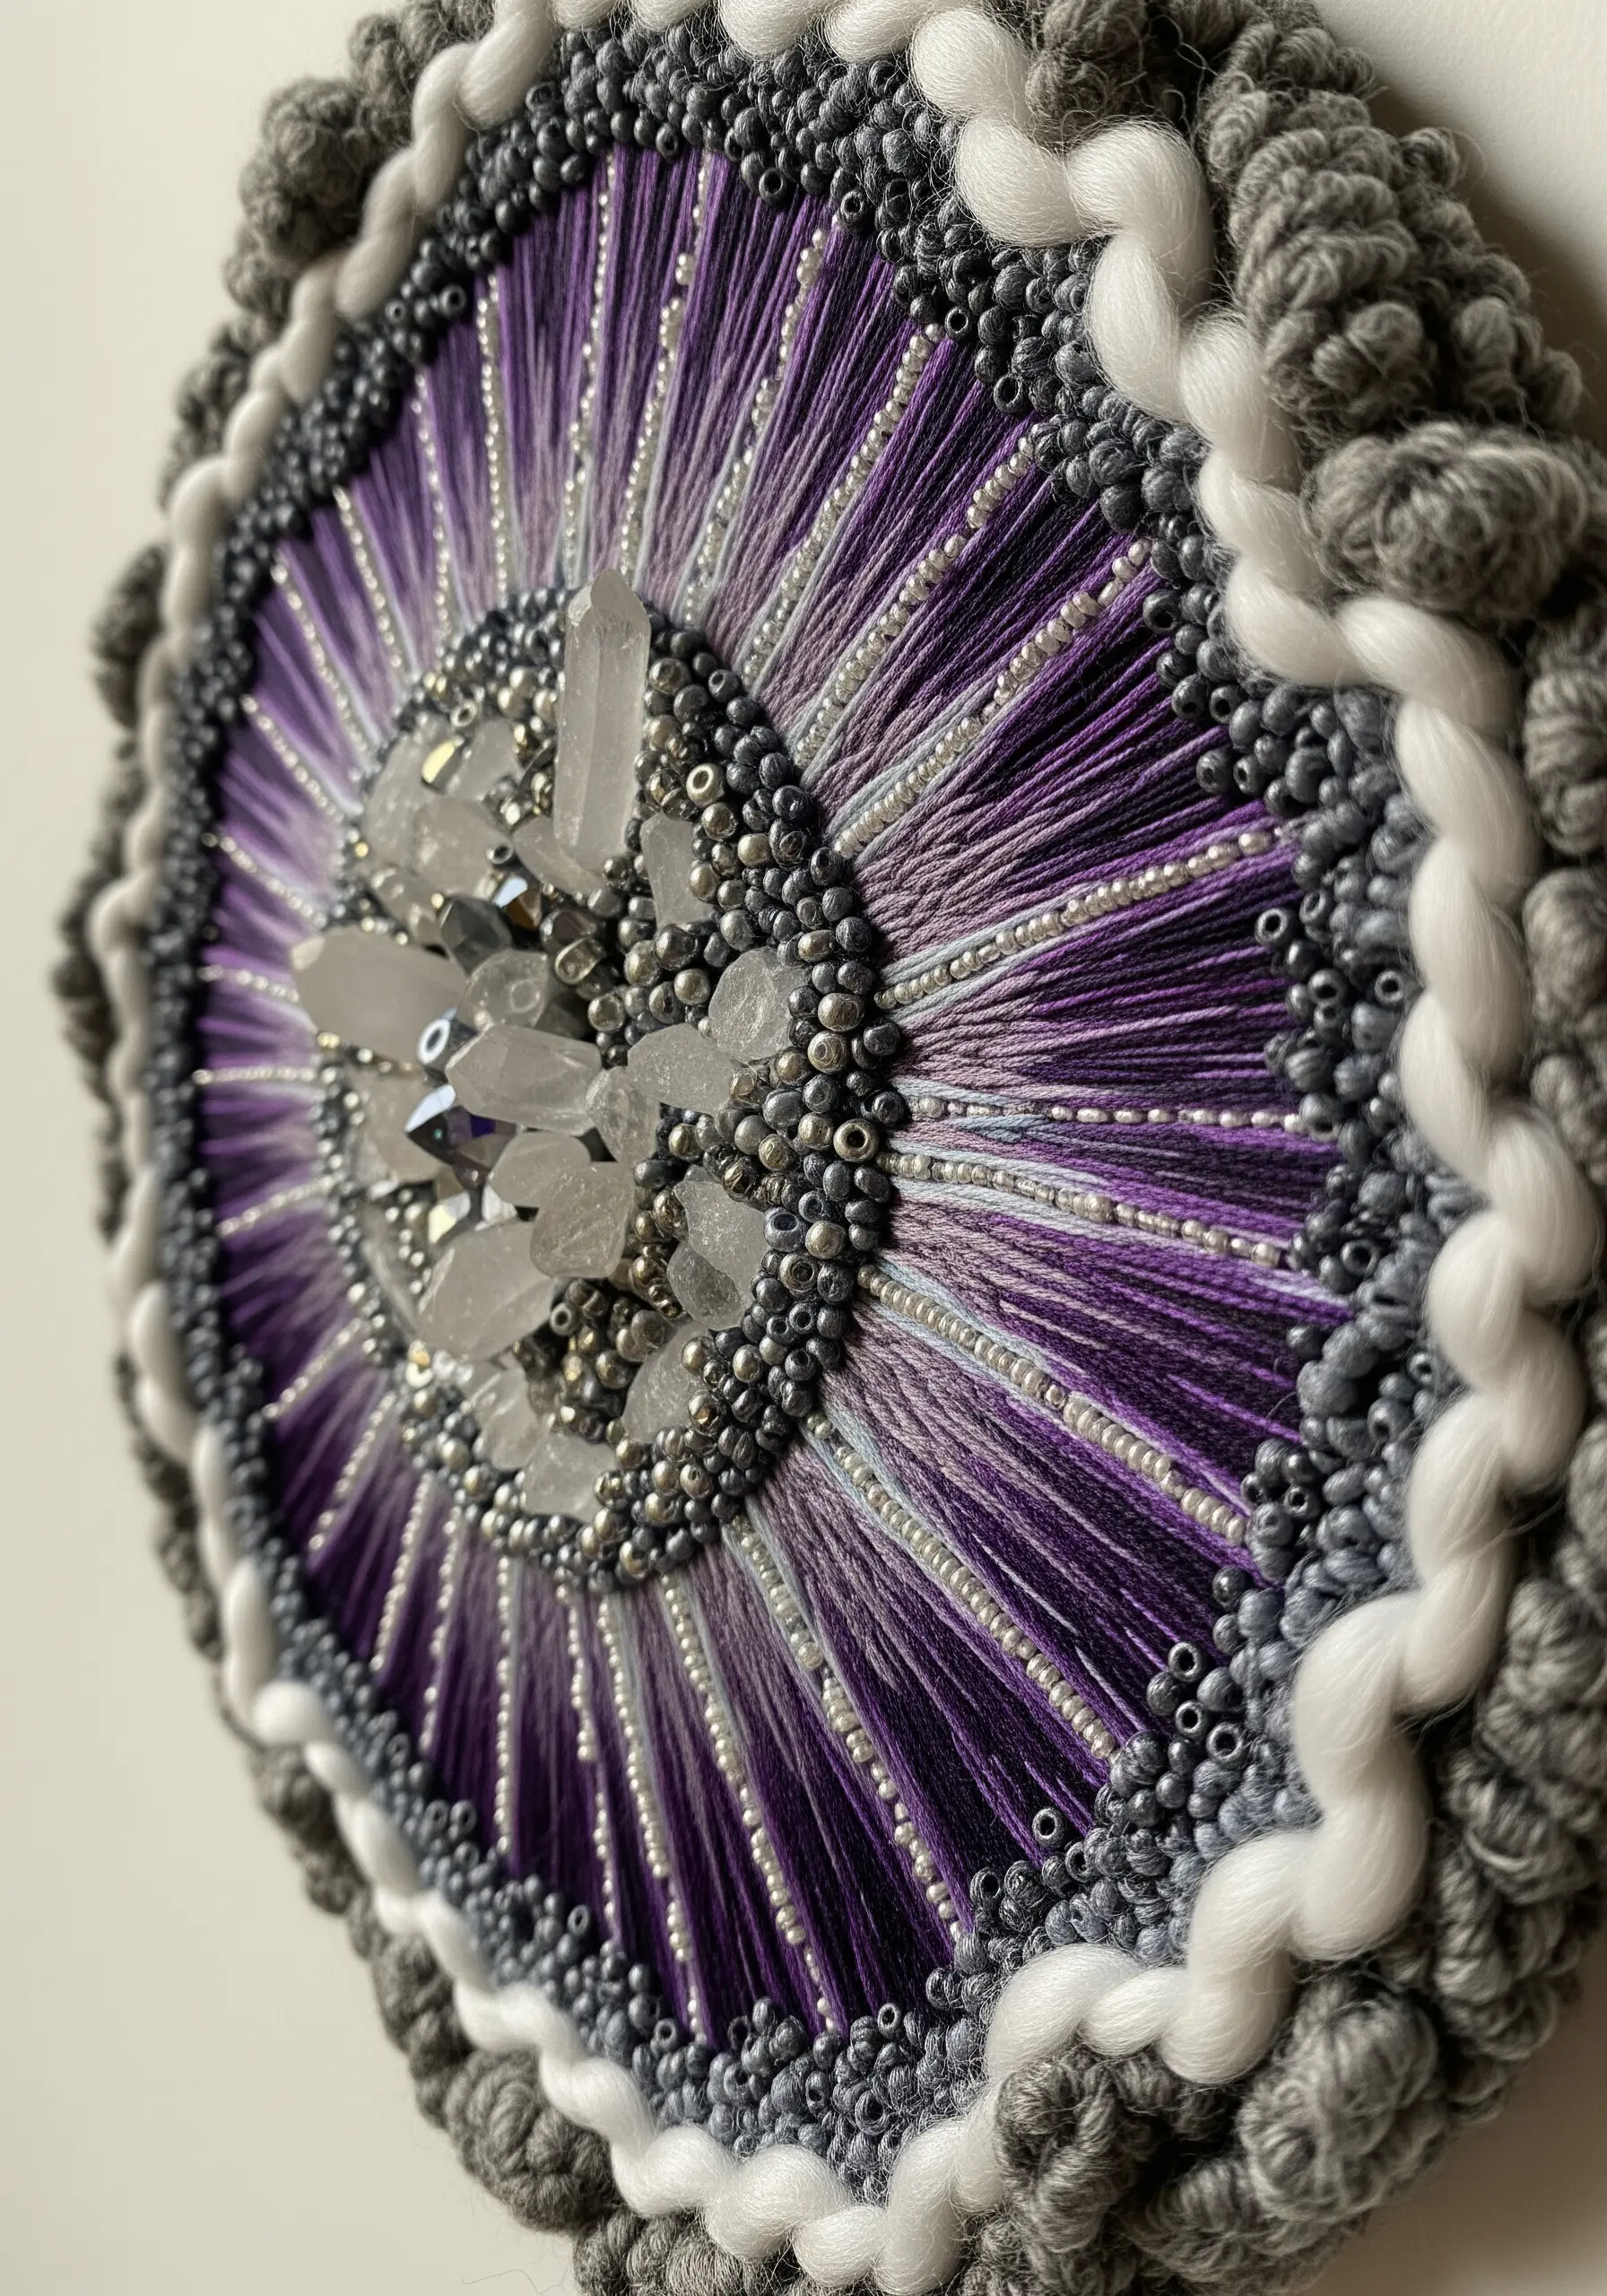
Integrate natural elements directly into your embroidery for a powerful focal point.
Secure a cluster of small quartz crystals or semi-precious beads at the center of your design first, stitching them down firmly through their drill holes or using a bead bezel technique.
Radiate your stitches outwards from this central point, using long straight stitches in colors that complement the stones.
Frame the entire piece with a border of thick, soft yarn to create a satisfying contrast between the hard, reflective crystals and the soft, matte fibers. This is a great example of stunning mixed-fiber projects.
15. Capture a Field of Windswept Grass
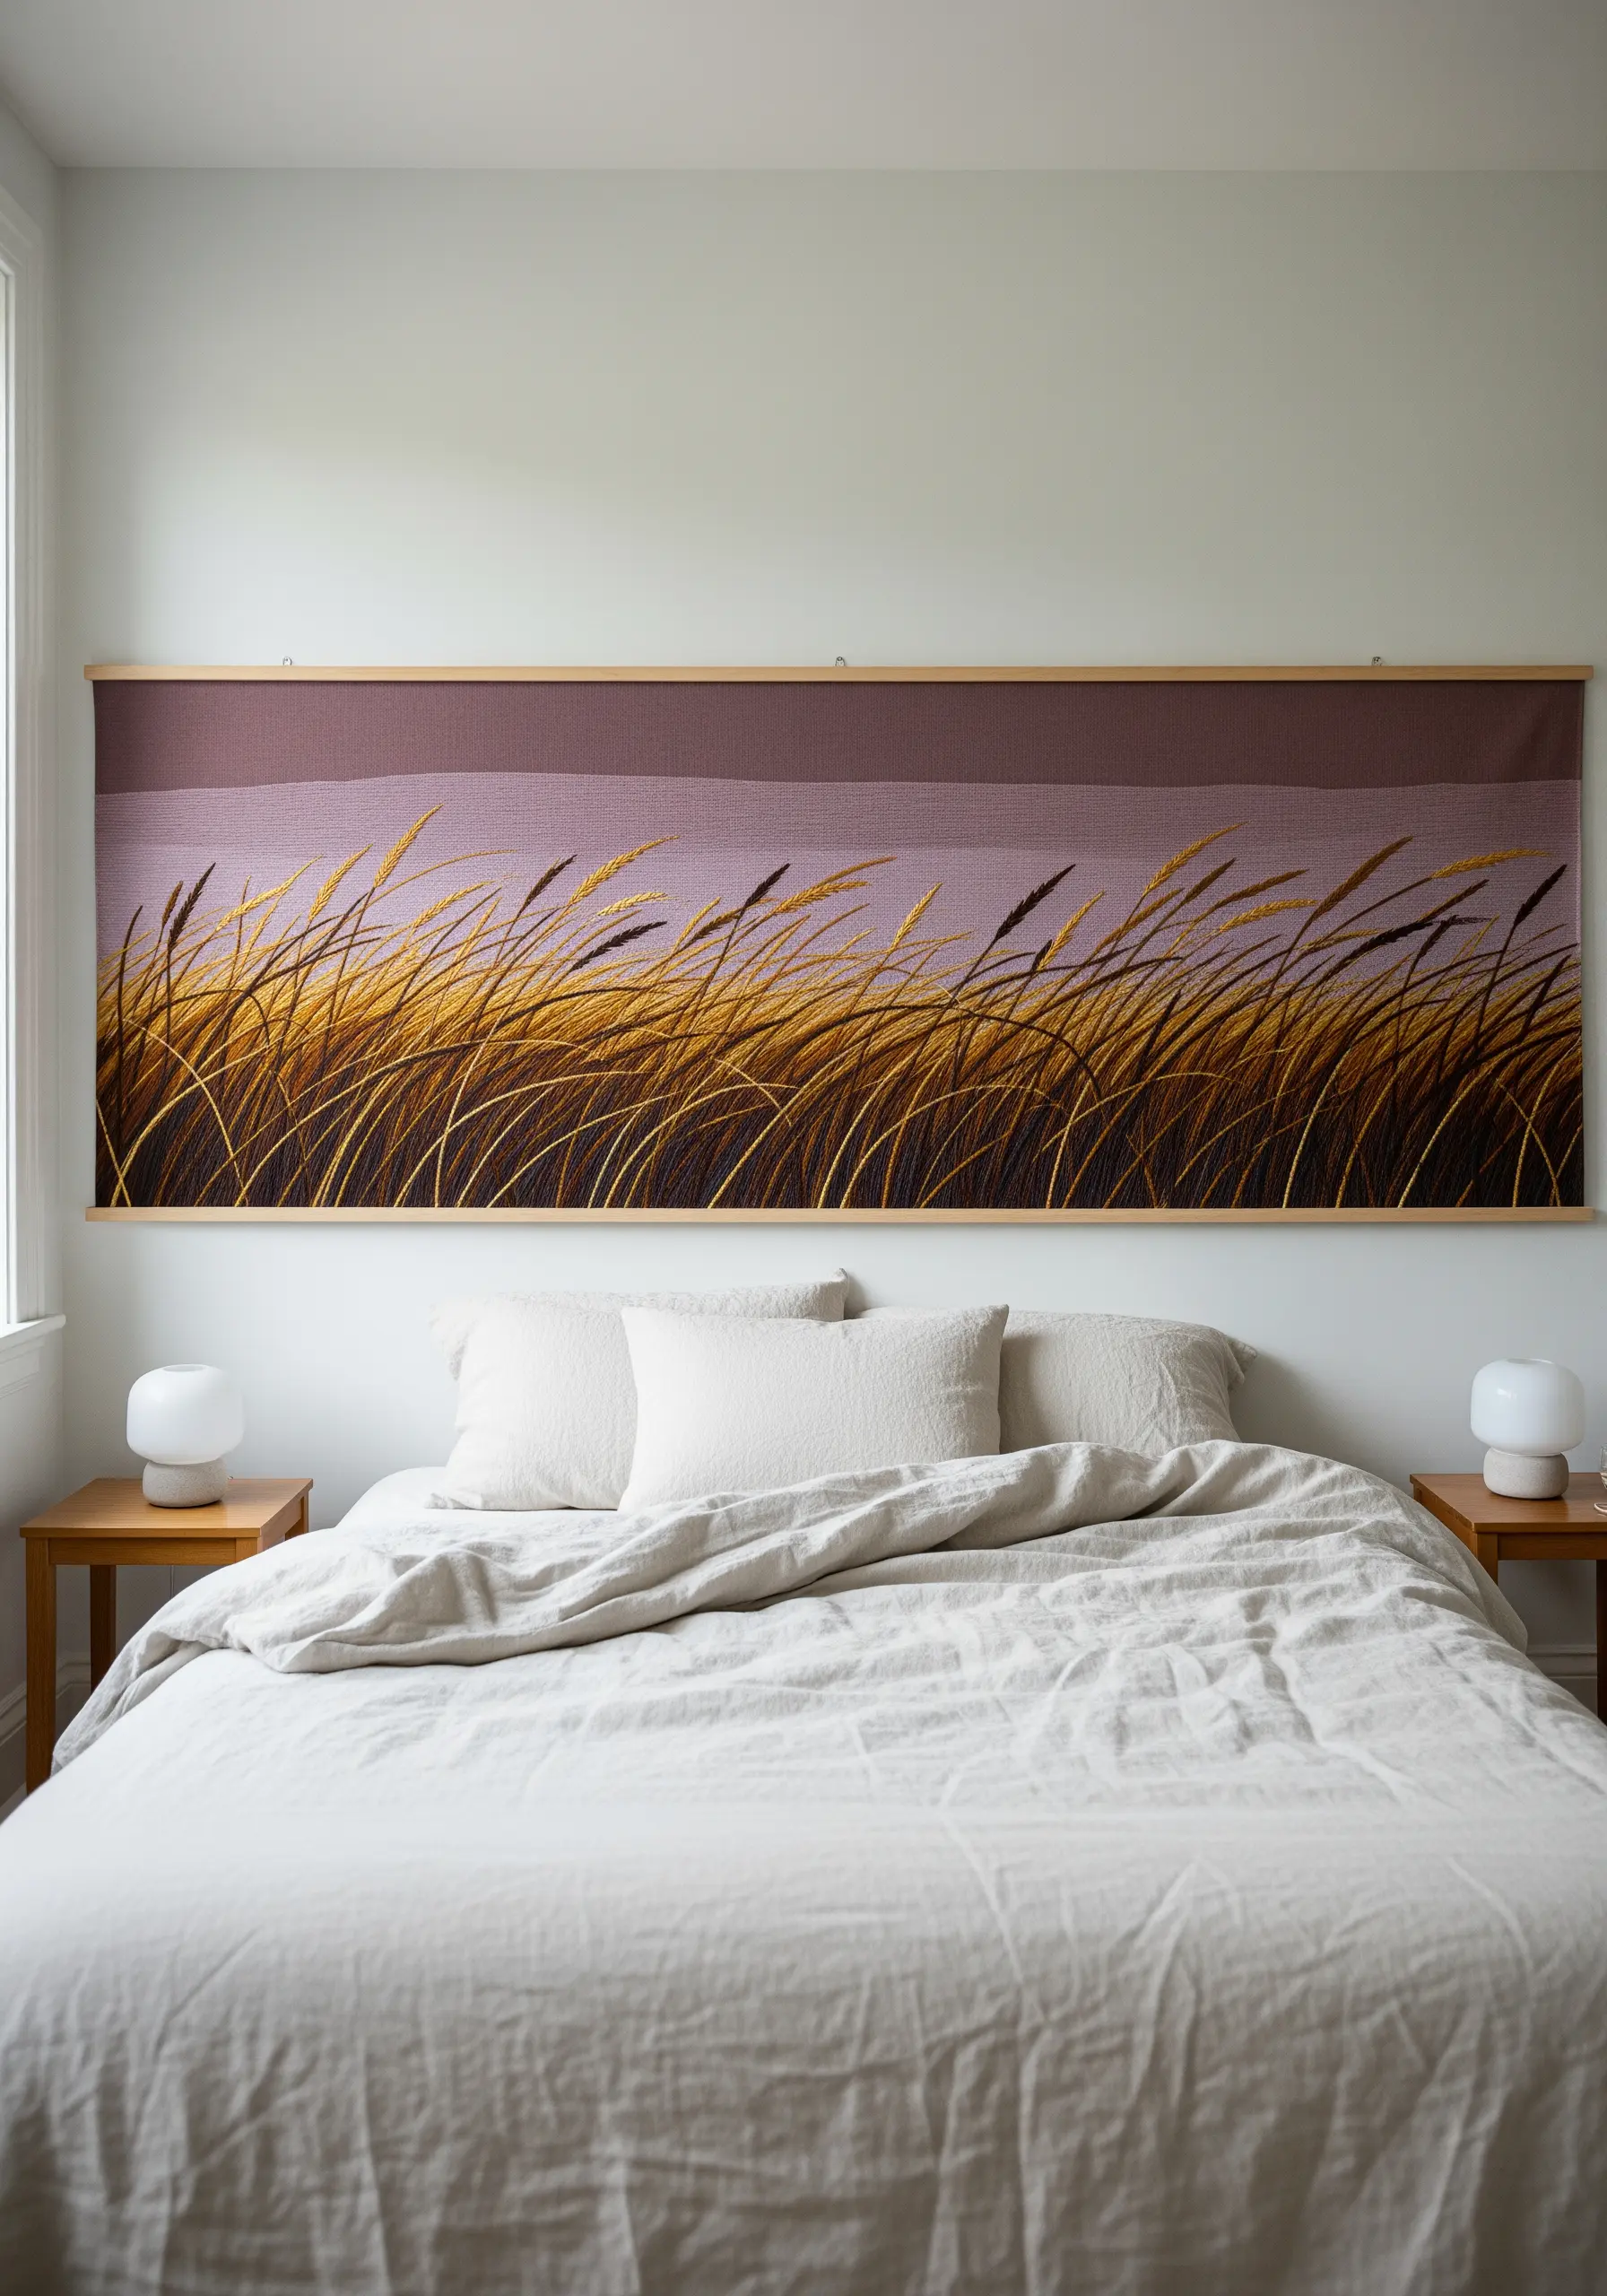
To evoke the feeling of movement in a landscape, the direction and length of your stitches are paramount.
Use single strands of floss in various shades of gold, ochre, and brown to create the grasses.
Instead of uniform stitches, make them long, slightly curved, and overlapping, all leaning in the same general direction as if blown by a gentle wind.
This simple technique of directional stitching is incredibly effective for creating atmosphere and turning a static image into a dynamic scene.
16. Craft a Riverbed Table Runner
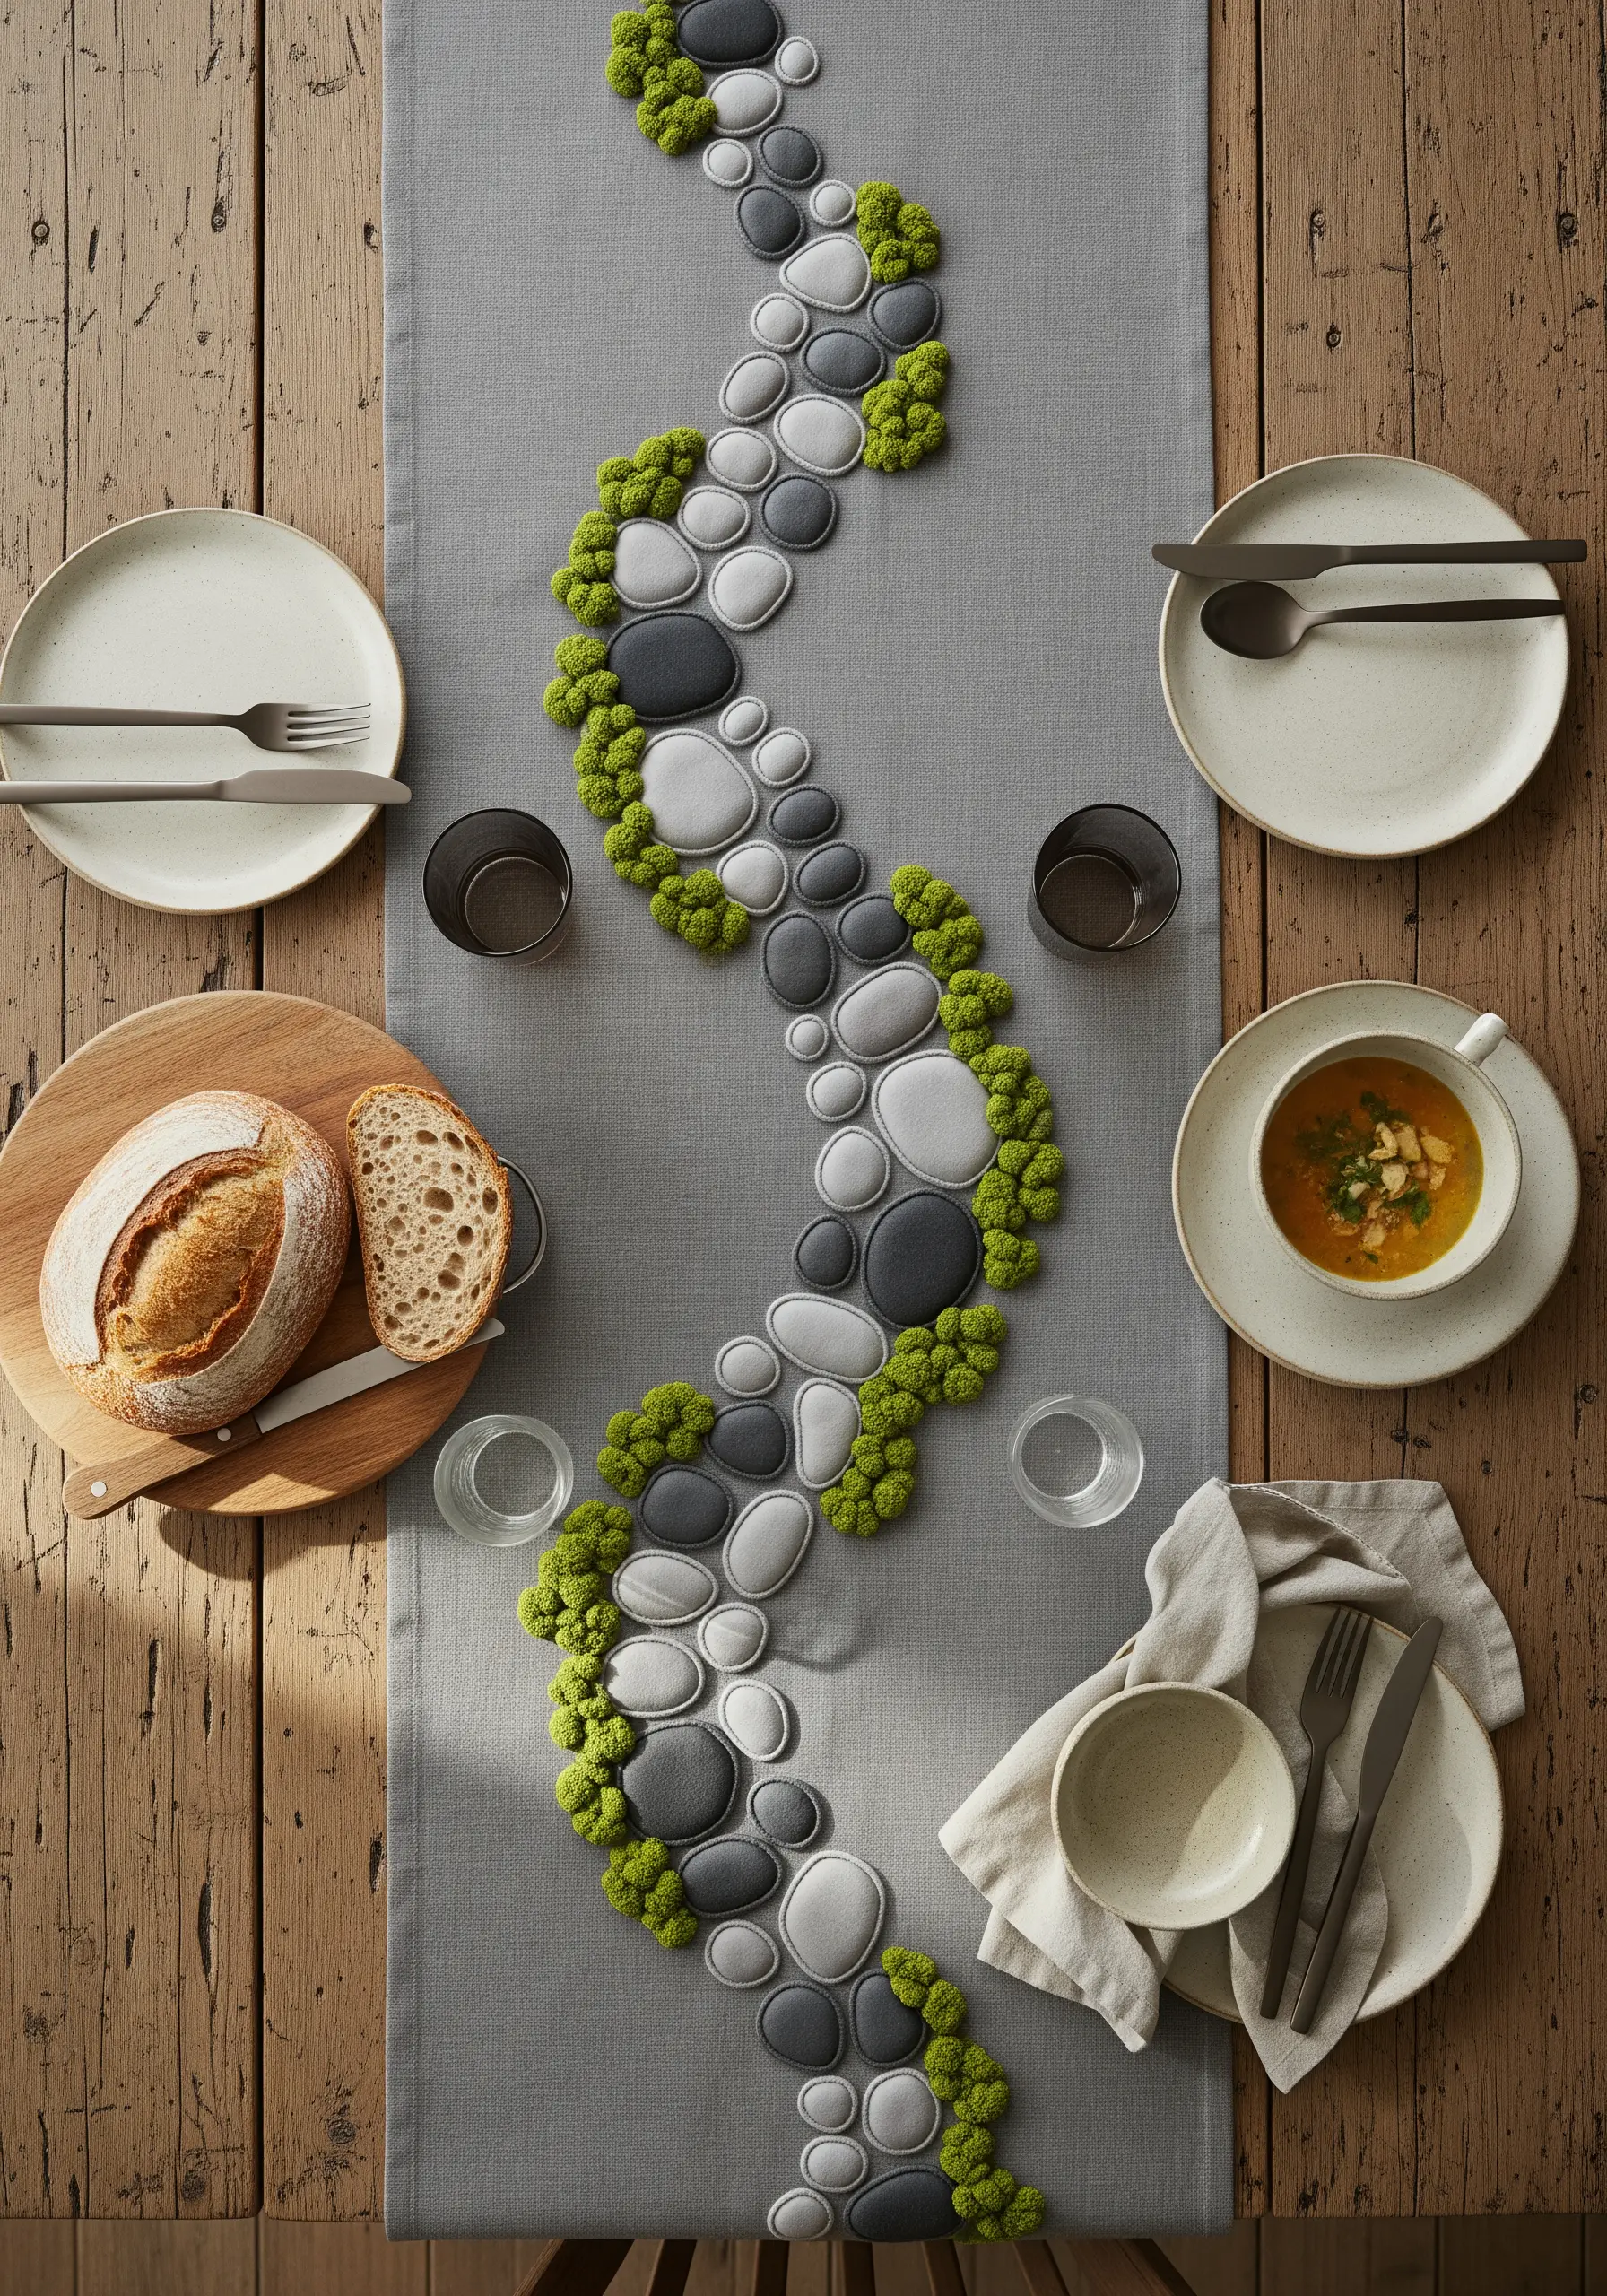
Elevate your table linens by adding three-dimensional, nature-inspired elements.
Create the stones using padded appliqué: cut oval shapes from felt, place them on your runner, and cover them with satin stitches in shades of grey.
For the mossy accents, use the turkey work stitch with a vibrant green chenille thread or yarn, then trim the loops to create a plush, velvety texture.
This combination of smooth, raised stones and soft moss creates an incredible tactile experience for your dining table.
17. Map Topography with a Single Continuous Line
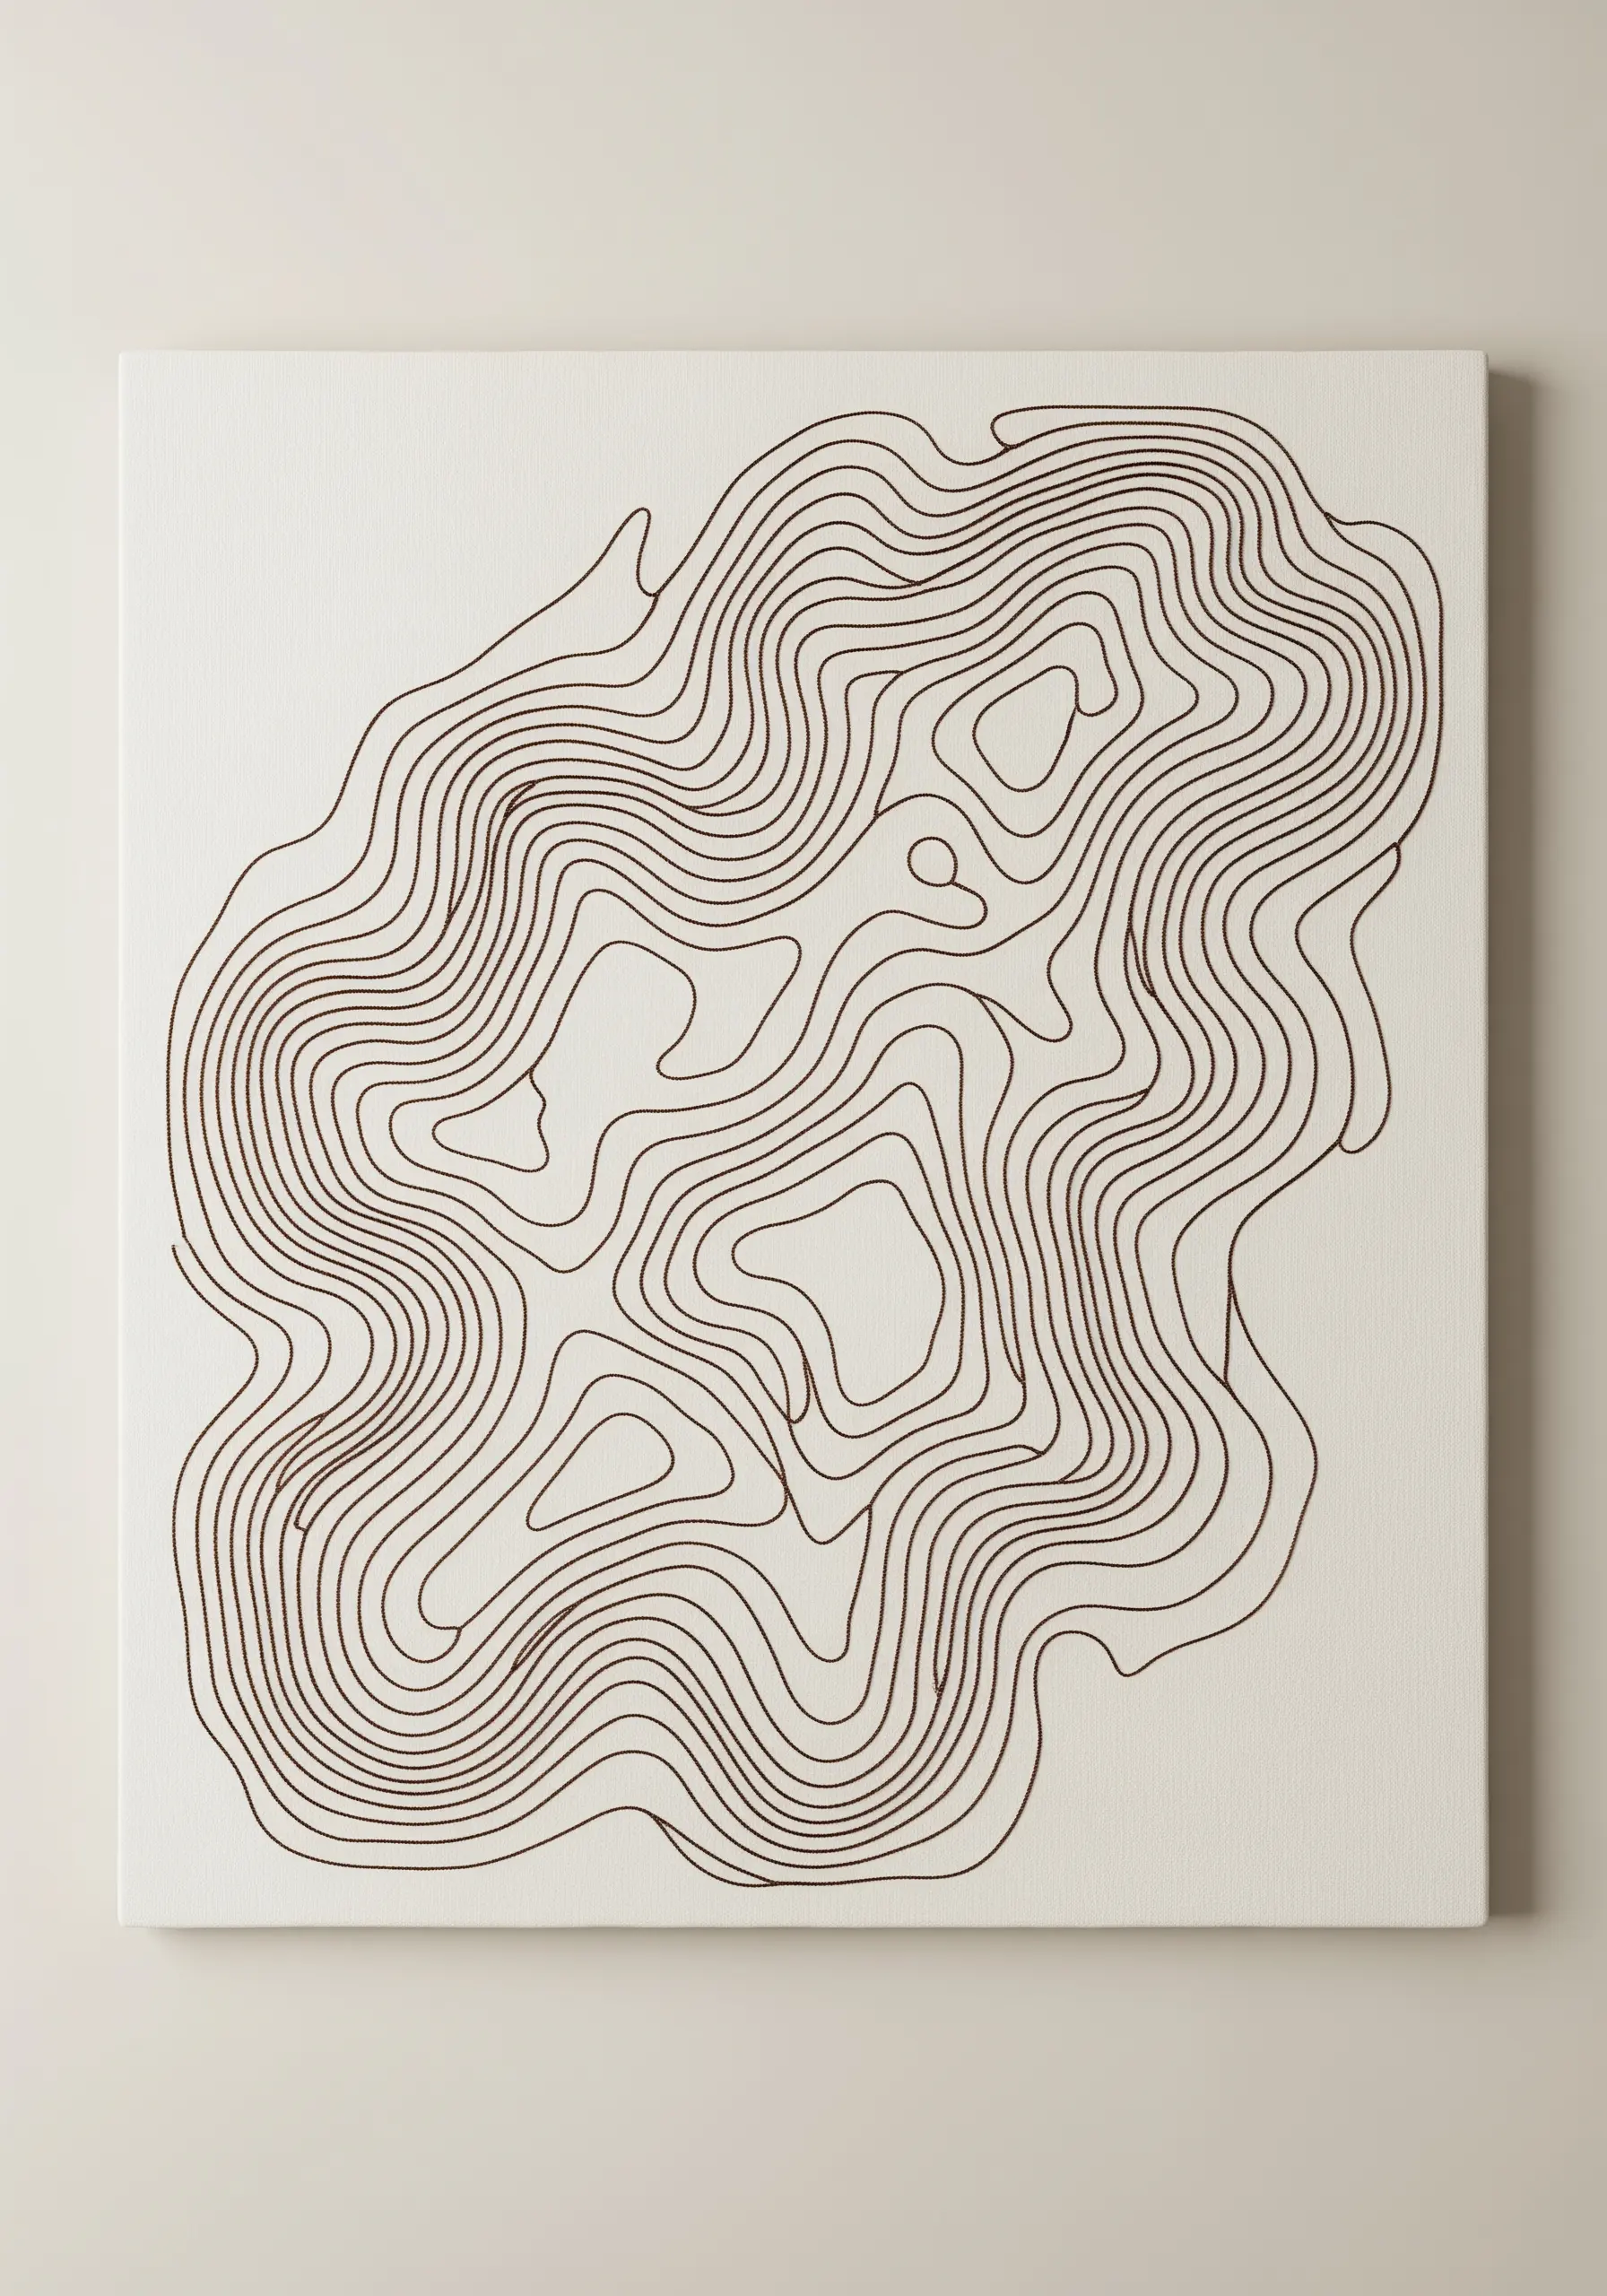
Translate the elegant precision of a topographic map into thread.
For a clean, graphic look, stretch your fabric over a canvas frame instead of using a hoop. This provides a perfectly taut and flat surface.
Use a whipped backstitch with a single, dark-colored thread to create lines that are exceptionally smooth and continuous, without the stepped look of a standard backstitch.
The result is a sophisticated piece of minimalist line art embroidery that feels both scientific and deeply organic.
18. Weave Volcanic Textures with Knotted Stitches
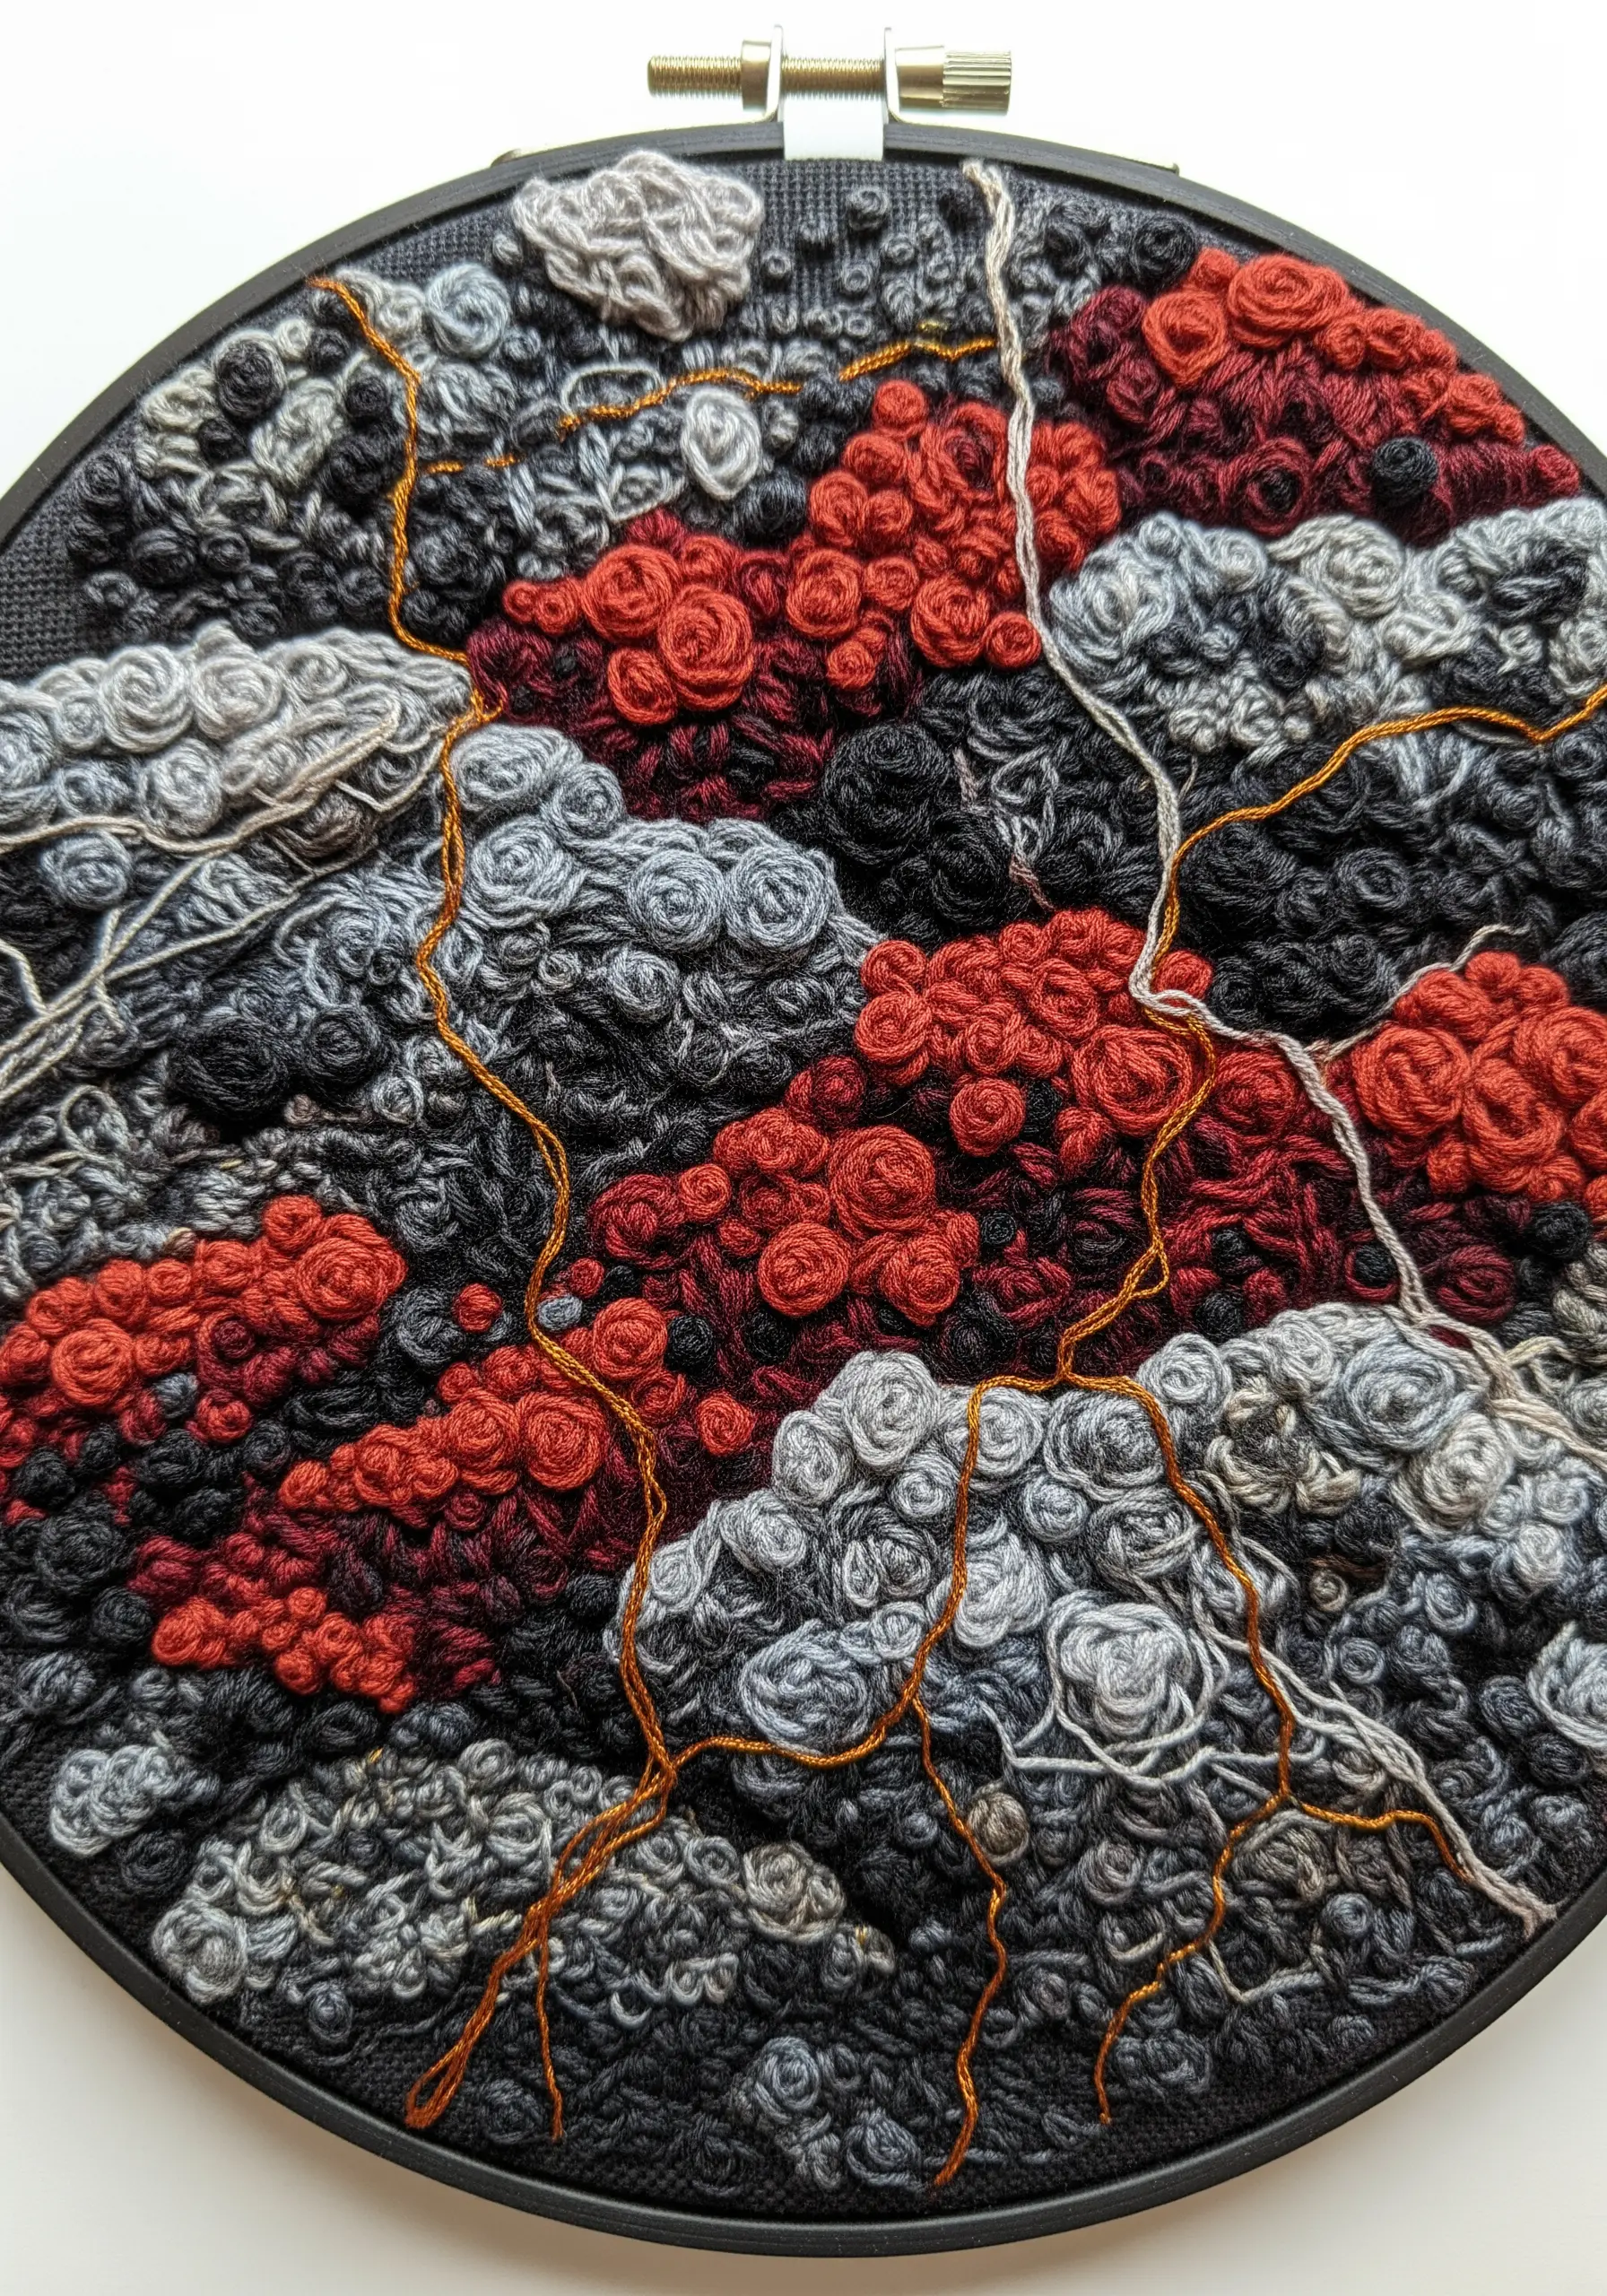
To capture the raw, chaotic texture of cooling lava, you need stitches that create intense dimension.
Fill large areas with woven picot stitches; these detached, three-dimensional stitches can be clustered together to form highly textured mounds.
Contrast these with tightly packed French knots in adjacent sections to create a different kind of granular surface.
Finally, trace a thin, crack-like line through the composition with a single strand of gold metallic thread to represent a glowing fissure, adding a dramatic finishing touch.
19. Embroider a Translucent Leaf Skeleton
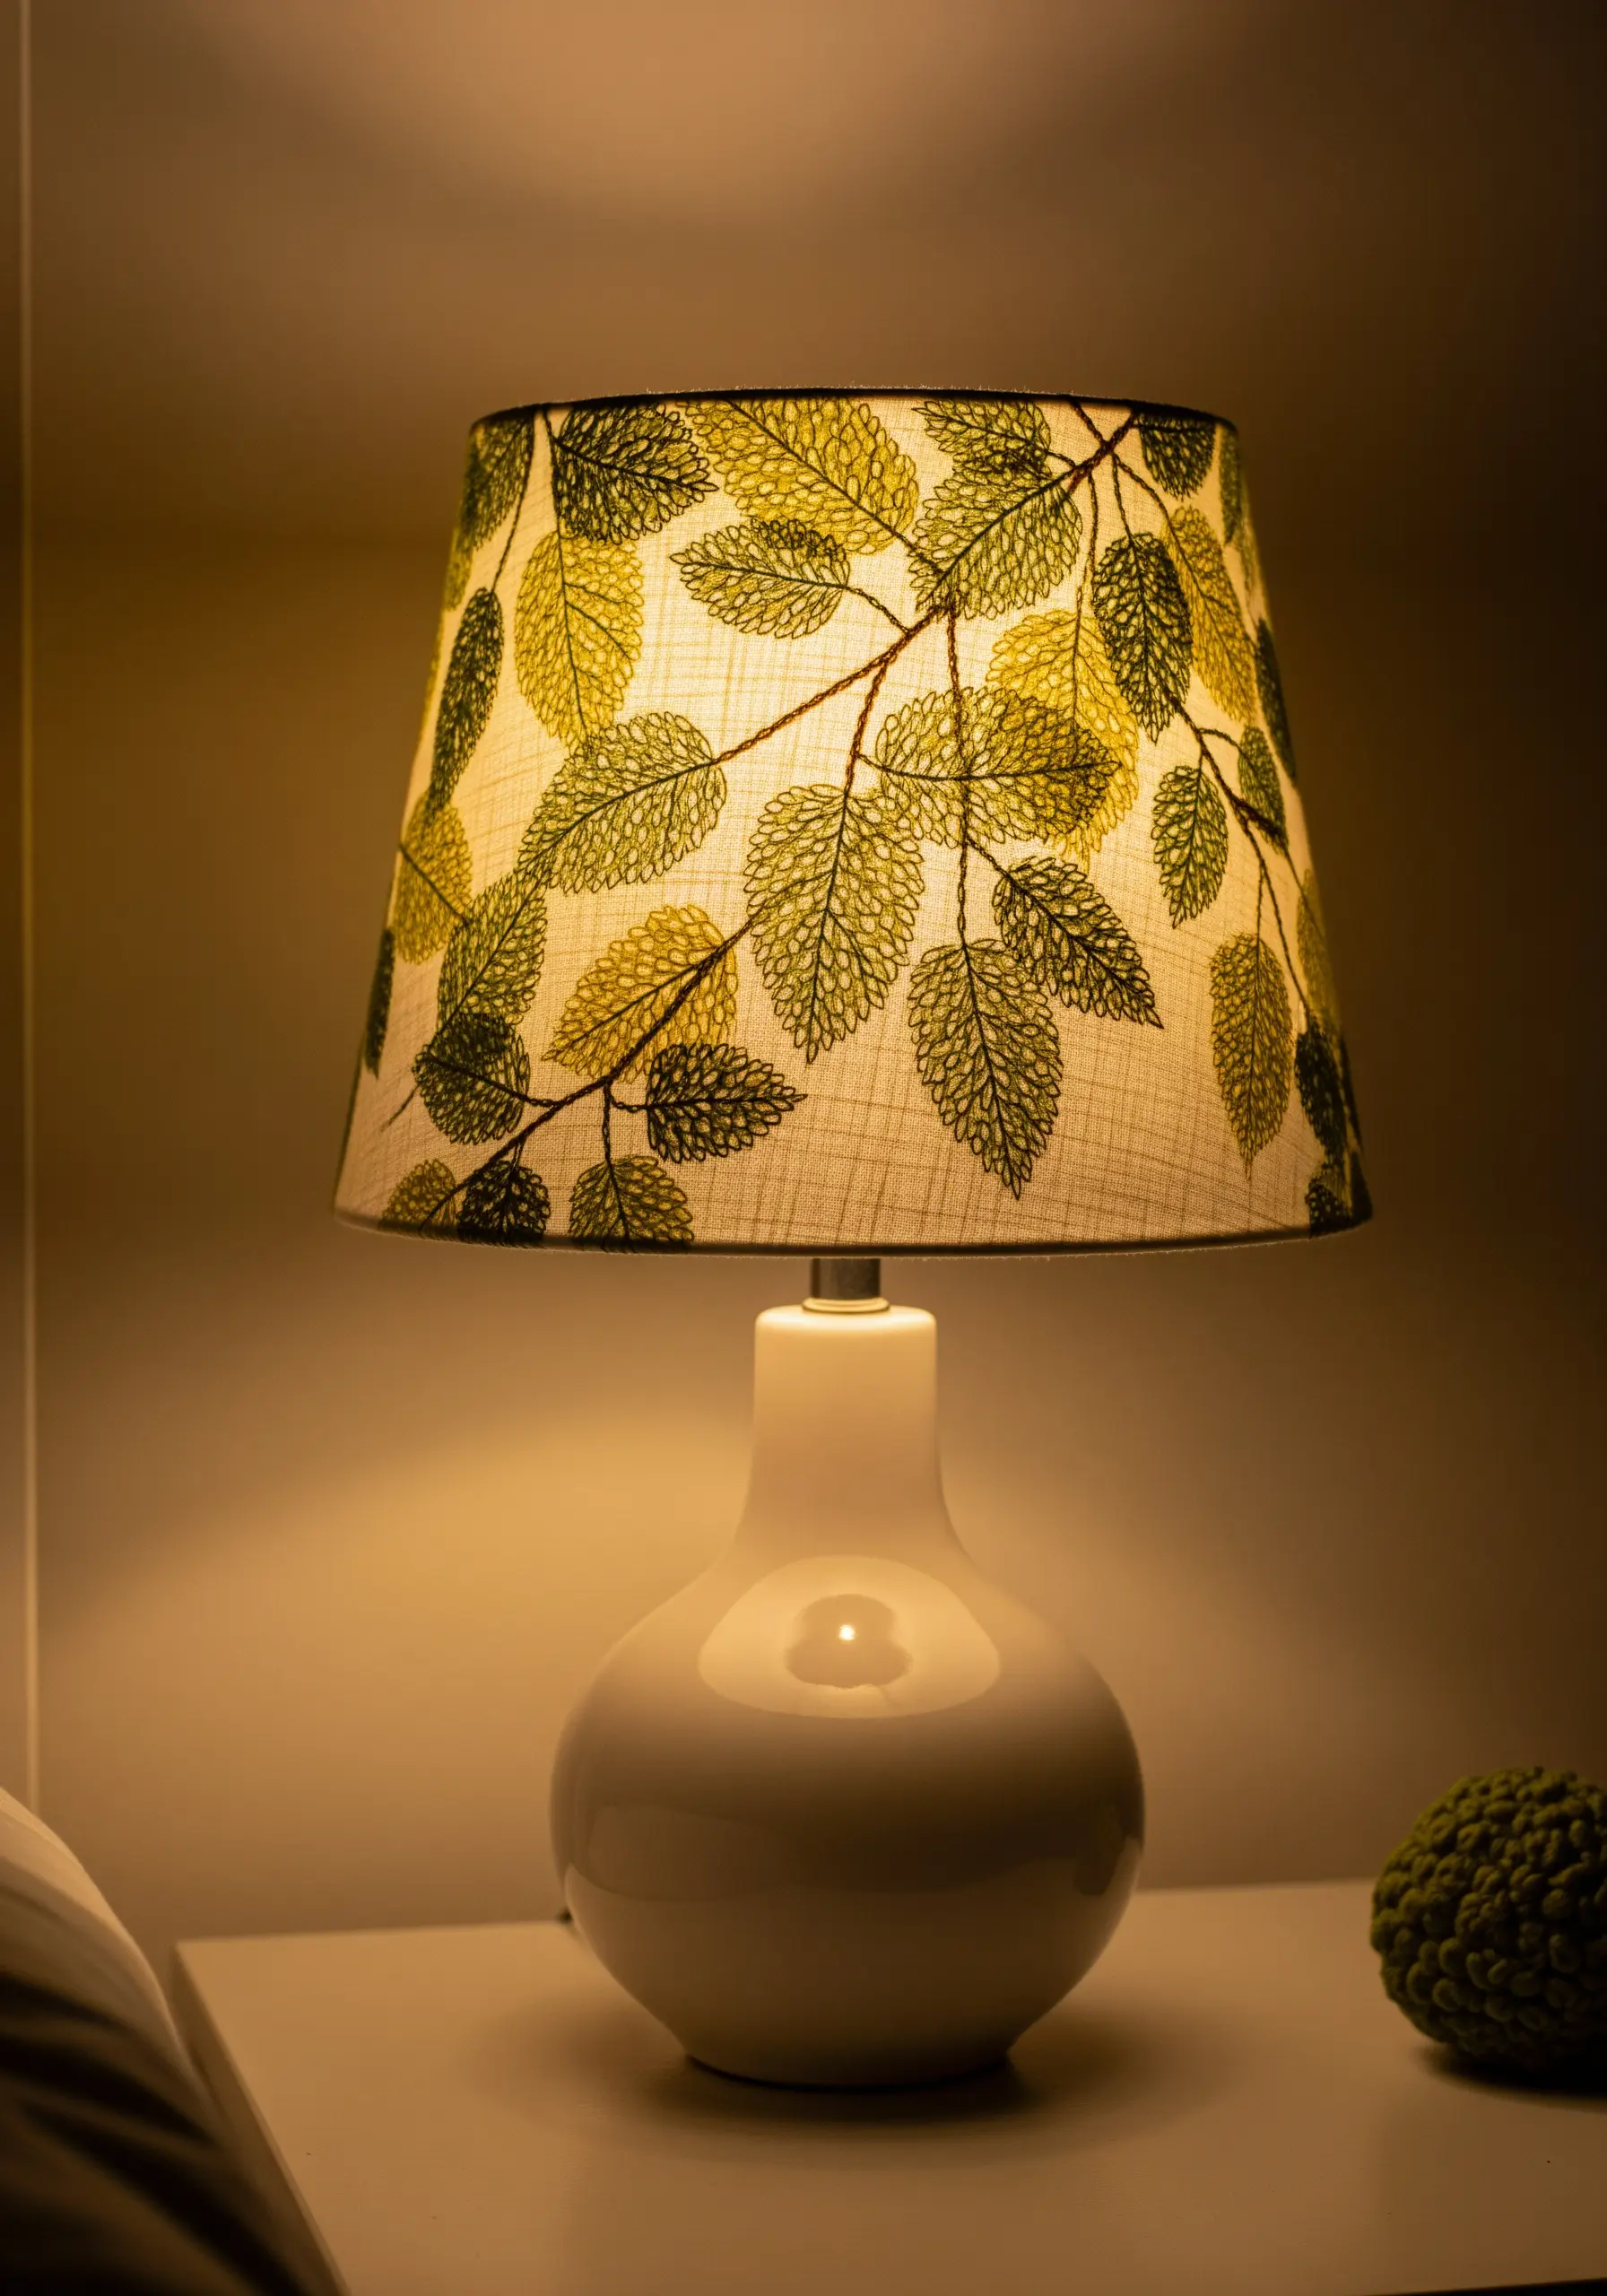
Stitching on a translucent surface like a lampshade creates a magical, light-filtering effect.
To prevent puckering on the delicate fabric, secure a piece of tear-away stabilizer to the inside of the shade before you begin stitching.
Use a simple backstitch or stem stitch with a fine thread to trace the intricate veins of the leaves.
When you turn on the lamp, the embroidered lines will be thrown into silhouette, transforming your stitching into a beautiful, glowing piece of functional art.
20. Define a Fern with the Fishbone Stitch
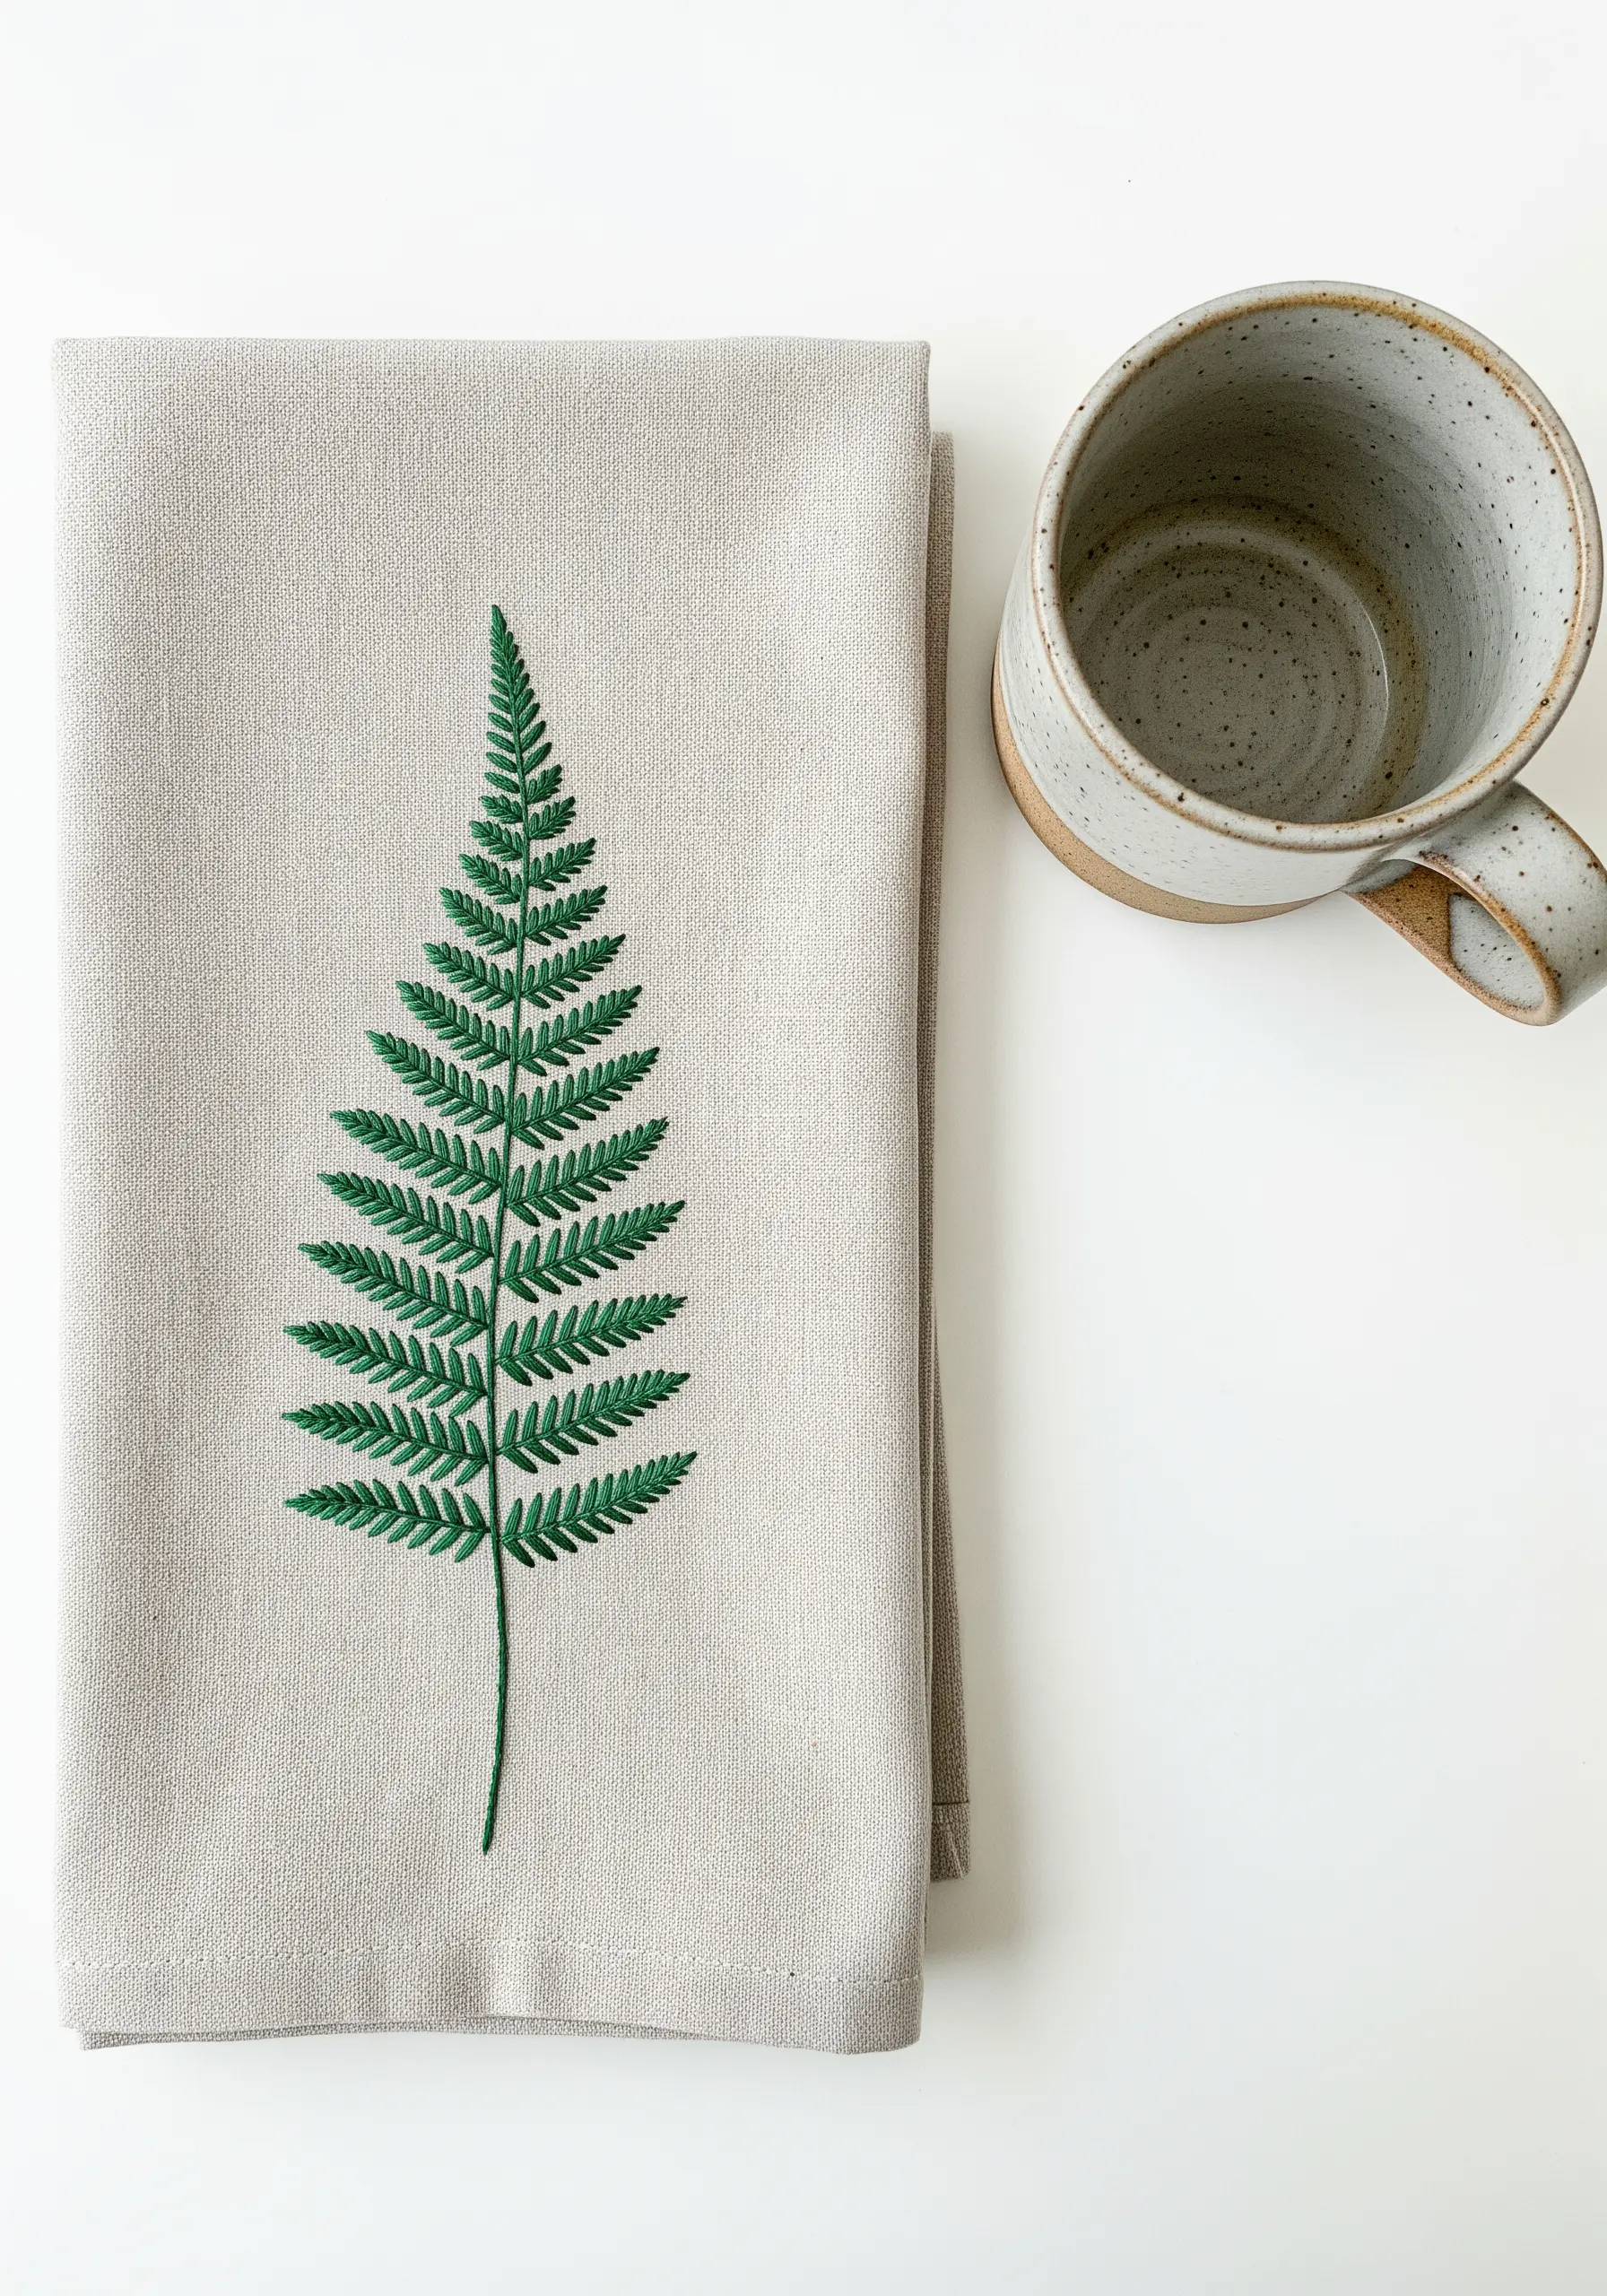
For certain botanical shapes, one stitch does the job better than any other. For ferns, it’s the fishbone stitch.
This stitch creates a central spine and angled sides all in one motion, perfectly replicating the structure of a fern frond.
Use a consistent tension and stitch length for a clean, professional finish that highlights the elegant geometry of the plant. This simple choice elevates a basic motif into a refined piece of fern and foliage art.
21. Sculpt a Nest with Unconventional Fibers
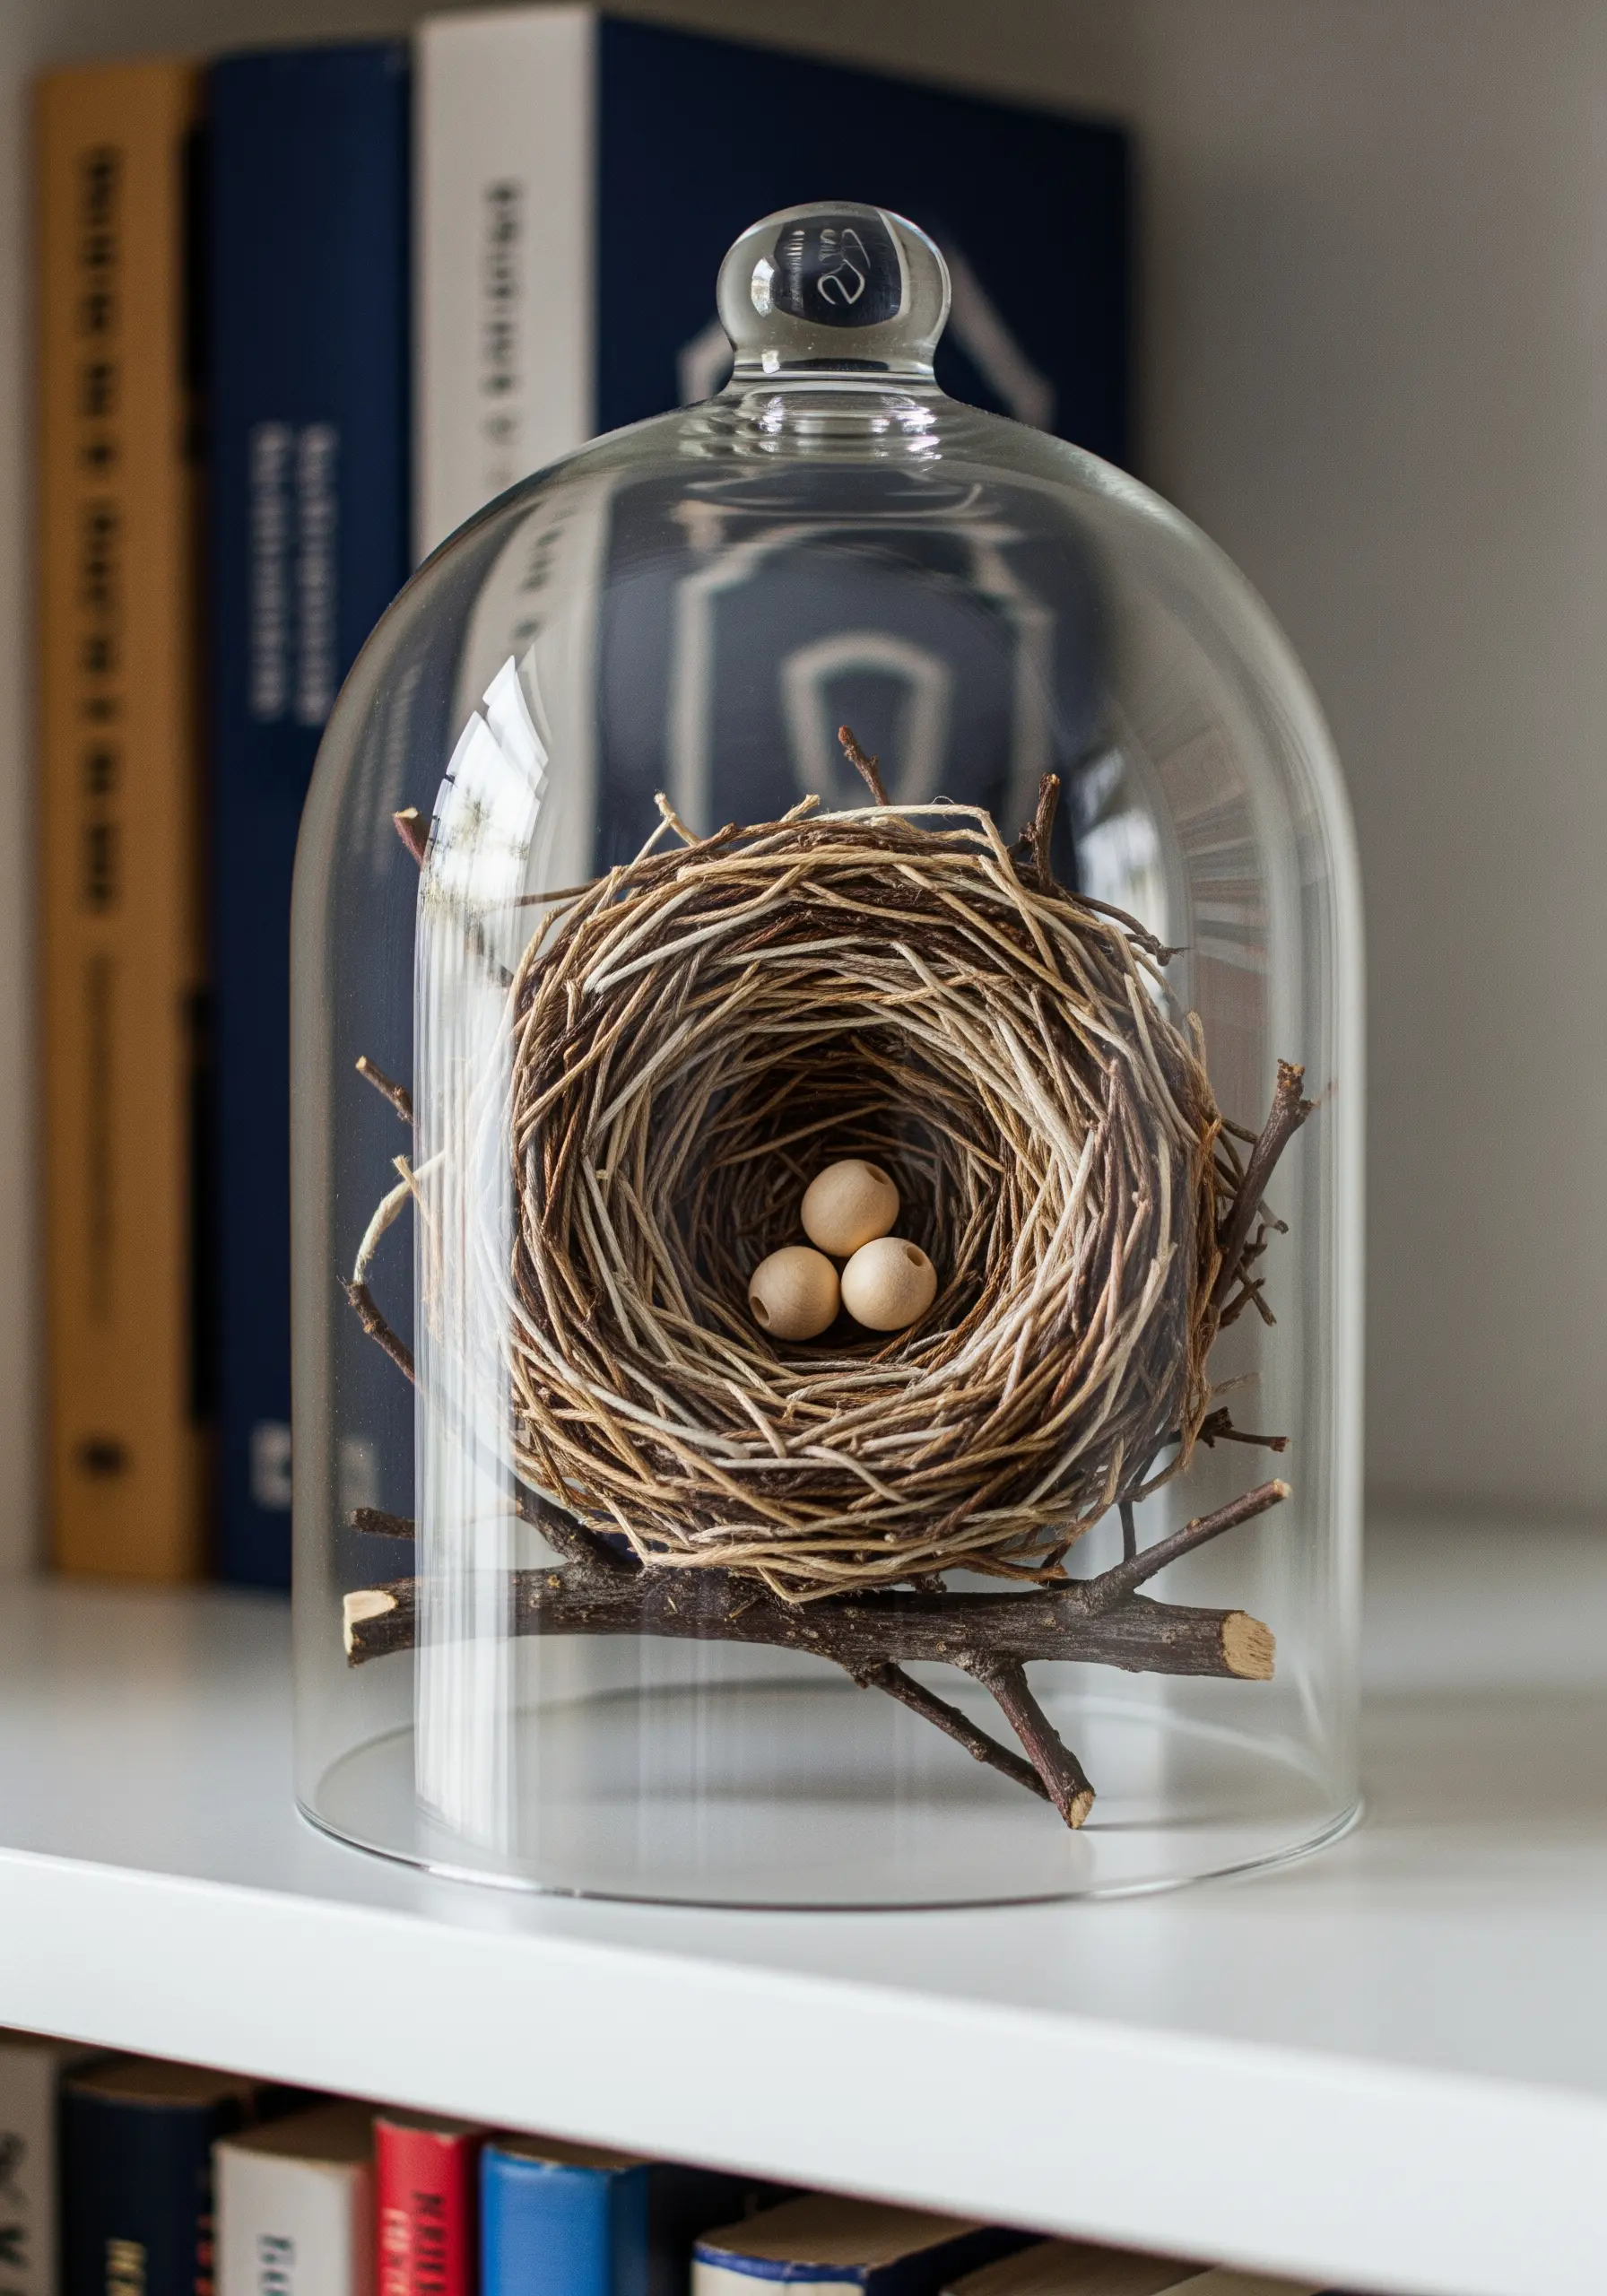
Sometimes, the most evocative textures come from looking beyond standard embroidery floss.
To create the rough, interwoven structure of a bird’s nest, try couching down natural fibers like jute, raffia, or even dried grasses.
Lay down the fibers in a swirling, layered pattern and use a strong, neutral-colored thread to tack them into place.
This mixed-media approach is less about precision and more about capturing the wild, organic essence of your subject, resulting in handmade art pieces that tell a story through texture.
22. Carve Gentle Waves with Chain Stitch
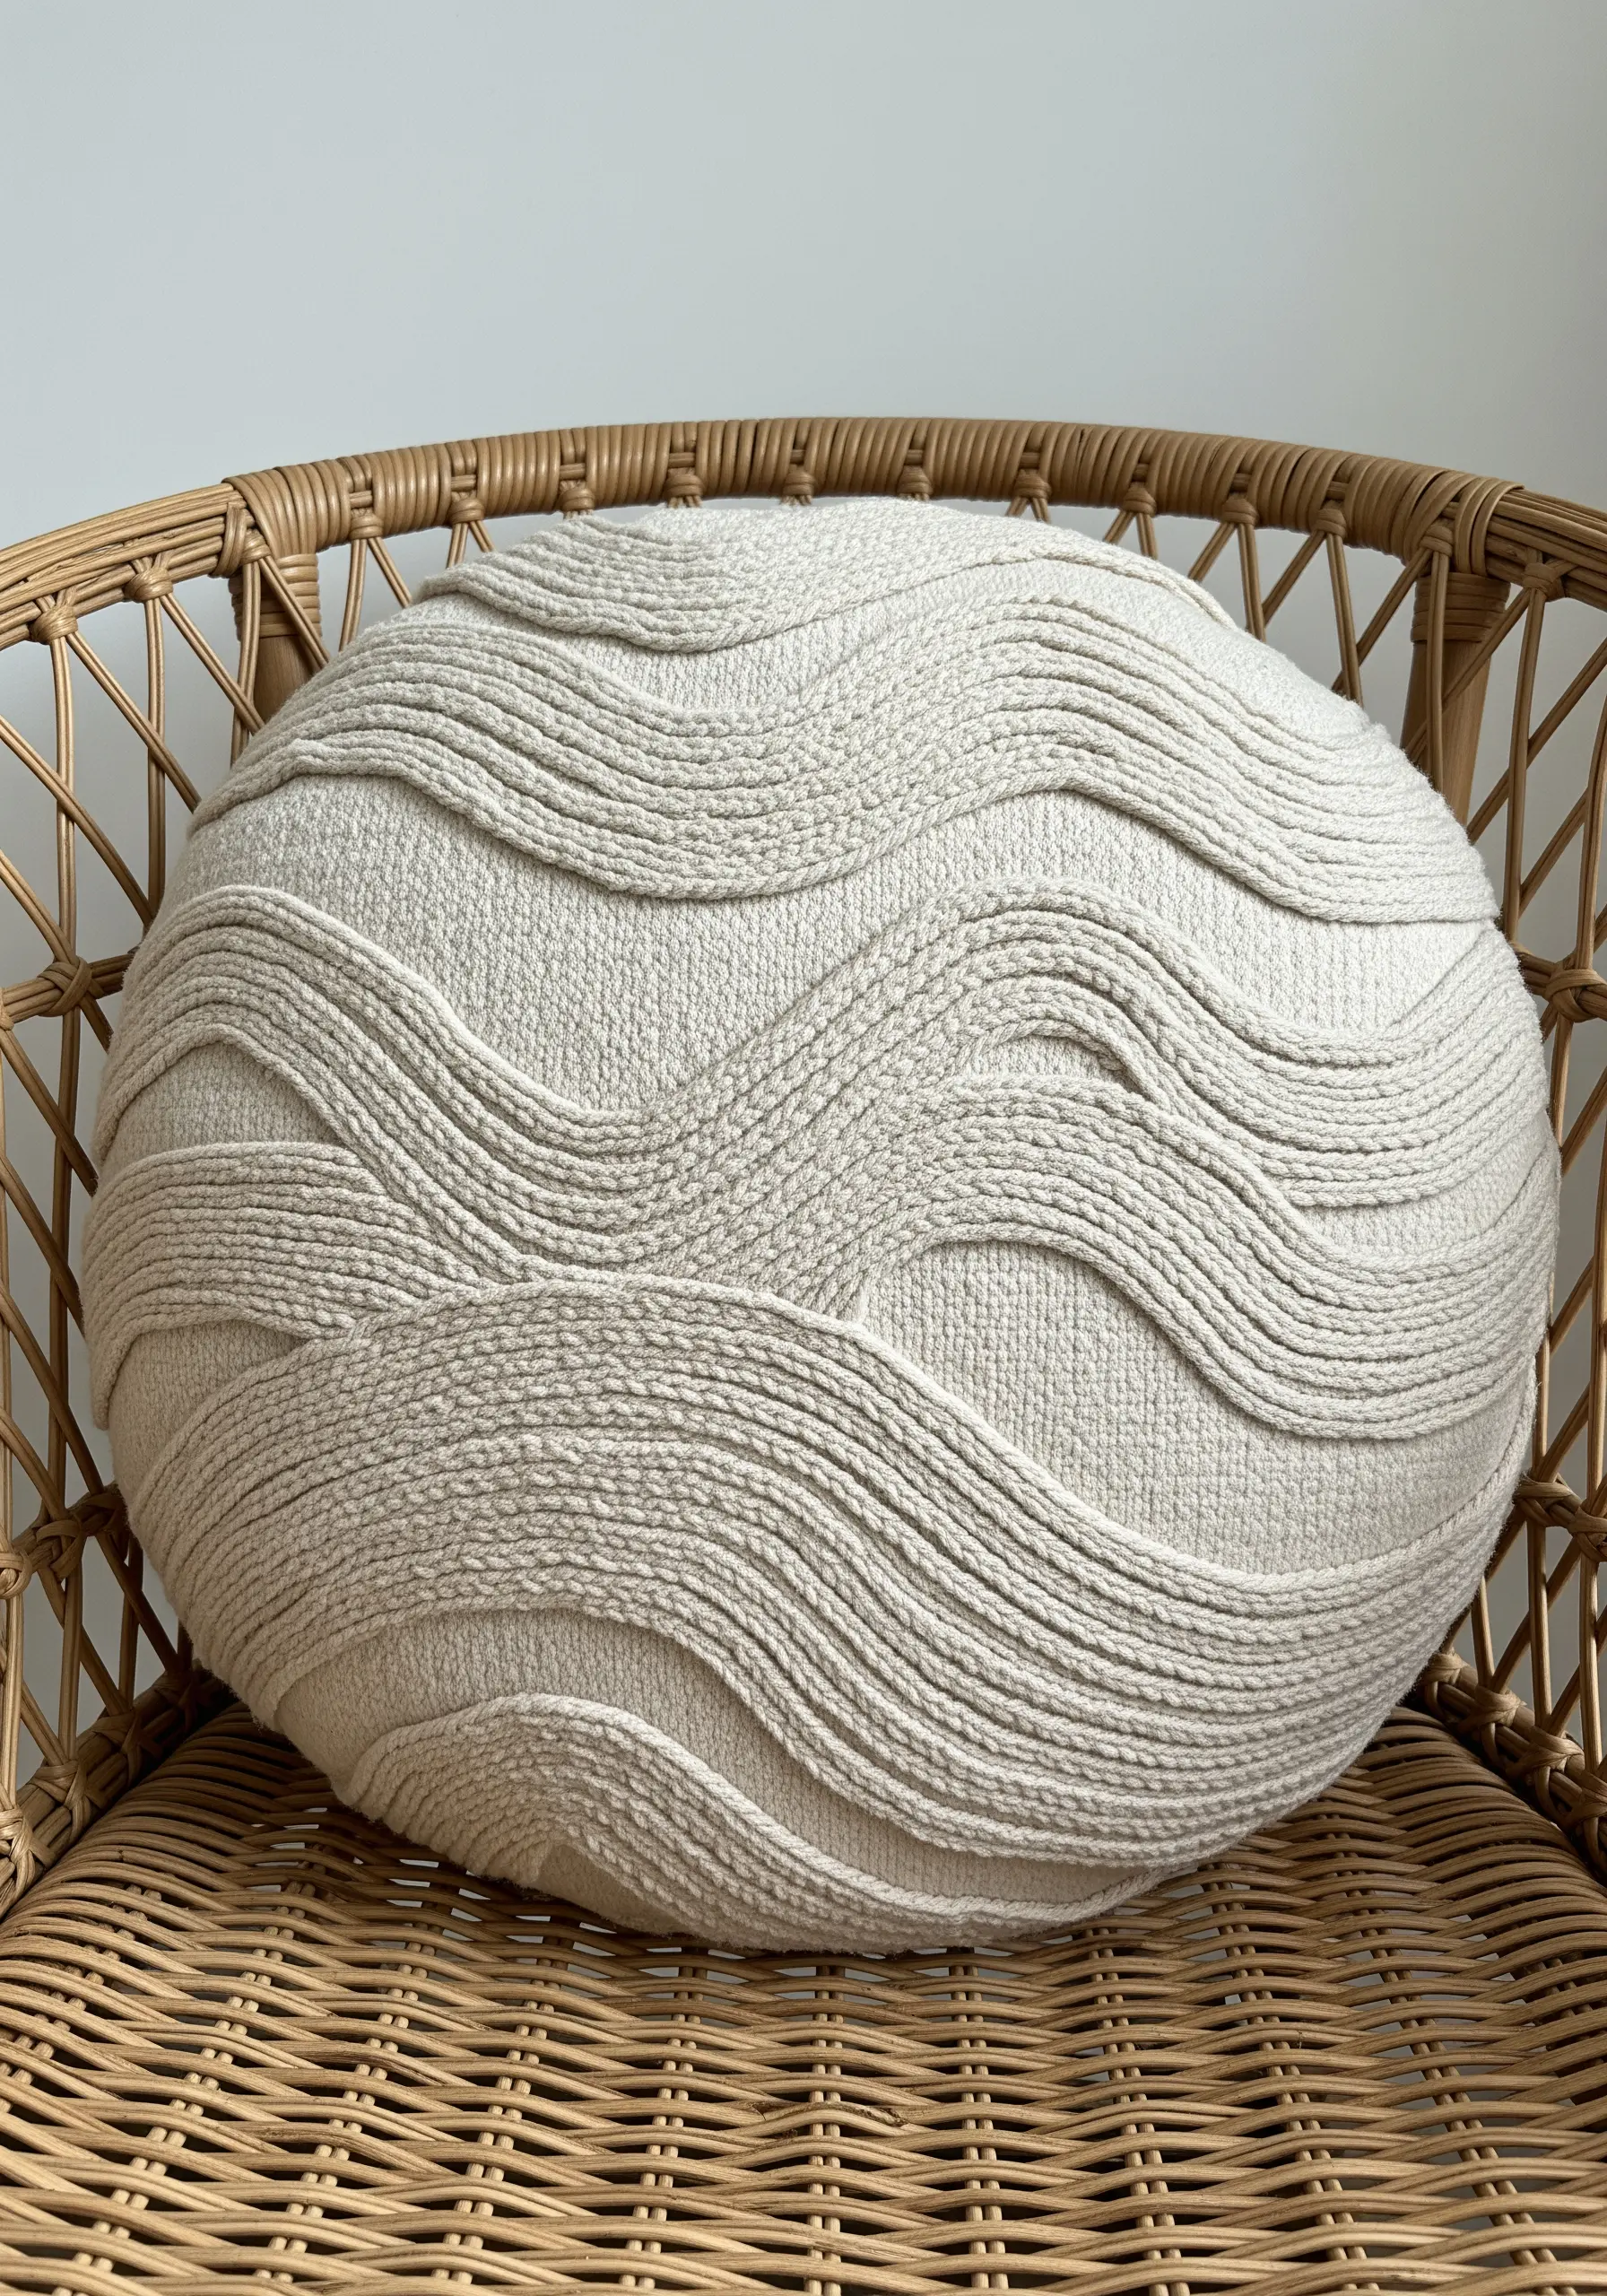
To add both visual and tactile interest to home décor items like pillows, choose a stitch with inherent texture.
The chain stitch, with its braided, rope-like appearance, is perfect for creating flowing, organic lines that suggest waves, wood grain, or rolling hills.
Work rows of chain stitch close together in undulating patterns across the surface.
The result is a design that not only looks beautiful but also has a satisfying, touchable quality, making your handmade cushions feel truly luxurious.
23. Chart the Lunar Phases in Thread
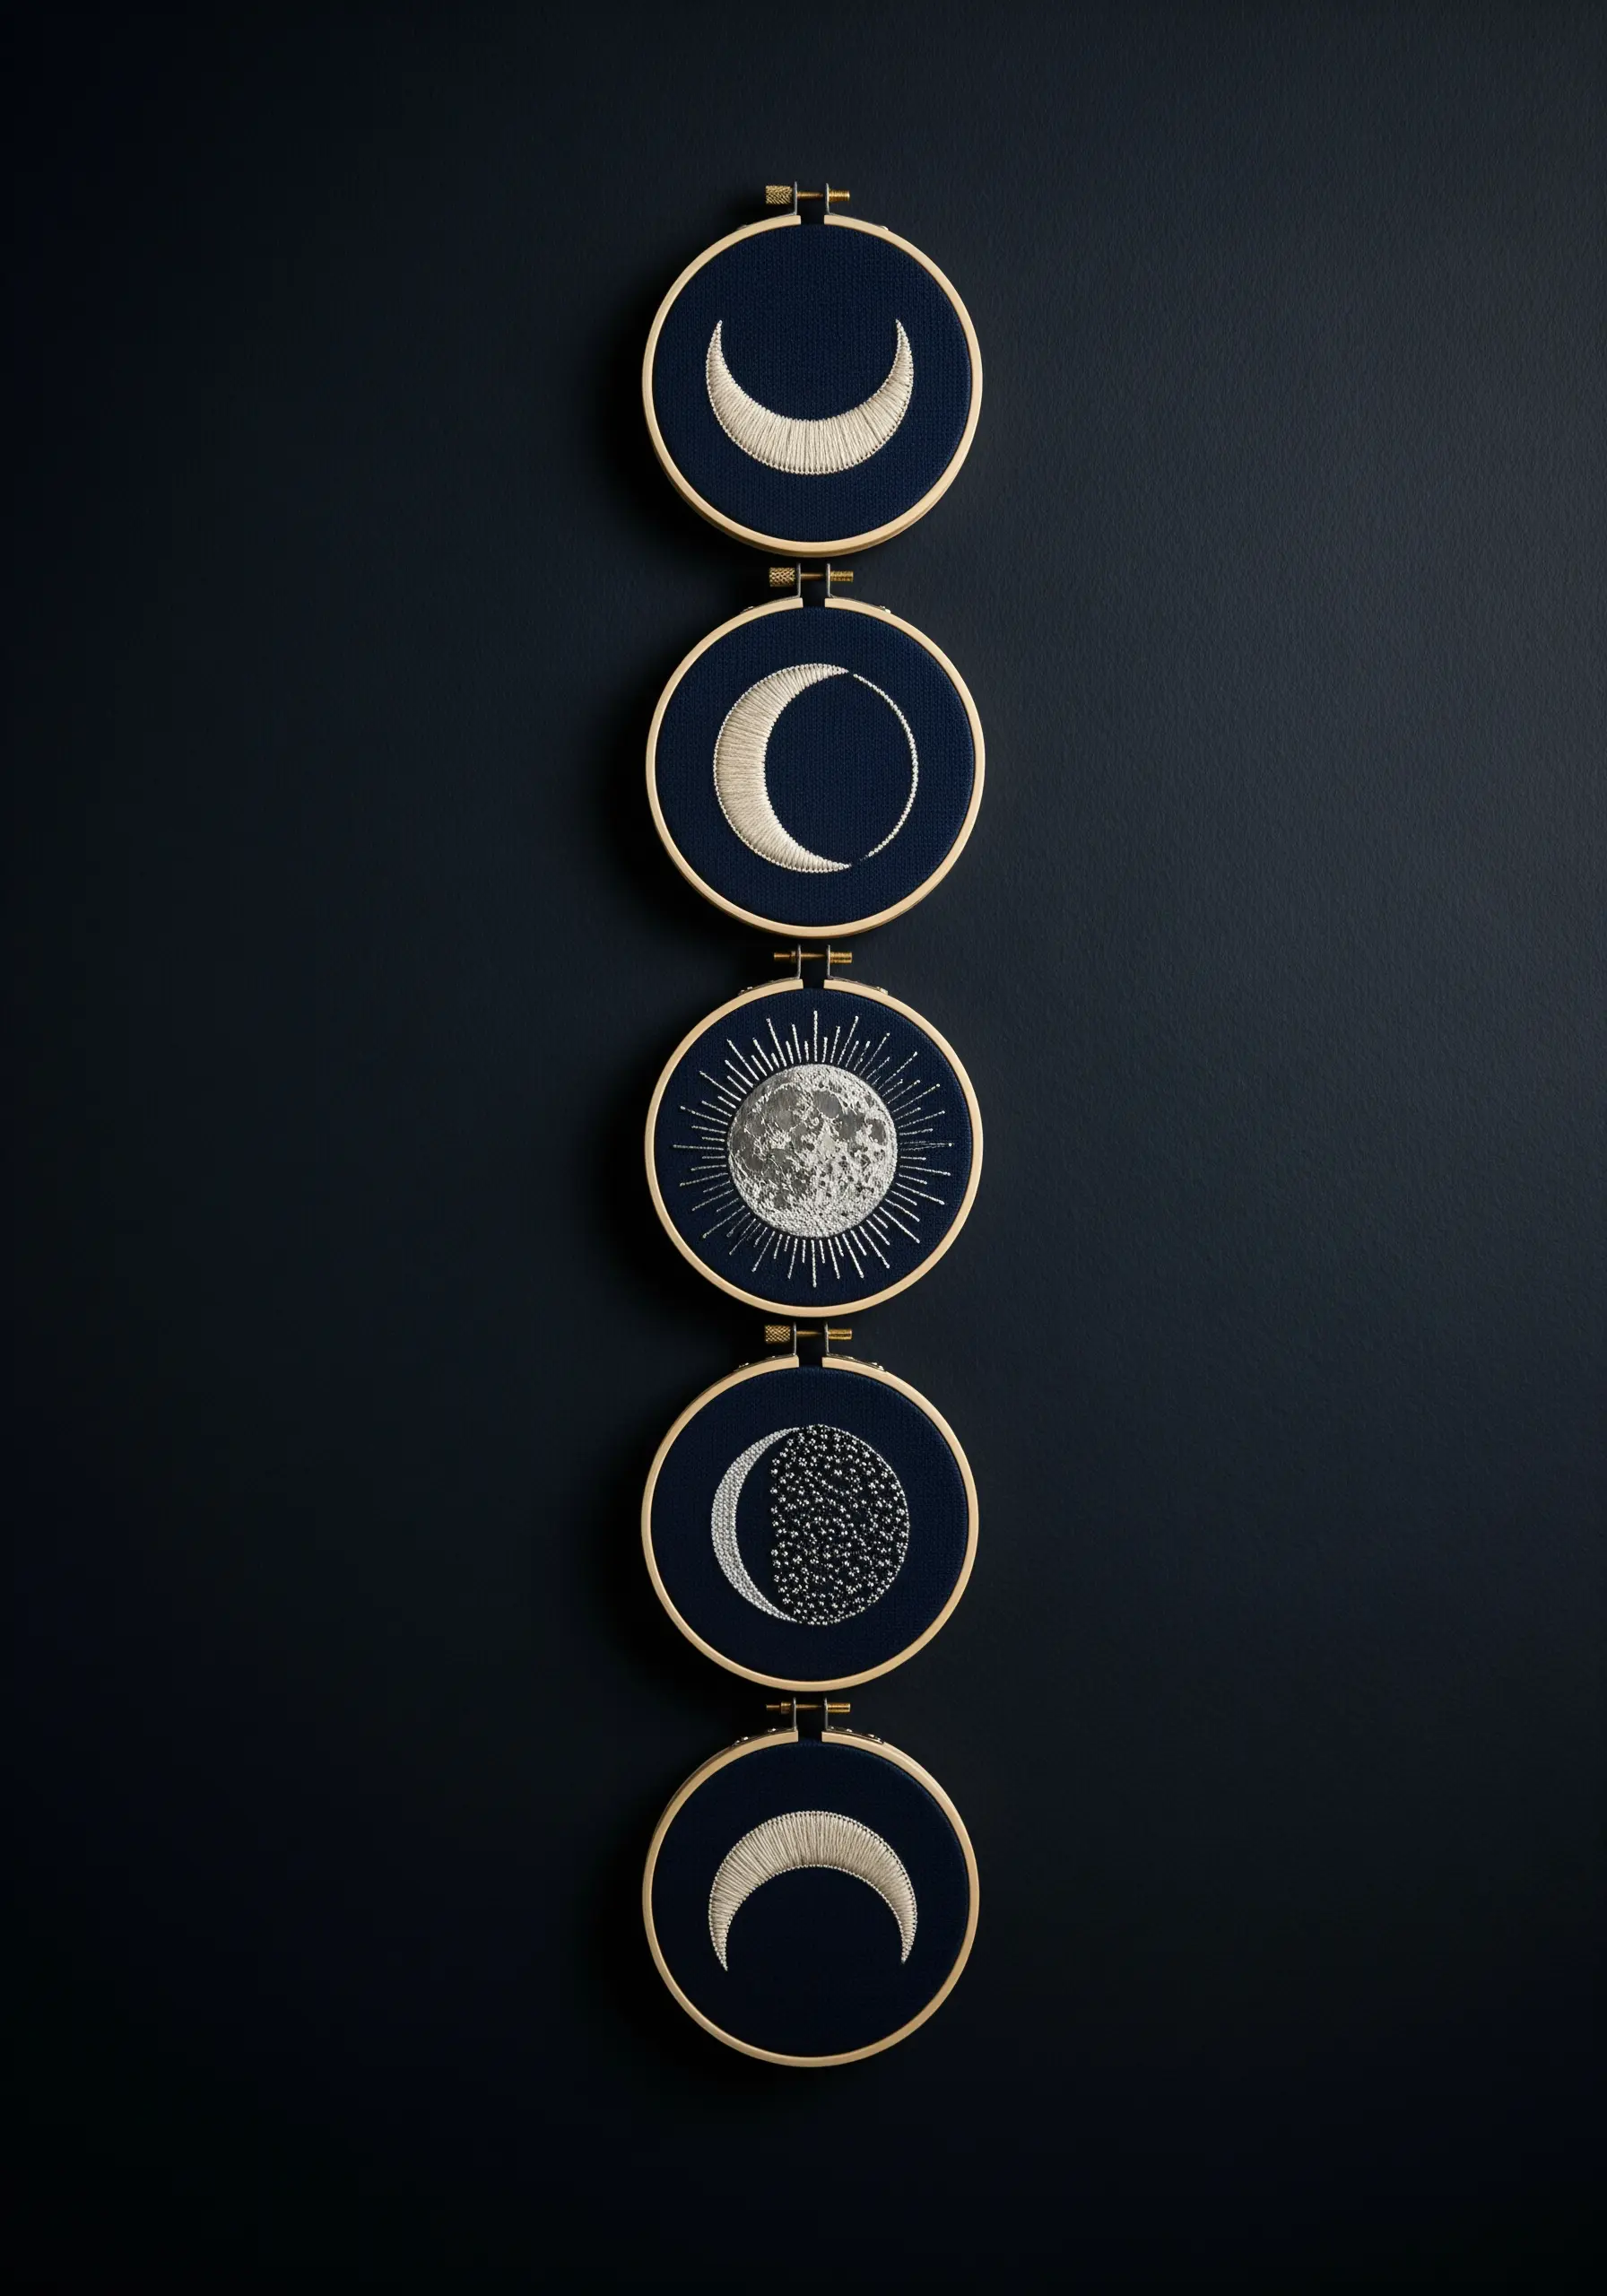
Create a stunning visual contrast by stitching the moon against a deep navy or black fabric.
Use different fill techniques to represent the moon’s surface: a smooth, glossy satin stitch for the sliver of a crescent moon, and a dense field of French knots in white and silver for the textured face of the full moon.
This variation in texture makes the full moon the undeniable focal point of the series, drawing the eye with its intricate, crater-like surface. It’s a perfect project for minimal sky and moon designs.
24. Add Botanical Detail to Functional Objects
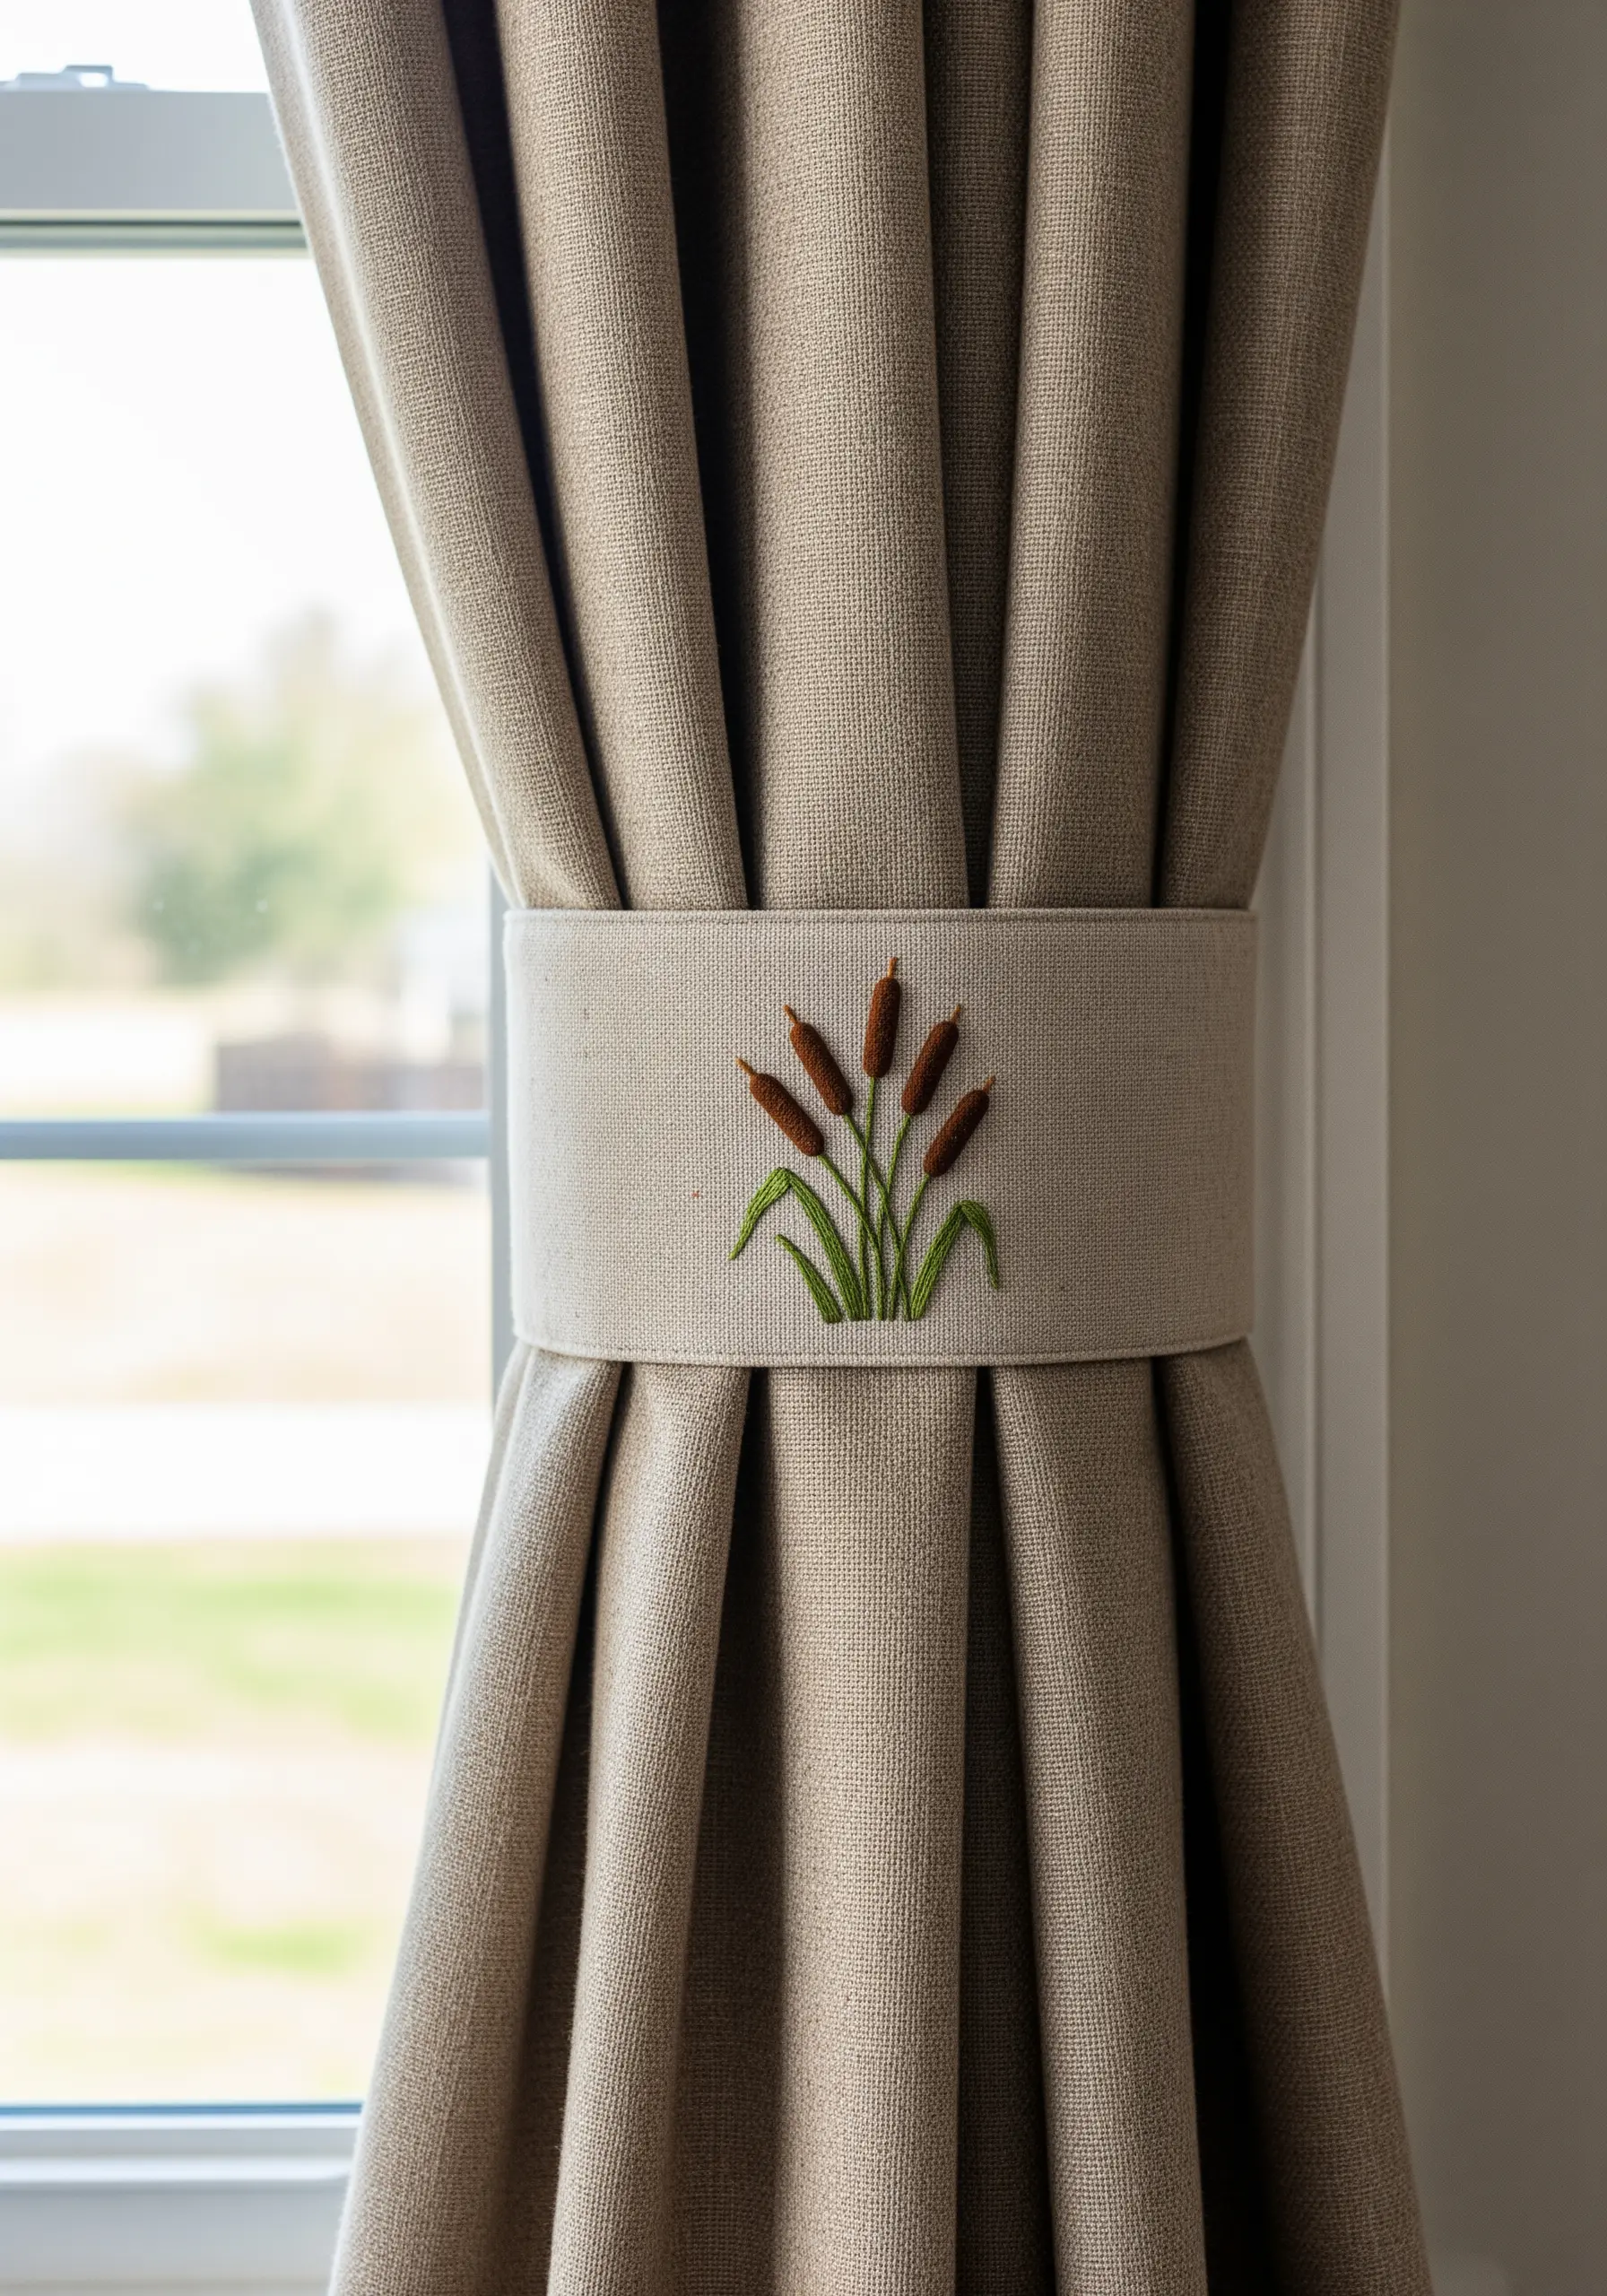
Embroidery can transform the most mundane household items into elements of beauty.
For a project like a curtain tie-back, choose a motif that is both elegant and hardy.
To create the plush heads of cattails, use turkey work or long bullion knots worked vertically. This gives them a rich, three-dimensional texture that stands up to daily use.
Use simple straight stitches for the slender leaves to complete the composition, adding a quiet, natural touch to your window treatments.
25. Construct an Abstract Root System

Explore the beauty of interconnectedness by creating an open, lace-like structure with knotted stitches.
Use a knotted stitch that creates a raised line, such as the Palestrina knot or a knotted chain stitch.
Work the stitches in an irregular, branching network across your fabric, allowing for plenty of negative space.
This technique shifts the focus from filling a shape to creating a delicate, web-like form, resulting in a sophisticated piece that feels both fragile and strong, like a network of roots or veins.


