

That denim jacket in your closet is more than just a piece of clothing—it’s a canvas. Before you stitch a single thread, I want you to reconsider what’s possible. It isn’t about mastering dozens of complex techniques, but about understanding how one simple, well-placed stitch can completely redefine a garment.
We will move beyond just adding decoration and focus on intention. You’ll learn why a padded satin stitch gives a motif authority, how a whipped backstitch creates elegant, fluid lines for lettering, and why the direction of your stitches can create the illusion of light and shadow.
These aren’t just patterns; they are techniques that empower you to make deliberate, artistic choices. Let’s transform that jacket into something that is deeply, personally, and beautifully yours.
1. Perfecting the Satin Stitch for Smooth Curves
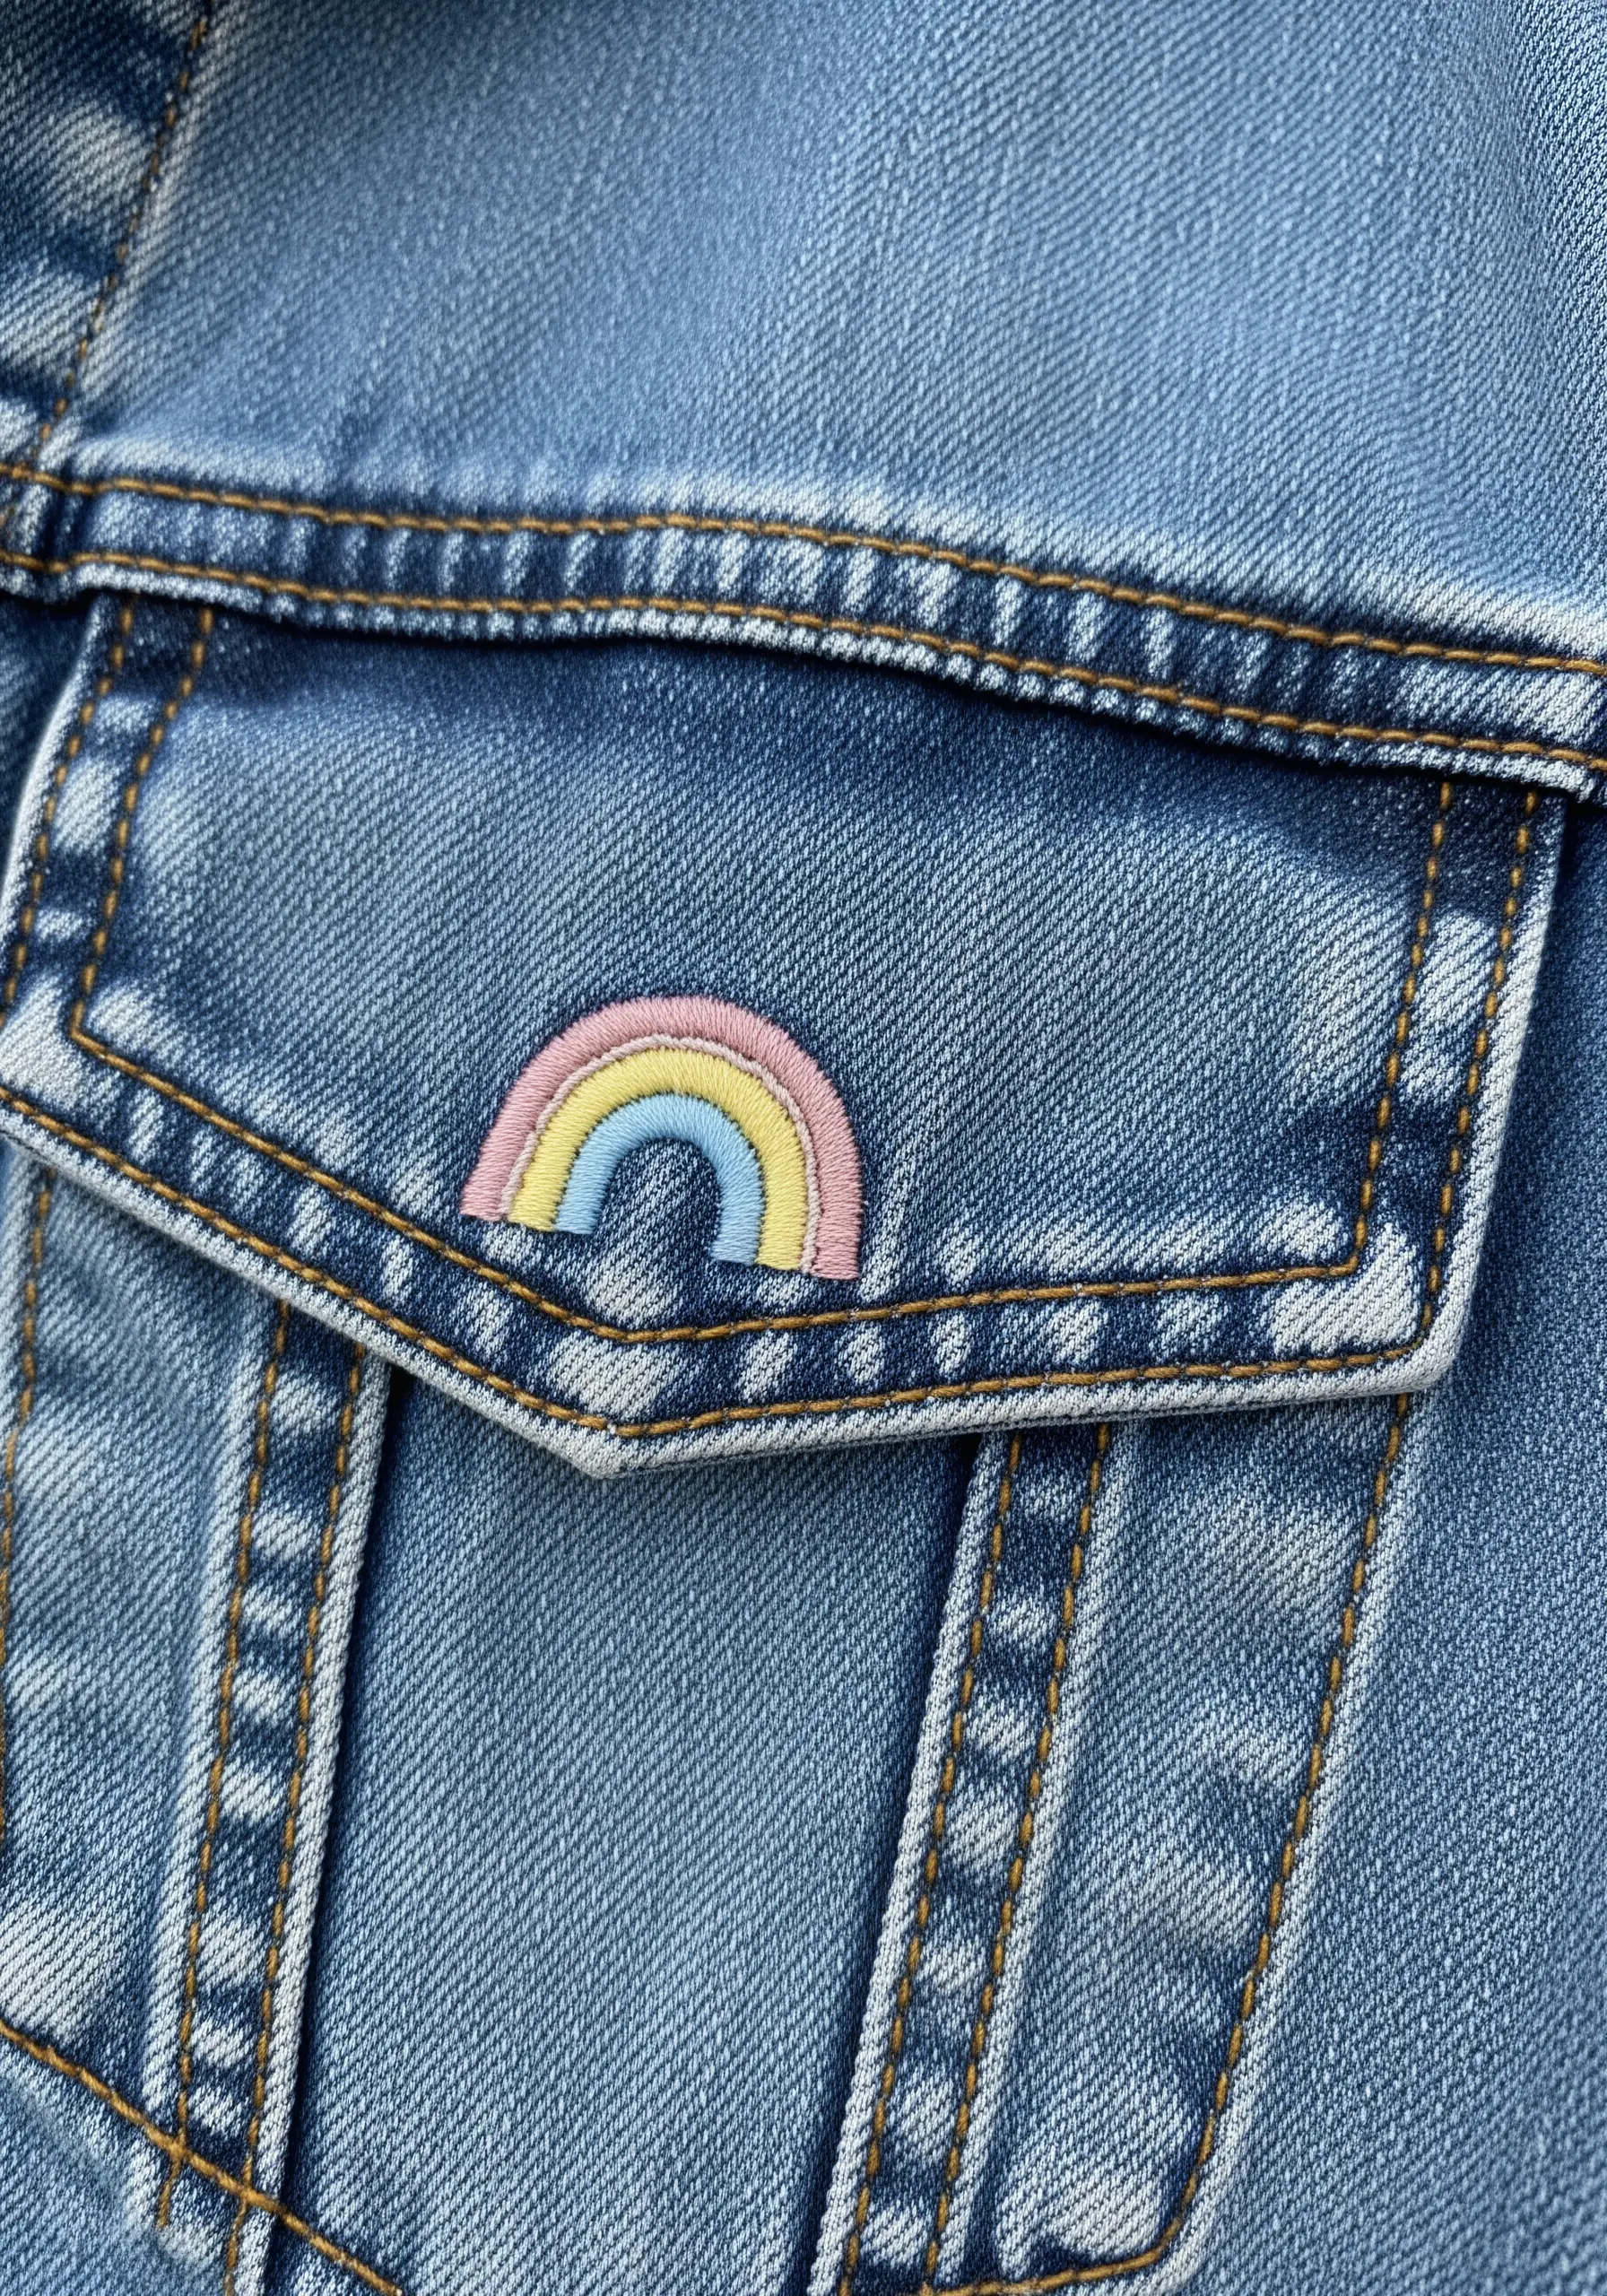
To achieve a perfectly smooth satin stitch on thick denim, first outline your shape with a split stitch.
This creates a slightly raised edge that guides your satin stitches and prevents them from sinking into the fabric’s weave.
Work your satin stitches closely together, ensuring each one lies flat against the last without overlapping.
Using a high-quality six-strand floss (use 3-4 strands for this scale) and a sharp needle will make piercing the dense fabric much cleaner.
The pastel palette creates a soft, modern contrast against the rugged blue denim, making the design feel both playful and refined.
2. Clustering Lazy Daisy Stitches for a Floral Accent
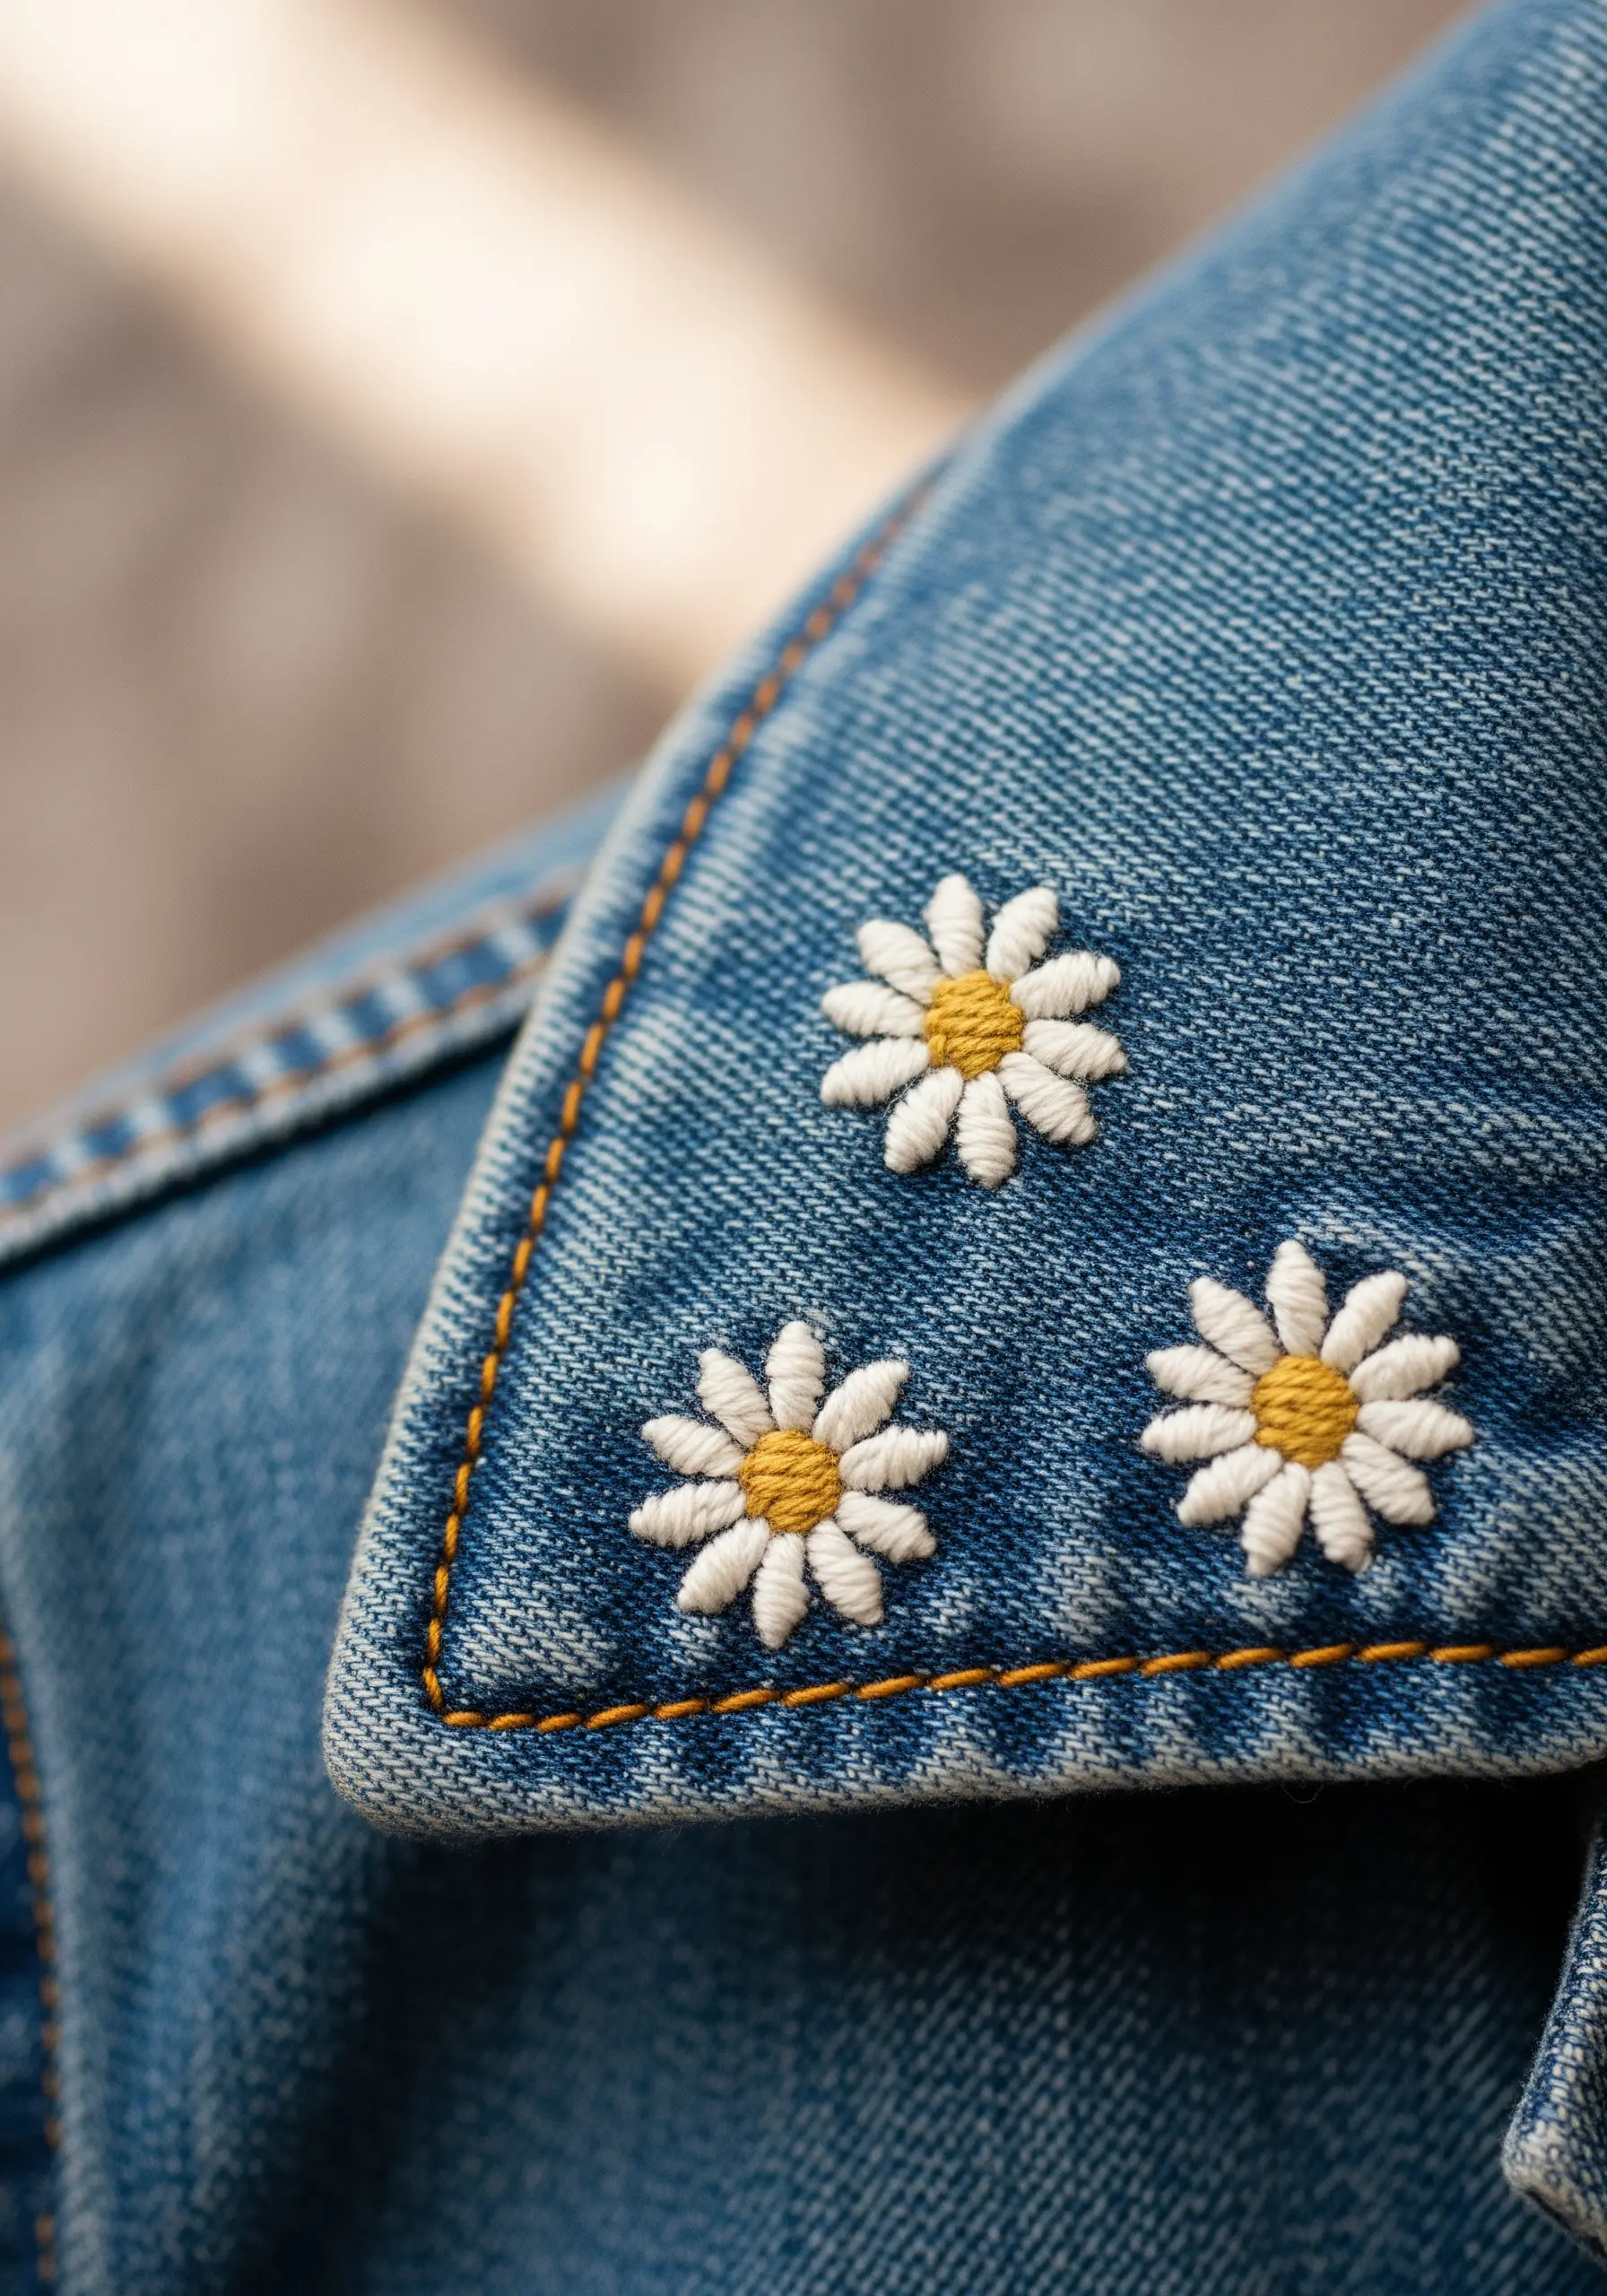
Transform a simple collar by grouping lazy daisy stitches into delicate floral clusters.
For each petal, create a single lazy daisy stitch, anchoring the loop at the tip before returning your needle to the center.
The magic is in the center: use three or four tightly packed French knots in a contrasting color, like this warm yellow, to add dimension and texture.
This technique turns a basic stitch into a sophisticated motif, perfect for adding a touch of nature-inspired elegance to an unexpected place.
3. Crafting a Crisp, Padded Satin Stitch Heart
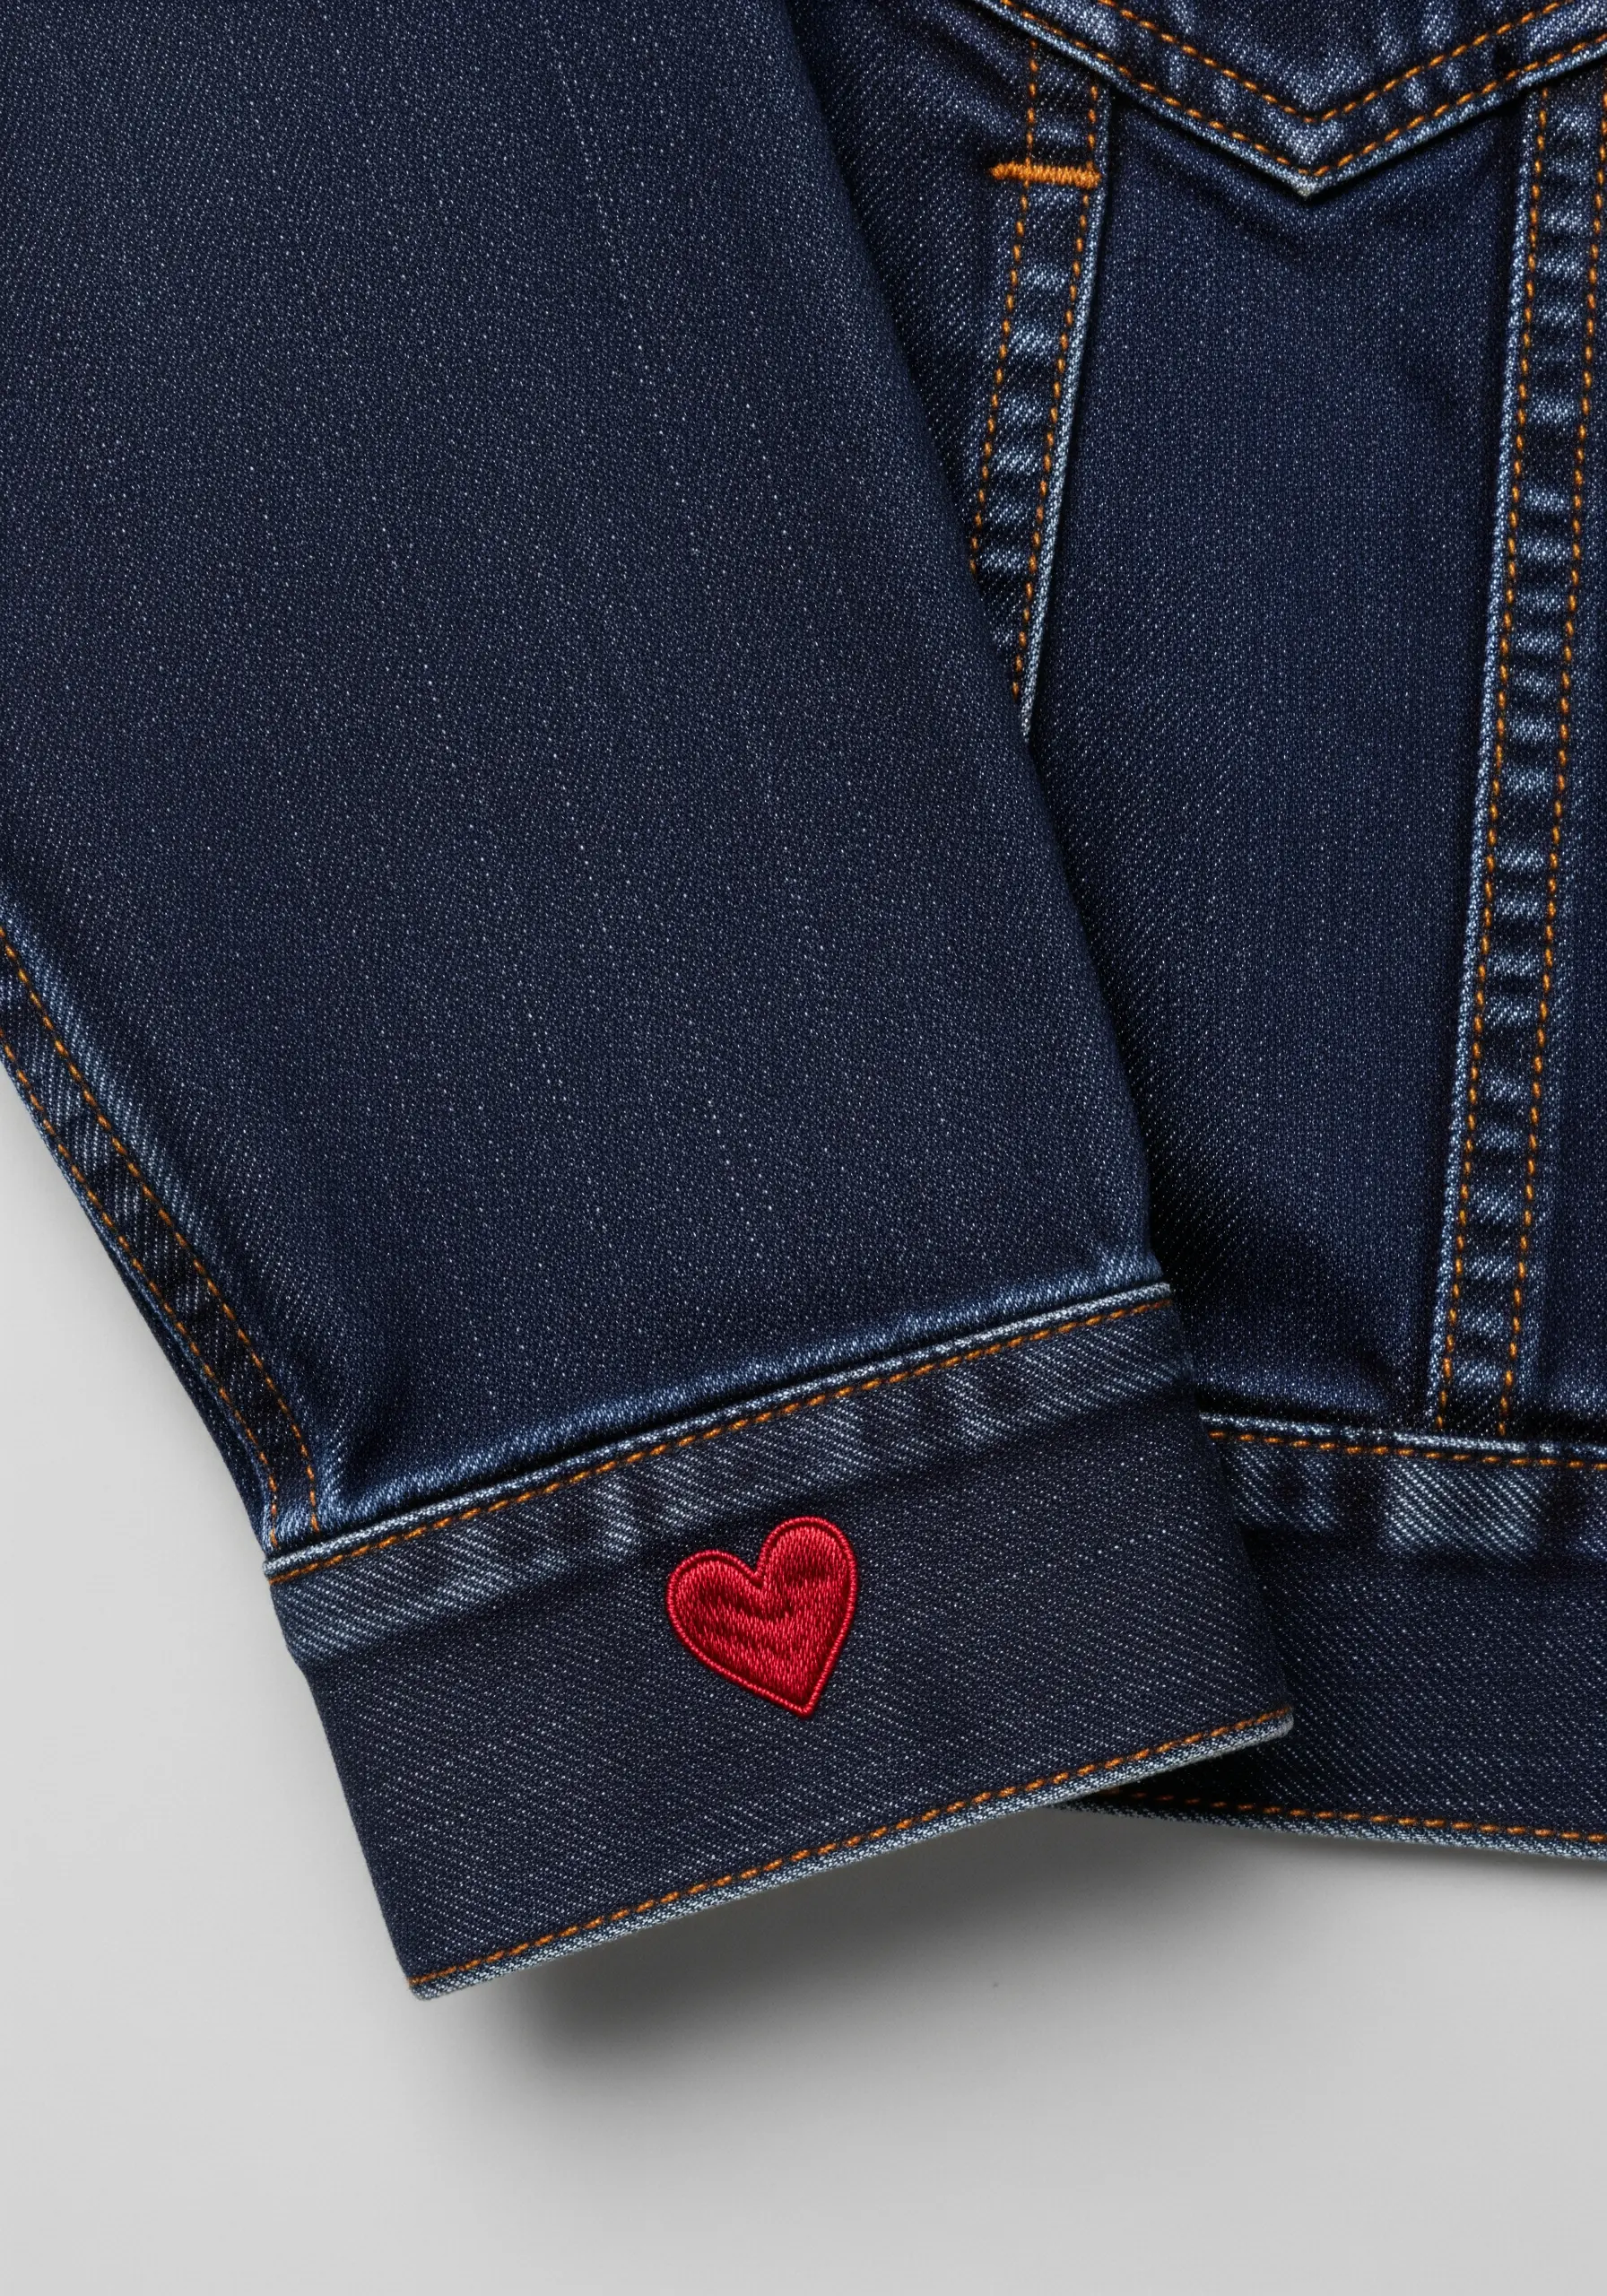
A single, perfectly executed motif on a cuff creates a subtle and personal statement.
To give your satin-stitched heart a raised, almost three-dimensional appearance, first fill the shape with a foundation of small, horizontal straight stitches.
Then, work your final satin stitches vertically over this padding, extending just beyond your outline for full coverage.
This padding technique prevents the dark denim from showing through the red thread and gives the shape a satisfying plumpness and professional finish.
4. Mapping Celestial Designs with Star and Straight Stitches
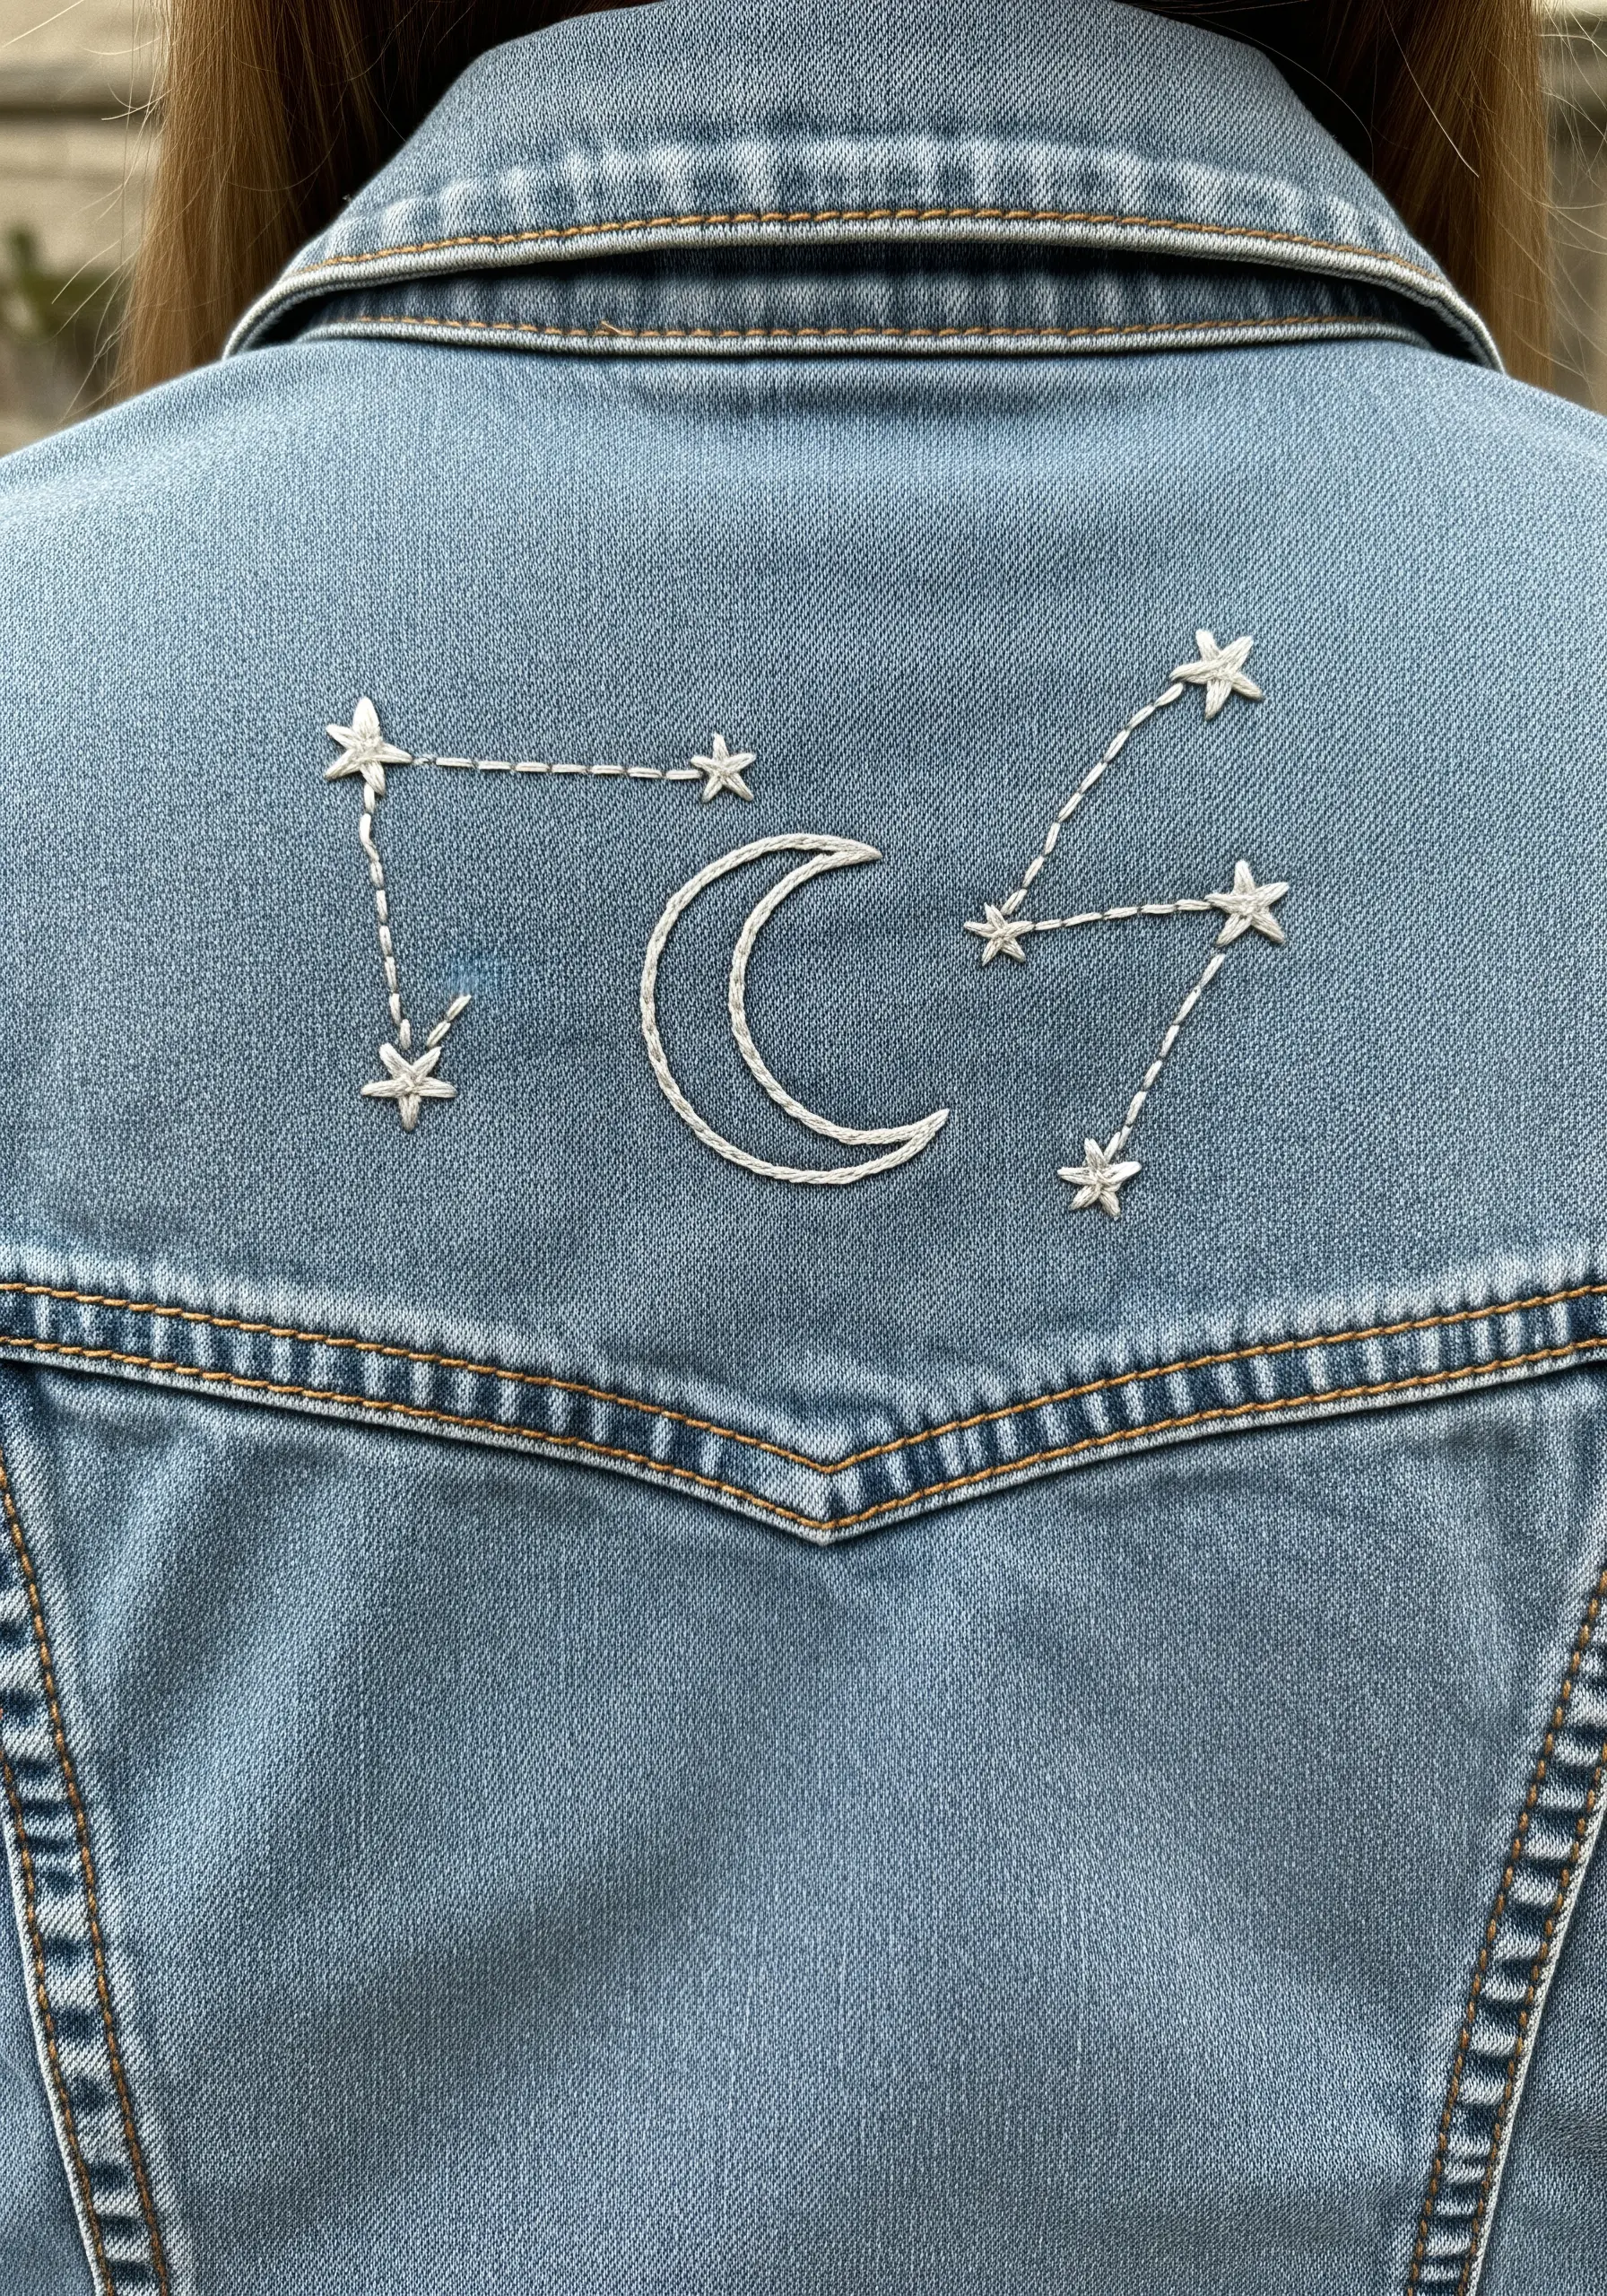
Create your own constellations on the back panel of your jacket—it’s a canvas waiting for a story.
Use a water-soluble transfer pen to lightly draw your design first, ensuring perfect placement.
Stitch the stars using a simple star stitch (three intersecting straight stitches) or a detached chain stitch for a softer look.
Connect them with a delicate, single-strand backstitch to maintain clean lines that don’t overpower the stars themselves.
The negative space is just as important as the stitches, giving this celestial micro embroidery a light, ethereal quality.
5. Building Geometric Texture with Patterned Fills
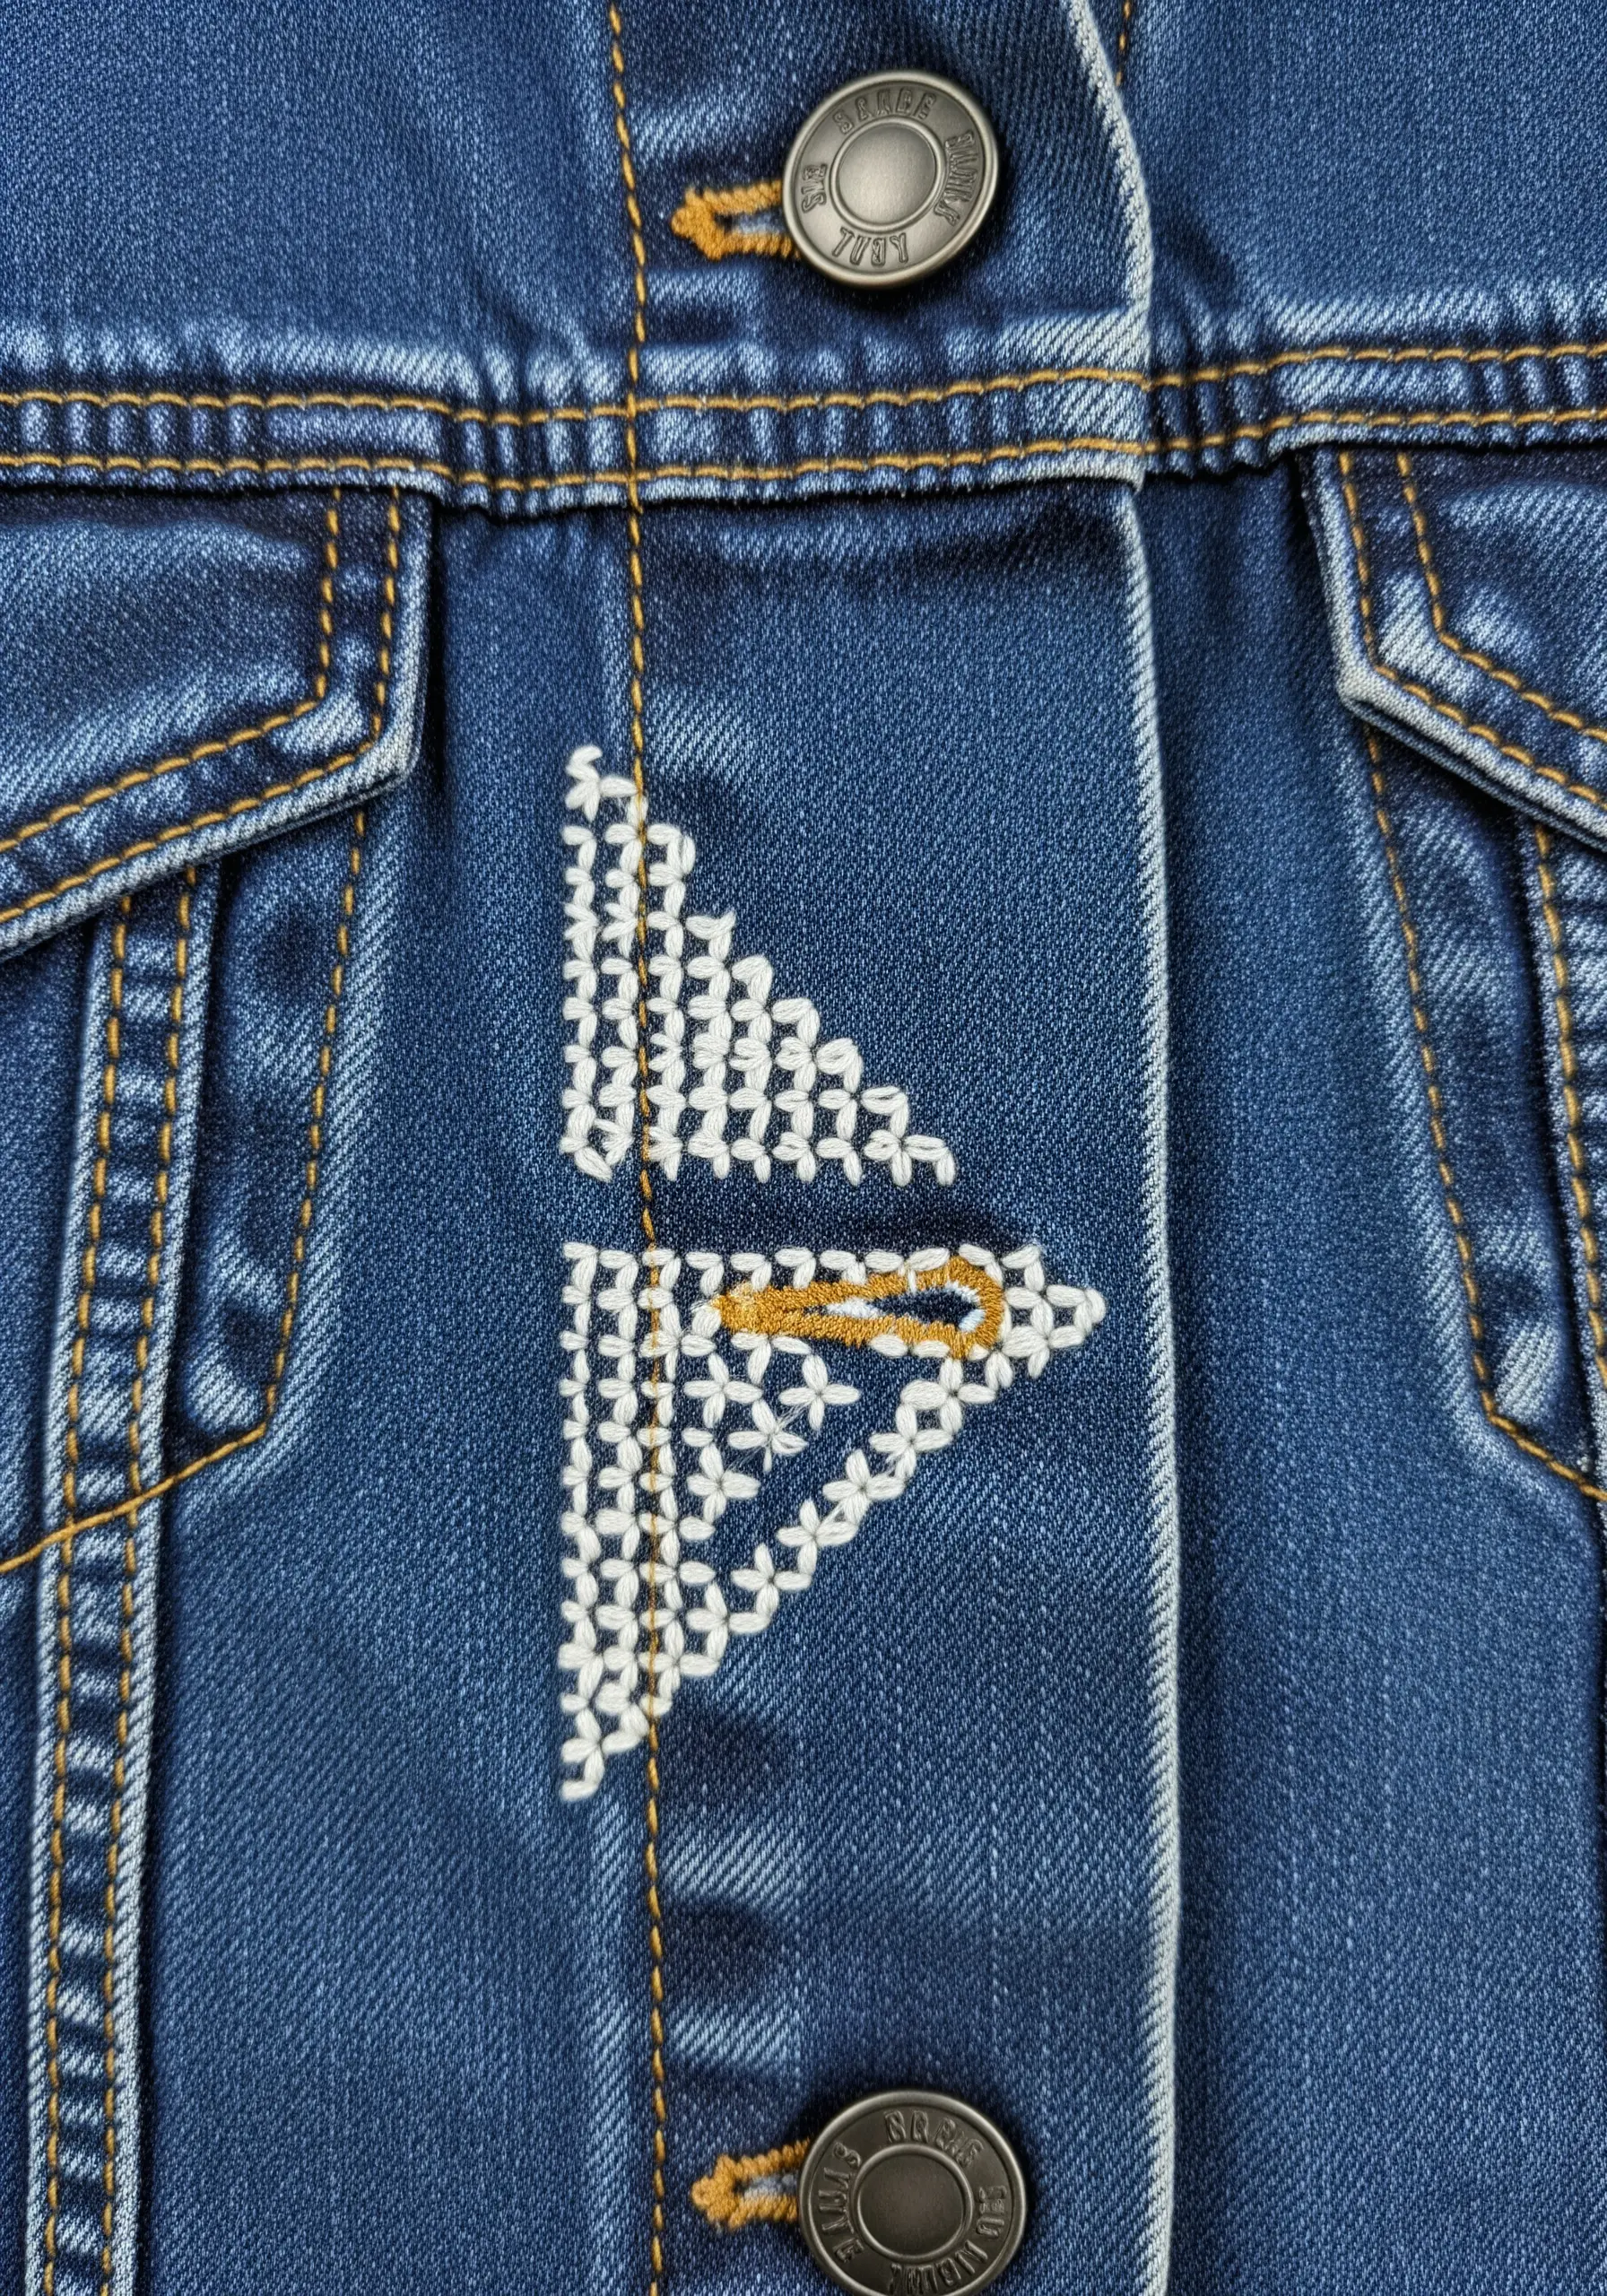
Move beyond solid fills and explore geometric patterns for a modern, textured look.
This design uses rows of alternating diagonal stitches (similar to a mosaic stitch in needlepoint) to create a woven, graphic effect.
First, outline your shape with a split stitch to define the edges clearly.
Fill the shape with your chosen repeating pattern, keeping tension consistent so the denim doesn’t pucker.
Adding a single line of a contrasting color, like the gold here, introduces a focal point and elevates the entire design.
6. Achieving Realistic Leaves with the Fishbone Stitch
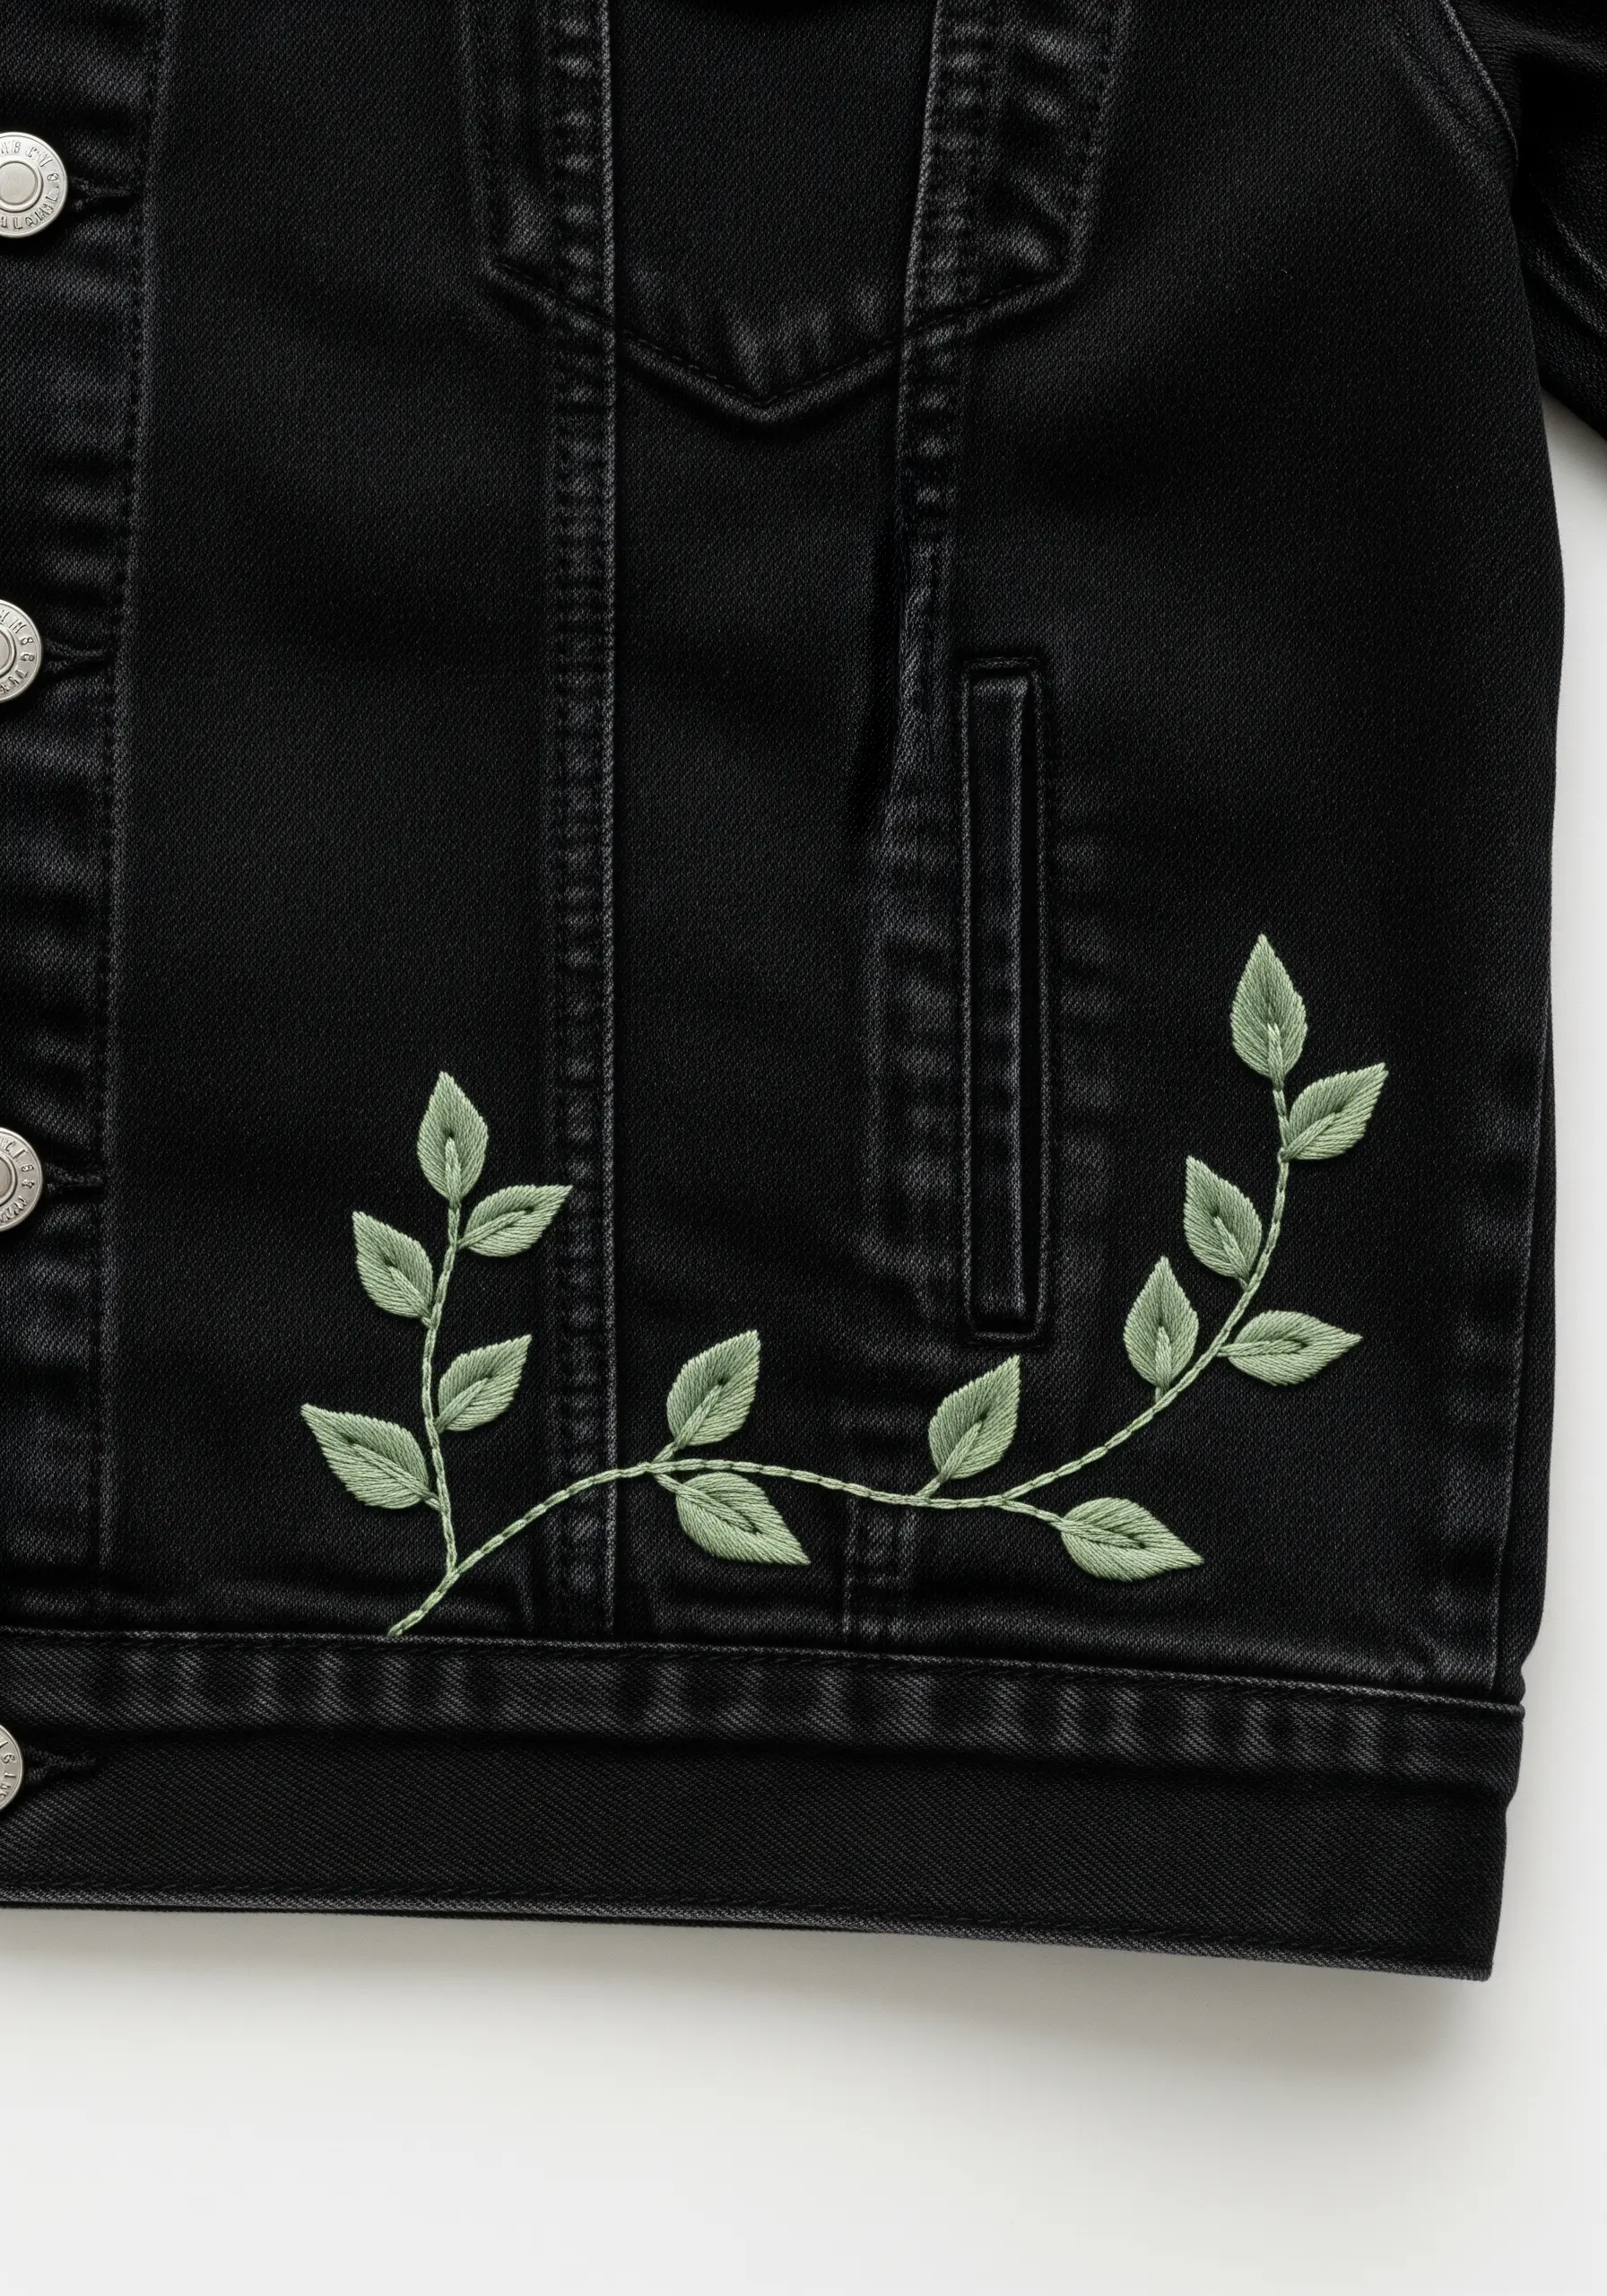
The fishbone stitch is your key to creating beautiful, natural-looking leaves with a single stitch.
Each stitch starts at the outer edge and crosses over the centerline, creating a central vein organically as you work your way down the leaf.
For a graceful vine, connect the leaves with a simple stem stitch, which creates a smooth, rope-like line that curves elegantly.
Placing a light, earthy green against dark denim creates a stunning contrast that feels both organic and chic.
7. Creating Playful Texture with Knots and Sprinkles

Embrace abstract texture by scattering French knots and straight stitches like confetti.
Vary the number of wraps for your French knots (one, two, or three times) to create knots of different sizes, adding depth and interest.
Keep the straight stitches short and place them at random angles to mimic the playful look of sprinkles.
This technique requires no precise pattern, making it a liberating and joyful way to add a splash of color and personality to your jacket.
8. Defining Small Motifs with Backstitch Outlines
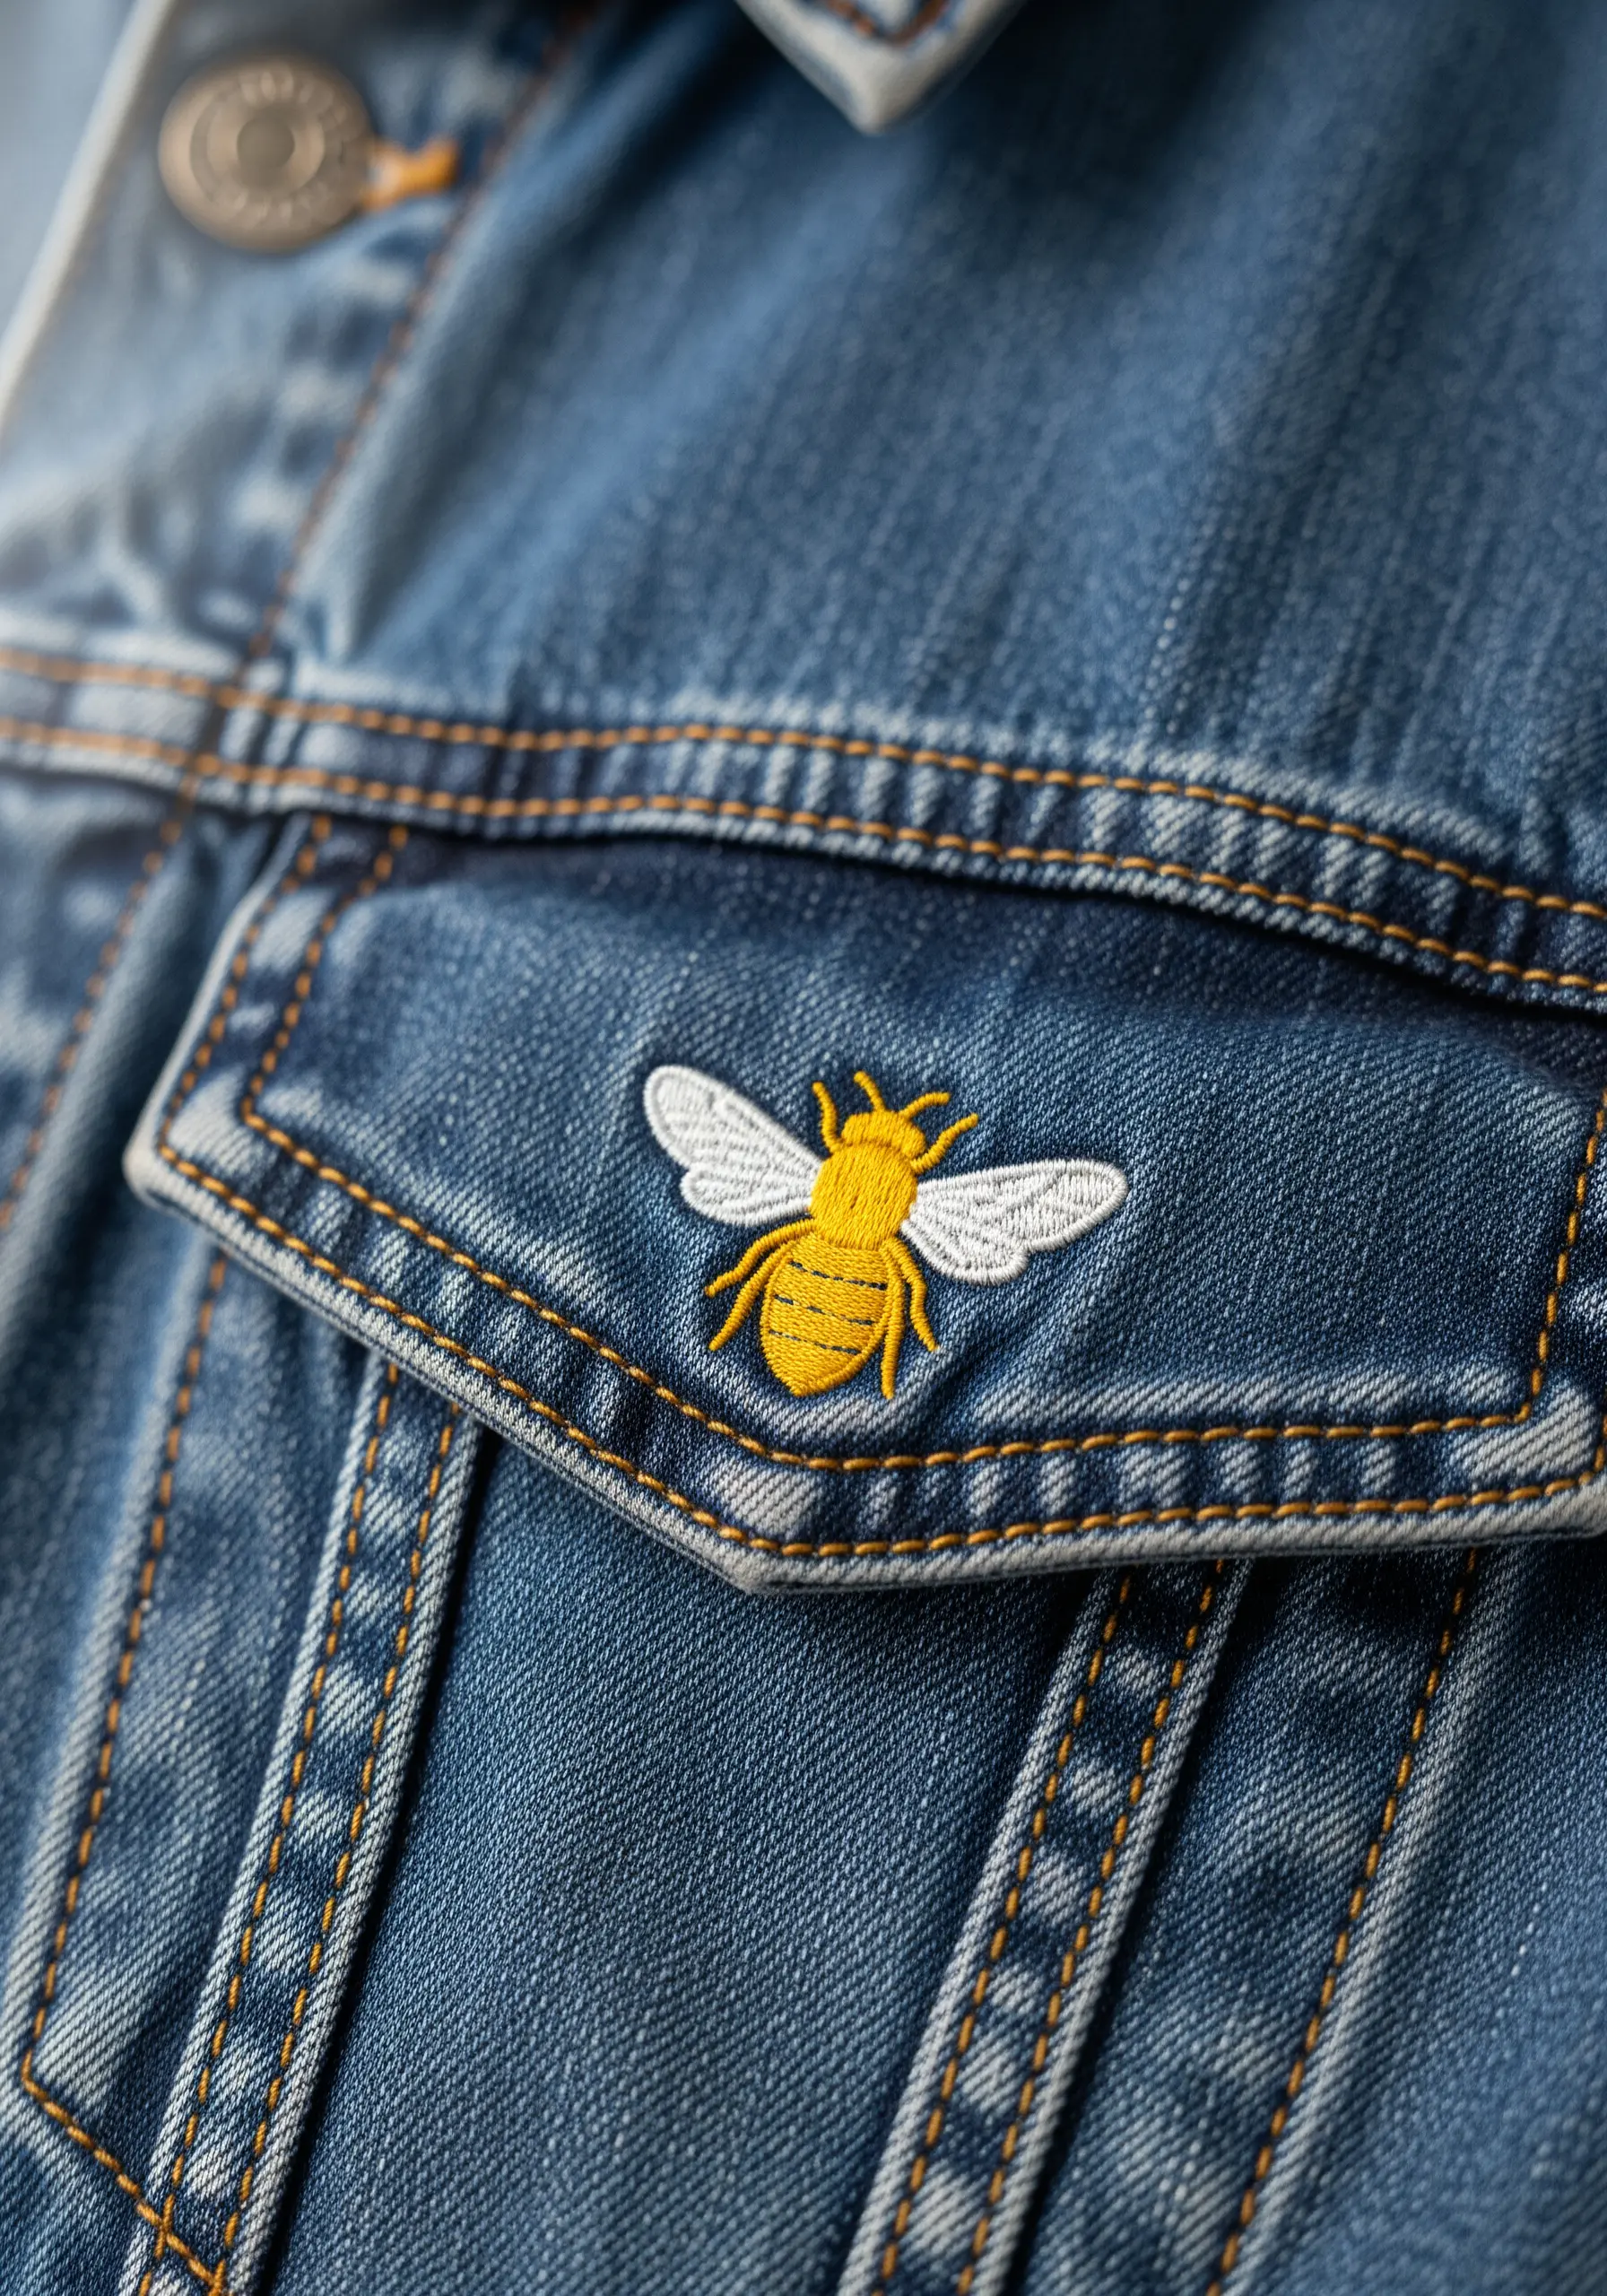
For tiny, detailed motifs like this bee, a strong outline is essential for clarity.
First, fill the main shapes with satin stitch—yellow for the body, and an off-white for the wings, using a single strand for the delicate wing veins.
Once the fill is complete, use a single strand of black thread to carefully backstitch around every element.
This final step acts like ink on a drawing, adding sharp definition that makes the entire design pop against the textured denim.
9. Stitching Elegant Cursive with Whipped Backstitch

To achieve smooth, continuous script that flows like ink, the whipped backstitch is your best choice.
First, lay down a foundation of simple backstitches, keeping them small and even, especially around curves.
Then, using the same thread, pass your needle under each backstitch without piercing the fabric, ‘whipping’ the stitches into a seamless, raised line.
This technique elevates simple text, turning tiny lettering embroidery ideas into a refined and personal detail.
10. Making a Bold Statement with Yarn Couching
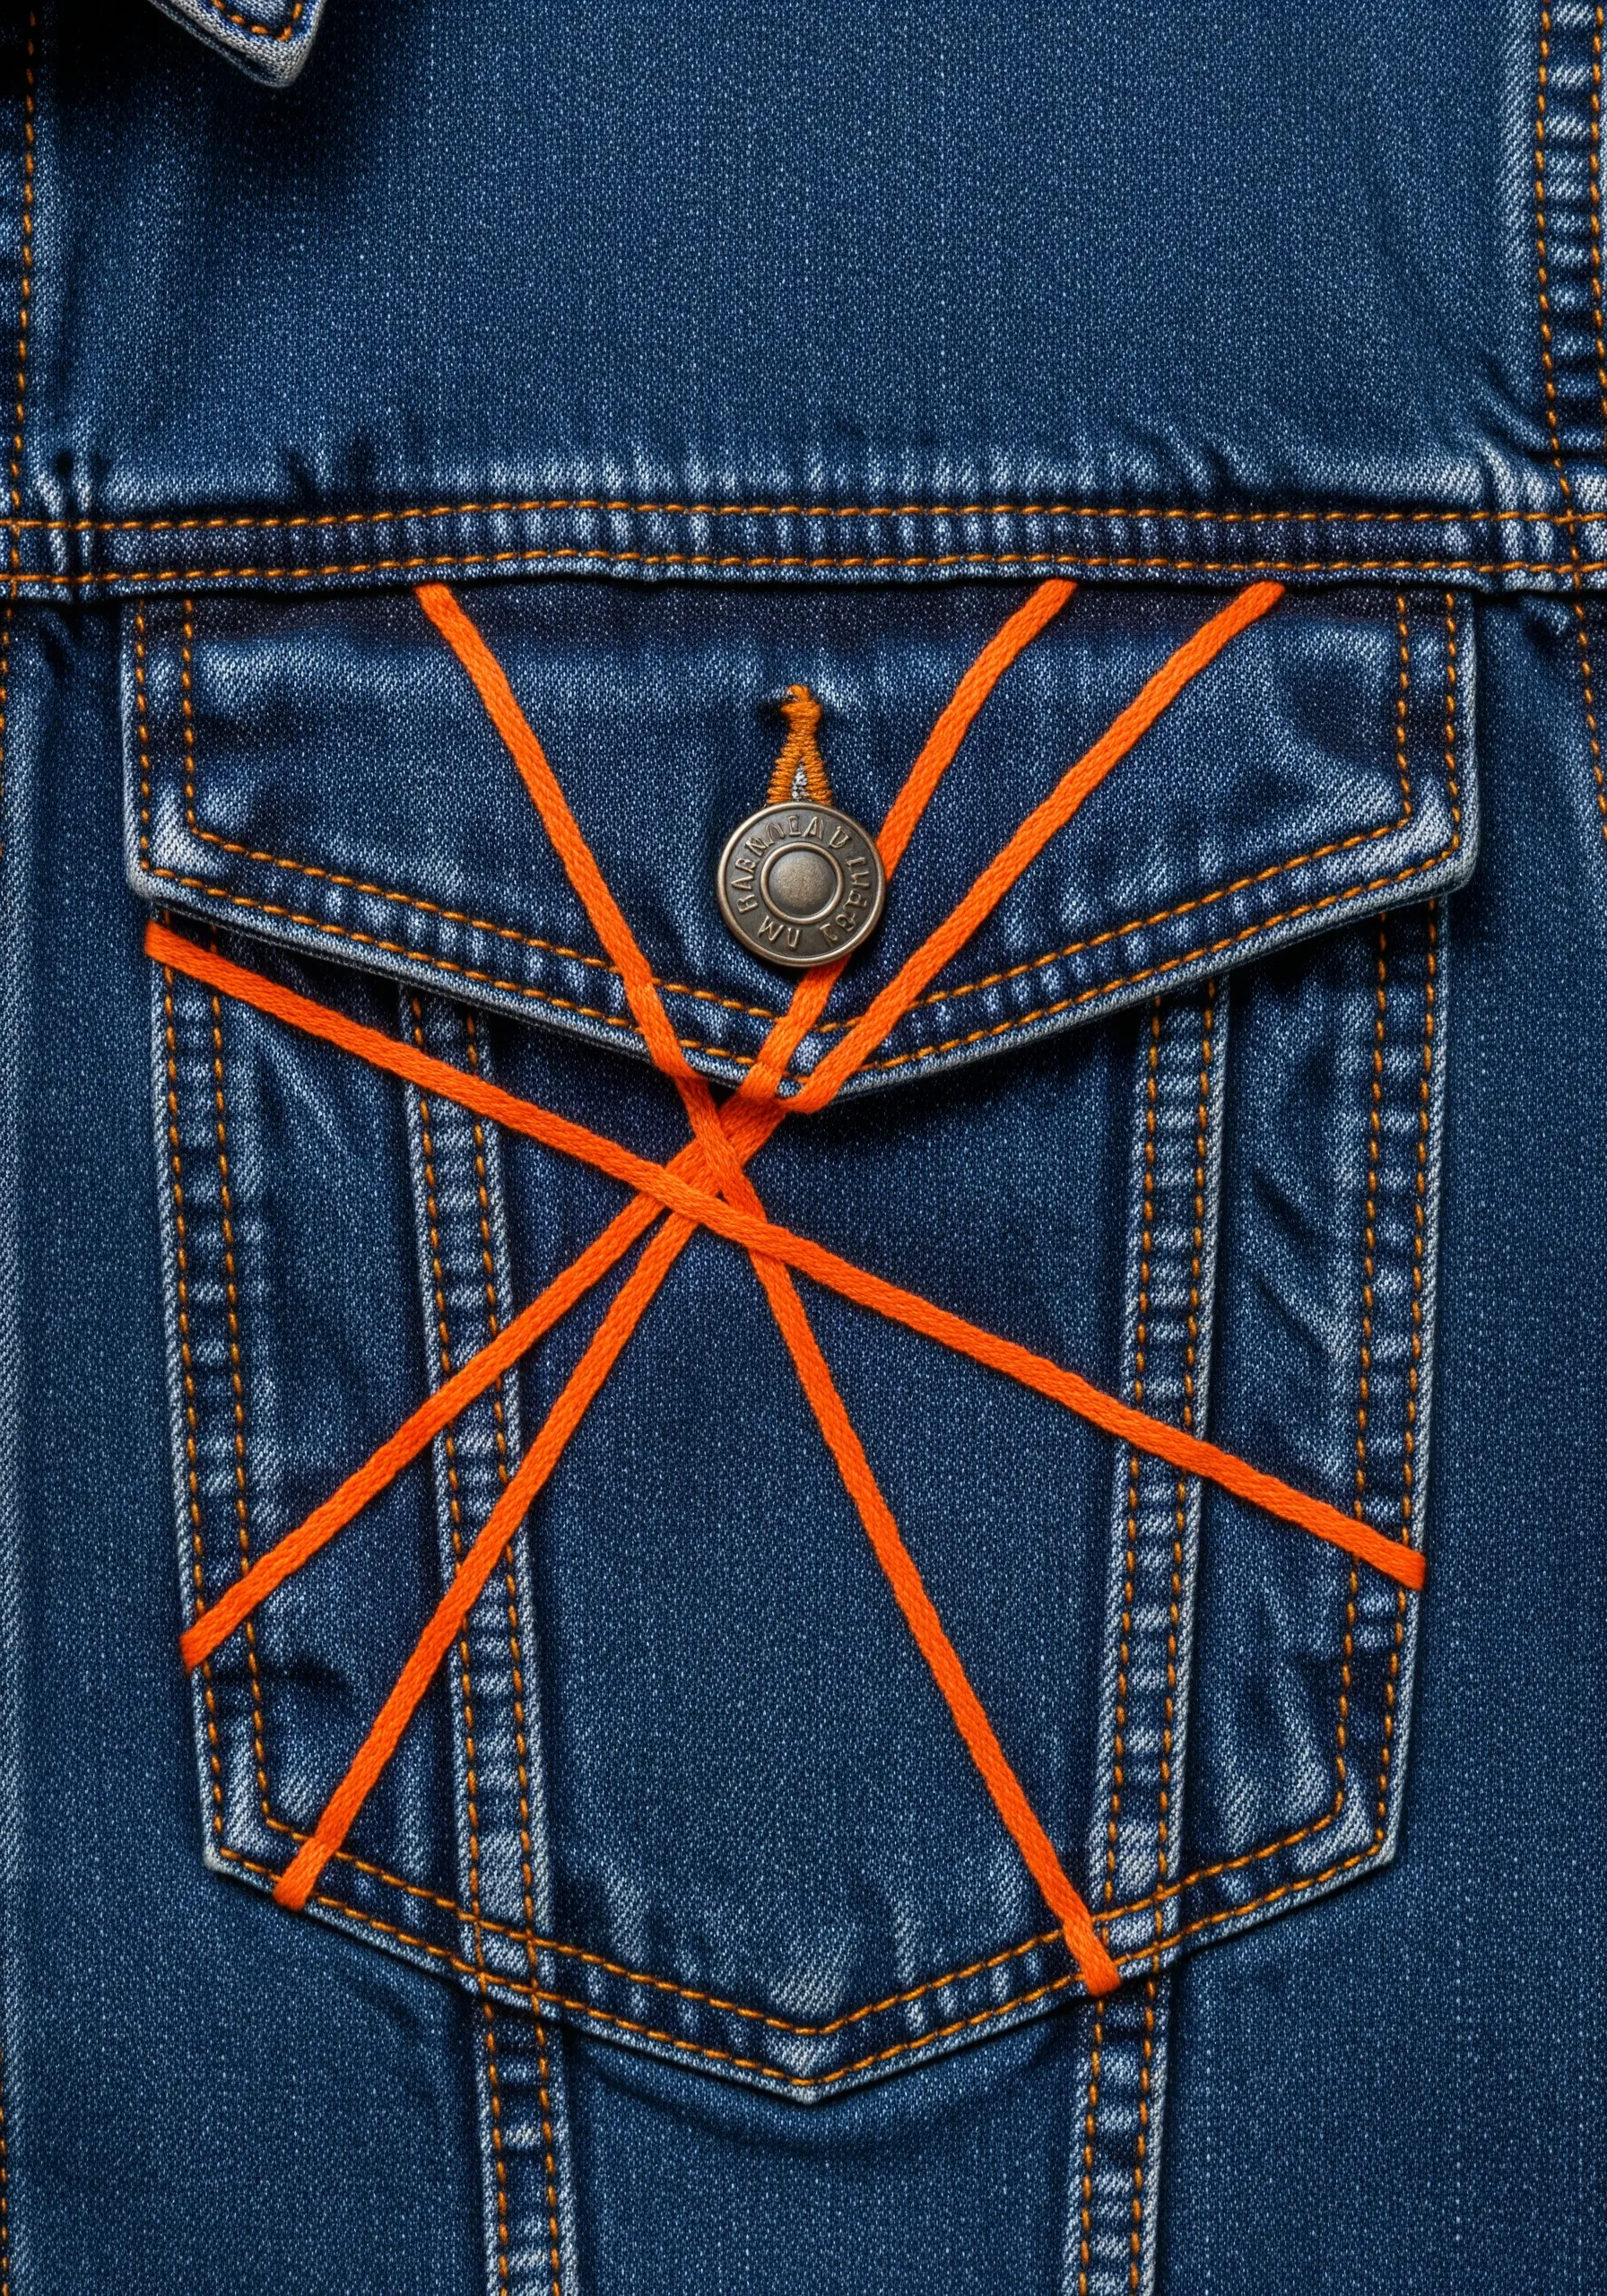
For a high-impact, graphic look, don’t be afraid to use materials thicker than standard floss.
This abstract design uses a thick, vibrant orange yarn laid across the surface of the jacket.
To secure it, use a technique called couching: lay the yarn in your desired shape and use a thinner, matching (or contrasting) thread to tack it down with small, perpendicular stitches.
This method allows you to create bold lines and shapes that would be impossible with traditional stitches alone.
11. Capturing Botanical Detail in a Fern Frond
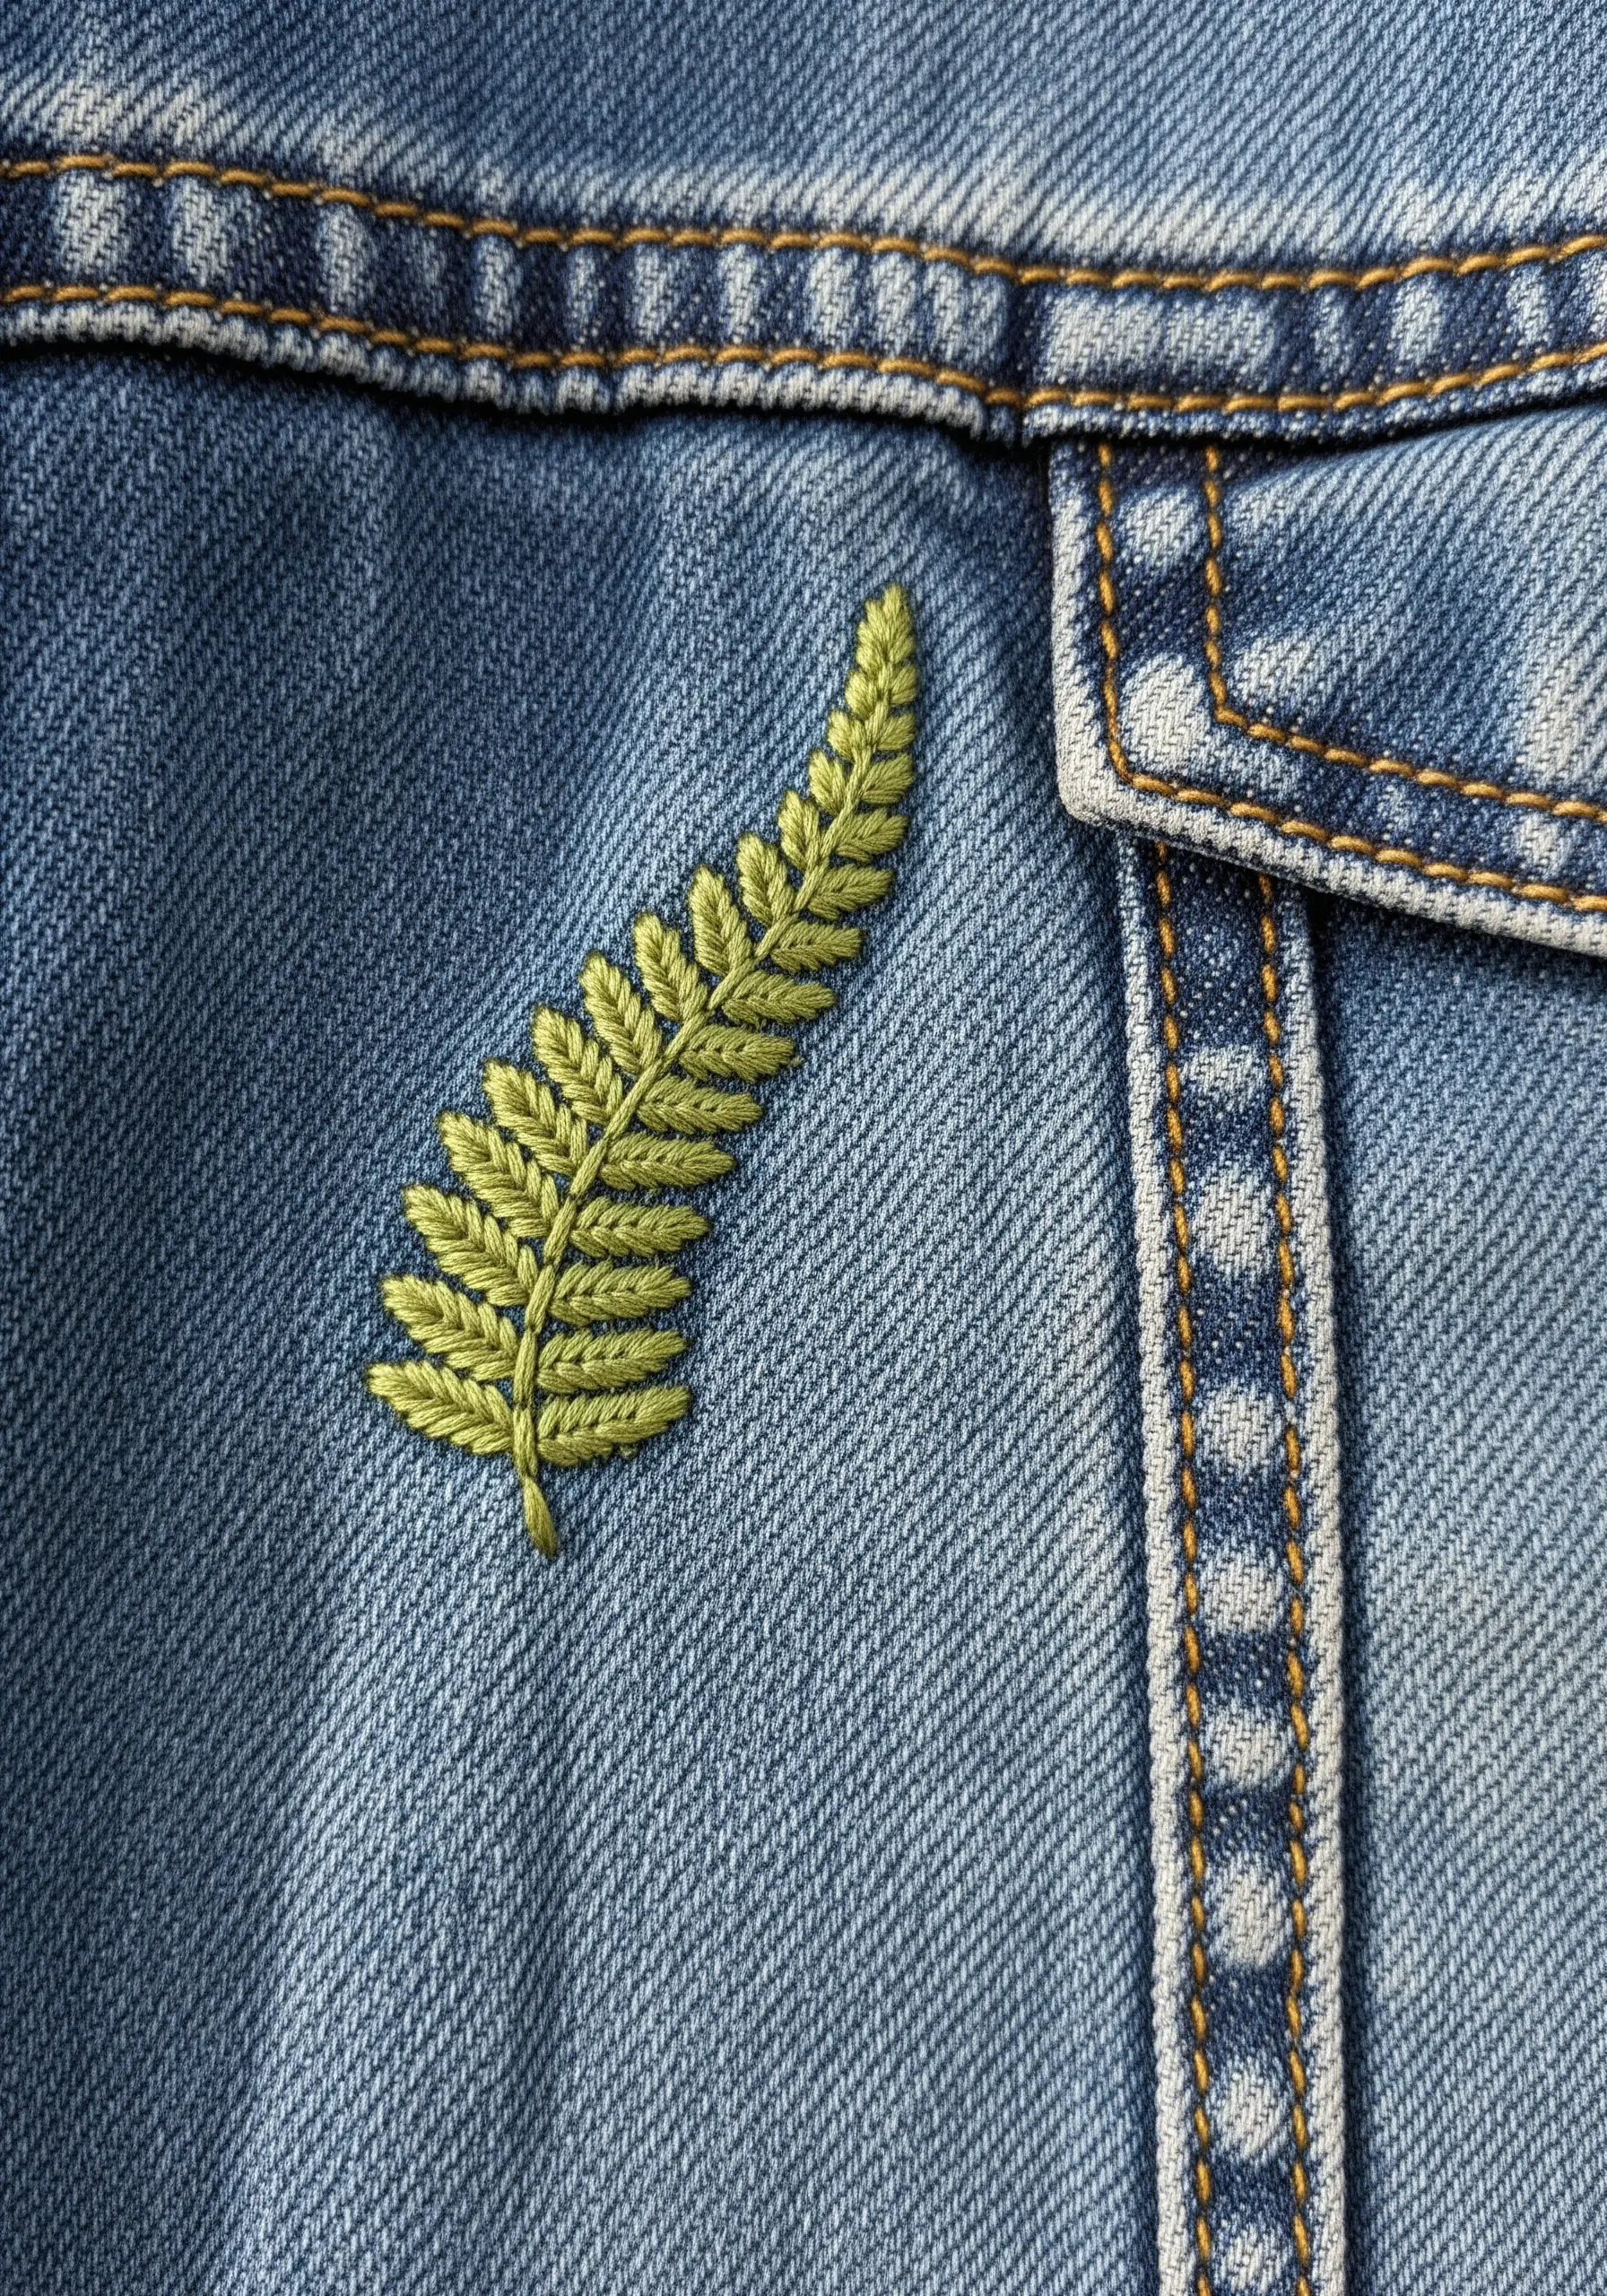
The key to a realistic fern is capturing the delicate structure of its fronds.
Use a fishbone stitch for the main stem, then switch to single, angled straight stitches for the individual leaflets.
Vary the angle and length of these straight stitches, making them shorter toward the tip, to mimic the natural taper of the fern.
A slight color gradient, using two similar shades of green, adds depth and realism. Explore more ways to layer leaf stitching to enhance your botanical work.
12. Drawing Minimalist Landscapes with a Simple Backstitch
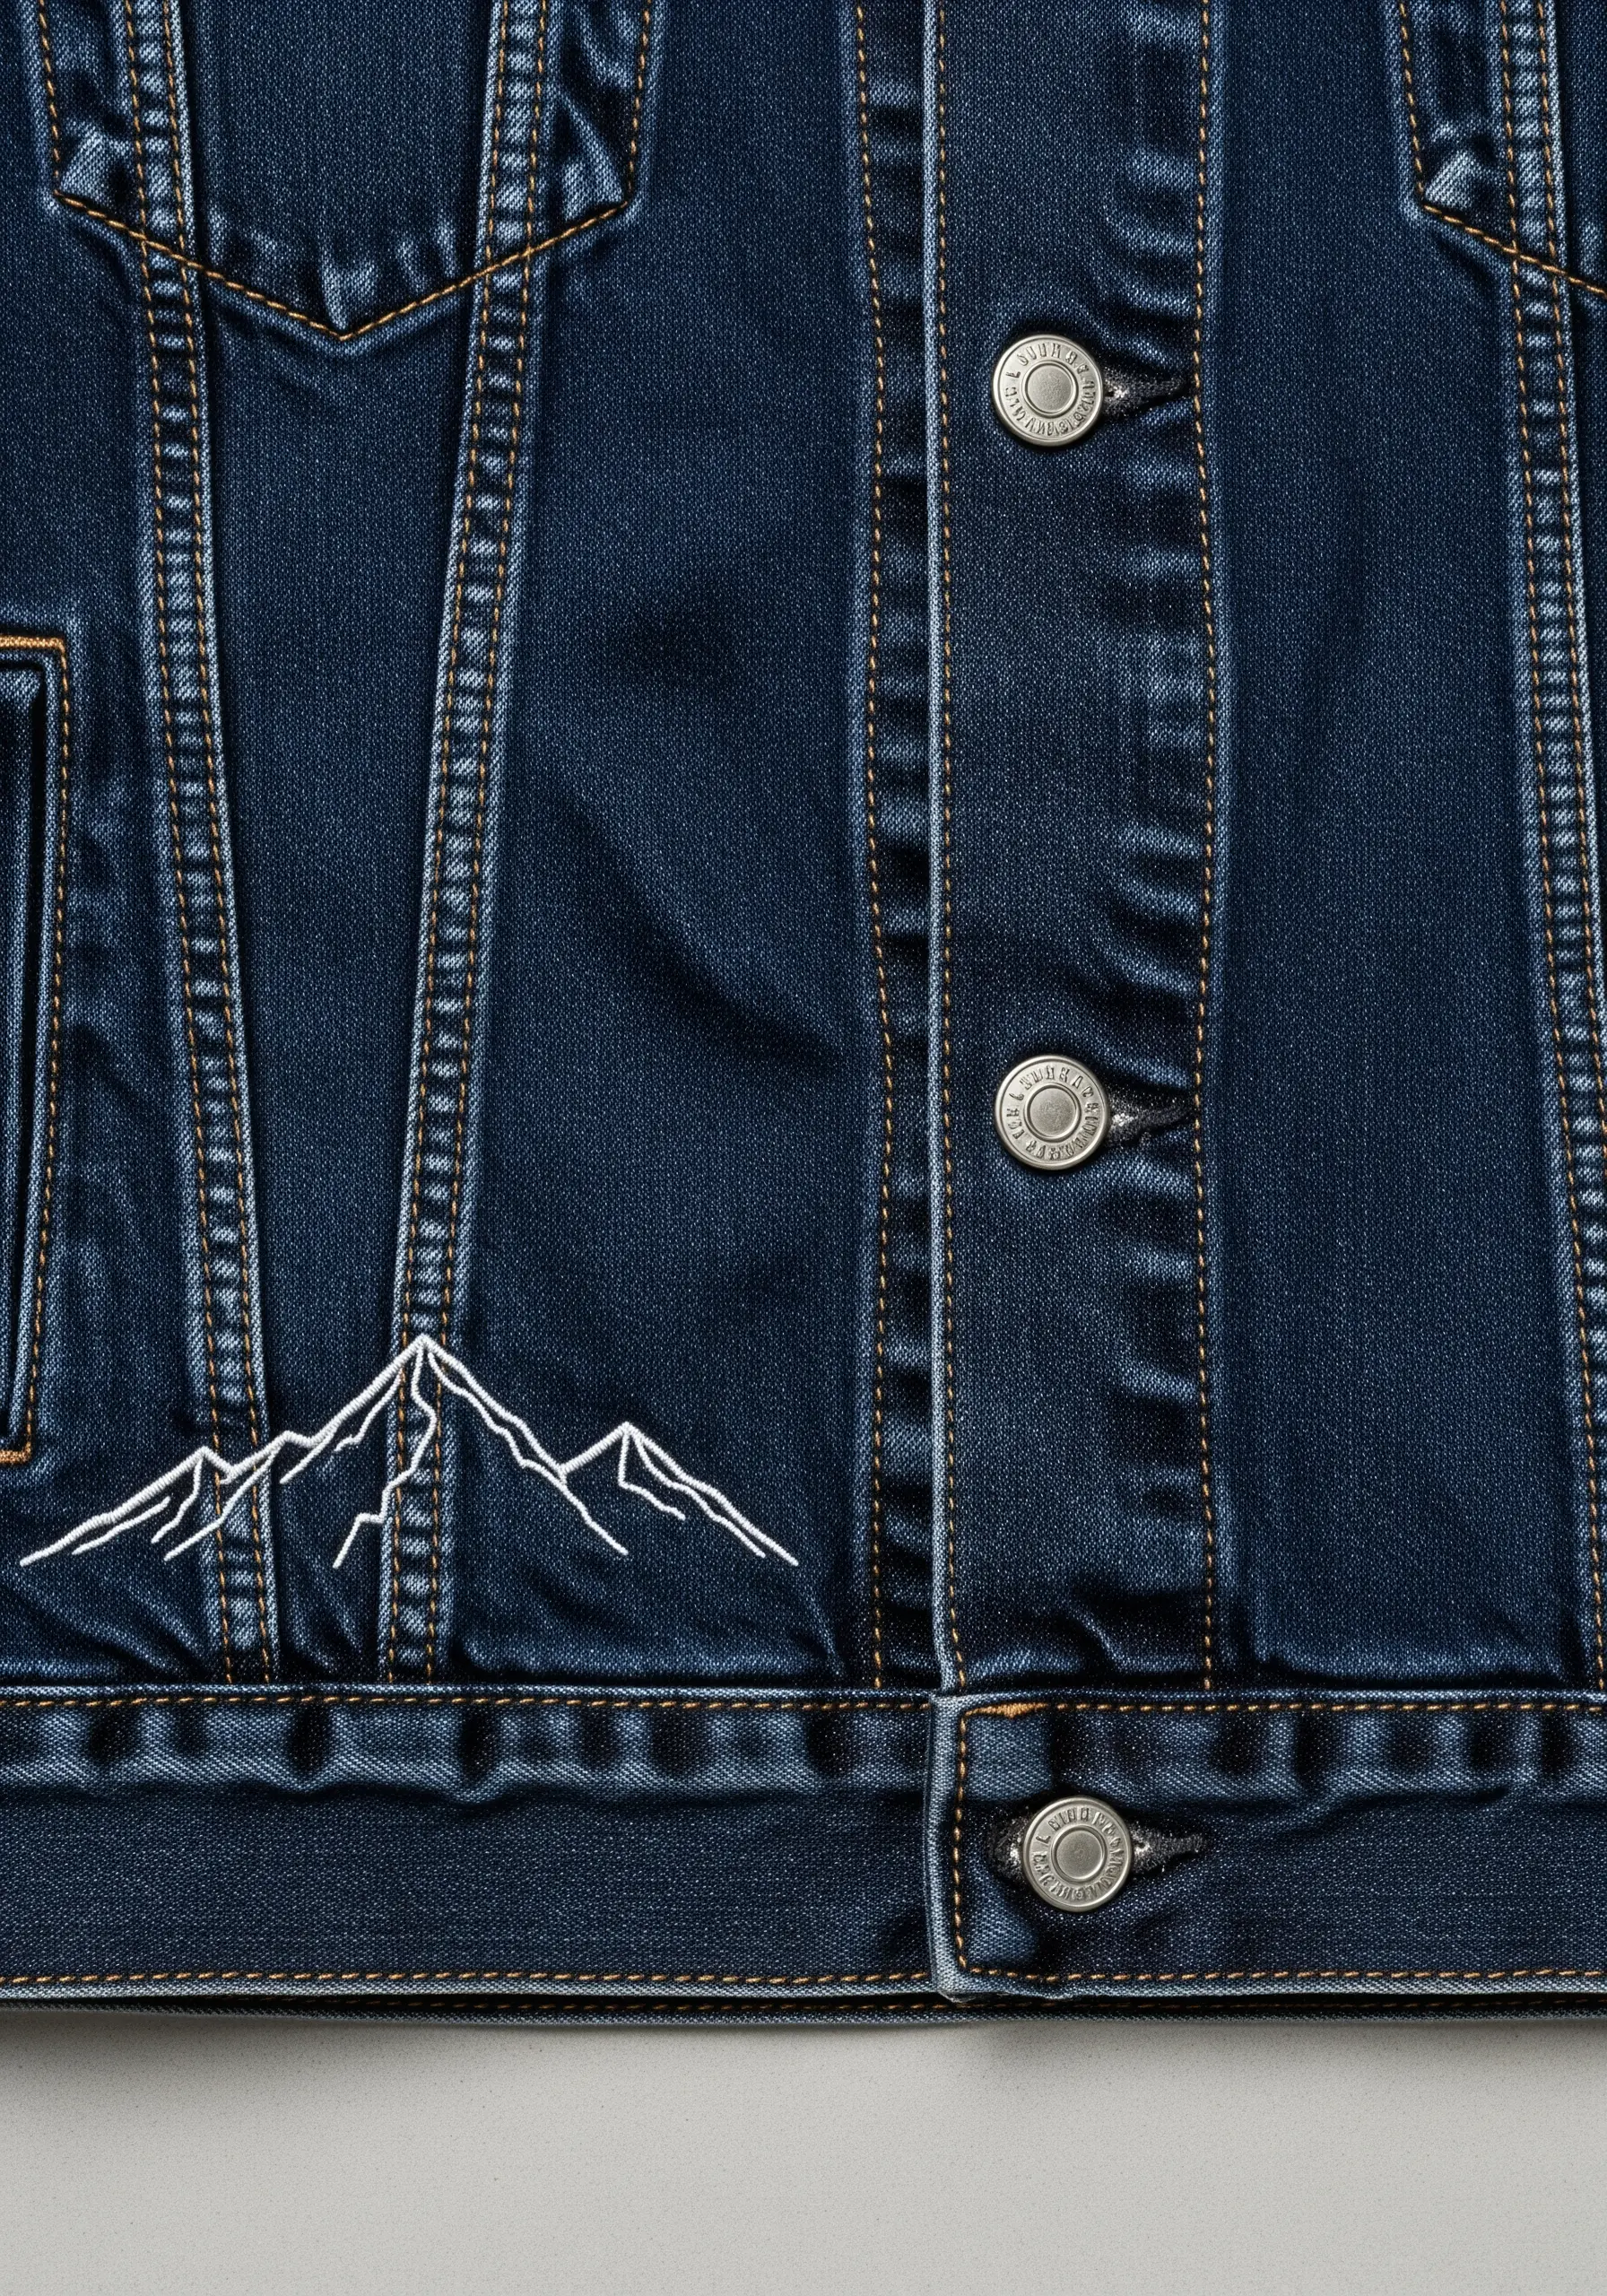
Sometimes, the simplest line creates the most powerful image.
A backstitch is all you need to trace the iconic silhouette of a mountain range along the bottom seam of your jacket.
To ensure your lines are crisp and stand out against the dark denim, use three or four strands of white floss.
This approach proves that you don’t need complex fills or colors to create a meaningful and visually striking design. It’s a perfect example of minimalist embroidery designs inspired by nature.
13. Designing a Subtle Ditsy Pattern with Star Stitches

Create an all-over texture that feels integrated and sophisticated, not overwhelming.
Use a simple star stitch—two small, intersecting straight stitches—and scatter it across an entire panel, like the collar.
Choose a thread color that is only a few shades different from your denim for a subtle, tone-on-tone effect.
This creates a ‘ditsy’ pattern that adds texture and interest without shouting for attention, giving the jacket a custom, high-end feel.
14. Combining Satin Fill and Radiating Straight Stitches
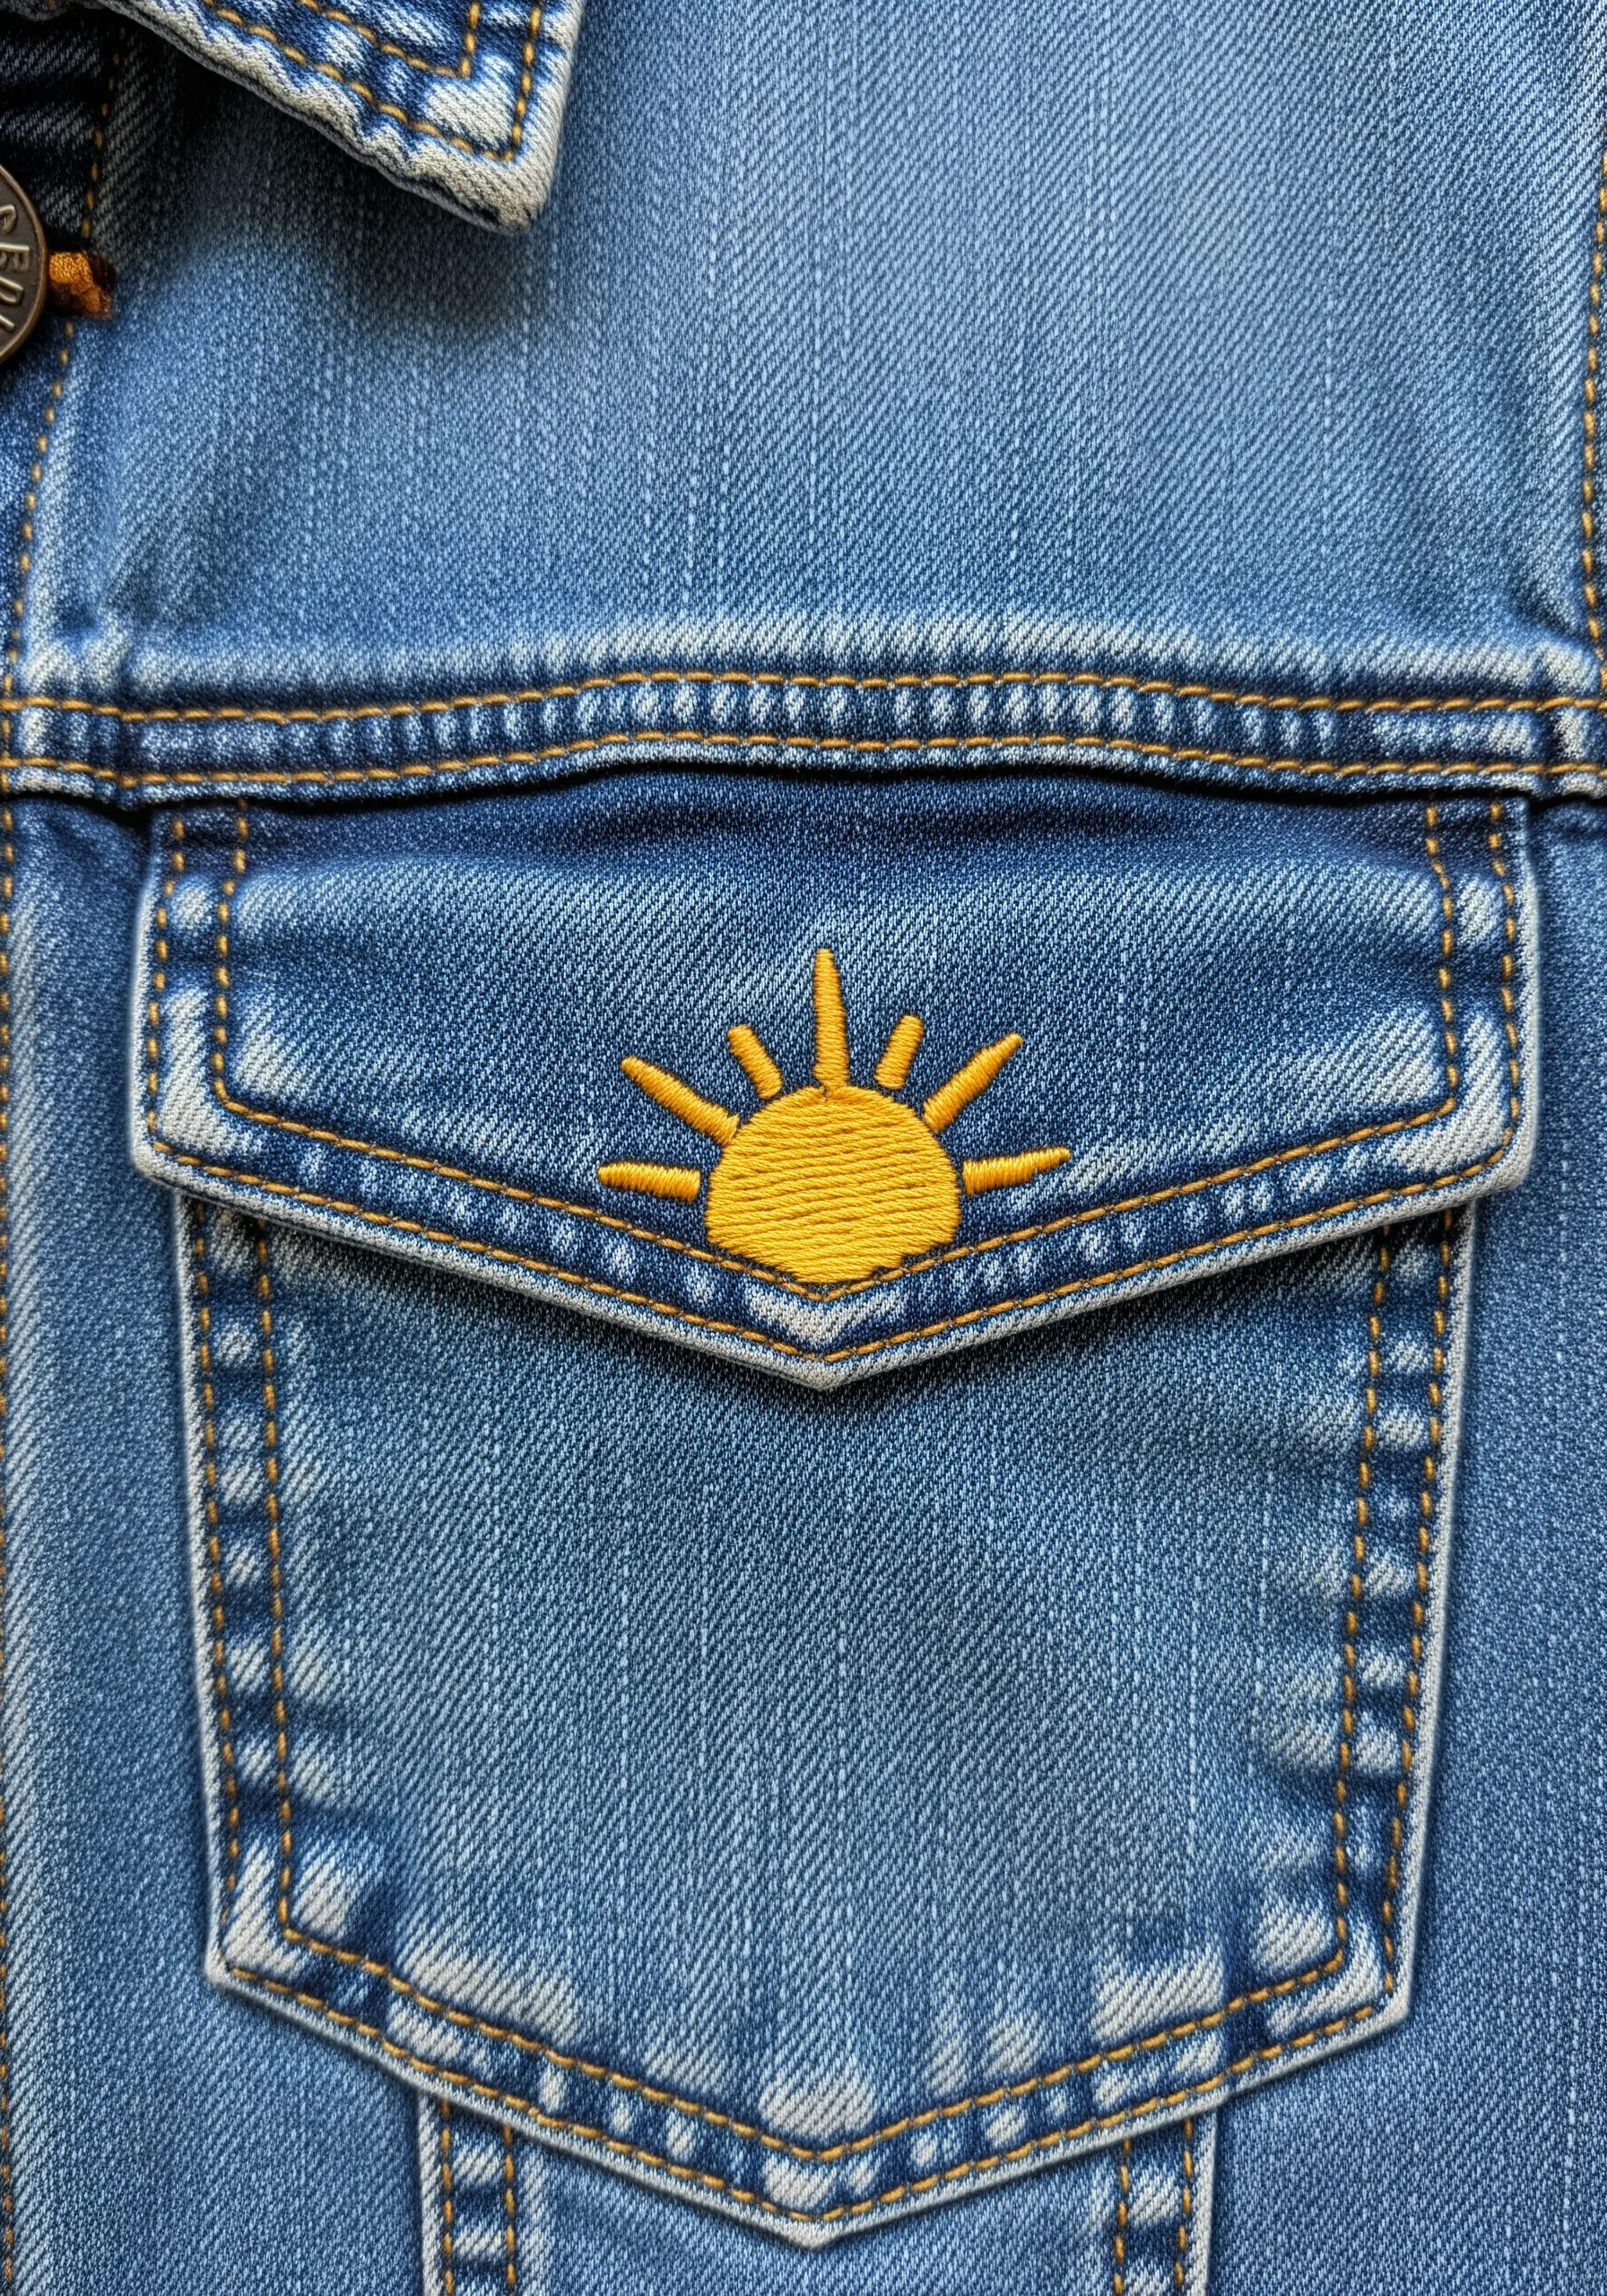
Create the illusion of light and energy by combining two fundamental stitch types.
First, fill the semi-circle of the sun with a dense, horizontal satin stitch for a solid, vibrant base.
Then, add the rays using single straight stitches that radiate outward from the curved edge.
Varying the length of the rays adds a dynamic quality, making this simple sun motif feel energetic and cheerful. The contrast between the solid fill and the open lines is what makes it so effective.
15. Creating Movement with Running and Seed Stitches
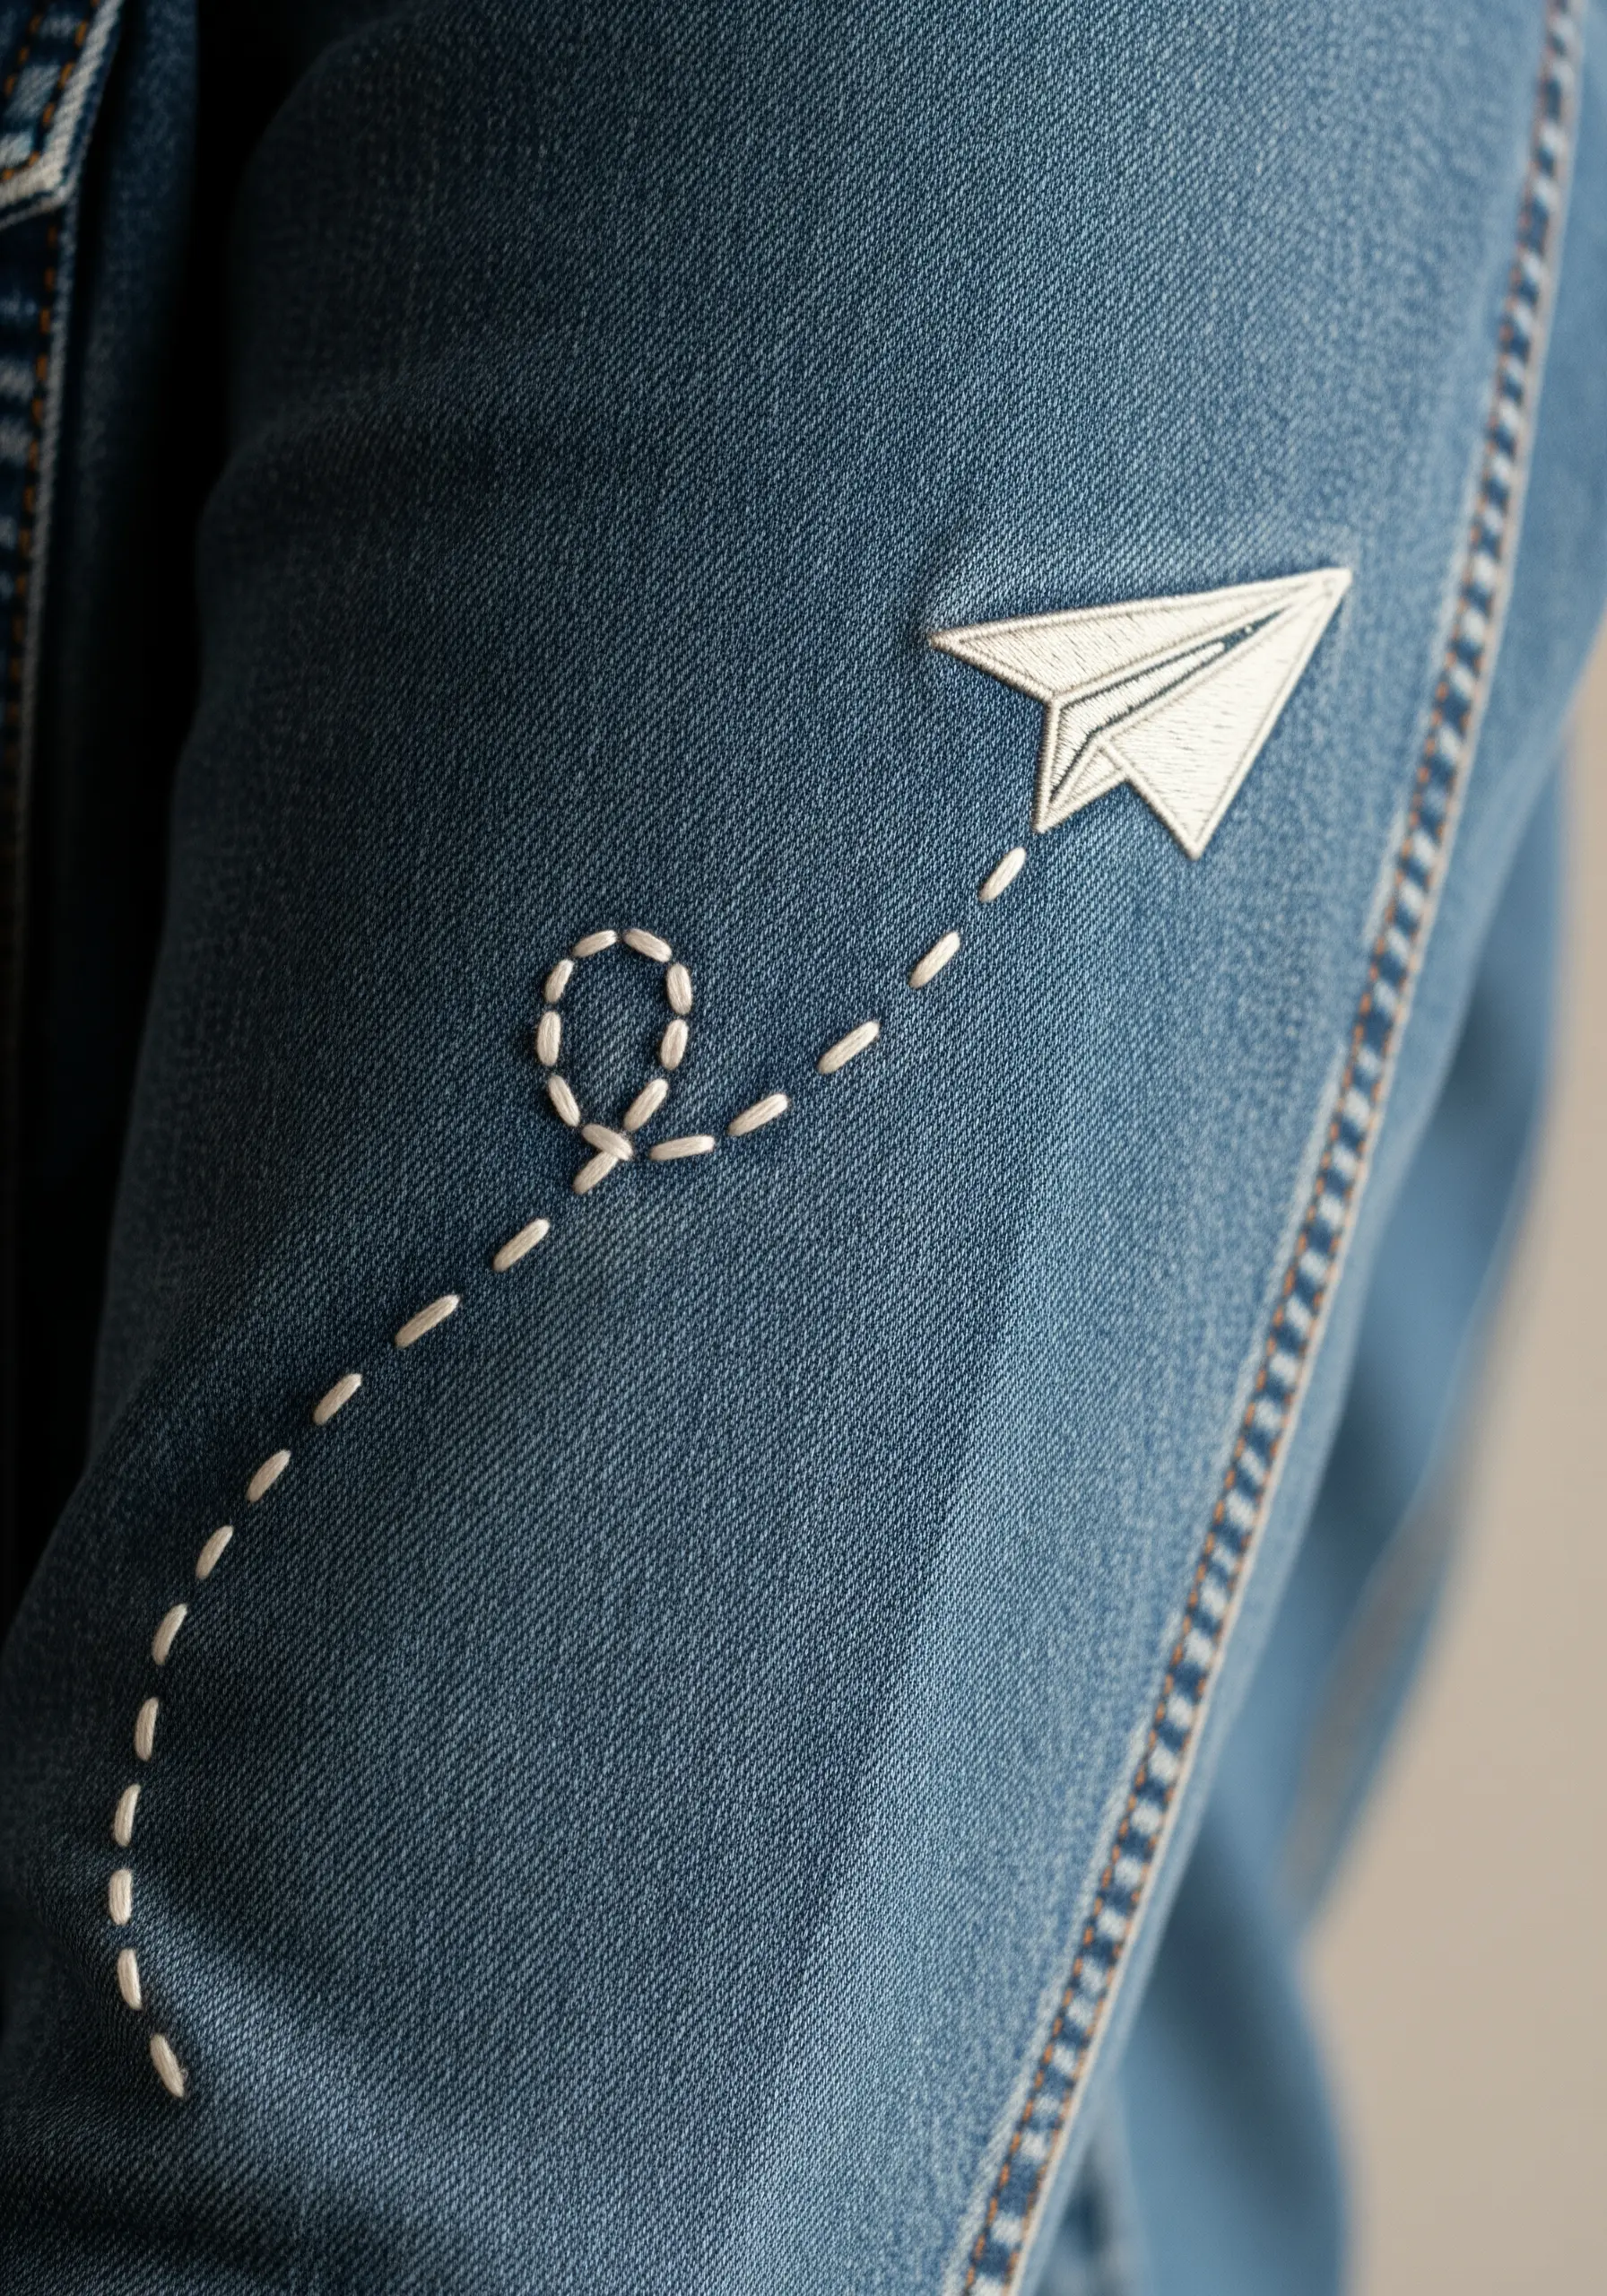
Tell a story and imply motion by thoughtfully combining different stitches.
The paper airplane is crafted with a precise satin stitch fill for a solid, defined shape.
The flight path begins with a simple running stitch, with the space between stitches growing to suggest speed and distance.
Adding a small loop made of tiny, scattered seed stitches adds a touch of playful whimsy and breaks the straight line, making the design feel more dynamic.
16. Adding Architectural Detail with Parallel Running Stitches
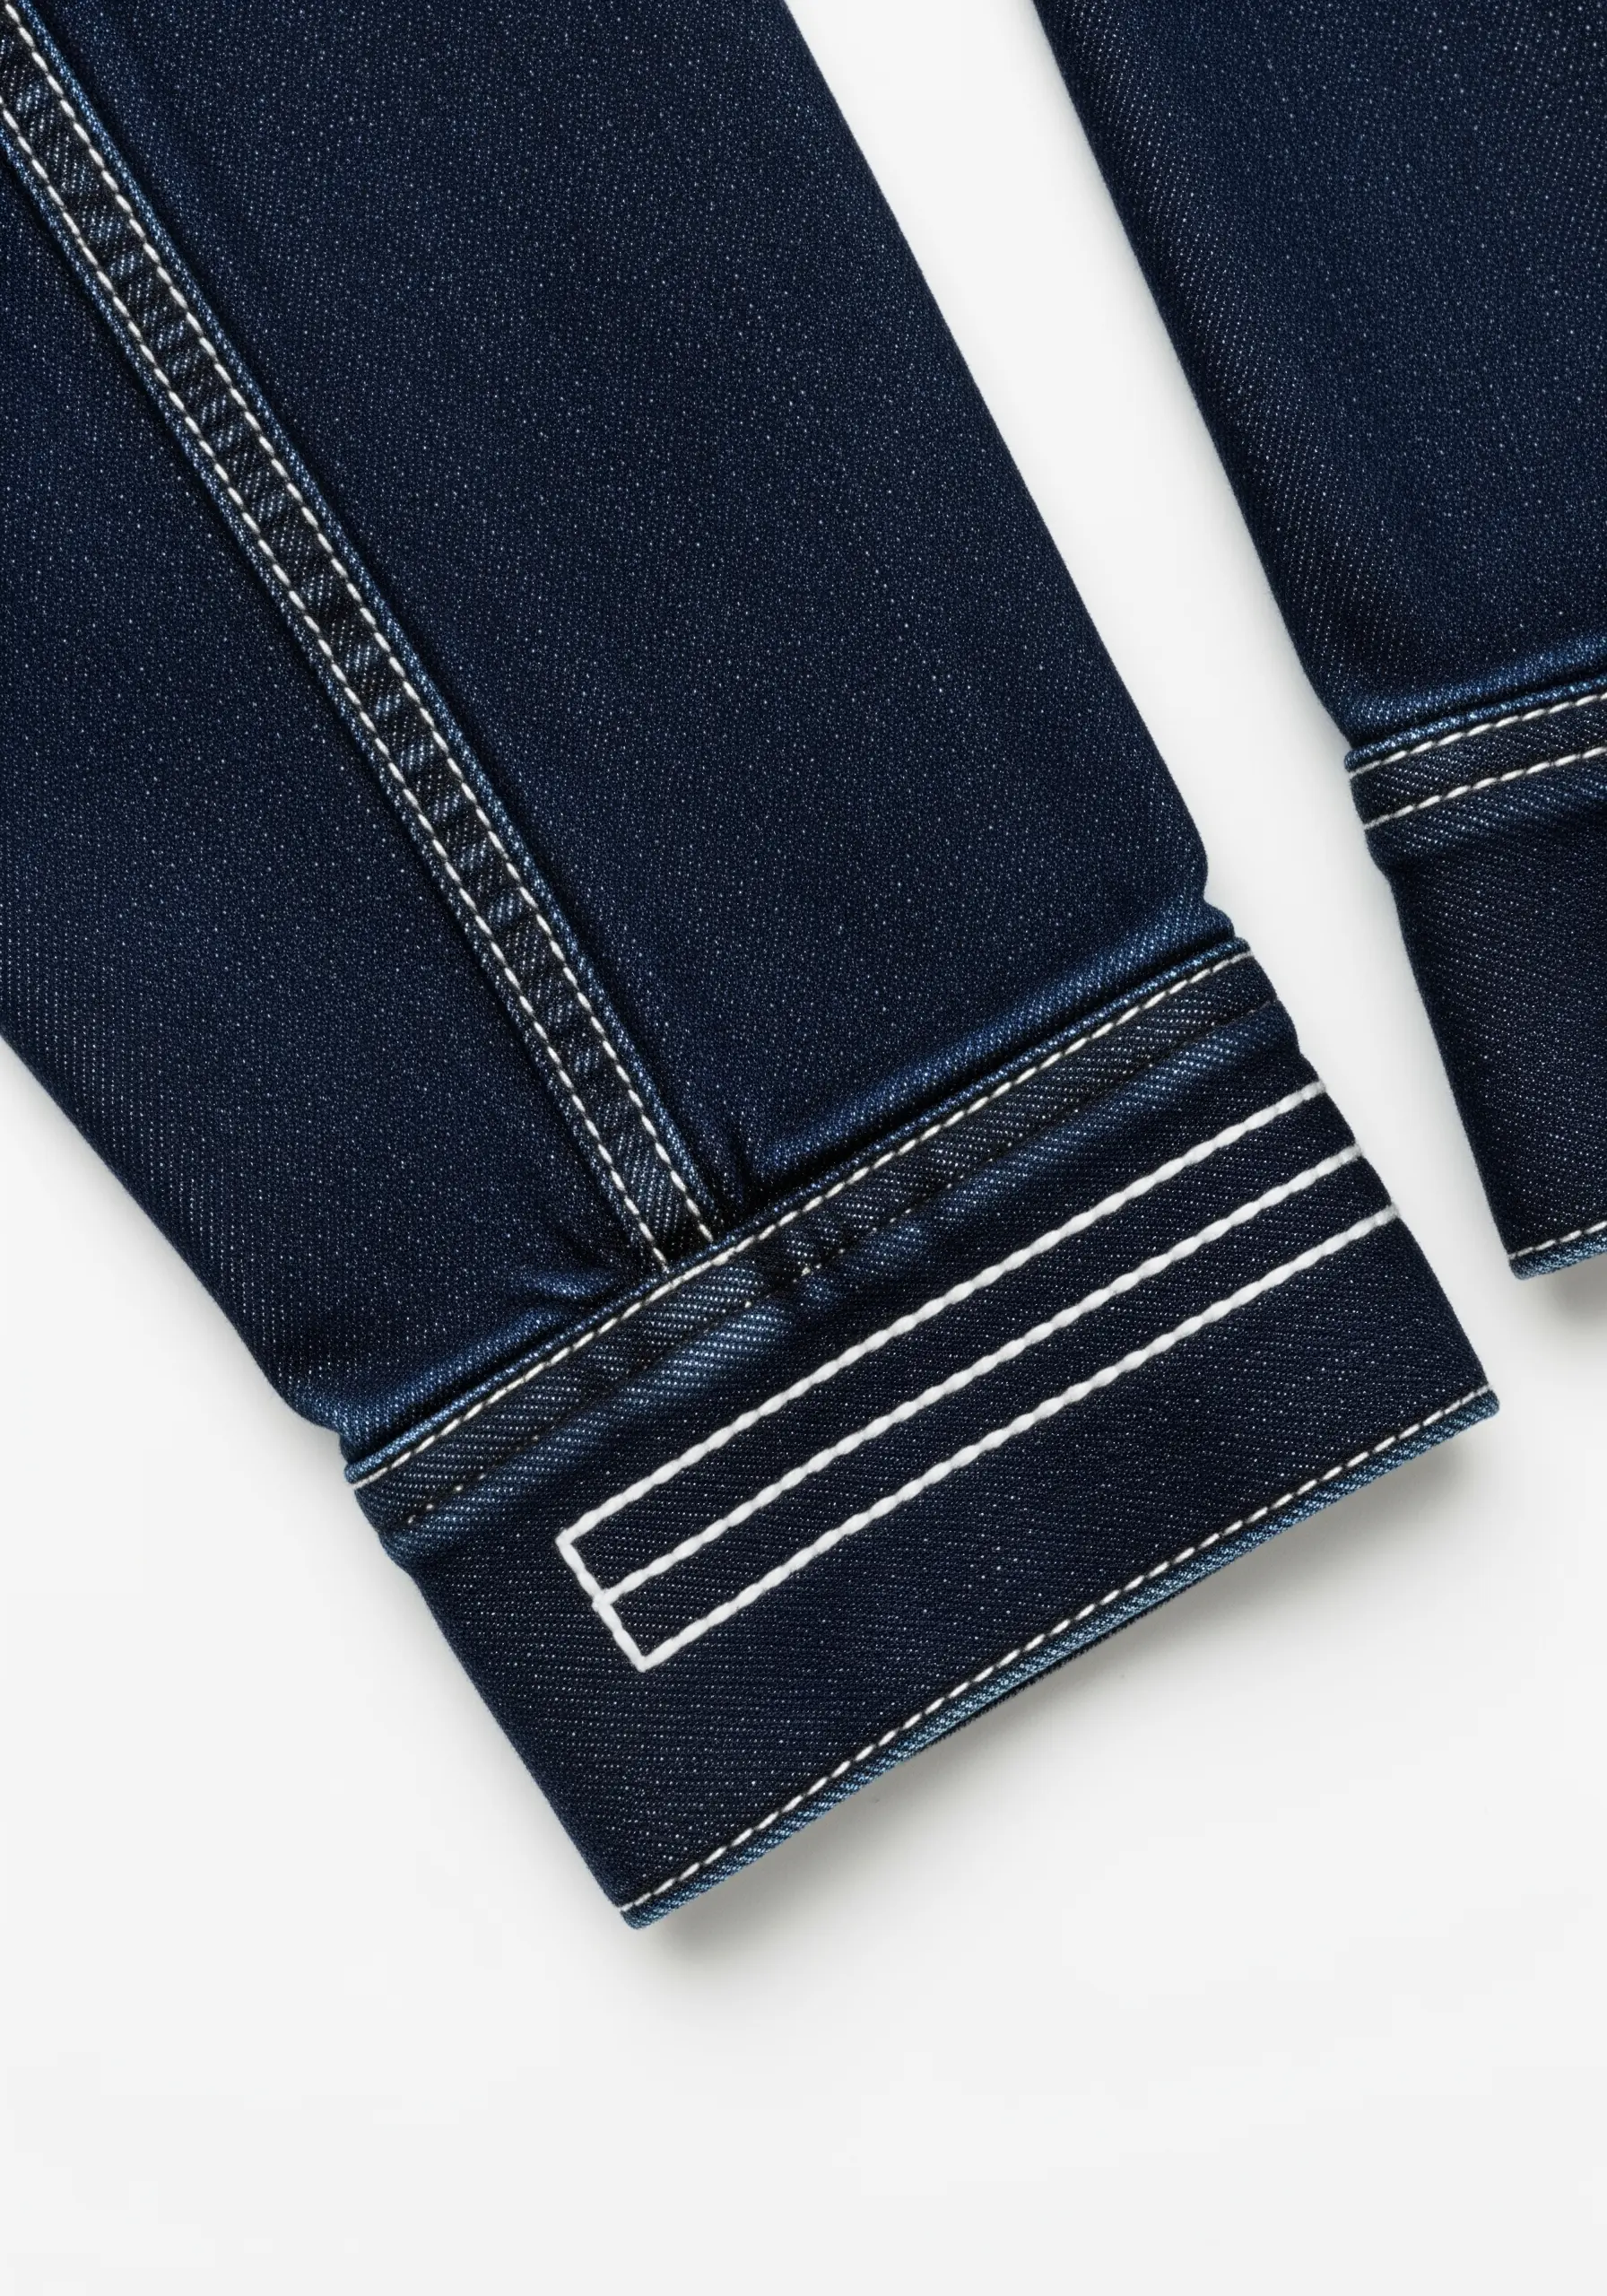
Elevate your jacket’s existing design by highlighting its construction with thread.
Use a simple, sturdy backstitch or running stitch to add parallel lines that echo the seams on the cuffs or yokes.
Using a thick, contrasting thread—like this bright white against dark indigo—turns a structural element into a deliberate graphic detail.
This minimalist approach is incredibly effective for adding a touch of custom, architectural flair without a complex pattern.
17. Adding Dimension with Long-and-Short Stitch Shading
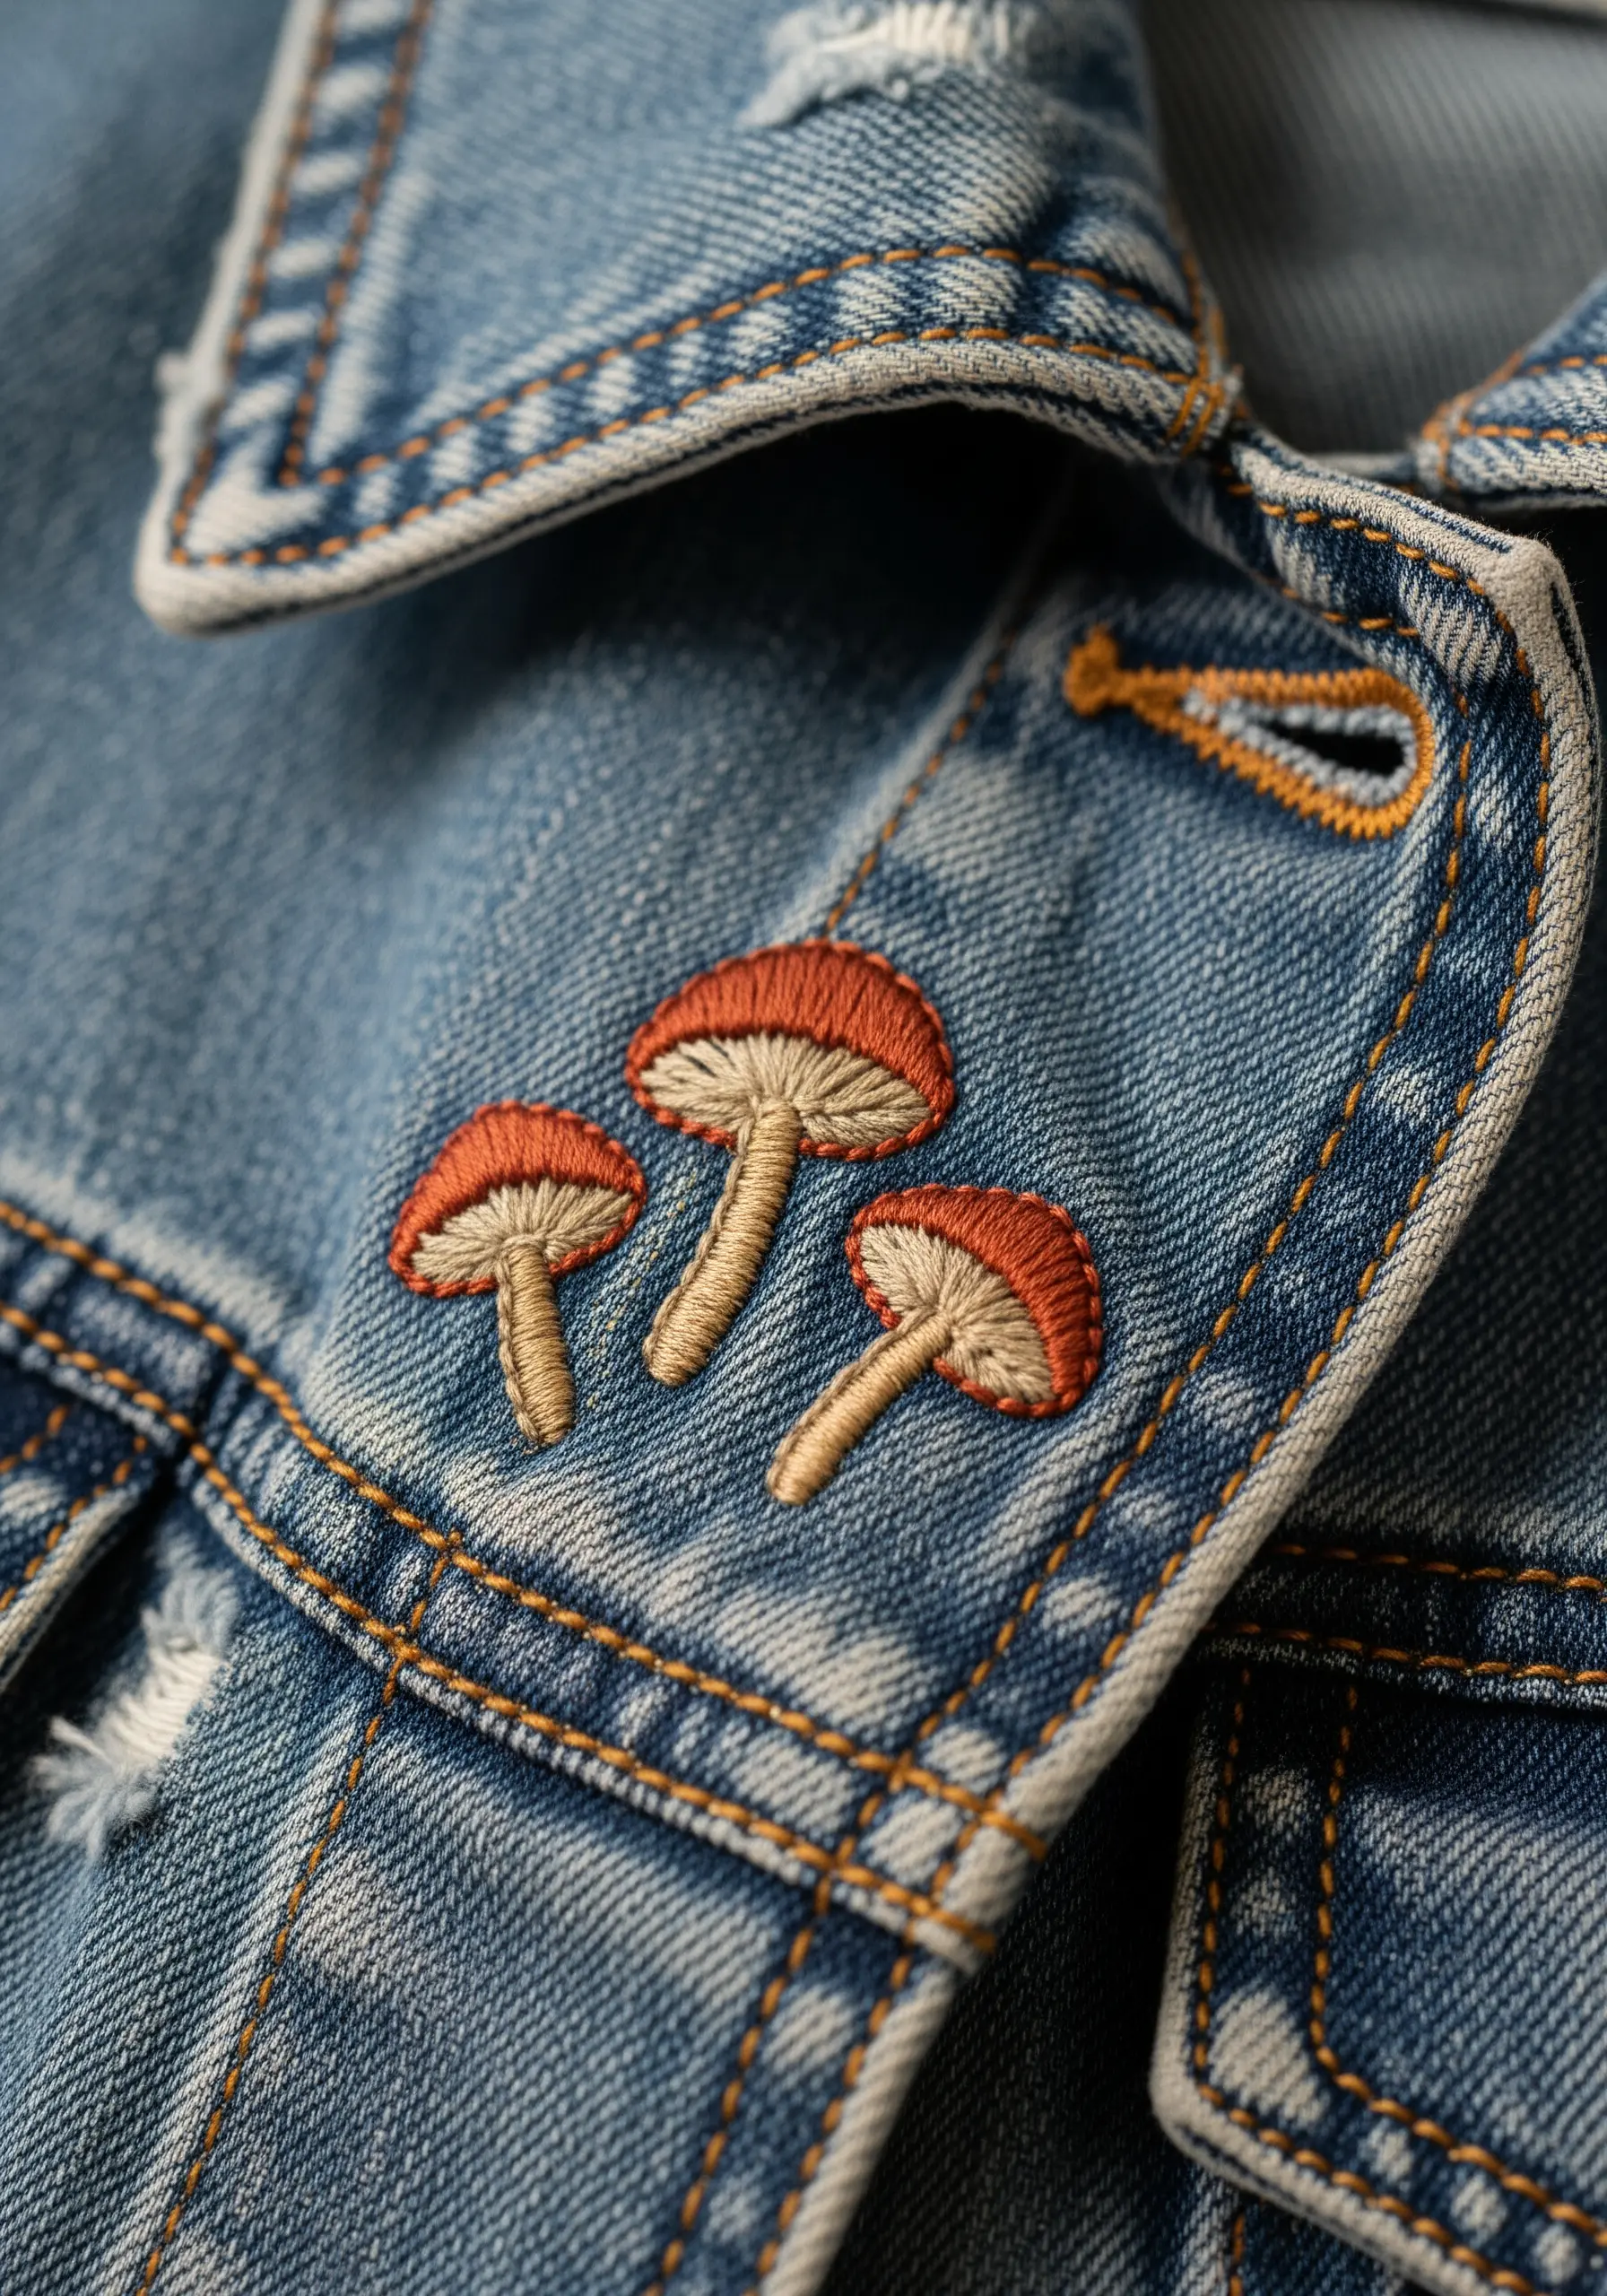
Give your motifs lifelike dimension by blending colors with the long-and-short stitch.
Instead of a flat satin stitch, fill the mushroom caps with interlocking rows of long and short stitches.
Start with your darkest color on the bottom edge and gradually introduce lighter shades as you work upward. This technique creates a soft, painterly gradient.
Finish with a crisp backstitch outline to define the shape and contain the beautiful color blending.
18. Weaving a Textured Starburst for a Touch of Shine

Create a focal point that combines structure and texture with a woven starburst stitch.
Begin by making a foundation of straight stitches that cross at a central point, like the spokes of a wheel.
Then, using the same or a different thread, weave your needle over and under these spokes without piercing the fabric, spiraling out from the center.
This technique builds a raised, woven texture that catches the light beautifully, especially when stitched directly over an existing seam for added interest.
19. Achieving a Flawless Monogram with Dense Satin Stitch
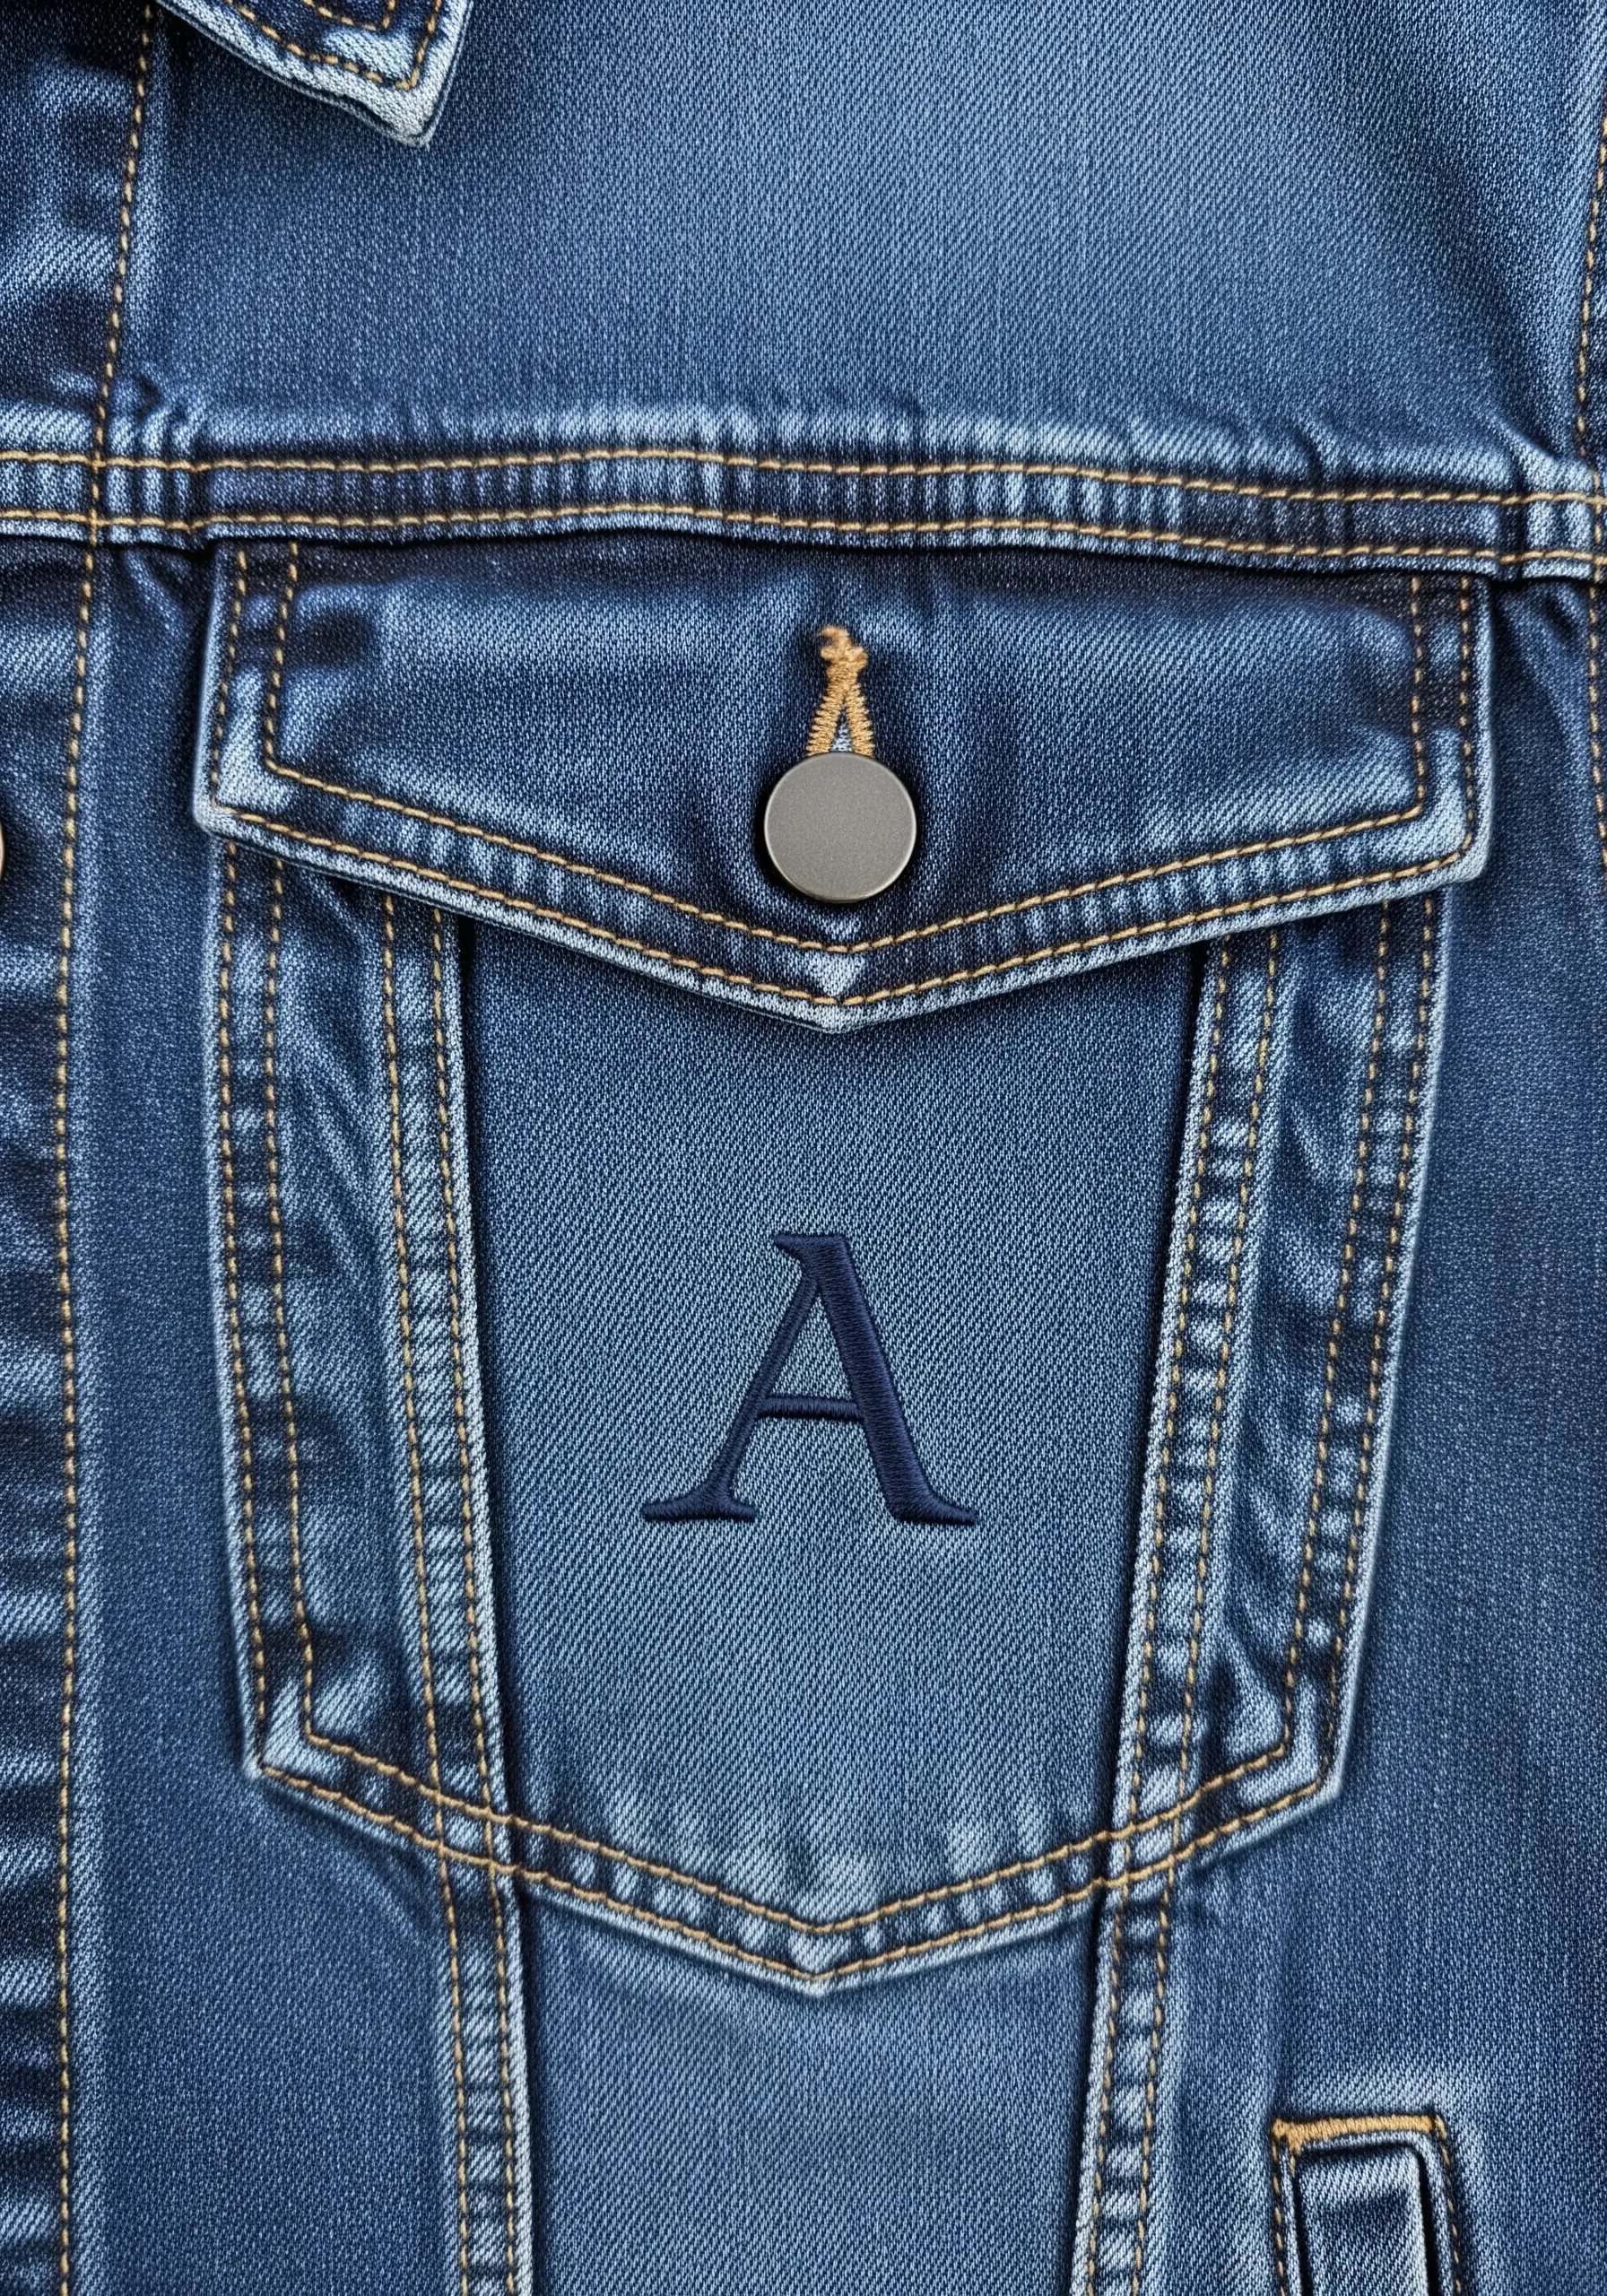
To replicate the clean look of a machine-embroidered monogram by hand, precision is paramount.
Use a tone-on-tone embroidery technique by choosing a thread that is just a shade darker than your denim for a subtle, sophisticated finish.
Create a sharp boundary by outlining the letter with a split stitch. Then, fill the shape with exceptionally dense satin stitches, ensuring each one sits perfectly parallel to the last.
Work slowly and maintain even tension to achieve that flawlessly smooth, almost printed, appearance.
20. Crafting Delicate Motifs with a Simple Outline Stitch
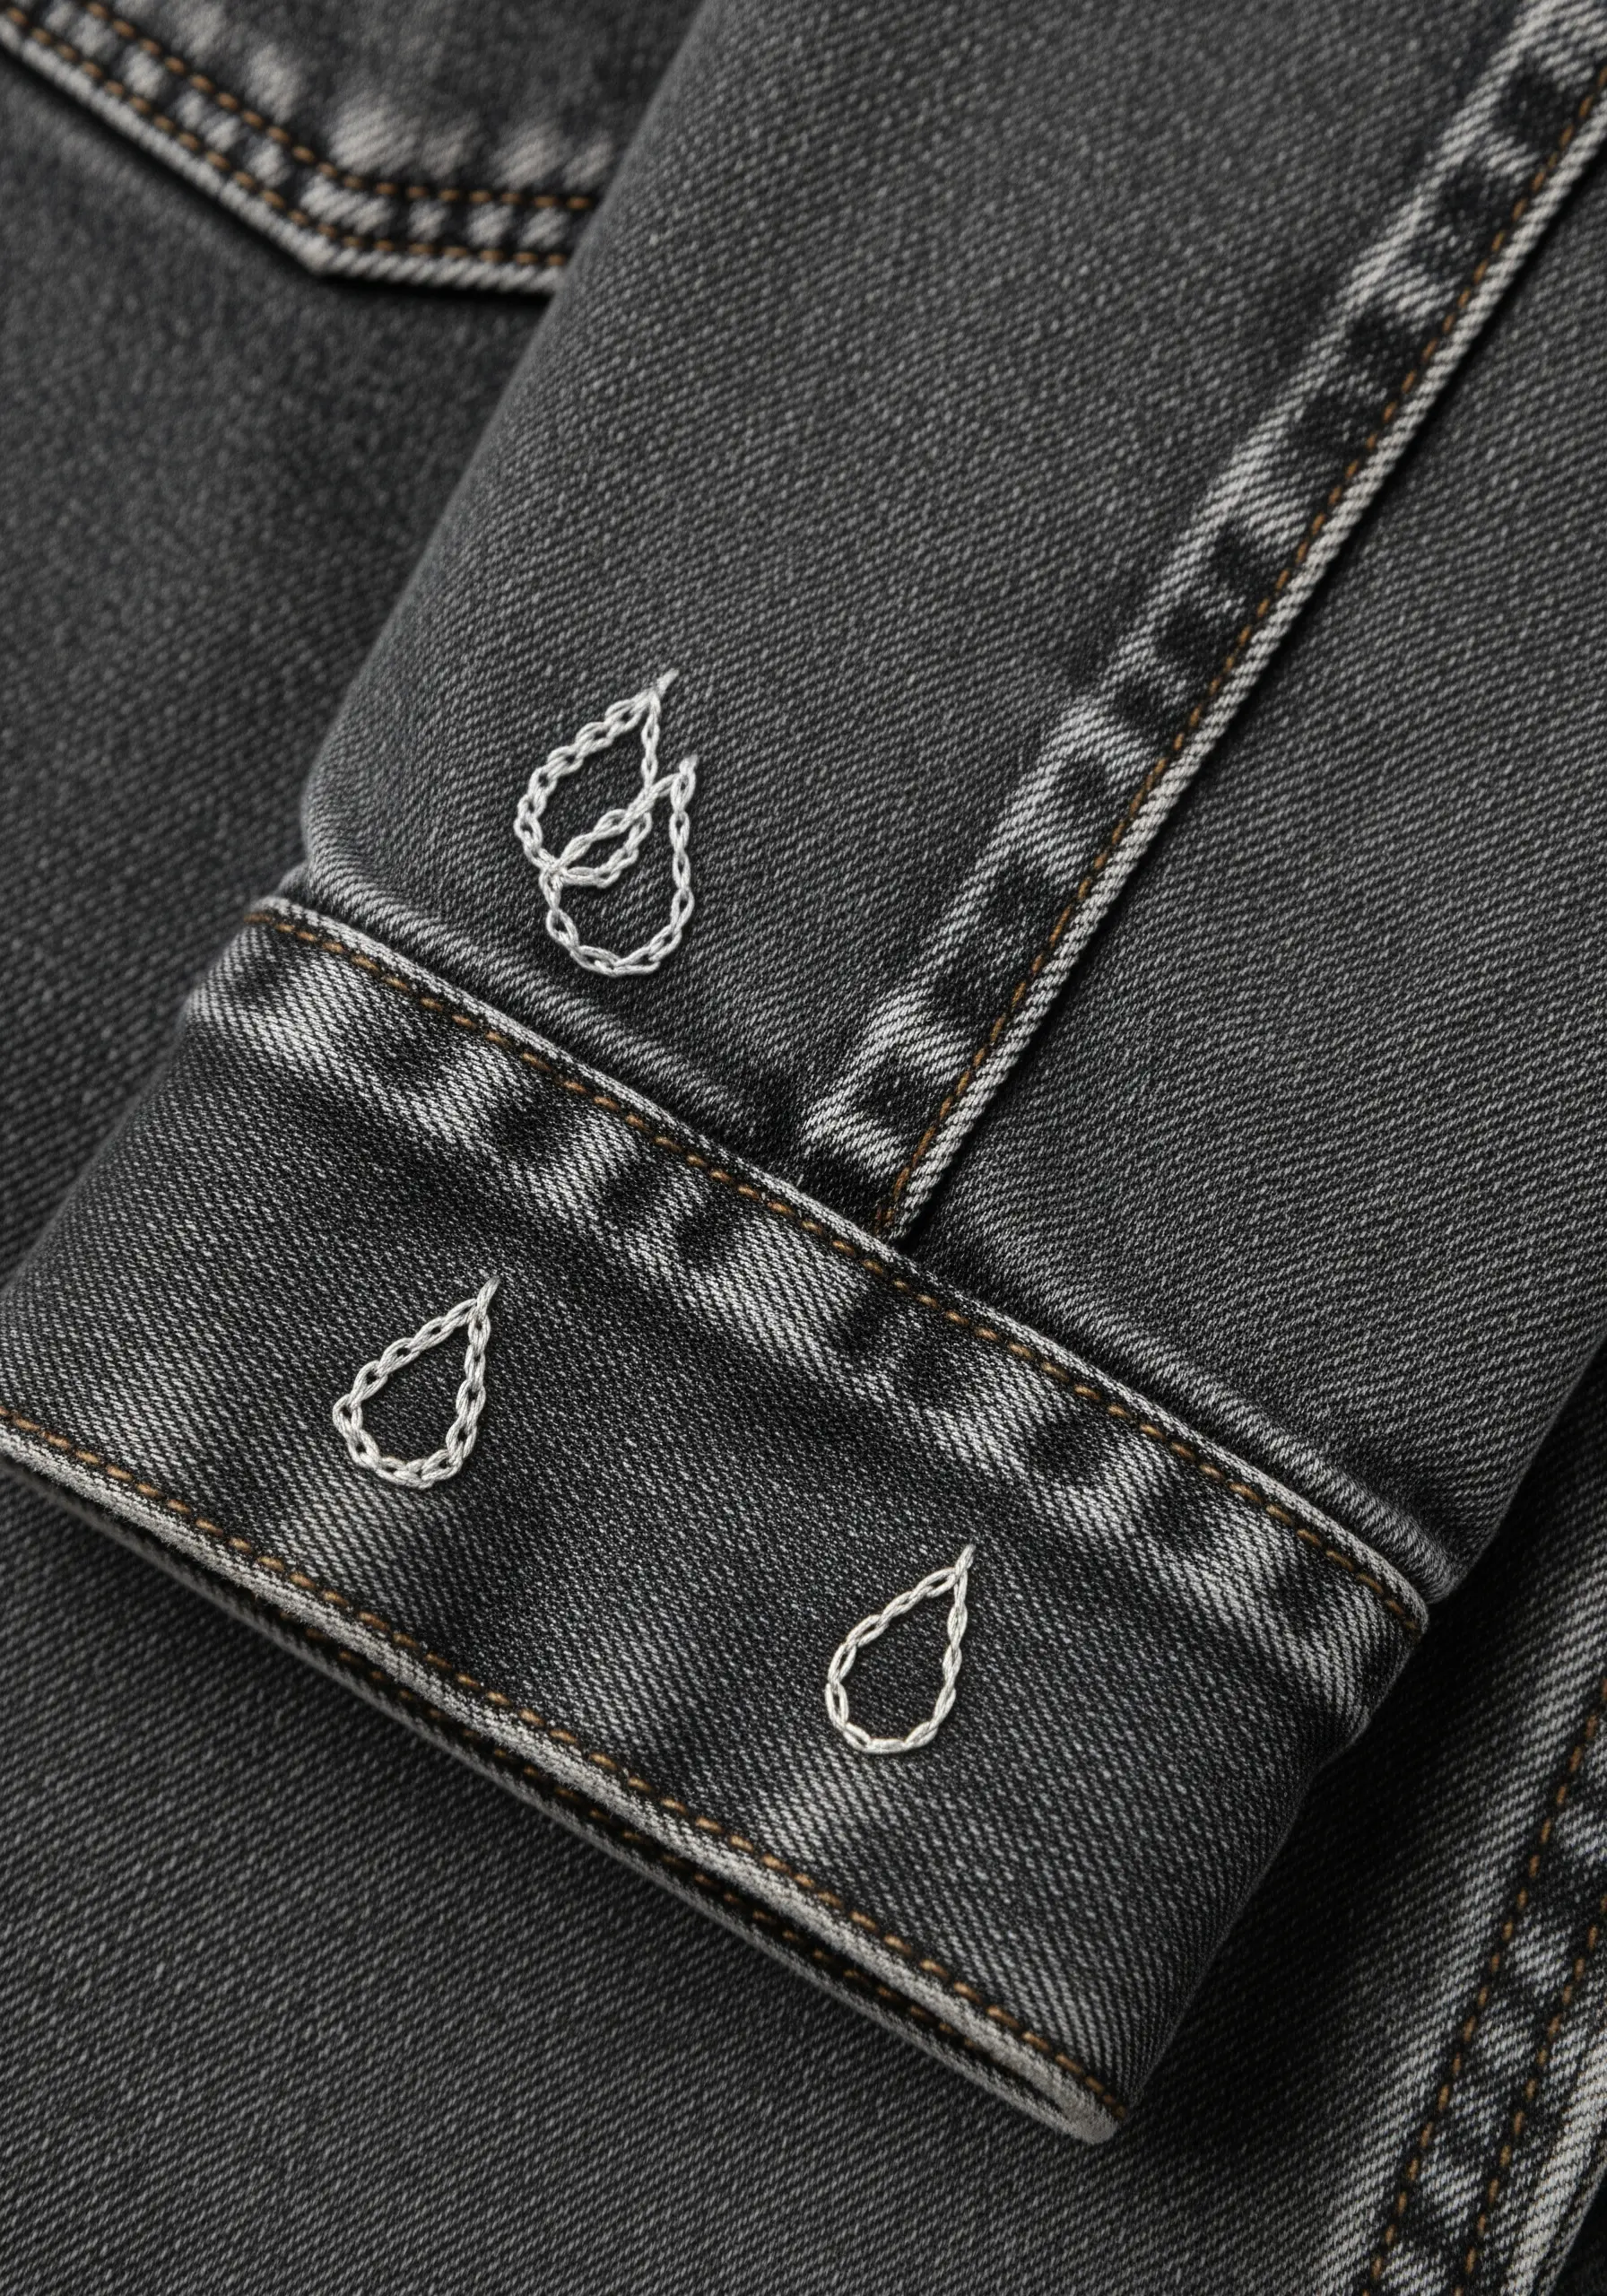
Embrace minimalism by focusing on the purity of line work.
These simple teardrop shapes are created using just an outline stitch, like a stem stitch or split stitch, with two strands of floss.
The beauty of this approach lies in its restraint. The empty space inside the shapes allows the texture of the denim to become part of the design.
Scatter them asymmetrically along a cuff or collar for a delicate, rain-inspired pattern that is both modern and understated.


