

You’ve mastered the basic stitches, and now you’re looking for that next step—the one that turns a pleasant craft into a personal art form. The secret isn’t in learning dozens of complex new techniques. It’s in learning to see the world around you with an artist’s eye and translating its textures, colors, and light into thread.
Nature offers the most profound inspiration. Think of the velvet texture of moss, the delicate veins of a leaf, the rough architecture of bark. These aren’t just things to replicate; they are studies in form and shadow that you can capture with a needle and floss.
This collection is your guide to looking closer. Each piece reveals a way to interpret the natural world with intention and modern elegance. Let these ideas empower you to move beyond the pattern and begin creating work that feels authentic, detailed, and truly your own.
1. Capture Ephemeral Motion with 3D Stitches
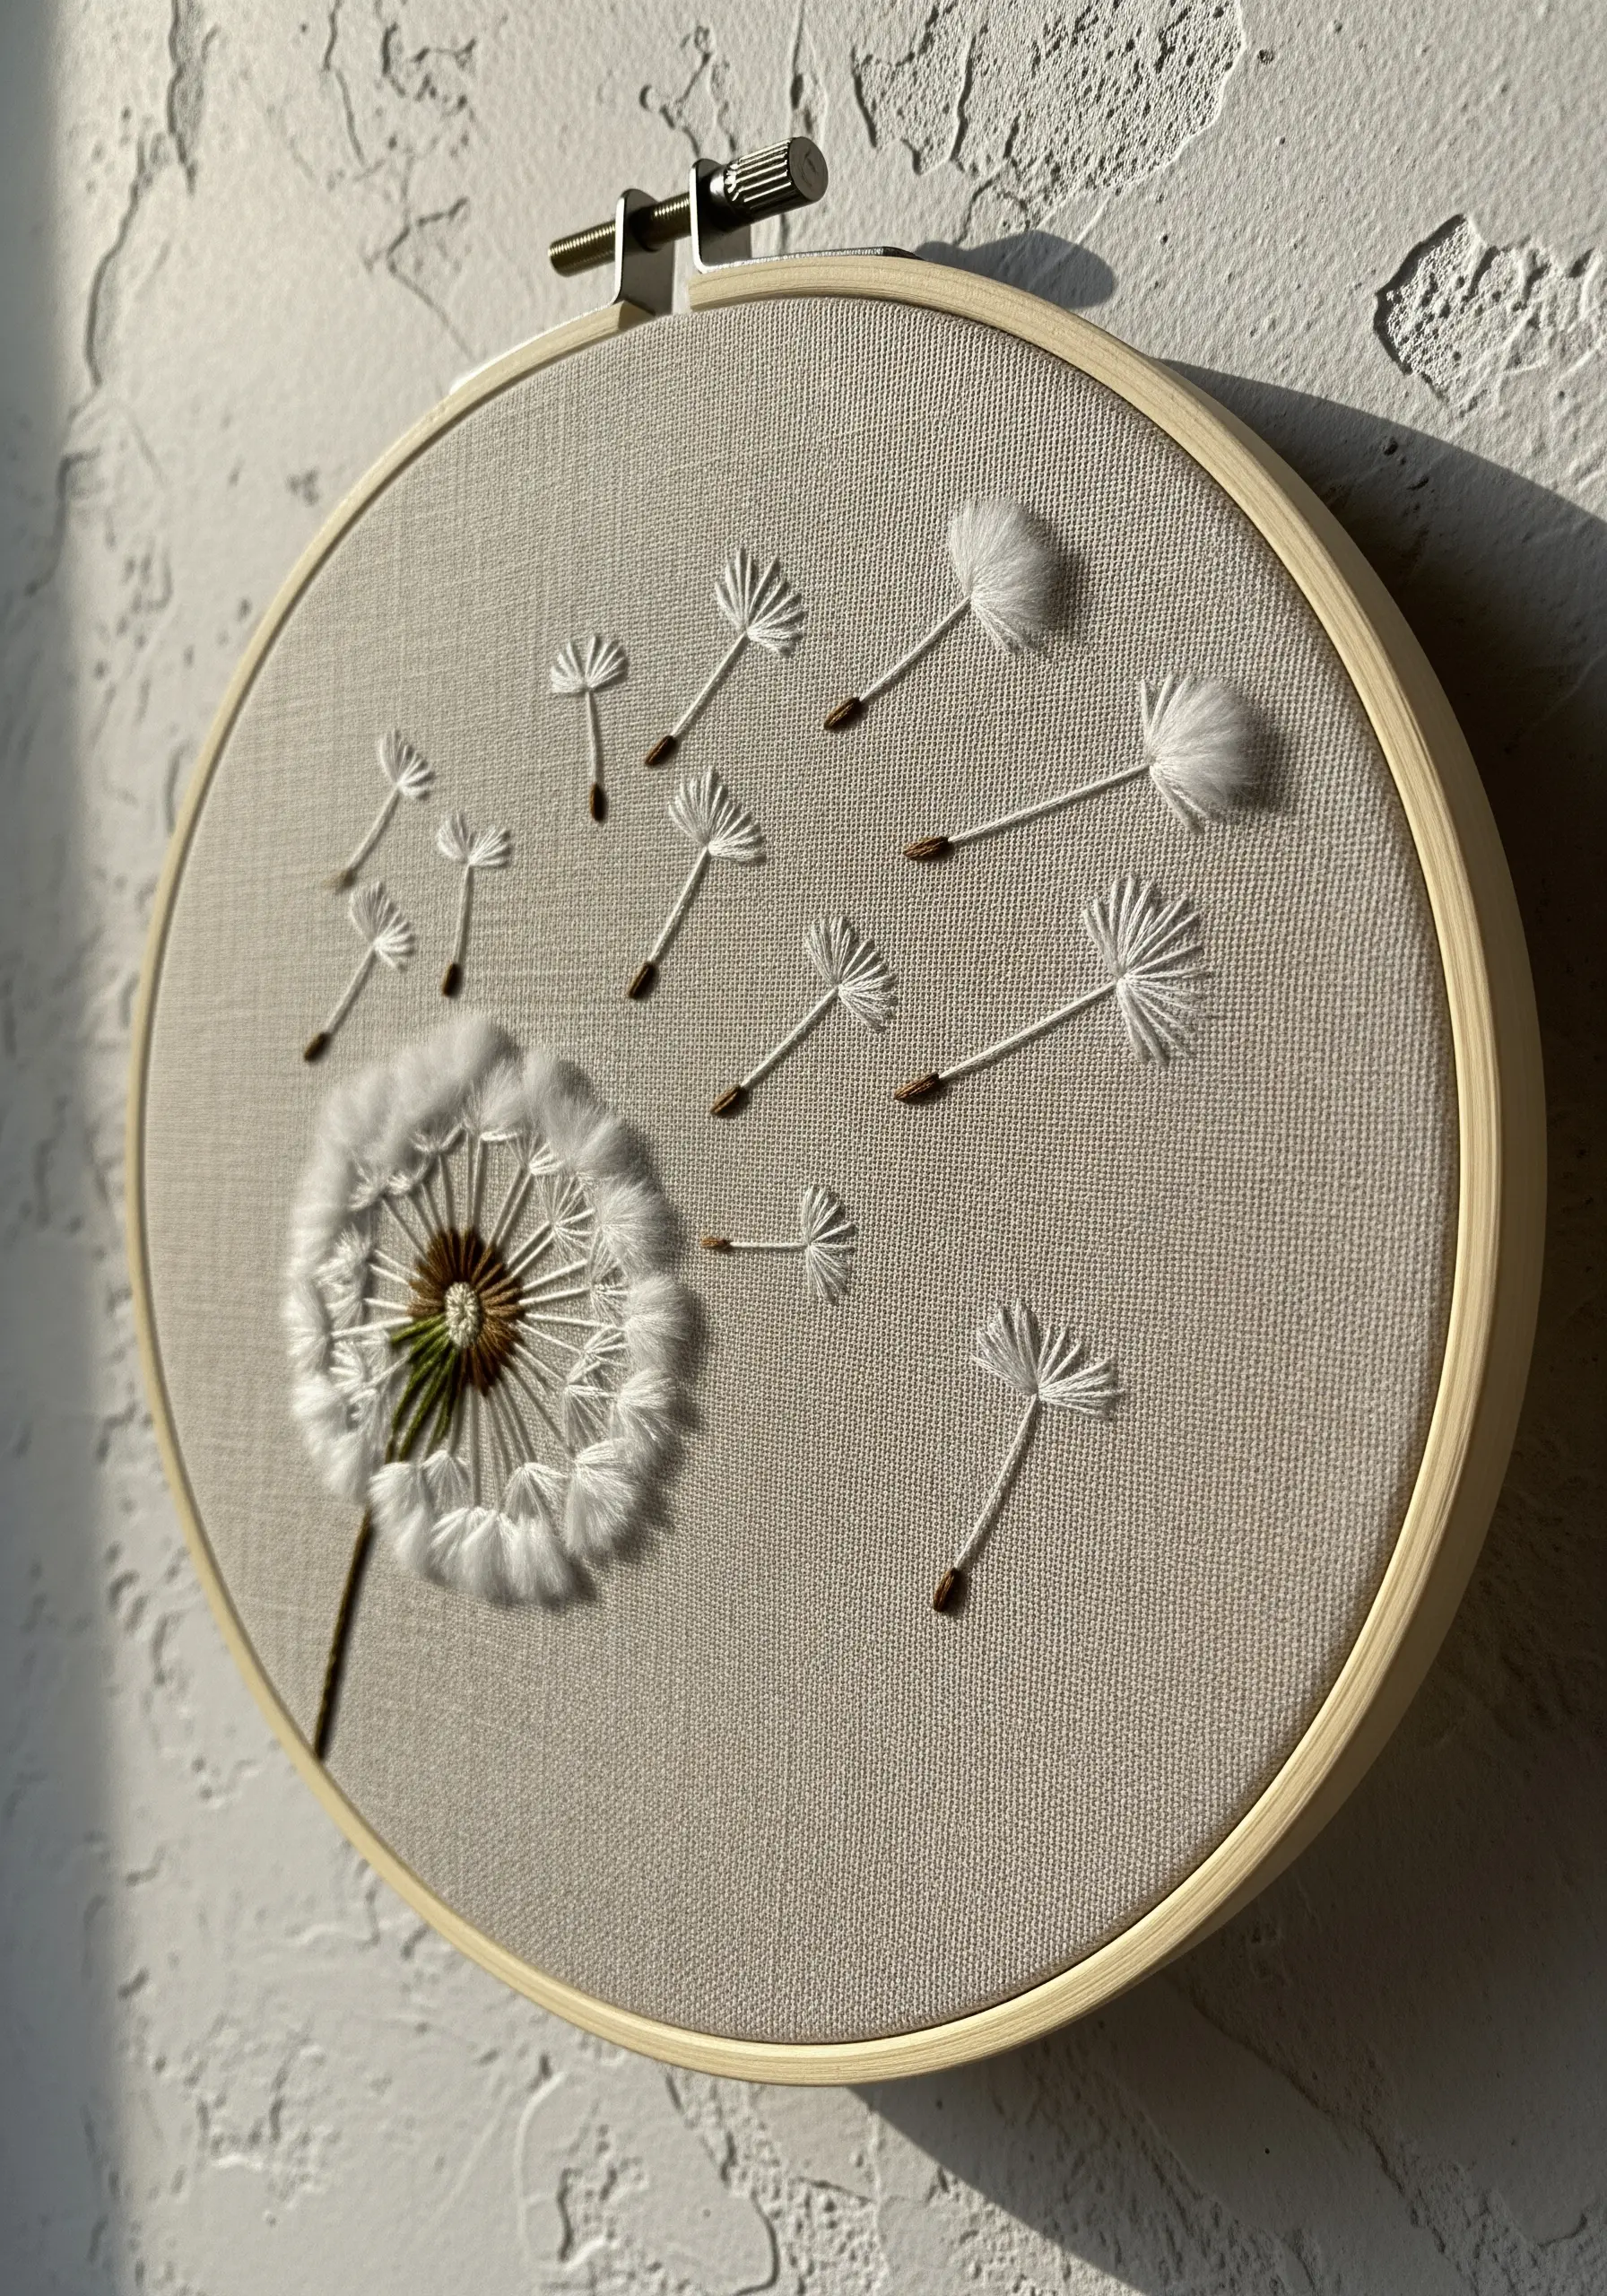
To give your dandelions a lifelike, windswept quality, move beyond flat stitches.
Use turkey work (or Ghiordes knot) for the main seed head, trimming the loops to create a soft, fluffy sphere that invites touch.
For the floating seeds, create detached chain stitches for the parachute-like tops, allowing them to lift slightly from the fabric.
This contrast between the dense, trimmed puffball and the delicate, airy floating seeds creates a powerful sense of movement and fragility.
2. Sculpt a Landscape with Fiber Appliqué
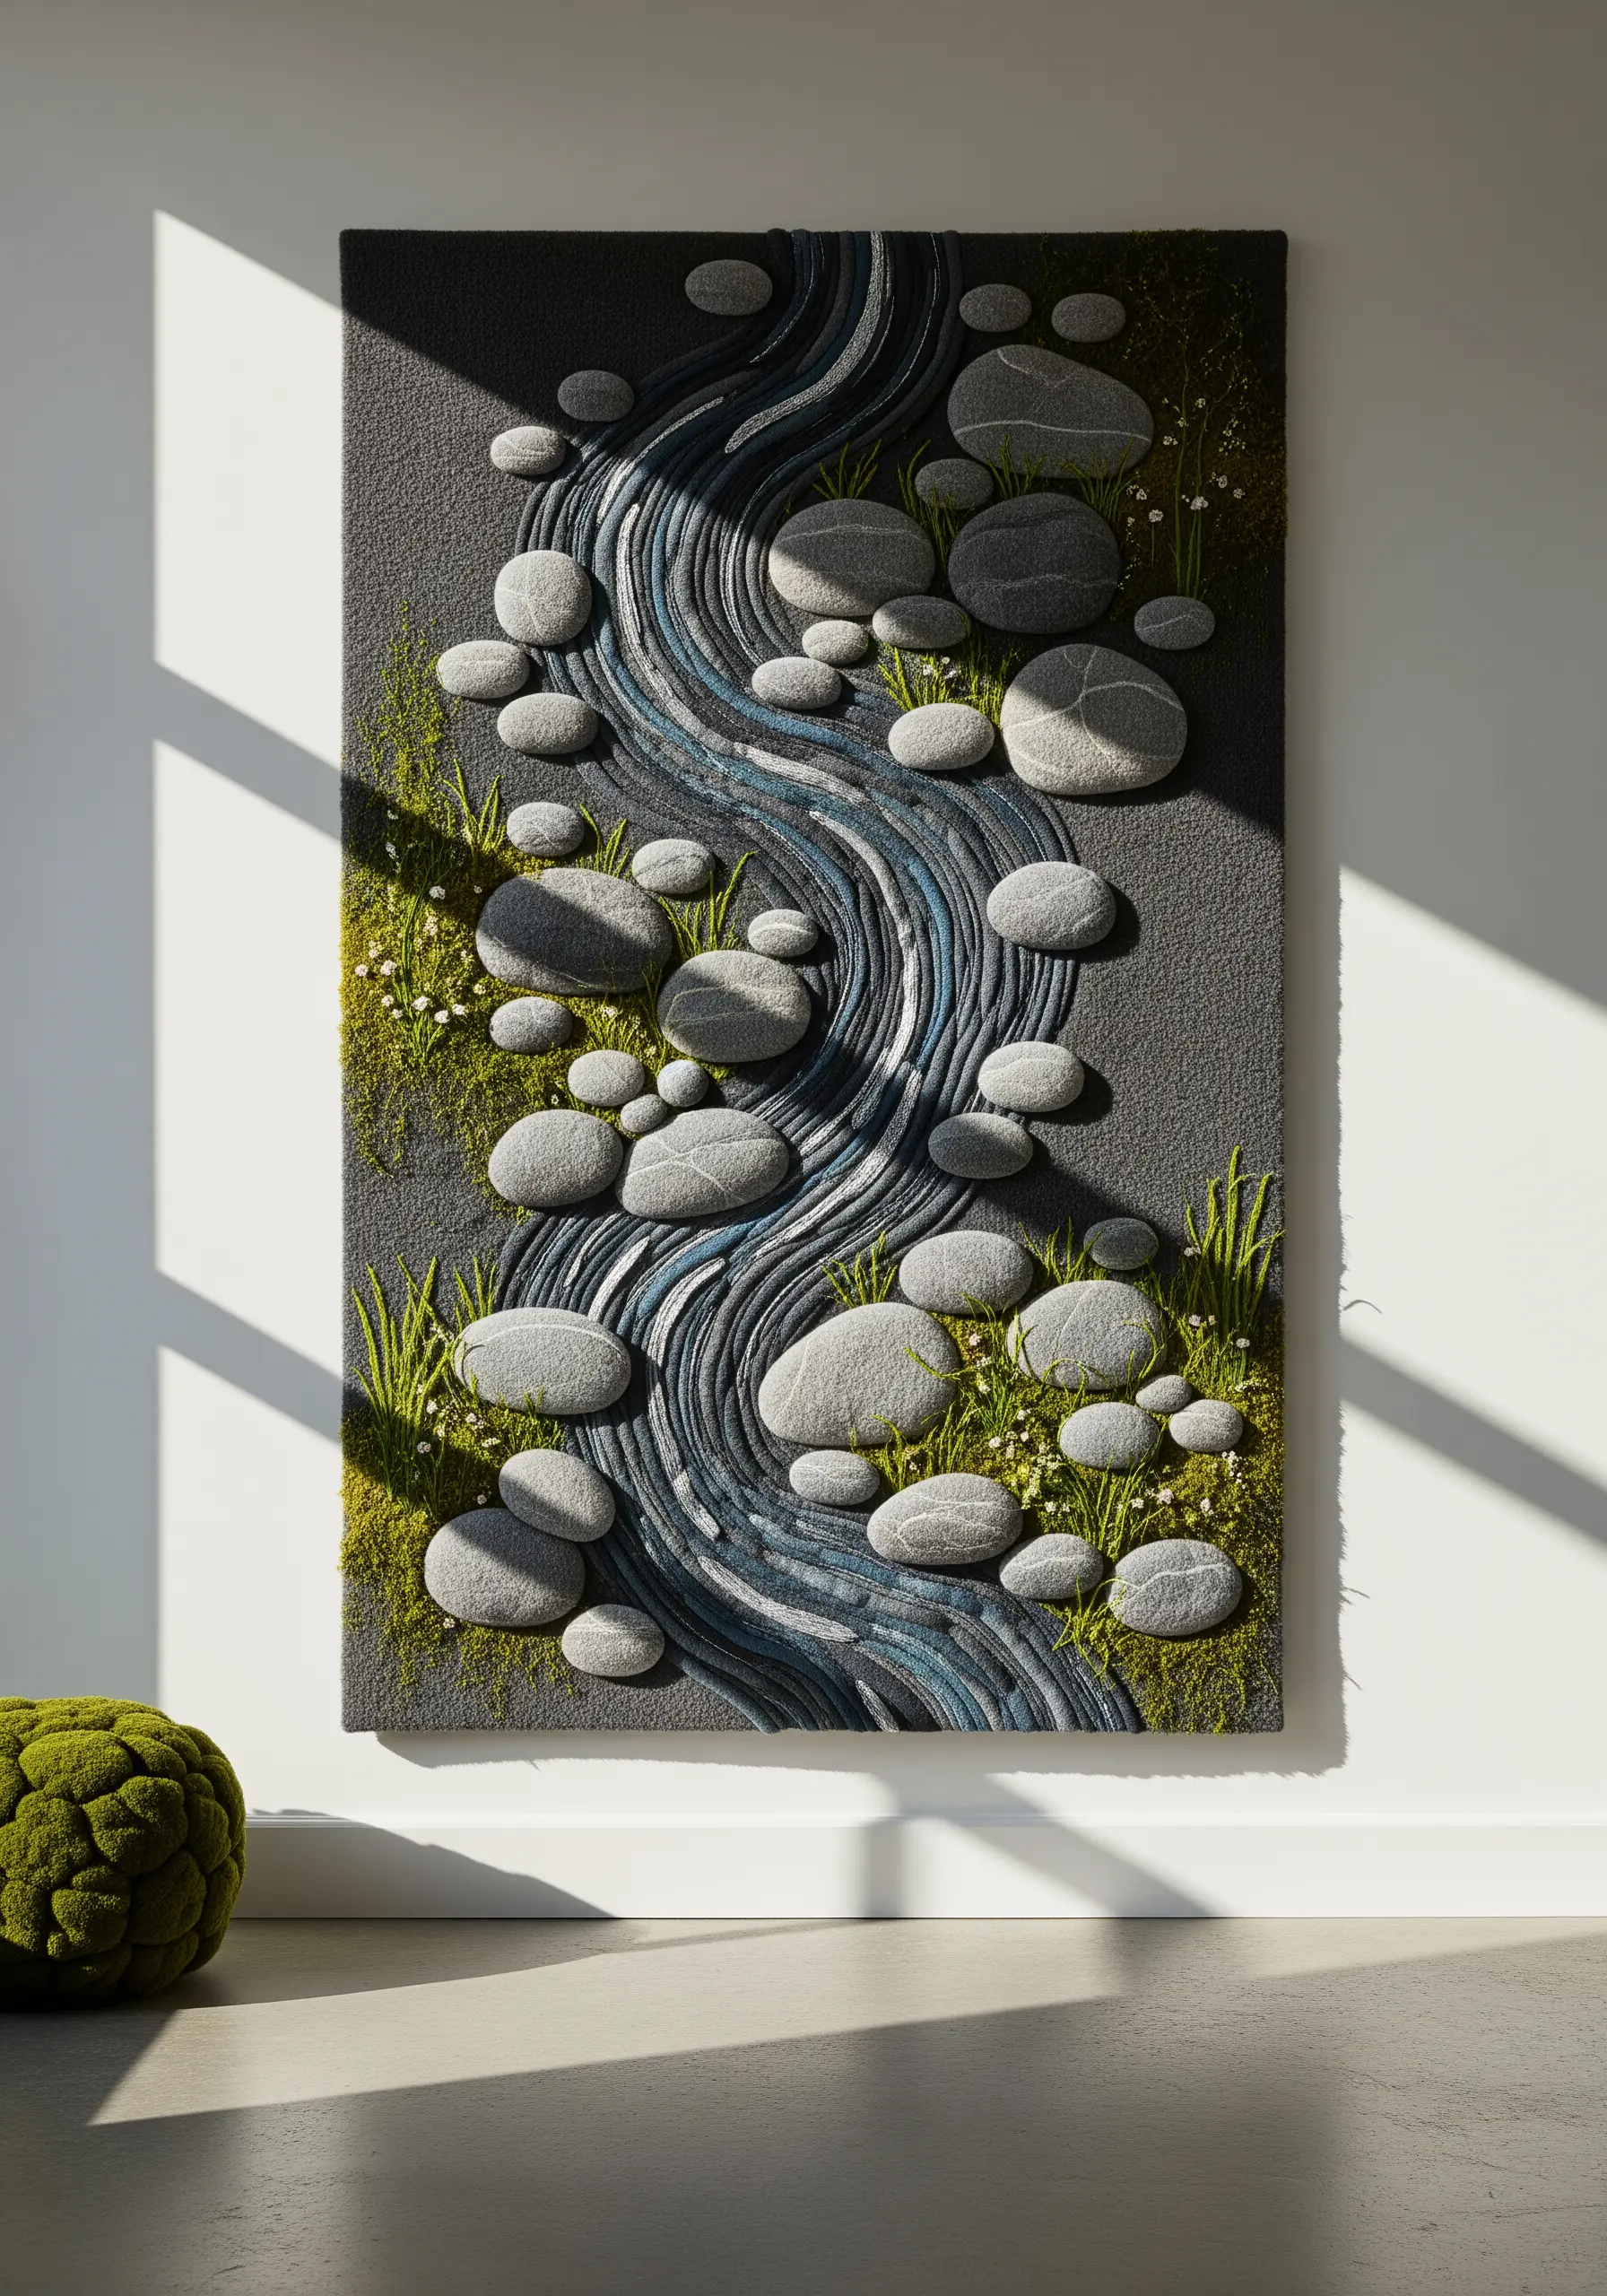
For large-scale pieces that mimic natural terrain, think like a sculptor, not just a stitcher.
Create river stones by cutting shapes from thick felt or wool fabric, then use needle-felting or dense satin stitch to add texture and shading before appliquéing them onto your background.
For the flowing water, couch down multiple strands of variegated blue and gray yarn, twisting them as you go to simulate currents.
This method of building up layers creates dramatic depth and tactile realism that traditional stitching alone cannot achieve.
3. Master Realistic Shading with Thread Painting
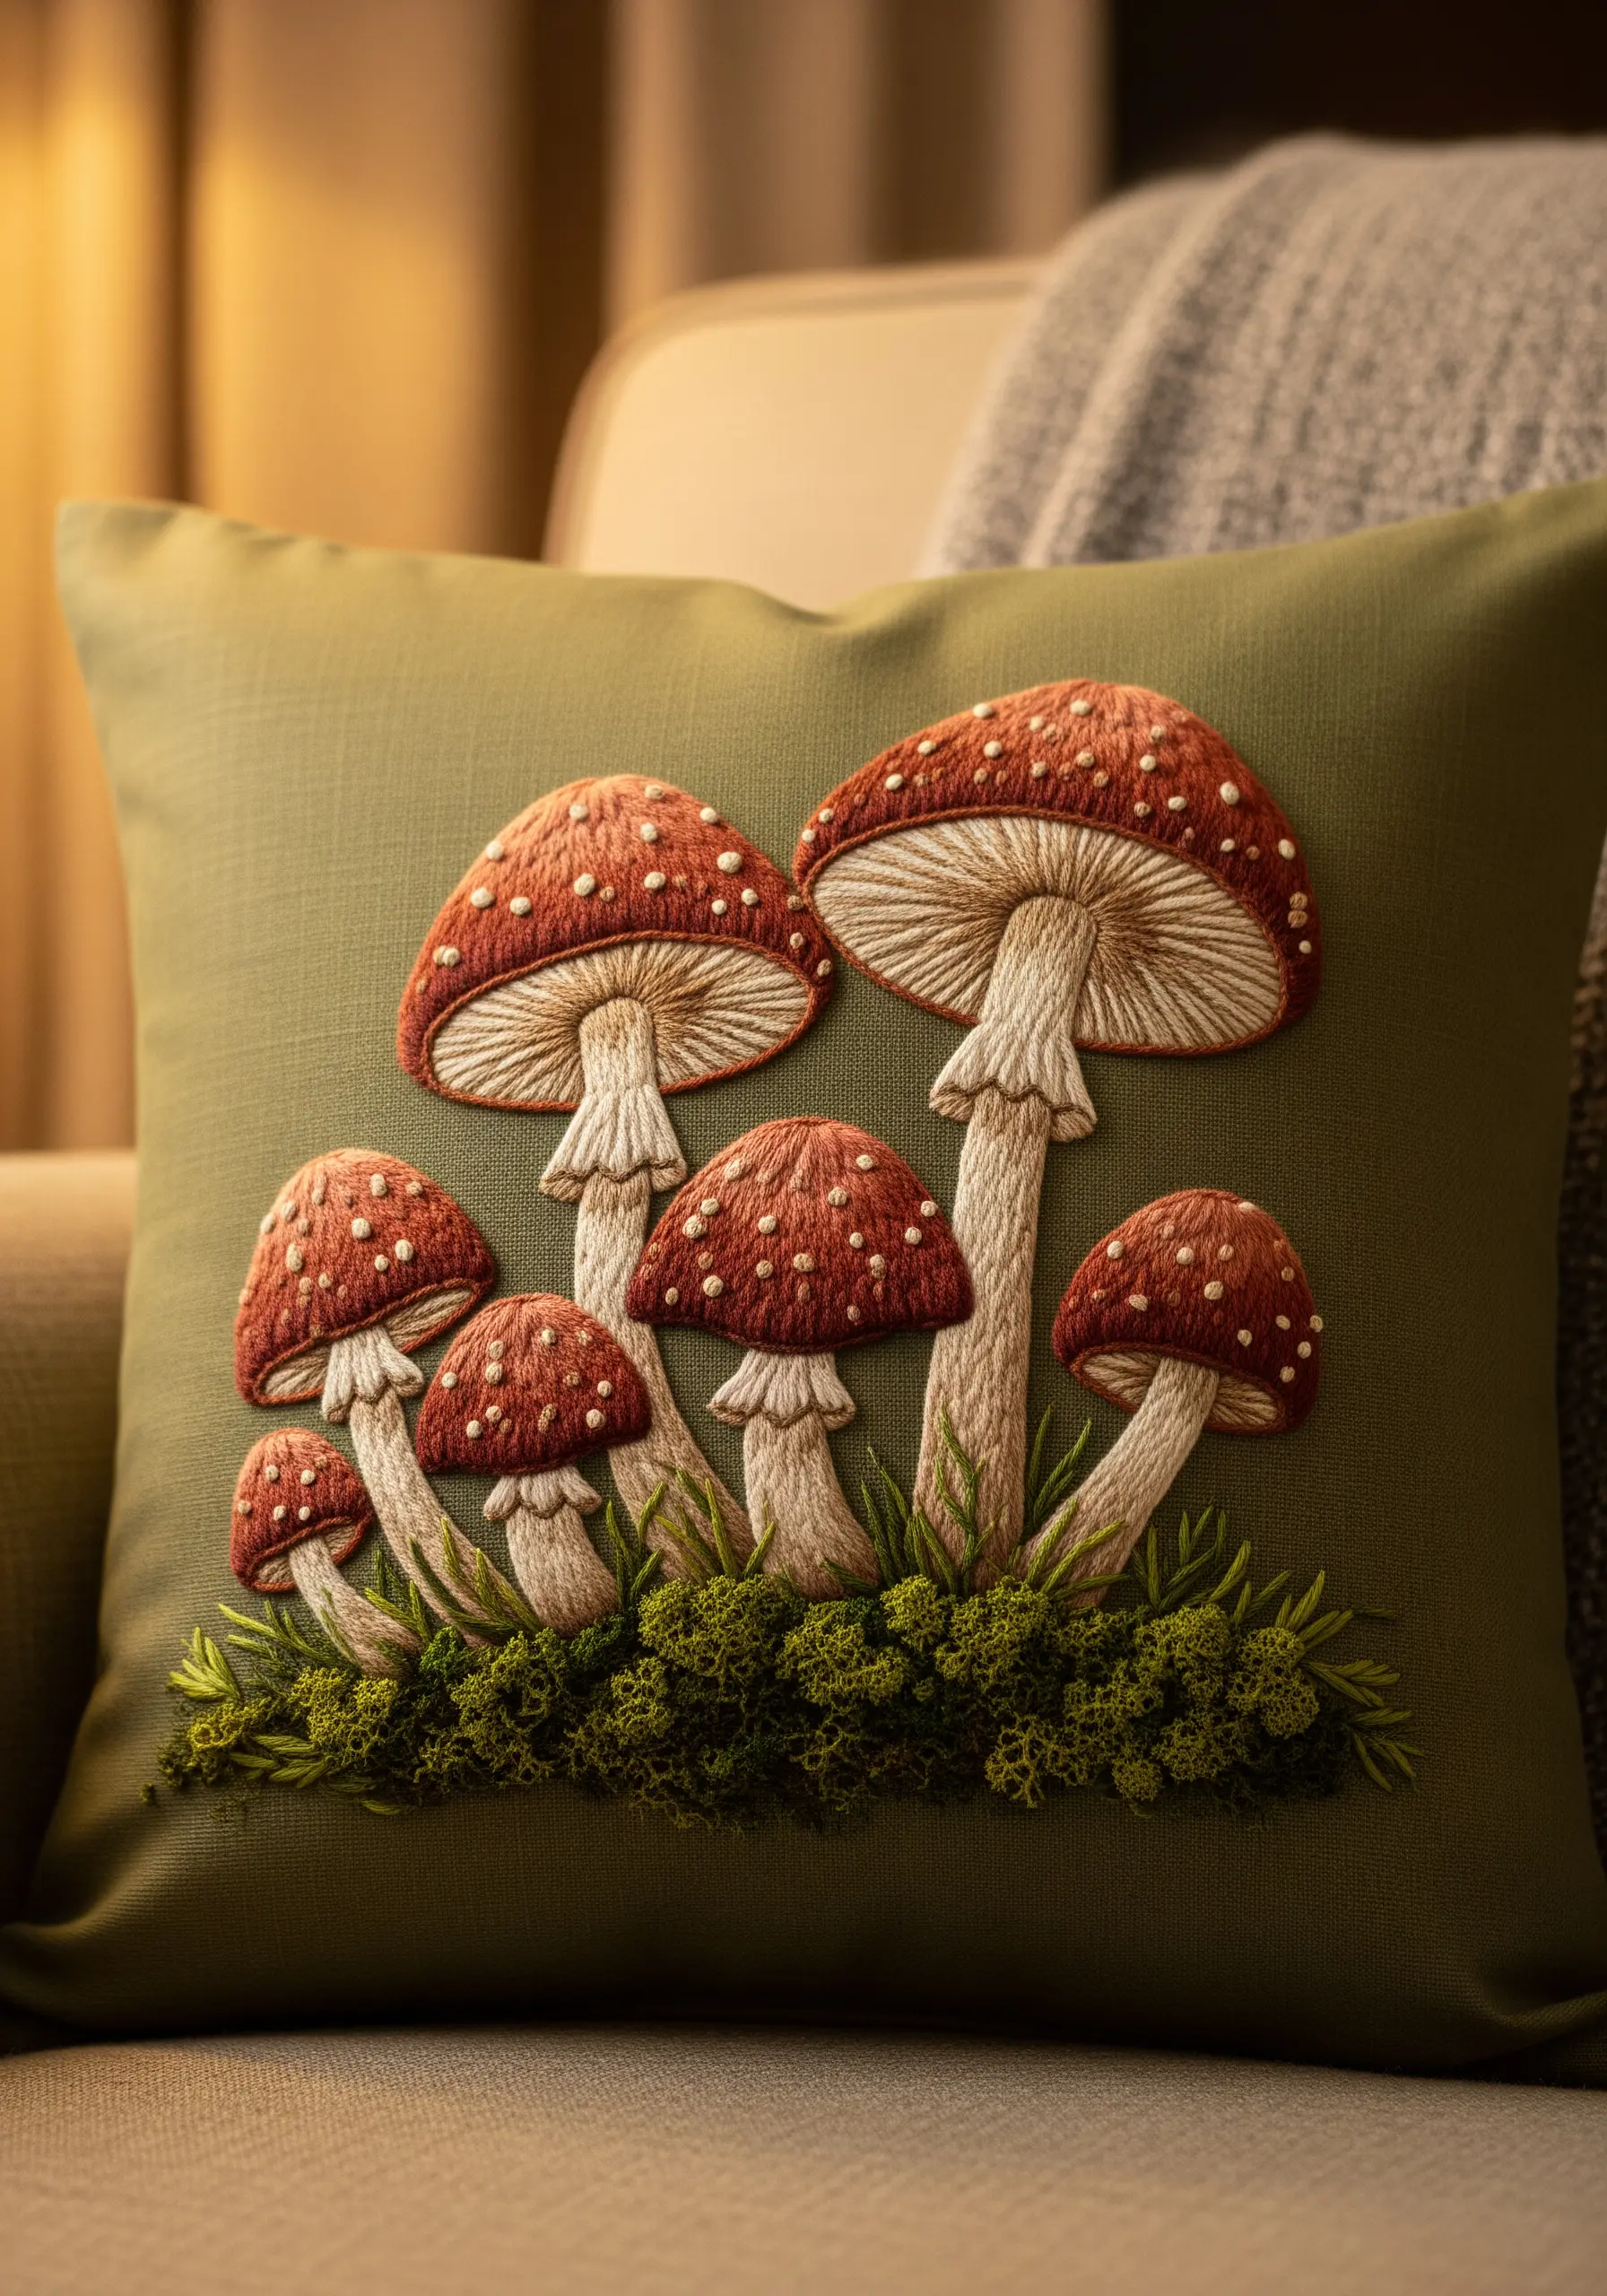
To give mushrooms a believable, rounded form, the long-and-short stitch is your essential tool.
Map out your color zones first—darkest under the cap, lightest on top where the light hits.
Use a single strand of floss and blend the shades with angled stitches that follow the curve of the mushroom cap. This creates a smooth gradient that looks painted.
For the mossy ground, use a dense cluster of French knots in several shades of green and ochre to build a rich, uneven texture.
Explore more realistic mushroom forest floor embroidery projects to perfect this technique.
4. Recreate Organic Textures with Padded Stitching
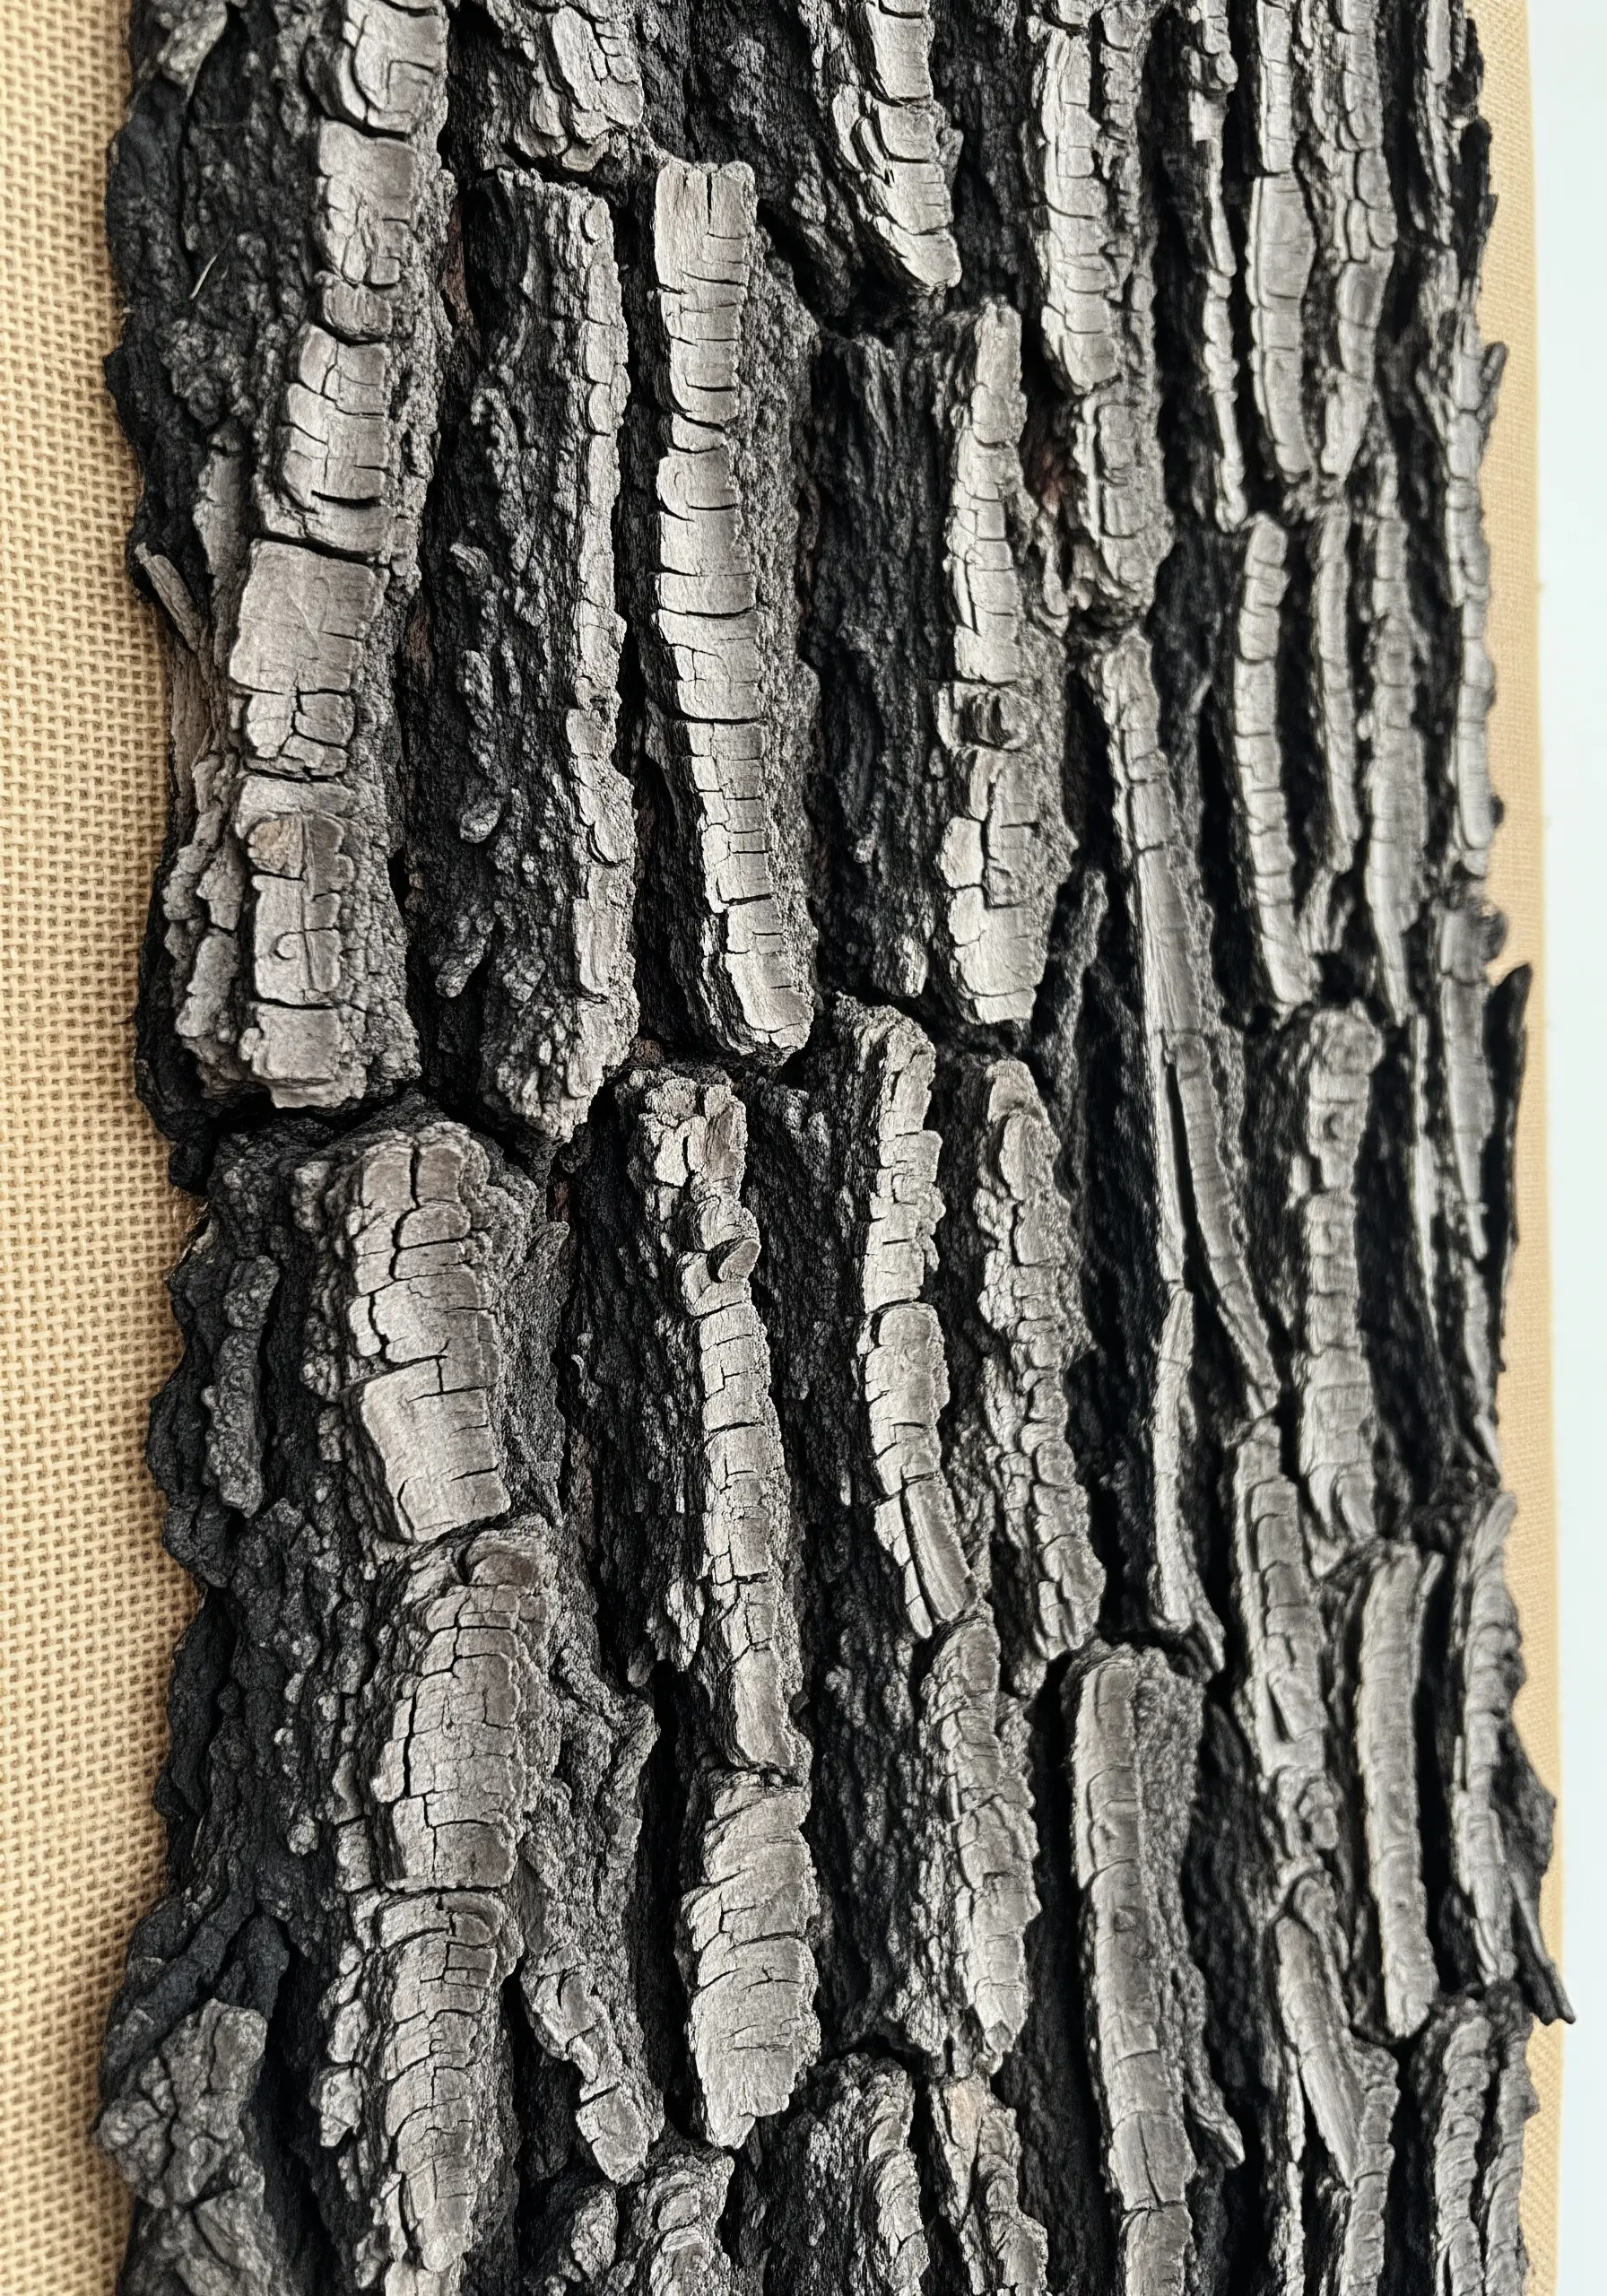
Capturing the ruggedness of tree bark is an exercise in creating extreme texture.
Instead of simple satin stitch, use a padded satin stitch by laying down a foundation of straight stitches or felt shapes first, then stitching over them.
Work in small, vertical sections, varying the height of the padding to mimic the deep grooves and peeling layers of bark.
Using a matte, monochrome palette of grays and blacks forces the focus entirely onto the texture, resulting in a powerful, abstract representation of nature.
These ways to capture nature’s textures in your next embroidery project will help you find more inspiration.
5. Stitch on Sheer Fabric for Ethereal Light Play
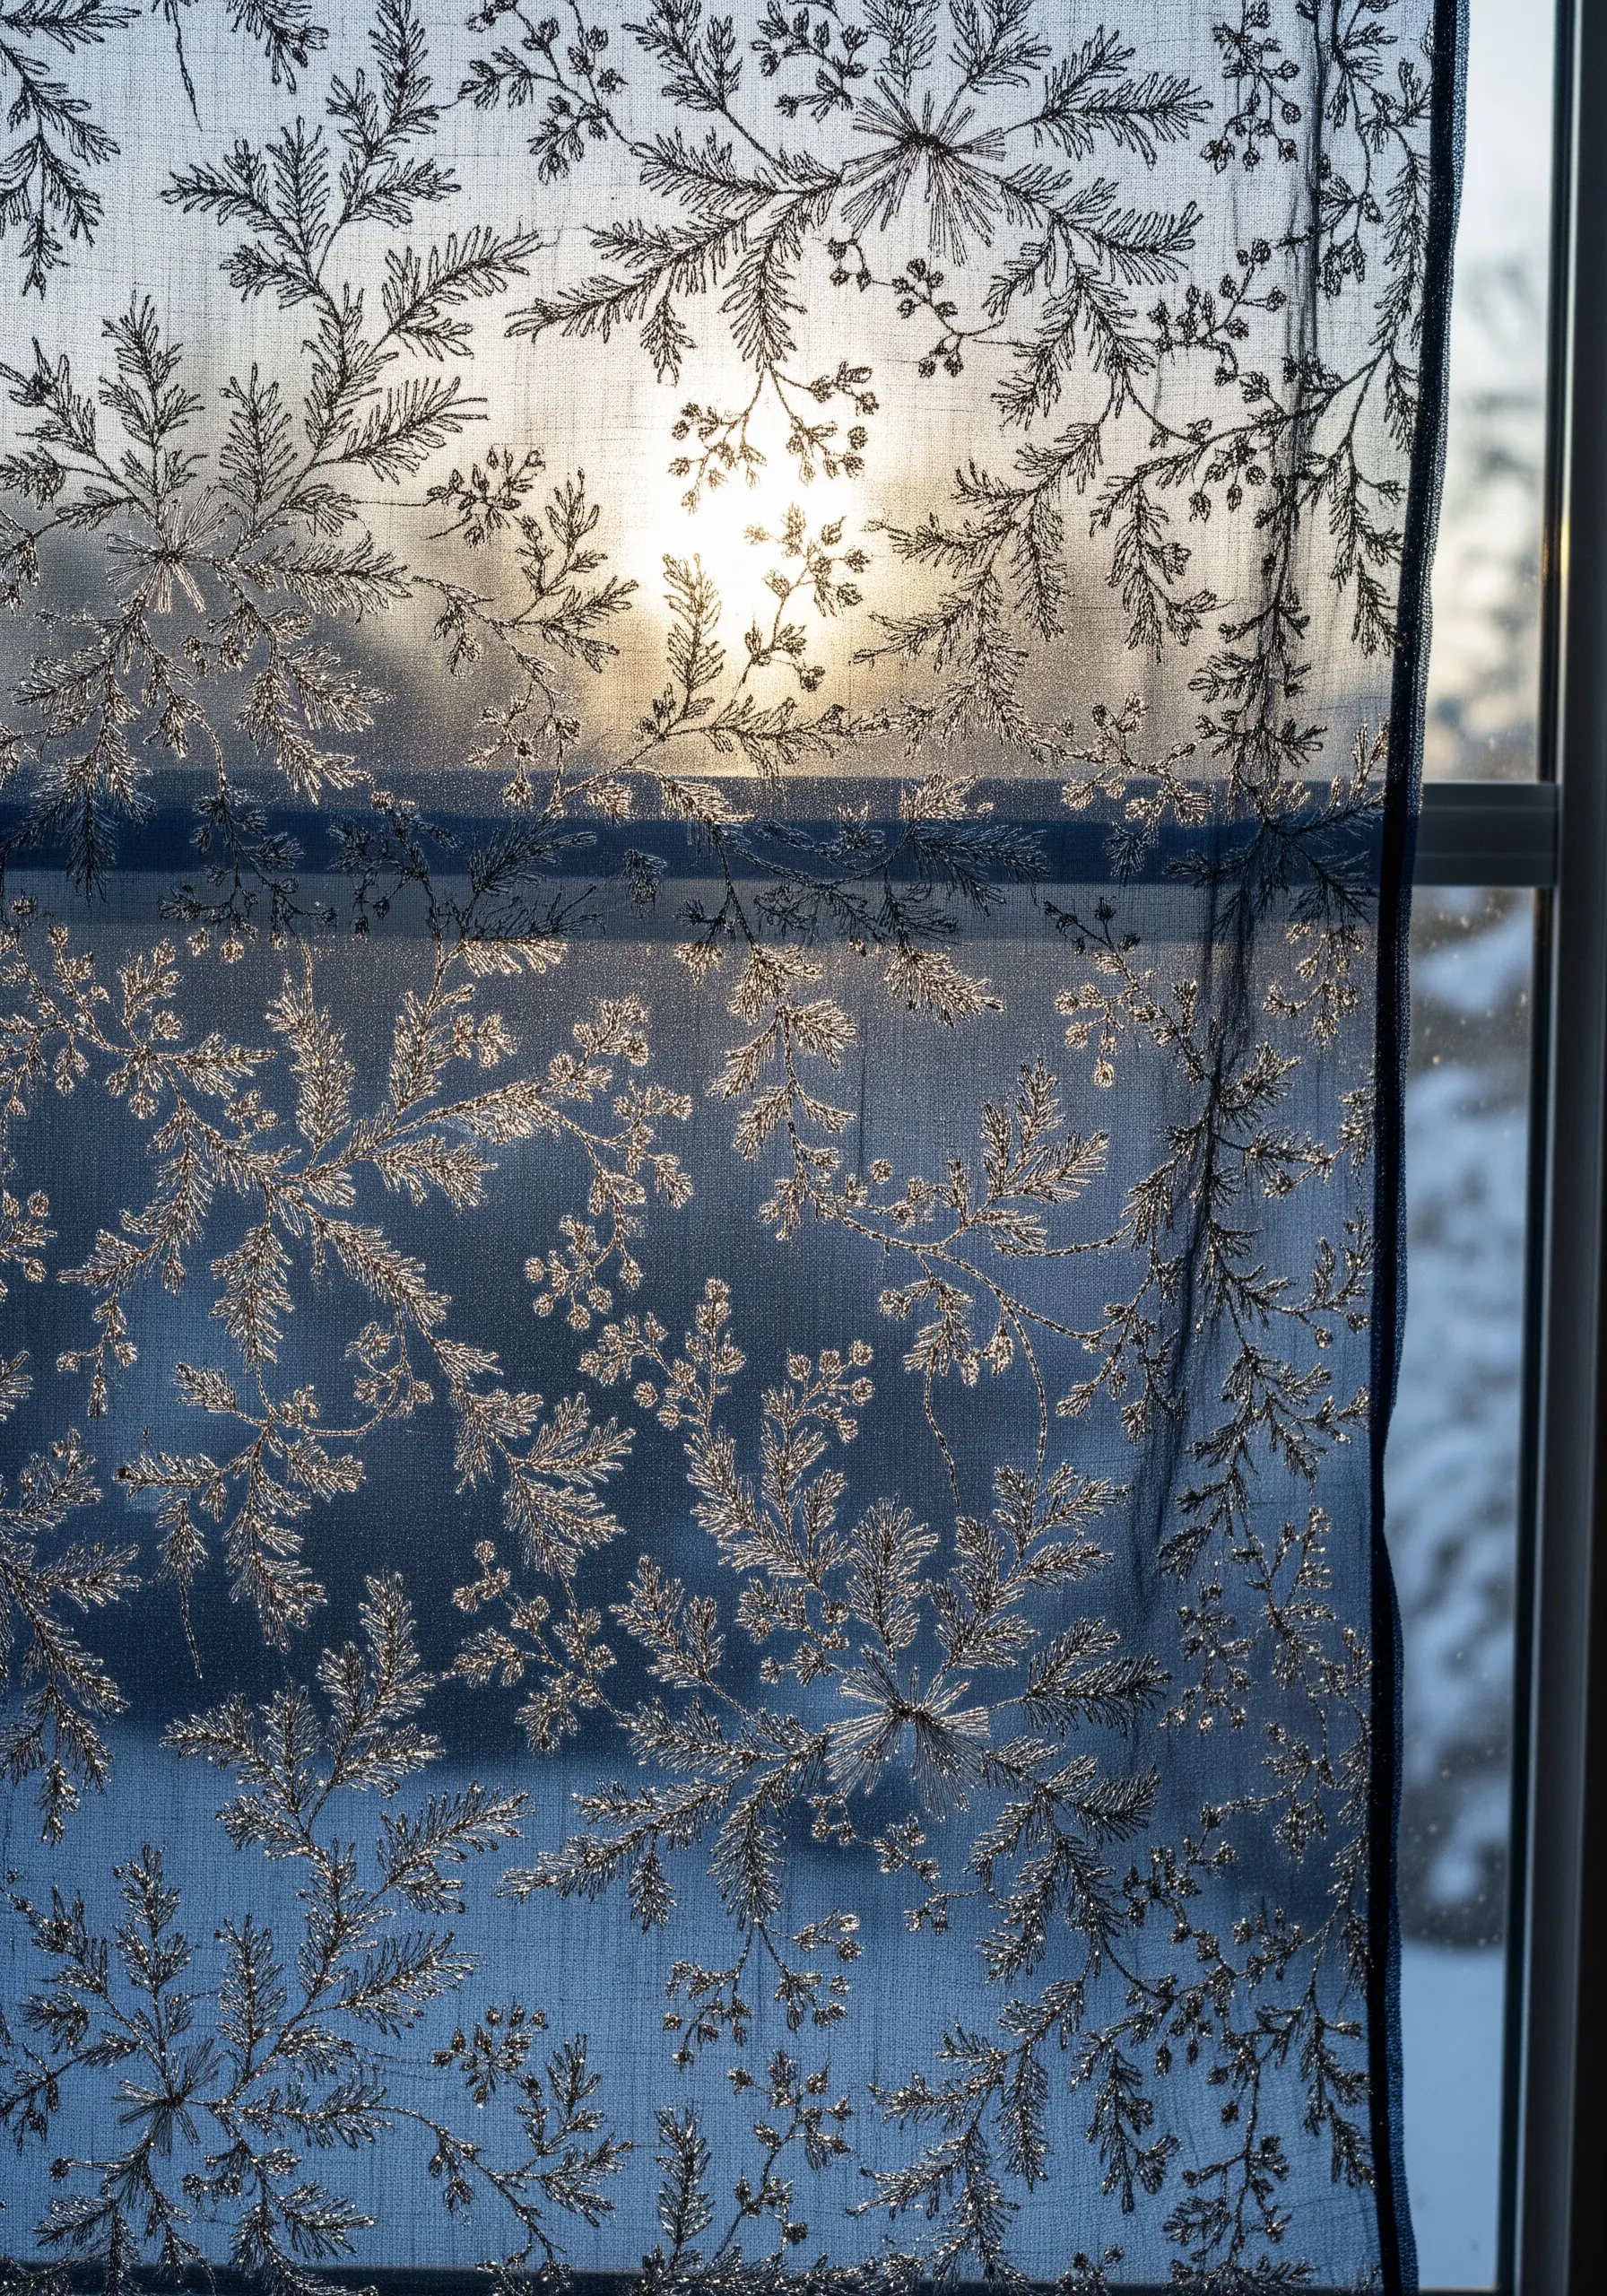
Embroidering on sheer fabric like organza or tulle transforms your stitches into delicate silhouettes that interact with light.
Always use a stabilizer to prevent puckering; a water-soluble or heat-away type is ideal as it vanishes completely, leaving just the thread.
Choose a fine metallic or silvery-gray thread to mimic the crystalline structure of frost on a windowpane.
The magic happens when light filters through, making the embroidery appear to float and sparkle—a perfect technique for curtains or delicate wall hangings.
6. Integrate Found Objects for Mixed-Media Art
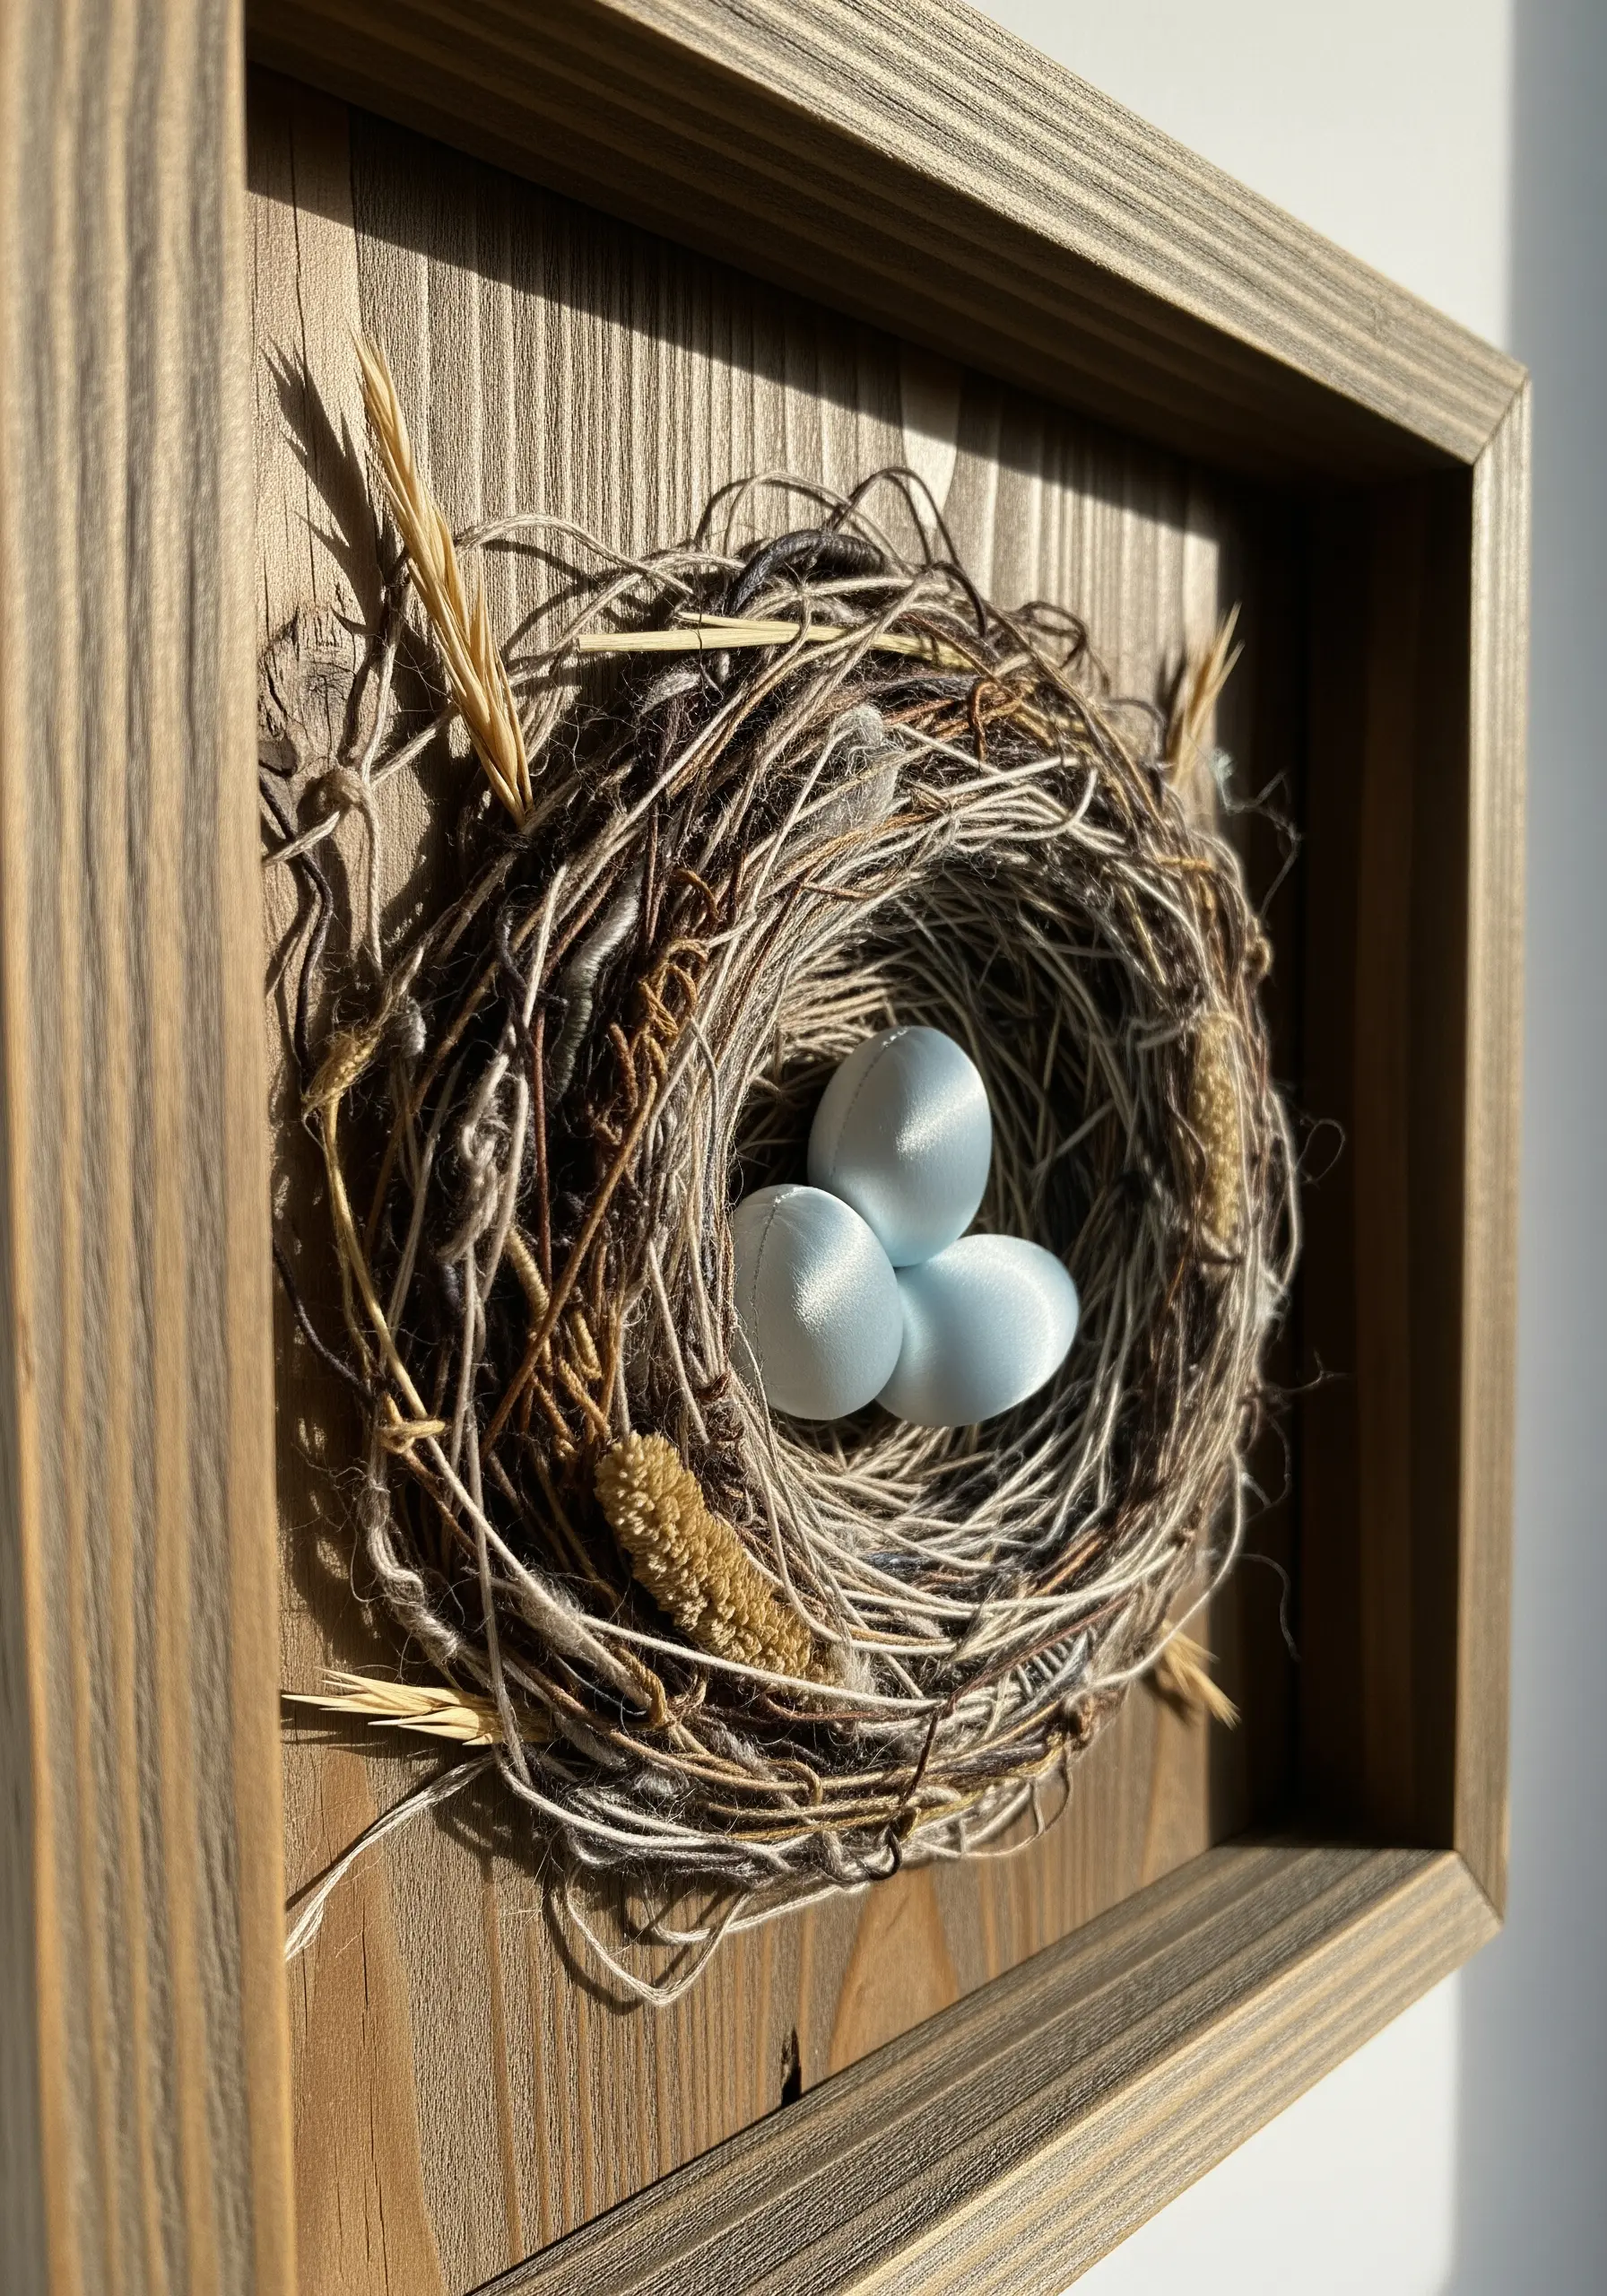
Elevate your embroidery by blending thread with elements from the natural world.
Create the base of a bird’s nest by couching down threads, raffia, and even fine, flexible twigs directly onto your fabric or wooden base.
For the eggs, create 3D forms by stitching satin stitch over a small bead or a padded felt shape to give them smooth, volumetric dimension.
This technique turns your piece from a representation into a small, tactile diorama, adding a layer of authenticity and wonder.
7. Achieve Delicate Detail with Minimalist Line Work
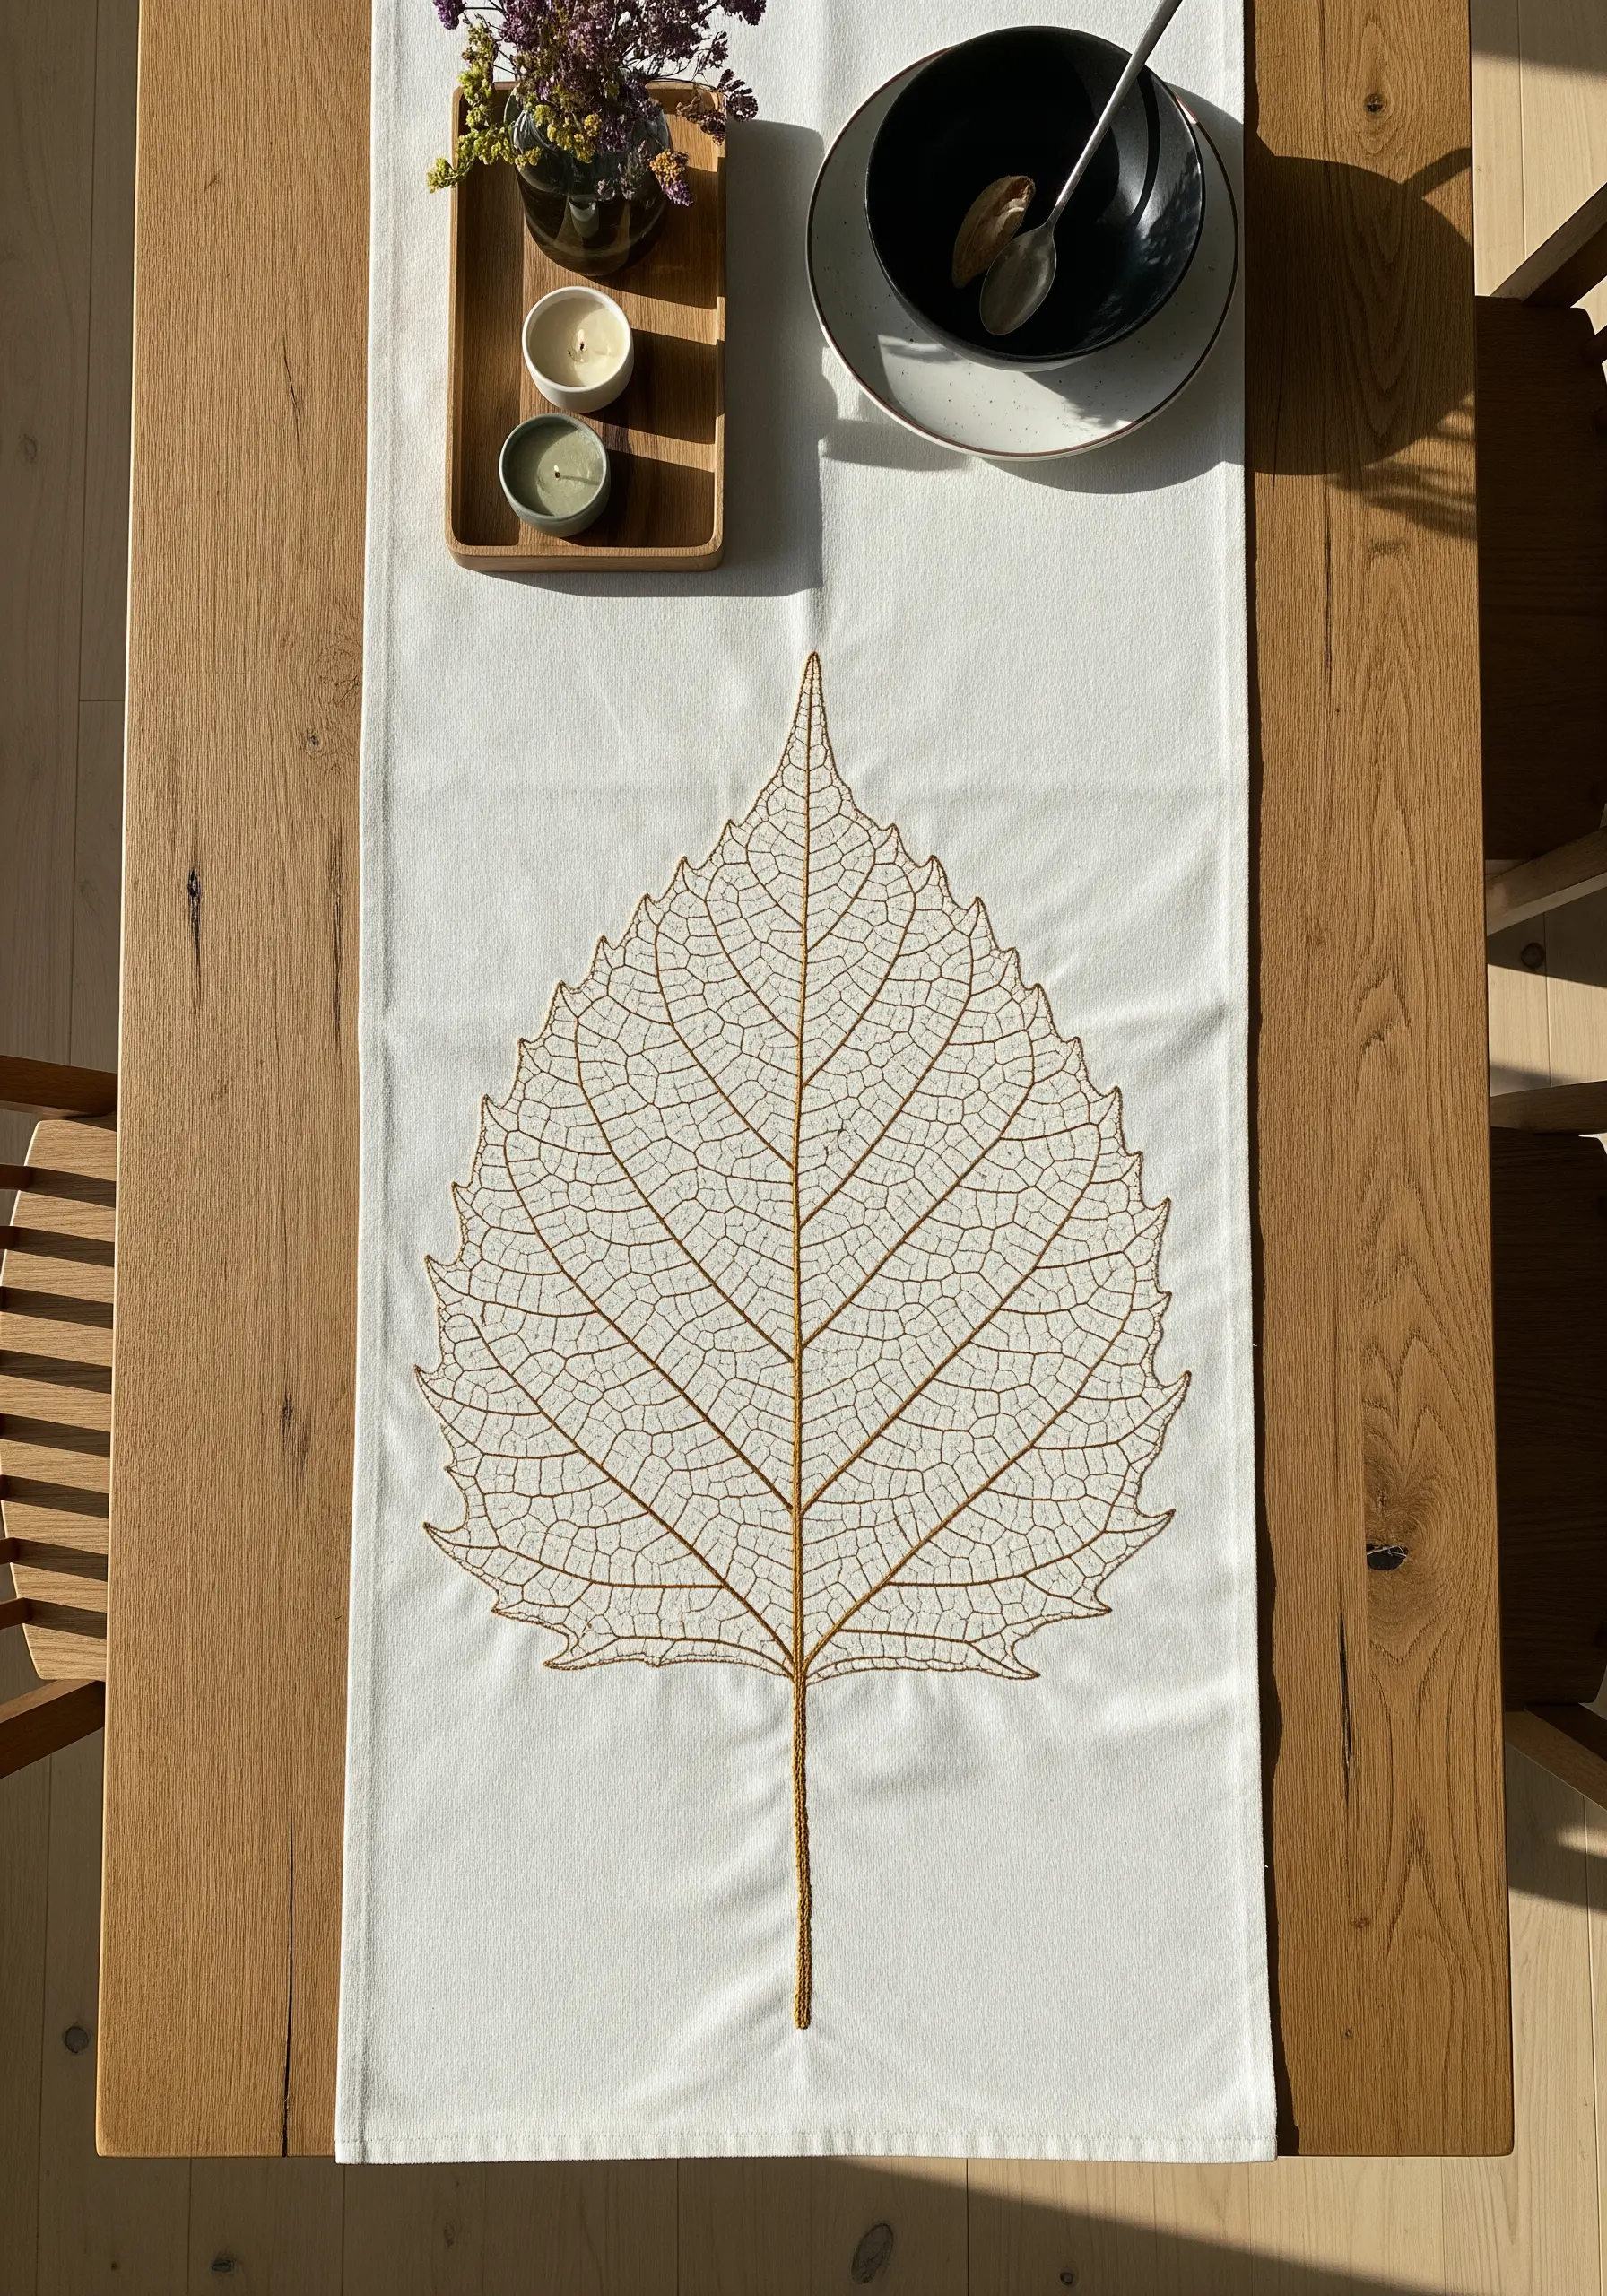
Sometimes, the most impactful designs are the most restrained.
To capture the intricate structure of a skeleton leaf, focus on precision line work rather than filled shapes.
Use a single strand of floss in a contrasting color and a neat backstitch or stem stitch to trace the delicate veins.
The negative space becomes as important as the stitches themselves, creating a modern, graphic design that highlights the leaf’s natural architecture. This approach is perfect for elegant line art garden motifs that transform table runners.
8. Emulate Iridescence with Variegated Threads and Beads
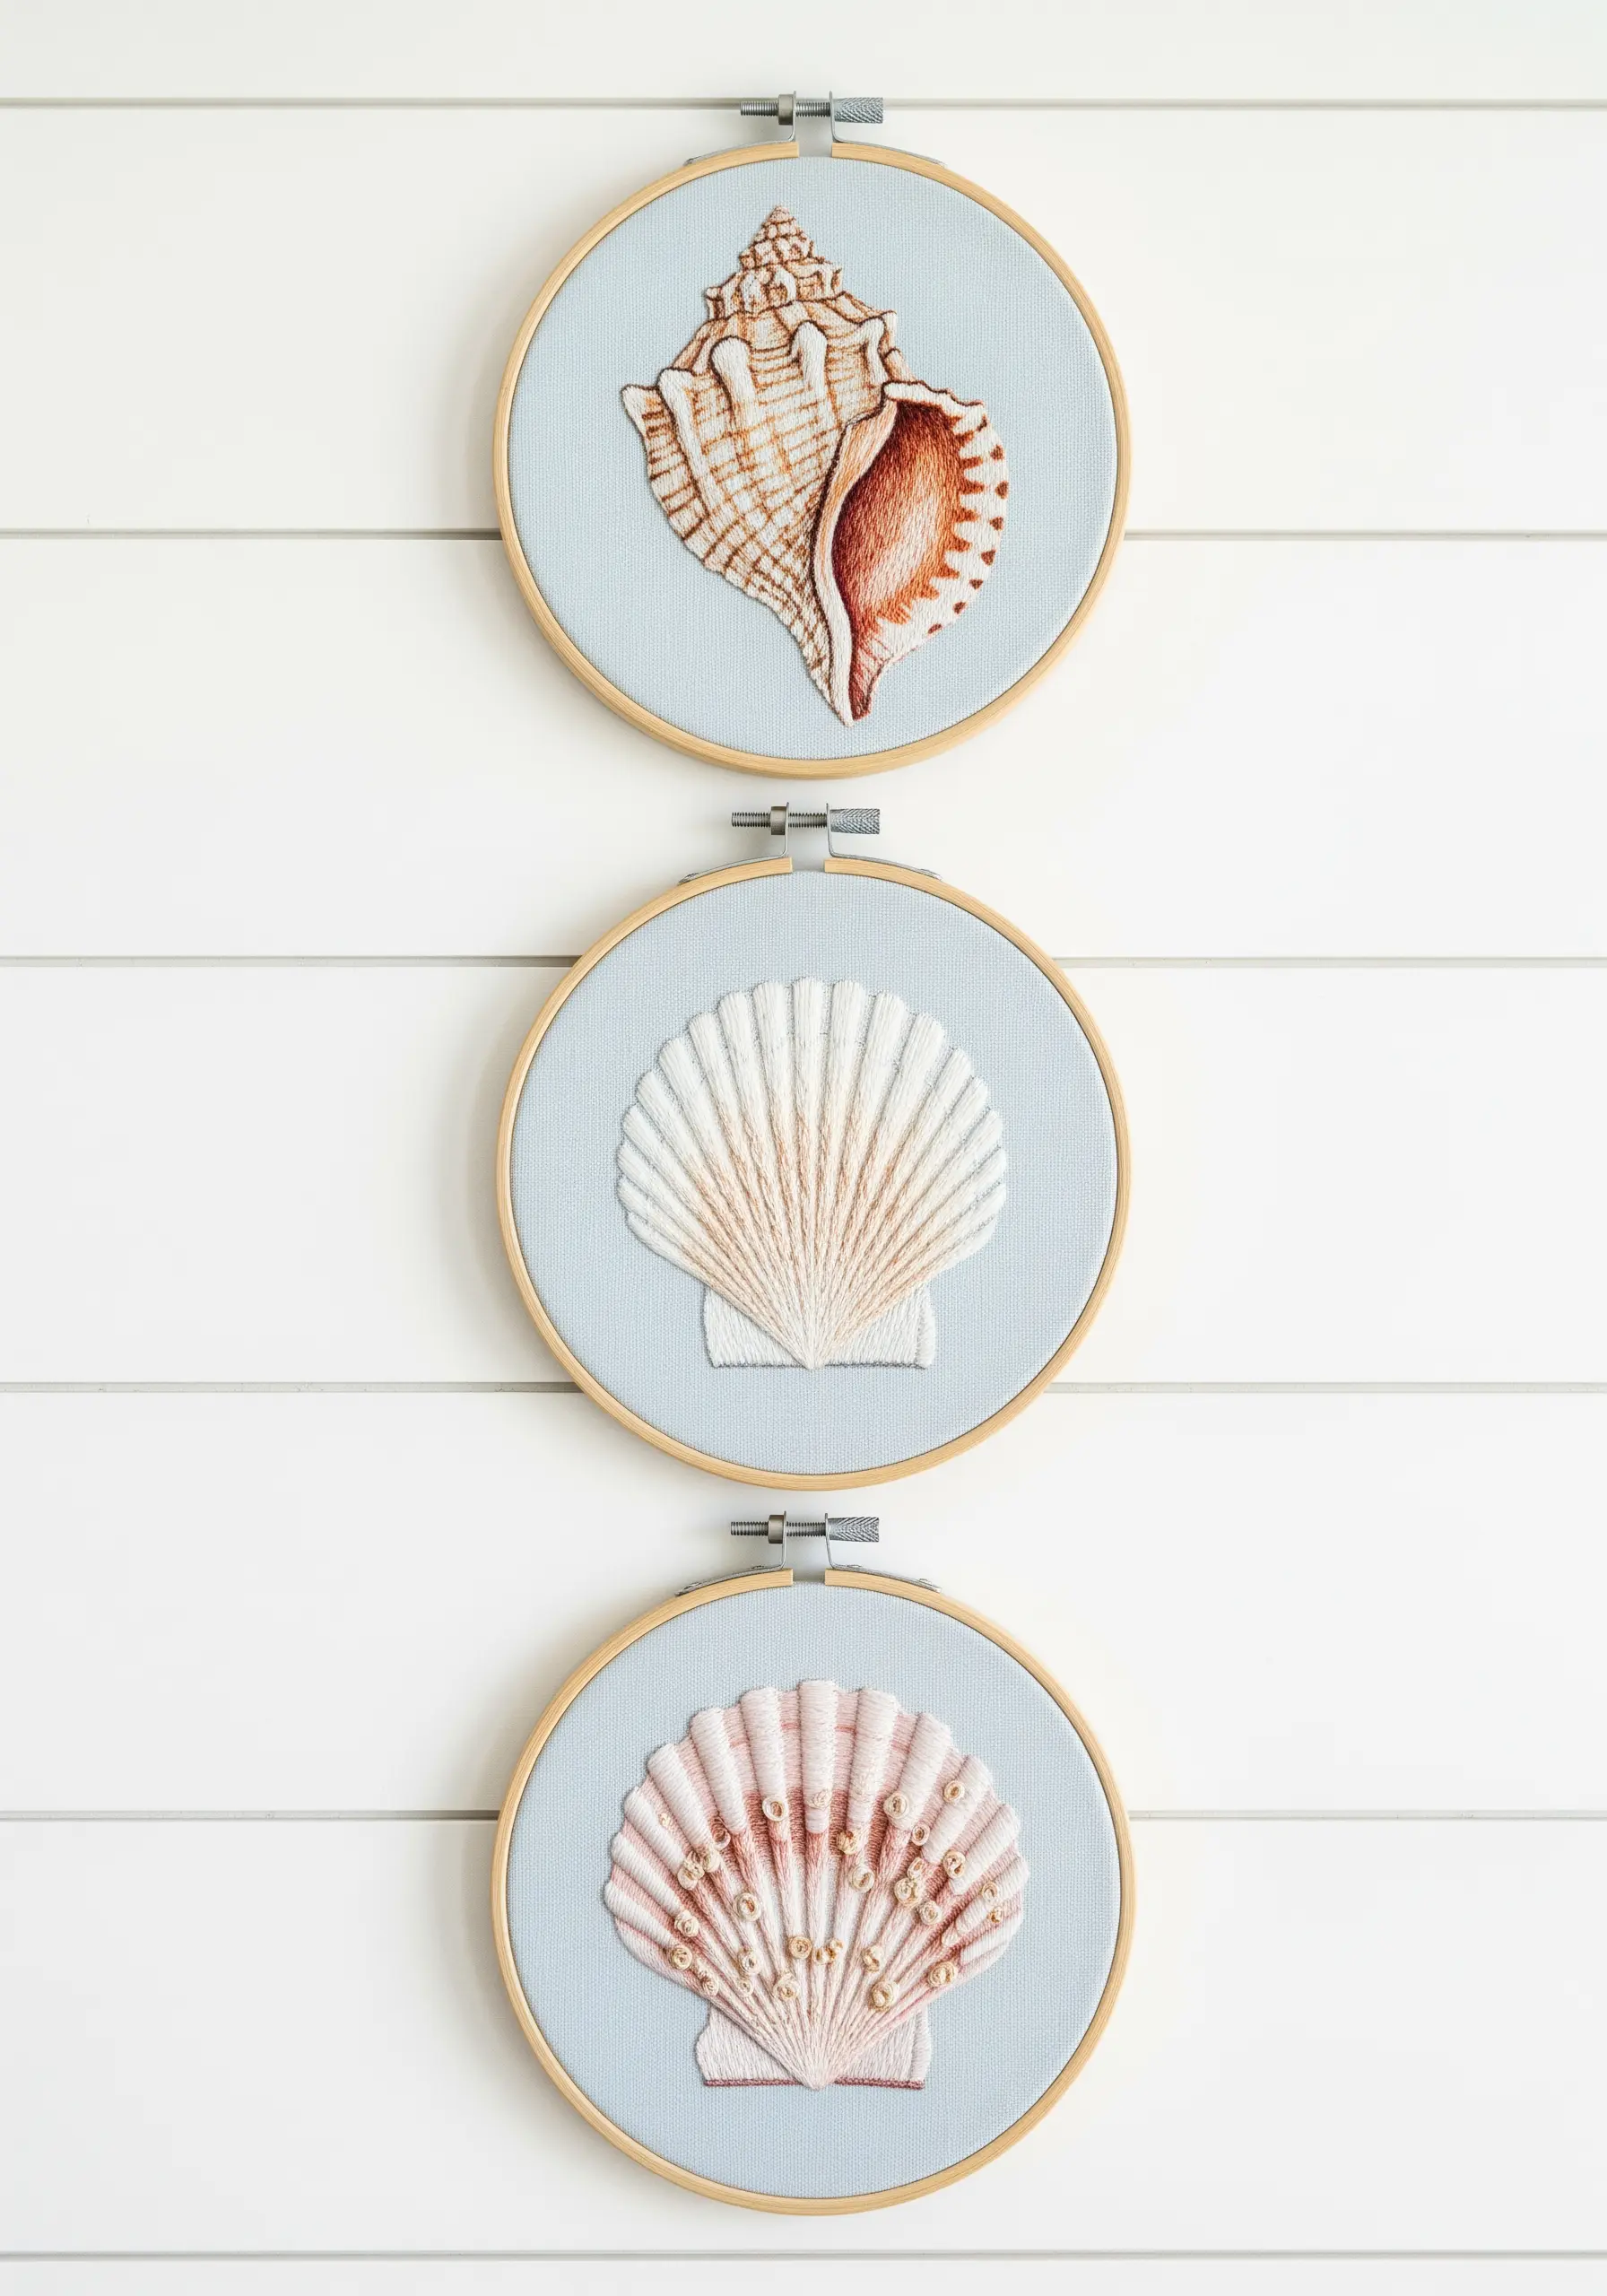
To give seashells that pearlescent, sun-bleached look, choose your materials with care.
Use long-and-short stitches with a single strand of variegated silk or light-reflecting rayon floss to create subtle, natural color shifts.
Follow the curved contours of the shell with your stitches to enhance its three-dimensional form.
For an extra touch of realism, add a few strategically placed seed beads or French knots to mimic texture or tiny drops of water.
These techniques are perfect for any coastal theme tiny embroidery art.
9. Build Living Texture with Clustered Knots

To recreate the dense, velvety surface of moss or lichen, the French knot is your primary tool.
The key to realism is variation. Use multiple shades of green and ochre, and vary the number of times you wrap the thread (once or twice) to create knots of different sizes.
Pack the knots tightly together in organic, irregular clusters, allowing the colors to mingle naturally.
This technique creates a lush, highly tactile surface that perfectly captures the feeling of a forest floor.
10. Create Illusion with Negative Space and Beading
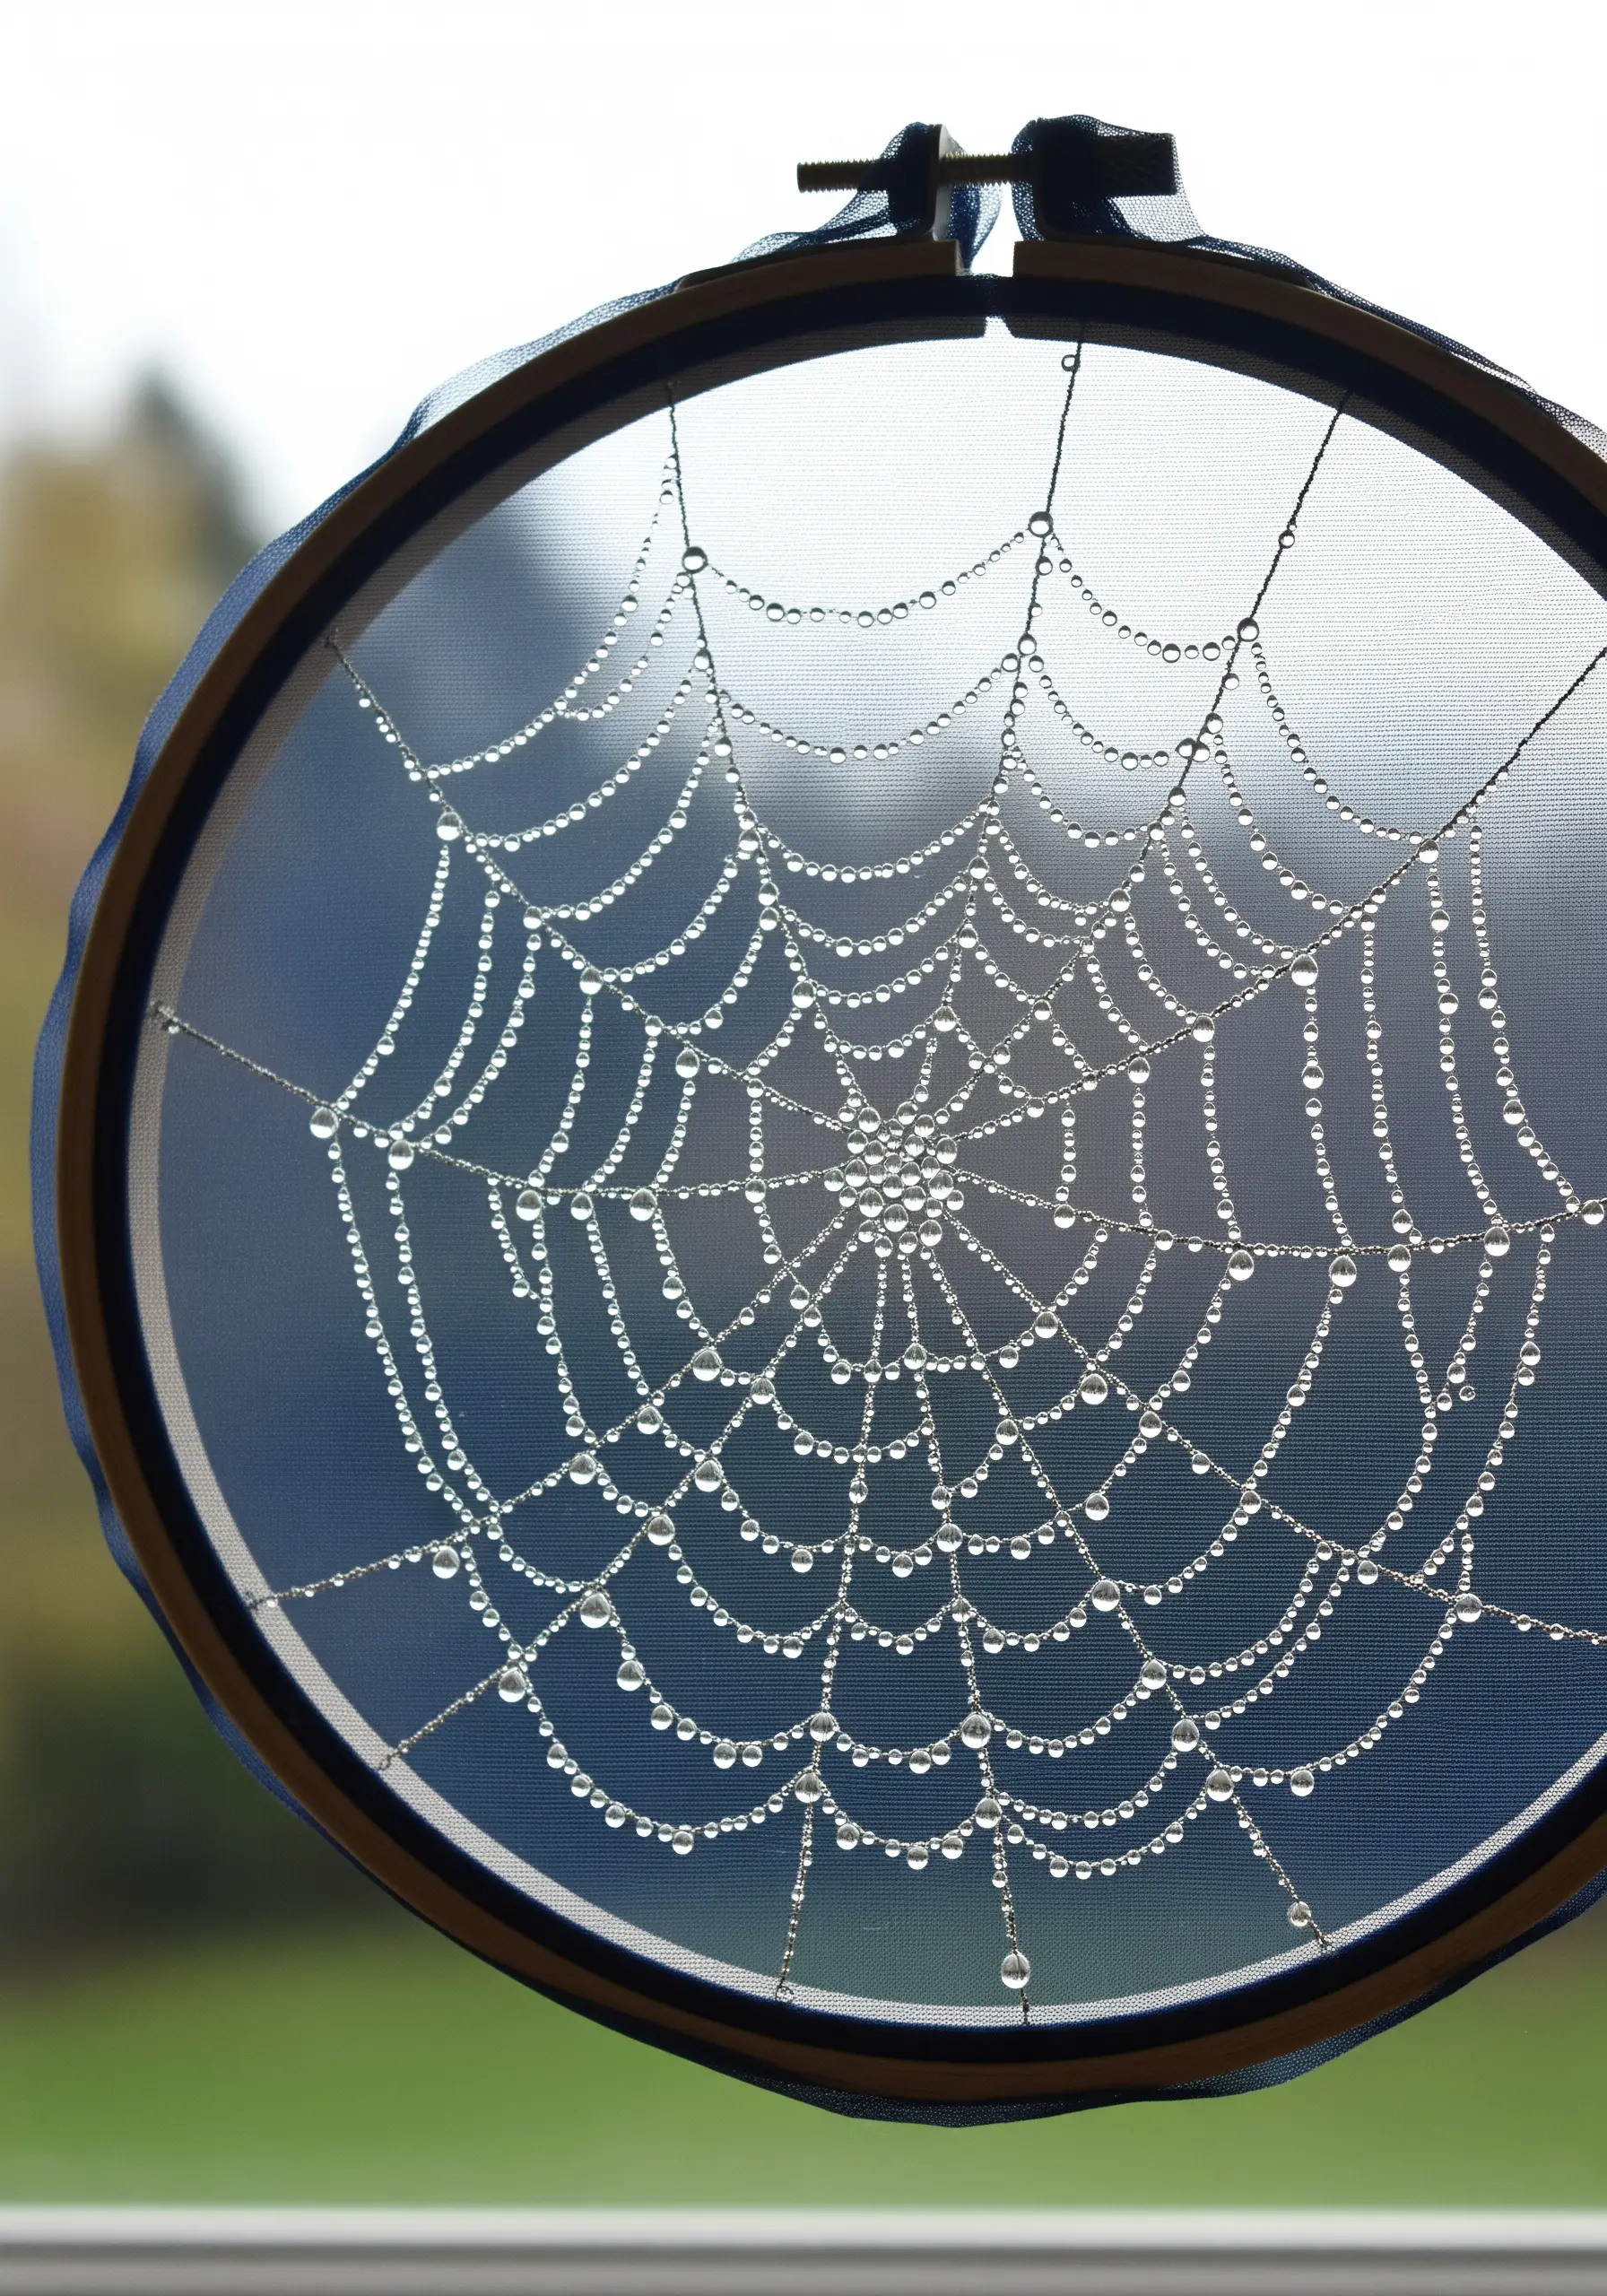
To capture the ephemeral beauty of a dew-covered spiderweb, the fabric becomes the air itself.
Work on a sheer fabric like tulle or voile, or use a water-soluble stabilizer that you’ll rinse away at the end, leaving only the stitched web.
Use a single strand of a fine, silvery thread for the web’s structure. Then, meticulously add tiny, clear seed beads or microbeads along the threads to represent dewdrops.
The result is a fragile, floating illusion that seems to defy gravity.
11. Mimic Crystalline Structures with Mixed Media
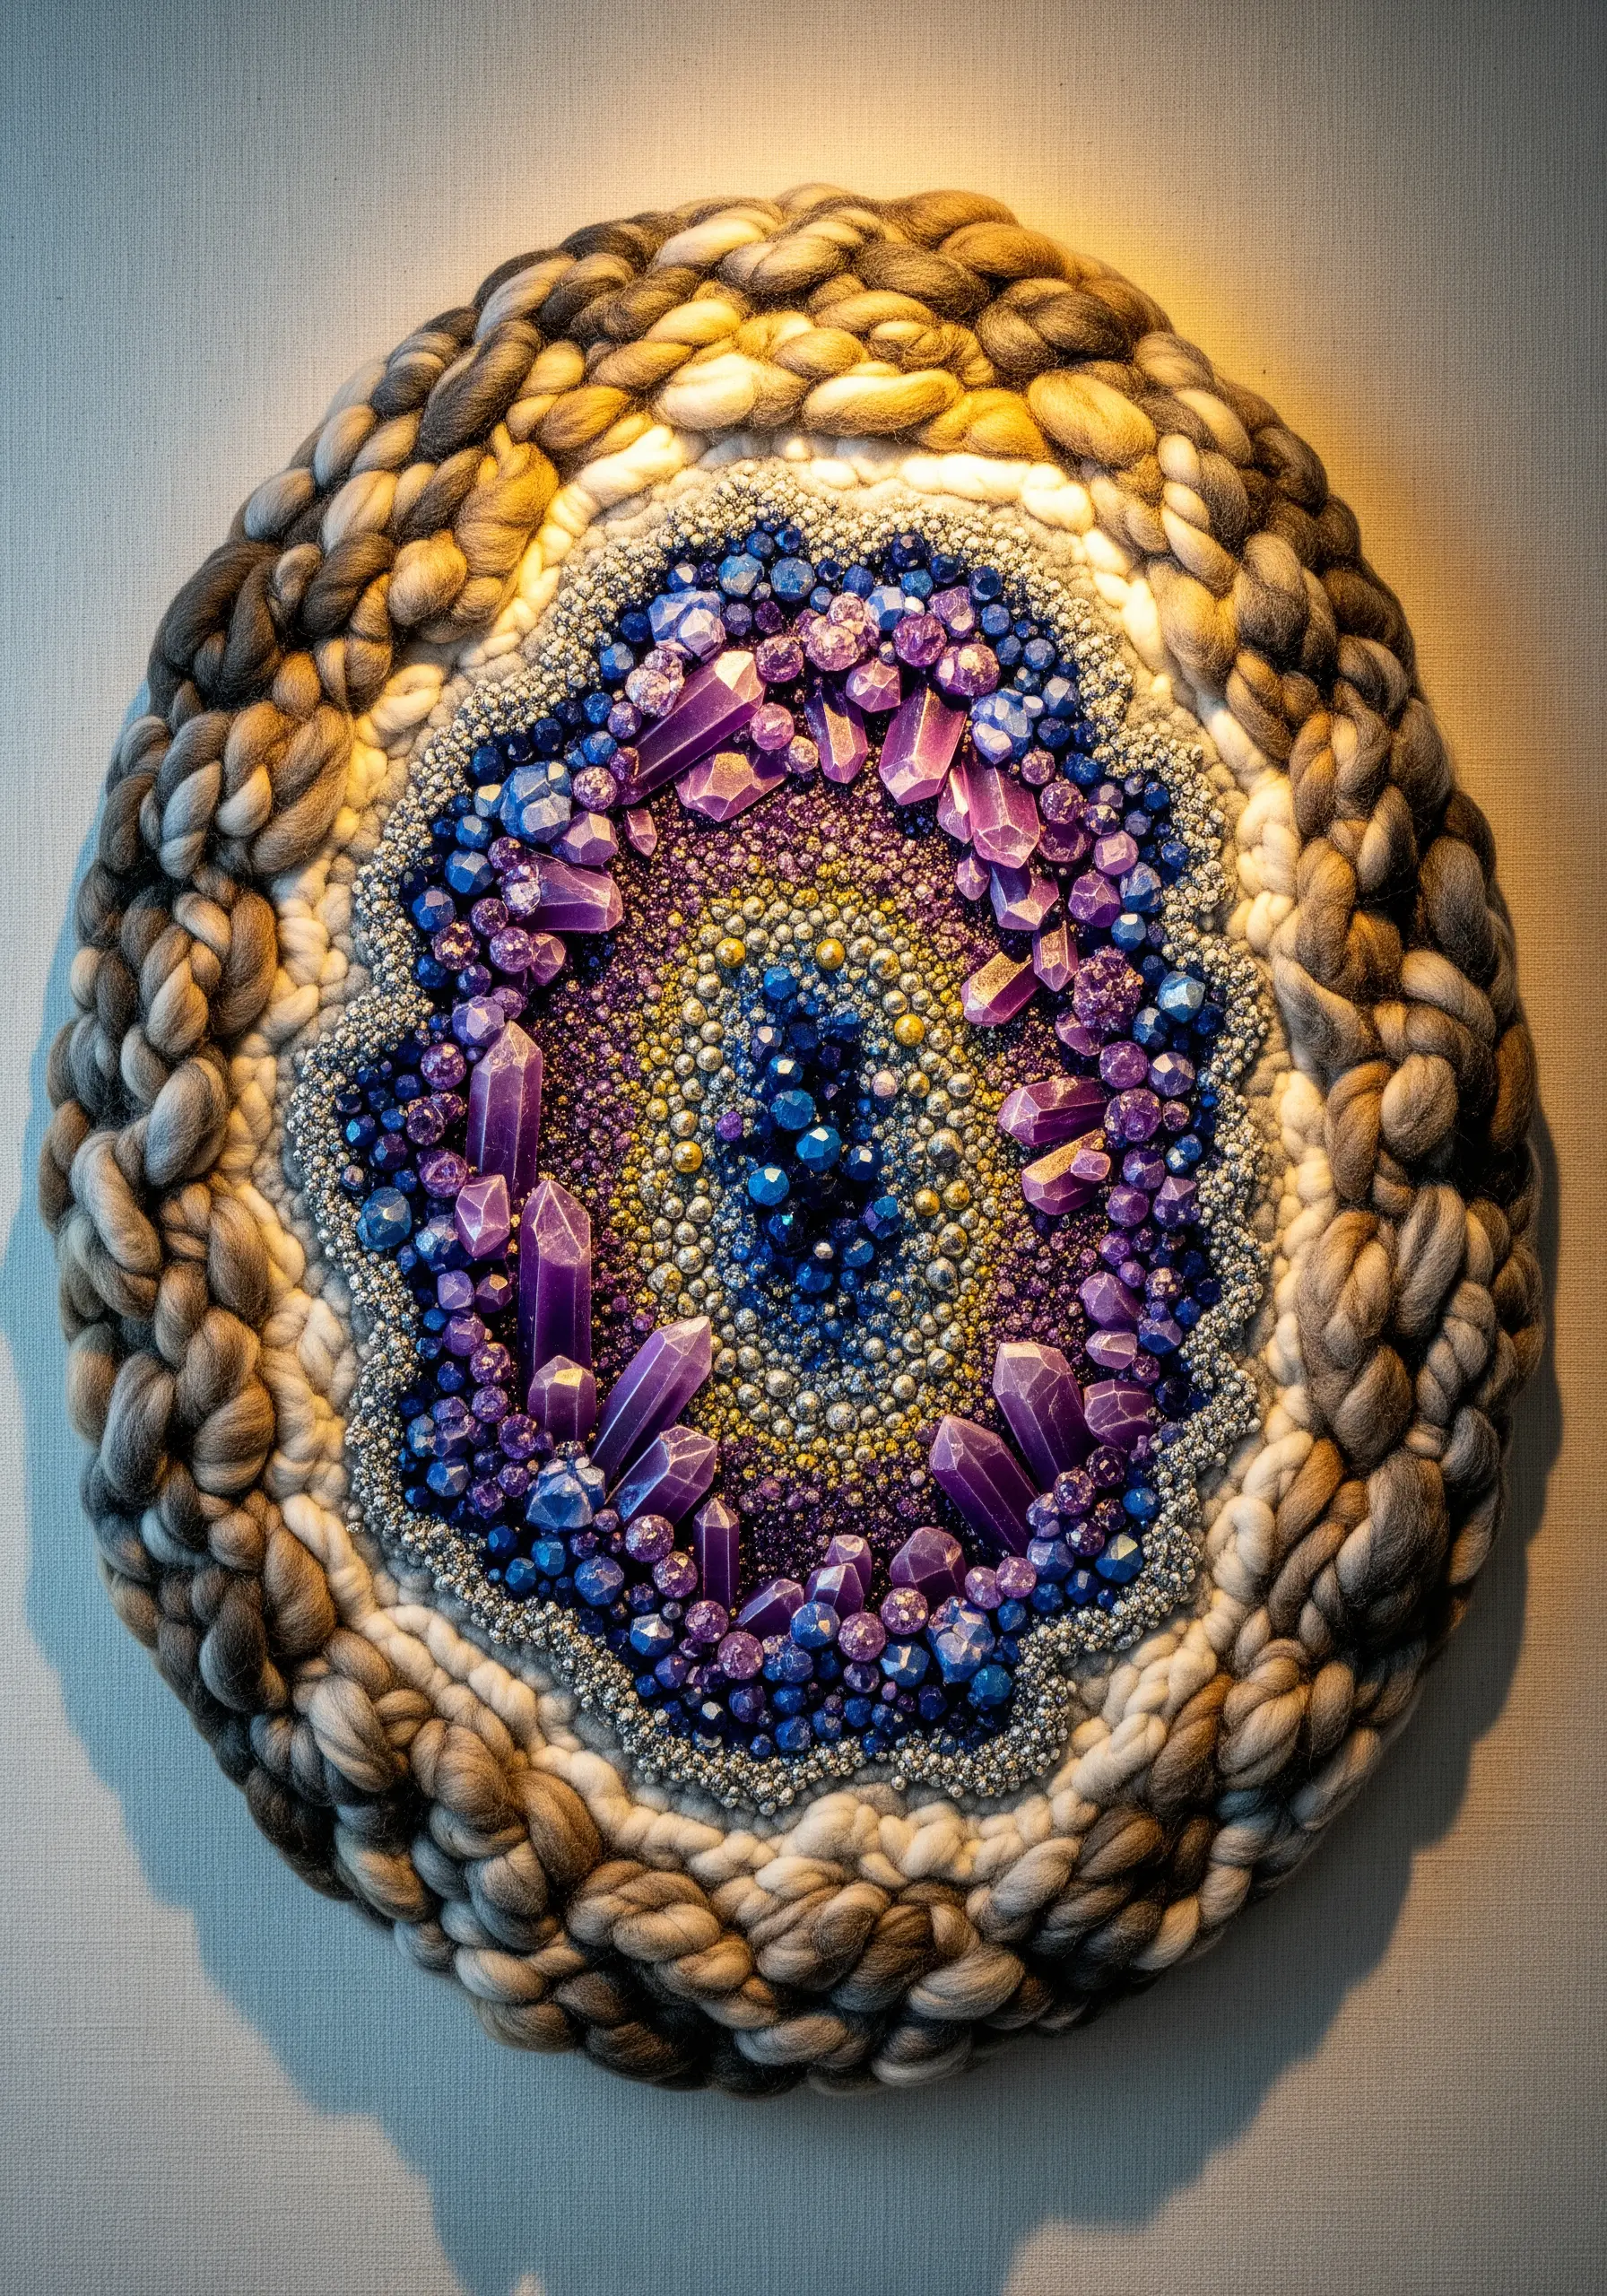
Replicating a geode requires a shift from traditional floss to a rich mix of materials.
Define the outer edge by couching down thick, textured yarn or wool roving to create a soft, rocky border.
Fill the interior with a dense mosaic of French knots, seed beads, and larger faceted beads or small crystals to mimic the crystalline growth.
Arrange the elements in concentric rings, graduating from smaller, darker pieces in the center to larger, lighter ones on the edges to create depth and light.
12. Break the Frame with Sculptural Stitching
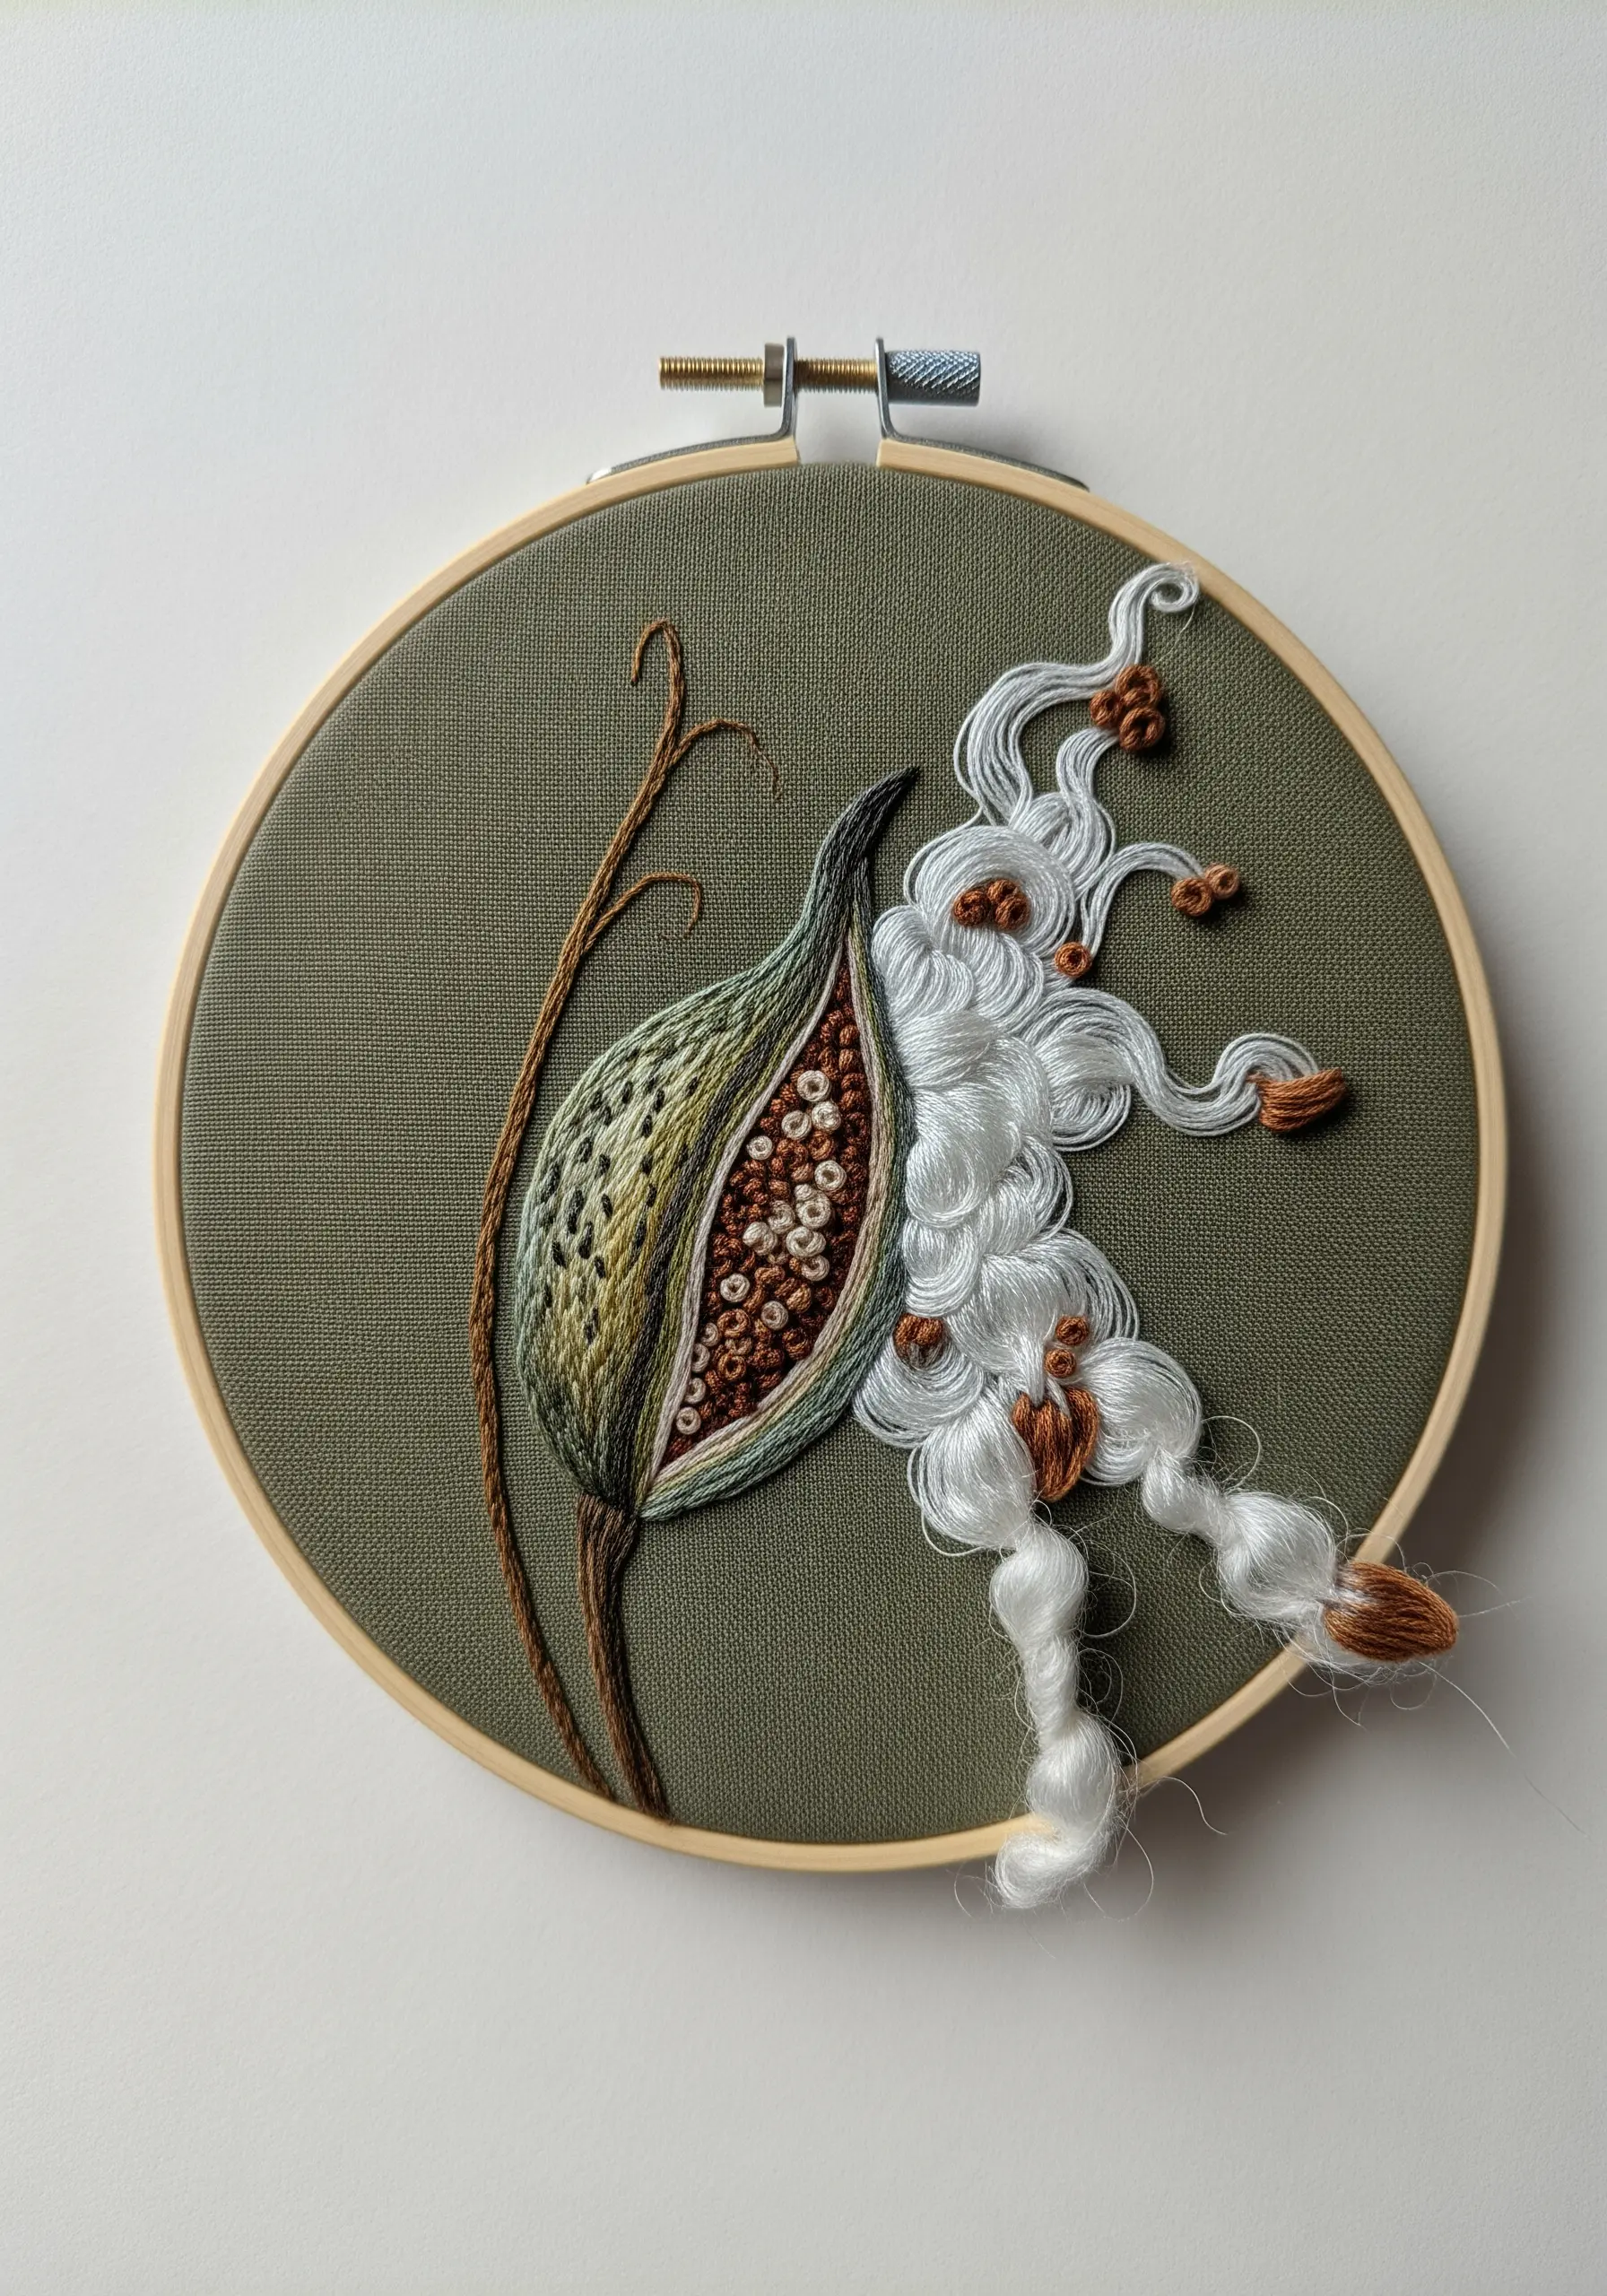
Tell a more dynamic story by allowing your embroidery to escape the confines of the hoop.
For a milkweed pod, stitch the pod itself directly onto the fabric using directional satin stitch for shading.
To create the silky floss, use untwisted, loose strands of white silk or cotton floss. Anchor them inside the pod, then let them flow freely outside the hoop, securing them with just a few tiny, discreet stitches.
This technique creates a stunning sense of release and movement, turning a static image into a moment in time.
13. Create Depth in Landscapes with Layering
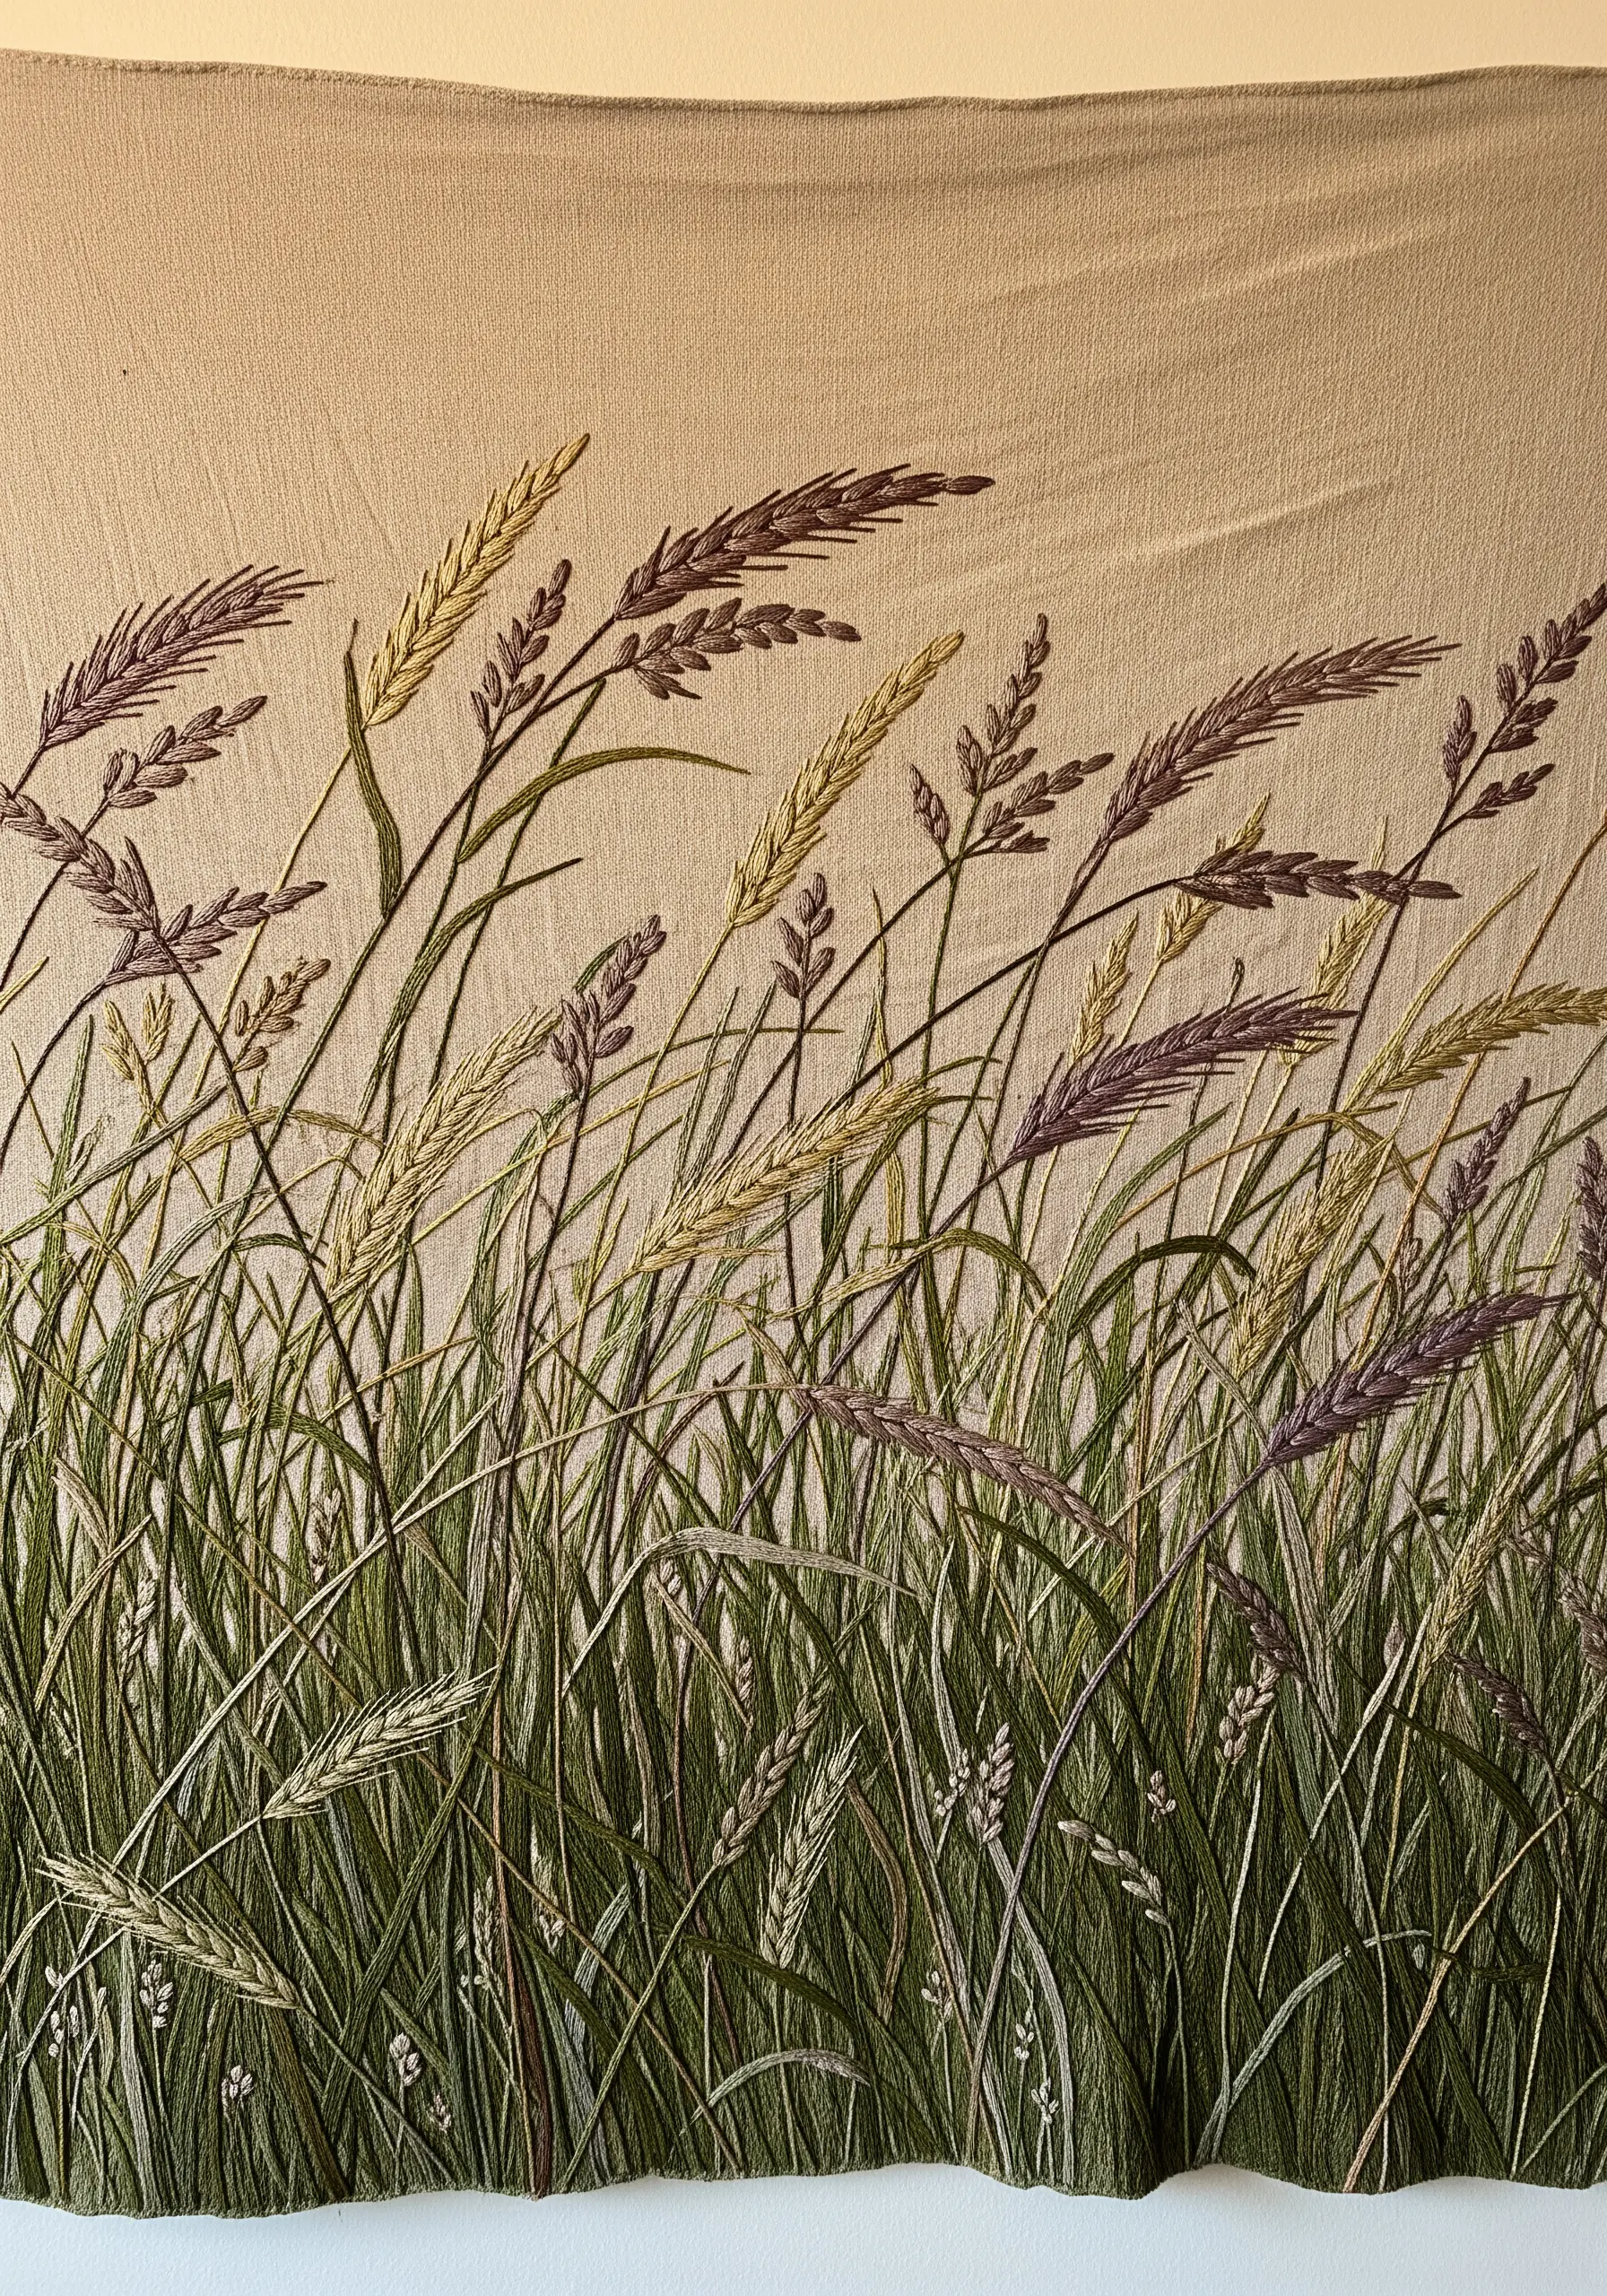
To stitch a field of grass that feels deep and dimensional, you need to think in layers.
Begin with the background elements, using lighter shades of green and thinner thread for the grasses farthest away. Keep these stitches sparser.
As you move to the foreground, switch to darker, richer colors and use more strands of floss. Make these stitches denser and overlap them on top of the background layers.
This simple technique of layering color and stitch density instantly creates an illusion of perspective.
14. Apply Embroidery Principles to Upholstery
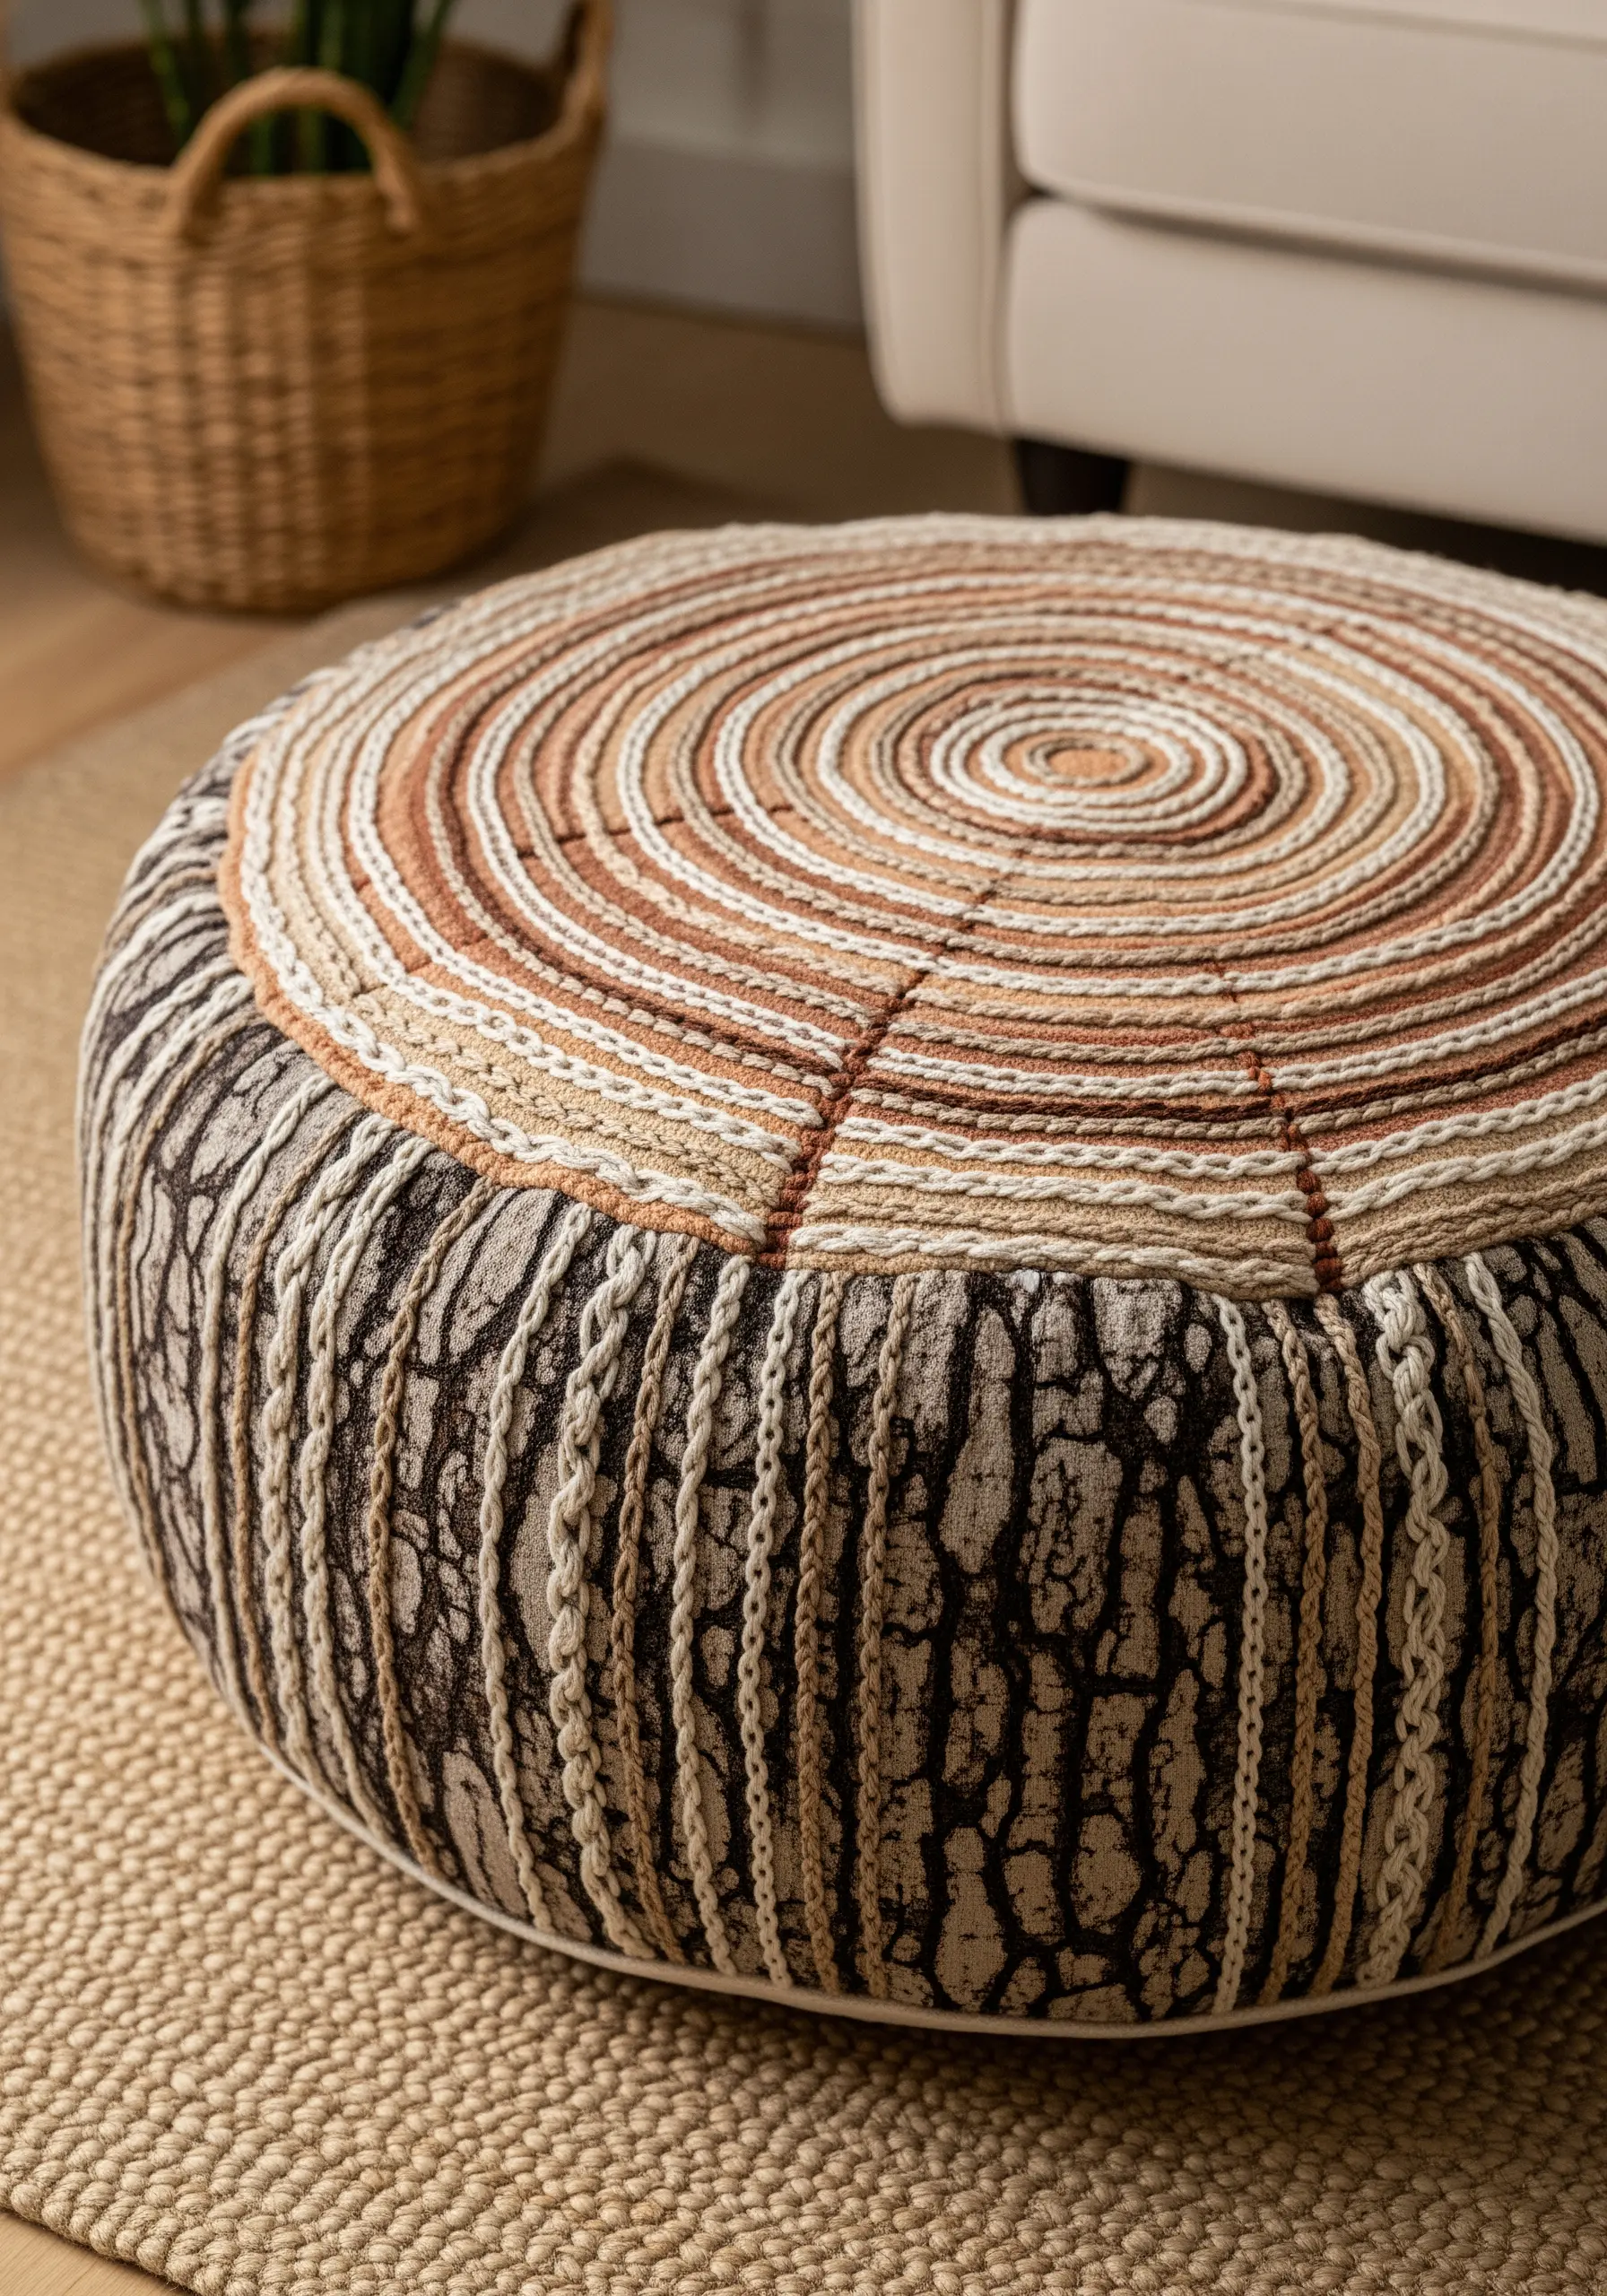
Translate the textures of nature into functional home decor by thinking beyond the hoop.
To create the look of a tree stump, use a spiral of couched cords or thick yarn on the top surface of a pouf or cushion to mimic the growth rings.
For the sides, choose a fabric with a bark-like print and enhance it with vertical rows of chunky chain stitch or couching to add authentic, tactile grooves.
This approach combines fabric choice with targeted stitching to create a piece that is both artful and usable.
15. Elevate Linens with Modern Botanical Motifs
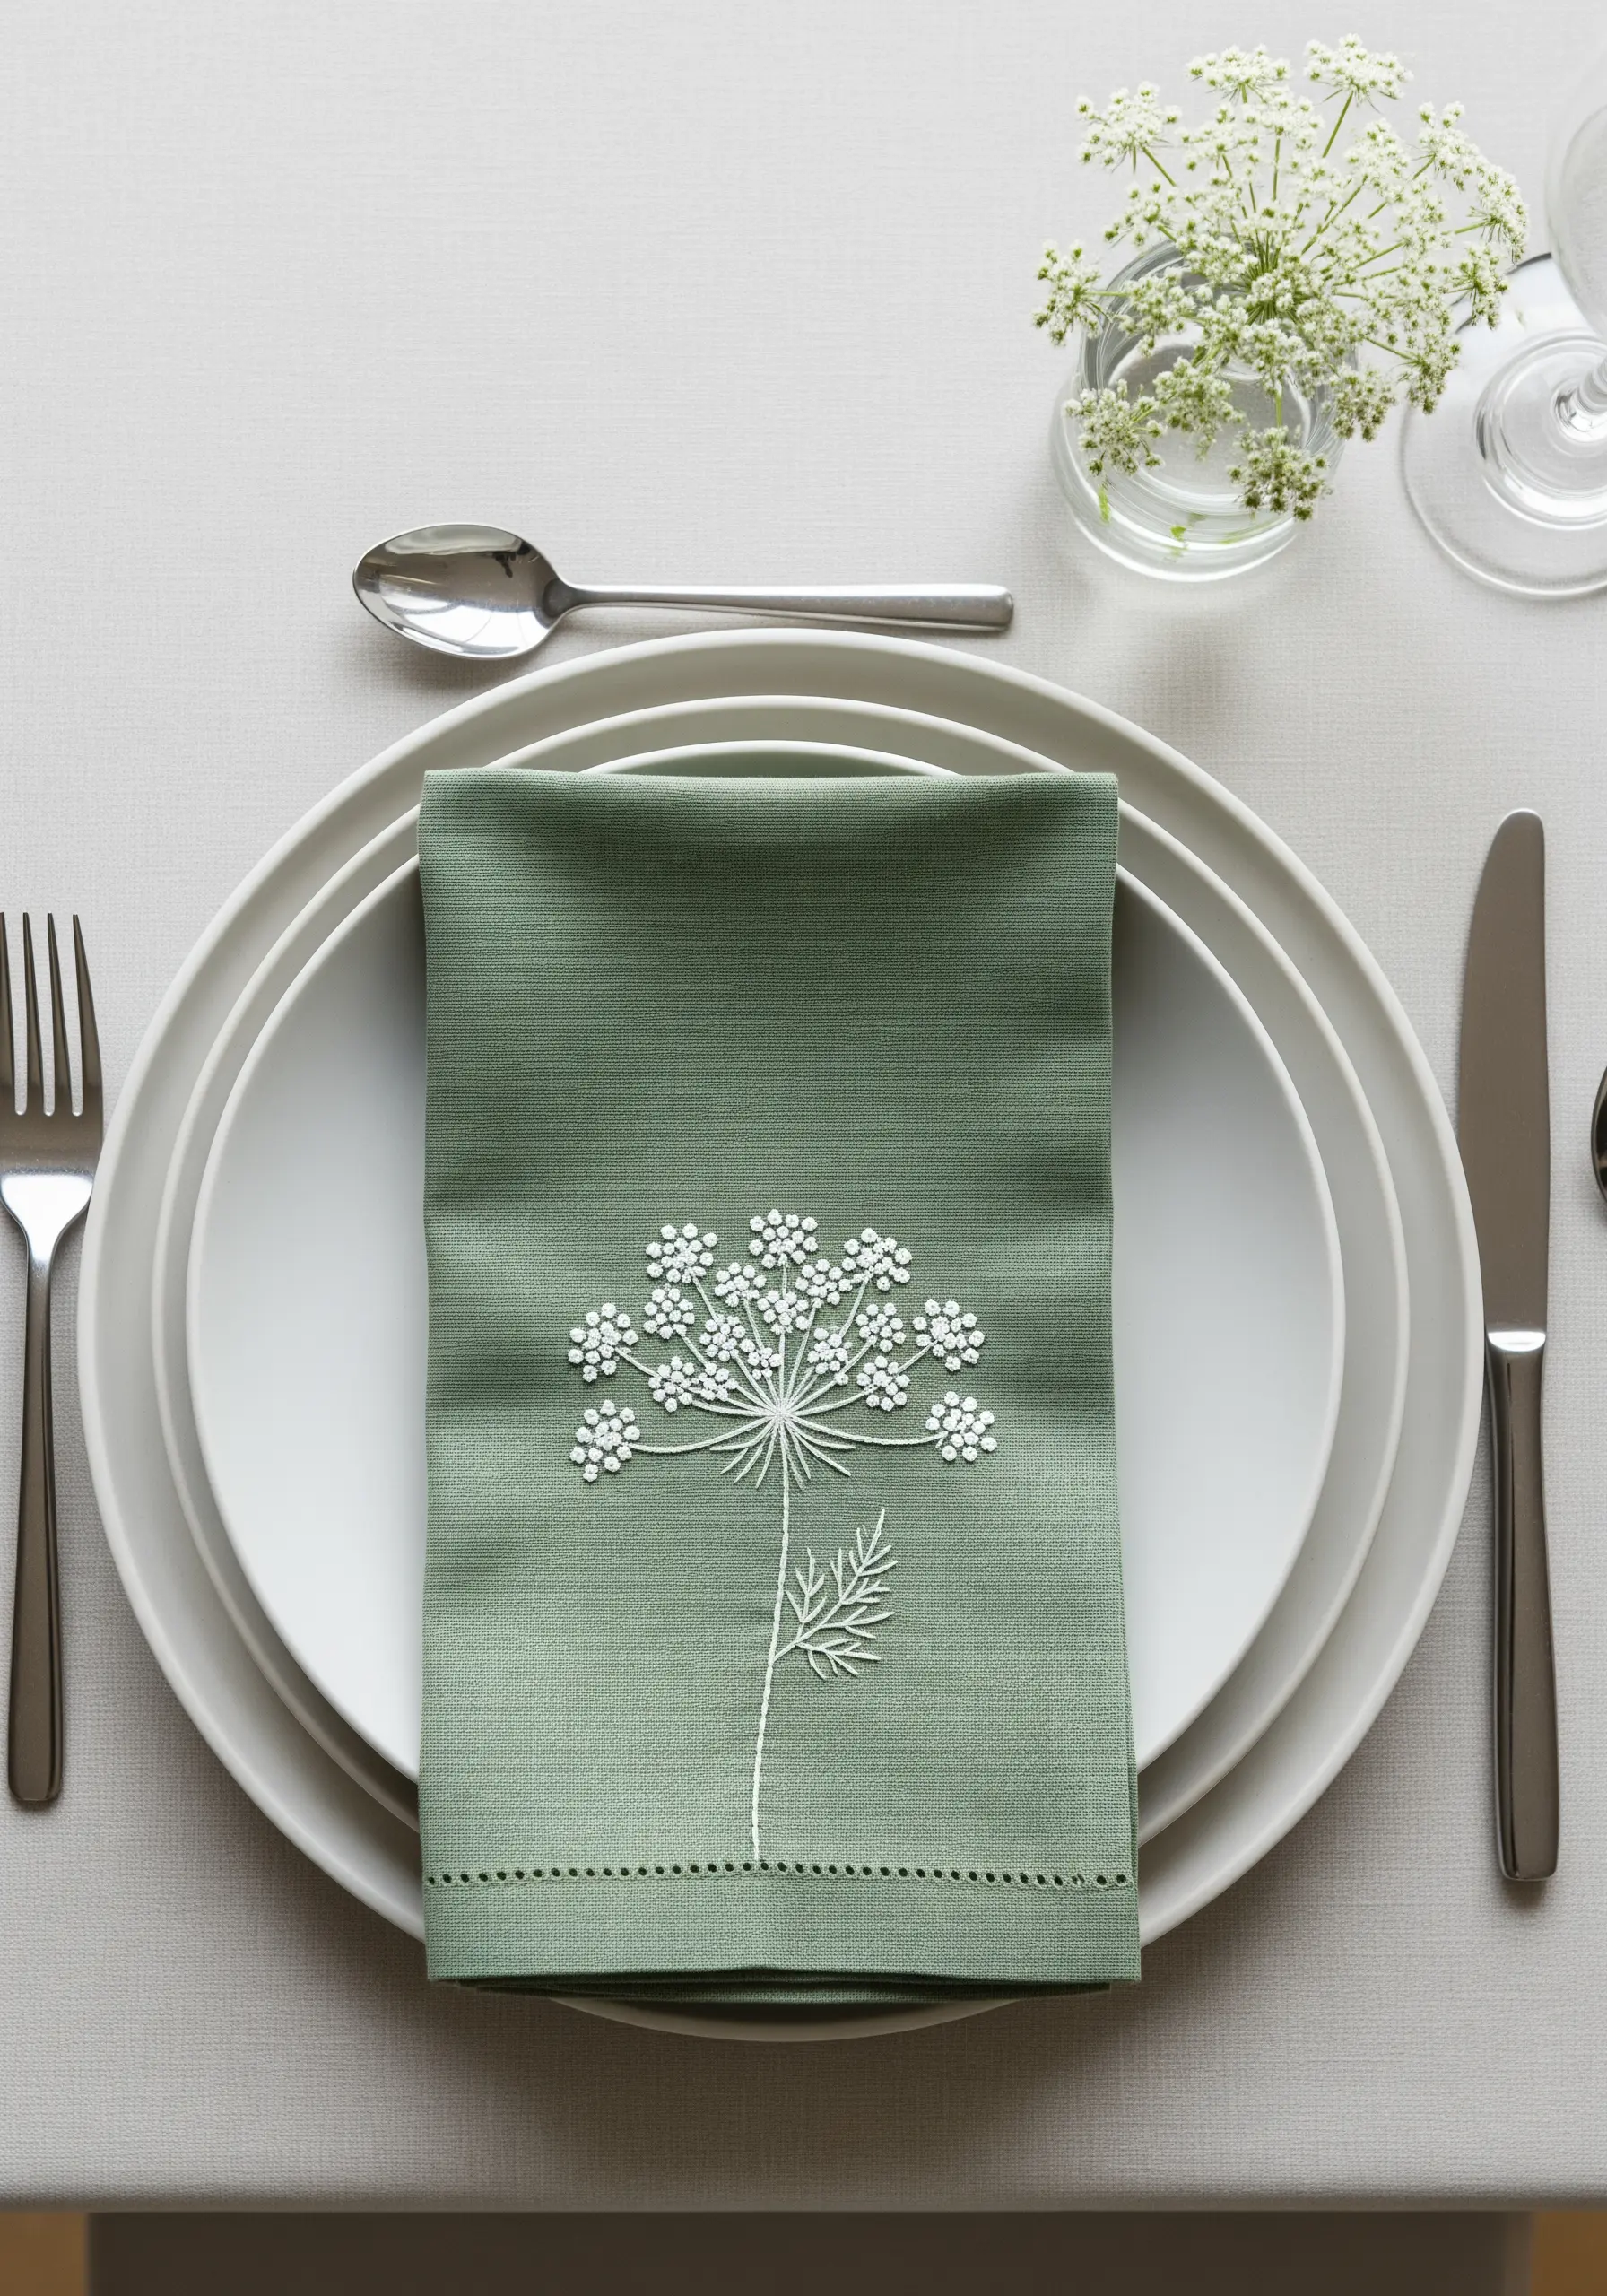
A single, well-placed motif can transform an everyday object into something special.
For a clean, modern aesthetic on table linens, choose a simple botanical silhouette like Queen Anne’s Lace.
Use a single color of thread—white on a colored linen creates a crisp, elegant contrast. Use French knots for the delicate flower heads and a simple backstitch for the stem and leaves.
This restrained approach feels sophisticated and intentional, proving that great design doesn’t require complexity. You’ll find more inspiration in these modern minimalist table linen embroidery ideas.
16. Use a Dark Background for Dramatic Contrast
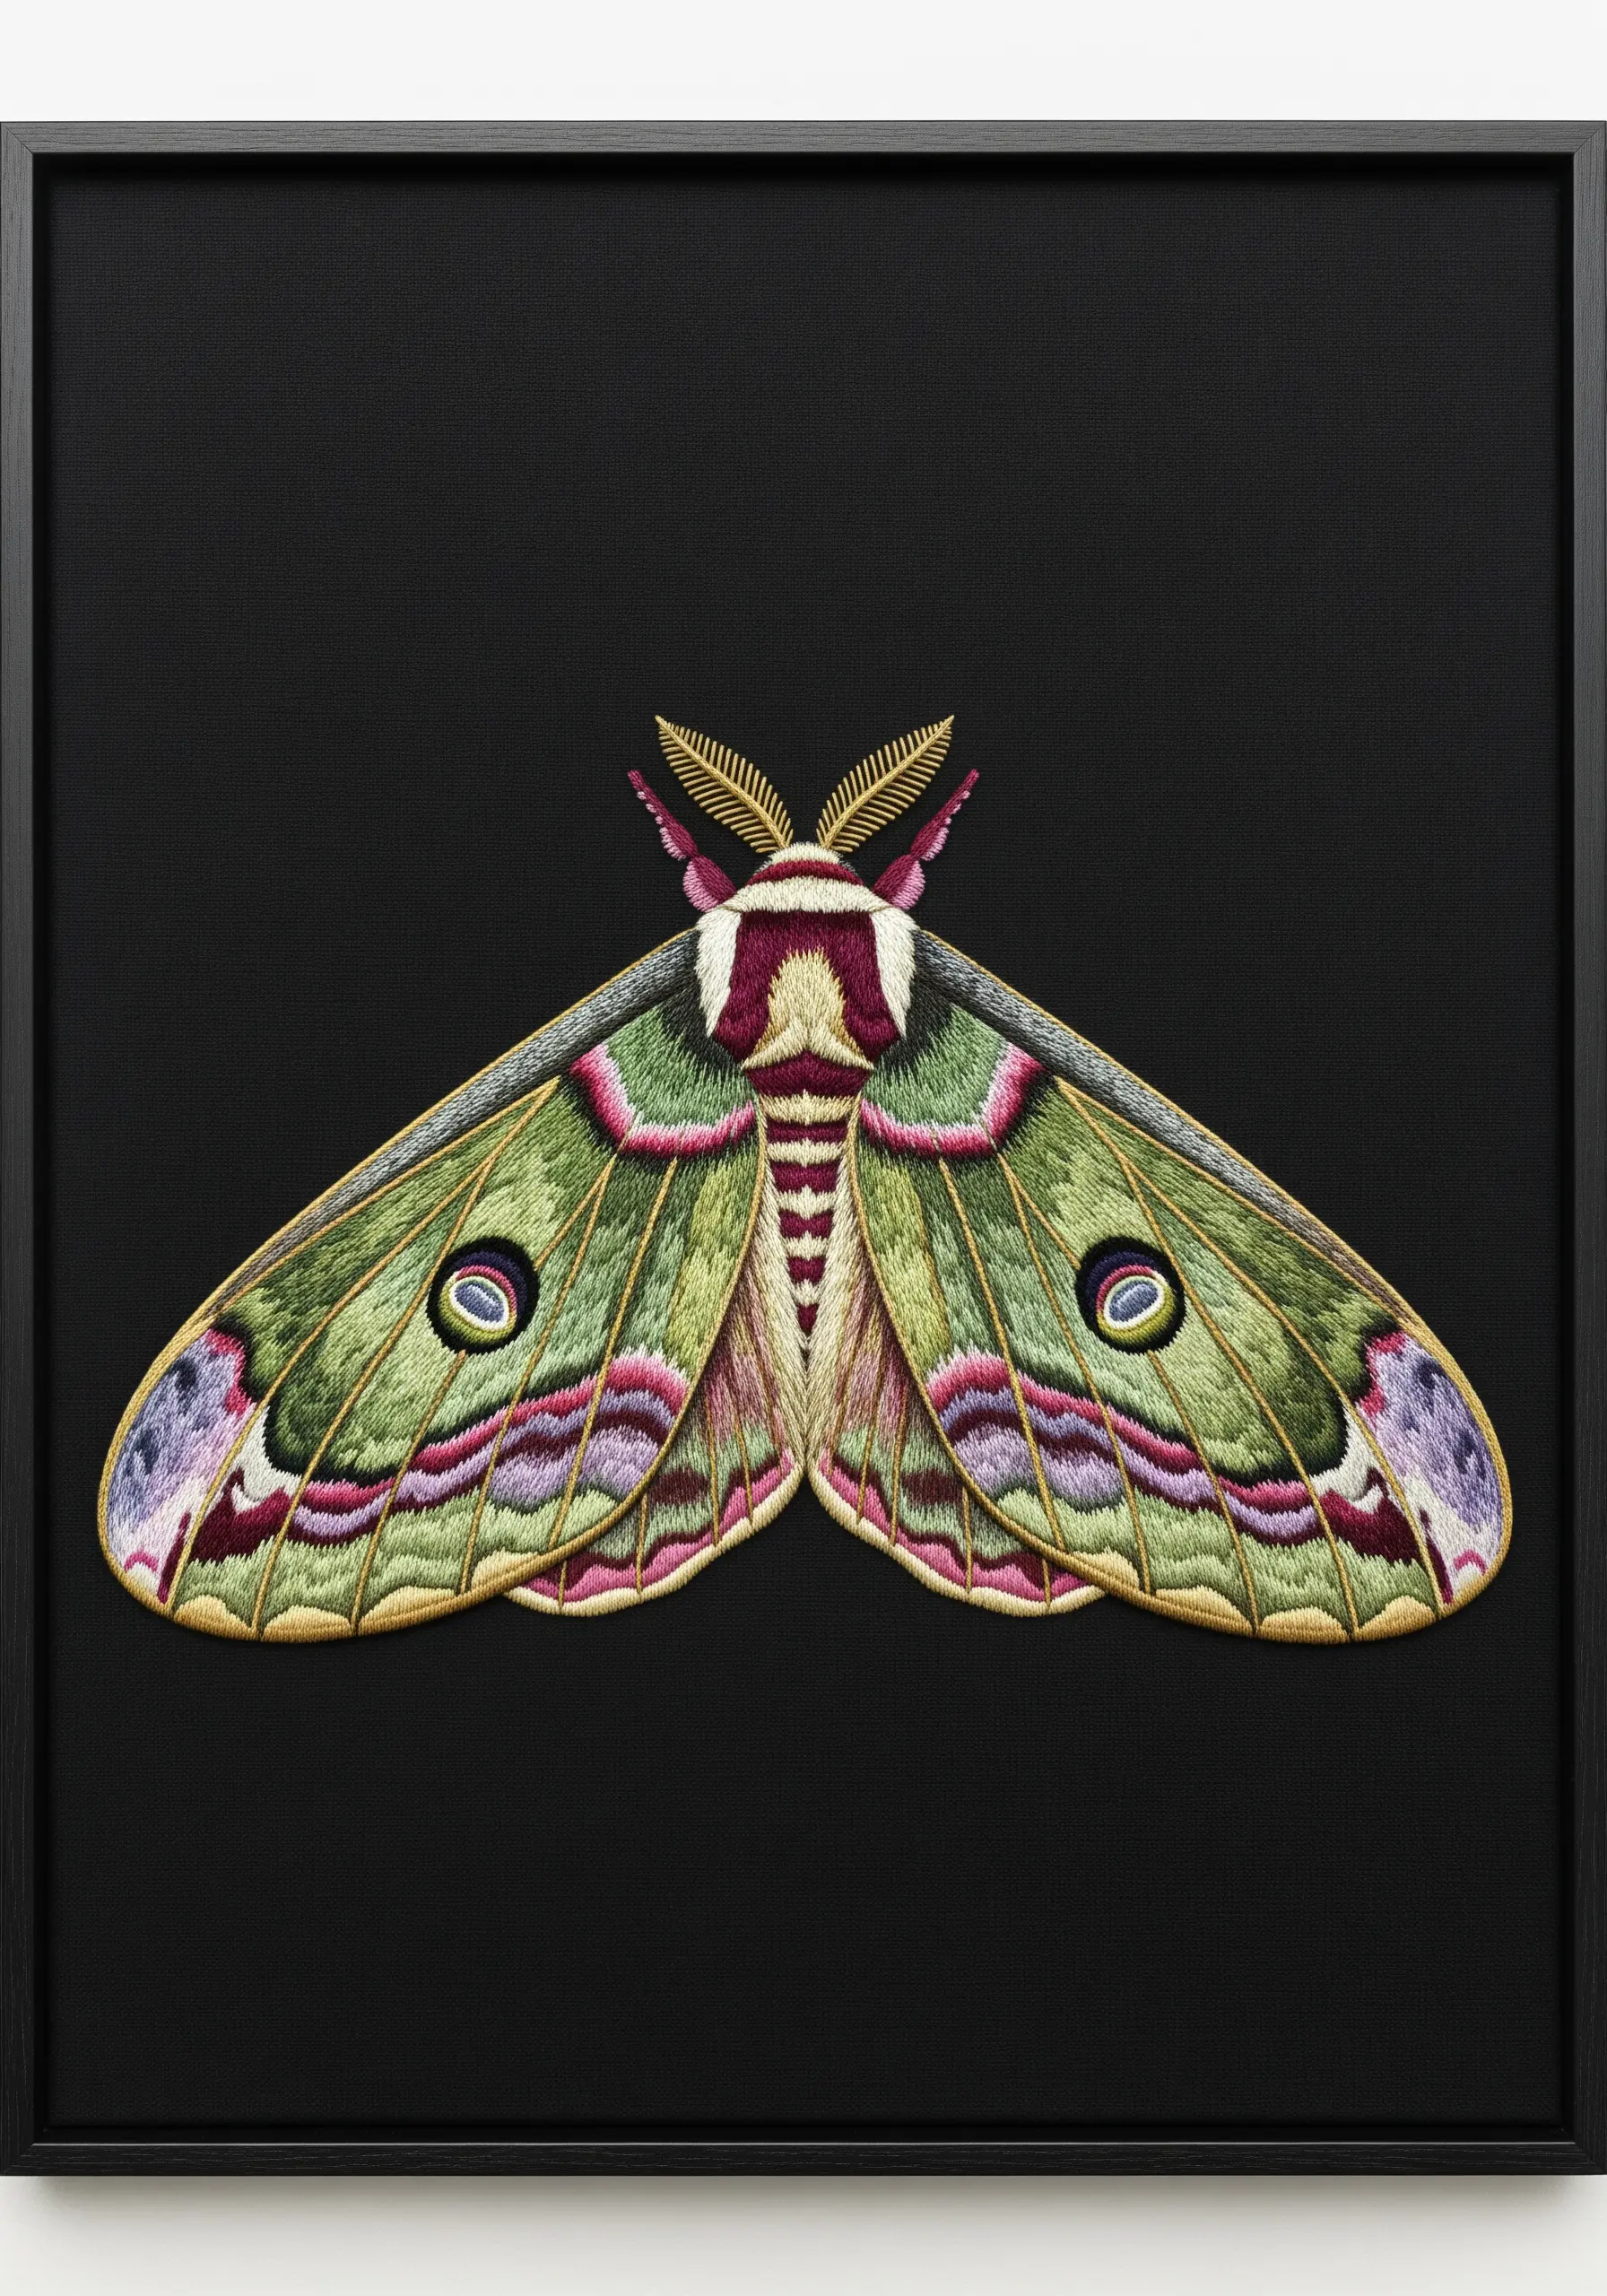
Stitching on black or dark-colored fabric makes your colors appear more saturated and vibrant.
When thread painting a subject like a moth, the dark background does the work of creating shadows, allowing you to focus on the highlights and mid-tones.
Trace your design with a white or silver transfer pen that will show up clearly on the dark ground.
Framing the finished piece with a simple black frame enhances the effect, making the embroidered subject appear to float in space.
Explore these night garden embroidery ideas using dark fabric for more high-contrast inspiration.
17. Sculpt with Padded Stitches for 3D Botanicals
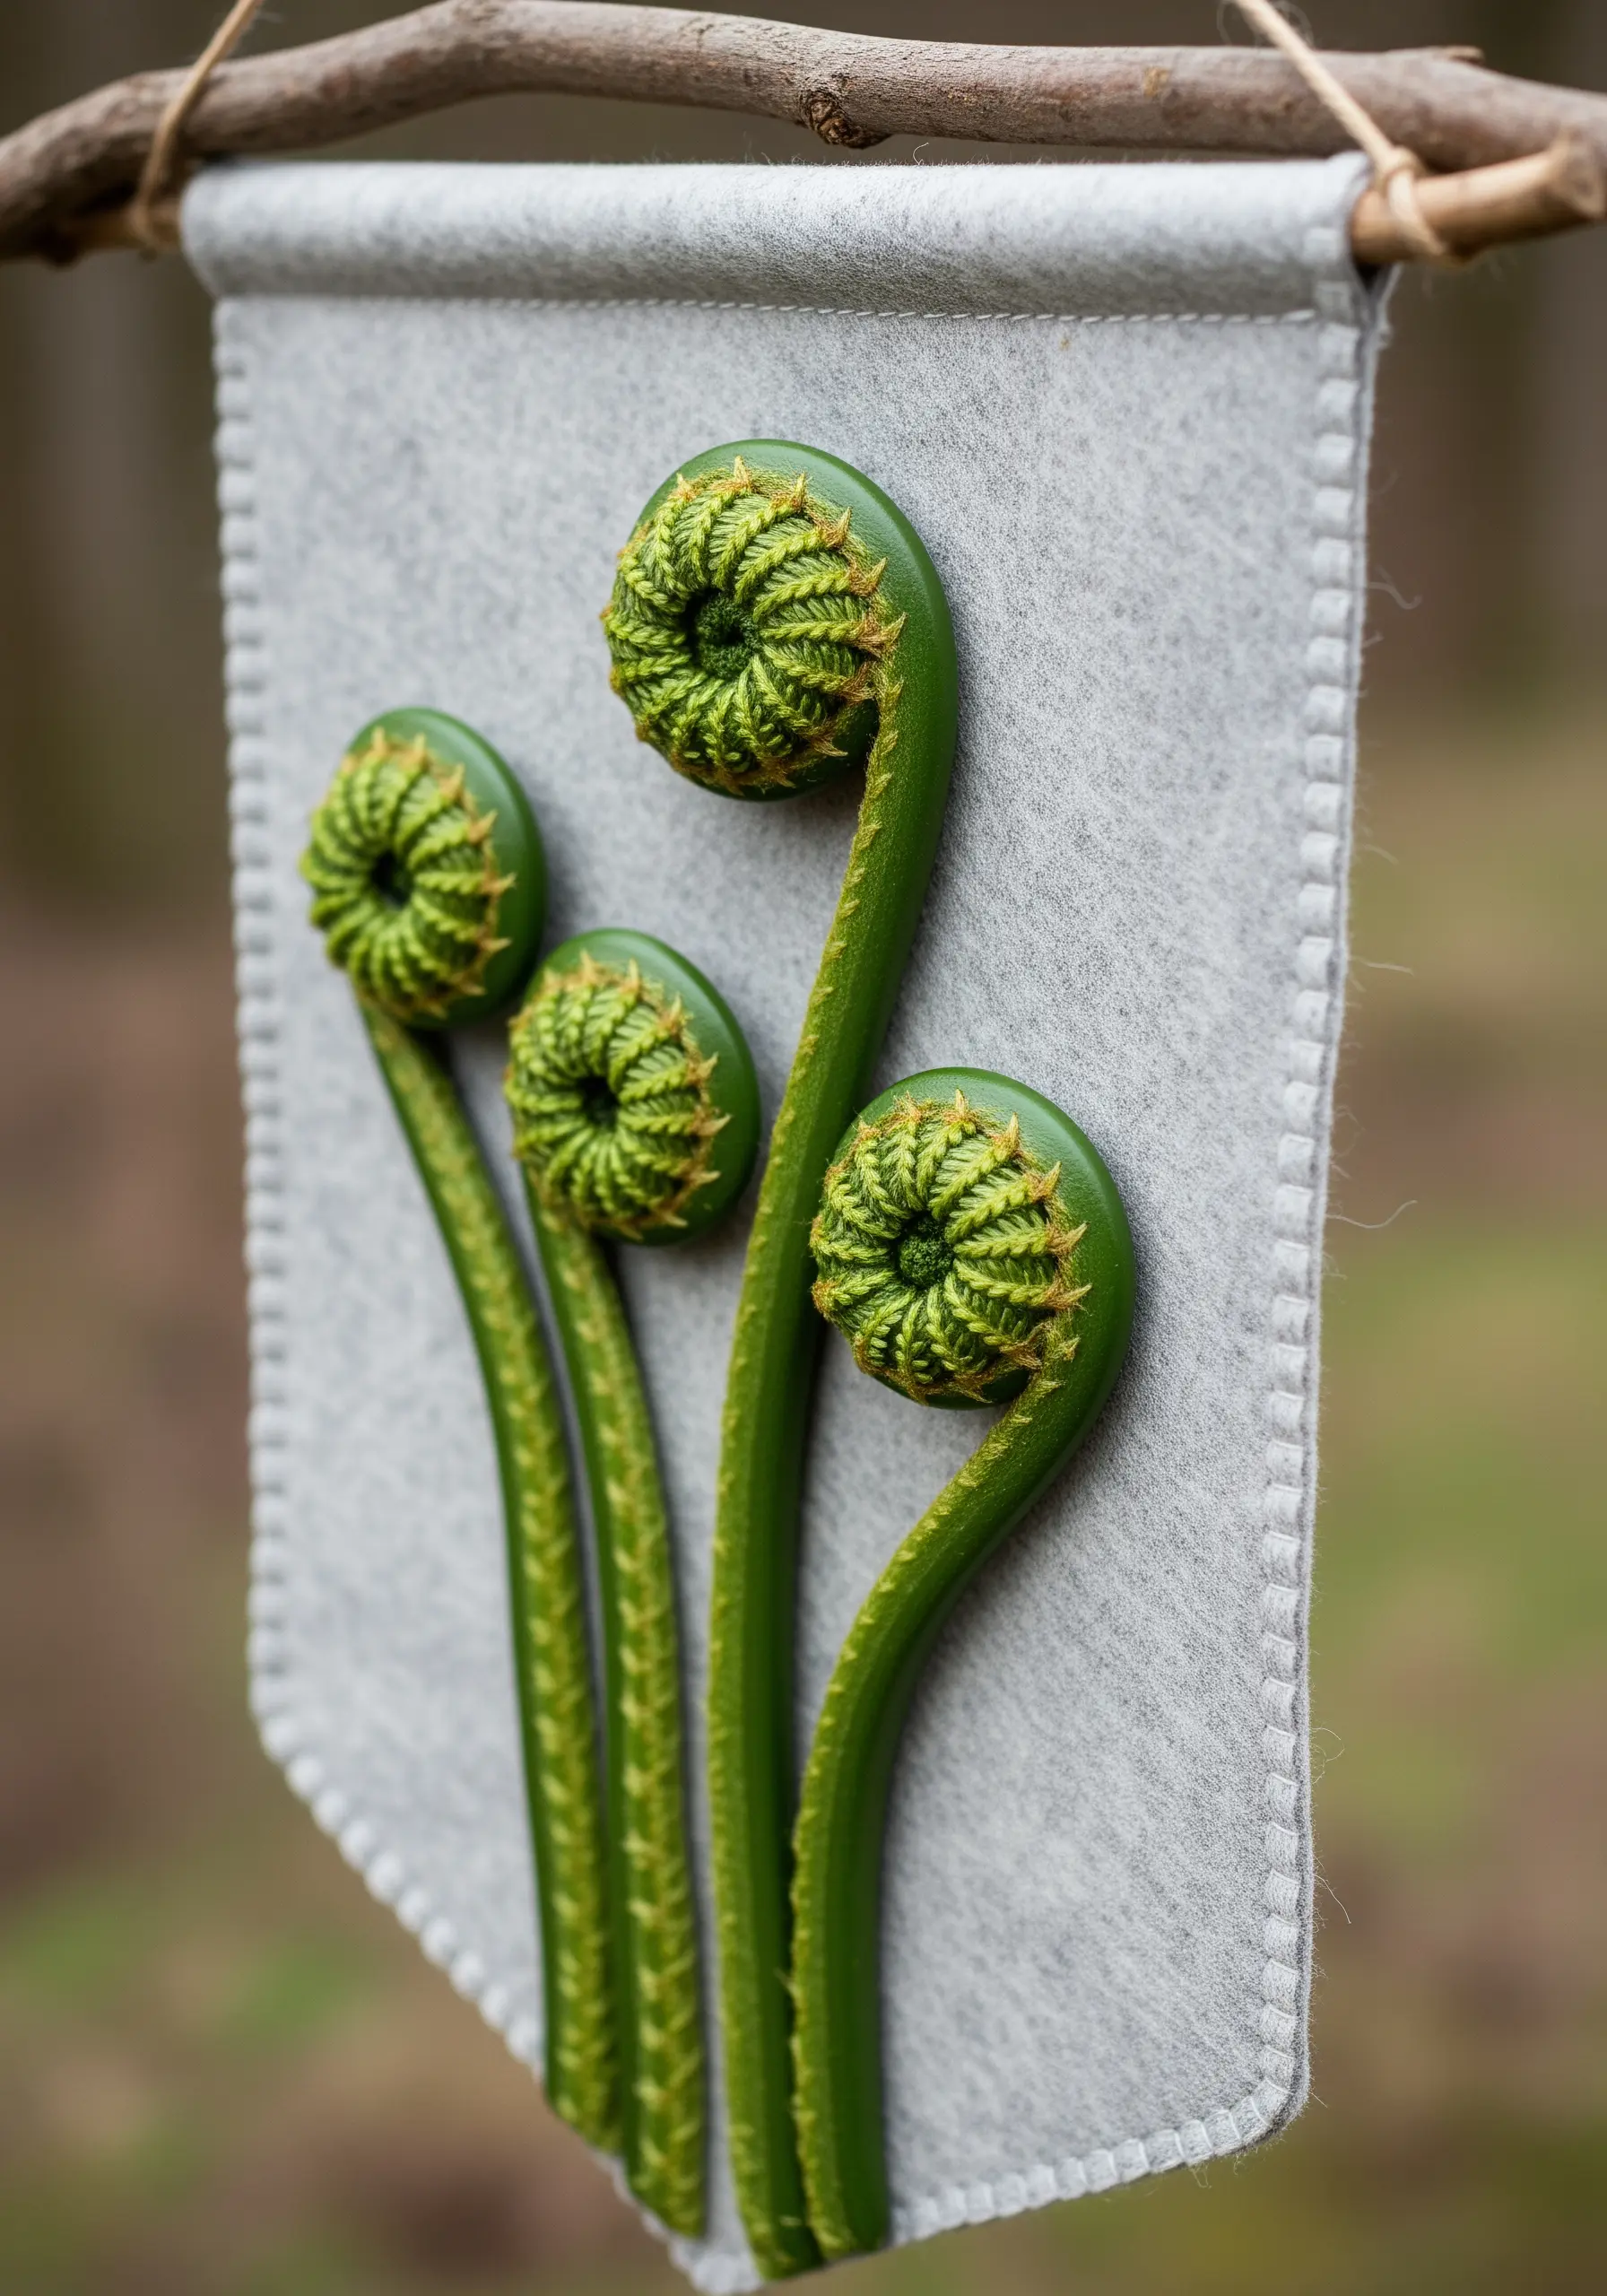
To make your embroidered plants look like they’re growing right off the fabric, use stumpwork techniques.
For the curled heads of fiddlehead ferns, create a foundation of felt padding or layered straight stitches. Then, cover this padding completely with neat, directional satin stitches.
This padding lifts the embroidery off the surface, creating realistic curves and shadows.
Use a slightly darker thread for the underside of the curve to enhance the three-dimensional illusion. For more ideas, see these fern and foliage stitch variations.
18. Create Texture with Paint and Appliqué
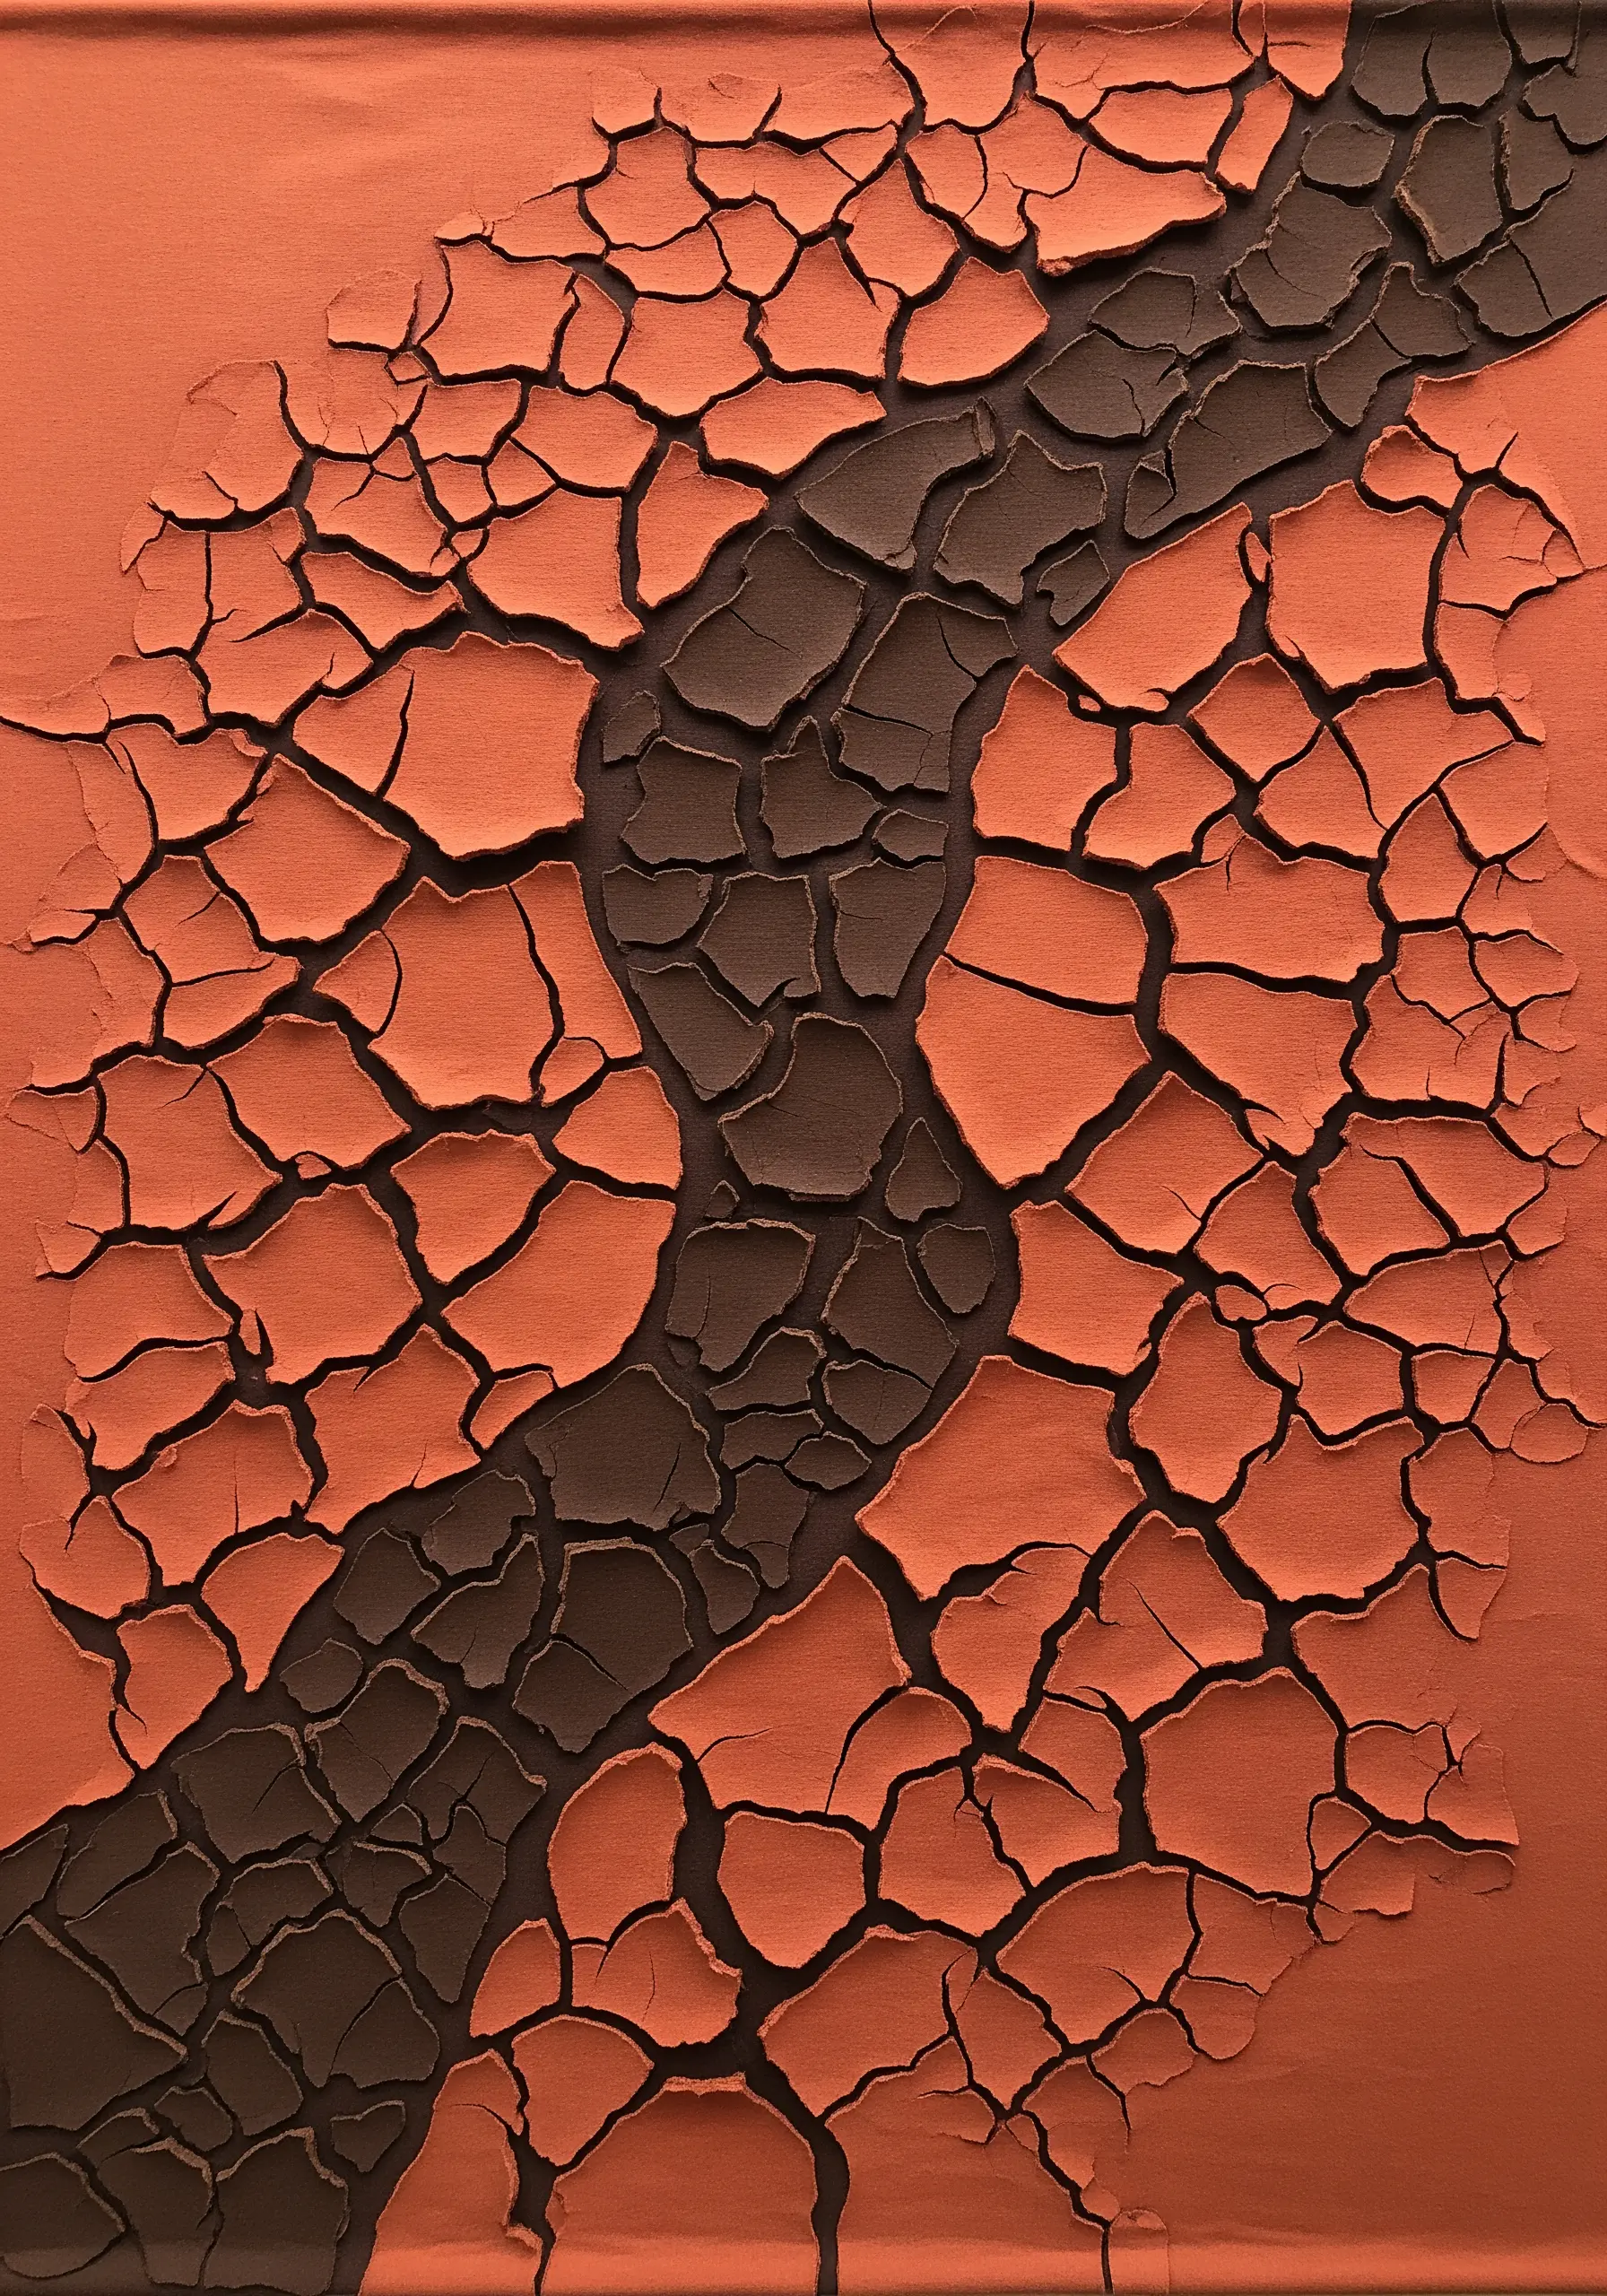
Sometimes, the most interesting textile art begins before you even thread your needle.
To create the effect of cracked earth, apply a layer of textile paint mixed with a crackle medium to your canvas and let it dry completely.
As the paint dries, it will form a network of cracks. You can then enhance this texture by stitching along the cracks or by cutting out the cracked pieces and appliquéing them onto a contrasting background fabric.
This mixed-media approach adds a layer of authentic, uncontrollable texture that is difficult to achieve with thread alone.


