
Sometimes, the key to unlocking your next creative breakthrough isn’t a new stitch, but a new perspective. You already have the skills, the threads, and the feel for fabric. What you’re looking for now is a way to make your work resonate with more intention and impact.
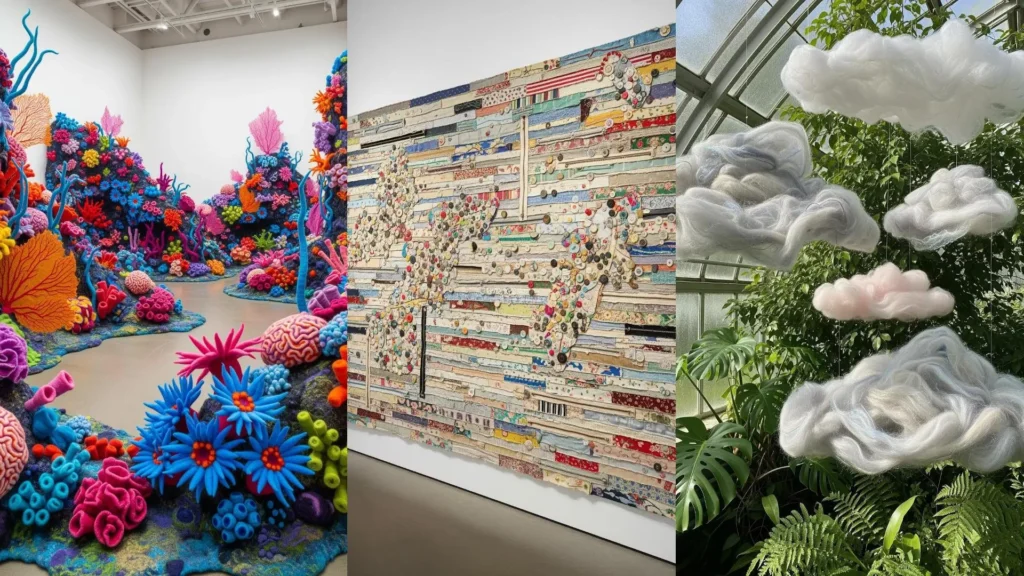
These large-scale installations aren’t just beautiful to look at; they are masterful studies in texture, color, and form. They show us what happens when a simple material like thread or yarn is pushed to its expressive limits.
Let’s borrow that spirit of fearless exploration. In each of these ideas, I’ll show you how to translate the core principle of a monumental artwork into a technique you can use right now, in your own hoop. It’s about seeing the potential for sculpture in a chunky yarn, for painting in a gradient of threads, and for architecture in a simple straight stitch. This is how you elevate your craft into art.
1. Master the Art of the Thread Gradient
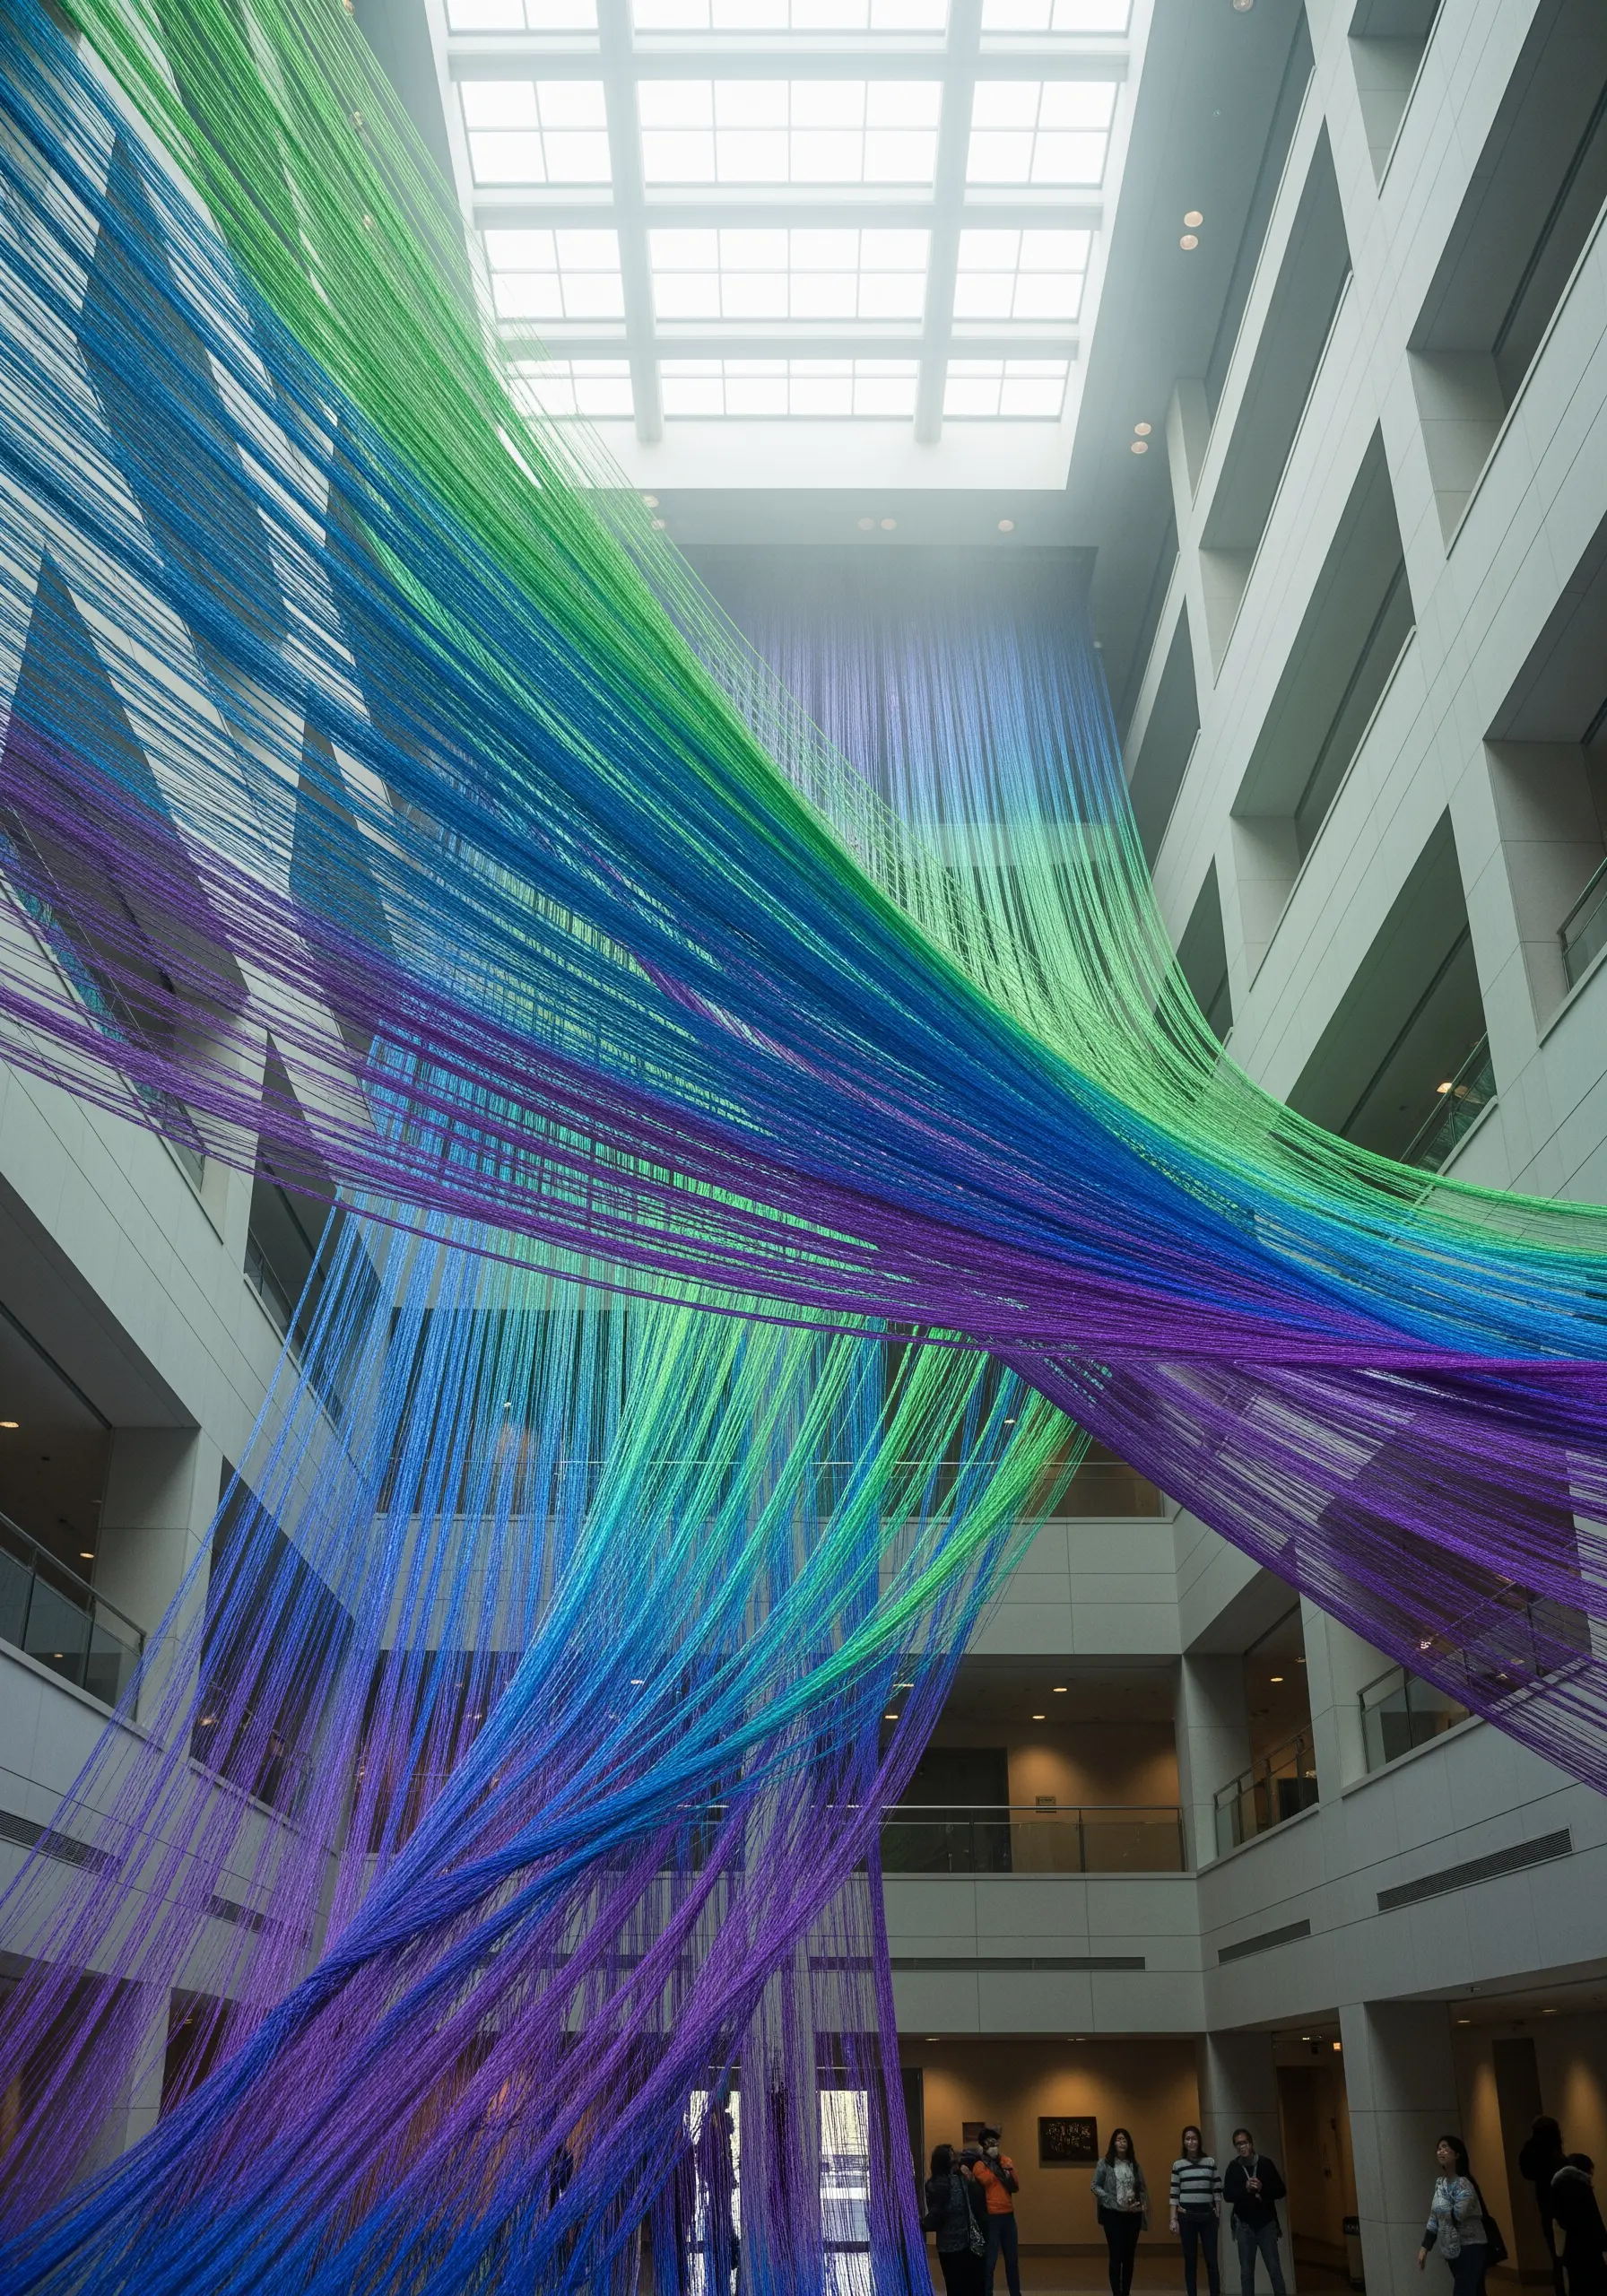
To create a seamless flow of color, think beyond simple satin stitch and embrace thread painting with single strands of floss.
Arrange your colors in a sequence from light to dark or from one hue to another before you begin.
Work in sections, using long-and-short stitches to blend where two colors meet.
This technique diffuses the hard lines between shades, creating a soft, atmospheric effect that gives your work incredible depth and realism, even on a small scale.
For large areas, consider using a multi-needle tool to lay down parallel threads quickly, then stitch over them to secure the gradient.
2. Integrate Chunky Fibers for Sculptural Impact
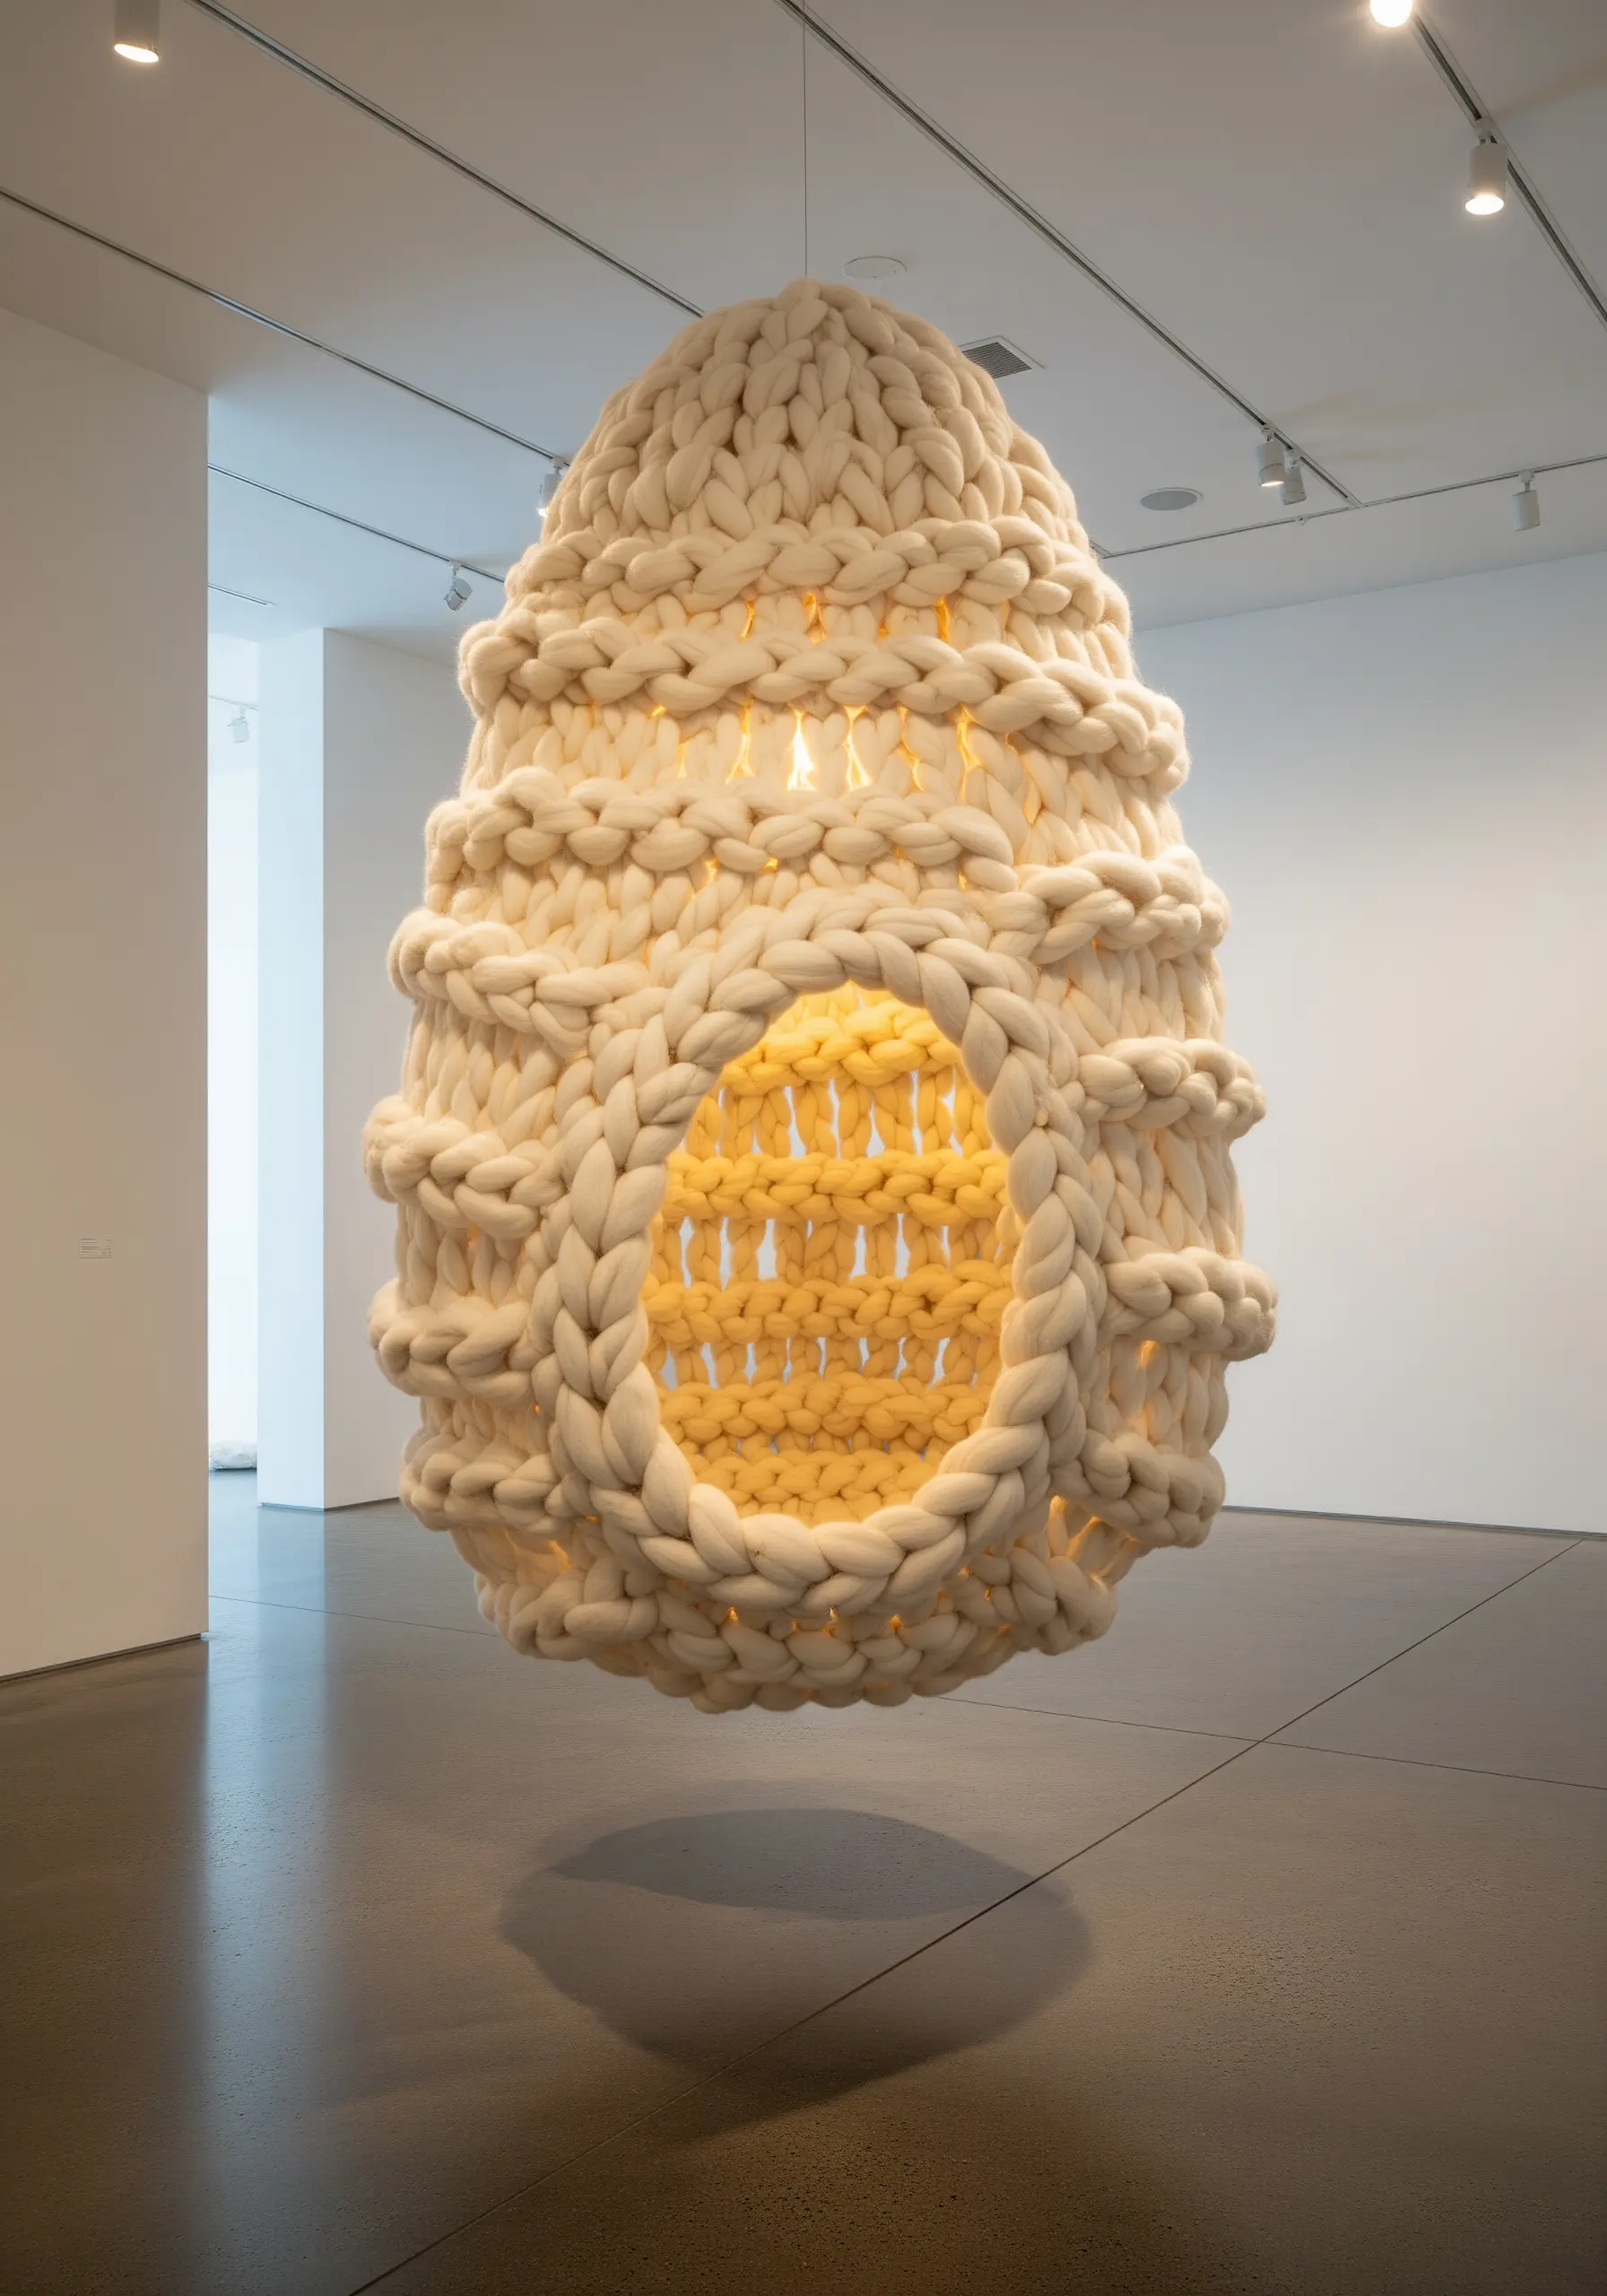
You can achieve dramatic texture by incorporating chunky wool roving or thick, unplied yarn into your embroidery hoop.
Instead of stitching with it, couch it onto your fabric surface using a thinner, matching thread.
Lay the chunky fiber in your desired shape—a curve, a spiral, or a bold line—and use small, discreet stitches to tack it down every half-inch.
This method adds immediate three-dimensional form and a soft, inviting tactility that contrasts beautifully with delicate floss embroidery.
3. Create Luminous Geometry with String Art Stitches
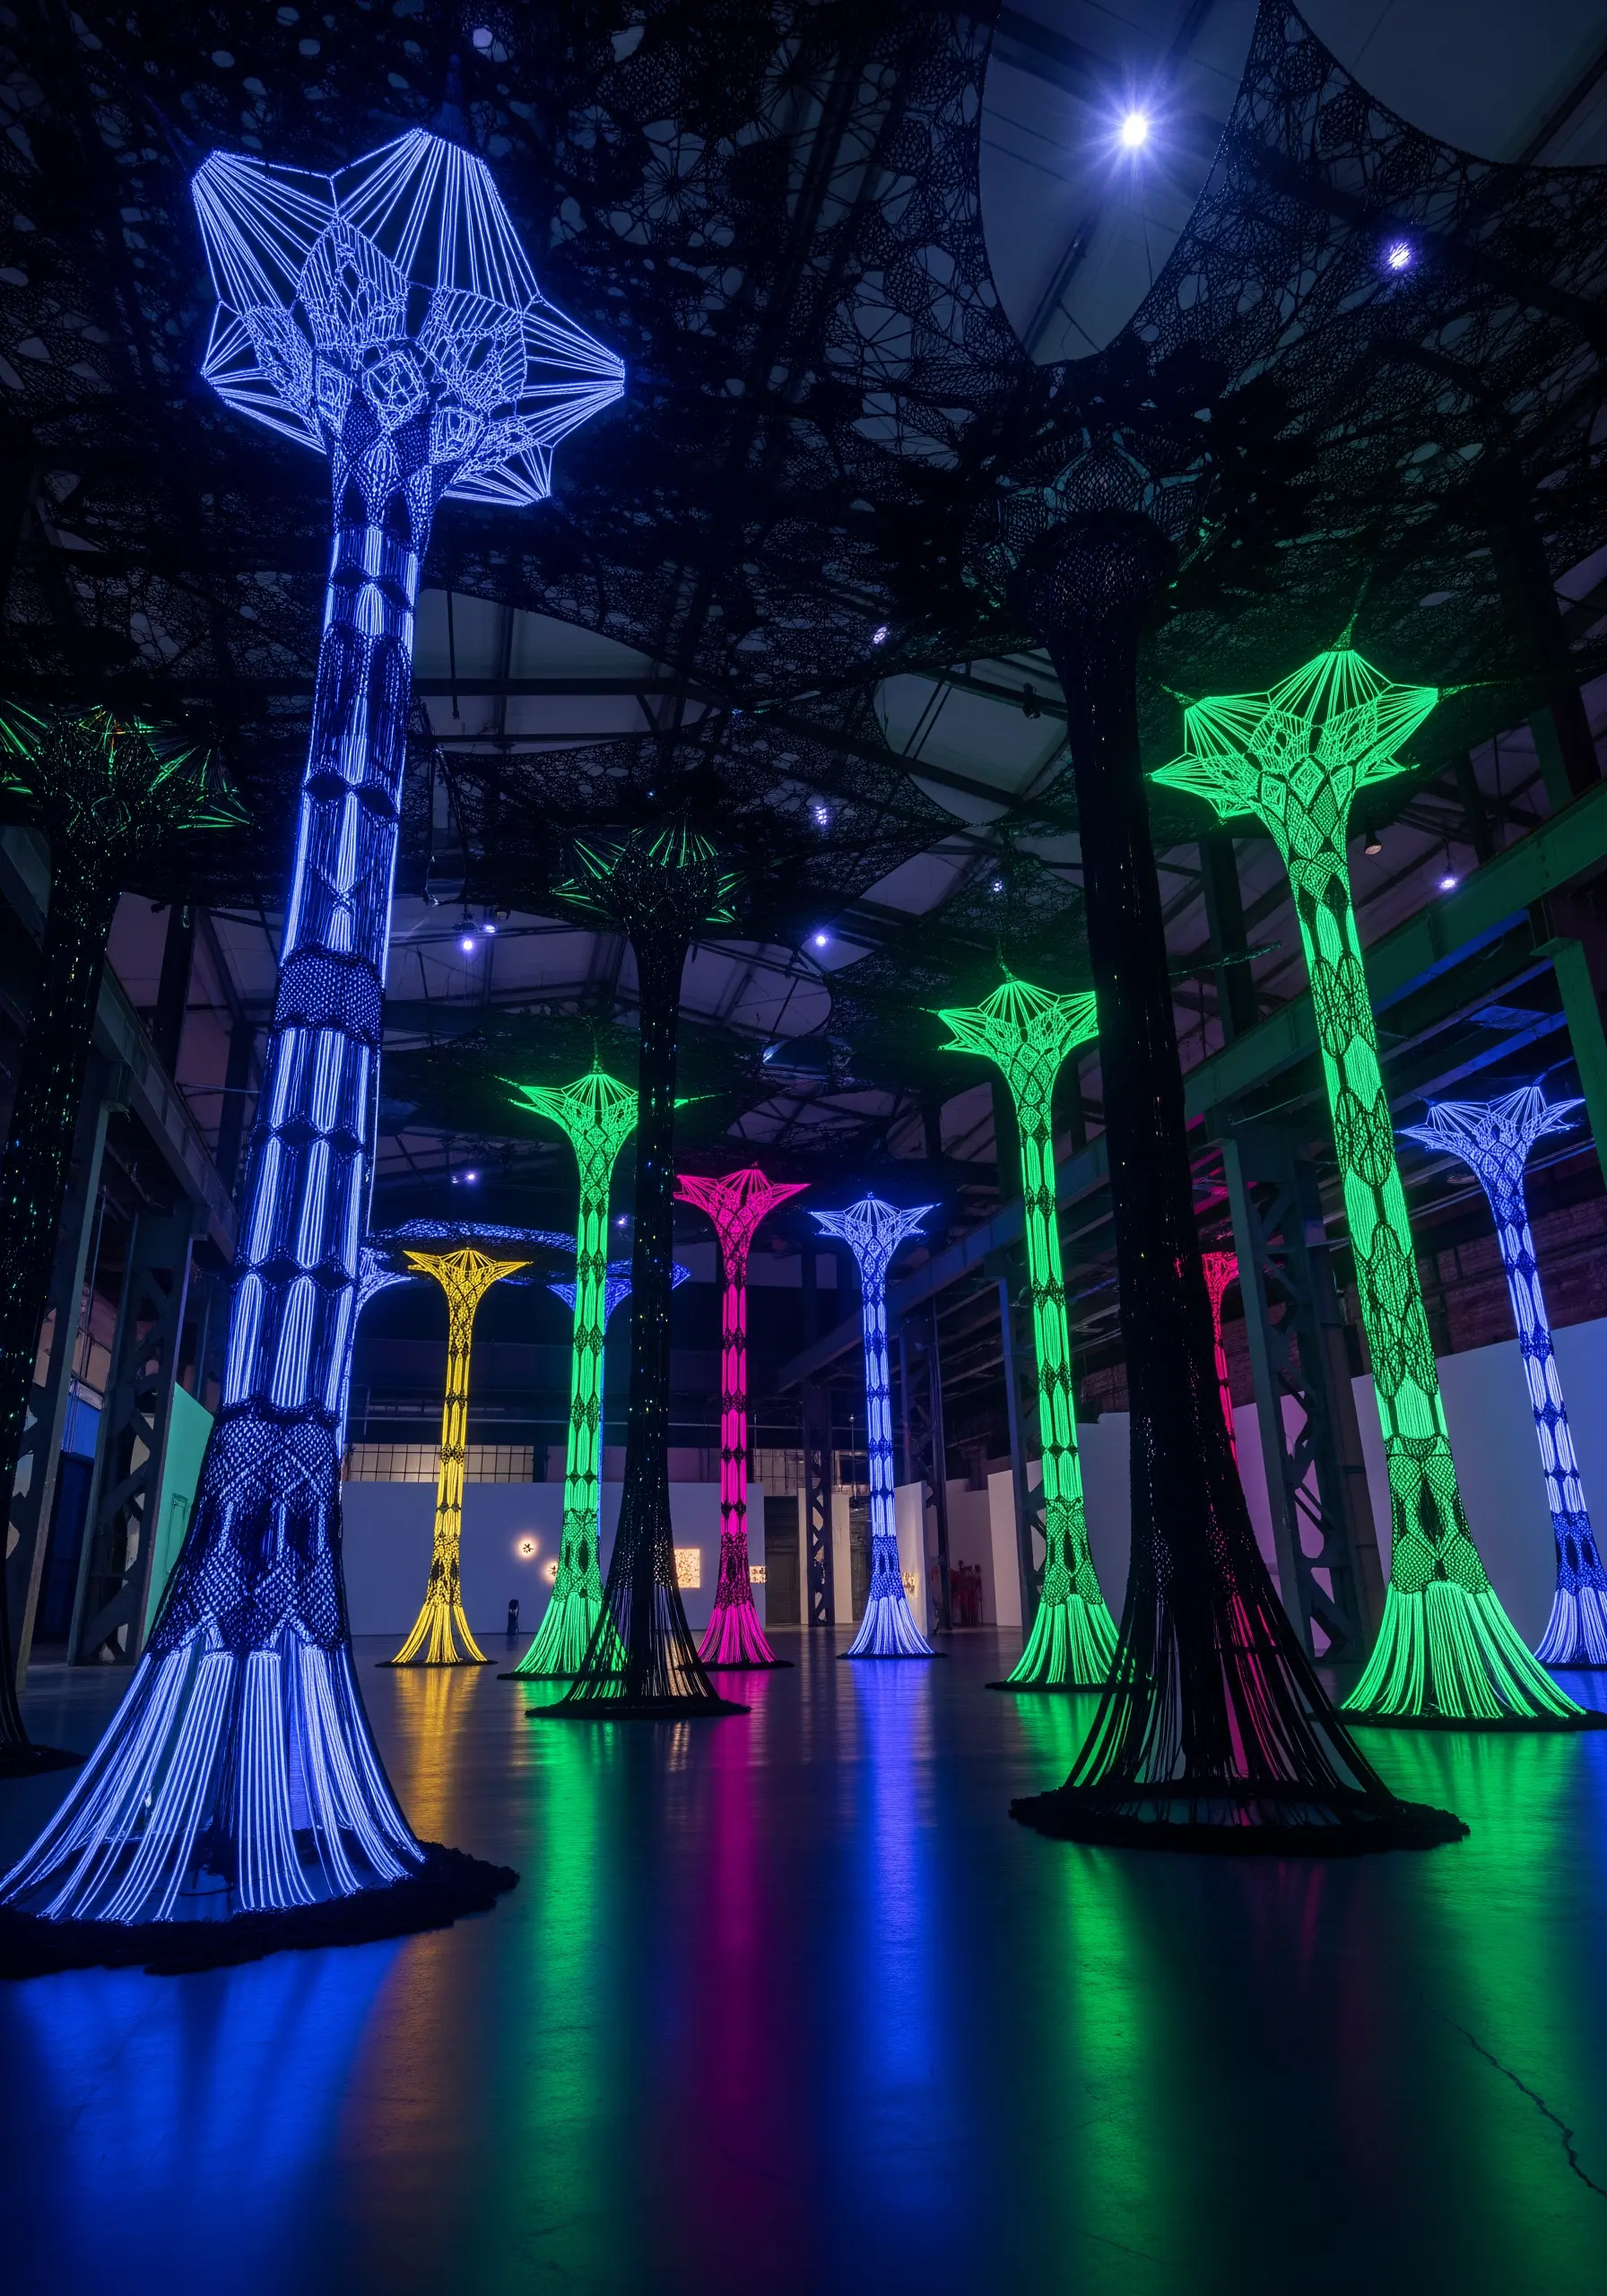
Transform your hoop into a loom for creating striking geometric patterns.
Instead of stitching onto fabric, wrap thread from one side of the hoop to the other, creating layers of overlapping straight lines.
To achieve this, mark evenly spaced points around your hoop’s edge and use them as anchor points.
Experiment with fluorescent or metallic threads, which catch the light and create a mesmerizing sense of depth and structure, turning a simple circle into a piece of modern art.
These string art landscape scenes show how lines can build complex, captivating visuals.
4. Build Organic Textures with Layered Knots
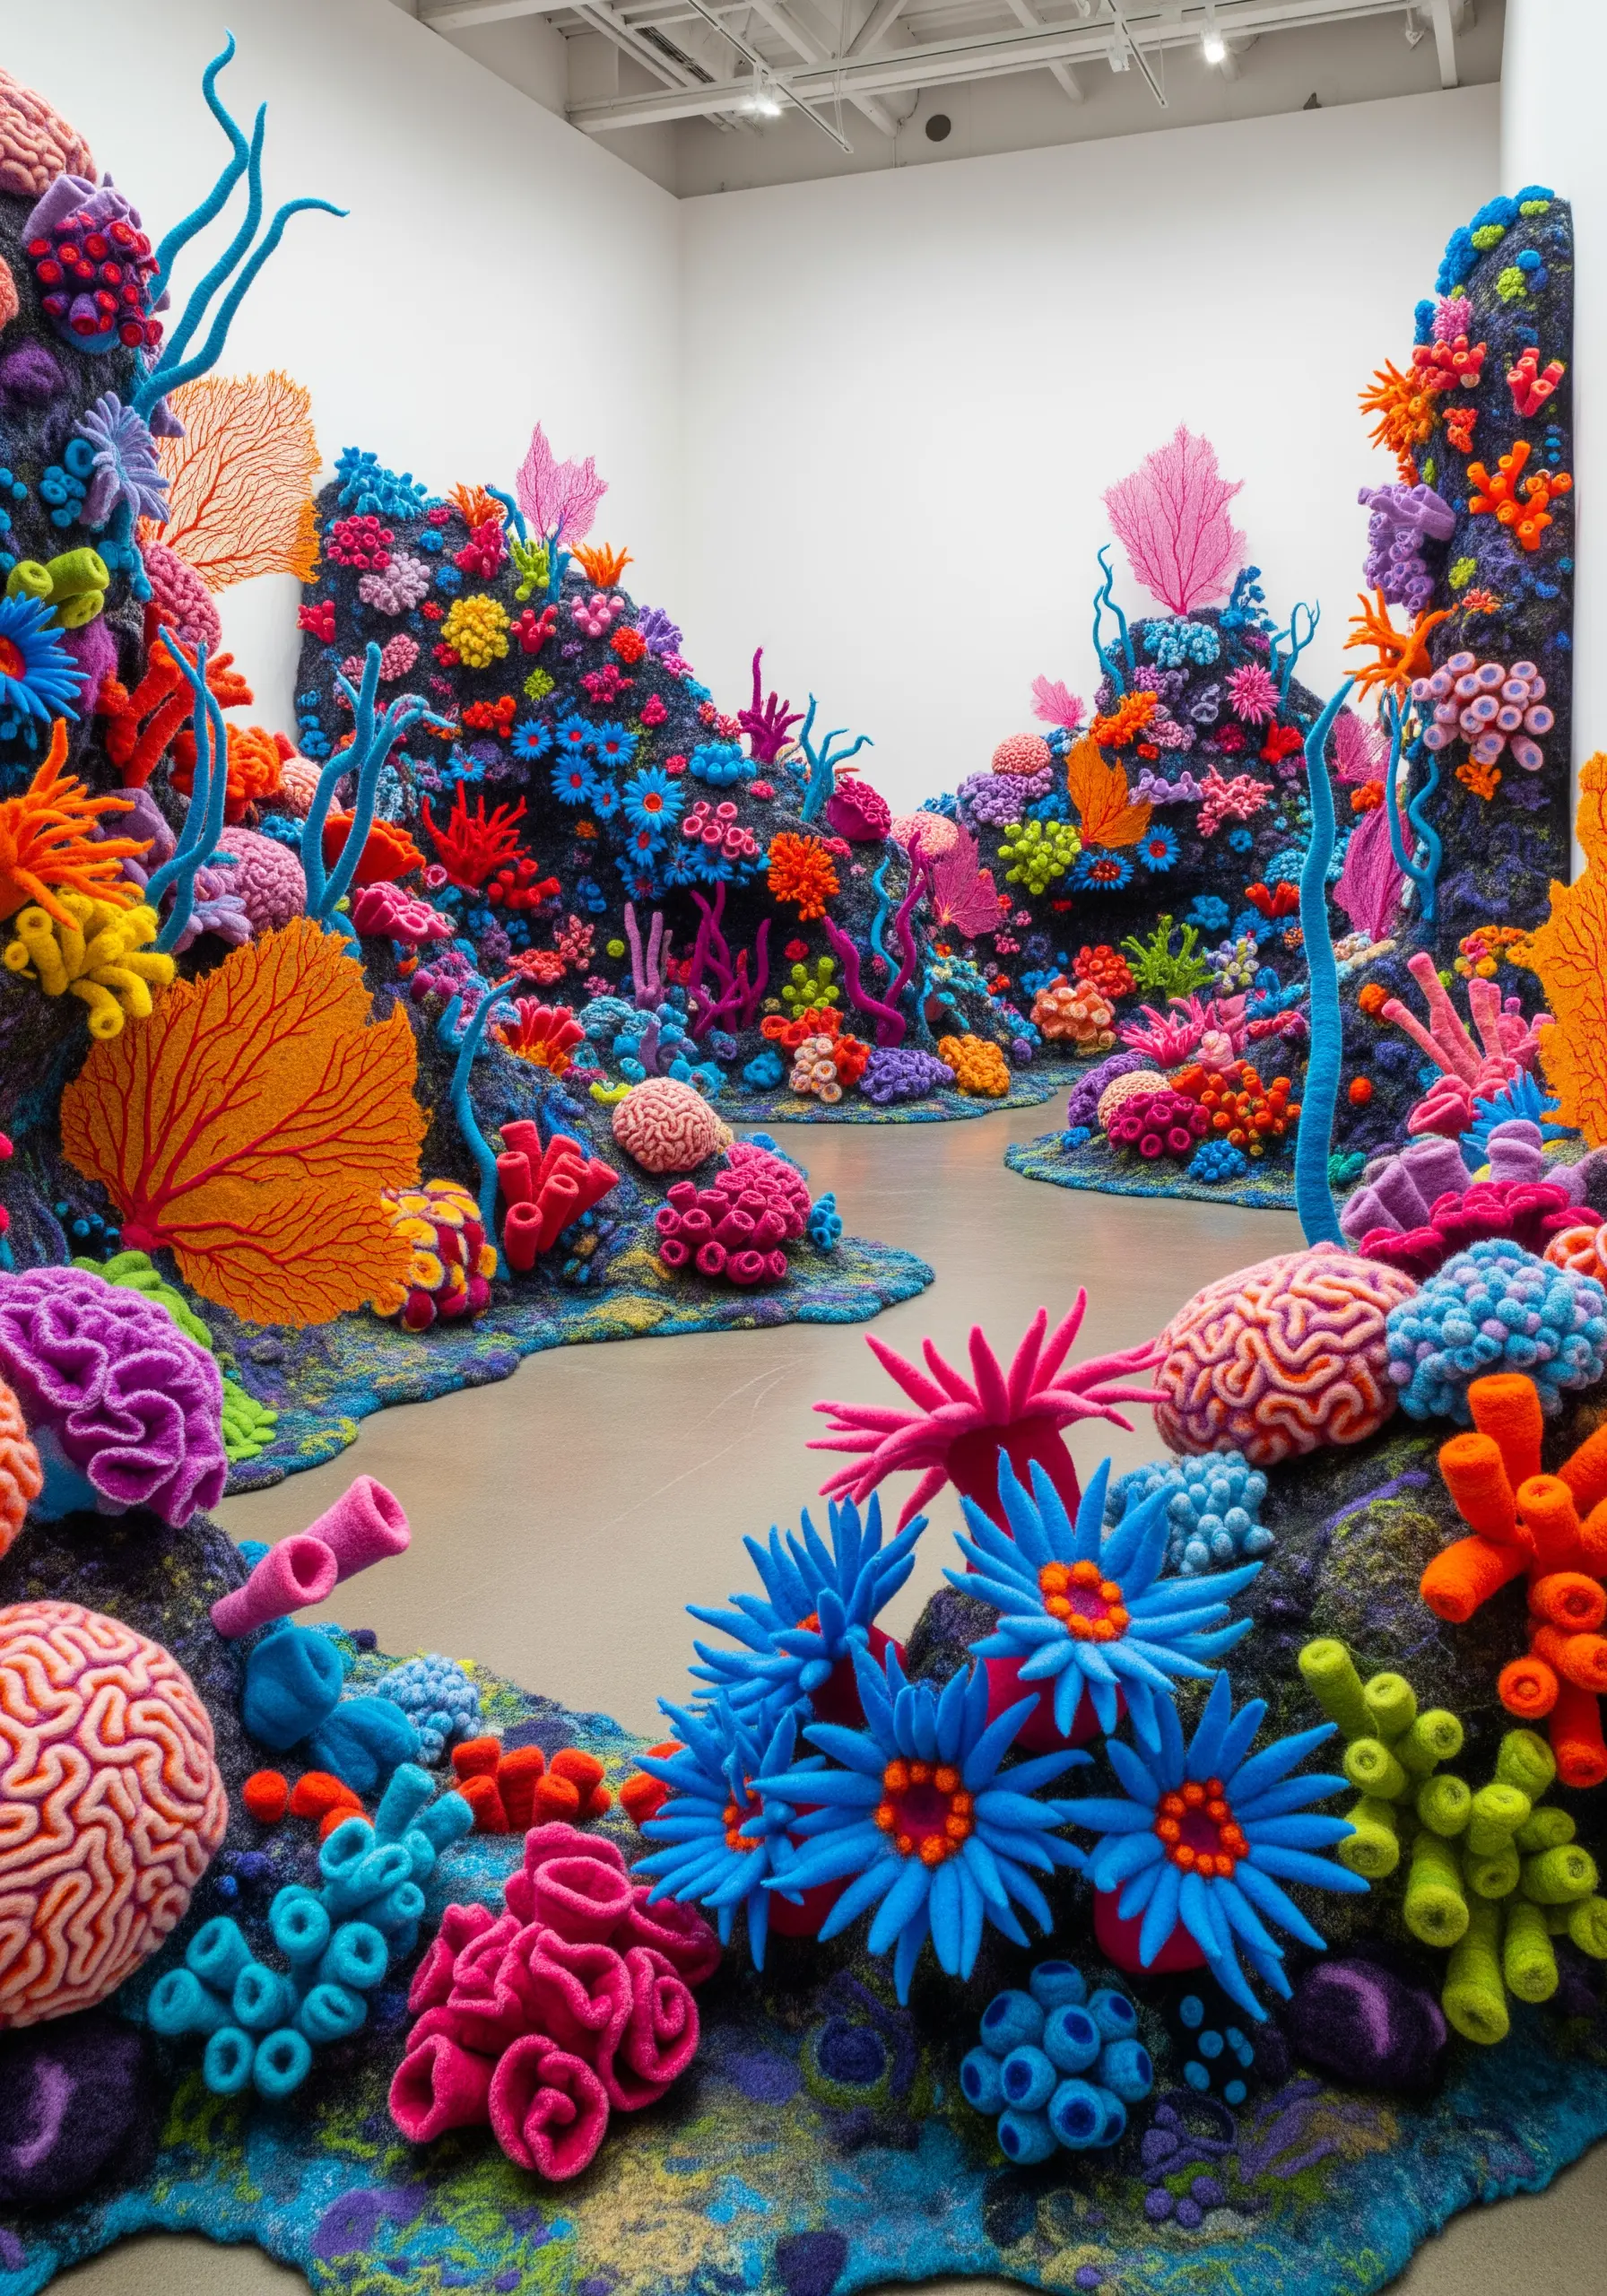
To build dense, organic textures like coral or moss, rely on the power of clustered knots.
Combine French knots, colonial knots, and bullion stitches in varying sizes and colors within a small area.
Use a range of thread weights, from single-strand floss to all six strands, to create variation in size and height.
This layering technique produces a rich, tactile surface that invites touch and gives your work a lifelike, three-dimensional quality without needing complex structural skills.
5. Use Thread Wrapping for Bold Color Blocking
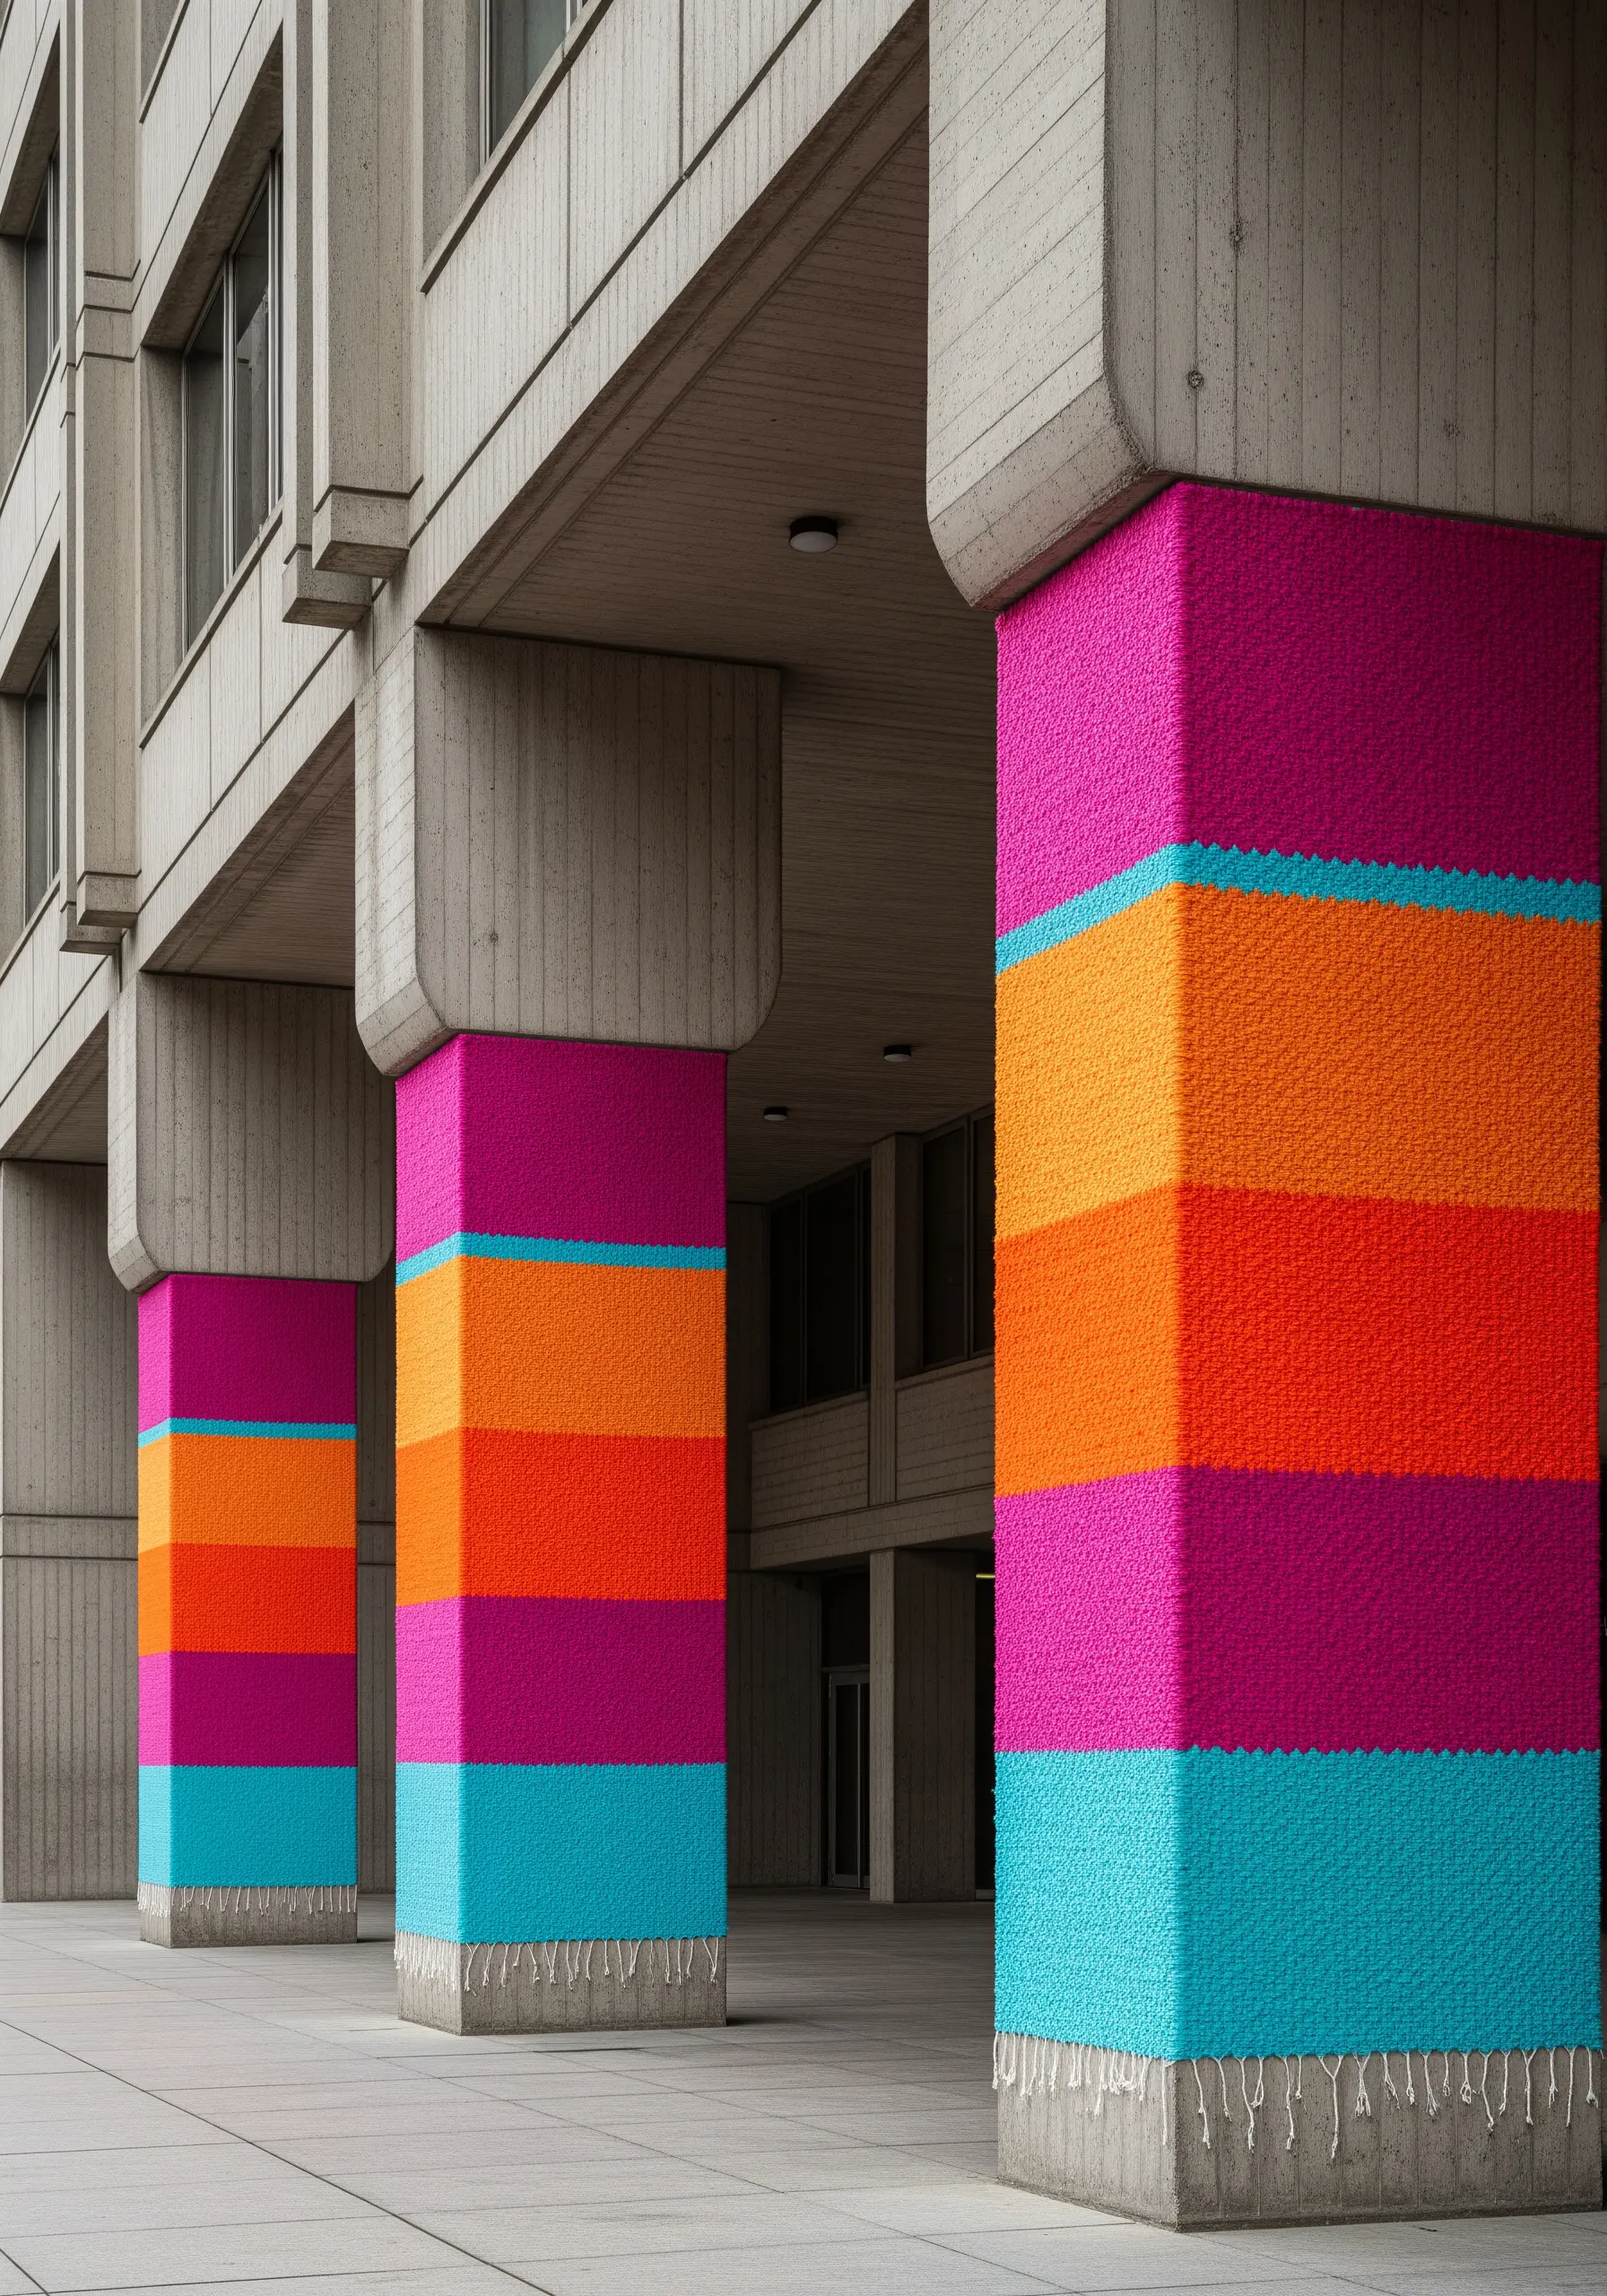
Instead of filling a shape with stitches, consider wrapping it with thread for a perfectly smooth, saturated block of color.
This works beautifully on dowels for wall hangings, sections of a hoop, or even cardboard shapes you can later appliqué onto fabric.
Maintain tight, even tension as you wrap, ensuring each new strand sits snugly against the last.
This is one of those unexpected embroidery techniques that provides a clean, graphic finish that’s difficult to achieve with satin stitch alone.
6. Drape and Layer Fabric for Soft Sculptural Forms

Let the fabric itself become the art by exploring draping and layering.
Choose lightweight materials like organza, silk, or hand-dyed linen that hold their shape but also offer a degree of translucency.
Secure gentle folds and billows to a base fabric or frame with a few hidden stitches.
This approach shifts the focus from dense stitching to the elegant interplay of light, shadow, and color within the textile itself, showing that sometimes the most powerful statements are also the most delicate.
7. Incorporate Couching for Bold, Graphic Lines
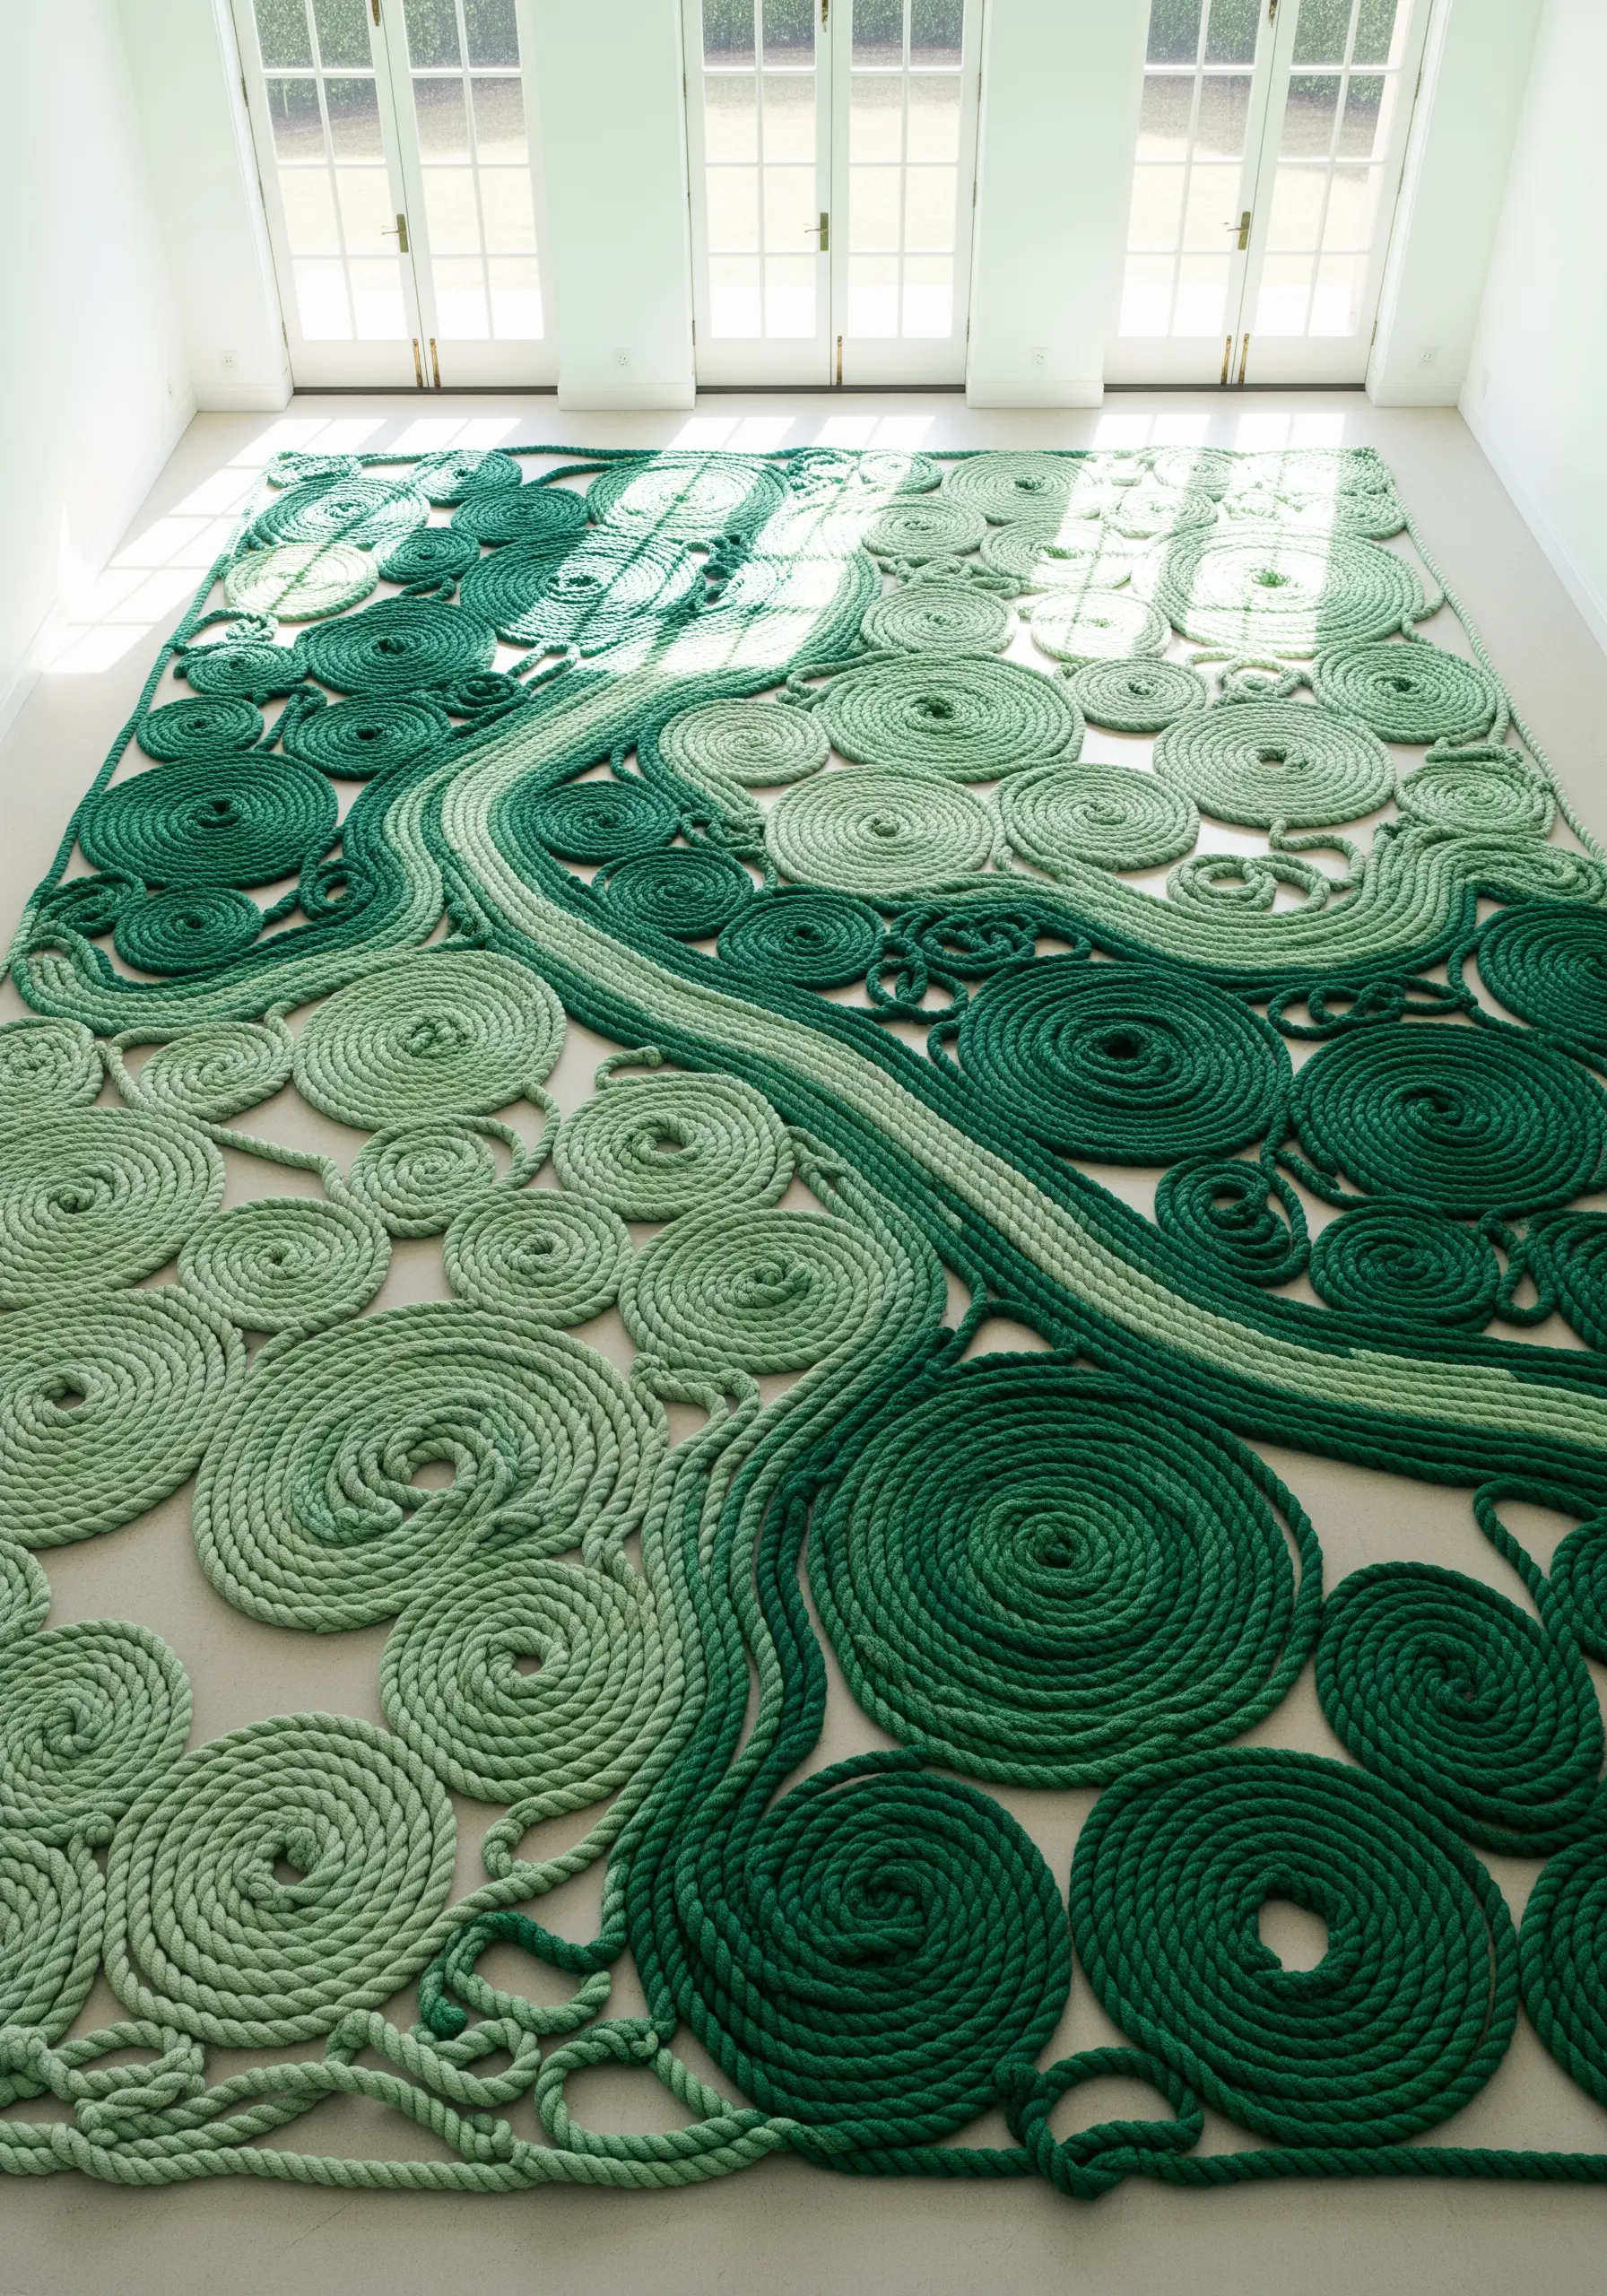
When you want a line to have significant presence and texture, couching is the answer.
This technique involves laying a thick fiber—like rope, cord, or heavy yarn—onto your fabric and securing it with a thinner, less conspicuous thread.
The smaller stitches can be either invisible (matching the cord color) or contrasting to add a secondary pattern.
It’s a perfect way to introduce unconventional materials and create strong, defined pathways in your design, transforming a simple line into a powerful focal point.
8. Explore Radial Stitching on Open Frames
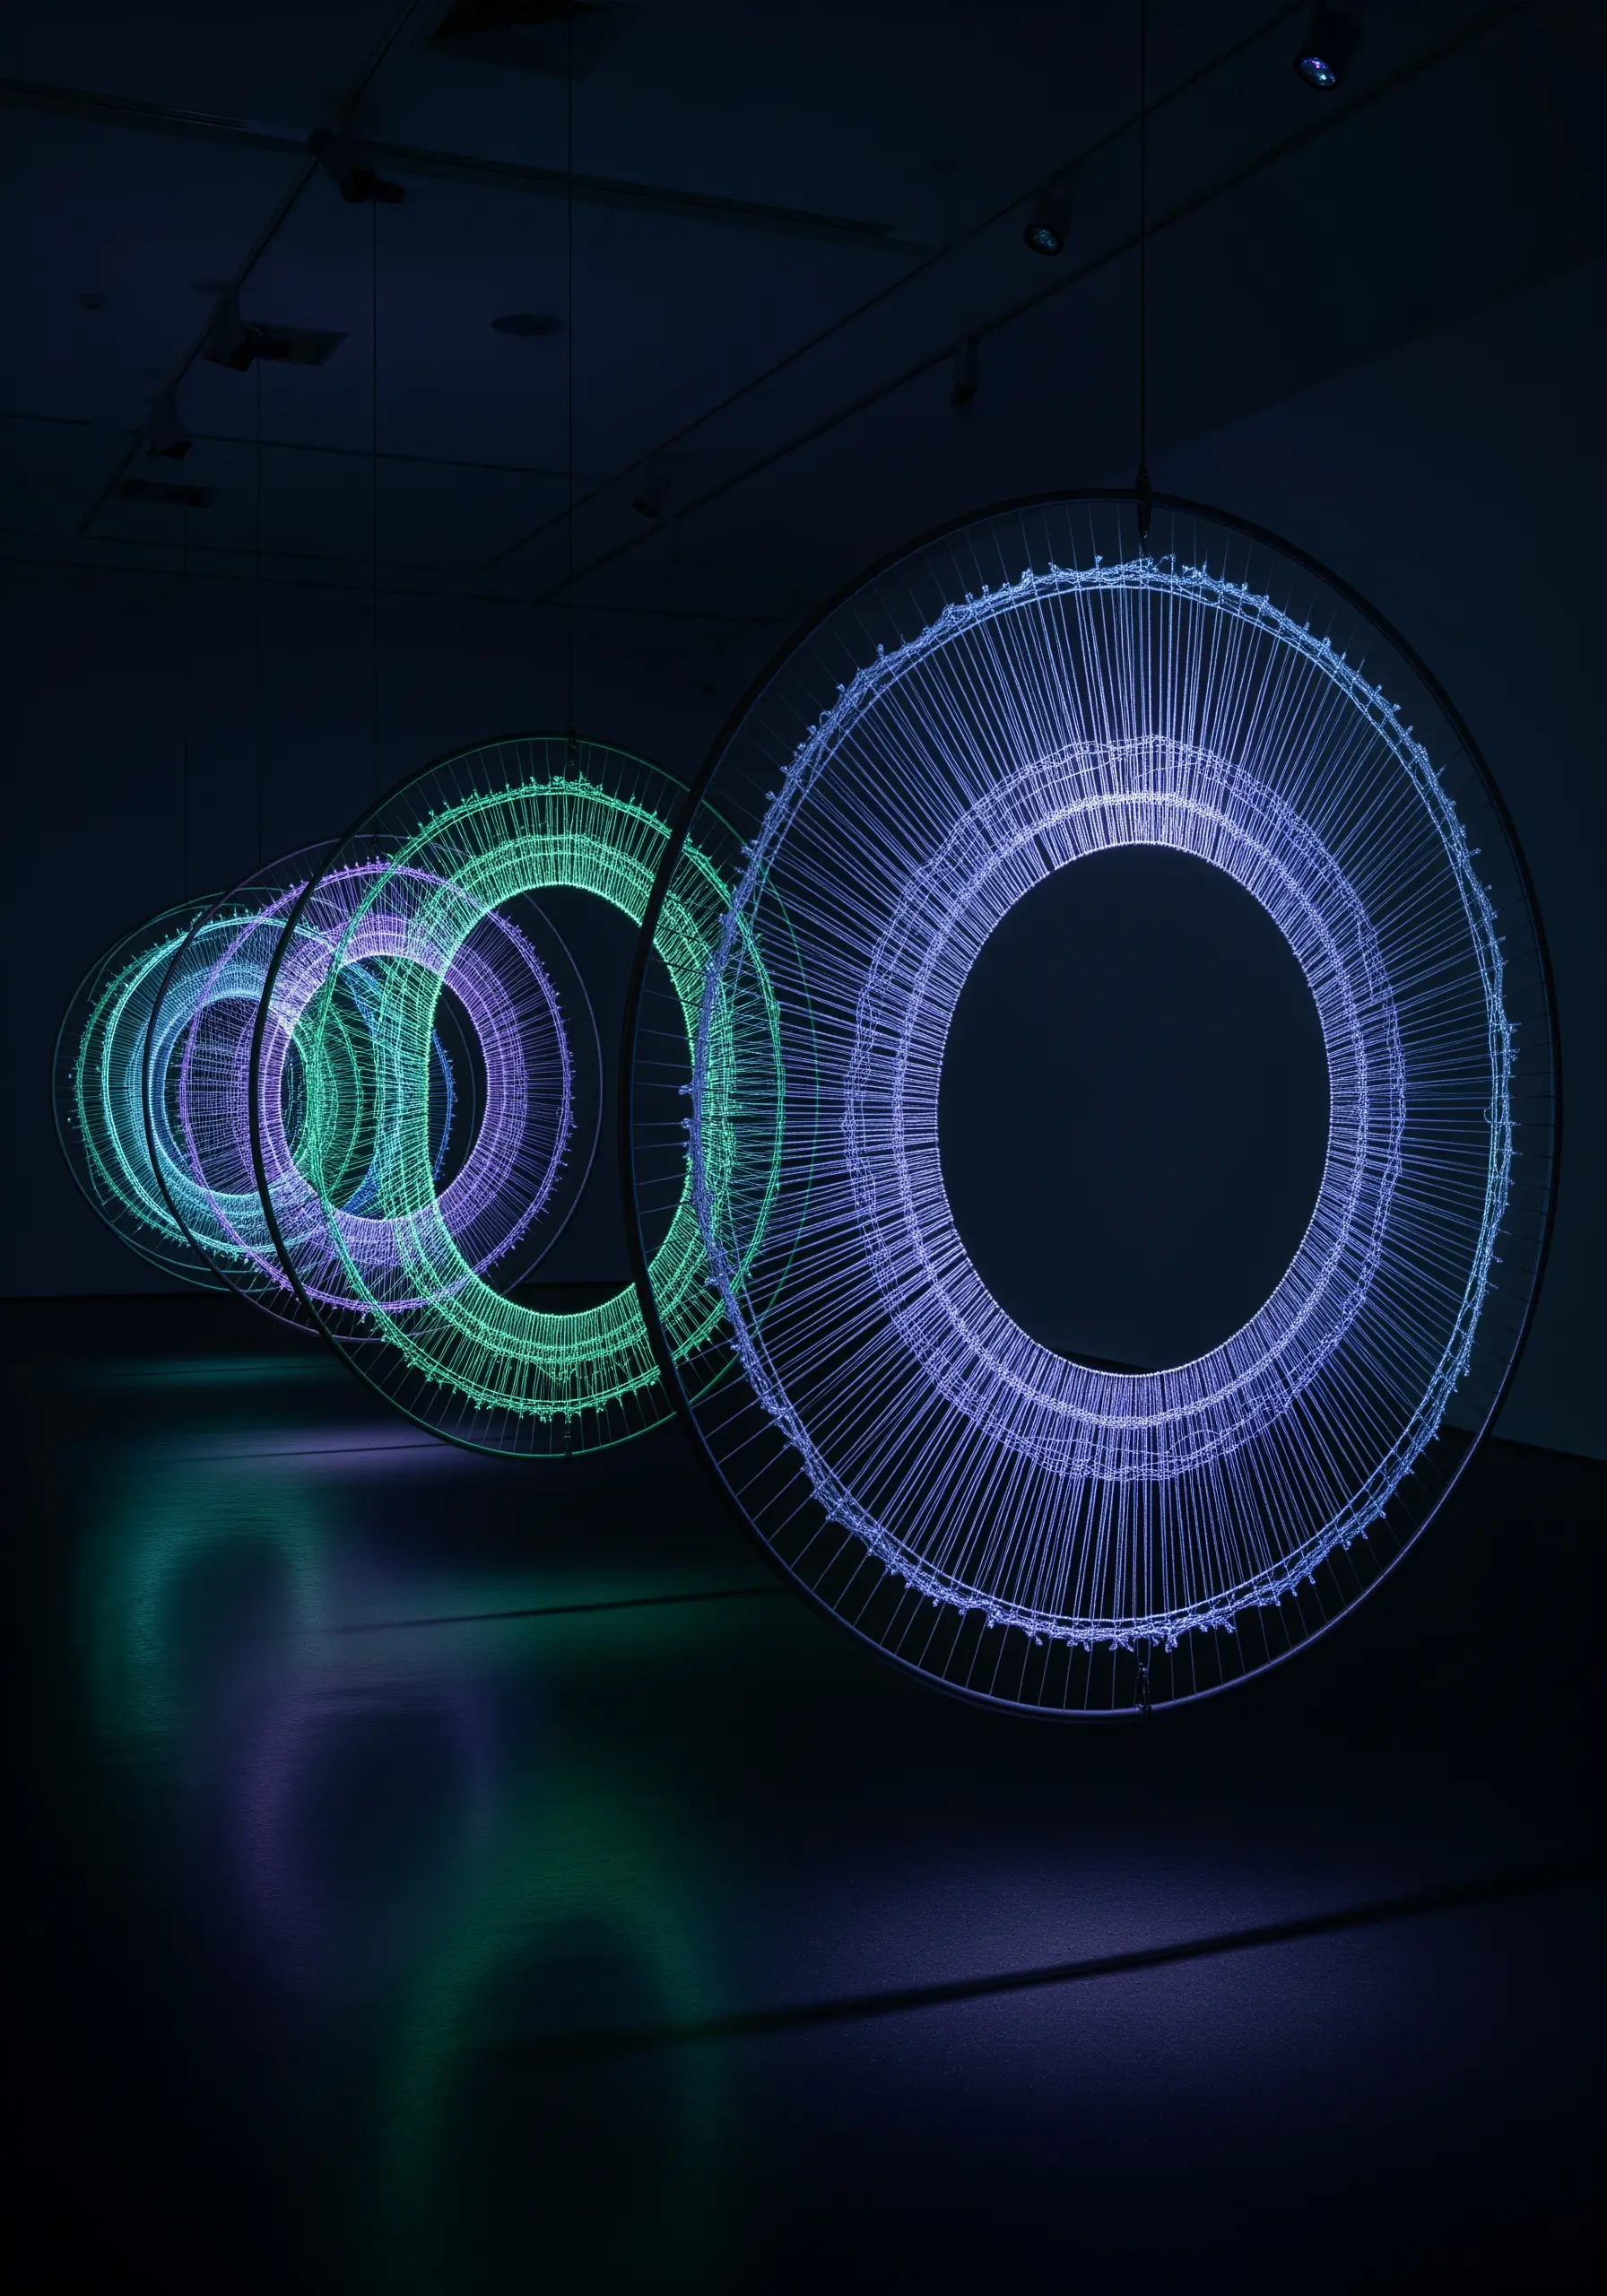
Move beyond fabric and use an open frame—like a metal ring or even a stripped lampshade—as your canvas.
Create dynamic patterns by stitching from one point on the frame to another, building up layers of thread that intersect in the middle.
This radial technique turns simple straight stitches into complex-looking circular and parabolic designs.
For a truly modern feel, use high-contrast or neon threads that emphasize the geometric purity of the form, turning your piece into a suspended sculpture.
9. Mimic Knit Textures with Padded Stitches
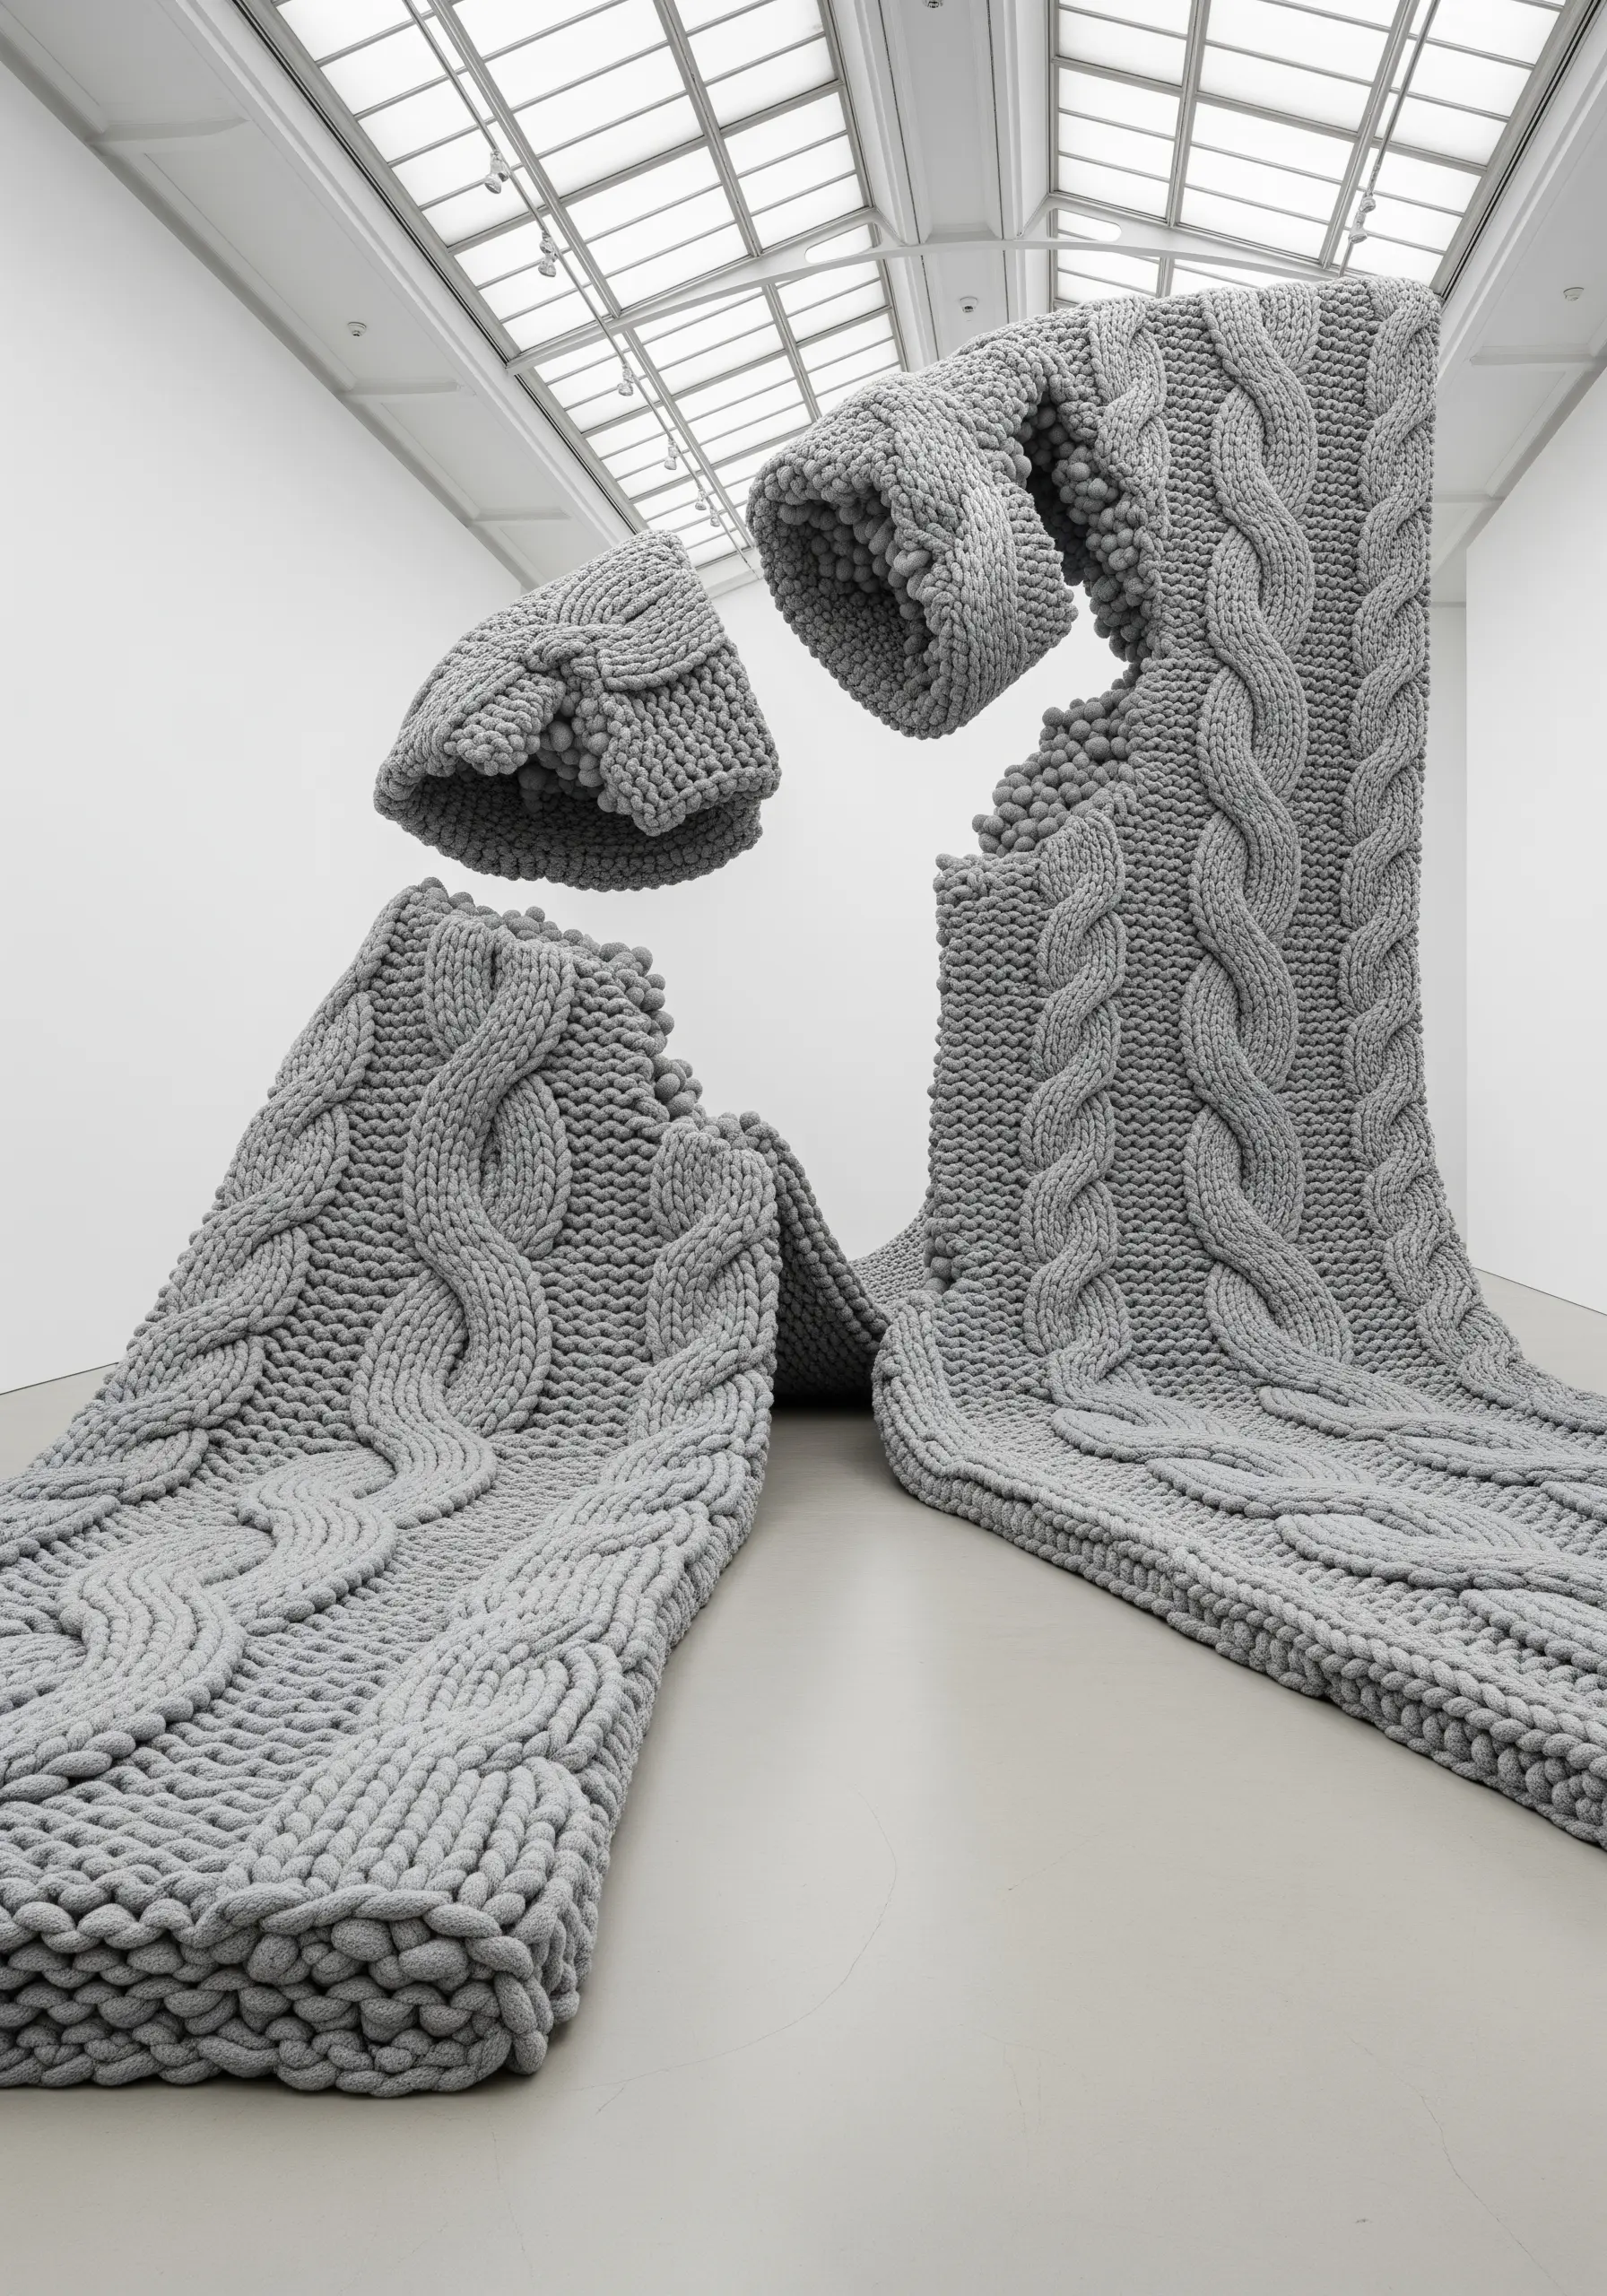
You can replicate the cozy, dimensional look of a cable knit without knitting needles.
First, create a padded base by laying down several long straight stitches or a piece of felt cut to shape.
Then, cover this padding completely with satin stitches, working perpendicular to the base stitches.
For the cabled effect, use raised stem stitch bands or couched cords to create the twisting lines, instantly adding sculptural depth and a familiar, comforting texture to your textile art.
10. Create Atmosphere with a Monochromatic Palette
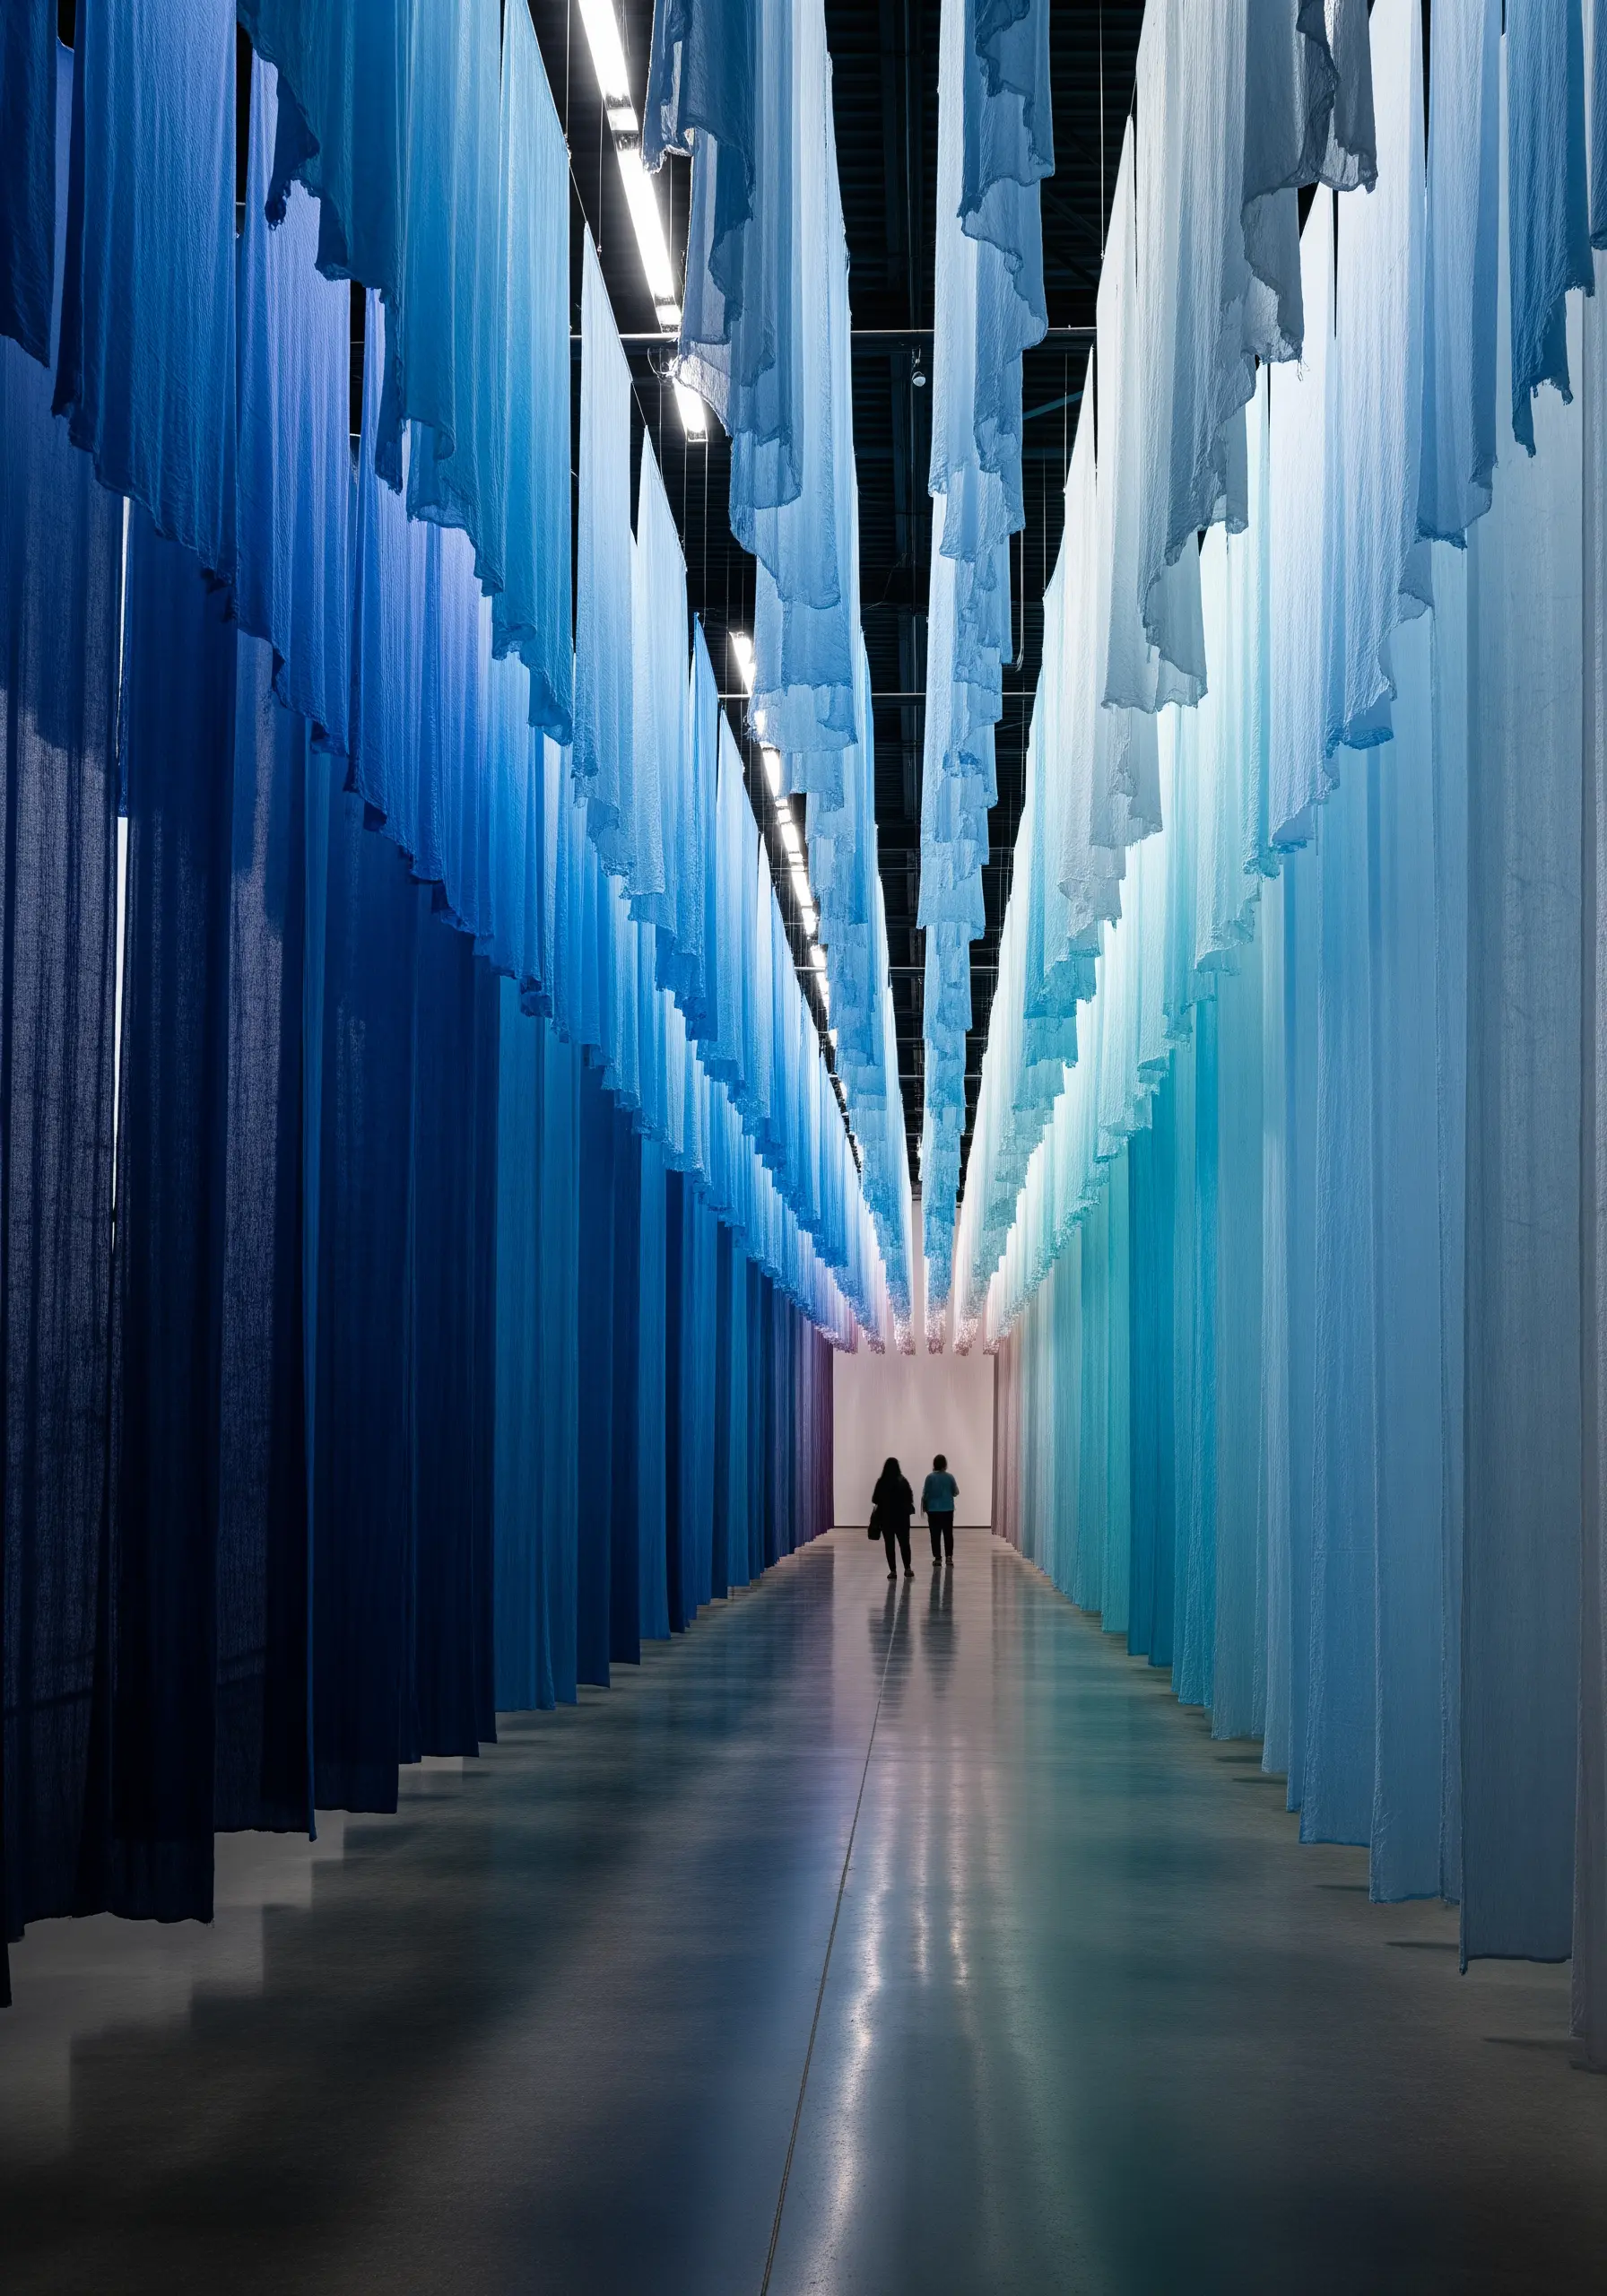
Limiting your color palette to shades of a single hue can create a surprisingly powerful and sophisticated piece.
Select at least five tones of one color, from the palest tint to the deepest shade.
Use these tones to define shapes, create gradients, or build patterns.
This disciplined approach forces you to focus on texture, composition, and stitch direction to create interest, resulting in monochrome embroidery ideas that feel intentional, cohesive, and deeply atmospheric.
11. Integrate Found Objects into Fabric Collage
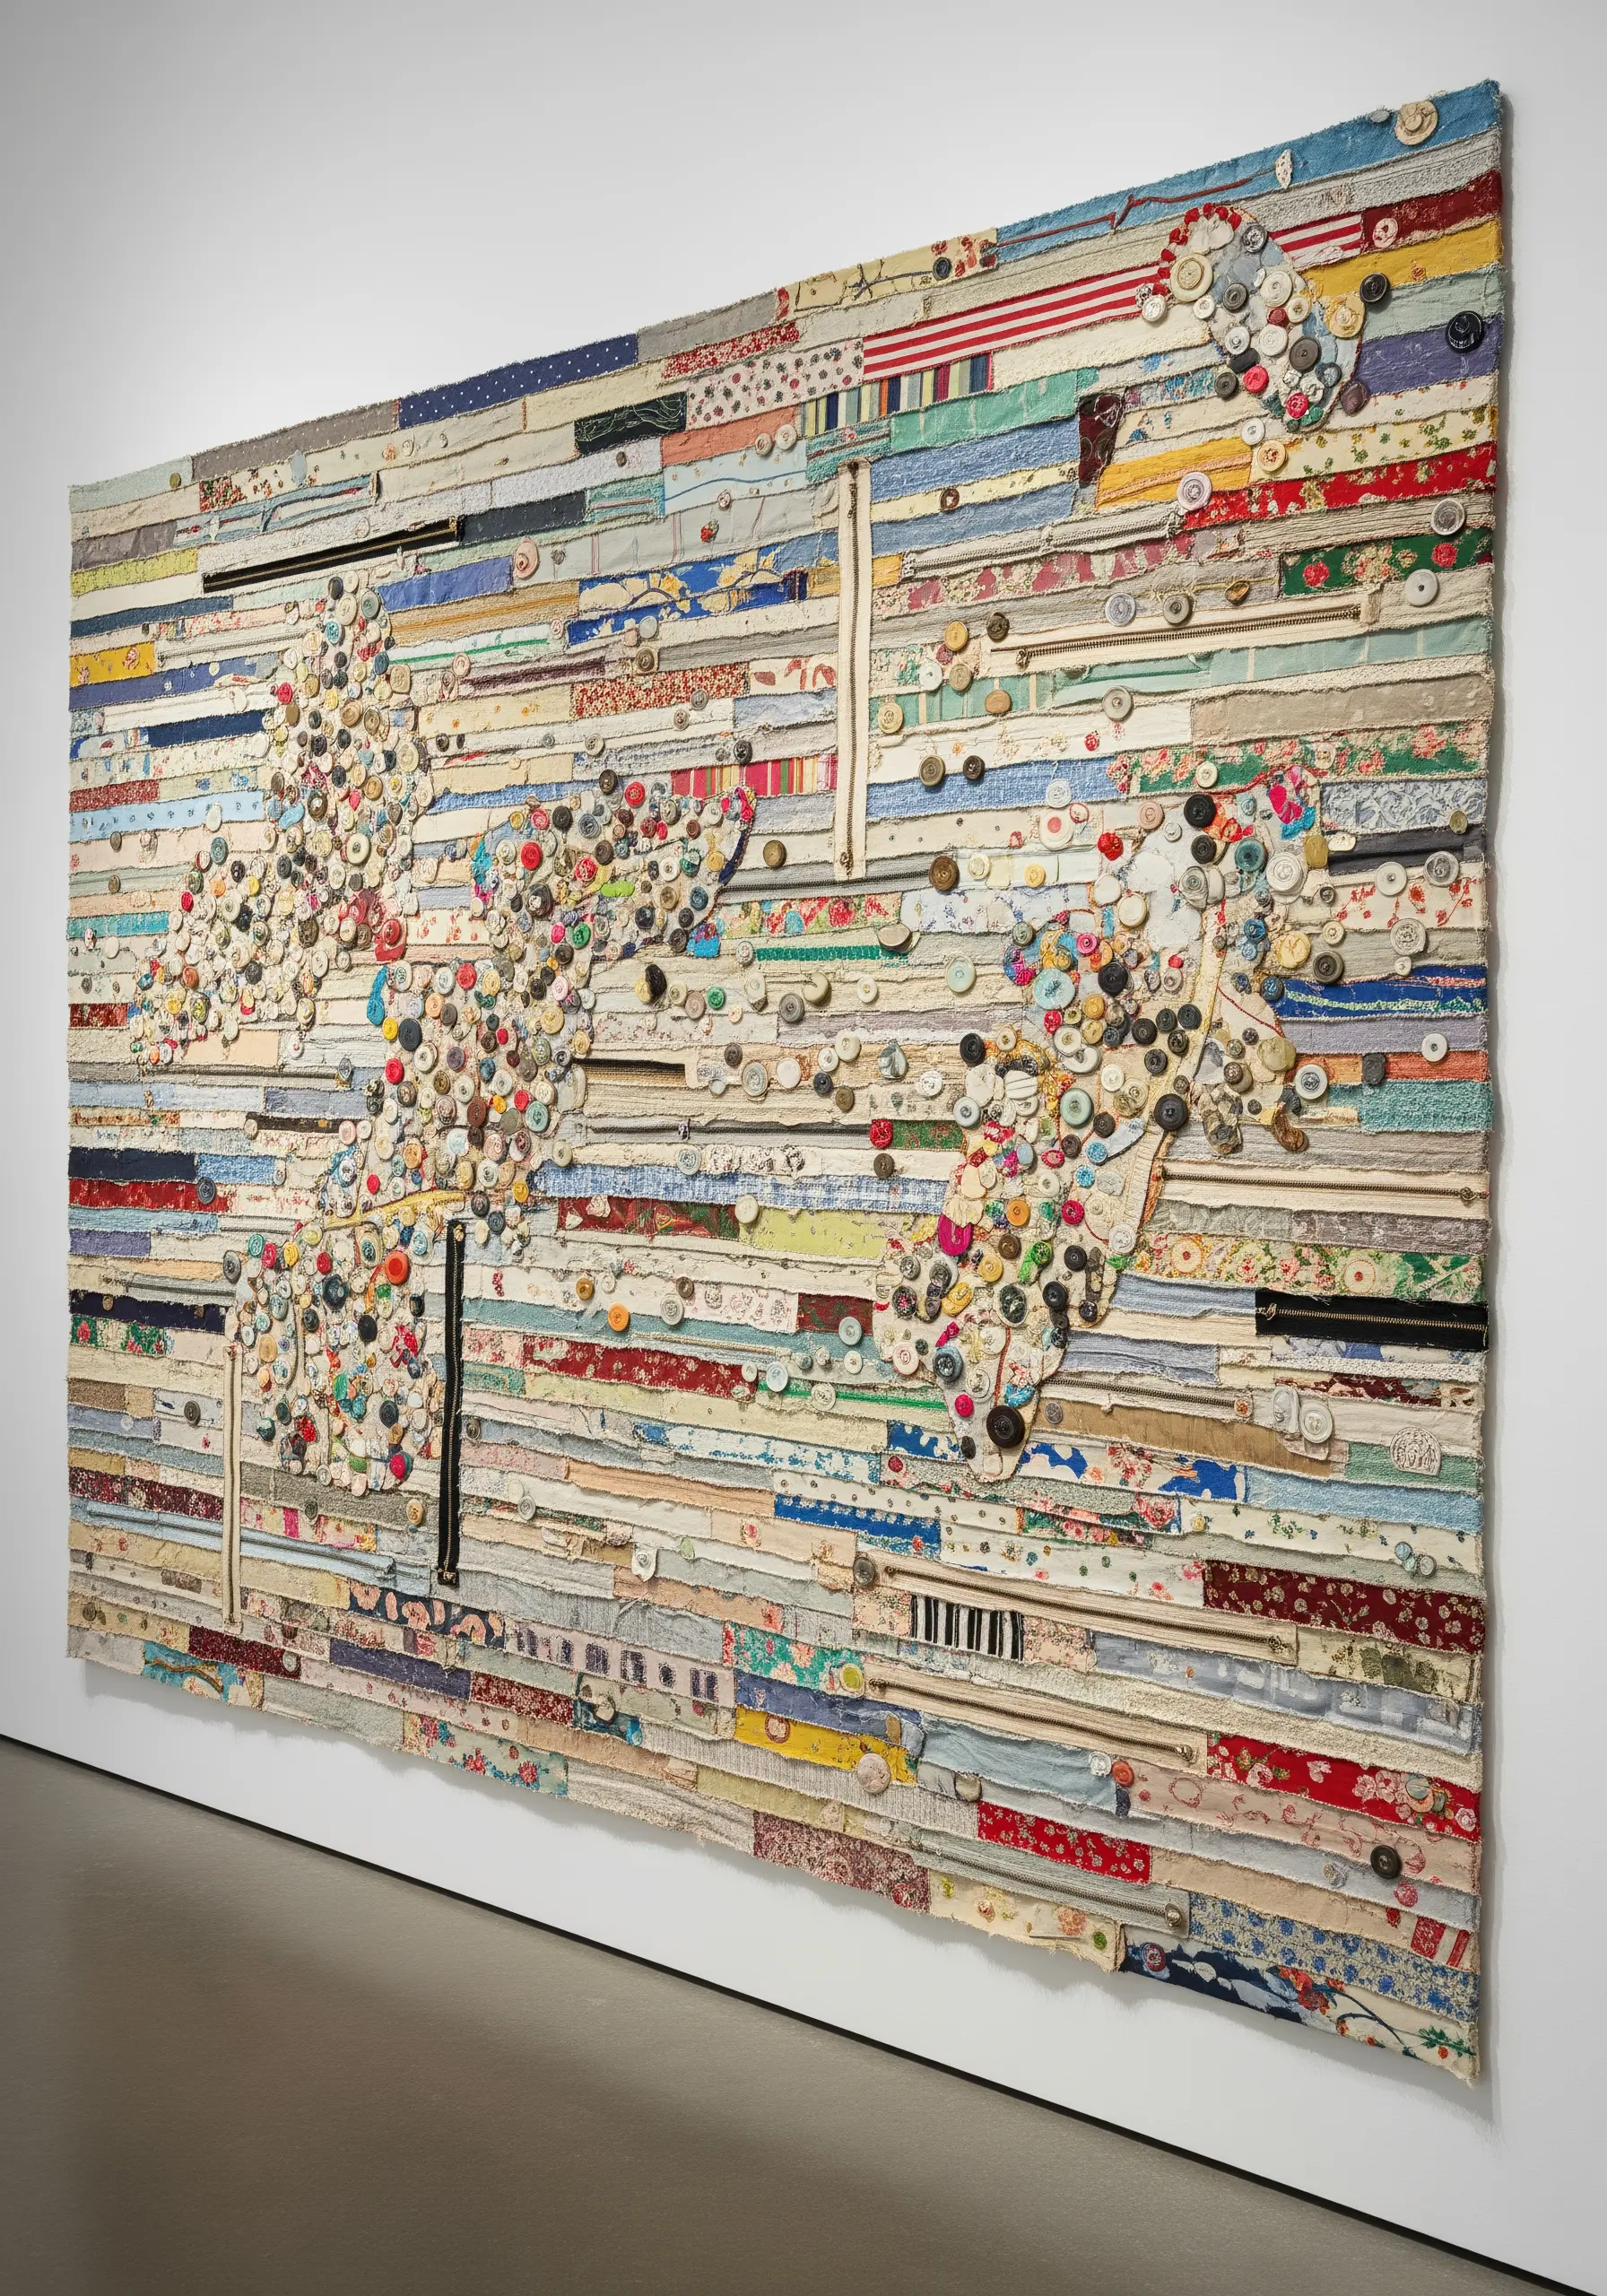
Elevate your work by turning it into a mixed-media piece that tells a story.
Start with a base of layered fabric scraps, then stitch into them to unify the composition.
Incorporate small, meaningful objects like buttons, beads, or even tiny scraps of paper by sewing them directly onto the surface.
This method adds personal history and unexpected texture, transforming your embroidery from a purely decorative piece into a tactile tapestry of memories and materials.
12. Use Knots as Sculptural Focal Points
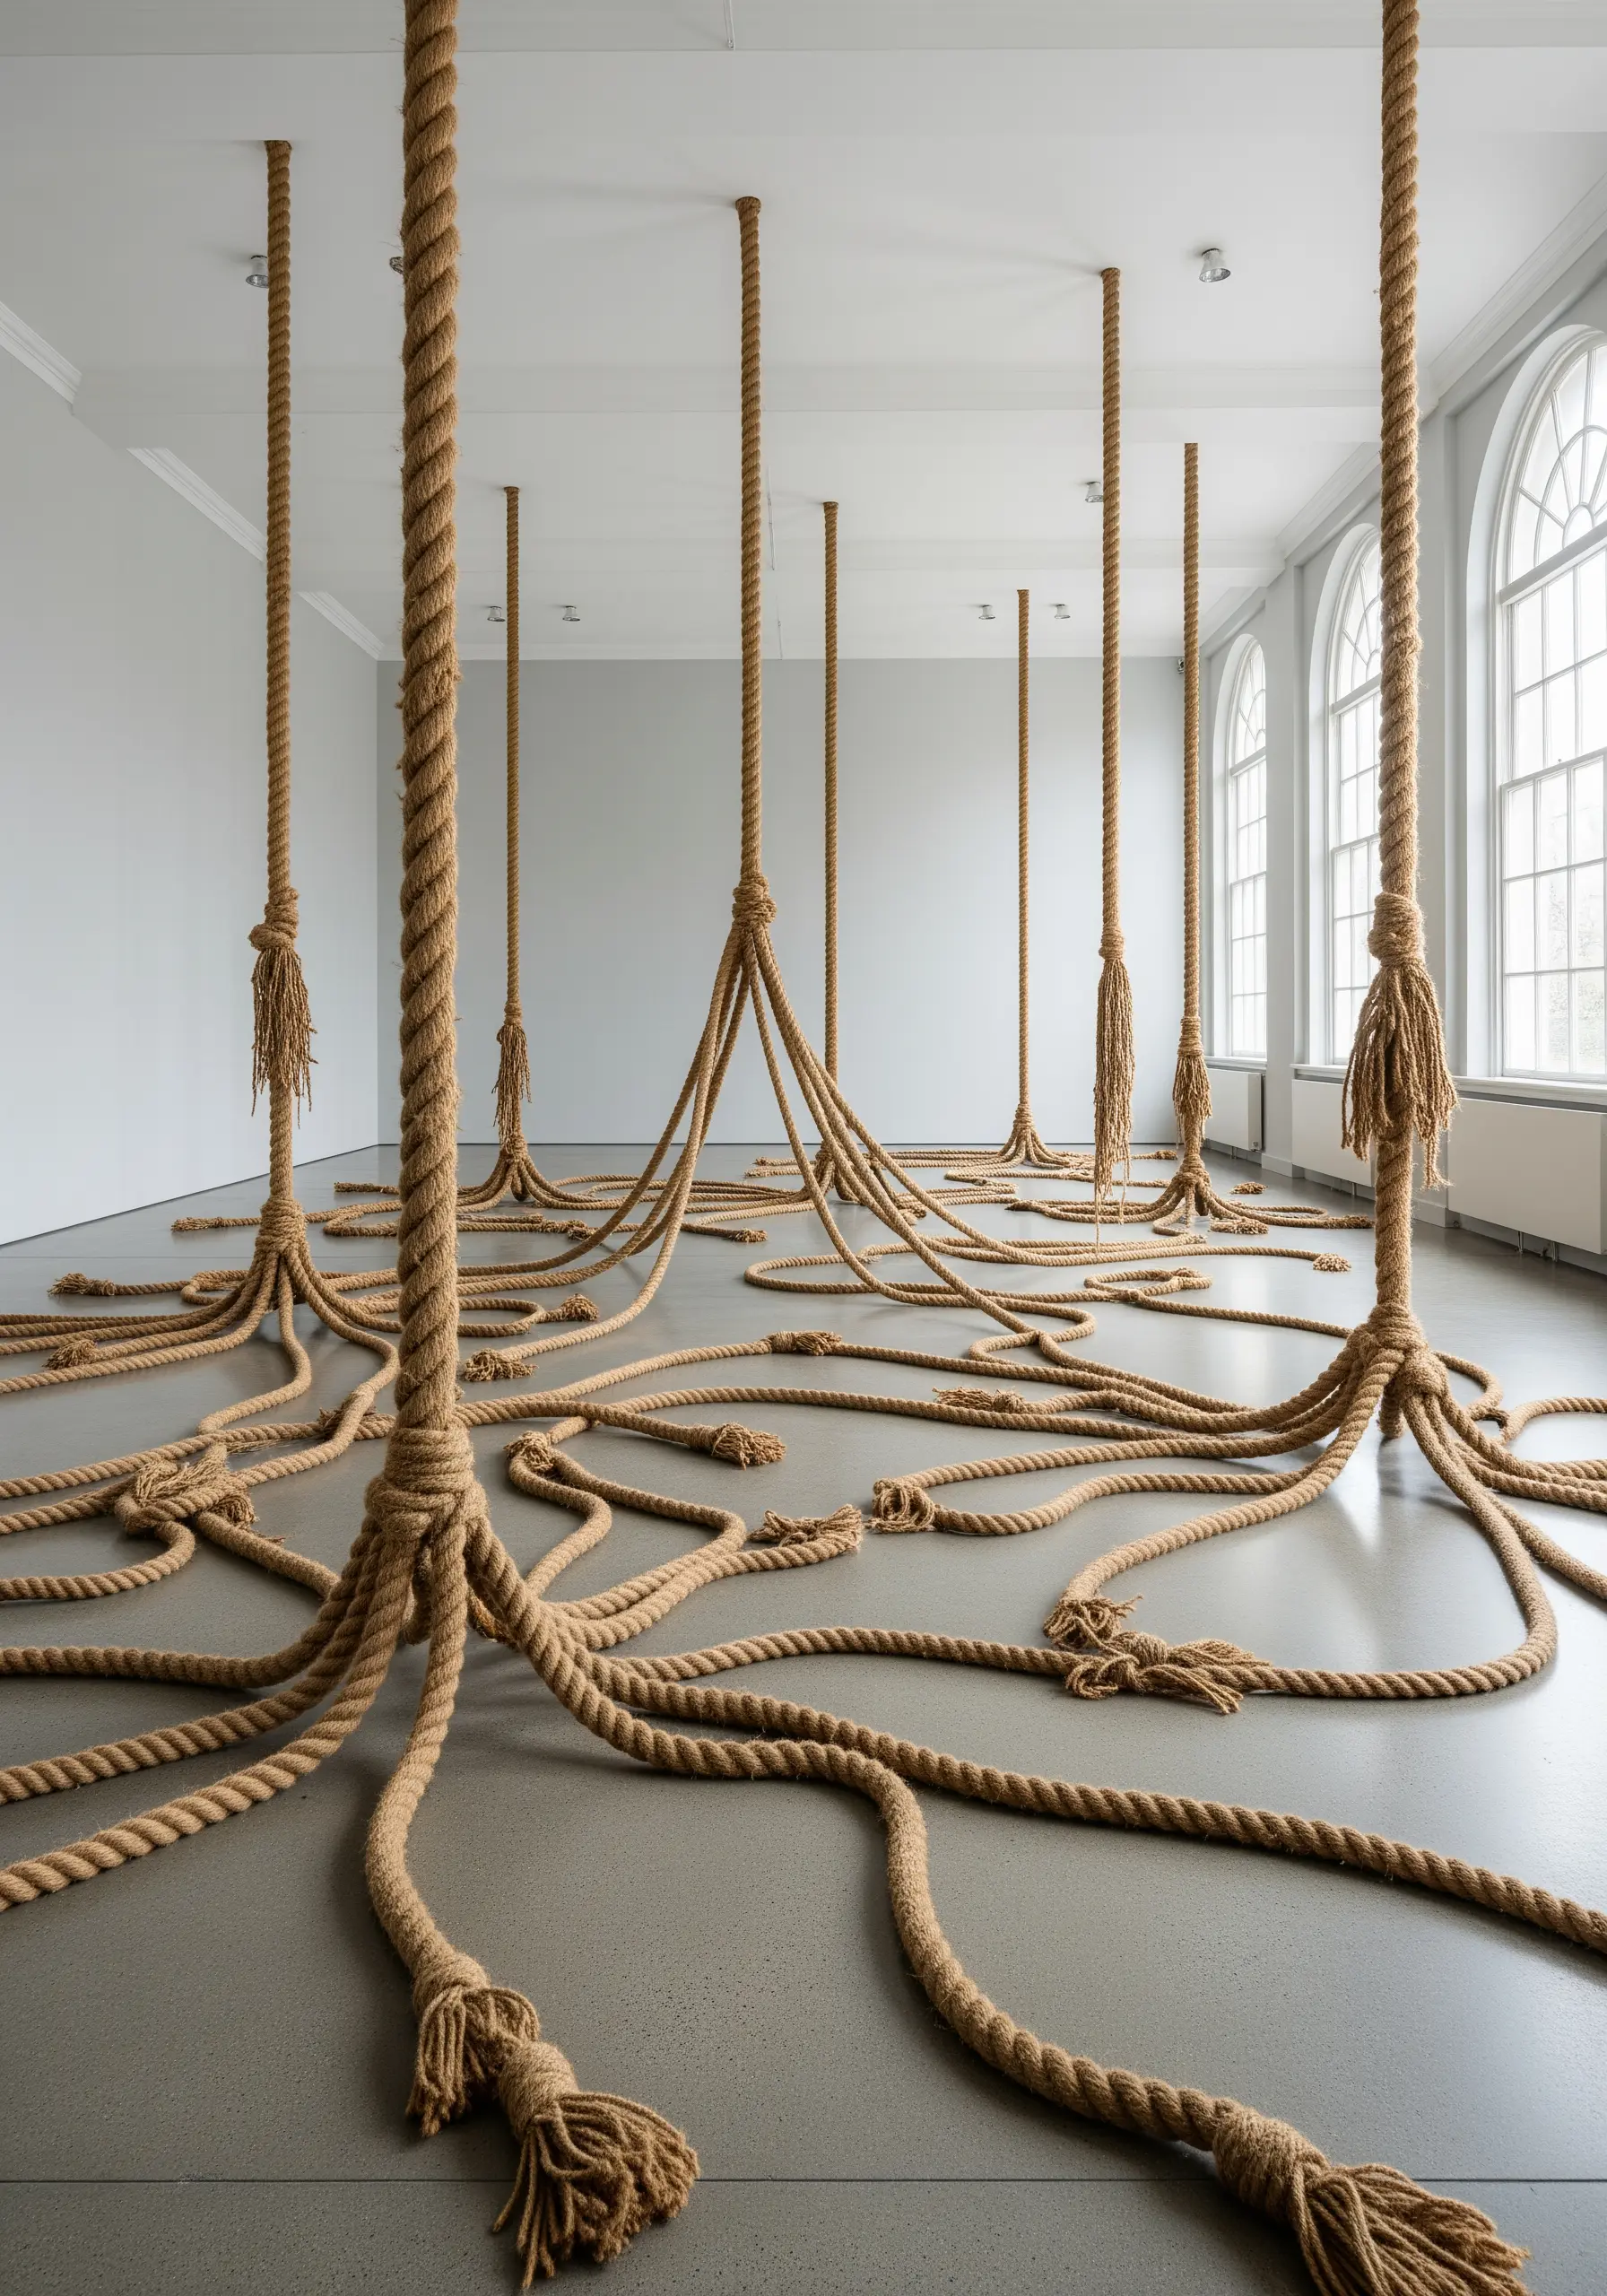
Treat knots not just as a way to end a thread, but as deliberate artistic elements.
Learn a few decorative knots from macrame or sailing—like a Monkey’s Fist or a Josephine knot—and tie them with thicker cord or yarn.
You can stitch these directly onto your fabric or incorporate them into a wall hanging where they can act as junctions from which other fibers flow.
This adds a sculptural, robust quality and a satisfying sense of structure to your work.
13. Paint with Unspun Fiber for Ethereal Effects

For soft, cloud-like textures, work with unspun wool roving.
Instead of spinning it into yarn, pull apart wisps of the fiber and lay them onto your background fabric.
Use a felting needle to gently tack the roving in place, or secure it with a few sparse, hidden stitches in a matching thread.
You can blend different colors of roving just by teasing them together with your fingers, creating dreamy, watercolor-like effects perfect for abstract thread embroidery ideas.
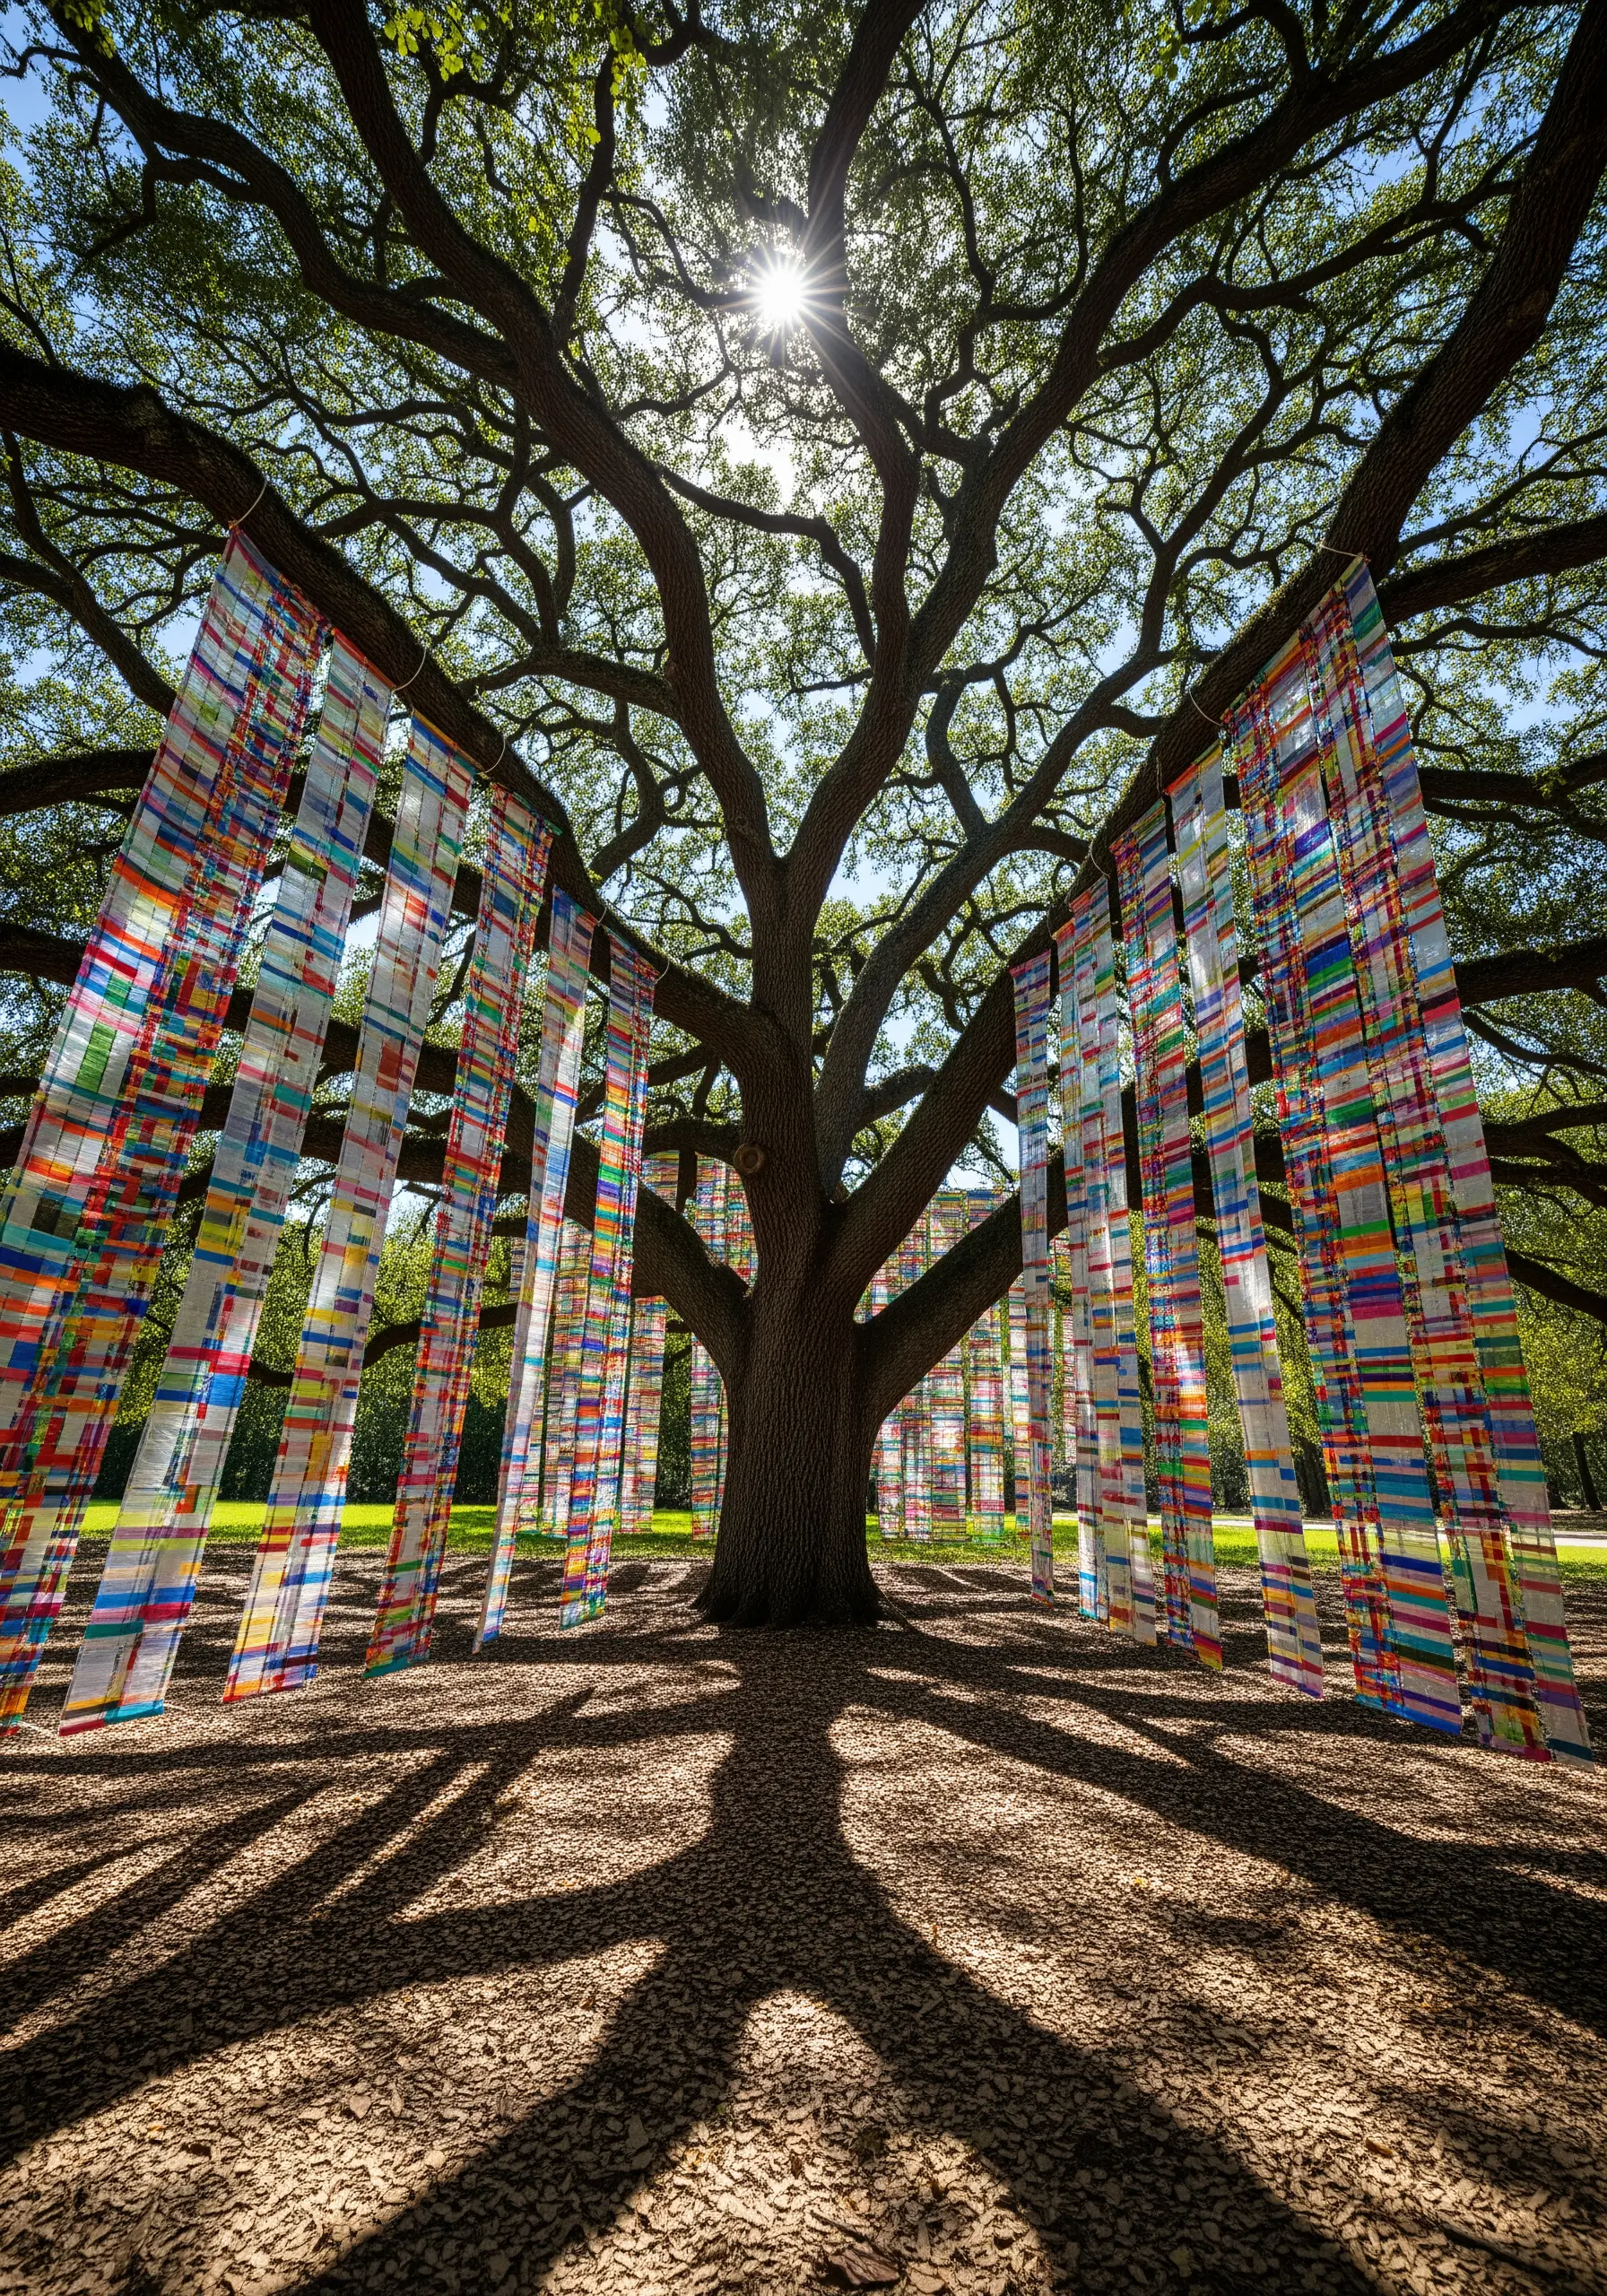
14. Design with Suspended Threads for Dynamic Fringe

Create a wall hanging with a curtain of freely hanging threads for movement and color.
Securely anchor your threads along a top support, like a dowel or the top of a hoop.
For a clean, modern look, ensure the threads are all cut to the same length and hang straight.
You can add a small bead or weight to the end of each thread to help it hang perfectly.
This technique is a simple way to create statement-size wall art ideas with incredible visual impact and satisfying kinetic quality.
15. Combine Felting and Stitching for Natural Forms
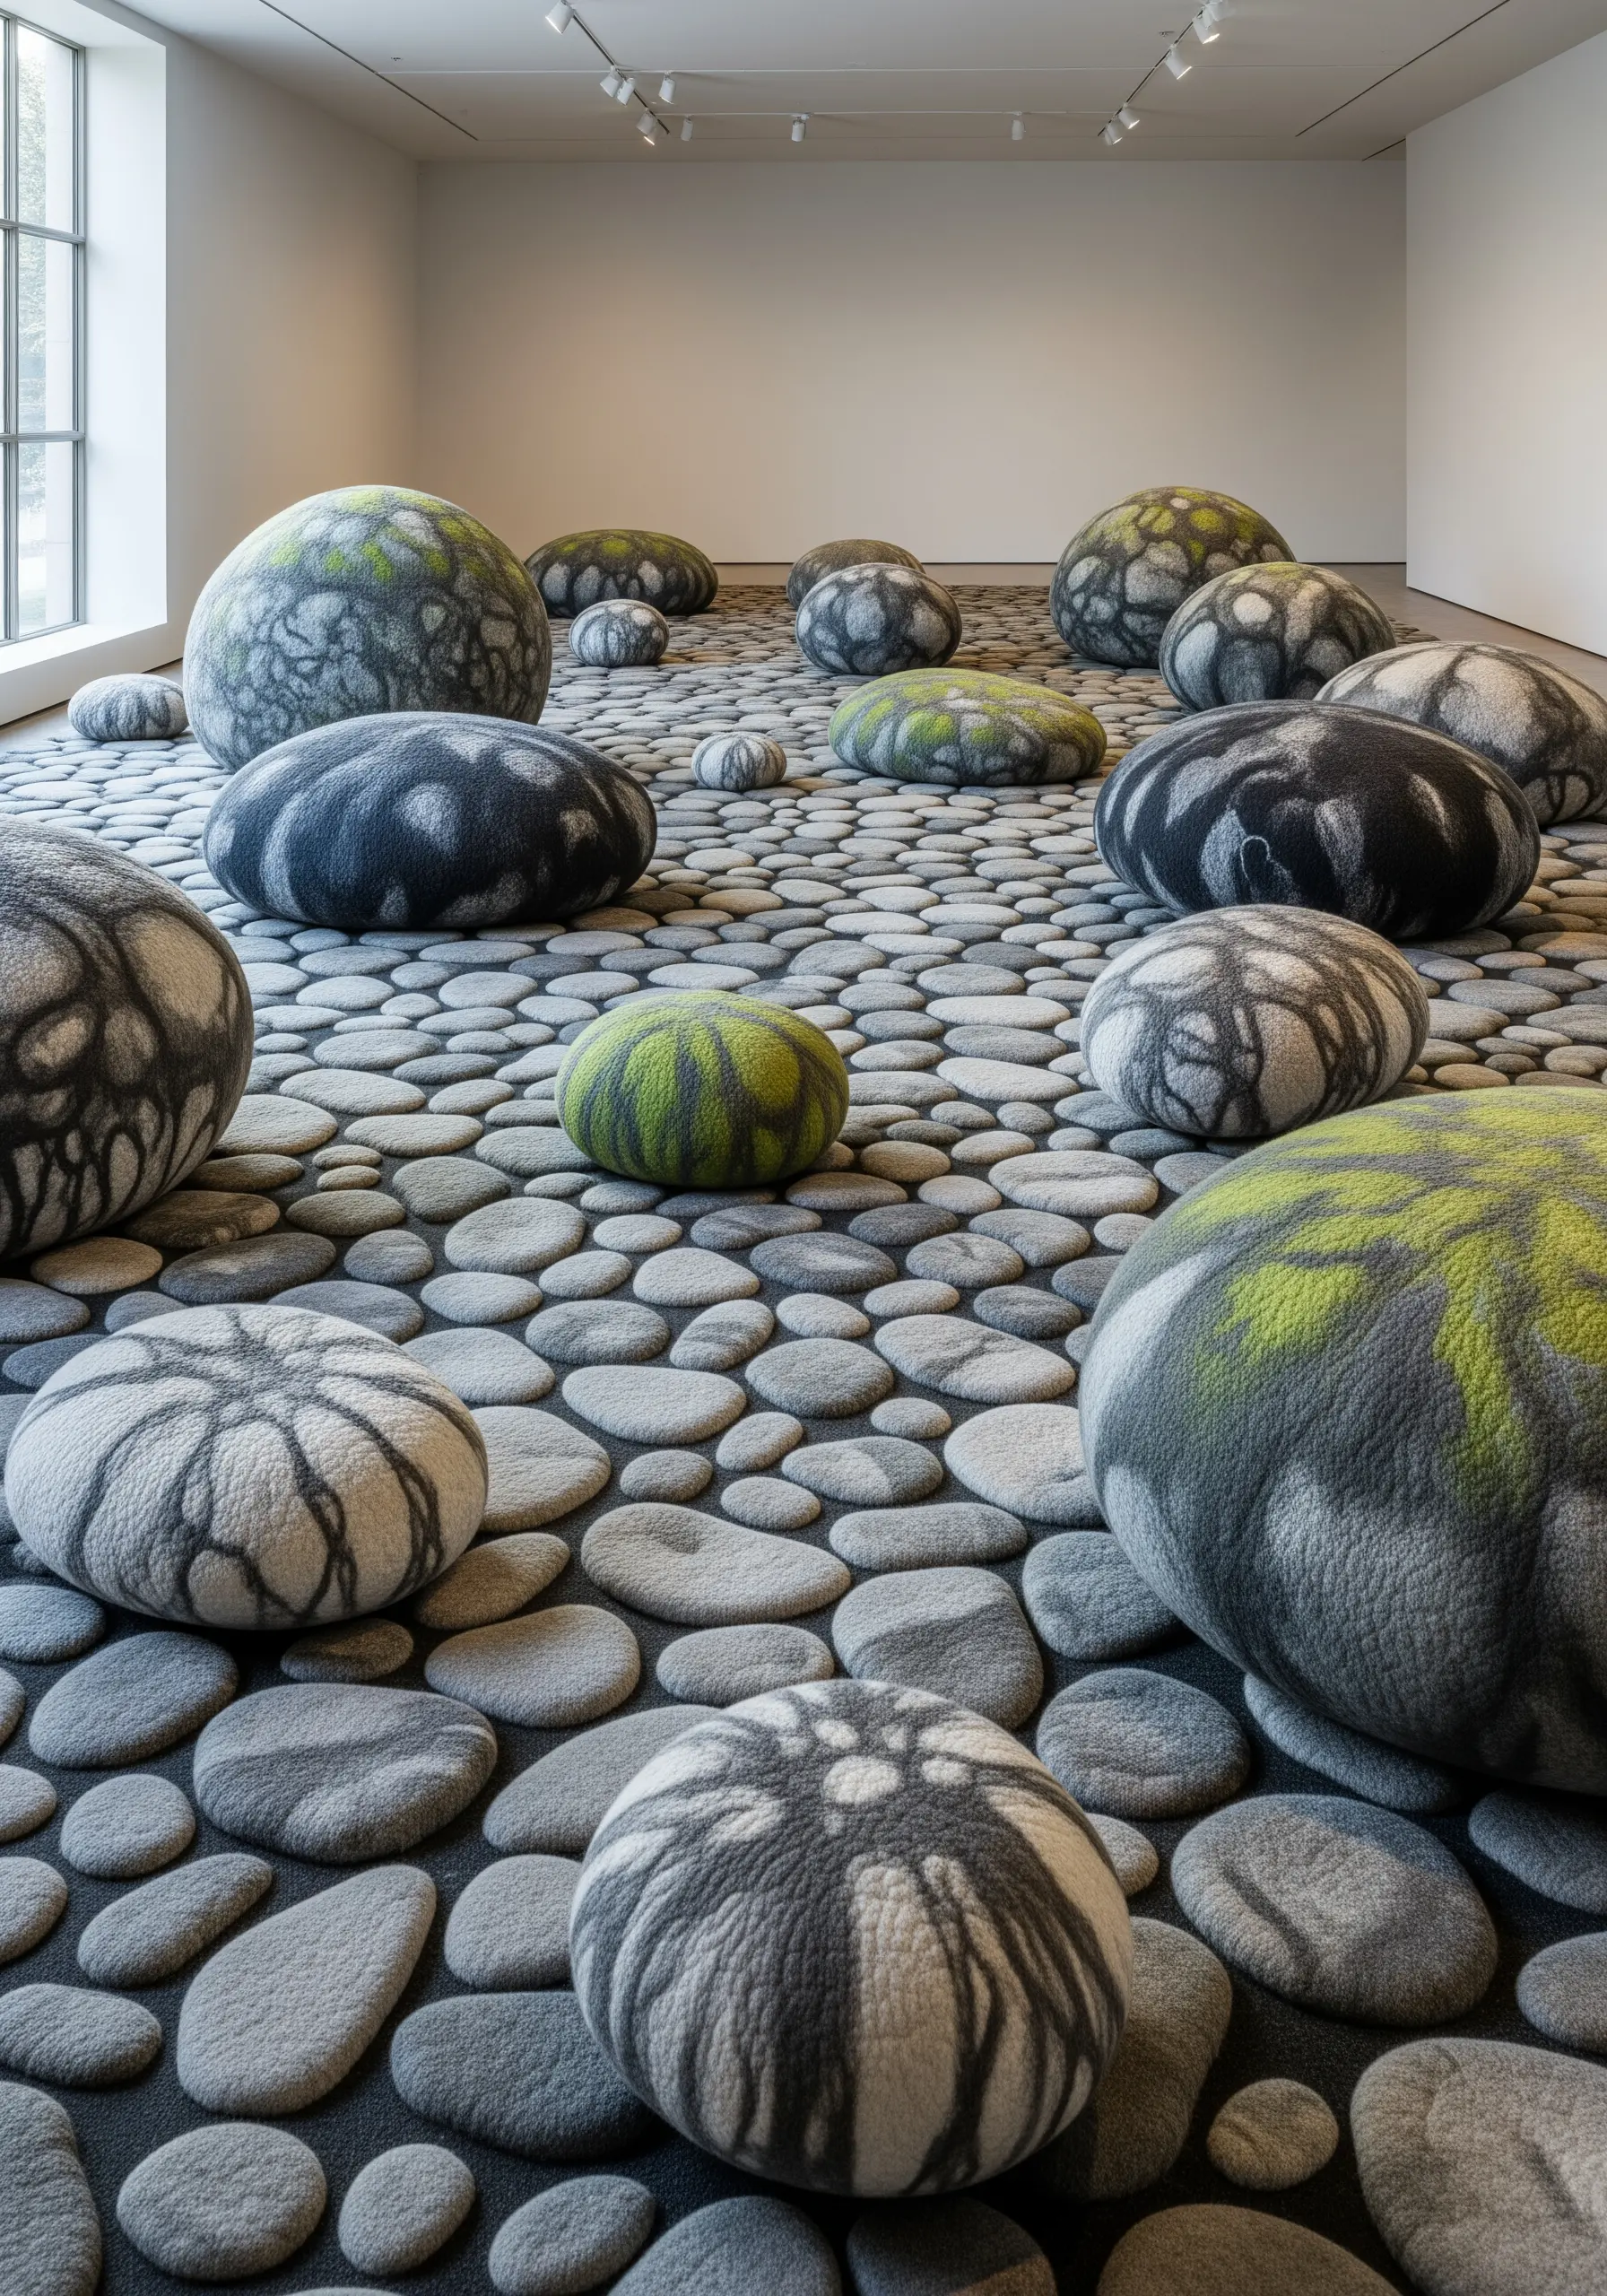
Create a textured, organic base for your embroidery by starting with felt.
Use needle felting to sculpt soft, three-dimensional shapes like stones, moss, or fungi from wool roving.
Once you have your felted form, you can add fine detail, contour lines, or contrasting texture with hand embroidery.
The combination of the soft, matted surface of the felt and the sharp, defined lines of thread is one of the most effective ways to turn natural textures into stunning embroidery art.
16. Stitch on Transparent Surfaces for Layered Light
Experiment with unconventional canvases like organza, tulle, or even clear vinyl to play with light and transparency.
Stitching on a sheer surface allows you to see the ‘back’ of your work, so every stitch must be deliberate.
You can layer multiple pieces of stitched organza in a floating frame to create incredible depth and ethereal, overlapping visuals.
This technique transforms thread from a surface embellishment into a drawing suspended in space.
17. Weave with Ribbon for Bold Strokes of Color

Swap your floss for silk or satin ribbon to create broad, lustrous fields of color with minimal effort.
Use a large-eyed chenille needle to avoid snagging the ribbon.
Stitches like the straight stitch, French knot, and lazy daisy take on a completely different character when rendered in ribbon, becoming plush and high-impact.
This is a perfect way to fill large areas quickly while adding a unique texture and sheen that thread alone cannot replicate.
18. Map the Cosmos with Metallics and French Knots
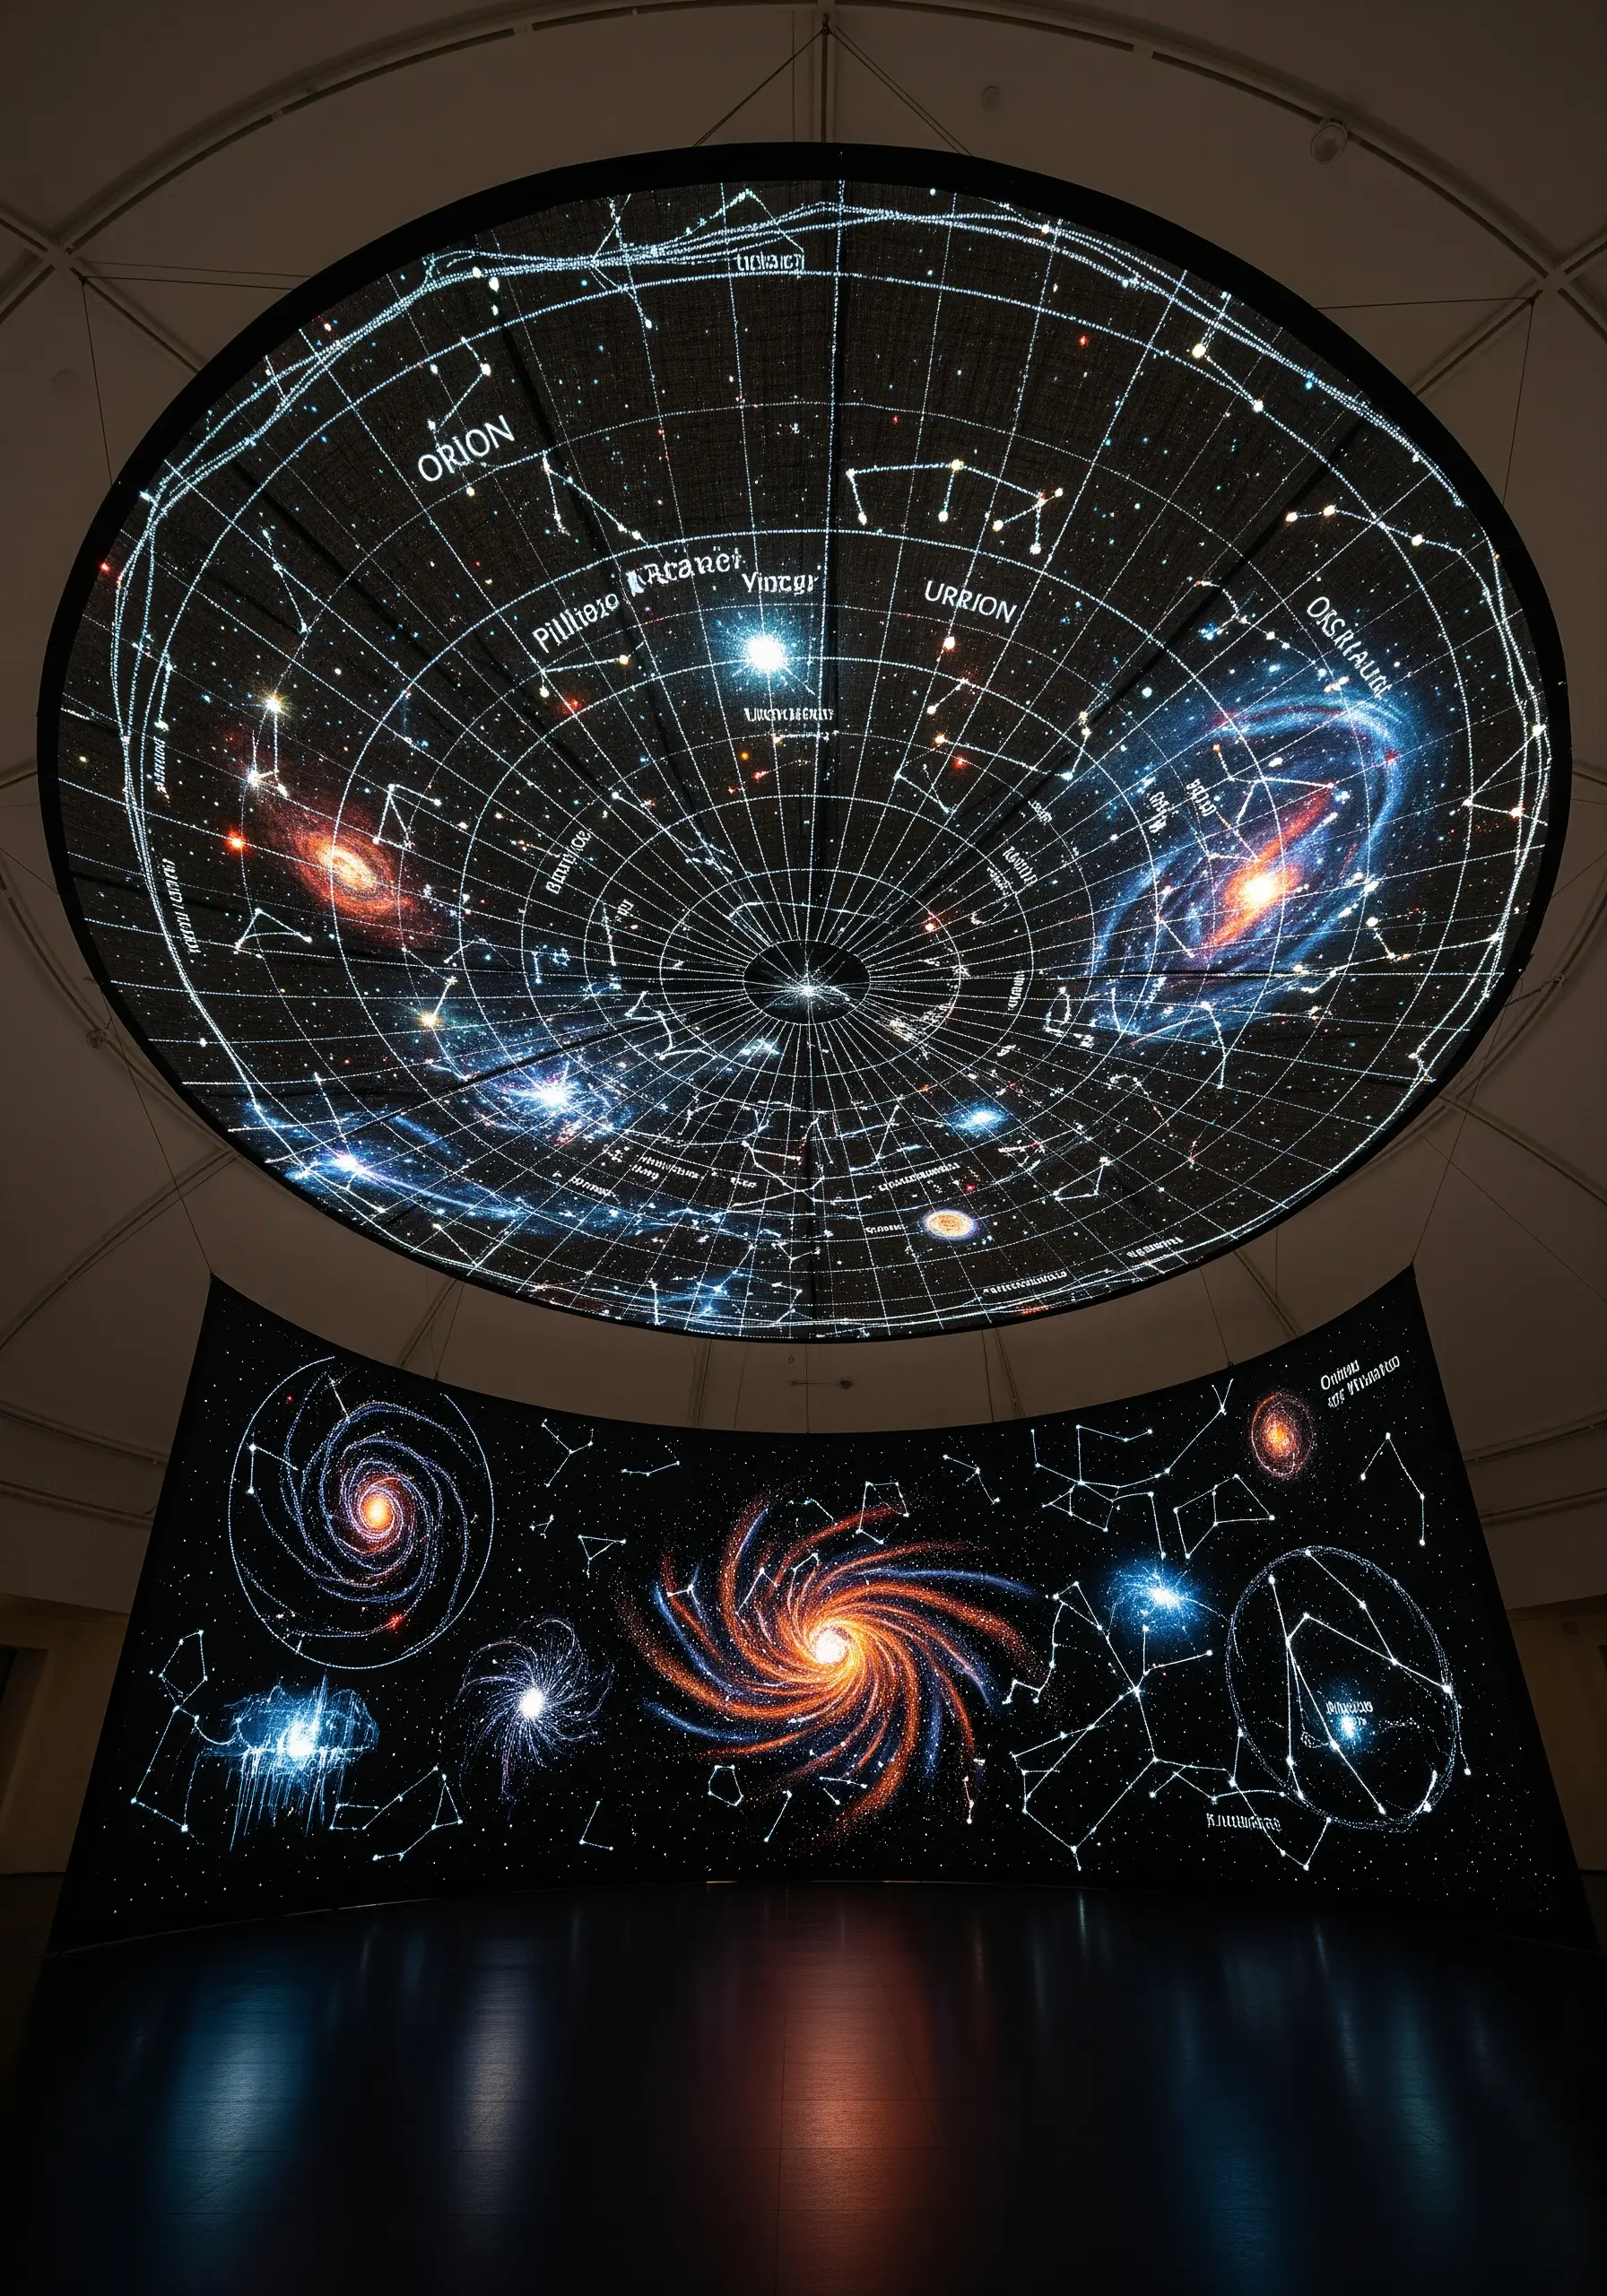
Recreate the magic of the night sky on dark fabric, like navy or black linen.
Use a single strand of metallic or glow-in-the-dark thread for fine constellation lines, securing it with a couching stitch for smooth curves.
Create stars using French knots in varying sizes—use more wraps or thicker thread for brighter stars.
For extra sparkle, add tiny silver beads or sequins. This transforms a simple piece into one of those tiny night sky embroidery designs that feels truly magical.


