
It’s easy to fall in love with embroidery, but it can be frustrating when your finished pieces don’t quite capture the polished, intentional look you envision. You have the skills, but perhaps you’re ready to move beyond simply following a pattern and start making deliberate artistic choices.
Transforming your stitching from a pleasant craft into true wall art isn’t about mastering hundreds of complex stitches. It’s about understanding how to use the stitches you already know with more intention—how to manipulate thread weight for depth, how to choose a fabric that enhances your design, and how to compose a collection that tells a story on your wall.
These ideas are designed to help you make those subtle but powerful shifts. You’ll learn not just what to stitch, but why certain choices create a cohesive, modern, and deeply personal aesthetic. It’s time to pick up your needle with renewed confidence and create art that truly reflects your style.
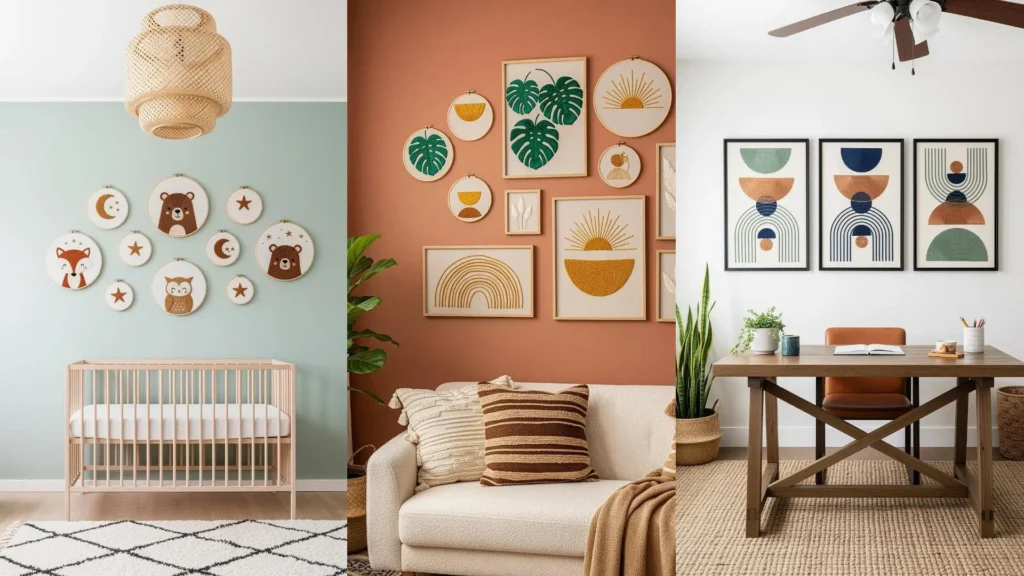
1. Curate a Cohesive Gallery Wall with Thematic Motifs
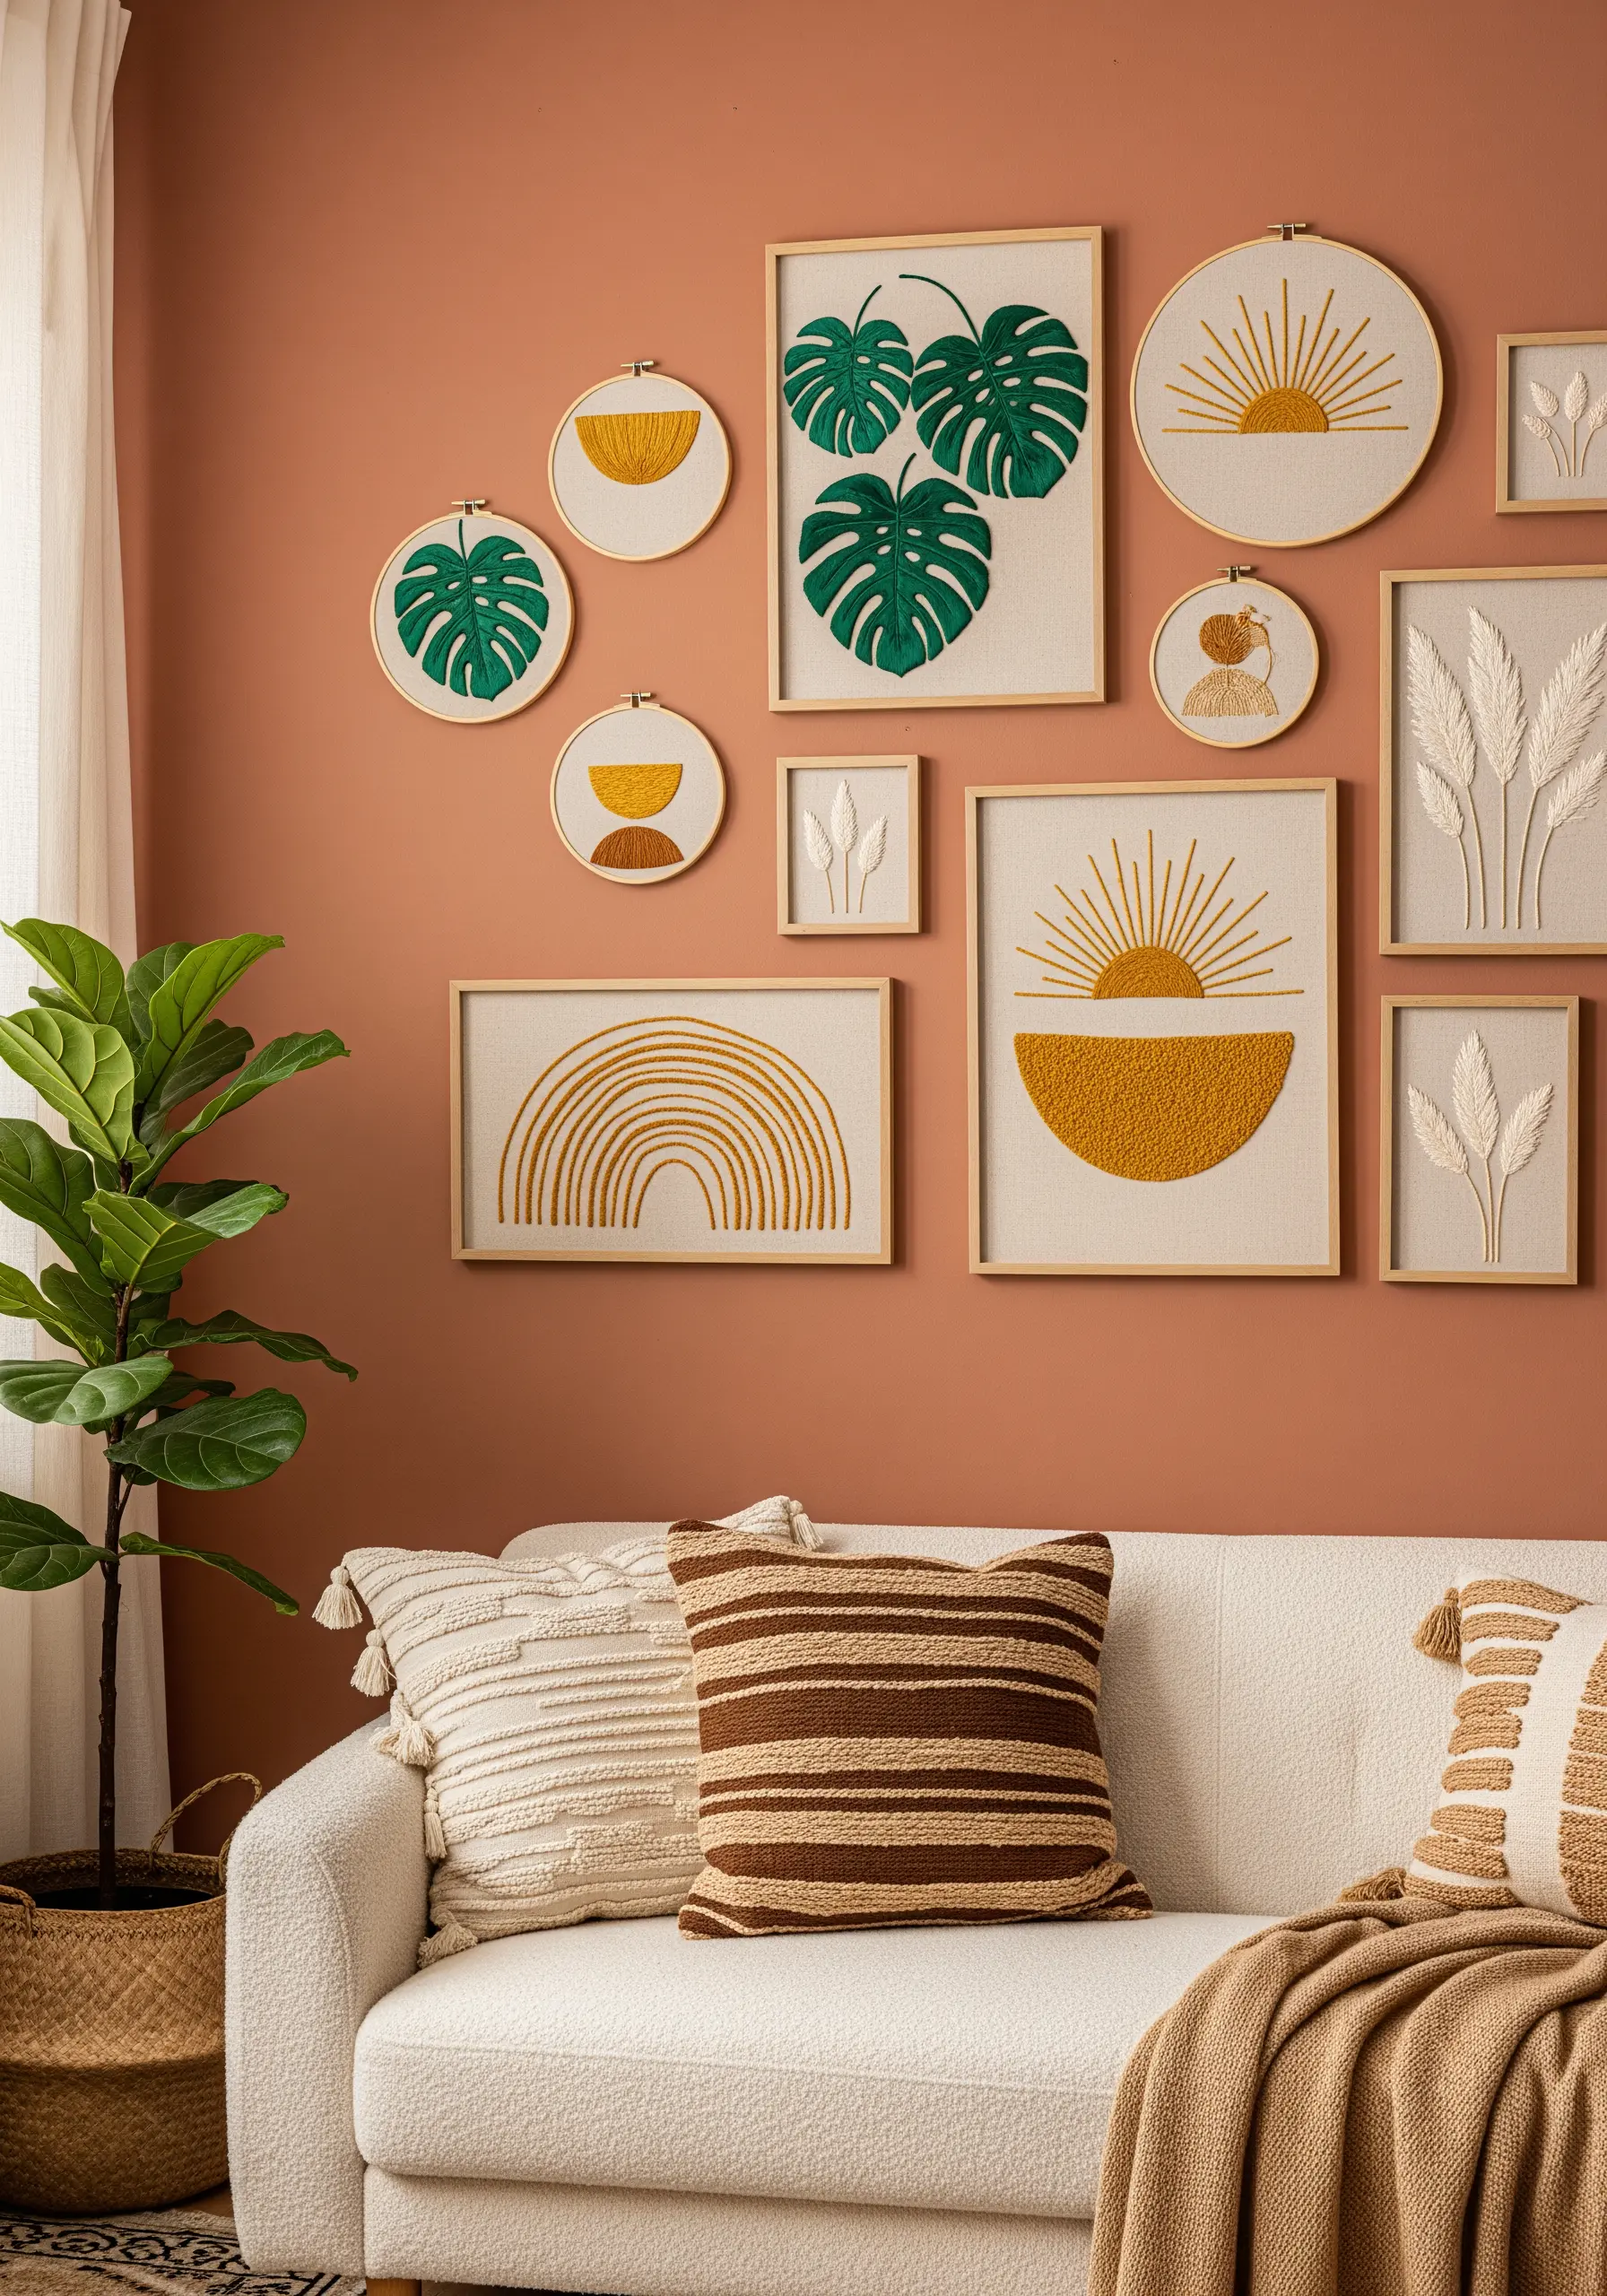
To create a harmonious gallery wall, start by choosing a tight color palette of three to four complementary shades, like terracotta, mustard, and deep green.
Repeat core motifs—such as suns, rainbows, or leaves—across different sizes and frame shapes (both hoops and rectangles) to build visual rhythm.
Use stitch direction to create subtle texture; for example, employ long vertical satin stitches for sun rays and angled satin stitches for monstera leaves to mimic natural growth.
This approach ensures your collection feels intentionally curated rather than randomly assembled, resulting in one of the most impactful wall hoop art ideas.
2. Master Thread Painting for Expansive Landscapes
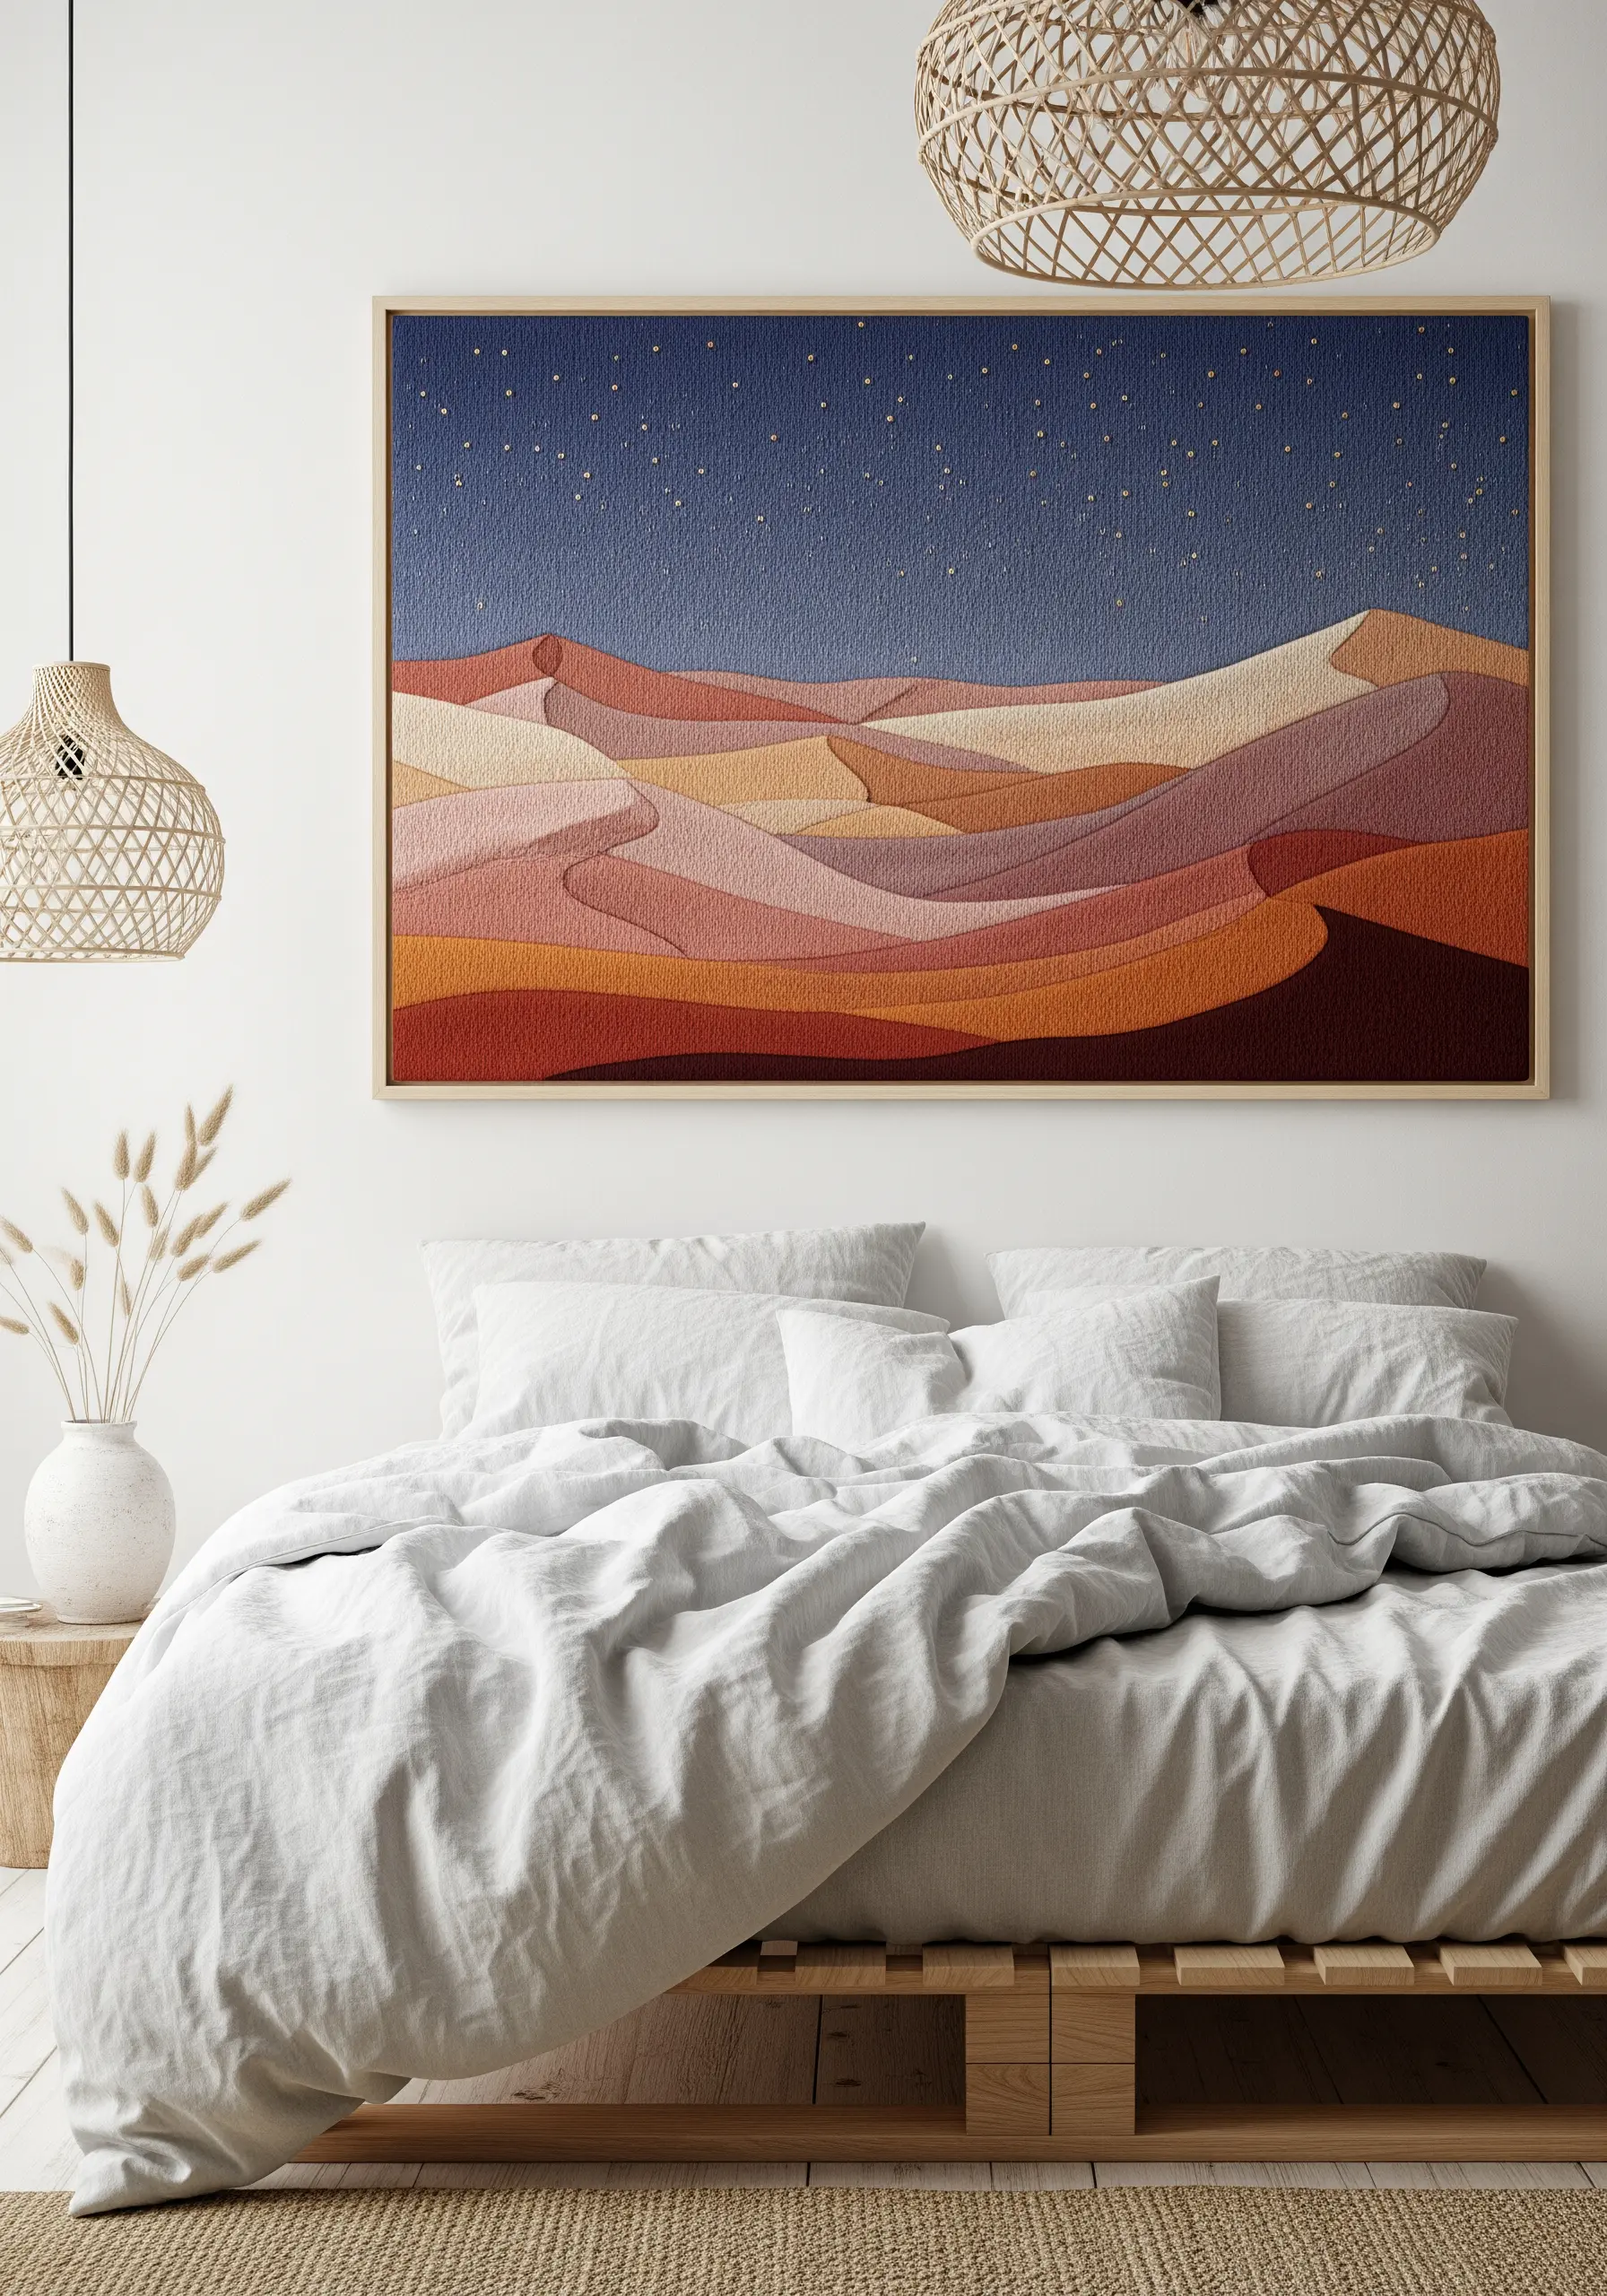
To achieve the smooth, blended look of a painted landscape, use the long-and-short stitch to transition between color-blocked sections.
This technique eliminates harsh lines and creates the soft, rolling illusion of desert dunes or hills.
For the night sky, scatter tiny, single-strand French knots or seed stitches across a dark fabric to represent stars, ensuring they vary slightly in size and placement for a natural effect.
This method transforms a simple scene into a work of art, perfect for ambitious mountain landscape thread painting techniques.
3. Explore Geometric Abstraction with Precise Satin Stitch
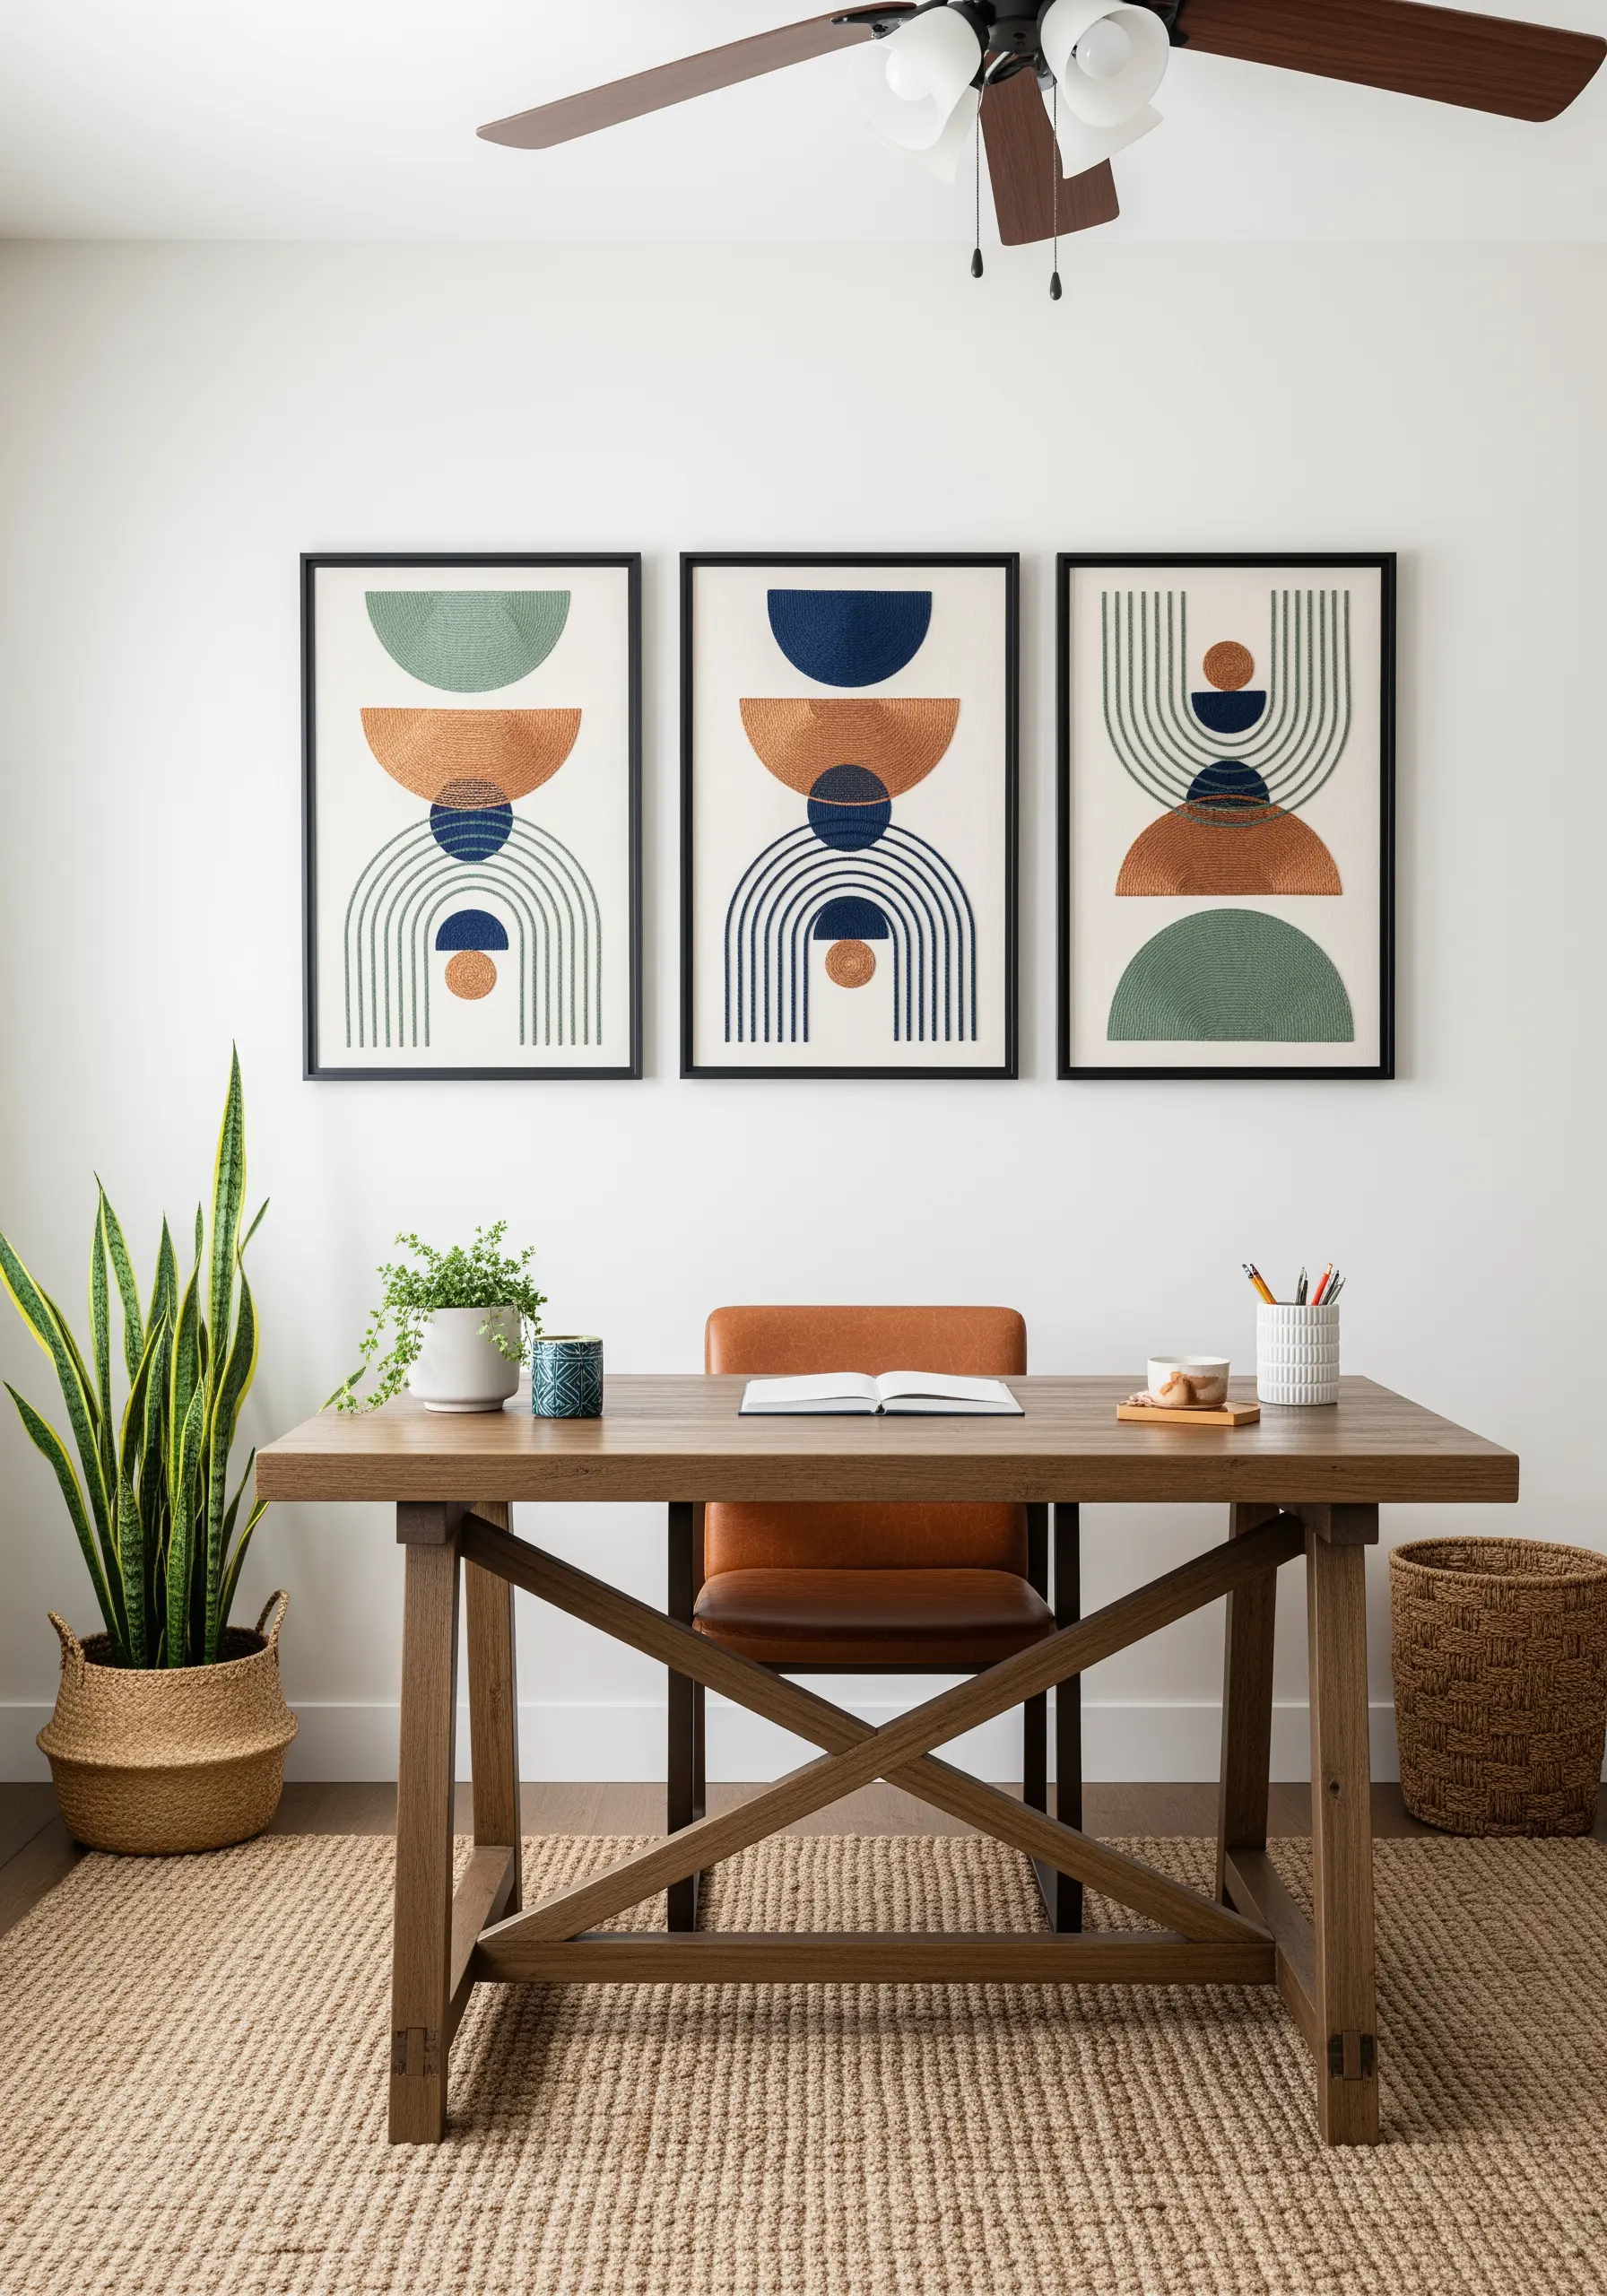
The power of geometric art lies in its precision, so use a single strand of floss to draw your outlines for maximum sharpness.
Fill each shape with a dense, smooth satin stitch, ensuring every stitch lies parallel to the last.
Maintain a consistent stitch direction within each block (e.g., all vertical in one shape, all horizontal in another) to create a clean, graphic contrast.
This meticulous approach elevates simple shapes into sophisticated abstract framed embroidery patterns.
4. Capture Lunar Phases with High-Contrast Detailing
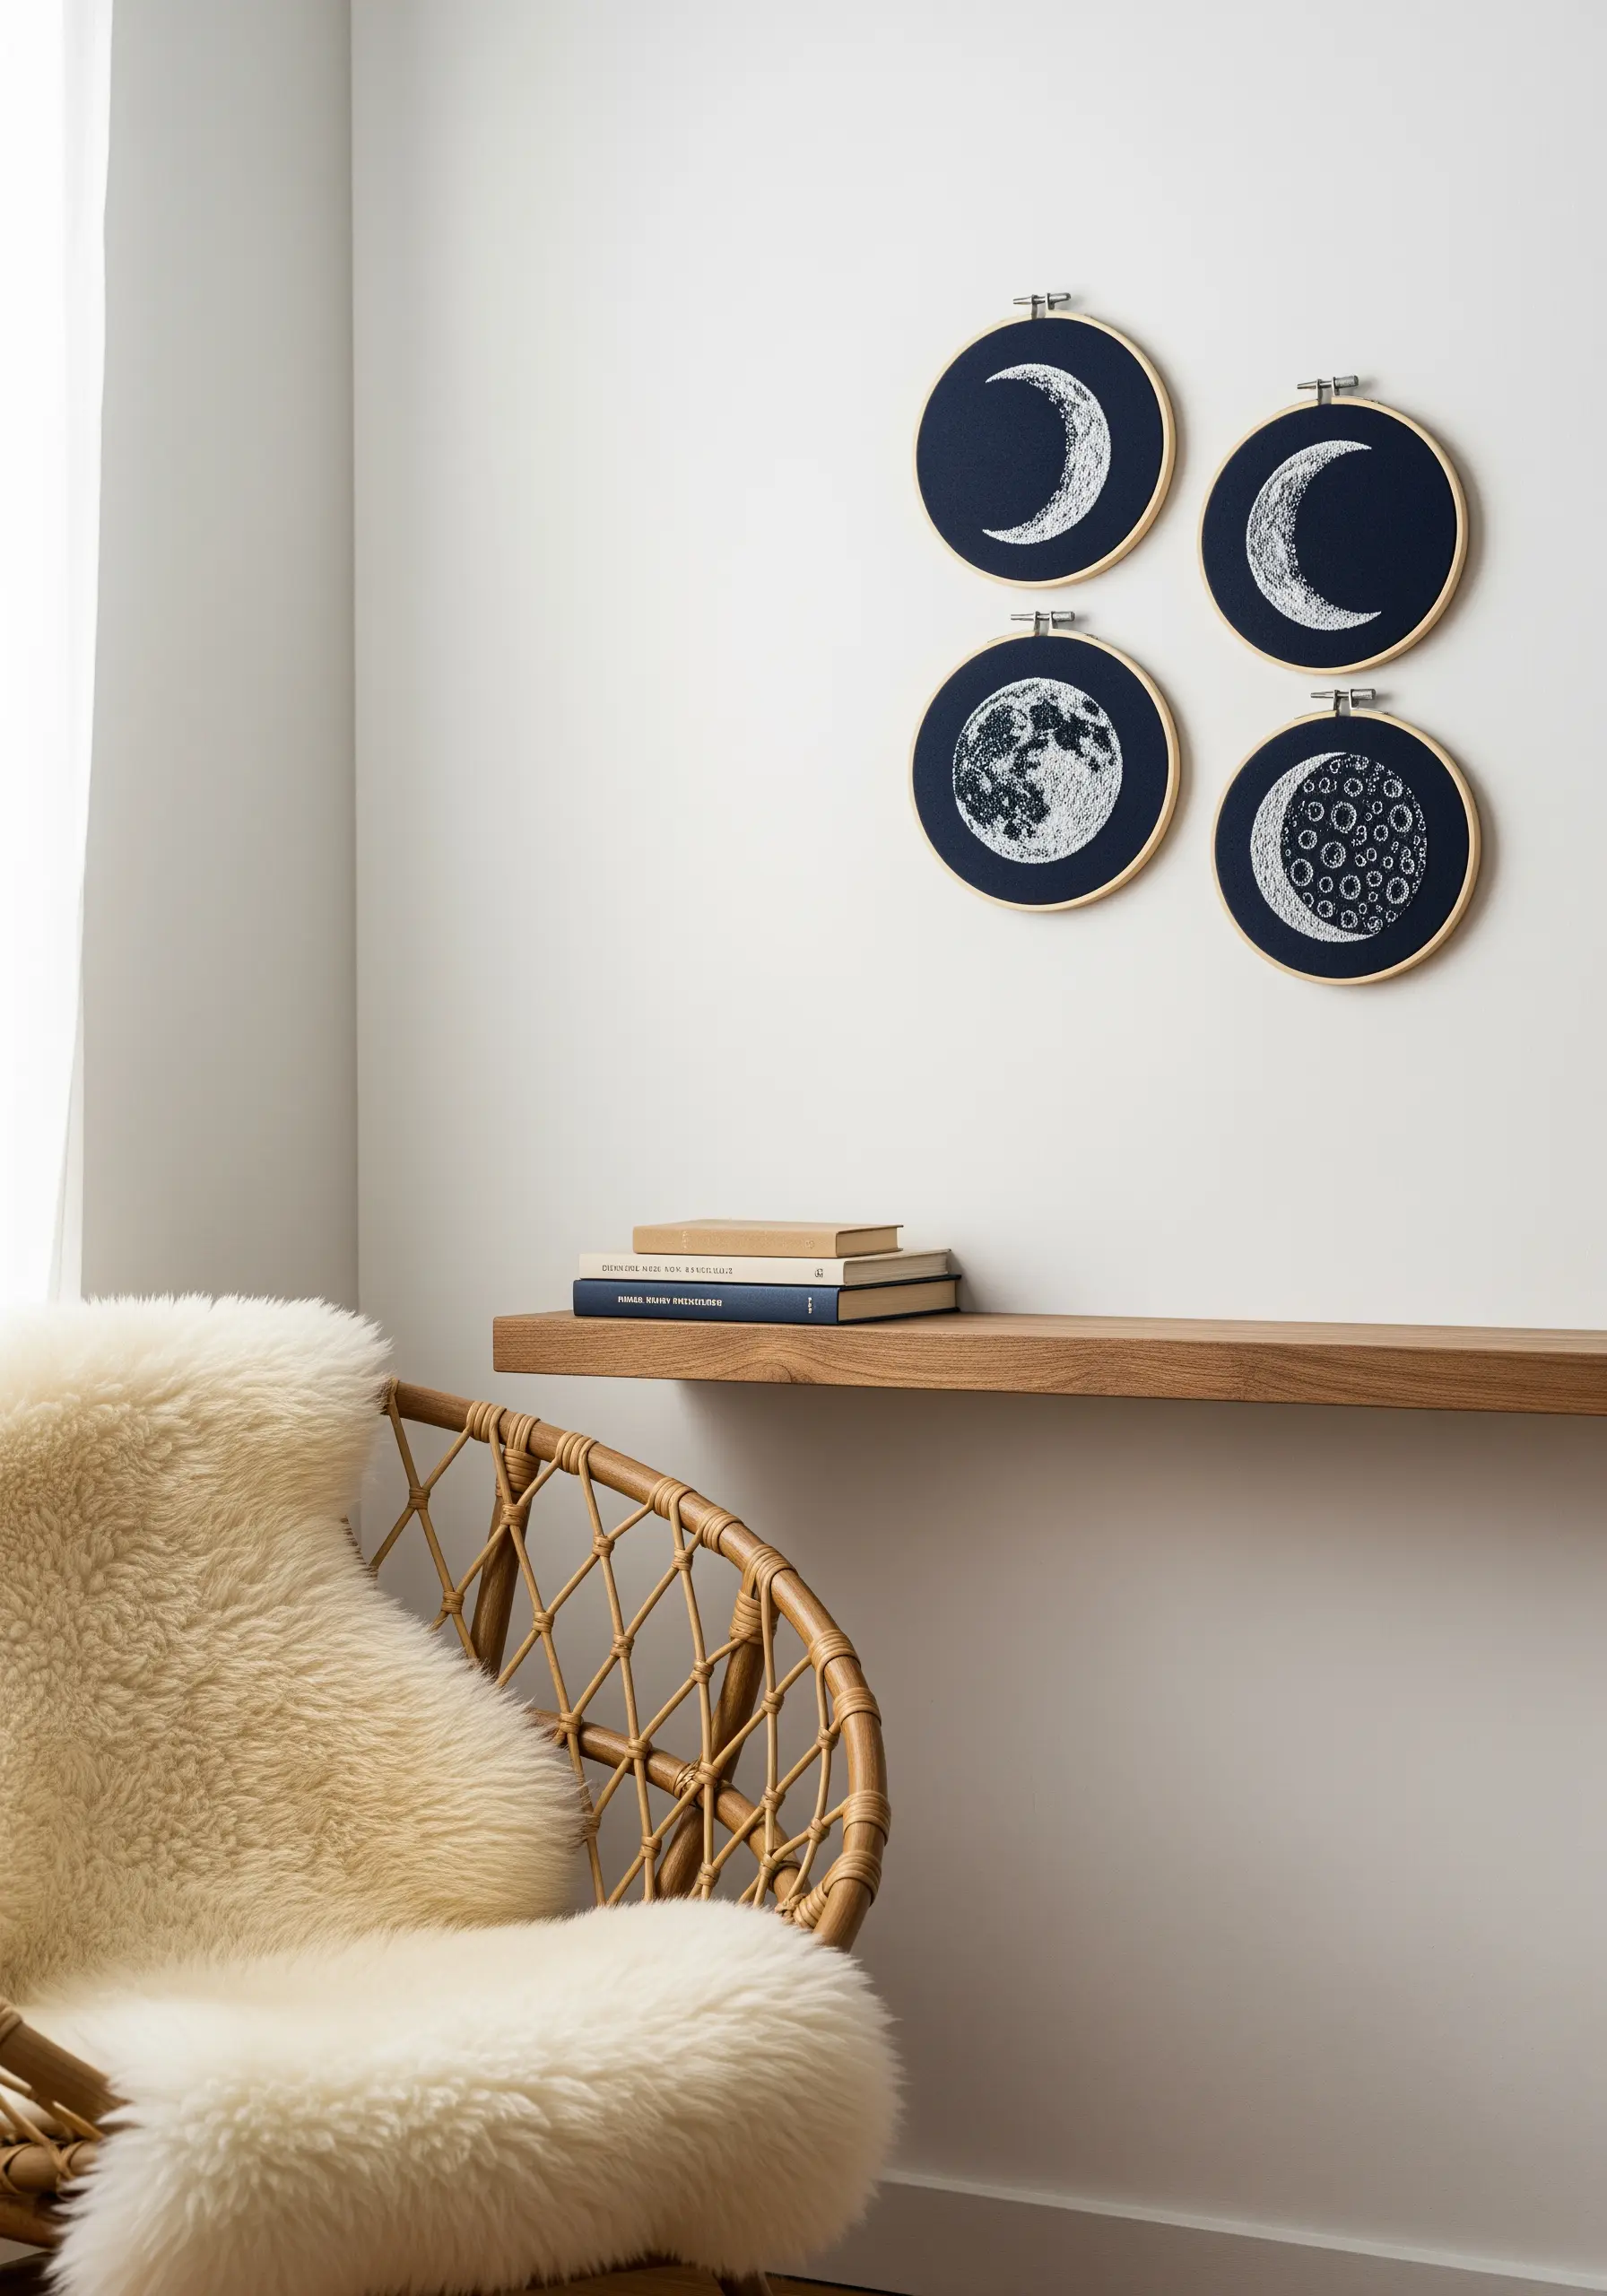
Make your celestial designs pop by stitching with high-contrast thread—like bright white on navy fabric.
To recreate the textured surface of a full moon, layer French knots and seed stitches of varying sizes to mimic craters and shadows.
For the sharp curves of crescent moons, use a whipped backstitch or a neat satin stitch to achieve a smooth, solid edge.
This combination of texture and clean lines brings a dynamic quality to night garden embroidery ideas.
5. Integrate Embroidery with Printed Art for a Layered Look
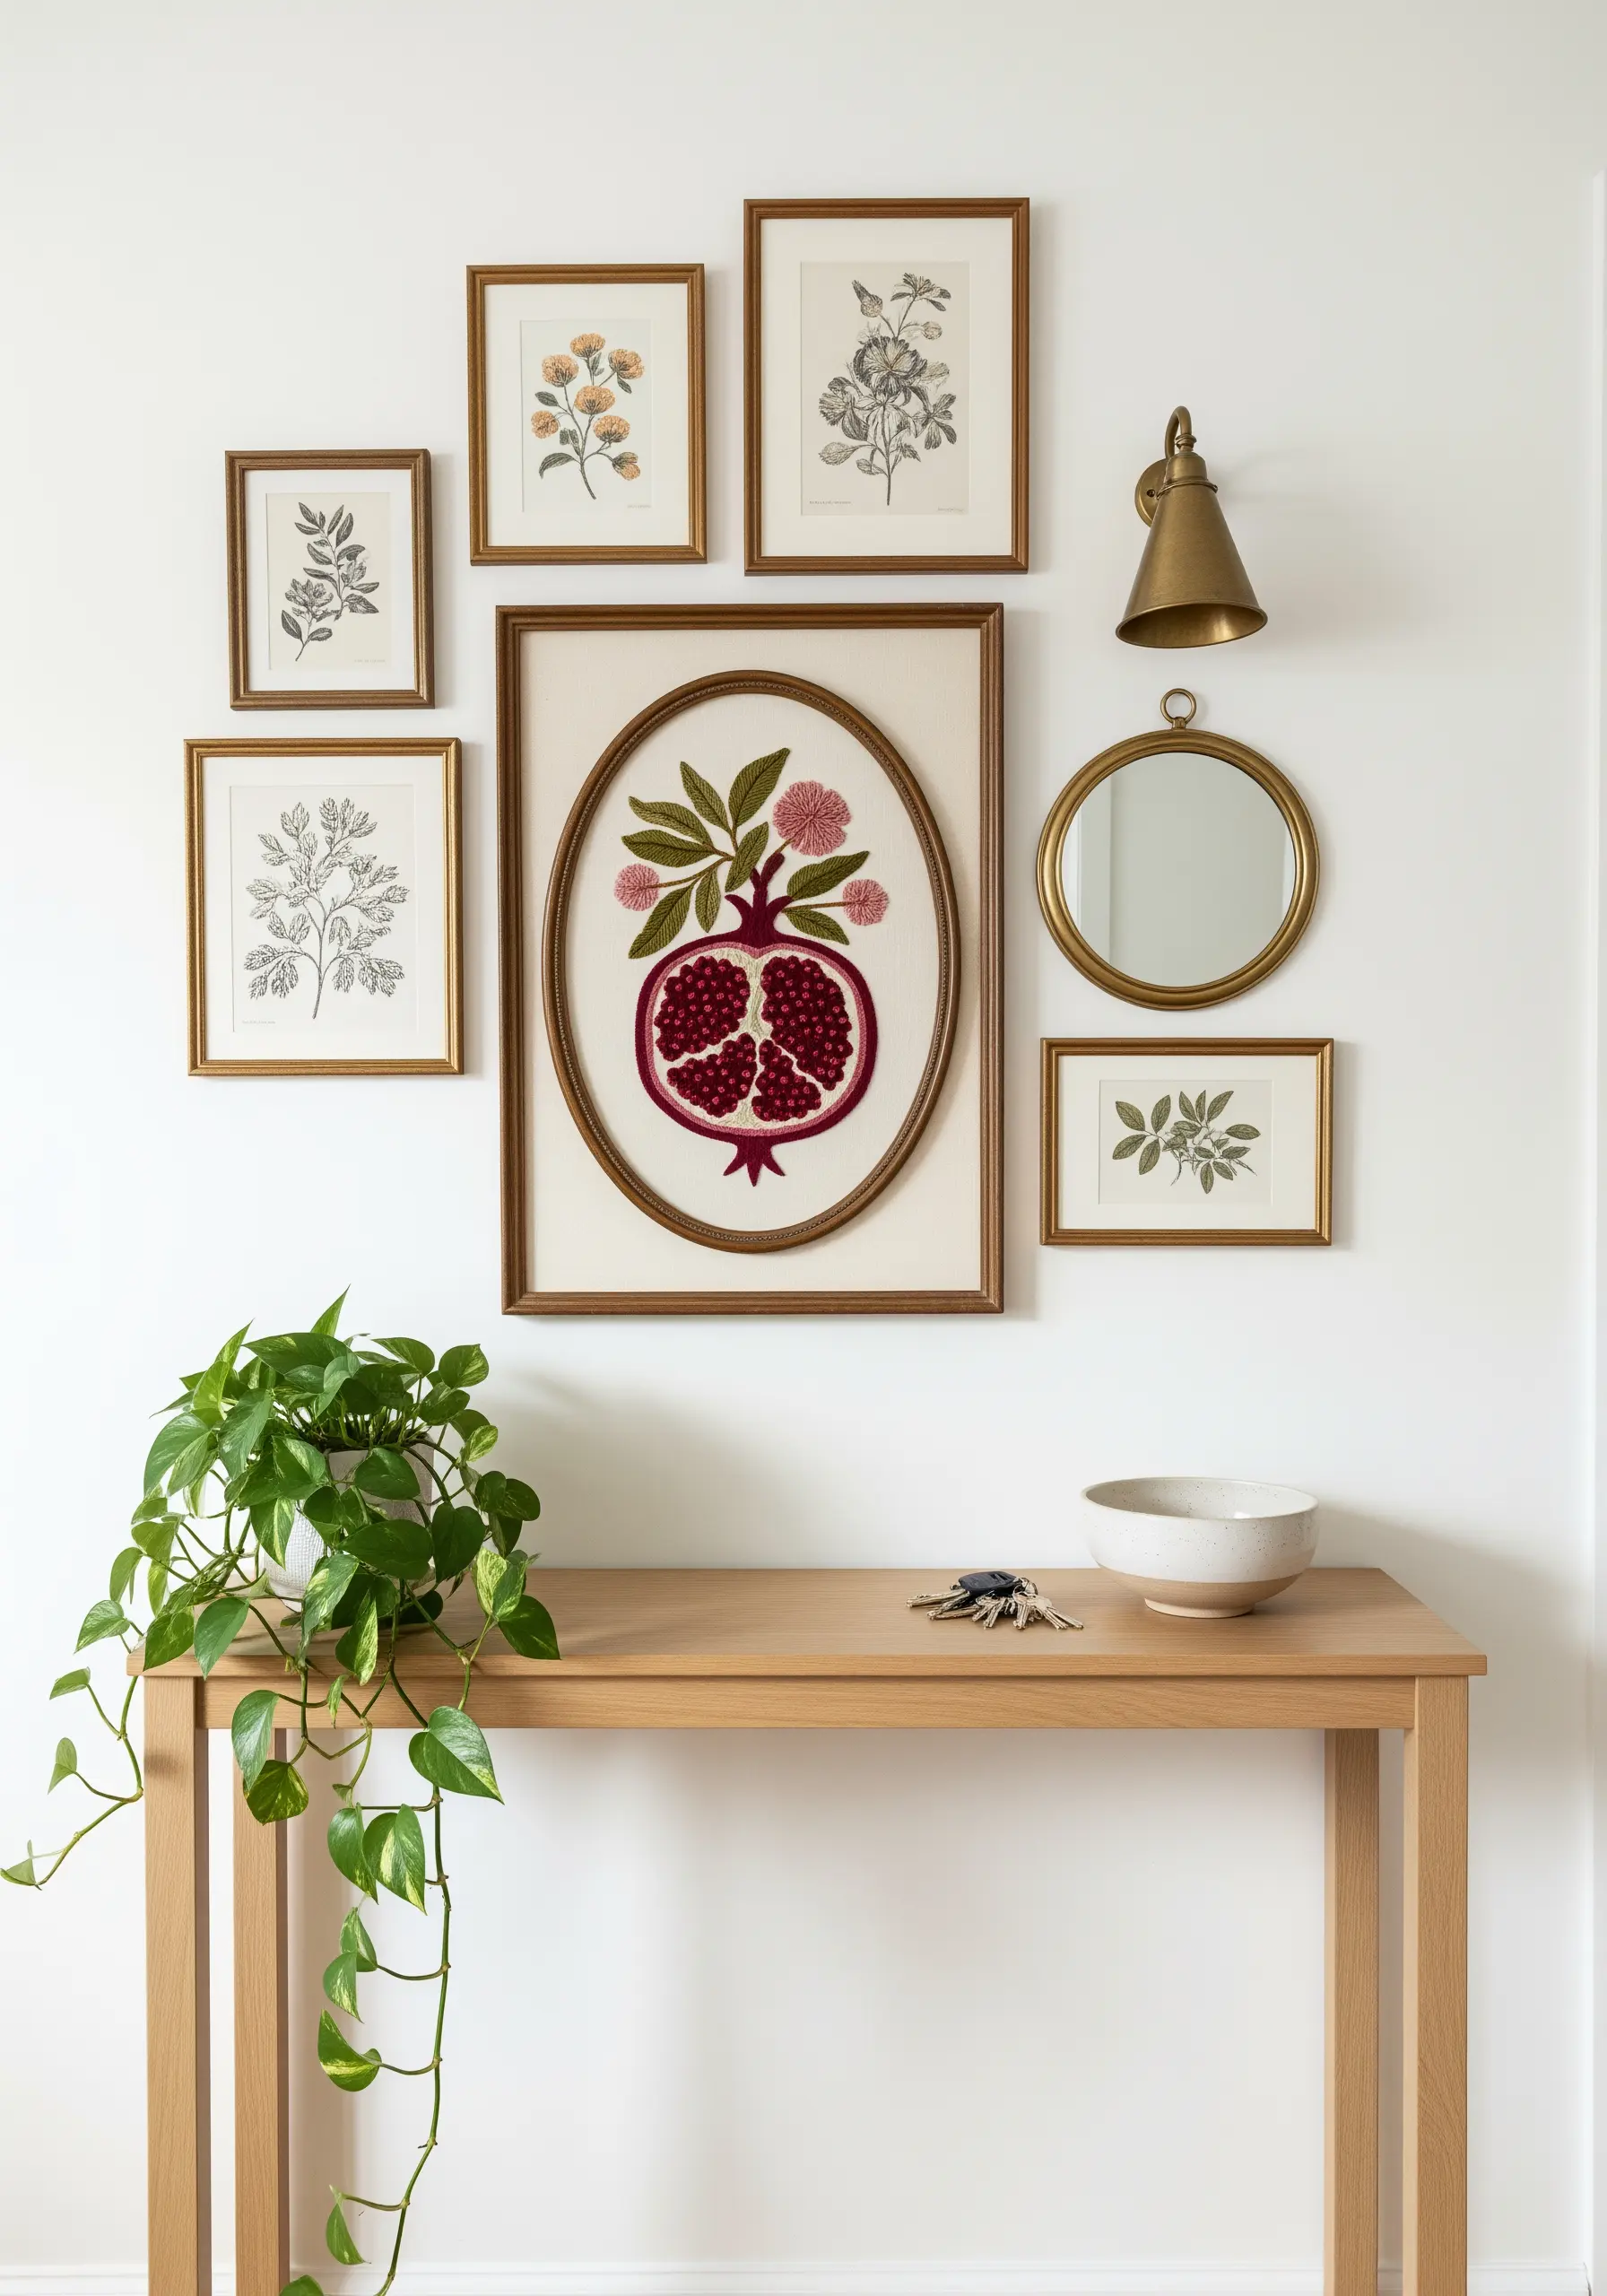
When mixing embroidery with prints, make your stitched piece the tactile focal point.
Achieve this by using dimensional stitches—like hundreds of French knots for pomegranate seeds or a padded satin stitch for the rounded rind.
Using a thicker thread, such as #8 pearl cotton, also adds physical presence.
Ensure the surrounding prints share a complementary color palette or theme (like botanicals) to create a cohesive and sophisticated gallery wall, making your minimal fruit plant motifs stand out.
6. Create Delicate Botanical Studies on Natural Linen
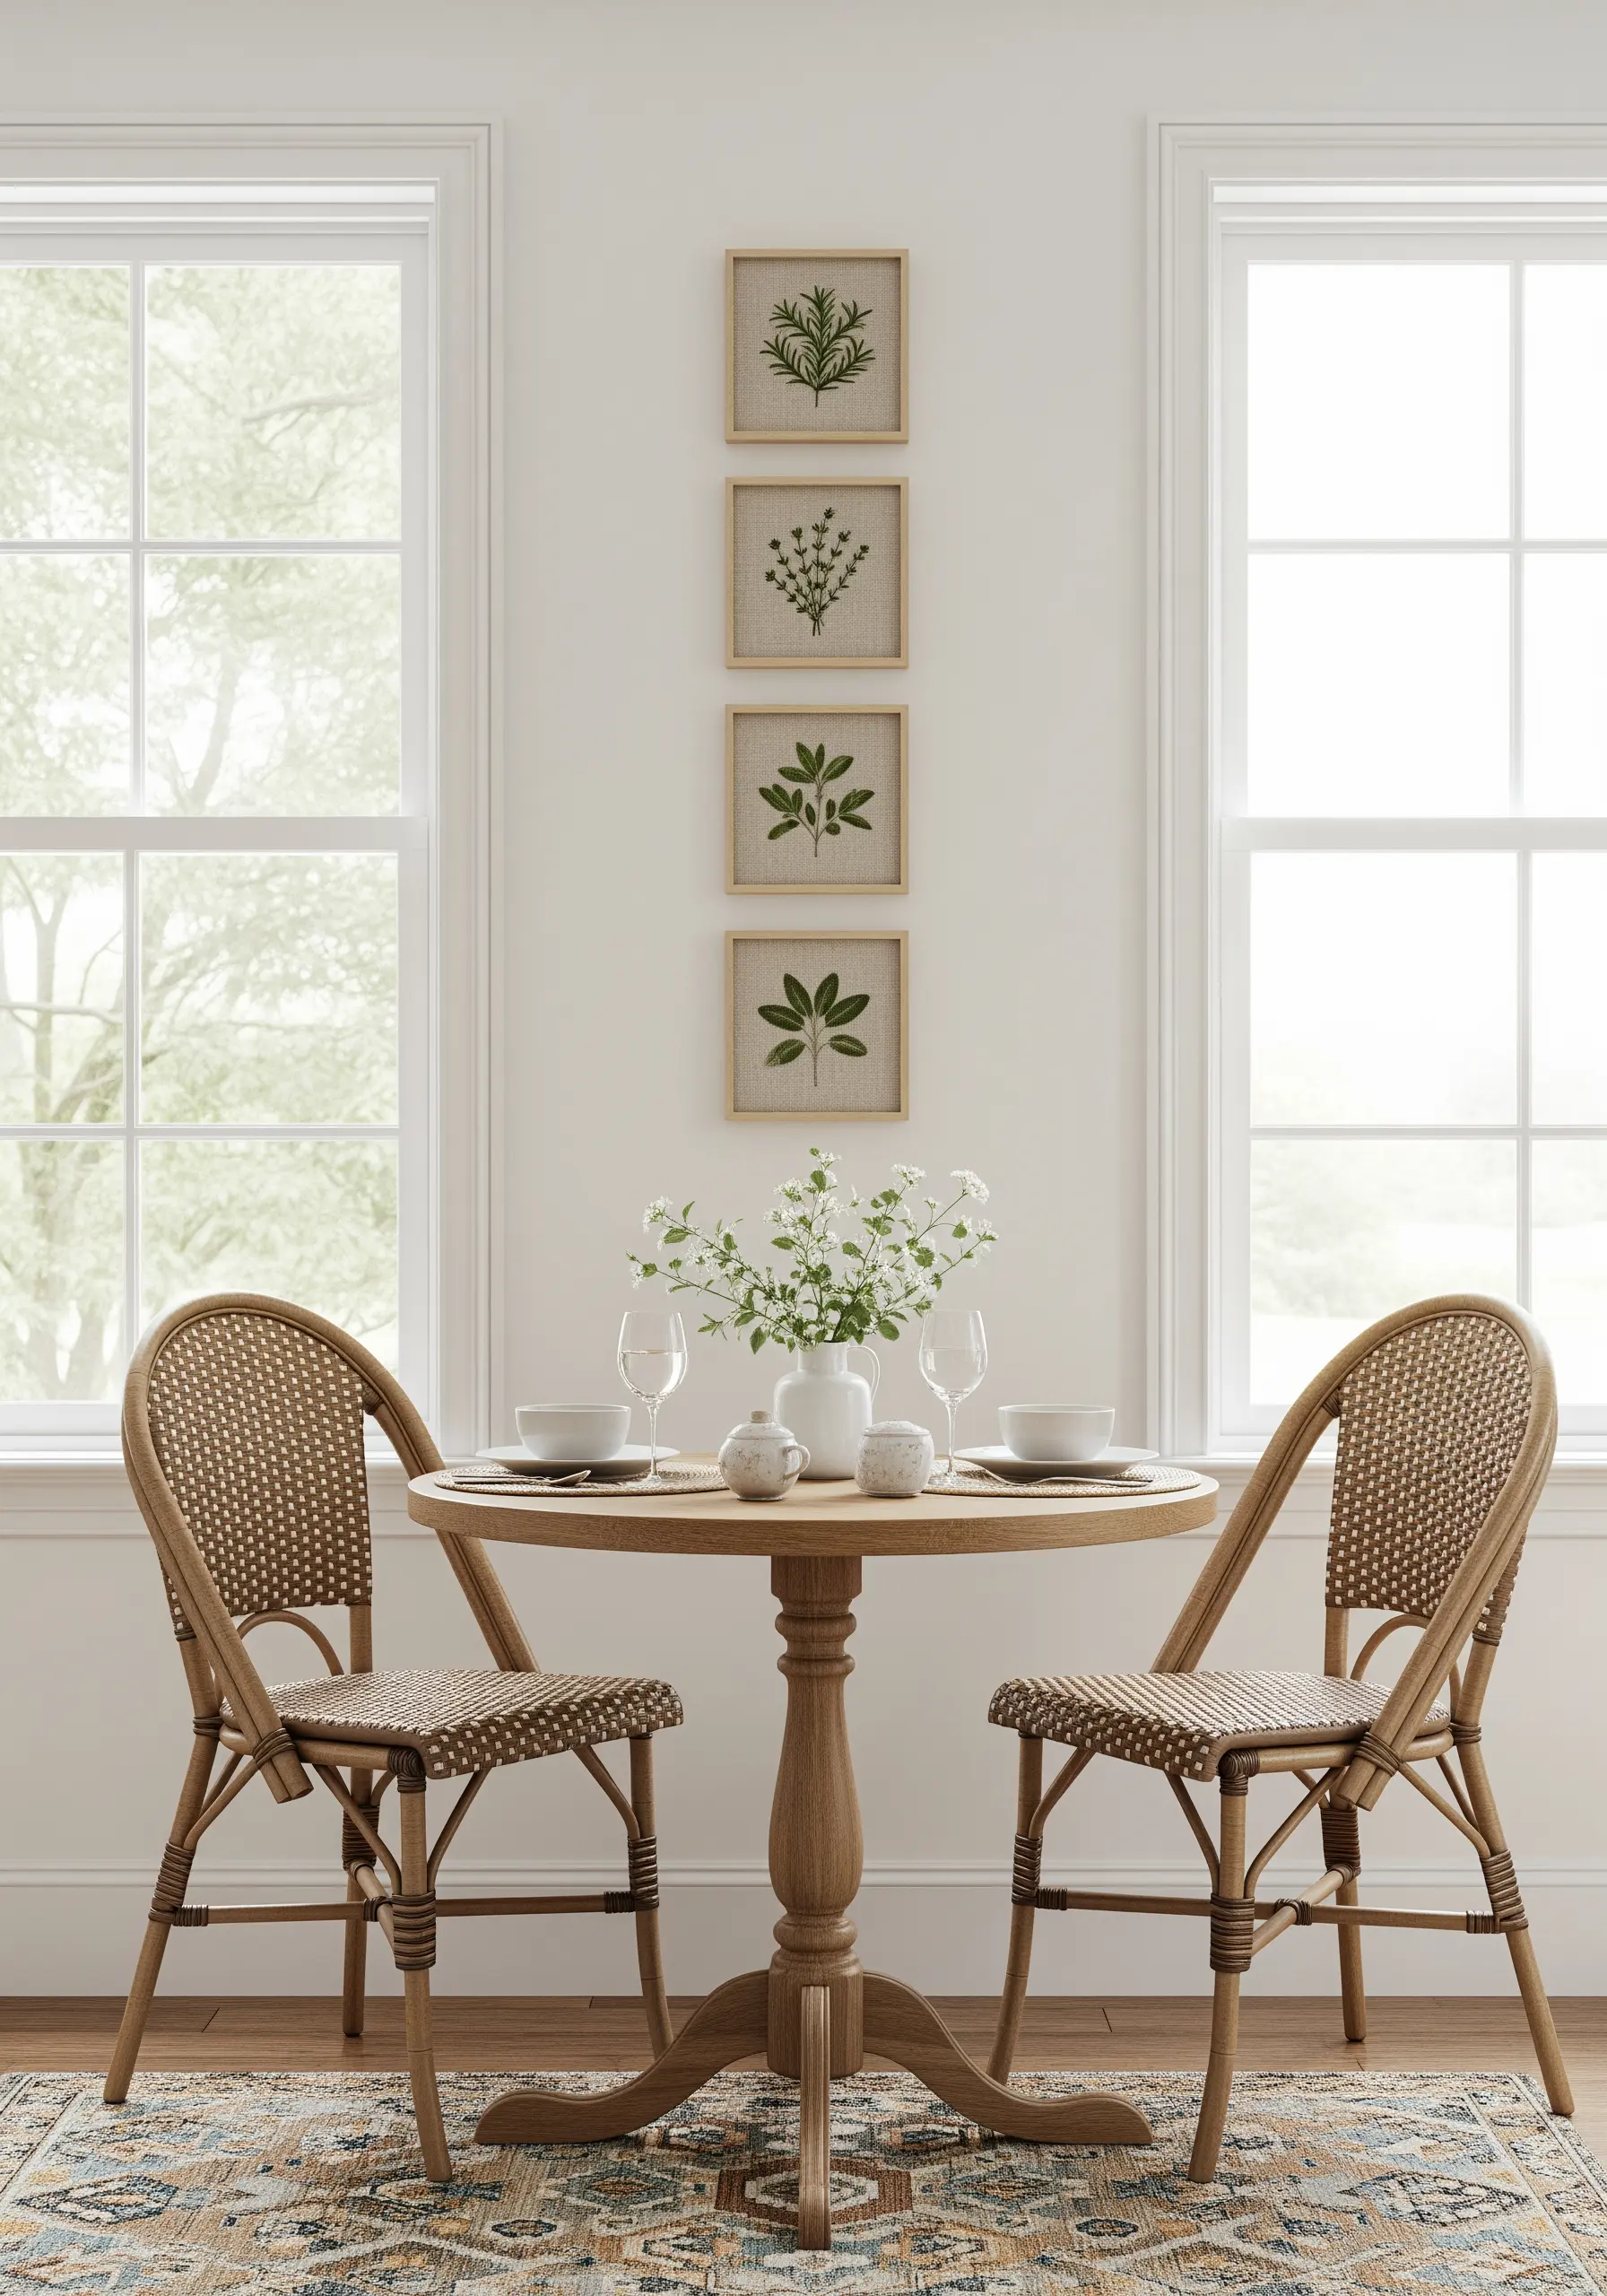
For an airy, minimalist aesthetic, choose a natural, unbleached linen or cotton fabric as your canvas.
Its subtle texture enhances the organic feel of the botanicals without overwhelming them.
Use only one or two strands of floss for your stitches; a simple stem stitch for the stems and a fishbone stitch for the leaves will provide just enough definition.
This restrained approach allows the beauty of the delicate leaf embroidery stitches and the fabric to shine through.
7. Weave Bold Textures with Punch Needle or Yarn Couching
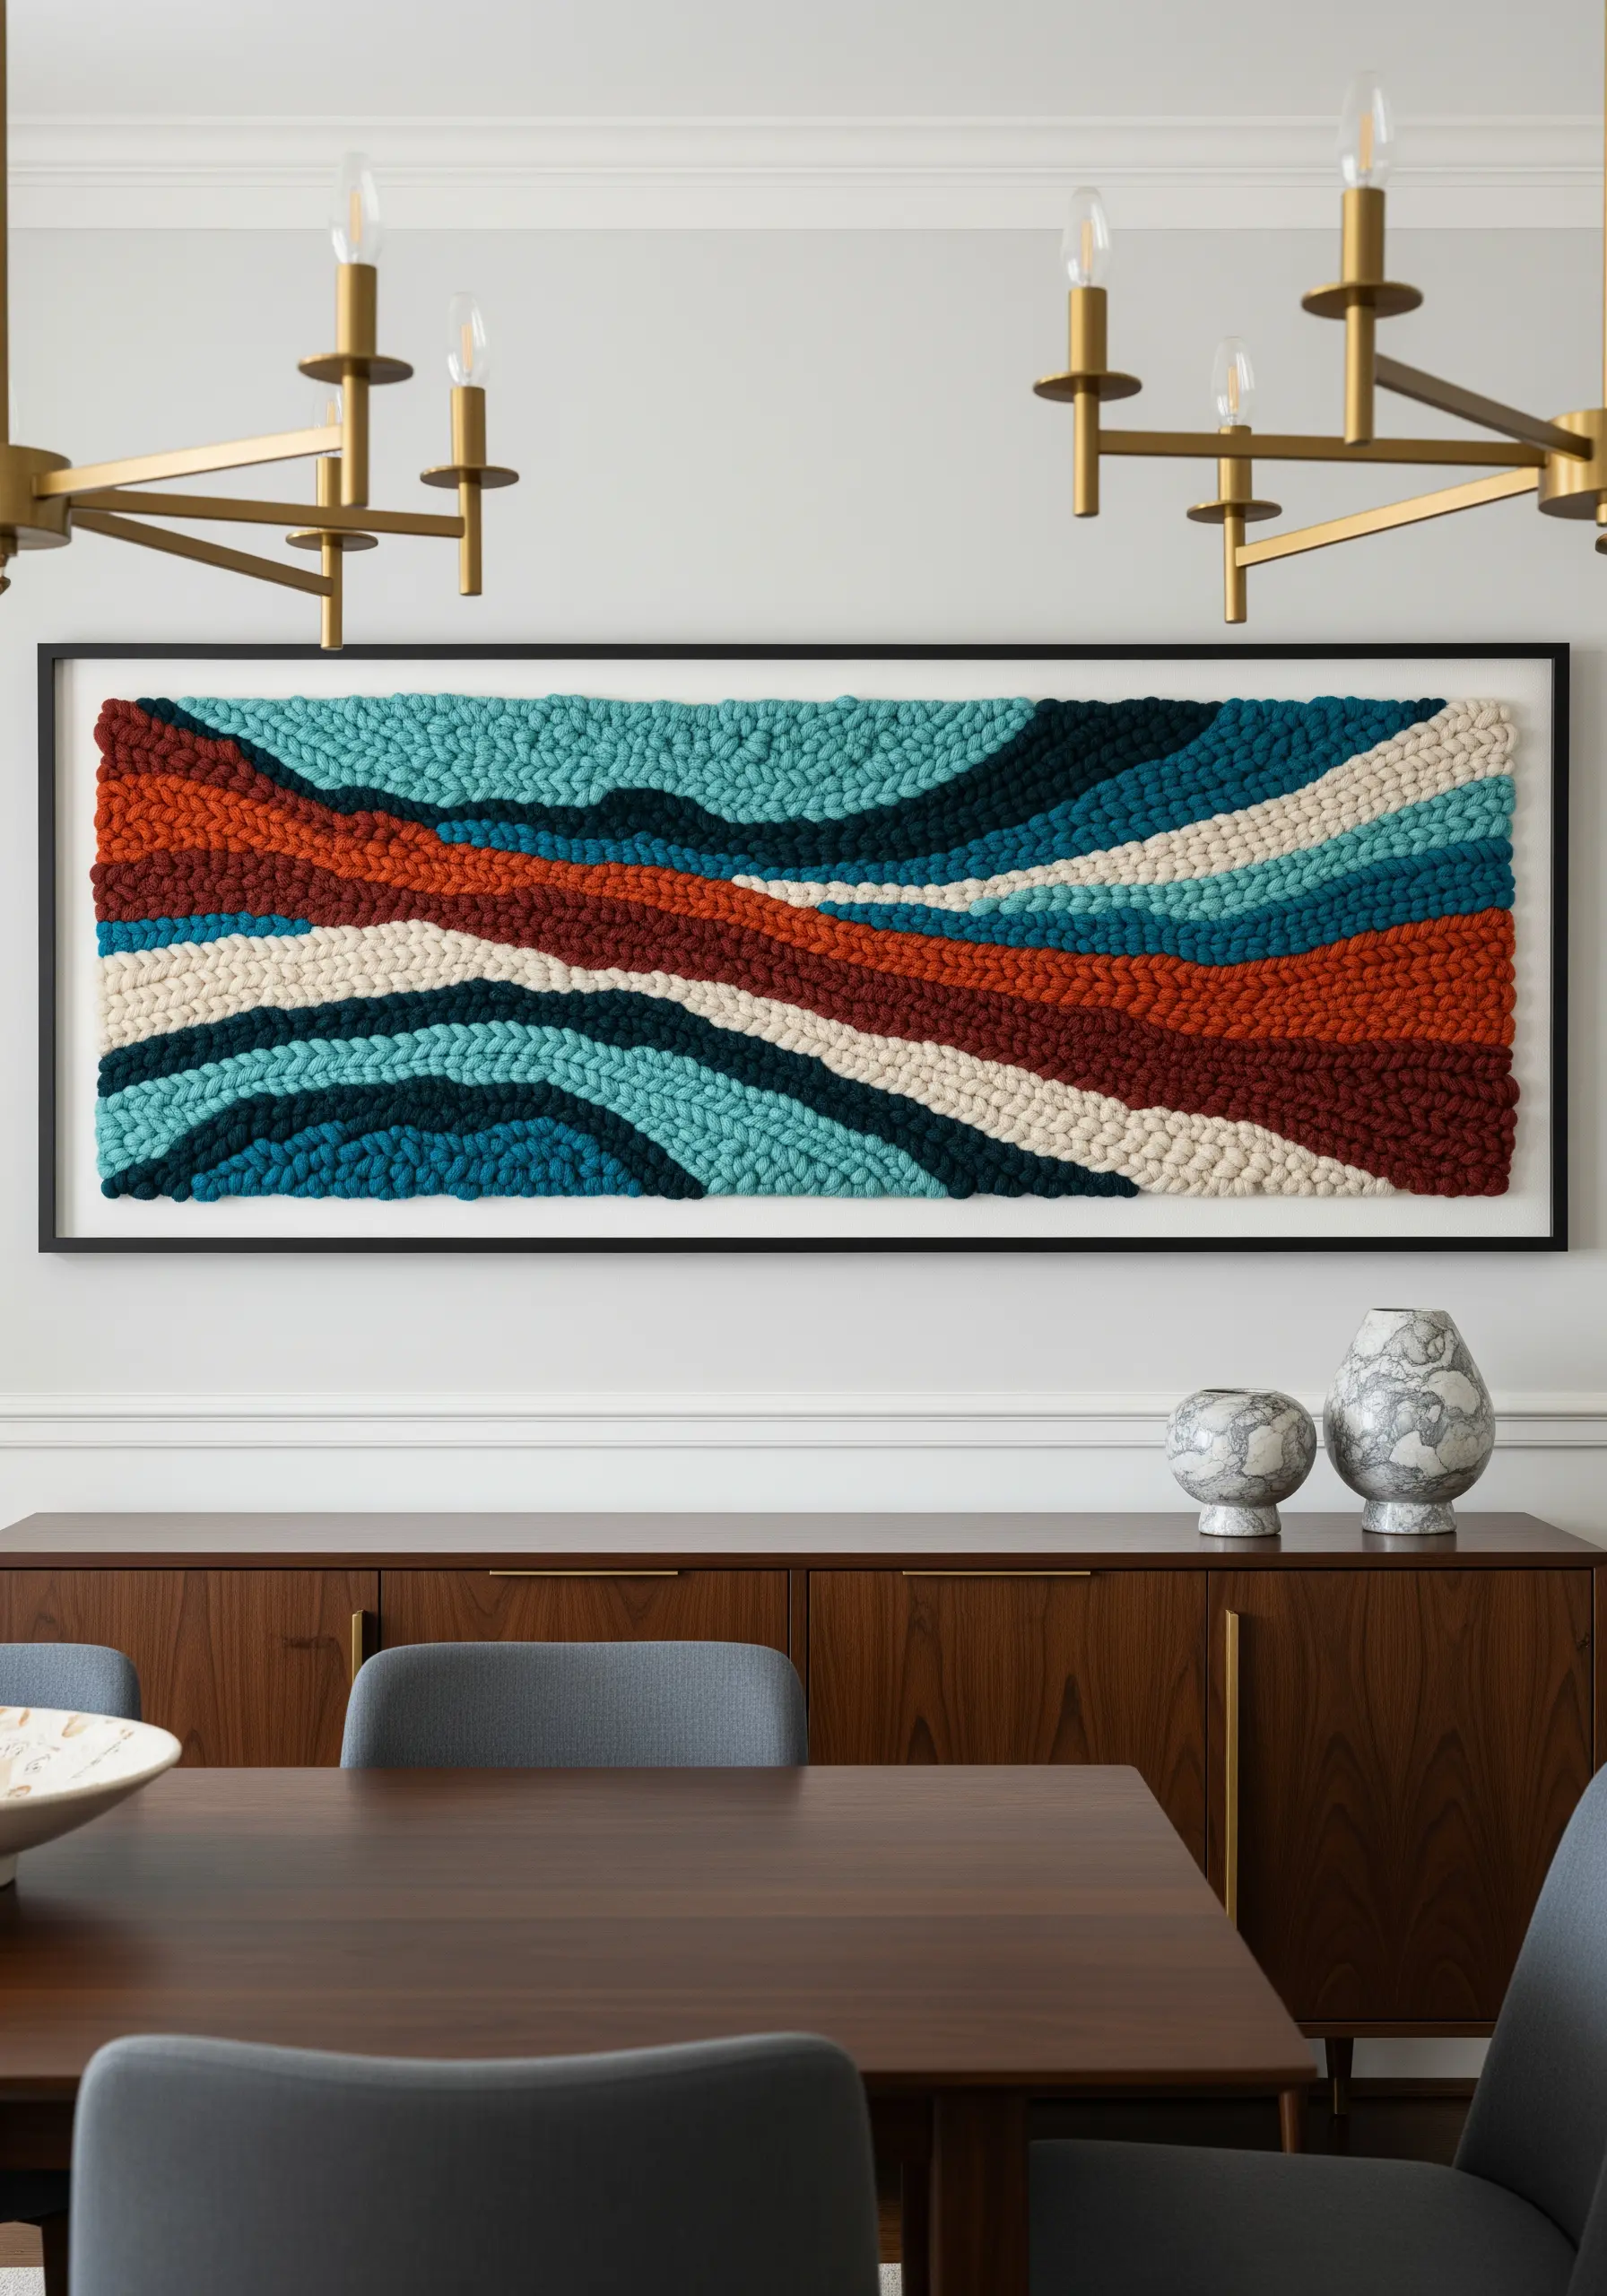
To create a large-scale, sculptural piece with significant texture, traditional embroidery floss won’t suffice.
Instead, use a punch needle with chunky yarn to create dense, looped textures that build up quickly and create a plush surface.
Alternatively, you can couch down thick braids of yarn onto the fabric using a thinner, matching thread, allowing you to create bold, flowing lines for abstract nature-inspired motifs.
8. Design a Gentle Nursery Gallery with Soft Textures
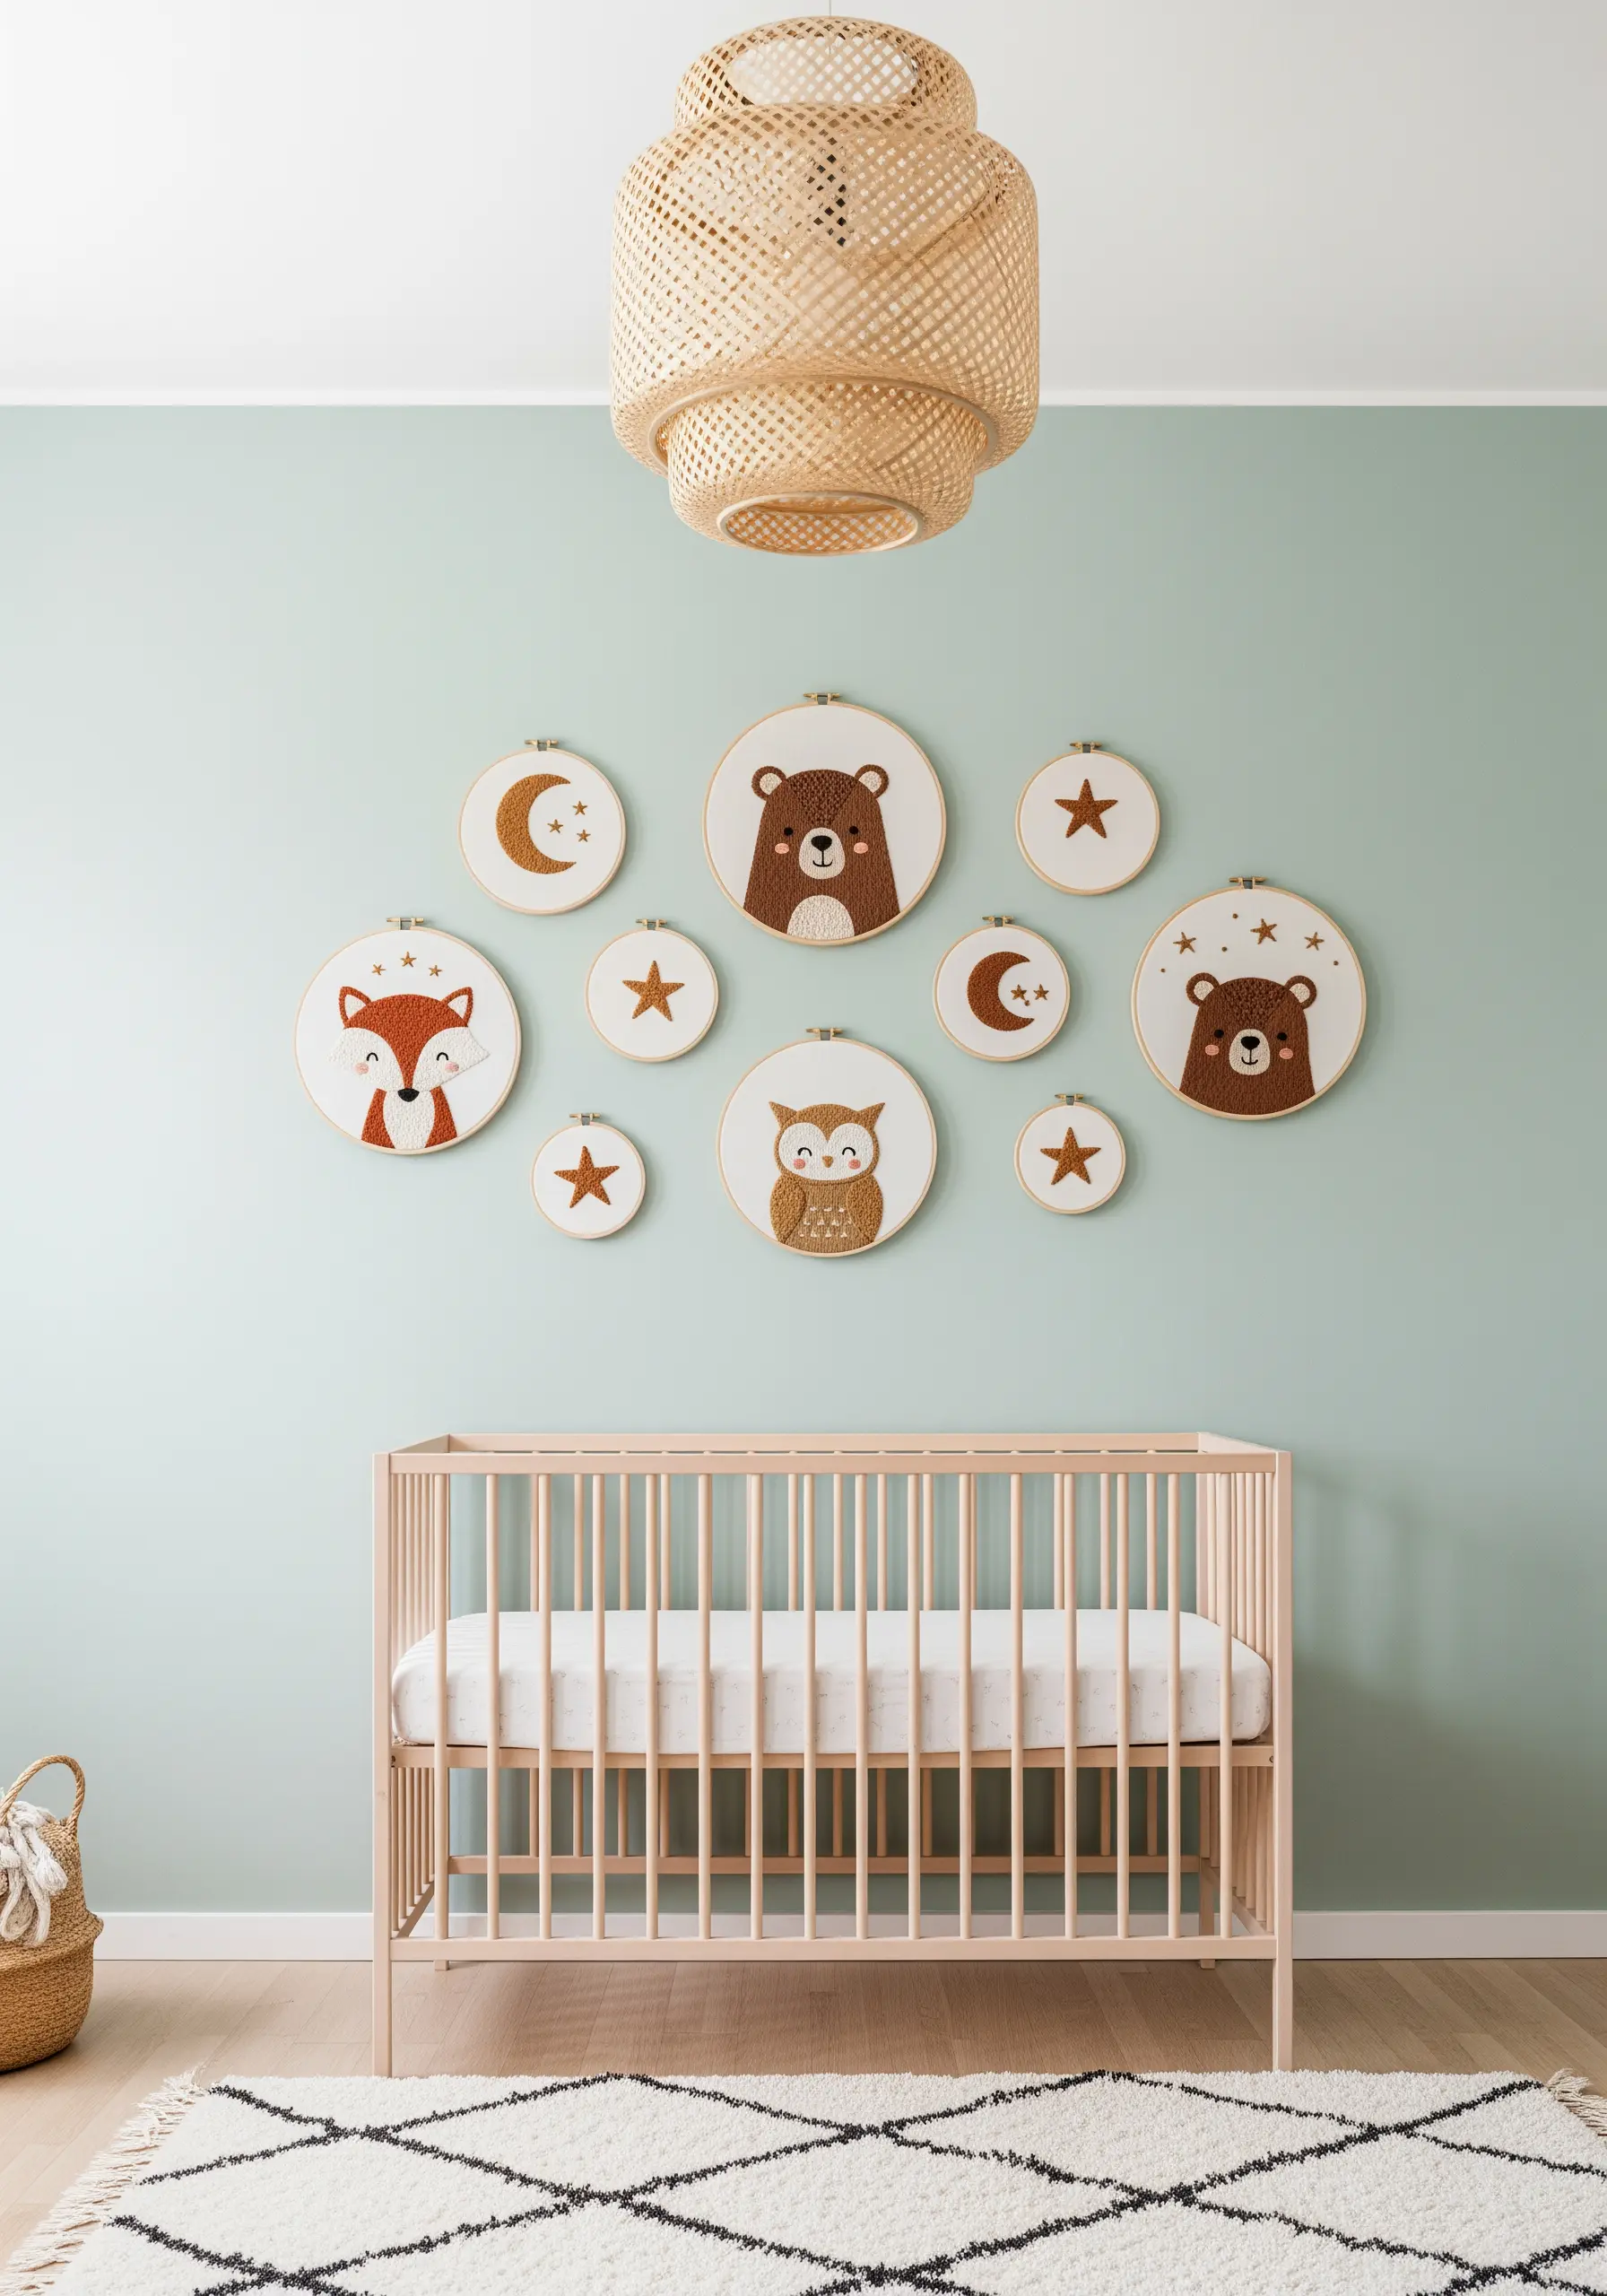
For a child’s room, combine felt appliqué with simple embroidery for a soft and charming effect.
Cut the main animal shapes from felt and secure them to the fabric with a neat running stitch around the edge.
This gives you clean, plush shapes instantly.
Then, add sweet details like eyes, noses, and whiskers using a simple backstitch and a few satin stitches, perfect for creating gentle fox and deer embroidery patterns.
9. Embrace Maximalism with Ornate Vintage-Style Frames
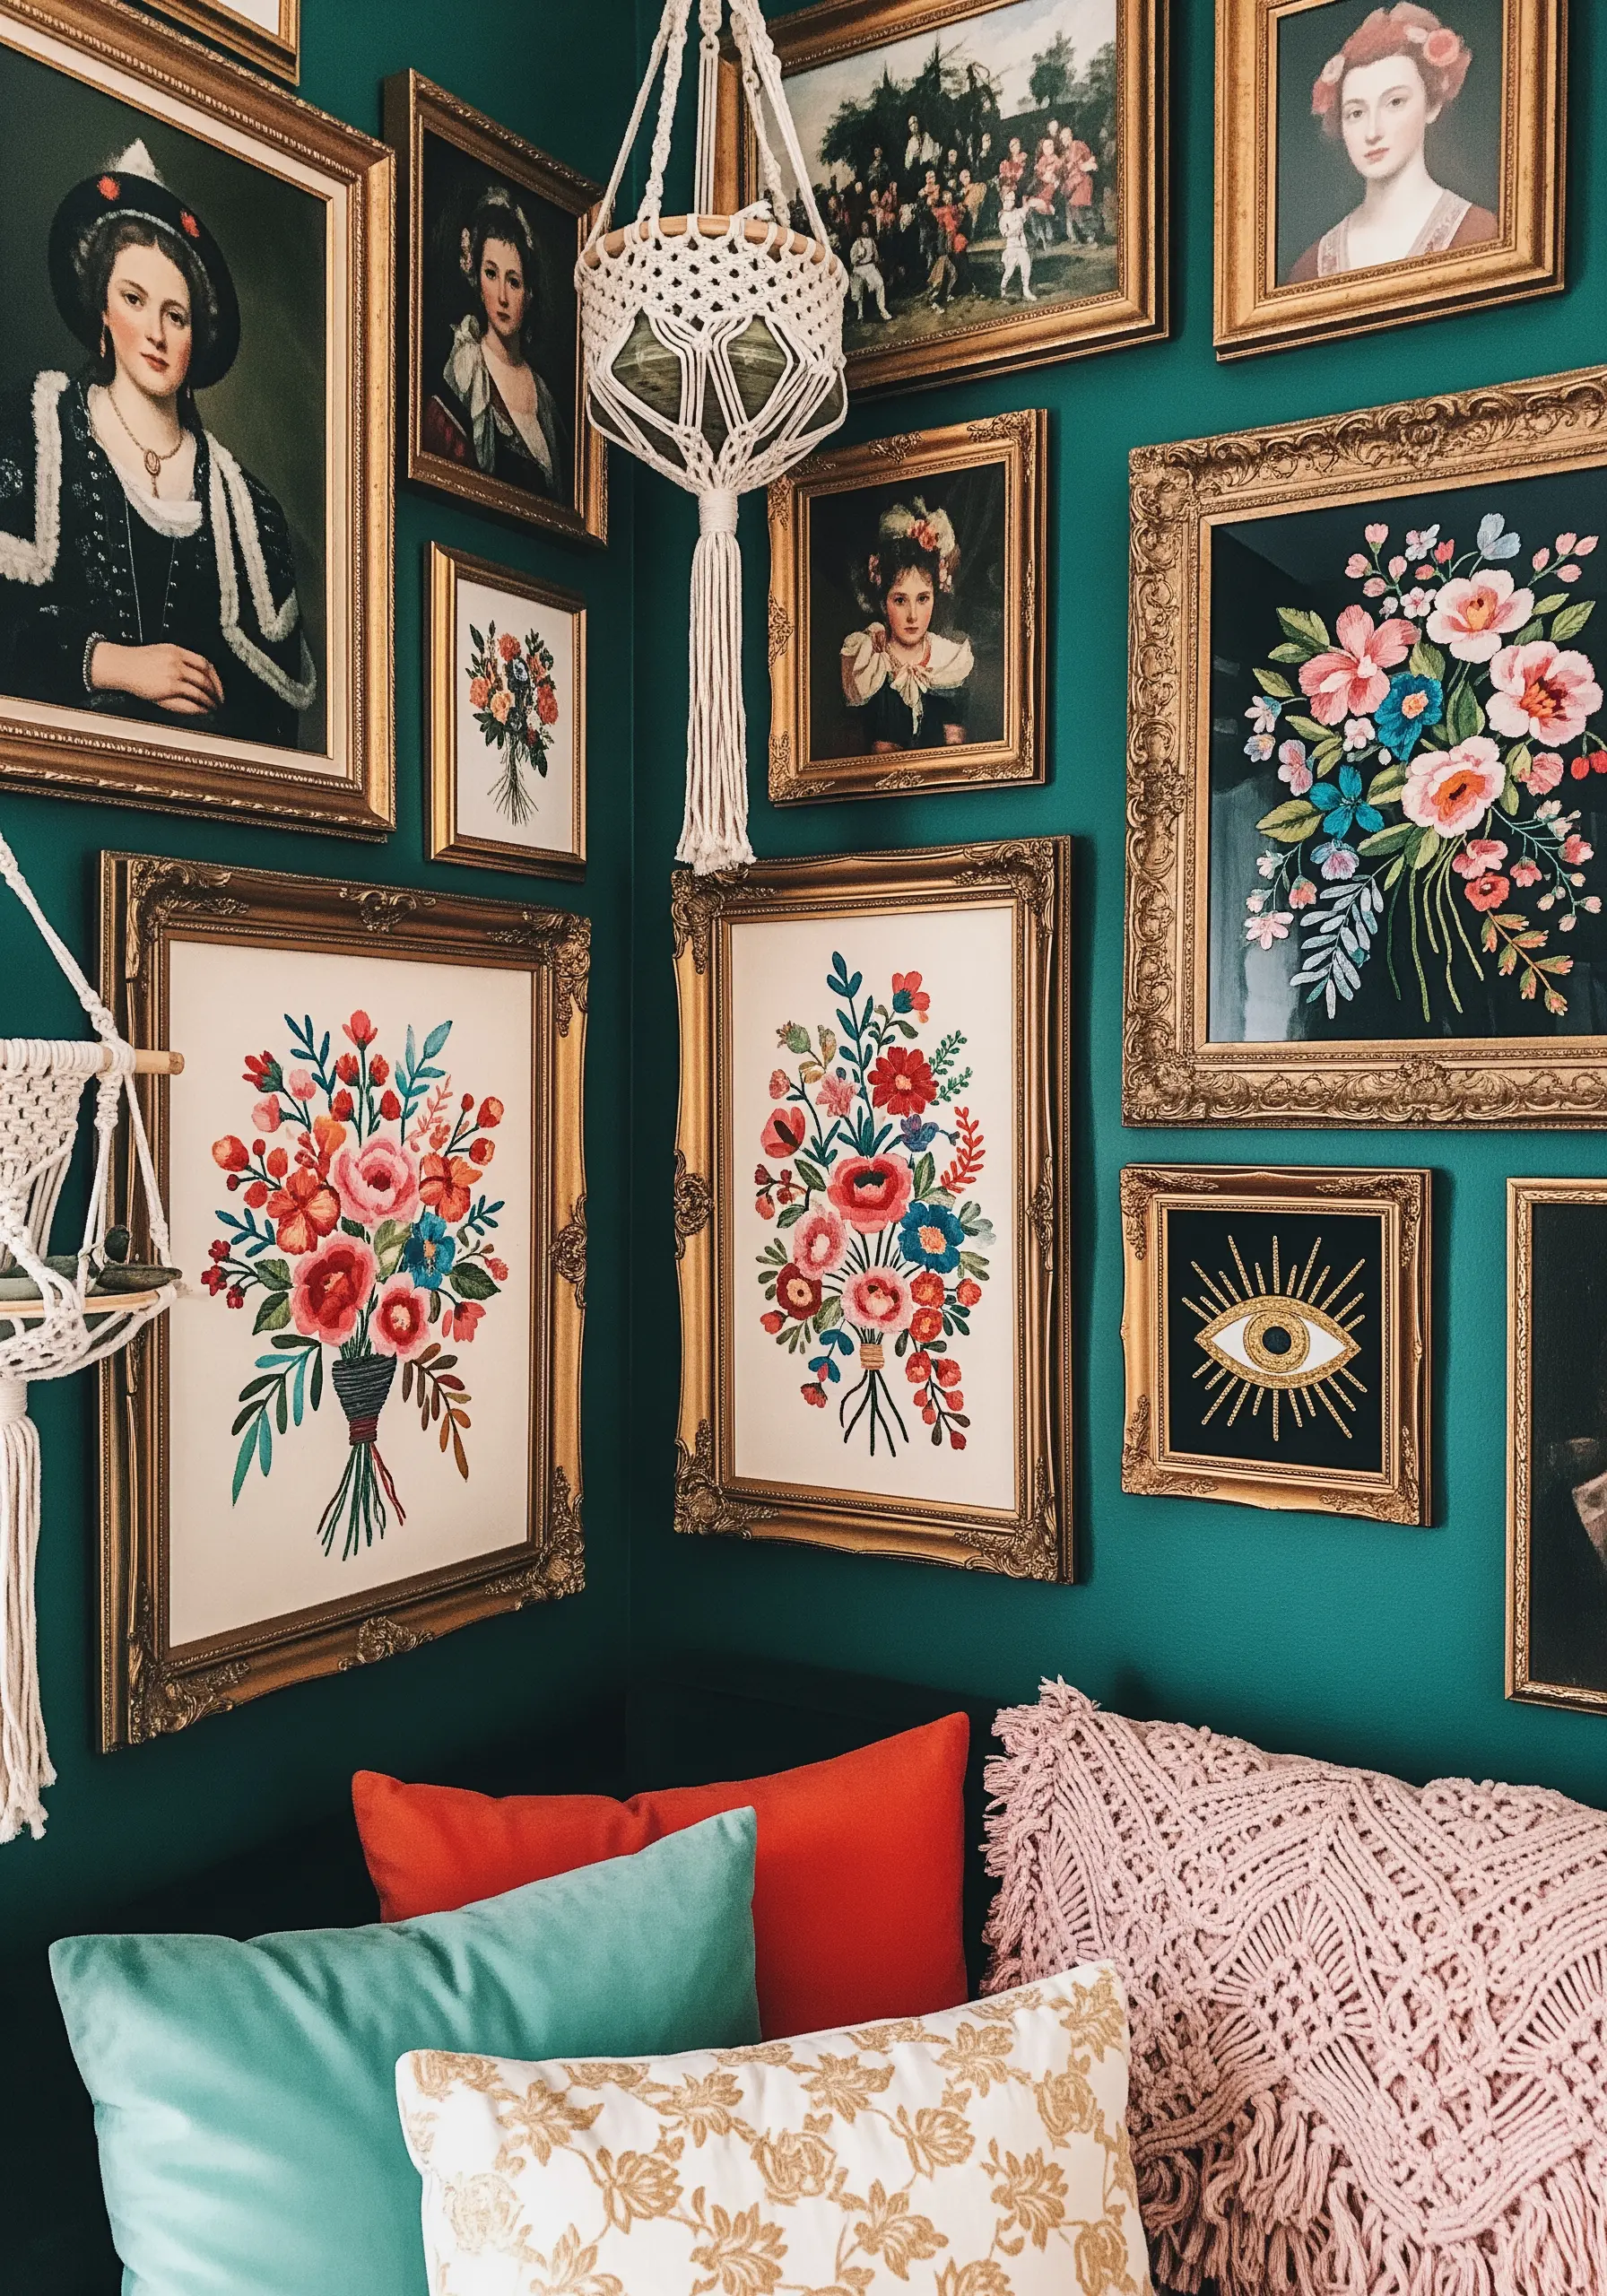
Elevate your embroidery by treating it like fine art.
Pair bold, vibrant floral pieces with ornate, vintage-inspired gold frames to create a stunning contrast between soft textile and hard, decorative lines.
Integrate your stitched work into a dense gallery wall with paintings and prints, allowing the unique texture of your embroidery to become a standout element in a rich, eclectic collection.
This approach transforms simple floral embroidery ideas into opulent decor.
10. Master the Elegance of Single-Line Contour Stitching
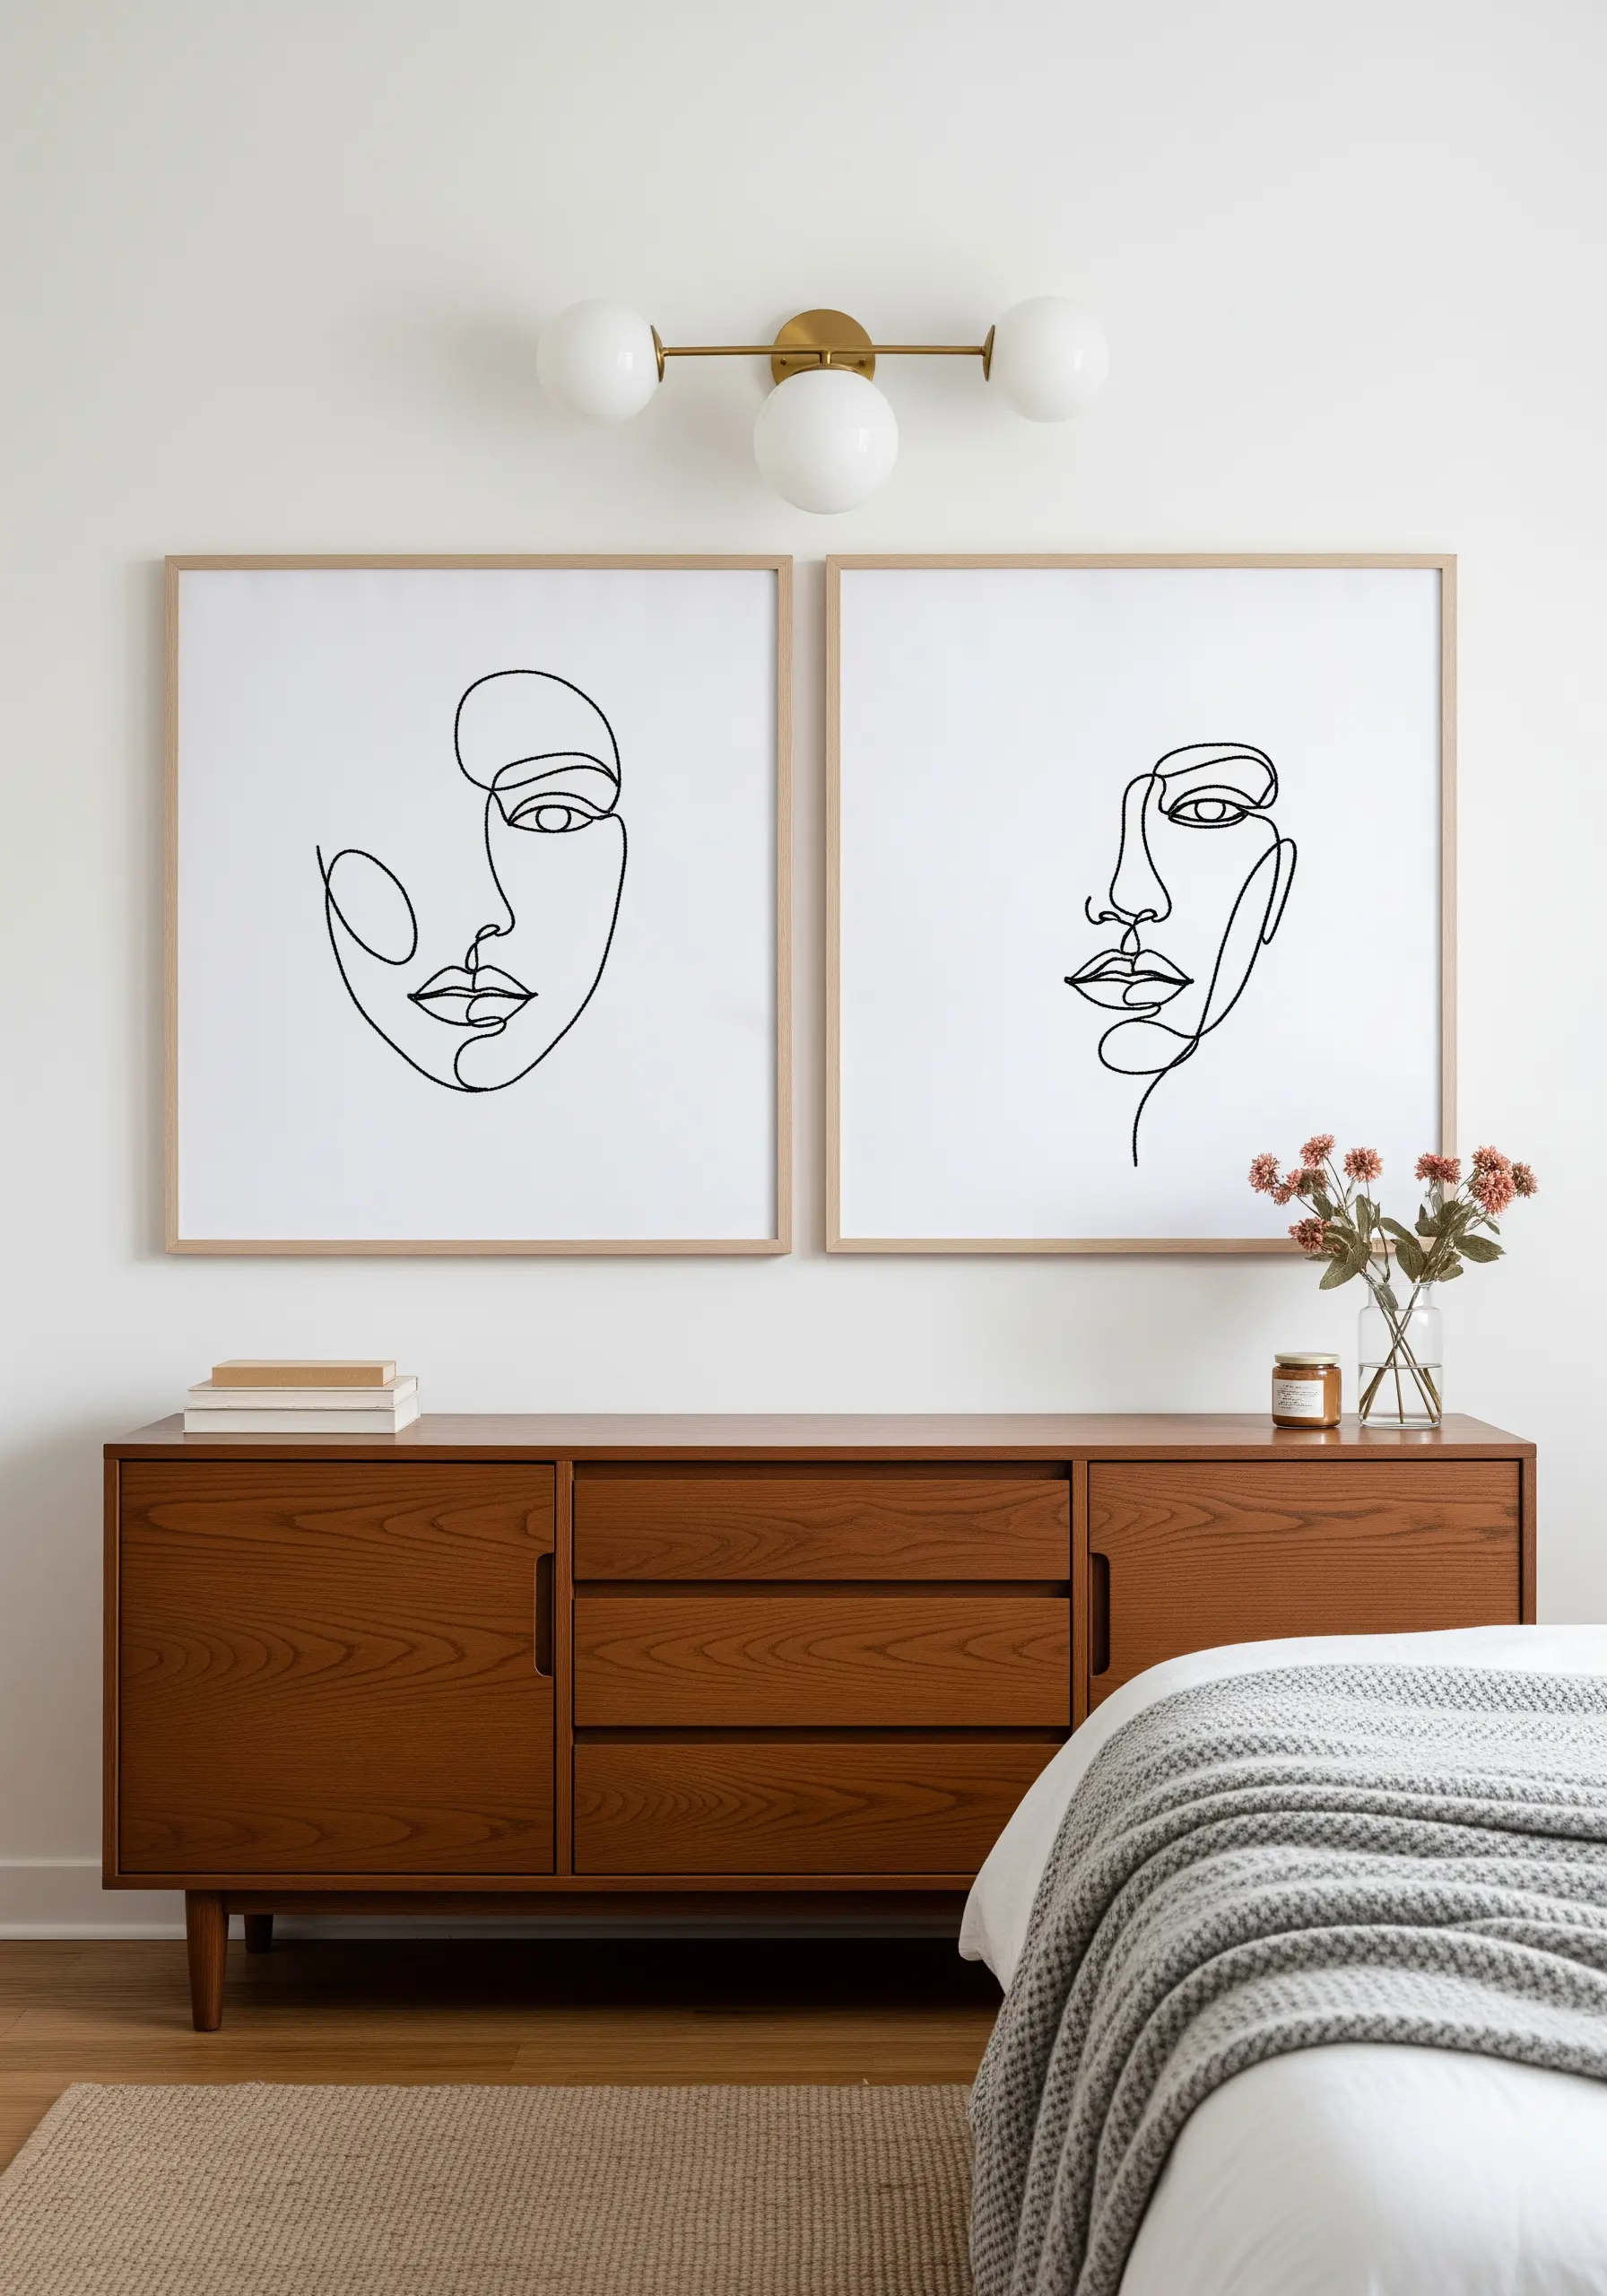
The key to successful line art is a smooth, uninterrupted line.
Use a whipped backstitch or a stem stitch with three to four strands of floss to create a raised, consistent line that flows without snagging.
Before you begin stitching, trace the entire design onto your fabric to use as a precise guide.
Maintain even tension throughout to prevent any puckering, ensuring your final piece has the fluid grace of a pen-and-ink drawing, ideal for minimal portrait line embroidery projects.
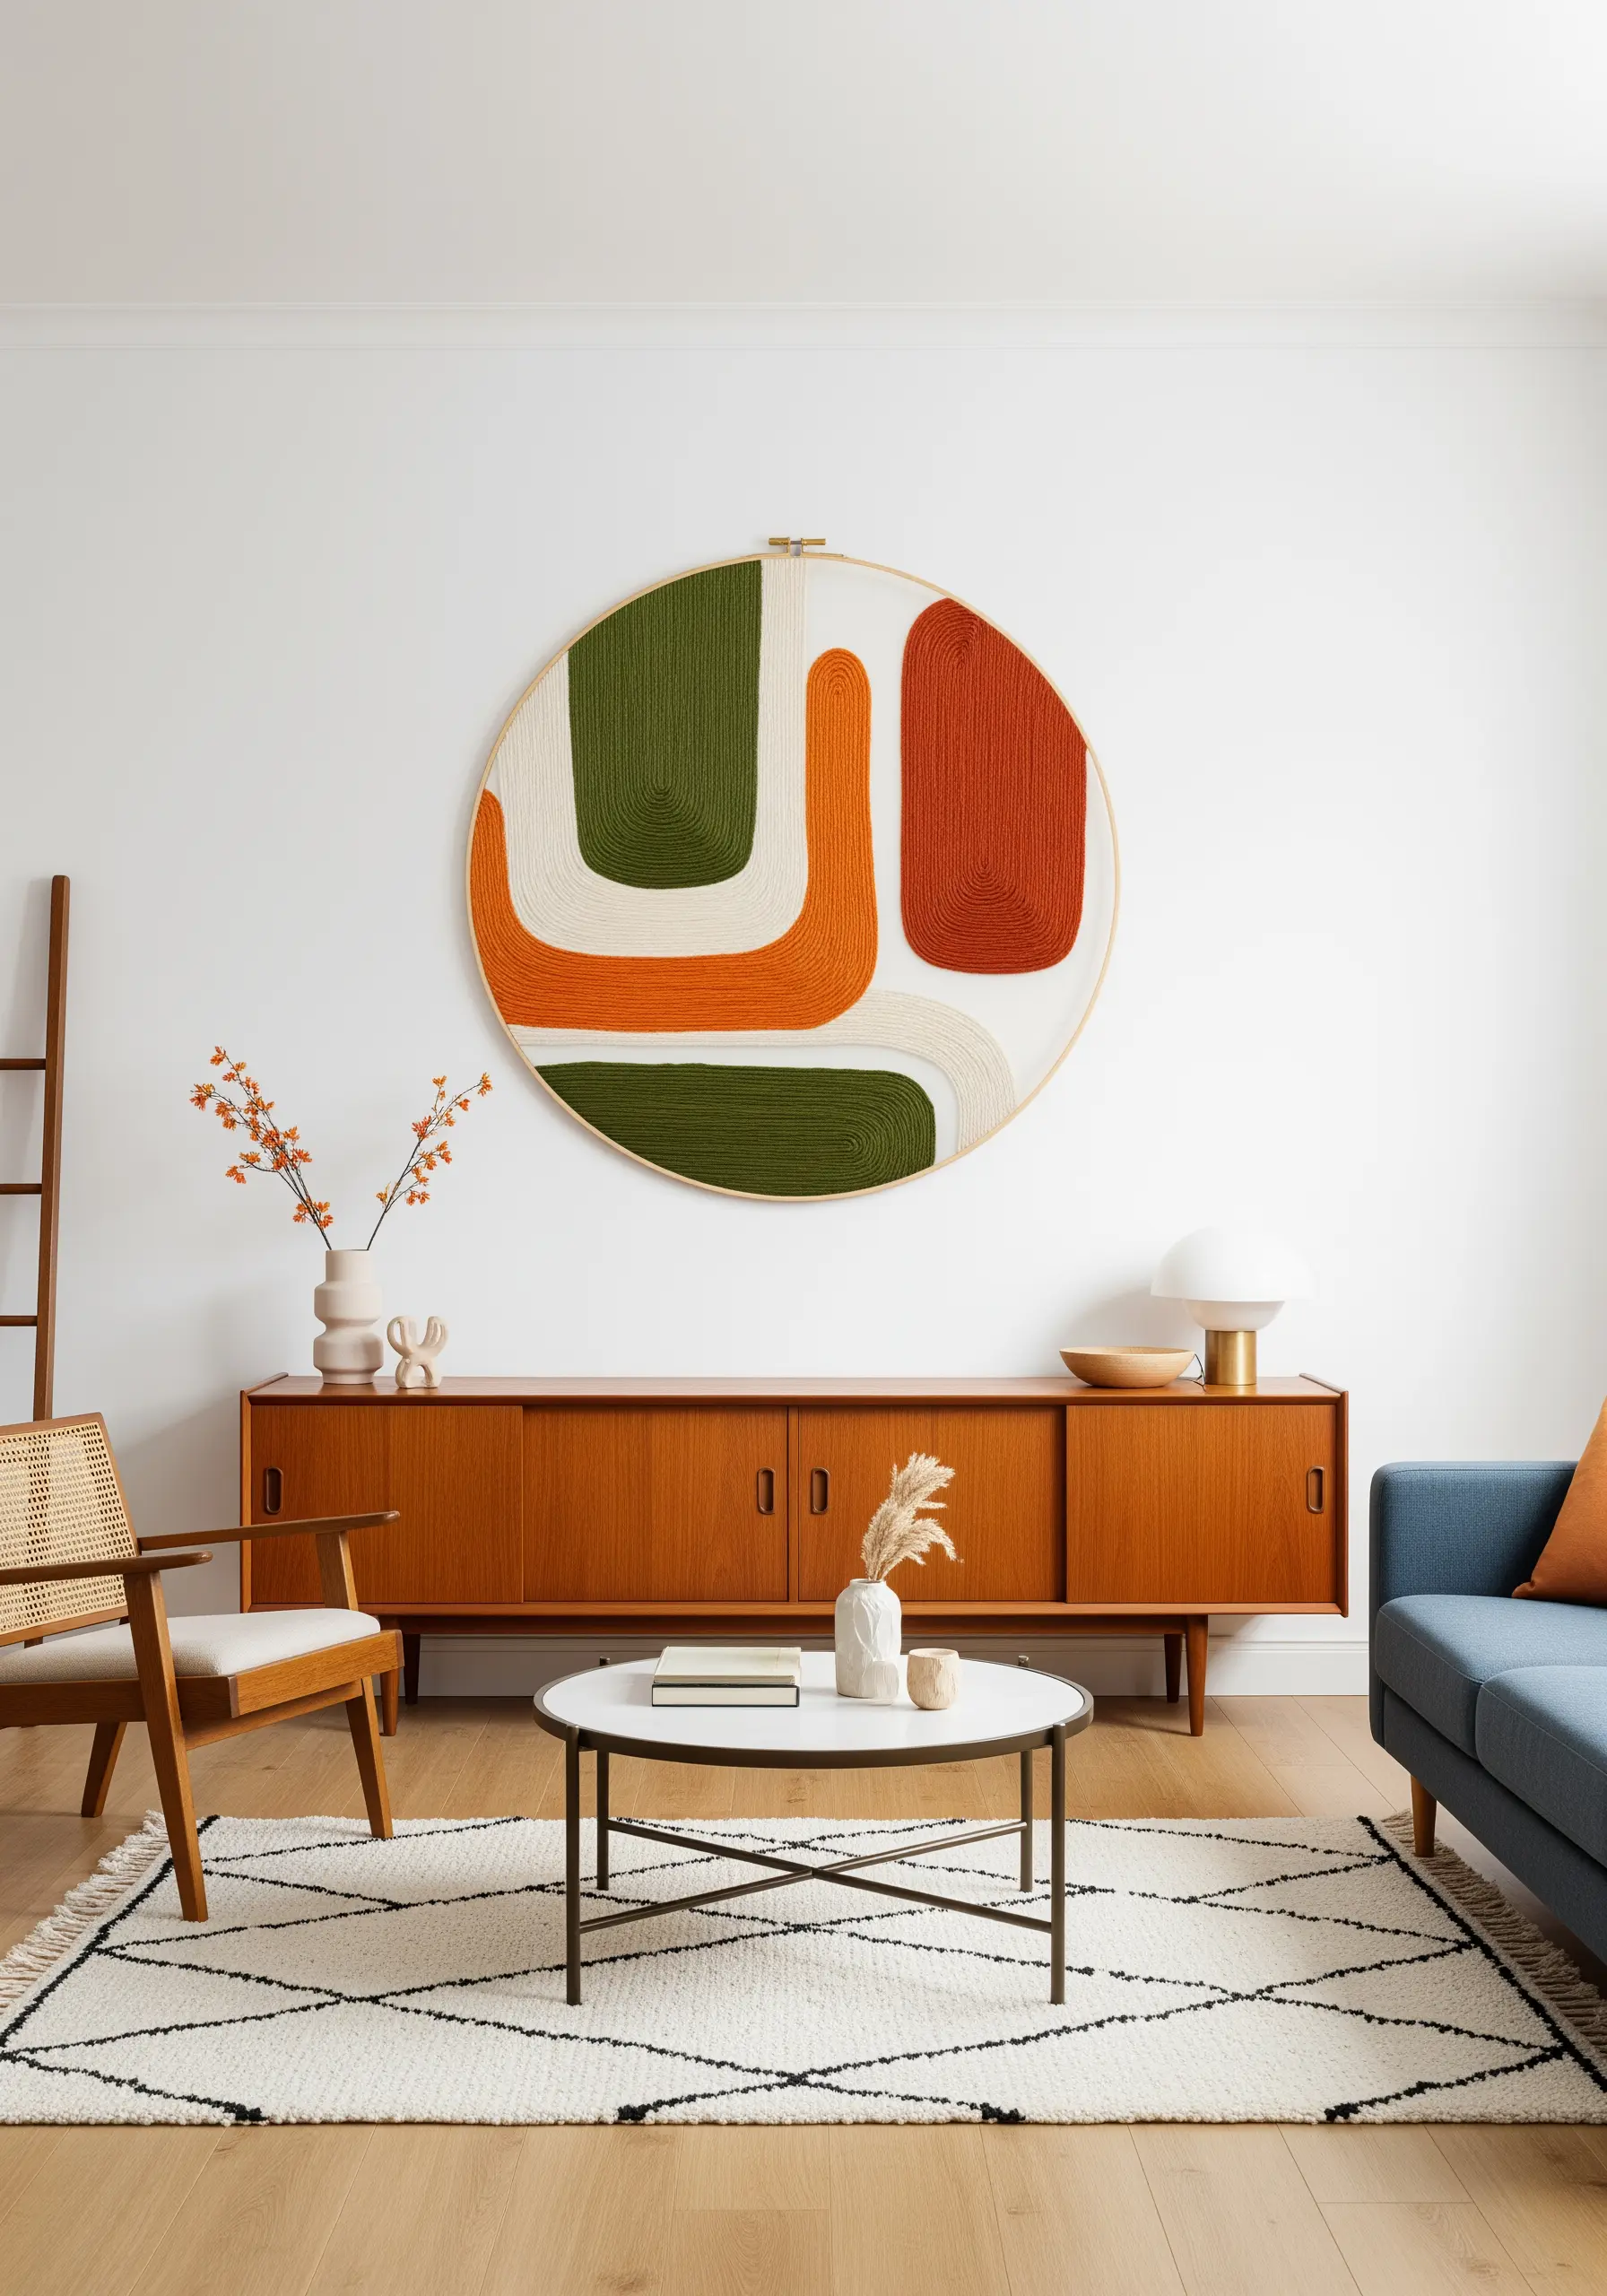
11. Go Big with Large-Scale Yarn-Wrapped Hoop Art
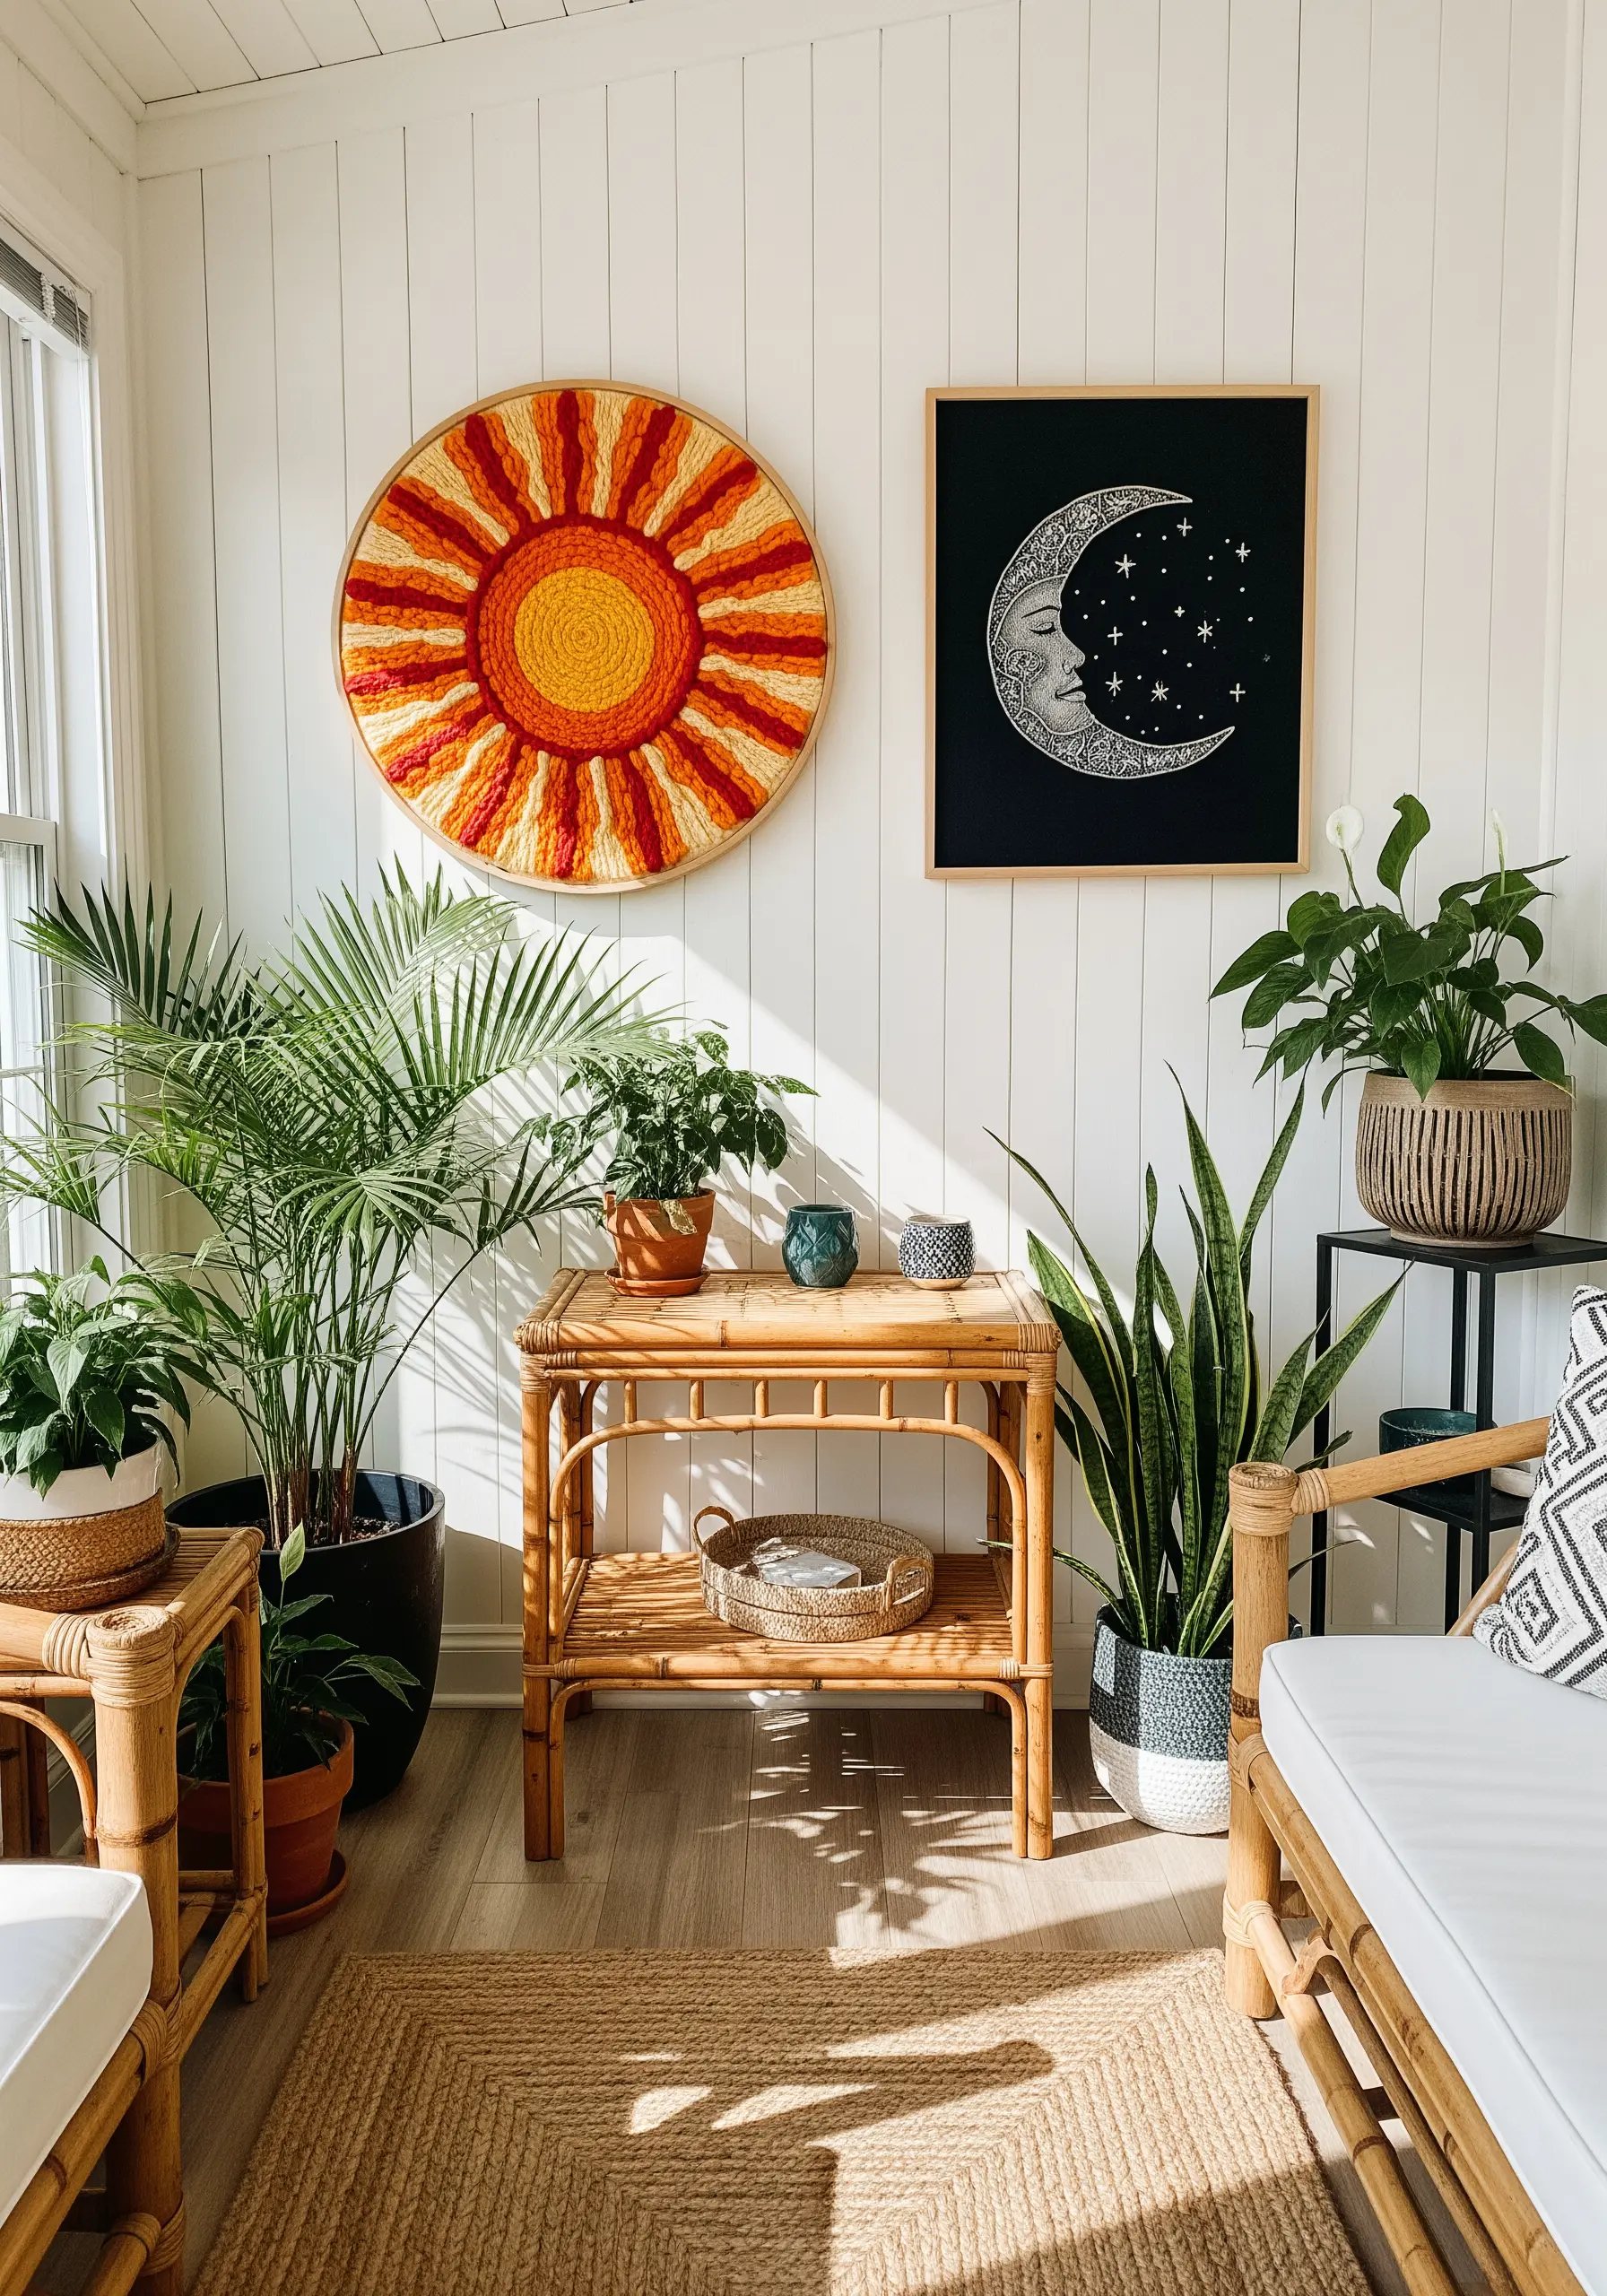
For a piece that makes an immediate impact, scale up your materials.
Instead of floss, use chunky yarn wrapped around a large embroidery hoop or a custom frame to create bold, graphic designs.
This method covers large surface areas quickly and offers incredible texture and color-blocking potential.
It’s a perfect way to translate a simple sun or moon motif into a commanding focal point, creating yarn wall art pieces that feel both handmade and high-design.
12. Create a Narrative Flow Along a Staircase Wall
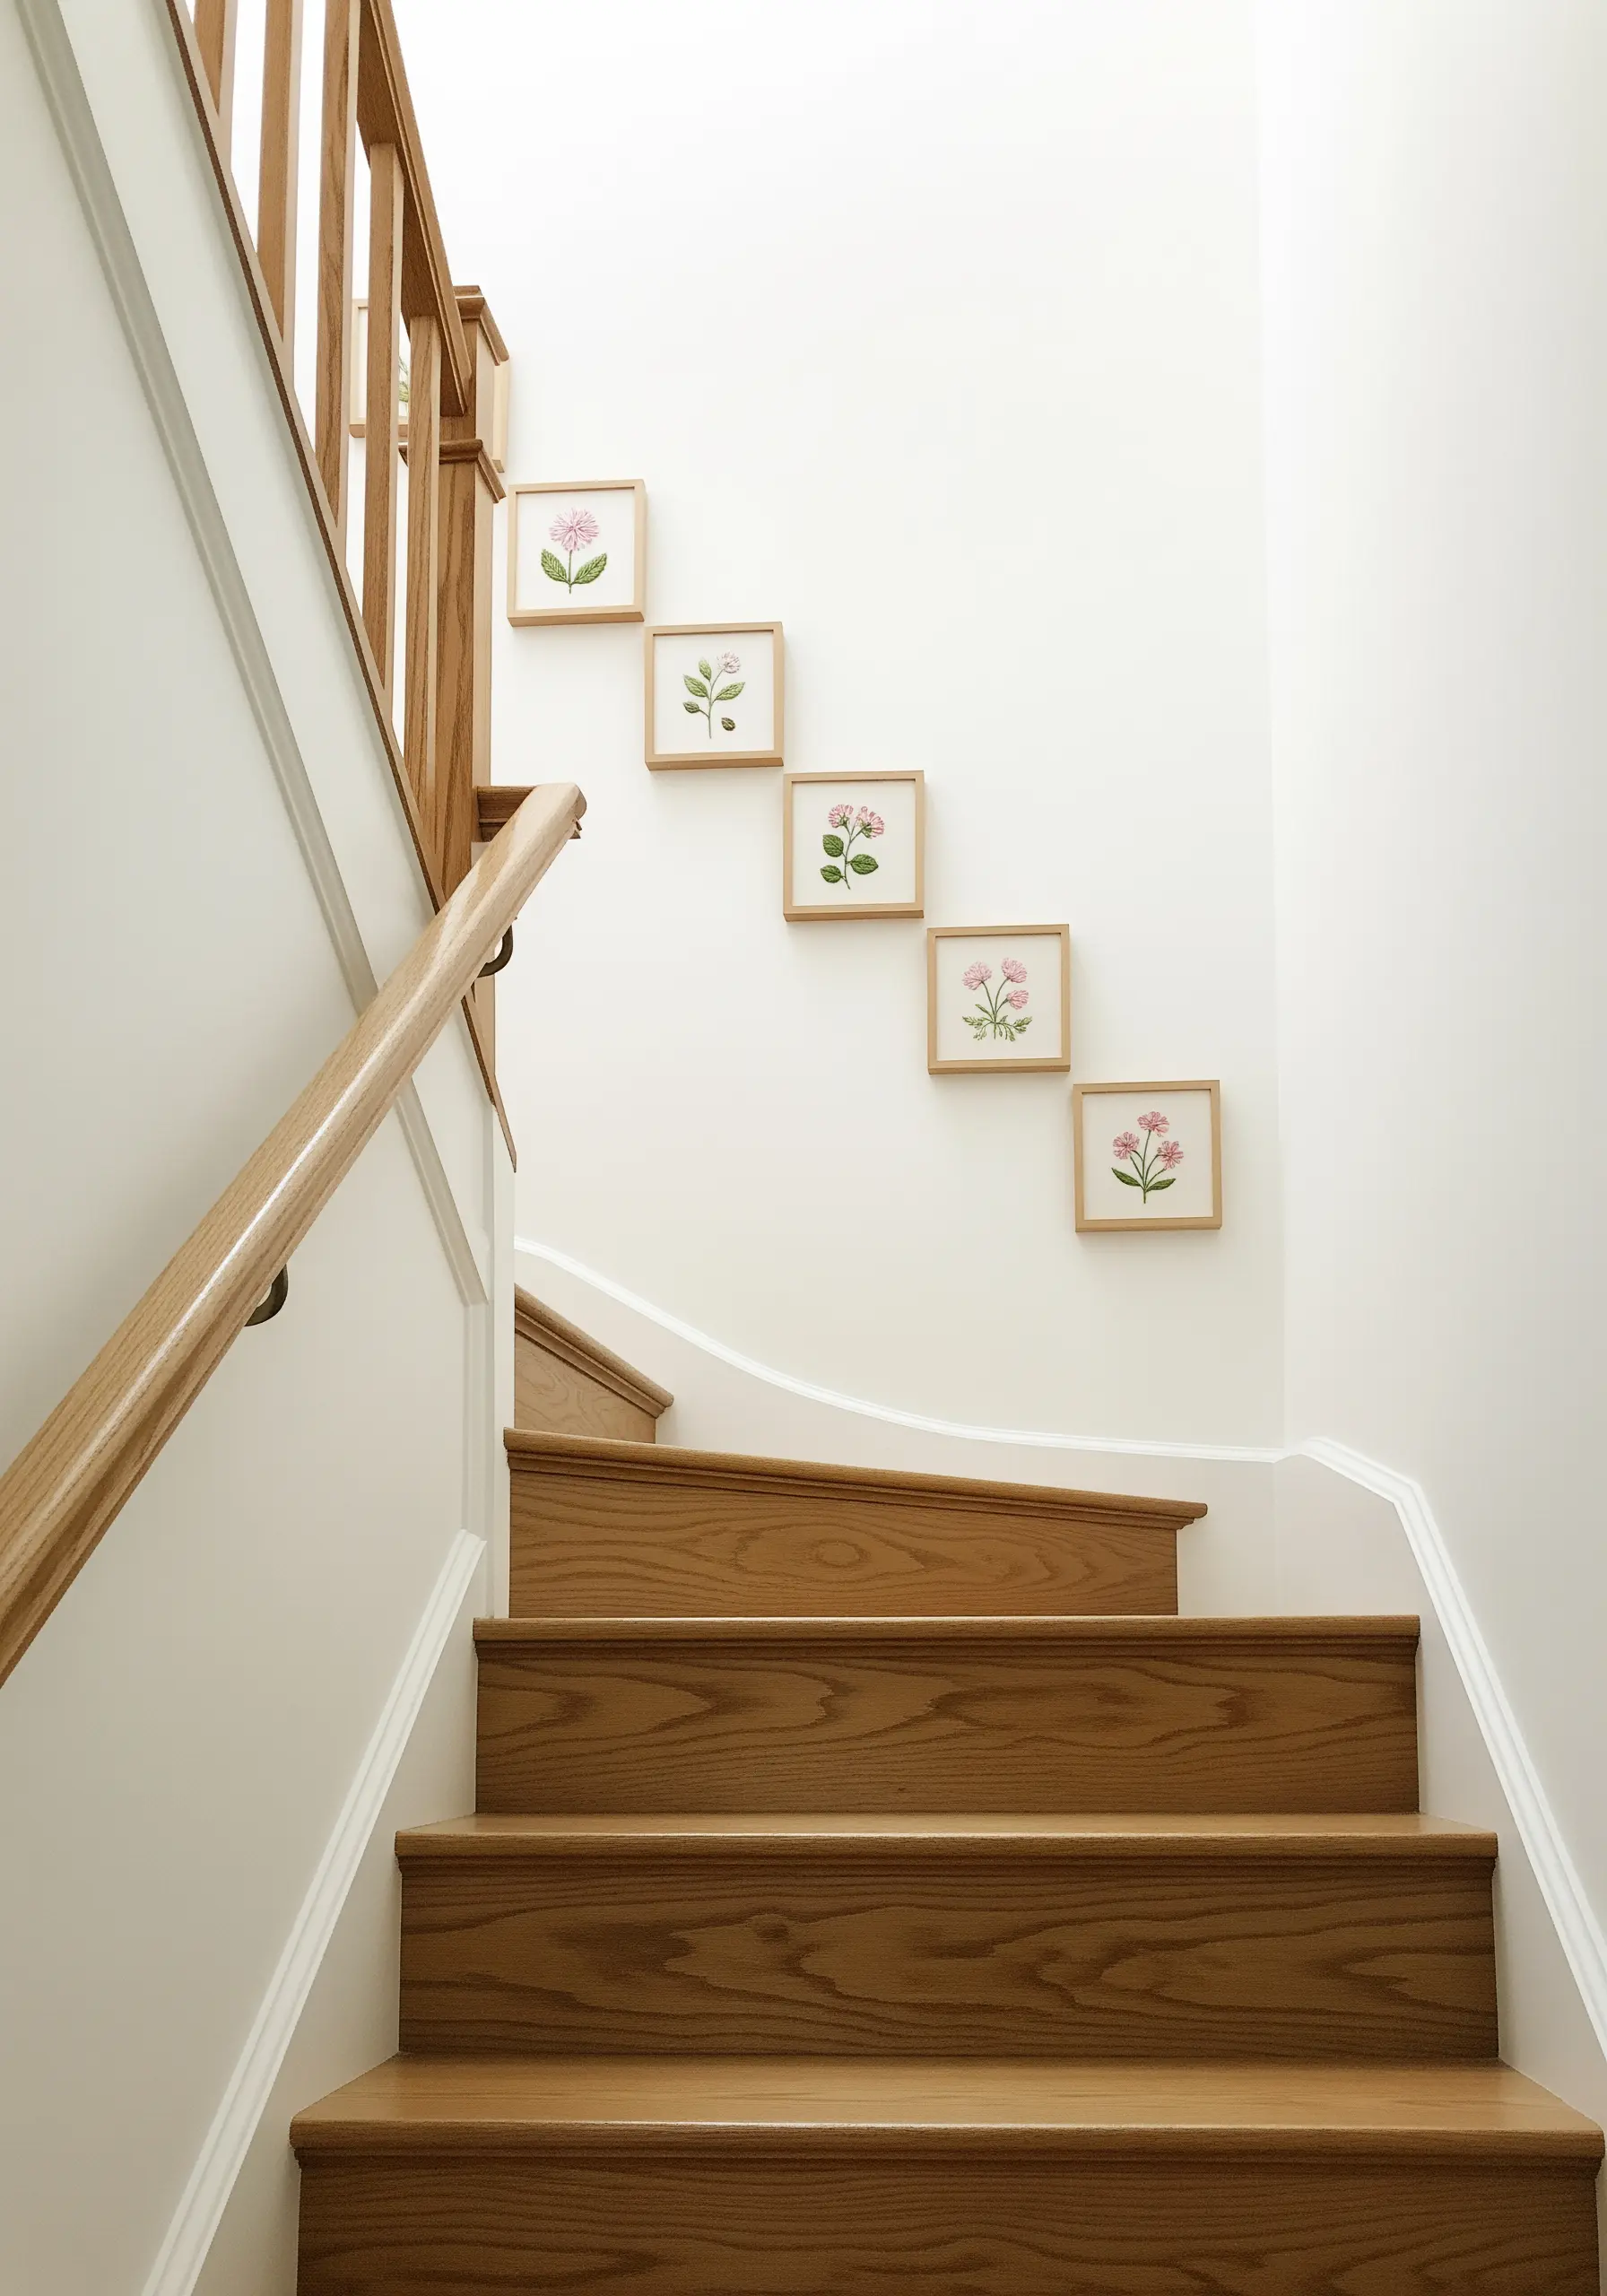
Use the natural angle of a staircase to guide the eye and tell a visual story.
Stitch a series of small, related motifs—like different floral specimens or flowers in progressive stages of bloom—and arrange them in a diagonal line that follows the ascent of the stairs.
Keeping each piece small and the frames identical prevents the display from overwhelming the narrow space, turning a transitional area into a thoughtful gallery of small hoop floral motifs.
13. Use Negative Space to Define Intricate Silhouettes
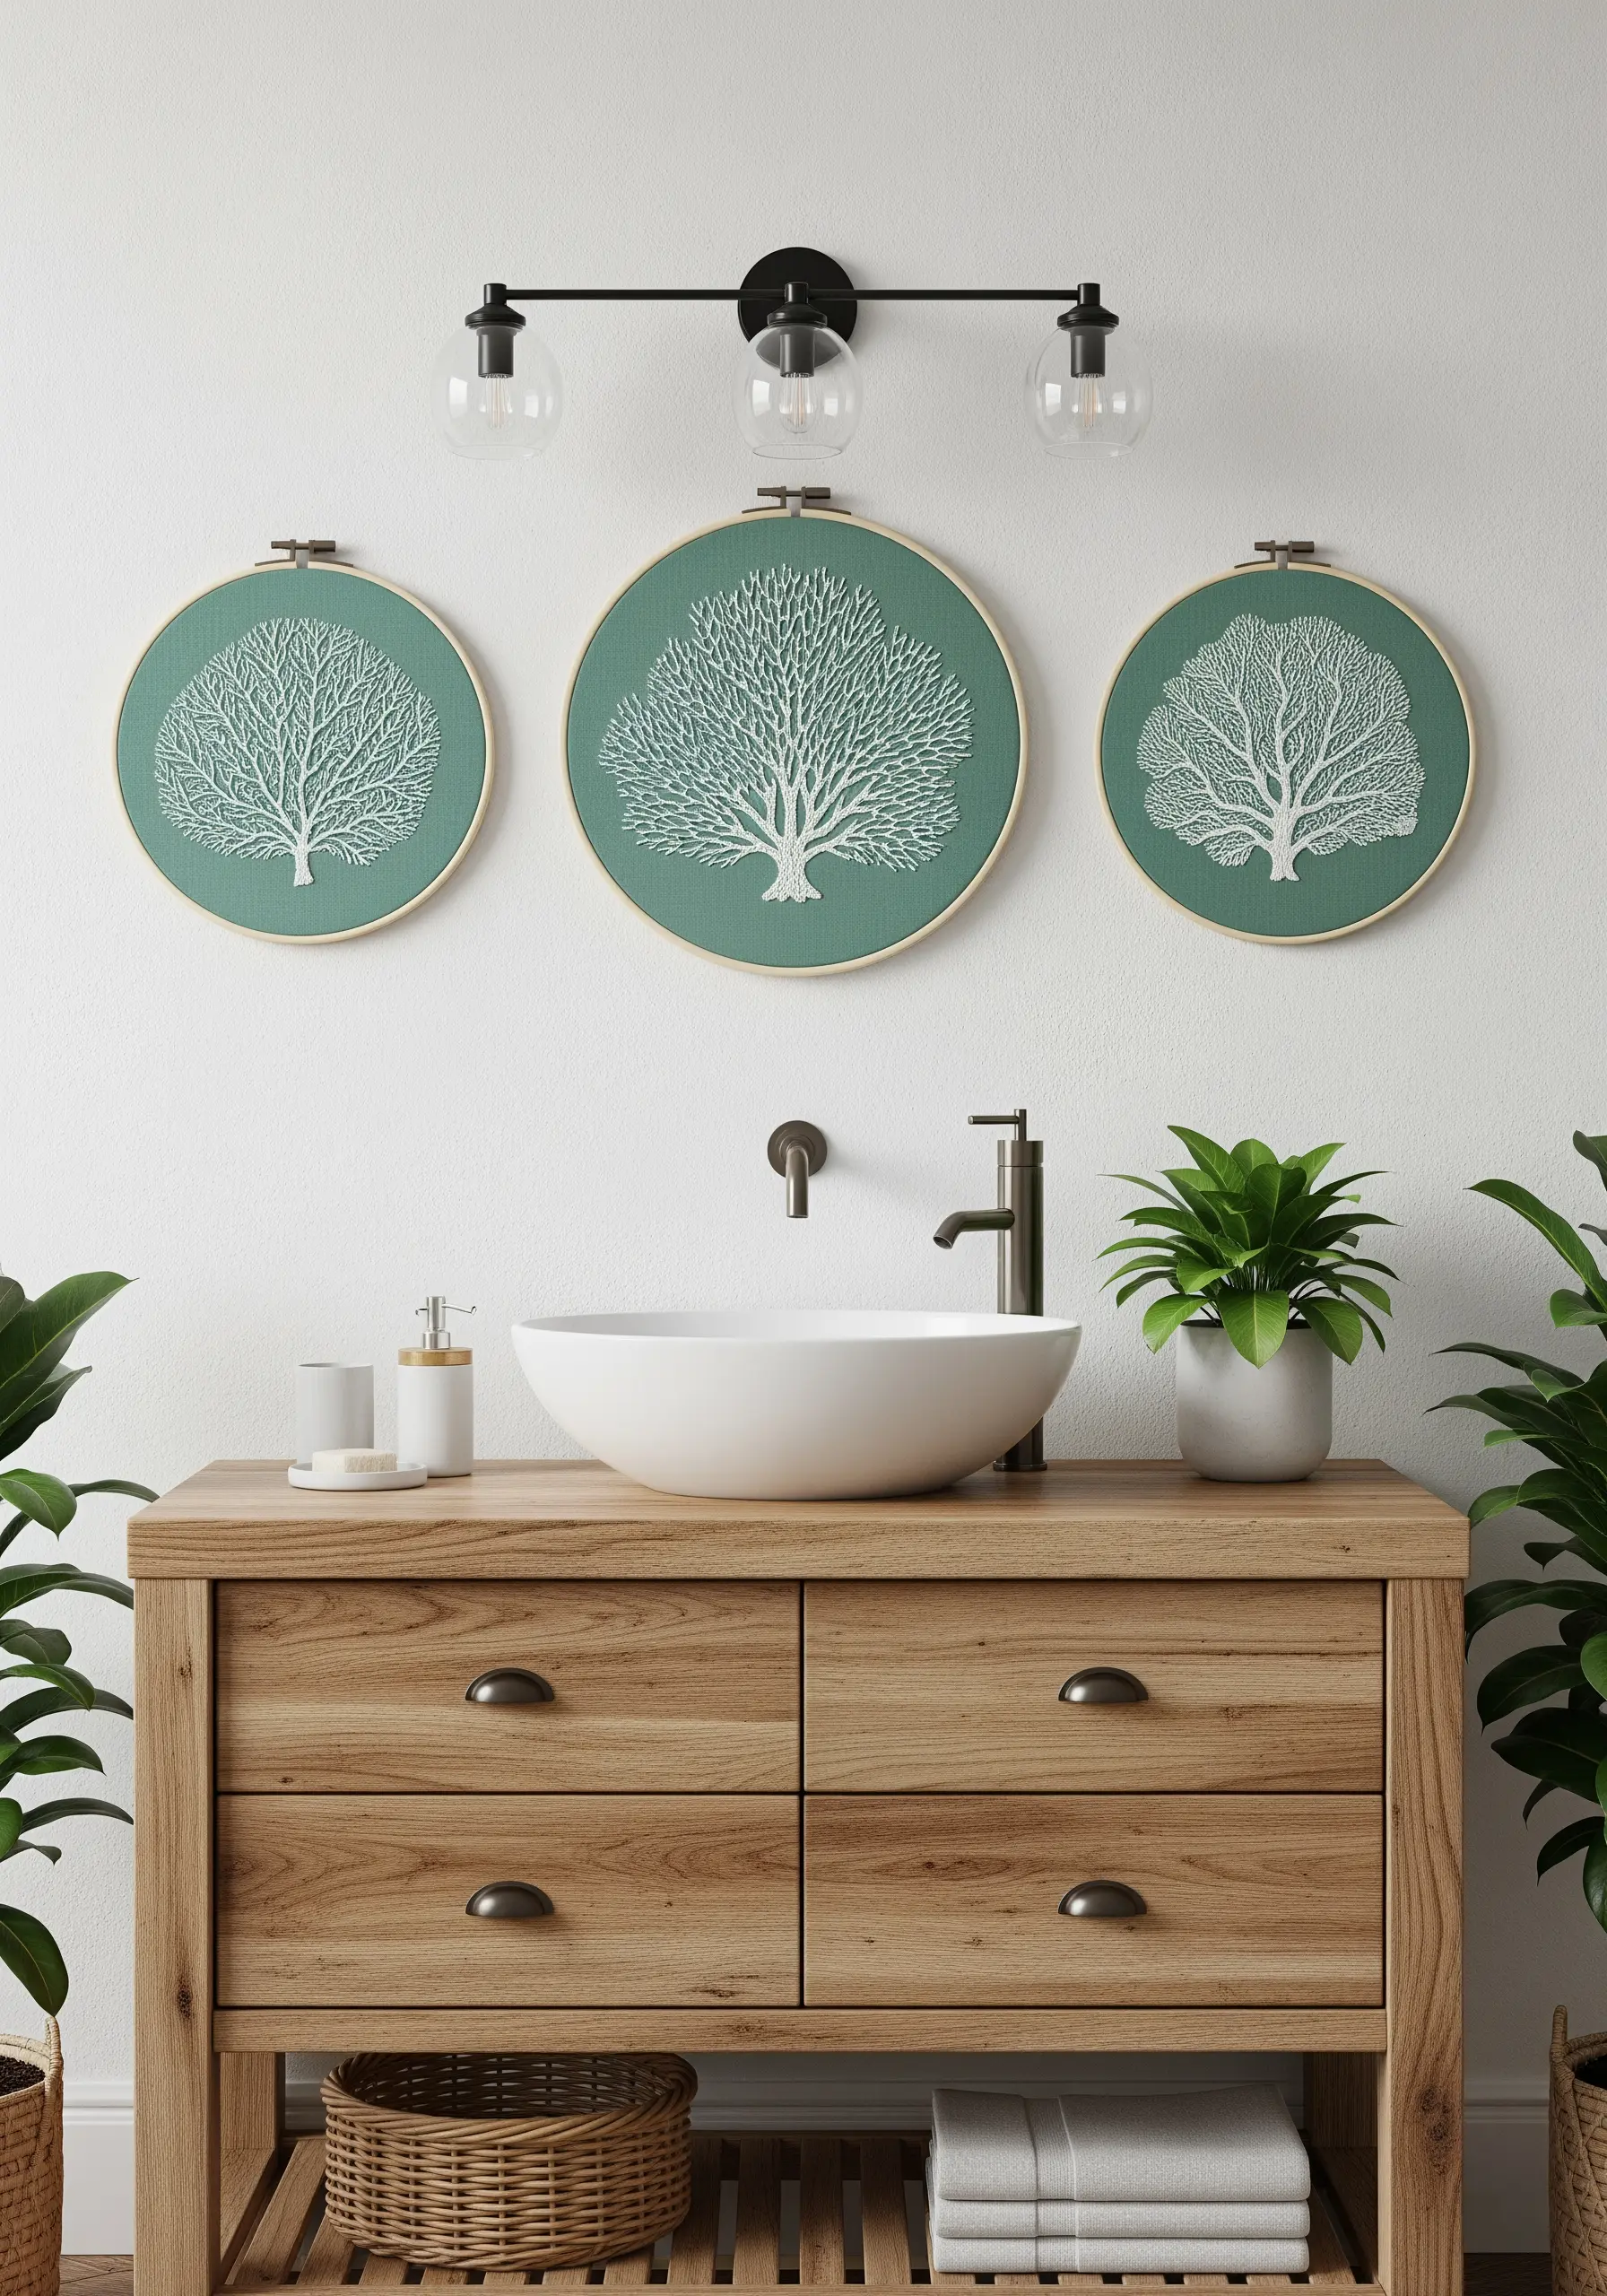
In this technique, the background fabric is as crucial as the thread.
By stitching a complex silhouette, like a tree with fine branches, in a single high-contrast color, you allow the negative space of the fabric to define the form.
Use a fine split stitch or backstitch with a single strand of floss to ensure the most delicate parts of the design remain crisp and clear.
This method is perfect for creative embroidery ideas inspired by tree bark and leaves.
14. Explore Monochrome Texture with Sculptural Stitches
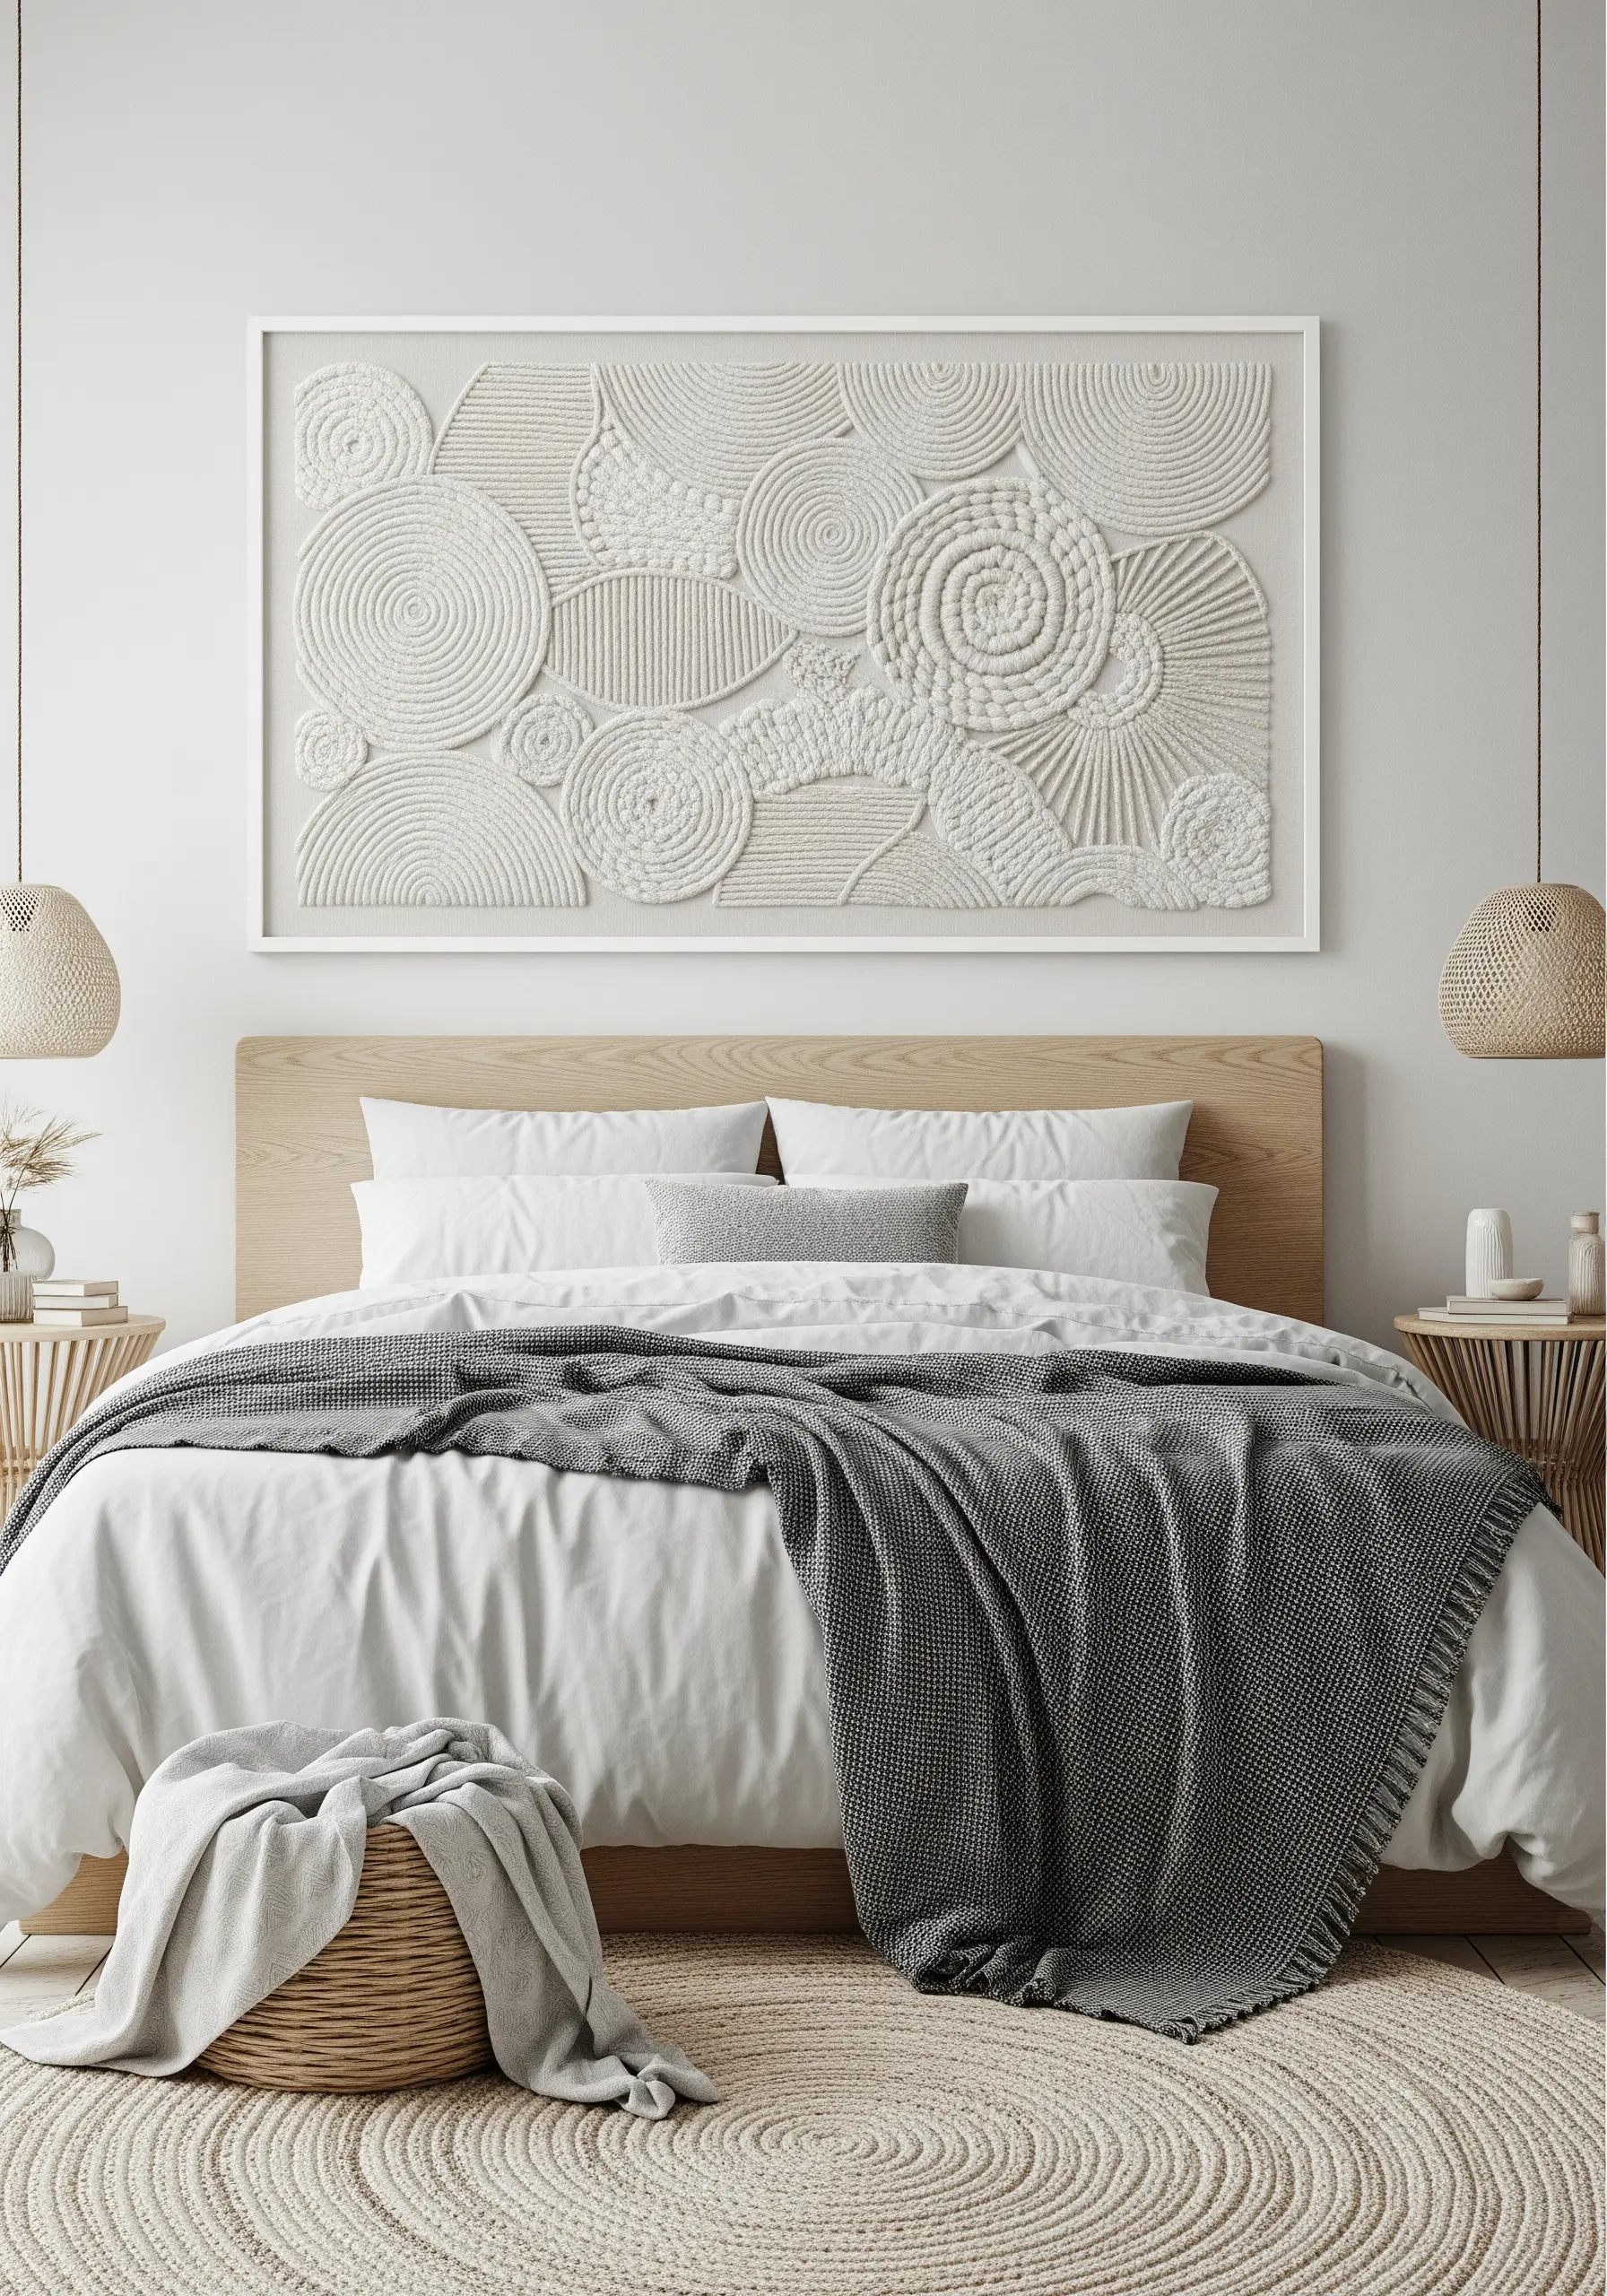
Create a visually serene yet texturally complex piece by using a single color of thread and fabric.
The interest comes not from color, but from the shadows and light cast by varied stitches.
Combine thick, dimensional techniques like coiled bullion knots, padded satin stitch, and dense French knot clusters to build a sculptural surface.
This tone-on-tone embroidery technique is sophisticated, calming, and perfect for creating a focal point in a restful space like a bedroom.
15. Create an Airy Display with Embroidery on Tulle
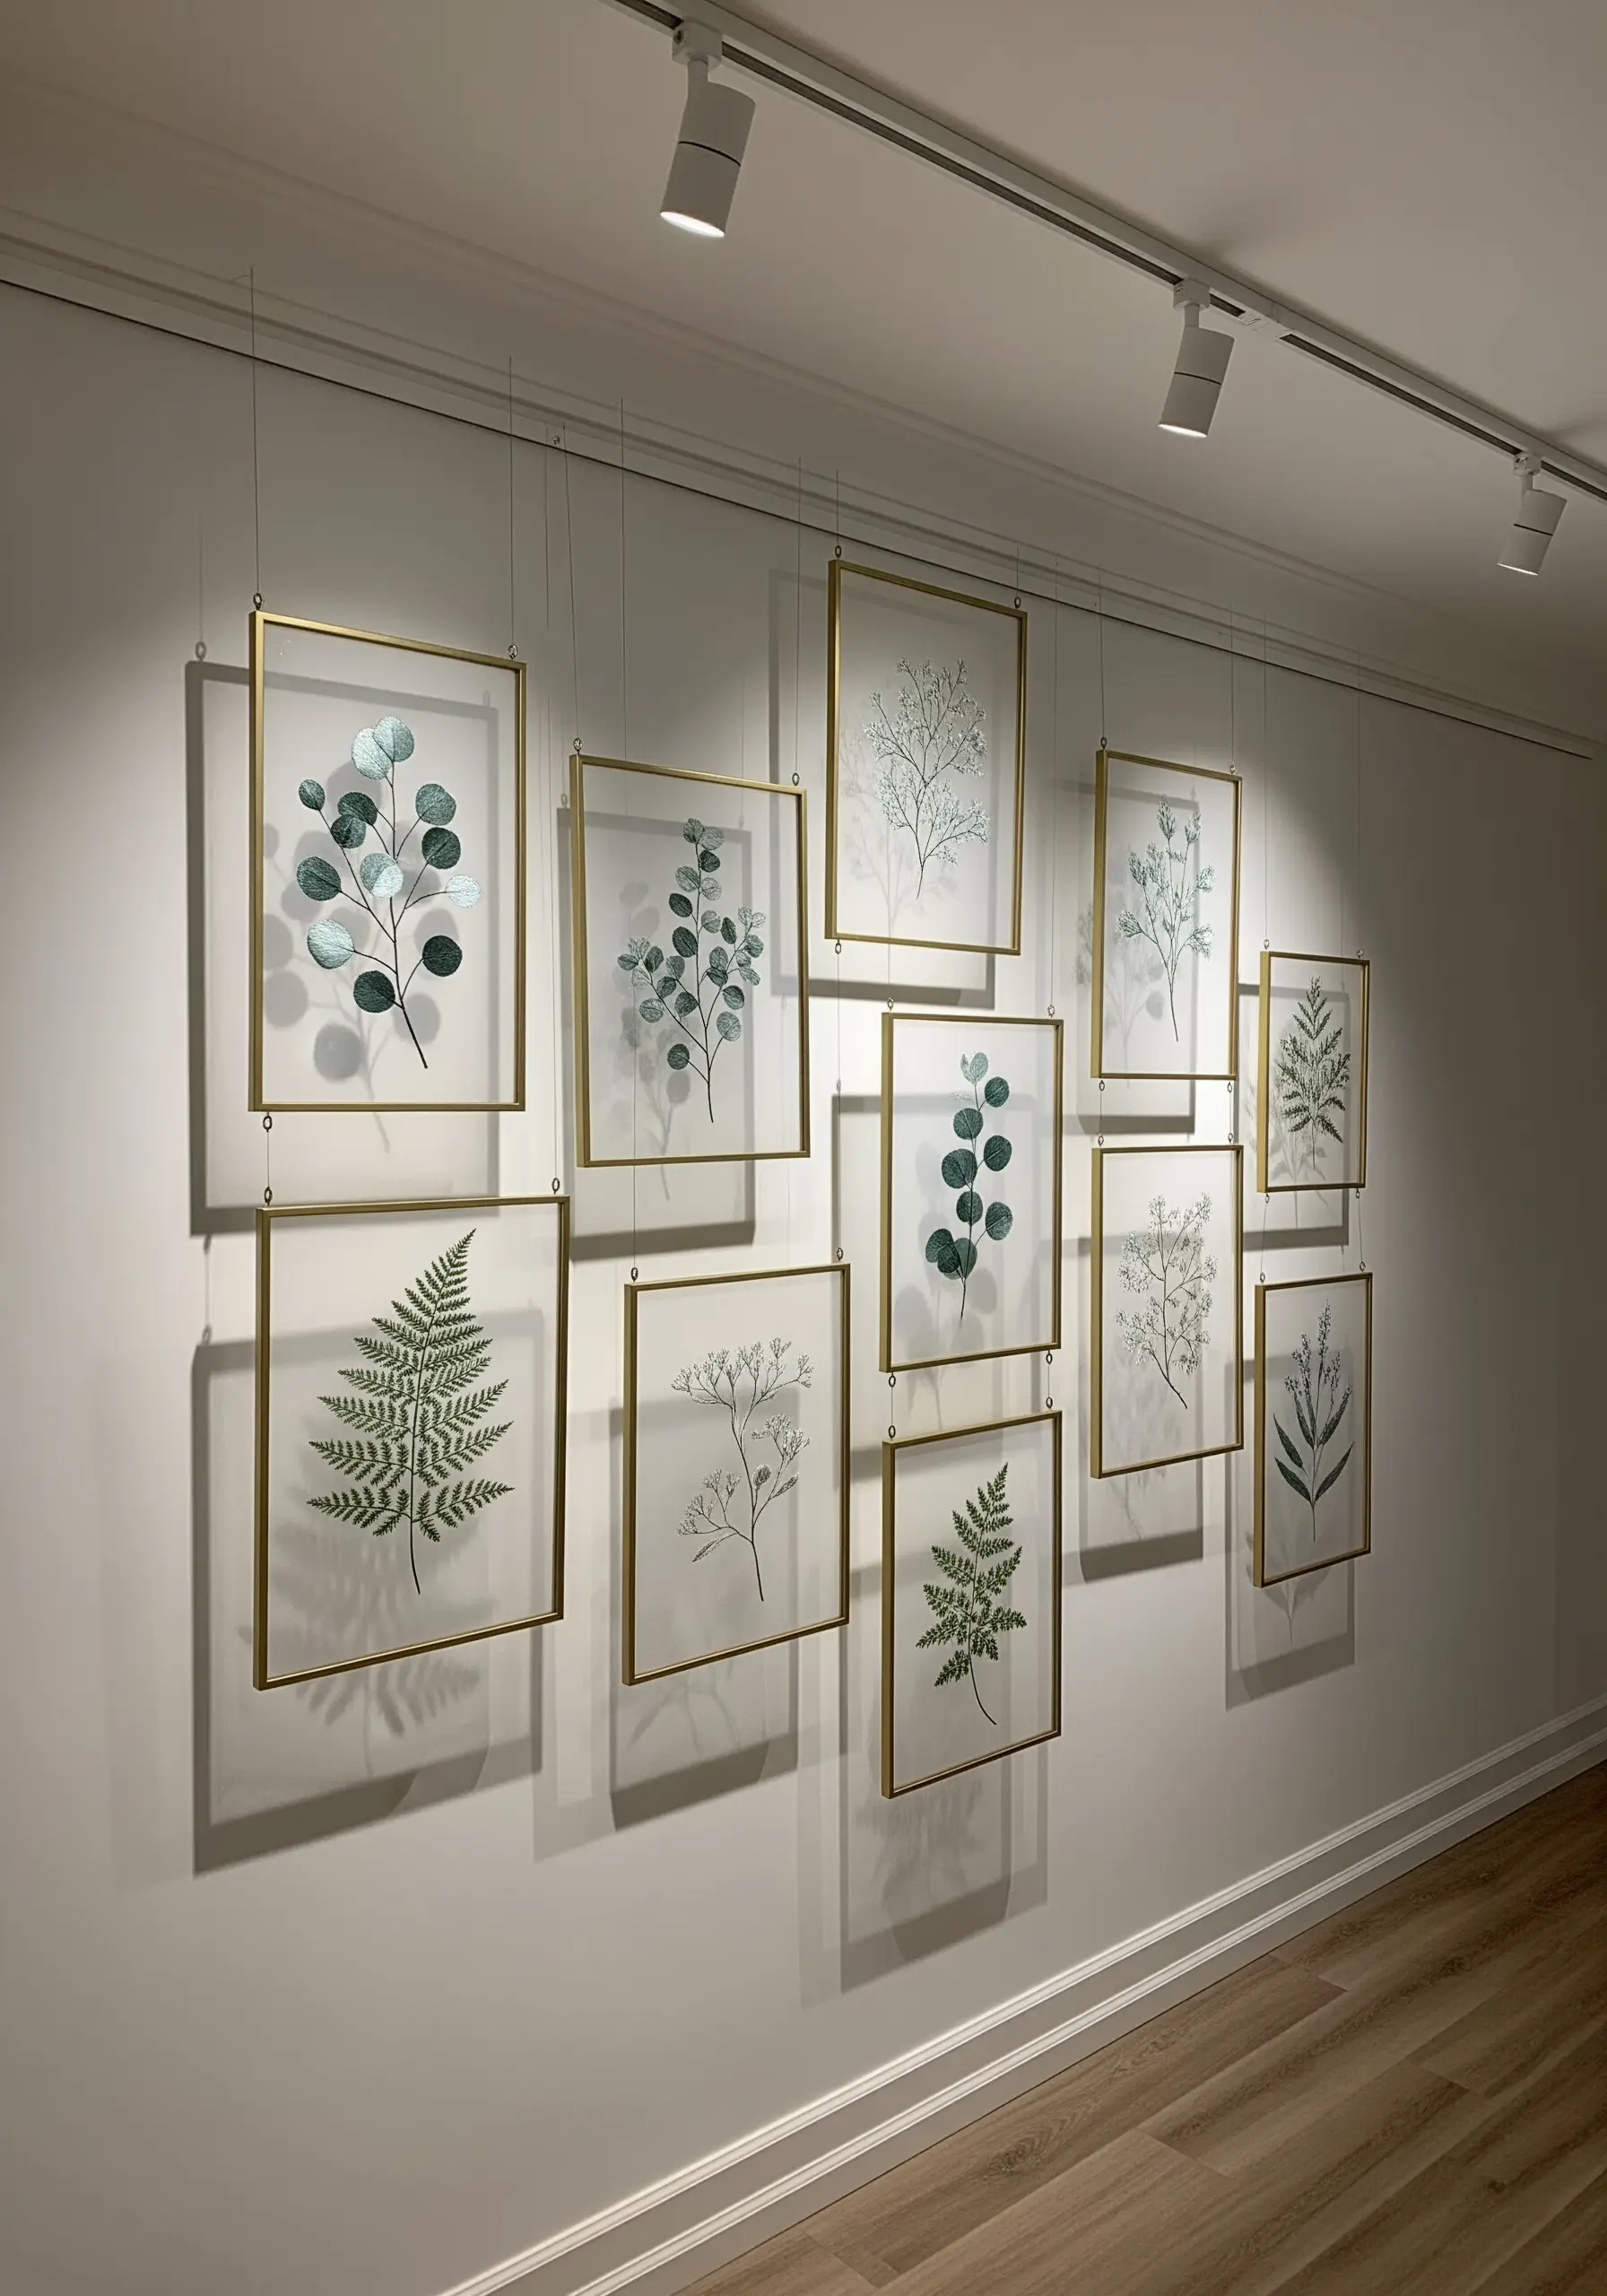
For a delicate, floating effect, switch your canvas from cotton or linen to sheer tulle or organza.
You must stretch the tulle very tightly in your hoop to prevent distortion as you stitch.
Stick to simple line stitches like backstitch or stem stitch, as heavy fill stitches can tear the fragile fabric.
When mounted in a double-glass frame, the botanicals appear suspended in mid-air, casting subtle shadows and elevating minimal botanical patterns to ethereal art.
16. Add Playful Character with Whimsical Kitchen Motifs
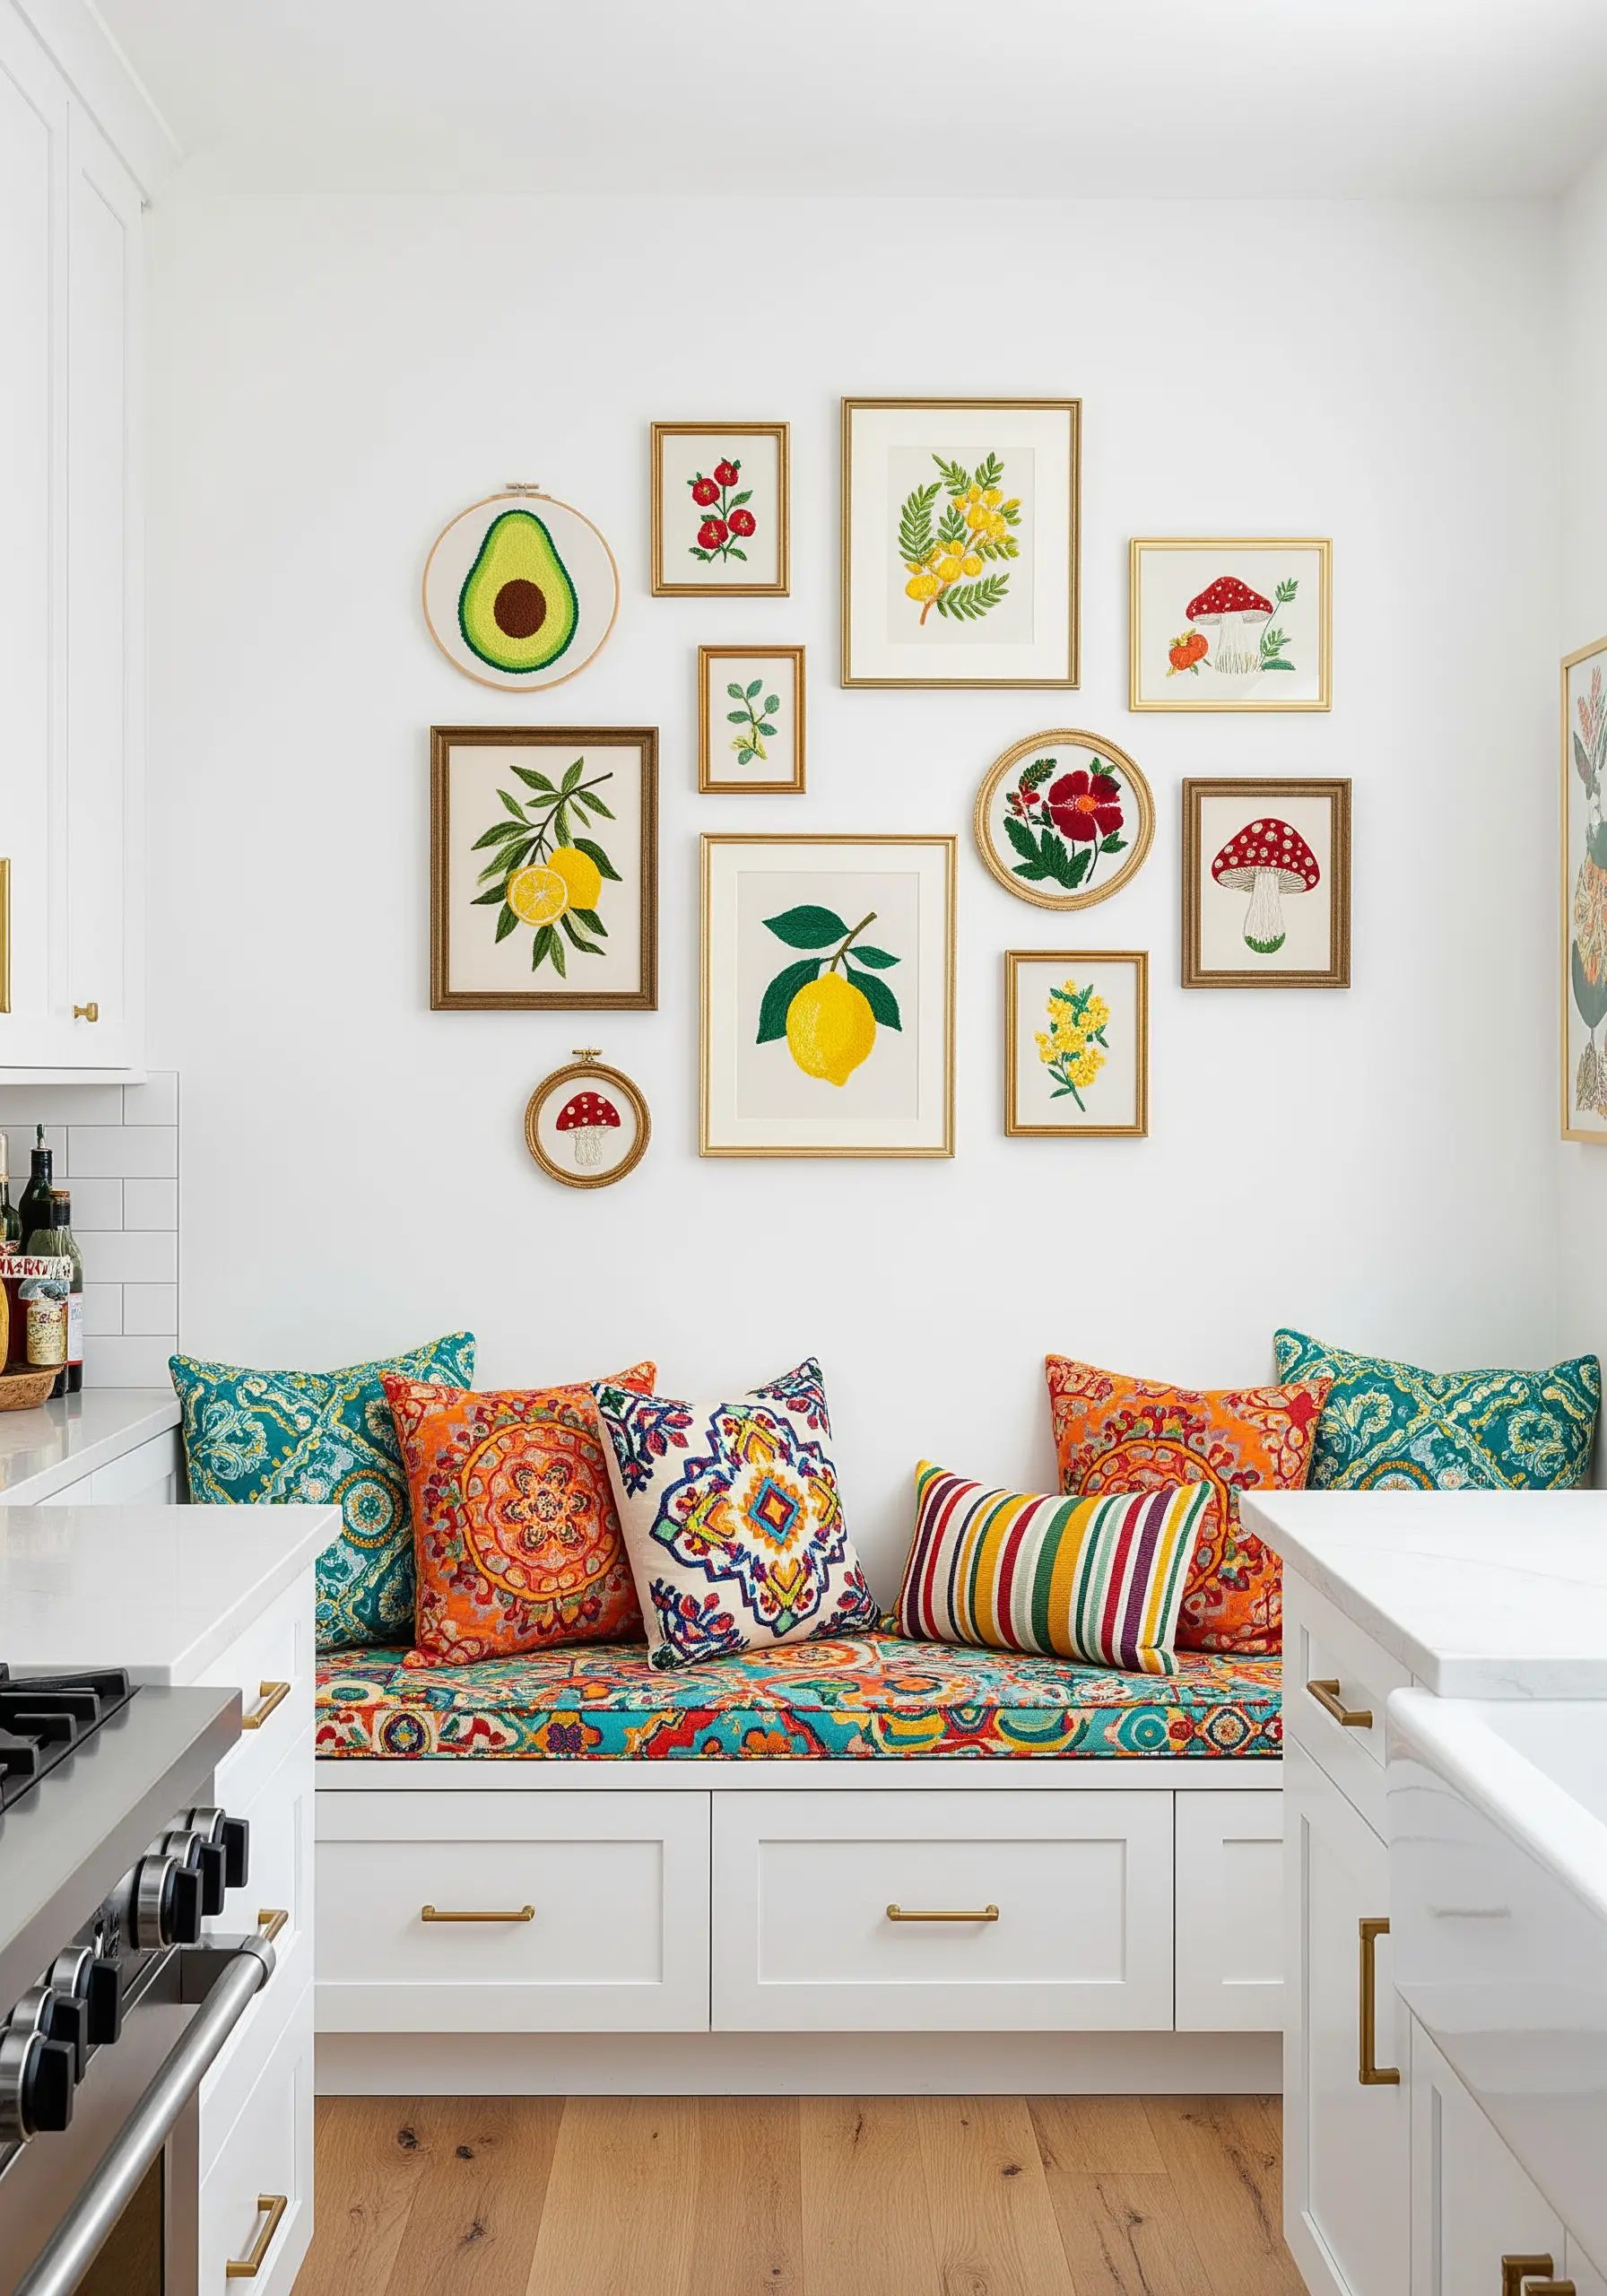
Animate a kitchen or dining nook with a charming gallery of food-themed embroidery.
Choose simple, graphic shapes like avocados, lemons, or mushrooms for immediate recognizability.
Use a bold satin stitch for the fills and a crisp backstitch for the outlines to make each motif pop with color and clarity.
Mixing round hoops with small square frames adds a collected, informal feel that makes the space feel personal and cozy, perfect for minimal fruit and botanical embroidery patterns.
17. Define Abstract Shapes with Contrasting Outlines
Give your abstract color-blocking a refined, graphic edge by outlining each shape with a contrasting thread.
After filling your shapes with satin stitch, trace their perimeters with a neat backstitch using a thin black or dark-colored thread.
This simple addition creates sharp definition, making the colors appear more saturated and the overall composition feel more intentional.
This technique is highly effective for abstract thread designs using negative space, as it clearly separates form from background.
18. Create a Dramatic Focal Point with Metallic Threads
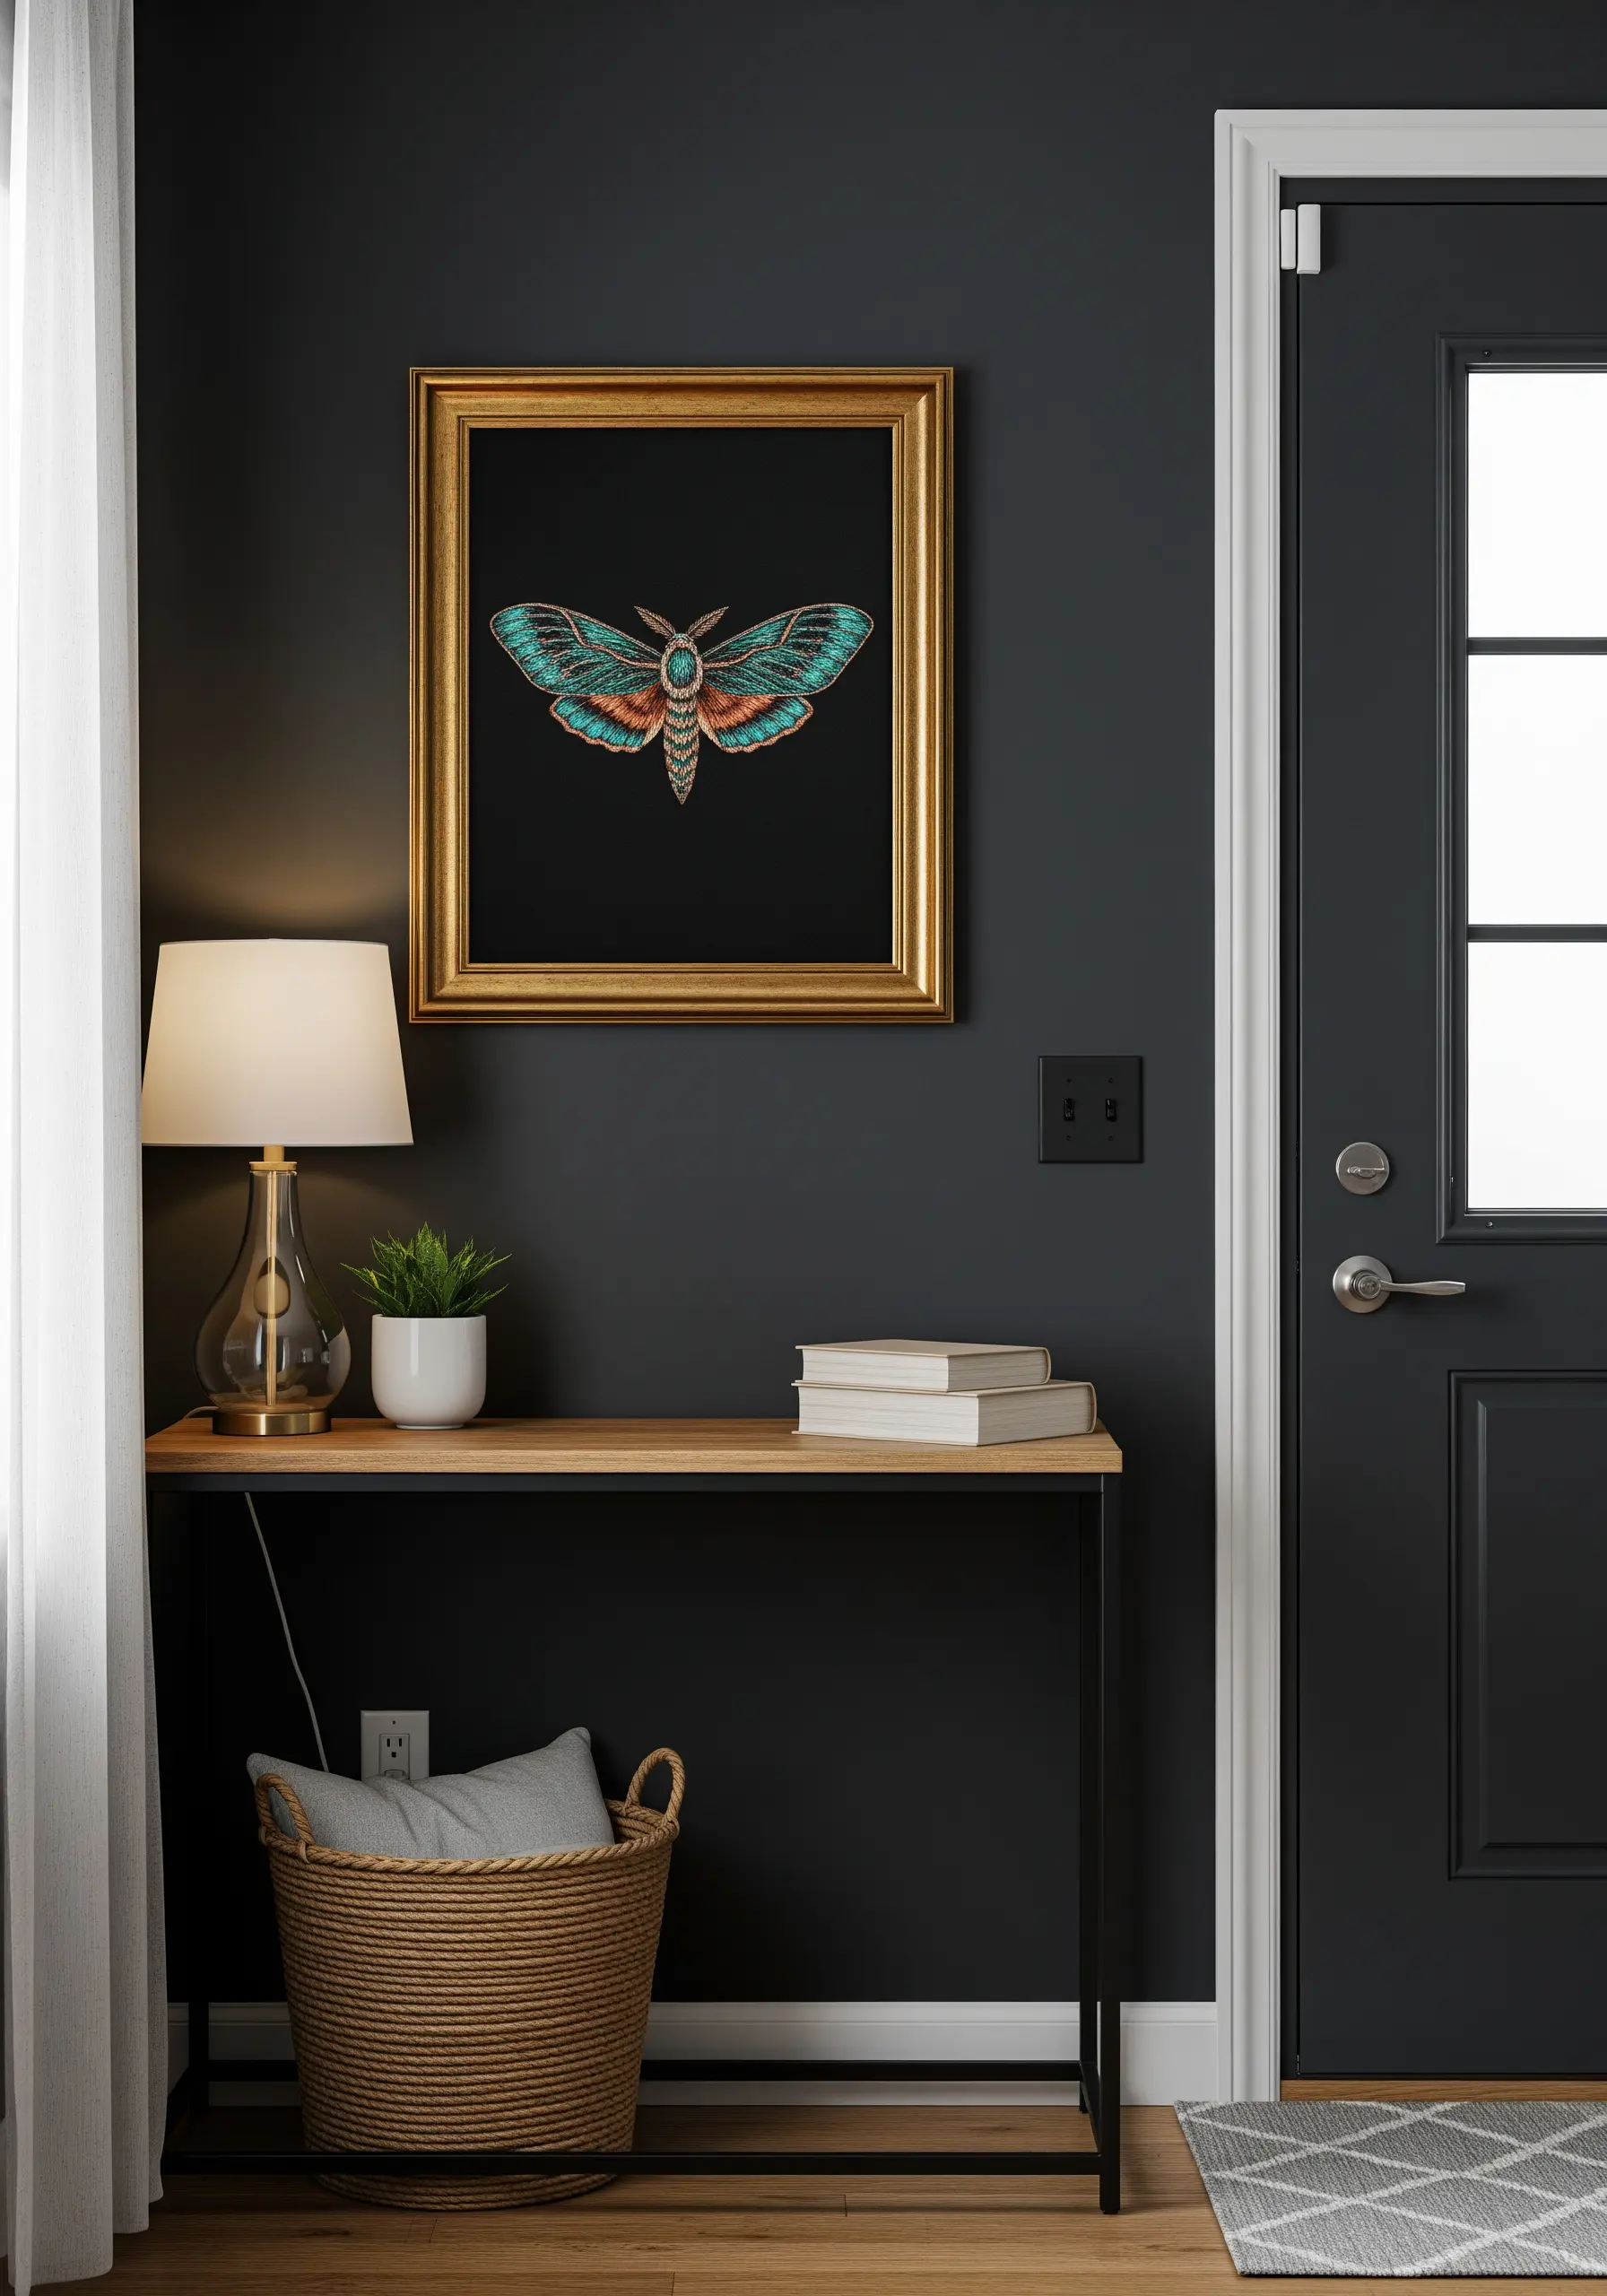
To craft a single piece that commands attention, stitch an intricate motif on dark, solid-colored fabric.
Incorporate metallic floss in key areas—like the details on a moth’s wings—to catch the light and add an element of iridescence and luxury.
Pro tip: Use shorter lengths of metallic thread and a thread conditioner to prevent tangling and fraying.
Mounting the finished work in a simple metallic frame against a dark wall enhances the moody, dramatic effect, creating a piece of gold-thread luxury wall art.


