
Transforming an oversized tee or a denim jacket from a simple garment into a piece of wearable art isn’t about covering it in stitches. It’s about choosing the right technique for the right idea, and executing it with intention.
The difference between amateur and professional-looking apparel embroidery often comes down to texture, tension, and technique. It’s knowing when to use a padded appliqué for a 3D pop, how to make colors blend seamlessly for a gradient effect, or why a simple change in stitch direction can mimic the sheen of metal.
Here, we move beyond basic stitches. I’ll show you how to think like a designer, using thread, fabric, and even negative space to create funky, polished streetwear that feels entirely your own. These are not just patterns; they are technical approaches to help you elevate your craft.
1. Cyberpunk Robotics with 3D Corded Outlines
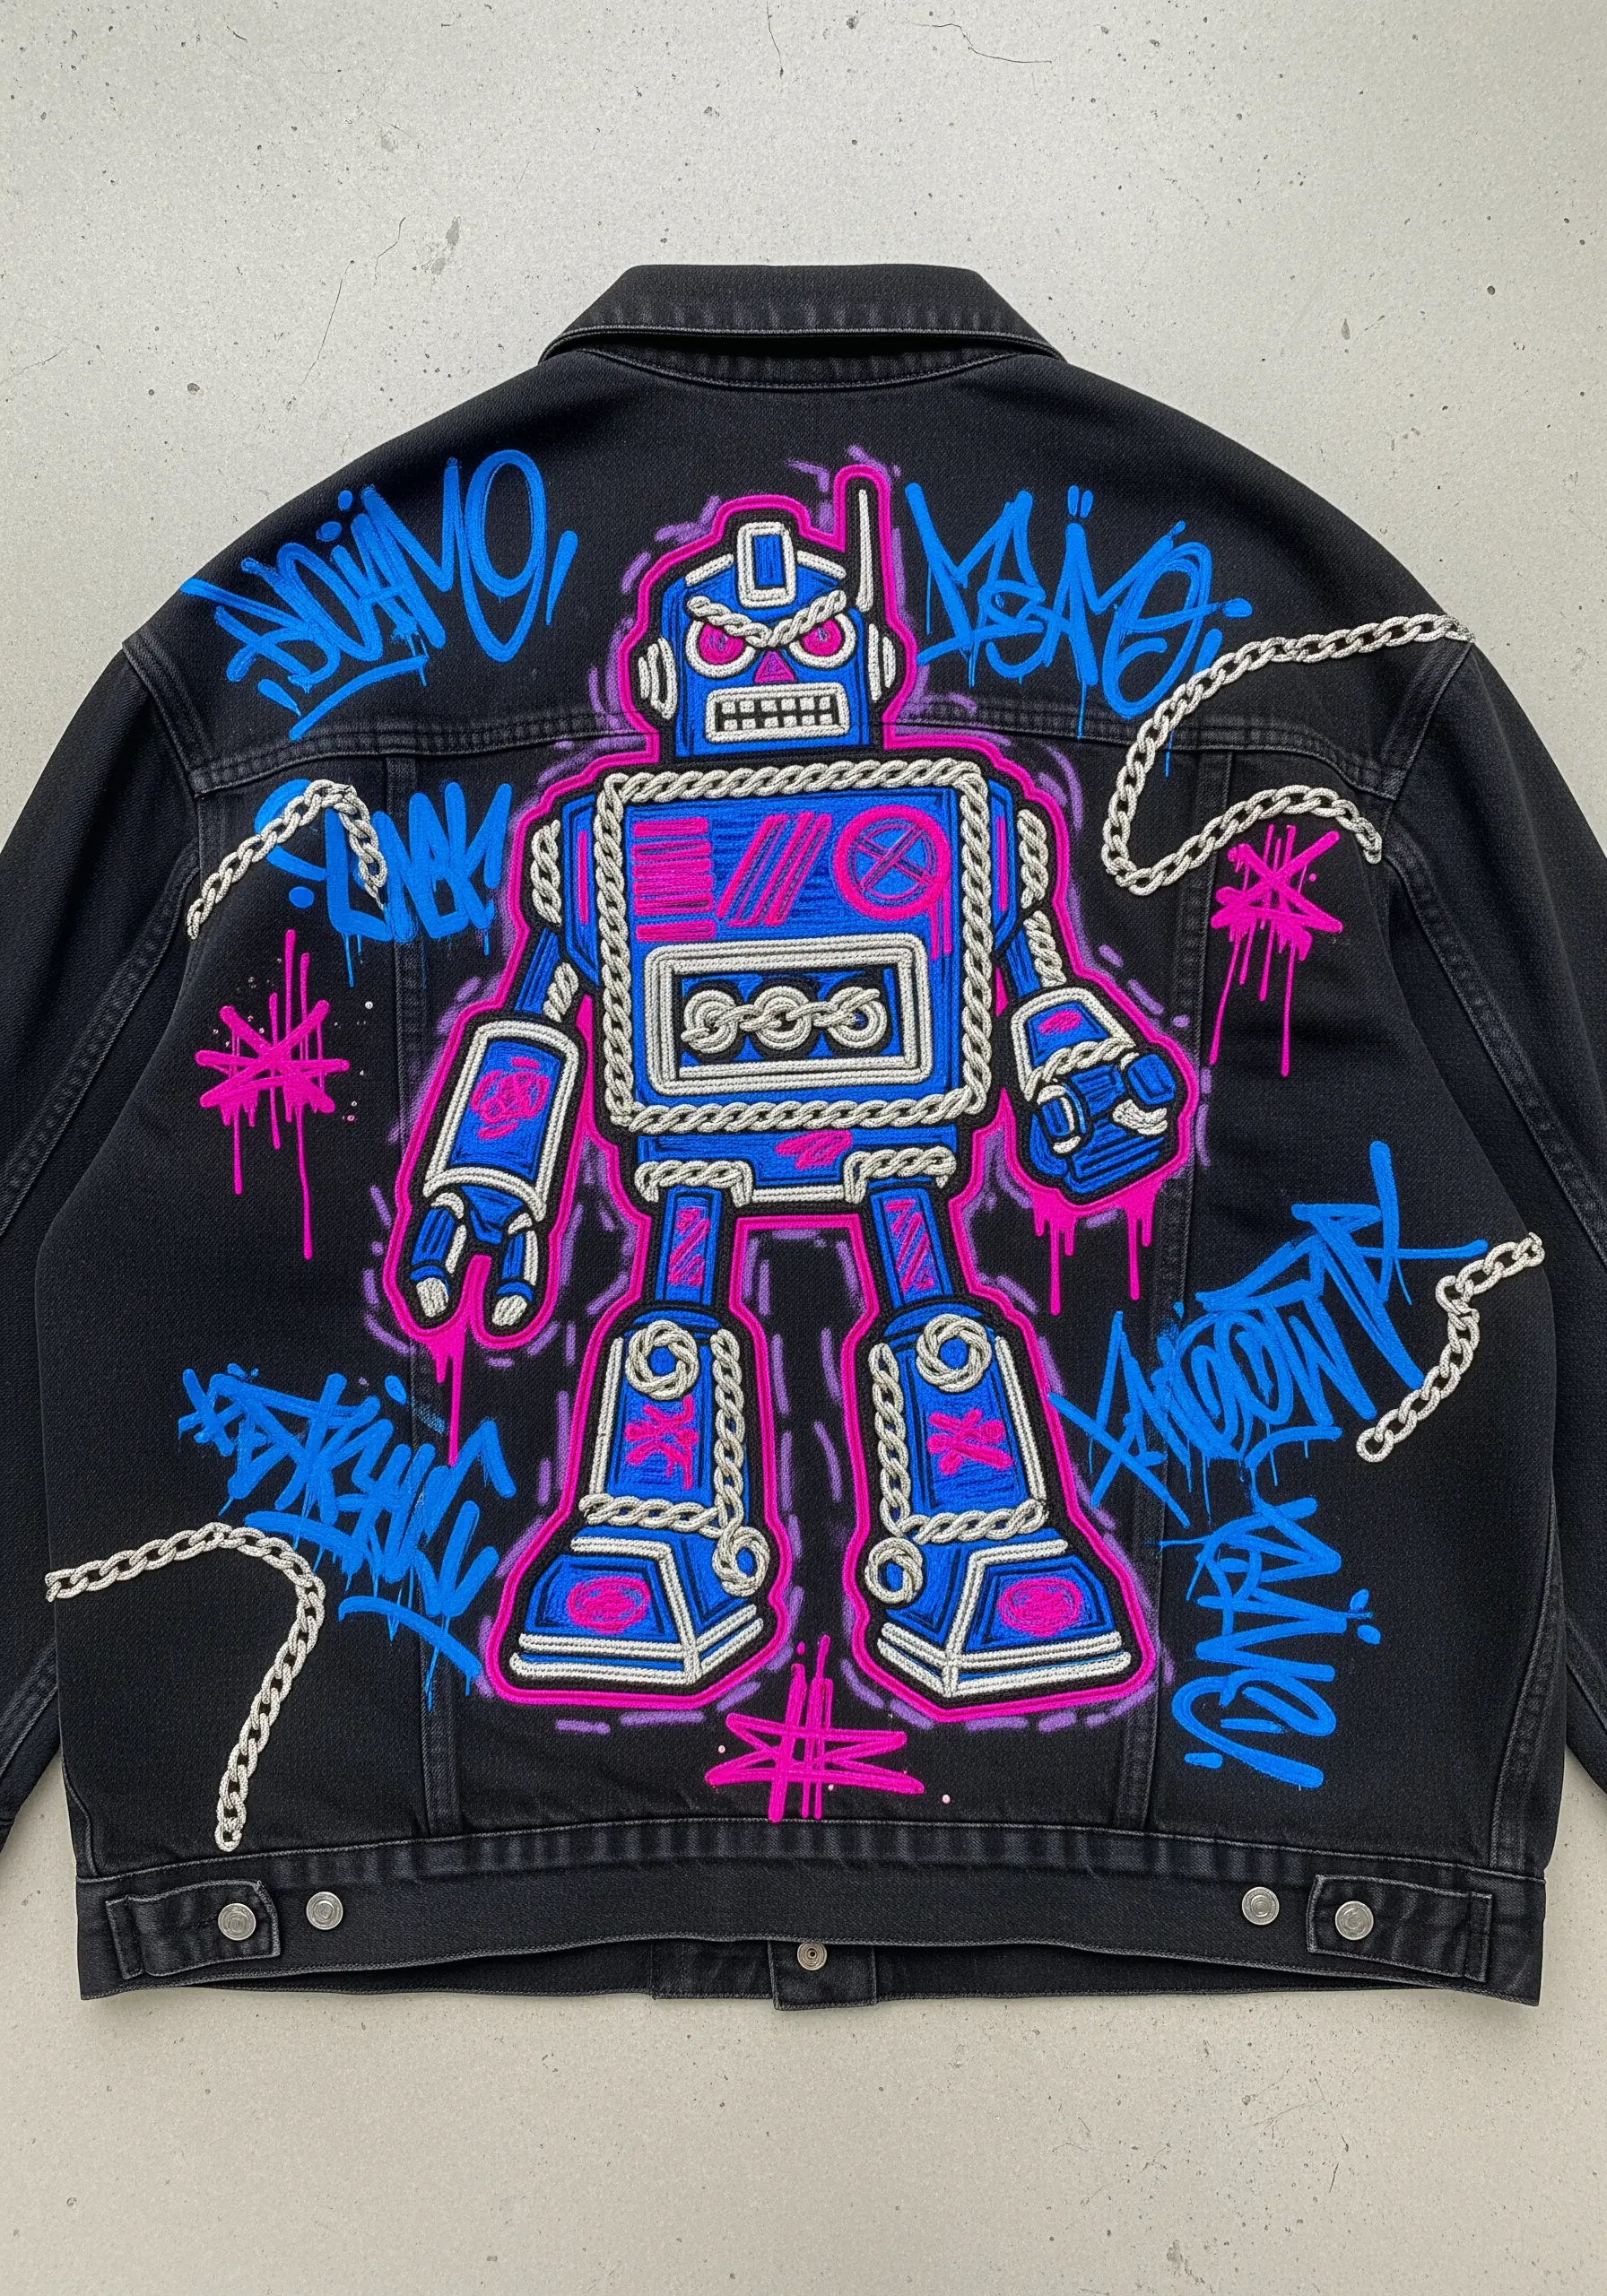
Give your graphic embroidery a tactile, three-dimensional edge by using couching for the outlines.
Instead of a standard backstitch, lay down a thick metallic cord or yarn and secure it with small, evenly spaced stitches in a matching or contrasting thread.
This technique creates a raised, industrial border that makes the flat satin stitch fills pop, adding depth and texture that mimics armor plating.
Combine this with splashes of fabric paint for a true mixed-media finish that feels raw and energetic.
2. Glitch Art Realism with Directional Satin Stitch
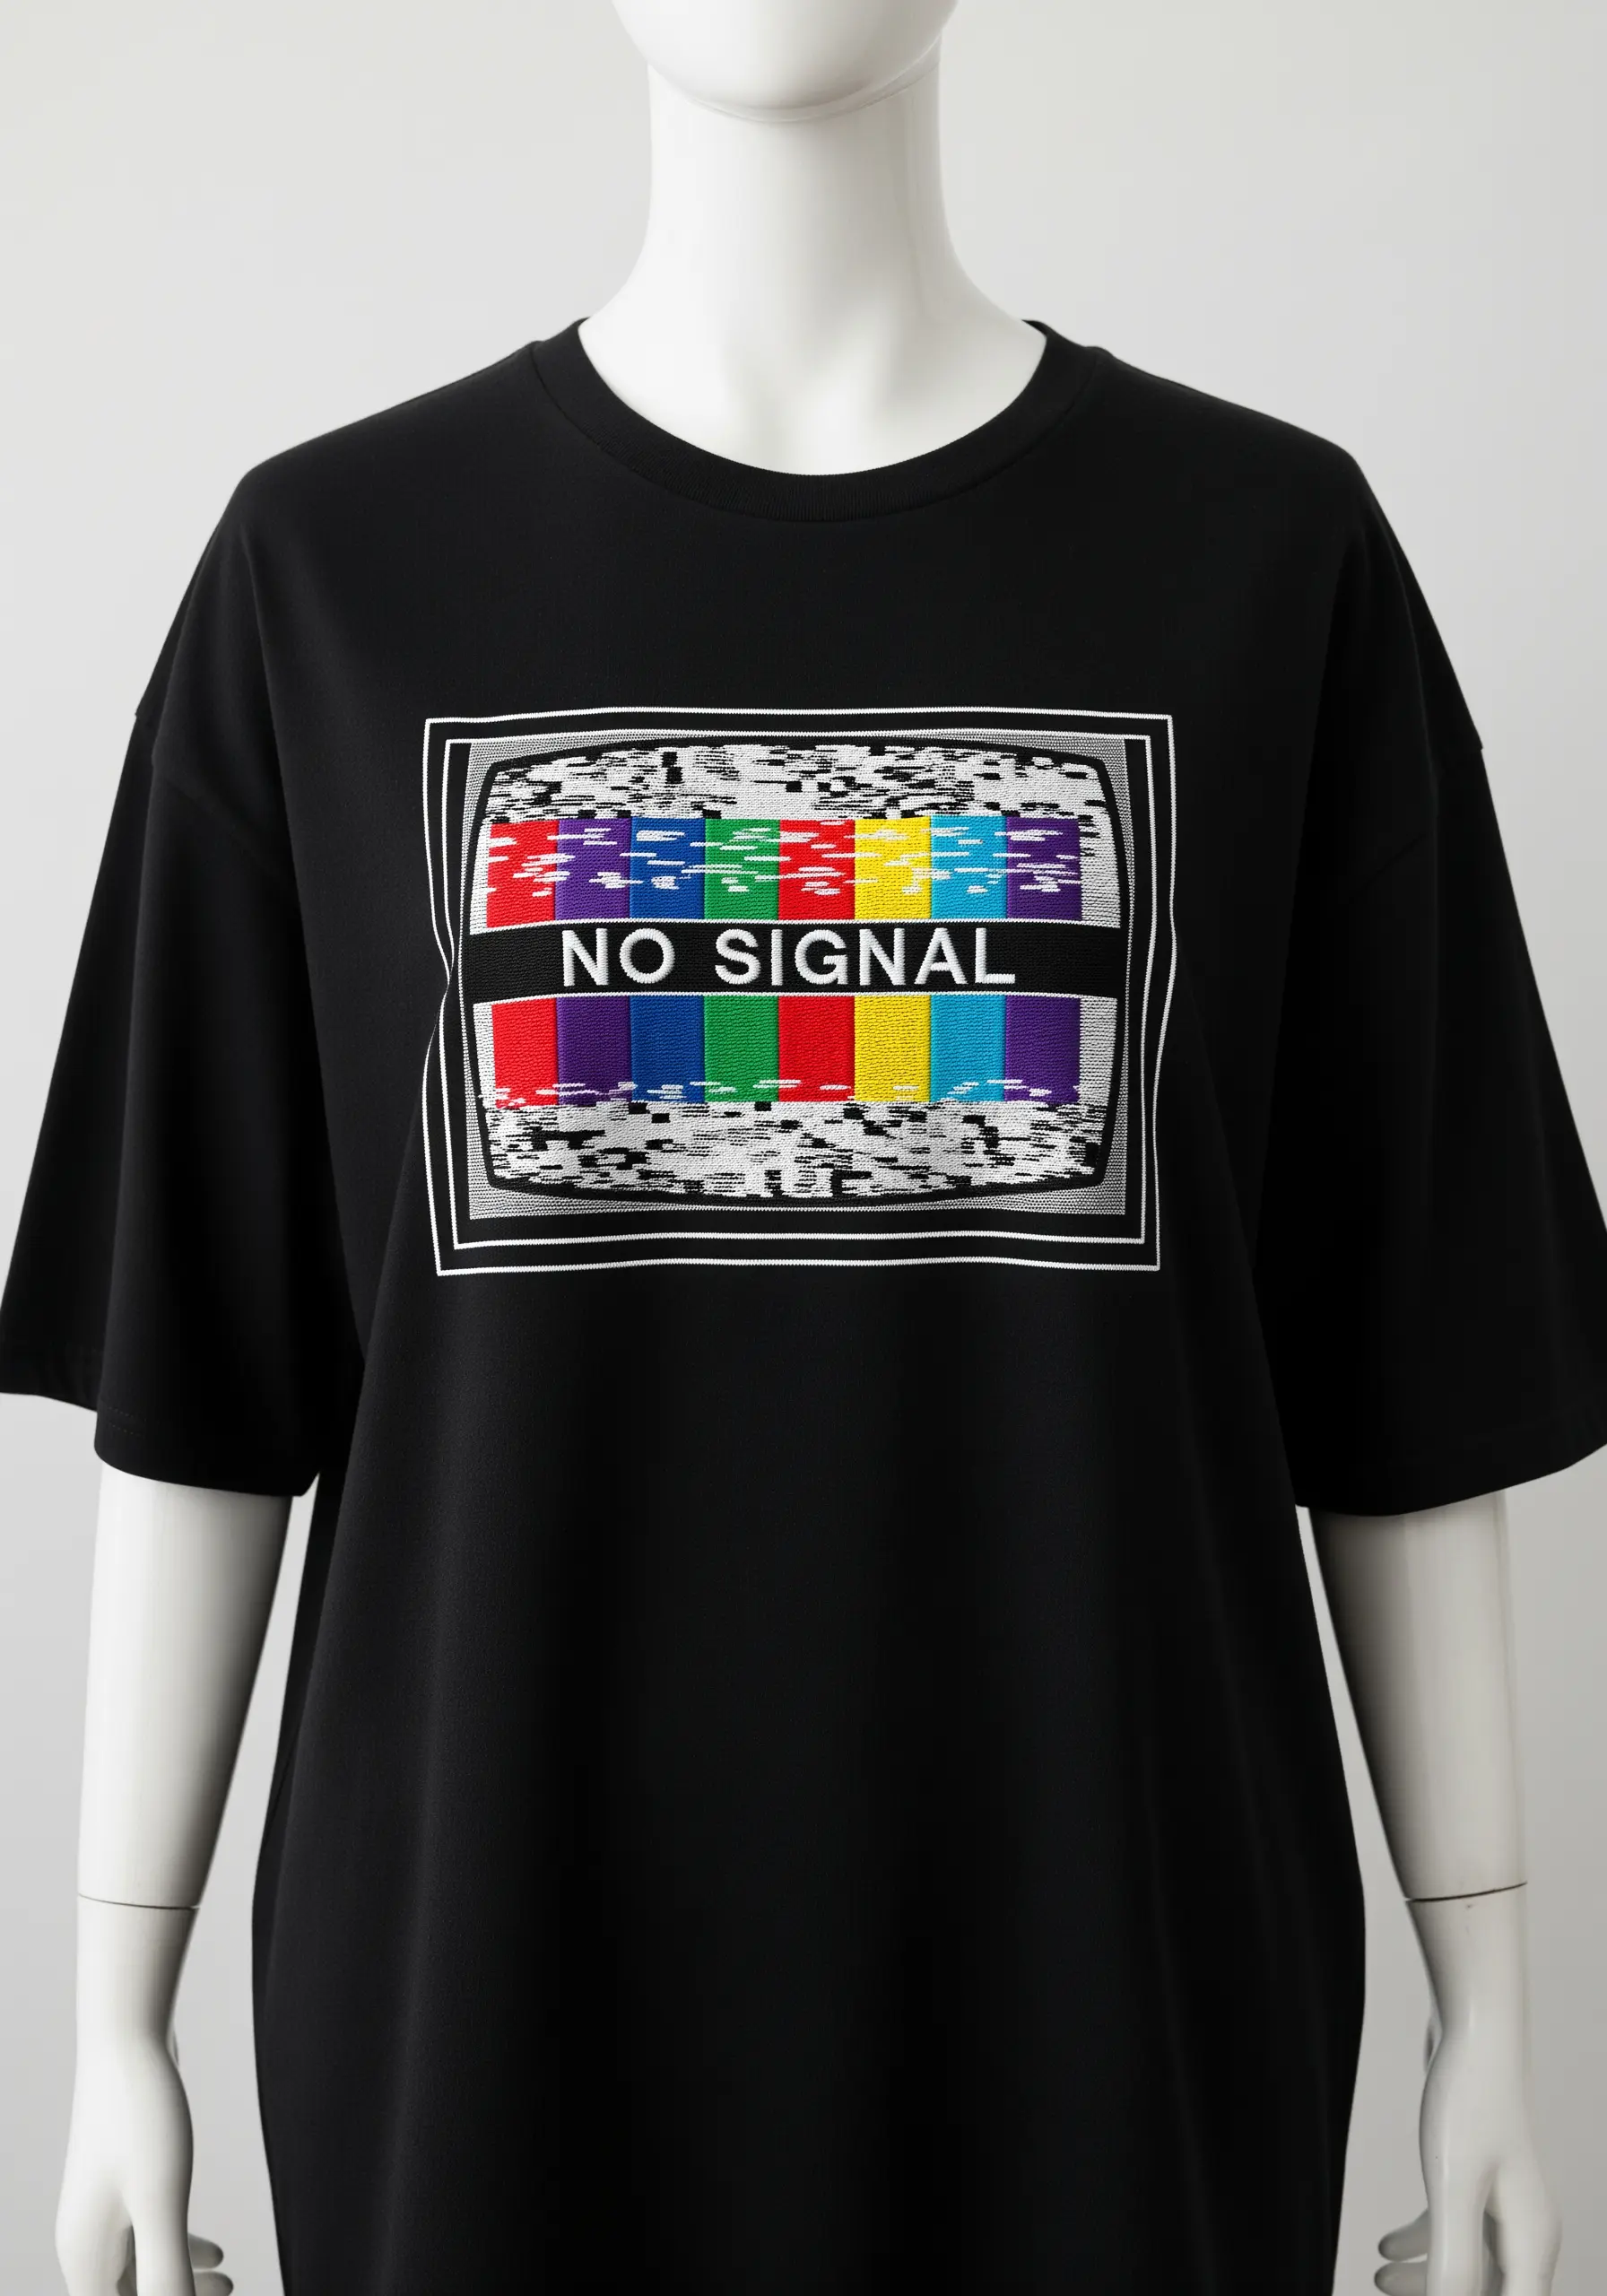
To capture the chaotic energy of a “no signal” screen, you need disciplined stitching.
Fill the color bars with dense, vertical satin stitches, keeping them perfectly aligned.
For the static or “glitch” effect, use short, random satin stitches in black, white, and grey, varying the length and angle of each stitch to create a textured, pixelated look.
Frame the entire design with a crisp, clean backstitch outline to provide a sharp contrast between the orderly television and the disorderly static within.
3. Psychedelic Drips with Gradient Thread Painting
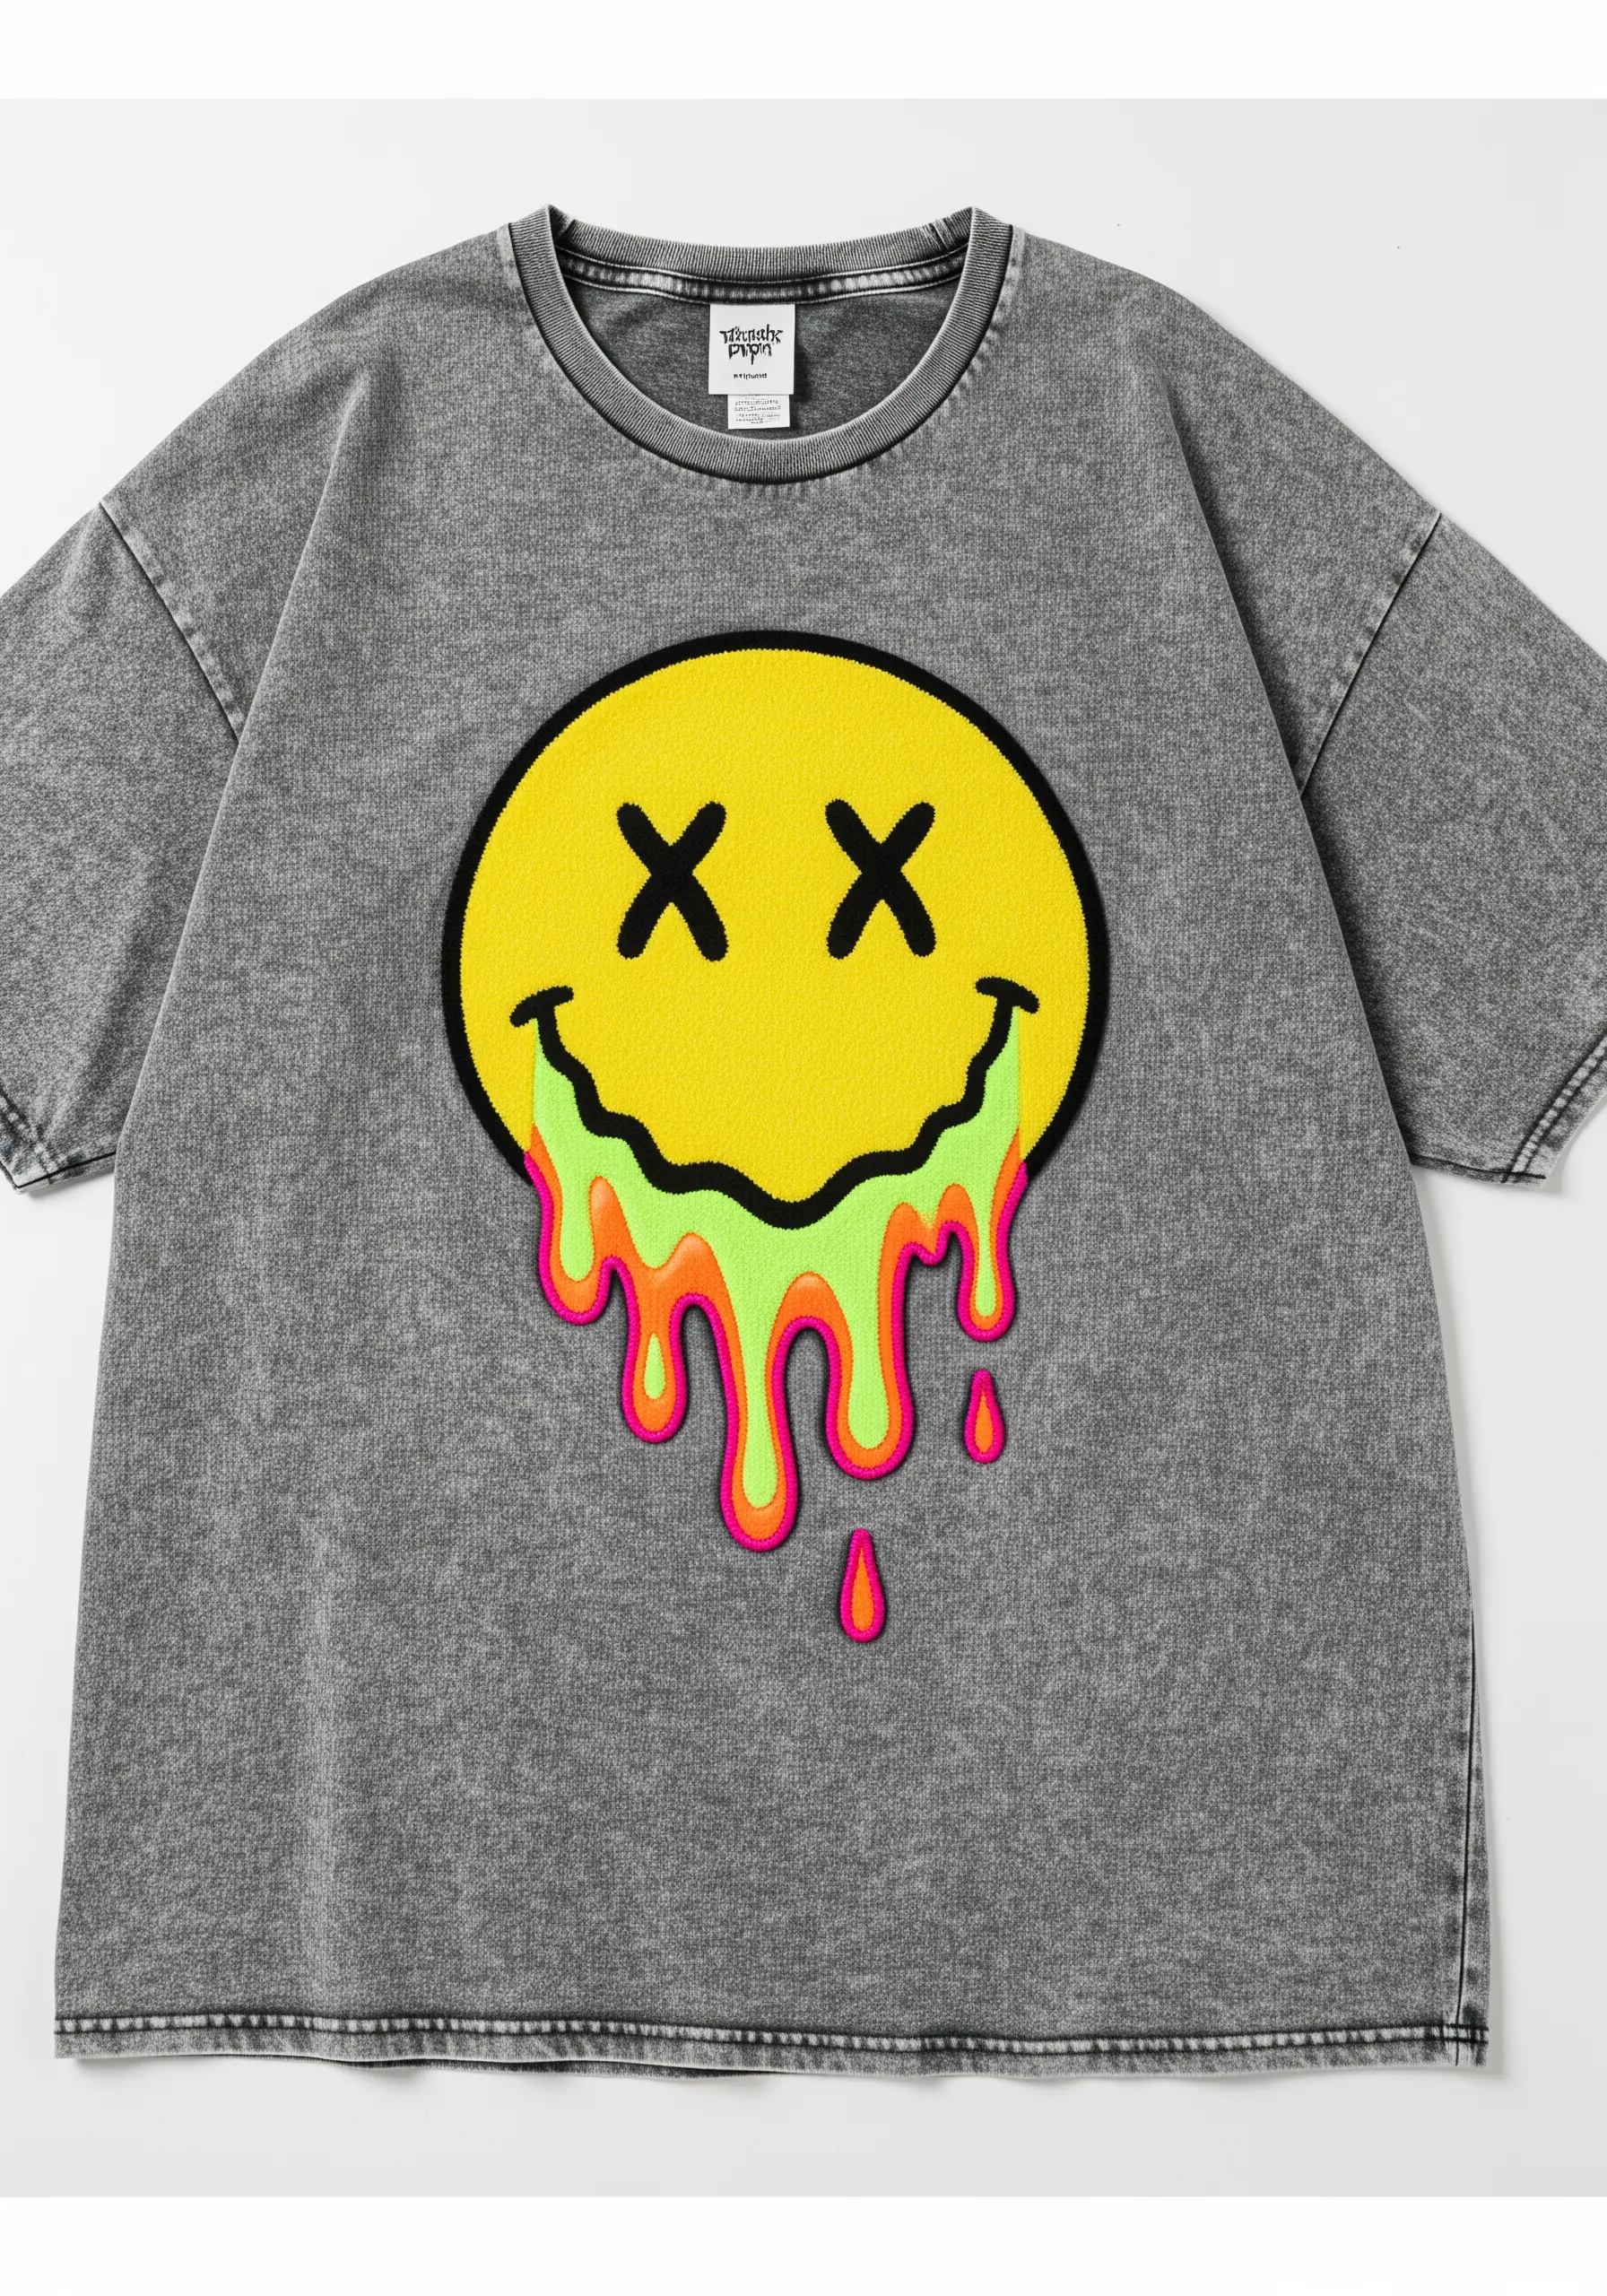
Achieve that smooth, melting neon effect by mastering the long-and-short stitch for color blending.
Work with single strands of thread, overlapping stitches of lime green, hot pink, and fluorescent orange to create a seamless gradient.
The key is to stagger your stitches so no harsh lines are visible between the color changes.
Finish with a bold, black satin stitch outline to give the design a clean, sticker-like edge that makes the vibrant colors feel even more electric against the fabric.
4. Photorealistic Metallics with Precision Satin Stitch
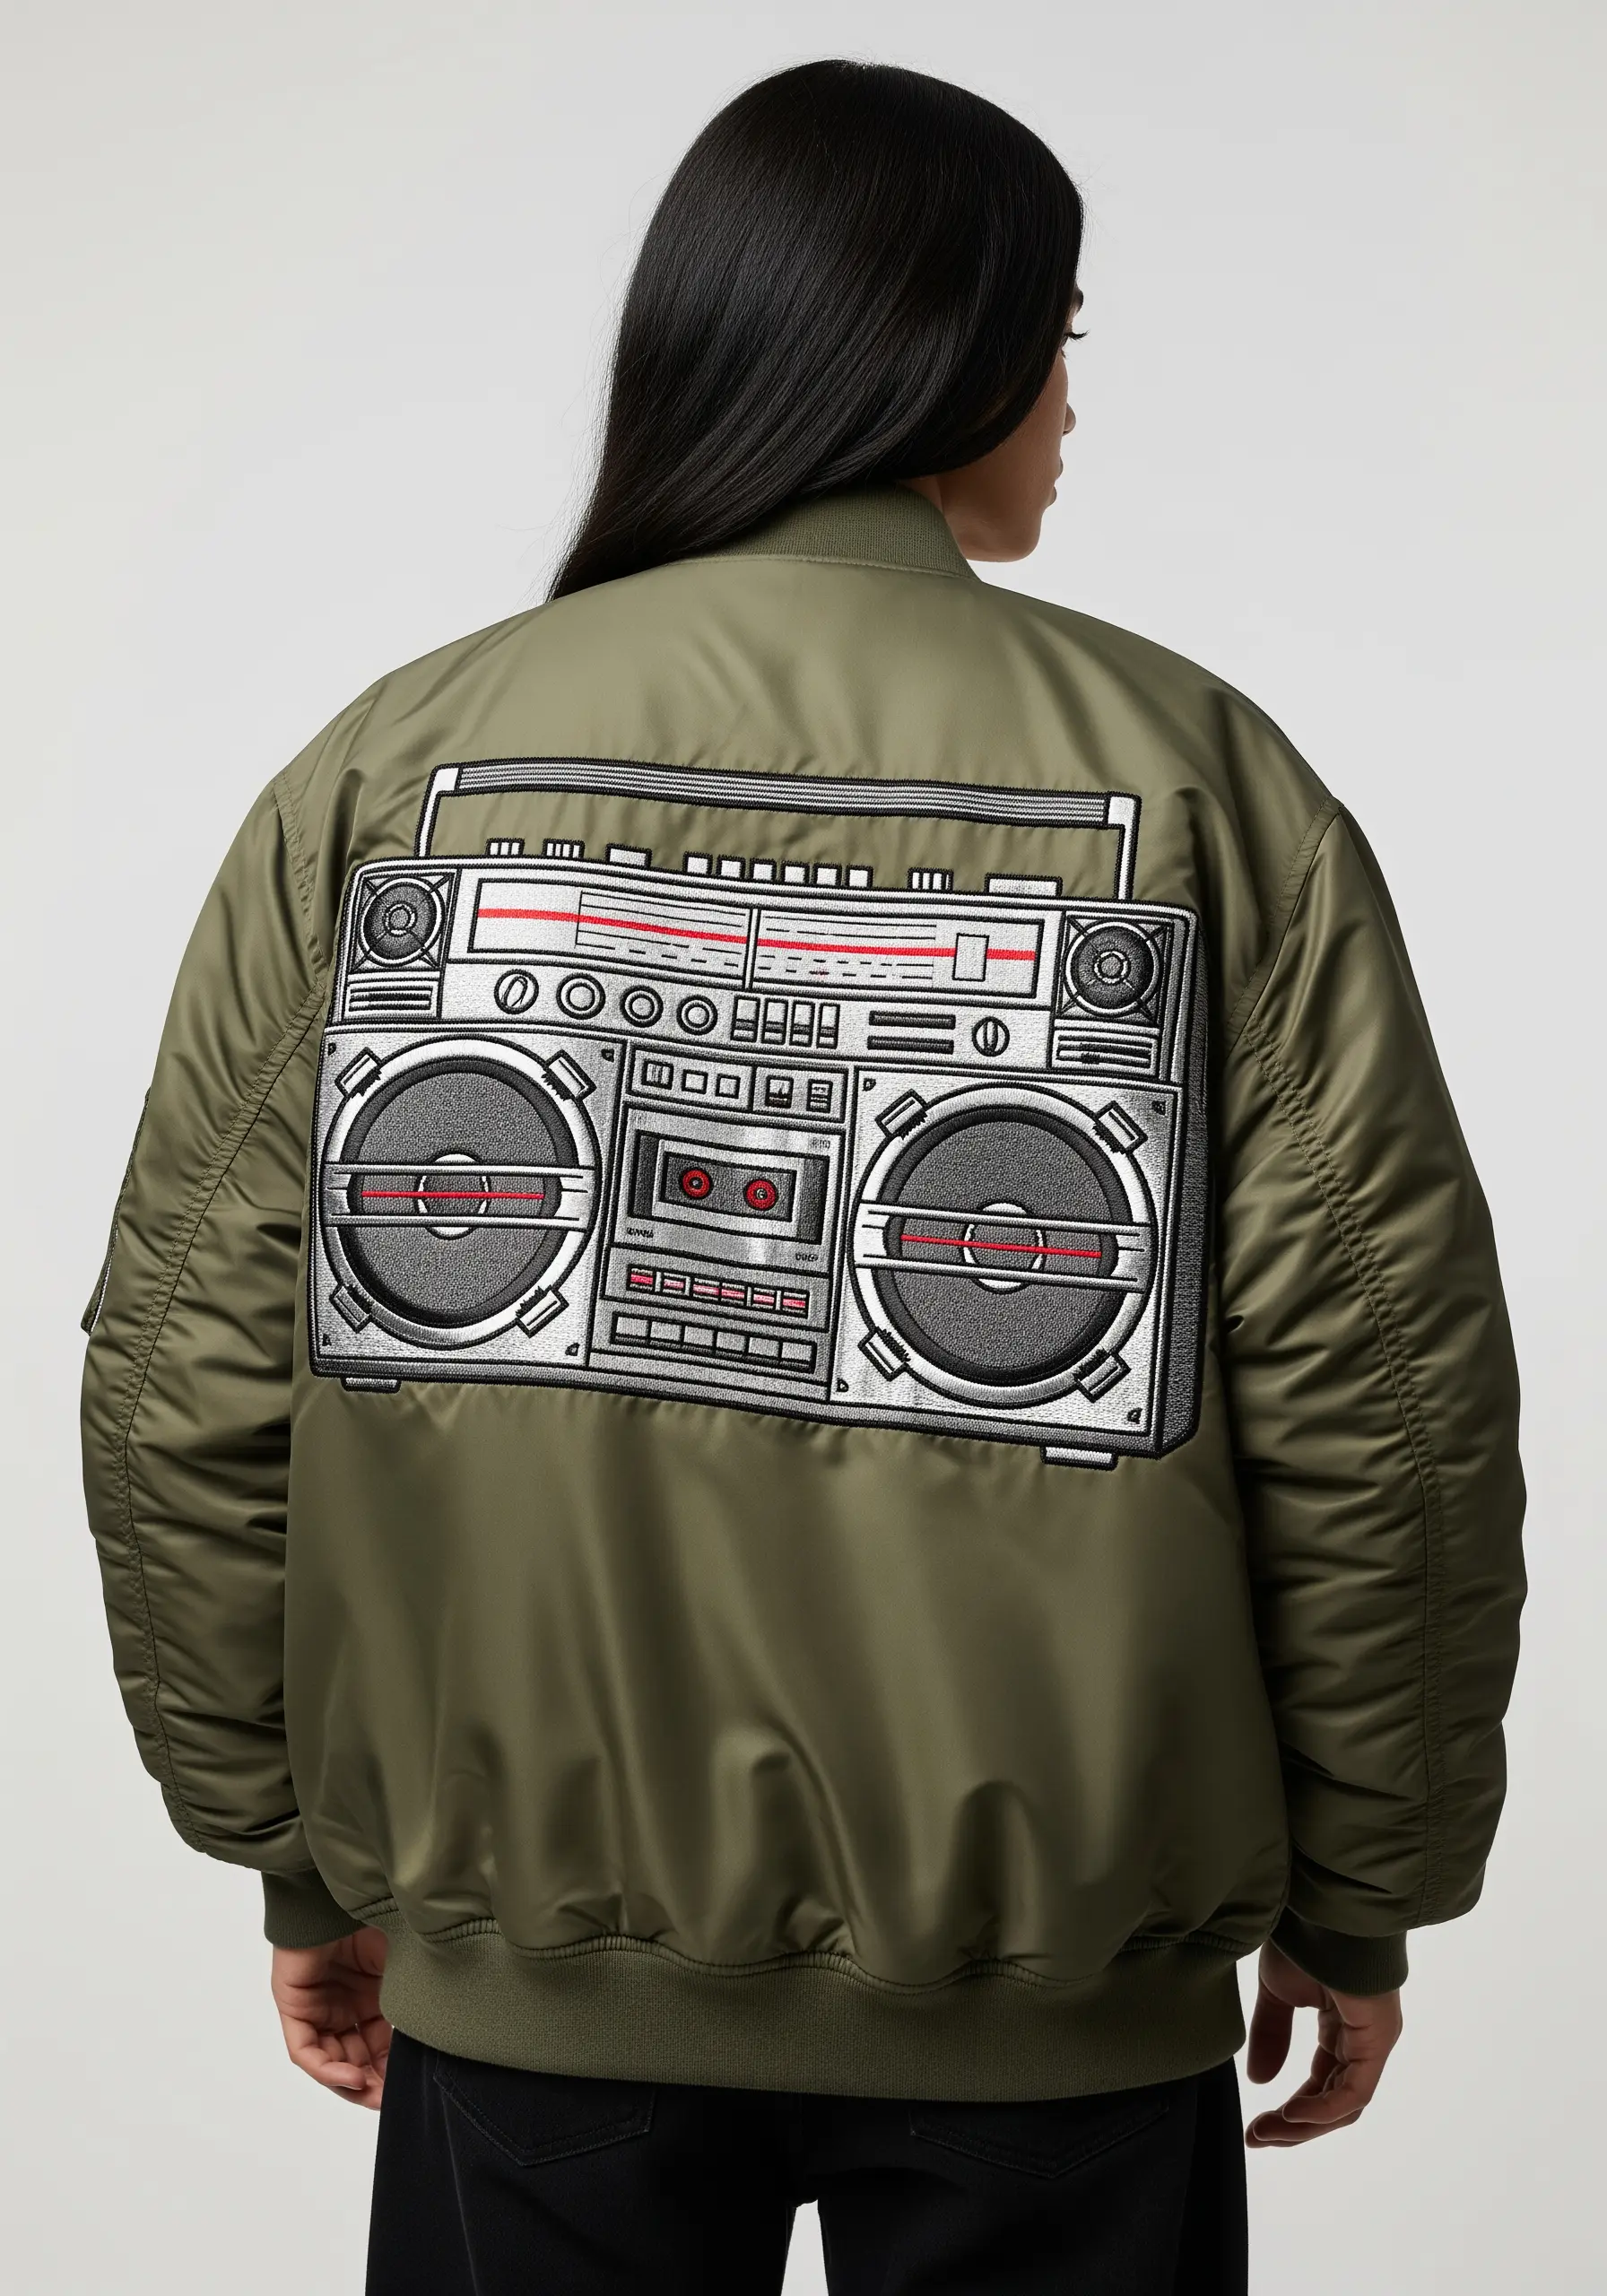
To make an object look metallic and three-dimensional, your stitch direction is your most powerful tool.
Use light grey, dark grey, and silver threads to fill different components of the boombox.
Stitch the speakers in a circular pattern, the handle with horizontal stitches, and the main body with vertical stitches.
This subtle shift in direction catches the light differently, creating the illusion of separate materials and realistic depth without needing complex shading.
5. Bioluminescent Botanicals with Vibrant Thread Painting
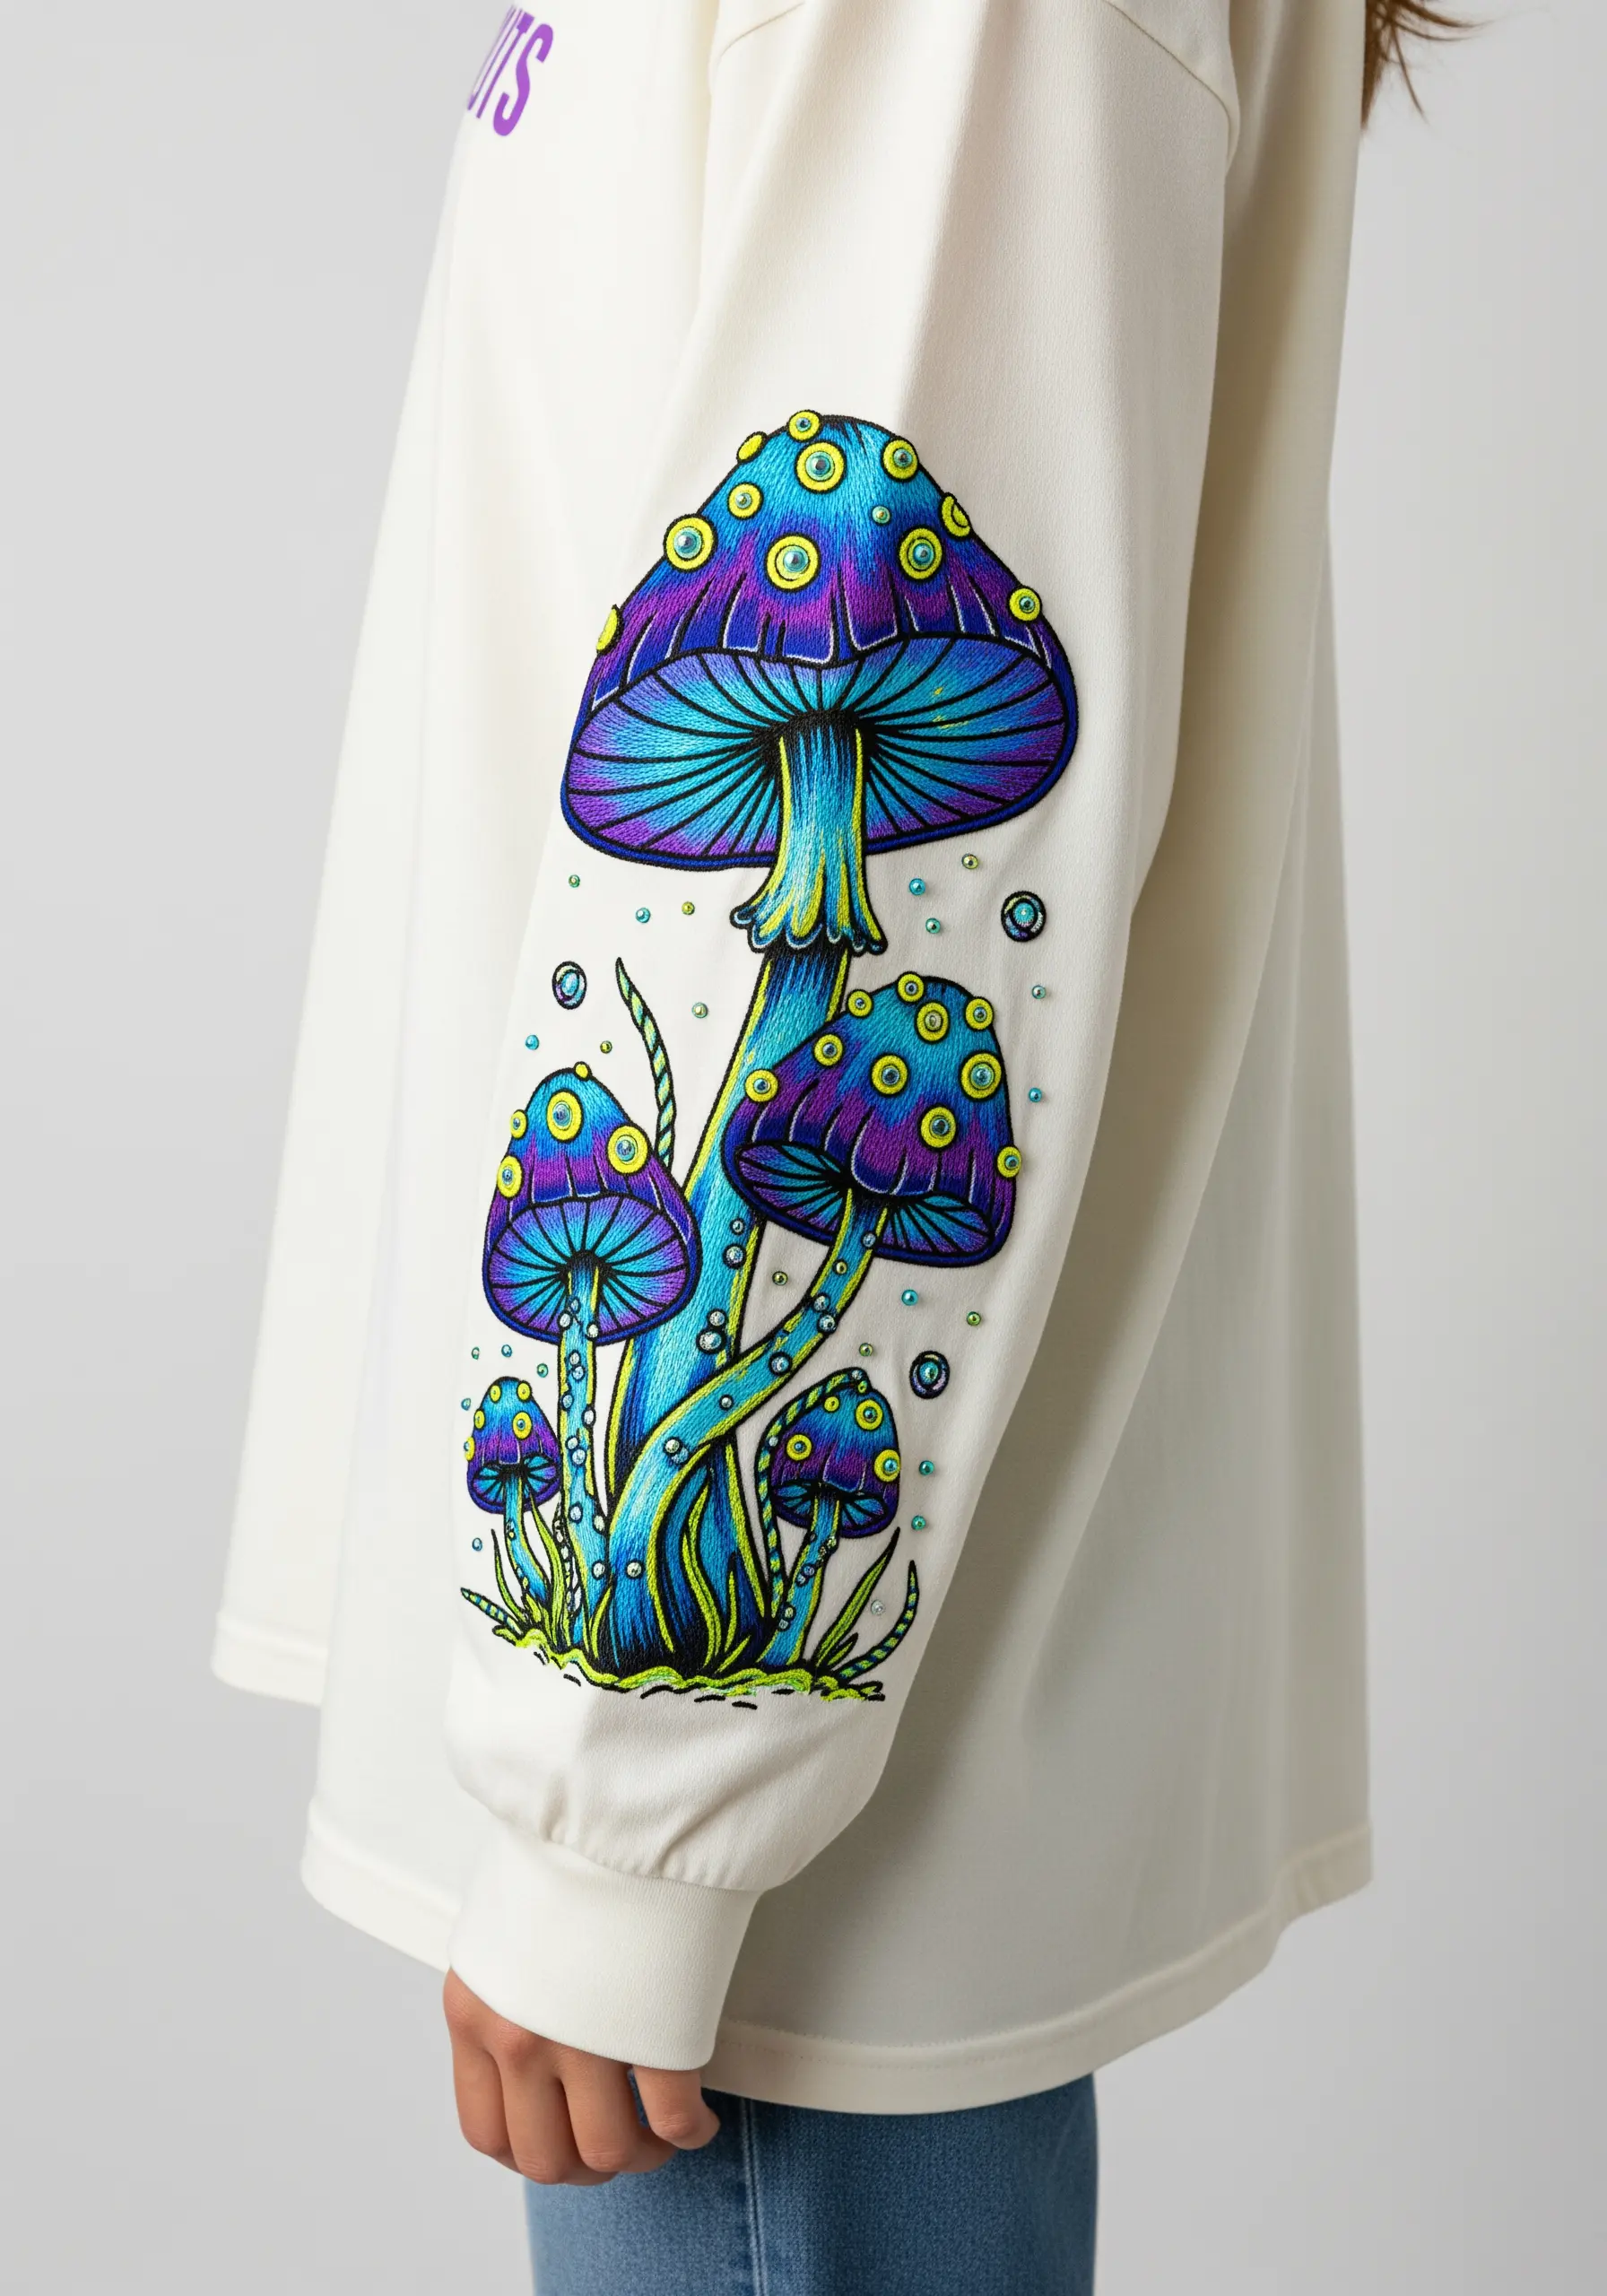
Give your motifs a magical glow by pairing rich color blending with a high-contrast outline.
Use long-and-short stitch with single strands of thread to create seamless gradients from deep indigo to electric turquoise.
Once the blending is complete, use a neon yellow or lime green thread to add a fine split stitch outline around key areas.
This sharp, bright line acts as a visual barrier, making the deeper colors appear more luminous and creating a stunning bioluminescent effect.
6. Pop Art Impact with Bold Satin Stitch Fills
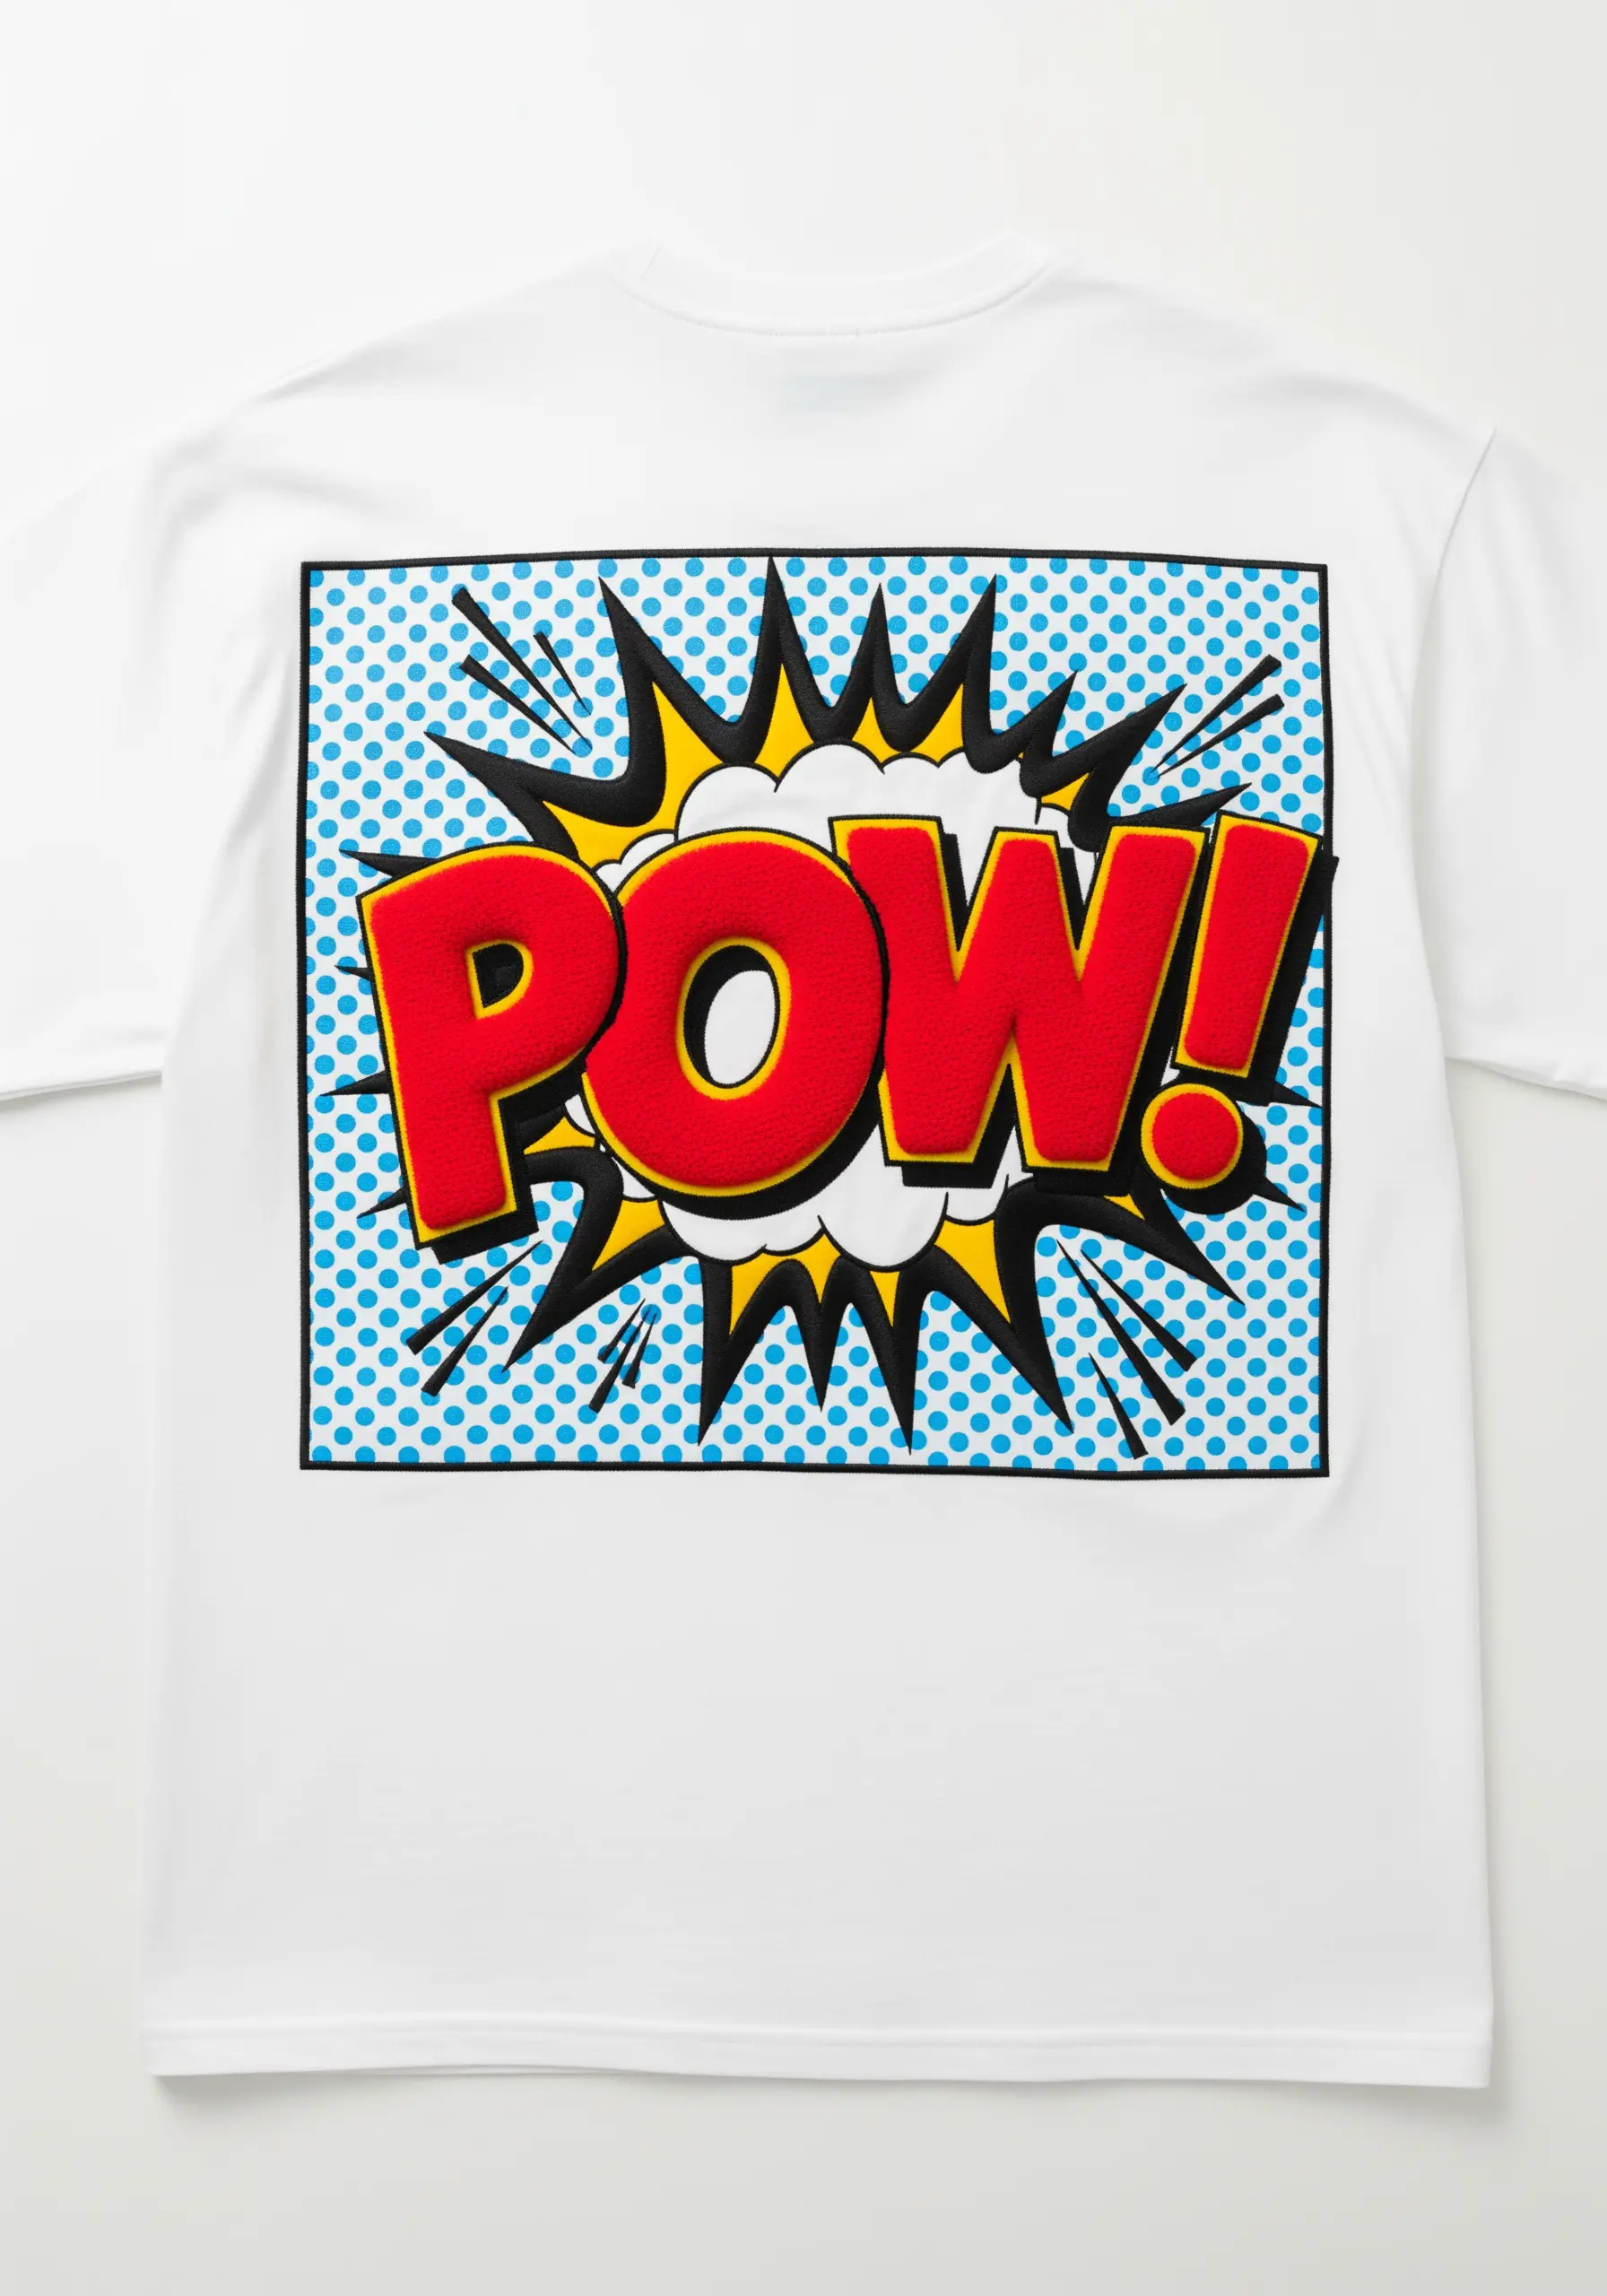
The secret to authentic comic book style embroidery is an unapologetically bold, black outline.
Fill the letters and explosion shape with dense, flat satin stitch in primary colors for that classic printed look.
Then, frame every shape with a thick, heavy outline using either a wide satin stitch or a whipped backstitch with all six strands of floss.
For the halftone background, use perfectly spaced French knots to replicate the dot pattern of vintage comics.
7. Minimalist Typography with High-Contrast Thread
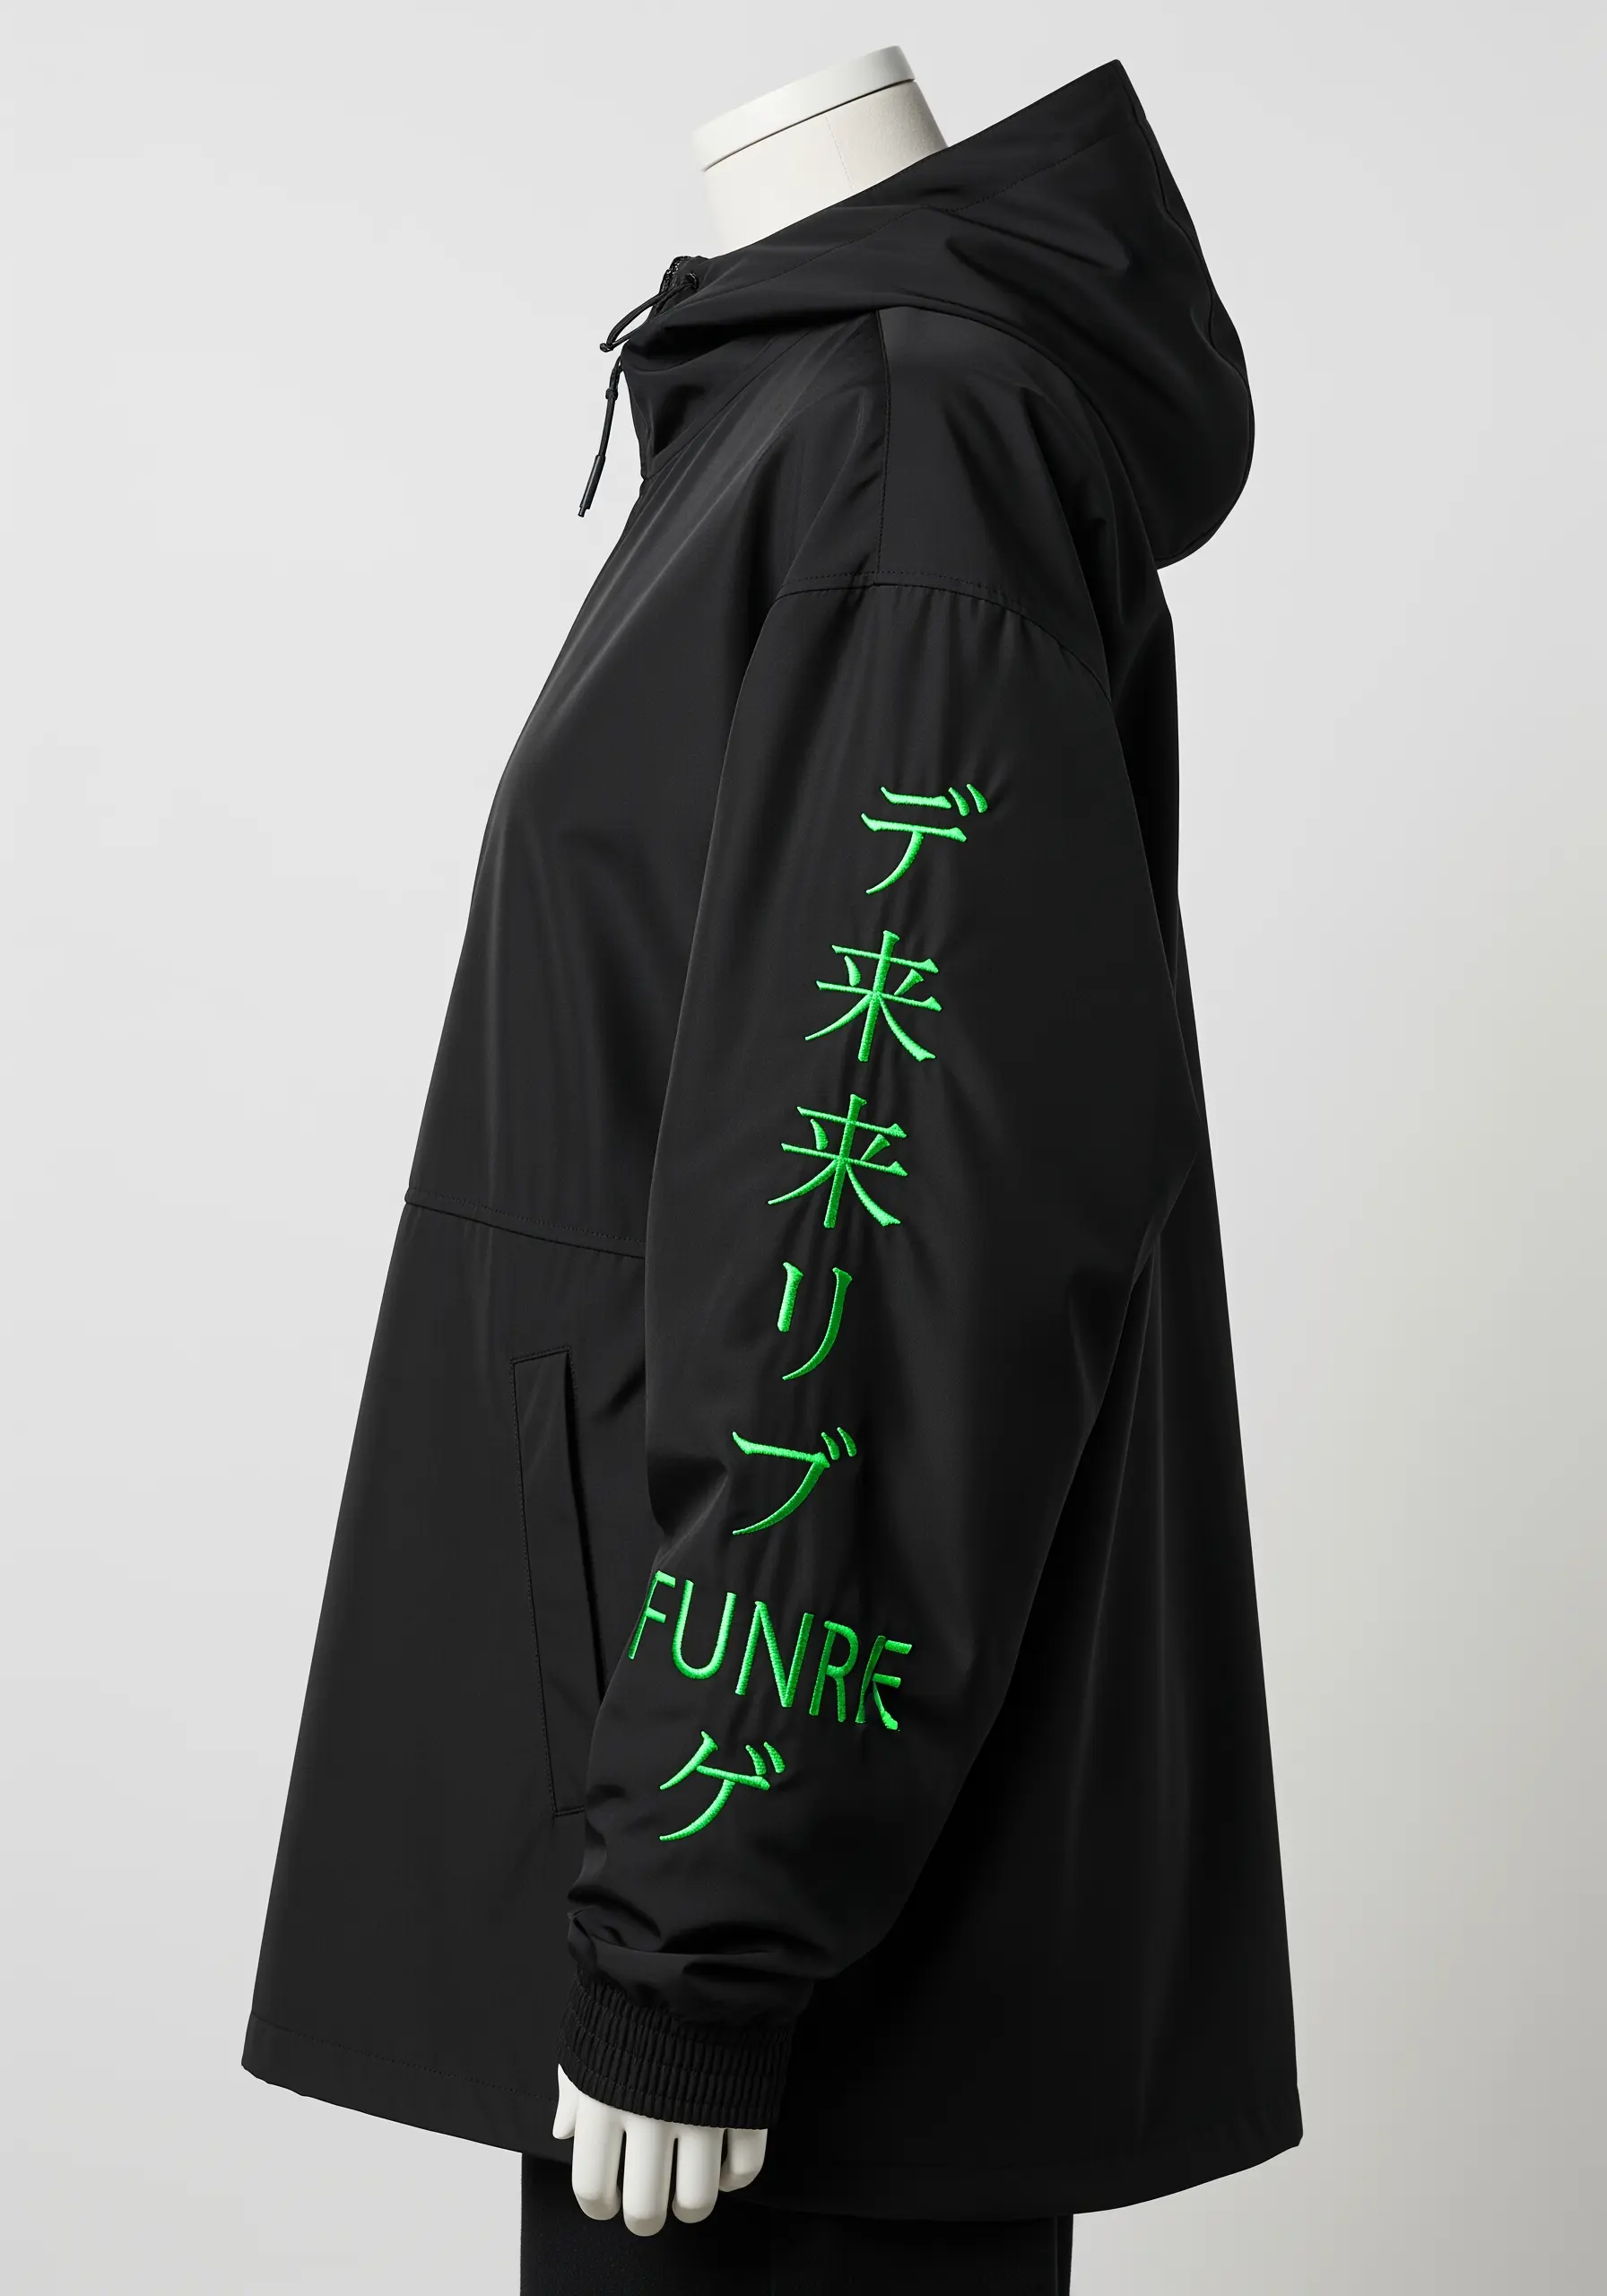
When embroidering bold text on performance fabrics or knits, stability is crucial.
Always use a heavy-duty cut-away stabilizer on the back of your garment to prevent the fabric from puckering or stretching around the stitches.
For the letters themselves, a whipped backstitch or a clean stem stitch will create smooth, consistent lines.
Choosing a vibrant, neon thread against a dark, technical fabric creates a sharp, futuristic look that feels both clean and rebellious.
8. Abstract Composition with Geometric Fill Stitches
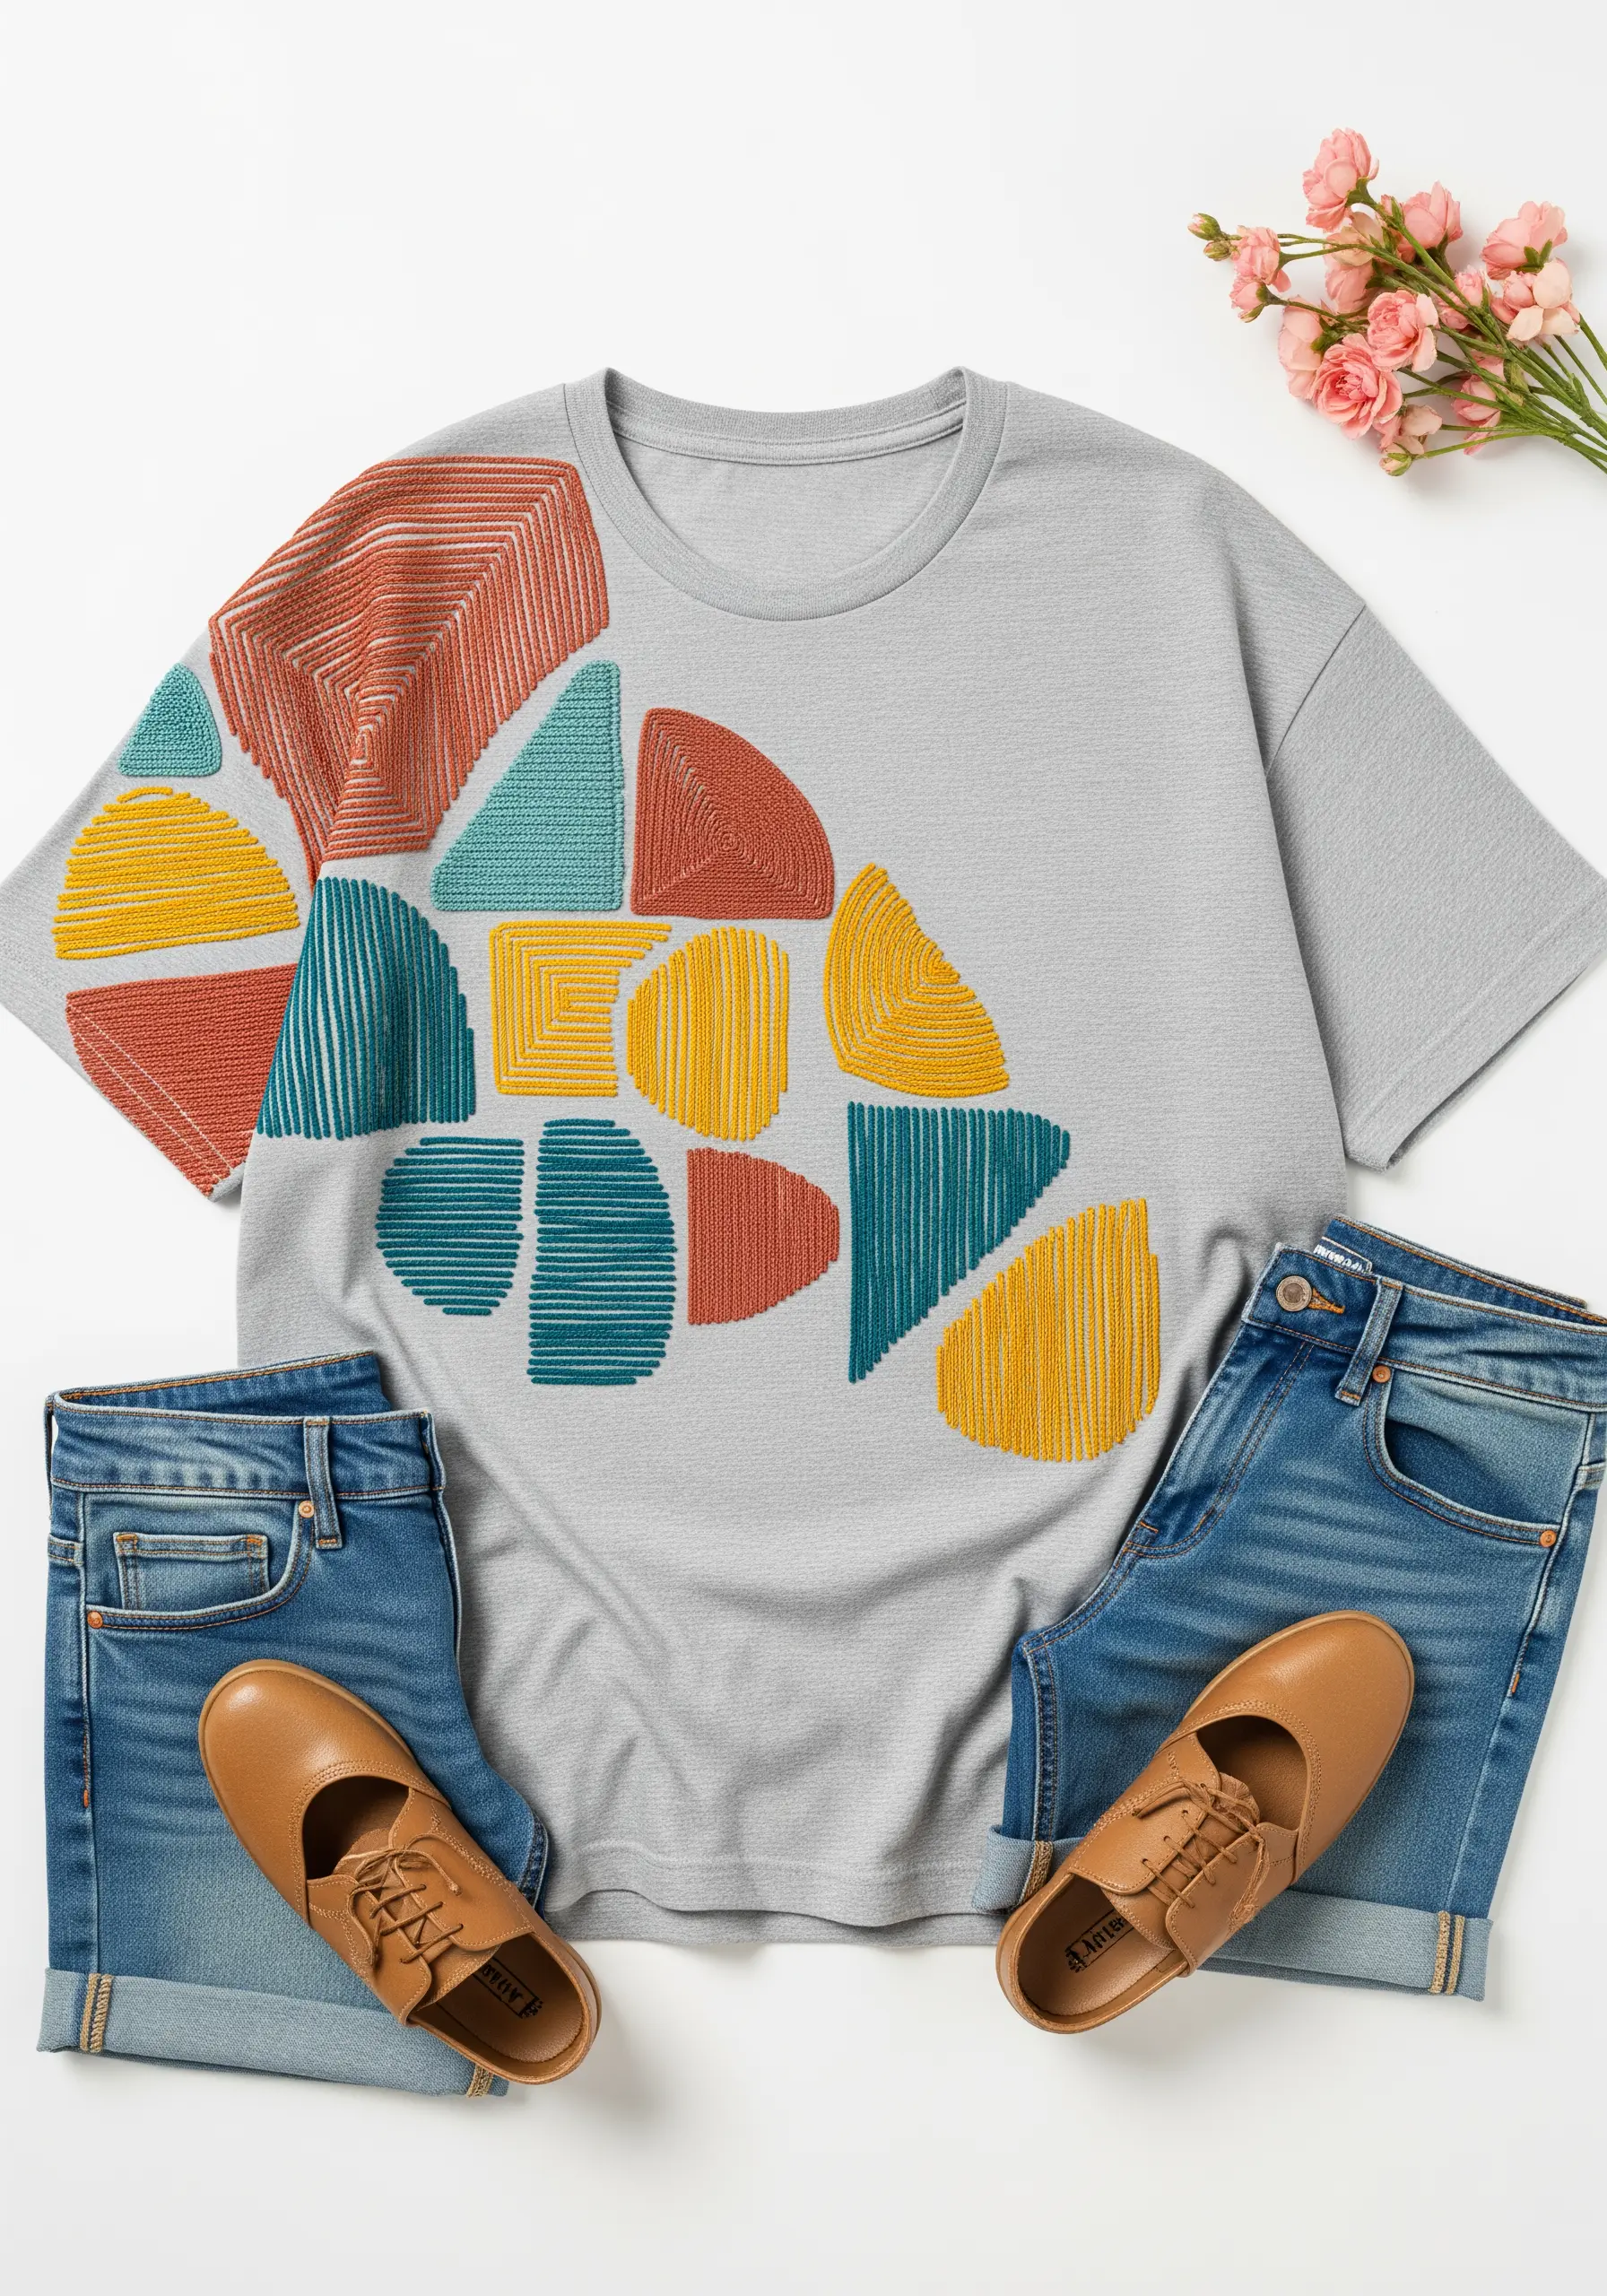
You don’t need complex stitches to create compelling texture.
Design a cluster of abstract, geometric shapes and fill each one with simple straight stitches or seed stitches.
The trick is to vary the direction of your stitches in adjacent shapes—fill one with vertical lines, the next with horizontal, and another with diagonal.
This simple technique creates a dynamic, woven-like texture and defines each shape without relying on outlines.
9. Anatomical Realism with Deconstructed Threadwork
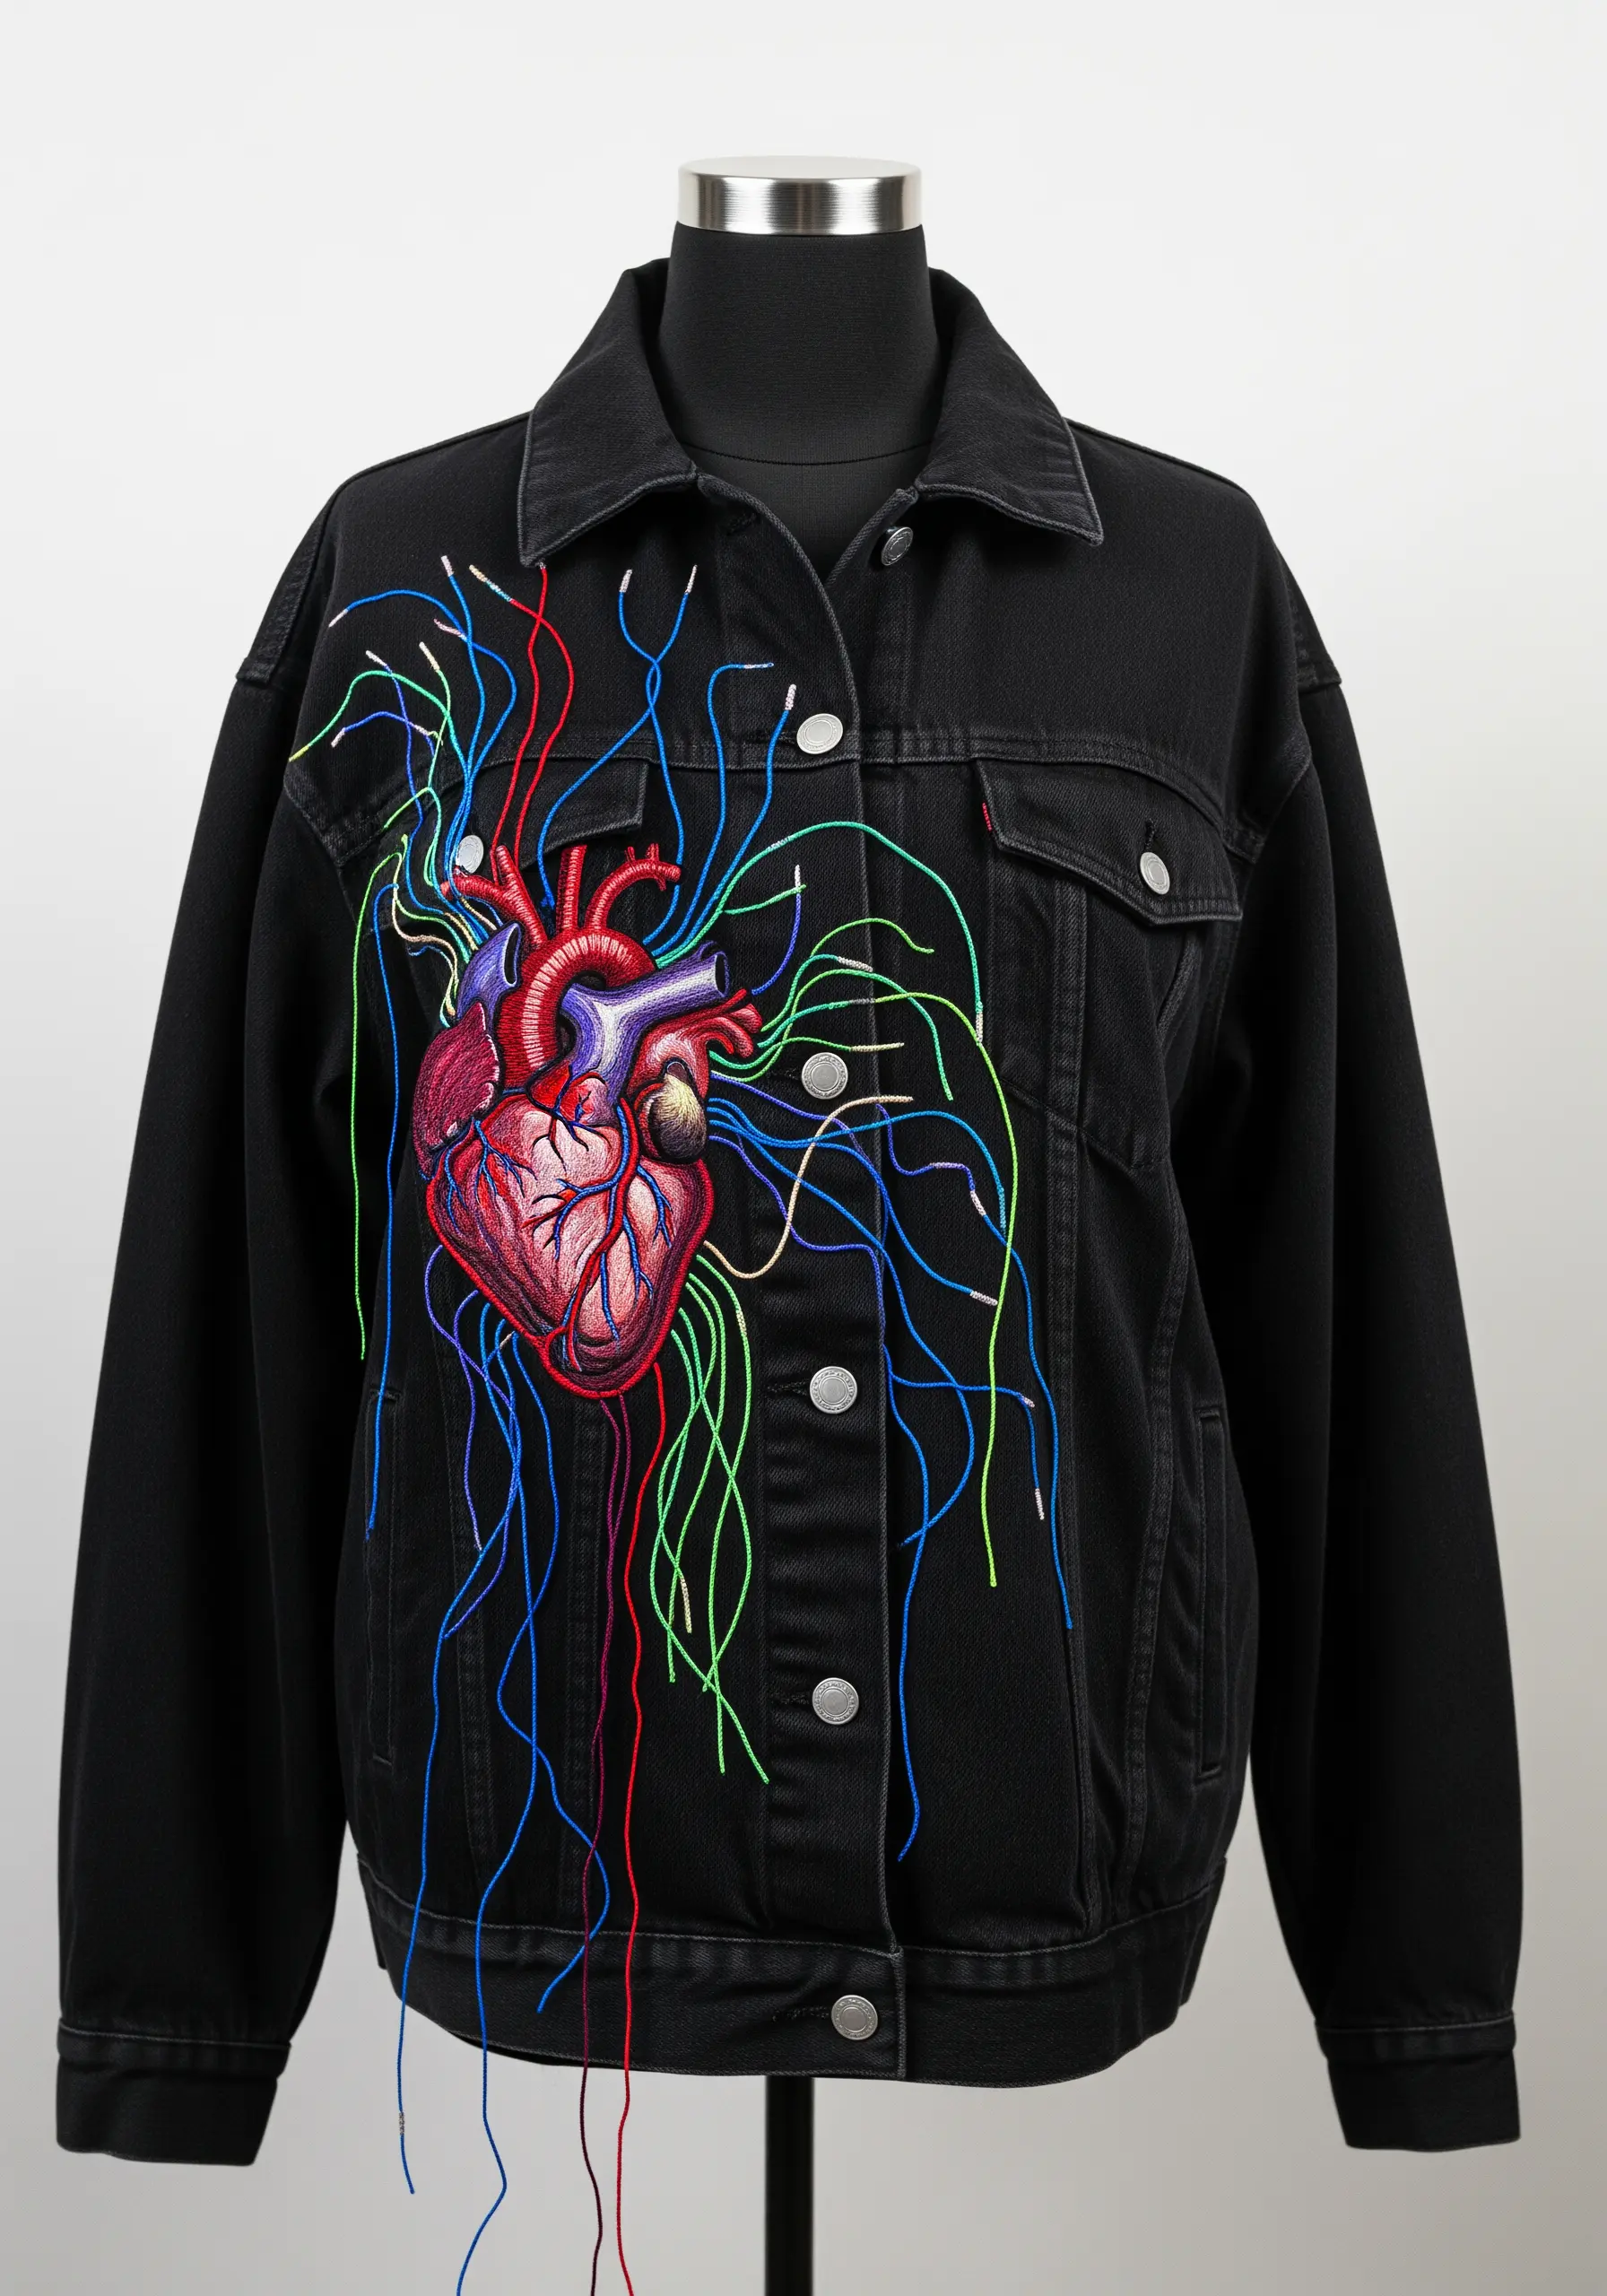
Create a powerful visual narrative by contrasting meticulous detail with intentional chaos.
Render the anatomical heart with precise thread painting, using long-and-short stitch to blend reds and purples for a realistic finish.
For the extending veins and arteries, switch to long, loose stitches in vibrant colors, allowing the ends to hang free.
Tack the threads down in a few strategic spots to guide their shape, but leave the rest untamed for a raw, expressive look that breaks the boundaries of the design.
10. Retro Gaming Nostalgia with Pixel-Perfect Stitches
To recreate the sharp, blocky aesthetic of 8-bit video games, you have two excellent options.
The first is traditional cross-stitch on waste canvas, which provides a perfect grid directly on your garment that you can tear away when finished.
For a denser, more opaque look, map out your design on a grid and fill each square with a tiny, precise satin stitch.
This method gives you that classic pixelated feel with a smooth, almost patch-like finish.
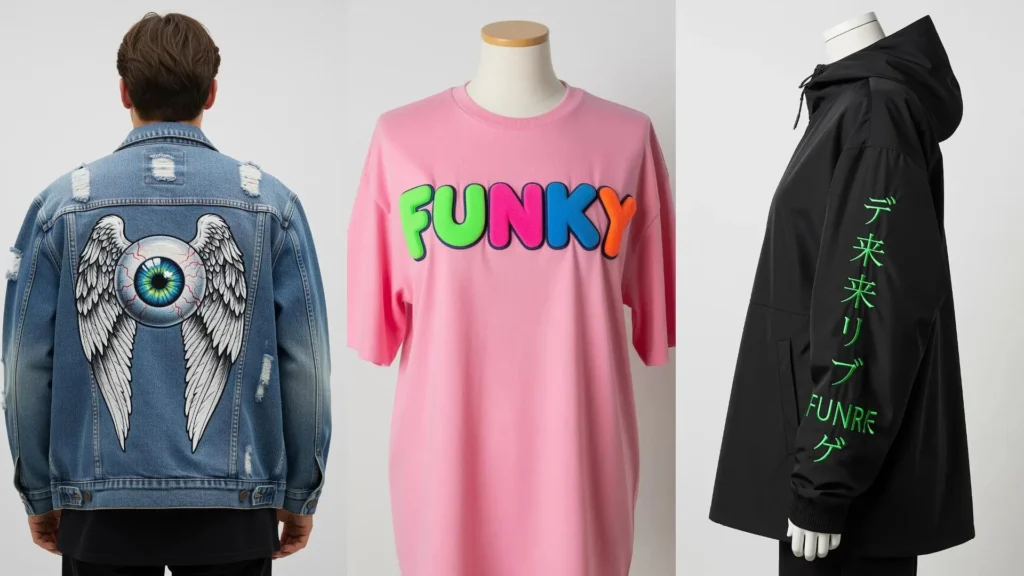
11. Surrealist Detail with Hyper-Realistic Thread Painting
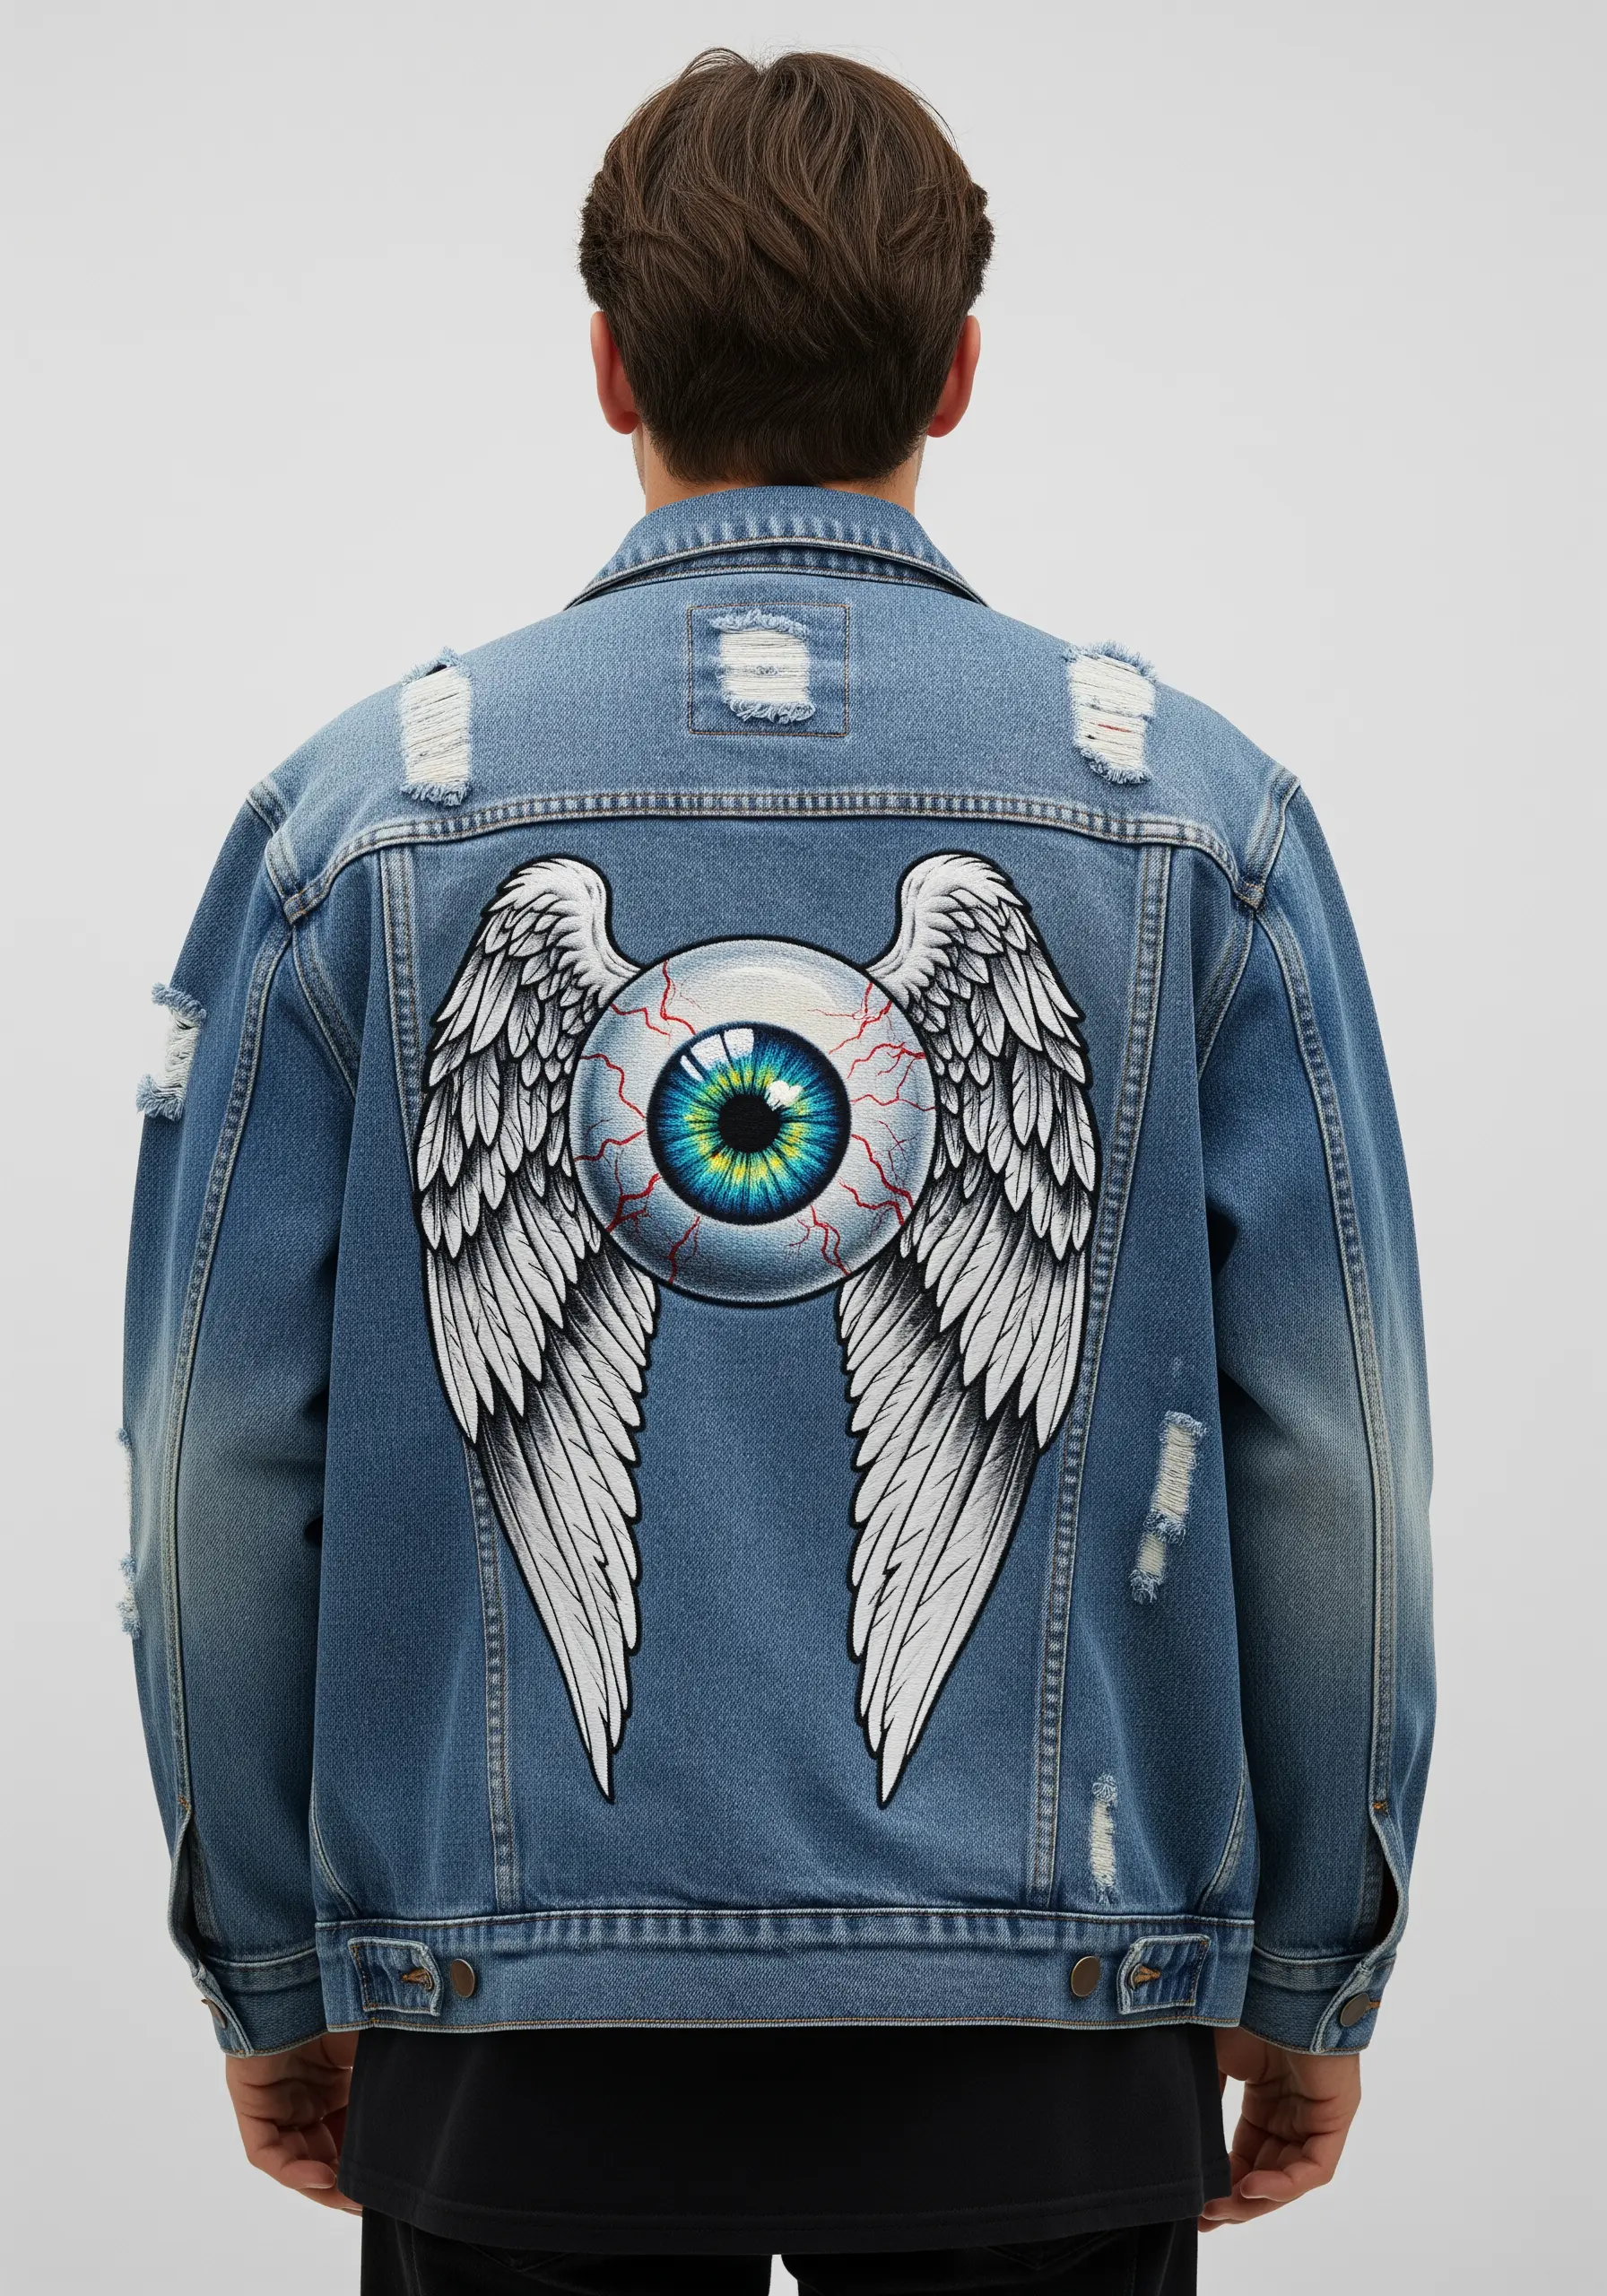
The soul of this design is the hyper-realistic iris.
To achieve this depth, use single strands of multiple thread colors (blues, greens, and a touch of yellow) in a radial split stitch, working from the pupil outwards.
For the whites of the eye, avoid pure white; instead, use shades of off-white and very light grey to create shadow and form.
A few fine, red split stitches for veins will complete the illusion of a living, surrealist eye.
12. Neo-Traditional Tiger with Bold Color Blocking
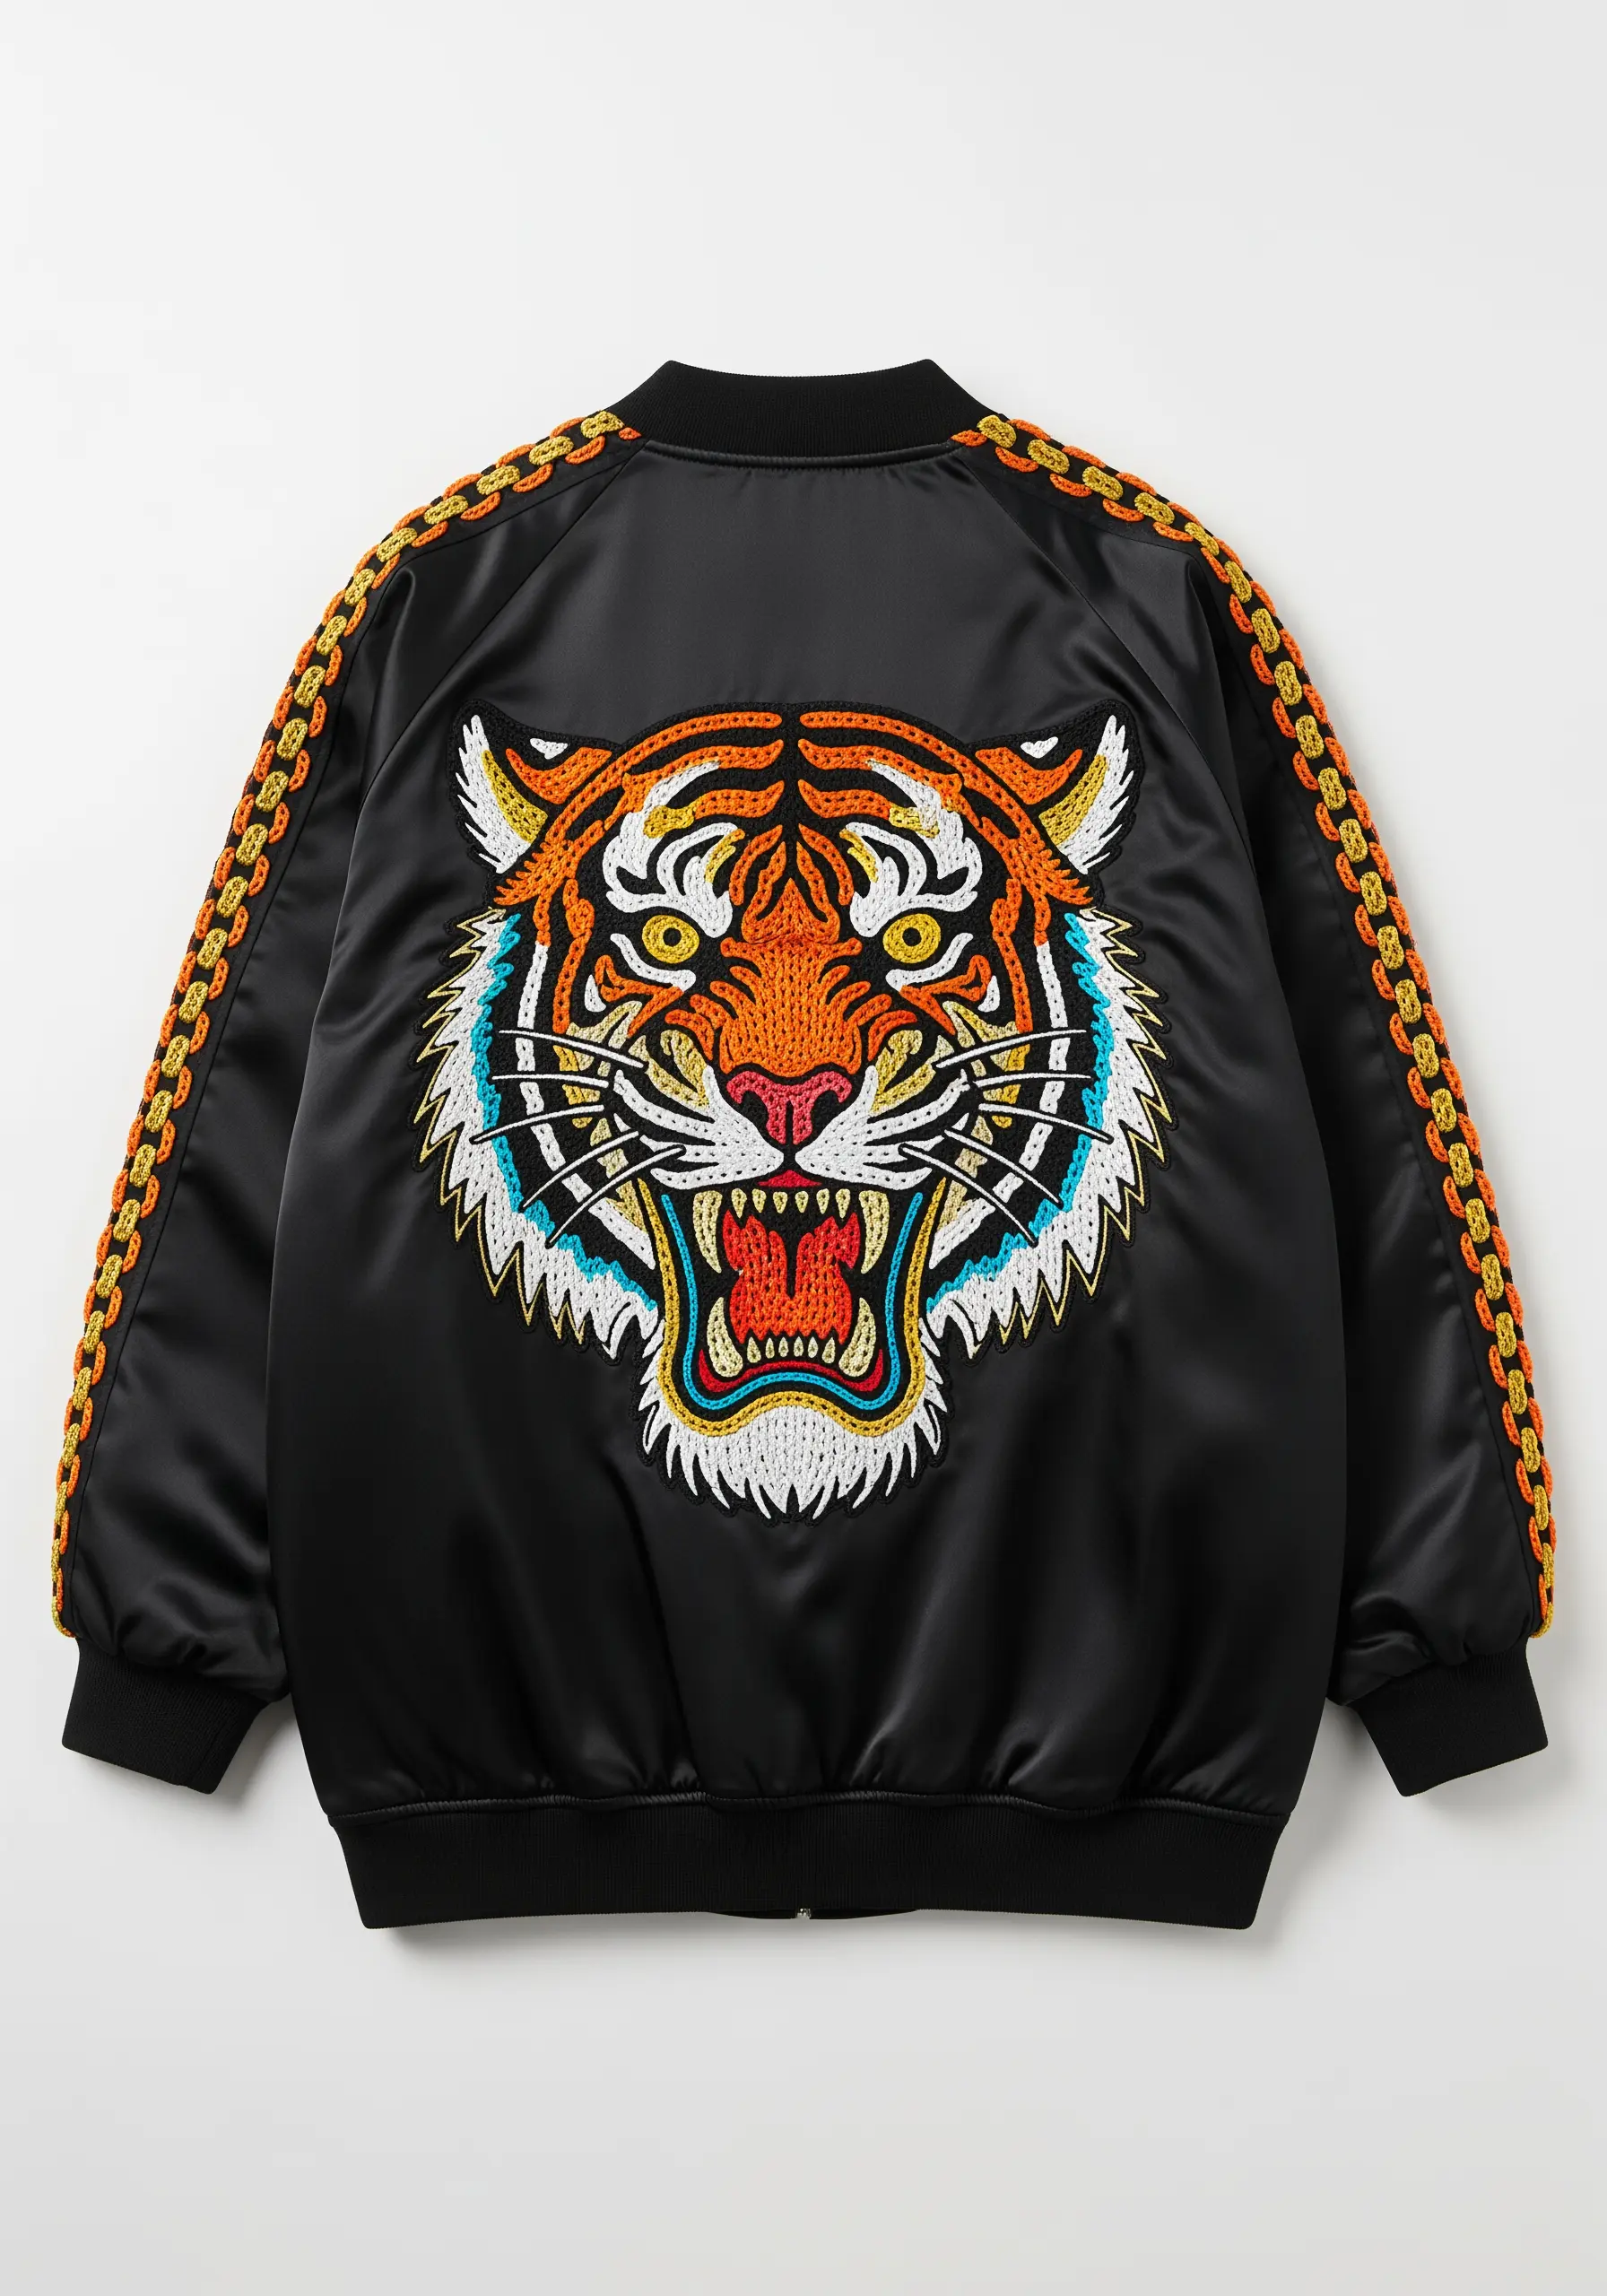
This iconic style, reminiscent of classic sukajan (souvenir jackets), relies on crisp, defined shapes and zero color blending.
Use a dense, uniform satin stitch to fill each color block, ensuring your stitch direction follows the contours of the shape—for example, curving the stitches along the tiger’s stripes.
A heavy, black satin stitch border is non-negotiable; it defines every element and delivers that powerful, graphic punch.
13. 3D Bubble Lettering with Padded Appliqué
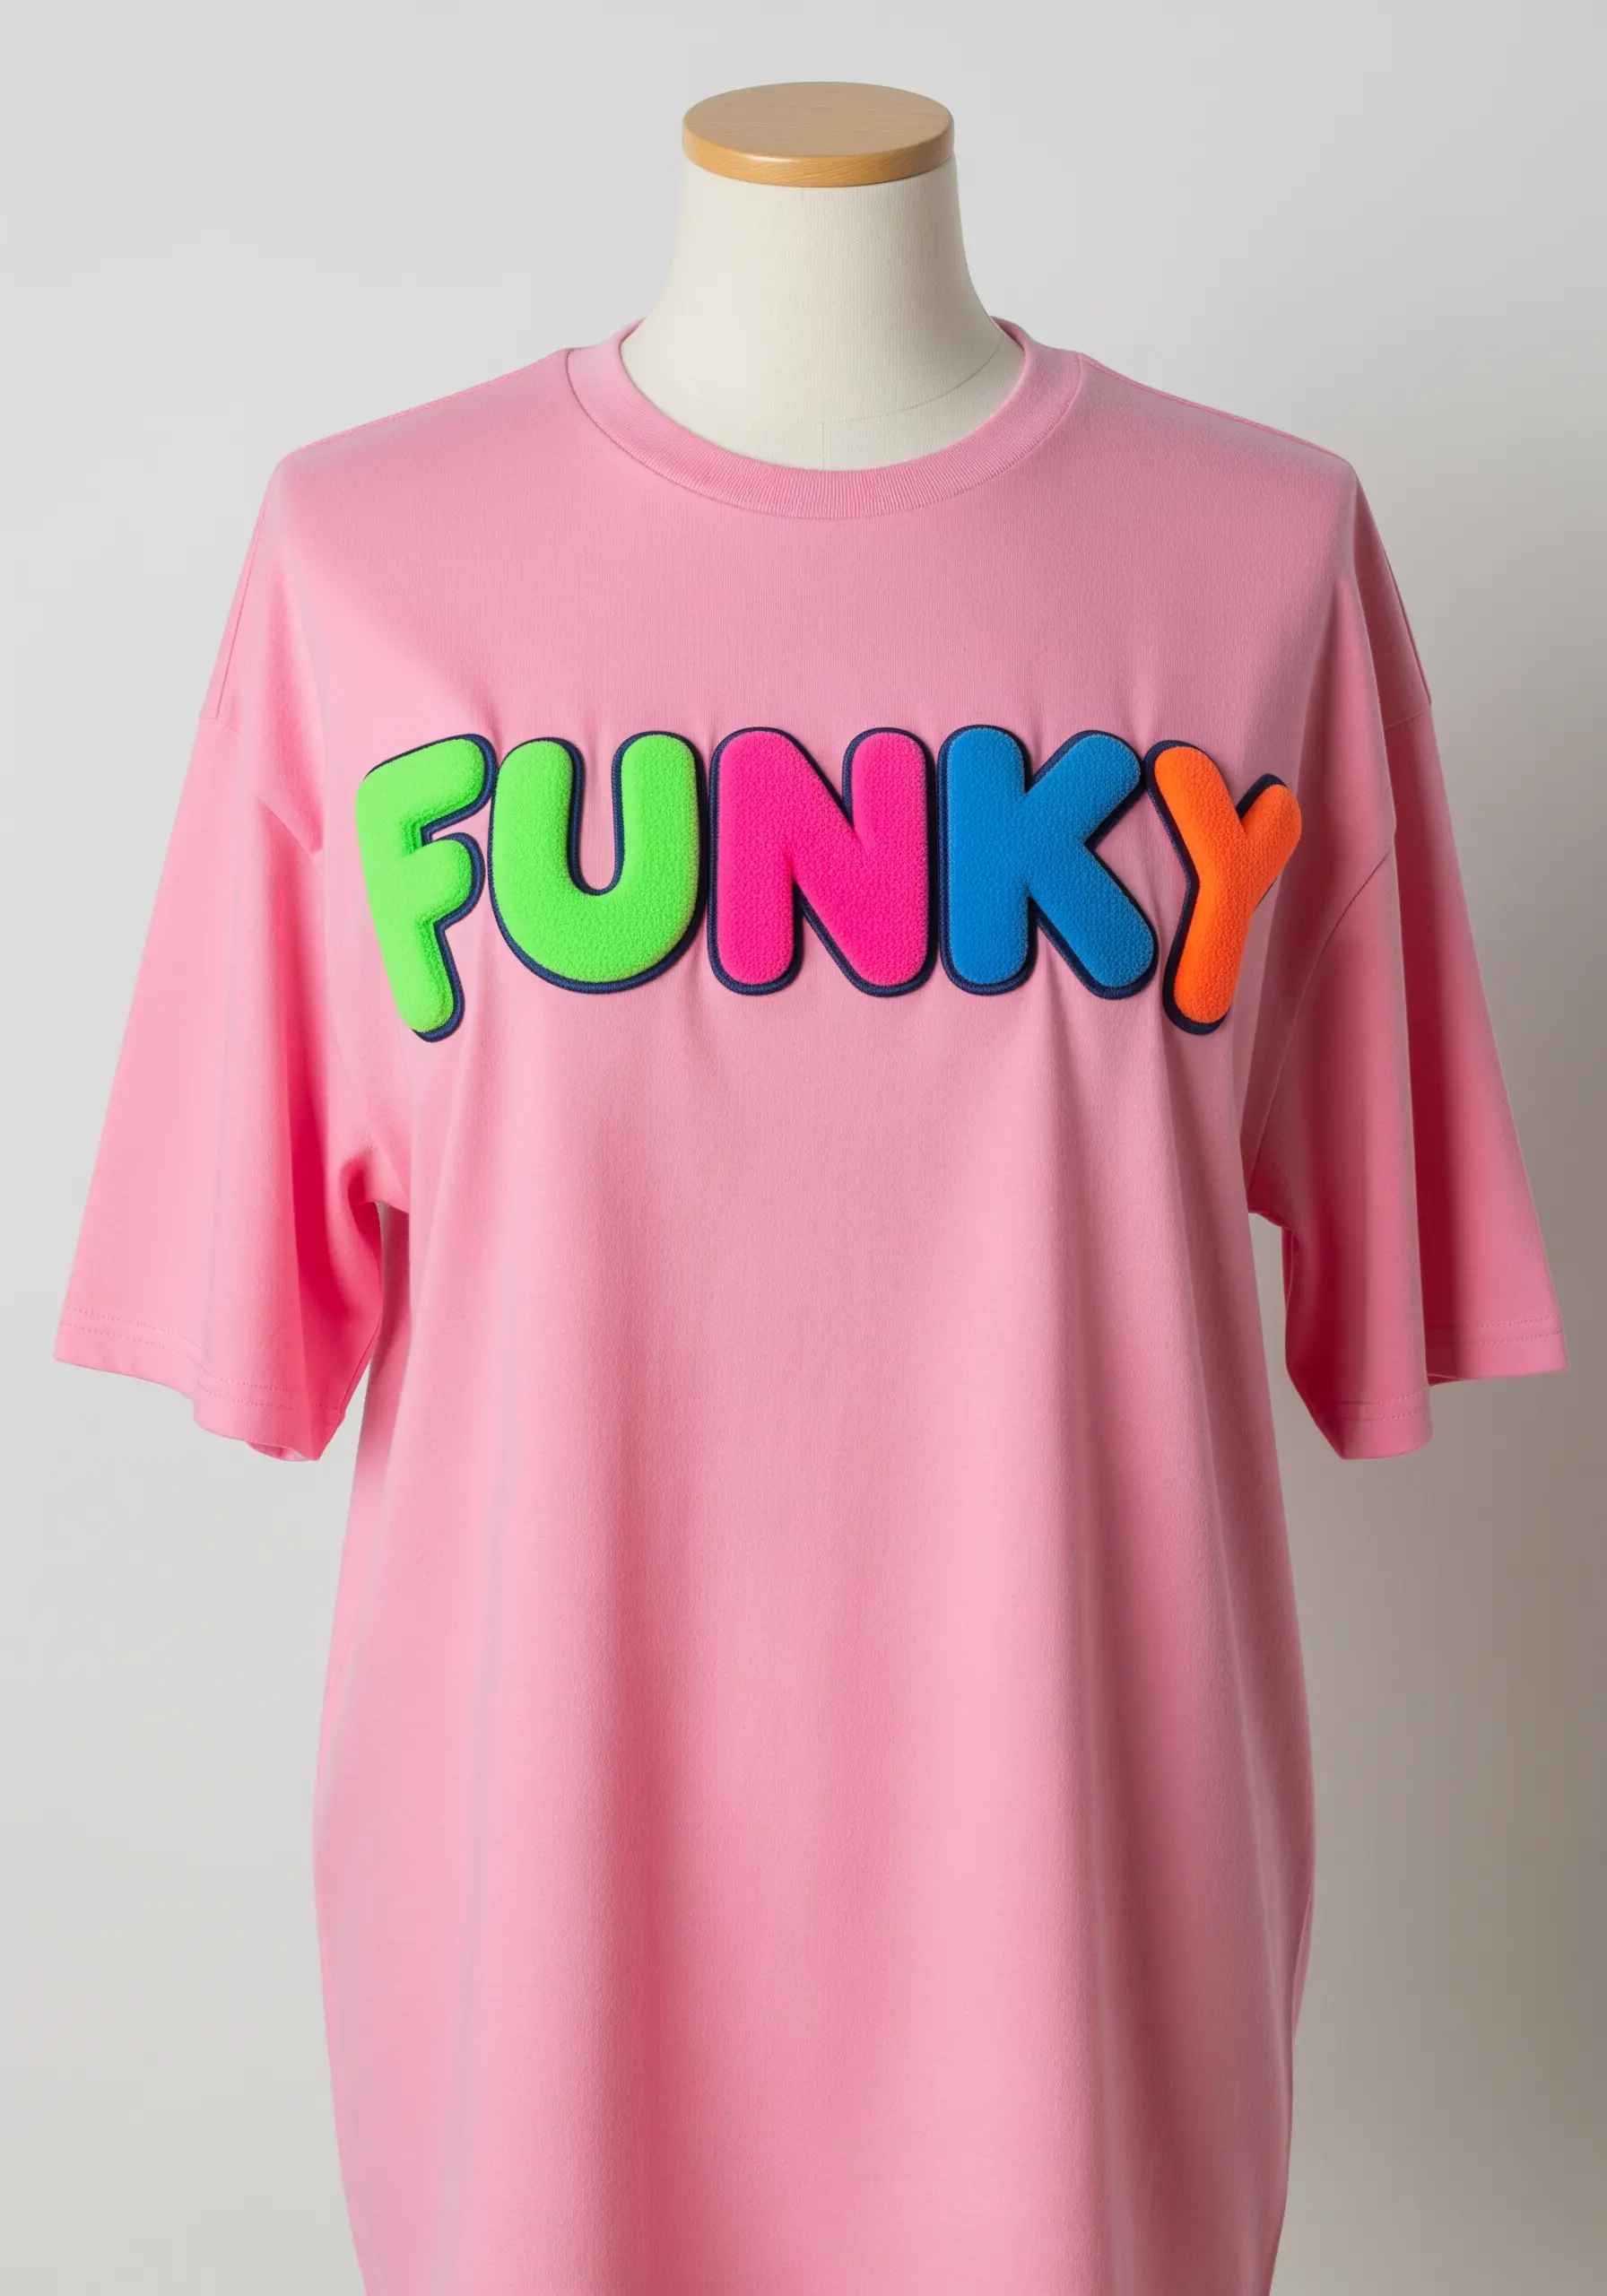
Get that puffy, cartoonish 3D effect by using padded appliqué.
Cut your letter shapes from felt, and place a small piece of thin batting or craft foam underneath each one before placing it on your shirt.
Secure the shape with a few temporary stitches, then use a wide, dense satin stitch in a contrasting color to cover the raw edges completely.
This technique not only hides the edge of the appliqué fabric but also compresses the padding, making the center of the letter pop up.
14. Skate-Graphic Style with a Neon Halo Outline
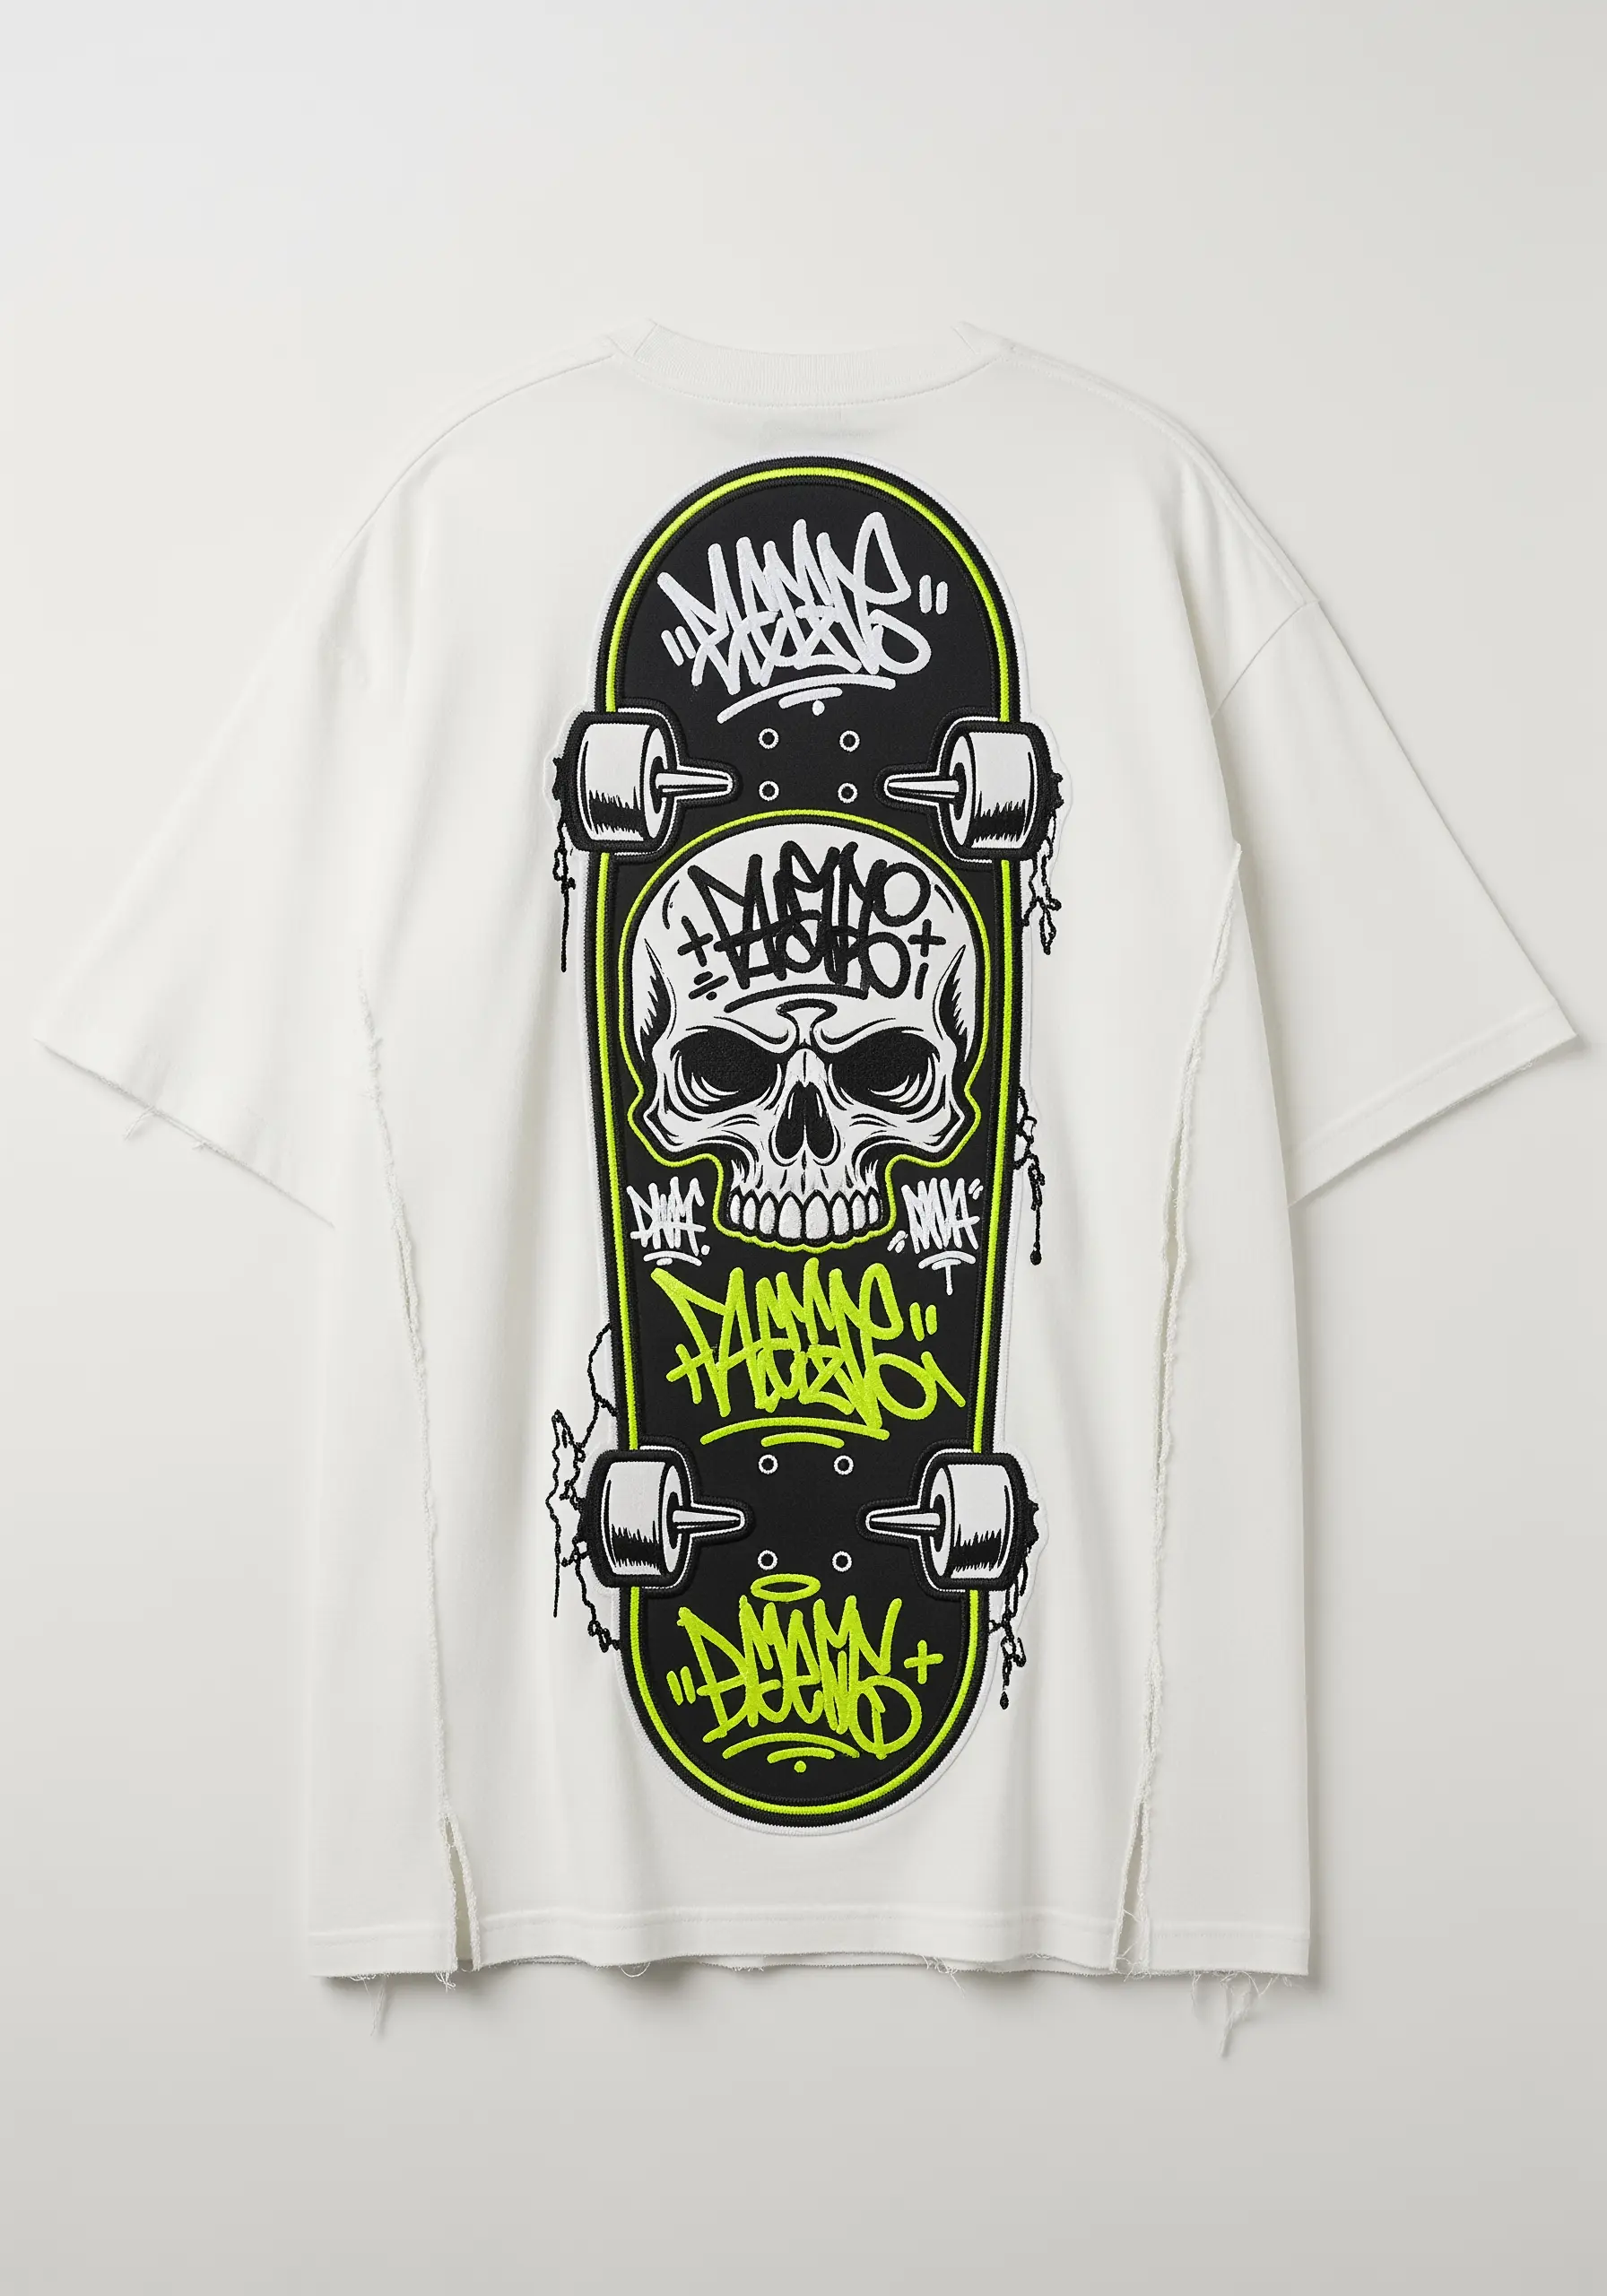
To replicate the look of a vinyl sticker or a screen-printed skate deck, focus on the outline.
Embroider the main skull-and-board design using standard fill stitches.
Then, using a vibrant, fluorescent thread, add a second outline slightly offset from the first.
This creates a “halo” or “glow” effect that mimics the bright, energetic aesthetic of skate culture and makes the entire design lift off the fabric.
15. Iridescent Appliqué for a Sci-Fi Sheen
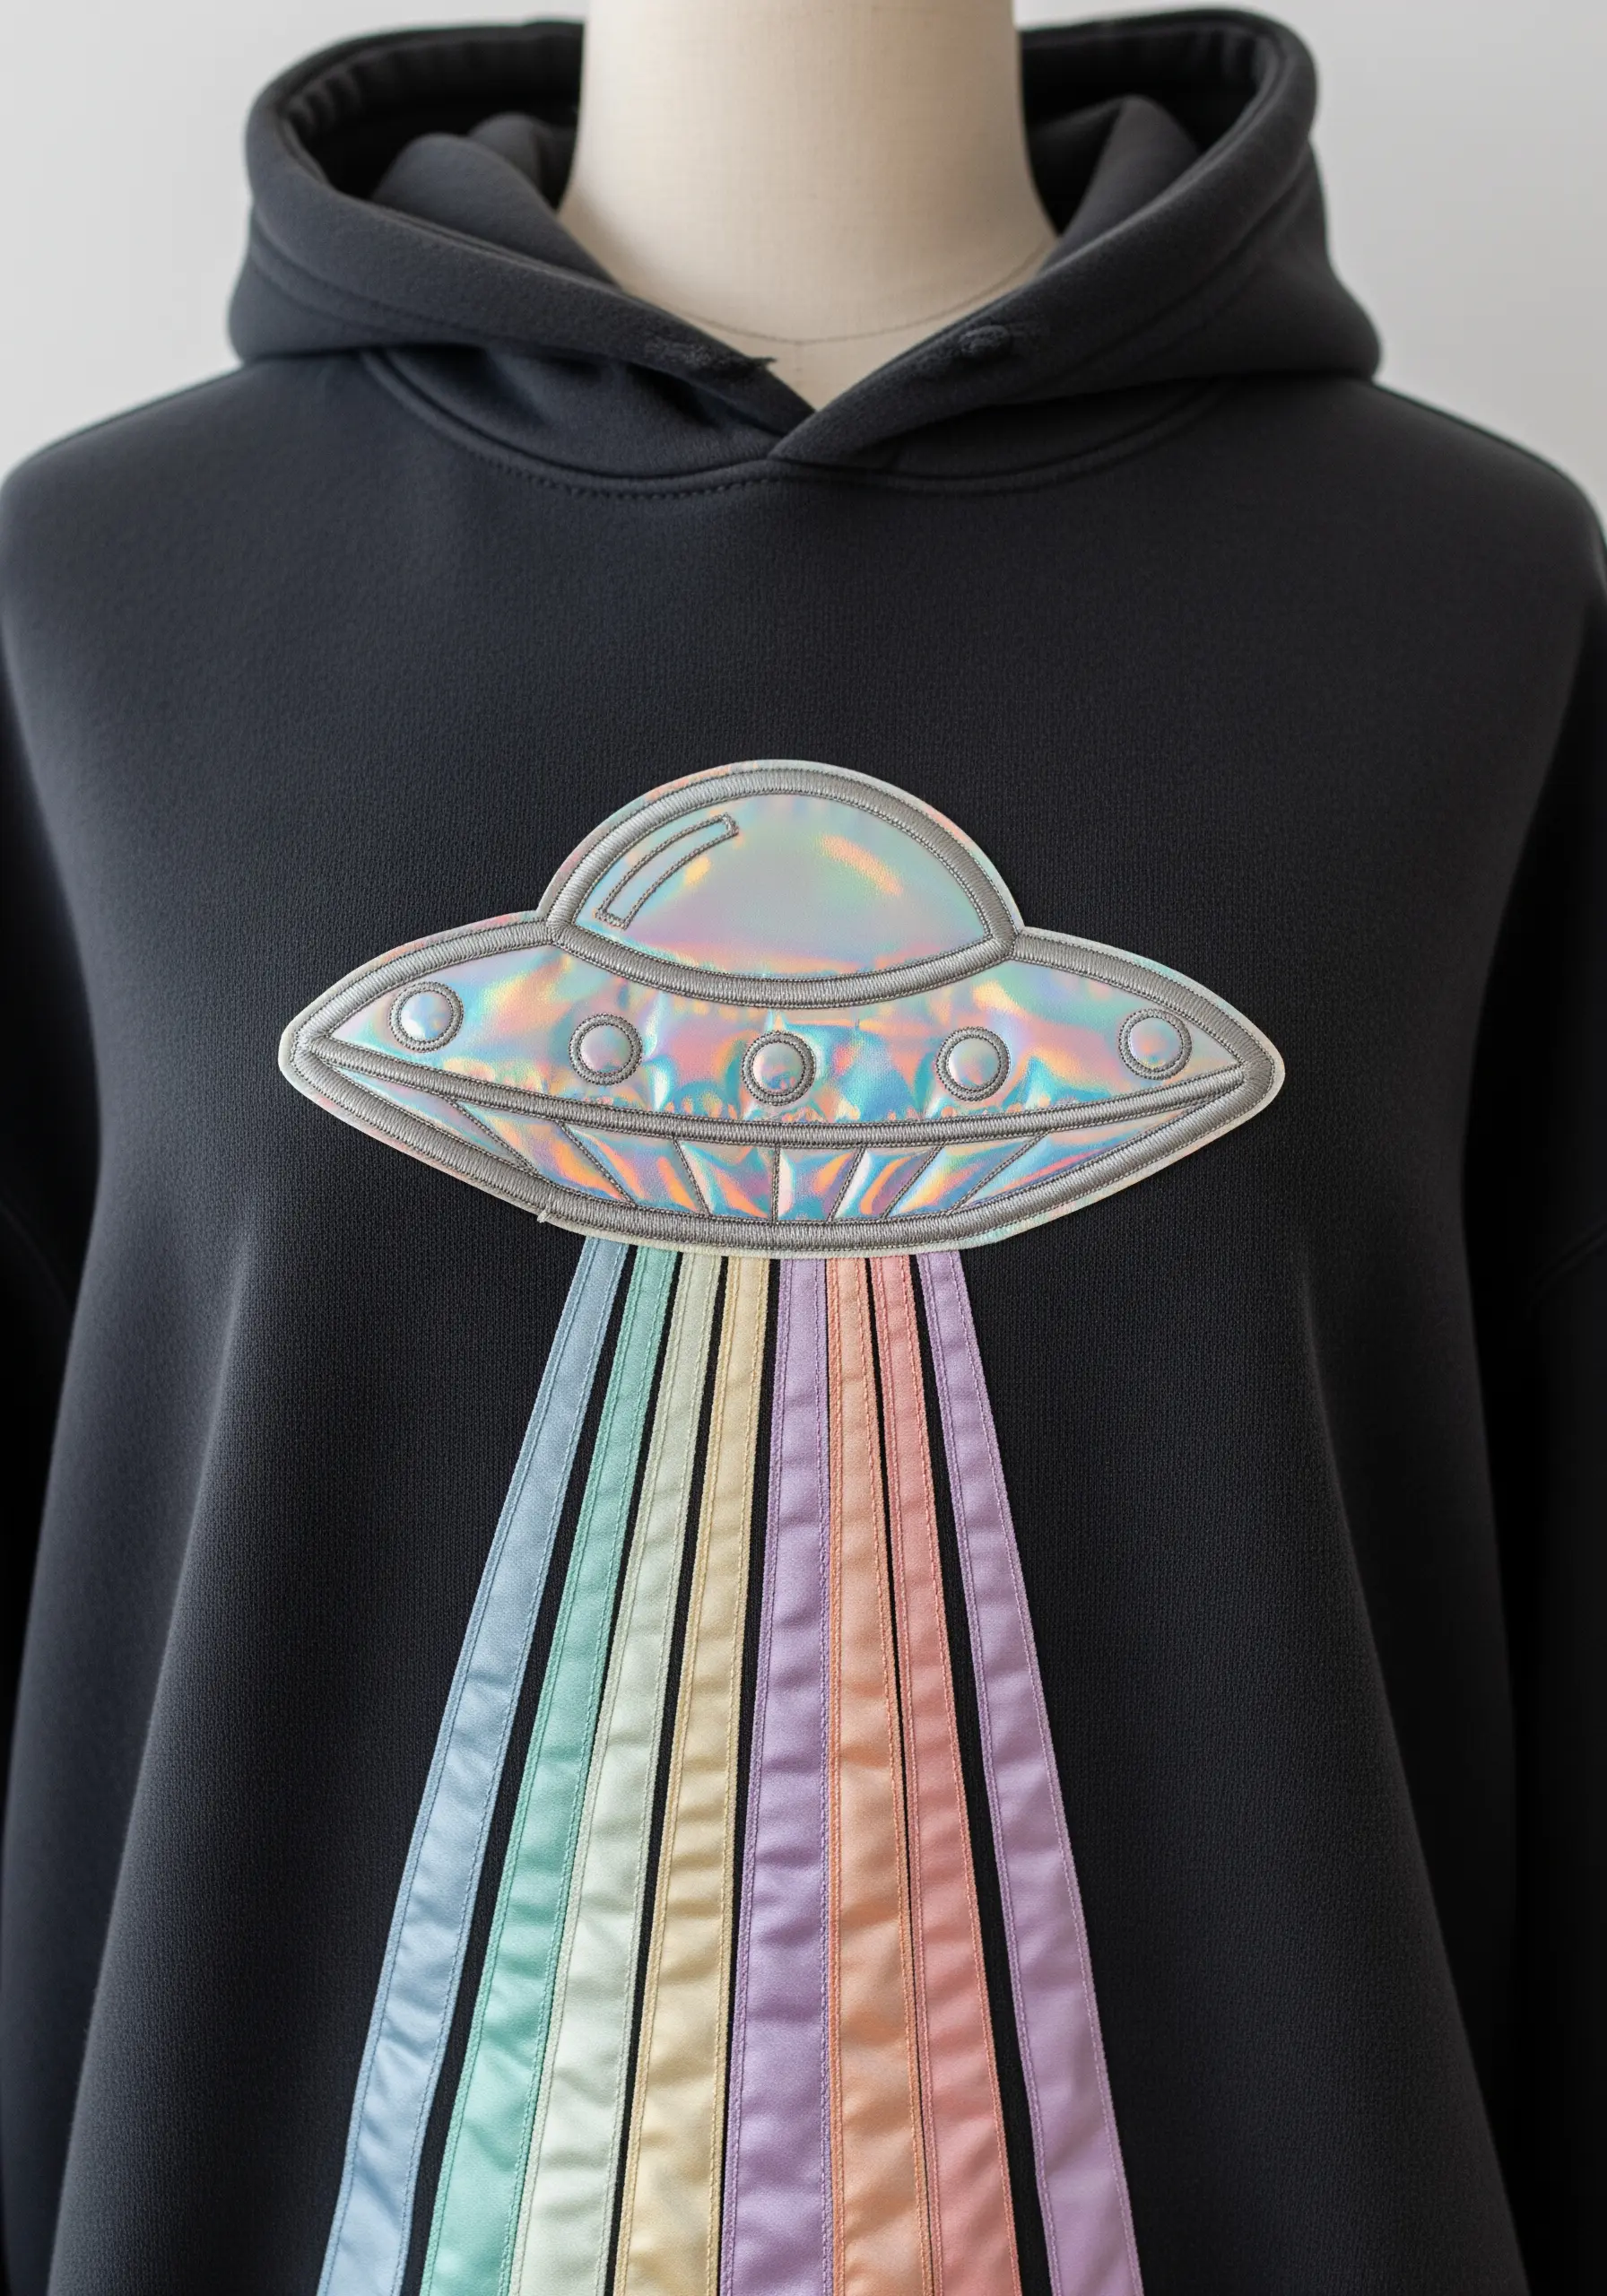
The futuristic shimmer of this UFO comes from the fabric, not the thread.
Incorporate mixed-media embroidery by using an iridescent or holographic fabric for the main body of the ship.
Cut out the shape, tack it onto your hoodie, and then use a clean, tight satin stitch border in silver or grey thread to secure the edges.
This combines the light-catching quality of the specialty fabric with the polished, professional finish of embroidery.
16. American Traditional Tattoo Flash Embroidery
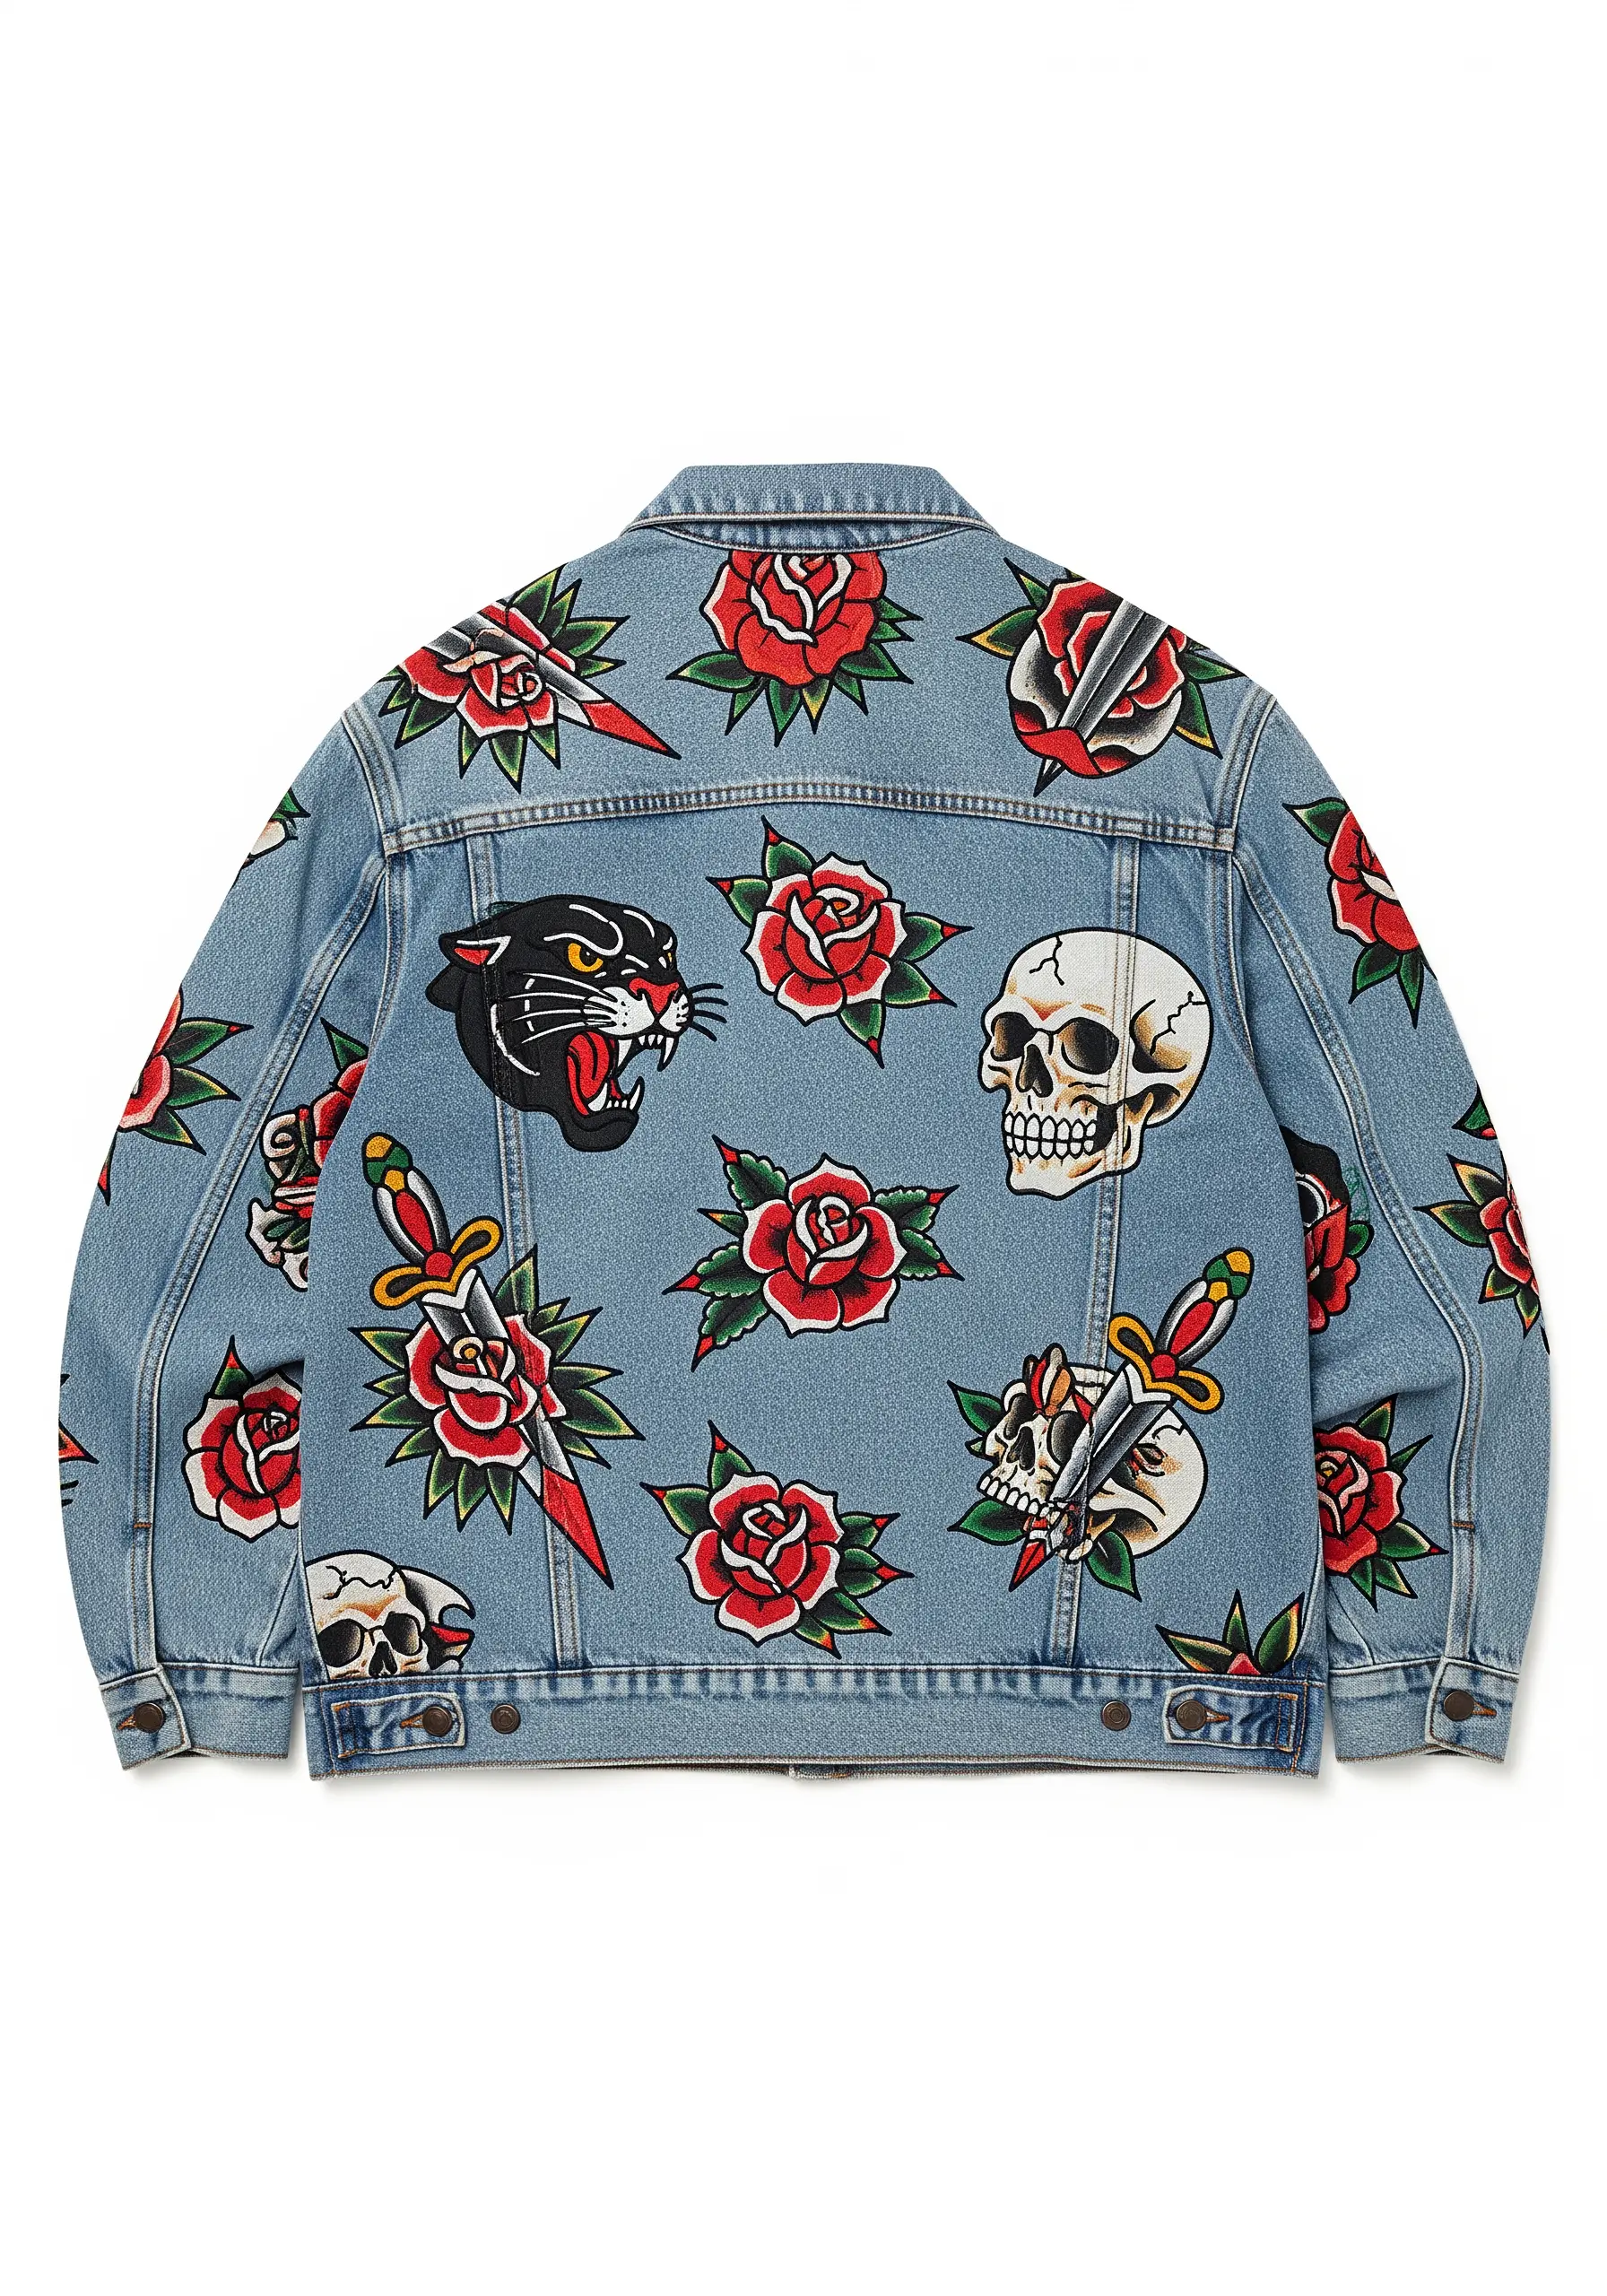
To capture the authentic spirit of classic tattoo flash, embrace simplicity and restraint.
Use a strictly limited color palette: bold reds, primary greens, golden yellows, and lots of black.
Fill shapes with flat, simple satin stitch and avoid any complex blending or shading.
The most crucial element is the clean, bold black outline around every single motif. Use a thick stem stitch or backstitch to ensure it’s strong and unwavering, just like a tattoo artist’s line work.
17. Deconstructed Mixtape with Loose Thread Art
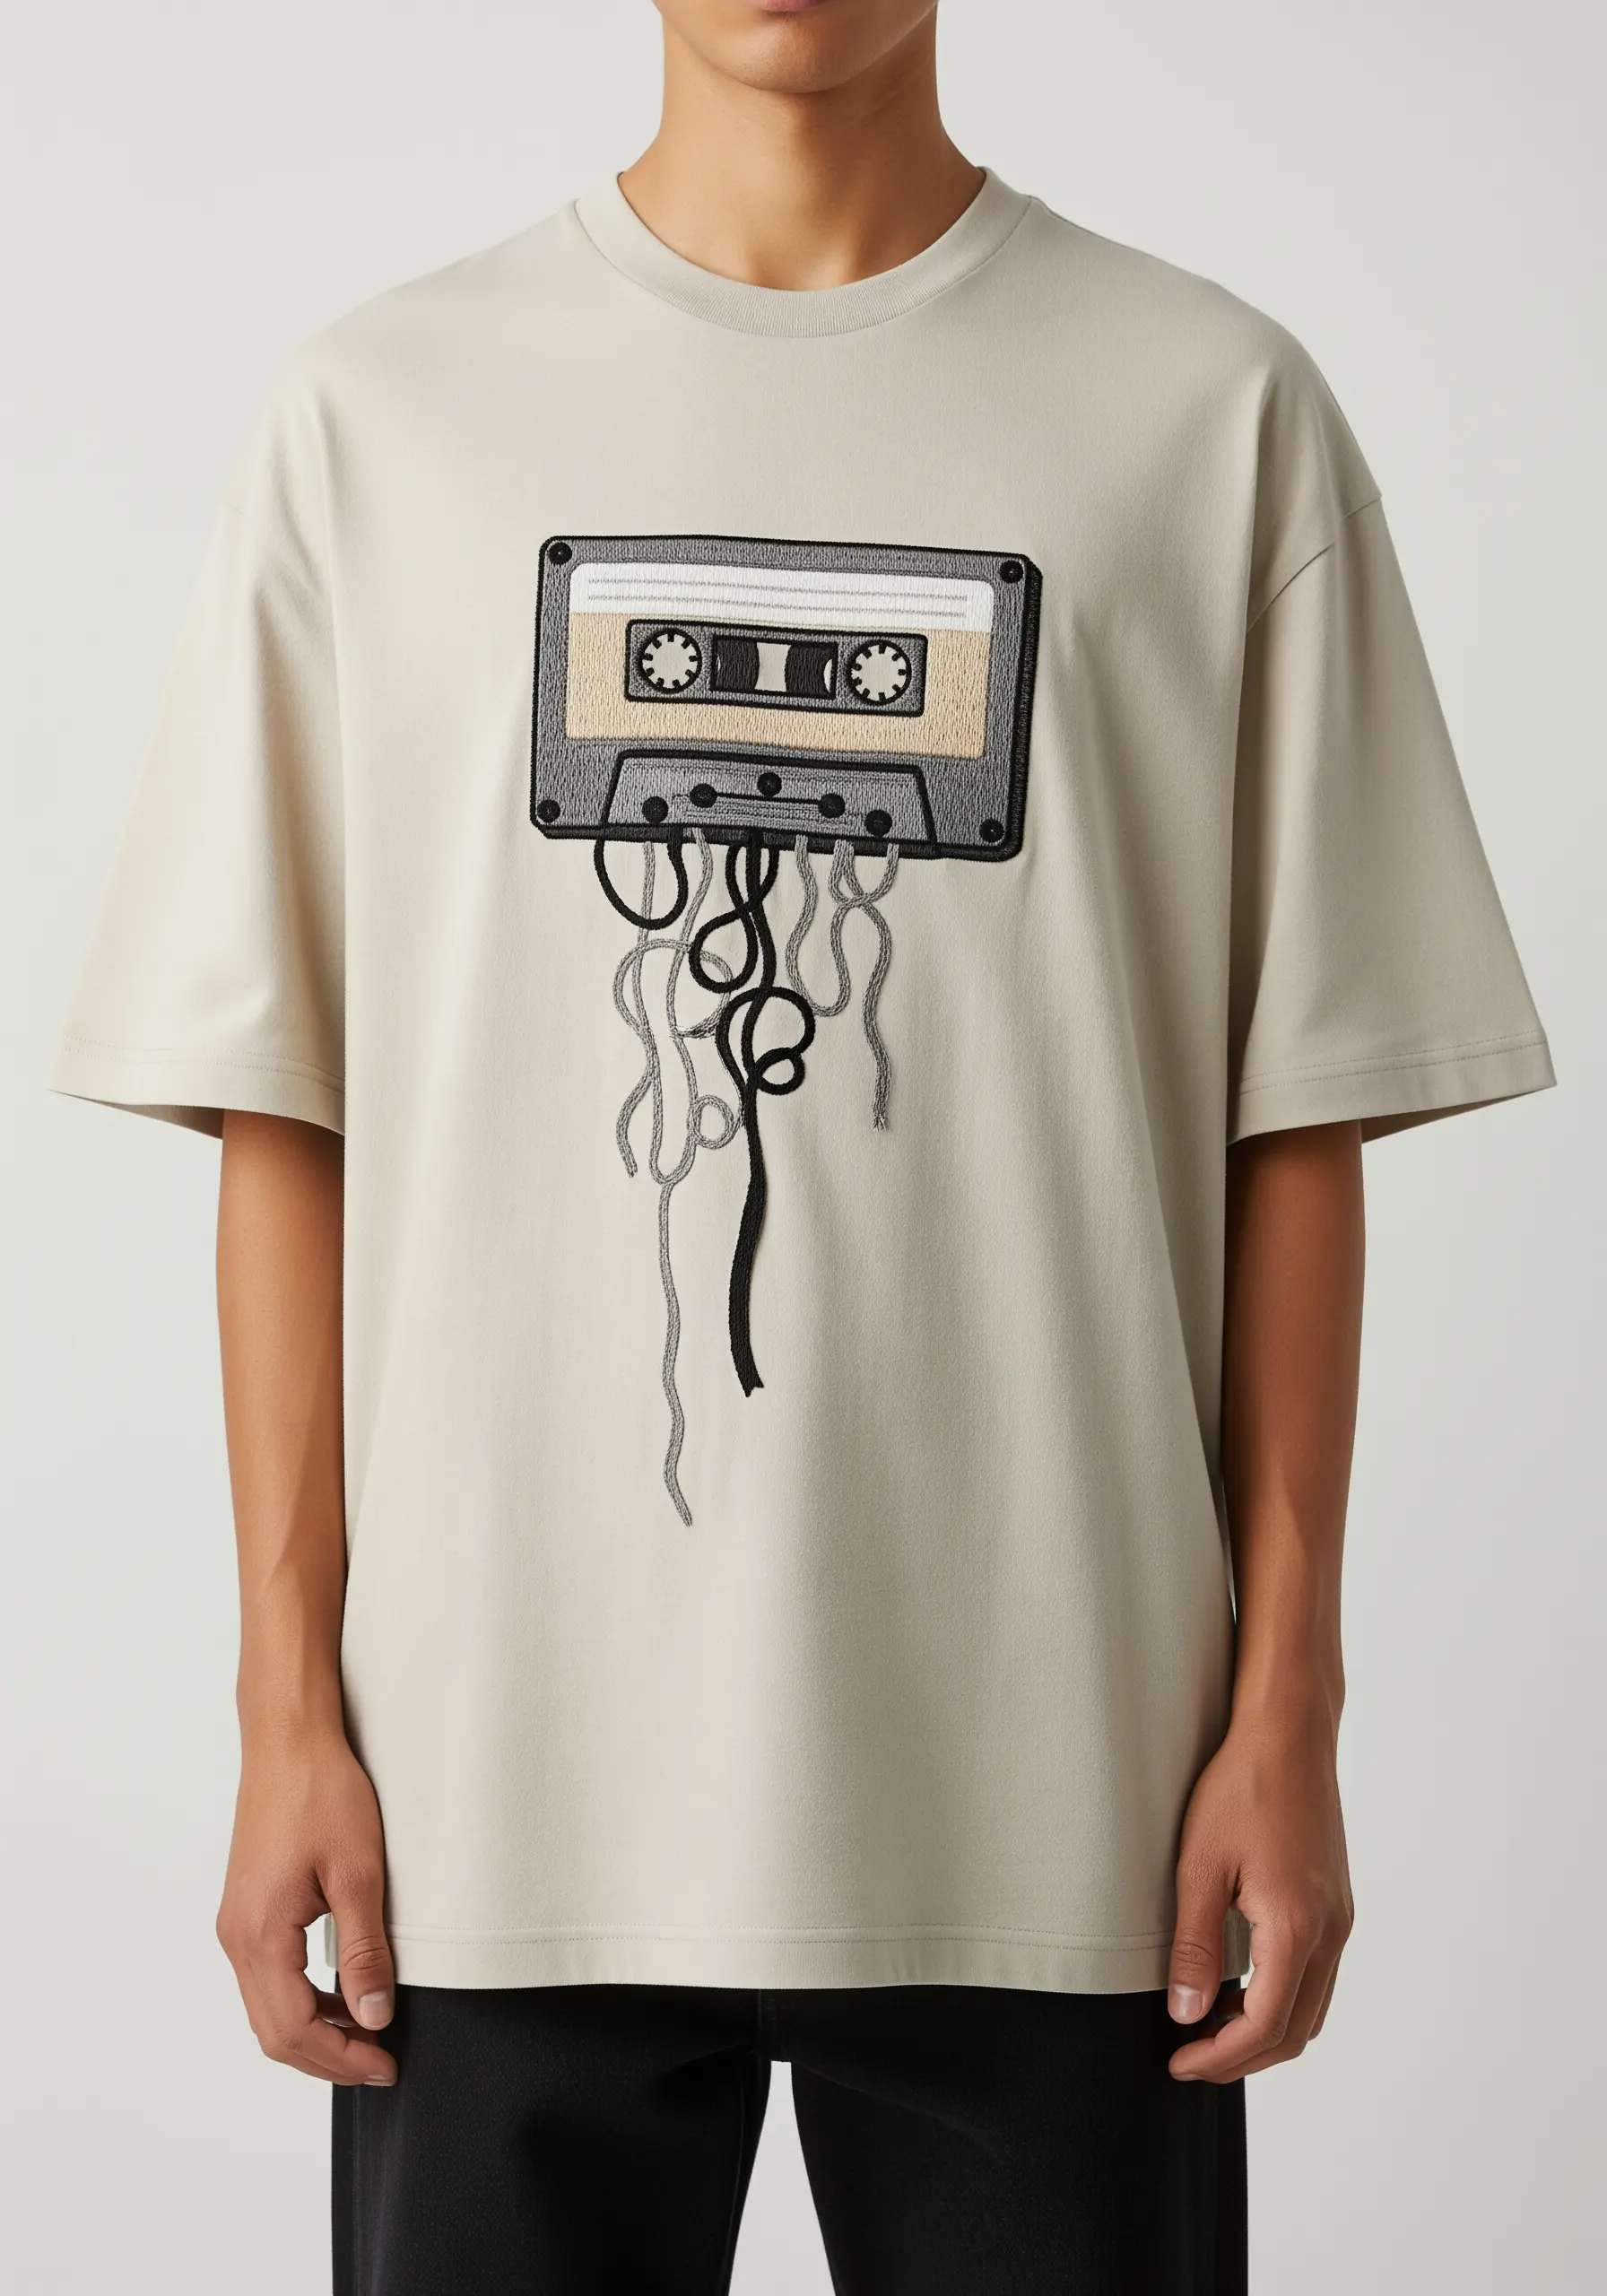
This design is a masterclass in contrasting textures.
Stitch the cassette tape with precise, graphic details using satin stitch for fills and backstitch for the fine lines.
For the unspooled tape, create true three-dimensional texture by letting your threads hang loose.
Use long straight stitches that you only tack down in a few places, allowing the rest to loop, twist, and dangle freely from the garment. This creates a tangible sense of chaos and movement.
18. Serpentine Scales with Sequins and Satin Stitch
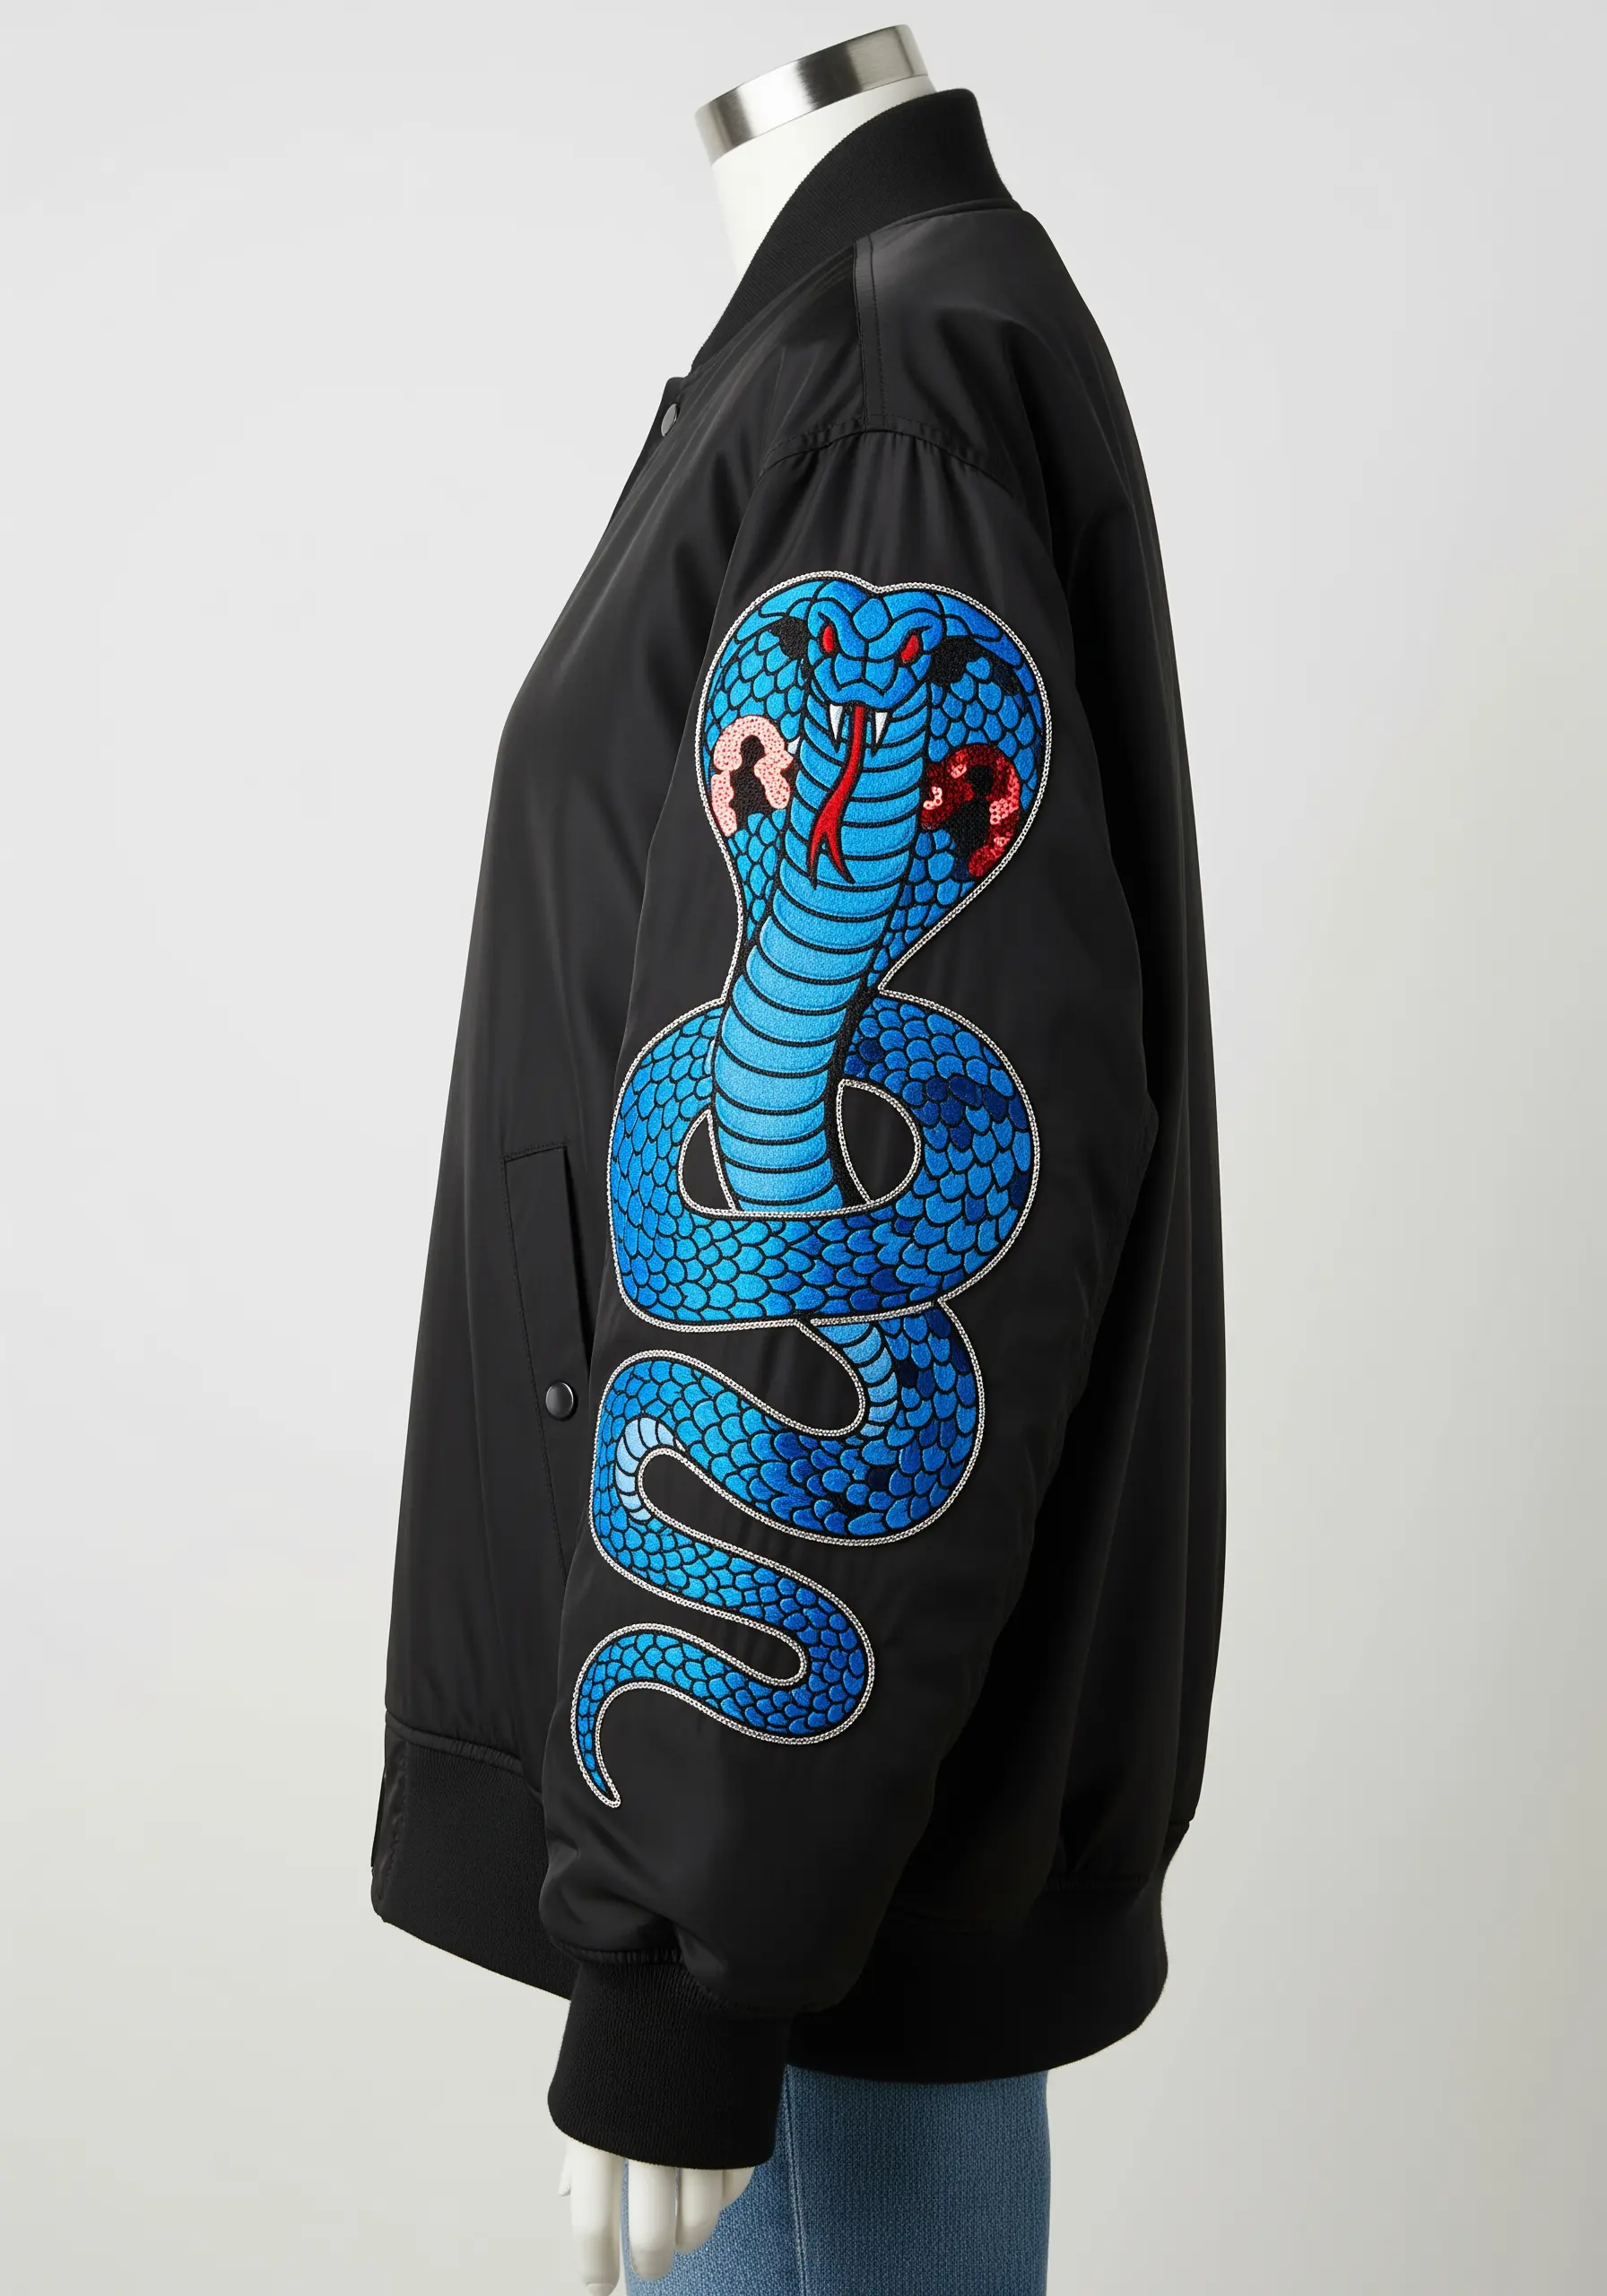
Mimic the shimmering, reptilian texture of scales by combining thread with other materials.
Stitch the body of the snake using rows of satin stitch in a vibrant blue.
Then, in between these rows, hand-sew individual sequins in a matching or slightly lighter shade.
This creates a varied surface that catches the light in different ways, giving the design a dynamic, lifelike shimmer that thread alone cannot achieve.
19. High-Texture Heartbeat with Turkey Work Stitch
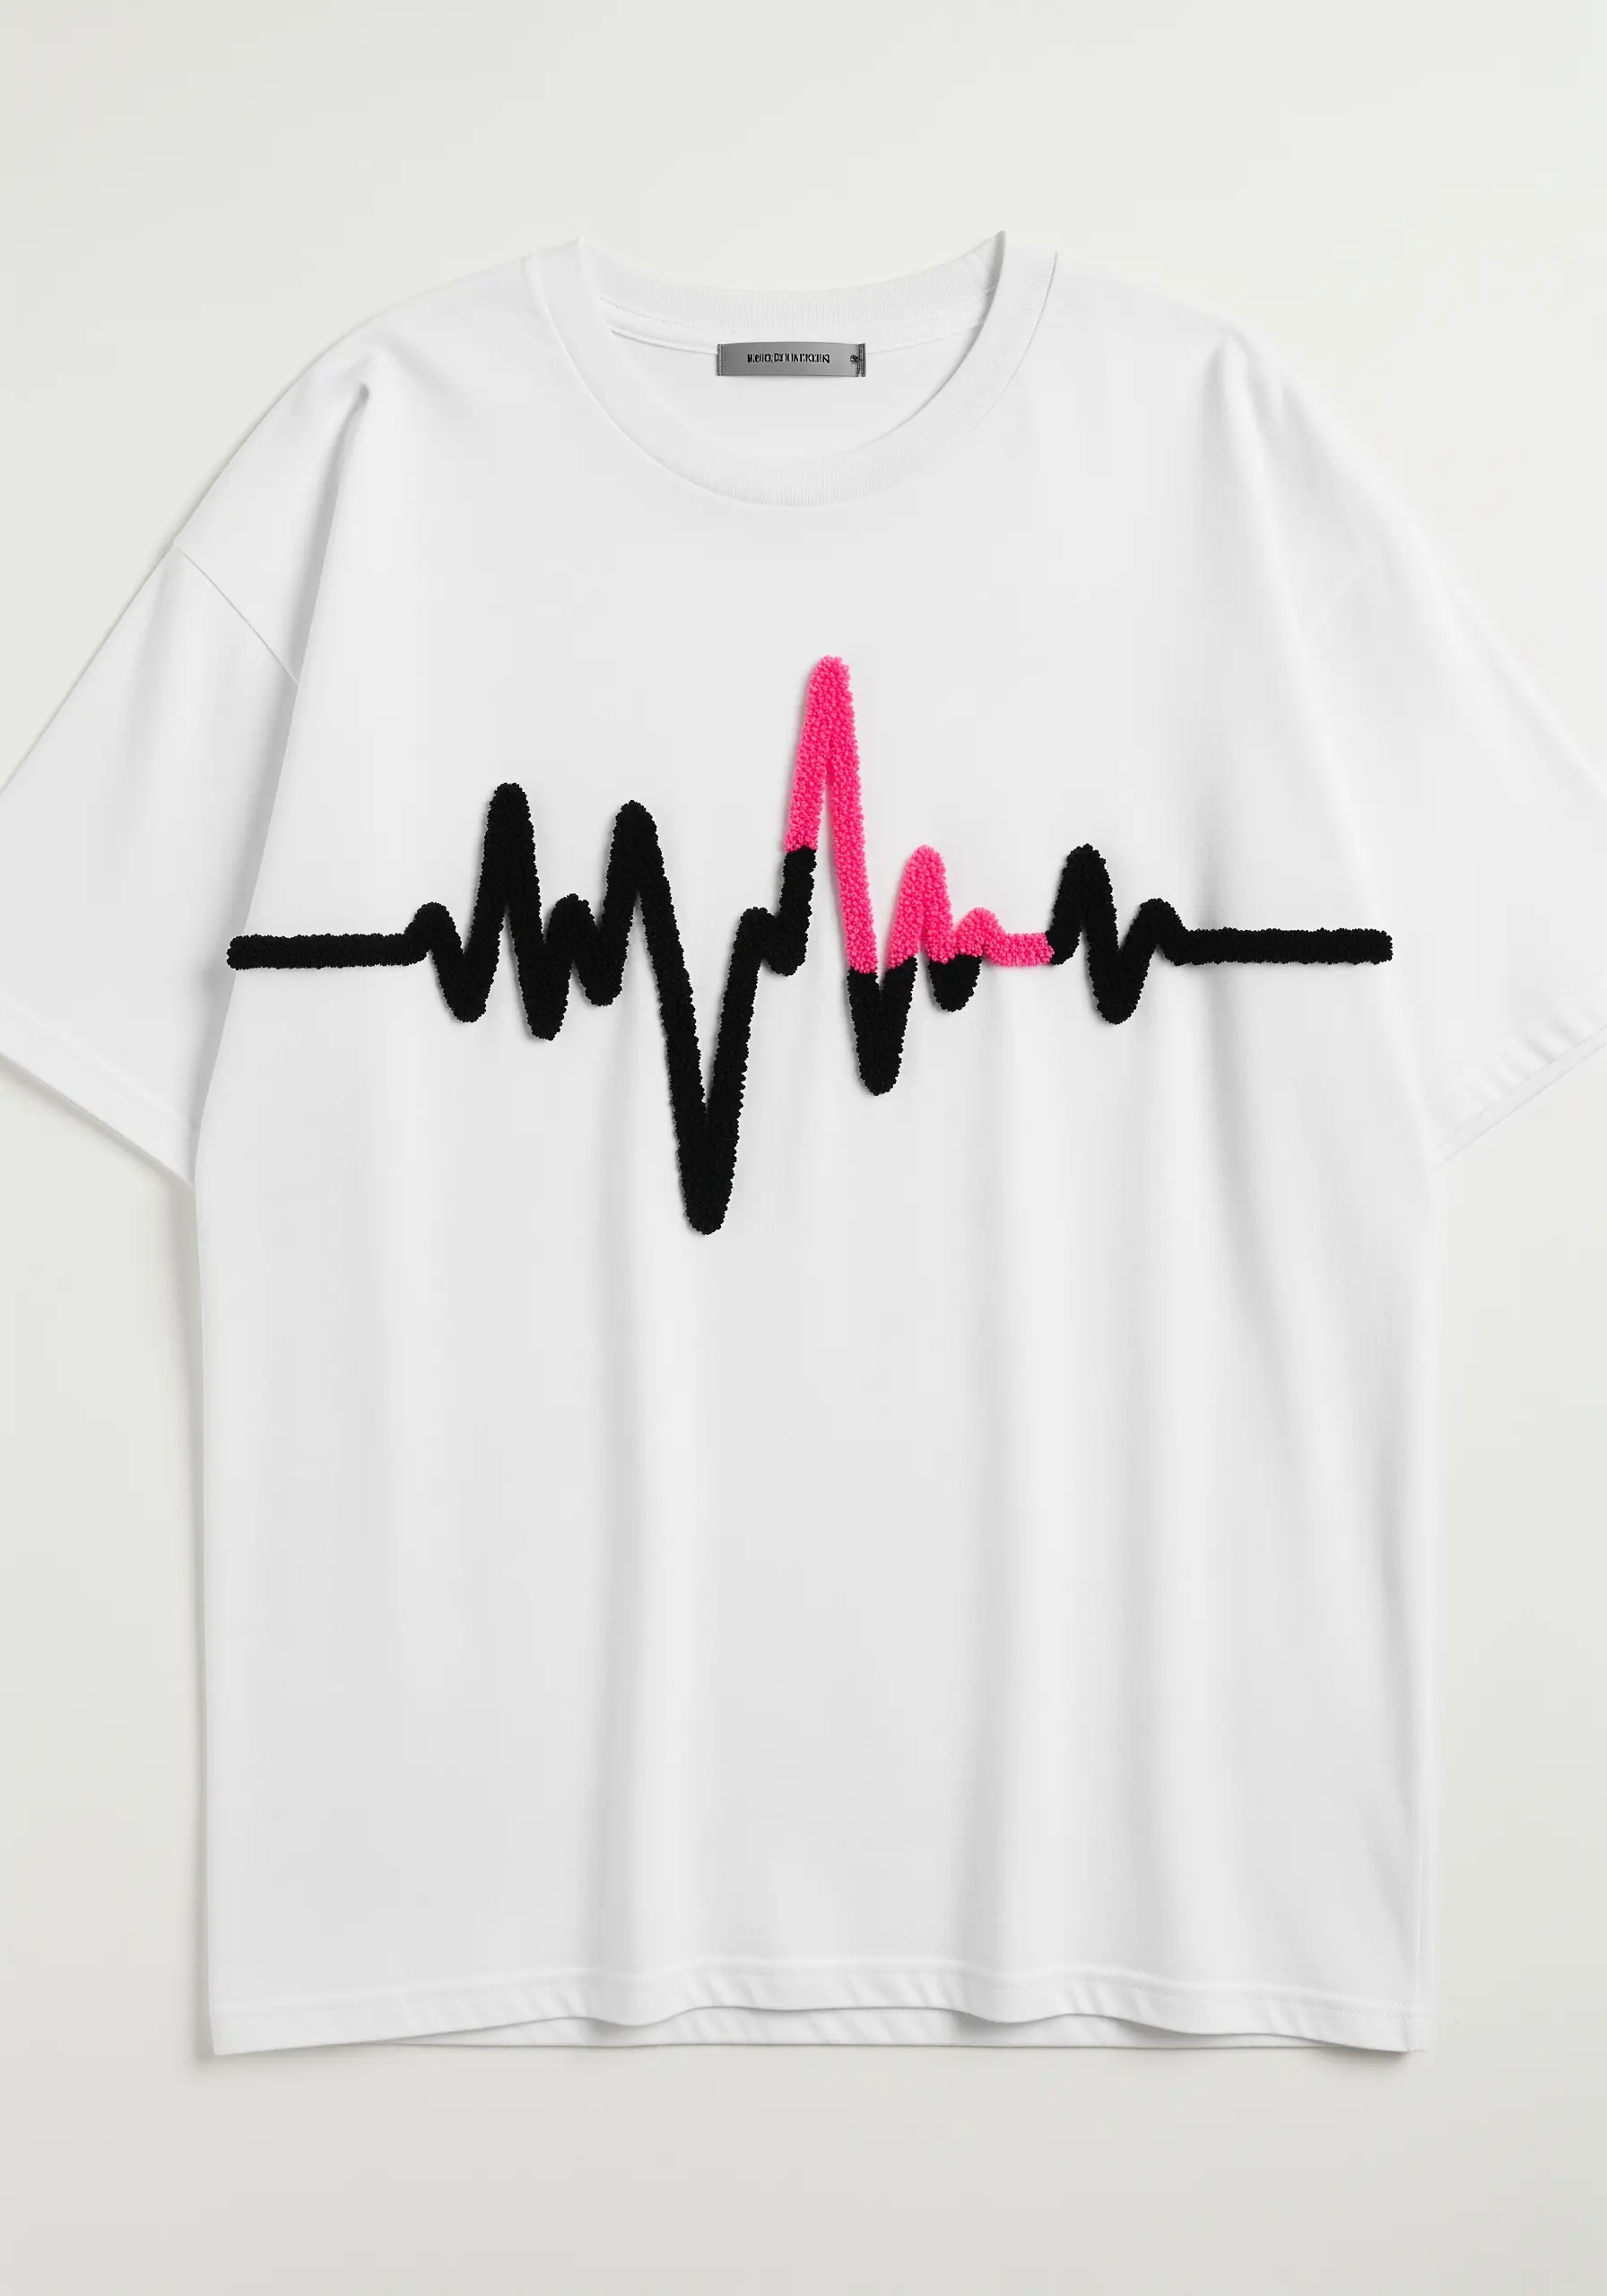
For a bold, fuzzy texture that you can actually feel, the turkey work stitch is your answer.
This technique involves creating a series of loops on the surface of the fabric, which you then snip with scissors to create a plush, chenille-like pile.
By trimming the loops to a uniform length, you can create clean, graphic lines—like this heartbeat—that have an incredible tactile quality and stand out dramatically against the flat t-shirt fabric.
20. Vaporwave Sunset with Thread-Painted Gradients
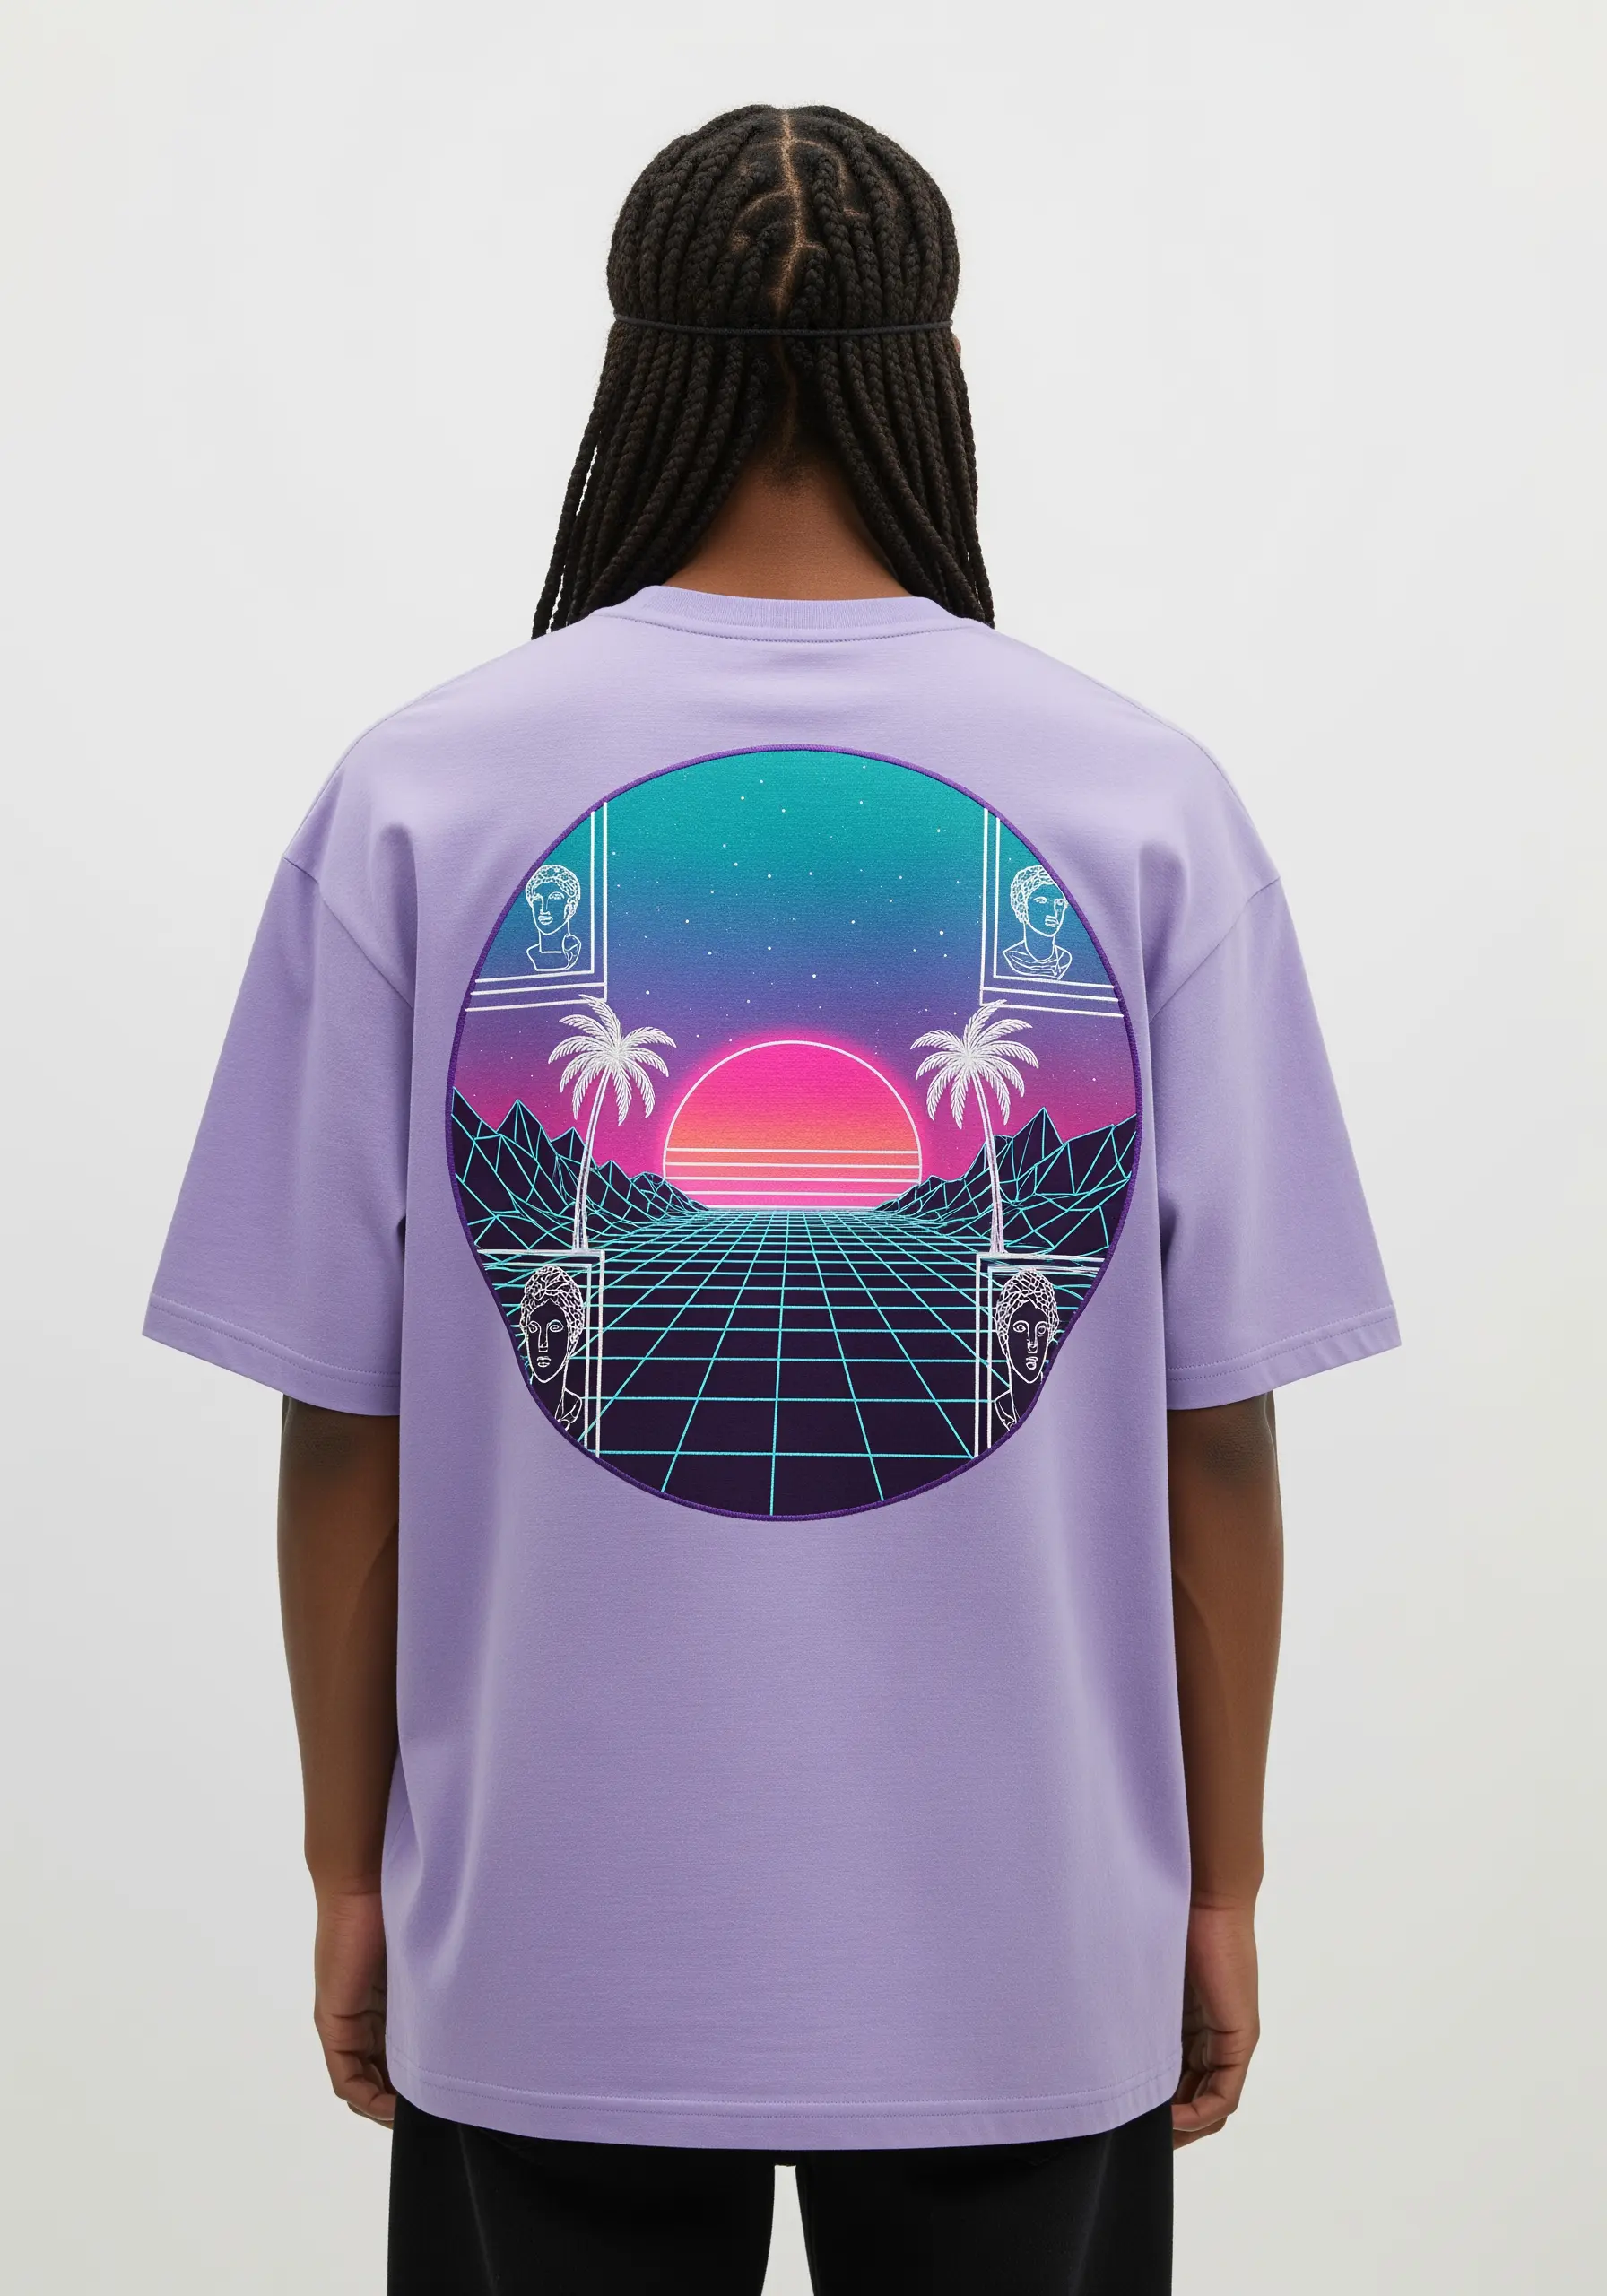
The aesthetic of vaporwave is all about smooth, digital gradients and sharp, vector-like lines.
Achieve the sunset gradient using a meticulous long-and-short stitch, blending multiple shades of pink, purple, and orange to create a flawless transition.
For the perspective grid and outlines, switch to a single strand of black or dark purple thread and use a precise backstitch.
This sharp contrast between the soft, blended sky and the clean, graphic lines is the essence of the retro-futuristic style.


