

A simple cushion can become so much more than a place to rest your head. With a needle and thread, you can transform it into a piece of art that tells a story, softens a room, and brings a quiet, handmade comfort to your space.
But where do you begin? It’s easy to feel overwhelmed by patterns or stuck repeating the same stitches. The secret to elevating your work isn’t about learning dozens of complex techniques. It’s about understanding how to use a few stitches with intention—how to choose the right thread, direct your needle to create texture, and balance color for a design that feels both personal and polished.
Let’s move beyond just following a pattern. In these examples, you’ll discover how a simple adjustment in stitch direction can mimic the curve of a leaf, how a thicker thread can add modern drama, and how you can create depth and emotion with just a few well-chosen colors. This is your guide to creating cushions that don’t just decorate a room, but truly complete it.
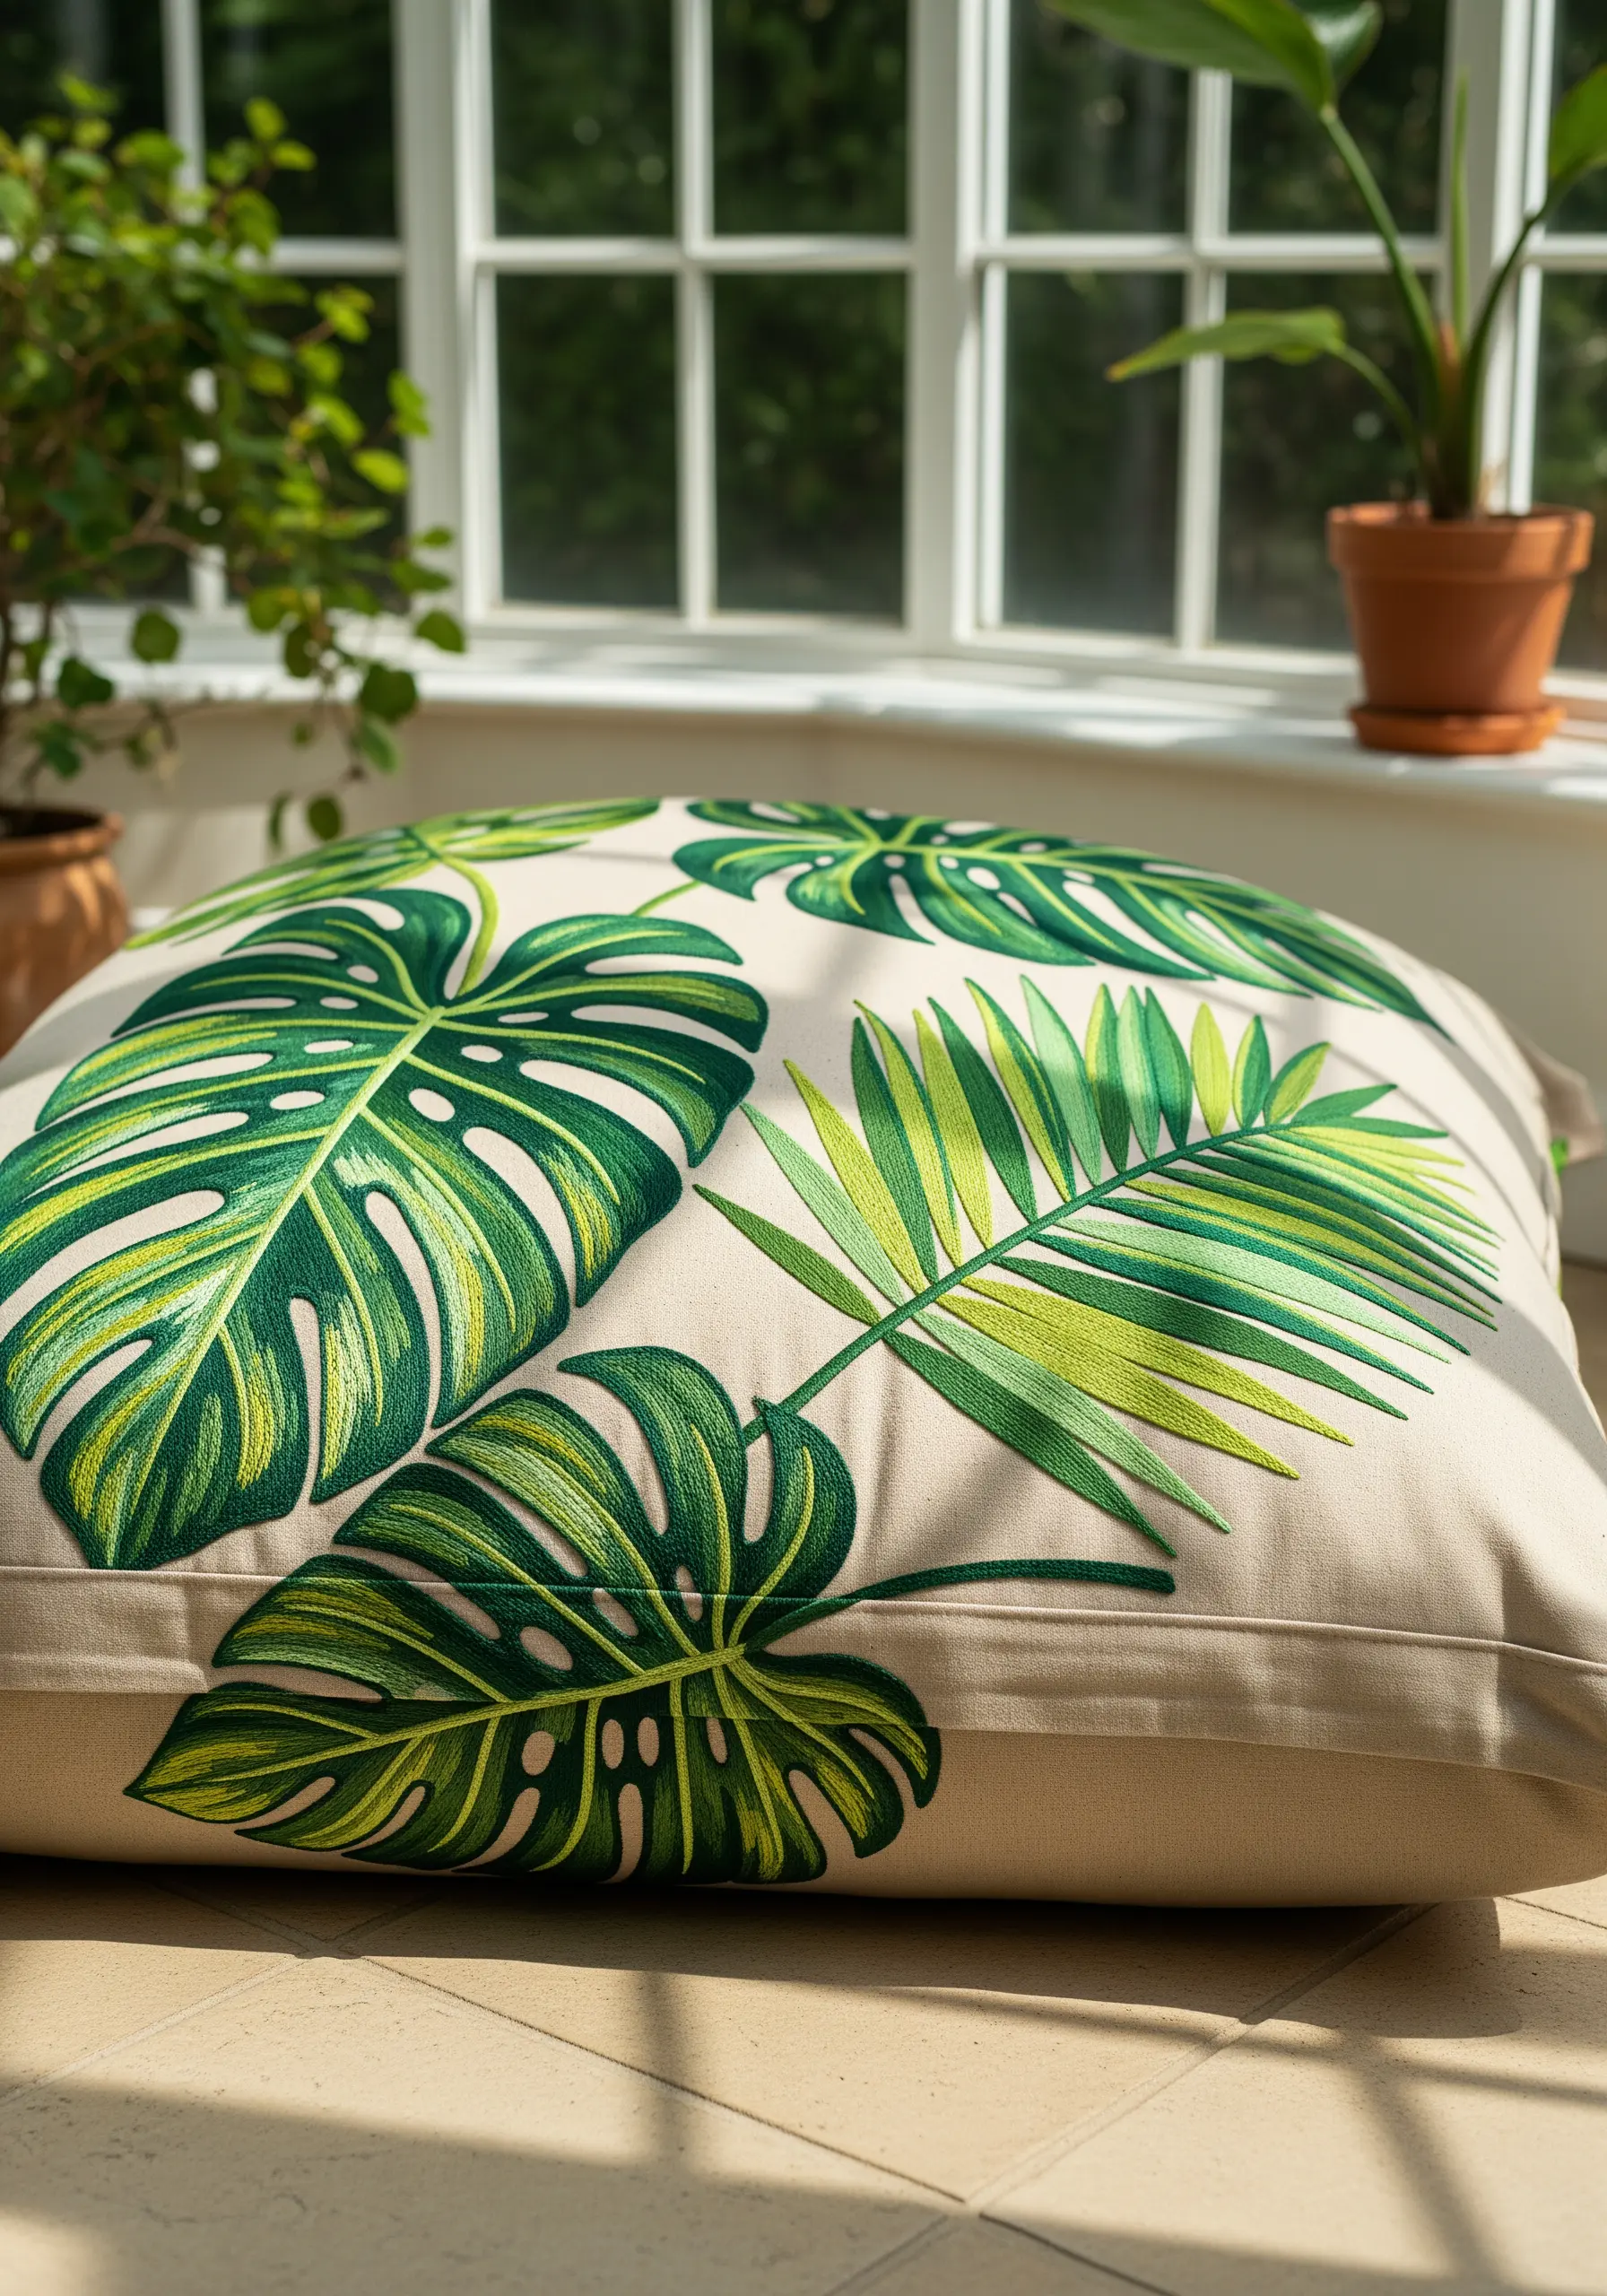
1. Create Botanical Depth with Directional Satin Stitch
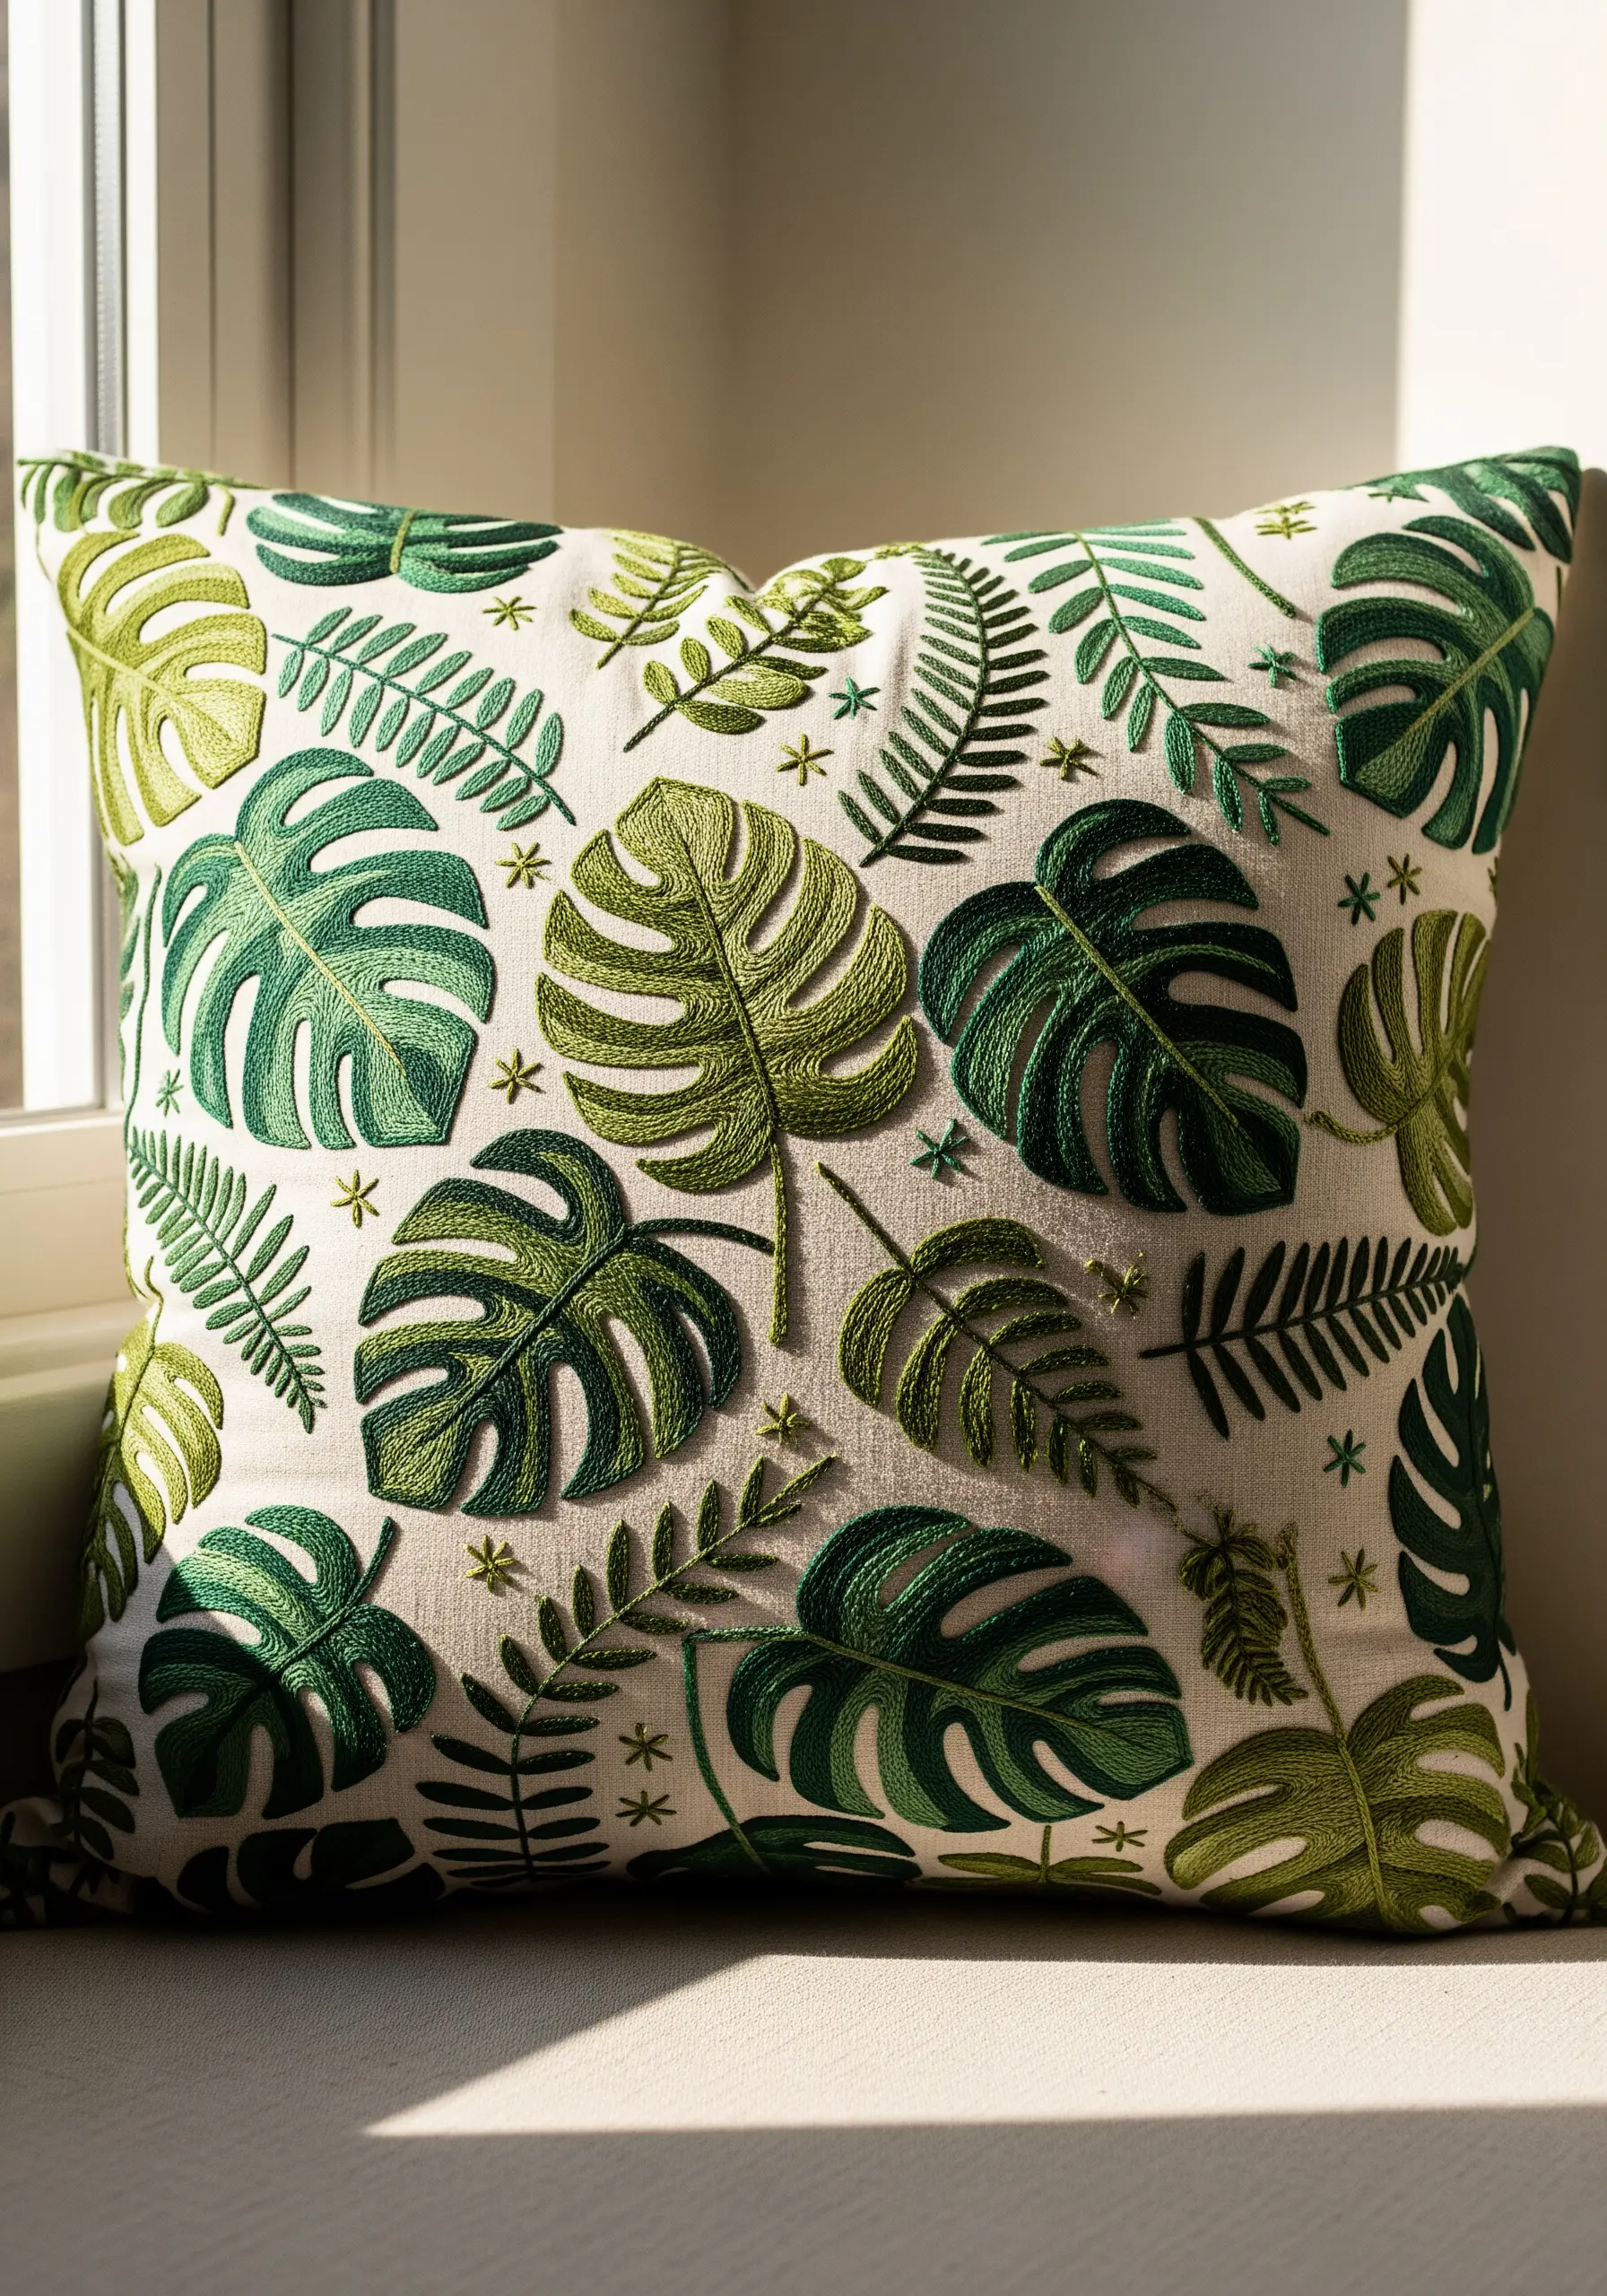
To prevent a flat, uniform look on your leaf patterns, vary the direction of your satin stitches within each section of a leaf.
Stitch from the central vein outwards towards the edge, angling your stitches slightly to mimic the natural growth lines.
Use three to four shades of green—a dark for the shadowed side, a medium for the main body, and a light for highlighted edges—to create realistic dimension.
This technique turns a simple fill stitch into a dynamic, light-catching surface that makes the tropical leaf embroidery designs feel alive.
2. Achieve Flawless Curves with Whipped Backstitch

For clean, continuous geometric lines that don’t look segmented, use a whipped backstitch instead of a standard backstitch or stem stitch.
First, lay down a foundation of simple backstitches along your design line.
Then, take a new thread (in the same or a contrasting color) and weave it under each backstitch without piercing the fabric.
This method smooths the jagged edges of the backstitch, creating a single, fluid line perfect for minimalist and modern geometric thread art.
3. Sculpt Realistic Fur with Blended Long-and-Short Stitch

To create the soft, dense texture of animal fur, rely on the long-and-short stitch using multiple shades of thread in your needle at once.
Combine two strands of orange with one strand of white or brown to create subtle, natural color variations in a single stitch.
Always stitch in the direction the fur would naturally grow, following the contours of the animal’s body to create shape and movement.
For the curled tail, use shorter, more curved stitches to emphasize the form, making your fox and deer embroidery patterns incredibly tactile.
4. Stitch Elegant Lettering on Plush Velvet
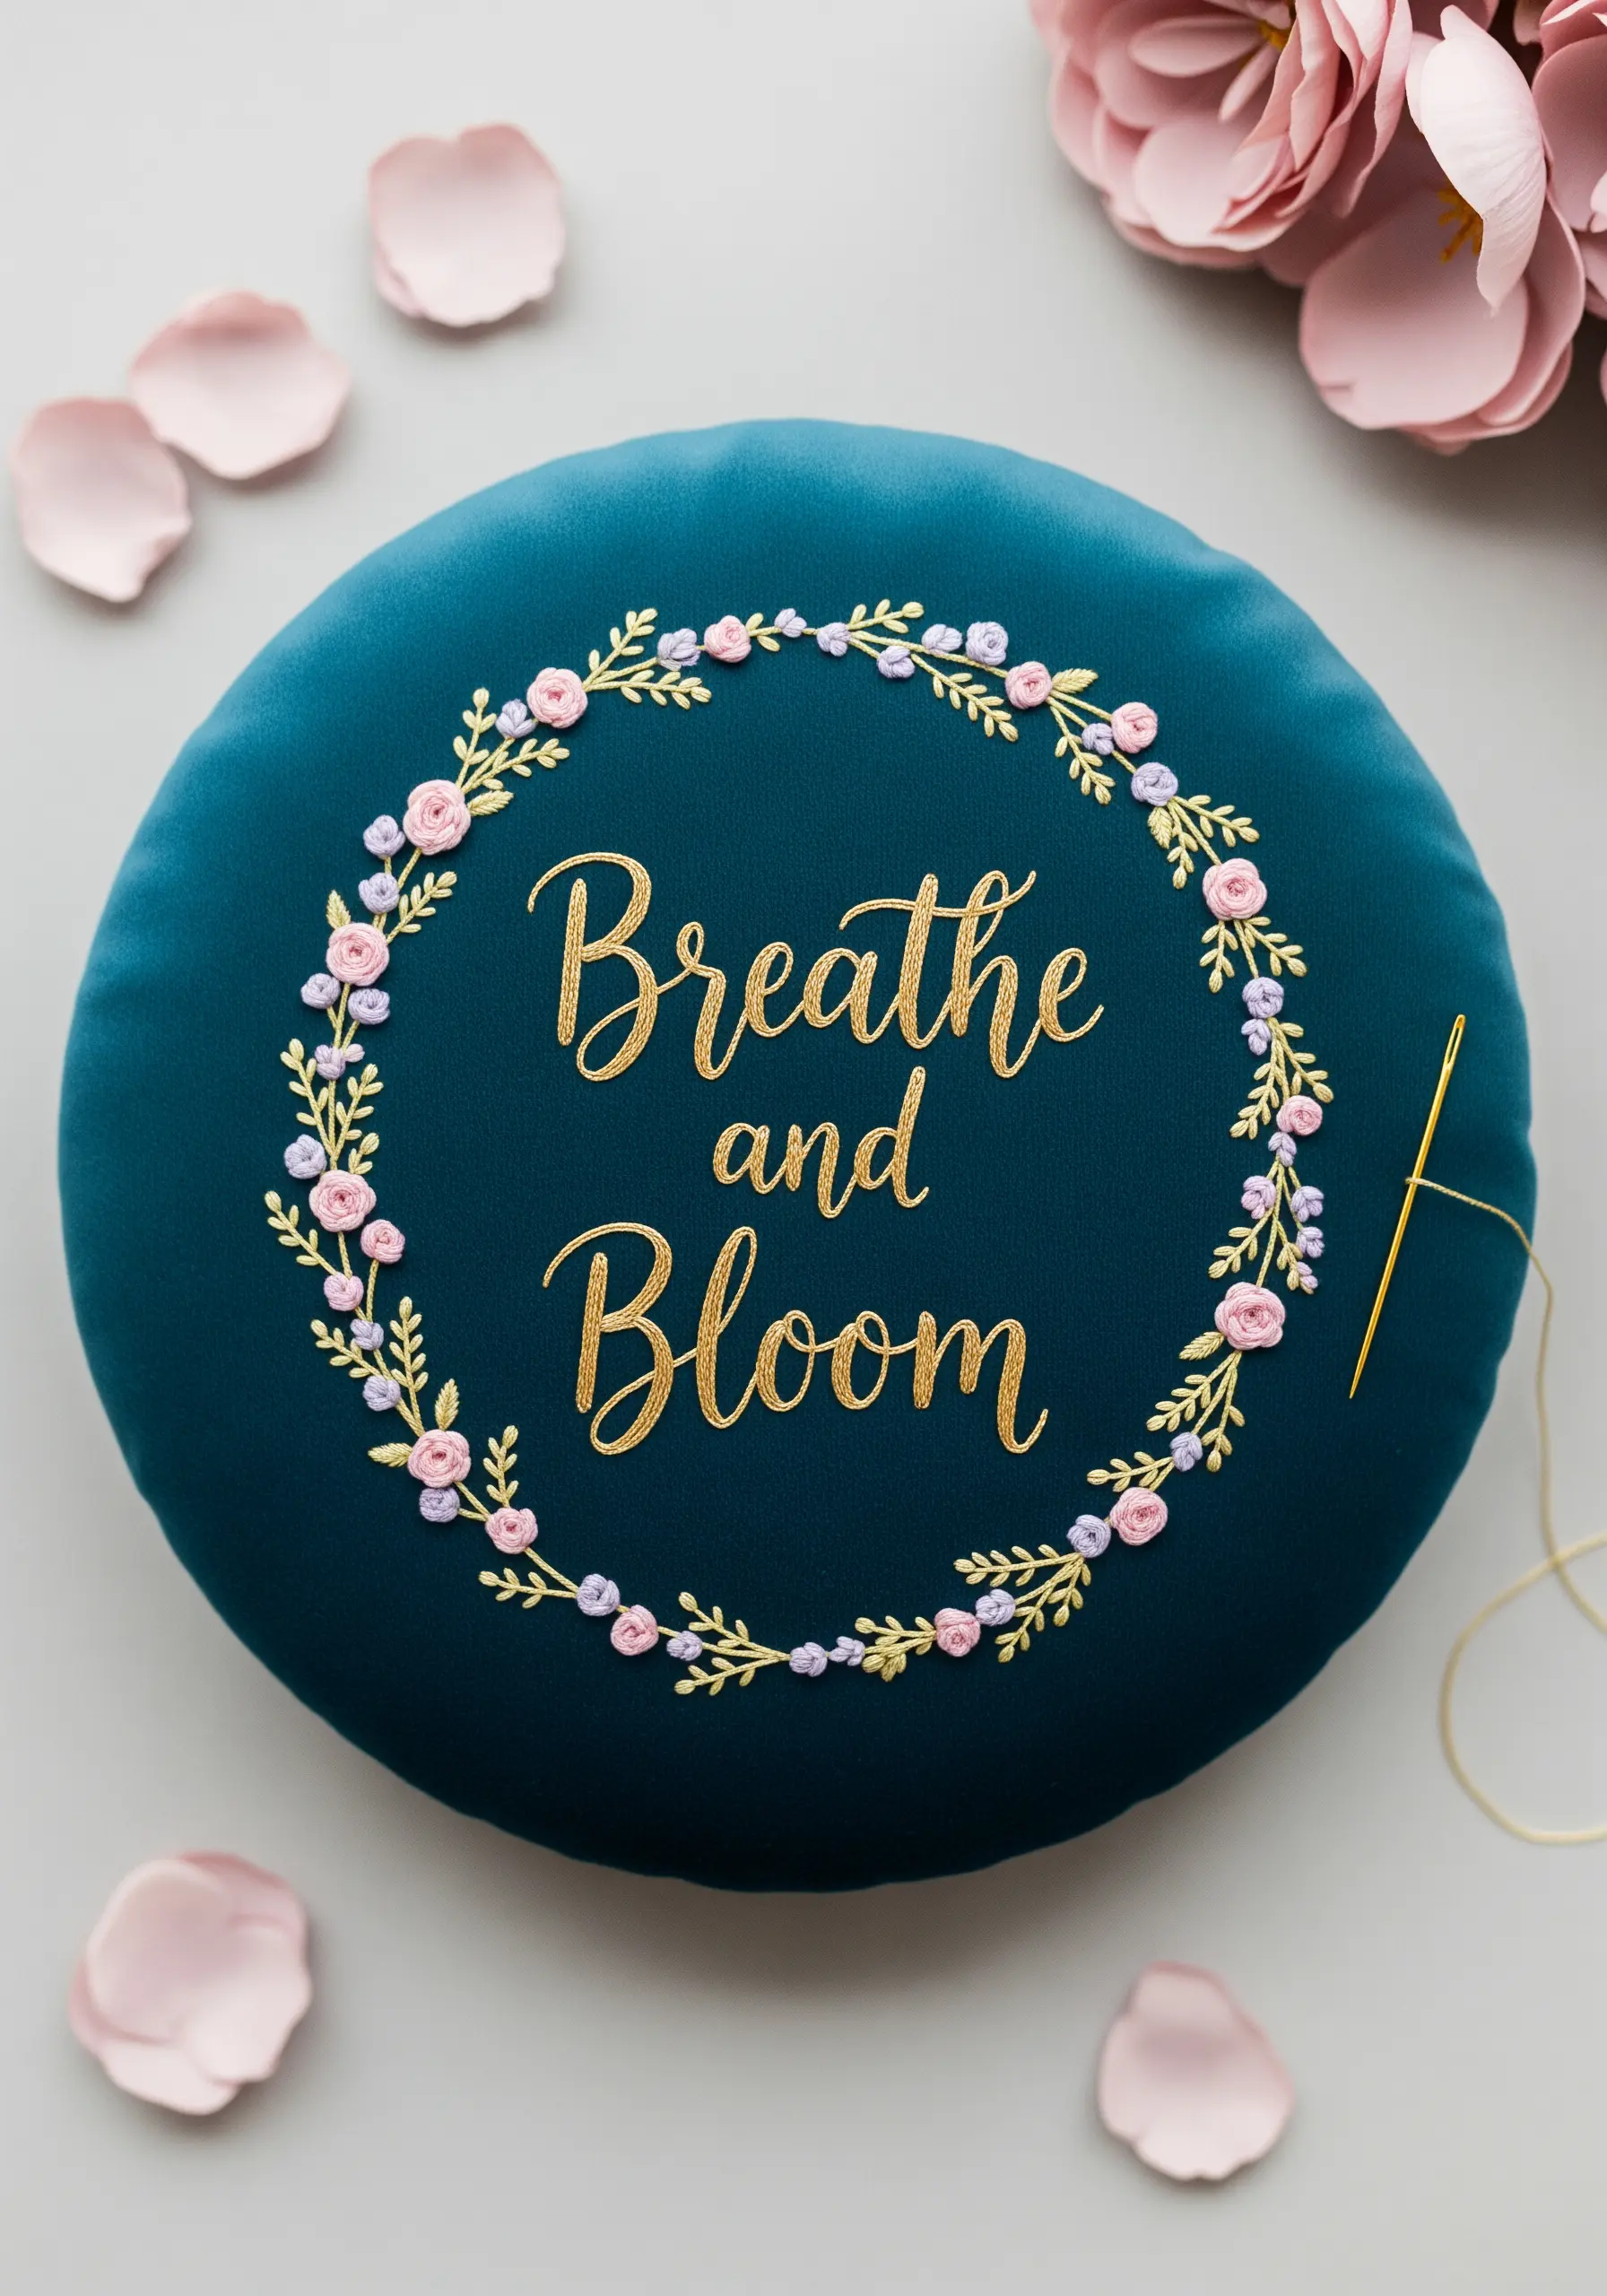
Embroidering on velvet requires a light touch to avoid crushing the pile. Use a single strand of high-sheen floss and a fine, sharp needle.
For delicate script, a whipped backstitch provides a raised, clean line that sits beautifully on top of the fabric’s texture.
For the tiny floral elements, use simple French knots and detached chain (lazy daisy) stitches—they require minimal fabric piercing and add just enough detail.
Always back your velvet with a lightweight, iron-on stabilizer to prevent the fabric from shifting and puckering as you stitch.
5. Build a Shimmering Surface with Seed Stitch
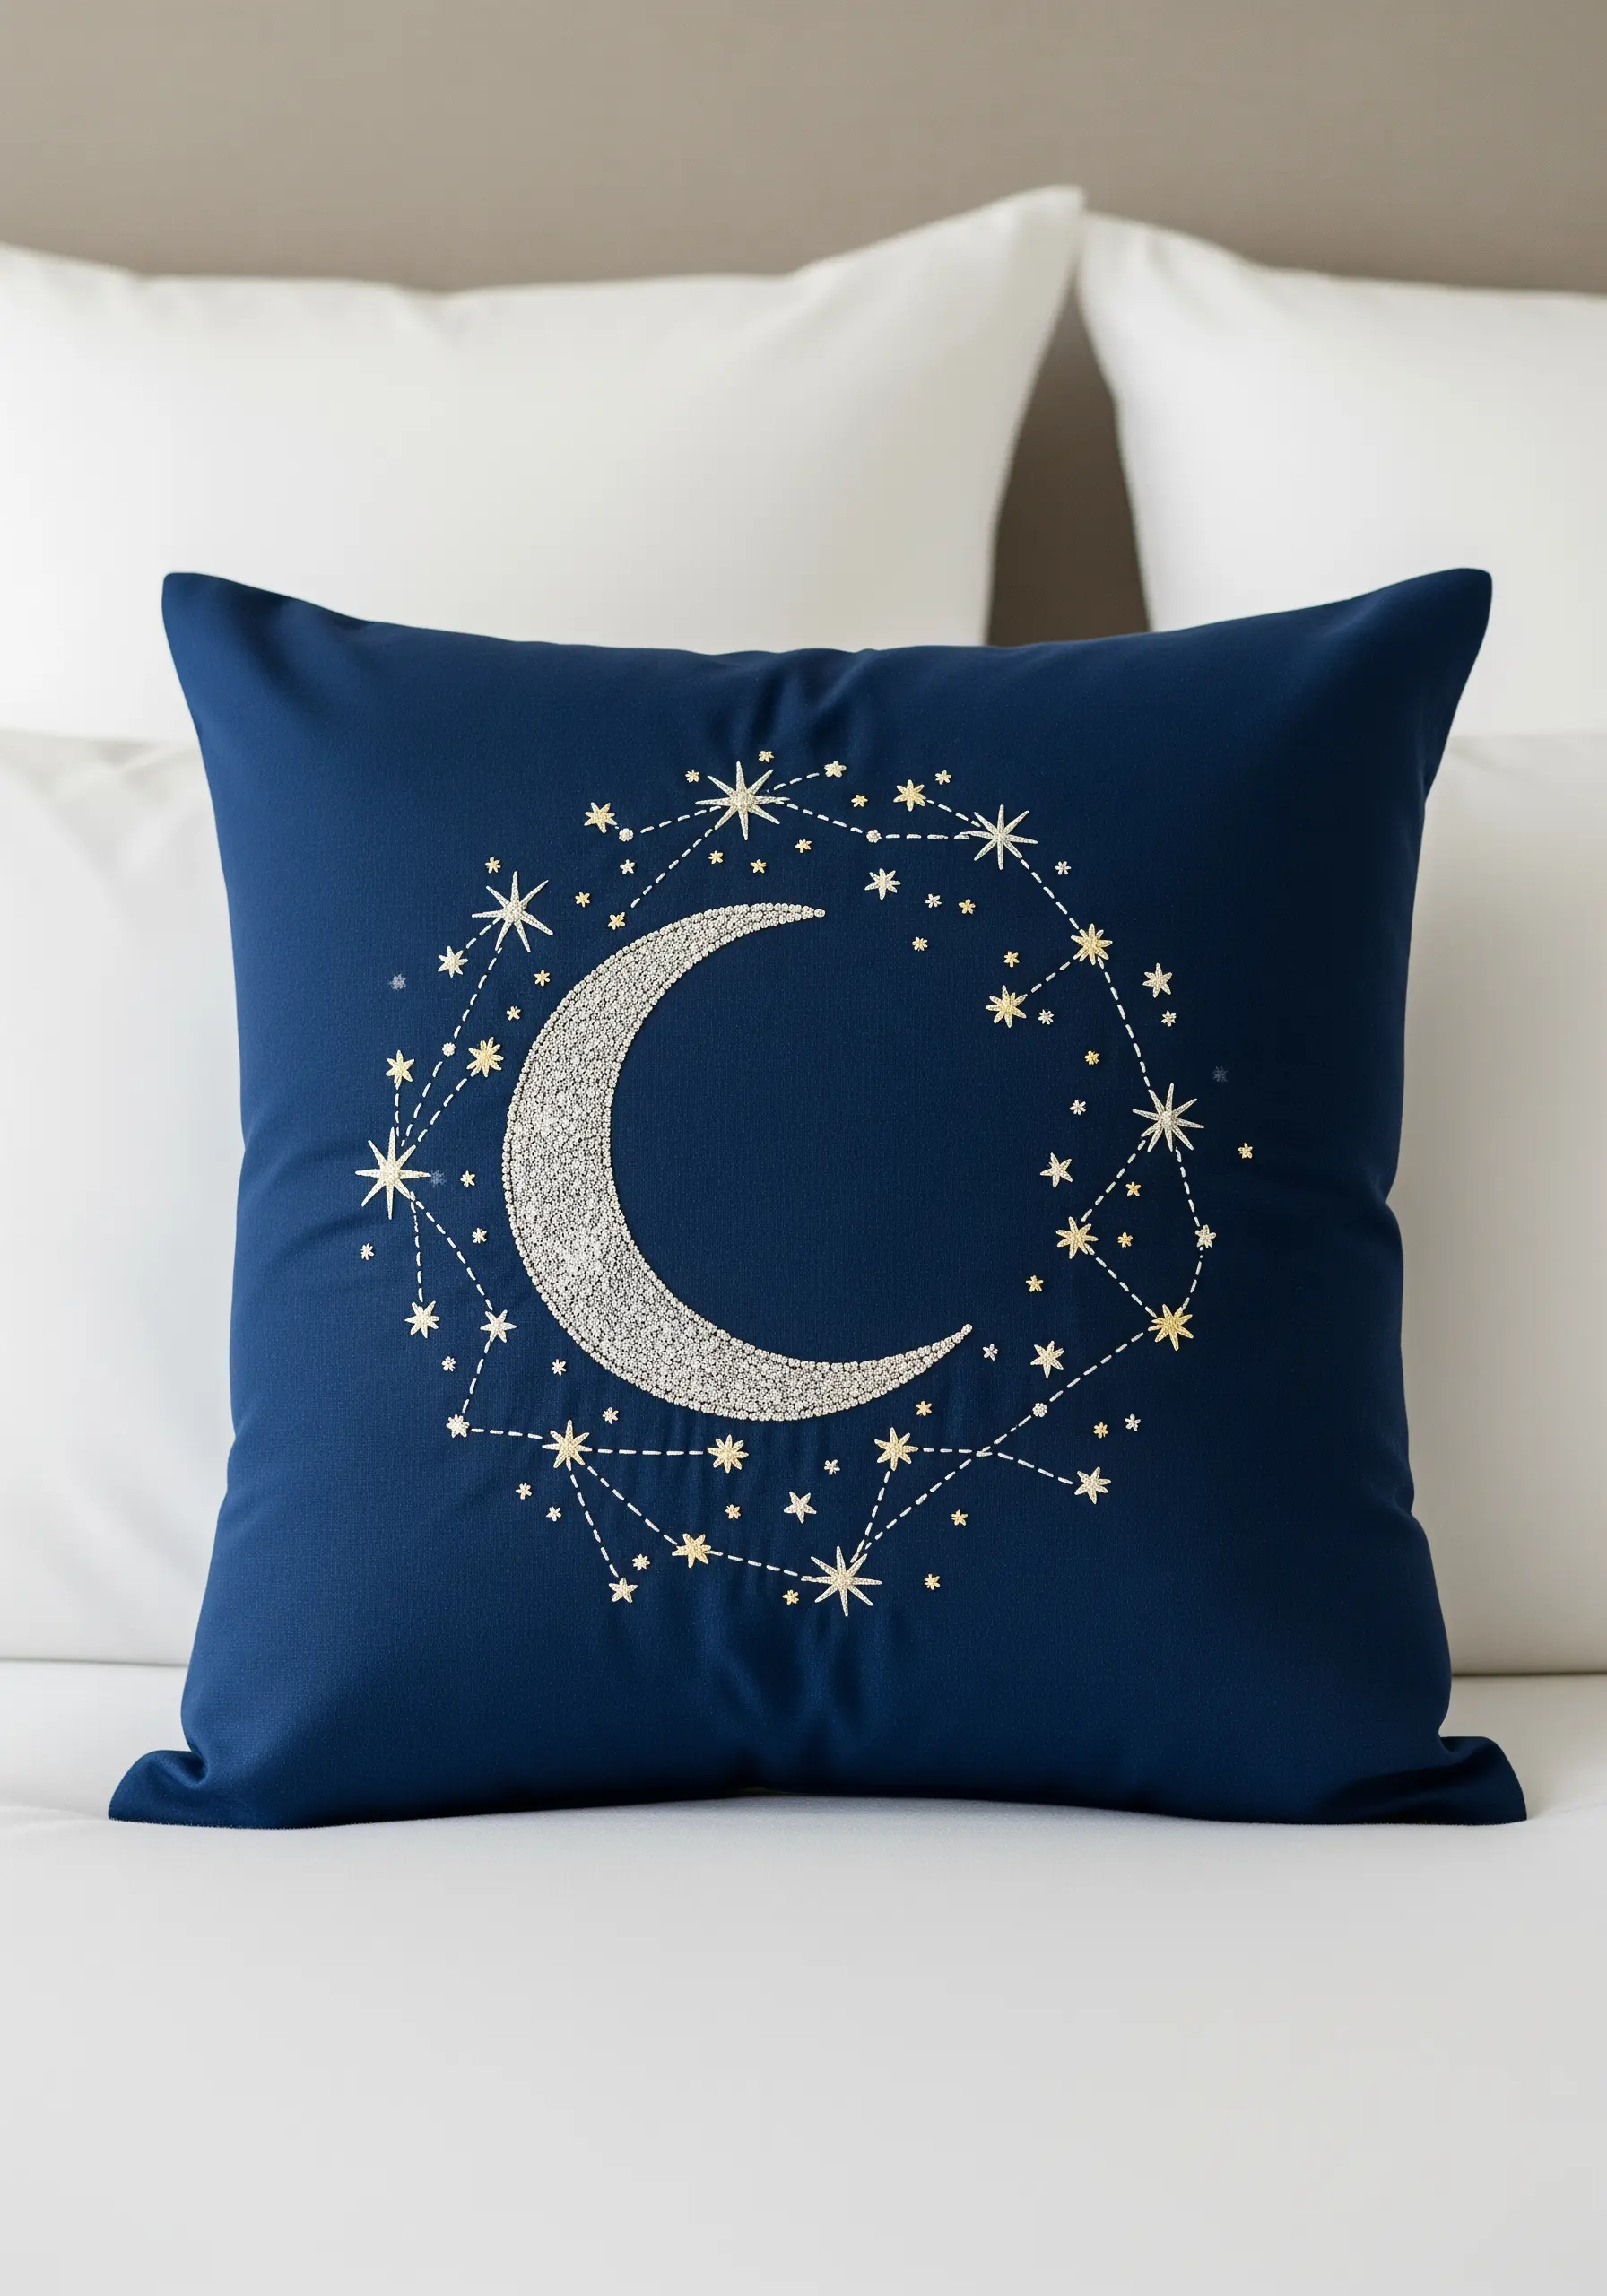
To create a dense, sparkling texture for celestial motifs, fill the shape with tightly packed seed stitches using a metallic or silver thread.
A seed stitch is simply a series of tiny, randomly placed straight stitches that work together to create a non-directional, light-reflecting fill.
This technique is more forgiving than satin stitch, as it hides imperfections and creates a beautifully uneven, glittery surface.
Contrast the filled moon with simple, four-pointed star stitches in a complementary metallic thread to make your tiny night sky embroidery designs pop.
6. Add Dimension with Padded Appliqué and Contour Stitching

Create a three-dimensional effect by first cutting your shell shapes from a separate piece of fabric and placing a thin layer of felt or batting behind them before stitching them onto the cushion.
Secure the appliqué pieces with a neat blanket stitch around the edges.
Then, use a split stitch or stem stitch in varying neutral tones to embroider the contoured lines, following the natural ridges of each shell.
This combination of padding and directional stitching gives your coastal-themed pillow stitching ideas a raised, sculptural quality.
7. Master Bold Line Art with Couching

To achieve a single, unbroken line for abstract portraits, traditional stitches like backstitch can look too segmented. Instead, use the couching technique.
Lay a thick piece of yarn, cord, or multiple strands of embroidery floss along your design line.
Using a second, finer thread, come up from the back of the fabric and make small, perpendicular stitches over the cord to tack it down.
This method allows you to create perfectly smooth curves and sharp angles, making it ideal for minimal portrait line embroidery projects.
8. Weave Texture with Chunky Chain Stitch Braids
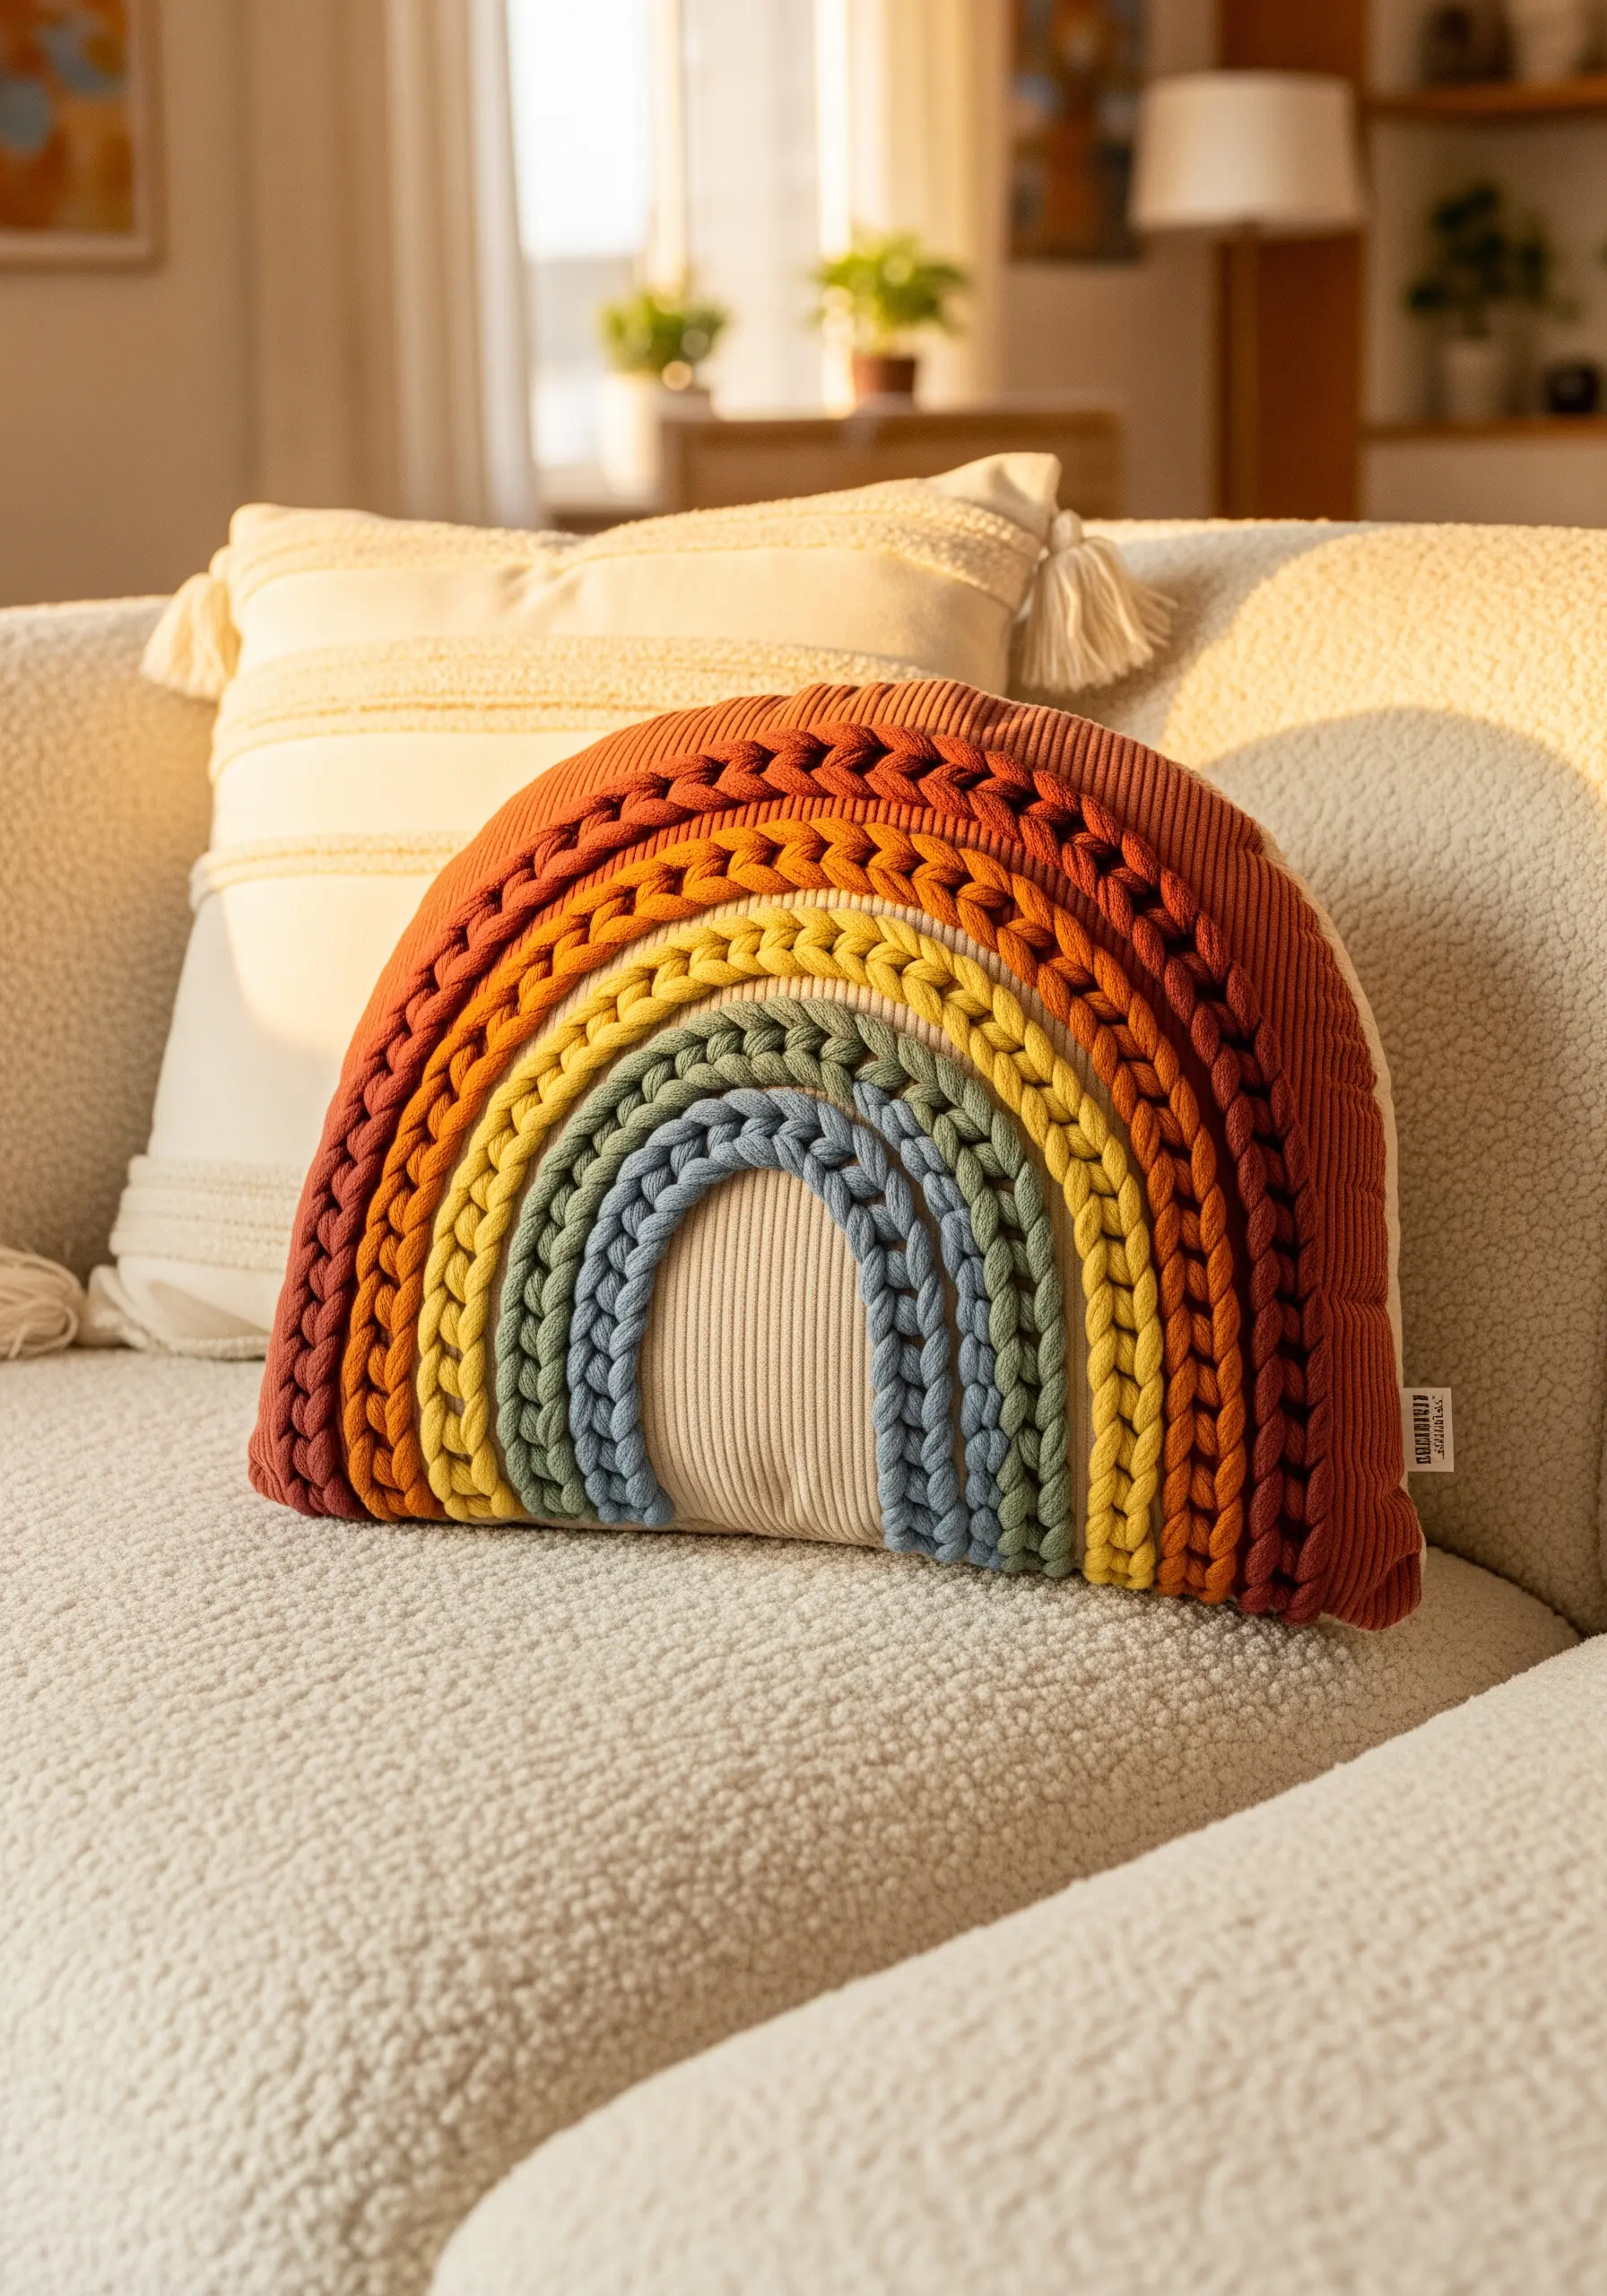
For a highly tactile, three-dimensional design, move beyond floss and embrace chunky yarn or macrame cord.
Use an oversized chain stitch or a tambour hook to create thick, braided arches that sit high on the fabric surface.
This technique transforms the cushion into a piece of fiber art, where the texture is the main focus.
Combine these bold stitches with a contrasting fabric texture, like corduroy, to create even more visual and sensory interest.
9. Capture Art Deco Glamour with Metallic Precision
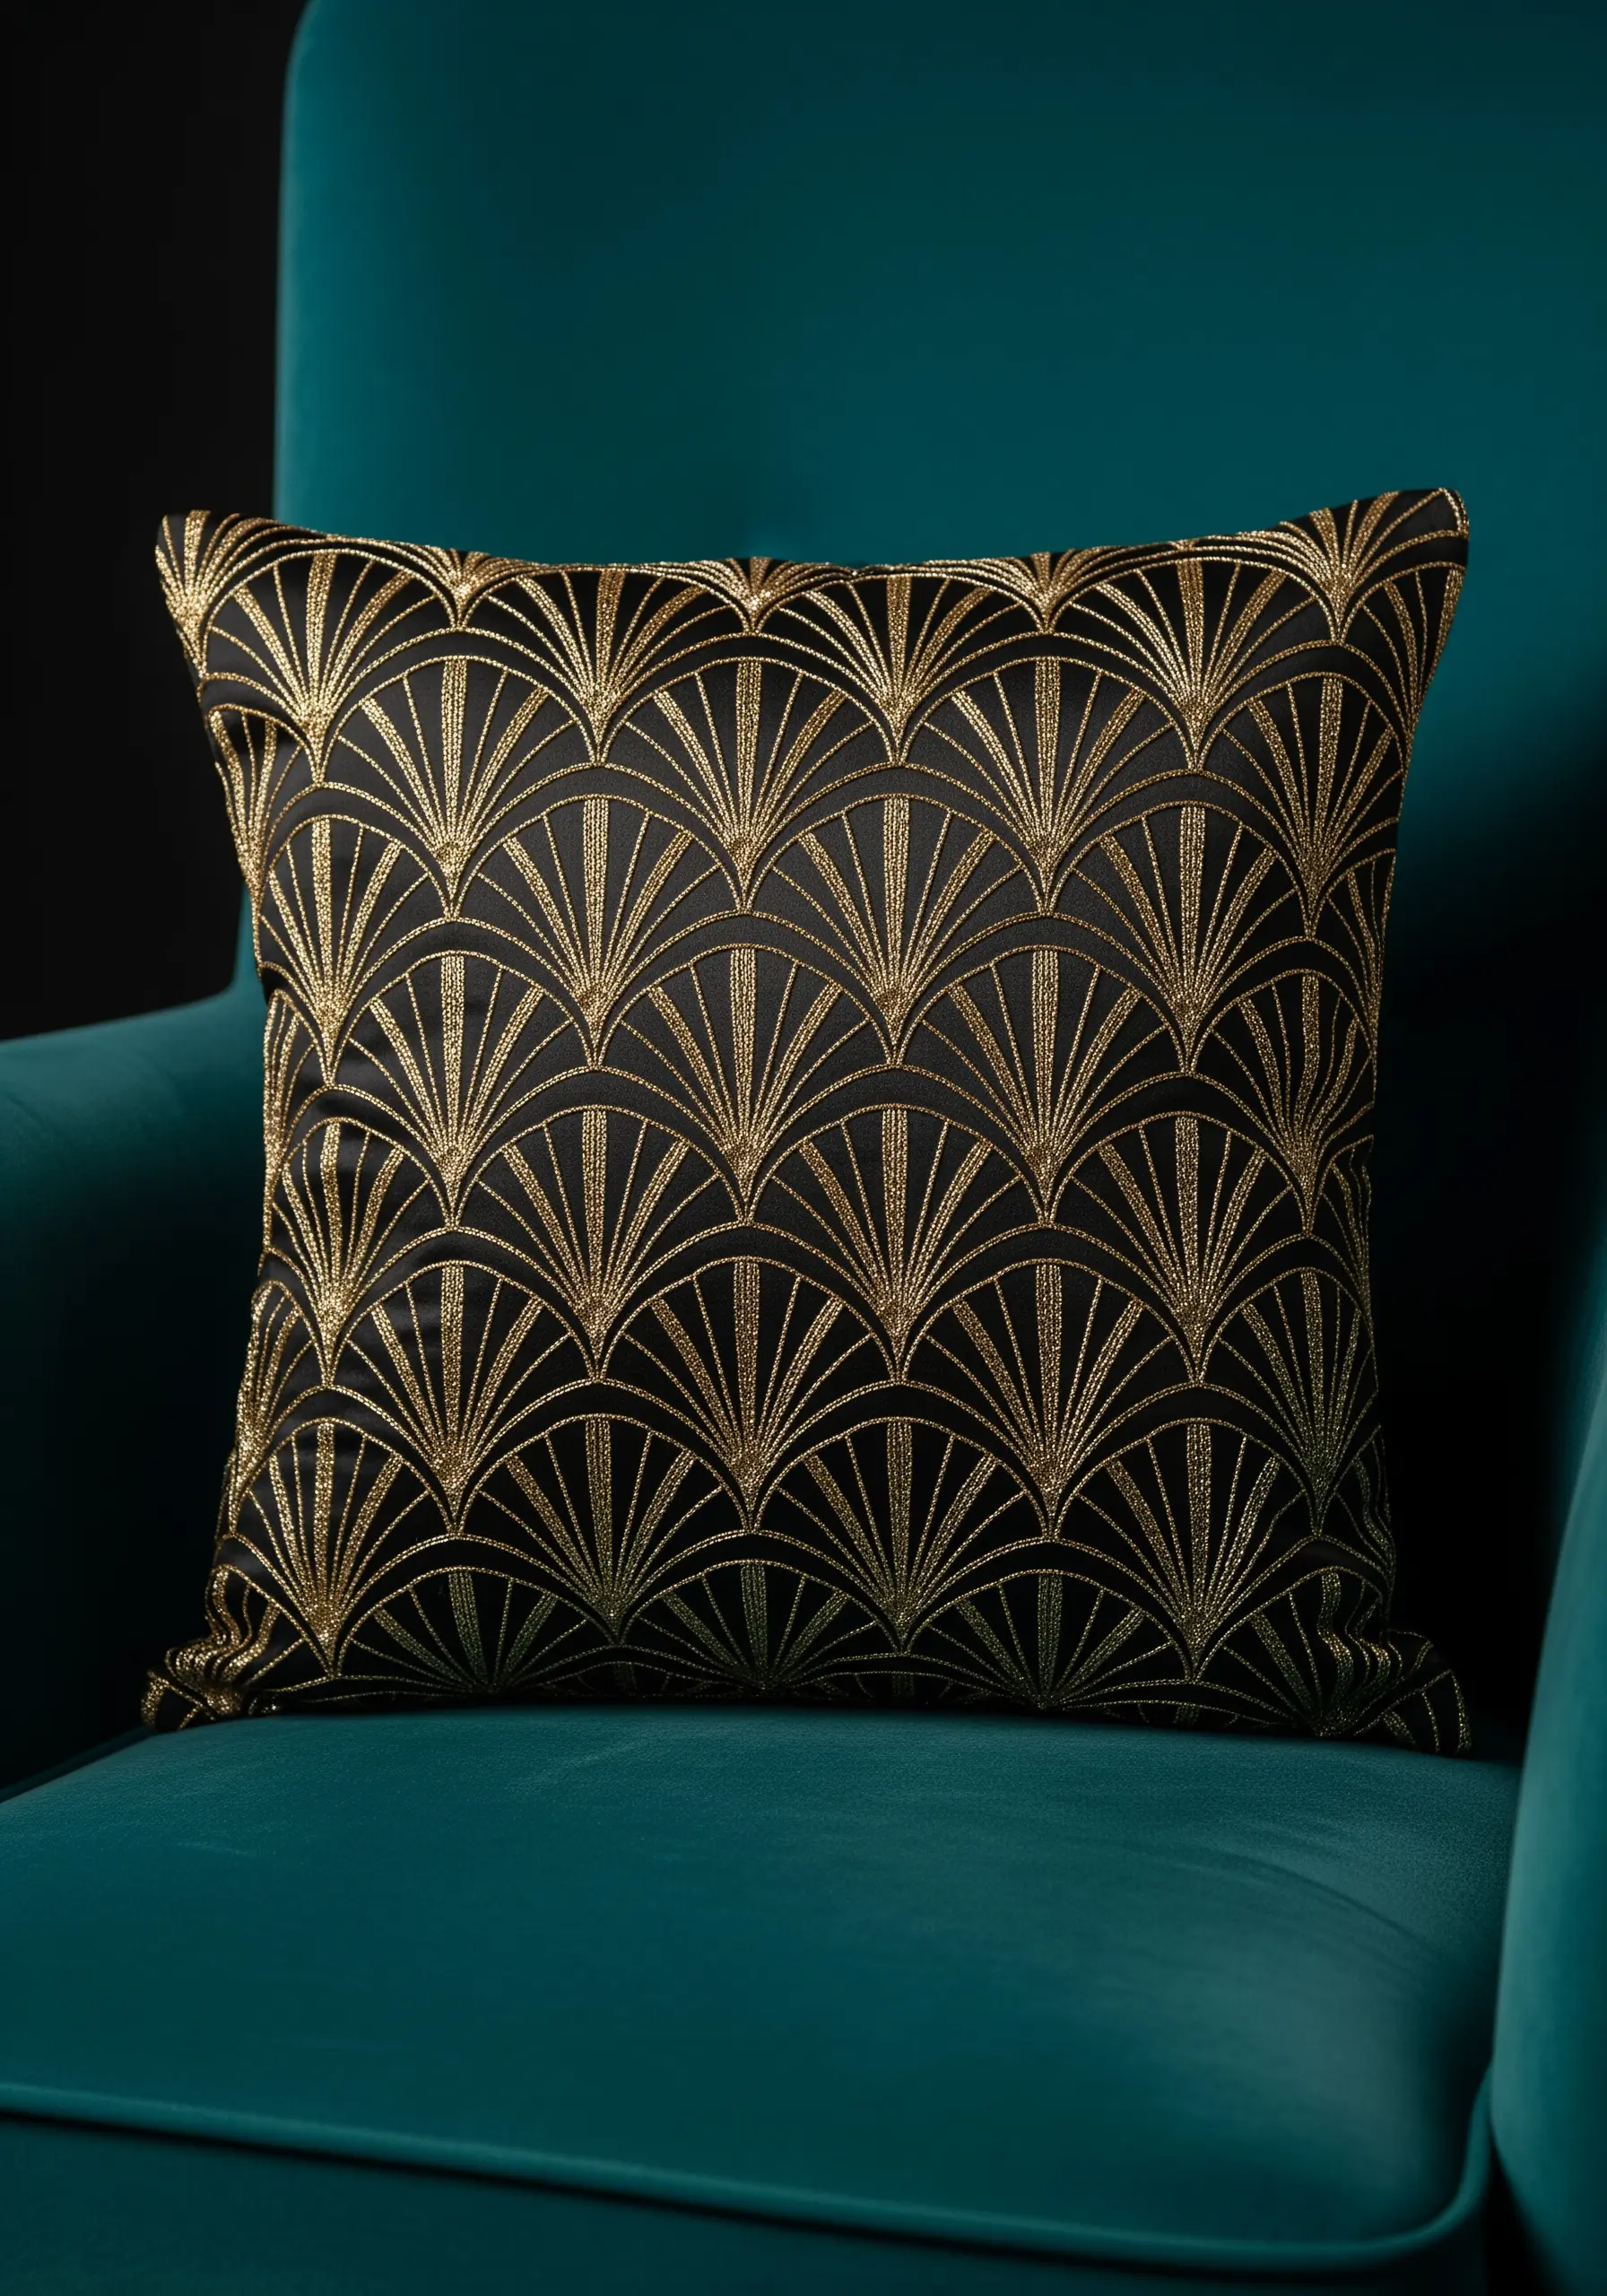
The key to a striking Art Deco pattern is absolute precision and the right choice of thread. Use a high-quality metallic floss that won’t snag or unravel.
Carefully transfer your fan pattern onto the dark fabric using a white water-soluble marker for perfect accuracy.
Execute the design with a simple split stitch. Its clean, rope-like texture provides a sharp line that enhances the geometric nature of the pattern while adding a subtle sheen.
This disciplined approach ensures your metallic thread wall art designs look luxe, not homemade.
10. Embrace Bold Folk Art with Wool Thread
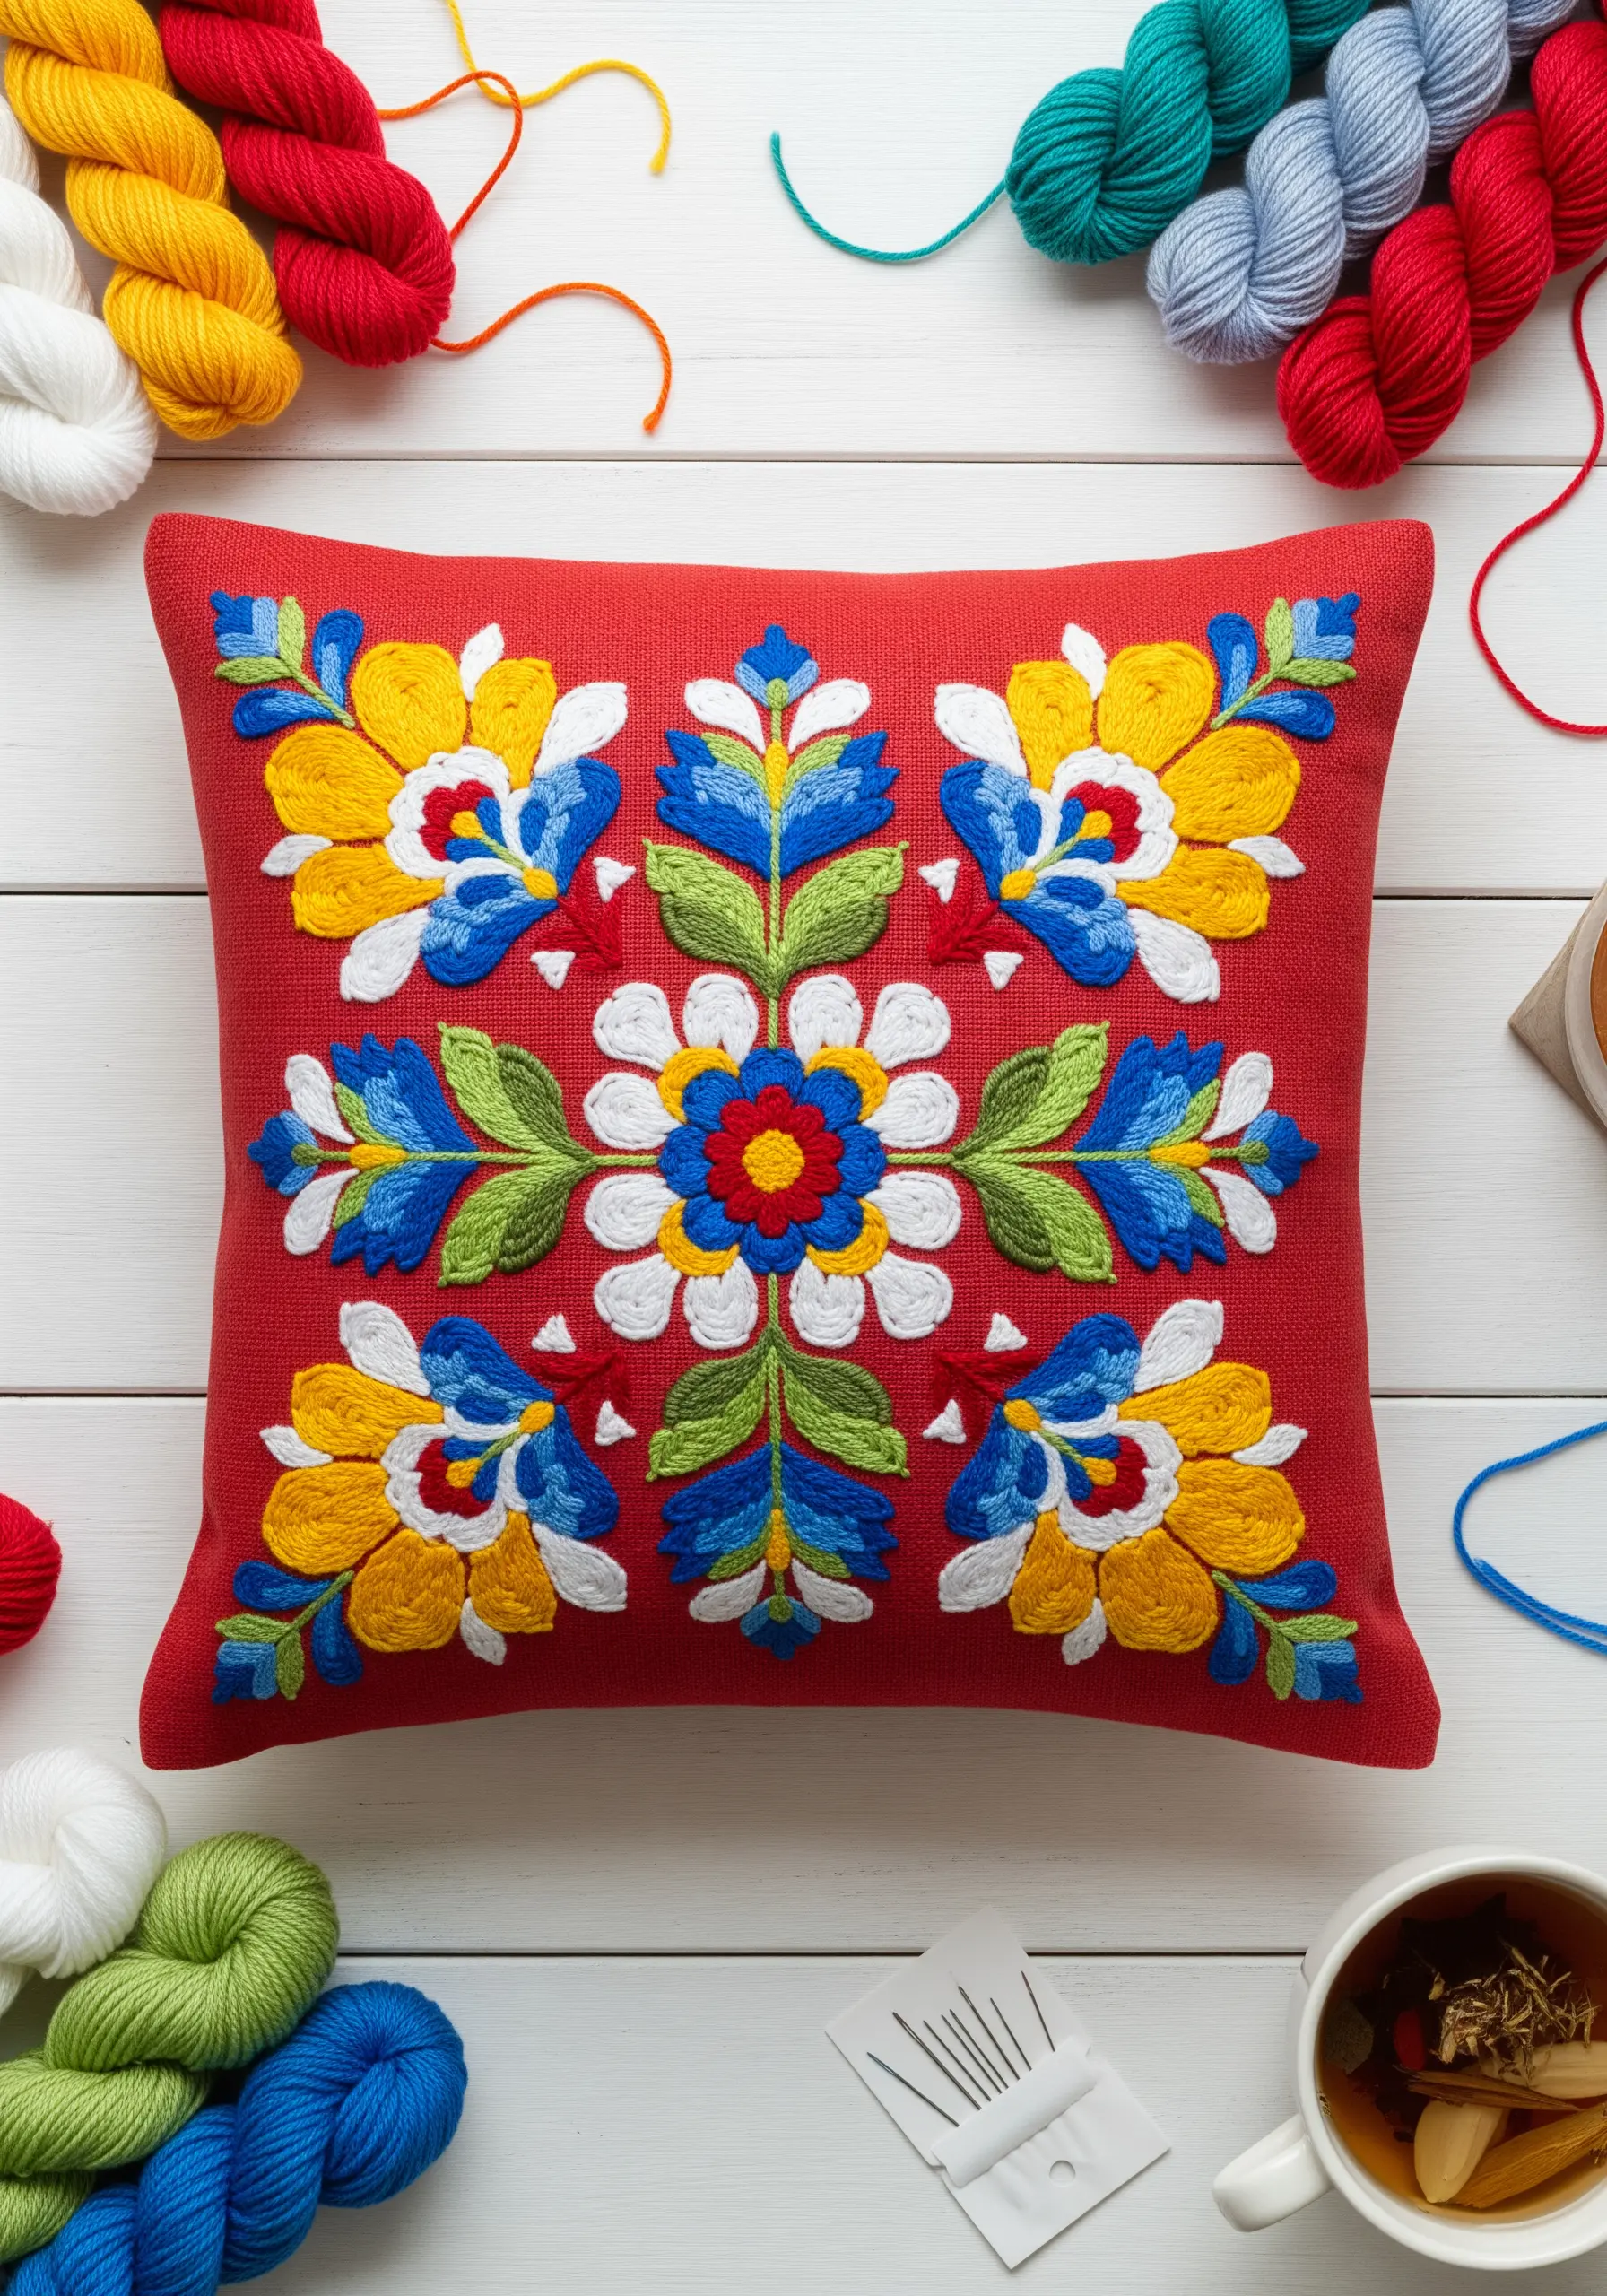
For a vibrant, matte finish that defines folk art styles, switch from cotton floss to crewel wool yarn.
Wool thread offers excellent coverage for filling large shapes, and its slightly fuzzy texture adds a soft, rustic authenticity to the design.
Use a simple satin stitch for the fills and a contrasting backstitch for the outlines to make the bold colors pop against each other.
This approach emphasizes color-blocking and handcrafted charm over intricate detail.
11. Paint a Landscape with Textural Stitches

Build a tactile landscape by assigning a different stitch to each natural element to create depth and variety.
Use dense French knots for the fluffy texture of sheep’s wool and the foliage of trees.
Fill the rolling hills with long, horizontal straight stitches in blended greens and blues to suggest distance and contour.
Create puffy clouds with tightly packed colonial knots or couched chenille yarn. This transforms your cushion into one of those simple small hoop landscape designs, but on a larger scale.
12. Achieve Crisp Citrus Slices with Whipped Outlines
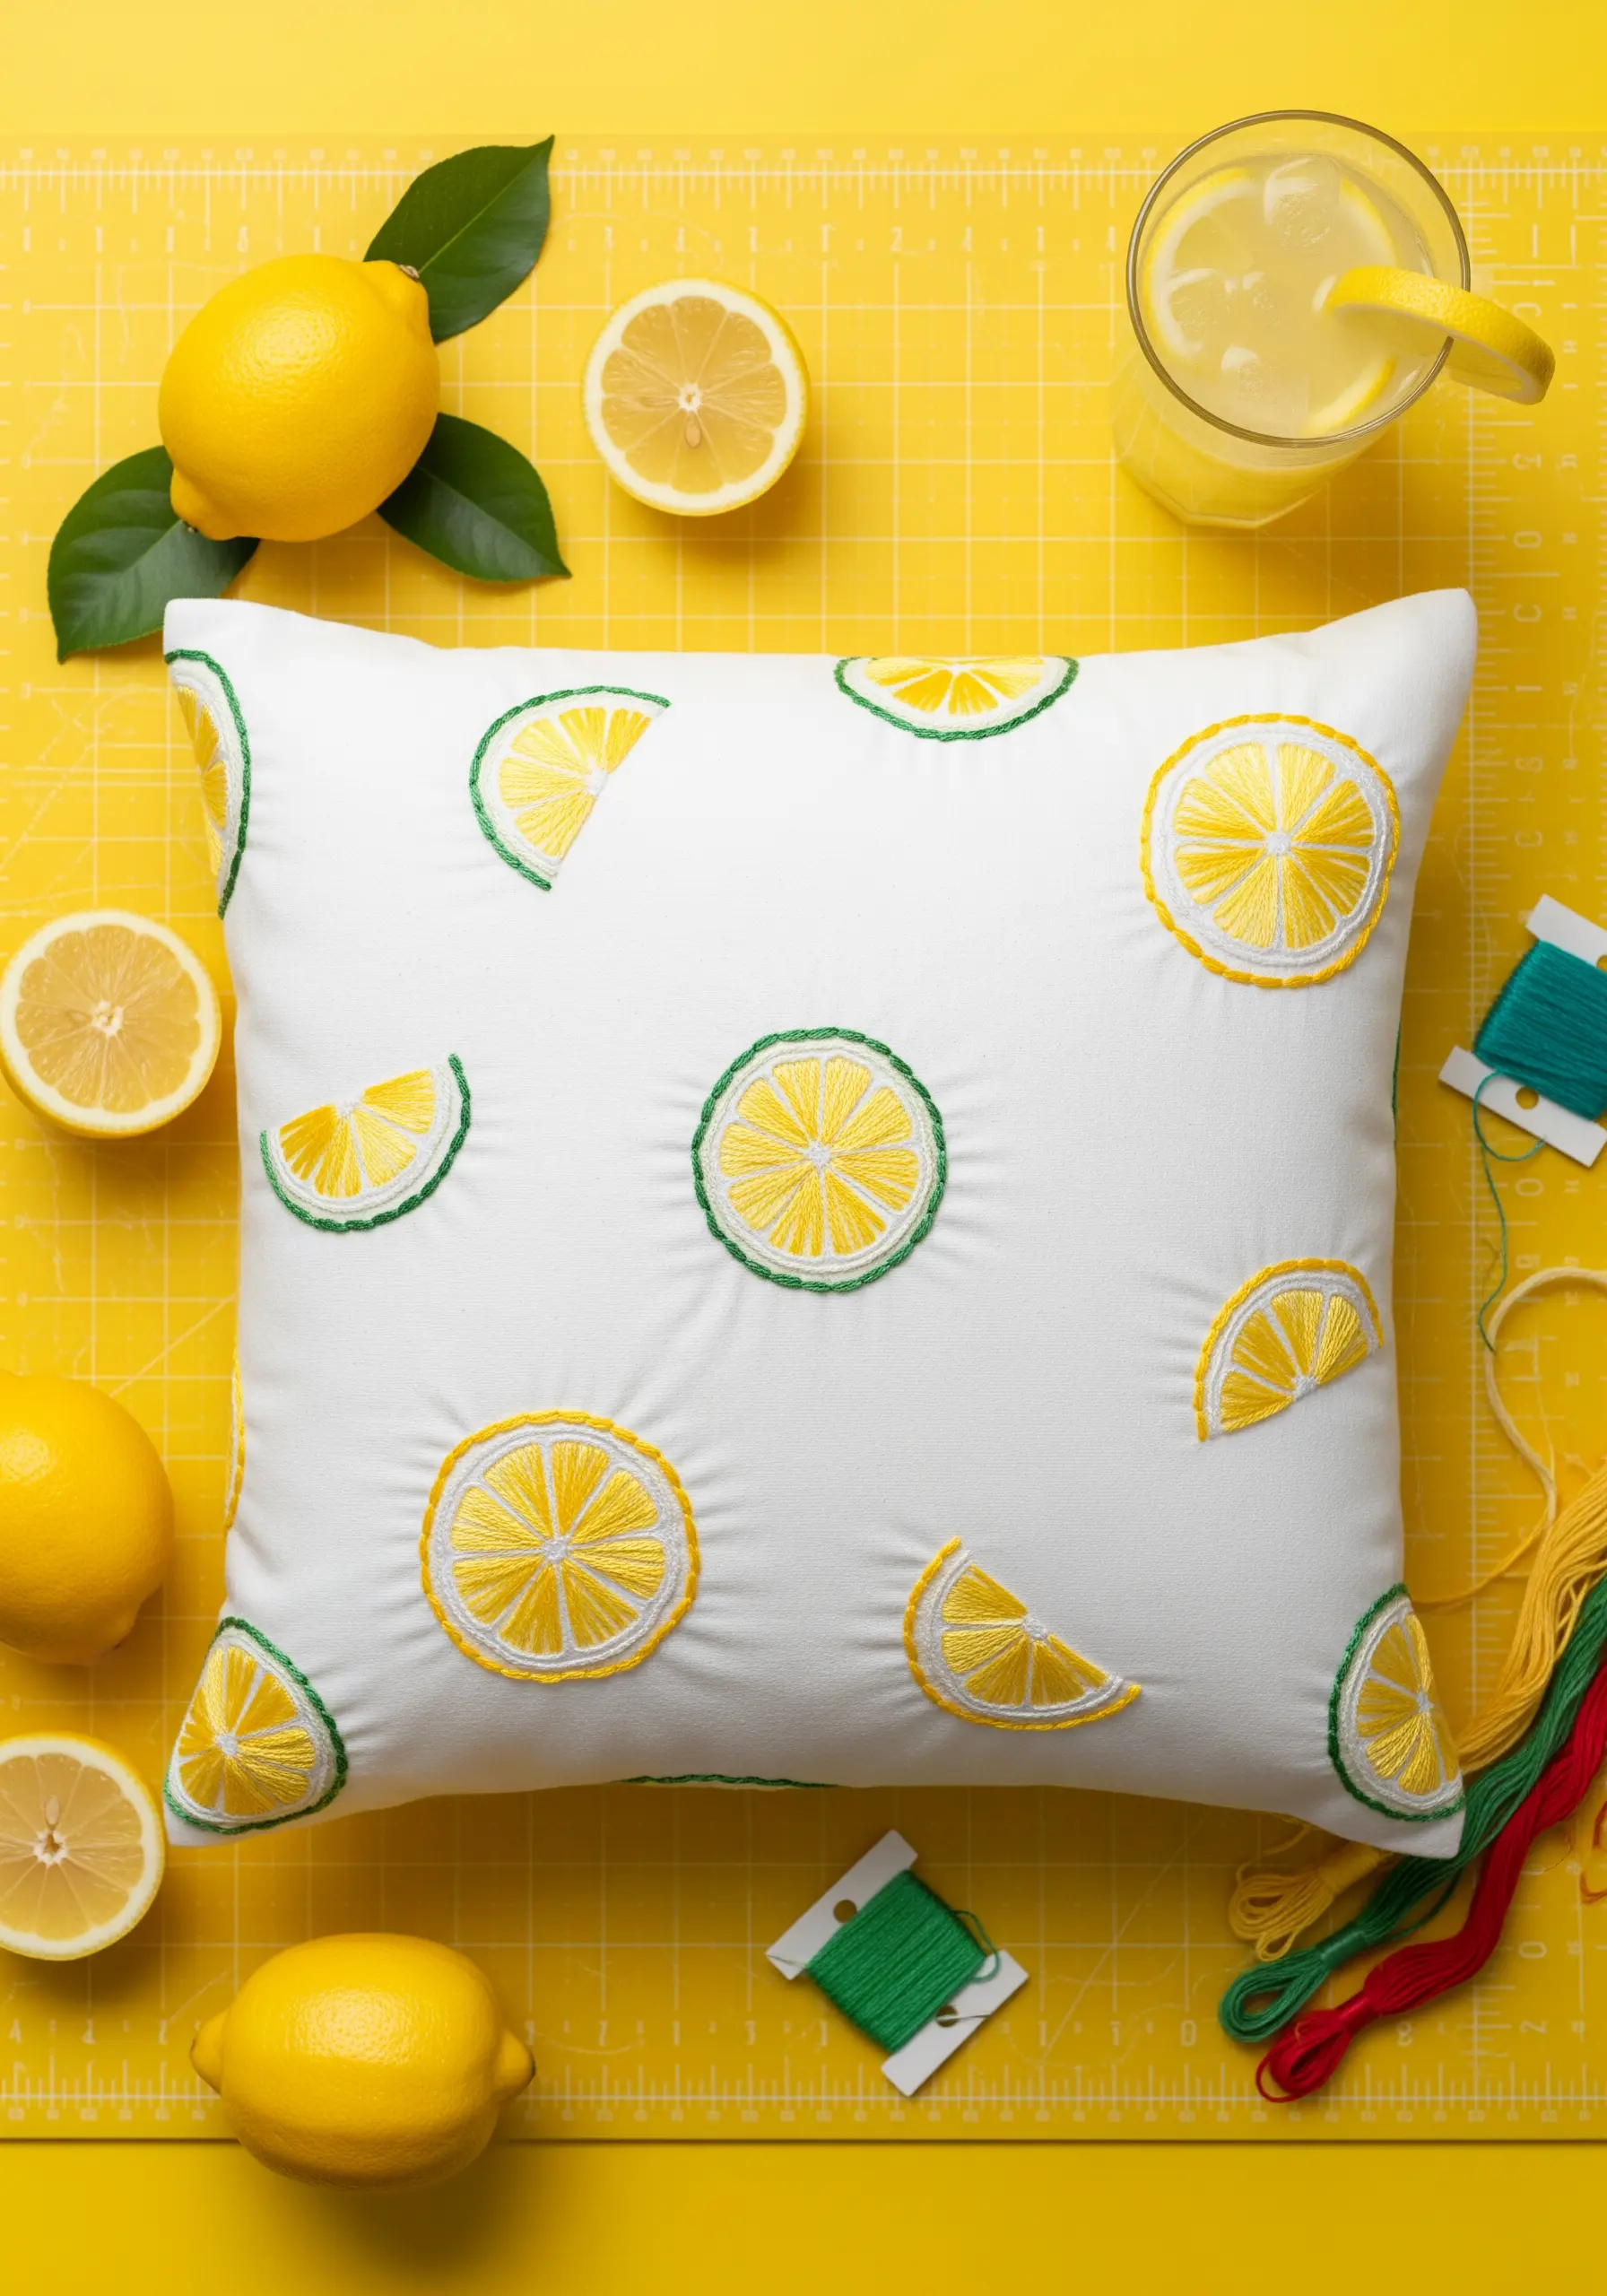
To make graphic fruit motifs look clean and sharp, outline each shape with a two-step whipped backstitch.
First, create a standard backstitch outline. Then, wrap that line with a second thread to create a smooth, raised edge that contains your fill stitches perfectly.
For the citrus segments, use a directional satin stitch, angling your stitches toward the center of the slice to mimic the fruit’s natural texture.
This combination of clean lines and textured fills makes your design look polished and intentional.
13. Modernize Cross-Stitch on Upholstery Fabric

To apply a cross-stitch pattern to a non-grid fabric like linen or canvas, use a waste canvas.
Simply tack the waste canvas onto your pillow fabric, stitch your design through both layers, and then carefully pull out the canvas threads one by one when you’re finished.
This leaves a perfect, grid-based design on any fabric you choose. Opt for a simple, graphic motif and a limited color palette for a contemporary Scandinavian feel.
14. Introduce Opulence with Beading and Couching
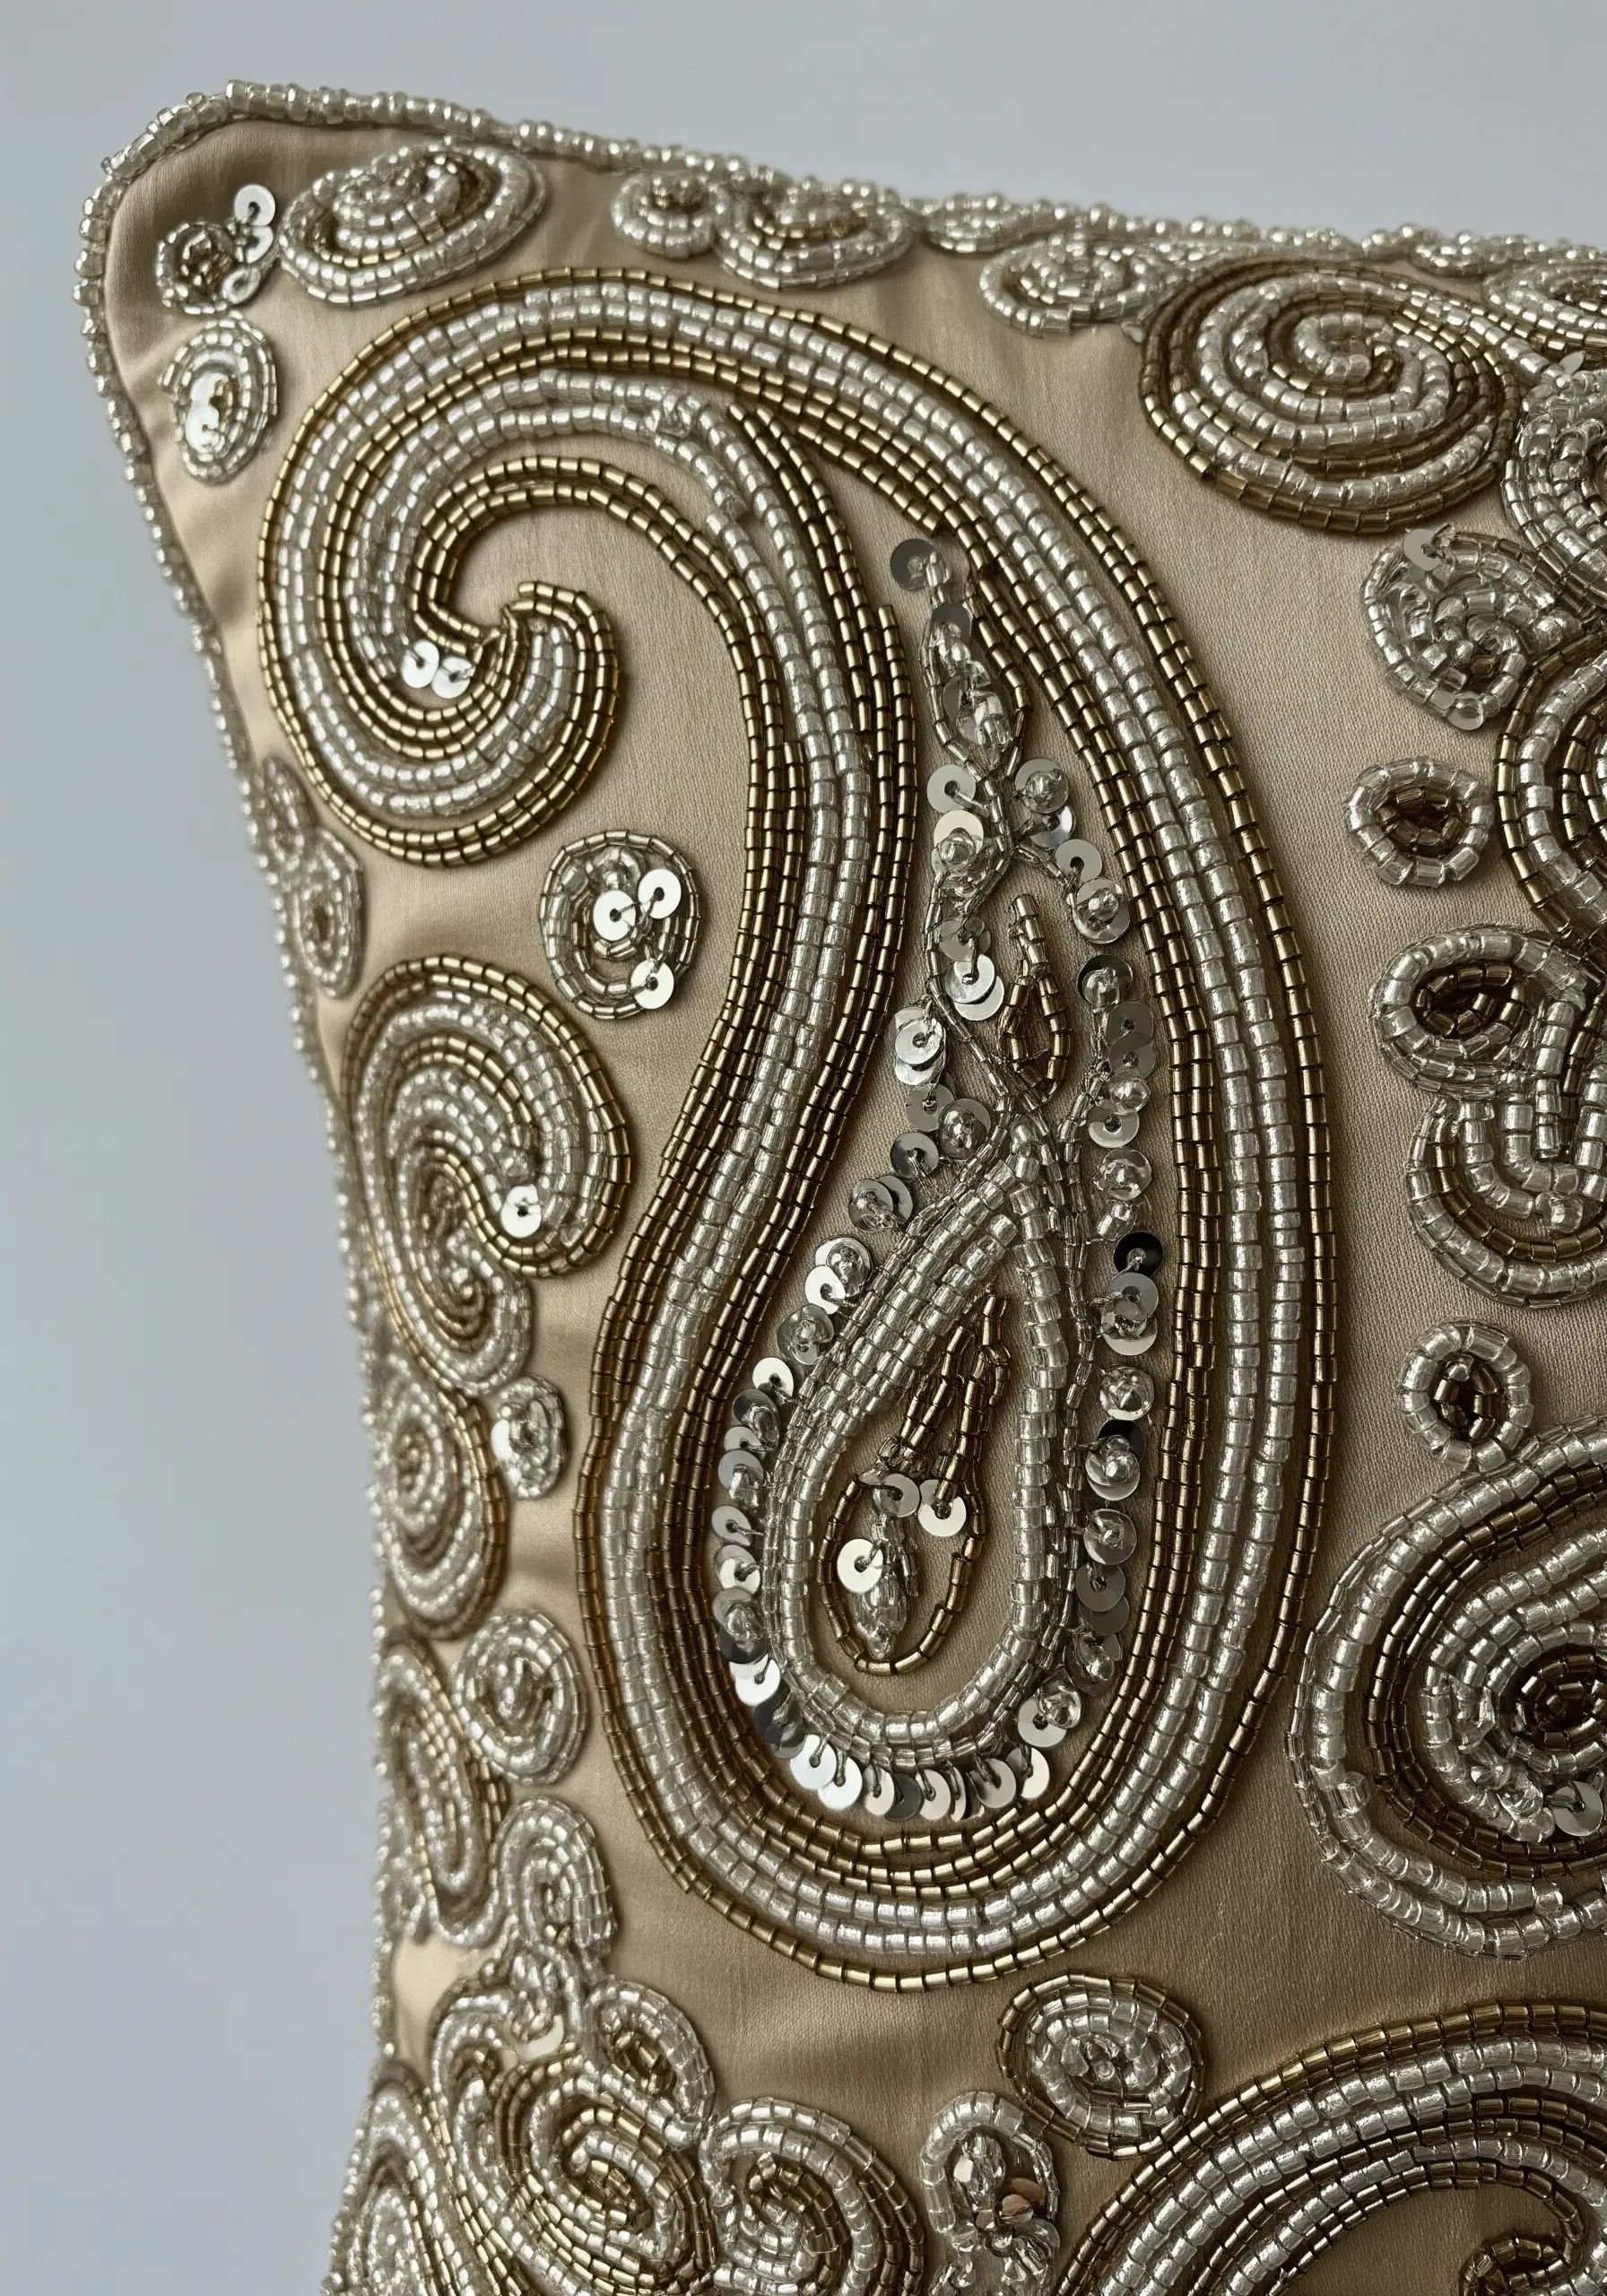
Elevate a simple line pattern by combining thread with beads and metallic cord for a truly luxurious finish.
Use the couching technique to lay down a thick metallic cord for the main swirls of the paisley design.
Fill the interior spaces with shimmering seed beads and sequins, attaching them with a single strand of matching thread.
This mixed-media contemporary embroidery technique adds texture, reflects light, and gives the cushion a high-end, decorative feel.
15. Create Celestial Drama with High-Contrast Line Work

Make your celestial designs stand out by using a high-sheen metallic thread on a dark, matte fabric like navy blue cotton or linen.
Use a simple stem stitch or split stitch for all the line work. These stitches create a slightly raised, rope-like texture that catches the light beautifully.
For the filled areas, like the faces of the sun and moon, use a dense satin stitch, ensuring your stitches lie flat and smooth for maximum shine.
This high-contrast approach gives the design a graphic, almost engraved, appearance.
16. Explore Punch Needle for Plush, Abstract Textures

For a soft, rug-like texture, explore punch needle embroidery. This technique uses a special tool to create loops of yarn on the fabric’s surface.
It’s ideal for filling large color blocks quickly and creating abstract shapes with soft, blended edges.
Vary the height of your needle’s setting to create different loop lengths, adding subtle dimension and texture to your design.
This method is perfect for simple abstract designs that prioritize color and tactile comfort.
17. Achieve Painted Realism with Thread Painting
To create smooth, realistic color gradients on large leaves, use the long-and-short stitch, also known as thread painting.
Work in rows, staggering stitches of varying lengths and blending different shades of green together to mimic how light hits the leaf surface.
Use a single strand of six-strand floss for the finest blending and a seamless, paint-like effect.
This technique is patient work, but it results in stunningly realistic floral thread painting that looks professional and artistic.
18. Make a Modern Statement with Minimalist Stitches
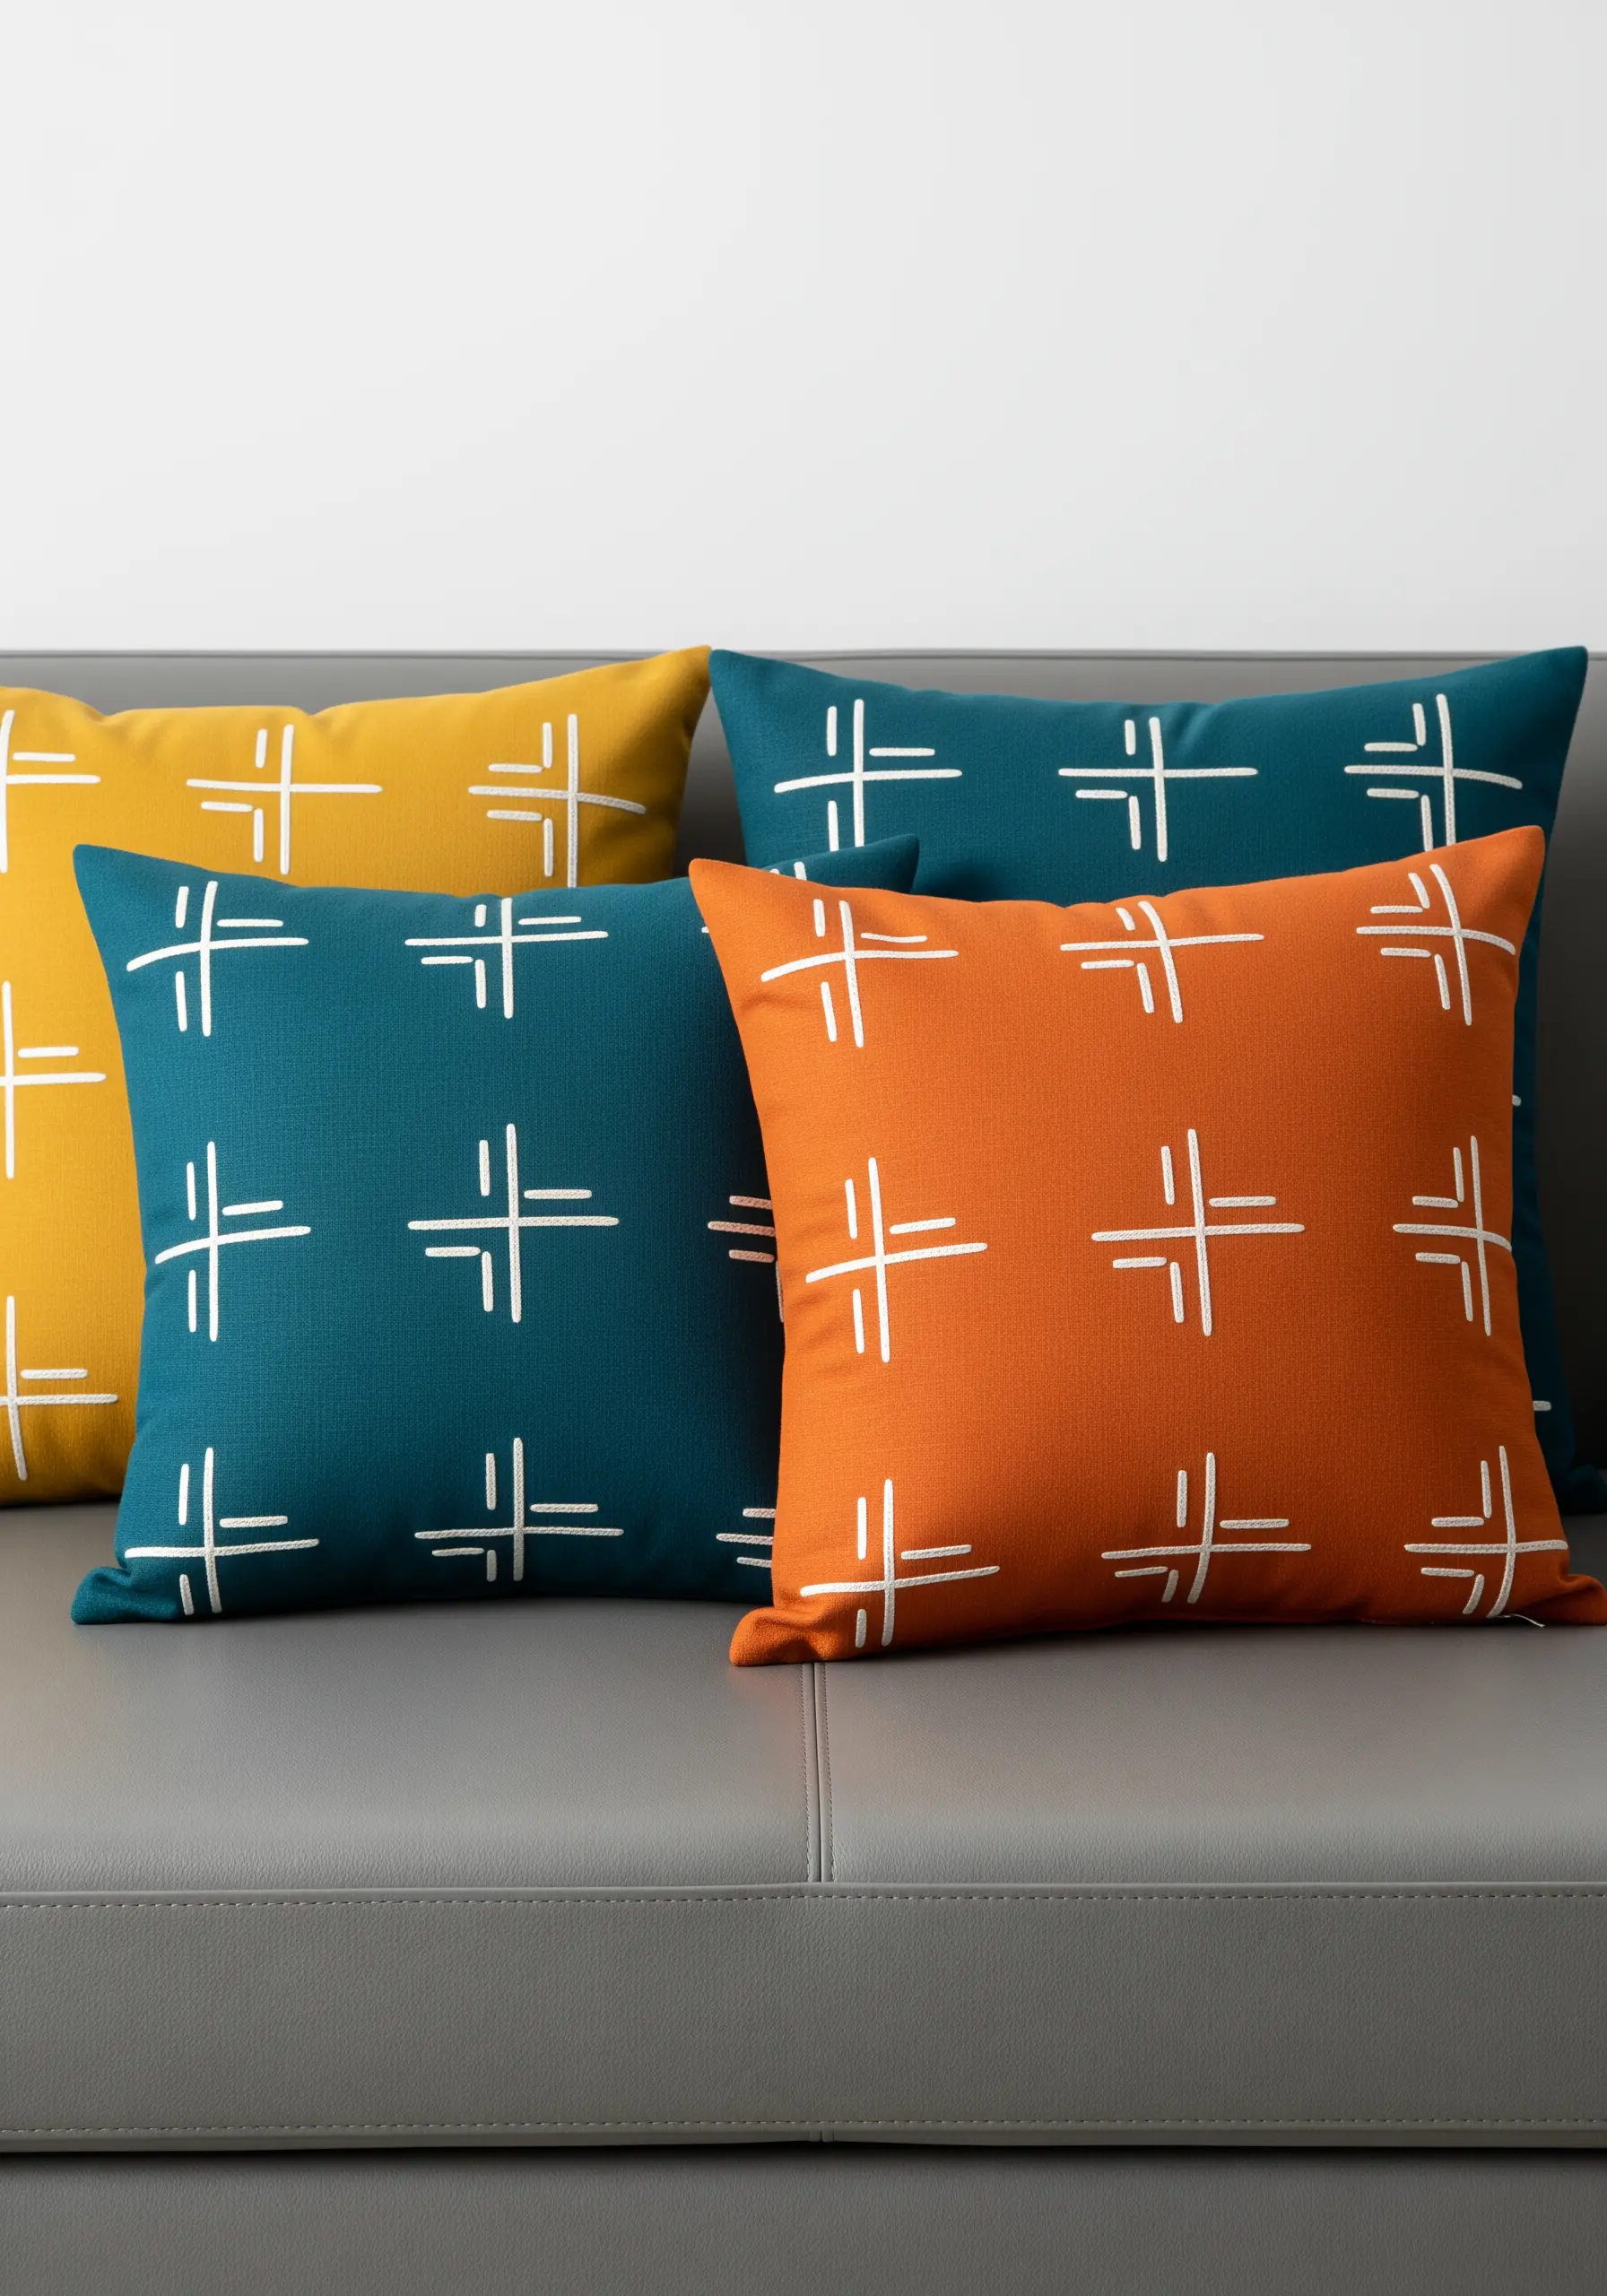
You don’t need complex patterns to make an impact. Create a bold, graphic design using a simple repeating motif and a high-contrast color palette.
Use a thick thread, like cotton perle No. 8, and a simple backstitch or running stitch to create your lines.
The thickness of the thread provides visual weight, making the simple design feel intentional and modern.
This is one of the most effective minimalist embroidery ideas for transforming a set of plain cushions quickly.
19. Cultivate a Delicate Meadow with Varied Stitches

To create a natural, un-manicured wildflower meadow, use a mix of simple, delicate stitches and vary their scale.
Use lazy daisy stitches for daisy petals, French knots for small buds and flower centers, and fly stitches for tiny leaves.
Stitch the stems with a fine, single-strand stem stitch, and slightly alter the height and density of the flowers to create a sense of depth and realism.
This approach gives your wildflower thread palettes a light, airy, and organic feel.
20. Create Rhythmic Patterns with Sashiko Stitching
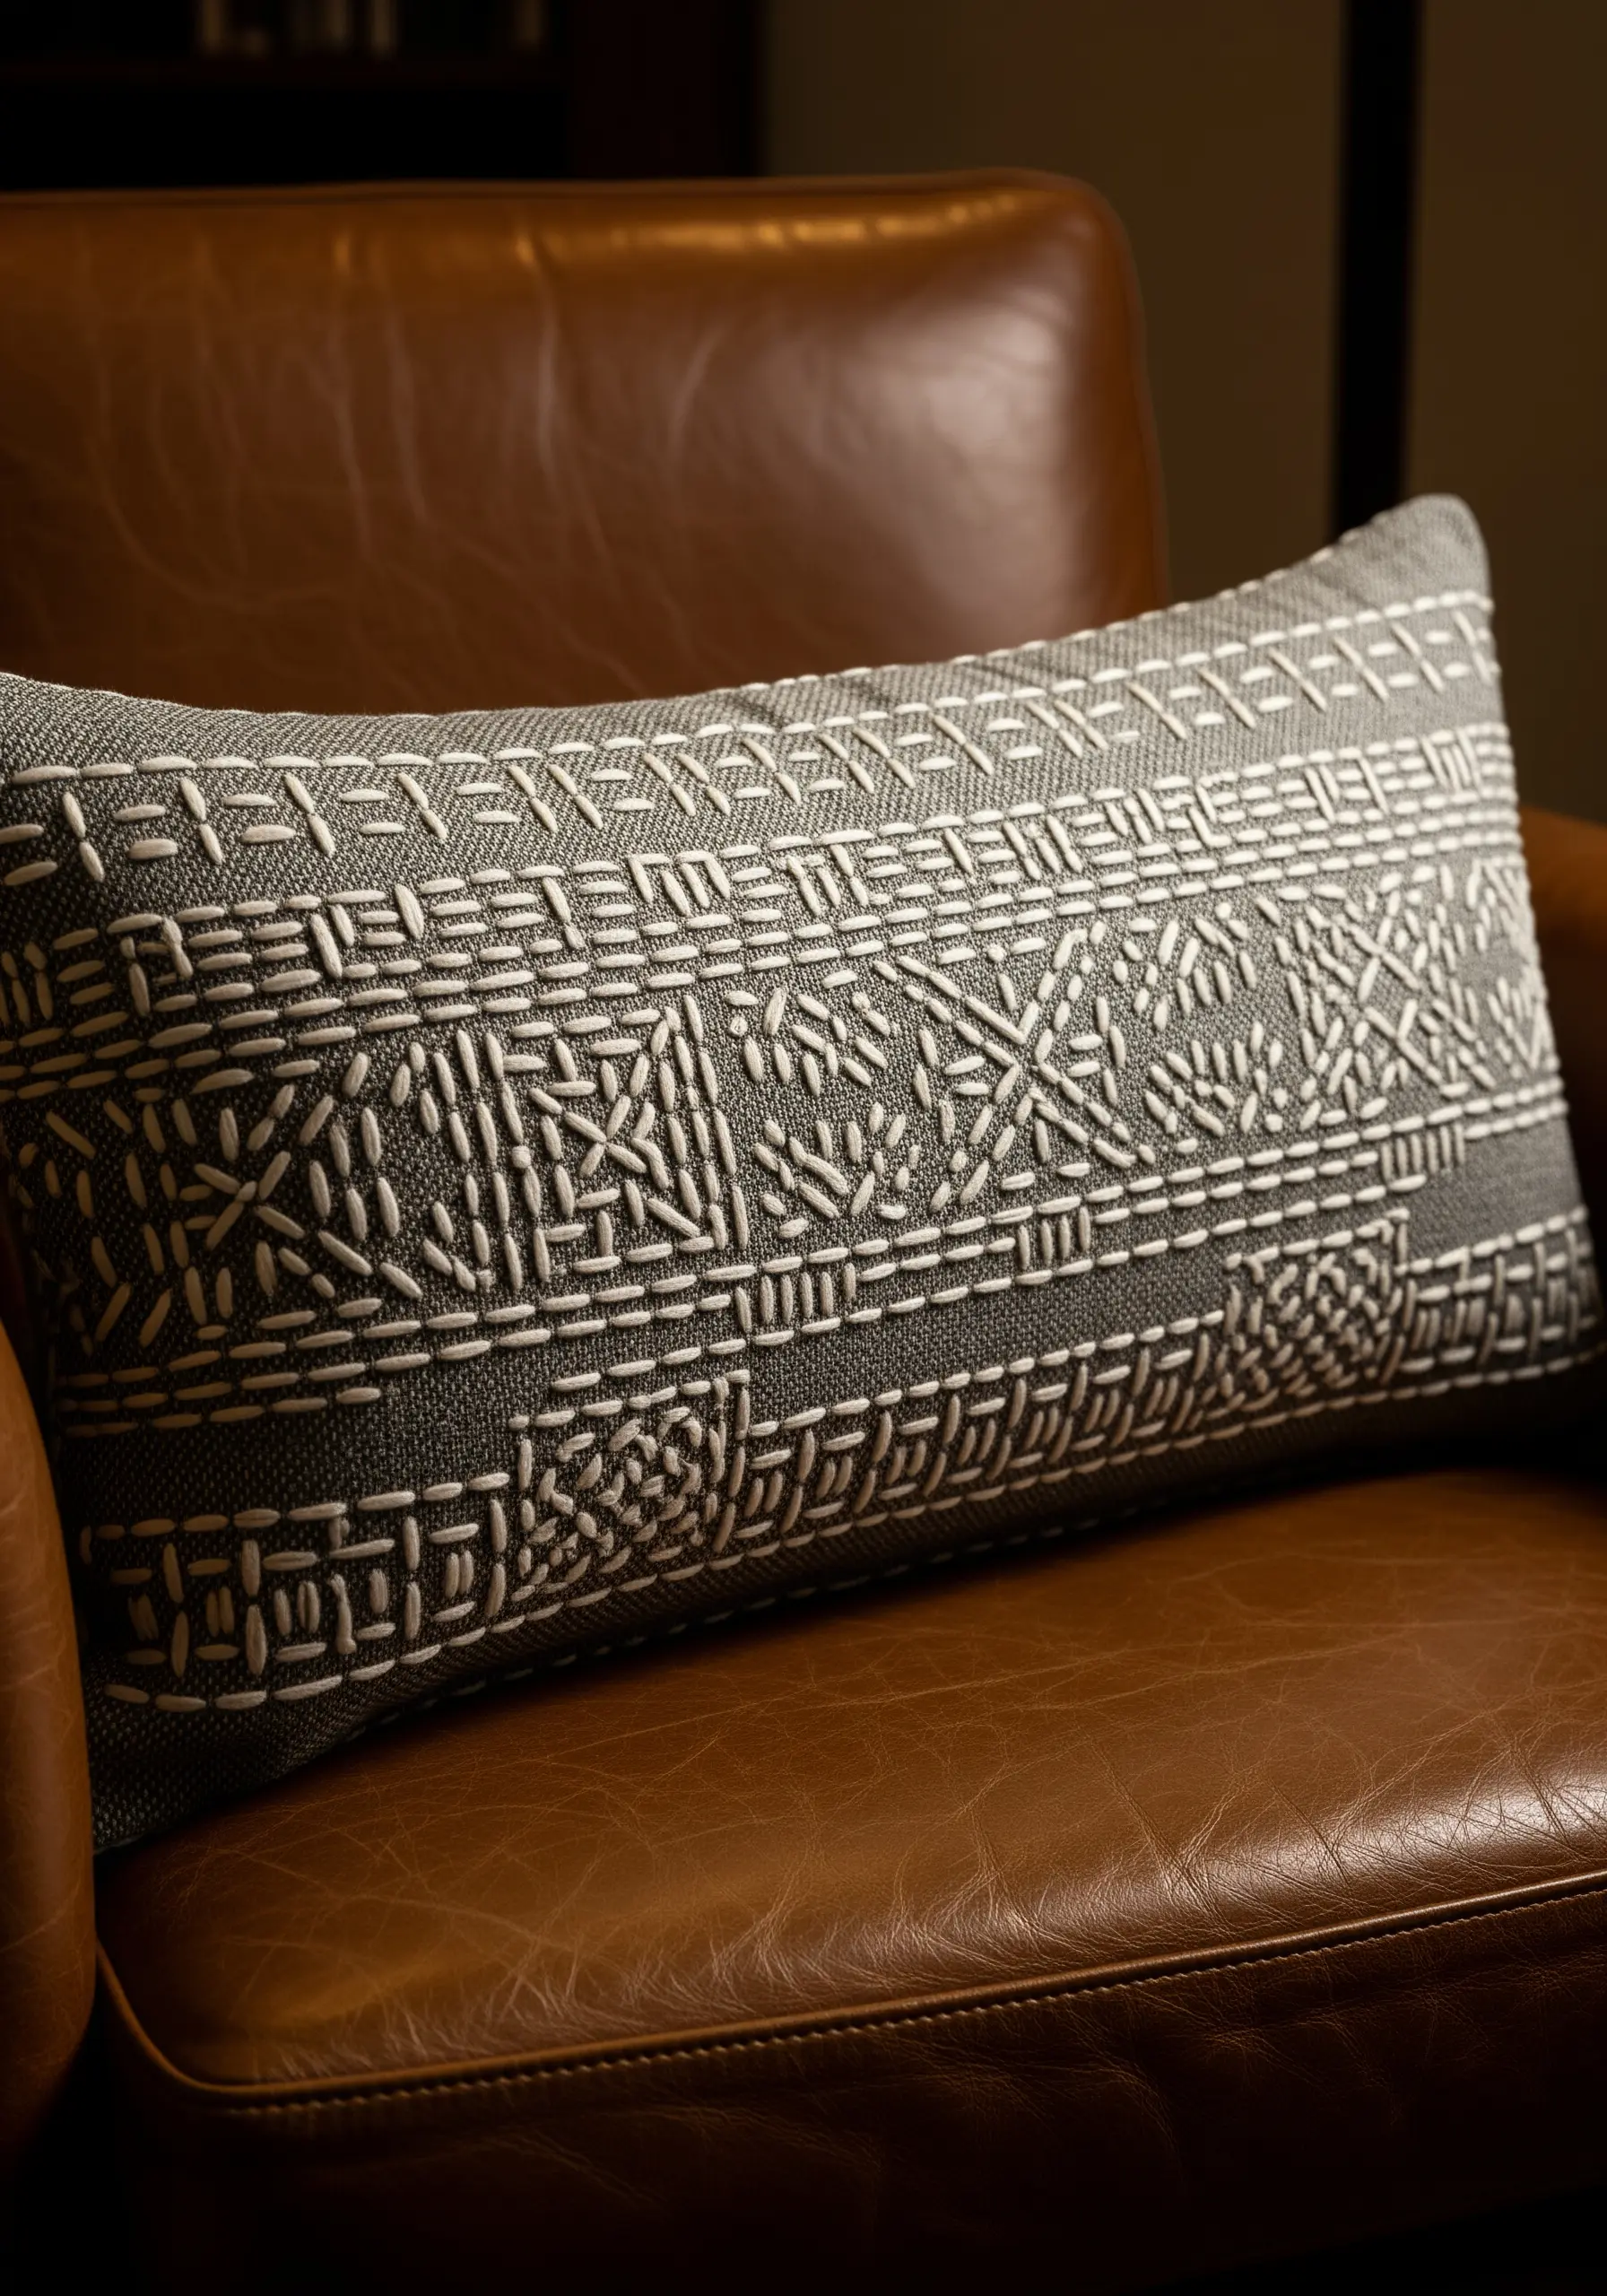
For a meditative and graphically striking design, explore Sashiko, a traditional Japanese embroidery style that uses a simple running stitch.
Use a thick, high-contrast Sashiko thread on a textured, sturdy fabric like linen or denim.
The key to authentic Sashiko is maintaining a consistent stitch length and leaving a tiny, even gap between each stitch.
The beauty of these hand-stitched cushion borders lies in the rhythm and precision of the humble running stitch.
21. Define Intricate Mandalas on Plush Surfaces

Stitching fine details on a high-pile fabric like velvet requires preparation. Always use a cut-away stabilizer on the back to prevent distortion.
For the intricate lines of a mandala, a whipped backstitch or a fine chain stitch in a contrasting color will create a raised, clear line that doesn’t get lost in the fabric’s pile.
Use a color palette of analogous cool tones (blues, purples) with a bright white outline to create a design that feels both complex and serene.
These soft-tone embroidery mandalas are perfect for creating a focal point of calm.
22. Add Farmhouse Charm with Appliqué and Fill Stitch

Combine fabric appliqué with embroidery to create a rustic, layered look. Cut your main shape (the rooster) from a piece of contrasting fabric.
Secure the appliqué piece to the cushion using a neat blanket stitch around the edge, which adds a decorative, handcrafted frame.
Then, add interior details like wing textures and tail feathers using a simple satin stitch or long-and-short stitch directly onto the appliqué fabric.
This mixed-media approach is perfect for creating rustic farmhouse embroidery pieces with character.
23. Create Sculptural Lines with Raised Cord Embroidery

For a minimalist design that still has a strong physical presence, use a raised cord technique instead of standard floss.
This involves couching a thick, stiff cord or even a flexible wire onto the fabric surface, allowing you to create lines that have a truly three-dimensional, sculptural quality.
The key is to use a strong, discreet tacking thread and space your stitches just close enough to hold the curves without interrupting the flow of the line.
This method elevates abstract face line embroidery designs into tactile art.
24. Build a Woodland Scene on Textured Fabric

Let your base fabric do some of the work. The vertical lines of a corduroy cushion instantly add a forest-floor texture to your composition.
Use a padded satin stitch for the mushroom caps to make them feel plump and rounded. Simply add a few foundation stitches underneath before covering them with your top layer of satin stitch.
For the ground, a dense scattering of French knots and seed stitches in mossy greens and browns creates a rich, uneven forest floor, adding to the charm of your cottagecore floral embroidery.
25. Design a Classic Monogram with Balanced Stitches
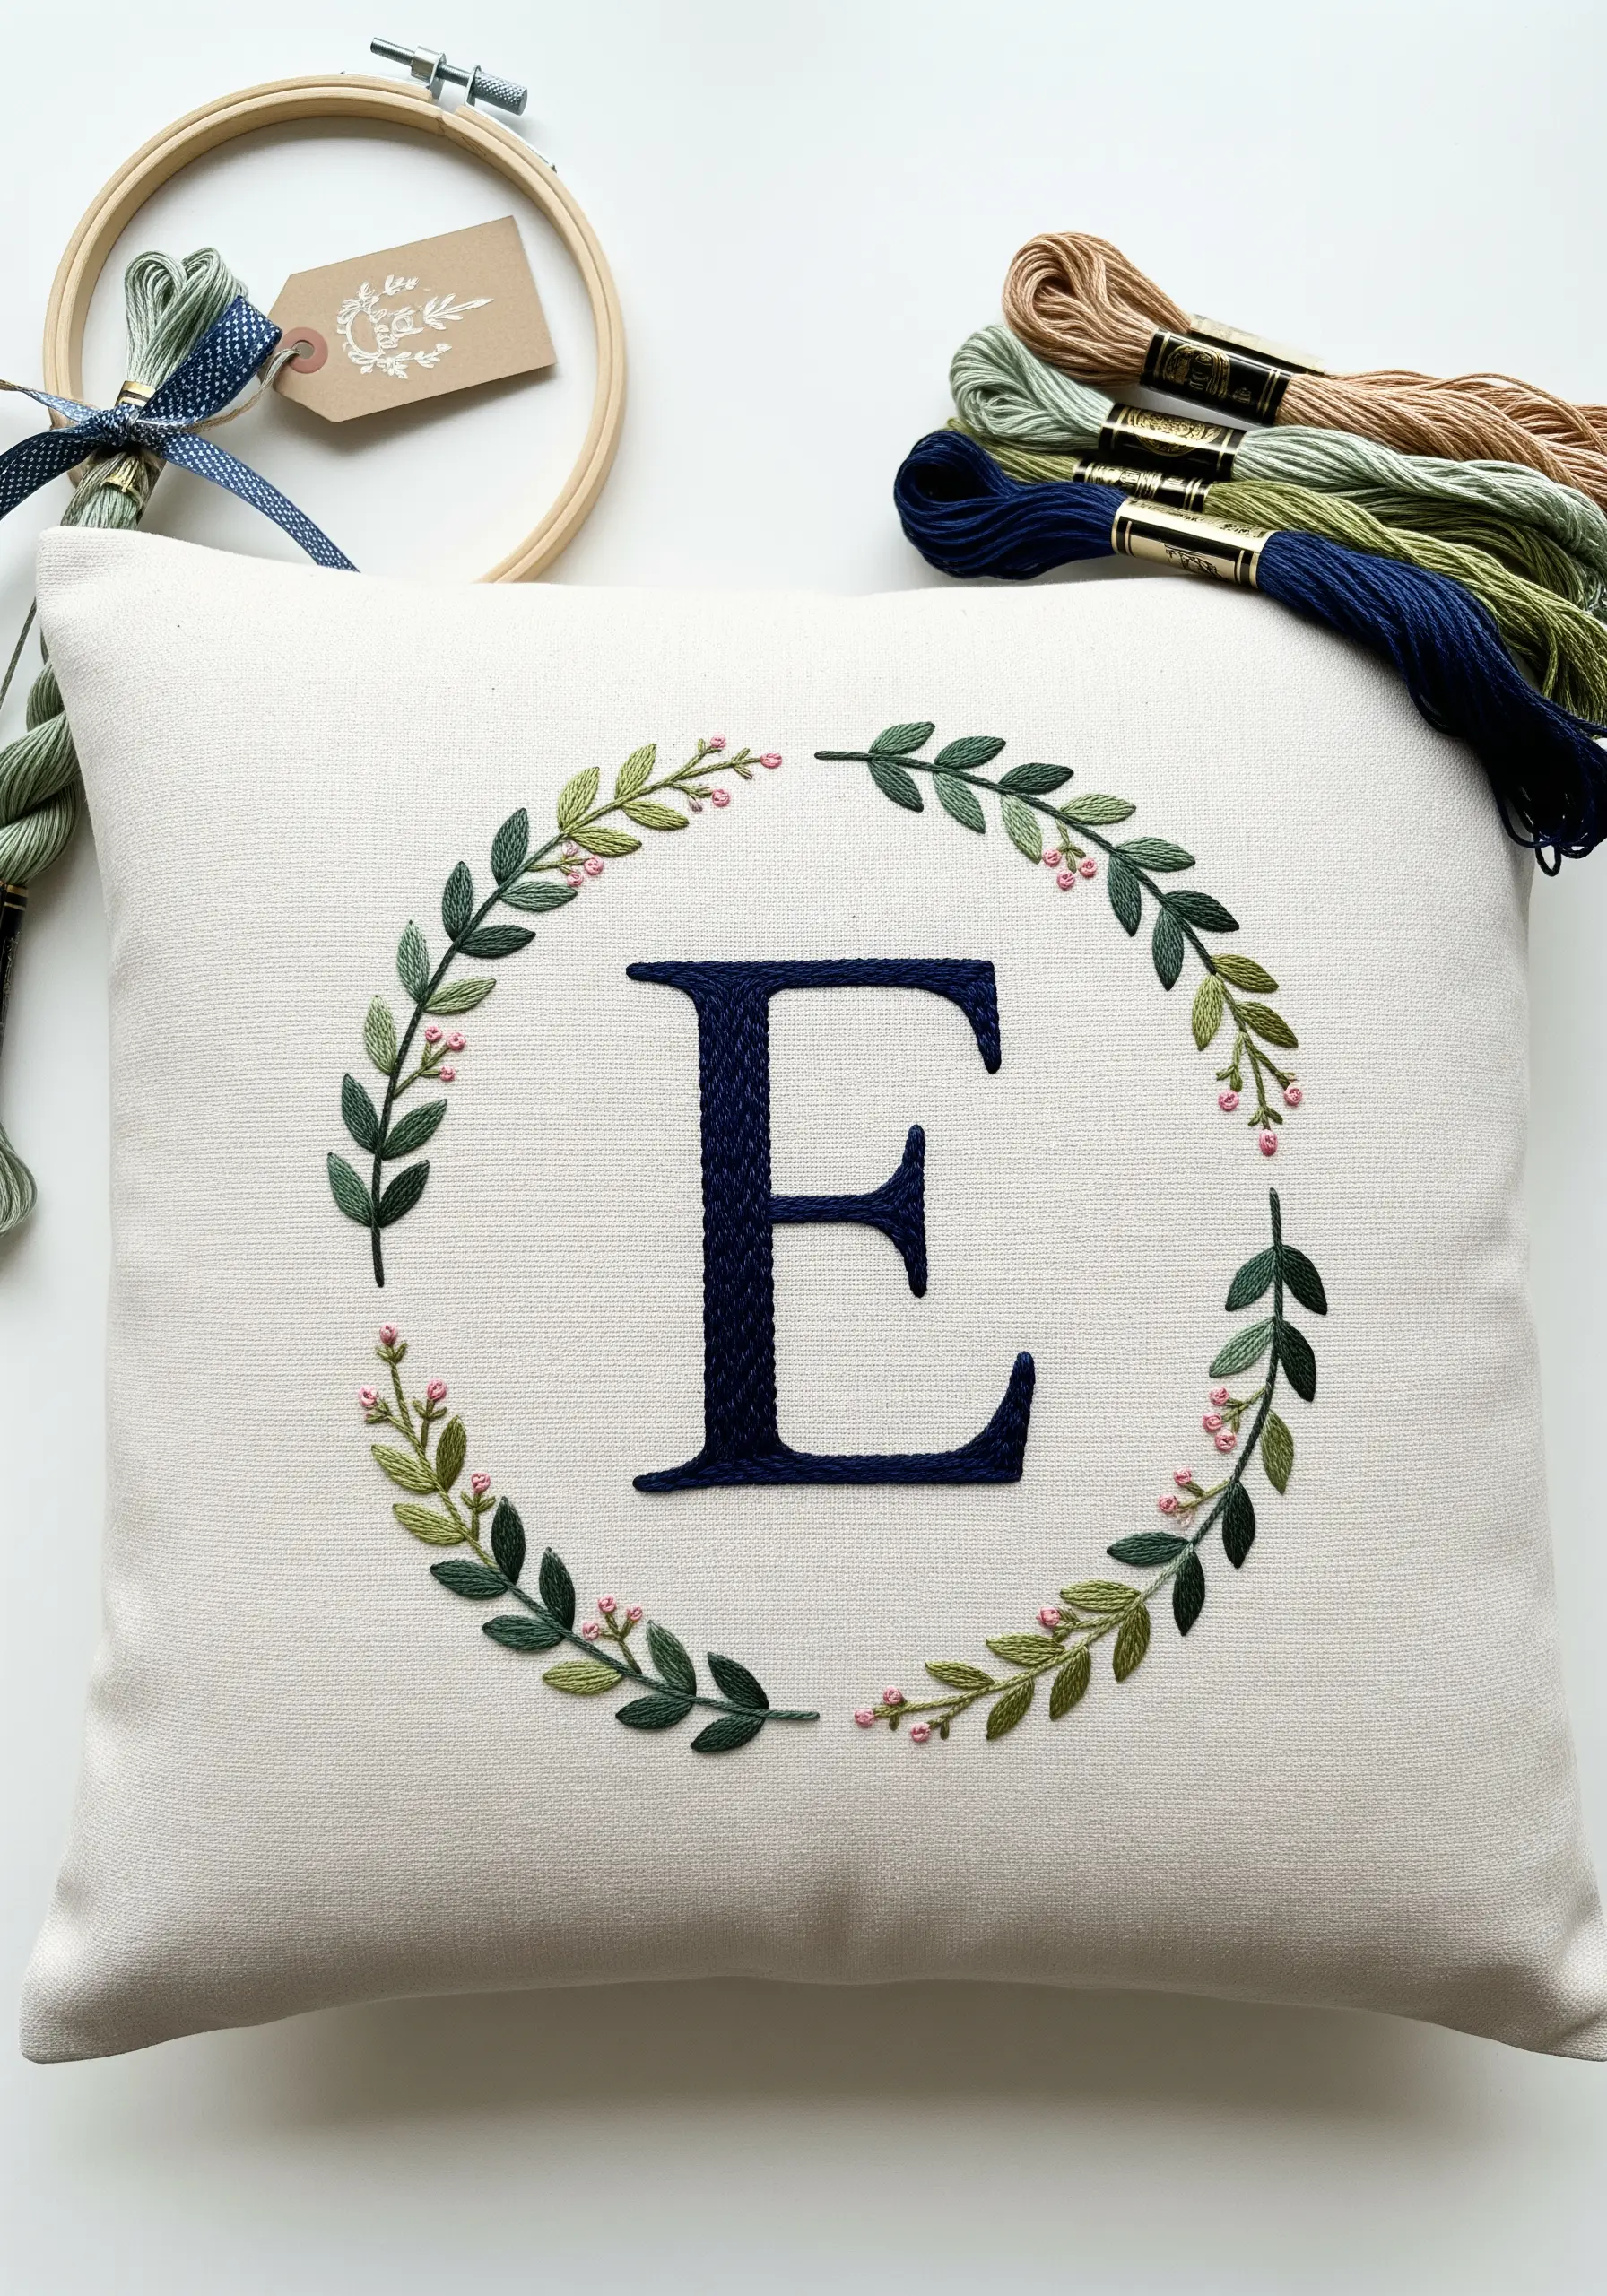
To create an elegant and balanced monogram, combine a bold, heavy stitch for the letter with a lighter, more delicate stitch for the decorative elements.
Fill the initial with a dense, perfectly smooth satin stitch using at least four strands of floss for good coverage.
For the surrounding wreath, use a finer fishbone stitch for the leaves and tiny French knots for the berries. This contrast in texture and visual weight creates a sophisticated and timeless design.
These minimal monogram styles are perfect for personalized gifts.
26. Master the Seigaiha Wave with Rhythmic Running Stitch

The Japanese Seigaiha (wave) pattern is a classic Sashiko motif that relies on precision and rhythm. The goal is perfectly concentric arcs.
Use a fabric marker and a compass or circular objects to draw flawless guidelines before you begin stitching.
Use a long Sashiko needle and thick, contrasting thread to execute the running stitch, aiming for stitch and gap lengths to be as uniform as possible.
This meditative process results in a powerful, graphic pattern that adds both energy and tranquility to your decor.
27. Explore Jacobean Texture with Crewel Wool
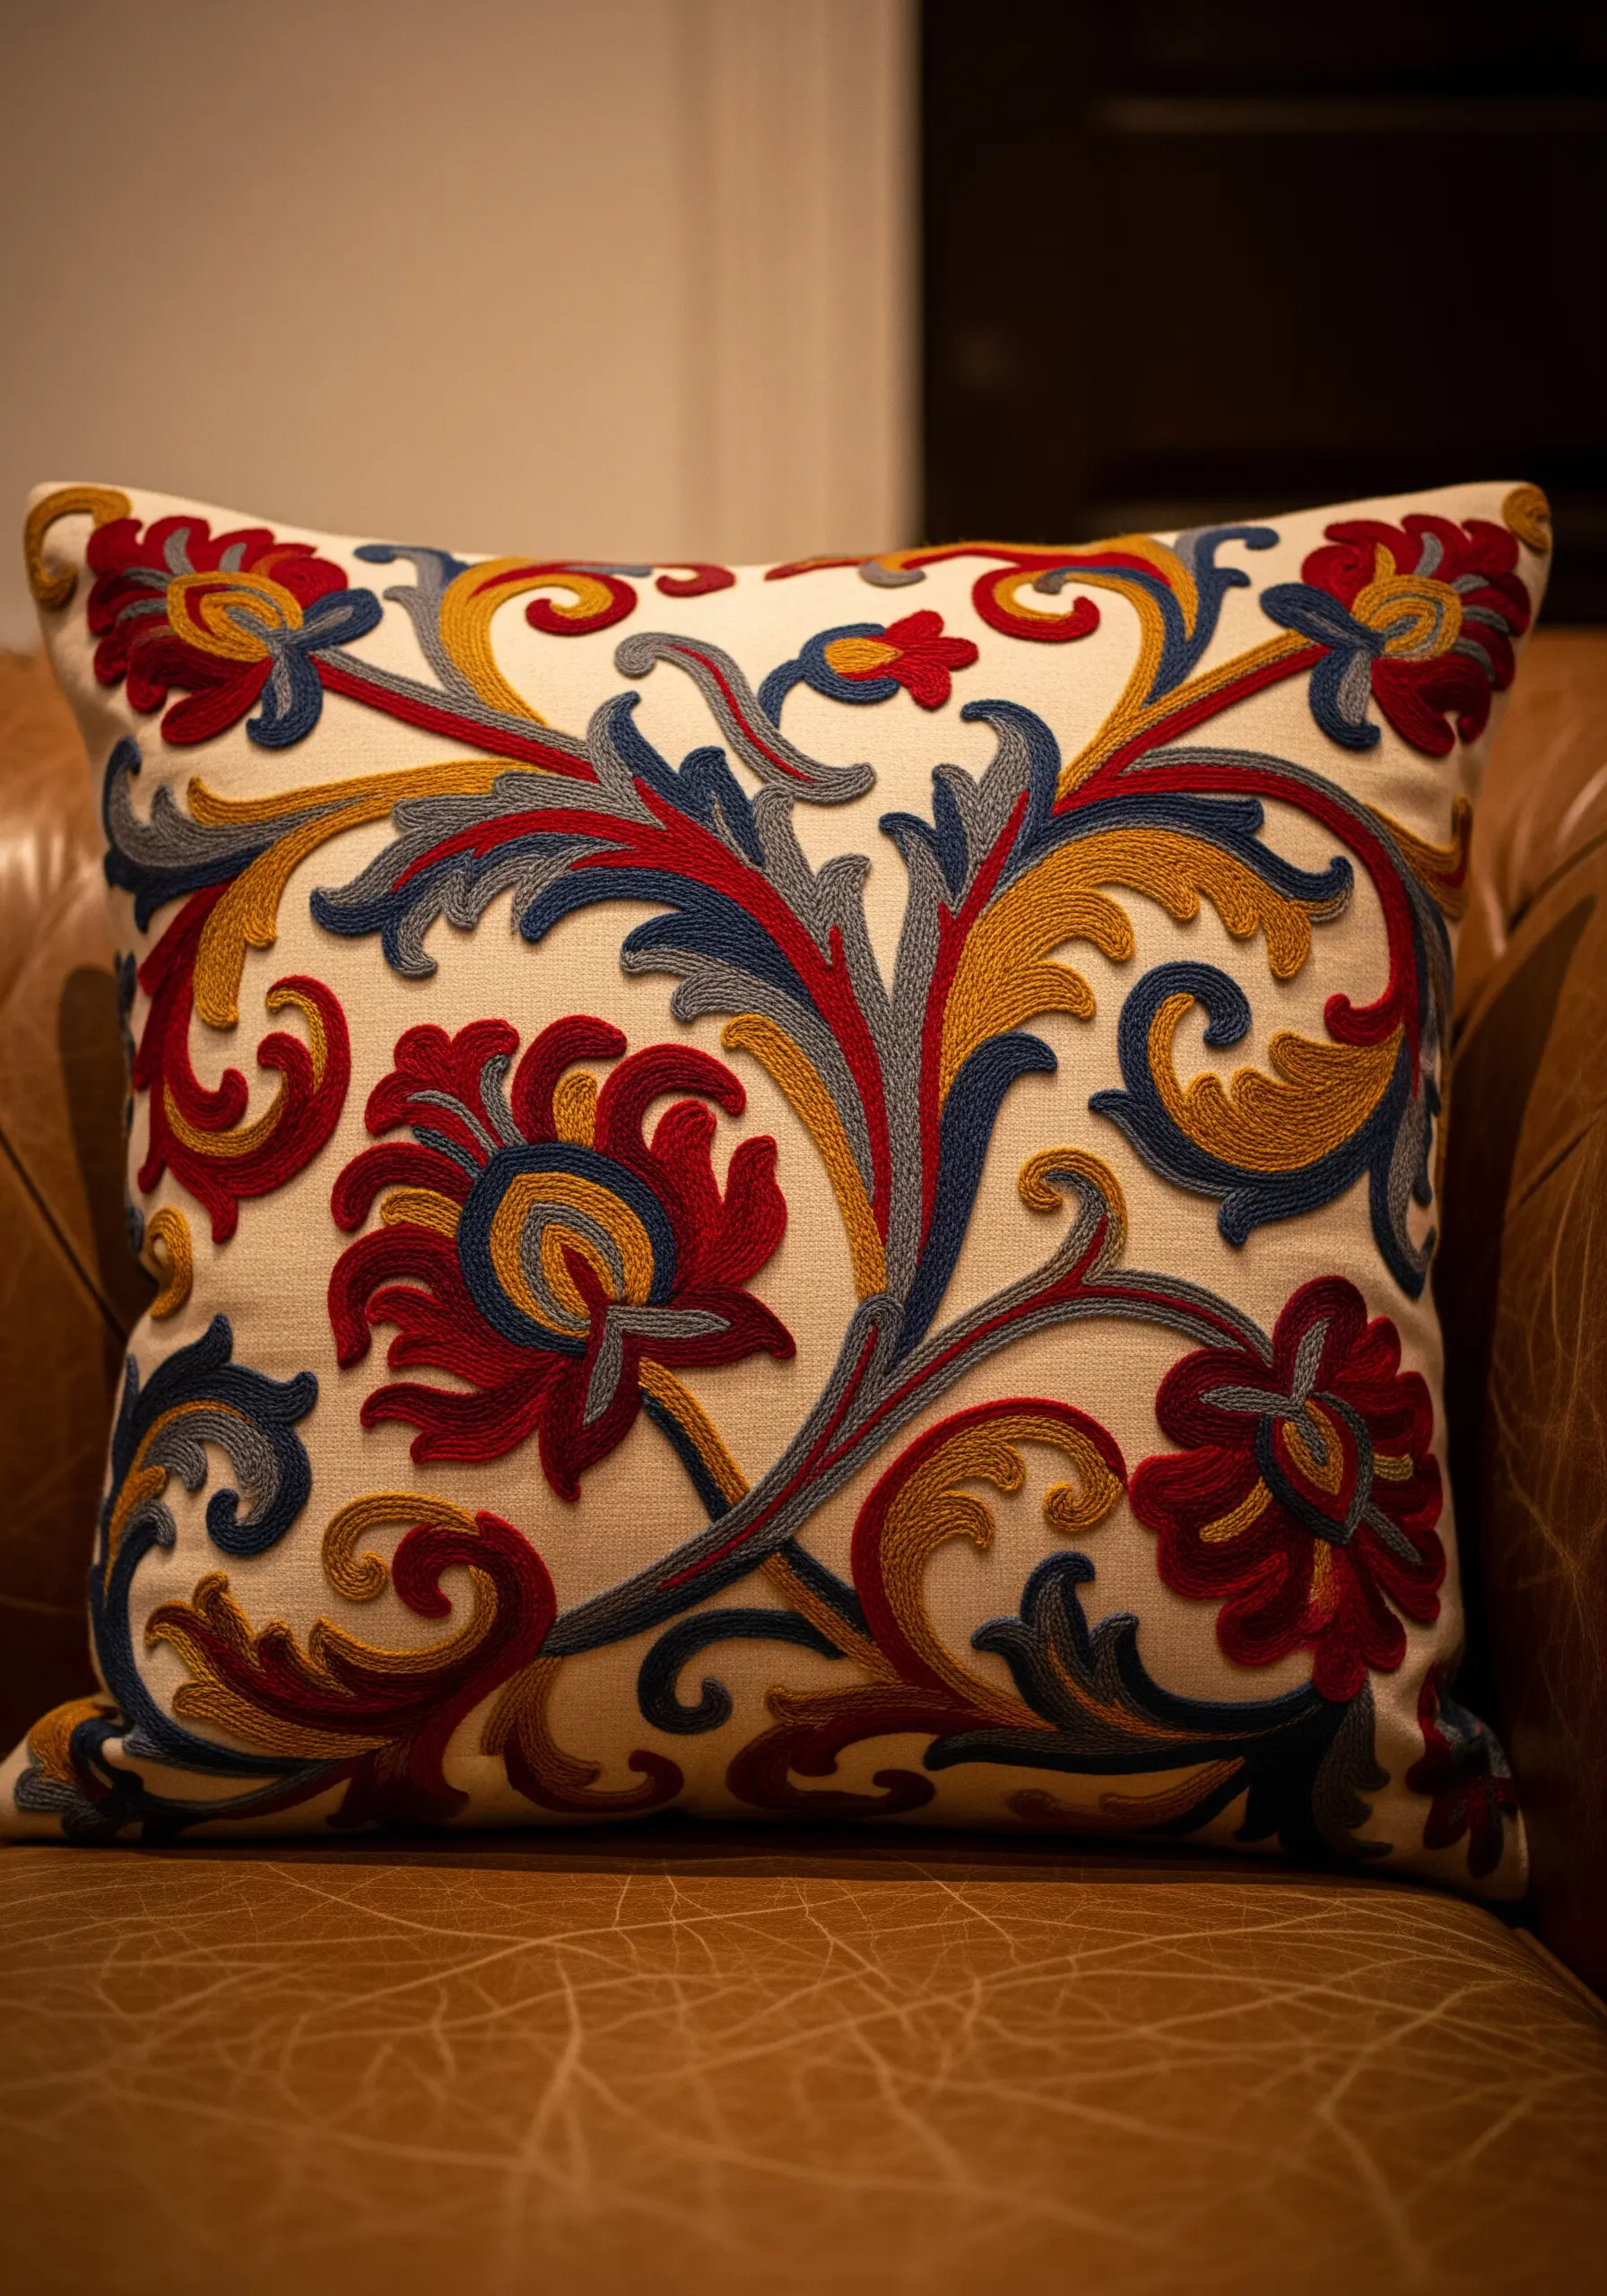
Jacobean embroidery is defined by its rich textures and stylized floral motifs. Use crewel wool on a sturdy linen or twill fabric for an authentic feel.
Don’t stick to one stitch. Outline your shapes with a heavy chain stitch, fill leaves with trellis couching for a woven effect, and use blocks of satin stitch for petals.
The variety of stitches and the matte, plush texture of the wool yarn are what give this style its distinctive, opulent character.
28. Stitch Delicate Lavender with Granitos Stitch

To create the tiny, clustered buds of a lavender sprig, use the granitos stitch or a dense cluster of French knots.
For granitos, make several small straight stitches layered over one another in the same spot to create a tiny, raised oval shape that perfectly mimics a lavender floret.
Arrange these tiny stitches in a staggered pattern along a simple stem stitch stalk. This technique is quick, effective, and gives your delicate lavender stitch ideas a realistic, textured look.


