

A small hoop is not a limitation—it’s an invitation. It’s a space to be bold, to experiment, and to see progress in a single afternoon. Too often, we get stuck trying to perfect large, complex pieces, and the joy of simply making gets lost. These small samplers are your way back to that joy.
Think of each one as a creative workout. It’s an opportunity to master a new stitch, explore a color palette, or play with texture without the pressure of a masterpiece. You’ll build technical confidence with every stitch, creating a library of skills you can carry into any project you dream of.
Let these ideas be a starting point. Change the colors, swap the stitches, and make them entirely your own. Your most creative, polished, and intentional work is waiting just on the other side of a small, focused hoop.
1. The Foundational Stitch Sampler
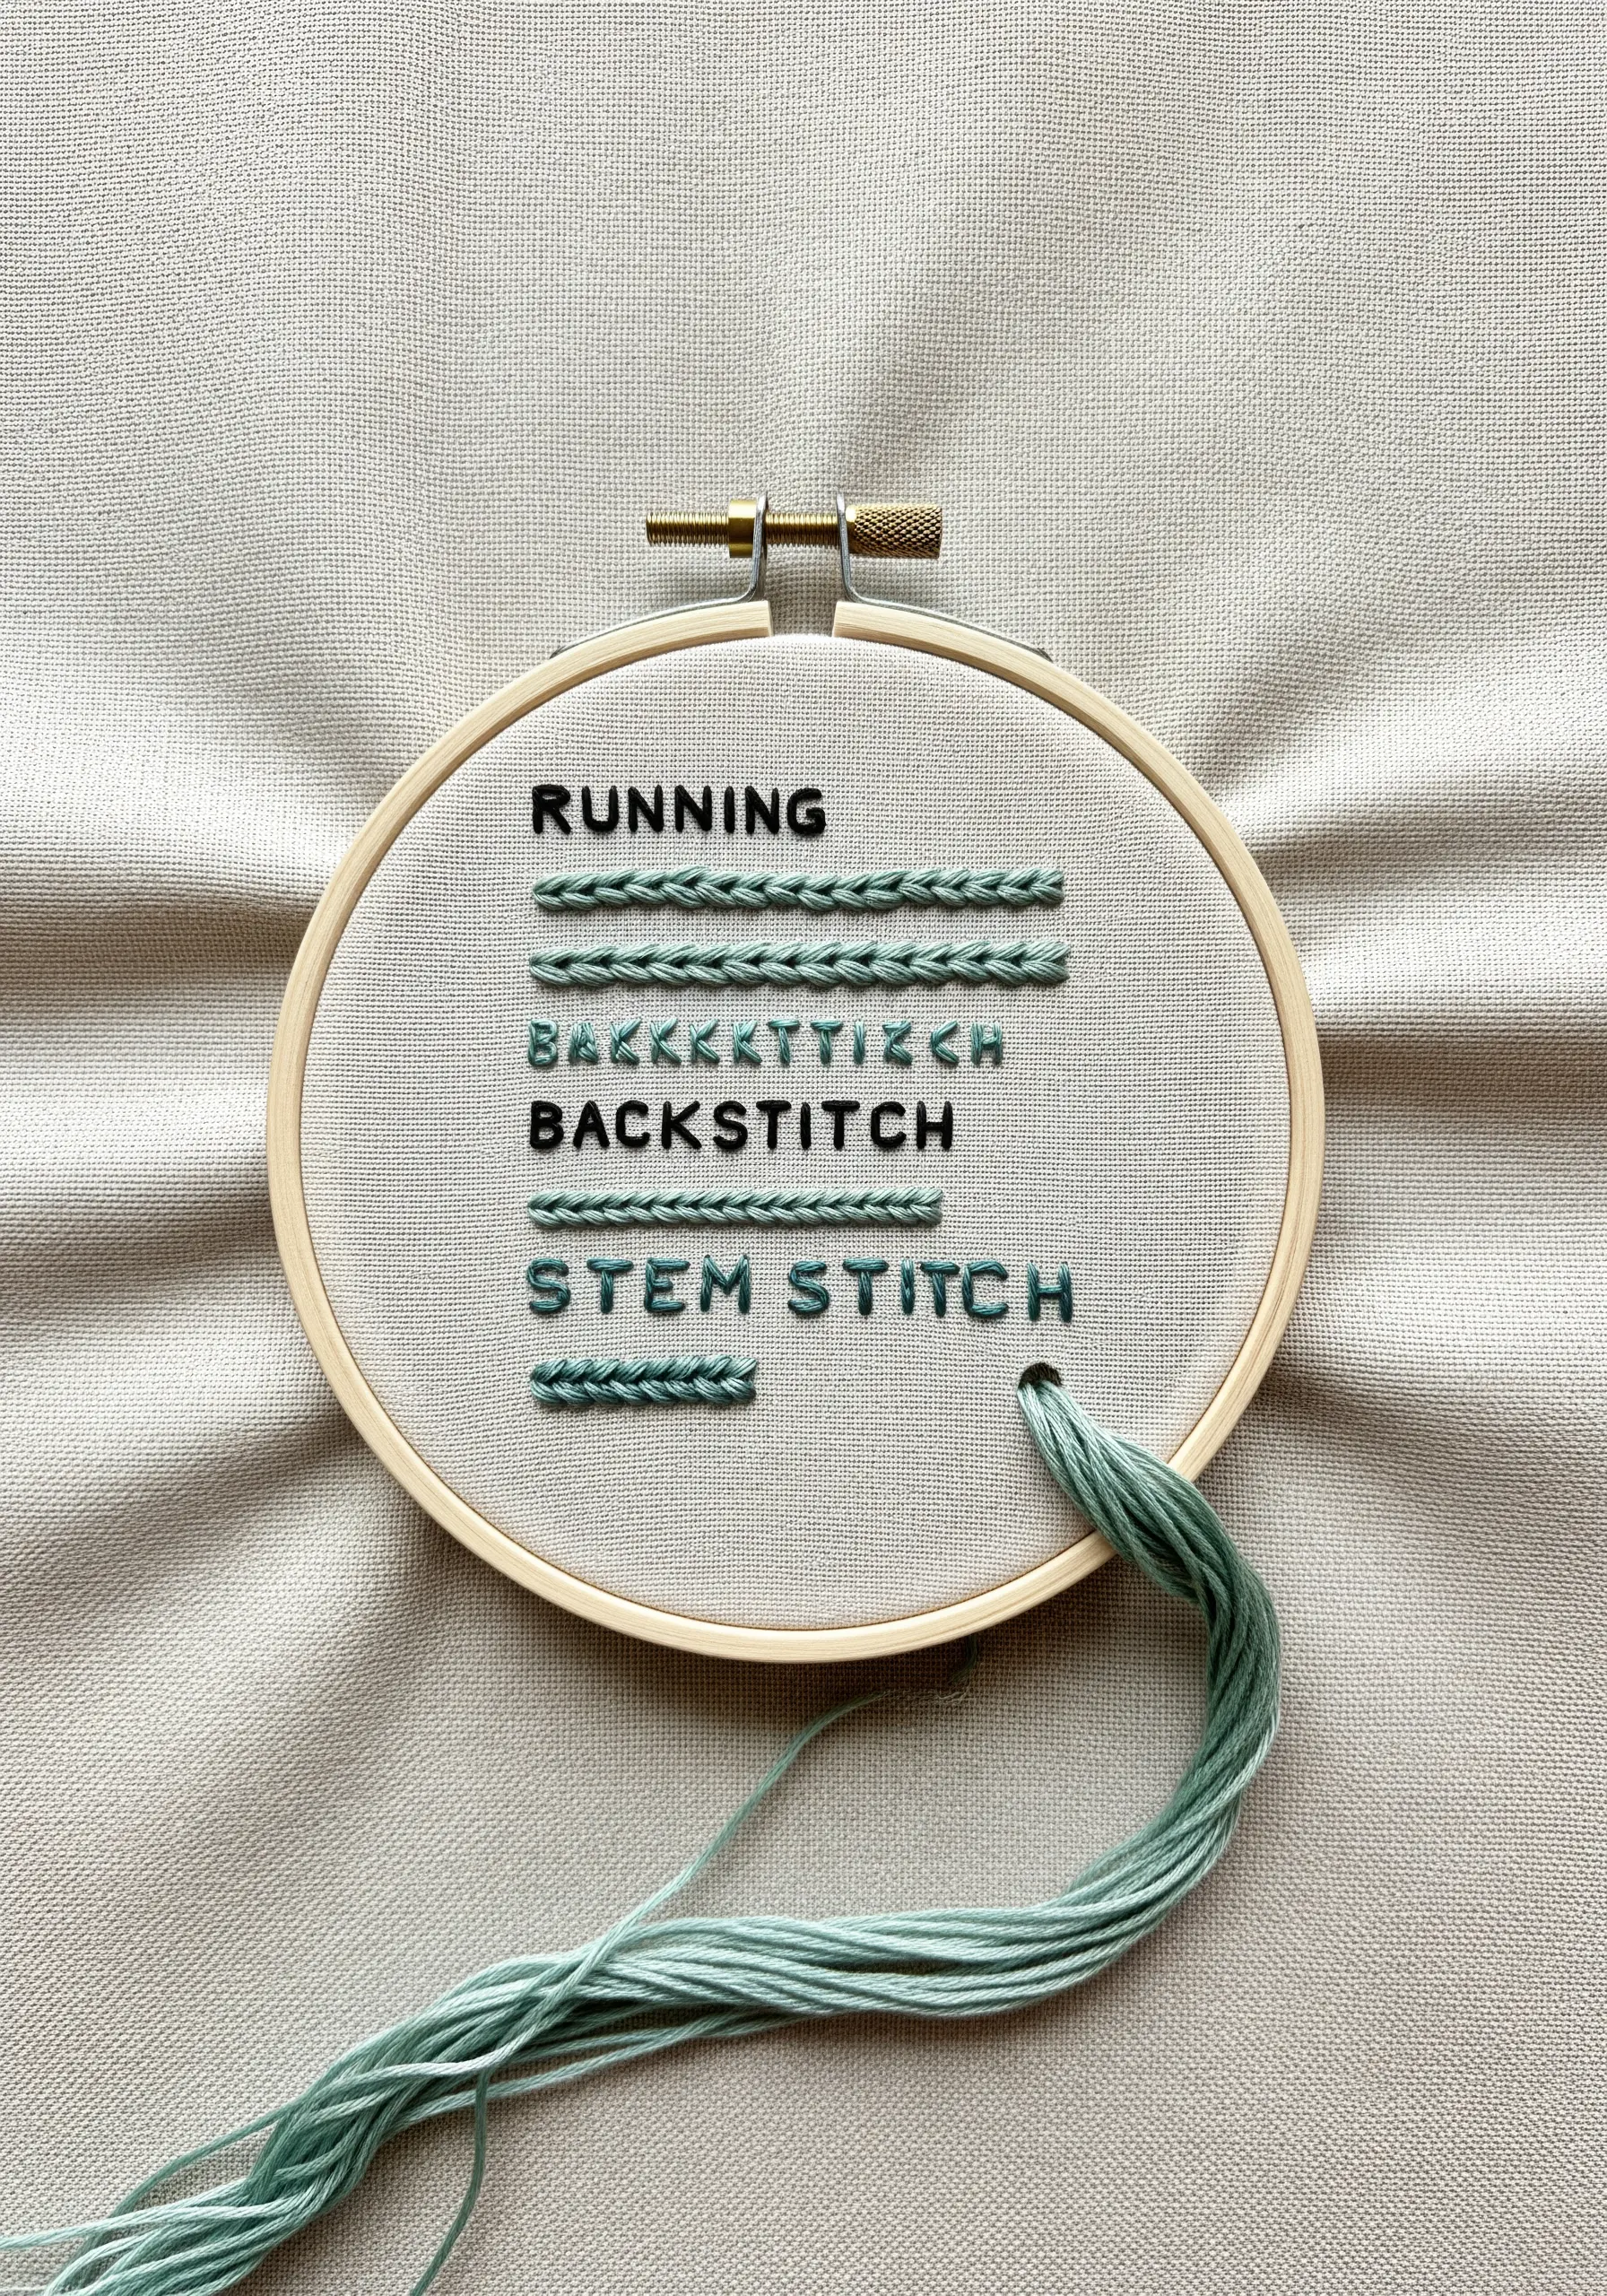
Dedicate one small hoop to mastering your foundational stitches—running, backstitch, stem, and chain.
Instead of just practicing in random lines, stitch the name of each stitch using the stitch itself.
This creates an elegant, functional reference you can keep in your project bag.
Use a high-contrast thread against a neutral linen or cotton so the structure of each stitch is perfectly clear.
Varying the thickness of the lines, as shown here, also teaches you how stitch density affects visual weight.
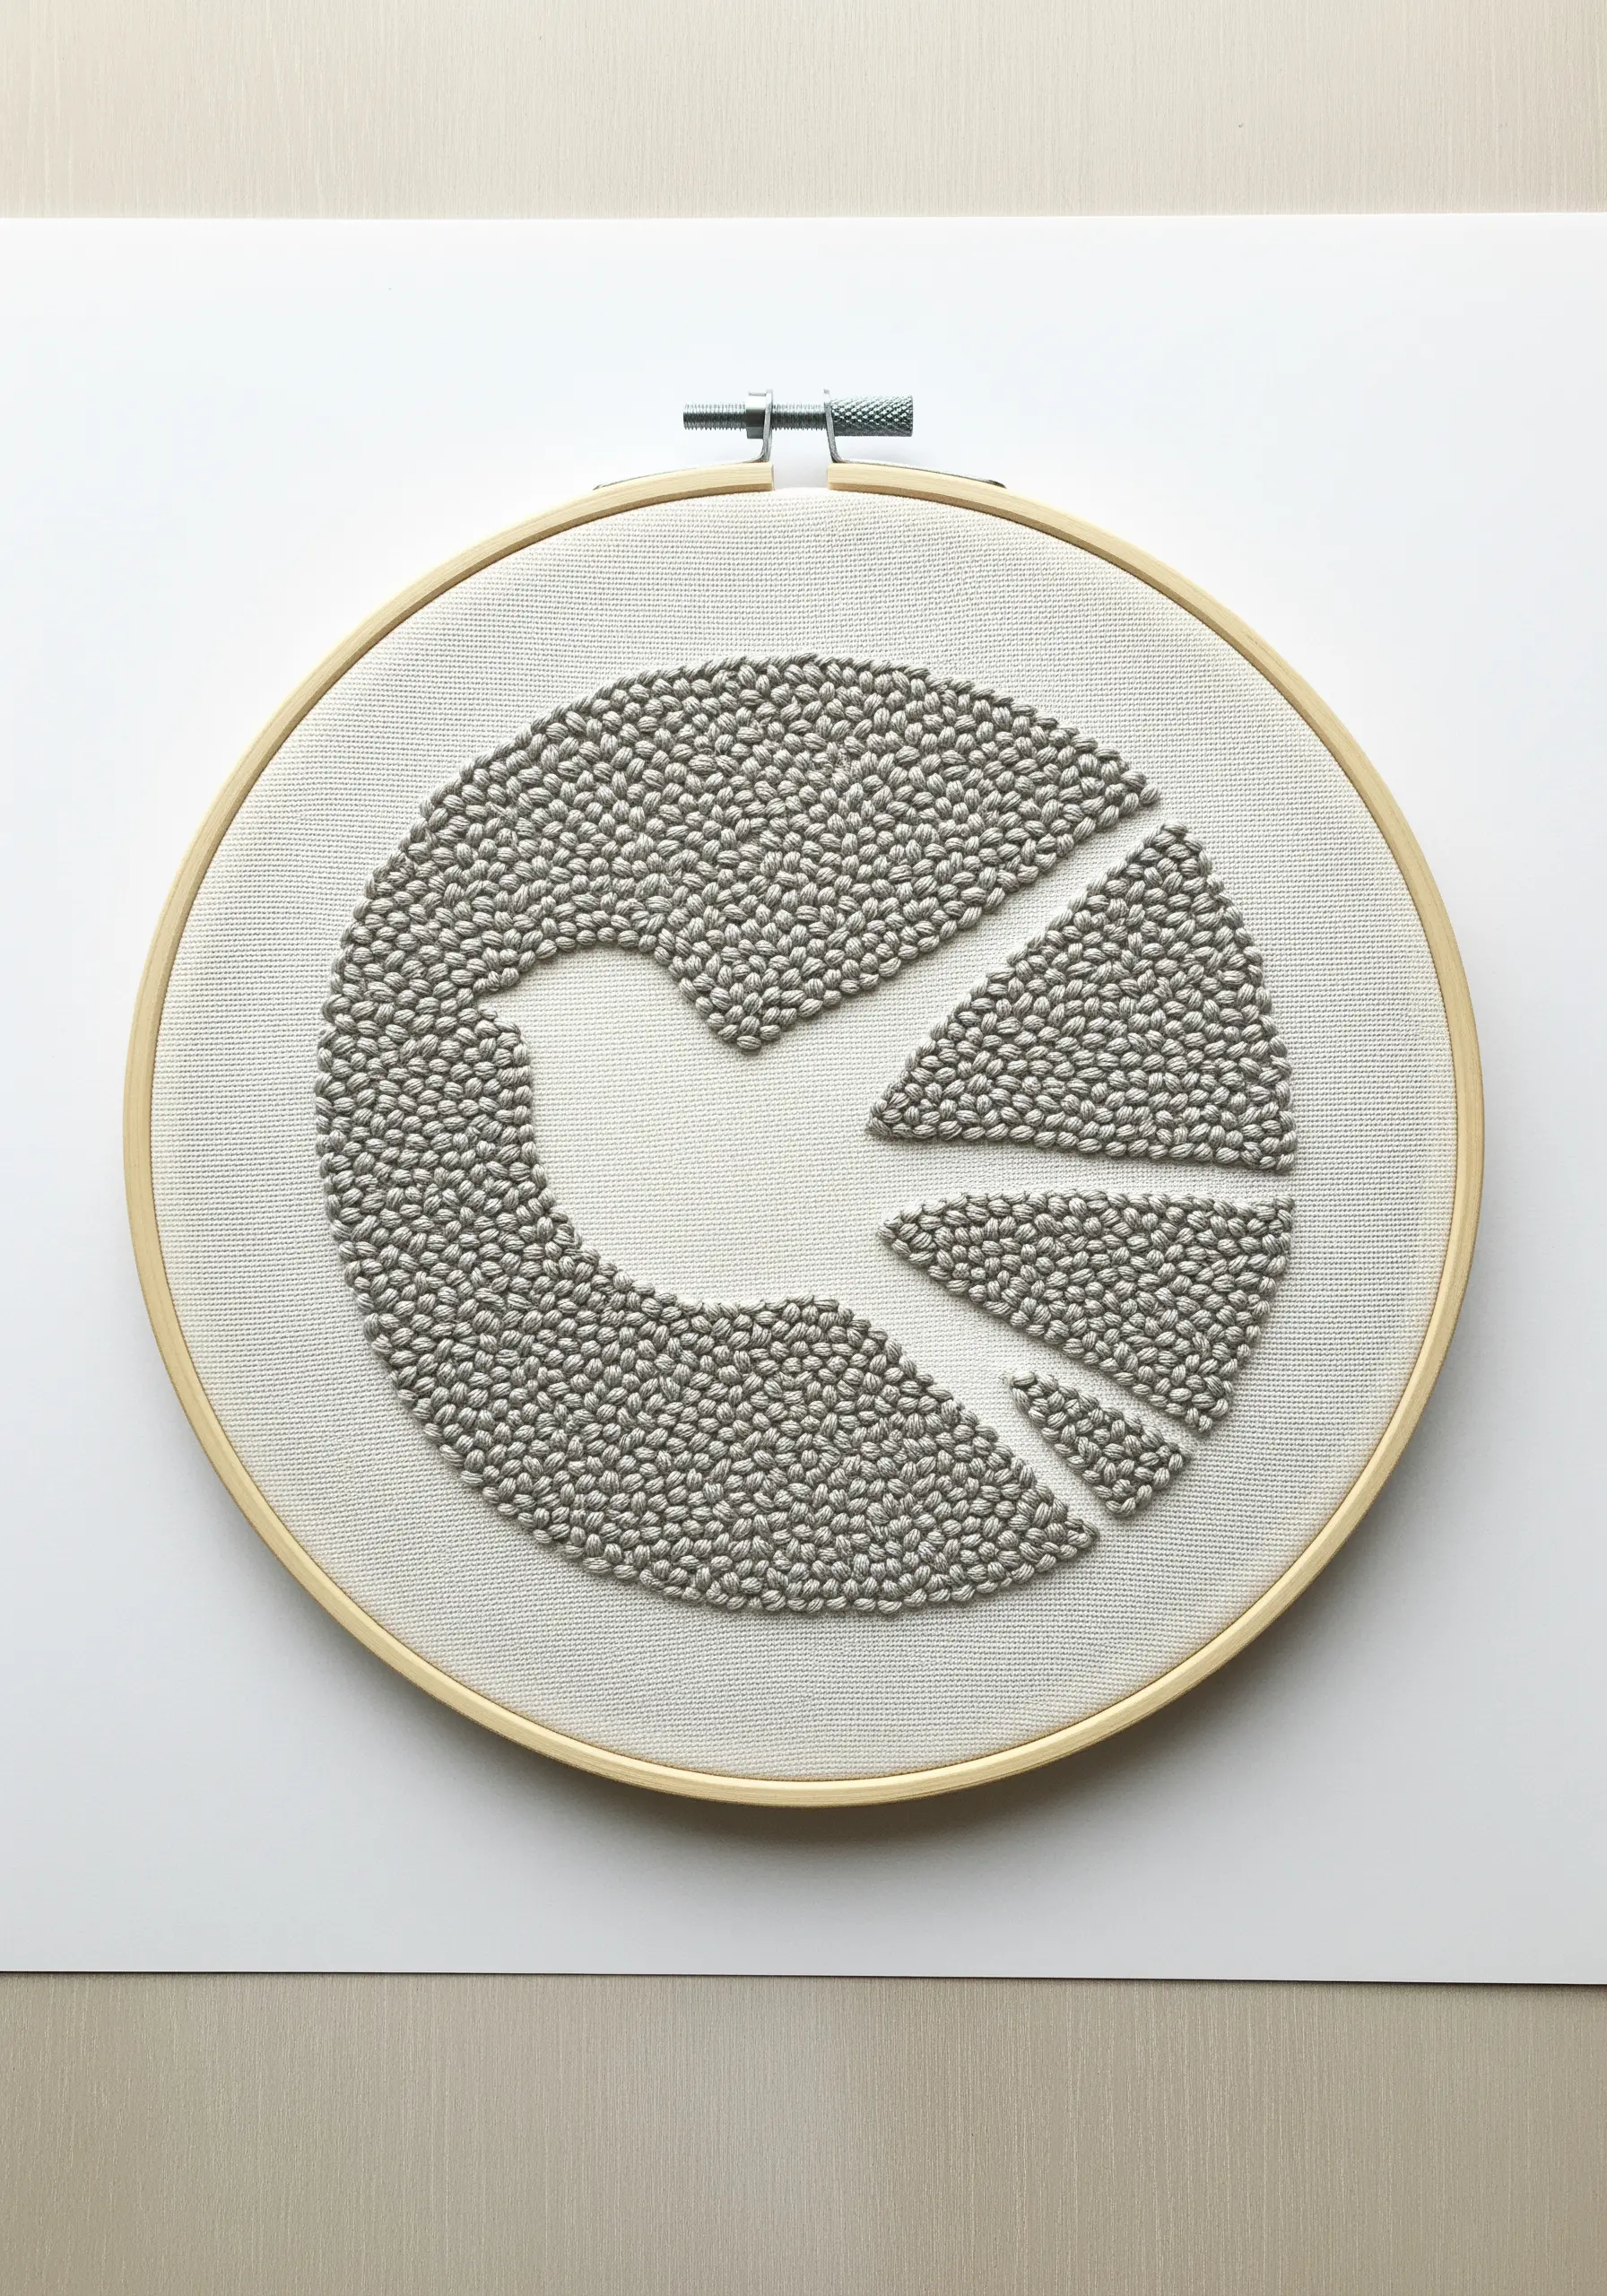
2. Radiating Light with Directional Satin Stitch
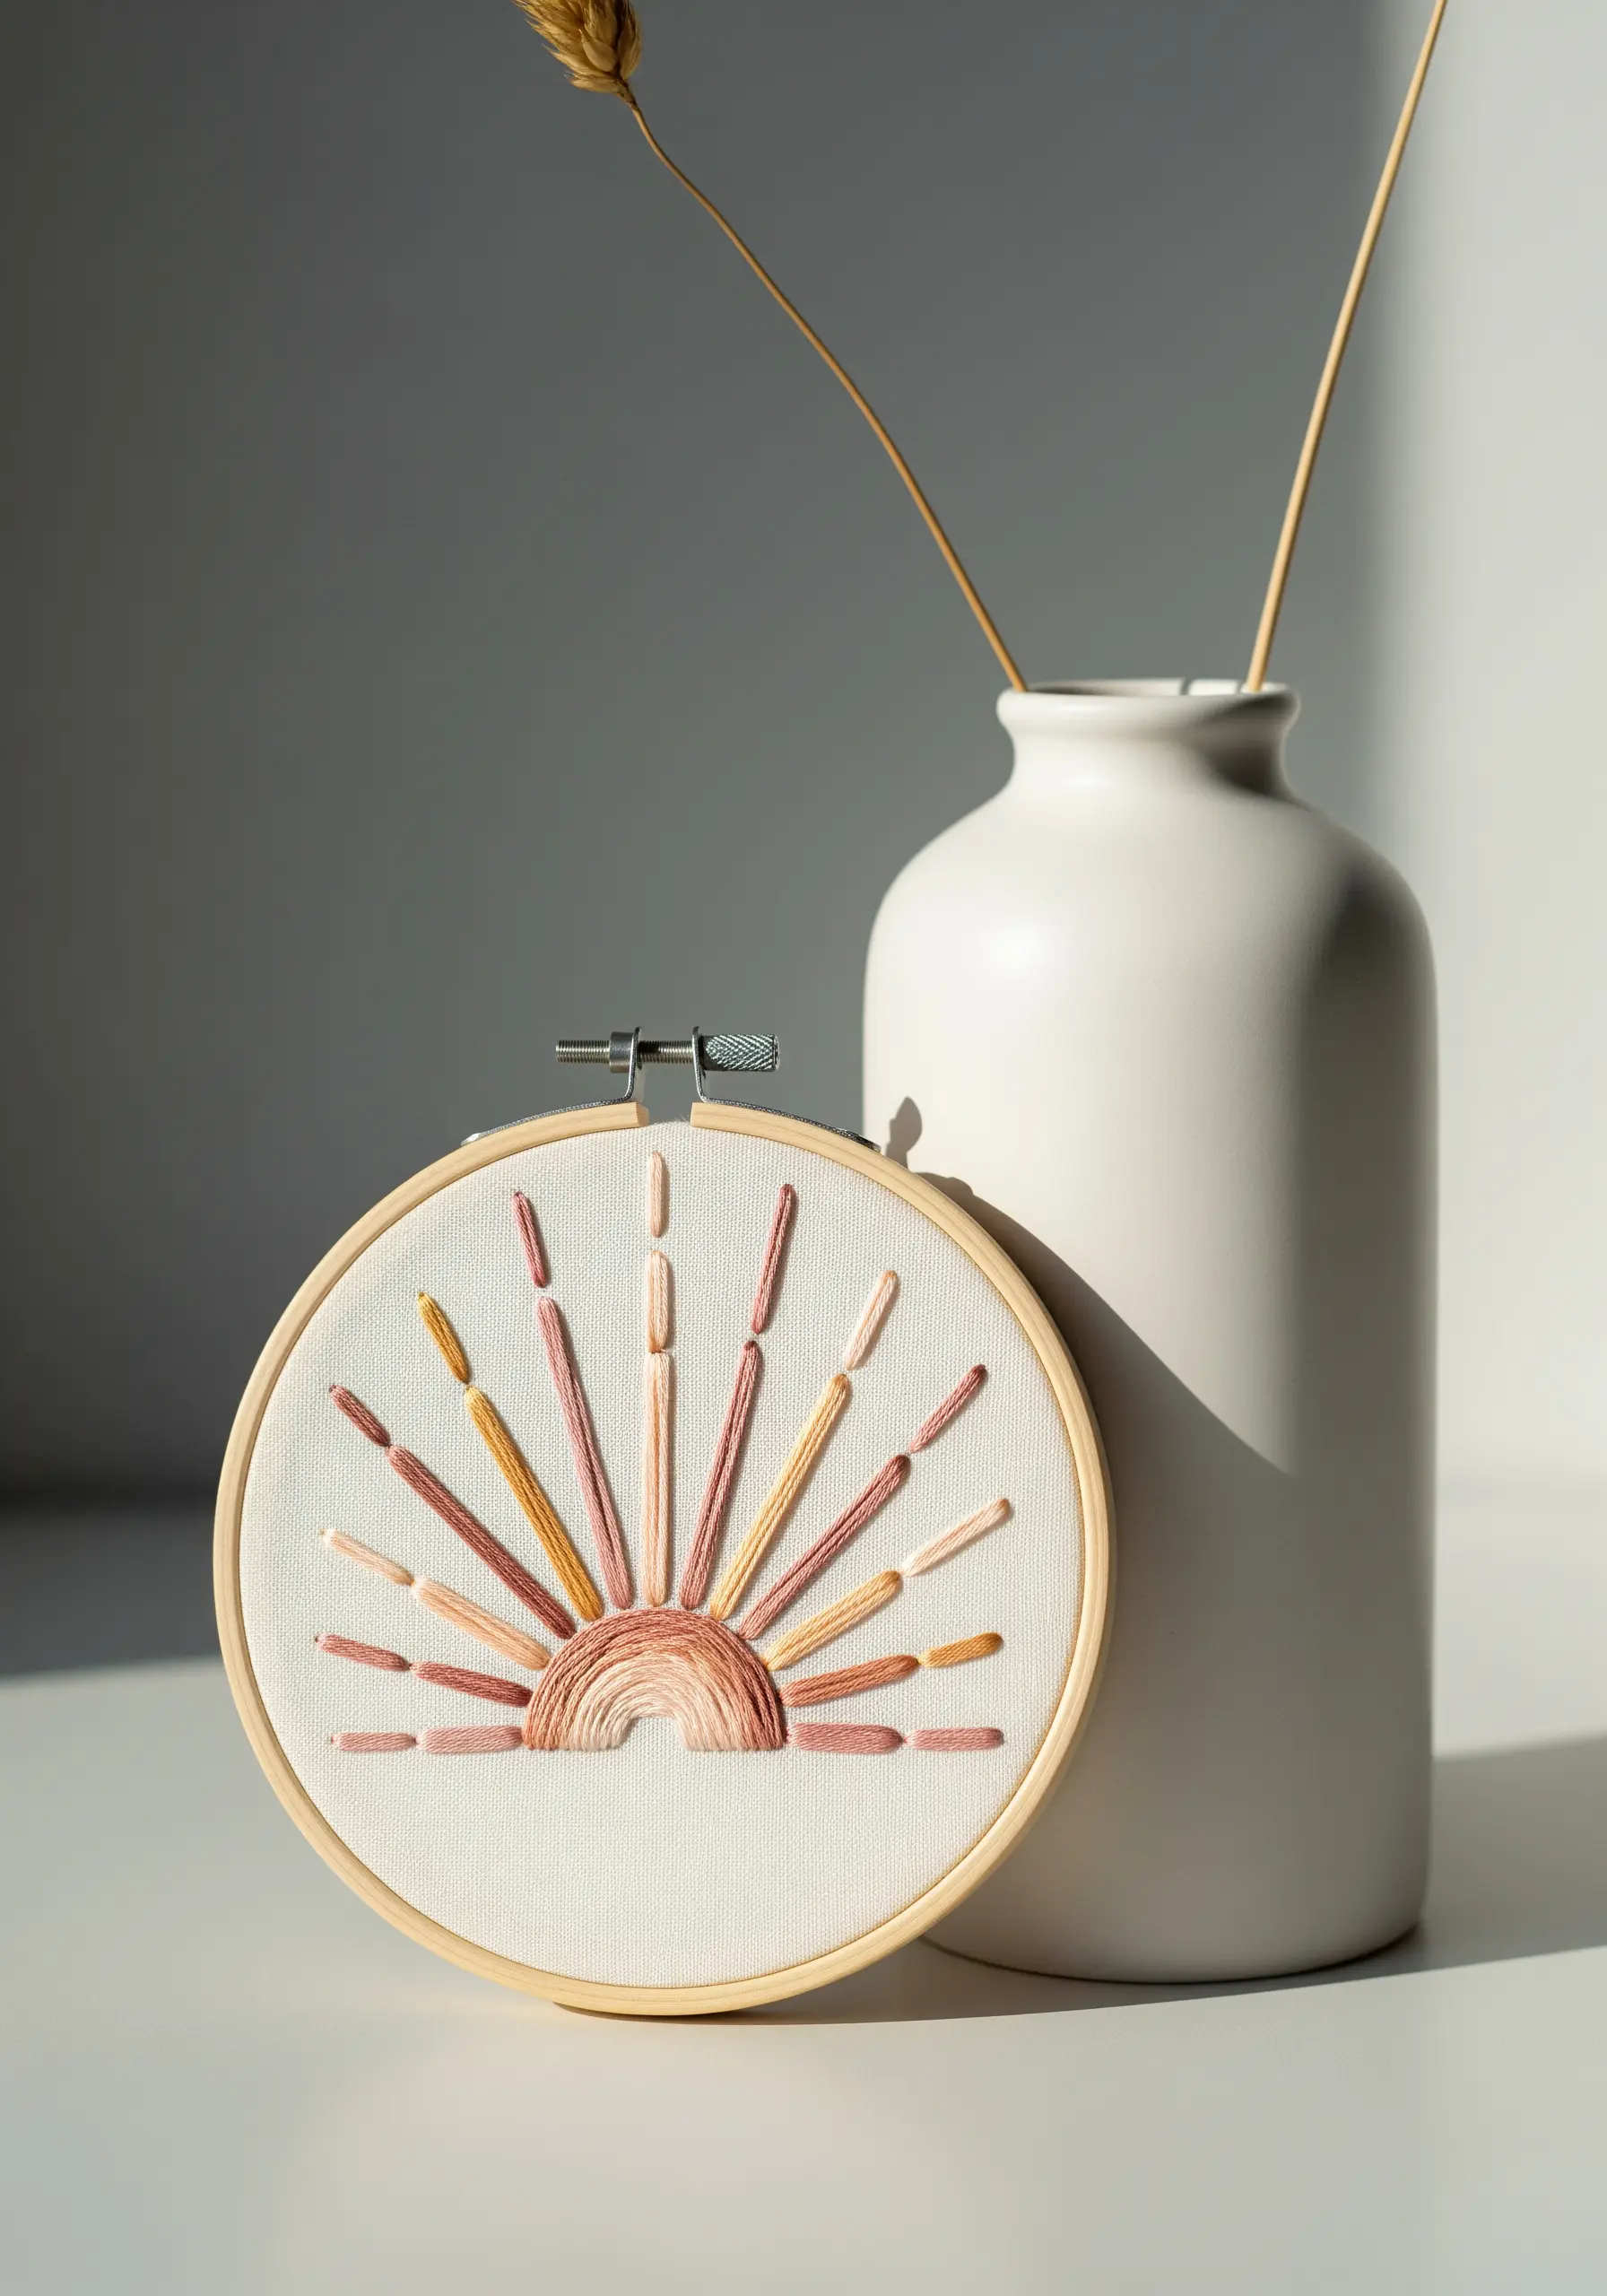
When filling a circular or semi-circular shape, use the direction of your stitches to create movement and energy.
For this abstract sun, the satin stitches radiate outward from the base, perfectly mimicking the rays of light.
To achieve a soft gradient, choose three or four analogous colors and blend them seamlessly.
This technique turns a simple shape into a dynamic focal point, proving that how you lay your stitches is as important as the stitch itself.
Explore more ways to create blends with gradient petal techniques for stunning results.
3. A Study in Botanical Textures
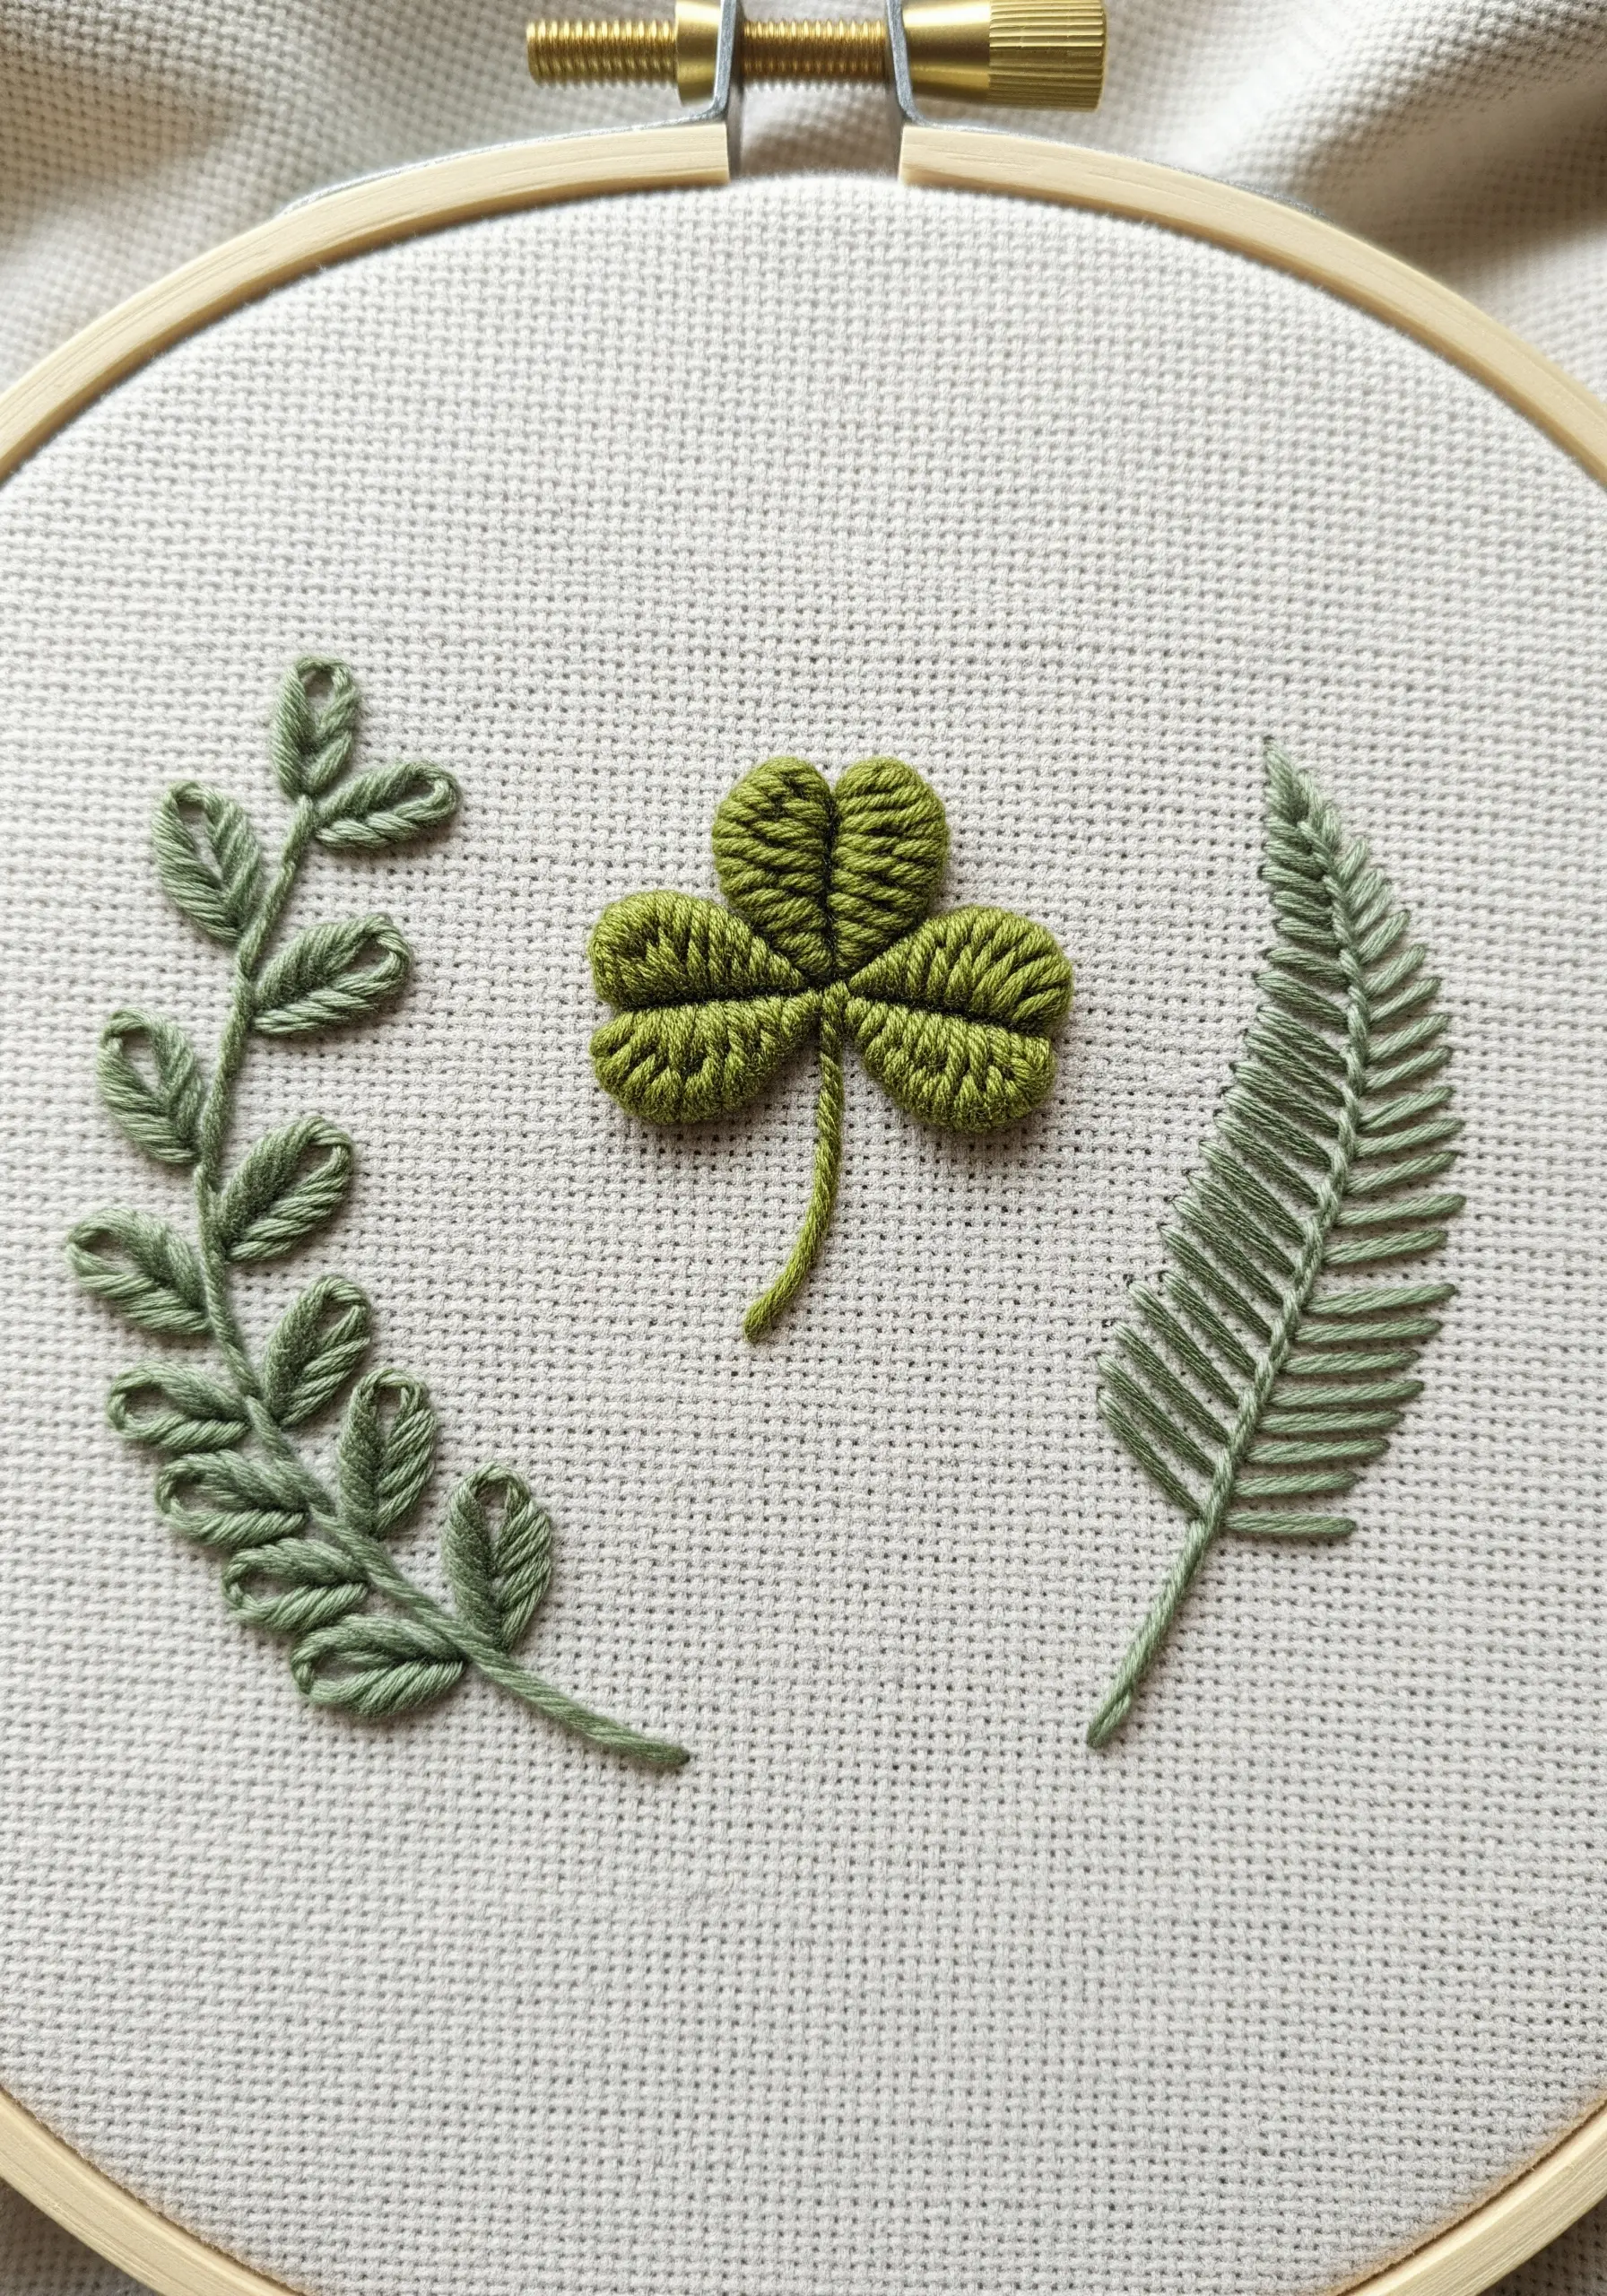
Elevate your botanical embroidery by assigning a unique, true-to-life texture to each leaf type.
For the clover, use a padded satin stitch to give the leaves a plump, three-dimensional feel—just add a few underlying straight stitches before covering them.
For the fern, a fishbone stitch creates a beautiful central spine and delicate, feathery texture.
This approach transforms a simple nature study into a sophisticated textural sampler.
Discover more ideas for capturing nature’s textures in your work.
4. Rhythmic Patterns with Geometric Fills
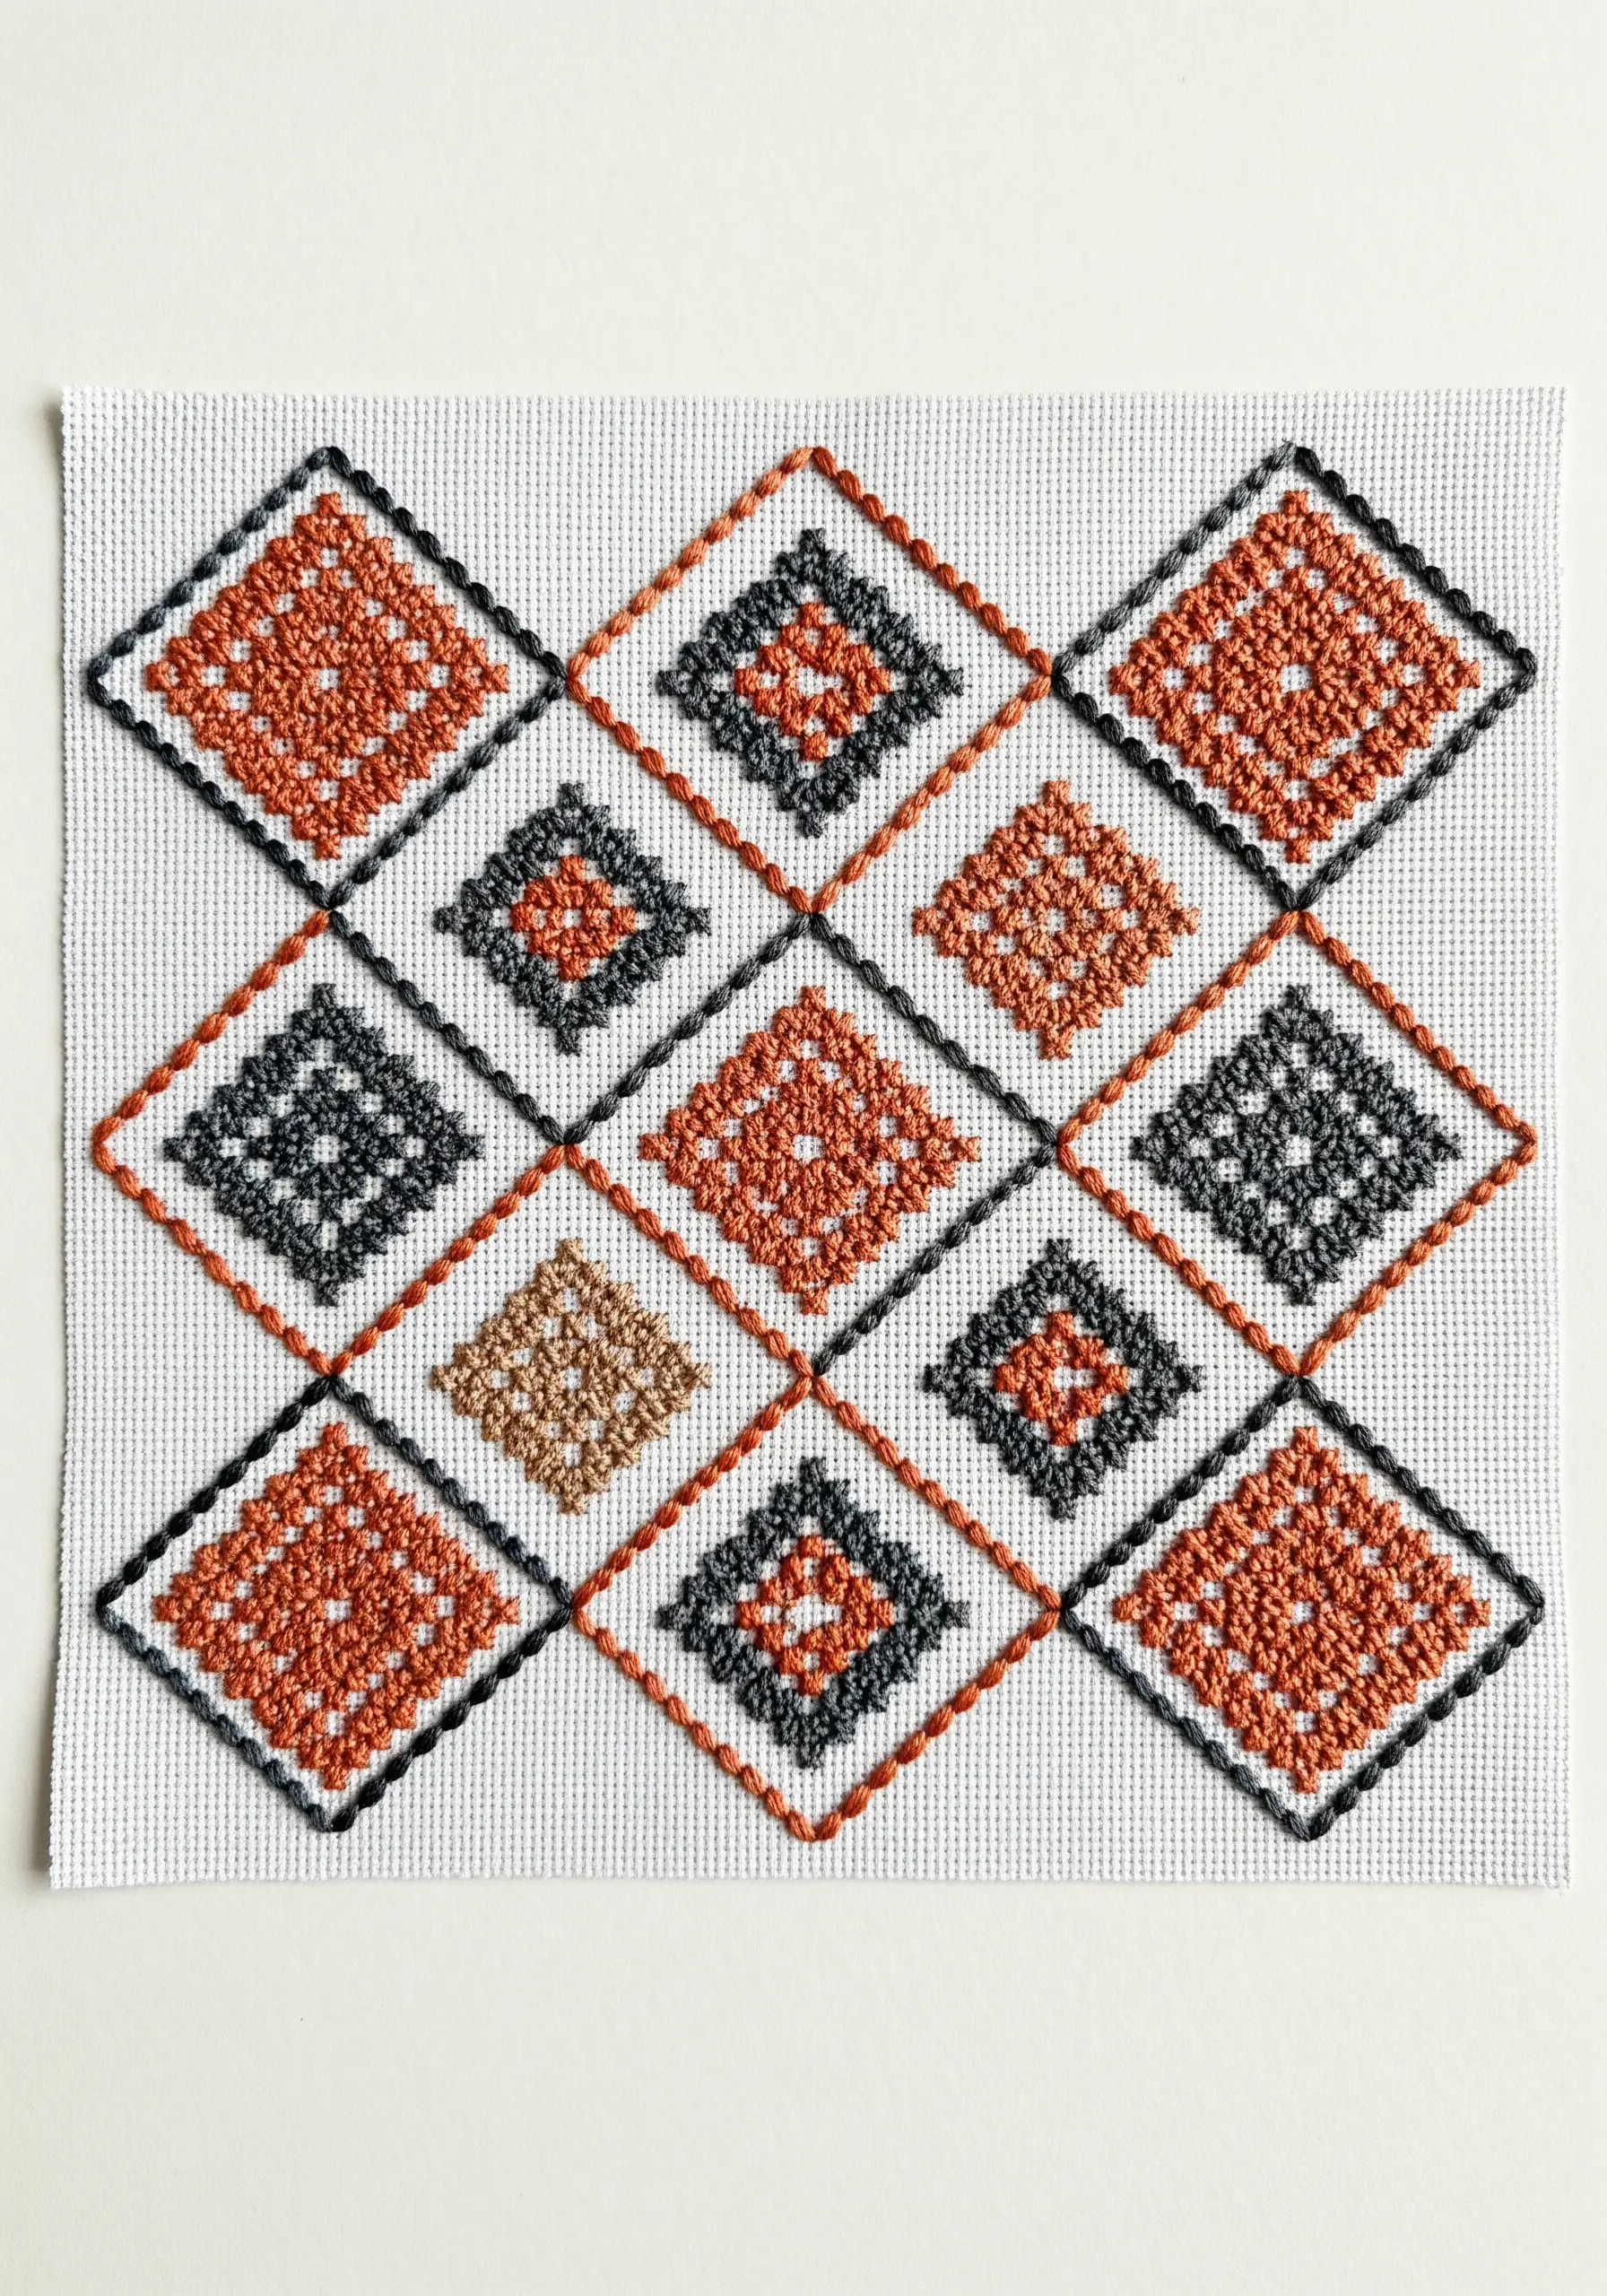
Create a captivating geometric design by combining clean outlines with varied textural fills.
Use a simple backstitch to create the diamond grid, ensuring your lines are crisp and even.
Then, fill the shapes with different stitches—like cross-stitches or seed stitches—to establish a visual rhythm.
Working with a limited, high-contrast color palette of two or three colors keeps the intricate pattern from feeling chaotic, resulting in a balanced and modern piece.
5. Evocative Landscapes with Minimal Stitches
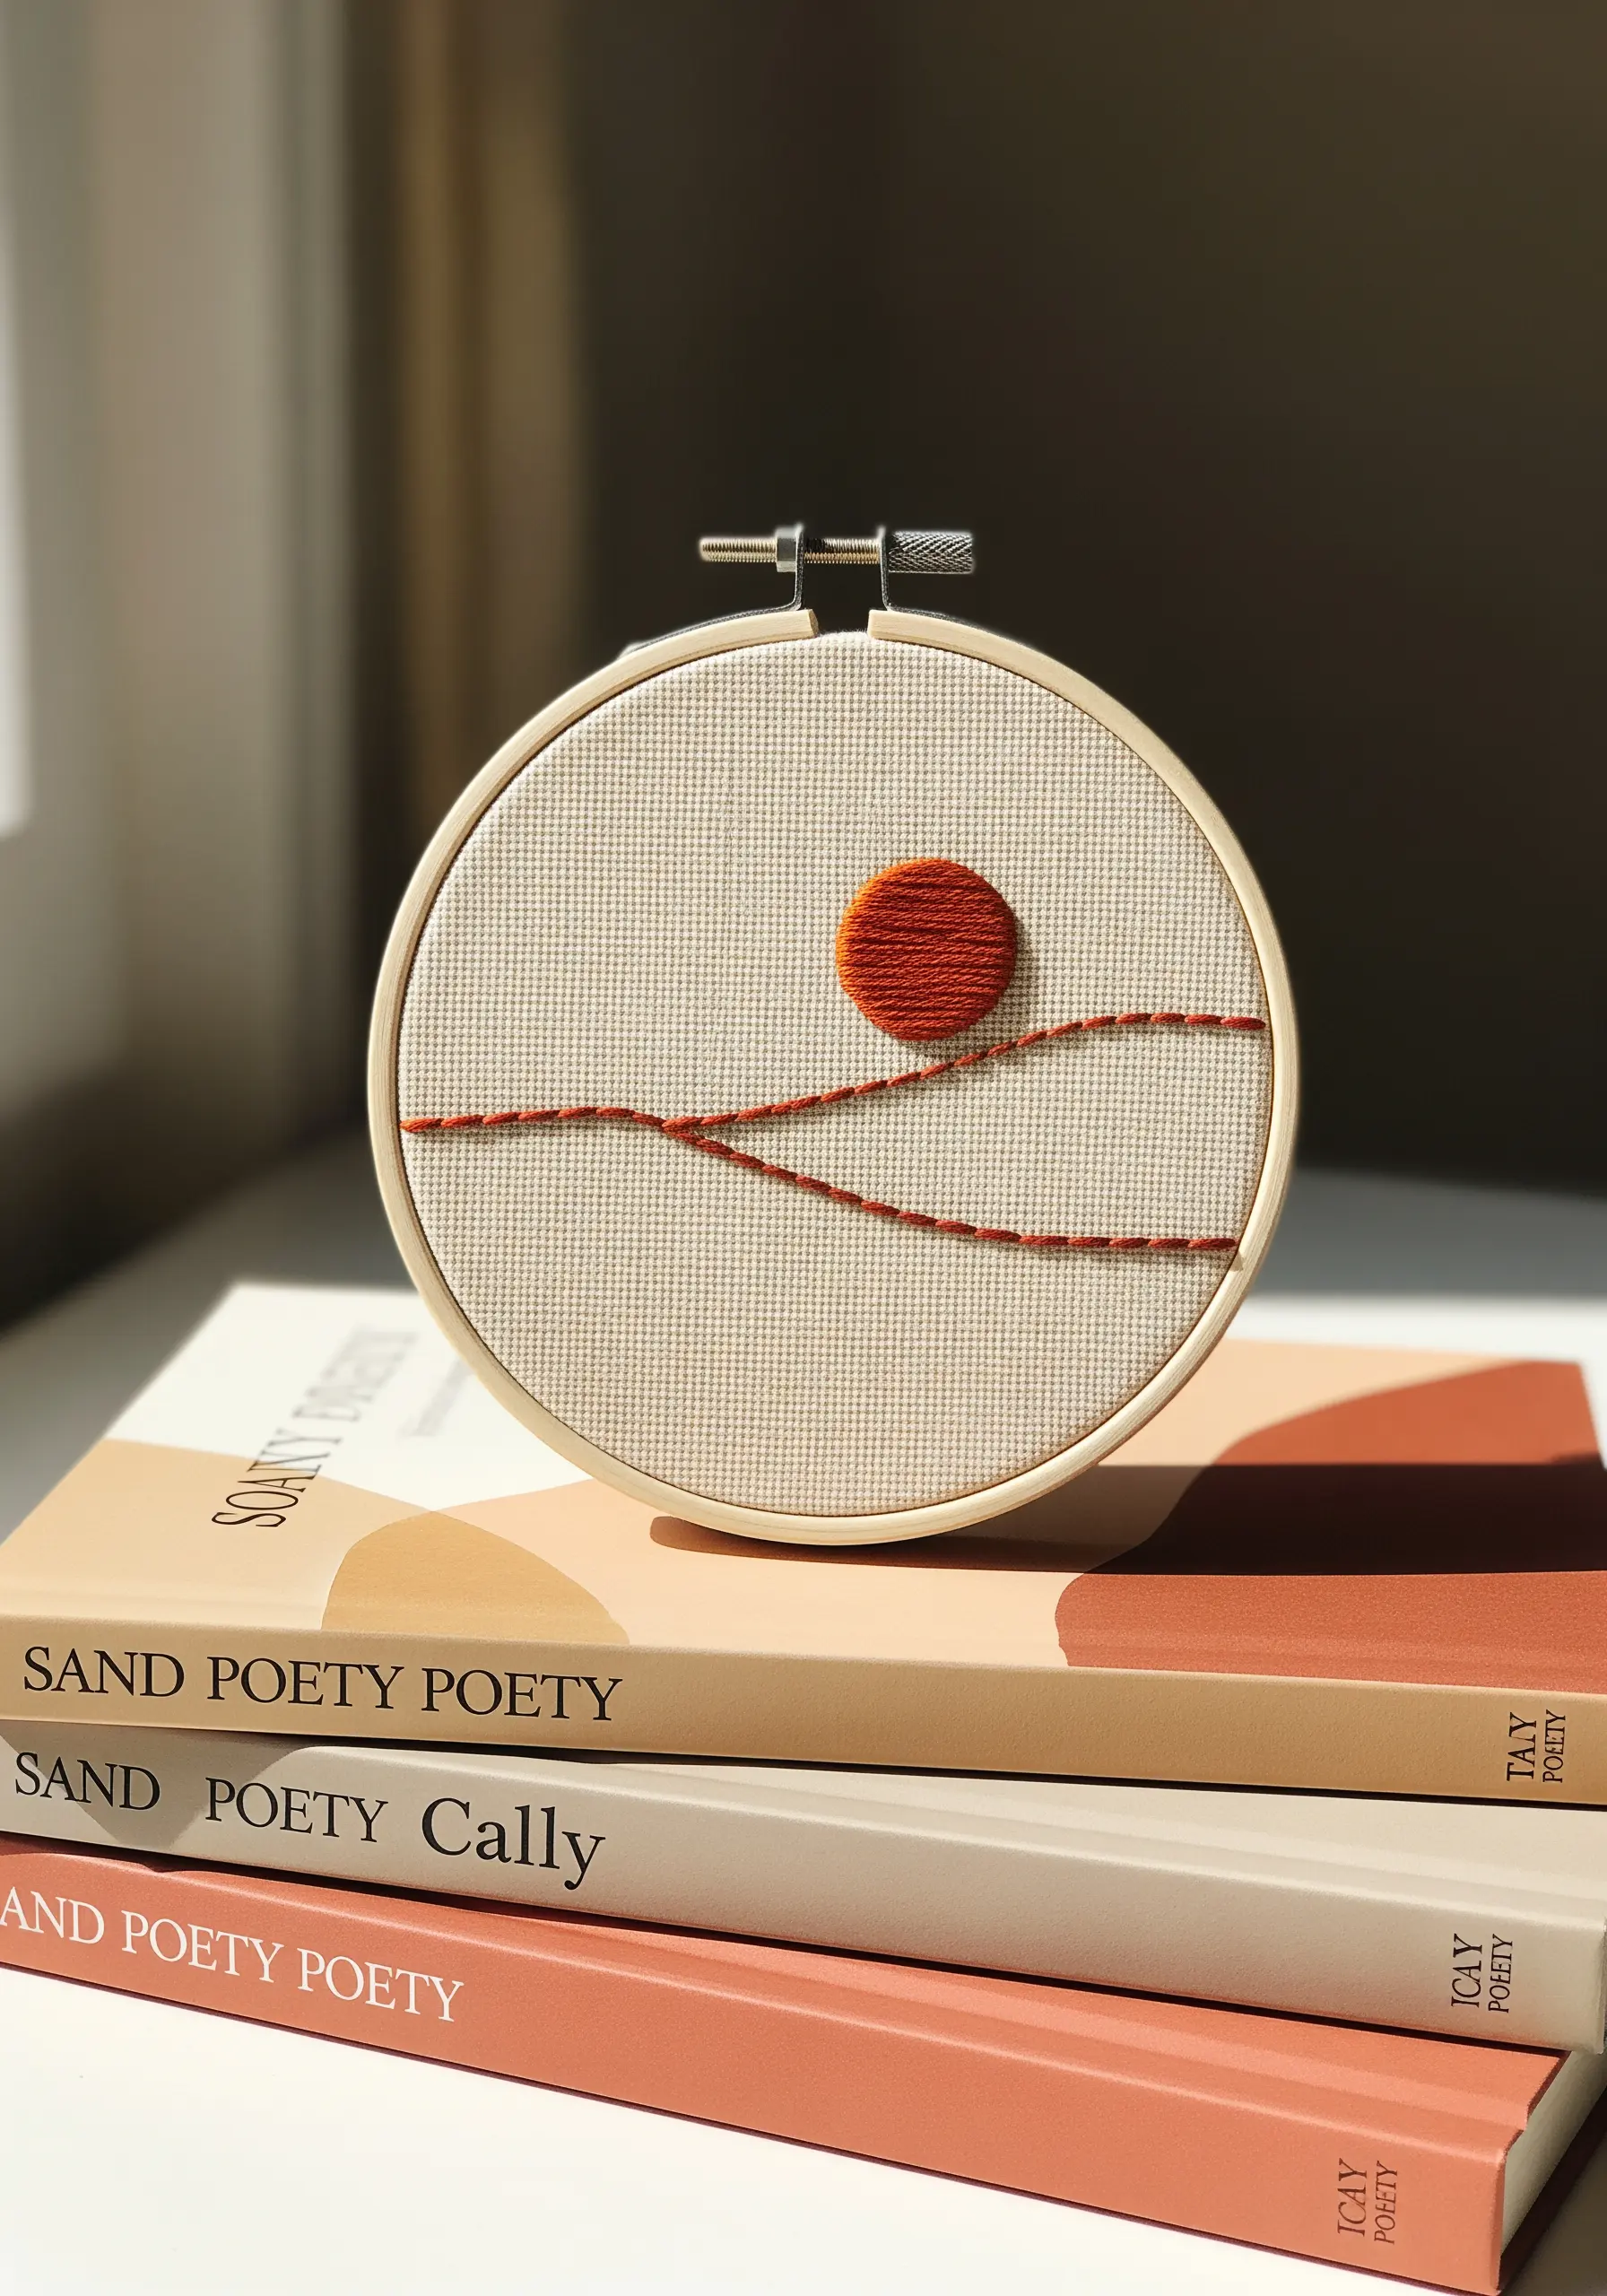
You don’t need a fully stitched canvas to convey a powerful landscape.
Use a single, textured line—like a whipped backstitch or a fine chain stitch—to suggest rolling hills.
Contrast this delicate line work with a single, solid element, such as a padded satin stitch sun.
This intentional use of negative space creates a serene and modern composition that feels both complete and uncluttered, making it perfect for nature scenes.
6. Celestial Glow with Metallic Threads
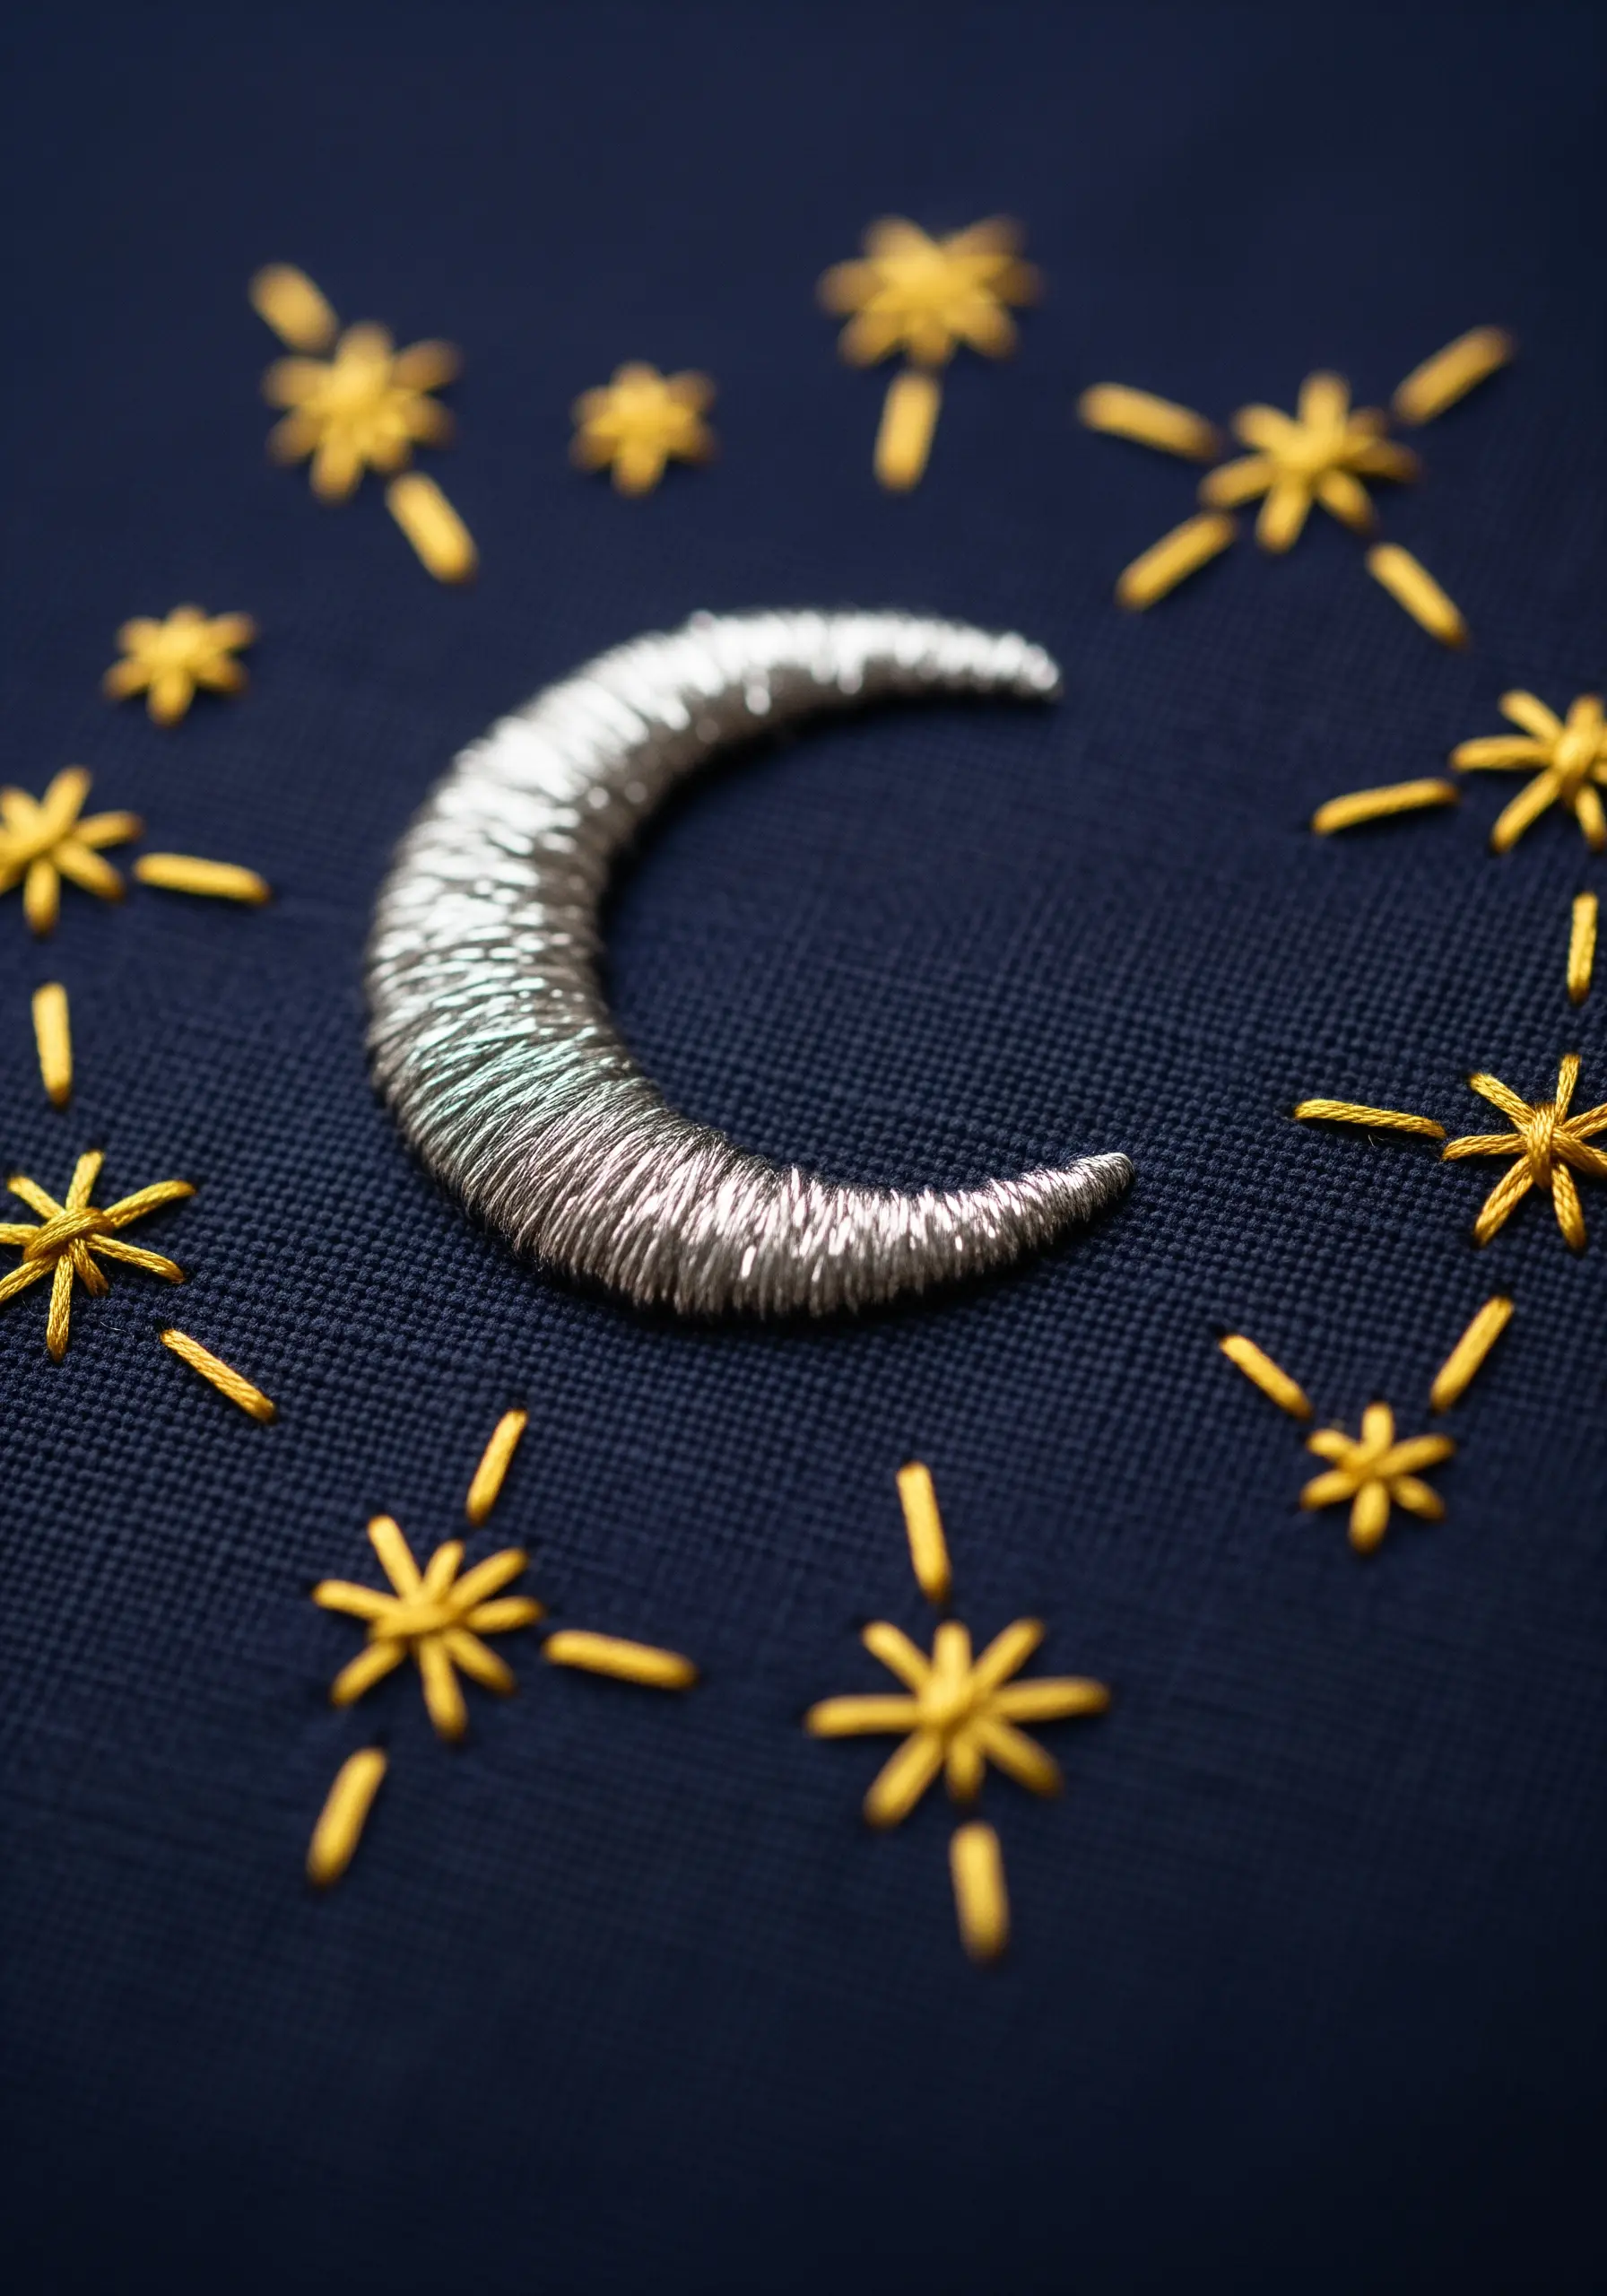
Make your celestial designs shimmer by stitching with metallic thread on a dark fabric background.
To create a solid, light-reflecting surface for the moon, use a satin stitch, laying each thread closely against the last.
For the surrounding stars, simple straight stitches are all you need to create a sparkling contrast.
Pro tip: Use shorter lengths of metallic thread and a thread conditioner like beeswax to prevent tangling and breakage.
These are perfect for soft cosmic vibes.
7. Building Texture with French Knots
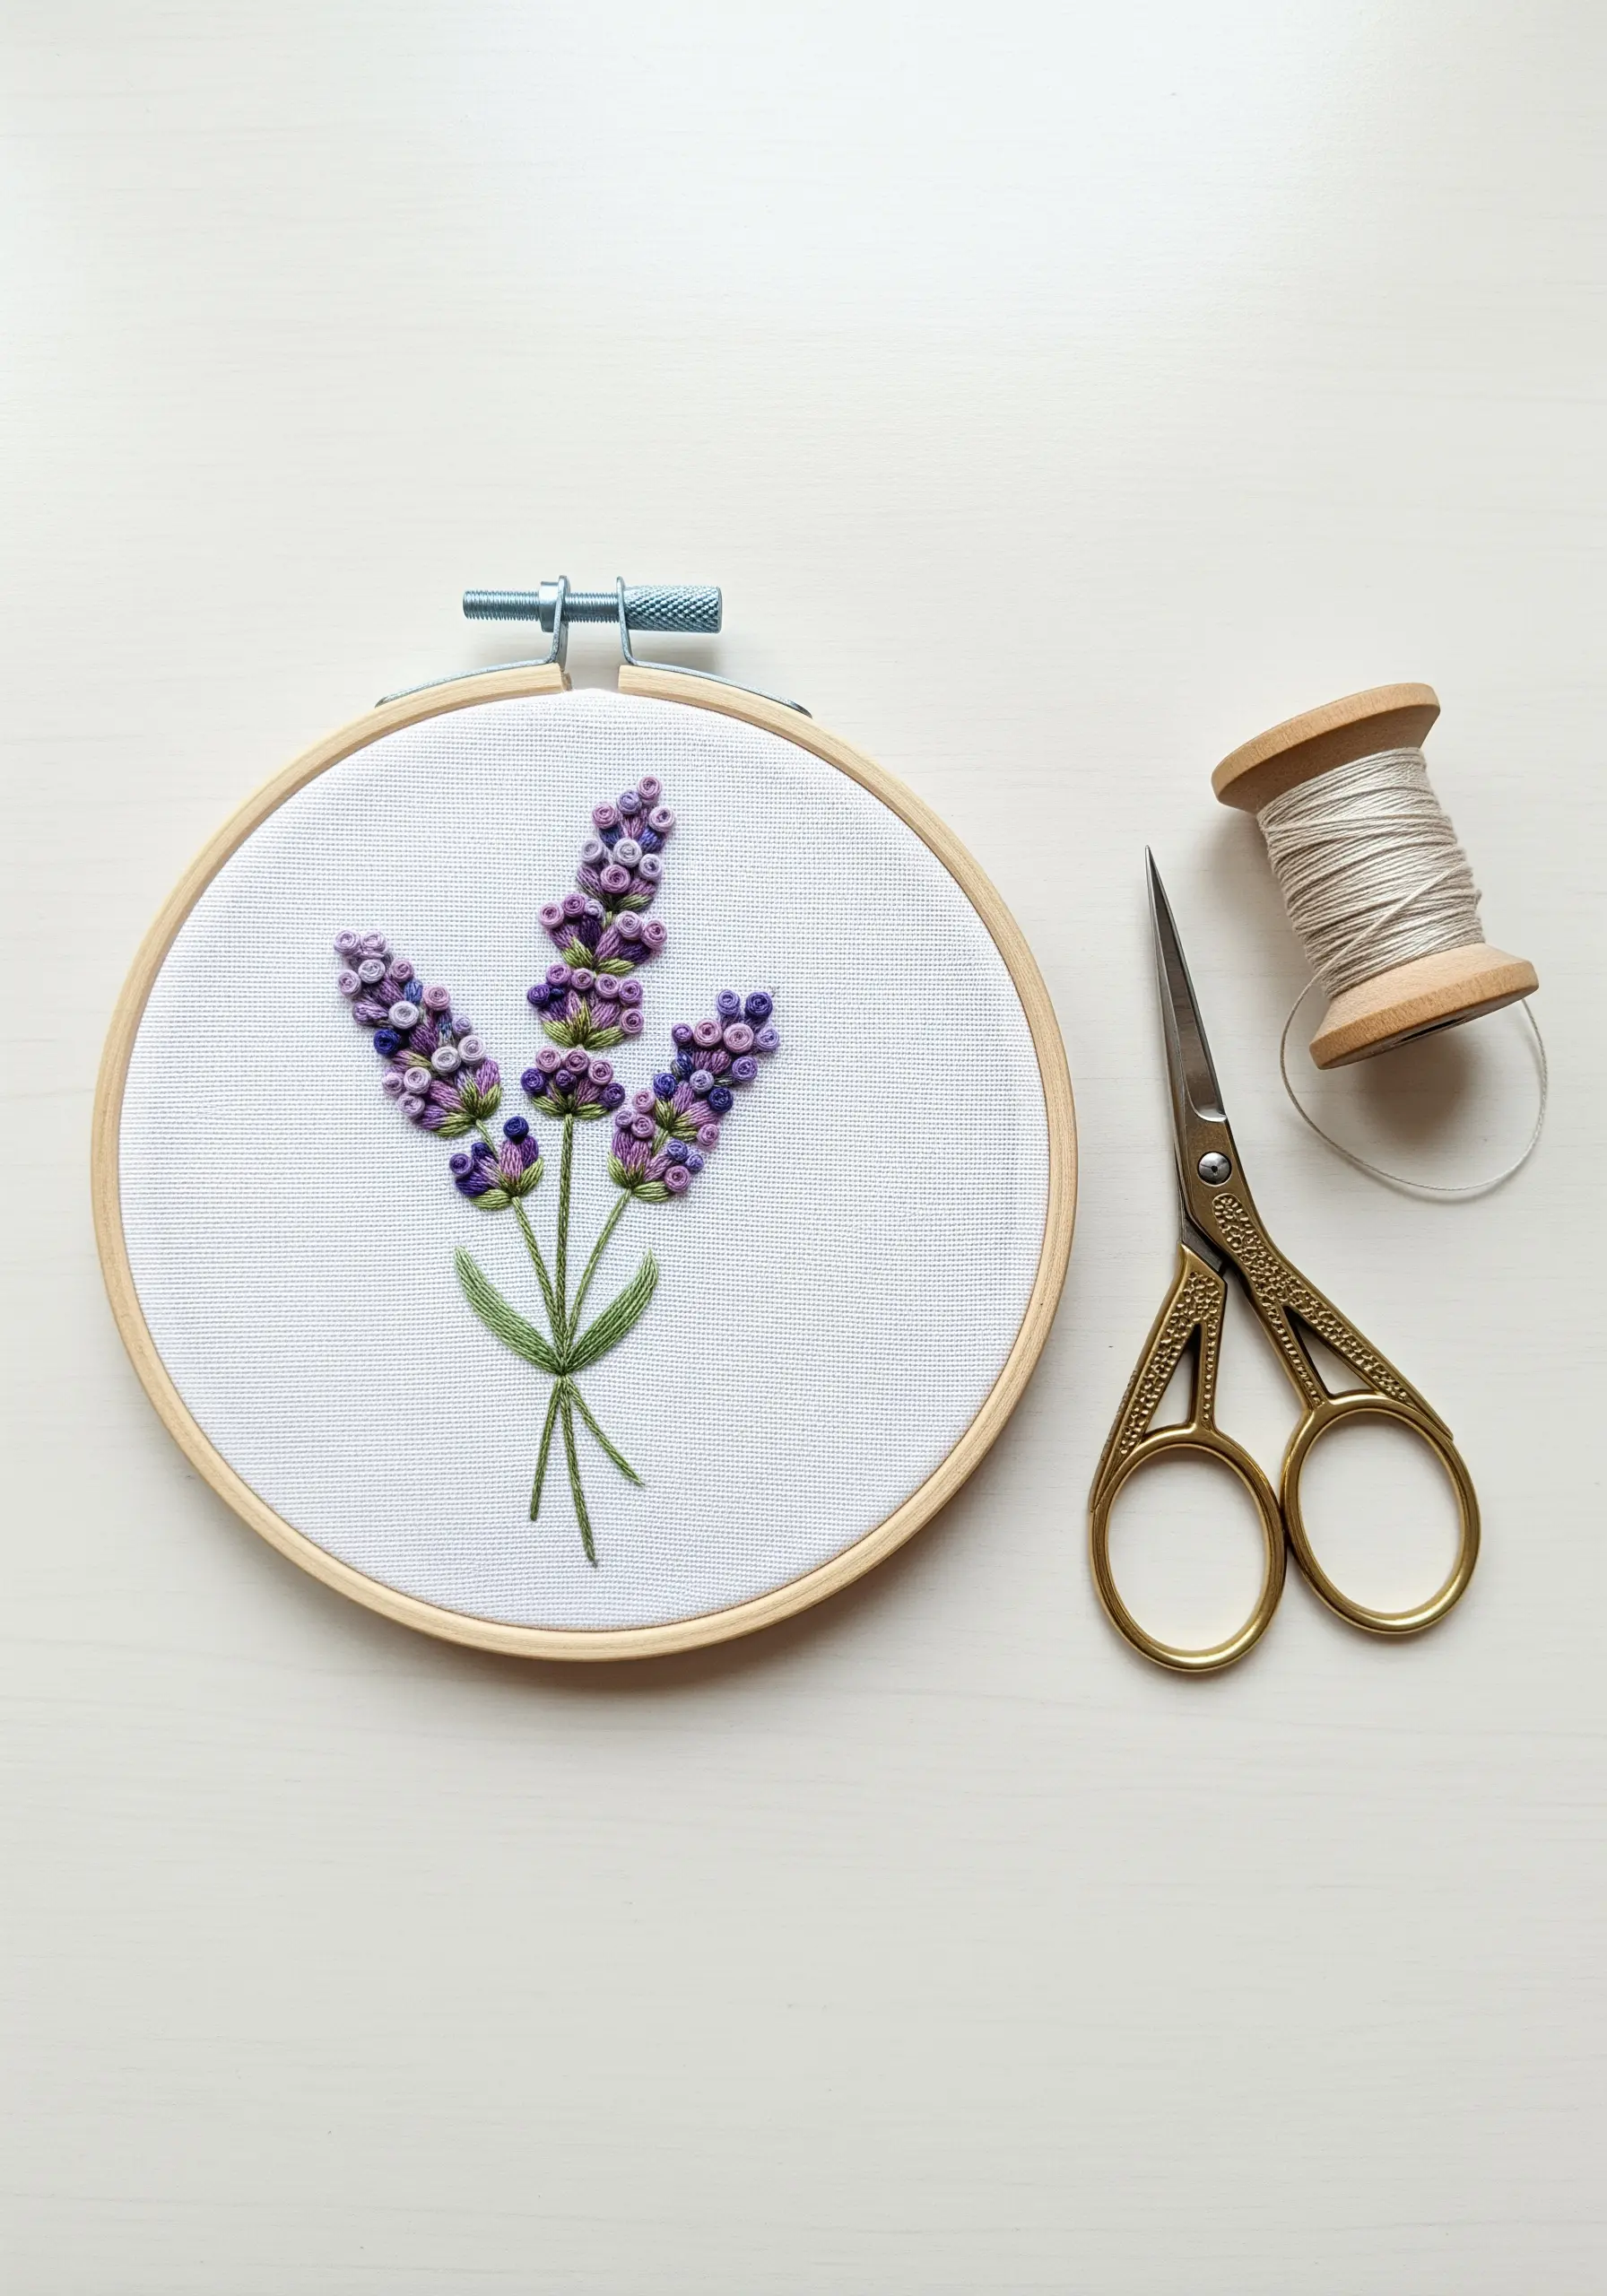
Mimic the delicate texture of lavender buds by clustering French knots.
Create realistic depth by varying the size of the knots—use a single strand of floss for tighter buds and two or three strands for fuller blossoms.
Sprinkle in a few darker purple knots to add shadow and dimension.
This simple technique is incredibly effective for creating touchable, realistic floral textures in calming bedroom art.
8. Abstract Waves with Layered Stitches
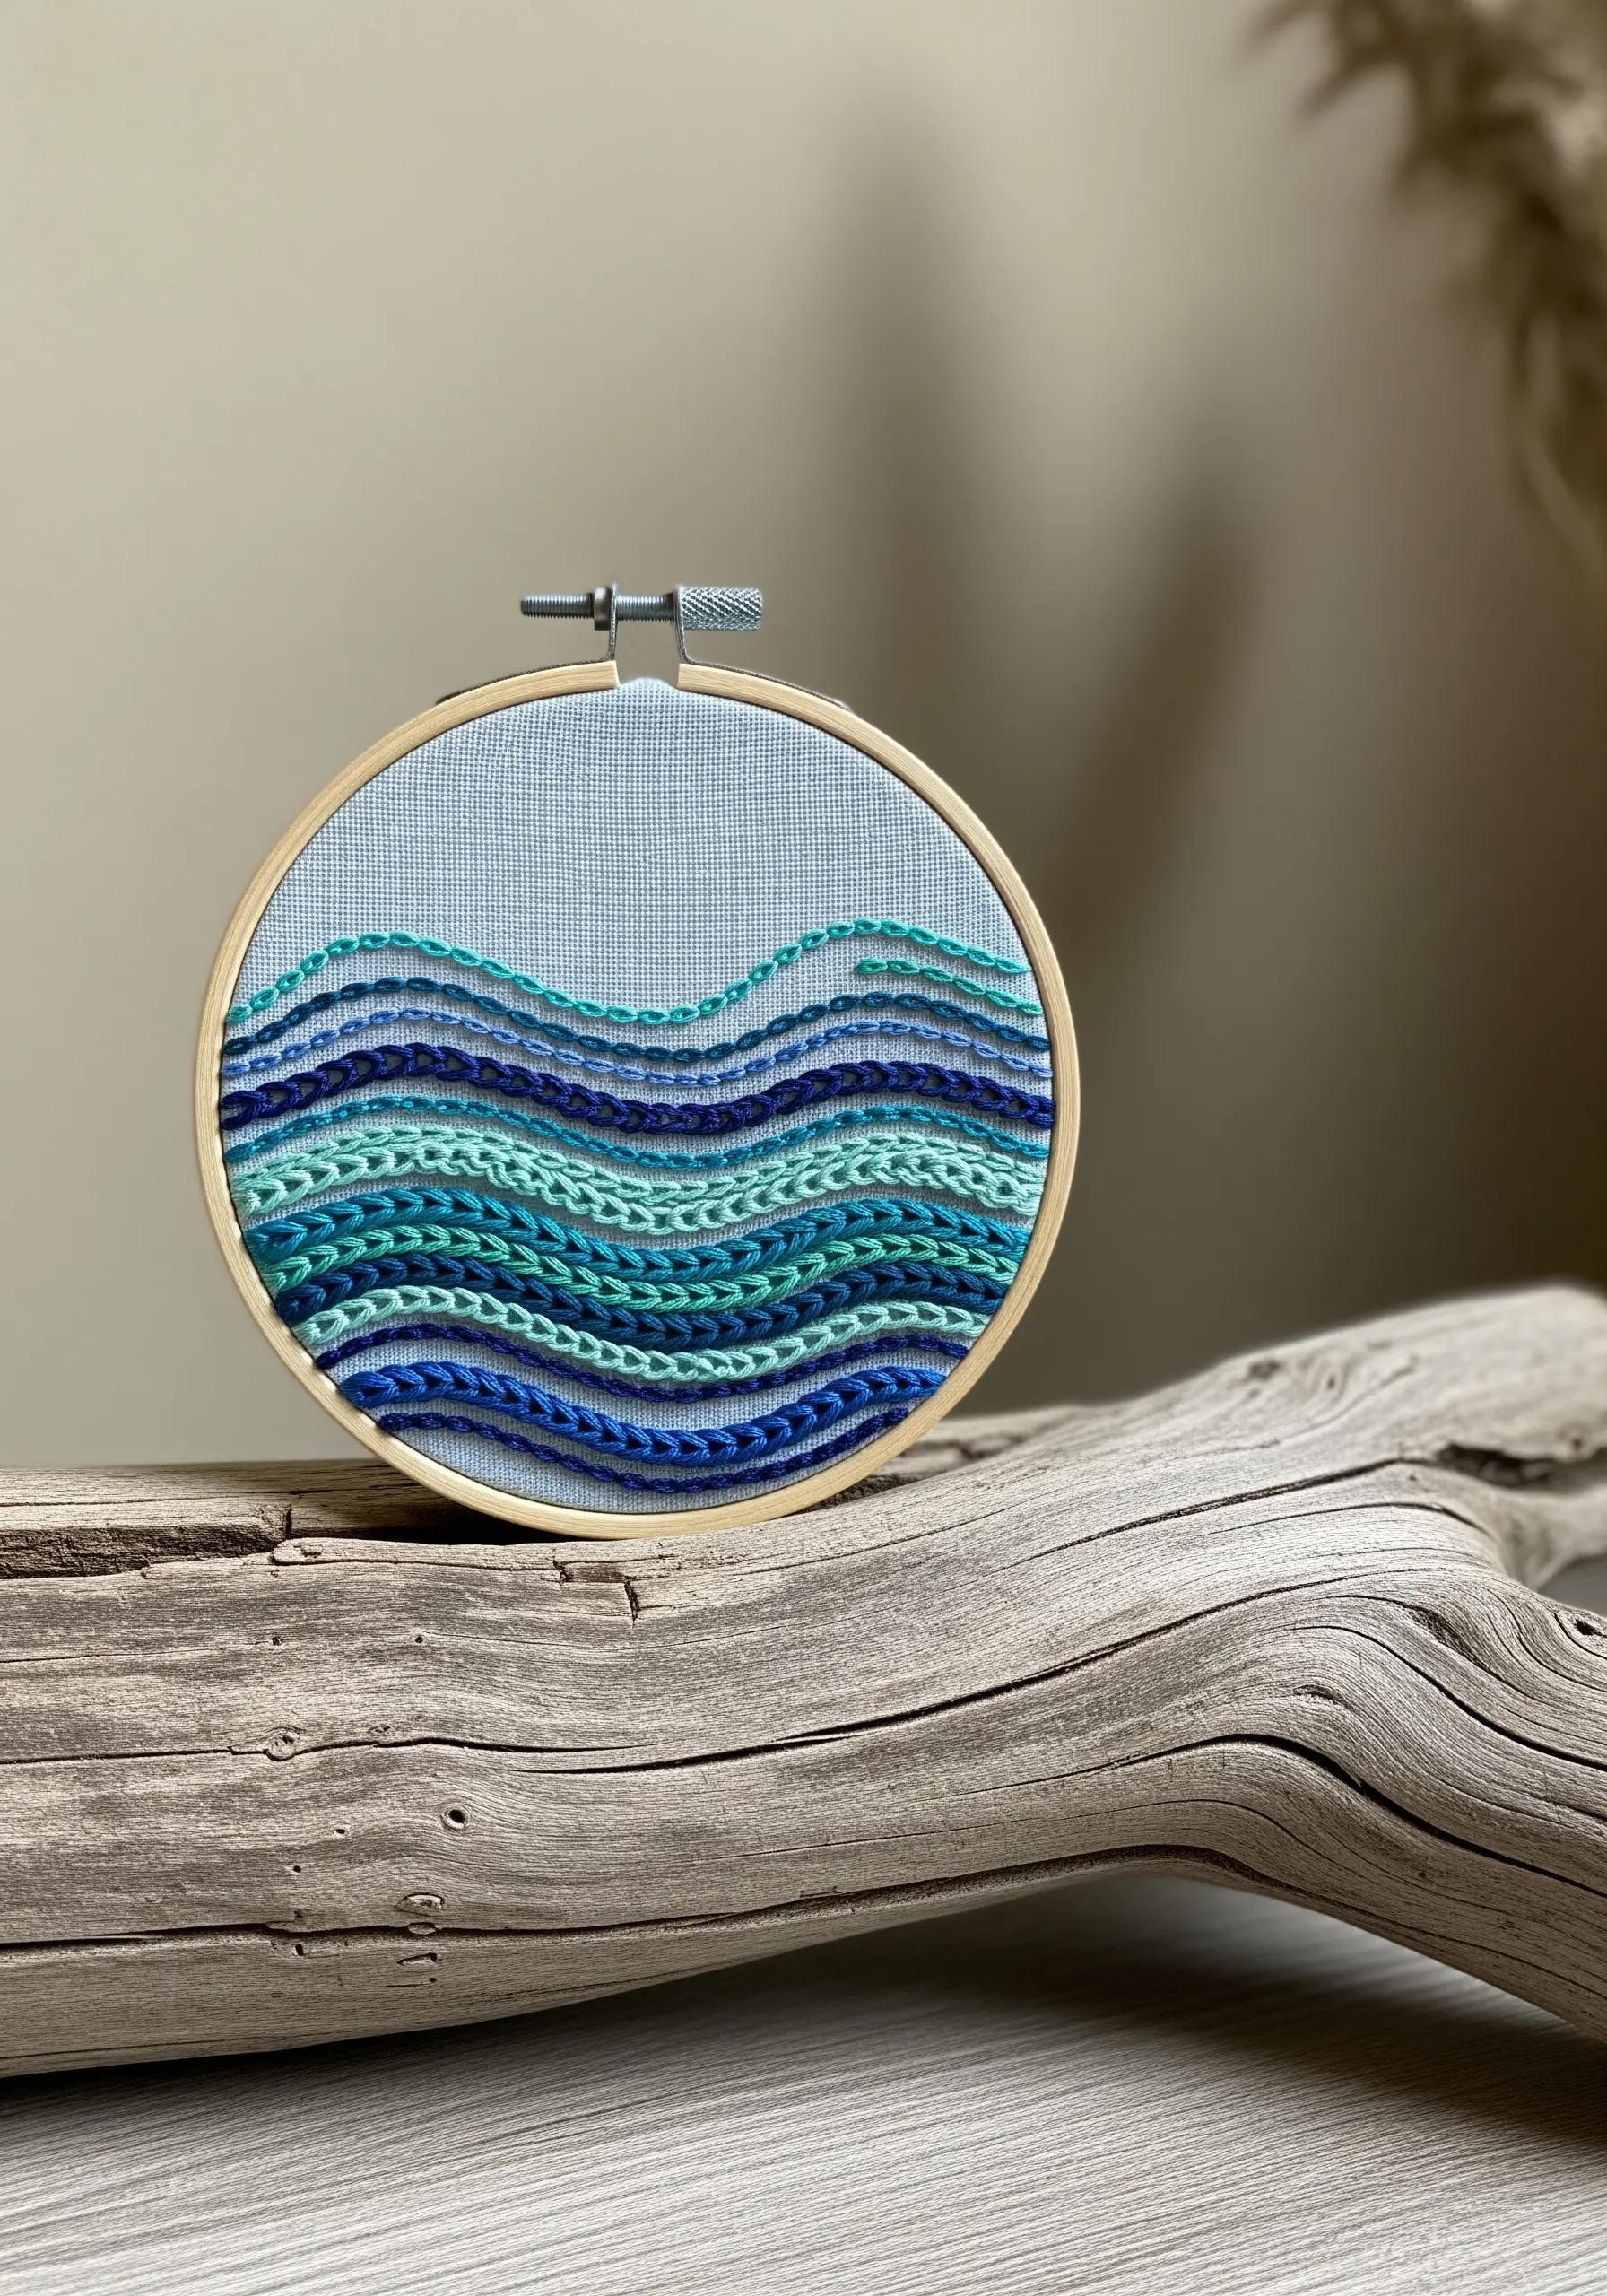
Capture the movement of water by layering rows of different textural stitches.
Combine thick, ropey stitches like the chain stitch or Palestrina knot with smoother ones like the split stitch.
Slightly overlap each row and use an analogous color palette of blues and greens to create a sense of depth and fluidity.
This technique turns your hoop into a dynamic, ocean-inspired textile painting.
9. A Miniature Embroidered Herbarium
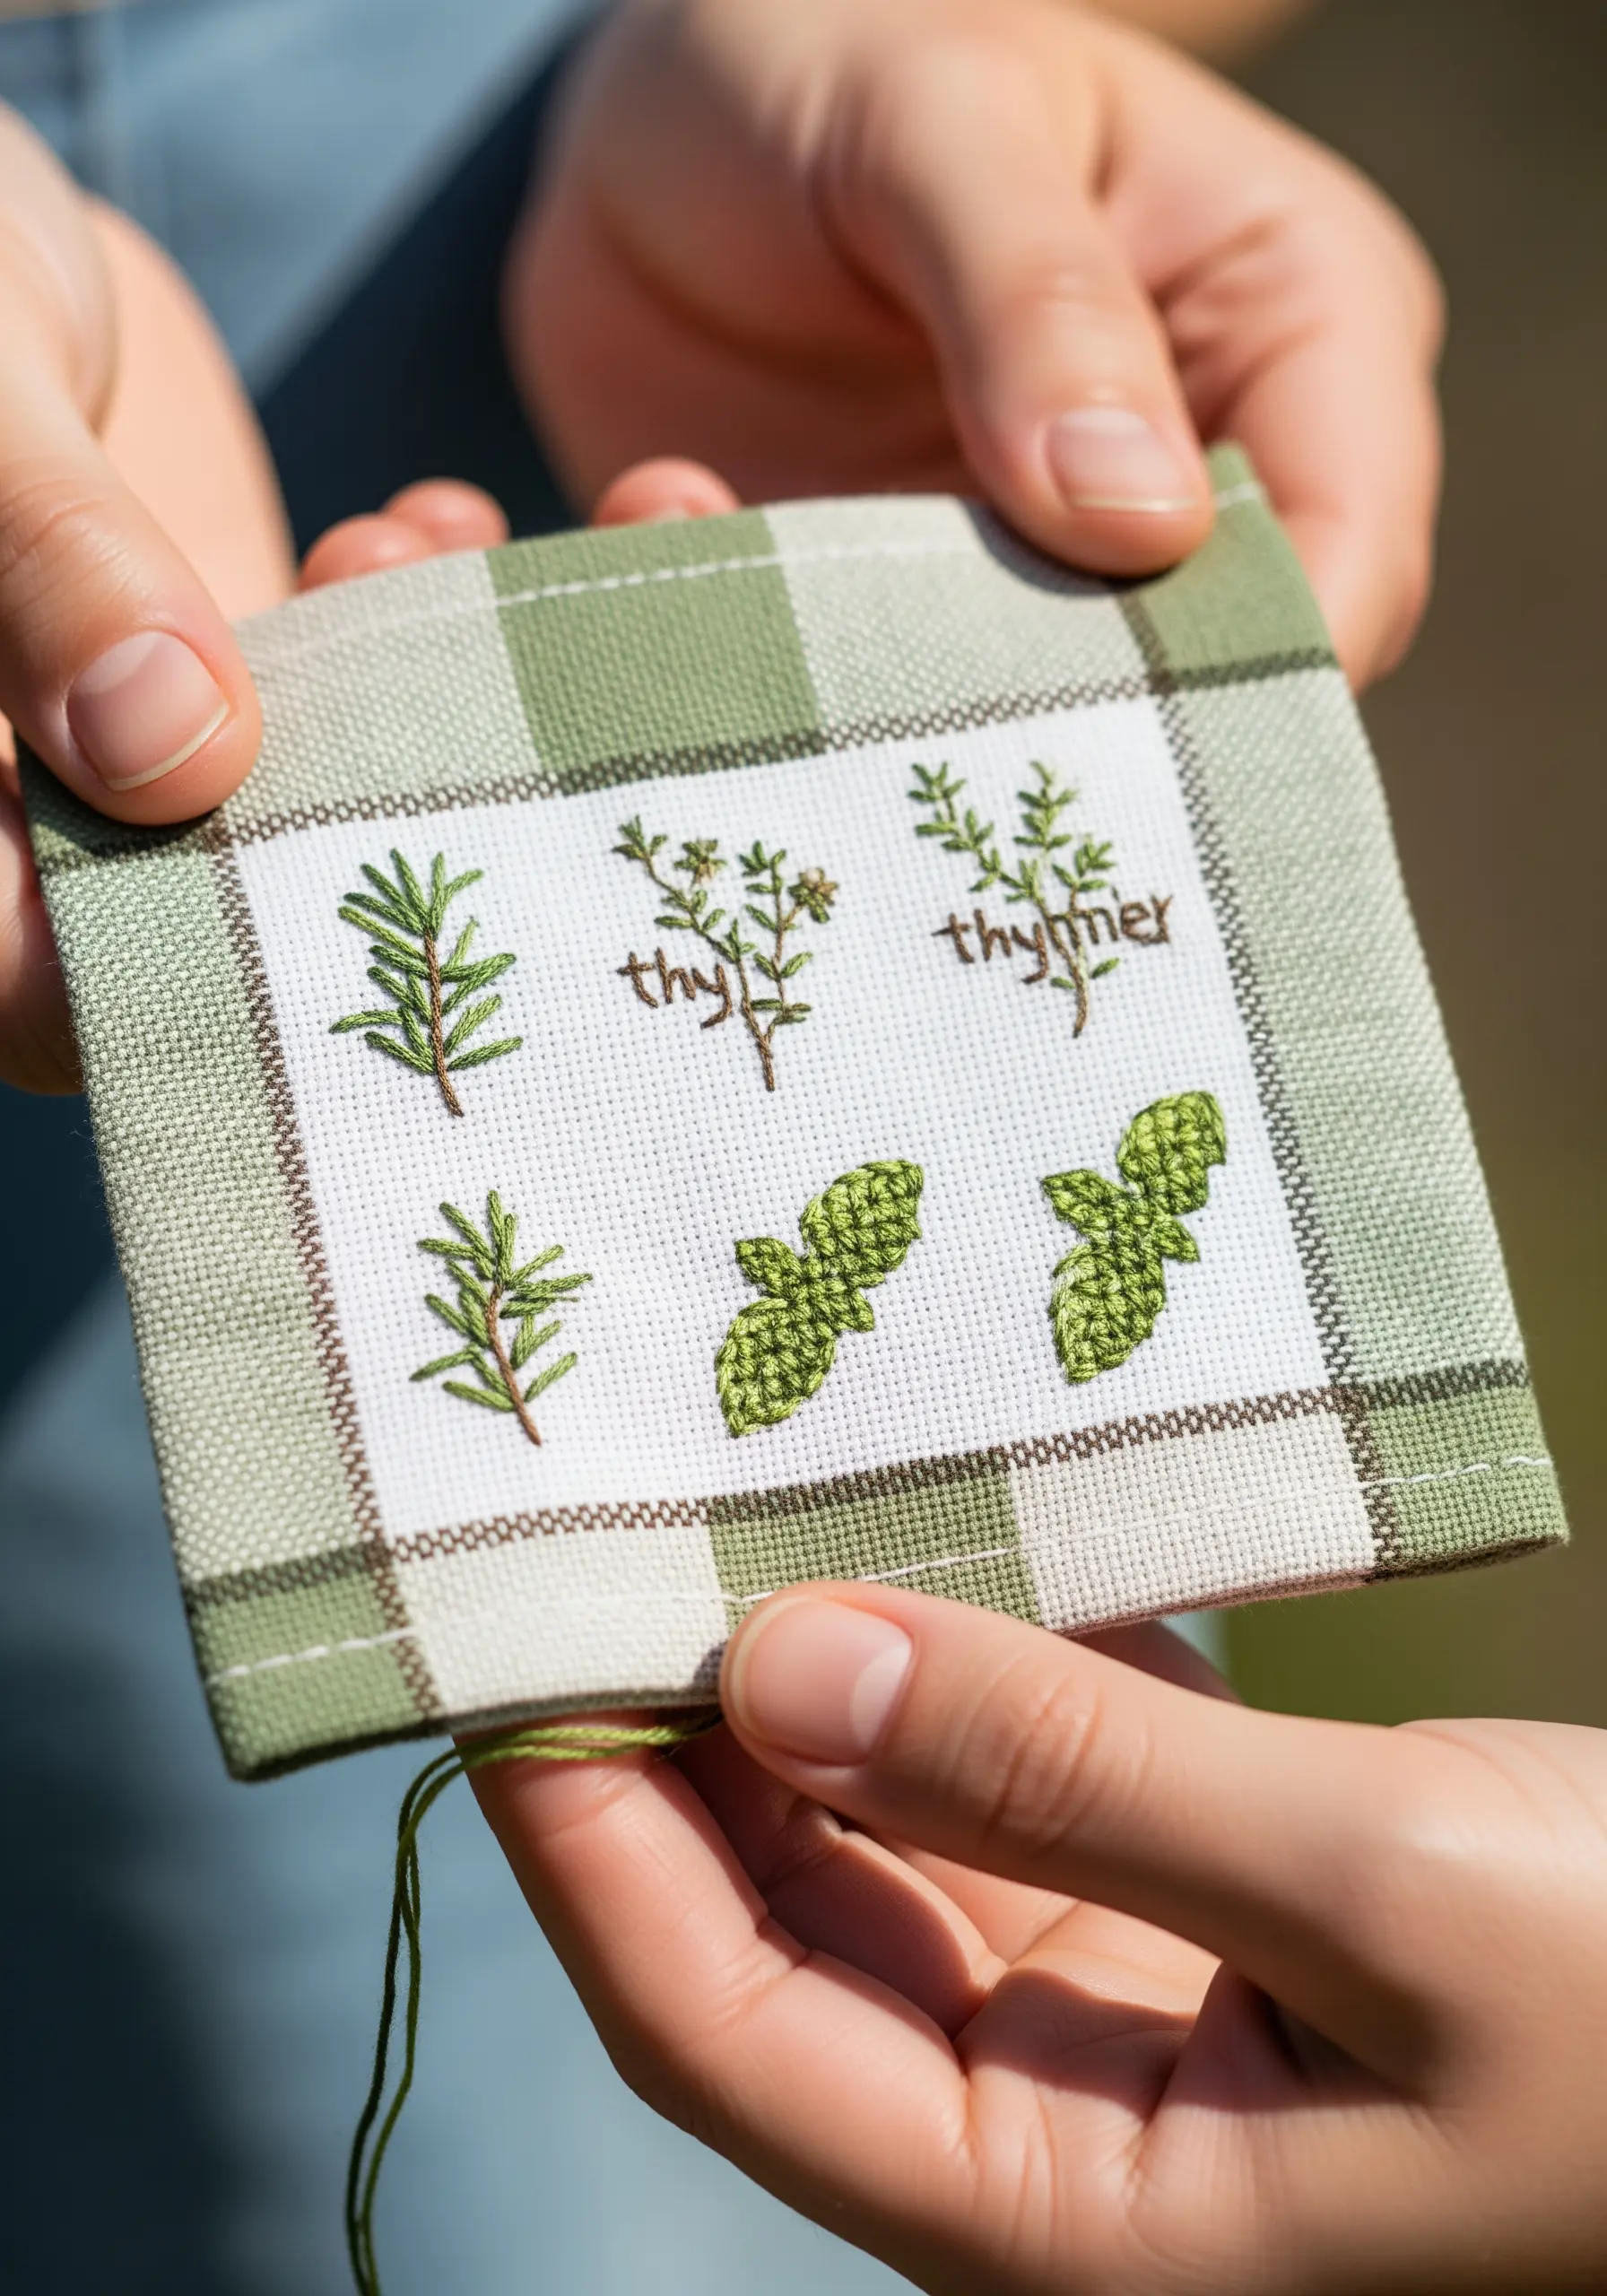
Challenge your fine motor skills by creating a sampler of delicate herbs.
Use just a single strand of floss to capture the fine details of rosemary, thyme, and basil leaves.
Fly stitch, detached chain stitch, and tiny straight stitches are perfect for this scale.
Stitching on a subtle patterned fabric, like this gingham, adds a layer of charm and context to your miniature botanical collection, similar to these medicinal herb embroidery designs.
10. Modern Monograms with Pattern Contrast
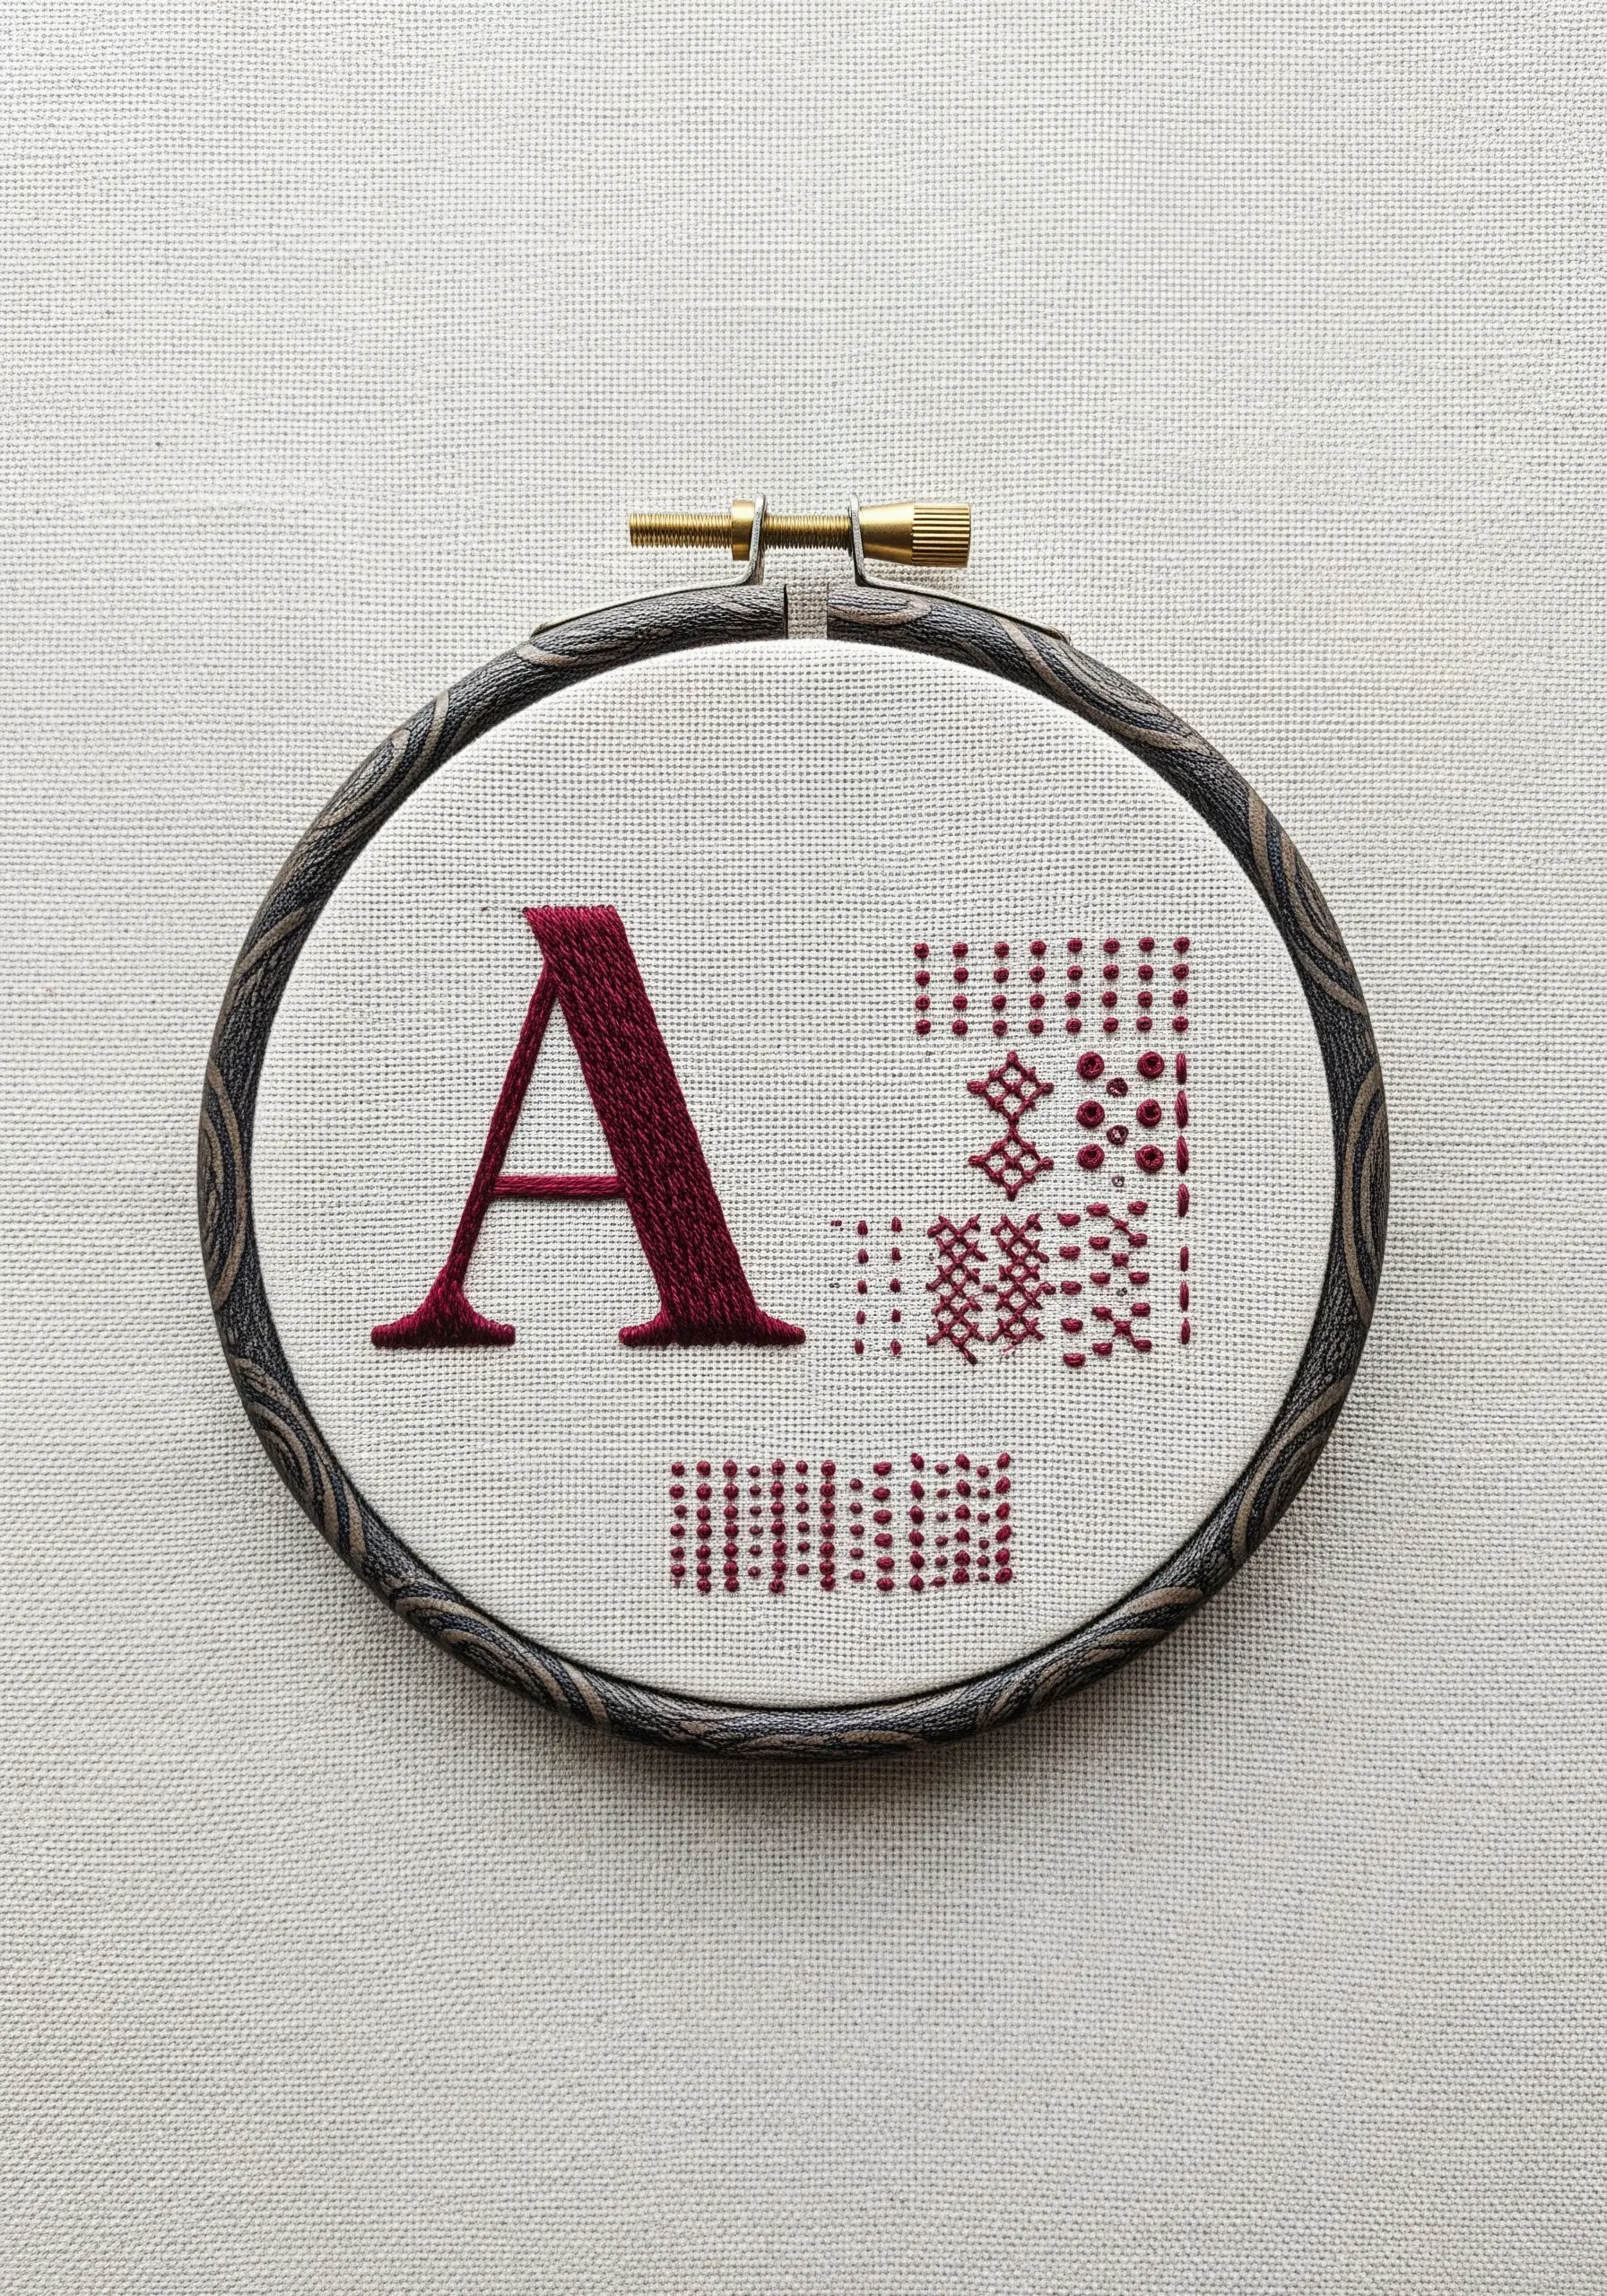
Create a sophisticated sampler by pairing a bold, solid shape with delicate, repeating patterns.
Stitch your monogram with a flawless satin stitch, ensuring each thread lays flat and smooth.
Then, contrast that solid block of color with airy geometric fills made from simple running stitches or cross-stitches.
This juxtaposition of texture and density is the key to a polished, contemporary design.
It’s an elegant approach for creating minimal monogram styles.
11. Tell a Story with Contrasting Thread Textures
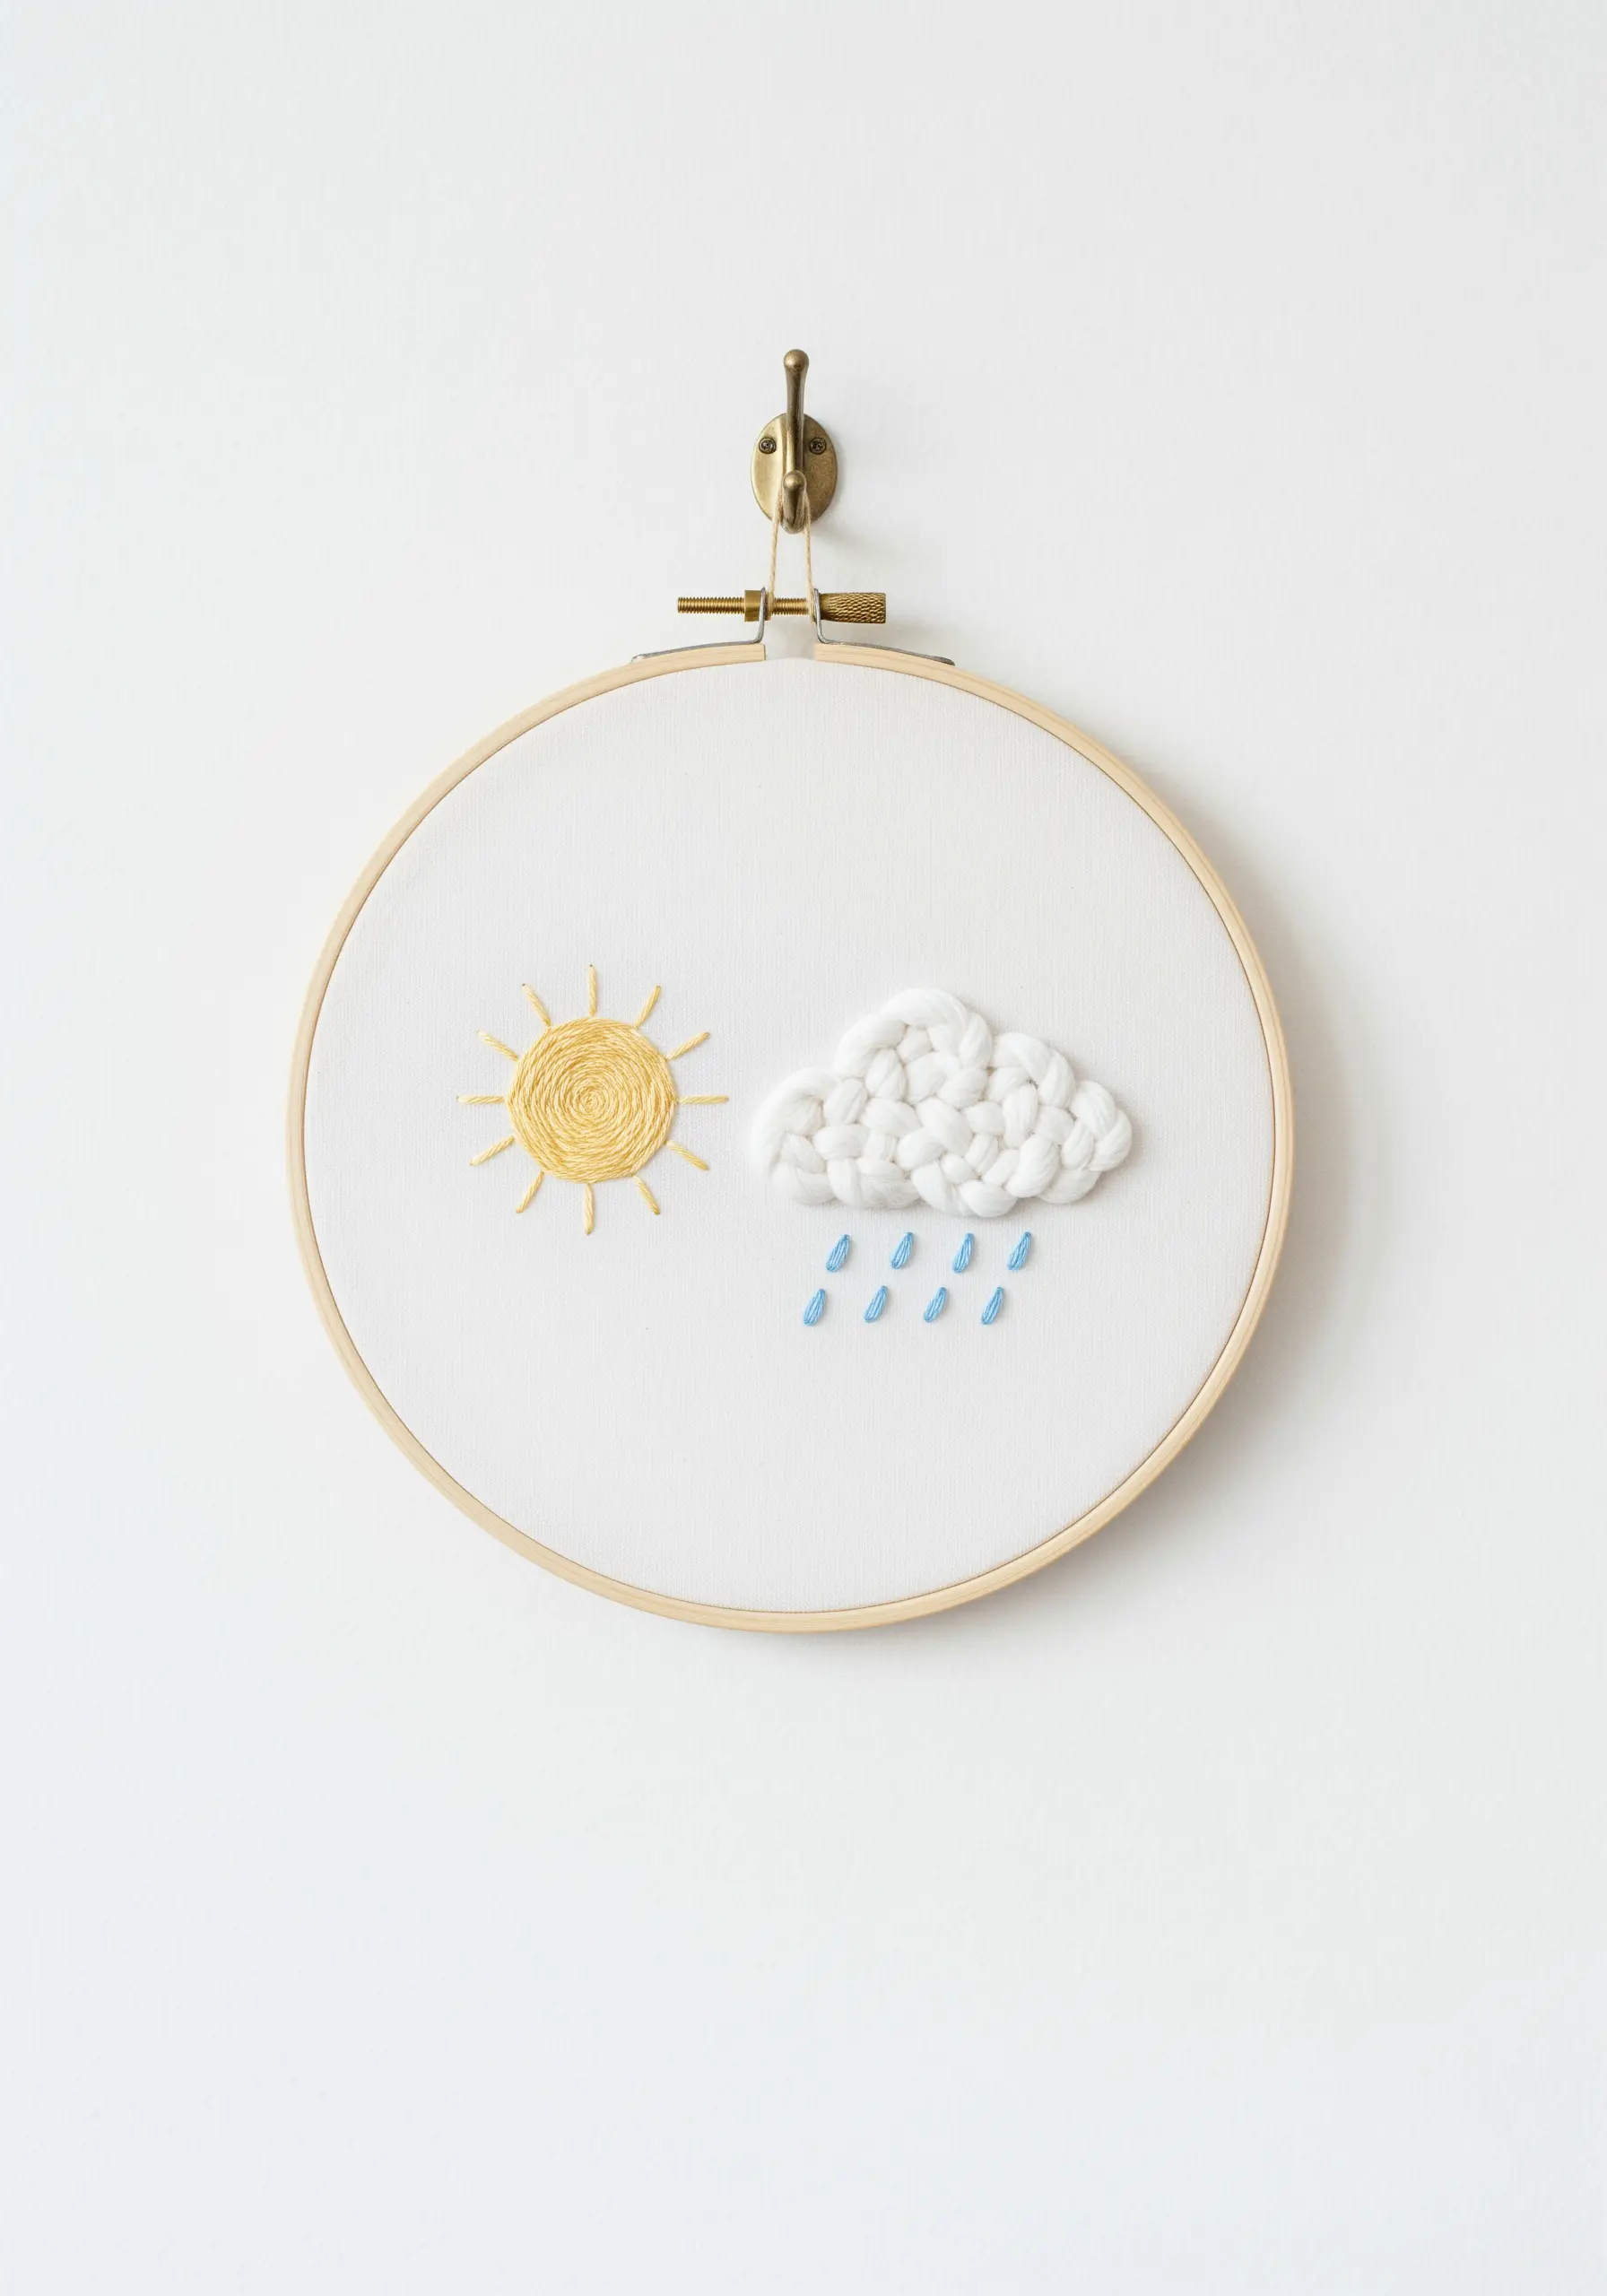
Elevate simple icons by giving each element a distinct, tactile quality.
Use a chunky, soft yarn and a large-eyed needle to create a fluffy, voluminous cloud with chain stitches.
Then, switch to standard six-strand cotton floss for the smooth, delicate sun rays and raindrops.
This deliberate play on thread weight and texture makes the design far more engaging and transforms it into cozy embroidered wall art.
12. Achieve Bold Lines with Whipped Backstitch
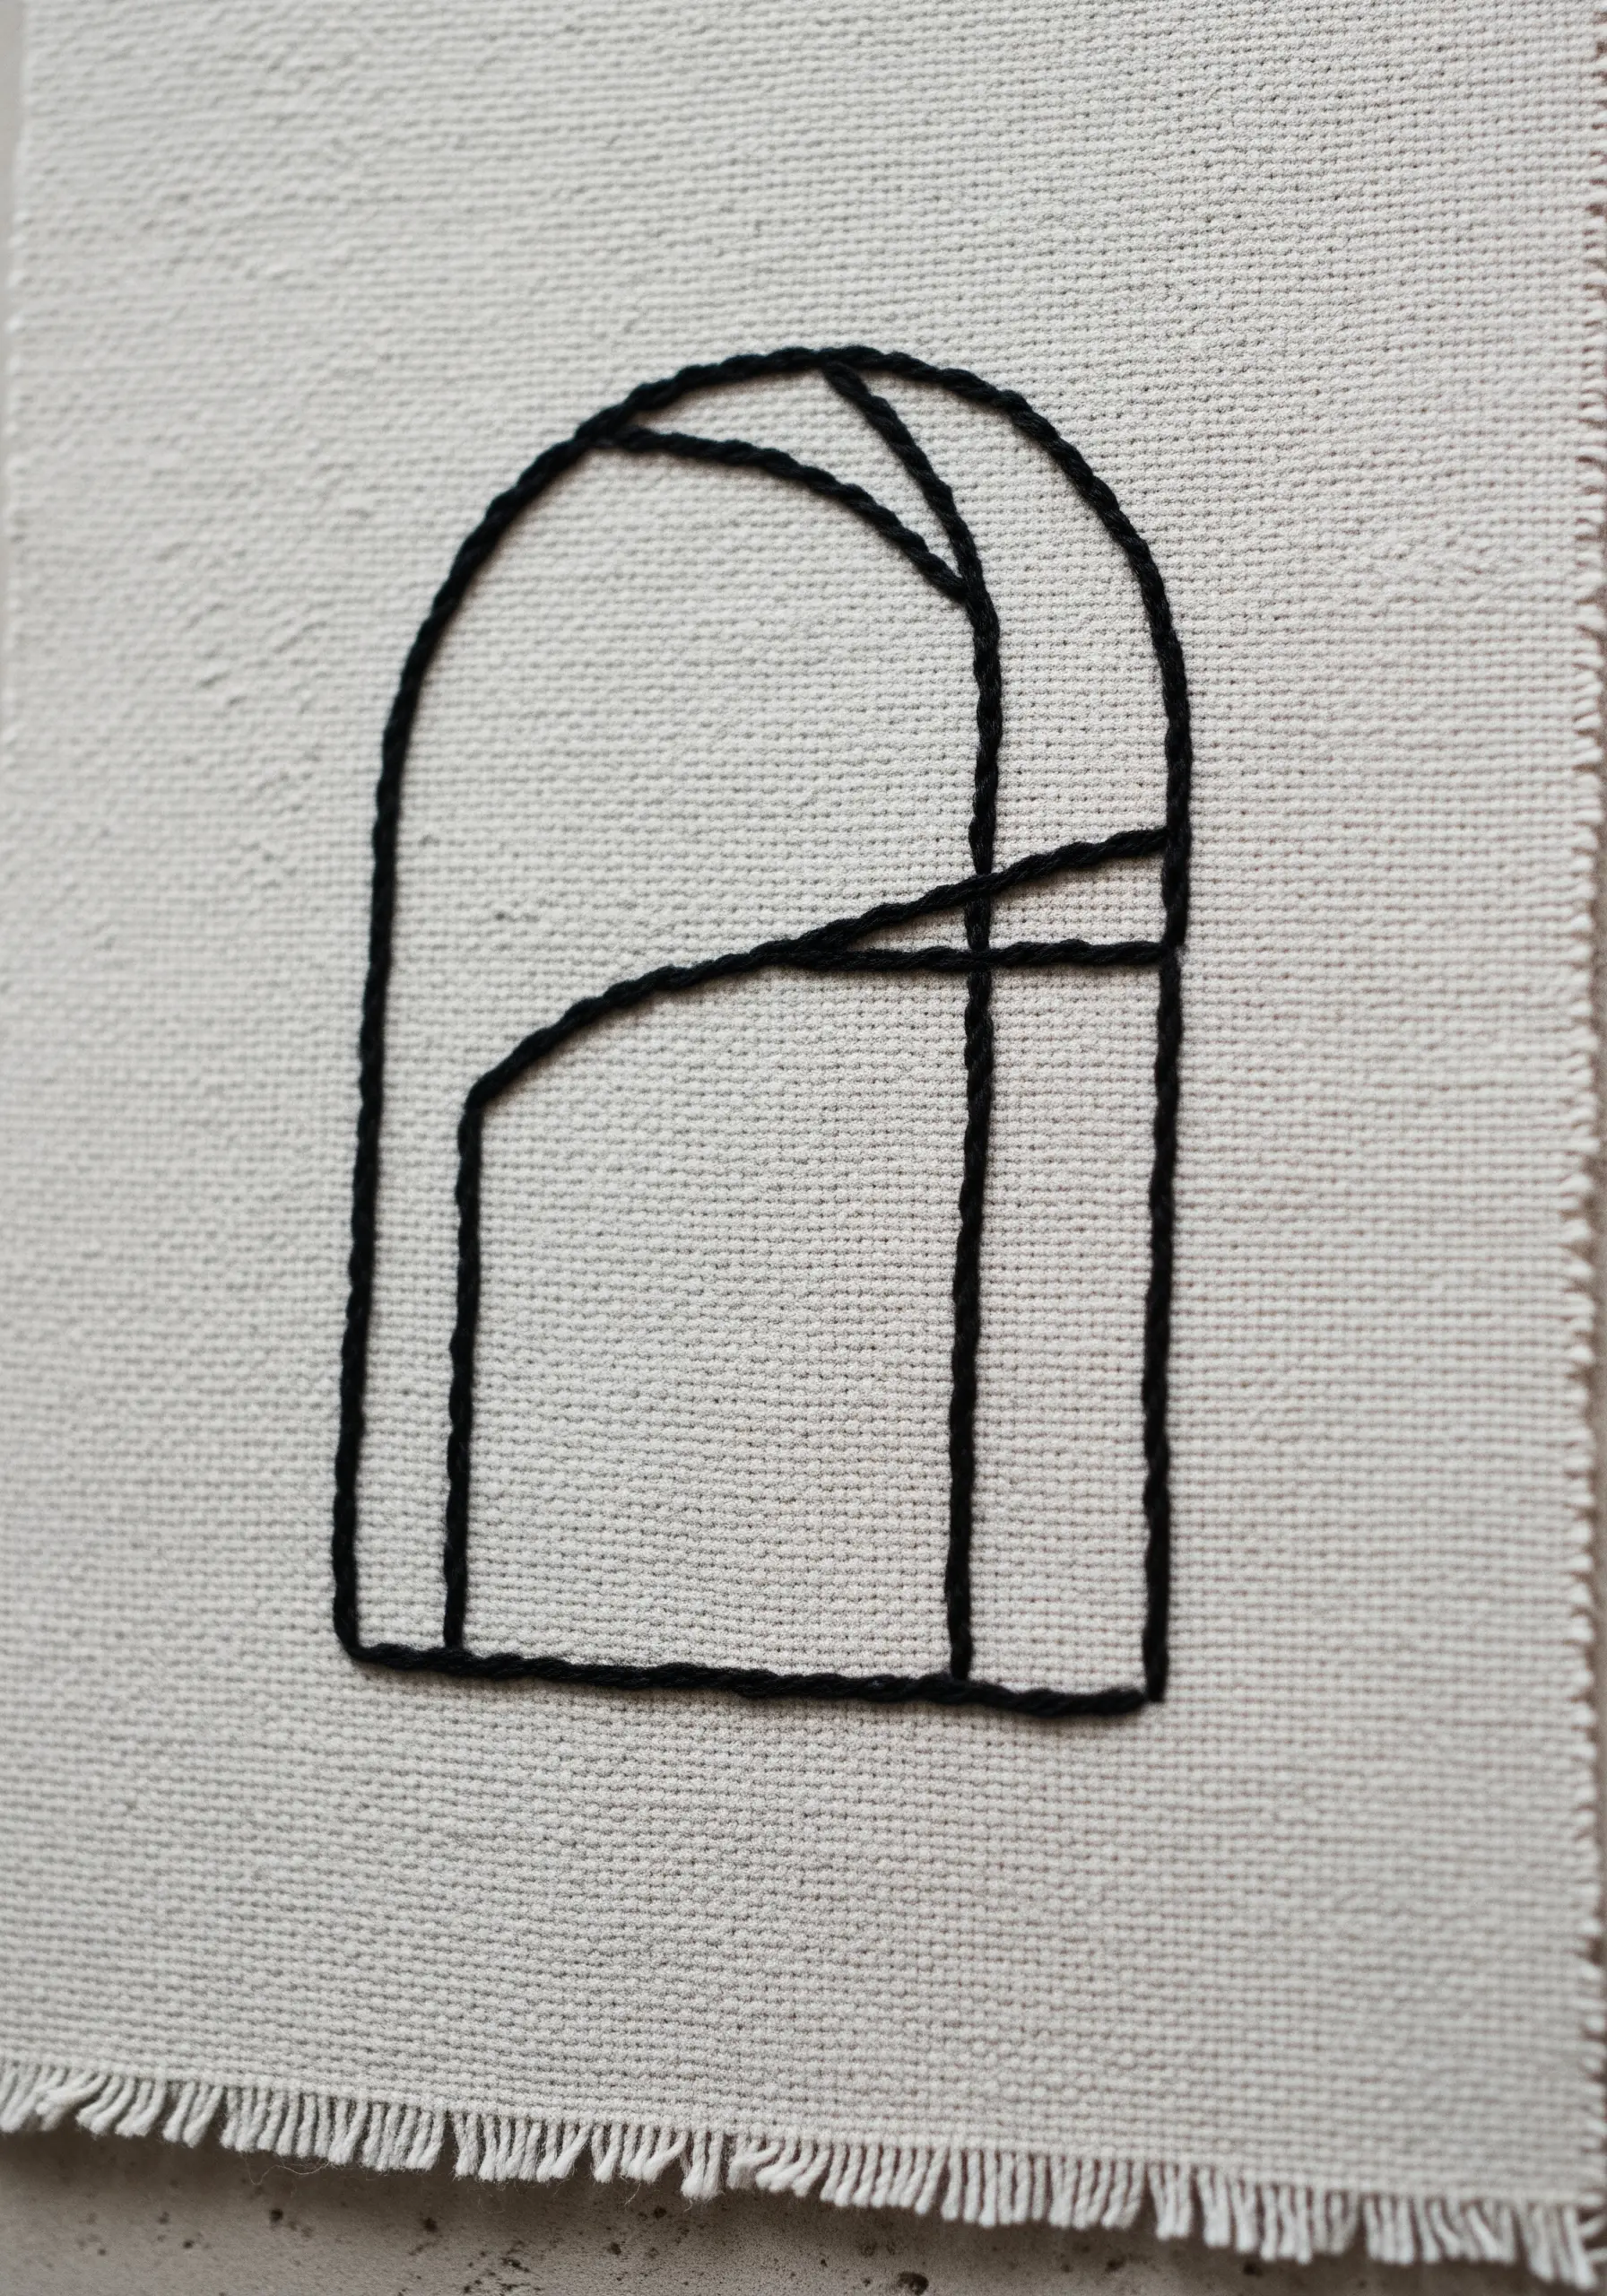
For flawless, solid outlines in your line art, the whipped backstitch is your best friend.
First, lay down a standard backstitch.
Then, pass a second thread under each stitch without piercing the fabric, ‘whipping’ around the outline.
This technique covers the gaps inherent in backstitch, creating a smooth, rope-like line that gives graphic and architectural designs a clean, professional finish.
It’s ideal for all kinds of minimalist line art embroidery patterns.
13. Dynamic Fills with Contrasting Directions
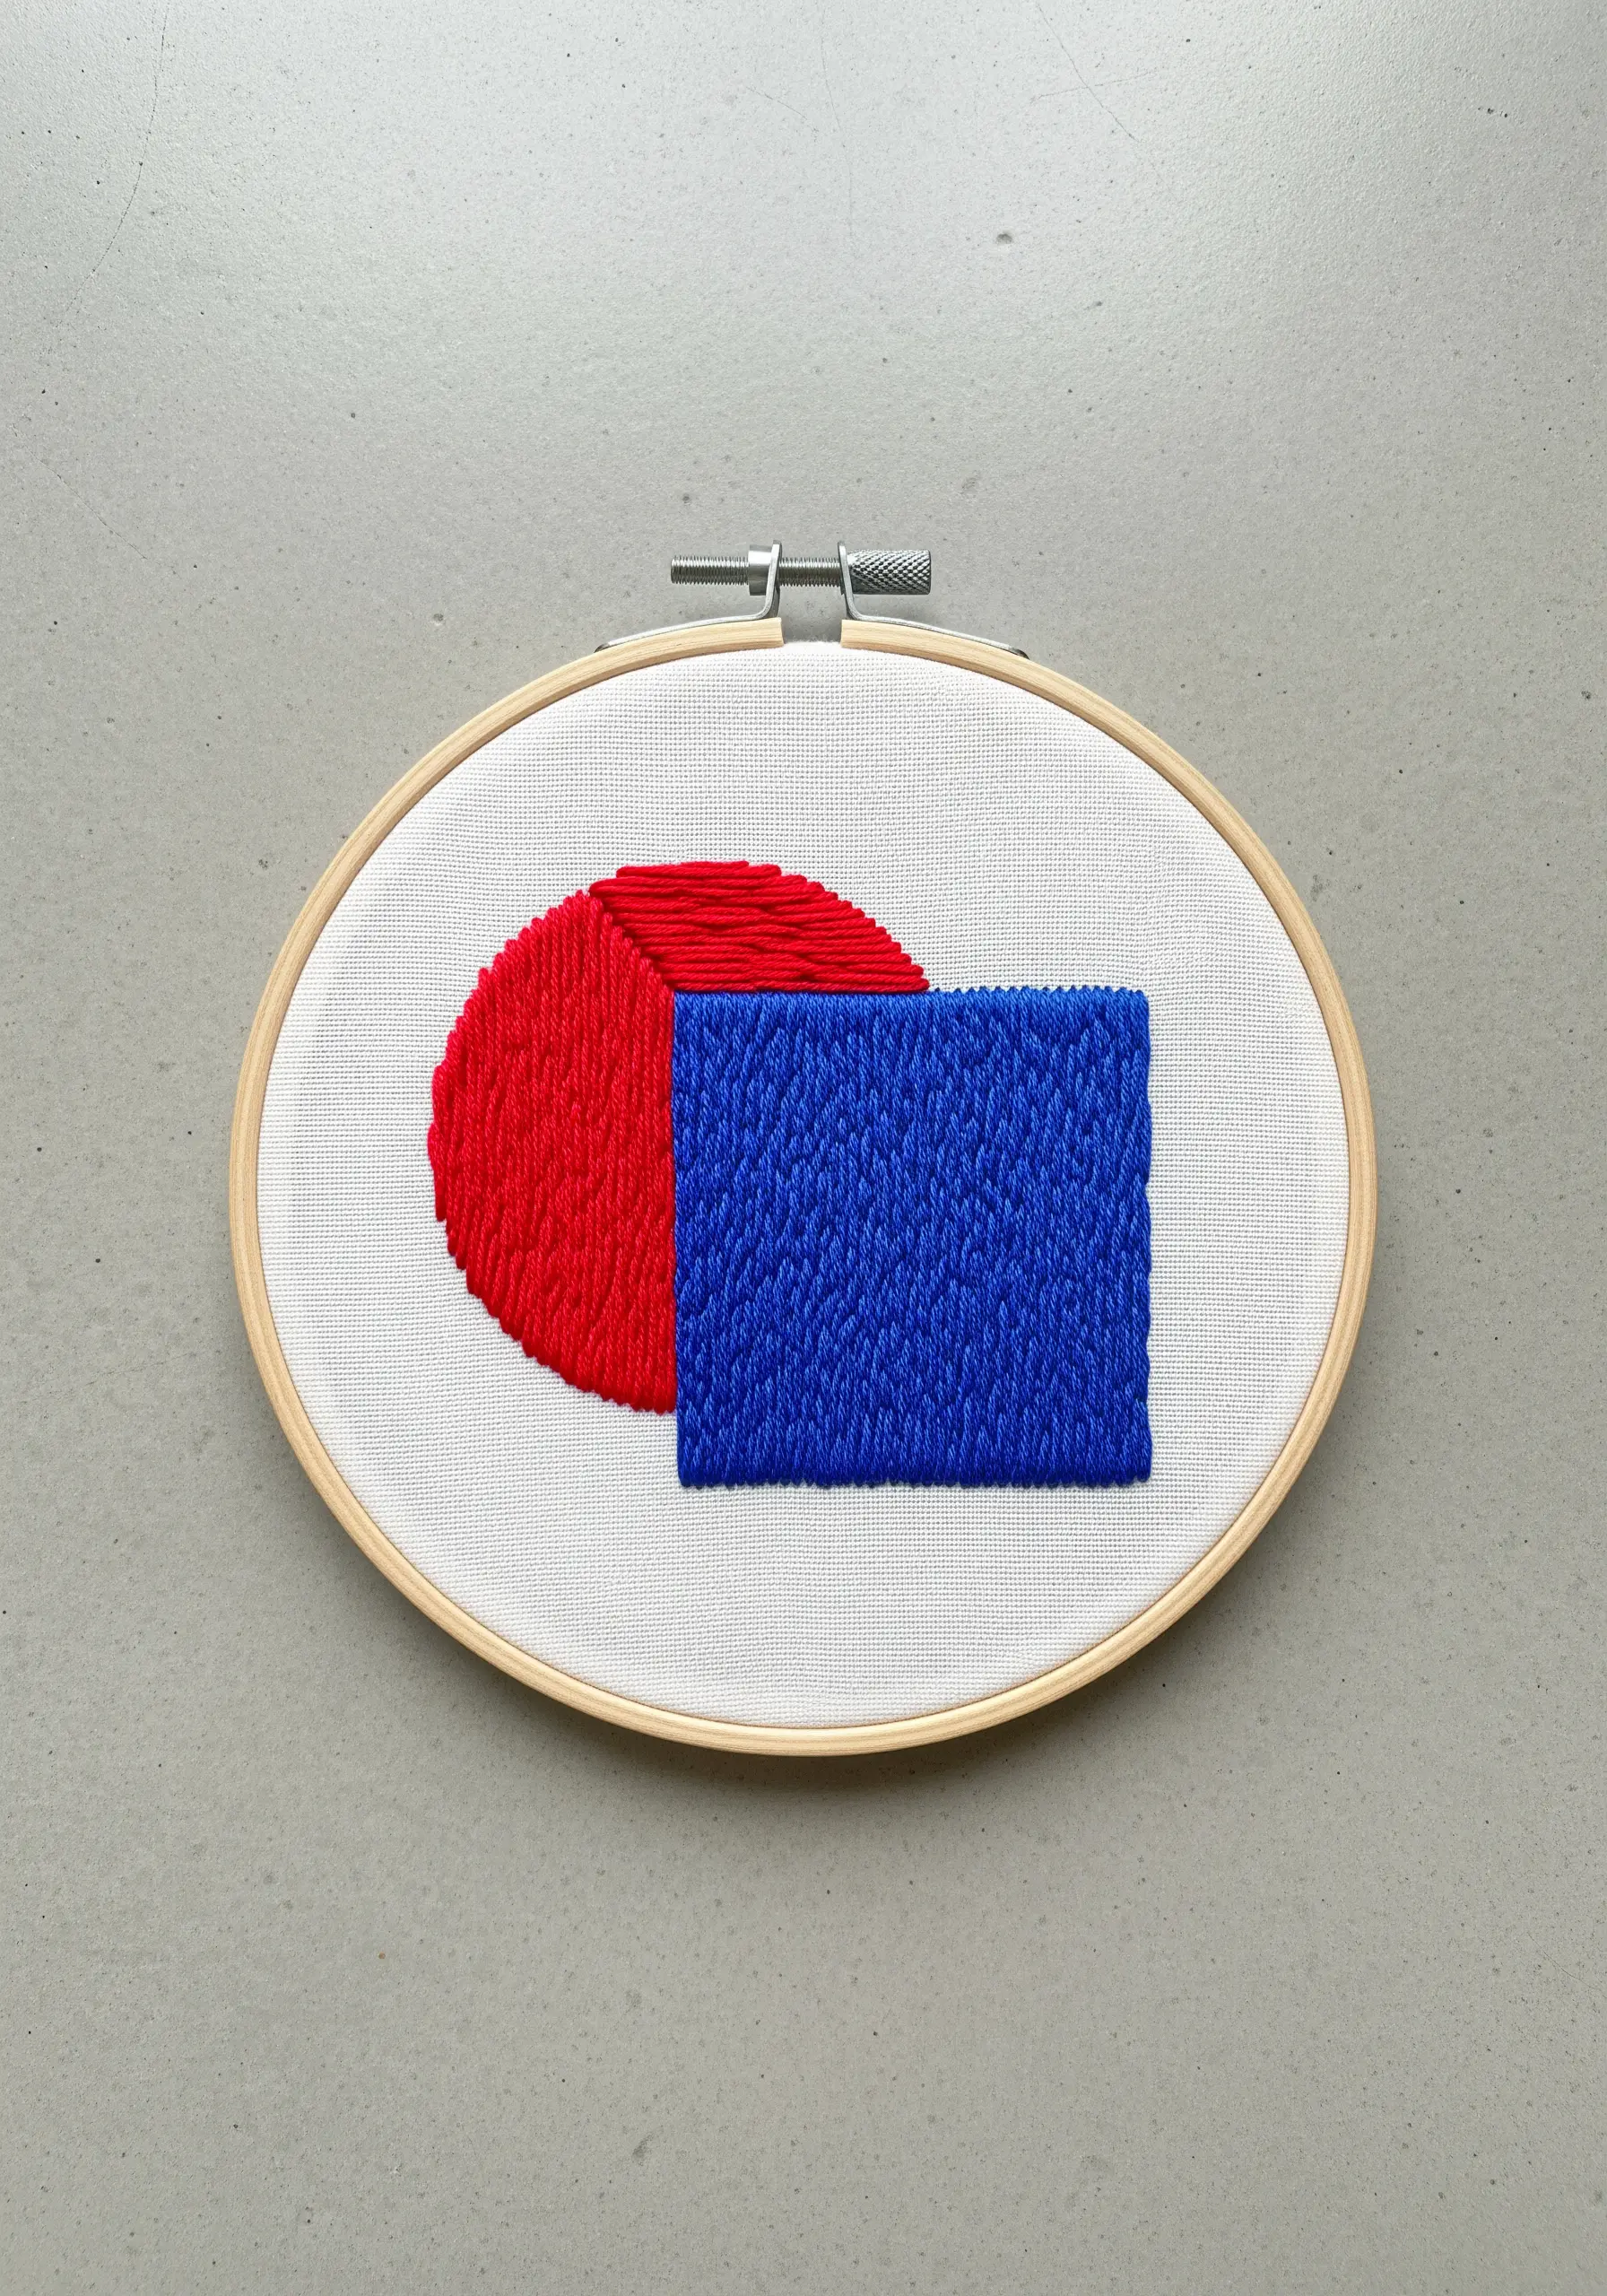
When stitching adjacent blocks of color, introduce visual energy by simply changing the direction of your fill stitches.
Here, the red semi-circle is filled with vertical long-and-short stitches, while the blue rectangle is filled horizontally.
This subtle shift creates a dynamic tension where the shapes meet, making the composition feel more alive.
It is a powerful tool for creating impactful abstract designs.
14. Lifelike Dimension with Stumpwork
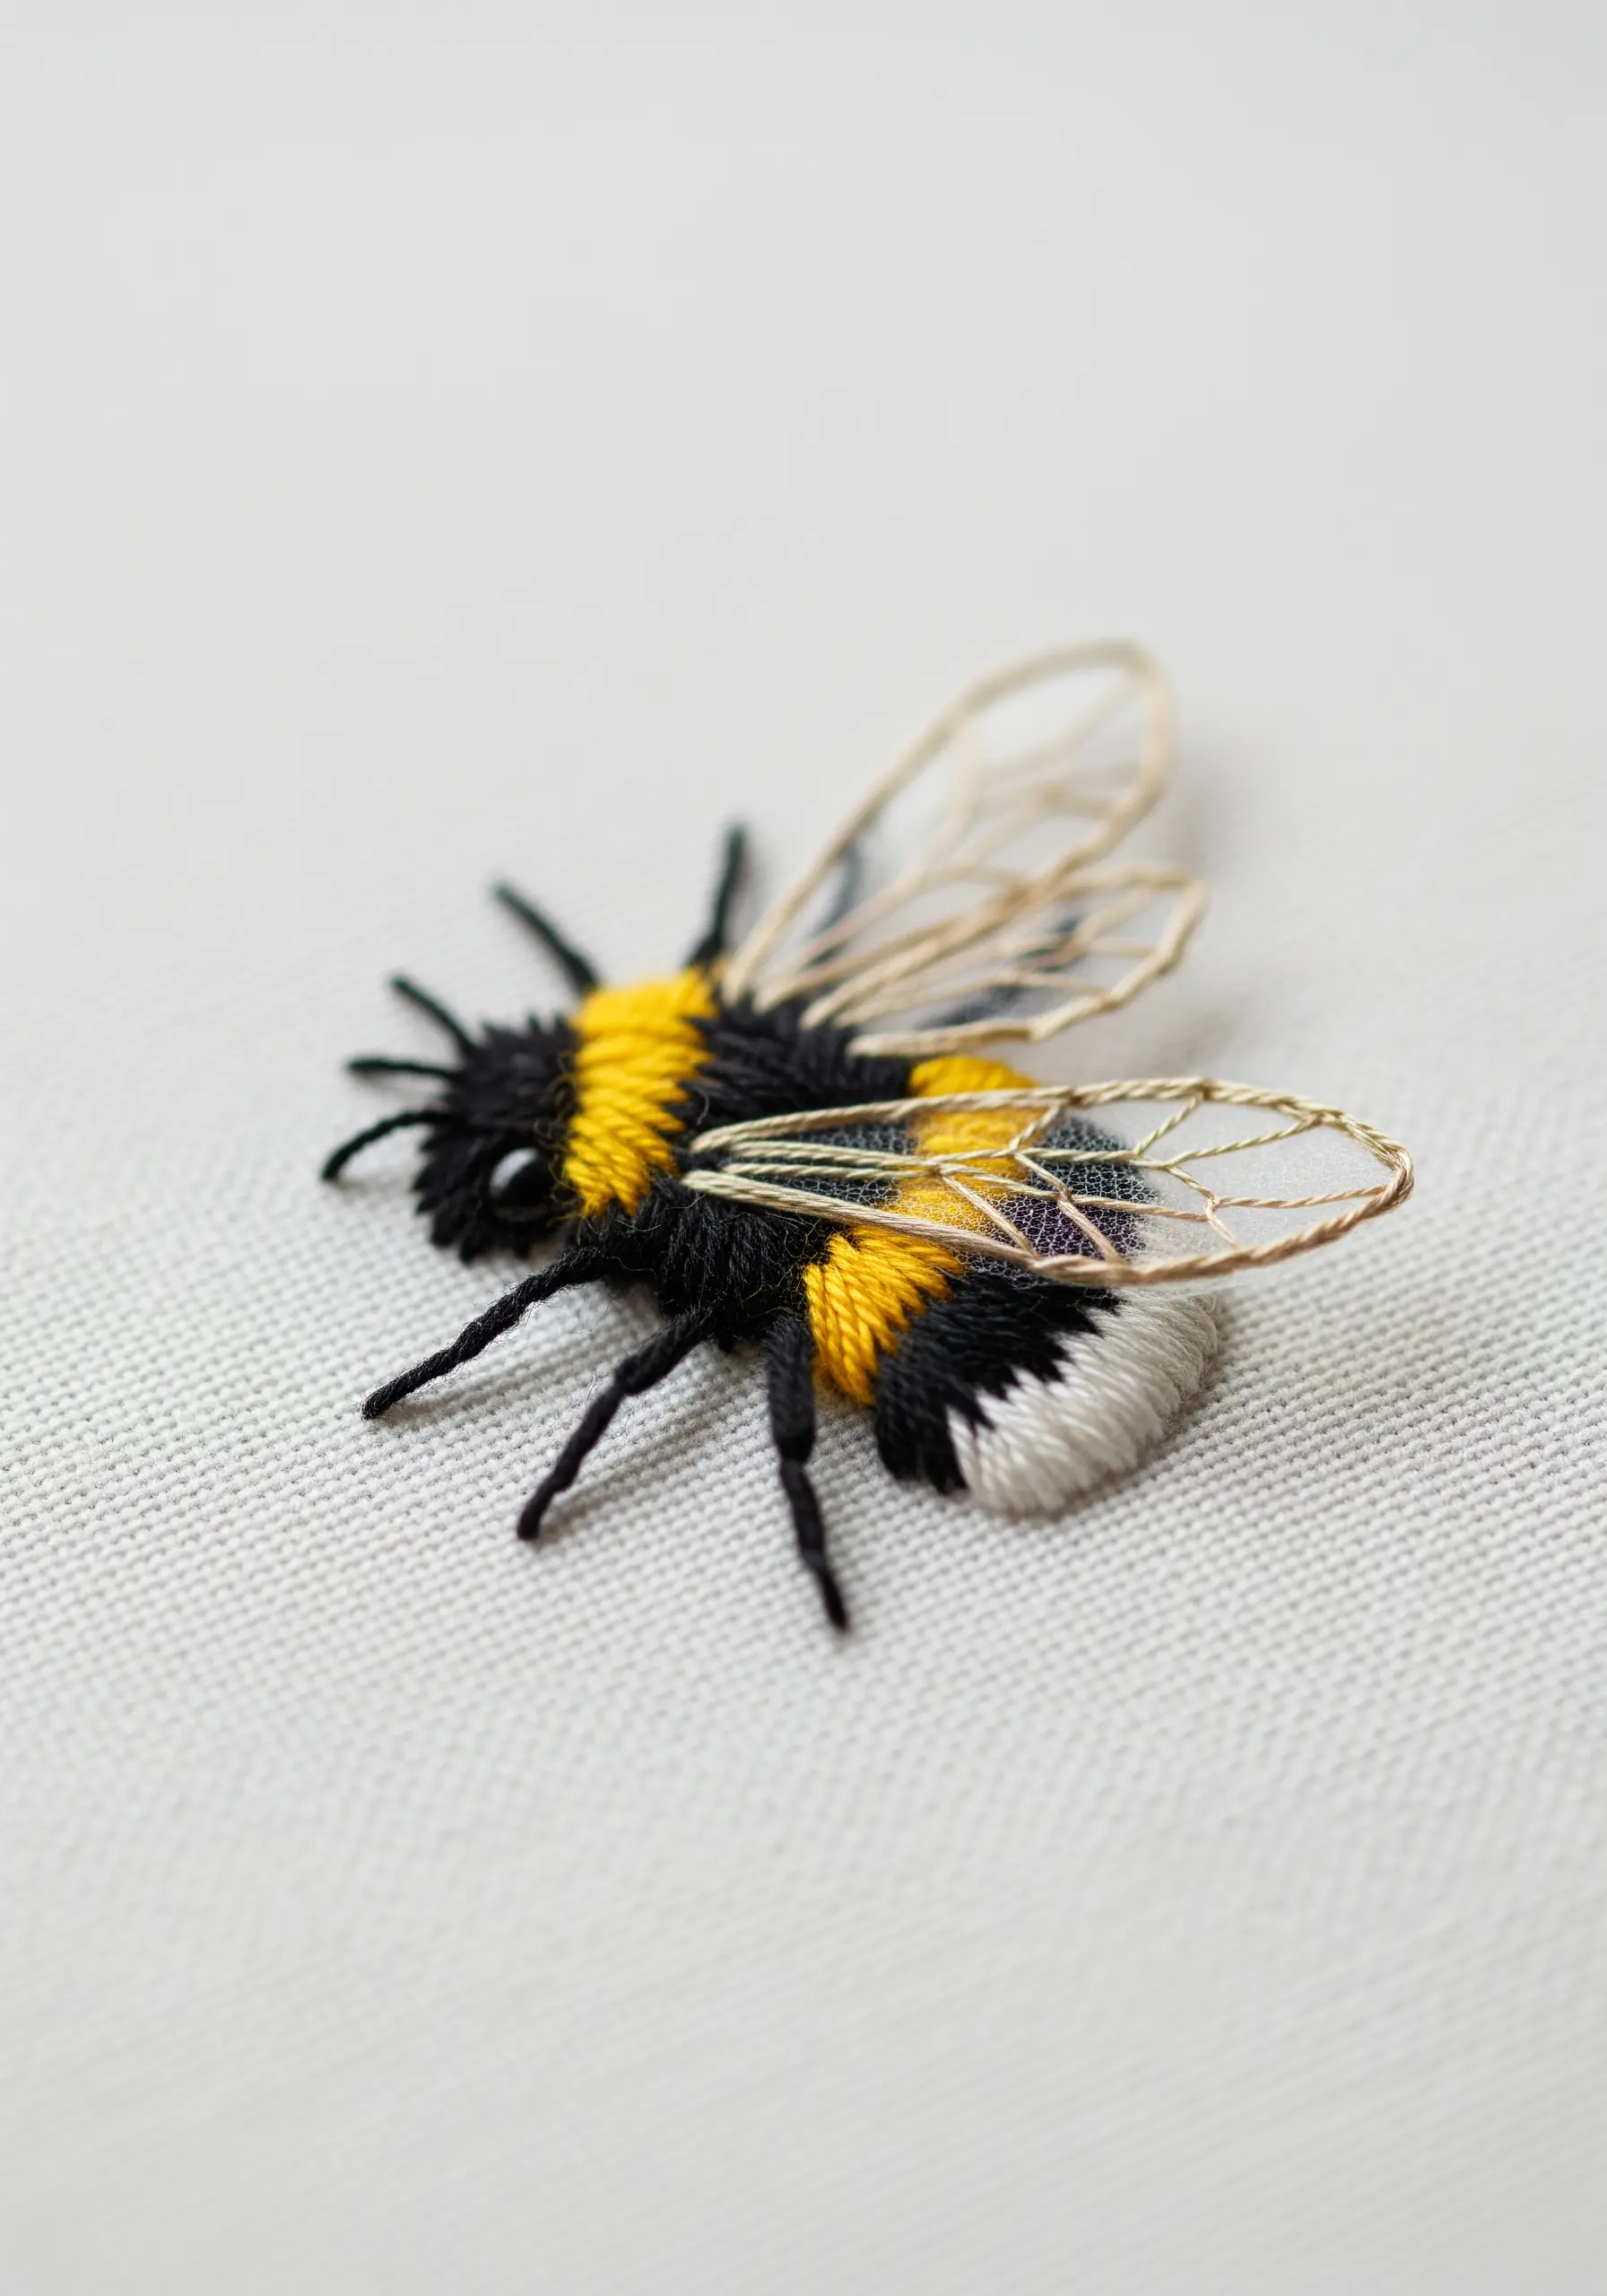
Bring your embroidery off the fabric and into the third dimension with stumpwork techniques.
For the bee’s fuzzy body, use the turkey stitch—create loops and then trim them to create a plush, velvety texture.
The wings are crafted separately on sheer organza, then cut out and carefully attached to the body.
This mixed-media approach results in a breathtakingly realistic creature.
It works wonderfully for bird & butterfly embroidery patterns, too.
15. Effortless Blending with Variegated Thread
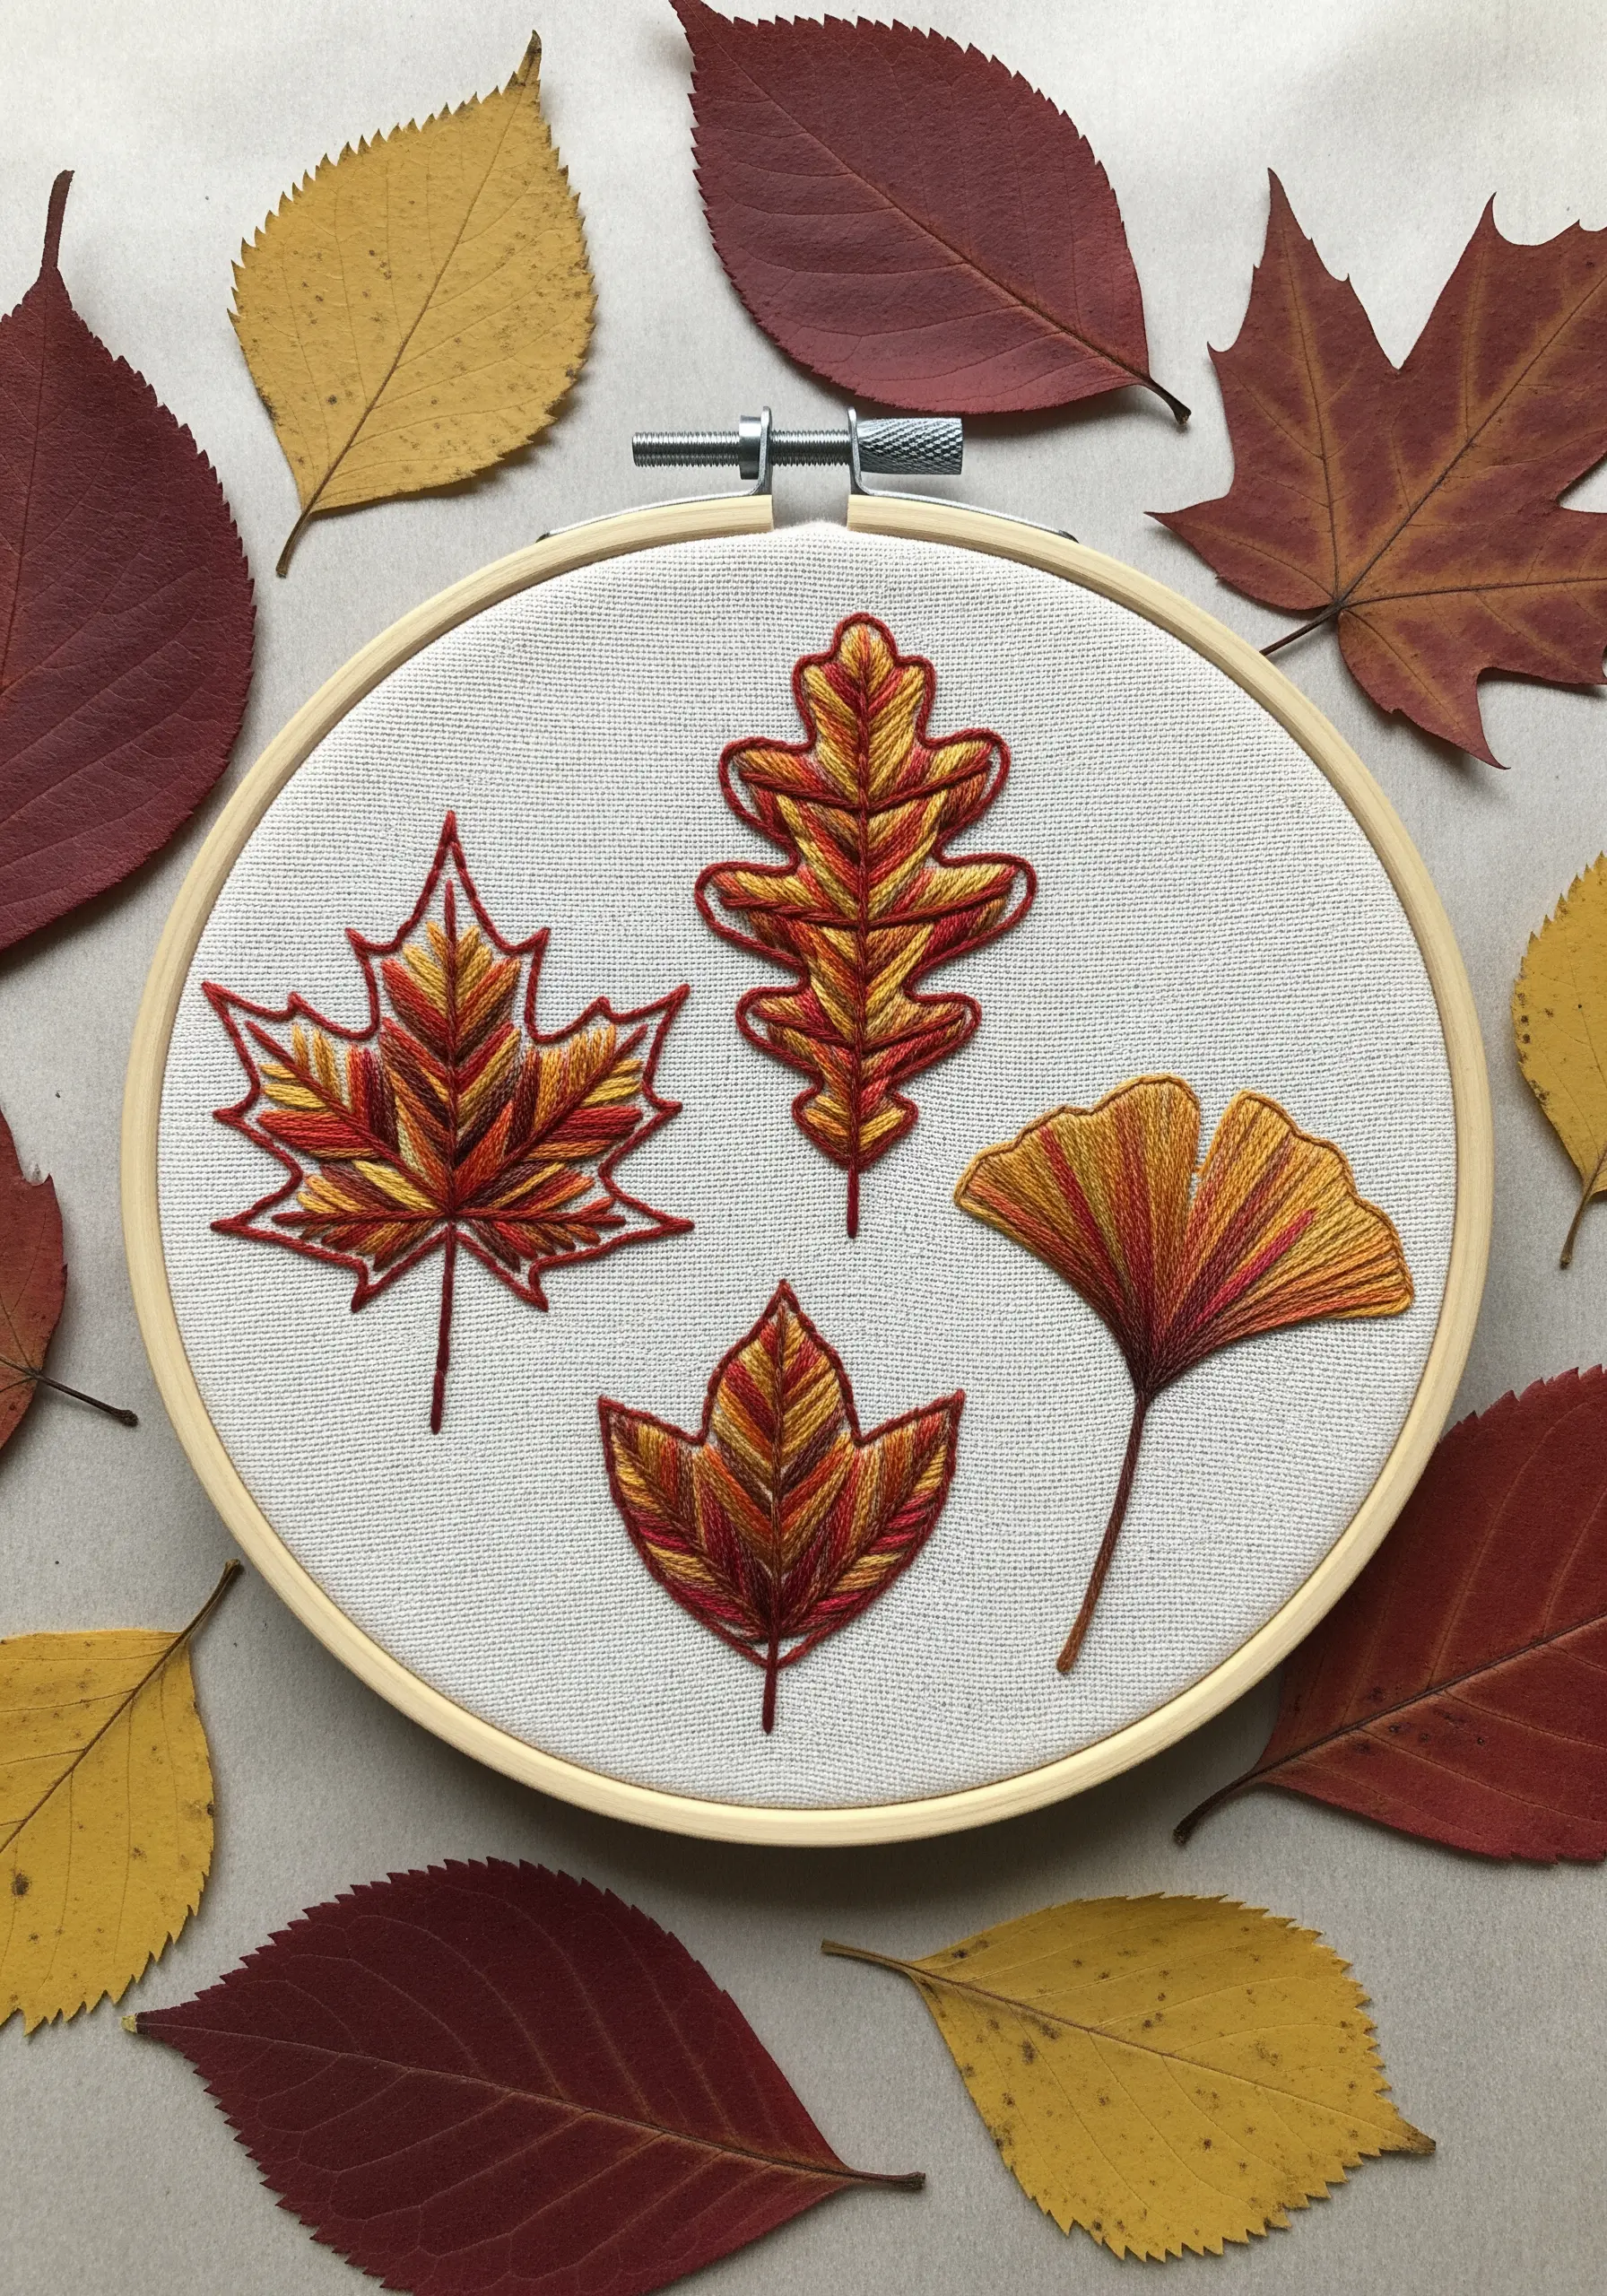
Achieve beautiful, natural-looking color gradients without changing your thread.
Select a variegated floss that contains all the colors of your desired palette—in this case, the reds, oranges, and yellows of autumn leaves.
As you work a fishbone or satin stitch, the thread will do the blending for you, creating soft transitions and a subtle, organic look.
Explore ways to layer leaf stitching to add even more depth.
16. Modern Botanicals with Open Fill Stitches
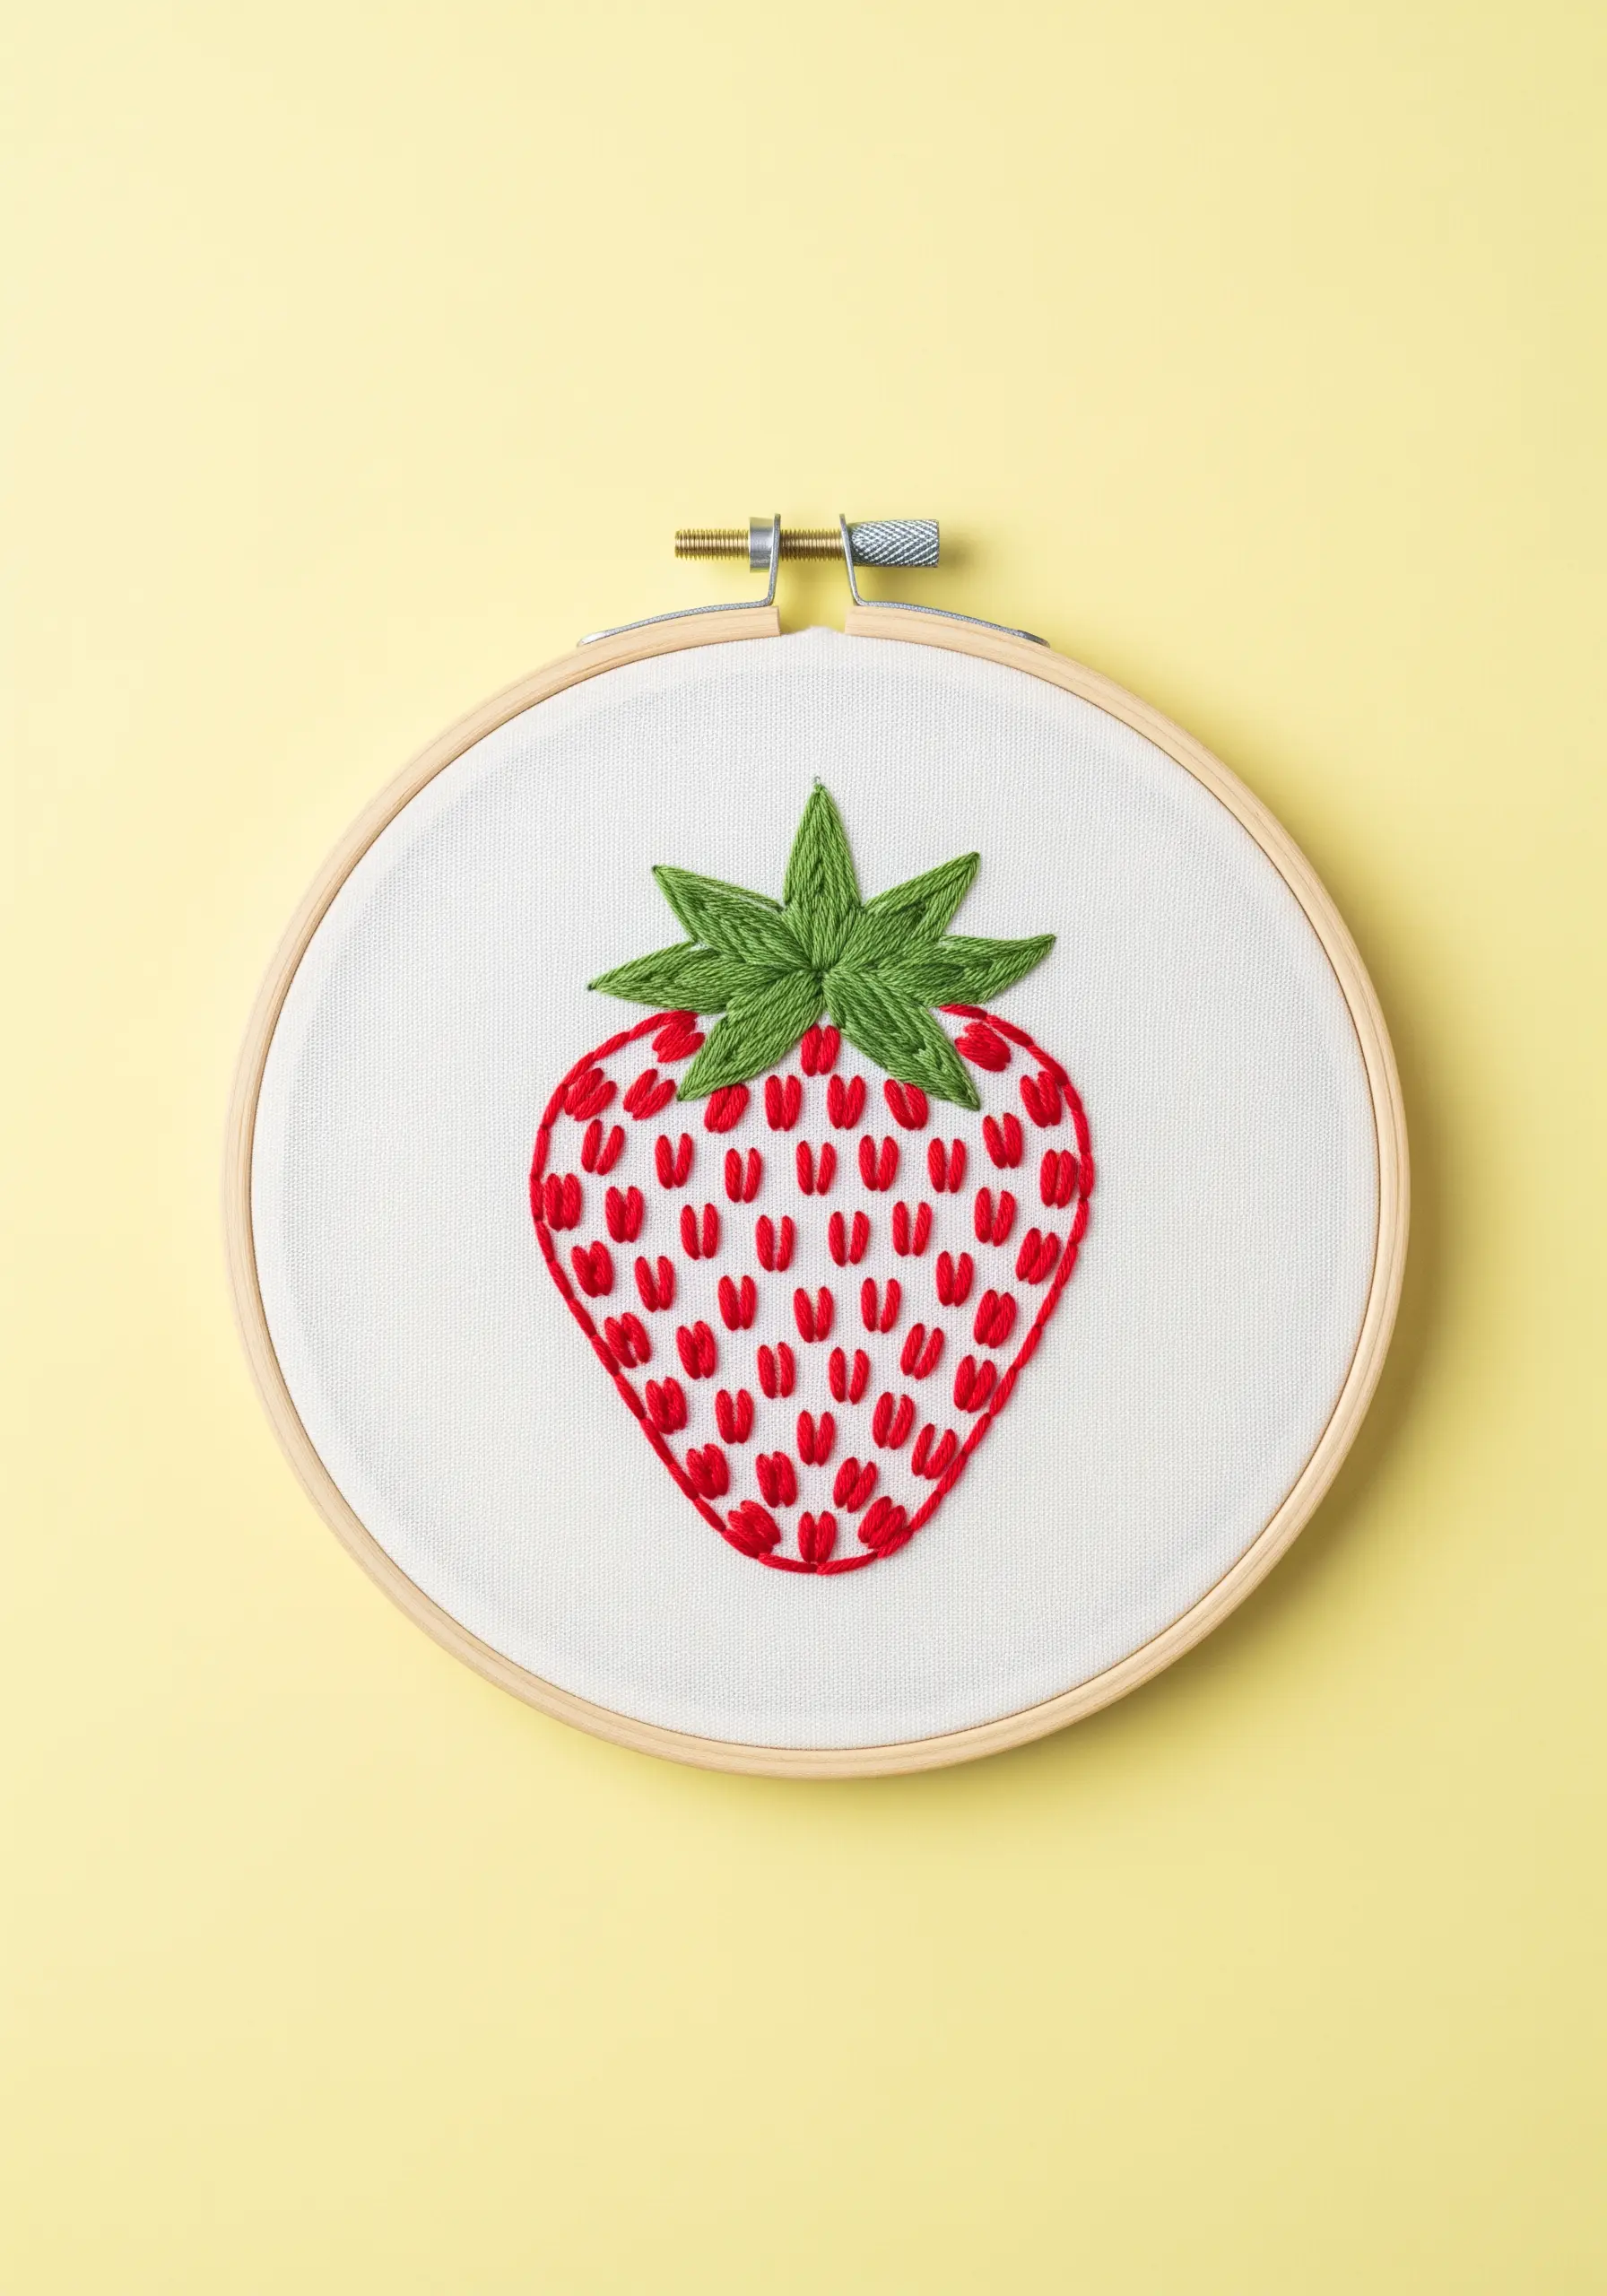
For a clean, contemporary take on a classic motif, use negative space to your advantage.
Instead of solidly filling the strawberry, outline it with a crisp backstitch and then scatter detached chain stitches across the interior.
This open fill technique suggests the texture of seeds while allowing the background fabric to breathe, resulting in a light and graphic design.
It’s a great way to approach minimal fruit botanical embroidery patterns.
17. Exploring Woven Textures with Drawn Thread Work
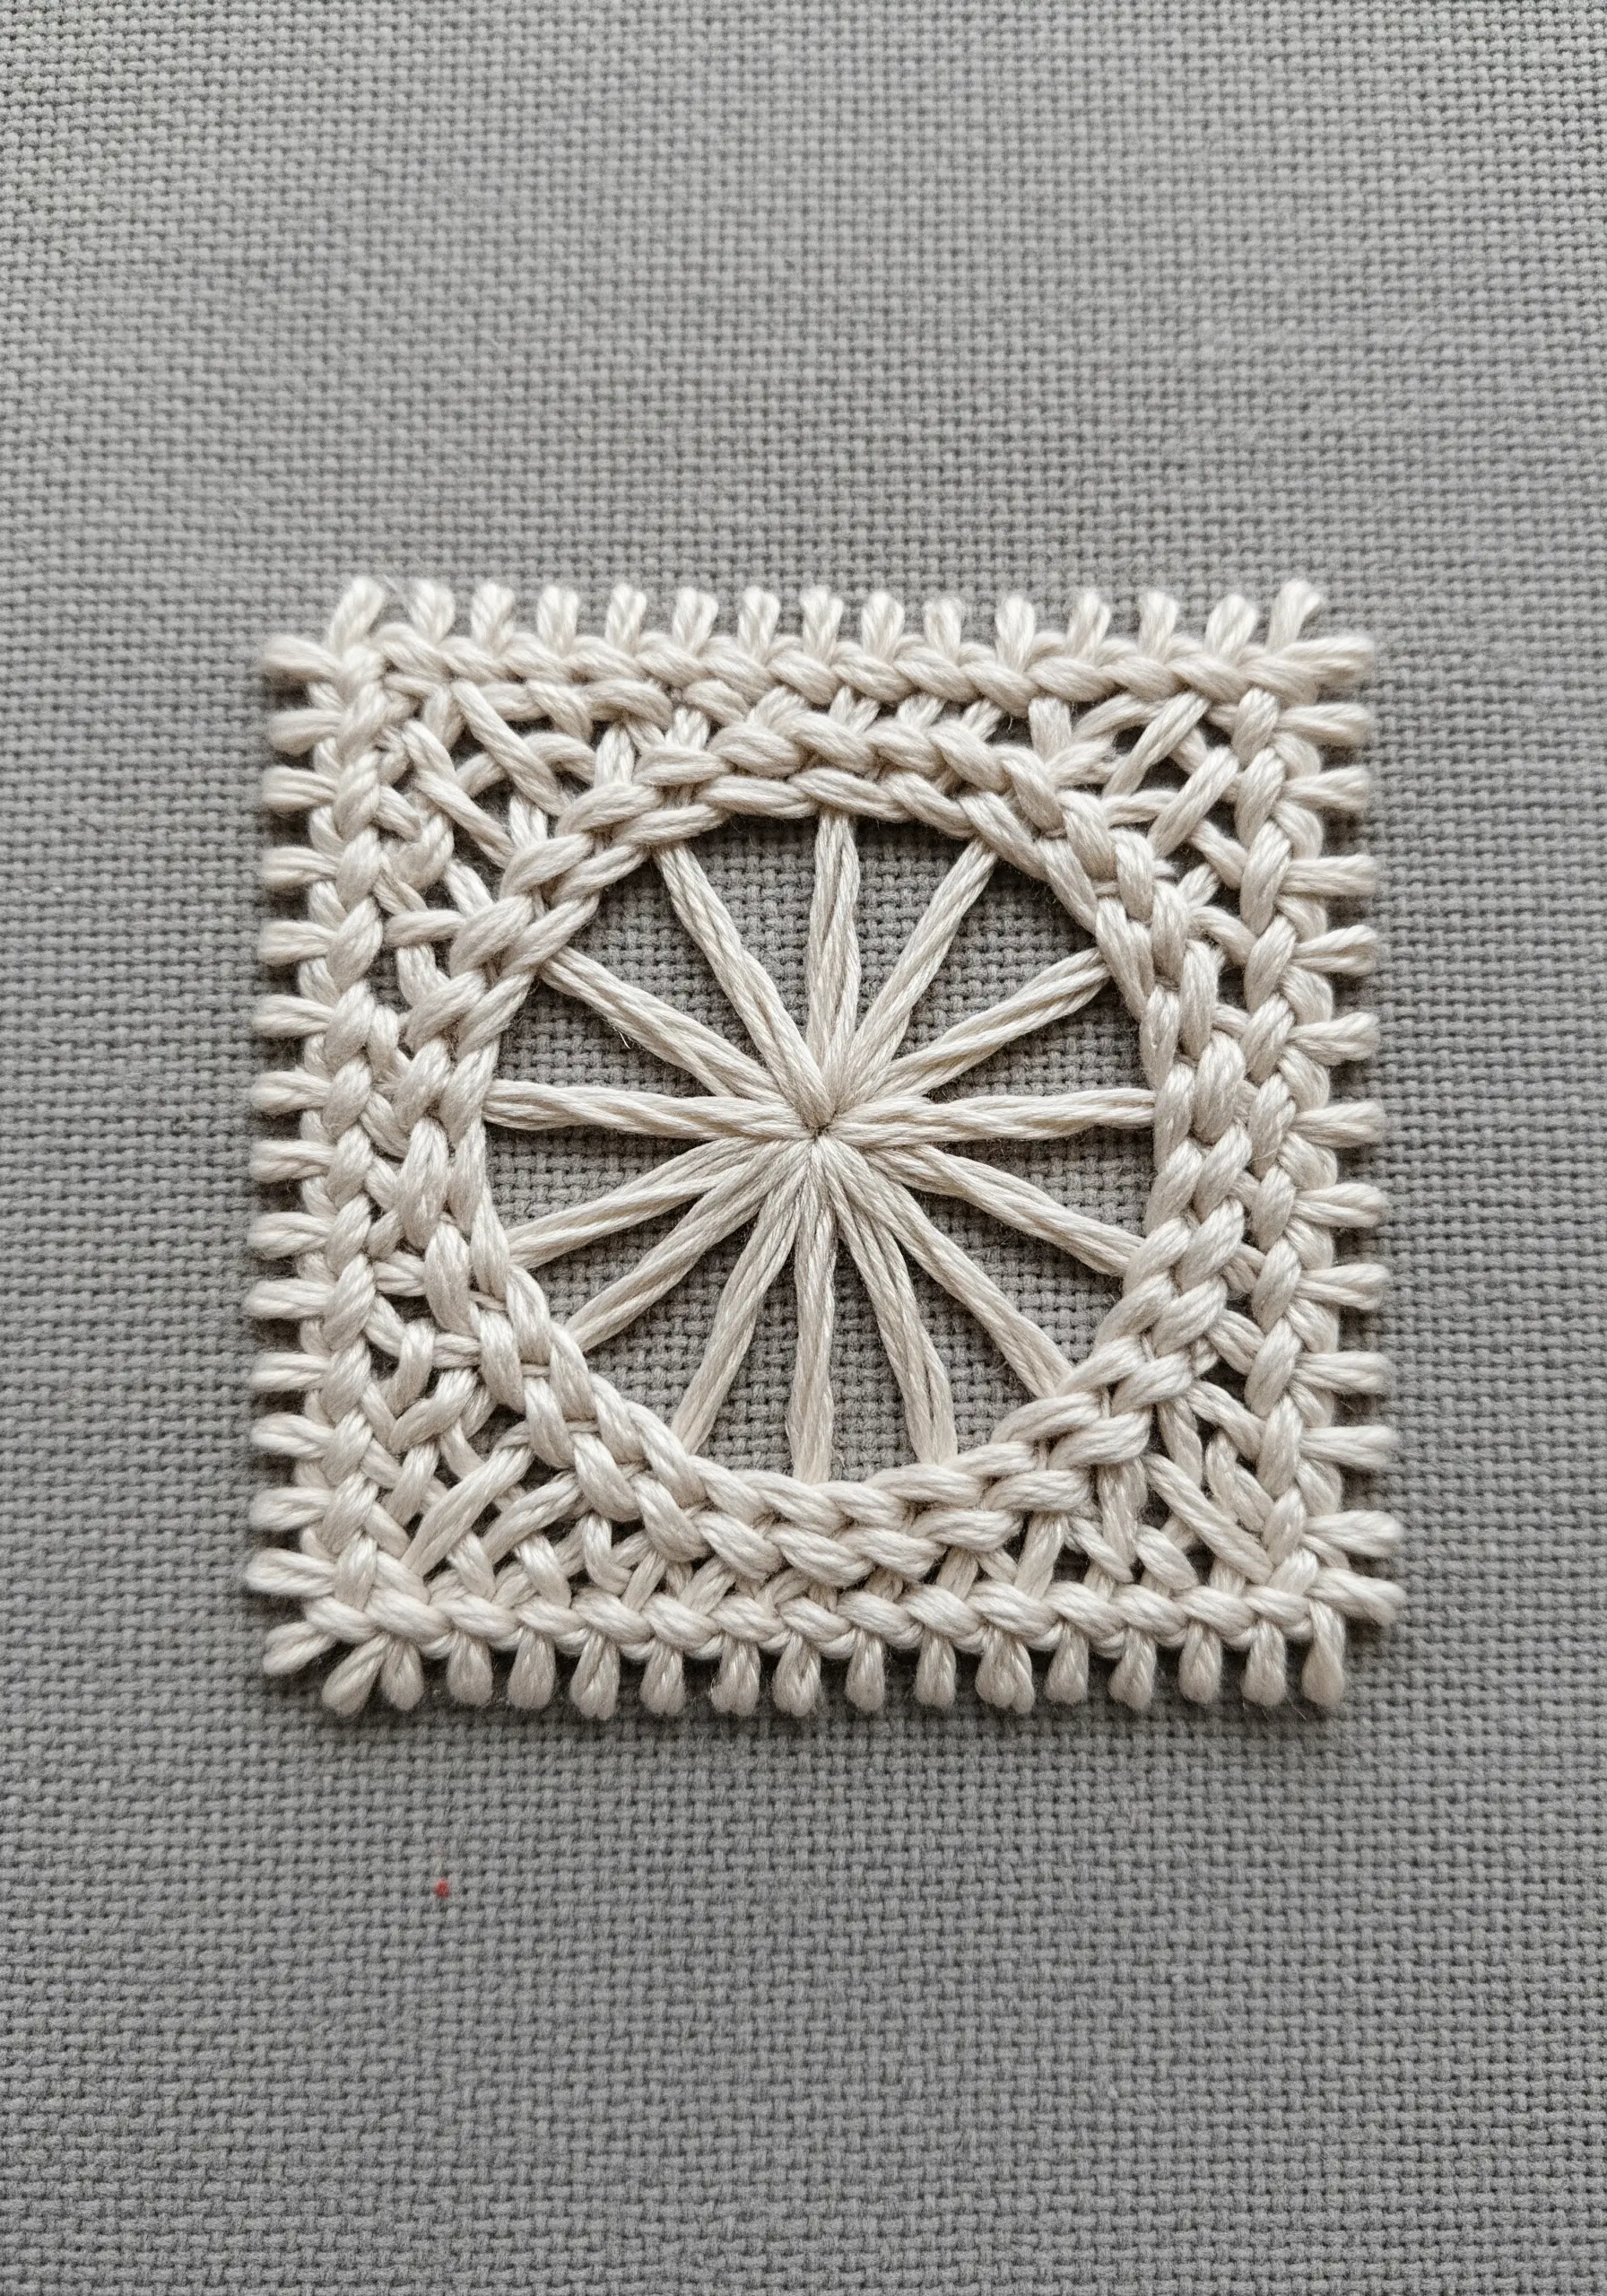
Create intricate, lace-like patterns by experimenting with drawn thread embroidery.
This technique involves carefully pulling out some of the fabric’s warp or weft threads and then using stitches to bunch the remaining threads together in decorative ways.
It creates a beautiful interplay between solid and open space, perfect for elegant borders or standalone geometric samplers.
This is one of many contemporary texture techniques to explore.
18. Dimensional Constellations with Raised Stars
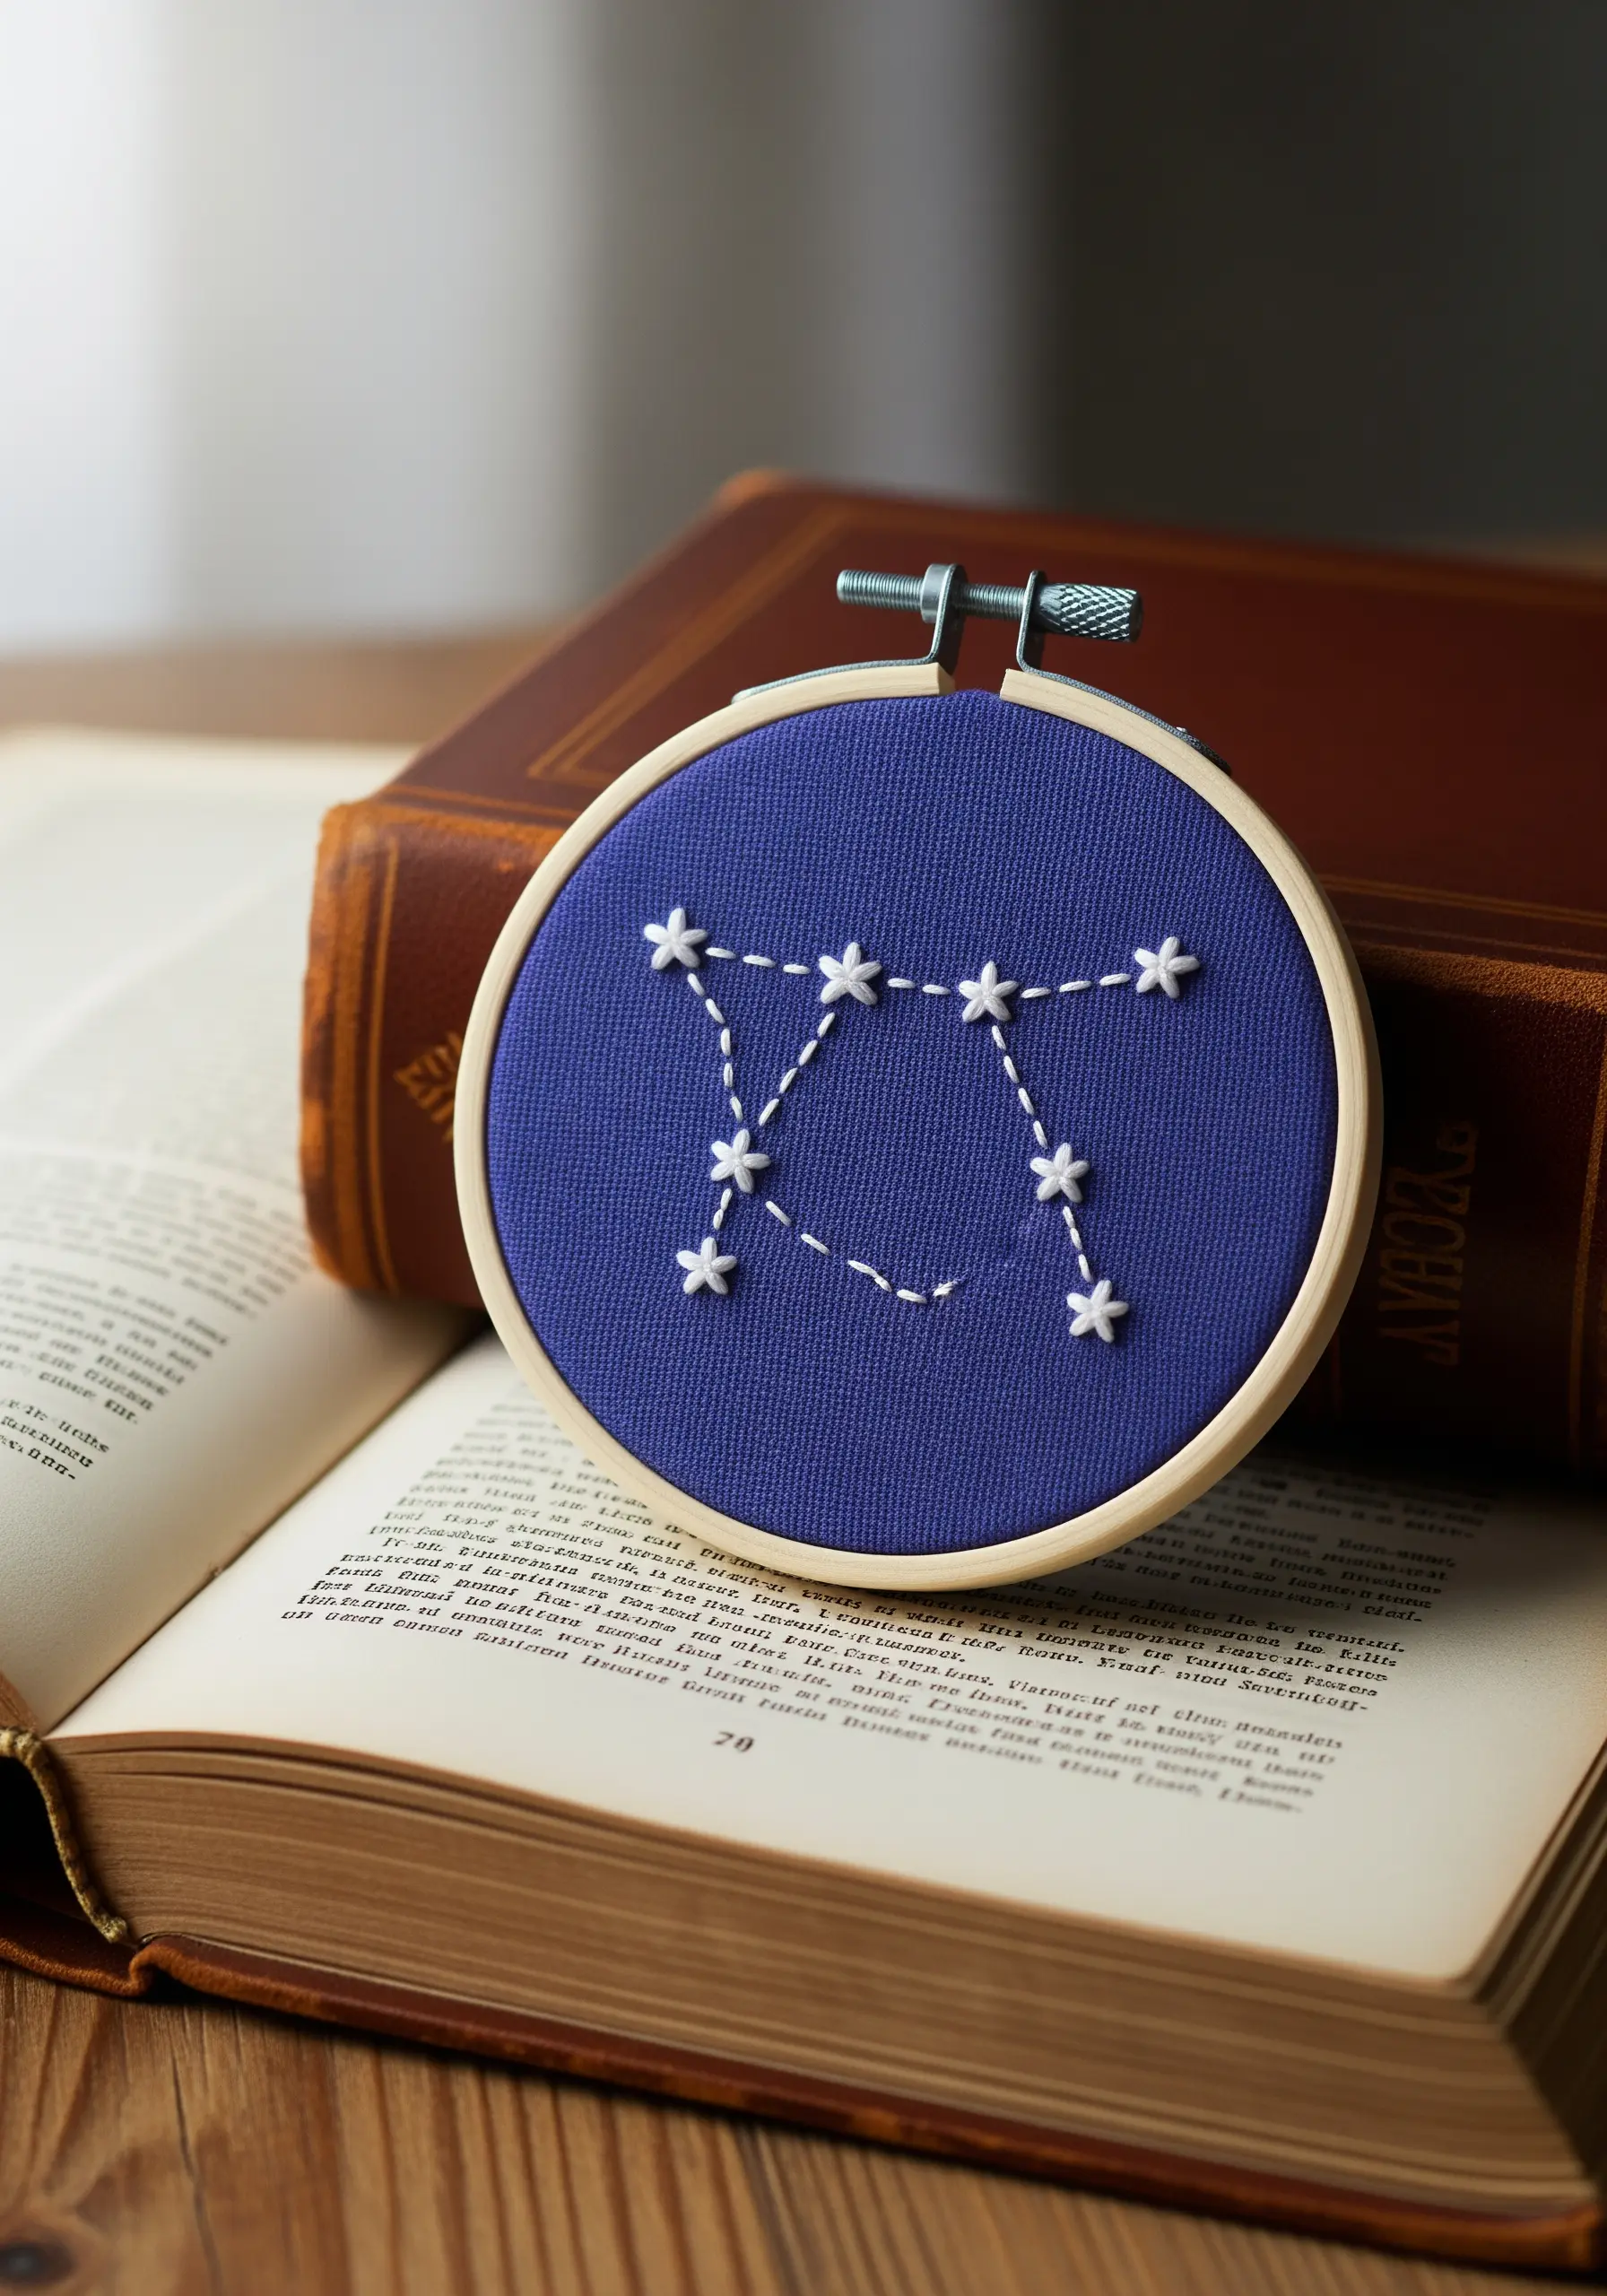
Give your embroidered constellations a celestial pop by using a padded satin stitch for the stars.
First, create a small, raised base for each star using a few tiny straight stitches or a cluster of French knots.
Then, cover this padding with satin stitches radiating from the center.
This simple preparation lifts the stars off the fabric, creating a beautiful 3D effect that catches the light.
This is perfect for tote bag embroidery ideas featuring zodiac signs.
19. Define Shapes Using Negative Space
Create a powerful design by stitching the background instead of the subject.
Lightly trace your desired shape—like this dove—onto the fabric.
Then, meticulously fill the entire area around it with densely packed French knots.
This technique, known as voiding, creates a striking silhouette where the empty fabric becomes the focal point.
You can combine thread and negative space to achieve luxury results.
20. The Modern Rainbow with Texture and Tone
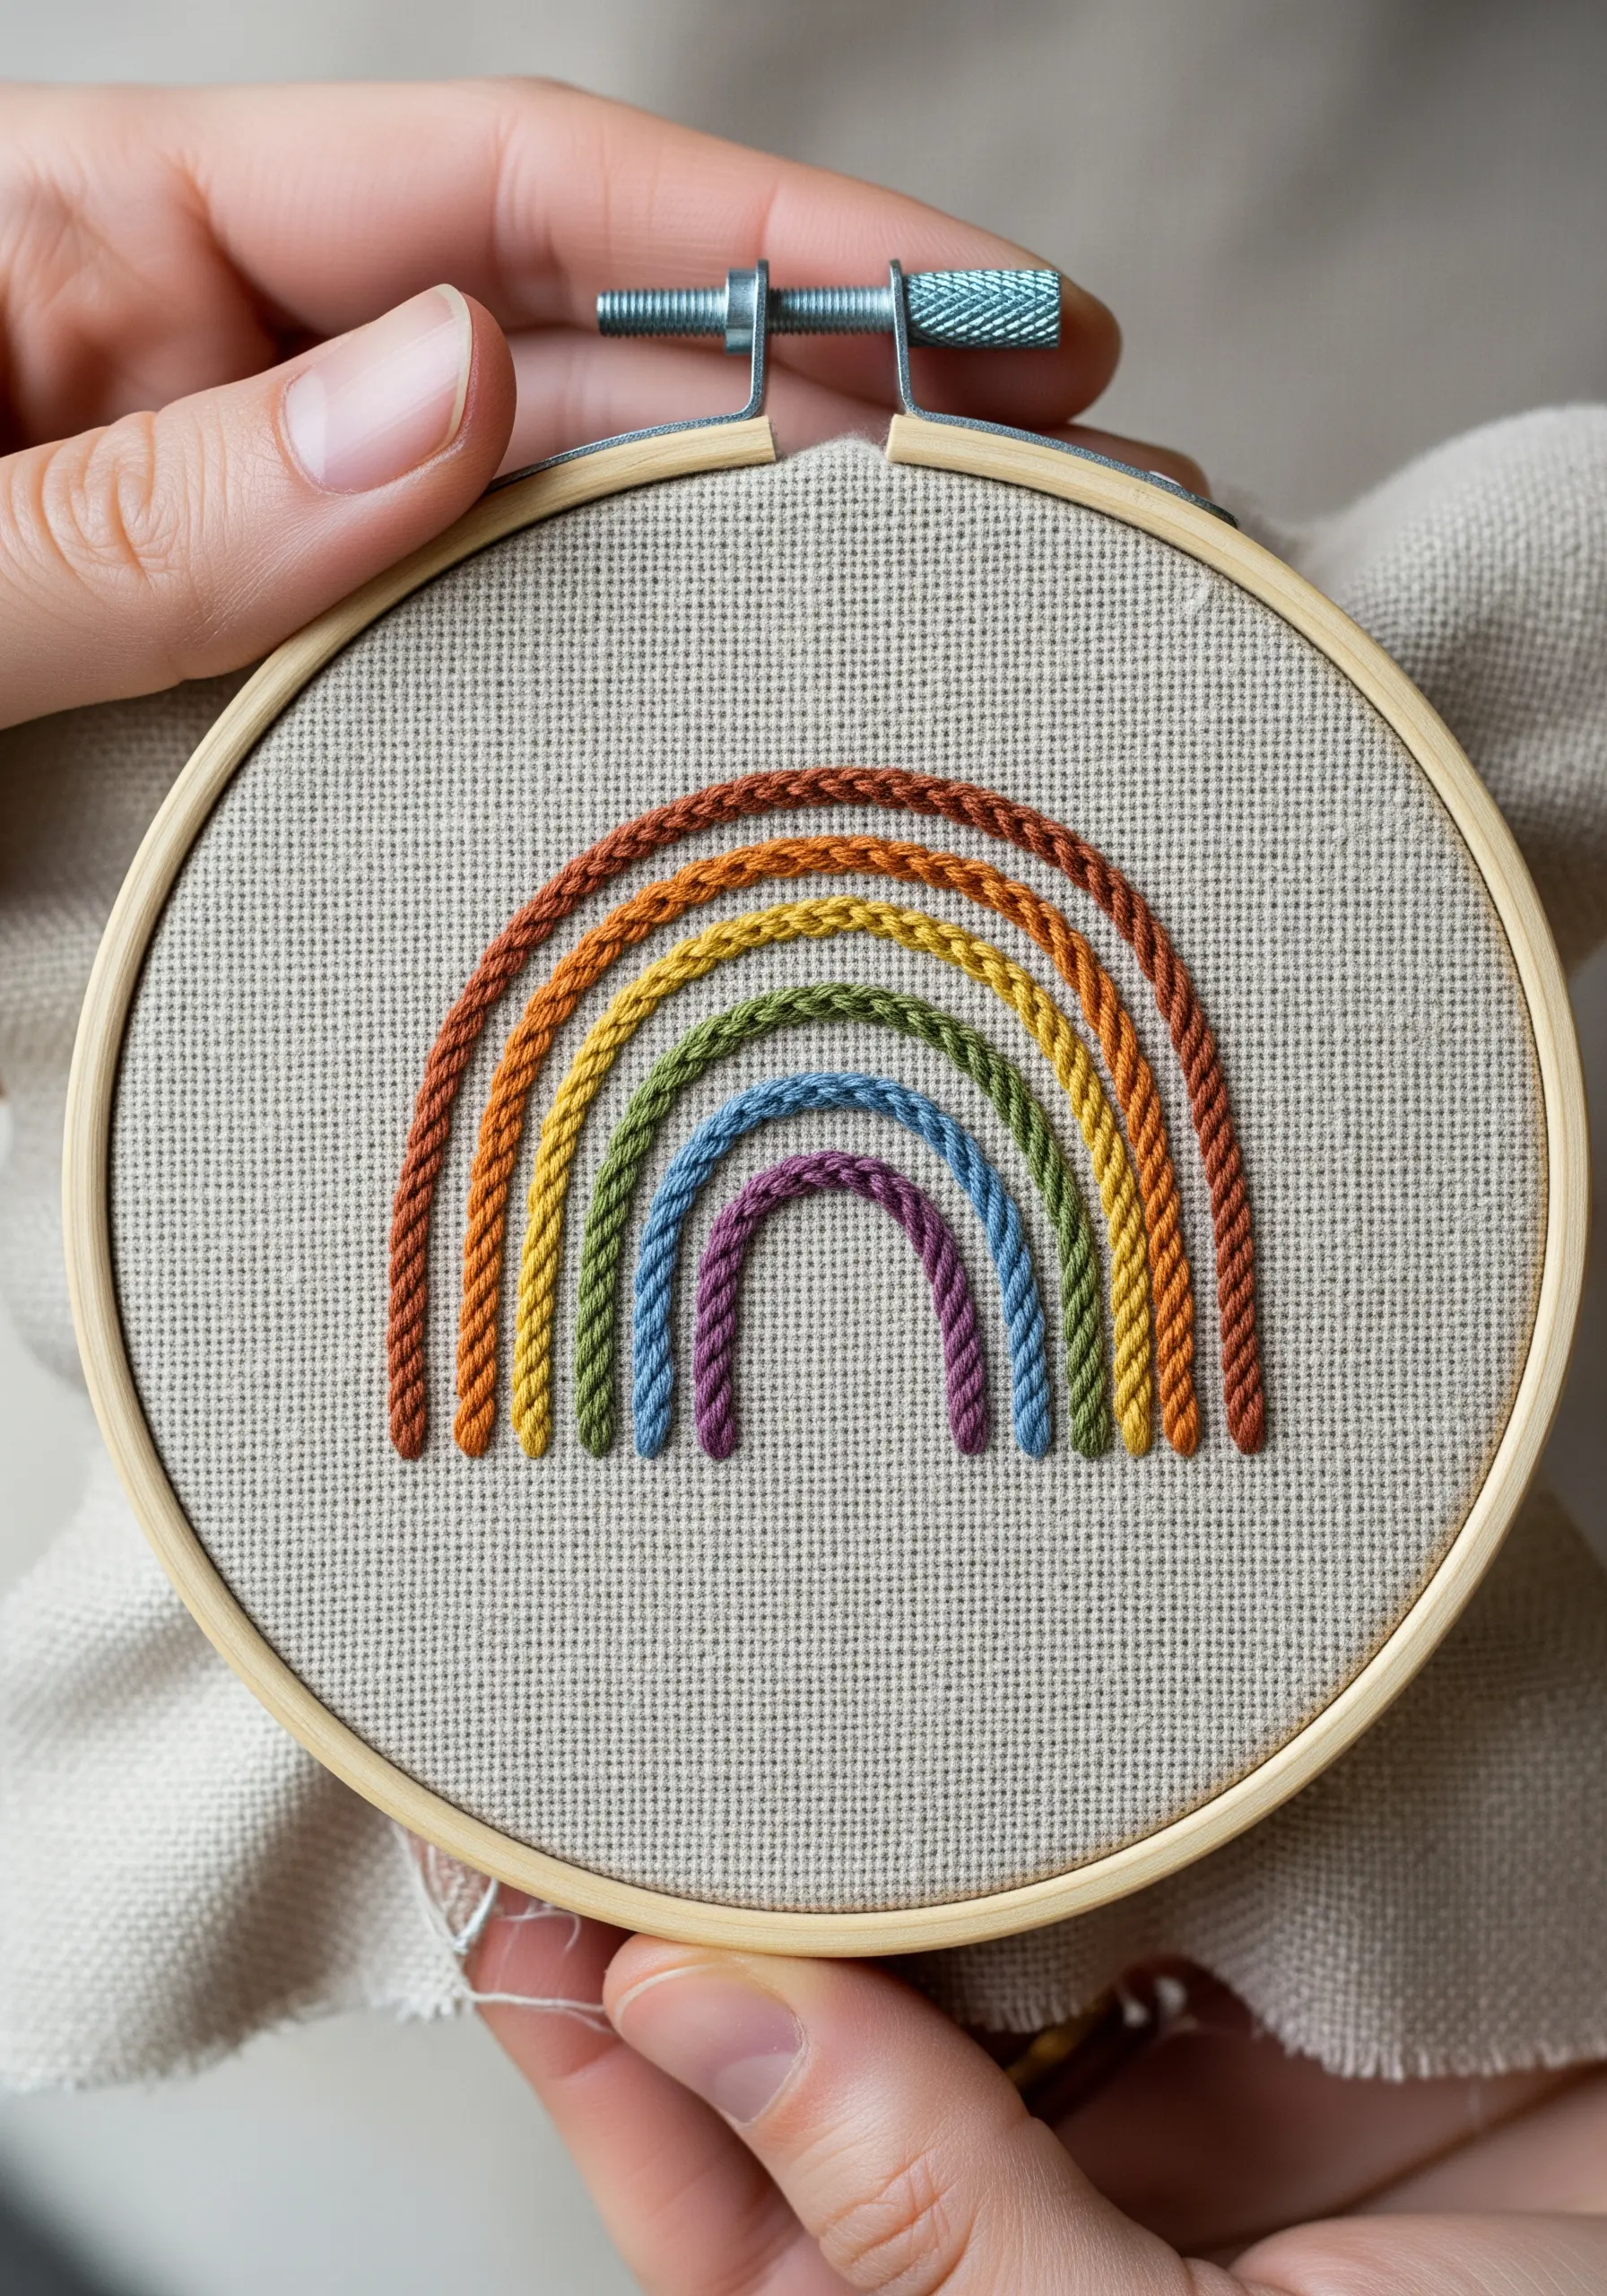
Reinvent the classic rainbow by focusing on sophisticated texture and color.
Instead of simple satin stitch, use a whipped backstitch or a heavy chain stitch to give each arc a raised, rope-like quality.
Swap out bright primary colors for a muted, earthy palette.
This instantly elevates the motif from playful to polished, creating a piece that fits beautifully into contemporary decor, especially among other neutral-toned embroidery projects.
21. Graphic Mountainscapes with Line and Fill
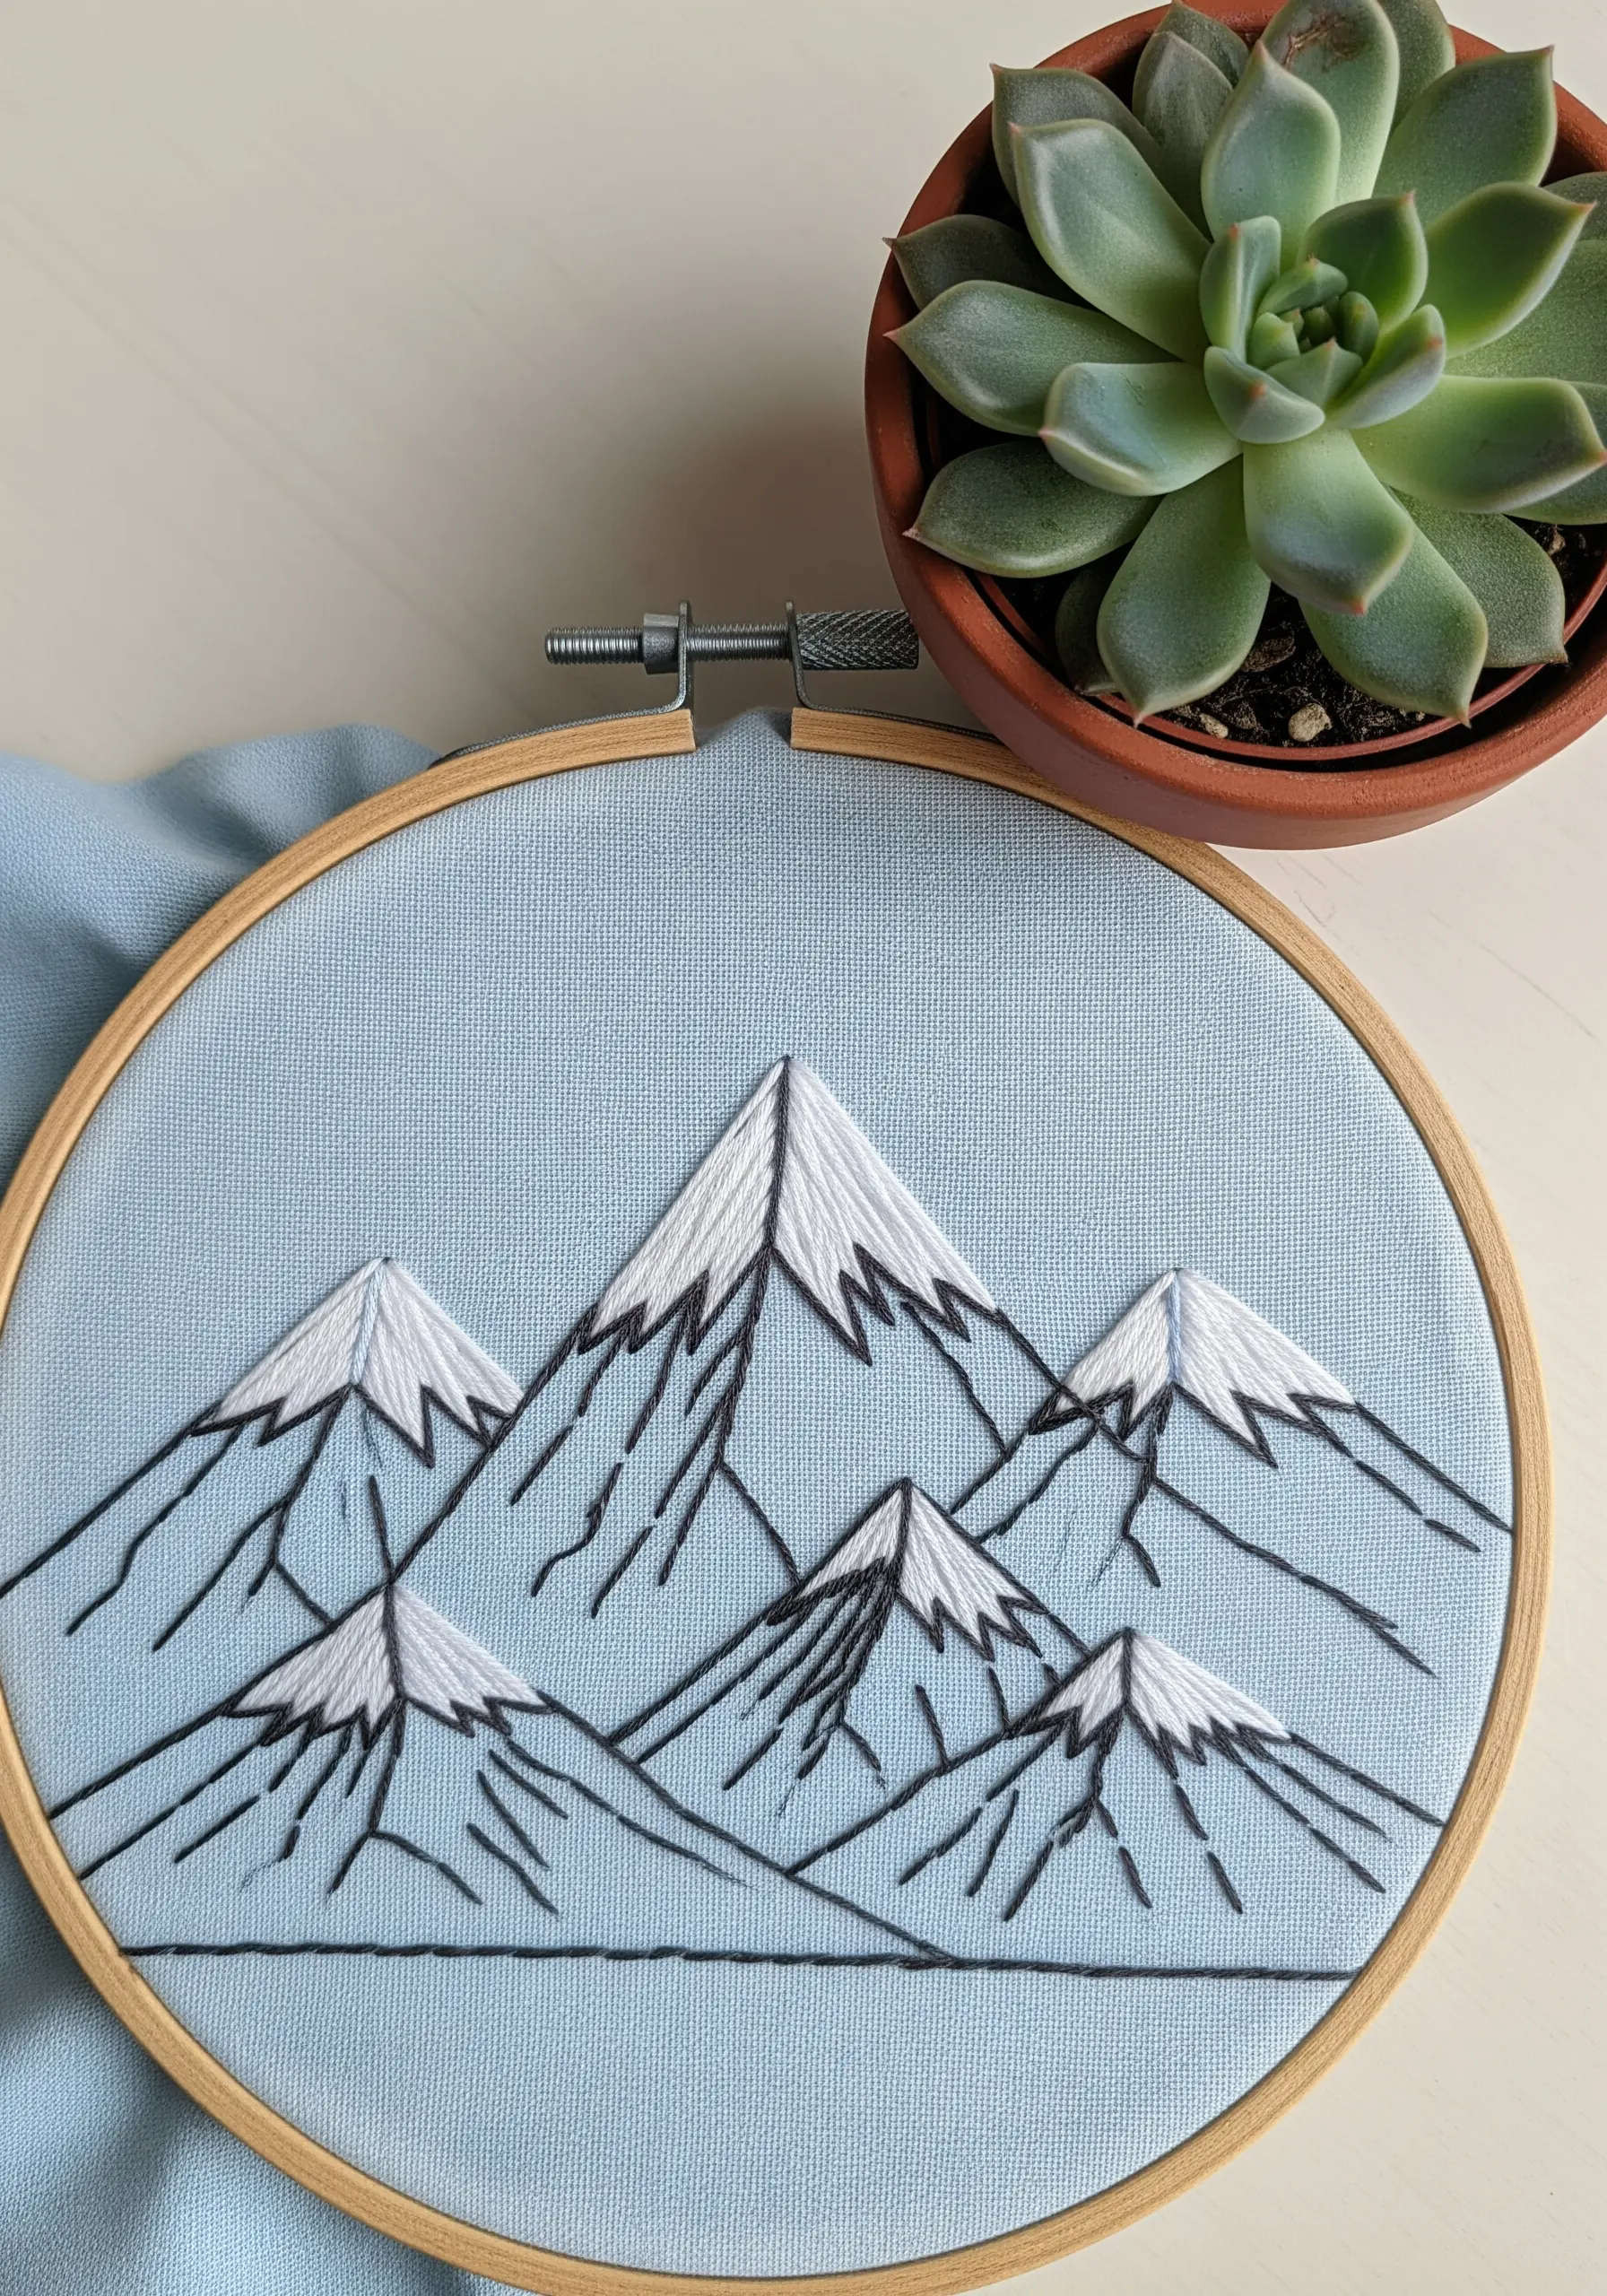
Capture the crispness of a mountain range by combining sharp line work with solid blocks of fill.
Use a clean backstitch or stem stitch in black for the angular outlines of the peaks.
For the snow caps, fill the shapes with a dense, angled satin stitch in white.
This high-contrast, graphic approach creates a bold and modern interpretation of a classic natural scene, a perfect example of minimalist line art nature embroidery.
22. The High-Texture Floral Medallion

Create a stunning floral piece that is a feast for the fingers as well as the eyes.
Combine a variety of highly textural stitches in a single composition.
Use woven wheel stitches or bullion knots for the central blossoms, fishbone stitch for the leaves, and clusters of French knots for accent berries.
This layering of textures creates incredible richness and depth, making the design feel lush and abundant.
Try these 3D floral embroidery techniques on pillows.
23. Realistic Shading with Thread Painting
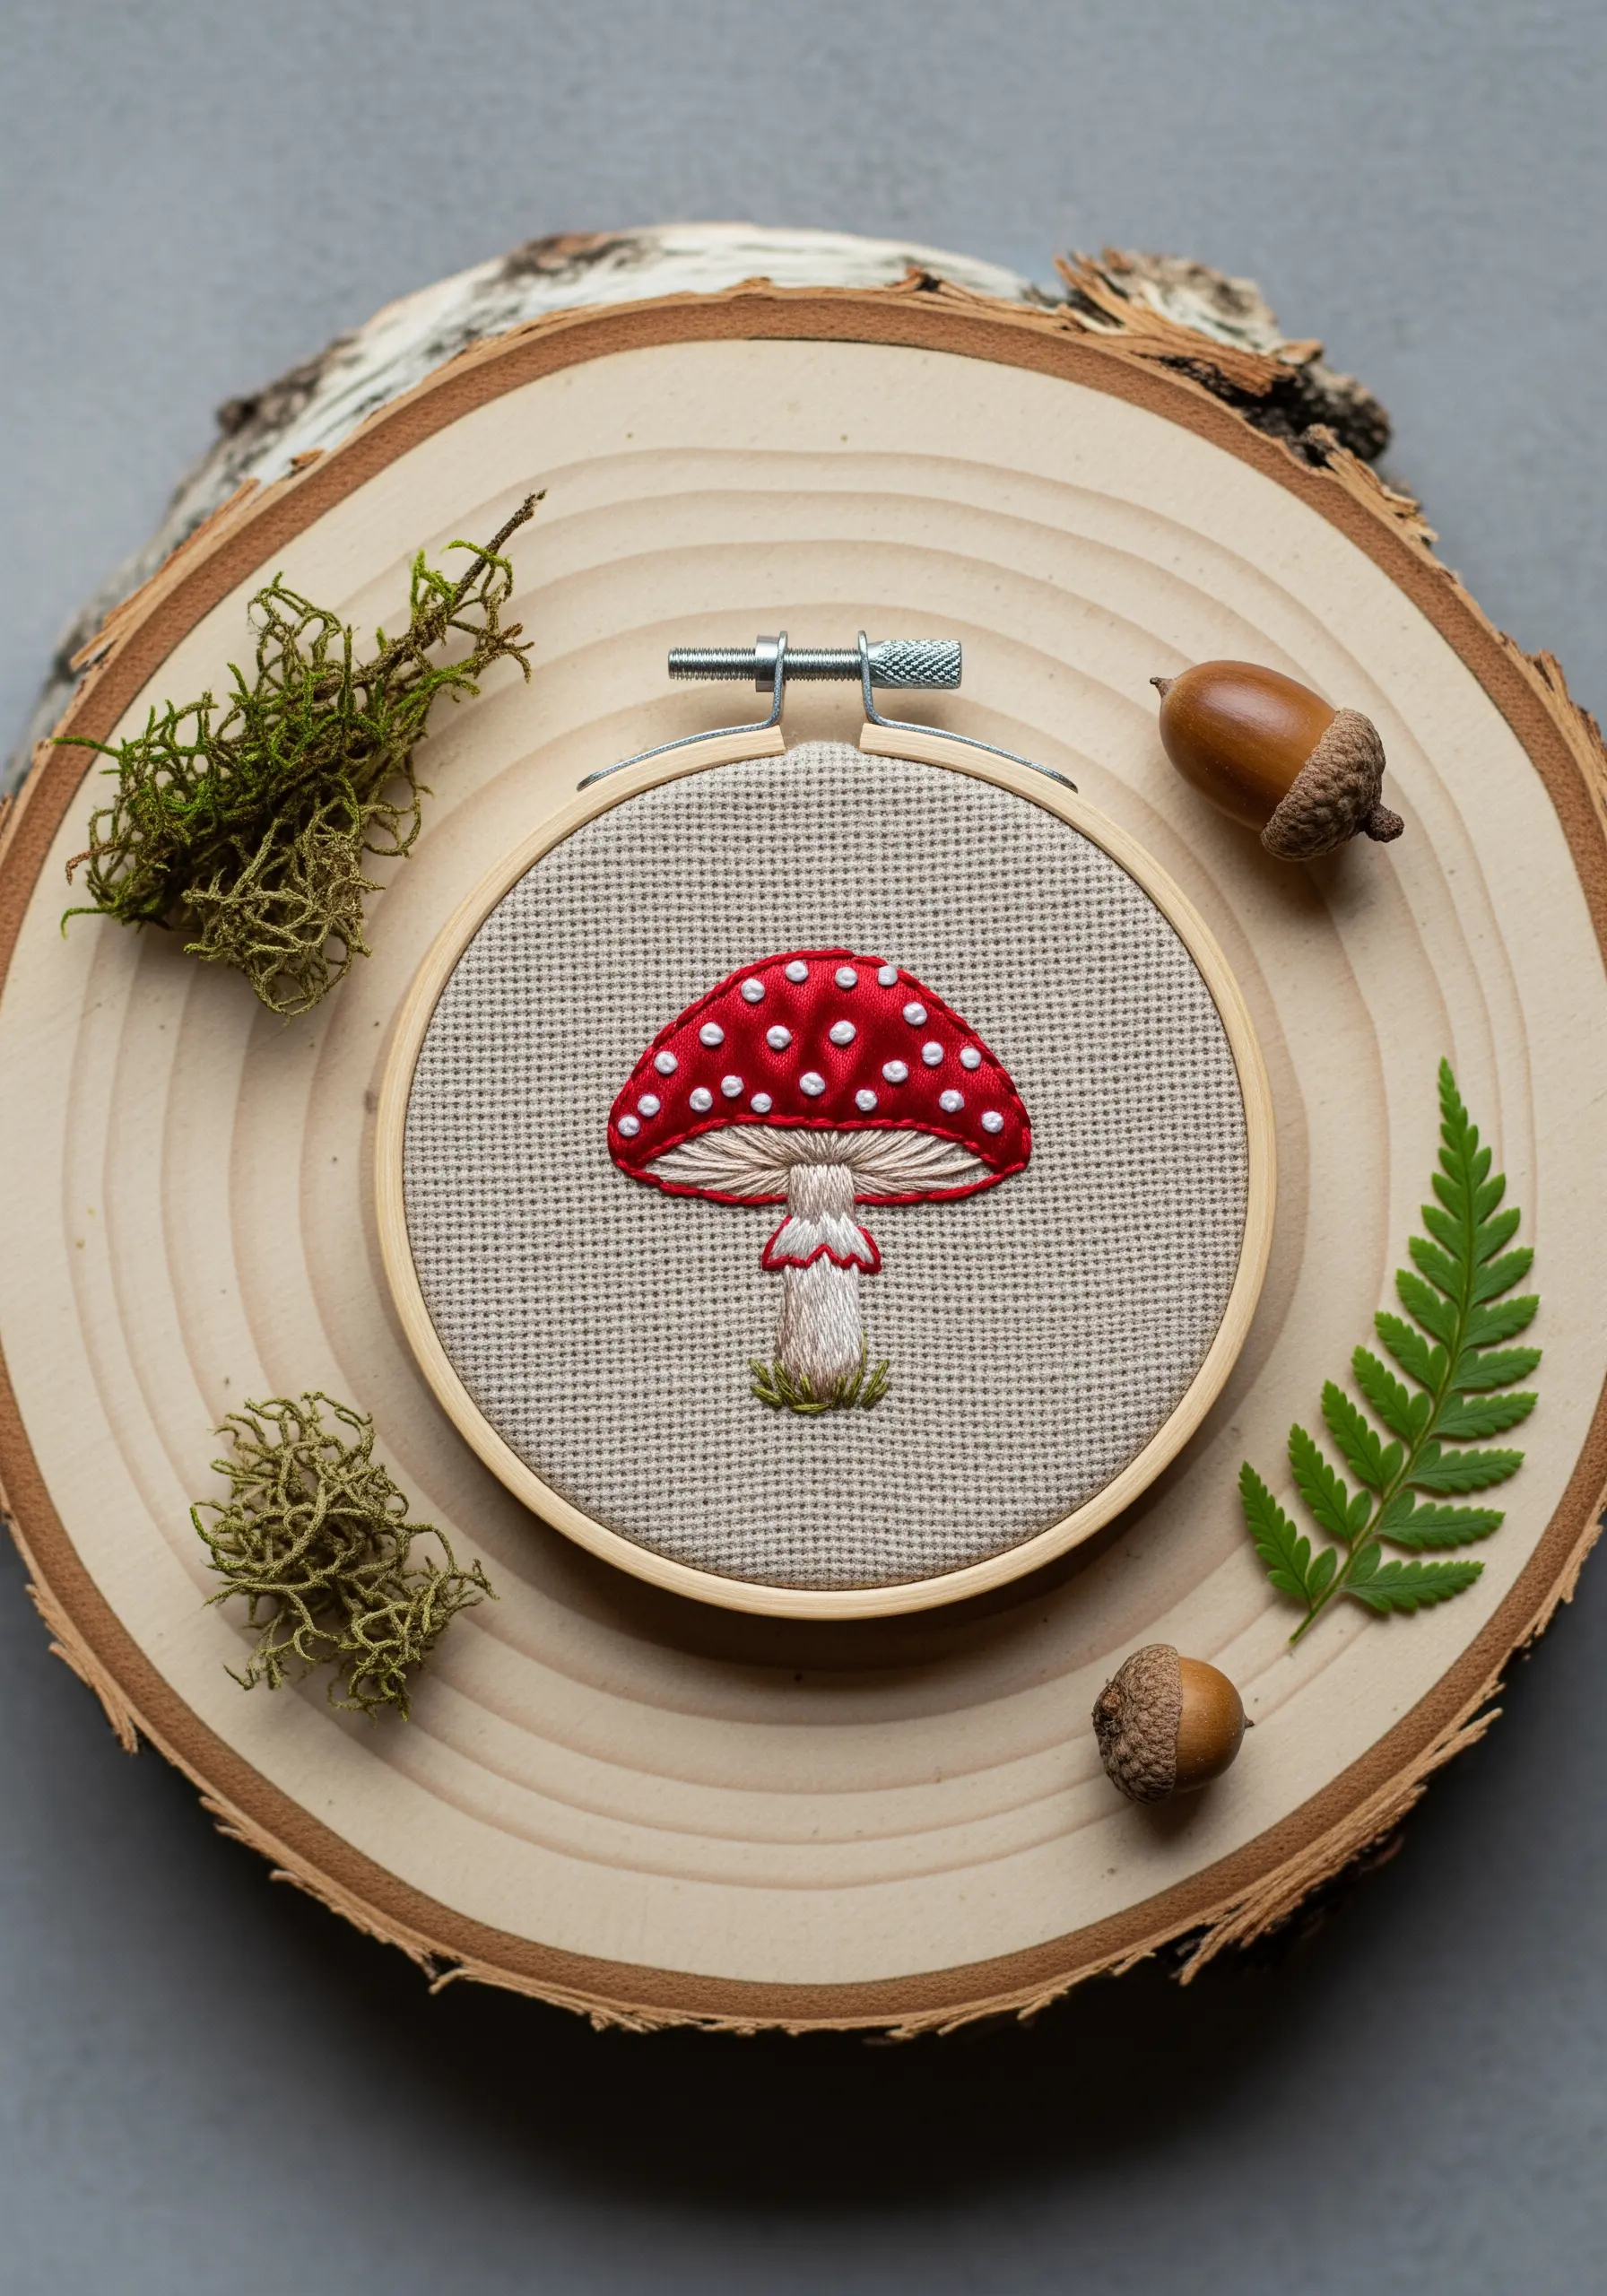
Achieve a soft, painterly effect using the long-and-short stitch.
To create the subtle gradient on the mushroom cap, work in rows of staggered stitches, slightly overlapping different shades of thread.
This technique, also known as needle painting, allows for seamless color blending and gives your work a beautiful, realistic quality.
It’s perfect for capturing the details of forest floor botanical stitch ideas.
24. A Modern Sampler of Straight Stitches
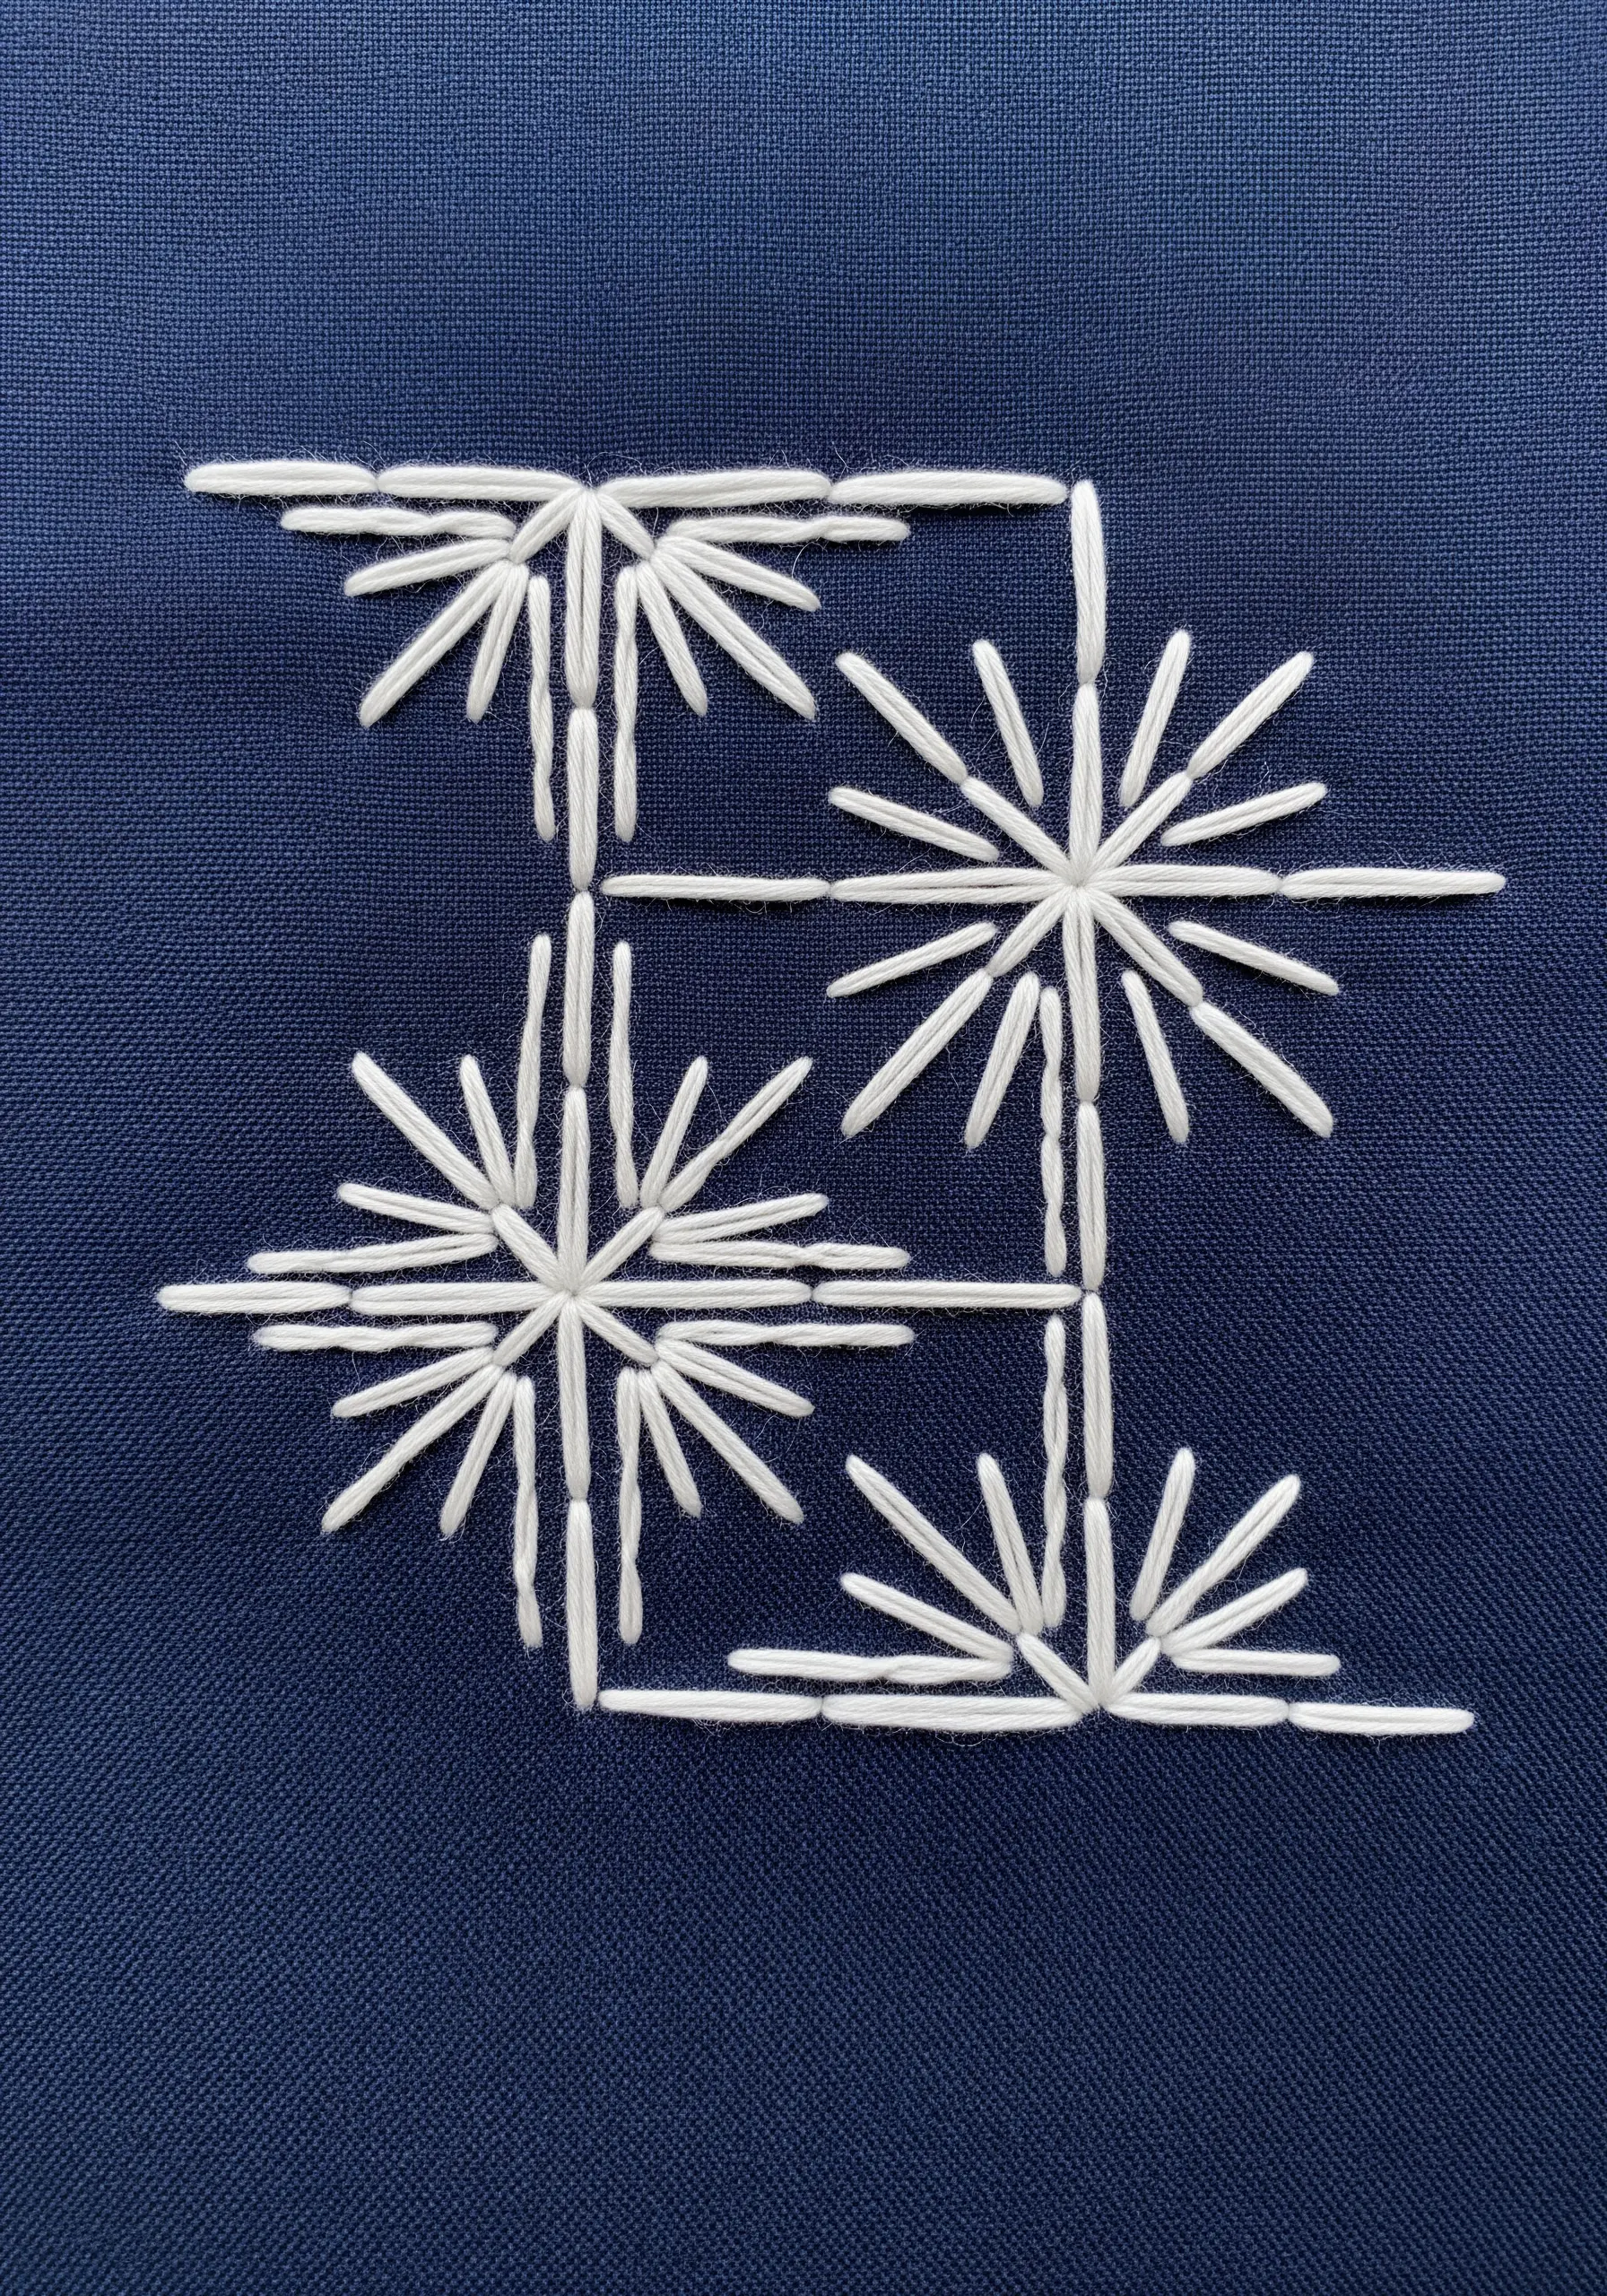
You can create a surprisingly dynamic and modern design using only the most basic stitch.
This piece is composed entirely of straight stitches, strategically grouped and angled to form geometric starbursts.
The key to success is precision in your stitch placement and tension.
Using a high-contrast palette, like white thread on navy fabric, emphasizes the clean, graphic nature of the patterns.
These are great for geometric framed embroidery patterns.
25. Abstract Depth with Interwoven Lines
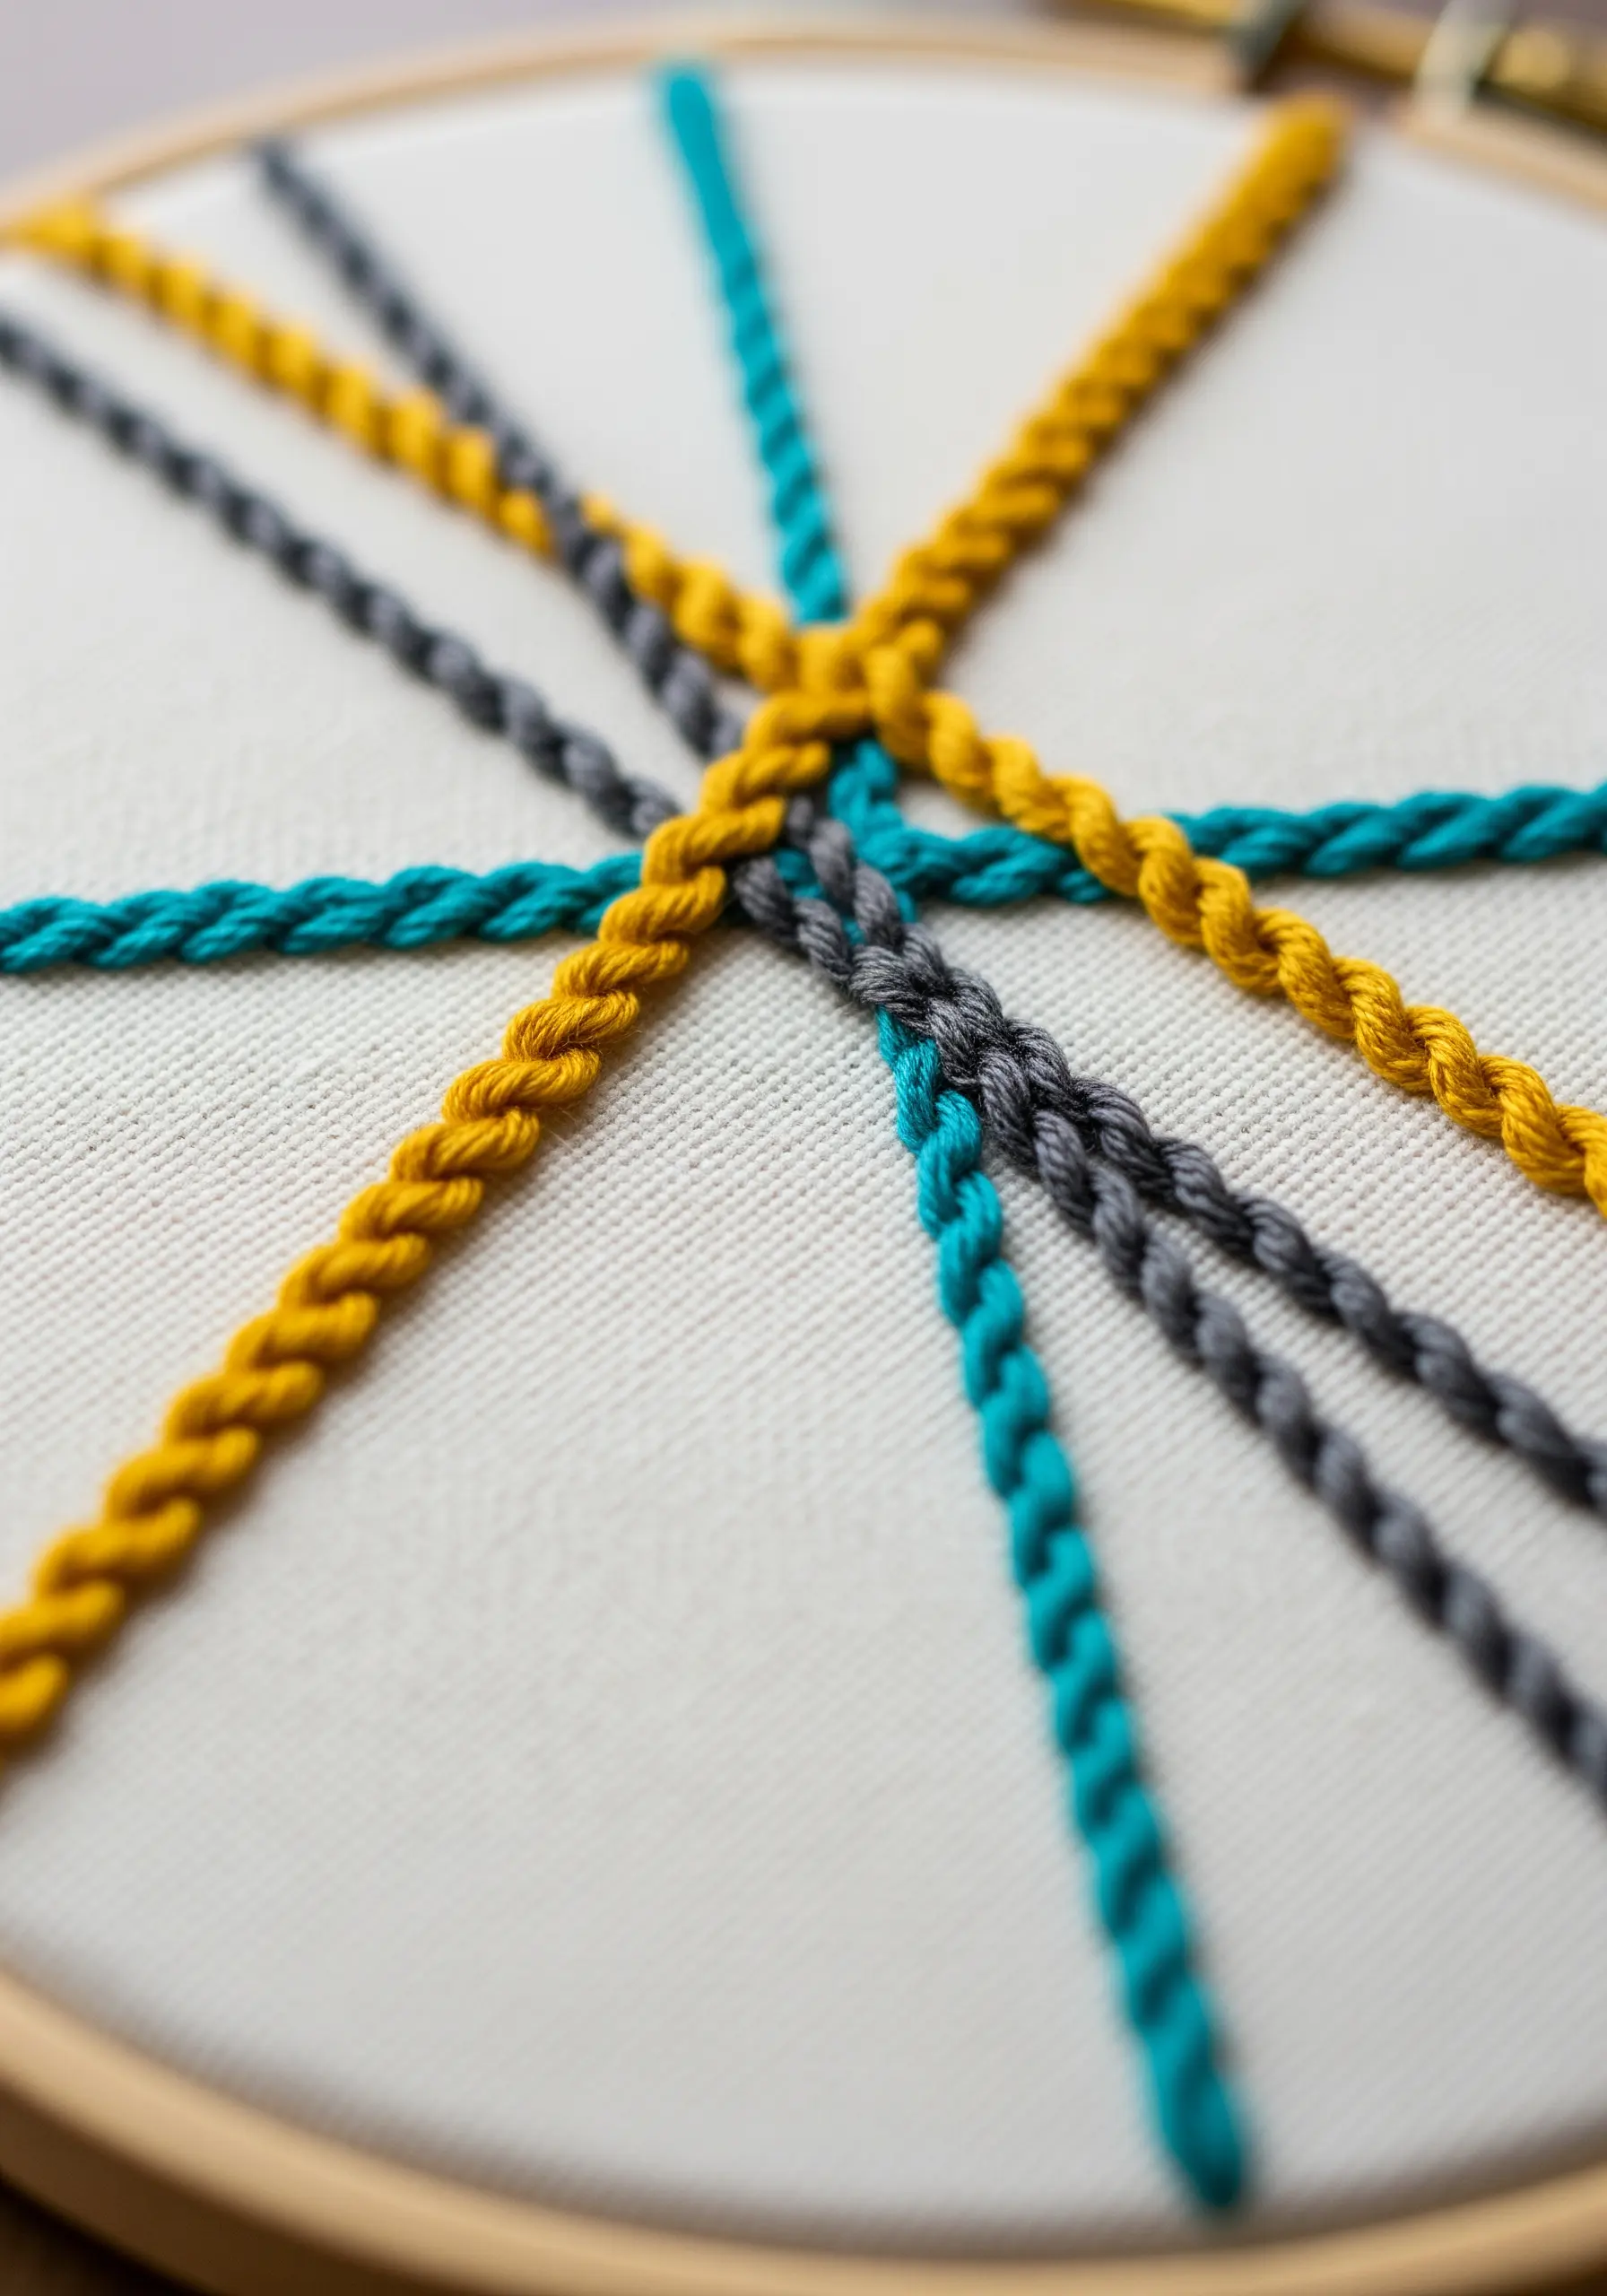
Create the illusion of depth by weaving lines of textured stitches.
Use a thick, rope-like stitch like a heavy chain stitch or whipped backstitch.
As you stitch, intentionally pass your needle under previously stitched lines to make them appear as if they are woven together.
This simple trick adds a sculptural quality to your abstract work.
These abstract thread embroidery ideas turn simple lines into art.
26. Capturing Delicacy with Spaced Stitches
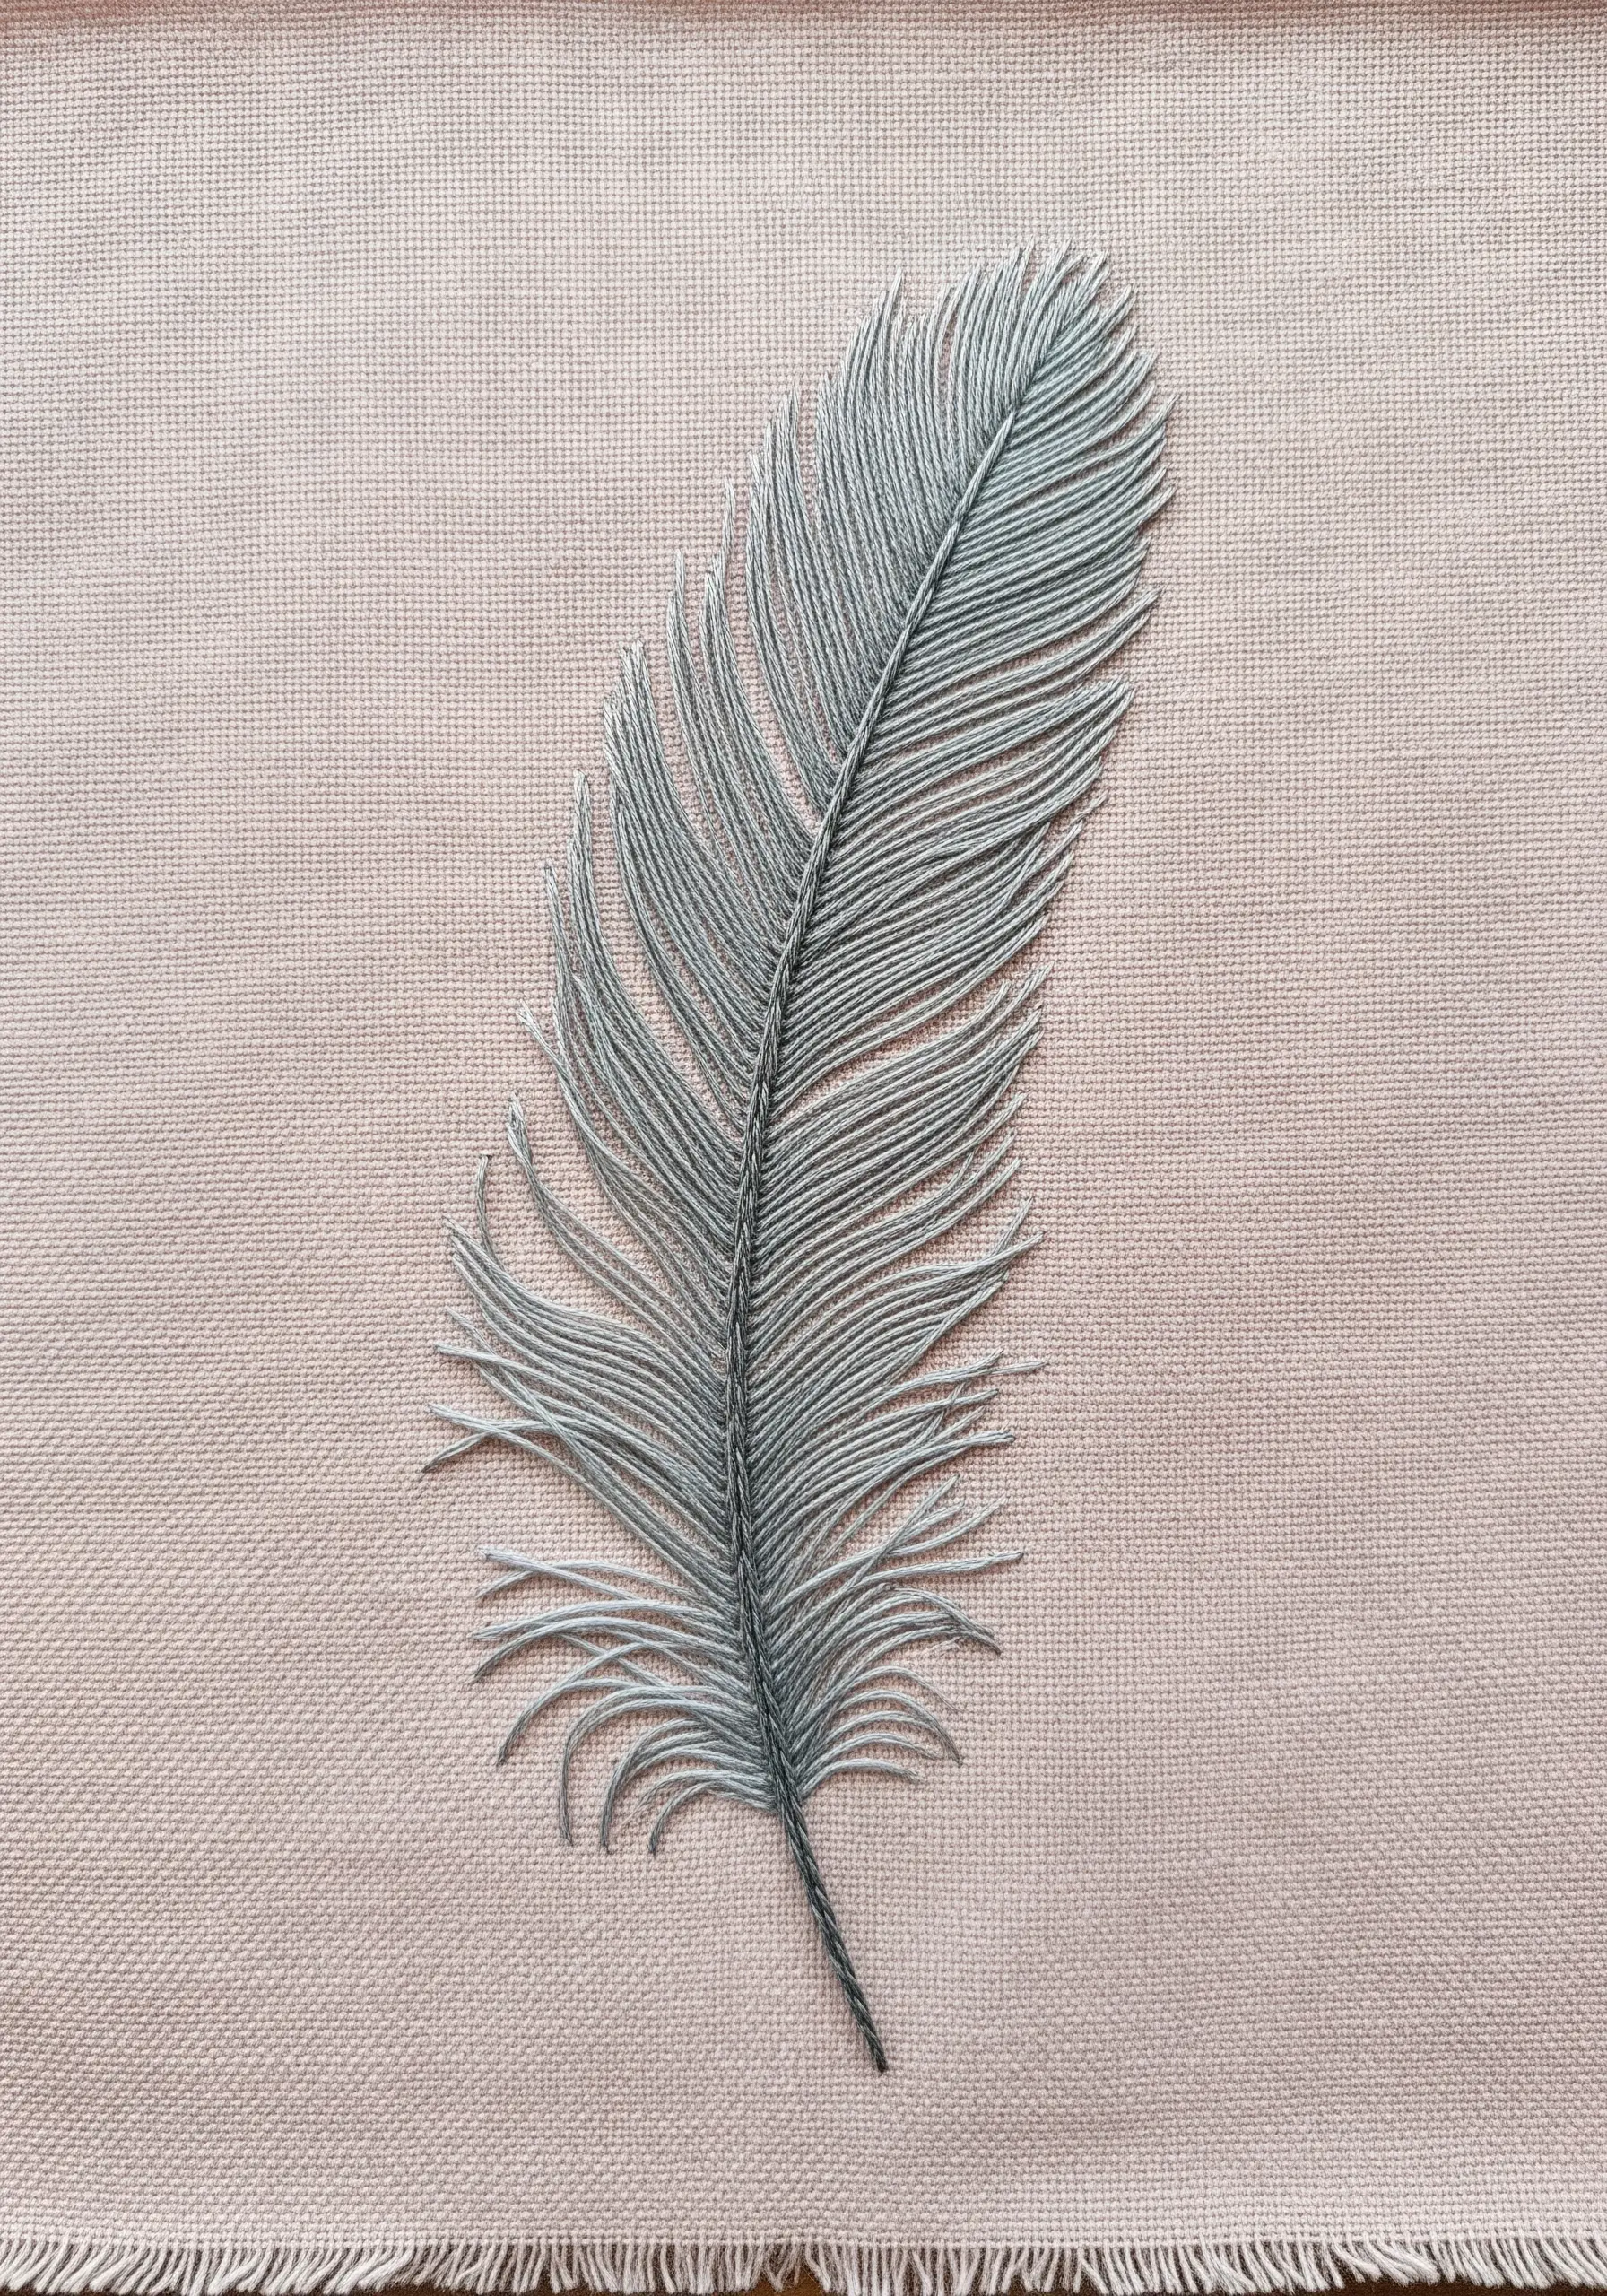
To give an object a sense of lightness and air, use an open fill stitch.
Instead of packing your fishbone stitches tightly together for this feather, leave a tiny bit of the background fabric visible between each stitch.
This technique creates a more delicate, almost translucent effect.
Using a very fine thread (one or two strands) will further enhance the feeling of weightlessness, creating a truly realistic feather.
27. Mixed-Media Storytelling with Stains and Stitches
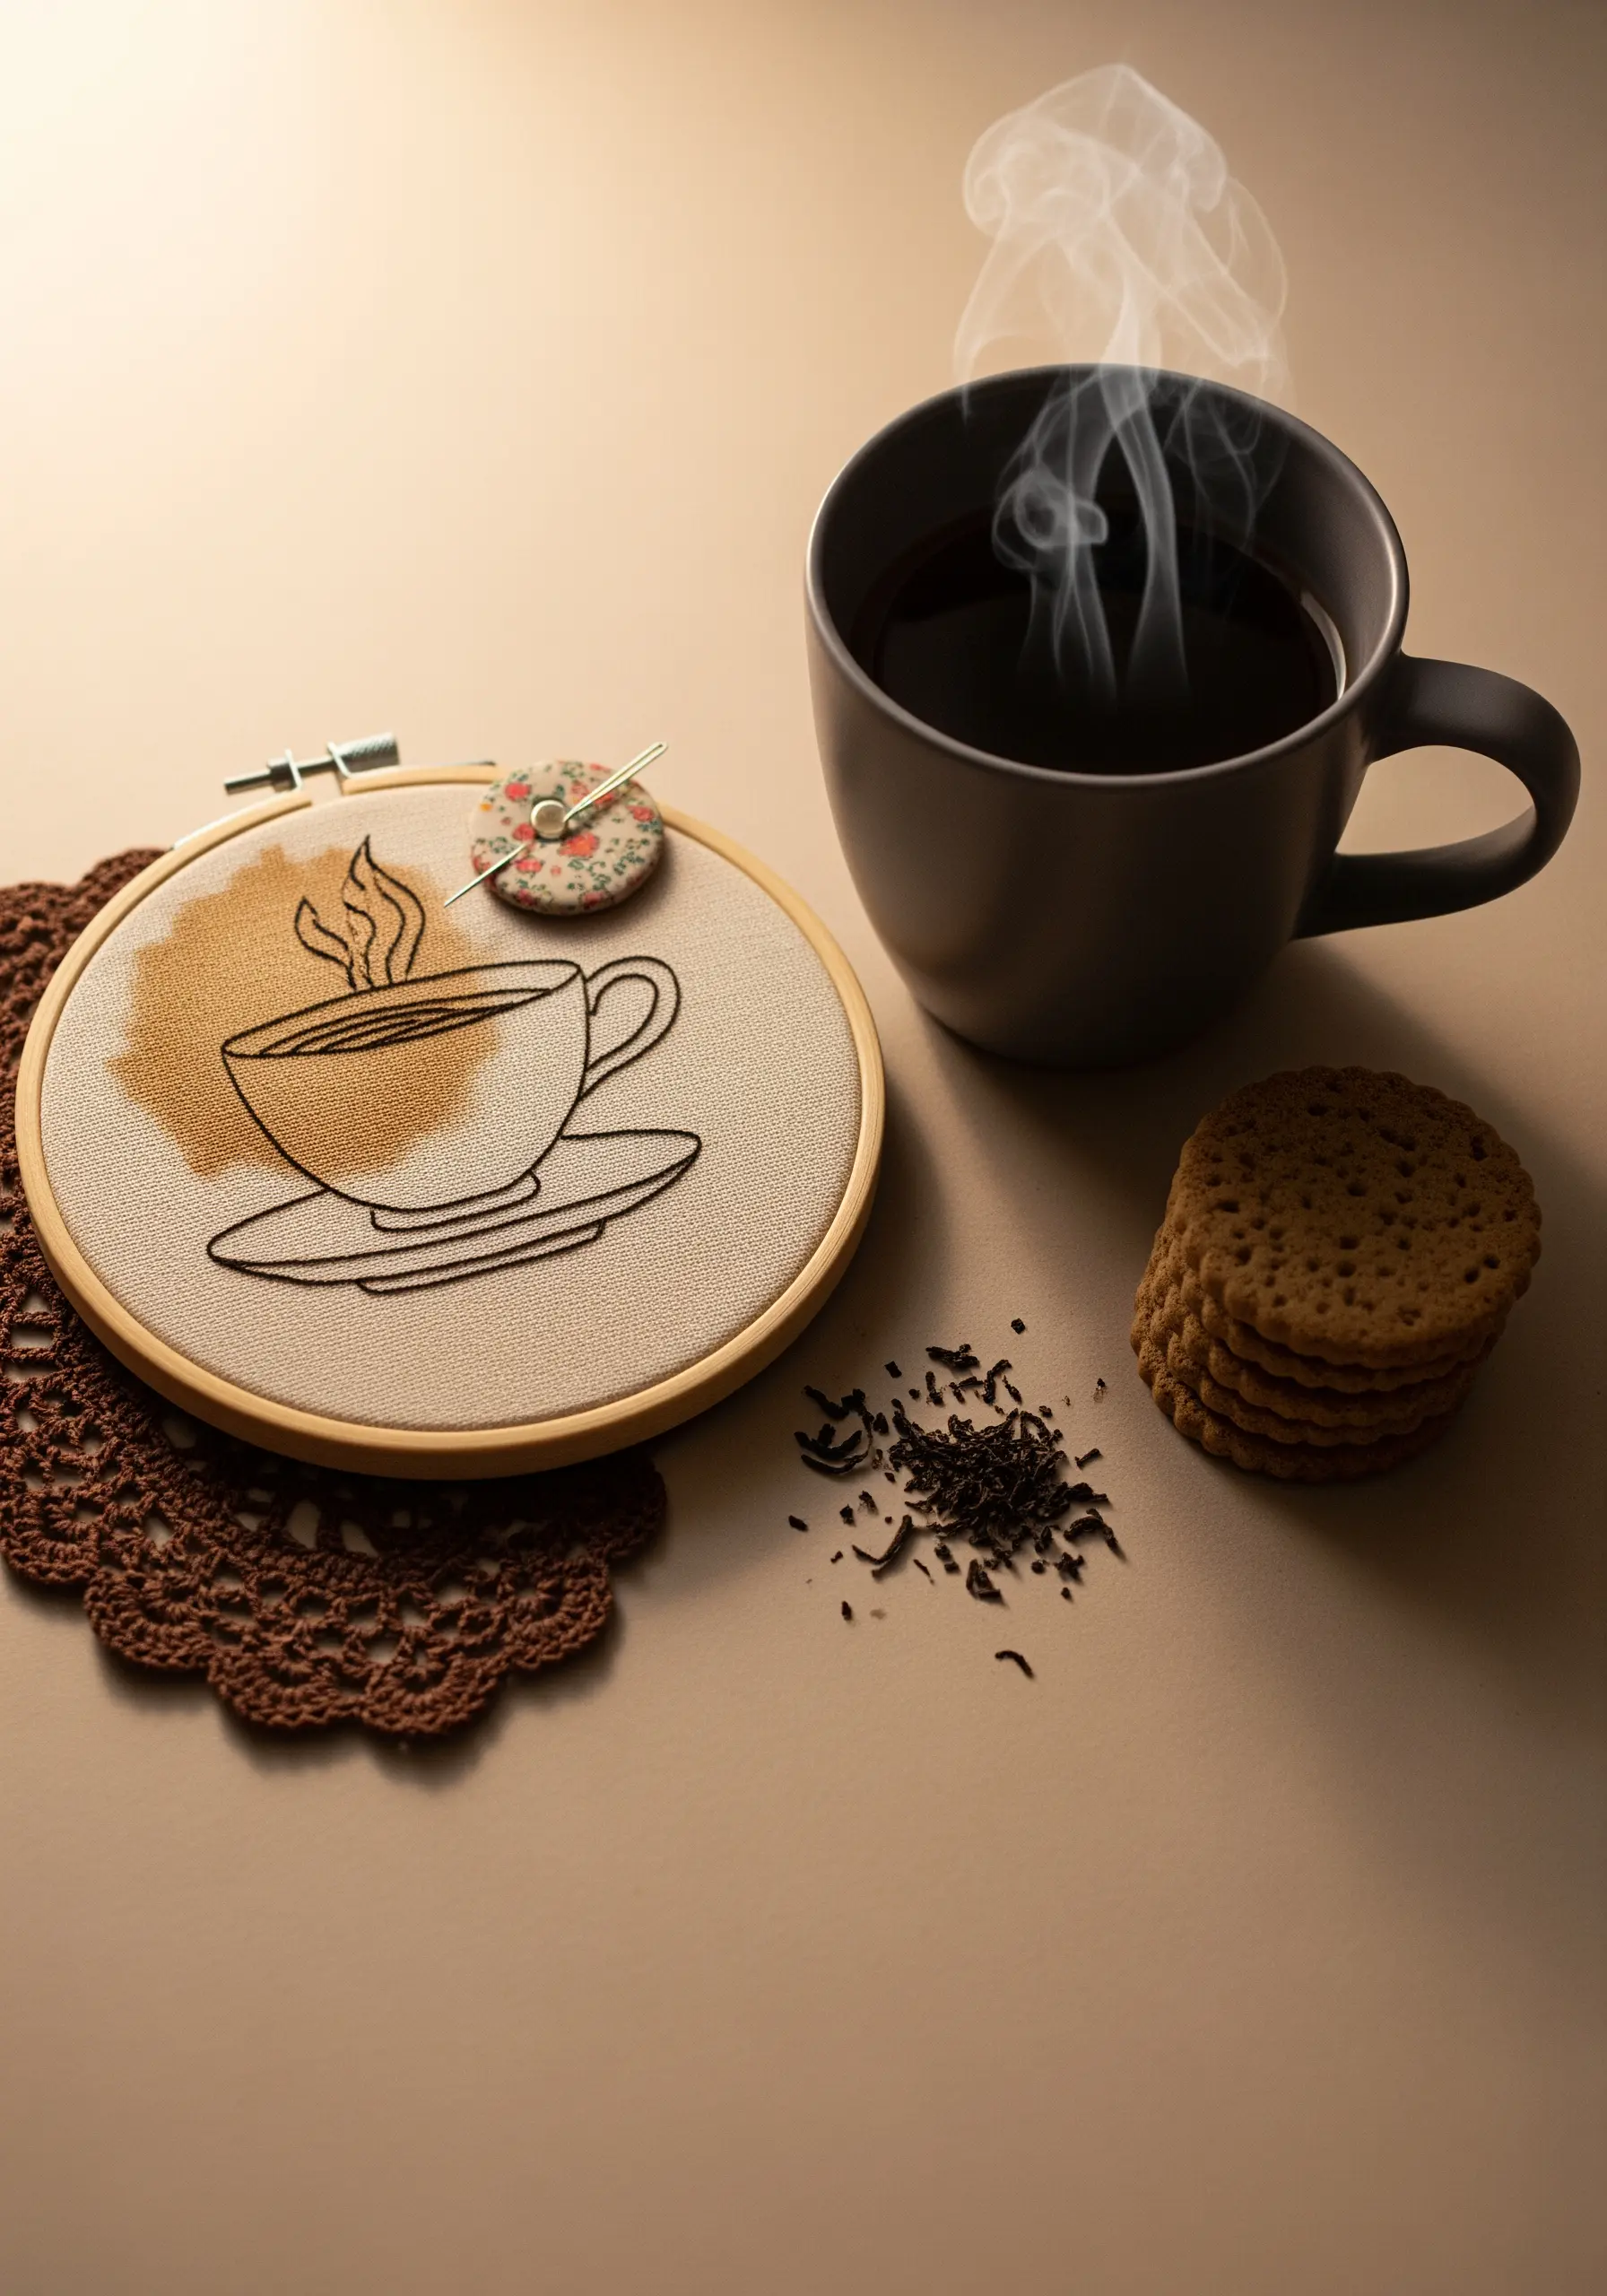
Add a layer of history and warmth to your work by incorporating unconventional materials.
Before you begin stitching, intentionally stain your fabric with coffee or tea for an organic, aged effect.
Once it’s dry, stitch your design right over the stain.
The clean lines of the embroidered coffee cup against the soft, irregular background create a compelling narrative.
Explore more ways to combine embroidery and mixed media for unique decor.
28. Graphic Fills for Dynamic Silhouettes
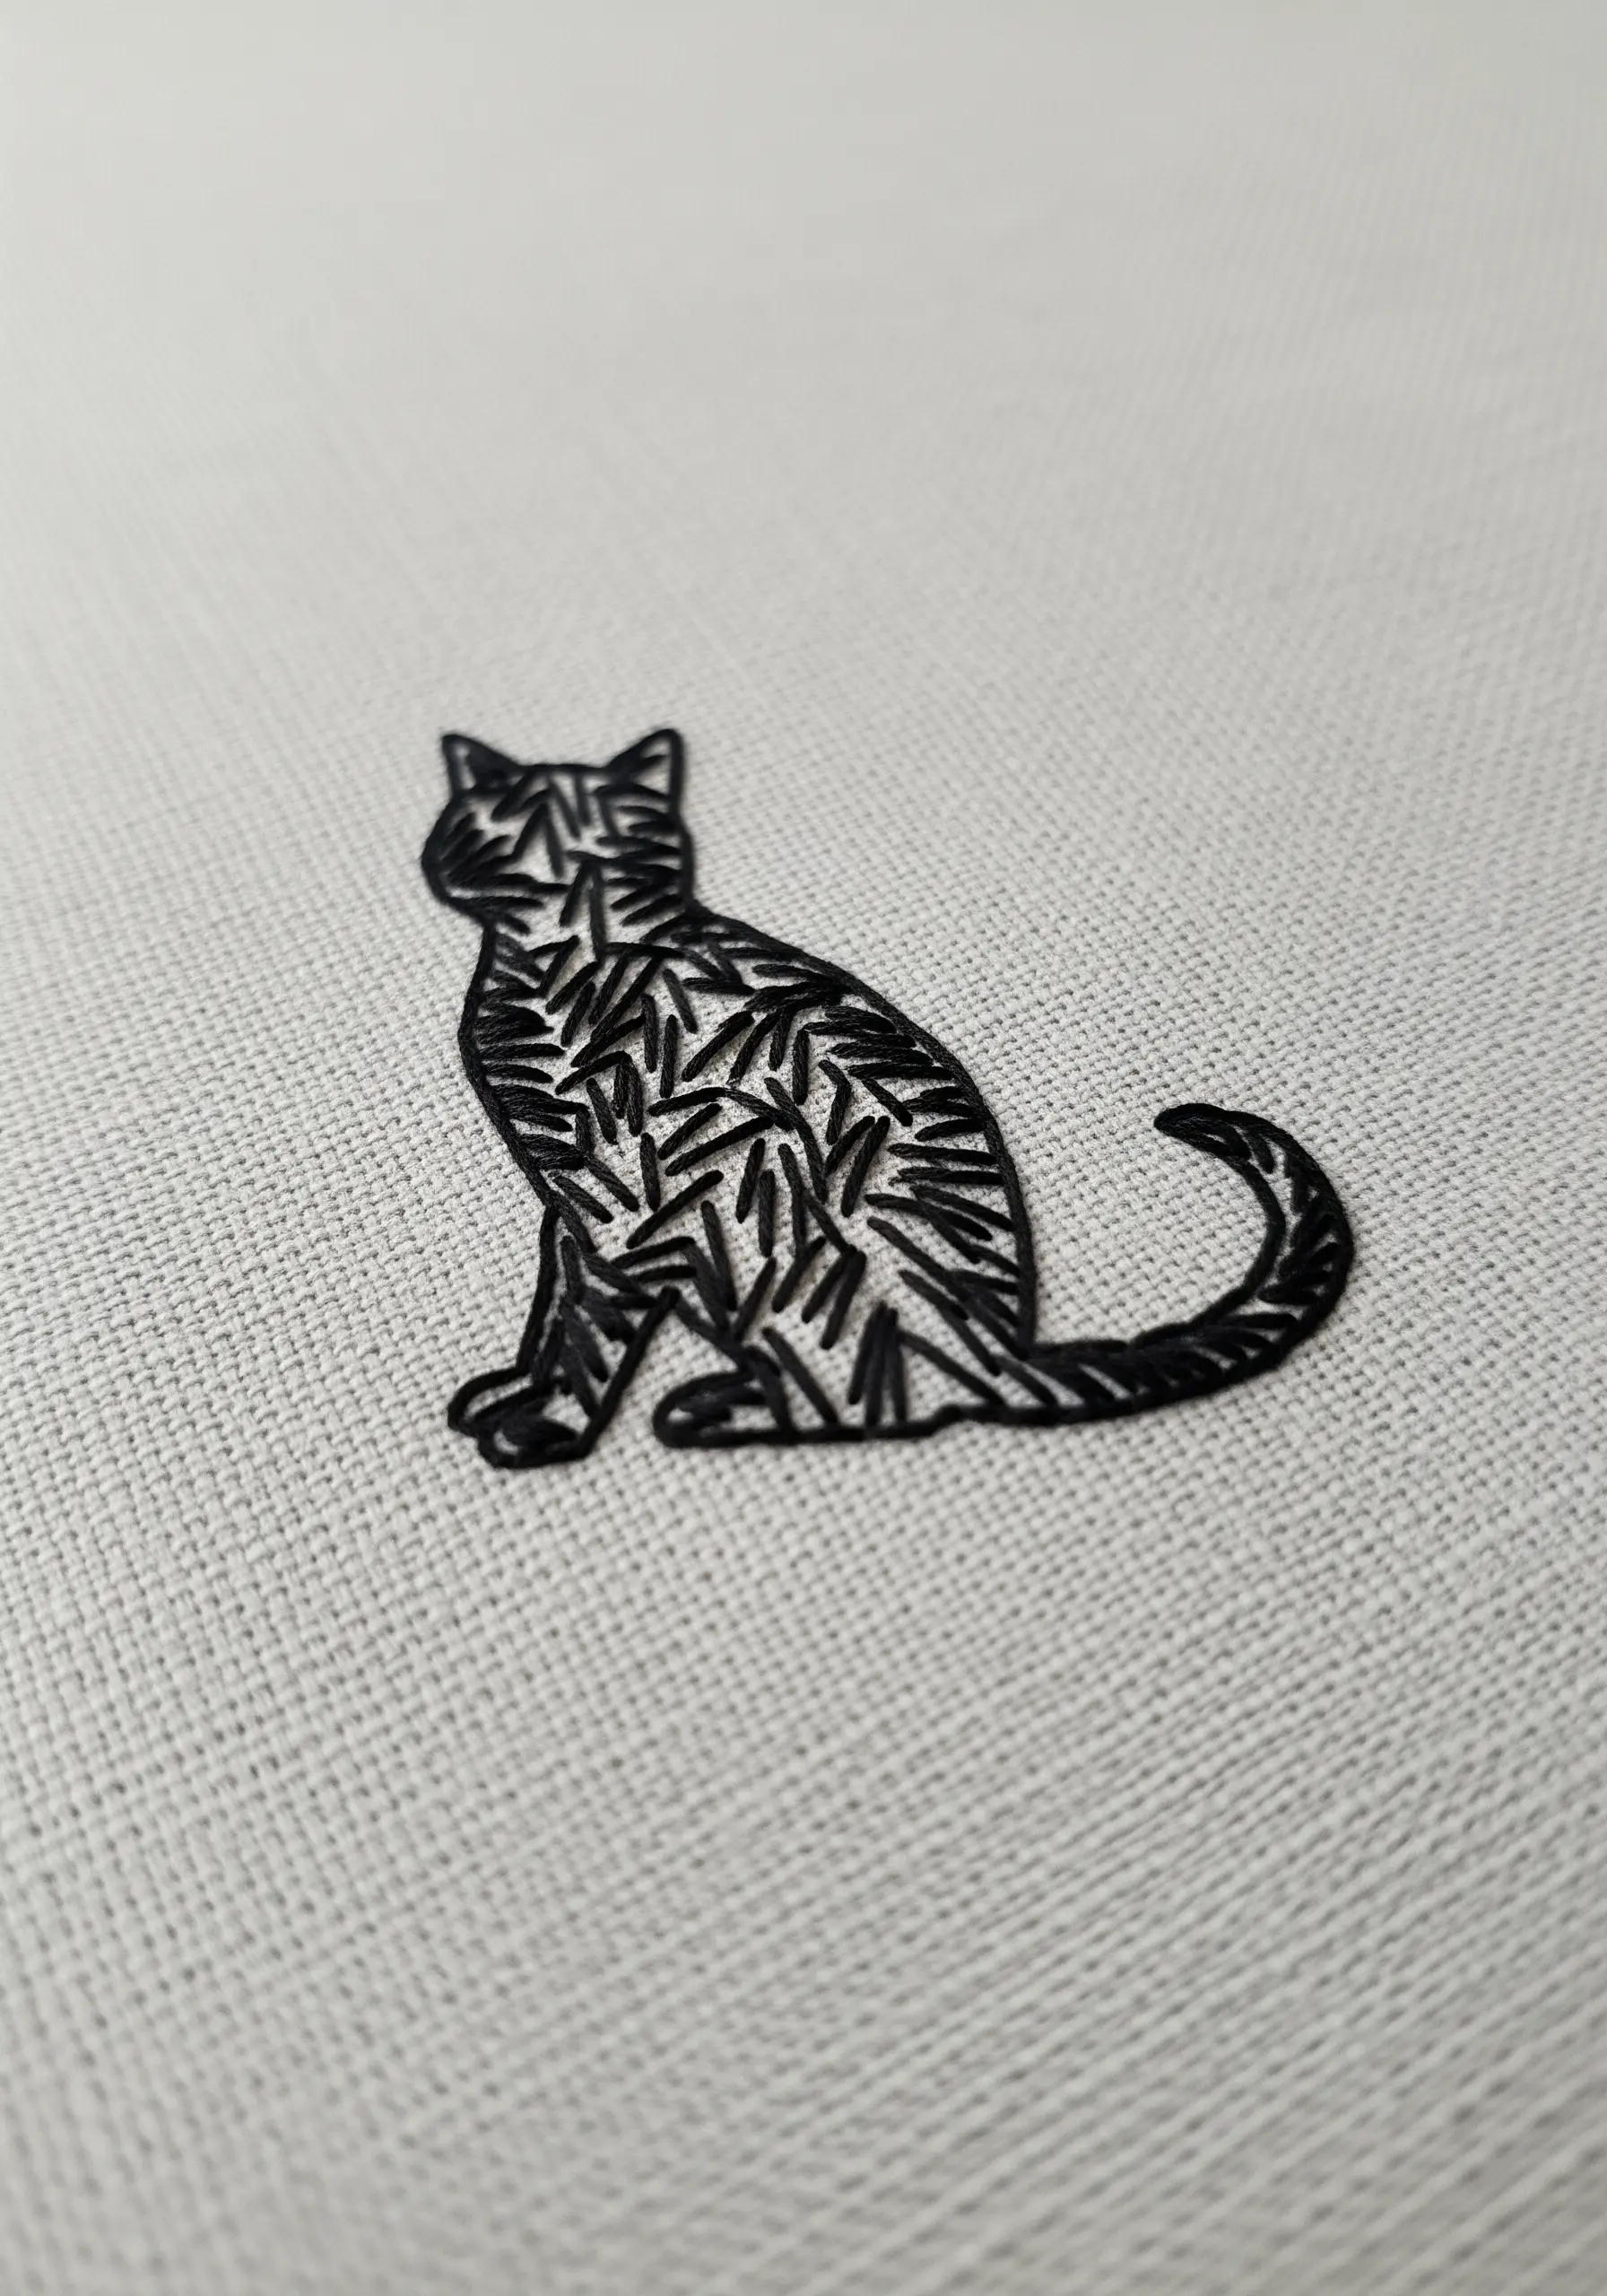
Bring a simple silhouette to life by filling it with a bold, graphic pattern.
Outline your shape with a split stitch for a sharp edge.
Then, instead of a flat satin stitch, fill the interior with a dense pattern of short, angled straight stitches.
This technique adds texture, movement, and a modern, illustrative quality that is far more eye-catching than a solid fill.
These are perfect for delicate pet line art embroidery ideas.
29. A Sampler Celebrating Dimensional Knots
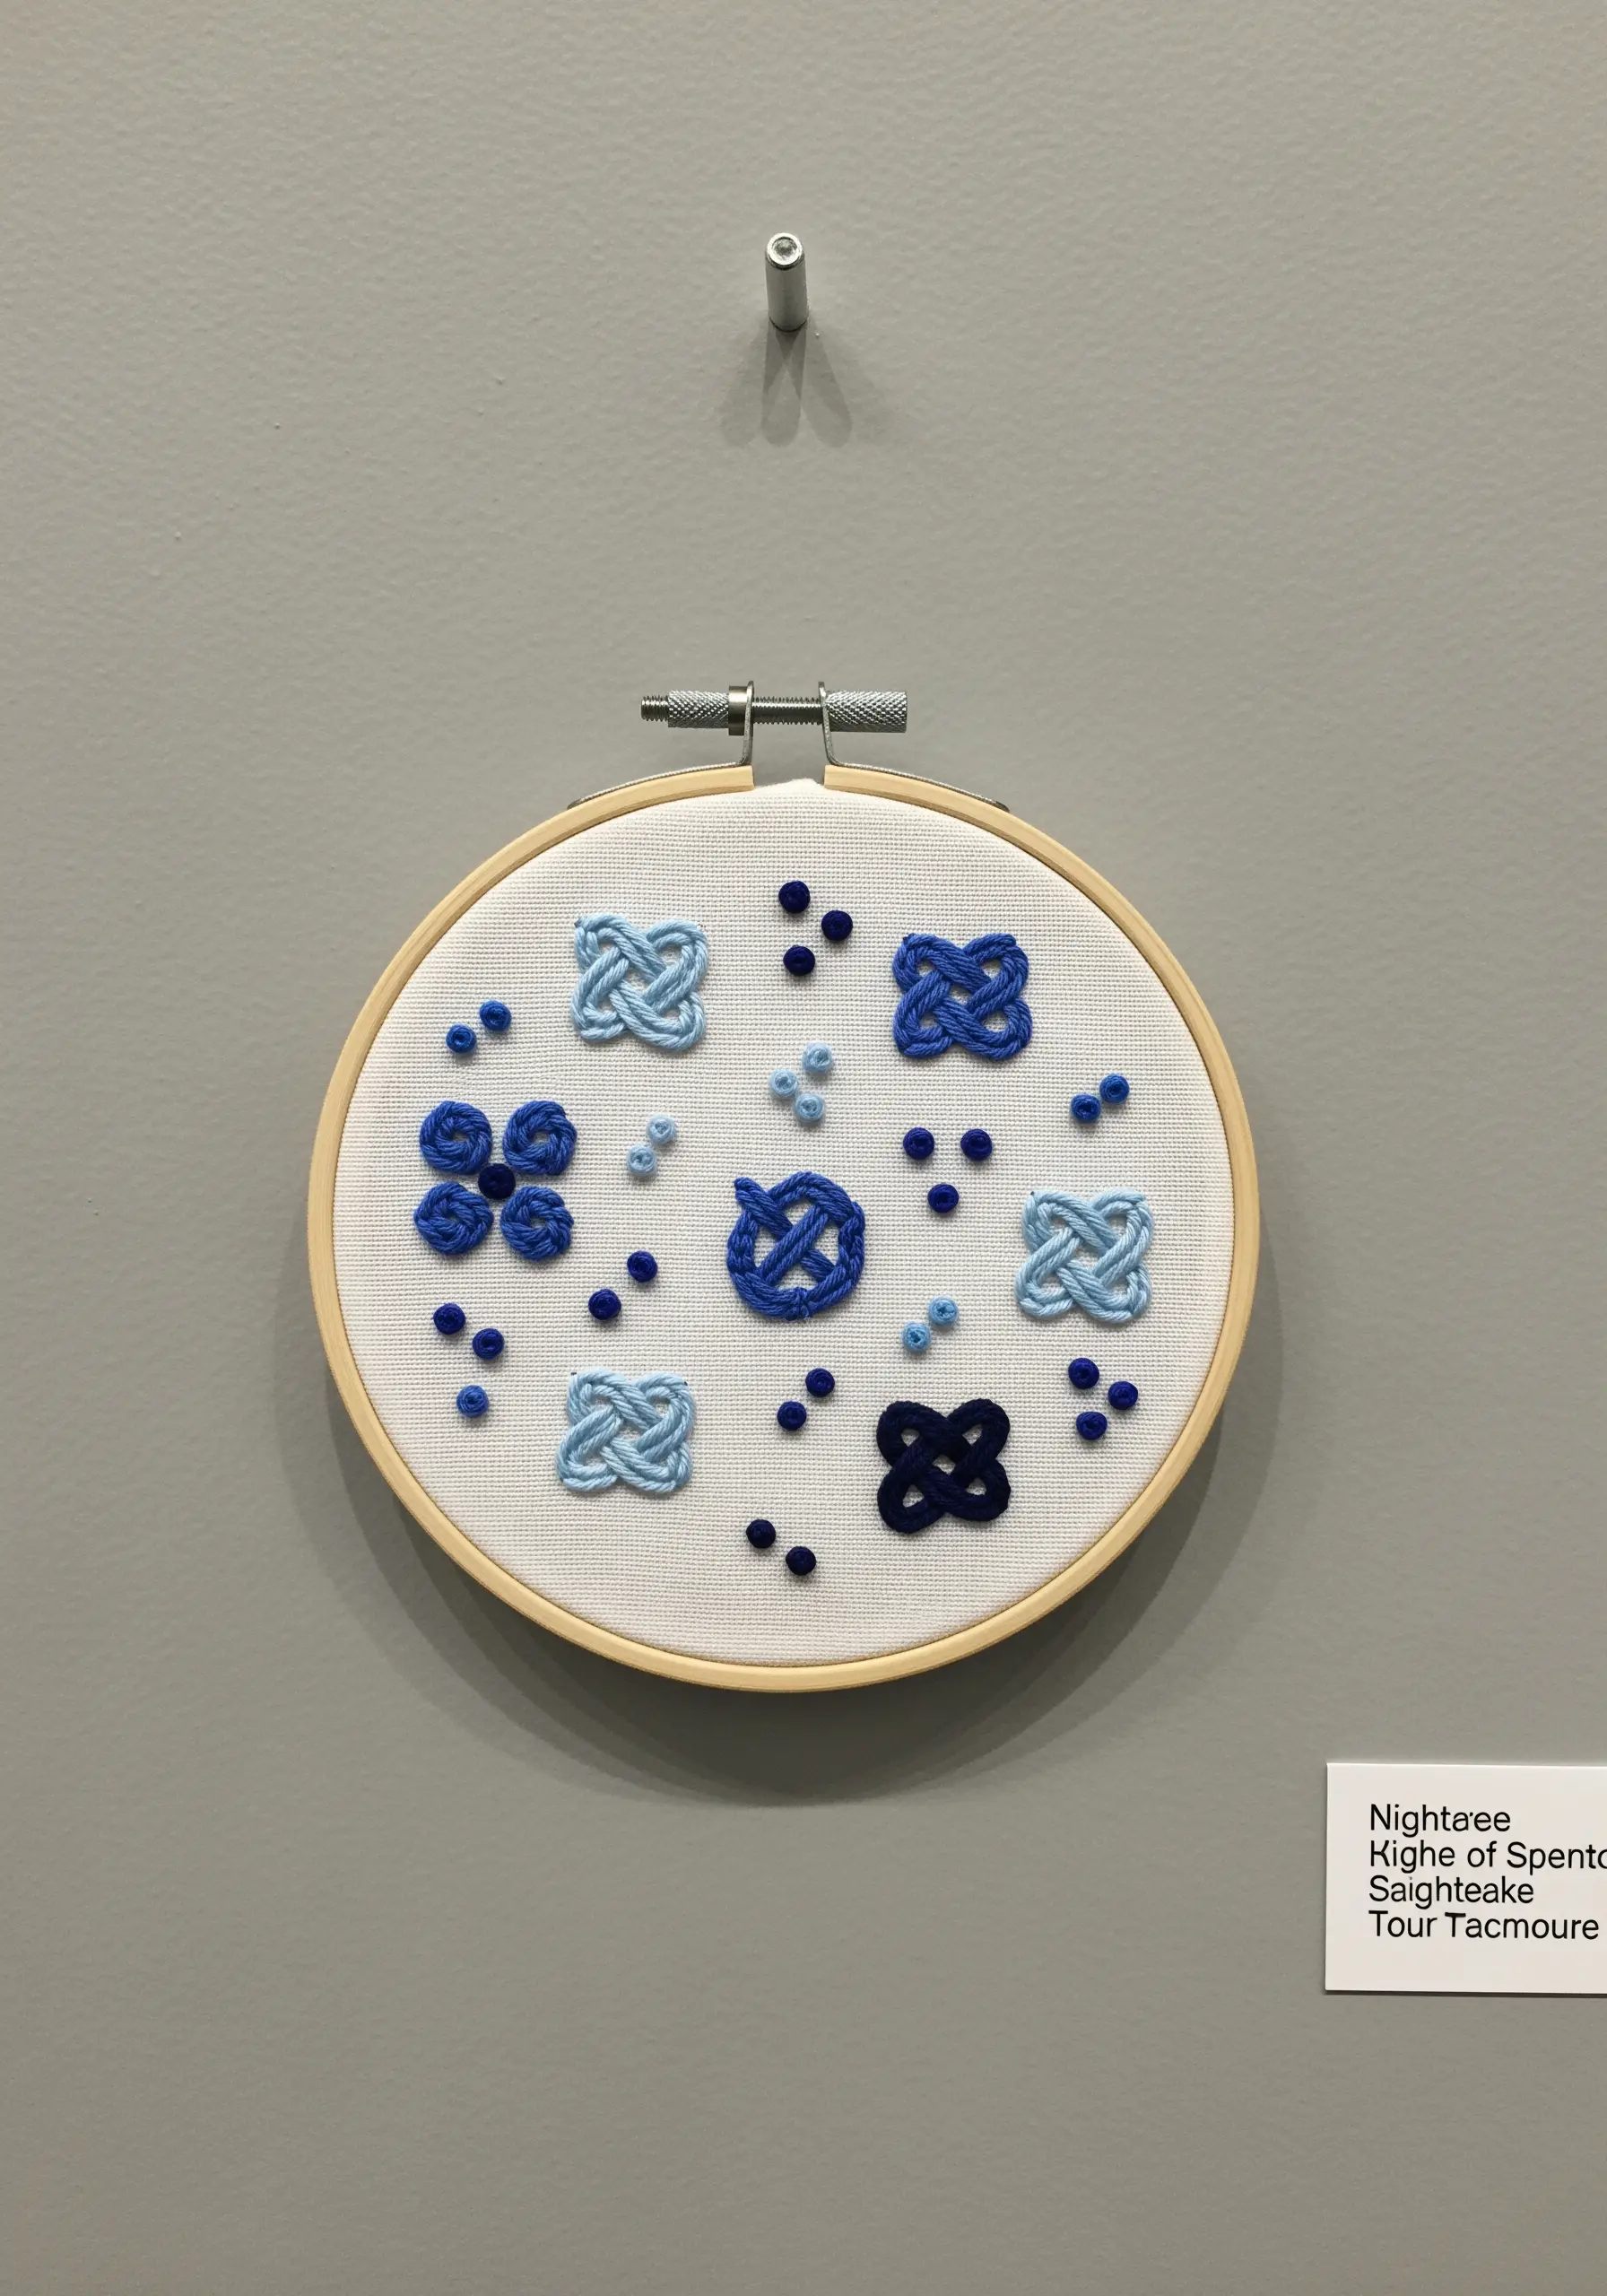
Move beyond the French knot and dedicate a sampler to exploring the world of decorative, three-dimensional knots.
Practice bullion knots, Danish knots, and woven knots like the Celtic knot.
Arrange them in a pleasing composition, playing with scale, color, and spacing.
This not only builds your technical repertoire but also creates a beautiful, textural piece of art in its own right.
These make wonderful handmade embroidery gifts.
30. The Typographic Stitch Library
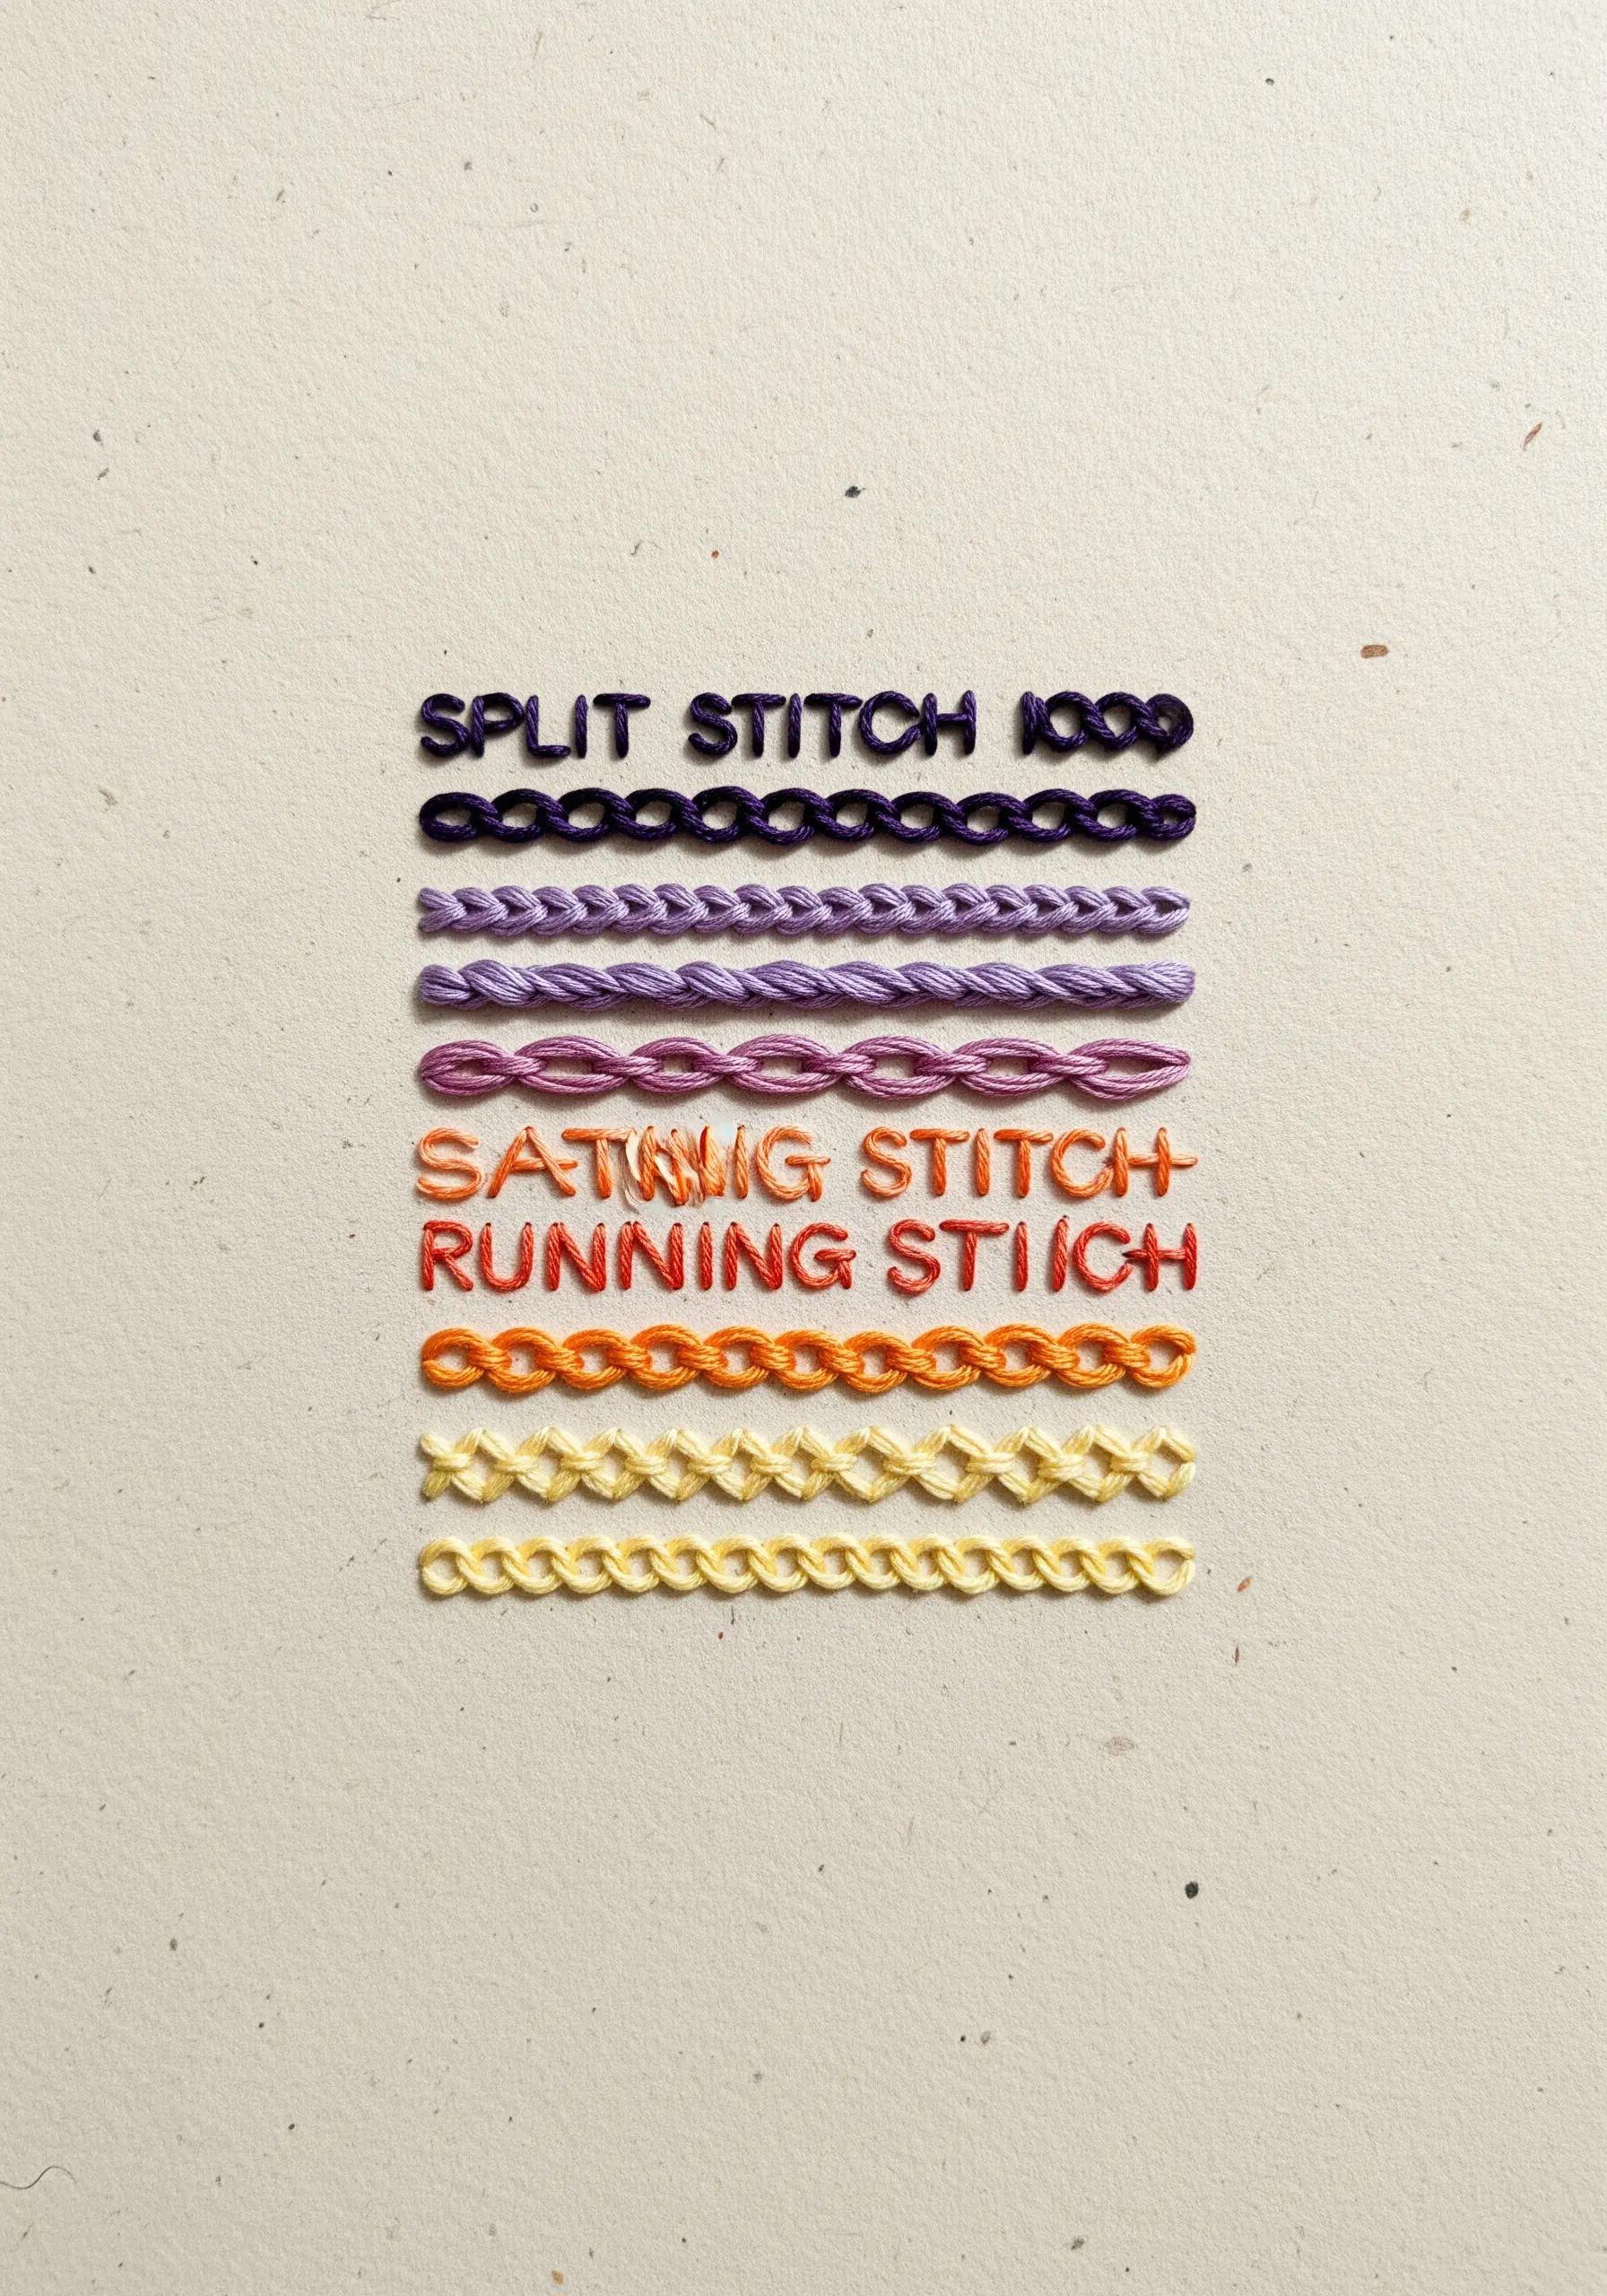
Create the ultimate stitch reference by embroidering the name of each stitch using the stitch itself.
This clever exercise is the best way to understand how each stitch behaves on curves, corners, and straight lines.
Arranging them in a color gradient adds a layer of design savvy, turning a practical tool into a piece of inspiring hoop art.


