
A monogram is more than just an initial; it’s a mark of identity, a quiet statement of ownership, and a beautiful way to make any gift feel deeply personal. But how do you elevate it from a simple craft project to a piece of high-end, bespoke art?
The answer isn’t in complexity, but in intention. It’s in choosing the right stitch for the font, the right thread for the fabric, and the right composition to make it feel seamlessly integrated.
Here, you’ll discover how a simple shift in technique—like padding your satin stitch for a 3D effect, using negative space to define a letter, or blending colors for a watercolor finish—can transform your work. These are not just ideas; they are thoughtful approaches to create monograms that look and feel luxurious, personal, and professionally executed.
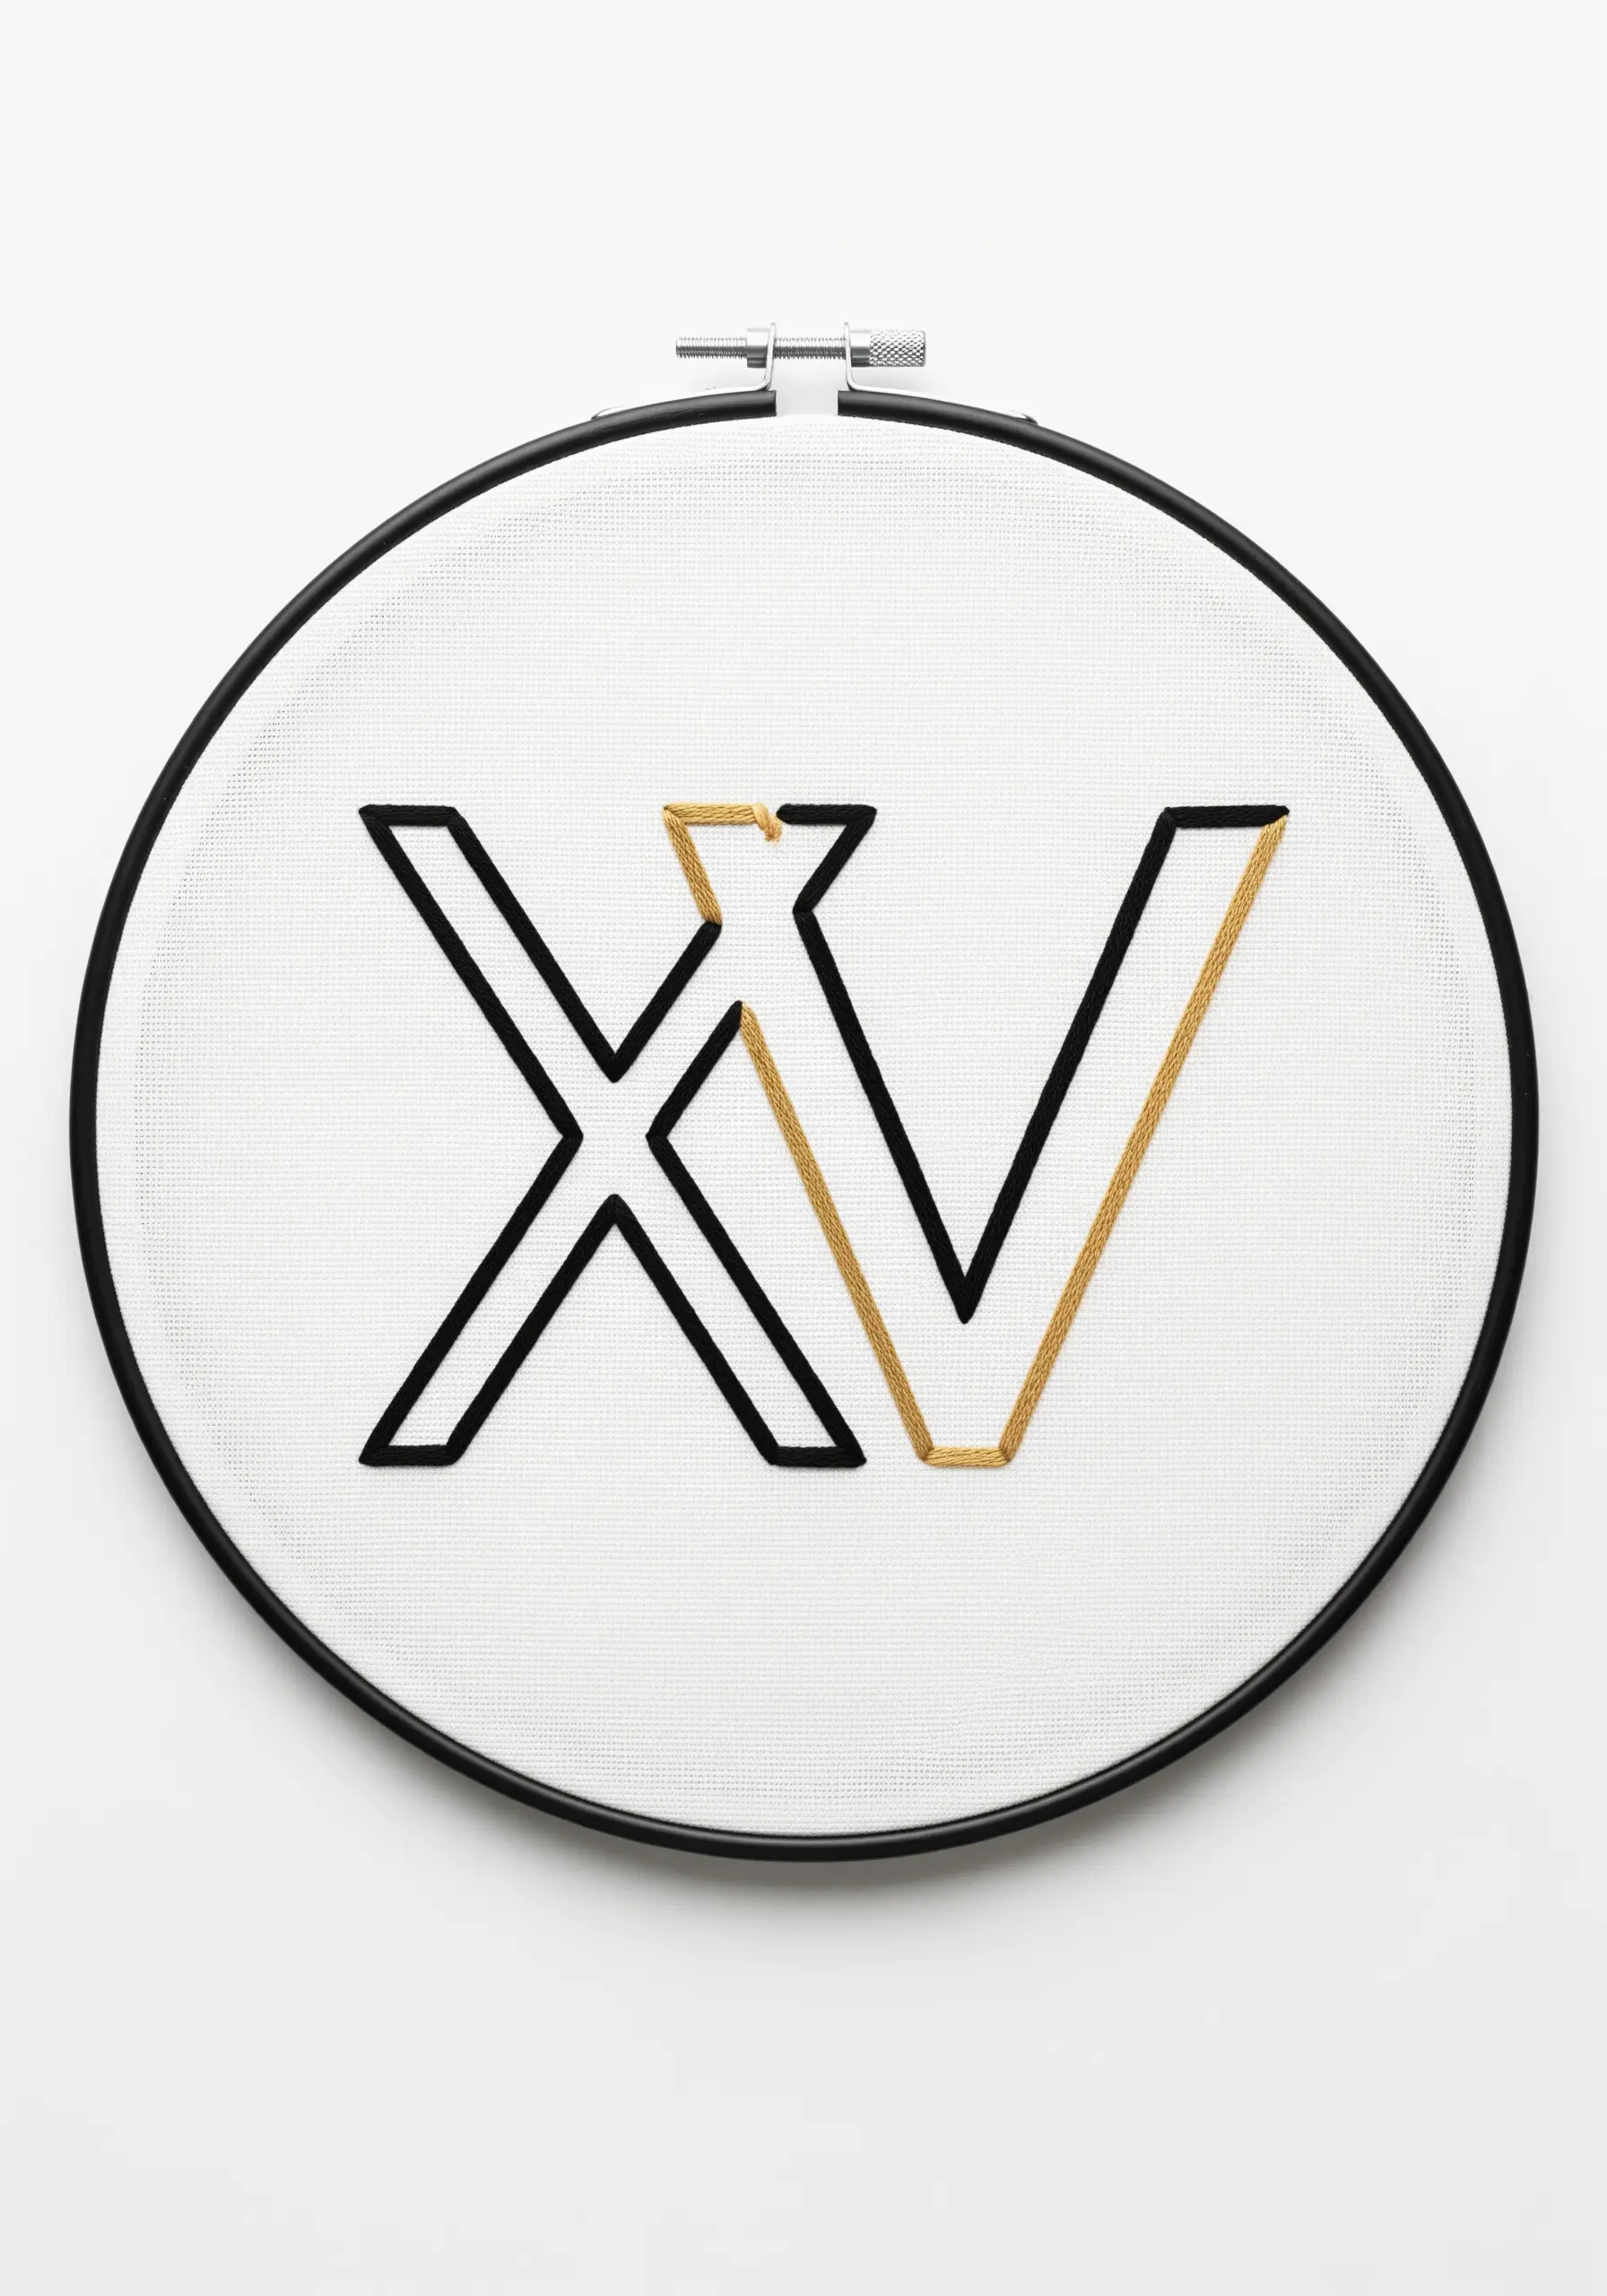
1. The Gilded Geometric Initial

Embrace a high-contrast, jewelry-like effect by using a metallic thread on a plush, dark fabric like velvet or moleskin.
Use a chain stitch to build your letterform, which creates a dimensional, corded texture that catches the light beautifully.
The key to a polished geometric design is consistency; keep your chain stitches uniform in size to maintain the crisp, architectural lines of the monogram.
This abstract style turns a simple initial into a small piece of modern art, perfect for a floor cushion or the corner of a luxury throw.
2. The Botanical Flourish
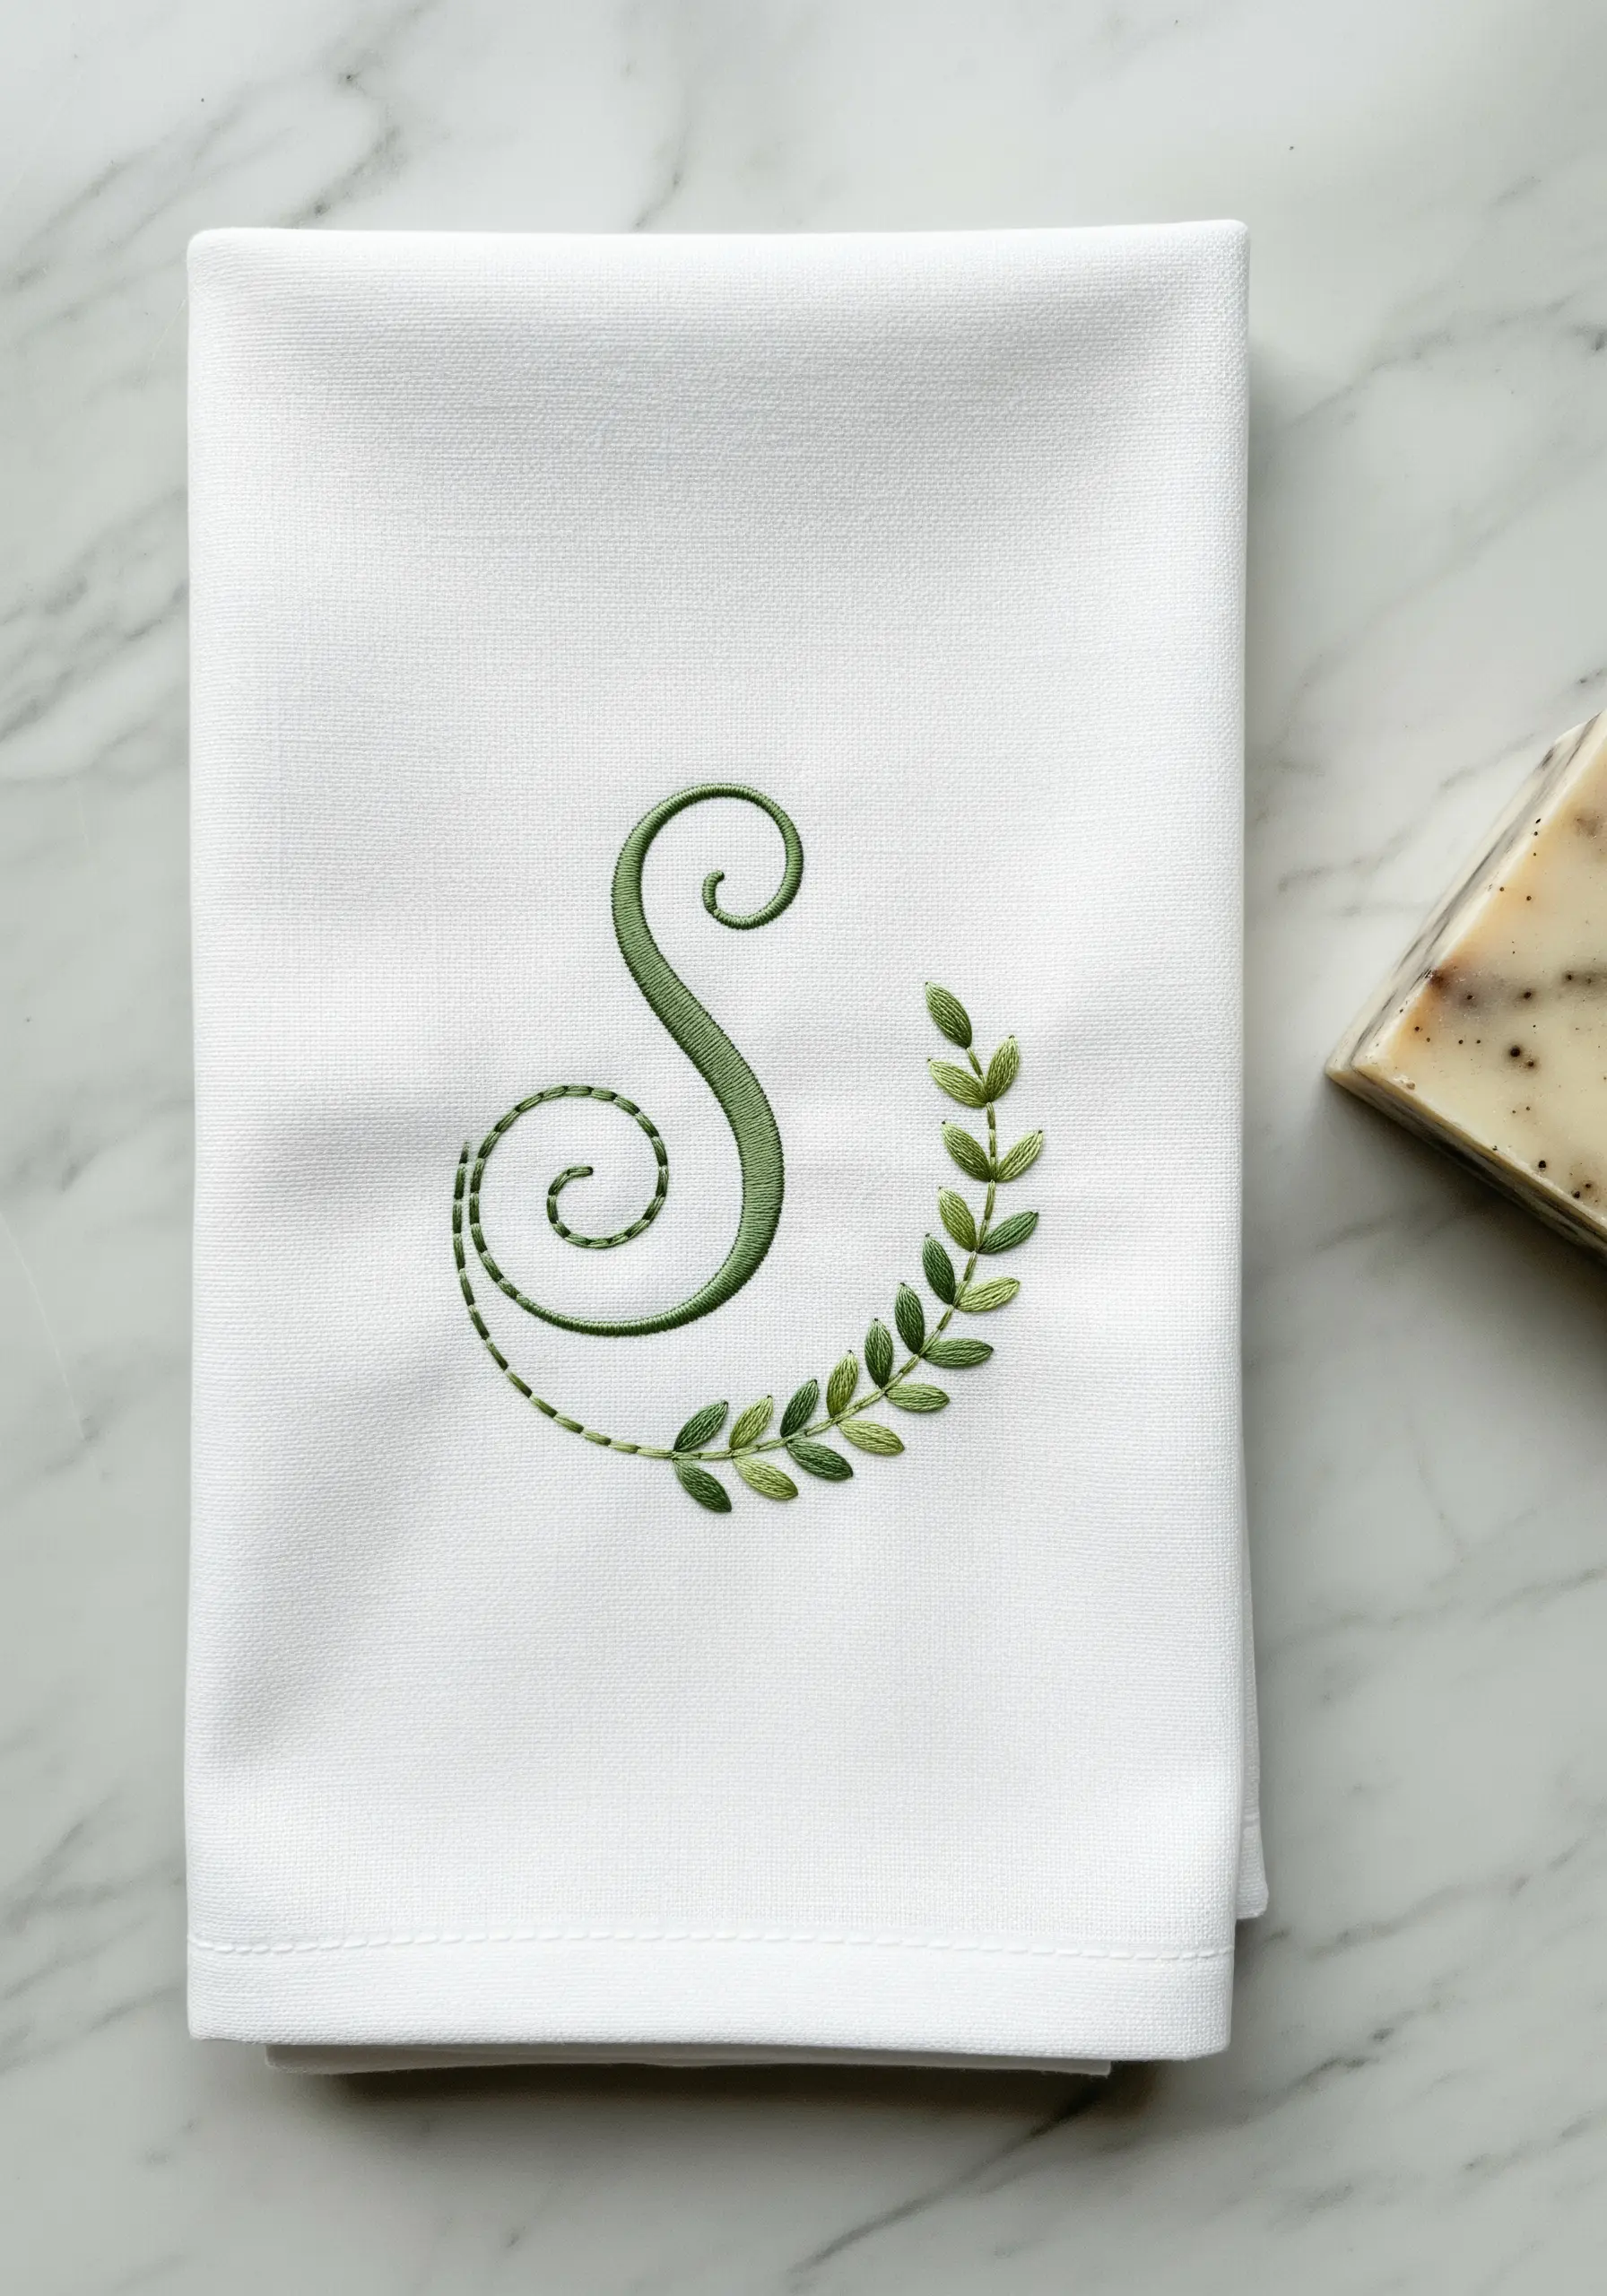
Create balance by pairing a bold, satin-stitched initial with a delicate botanical element stitched in a finer thread.
To achieve a natural look in the leaves, use a fishbone stitch with two or three closely related shades of green; this creates a subtle gradient that mimics natural light and shadow.
For a seamless transition, extend a tail from your main letter using a simple backstitch, allowing the botanical sprig to grow organically from the initial.
This design works beautifully on items that call for a touch of organic elegance, like linen napkins or guest towels.
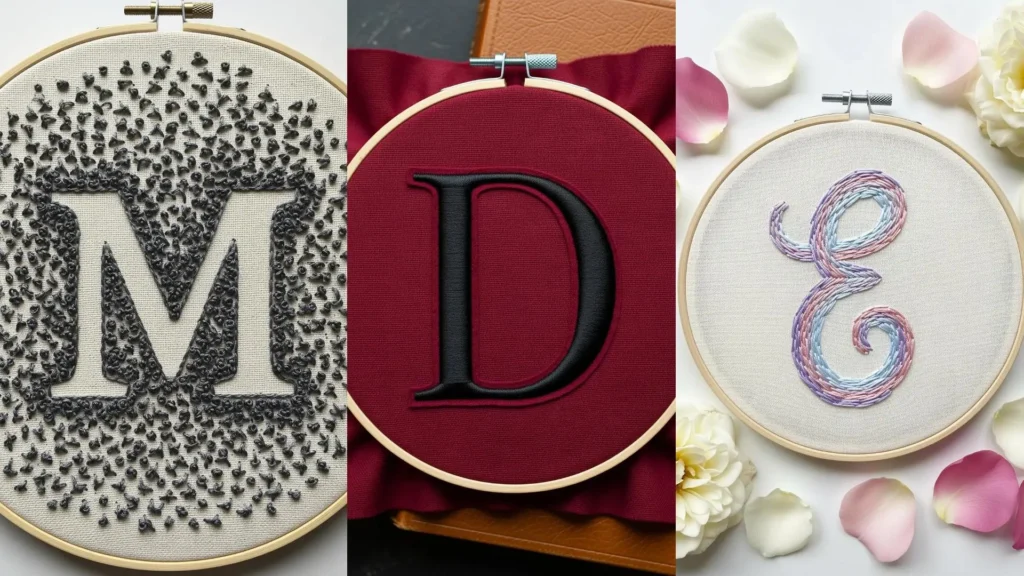
3. The Deconstructed Texture Monogram
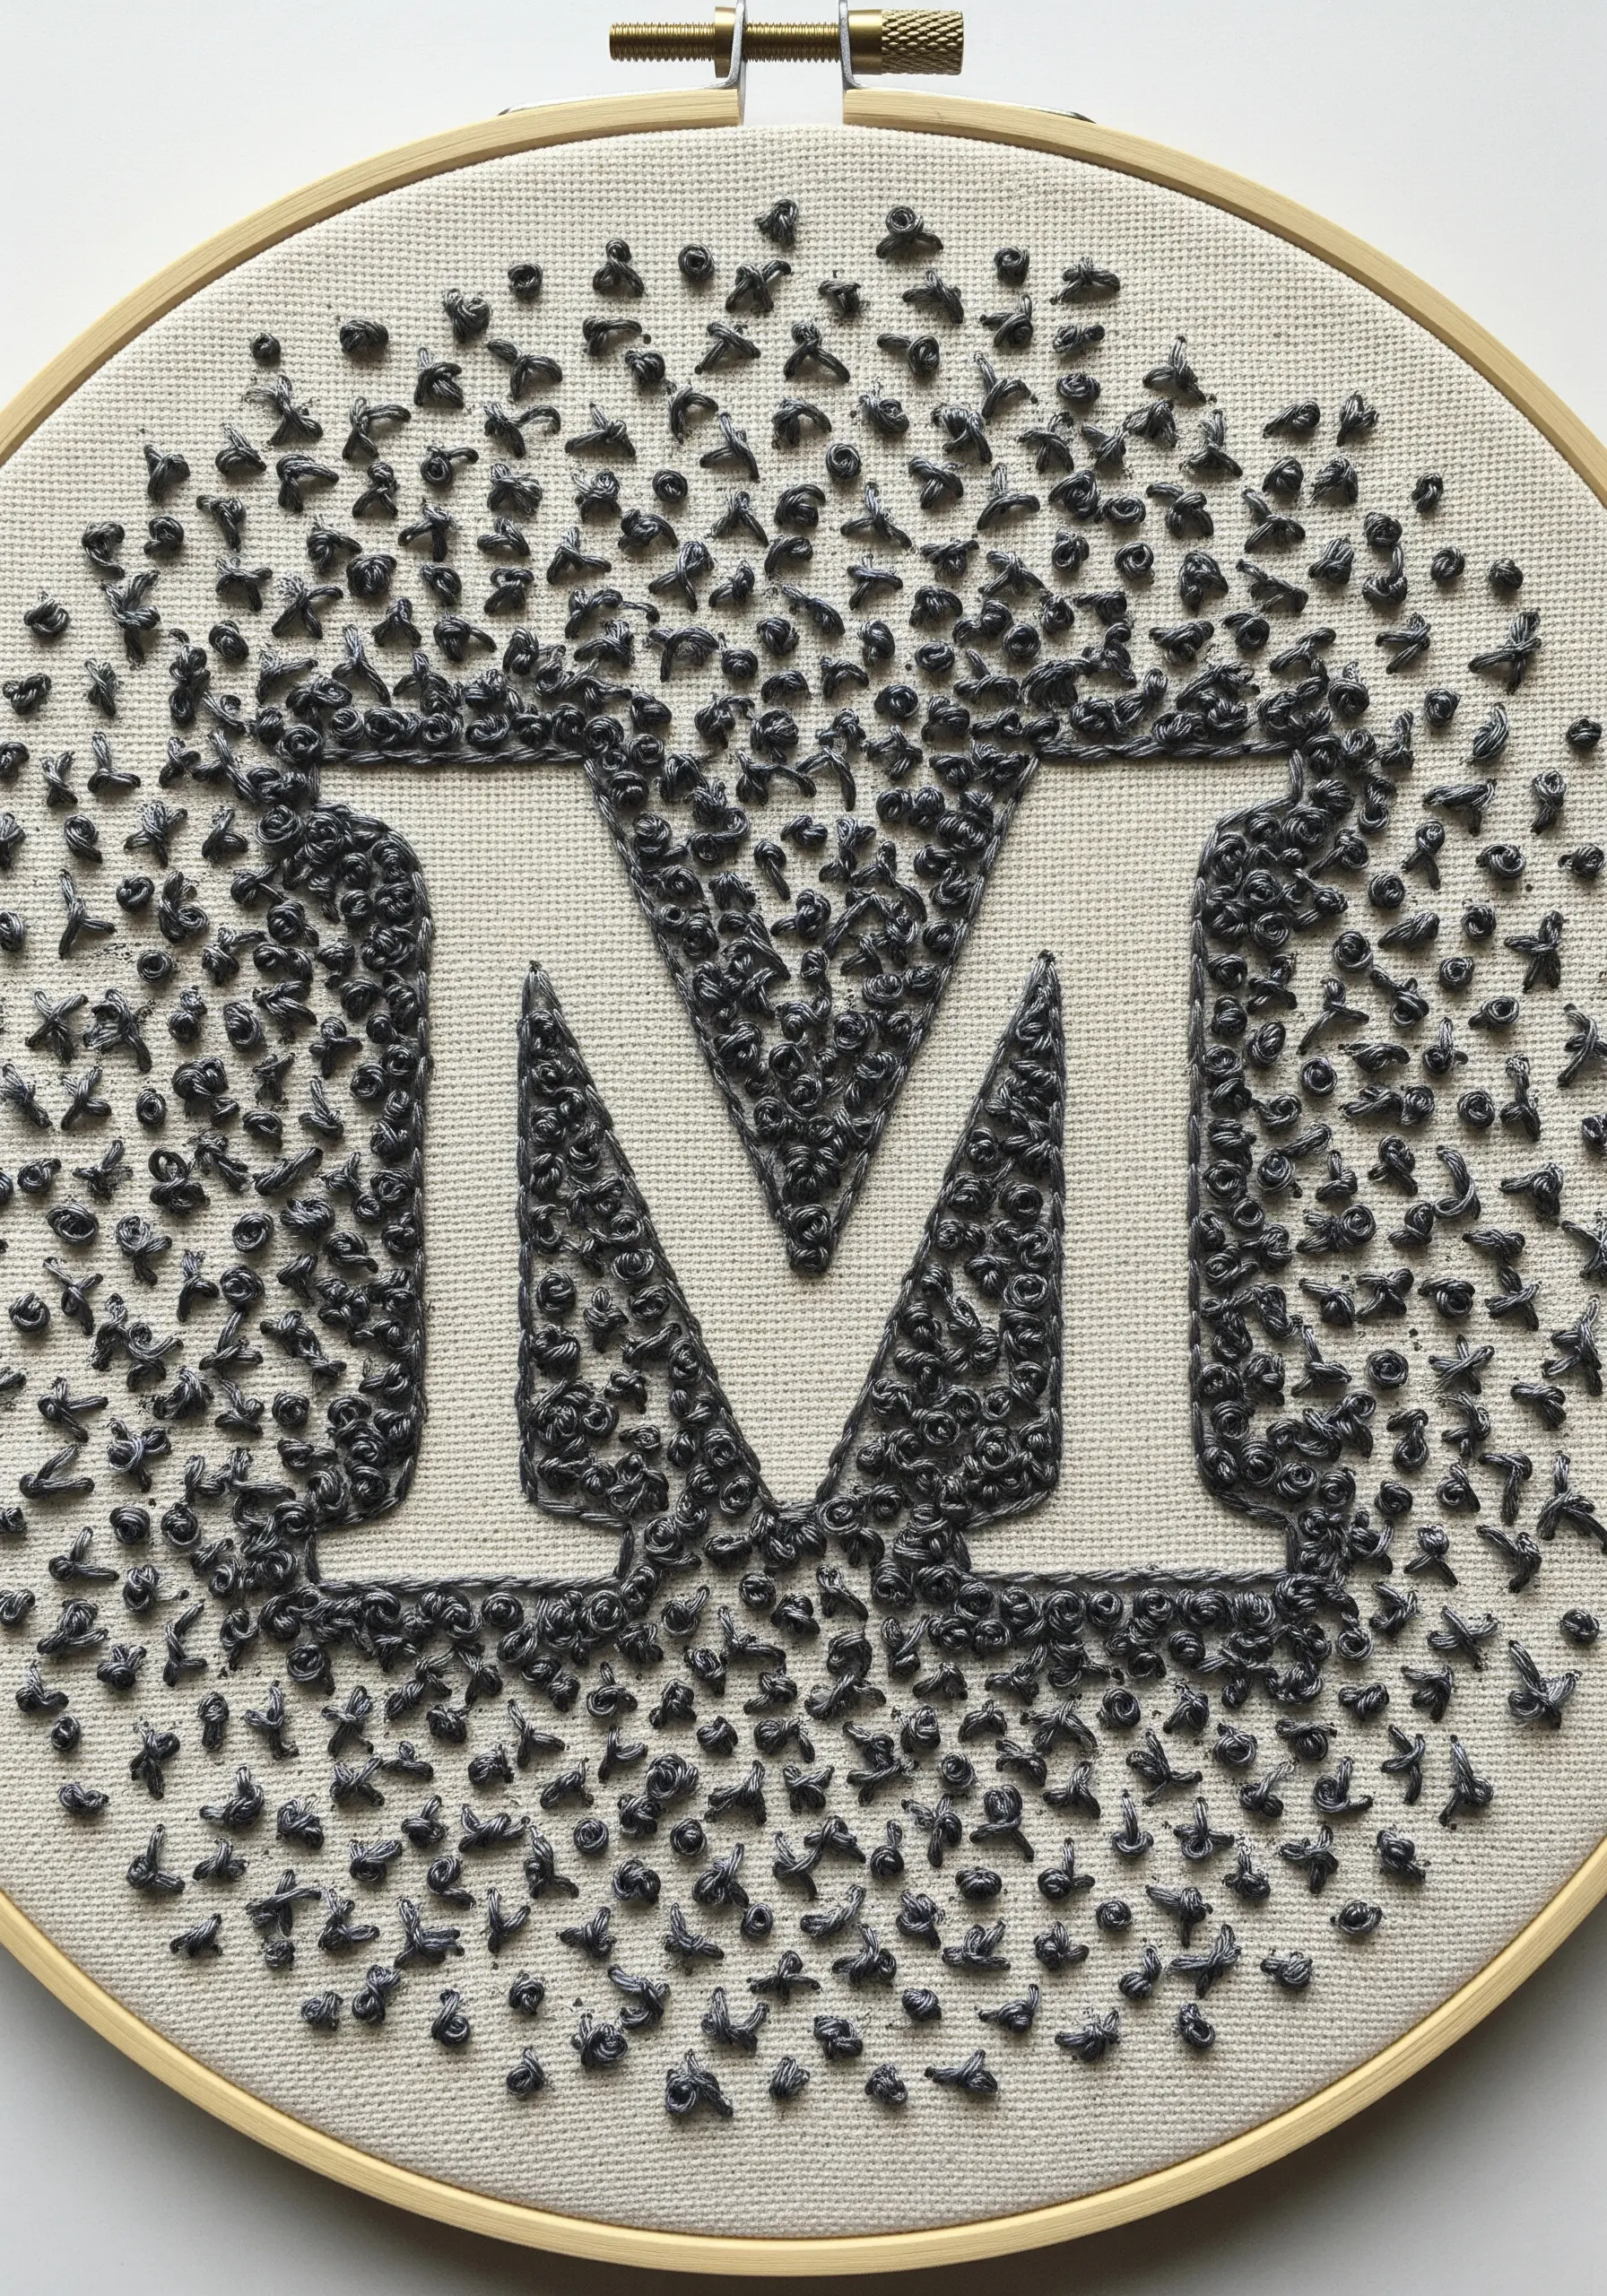
Define your monogram using negative space, filling the area around and inside the letter with a dense field of French knots.
Create a sense of movement by varying the density of your stitches; concentrate them near the letter’s edges and scatter them outwards to achieve a dynamic, dissolving effect.
By using a single thread color, you place the focus entirely on the rich texture, transforming a simple stitch into a conceptual piece of modern art.
4. The Constellation Initial
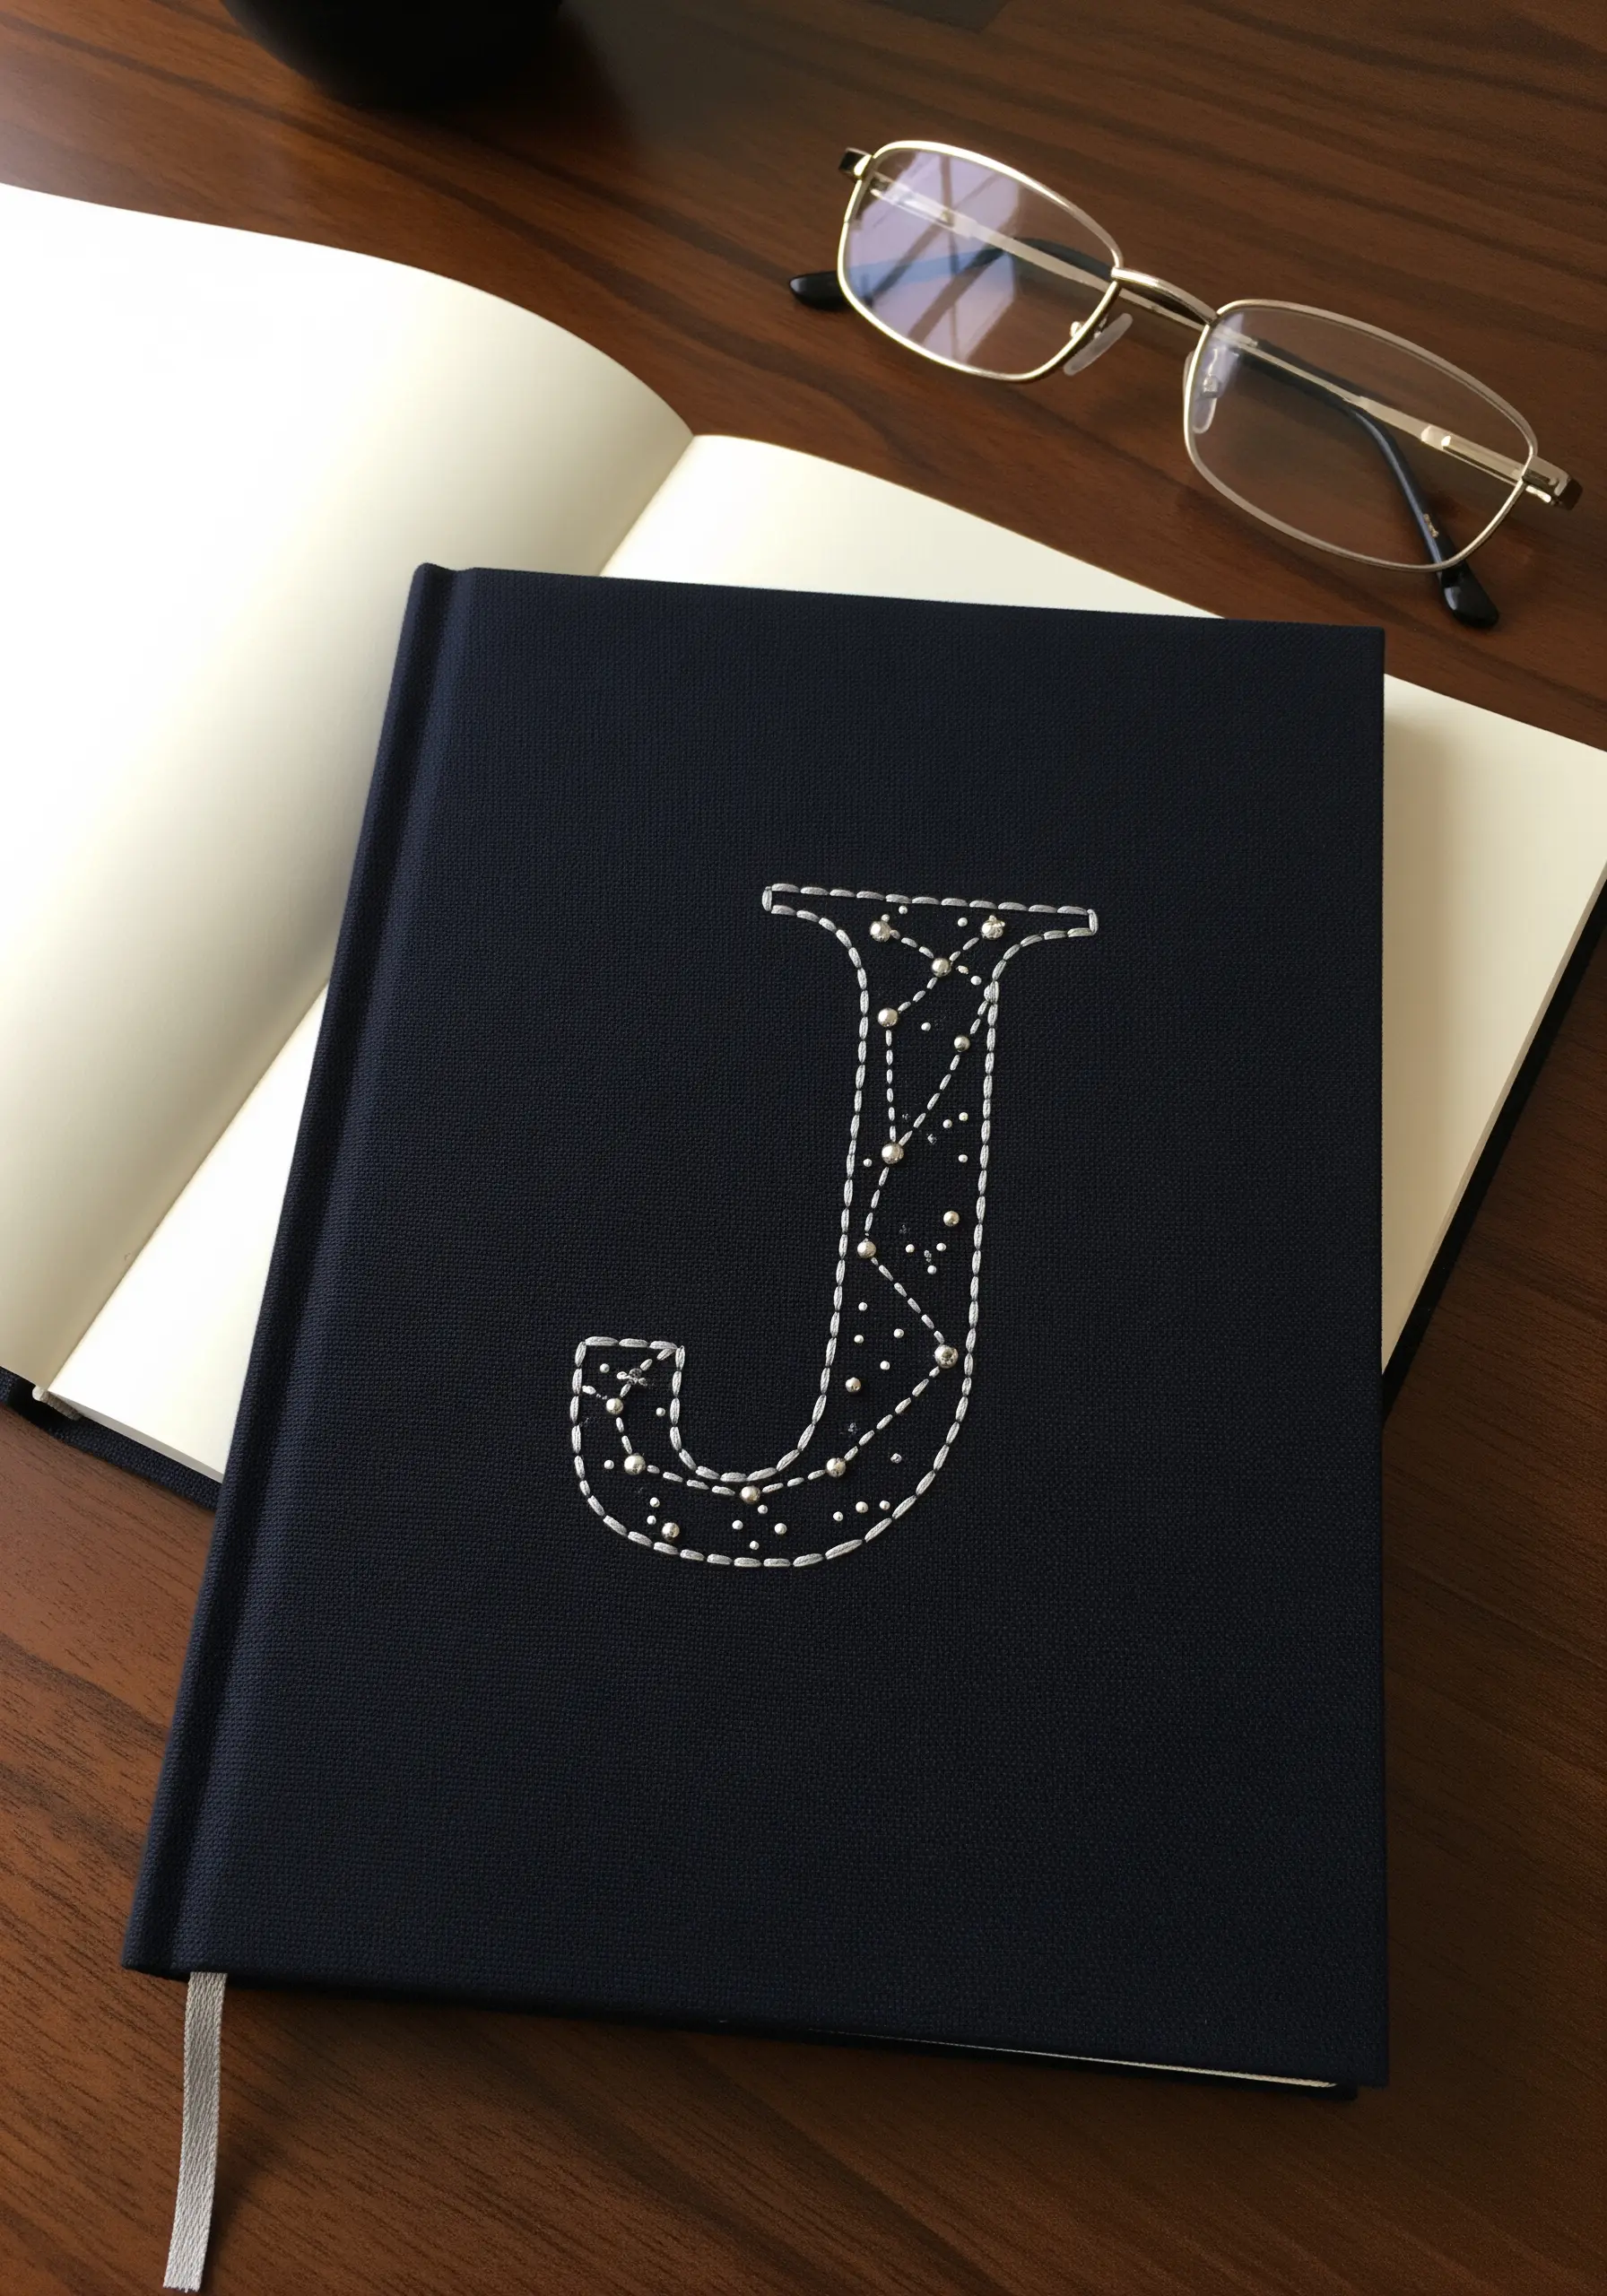
Elevate a simple backstitch outline by filling the letter’s interior with a celestial-inspired scatter of tiny French knots and seed stitches.
Use a fine, single-strand white or metallic thread for the “stars” to create a delicate sparkle against a dark background, like the cloth cover of a journal.
This approach adds thoughtful detail and personality without overwhelming the clean shape of the letter, making it feel both personal and magical.
5. The Minimalist Couching Script

For a perfectly smooth, uninterrupted cursive line, couching is the ideal technique, especially on materials that are difficult to hoop, like felt or heavy cardstock.
Lay down a thicker thread (like perle cotton or multiple strands of floss) to form the letter, then use a single, finer strand to tack it down with tiny, evenly spaced stitches.
This method avoids the segmented look of other line stitches, resulting in a single, fluid stroke that feels both effortless and intentional.
6. The Tone-on-Tone Cypher
Achieve a high-end, bespoke look by selecting a thread just a shade or two different from your fabric.
This subtle, tone-on-tone approach shifts the focus from color to the texture of the satin stitch, which allows the light to define the interlocking shapes.
Pay careful attention to your stitch direction; ensuring all stitches lie parallel and flat will maximize their gentle sheen and create a finish that feels both quiet and luxurious.
7. The Architectural Blueprint Initial
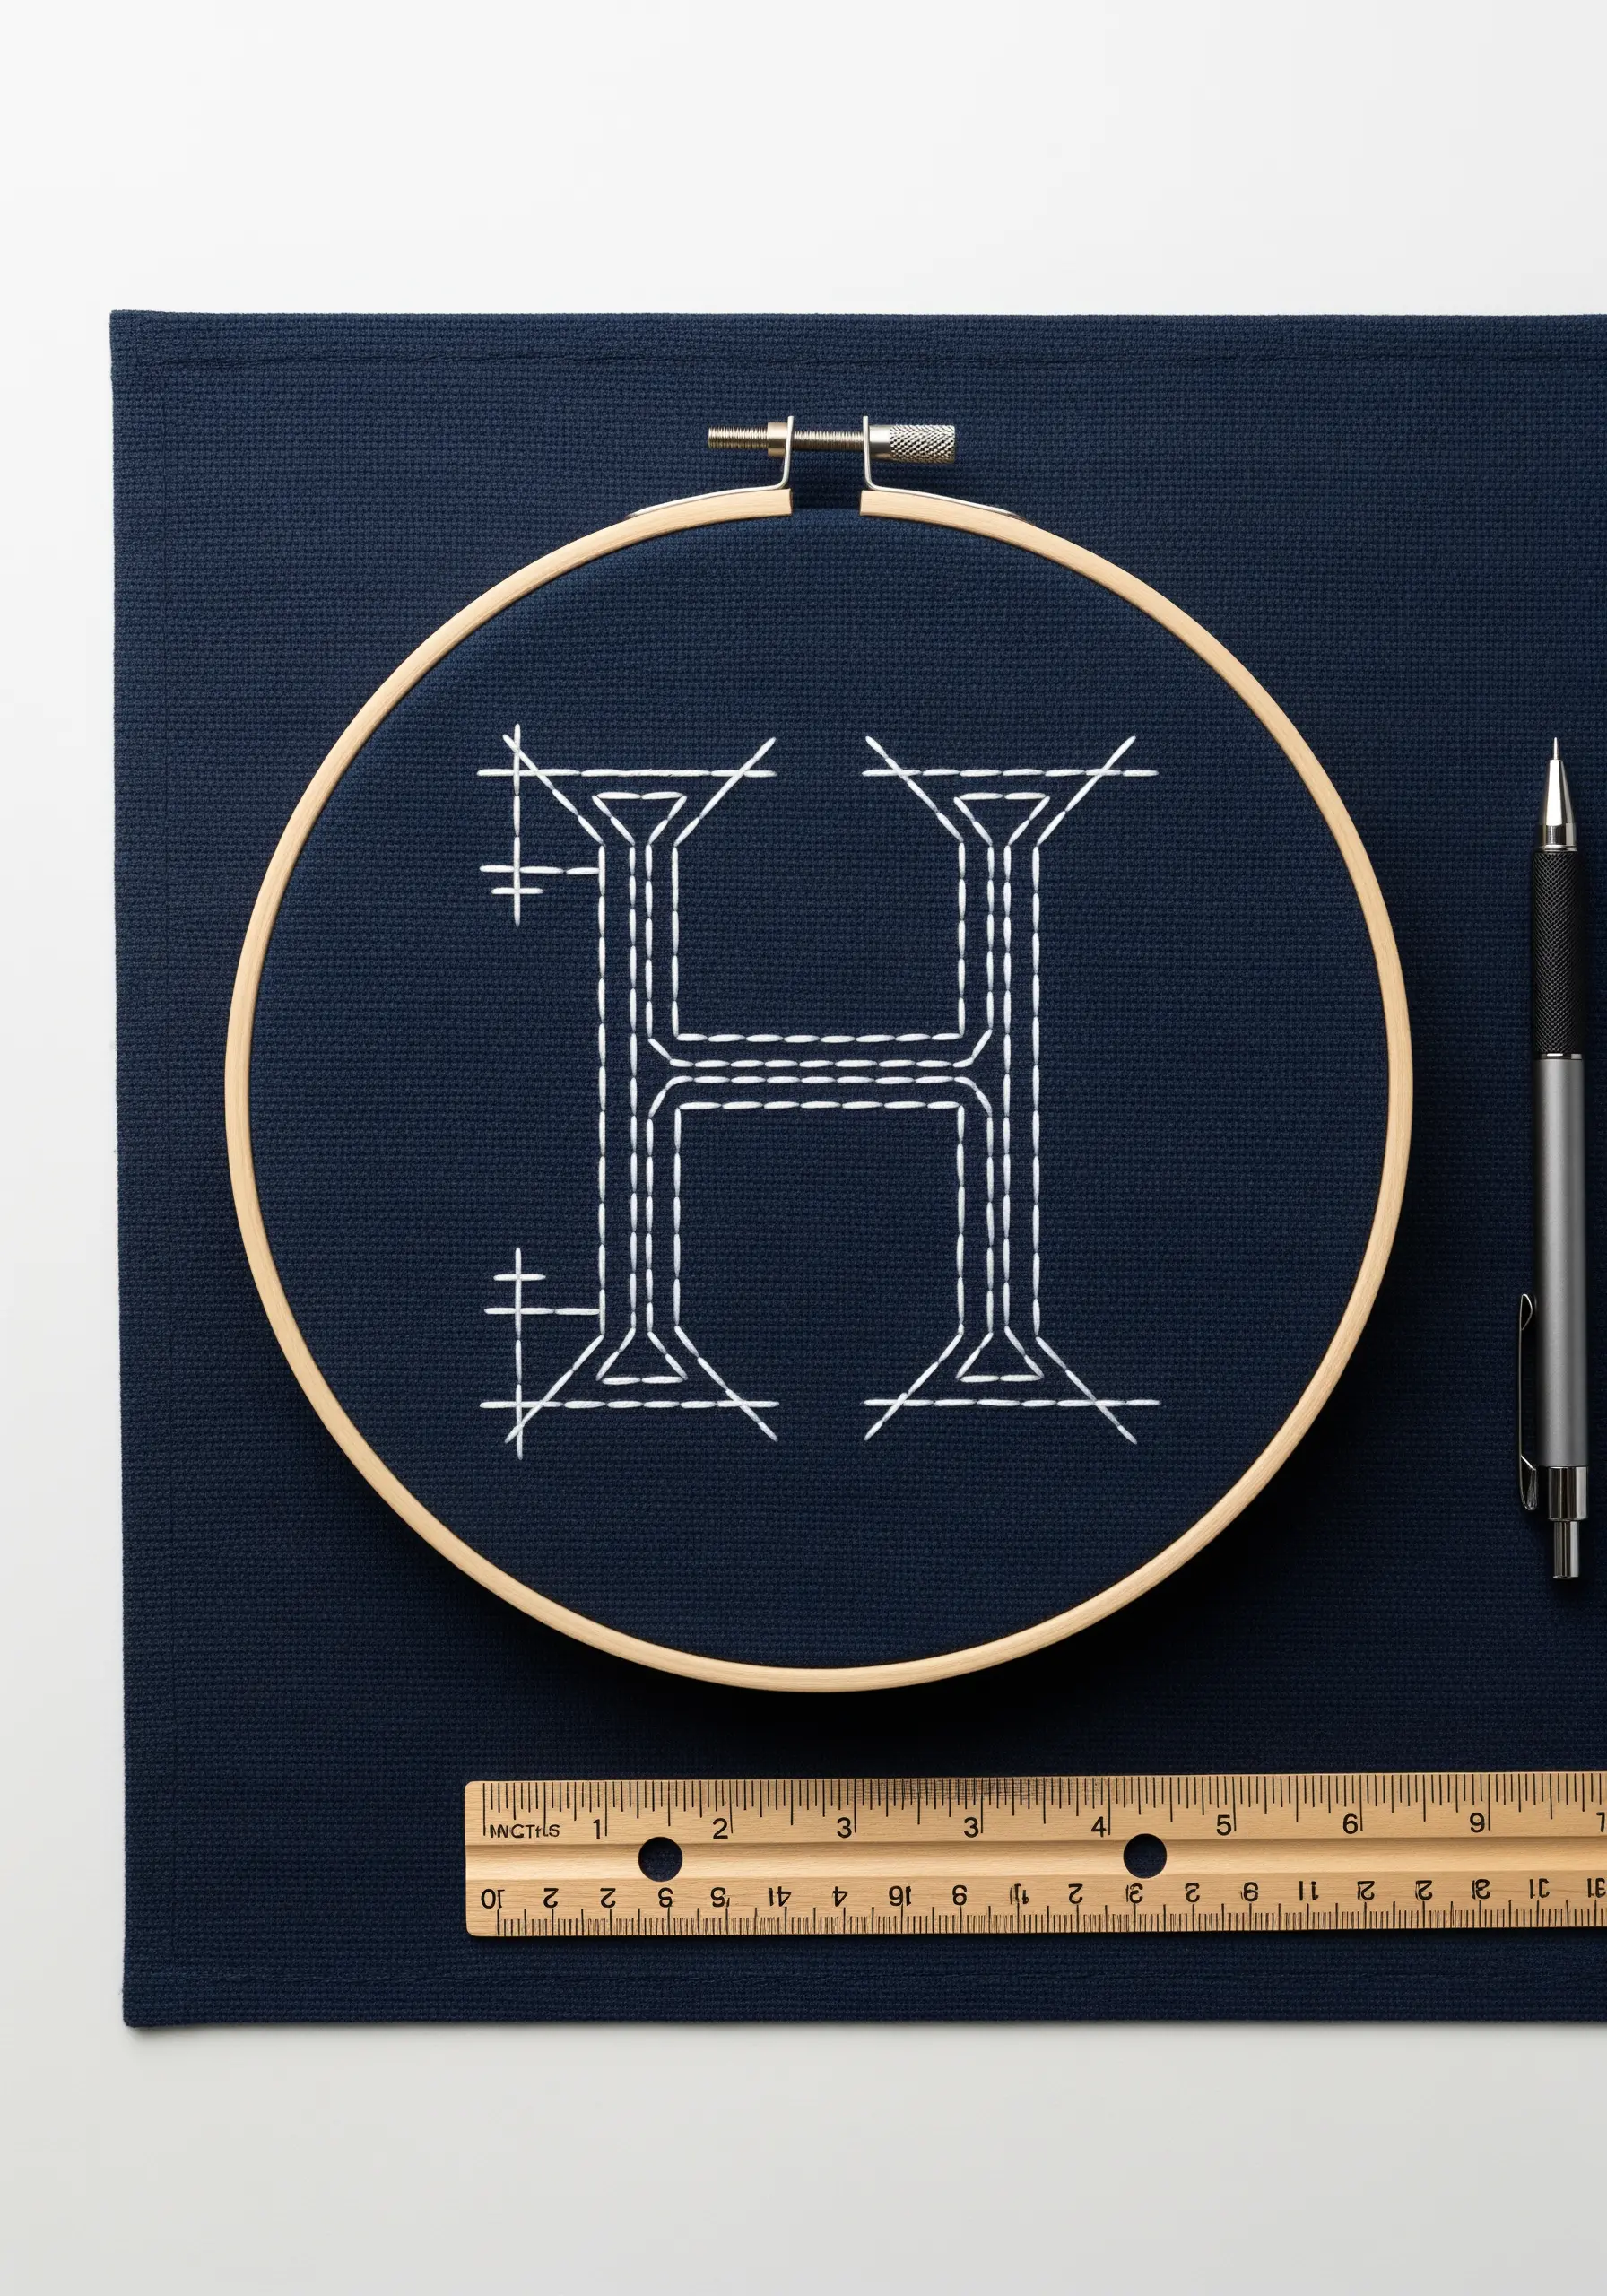
Give your monogram a modern, structural feel by approaching it like a technical drawing.
Use a simple backstitch in a high-contrast color for the main letterform, then add precise straight-stitch “guidelines” extending from the corners.
The key to this style is precision. Use a water-soluble marker and a small ruler to ensure every line is perfectly straight, transforming a simple letter into a piece of graphic design.
8. The Faux Bois Monogram

Create the organic illusion of woodgrain by filling your letter with long and short stitches using a variegated brown thread.
Deliberately alter the direction and length of your stitches to mimic the natural, flowing patterns found in wood.
To stitch on unconventional materials like leather or vinyl, use a specialized leather needle and slightly longer stitches to avoid over-perforating the surface.
A clean backstitch outline in a darker shade will contain the texture and give it a sharp, defined edge.
9. The Folk Art Crowned Initial

Add a touch of Scandinavian folk-art charm by topping your initial with a simple, stylized botanical motif.
Combine basic stitches like lazy daisy for petals, straight stitches for stems, and French knots for berries to create a balanced arrangement.
To keep the look modern and fresh, restrict your palette to a single bold color on a neutral linen background. This allows the playful composition and clean stitch work to shine.
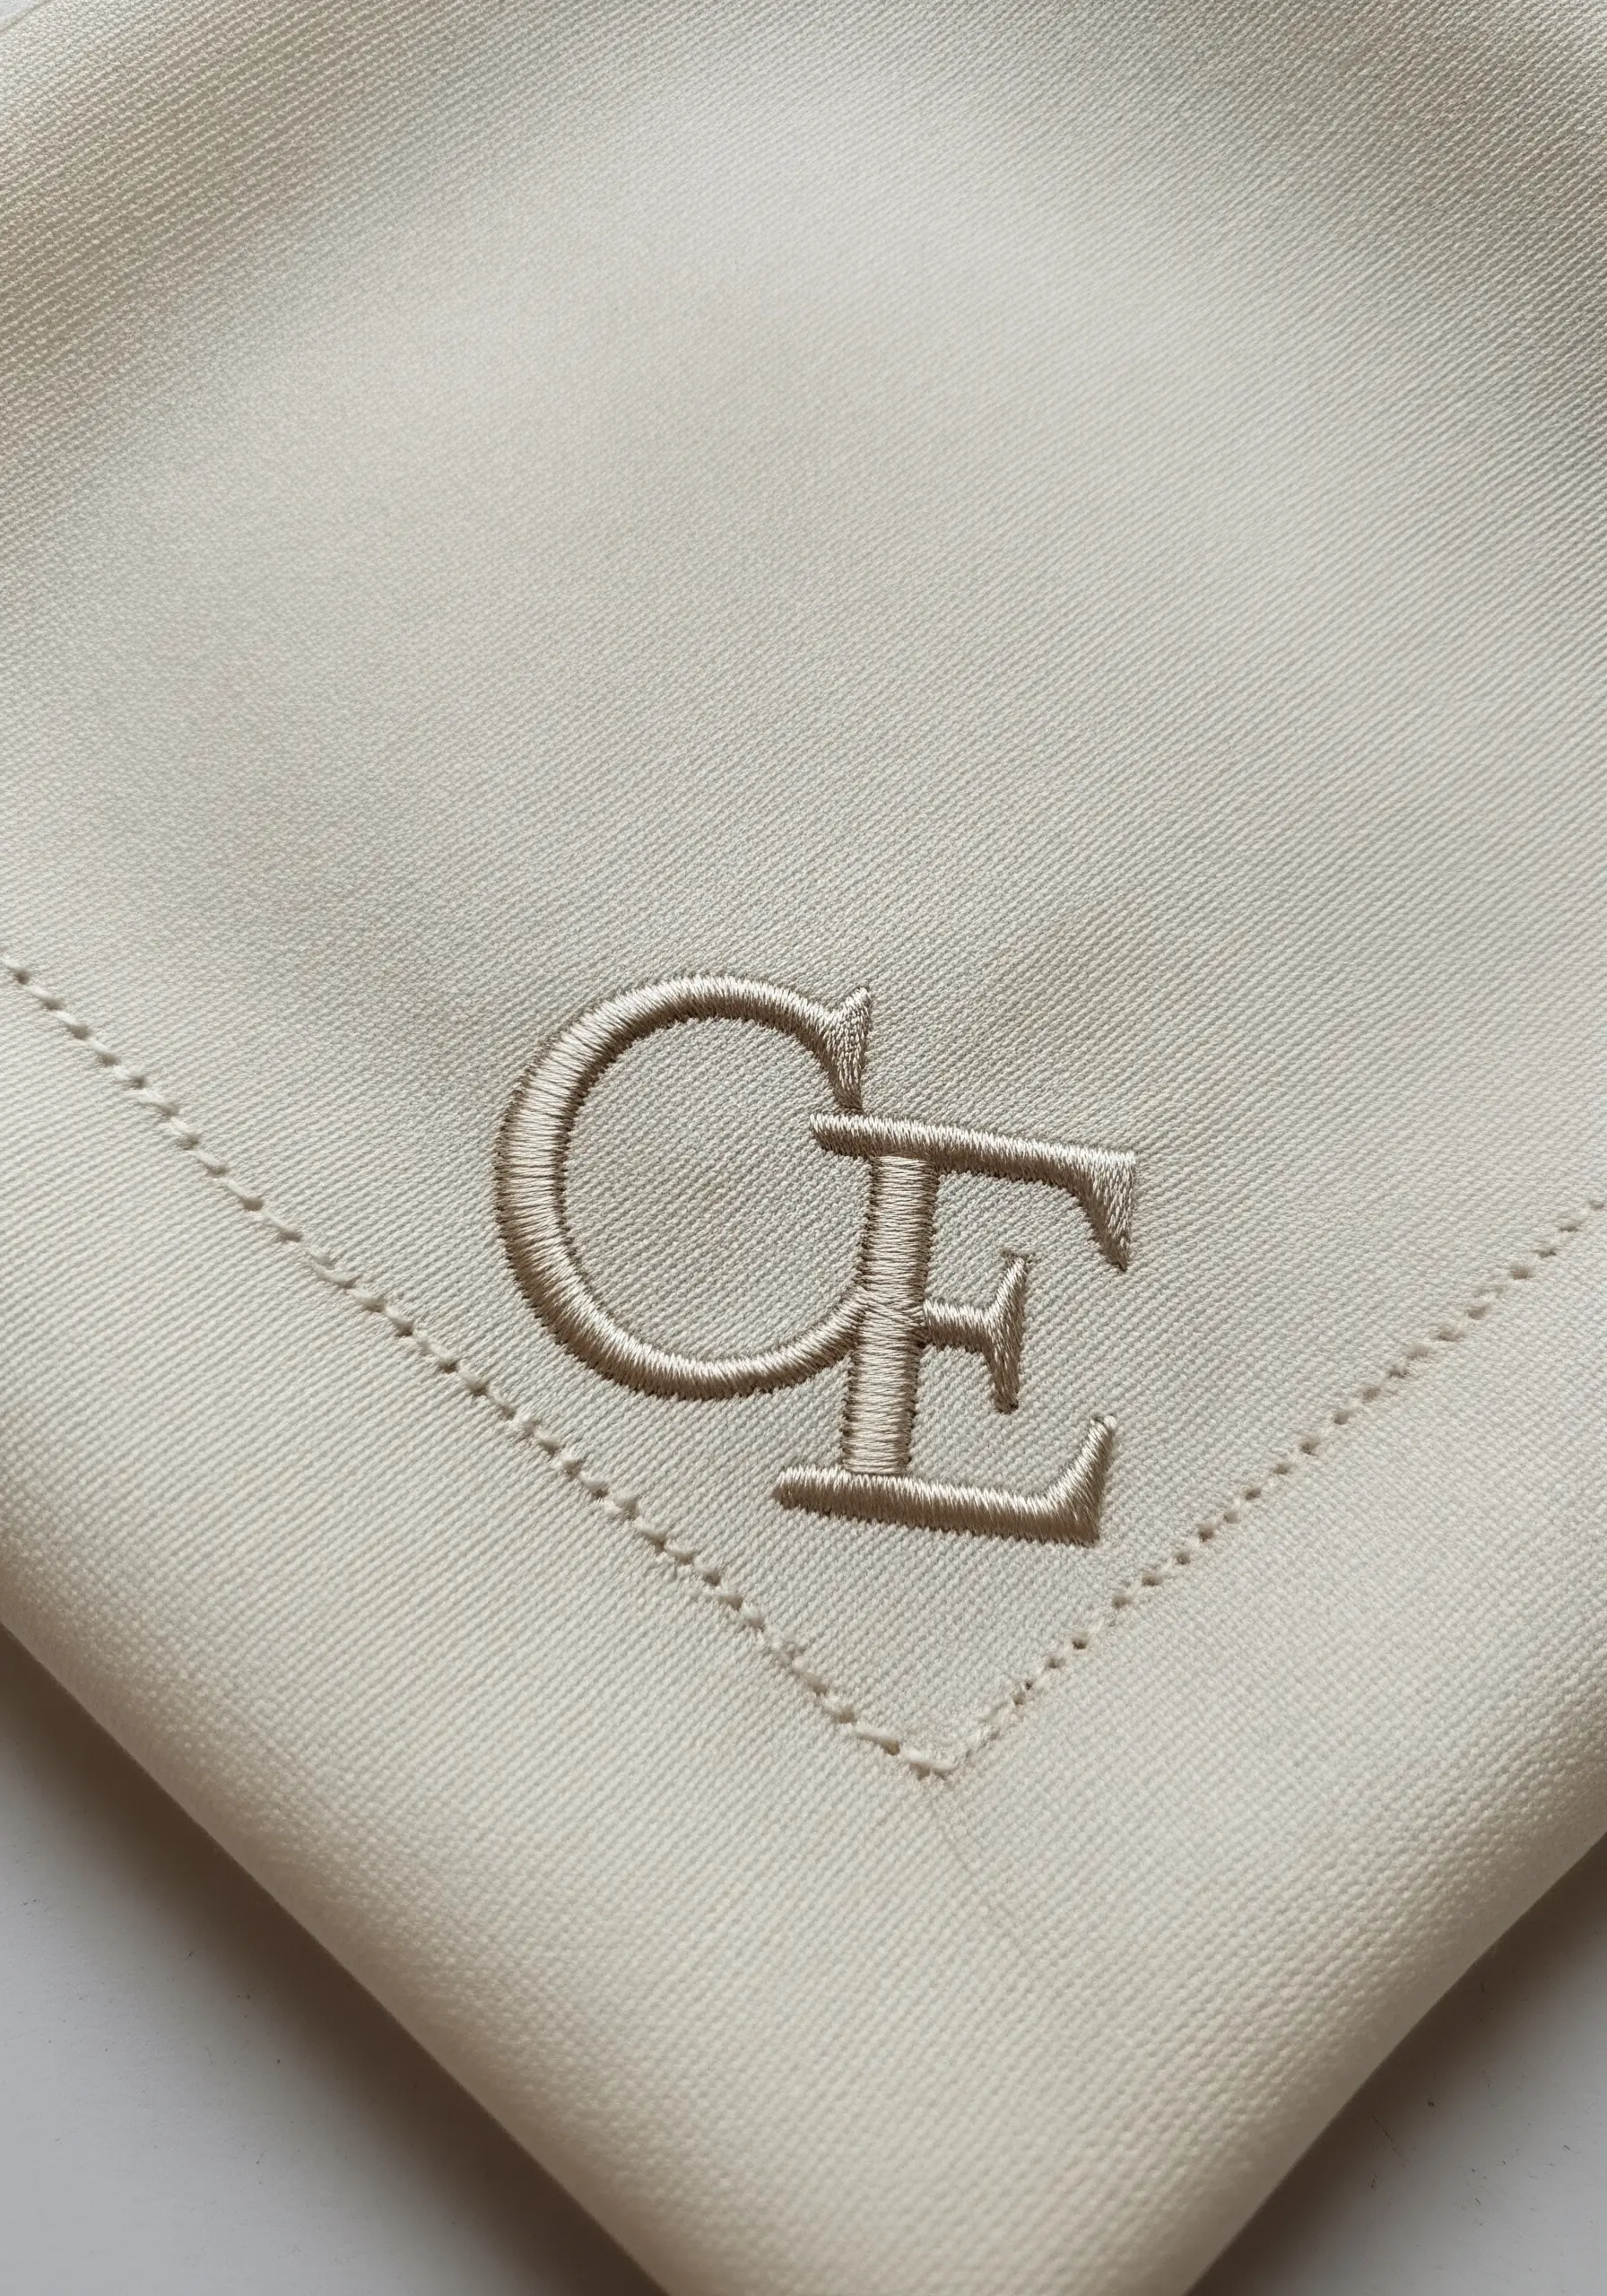
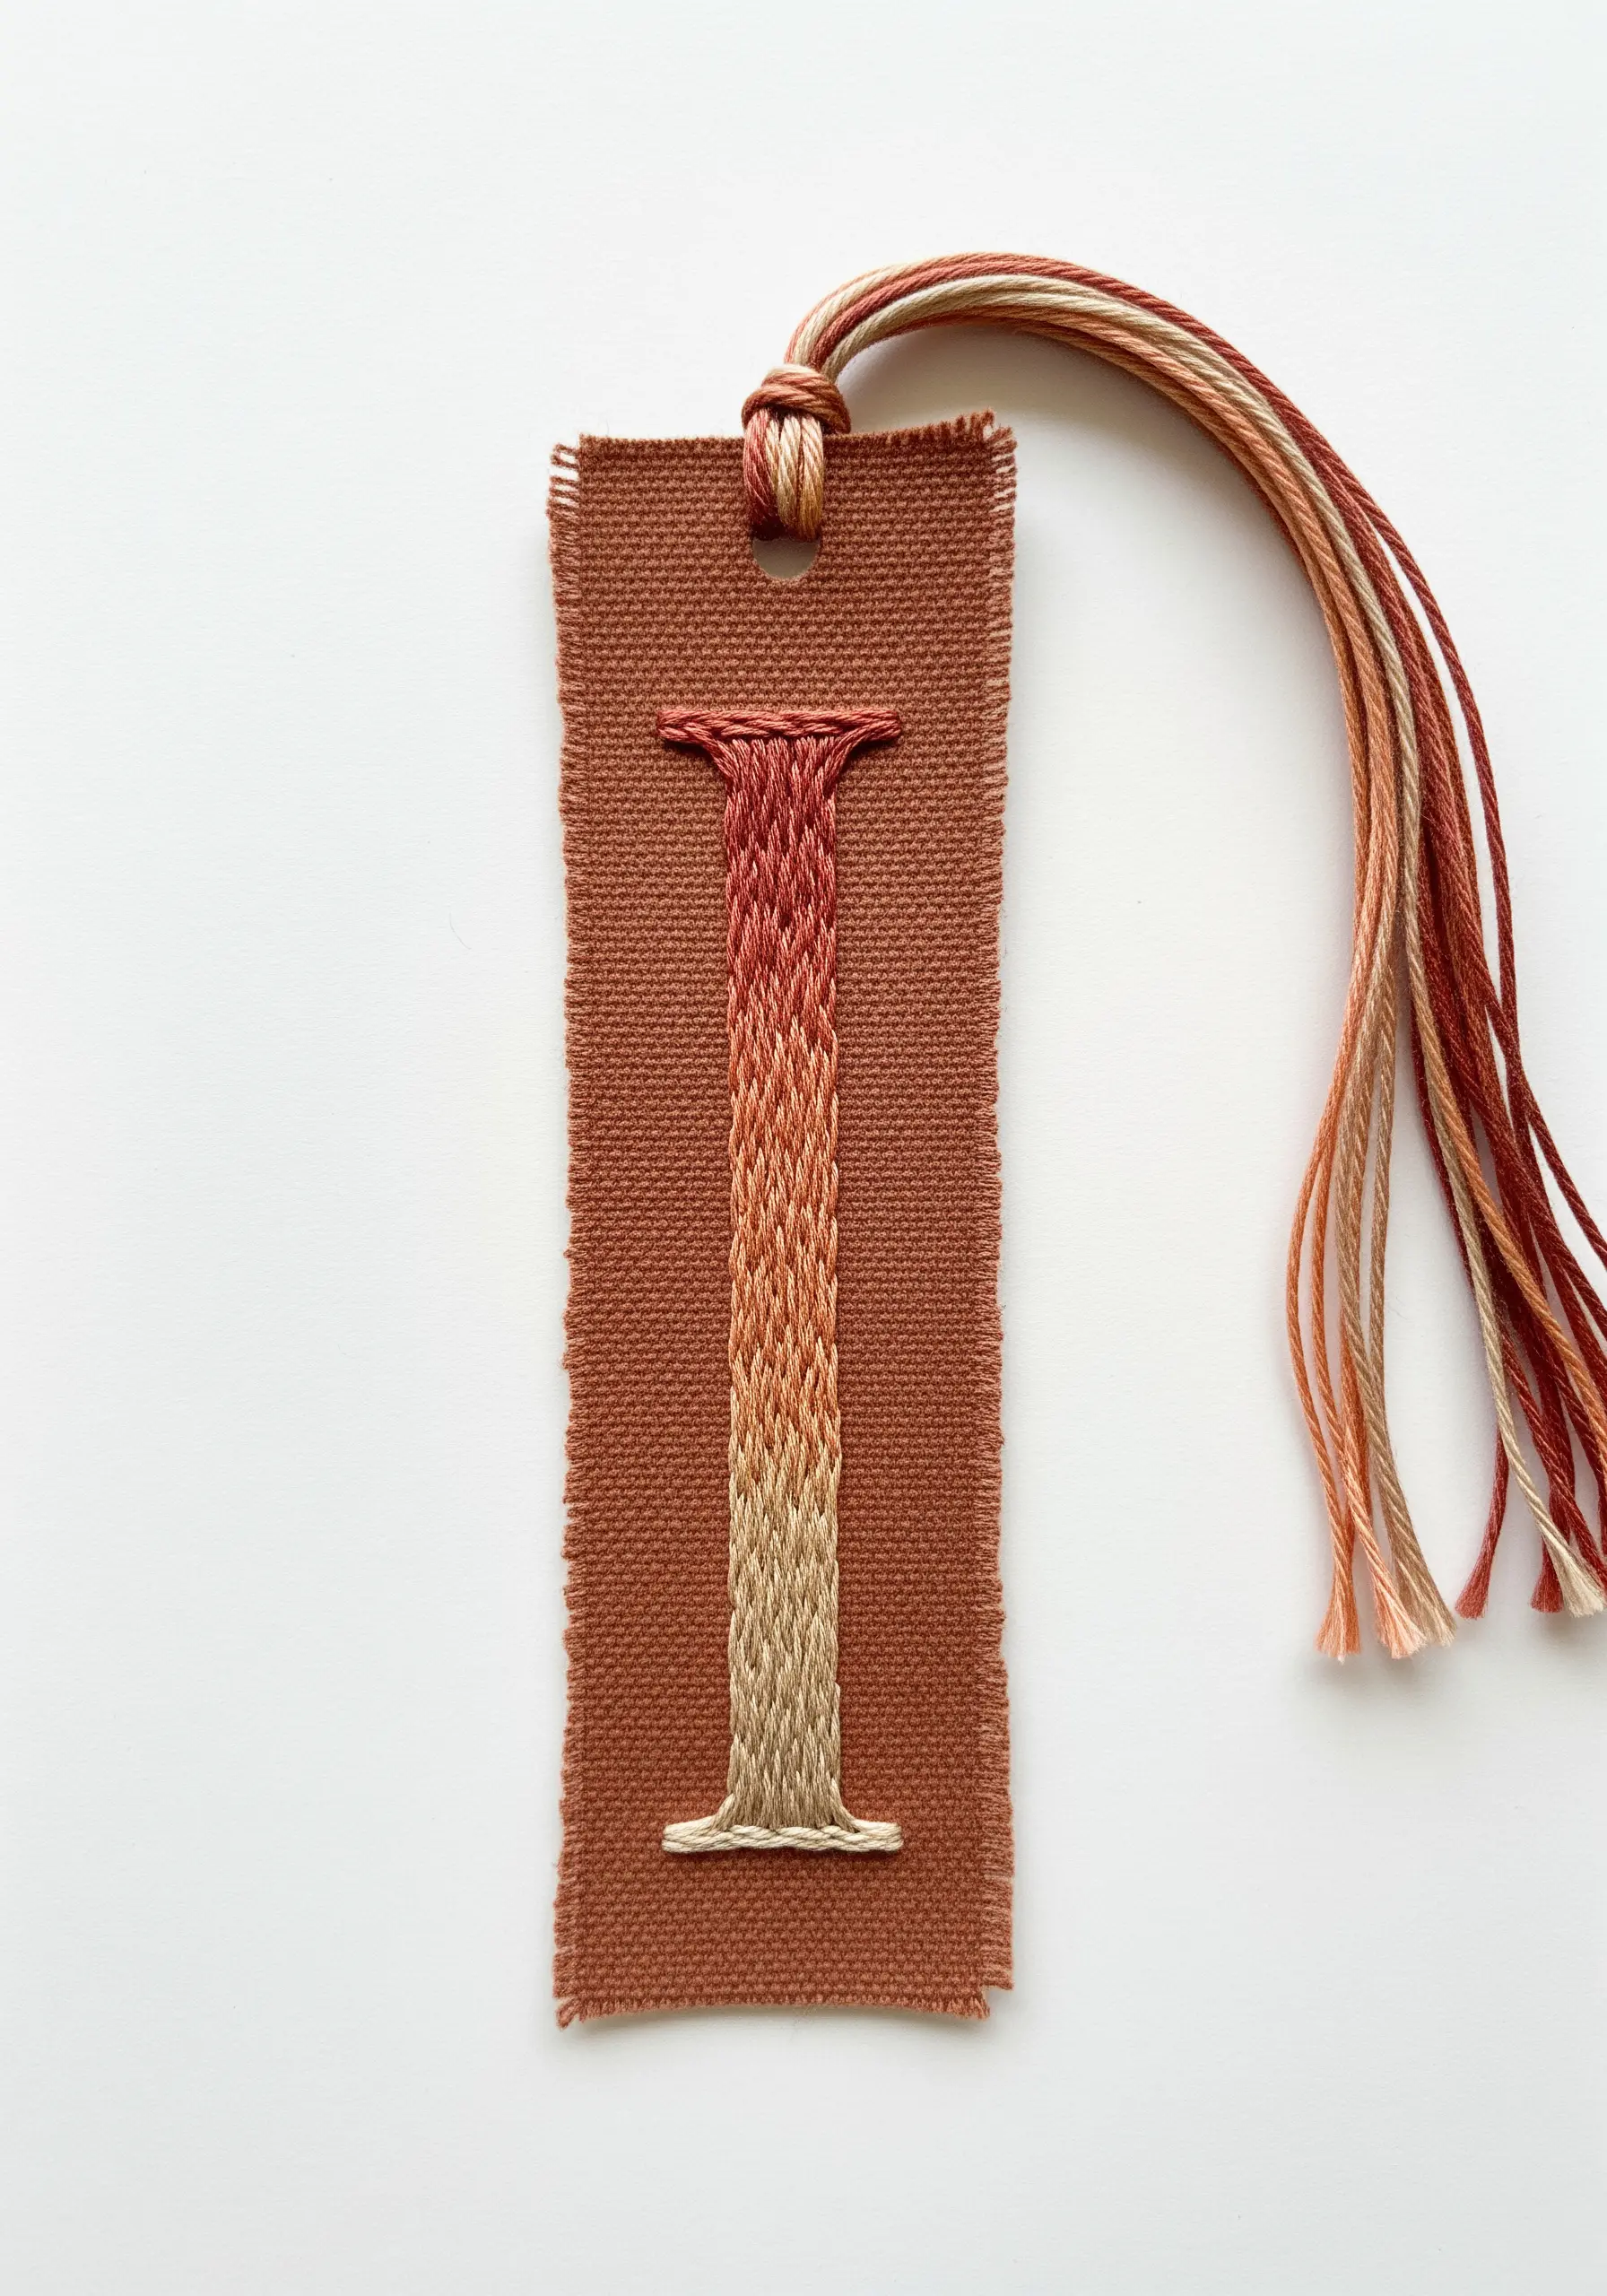
10. The Padded Satin Stitch Letter
To give your monogram a raised, three-dimensional profile, build a foundation of padding before you begin your satin stitch.
First, fill the letter shape with small seed stitches or horizontal straight stitches. Then, work your final satin stitches vertically over this base.
This underlay lifts the top layer, creating beautiful volume and a smooth, professional finish reminiscent of high-end athletic apparel.
Always use a stabilizer on the back of stretchy fabrics to prevent the dense stitching from causing puckering.
11. The Blackwork Pattern-Fill Monogram
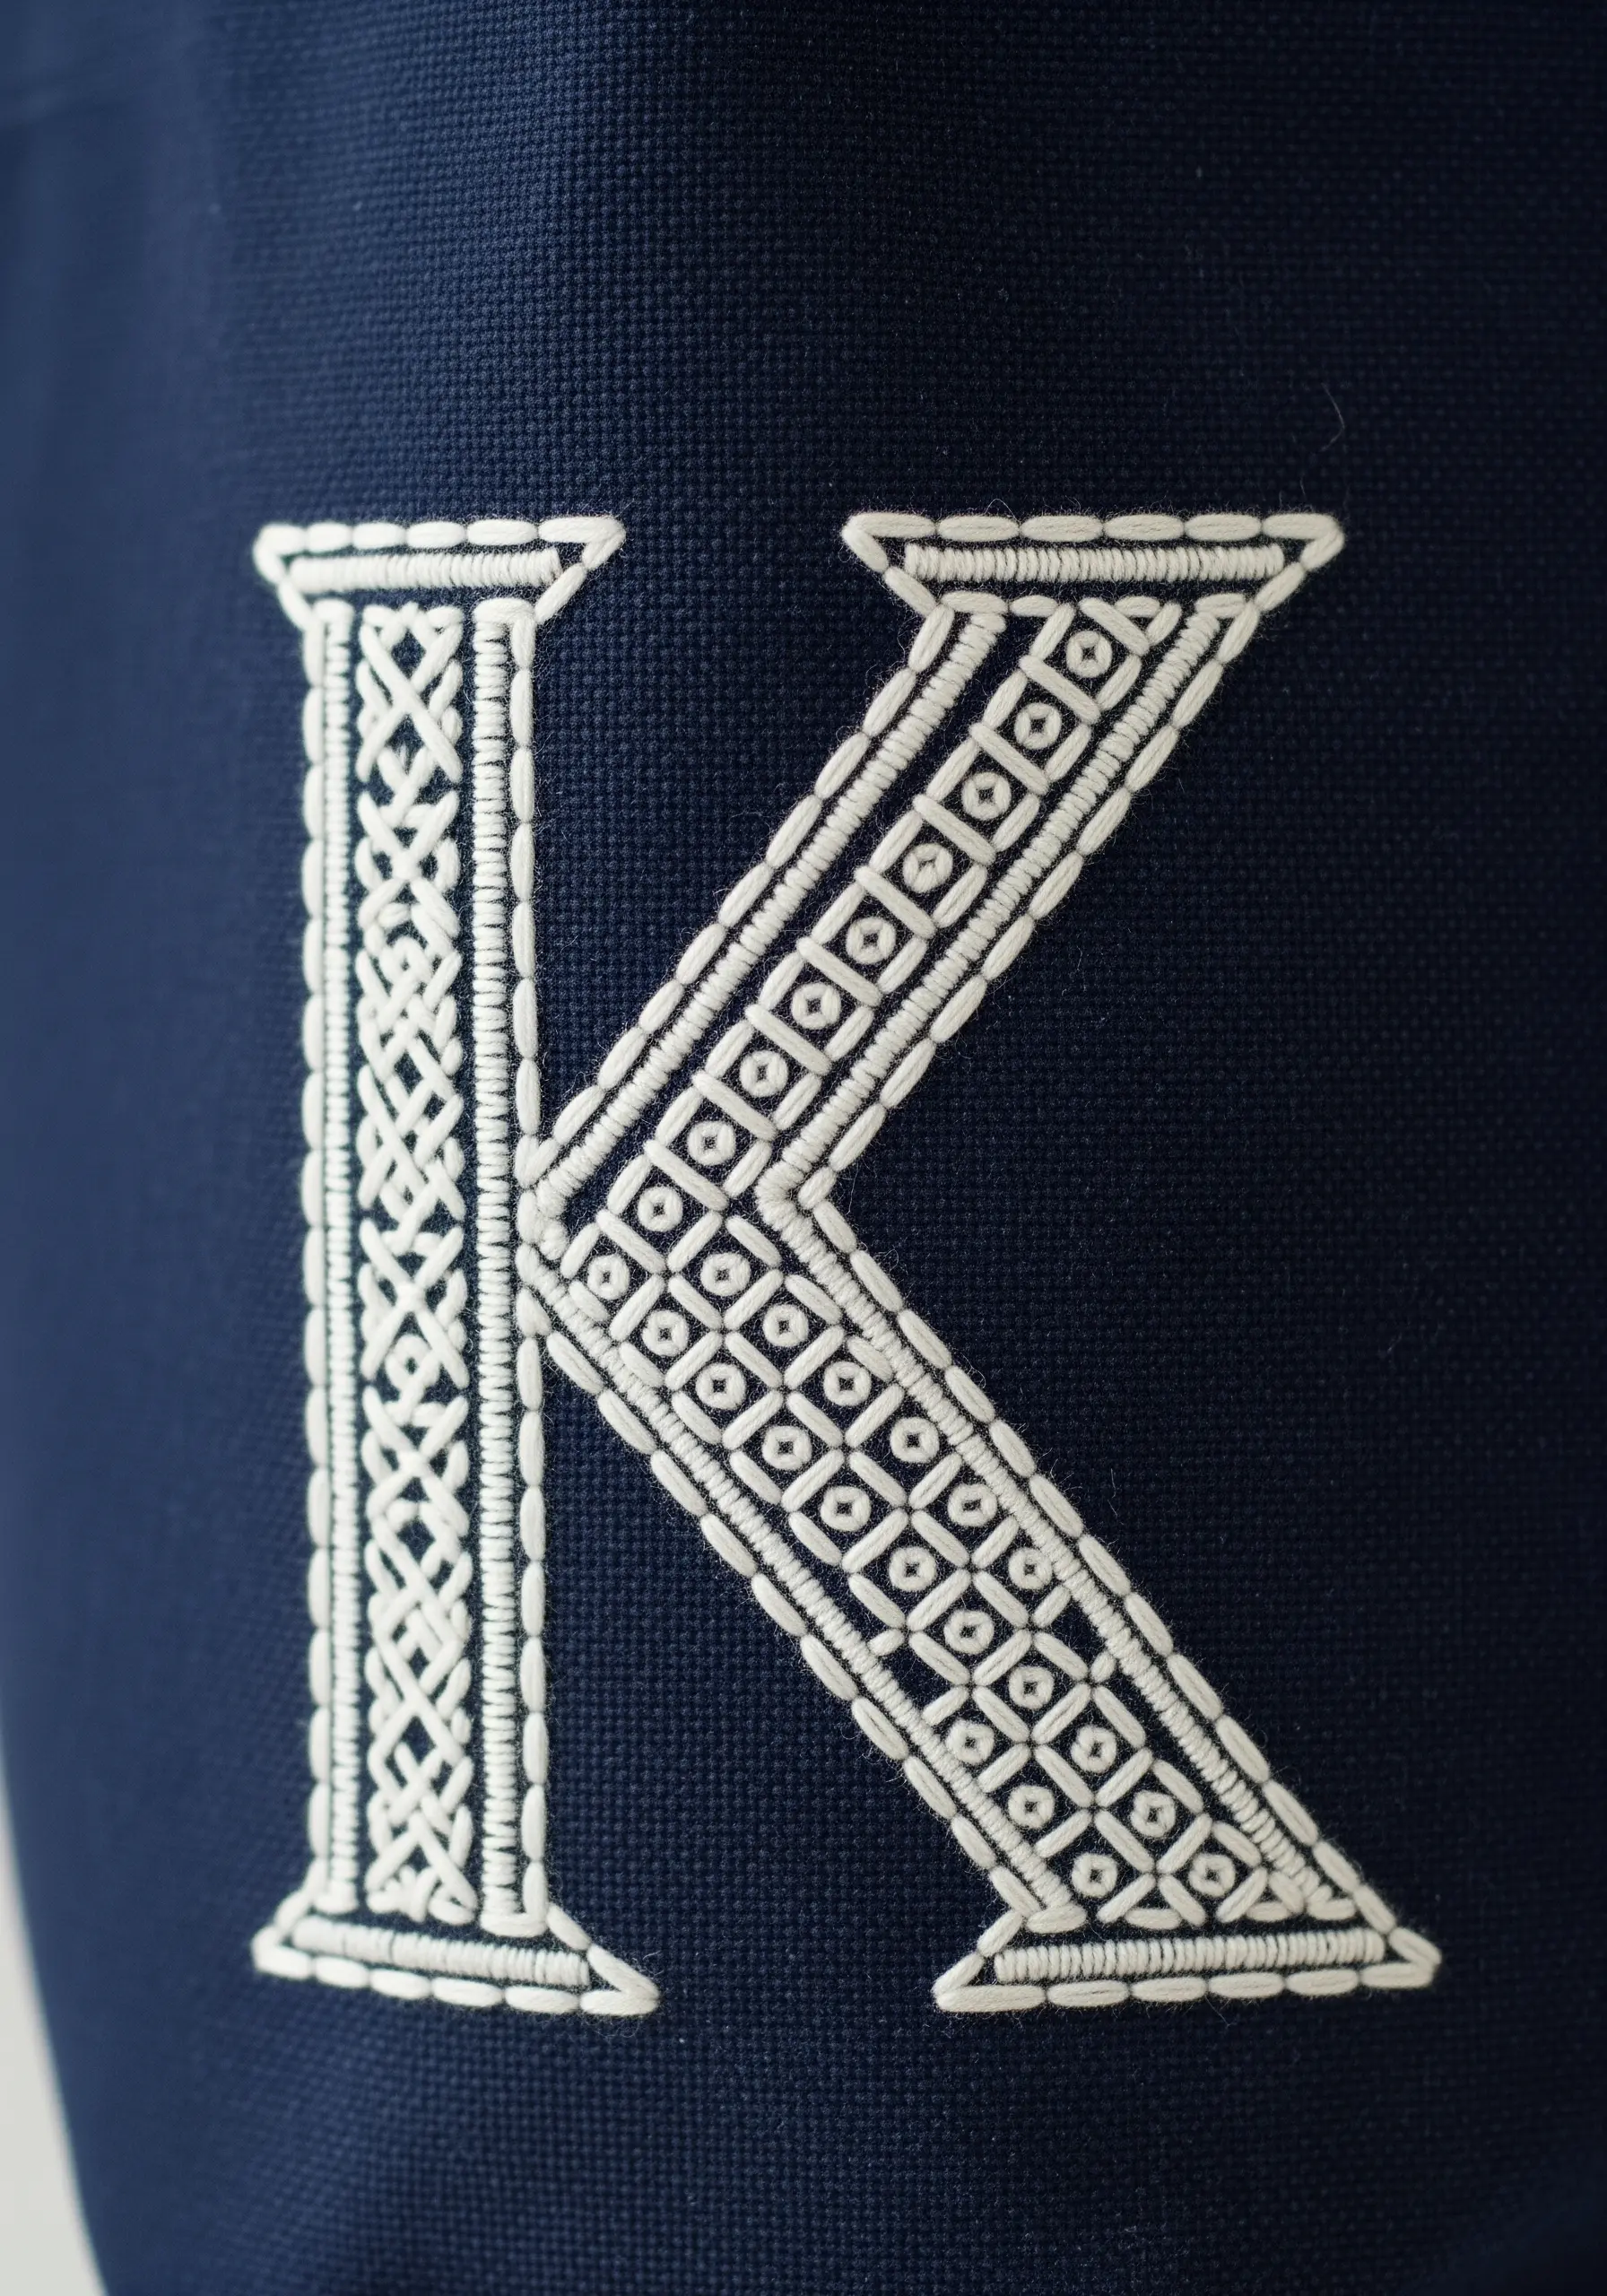
Instead of a solid satin stitch, fill your monogram with intricate geometric patterns inspired by blackwork or pattern darning.
Begin by creating a crisp border for your letter using a split stitch. Then, using a finer thread, fill the interior with a repeating pattern of small, precise straight stitches.
This technique adds incredible detail and sophistication, transforming a simple initial into a piece of delicate, lace-like textile art.
12. The Watercolor Blend Initial
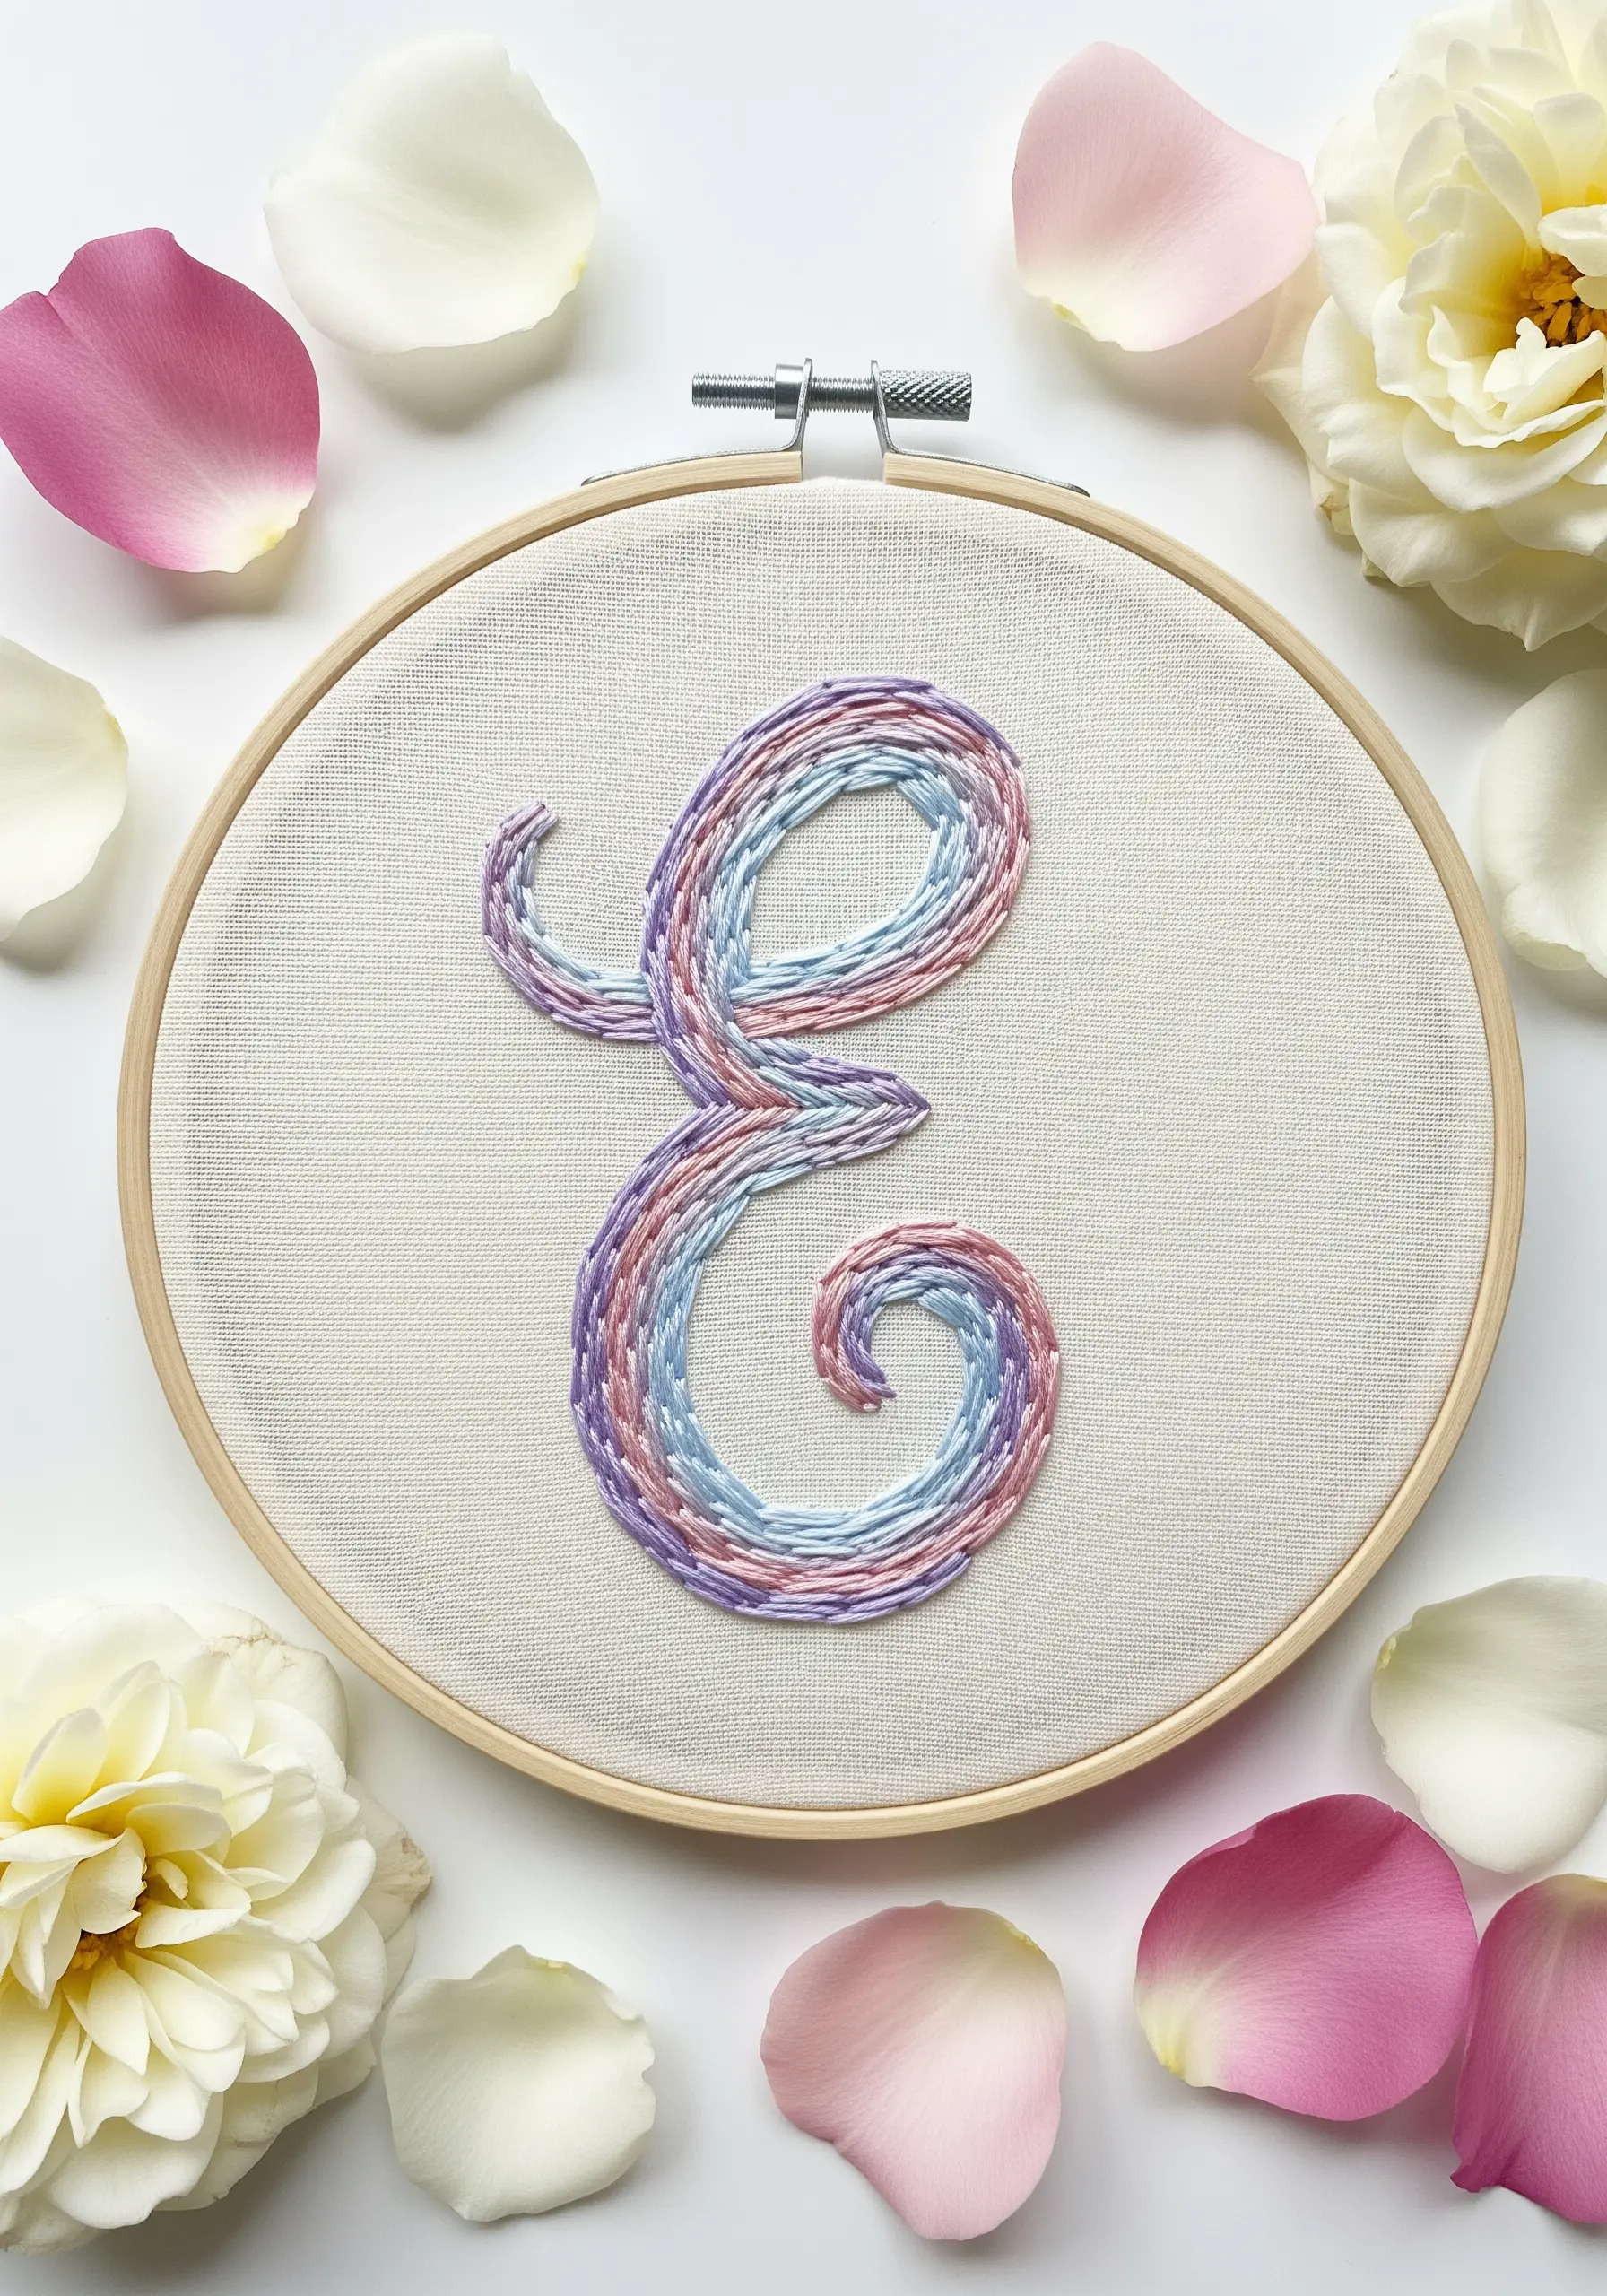
Achieve a soft, painterly look by threading your needle with single strands of multiple pastel colors at the same time.
As you work the satin stitch, the colors will blend together organically, creating subtle shifts and a beautiful watercolor effect.
Don’t try to control the color placement too much; the magic of this technique lies in the spontaneous, gentle mixing of the hues.
This style is especially effective for cursive letters, where the soft color transitions can follow the graceful curves of the script.
13. The Asymmetrical Geometric Frame
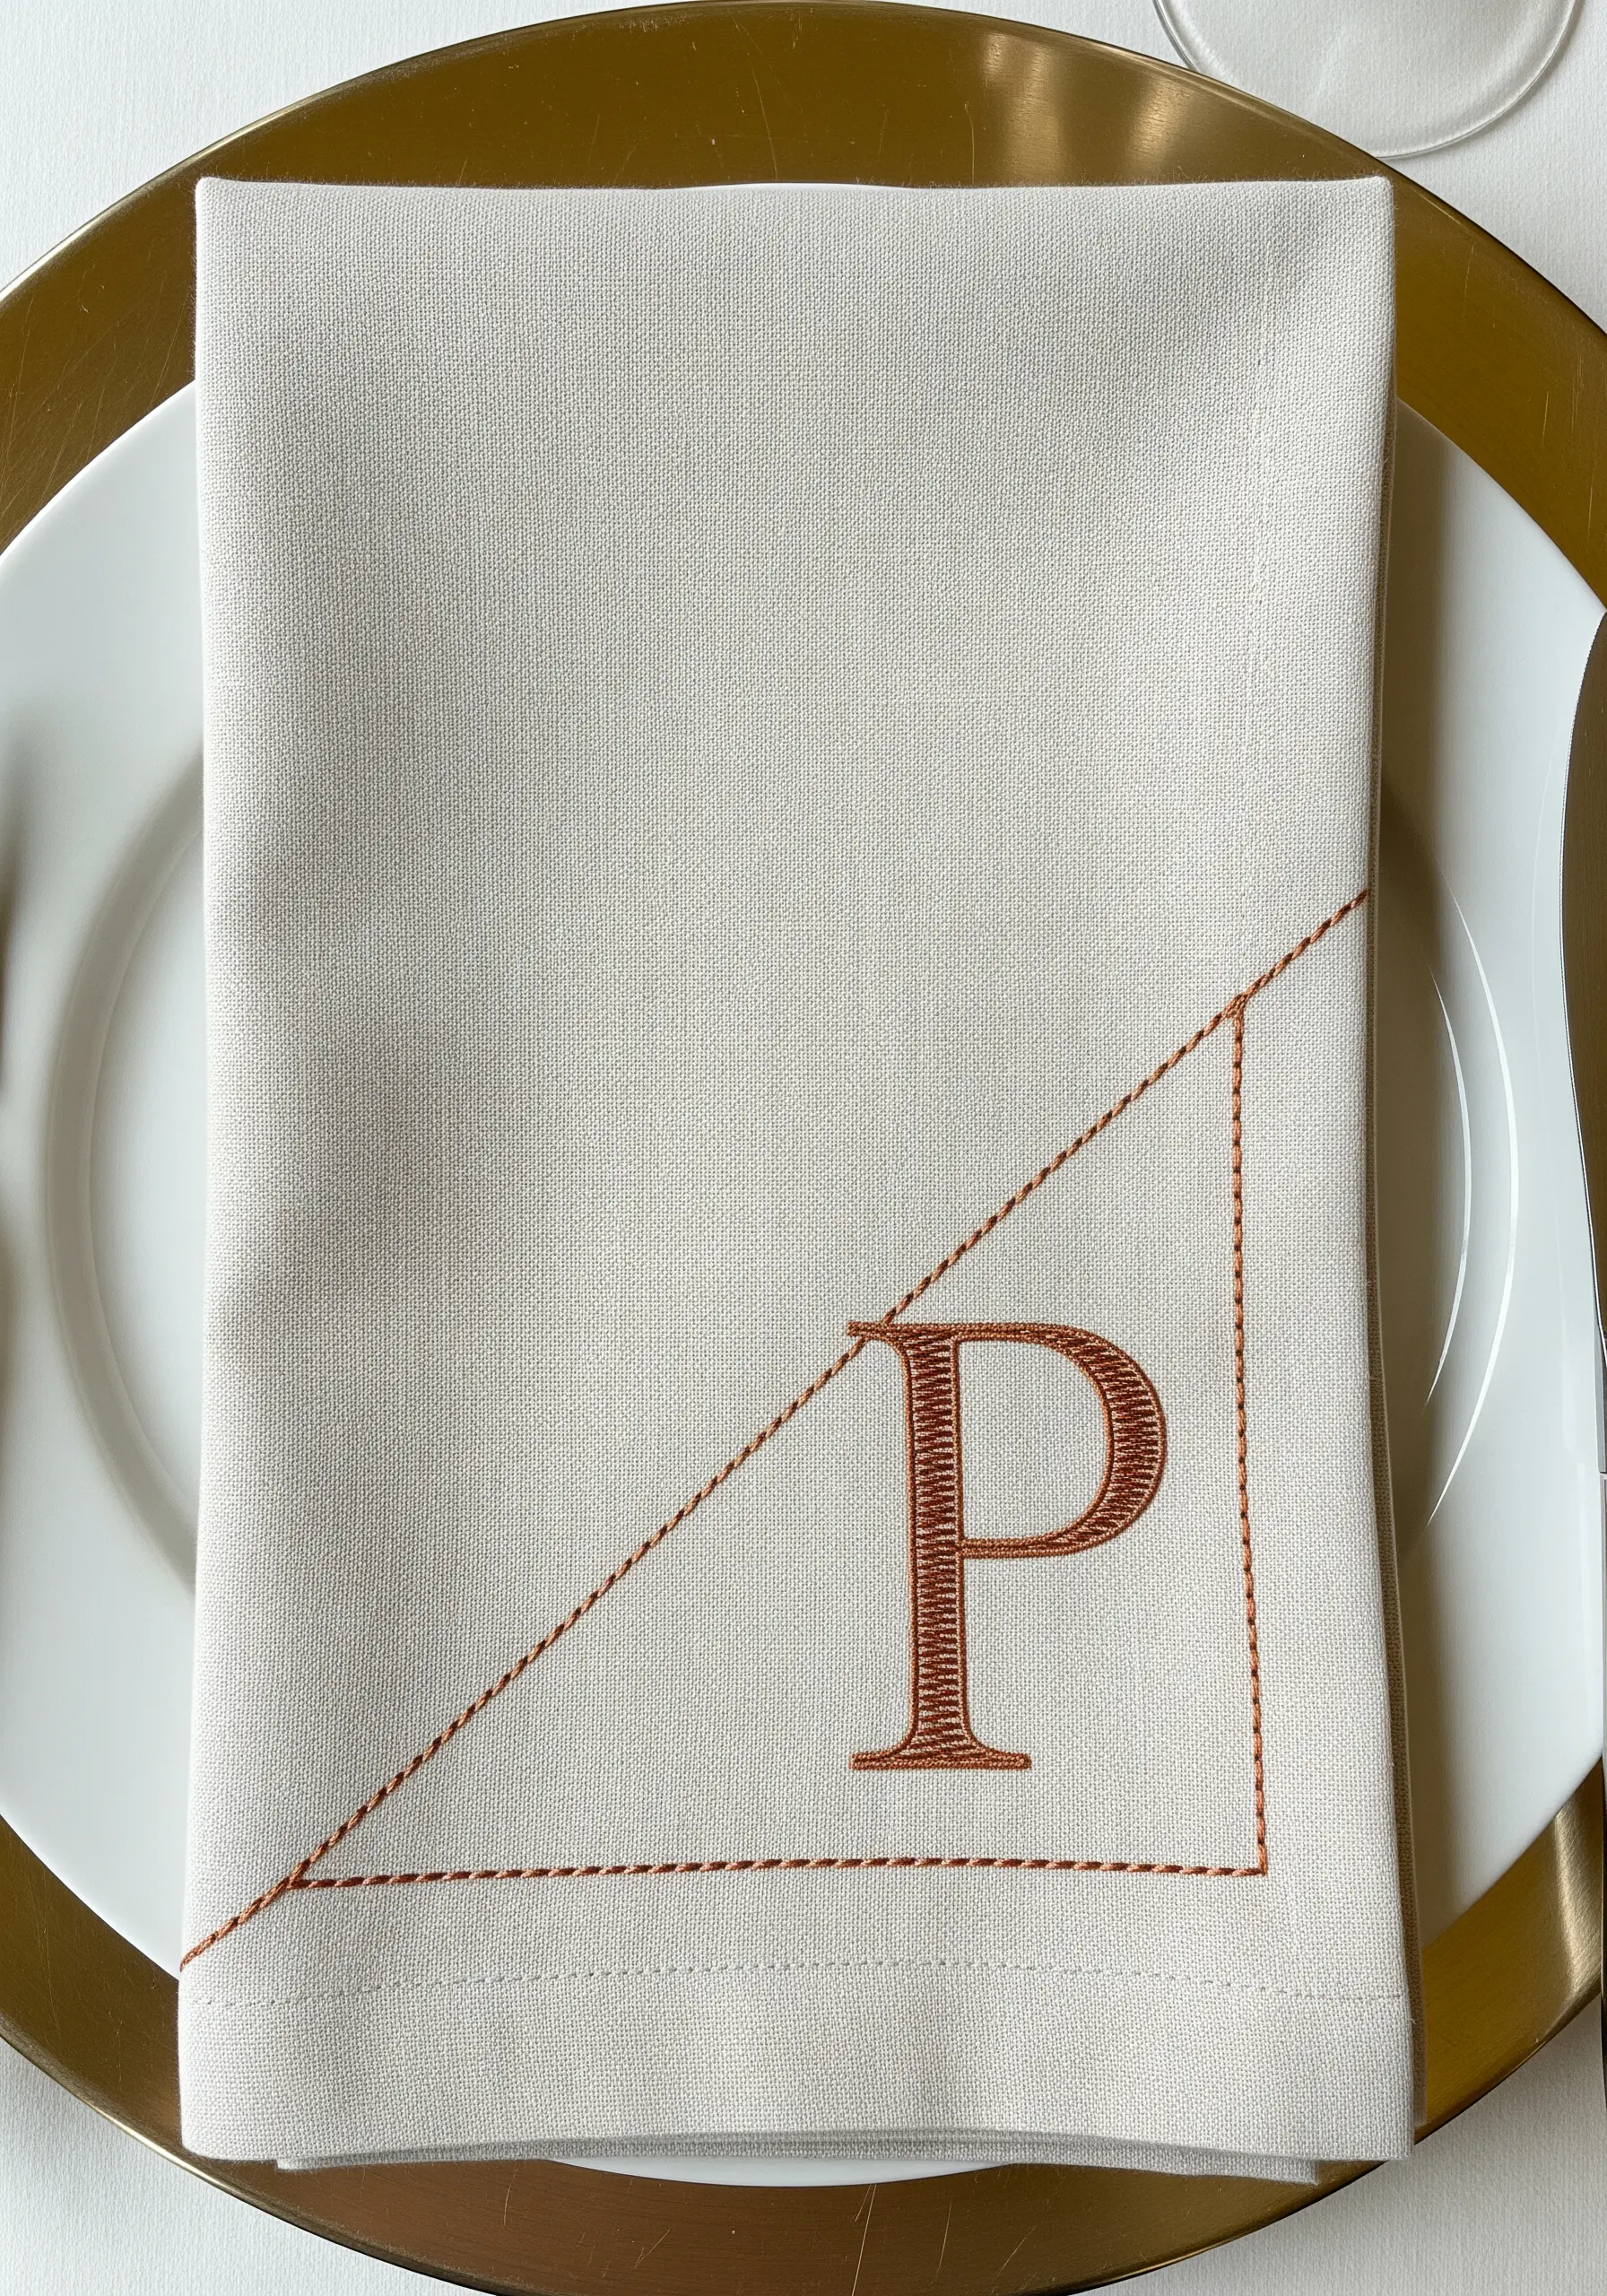
Integrate your monogram into a larger composition by framing it with clean, asymmetrical lines.
A simple running stitch is all you need to create the geometric frame, providing a delicate contrast to the solid satin stitch of the initial.
This approach makes the monogram feel like a deliberate part of the item’s overall design, turning a simple napkin into a piece of modern minimalist table linen.
14. The Chiaroscuro Column Monogram
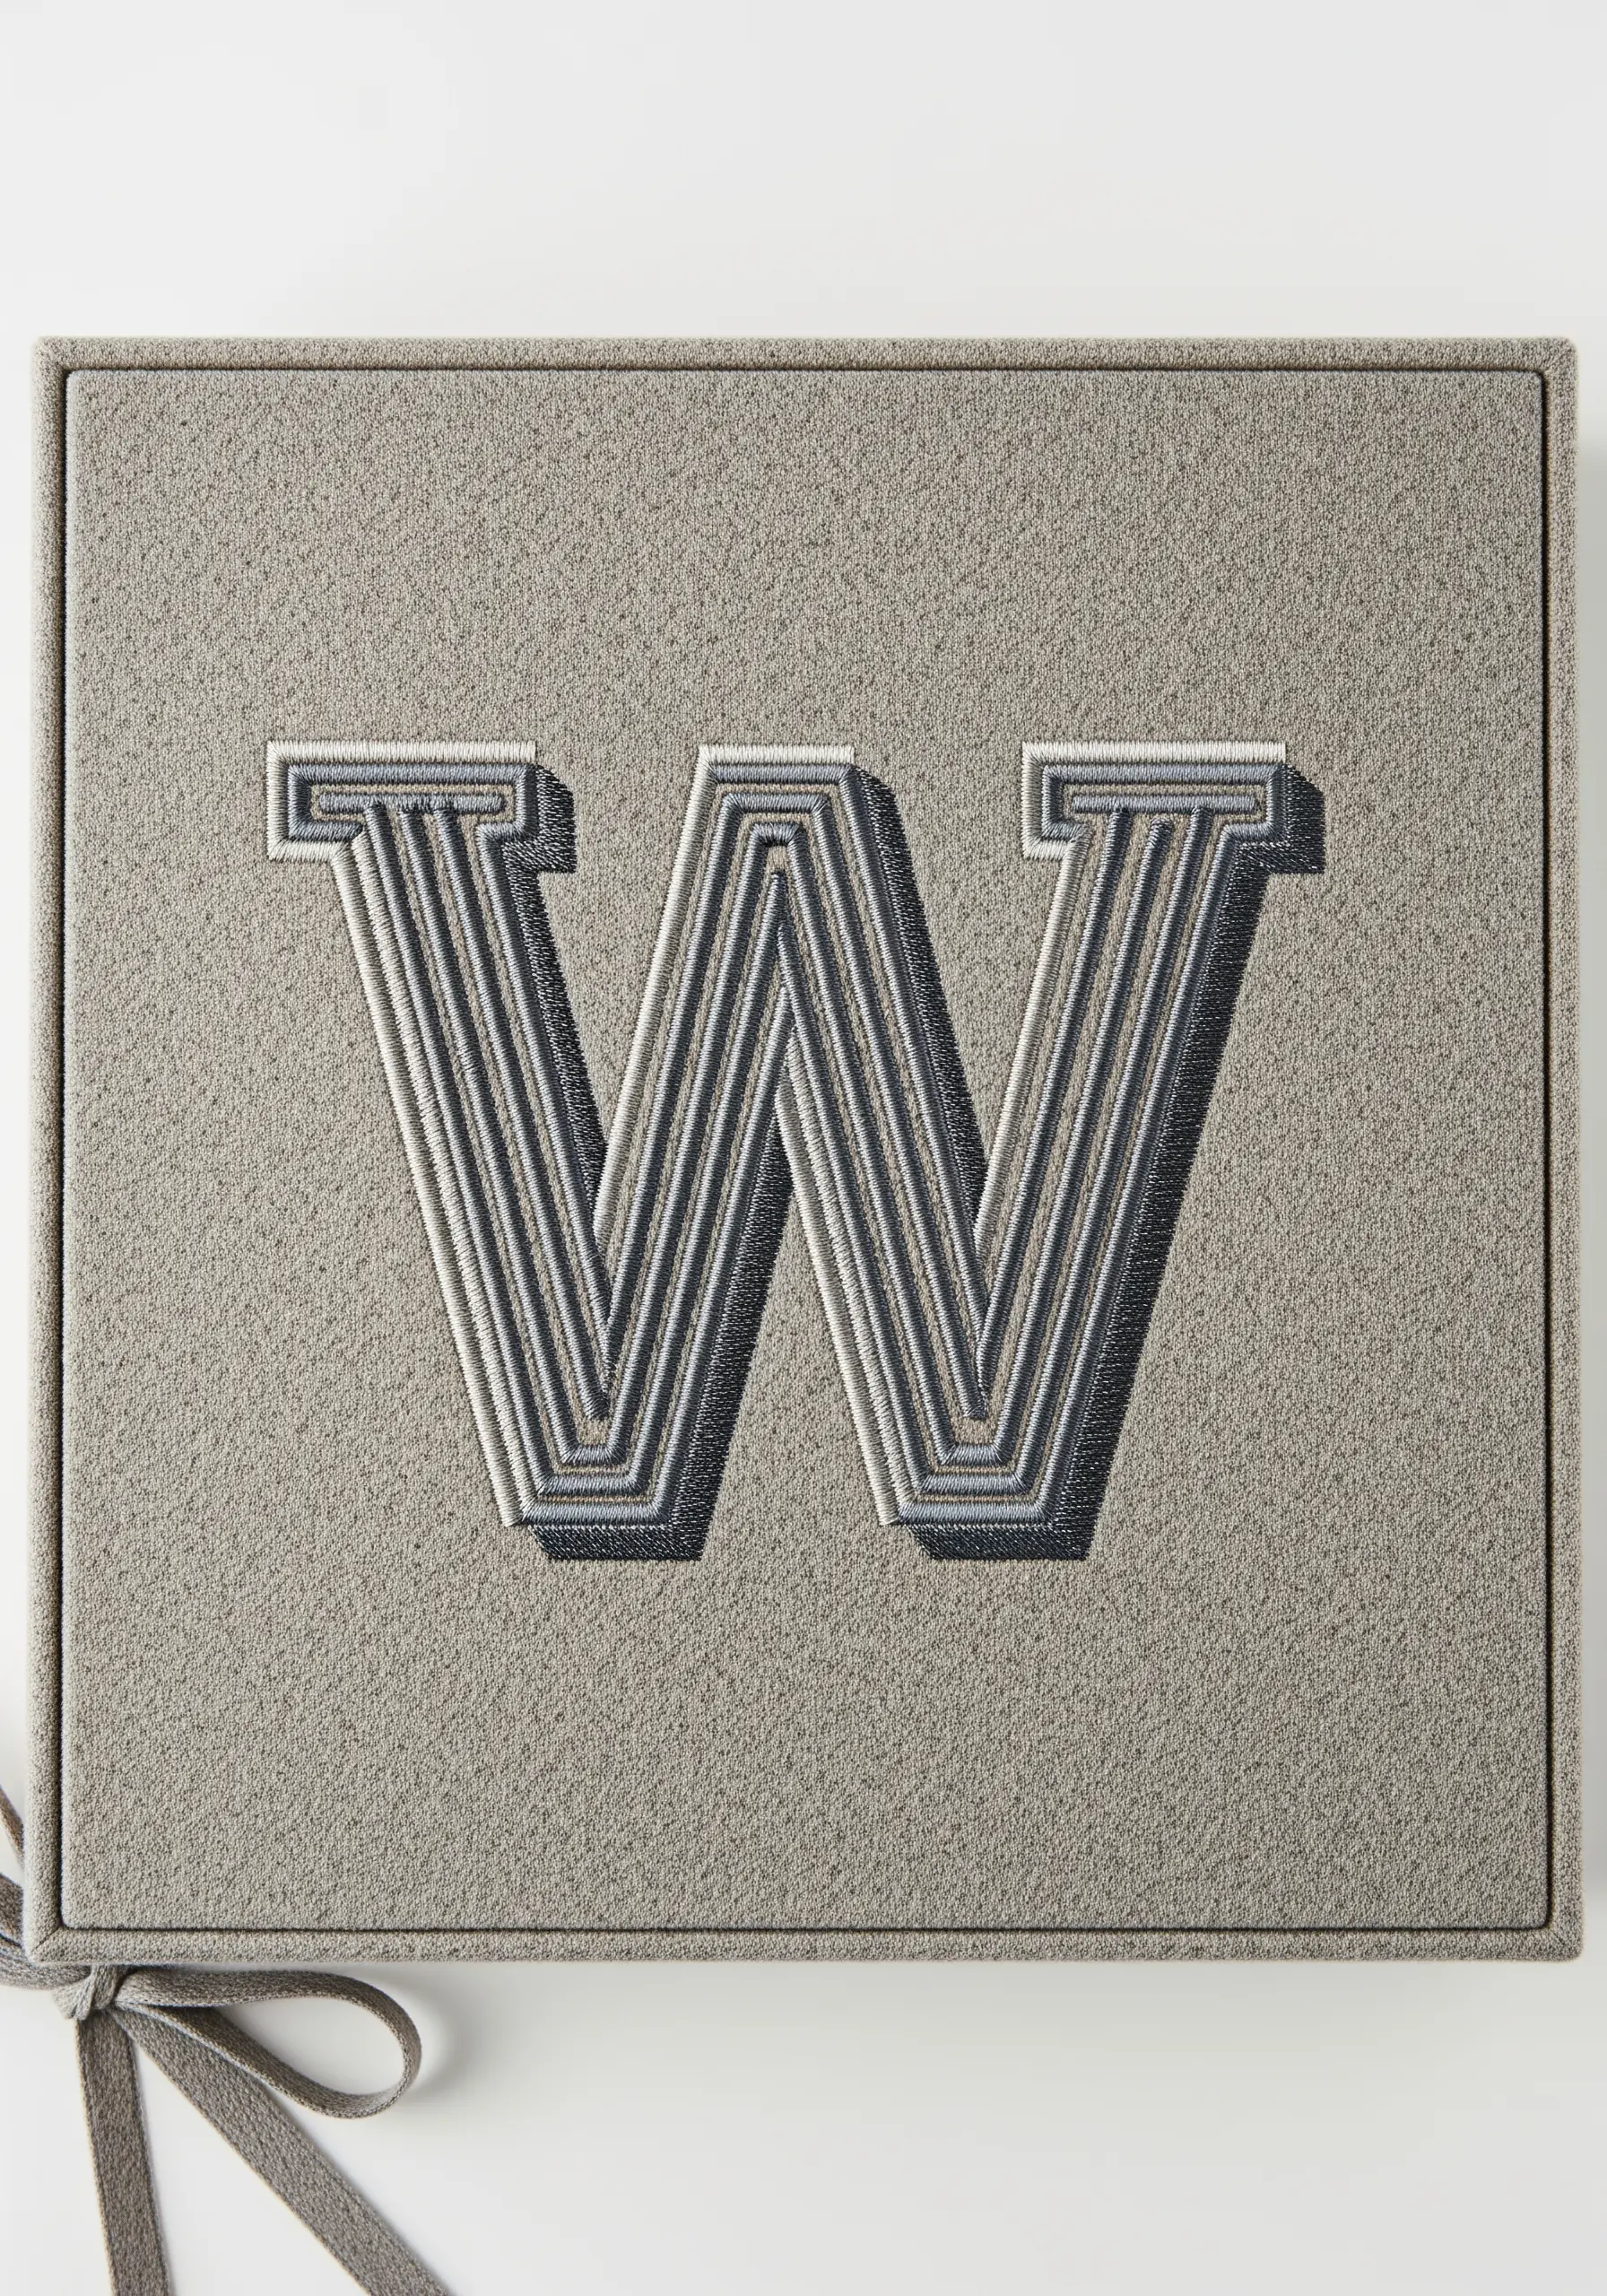
Create a stunning 3D illusion of light and shadow using several shades of a single color.
Divide your letter into vertical sections and fill each with satin stitch, using your darkest thread for areas in shadow and your lightest thread for highlights.
This strategic placement of color tricks the eye into seeing depth and dimension, making the letter appear carved or beveled.
A crisp outline in your darkest shade will enhance the trompe-l’œil effect and give the entire monogram a polished finish.
15. The Pressed Botanical Initial
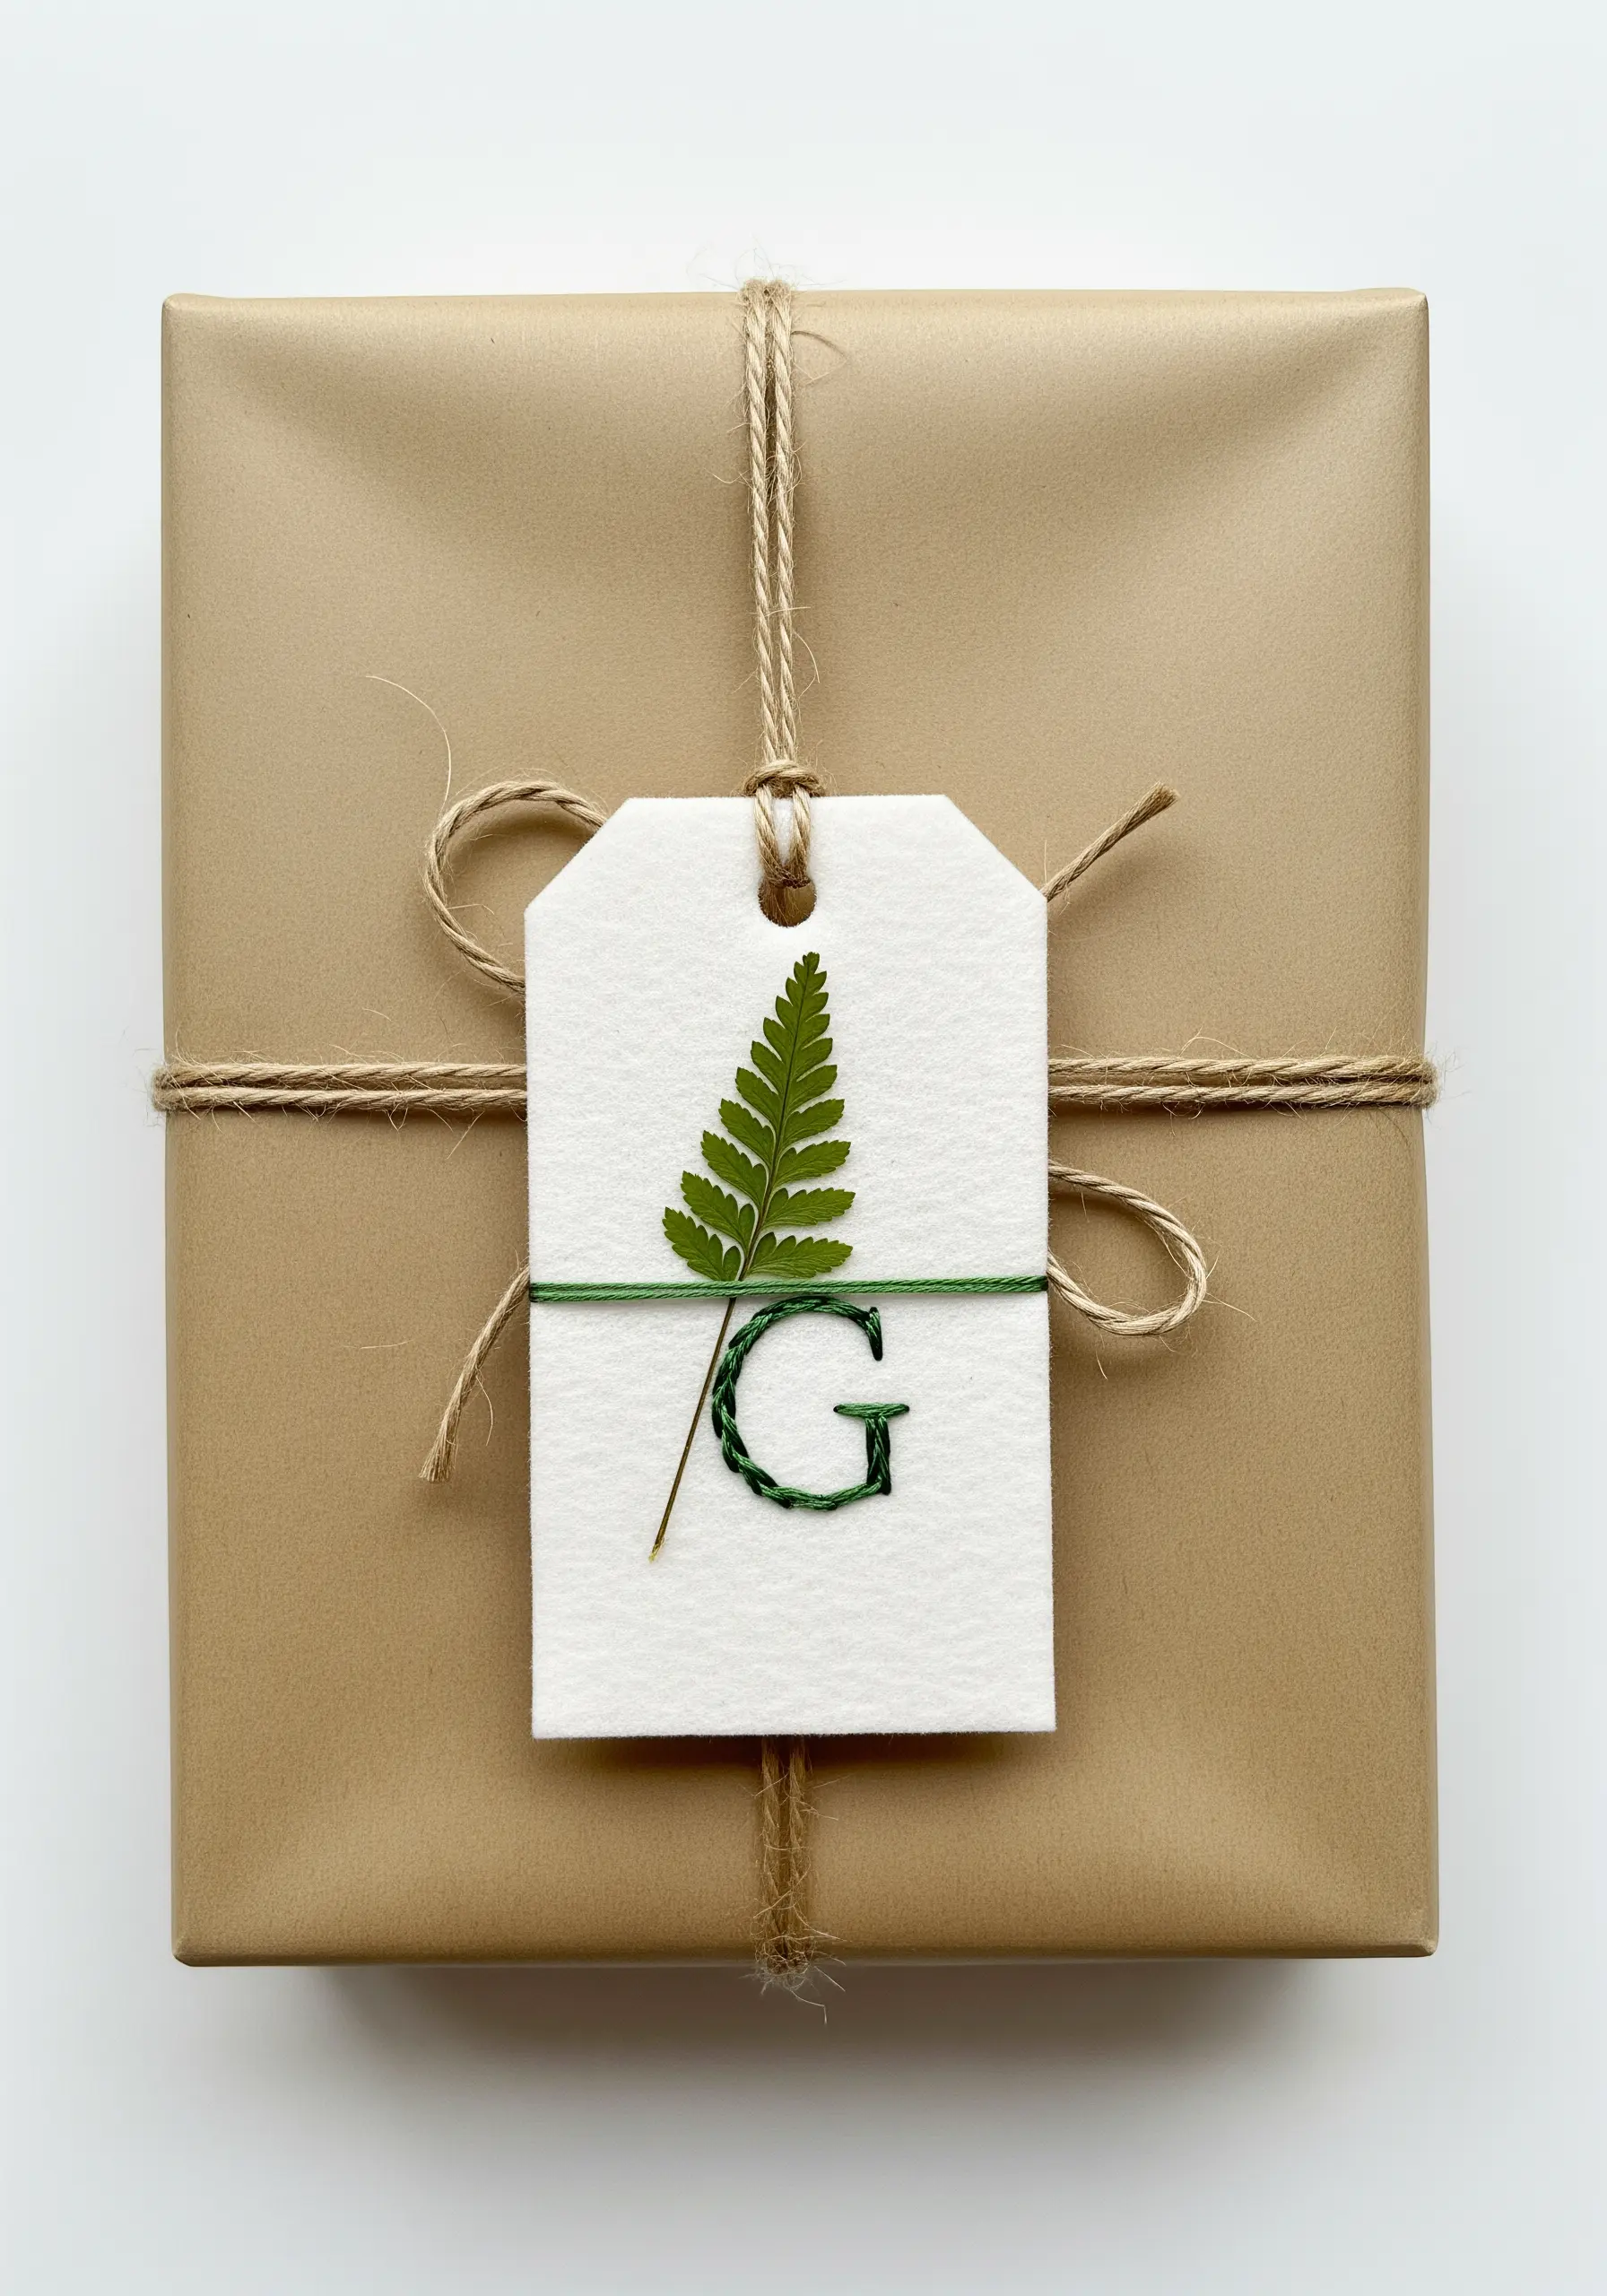
Combine embroidery with natural elements for a uniquely personal, mixed-media touch.
First, stitch a simple monogram onto heavy cardstock or thick watercolor paper. Then, using a tiny dab of archival glue, carefully affix a small pressed fern or flower, integrating it into your design.
You can secure the stem further and visually connect the two elements by adding a single line of thread stitched over it.
This method transforms a gift tag or small piece of art into a treasured keepsake.
16. The Discreet Micro-Monogram

Embrace quiet luxury with a tiny, perfectly executed monogram placed in an unexpected spot.
Stitched on the corner of a blanket, the hem of a shirt, or the edge of a scarf, a micro-monogram feels like a thoughtful, hidden detail.
Use just one or two strands of floss and a neat satin stitch or backstitch outline. For a cohesive, handcrafted finish, pair it with a decorative edge like a matching blanket stitch.
17. The Color-Accent Graphic Monogram
Apply principles of graphic design to your embroidery by using clean lines and a strategic pop of color.
Outline a modern, interlocking monogram with a simple backstitch or stem stitch. Then, choose one letter—or even just one part of a letter—to stitch in a contrasting accent color.
Using a single metallic thread against a matte neutral creates a sophisticated, high-impact look that feels both minimalist and bold.
18. The Raised-Edge Satin Stitch
If you struggle with uneven satin stitch edges, this preparation technique is a game-changer.
First, outline your entire letter with a precise split stitch. This creates a slightly raised border that acts as a ‘fence’ for your fill stitches.
Then, work your satin stitches by bringing the needle up just inside the line and taking it down just over the line on the other side.
This simple trick gives your letter an incredibly crisp, clean, and slightly elevated edge.
19. The Modern Cuff Initial
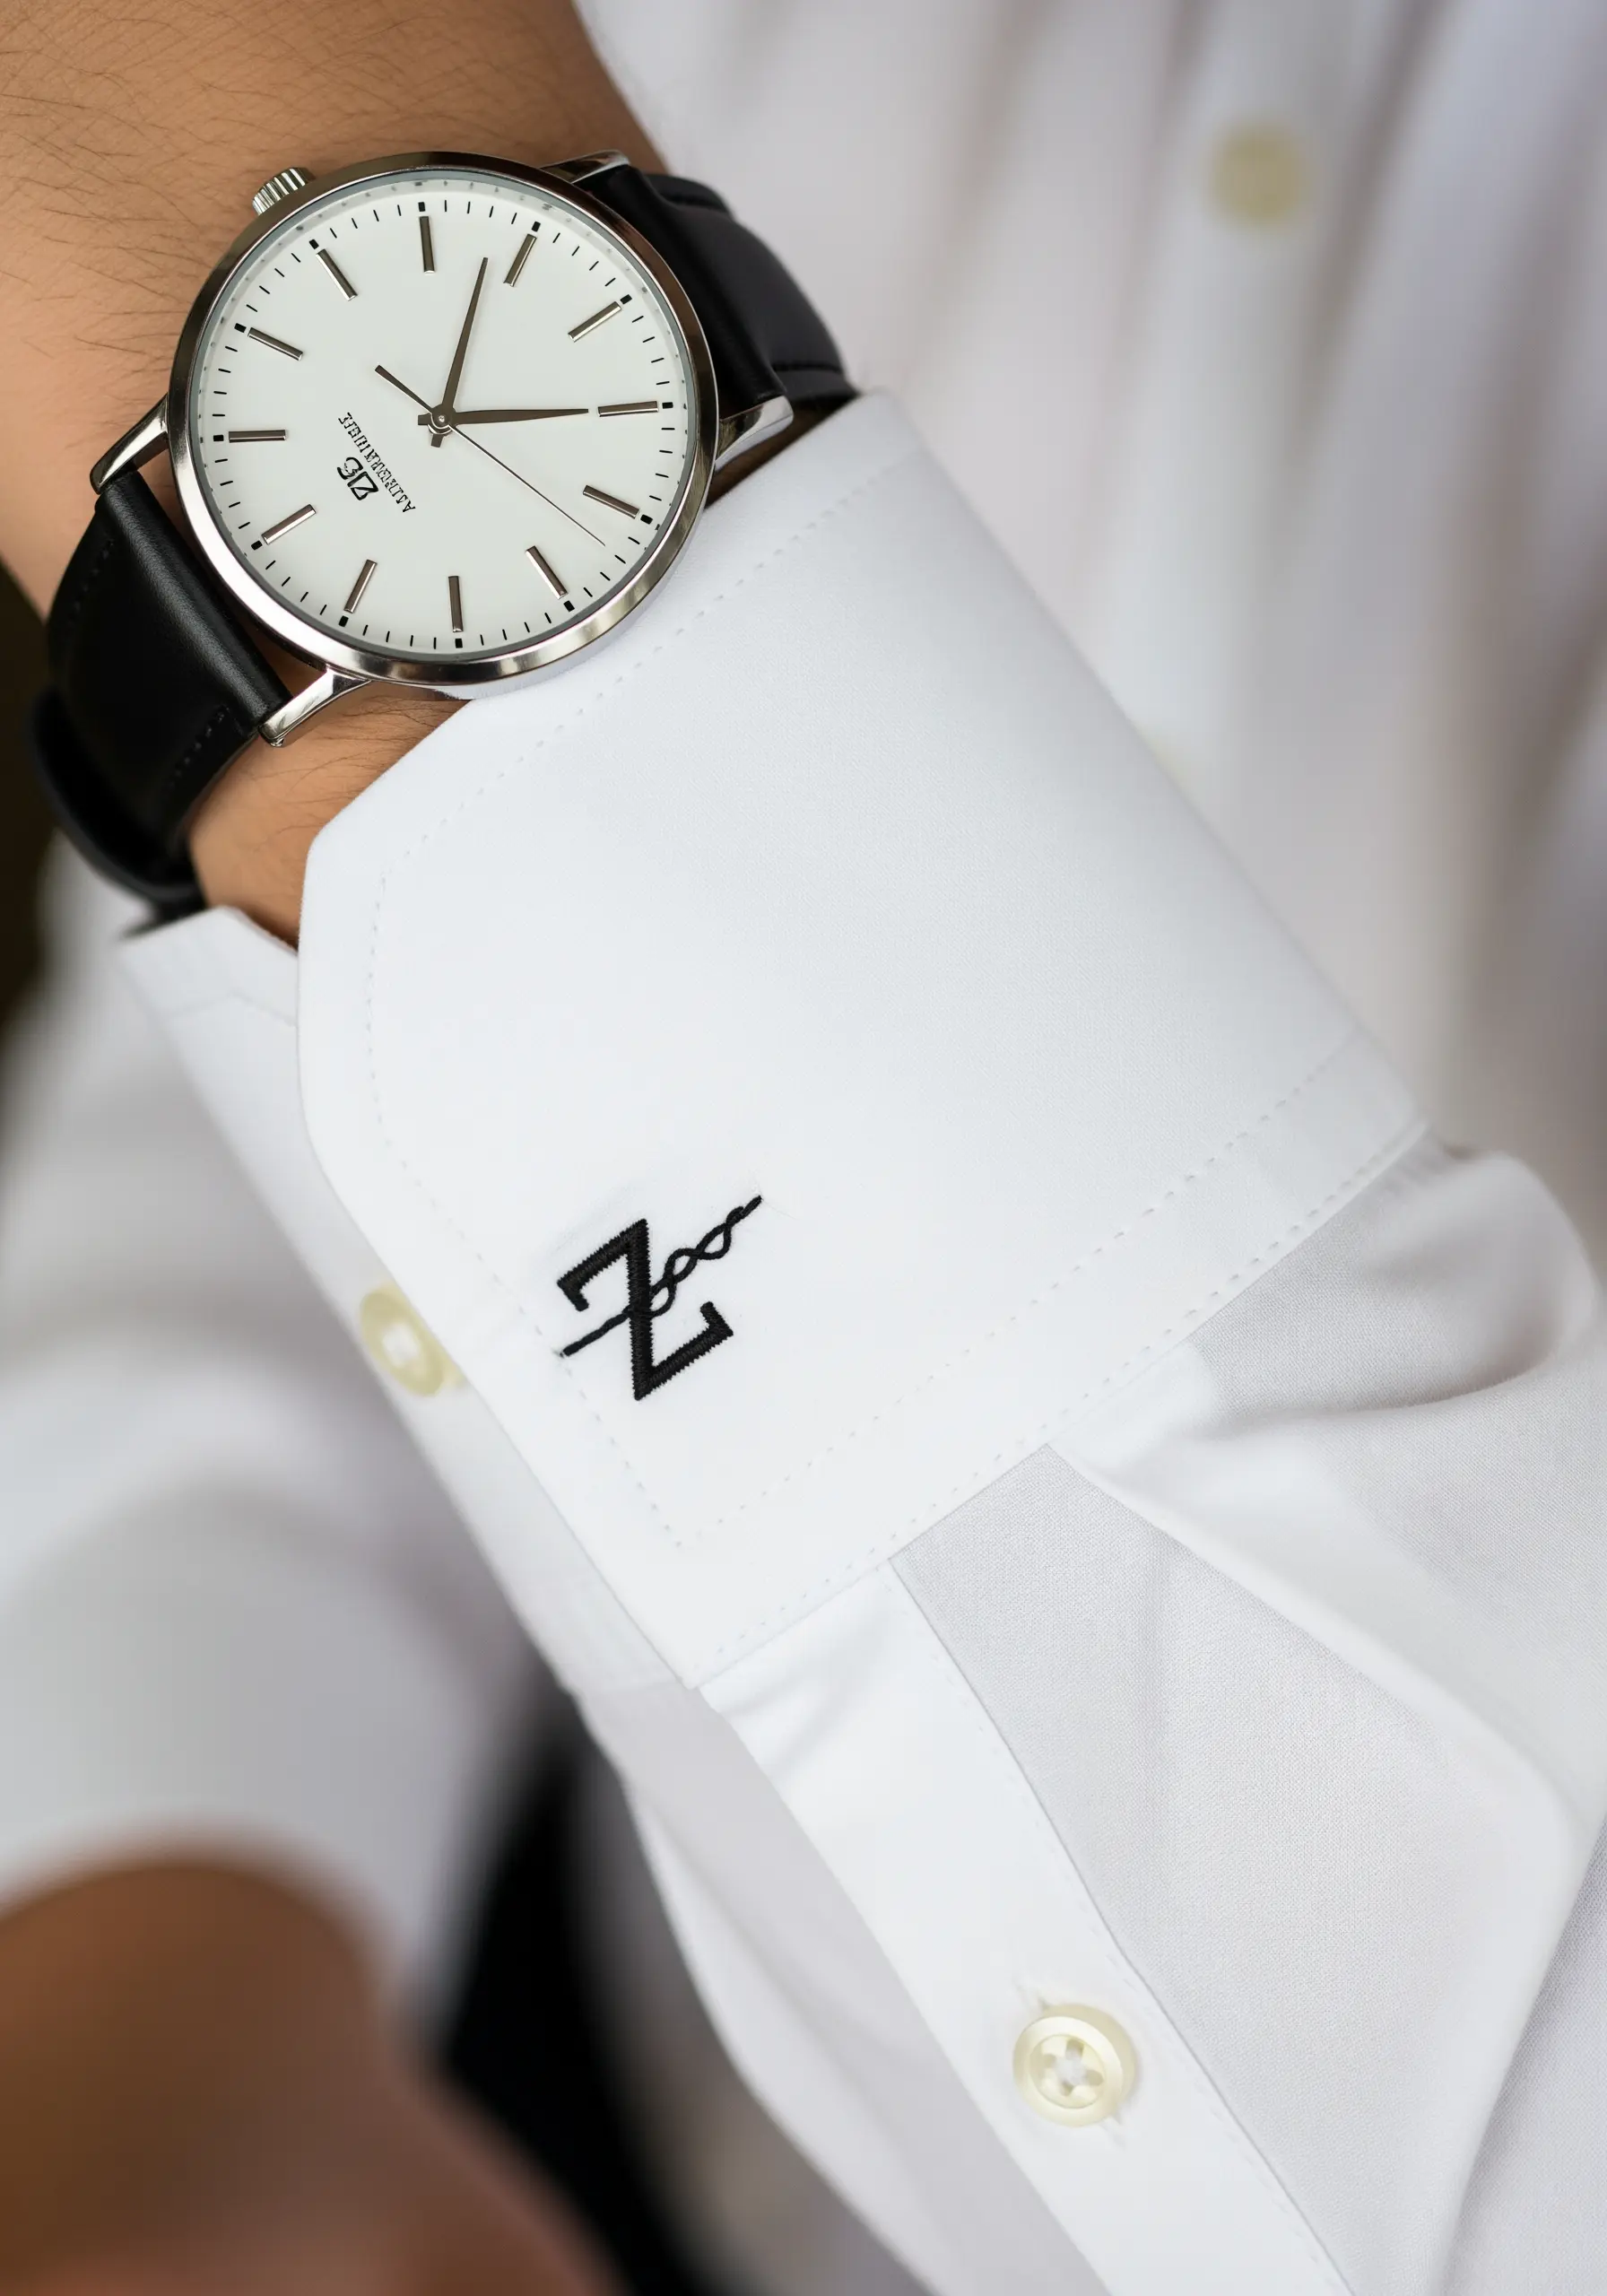
Personalize a dress shirt with a small, graphic monogram for a touch of contemporary style.
The key to making this feel modern rather than traditional is font choice and placement. Opt for a clean, sans-serif or abstract letterform instead of a classic script.
Place the tiny monogram on the cuff, about an inch from the edge, using a neat backstitch or a tiny satin stitch in a classic color like black, navy, or silver.
20. The Gradient Echo Monogram
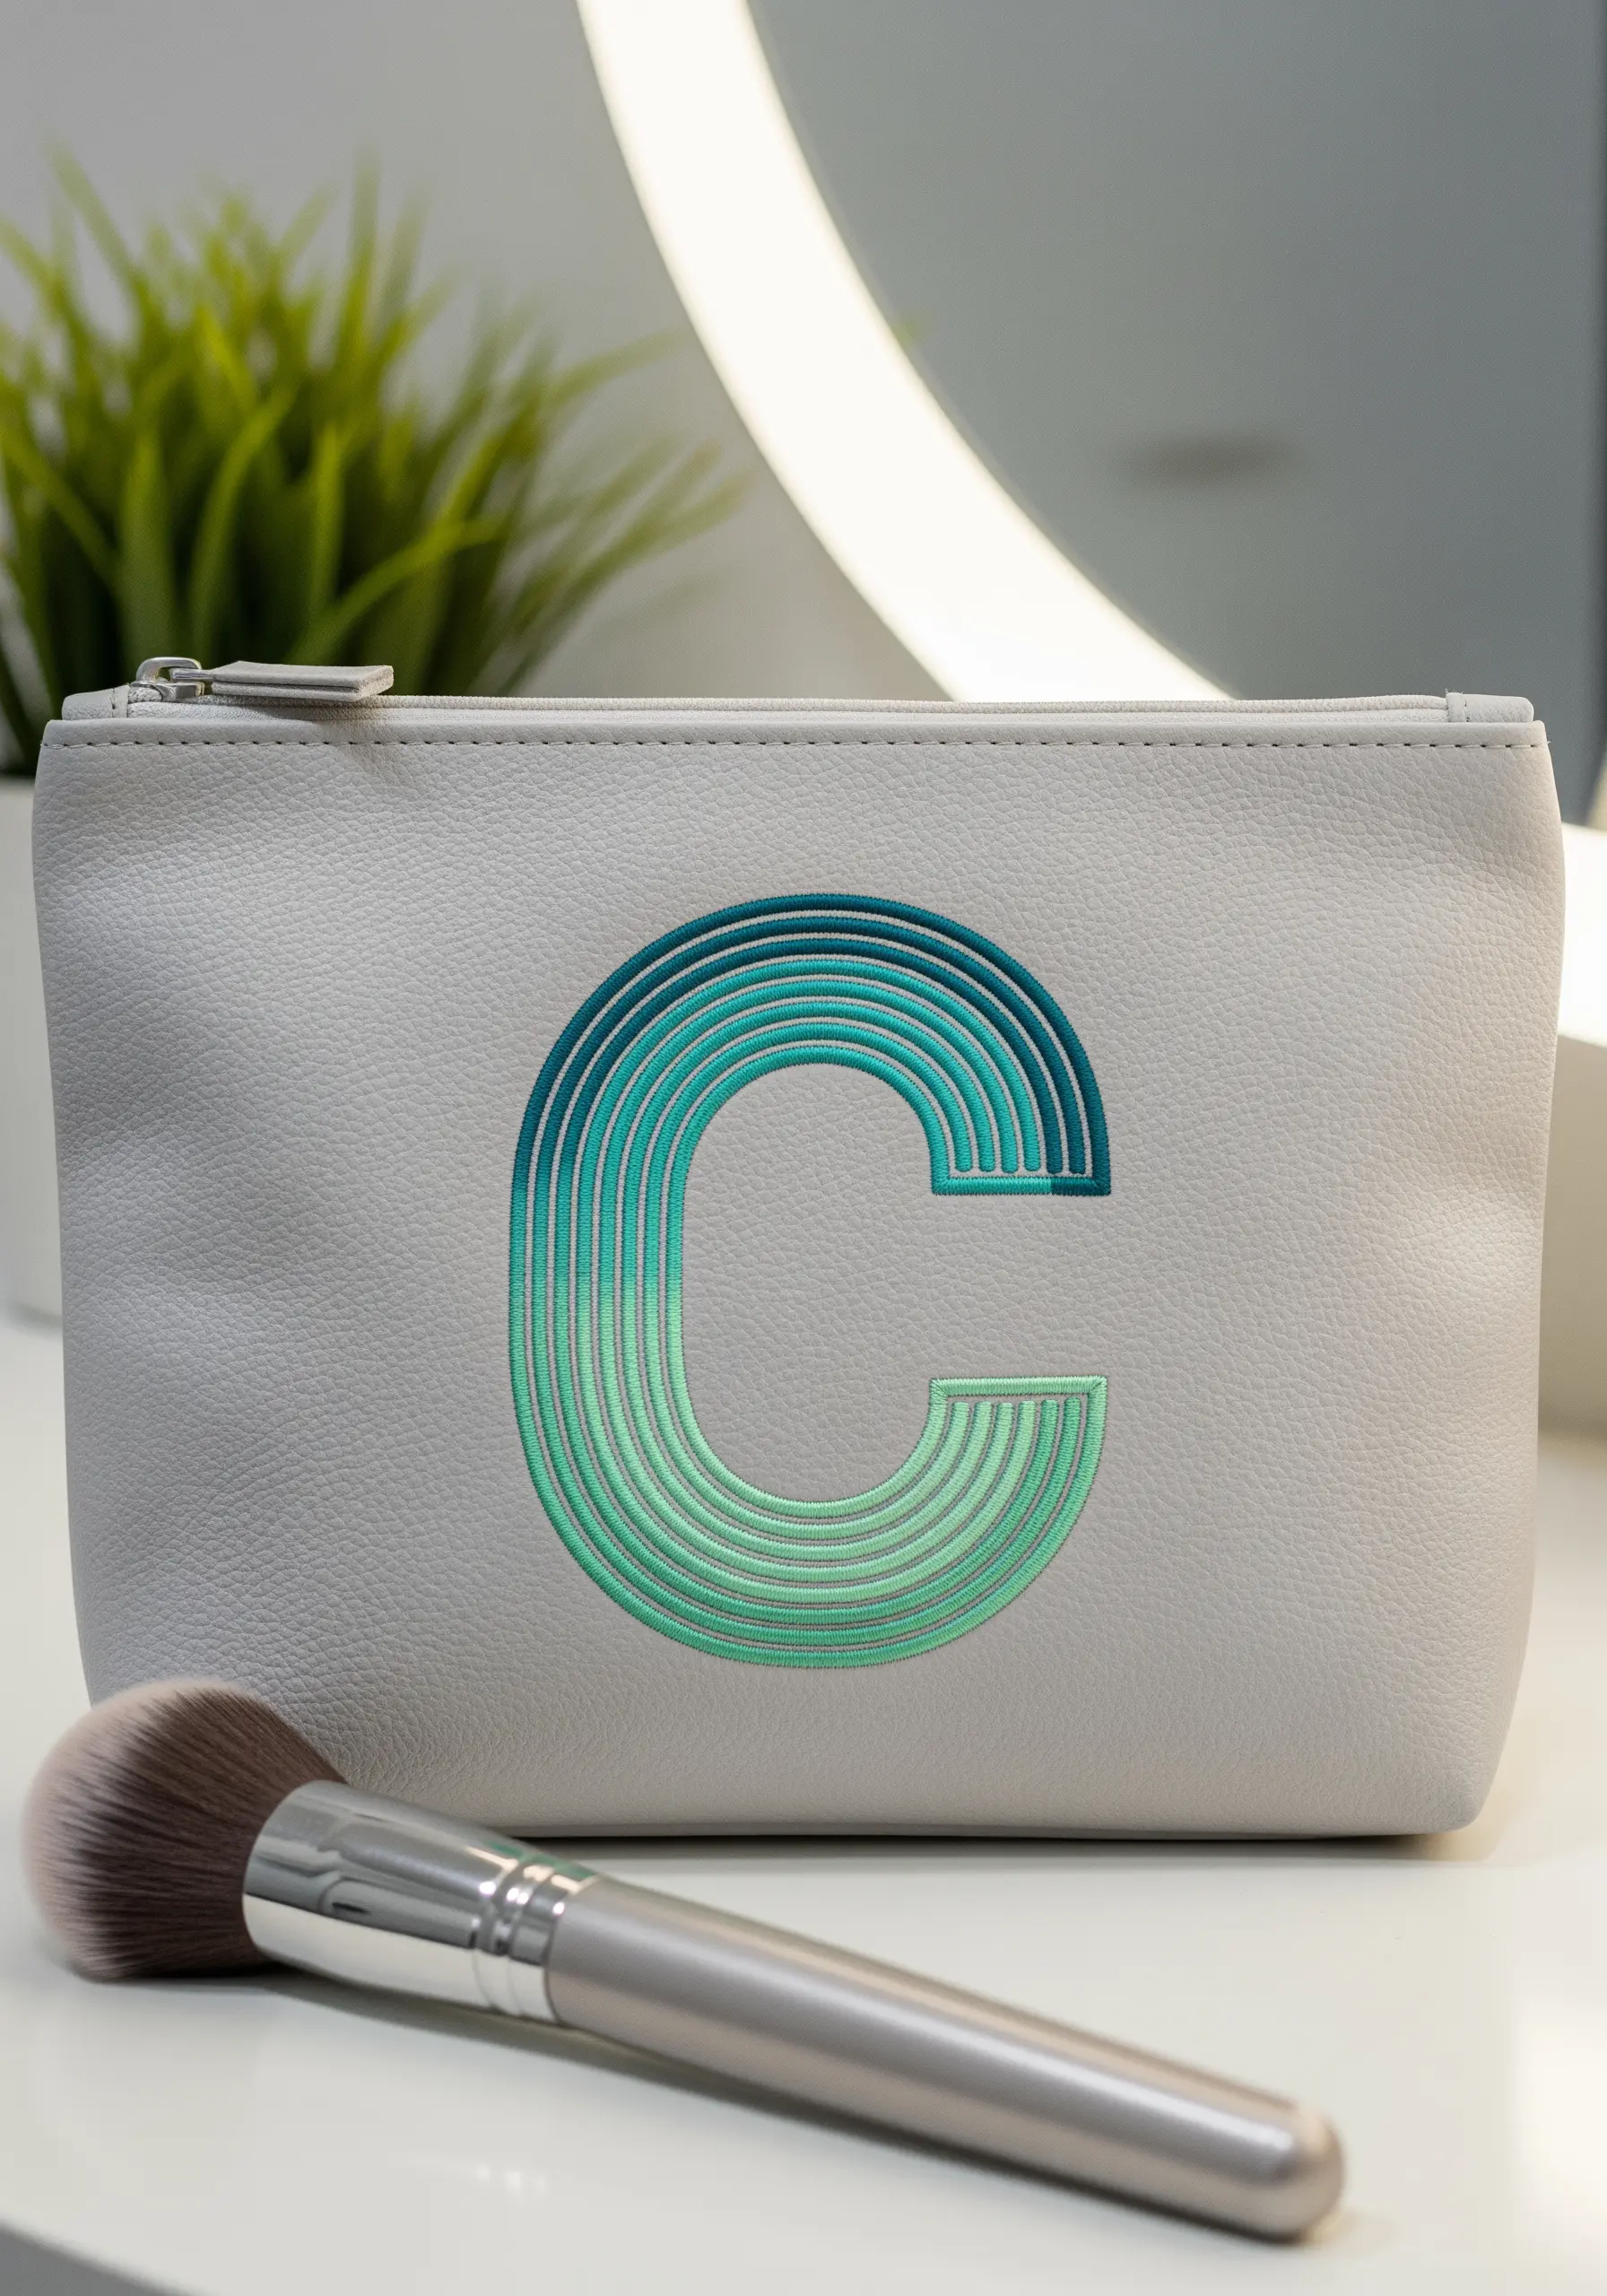
Create a mesmerizing optical effect using concentric lines of backstitch and a smooth color gradient.
Start with the innermost outline of your letter and work your way outwards, changing the thread color with each new line to create a seamless ombré.
For the most delicate result, use a single strand of floss. This technique turns a simple initial into a piece of modern, hypnotic art, perfect for personalizing a makeup bag or tech case.
21. The Vertical Ombré Initial
To create a smooth, vertical gradient within a block letter, the long-and-short stitch is your best friend.
Divide the letter into horizontal color blocks. Begin stitching the first block, then introduce the next shade by staggering your stitches up into the previous color.
This interlocking technique creates a soft, seamless transition between hues. Using an analogous color scheme—colors that sit next to each other on the color wheel—will ensure your gradient is harmonious and pleasing to the eye.
22. The Beaded Script Initial
Add a touch of delicate glamour to a script monogram by incorporating tiny seed beads.
First, stitch the letterform using a whipped backstitch or stem stitch with a fine metallic thread for a smooth, cord-like line.
Then, go back and secure small beads along the curves of the letter, concentrating them at the end of a flourish or the cross of a ‘t’ for emphasis.
This combination of texture and sparkle adds dimension and catches the light beautifully.
23. The Chunky Knit Monogram
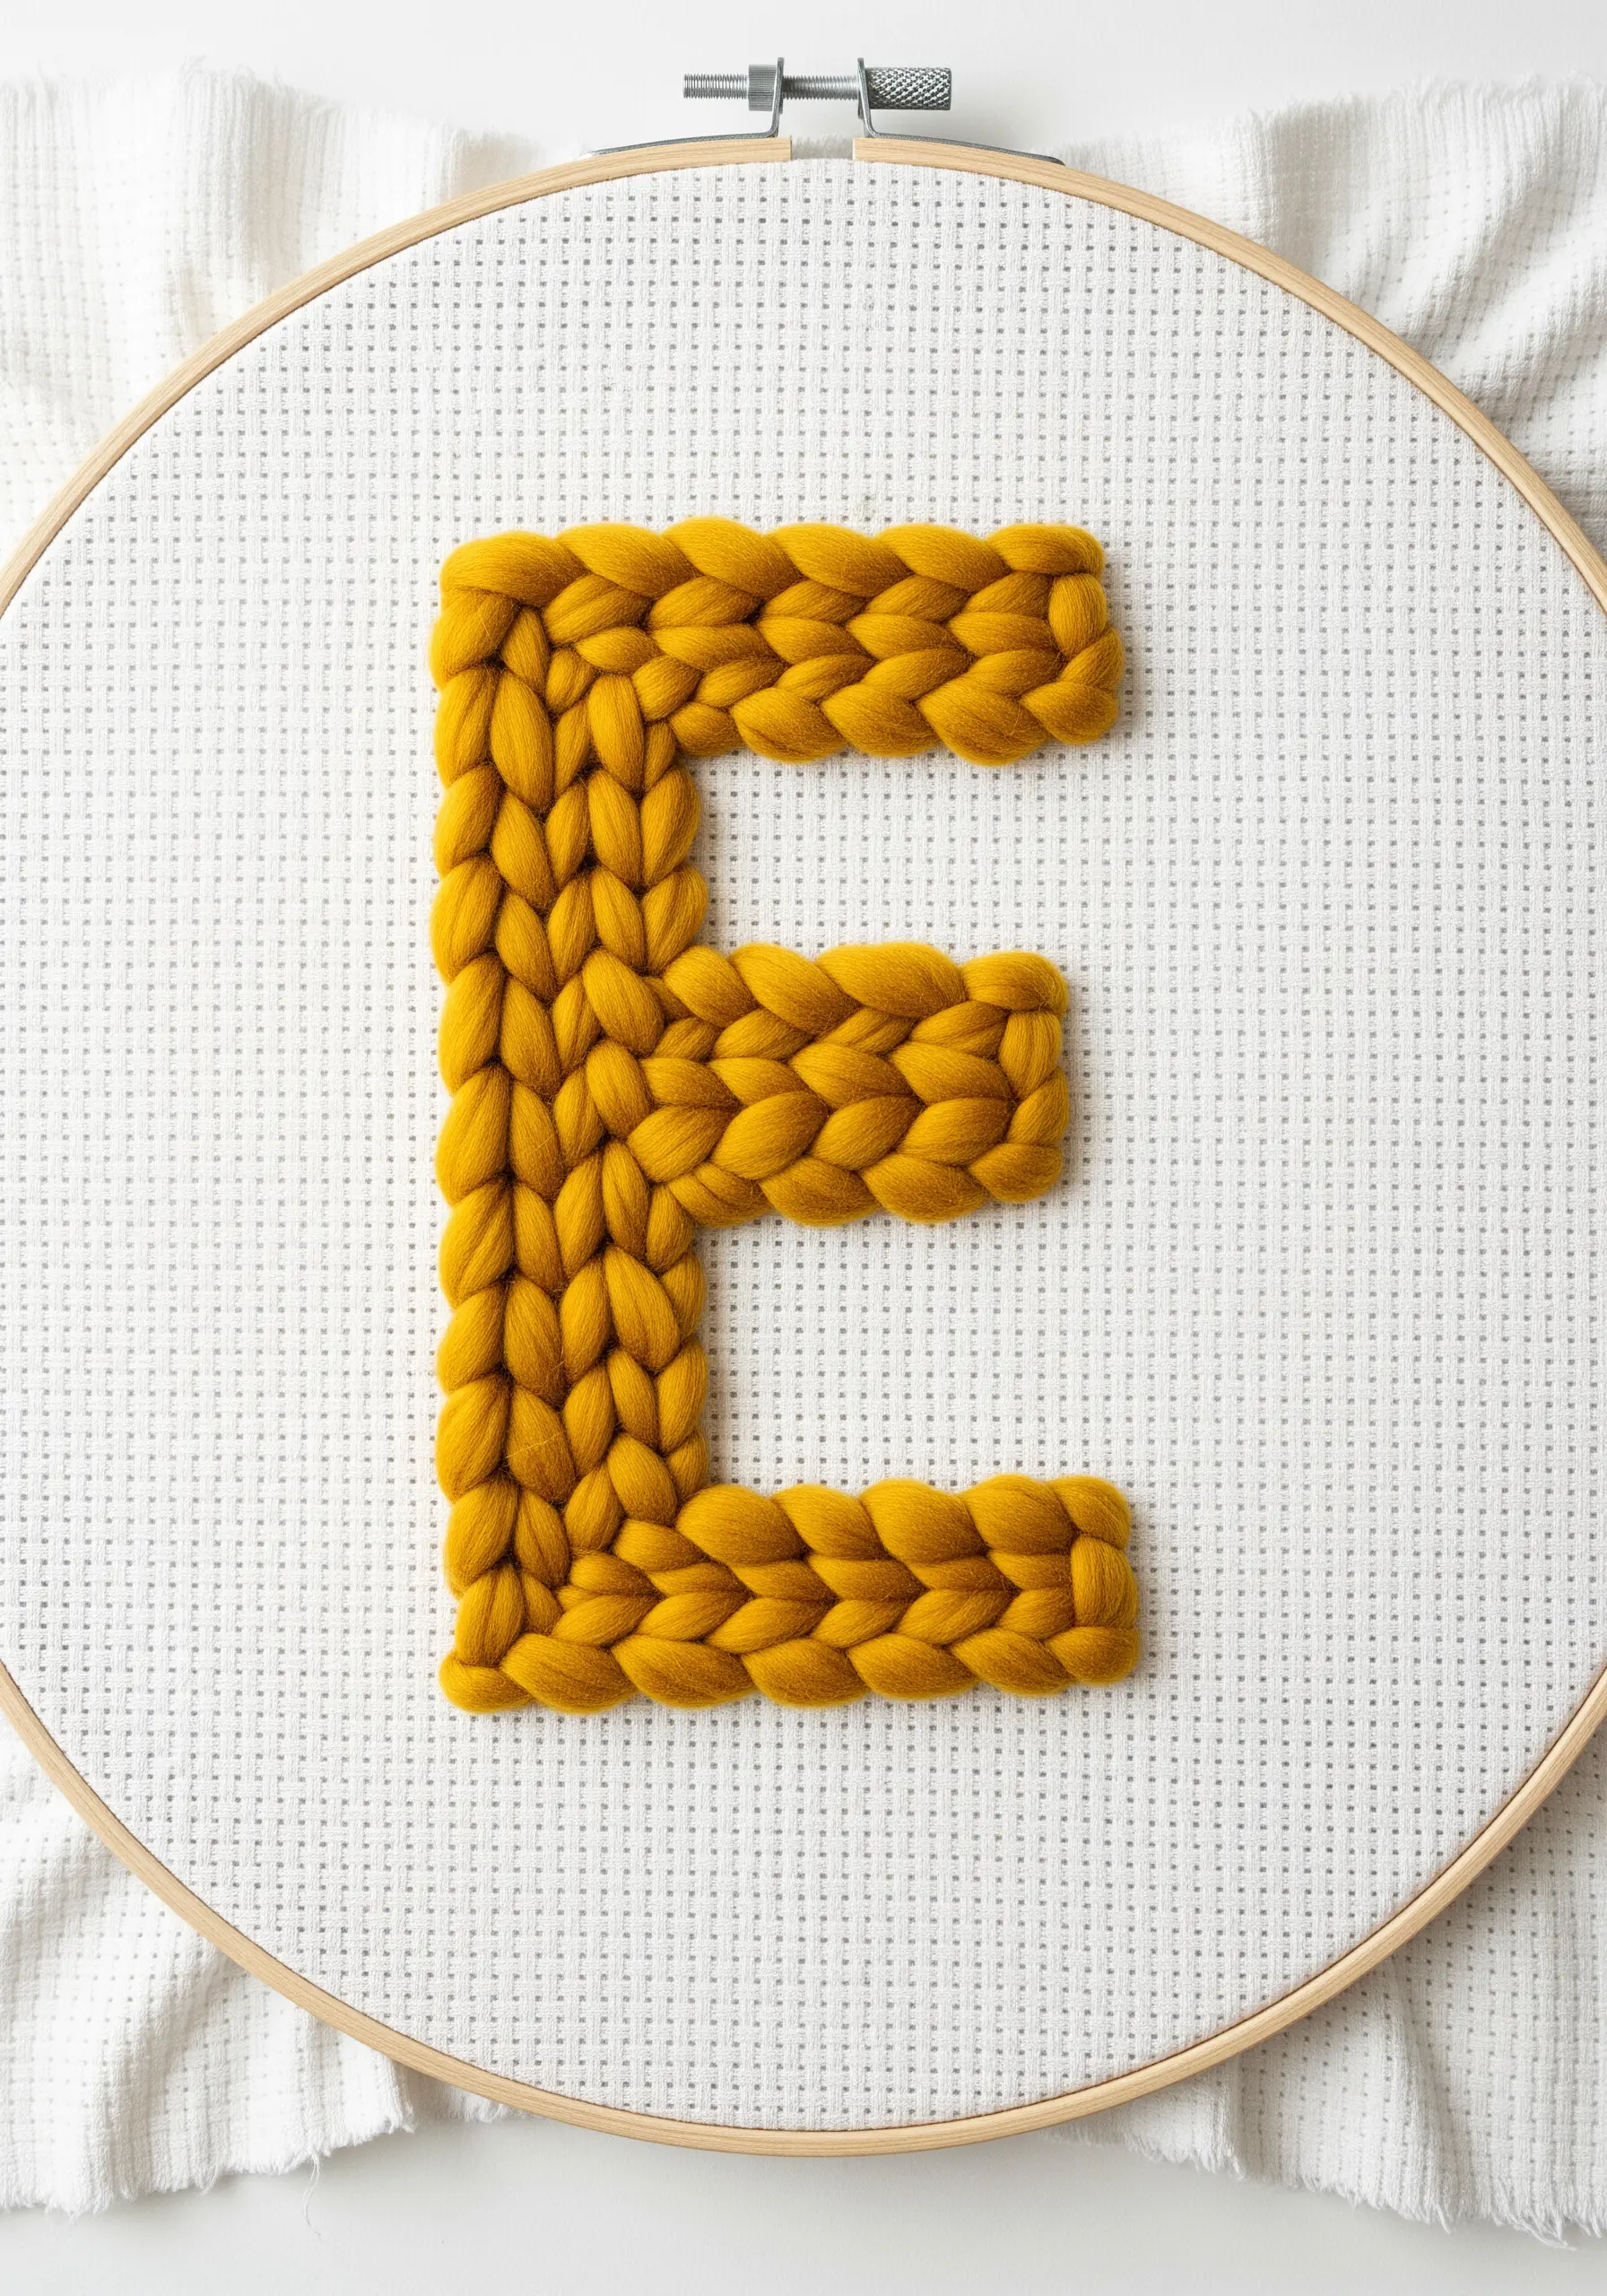
For a bold, high-texture statement, move beyond floss and embrace chunky yarn or roving.
You can create this effect by couching a thick yarn onto your fabric, or for an even more textural look, finger-knit a small cord and then stitch it down in the shape of your letter.
Using a grid fabric like Aida cloth helps maintain the correct proportions of a block letter. This is a fast, impactful technique perfect for large-scale pieces like pillows or wall art.
24. The String Art Illusion Monogram

Create compelling curves and shading using only straight stitches by applying string art principles to your embroidery.
Mark anchor points along the inner and outer edges of your letter’s curves. Then, using a single strand of thread, stitch straight lines connecting these points.
The overlapping lines build up density and create the illusion of a smooth, shaded curve. It’s a precise, modern technique that transforms a letter into a piece of captivating abstract art.
25. The Heirloom Padded Script

To create a classic, heirloom-quality monogram on delicate fabrics like linen or cotton voile, use a padded satin stitch.
The key is to keep the padding layer—made of tiny, dense running stitches—delicate and well within the final outline of the letter.
When working on fine or sheer fabric, always use a lightweight stabilizer and a fine, sharp needle to prevent puckering or distortion.
The subtle, raised effect gives the script a beautiful, sculptural quality that feels timeless and precious.


