

Have you ever finished an embroidery project and felt that, while technically correct, it was missing a certain spark? You’re not just looking to follow a pattern; you’re searching for a way to infuse your work with a quiet confidence and a modern, personal touch.
Minimalist line art is the answer. This style isn’t about mastering dozens of complex stitches. It’s about restraint, intention, and the power of a single, well-placed line to convey emotion and character. It’s an approach that celebrates the beauty of the fabric, the texture of the thread, and the elegance of negative space.
In these projects, you’ll discover how a simple shift in thread weight, a deliberate stitch choice, or a new way of framing can transform your work from a simple craft into a piece of art. It’s time to create embroidery that feels less like a hobby and more like an extension of your own calm, sophisticated style.
1. Master the Single, Expressive Line

The power of minimalist portraiture lies in the illusion of a single, unbroken line.
To achieve this fluid look, use a whipped backstitch or stem stitch, which smooths out the segmented appearance of a basic backstitch.
For a bold, graphic statement on a large hoop, use all six strands of your embroidery floss.
The choice of a textured oatmeal linen provides a warm, organic backdrop that keeps the black thread from feeling too stark.
2. Create a Cohesive Series with Abstract Color
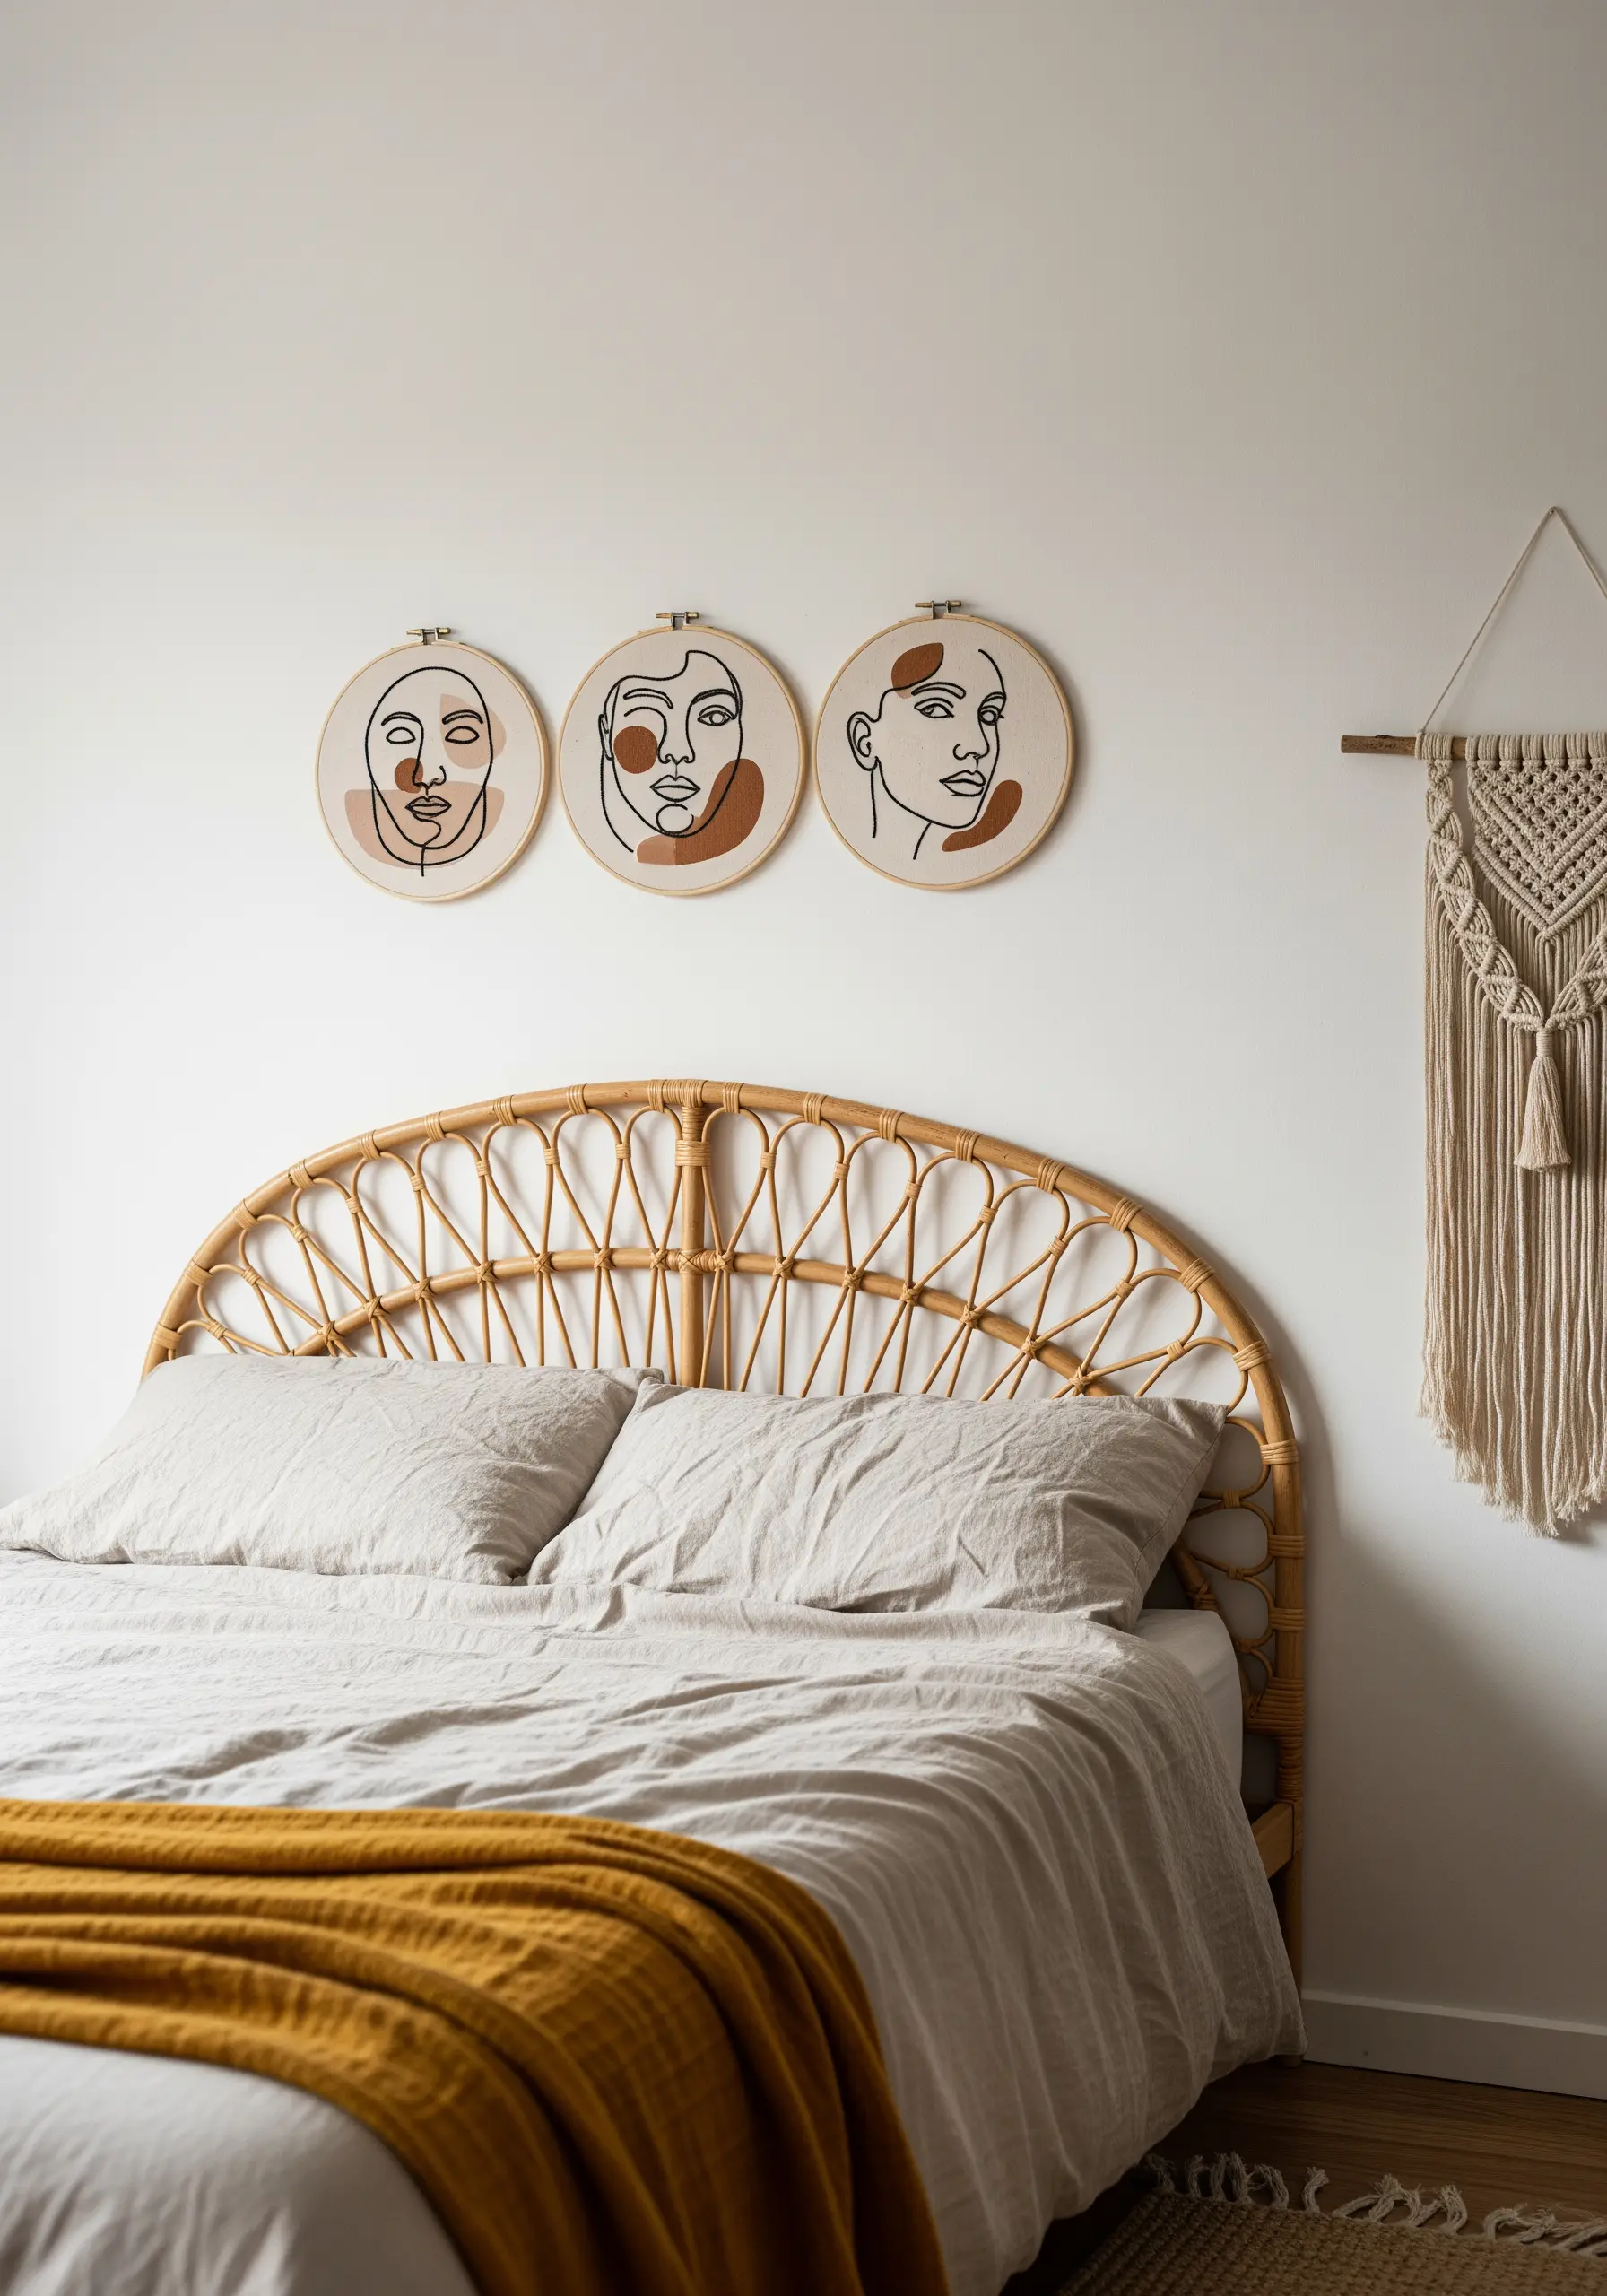
When creating a triptych, unify the pieces with a consistent visual language.
Use the same single-strand backstitch for all faces, but give each one a unique personality by adding an abstract color block.
Fill these shapes with a dense satin stitch, ensuring your stitches lie flat and parallel for a smooth, painted effect.
This technique introduces color and emotion without compromising the minimalist aesthetic of the line work.
3. Translate Delicate Stitches into Framed Art
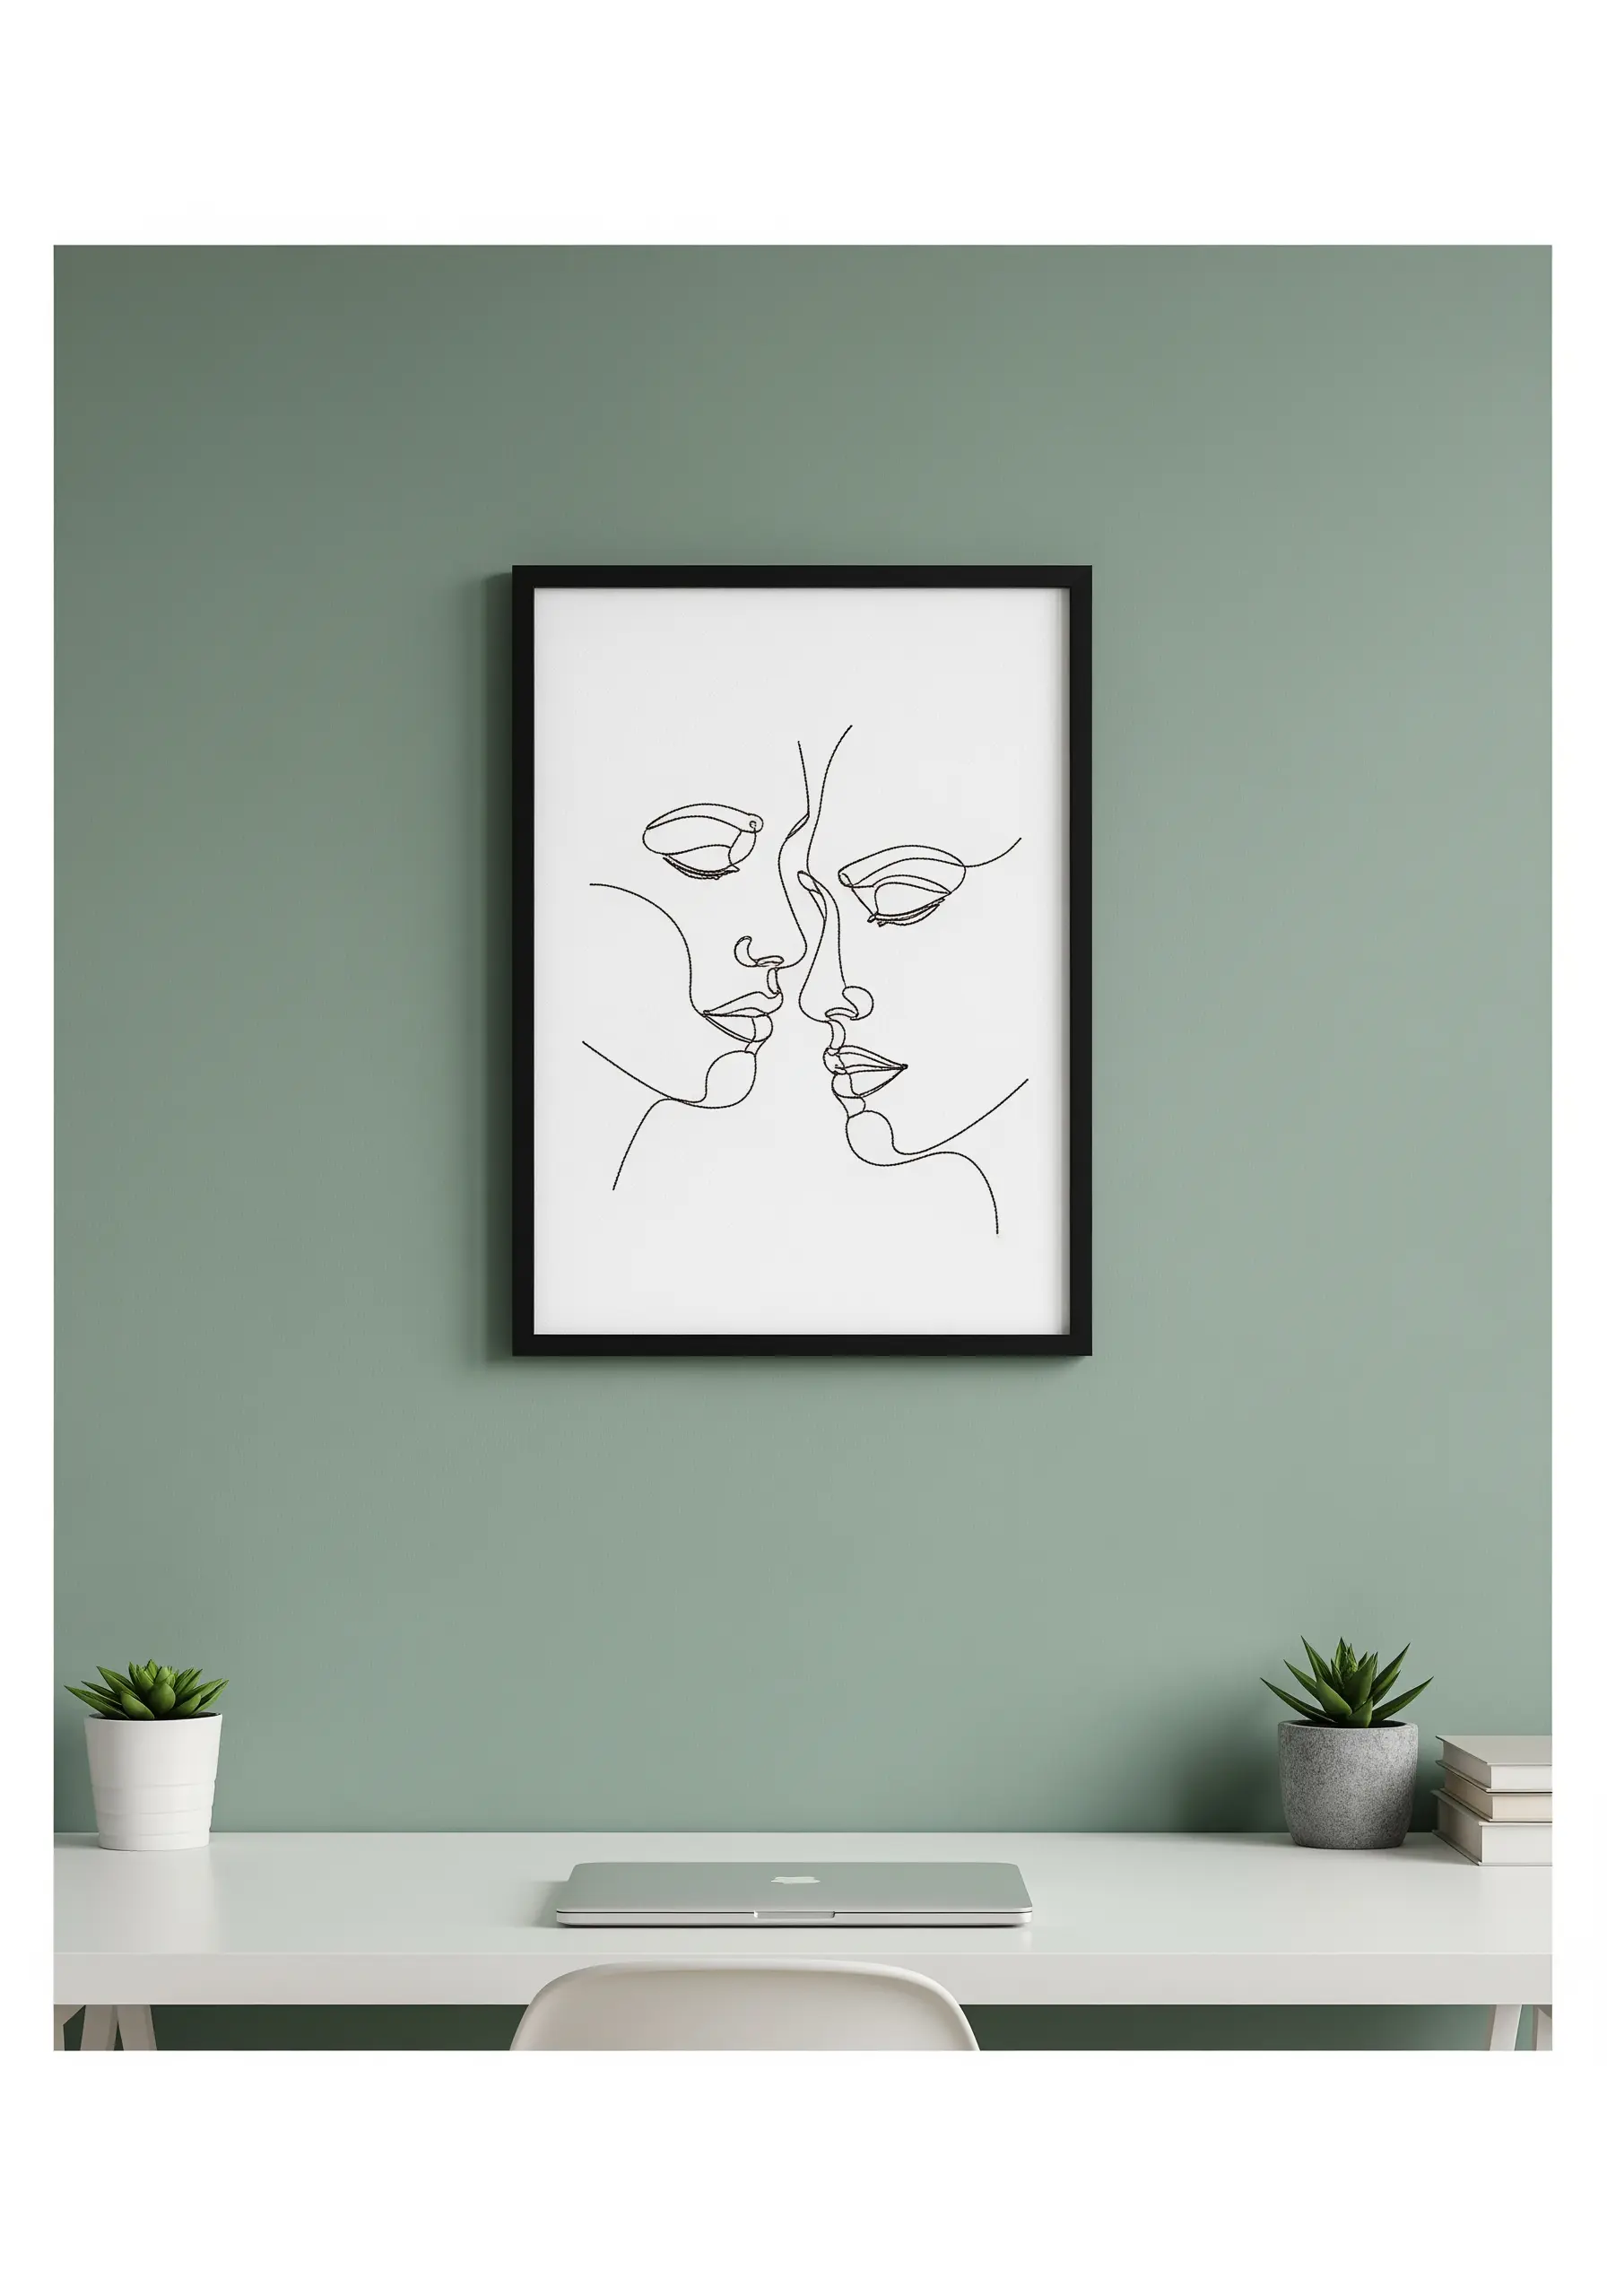
Elevate your embroidery by presenting it in a traditional frame, which instantly positions it as fine art.
To create the effect of a delicate ink drawing, switch from fabric to high-quality, heavyweight watercolor paper.
Use a single strand of black floss and a sharp, thin needle to pierce the paper cleanly.
A simple backstitch is all you need; the paper itself provides the structure and clean finish that makes these elegant framed embroidery artworks so compelling.
4. Use Negative Space to Create a Dynamic Composition
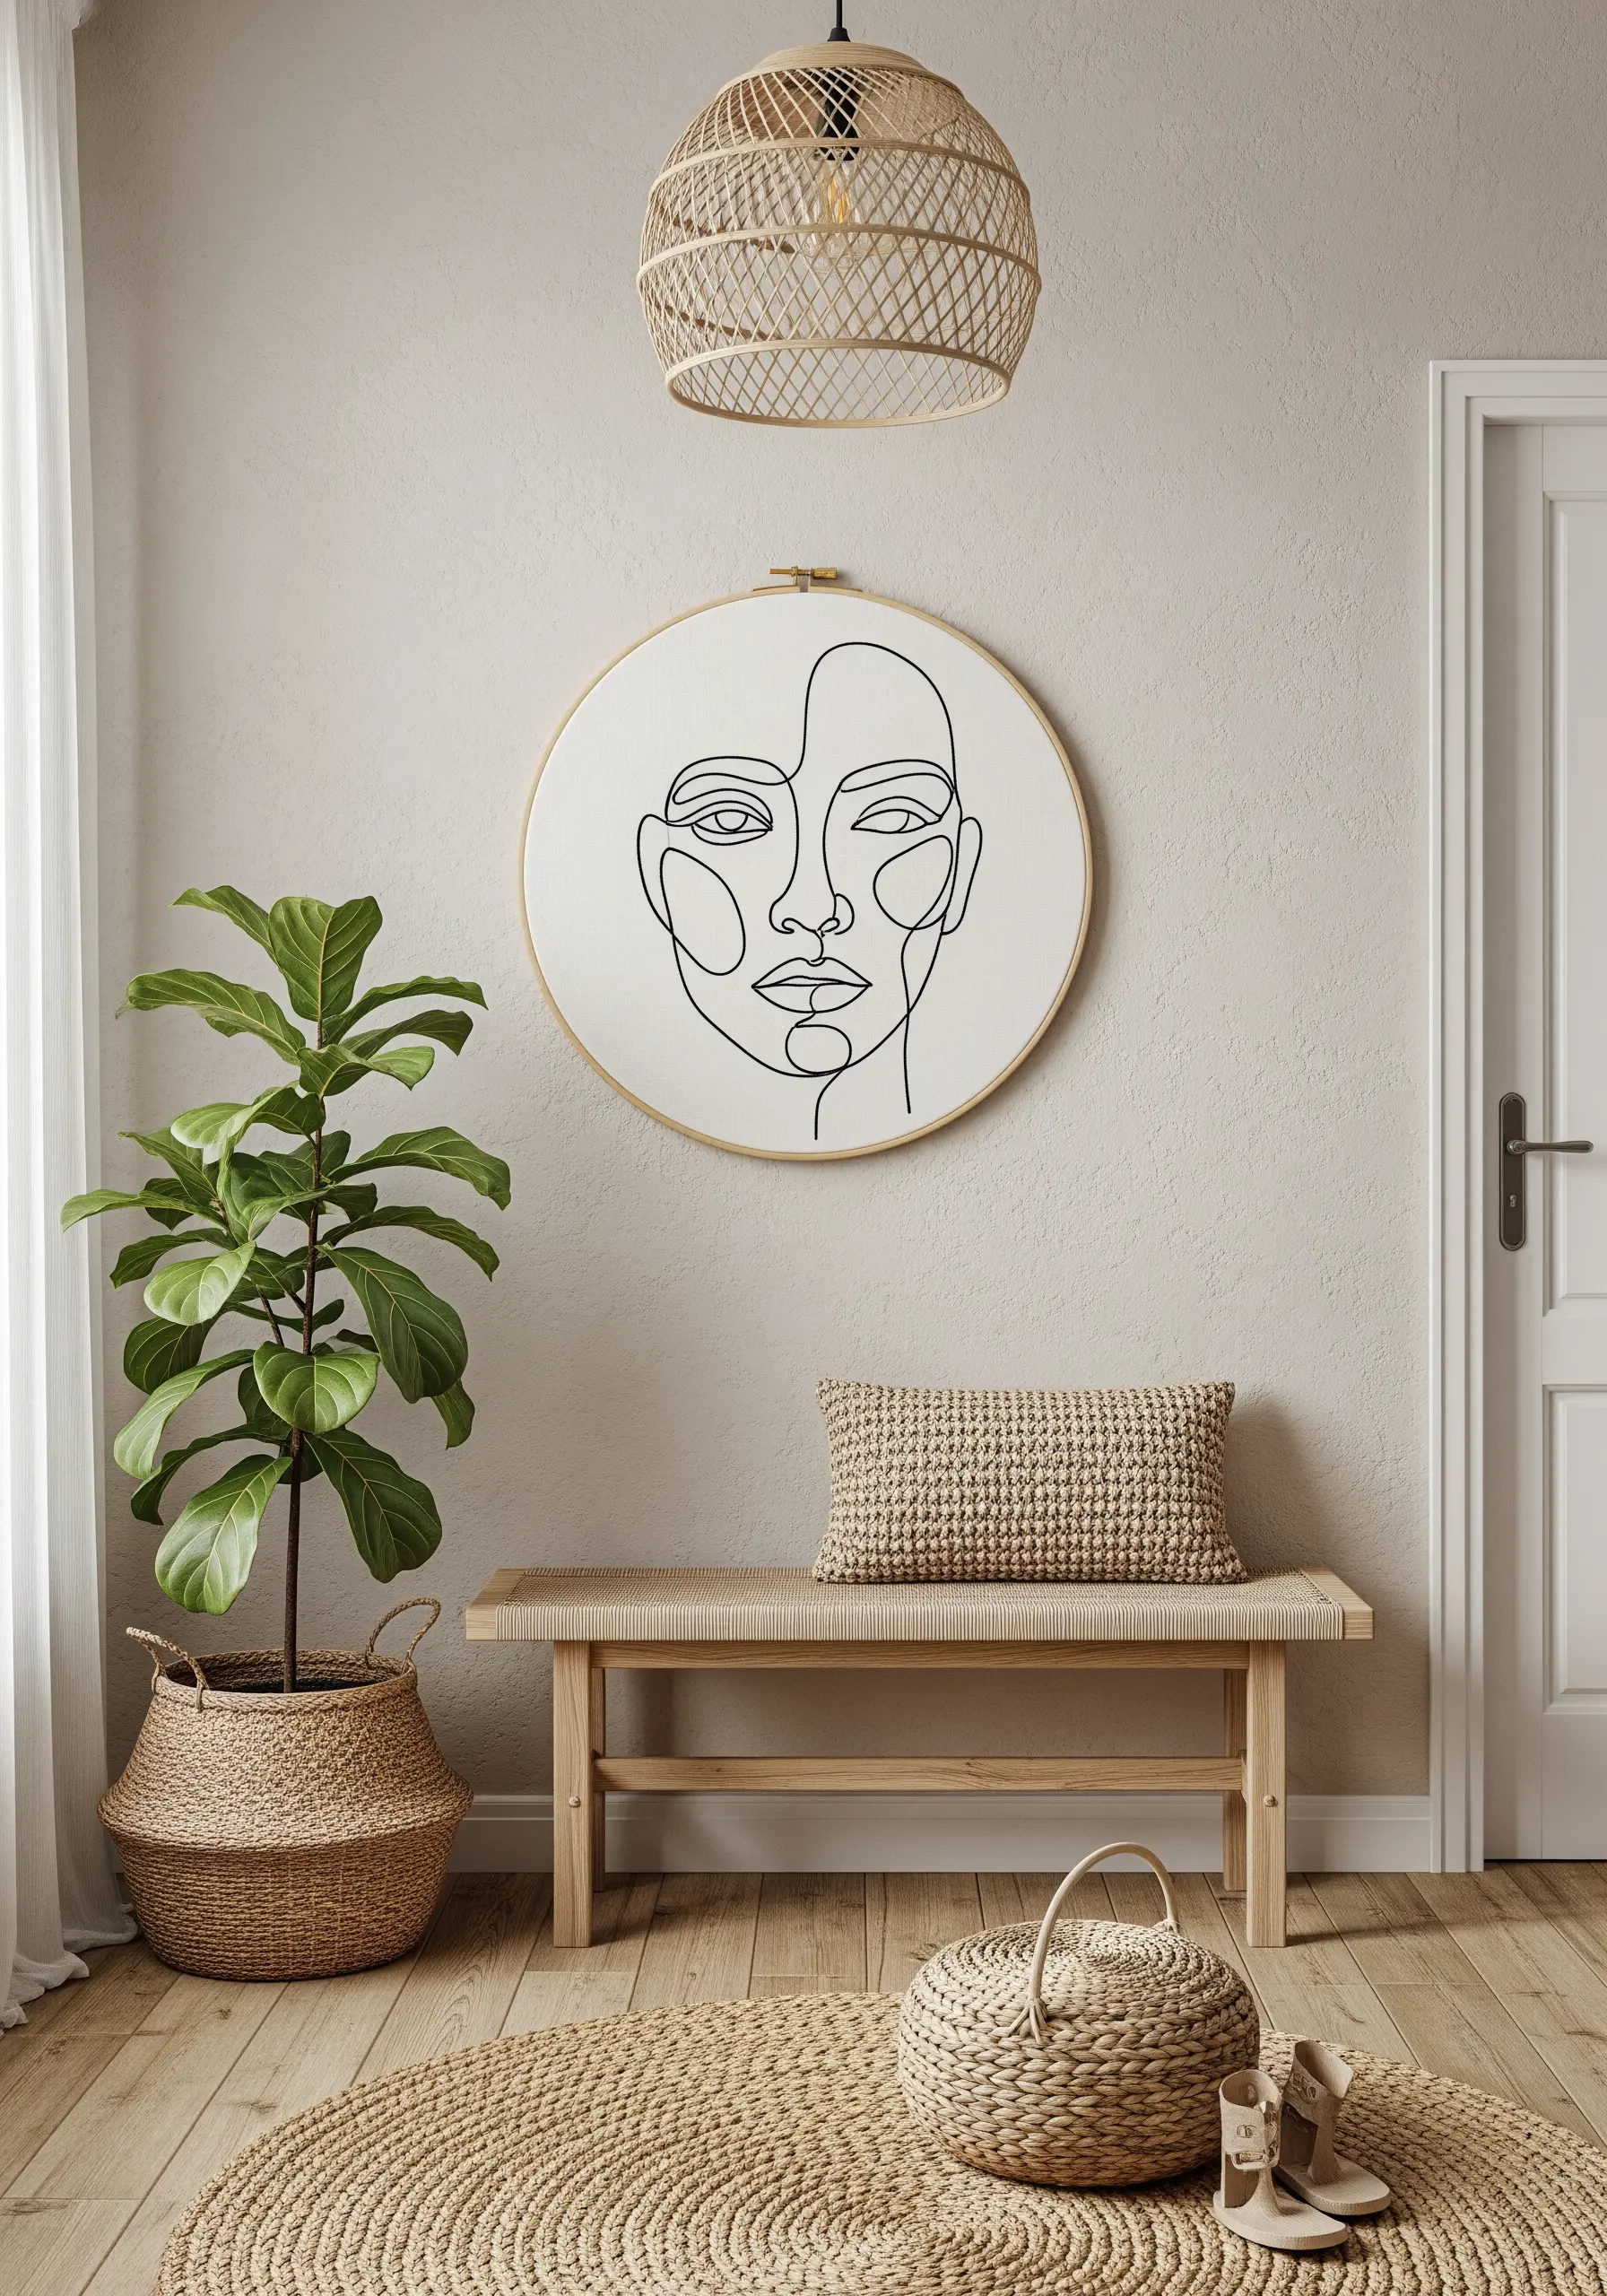
Resist the urge to center your design perfectly; an off-center placement creates visual tension and a more sophisticated composition.
By positioning the portrait to one side, you allow the empty space to become an active, balancing element in the artwork.
This approach gives the piece room to breathe and draws the viewer’s eye across the entire surface of the fabric.
Choose a mid-weight, neutral fabric that has enough body to remain smooth and unblemished in the unstitched areas.
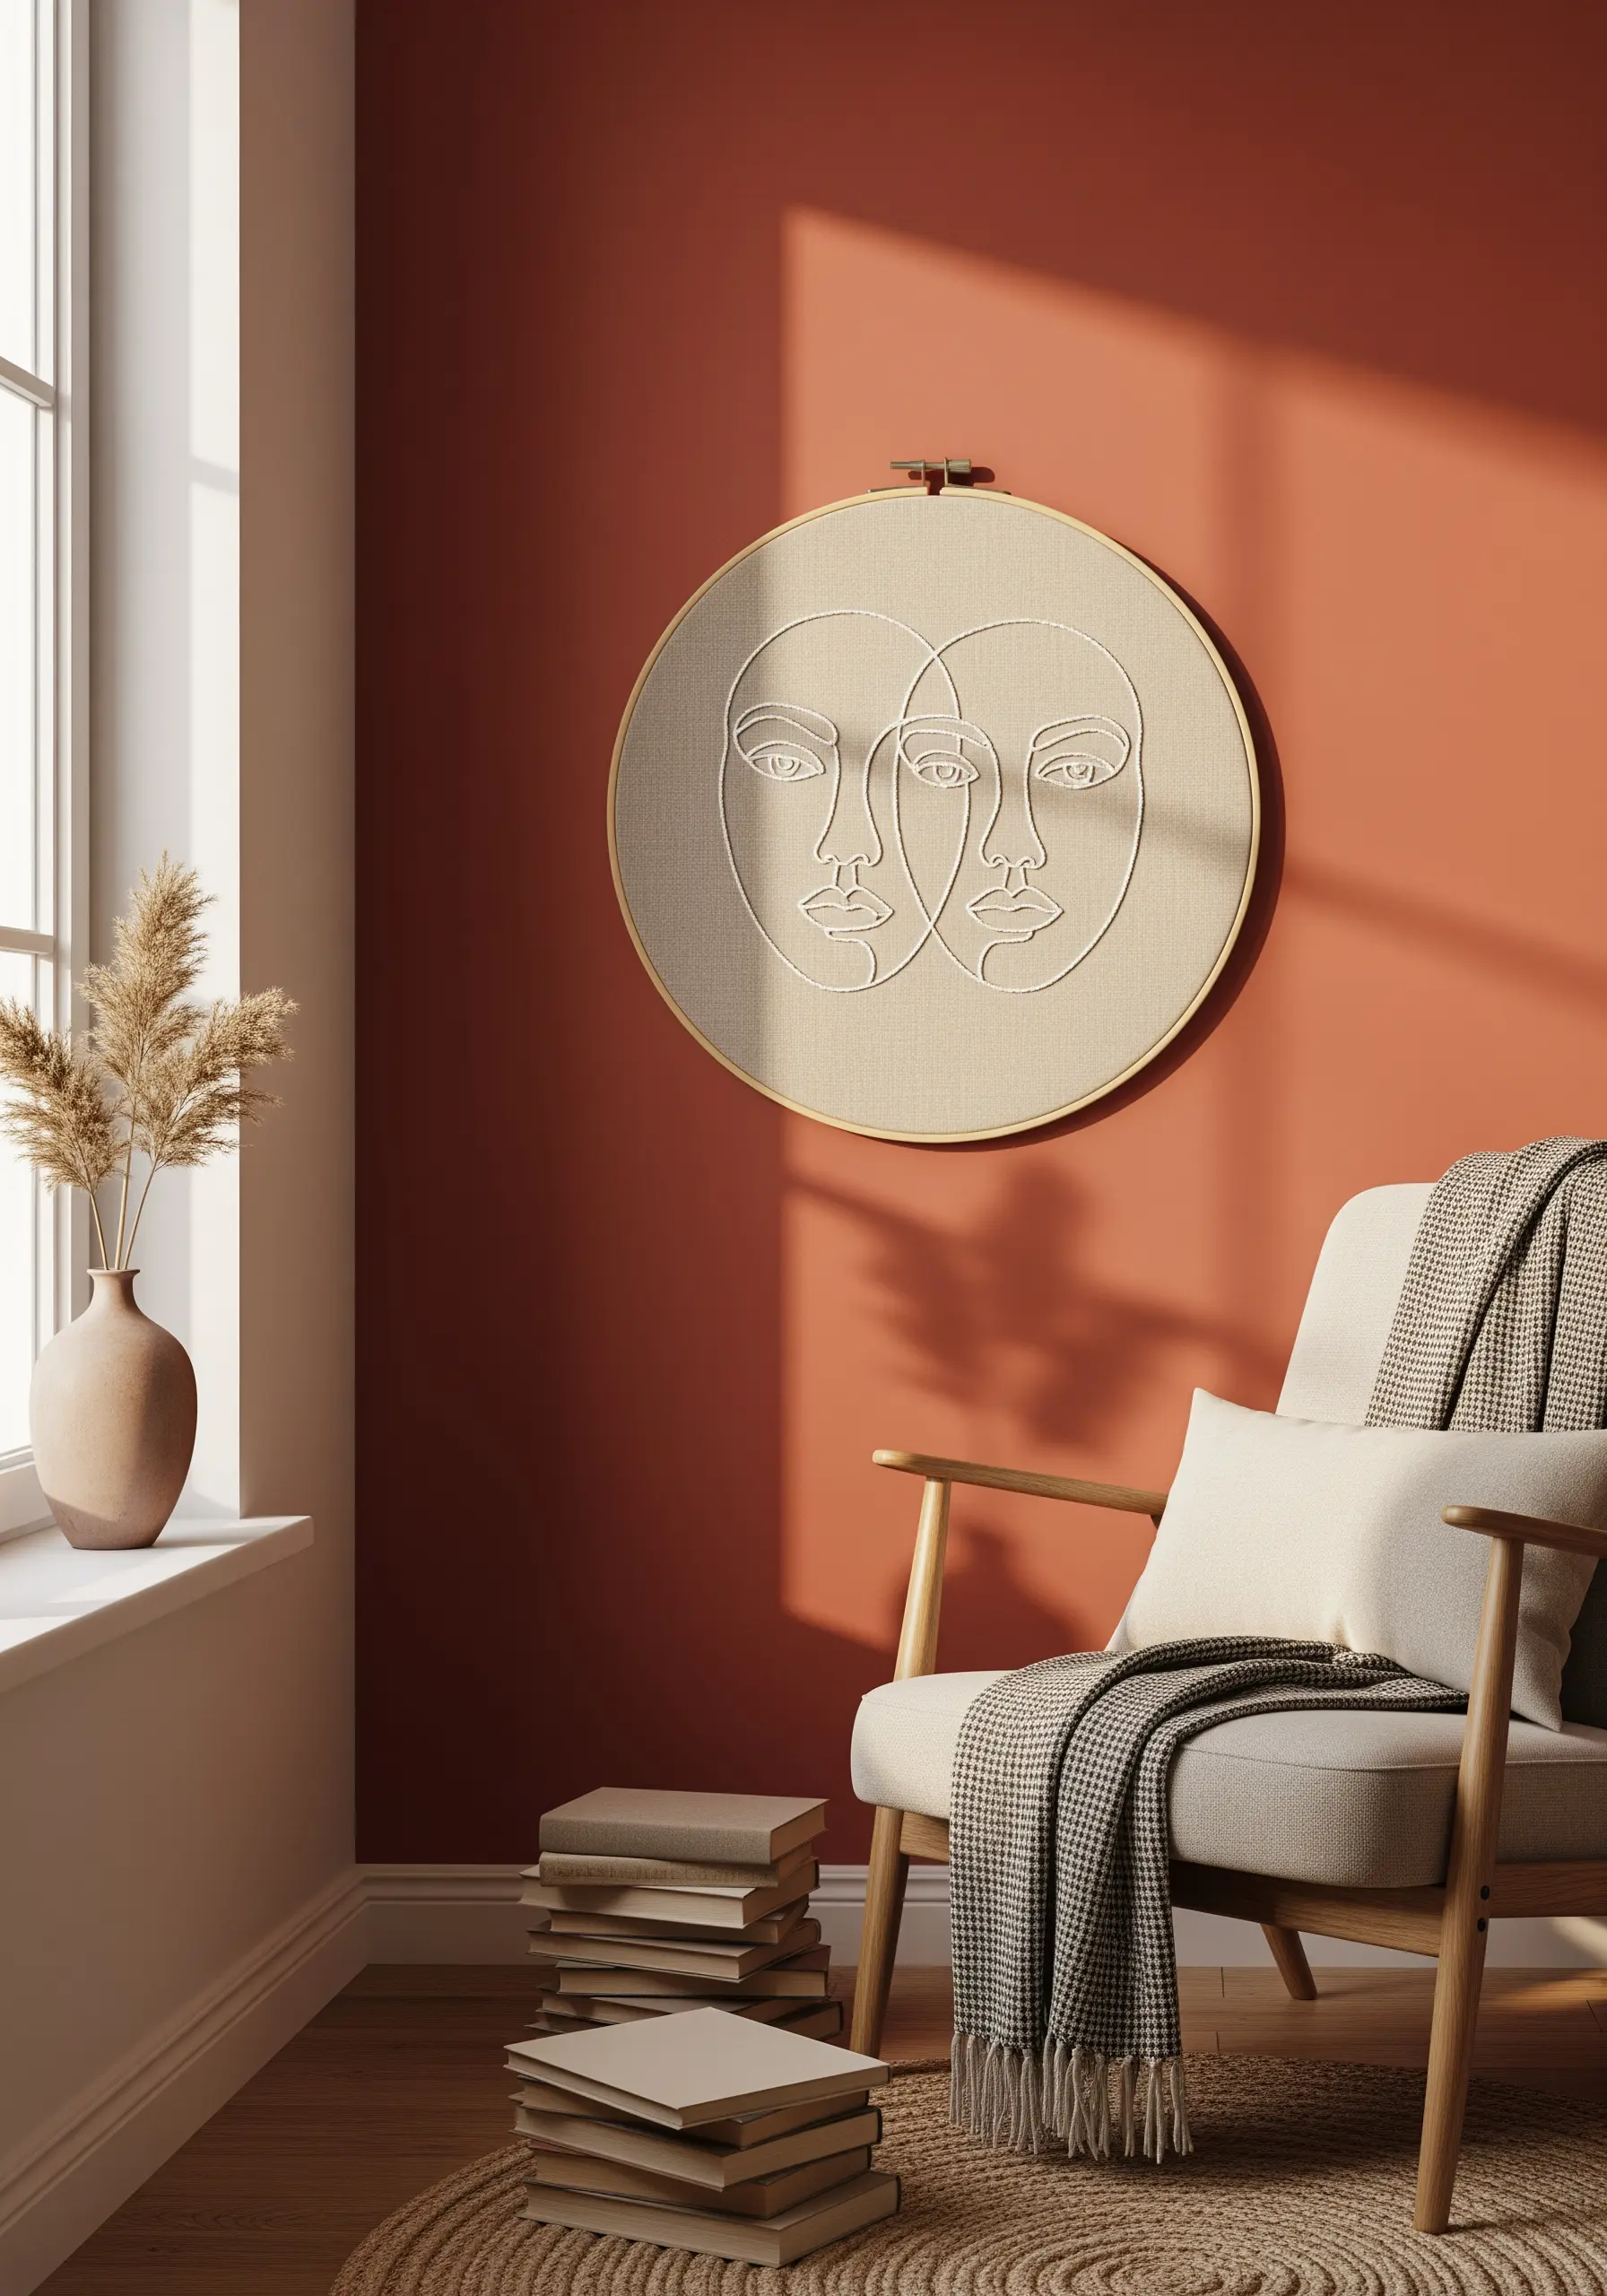
5. Set the Mood with a Single, Intentional Color
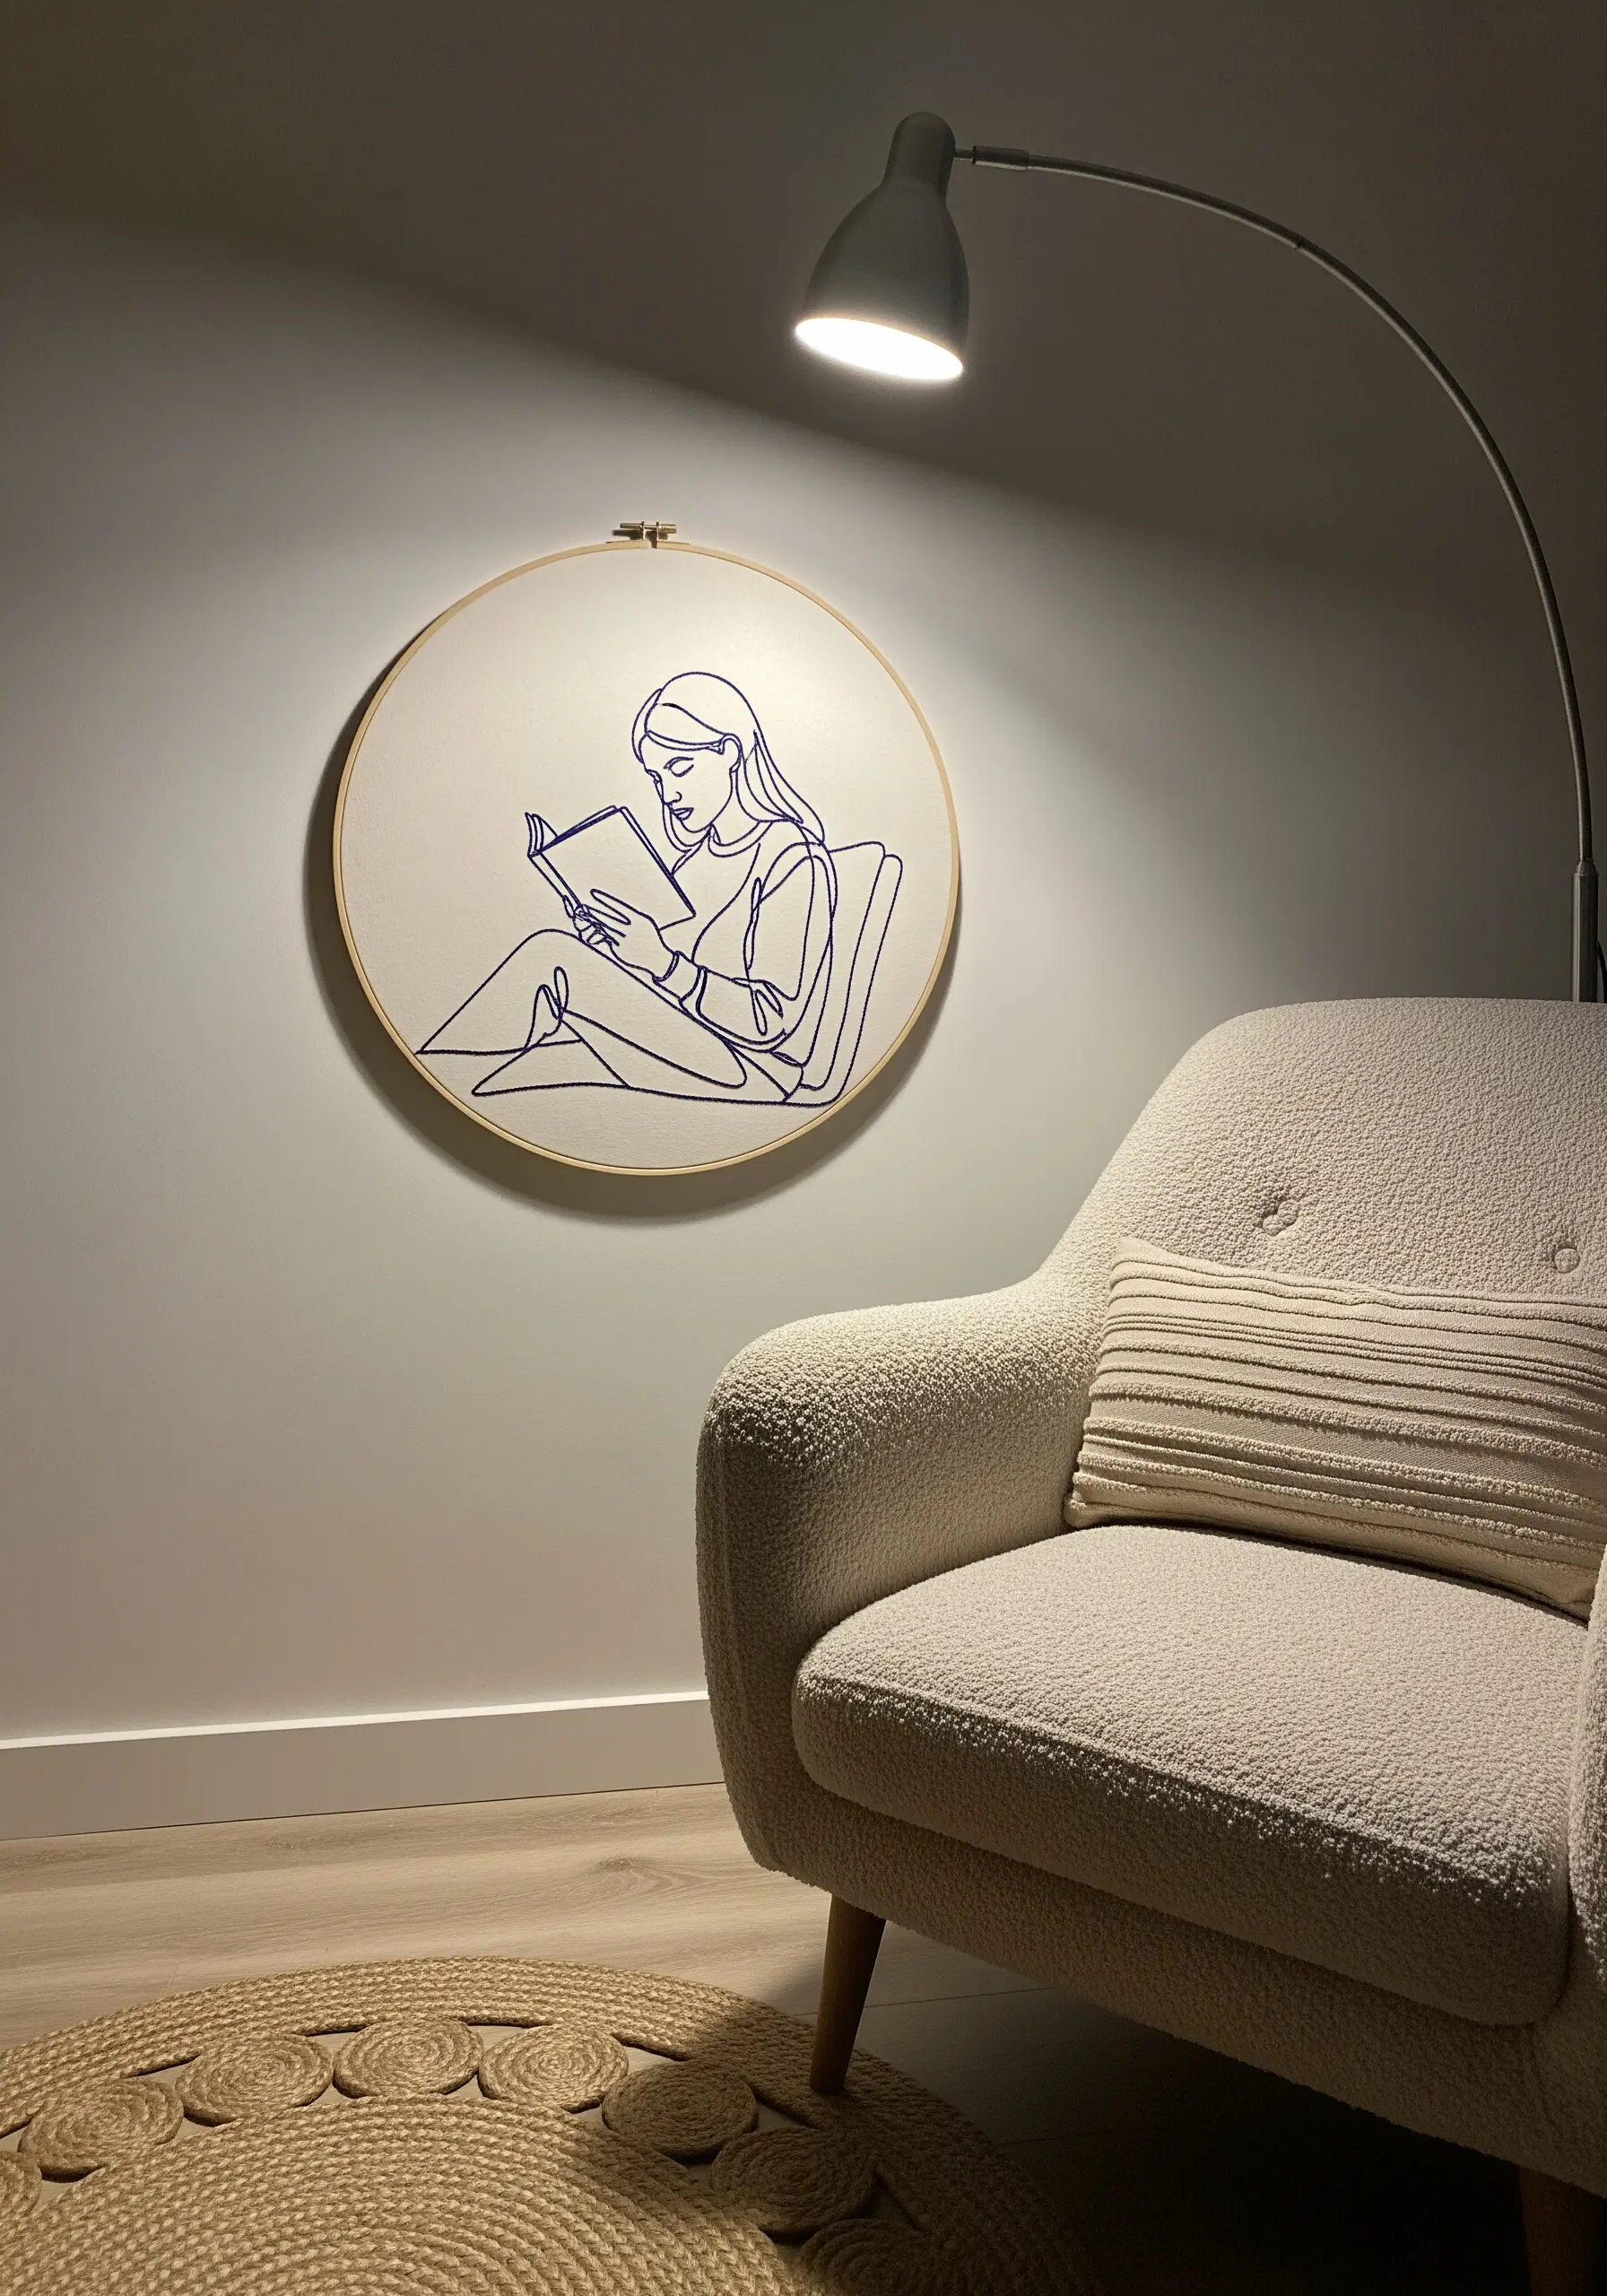
Instead of defaulting to black, choose a single color that evokes a specific feeling or mood.
A deep navy or indigo blue, for example, feels quieter and more contemplative than a stark black, making it perfect for a cozy reading nook.
To keep your curves exceptionally smooth, especially on a larger piece, use a whipped backstitch.
This technique involves wrapping a second thread around your initial backstitch line, eliminating any gaps and creating a perfectly solid, rope-like curve.
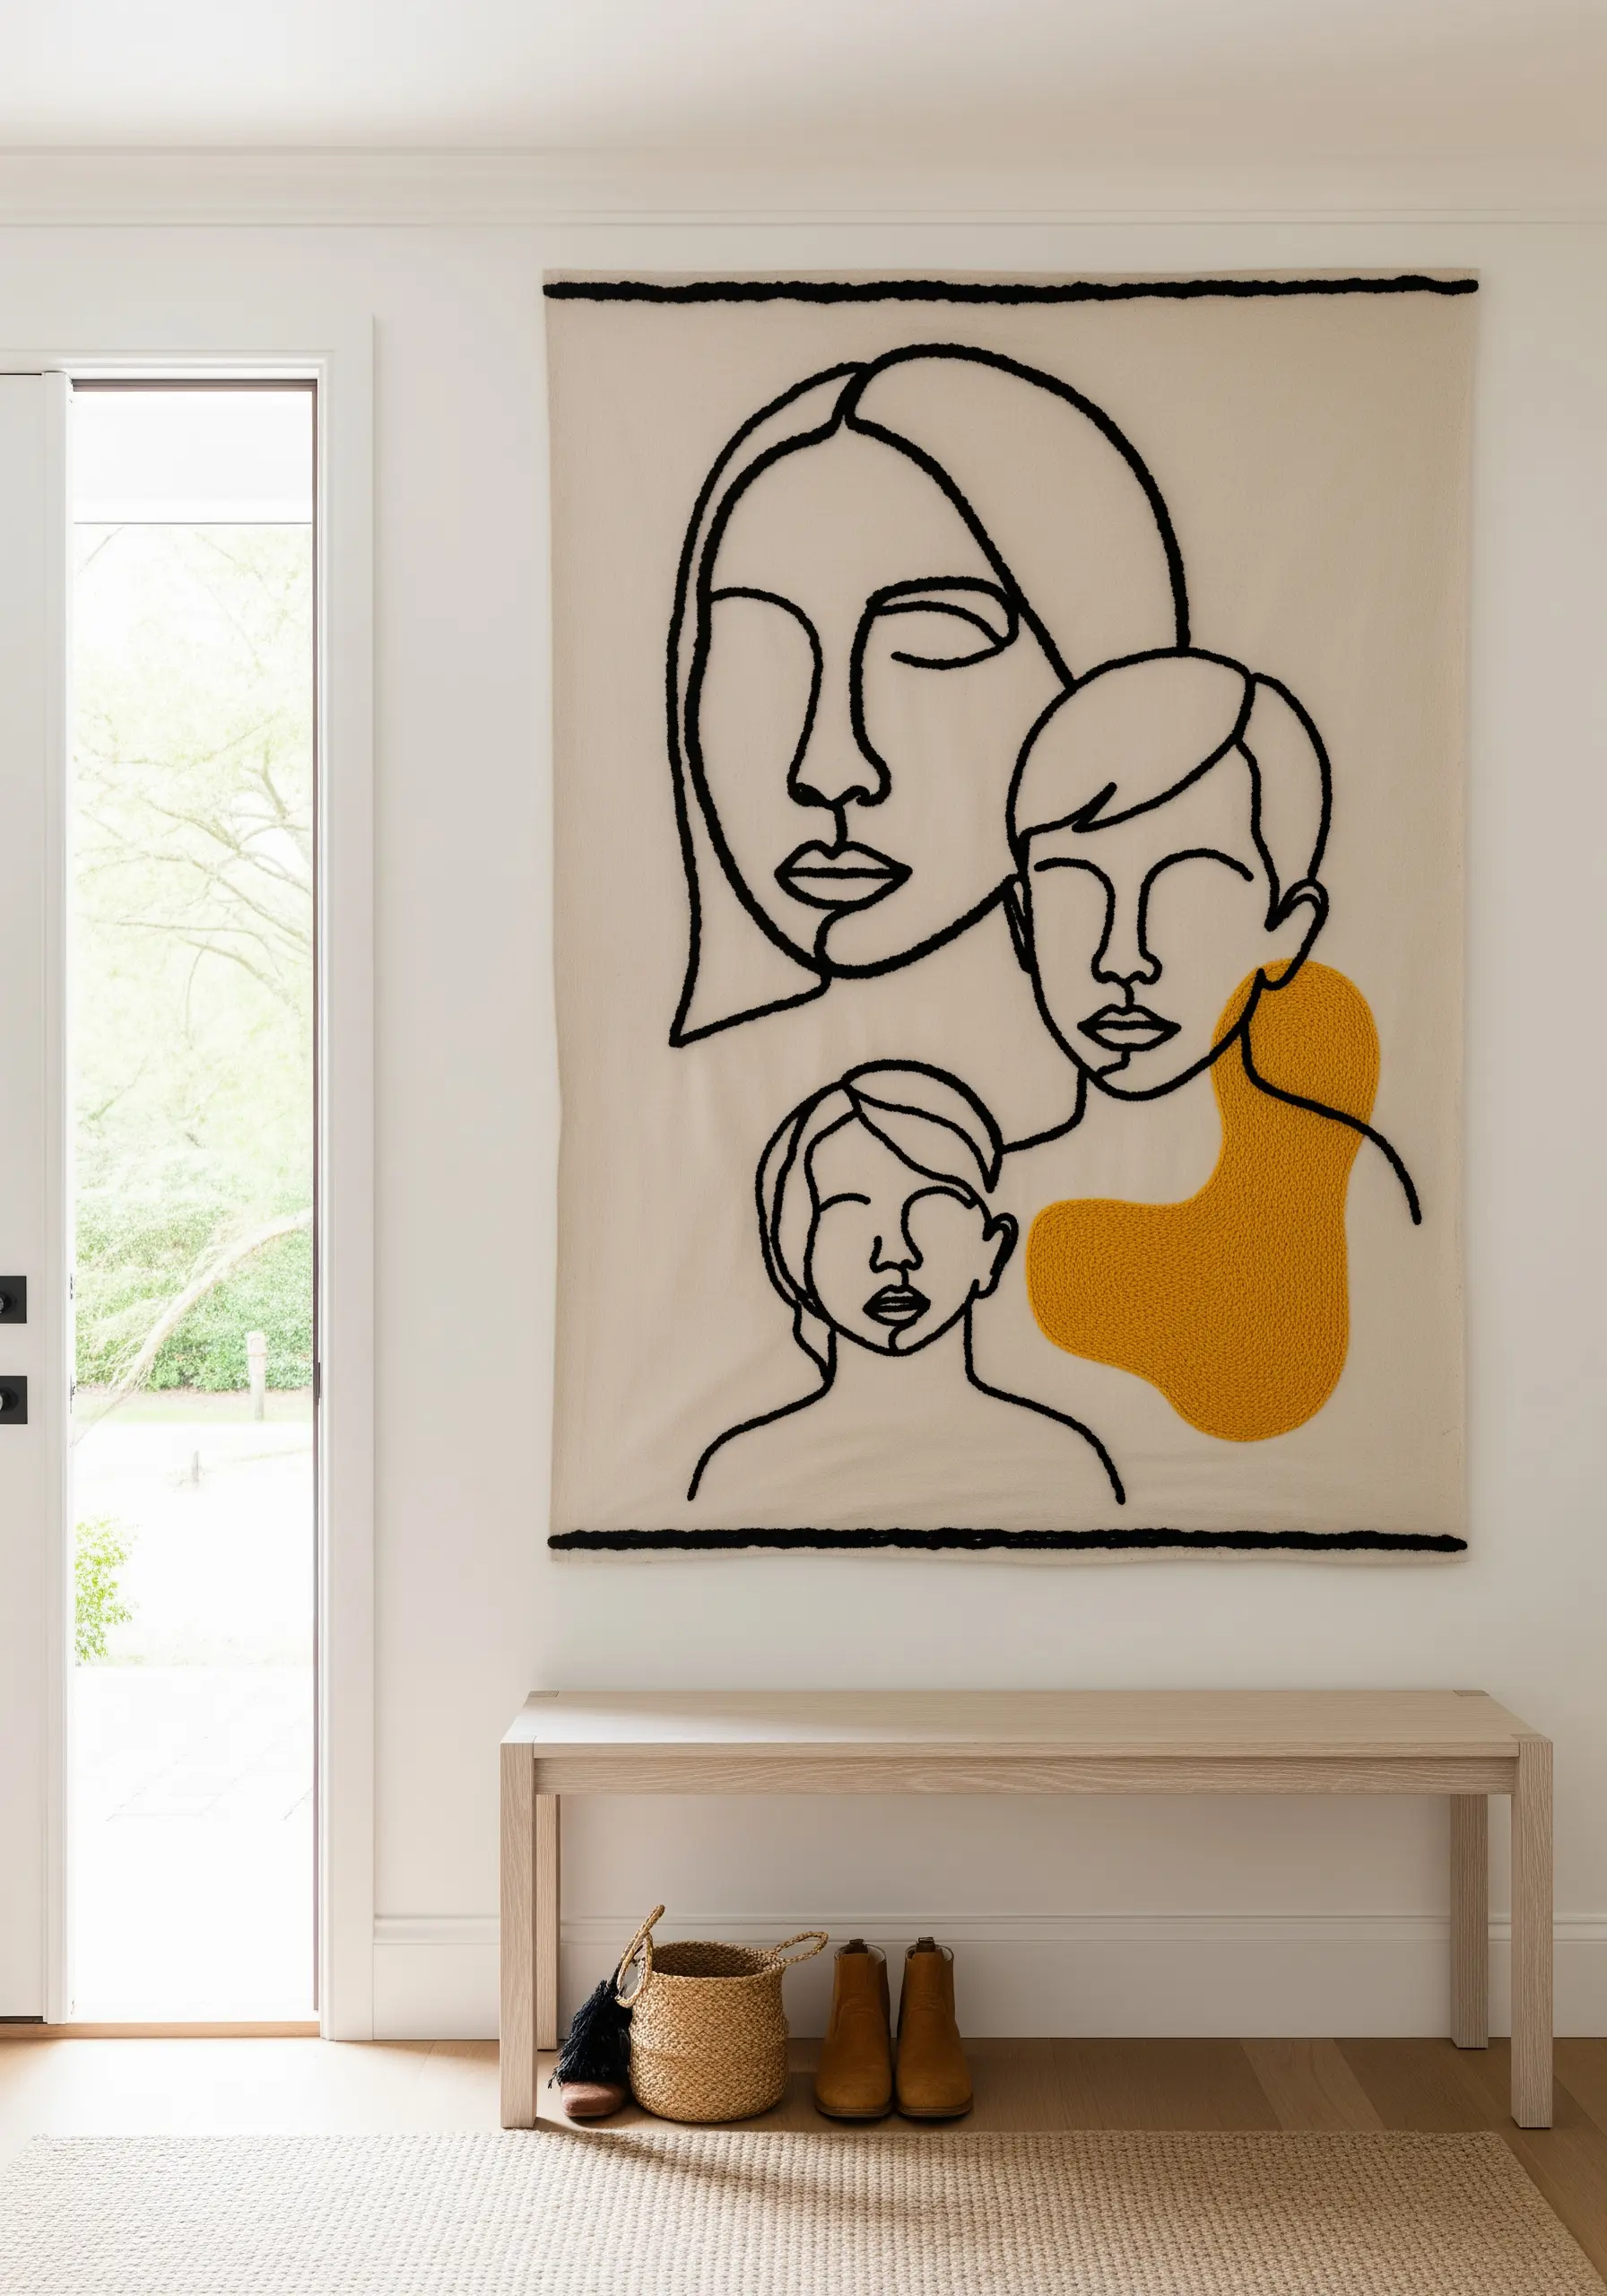
6. Convey Tenderness with Delicate Line Weight
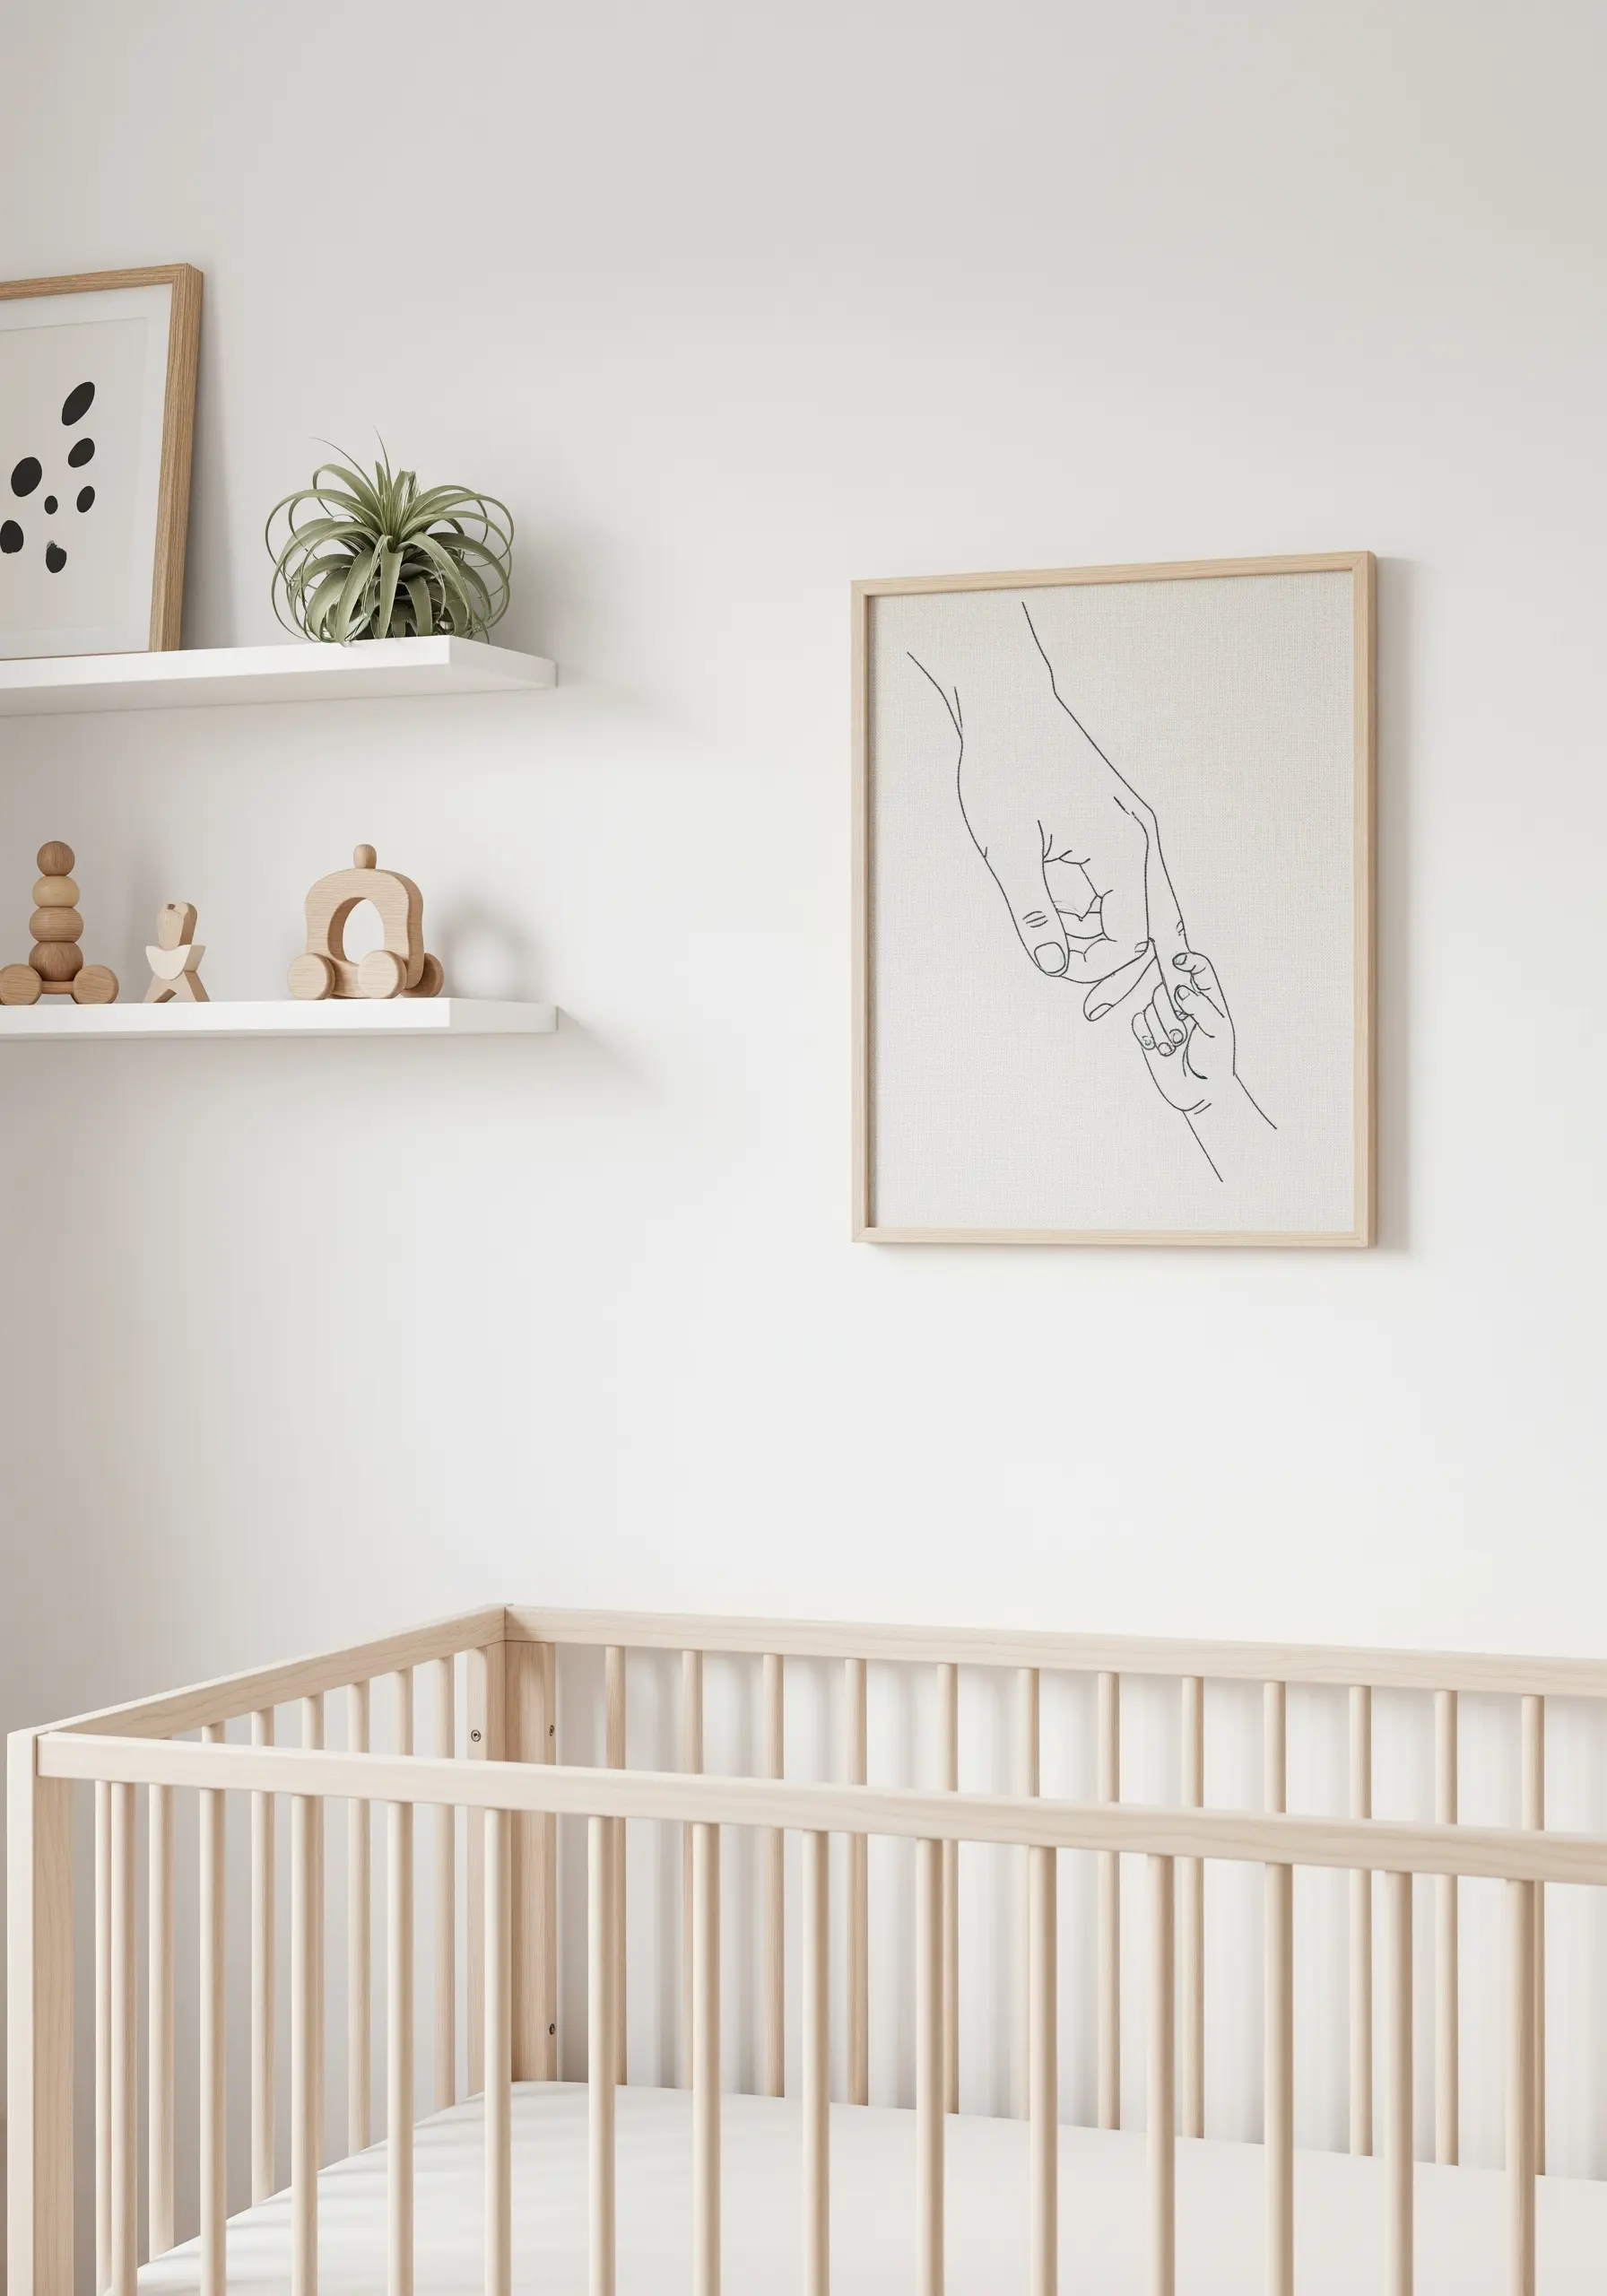
For emotionally resonant subjects, such as these mother-child line-art motifs, the weight of your line is everything.
Use just one or two strands of floss to achieve a line that feels gentle and intimate, rather than bold and graphic.
A simple backstitch works perfectly here, as its delicate, dotted quality enhances the sensitivity of the subject matter.
Stitch on a soft, unbleached cotton or linen to complete the soft and nurturing aesthetic suitable for a nursery.
7. Introduce Texture by Combining Stitch Styles
Create a compelling focal point by contrasting the simplicity of line work with a textured element.
Stitch the portrait using a clean backstitch or stem stitch, then render the botanical element with a different technique.
Use a fishbone stitch for the leaves; this creates a central vein and angled stitches that mimic natural leaf growth.
This simple shift in texture adds depth and sophistication, turning a simple design into a more complex piece of textile art.
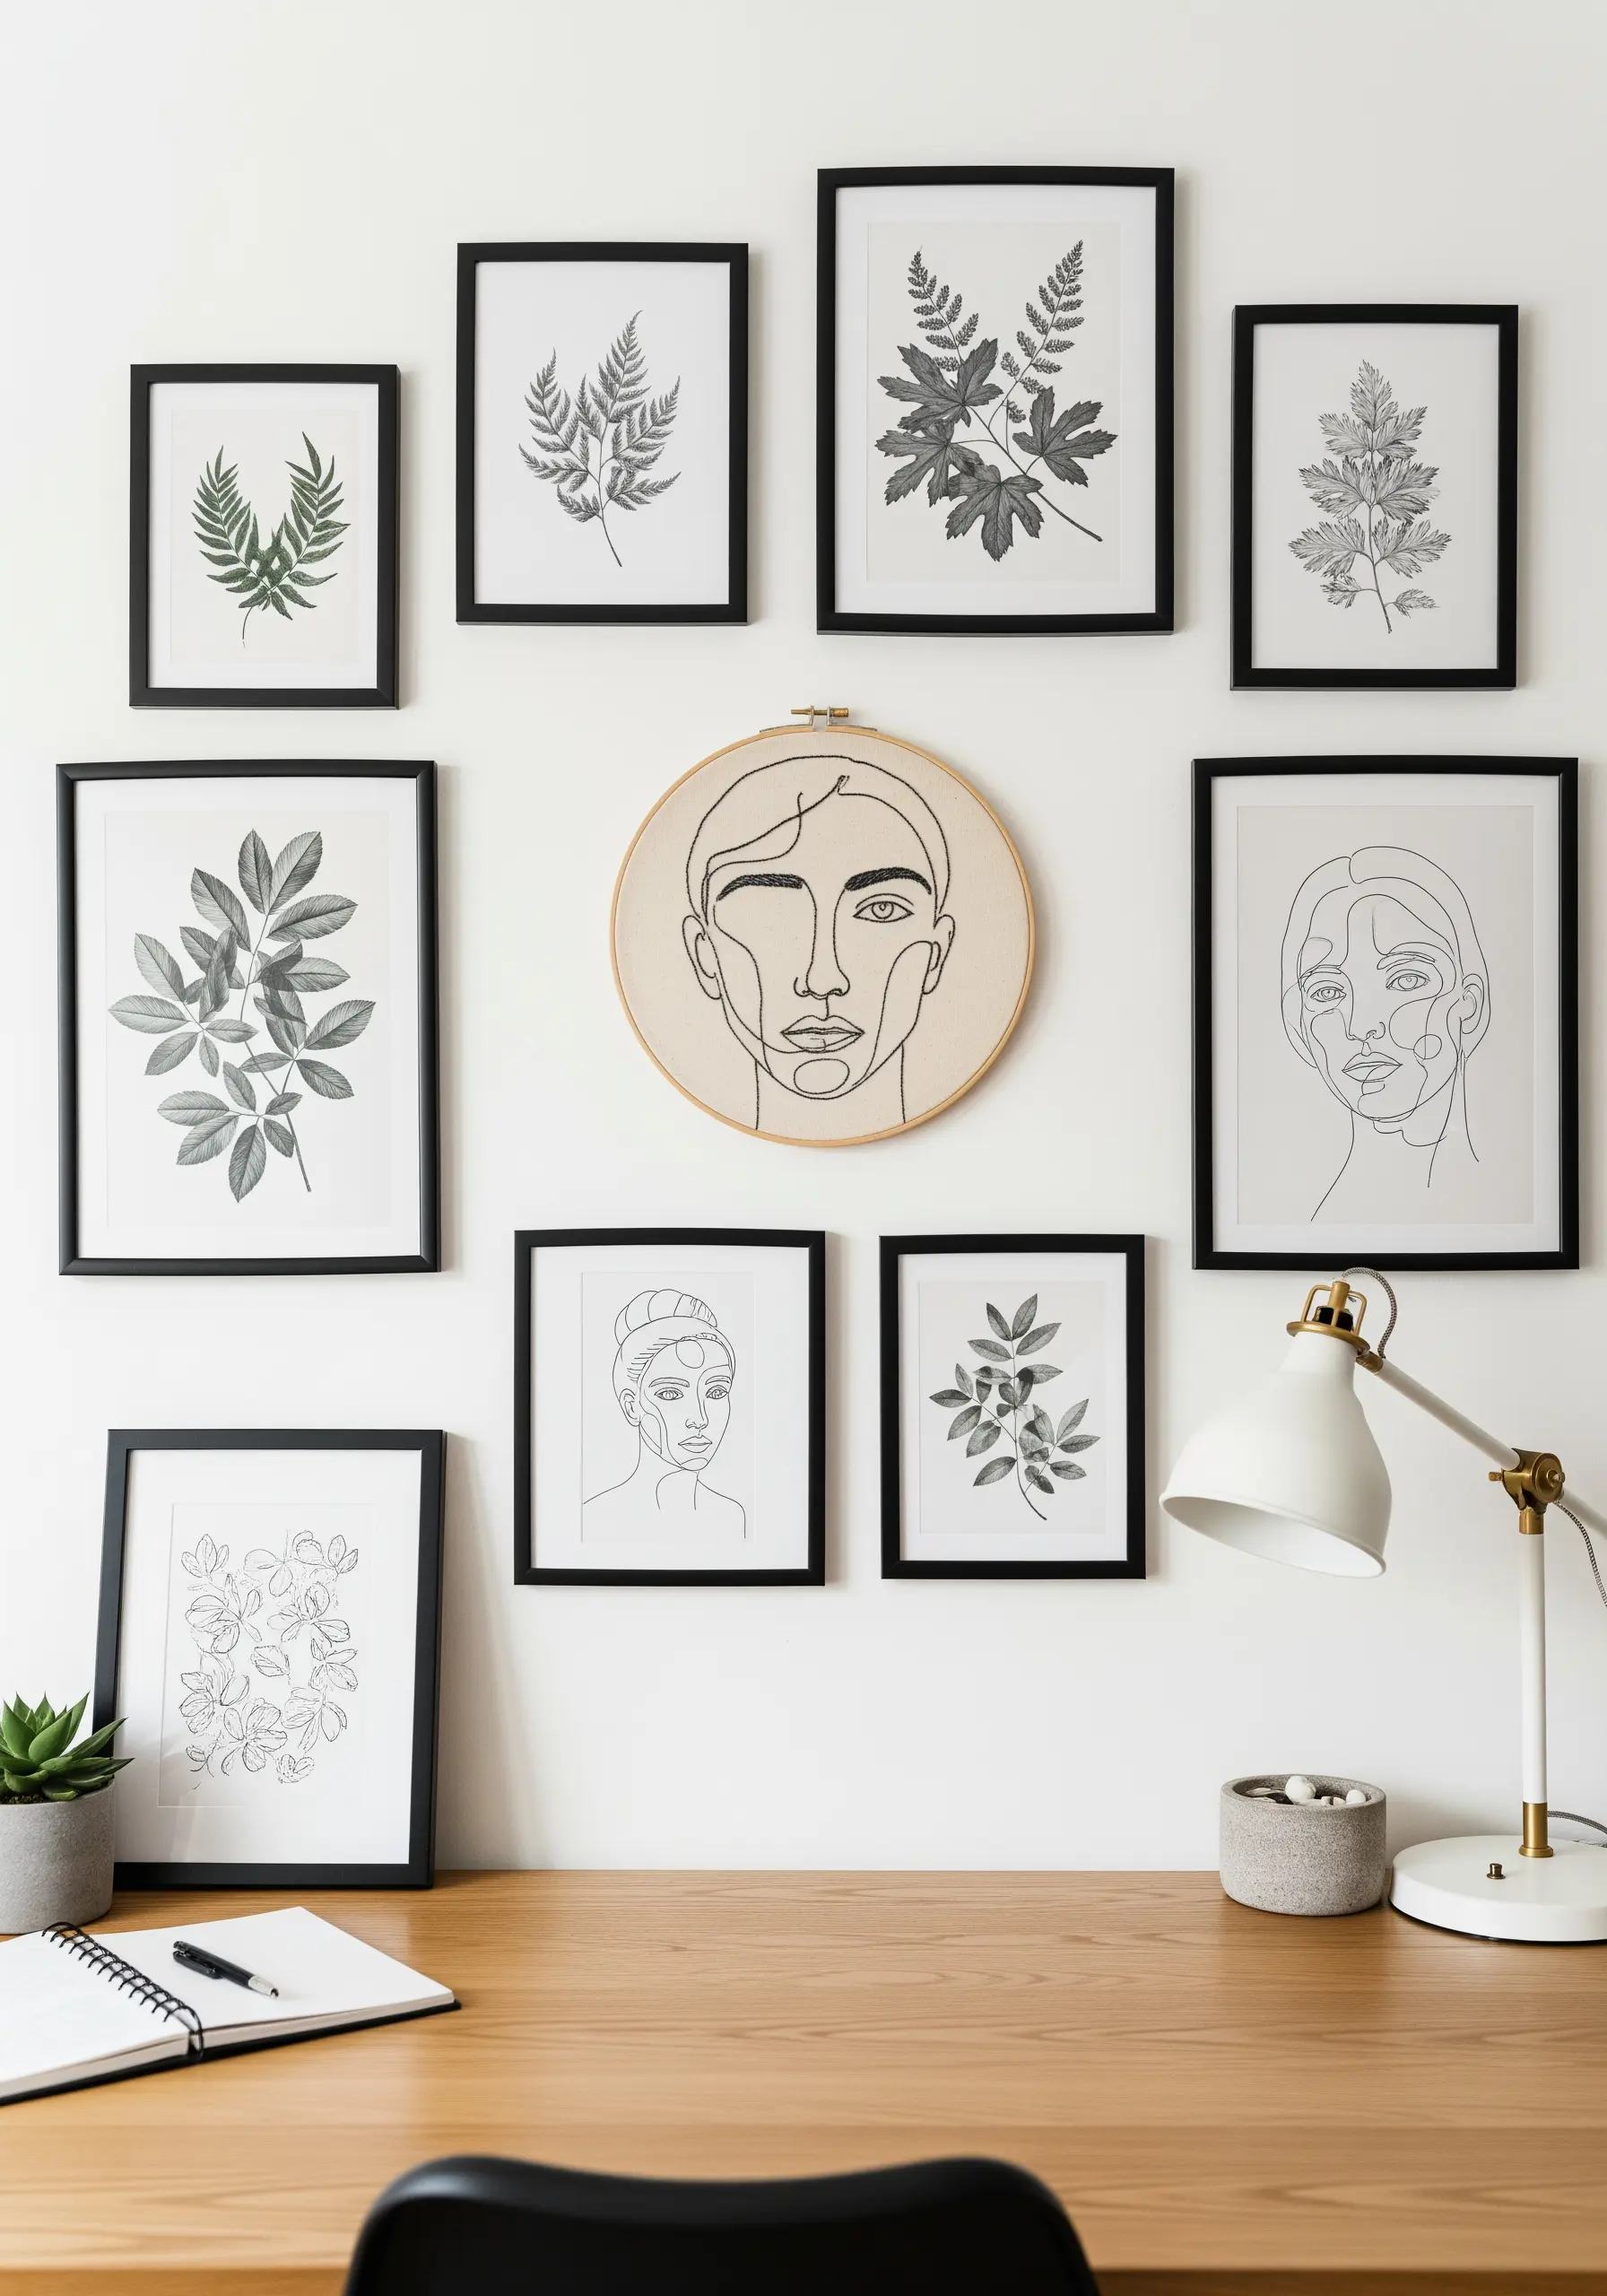
8. Integrate Small Hoops into a Gallery Wall
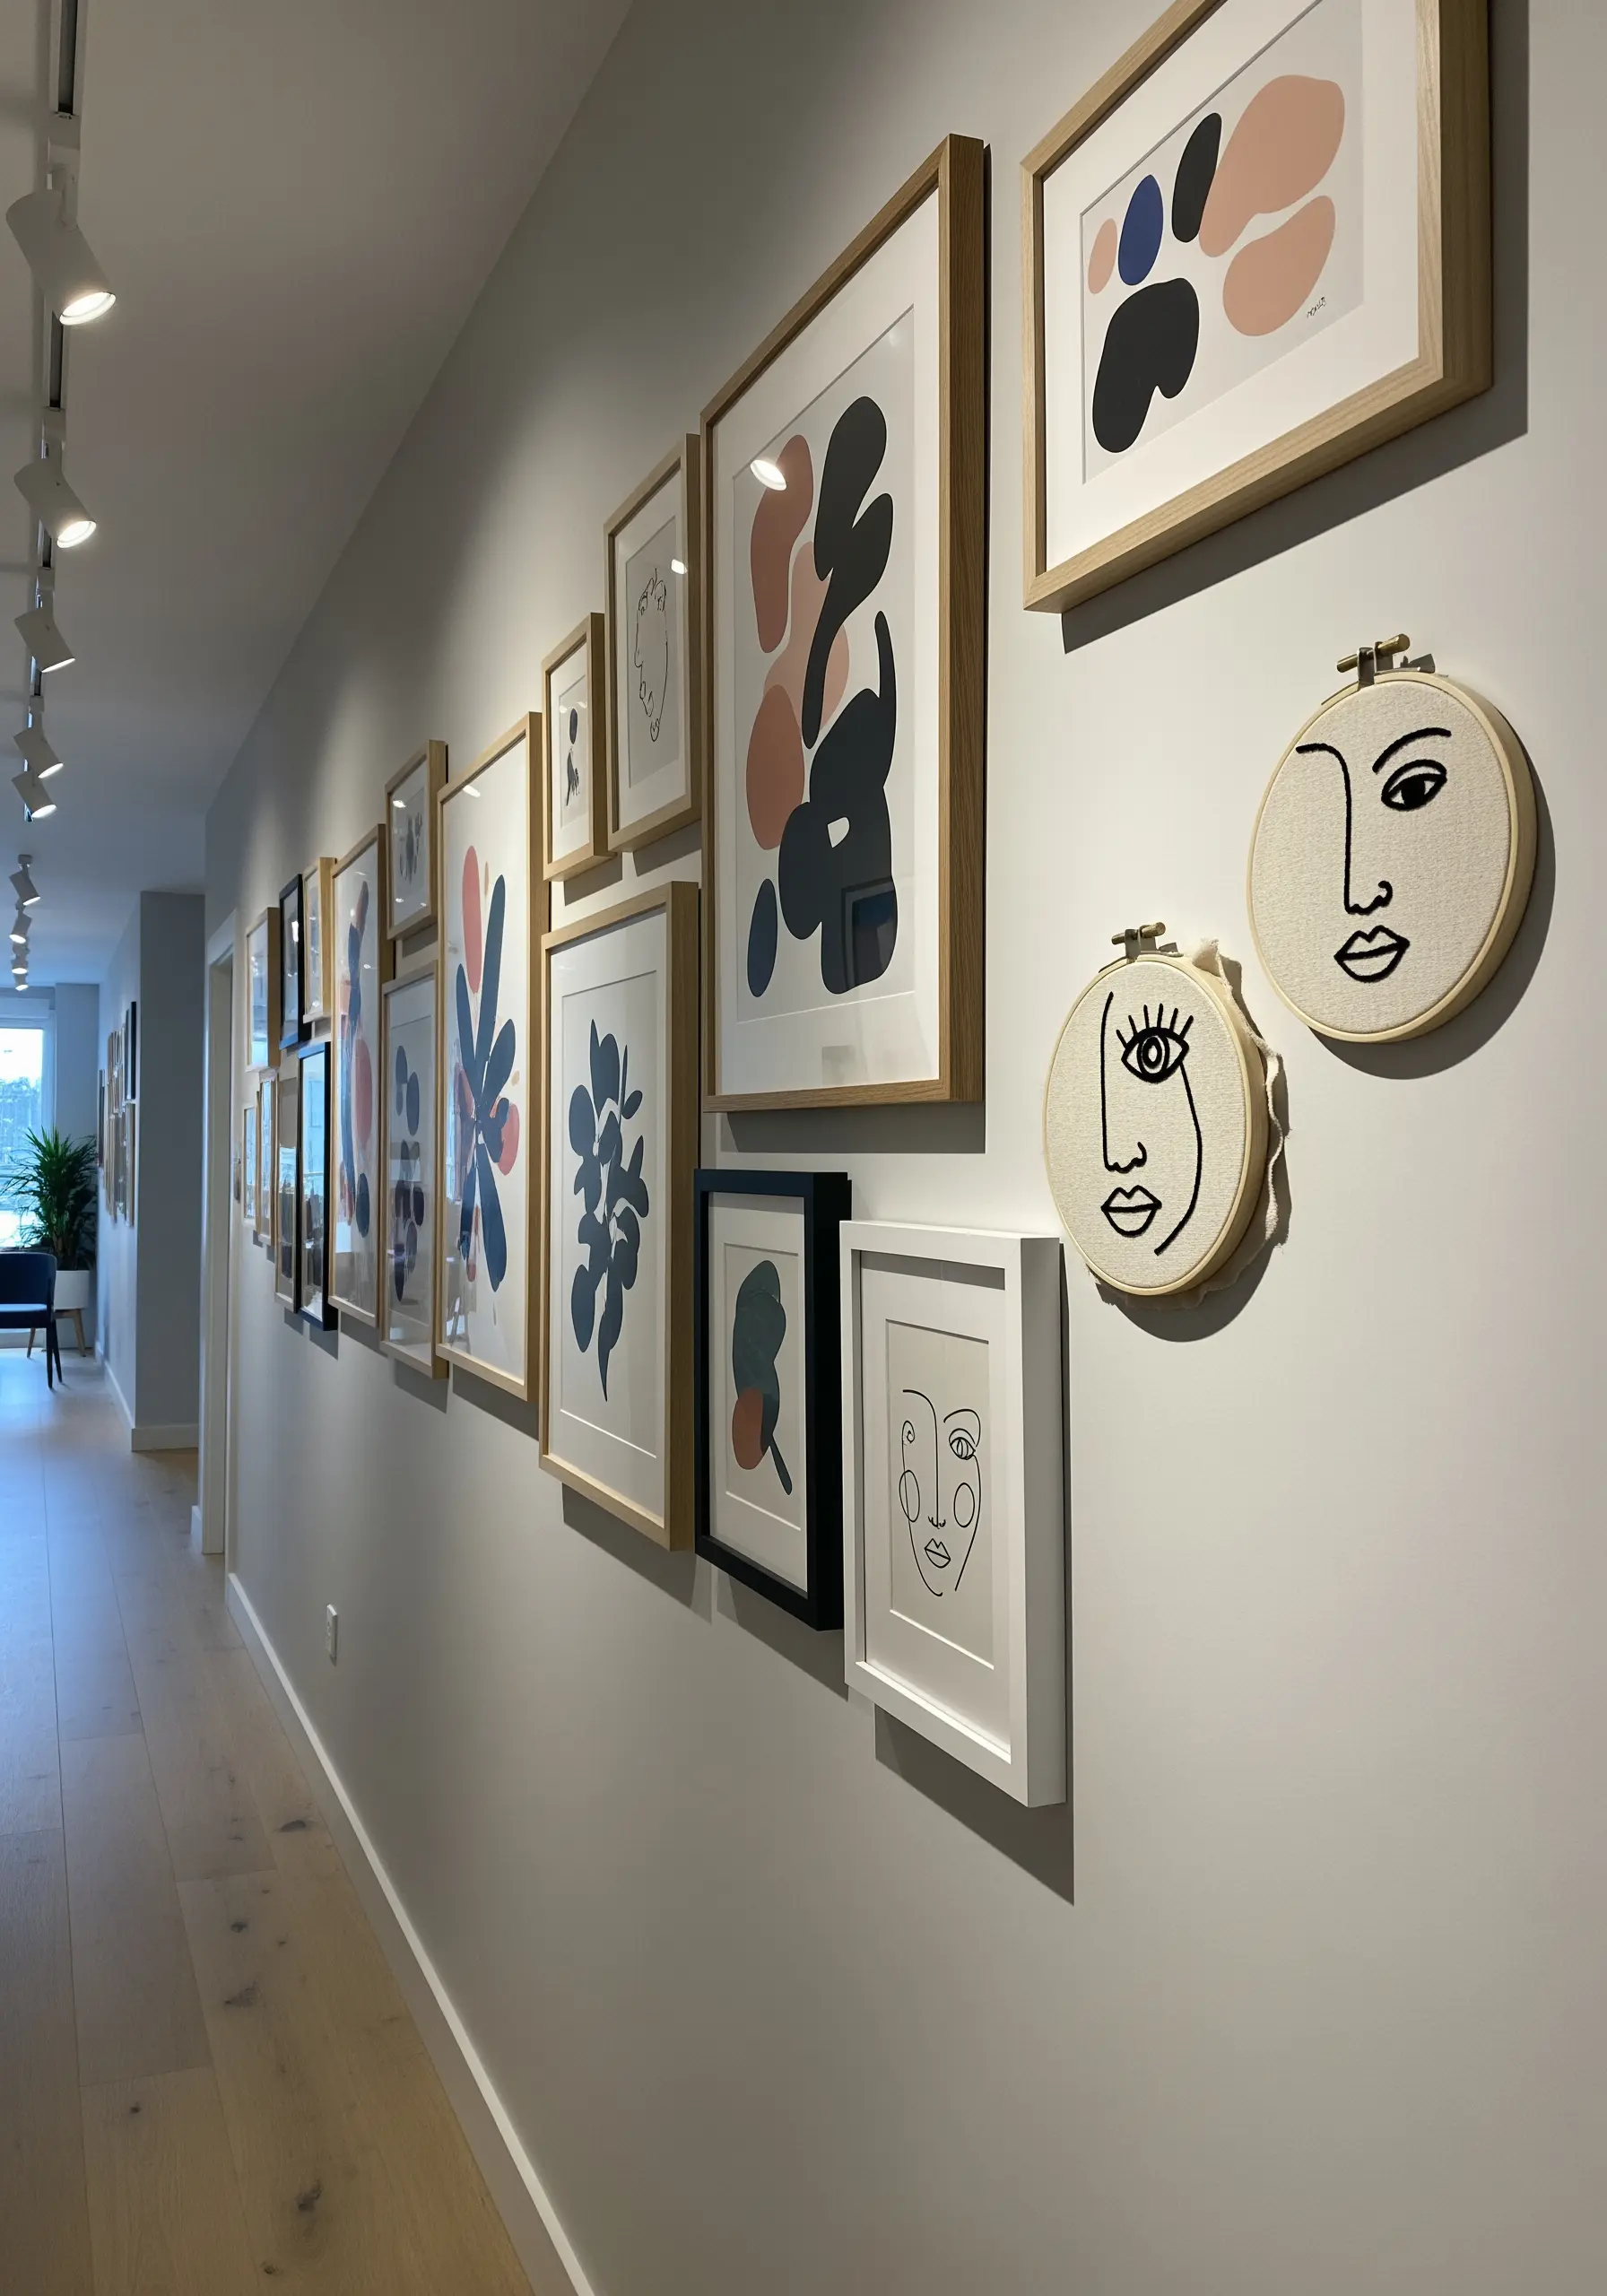
Your embroidery can be a key player in a larger art collection.
To make it work, choose smaller hoops that act as punctuation marks or surprising moments of texture among framed prints.
Keep the embroidered designs simple and graphic—these abstract face line embroidery designs are perfect because their boldness holds its own.
By echoing the black lines and neutral backgrounds of the surrounding art, your hoops will feel like an intentional and integral part of the whole.
9. Scale Up Your Design for a Statement Wall Hanging
To transform a small sketch into a large-scale embroidery tapestry, you need to adjust your materials.
Instead of standard six-strand floss, switch to a thicker thread like cotton perle or even fine wool yarn.
This ensures the lines are substantial enough to be seen from a distance and have a strong visual presence.
Use a couching stitch—where you lay the thick thread on the surface and tack it down with a finer thread—to achieve perfect curves without pulling the fabric.
10. Add Tactile Dimension with a Fill Stitch
Elevate a simple line portrait by filling one area with a dense, textural stitch.
Here, the hair is filled with seed stitch—tiny, randomly placed straight stitches—which creates a rich, tactile surface that begs to be touched.
This contrast between the flat, clean line of the face and the textured mass of the hair is what makes the design so visually engaging.
Choose a color with just enough contrast to be noticeable but soft enough to feel cohesive with your neutral palette.
11. Create a Quiet Dialogue with a Diptych
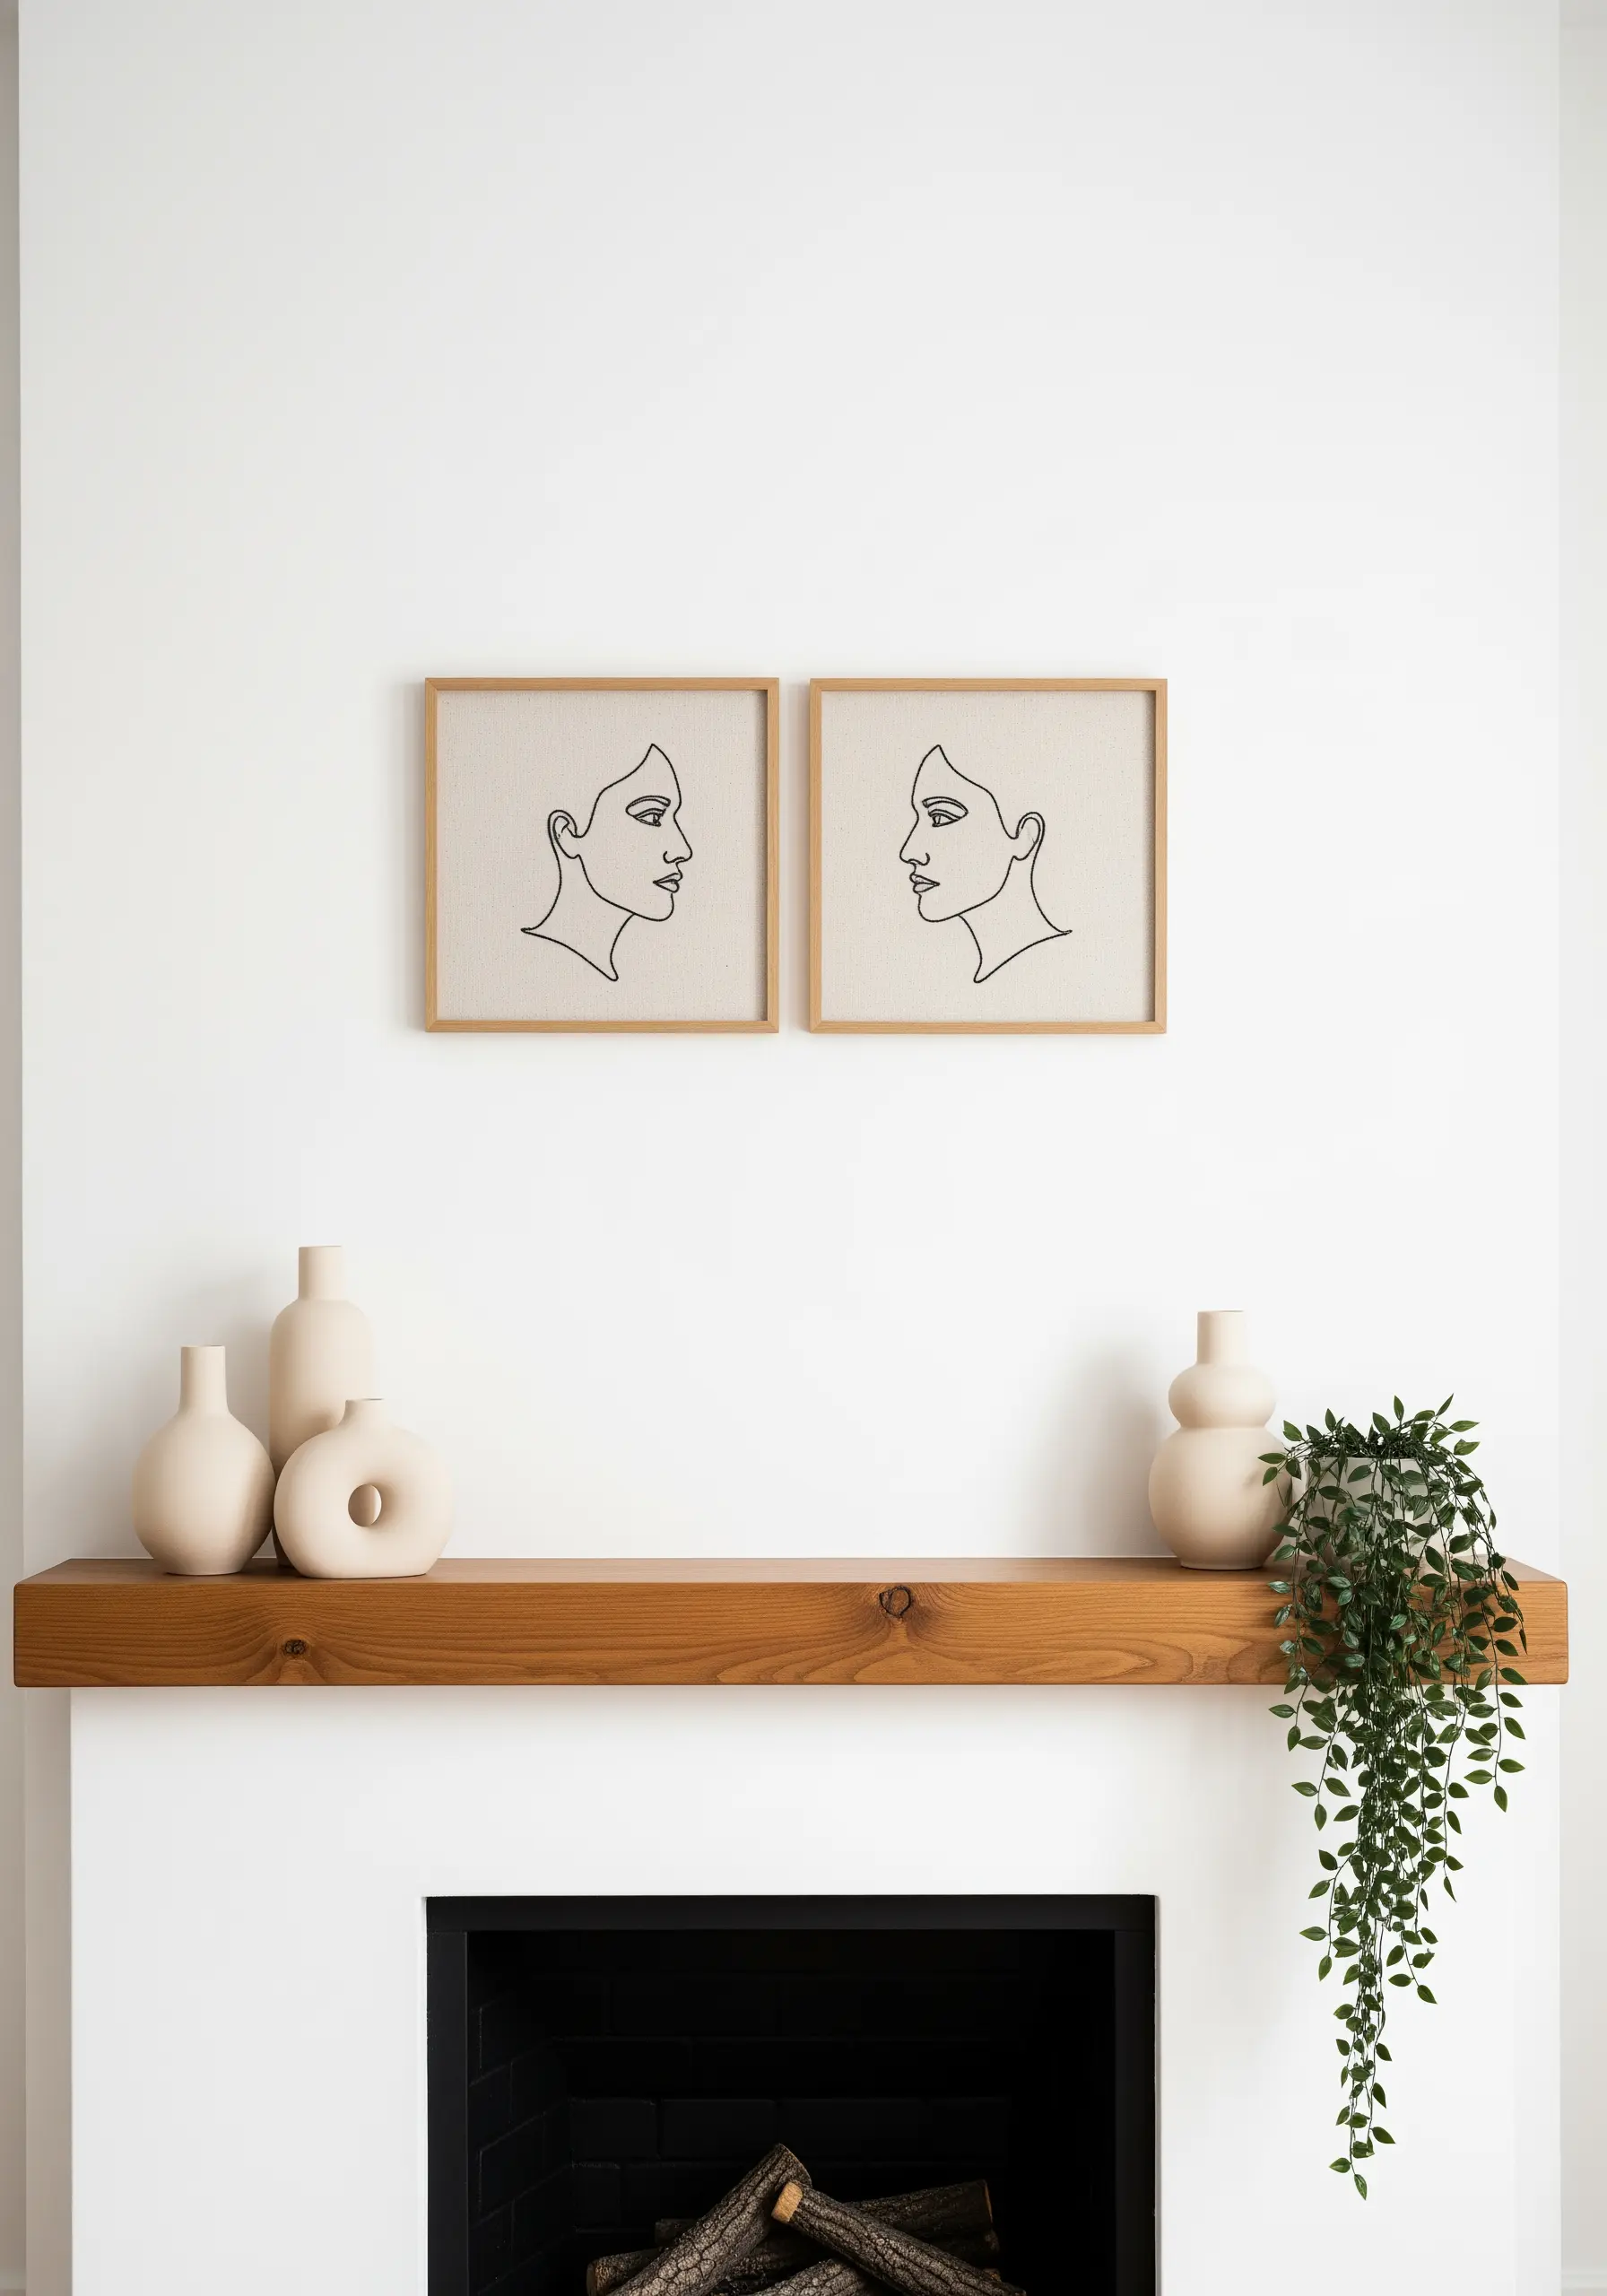
Tell a story by splitting a design across two perfectly matched frames.
Stitching two facing profiles creates a sense of connection and intimacy, leaving the space between them charged with unspoken energy.
To ensure a professional finish, stretch the fabric on the same grain line in both frames so the weave is perfectly aligned.
Using identical frames and fabric makes the pair feel like a single, intentional piece of art.
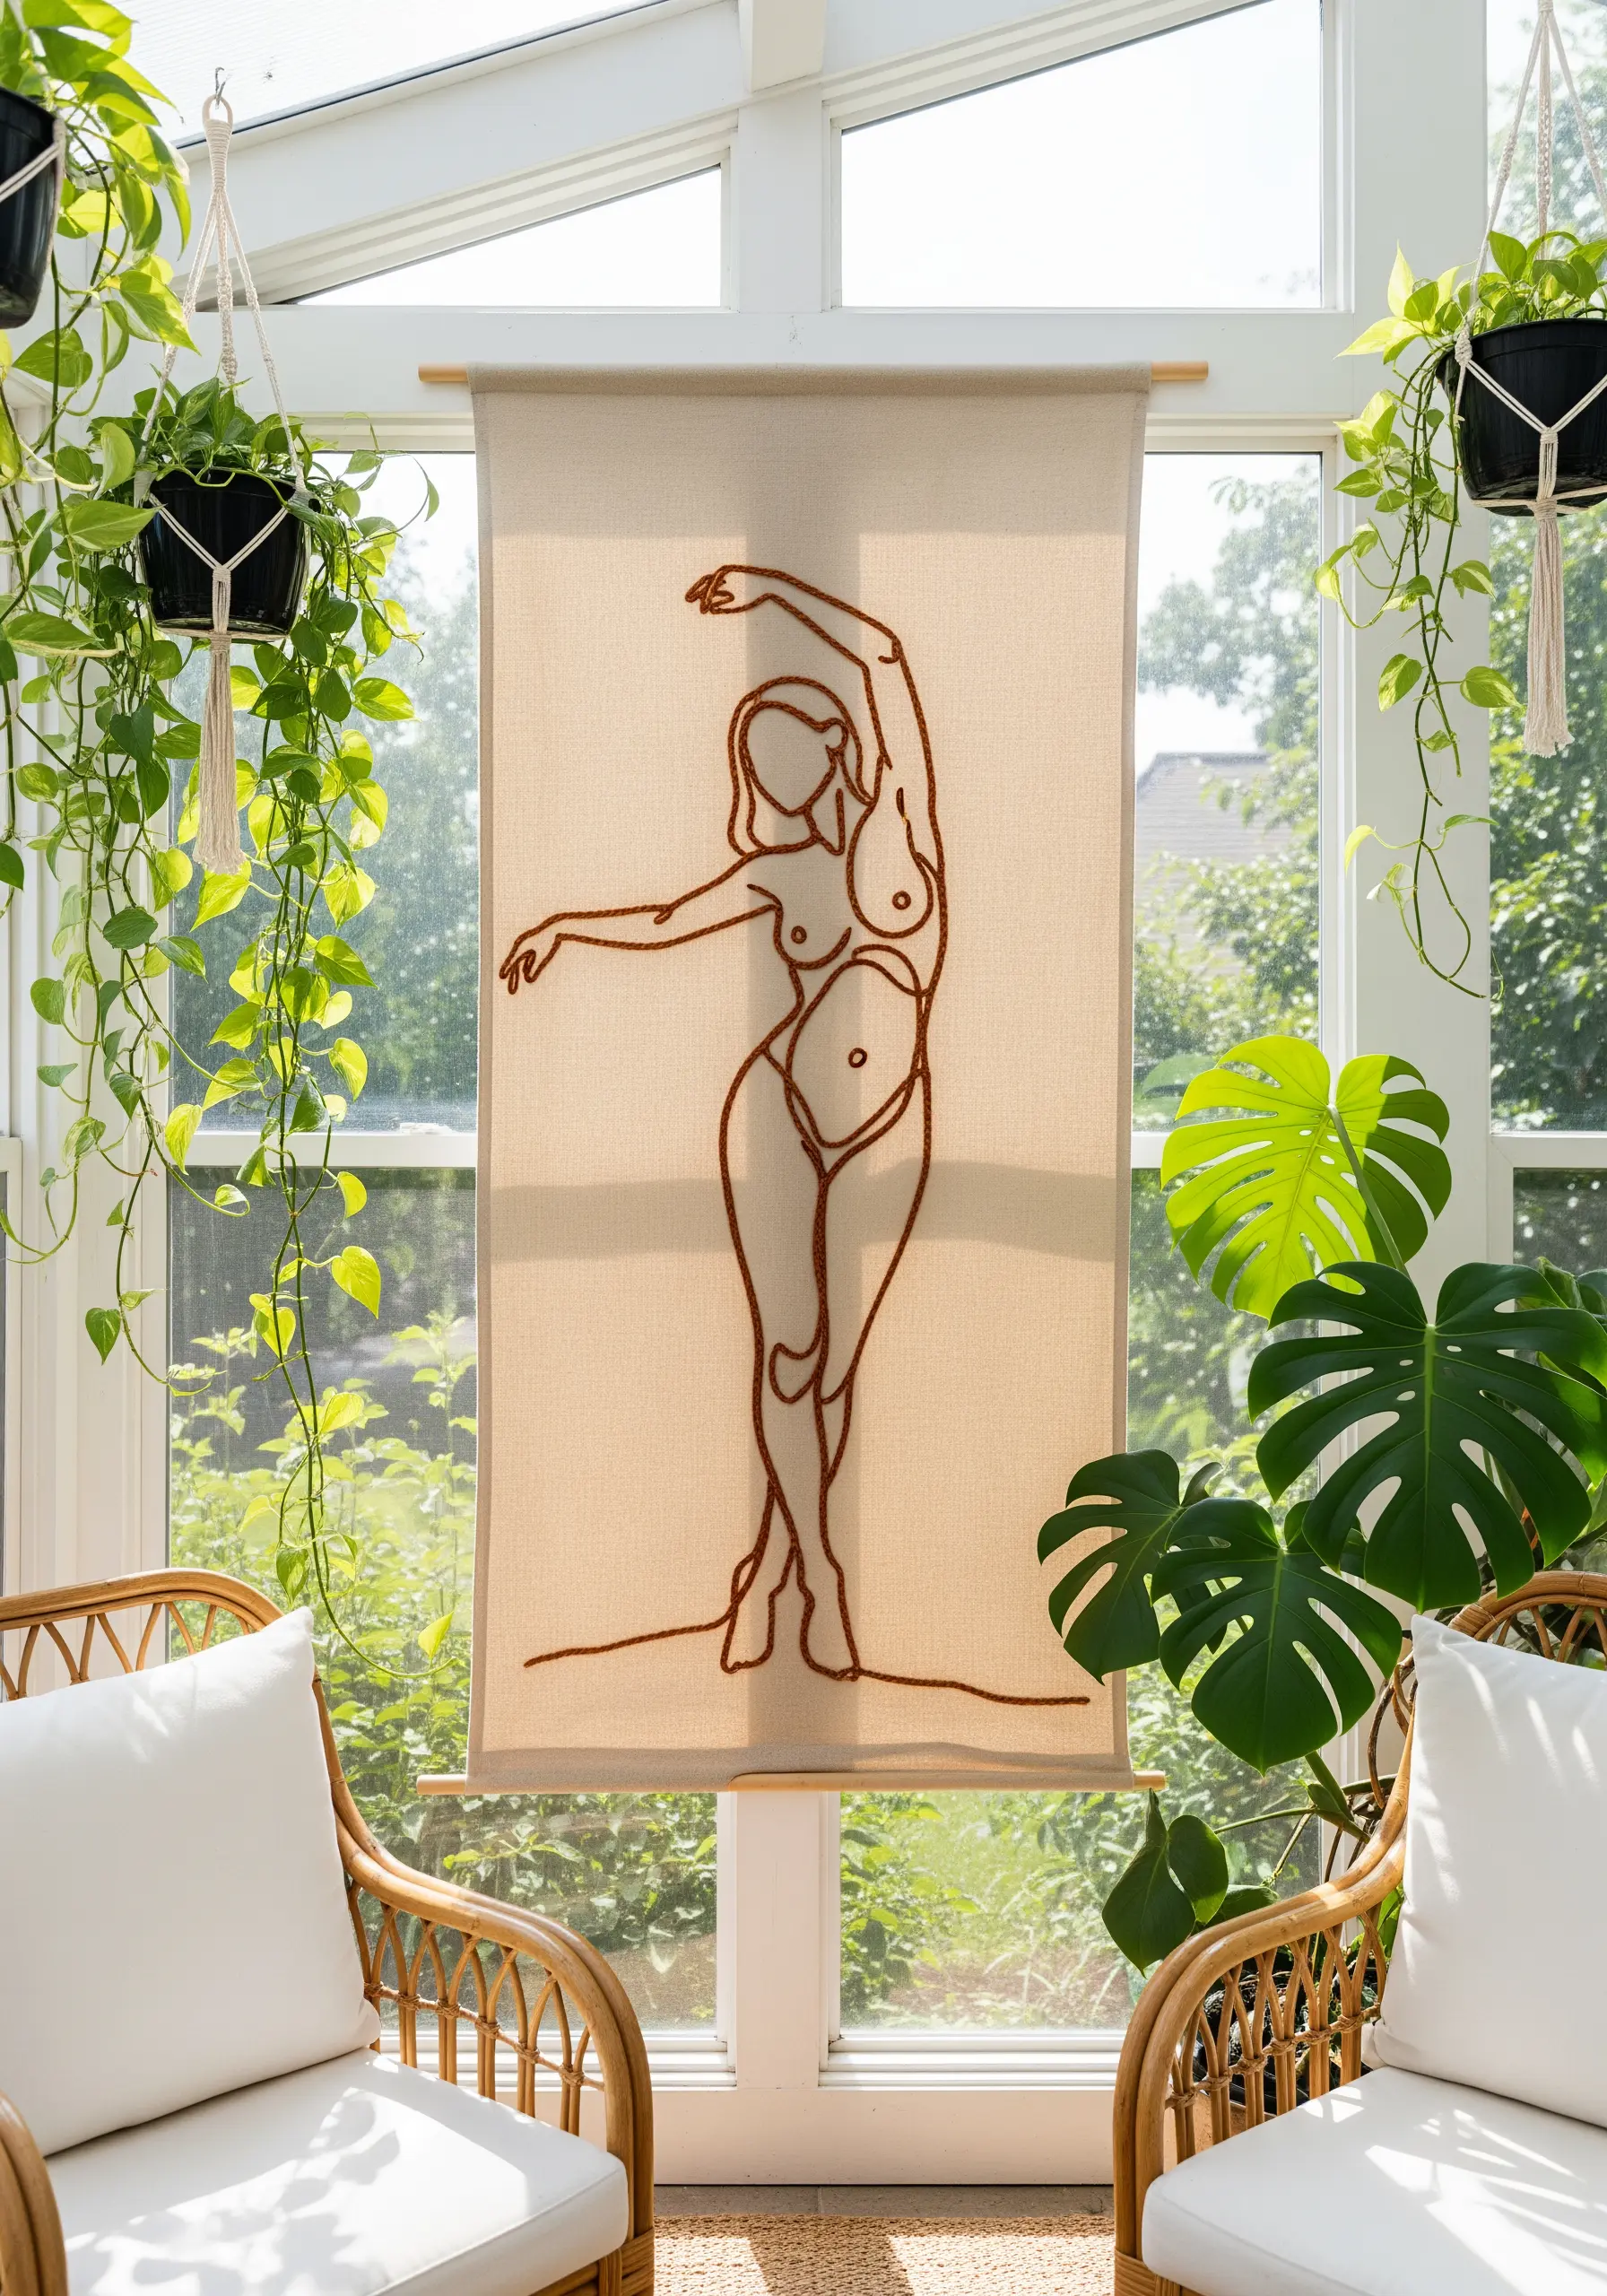
12. Embrace a Modern Finish with a Dowel Hanger
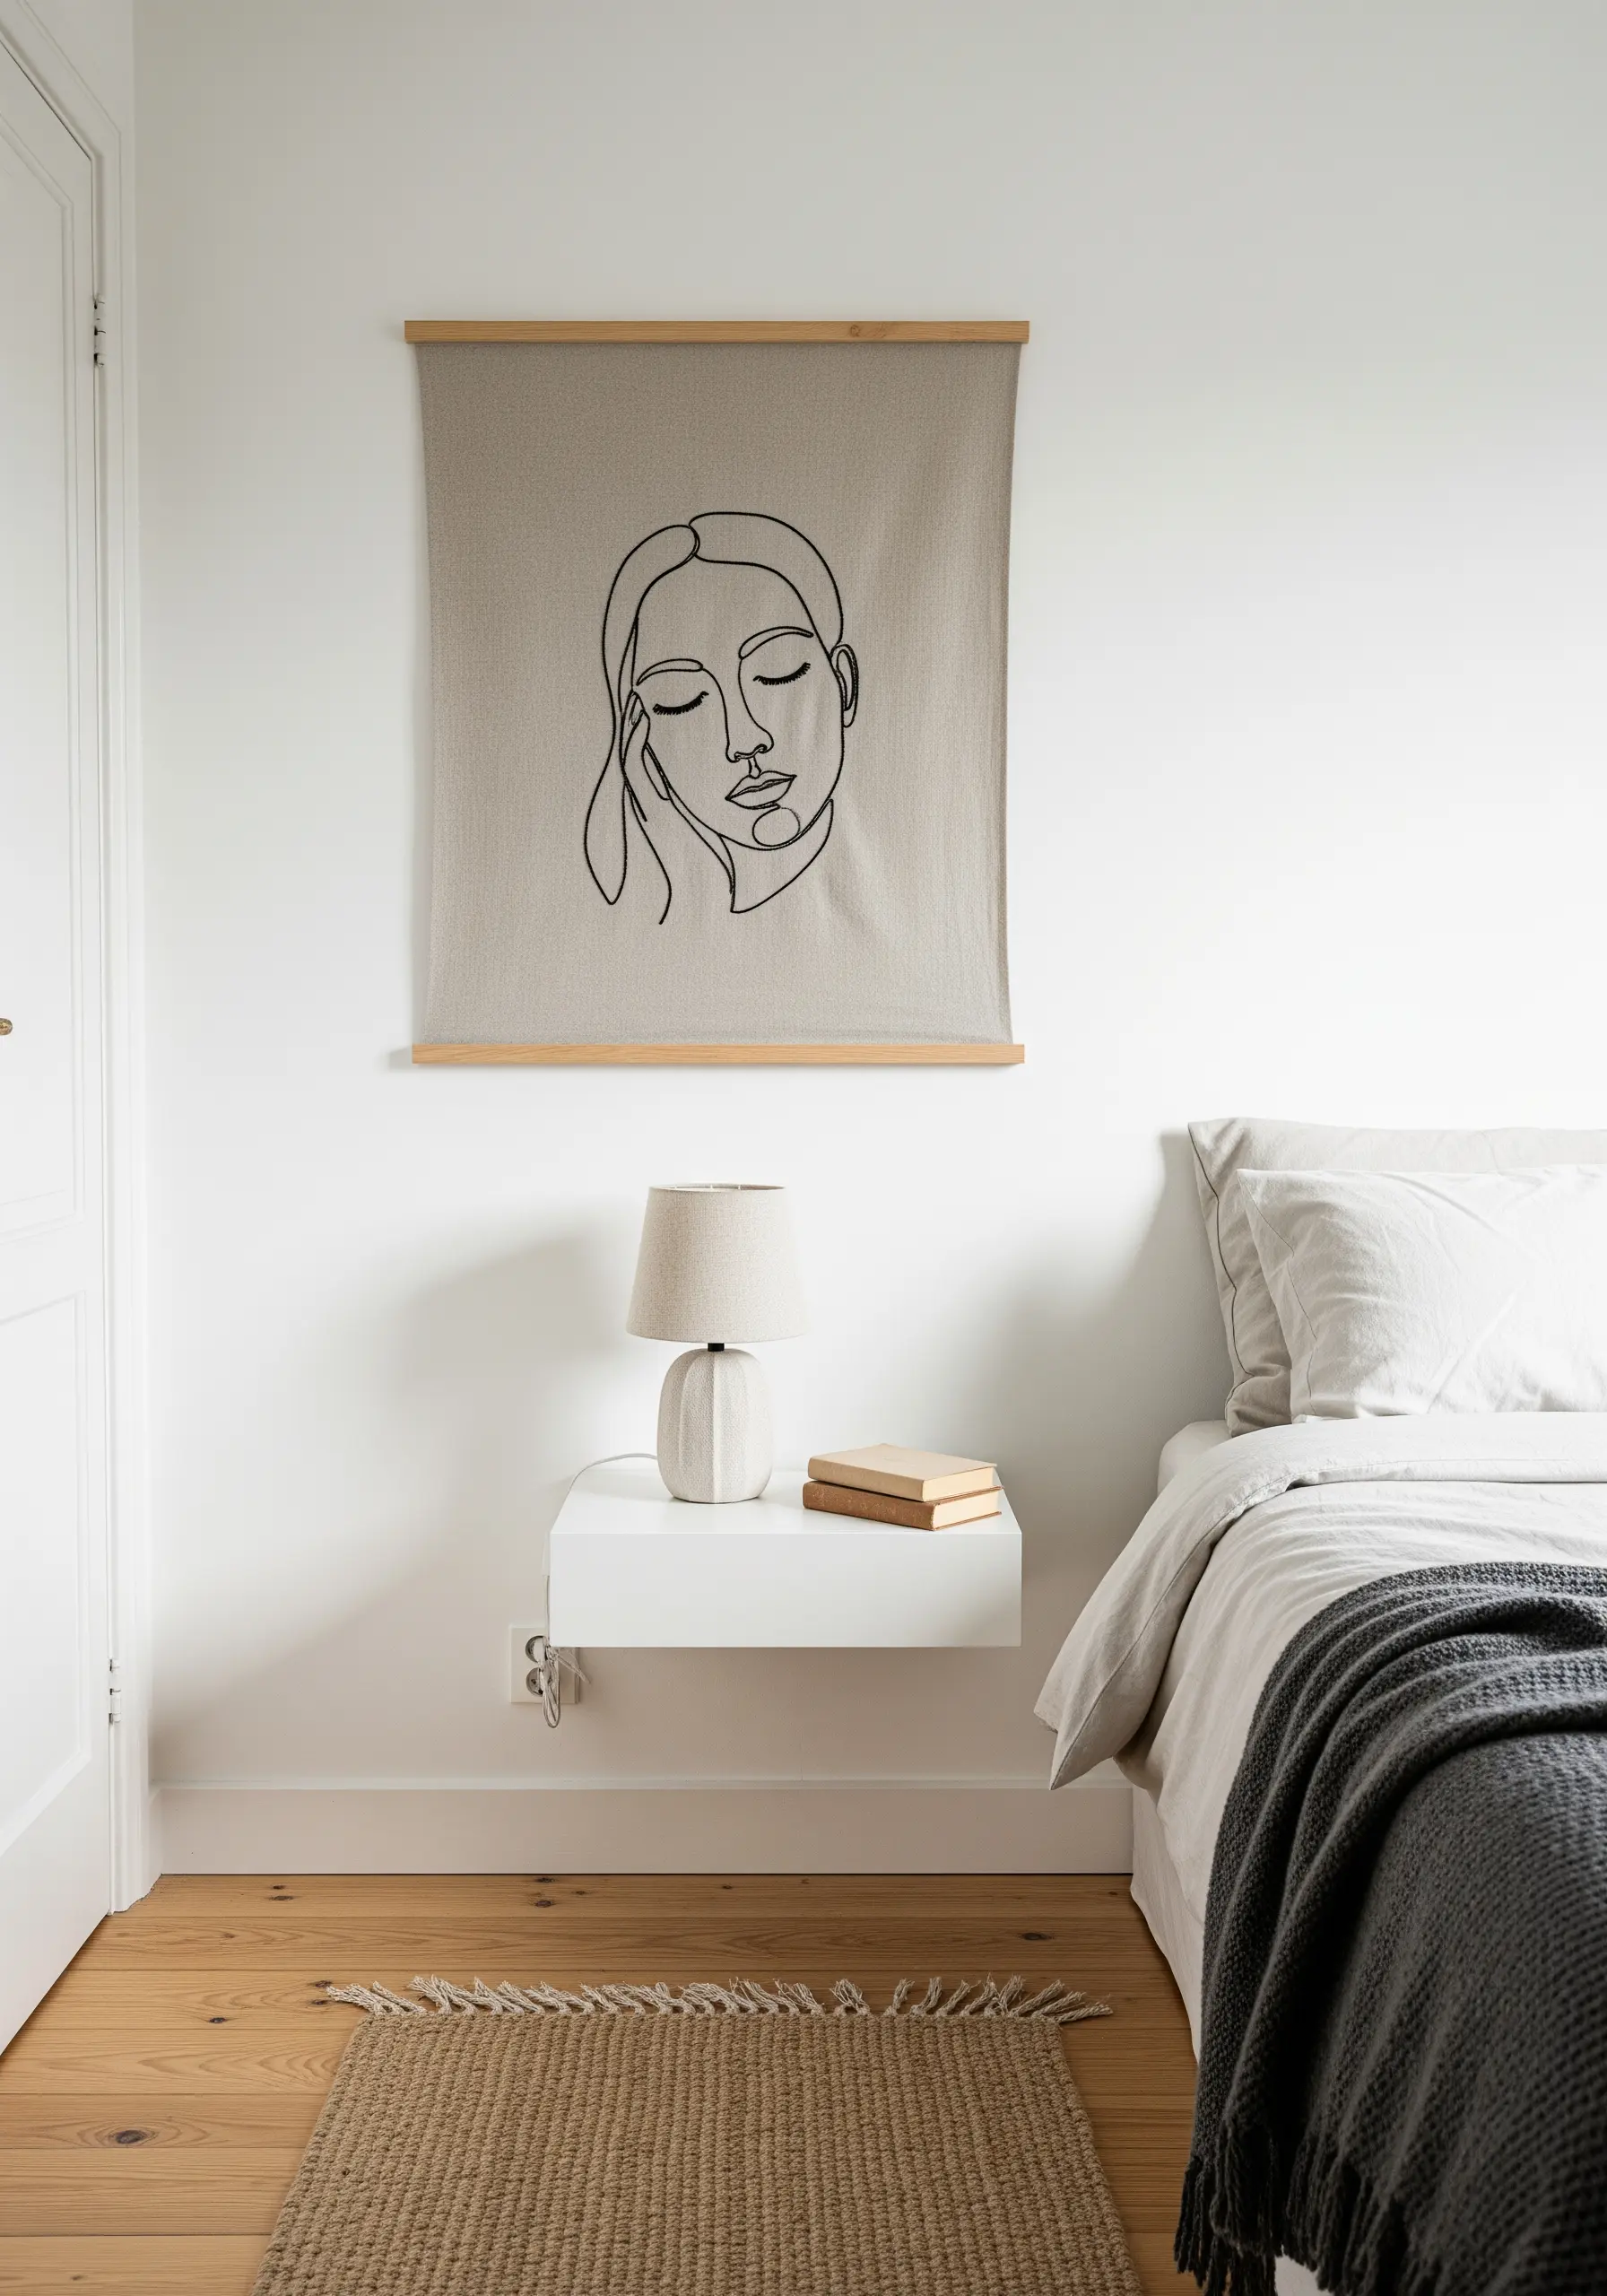
For a clean, boho-modern alternative to a traditional hoop or frame, finish your piece as a wall hanging.
Simply fold the top edge of your embroidered fabric over to create a channel and slide a wooden dowel through it.
This display method allows the fabric to drape naturally, highlighting its texture and softness.
Choose a heavier-weight linen or cotton canvas; a flimsy fabric won’t hang correctly and will cheapen the final look.
13. Master High-Contrast Stitching on Dark Fabric
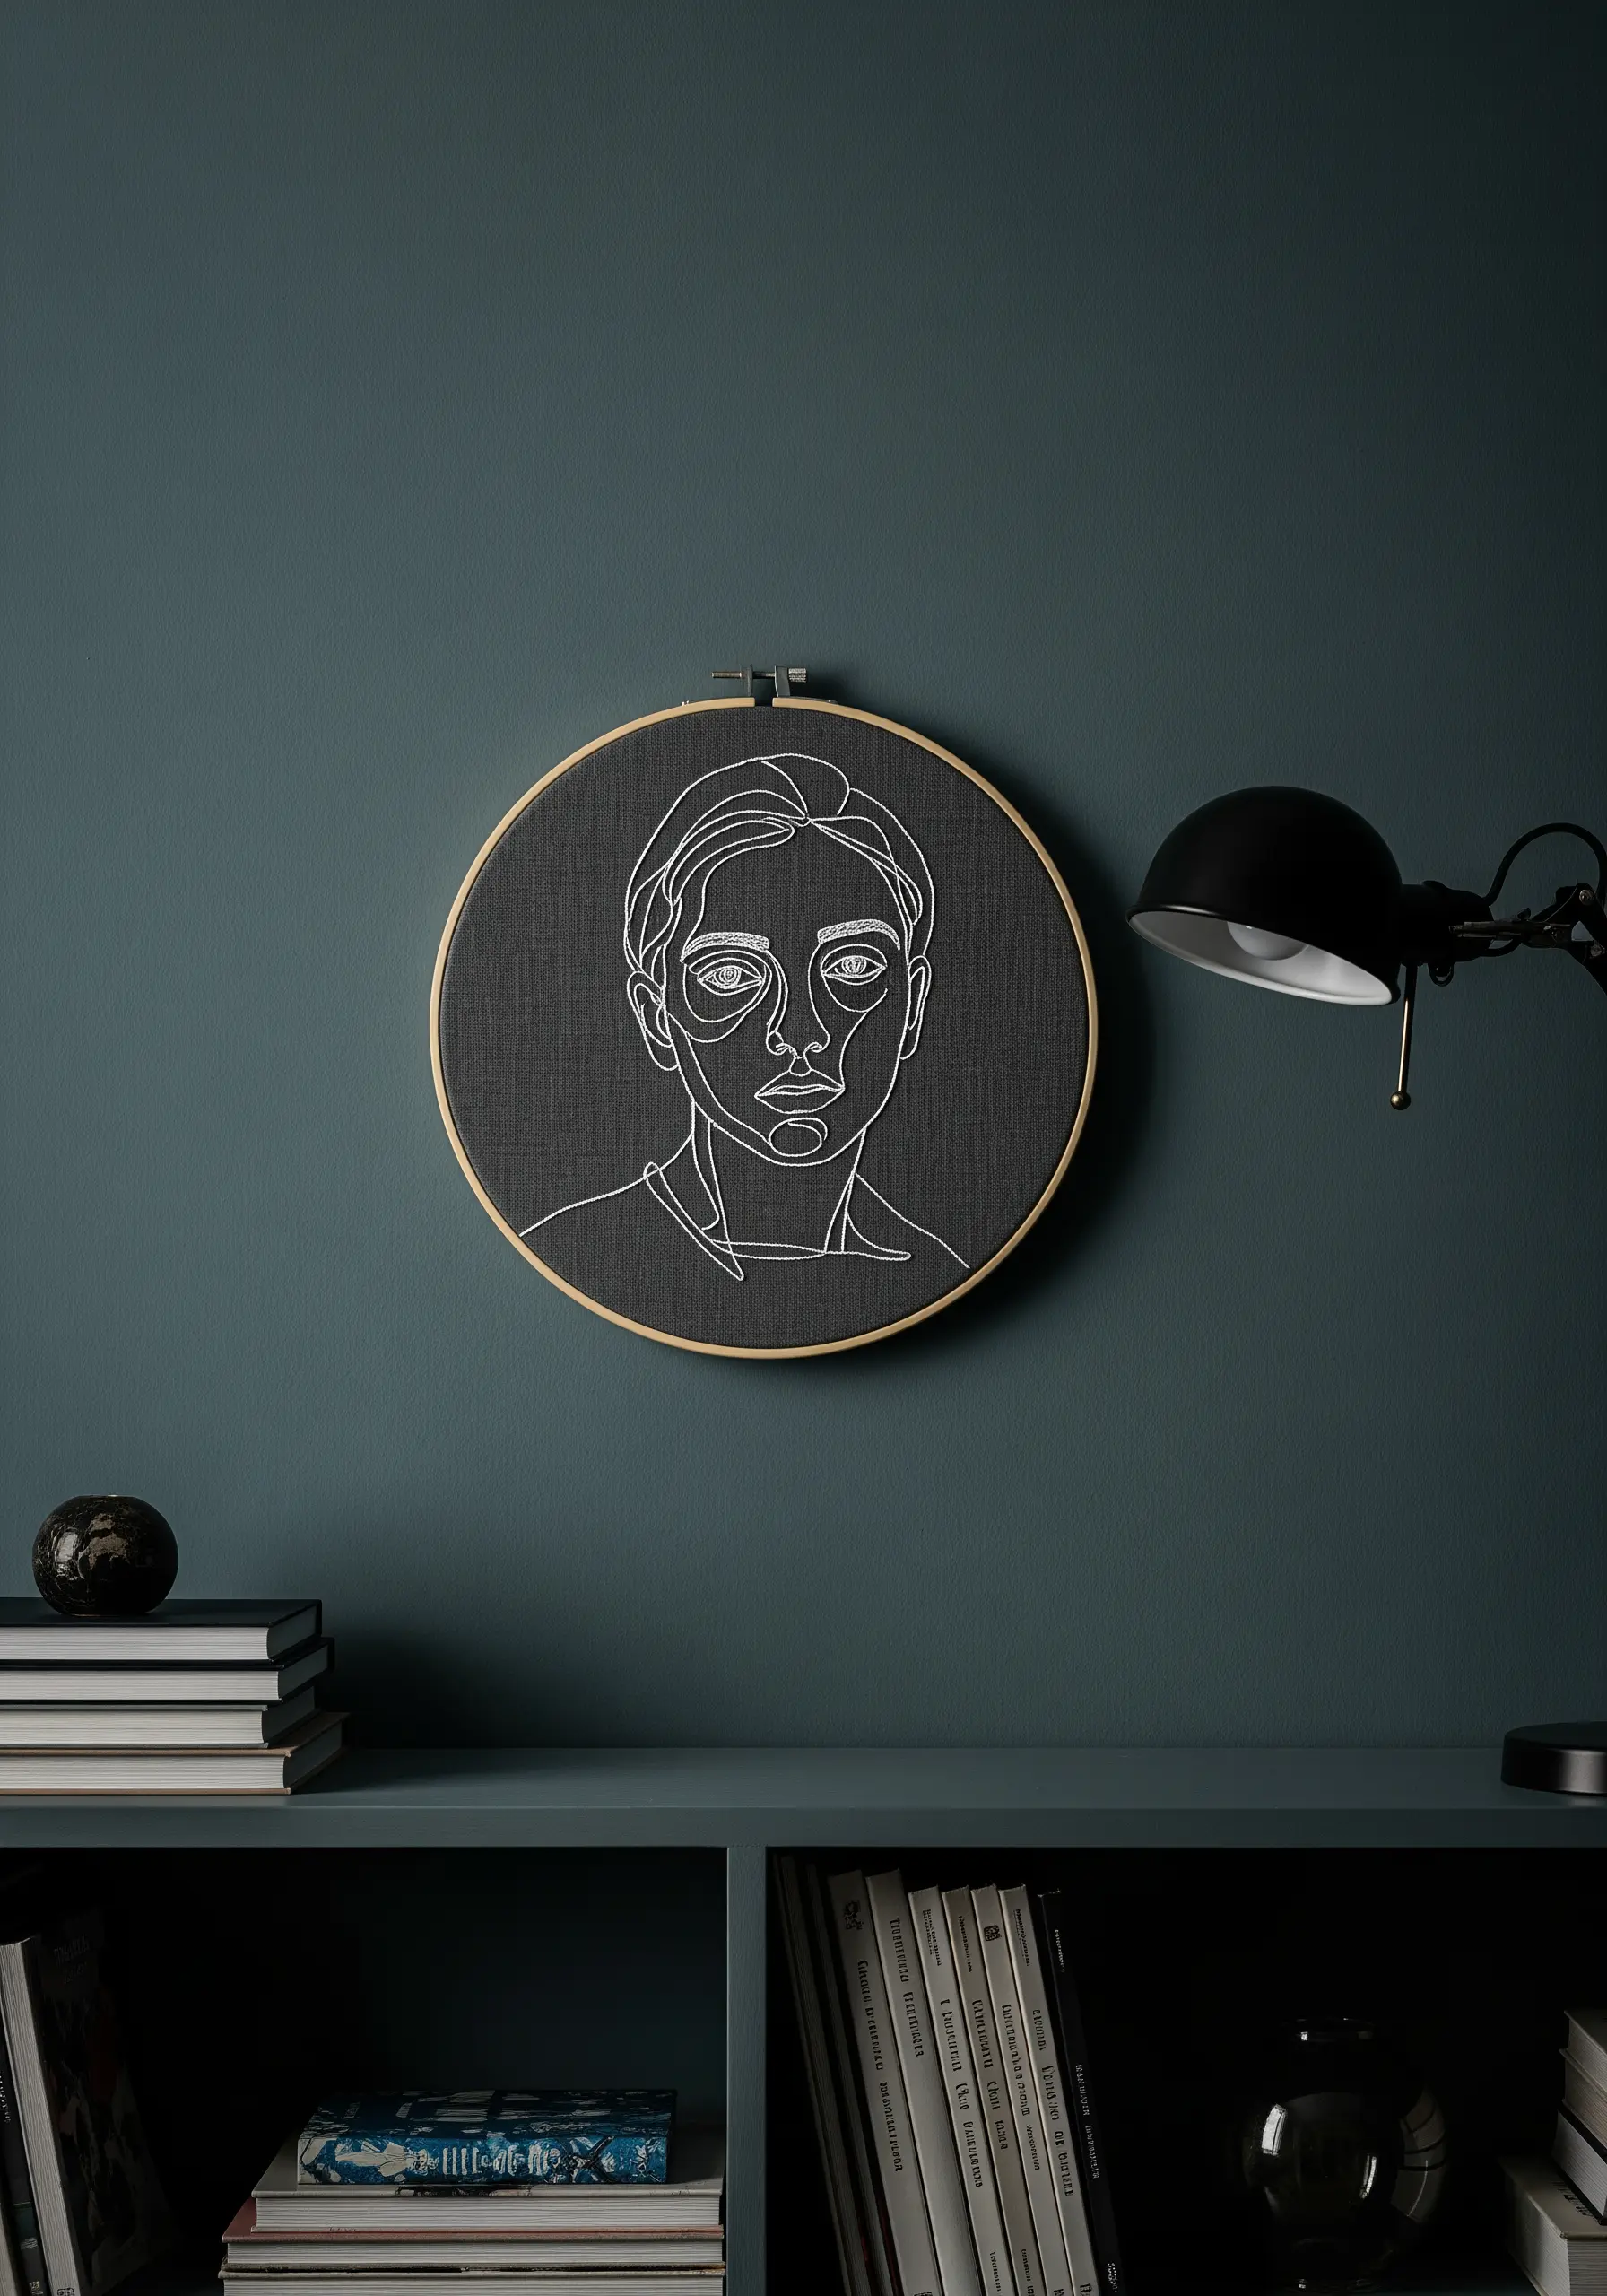
Stitching with white thread on black or charcoal fabric creates a dramatic, almost chalk-like effect.
To ensure your light thread remains bright and doesn’t get lost in the dark weave, use a split stitch.
This stitch creates a solid, raised line that sits on top of the fabric, giving it more presence than a standard backstitch.
A thread conditioner or a little beeswax will also help prevent tangles and keep your white floss pristine as you work.
14. Tell a Story Across a Triptych of Poses
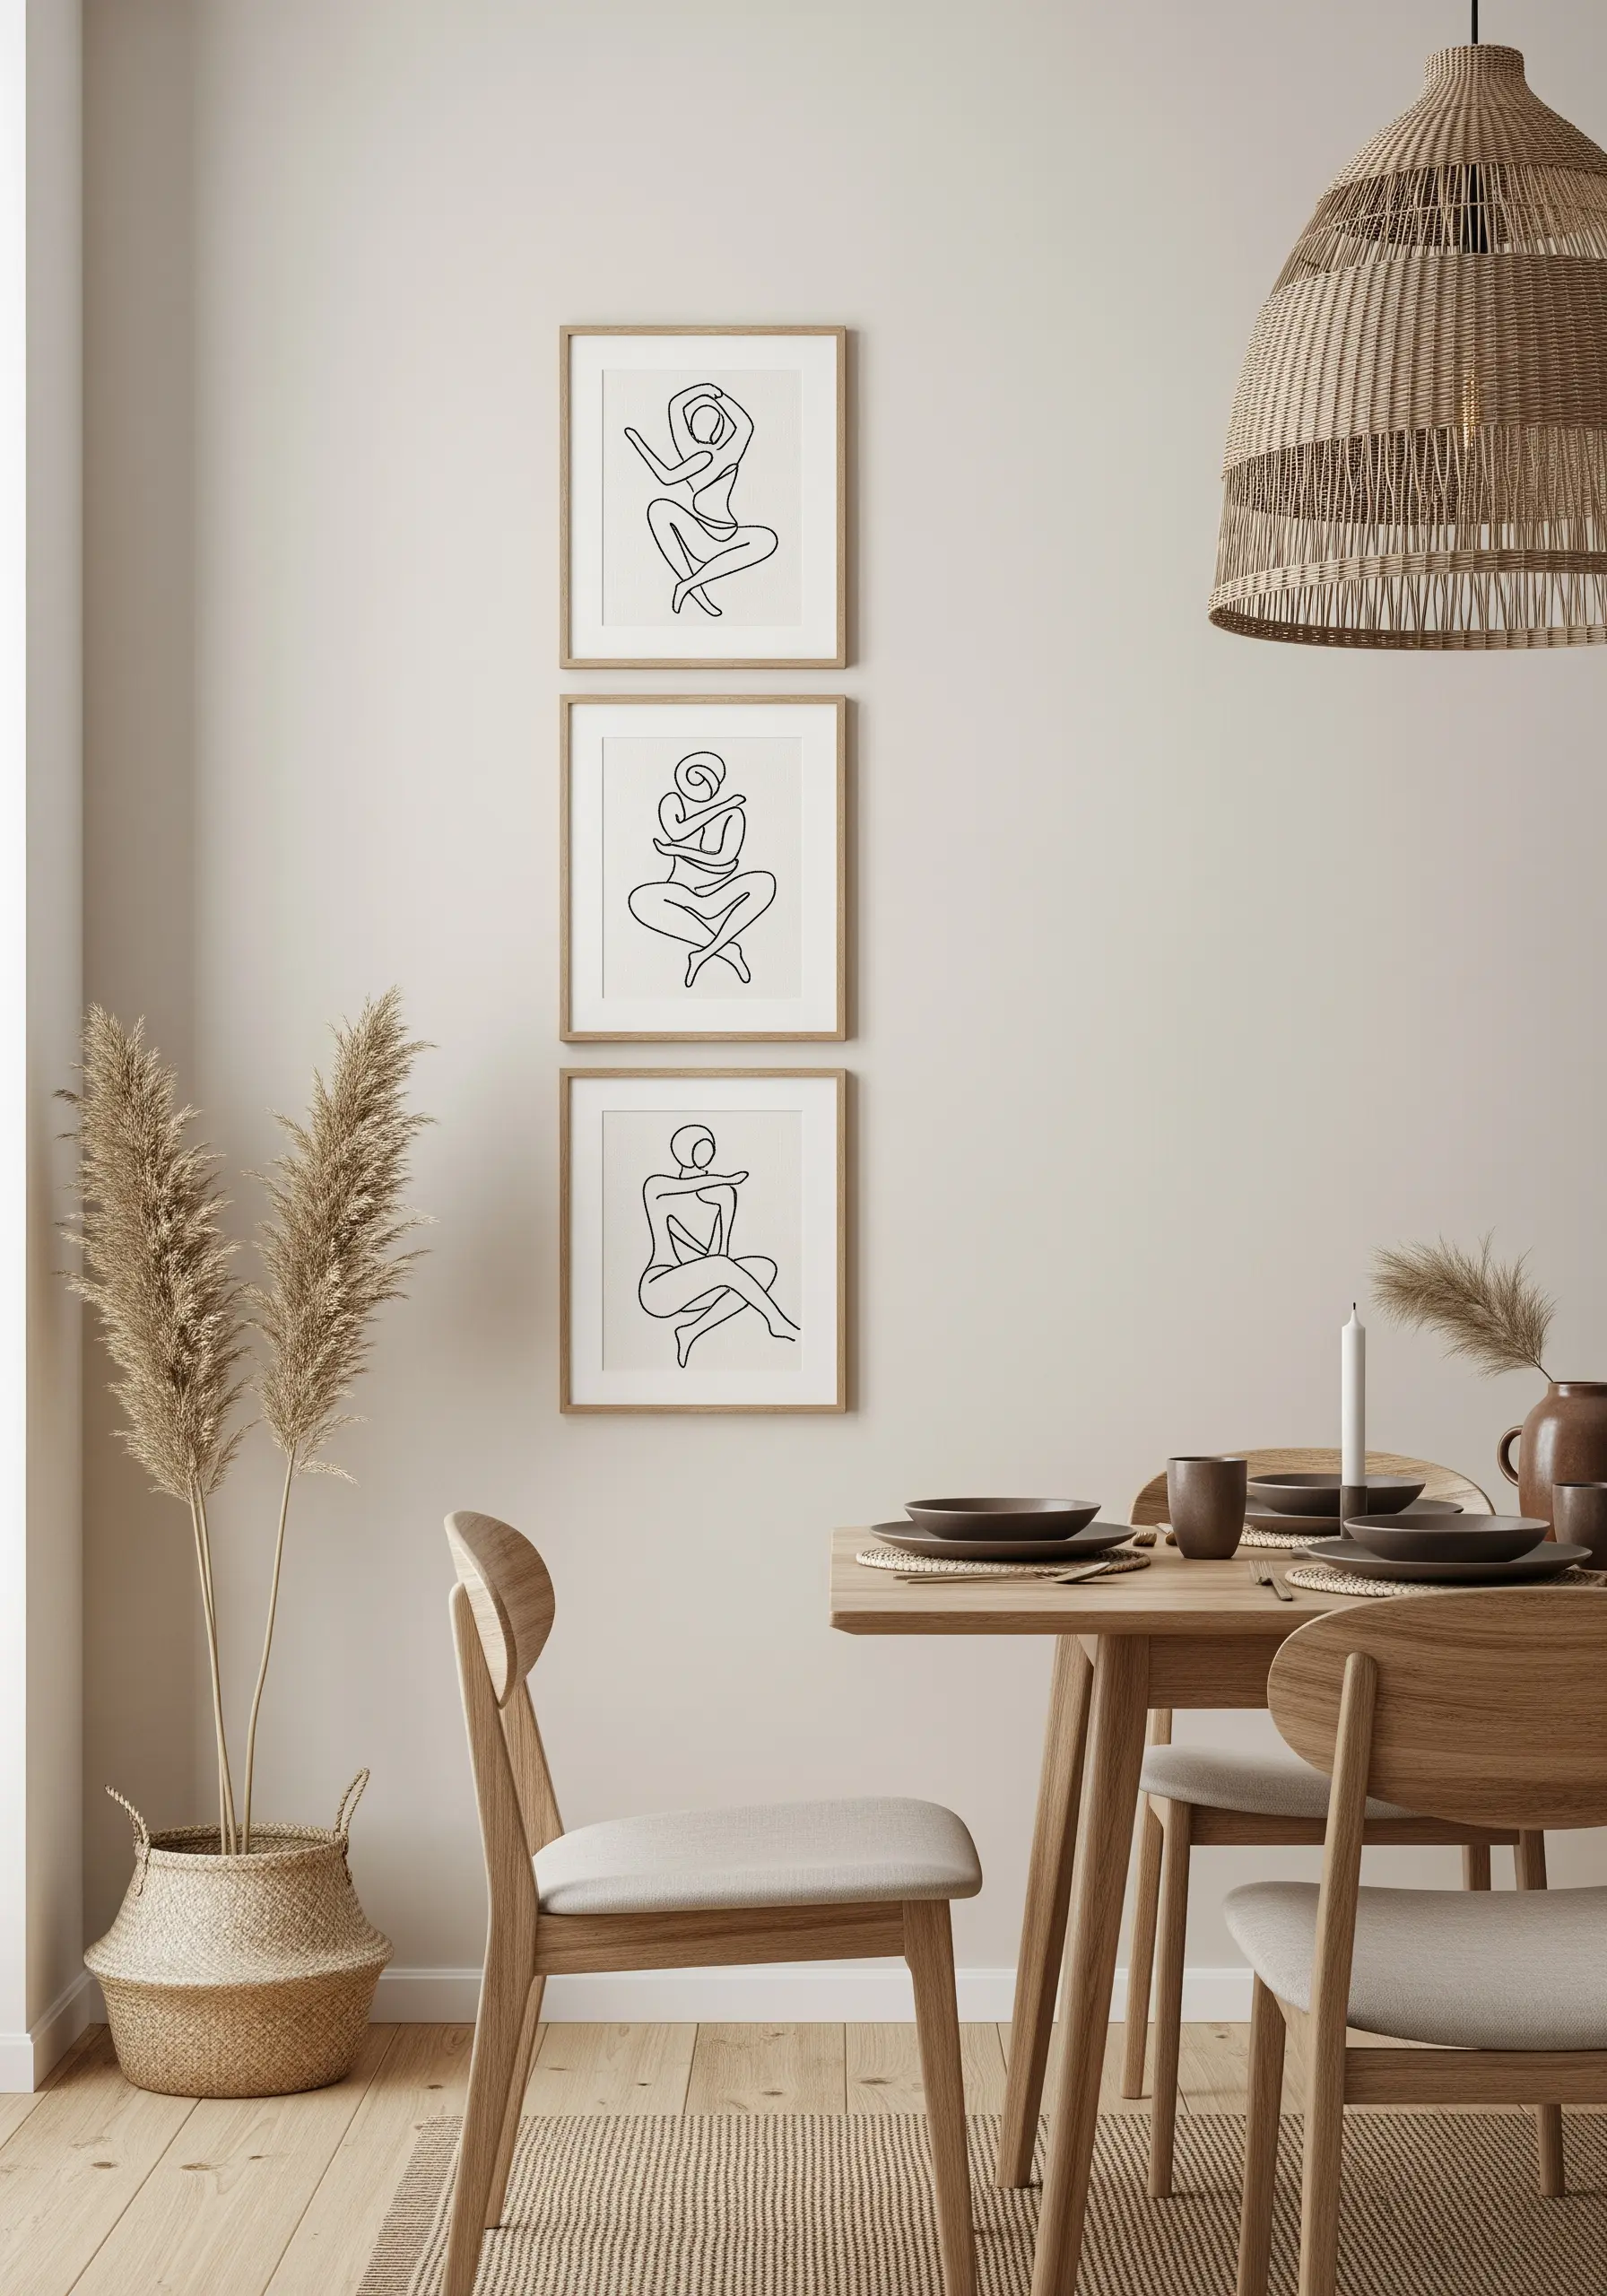
Expand on a single idea by creating a series that explores movement or form.
These three abstract figures, each in a different seated pose, feel like a study in motion and quiet contemplation.
Unify the series by using the exact same fabric, thread, and framing style for all three pieces.
This consistency is key; it allows the viewer to focus on the subtle differences in each pose, turning the collection into a cohesive narrative.
15. Adapt Line Art for Textural Punch Needle
Translate the simplicity of line art into the plush, tactile world of punch needle.
This technique creates a raised, looped line that has a bold, sculptural quality unlike anything in traditional embroidery.
To achieve a clean line, work from the back of your fabric with an adjustable punch needle set to a low pile height.
Choose a thick wool or rug yarn to create a substantial, graphic line that defines the portrait with satisfying texture.
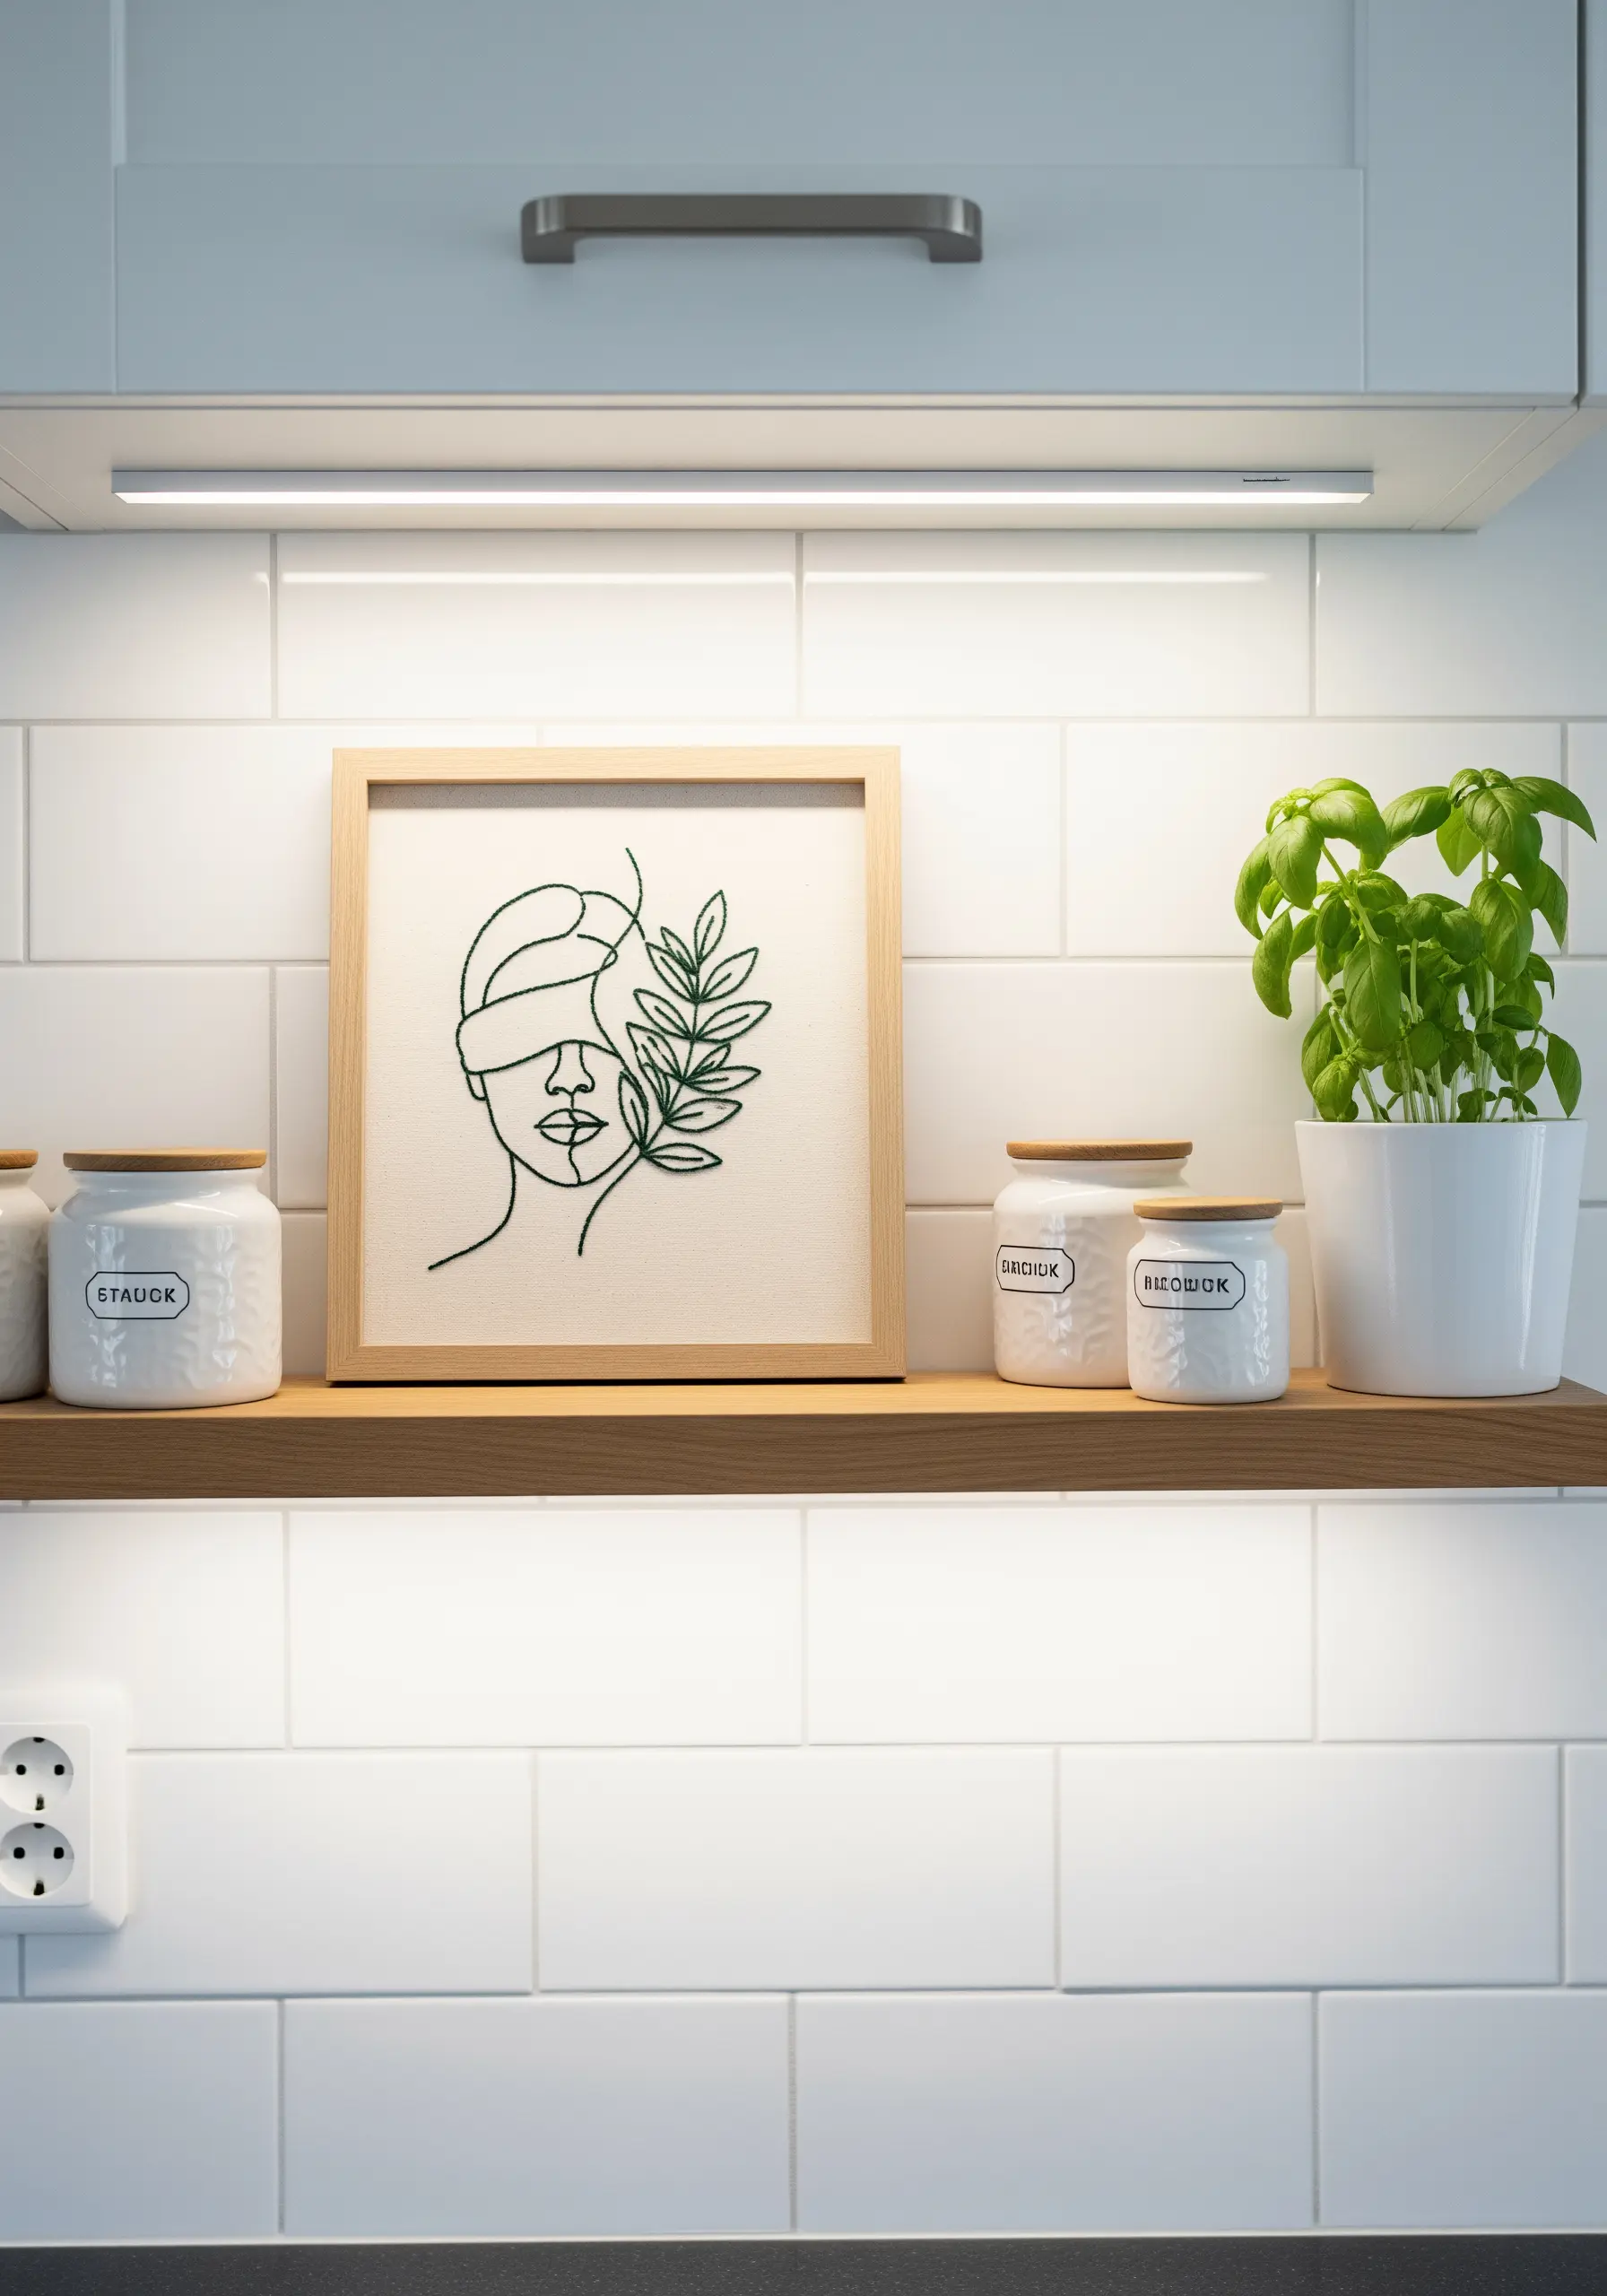
16. Fuse Botanical and Portrait Elements Creatively
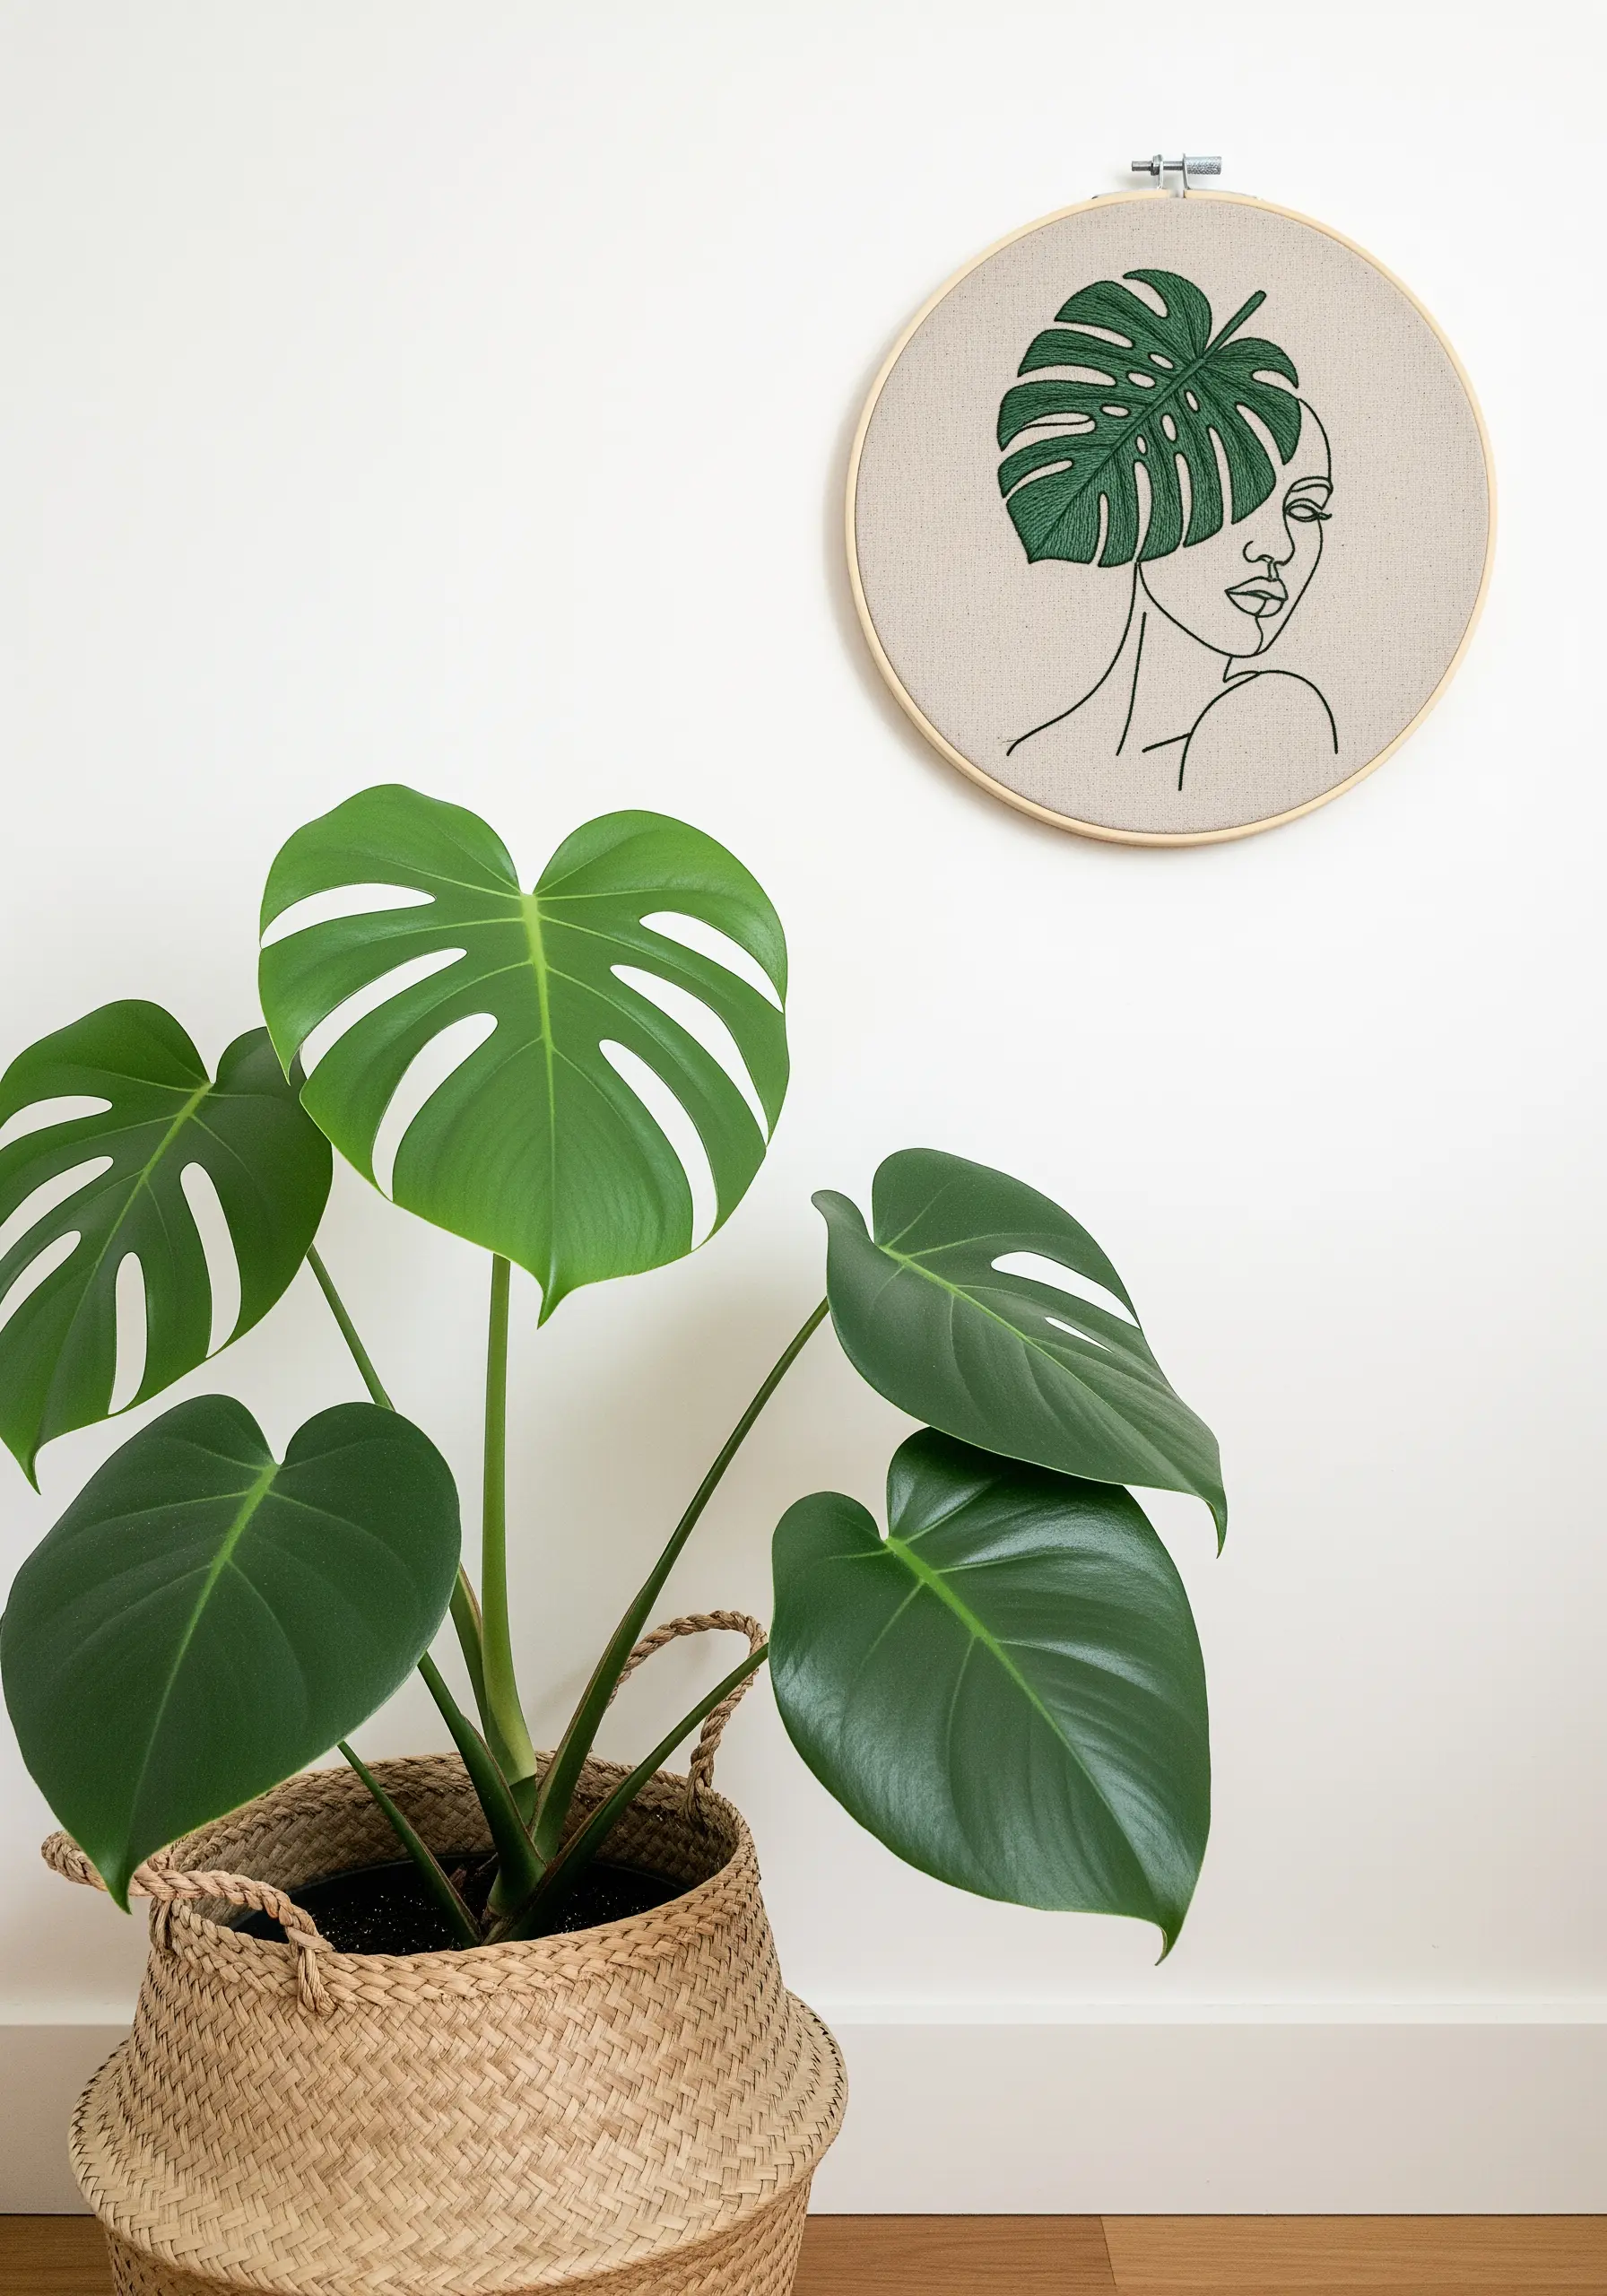
Go beyond simple portraits by merging them with other natural forms in imaginative ways.
Here, a Monstera leaf becomes the figure’s hair, creating a design that is both surreal and deeply connected to nature.
Use a fishbone stitch or satin stitch for the leaf sections to create a solid, lush texture that contrasts with the thin, delicate lines of the face.
This juxtaposition of stitch styles is what makes the composition so visually interesting and successful.
17. Anchor a Workspace with Clean, Simple Lines
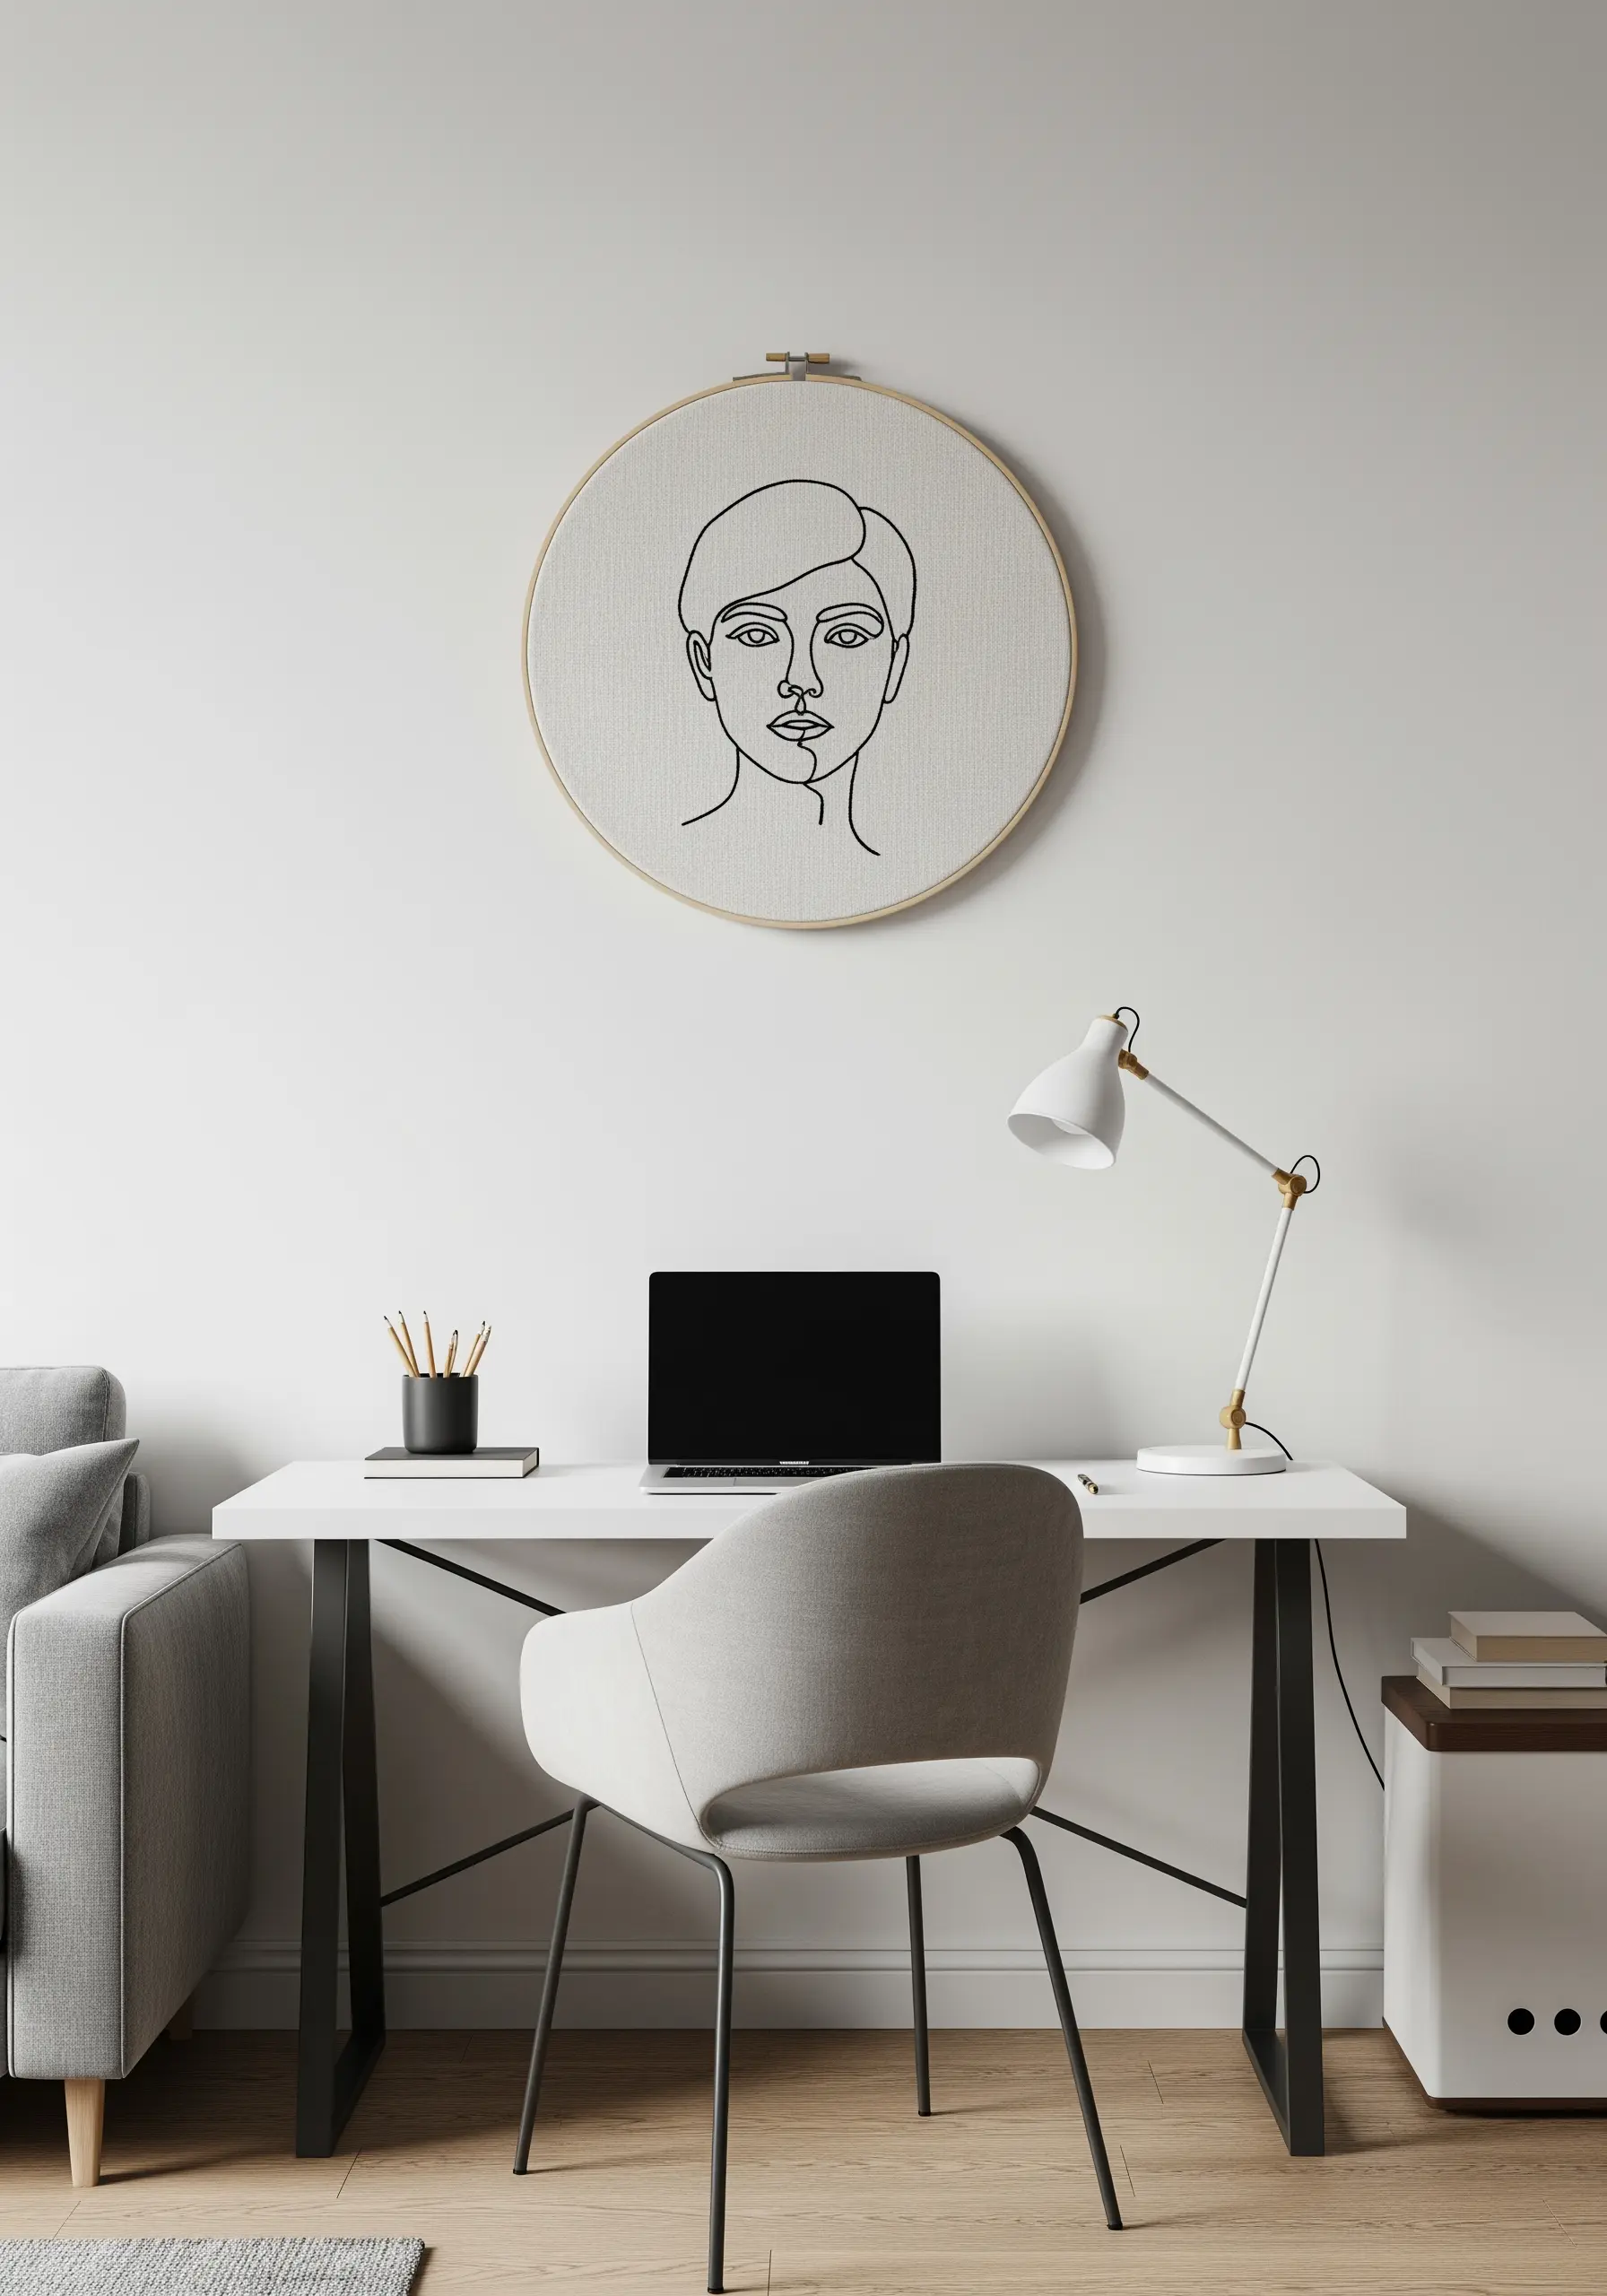
A minimalist embroidery piece can define a creative workspace without adding visual clutter.
A simple portrait, composed of clean backstitches using three strands of floss, is just enough detail to inspire focus.
The high contrast of black thread on white fabric feels sharp and intentional, mirroring the clarity needed for productive work.
This is one of the most effective minimalist embroidery wall art ideas for bringing personality to a functional space.
18. Capture Expression by Isolating Details
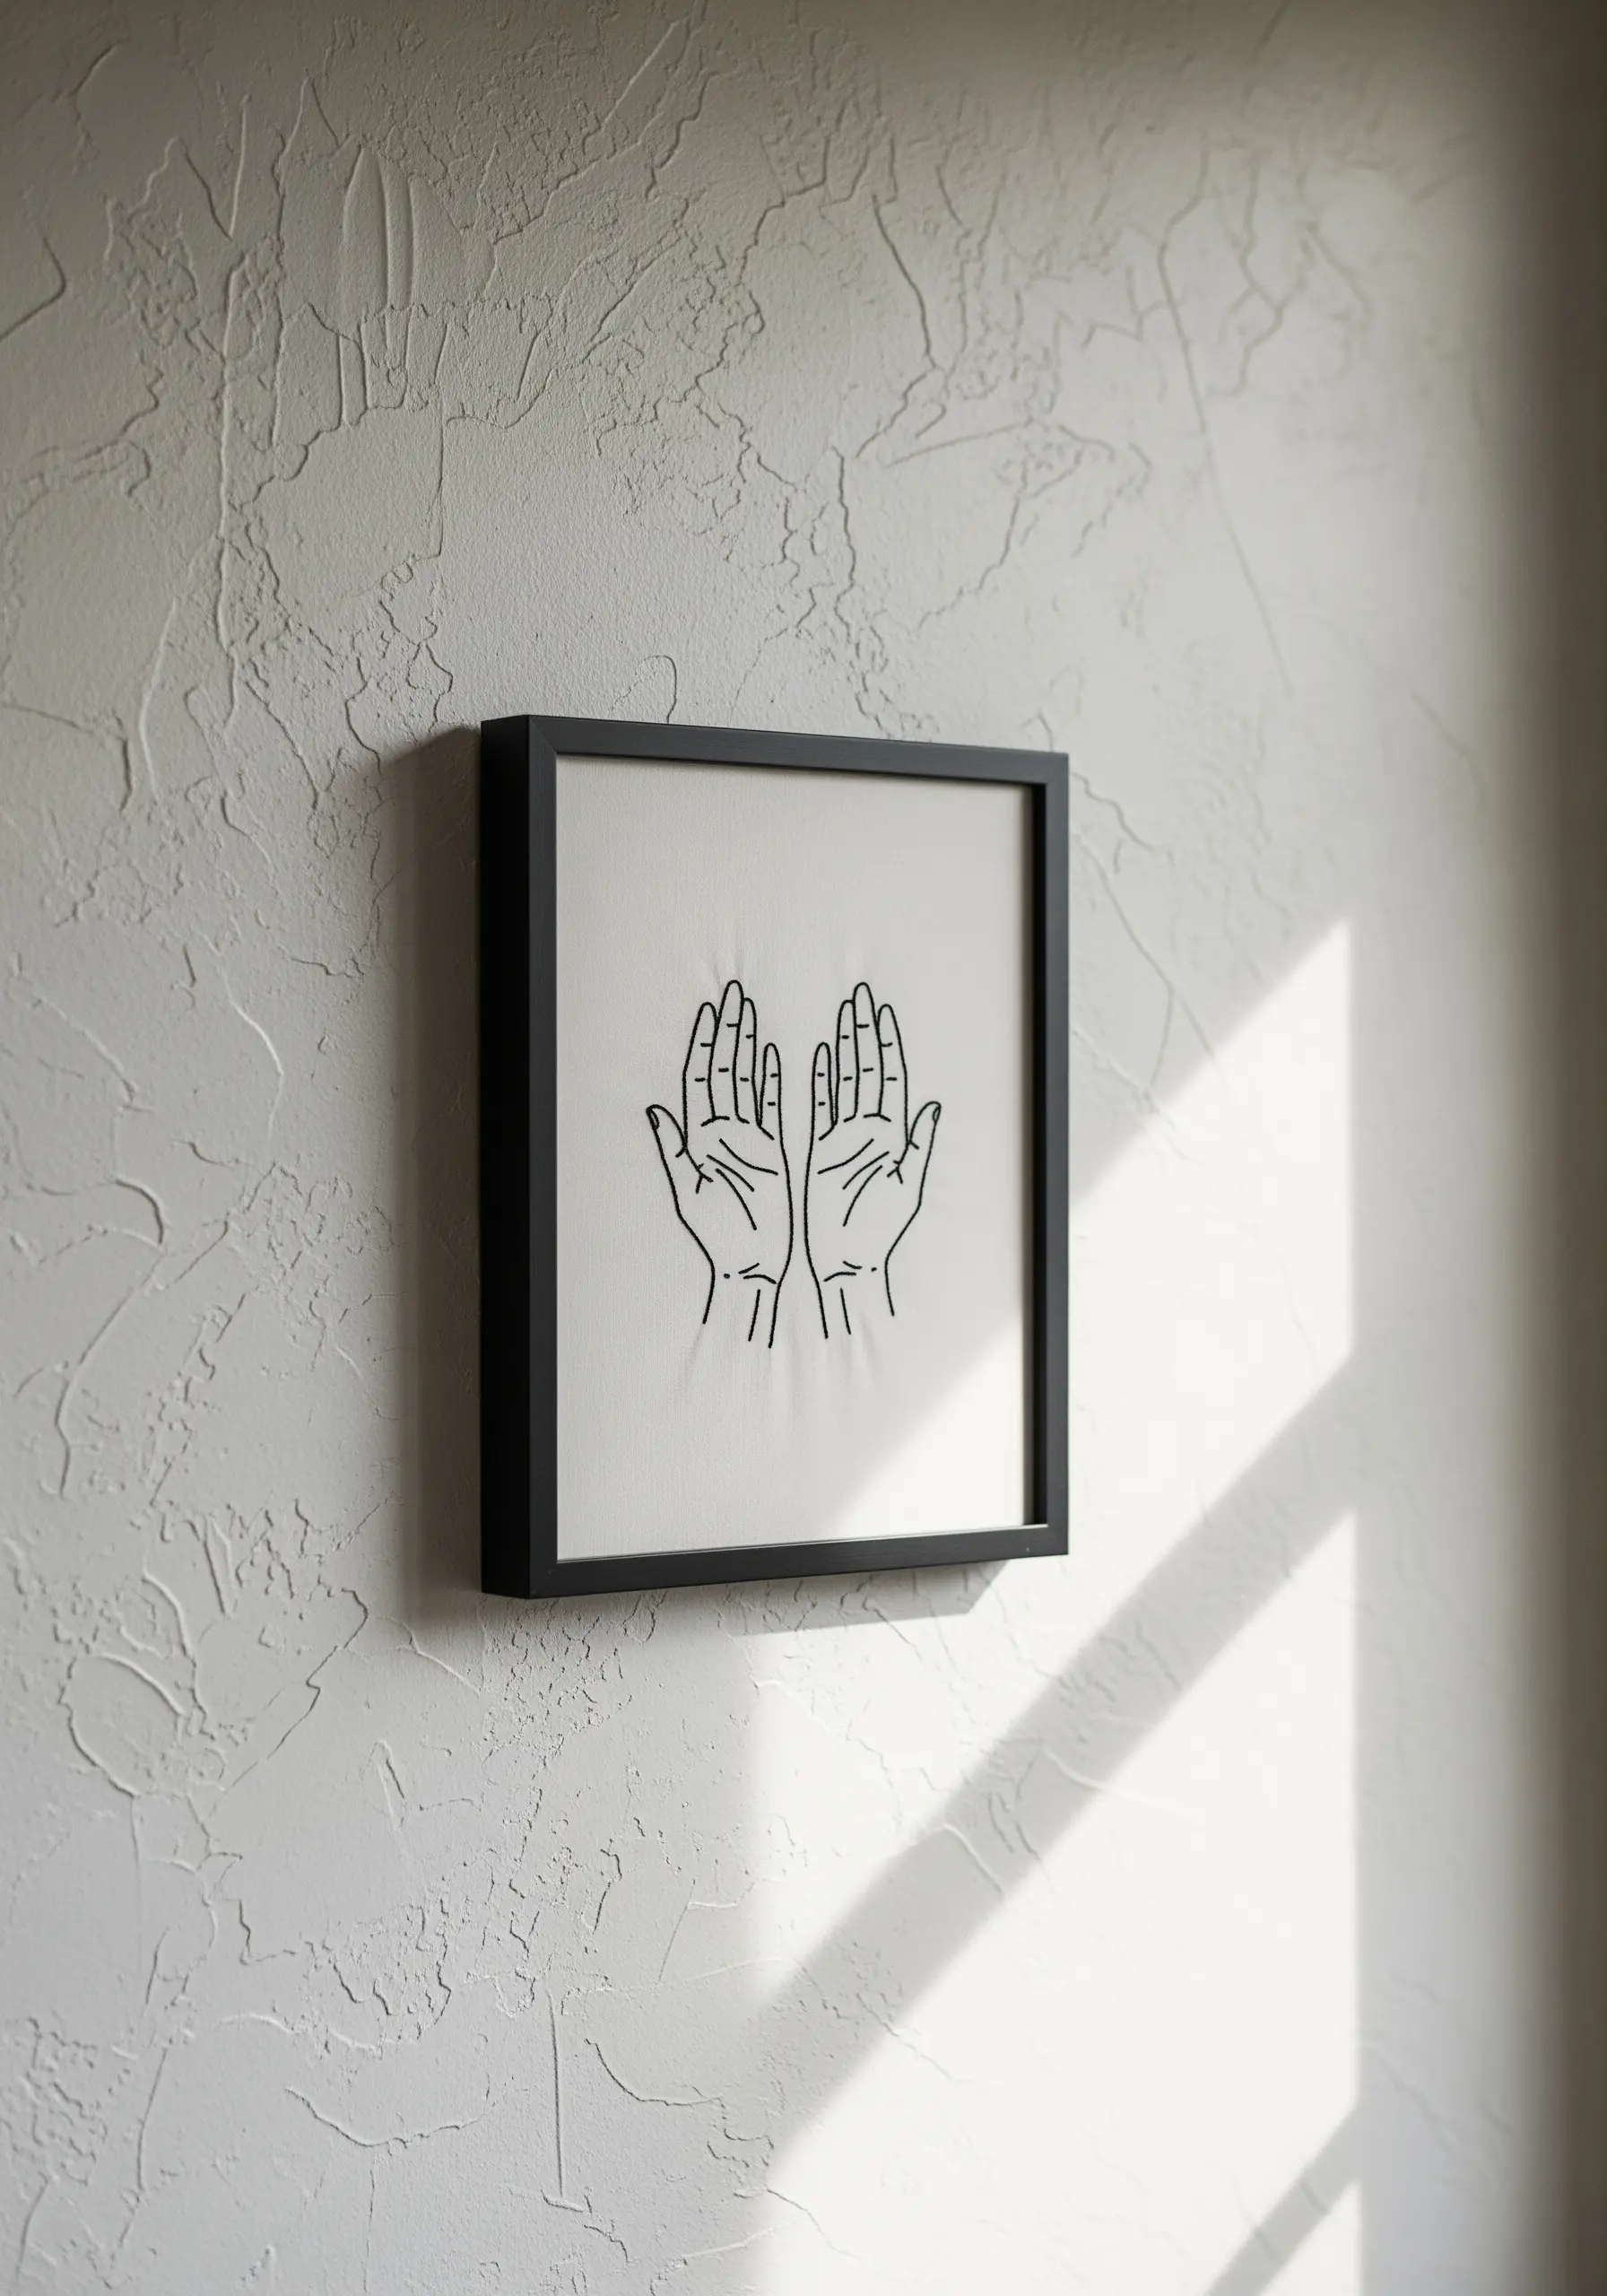
You don’t need a full face to convey emotion; sometimes, isolating a single detail is more powerful.
A pair of hands can communicate tenderness, offering, or prayer, allowing the viewer to project their own meaning onto the piece.
To give the lines an elegant, flowing quality, use a stem stitch. It wraps beautifully around curves, creating a smooth, rope-like line that is perfect for outlining fingers and palms.
19. Create the Illusion of Movement in Hair
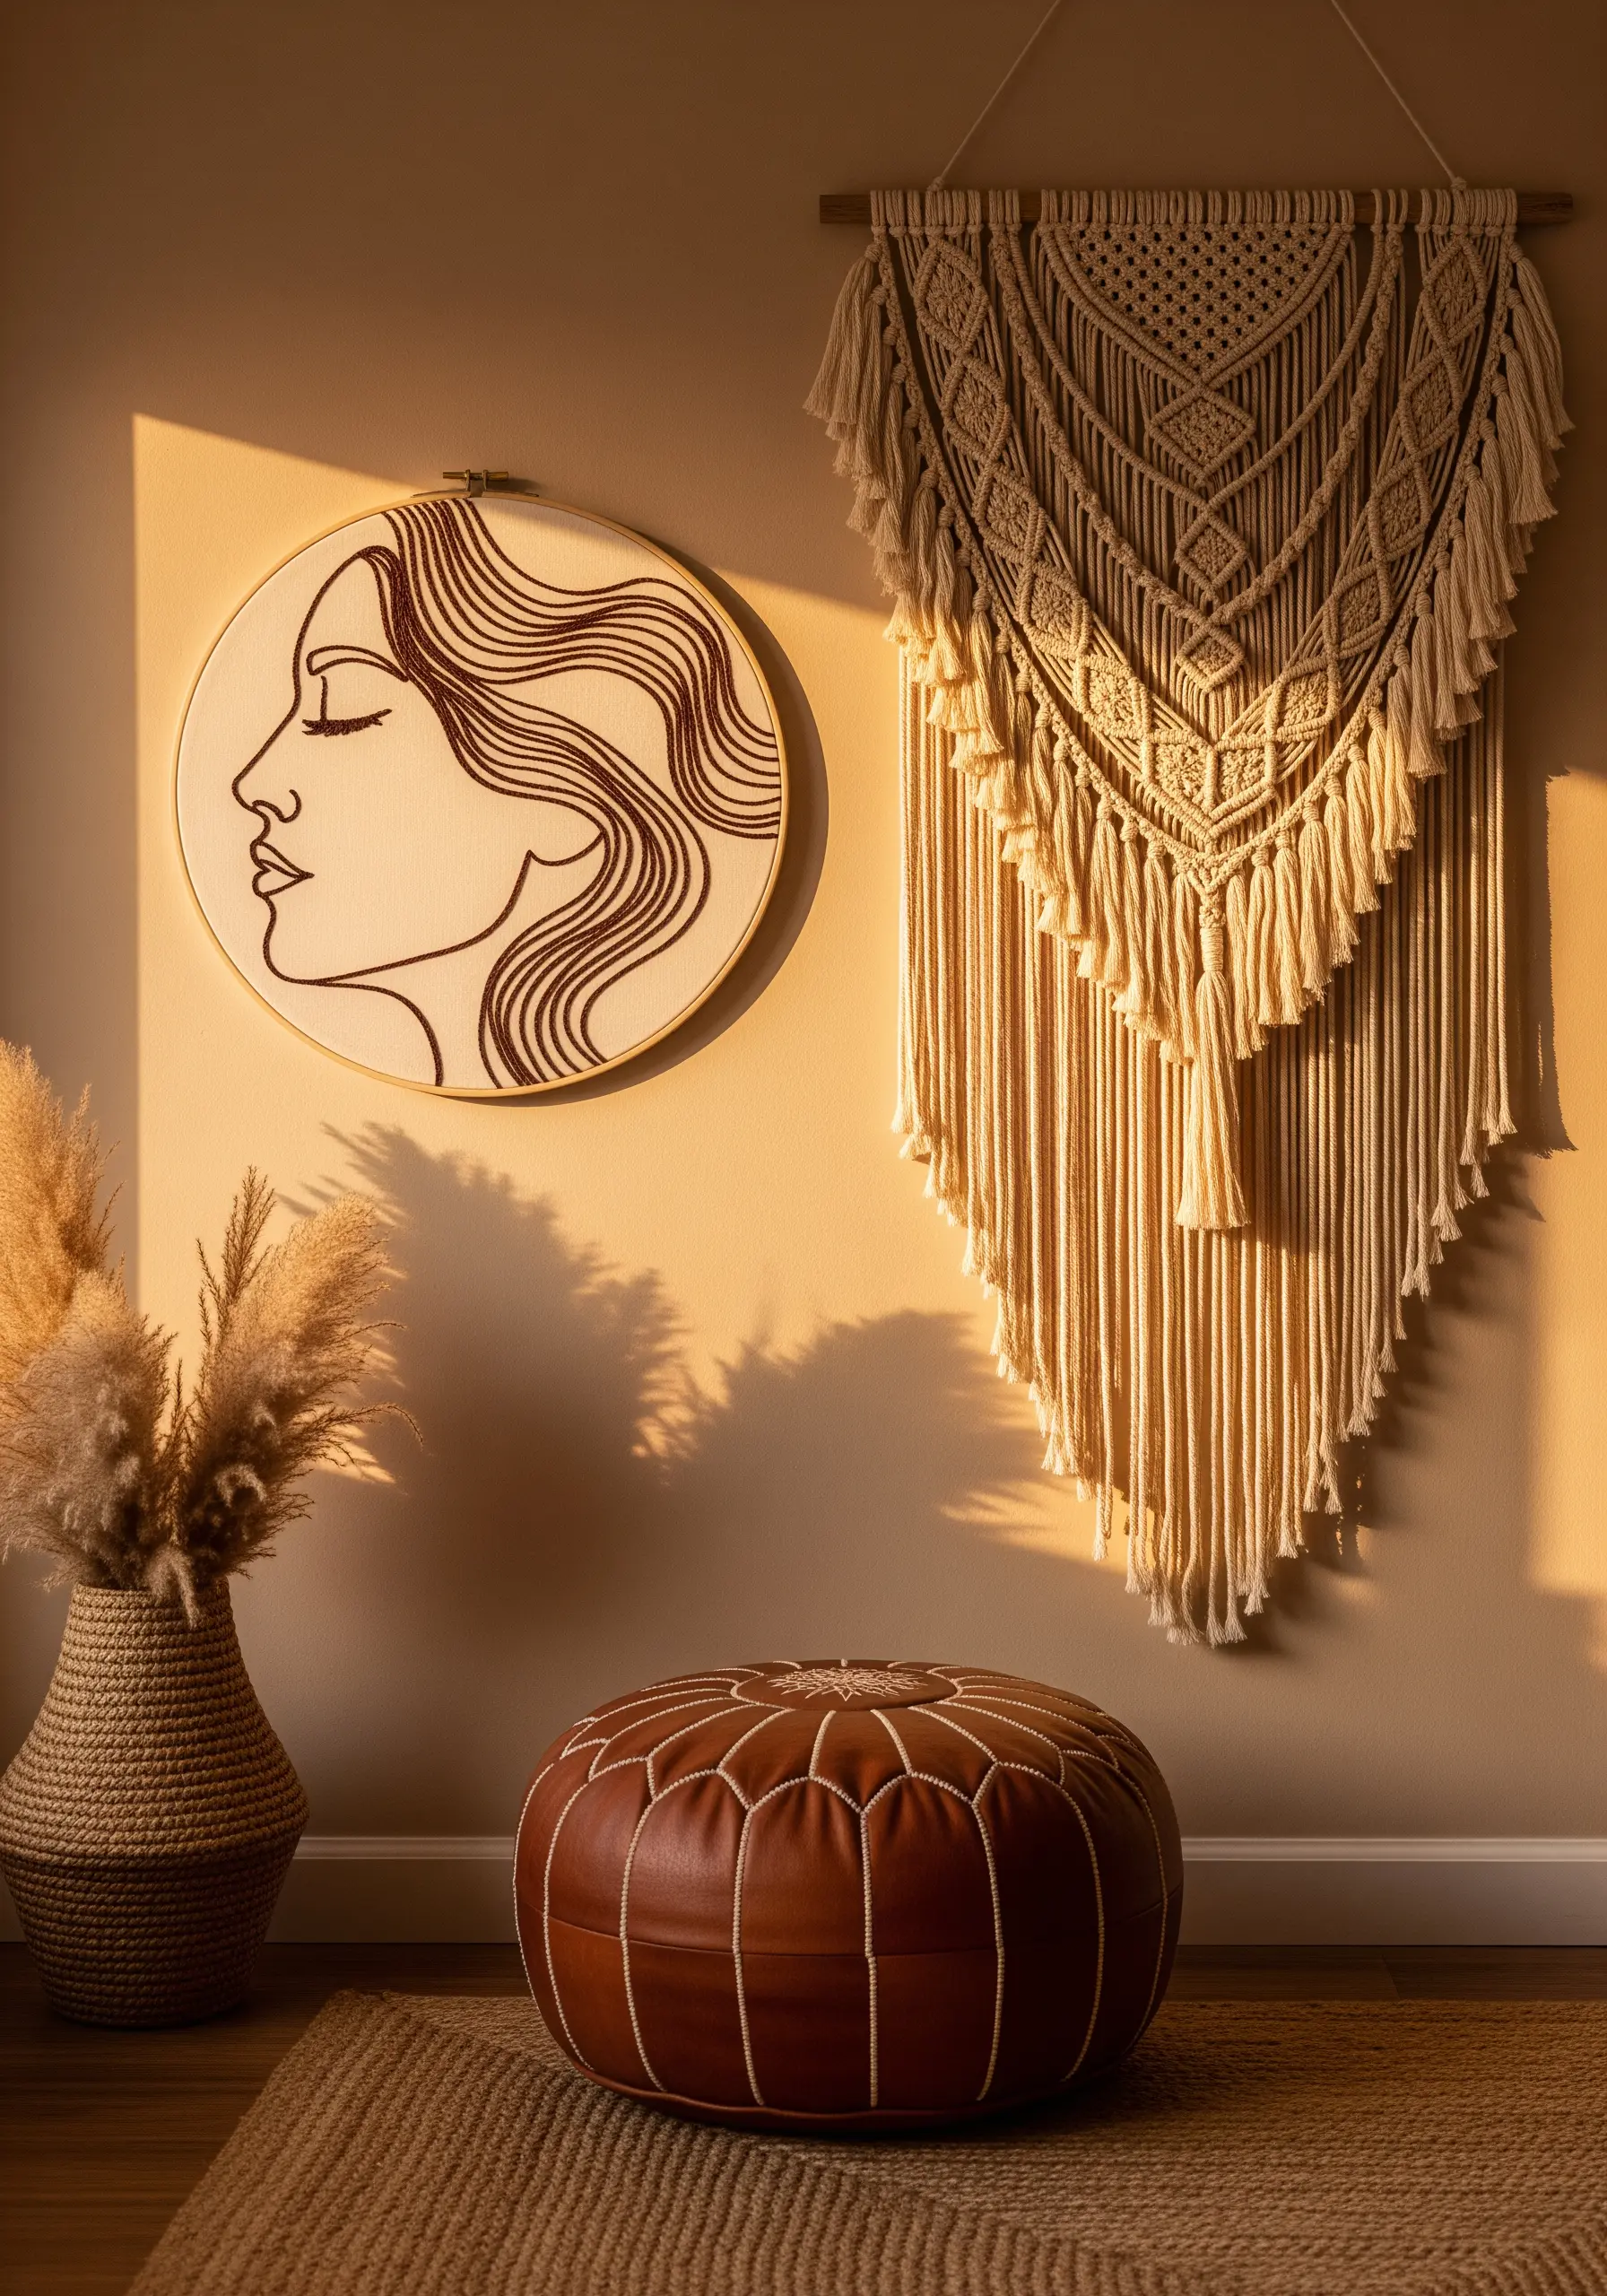
To embroider hair that feels fluid and alive, focus on creating long, sweeping lines.
A whipped backstitch is the ideal choice here, as it transforms a standard backstitch into a single, smooth, and solid line with no gaps.
Use a darker, contrasting thread to make the lines pop against the neutral fabric, emphasizing the flow and direction of each strand.
Pairing these boho-inspired textile wall art patterns with natural textures like pampas grass and macrame enhances the warm, organic feel.
20. Explore 3D Line Art with Sculptural Cording
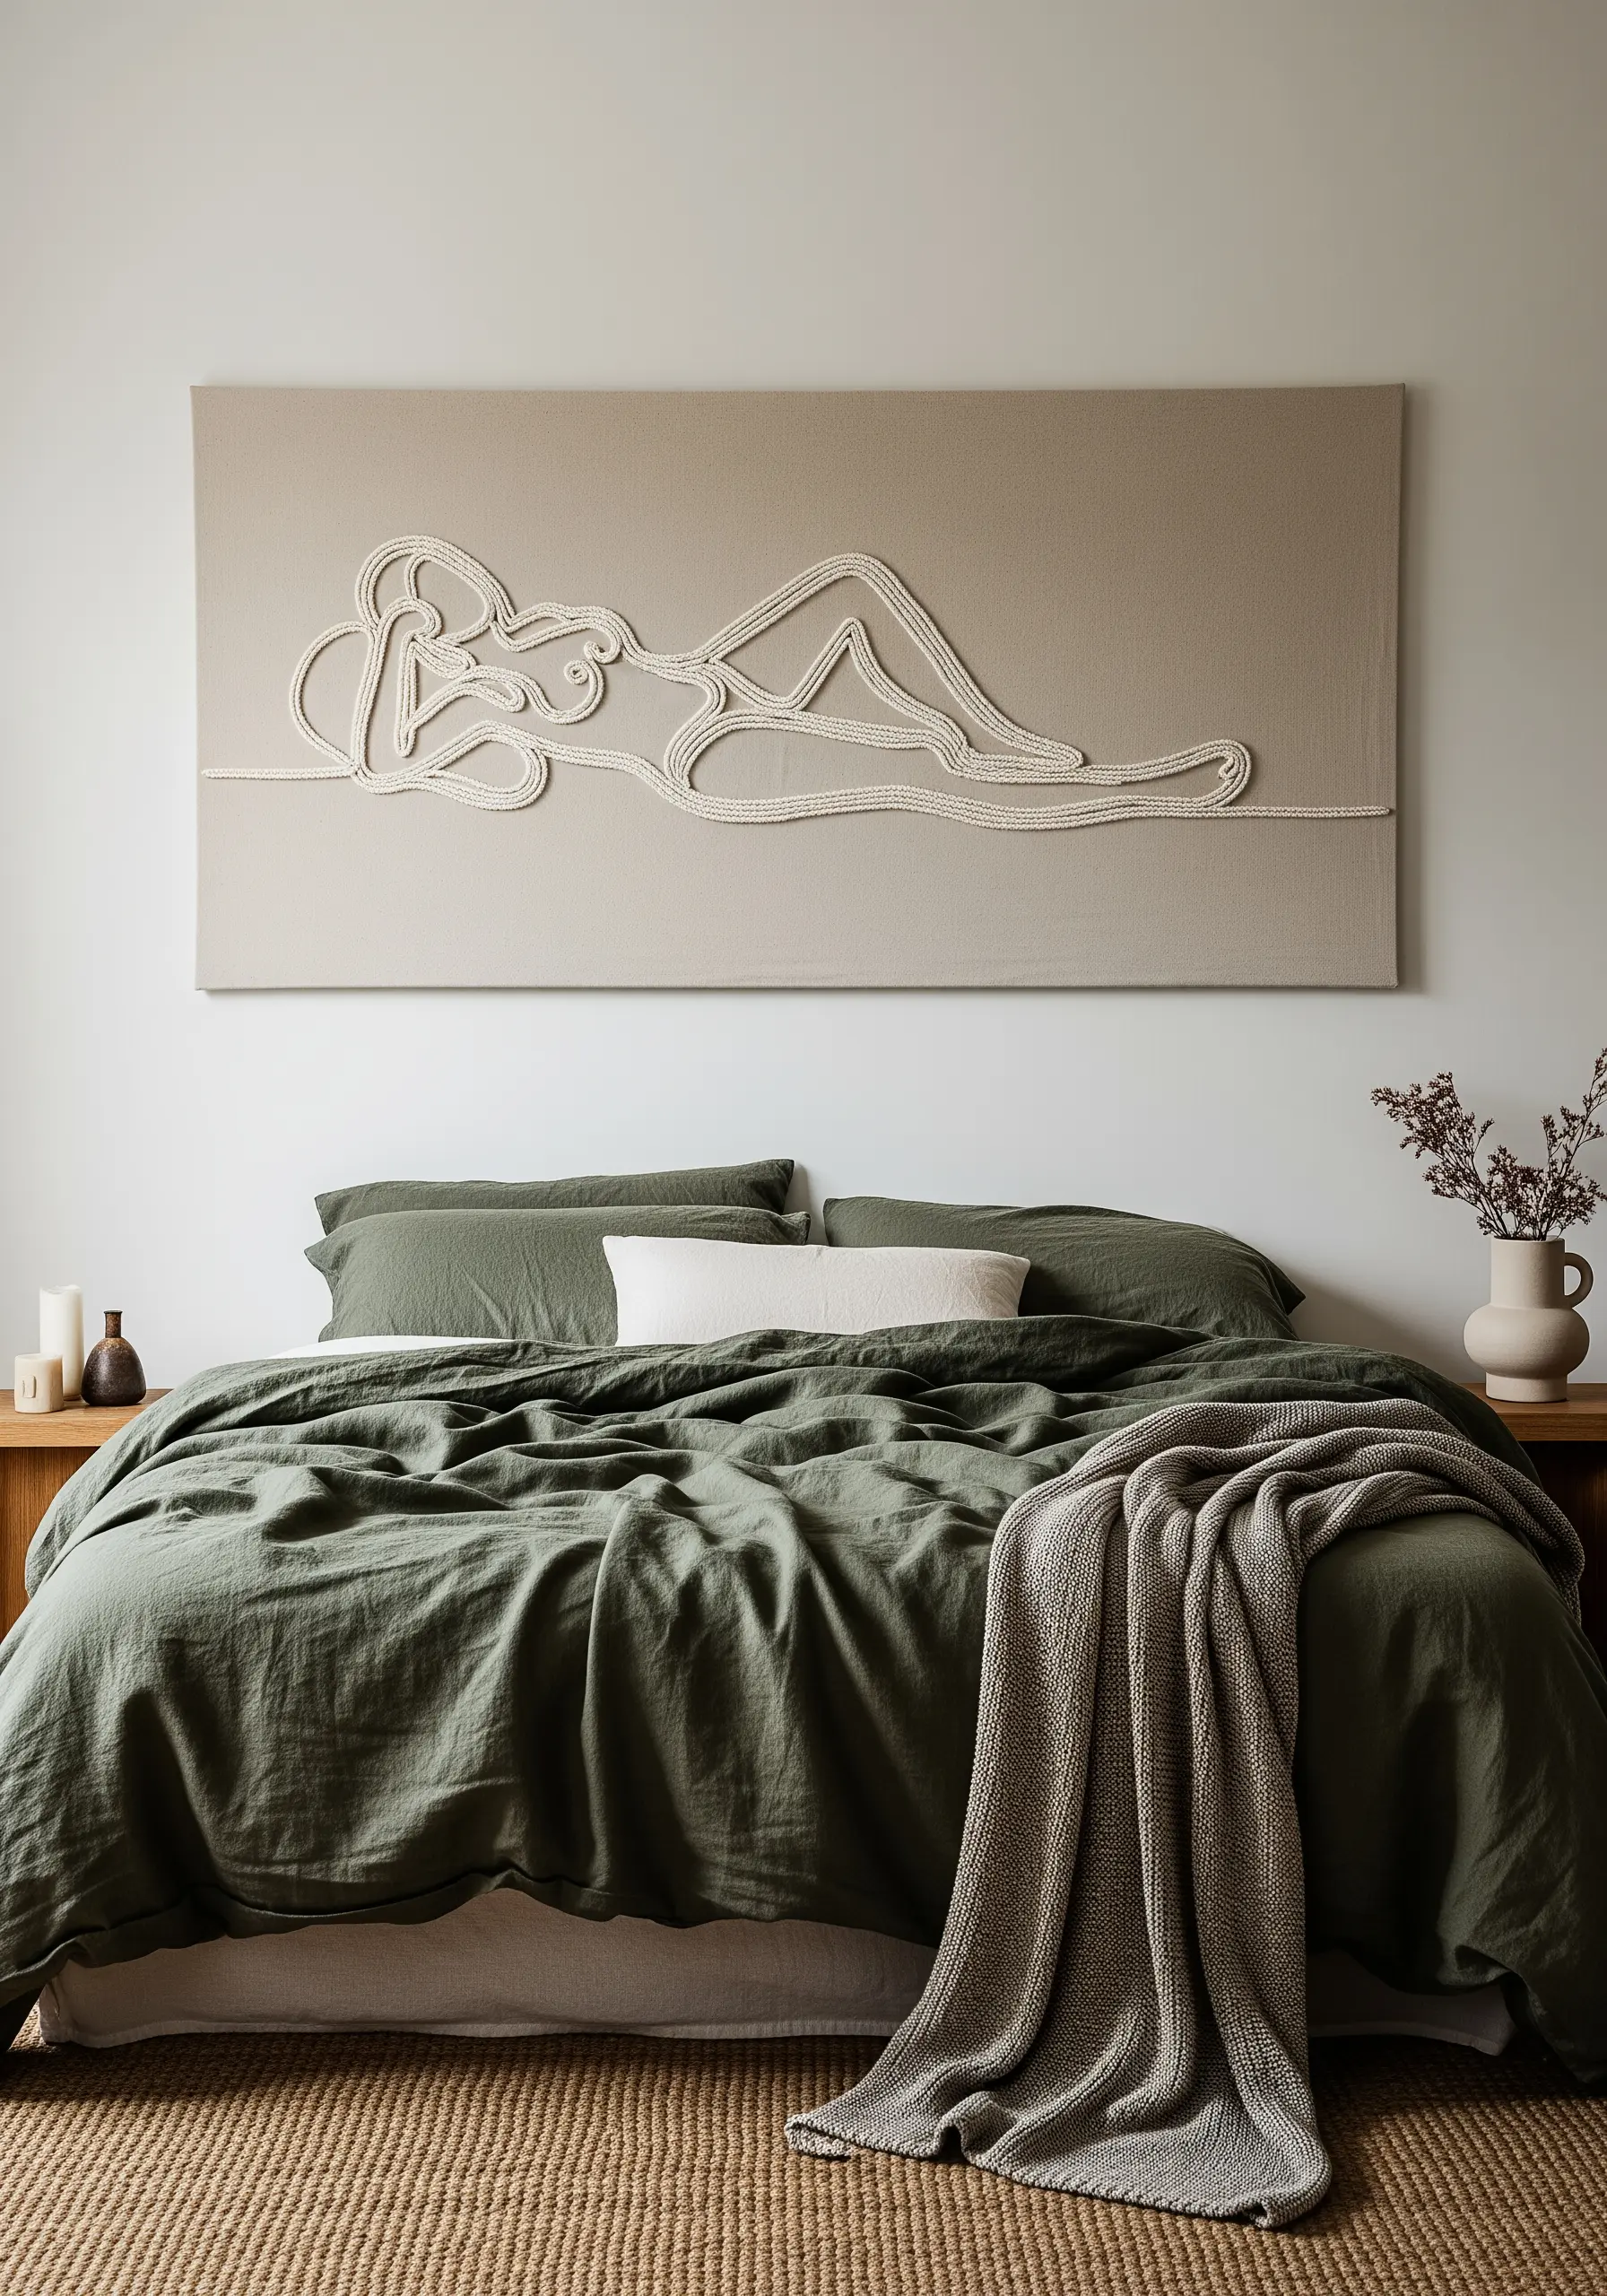
Take your line art off the surface by translating it into a three-dimensional form.
Instead of stitching with floss, lay down a thick cotton cord or rope directly onto a stretched canvas, following your design.
You can attach the cording by gluing it carefully from the back or by using a couching stitch with a matching fine thread to tack it down invisibly.
This technique creates a highly tactile, sculptural piece that plays beautifully with light and shadow.
21. Amplify Your Art with a Bold Wall Color
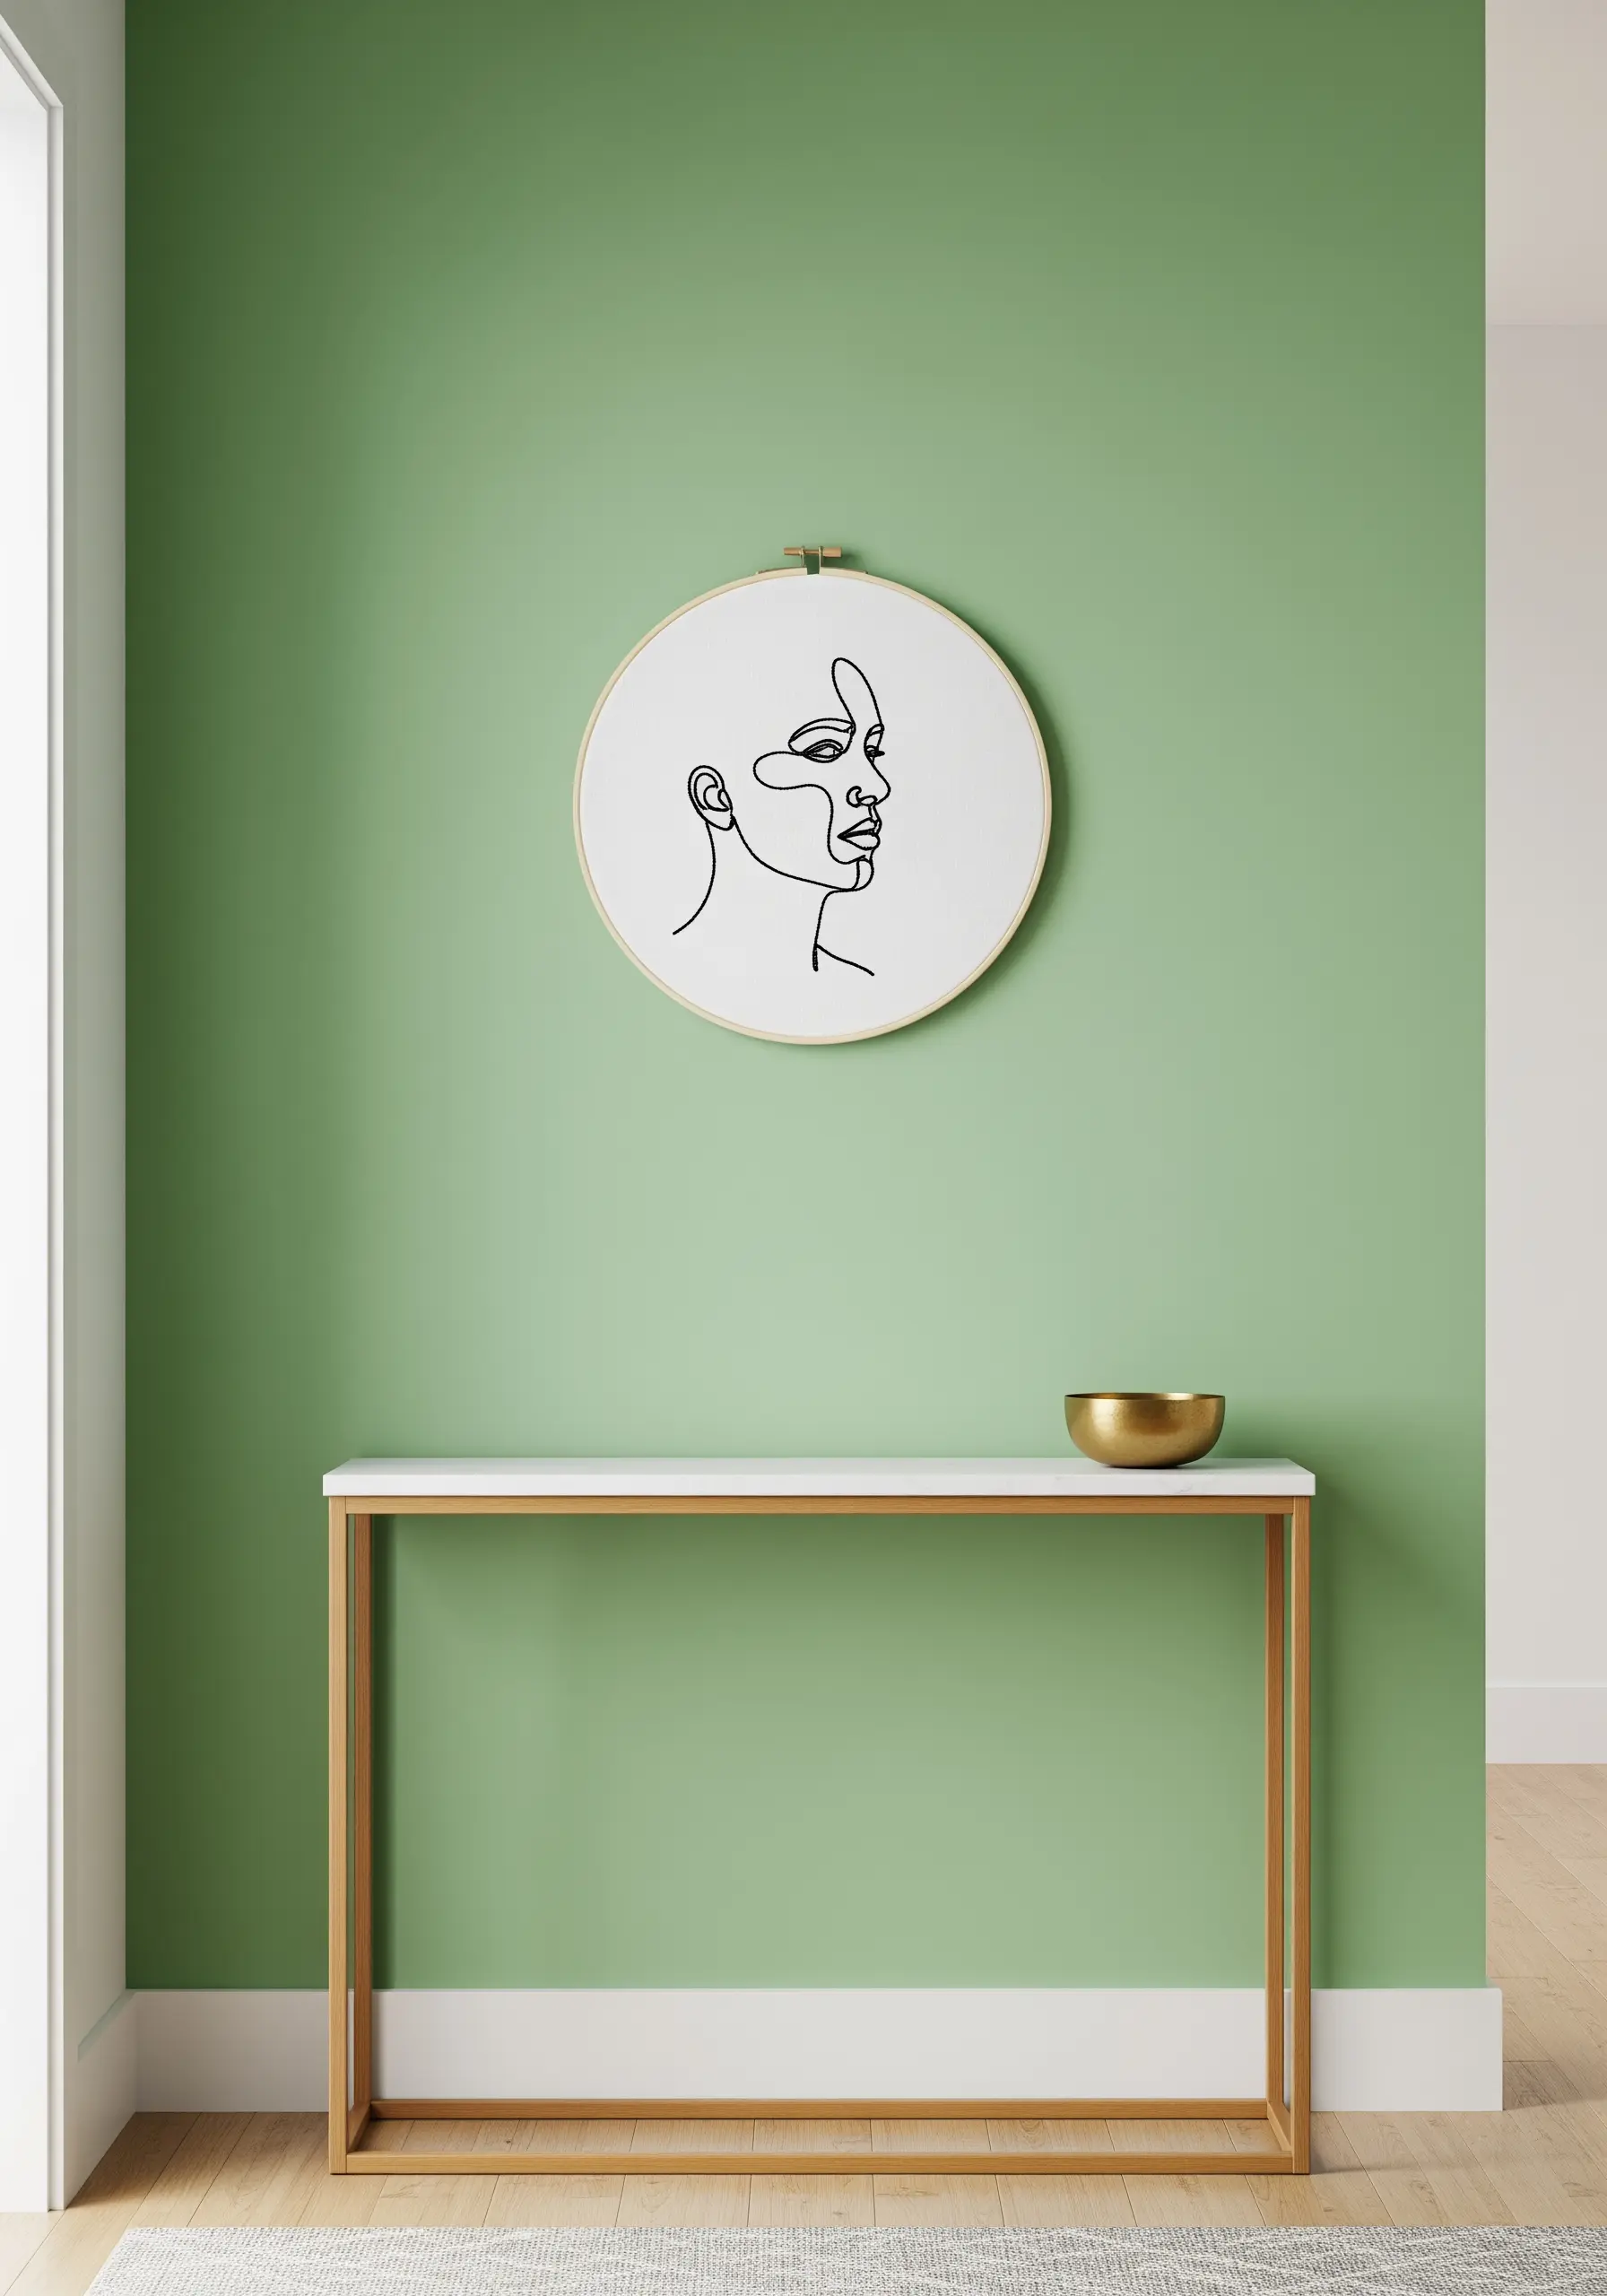
Don’t underestimate the power of your wall color as a secondary frame for your embroidery.
A simple black-on-white hoop, which might feel plain on a white wall, becomes a striking piece of graphic art when placed against a saturated color like this sage green.
The color isolates the hoop and makes the clean, graphic quality of the single-line face profile even more impactful.
This is a designer’s trick: use the background to do the heavy lifting.
22. Curate a Thematic Gallery Wall
Create a sophisticated and personal gallery wall by building it around a single theme.
Here, an embroidered portrait serves as the central anchor, surrounded by framed botanical and abstract line drawings.
The common threads—black lines, neutral backgrounds, and organic forms—are what make the collection feel cohesive rather than chaotic.
Your embroidered piece adds a unique touch of texture that sets the entire arrangement apart from a standard print-only gallery.
23. Achieve Softness with Tonal Stitching
For a subtle, ethereal effect, stitch with a thread color that is only a few shades lighter than your fabric.
Using white or off-white floss on a natural oatmeal or linen background creates a low-contrast design that feels incredibly soft and serene.
This tonal approach is perfect for creating a calm atmosphere in a reading corner or bedroom.
The beauty is in the quiet detail; the design reveals itself slowly and gently to the viewer.
24. Deconstruct a Portrait for an Abstract Trio
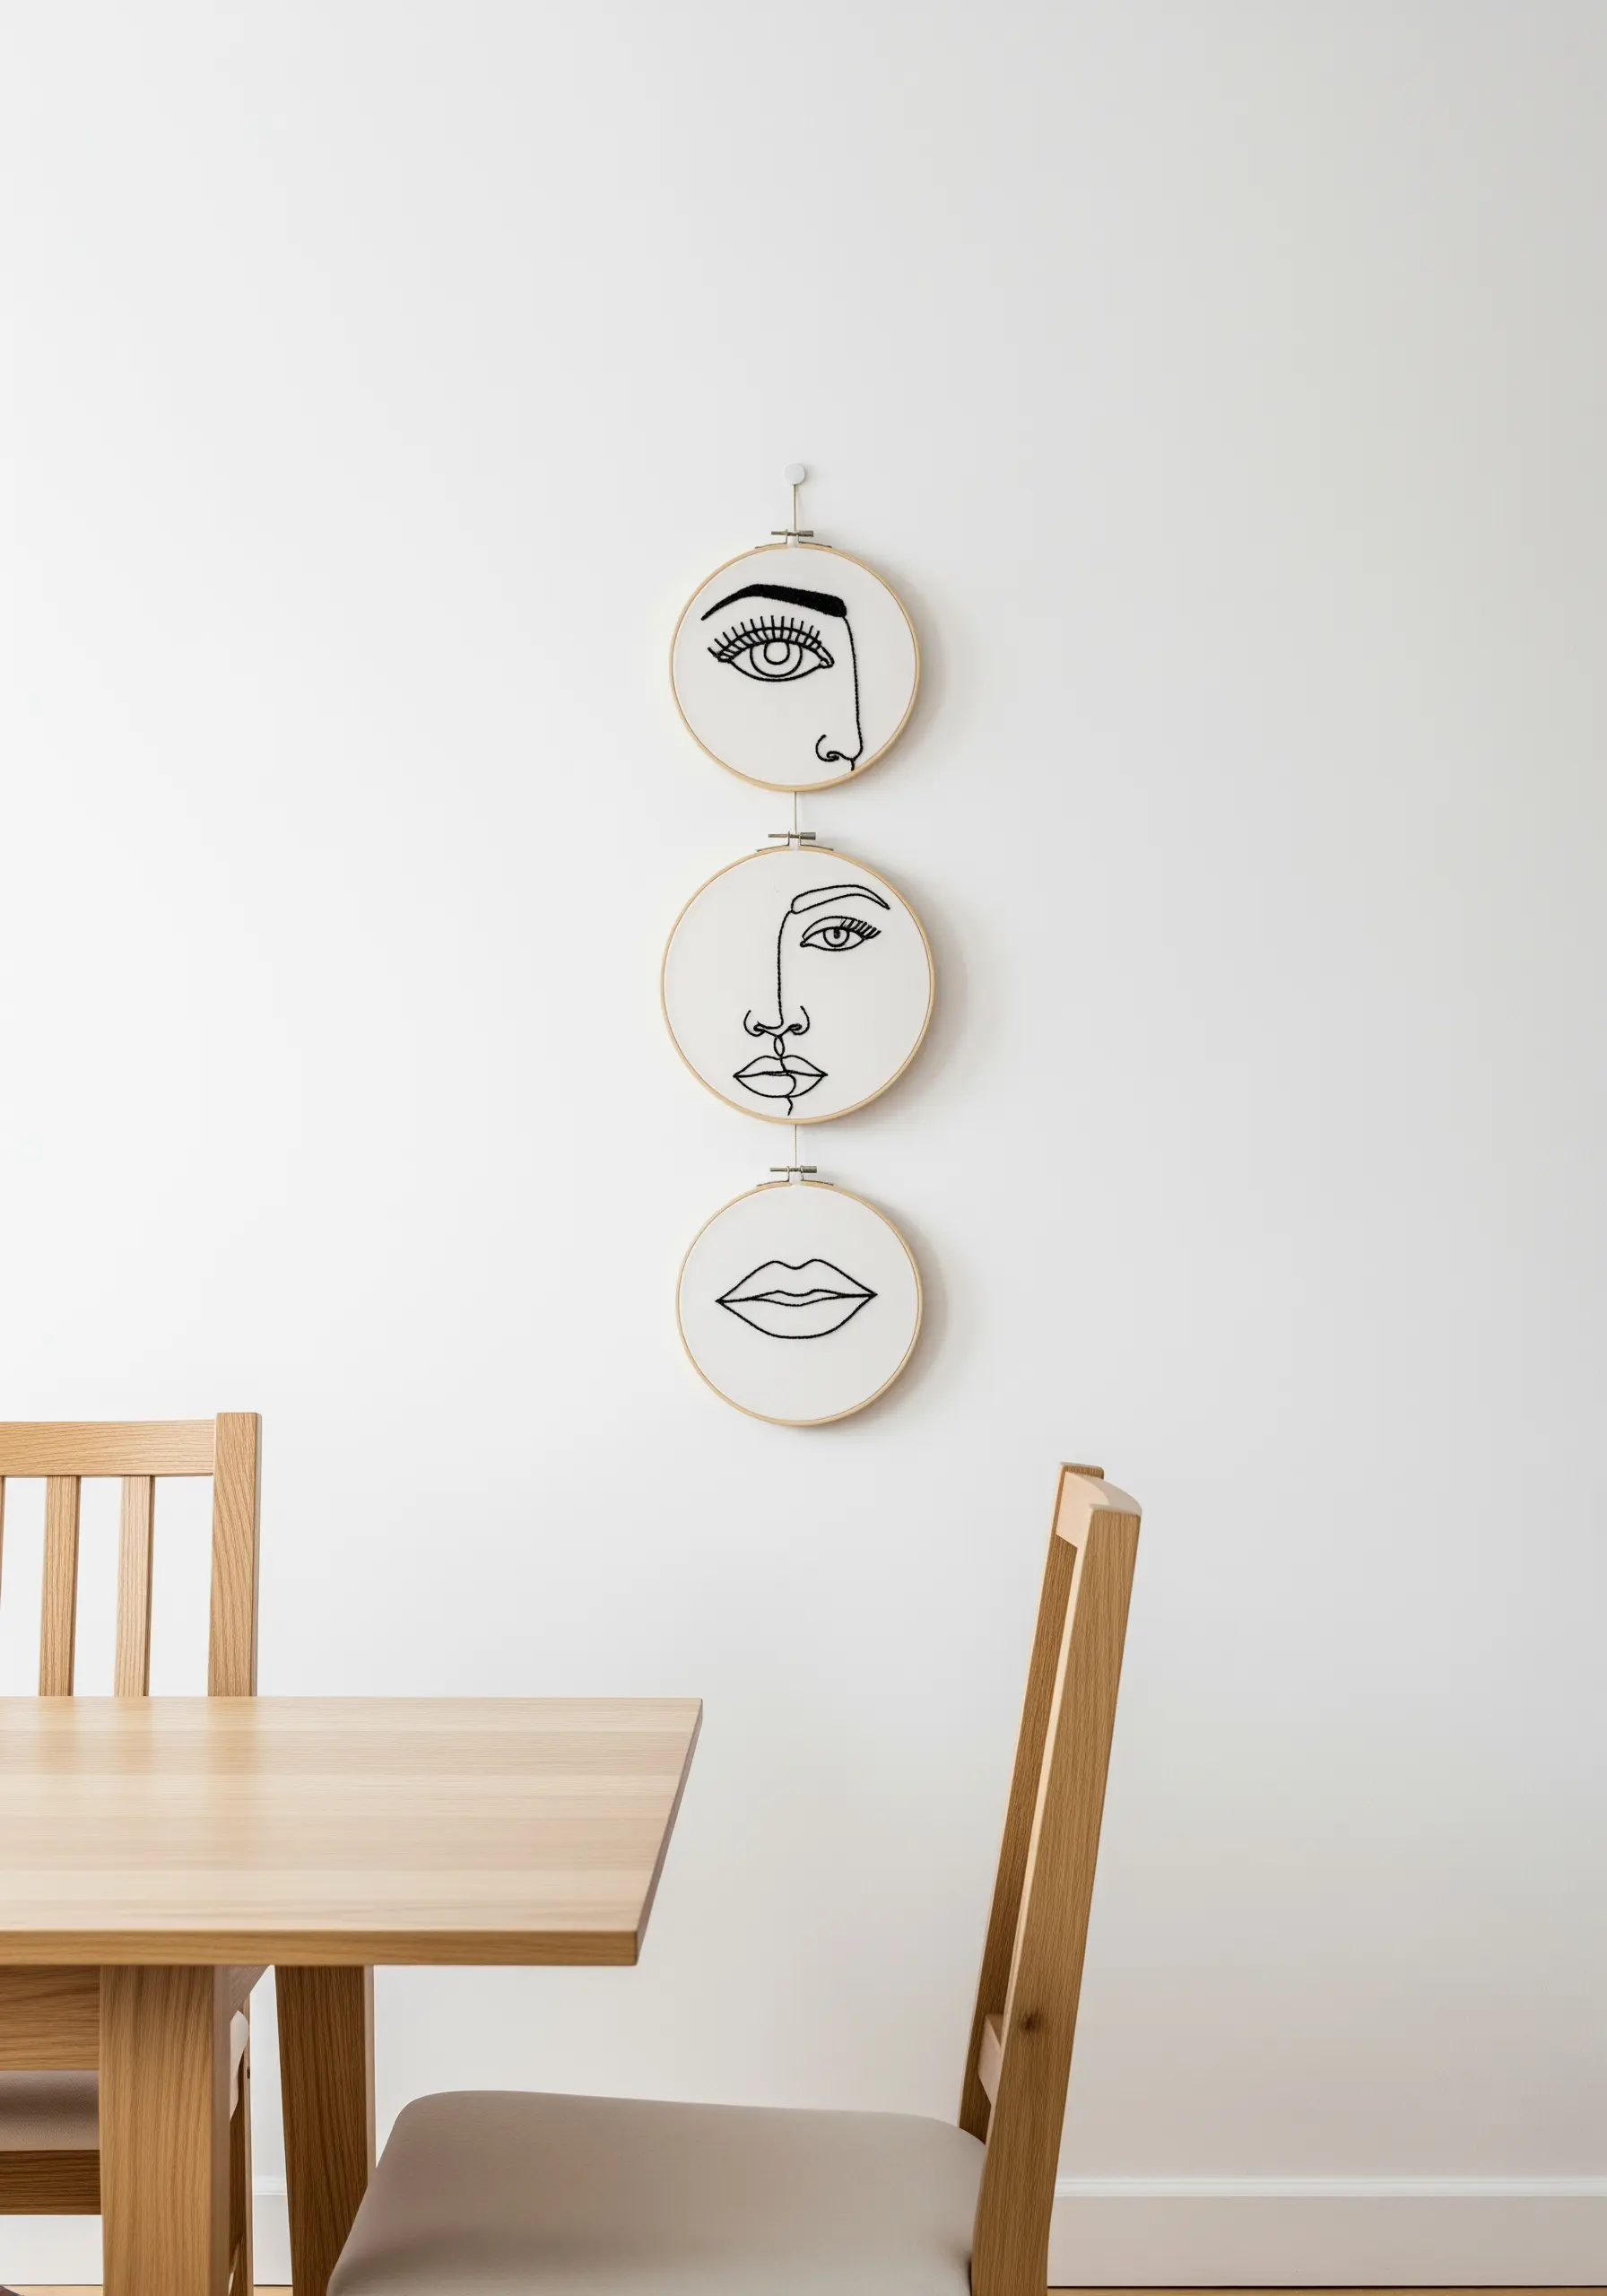
Challenge the traditional portrait by breaking it down into its essential components.
Dedicate one hoop to the eyes, another to the nose and profile, and a third to the mouth.
When hung together vertically, the elements recombine in the viewer’s mind, creating a playful and modern interpretation of a face.
This is an excellent way to fill a narrow vertical space with art that is both minimal and conceptually engaging.
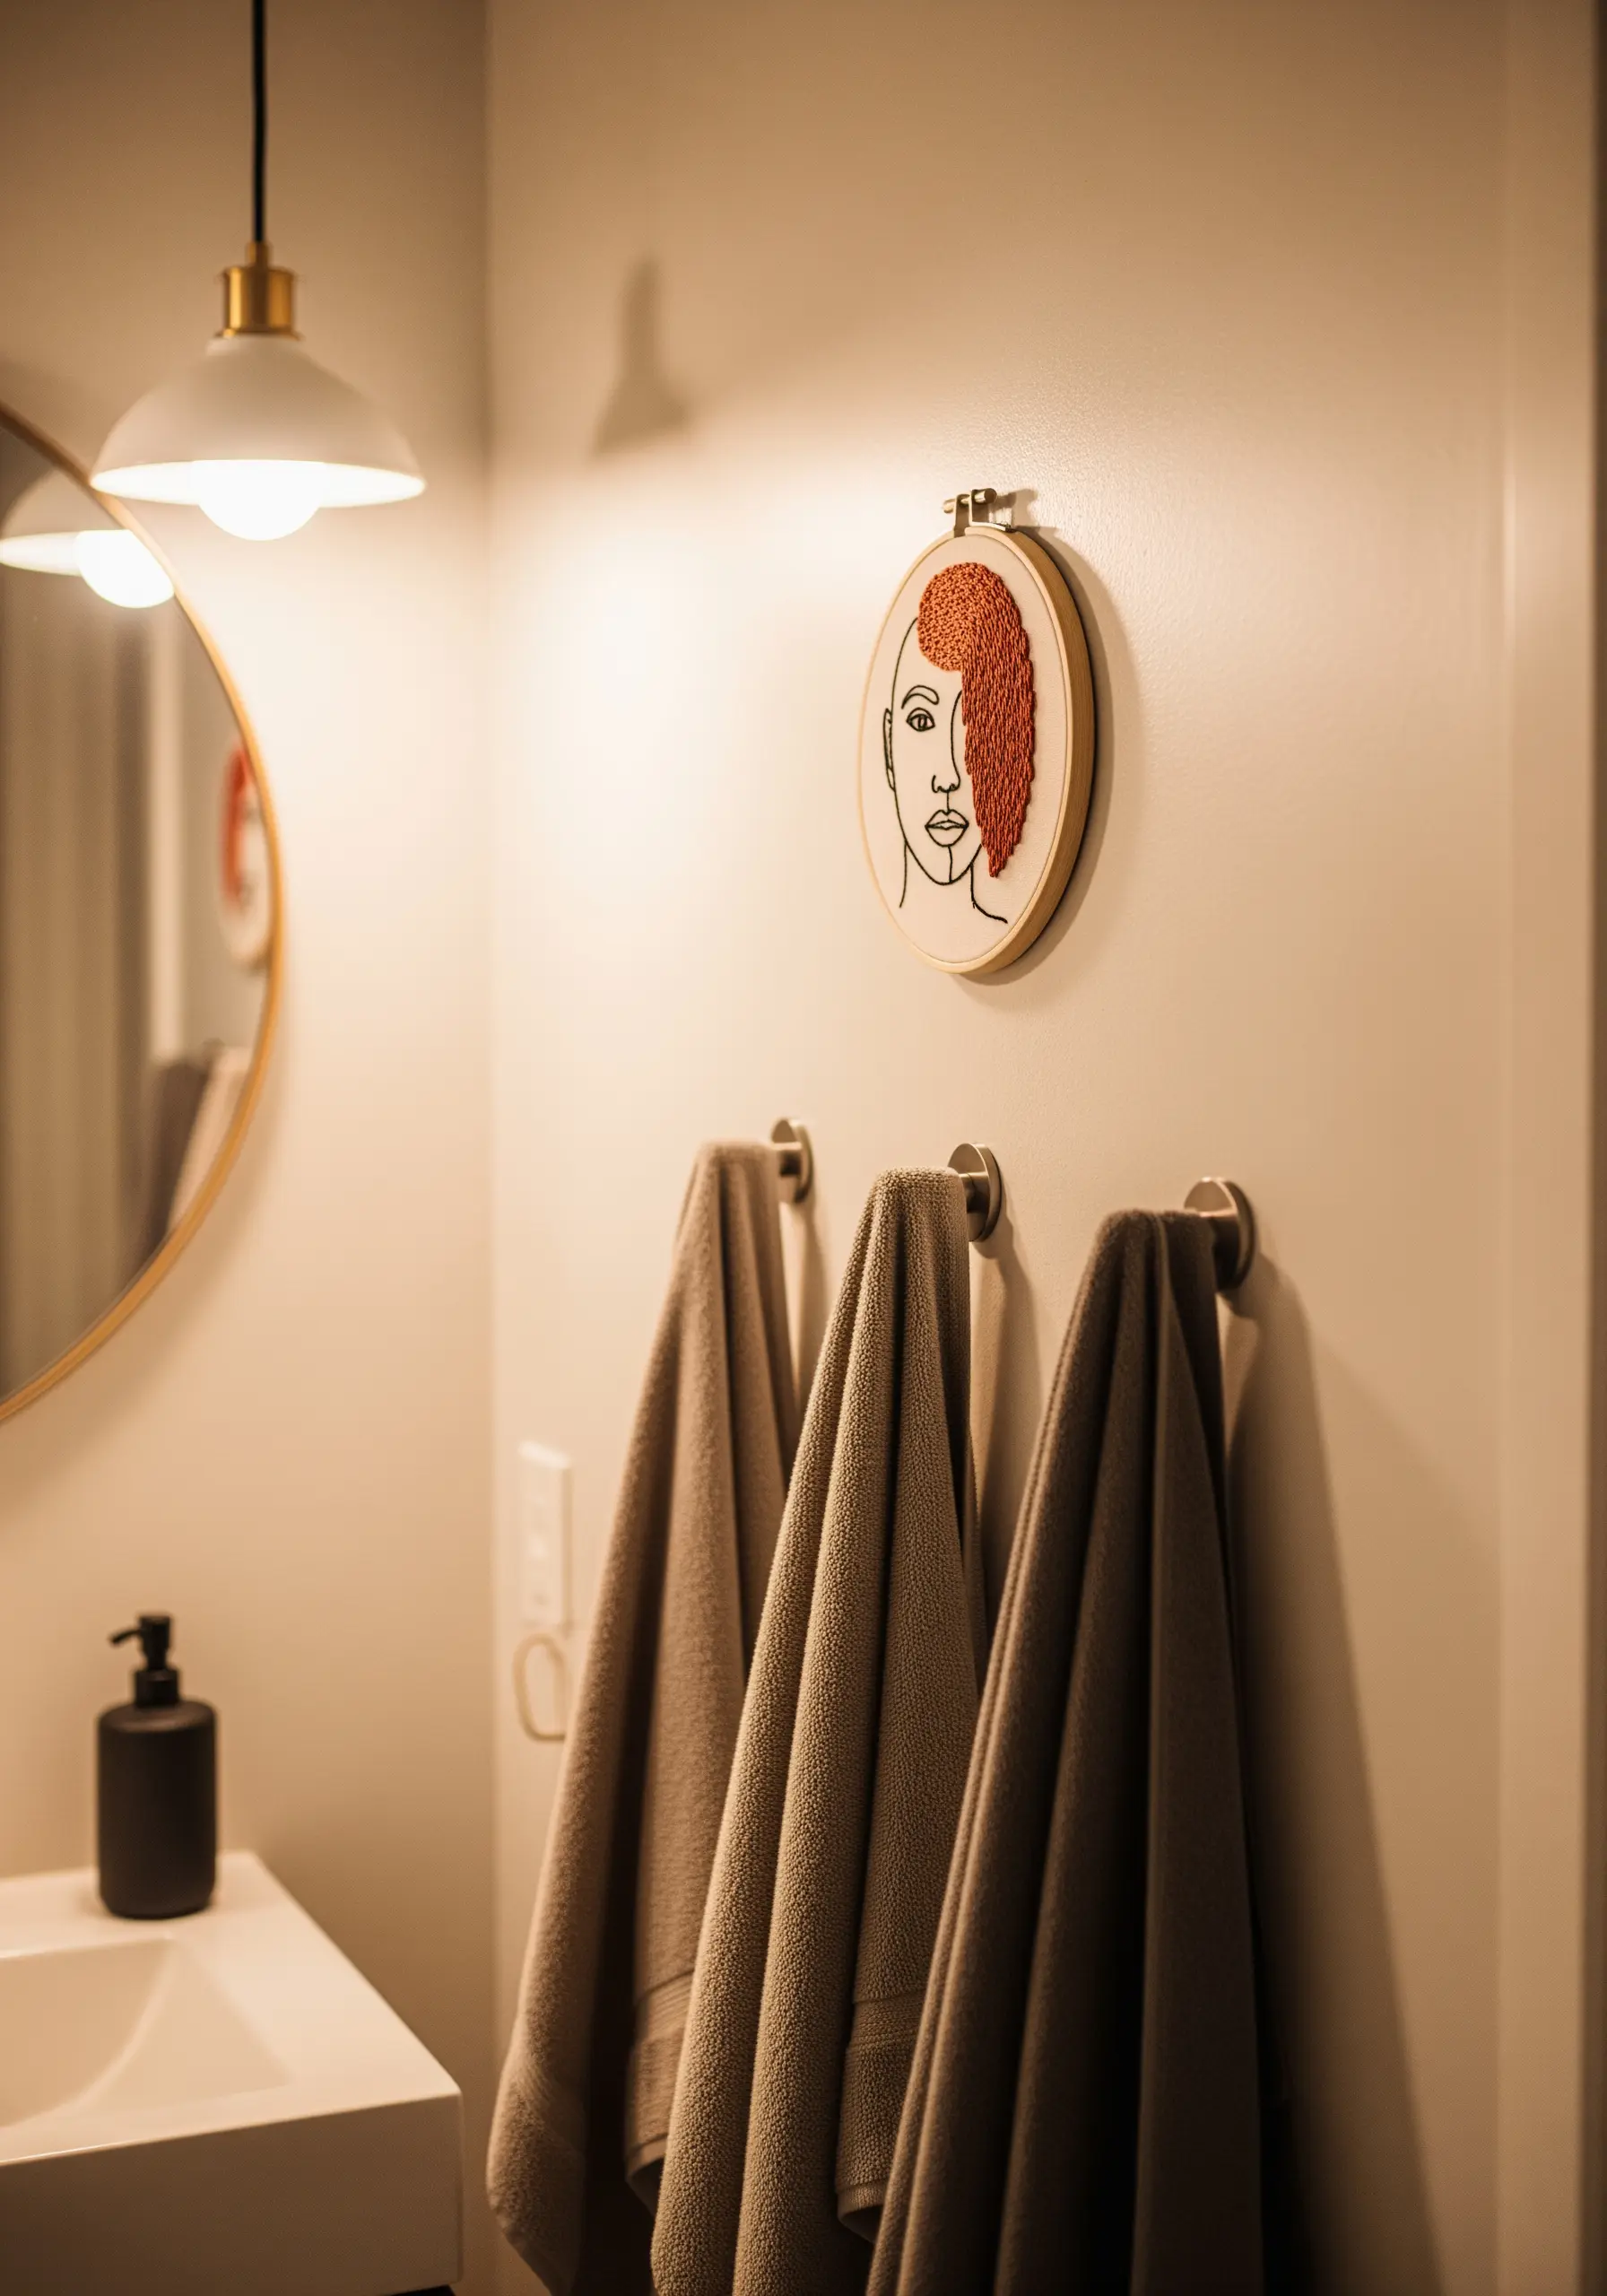
25. Add a Whisper of Color for Visual Interest
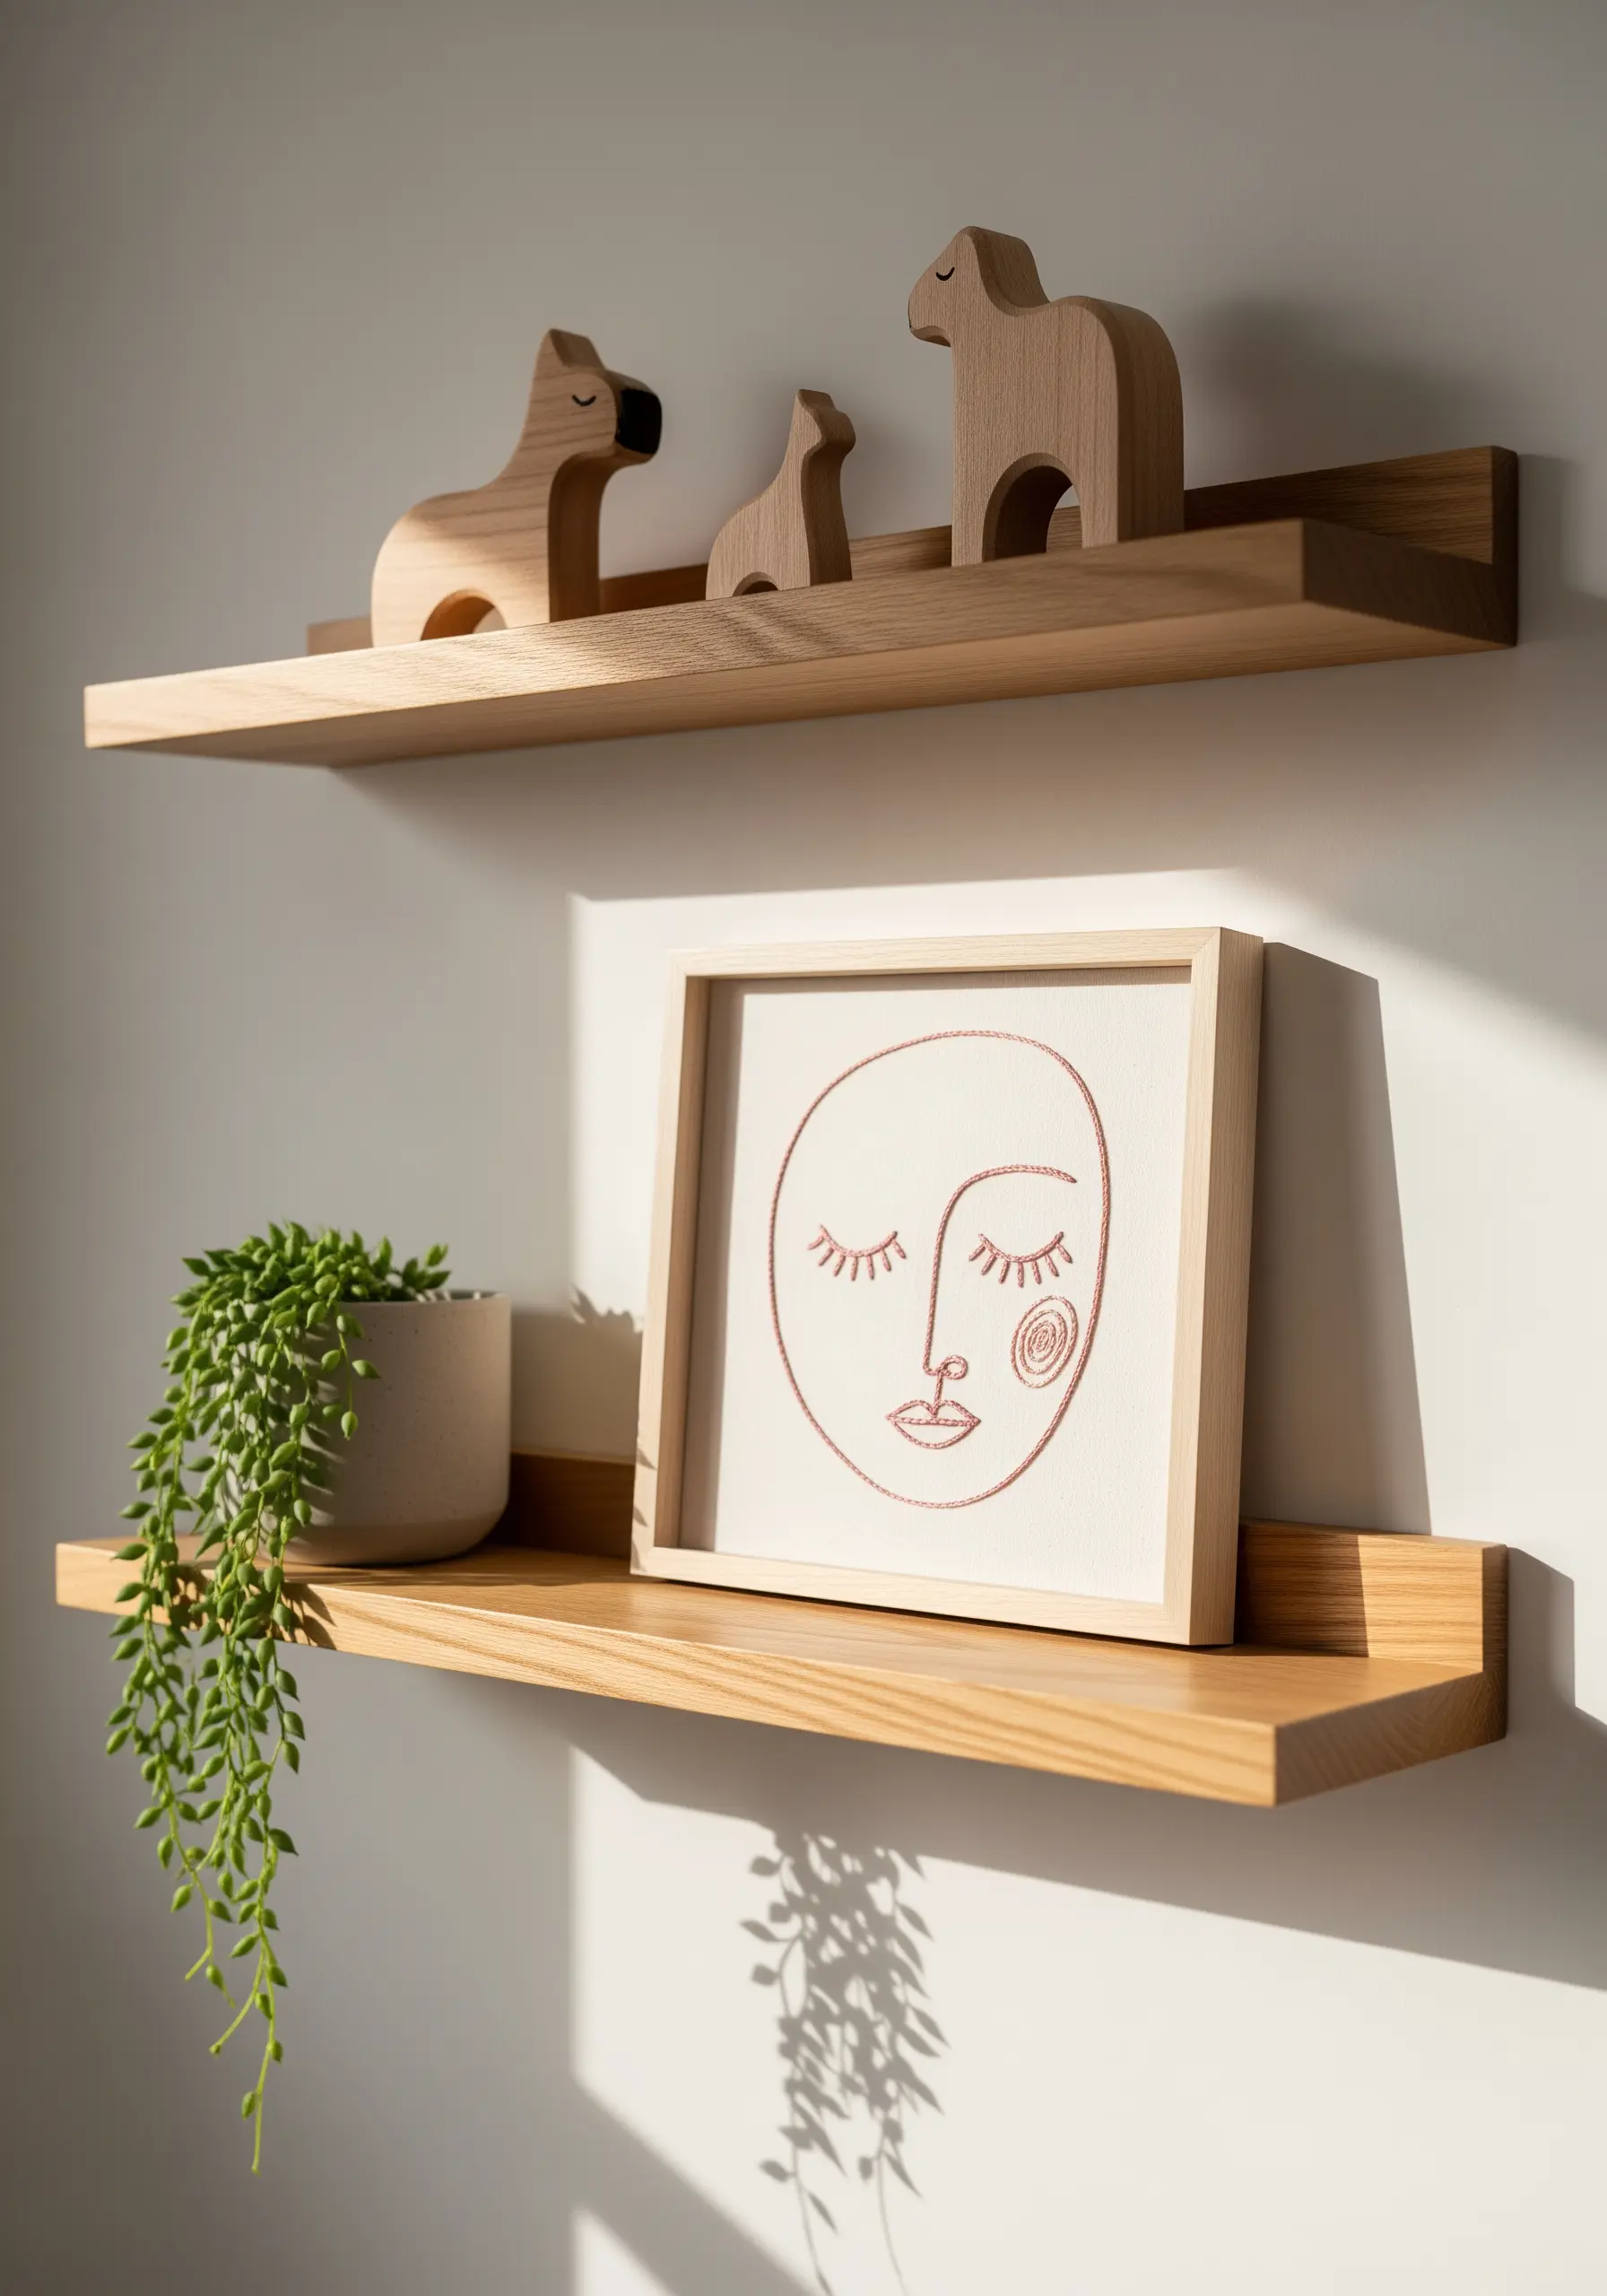
Even in a minimalist piece, a tiny, intentional pop of color can add personality and focus.
Here, a simple terracotta-colored spiral on the cheek draws the eye and adds a touch of warmth to the otherwise monochrome design.
You can create this accent with a few satin stitches, a tightly wound French knot, or a small appliquéd circle of felt.
This technique demonstrates that you don’t need a full palette to make a colorful statement.
26. Integrate Embroidery into Your Creative Process
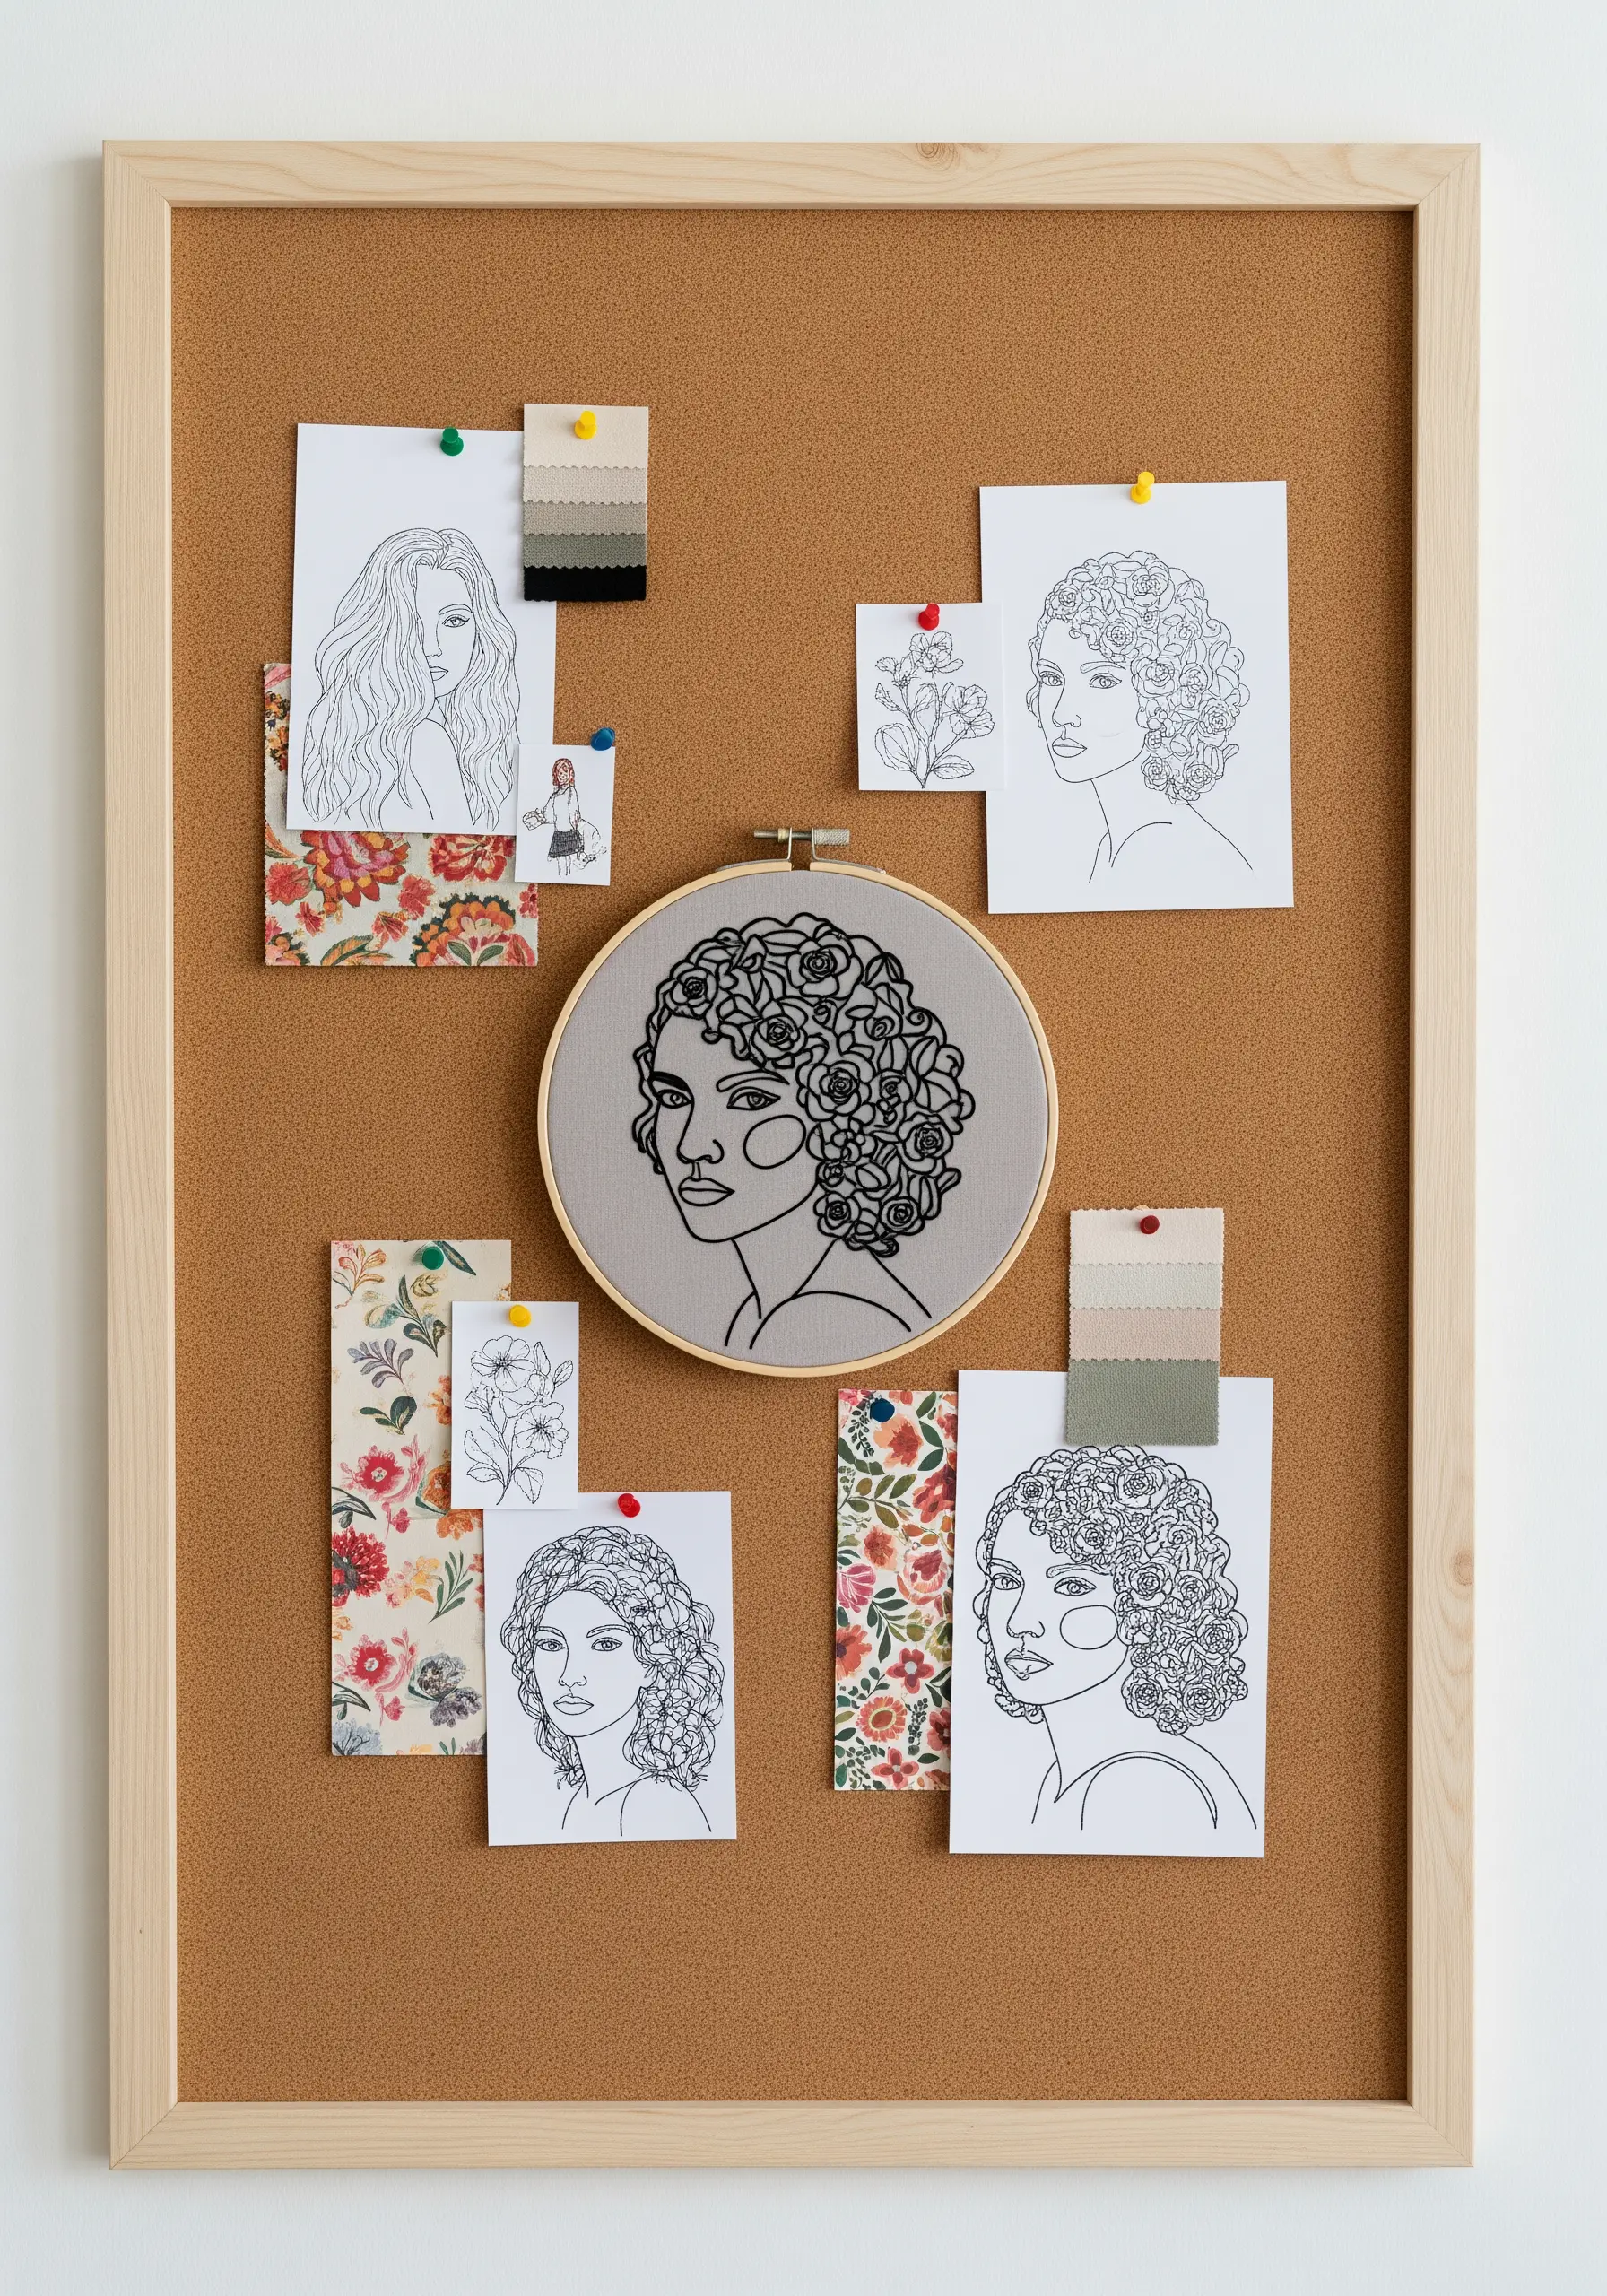
Use your embroidery hoop as the centerpiece of a physical mood board to guide and inspire your creative projects.
Surround your finished piece with sketches, fabric swatches, and inspirational images that share a similar aesthetic.
This not only creates a beautiful and personal display for your workspace but also helps you visualize and maintain a cohesive vision for your next series of artworks.
It transforms your craft from a final product into a living part of your creative journey.


