

Minimalist embroidery isn’t about doing less; it’s about making every single stitch matter. It’s a quiet conversation between thread, fabric, and an idea, where space and texture speak as loudly as color. If you’ve ever felt your work was missing a certain polish or intention, the answer isn’t more complexity—it’s more focus.
Here, you won’t find fleeting trends. Instead, you’ll discover how a change in stitch direction can create movement, how varying your thread weight can build depth, and how a well-chosen texture can turn a simple line into something sculptural. It’s about understanding the ‘why’ behind the ‘how’.
These ideas are designed to be more than just patterns to copy. They are technical starting points for you to develop your own modern, chic style. Think of each one as an invitation to slow down, to see the beauty in a single, perfectly executed line, and to create work that feels both personal and profoundly elegant.
1. The Unbroken Line Portrait

To achieve a smooth, raised line that feels both fluid and substantial, use a whipped backstitch with all six strands of embroidery floss.
The key to executing this perfectly is maintaining consistent tension as you stitch, especially around tight curves, which prevents the fabric from puckering.
This technique transforms a simple line drawing into a piece of tactile, sculptural art, where the thread itself has a powerful presence.
2. Textural Mountain Peaks
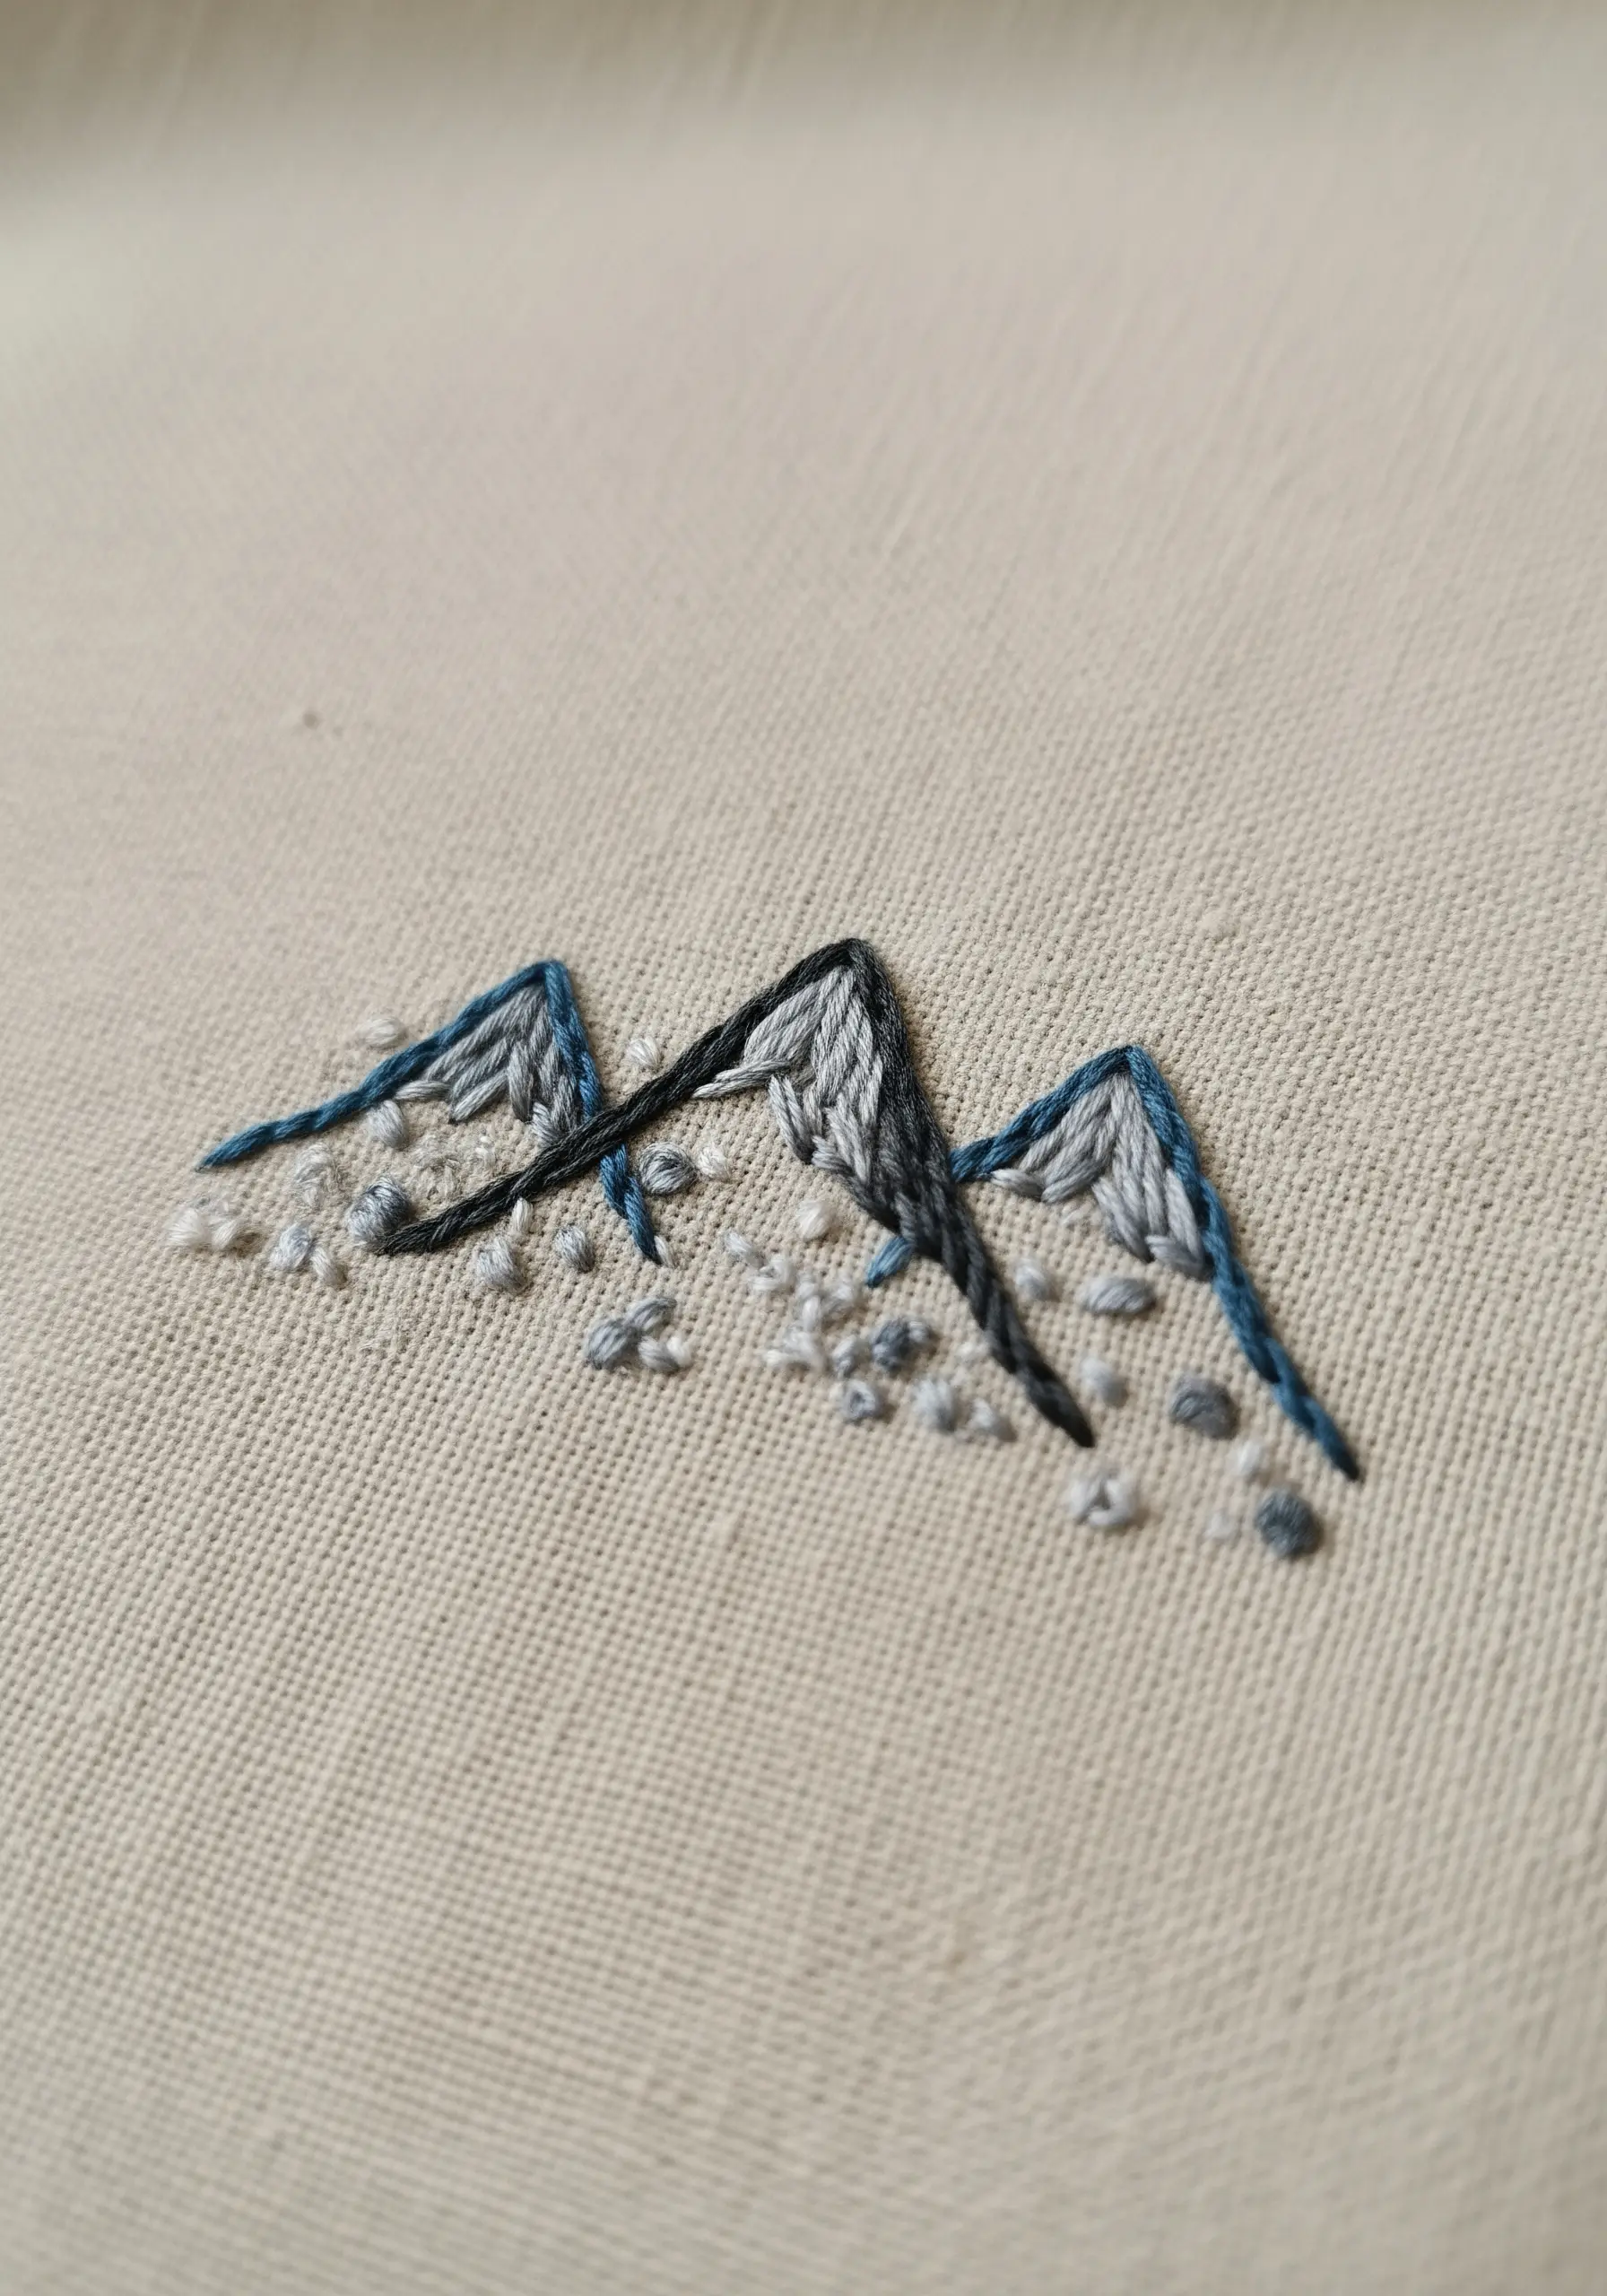
Create a dynamic miniature landscape by combining two distinct textures: a smooth long-and-short stitch for the snow-capped peaks and scattered French knots for the rocky terrain below.
Vary the number of wraps on your French knots from one to three to mimic the random, uneven surface of scree.
This deliberate contrast in stitch style gives the minimal design surprising depth and a tangible sense of realism.
3. The Canvas-Stretched Botanical

Elevate your finished embroidery from a craft project to a piece of decor by stretching it over a small artist’s canvas.
This finishing method provides a clean, frame-less presentation that integrates beautifully into a modern home.
For the botanical motif itself, use a simple split stitch or stem stitch to maintain crisp, elegant lines that complement the minimalist display.
4. Directional Satin Stitch Geometry

Instead of filling each geometric shape with a uniform satin stitch, intentionally change the direction of your stitches for each segment.
This simple adjustment creates a dynamic, light-catching surface that adds visual complexity without cluttering the design.
It works best with a limited, earthy color palette, allowing the texture and direction of the thread to become the main focus of the artwork.
5. Radiant Sunburst Lines
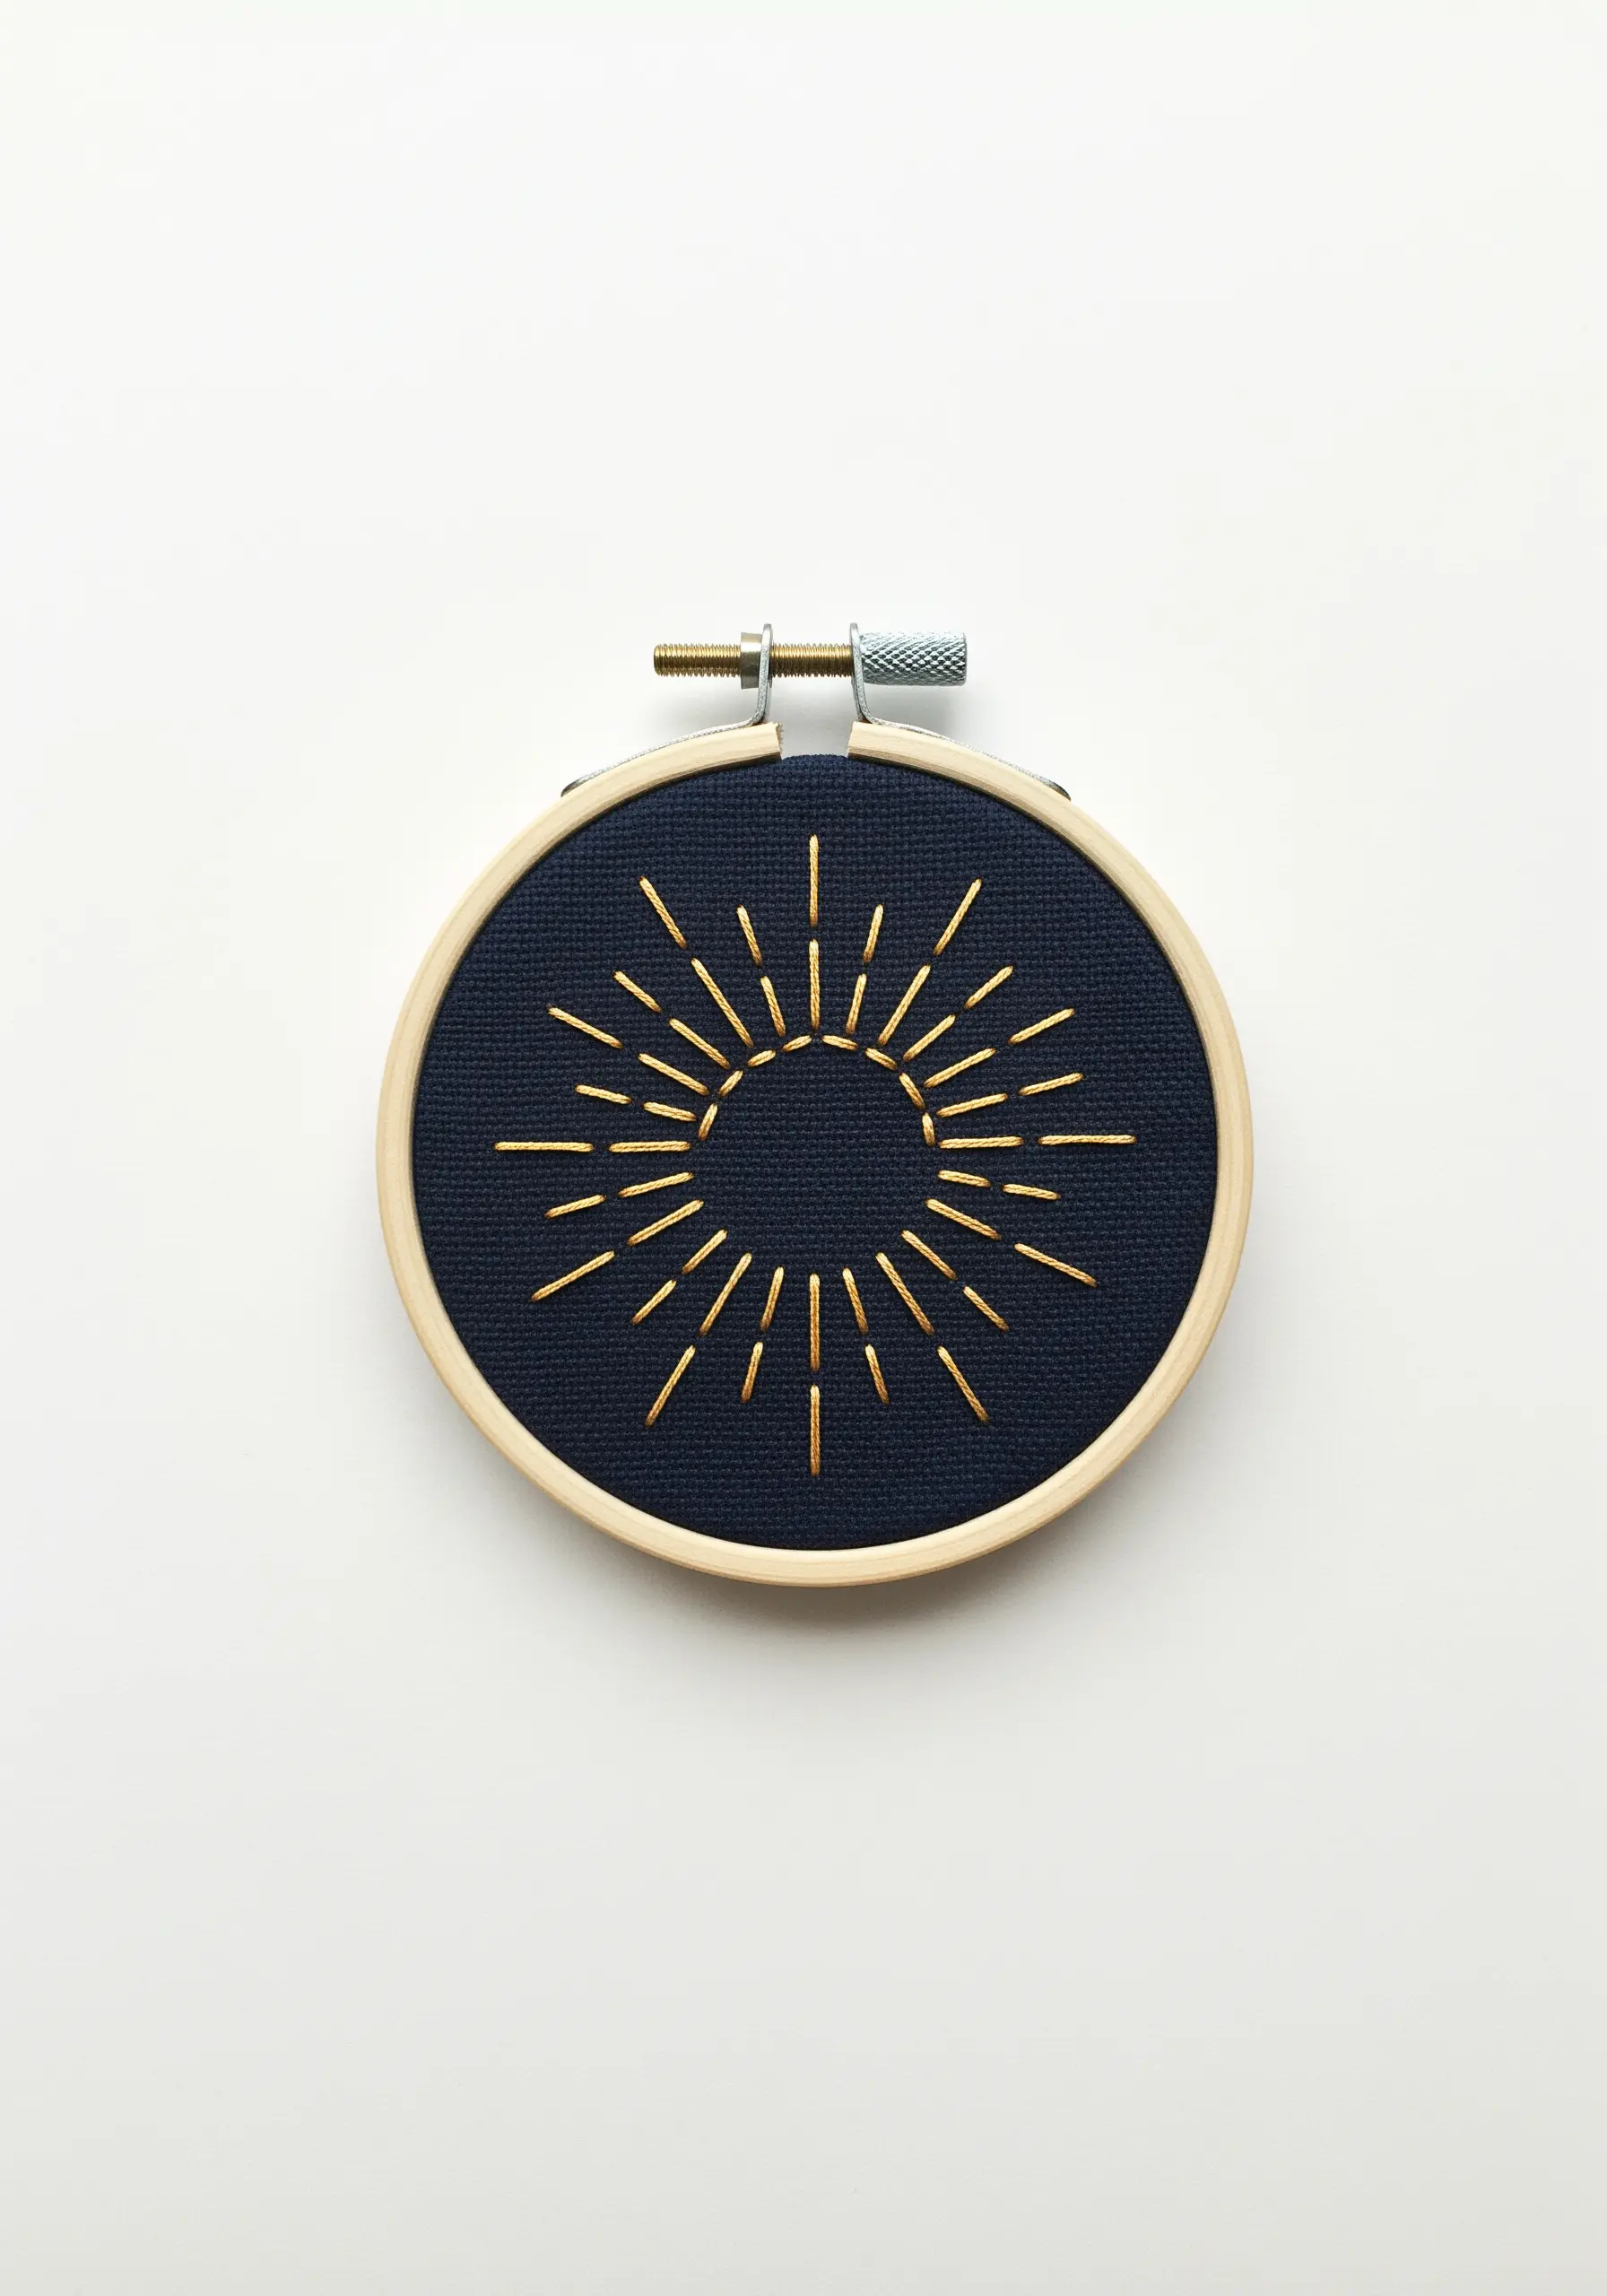
The effectiveness of this design lies in its high contrast and use of negative space.
Choose a dark, tightly woven fabric like navy or black cotton, which makes a single strand of metallic or bright floss appear to radiate light.
Vary the length of your straight stitches slightly to create a more organic, shimmering sunburst rather than a perfectly rigid, geometric form.
6. Delicate Lavender Clusters
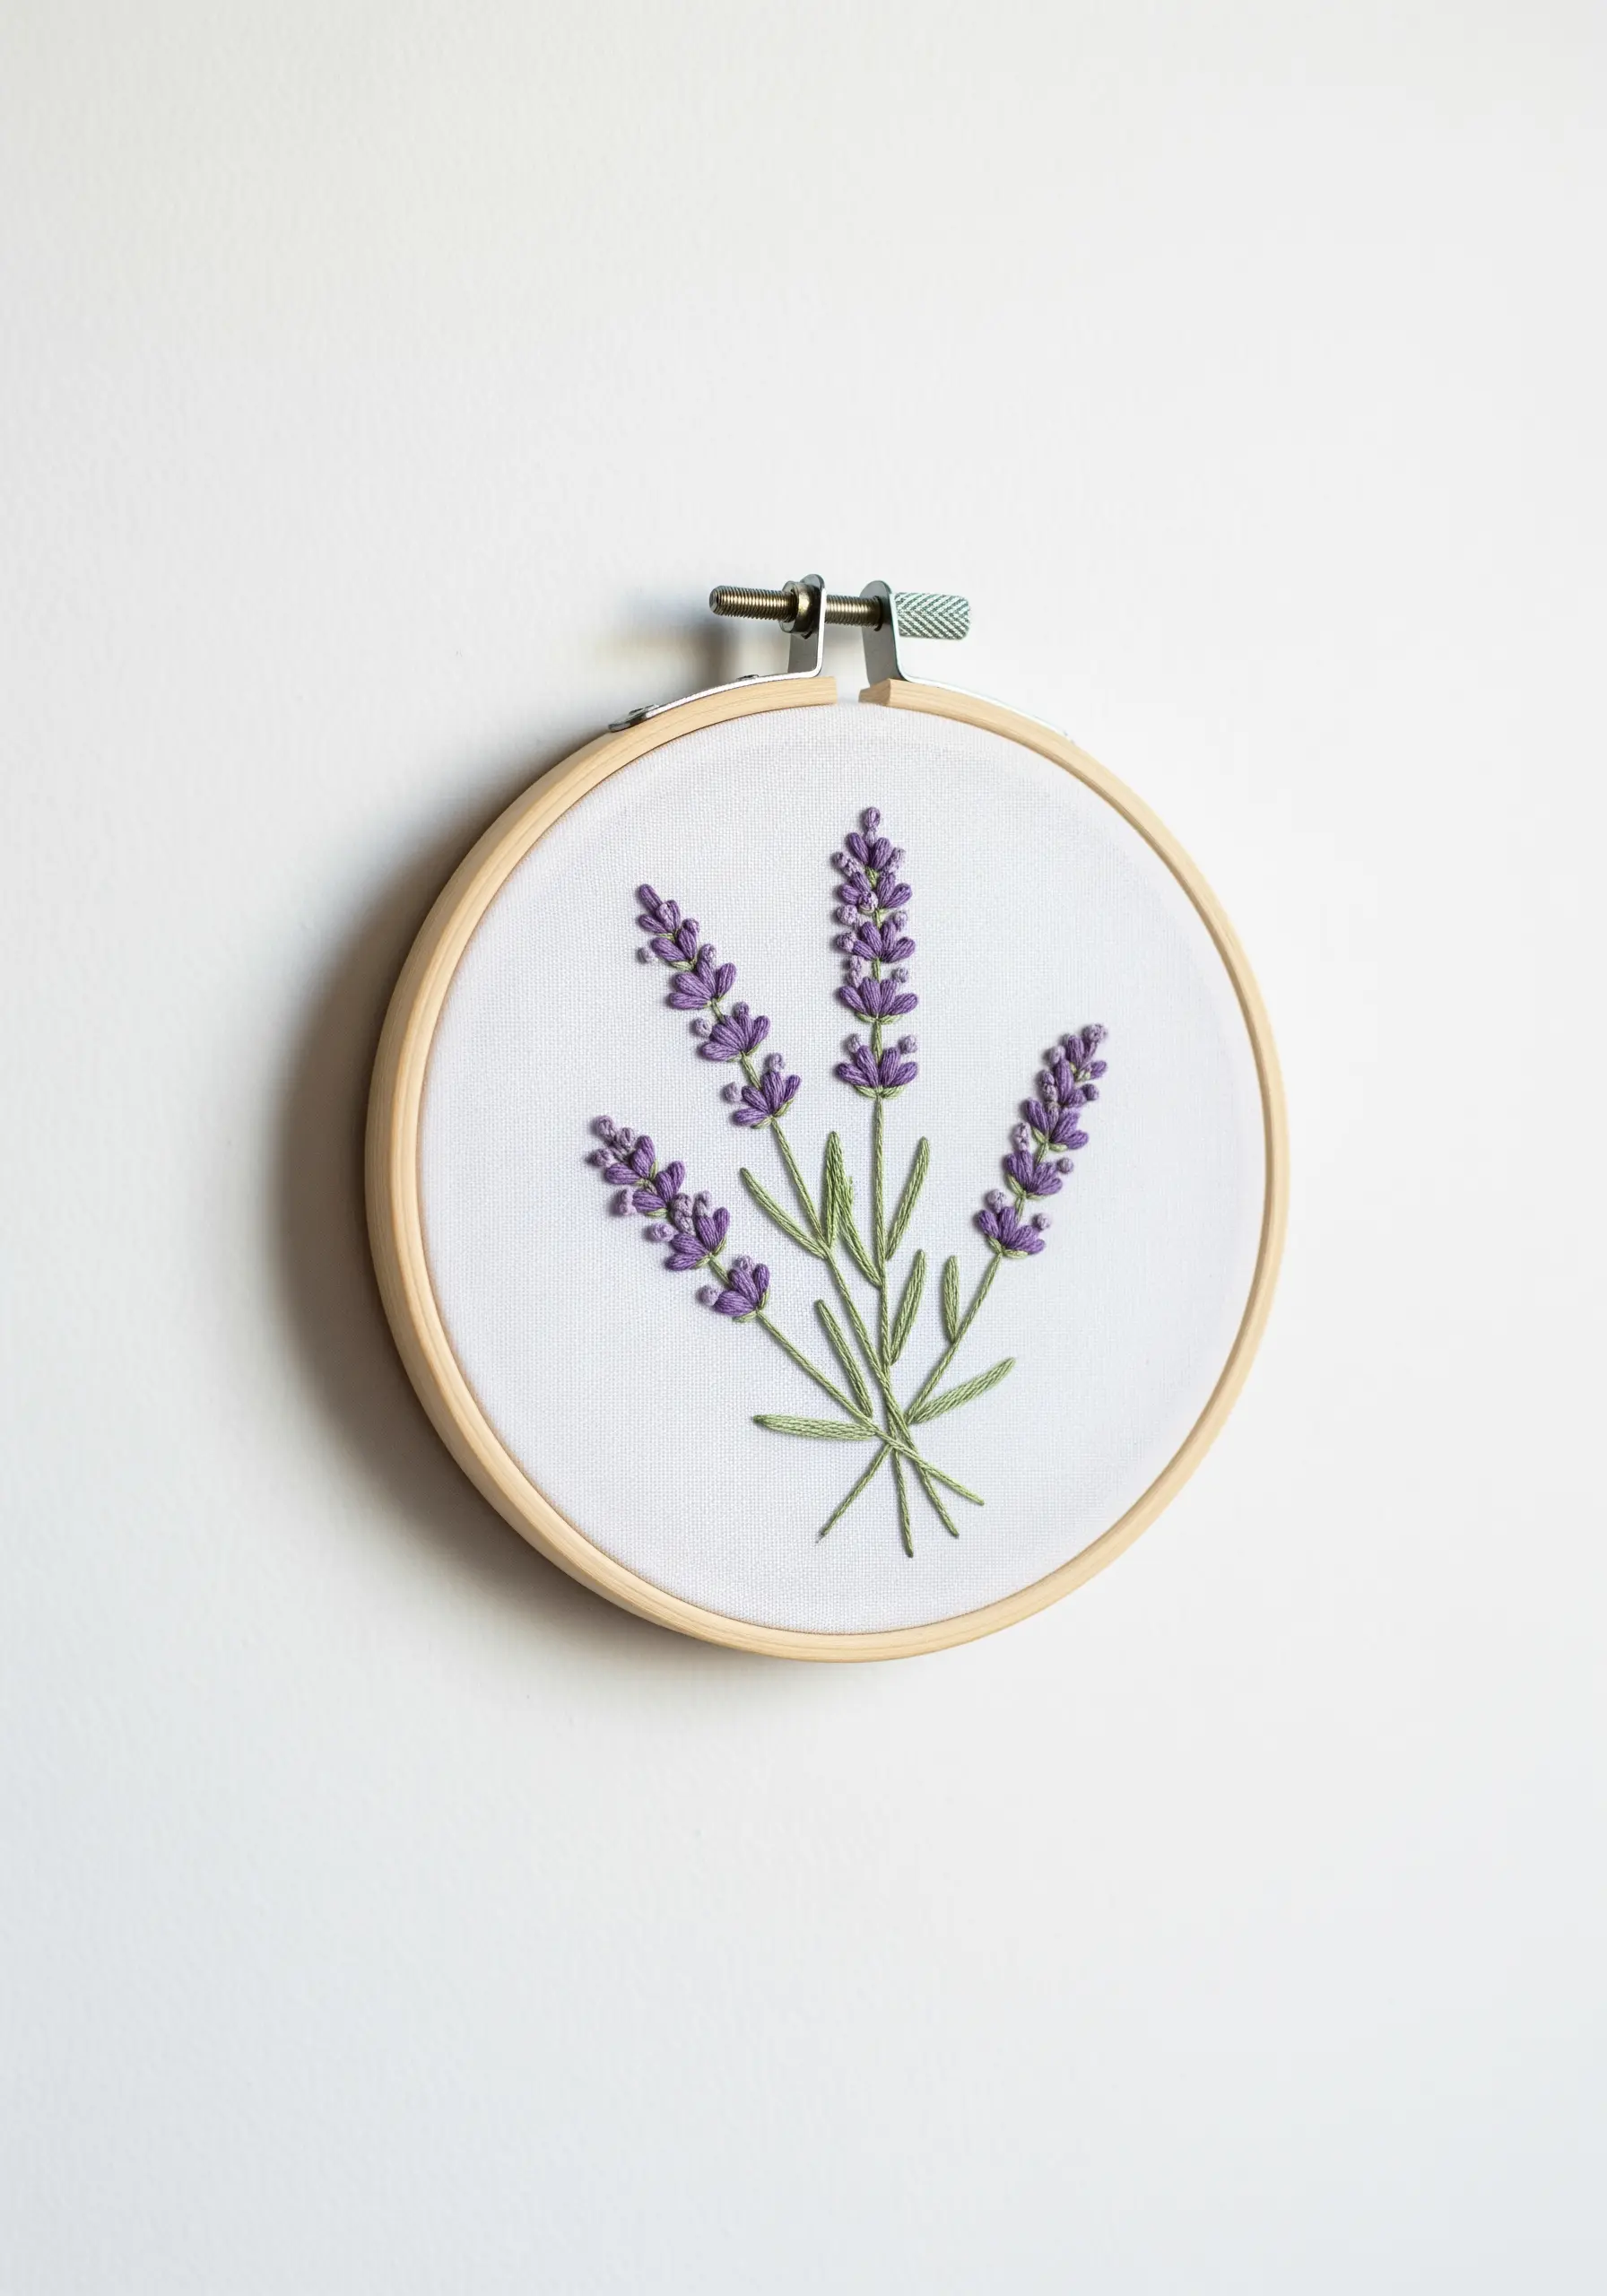
For lavender buds that look soft and voluminous, use detached chain stitches (lazy daisies) instead of French knots.
Cluster them tightly at the top of the stems, allowing them to overlap slightly for a more natural, full appearance.
Contrast the full buds with fine, delicate stems by using only a single strand of green floss for the stem stitch, which adds to the overall elegance of these calming botanicals.
7. The Secret Accent Stitch
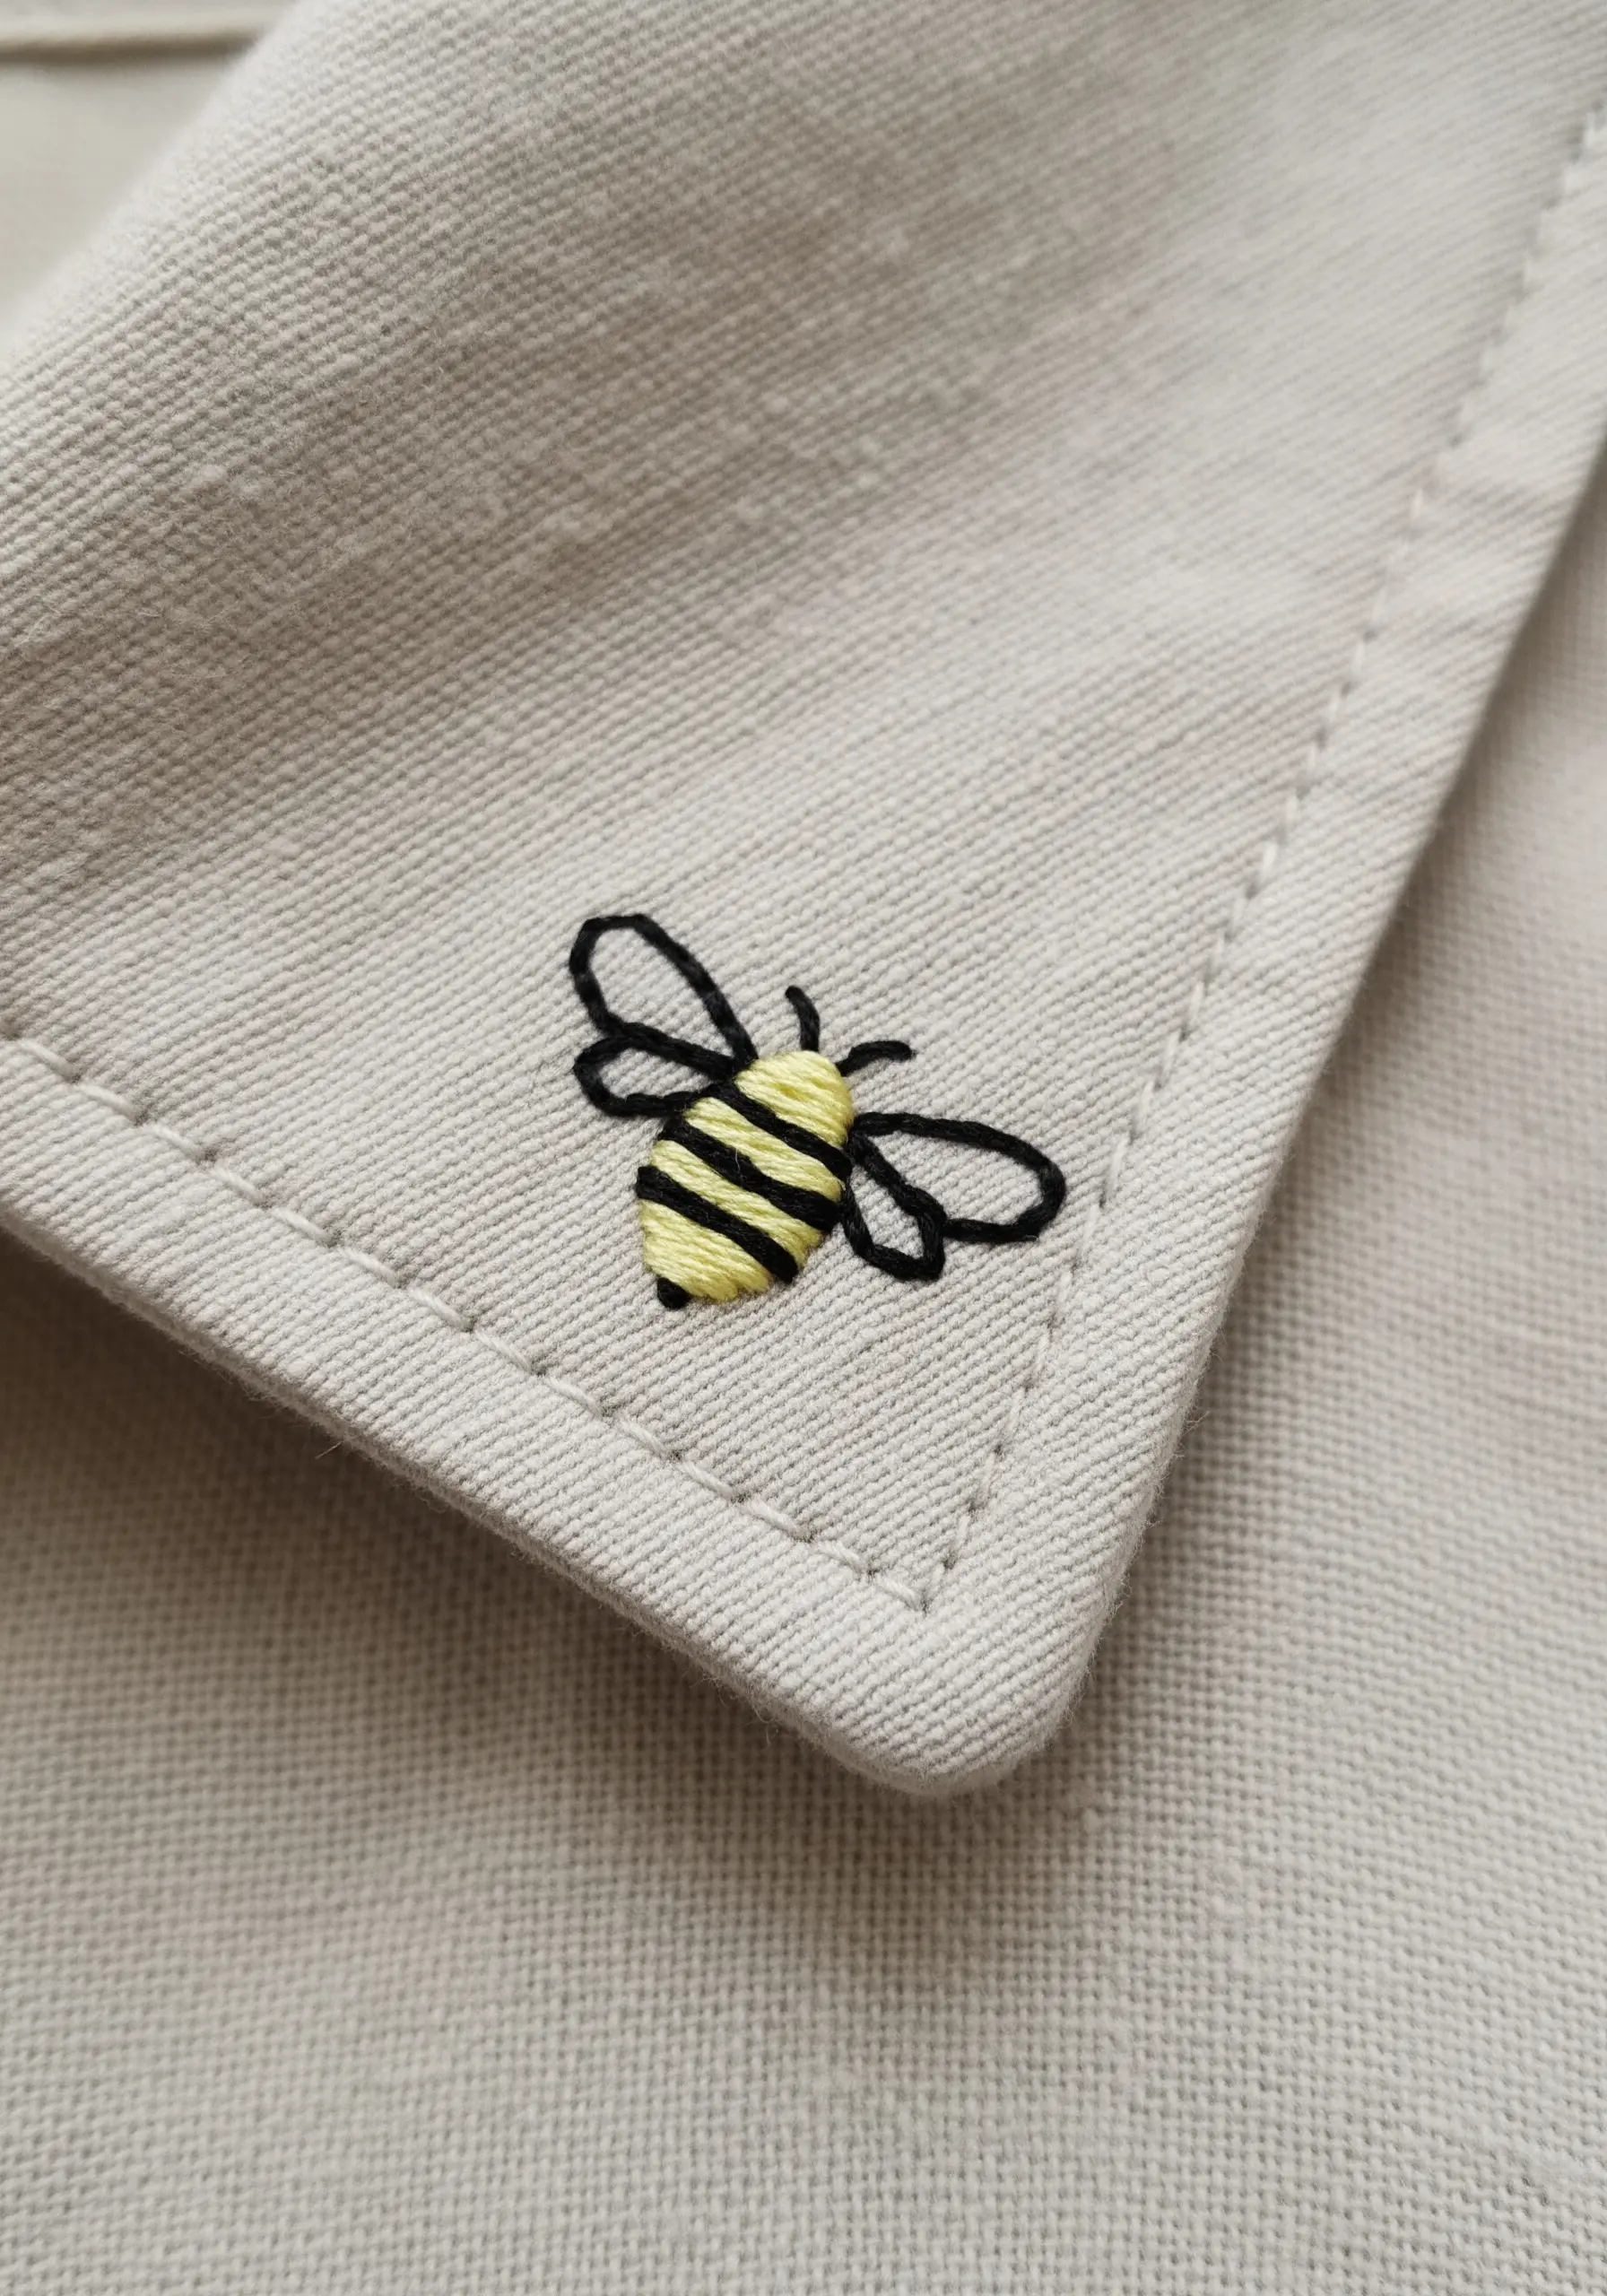
When embellishing apparel, thoughtful placement turns a simple stitch into a signature detail.
A tiny motif hidden on a cuff, collar, or near a hemline adds a touch of personal luxury.
To ensure your lines are crisp, even on a small scale, use a split stitch for the outline and keep your thread tension taut but not tight enough to pucker the garment’s fabric.
8. Celestial Star Stitching
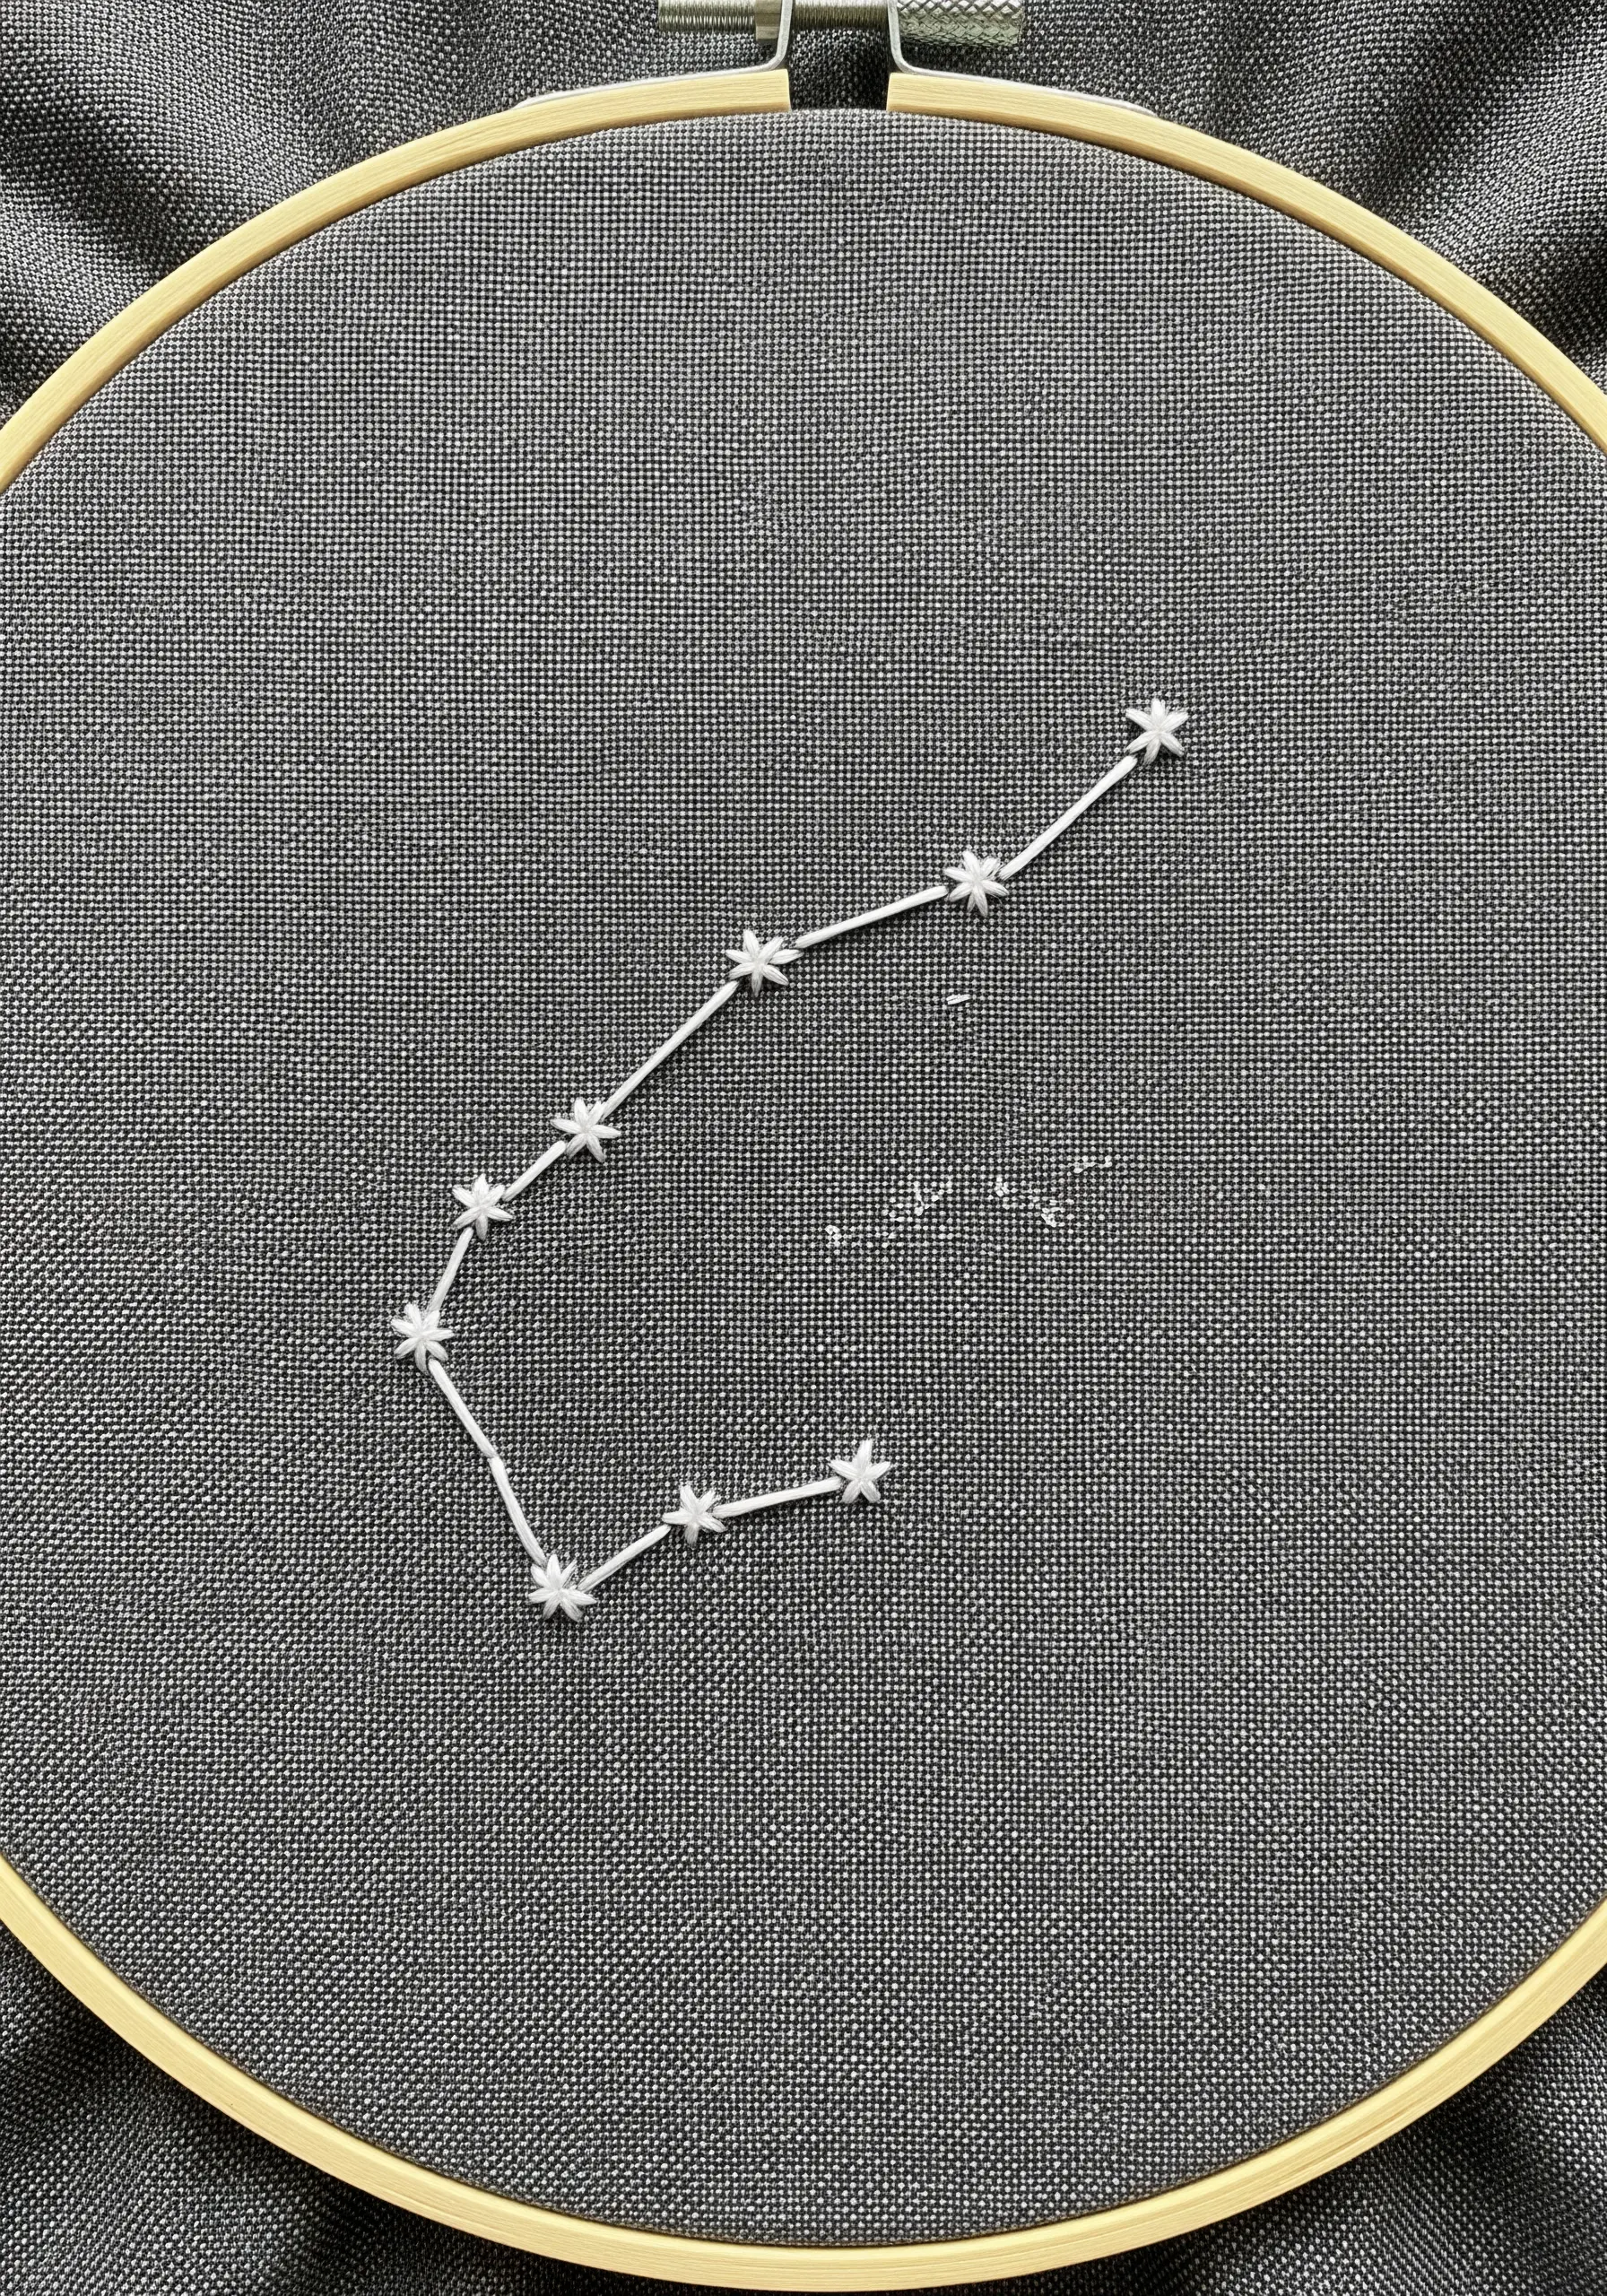
For perfectly defined, brilliant stars, use the star stitch rather than crossing two straight stitches.
This method creates sharper points that truly stand out, especially when using a metallic or bright white thread on a dark linen background.
Connect your stars with a delicate backstitch using only a single strand of floss to ensure the constellations, not the connecting lines, are the focal point.
9. The Bold Color-Block Botanical

Make an immediate visual impact by dedicating the entire design to a single, saturated color.
To achieve a perfectly smooth, solid fill, first outline your shape with a split stitch.
Then, lay your satin stitches so they tuck just underneath this border—a professional technique that creates a flawless, raised edge and prevents gaps.
10. Geometric Felt Appliqué
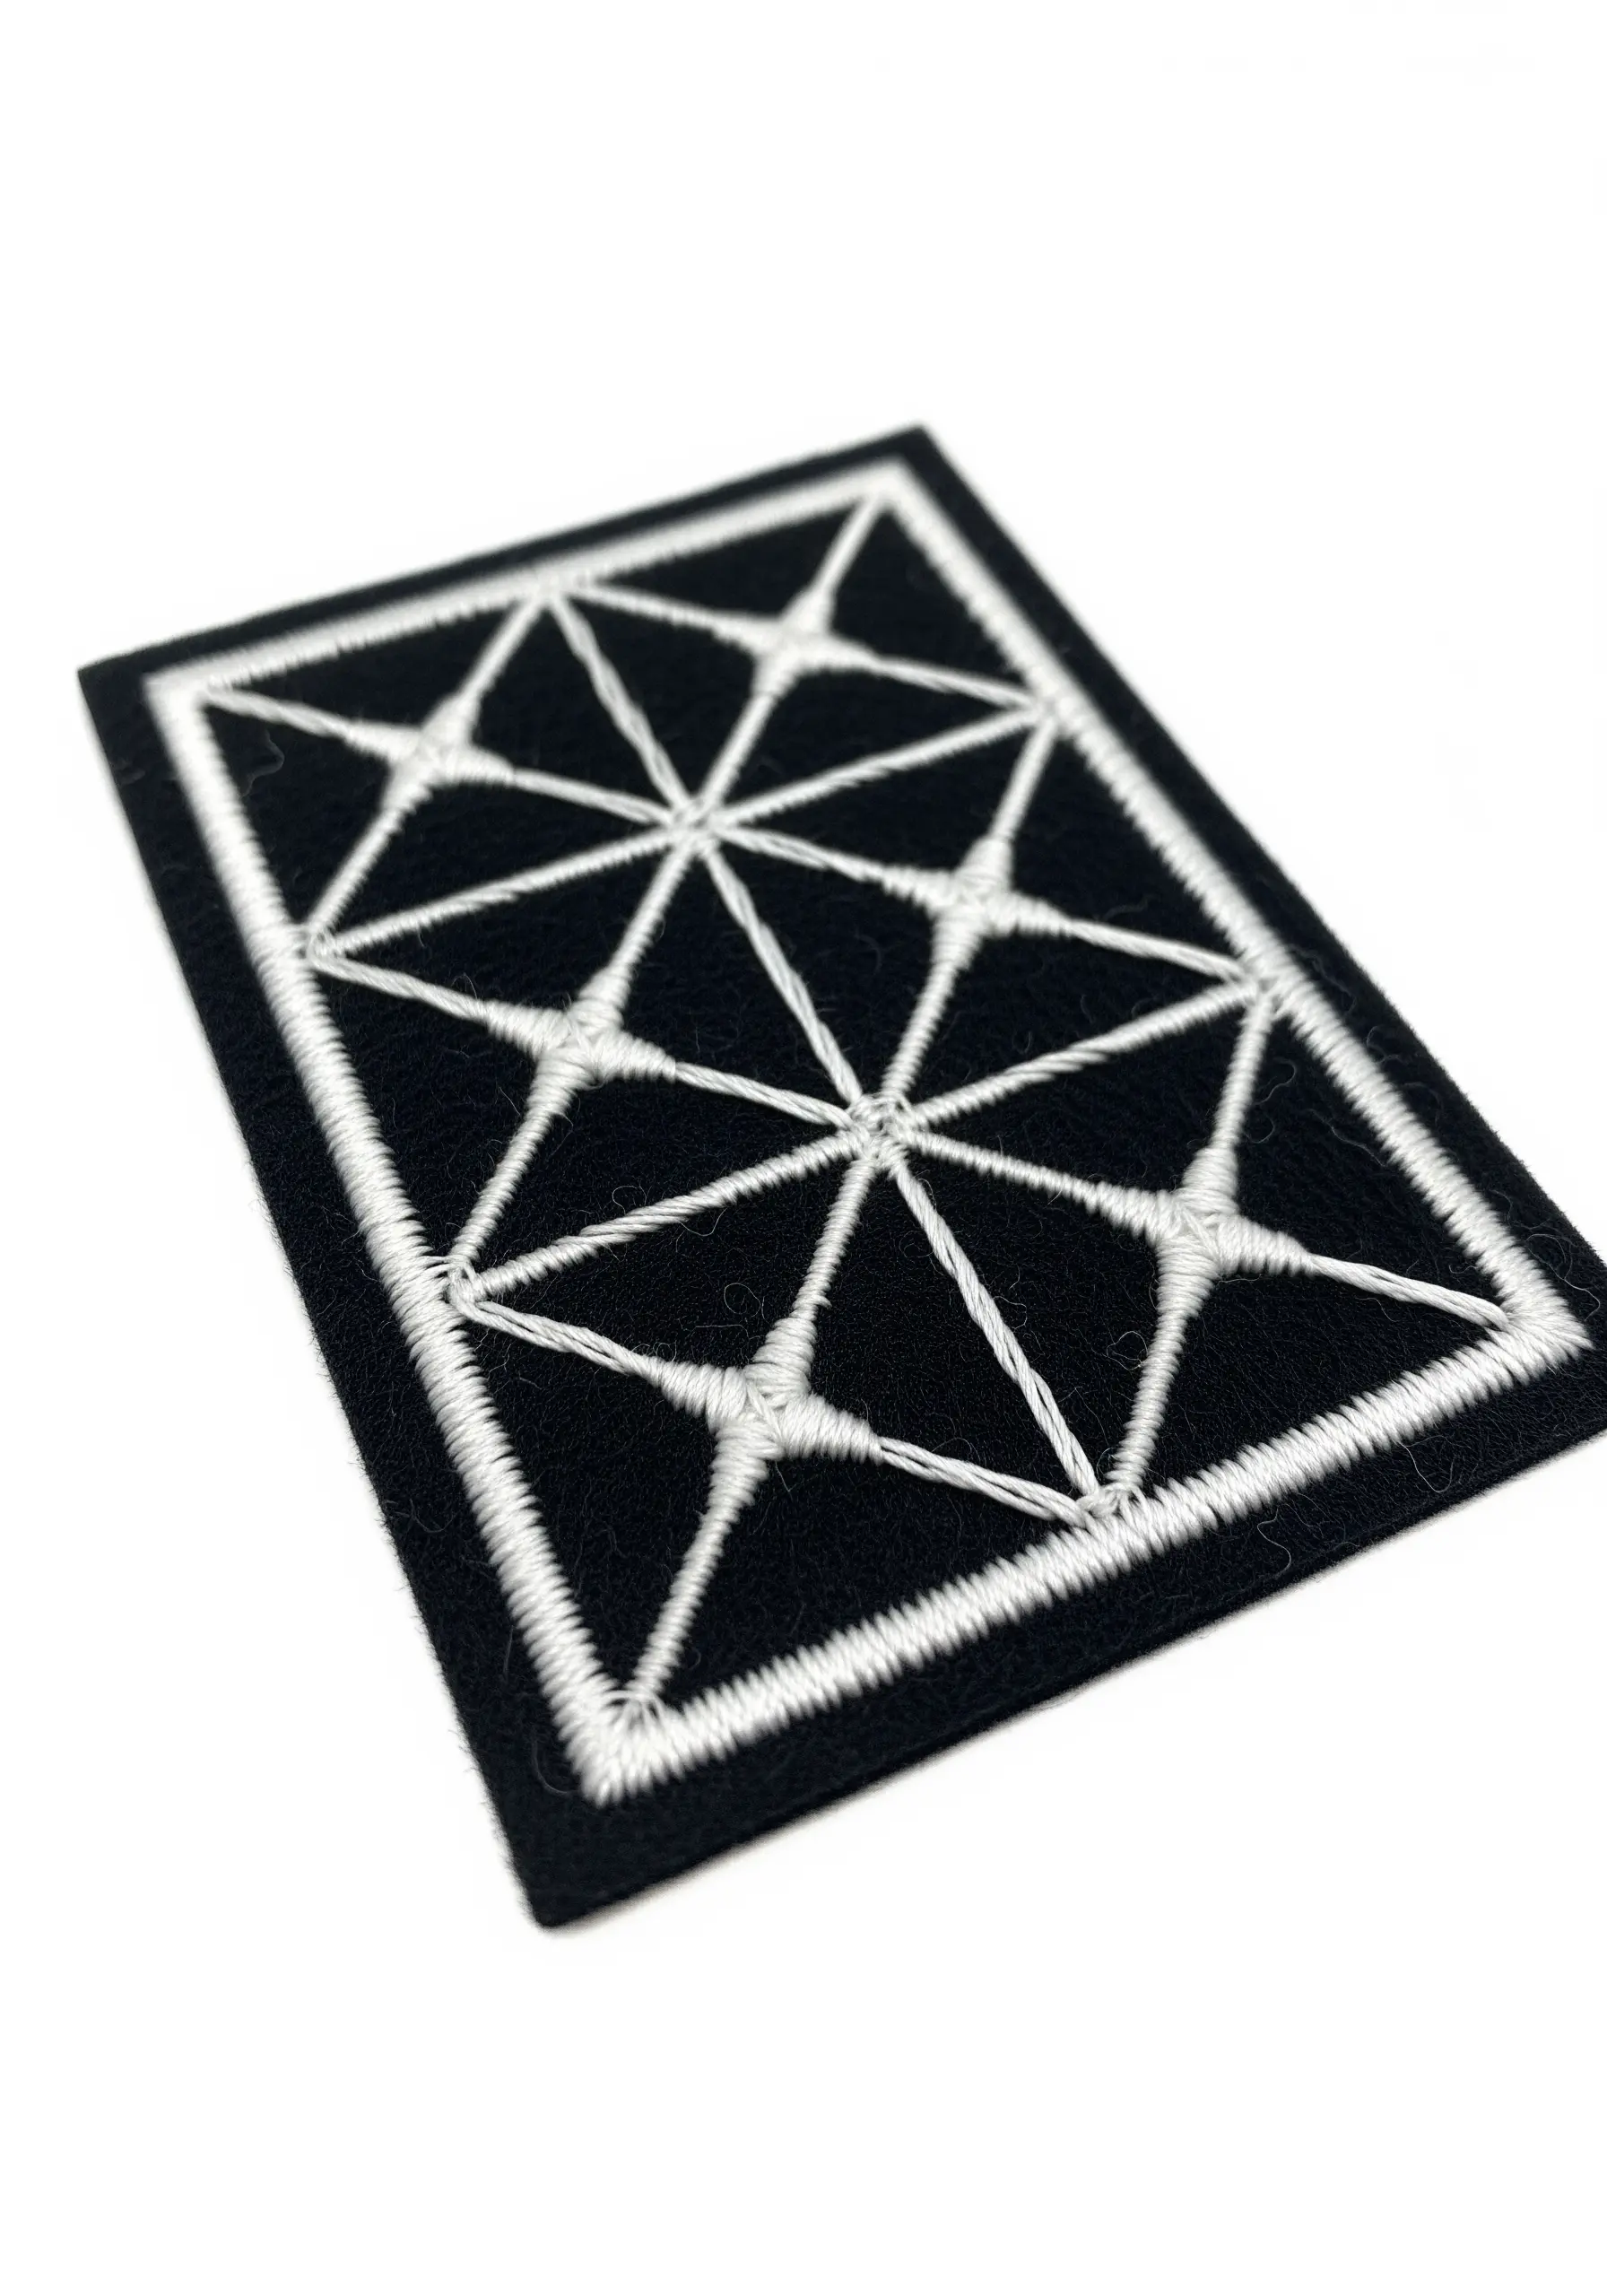
Create a durable, structured patch by stitching your design onto a piece of stiff felt instead of directly onto your final fabric.
Felt provides a stable, non-fraying base that makes it ideal for crisp geometric patterns executed with a simple backstitch.
This method allows you to create a sharp, contained design that can be applied to jackets, bags, or other items later.
11. The Graduated Arch Study
This design is a perfect canvas for exploring a sophisticated, neutral color gradient.
Instead of a hard-edged satin stitch, use a long-and-short stitch to softly blend the colors where they meet.
This creates a subtle transition that feels more painterly and organic, elevating a simple shape into a refined study of tone and texture.
12. Delicate Ginkgo Veins

The elegance of this design comes from a subtle variation in thread weight.
Use a single strand of floss and a simple backstitch to create the fine, radiating veins of the ginkgo leaf.
Contrast this by using two or even three strands for the outer leaf shape, which makes the delicate interior linework appear even more refined.
13. Flowing Linear Waves
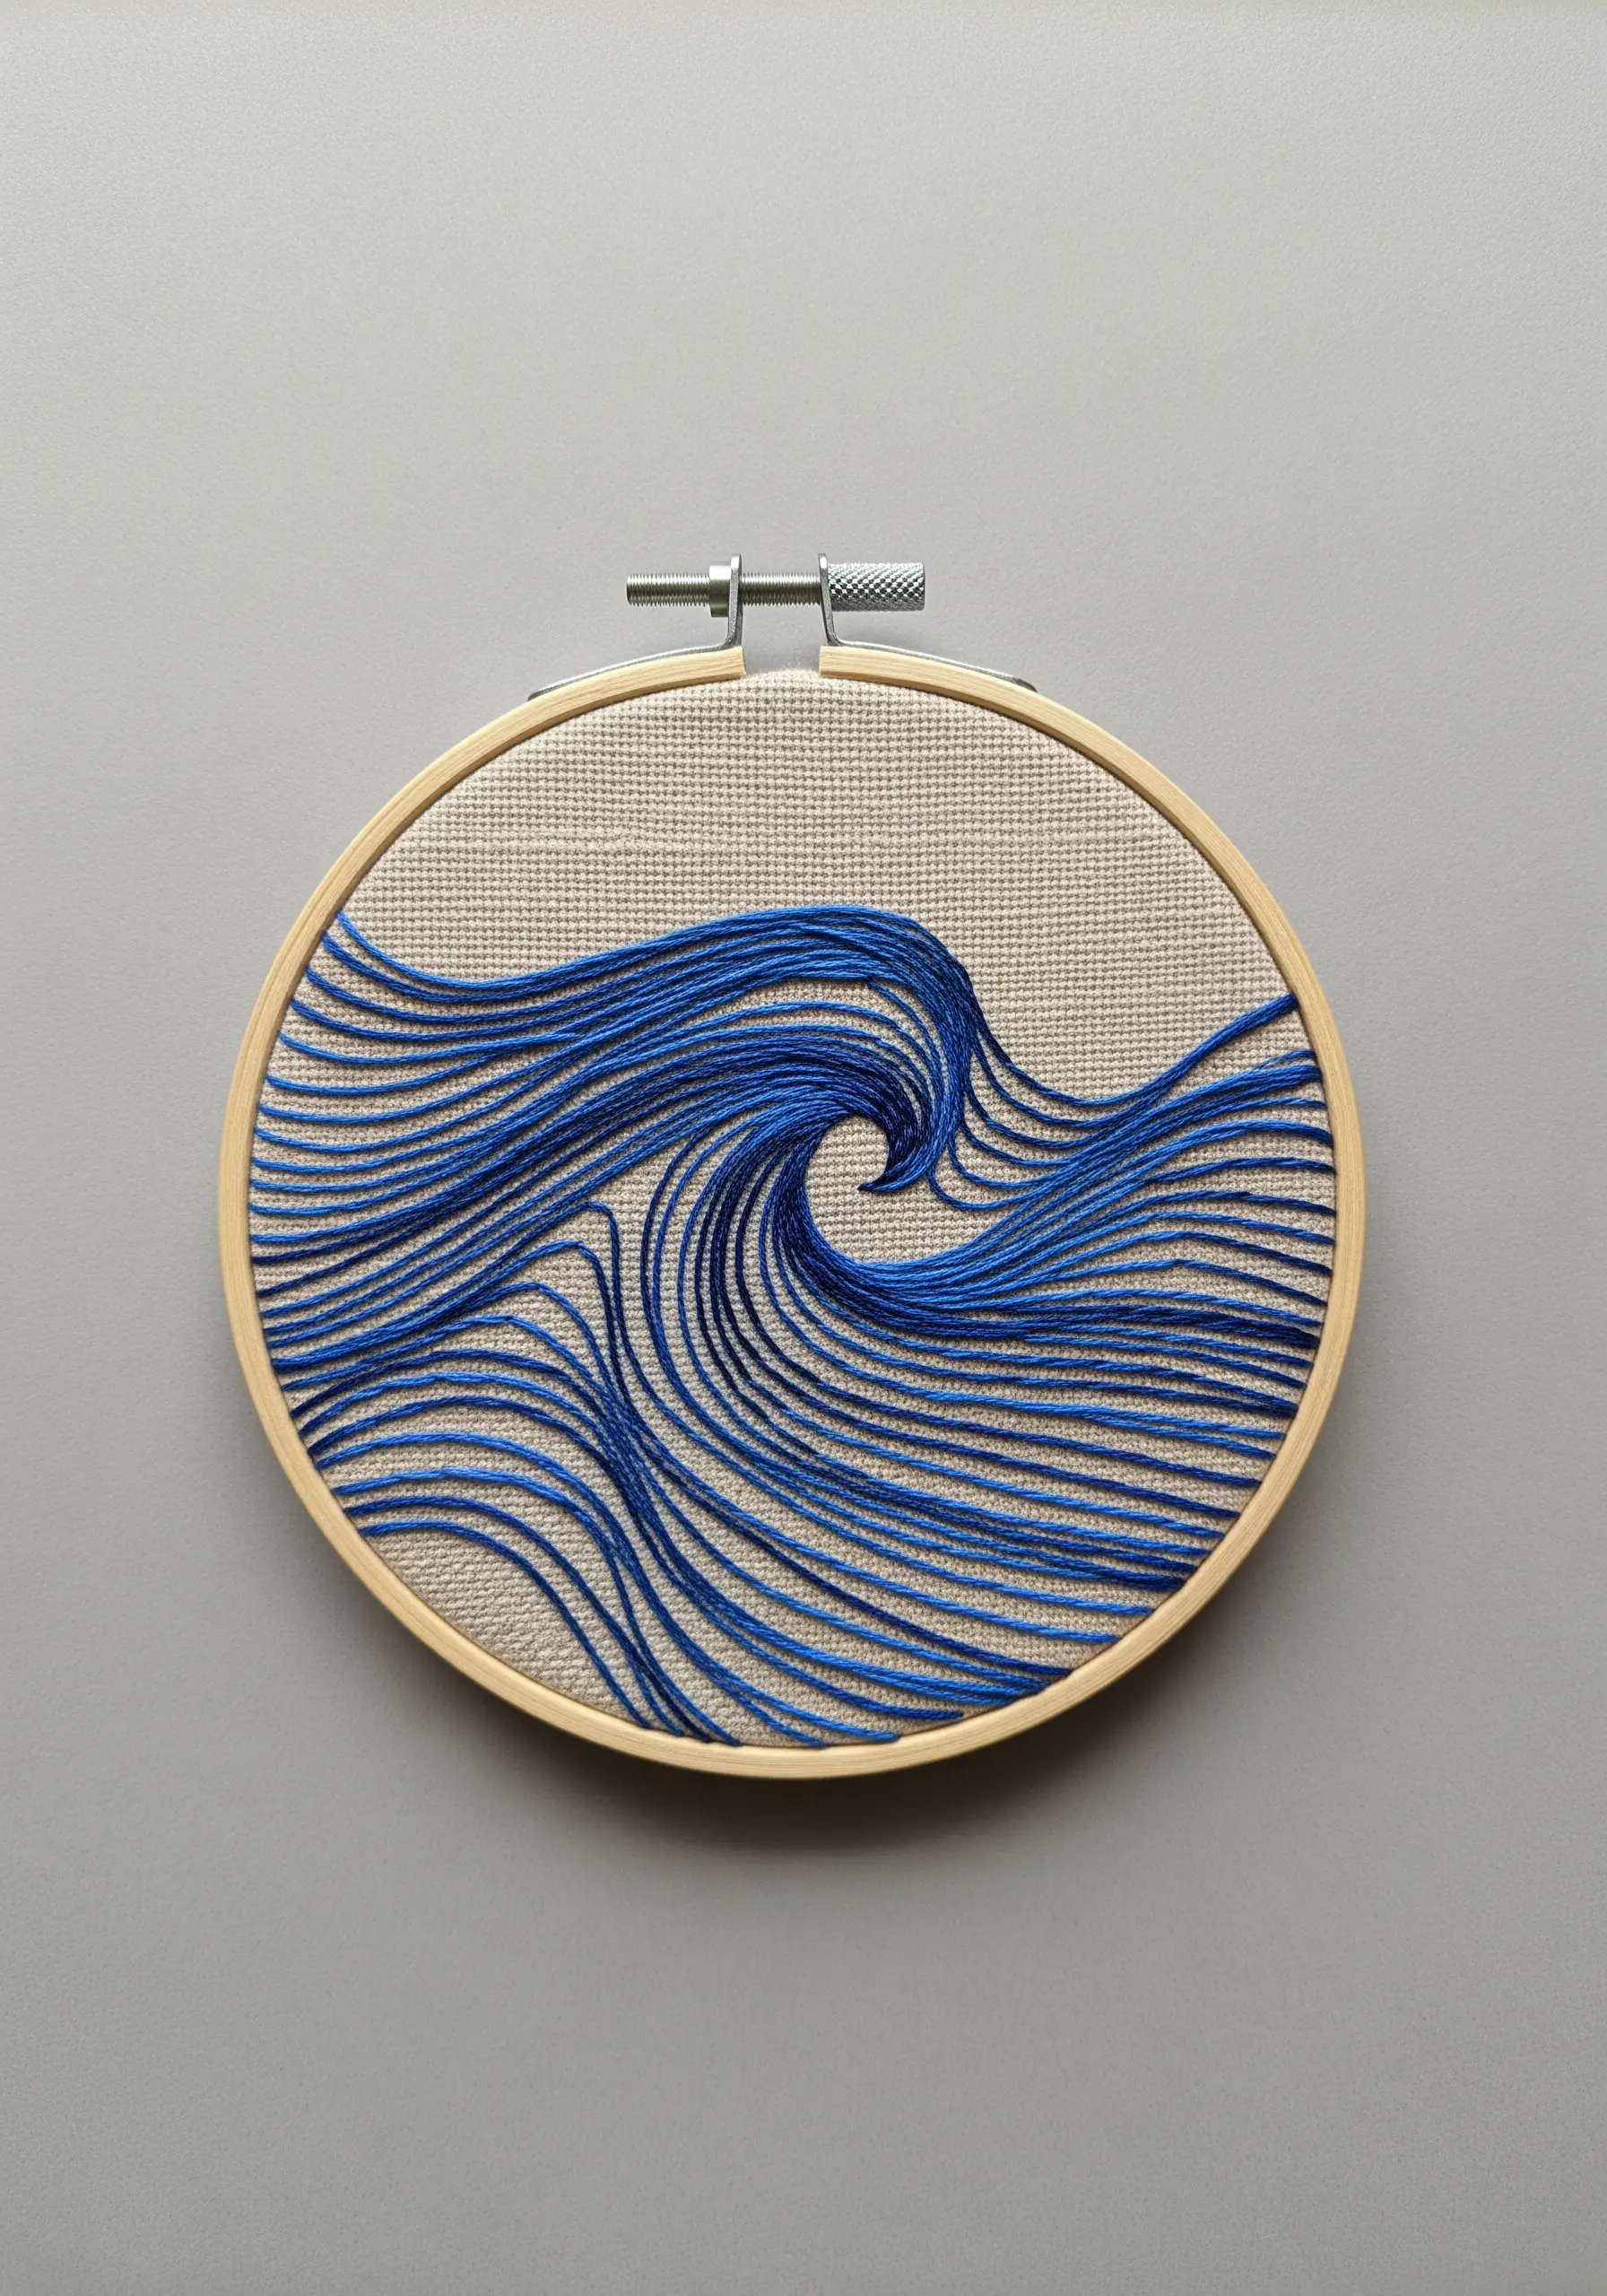
To capture the smooth, unbroken motion of water, lay your threads down with a couching stitch instead of a standard backstitch.
This involves laying a long piece of thread along your pattern line and tacking it down with tiny, perpendicular stitches.
This technique preserves the thread’s natural sheen and creates fluid, continuous lines that are impossible to achieve otherwise.
14. The Cursive Stem Stitch
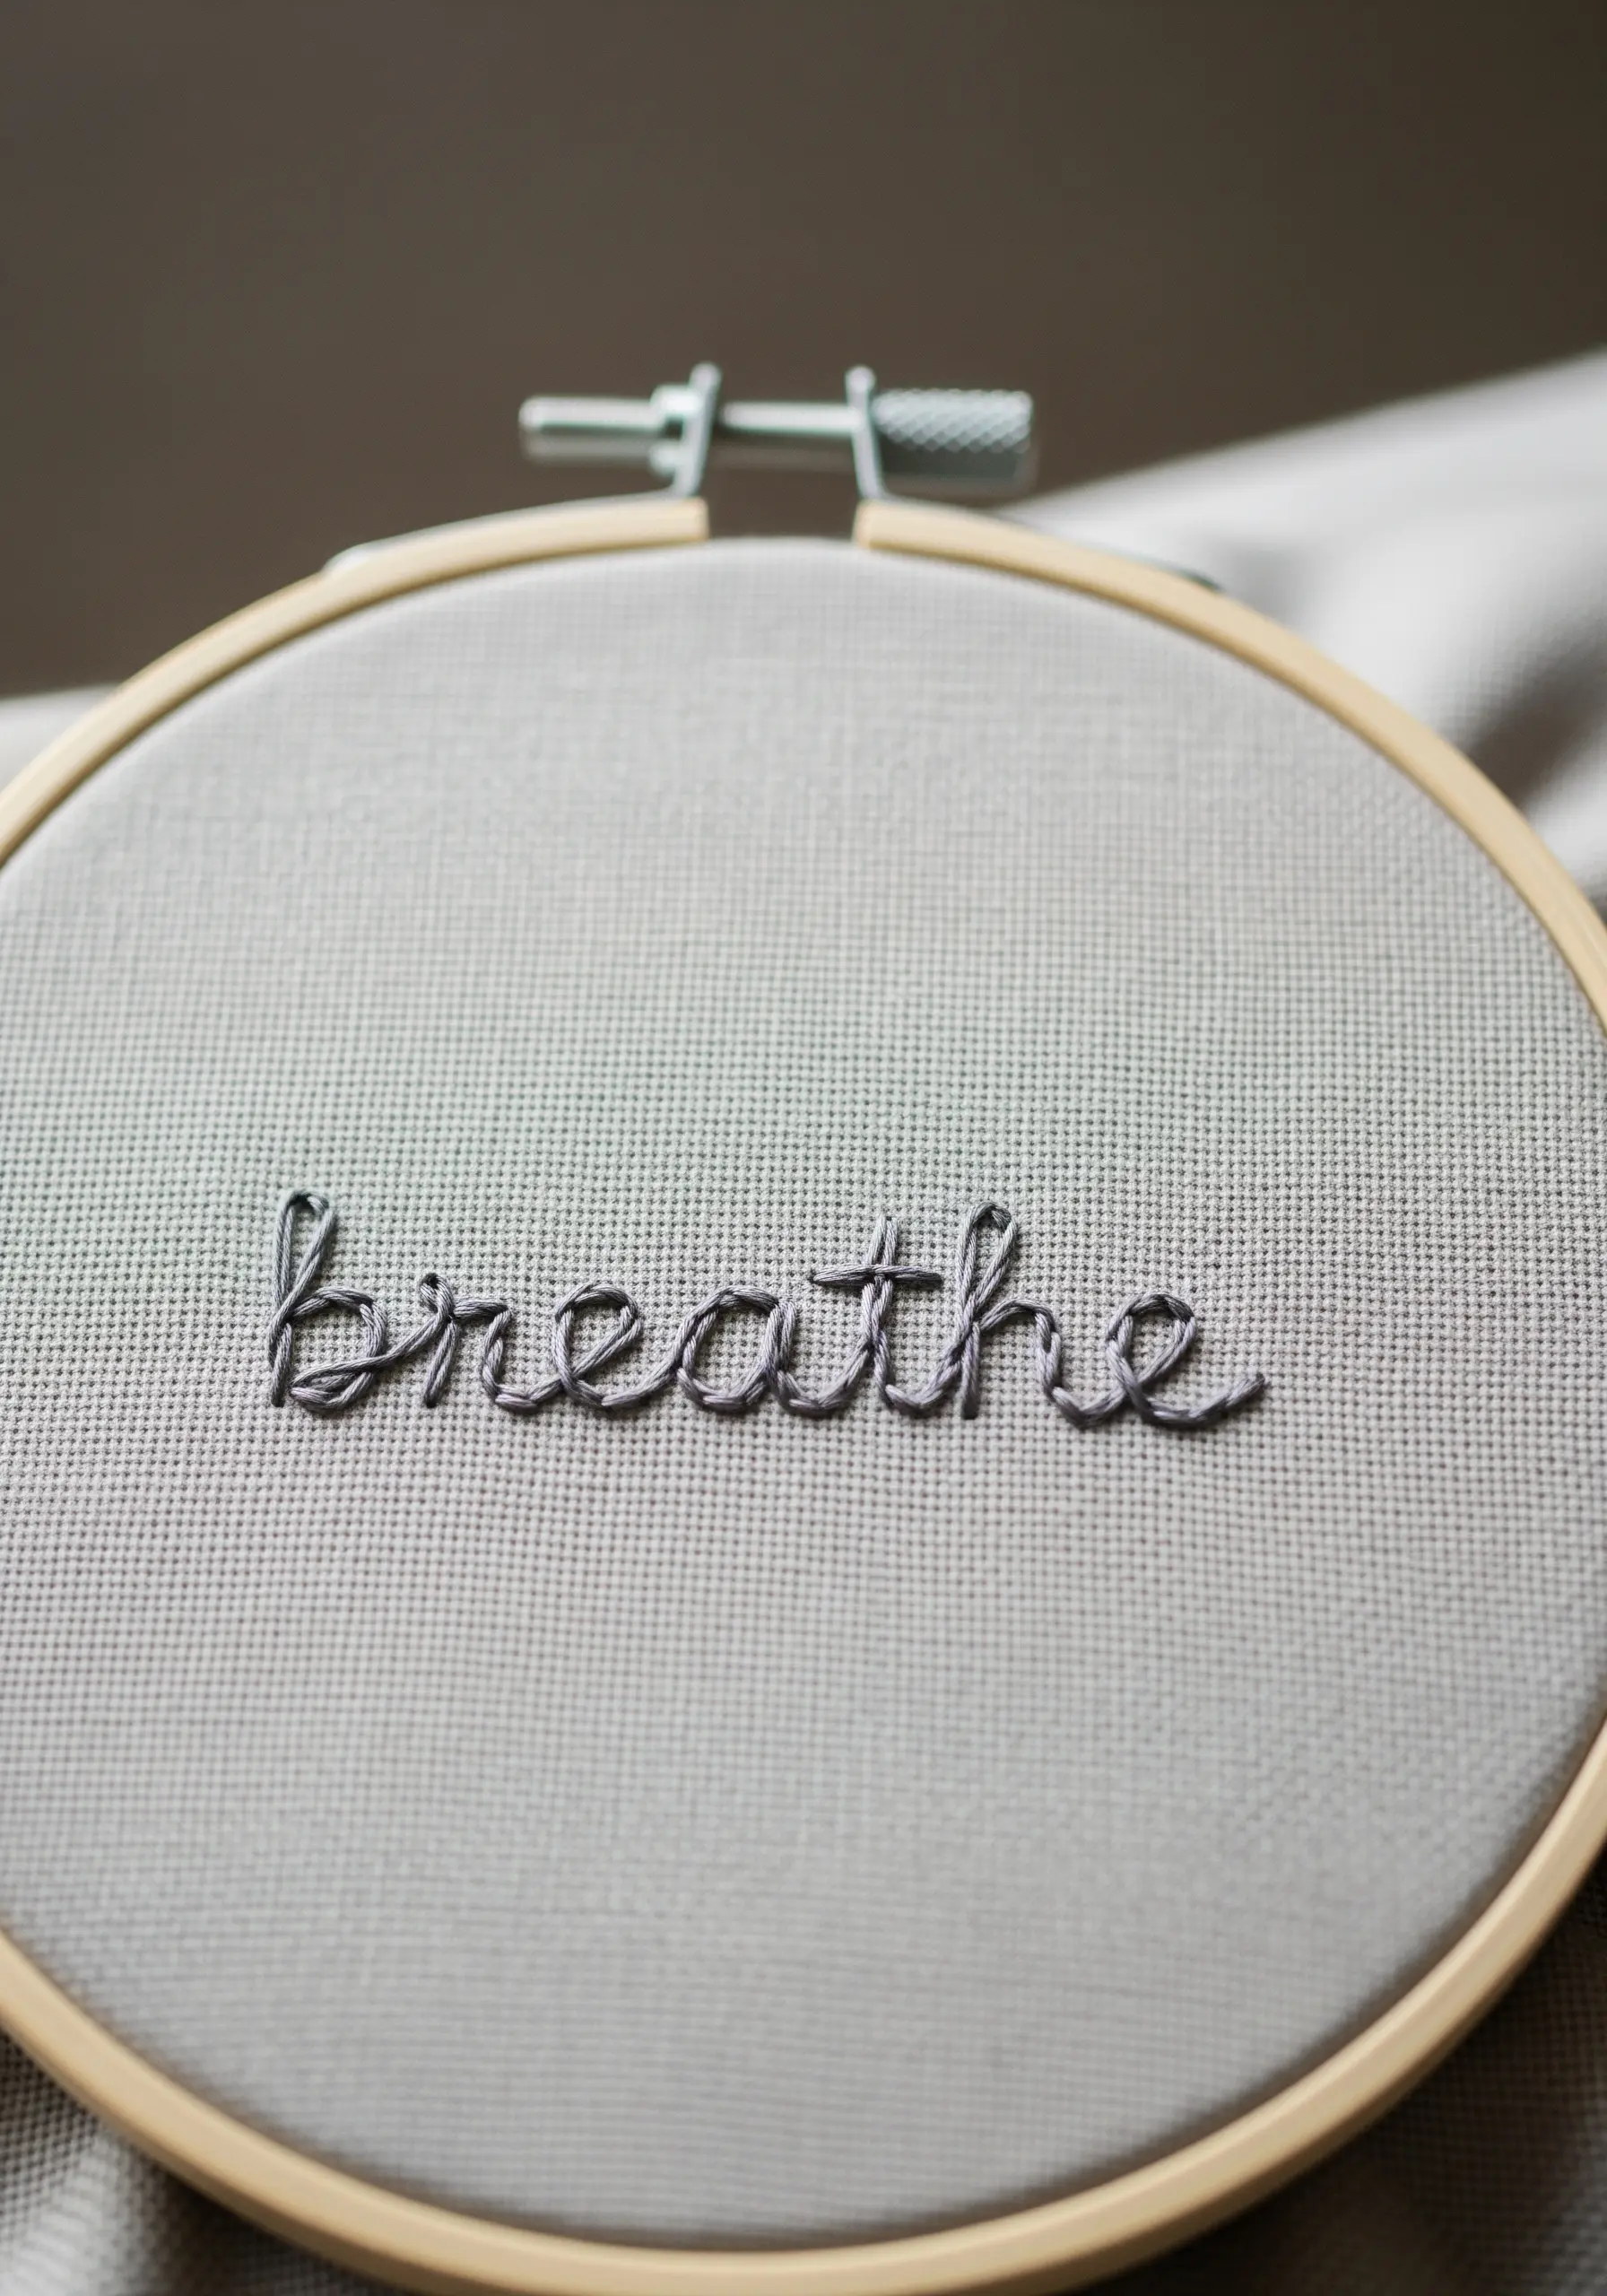
For elegant, flowing script, the stem stitch is technically superior to the more common backstitch.
It creates a twisted, rope-like line that handles curves with unparalleled smoothness, mimicking the continuous flow of ink.
To ensure your lettering is perfectly formed, focus on keeping each individual stitch the exact same length and angle as you follow your traced pattern.
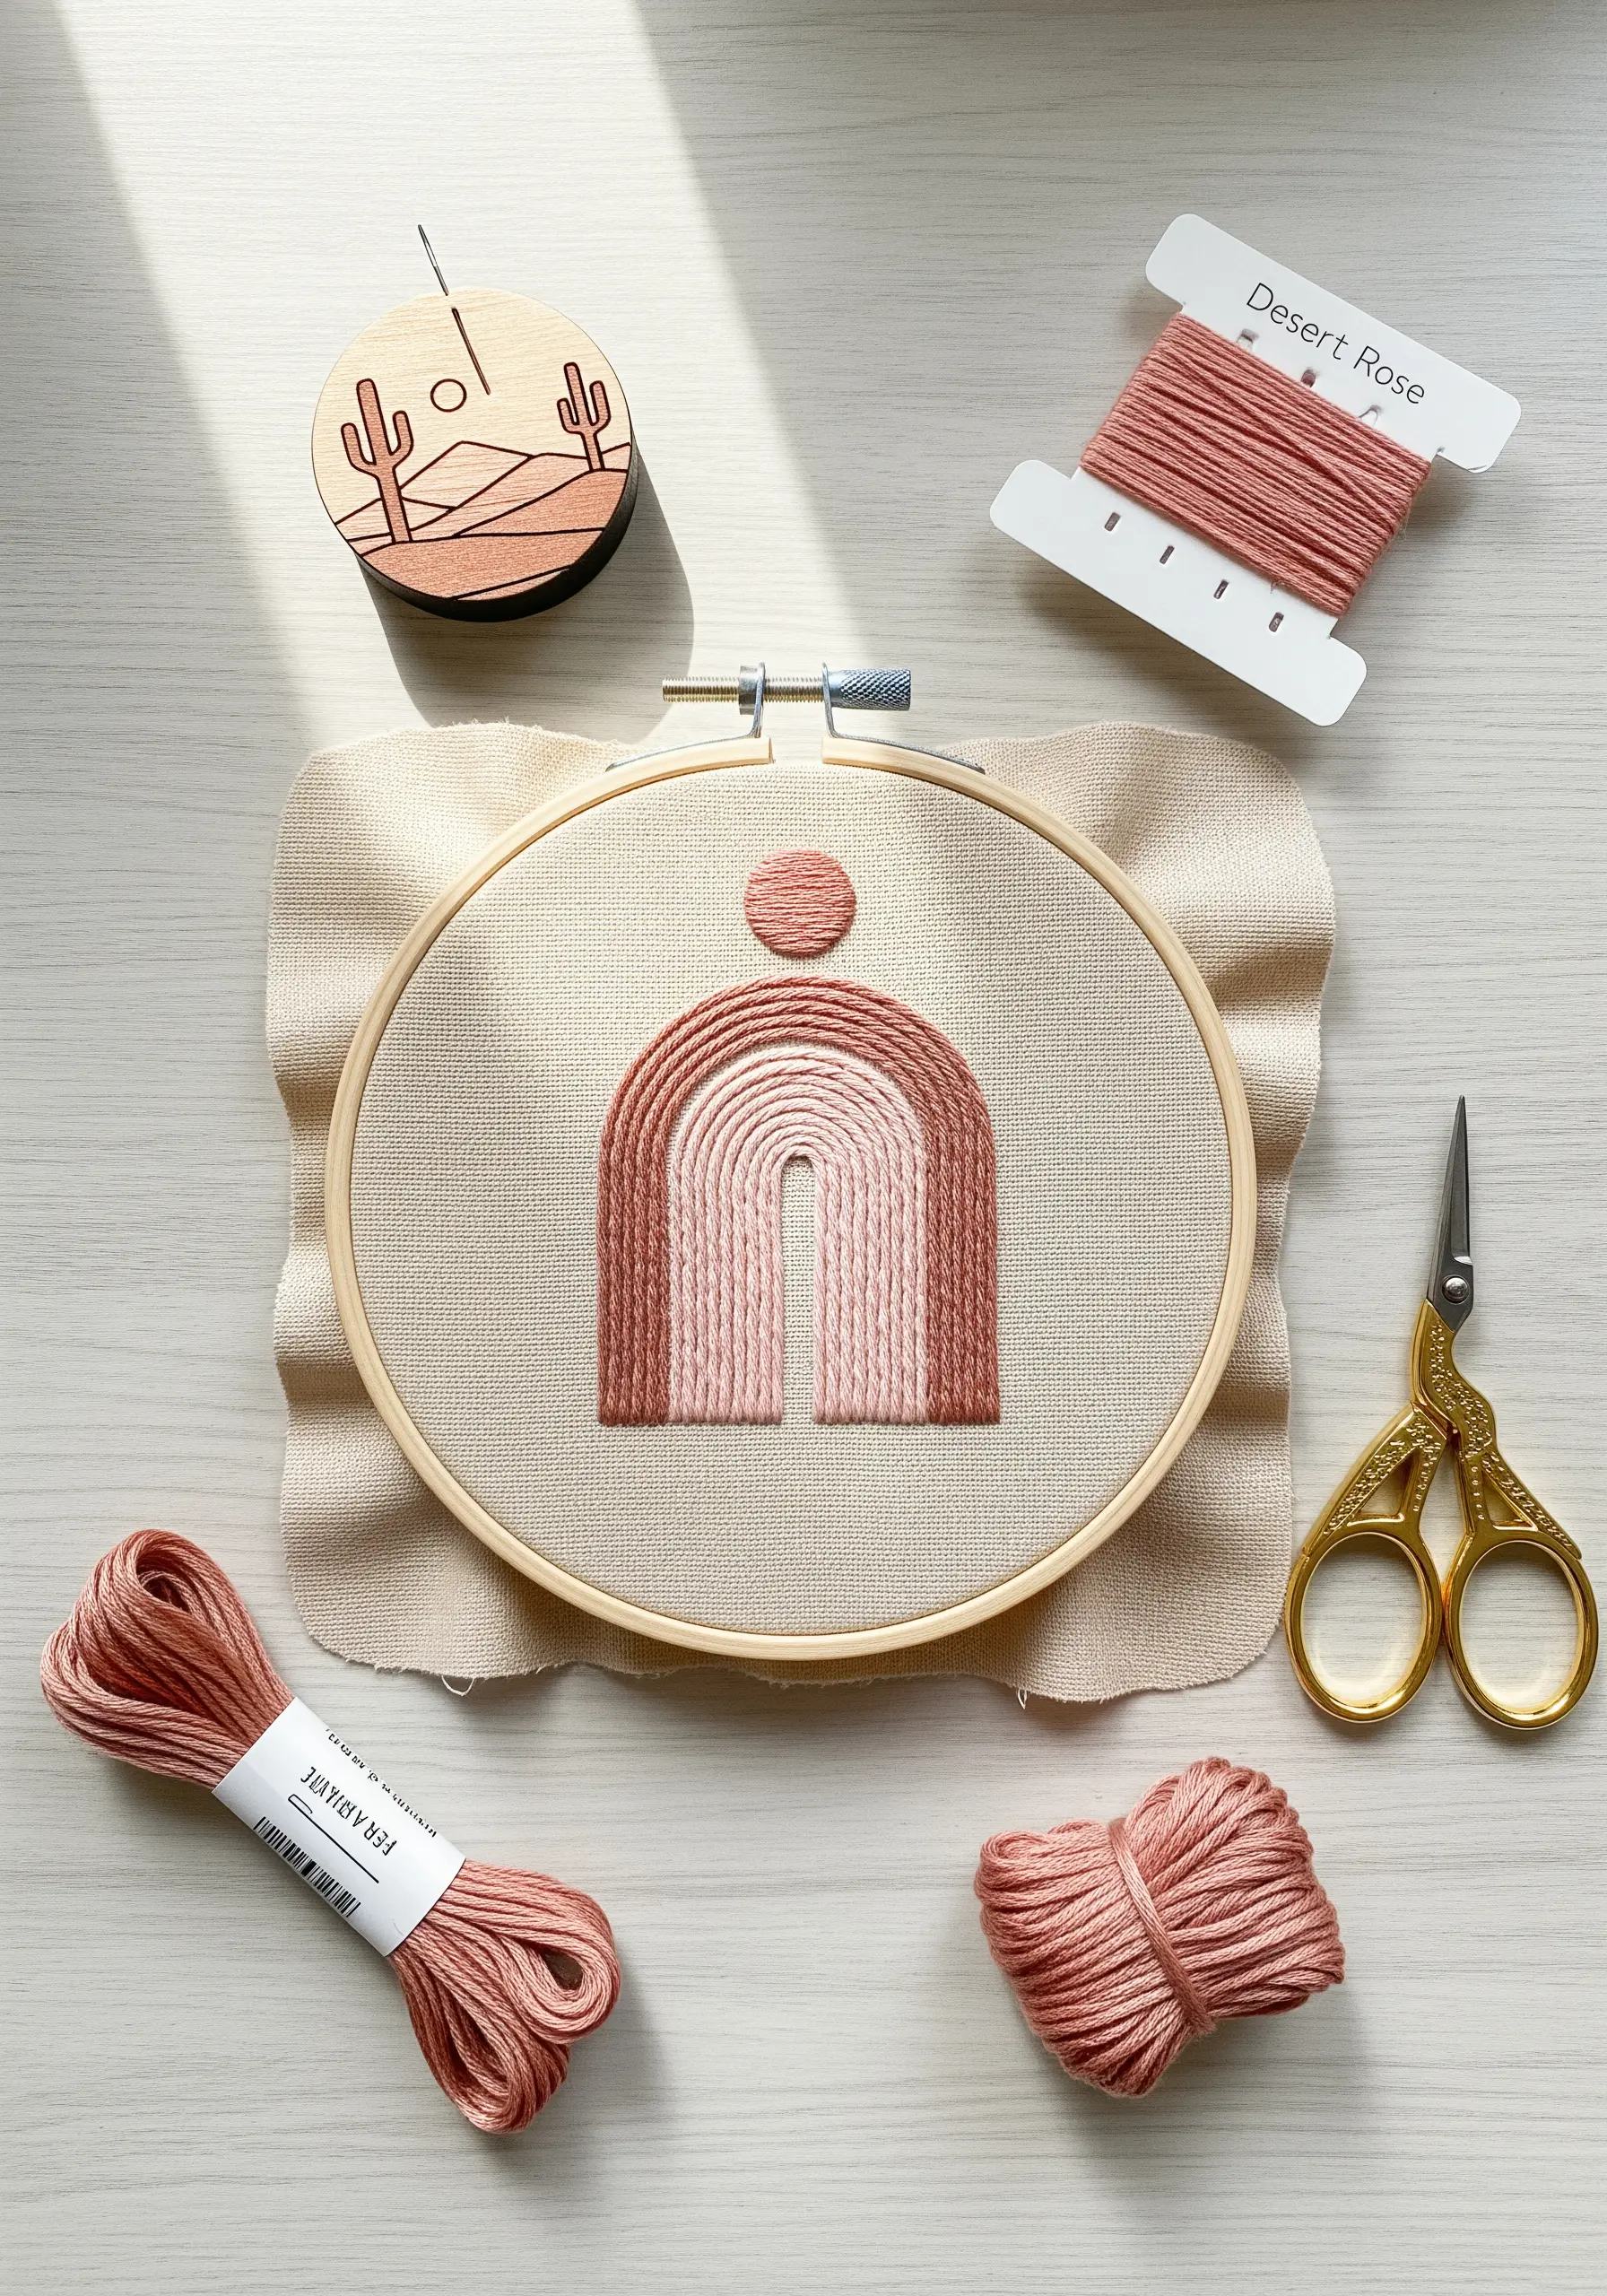
15. The Textured Chain Stitch Rainbow

Give a simple rainbow motif a cozy, tactile dimension by filling each arc with a heavy chain stitch instead of a flat satin stitch.
This creates a beautiful braided texture that invites touch and adds a sense of warmth.
Use all six strands of floss or even a fine pearl cotton to emphasize the chunky, woven quality of the stitchwork.
16. Refined Napkin Botanicals

When embroidering on functional items like table linens, the fishbone stitch is an excellent choice for leaves.
It automatically creates a central vein while building a smooth, slightly padded surface that looks exceptionally polished and professional.
This stitch is not only beautiful but also durable enough to withstand washing, making it perfect for heirloom-quality textiles.
17. Delicate Mushroom Illustrations
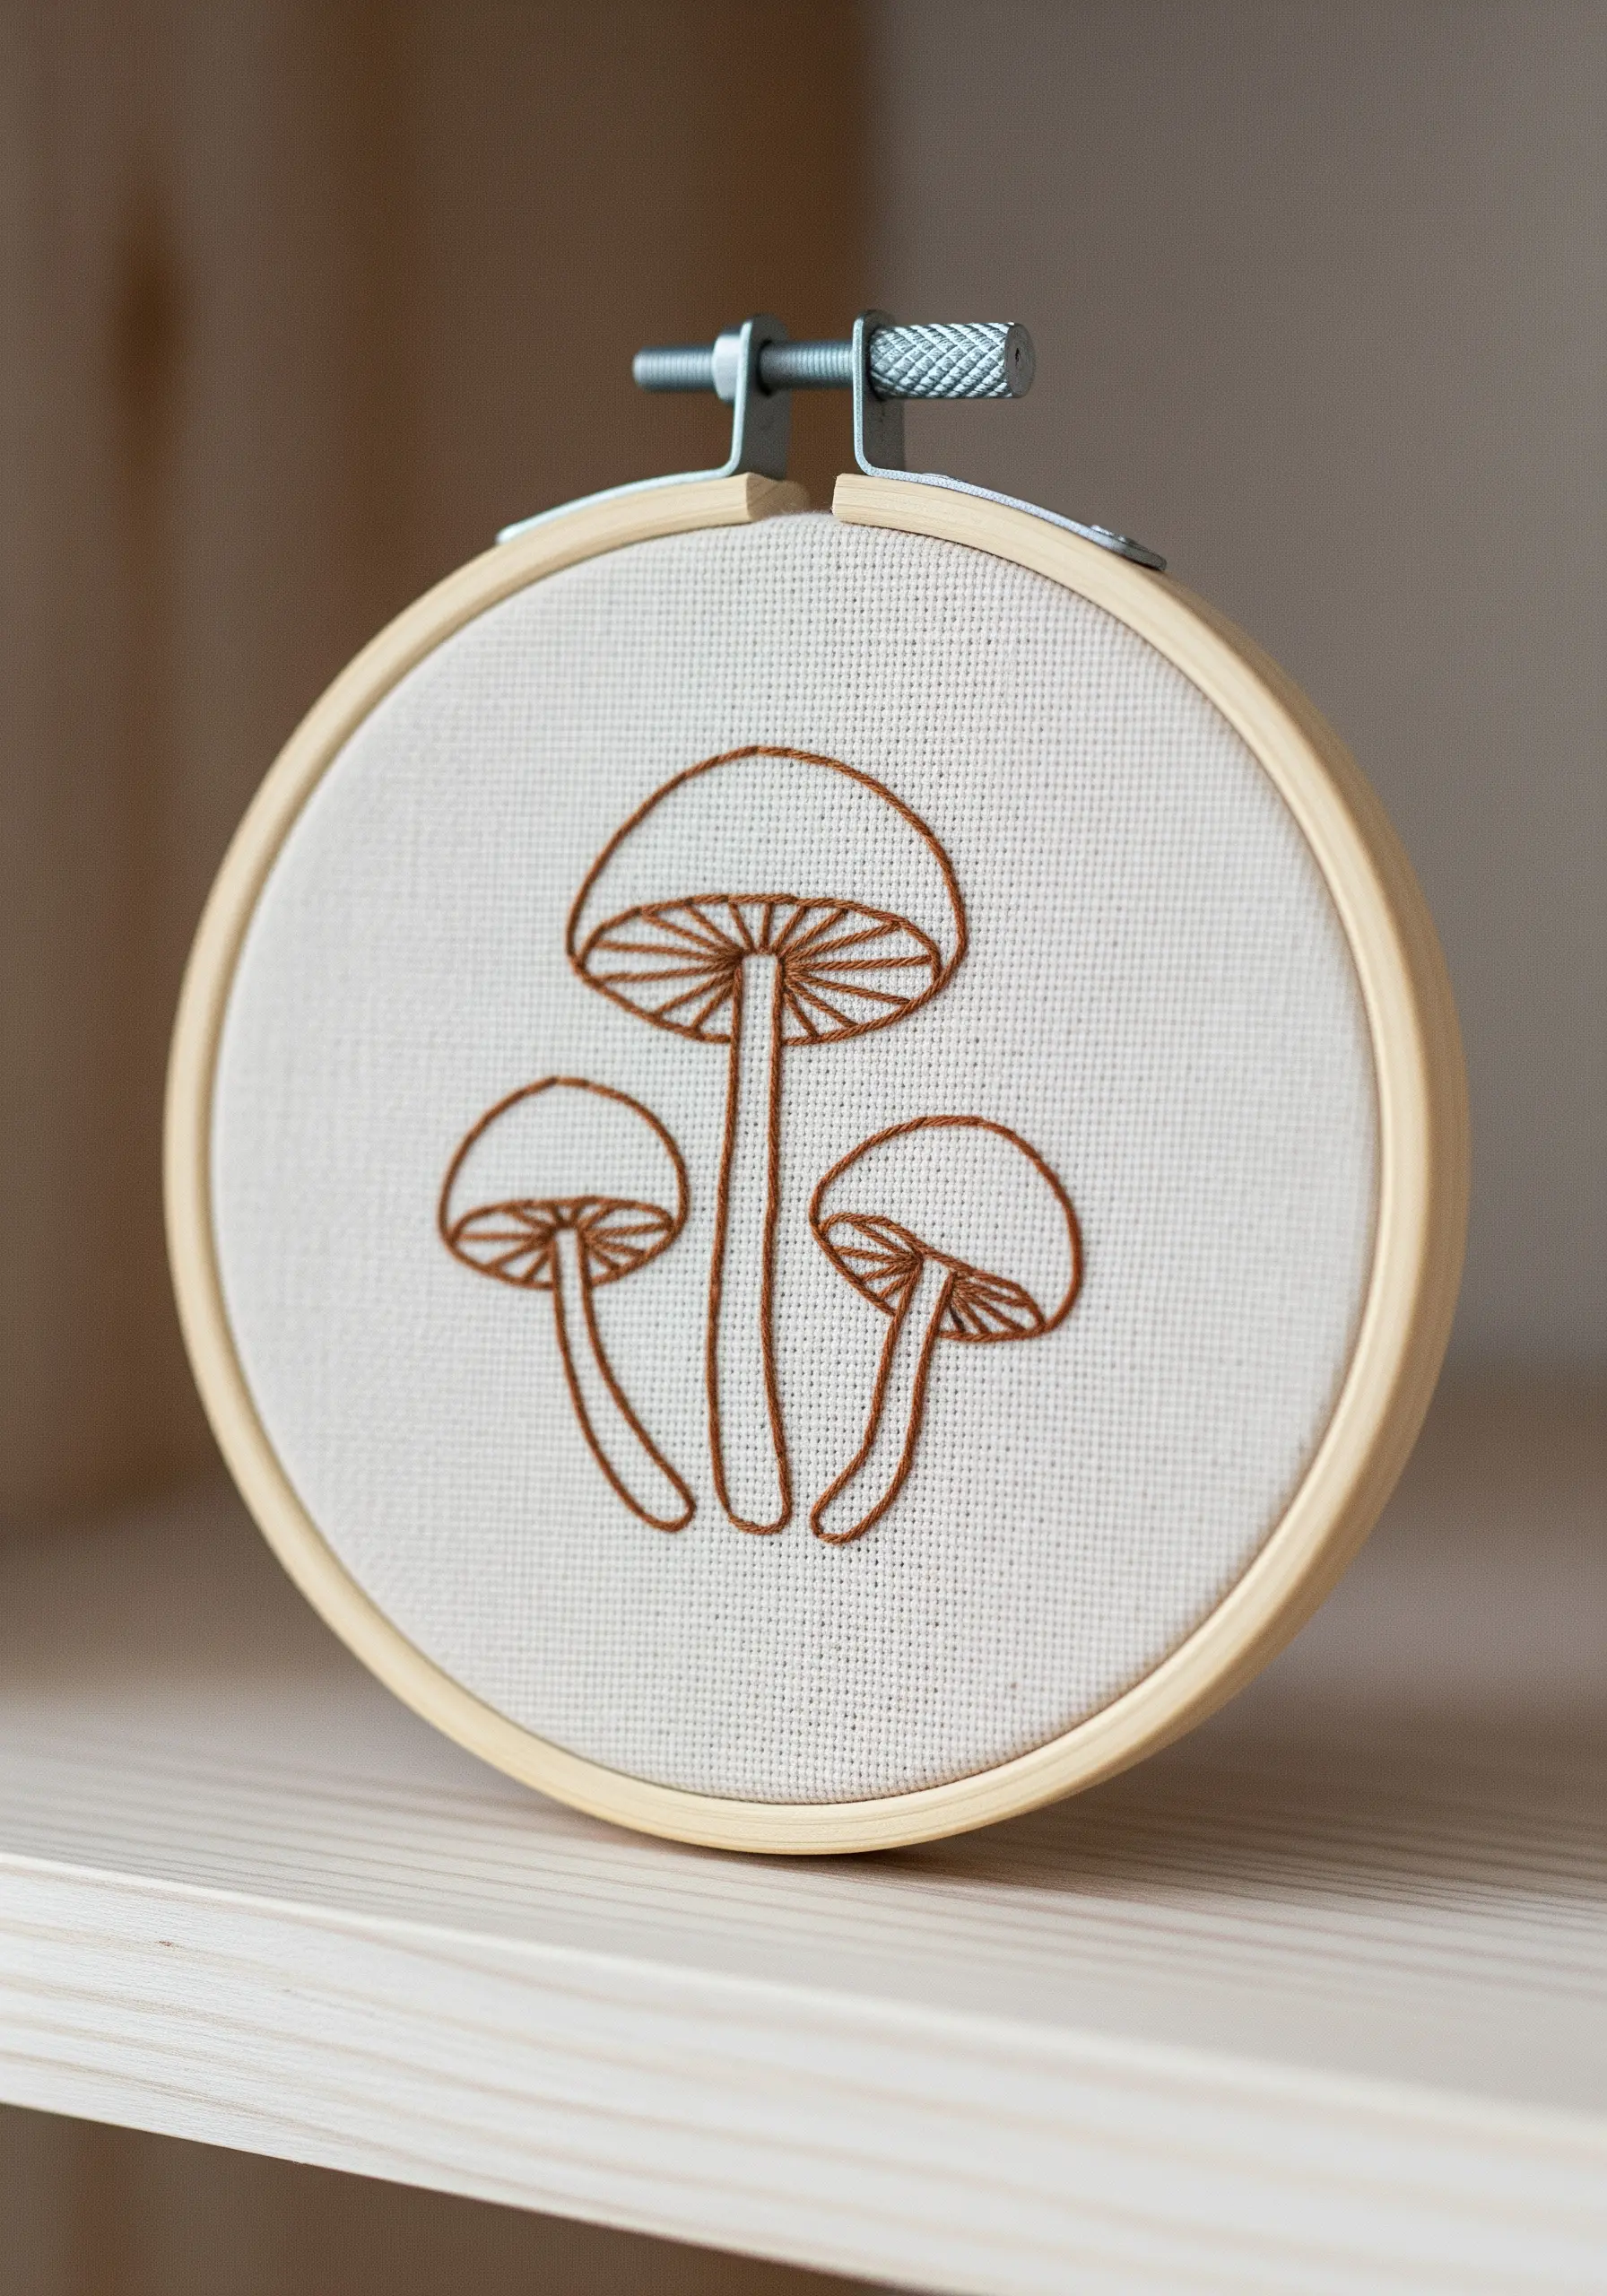
Capture the essence of a fine-line ink illustration by using a single strand of dark brown or black thread on a light, natural fabric.
The key to this style is restraint; a simple backstitch is all you need.
Embrace the negative space in your composition, allowing the un-stitched fabric to be as important as the lines themselves, creating a light, airy feel.
18. The Dashed Line Composition
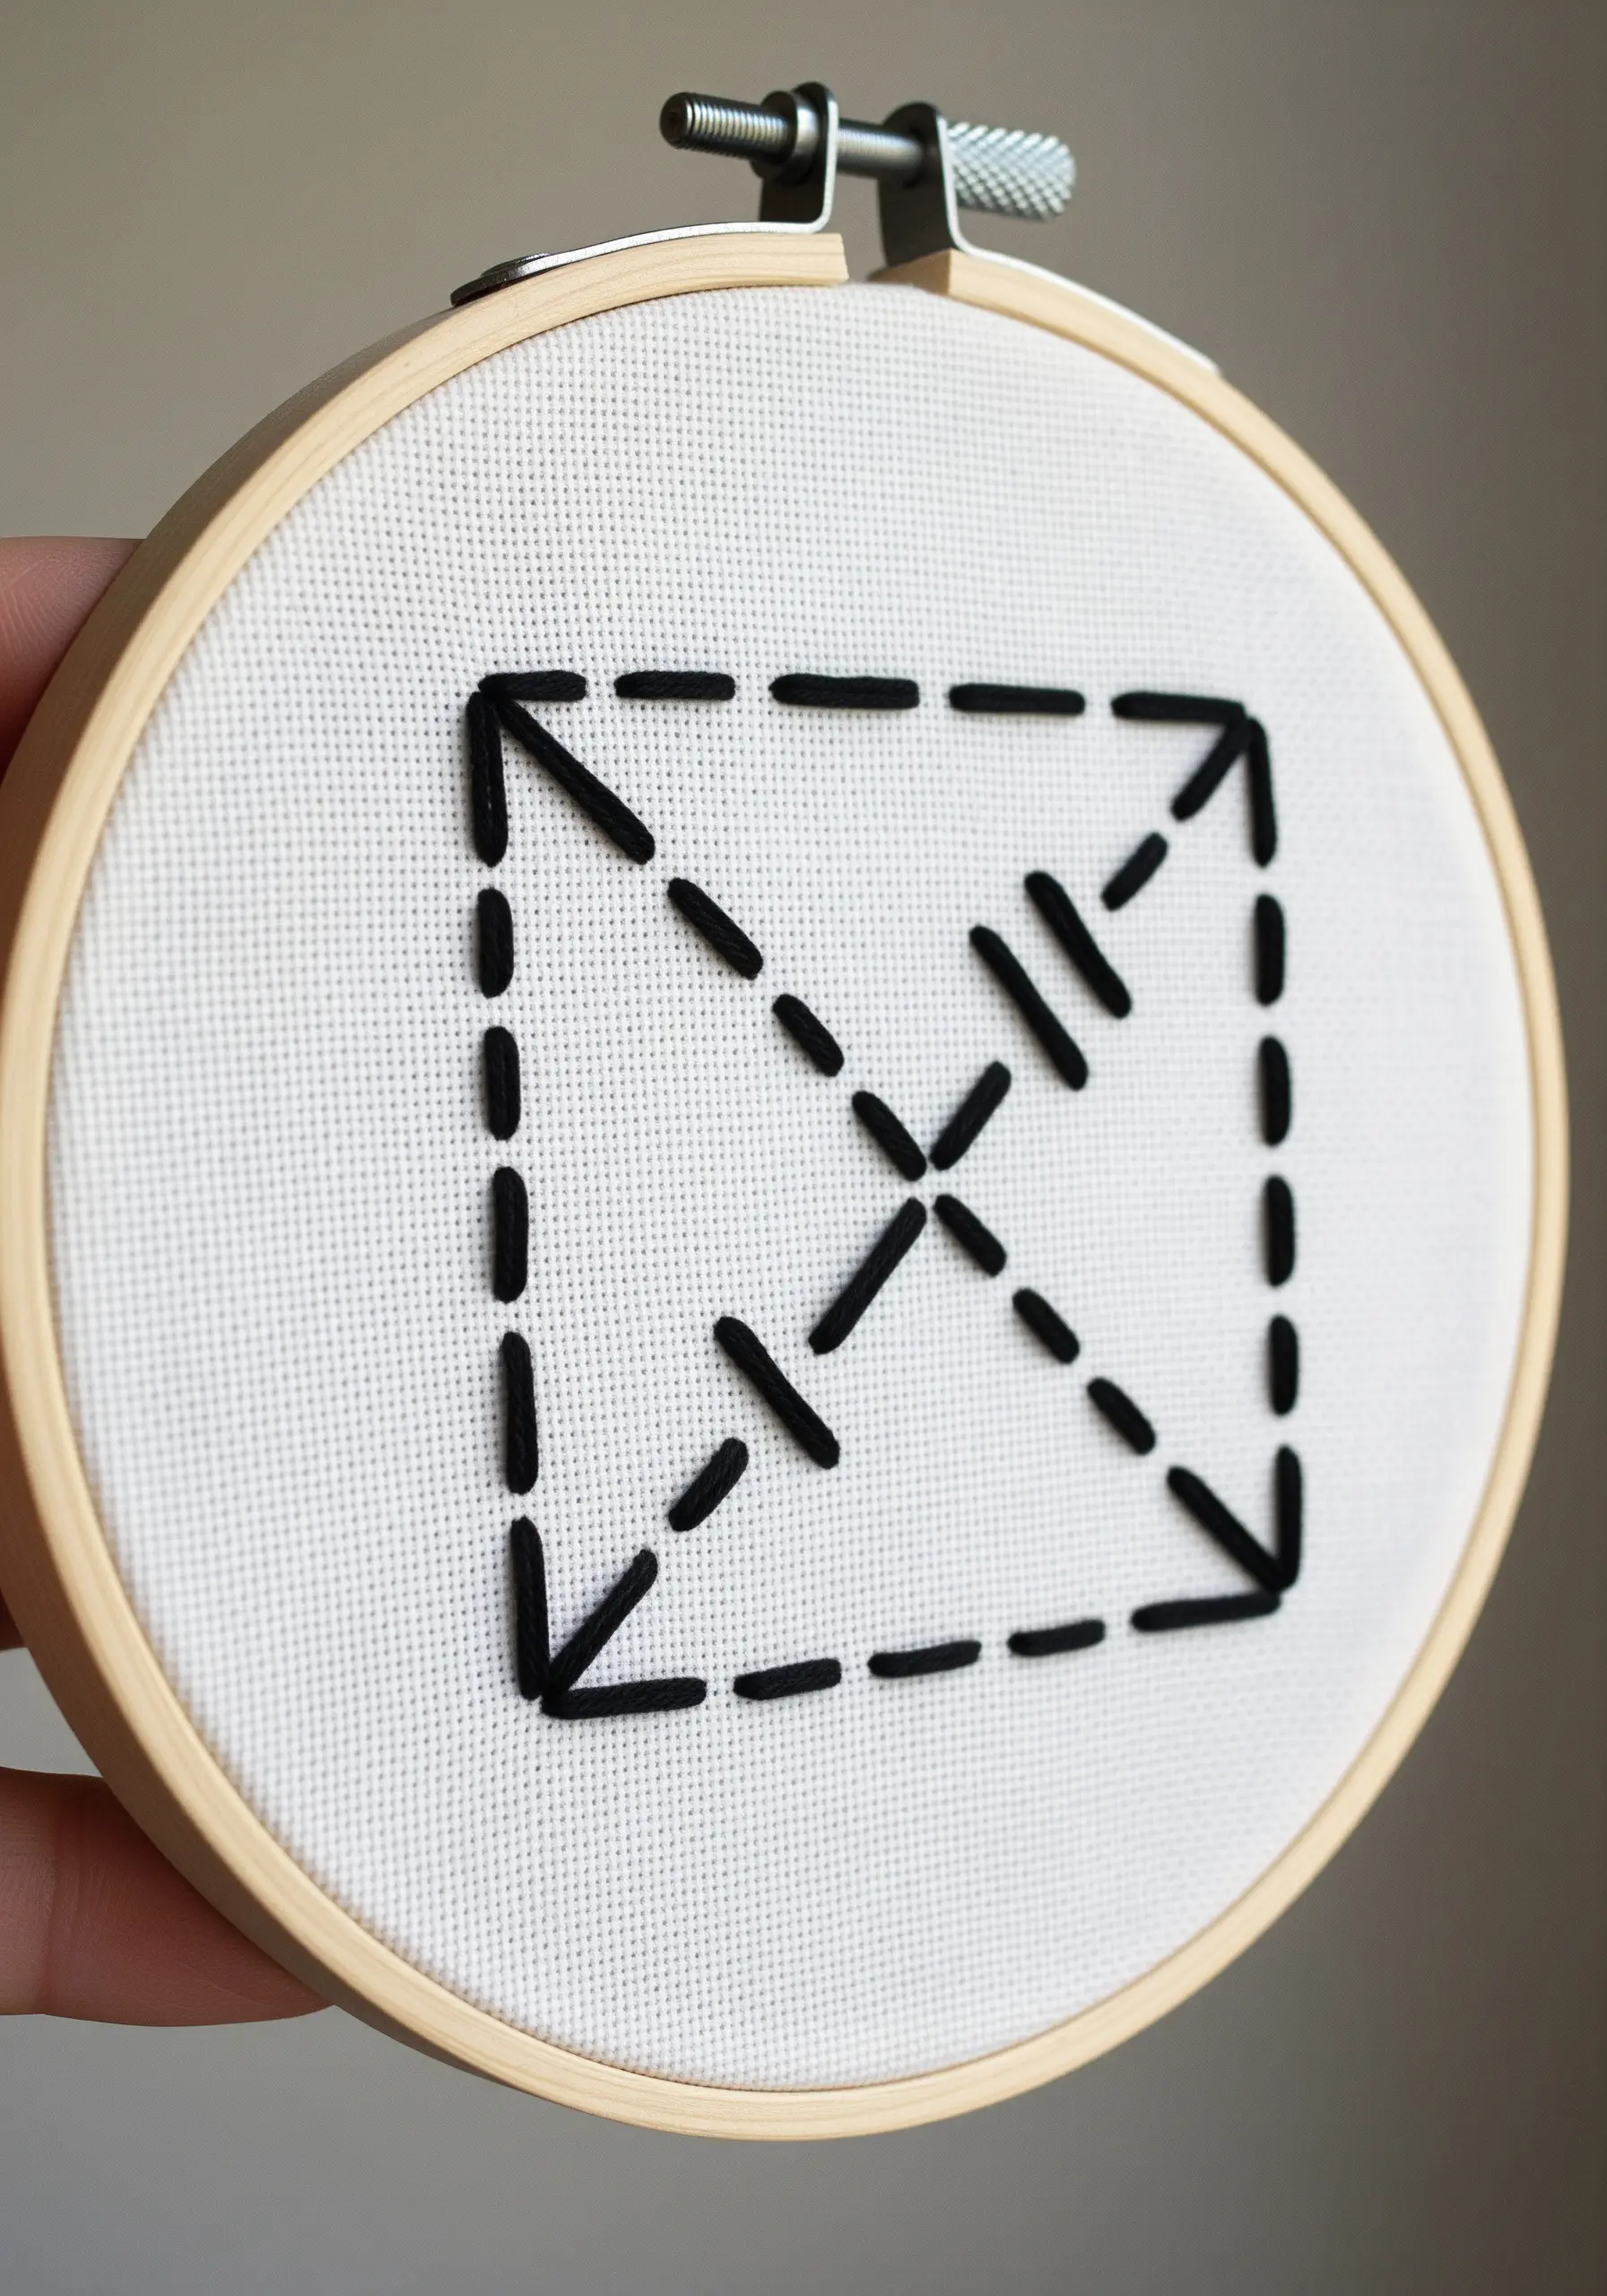
This design’s power comes from precision and rhythm, created using only the most basic straight stitch.
To achieve perfectly uniform dashes and spaces, use a fabric with a visible weave, such as even-weave linen or Aida cloth.
This allows you to count the threads for each stitch and gap, turning a simple concept into a flawless piece of geometric art.
19. The Thread-Painted Sunset

Create a seamless, painterly gradient by using the long-and-short stitch, a foundational technique in thread painting.
Work in rows, using closely related shades of thread and slightly overlapping your stitches to blur the transition between each color.
This method allows you to achieve a soft, blended effect that beautifully captures the gentle color shifts of a sunset.
20. The Weightless Feather Study
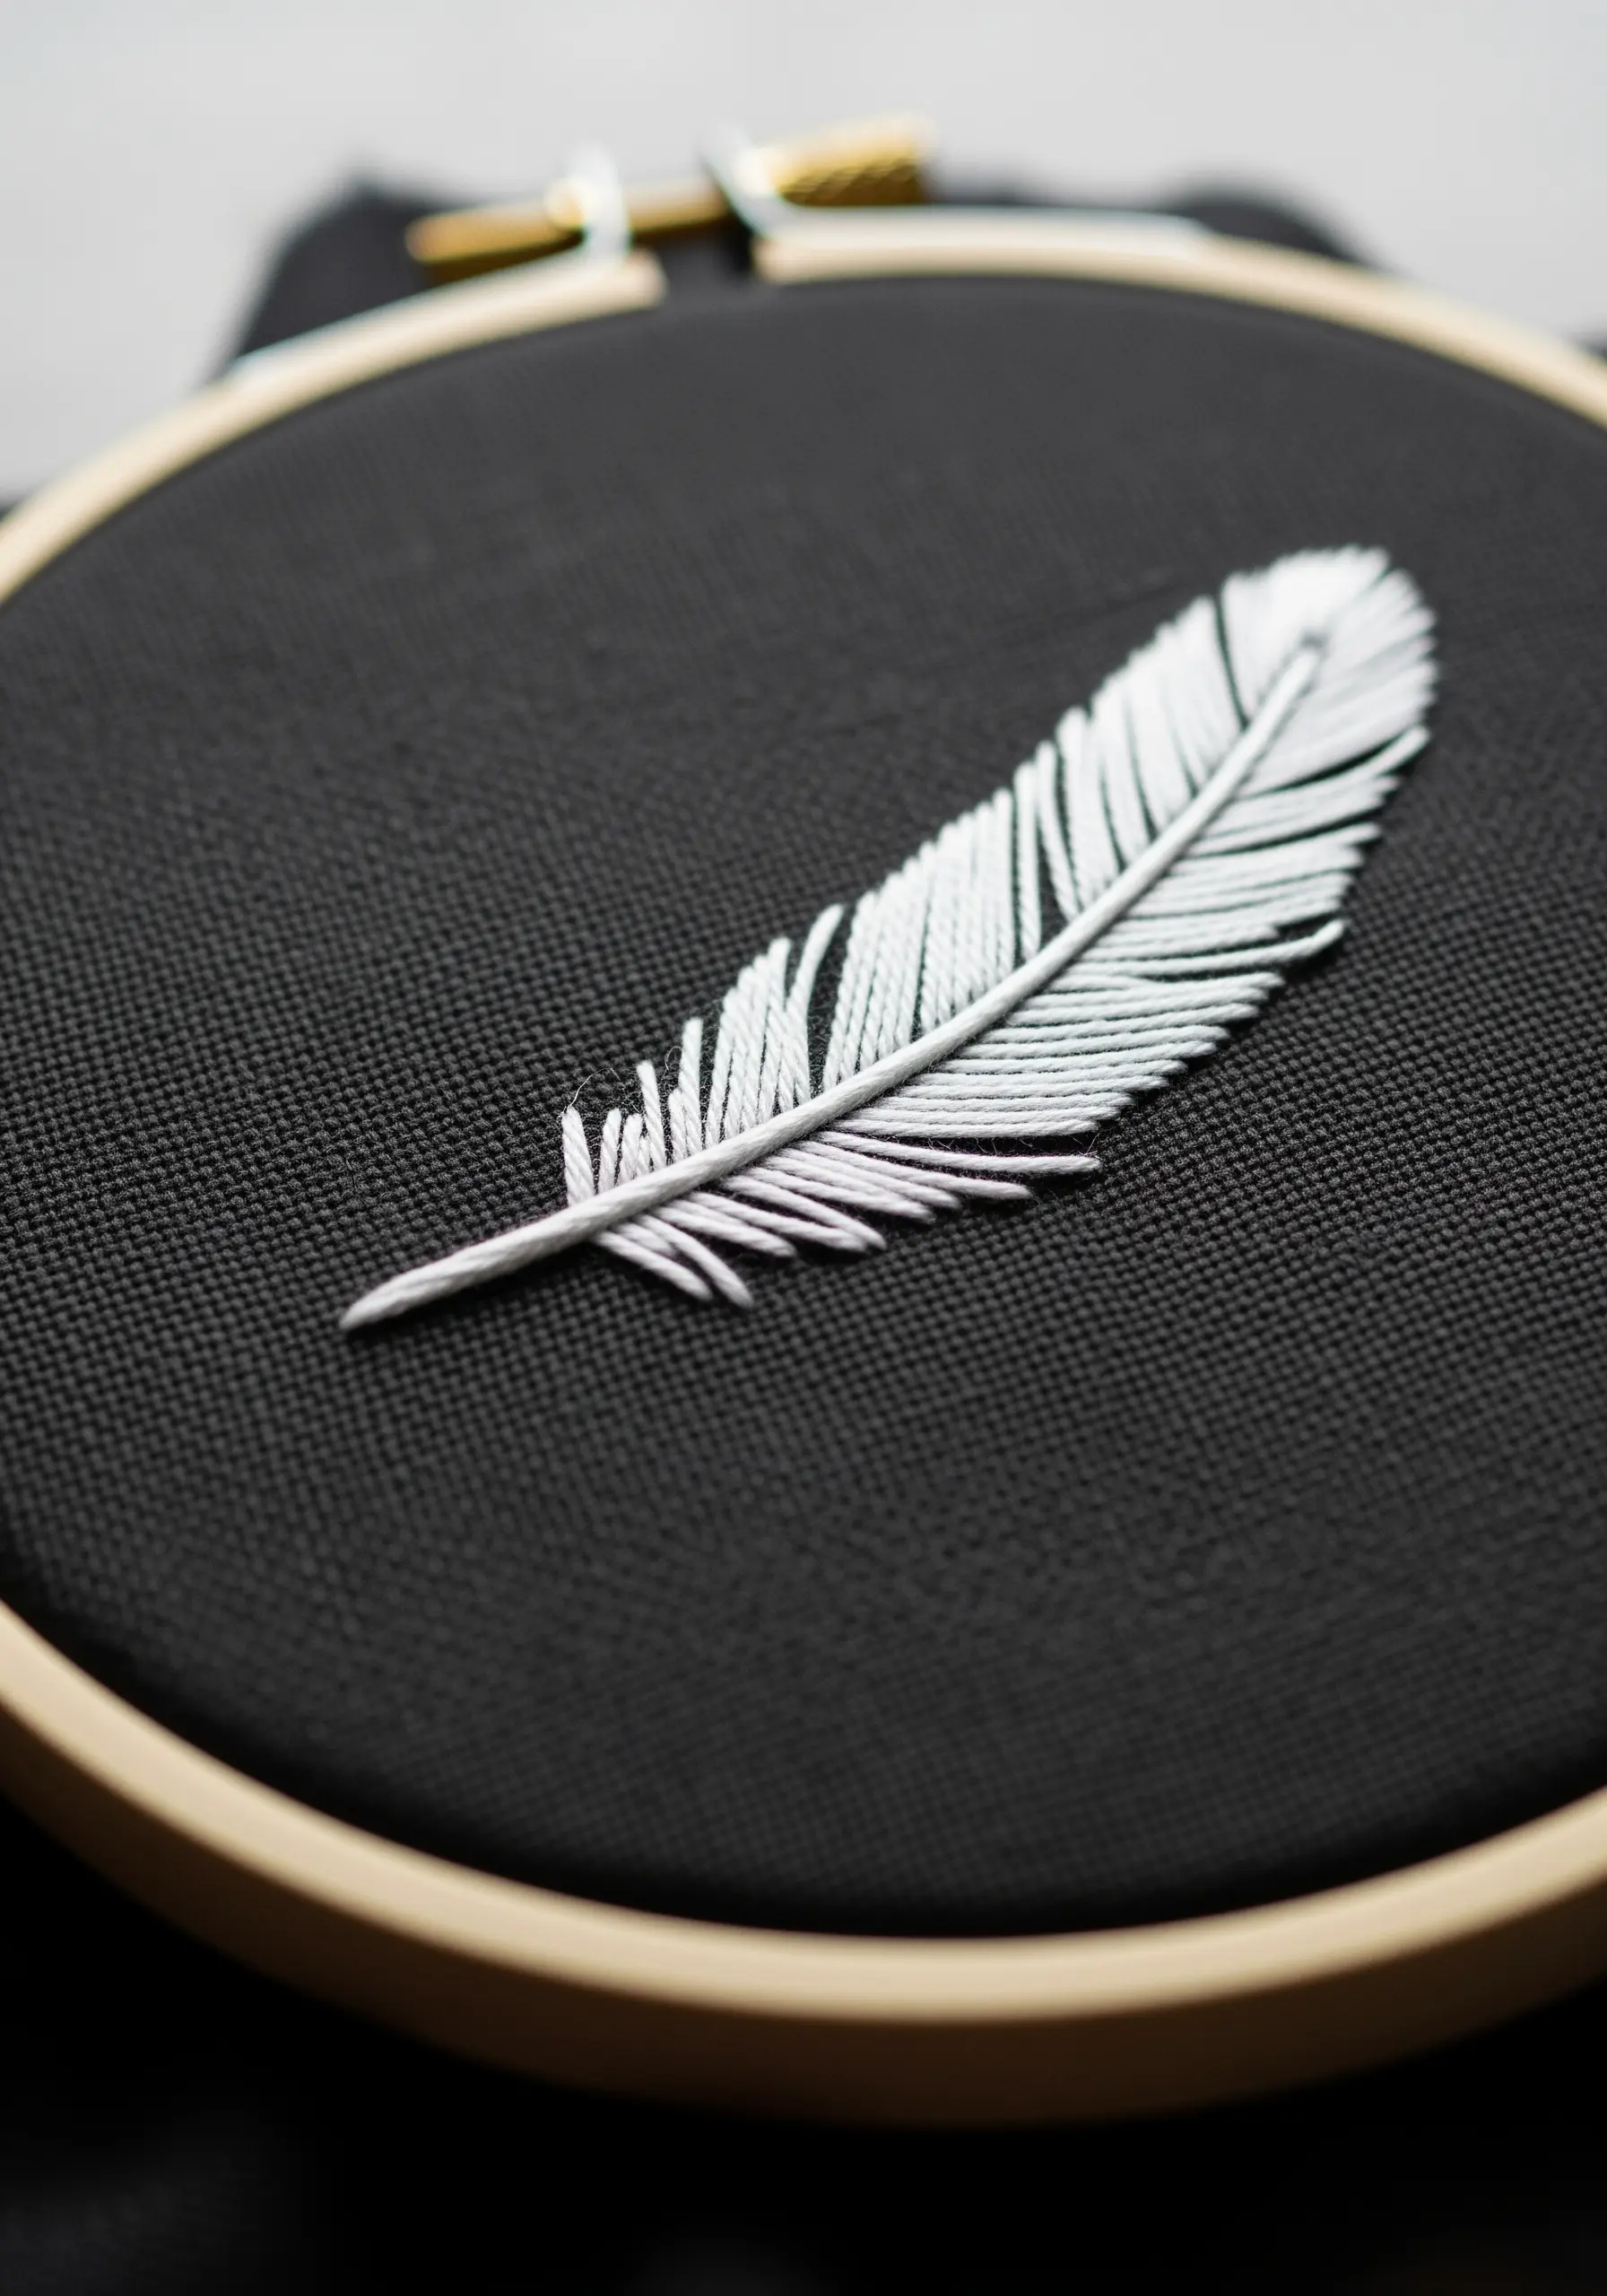
To create the soft, delicate texture of a feather, use angled satin stitches that extend from a central stem stitch spine.
Crucially, do not pull your stitches too tight; a slightly looser tension helps create a fluffy, airy effect.
Intentionally leaving tiny, irregular gaps between some of the barbs will enhance the realism and give the feather a sense of weightlessness.
21. Intersecting Lines in Space

This composition is a powerful study in balance and visual weight.
Use a whipped backstitch to create bold, solid lines that have a strong presence on the fabric.
When lines intersect, the technique of layering one stitched line physically over another creates an undeniable sense of depth and dimension in an otherwise flat, abstract design.
22. The Simple Still Life Outline
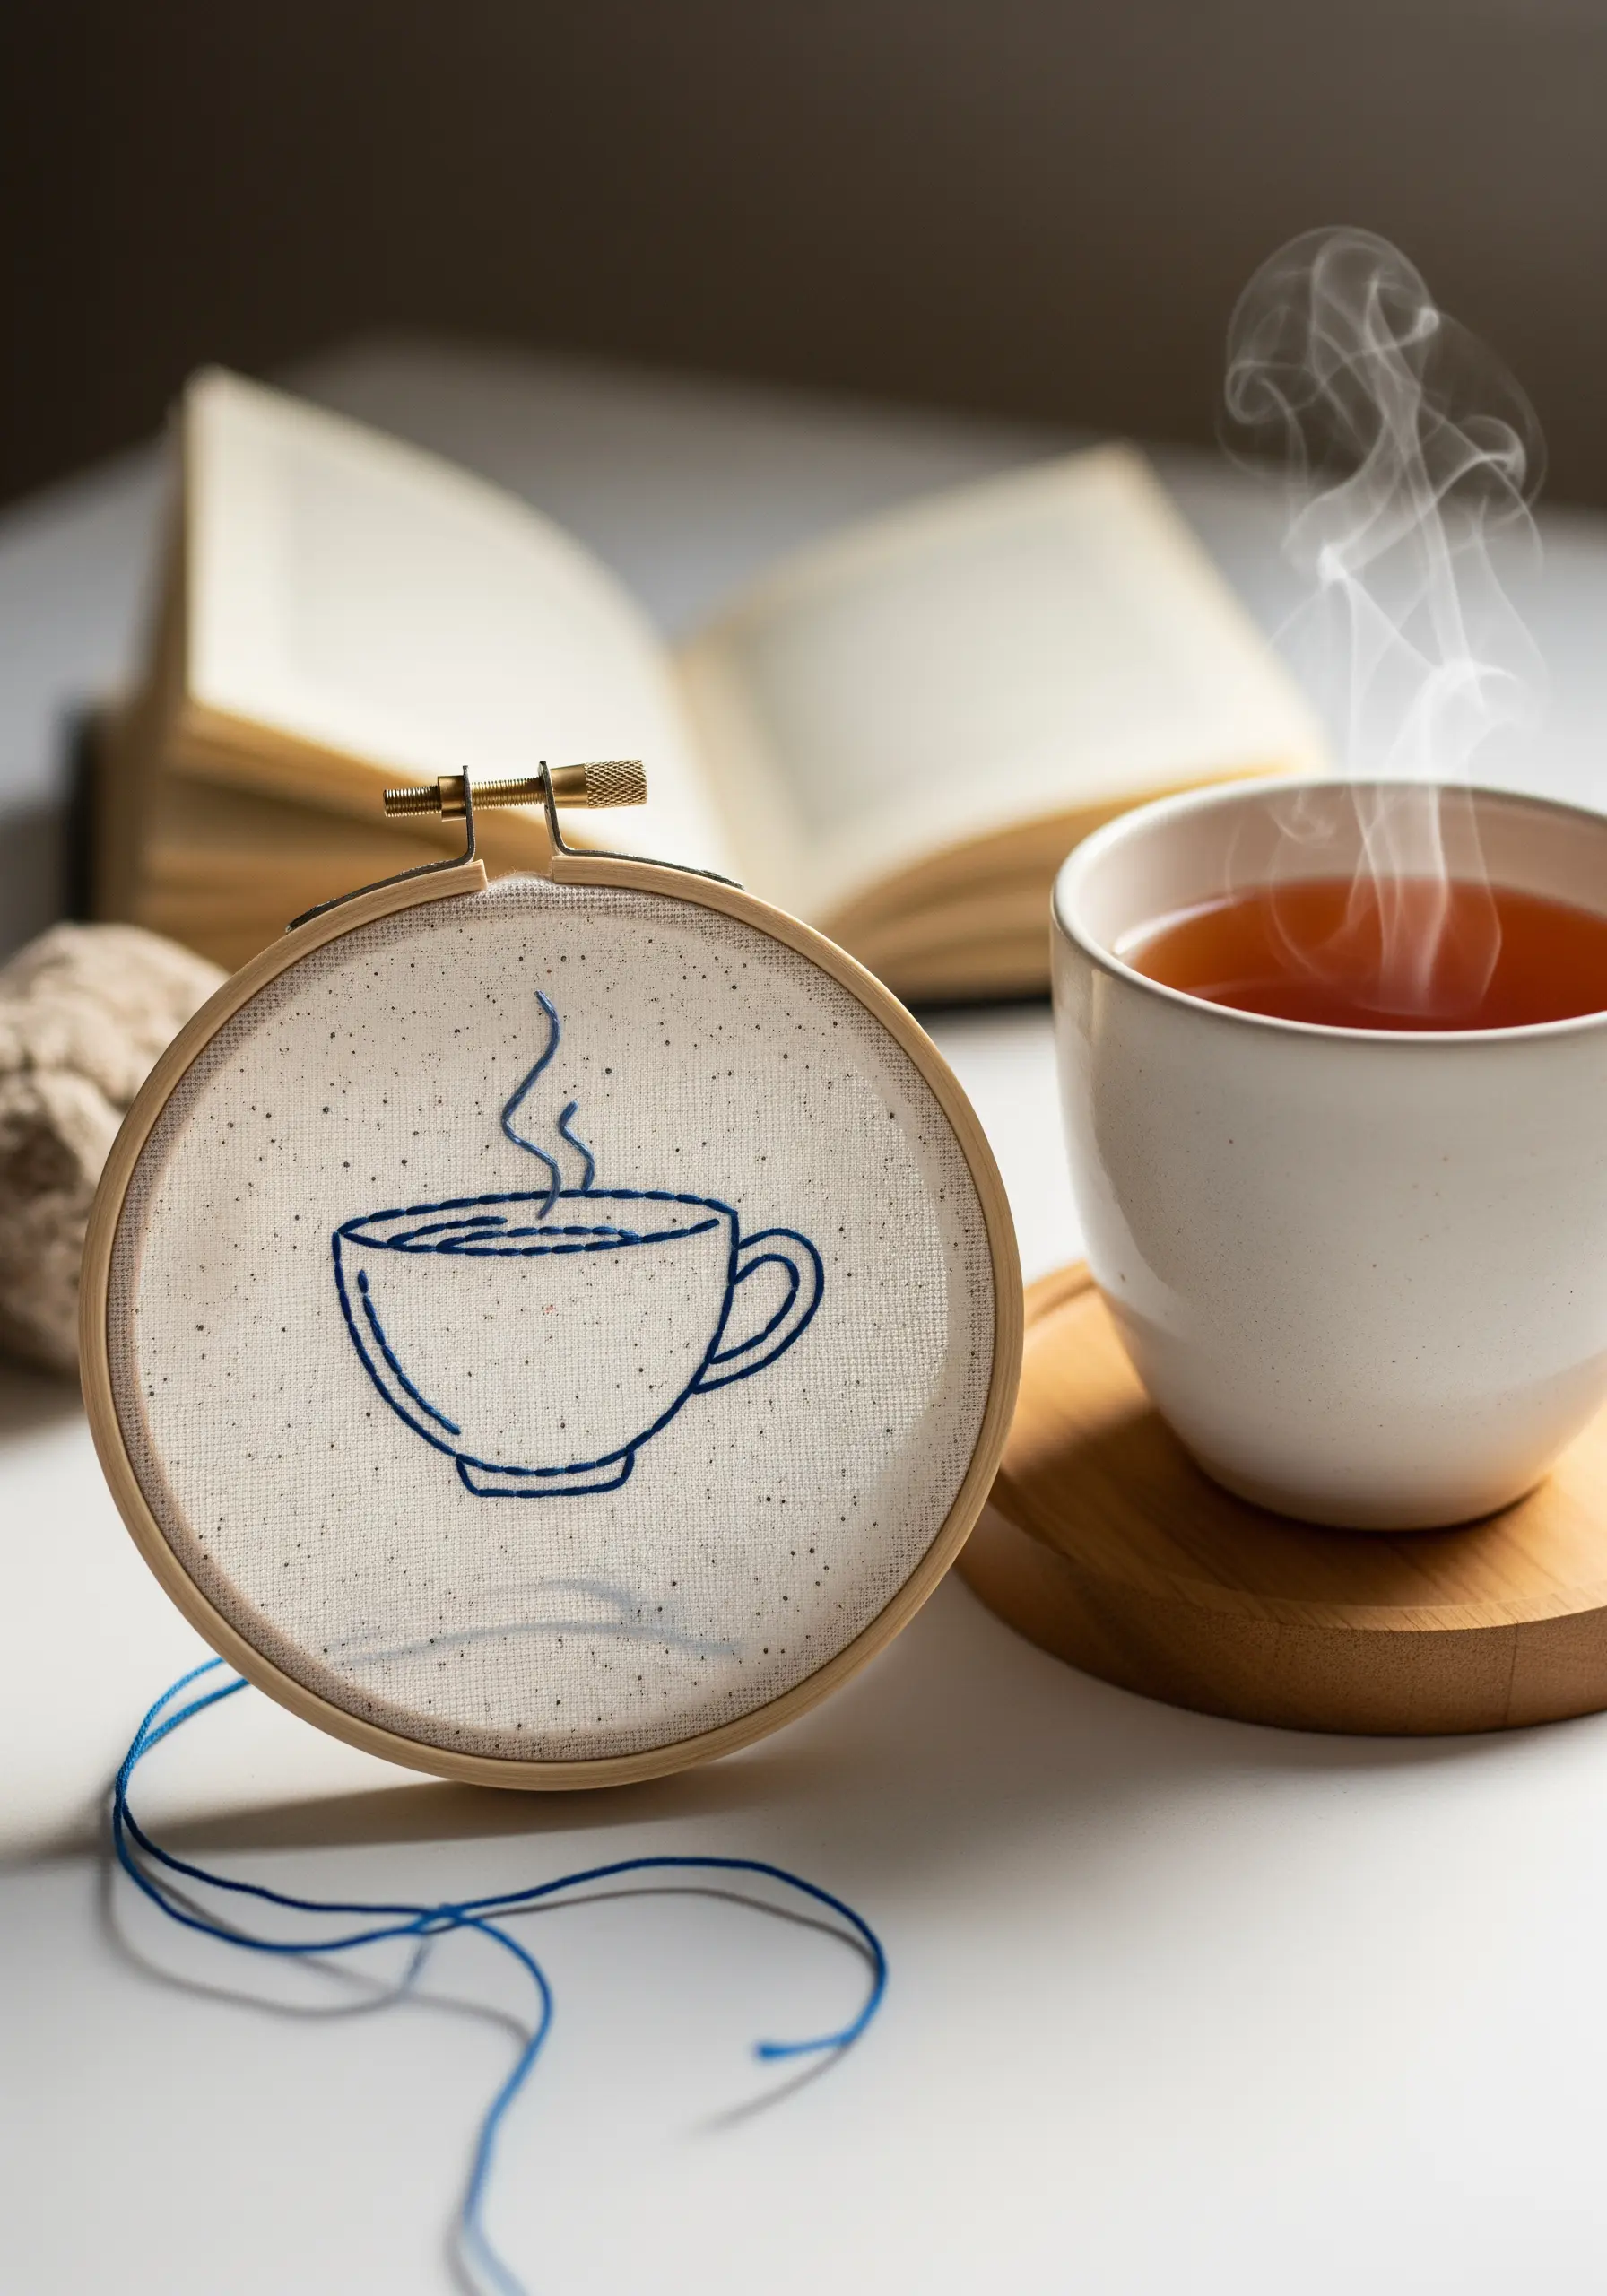
For a flawless, graphic outline, choose a split stitch over a backstitch.
A split stitch creates a much smoother, less segmented line that excels at rendering perfect curves, essential for this type of minimalist still life.
Pairing a single, dark thread with a natural or speckled fabric adds a touch of warmth and texture to the clean design.
23. The Sculptural Bullion Knot Garden
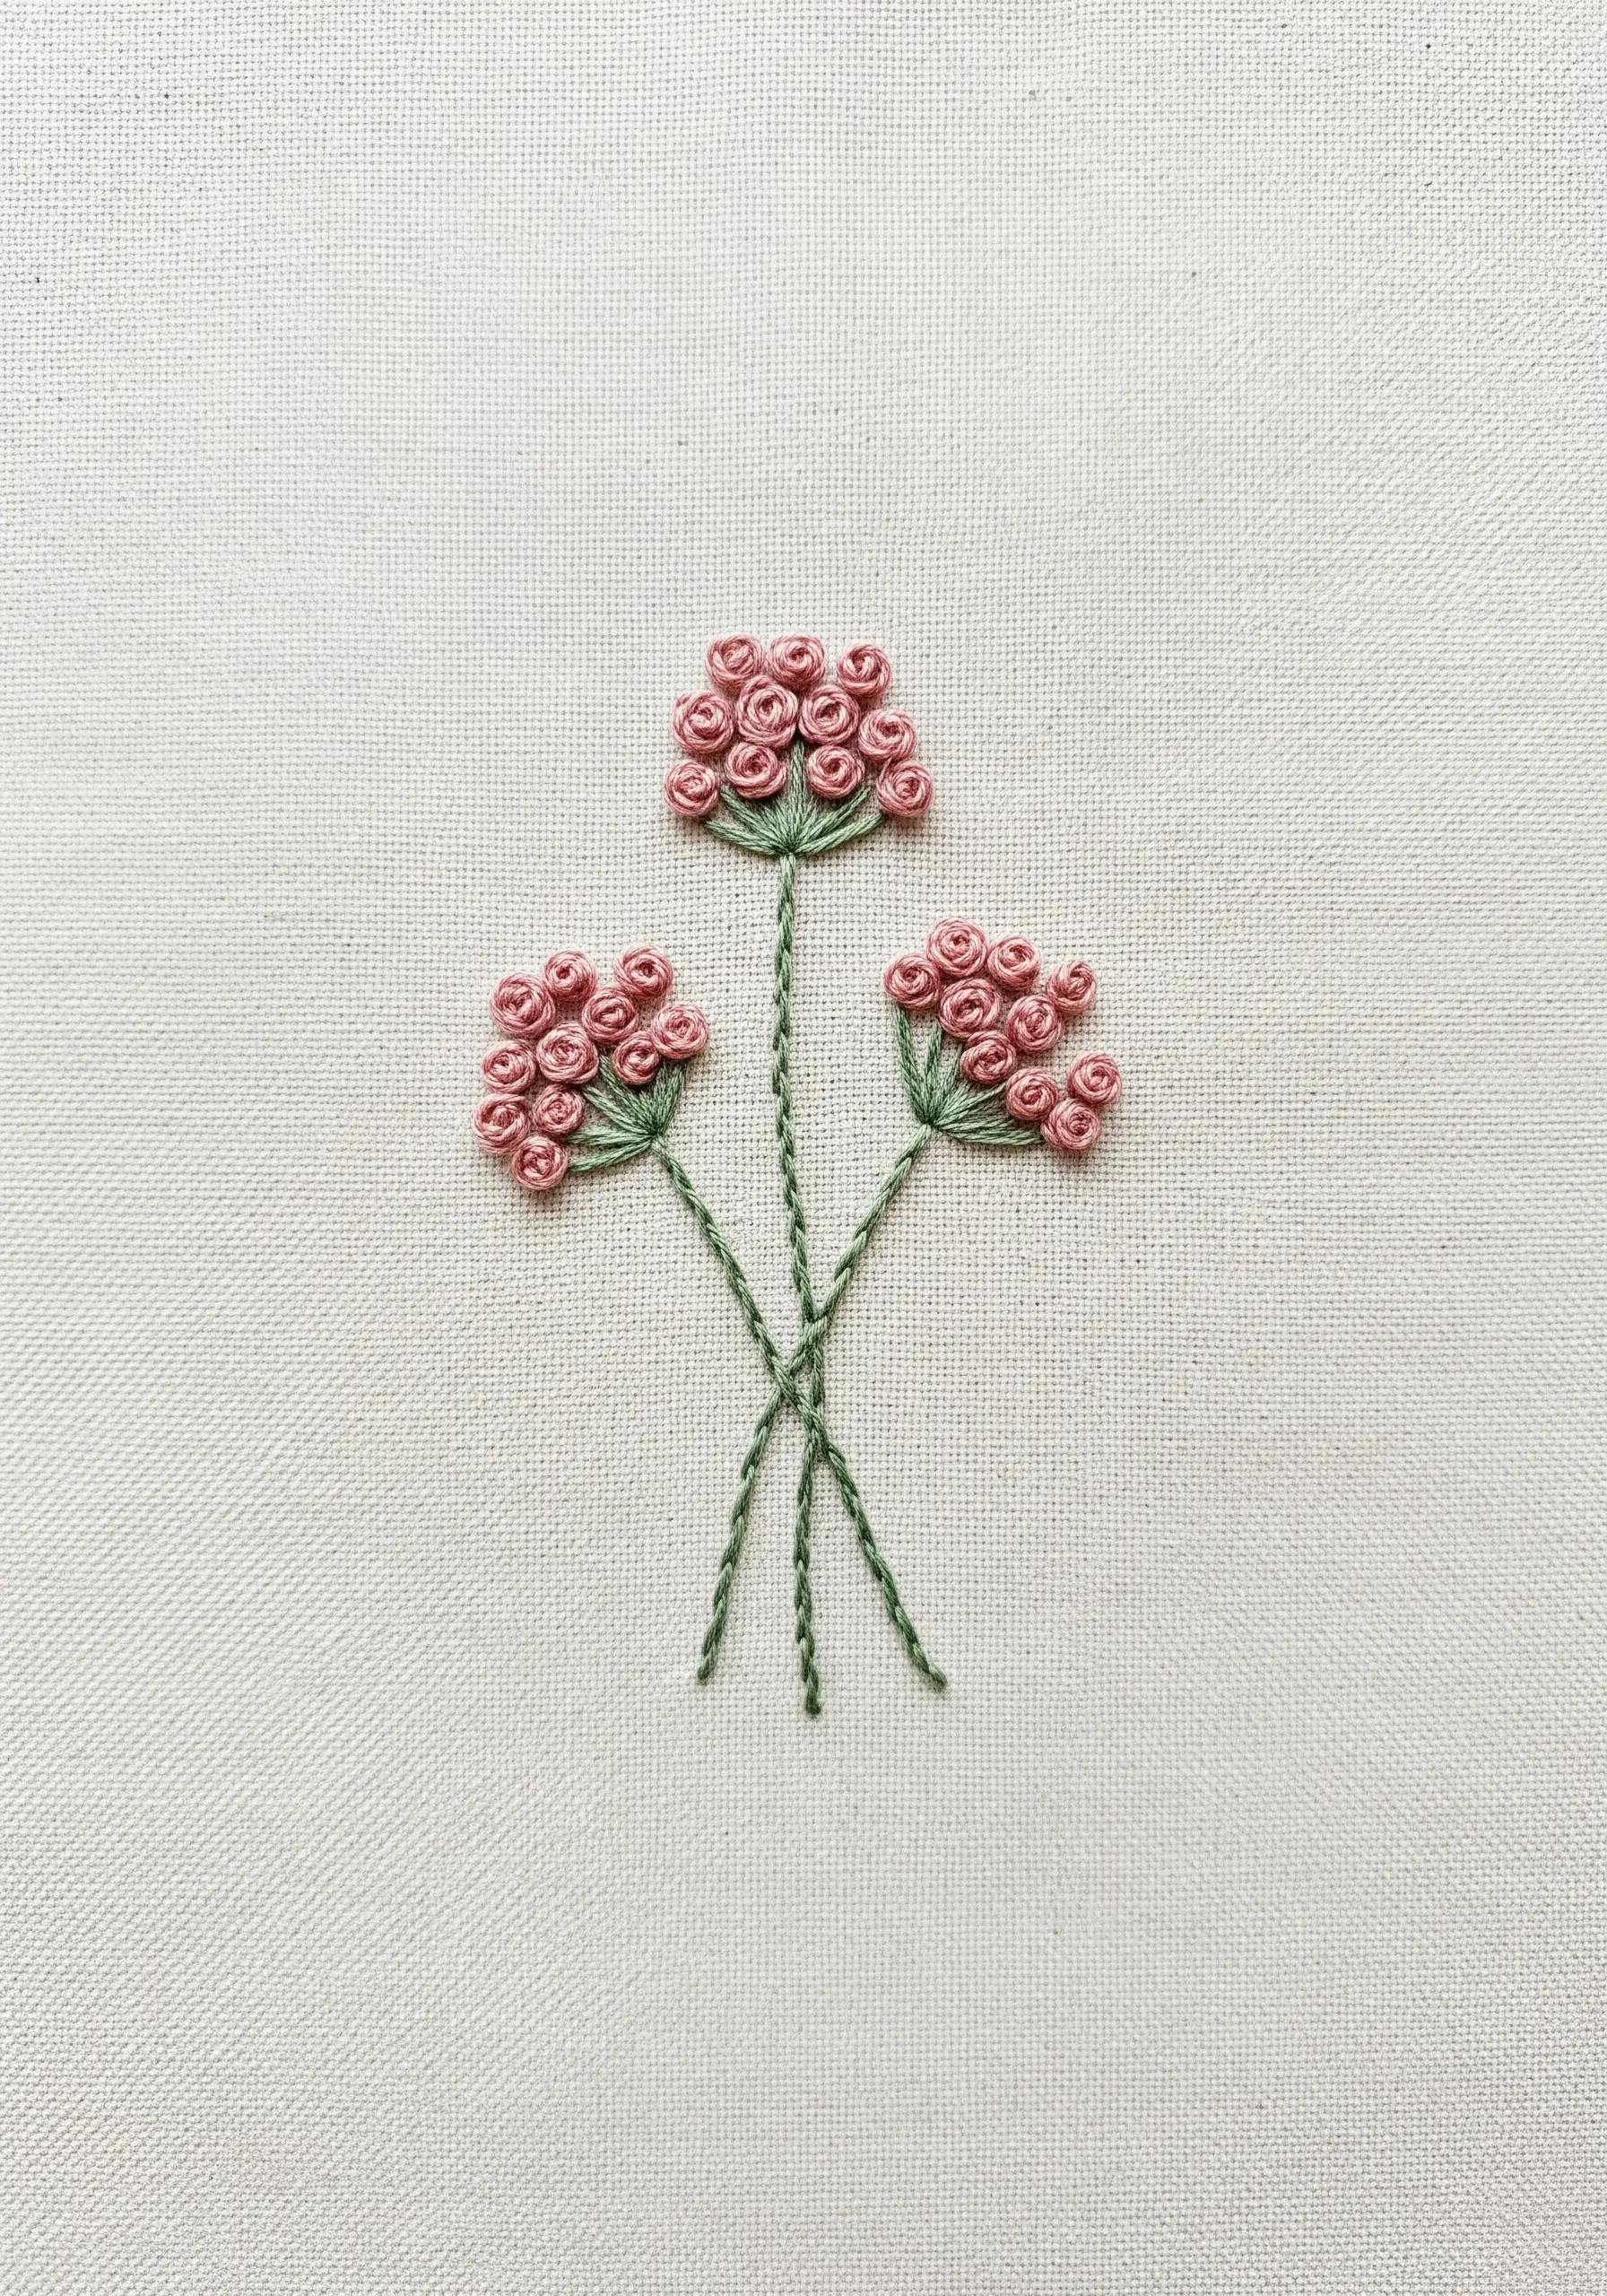
The bullion knot allows you to create tiny, three-dimensional rosebuds that stand proudly off the fabric.
The secret is to wrap the thread neatly around the needle without overlapping the coils, and to maintain even tension as you pull the needle through.
Group them in tight clusters to form sculptural bouquets that have incredible texture and presence.
24. The Meditative Coil Stitch
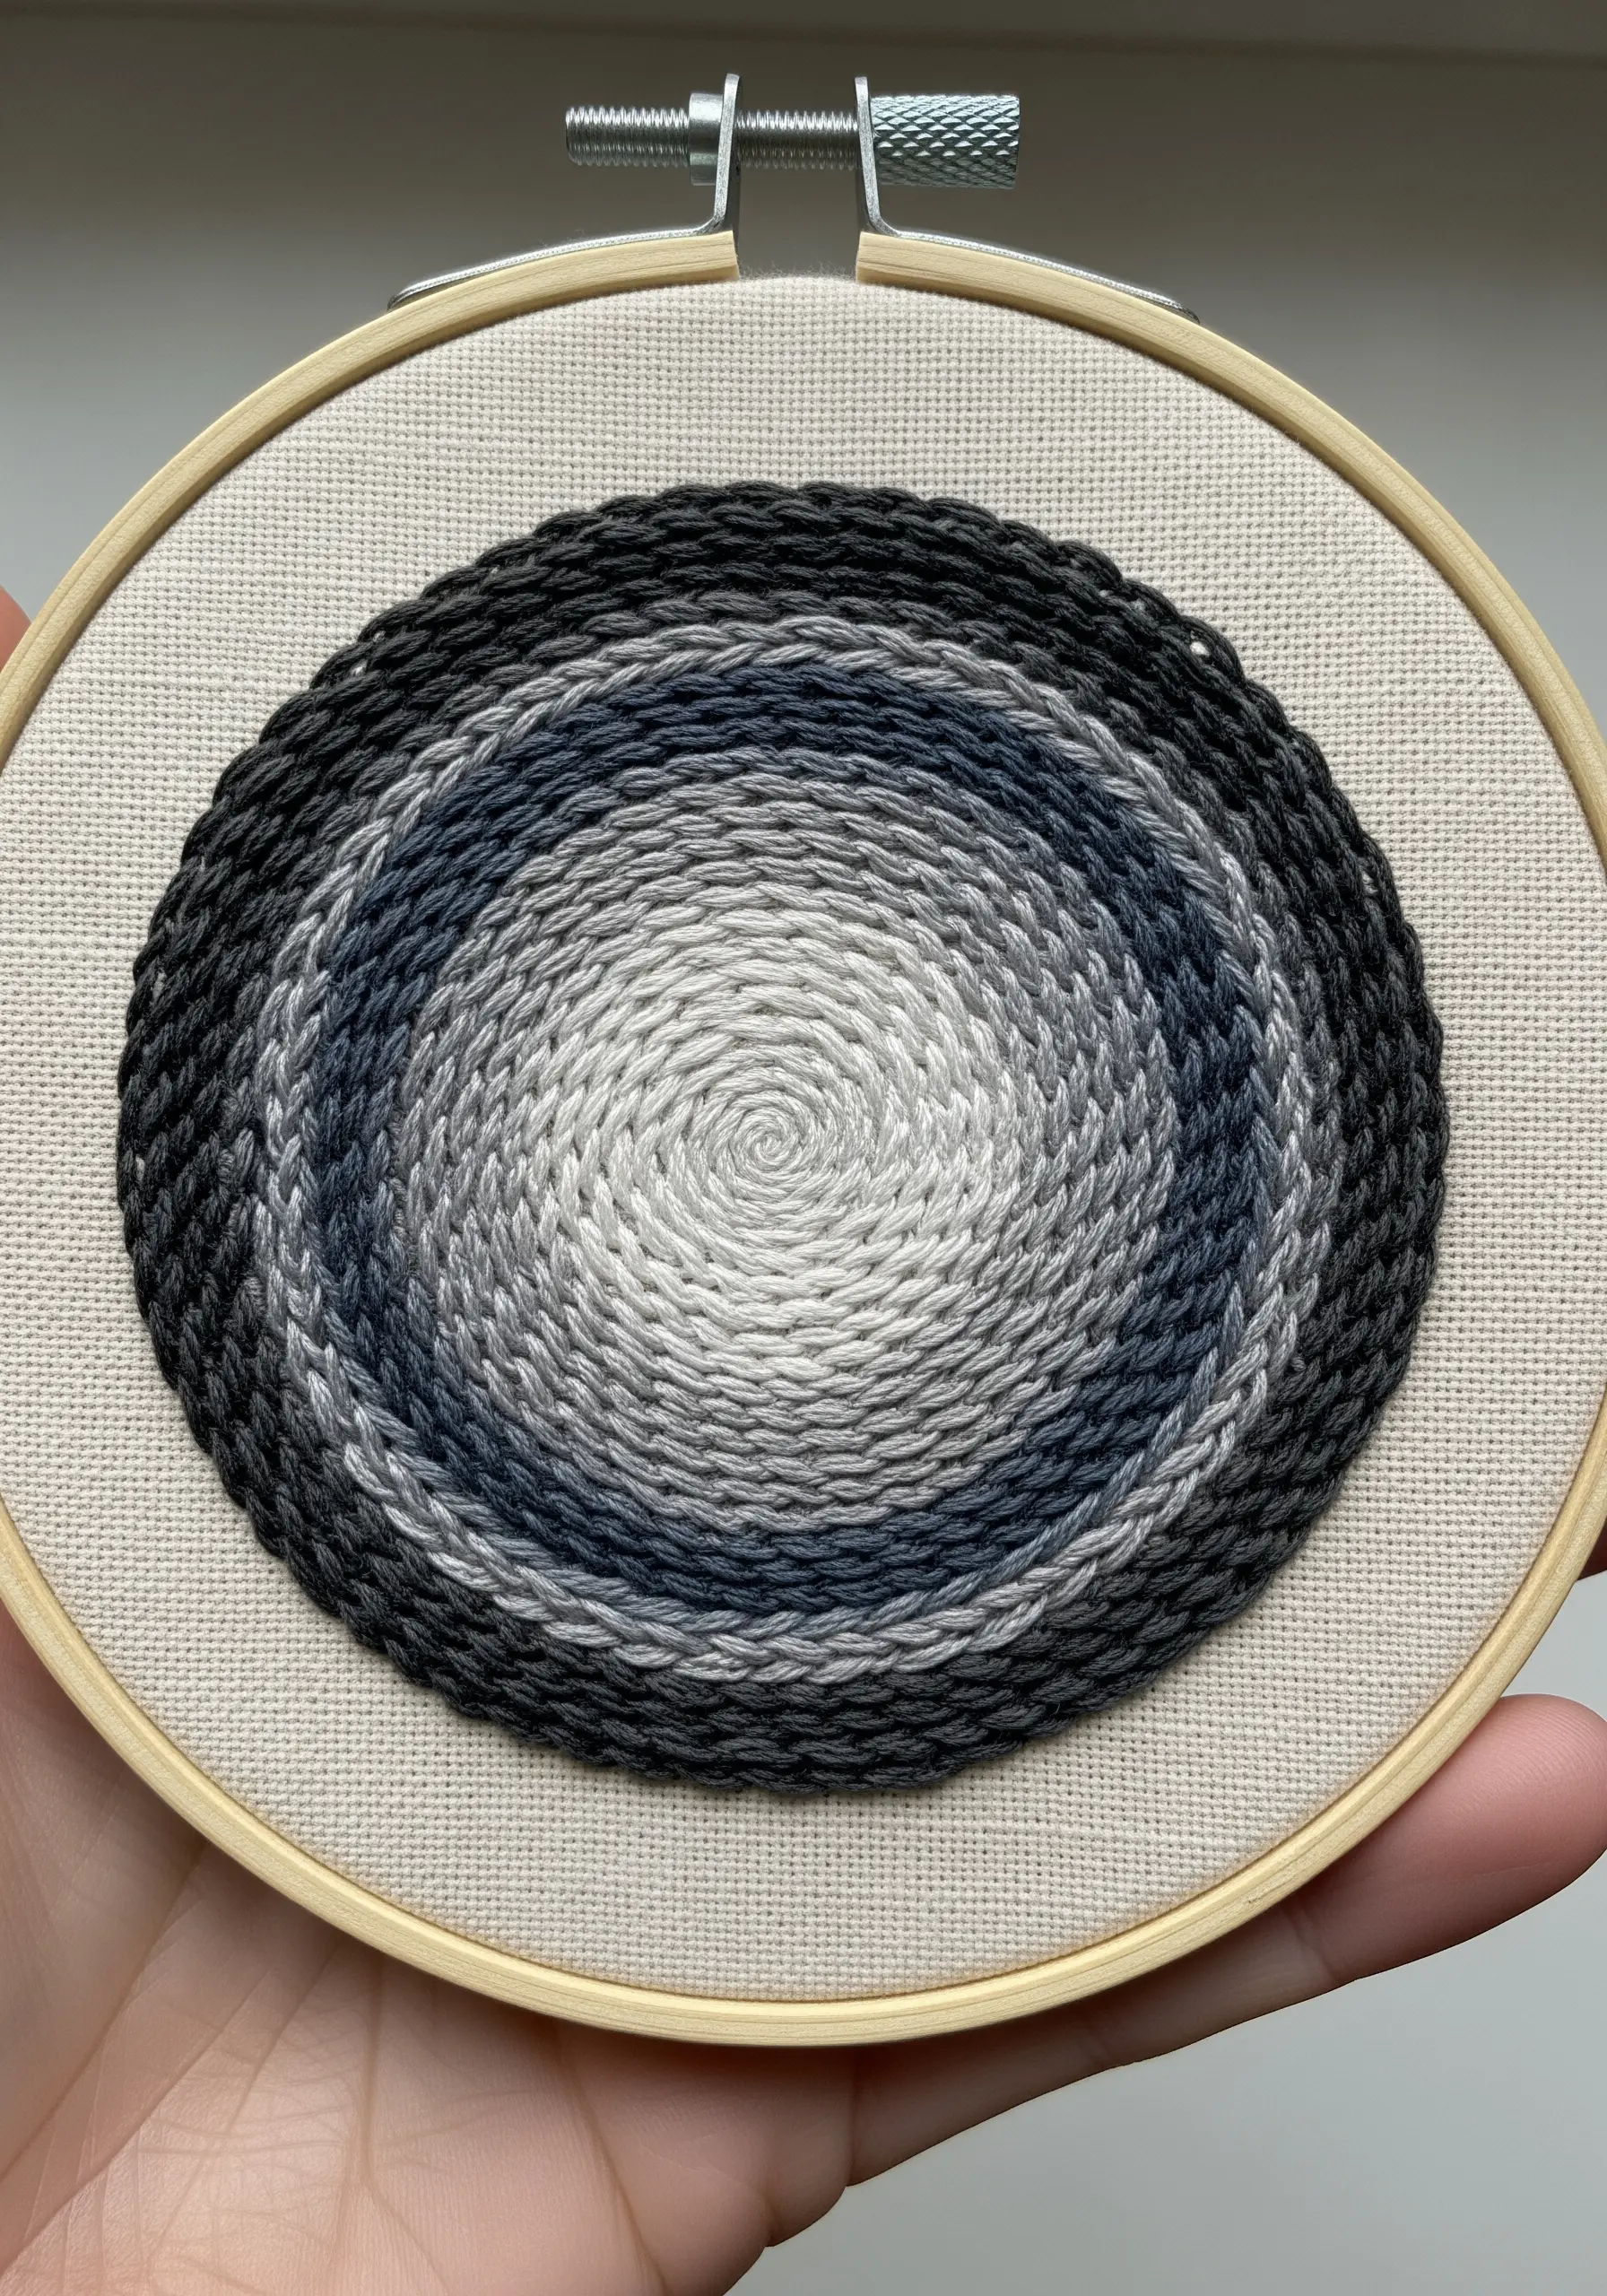
This dense, mesmerizing texture is created with a single, continuous whipped chain stitch that spirals out from the center.
You can create a seamless gradient effect by simply switching to a new color thread every few rows.
The repetitive motion of this stitch is wonderfully meditative, resulting in a highly tactile and visually hypnotic piece of art.
25. The Architectural Outline
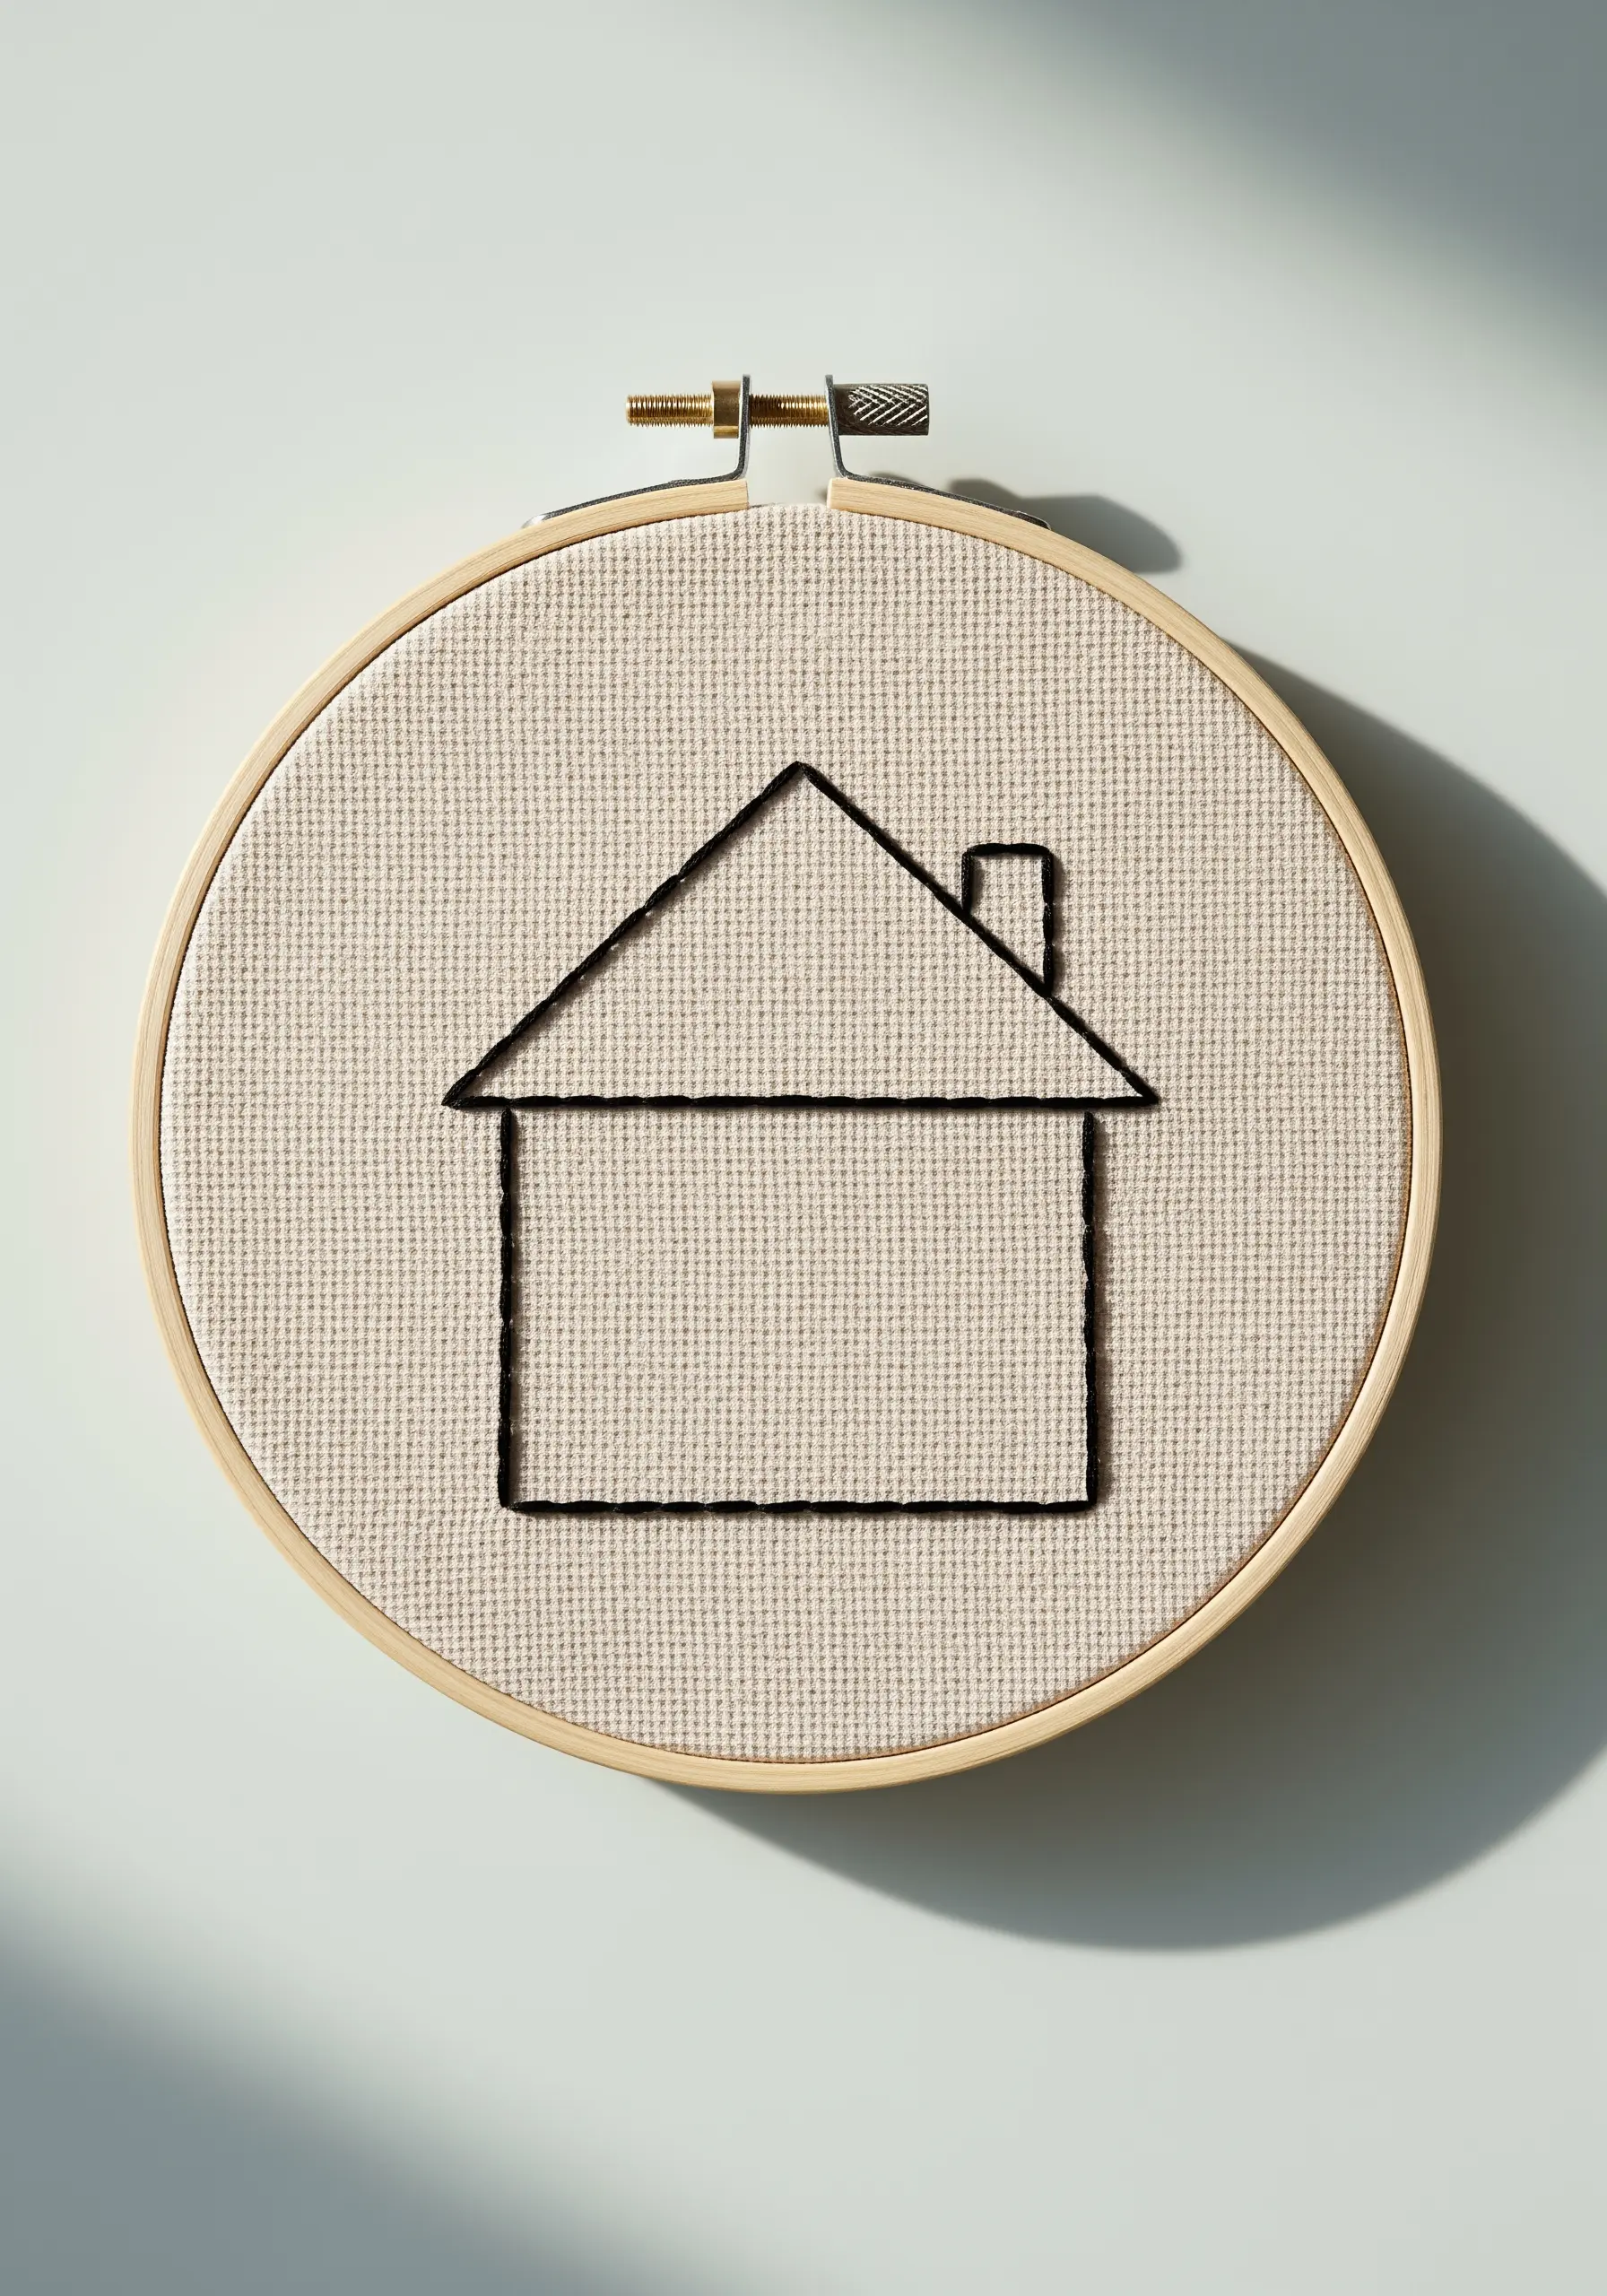
When stitching straight, architectural lines, precision is paramount. Your greatest tool is consistency.
Use a simple backstitch, but ensure that every single stitch is the exact same length.
Using the grid of the fabric’s weave as your guide is the most effective way to achieve perfectly straight lines and sharp, 90-degree corners for a clean, professional finish.
26. Abstract French Knot Clusters

This design is an elegant exploration of how a simple, repeated stitch can create complex texture and pattern.
Create a sense of organic movement by arranging your French knots in loose clusters, with areas of negative space providing visual rest.
Slightly varying the number of wraps (one or two) will produce knots of different sizes, enhancing the natural, pebble-like feel of these abstract groupings.
27. Minimalist Flight Silhouettes
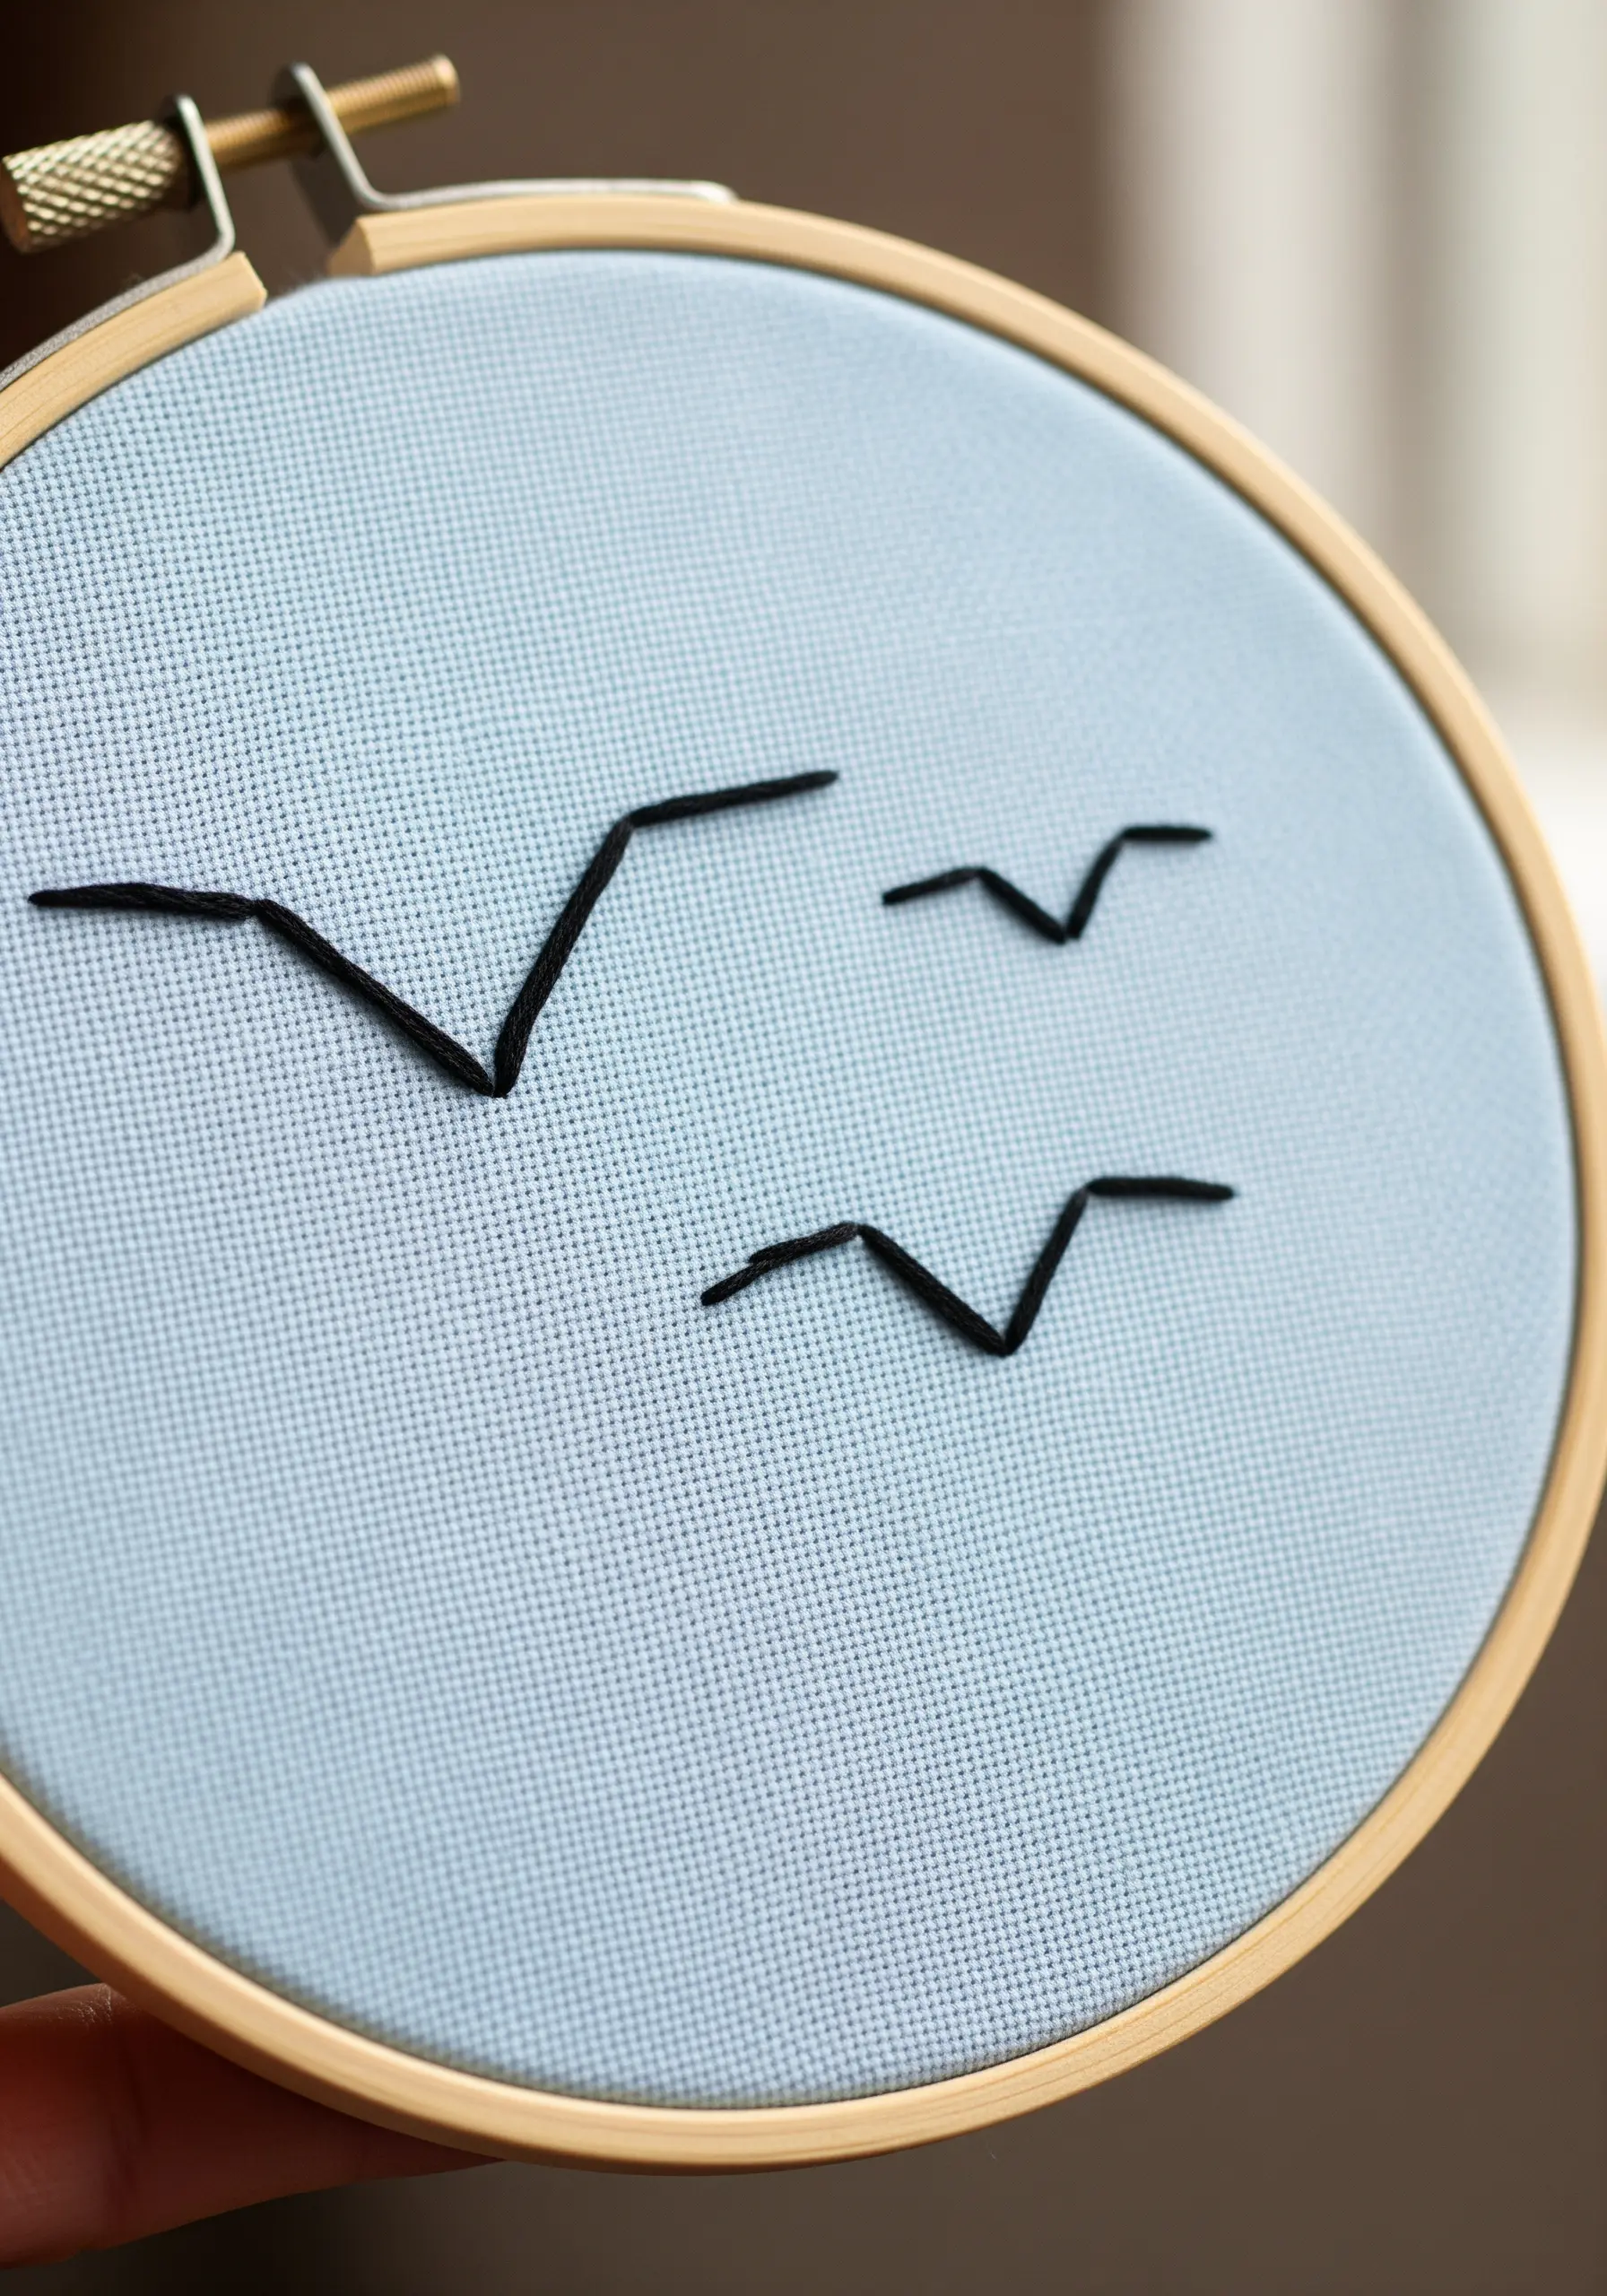
For a design this simple, the choice of stitch has a major impact. A dense satin stitch fill gives these birds a solid, graphic weight that a mere outline could never achieve.
Lay your stitches closely together, ensuring no fabric shows through, to create a bold, clean silhouette that stands out sharply against the pale blue fabric.
28. The Padded Satin Stitch Cactus

To give your cactus a realistic, rounded volume, use the padded satin stitch technique.
First, create a foundation of straight stitches within the shape, running perpendicular to your final layer.
Then, cover this padding completely with a top layer of smooth satin stitches. This simple preparation lifts the design off the fabric, creating subtle shadows and a convincing 3D effect.


