

Have you ever looked at your embroidery and felt that something was missing, that it lacked that clean, intentional finish you see in modern design? You’re not alone. Many of us learn complex stitches and intricate patterns, but the true art of embroidery often lies in the elegance of simplicity.
This is where minimalist line art comes in. It’s not about doing less; it’s about making every single stitch count. A single, well-placed line can convey more movement, emotion, and style than a dozen dense fills. It’s a quiet confidence in your craft, a way of speaking through thread with clarity and purpose.
Here, you’ll discover how to transform simple animal outlines into tactile art that feels both modern and warm. We’ll explore how changing your thread weight, choosing the right stitch for curves, or even just framing your work differently can elevate your pieces from handmade projects to cherished home décor. It’s time to let the simple line tell a powerful story.
1. Master the Geometric Outline with a Single Thread

To achieve the crisp, architectural lines of this deer, use a single strand of six-strand cotton floss.
This choice prevents the lines from looking bulky and ensures every angle and intersection remains sharp and defined.
Work the design with a meticulous backstitch on aida or linen-blend fabric; its natural, slightly open weave provides a grid-like guide for perfectly straight stitches.
This technique elevates a simple line drawing into a piece of structured, minimalist art that complements a neutral wall.
2. Imply Texture with Directional Stitching
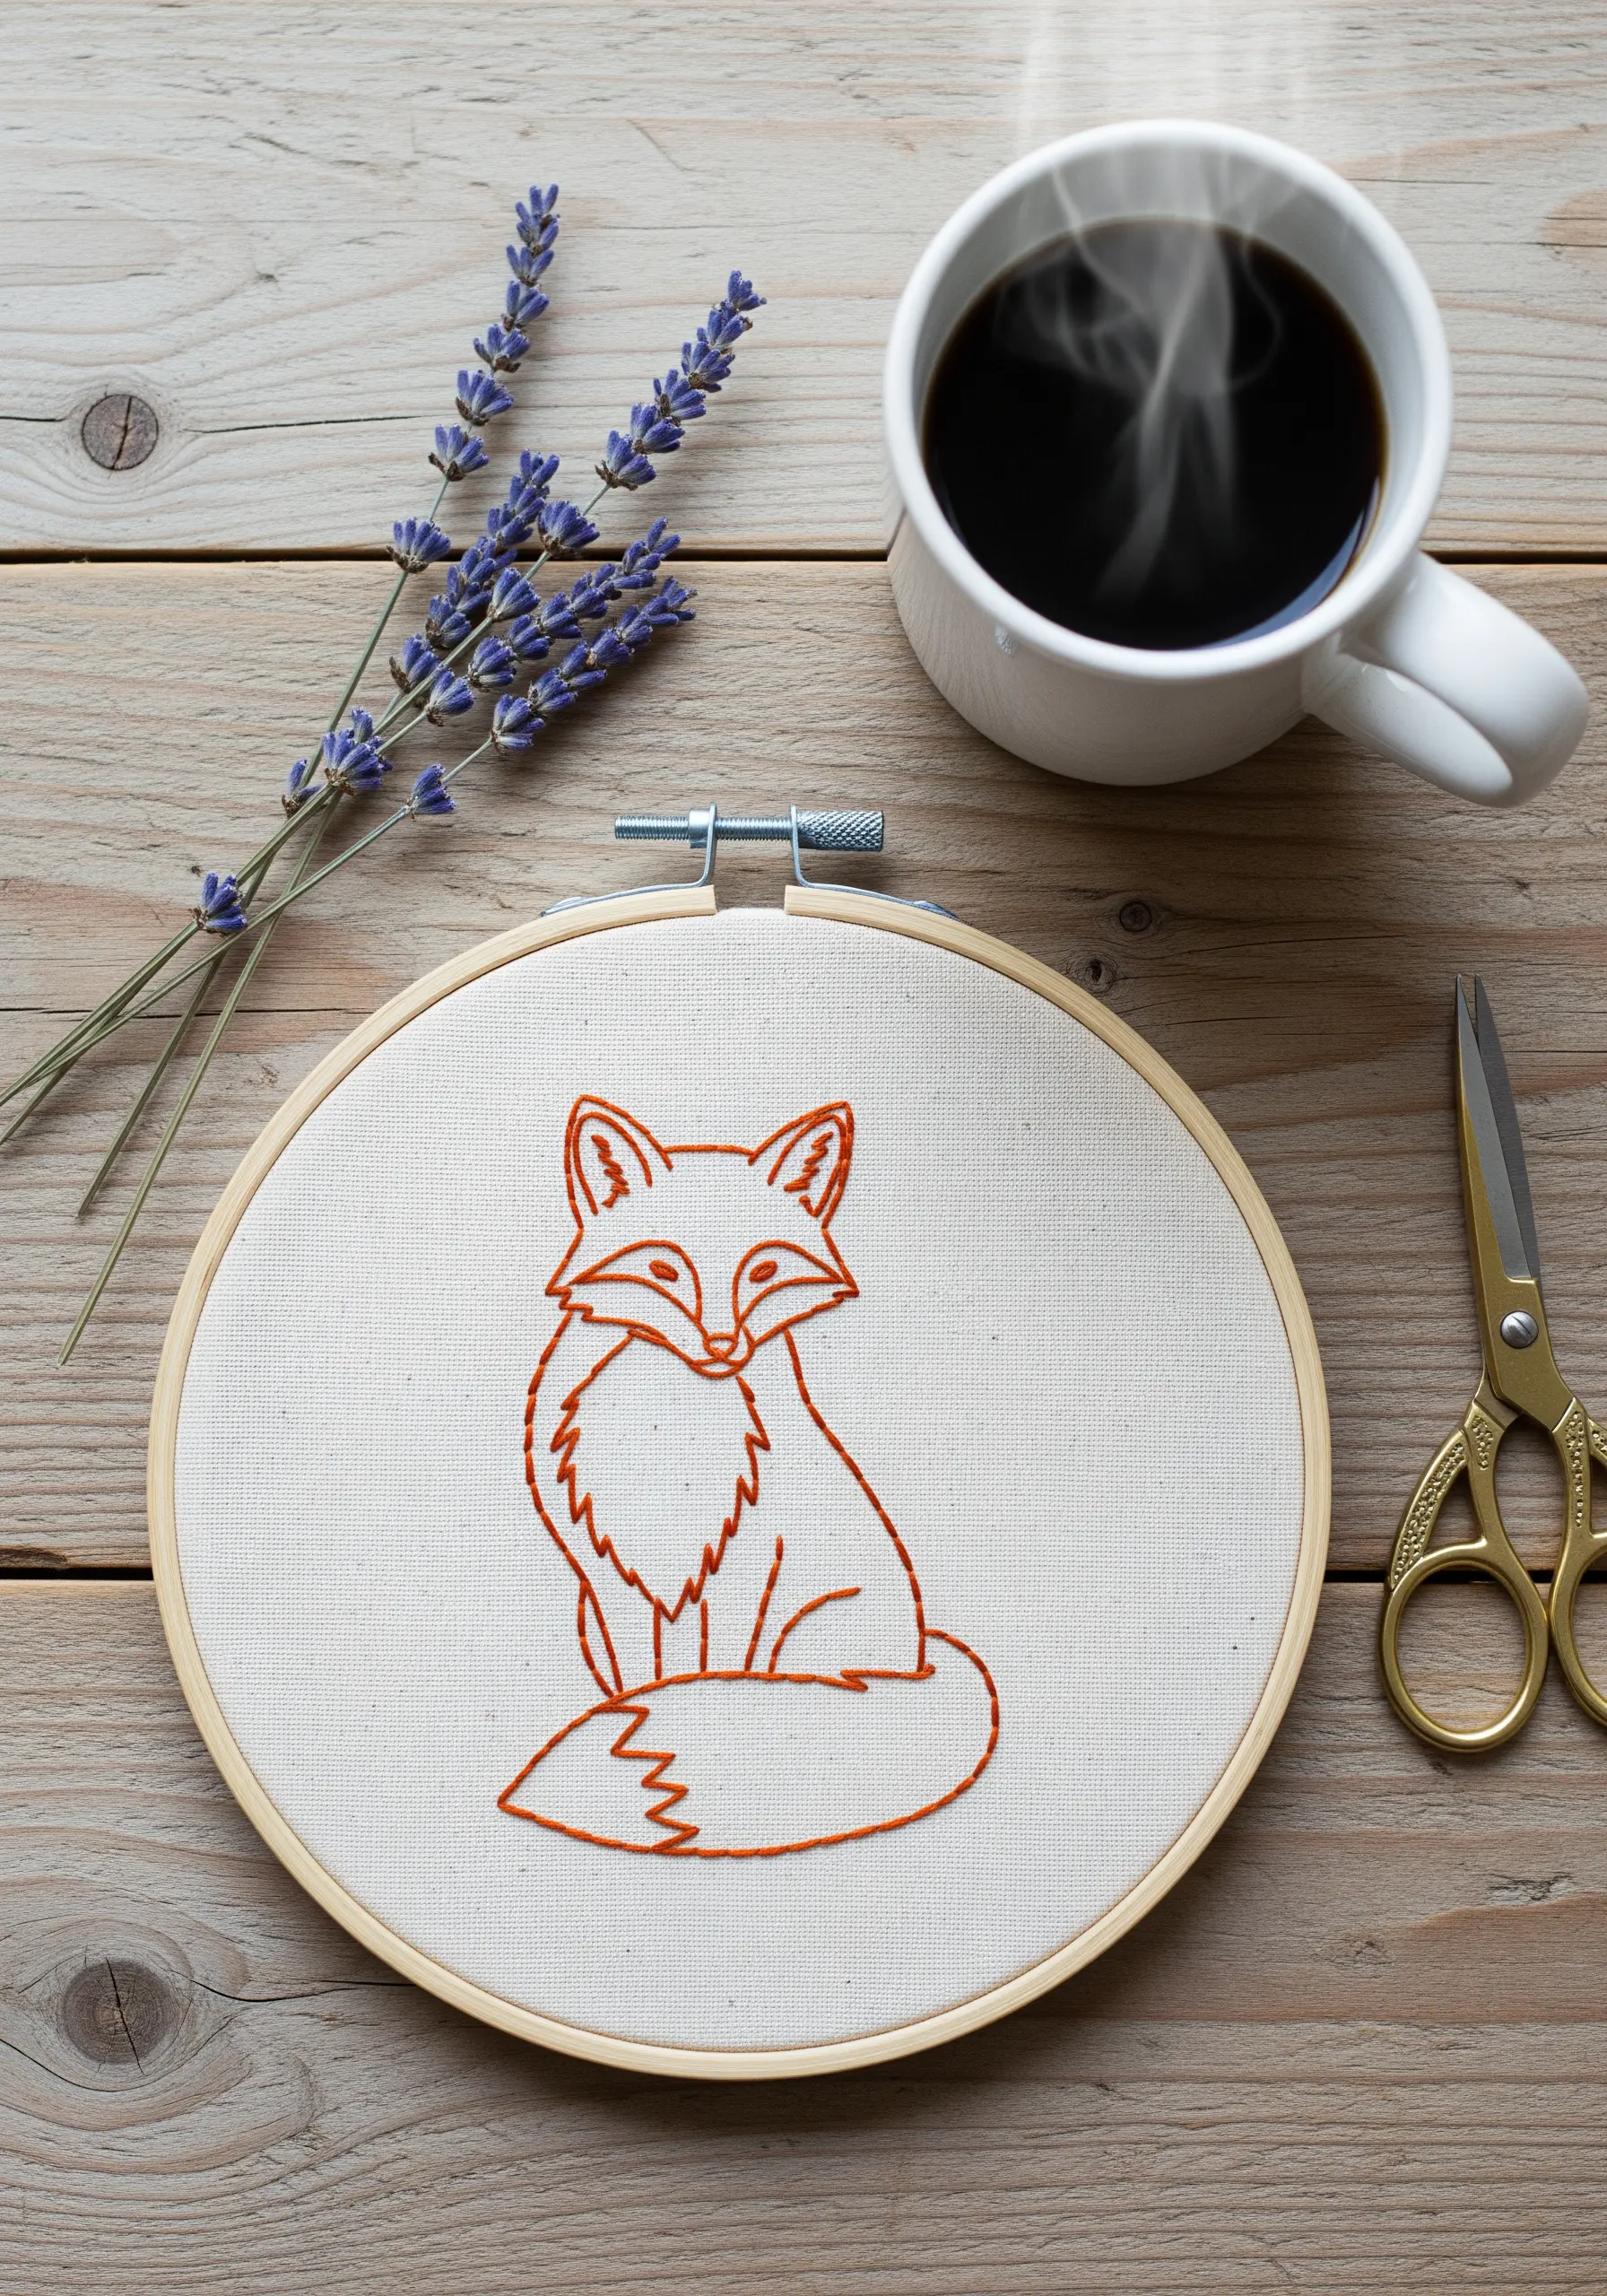
Instead of filling in this fox design, suggest the texture of fur using a strategic whipped backstitch.
The stitch adds a subtle, cord-like definition that gives the outline weight and dimension.
For areas like the chest and tail, use short, straight stitches that follow the natural direction of fur growth.
This creates a sense of movement and softness, proving that minimalism can be expressive and full of character without adding clutter.
3. Combine Bold Outlines with a Subtle Fill
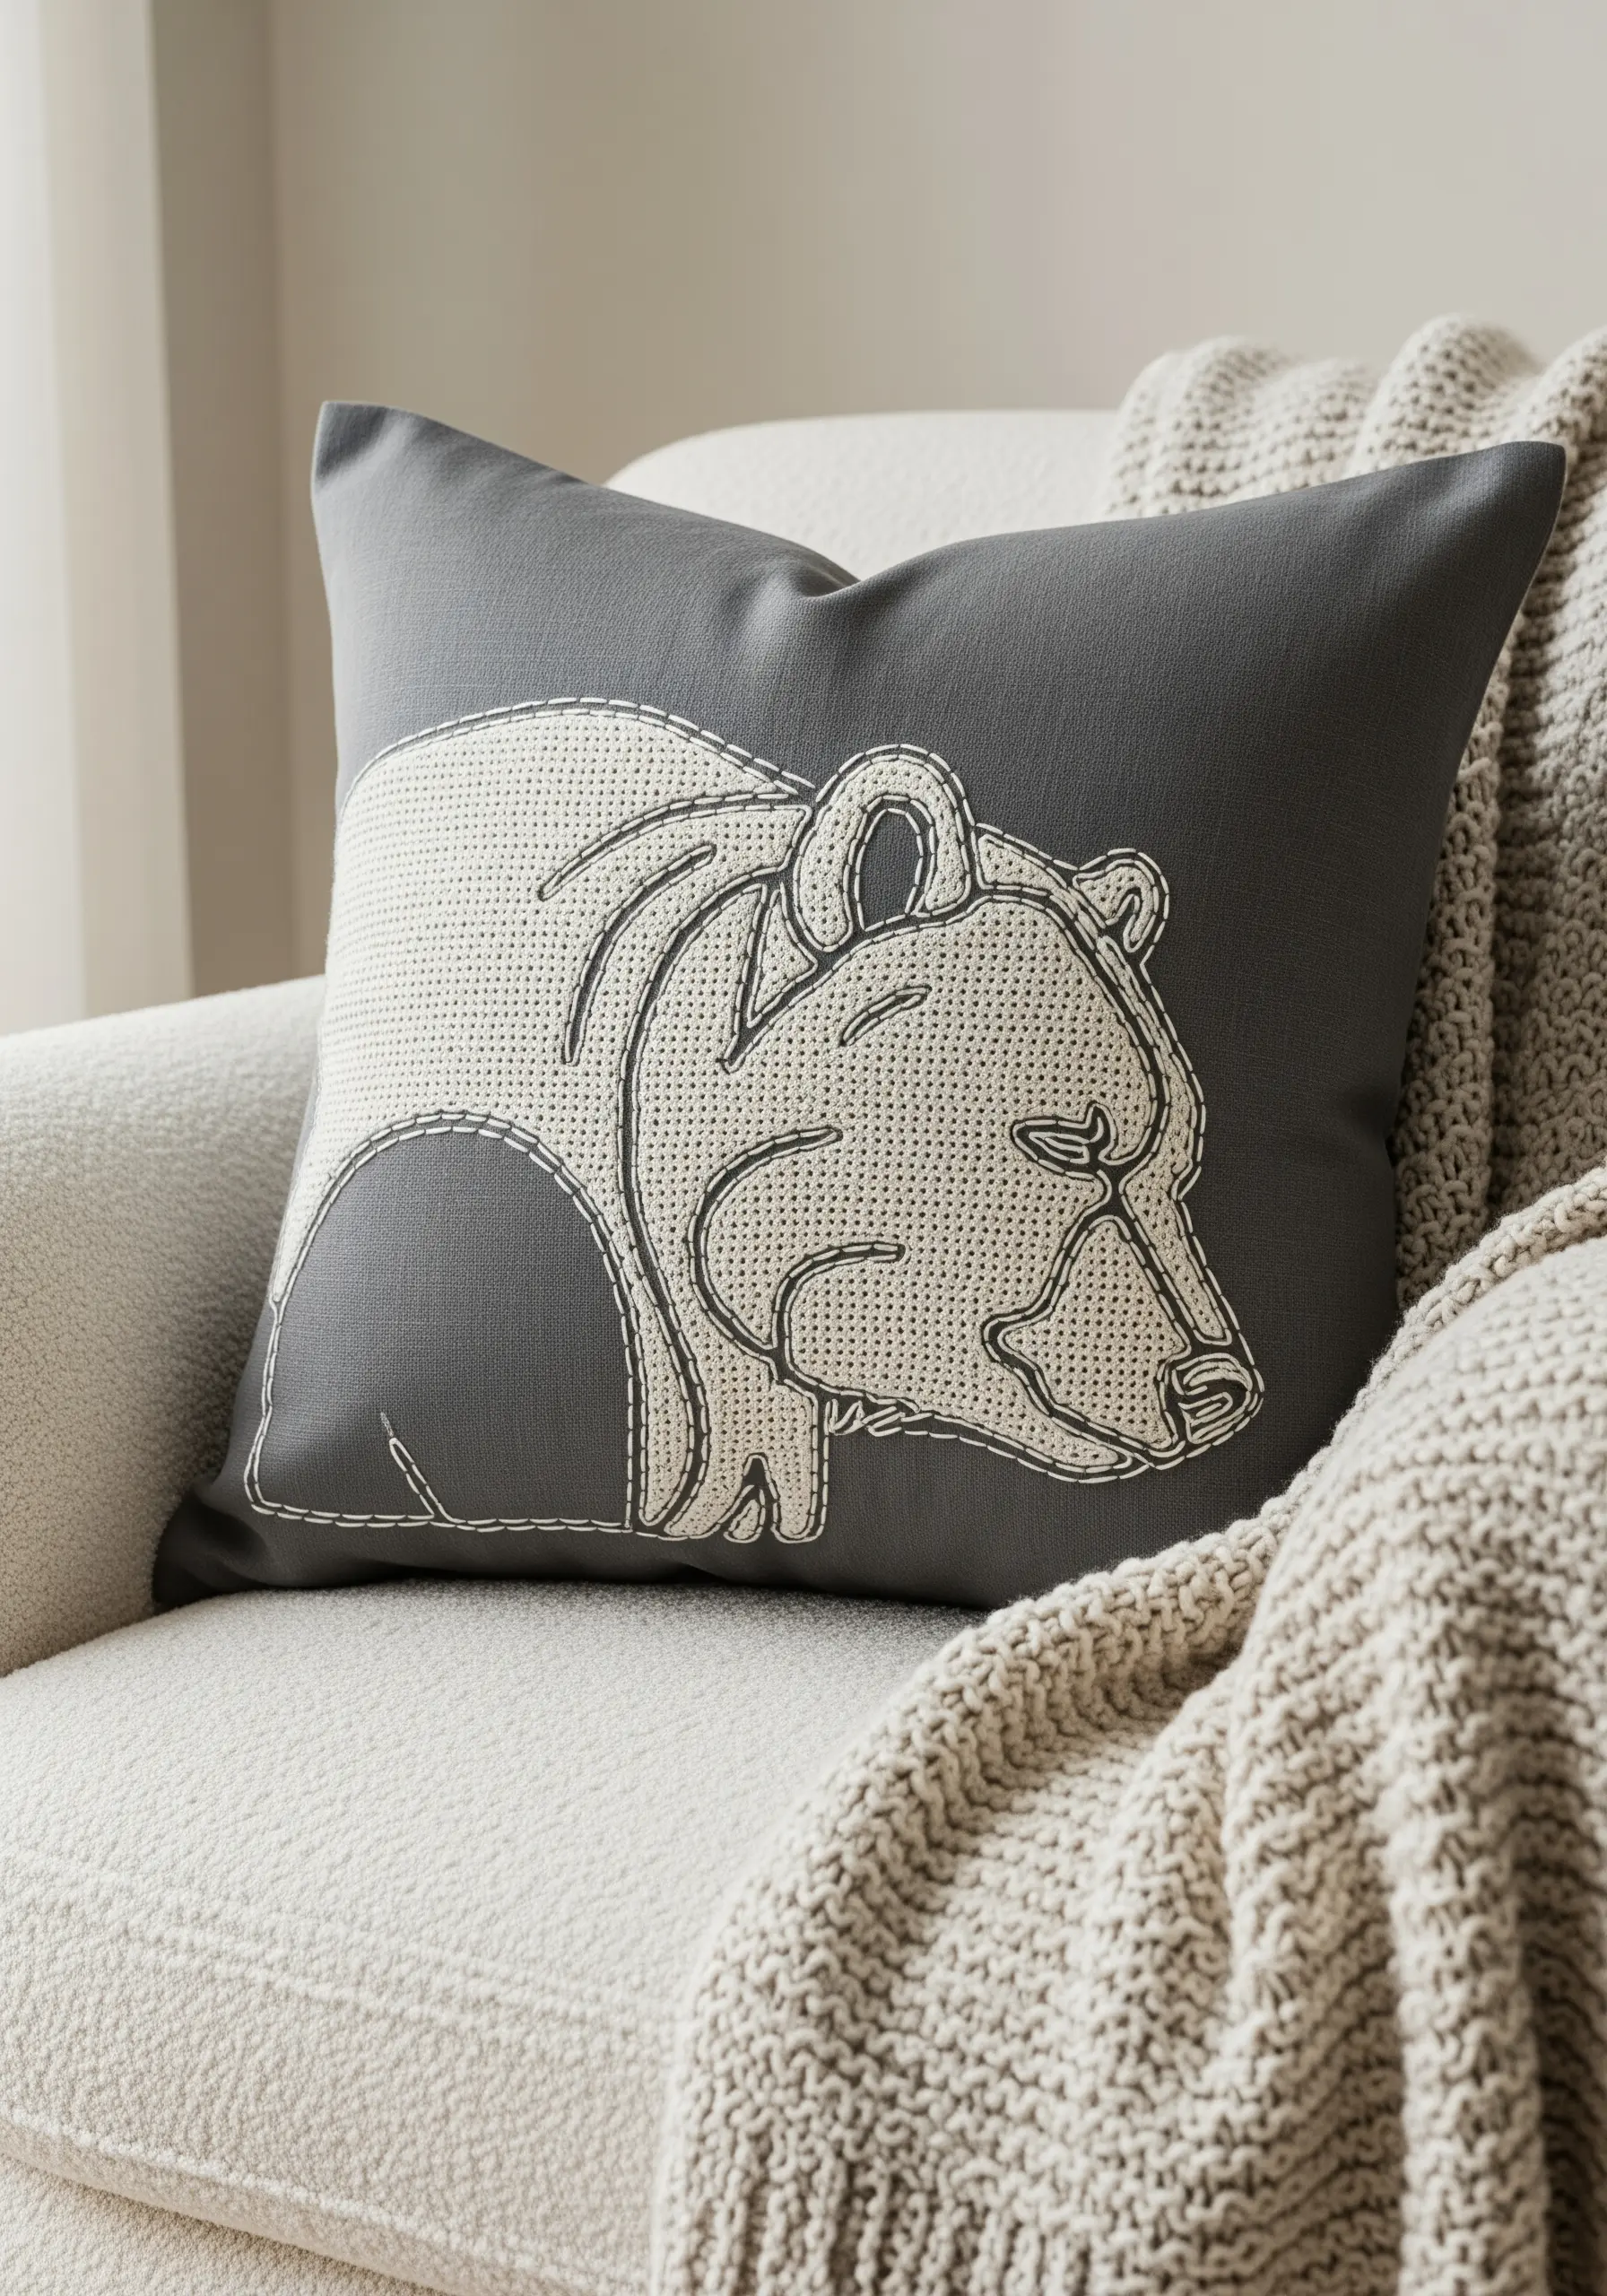
Create a powerful graphic statement by pairing a heavy outline with a contrasting fill stitch.
Use a chain stitch or a thick stem stitch for the bear’s outline to give it prominence and a hand-carved feel.
For the fill, lay down long, parallel stitches and then weave over and under them with the same thread, a technique known as darning.
This method adds incredible texture and turns a simple cushion into a focal point, showing how you can turn boring pillowcases into boutique home decor.
4. Frame Your Embroidery Like Contemporary Art
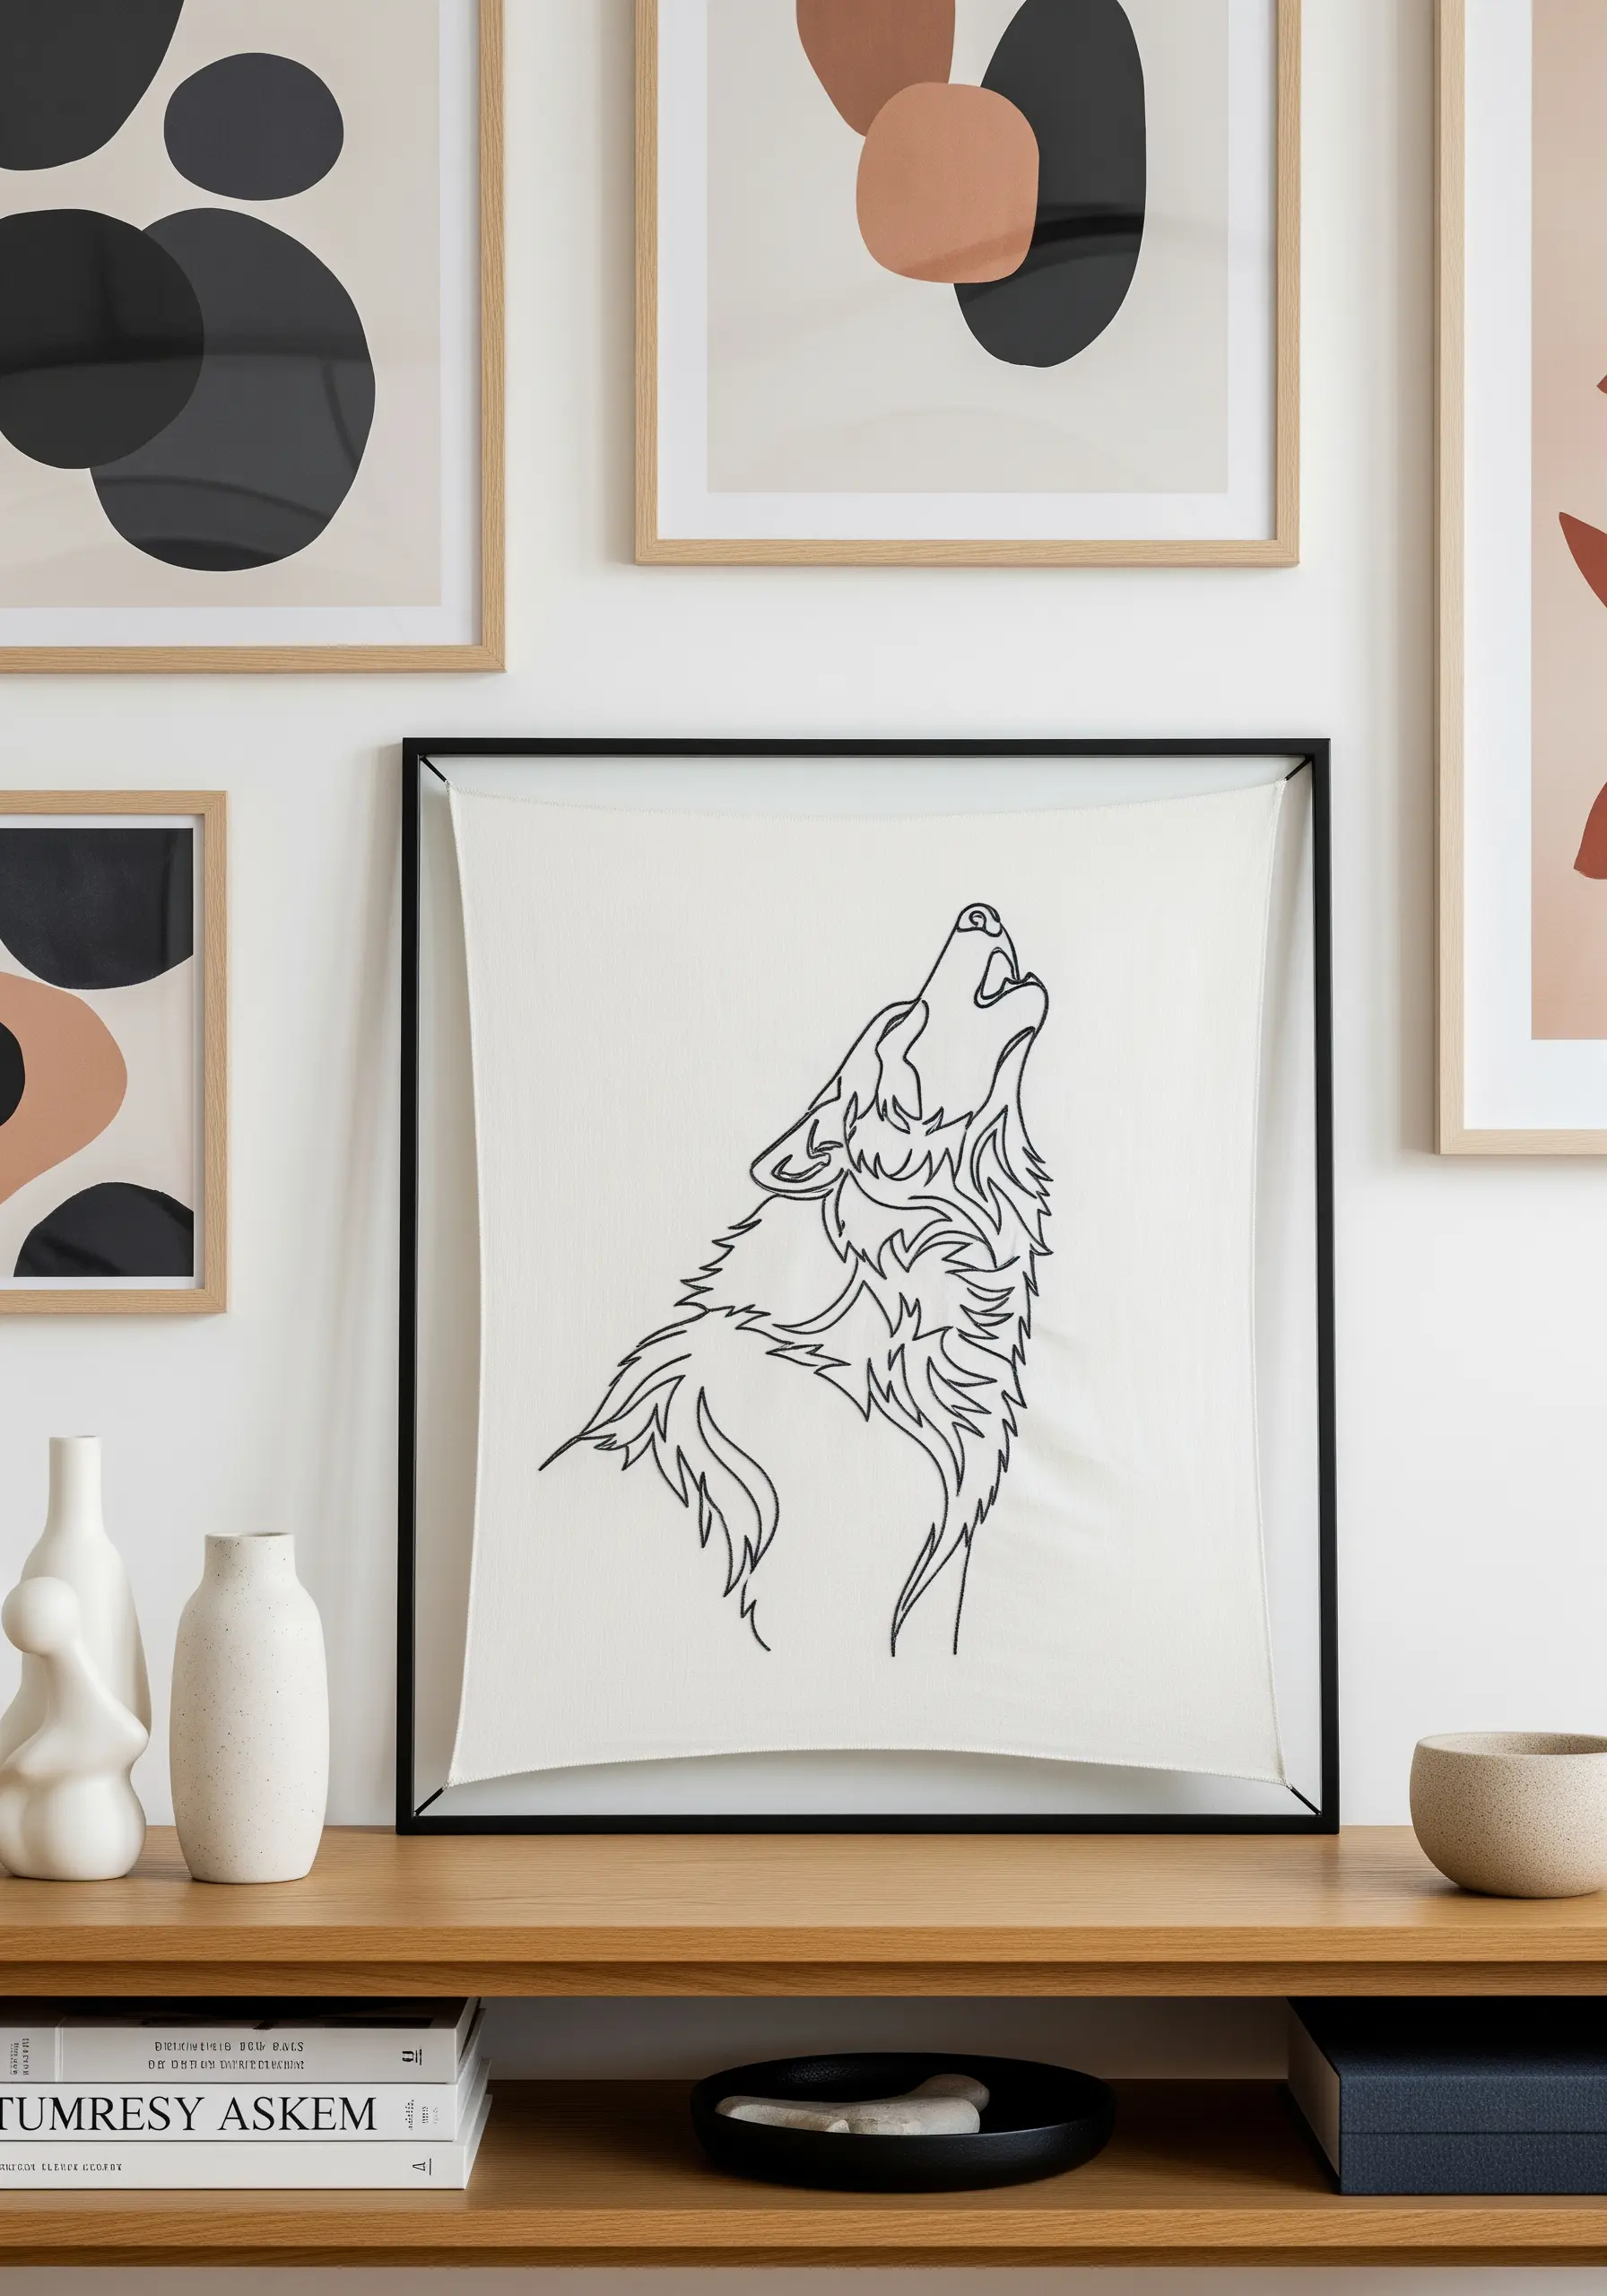
Elevate your finished piece by stretching it in a modern, floating frame instead of a traditional hoop.
This presentation removes the crafty association of the hoop and positions your embroidery as a piece of fine art.
Ensure your fabric is pulled taut and evenly on all sides to prevent sagging, securing it firmly to the back of the frame.
For a dynamic design like this howling wolf, a consistent backstitch using two strands of floss ensures the lines are fluid and unbroken, capturing the animal’s energy.
5. Use Whipped Running Stitch for Graphic Impact
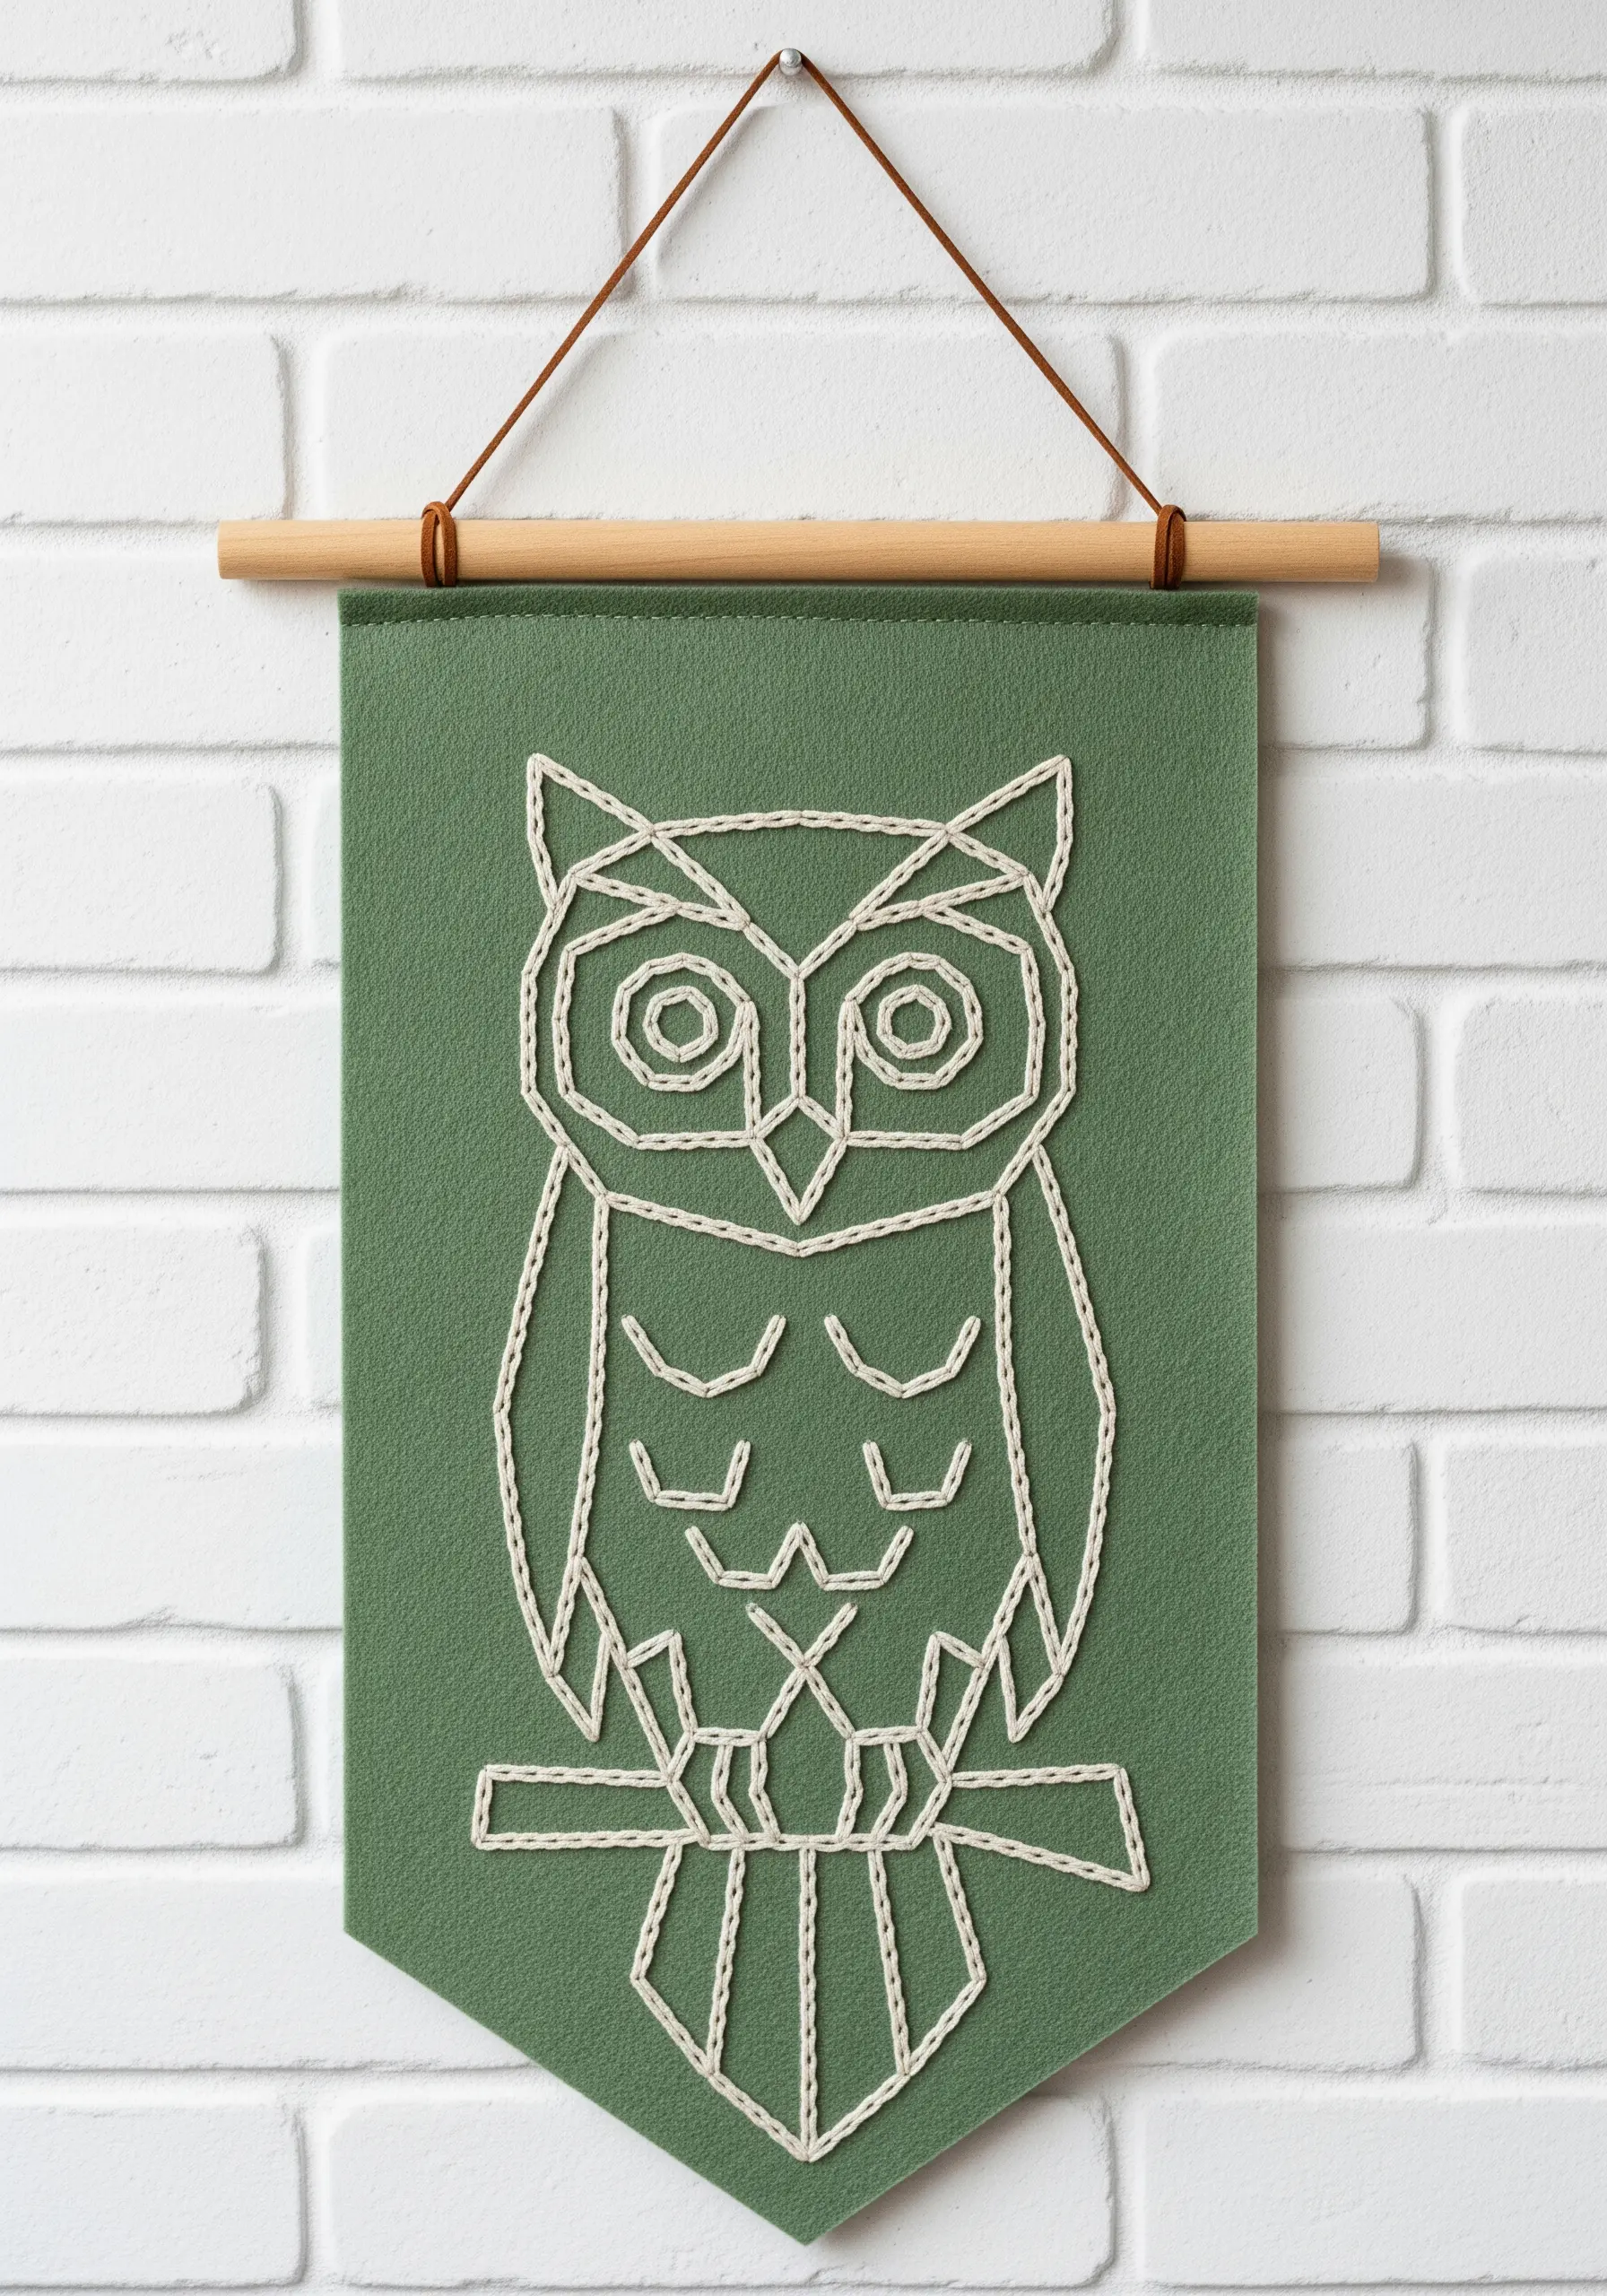
When working on felt or other non-woven fabrics, a whipped running stitch creates bold, clean lines that sit beautifully on the surface.
First, lay down a foundation of simple running stitches along your design lines.
Then, without piercing the fabric, loop a second thread under each running stitch to create a solid, raised line.
This technique is faster than backstitch and perfect for geometric designs like this owl, giving it a playful yet polished look for a wall banner.
6. Capture Motion with a Single, Flowing Line
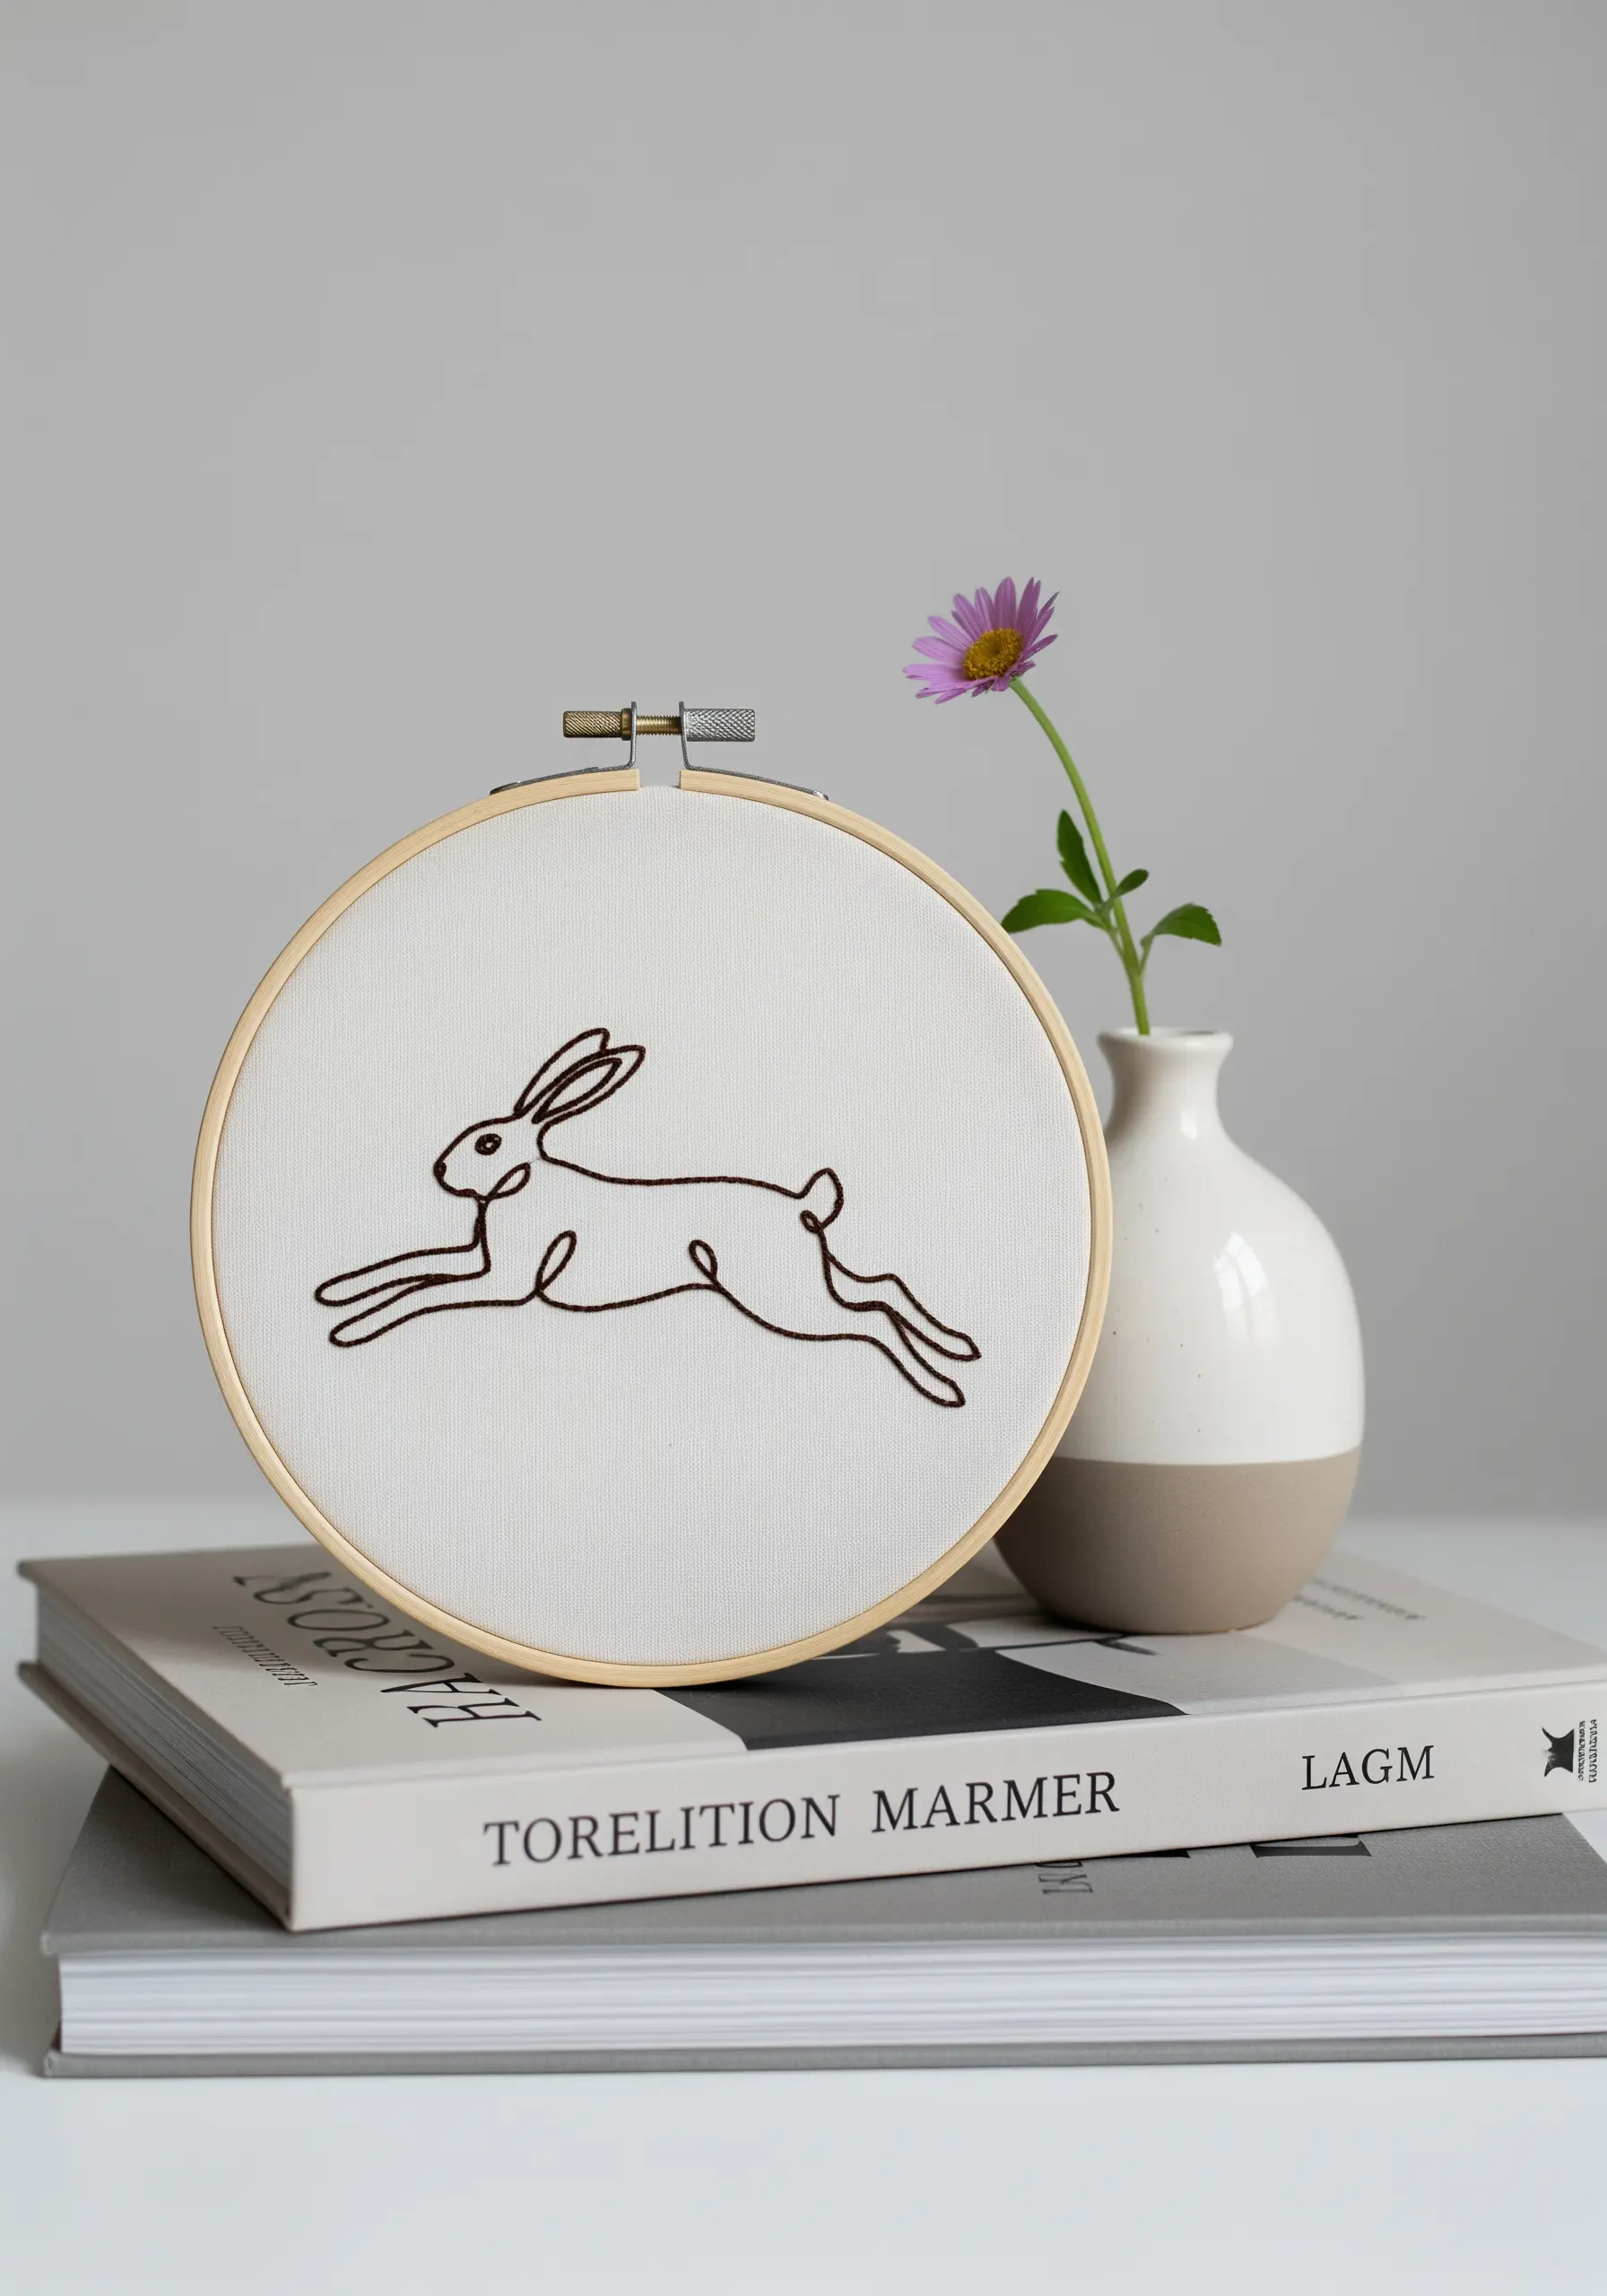
For designs that depict movement, like this leaping rabbit, prioritize a continuous line to convey energy and grace.
Use a stem stitch, as its twisted, rope-like appearance excels at creating smooth, dynamic curves without sharp breaks.
Choose a dark brown or grey thread on a light background; the contrast is strong enough to be clear but softer than stark black, adding a touch of warmth.
This approach transforms a simple sketch into a story of agility and lightness.
7. Scale Up Your Linework for a Statement Tapestry
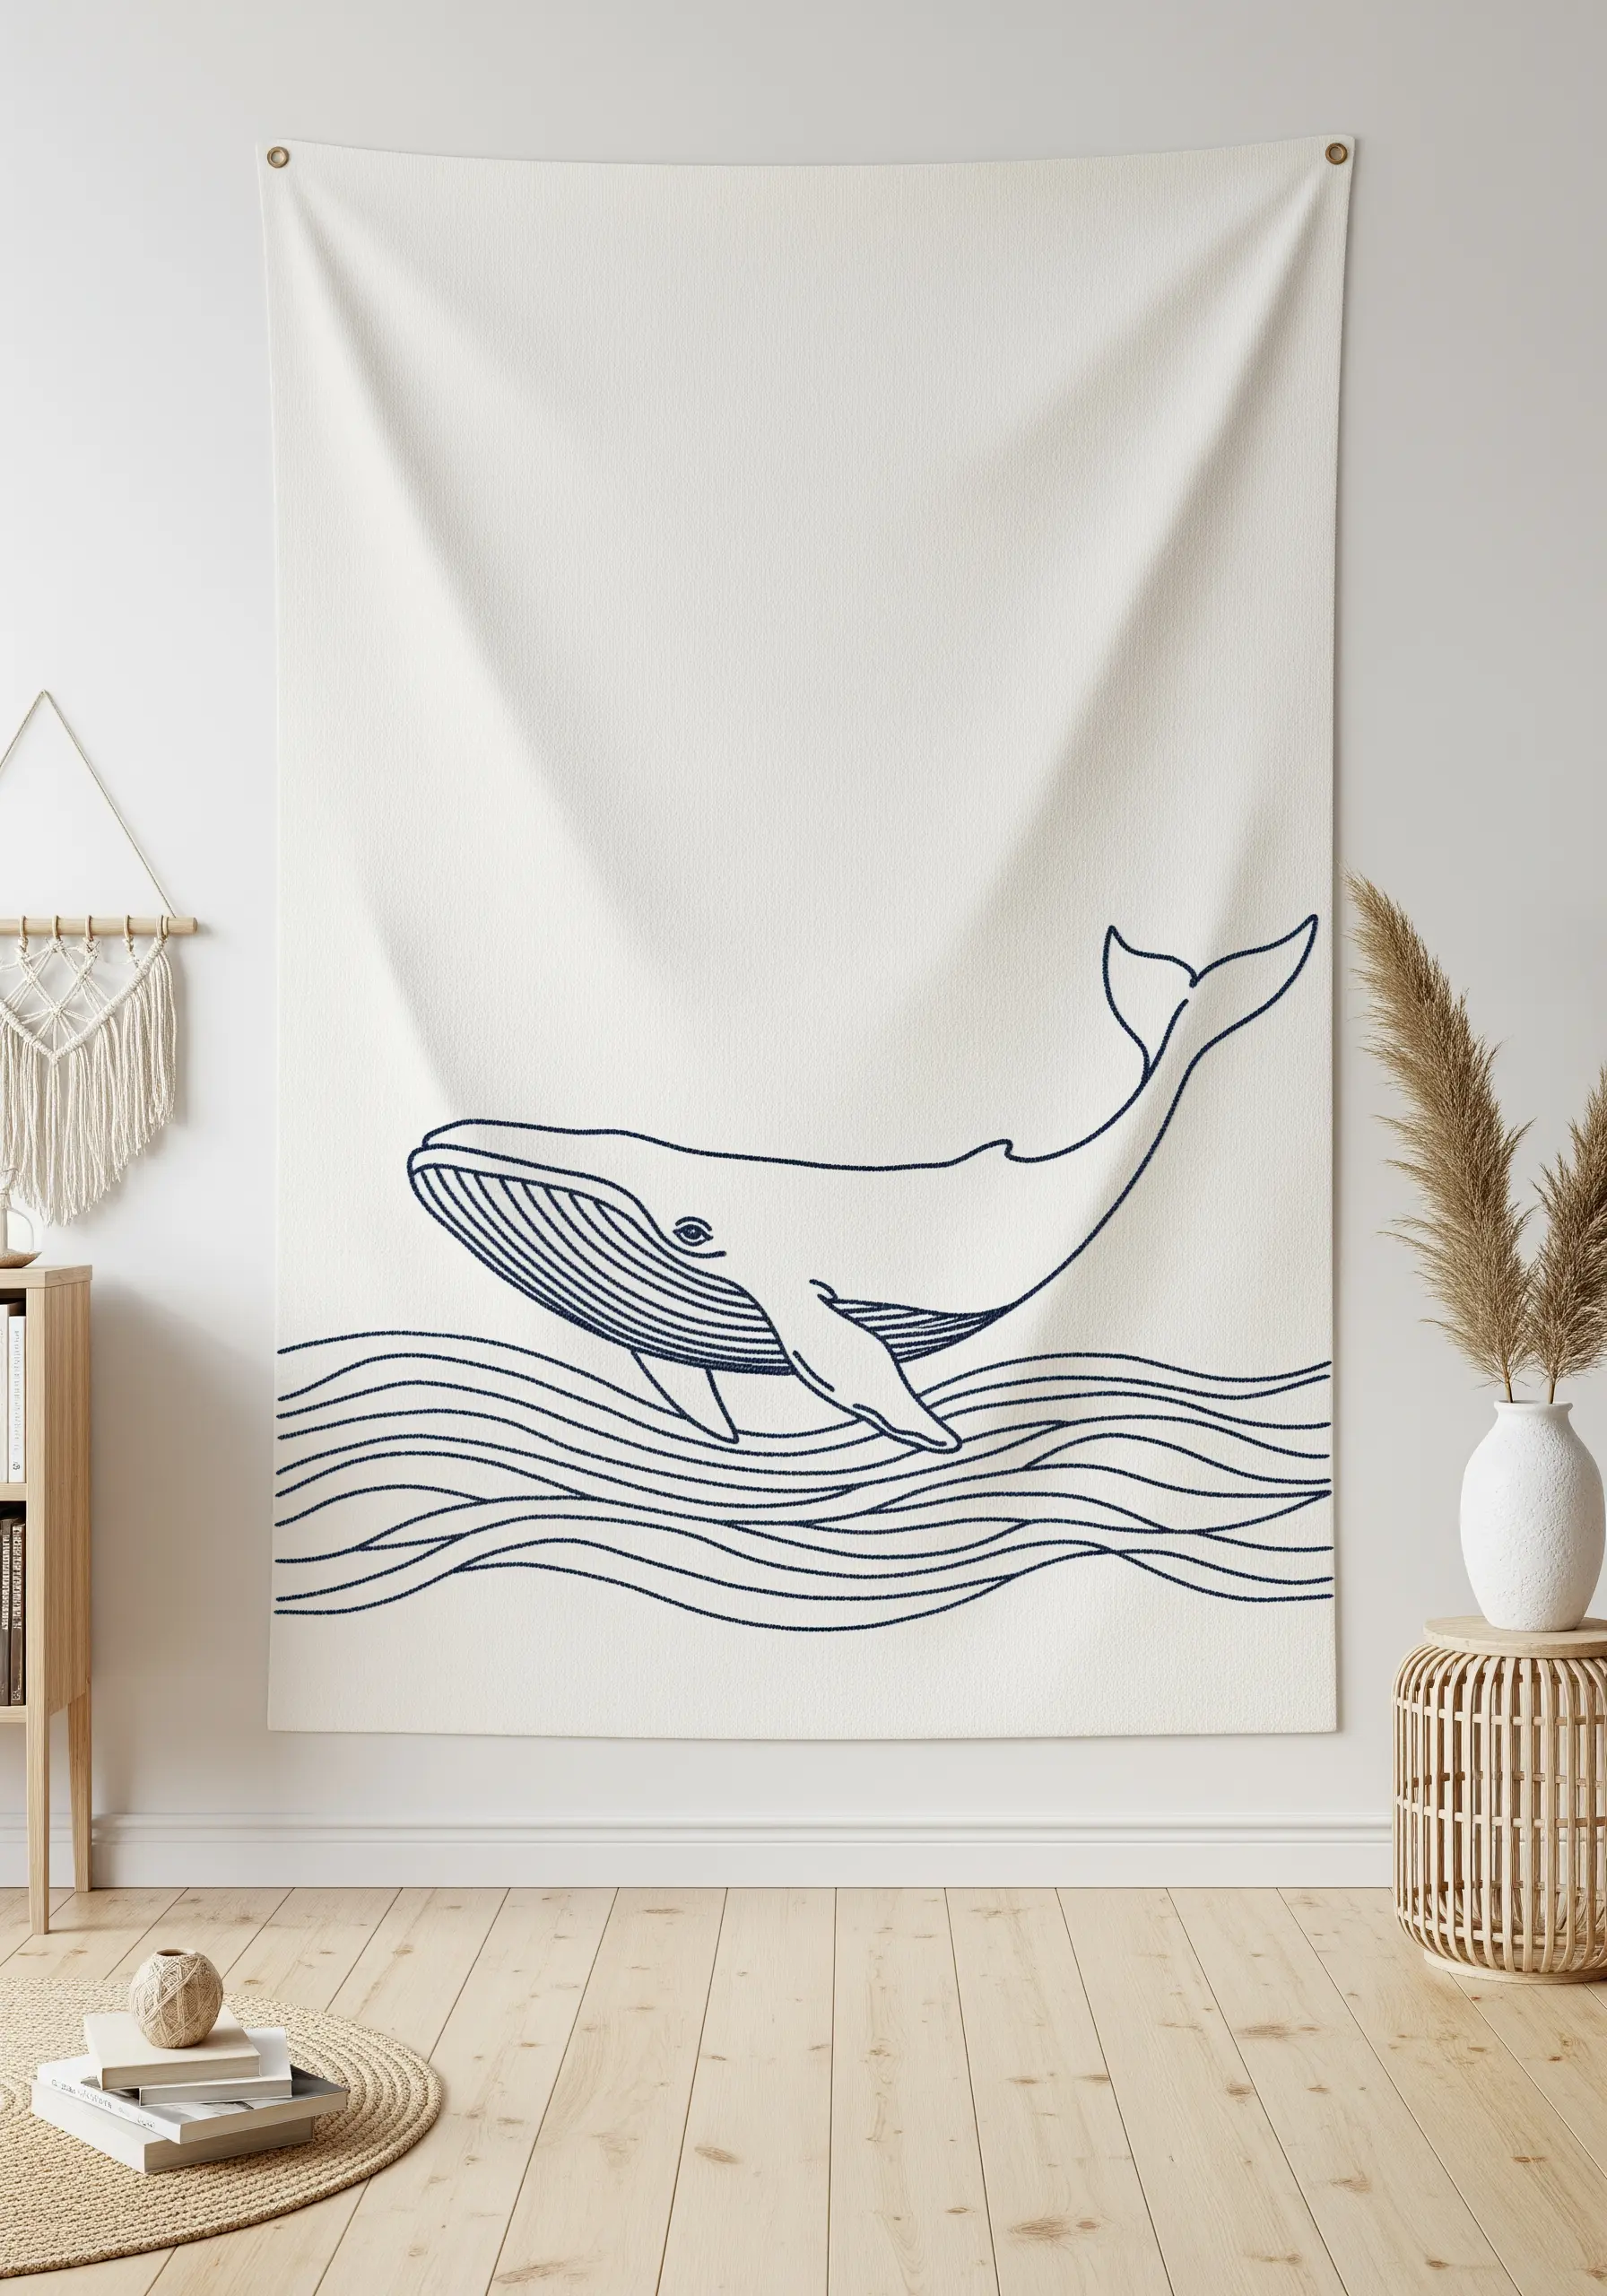
Don’t be afraid to take a simple line drawing and transform it into a piece of large-scale wall art.
For large-scale embroidery projects like this whale tapestry, use a thicker thread, such as pearl cotton No. 5 or even fine yarn.
A simple backstitch or chain stitch works perfectly, creating a bold line that is visible from across the room.
This technique turns a blank wall into an immersive, serene scene with minimal complexity.
8. Plan Your Stitch Path for Continuous-Line Designs
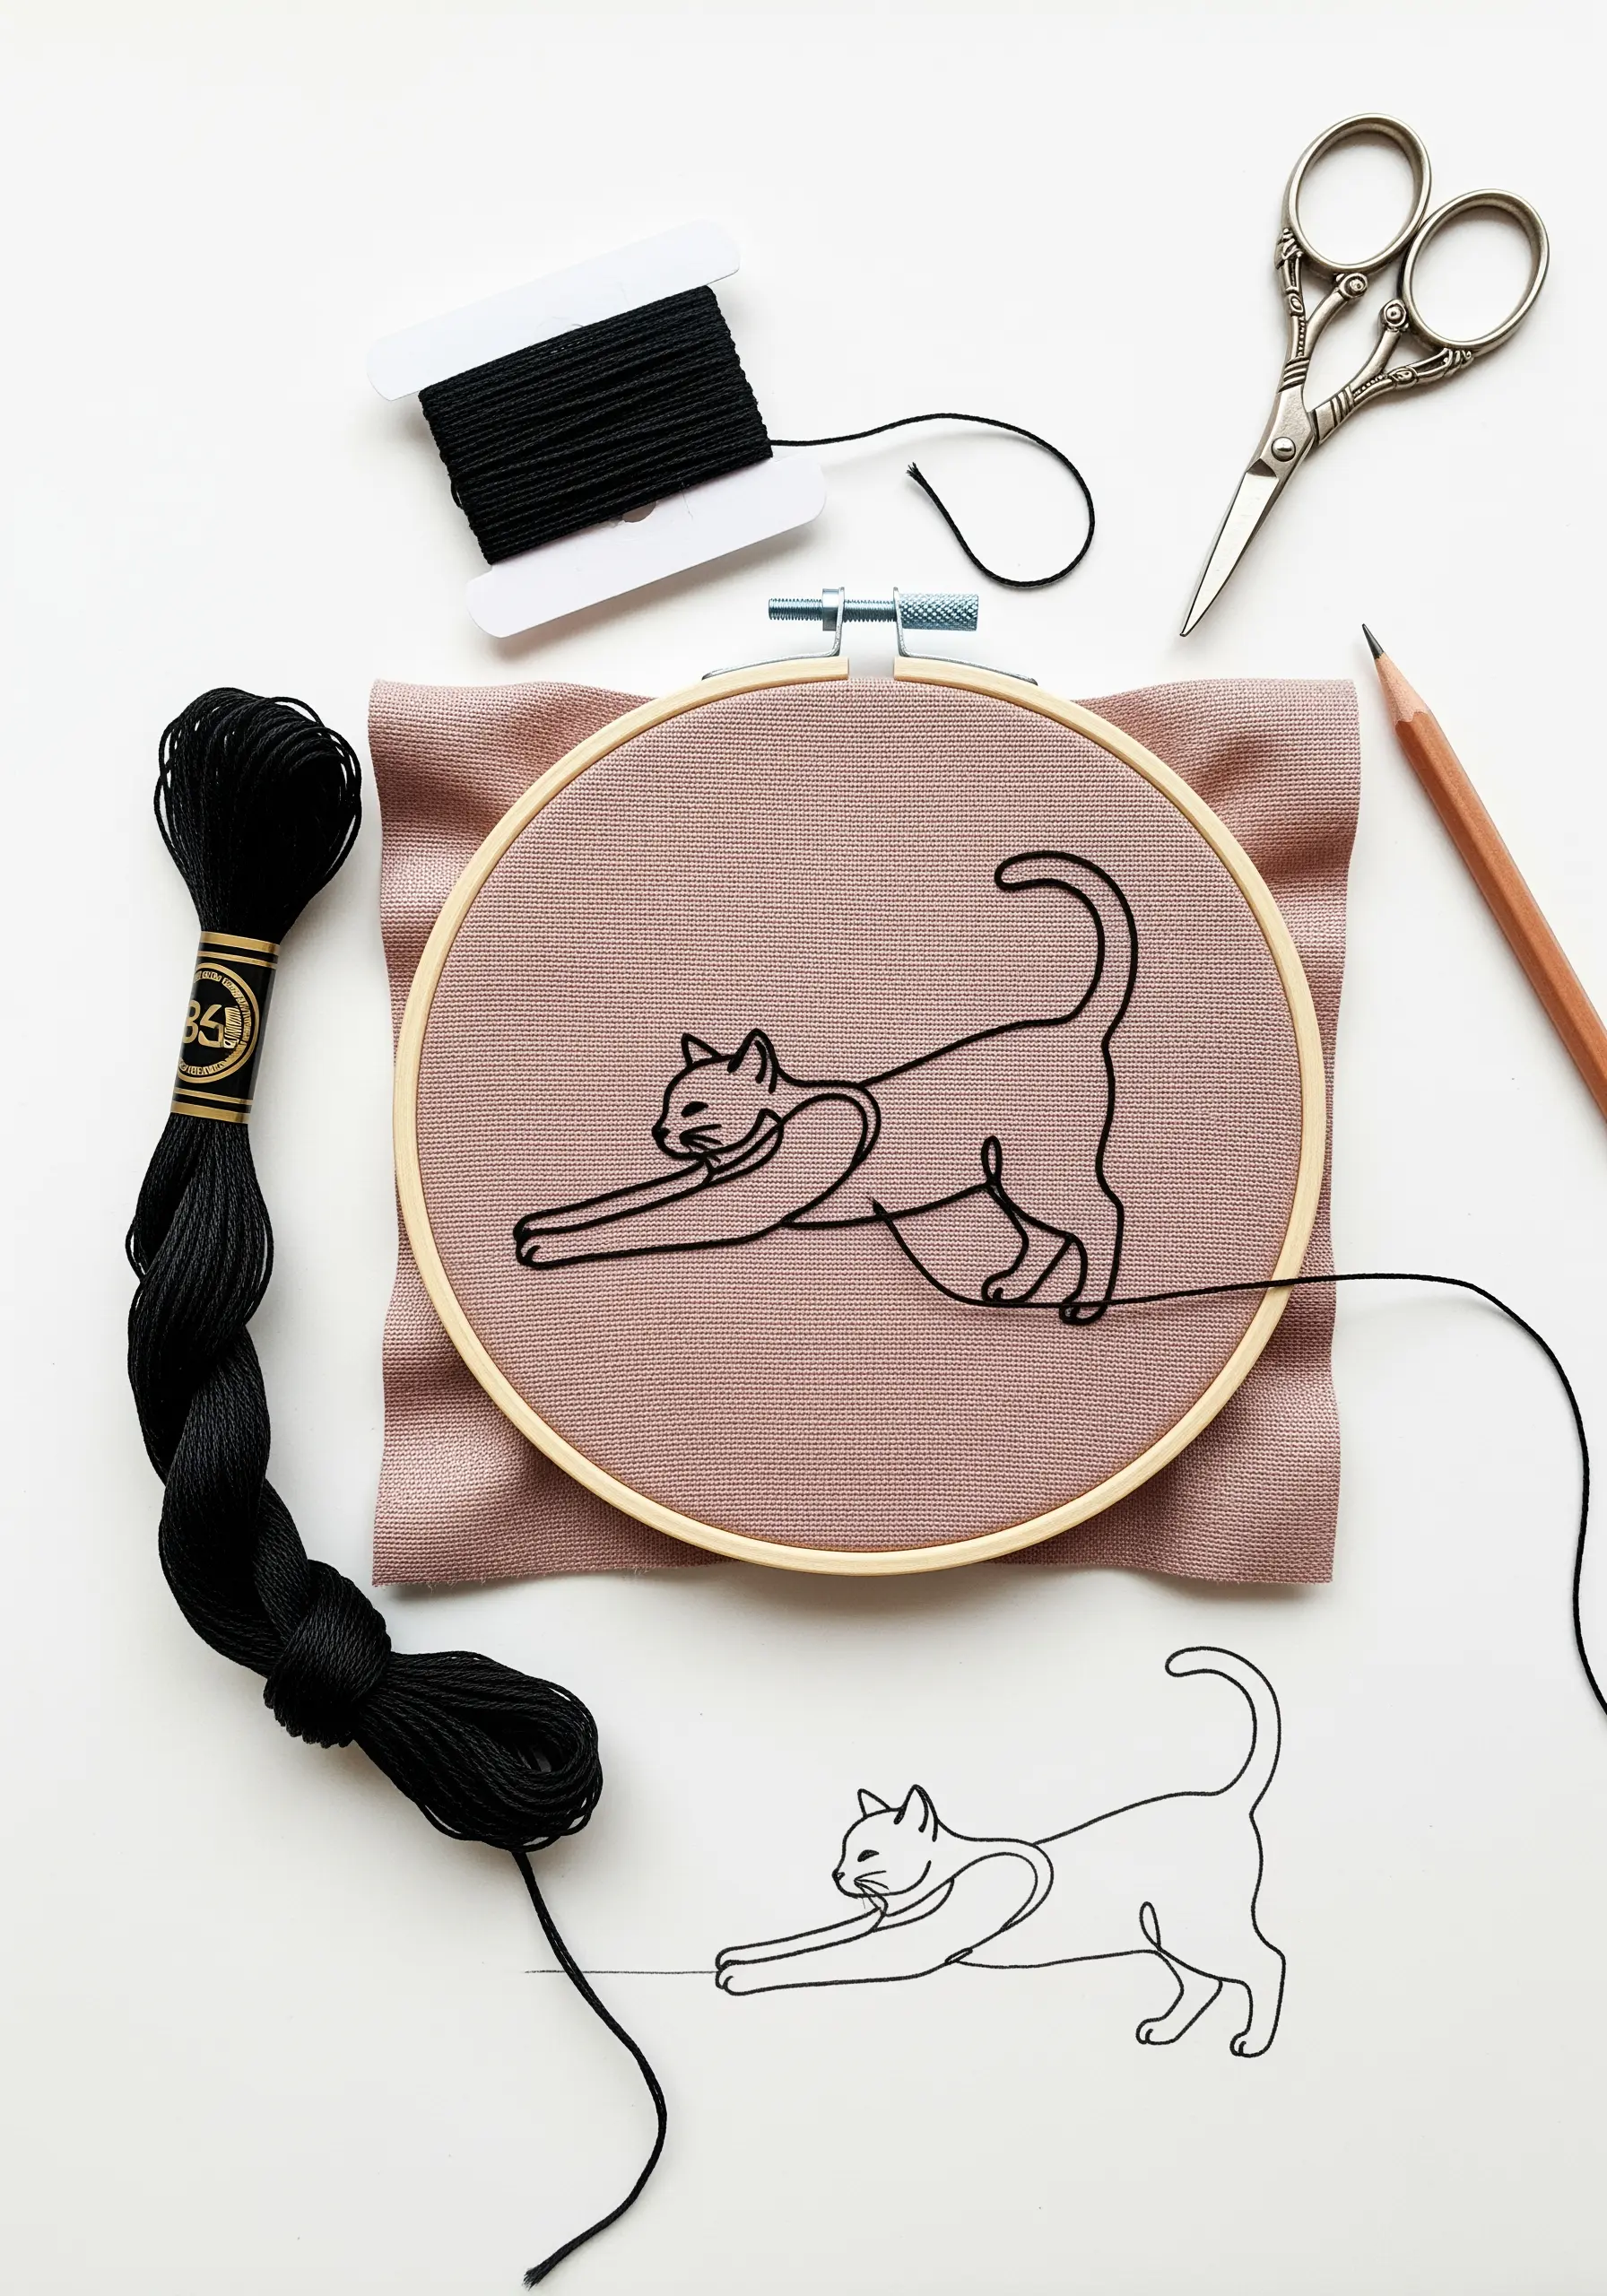
The magic of a single-line design, like this stretching cat, is its unbroken flow.
Before you even thread your needle, trace the entire path with your finger or a pencil on paper to find the most efficient route with no backtracking.
Use a single, long piece of thread to avoid starting and stopping, which can create bulky knots.
A simple backstitch is ideal here, as it allows for sharp turns and clean curves, perfectly capturing the fluid motion of the subject.
9. Add Minimal Color Accents for a Touch of Realism

Elevate a simple line-art bird by adding just a touch of color where it matters most.
Stitch the majority of the design in a neutral grey or black using a neat backstitch.
Then, use a single strand of vividly colored floss—like orange or yellow—to fill a small area like the chest or wing with satin stitch.
This subtle color blocking technique draws the eye and adds a surprising amount of personality and life without overwhelming the minimalist aesthetic.
10. Use Negative Space to Define Your Subject

In this swan design, the space inside the heart-shaped neck is as important as the stitched lines themselves.
When embroidering, focus on making the outlines clean and crisp to let the negative space do the work of defining the form.
Use a split stitch for the outline; it creates a solid, almost drawn-on line that is perfect for delicate curves.
This thoughtful use of space results in a design that feels elegant, light, and emotionally resonant.
11. Balance Detail and Simplicity in Large Formats

When embroidering a large, detailed animal like this horse, the key is to simplify without losing the essence of the form.
Focus the detail on key areas like the face and muscles, using more intricate linework there.
For the larger body, use longer, more sweeping lines to suggest shape and movement.
Stitching with a consistent two-strand backstitch on a heavy linen canvas gives the final piece a substantial, gallery-like presence perfect for a dining room wall.
12. Create Depth with Overlapping Satin Stitches
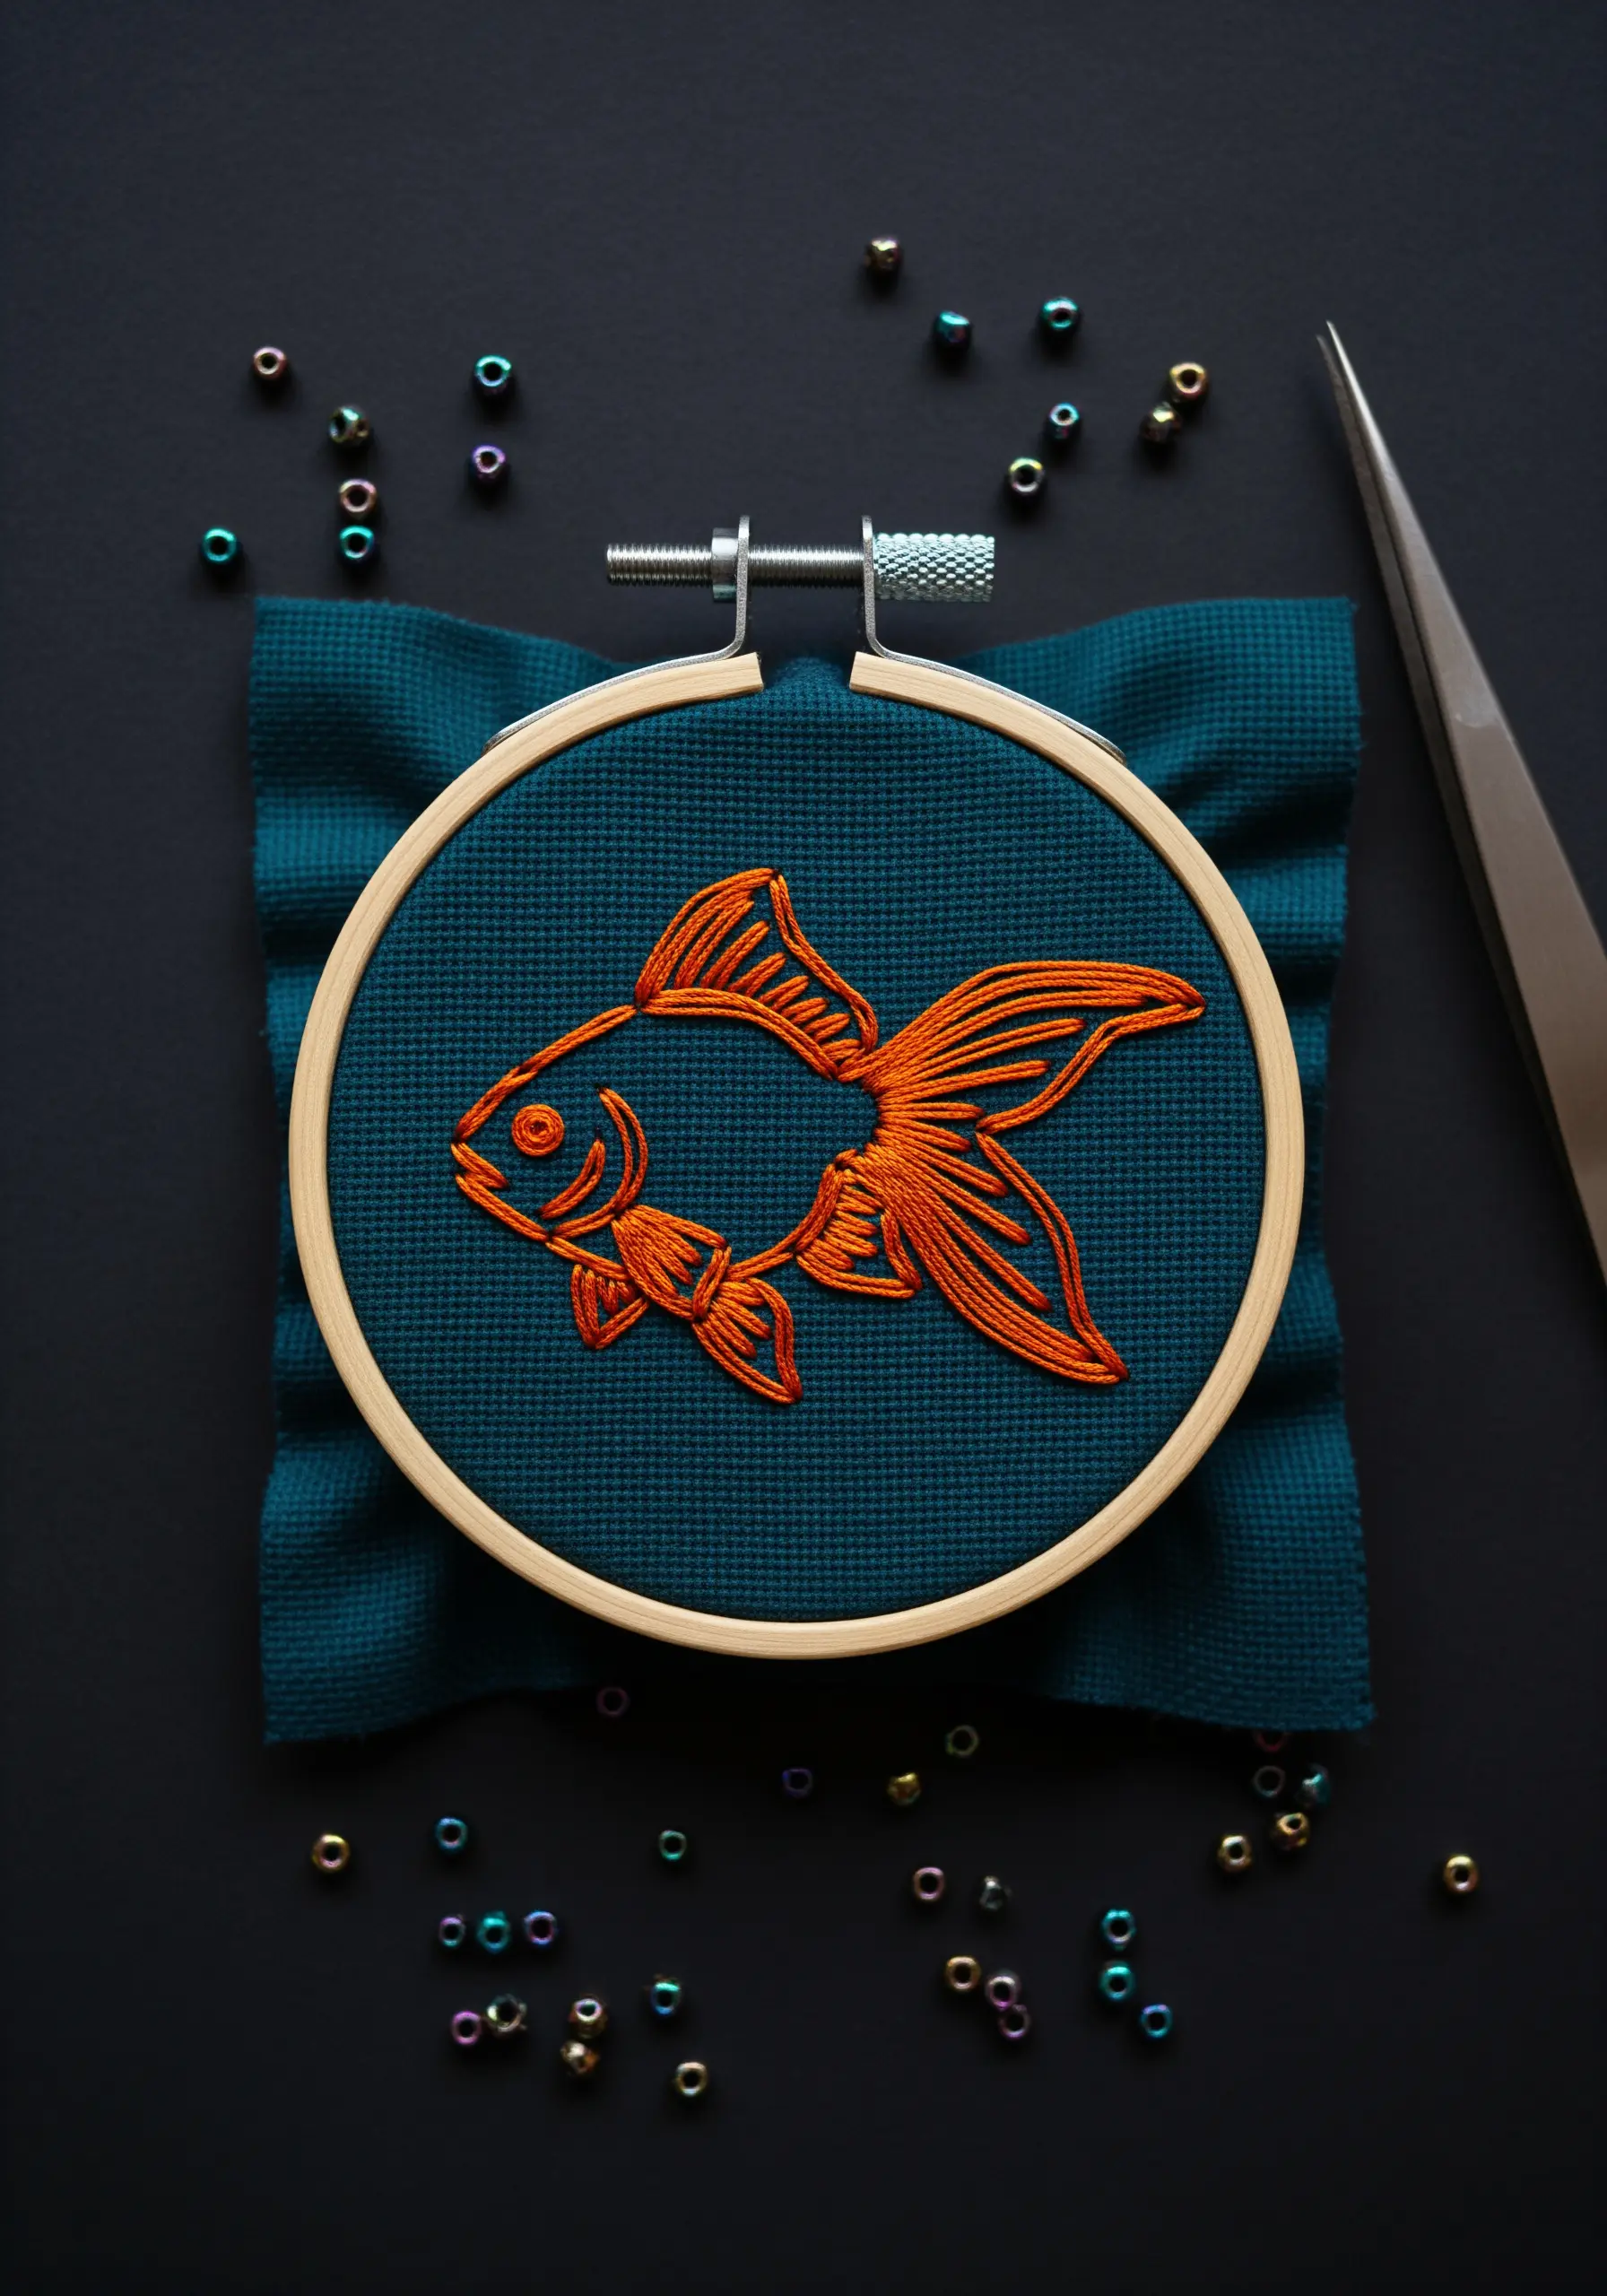
To make a motif like this goldfish feel dynamic, use layered satin stitches to suggest fins and scales.
Instead of one large block of satin stitch, break up the tail and fins into smaller, overlapping sections.
Vary the angle of your stitches slightly in each section to catch the light differently, creating a subtle shimmer and sense of movement.
Stitching with a high-sheen rayon or silk floss against a dark, matte fabric like Aida cloth will maximize this effect.
13. Let a Single Line Wander Beyond the Subject
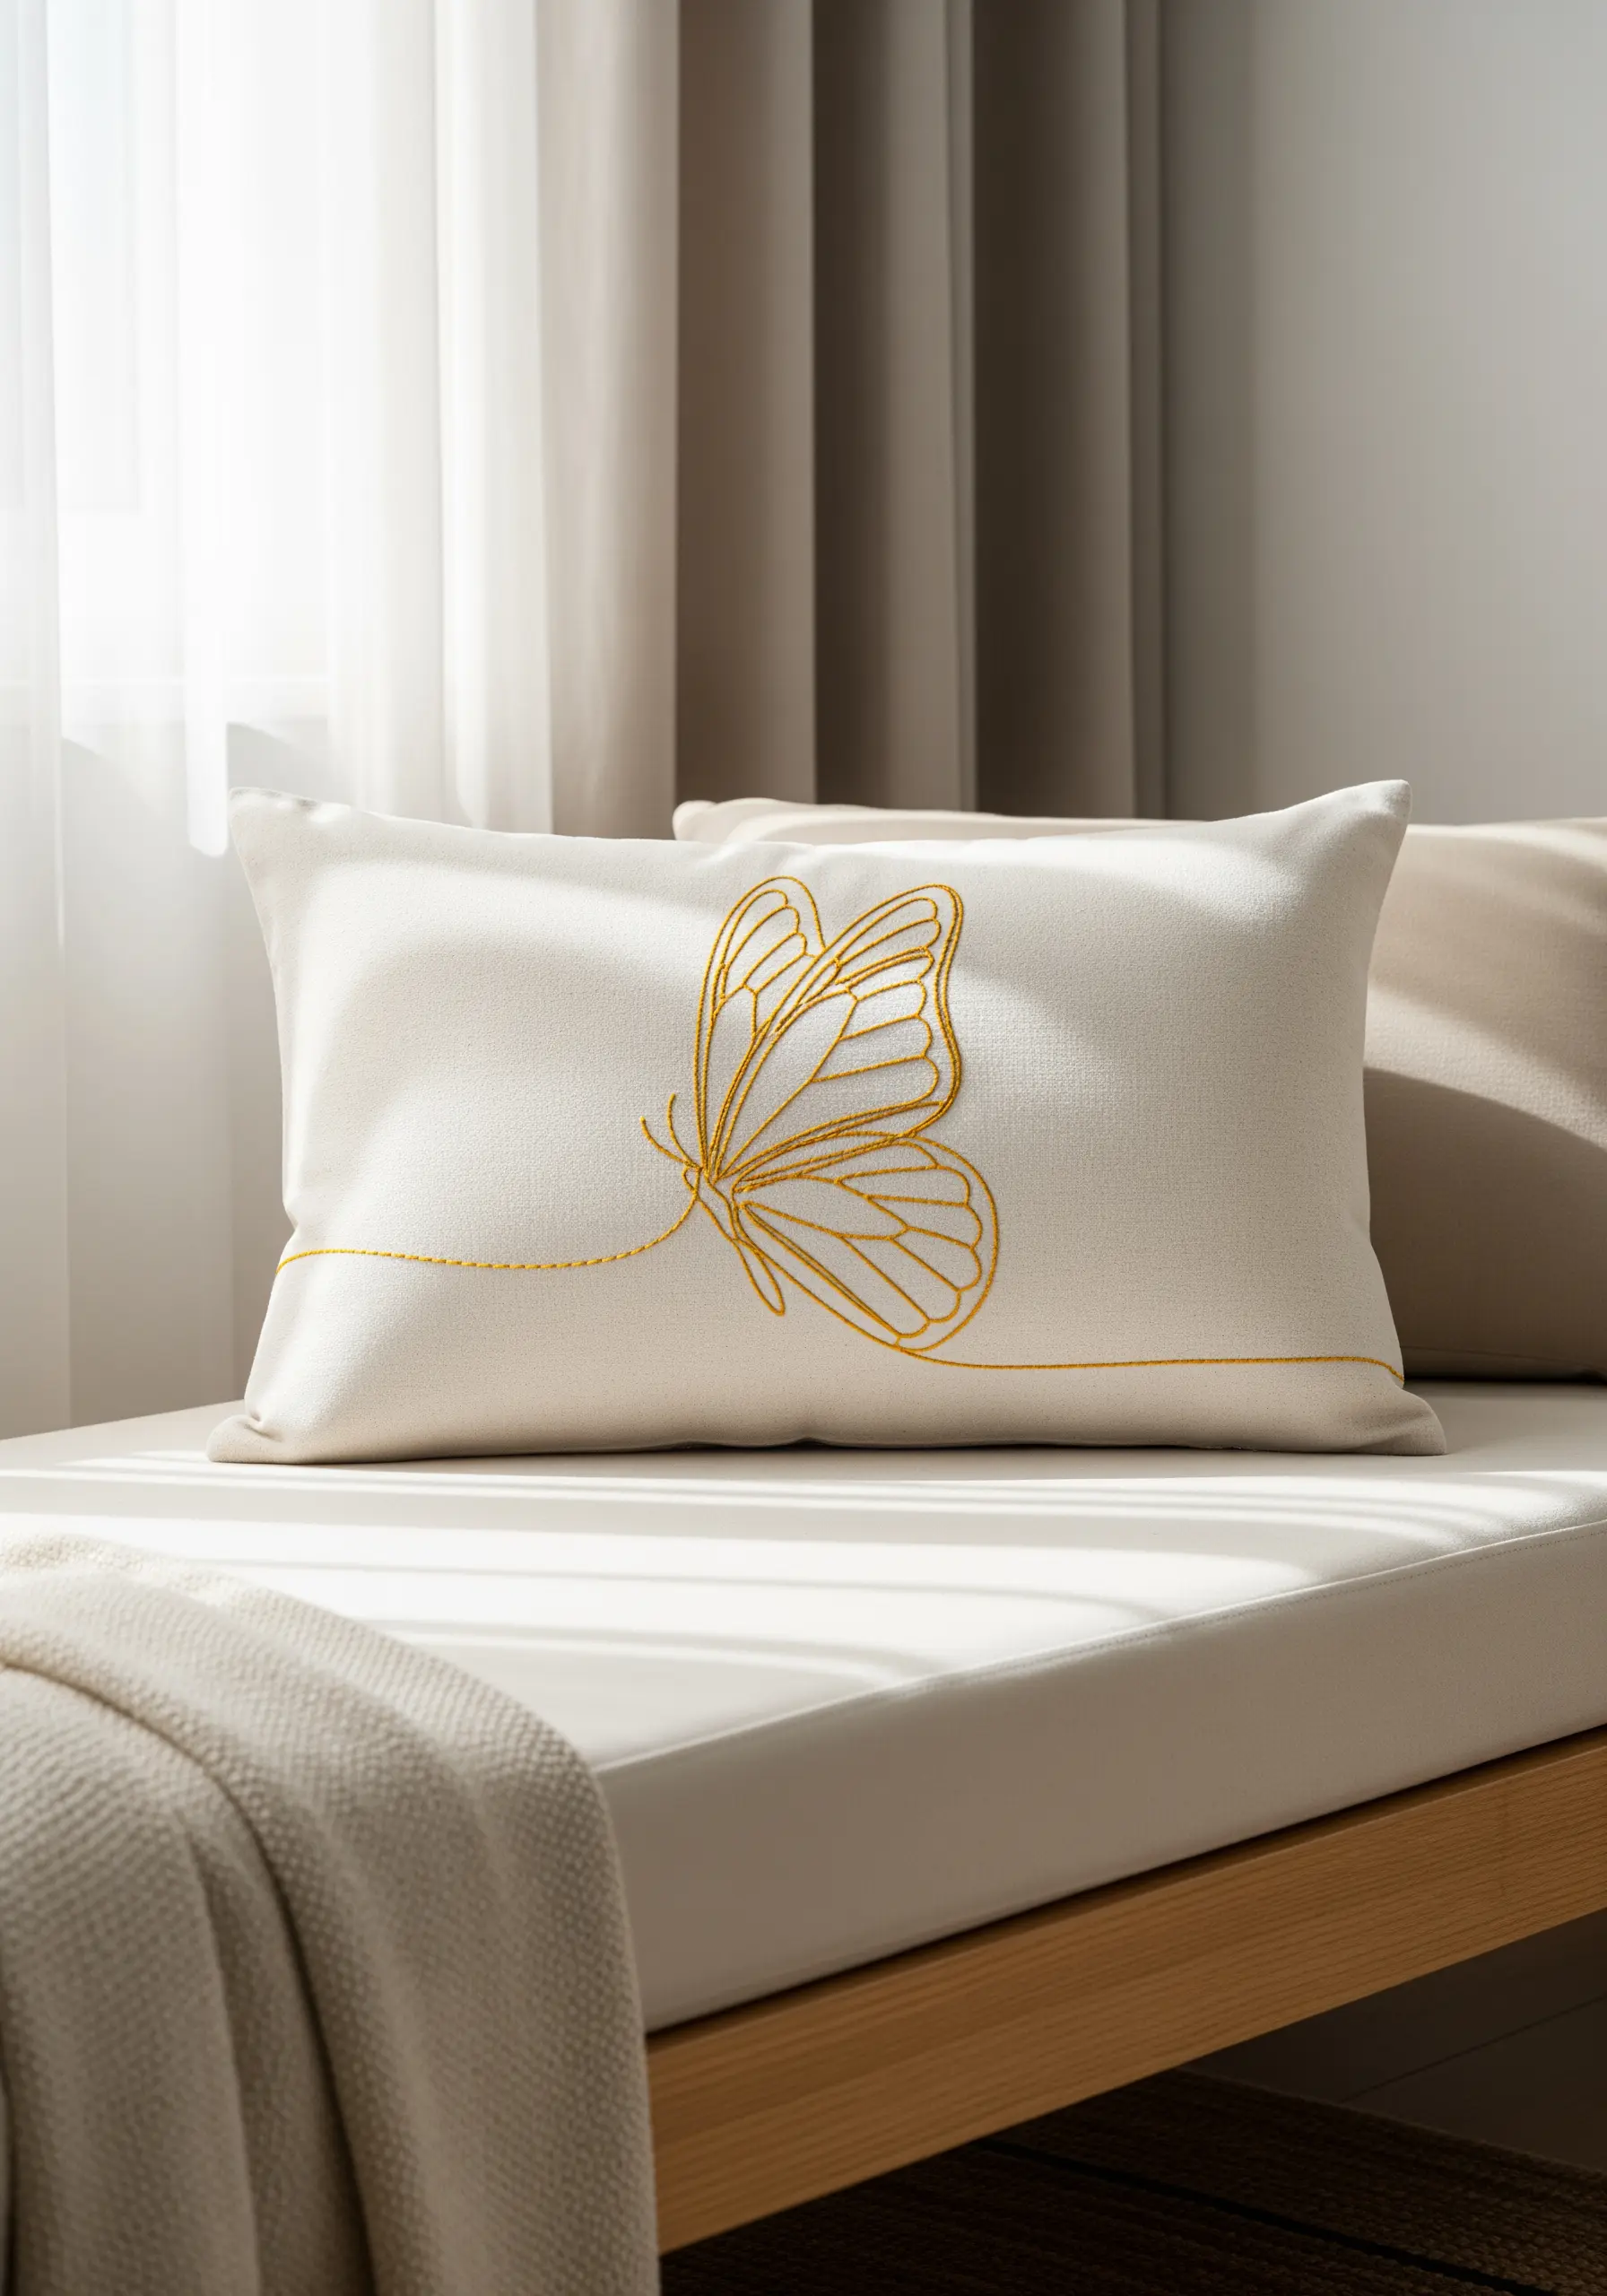
Add a touch of playful elegance by extending a single line from your design across the fabric.
Stitch the butterfly motif first, then continue one of the lines from the wing in a gentle, sweeping curve across the pillowcase.
Use a simple running stitch for this extended line to keep it light and unobtrusive.
This small detail connects the motif to its canvas, creating a more integrated and thoughtful composition that feels custom and high-end.
14. Mix Geometric and Organic Lines for Visual Interest
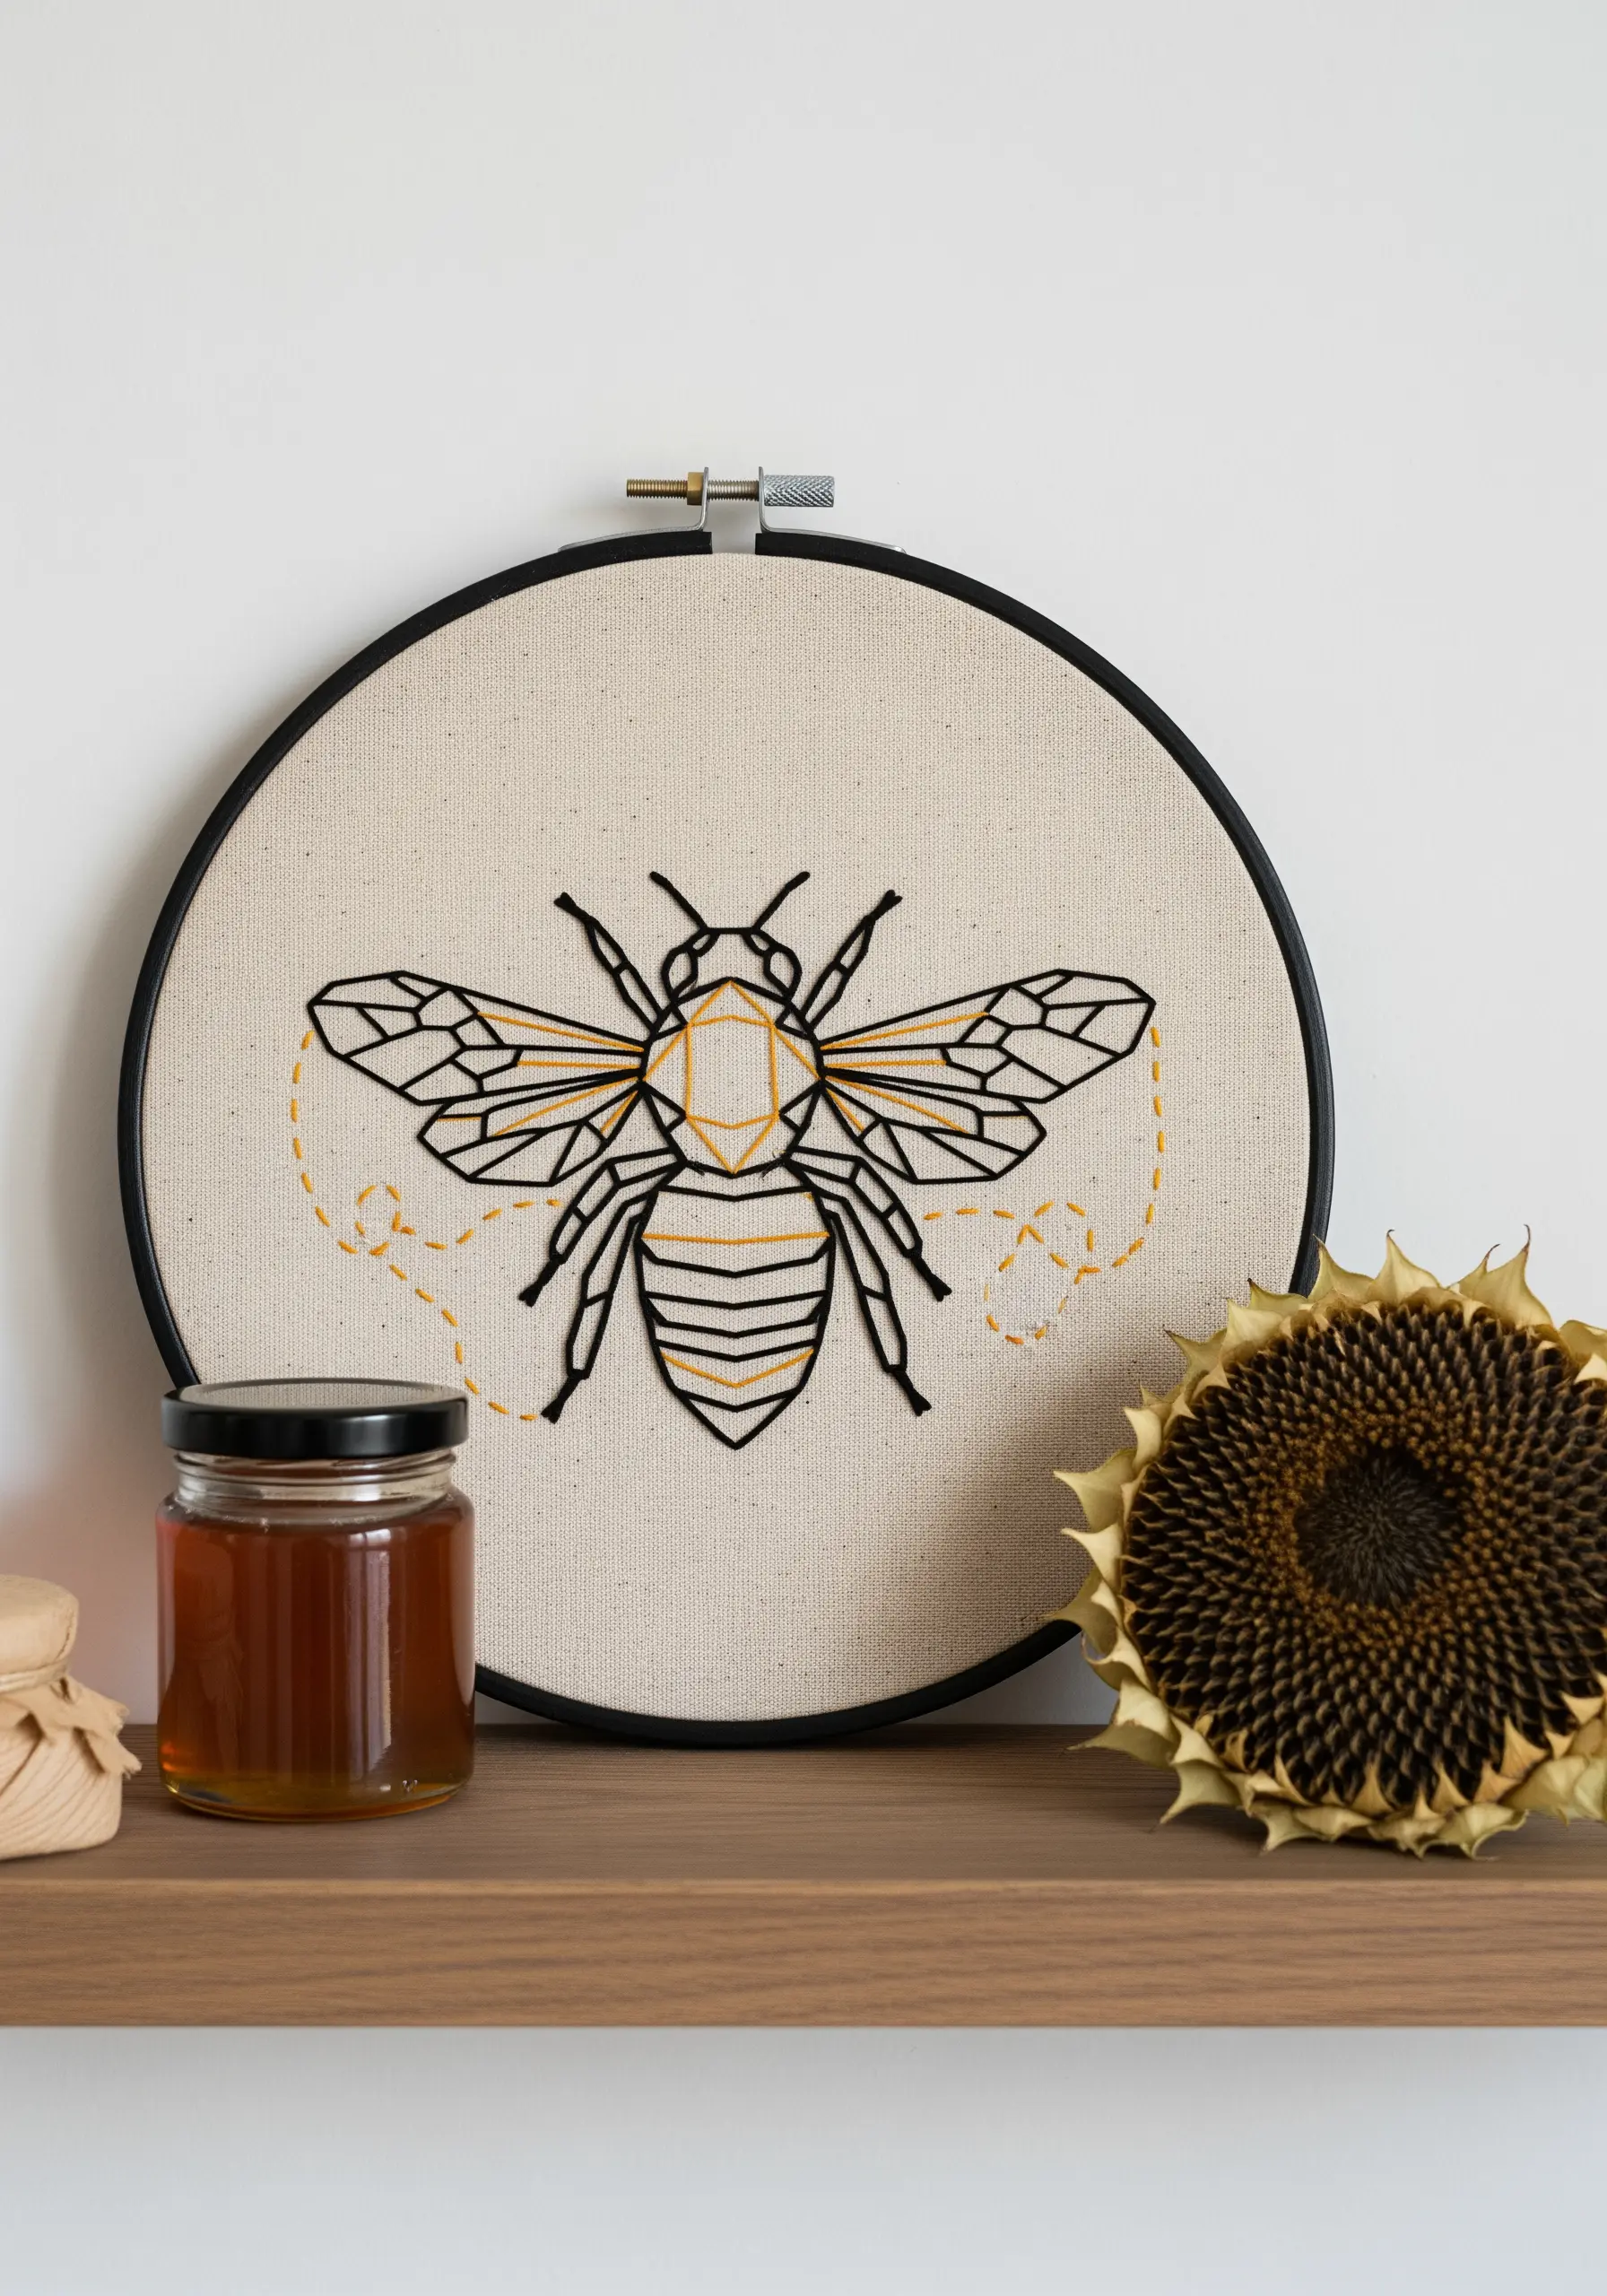
Combine the rigid structure of geometric shapes with the free-flowing energy of organic lines to create a captivating design.
Use a bold backstitch for the bee’s structured body and wings, emphasizing its sharp, geometric patterns.
Then, add a whimsical flight path using a looser, more delicate running stitch in a contrasting color.
This juxtaposition of styles makes the piece more engaging and is a simple way to turn minimal stitching into maximum style.
15. Adapt Minimalist Stitching for Functional Items
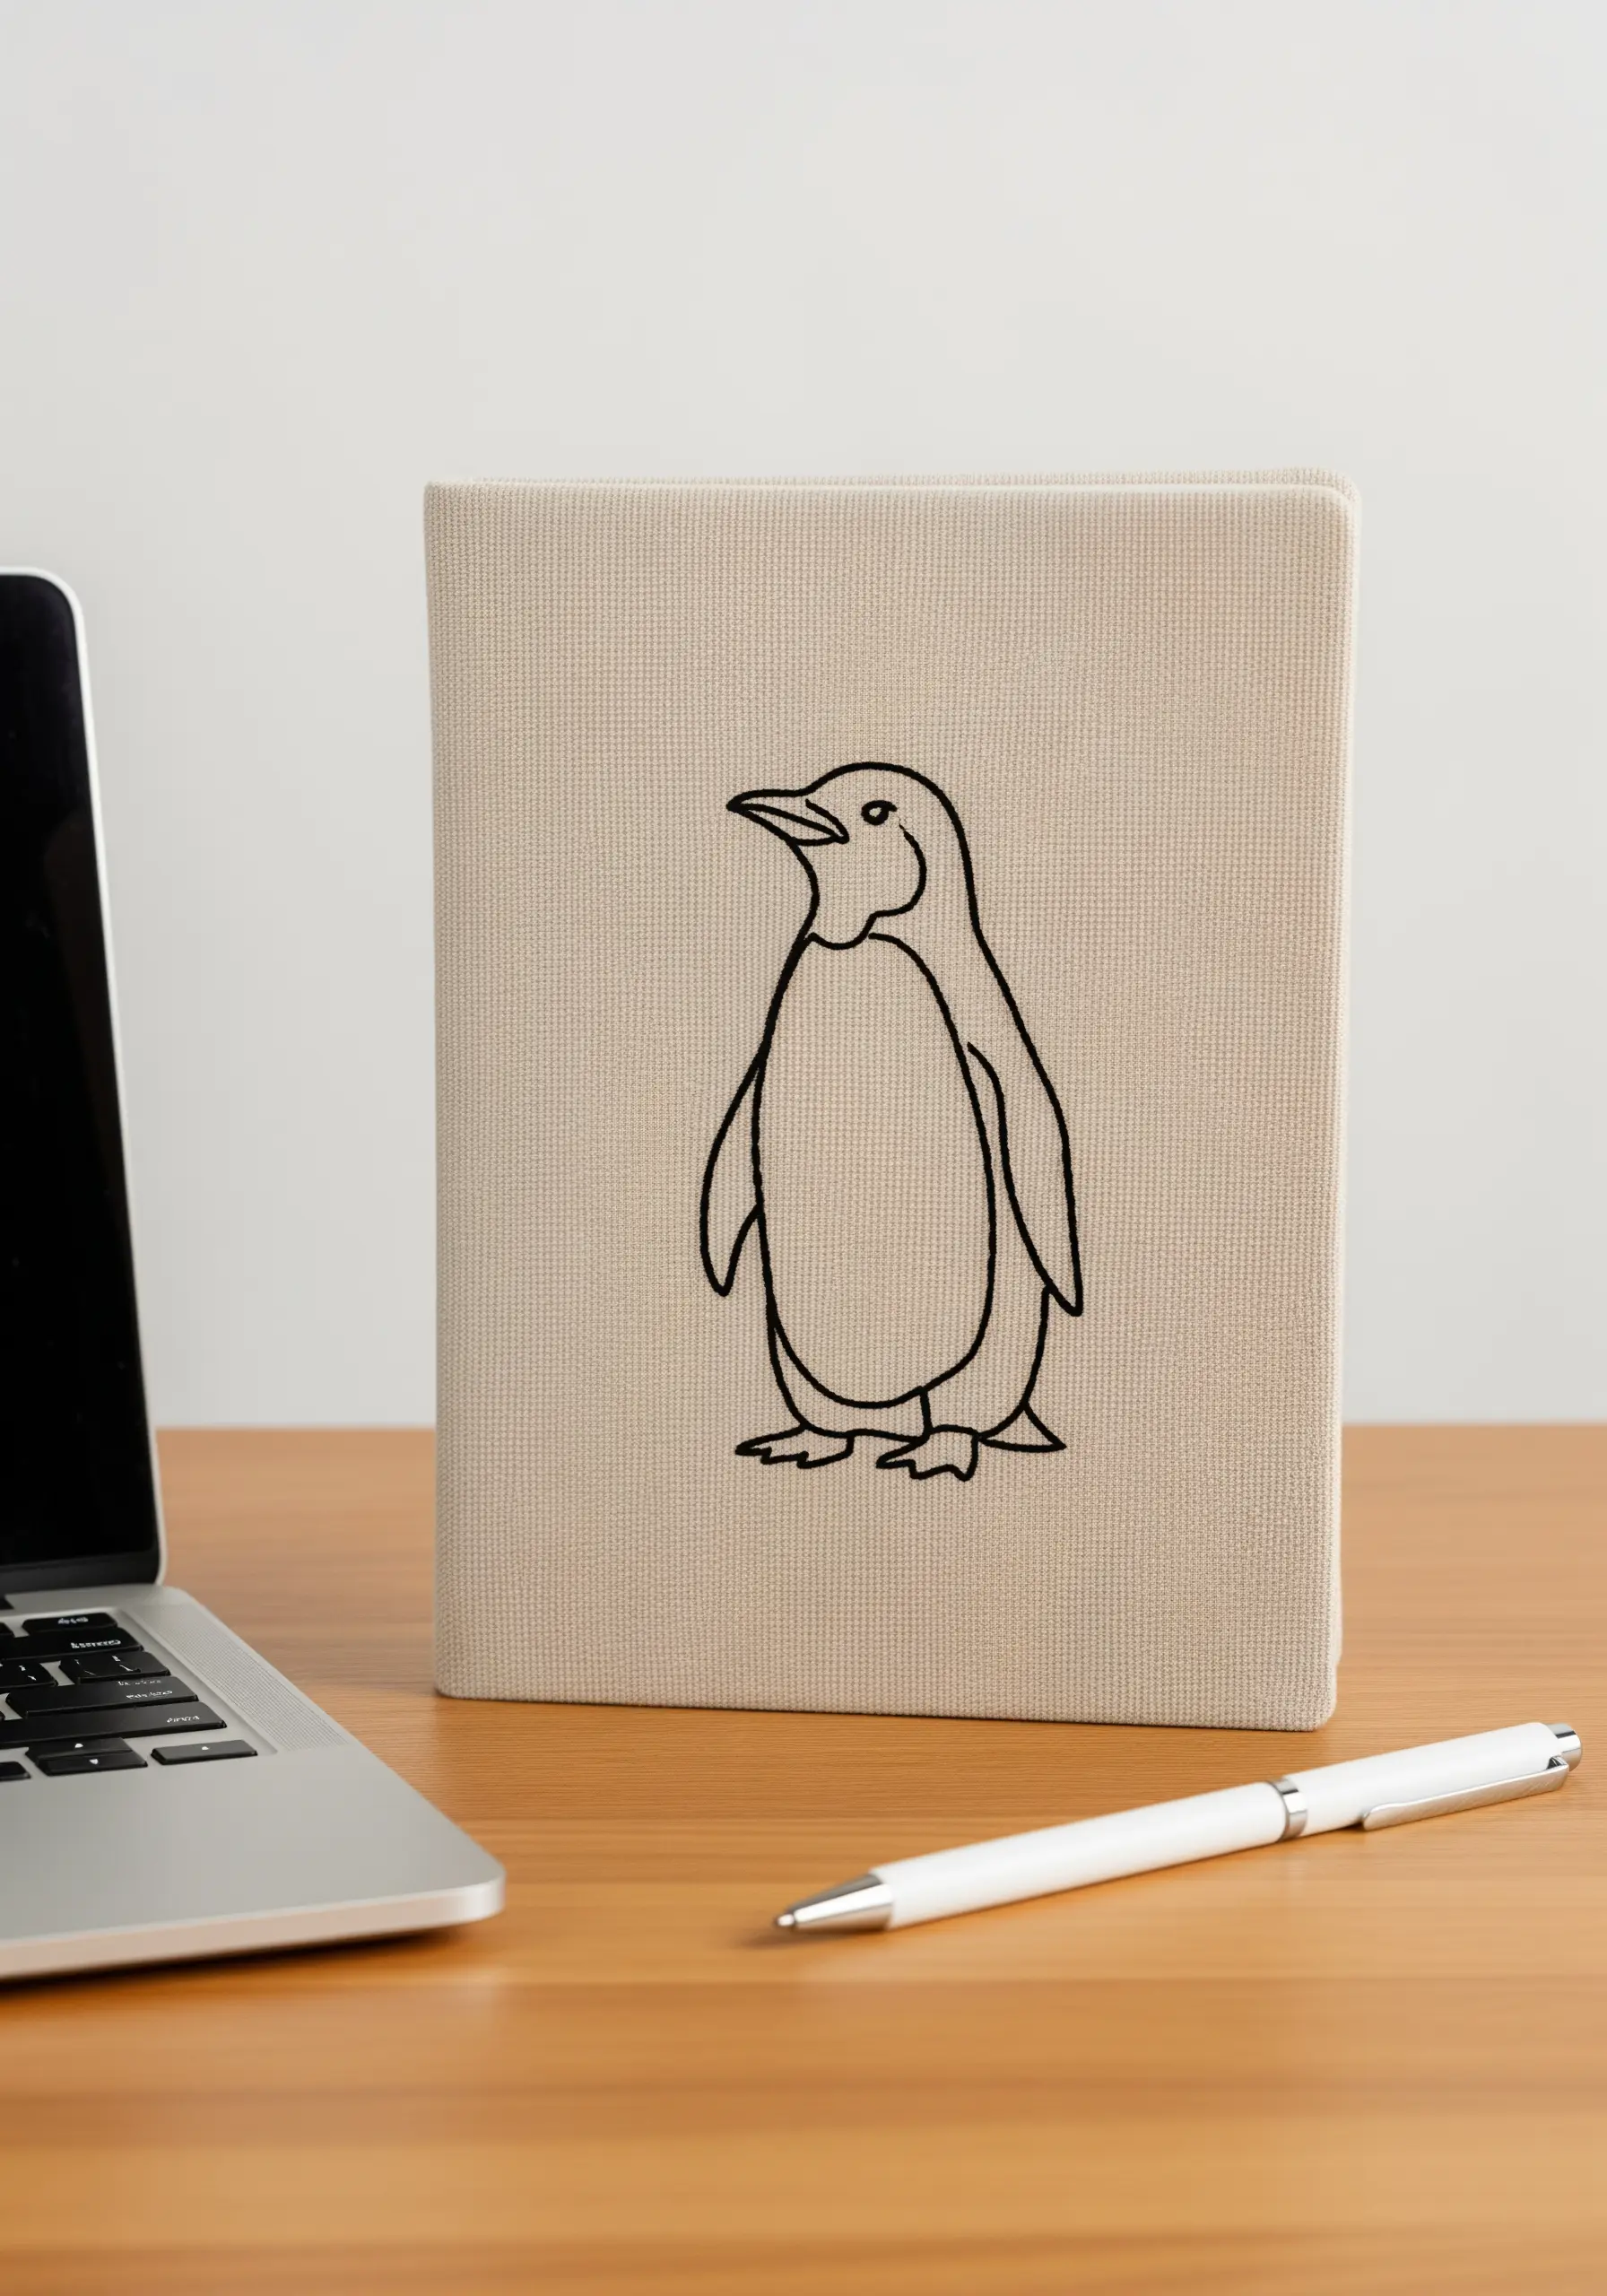
When embroidering on items that get handled, like a journal cover, choose your stitch and fabric carefully.
A tight, even-weave canvas is durable and provides a stable base for your stitches.
Use a split stitch for the penguin’s outline; it creates a solid line that is less likely to snag than a looser stitch like the chain stitch.
This ensures your artwork remains beautiful and intact, even with daily use.
16. Soften Nursery Décor with a Simple Backstitch
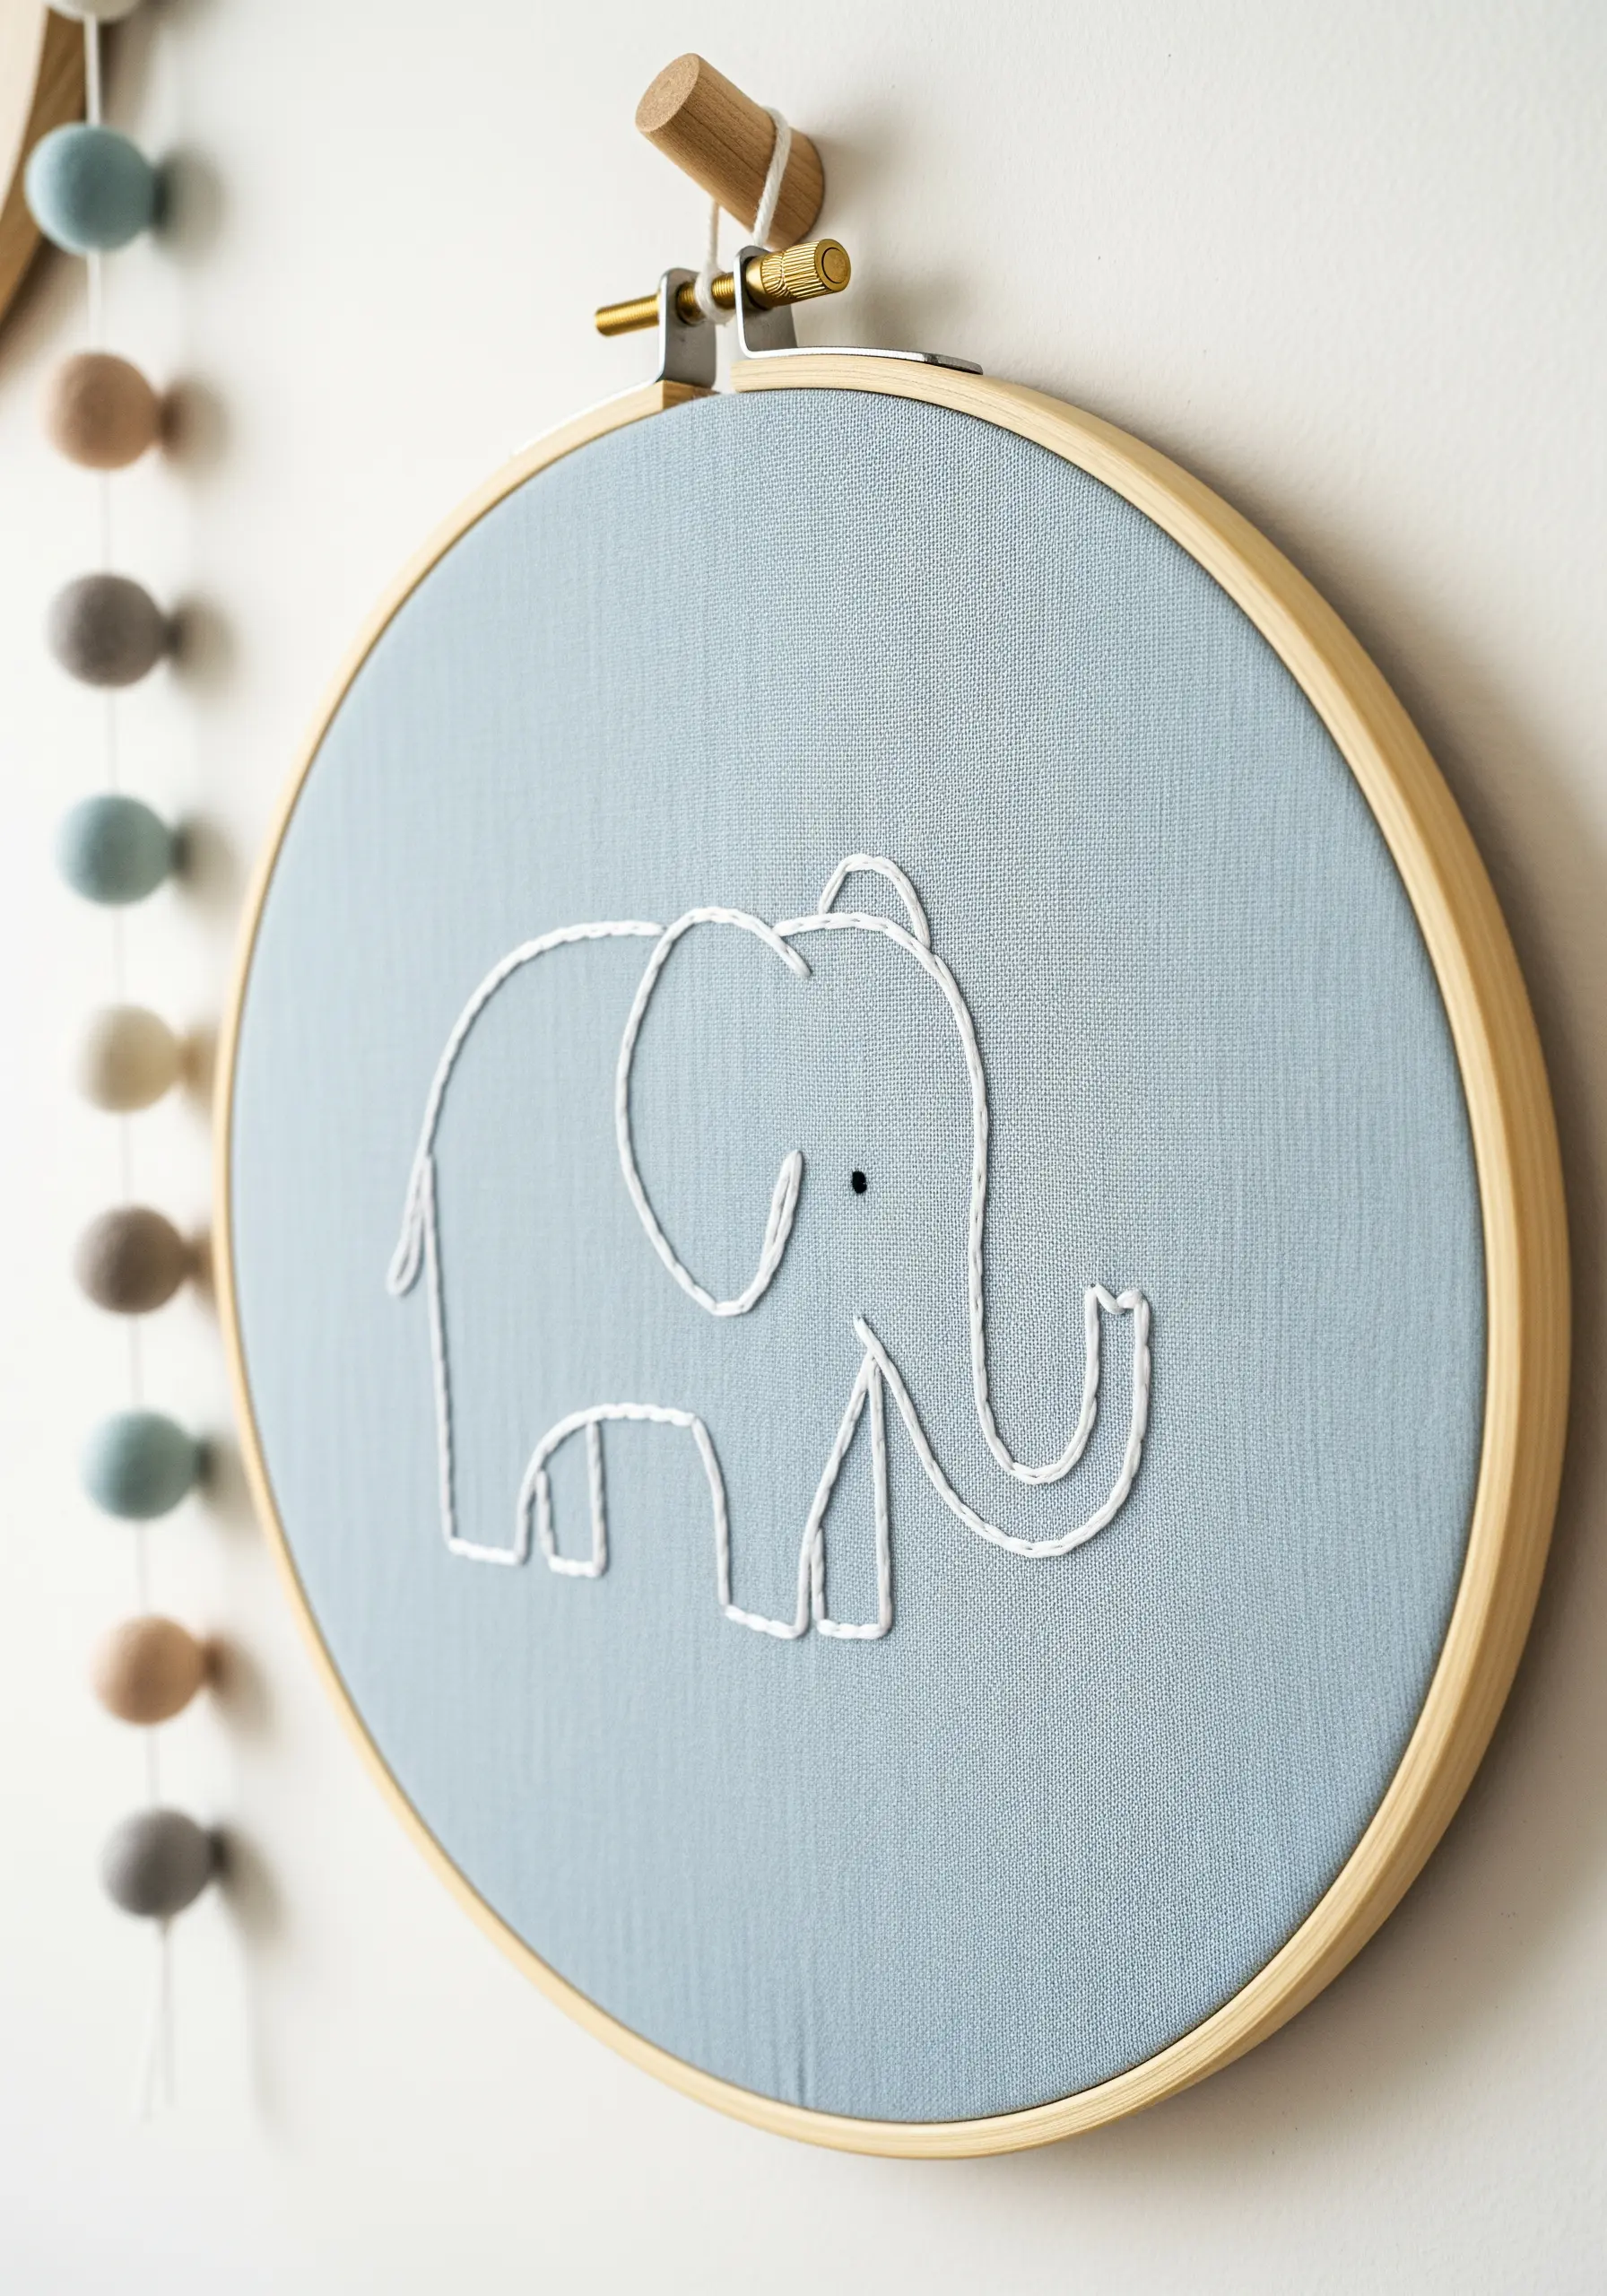
Create gentle, soothing artwork for a child’s room using a simple backstitch on soft, colored fabric.
Choose a high-contrast combination like white thread on dusty blue linen to make the simple elephant outline pop without being visually jarring.
Use three strands of cotton floss to give the lines a slightly rounded, soft quality perfect for a nursery.
This approach creates a piece of emotional nursery decor that is both modern and sweet.
17. Elongate Your Canvas for Unique Compositions
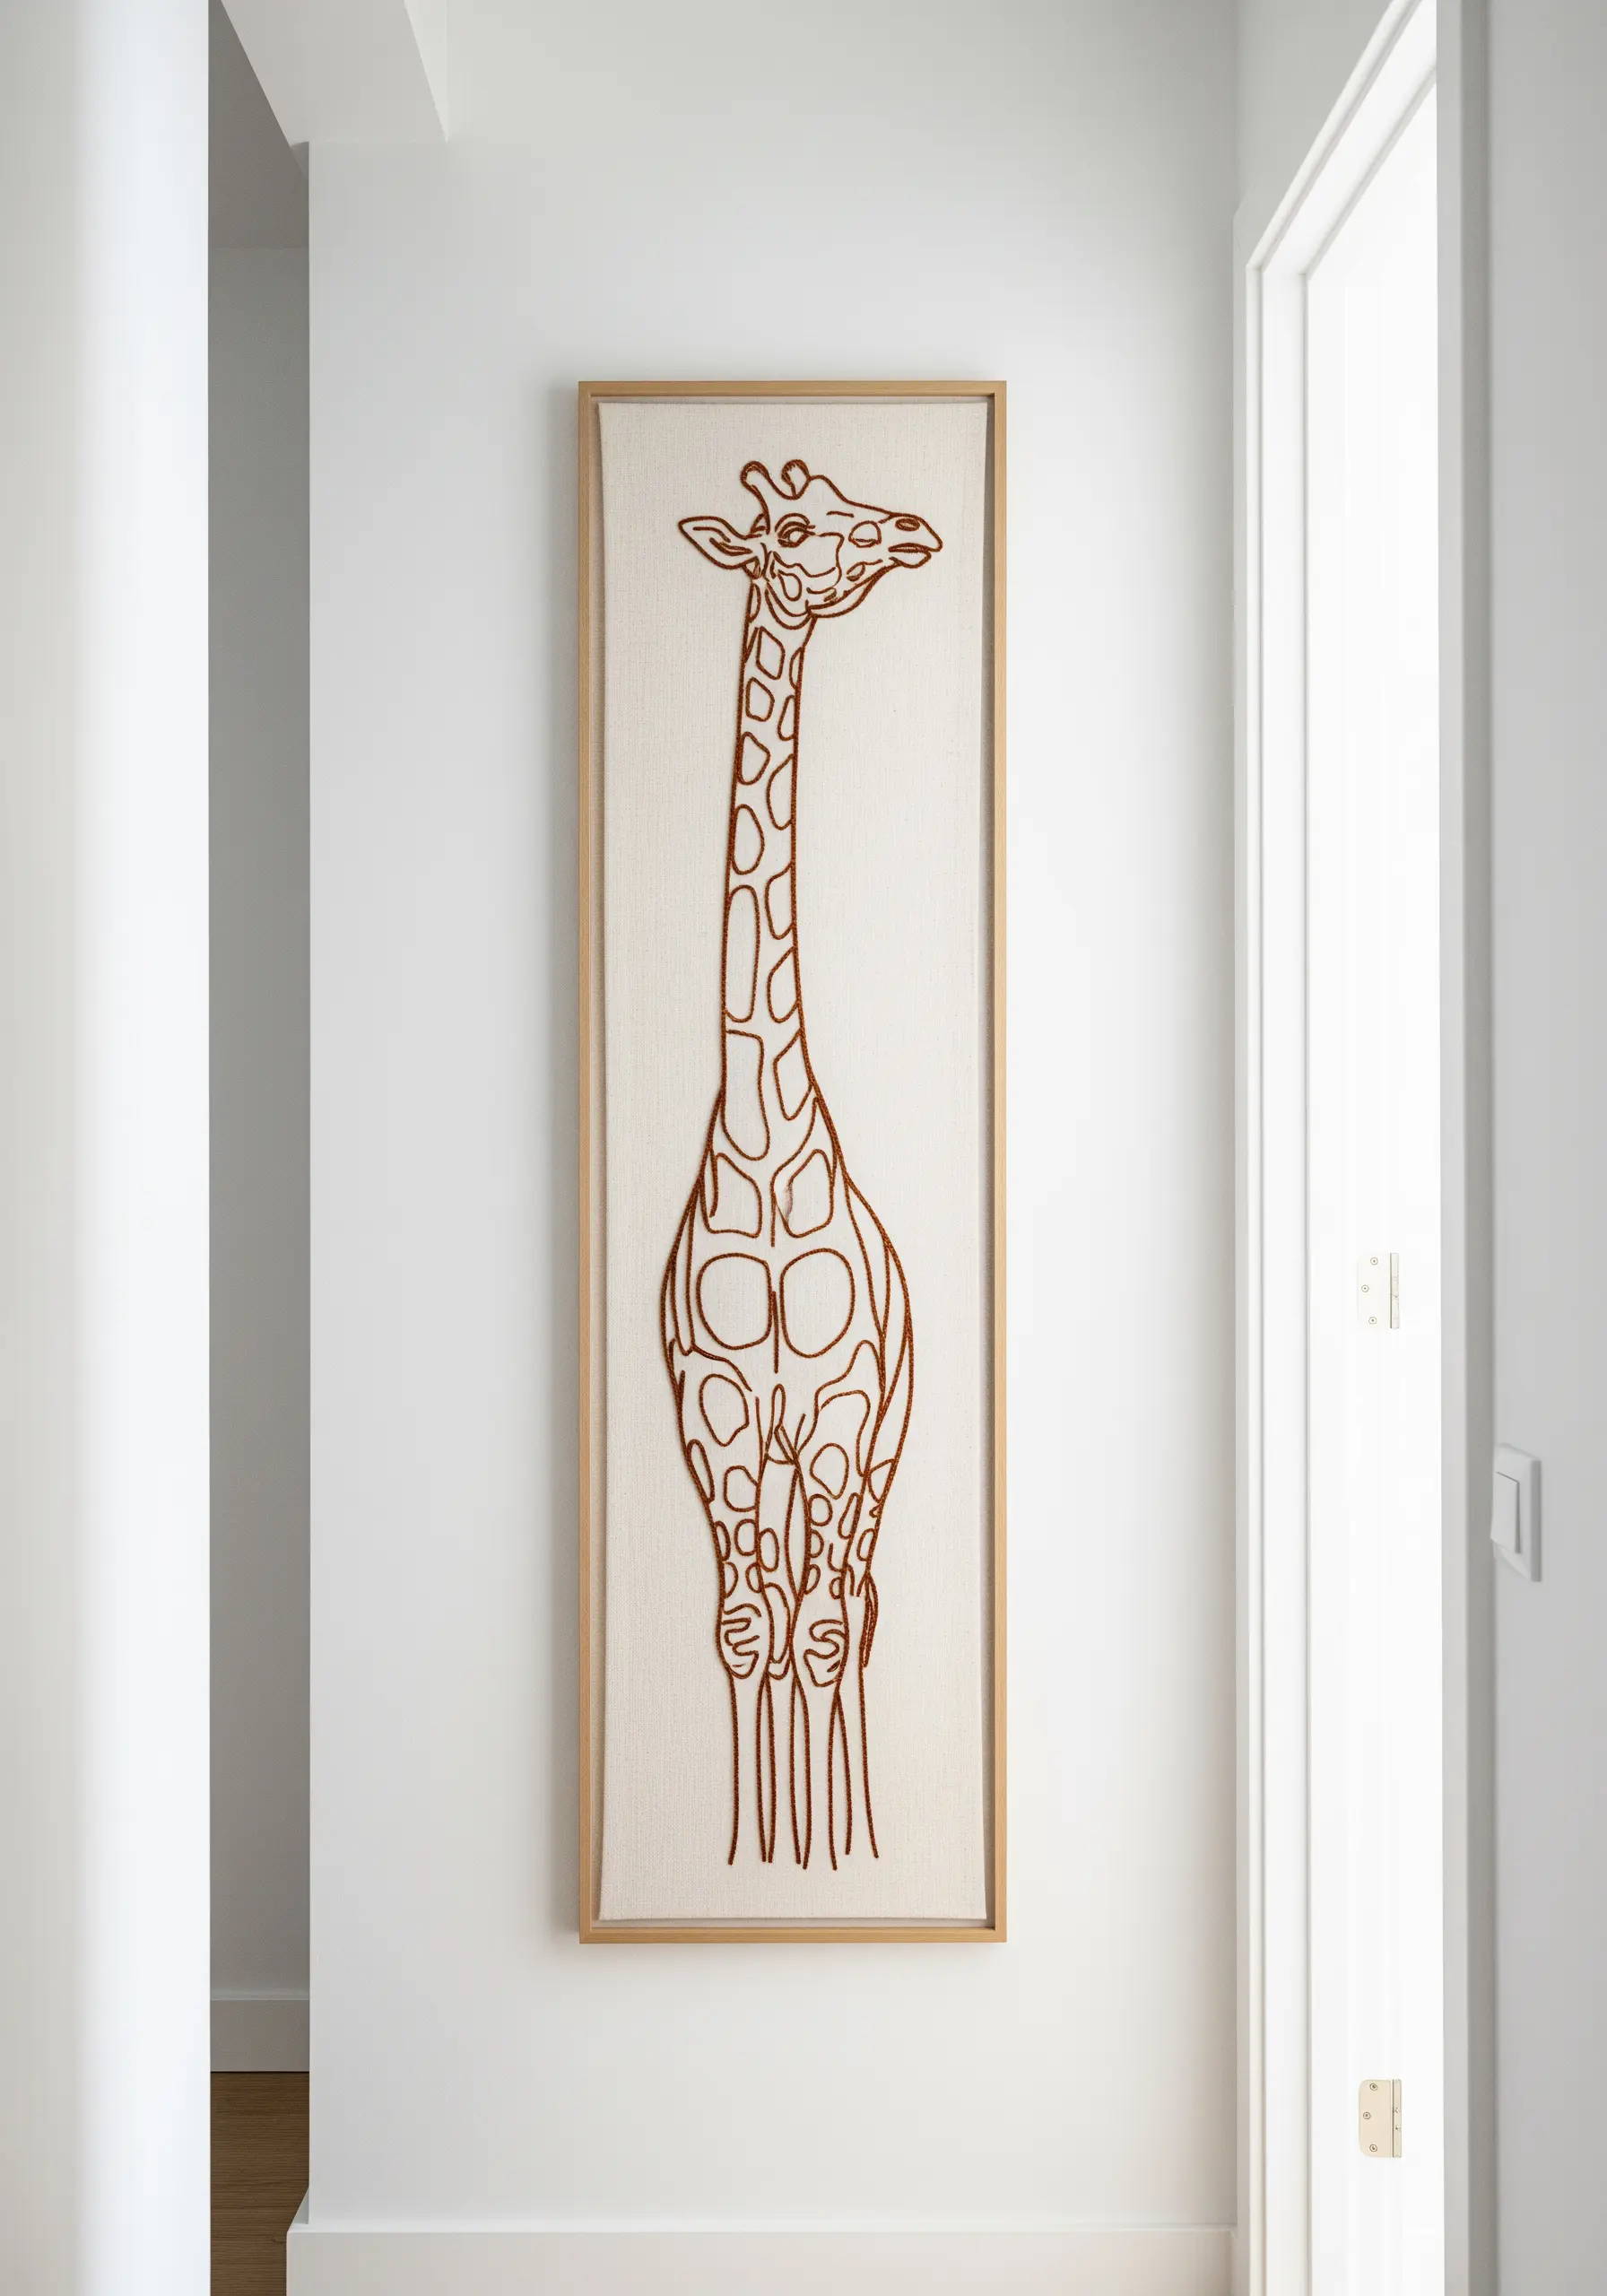
Break away from the traditional circle or square format by using a tall, narrow frame.
This unconventional canvas shape is perfect for animals with verticality, like this giraffe, instantly creating a more dramatic and artistic piece.
When stitching, let the lines of the animal guide the composition, filling the space naturally.
This simple shift in framing turns a straightforward embroidery project into a sophisticated piece of wall art that draws the eye upward.
18. Create Dramatic Contrast with Dark Fabric

Make your linework command attention by stitching with a bright, metallic, or warm-colored thread on a dark background.
A rich charcoal or black fabric makes a golden-yellow thread, like the one used for this lion, appear almost luminous.
To enhance this effect, use a satin stitch for any small fill areas and a stem stitch for the outlines; both stitches catch the light beautifully.
This high-contrast combination creates a sense of drama and regality with very simple techniques.
19. Use Thread Weight to Create Visual Hierarchy

Guide the viewer’s eye by varying the number of strands you use for different parts of your design.
For this koala, use three strands of floss for the main outlines to make them bold and clear.
For the finer details, like the facial features and the texture on the ears, switch to a single strand.
This subtle shift creates depth and makes the design feel more refined and less cartoonish, adding a professional touch to your work.
20. Translate Digital Art into Stitched Lines
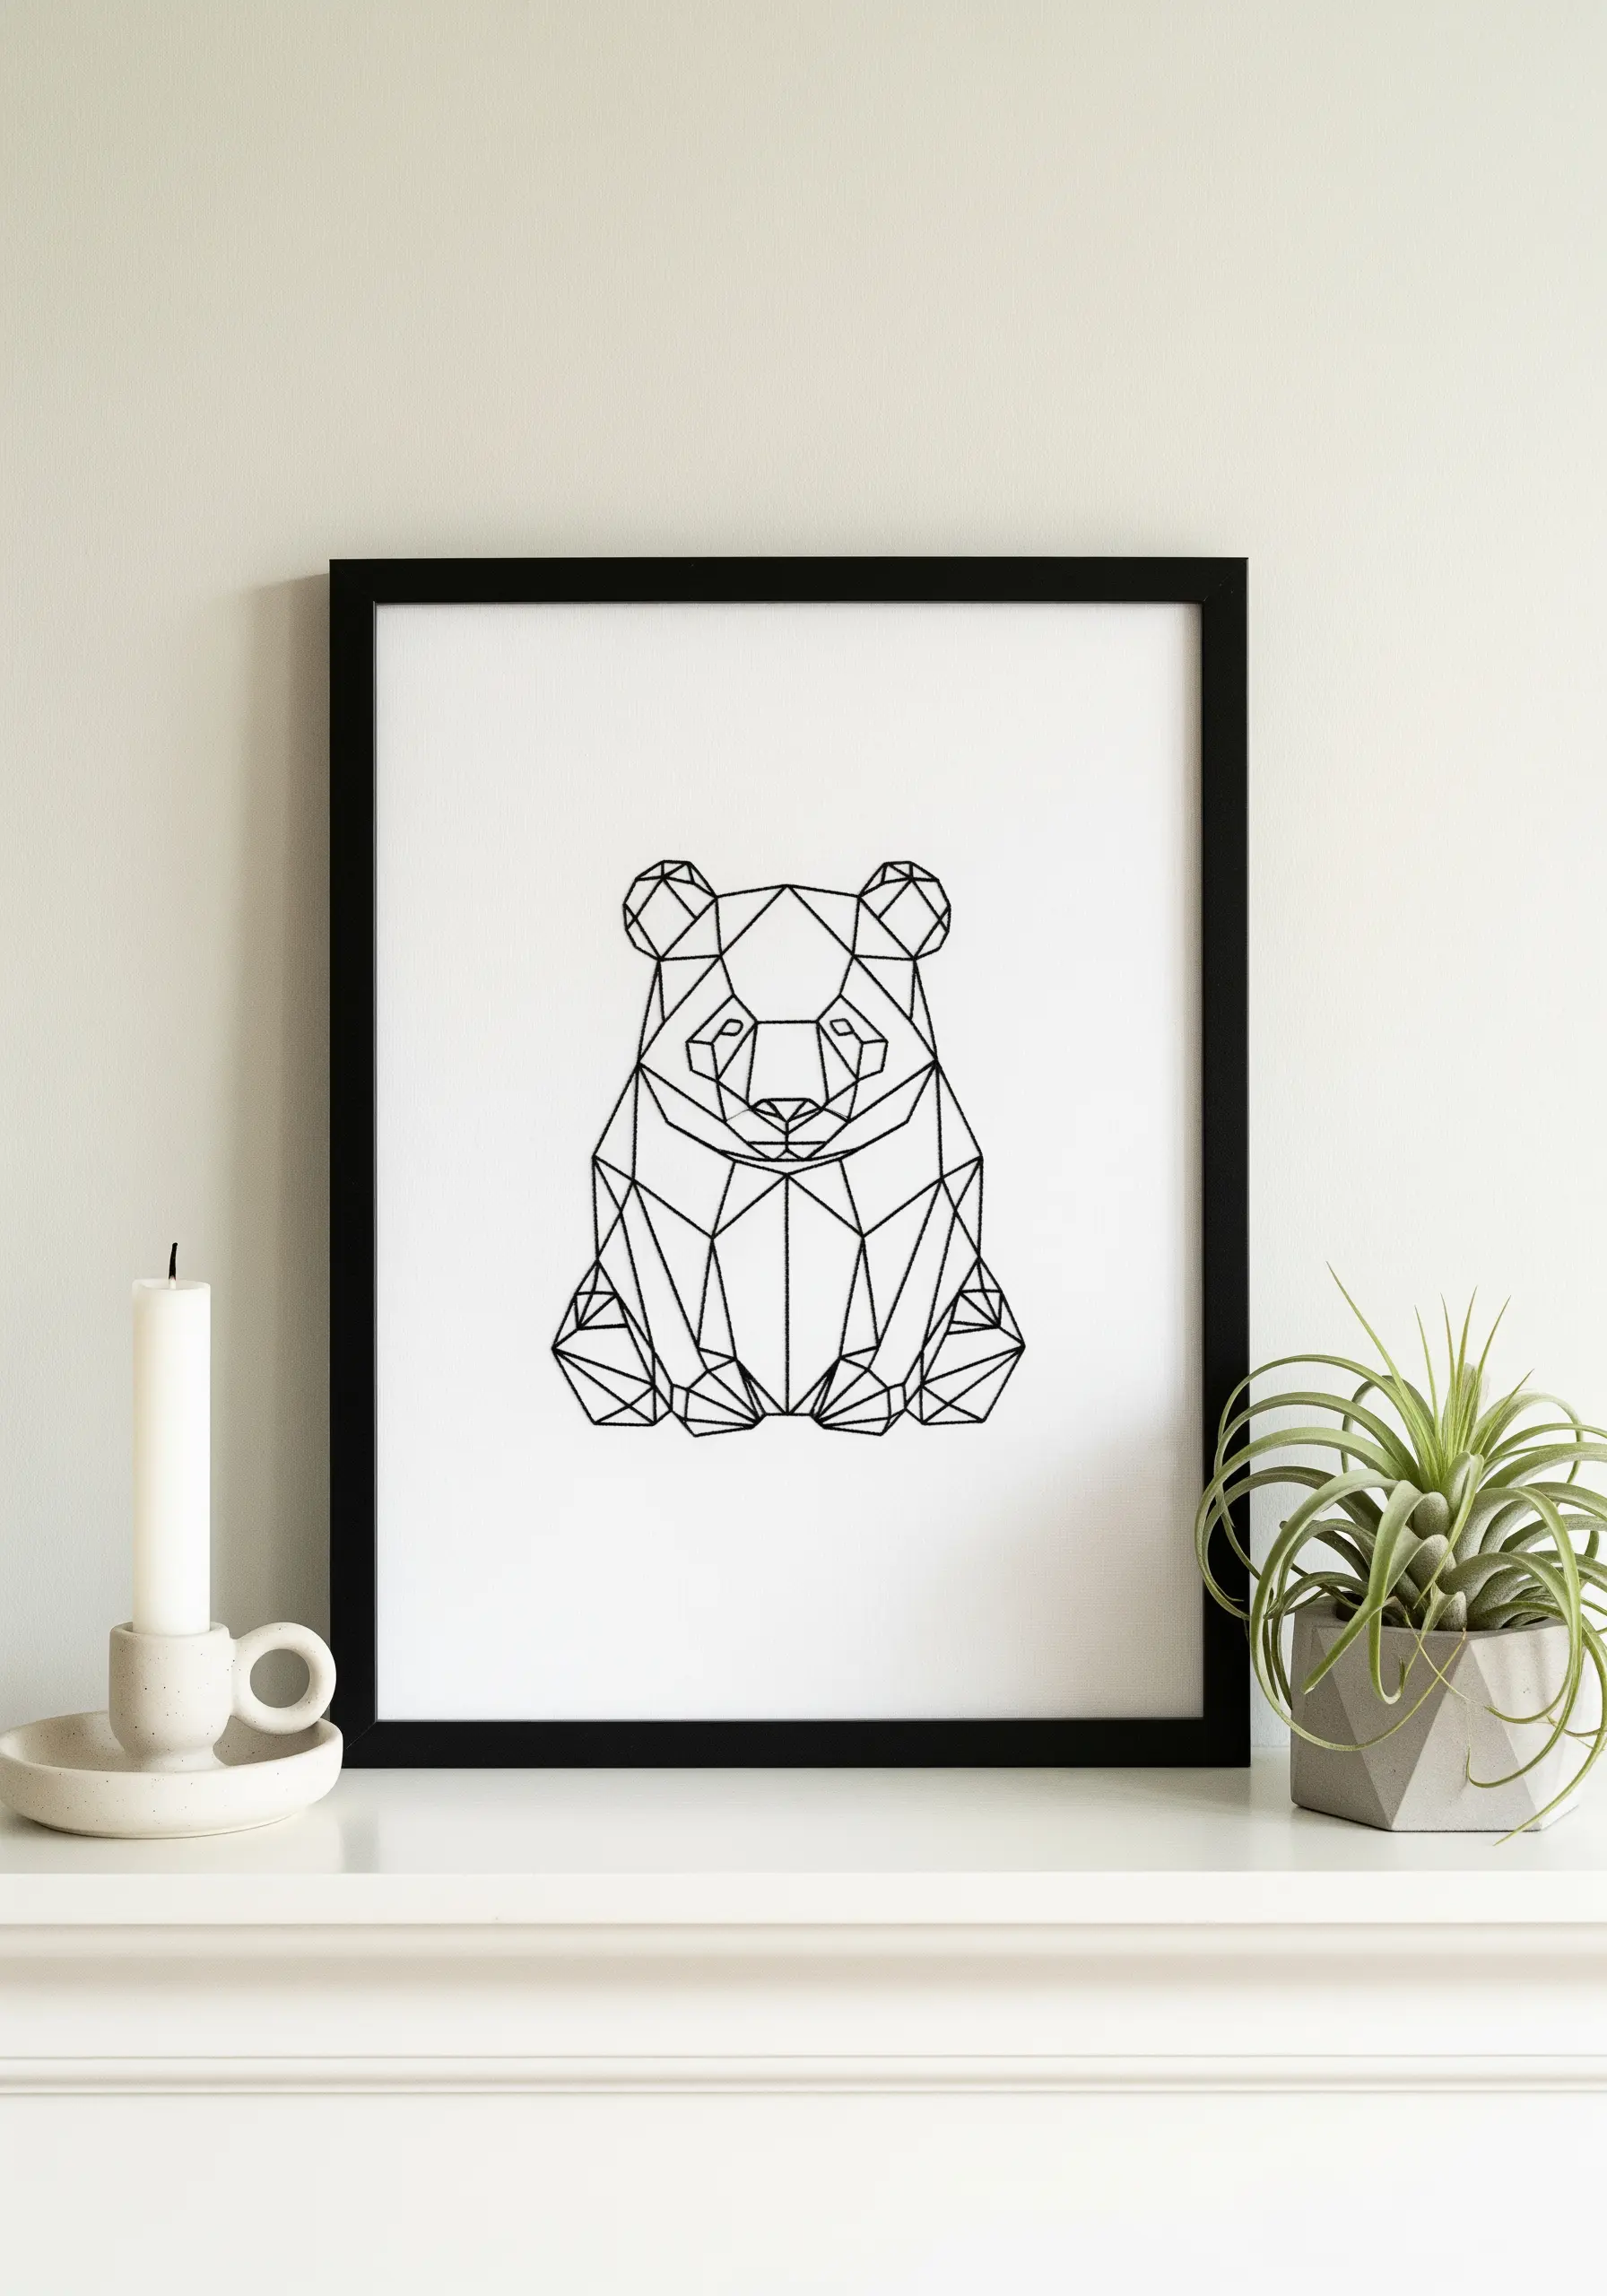
The clean precision of digital geometric art translates beautifully to embroidery, creating sharp, contemporary wall decor.
To replicate the perfect lines of this panda, trace your pattern onto the fabric using a fine-tipped, water-soluble marker.
Use a simple backstitch with two strands of black floss for a clean, graphic look.
These Minimalist embroidery wall art ideas are perfect for framing and adding a touch of Scandinavian cool to any room.
21. Harness the Magic of Variegated Thread
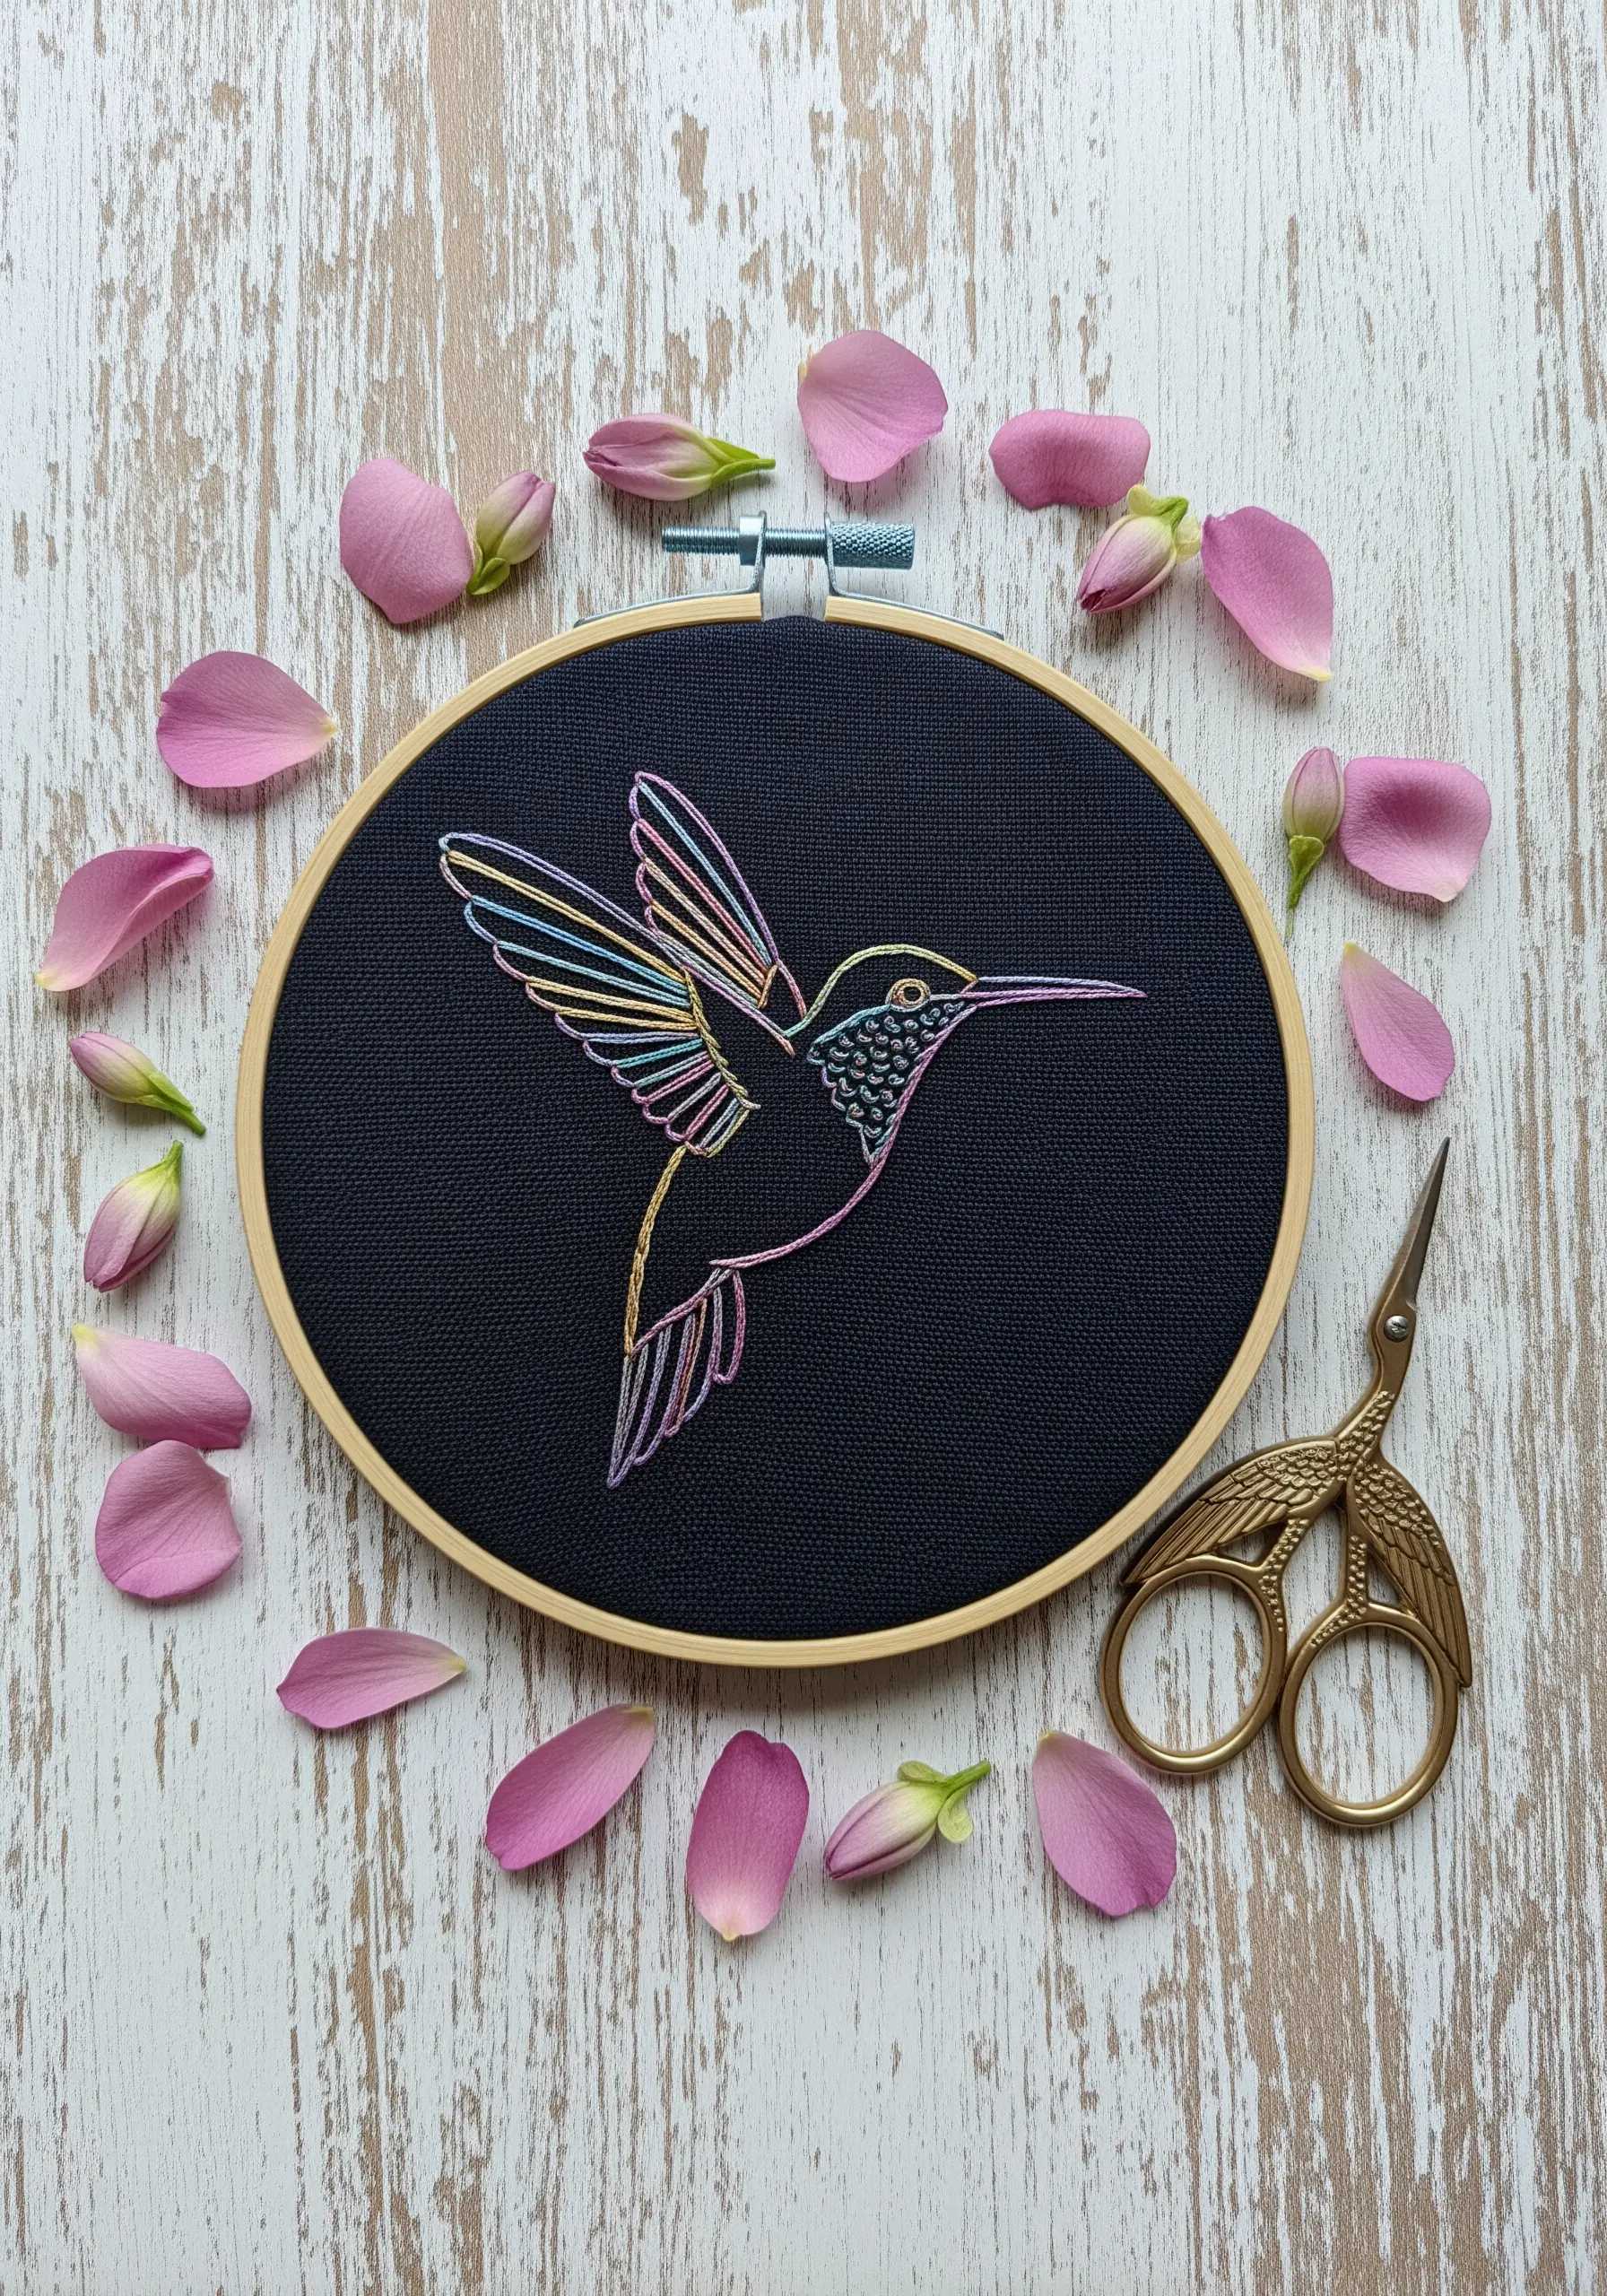
Create a stunning iridescent effect with minimal effort by using a single variegated thread.
To achieve the rainbow-like quality on this hummingbird’s wings, use long satin stitches that allow the full color gradient of the thread to show.
Stitch on a dark, solid background to make the shifting colors pop.
This technique from our guide to texture-rich thread art ideas allows you to create complex-looking color blends without changing your floss once.
22. Use Sheer Fabric for a Delicate, Floating Effect

Create an ethereal, light-as-air look by embroidering your design on a sheer or semi-sheer fabric like organza or voile.
When mounted in a hoop and placed near a window, the light shines through, making the seahorse design appear to float.
You must be very neat with the back of your work, as it will be visible.
This technique adds a layer of delicacy and magic to simple line art, transforming it into something truly special.
23. Tackle Complex Designs with Patient Linework

An intricate design like this octopus can feel intimidating, but it’s simply a collection of lines.
Break the pattern down into smaller, manageable sections, such as one tentacle at a time.
Use a fine-tipped, heat-erasable pen to transfer the design, as it will give you clear lines to follow without leaving any marks.
A consistent two-strand backstitch is all you need to bring this complex creature to life, one deliberate stitch at a time.
24. Offer Your Designs as a Complete Creative Kit

Turn your favorite minimalist design into a thoughtful gift by assembling it as a DIY kit.
Include a pre-printed piece of fabric, a hoop, a needle, and the exact amount of floss needed.
Clear, simple instructions are key. This approach is not just about the finished product, but about sharing the calming experience of stitching.
It makes your art accessible and encourages others to discover the joy of creating something beautiful by hand.
25. Create a Border Print for Unique Home Décor
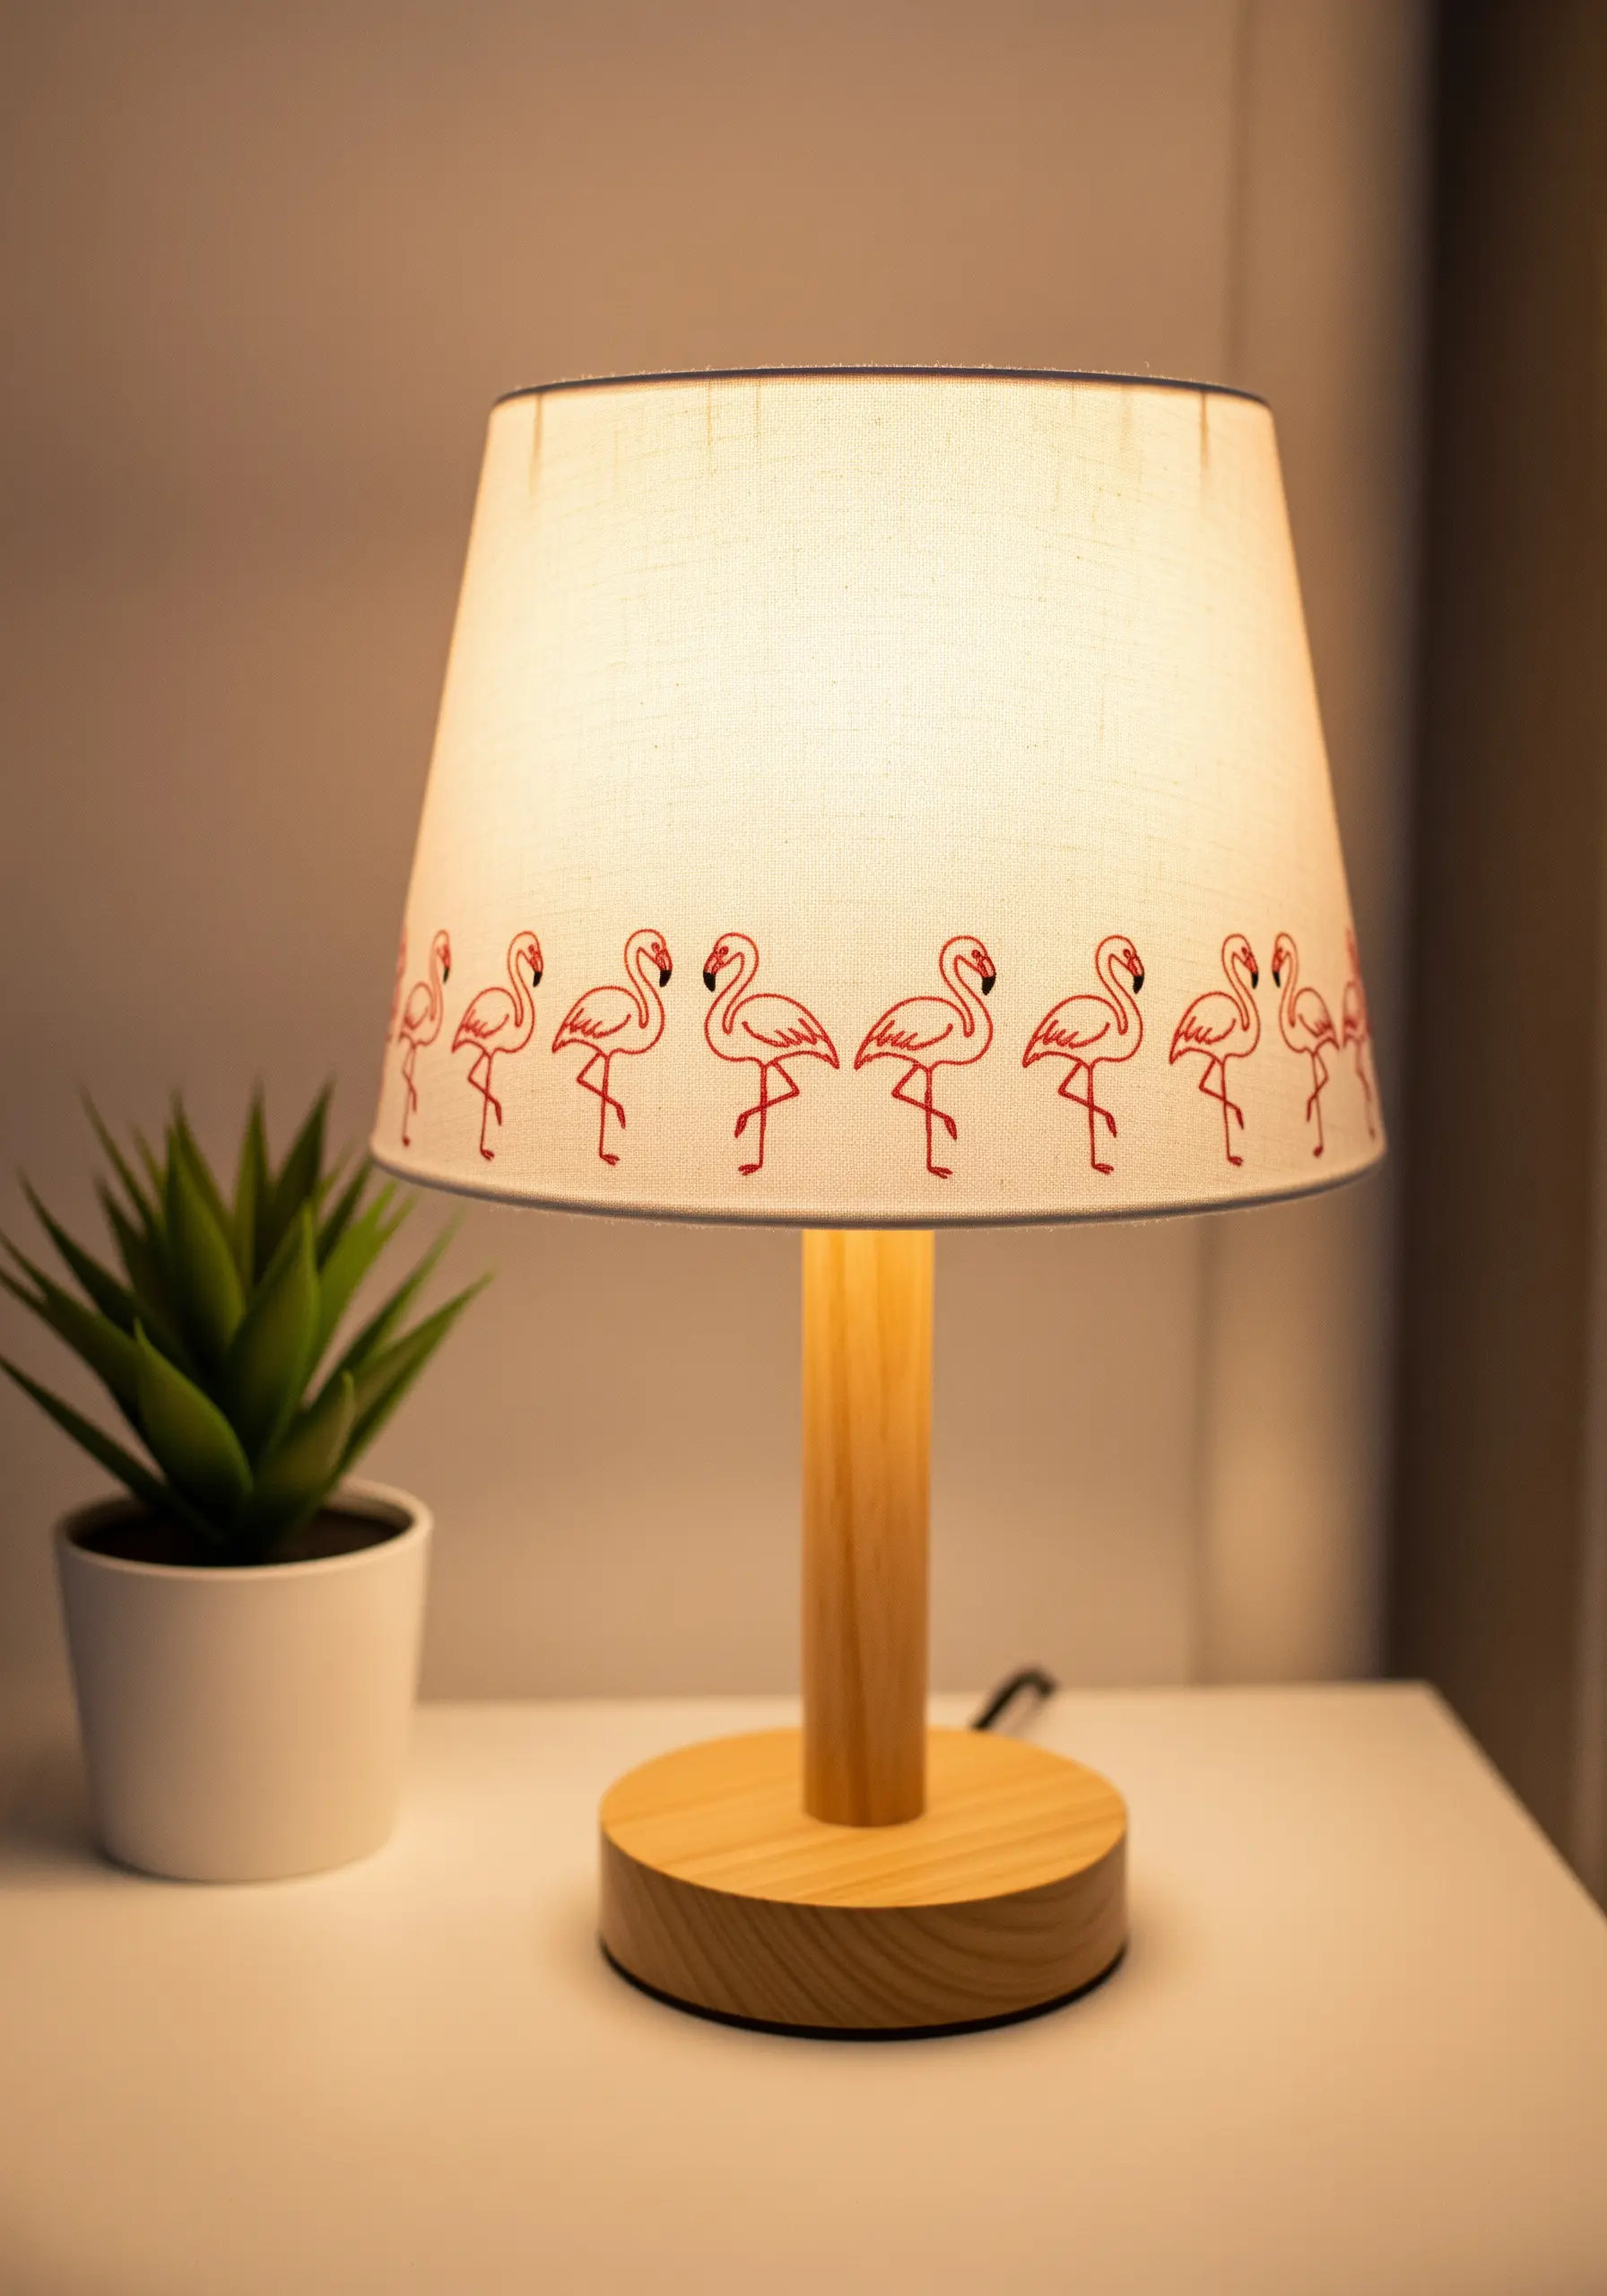
Think beyond a single motif and use a simple animal design to create a repeating pattern.
Embroider a line of flamingos along the bottom edge of a lampshade or a pillowcase to create a custom border print.
Use a template to ensure your spacing is even and consistent for a polished, professional look.
This technique transforms a basic home accessory into a unique piece of personalized decor.
26. Let Fabric Color Set the Mood

The color of your background fabric has a huge impact on the final feel of your piece.
Stitching a simple black outline of a llama on a vibrant, mustard-yellow fabric creates a bold, playful, and modern piece of art.
The same design on a neutral linen would feel more rustic and subdued.
Experiment with colored fabrics to create cozy embroidered wall art ideas that perfectly match your personality and your space.
27. Create Fluffy Texture with Turkey Stitch
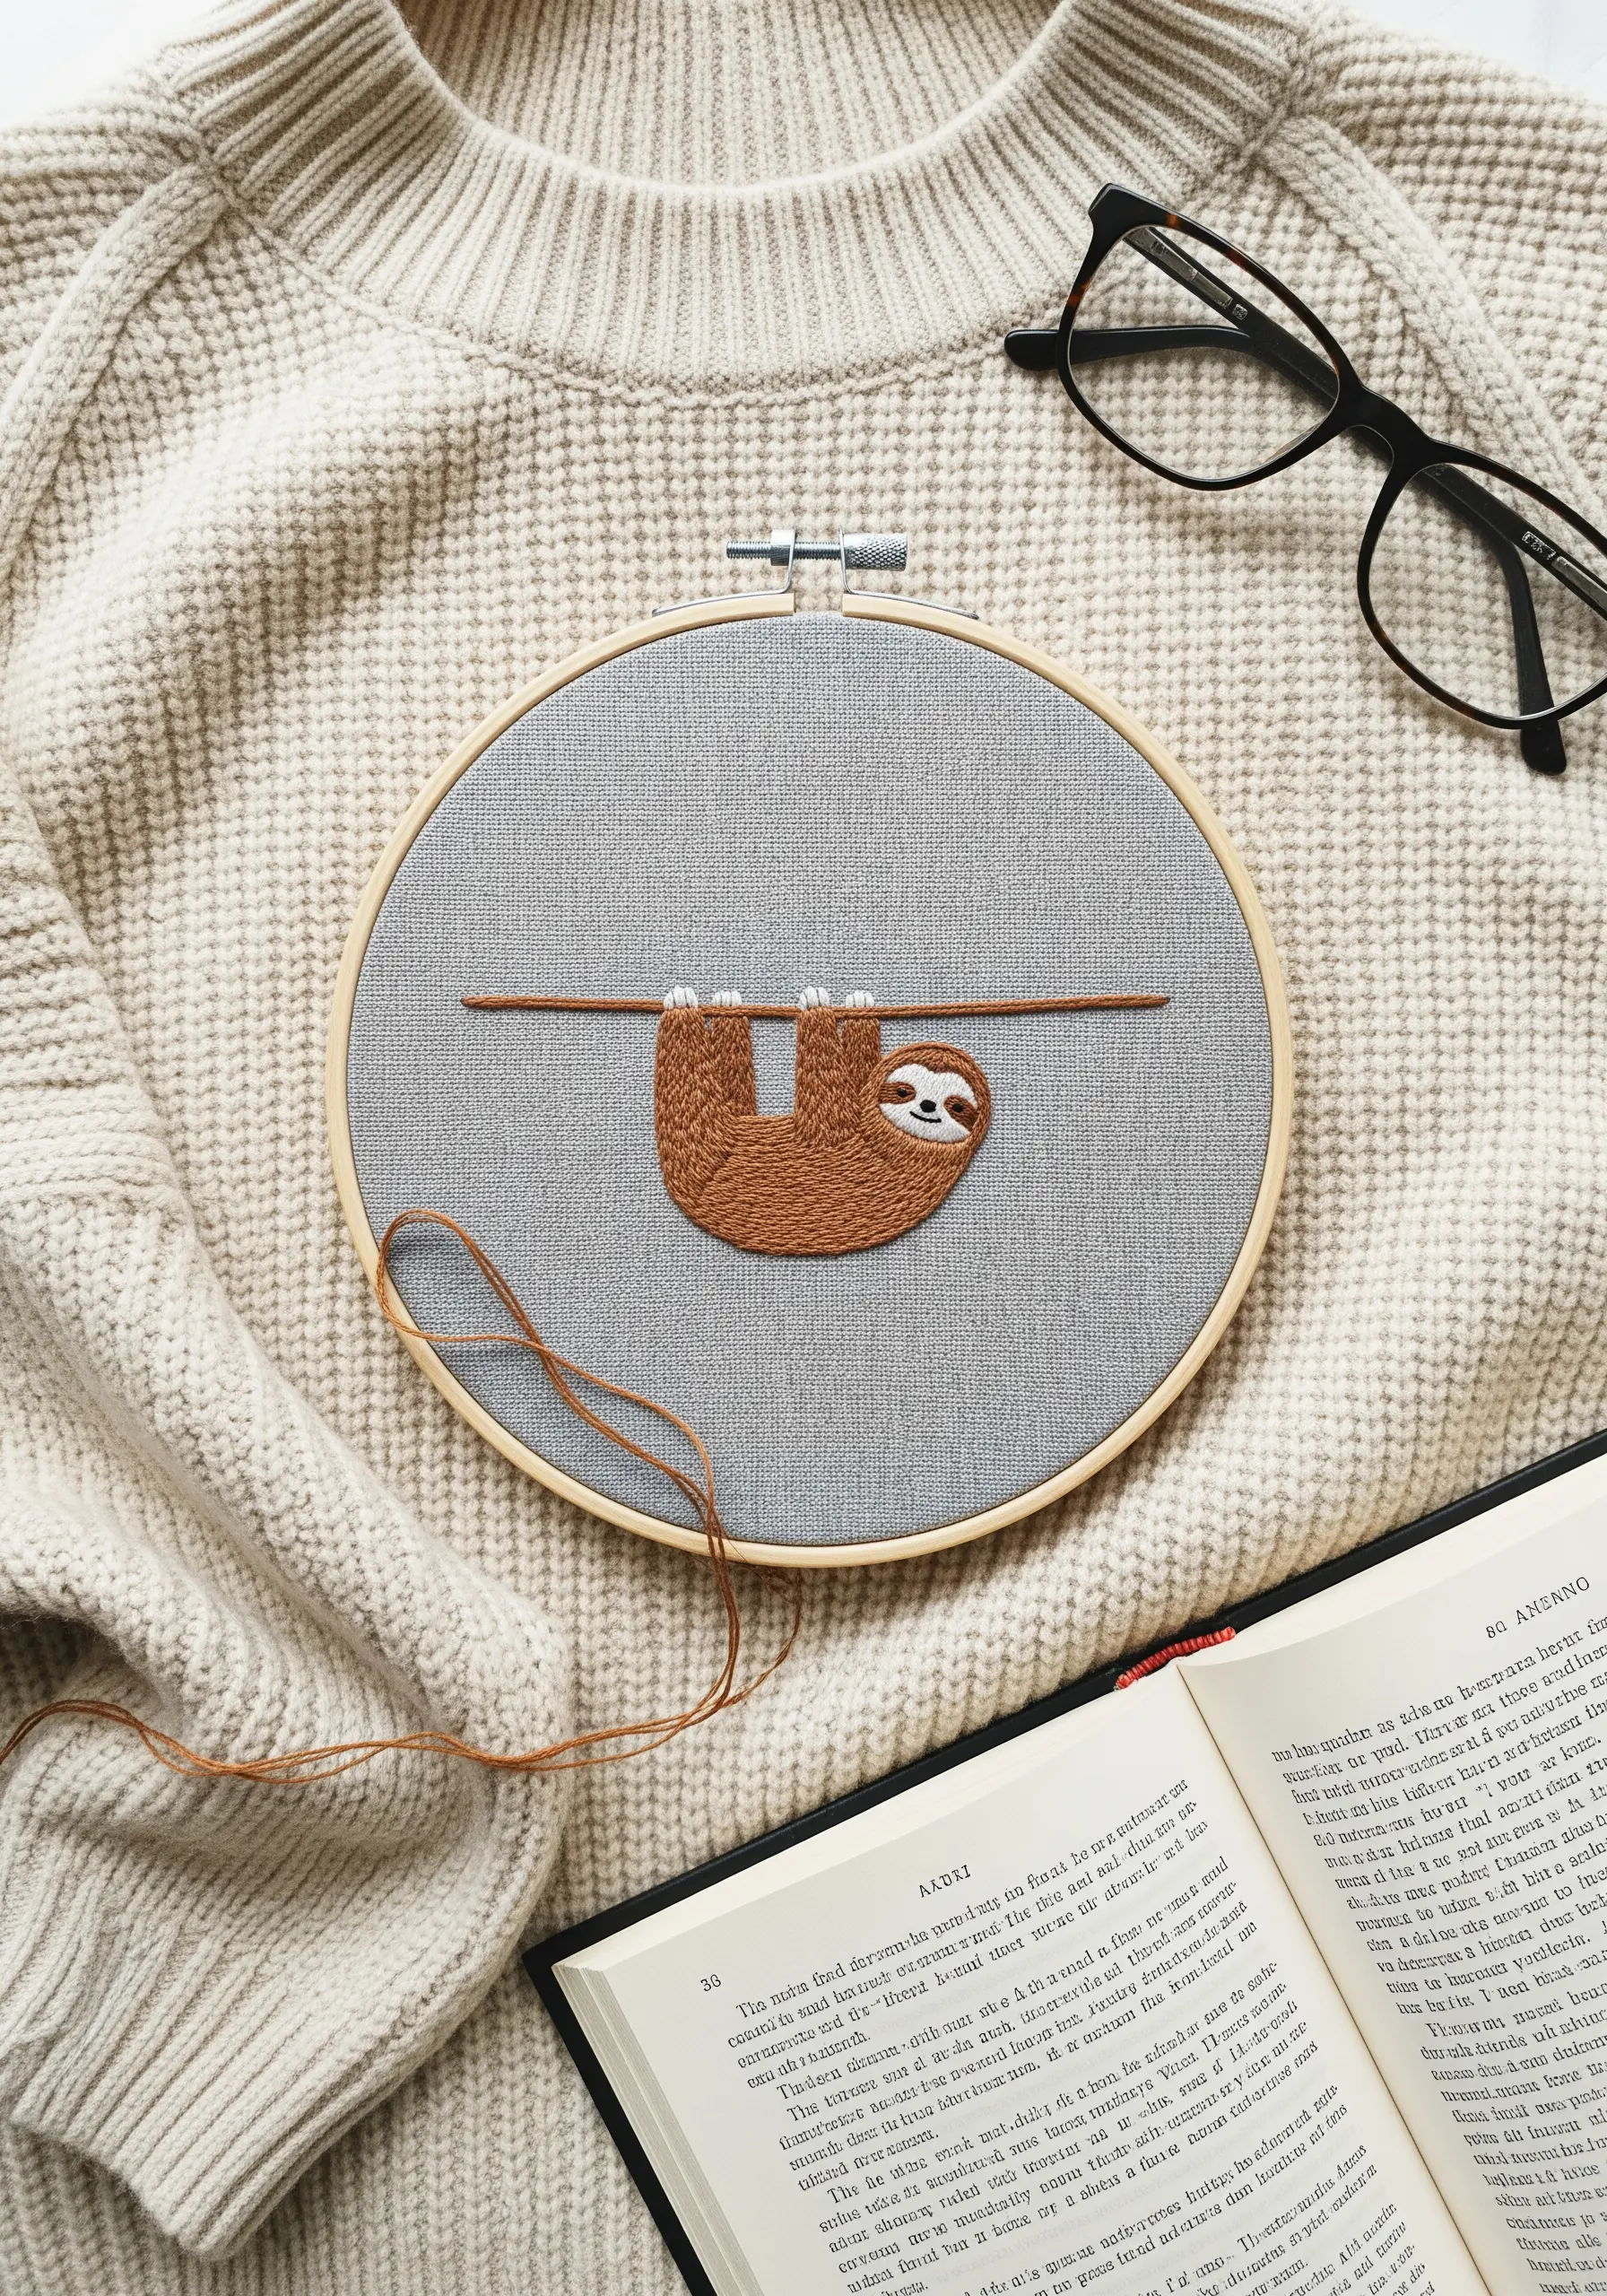
To give your embroidered animal a soft, tactile quality, incorporate the turkey stitch for a fluffy, 3D effect.
Outline the sloth’s body with a simple backstitch, then fill it with rows of turkey stitch loops.
Once all the loops are complete, carefully snip them open and trim them to create a uniform, velvety texture.
This technique adds a delightful, touchable element that brings the cozy character of the animal to life.
28. Frame Large Fabric Pieces for a Minimalist Look

For a clean, gallery-style presentation, stitch your design on a large piece of fabric and frame it with a wide mat.
This gives the embroidery breathing room and emphasizes the simplicity of the line art.
Stitch this graceful dolphin using a stem stitch in a cool blue-grey to enhance the serene, aquatic feel.
The generous white space around the subject creates a sense of calm and sophistication, making it perfect for an entryway or quiet corner.
29. Enhance Kitchen Linens with a Touch of Whimsy

Elevate everyday items like a simple linen tea towel with a charming, hand-stitched detail.
Use a backstitch for the squirrel’s outline and a series of straight stitches for the tail to give it a bushy, textured look.
Choose a classic brown or copper thread that complements the natural linen fabric.
These modern minimalist table linen embroidery ideas add a touch of handmade warmth and personality to your kitchen.
30. Group Small Hoops to Create a Cohesive Collection
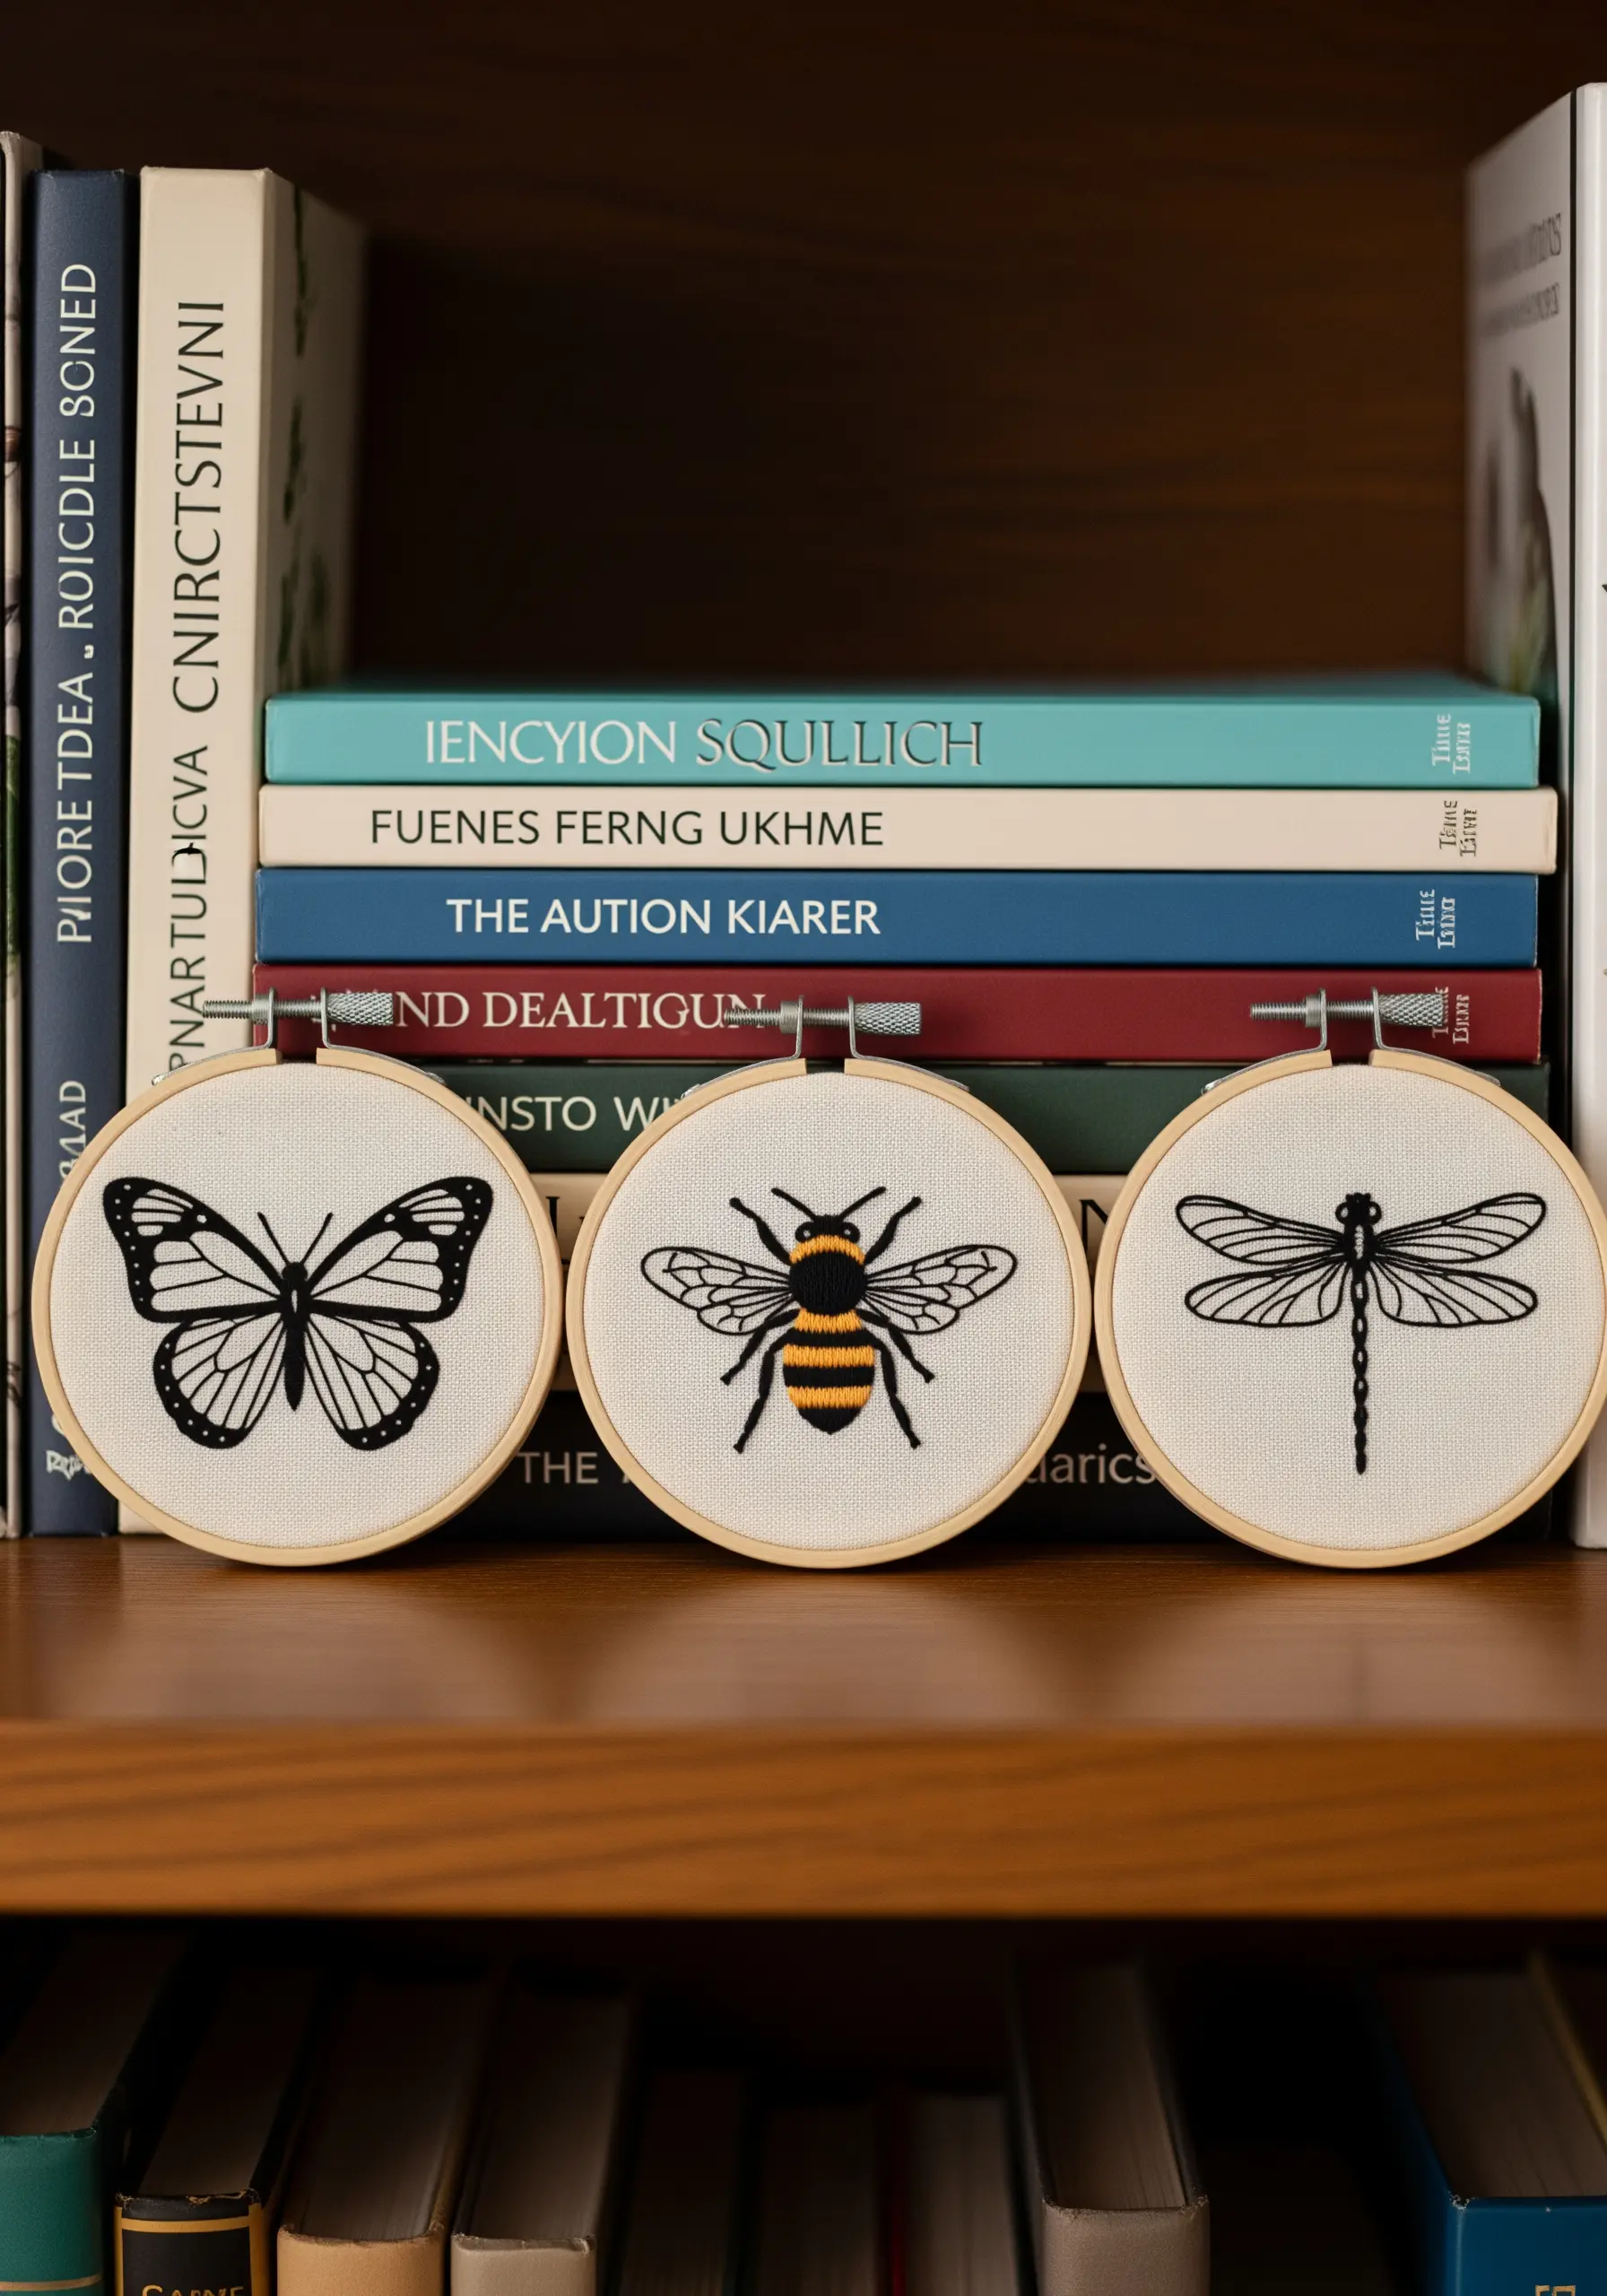
Instead of one large piece, tell a story by stitching a series of small, related designs.
Embroider different insects—a butterfly, a bee, a dragonfly—in individual hoops using a consistent style and color palette.
When displayed together on a shelf or wall, they create a beautiful, curated collection.
This is a wonderful way to build a gallery wall without visual clutter, adding character to small spaces.
31. Use Graduated Colors for Natural Shading
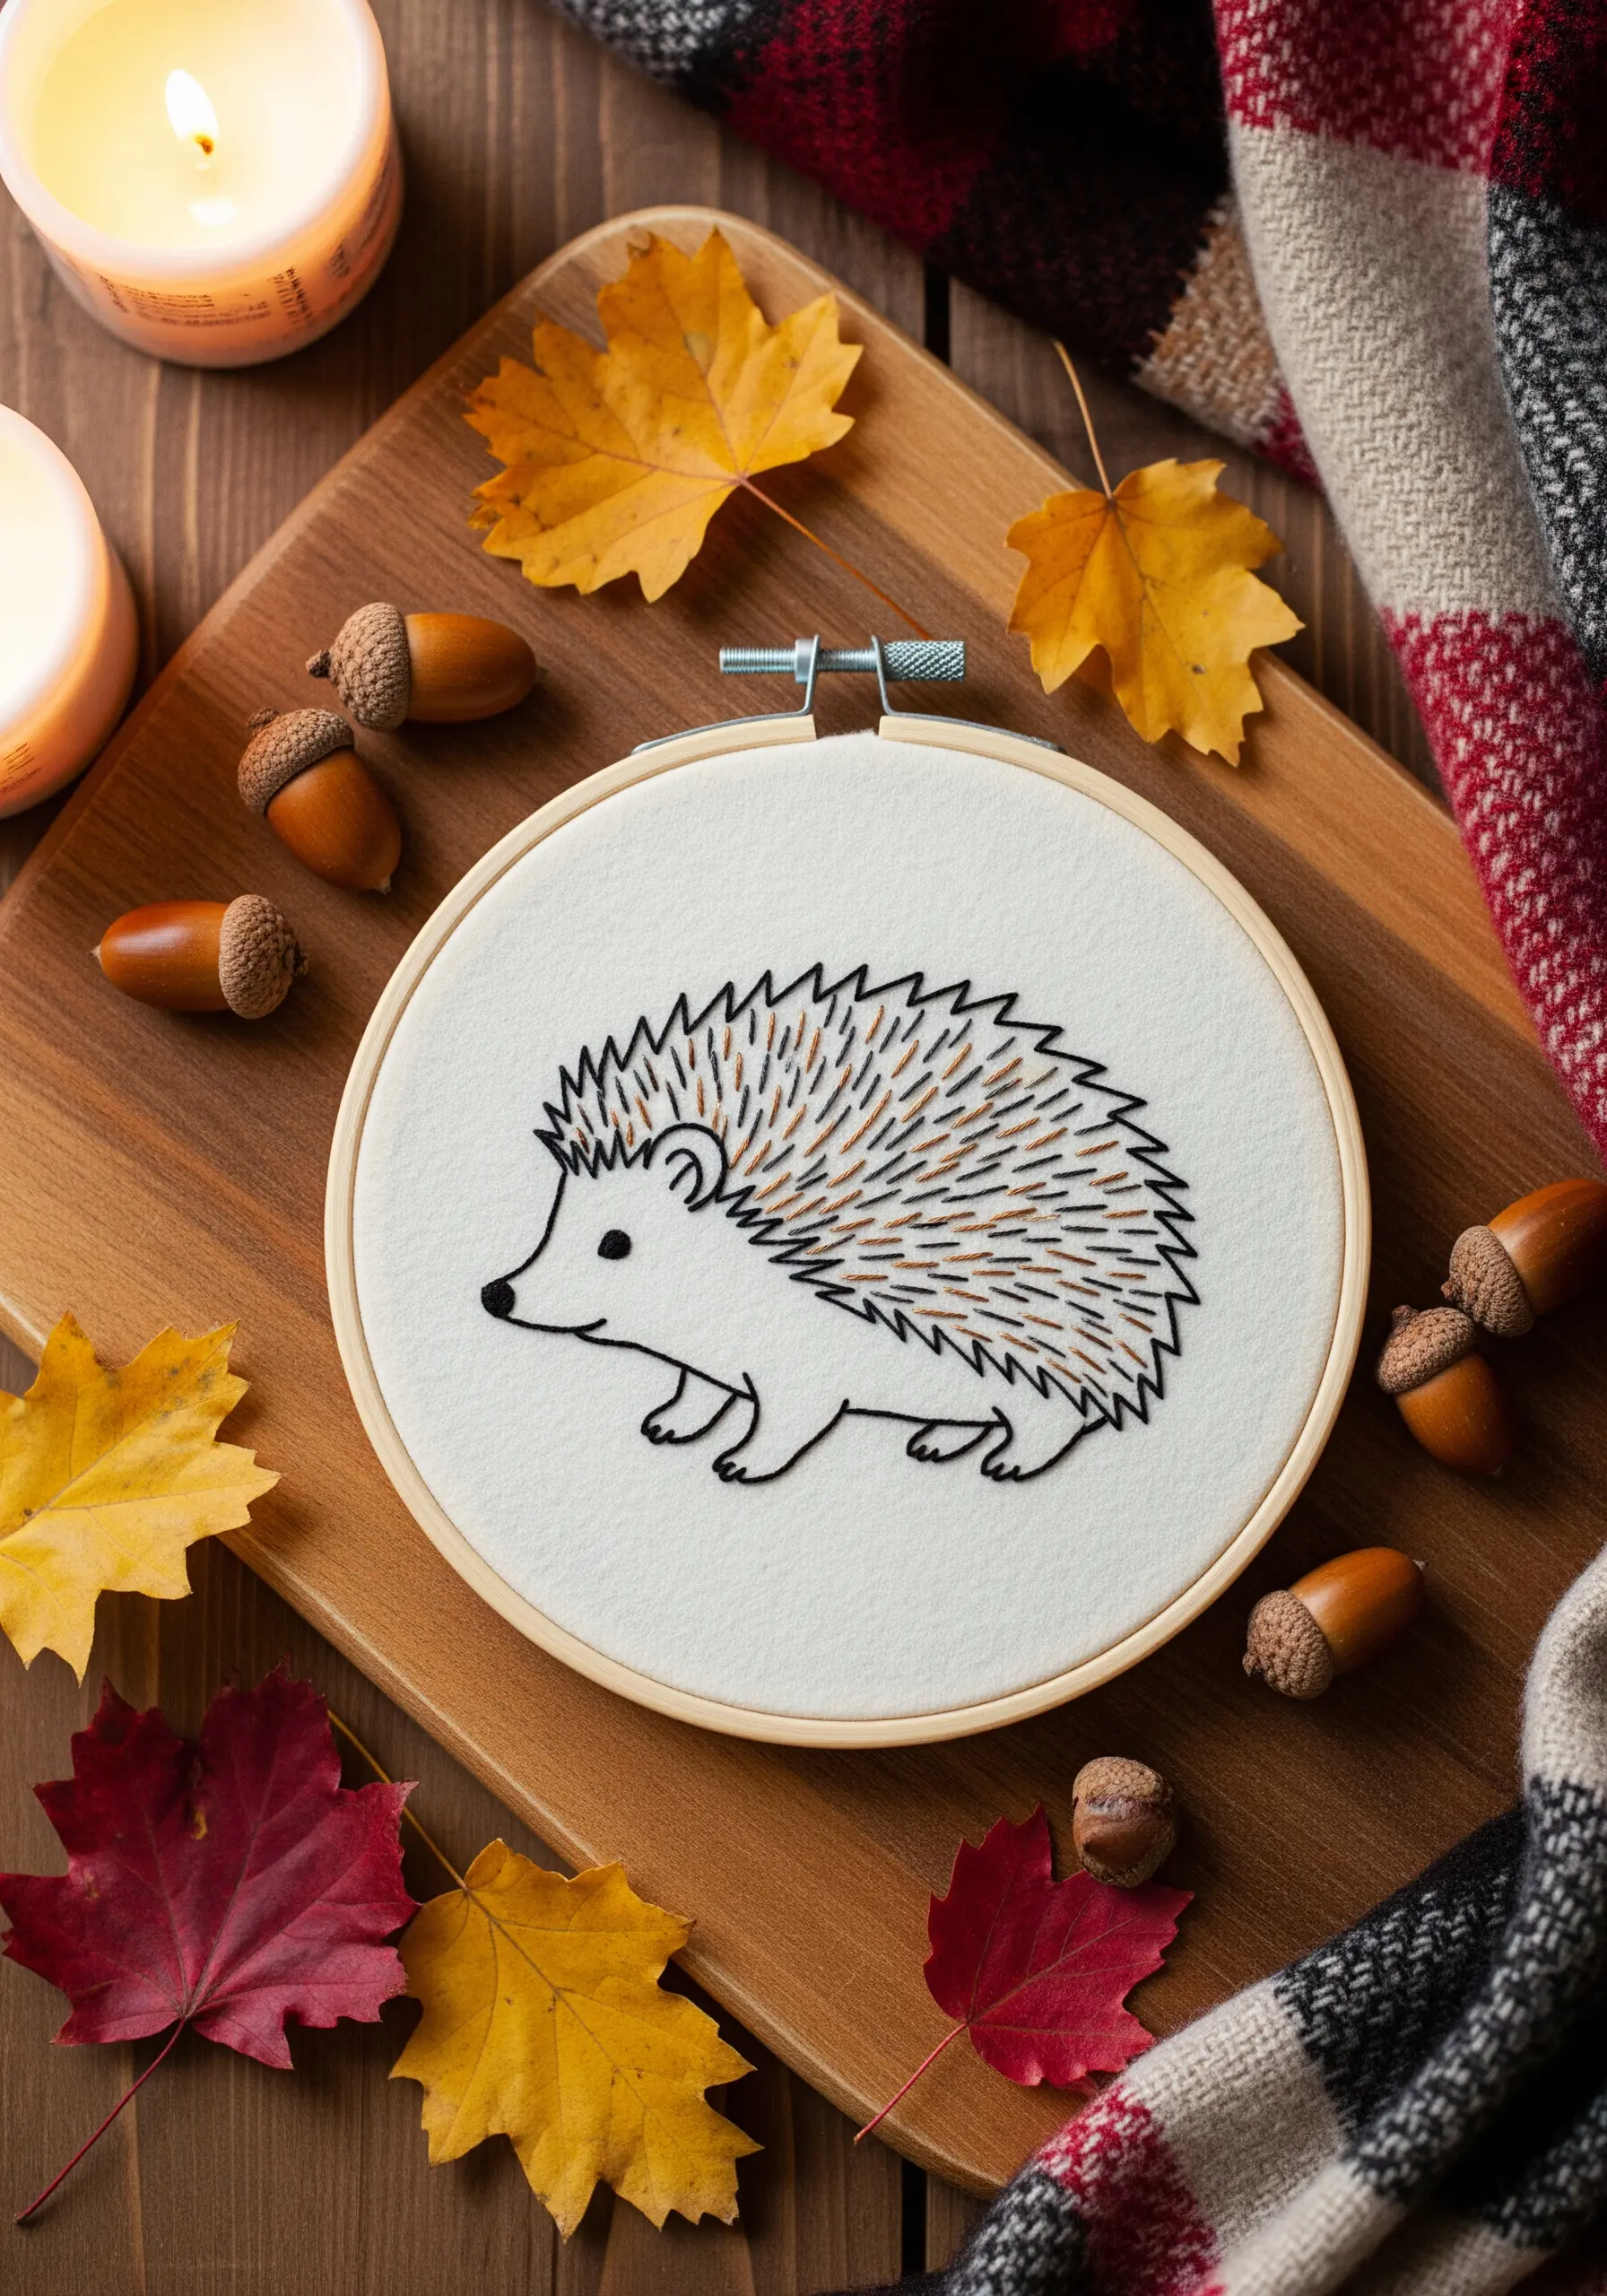
Create a subtle, natural-looking gradient on this hedgehog’s quills by using two or three closely related thread colors.
Stitch the darkest color at the base of the quills, the medium shade in the middle, and the lightest at the tips, using simple straight stitches.
Slightly overlap the colors where they meet to blend them softly.
This simple color-blending technique adds depth and realism to your design without requiring complex shading skills.
32. Go Bold with High-Contrast Apparel Embroidery
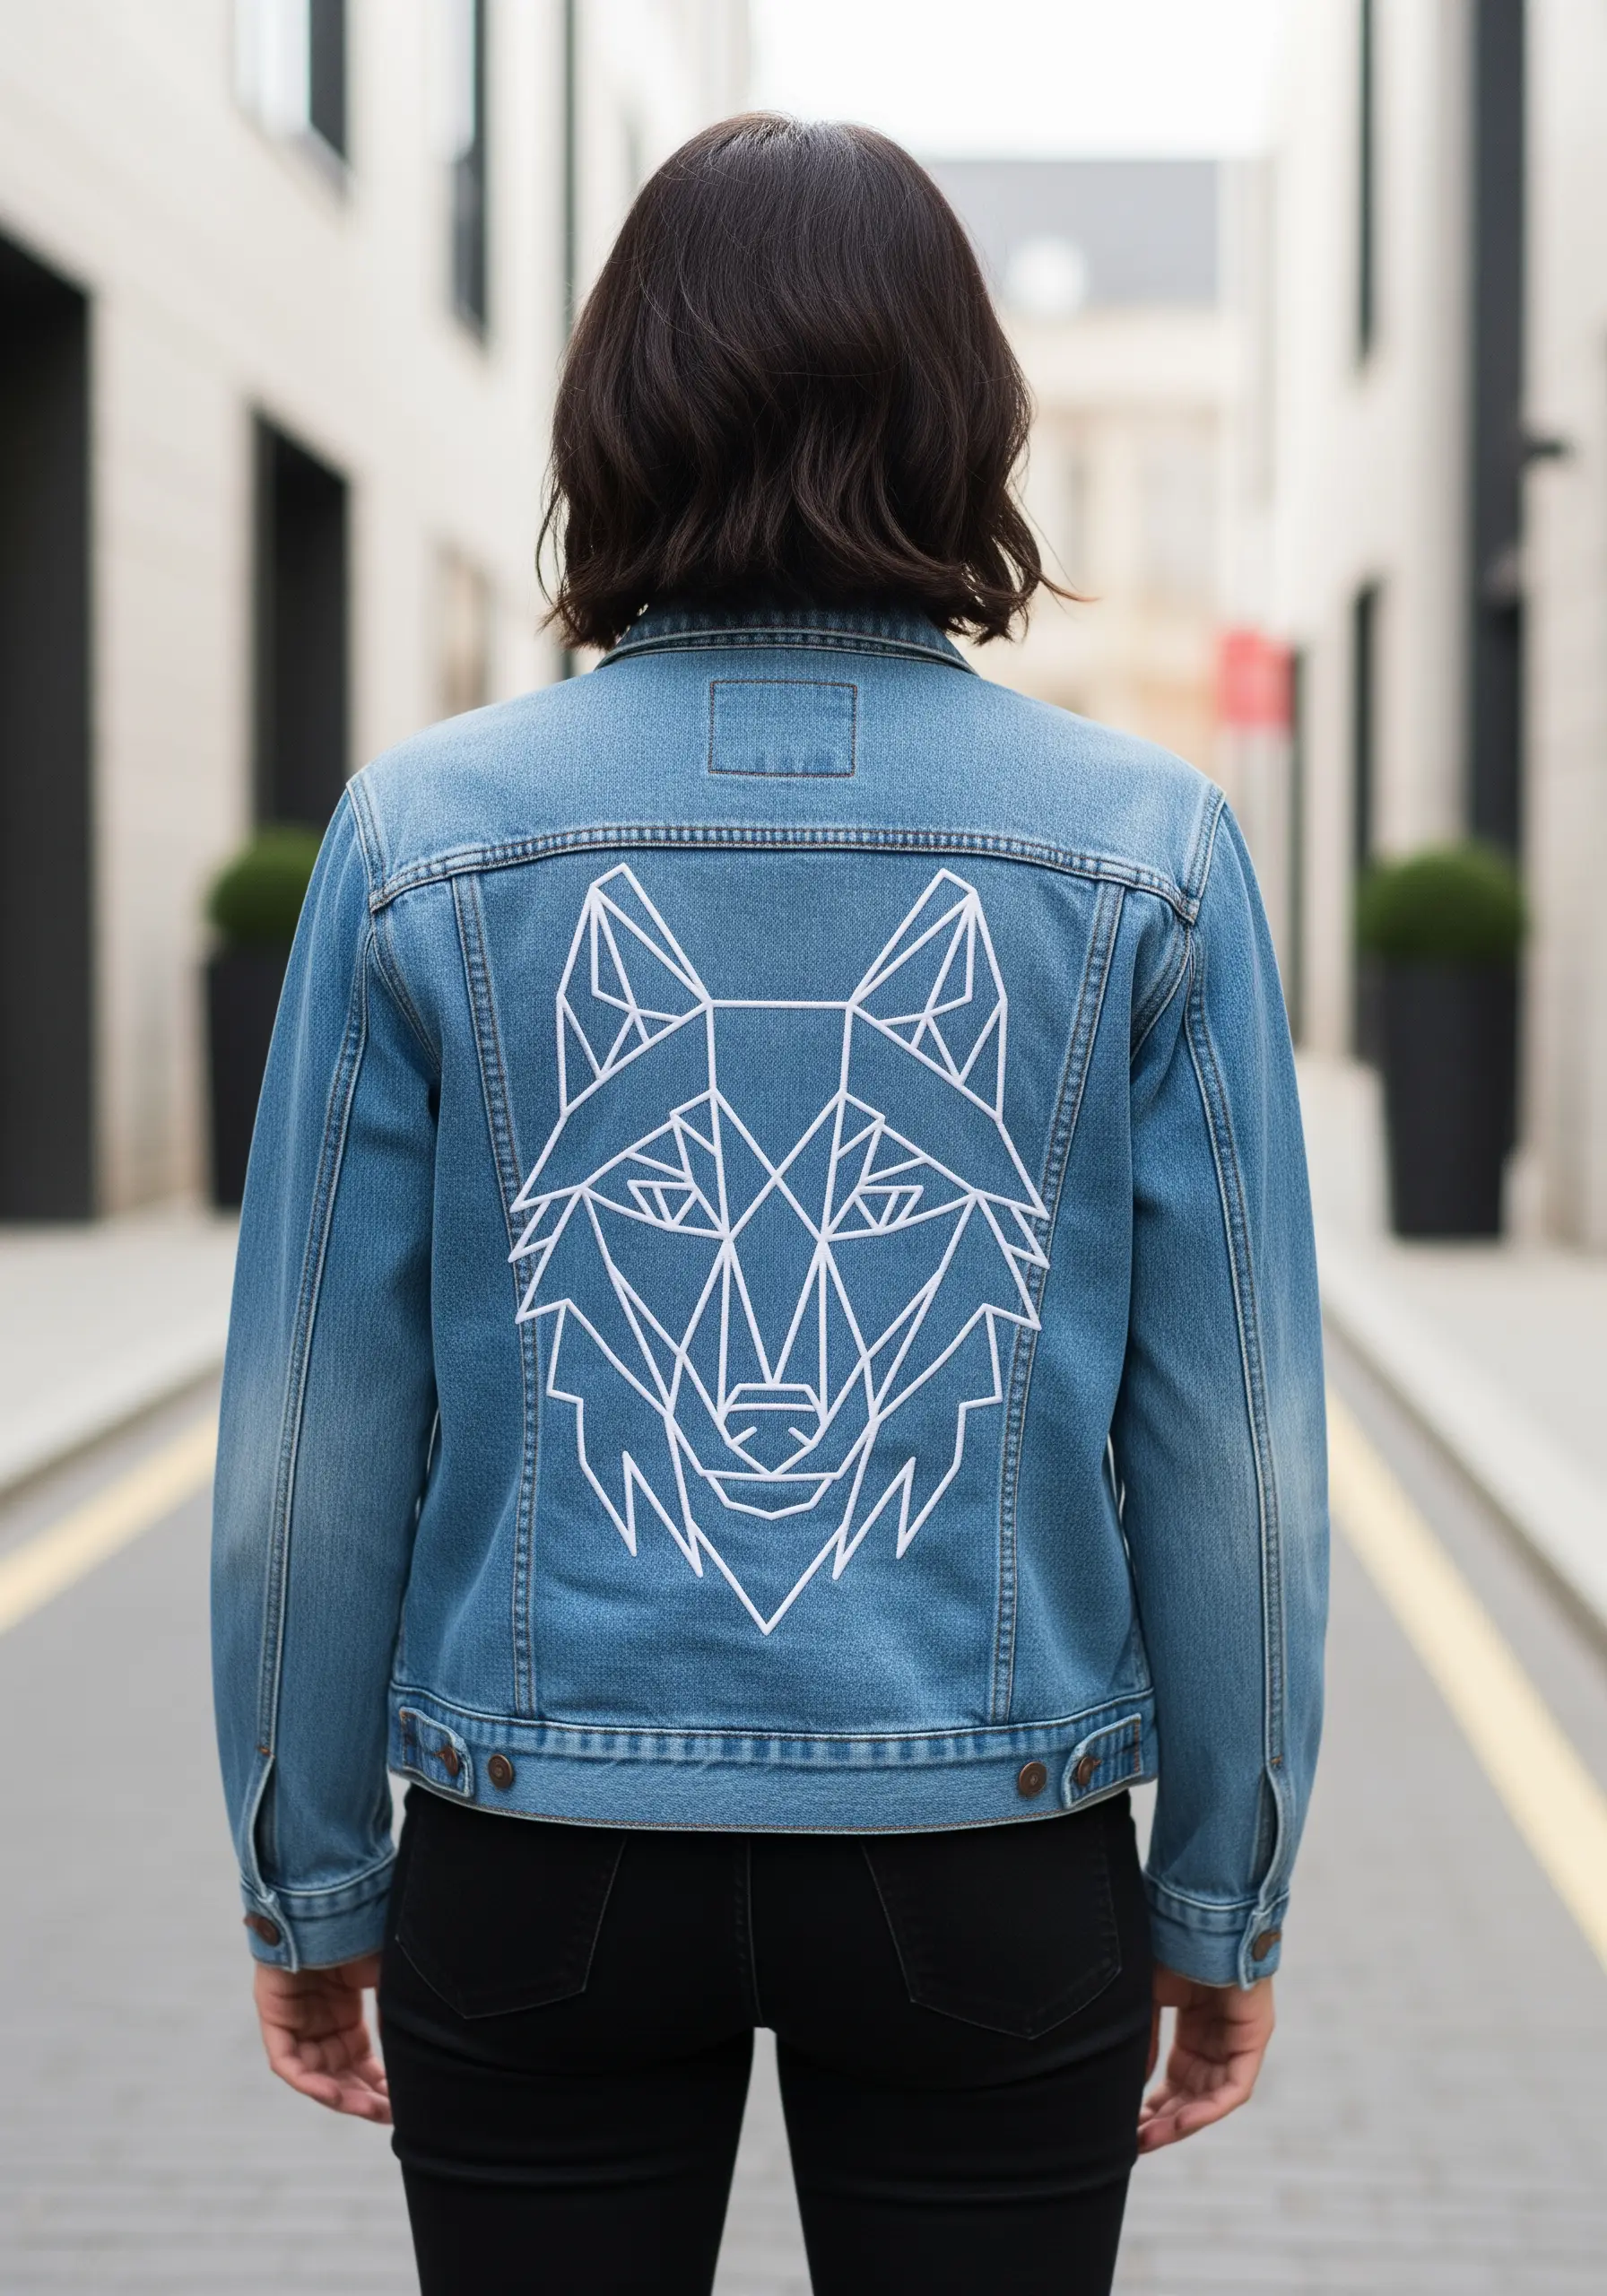
Make a powerful statement by embroidering a large-scale geometric design on the back of a denim jacket.
The key to success on heavy fabric like denim is using a sharp, strong needle and a thicker thread, like pearl cotton No. 8, for visibility.
A simple backstitch in a bright white thread creates a stunning contrast against the blue denim, turning a wardrobe staple into a piece of wearable art.
It’s an amazing way to turn your old clothes into art.
33. Capture Elegance with a Refined Single-Line Portrait
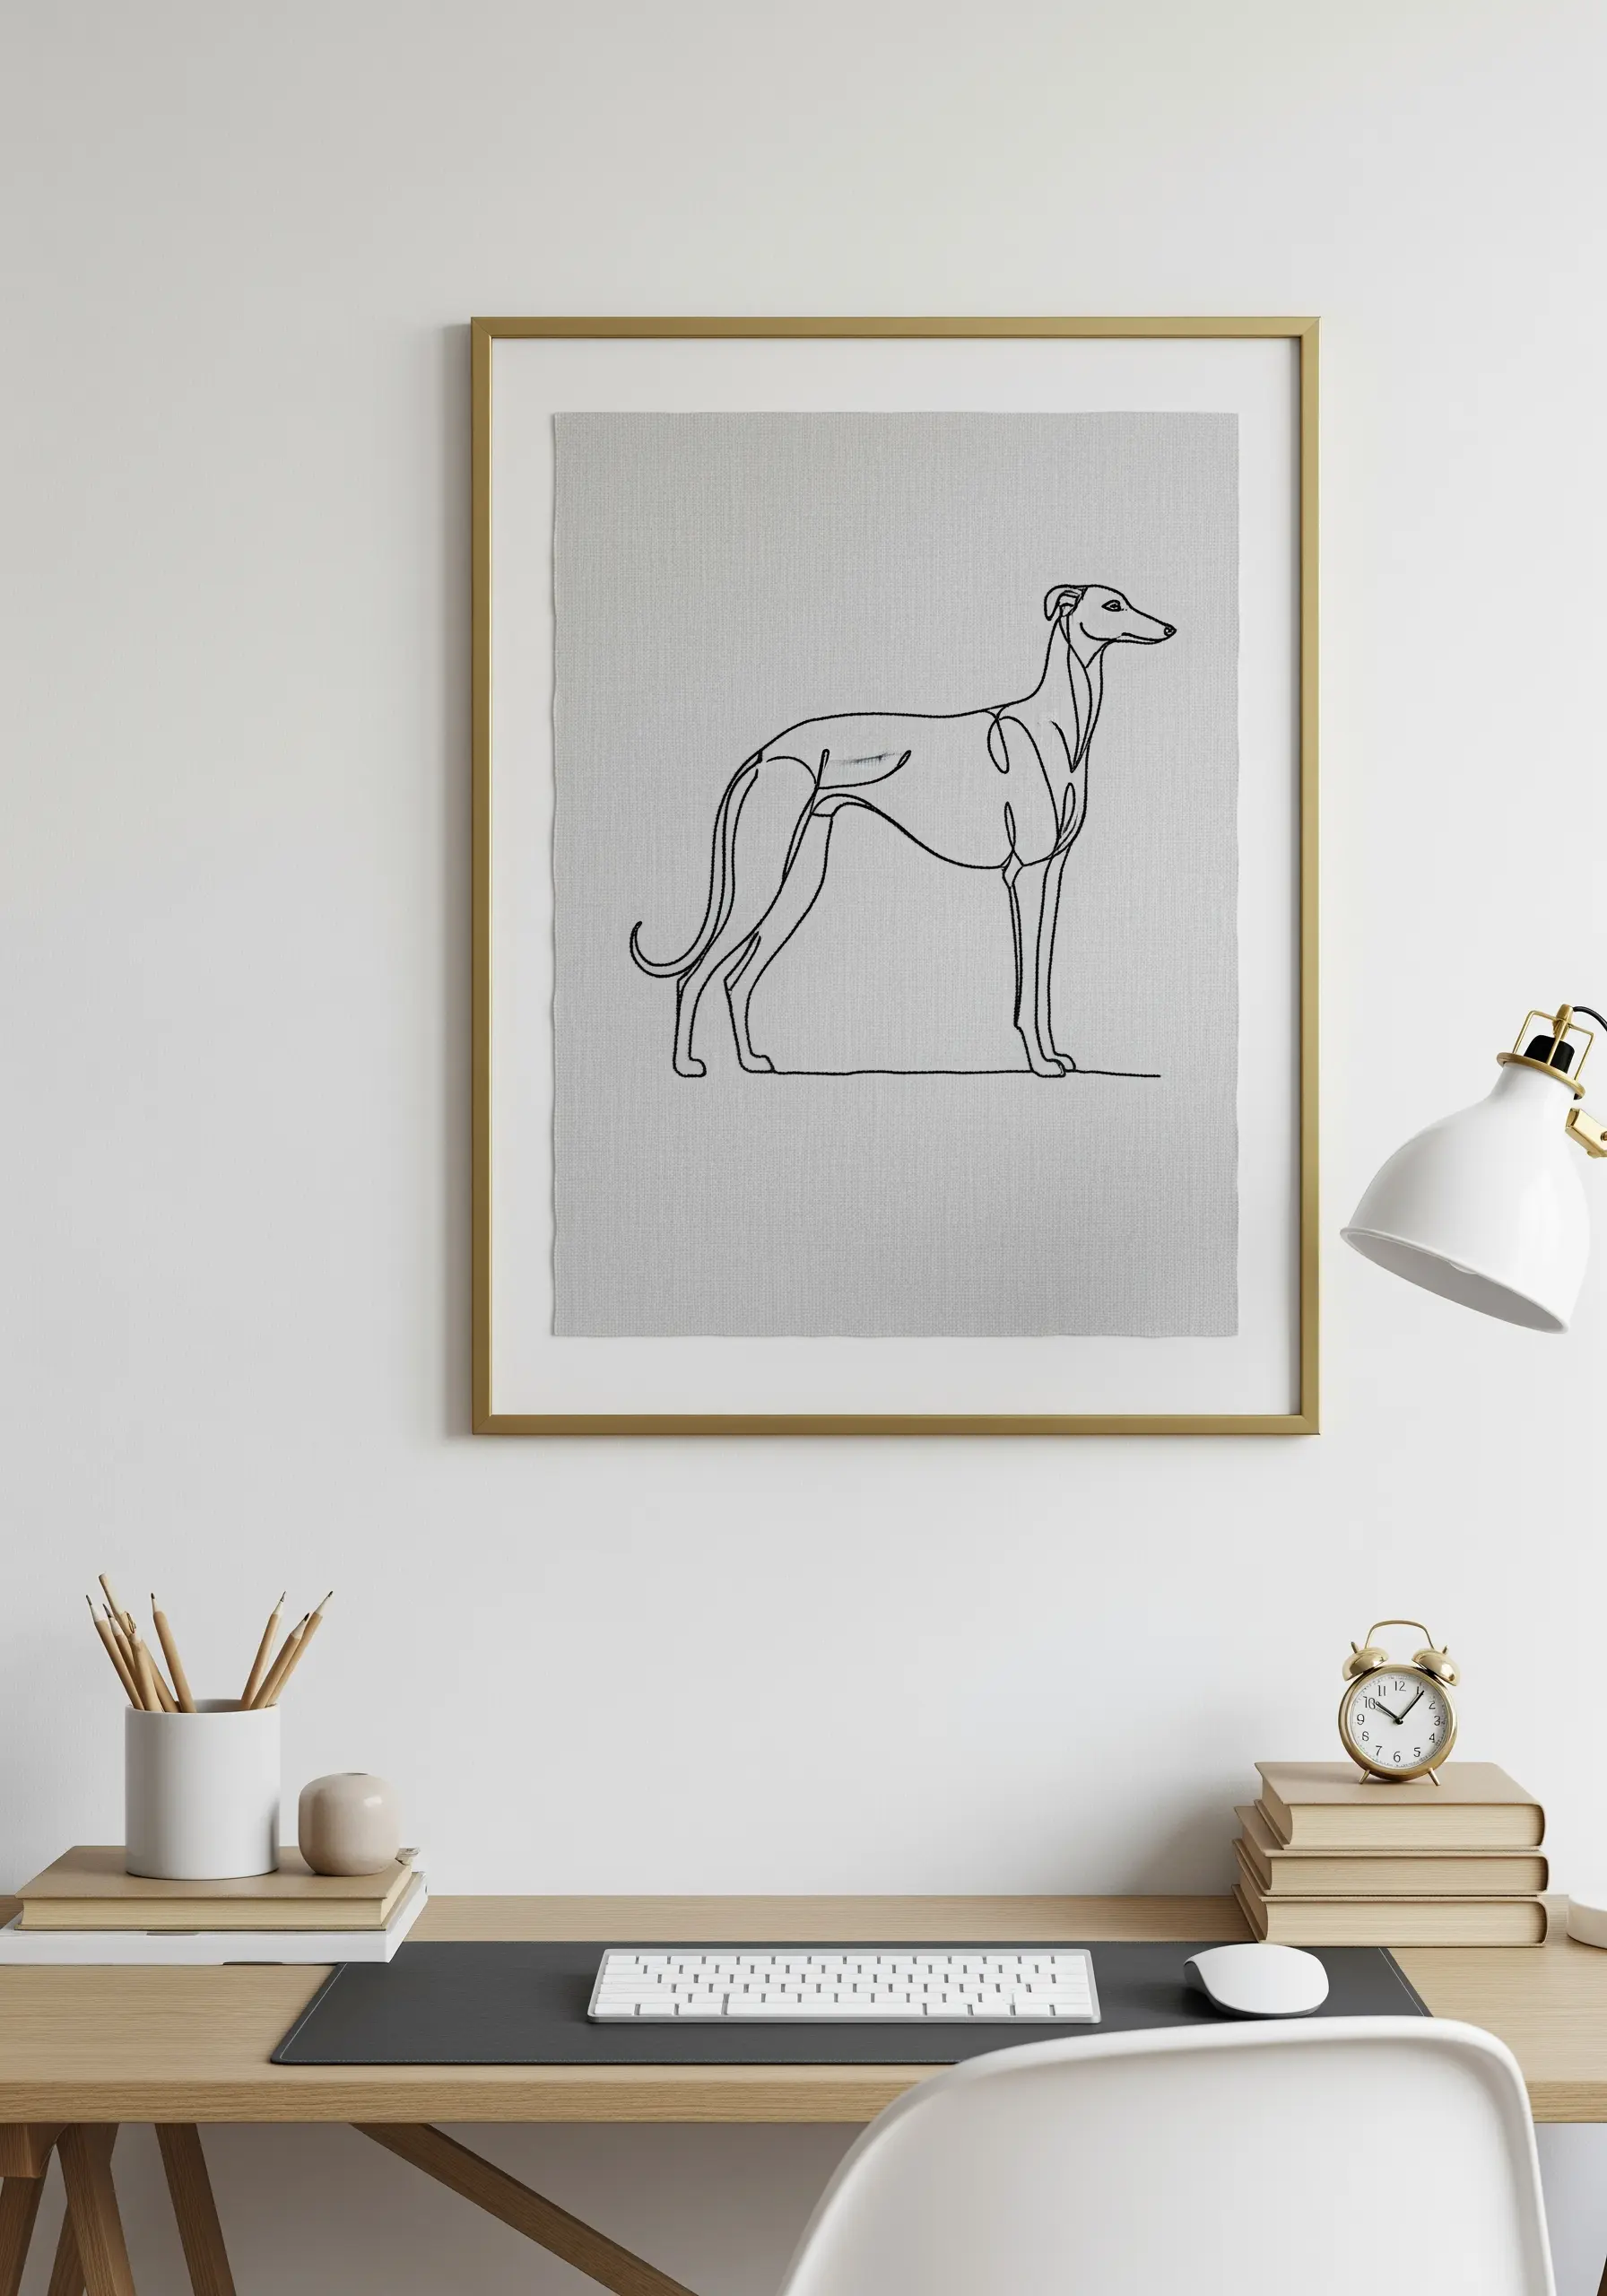
The grace of an animal like a greyhound is perfectly suited to a minimalist, continuous-line portrait.
Focus on capturing the essential curves and posture of the dog with one unbroken stitch line.
The stem stitch is your best tool here, as it creates a smooth, corded line that flows beautifully around curves.
Framed simply on a piece of high-quality grey linen, this project becomes a testament to the idea that less is truly more.


