
If you’ve ever felt that your embroidery, beautiful as it is, could use an extra layer of story or texture, I want you to consider paper. Think of it not as a replacement for fabric, but as its creative partner—a new surface that invites you to play with dimension, color, and narrative in ways a simple hoop of linen cannot.
Combining paper collage with your stitches isn’t about creating complex, intimidating projects. It’s about simple, elegant shifts in your process. It’s about letting a piece of a vintage map guide your color palette, or allowing the texture of handmade paper to inform the weight of your thread. It is a dialogue between two wonderfully tactile materials.
In these projects, you’ll see how a simple line of thread can bring a paper cutout to life, how layered fabric can build a sky with more depth than any single color, and how your needle and thread can become a drawing tool. This is your invitation to create art for your walls that feels deeply personal, wonderfully textured, and completely one-of-a-kind.
1. Botanical Tracing with a Single Thread
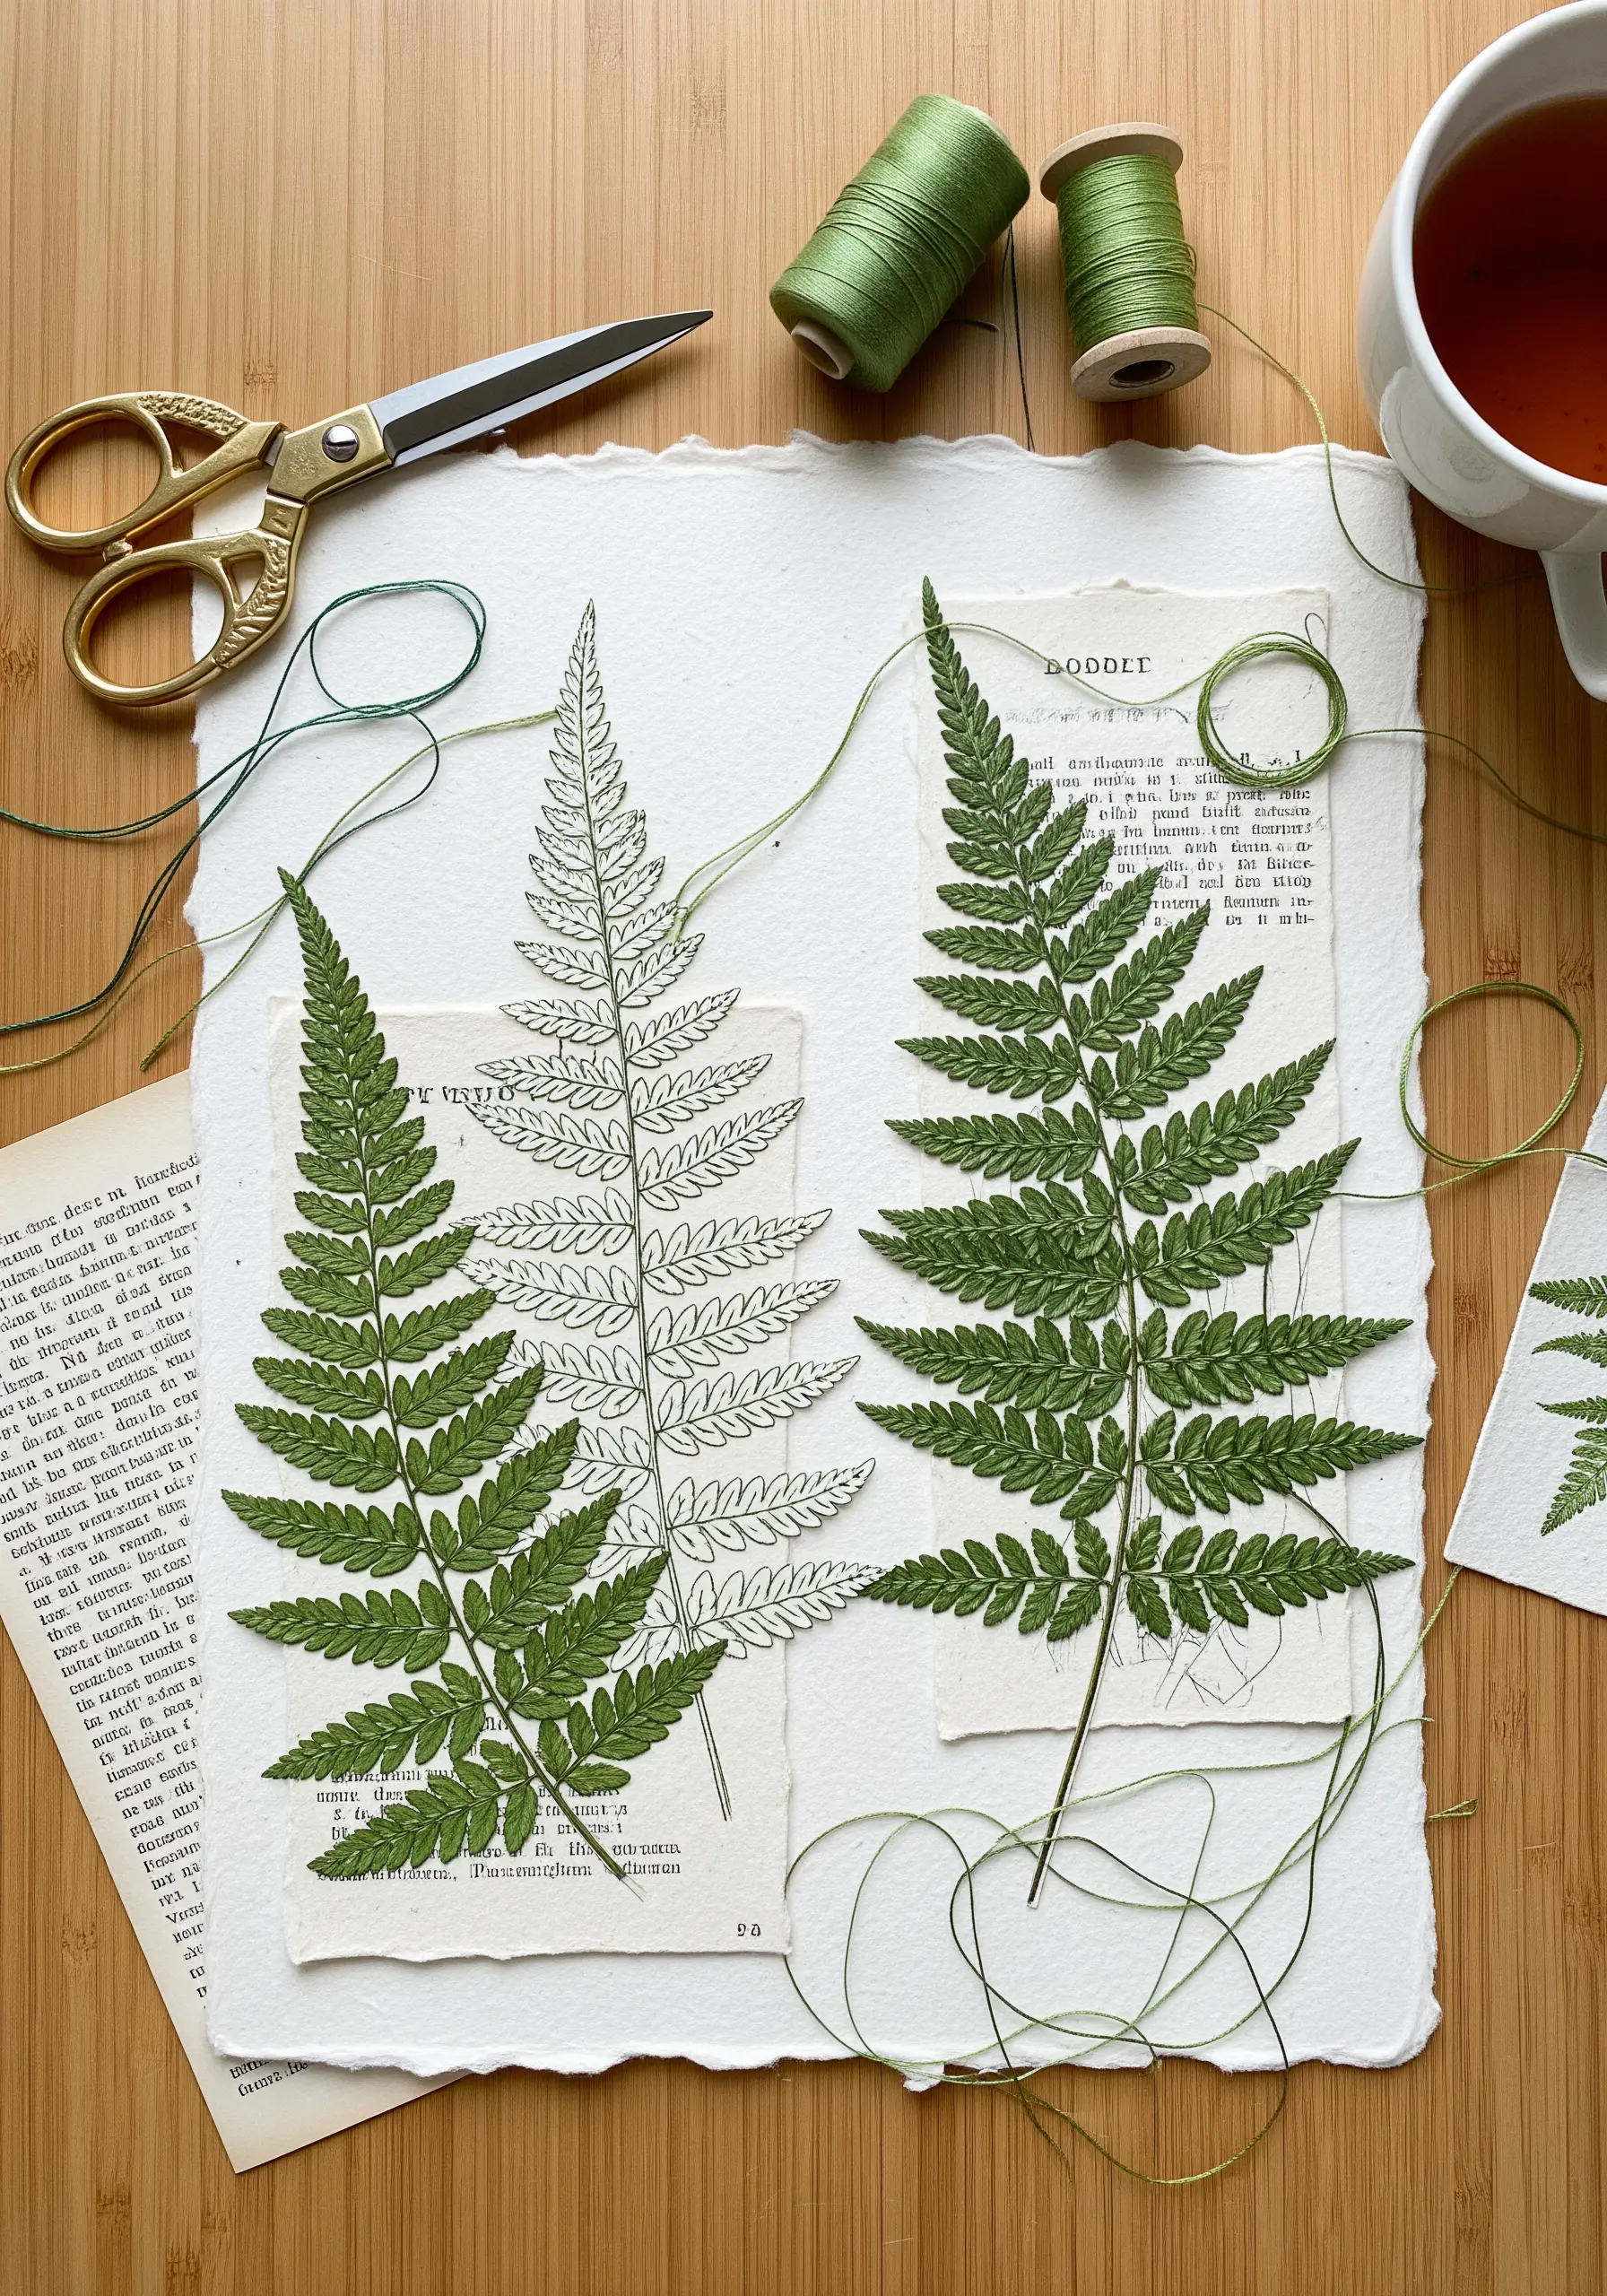
Instead of stitching a full design, use a printed botanical image on textured paper as your guide.
Selectively trace key features—like the central stem or the delicate veins of a fern—with a single strand of thread in a contrasting or complementary color.
This minimalist approach highlights the illustration’s details without overpowering them, creating a beautiful dialogue between the printed line and the stitched one.
Use a very fine needle and pre-pierce your holes on thicker paper to avoid tearing.
This is one of the best real garden leaf tracing ideas to transfer authentic shapes into your embroidery designs.
2. Layered Fabric Skies for Celestial Depth
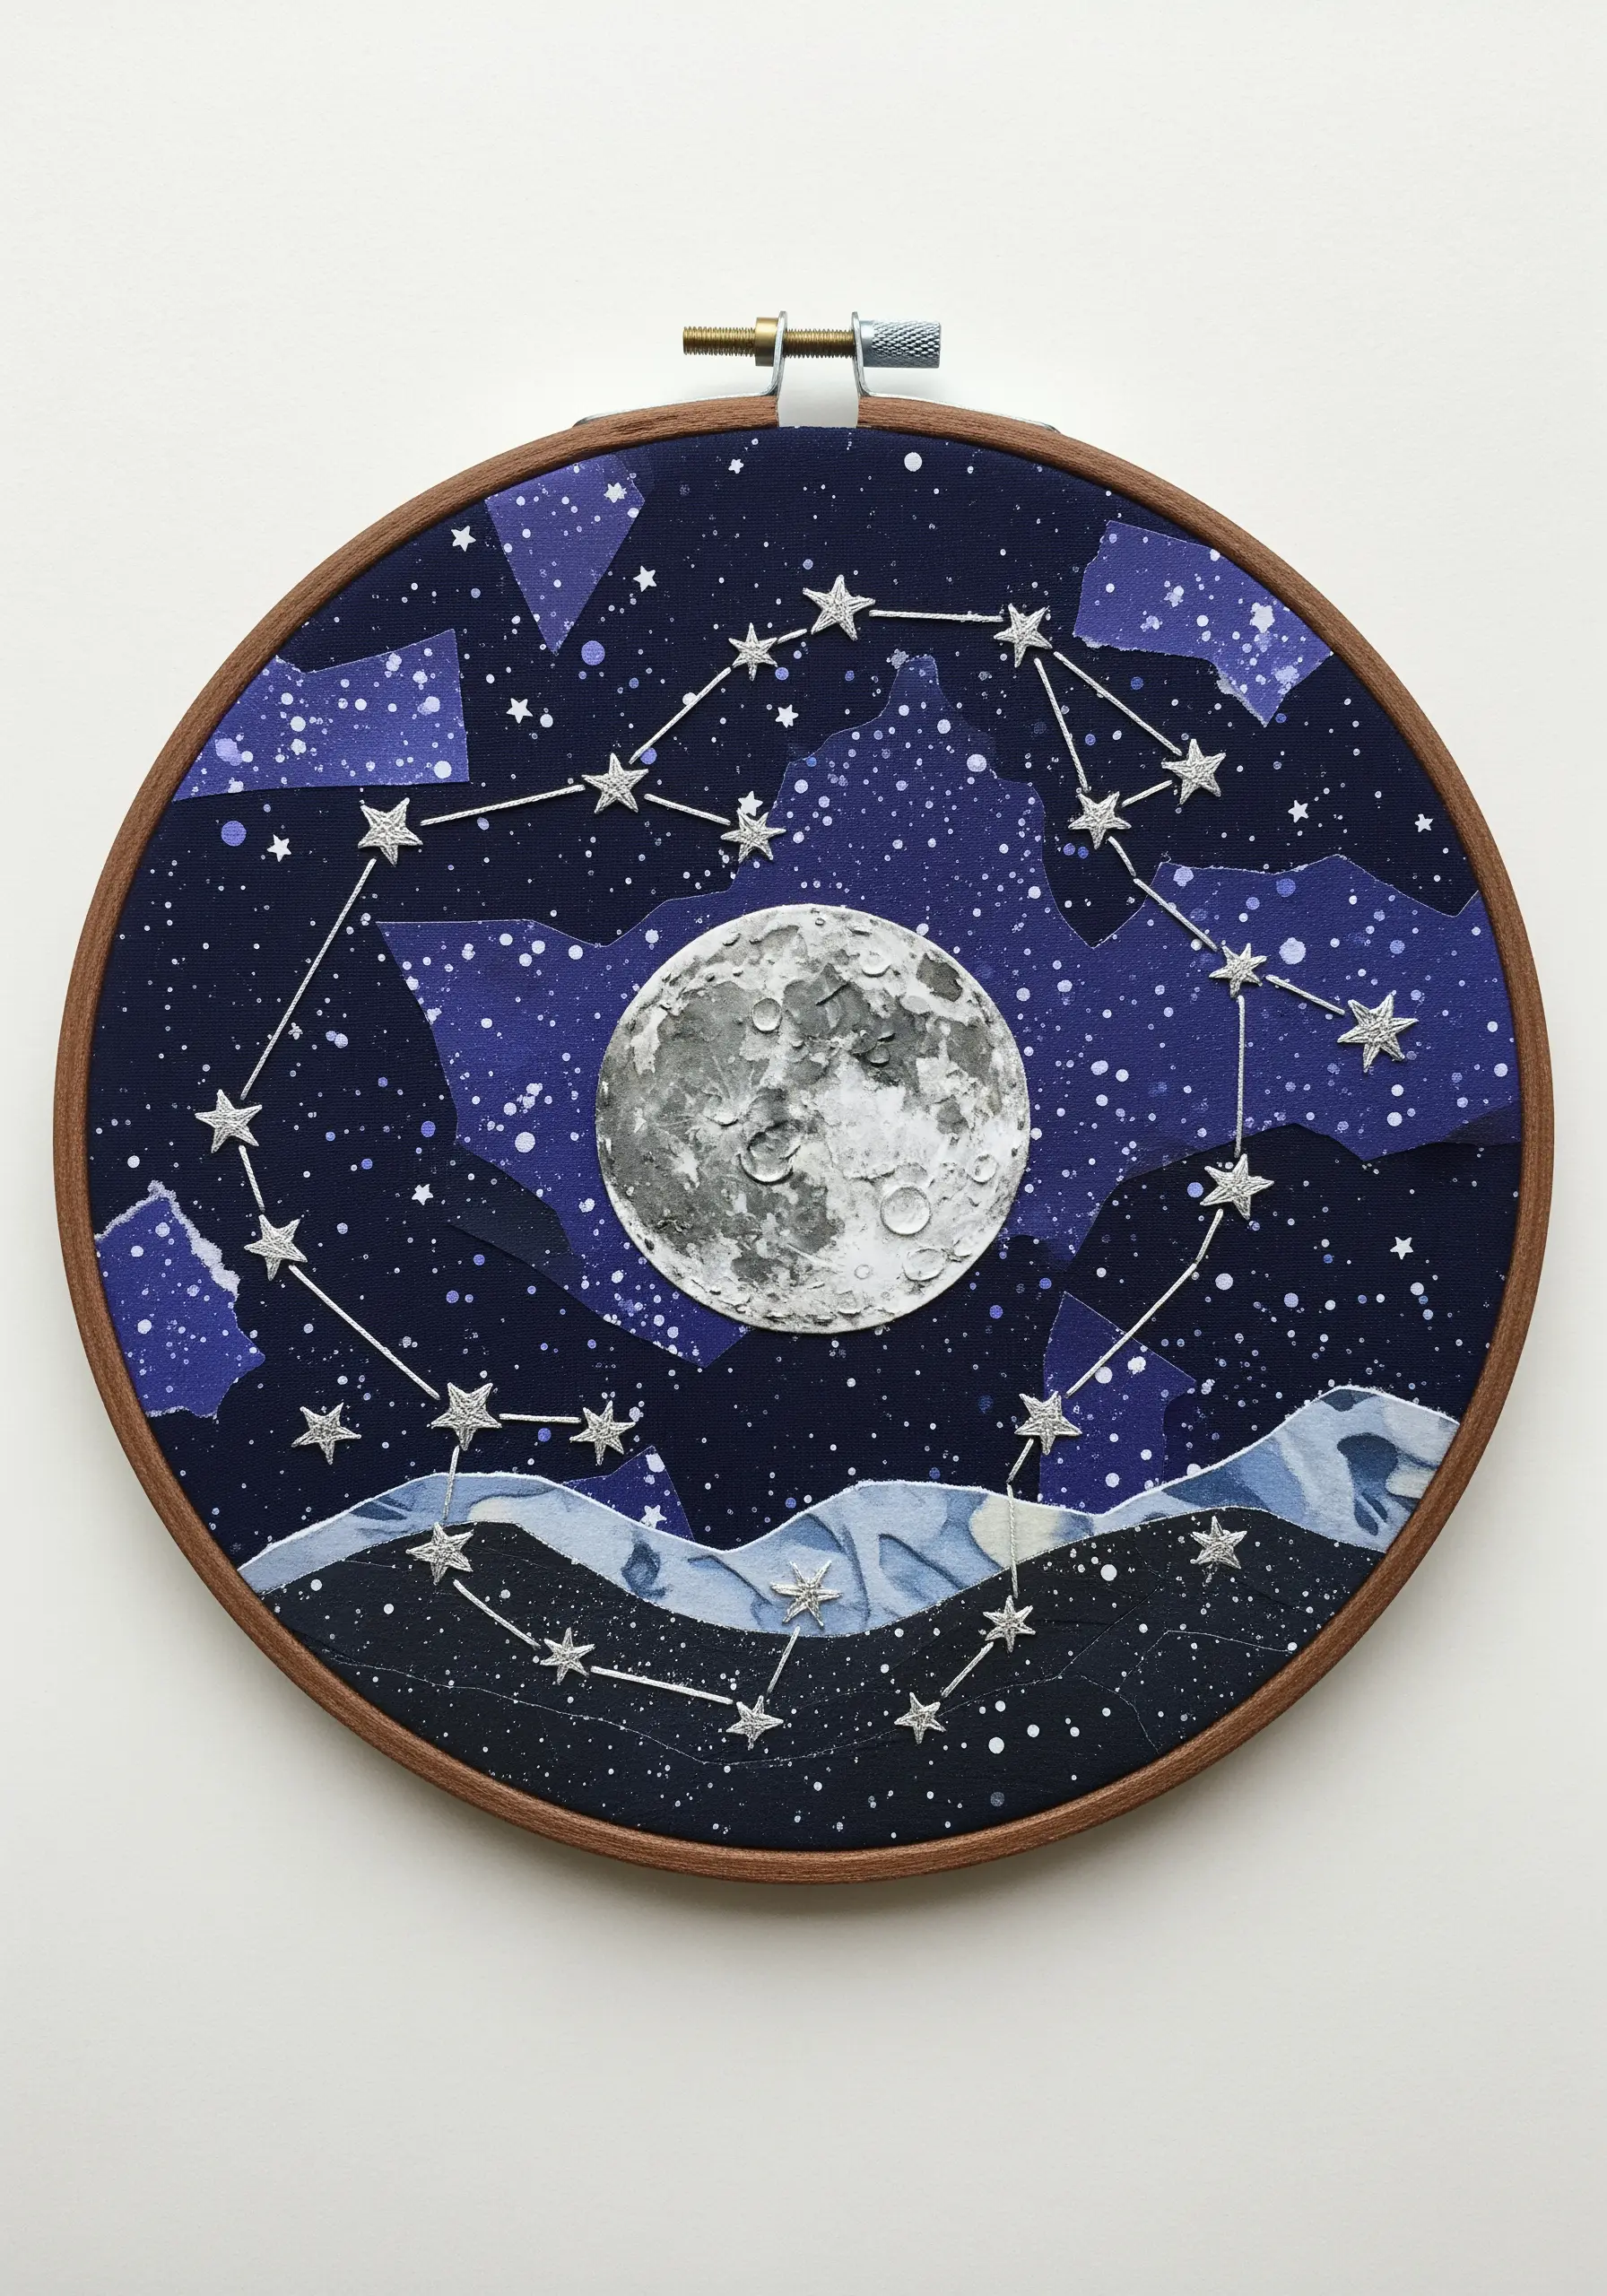
Create a dynamic night sky by building a collage from torn pieces of dark blue and indigo fabrics directly in the hoop.
Secure the pieces with a few discreet tacking stitches, then connect them with your embroidered constellations.
This method gives your background an organic, painterly depth that a single piece of fabric lacks.
Use a silver metallic thread for your stars and connecting lines; the shimmer will stand out beautifully against the matte, layered fabrics.
3. Architectural Tension with Graphic Threadwork
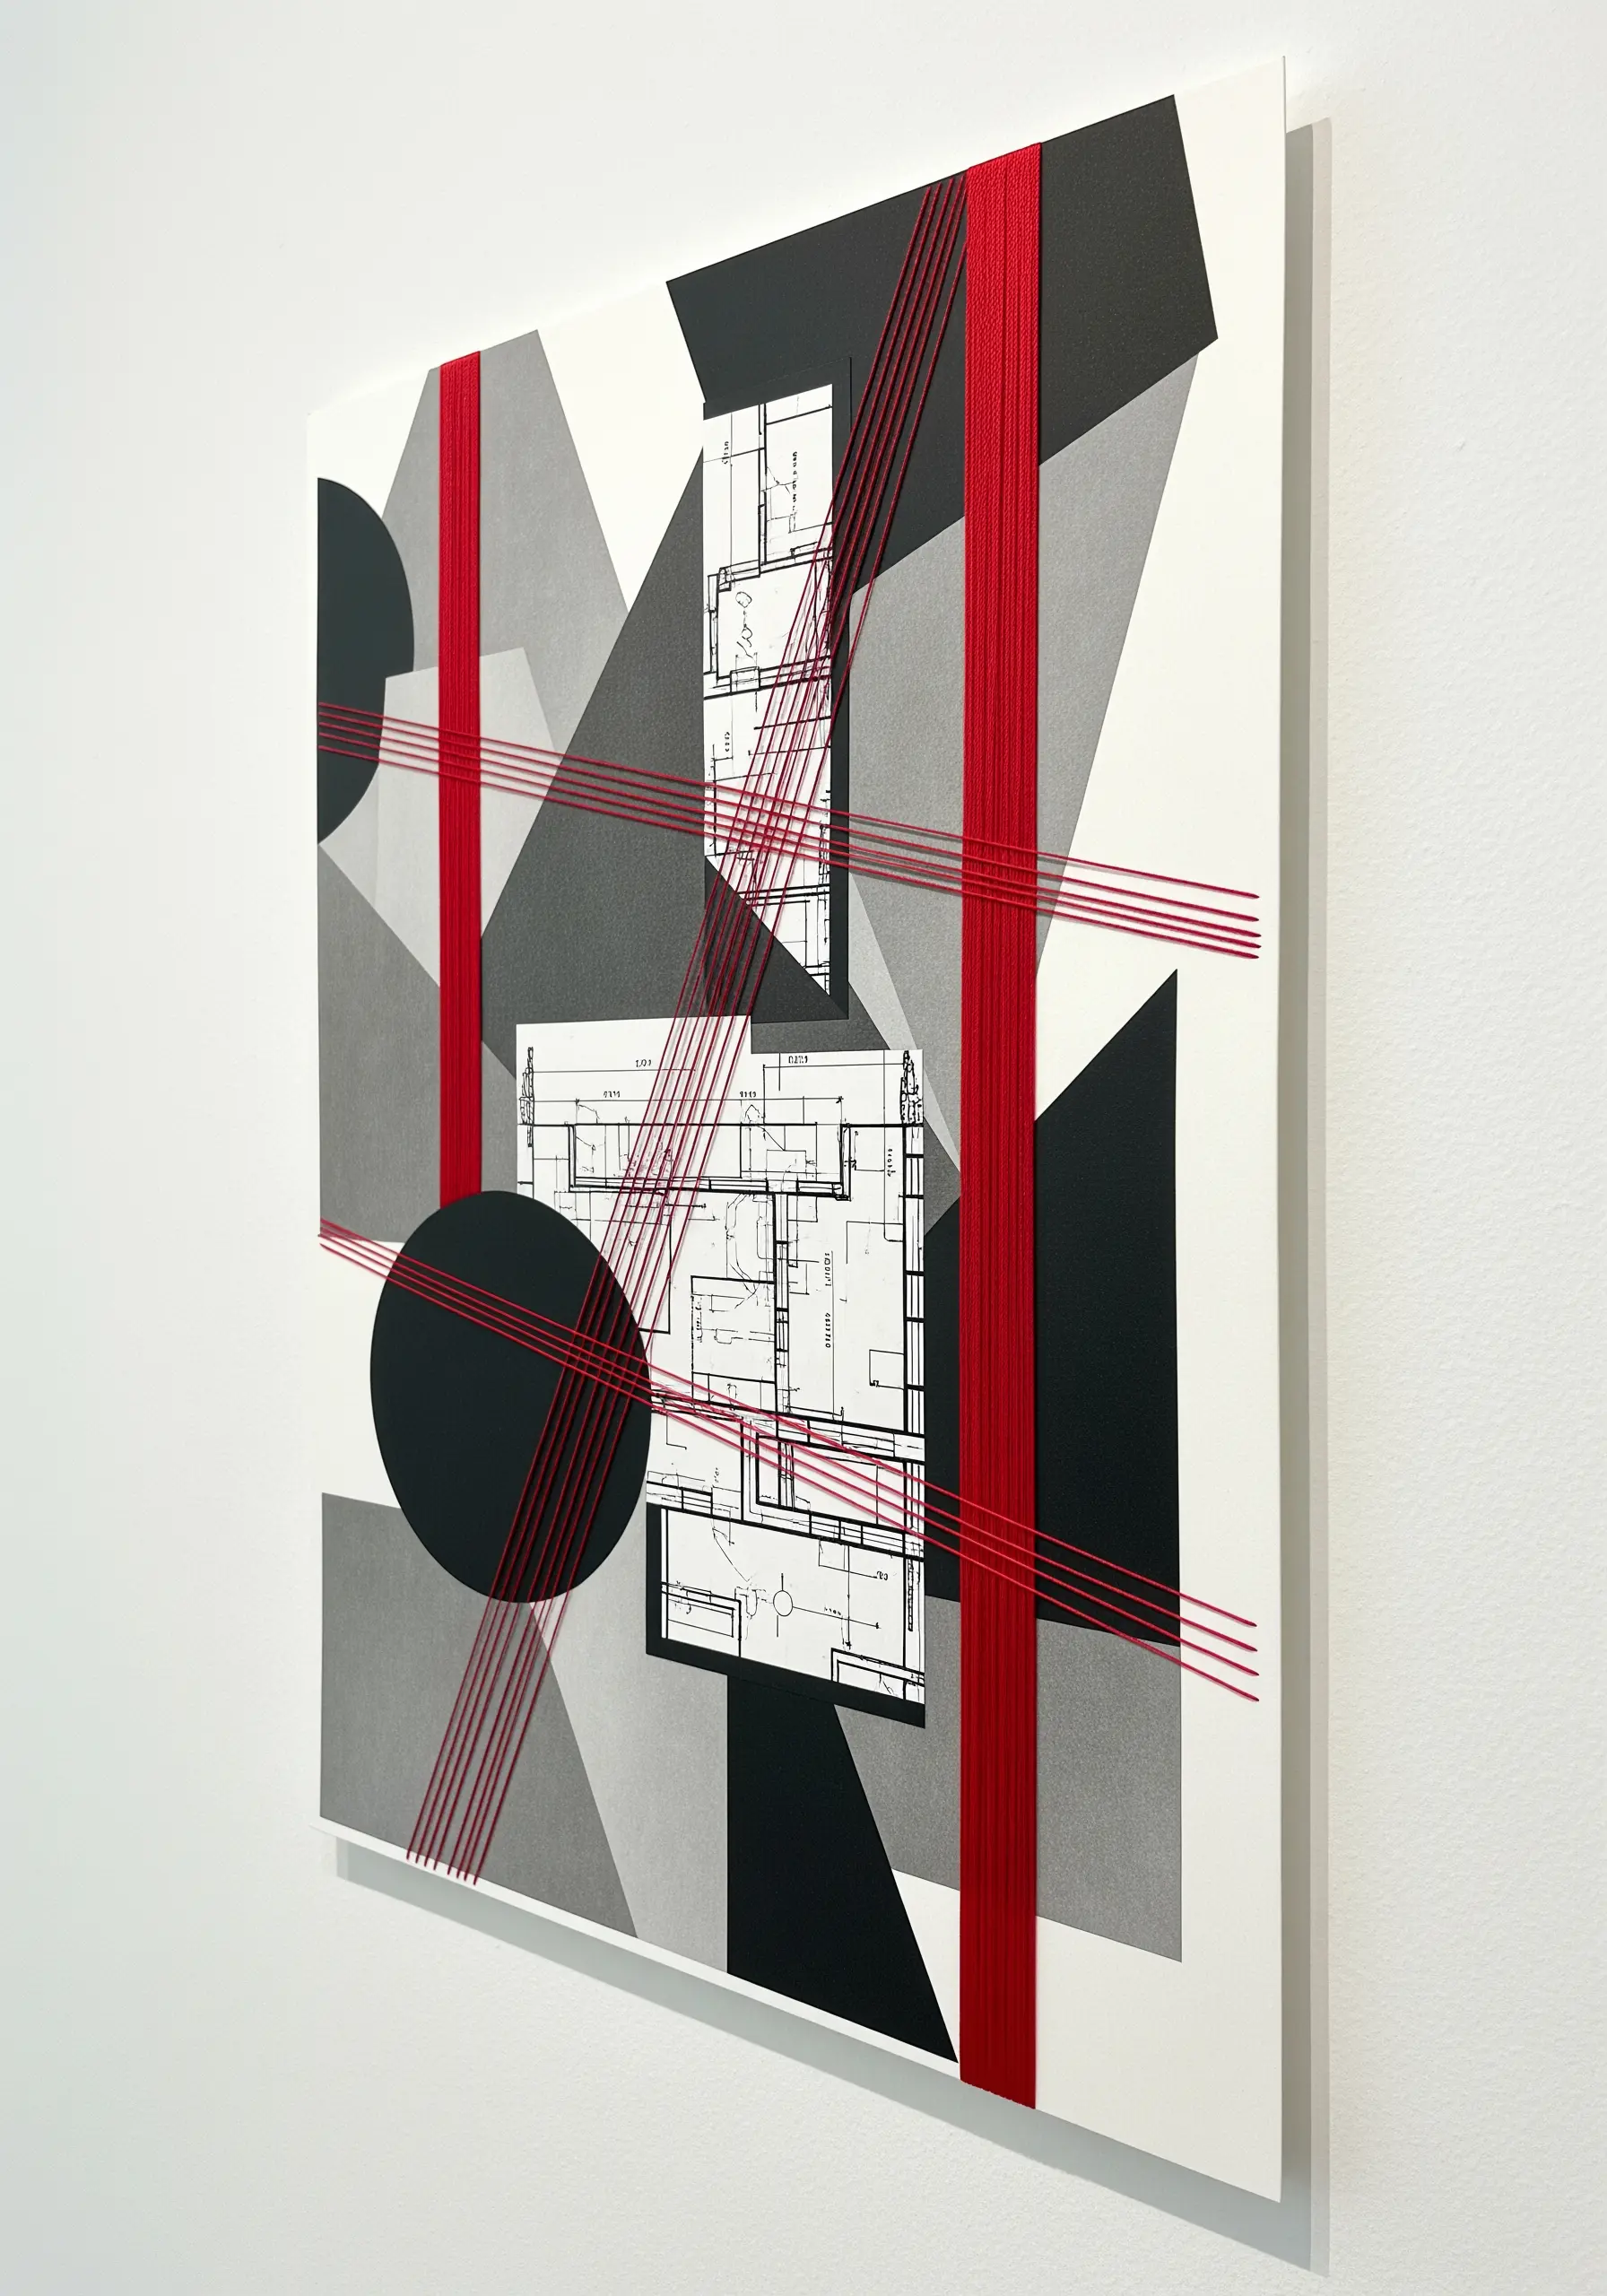
Transform a graphic paper collage into a piece of architectural art by stretching threads across the surface.
Use a sturdy base like a cradled wood panel or canvas board that won’t warp under tension.
Anchor threads on the back with staples or strong tape, wrapping them across the front to create intersecting lines that add structure and visual rhythm.
This technique turns thread into a bold graphic element, defining space and interacting with the geometric shapes beneath.
These are the kinds of modern geometric thread art ideas perfect for trendy office walls and studio spaces.
4. Define Collage Shapes with Couching

When your collage is made of multiple bold patterns, unify them with a strong outline.
Couching is the perfect technique for this: lay down a thicker cord or yarn along the edges of your paper shapes and tack it in place with a thinner, less visible thread.
This creates a clean, raised border that defines each section while tying the entire composition together.
It’s an elegant solution that adds both texture and graphic clarity to complex handmade collage projects that blend paper, fabric, and hand-stitched magic.
5. Build Underwater Textures with Stitch
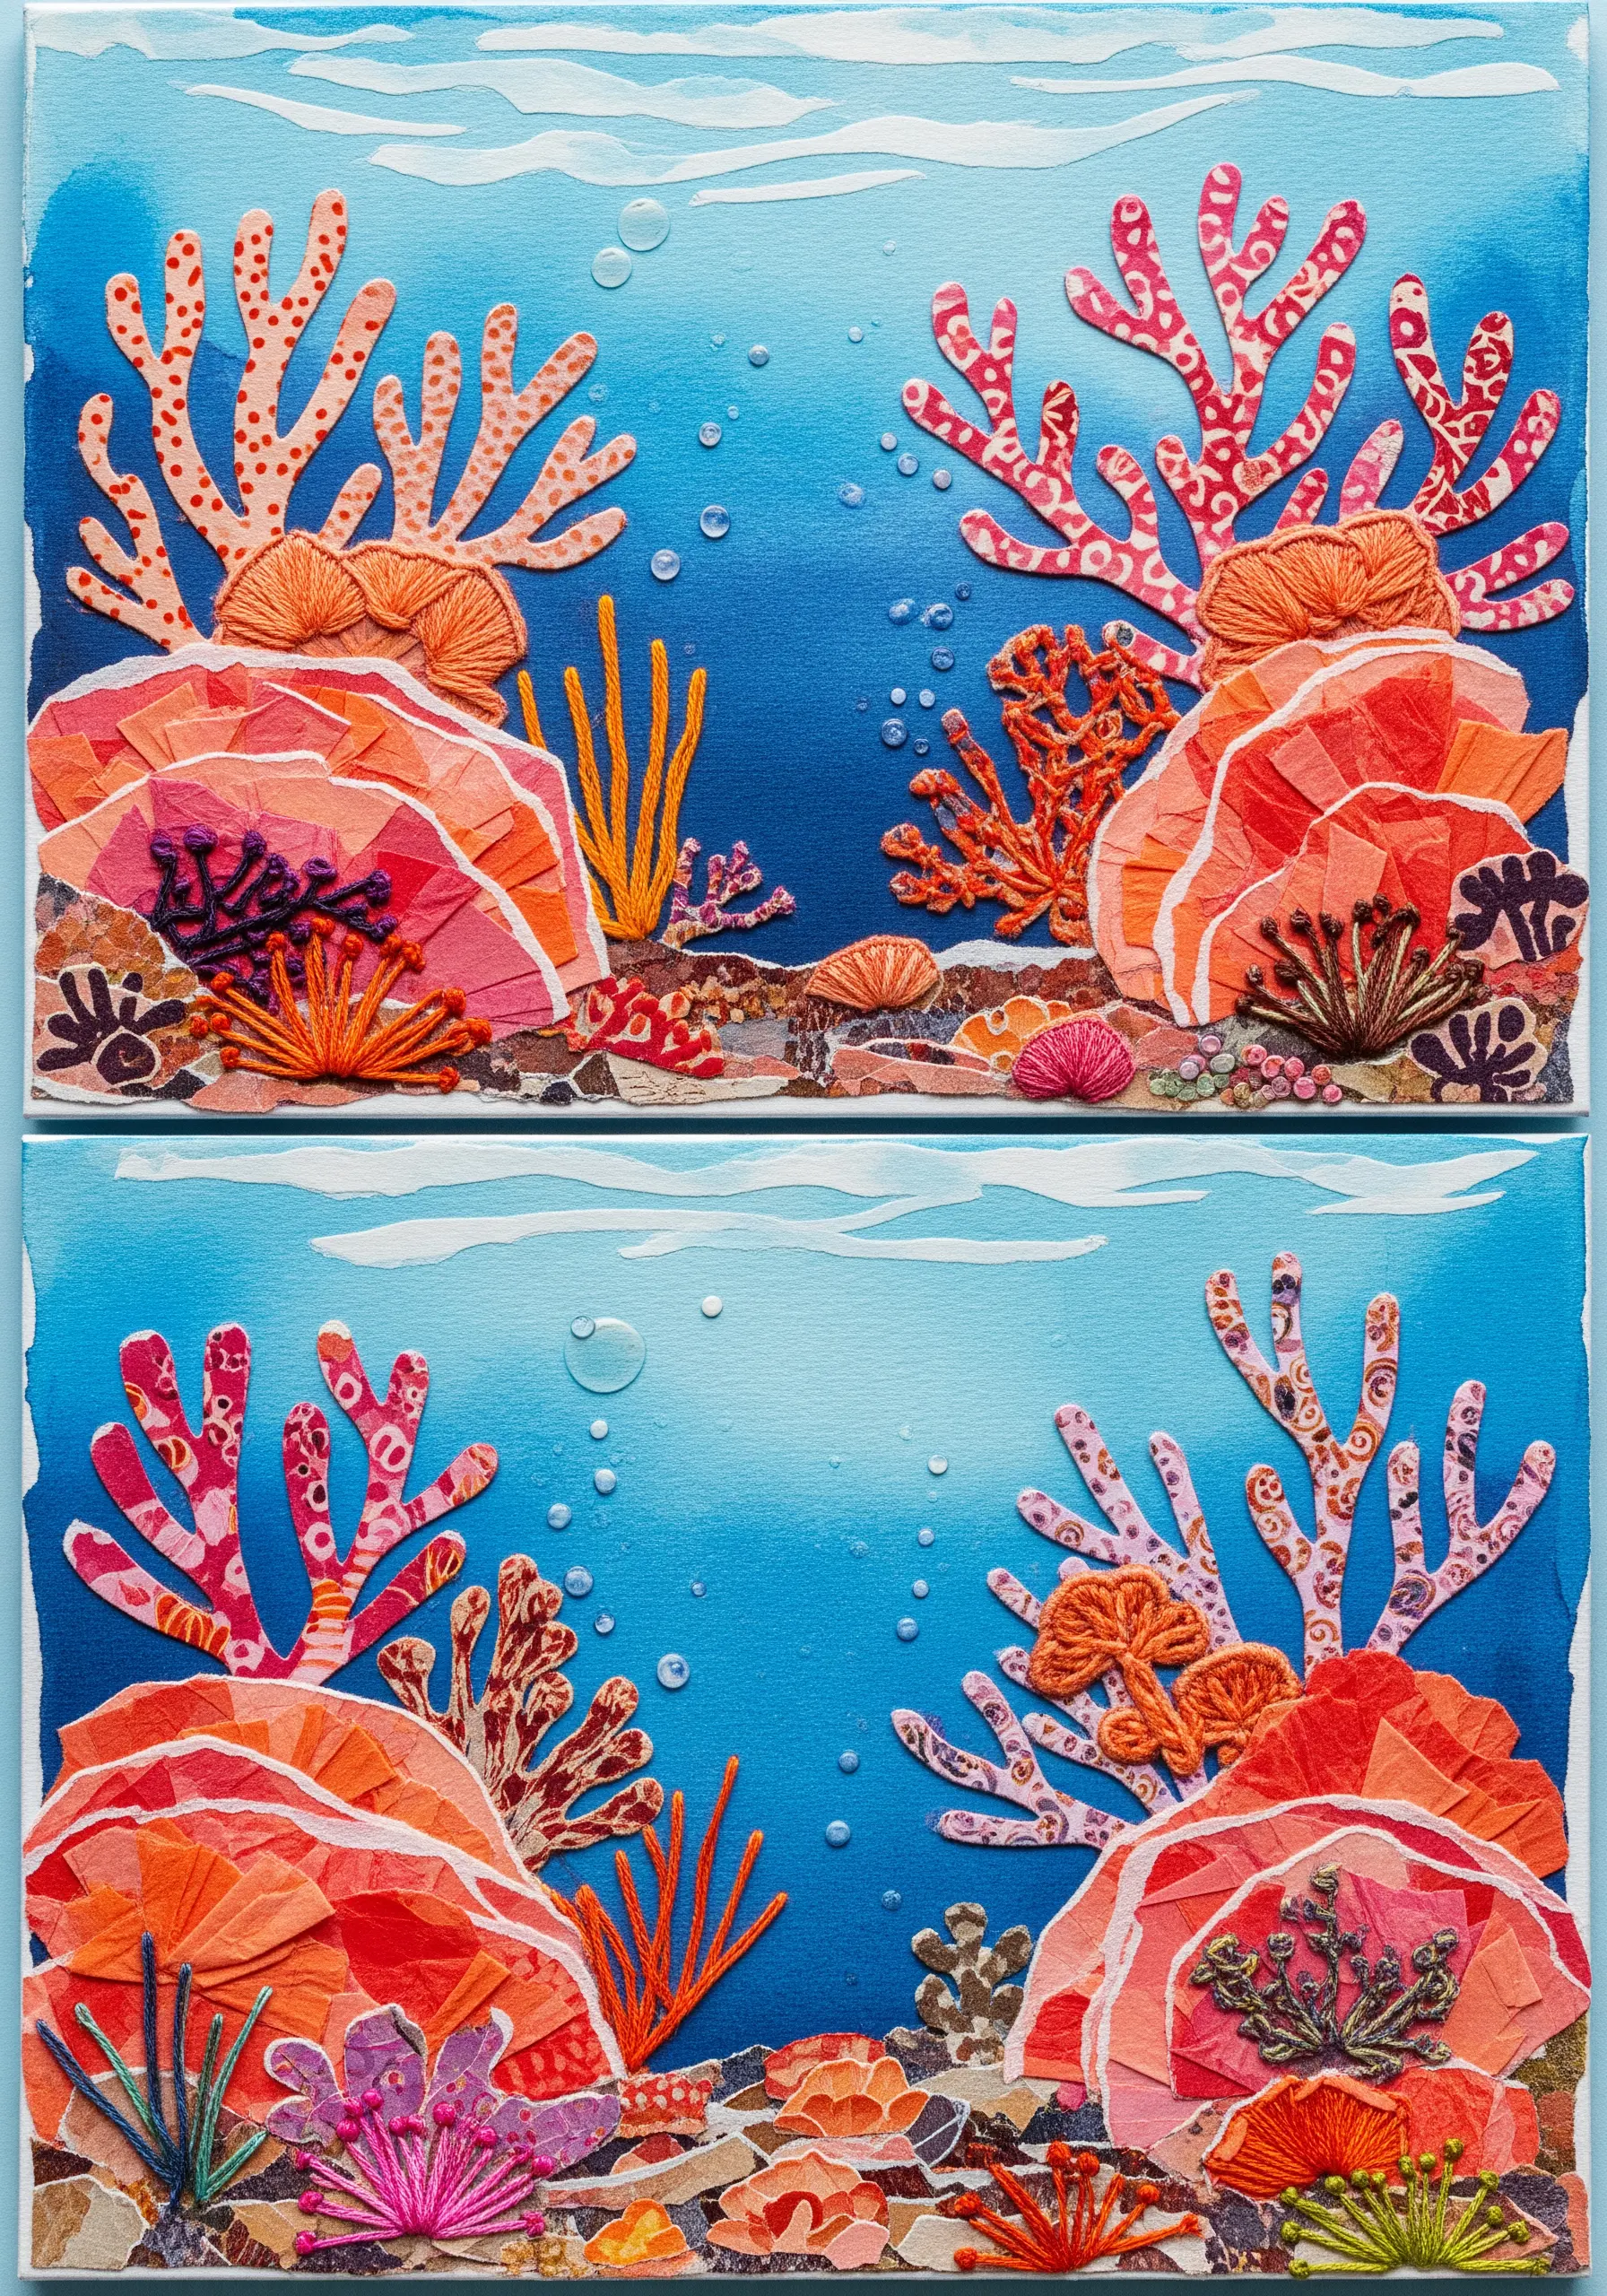
Start by creating a coral reef scene with torn and cut pieces of colored paper to establish your main shapes and color palette.
Then, build upon the paper with textural embroidery stitches to mimic the organic forms of marine life.
Use French knots for coral polyps, bullion stitches for sea anemones, and detached chain stitches for delicate fronds.
This layering of paper and thread is one of the best ways to capture nature’s textures in your next embroidery project, creating a piece with incredible depth and tactile appeal.
6. Add Metallic Veins to Paper Leaves
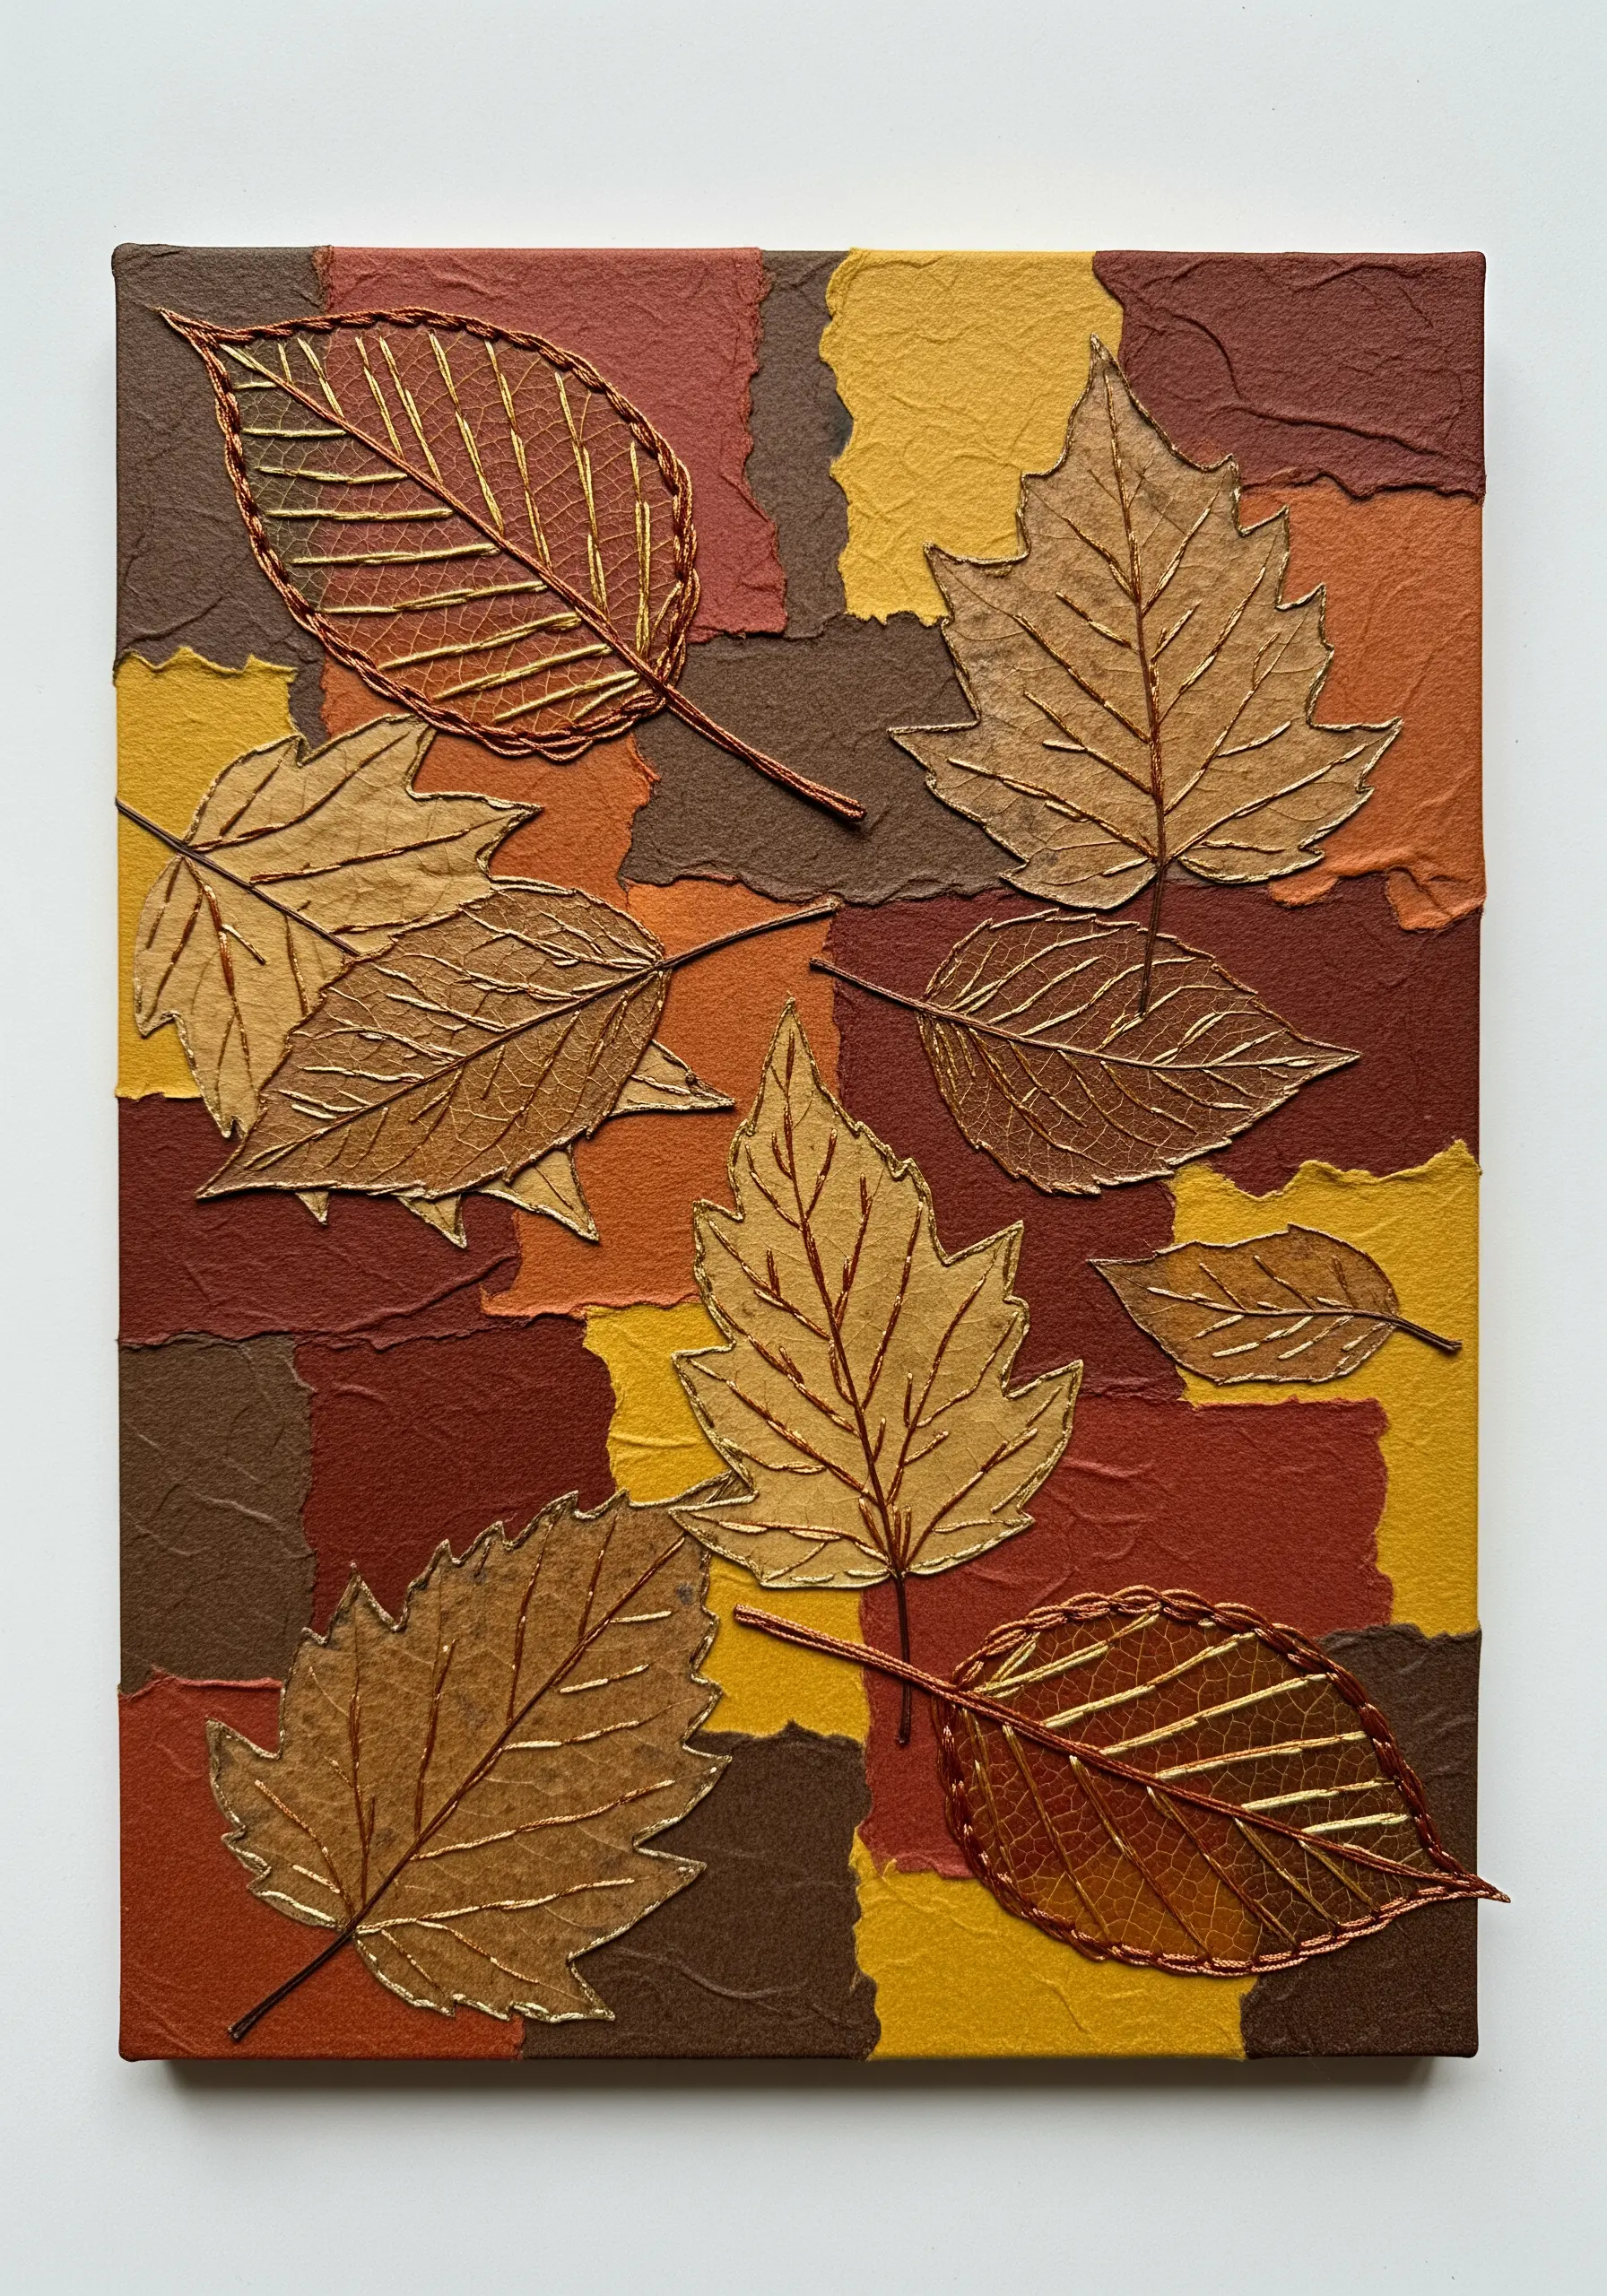
Elevate simple paper leaf cutouts by stitching their veins with a fine metallic thread.
Mount the leaves on a collaged background of textured, earth-toned paper for a warm, autumnal feel.
Use a simple backstitch, following the natural lines of each leaf. The metallic thread catches the light, adding a subtle shimmer that brings the static paper shapes to life.
This technique proves how even the smallest stitched detail can create a luxurious effect.
7. Isolate Textural Stitches in a Geometric Layout
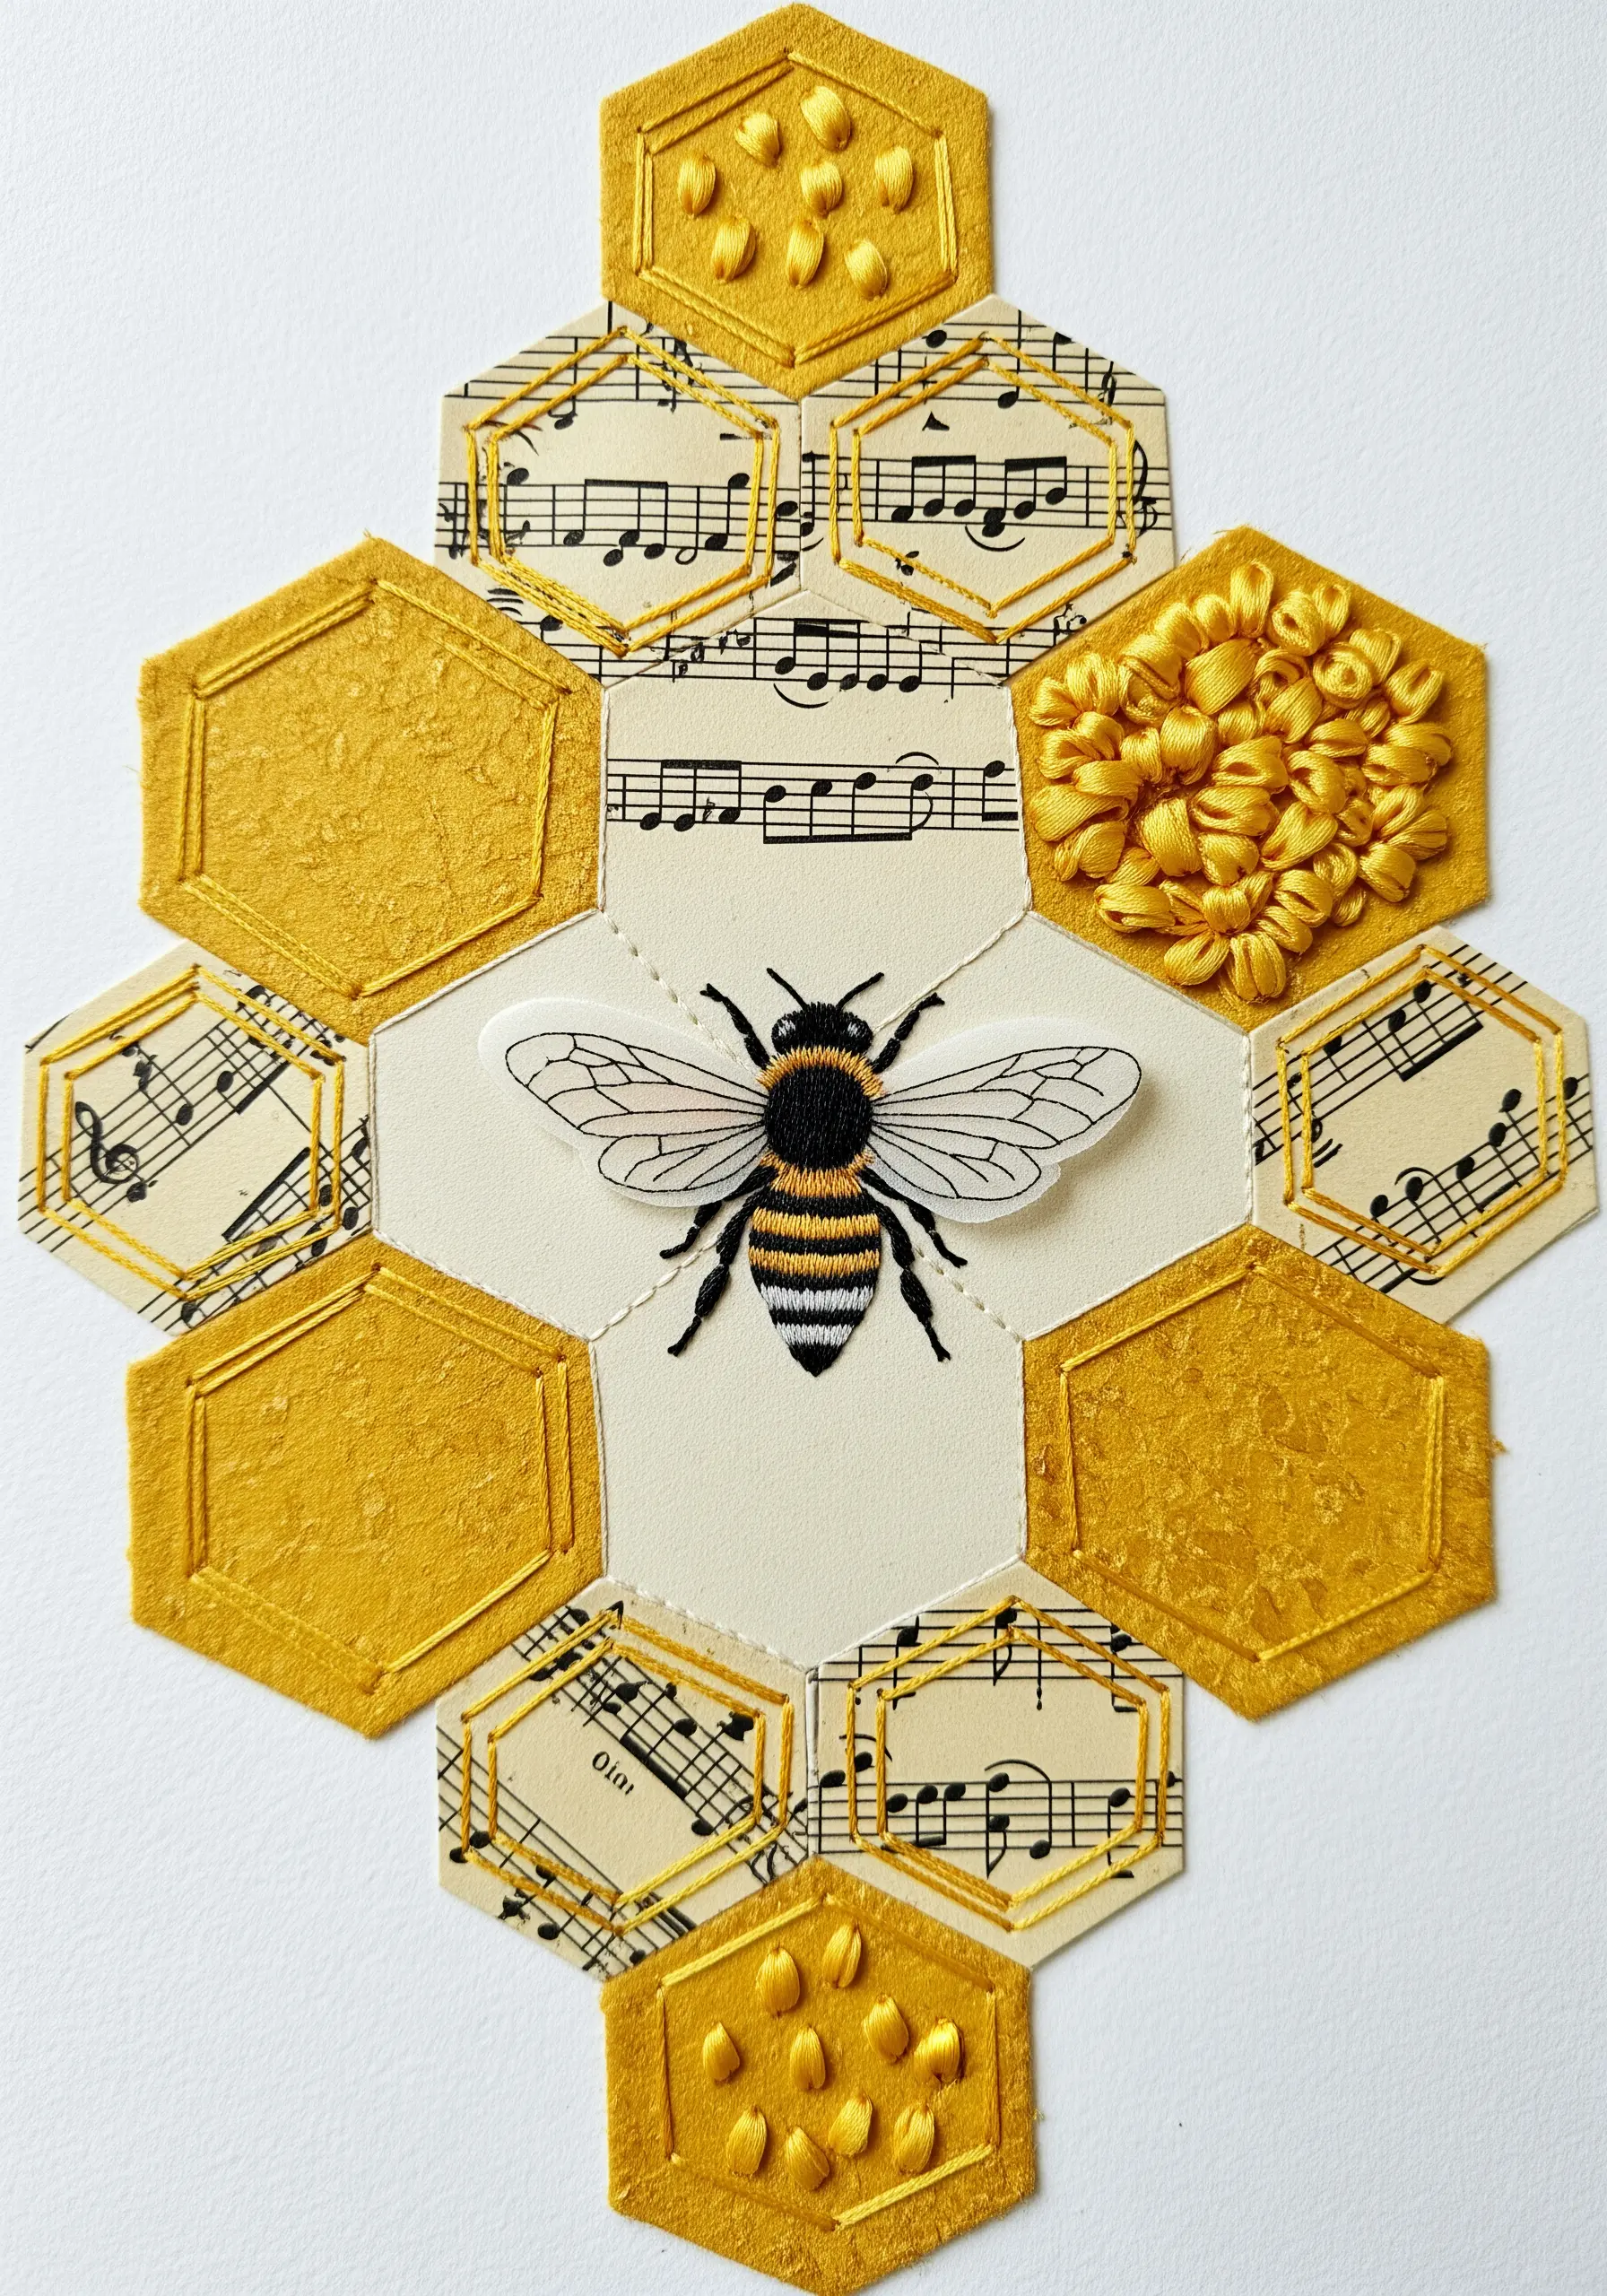
Combine the order of a geometric pattern with the organic feel of textural embroidery.
Create a honeycomb layout using paper cutouts—some with printed patterns like sheet music, others with solid colors.
Designate a few of the solid-colored hexagons as miniature canvases for dense stitch-work, like French knots or woven wheel stitches.
This contrast between flat pattern and raised texture creates focused moments of interest, guiding the viewer’s eye through the piece.
These are the gorgeous mixed fiber textures that everyone will admire and want to touch.
8. Frame Vintage Photographs with Delicate Florals
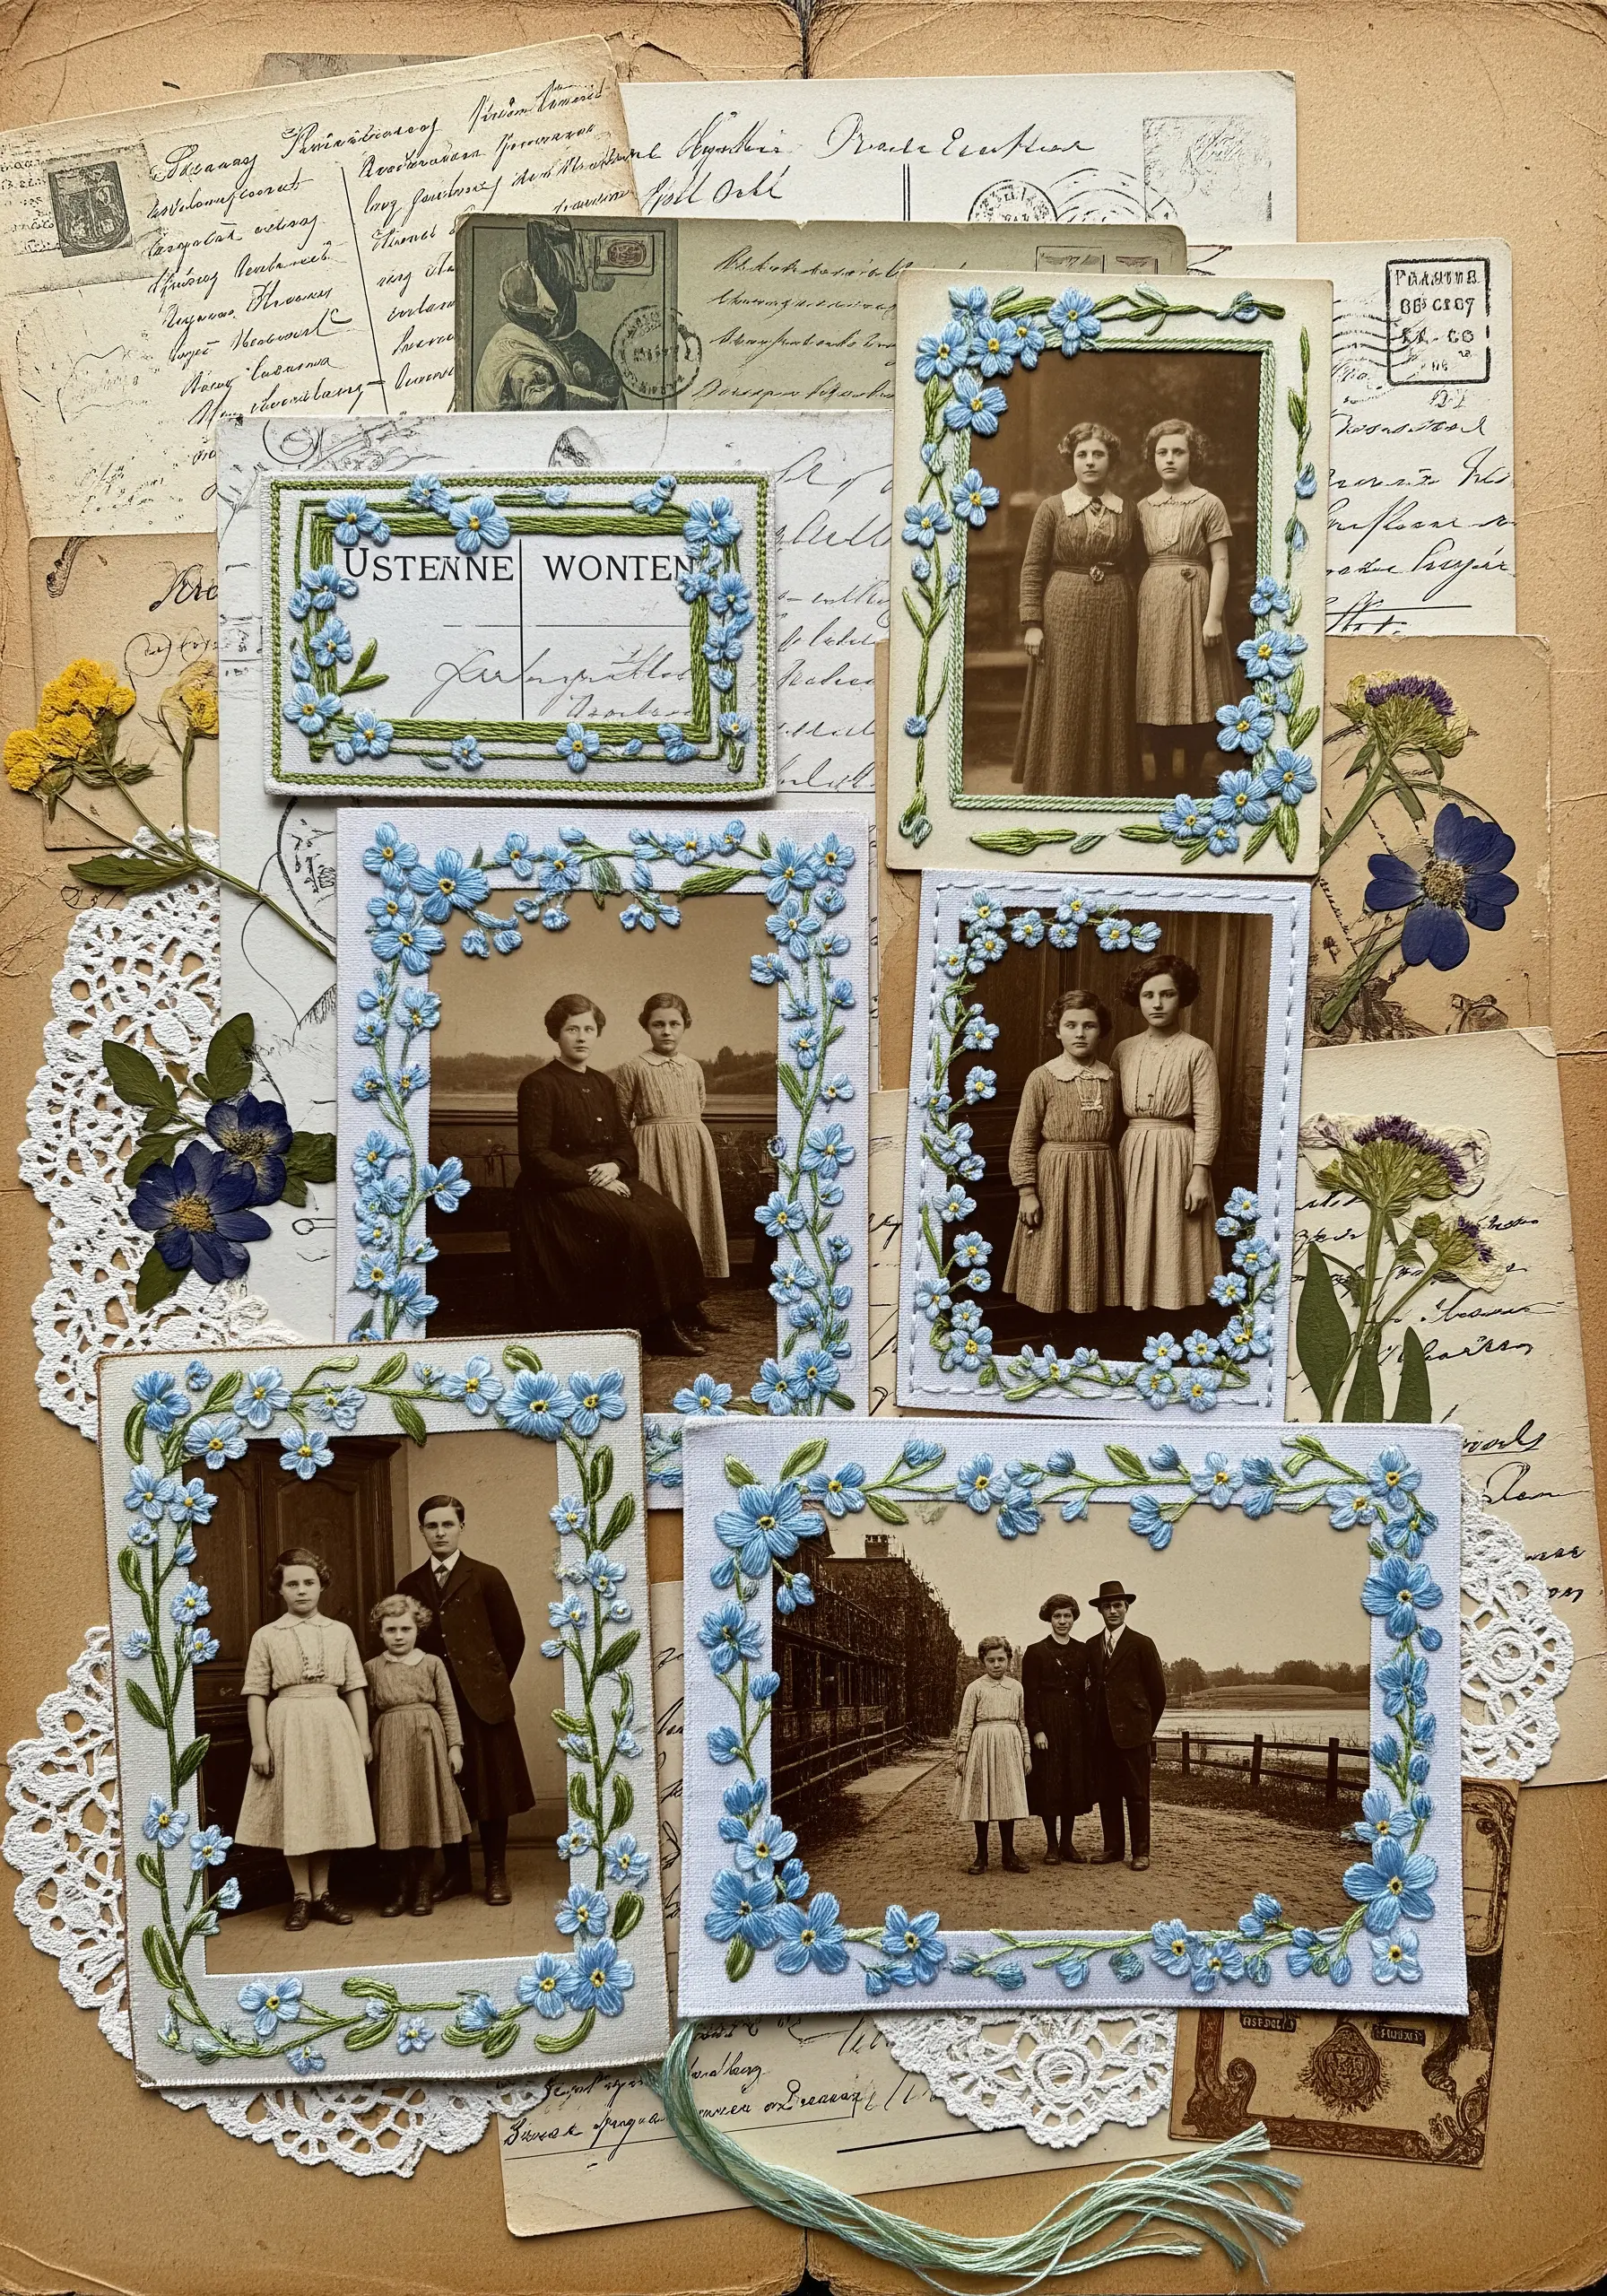
Give new life to antique photographs by creating embroidered frames directly on paper.
Use a simple floral motif, like forget-me-nots, stitched with lazy daisy stitches for petals and French knots for the centers.
Stitching on cardstock requires a sharp needle and gentle tension to prevent tearing. This technique adds a layer of tenderness and personal history to the images.
It’s a beautiful way to create handmade art pieces that tell a story through texture and memory.
9. Create Urban Energy with Satin Stitch Highlights
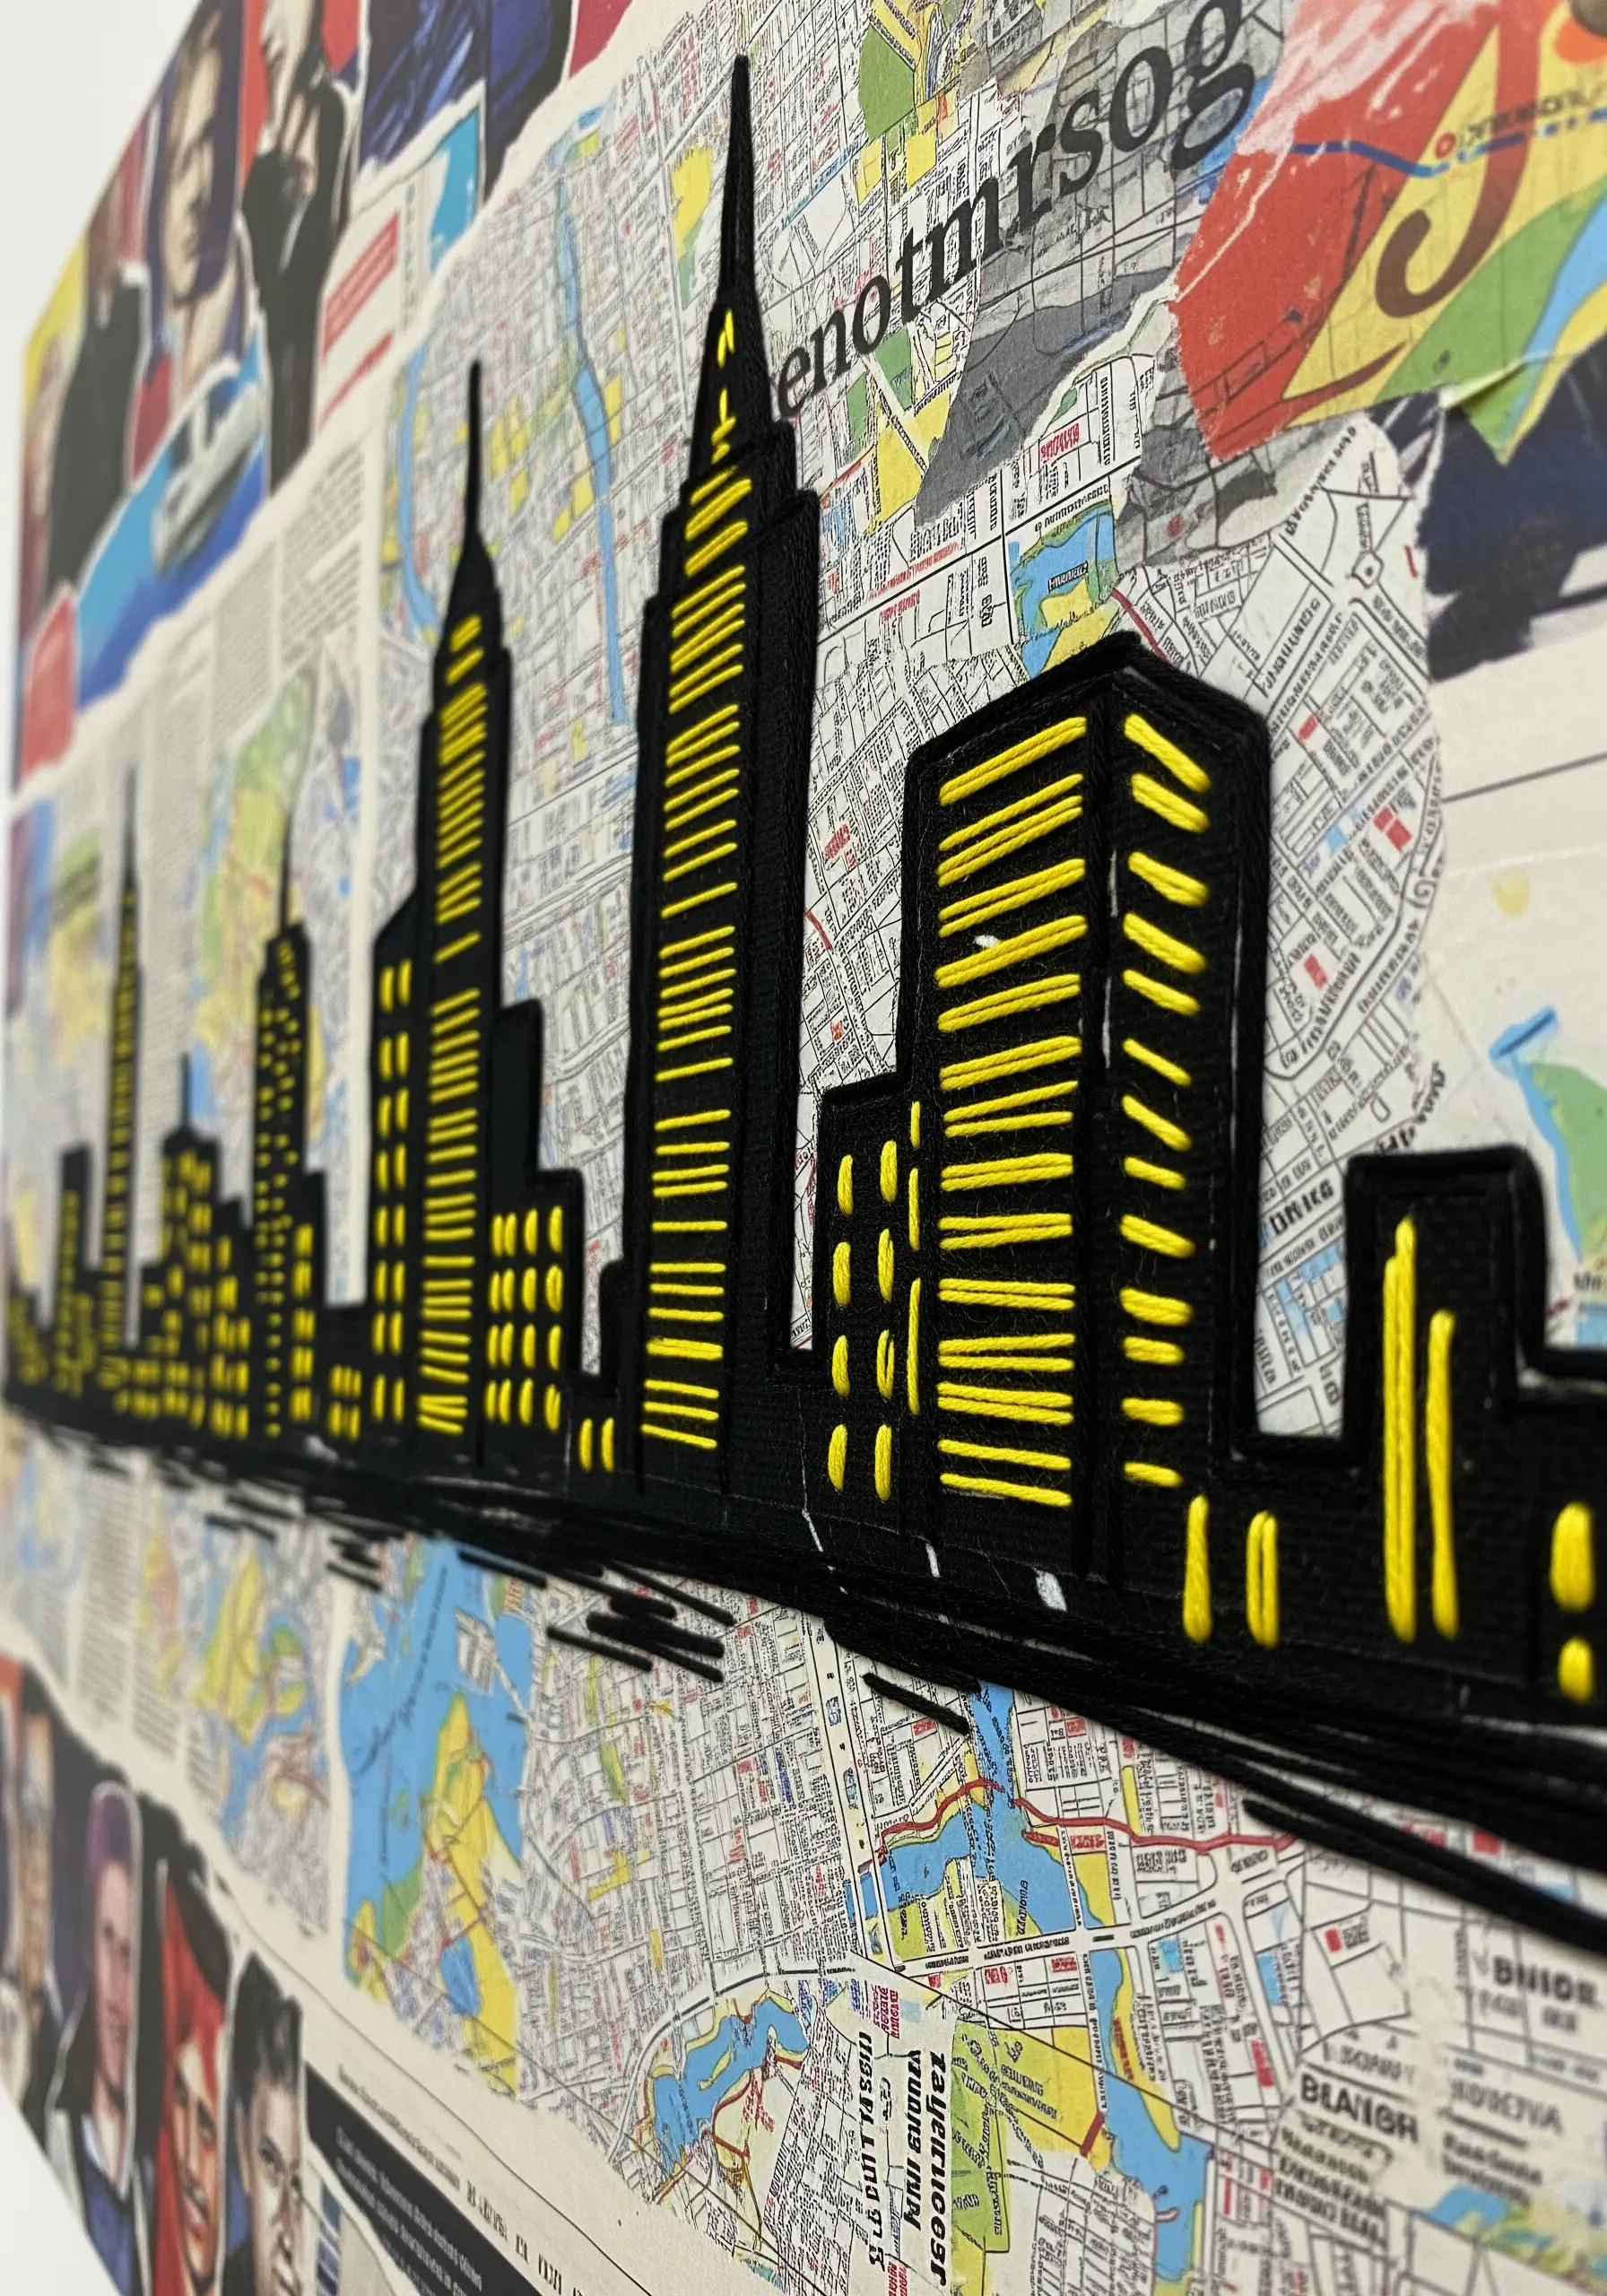
Build a dynamic city scene by collaging a background of maps, newspapers, or magazine pages.
Create your building silhouettes from black paper or fabric, then add pops of electric color with satin stitch.
Use a vibrant yellow or neon thread to fill in the windows, making them glow against the dark cityscape. The dense, smooth texture of the satin stitch creates a stark contrast to the busy paper background, mimicking the bright lights of a city at night.
10. Weave 3D Botanicals Over a Printed Image
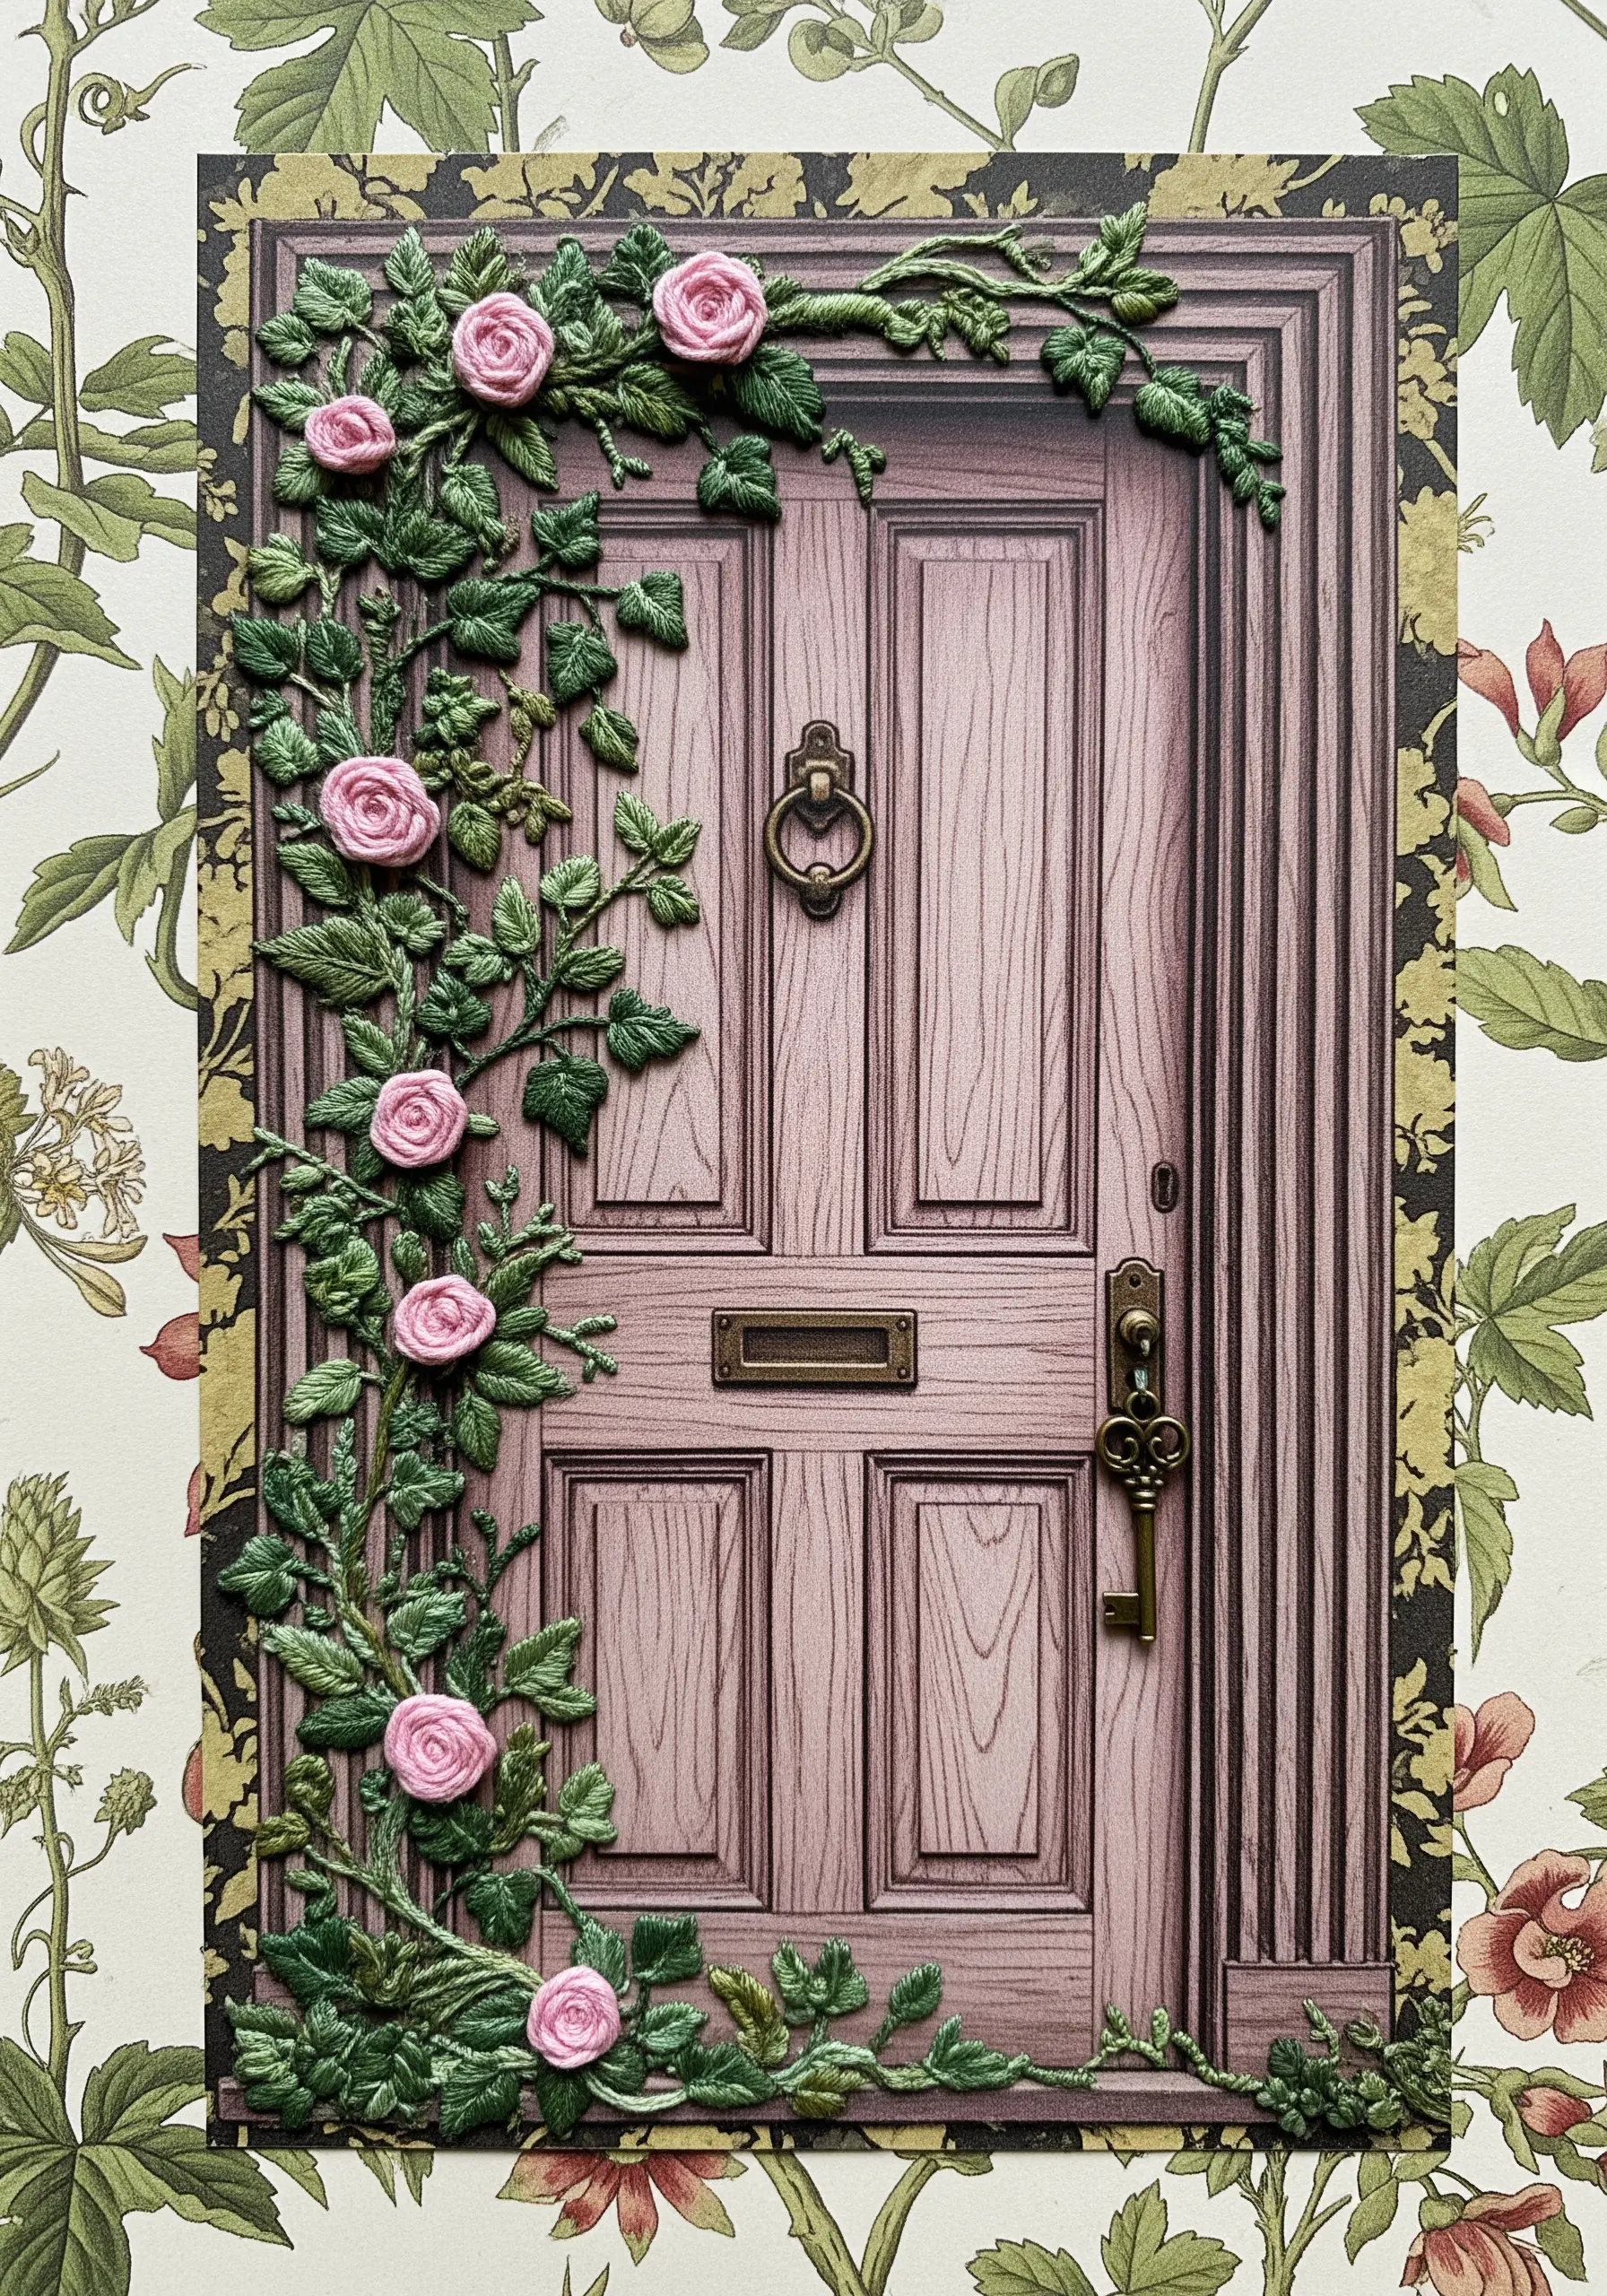
Add dimensional realism to a printed image by embroidering elements that seem to grow out of the paper.
For vines and leaves, use a detached chain stitch or fly stitch, varying the length and angle to create an organic, climbing effect.
Create roses with the woven wheel stitch (or spider web rose stitch), pulling the thread taut to create tightly packed, realistic petals.
This technique blends the 2D and 3D worlds, making your artwork incredibly engaging and lifelike.
11. Stitch Snowcaps on Layered Paper Mountains
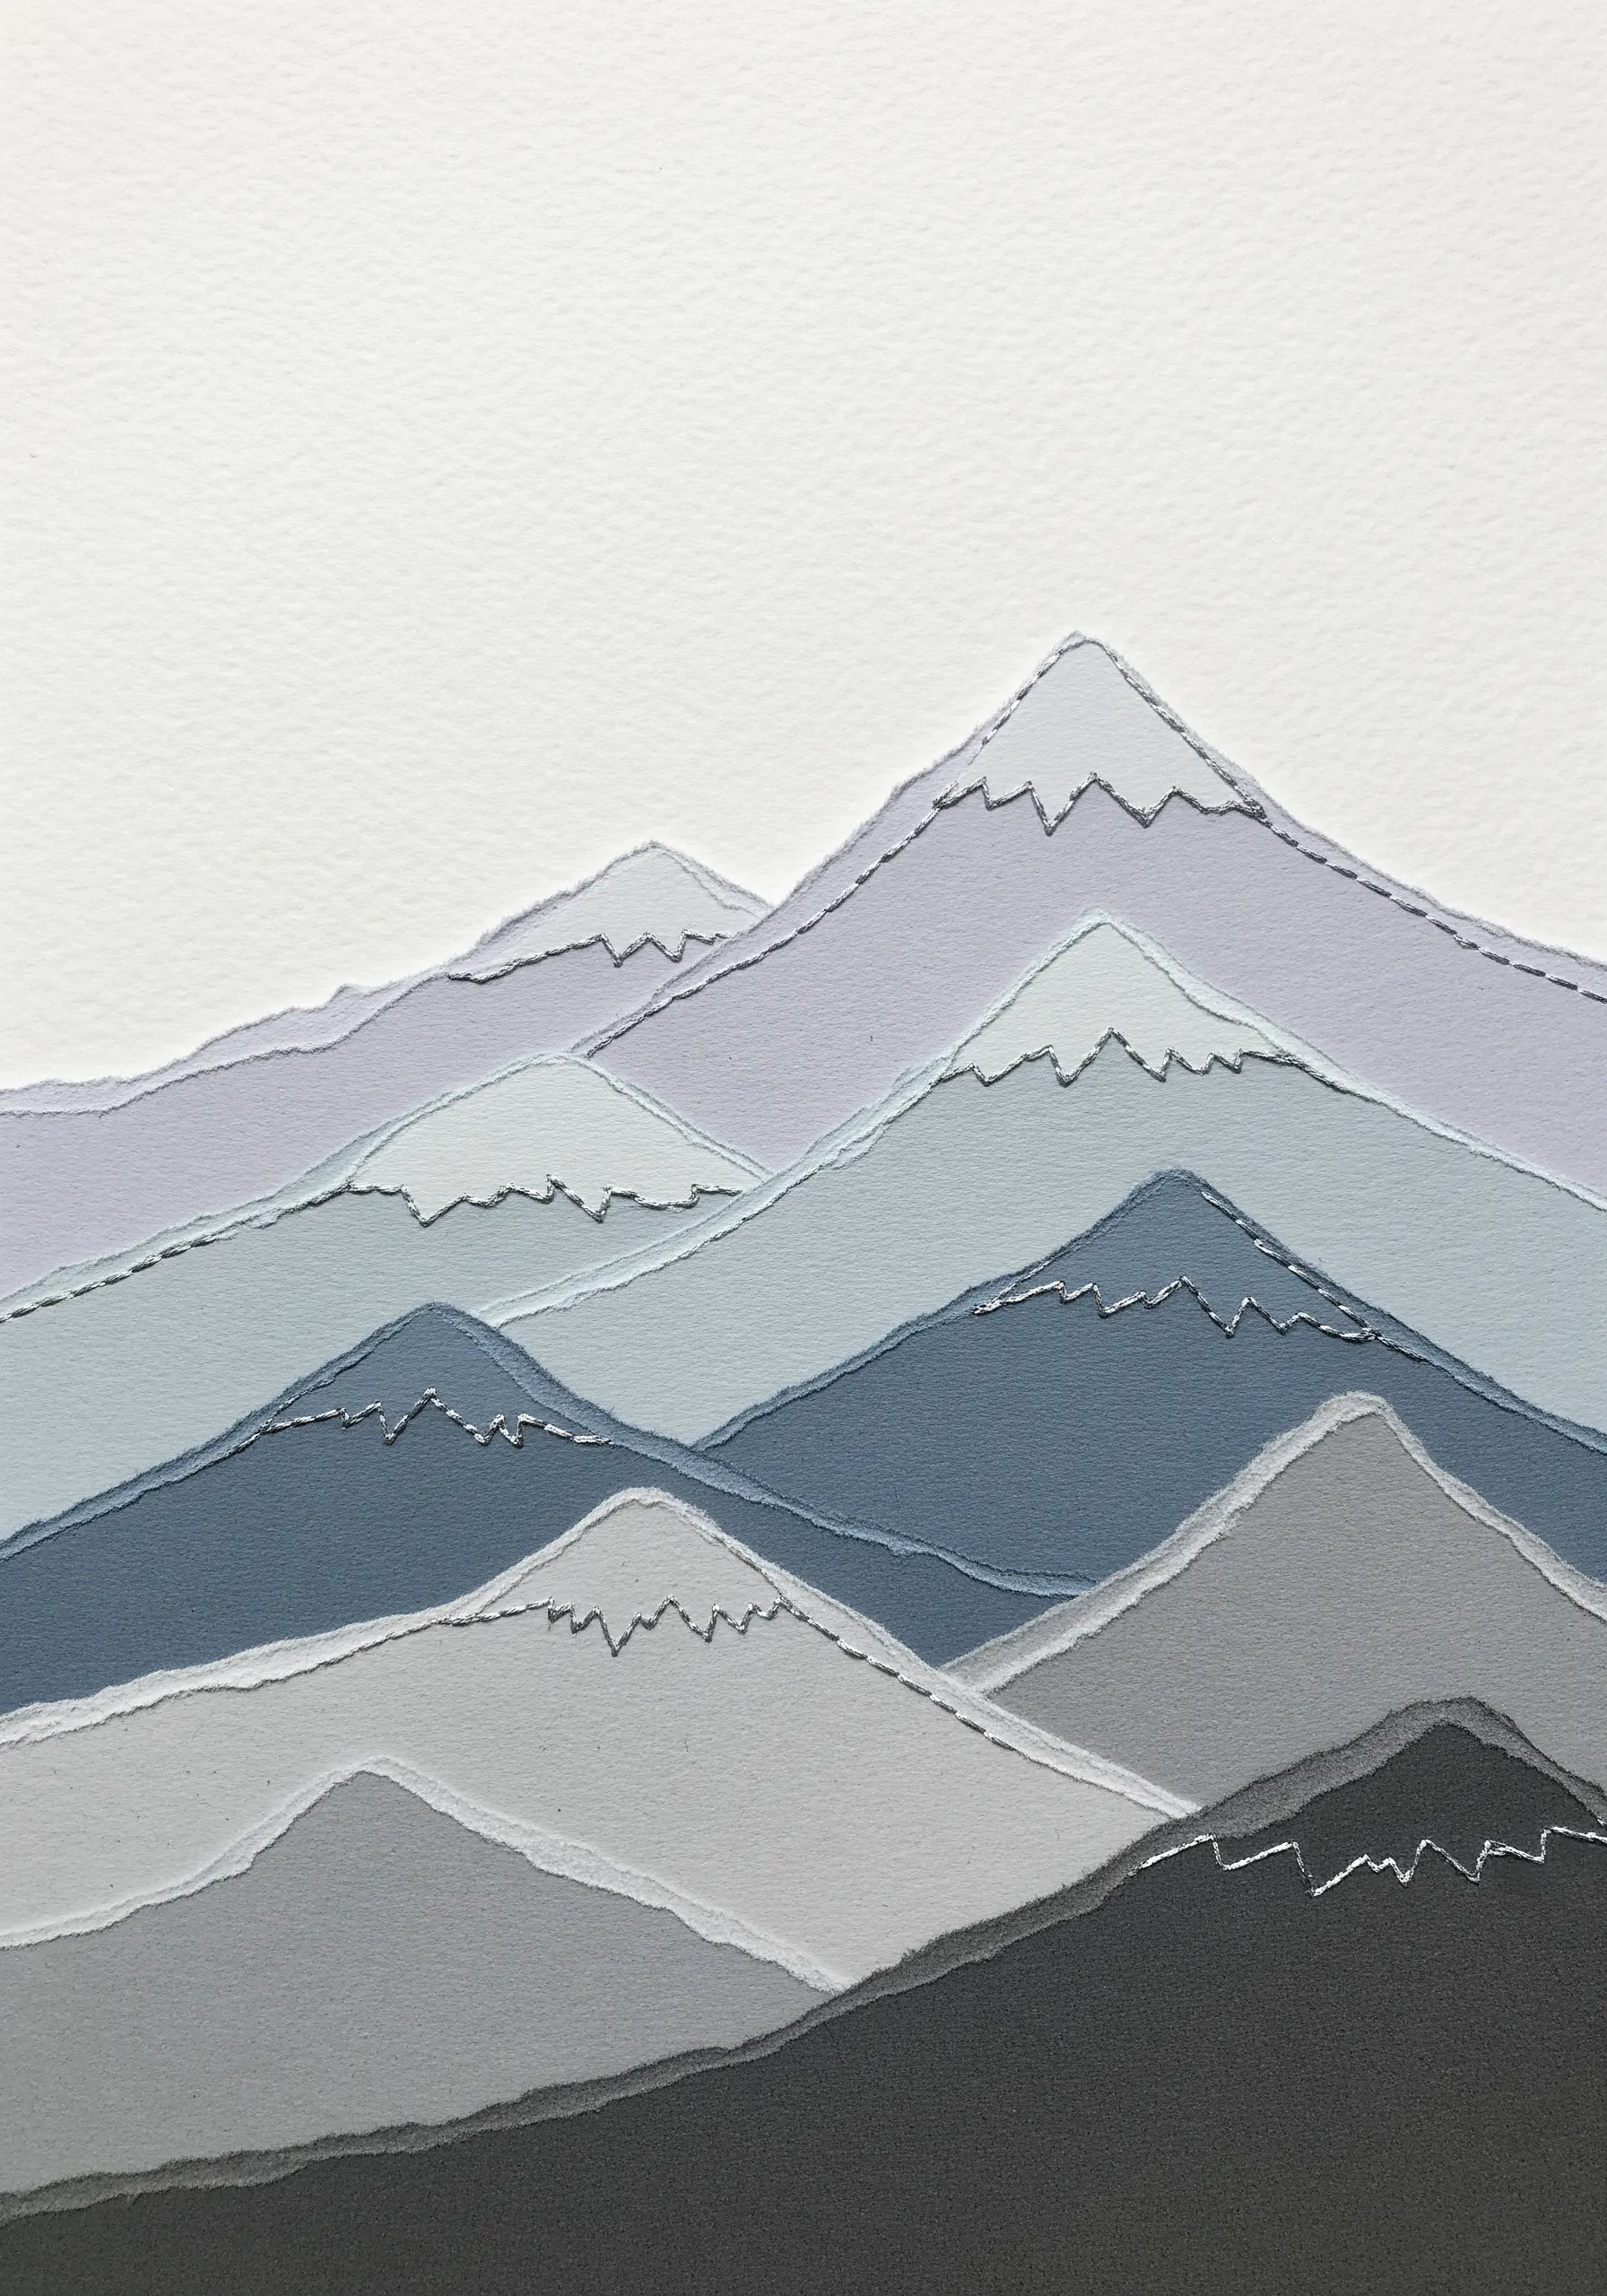
Capture the serene beauty of a mountain range by layering torn paper in muted, atmospheric tones.
The torn edges create a soft, natural horizon line for each peak.
Then, add a simple, jagged line of backstitch or running stitch in white or silver thread along the ridges to represent snow.
This minimal stitch detail adds just enough texture and definition to complete the landscape, transforming a simple paper collage into a tranquil work of art.
It’s one of the most effective string art nature trails featuring mountains & rivers for adventurous embroidery souls.
12. Contrast String Art with Delicate Collage
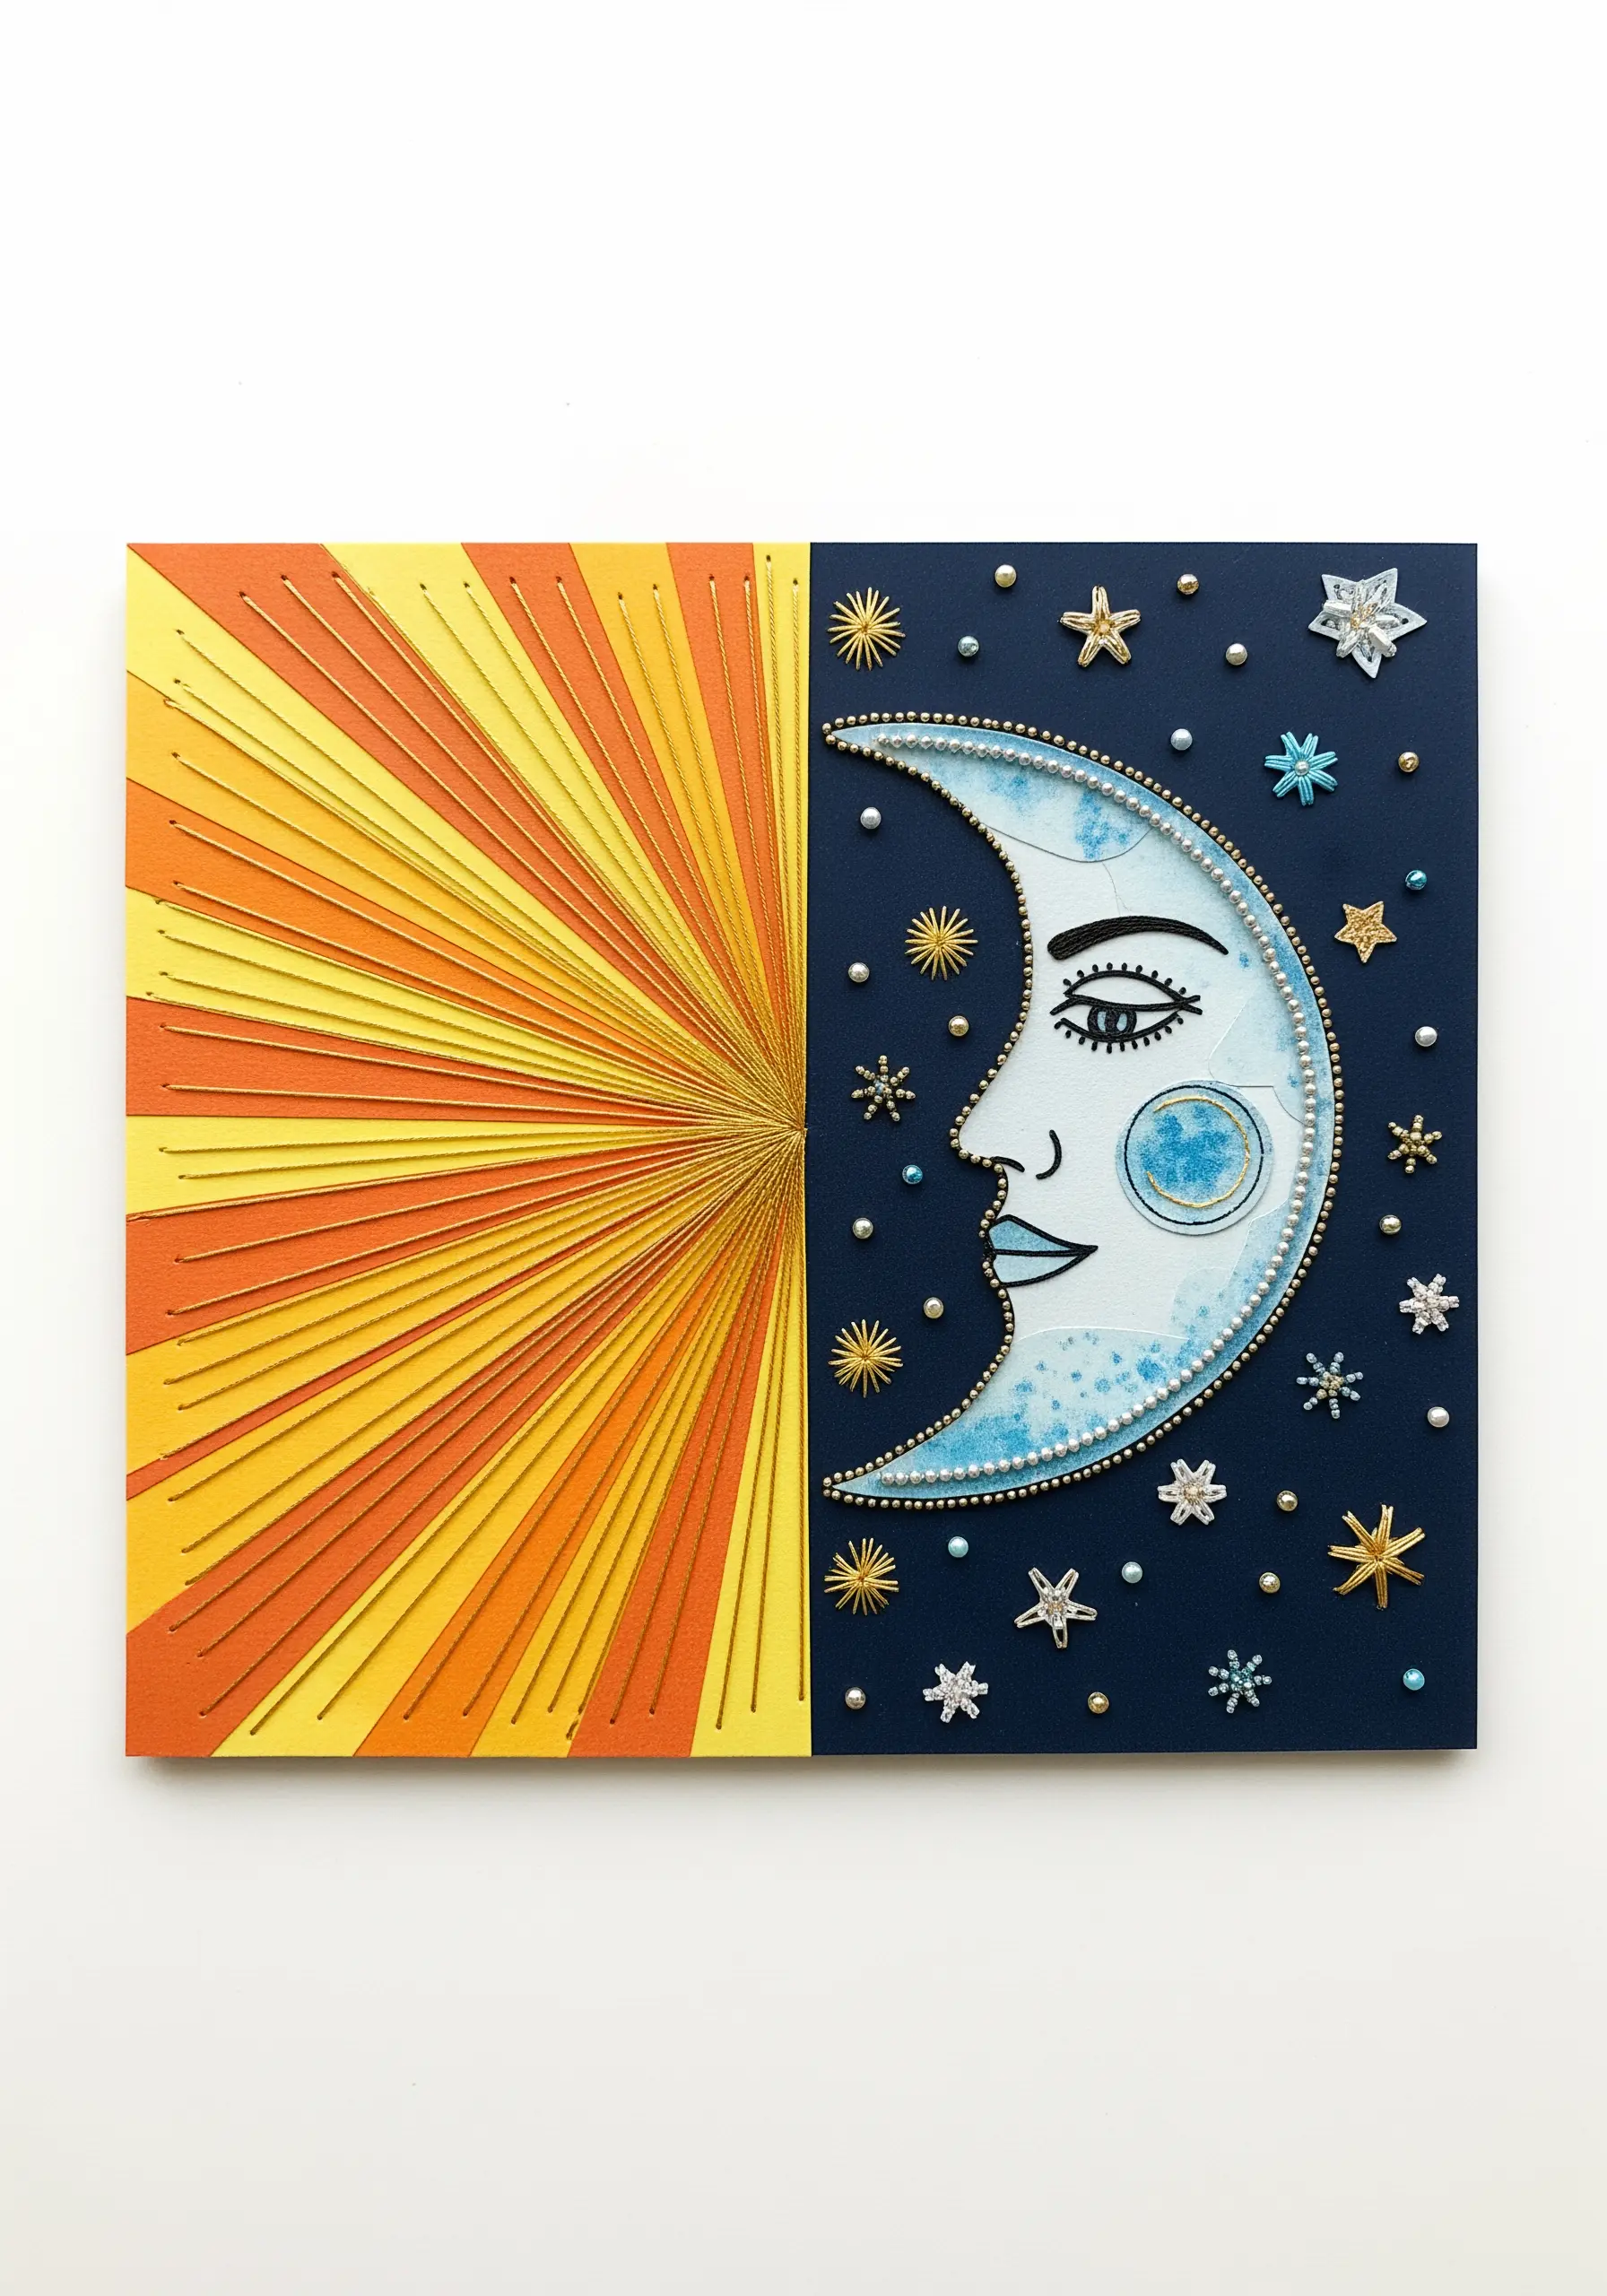
Create a powerful visual duality by combining geometric string art with delicate paper collage.
On one half of your canvas, create a vibrant sunburst using straight stitches pulled taut between pins or pierced holes.
On the other half, construct a celestial moon from soft, textured paper and embellish it with tiny beads and metallic stars.
The contrast between the rigid, graphic lines of the sun and the soft, detailed collage of the moon makes for a compelling and balanced composition.
13. Use Thread Painting to Blend Paper and Fabric
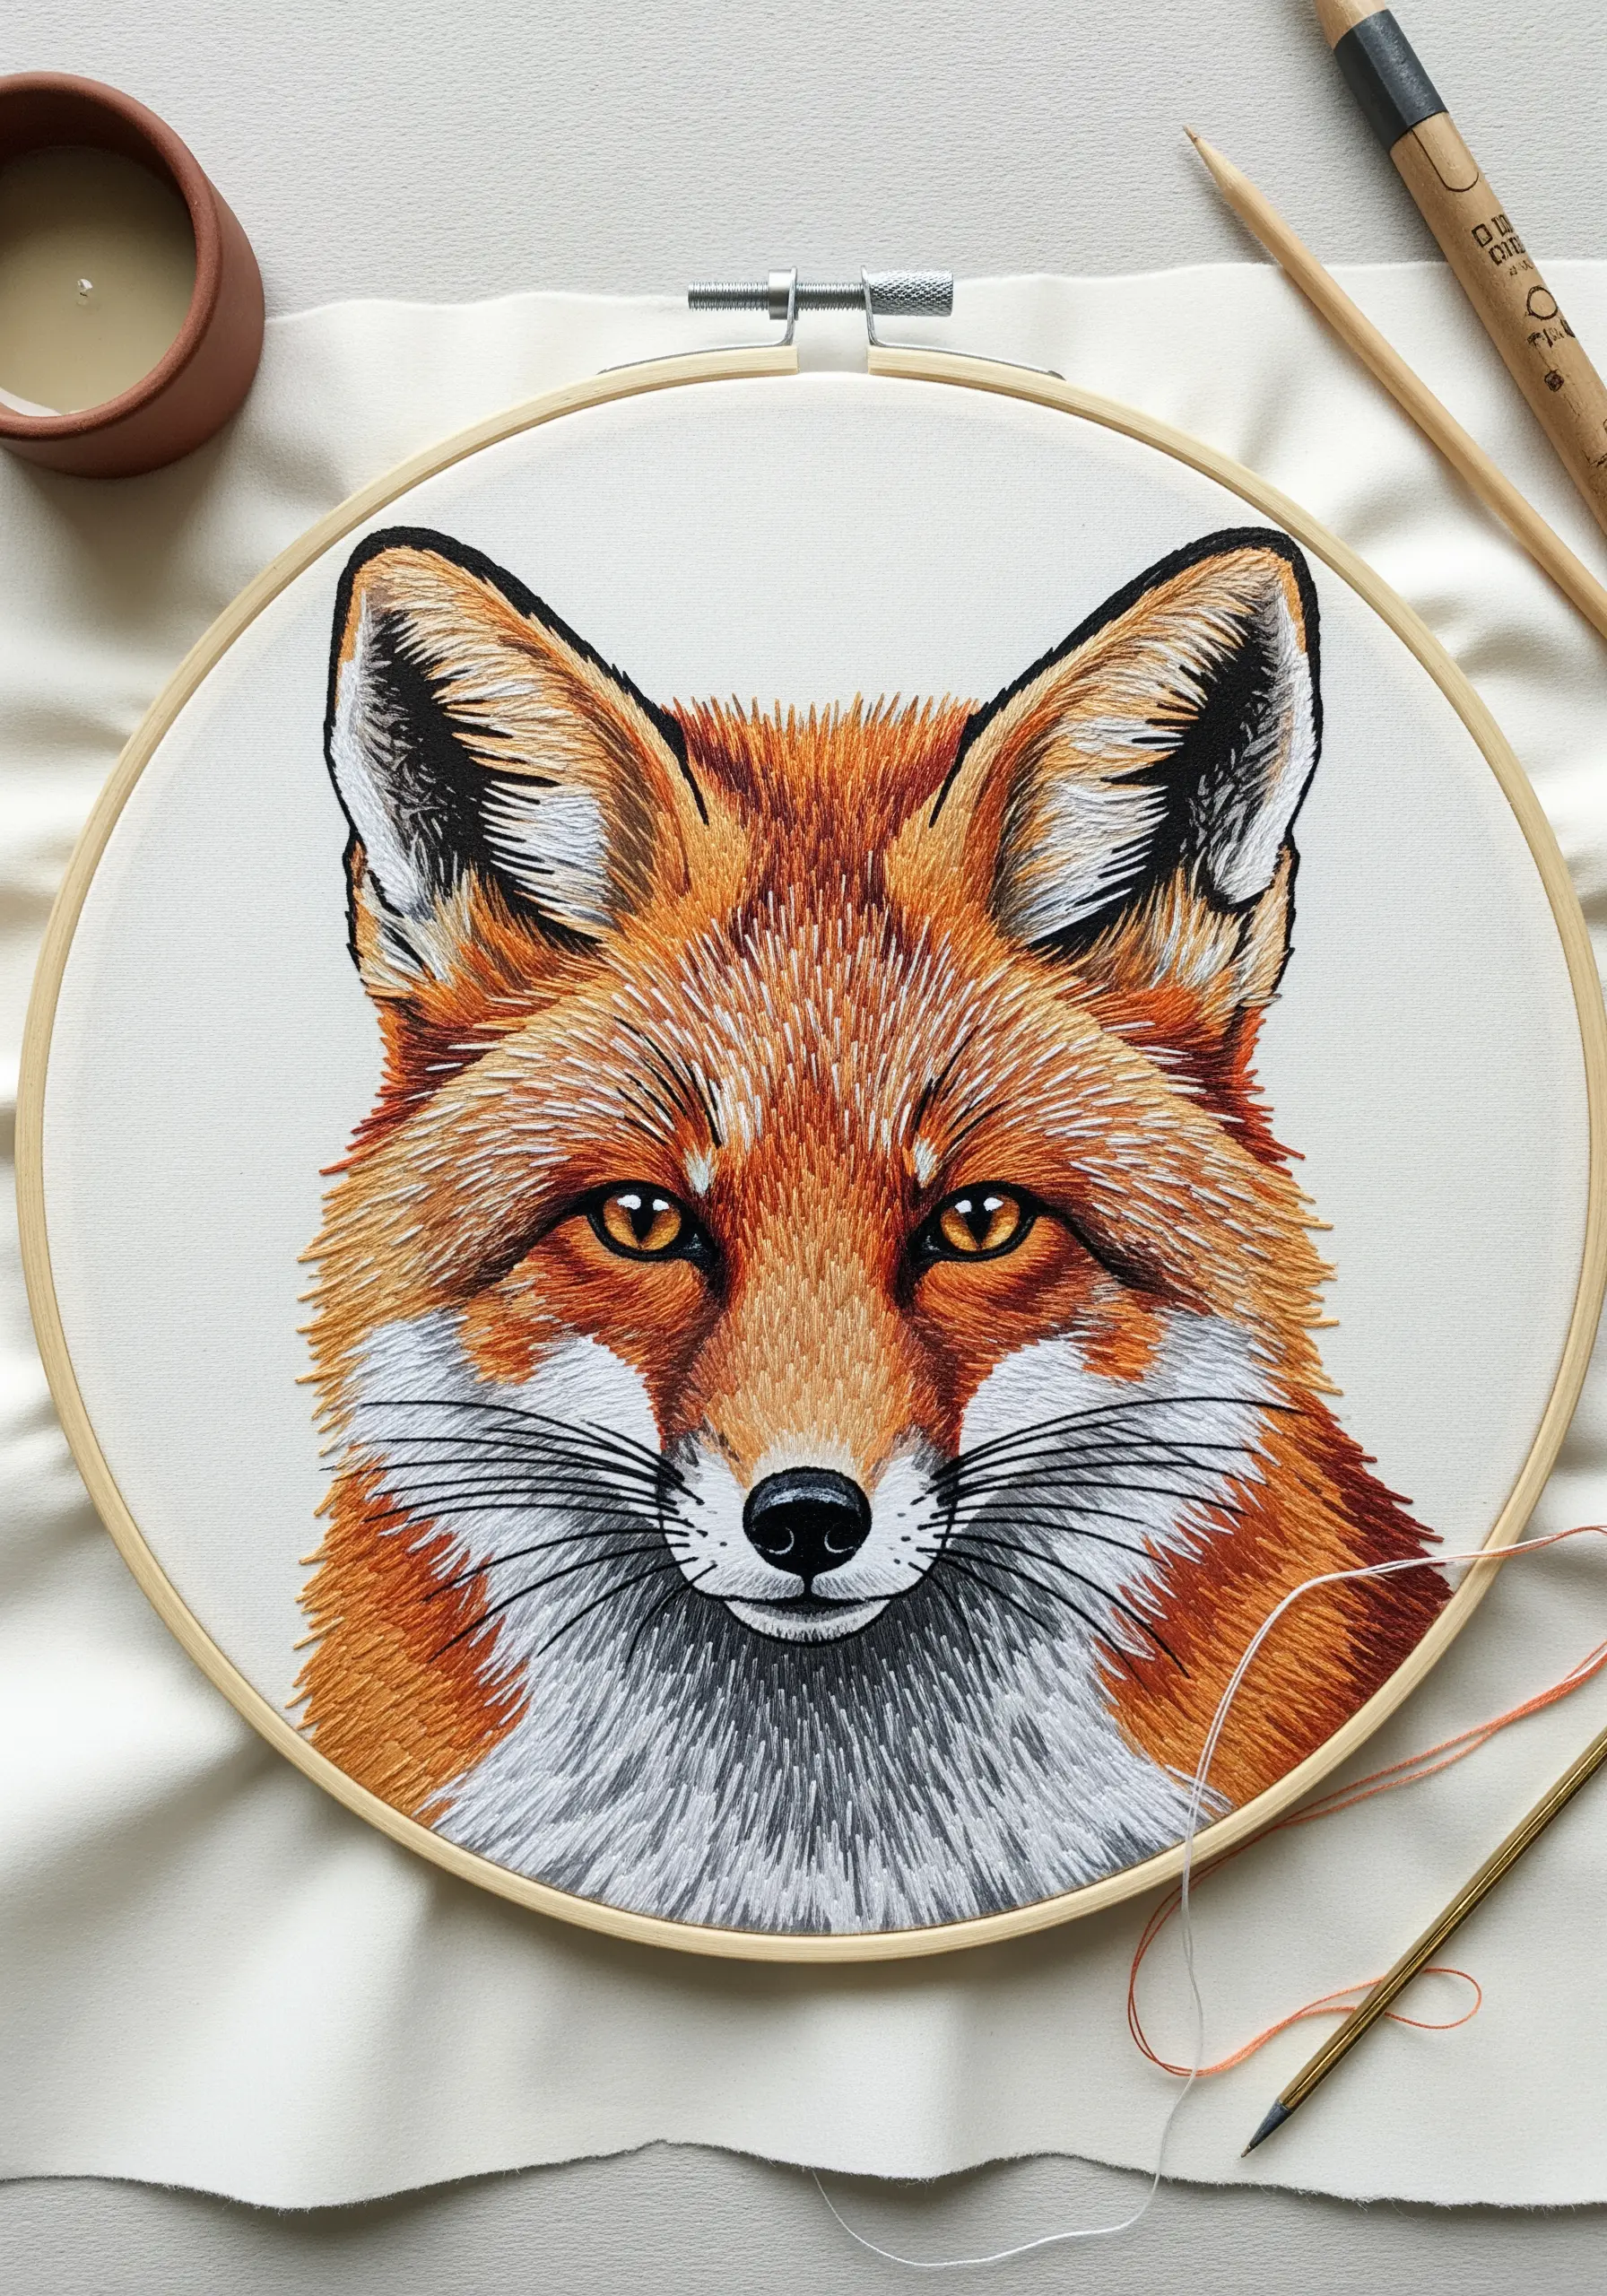
When you want to seamlessly integrate a paper element into a fabric piece, thread painting is your best technique.
Here, a paper fox face could be appliquéd onto the fabric, with the fur texture created using long-and-short stitches that extend from the fabric *over* the edge of the paper.
This method blurs the line between the two materials, making the paper feel like a natural part of the embroidered texture. Use single strands of floss for the most realistic blending.
Explore more contemporary thread painting techniques that make portraits look hyper-realistic.
14. Add Whimsical Details with Metallic Thread

Transform simple floral fabric cutouts into charming teacups with just a few stitched details.
Use a simple running stitch or backstitch around the edge of the paper to give it a finished, quilted look.
The real magic comes from adding steam with a wavy line of silver metallic thread. This small, imaginative touch elevates the piece from a simple craft to a whimsical scene, adding movement and personality with just a few stitches.
15. Create Order from Chaos with Stitched Outlines
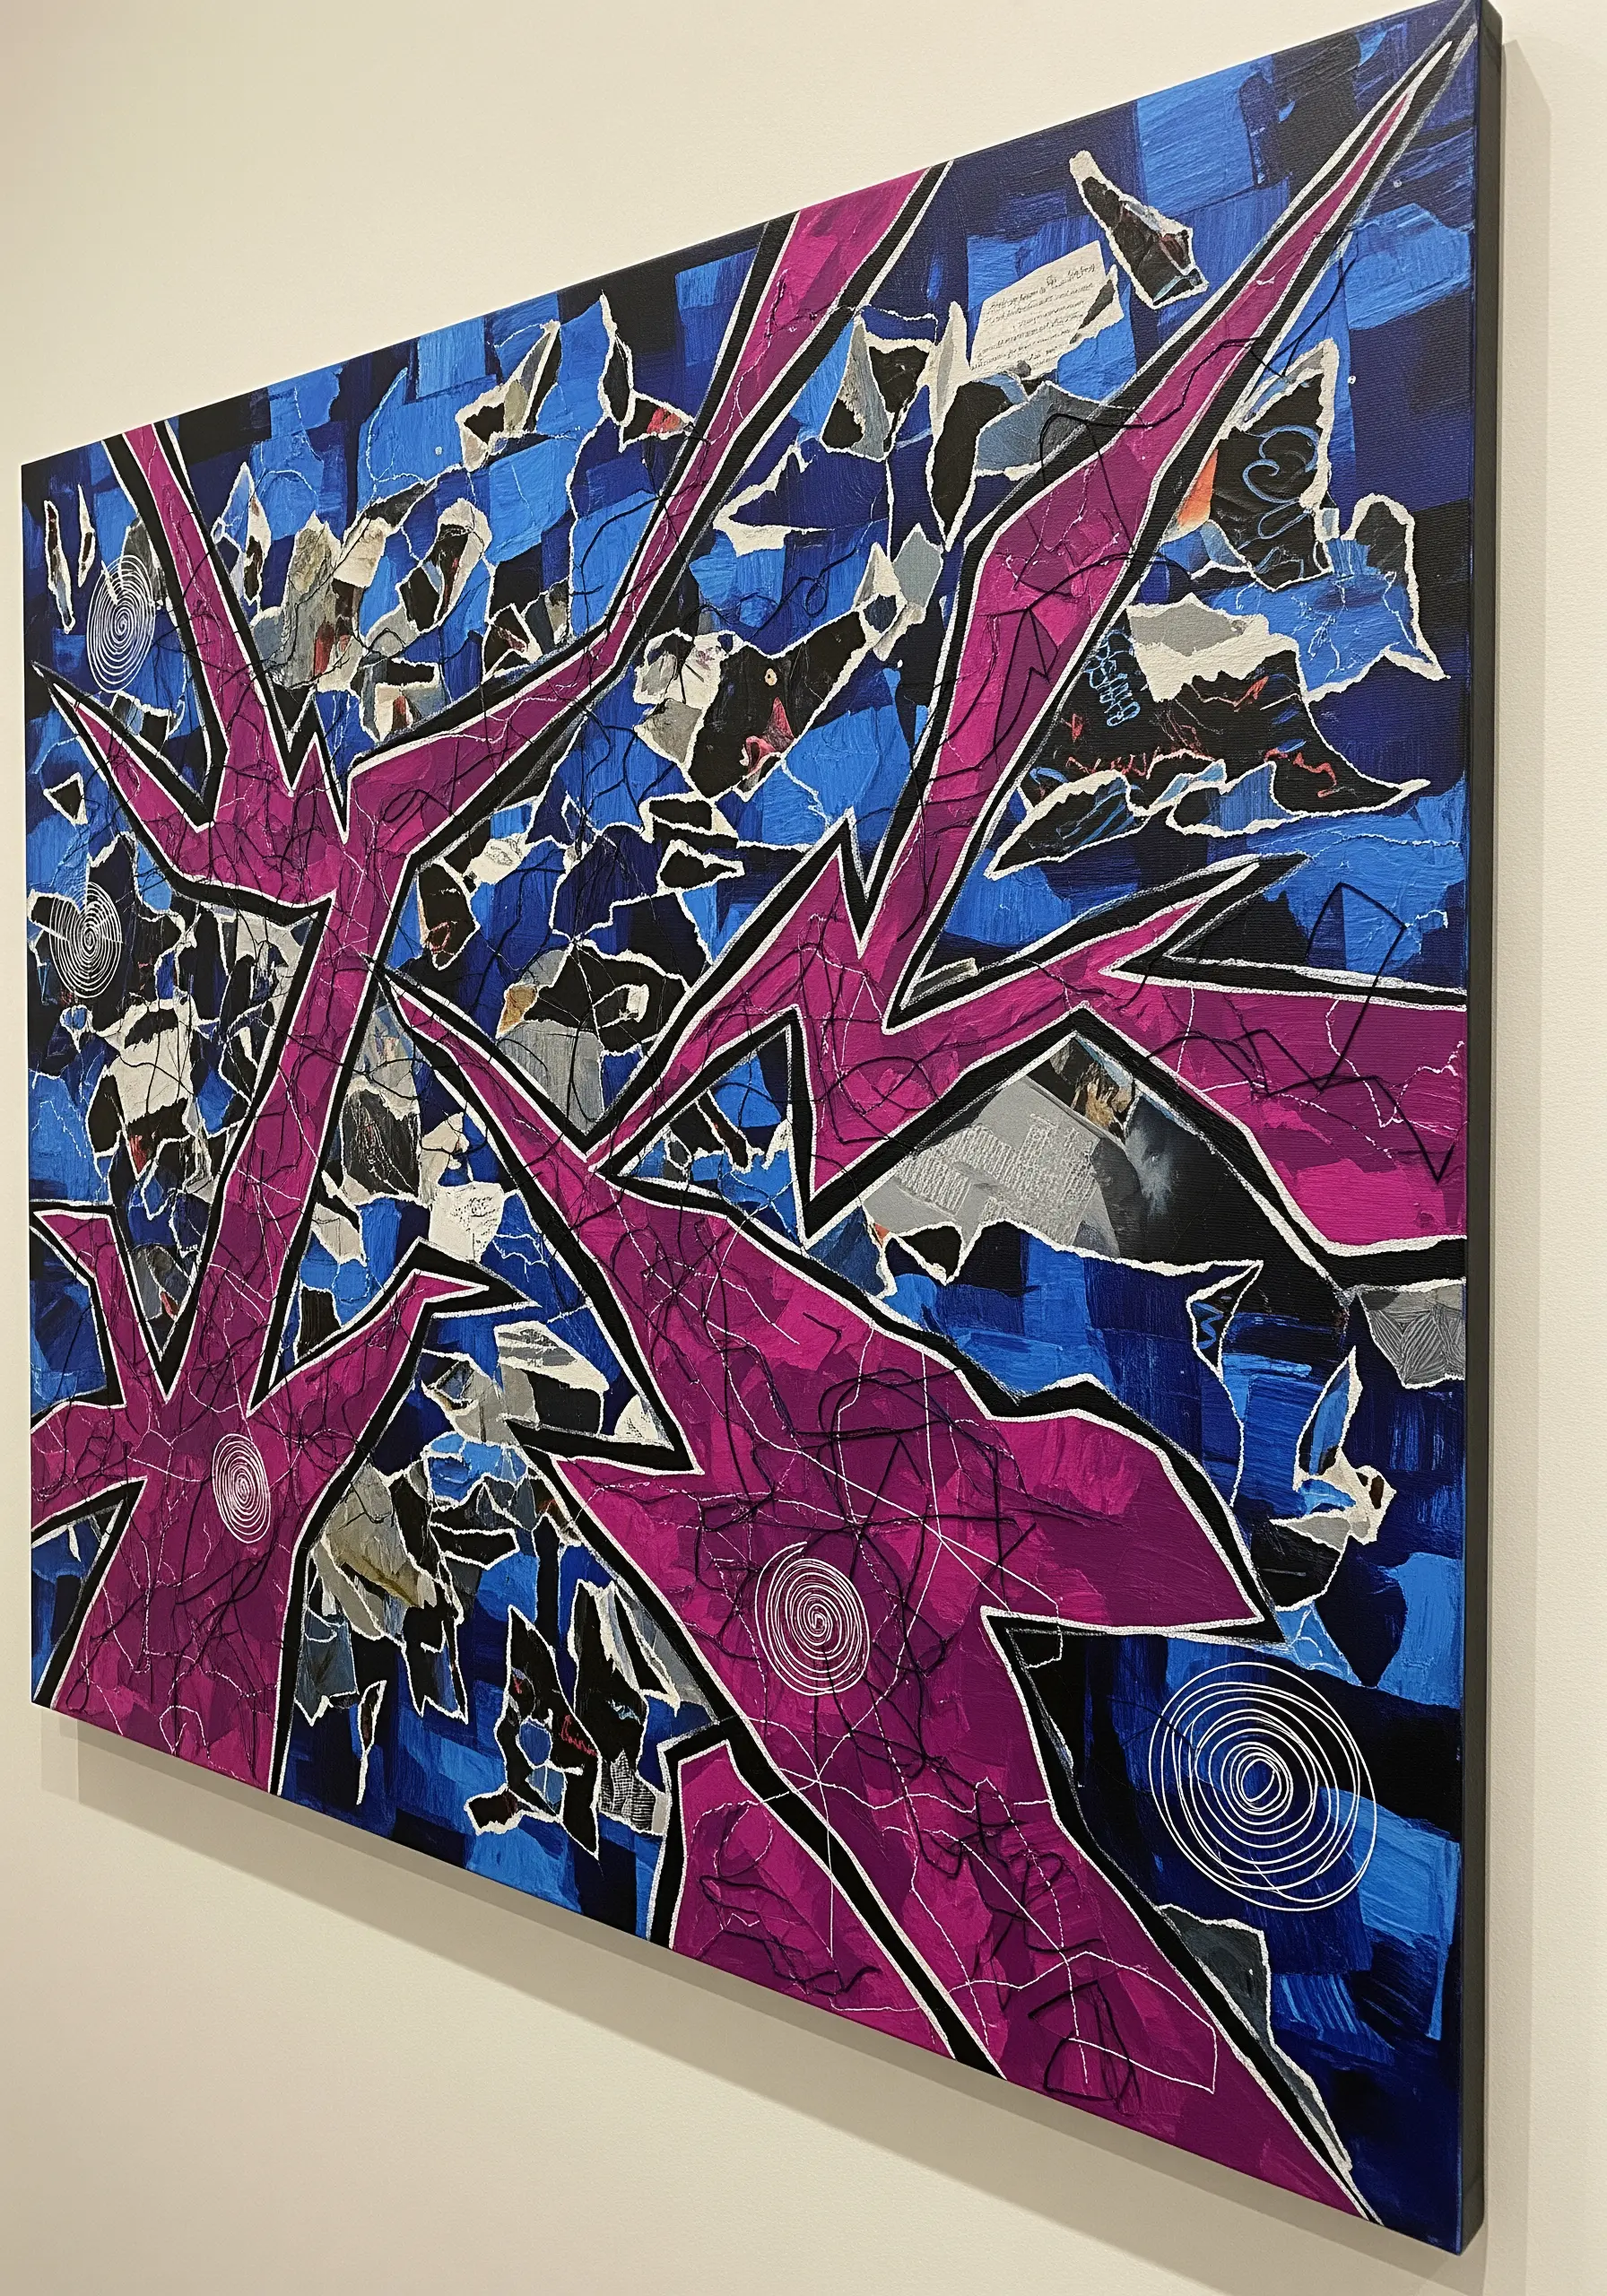
Embrace a chaotic, expressive background by layering torn paper scraps and paint splatters.
Then, impose a strong sense of structure by stitching a bold, graphic outline directly over the top.
Use a simple backstitch or stem stitch in a high-contrast thread color, like black or white, to ensure your design stands out.
This technique allows you to balance expressive, abstract energy with clean, defined lines, creating a visually powerful composition.
It’s one of the most eye-catching embroidered mixed-media projects to try this weekend.
16. Sculpt with Thread for 3D Effects
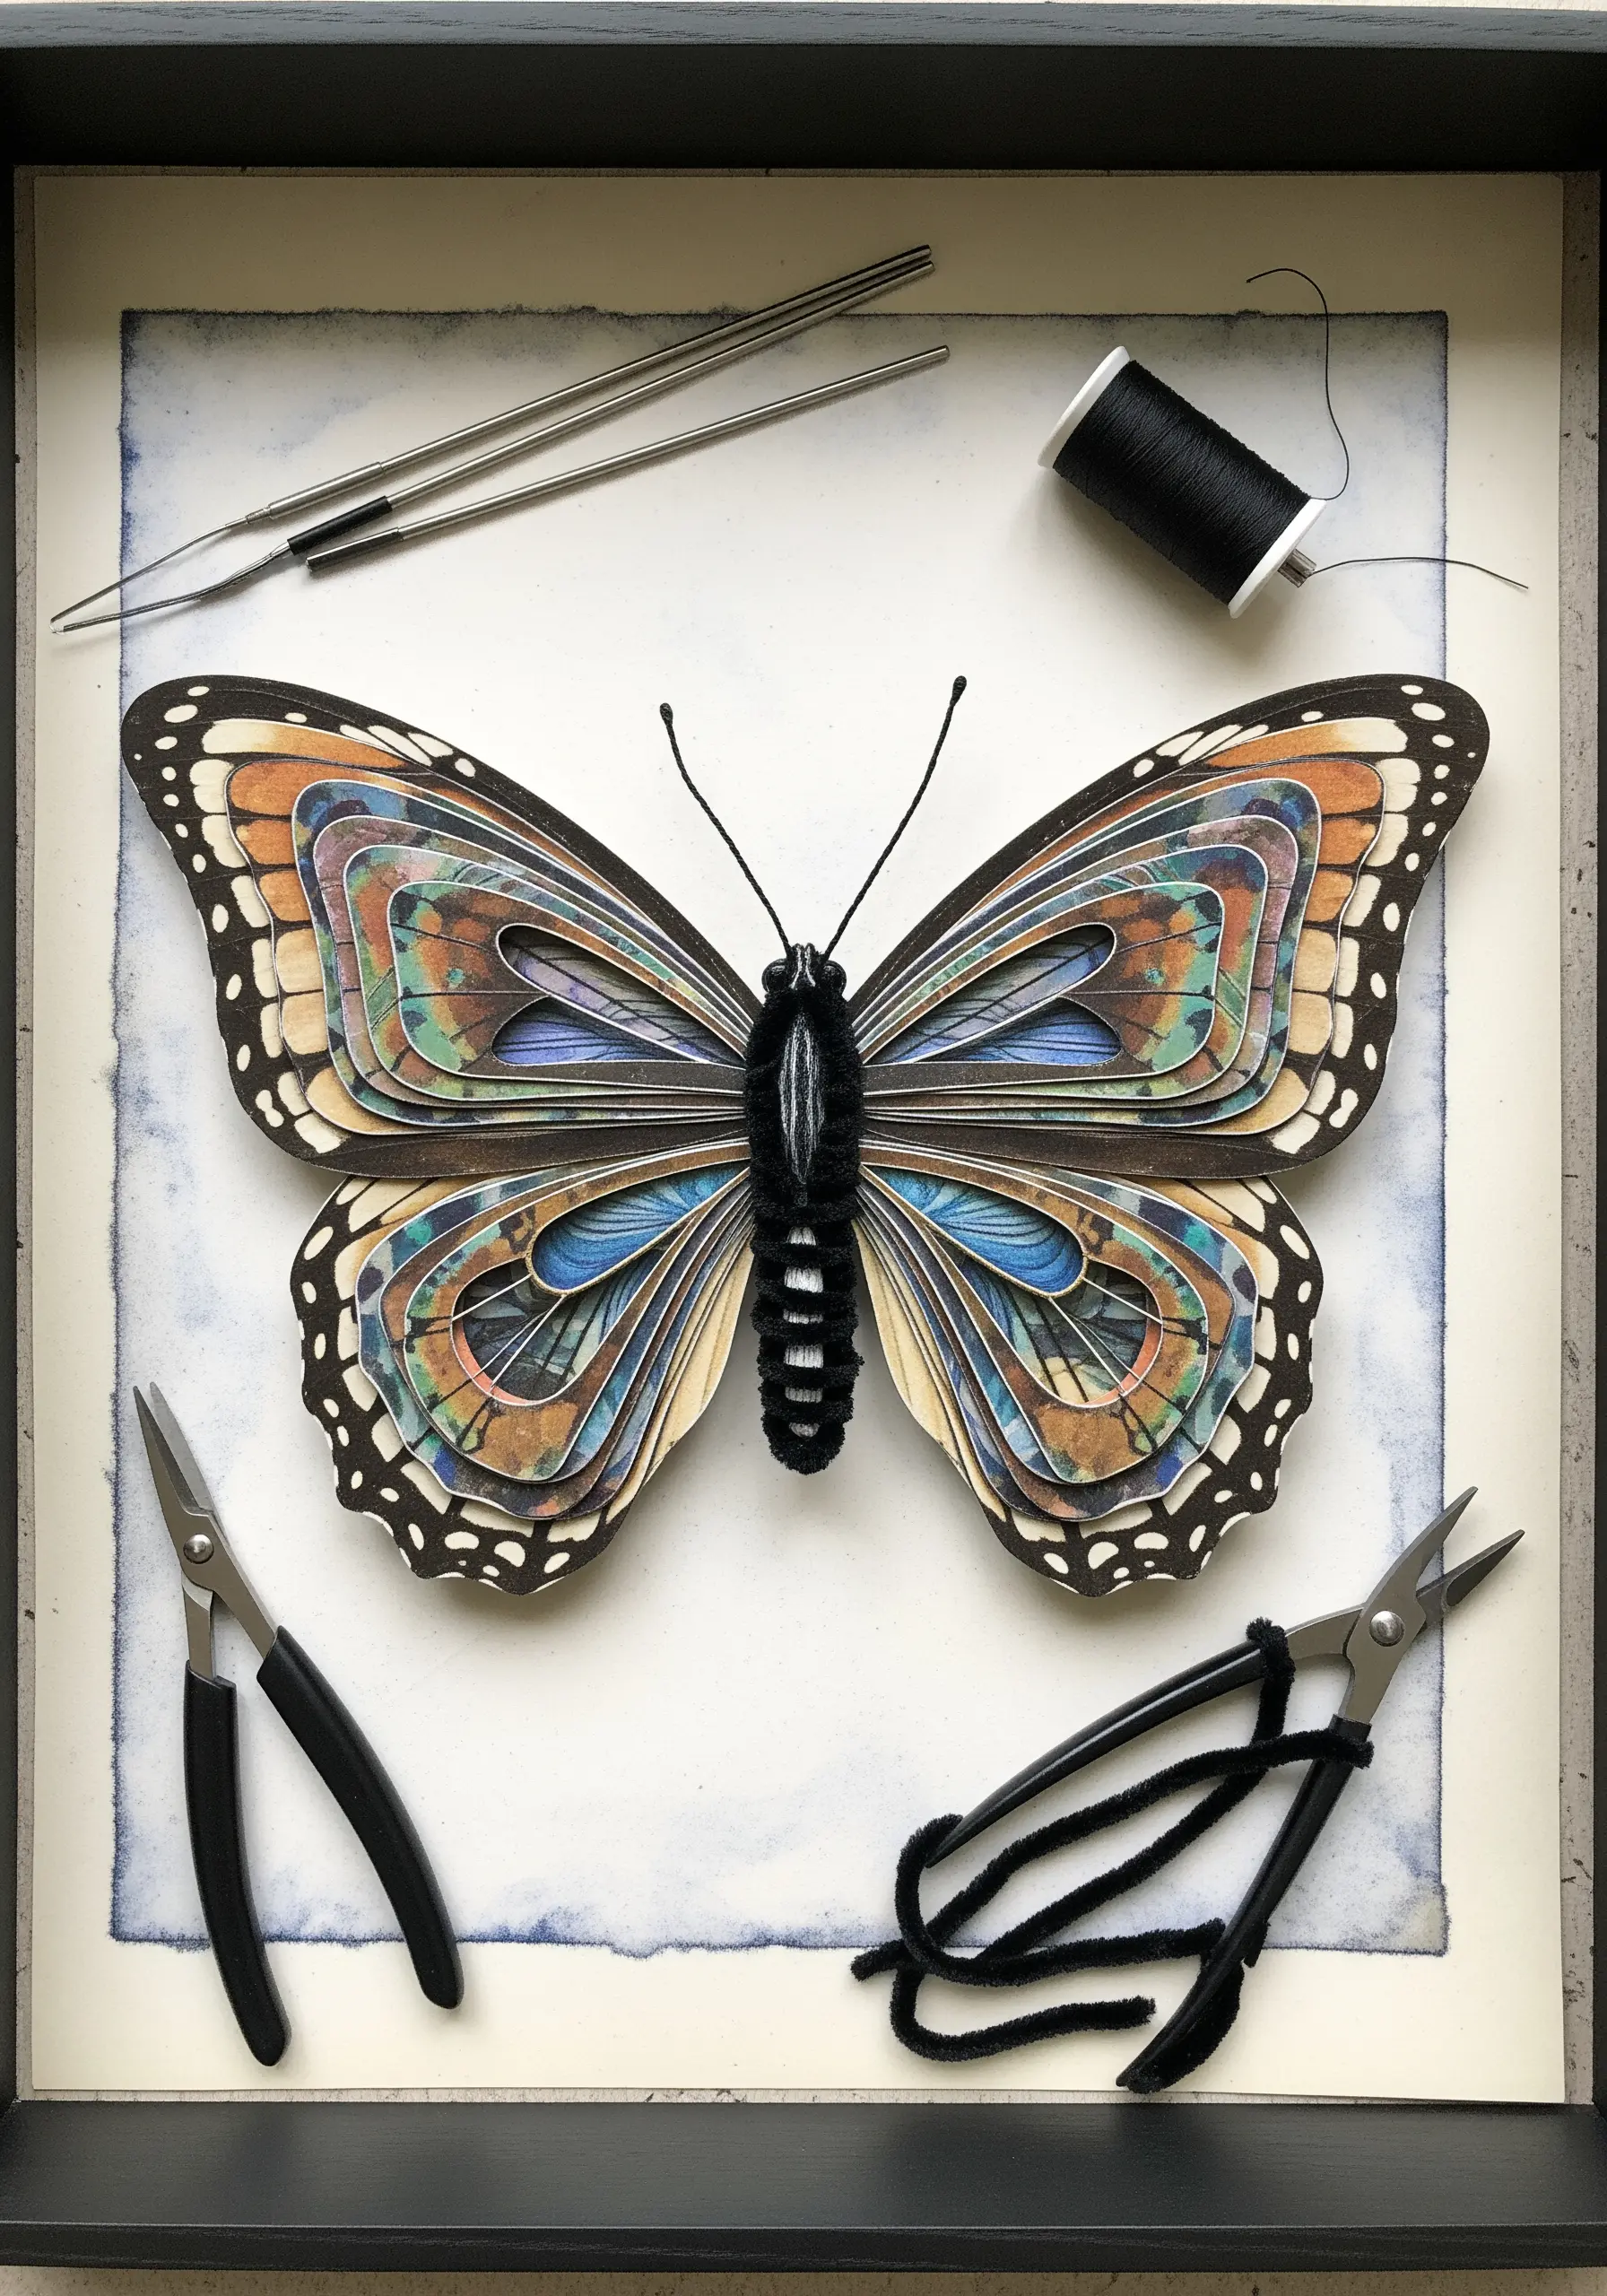
Move beyond the flat surface by using thread and wire to sculpt three-dimensional forms.
For a butterfly’s body, wrap black yarn or chenille stems around a wire base to create a fuzzy, realistic texture.
For the antennae, use stiffened thread or thin wire. This approach turns your embroidery into a small-scale sculpture, creating dramatic shadows and a lifelike presence that a simple stitch cannot achieve.
Combine this with layered paper wings for a truly breathtaking mixed-media piece.
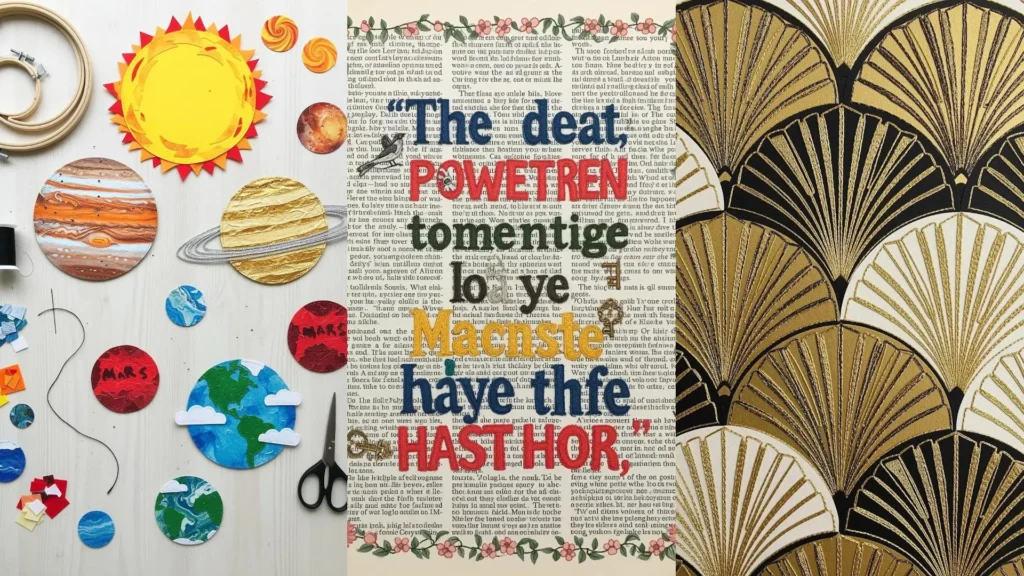
17. Integrate Typography with Satin Stitch
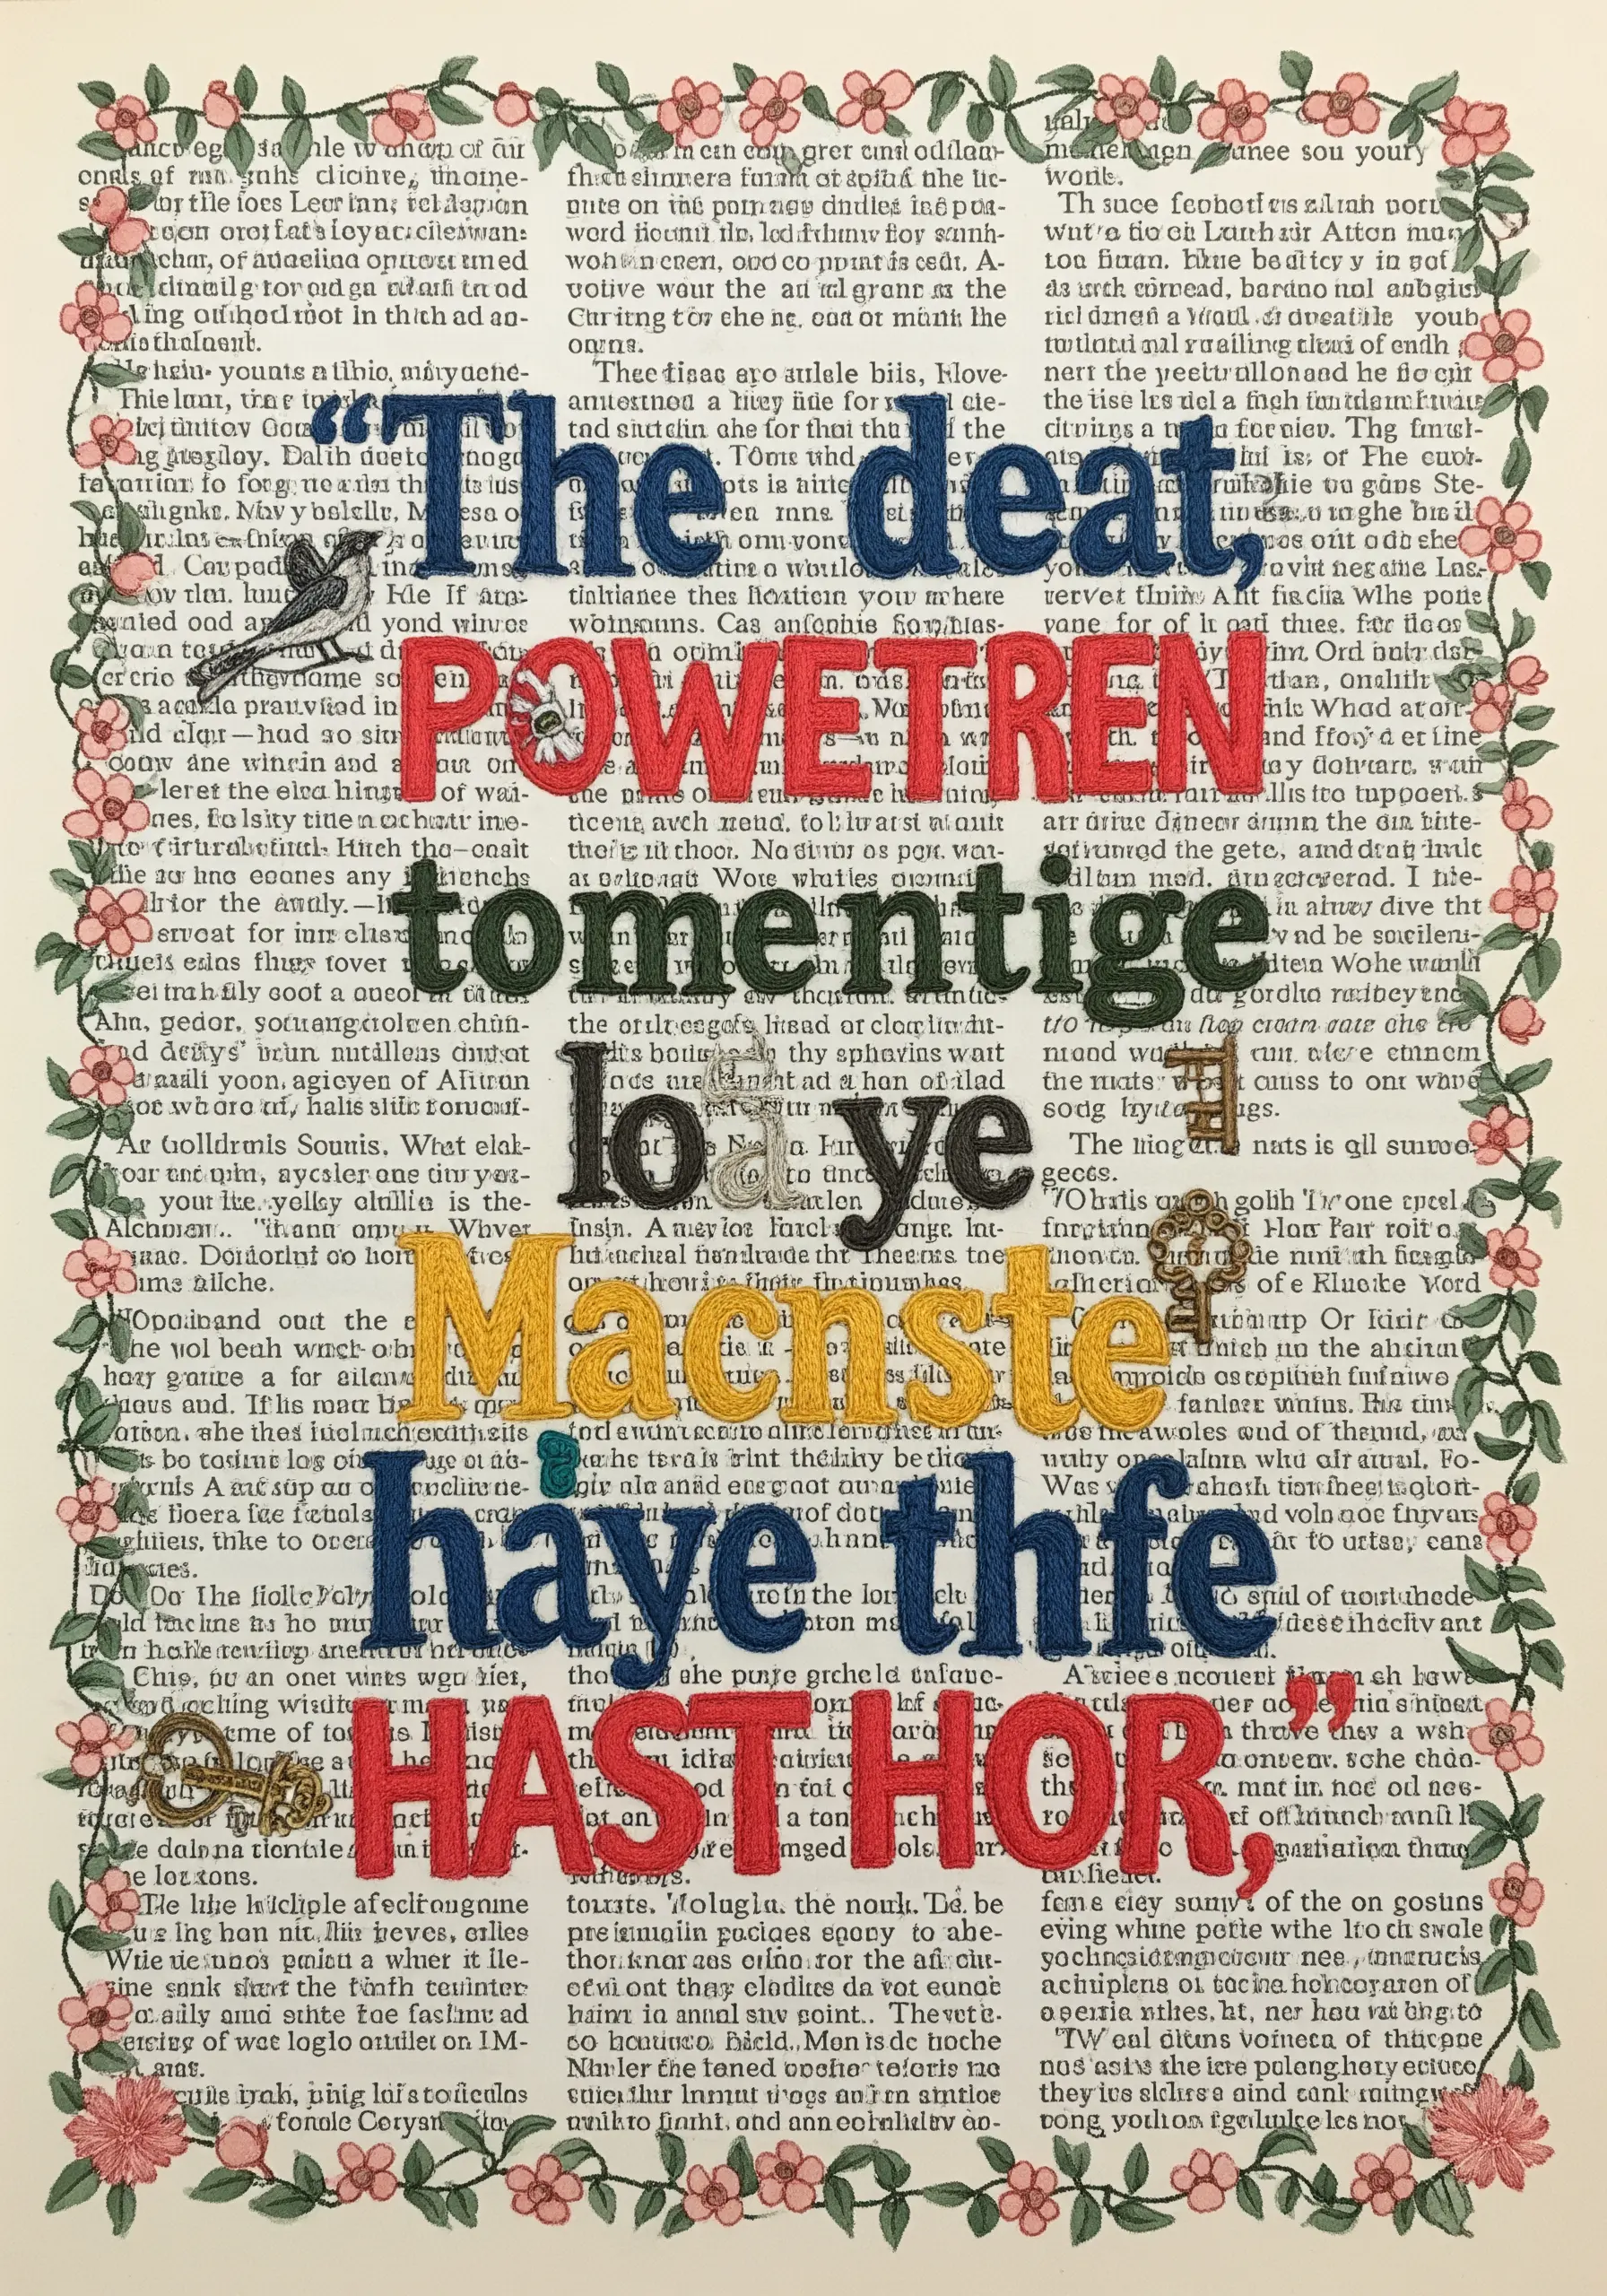
Turn lettering into a central design element by filling bold, blocky text with dense satin stitch.
To ensure your satin stitches are perfectly smooth and even, especially on paper, lay down a foundation of split stitches around the outline of each letter.
This raised edge acts as a guide and prevents the paper from tearing. Choose a thread color that contrasts sharply with the background text for maximum impact.
It’s a powerful method for creating minimal typography quotes that look trending on hoops and denim, or in this case, on paper.
18. Create a Quilted Effect on Paper Tiles
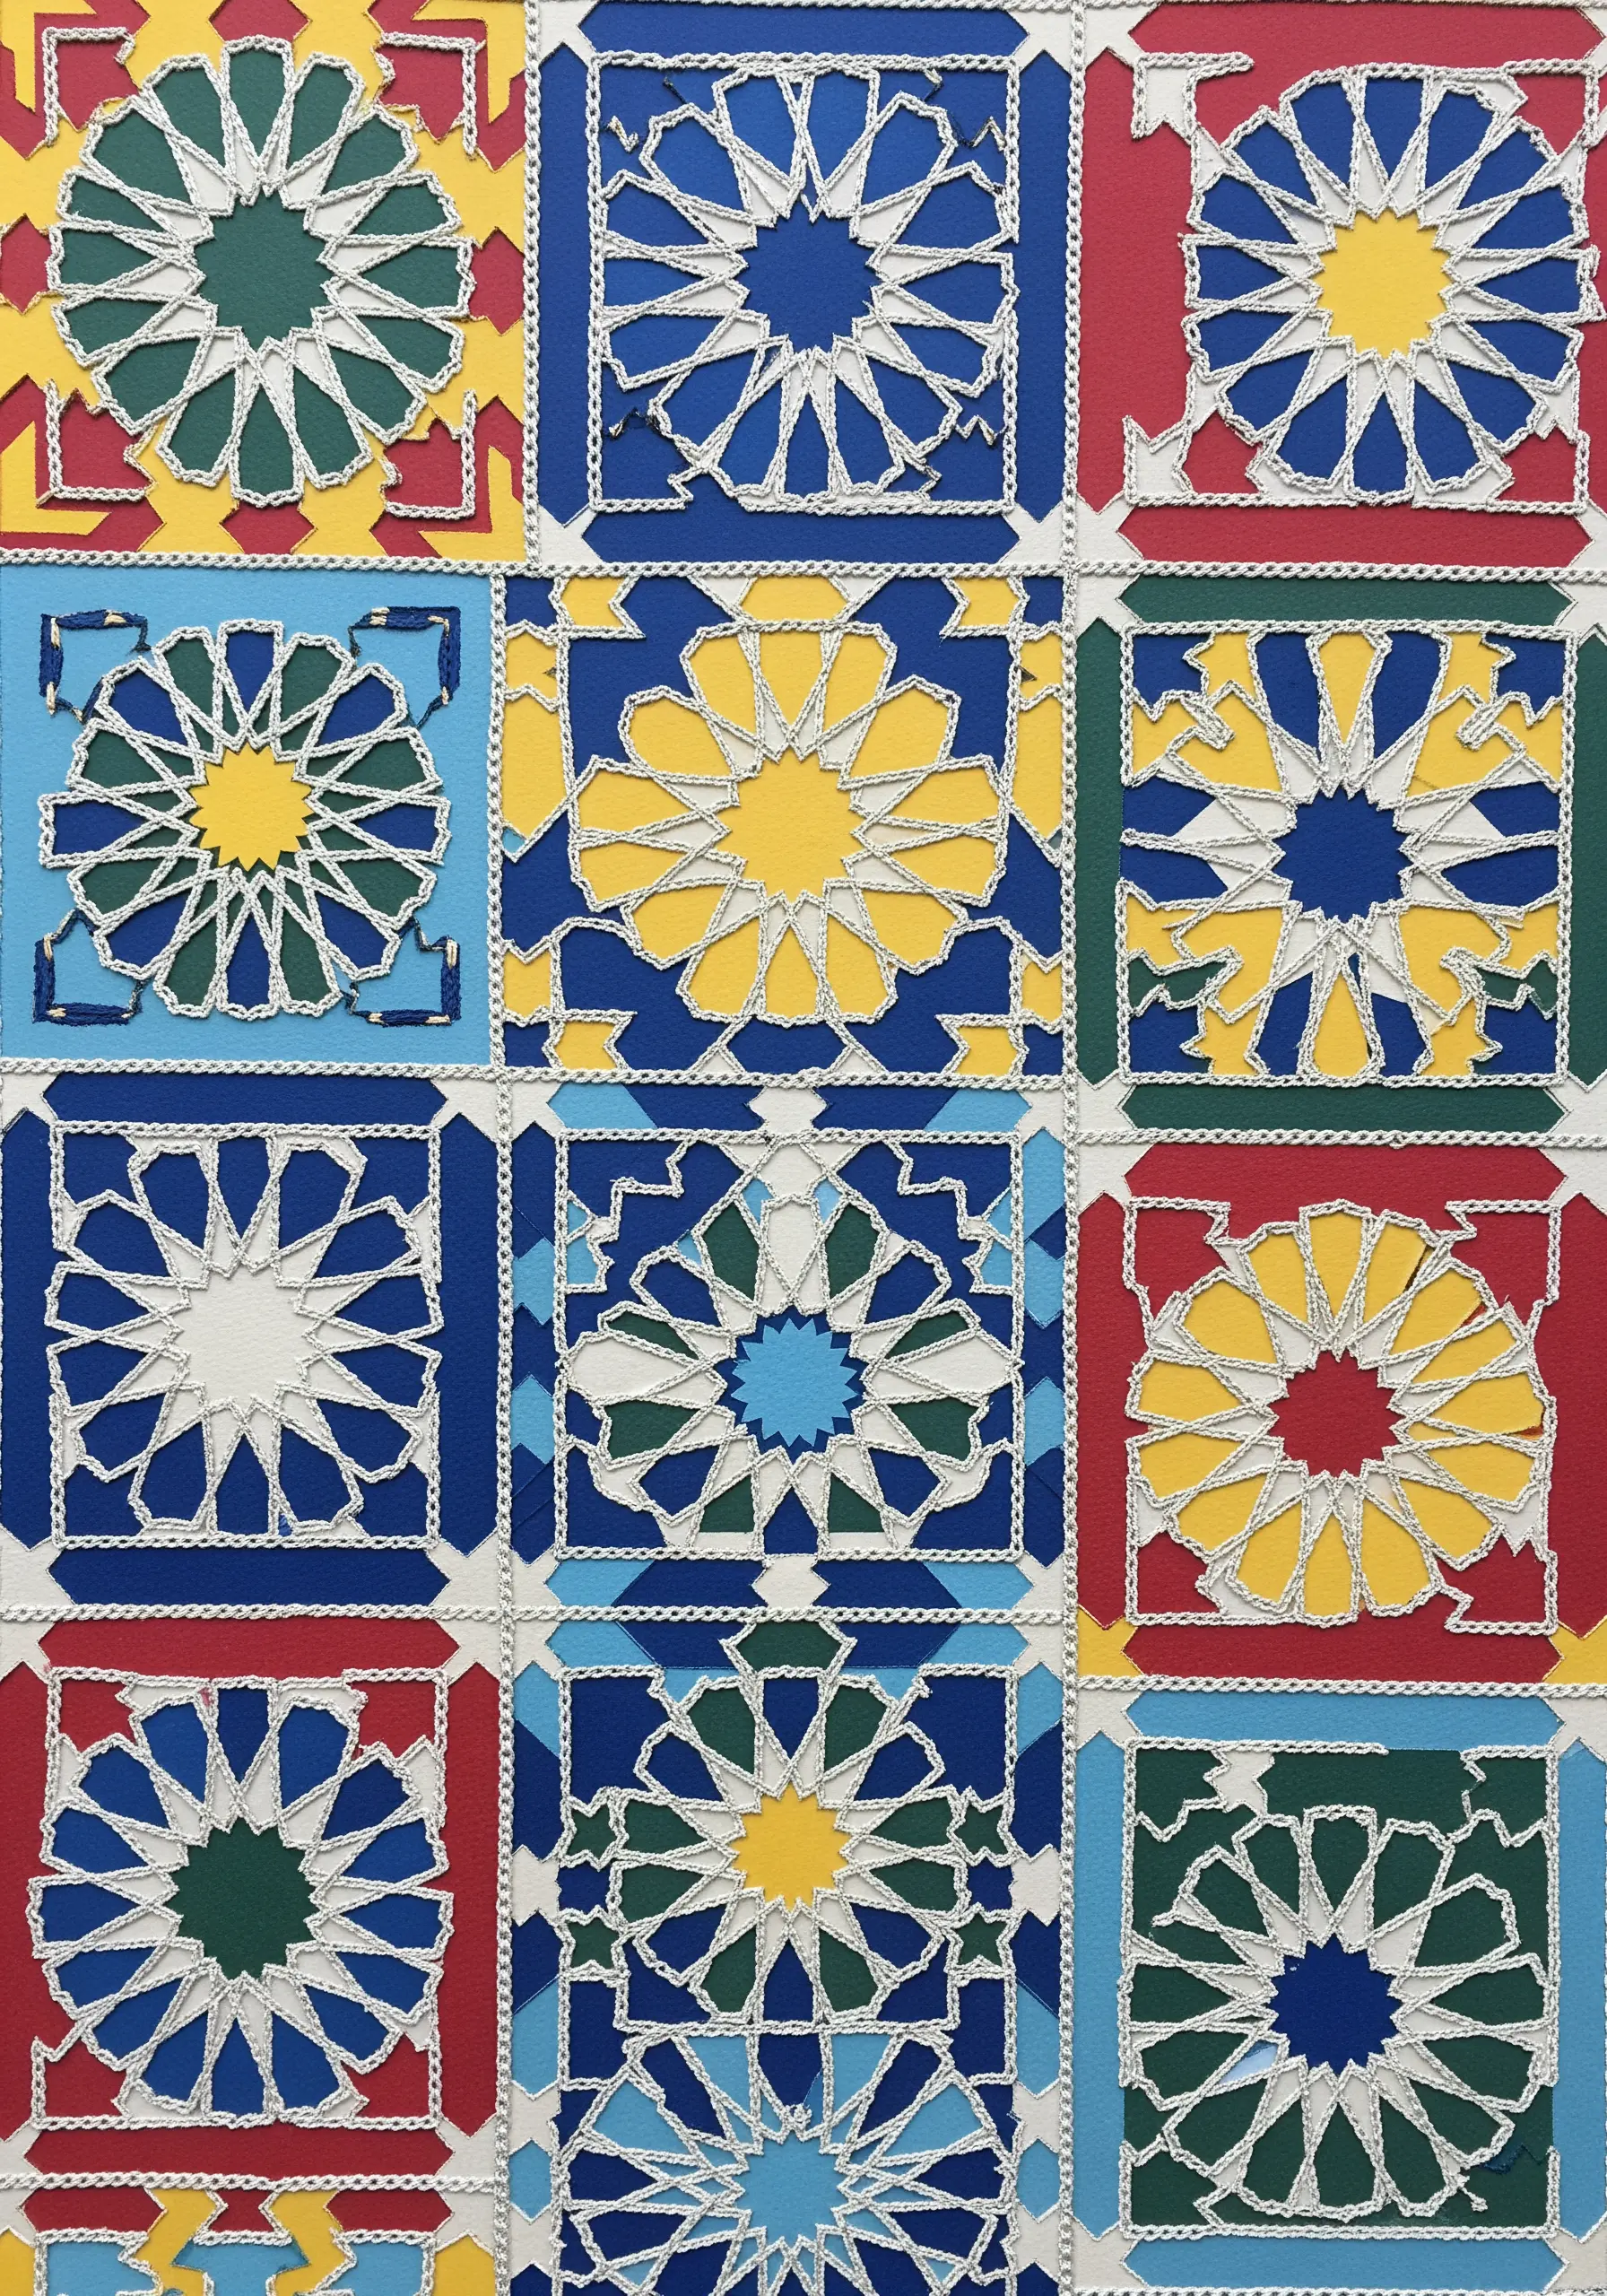
Mimic the look of traditional quilting by stitching together paper squares with a contrasting thread.
Use a simple whip stitch or cross stitch to connect the edges of each paper tile. The key is consistency in your stitch length and tension.
Pre-piercing the holes along the edges of the squares will make stitching easier and prevent the paper from buckling.
This technique adds a charming, handcrafted feel to geometric patterns, blending the worlds of paper craft and textile art.
These are the kinds of geometric framed embroidery patterns that transform any room.
19. Use Embellishments for Natural Details
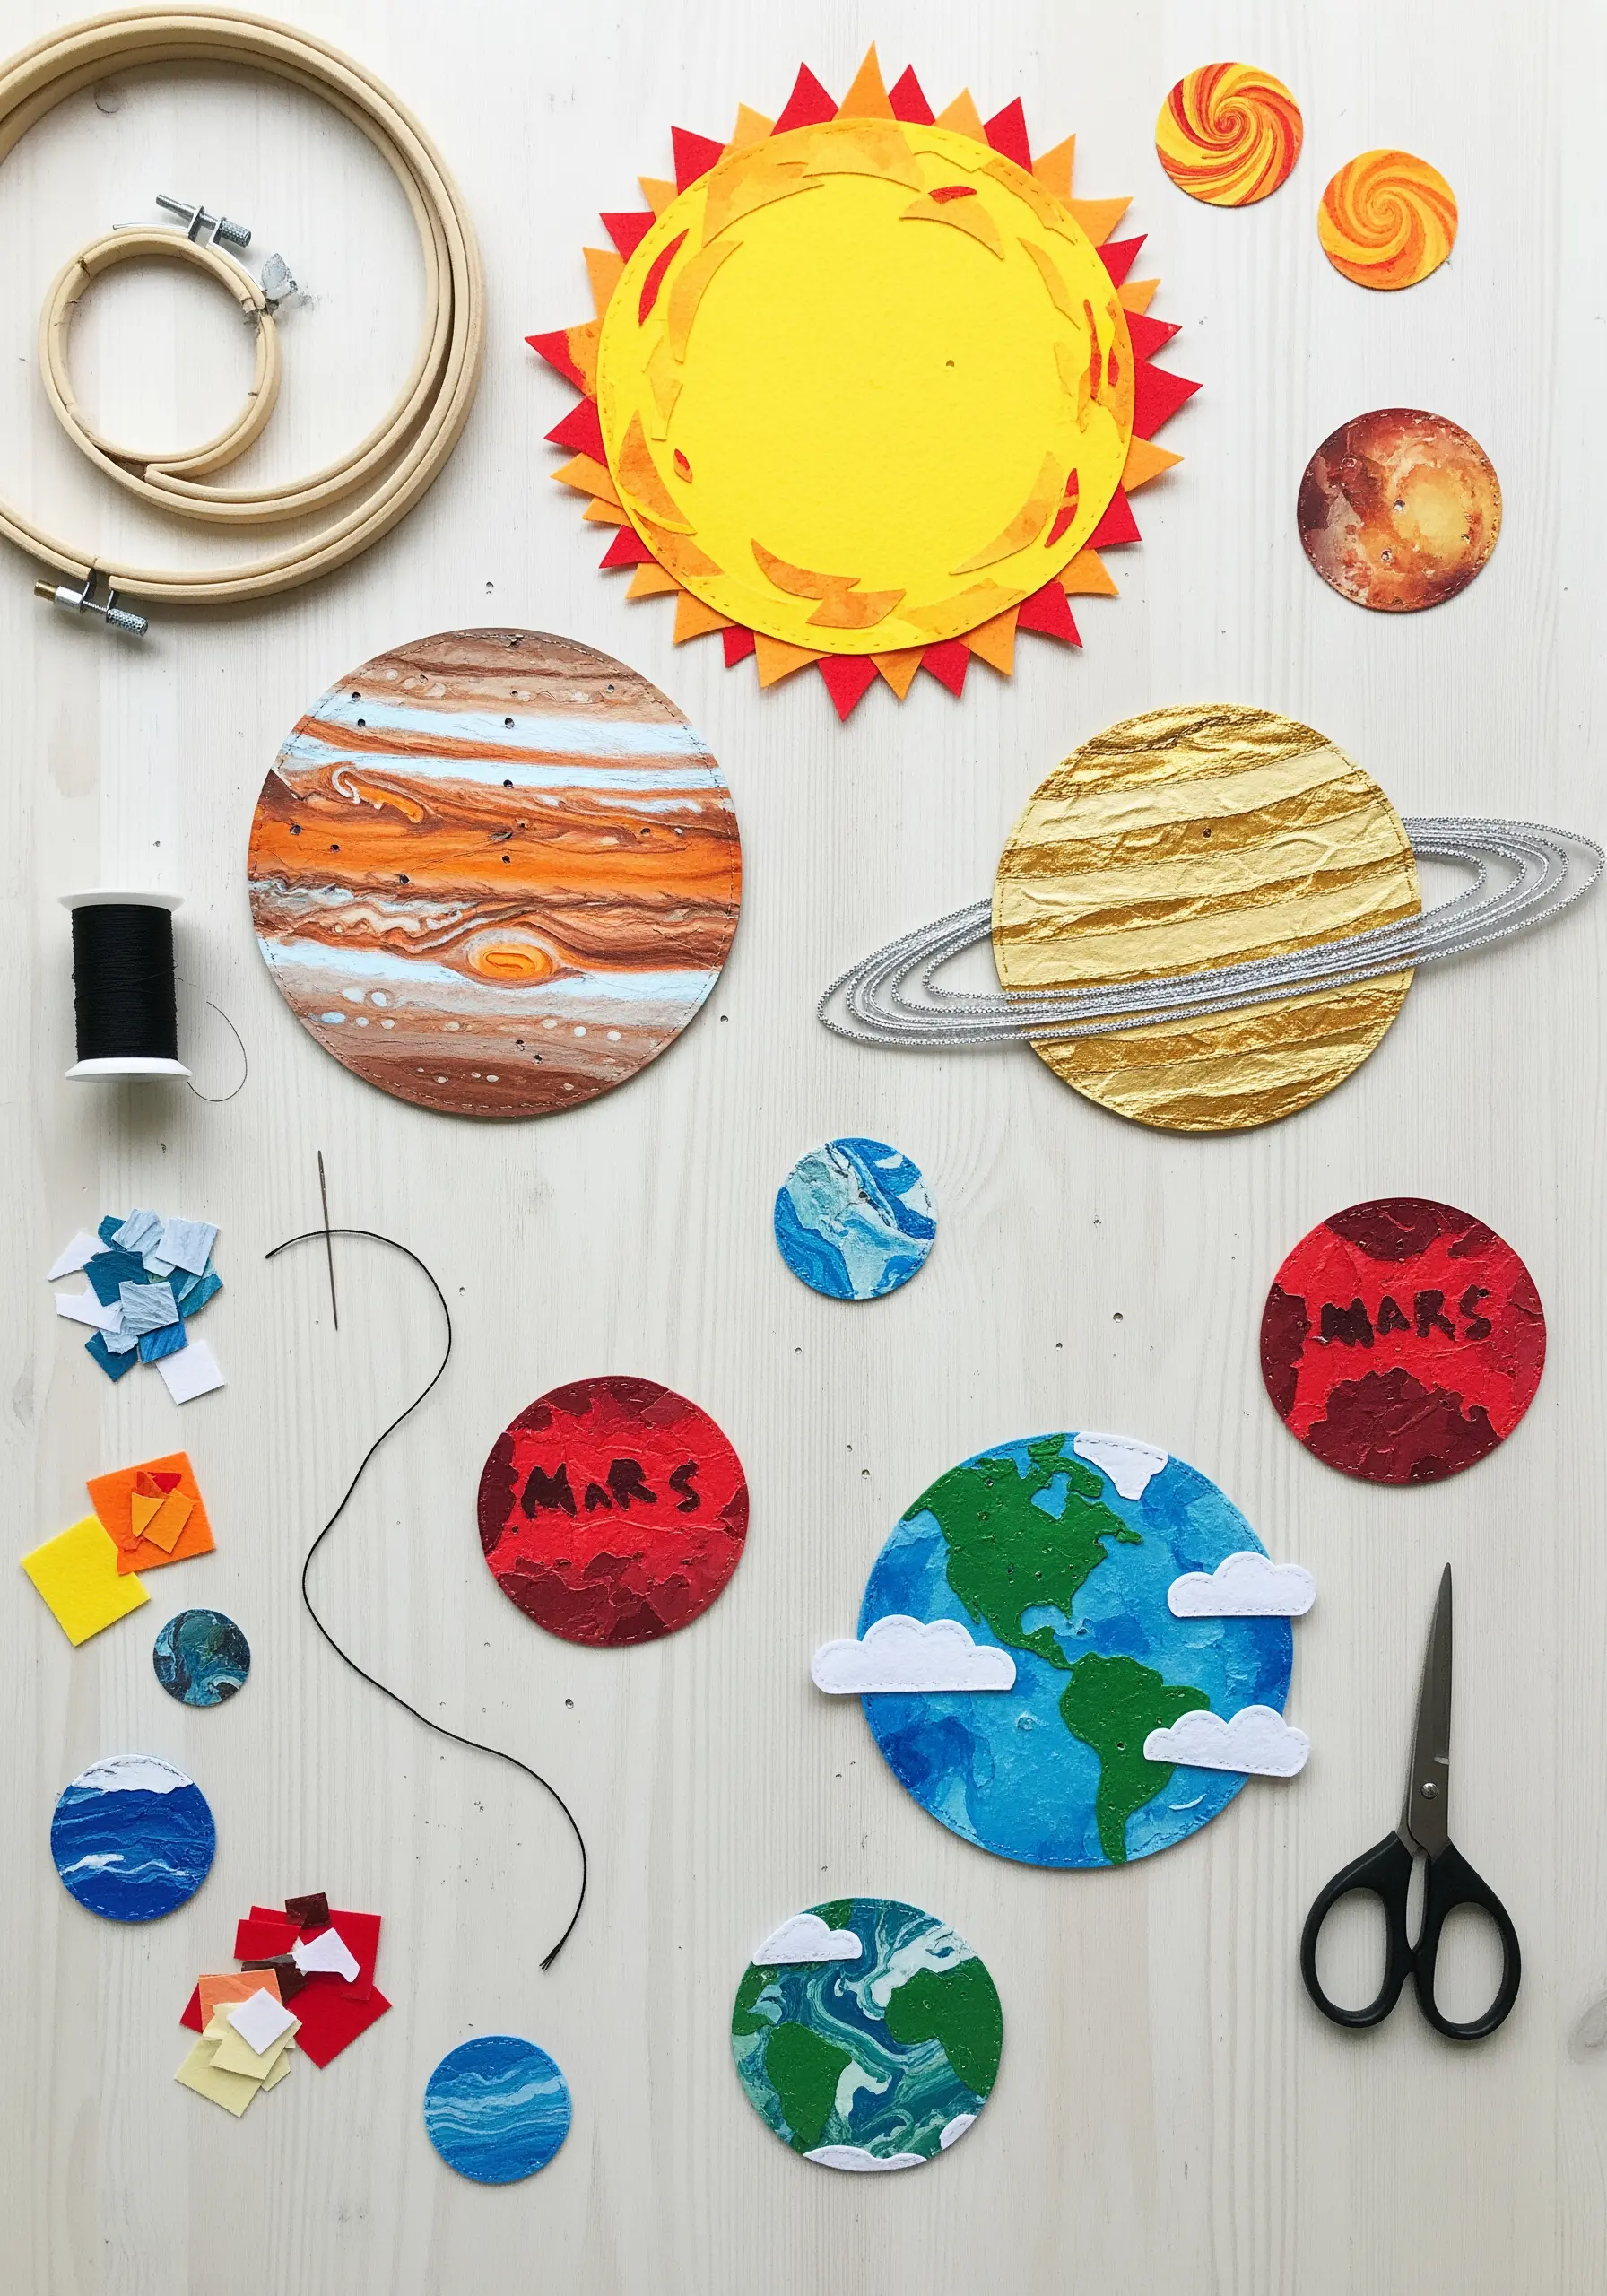
When working with organic subjects, don’t be afraid to incorporate non-thread elements to enhance realism.
After arranging your paper planet cutouts, you can add texture and dimension to Saturn’s rings with silver thread or fine glitter paper.
For a project like this, using different materials like foil paper for Saturn’s rings or marbled paper for Jupiter adds a layer of visual interest that thread alone might not capture. Stitching can be used to anchor pieces or add subtle outlines.
Explore more paper embroidery projects you can finish in a weekend.
20. The Elegance of a Simple Stitched Line
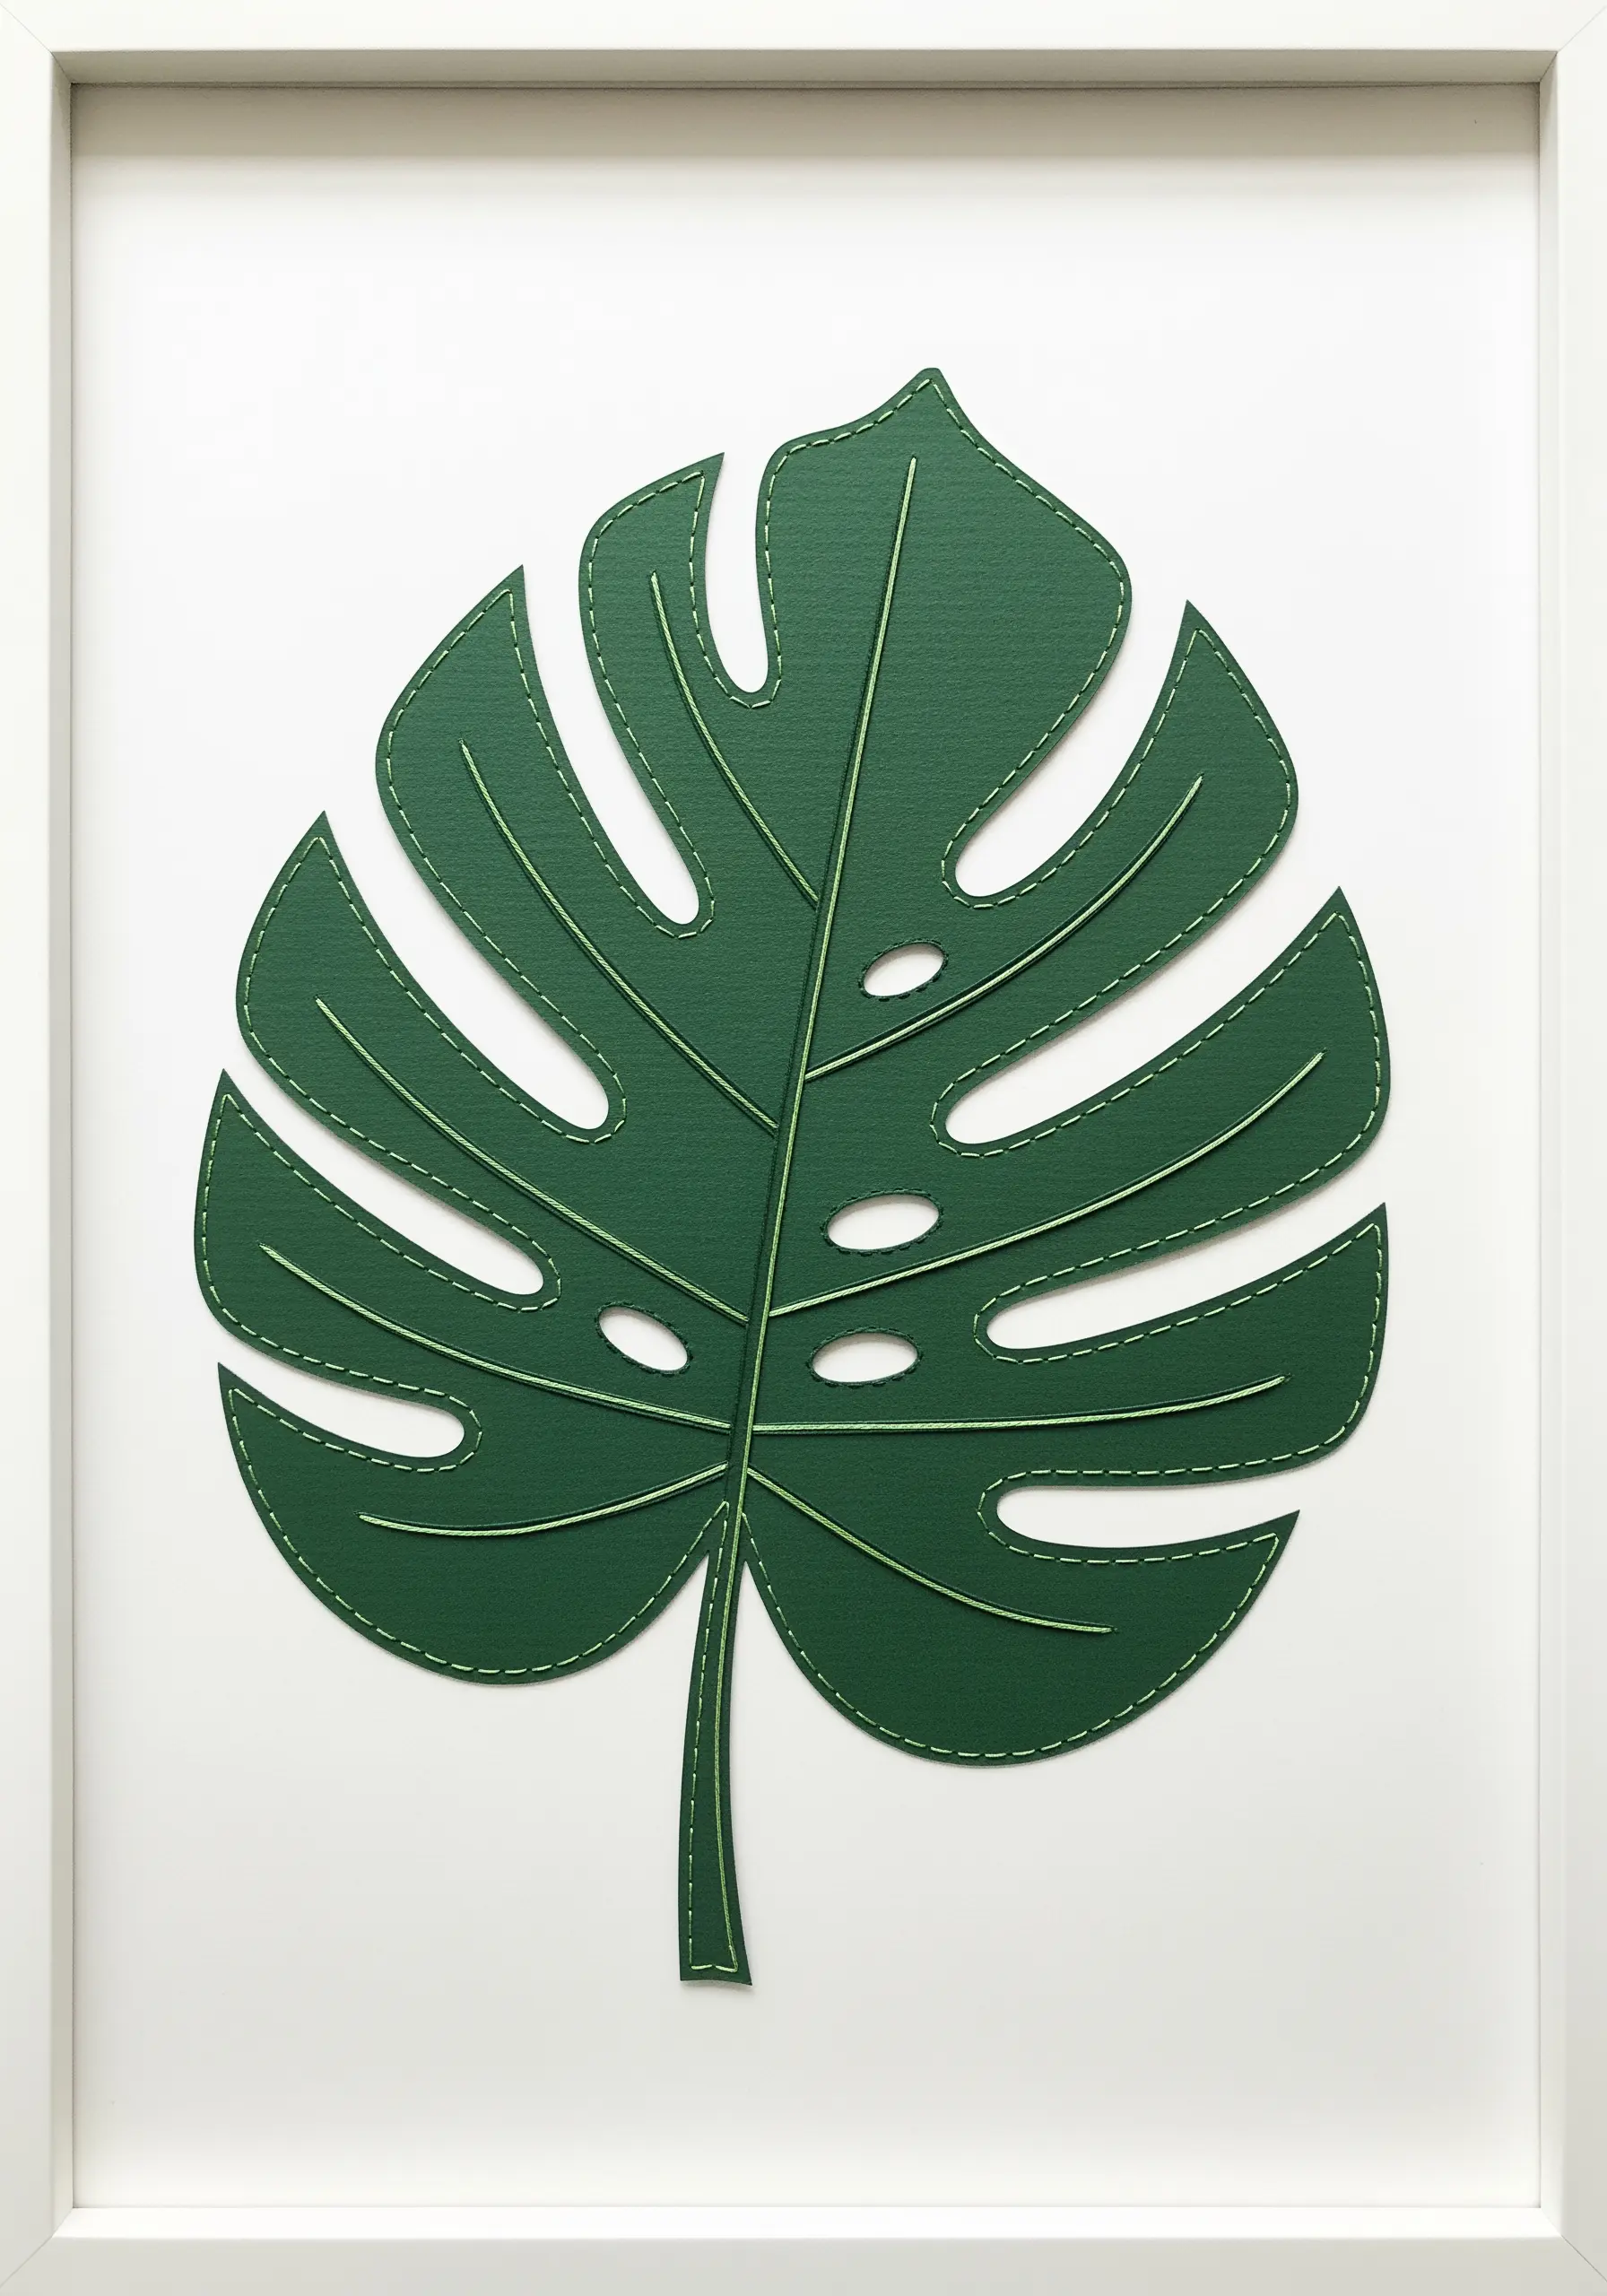
You don’t need complex stitches to make an impact. A simple, well-executed running stitch or backstitch can be incredibly powerful.
On a solid-colored paper cutout, like this monstera leaf, a single line of stitching in a contrasting thread adds definition, texture, and a sense of craftsmanship.
Focus on keeping your stitches perfectly even in length and spacing. This minimalist approach celebrates the beauty of the line itself and is a hallmark of contemporary stitch designs that turn plain linen into luxe minimalist wall art—or in this case, paper art.
21. Layer Fabrics to Build a Landscape
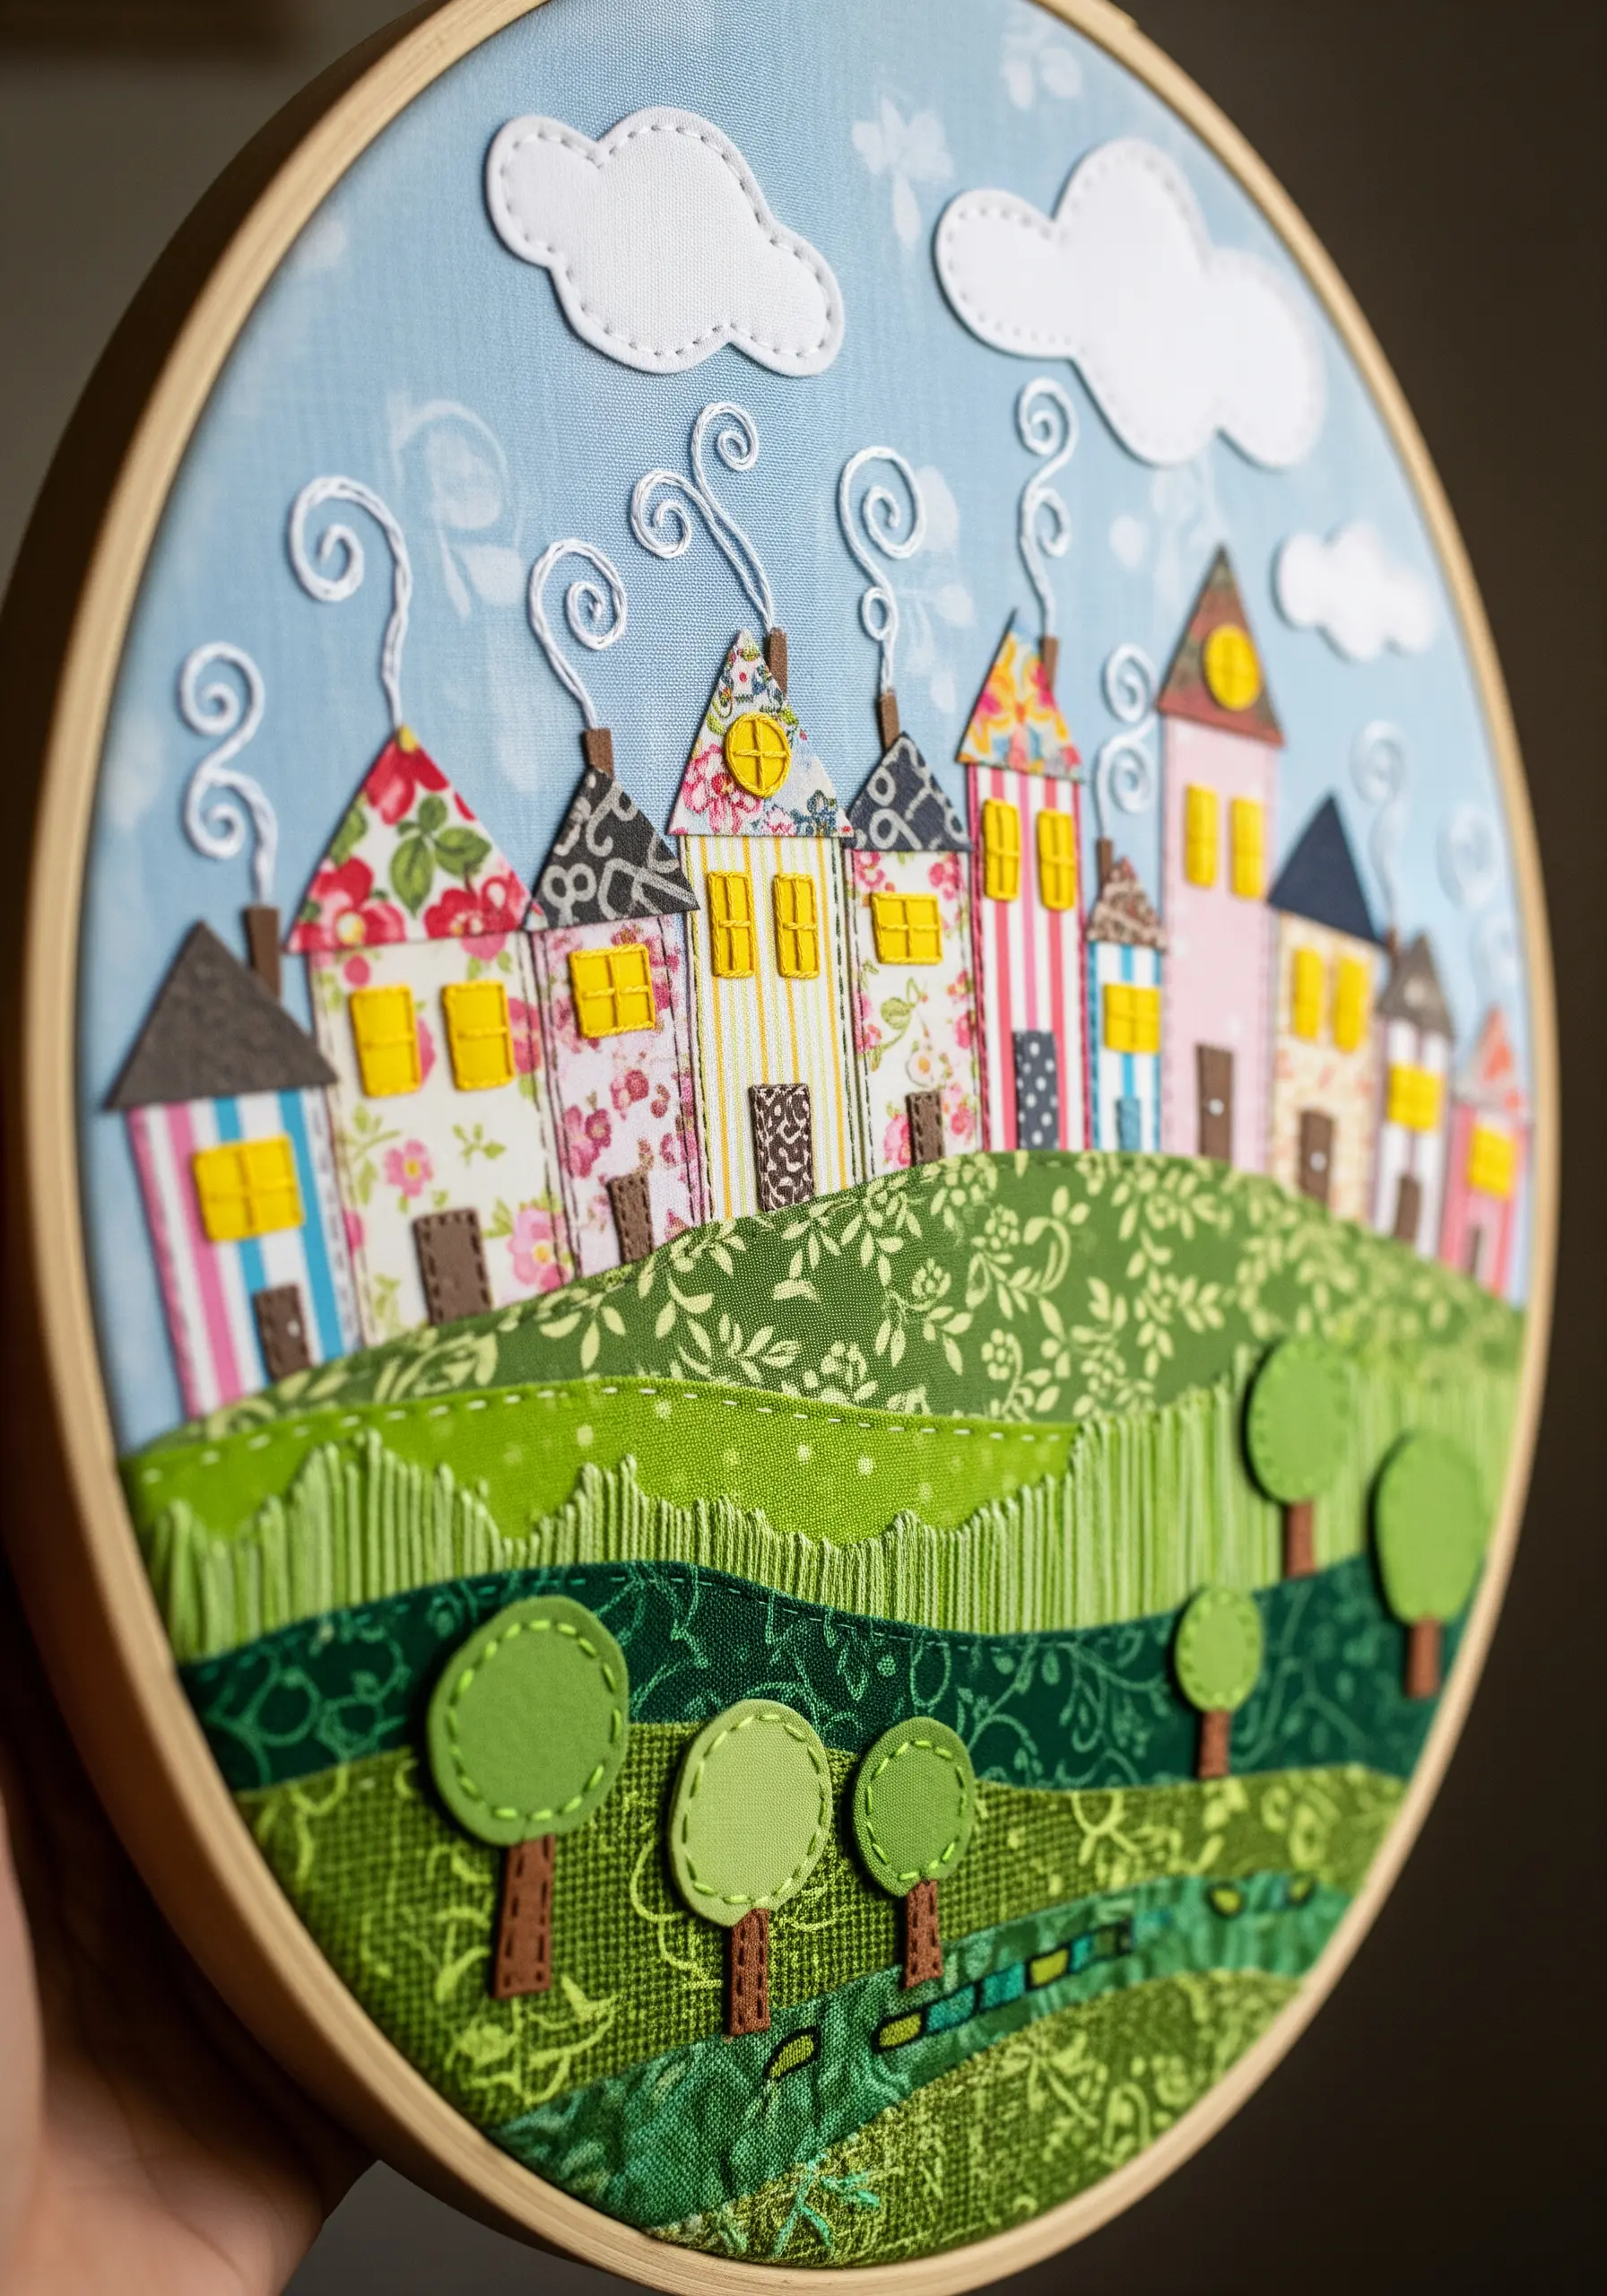
Create rolling hills and fields by layering different patterns and textures of fabric.
Cut or tear your fabric pieces to create soft, organic edges, then arrange them in a hoop to build your landscape.
Use a simple running stitch or decorative stitches to add details and secure the layers. Incorporate paper or felt cutouts for houses and clouds to add another layer of material difference.
This creates a whimsical, tactile scene with incredible depth, an excellent example of fabric collage embroidery layouts beginners can master in one weekend.
22. Recreate Feather Textures with Satin Stitch
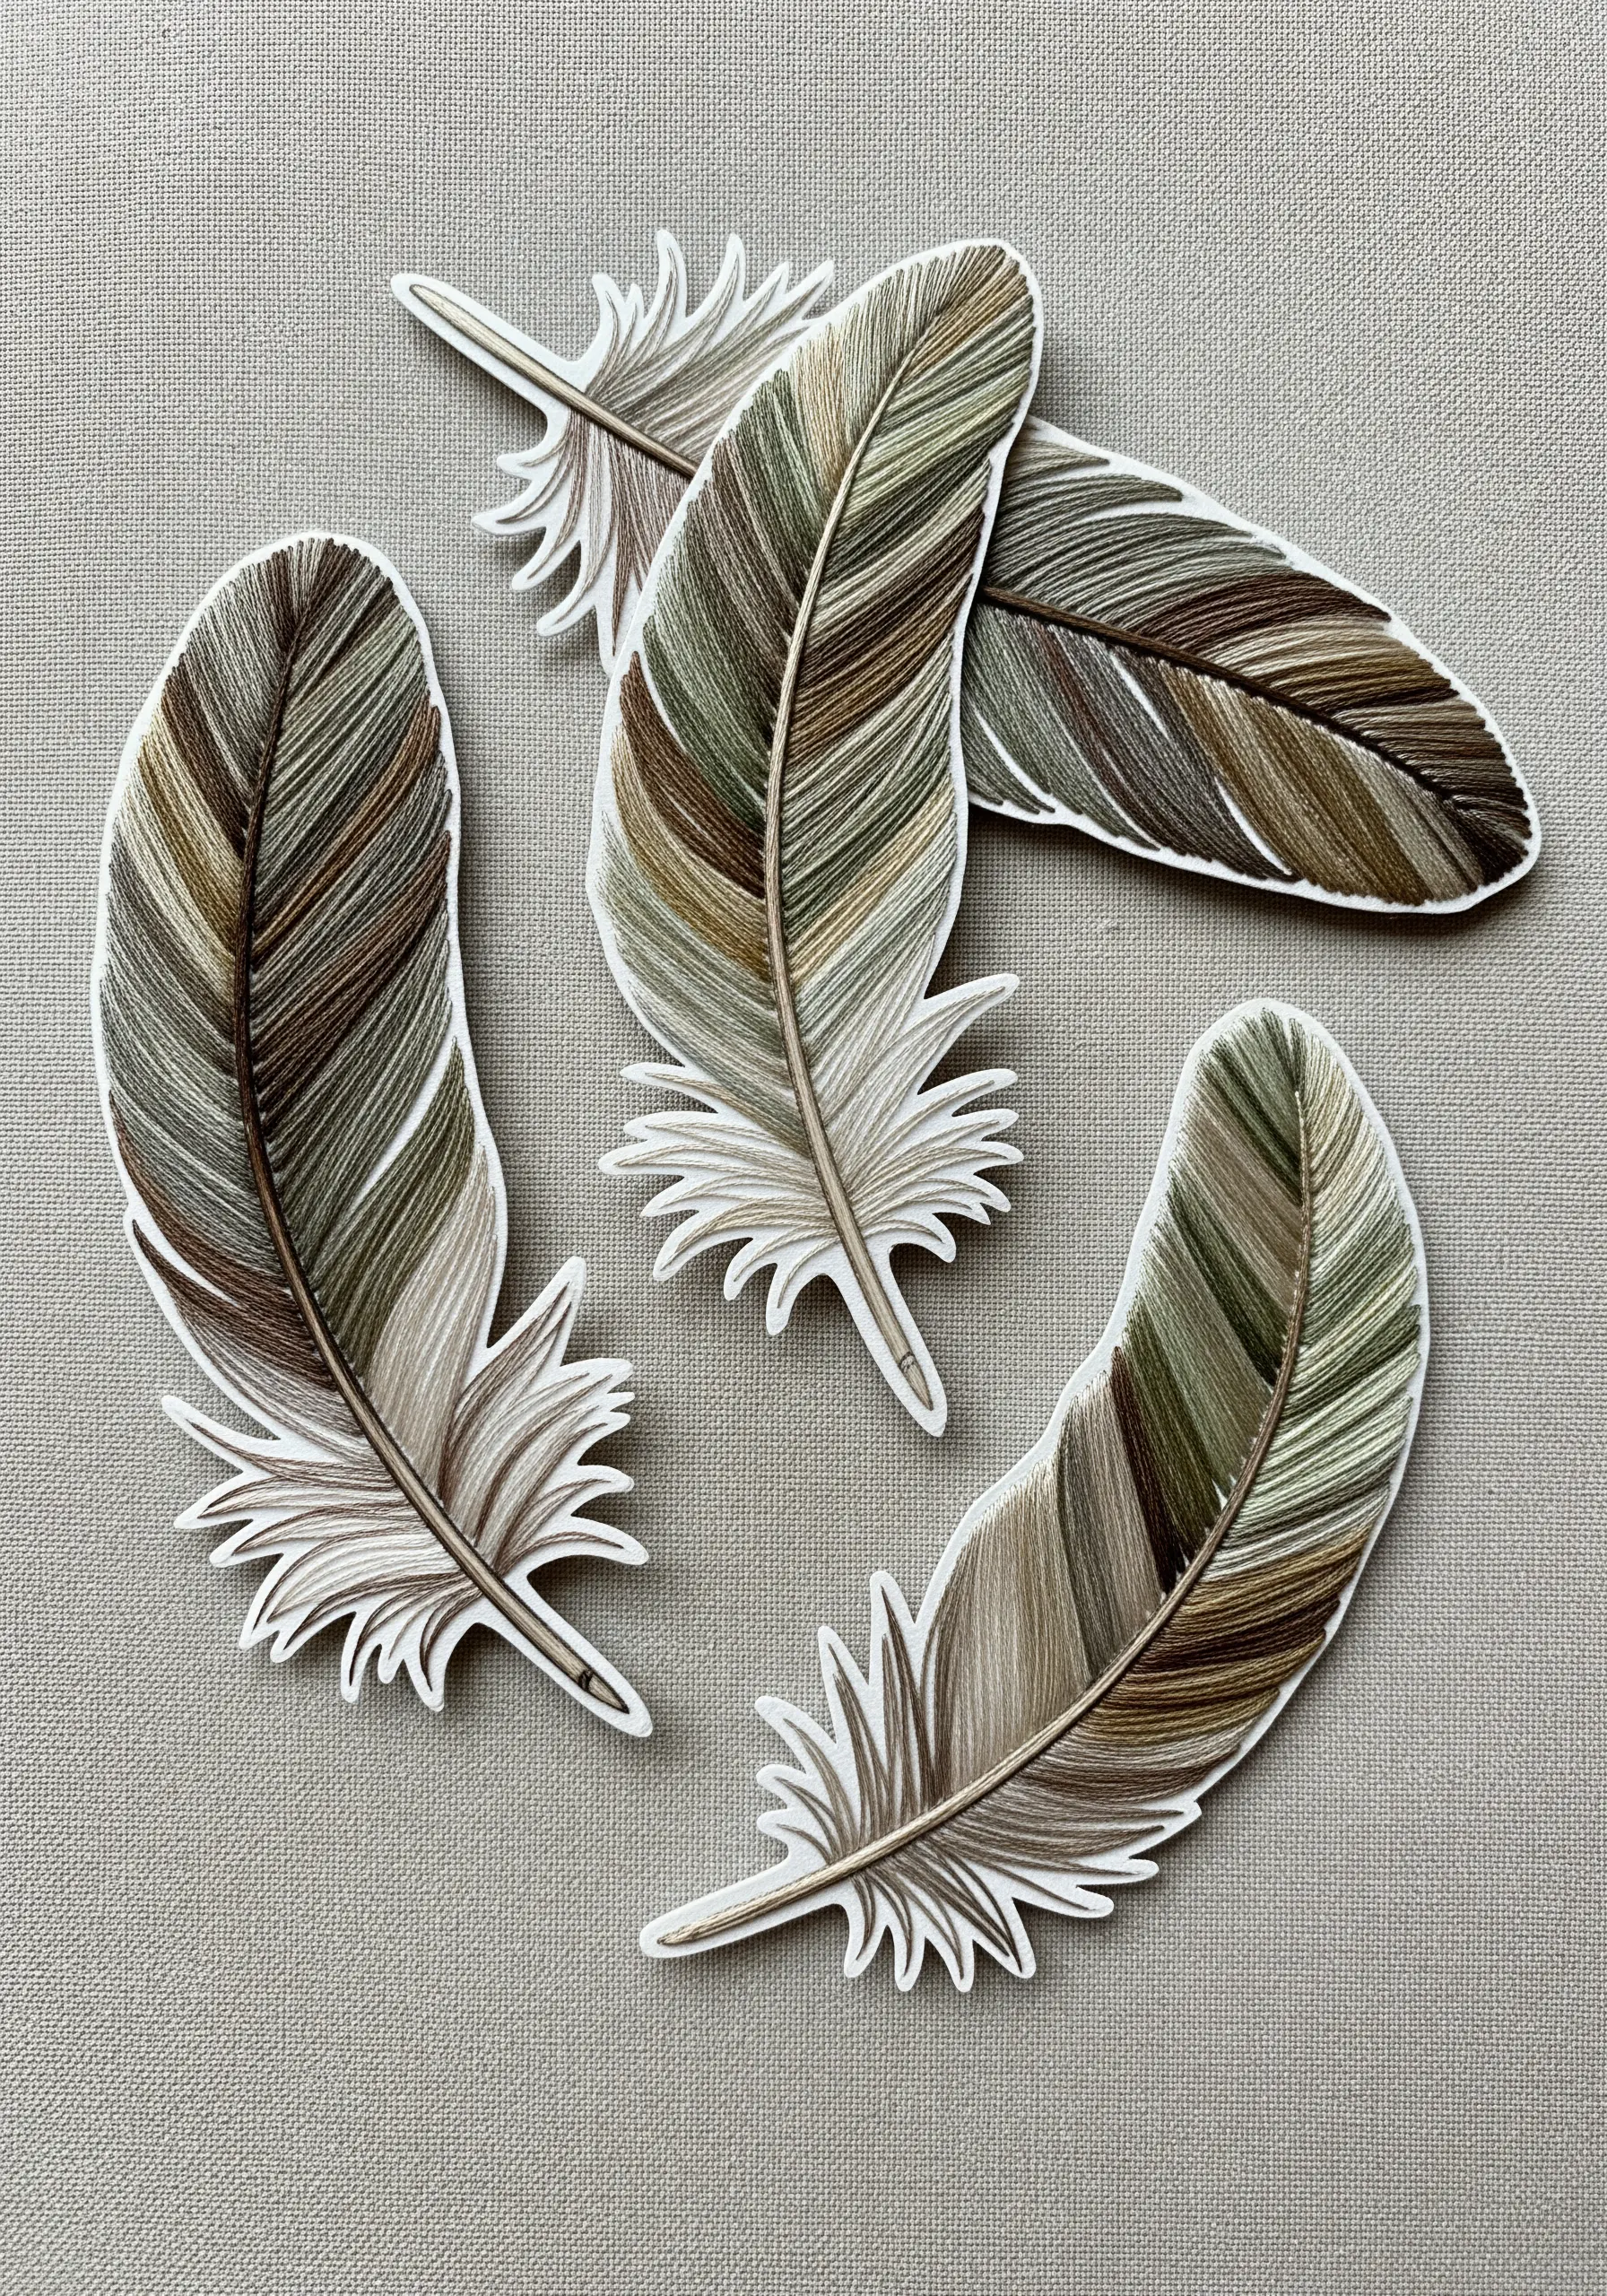
Capture the delicate variegation of a feather by using satin stitch on a paper cutout.
Draw fine parallel lines on your paper feather shape as a guide. Then, fill each narrow section with a different shade of thread, using satin stitch.
To create a soft, blended look, allow the stitches from adjacent color blocks to nestle closely together. This technique transforms a flat paper shape into a beautifully textured and realistic object.
It’s a wonderful way to study realistic feather embroidery techniques for birds that look almost alive.
23. Write with Thread for a Personal Touch
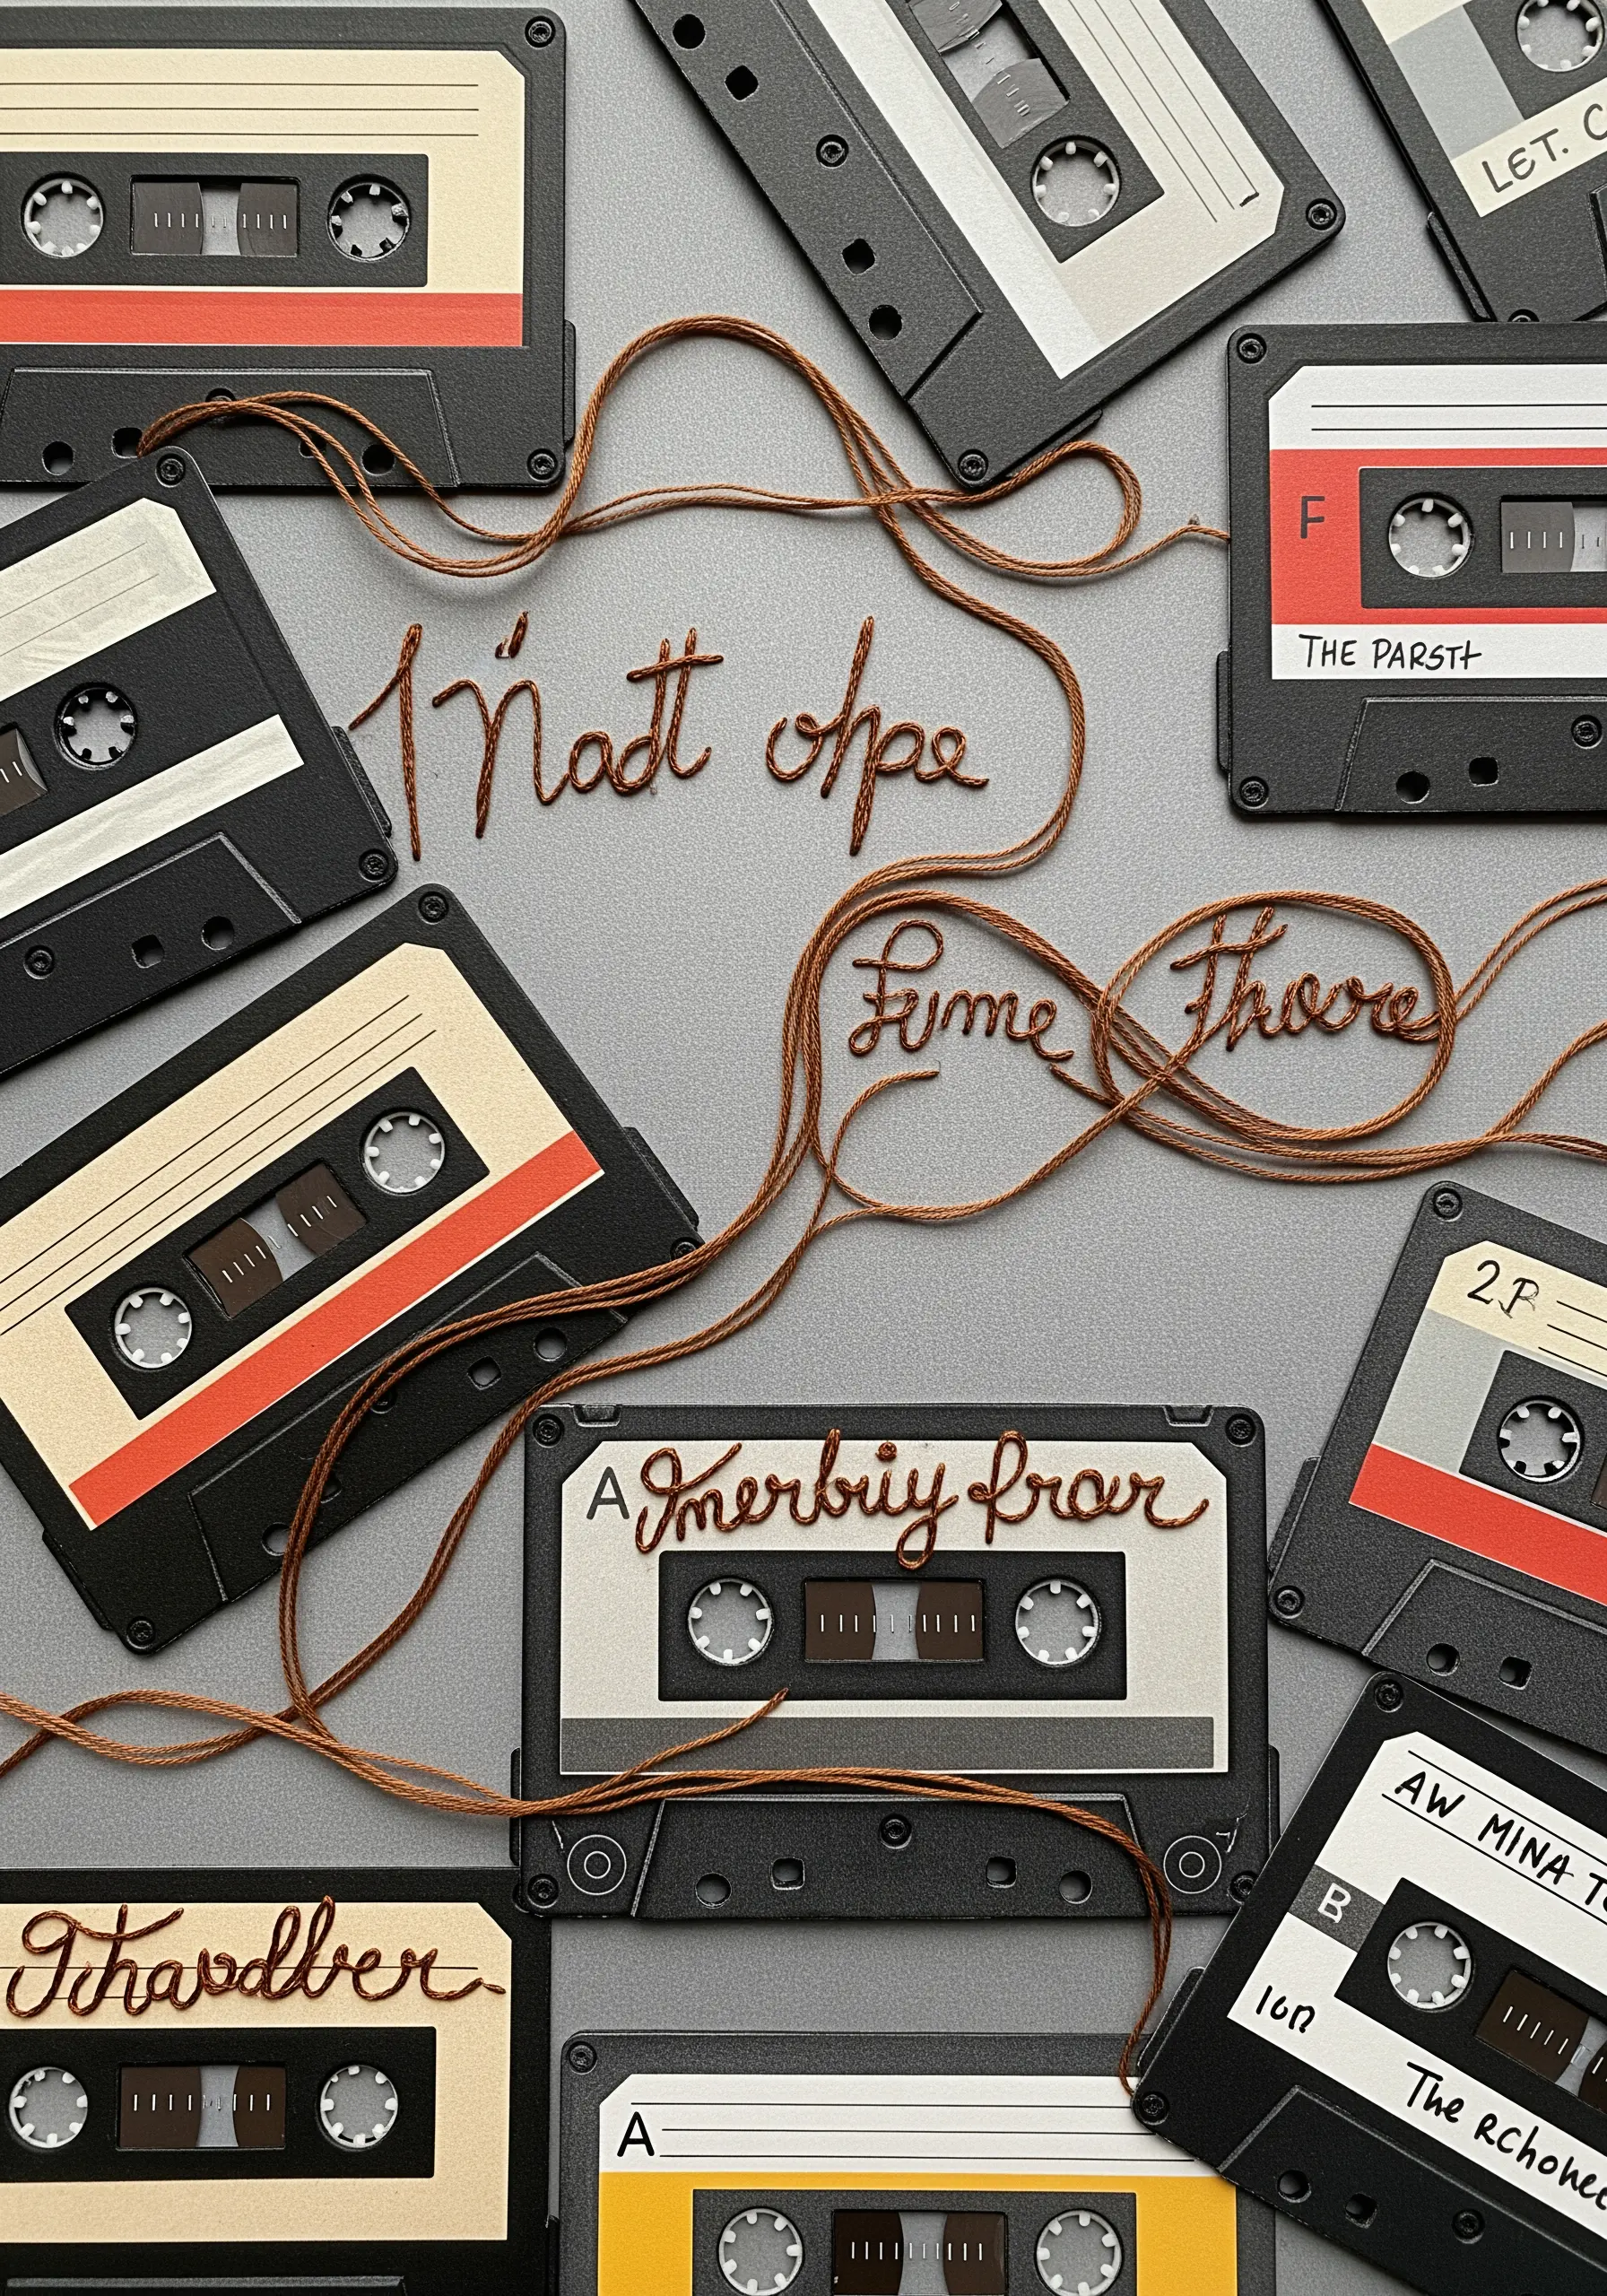
Turn your handwriting—or a favorite cursive font—into a stitched design element.
Lightly trace your words onto the paper background, then use a whipped backstitch or stem stitch to create a smooth, cord-like line.
Using a heavier-weight thread, like pearl cotton, will give your script more presence. This is a wonderfully personal way to add text to a collage, giving it a warmth and texture that ink cannot replicate.
It’s perfect for quick stitch inspirations to beautify your notebooks and journals or framed art.
24. Use Asterisk Stitches for Simple Texture
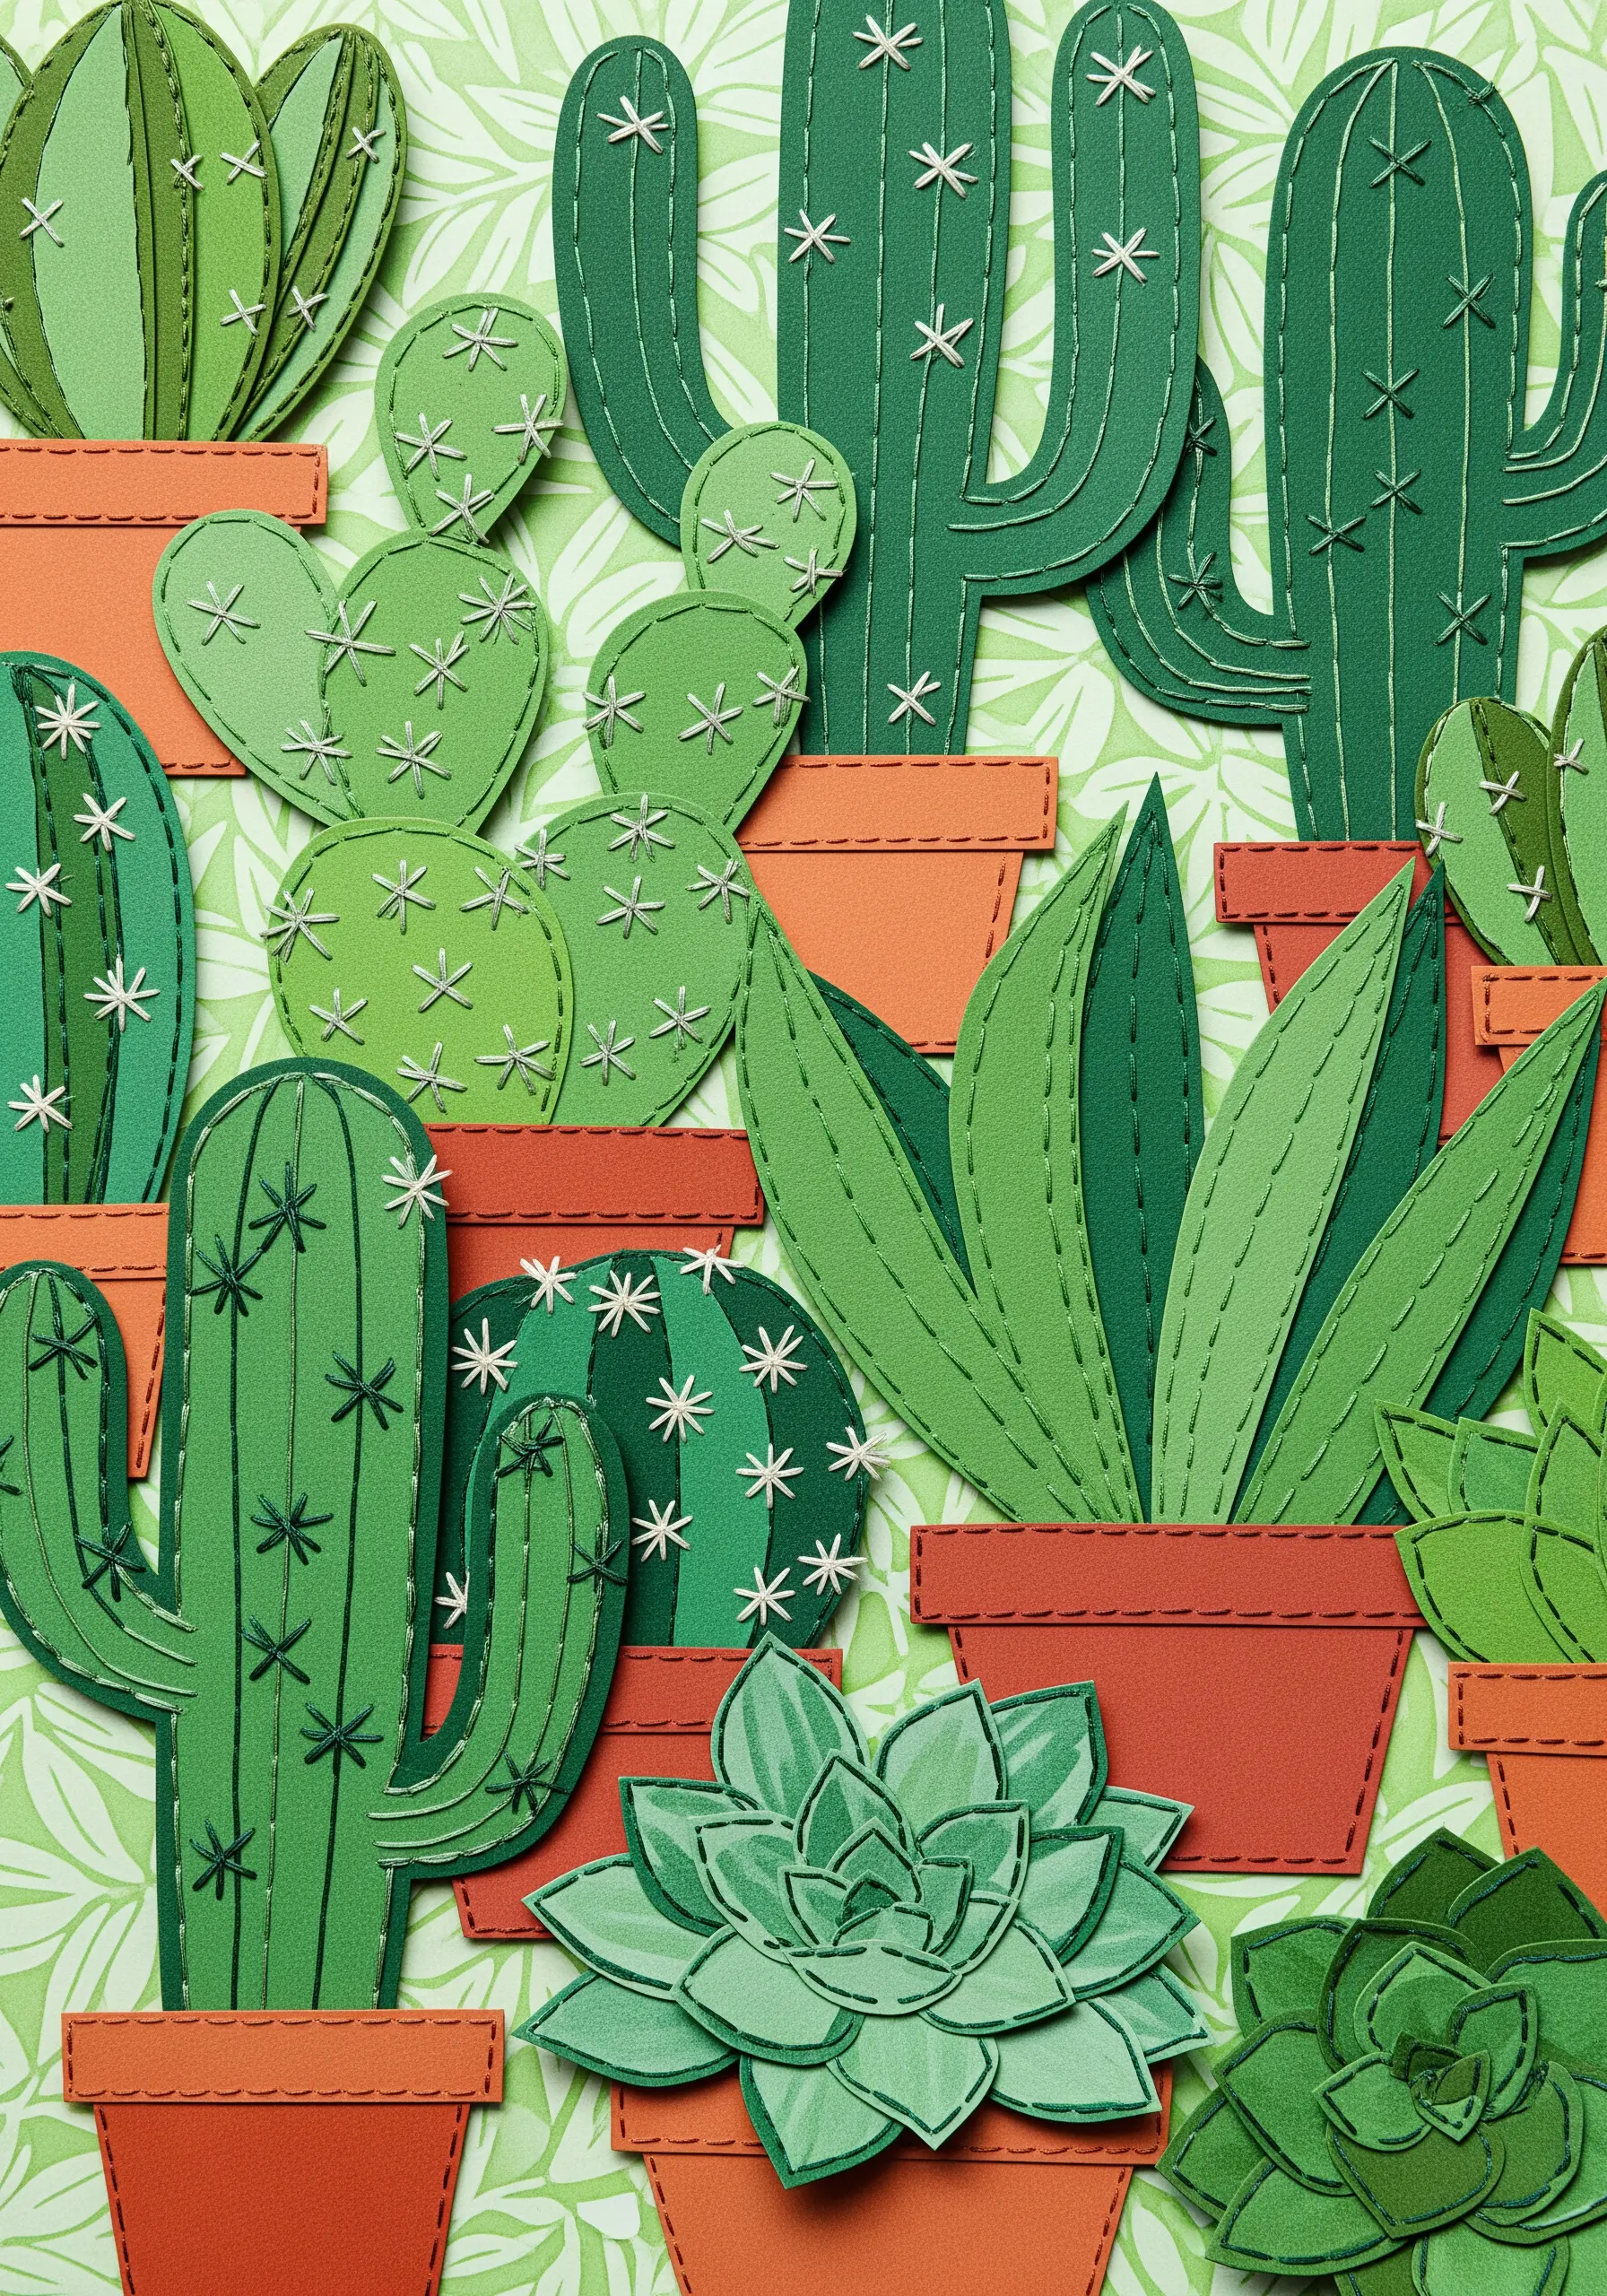
When you want to add a quick, decorative texture to paper shapes, the asterisk stitch is a perfect choice.
It’s essentially three small, intersecting straight stitches that form a star or sparkle shape. This stitch is ideal for adding detail to cacti or other botanicals without overwhelming the design.
It’s fast, easy, and creates a charming, stylized pattern. Vary the size and angle of your asterisks for a more organic, playful feel.
This is a great technique for minimal fruit & plant motifs that make summer clothing look handmade luxury.
25. Achieve Art Deco Glamour with Metallic Thread
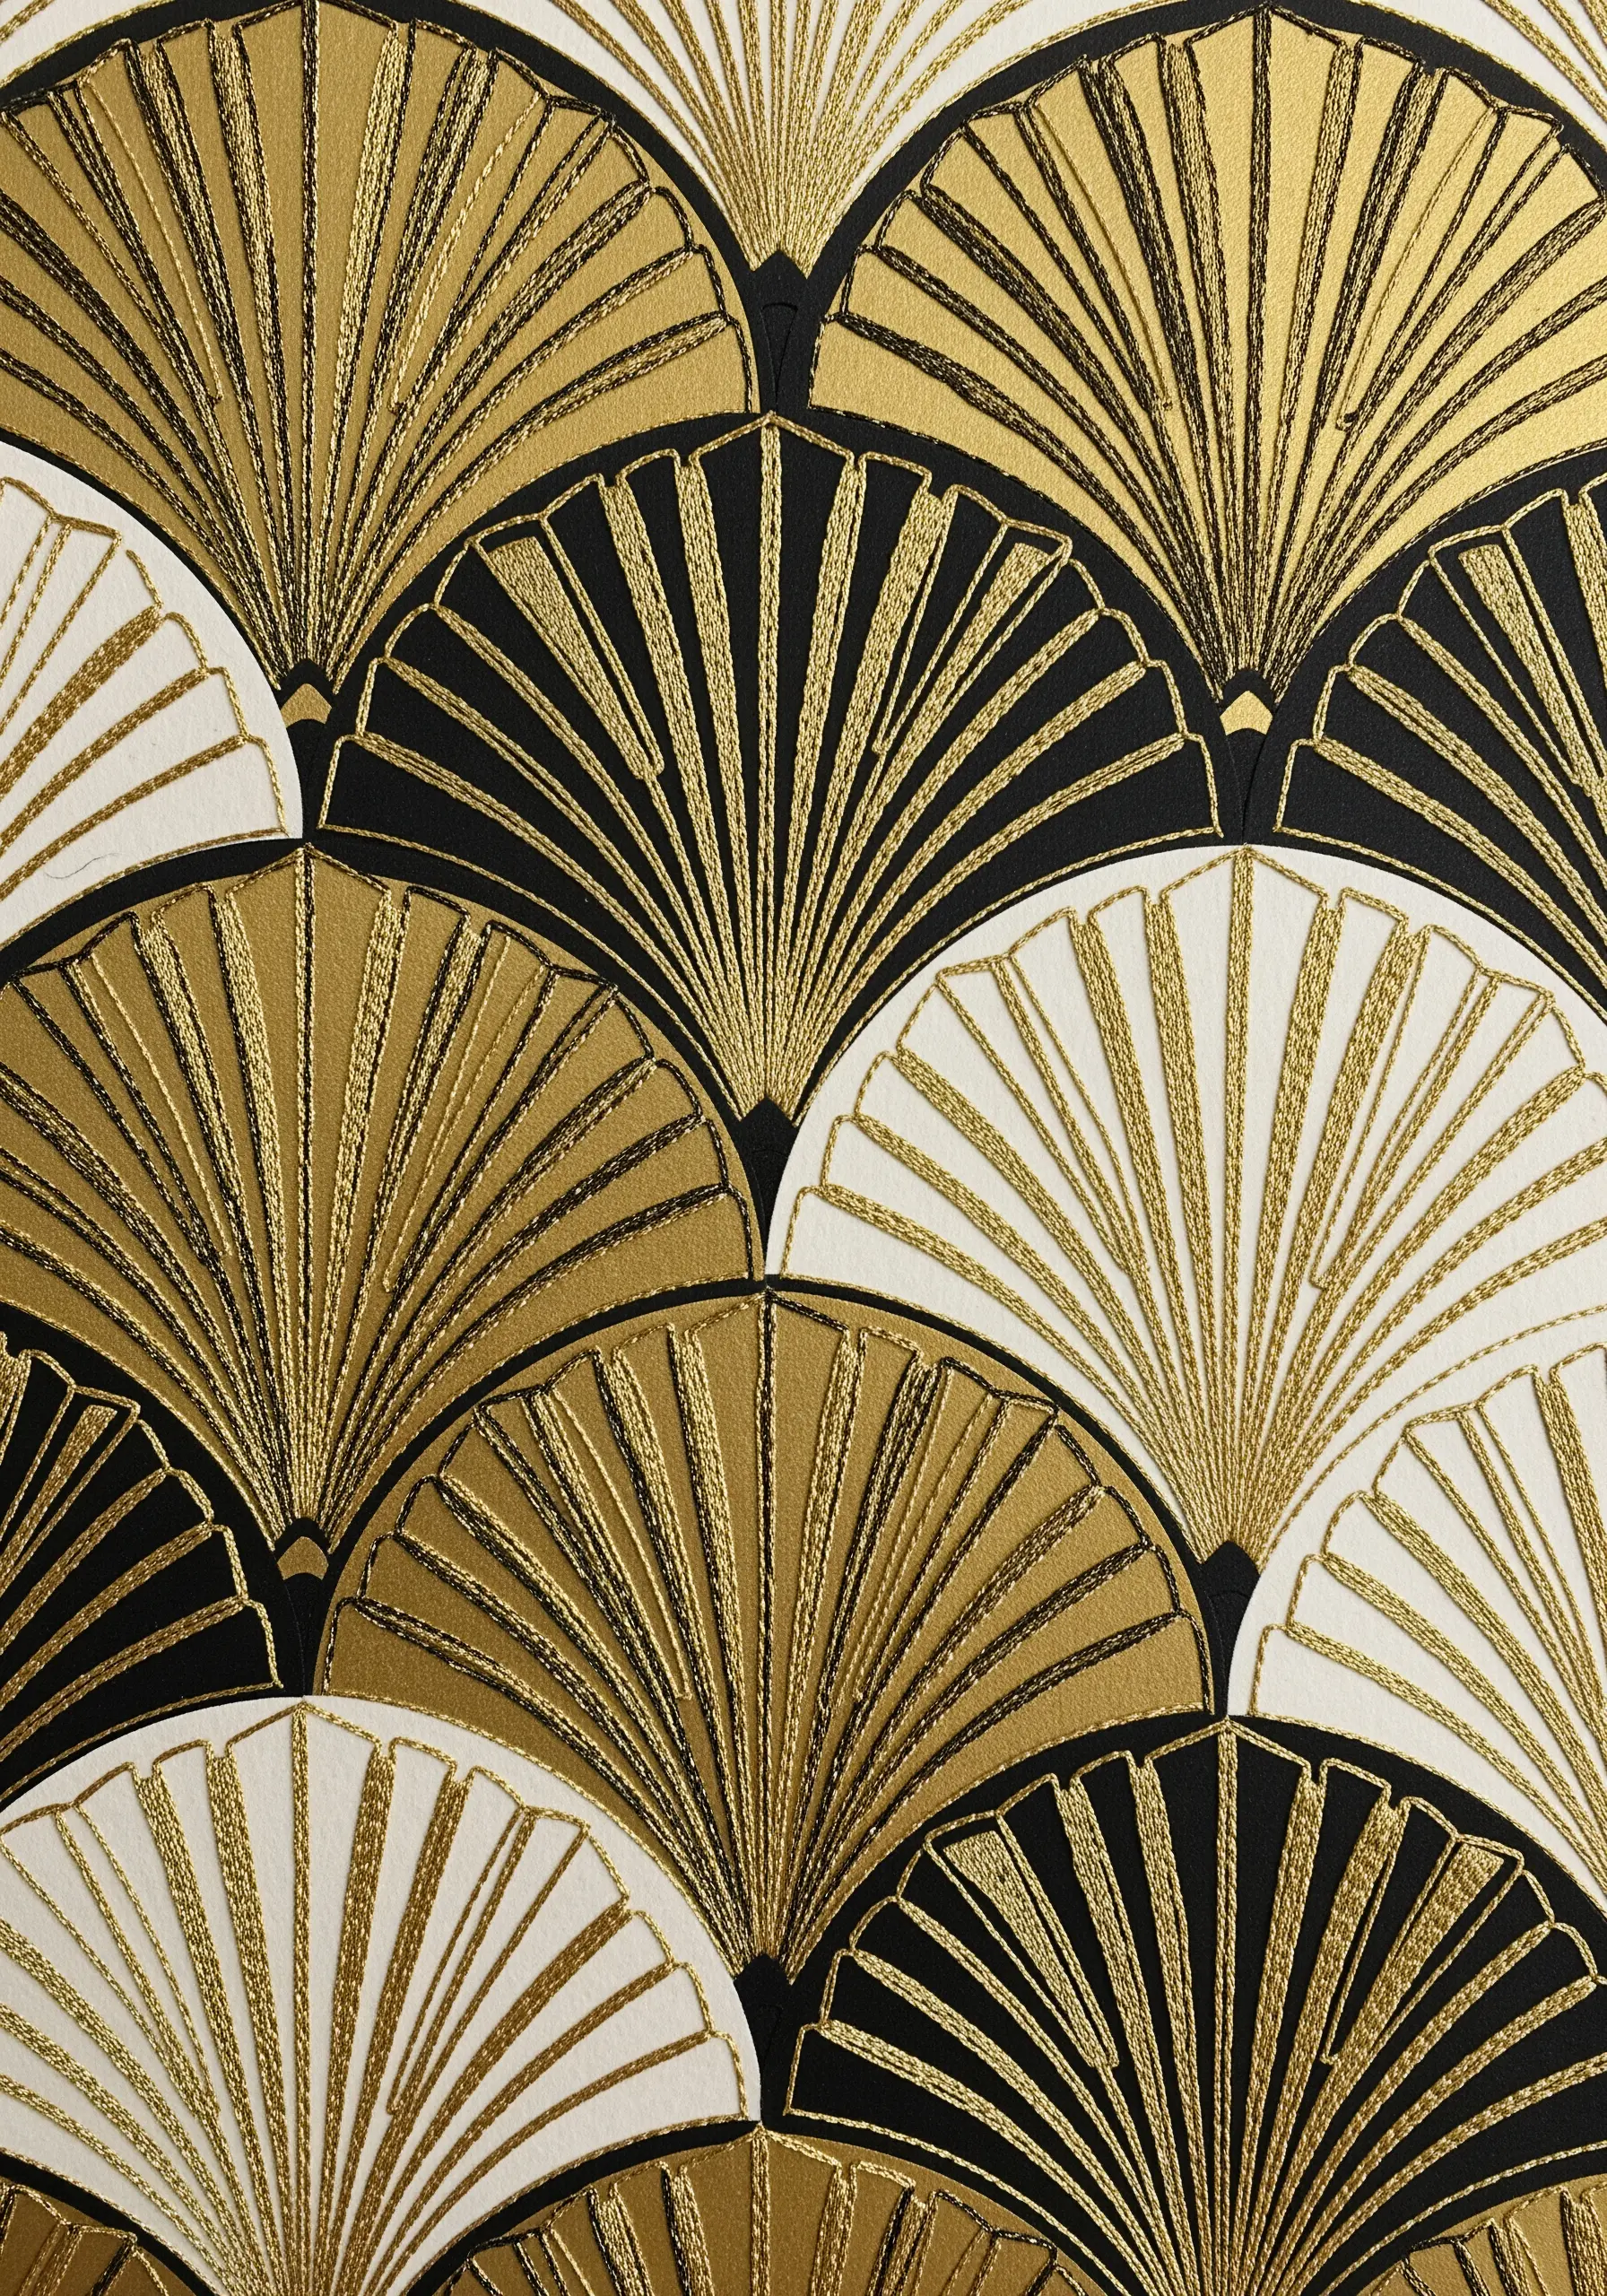
Capture the opulence of the Art Deco era by combining metallic threads with a bold, geometric paper collage.
Use a high-shine gold or silver thread and fill your paper shapes with perfectly aligned satin stitches.
To keep the stitches flat and reflective, maintain even tension and ensure they lay parallel to one another. The interplay of the metallic sheen against the matte black and cream paper creates a stunning, high-contrast effect that feels both vintage and modern.
These gold thread luxury wall art projects that give budget homes a premium look are perfect for this style.
26. Define Anatomical Forms with Directional Stitching
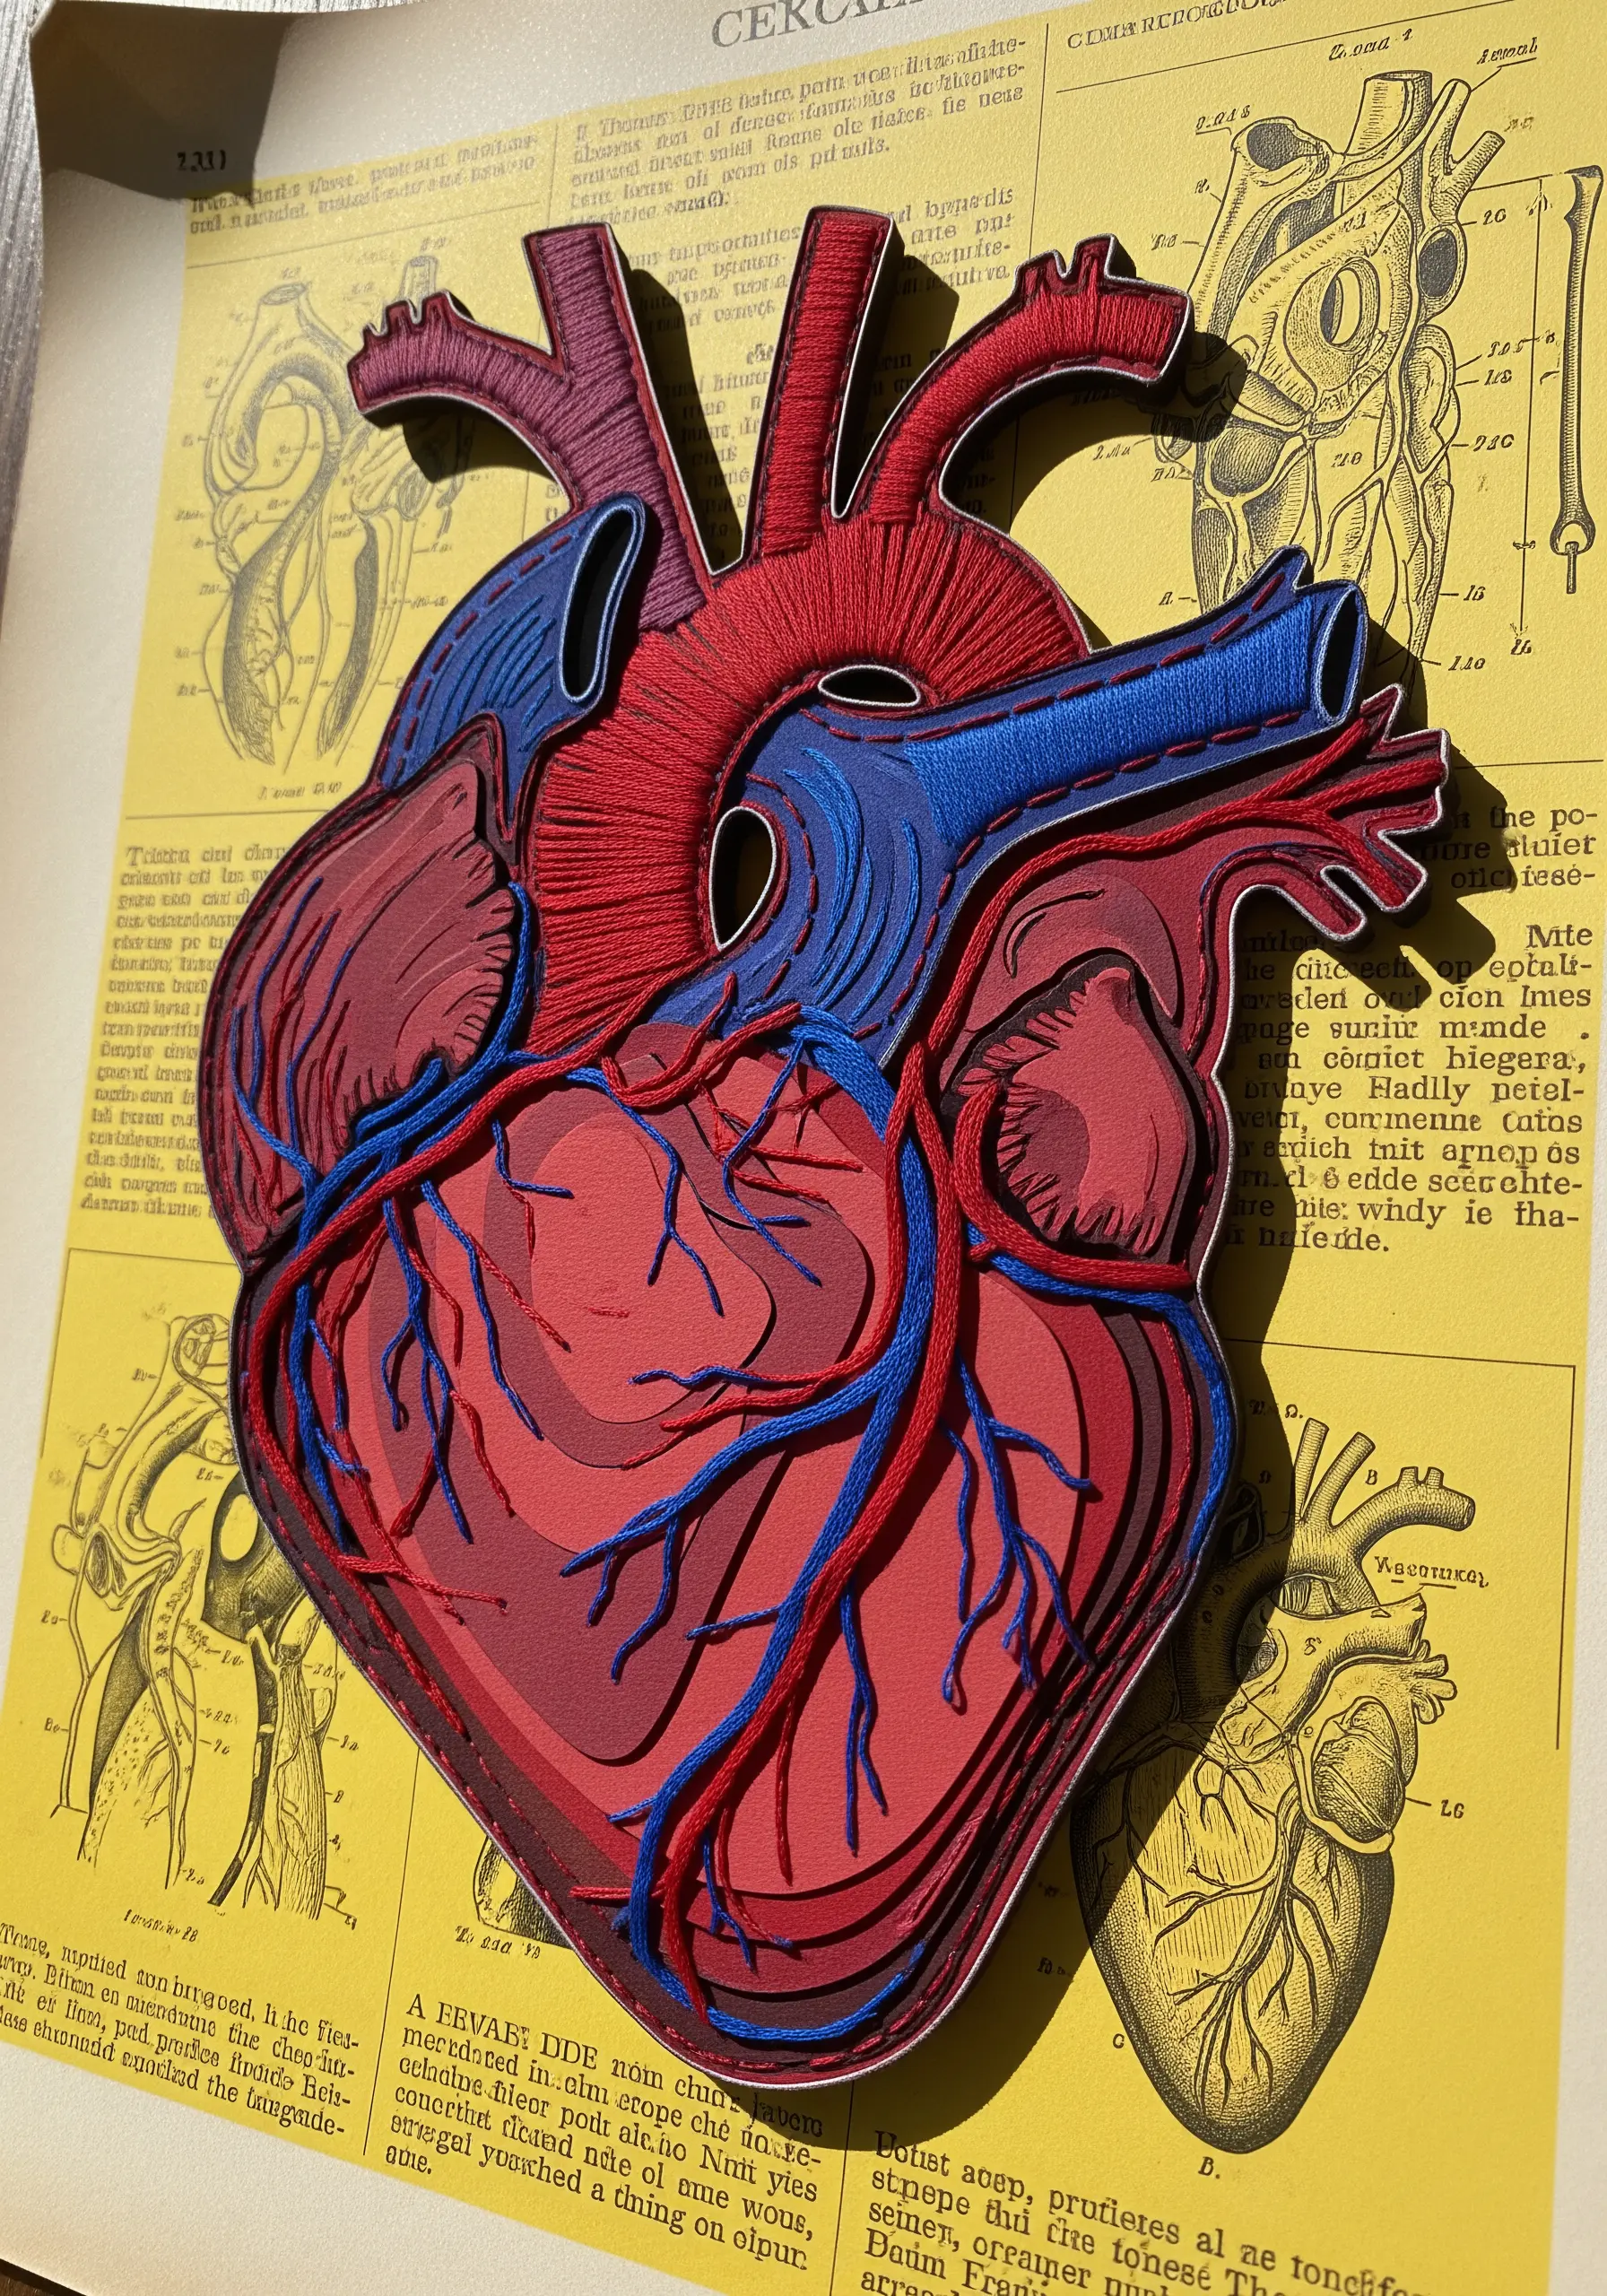
When embroidering over an anatomical illustration, use the direction of your stitches to define form and flow.
For arteries and veins, your satin stitches should follow the natural curve of the vessel. For larger muscle masses, like the heart’s chambers, angle your stitches to suggest the organ’s three-dimensional shape.
This thoughtful application of stitch direction turns a flat collage into a dynamic, sculptural piece, guiding the eye and enhancing the anatomical realism.
27. Create Water Ripples with Concentric Stitches
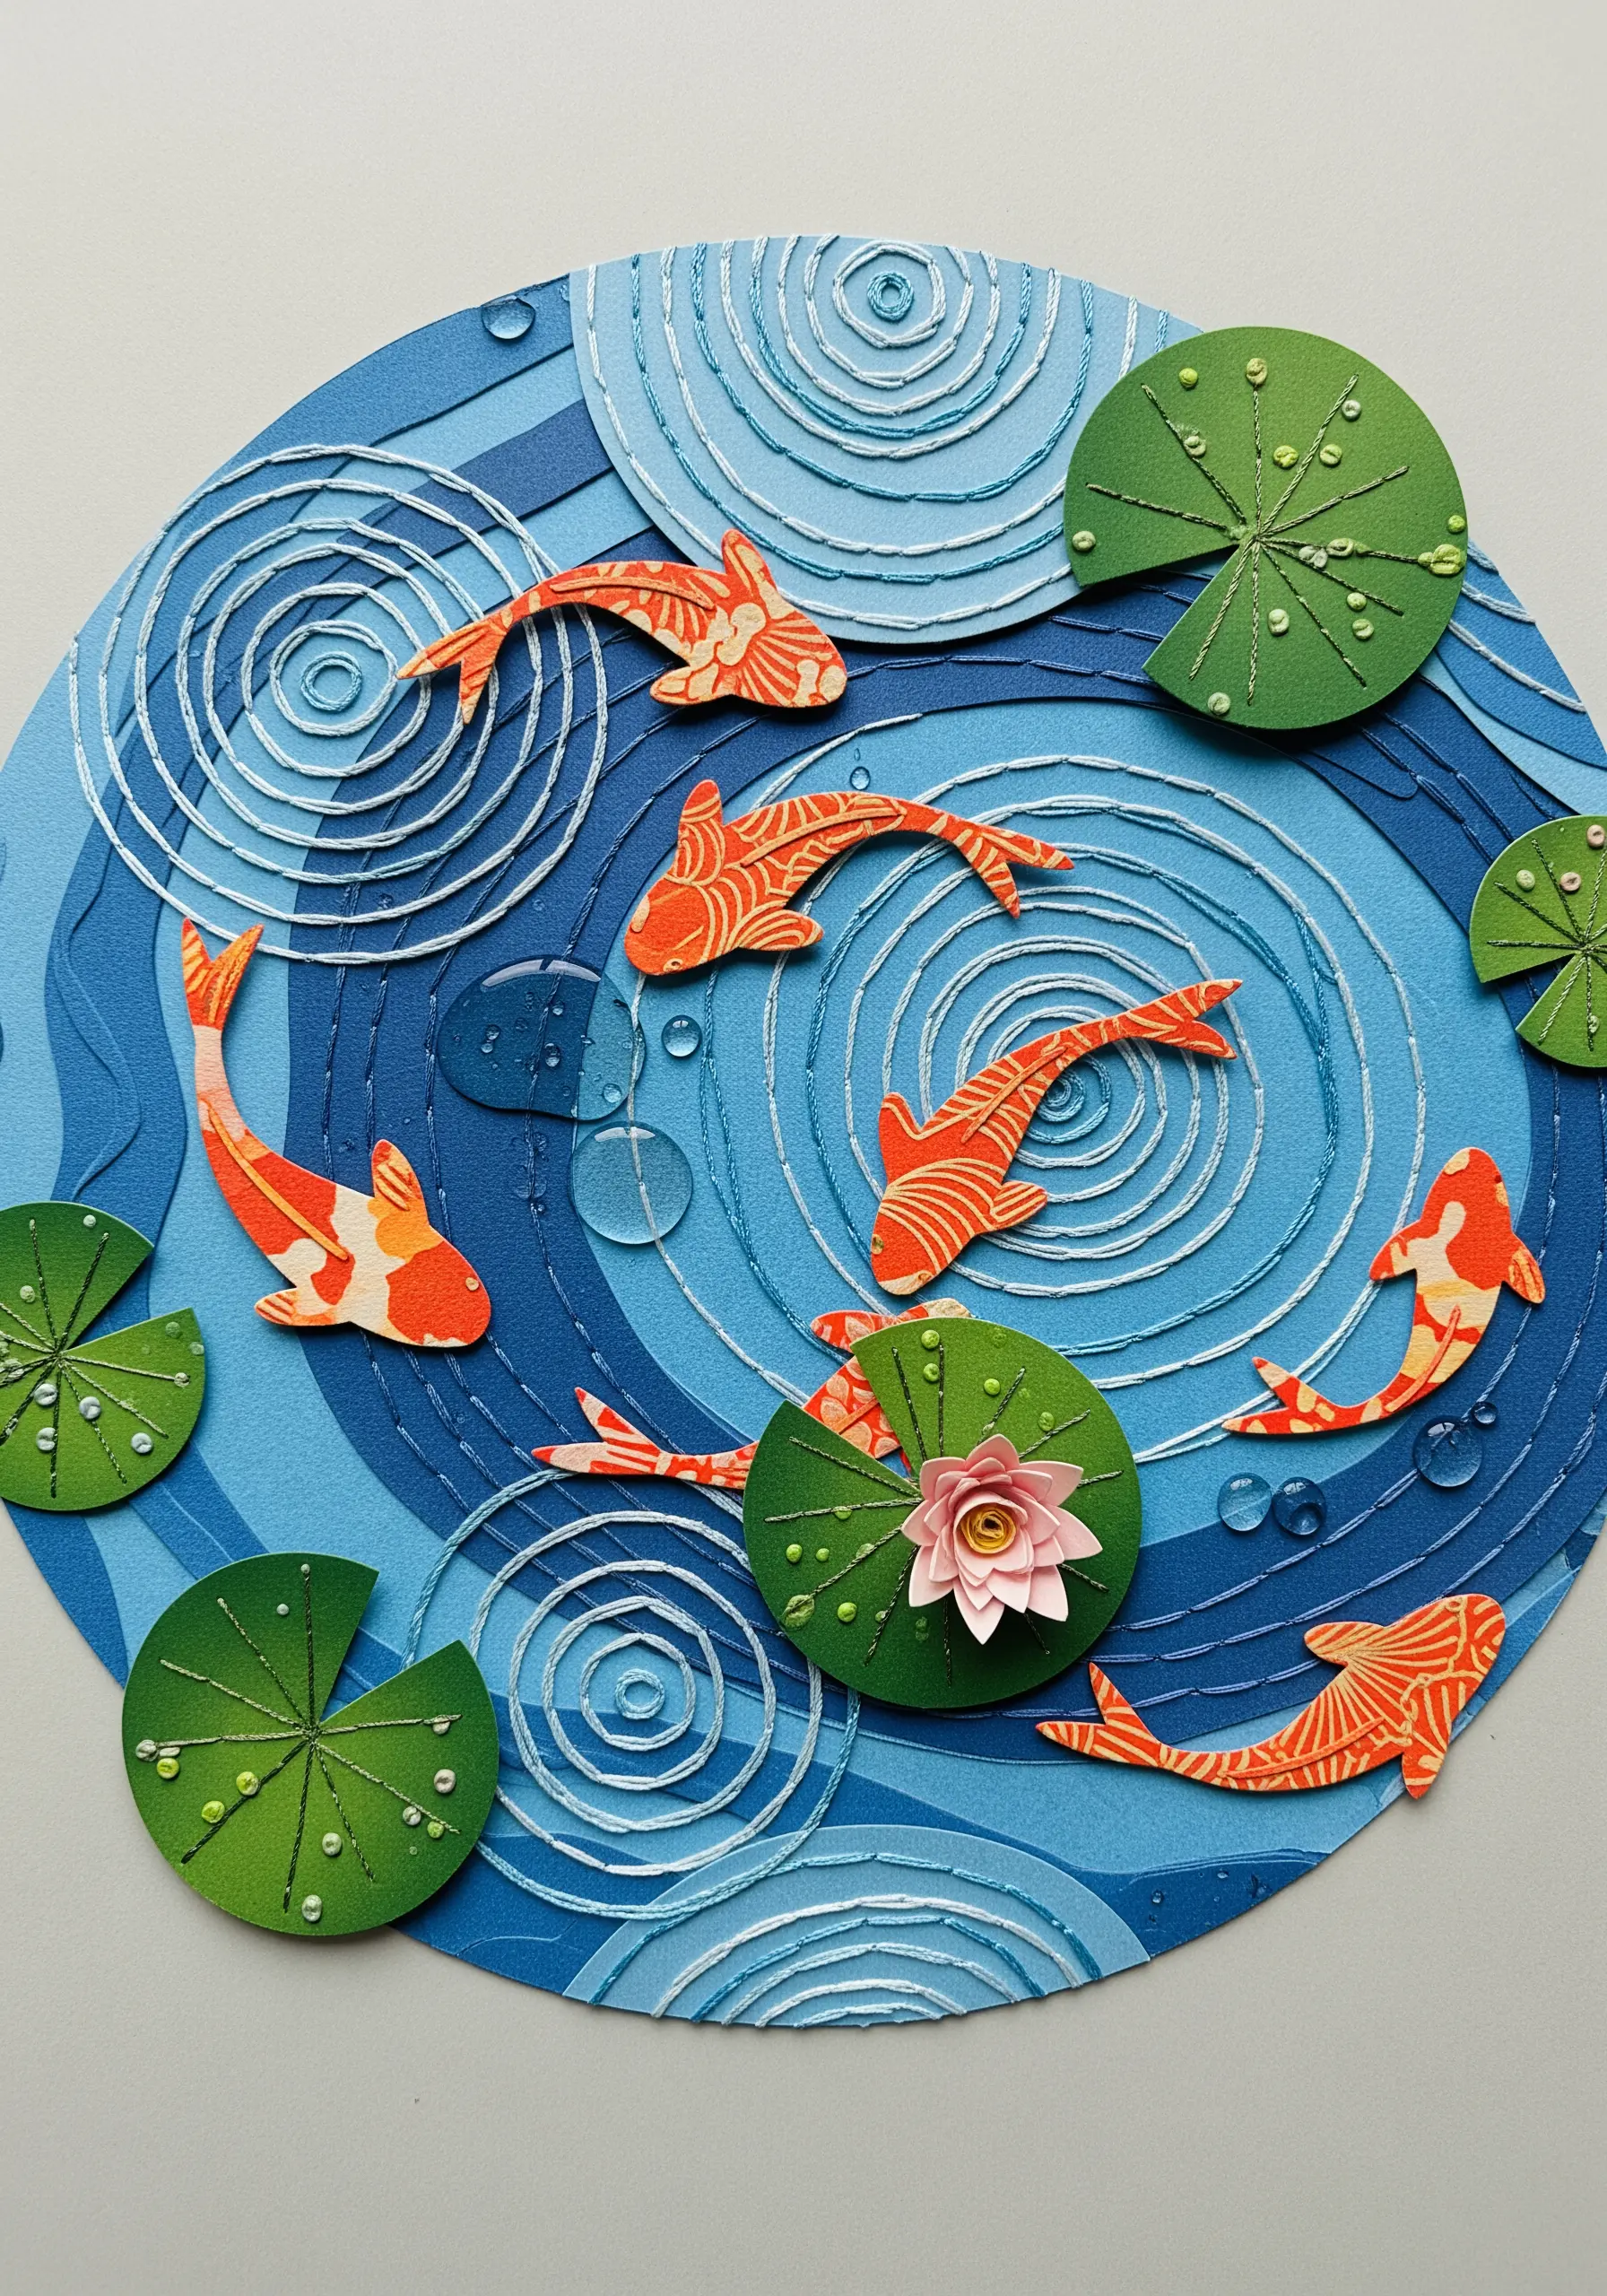
Suggest movement in water by stitching concentric circles with a simple backstitch or running stitch.
Use a white or silver thread on a blue paper background to mimic the way light catches on ripples.
Vary the size and placement of your circles to create a sense of random, natural motion. This simple technique is incredibly effective at transforming a static surface into a dynamic, living scene.
This is one of the most serene whale & dolphin embroidery patterns that bring calm coastal serene aesthetic to your work.
28. The Charm of the Utilitarian Cross Stitch
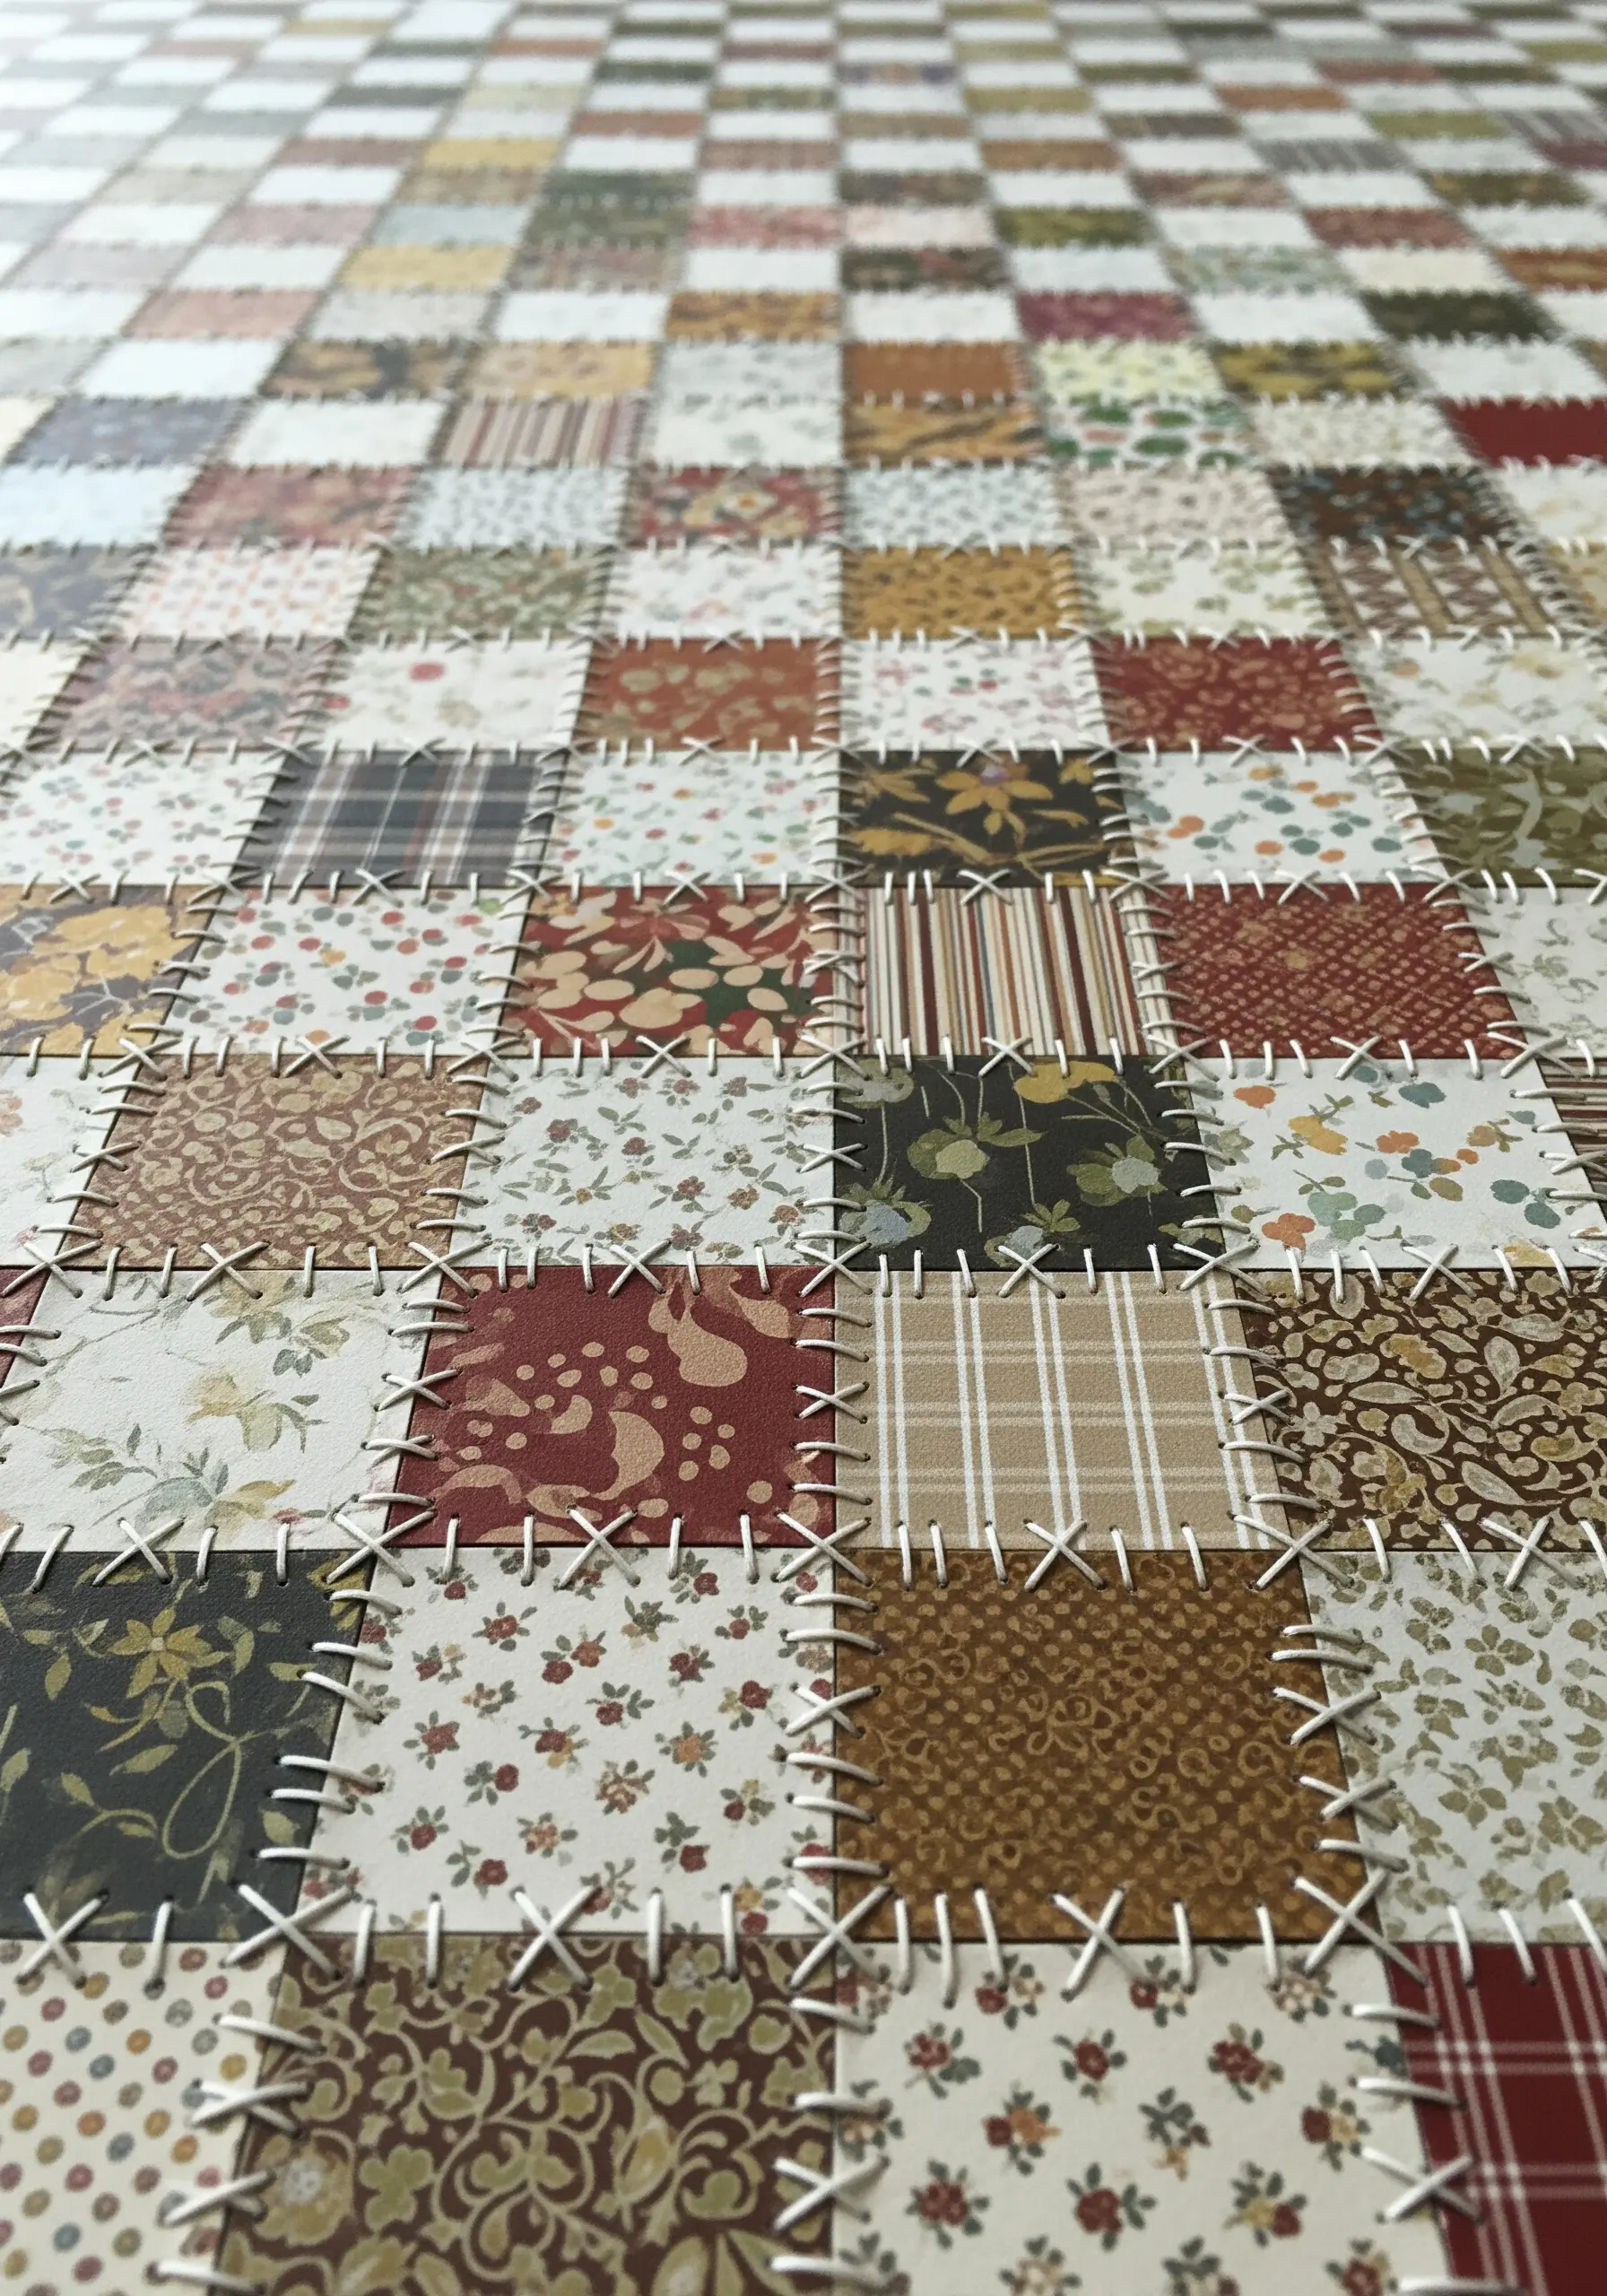
Embrace a rustic, homespun aesthetic by joining paper quilt squares with a bold, simple cross stitch.
Use a thick thread, like a full six strands of embroidery floss or even pearl cotton, to make the stitches a prominent design feature.
The visible, slightly imperfect nature of hand stitching is what gives this technique its charm. It speaks to the beauty of handmade objects and adds a layer of warmth to the precise geometry of the patchwork.
29. Add Organic Texture with Turkey Work
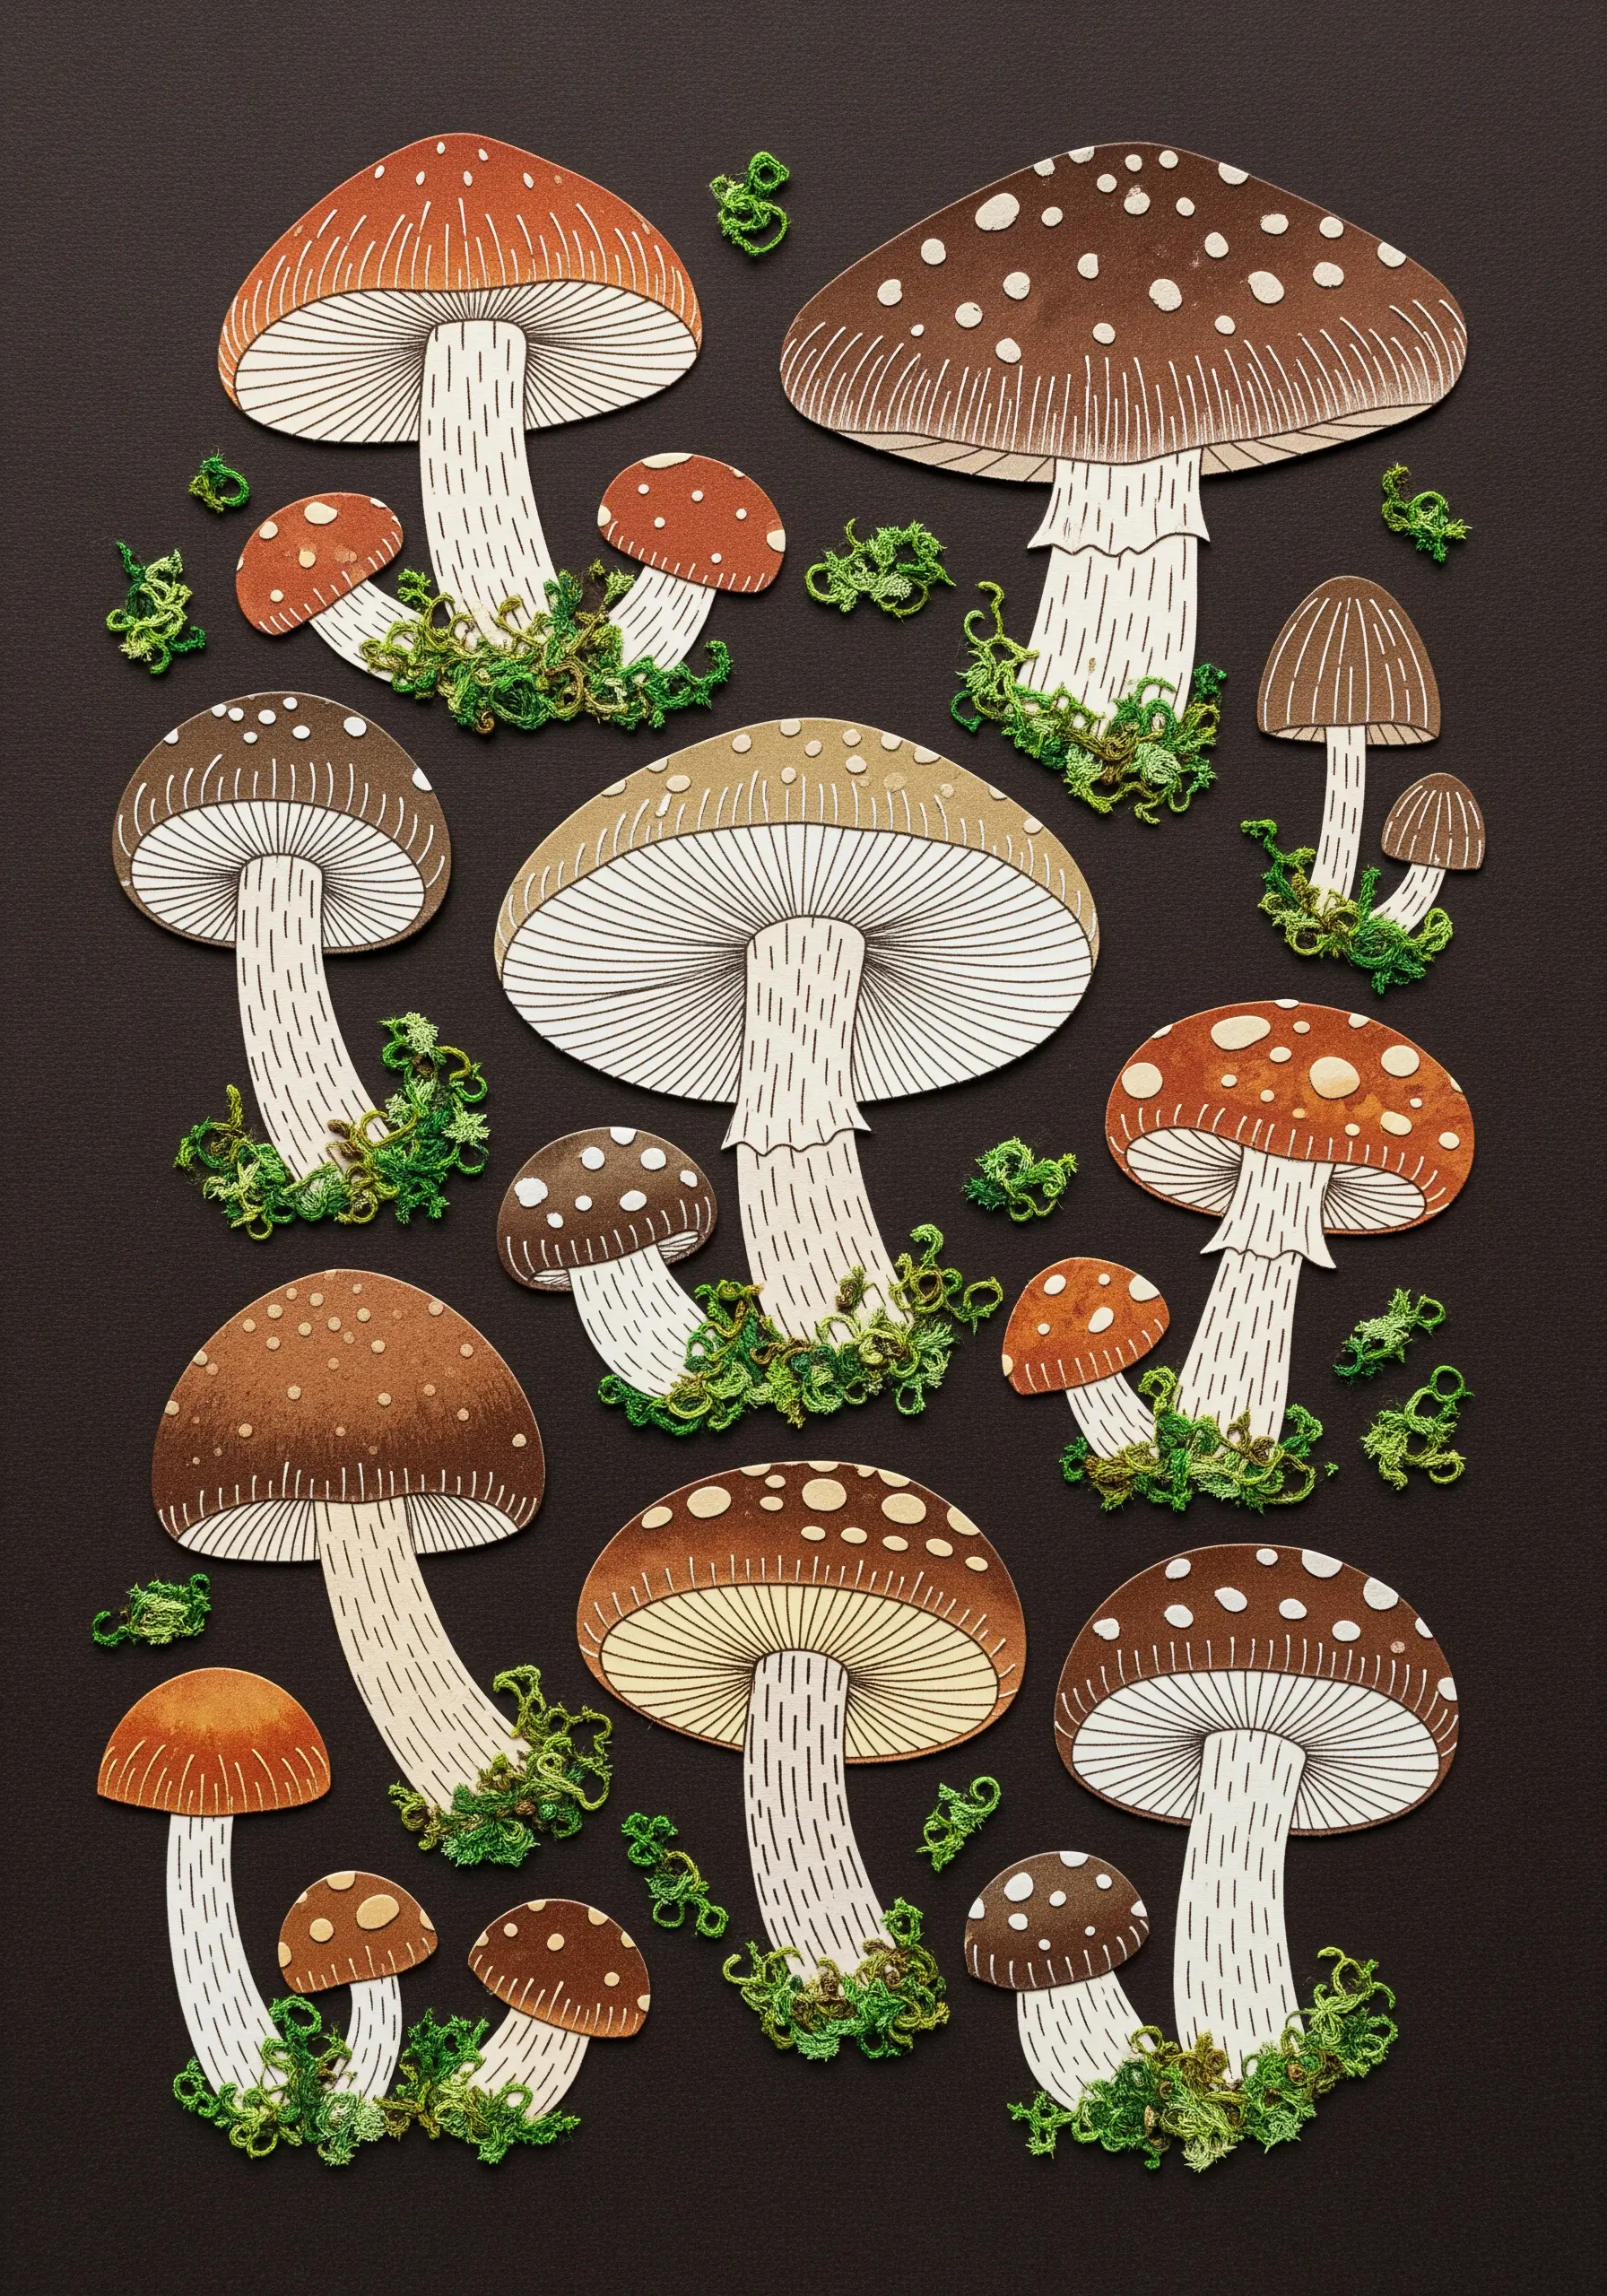
Create a realistic mossy texture at the base of your paper illustrations using the turkey work stitch.
This stitch creates loops that can be left as is or snipped to create a plush, velvety pile. Use variegated green and brown threads to mimic the complex colors found in nature.
Applying this highly textural stitch to the flat paper collage creates a wonderful sensory contrast and makes your artwork feel like a small piece of the forest floor.
You can find more ideas in our guide to moss & fern embroidery textures perfect for earth-tone home decor.
30. Construct a 3D Nest from Paper and Twigs
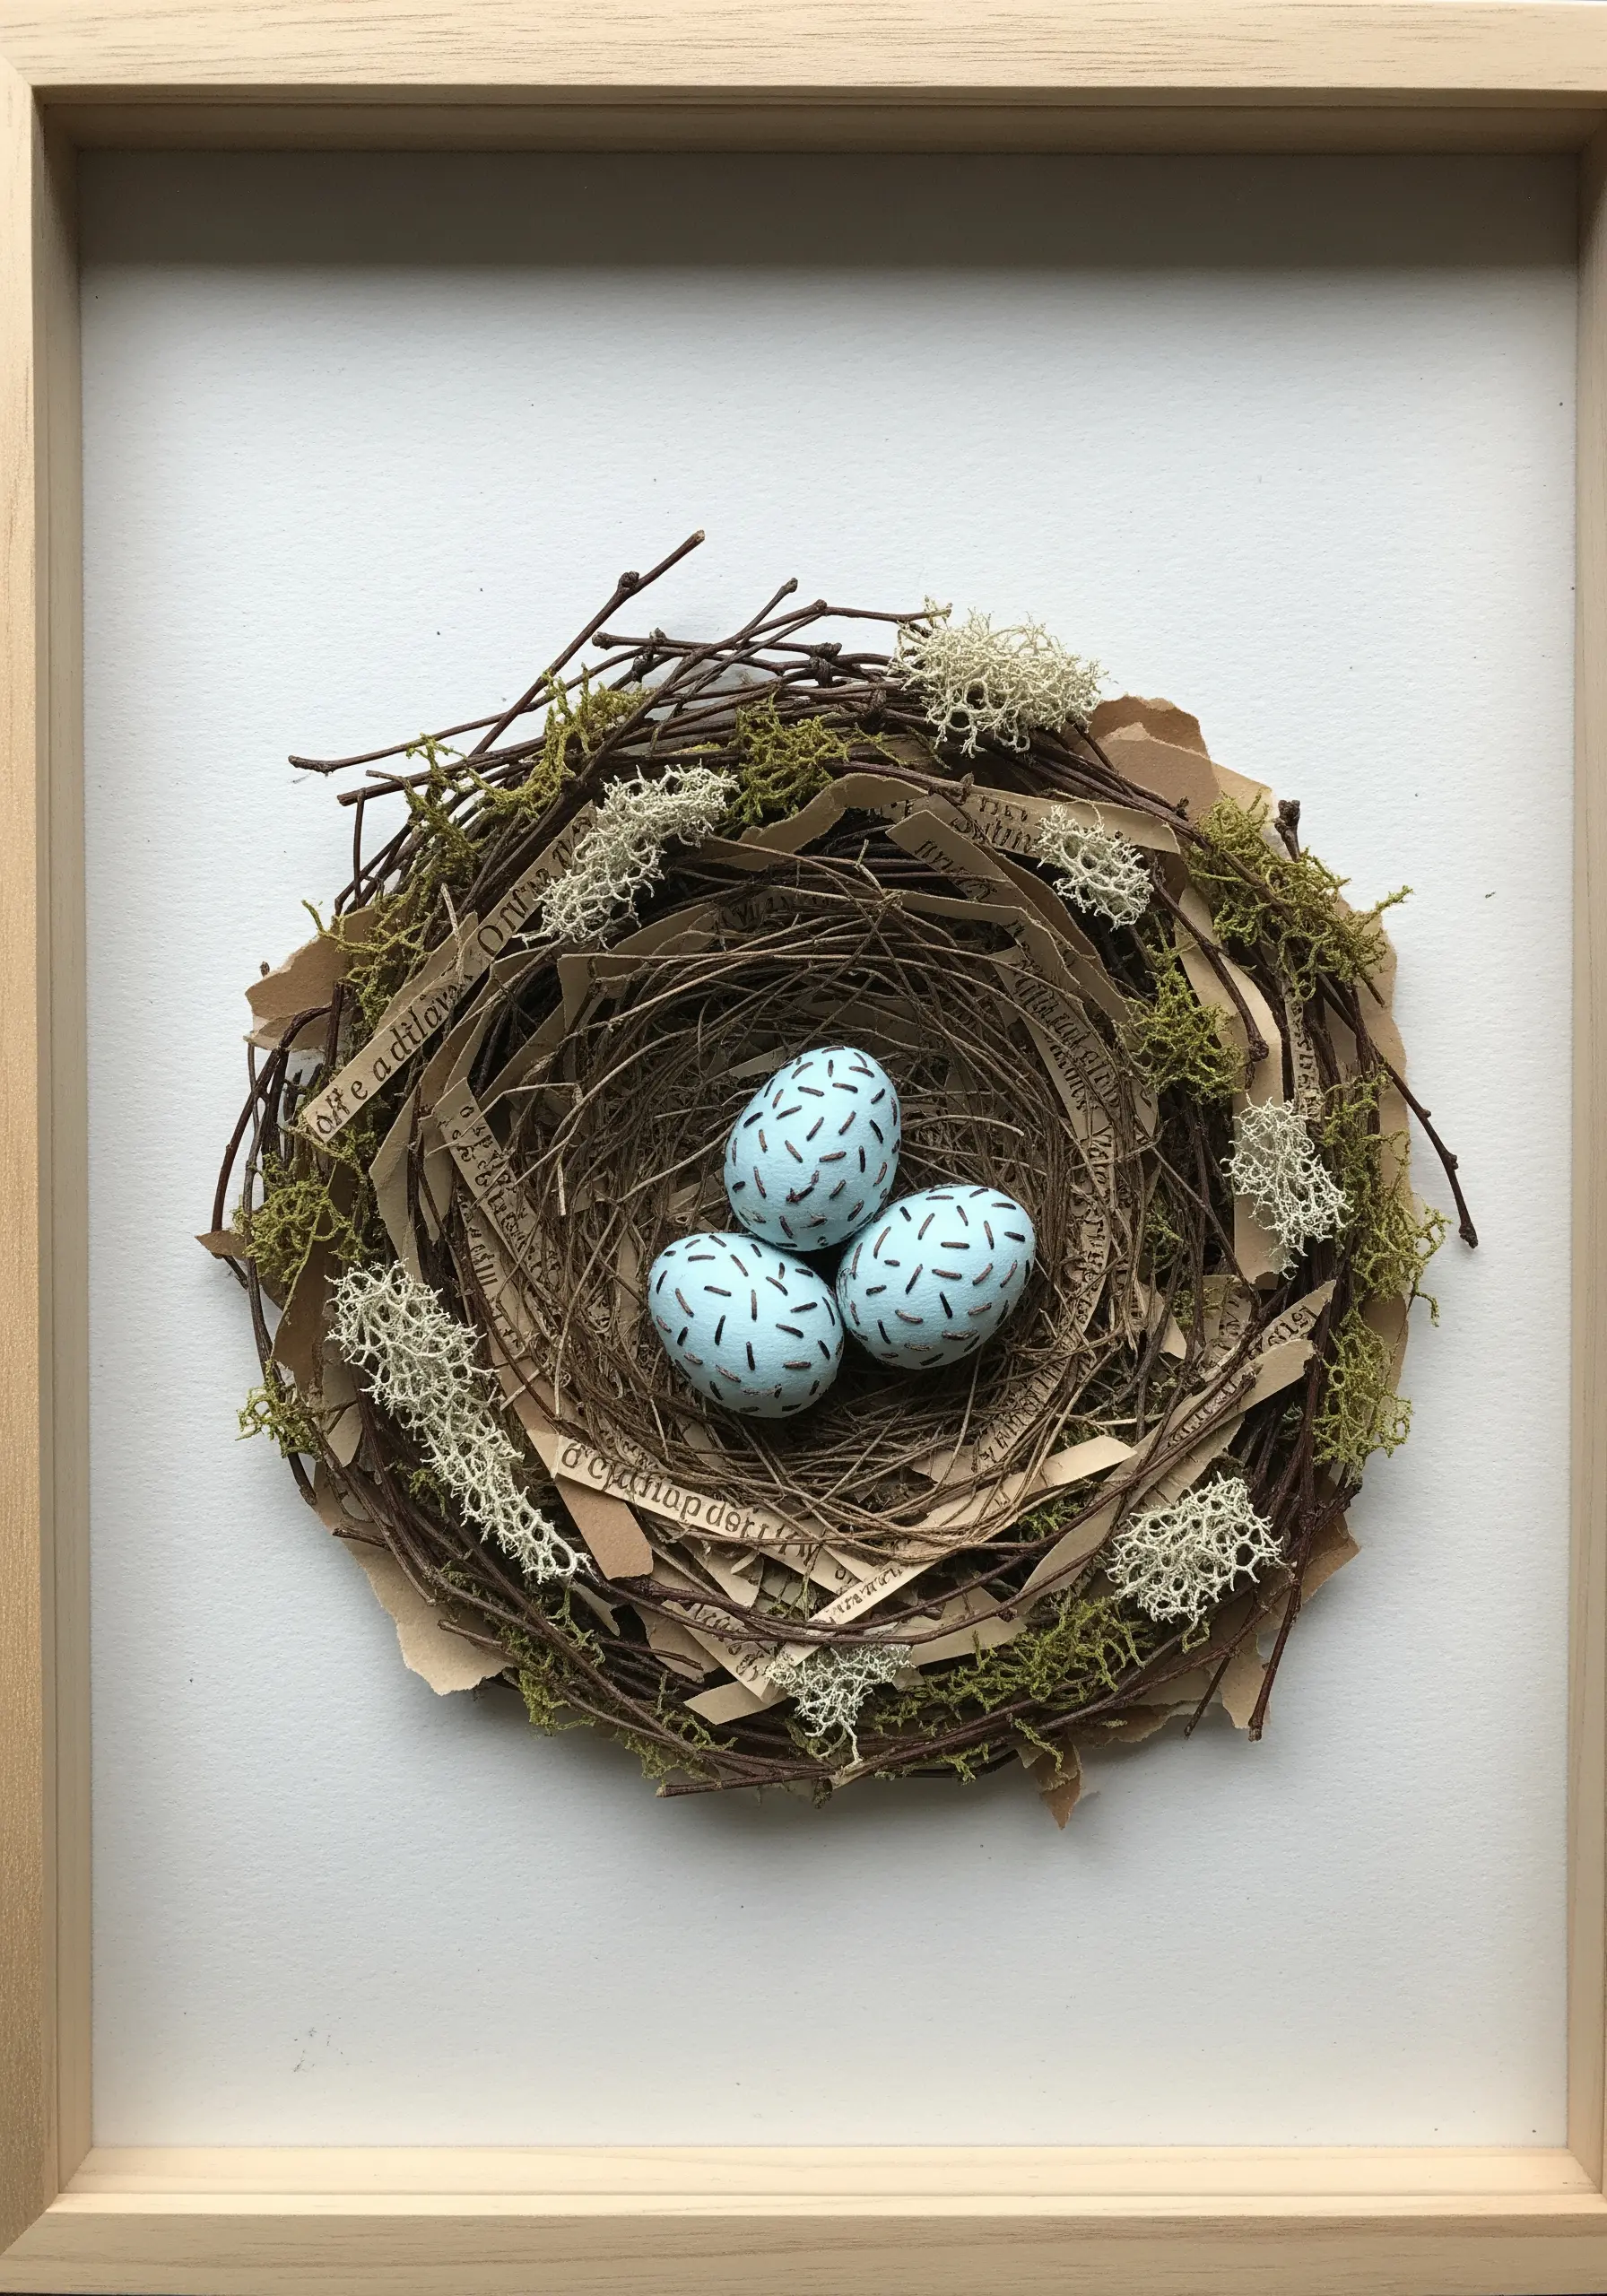
Move your collage into the third dimension by building directly onto your canvas.
Create a bird’s nest by layering real twigs, shredded paper, and moss, securing them with a strong craft glue.
Then, use thread to add finer details or to help anchor the more delicate elements. You can stitch directly into the paper base to secure twigs or wrap thread around the structure.
This technique blends collage, sculpture, and fiber art, resulting in a truly unique and compelling piece.


