

When you sit down to stitch, you’re doing more than just making a gift; you’re creating a keepsake. But it’s easy to feel like your work doesn’t quite capture the beautiful vision in your mind. The secret isn’t necessarily more complex stitches, but more thoughtful ones.
This is where you can shift from simply following a pattern to truly designing with thread. Think about texture, dimension, and composition. Consider how a thicker yarn can create a bold, modern line, or how densely packed French knots can mimic the softness of a real cloud. It’s about making deliberate choices that transform a simple motif into a piece of art.
Here, you’ll find ways to blend techniques, play with materials, and use simple stitches in new ways. Let these ideas give you the confidence to create something for a new baby that is not only beautiful and modern, but filled with the kind of heart and intention that only a handmade gift can hold.
1. Master Directional Satin Stitch for Striped Balloons
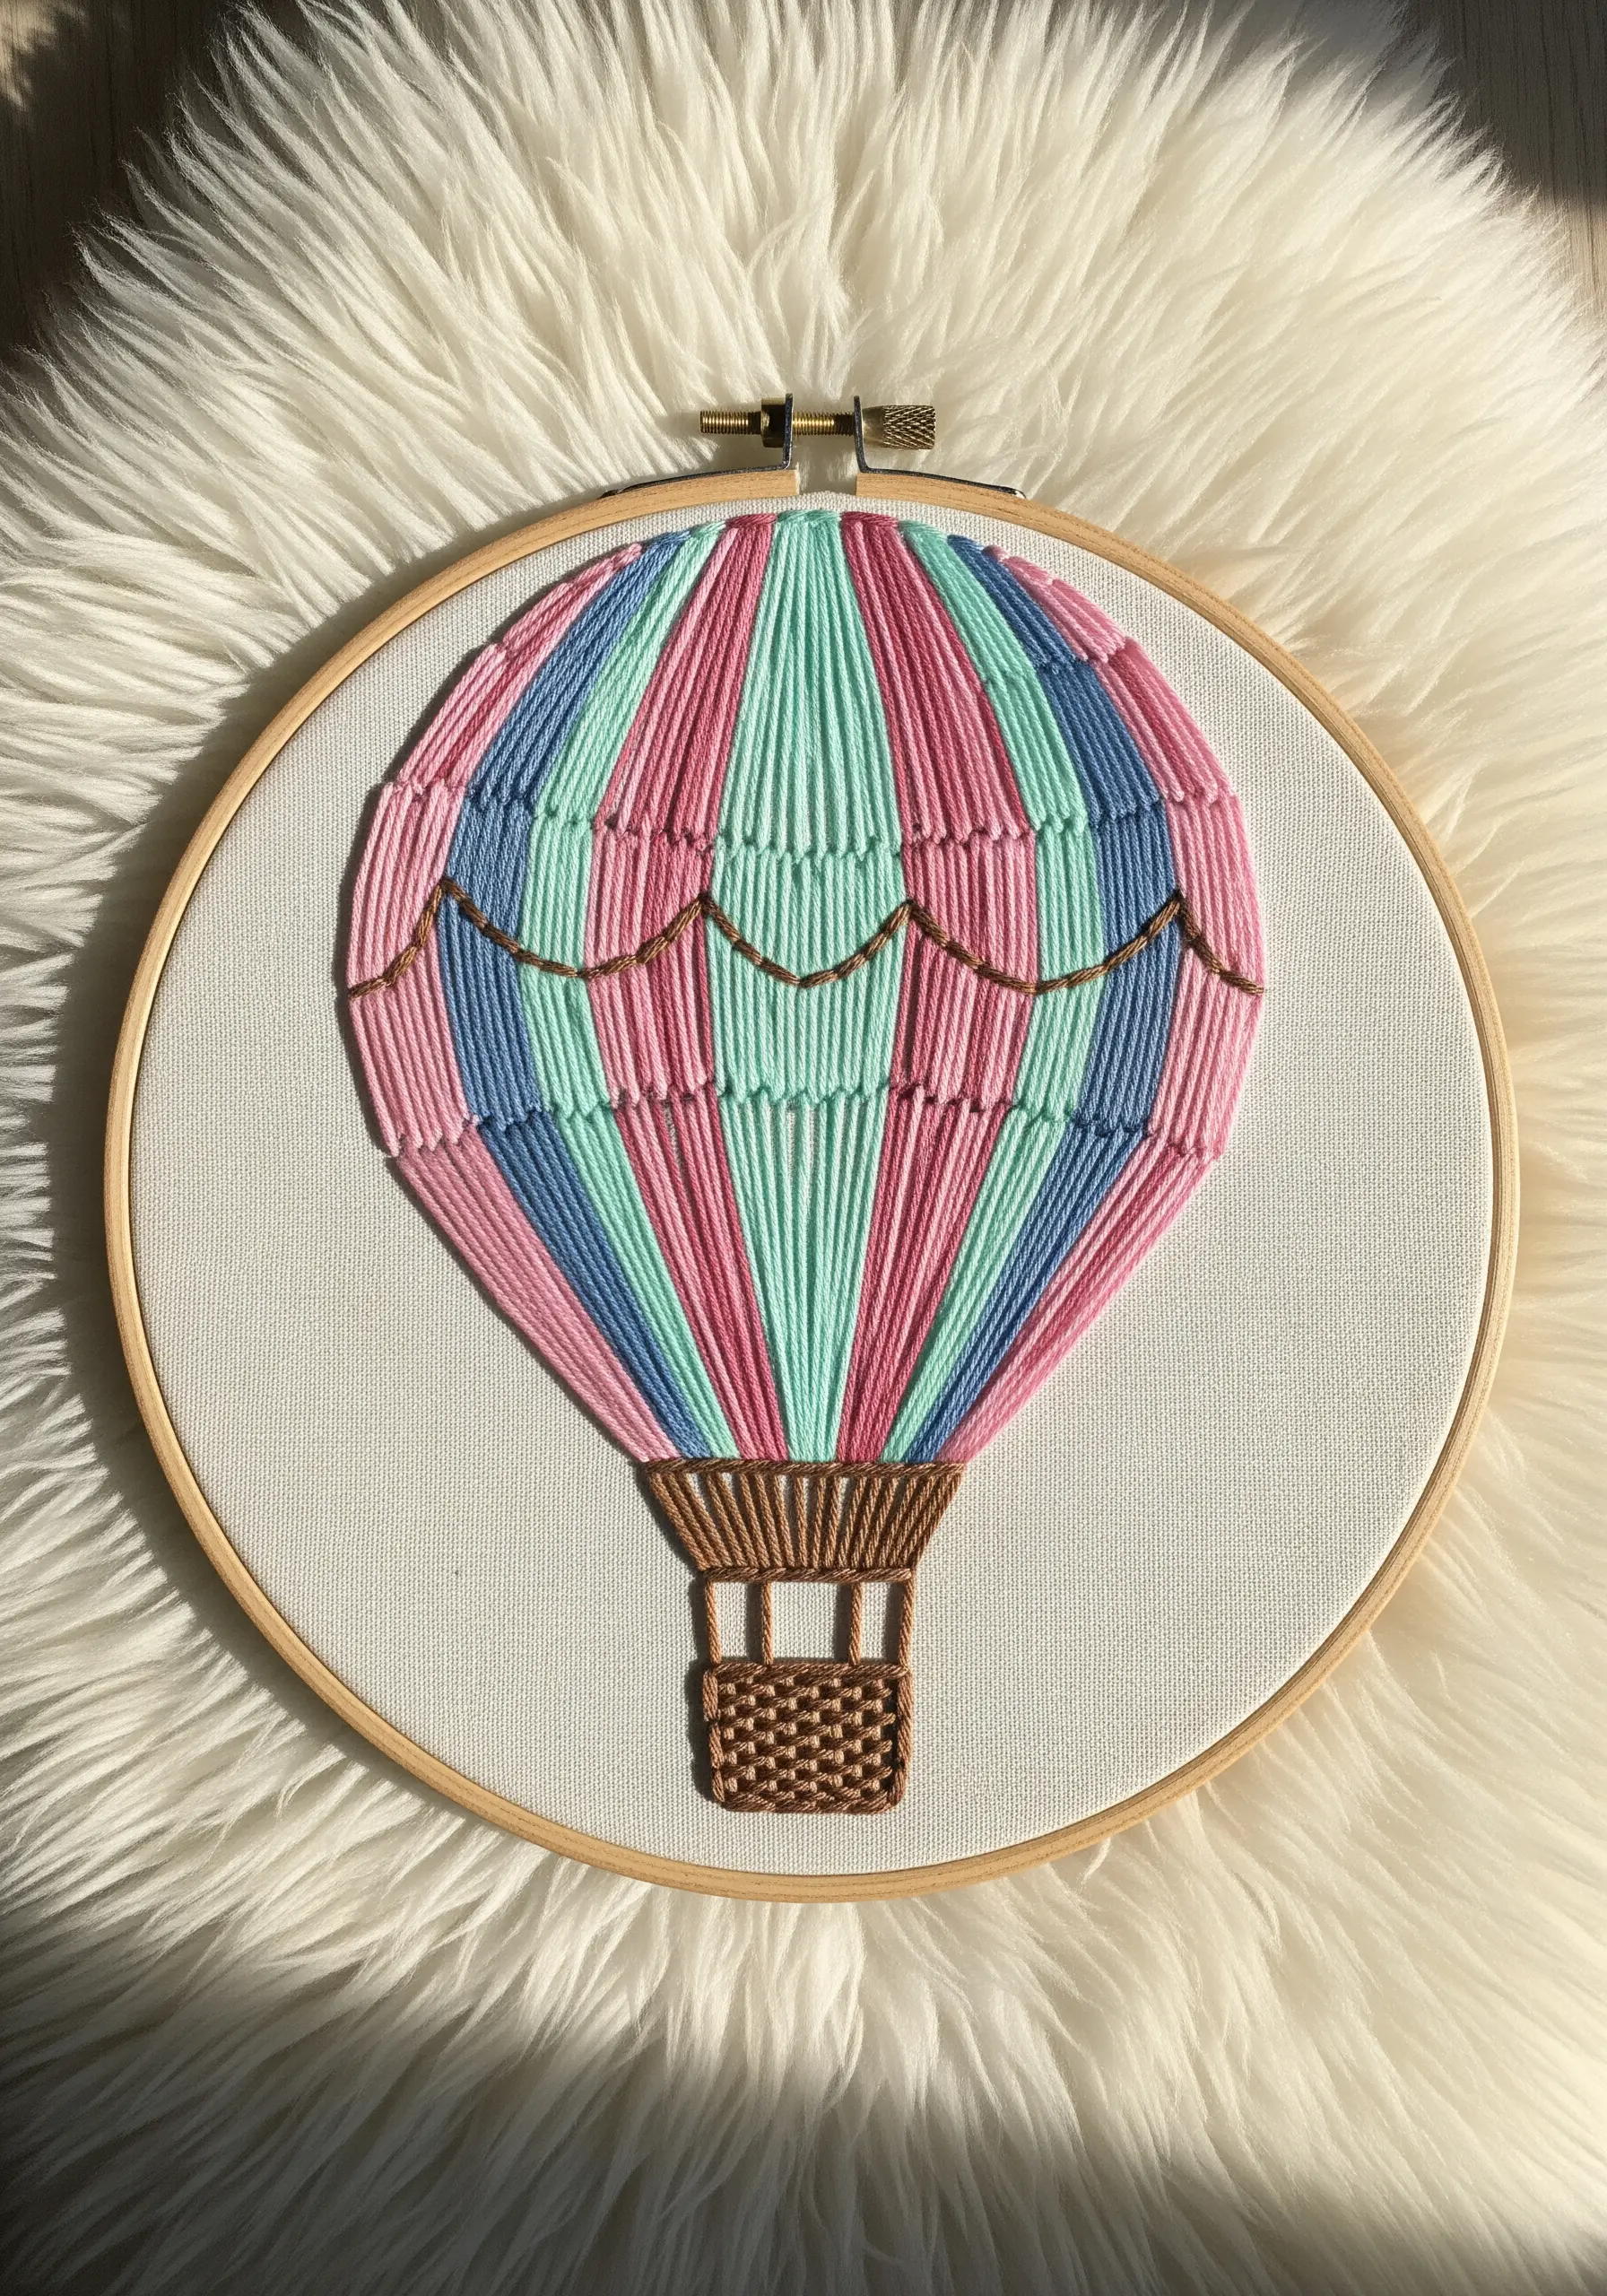
To achieve this clean, graphic look, map out your vertical stripes with a pencil before you begin stitching.
Use a full six strands of cotton floss for the colored sections to ensure full, plush coverage, but switch to a single strand of a contrasting color for the delicate scalloped ropes to maintain visual hierarchy.
The key to a flawless satin stitch is maintaining perfectly parallel stitches and consistent tension.
This prevents the fabric from puckering and gives the surface a smooth, almost woven appearance that feels incredibly polished.
2. Embellish Plush Felt with Beaded Textures
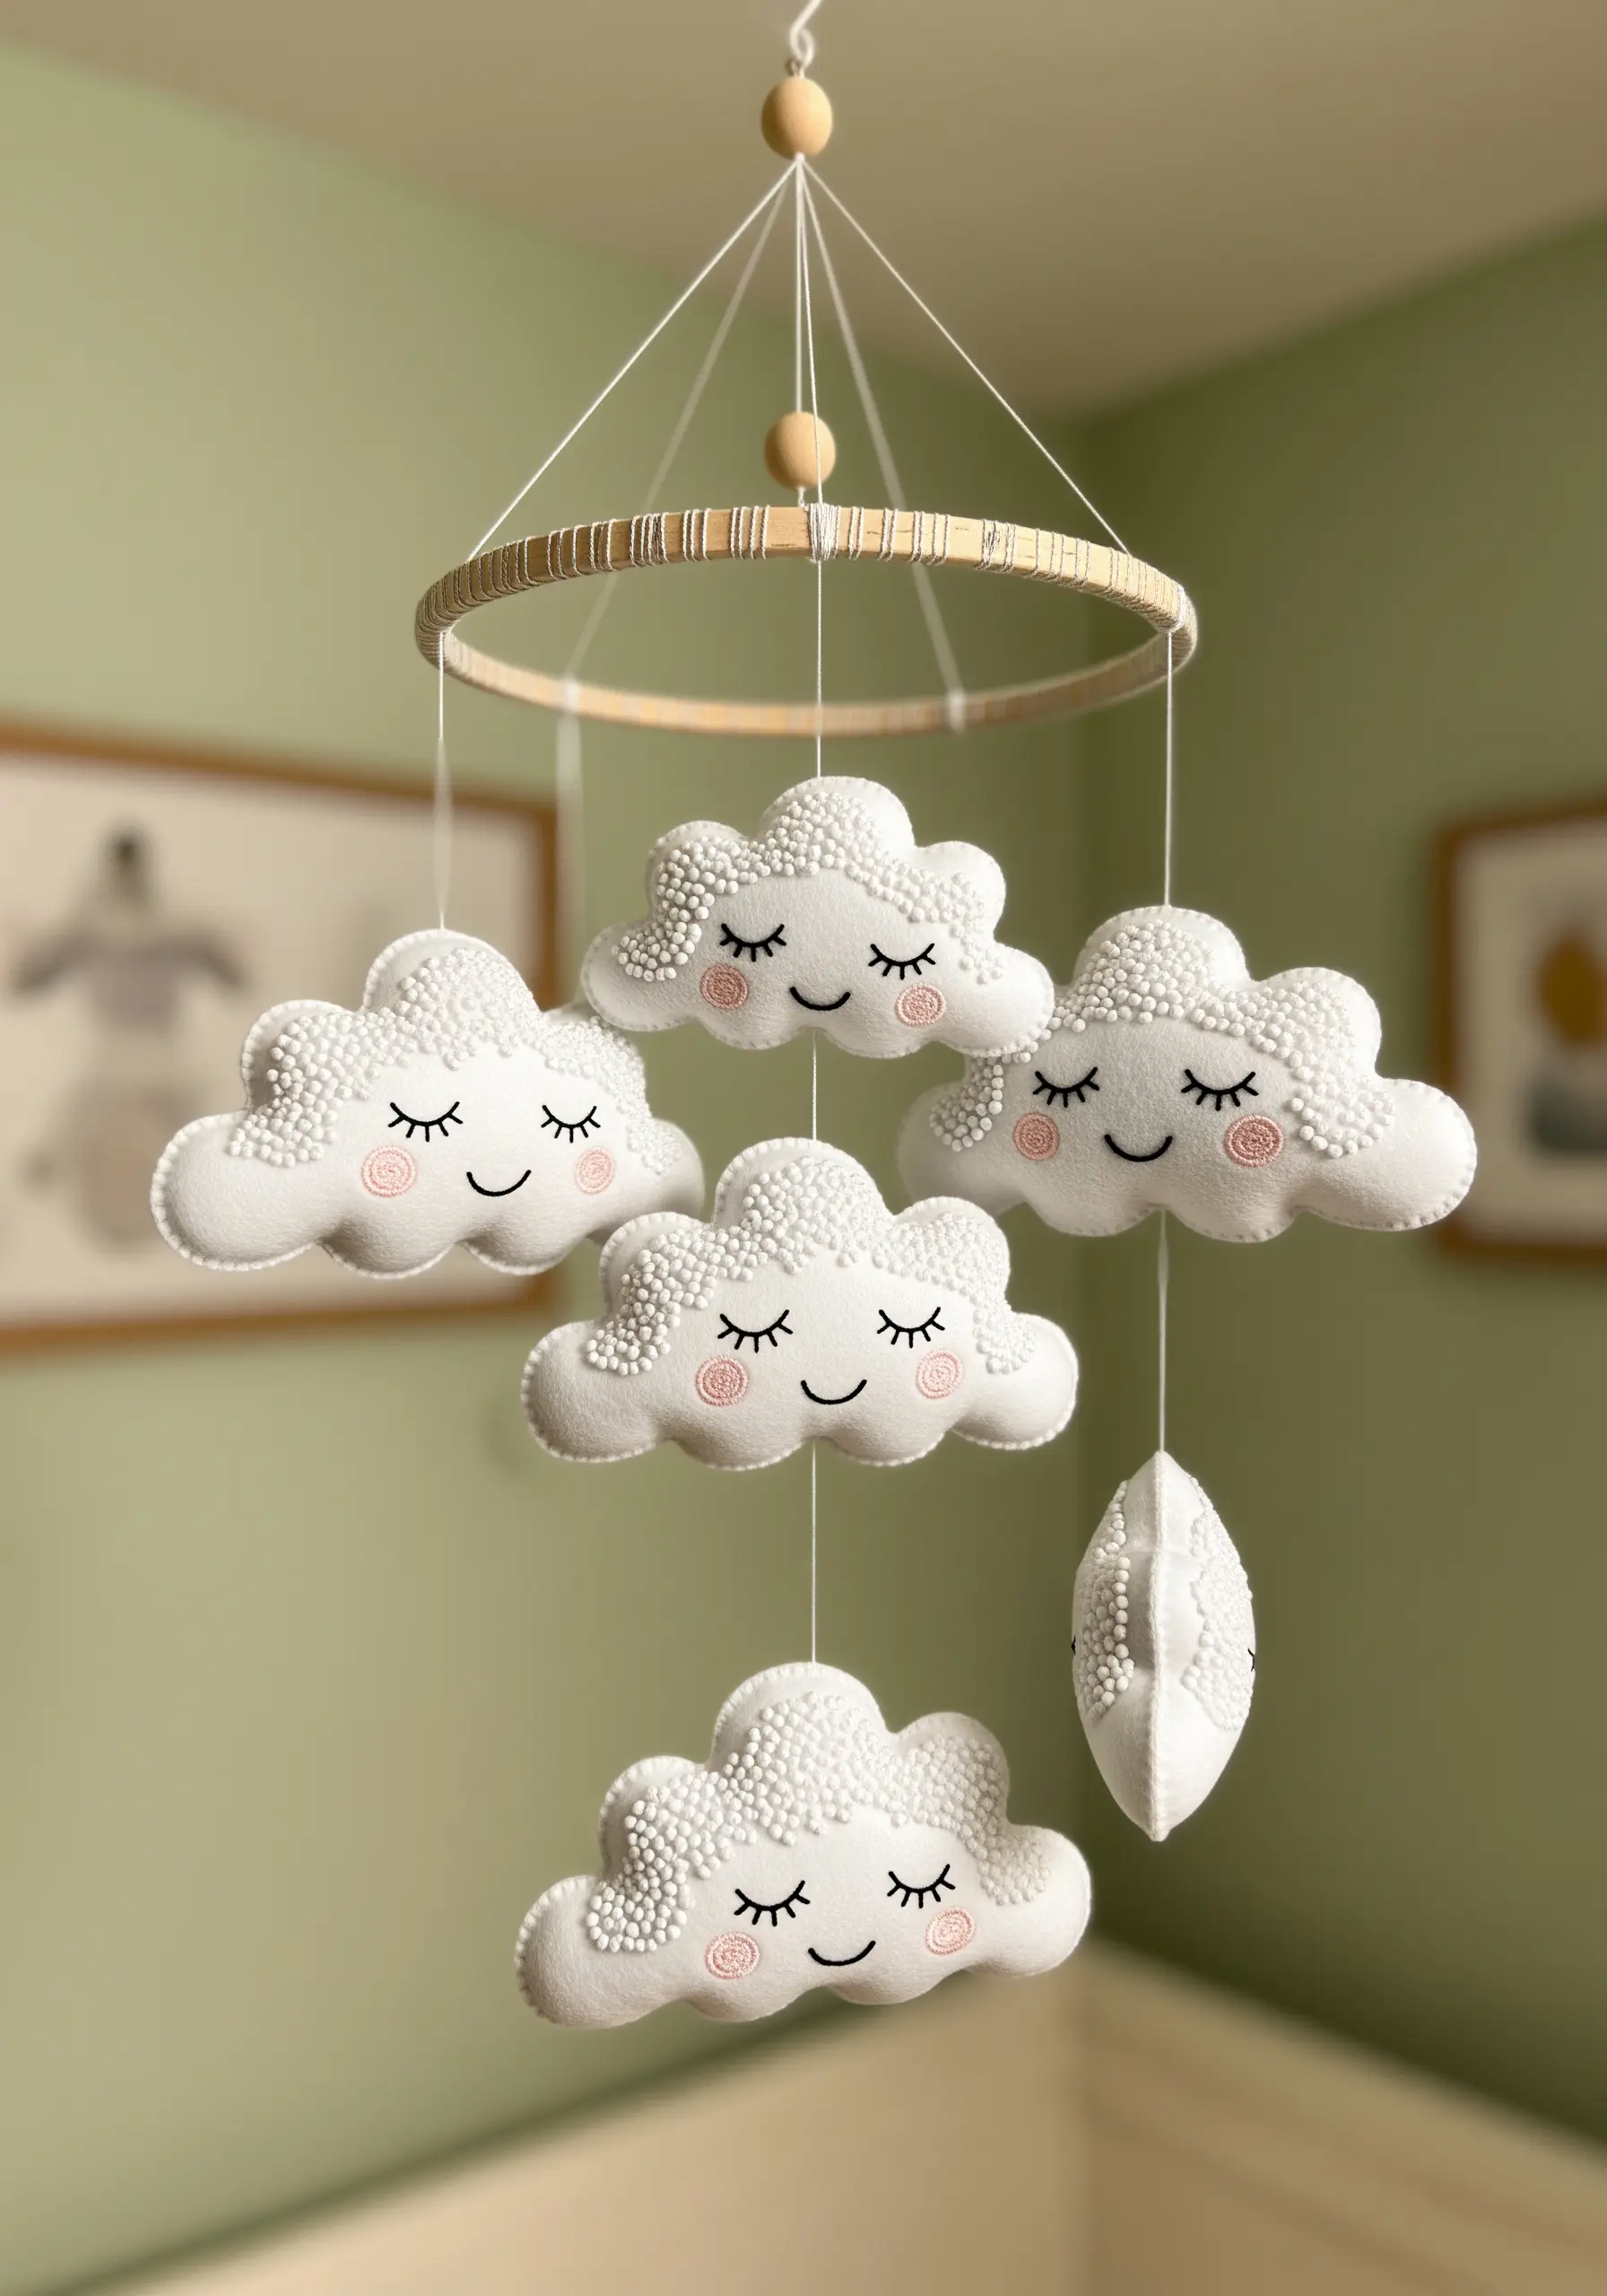
Transform simple felt shapes into a tactile mobile by adding dimensional details.
Instead of French knots, use small pearl-white seed beads to create the fluffy cloud texture, which adds a subtle sheen and saves considerable stitching time.
Always embroider the facial features with a single strand of black floss *before* you stuff and sew the cloud pieces together.
This ensures your lines are taut and clean, which is difficult to achieve on an already stuffed object.
3. Create Geometric Patterns with String Art Techniques
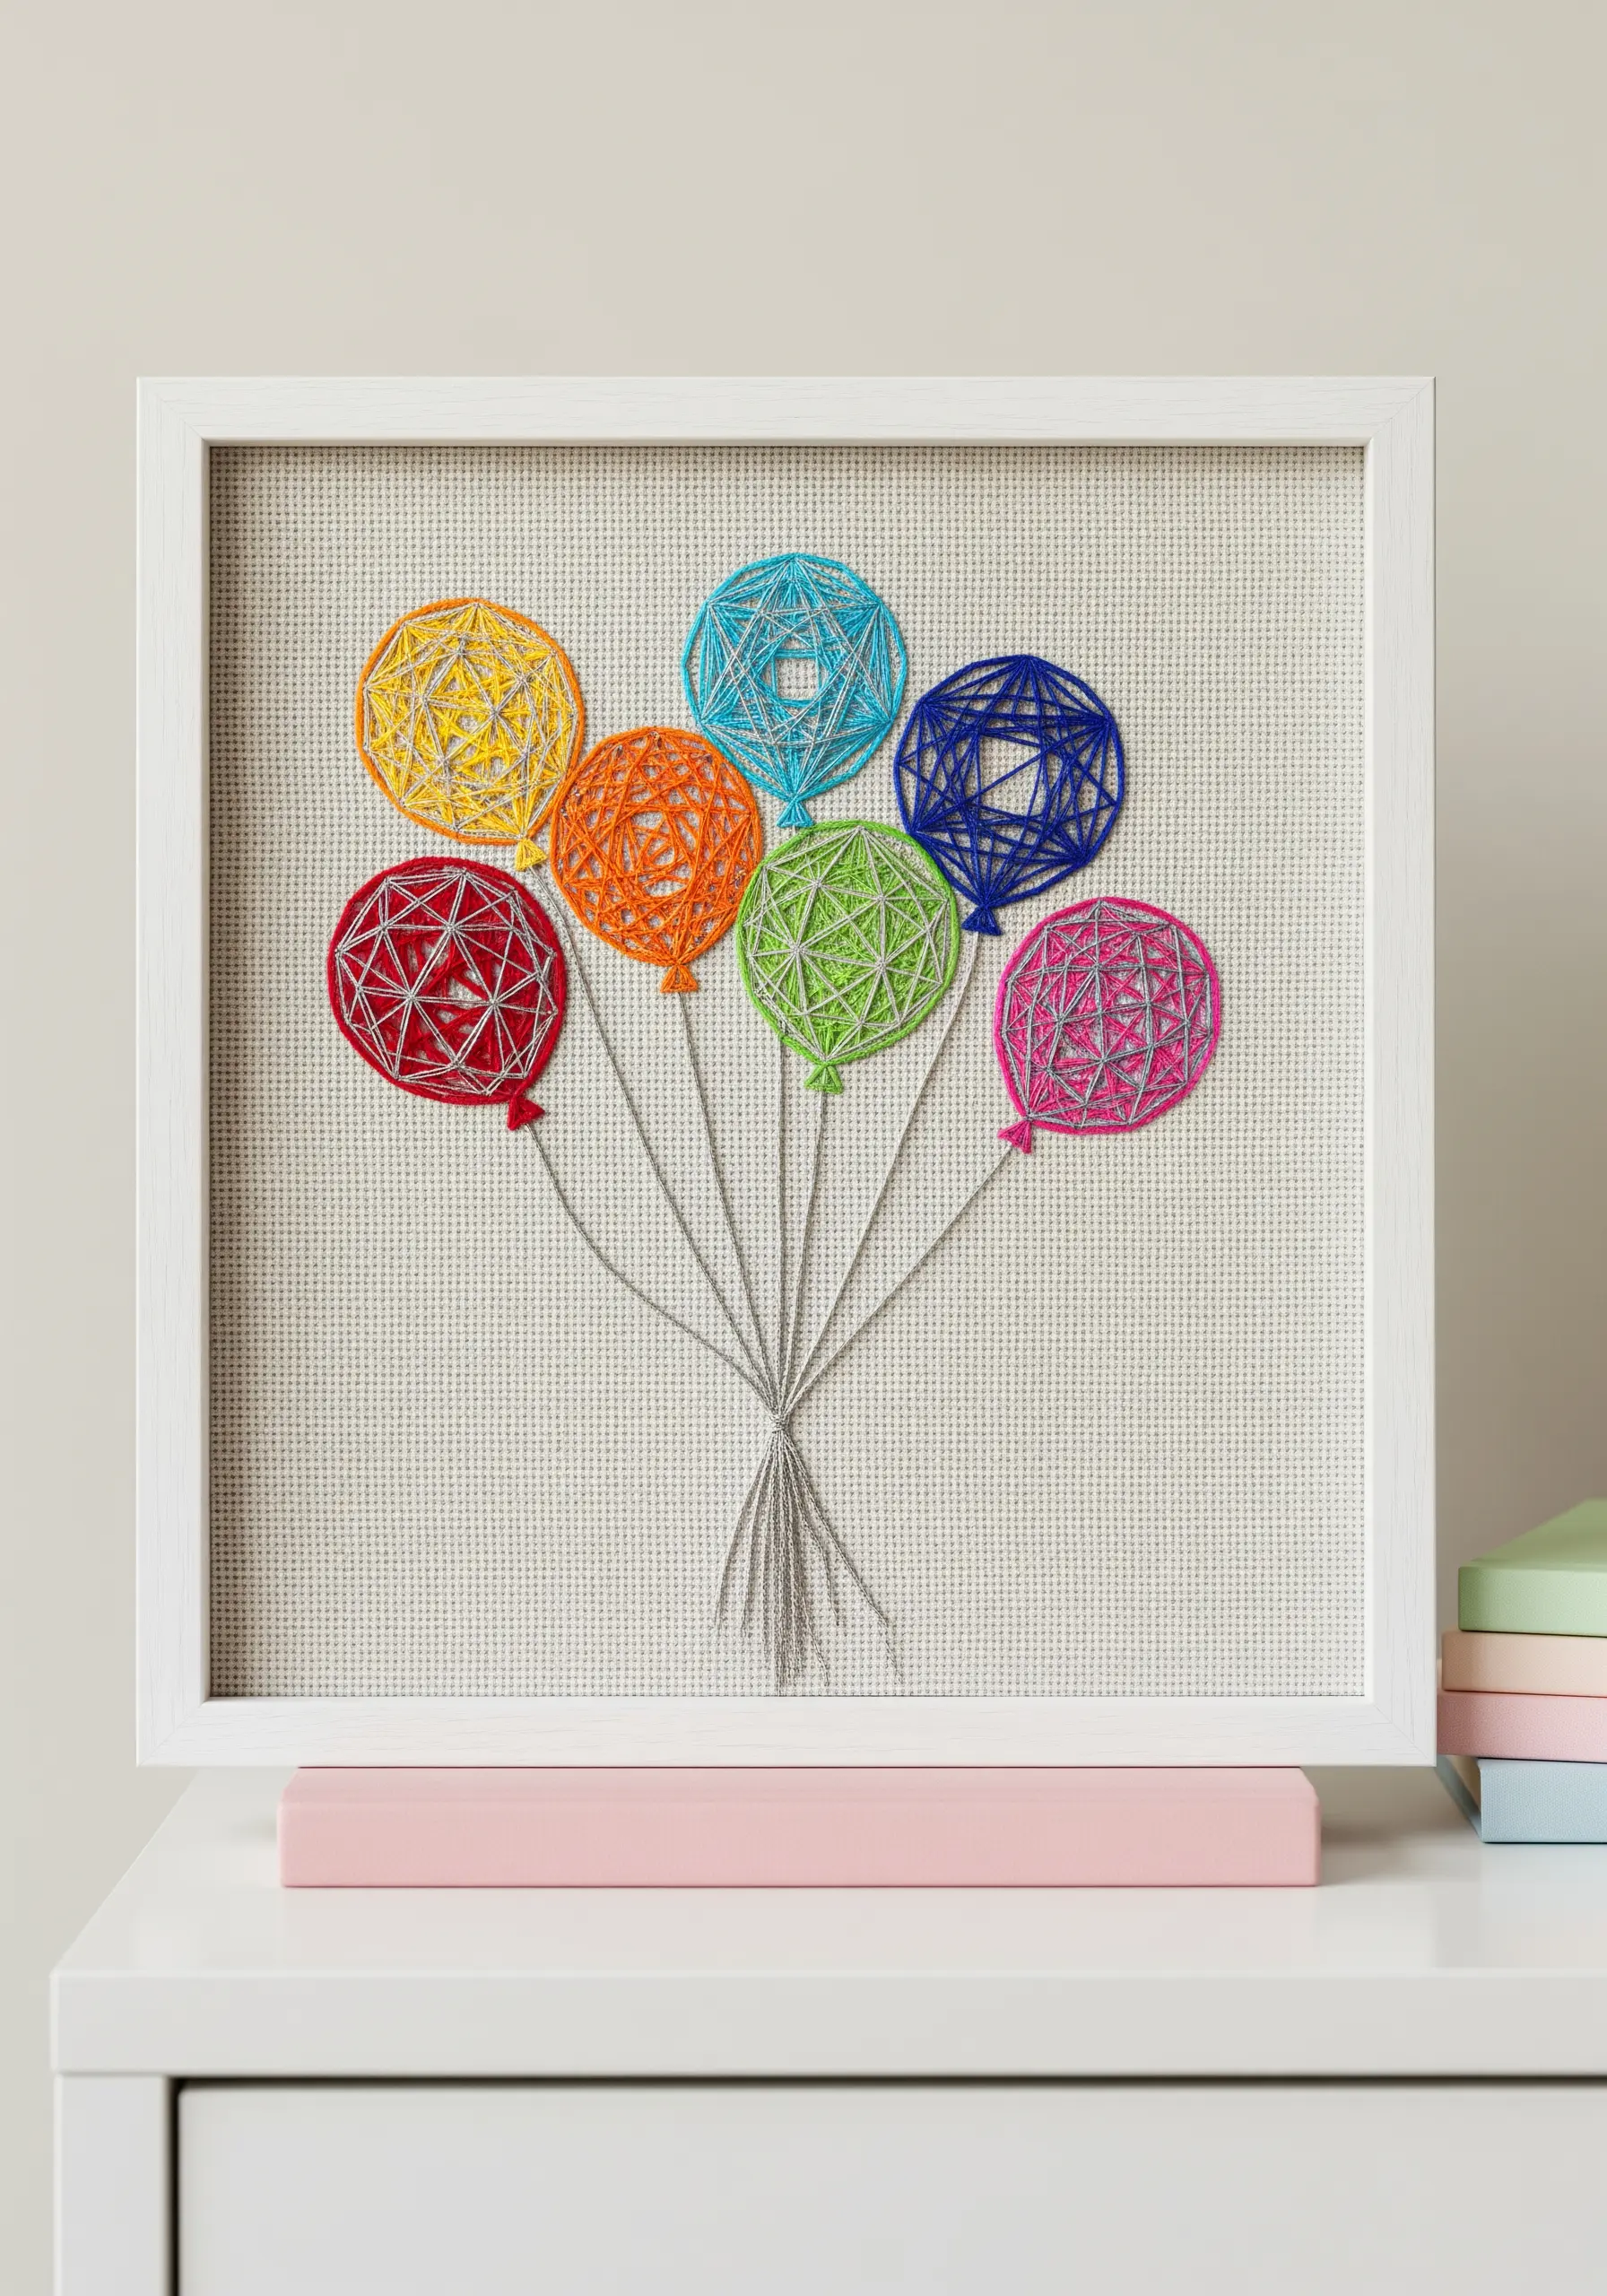
This style merges embroidery with the principles of string art for a crisp, modern effect.
Work on a stiff, even-weave fabric like Aida cloth, which can withstand the thread tension without warping.
First, create your anchor points around the balloon’s perimeter using small, strong backstitches.
Then, wrap a high-sheen pearl cotton between these points, layering the threads to build up intricate geometric patterns inside the shape.
4. Integrate Crochet Appliqué for High-Impact Texture
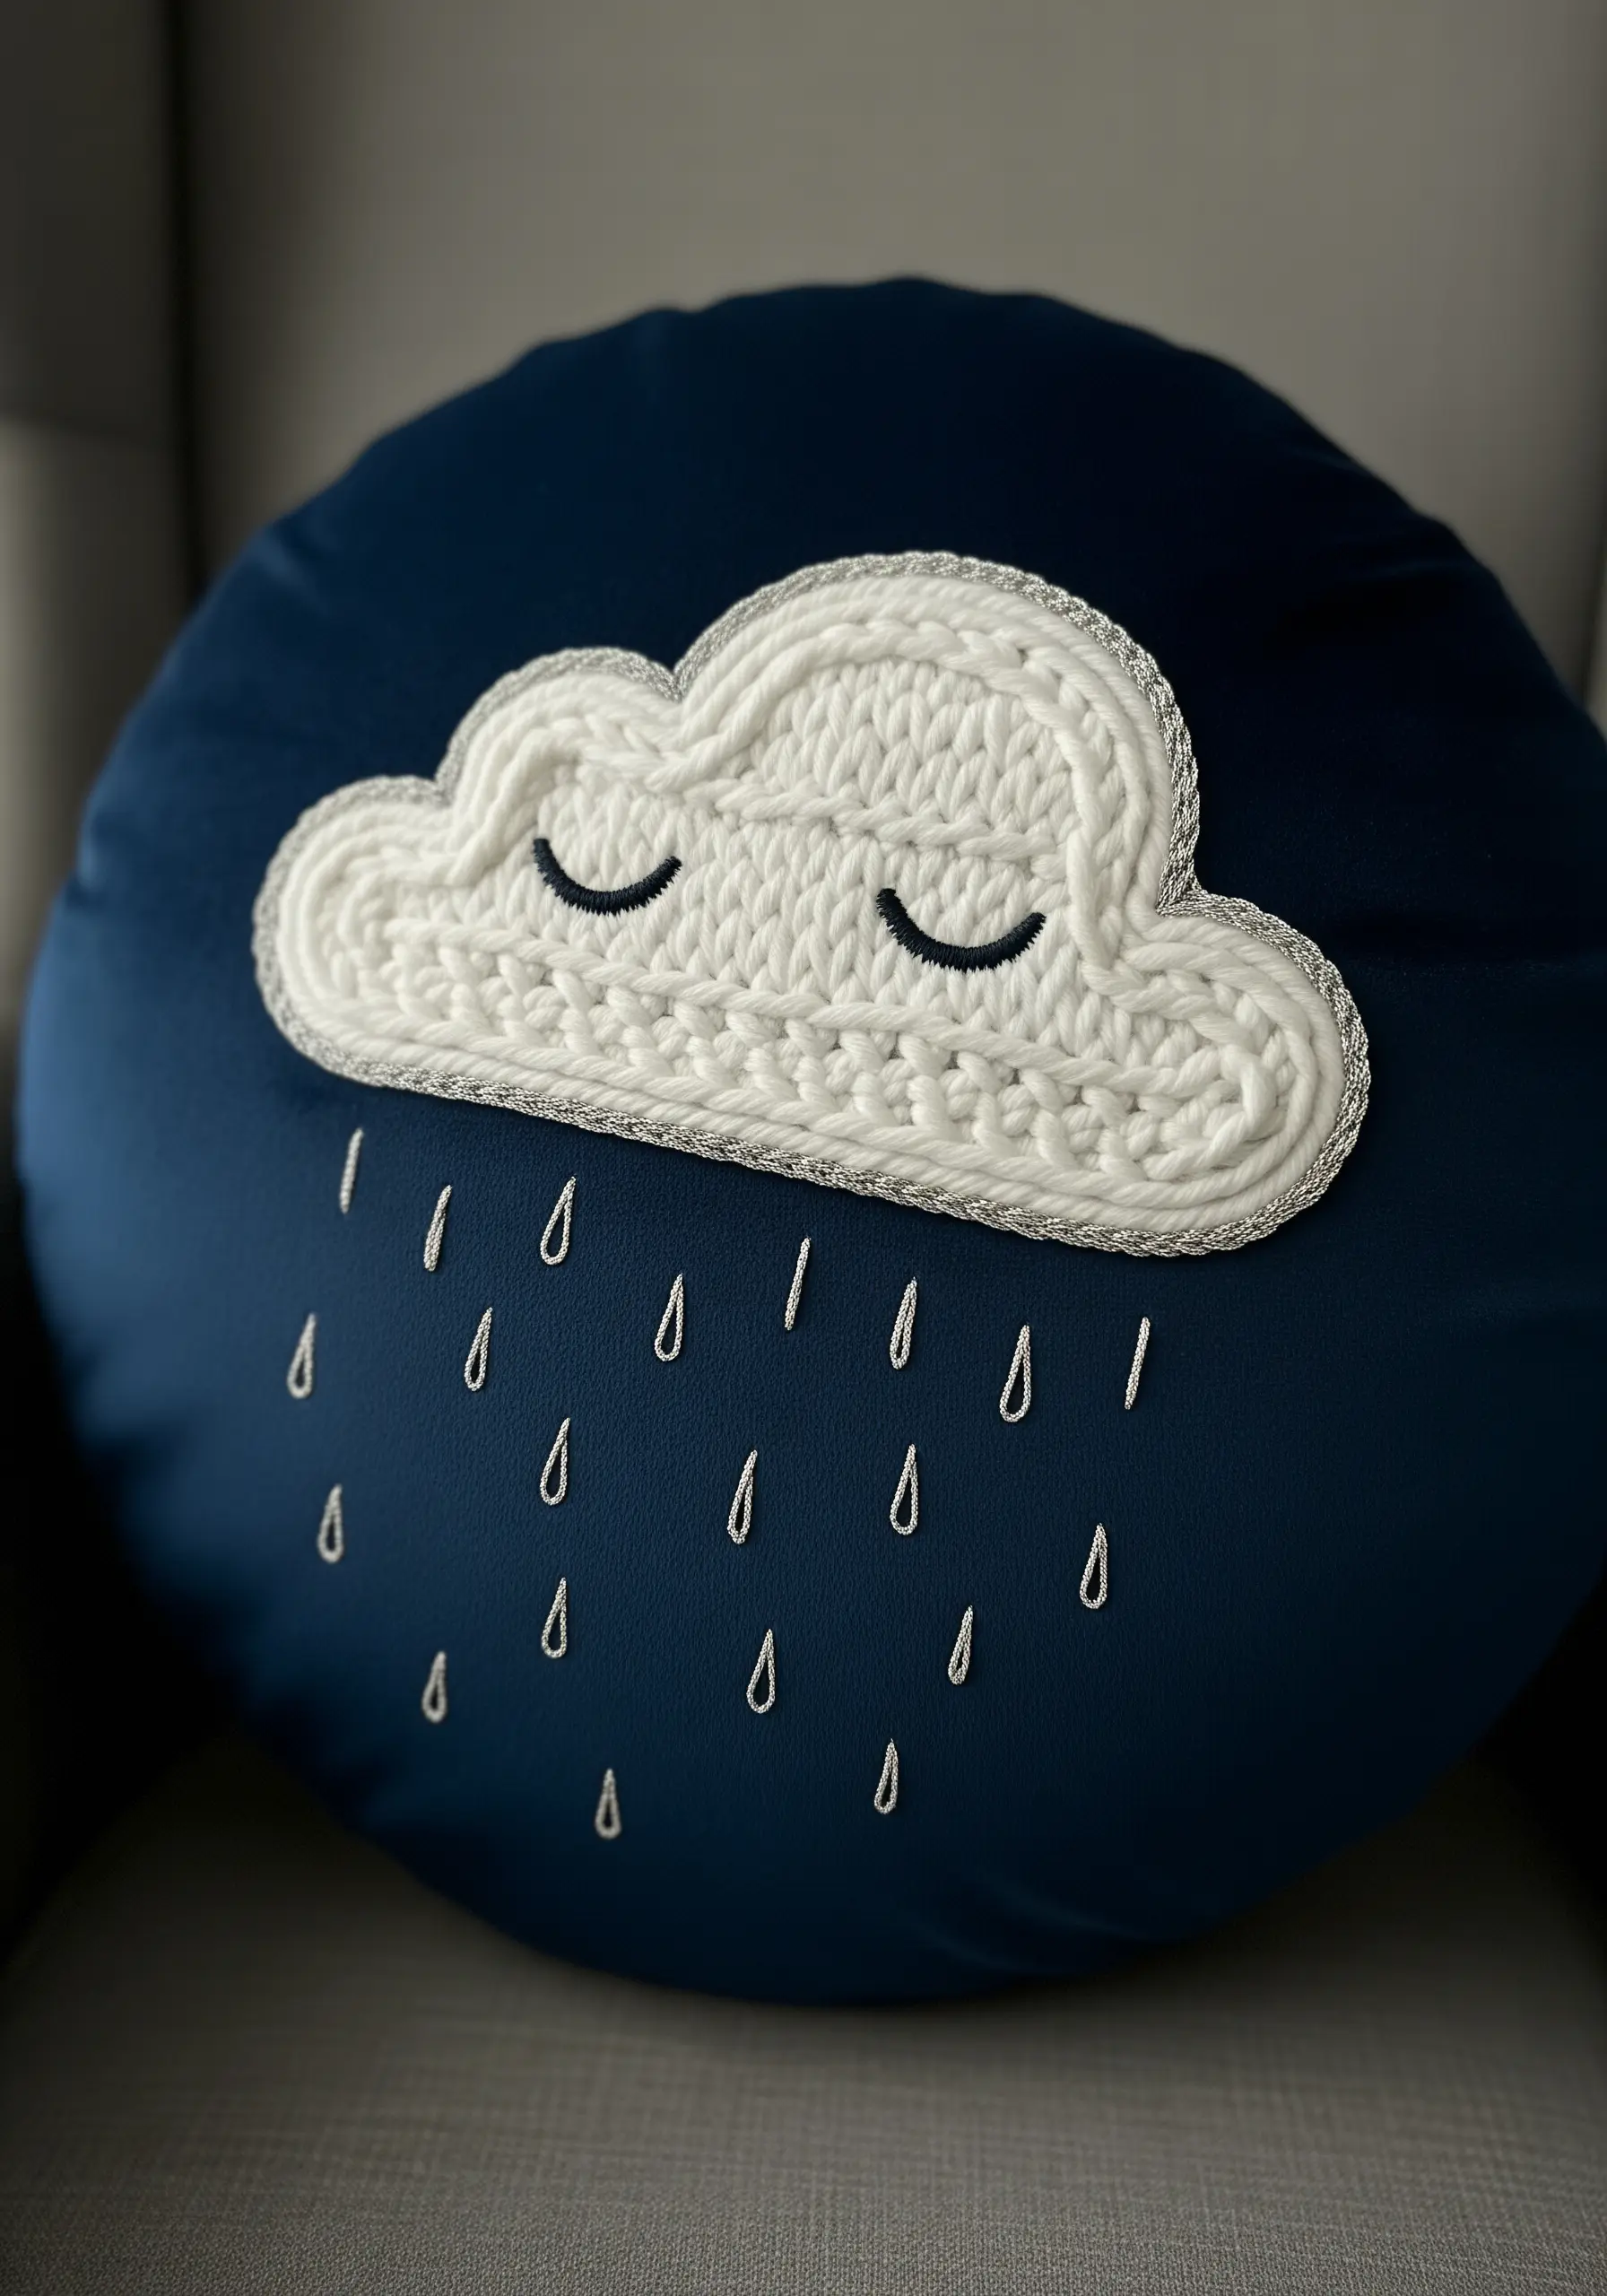
Combine fiber crafts by creating a simple crochet cloud appliqué and stitching it onto your base fabric.
Secure the appliqué with a neat blanket stitch around the edge for a handmade feel, or a simple running stitch for a more subtle finish.
Outlining the shape with a silvery cord, couched down with a matching thread, defines the silhouette and adds a touch of metallic elegance that separates it from the background.
The delicate, teardrop-shaped straight stitches for rain provide a perfect textural contrast.
5. Achieve Scandinavian Simplicity with Couched Line Art
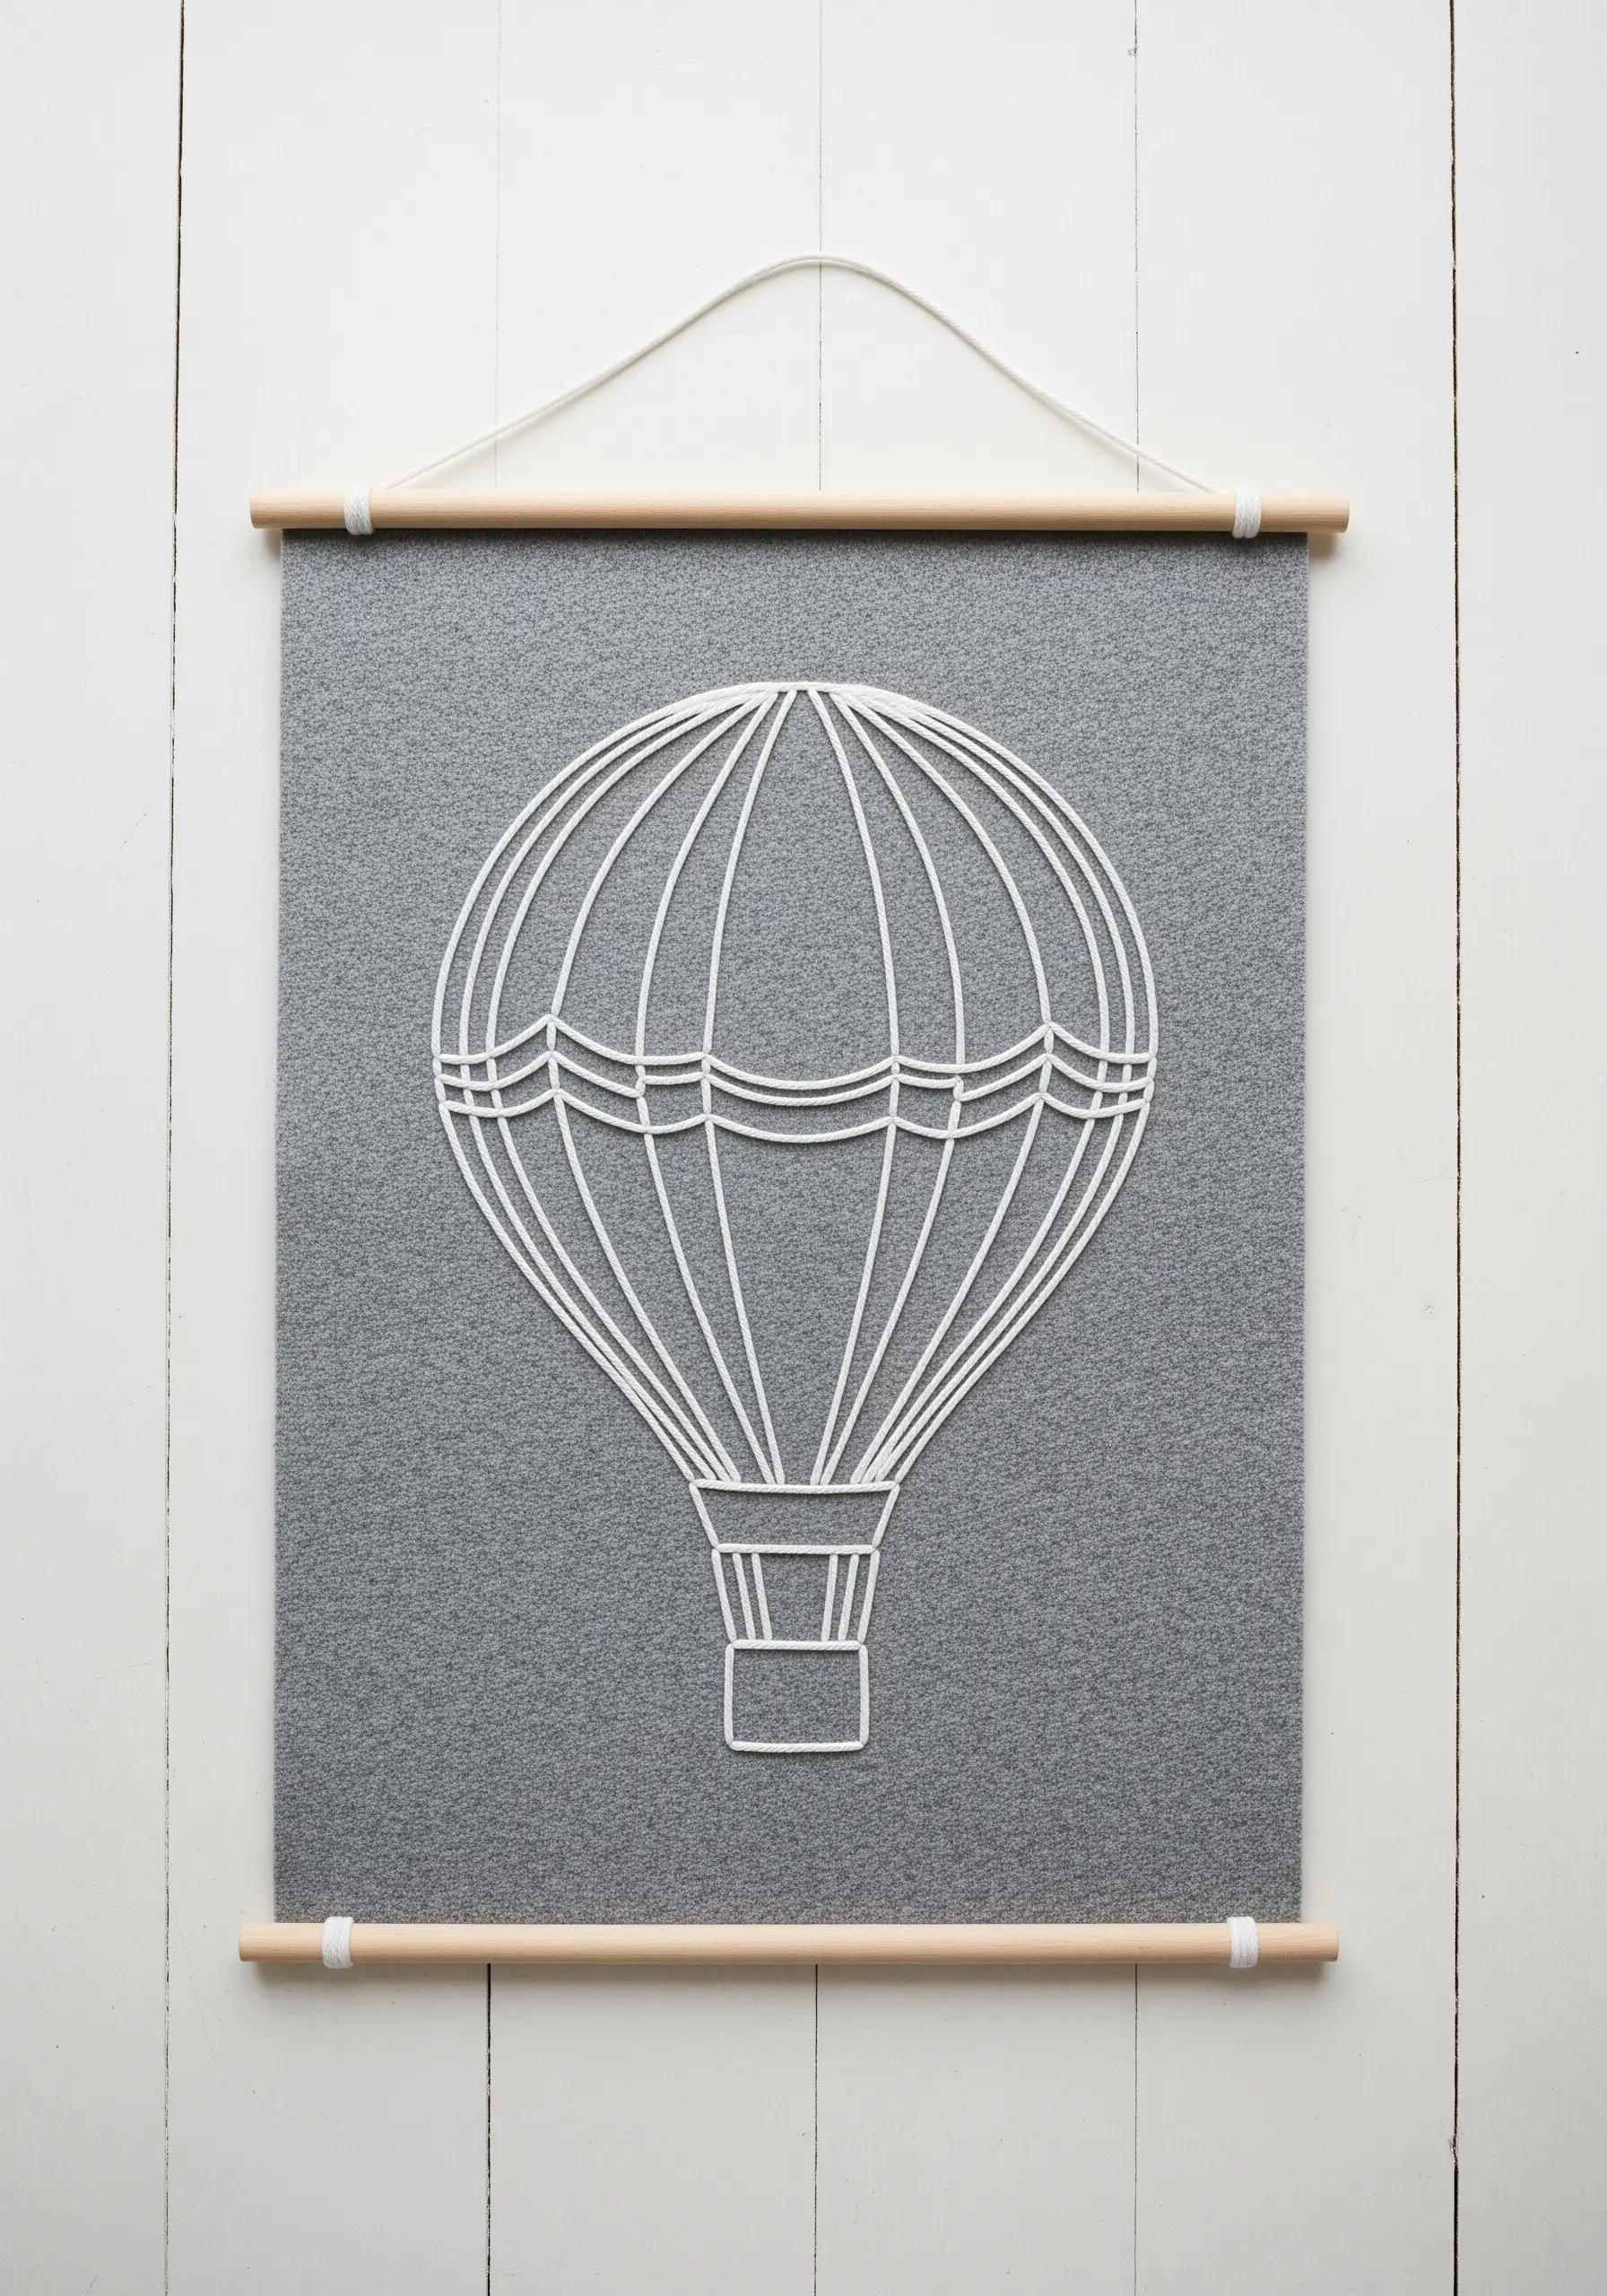
For a bold, graphic statement on felt, swap embroidery floss for a thicker cord or yarn.
The couching stitch is your best technique here: lay the cord along your design line, then use a thinner, matching thread to tack it down with small, evenly spaced stitches.
Felt is an ideal background as its matted fibers provide a stable, non-fraying canvas that makes the bright white lines pop. This method is perfect for creating impactful minimal DIY embroidery projects without complex stitches.
6. Build a Dreamy Skyscape with Layered French Knots
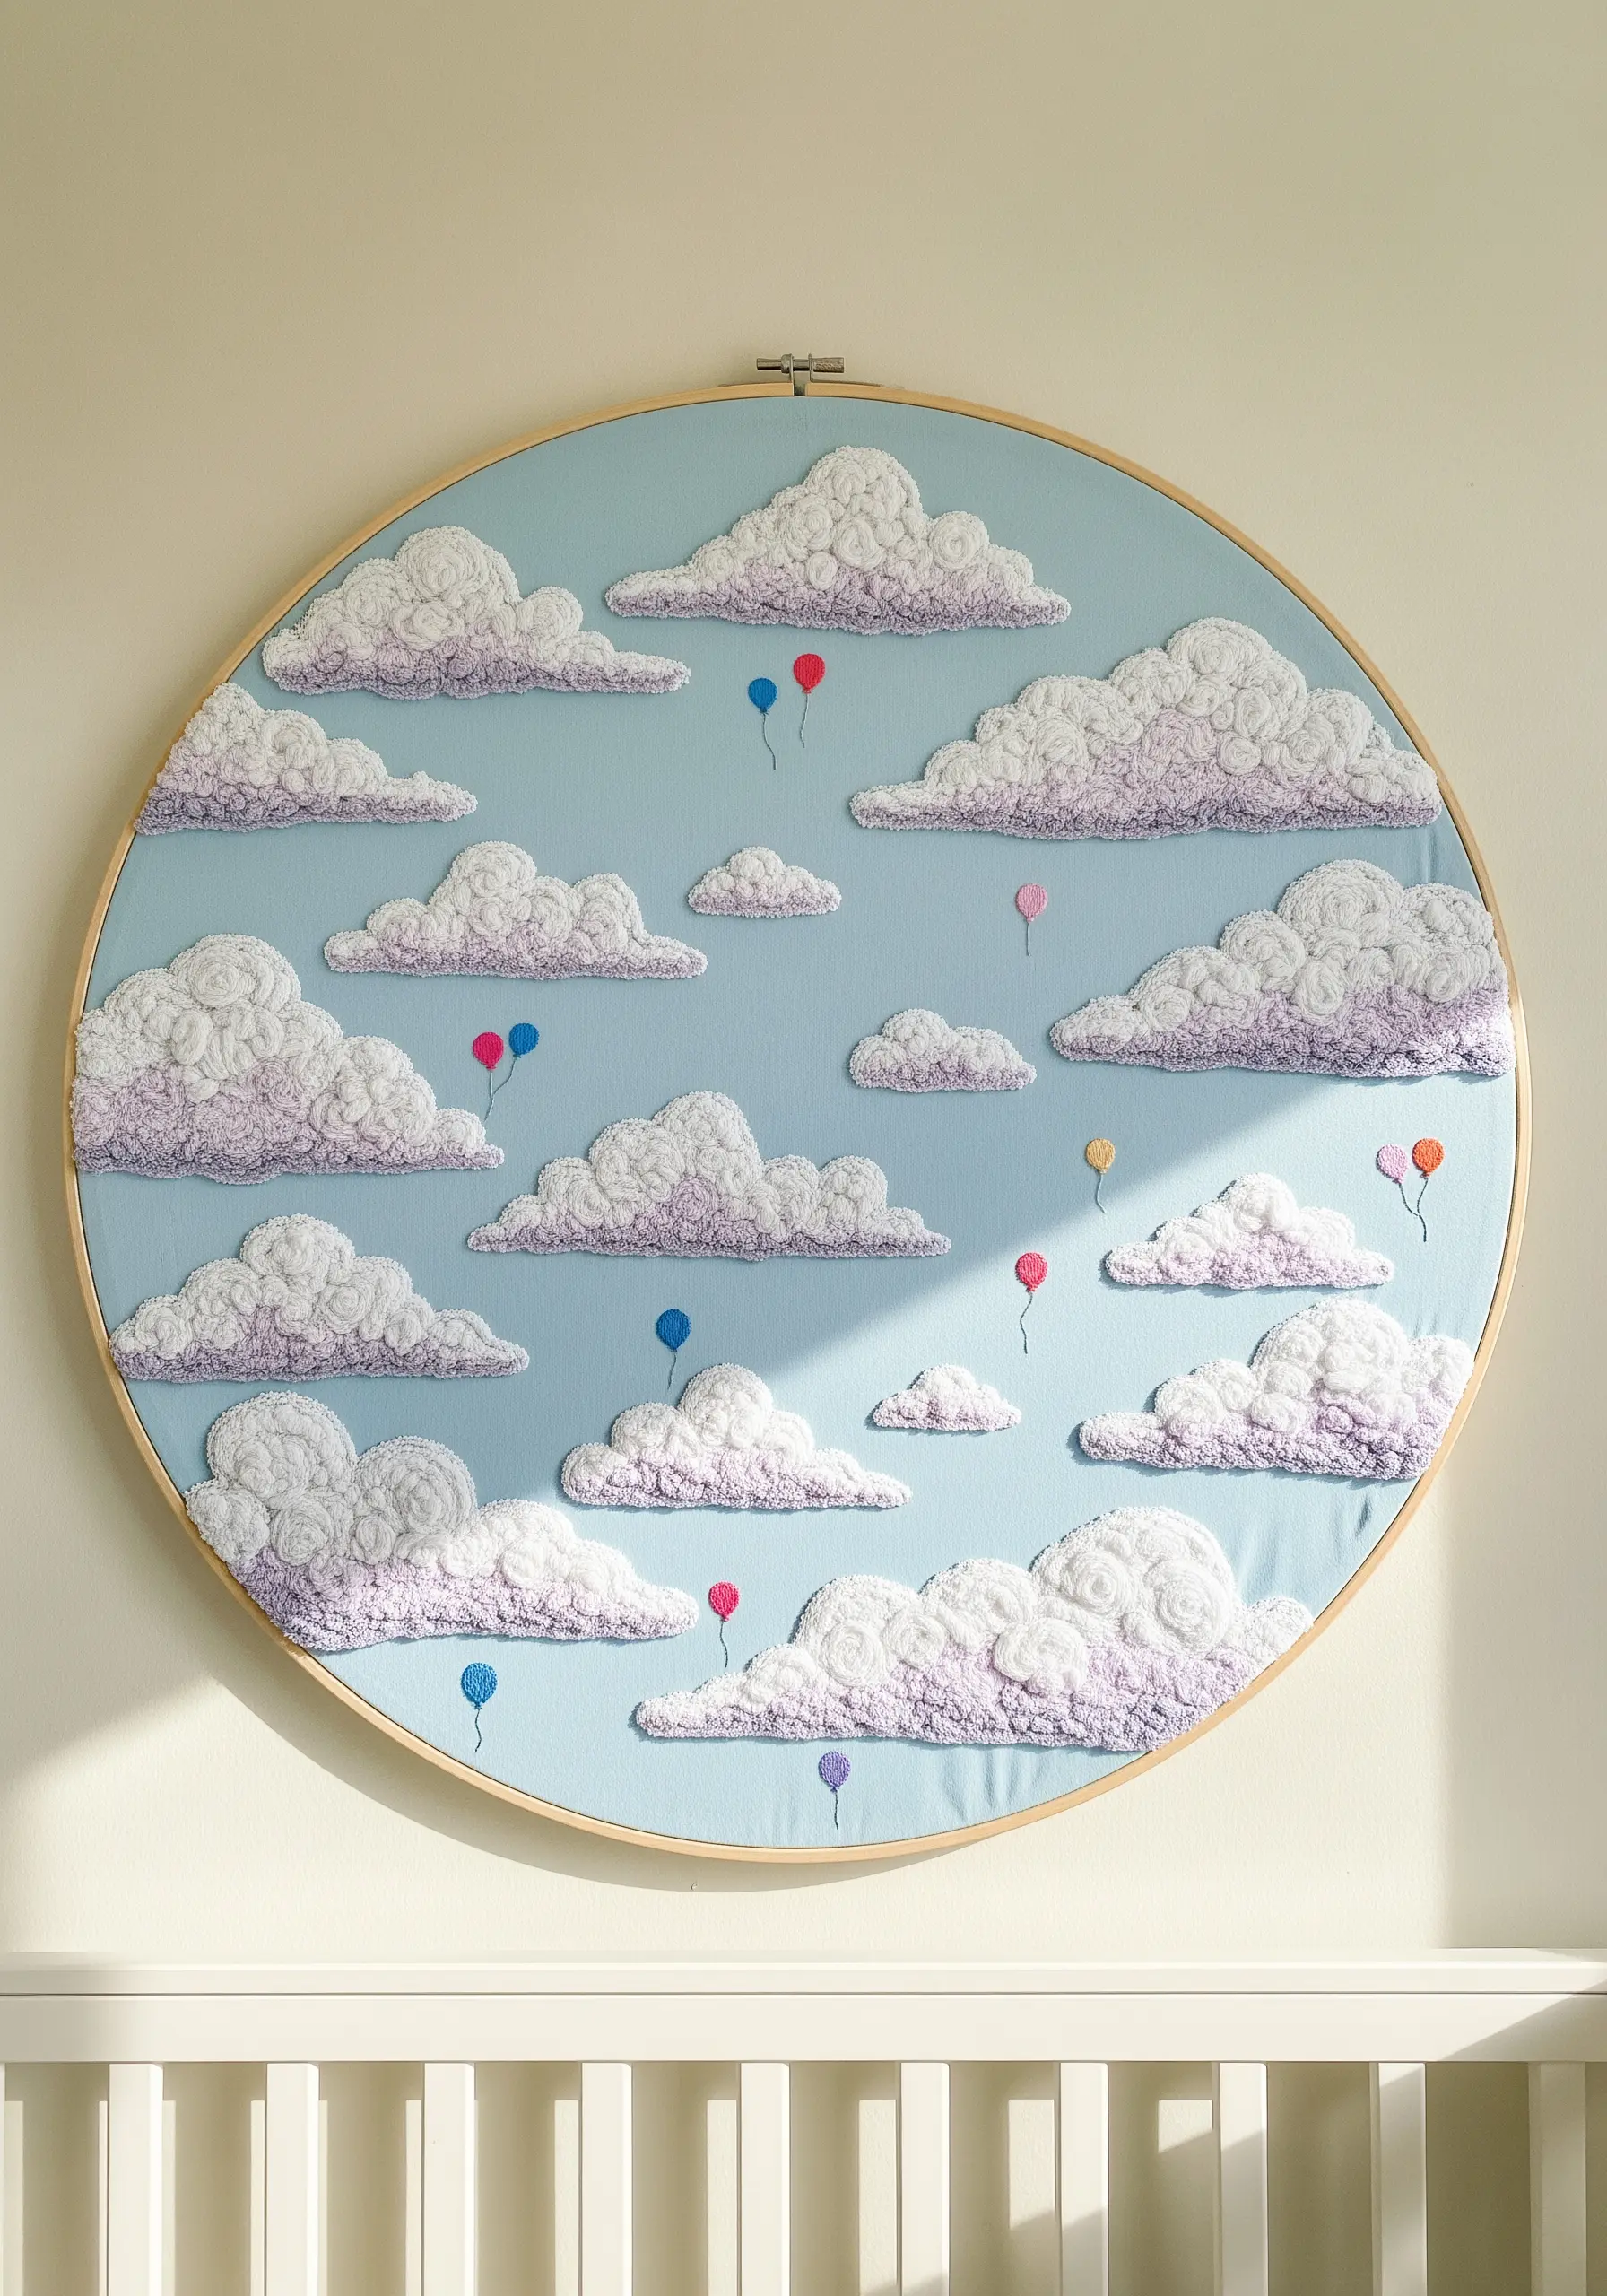
Create incredibly fluffy, touchable clouds by filling their shapes with densely packed French knots.
Use all six strands of cotton floss for each knot to maximize volume and texture.
To give the clouds realistic depth, subtly blend two or three shades—like white, cream, and a whisper of lilac—randomly throughout each shape.
The tiny, satin-stitched balloons add a pop of color and a crucial shift in scale, making the vastness of the sky feel intentional and composed.
7. Craft a No-Hoop Felt Garland with Simple Stitches
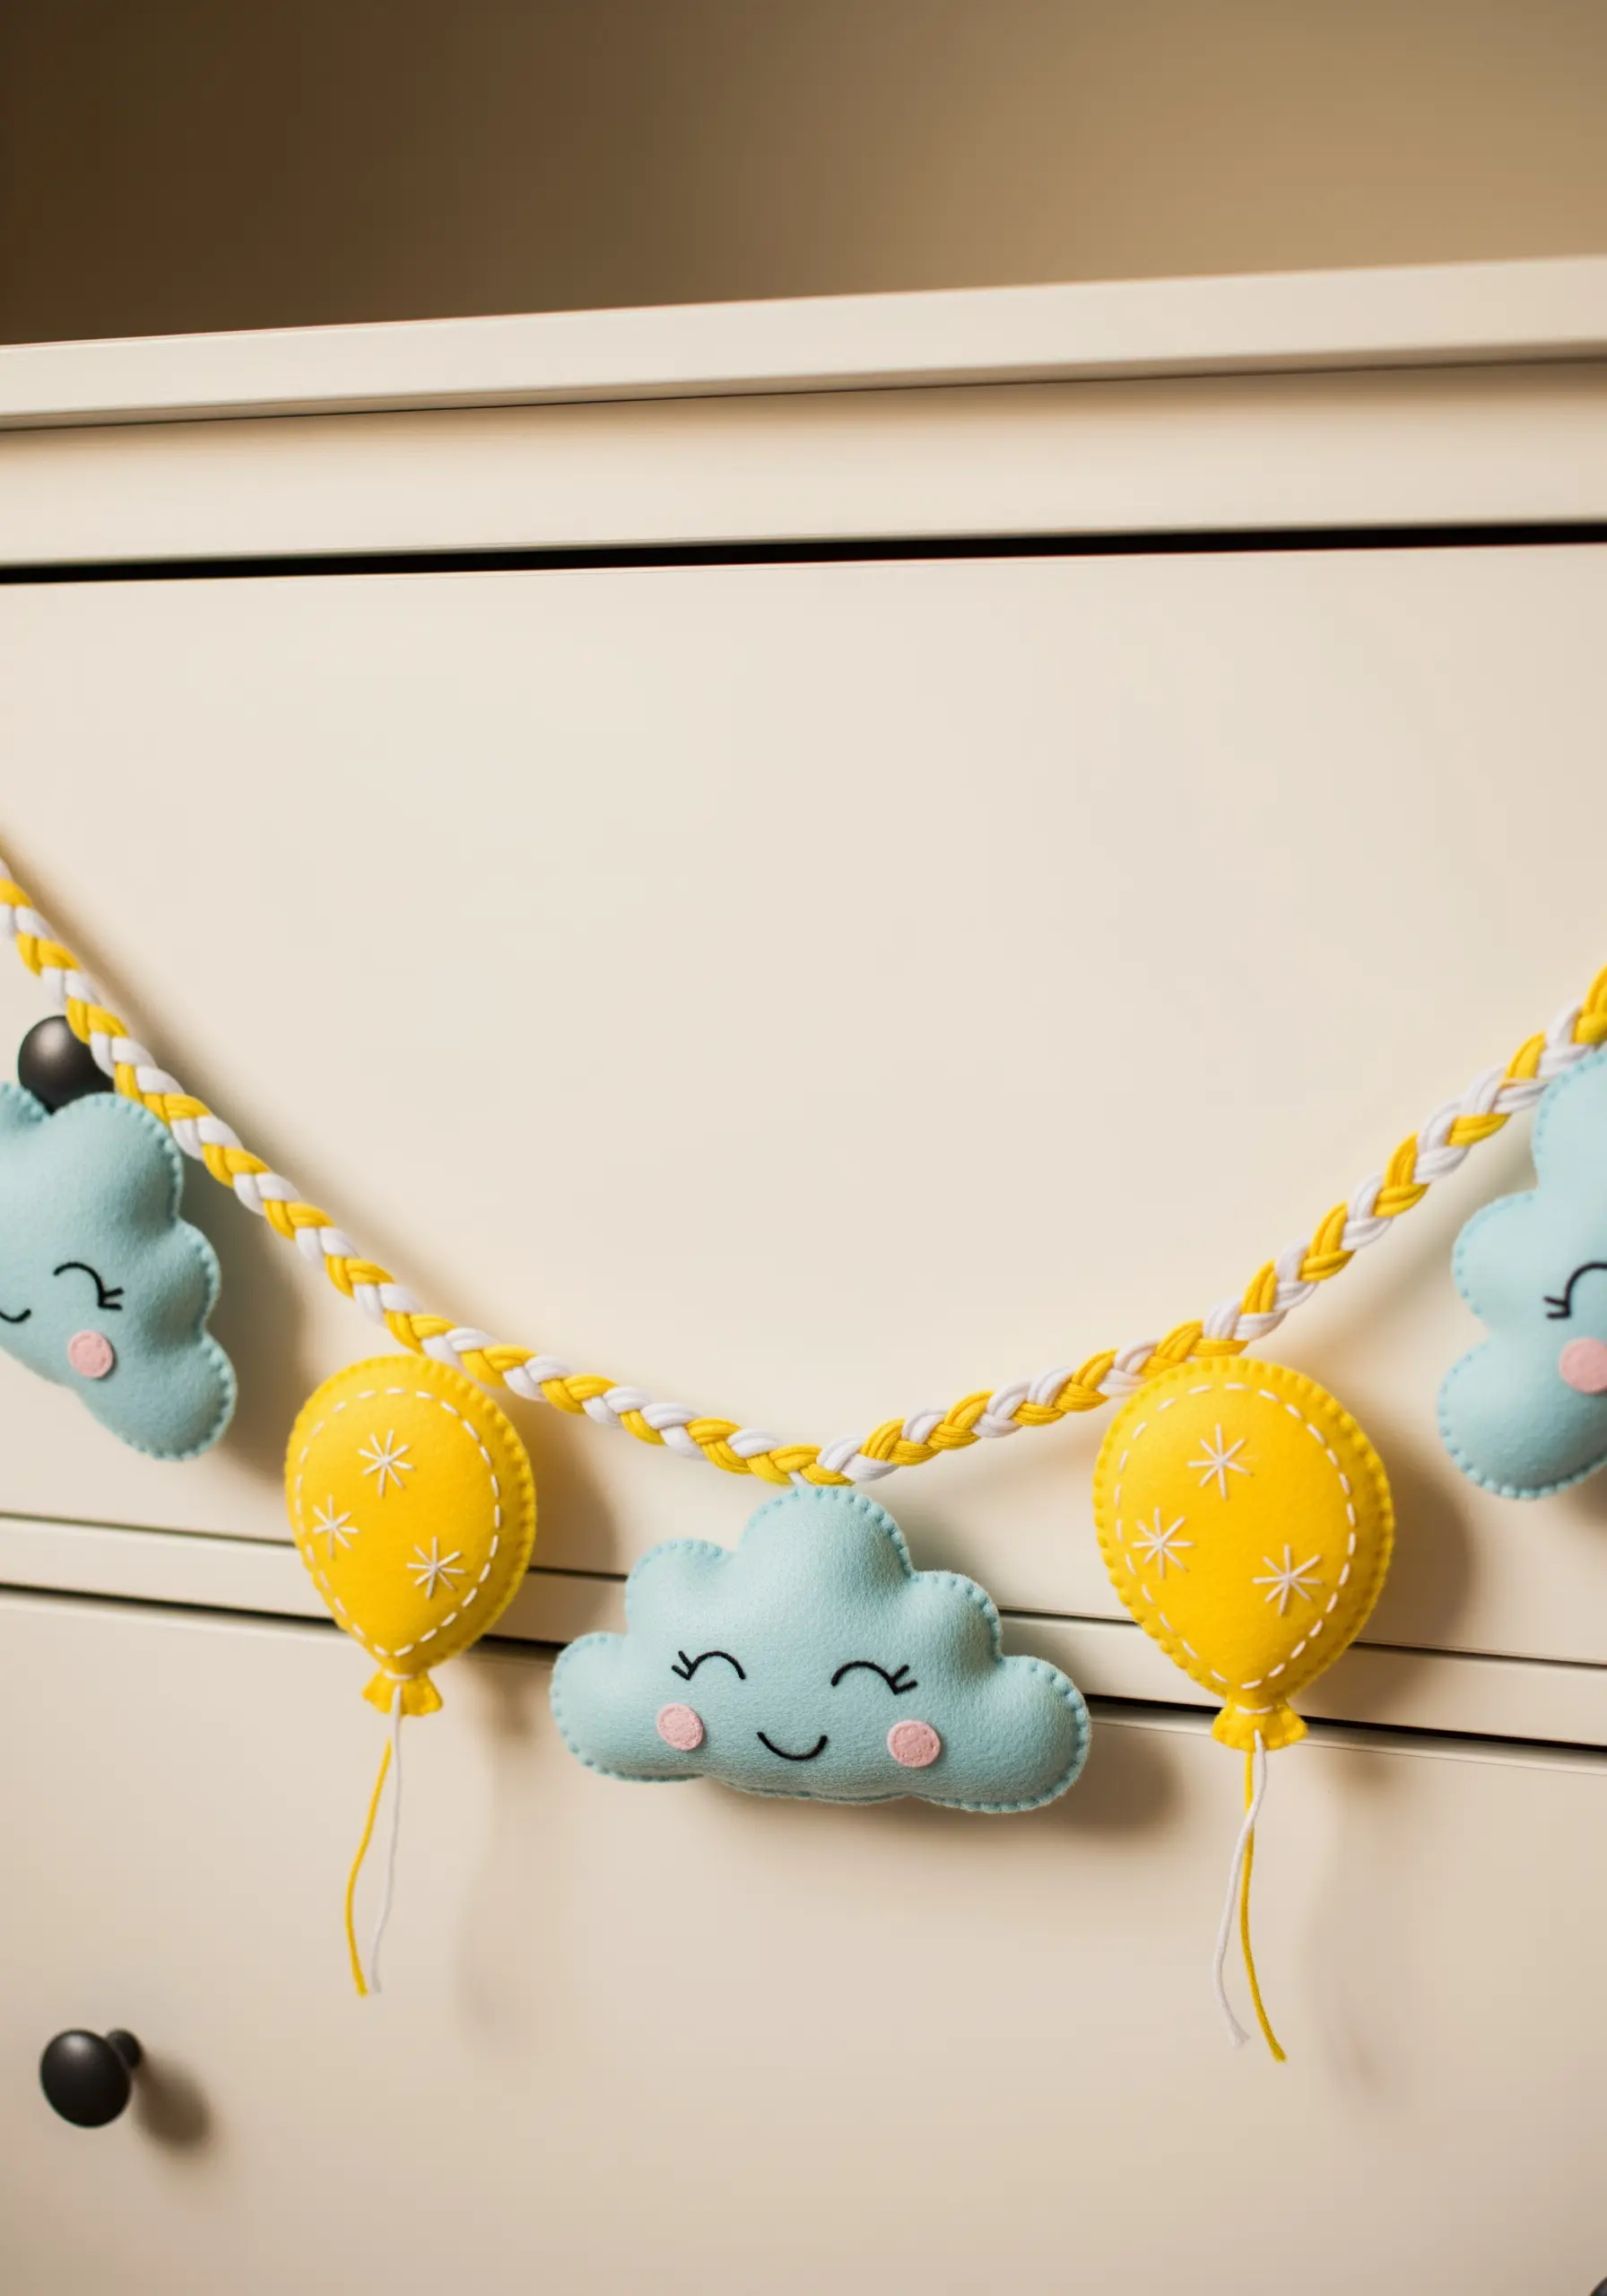
This is a perfect project for using felt scraps without needing a hoop.
Cut your paired shapes and embroider the details—like the faces and starbursts—onto the front pieces first.
Then, use a contrasting color of floss to join the front and back pieces with a simple, visible running stitch or blanket stitch around the edges, adding a light touch of stuffing before you close the final seam.
8. Design a Cloud Sampler with Varied Fill Stitches

Transform a simple motif into a sophisticated study of texture.
Dedicate each cloud to a different fill stitch to explore its unique effect: satin stitch for a smooth sheen, long-and-short stitch for a soft, painterly feel, woven wheel stitches for a raised floral effect, and French knots for a bubbly texture.
Enclosing each cloud with a crisp backstitch outline provides definition and makes each texture stand out as a deliberate choice.
9. Add Playful Dimension with String Art and Tassels
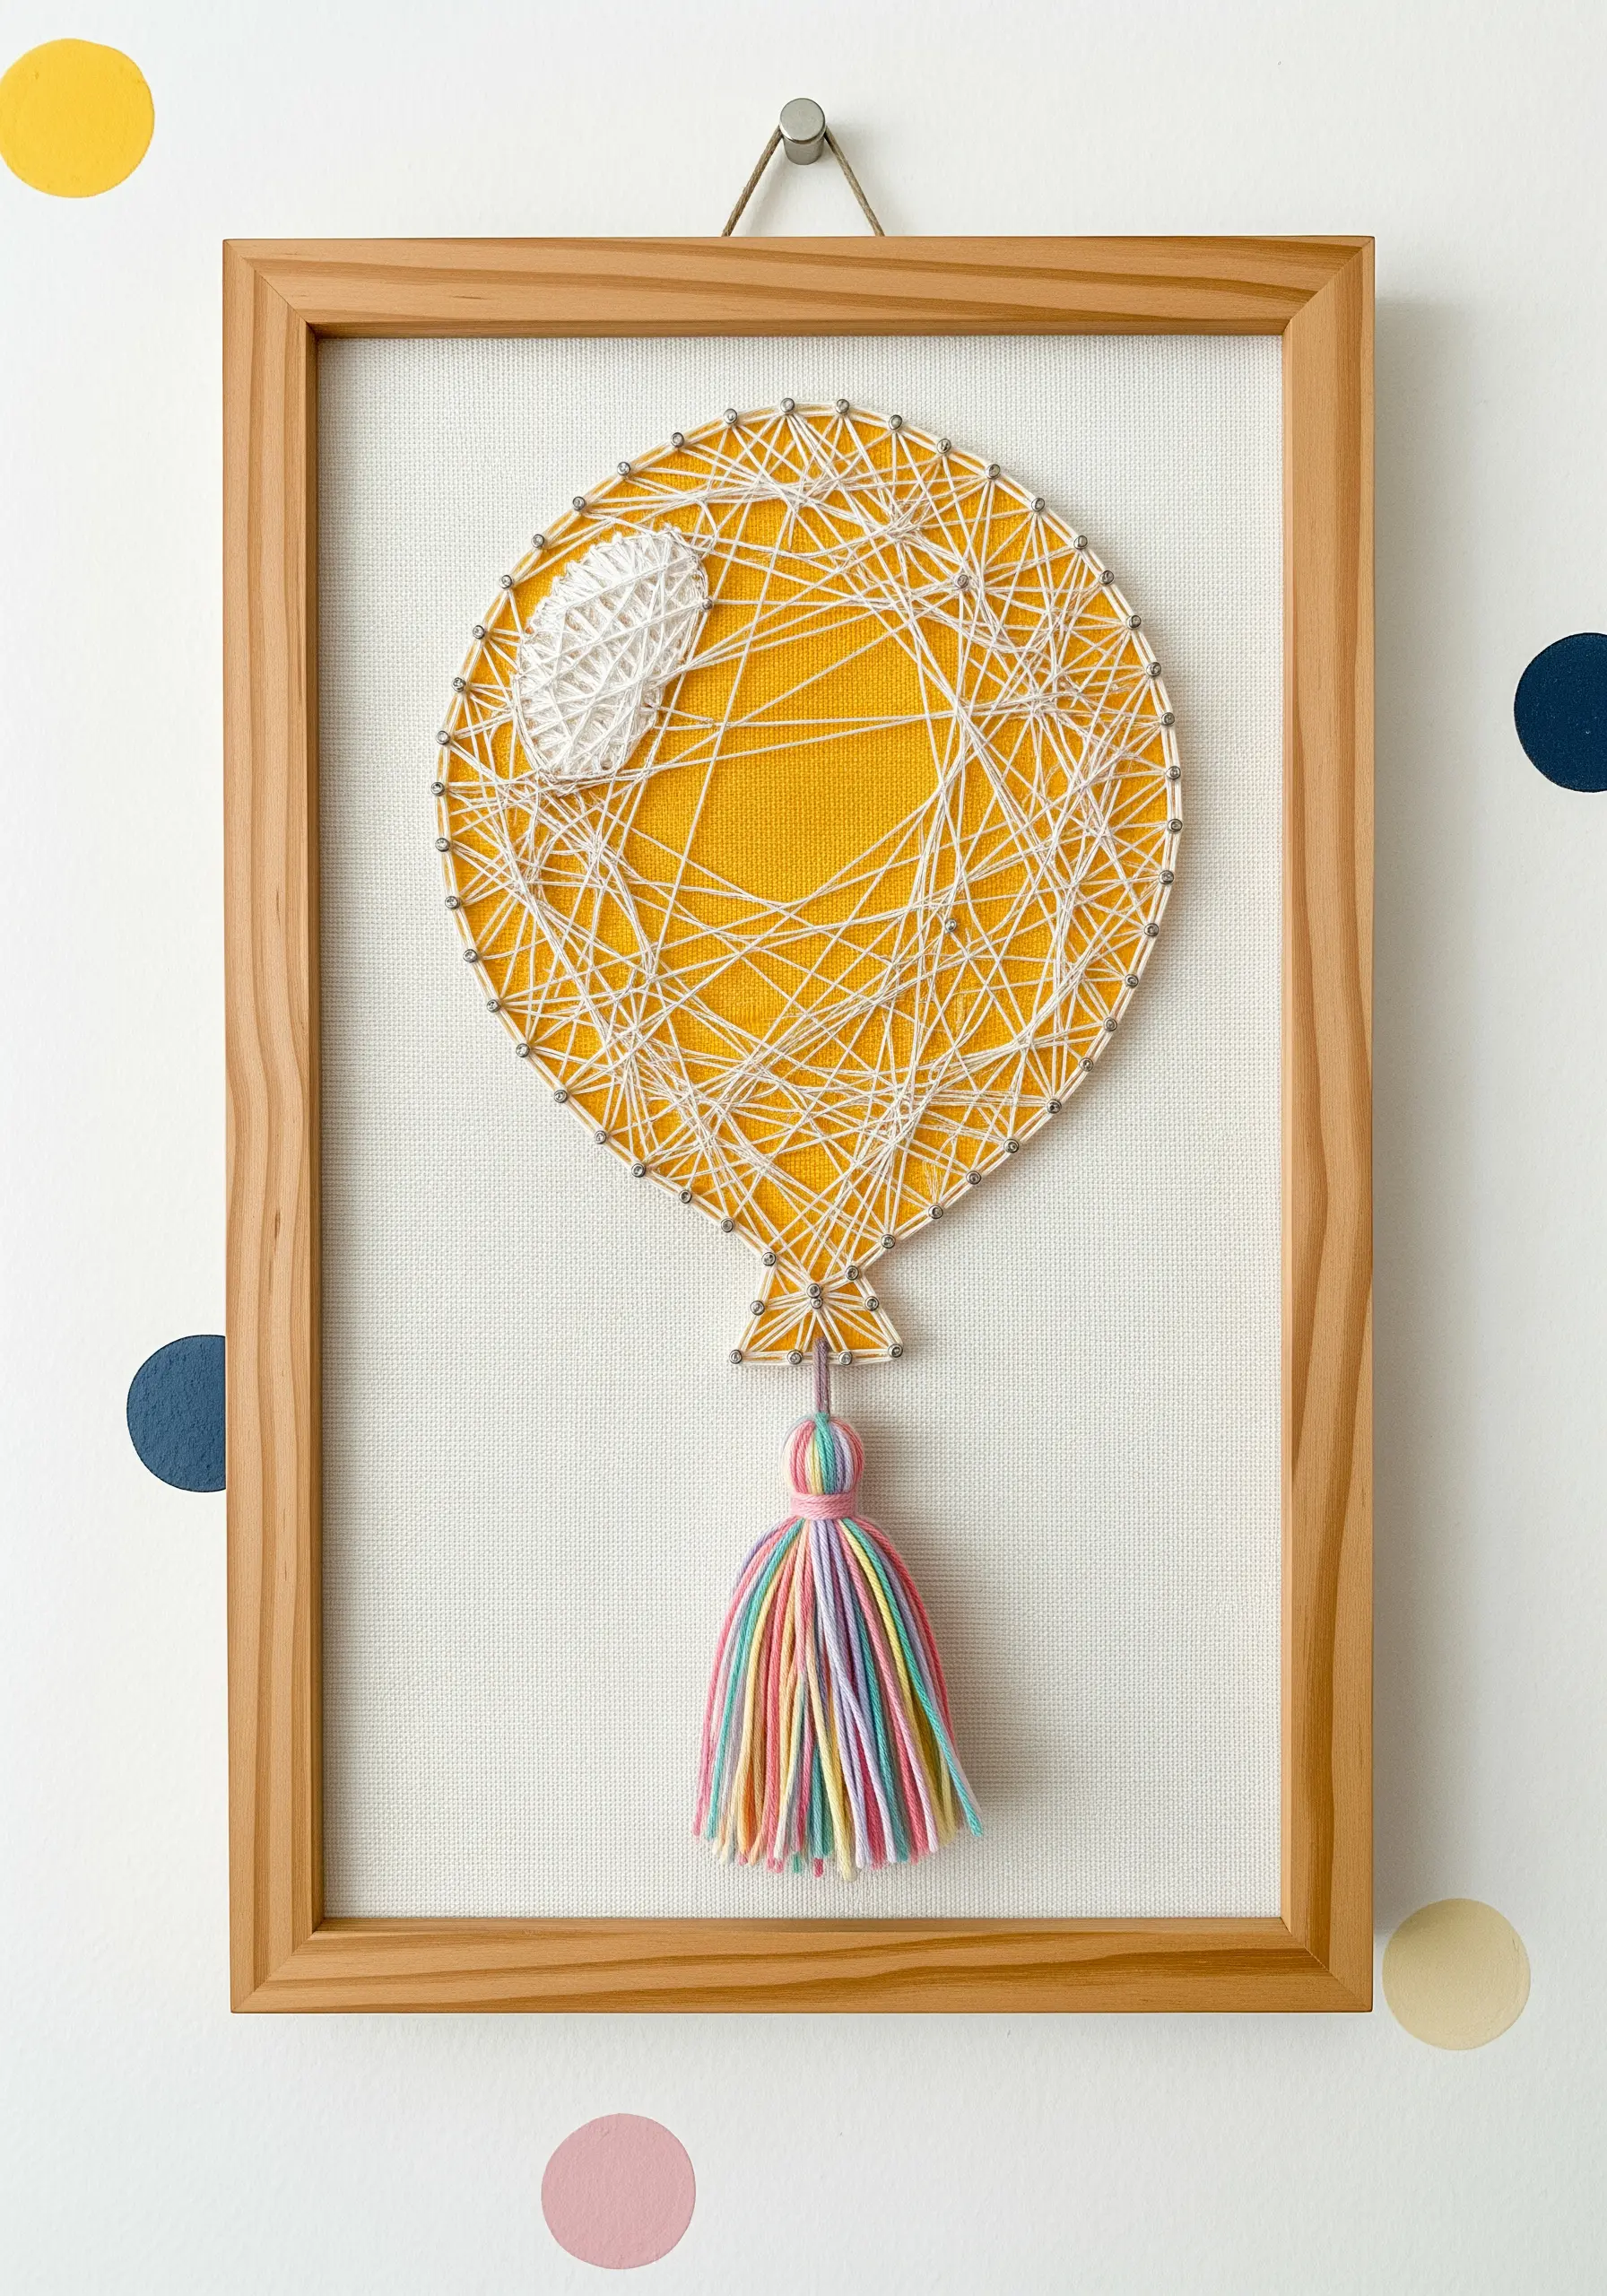
To execute this string art effect on fabric without causing tears, use small, strong seed beads as your anchor points around the balloon’s perimeter.
The random wrapping of the thread creates a feeling of energy and movement, while the small satin-stitched highlight provides a resting point for the eye.
Finish the piece with a handmade tassel using all the colors from your palette; this grounds the design and adds a perfectly coordinated, tactile element.
10. Tell a Story with a Triptych of Embellished Hoops
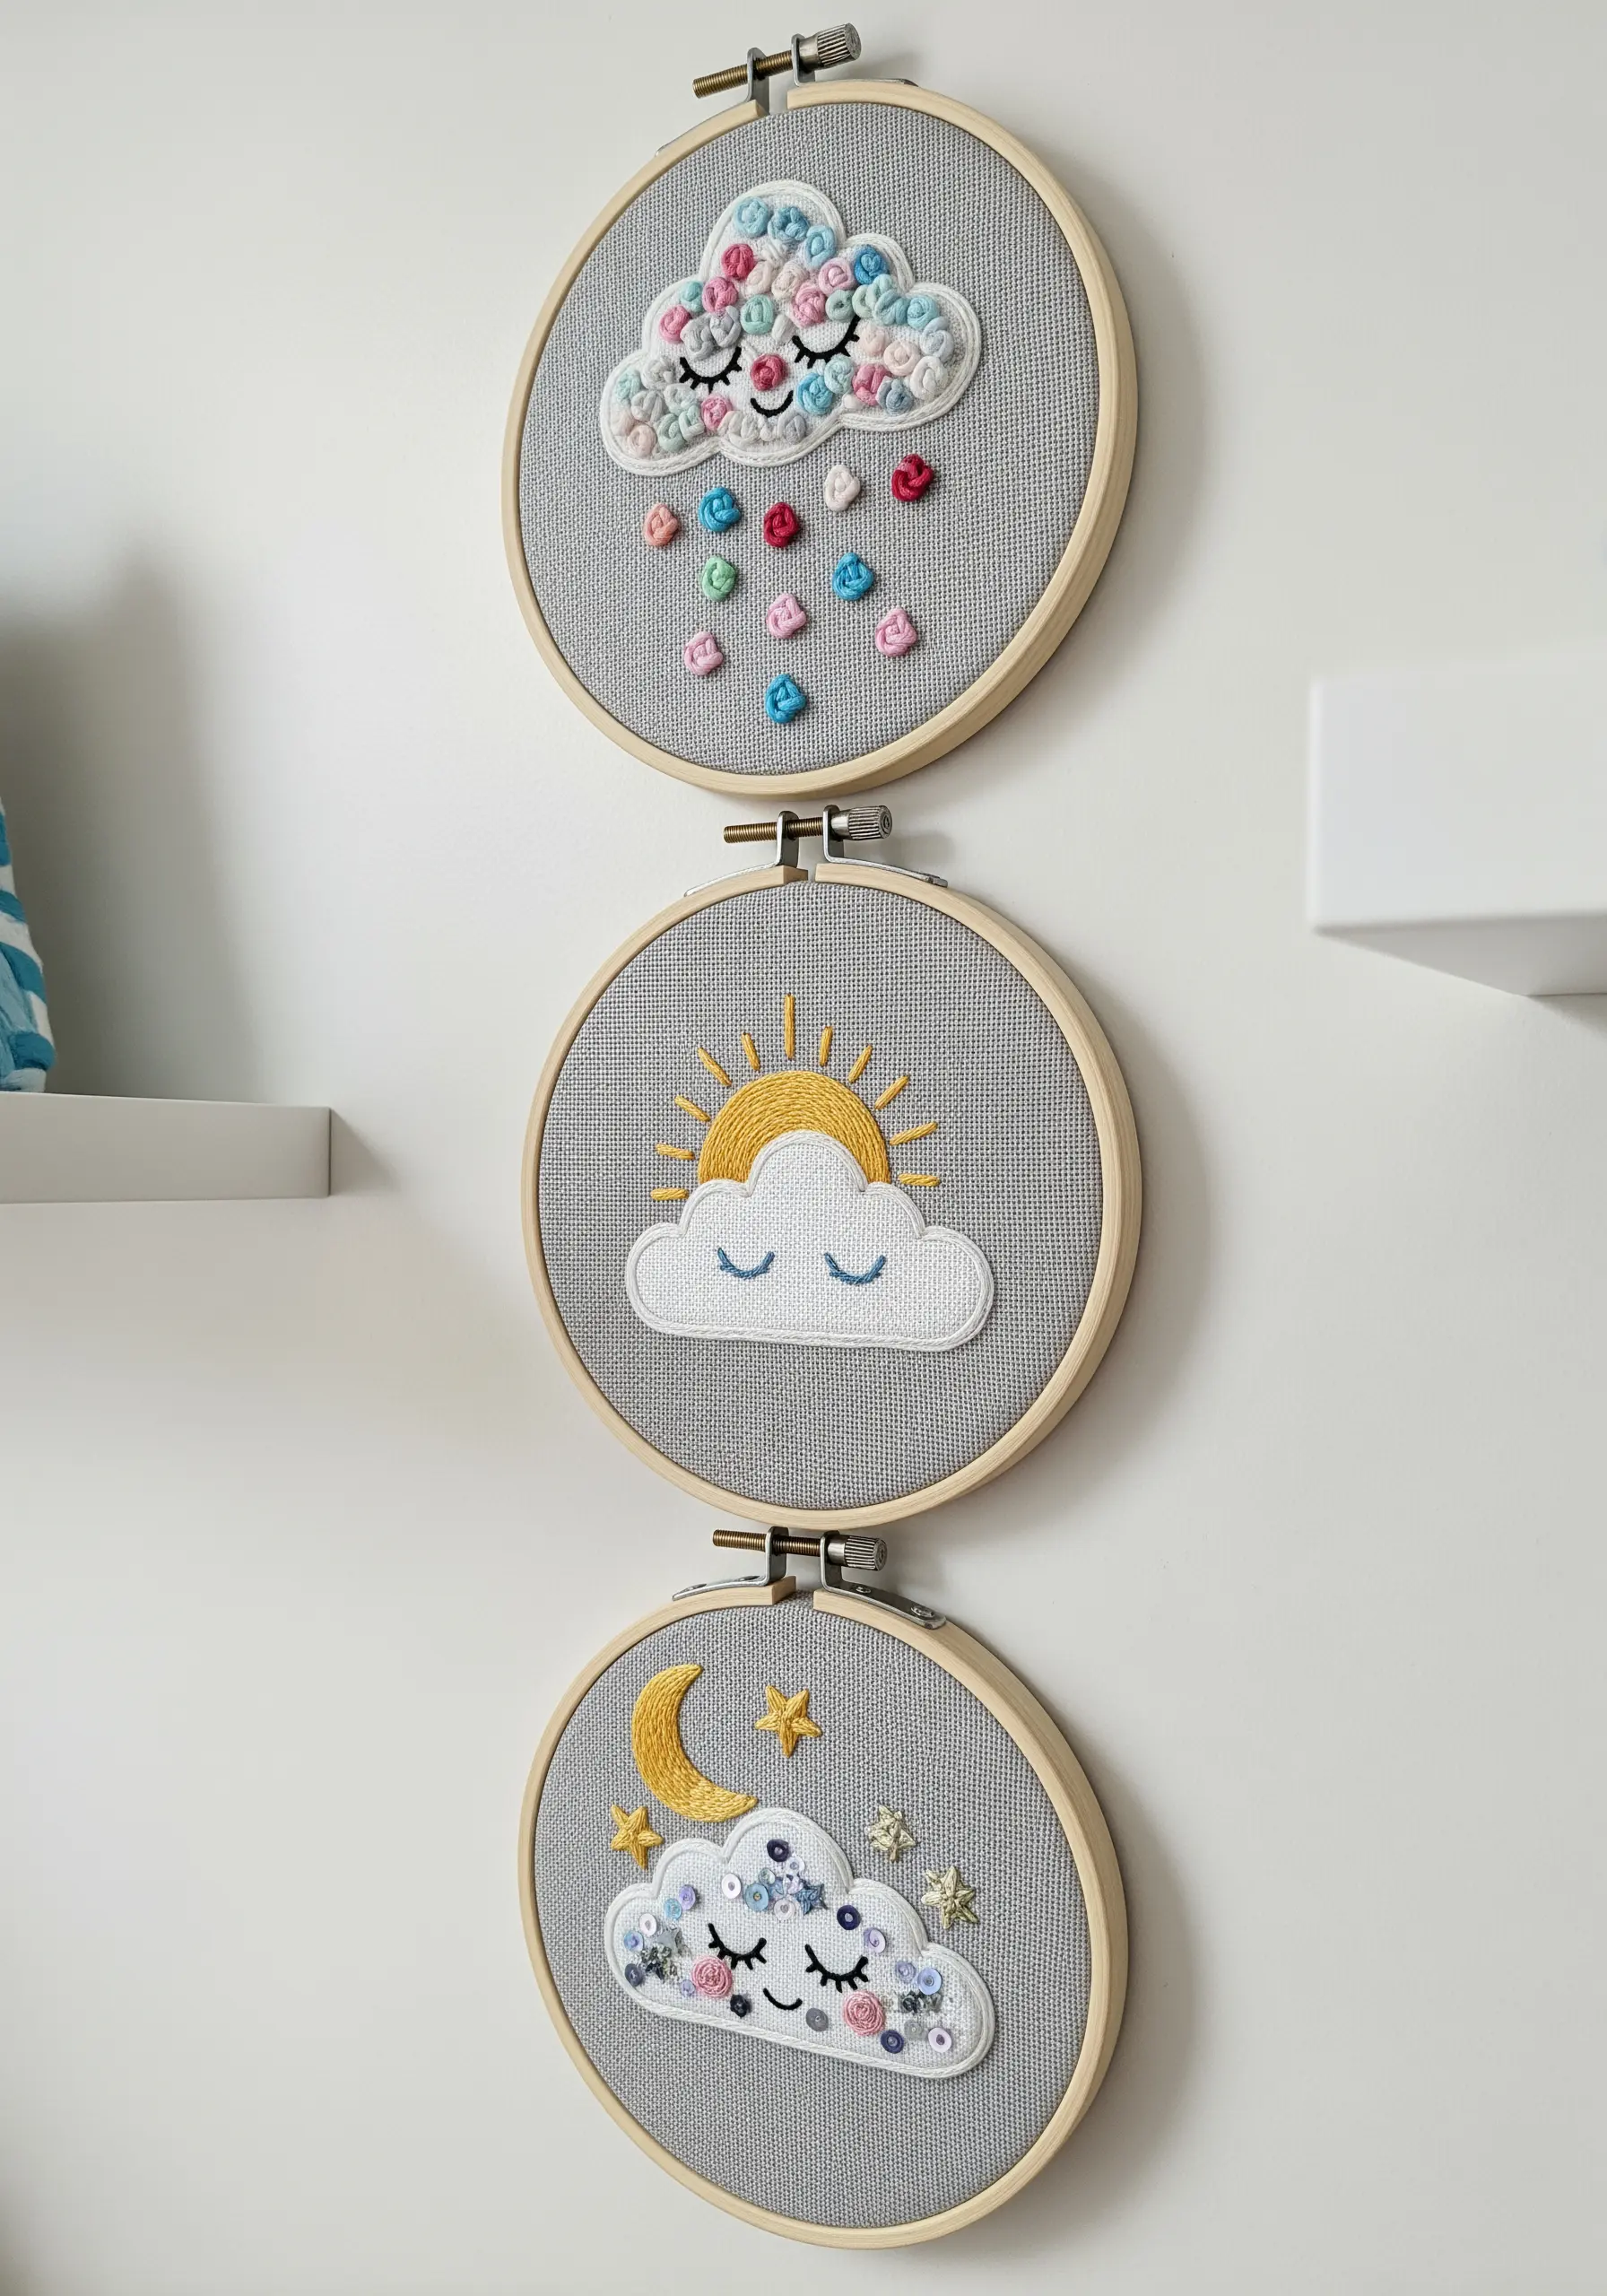
Arrange three hoops together to create a cohesive narrative wall display.
Start by using felt appliqué for the main cloud shapes to achieve a clean, raised silhouette on each hoop.
Then, give each scene its own personality through embellishments: bullion knot roses for a floral scene, sequins and star stitches for a night sky, and simple straight stitches for sun rays.
Using the same grey fabric and white cloud shape across all three hoops ensures the set feels unified and intentional.
11. Construct a Bold Appliqué and Tassel Banner
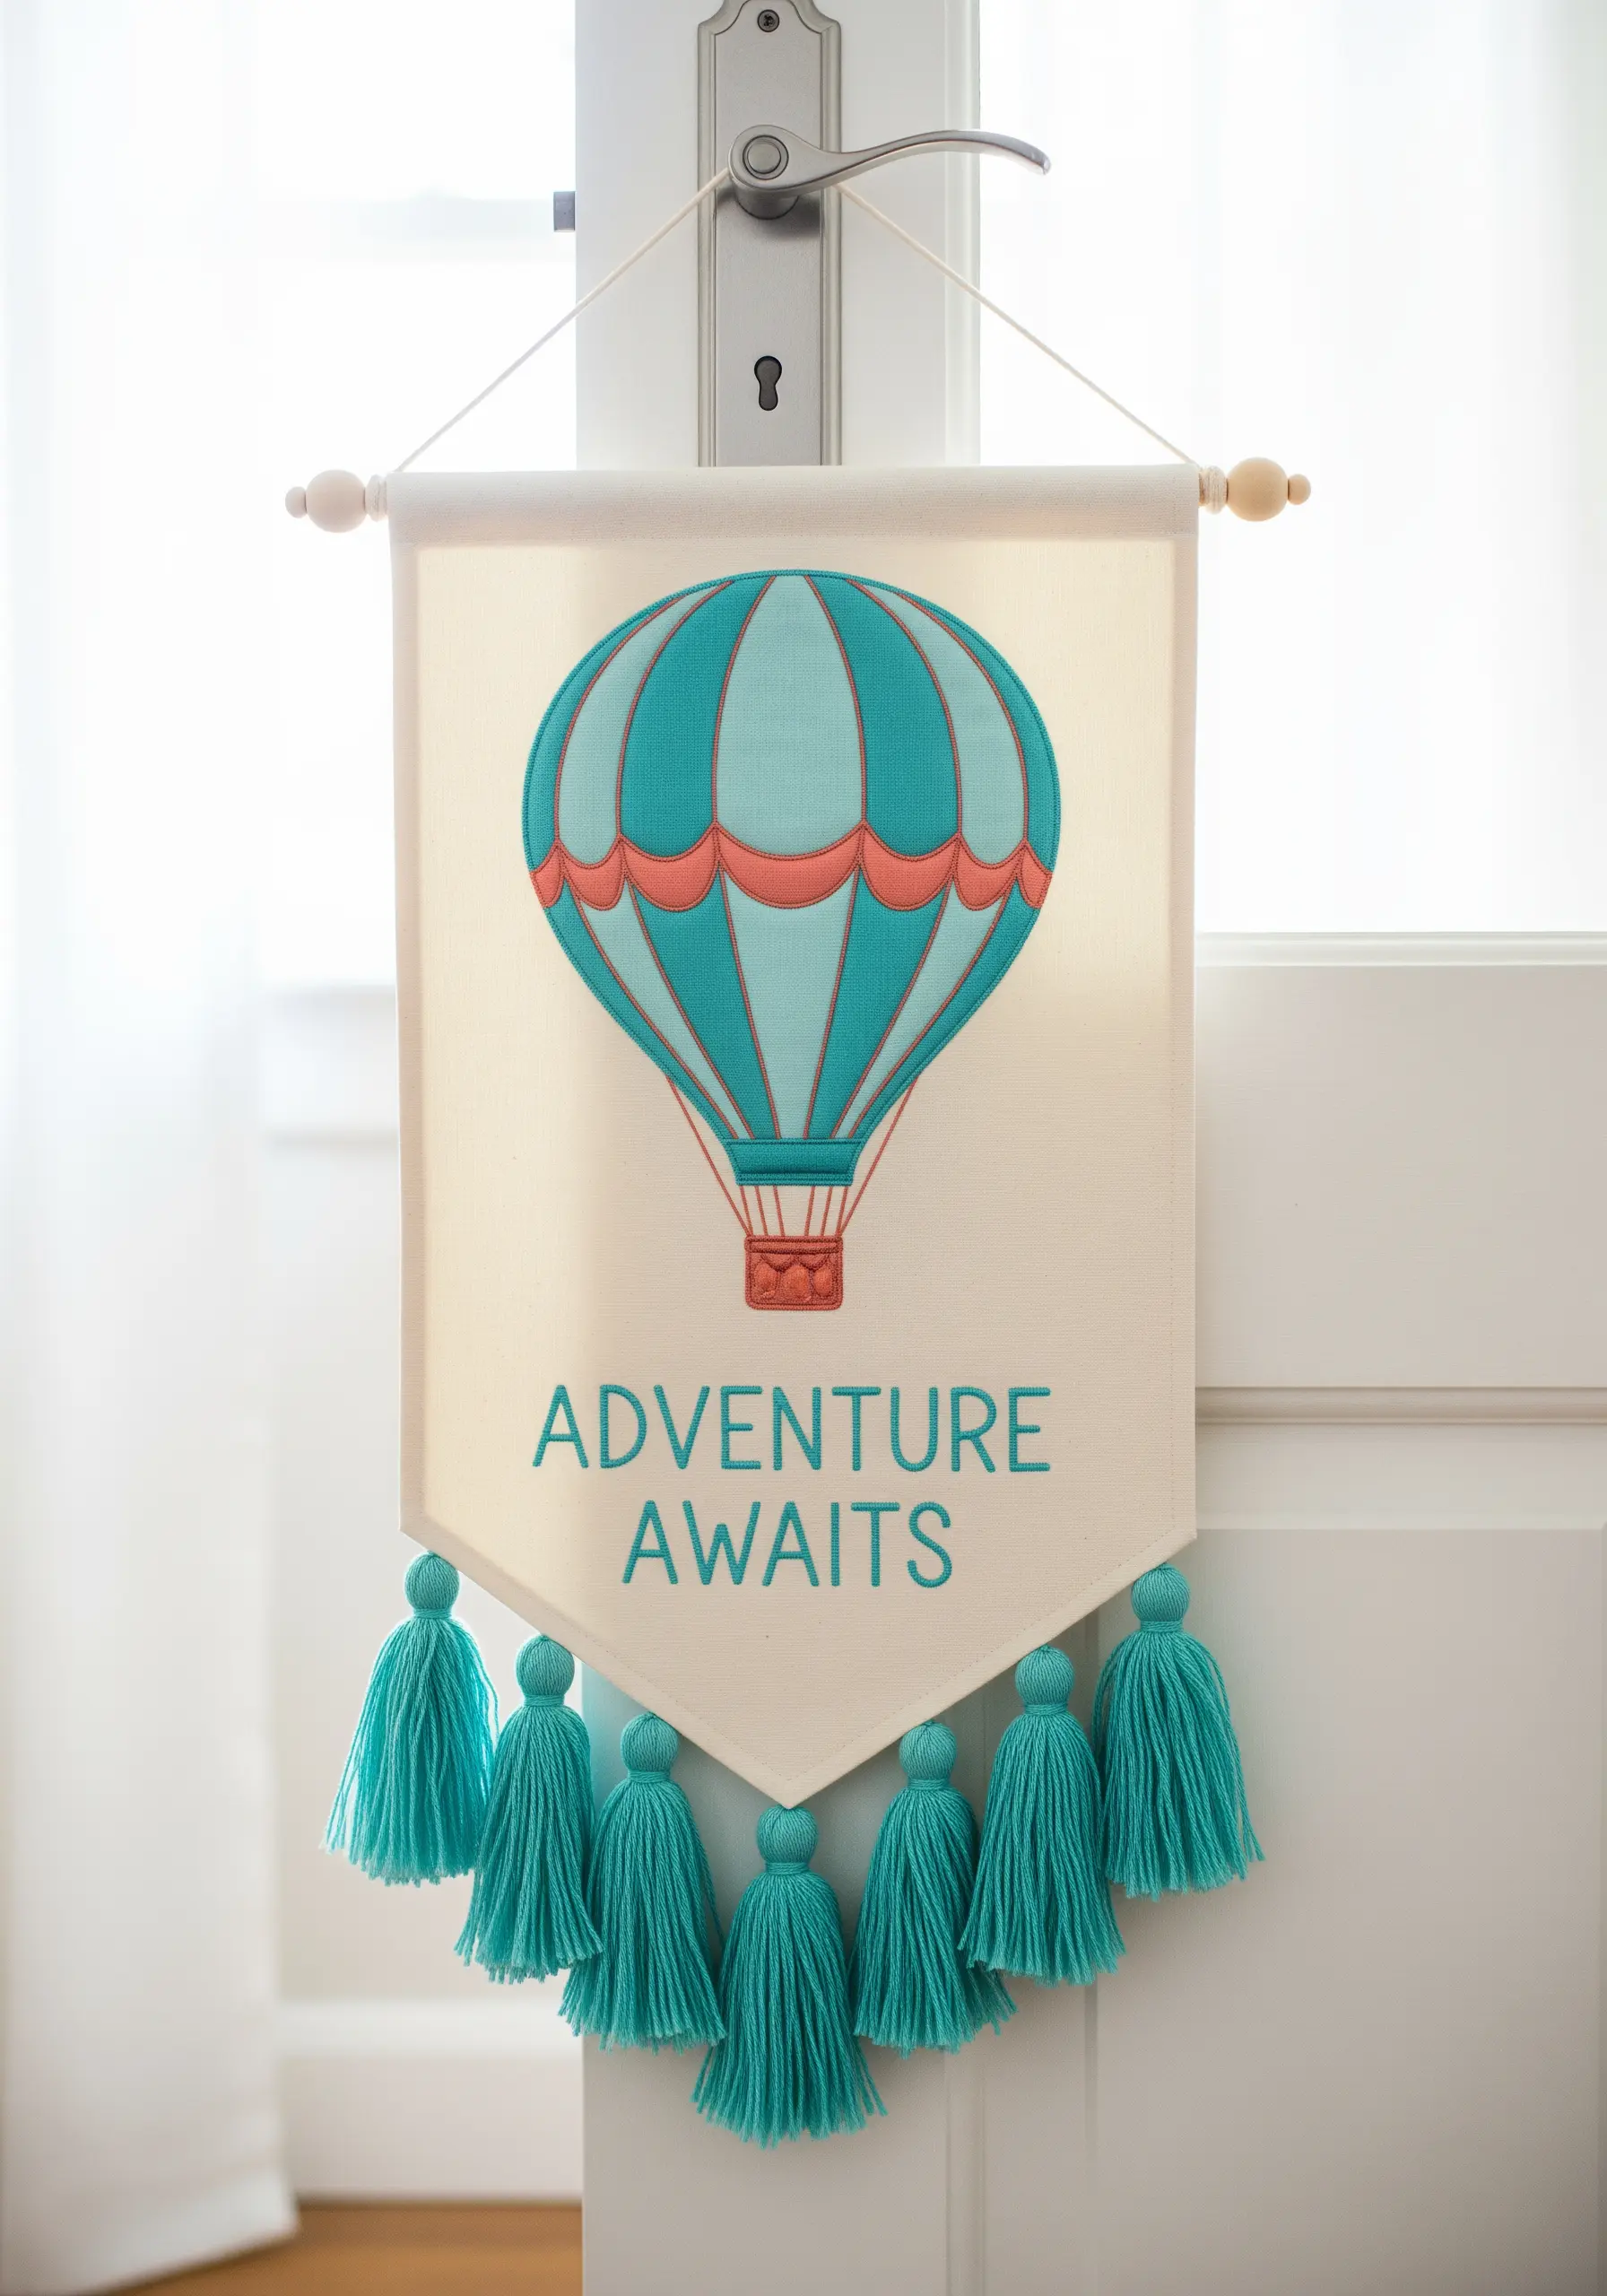
The power of this design lies in its crisp, clean lines, which you can achieve with fabric appliqué.
Use an iron-on adhesive to perfectly position your fabric pieces before stitching, eliminating any chance of shifting.
Secure the edges with a tight, clean machine-sewn satin stitch for a professional finish.
The large, handmade tassels at the bottom add satisfying weight, color, and a sense of playful ceremony to the banner.
12. Create Graphic Impact with High-Contrast Blackwork
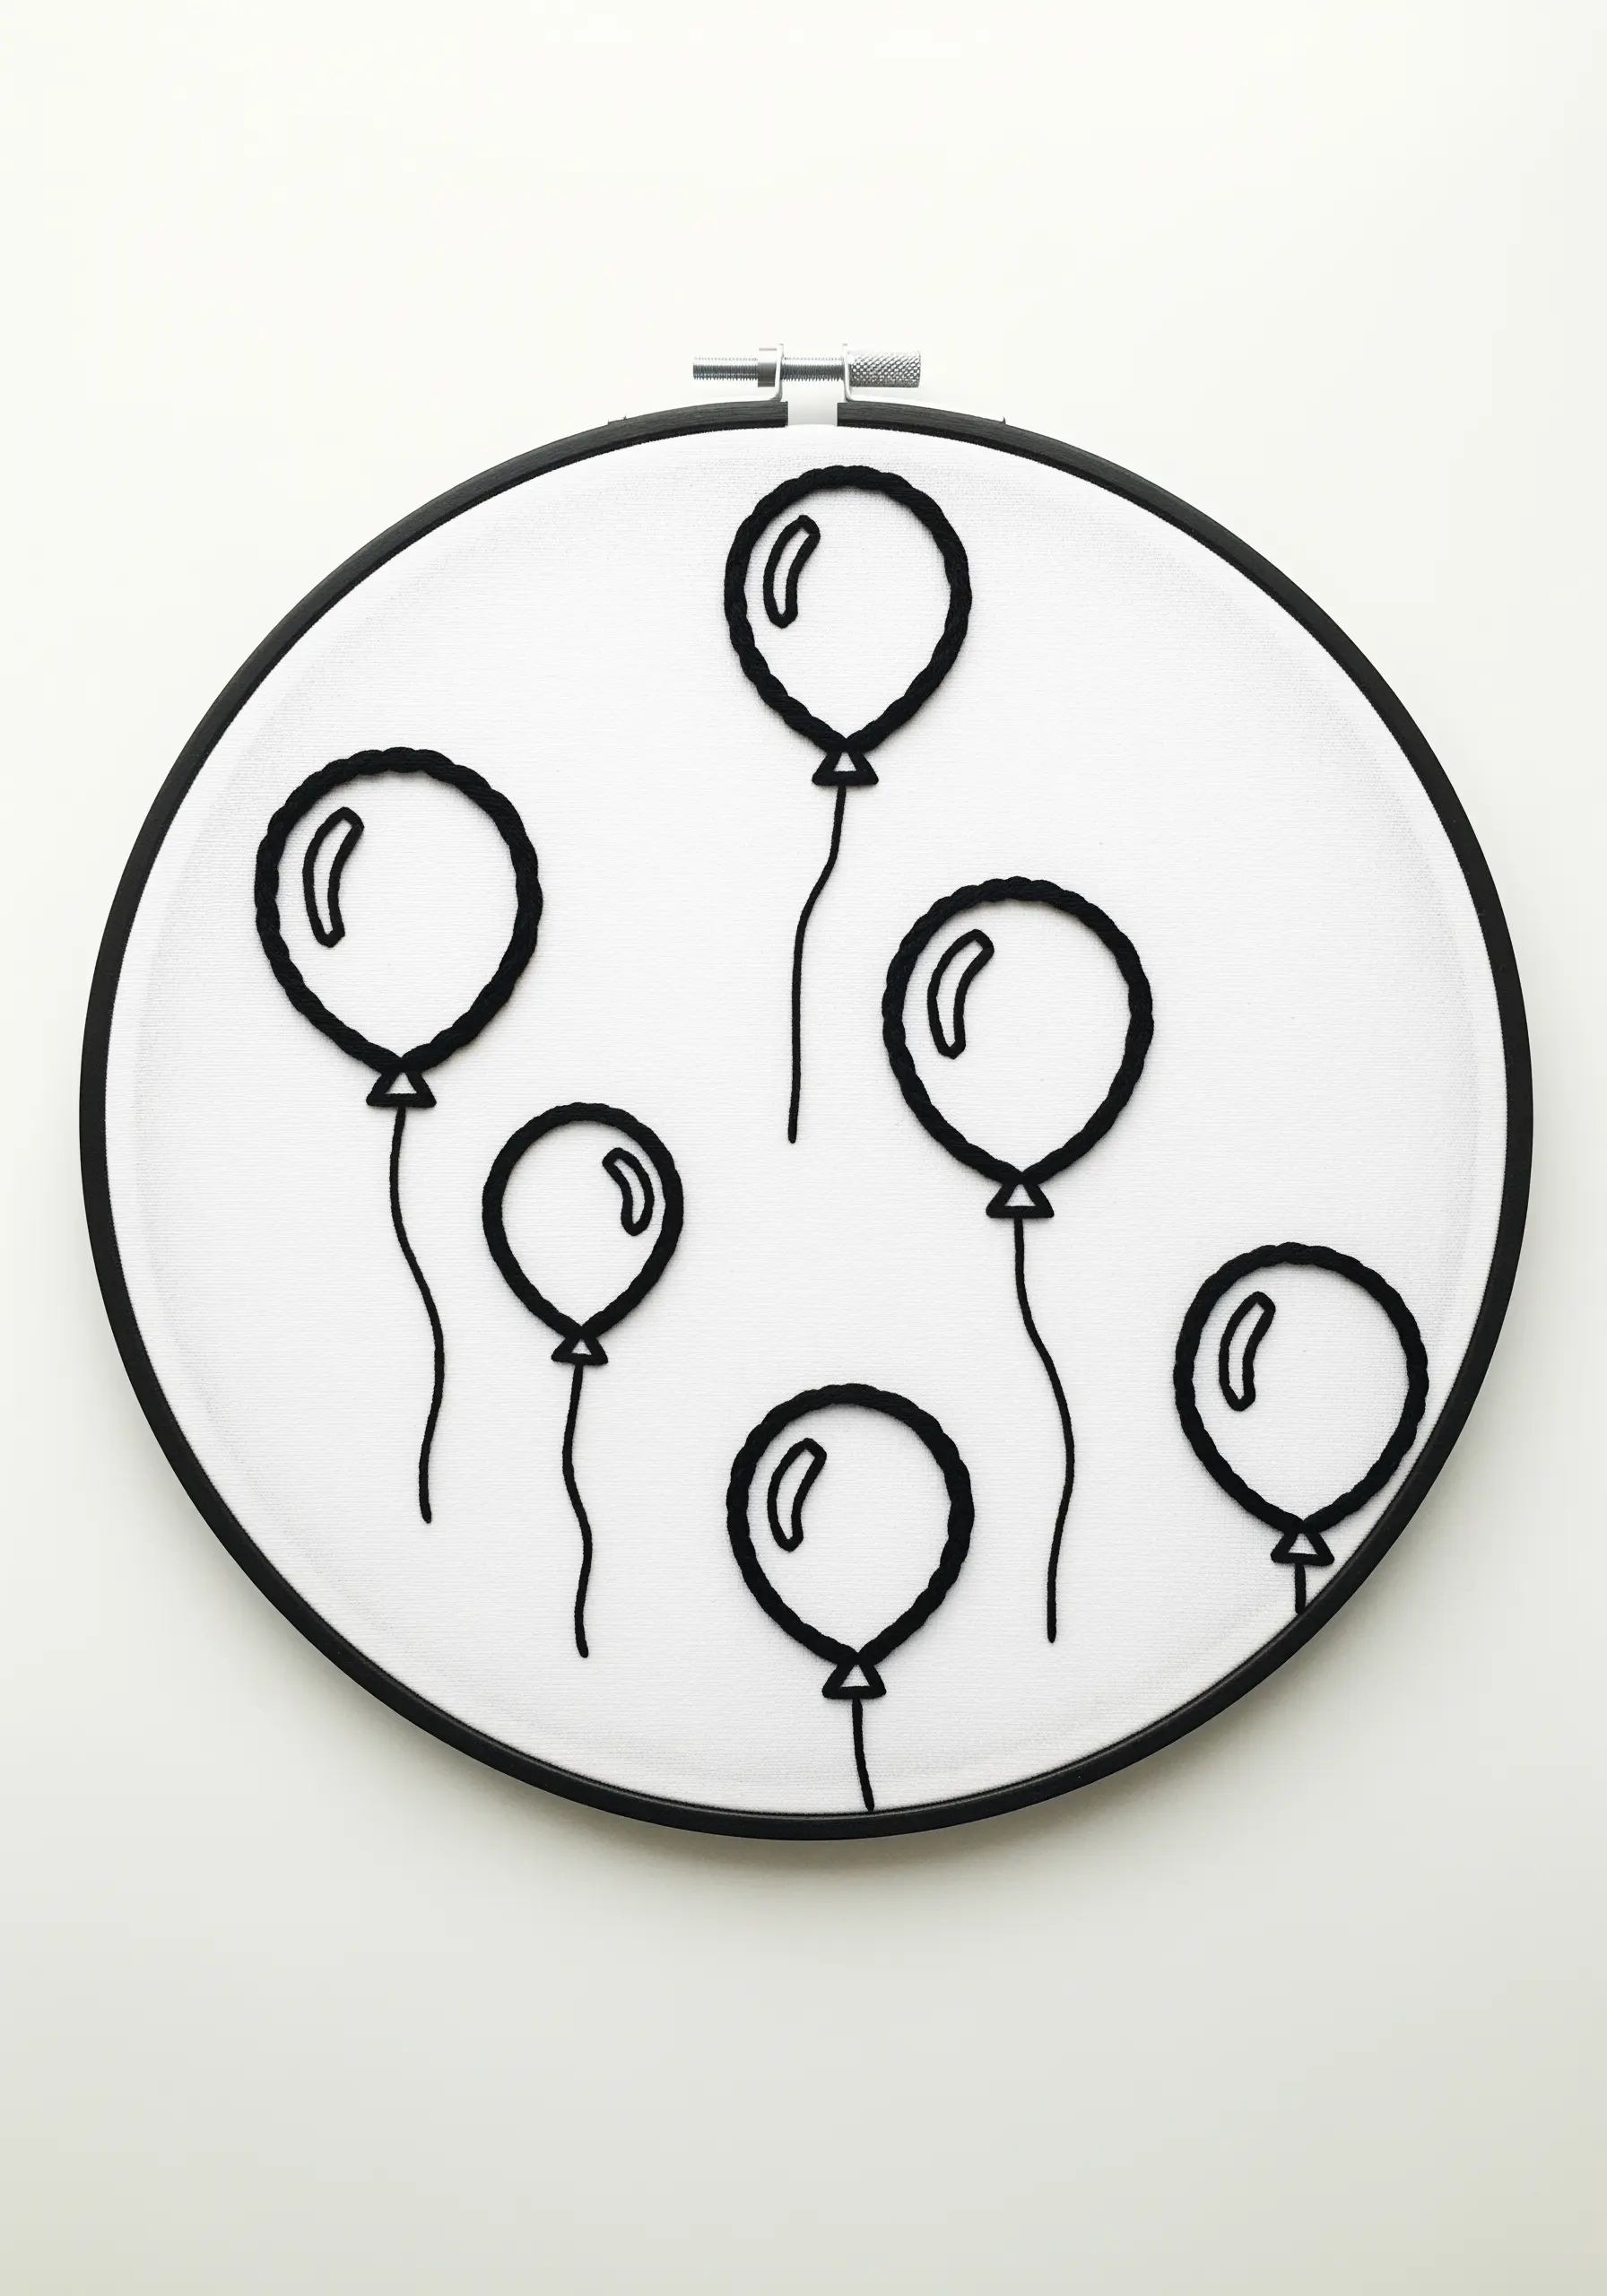
This style proves that simplicity is often the most striking choice.
Use a thick thread, such as pearl cotton #8, or all six strands of embroidery floss to create outlines that are bold and substantial.
To achieve an exceptionally smooth, solid line, use a whipped backstitch—it fills in the gaps of a standard backstitch for a rope-like effect.
The careful use of negative space is key, allowing the clean black lines to define the art, making it a perfect example of minimalist embroidery decor.
13. Add Miniature Motifs to a 3D Cloud Pillow
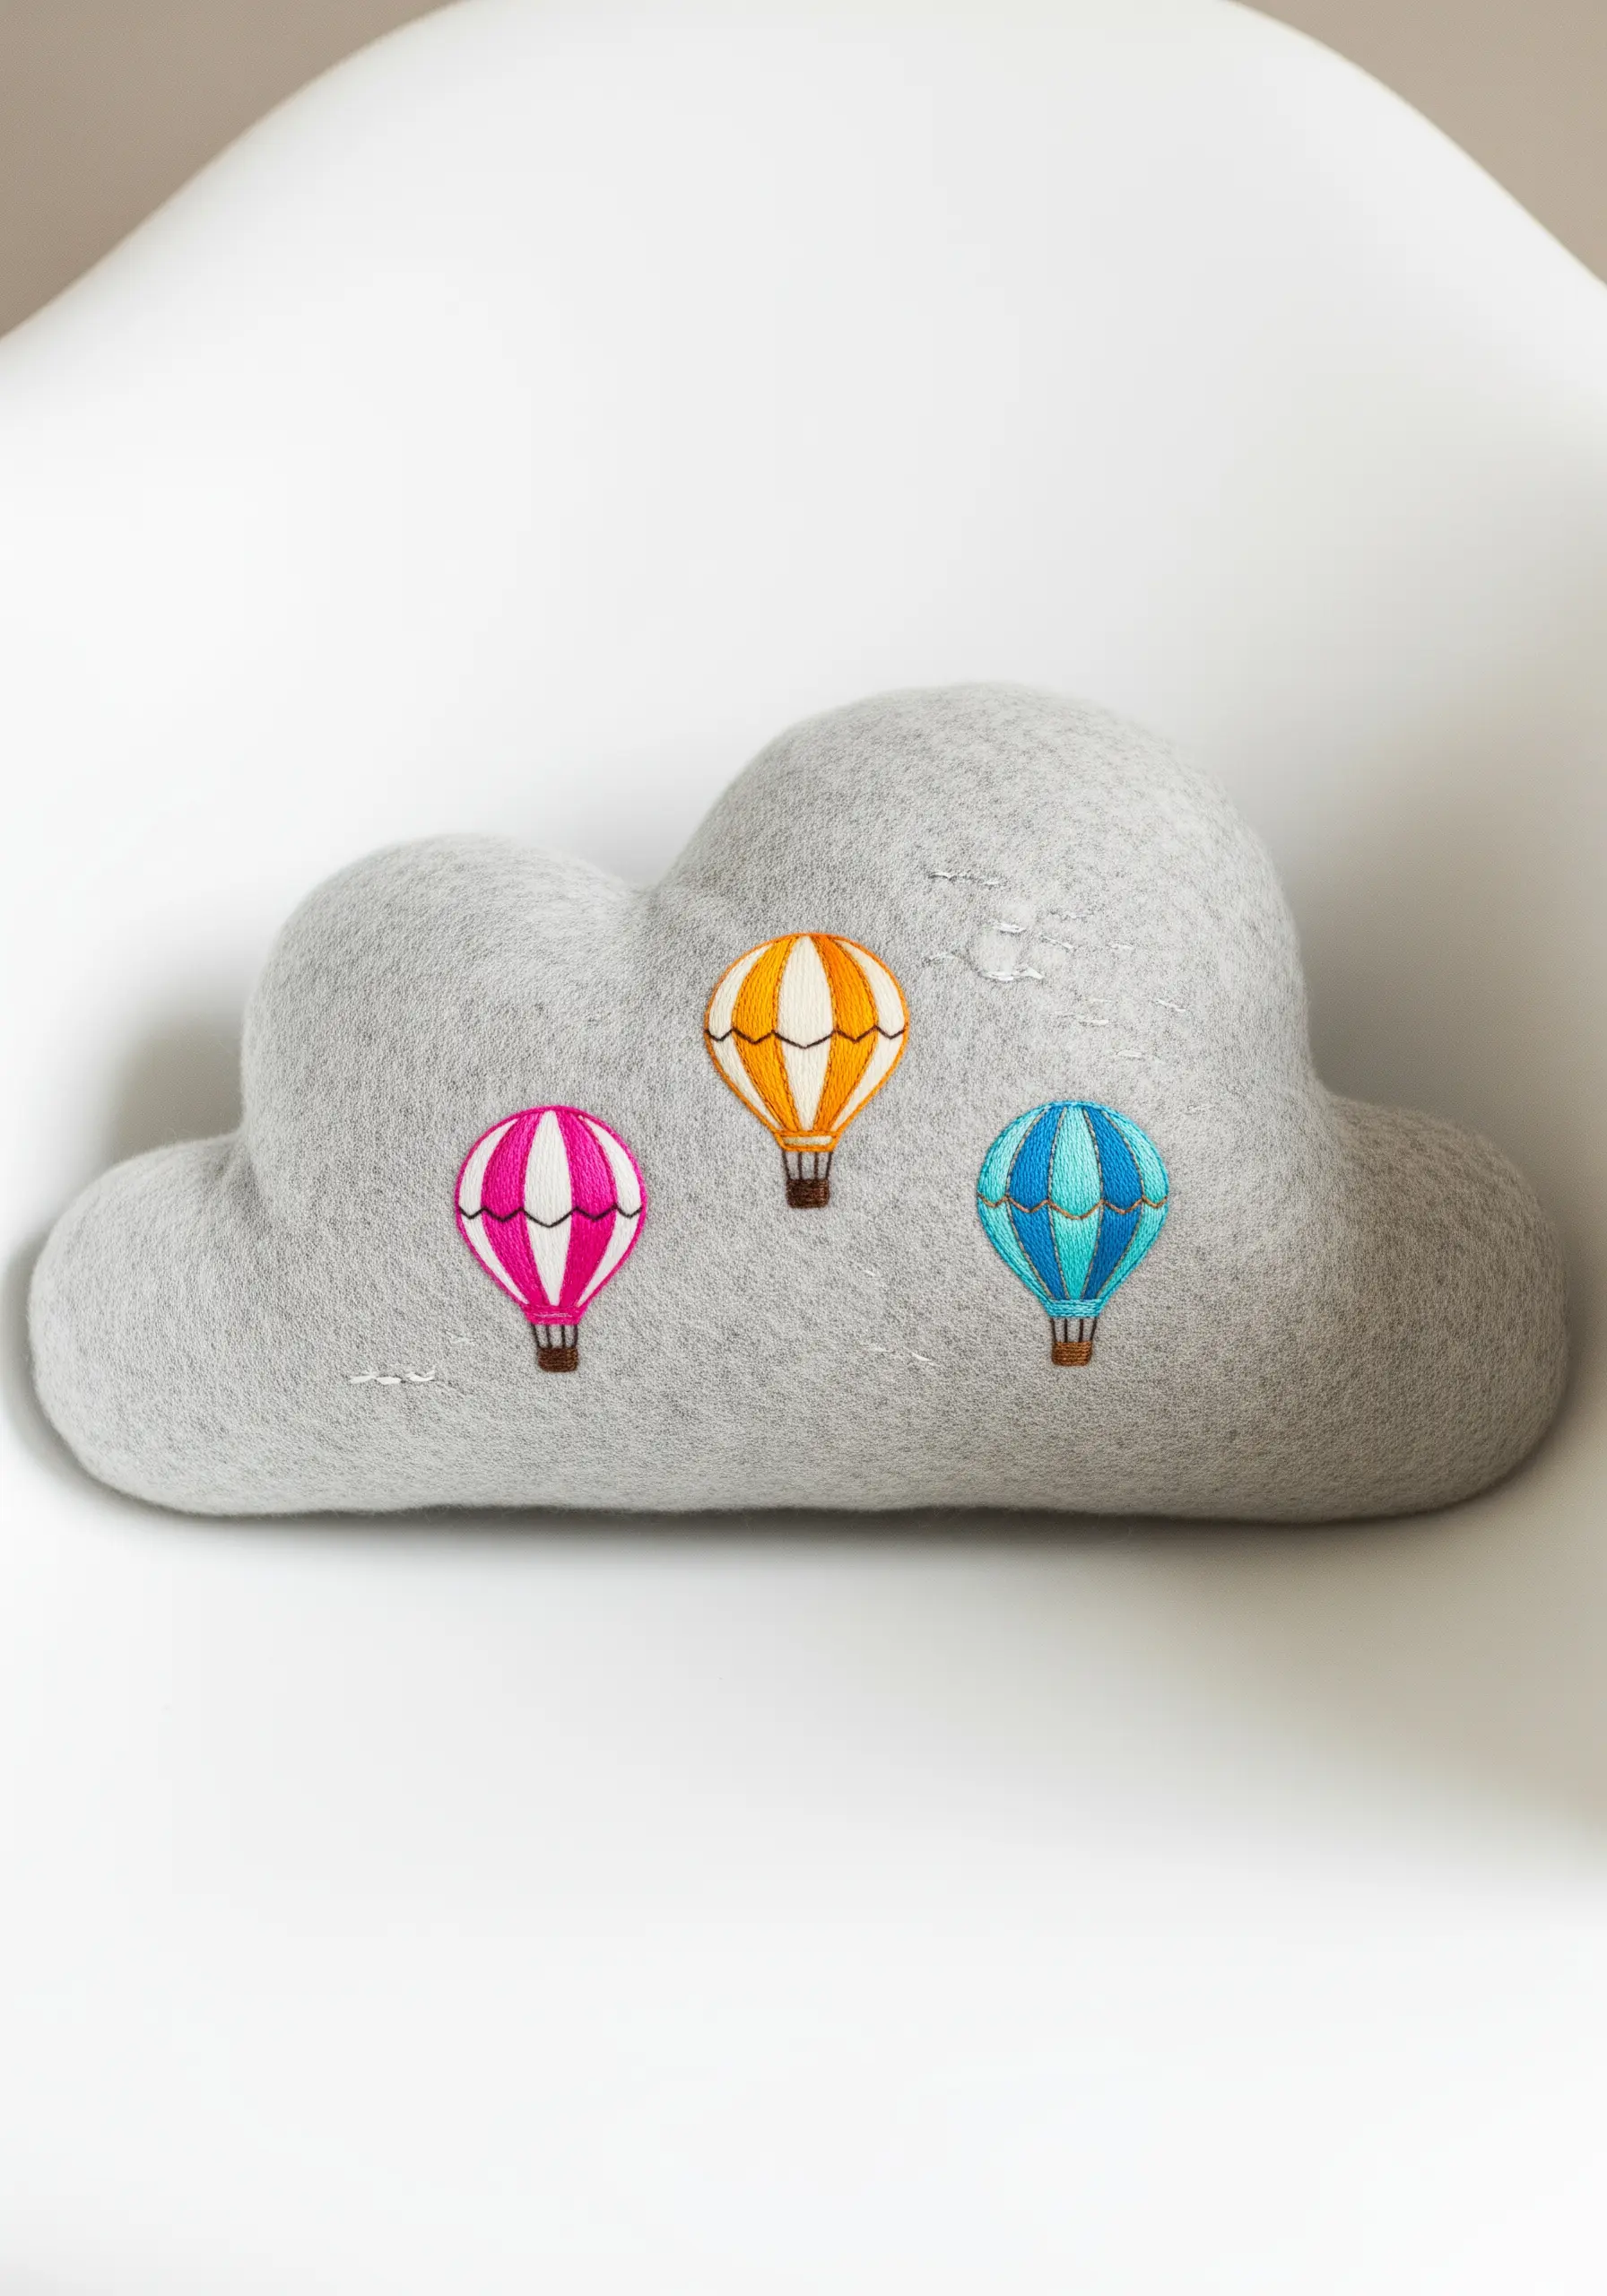
Embroidering on an existing stuffed object requires a gentle touch to avoid distorting the shape.
For these tiny hot air balloons, use a padded satin stitch to give them dimension and help them stand out against the soft felt texture.
You can create this padding by first filling the shape with a layer of small running stitches before covering it with your final, smooth satin stitches.
This technique makes the miniature motifs look raised and intentional.
14. Weave a Tactile Cloud with Roving and Beaded Rain
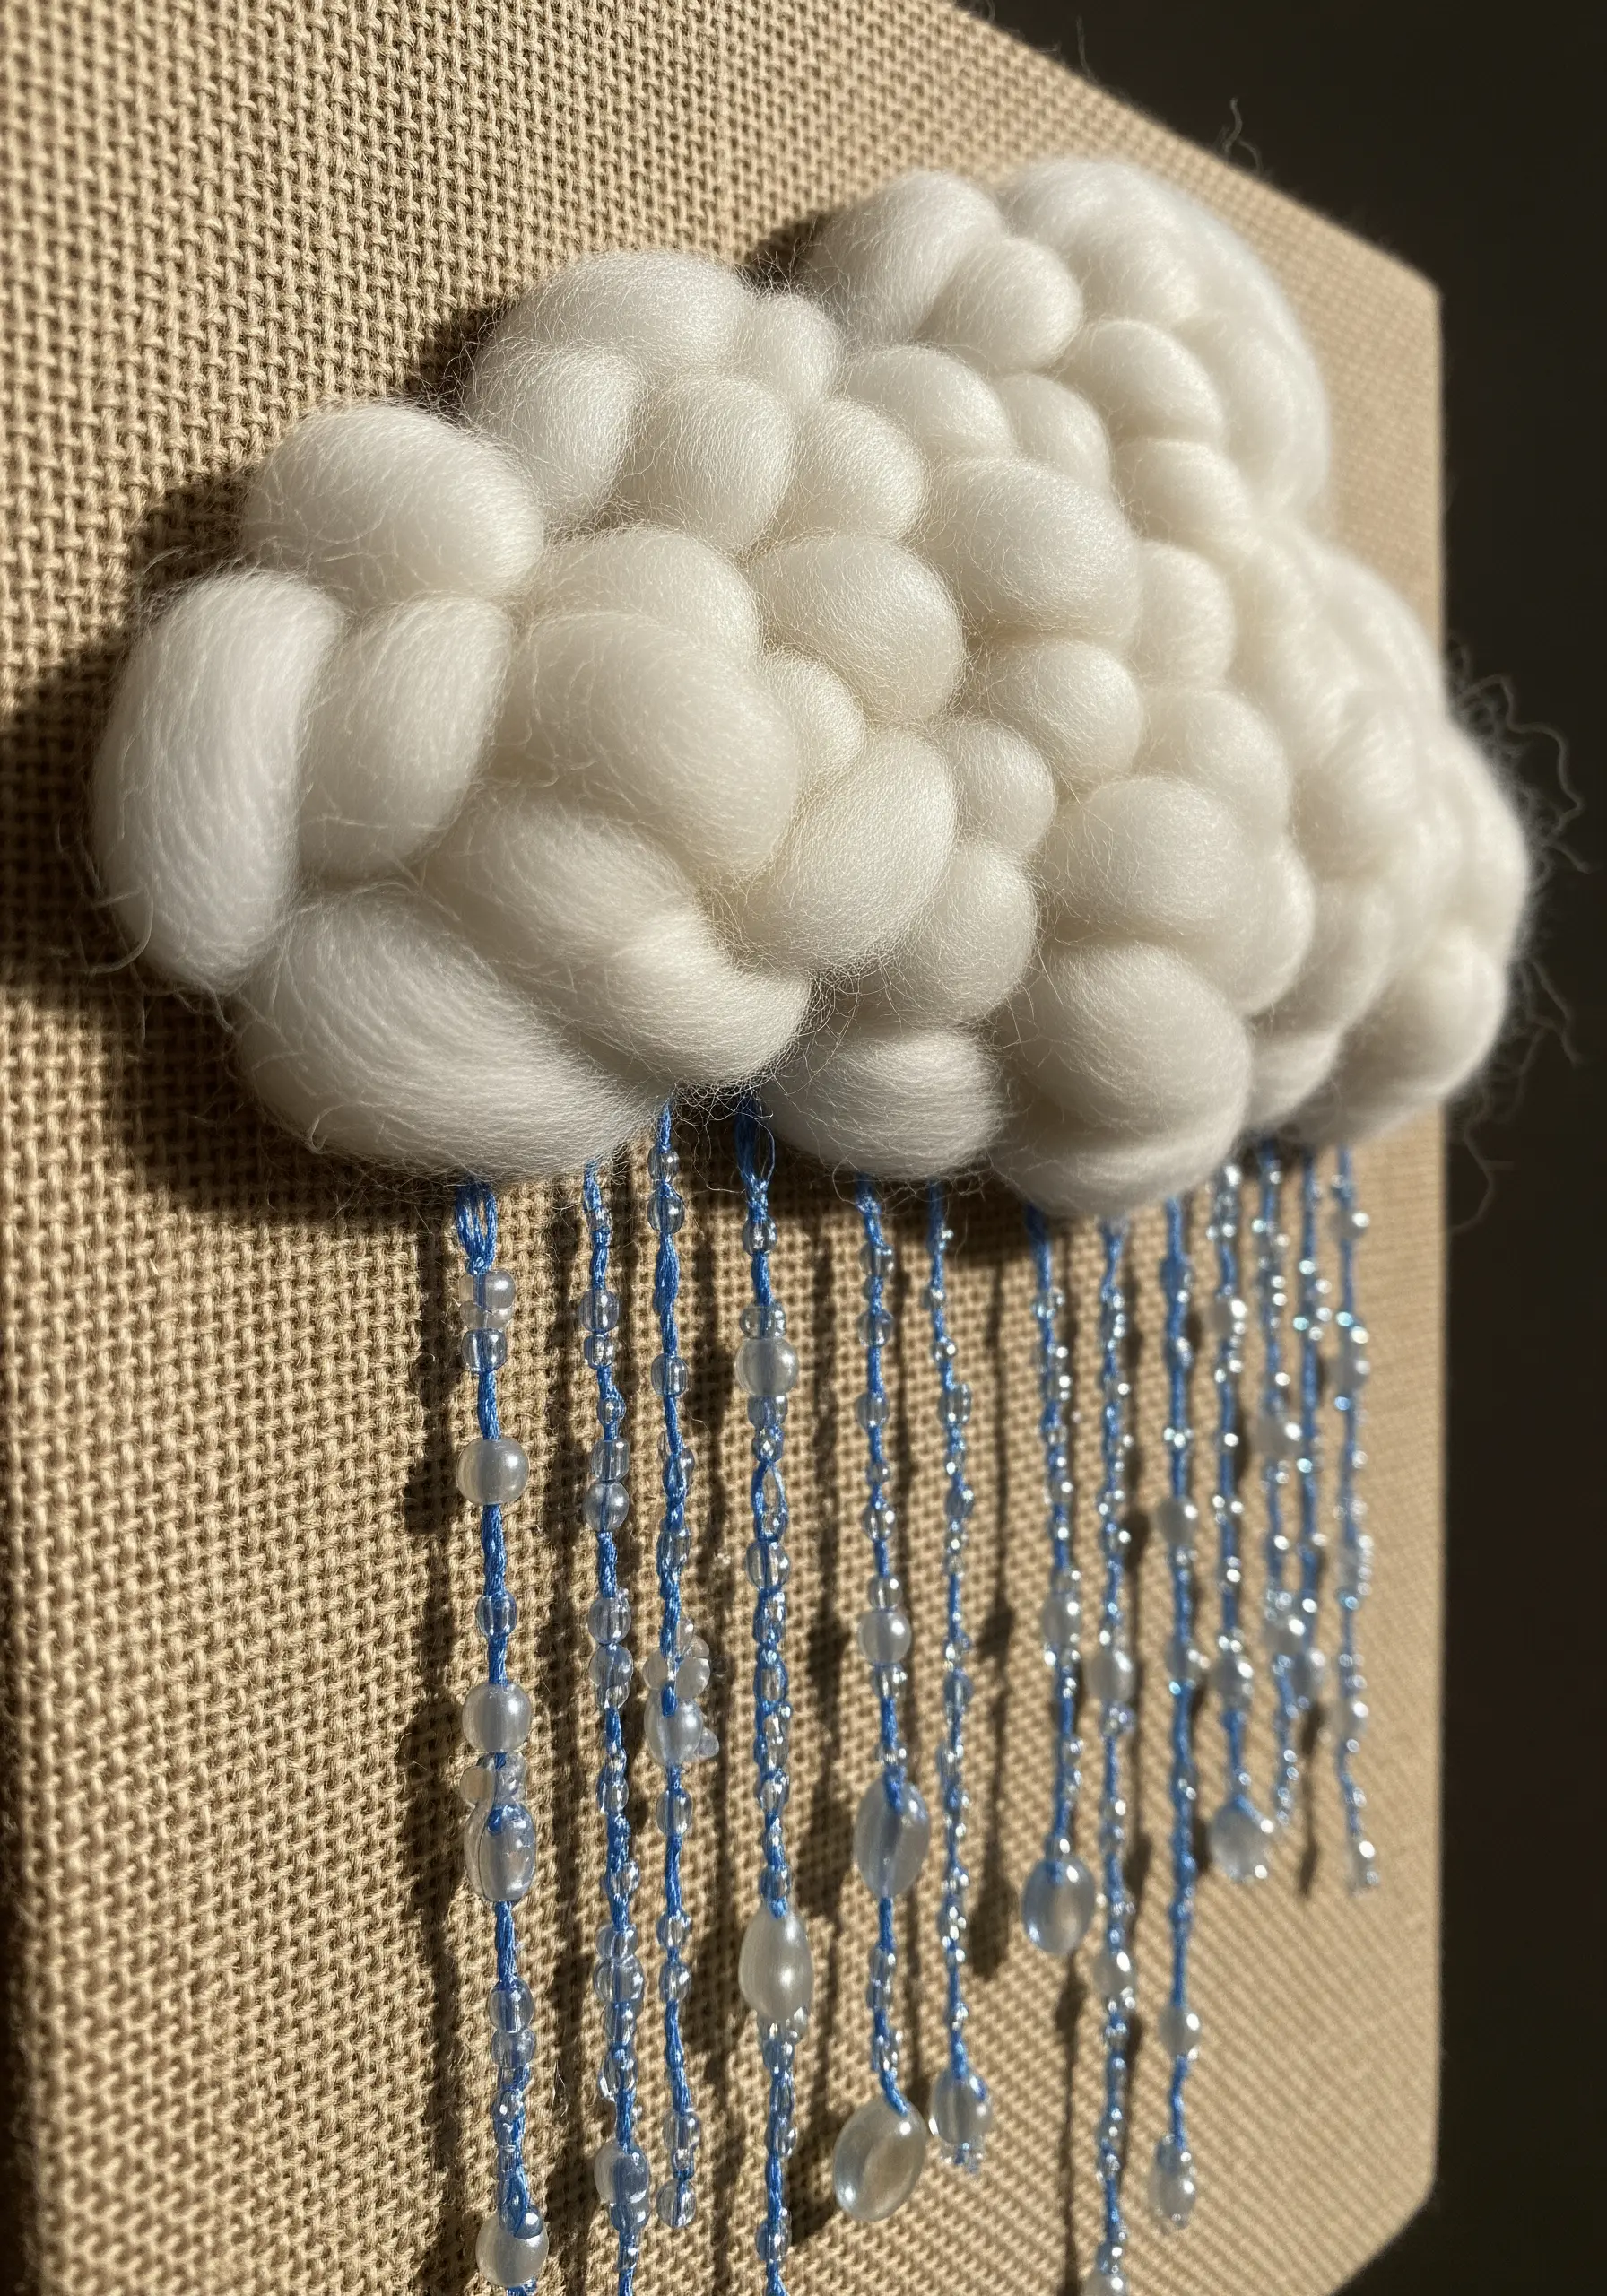
Introduce weaving to your embroidery for unparalleled texture.
On a sturdy canvas or burlap base, use a large needle to weave chunky wool roving back and forth, building up a dense, pillowy cloud.
For the rain, create delicate hanging strands by threading translucent beads onto embroidery floss.
The contrast between the soft, matte wool and the shimmering, kinetic beads makes these mixed fiber projects exceptionally beautiful.
15. Refine String Art with Metallics and a Neutral Palette
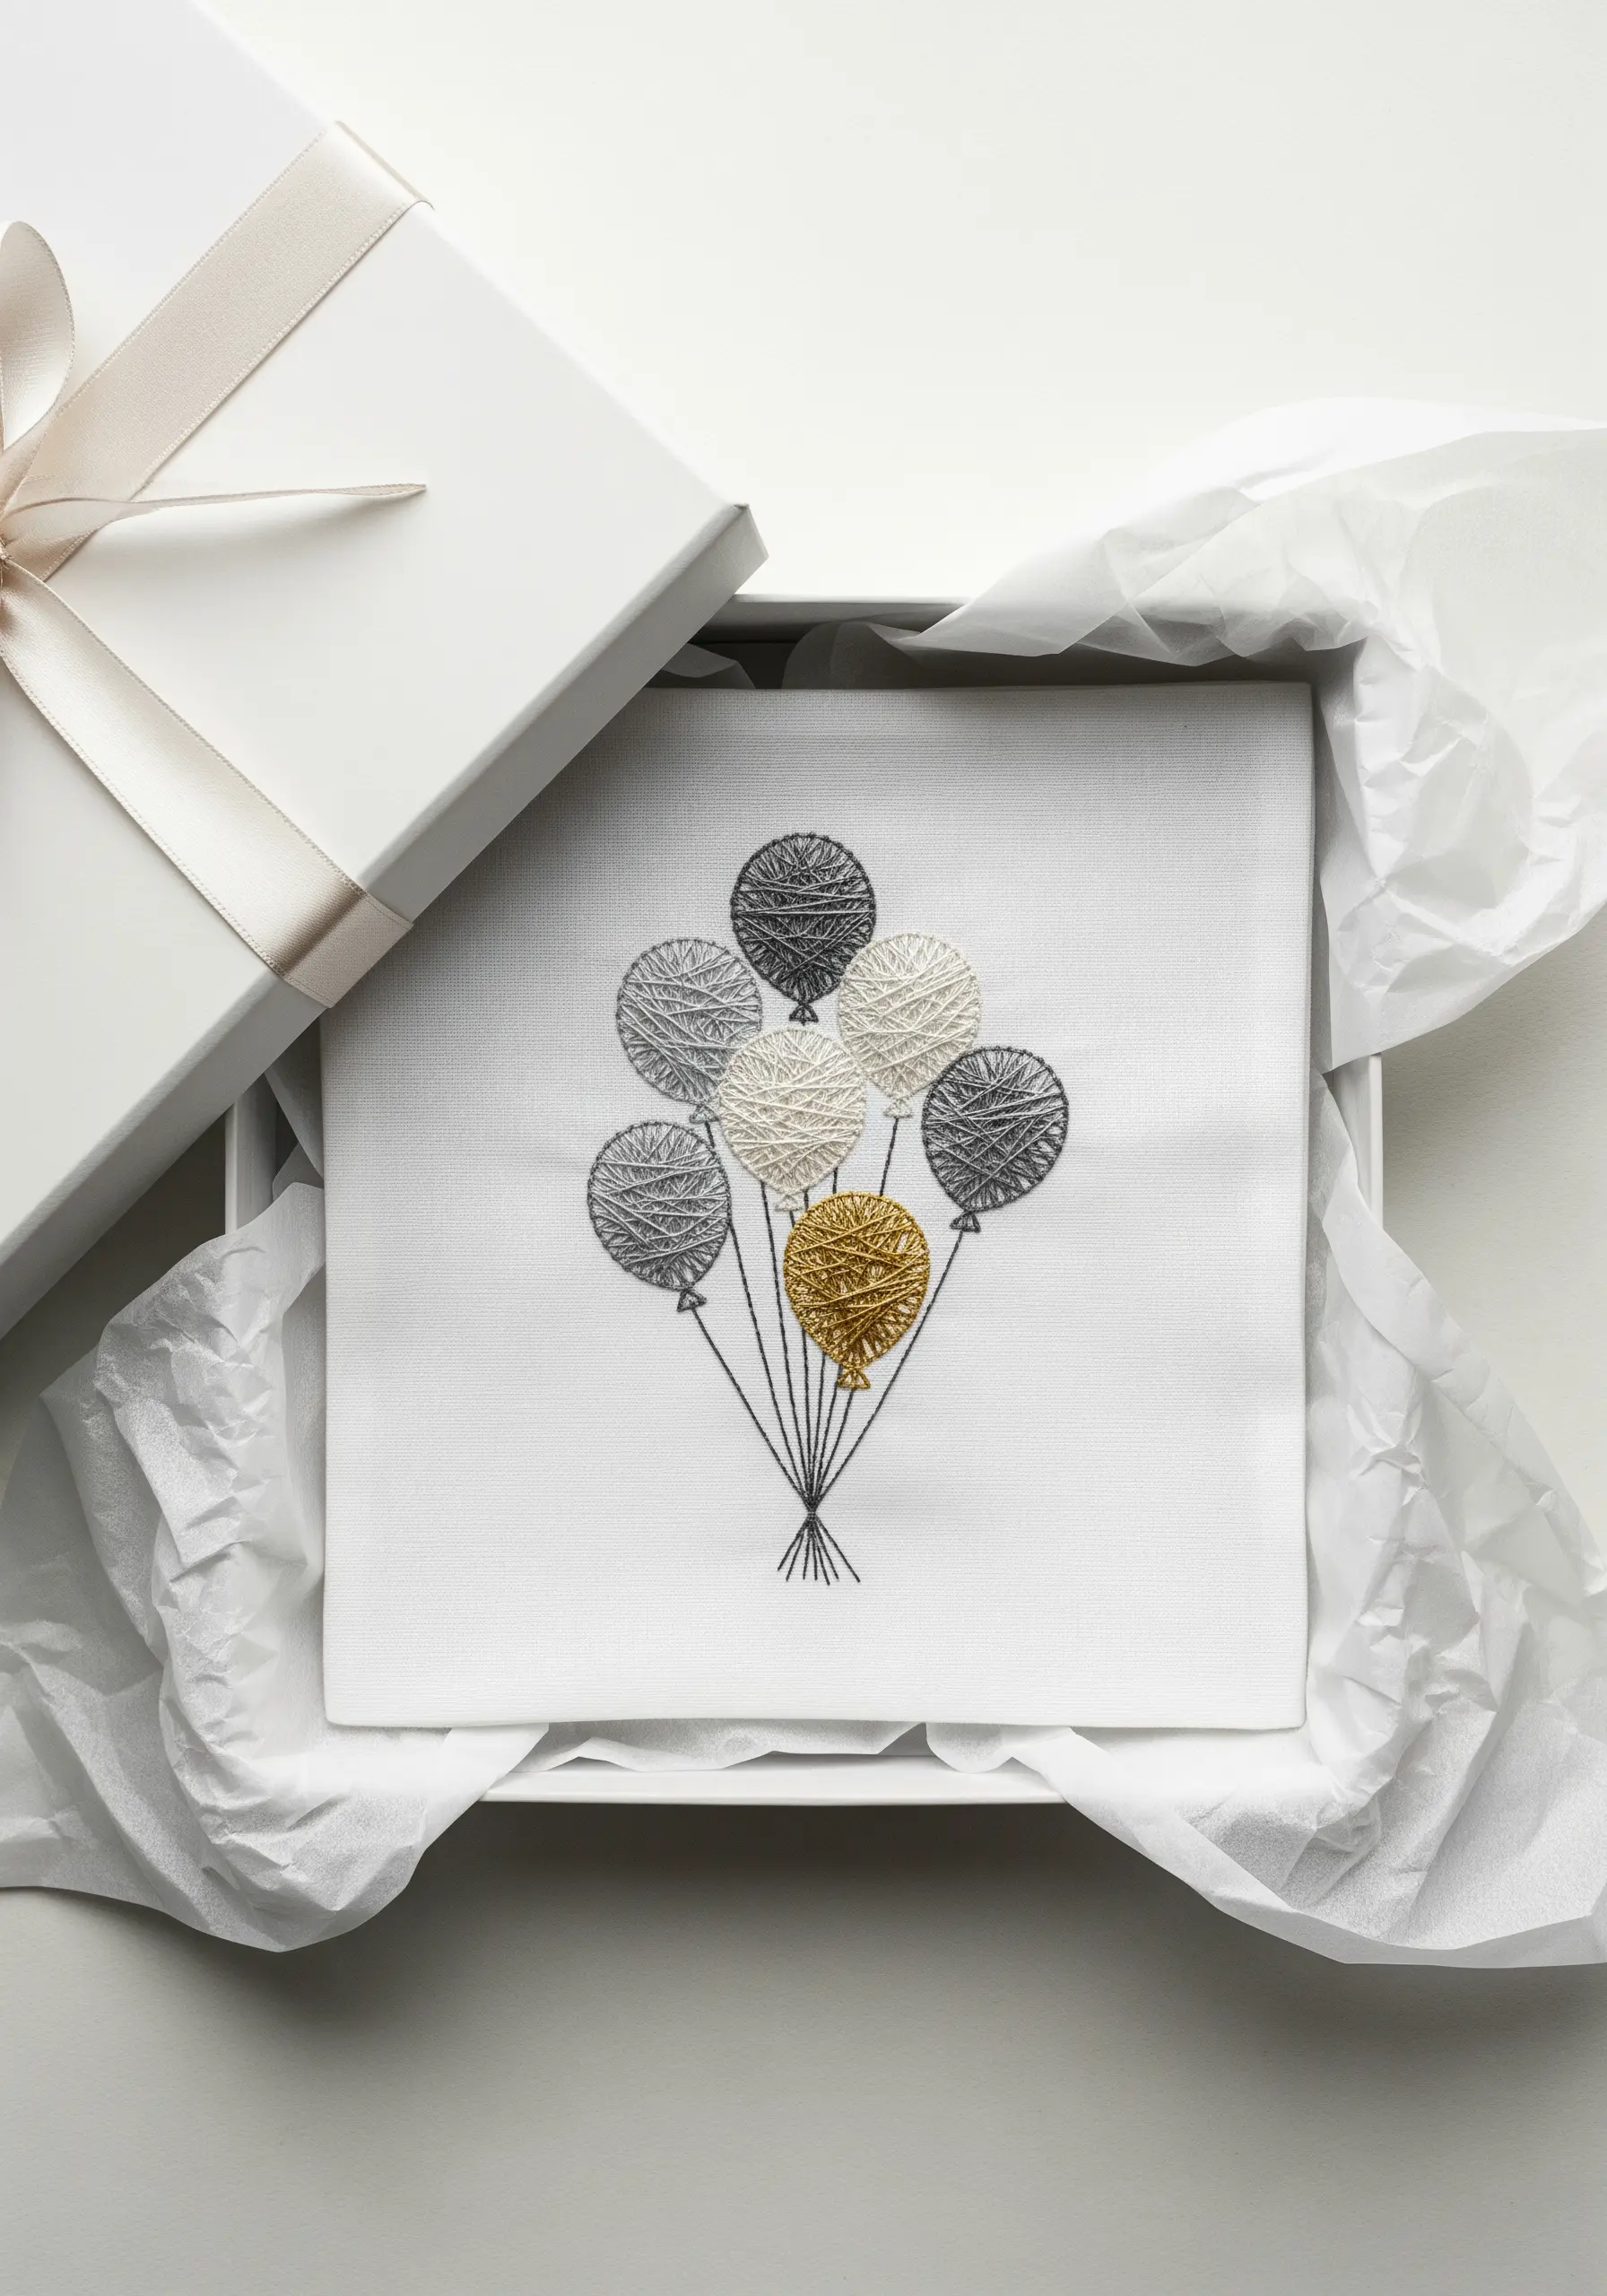
A sophisticated color story instantly elevates any design.
By limiting your palette to soft, neutral tones of grey, cream, and oatmeal, you create a calm and cohesive piece.
The introduction of a single metallic gold balloon immediately becomes the focal point, adding an unexpected touch of warmth and luxury.
Remember to use a thread conditioner and shorter lengths of metallic floss to prevent the frustration of tangling and fraying.
16. Compose a Landscape with Layered Appliqué
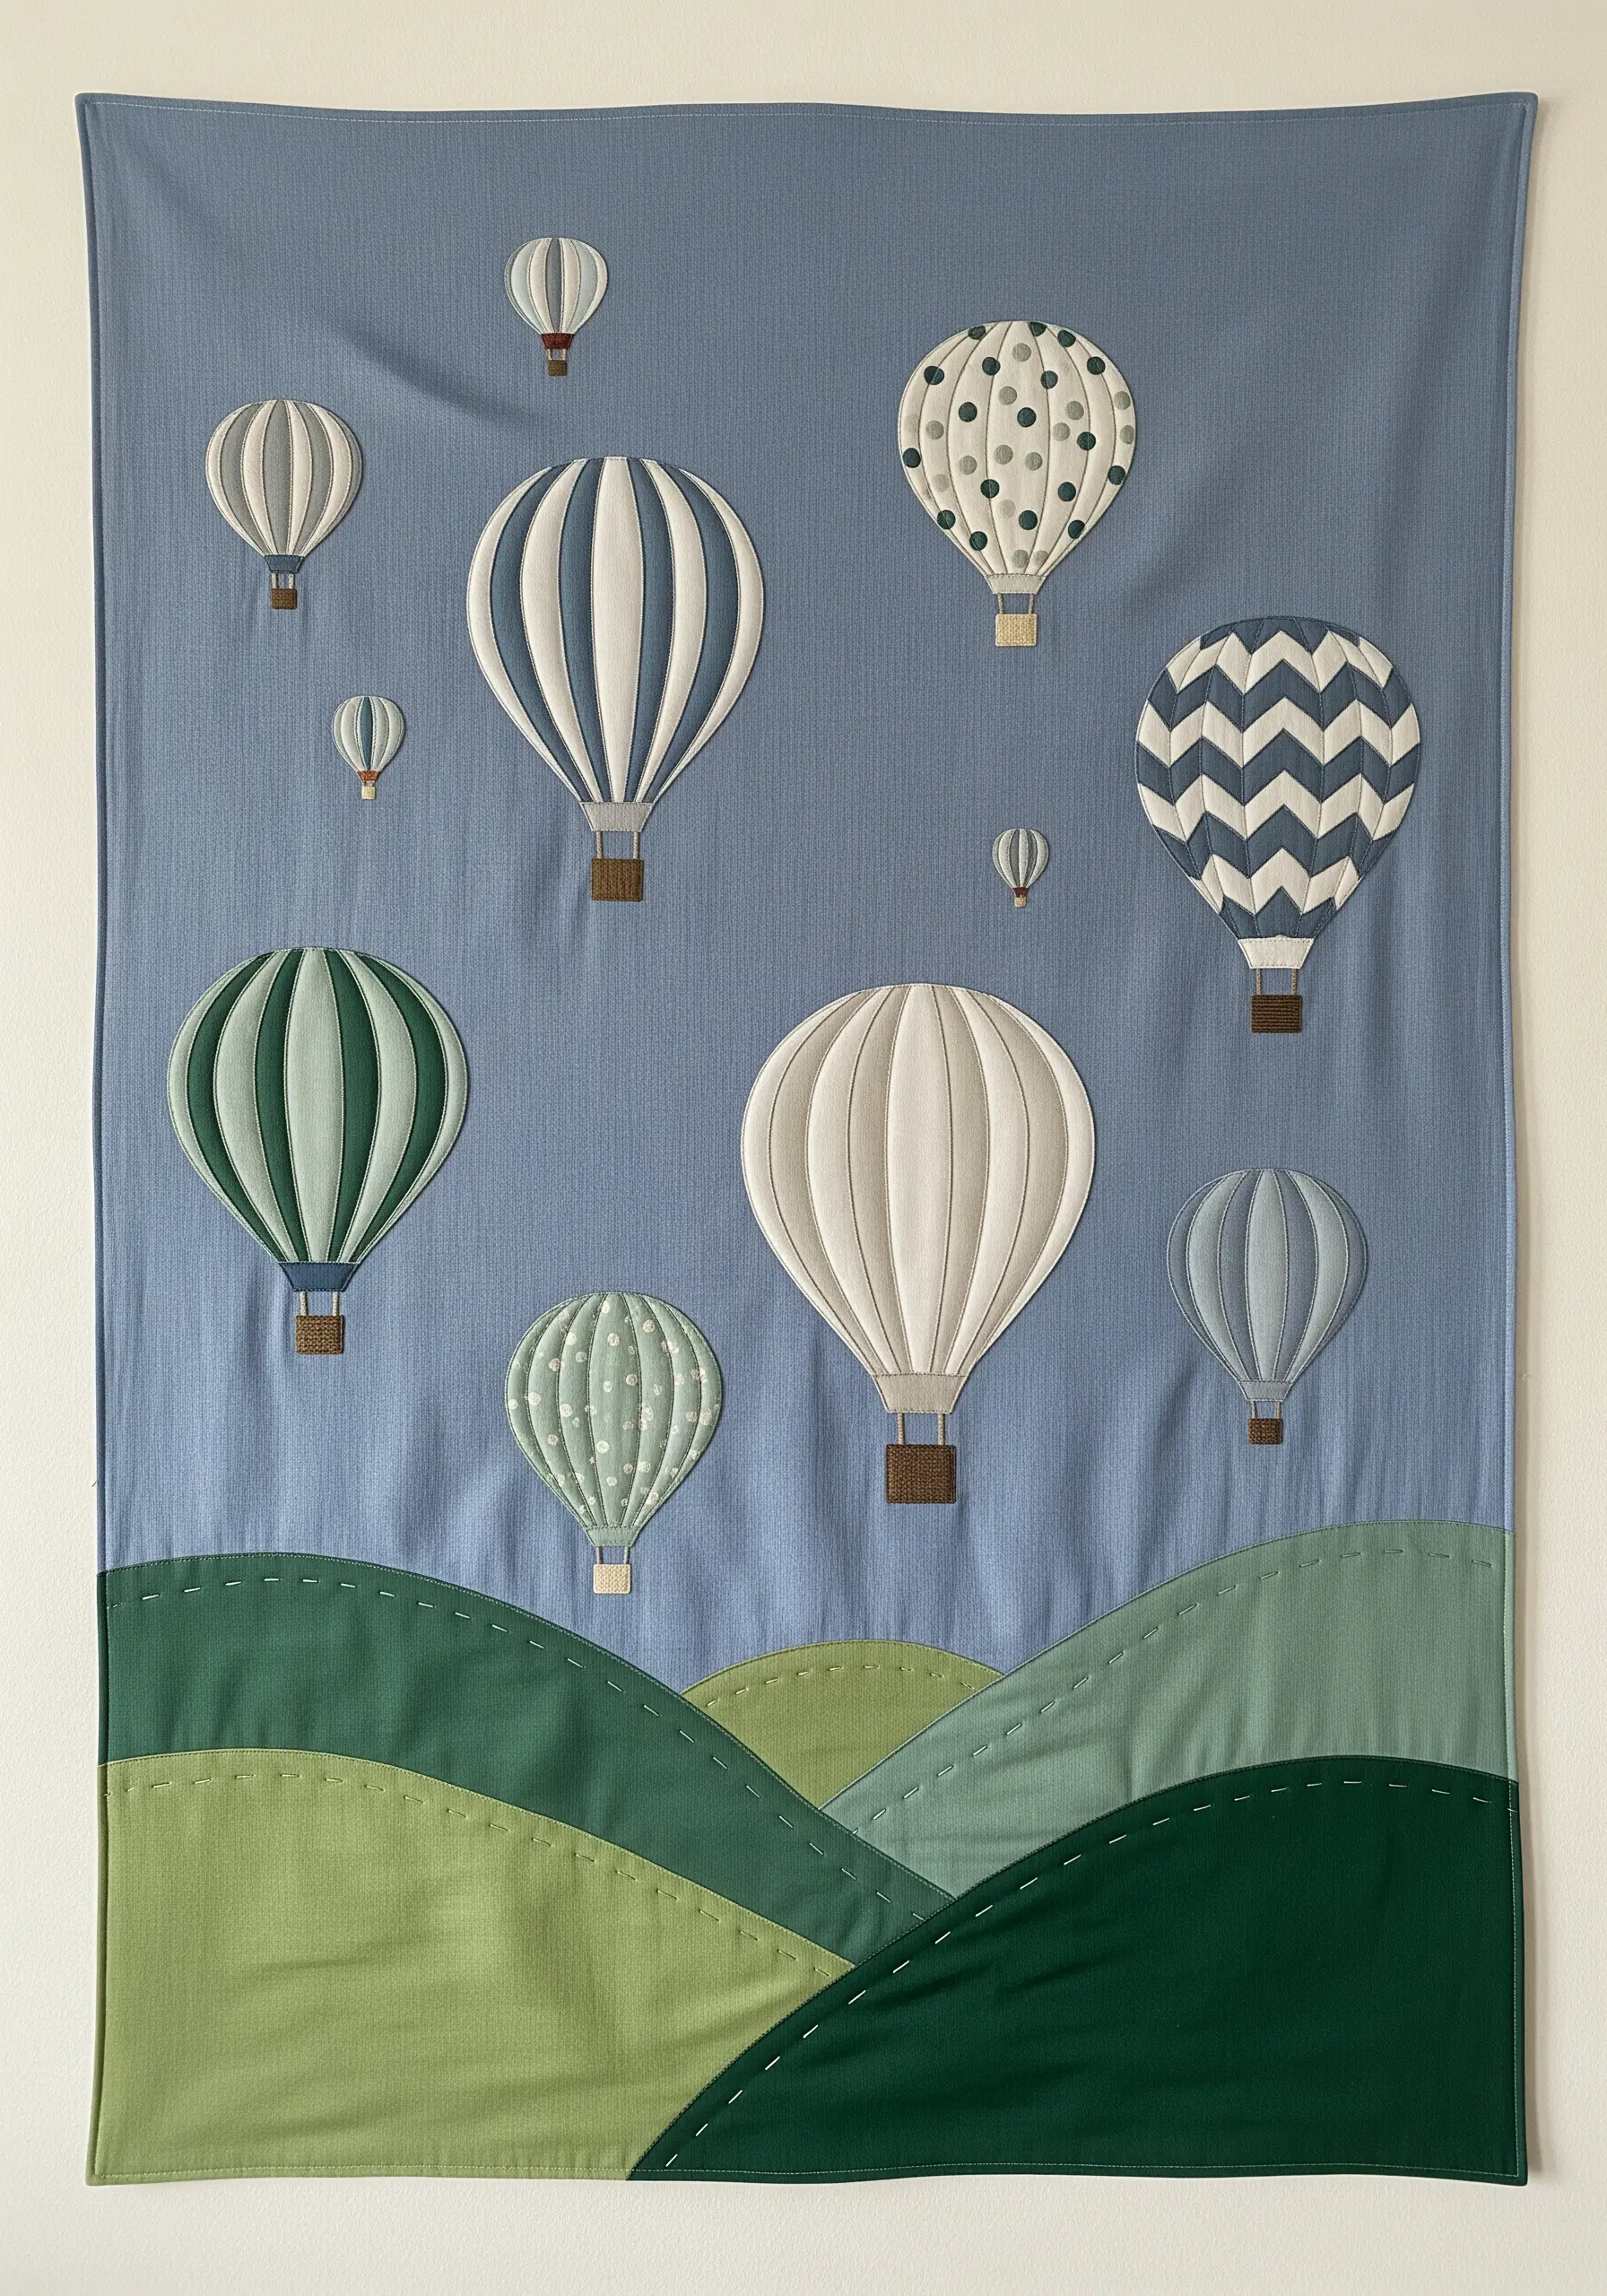
Build a dynamic scene by layering fabric appliqué to create a sense of depth.
Begin with the background elements, placing the rolling hills first.
Then, arrange the hot air balloons on top, allowing some to slightly overlap the hills to suggest distance.
Using a variety of fabric patterns like stripes, polka dots, and chevrons adds rich visual interest, while keeping the color palette harmonious ensures the final piece feels balanced and serene.
17. Customize Nursery Storage with Chunky Yarn Couching
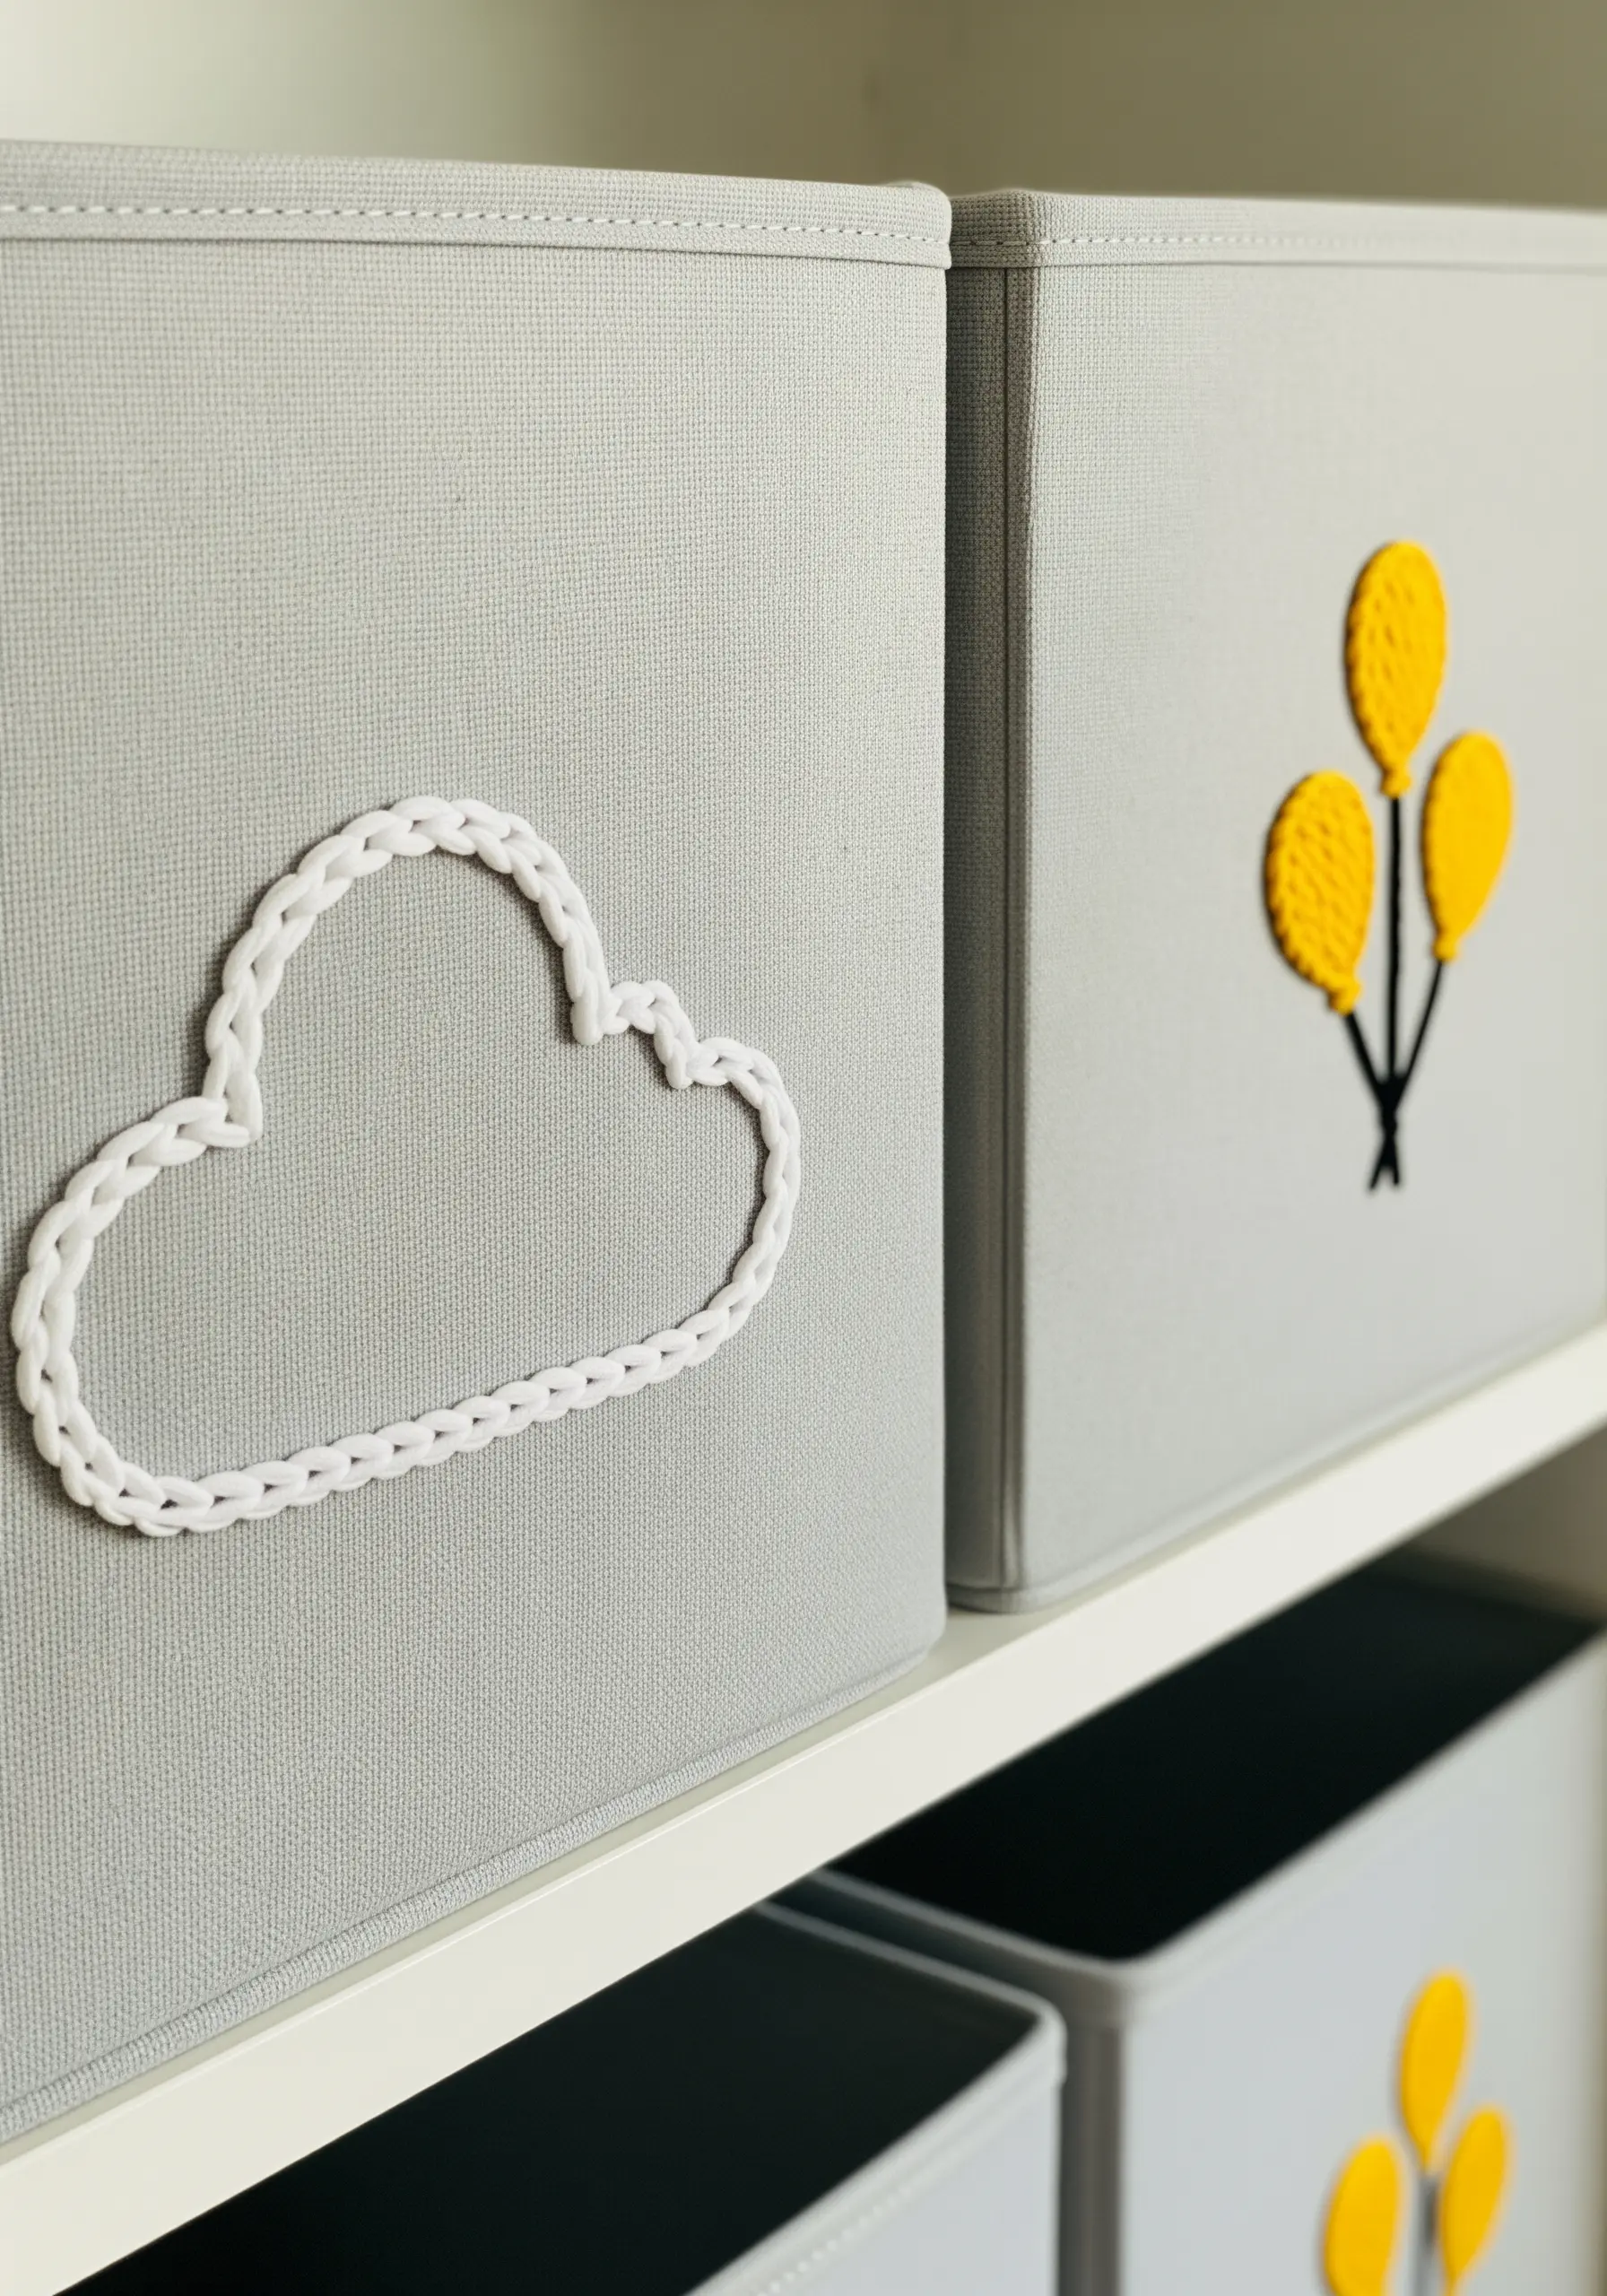
Personalize functional items like fabric storage bins with simple, high-impact embroidery.
Since you can’t use a hoop on a rigid object, couching is the ideal technique.
Simply lay down a thick, soft yarn along your design line and tack it in place with a thinner, matching thread.
The result is a raised, textural design that is both visually appealing and soft to the touch—perfect for a child’s space.
18. Create Hypnotic Texture with Spiral Seed Stitching
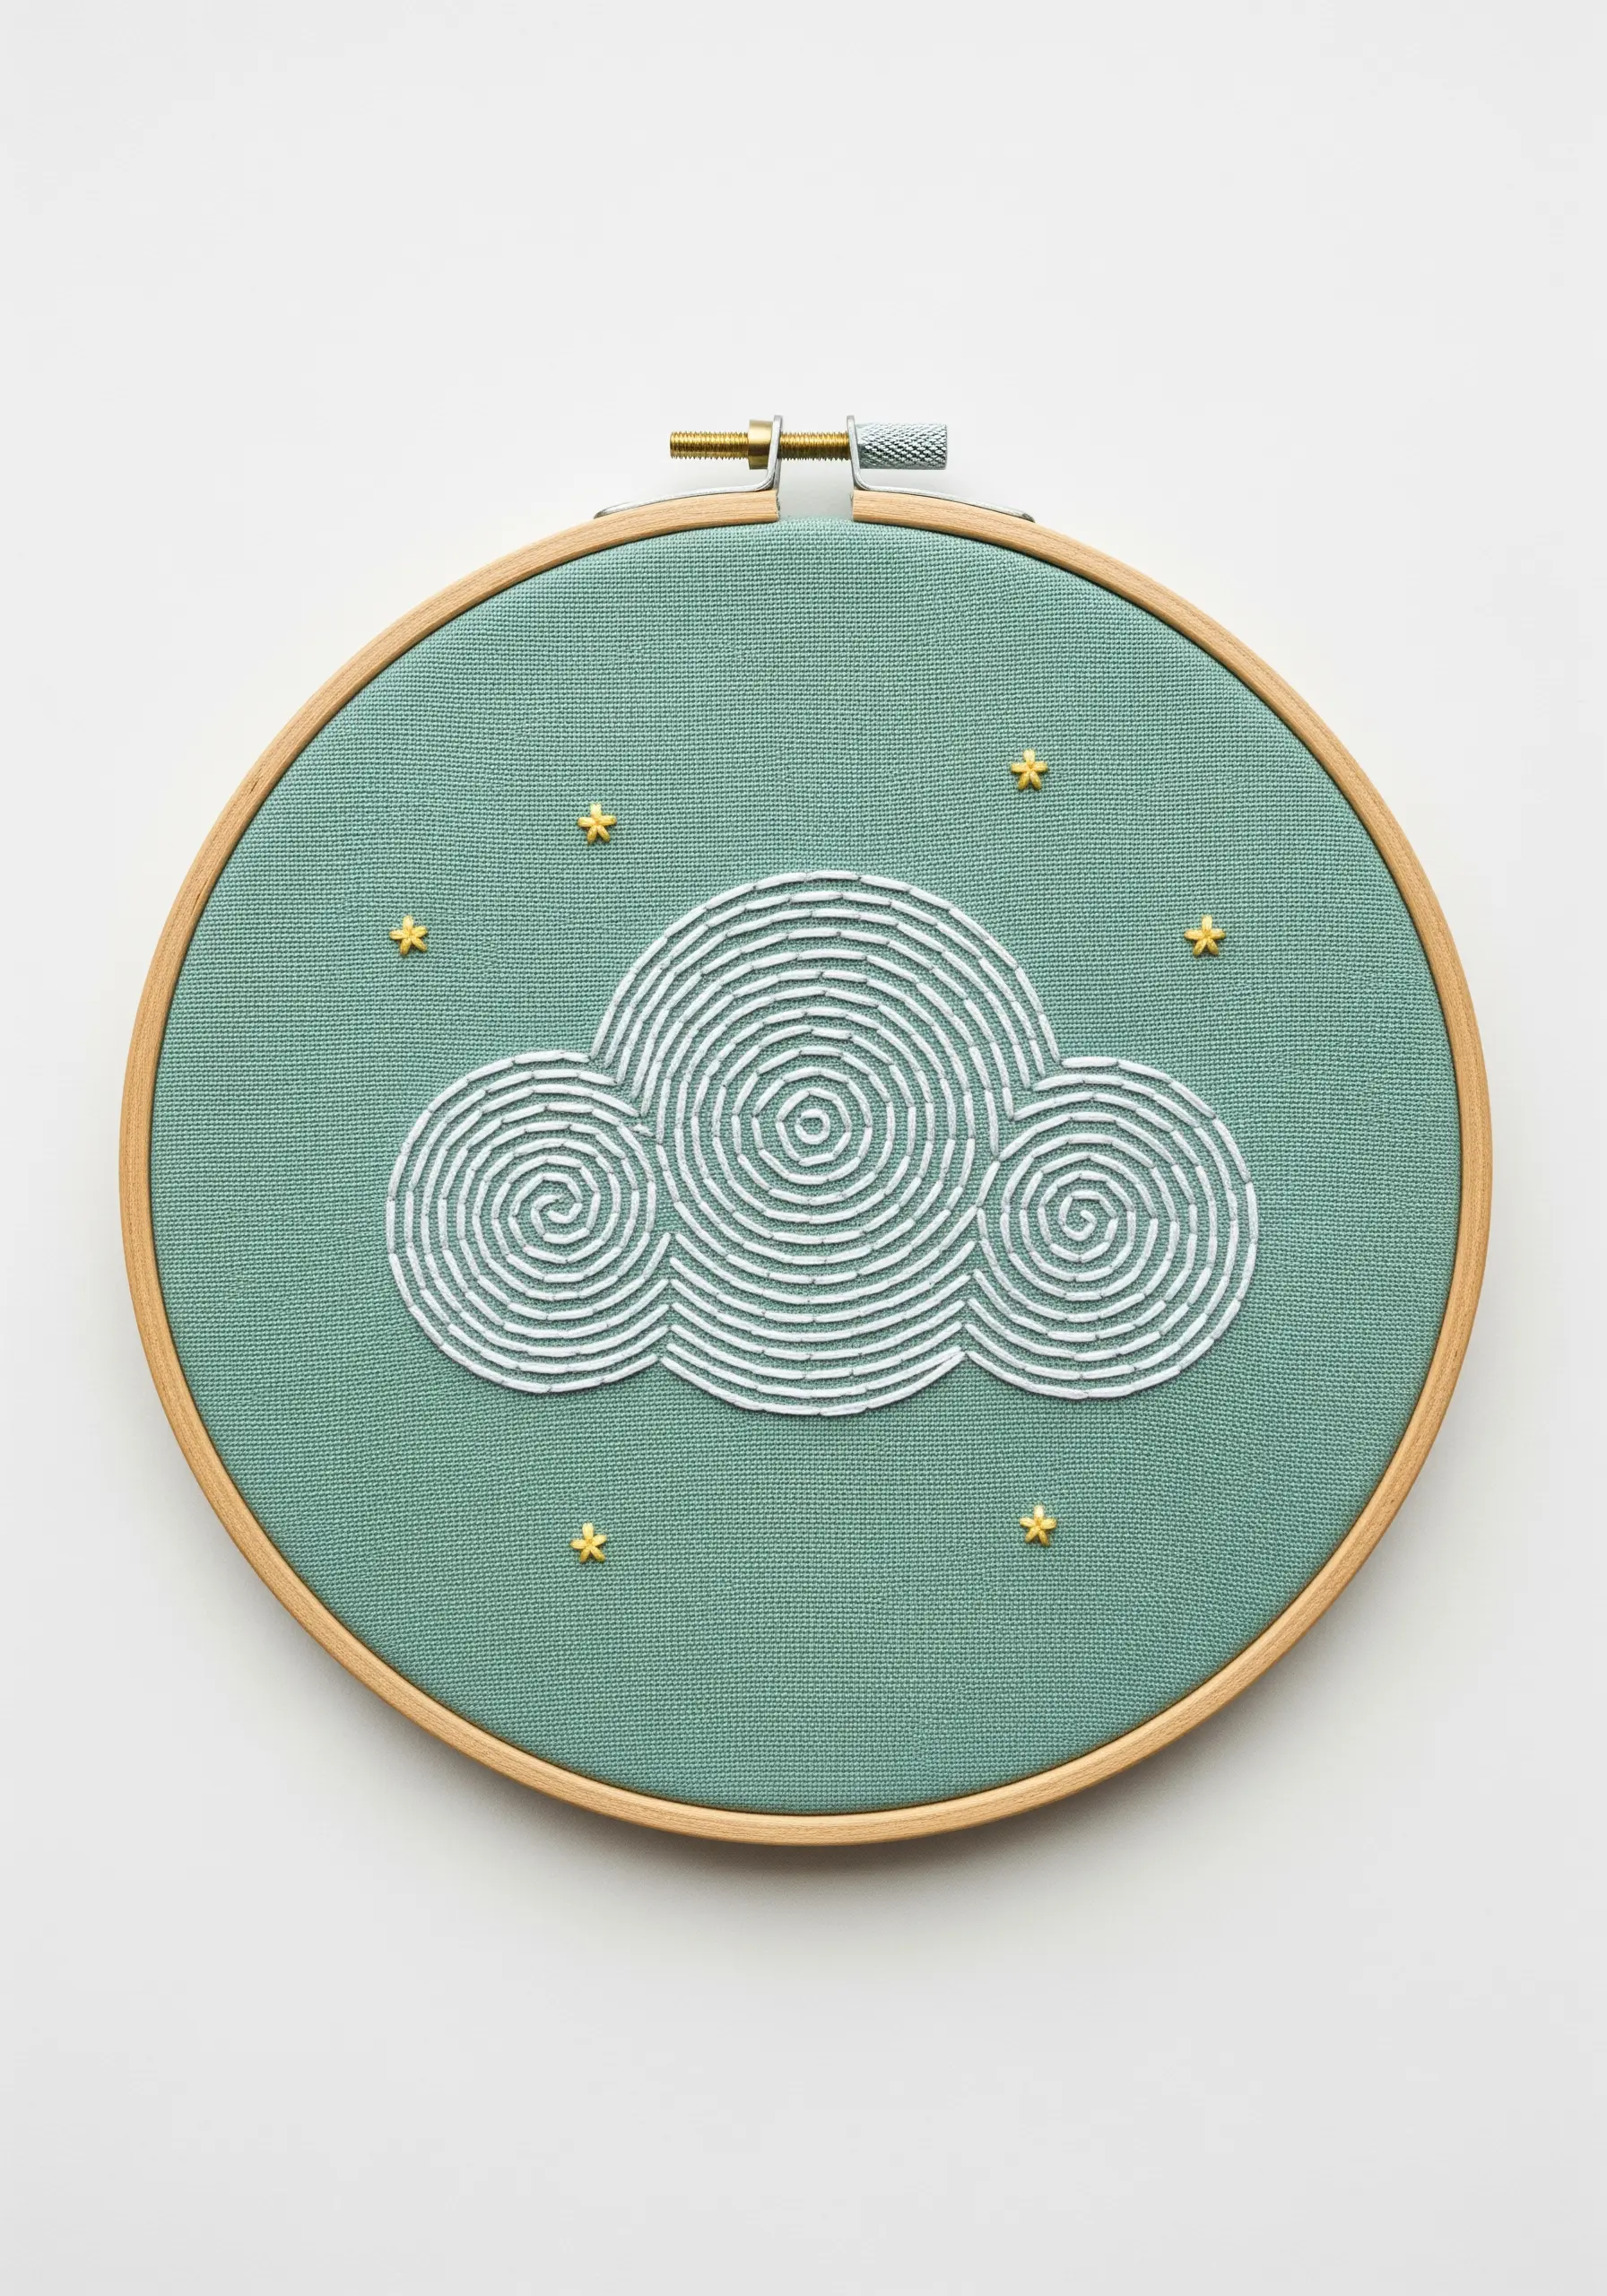
This design achieves its mesmerizing effect through repetition and direction.
Instead of a standard fill, use a simple seed stitch or backstitch worked in a continuous spiral from the center of each cloud section outwards.
This creates a fingerprint-like texture that draws the eye inward.
Using a bright white thread against the muted teal fabric enhances the graphic quality, while the tiny gold star beads add a delicate, celestial sparkle.
19. Reimagine the Hoop as a String Art Frame
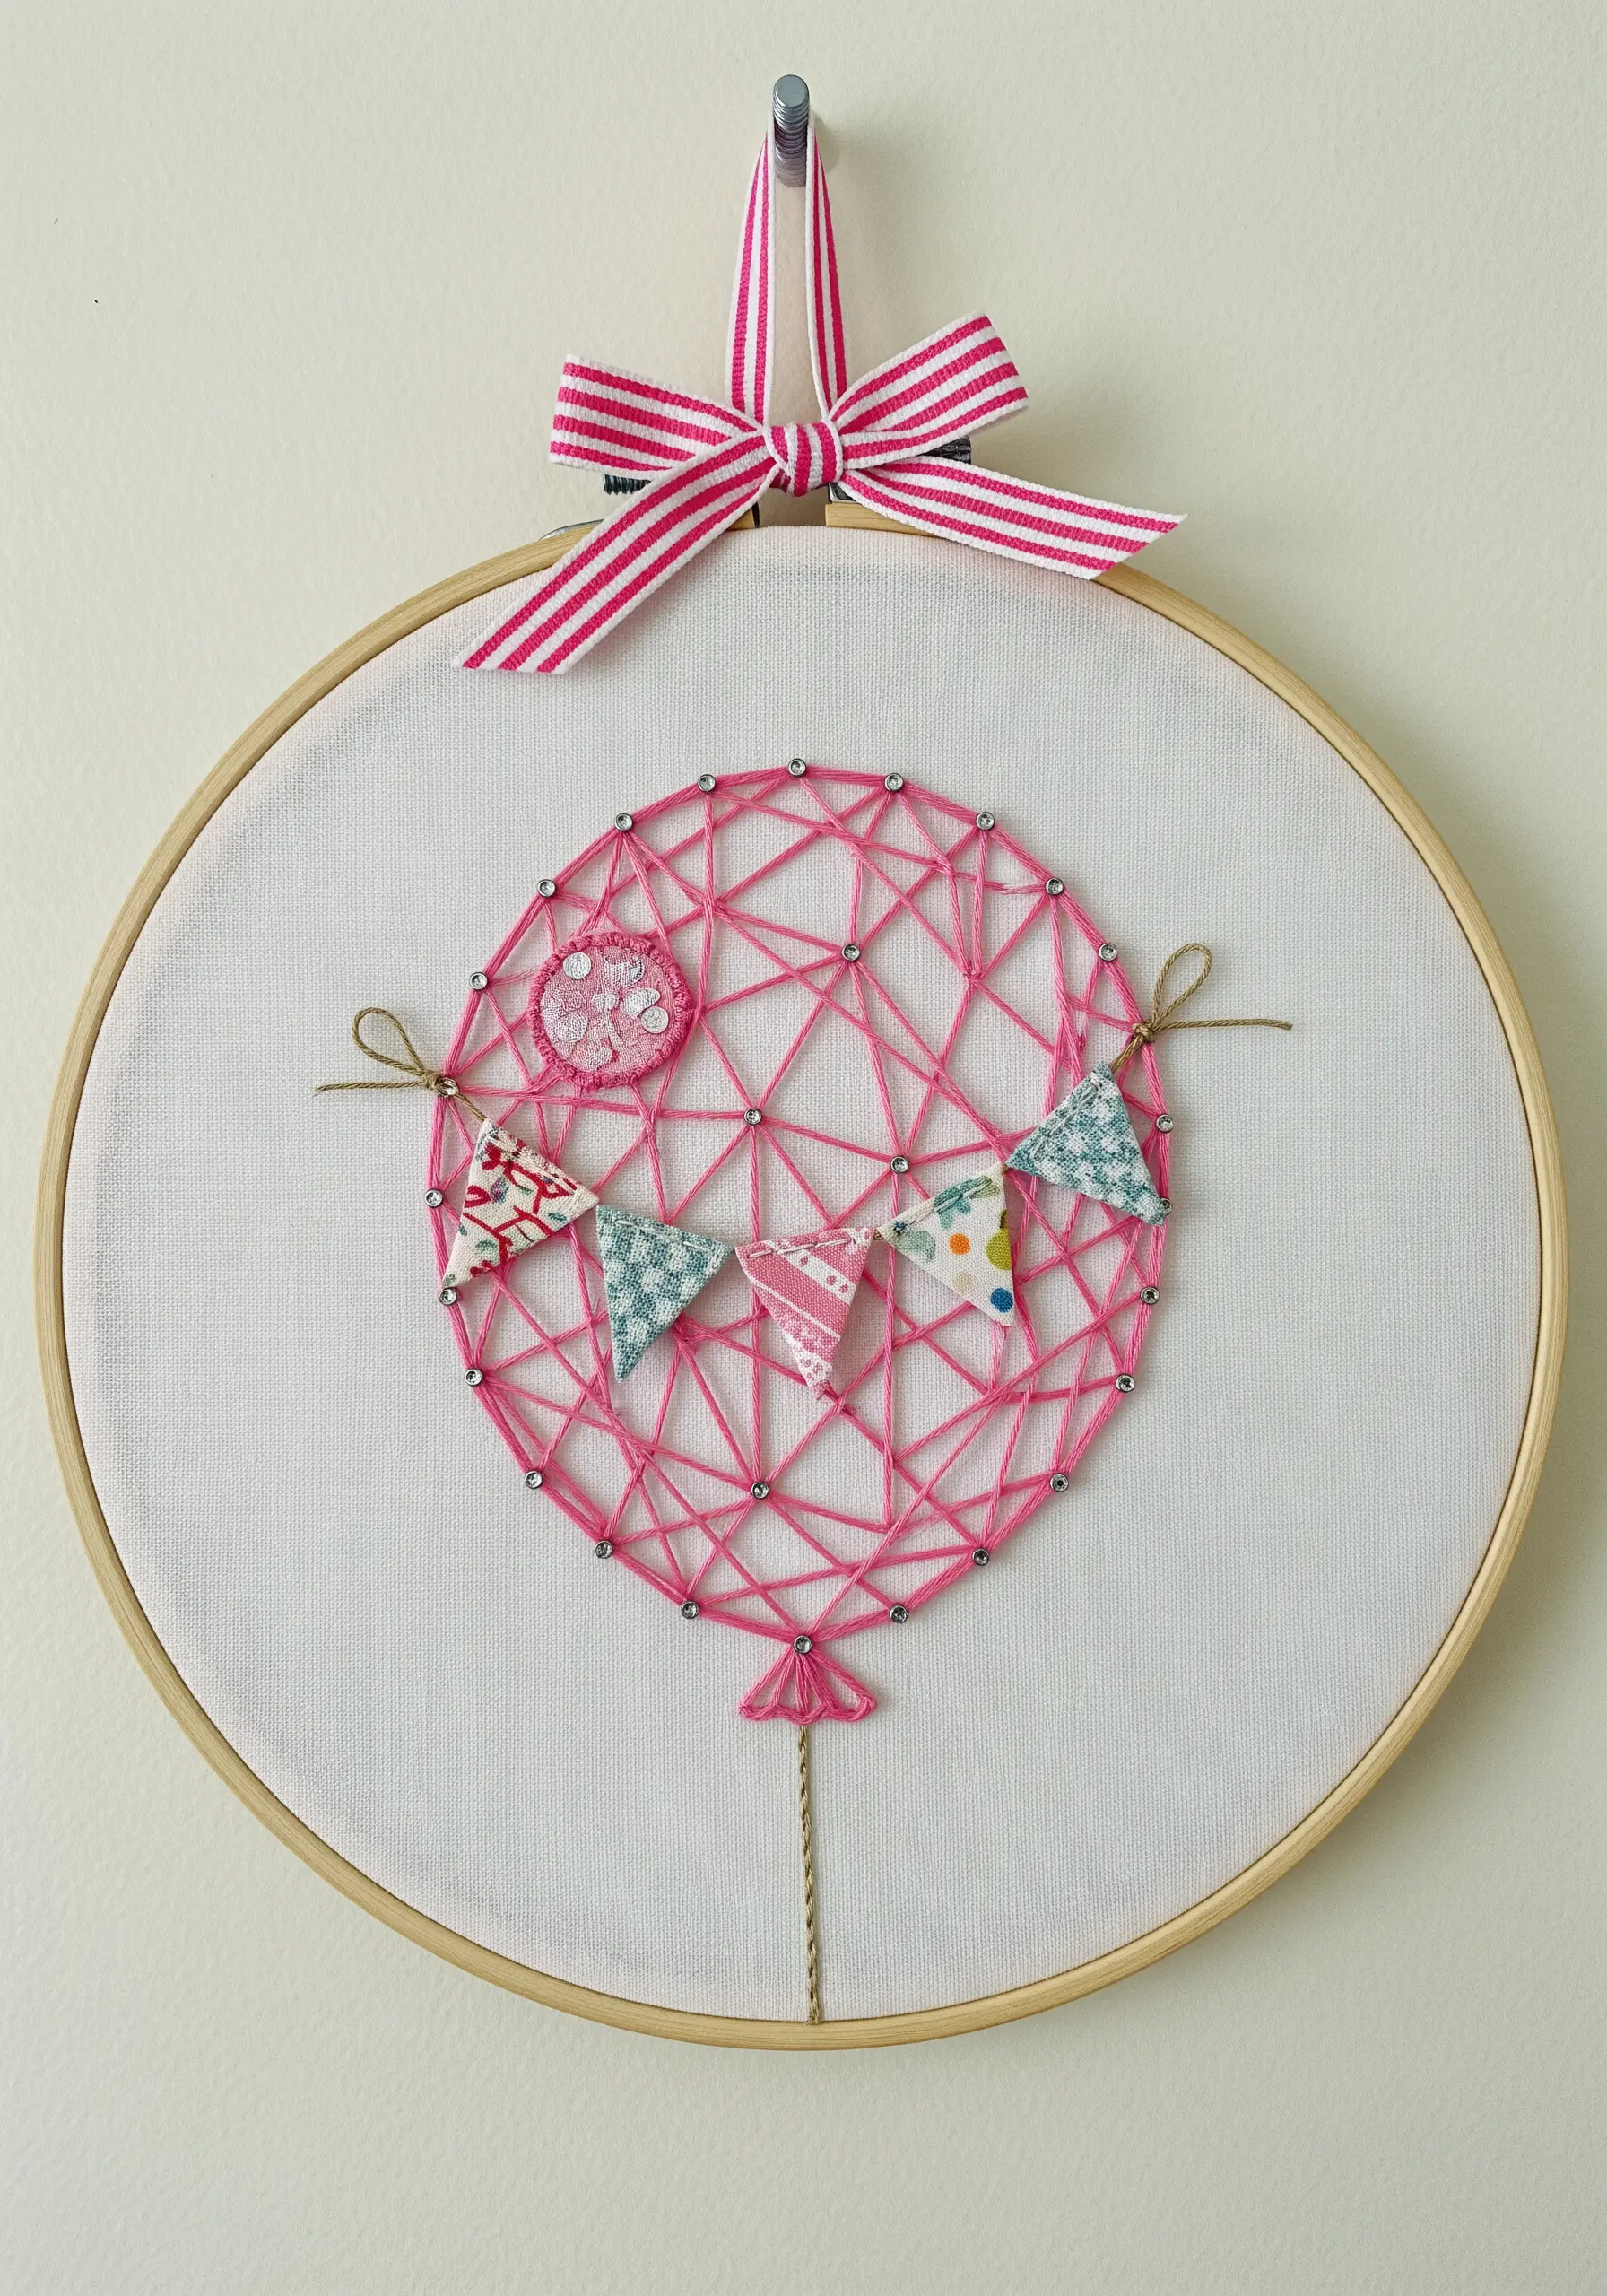
Use the embroidery hoop itself as an integral part of your finished piece.
Carefully press small nails or brads into the *inside* of the wooden hoop to serve as anchor points for your string art.
This creates a clean, self-contained display.
To add another layer of charm, create a miniature bunting from fabric scraps for unexpected textures and string it across the balloon, securing it with tiny bows.
20. Design Luminous Night Skies on Dark Fabric
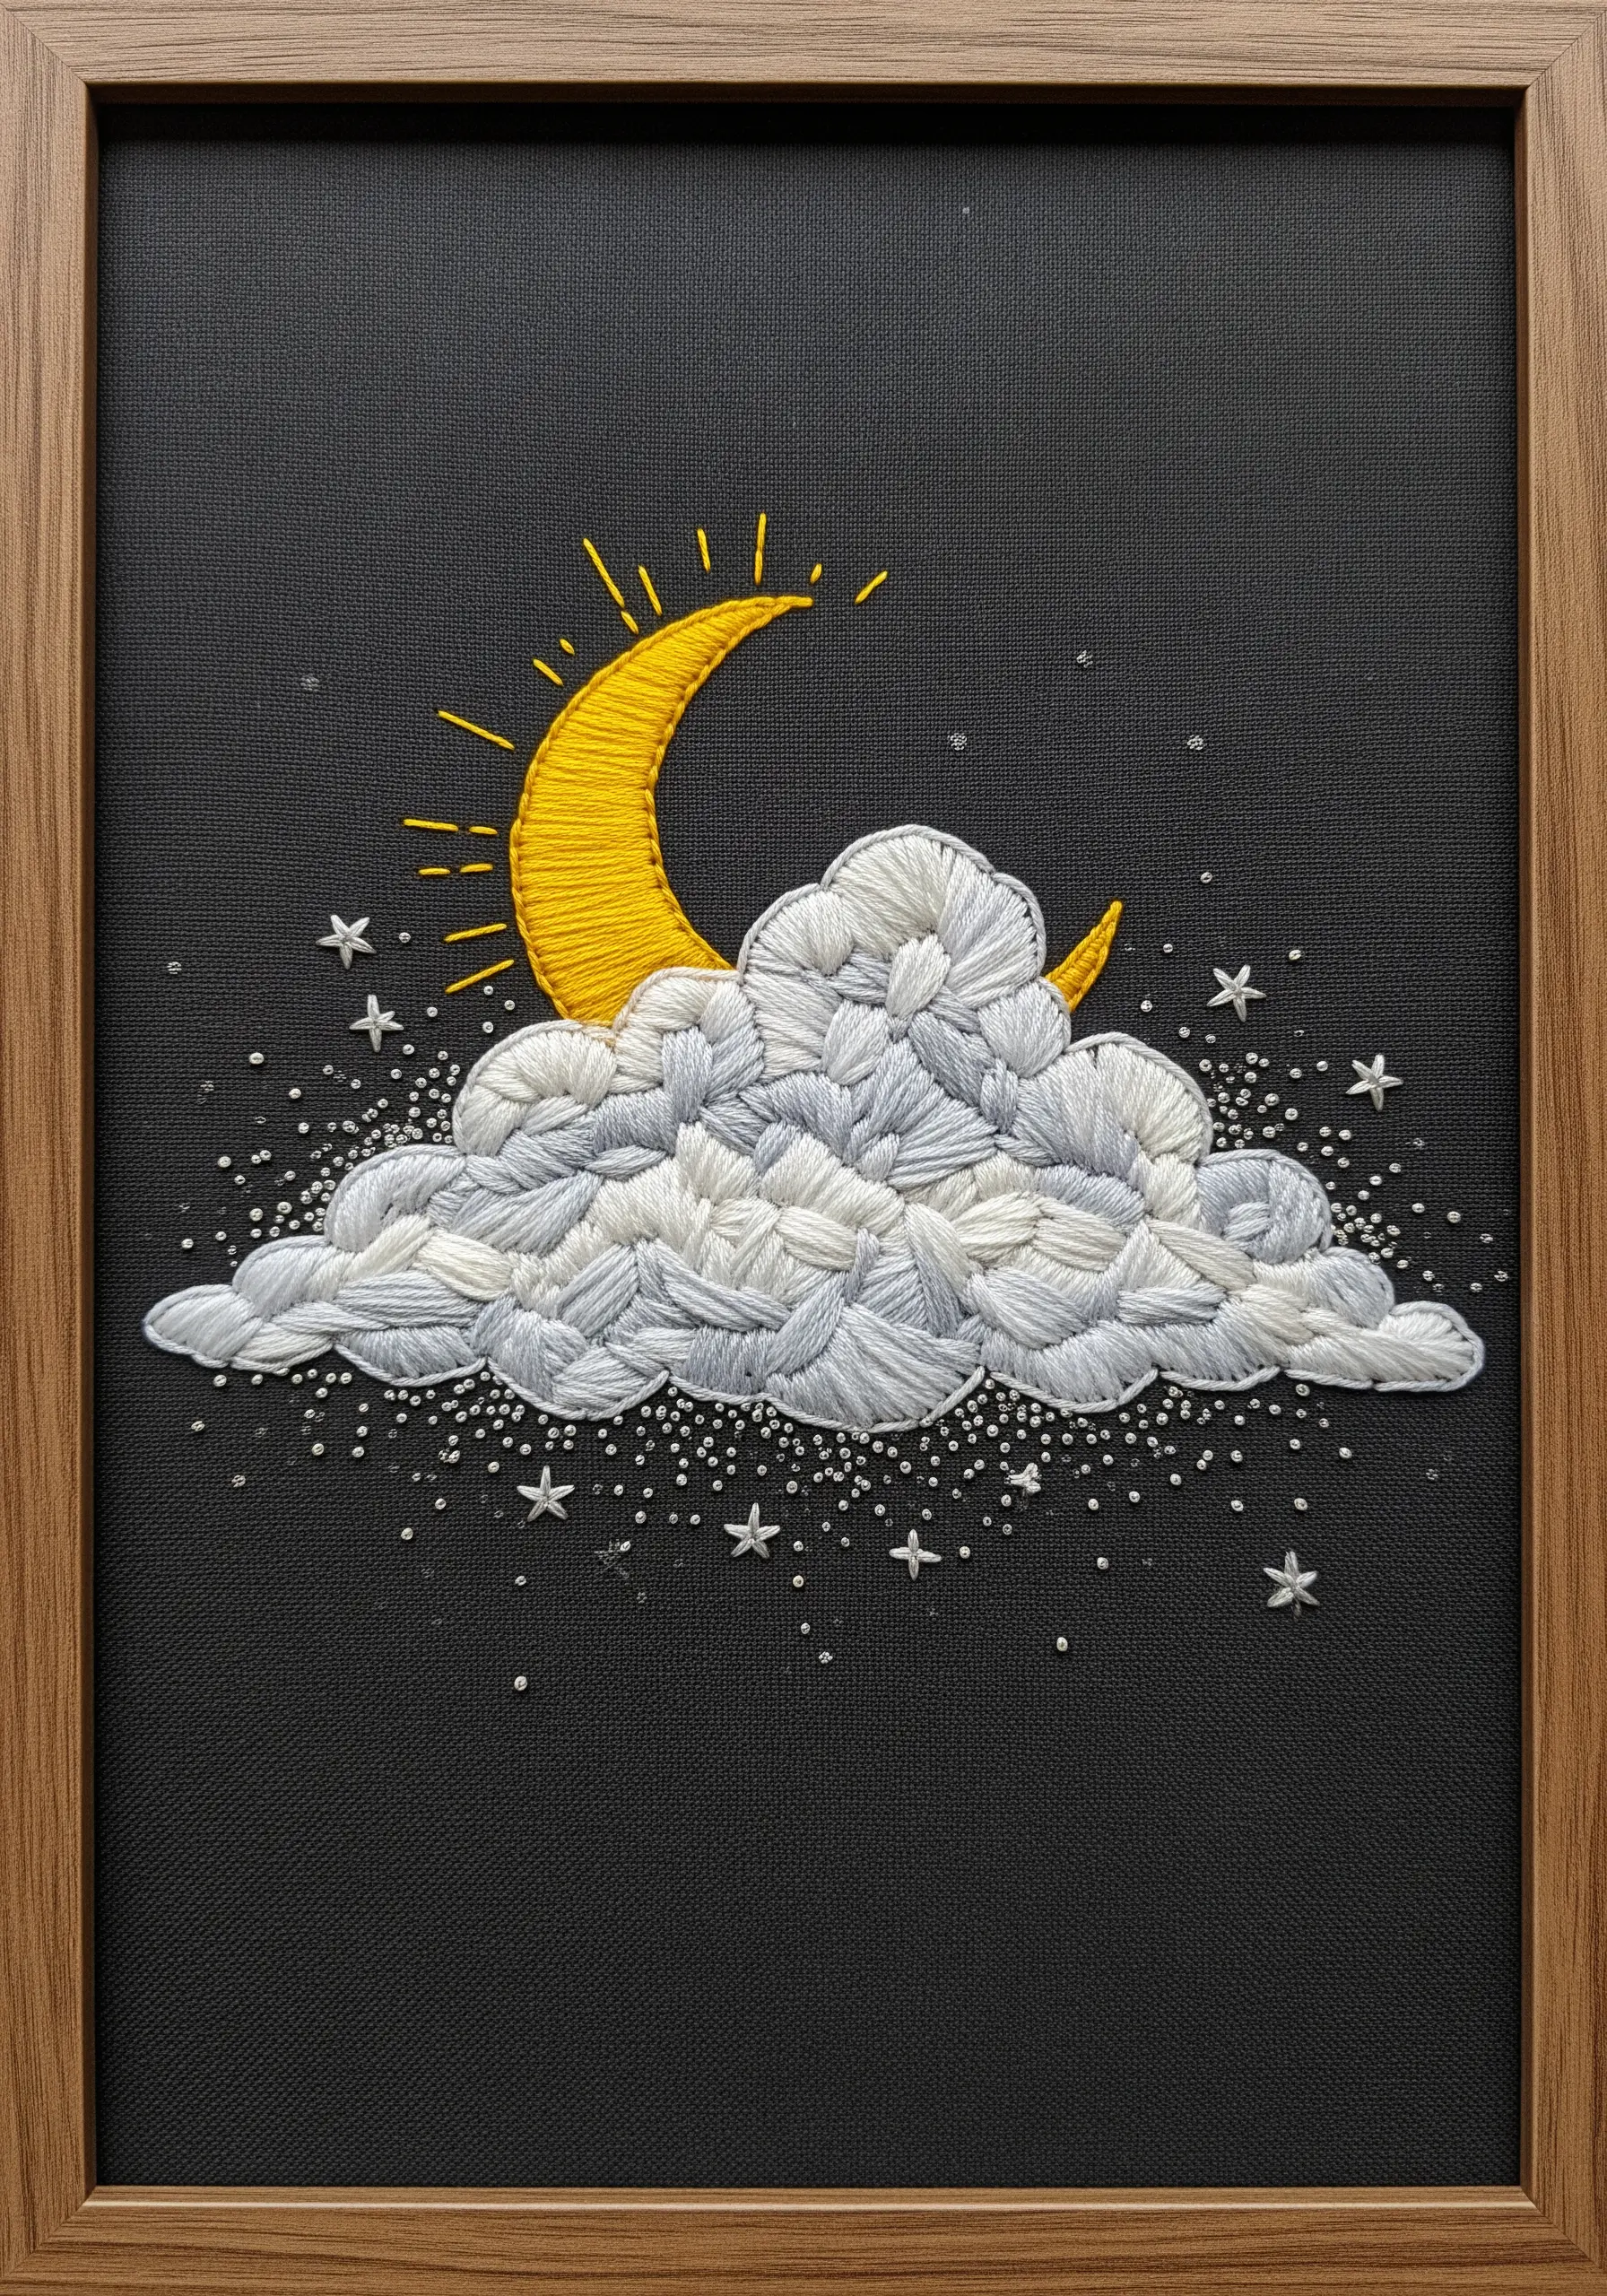
Make your colors appear to glow by stitching them on a dark background like black or navy linen.
Fill the moon with a directional satin stitch, following its crescent curve to create a natural sheen.
For the cloud, use a less uniform satin stitch—almost like thread painting—to blend shades of white, grey, and pale blue, giving it soft volume and depth.
A scattering of tiny silver seed beads provides the perfect finishing touch, suggesting a field of distant stars.
21. Quilt a Play Mat with Soft Appliqué Shapes
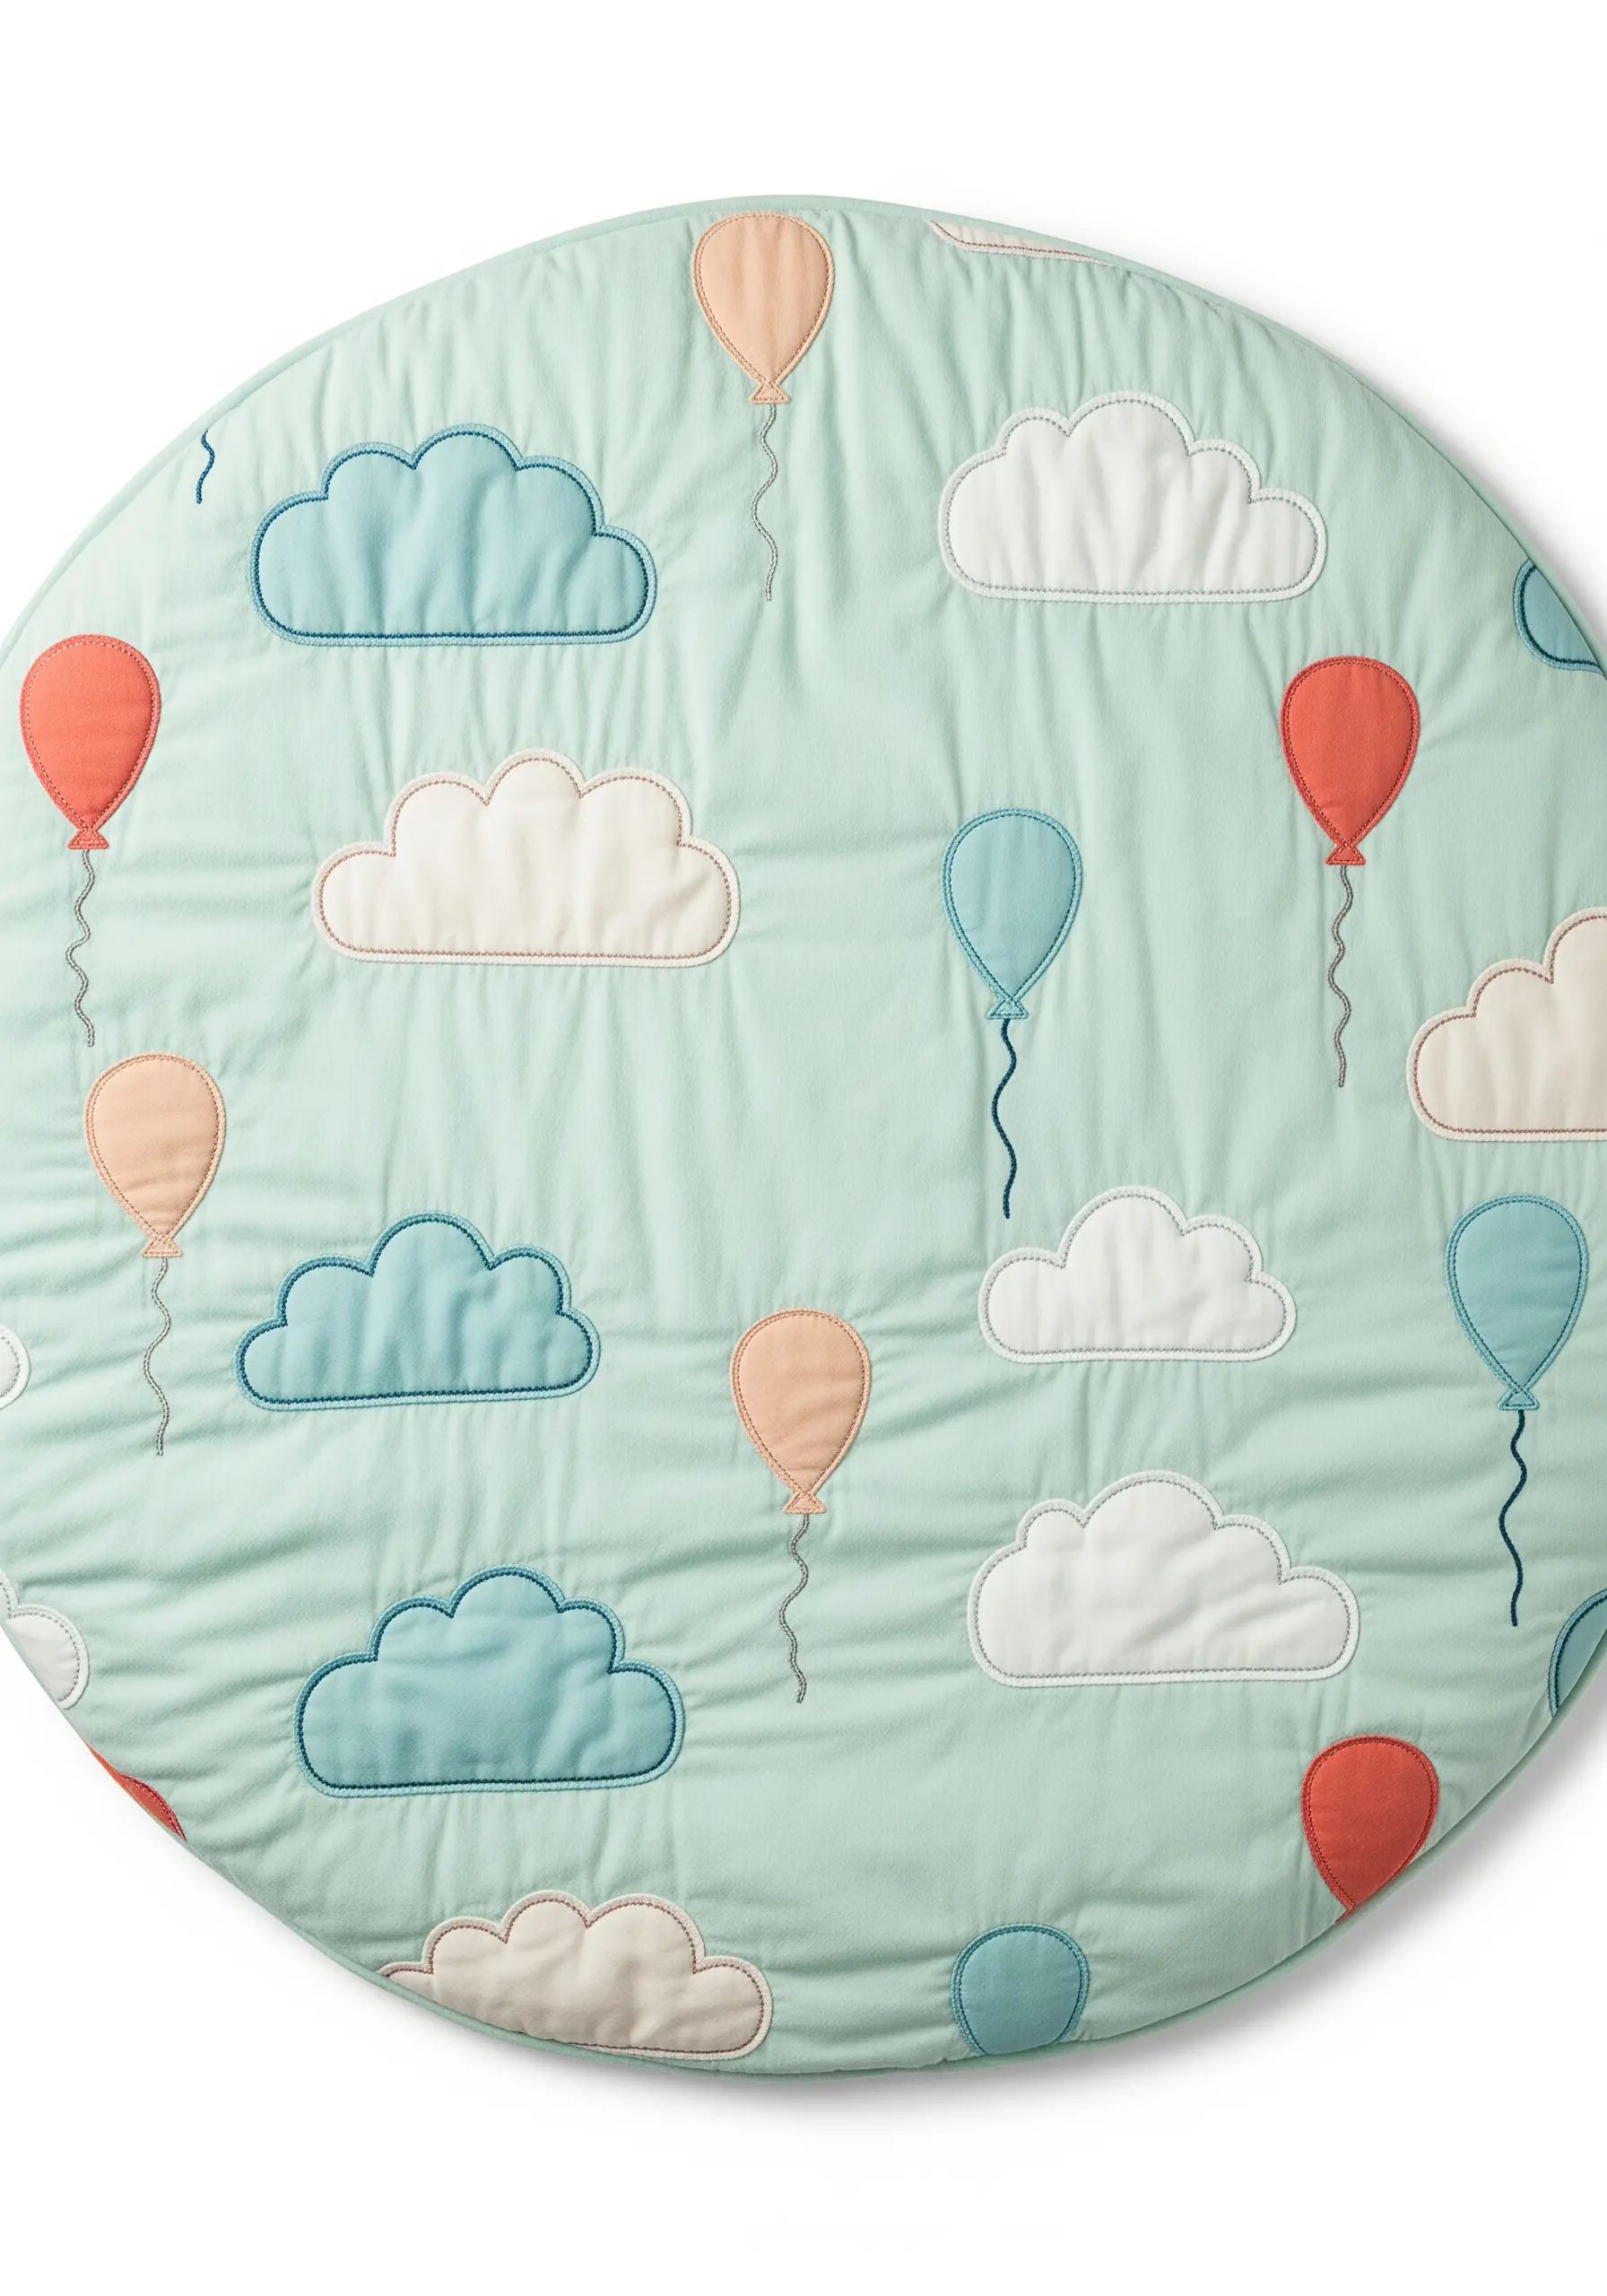
For a large, functional piece like a play mat, machine appliqué offers both beauty and durability.
Secure your fabric shapes with an iron-on adhesive, then topstitch around the edges with a simple straight stitch set about 1/8 inch from the edge.
This technique gives a lovely, soft, quilted look that is much faster than a dense satin stitch.
The gentle quilting lines across the mint-green background add extra softness and ensure the layers won’t shift with use.
22. Balance Filled Stitches with Delicate Linework

A successful composition often relies on visual balance.
Here, the hot air balloon is the clear focal point, filled with dense, smooth satin stitches in a muted, earthy palette.
To support this central element without competing with it, the surrounding clouds are rendered in simple backstitch outlines.
This contrast between solid and open shapes is a key principle in many minimal embroidery designs, creating a piece that feels both detailed and uncluttered.
23. Tell a Visual Story with a Three-Panel Design
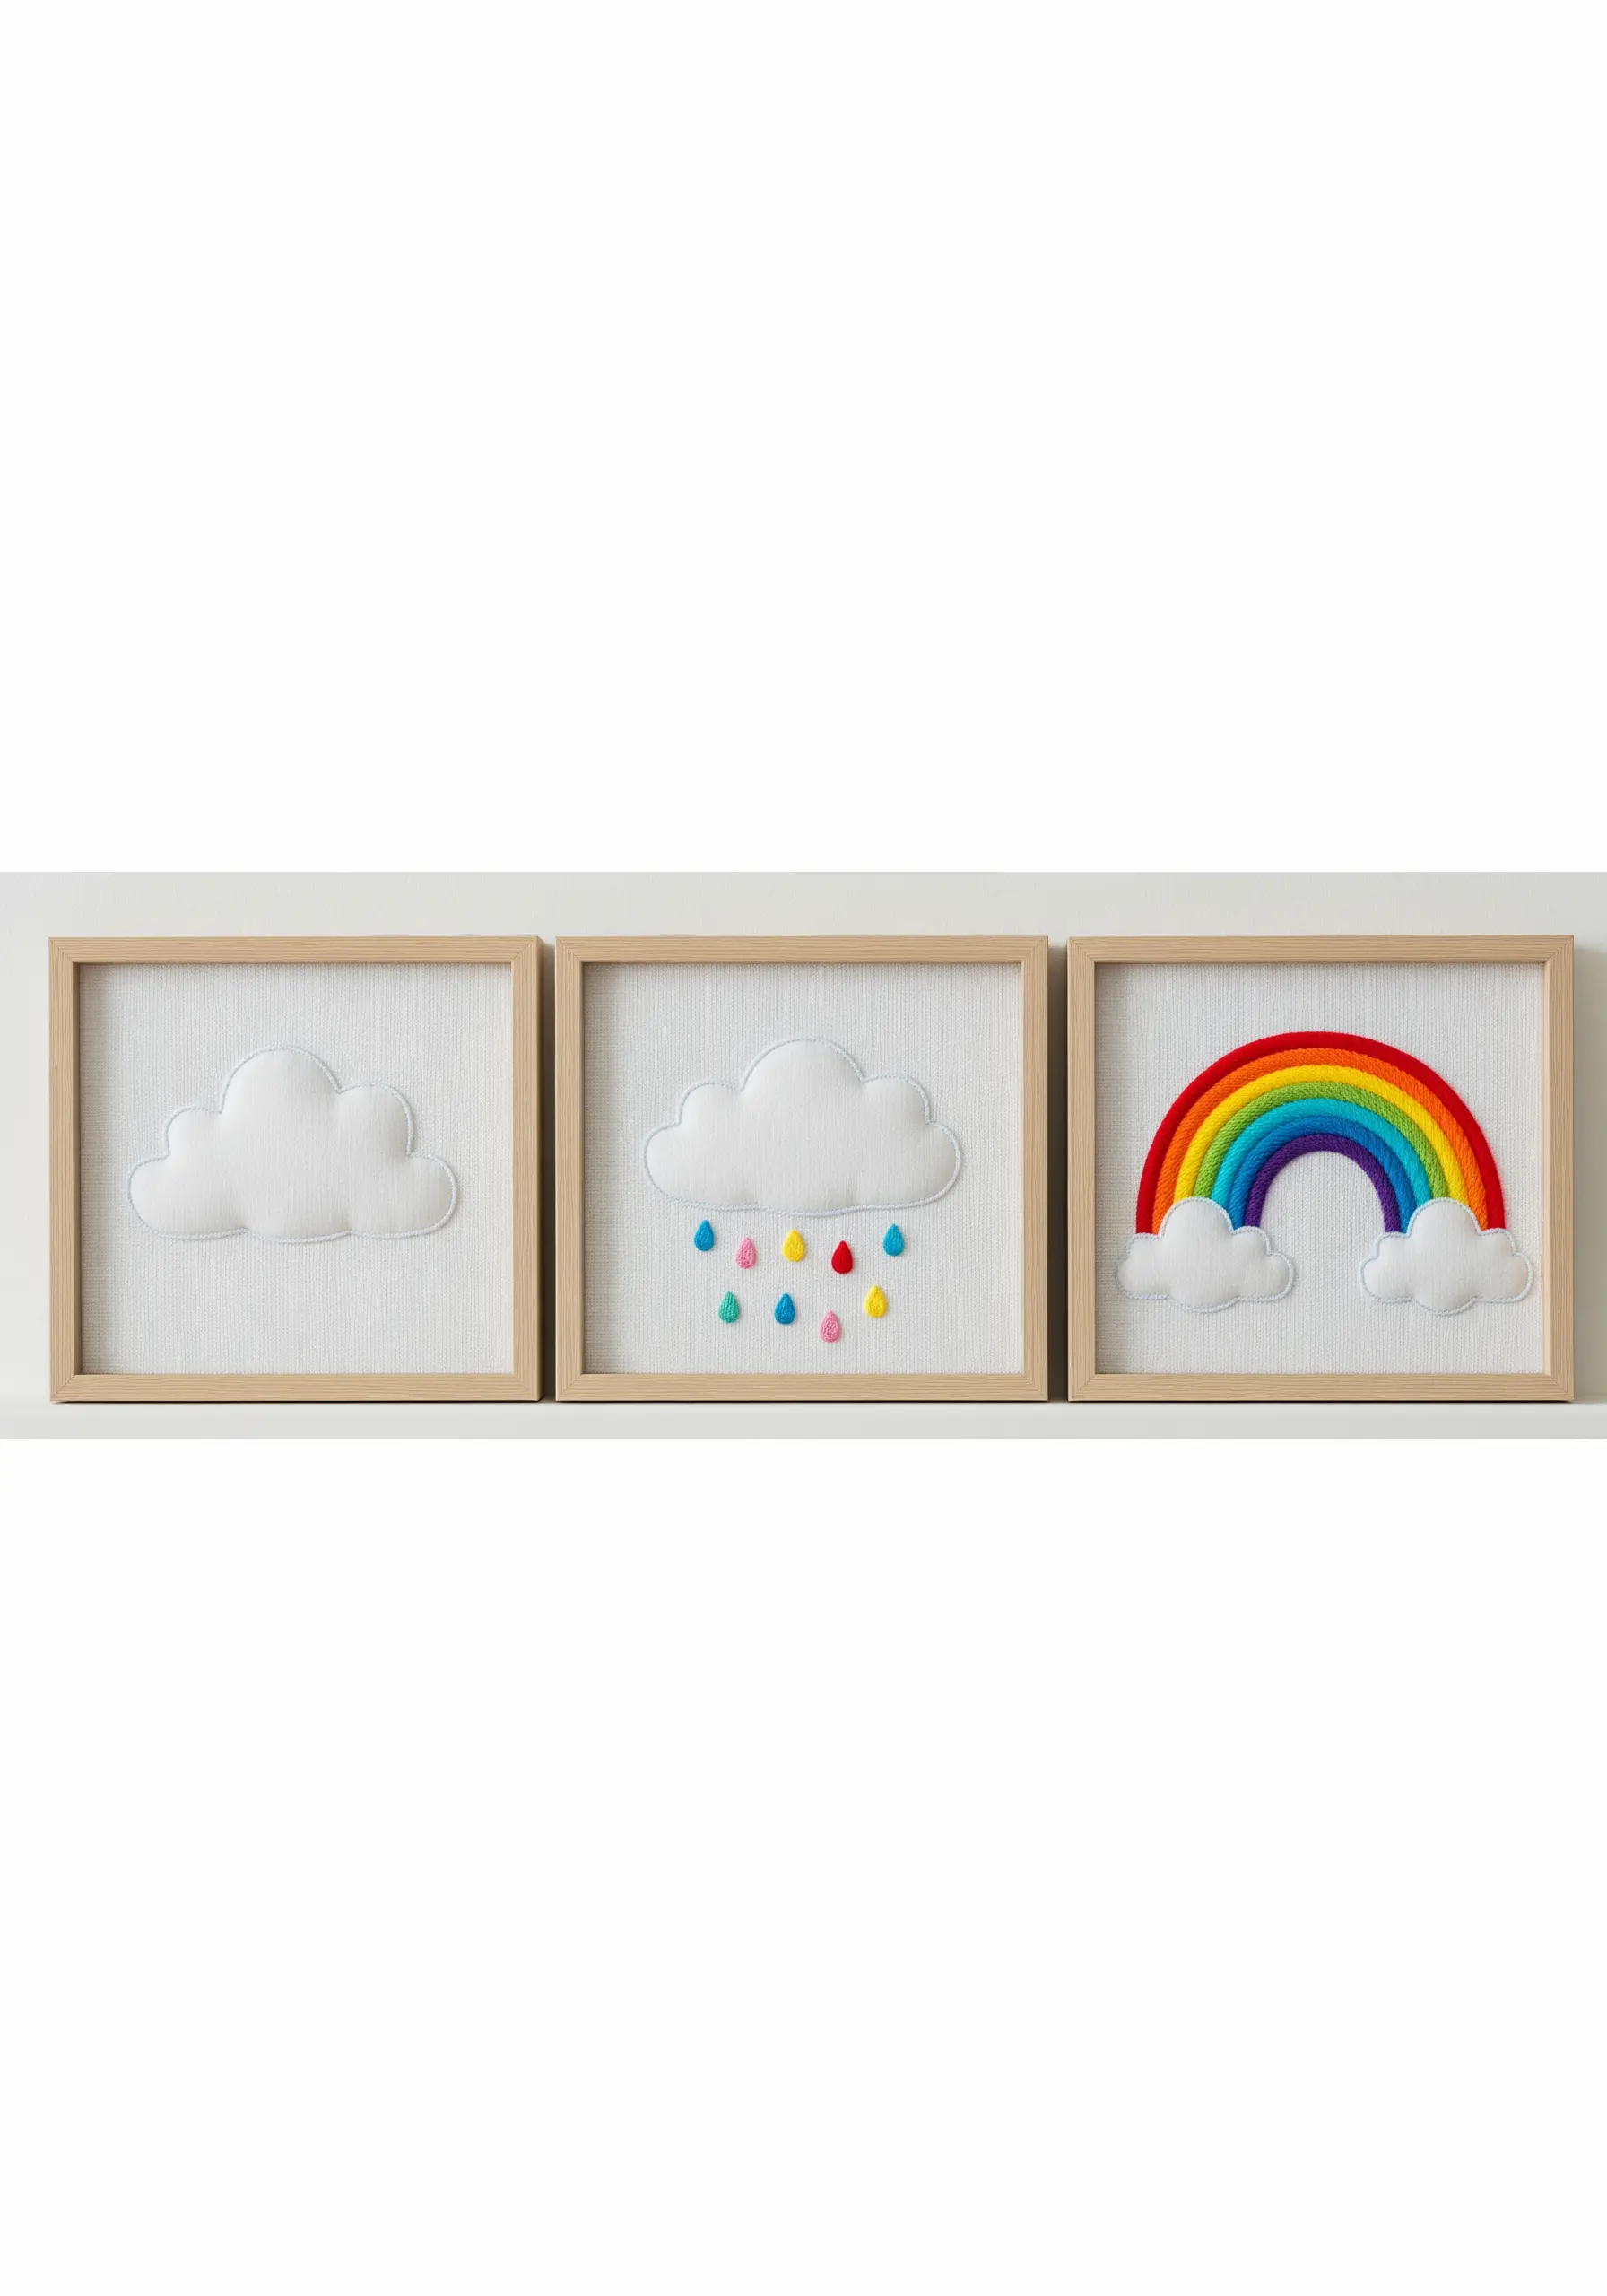
This triptych uses progression to tell a simple, charming story: a cloud, a shower, and the resulting rainbow.
Create a consistent visual anchor by using padded appliqué for the cloud in each frame—place a small piece of felt or batting under the white fabric before stitching to make it puffy and dimensional.
This repetition unites the three pieces, while the addition of colorful, satin-stitched raindrops and a vibrant rainbow creates a delightful narrative arc.


