
Have you ever finished a project and felt that something was missing? You followed the pattern, your stitches are neat, but the piece doesn’t quite have the life or artistry you envisioned. That feeling is the starting point for truly expressive embroidery.
The secret isn’t learning a hundred complex new stitches. It’s about learning to *see* texture all around you and translating it into thread with intention. It’s in the way you layer simple French knots to mimic moss, or how you angle your satin stitch to suggest the curve of a rolling hill.
These ideas are not just patterns to be copied; they are techniques to be understood and applied to your own work. Think of this as your personal library of textures. Borrow a concept, combine it with another, and begin stitching with a new level of confidence, knowing that you are not just coloring with thread, but sculpting with it.
1. Sculptural Moss with Layered Knots
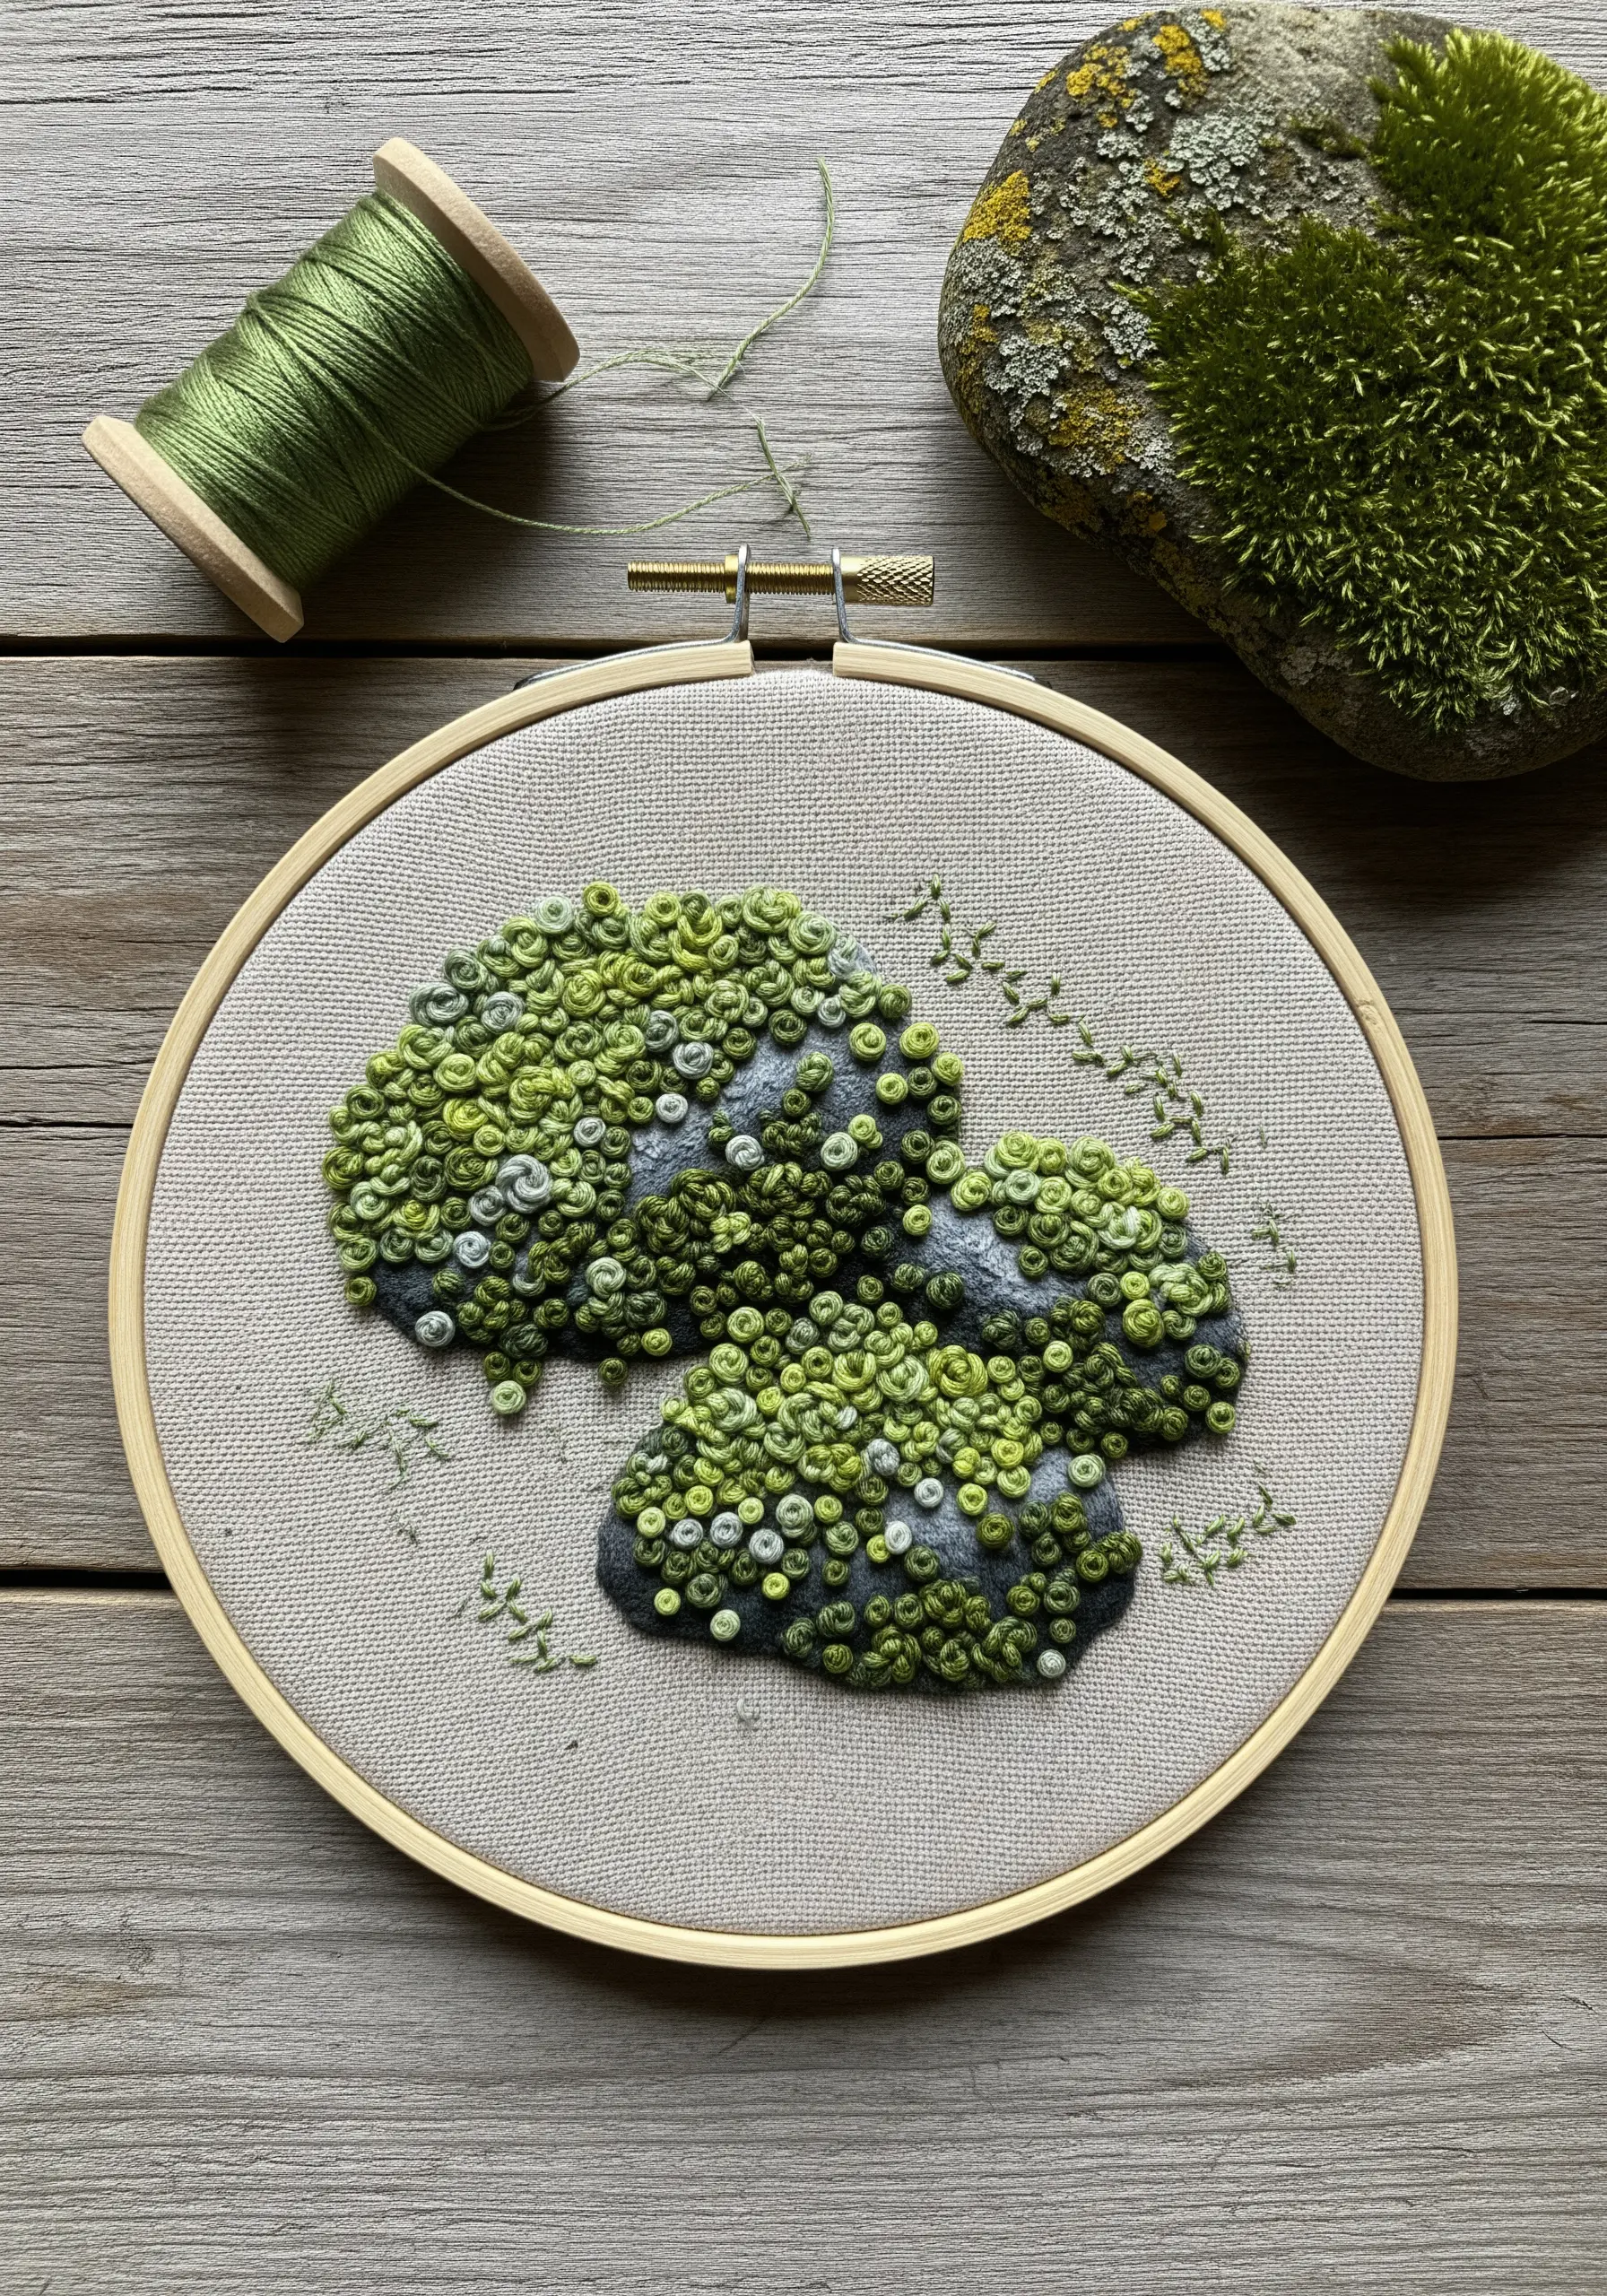
To create the lush, three-dimensional texture of moss, think in layers, not just stitches.
Start with a base of felt appliqué for the rock shapes to create instant height.
Then, populate the area with French knots, varying your thread count from six strands for the base to two strands for the delicate top layer.
Mix several shades of green—from deep forest to bright lime—and cluster them organically.
This variety in size and color is what transforms simple knots into a living, tactile surface, making your earth-inspired embroidery designs feel incredibly realistic.
2. Woven Bark with Couching and Chunky Fibers
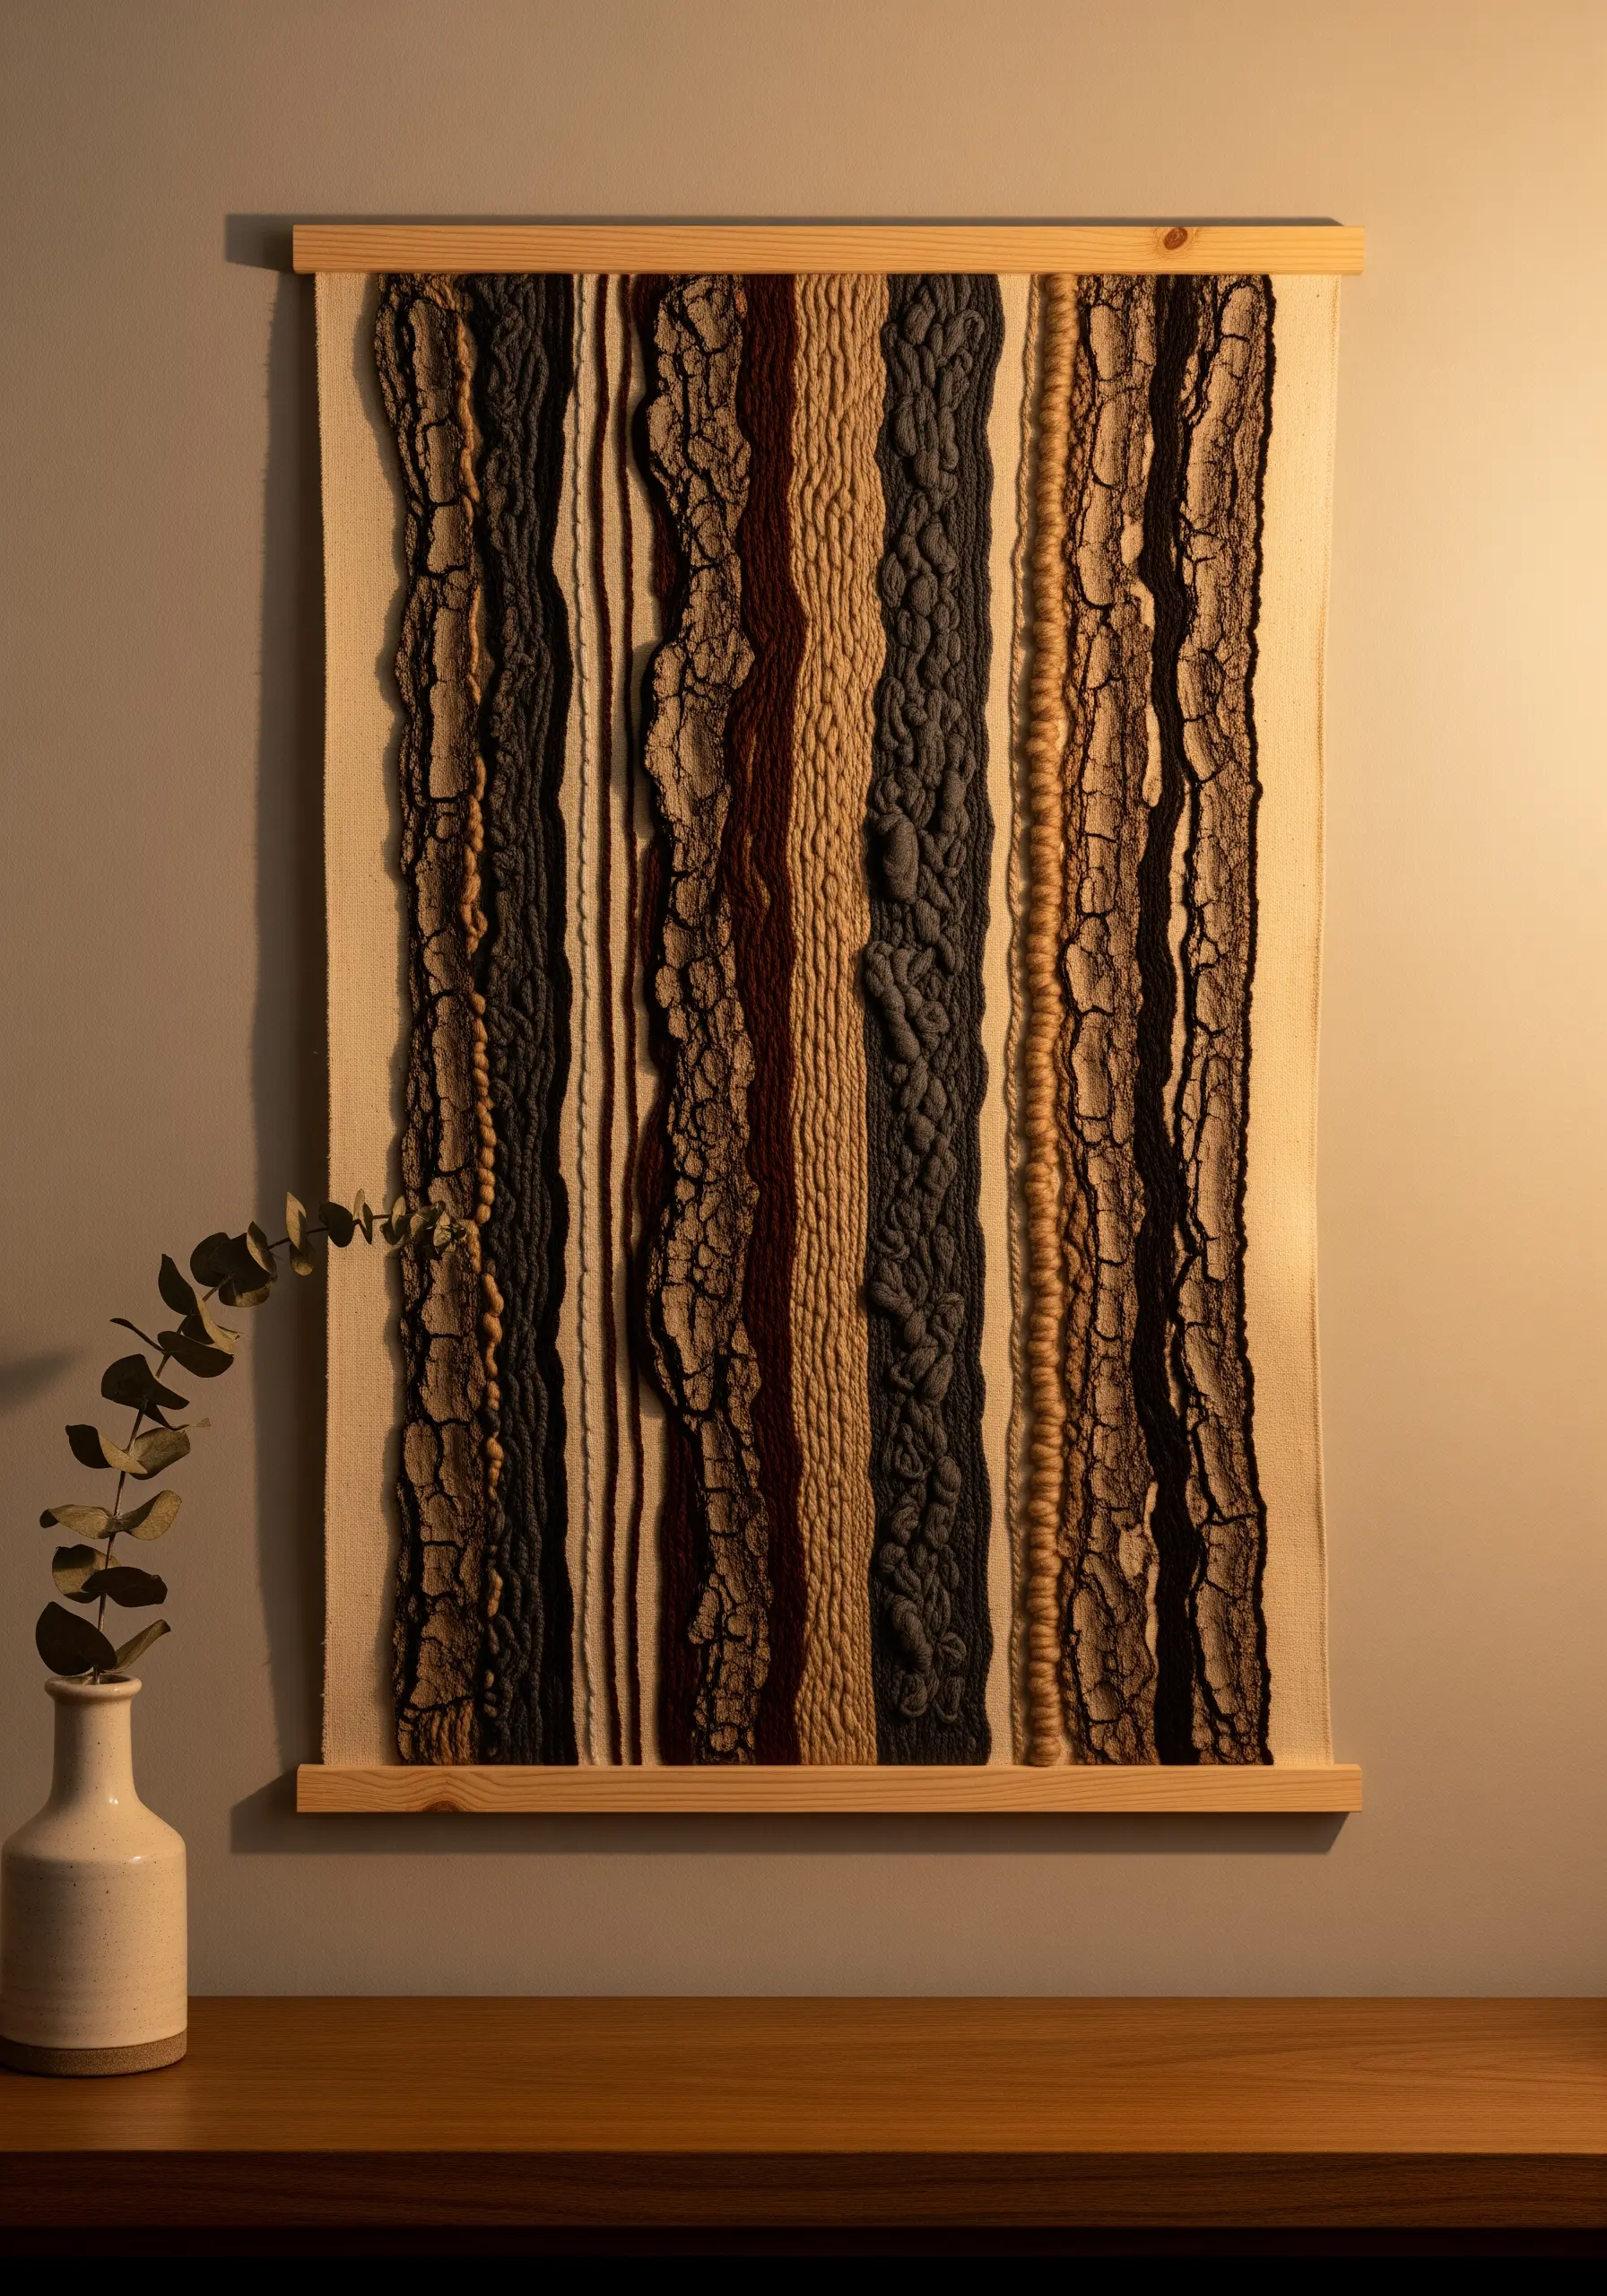
This impressive texture relies on combining different fiber weights and a simple couching technique.
Lay down thick, chunky yarns and wool roving onto a heavy fabric base like canvas.
Then, using a standard embroidery floss in a matching color, tack the thick fibers down with small, evenly spaced straight stitches.
Alternate between smooth, twisted yarns and soft, fluffy ones to replicate the rugged, varied surface of tree bark.
This method allows you to create large-scale embroidered textile wall hangings with dramatic texture quickly.
3. Meditative Spirals with Blended Threads
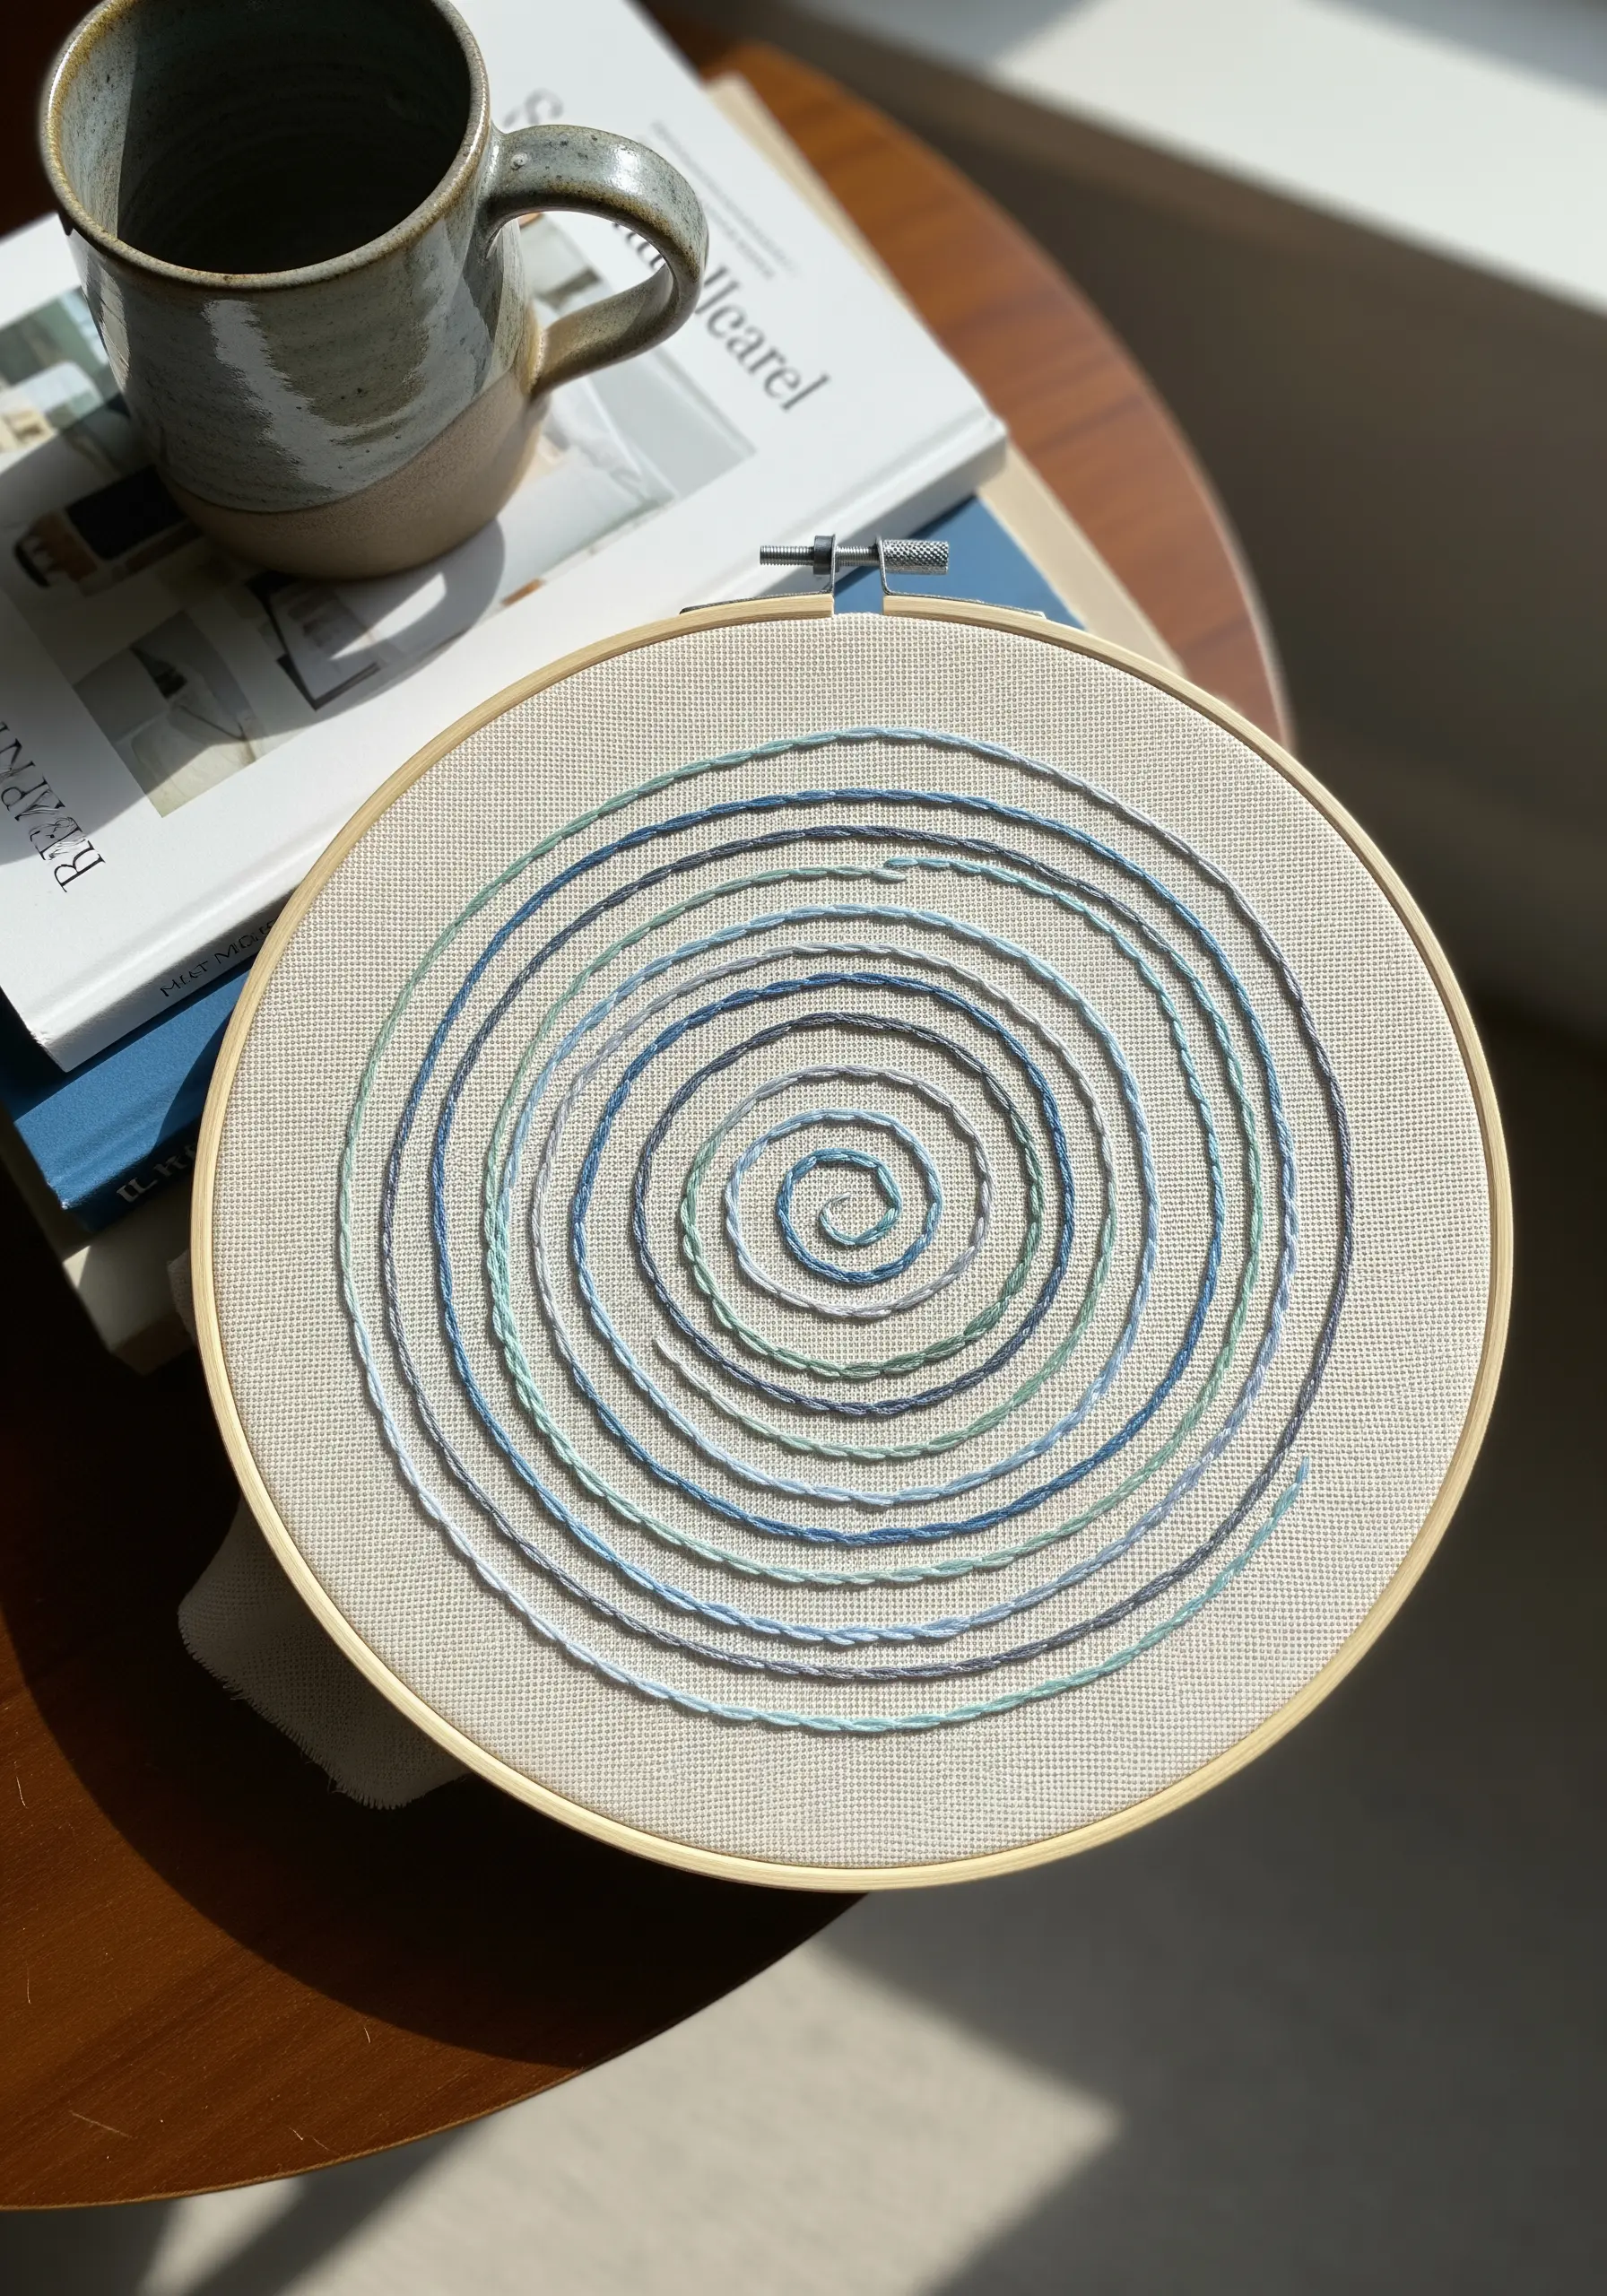
A simple spiral becomes a captivating piece through intentional color choices and a smooth, raised stitch.
Use a whipped backstitch or a stem stitch for a clean, cord-like line that has substance.
Instead of using one variegated thread, switch your solid color every one or two rounds.
Transitioning gradually from deep ocean blue to seafoam green creates a gentle ombré effect that is both calming to stitch and mesmerizing to view.
It transforms a basic shape into a minimalist embroidery project with surprising depth.
4. Monochrome Petals and Pebbles
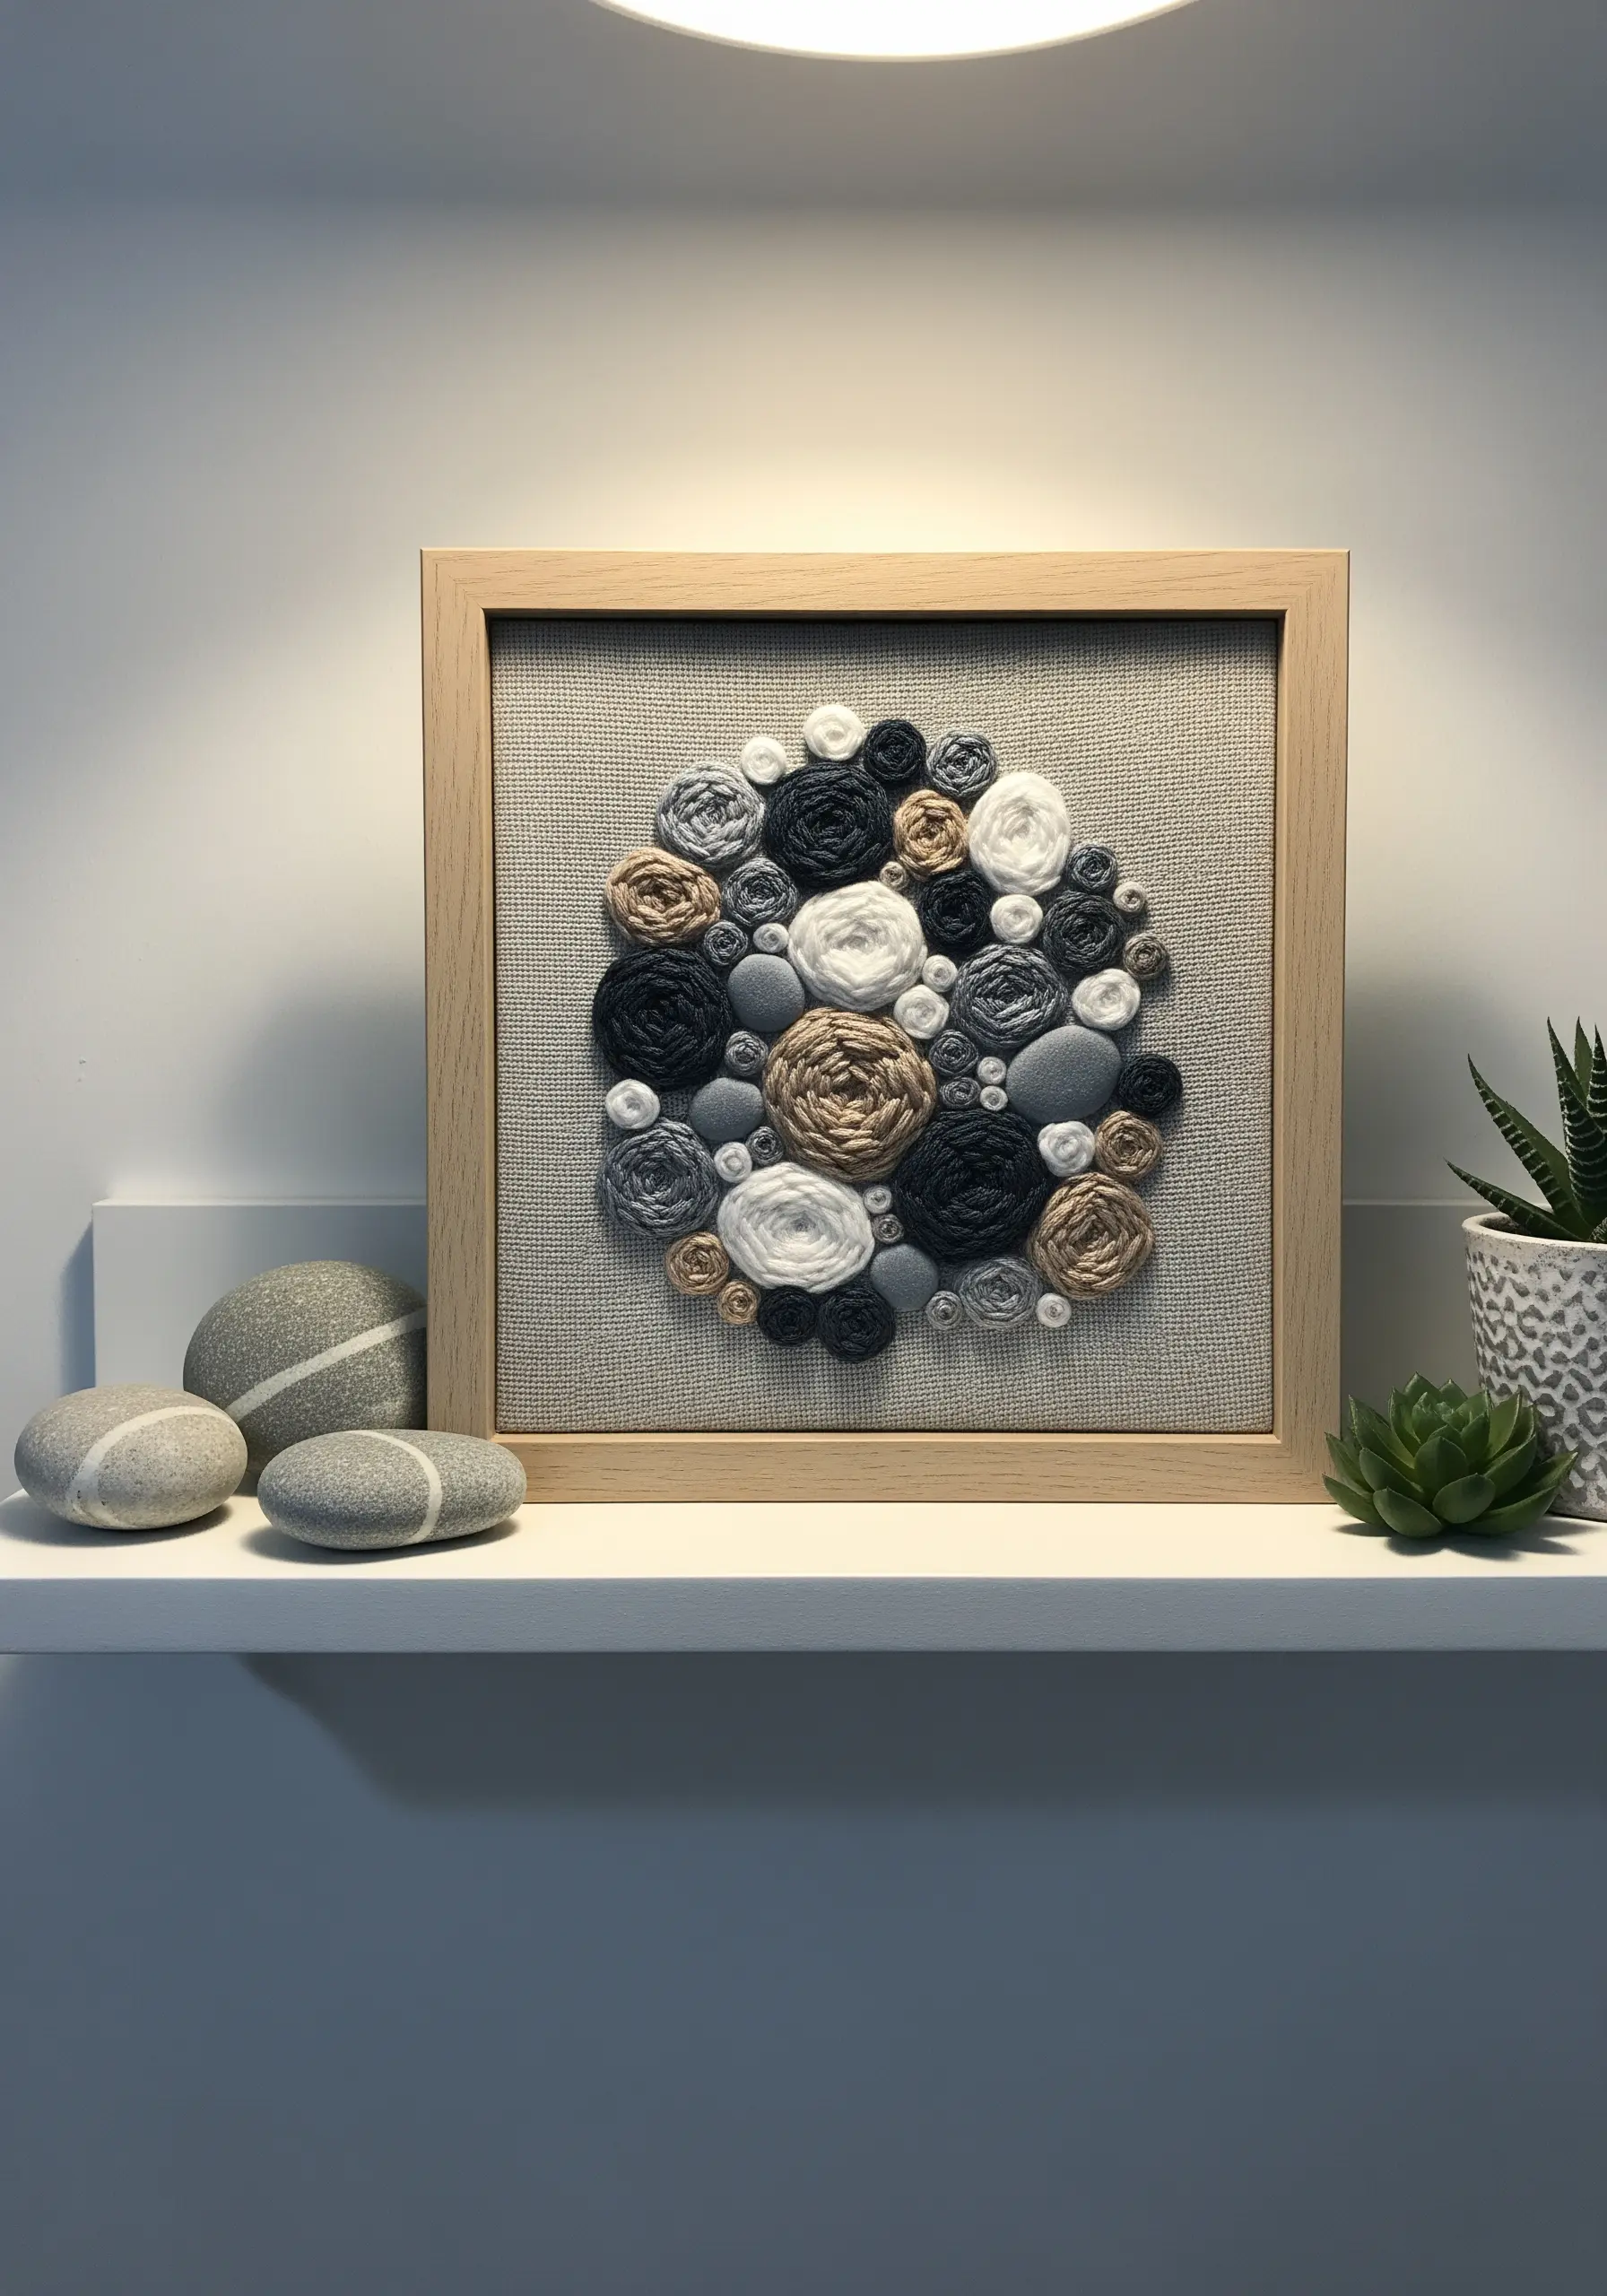
You don’t need a full spectrum of color to create a visually rich piece; texture can do the heavy lifting.
For the rosettes, use the woven wheel stitch, varying the number of spokes—five for a tight bud, seven for a fuller bloom—to create different floral forms.
To make the pebbles feel solid and smooth, use a padded satin stitch.
Lay down a foundation of horizontal straight stitches first, then cover them with vertical satin stitches.
This simple step raises the shape from the fabric, creating beautiful shadows and contrast in your embroidery for a serene living space.
5. High-Texture Sunflower with Blended Petals
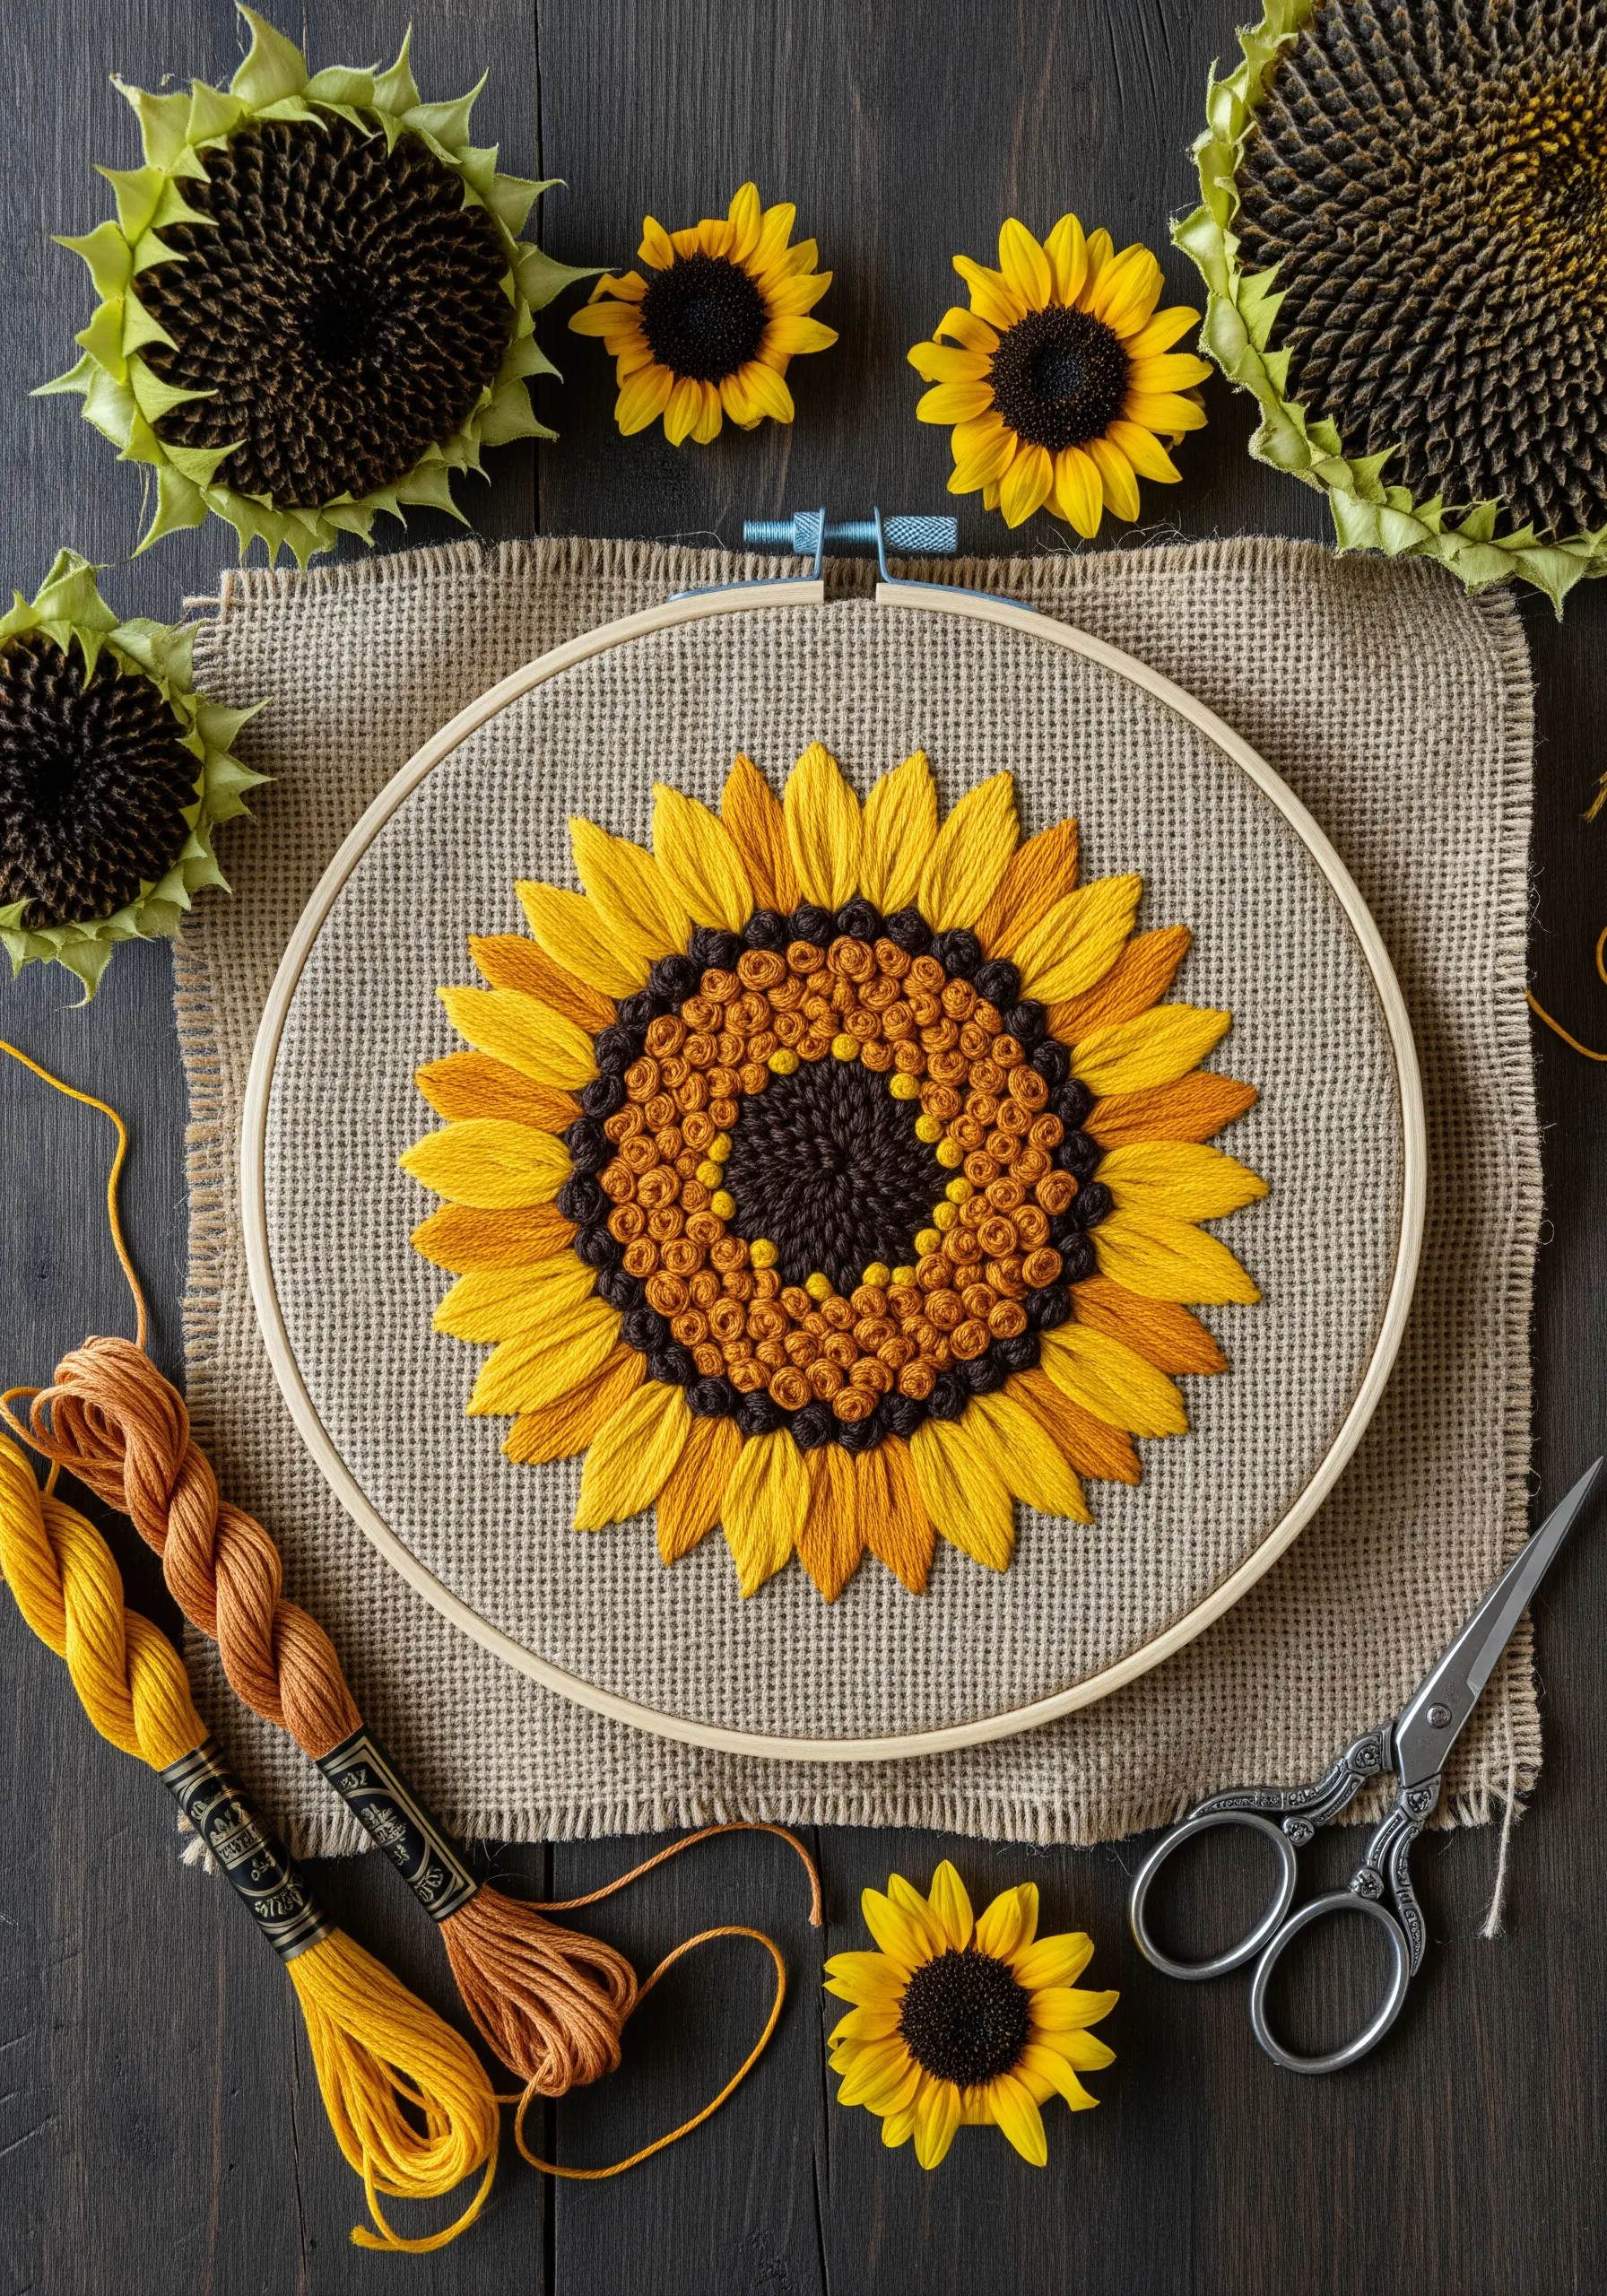
A truly vibrant sunflower comes from combining multiple stitch textures in one design.
Fill the center with a dense collection of French knots in dark brown and bronze to replicate the seed head.
For the petals, avoid a flat satin stitch.
Instead, use a long-and-short stitch with two or three shades of yellow and gold.
This allows you to blend the colors seamlessly, giving the petals a realistic gradient and a sense of movement that satin stitch alone cannot achieve.
Stitching on rustic burlap enhances the overall sunflower-inspired embroidery aesthetic.
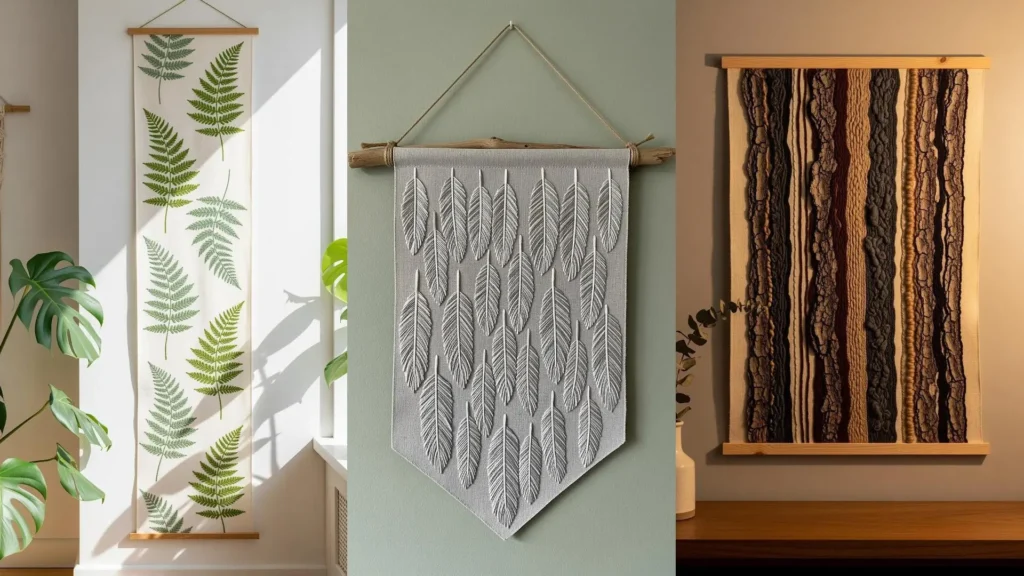
6. Elegant Fern Study with Precision Stitching
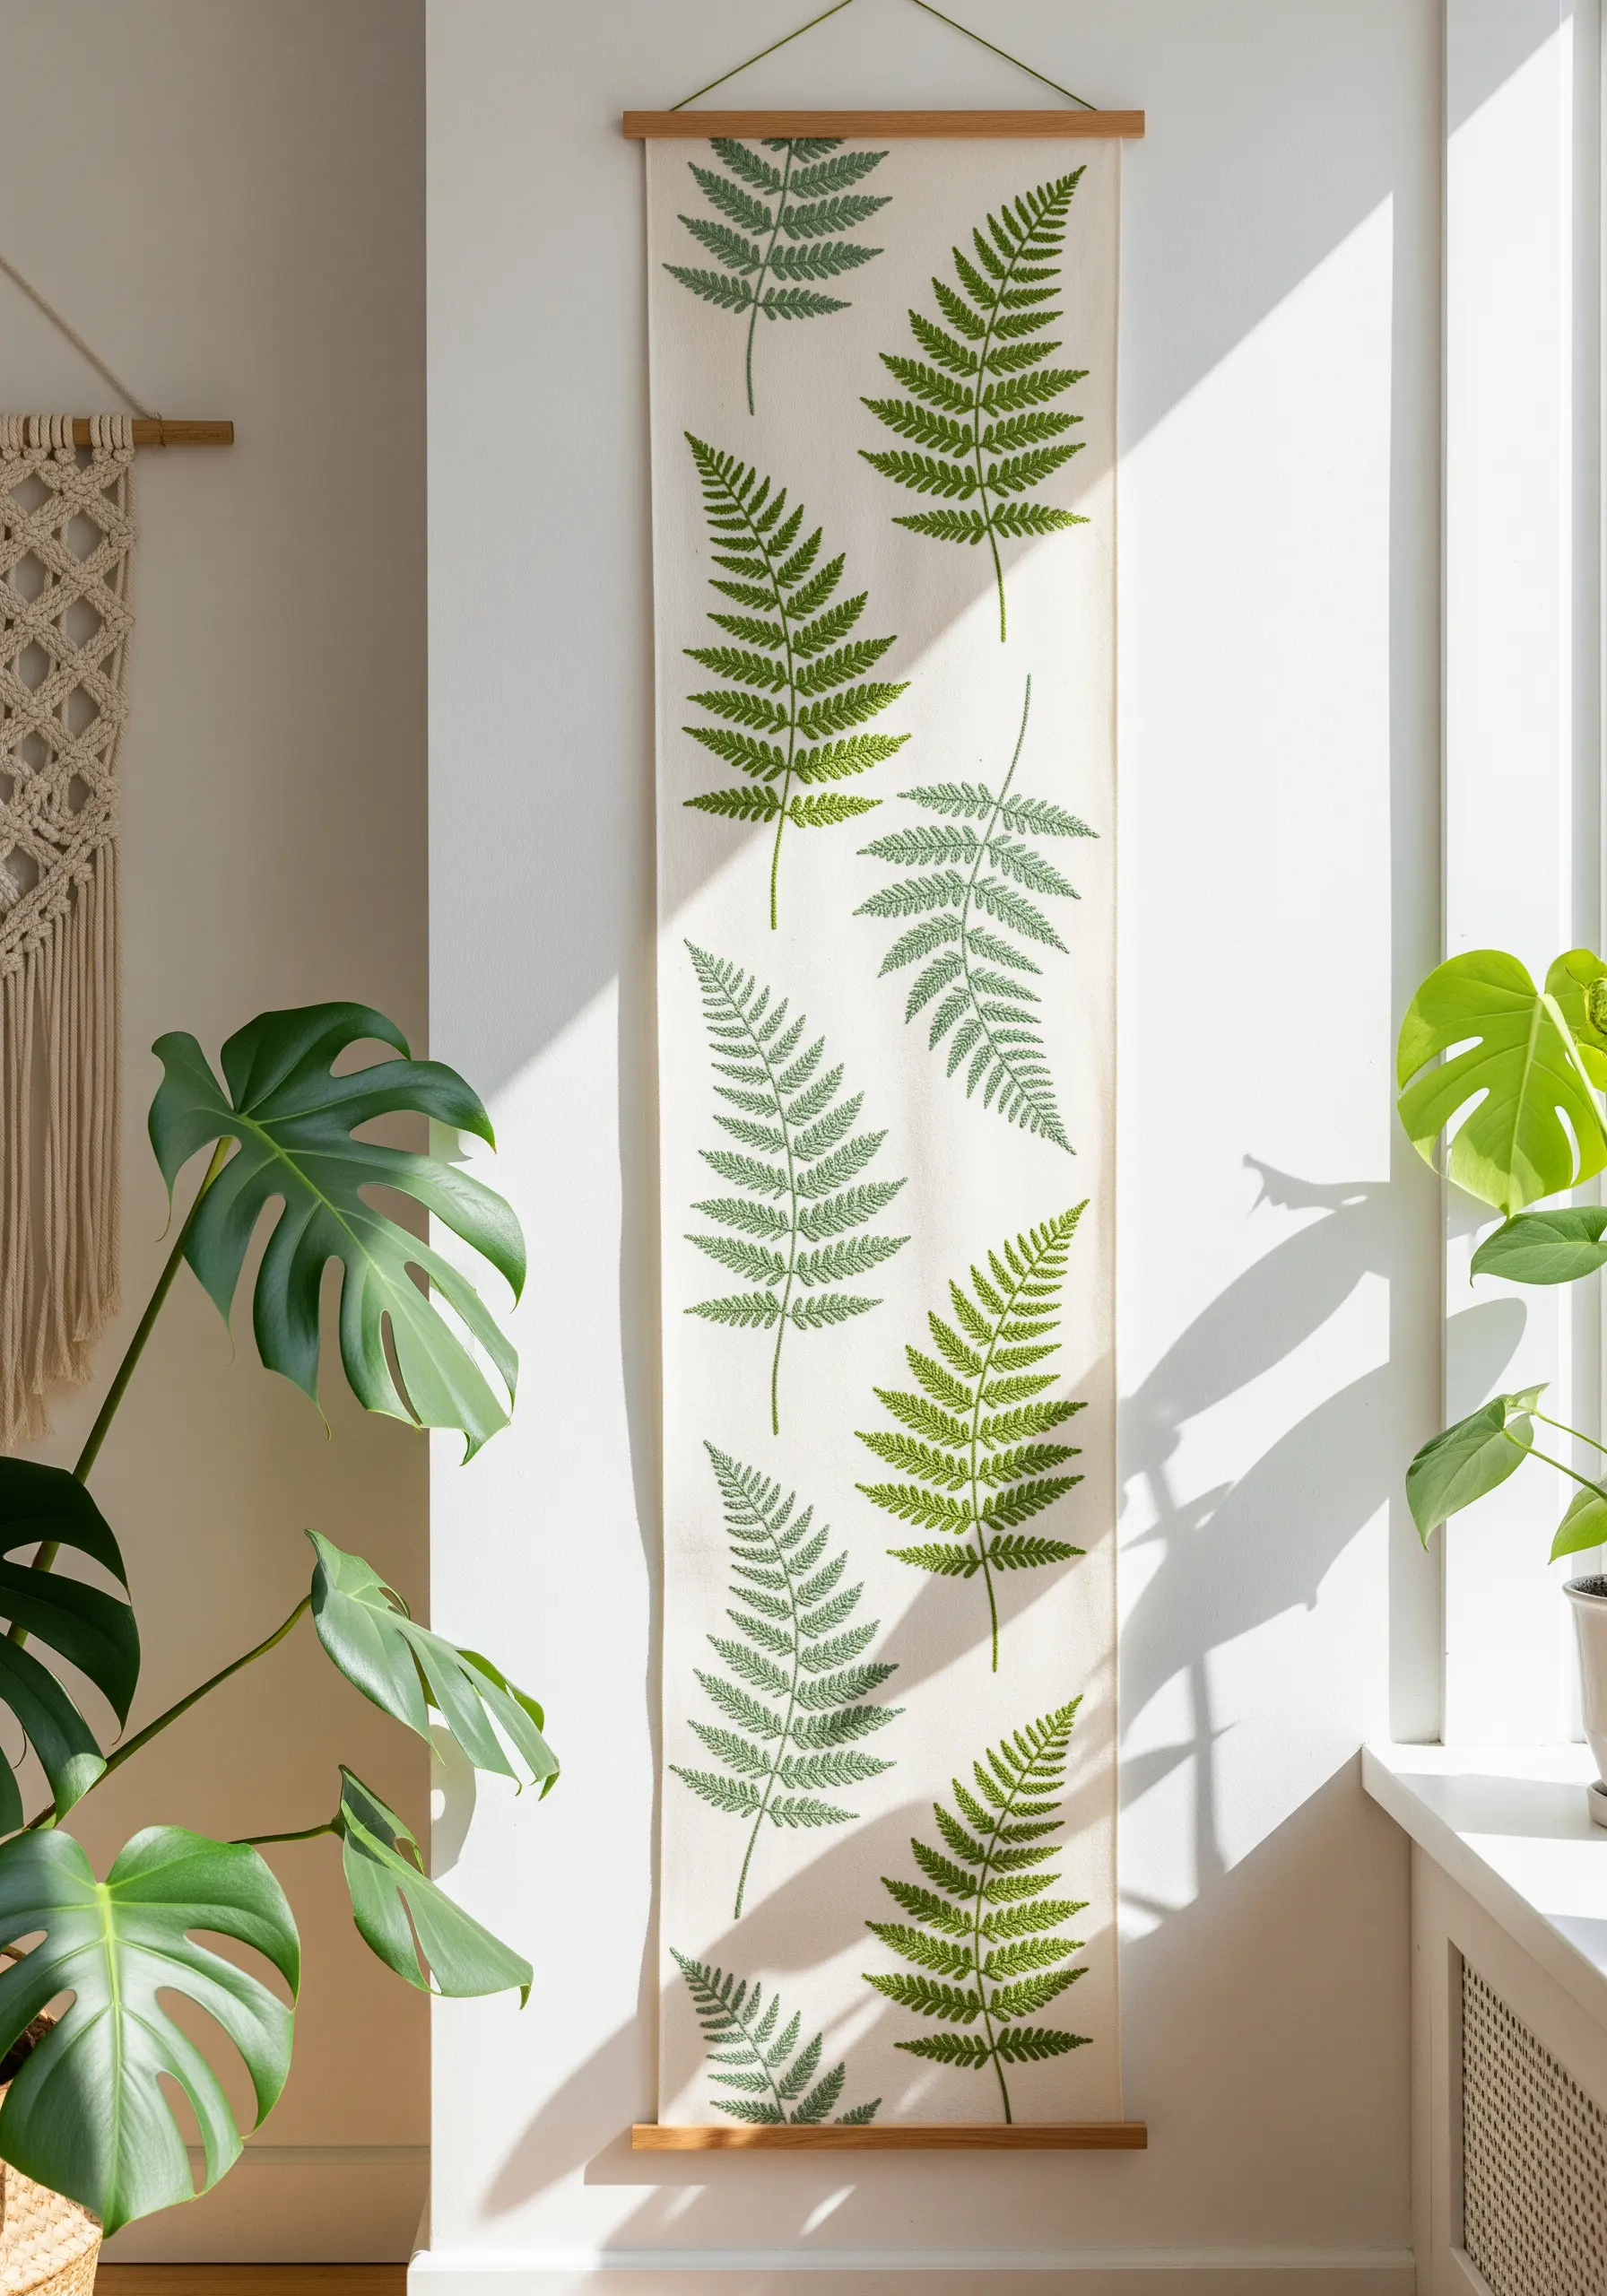
This design proves that simplicity and repetition can be incredibly powerful.
The fern stitch is ideal here, as it creates the central stem and delicate leaves in one efficient movement.
To achieve this clean, graphic look, focus on consistency.
Use a quality linen fabric and ensure your stitch length and angle are uniform across each frond.
Introducing subtle variations in the shade of green for each fern adds depth and realism to the composition, turning it into beautiful botanical embroidery wall pieces.
7. Intricate Lichen Study with Mixed Stitches
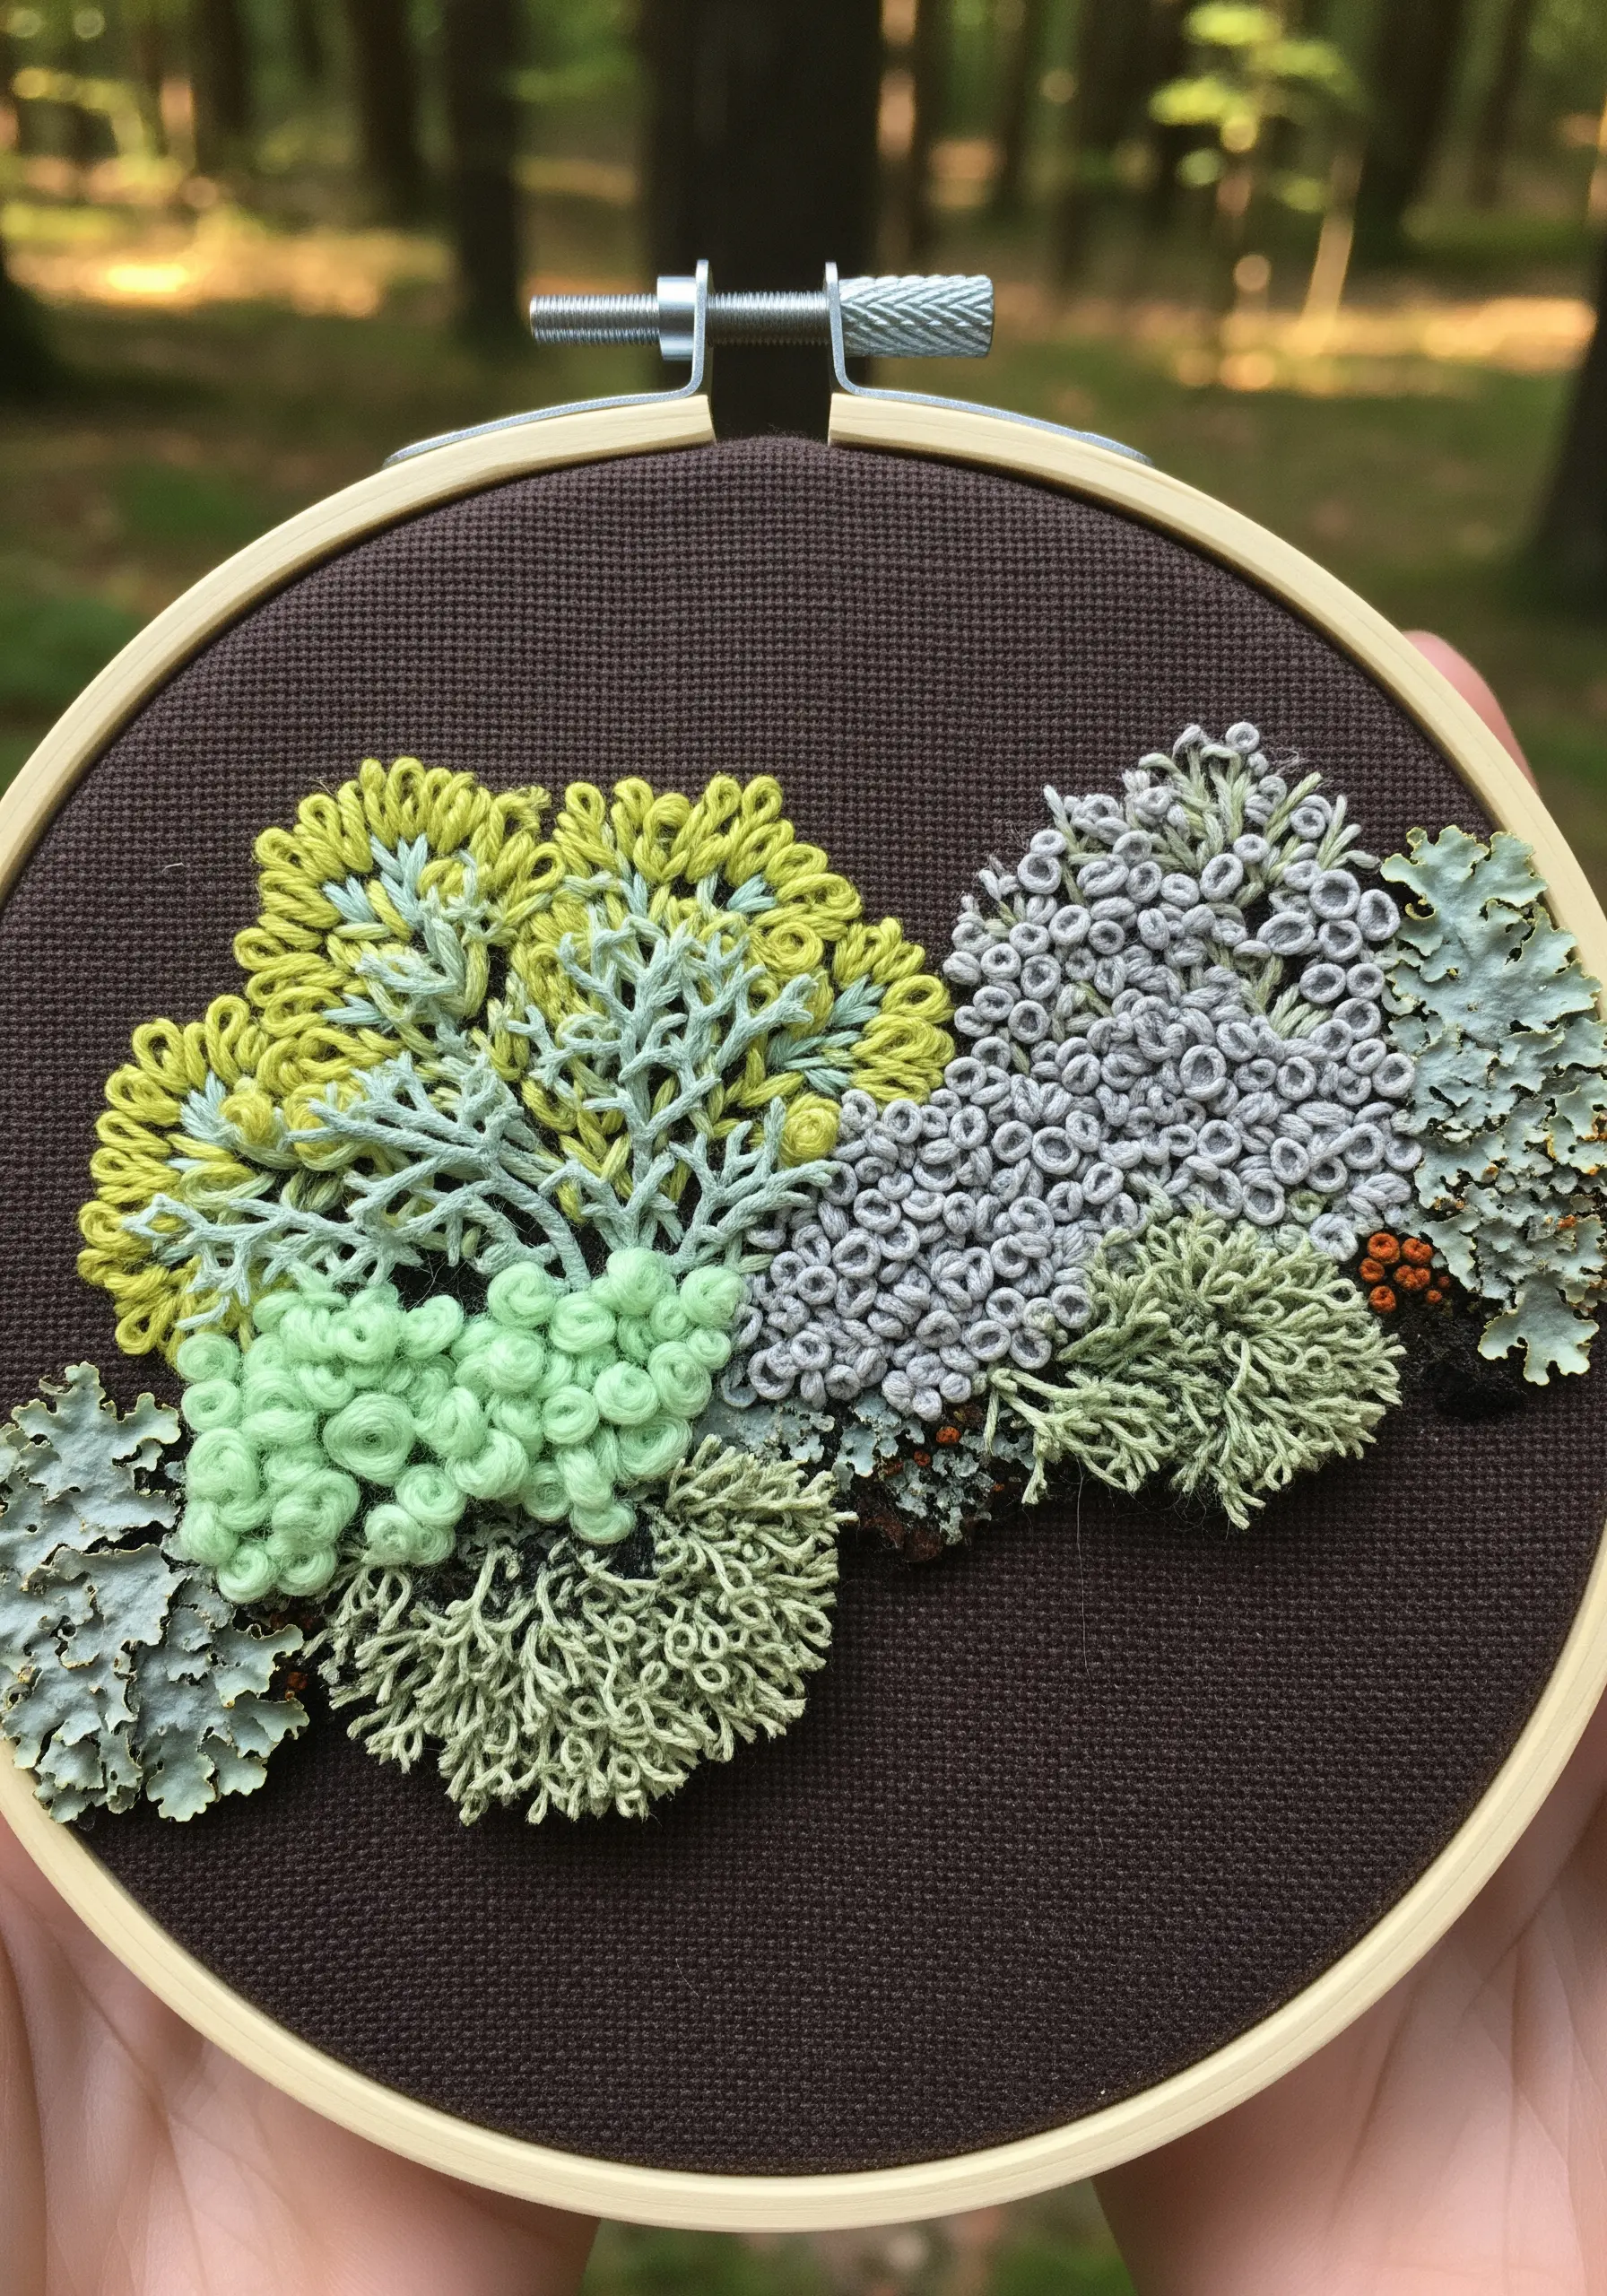
To capture the complex beauty of lichen, you need a small arsenal of textural stitches.
Use tight clusters of French knots for the bumpy, rounded growths.
For the delicate, branching structures, use bullion knots or layered detached chain stitches (lazy daisies).
Using a slightly thicker thread, like wool or all six strands of cotton floss, will give these stitches the volume they need to feel authentic.
This is one of the most effective creative ways to stitch natural textures with surprising accuracy.
8. Graphic Seashell with Couching and Cord
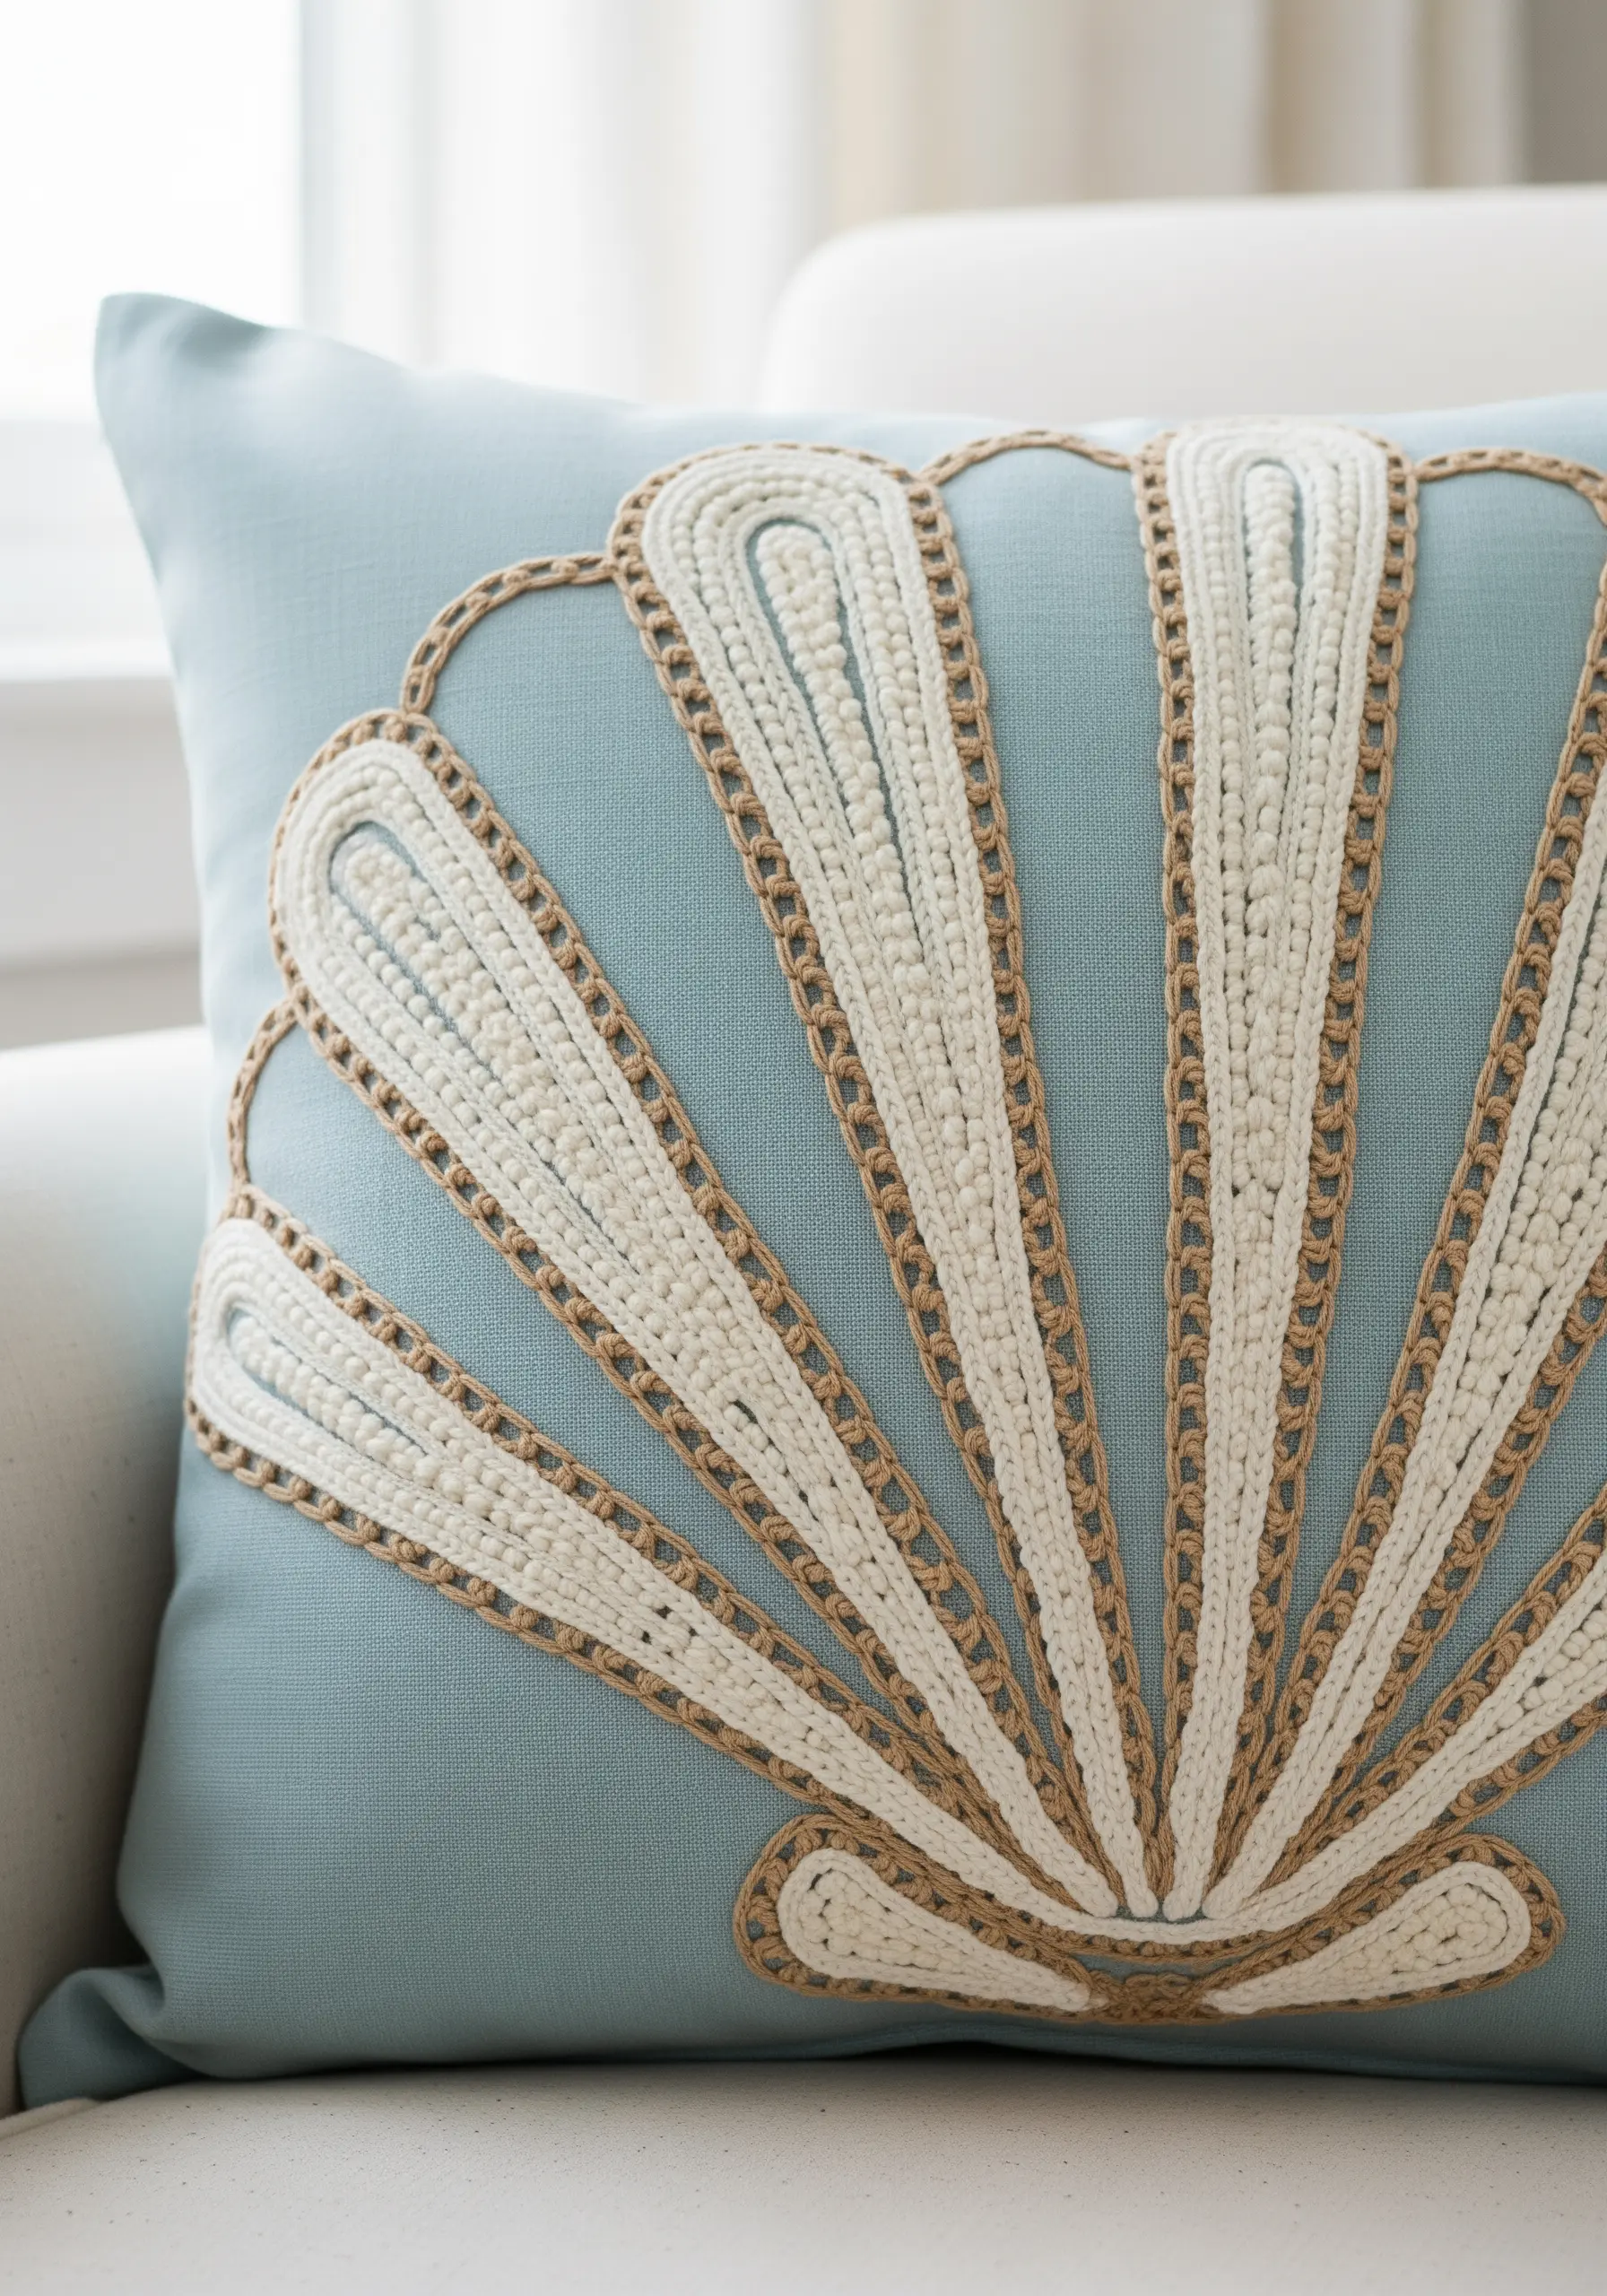
The sophisticated coastal feel of this design comes from the smart contrast of materials.
Create the main outlines of the shell by couching a thick, natural fiber like jute twine onto the fabric.
Then, fill the inner sections with a raised chain stitch band using a soft, thick cotton perle or yarn.
The interplay between the rough, rustic cord and the plush, refined chain stitch is what gives this piece its high-end, decorative appeal on embroidered pillow covers.
9. Thread-Painted Leaf with Seamless Gradients
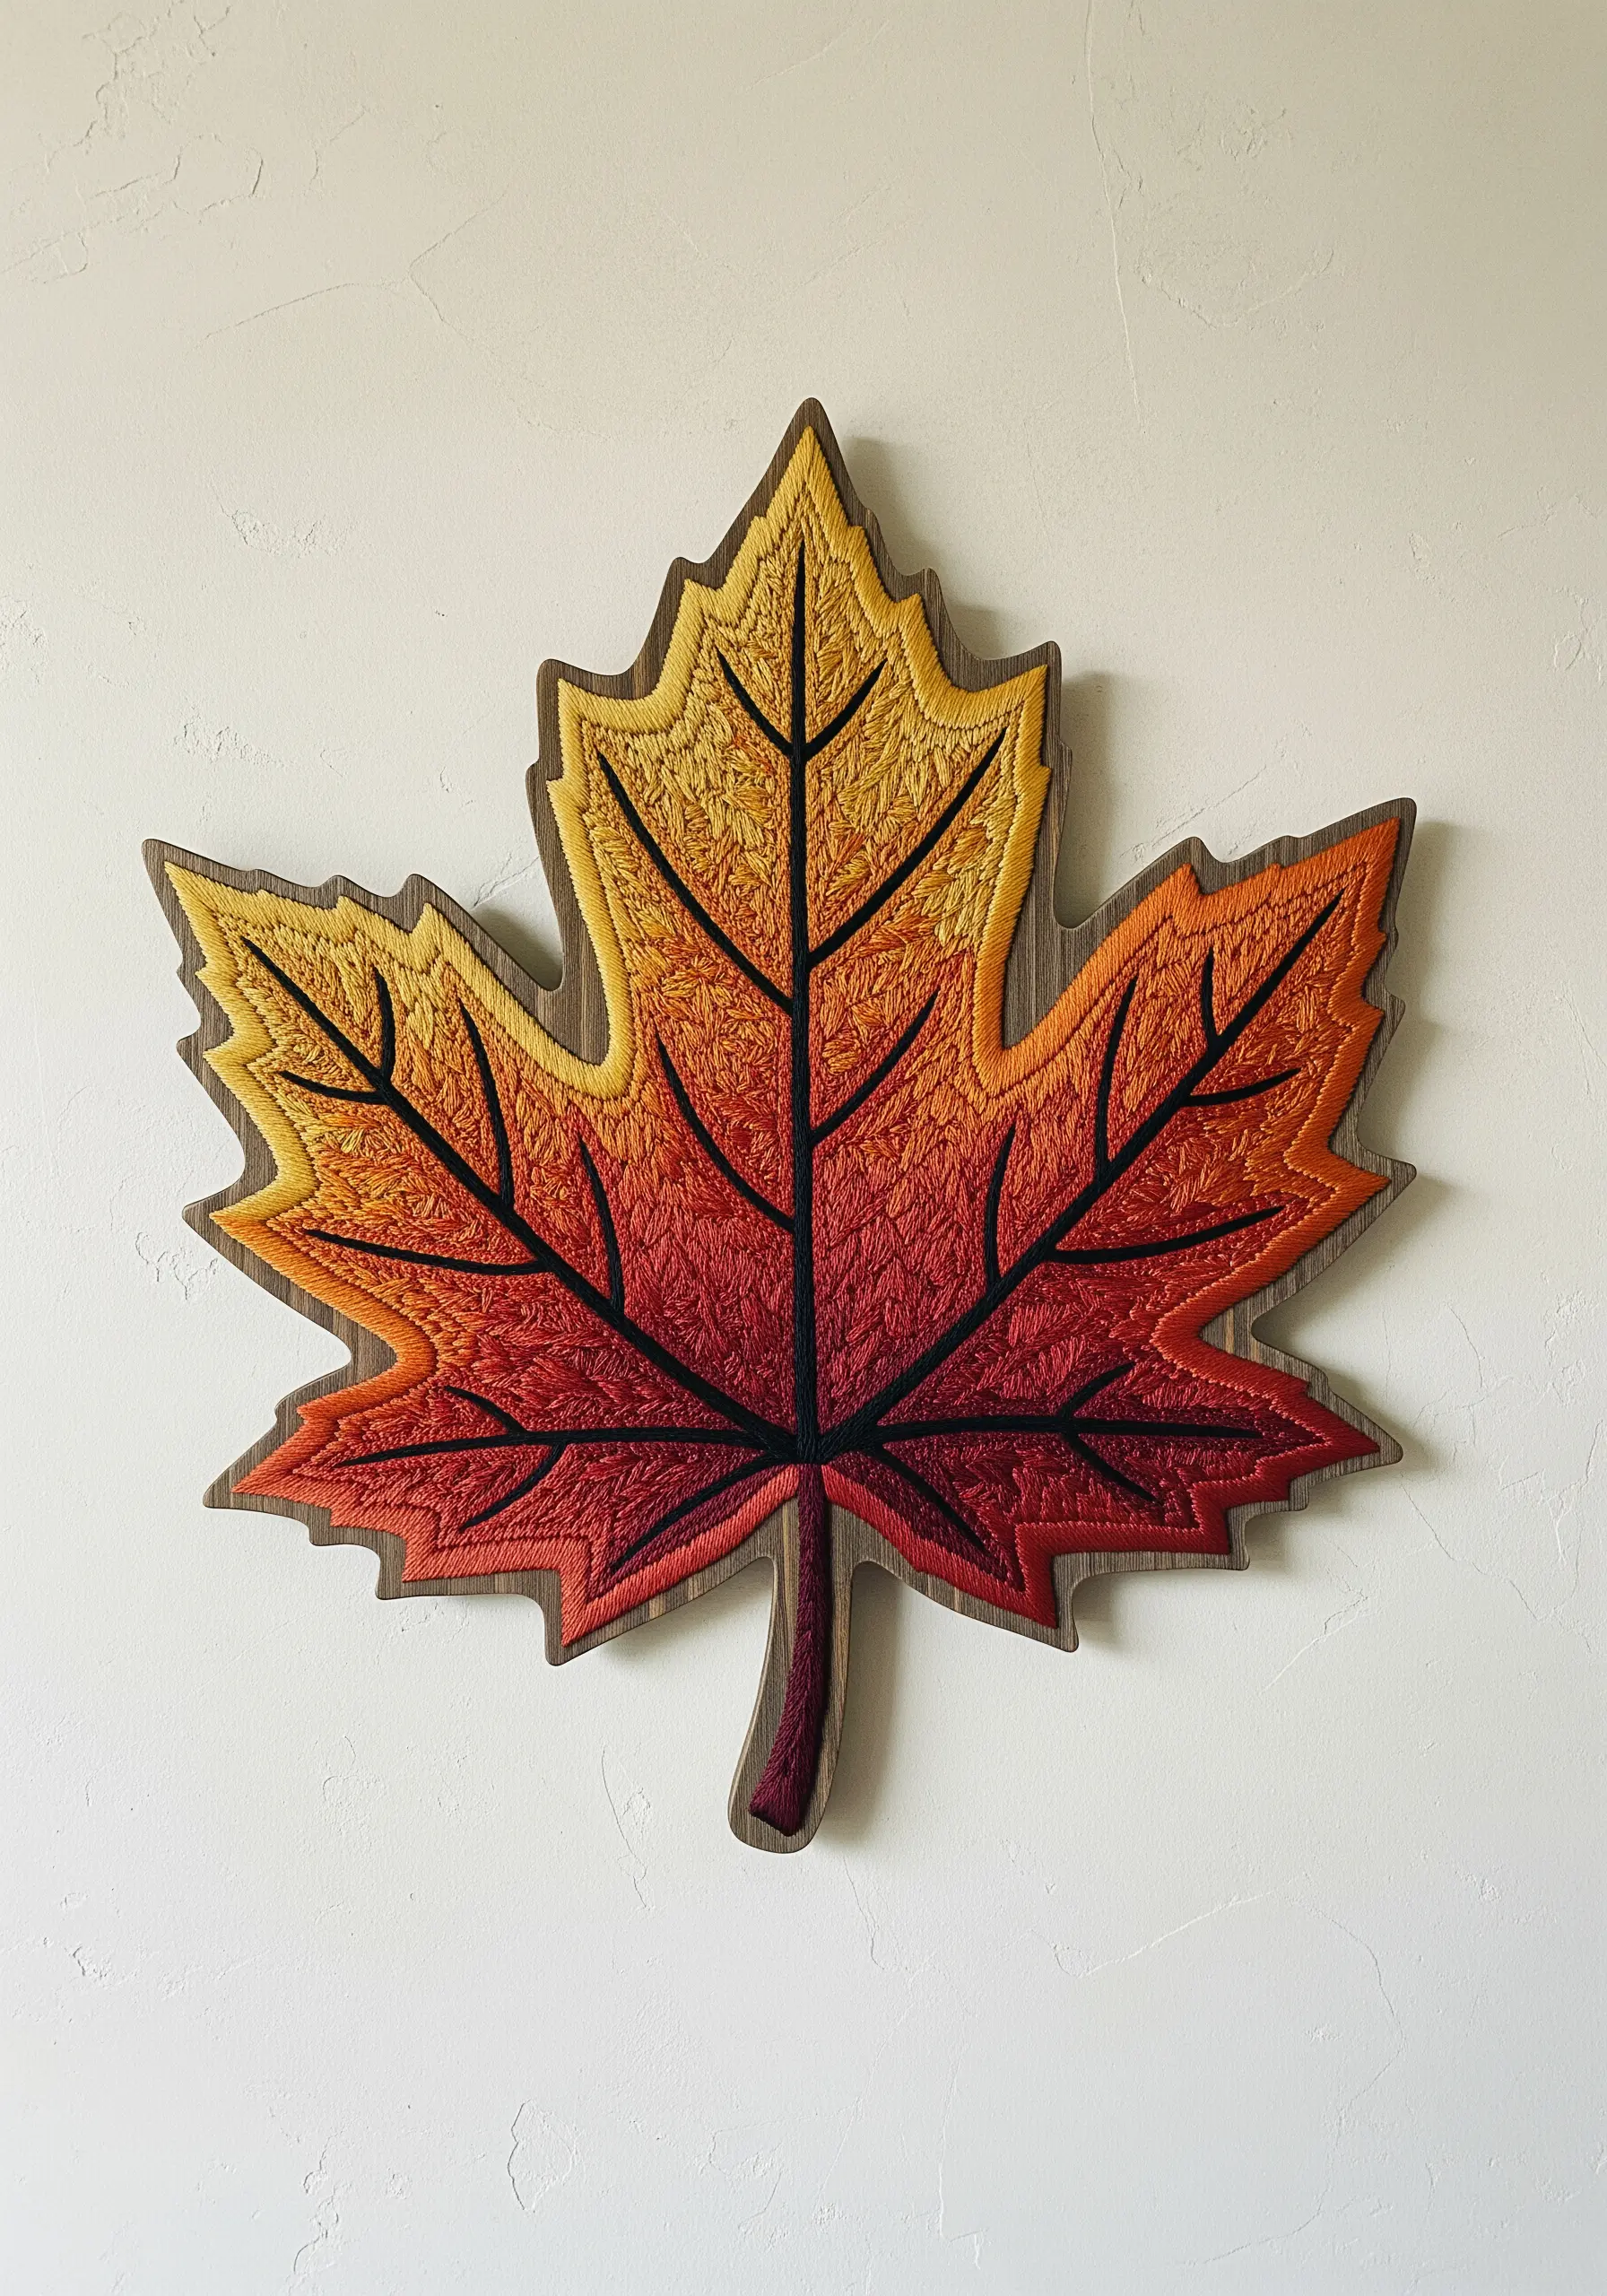
This is the perfect project to practice your thread painting without feeling overwhelmed.
Use a single strand of floss and the long-and-short stitch to create a seamless color transition.
Lightly draw your color zones onto the fabric as a guide.
Ensure the stitches of each new color section interlock with the previous one, like fine brushstrokes.
Finish by outlining the veins with a simple backstitch; this adds sharp definition and structure to the soft, blended colors of your leaf embroidery stitches.
10. Flowing Wood Grain with Directional Stitching
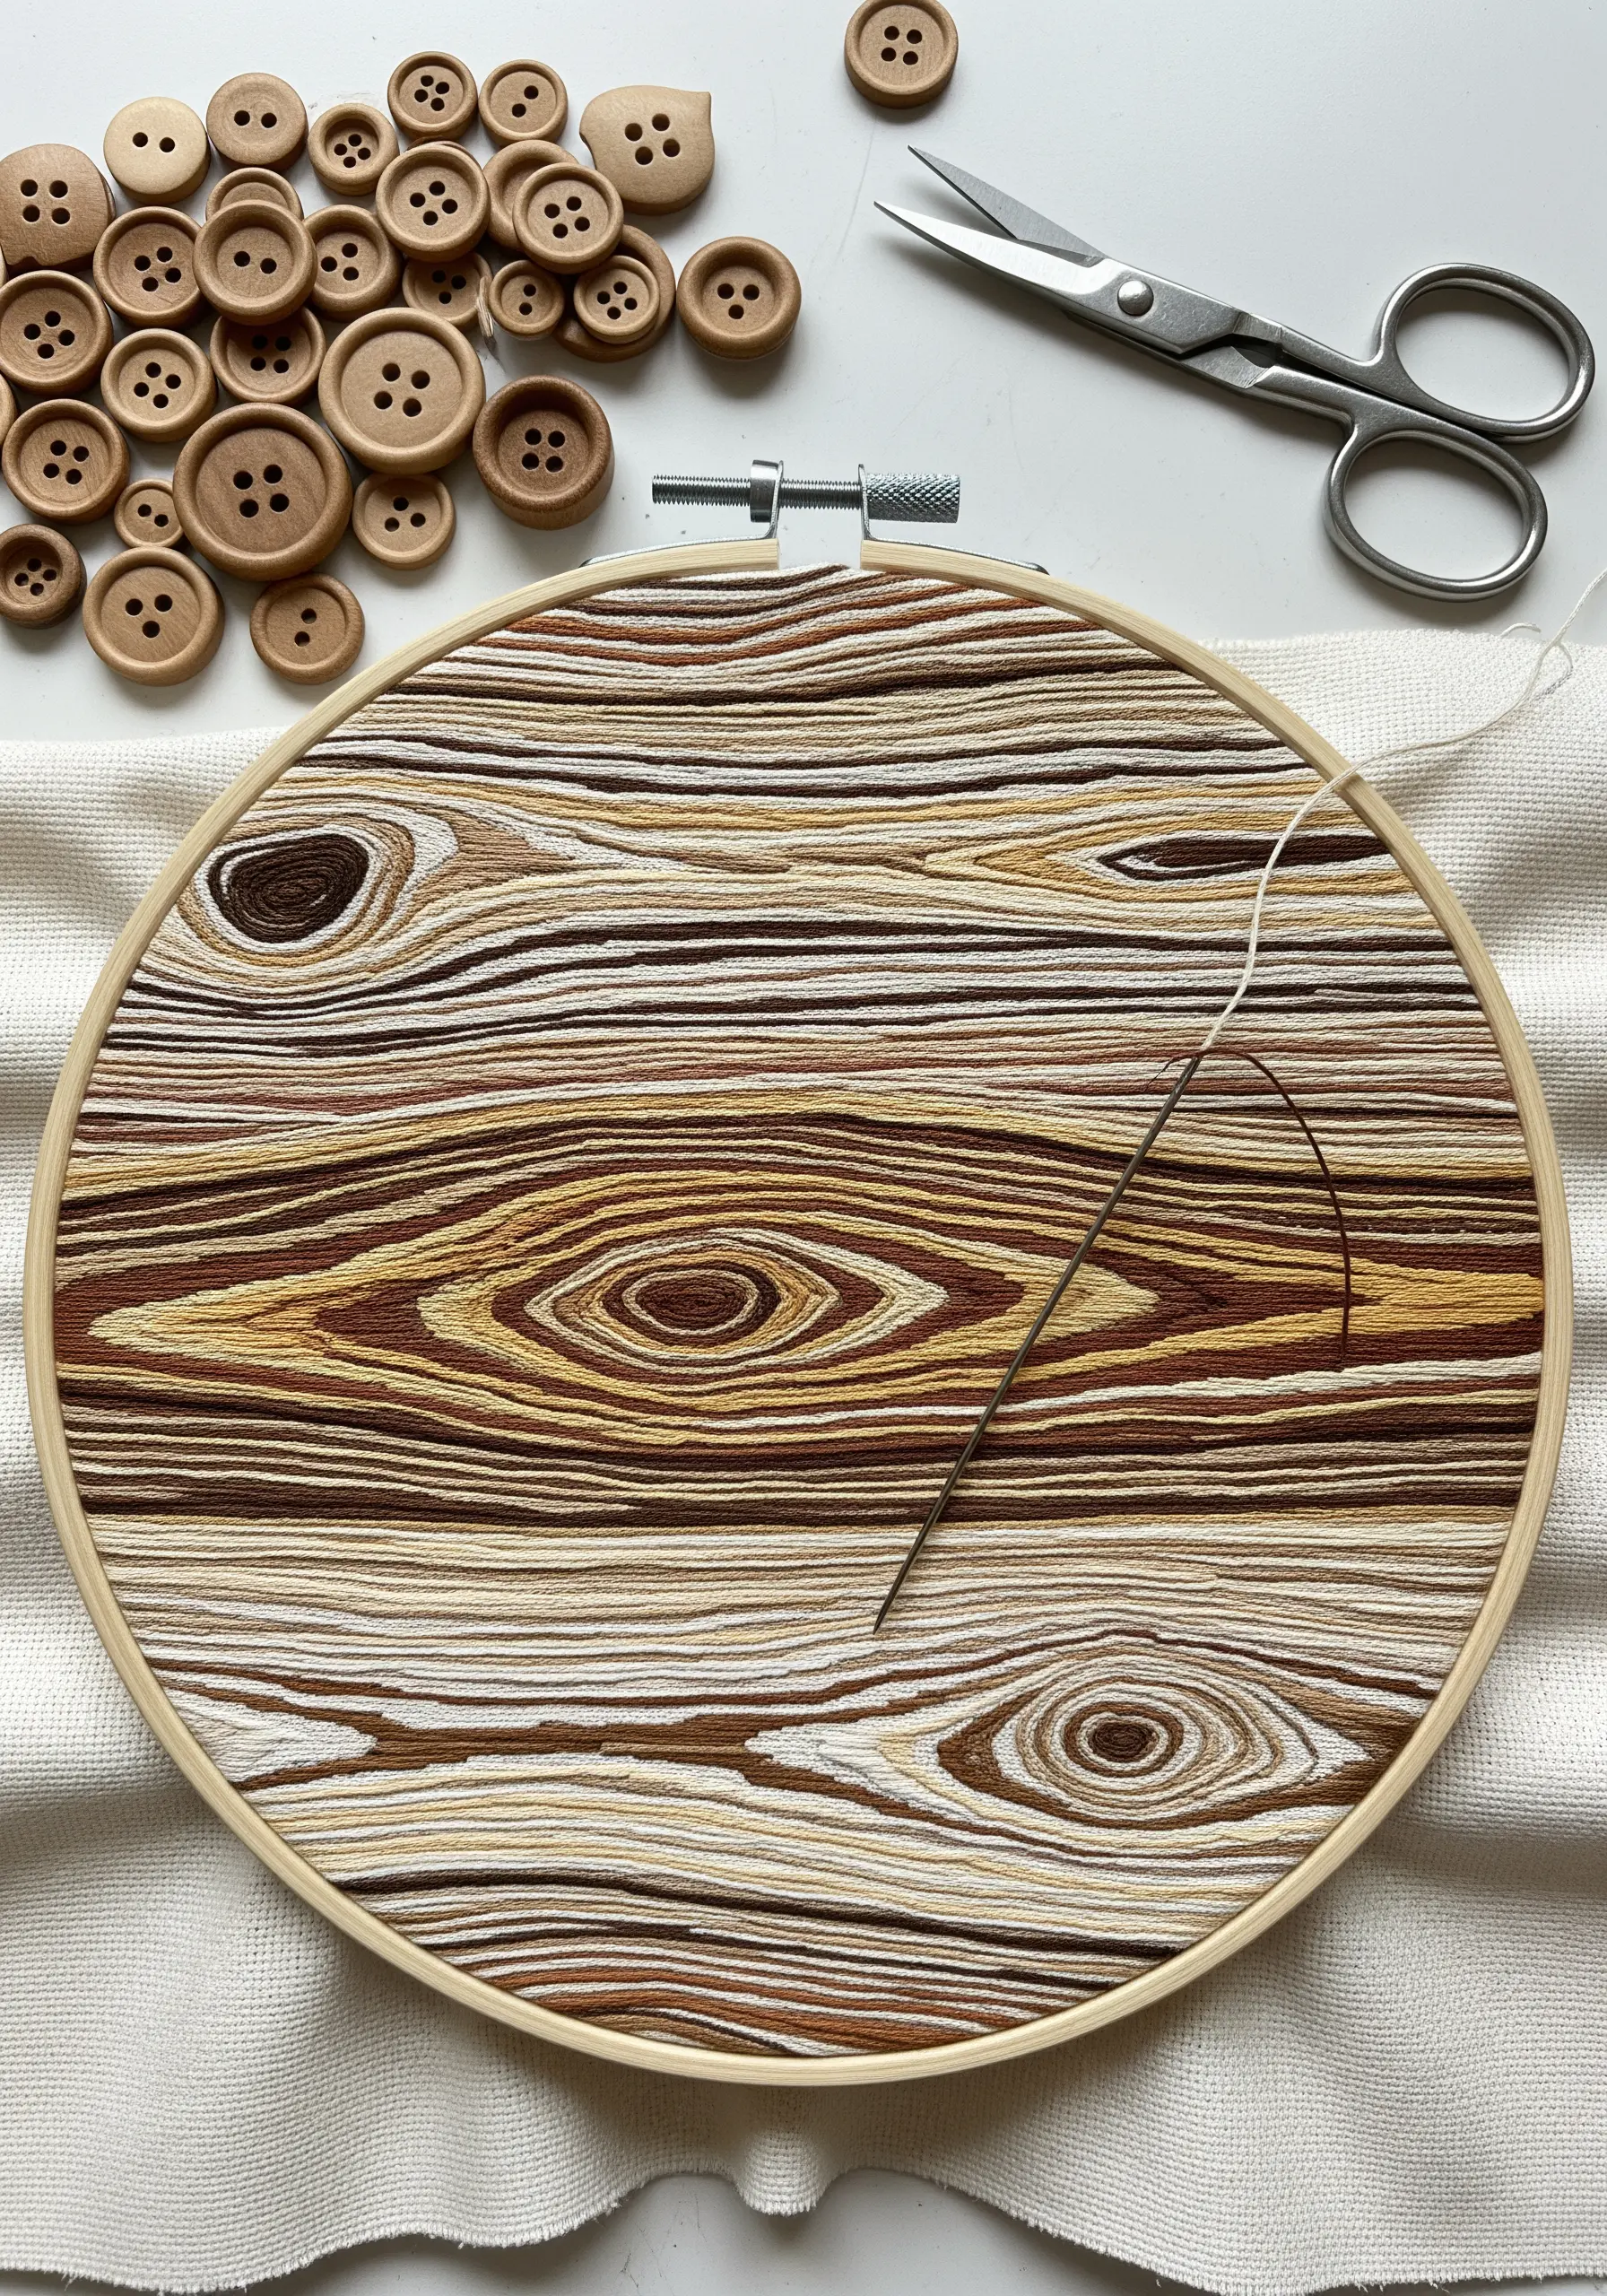
Replicating organic patterns like wood grain is all about mastering directional stitching.
Lightly sketch the flowing lines of the grain onto your fabric with a water-soluble pen.
Using a stem stitch or split stitch with 2-3 strands of floss, simply follow those lines.
The key is to use several shades of a color—ivory, beige, tan, and brown—and let them weave around each other naturally.
This movement and subtle color variation is what makes the texture so believable and transforms your hoop into embroidery patterns inspired by stones, wood, and leaves.
11. Honeycomb Texture with Seed Stitch Fill
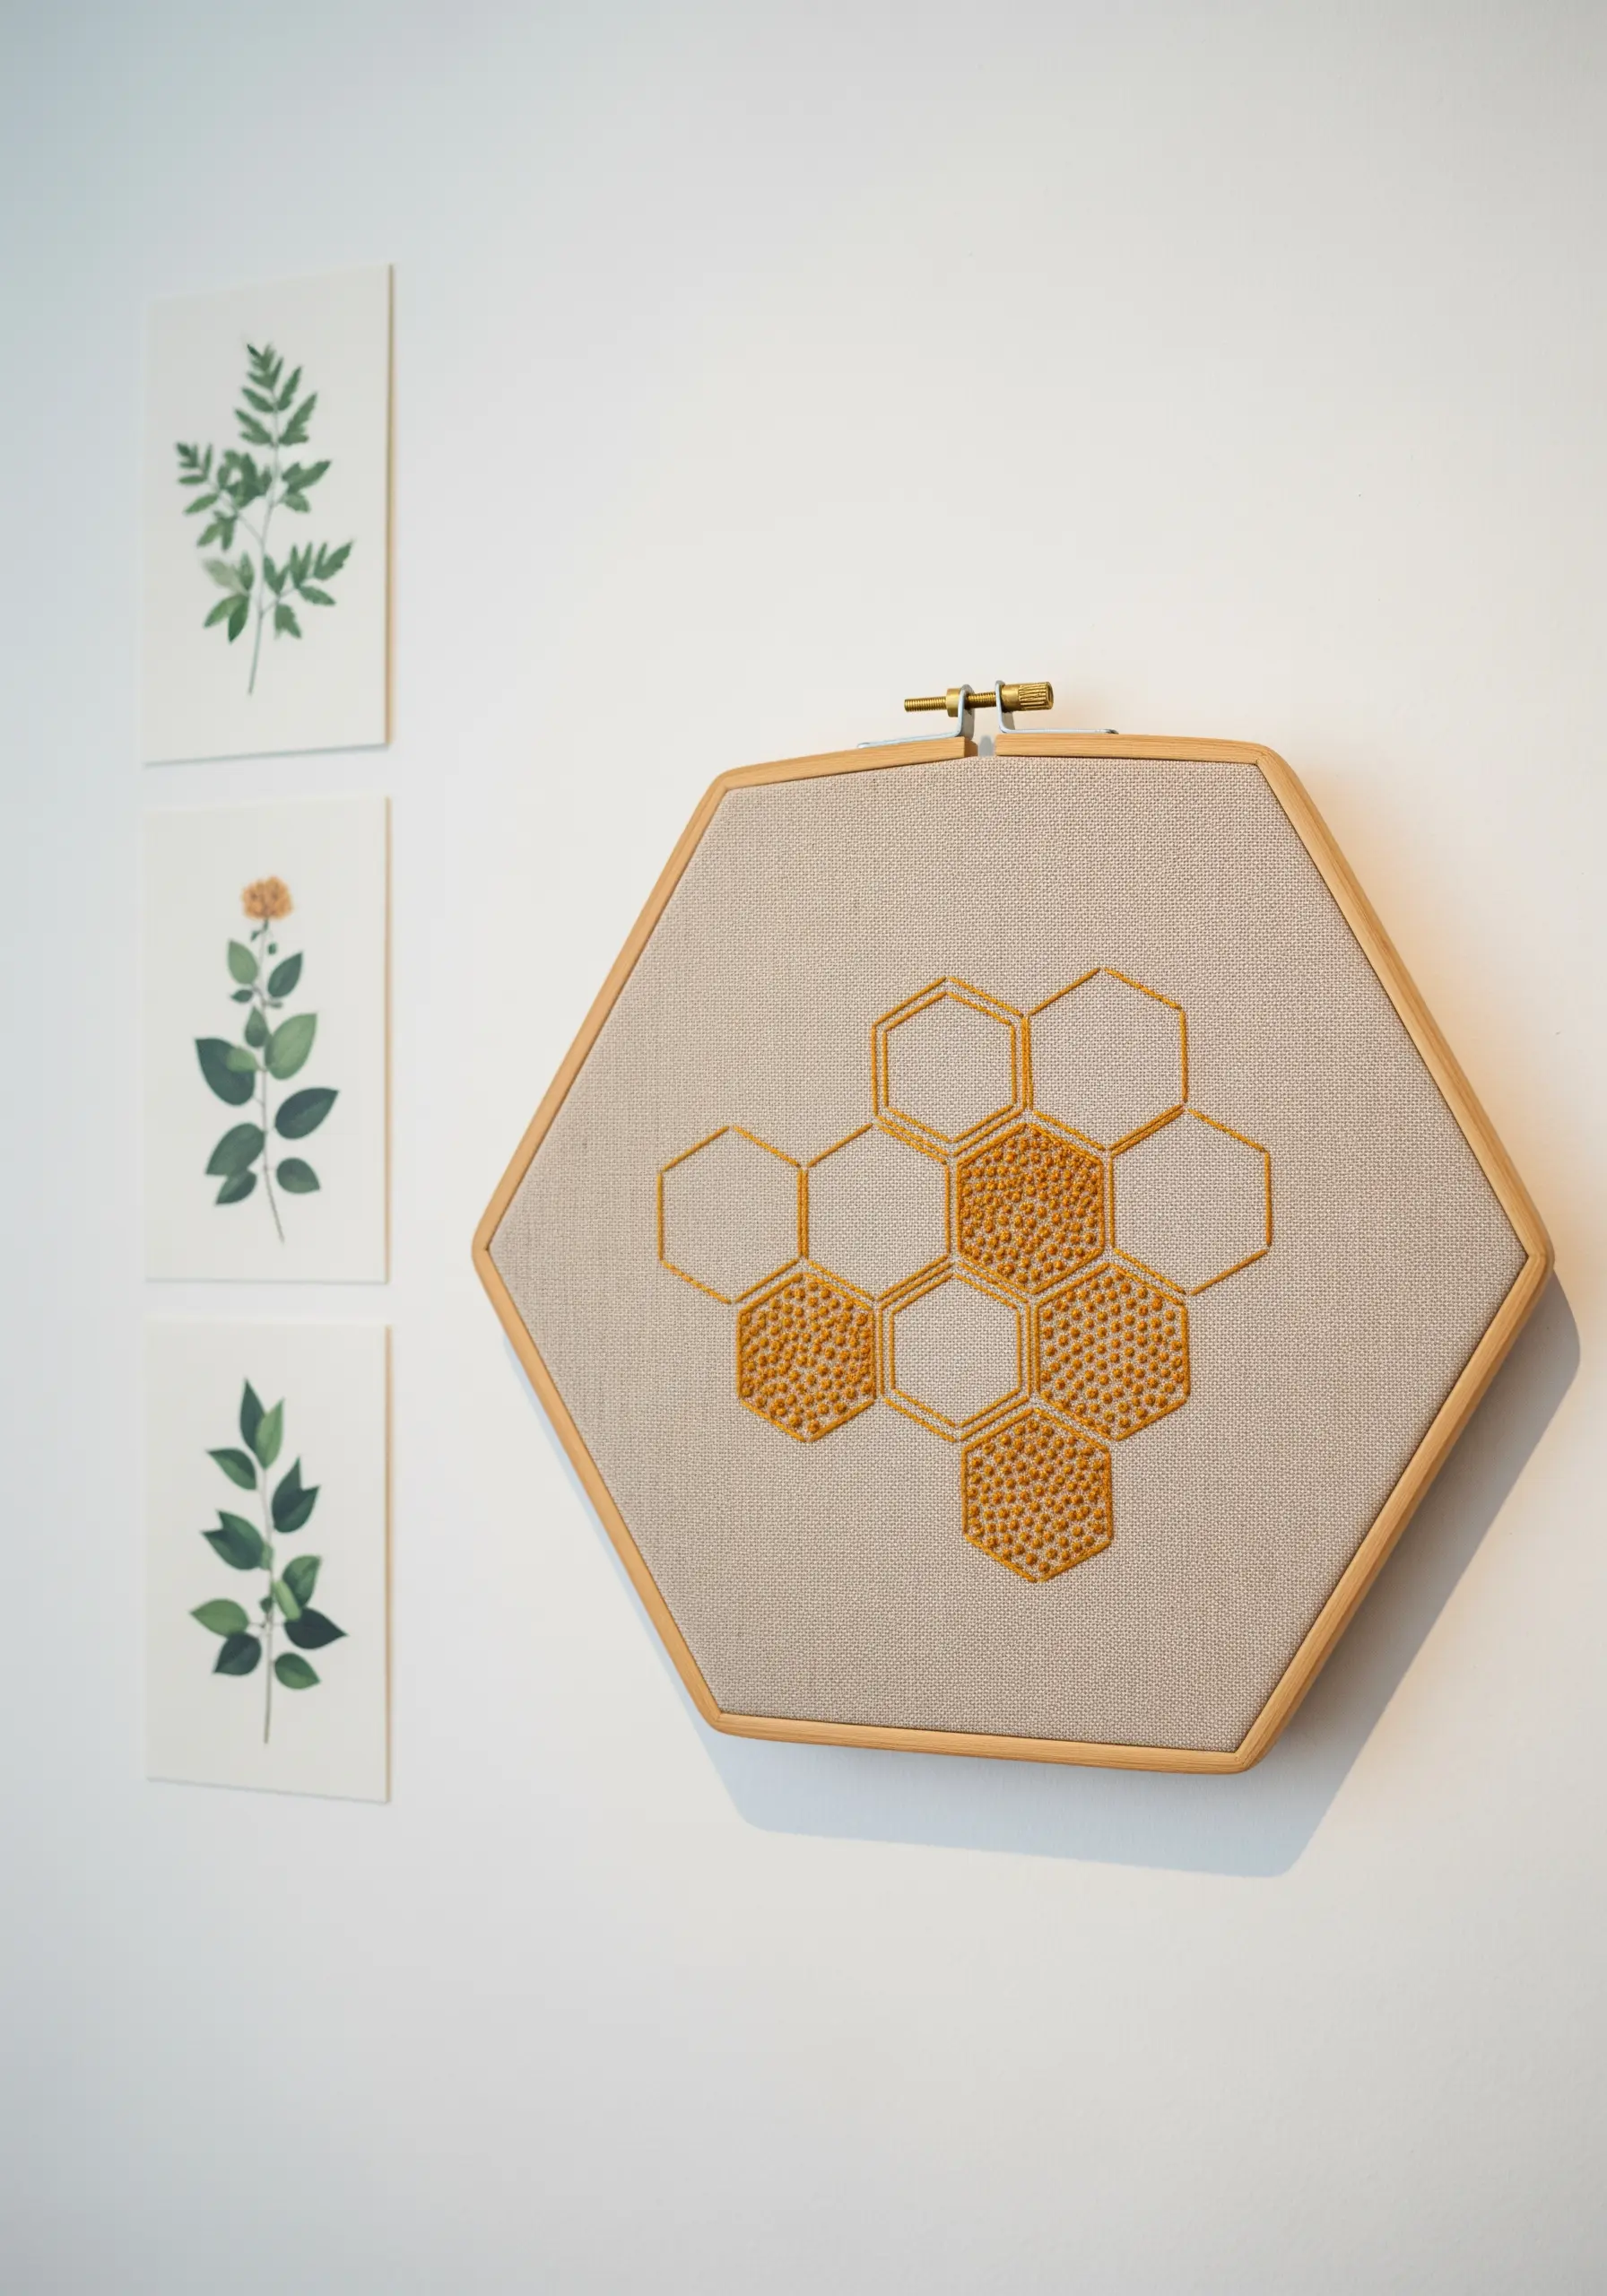
This design creates a beautiful visual rhythm by contrasting clean lines with dense texture.
Use a neat backstitch with two strands of floss for the honeycomb outlines.
In the cells you wish to fill, use a dense seed stitch—small, randomly placed straight stitches—with a slightly lighter or darker thread.
Packing these tiny stitches tightly together creates a granulated, pollen-like texture that draws the eye and provides a satisfying contrast to the open, airy cells.
It’s a perfect minimalist embroidery idea for a modern aesthetic.
12. Layered Pinecone with Stumpwork Scales
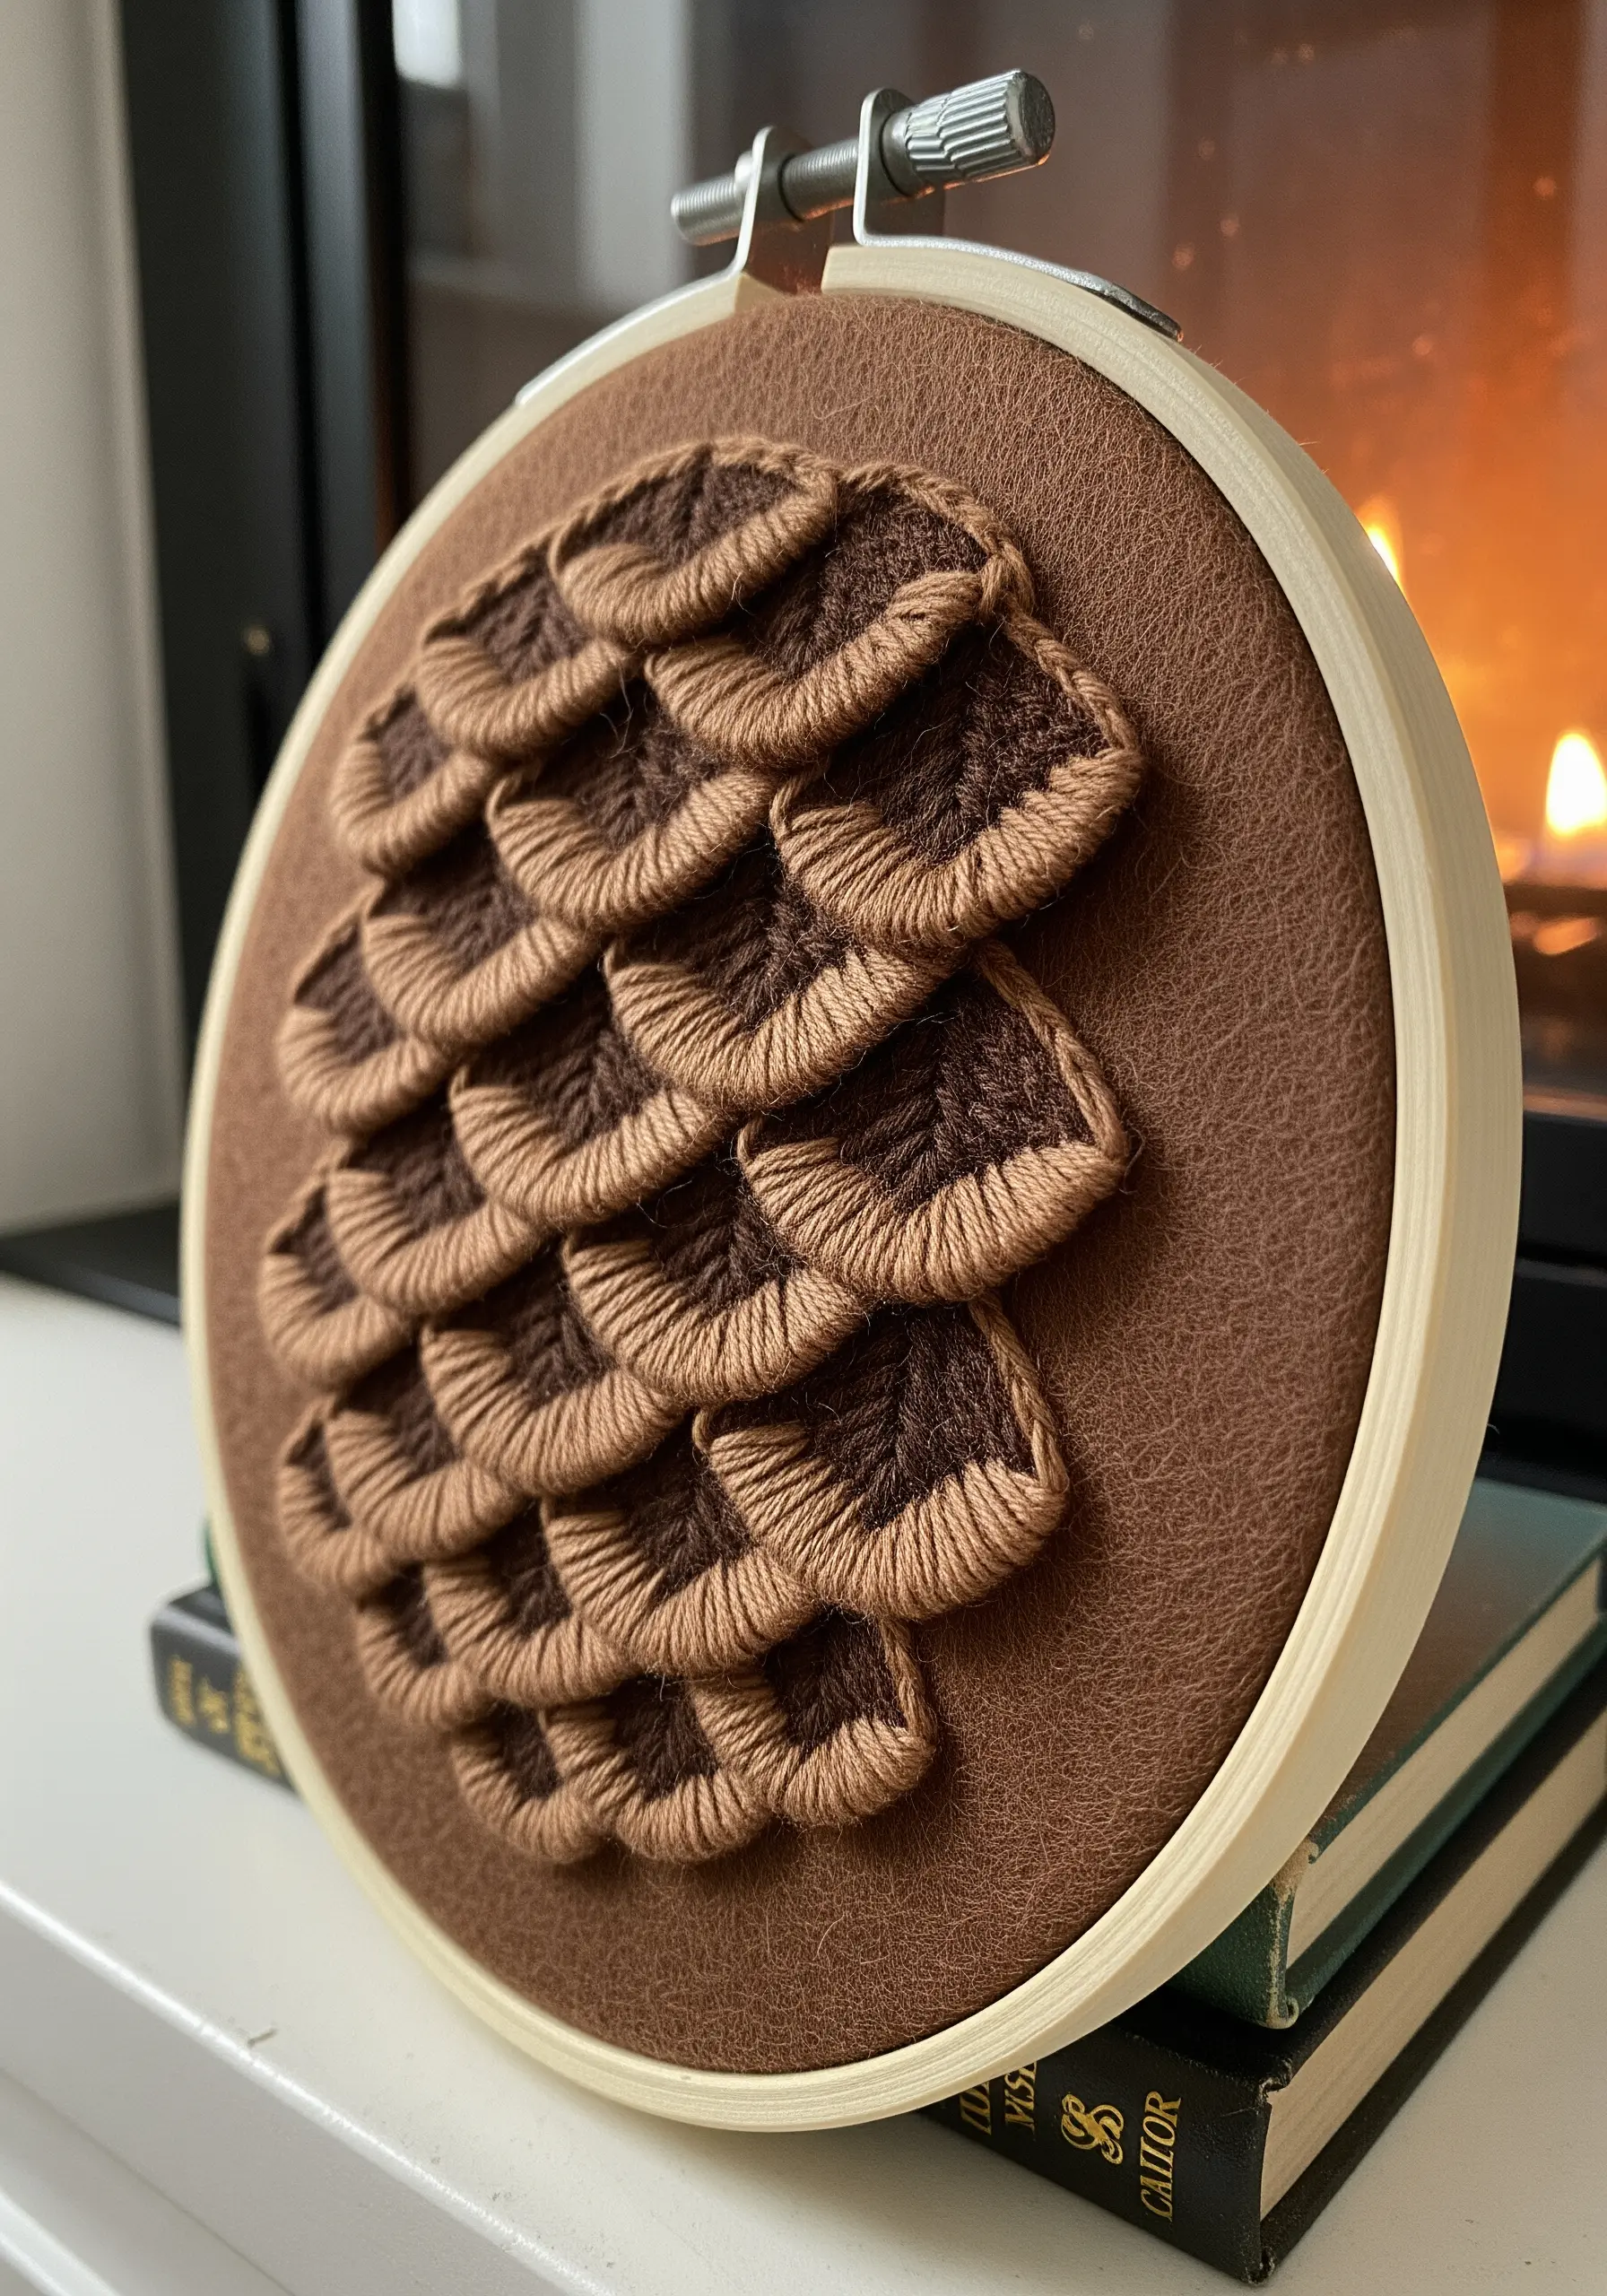
Achieve this incredible 3D effect by creating detached elements and layering them.
Each pinecone scale is a small shape made with the detached buttonhole stitch, worked over a foundation of two small parallel stitches.
Instead of cutting the thread after each scale, anchor it on the back and move to the next position.
Begin stitching the scales from the bottom of the pinecone and work your way up, overlapping each new row over the previous one to build that realistic, sculptural dimension.
This is a wonderful introduction to contemporary texture techniques.
13. Luminous Feathers with Padded Satin Stitch

The secret to these plush, elegant feathers is padding your satin stitch.
Before you lay down your final stitches, fill in the shape of each feather half with a base of simple straight stitches.
Then, work your final satin stitch in the opposite direction, completely covering the padding underneath.
This technique lifts the embroidery off the fabric, creating a soft, raised effect that catches the light beautifully, especially when using a thread with a slight sheen.
These are perfect for stunning embroidered wall hangings.
14. Weightless Dandelion on Sheer Organza
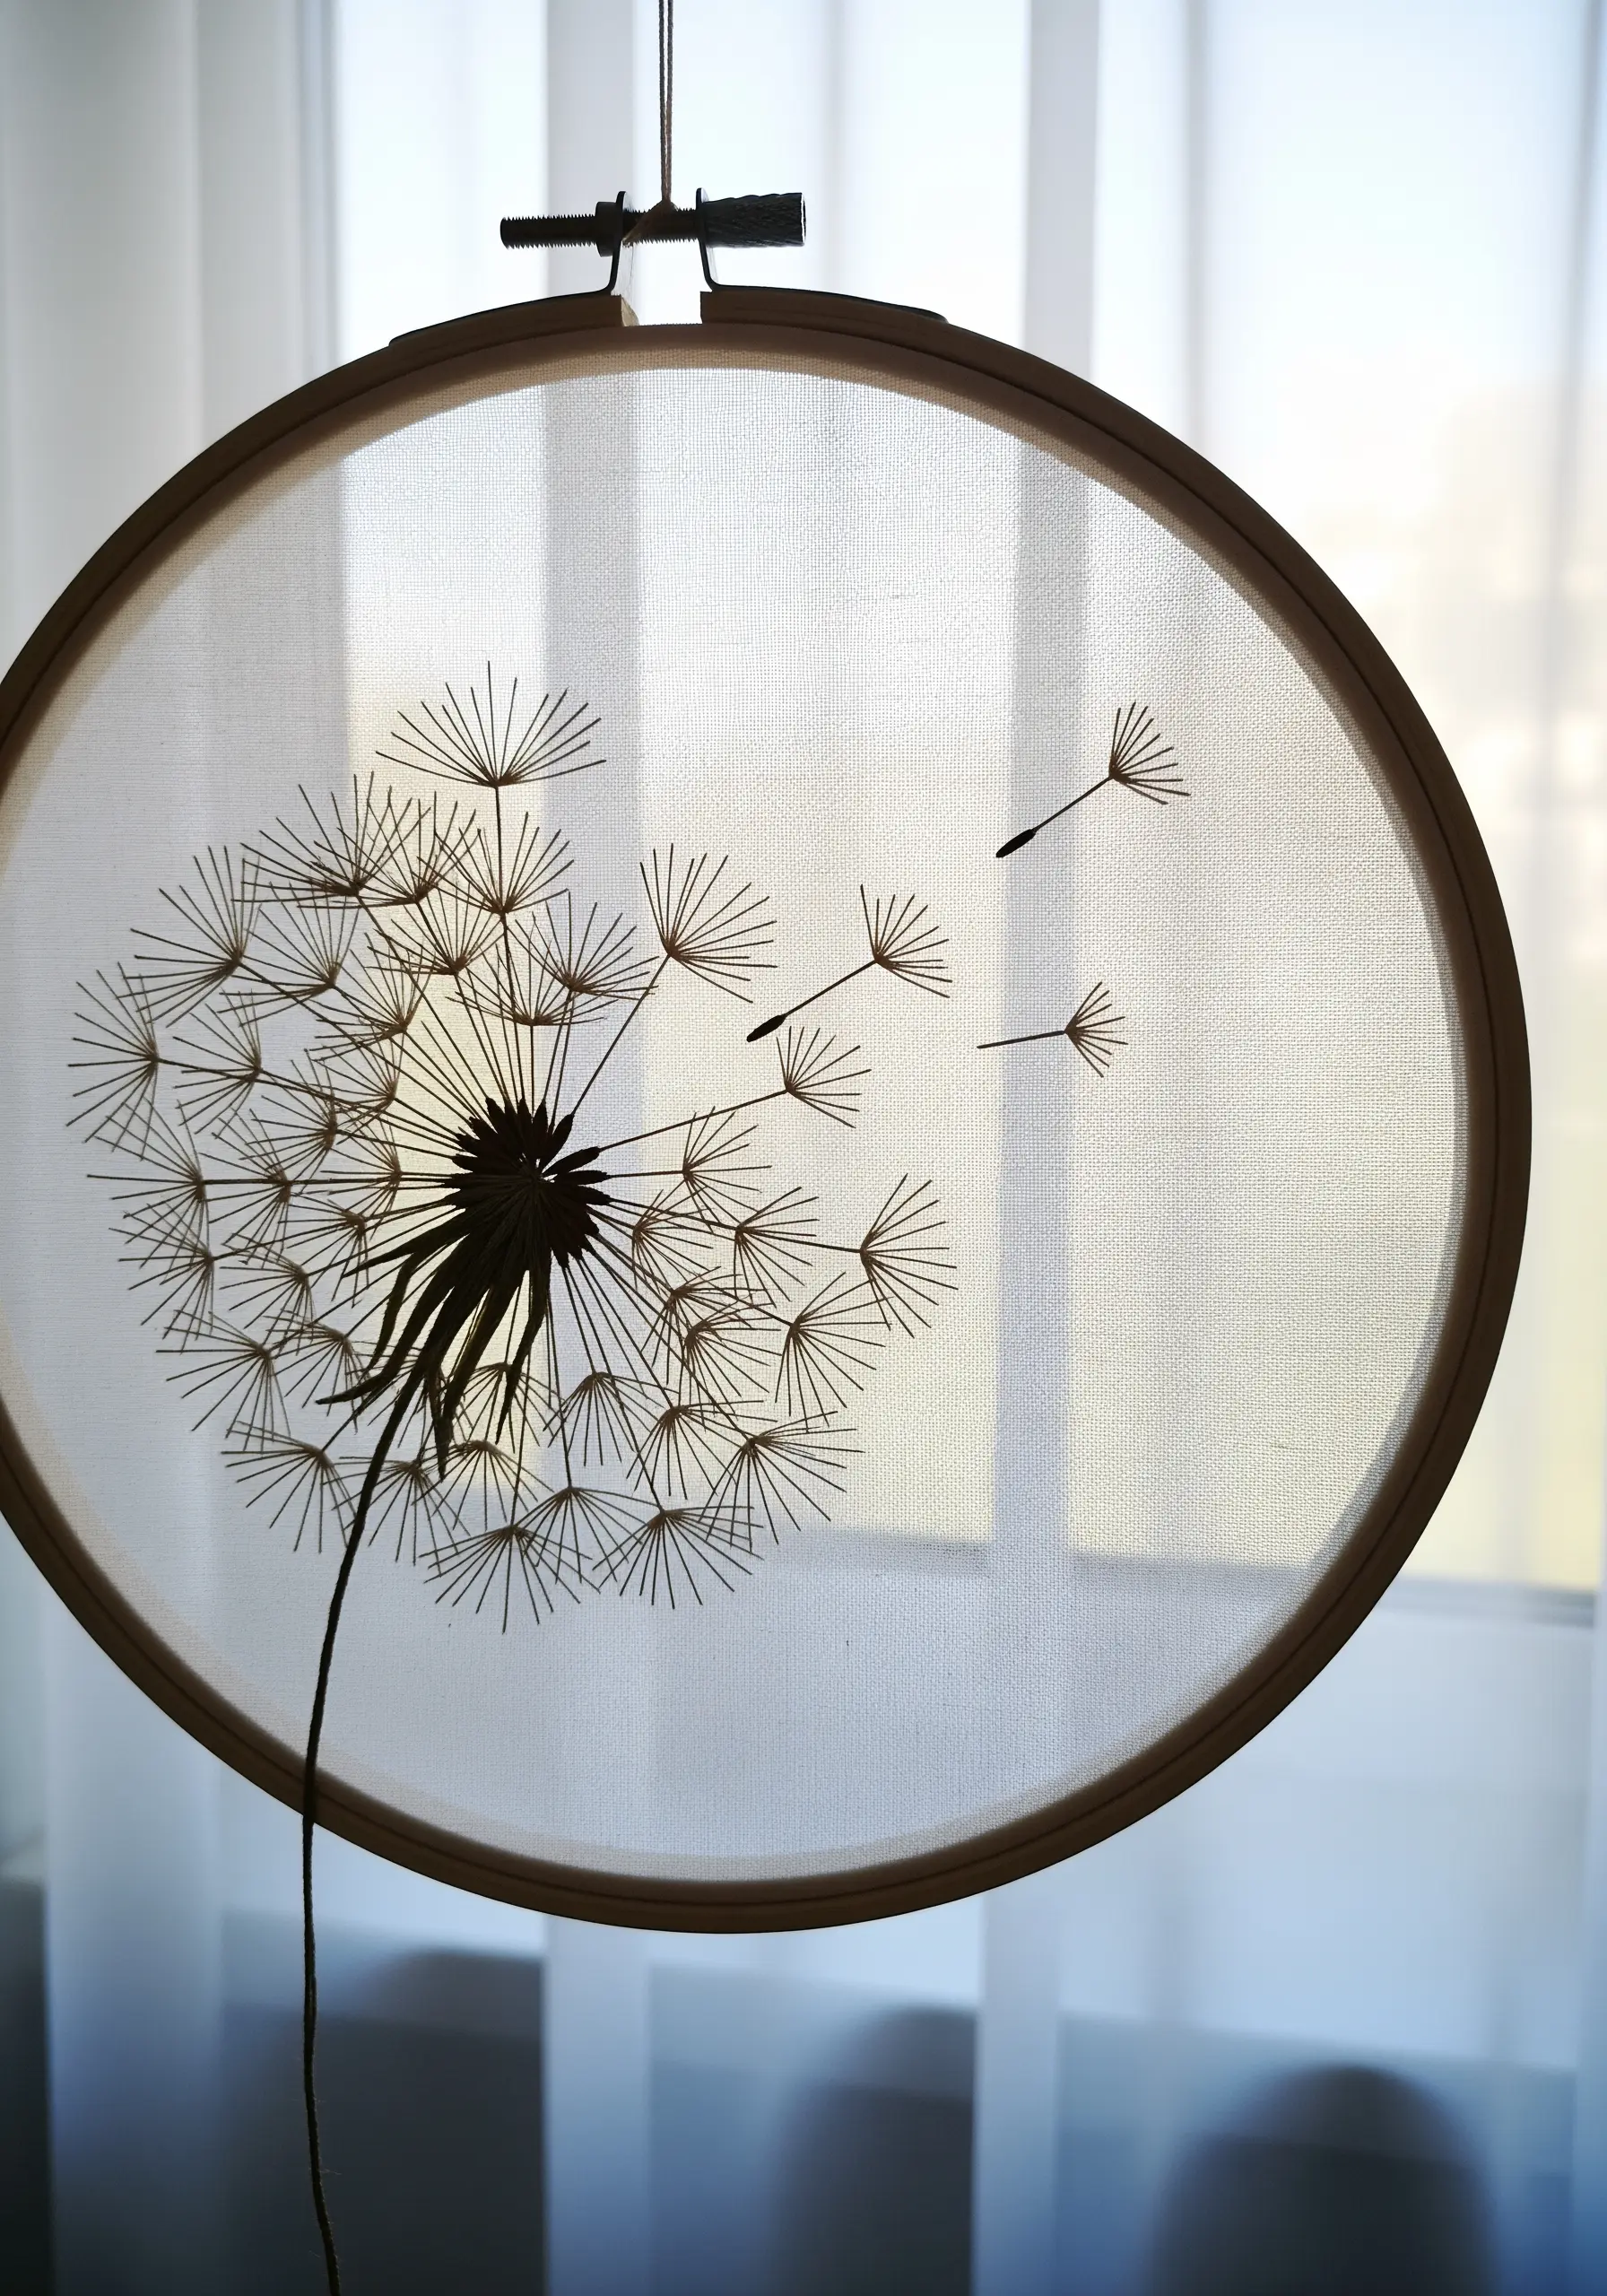
Stitching on a transparent fabric like organza or tulle allows you to create designs that feel like they are floating.
Use a single strand of floss for the delicate dandelion seeds to maintain their airy, weightless quality.
A stabilizer is essential here to prevent the fine fabric from puckering; a wash-away or tear-away version works perfectly.
The interplay of thread and negative space becomes the central focus, resulting in a truly ethereal piece of fun hoop art.
15. Graphic Earth Cracks with Couching
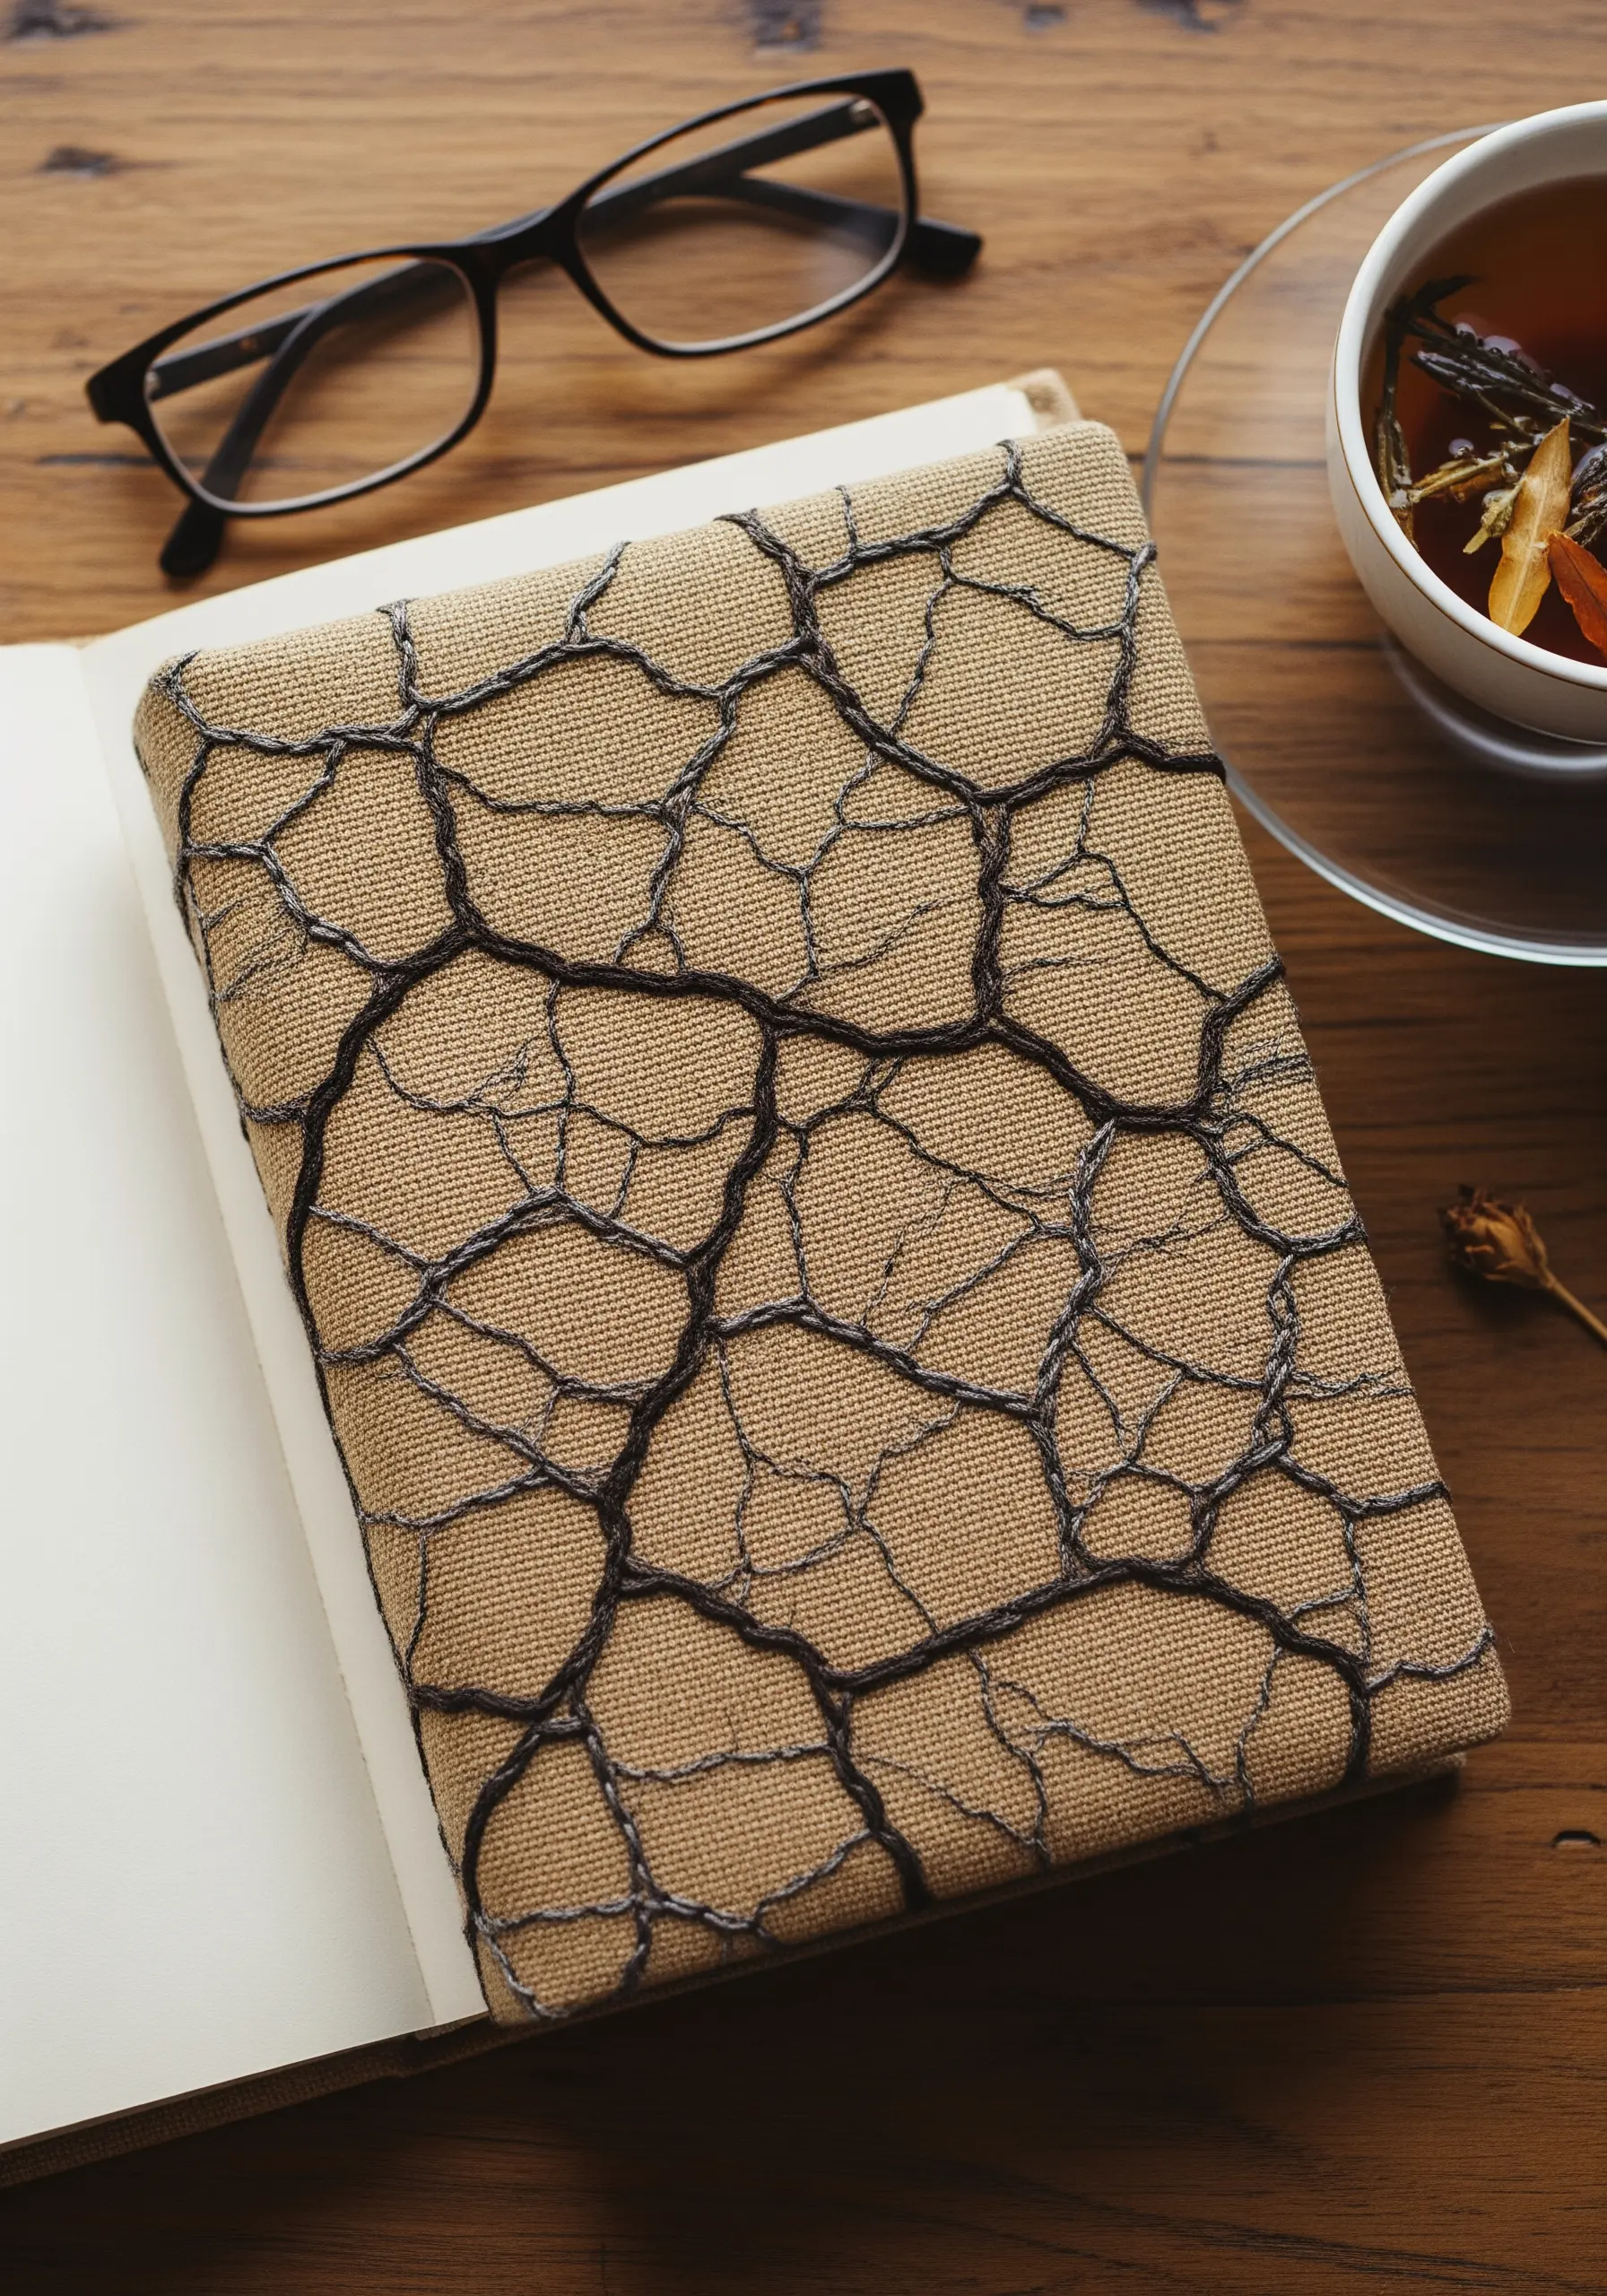
This bold, graphic texture is surprisingly simple to achieve using a technique called couching.
First, lay down a thick, textured yarn or cord onto your fabric in the desired pattern.
Then, using a standard six-strand floss in a matching color, make small, evenly spaced stitches over the cord to tack it down securely.
This method is perfect for creating strong, dimensional lines that would be impossible with traditional stitches, ideal for a project to beautify your notebooks and journals.
16. Glistening Leaf with Beaded Dew Drops
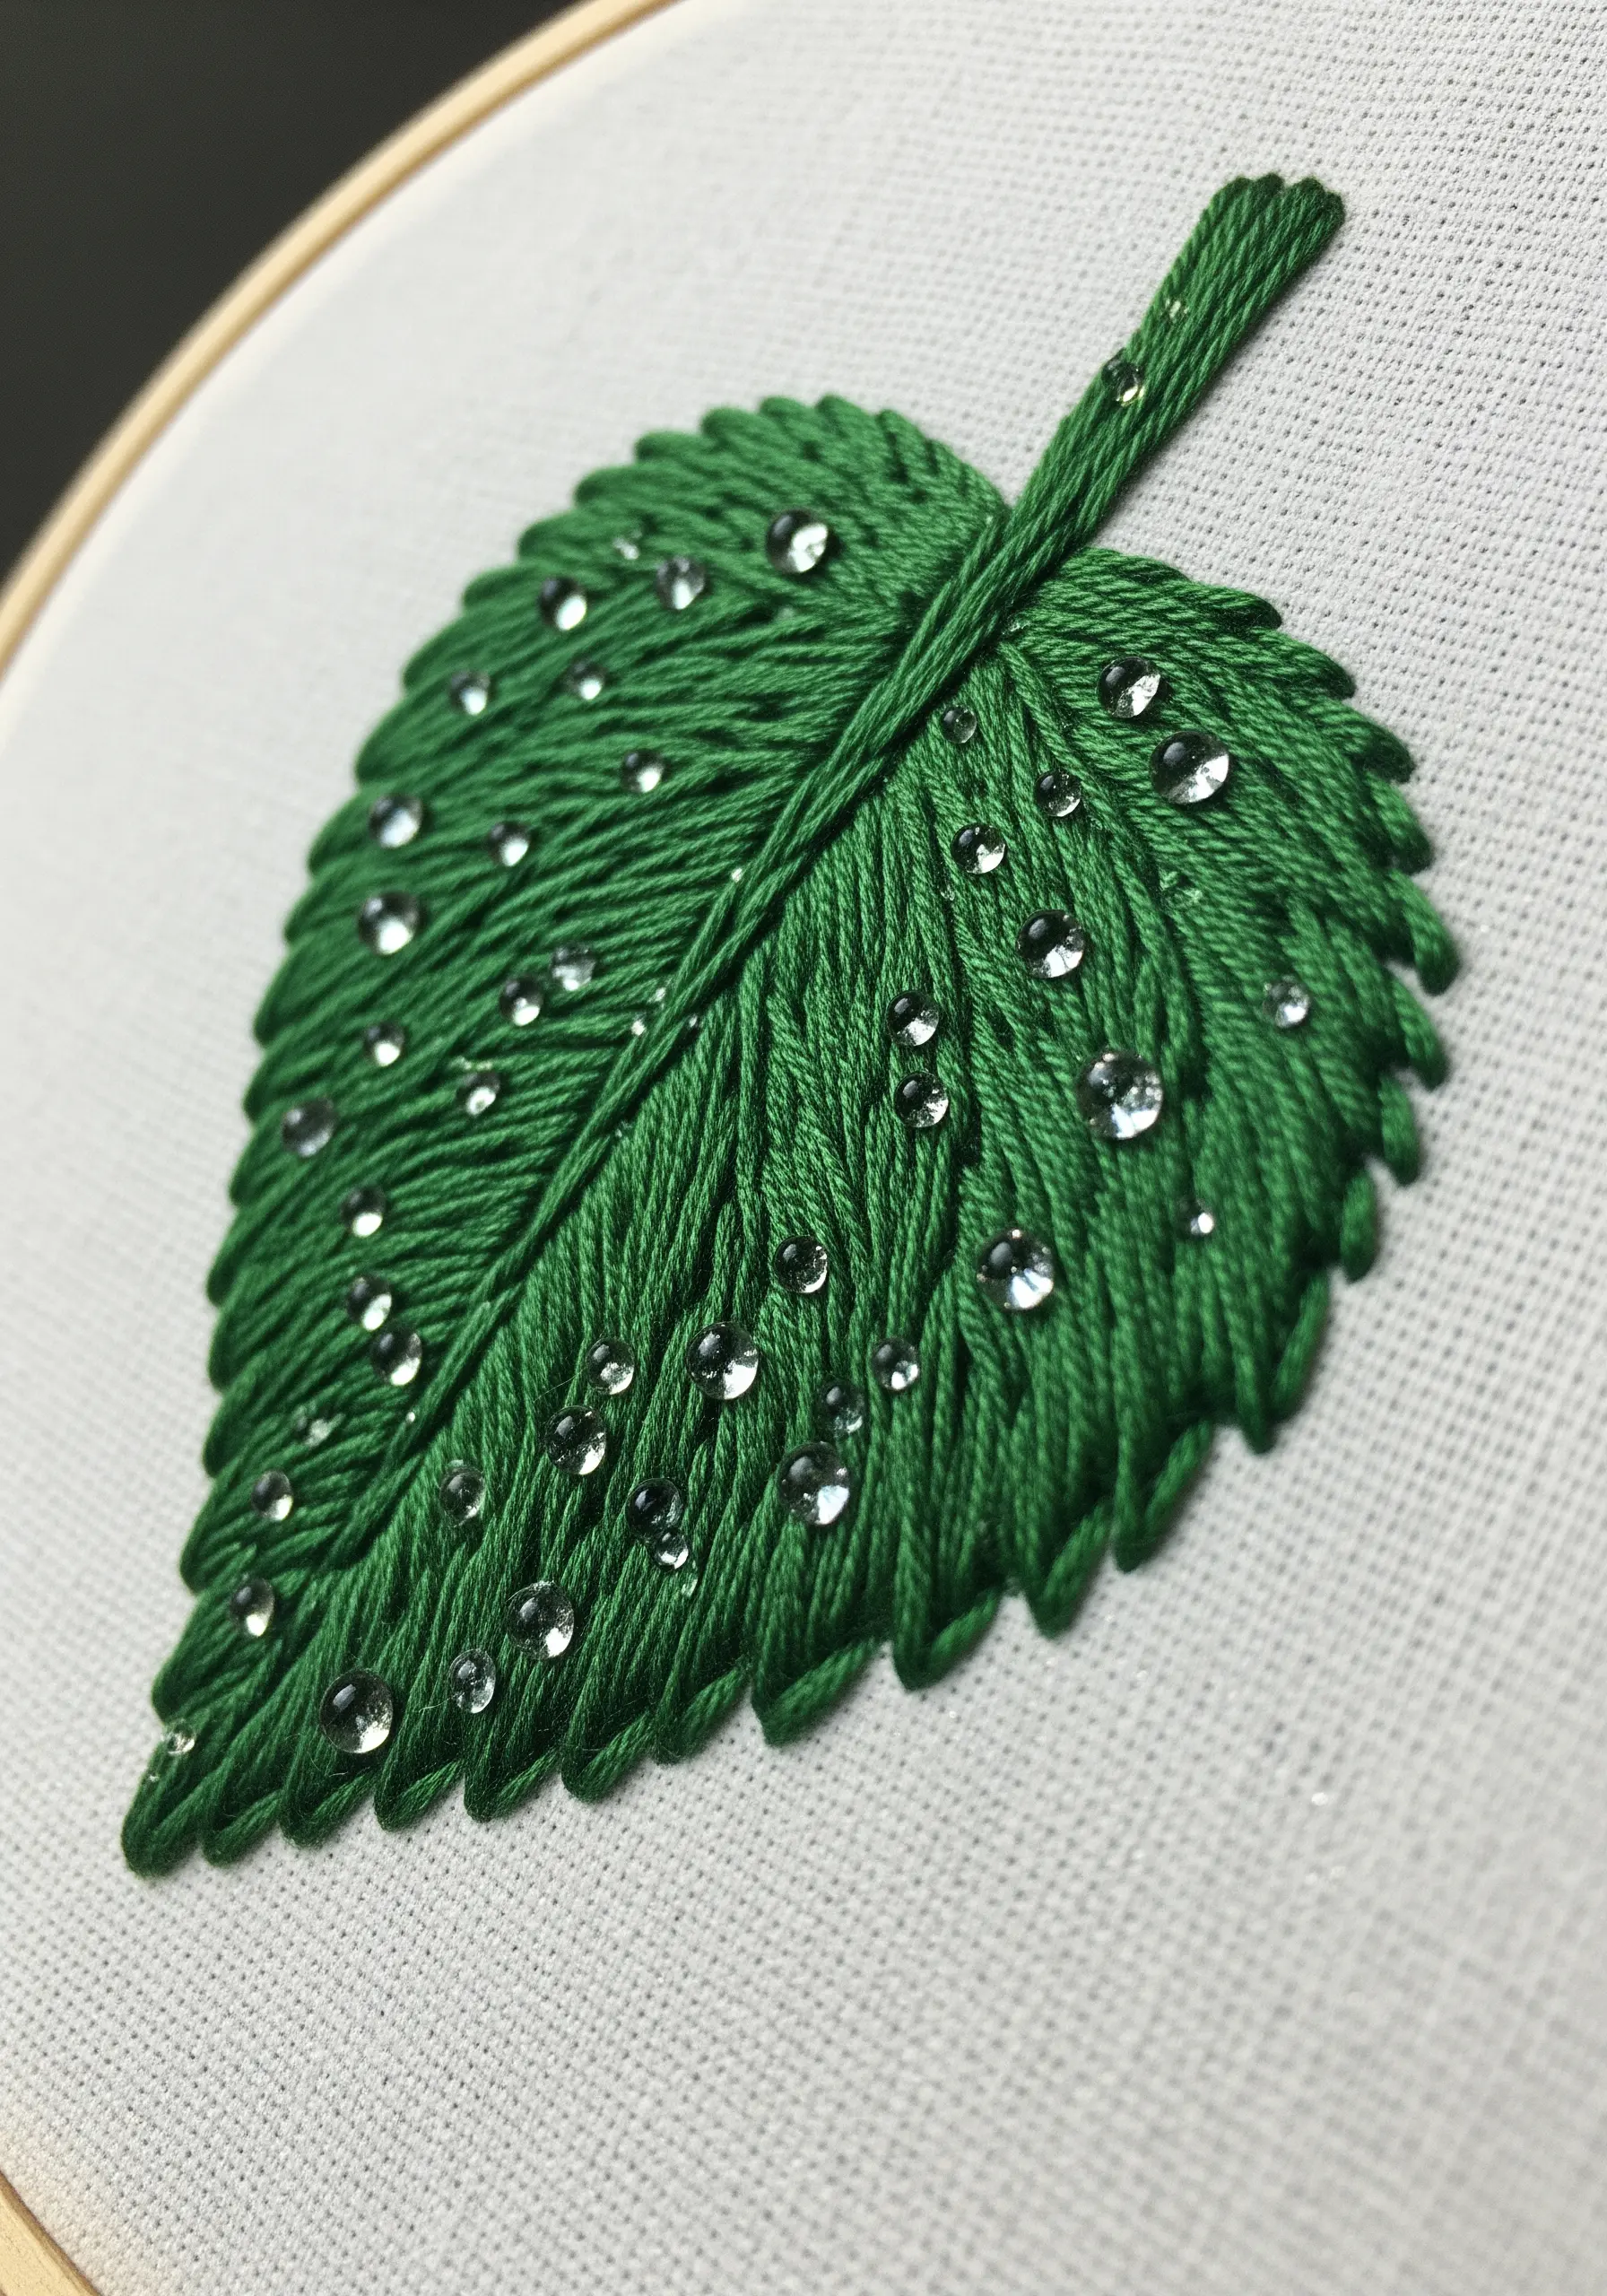
Elevate a simple satin-stitched leaf by adding the illusion of moisture with beads.
After completing your embroidery, use a beading needle and a single strand of matching thread to attach tiny, clear seed beads randomly across the surface.
Alternatively, you can use a strong fabric glue to affix flat-backed crystals for a no-sew option.
This small mixed-media touch adds a surprising level of realism and captures the light in a way thread alone cannot, making it one of those embroidery designs that turn everyday nature into stunning art.
17. Coastal Textures Triptych
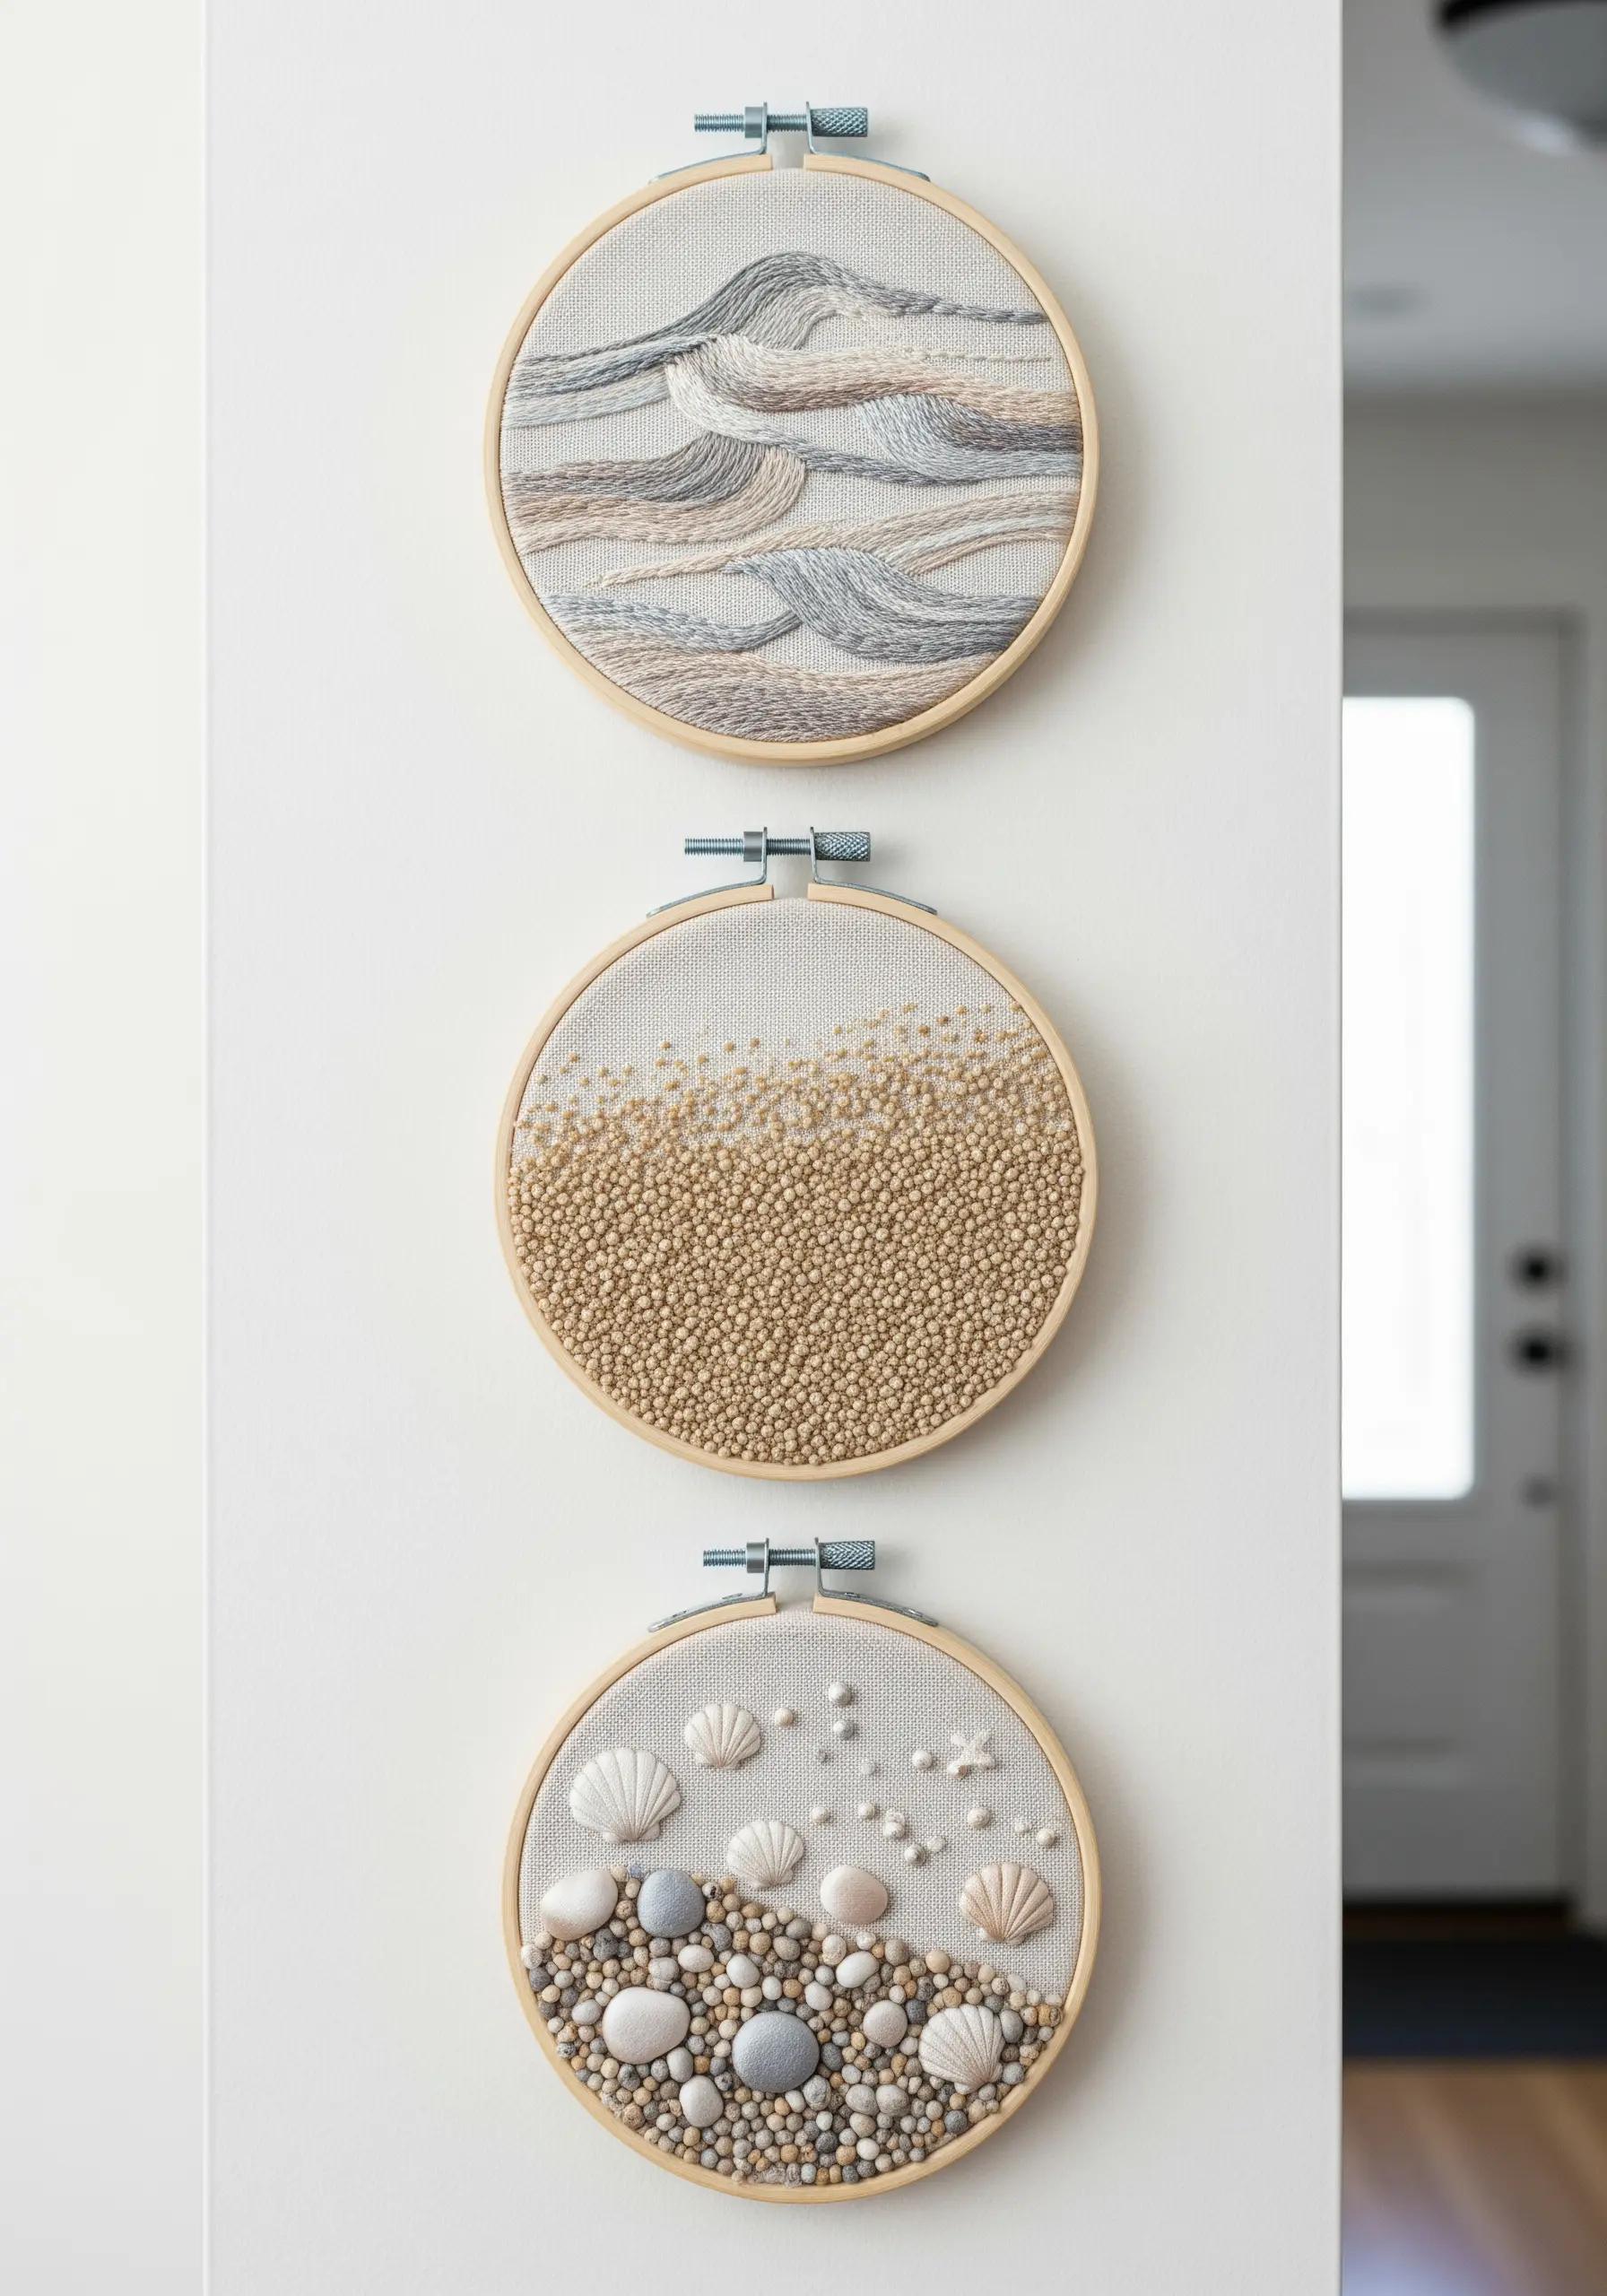
This beautiful set works because it explores a single theme through varied textures while maintaining a cohesive color palette.
You can replicate this by dedicating each hoop to a different coastal element.
Use flowing split stitches for waves, a dense field of French knots or seed beads for sand, and a combination of tiny shells, pebbles, and beads for the shoreline.
Grouping them creates a powerful visual story and is a great way to build an inspiring hoop art project for a gallery wall.
18. Graphic Mushroom with Radiating Lines
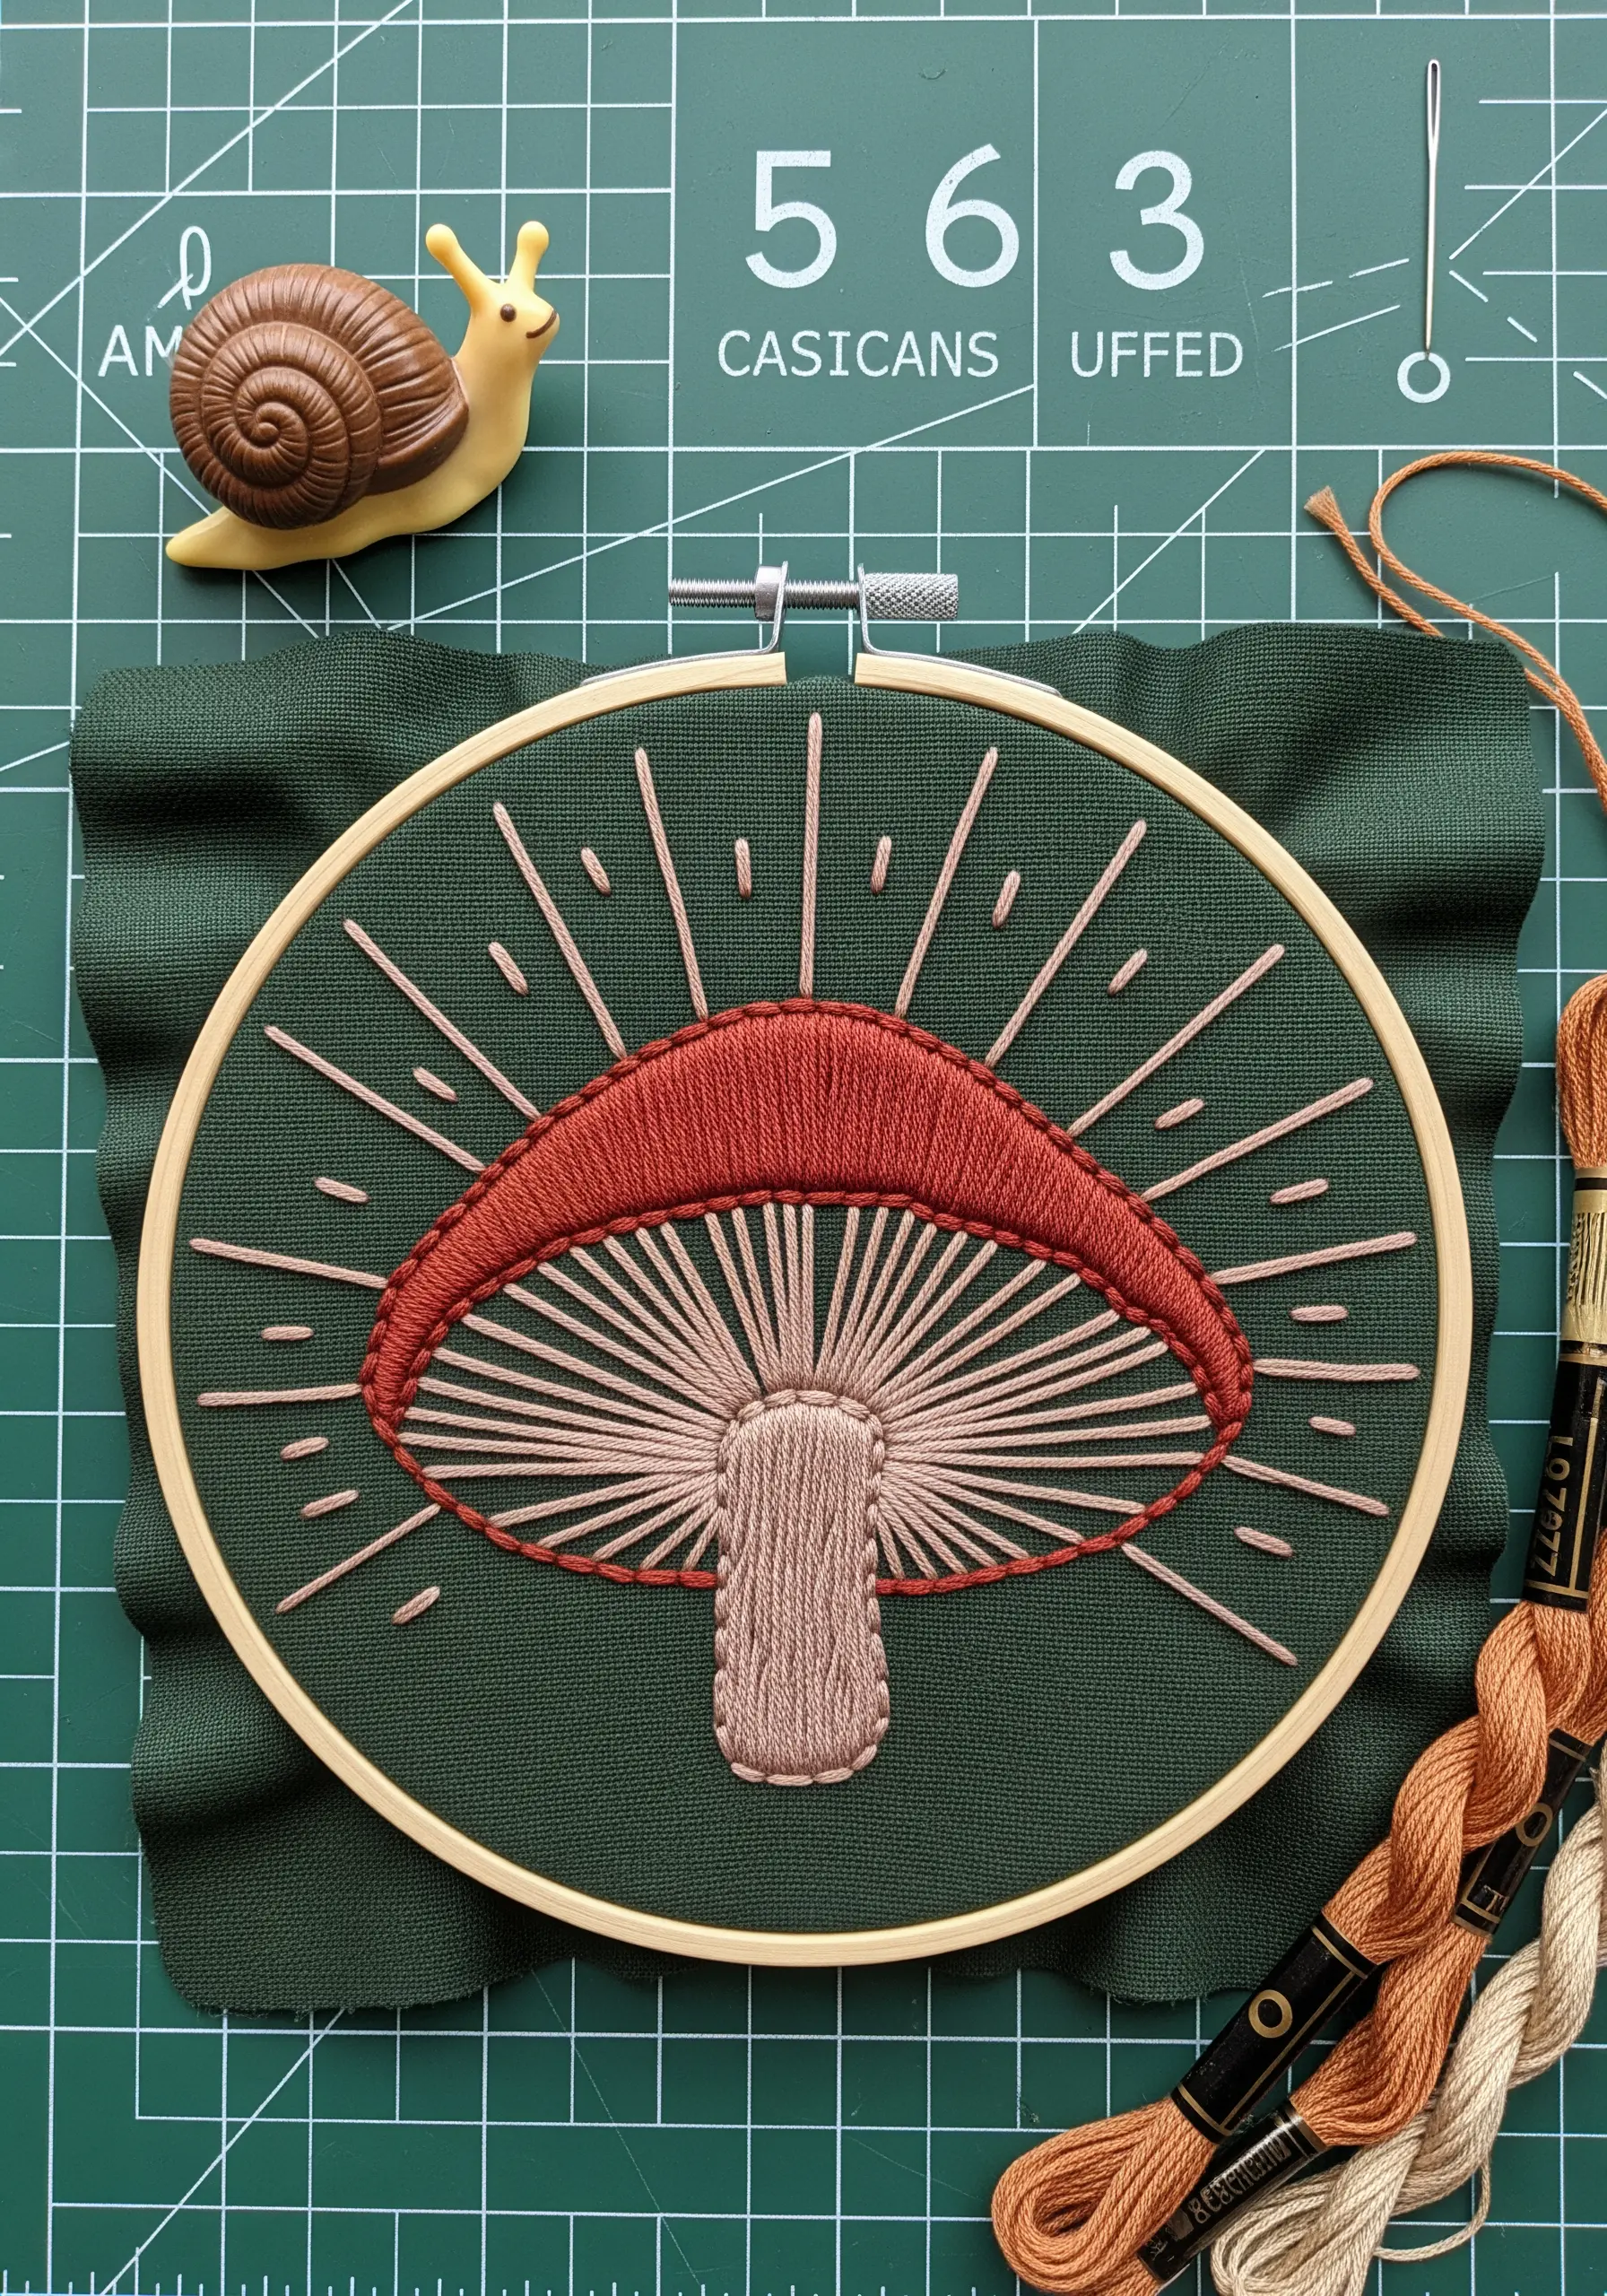
The energy in this piece comes entirely from the intelligent use of stitch direction.
Use satin stitch for the mushroom cap and stem, ensuring your stitches follow the natural curves to suggest form and roundness.
The magic happens in the details: use long, straight stitches radiating from a central point for the gills, and repeat this with longer stitches around the cap to imply light.
This technique shows how simple lines can create a dynamic sense of movement in your minimalist line art.
19. Contoured Landscape with Satin Stitch

You can stitch an entire landscape with just one basic stitch if you focus on color blocking and direction.
Divide your scene into curved, horizontal bands representing the rolling hills.
Fill each band with satin stitch, but angle your stitches to follow the contour of that specific hill.
This directional work creates a beautiful sense of movement and depth.
Using distinct blocks of color for each hill clearly defines the layers, resulting in a clean, modern, and abstract nature-inspired embroidery motif.


