
The shelves in your home are more than just storage; they are small stages for the things that tell your story. And sometimes, the most meaningful objects are the ones you create with your own hands. But how do you make your embroidery feel like it truly belongs there, looking intentional and artfully placed?
It begins with small, thoughtful choices. These accents aren’t about spending weeks on a monumental project. They are about embracing the power of a single, beautifully executed motif, a surprising texture, or a clever display that turns a simple hoop into a piece of decor you’re proud of.
Here, you won’t find complex instructions, but rather a shift in perspective. You’ll see how a change in stitch direction can mimic nature, how a simple stand can transform a hoop into a sculpture, and how the right fabric can elevate a design from nice to unforgettable. Pick one idea that speaks to you, and see how a quick, creative touch can bring new life to your shelf today.
1. Master the Satin Stitch Gradient

To achieve a truly realistic leaf, move beyond a single shade of green and embrace gradients.
Use a long-and-short stitch, blending at least three tones—a deep shadow, a mid-tone, and a bright highlight—to create natural dimension.
Pay close attention to your stitch direction, angling your threads to follow the leaf’s natural veins from the center outwards.
This simple adjustment transforms a flat motif into a dynamic botanical study that feels alive.
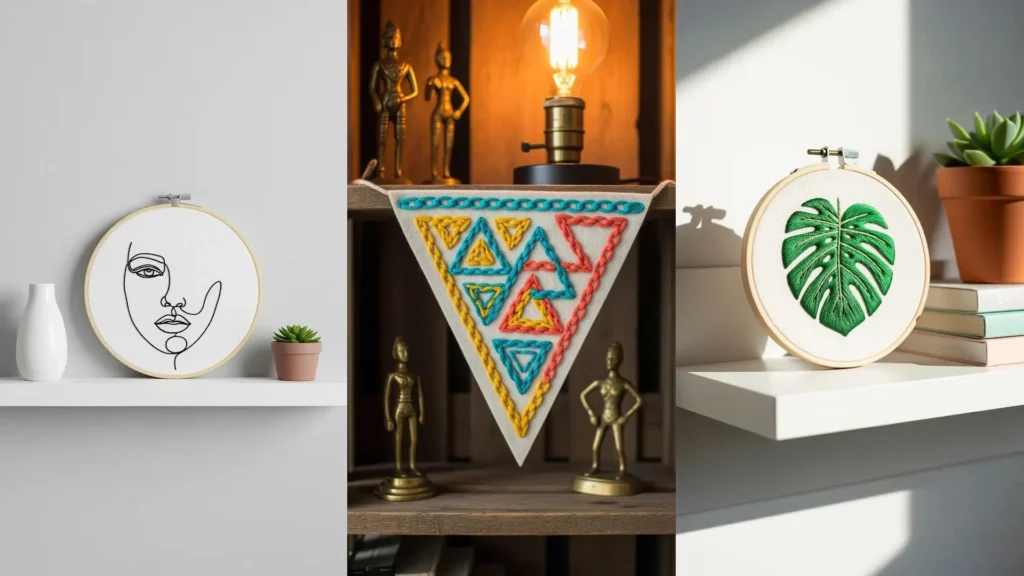
2. Elevate Line Art with Chain Stitch

When your design relies on bold, graphic lines, swap your standard backstitch for a chain stitch.
The chain stitch creates a substantial, rope-like texture that stands off the fabric, giving your geometric patterns a tactile, three-dimensional quality.
Use all six strands of cotton floss to maximize its impact, ensuring your linework is confident and defined.
This technique is especially effective for creating visual weight and turning simple shapes into statement pieces.
3. Combine Metallic and Matte Threads for Contrast

Create sophisticated visual interest by pairing lustrous metallic threads with traditional matte cotton floss.
Use a high-shine metallic for small accents like stars, allowing them to catch the light and create a subtle sparkle.
Reserve the matte thread for larger, solid areas, which provides a soft, non-reflective base that makes the metallic elements pop even more.
This play on texture and finish adds a layer of refinement to even the simplest celestial designs.
4. Refine Botanicals with Varied French Knots

To give floral motifs like lavender a more organic, natural feel, use French knots for the tiny buds.
Vary the size of your knots by changing the number of times you wrap the thread around the needle—once for small buds, twice for larger ones.
This subtle variation breaks up uniformity and mimics the imperfection of nature, making your botanicals look less like a pattern and more like a living plant.
Finish with simple stem stitches for the stalks to keep the focus on the textured blossoms.
5. Turn a Tiny Motif into a Functional Accent

Transform a small embroidered piece into a practical and charming object, like a decorative jar topper.
Stitch your motif on a small piece of fabric, then trim it in a circle, leaving a small seam allowance.
Back the embroidered piece with a circle of felt for stability and a clean finish before attaching it to a larger fabric square.
This thoughtful application turns a simple stitching exercise into one of your favorite tiny secret embroidery ideas that enhances an everyday item.
6. Build 3D Texture with Densely Packed Knots
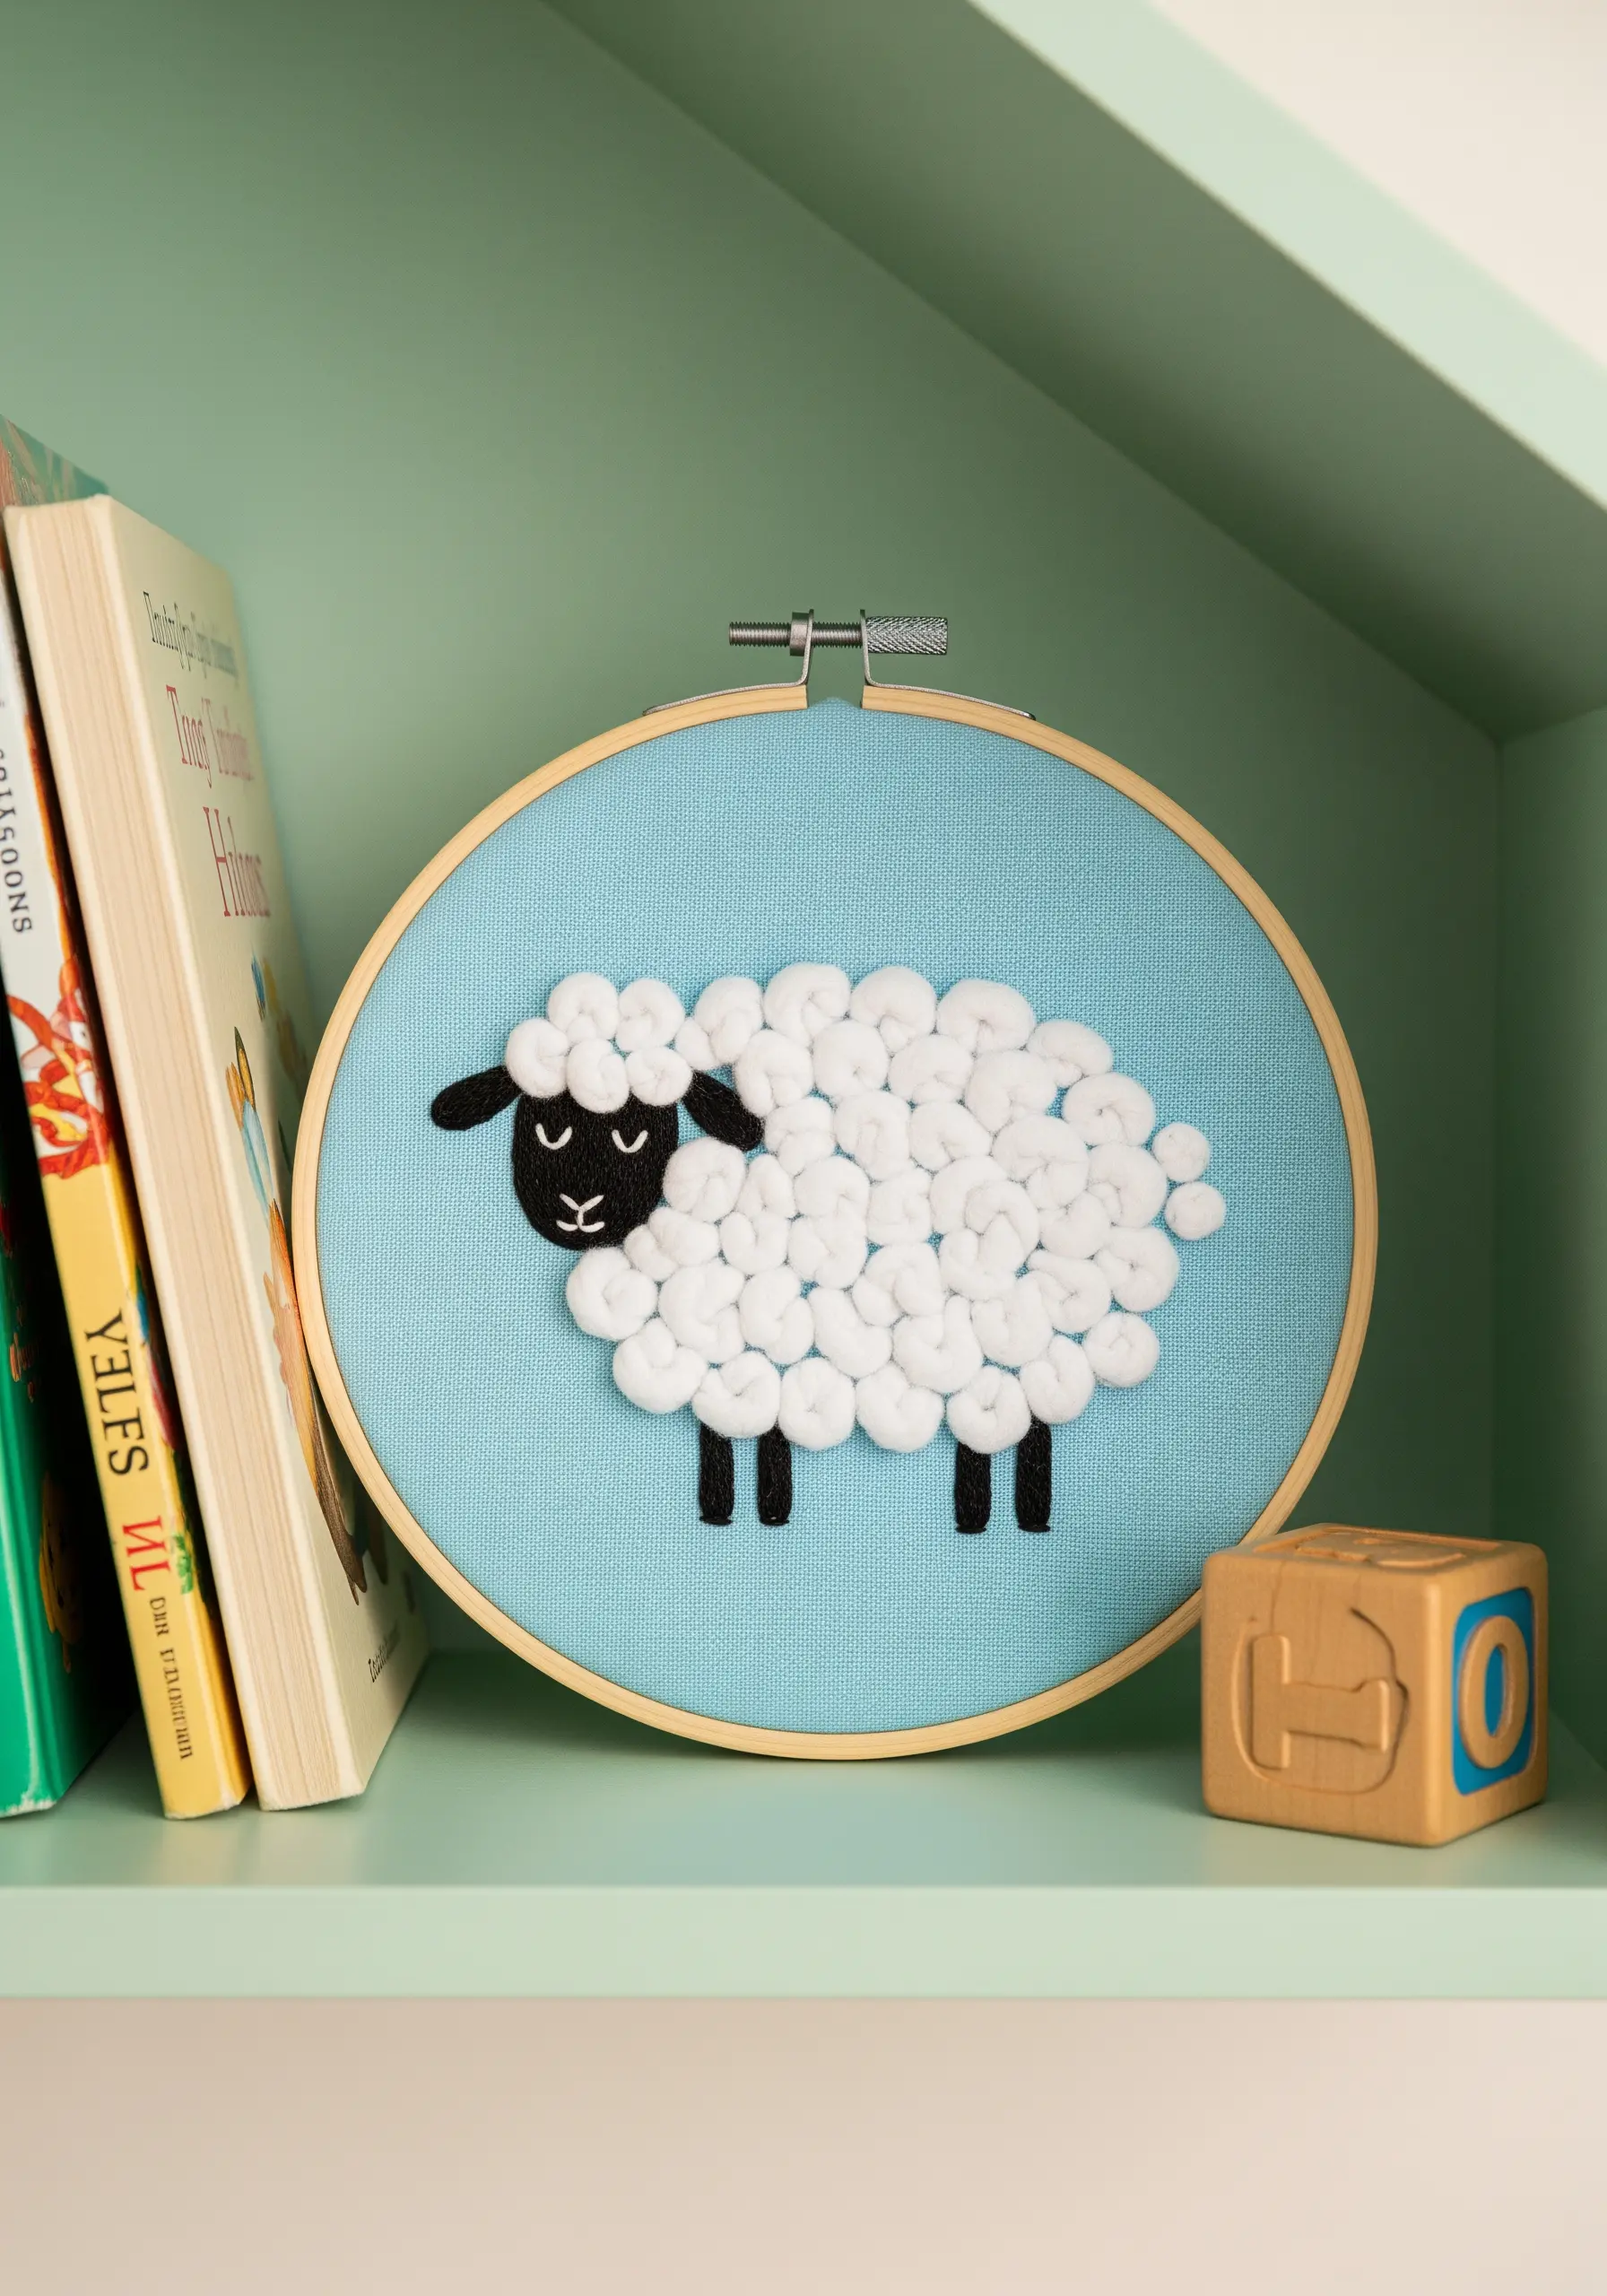
For textures that are meant to be soft and fluffy, like wool or clouds, rely on densely packed colonial or French knots.
The key to a convincing 3D effect is to place your knots so close together that the fabric beneath is completely obscured.
For even more dimension, use a thicker thread like pearl cotton or even fine-weight yarn.
This technique turns a flat illustration into a tactile piece that invites touch and adds playful dimension to embroidered nursery decor ideas.
7. Imply Shading with Varied Stitch Density

You don’t always need multiple thread colors to create depth and shadow; you can achieve it with stitch placement alone.
Use a simple seed stitch—small, scattered straight stitches—and vary its density across your design.
Pack the stitches tightly together in areas you want to appear highlighted or solid, and scatter them sparsely in areas that should recede into shadow.
This modern technique creates a sophisticated, graphic effect that feels both minimalist and complex.
8. Stitch an Elegant, Single-Motif Sachet

Elevate your space with a functional piece that doubles as delicate art.
Choose a breathable, natural fabric like linen or cotton canvas for your sachet pouch.
Embroider a single, clean motif using a simple backstitch or stem stitch. The simplicity of the stitching is what lends it elegance.
Fill the finished pouch with dried lavender or cedar to create a beautiful, fragrant accent for a drawer or shelf.
9. Add Hyper-Realism with Layered Seed Stitches

To make an embroidered fruit look truly realistic, focus on the tiny surface details.
After filling the main body with a blended long-and-short stitch, go back over the top with tiny seed stitches in a contrasting color to represent the seeds.
Placing these stitches on top of the fill, rather than leaving gaps for them, creates a true-to-life layered effect.
This finishing touch is what separates a good piece from a stunning one, making it one of the best DIY framed embroidery art projects.
10. Create Luxe Contrast on High-Pile Velvet

For an instantly luxurious piece, choose a fabric with a deep pile, like velvet or velour, as your base.
The plush, light-absorbing quality of the velvet creates a dramatic contrast with the sheen of a smooth satin stitch, making your embroidery appear to float on the surface.
Always use a stabilizer on the back to prevent stretching and ensure your stitches remain crisp and even.
A simple monogram stitched in a metallic or silk thread on velvet is a timeless and elegant statement.
11. Arrange a Thematic Trio of Mini Hoops

Instead of one large piece, create a more dynamic and curated display by grouping several small, related hoops.
Choose a cohesive theme, like culinary herbs, wildflowers, or geometric shapes, and stitch one motif per hoop.
Displaying them together as a triptych creates a focused narrative and has more visual impact than a single, isolated piece.
This approach is perfect for filling a narrow shelf and allows you to build a collection over time.
12. Display Stitched Patches as Sculptural Objects

Free your embroidery from the hoop by turning it into a three-dimensional object.
After stitching your motif, cut it out carefully, leaving a tiny fabric border.
Glue a piece of stiff felt to the back for support, then display your finished patch under a glass bell jar or cloche.
This presentation technique transforms your stitched work into a precious curio, inviting viewers to look closer.
13. Capture Fluidity with a Continuous Line

For a modern, artistic feel, translate a single-line drawing into a continuous line of thread.
Use a smooth, consistent stitch like a stem stitch or a whipped backstitch to create the illusion of an unbroken line drawn with ink.
The key is to carefully plan your stitch path to minimize jumps and starts. Using a high-contrast thread against a plain background makes the singular line the hero of the piece.
These minimalist embroidery projects are perfect for a clean, modern aesthetic.
14. Embellish Utilitarian Objects with Beads

Elevate the most practical items in your craft room by adding a touch of unexpected embellishment.
A standard tomato pincushion becomes a decorative object with the simple addition of tiny, pearlescent seed beads stitched into the crevices.
This small act of artistry transforms a functional tool into a piece you’re proud to display, proving that even everyday objects can be beautiful.
15. Stitch Reusable and Decorative Pantry Labels

Bring a touch of handmade charm to your kitchen organization with embroidered fabric labels.
Use a simple backstitch to create clear, legible script on durable cotton or linen scraps.
Finish the edges with a decorative blanket stitch or a simple machine-sewn hem to prevent fraying.
Secure them to your jars with twine or elastic for a rustic, reusable labeling system that is both beautiful and practical.
16. Create a Sunburst with Negative Space
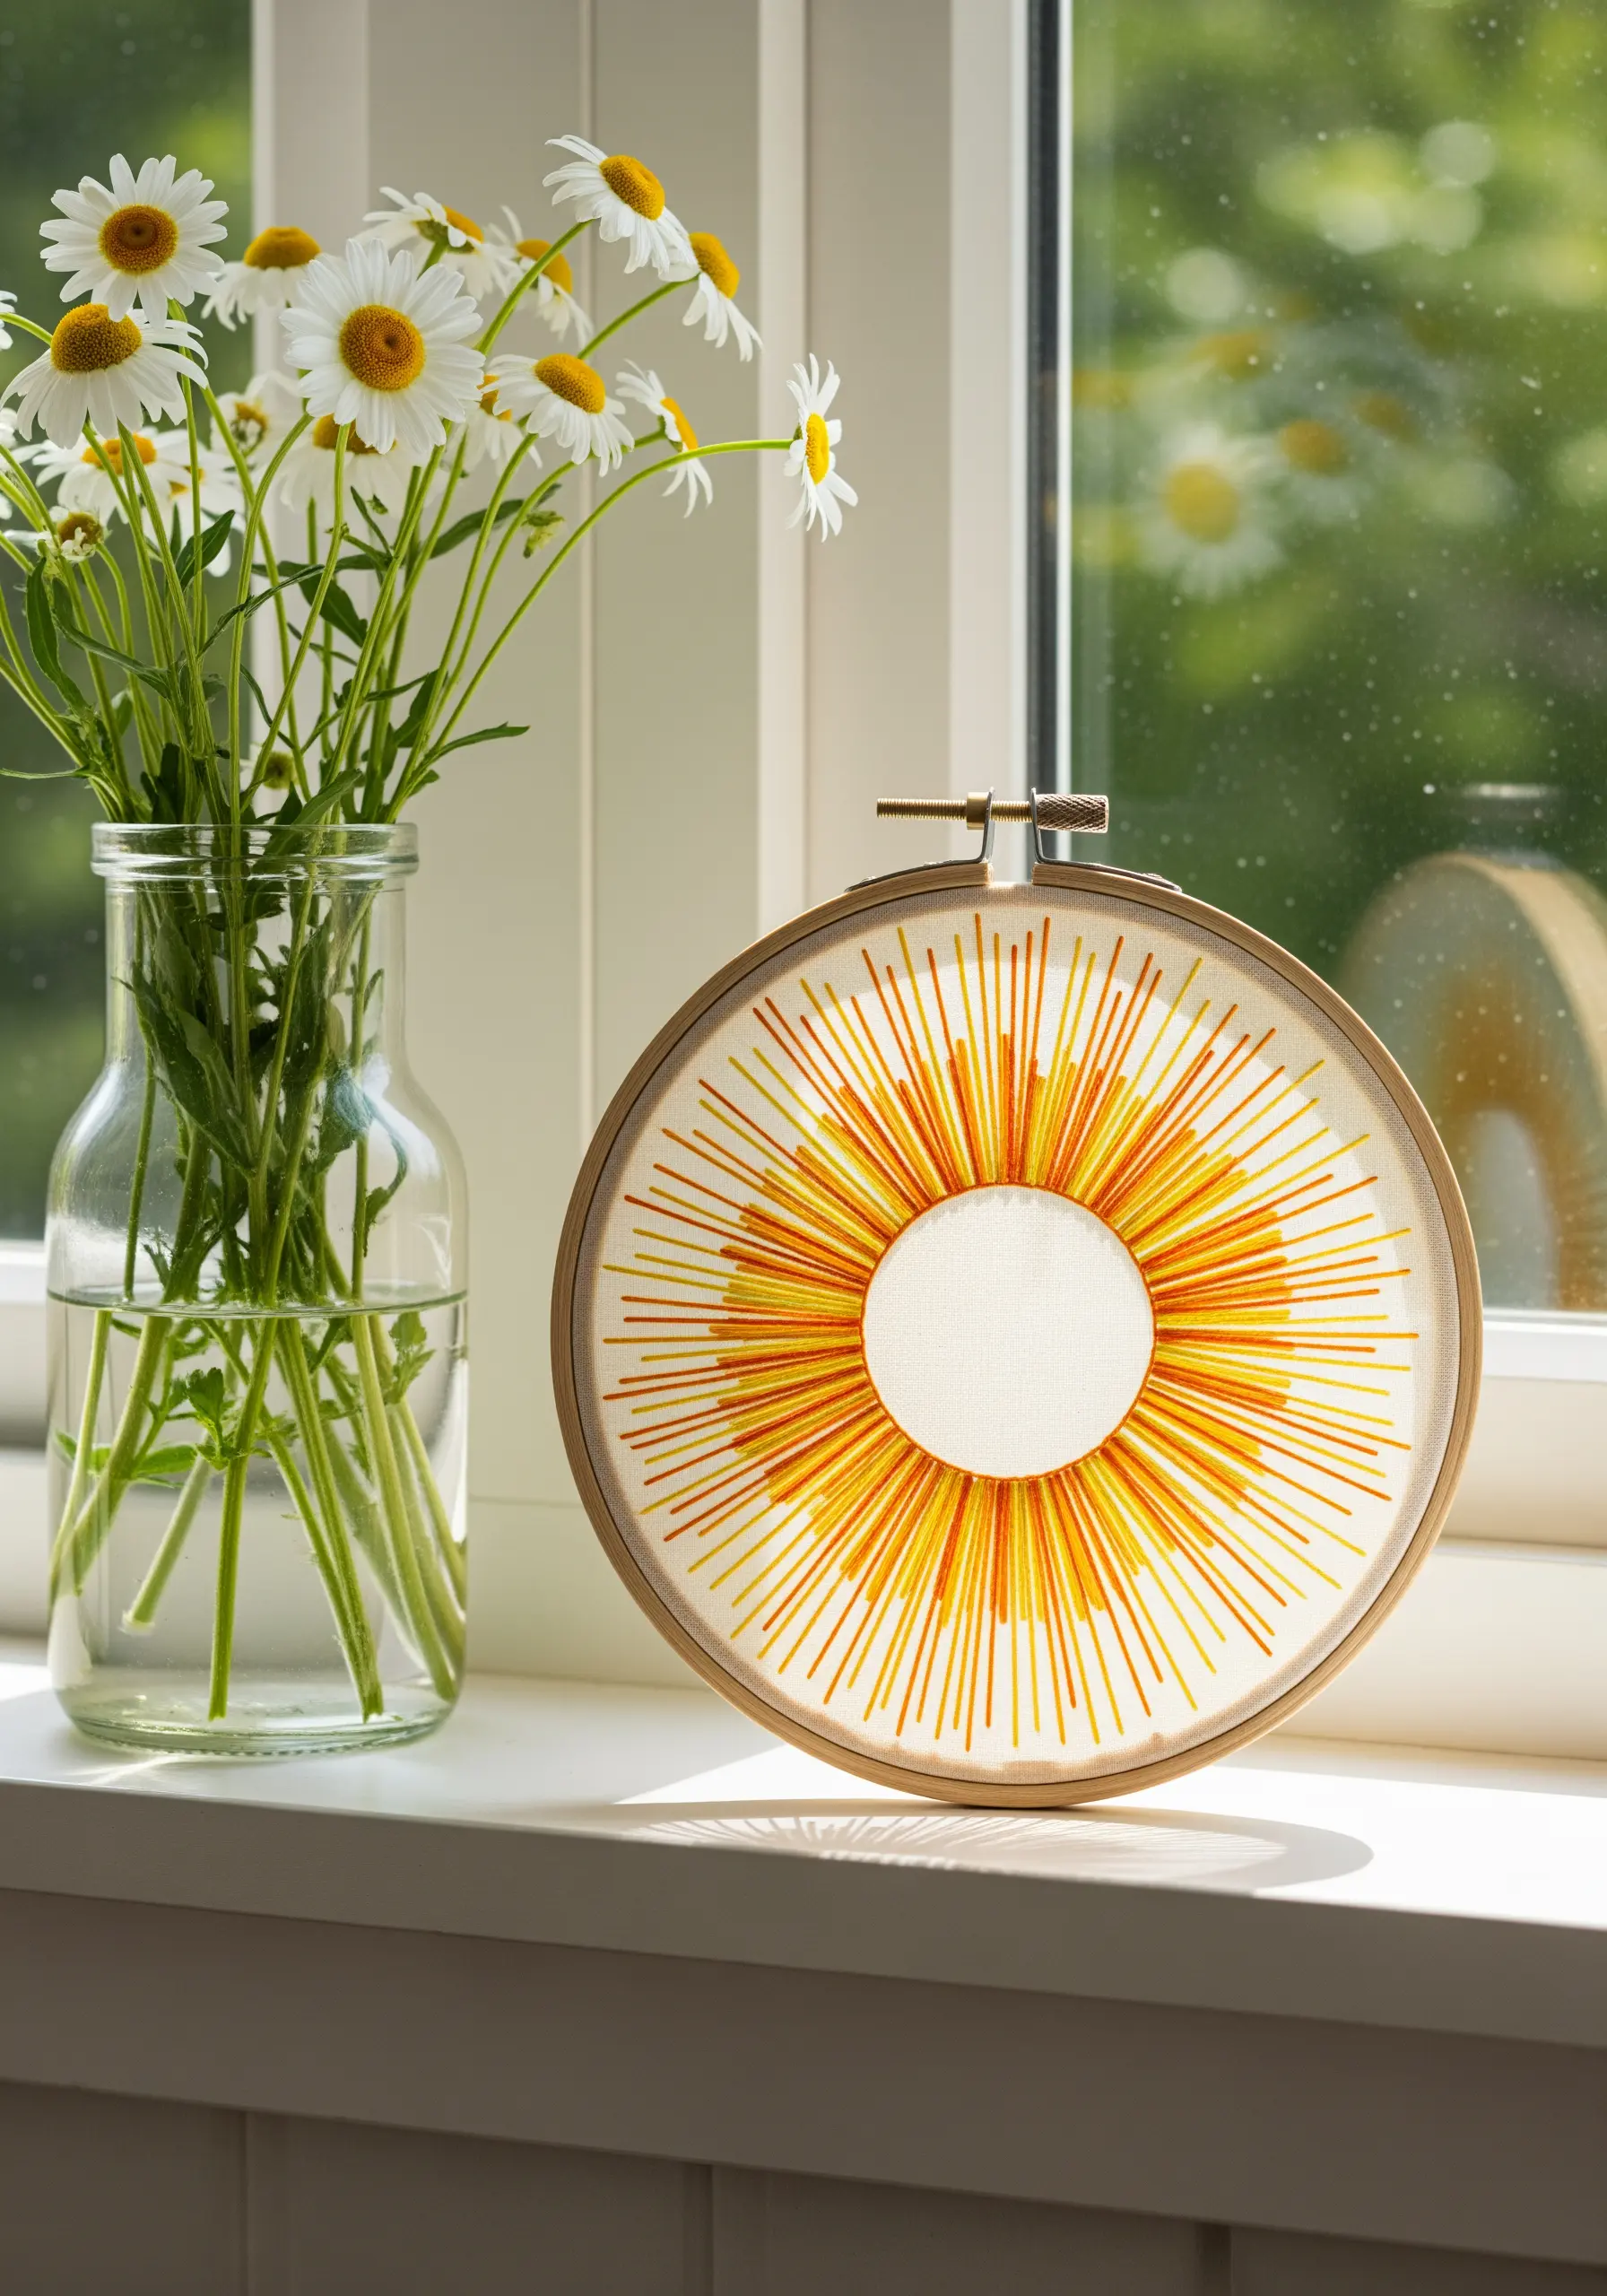
Explore a more abstract approach by using your thread to frame an empty space.
Instead of filling a design, use straight stitches stretched from the edge of the hoop toward the center, leaving the middle of the fabric unstitched.
The negative space becomes the focal point, creating a powerful sunburst or iris effect.
Layering different thread colors and lengths adds vibrancy and dimension to this simple yet striking modern grid dot stitch concept.
17. Form Delicate Petals with Lazy Daisy Stitches

When stitching tiny, delicate flowers like forget-me-nots, the lazy daisy stitch is your most efficient and effective tool.
Each stitch creates a single, perfect teardrop-shaped petal, allowing you to build flowers quickly and uniformly.
Cluster five or six lazy daisy stitches around a central French knot to form a complete blossom.
This method is far quicker than satin stitch and provides a light, airy texture that is ideal for dainty florals.
18. Capture Art Deco Sheen with Directional Stitching

The glamour of Art Deco design lies in its bold geometry and luxurious sheen, which you can replicate with thread.
Use a satin stitch with metallic floss, paying meticulous attention to the direction of your stitches.
By keeping all stitches within a single segment perfectly parallel, you create a smooth, uninterrupted surface that reflects light uniformly.
This precision is what creates the signature high-shine, graphic look of the era.
19. Use Bold Stitches on High-Pile Towels

Embroidering on textured fabrics like terrycloth requires stitches that won’t get lost in the loops.
Opt for thick, raised stitches like the chain stitch, stem stitch, or even a narrow satin stitch. These stitches sit on top of the pile rather than sinking into it.
For best results, use a water-soluble stabilizer on top of the towel as you stitch; it provides a smooth surface and dissolves away later, leaving your stitches crisp and defined.
20. Frame Your Work on a Denim Canvas

Choosing an unconventional fabric can completely change the mood of your embroidery.
Using sturdy cotton denim as your background lends a casual, retro, and slightly rustic feel to your work.
Its tight weave is excellent for holding stitches, and the classic indigo color makes bright threads pop.
When framed, a piece on denim feels less like a traditional sampler and more like a piece of modern, nostalgic art.
21. Document a Personal Story with Stitched Lines

Turn a simple outline into a deeply personal piece of art by using it as a canvas for your memories.
Start with a clean backstitch outline of a map, a house, or another meaningful shape.
Then, use a contrasting thread color and a simple running stitch to add your own story—trace your travels, mark important locations, or connect meaningful points.
This transforms a decorative object into a unique and evolving narrative of your life.
22. Integrate Beads for a Touch of Icy Sparkle
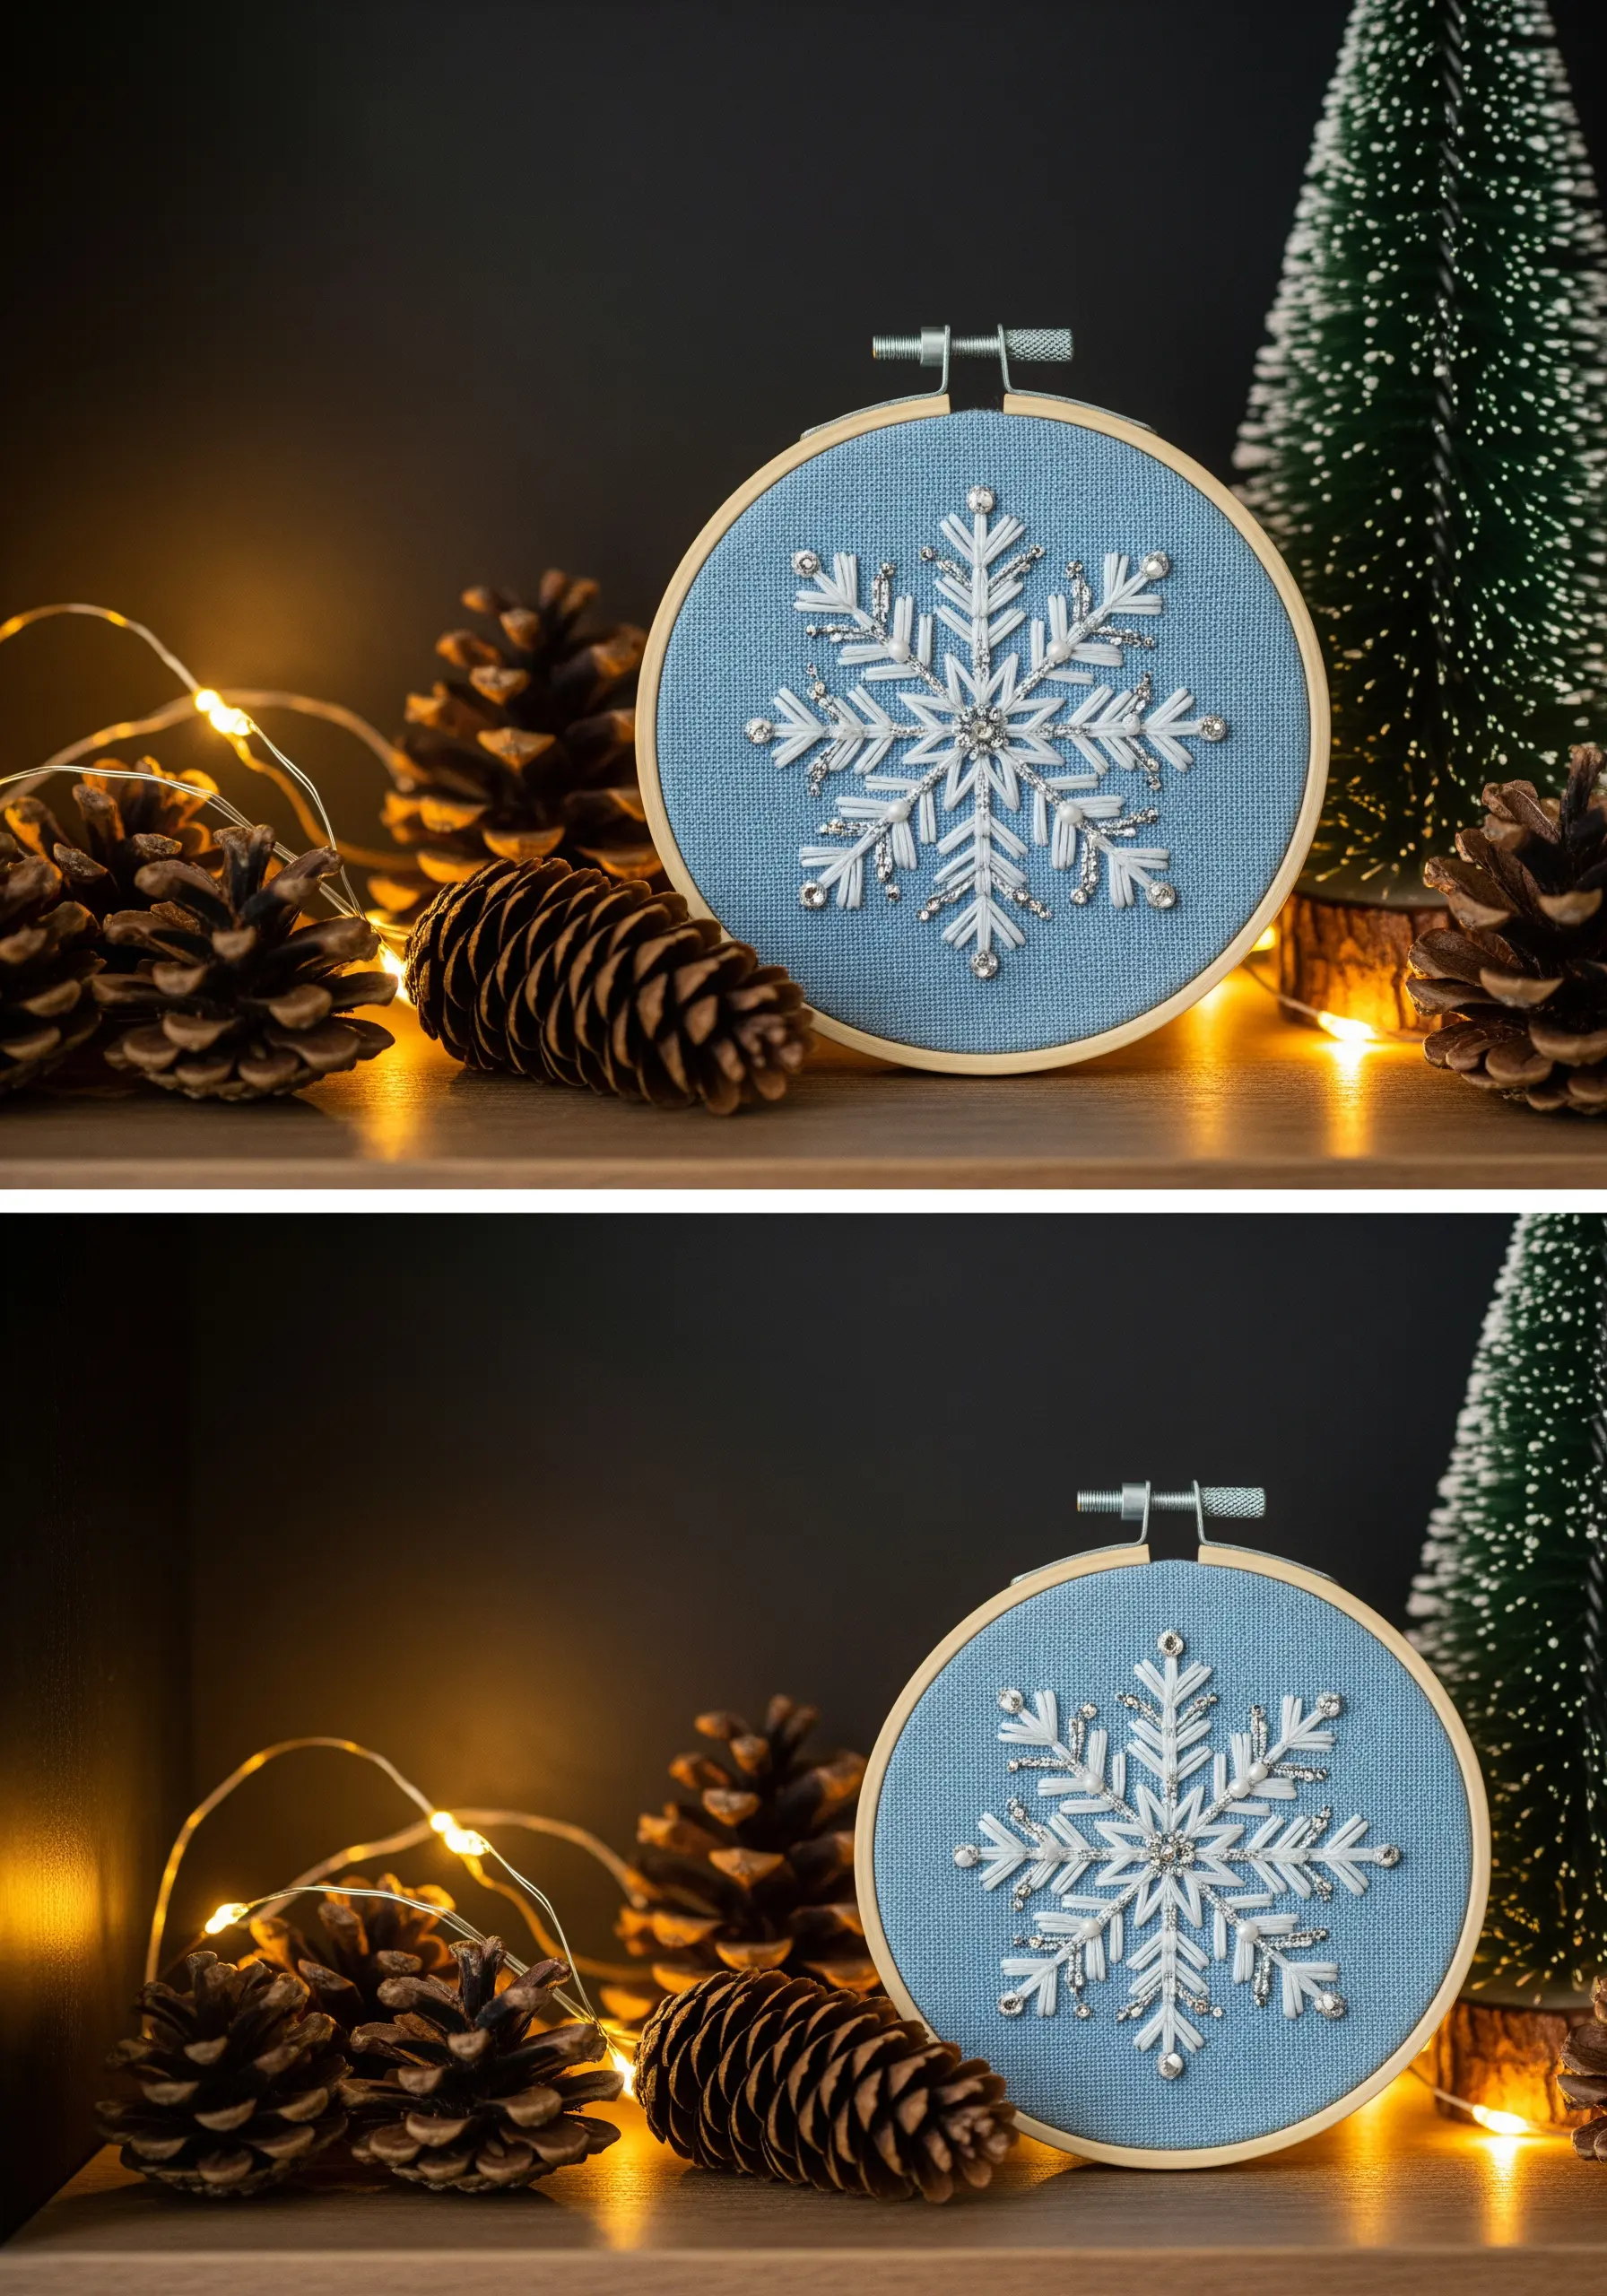
Amplify the magic of a winter-themed design by incorporating beadwork for texture and light.
After embroidering your main snowflake shape with simple straight stitches, strategically add tiny silver or clear seed beads.
Place them at the tips of the crystal arms or clustered in the center to mimic the way light glitters on ice.
This touch of mixed media contemporary embroidery adds a delicate sparkle that thread alone cannot achieve.
23. Create a Tactile Rainbow Stitch Sampler

Transform a simple rainbow motif into a rich, textural exploration by assigning a different stitch to each arc.
Use chunky French knots for the red band, a smooth chain stitch for orange, woven wheel stitches for yellow, and so on.
This approach turns a familiar shape into a sampler of your skills and results in a uniquely tactile piece that celebrates both color and texture.
It’s one of the most playful yarn wall art creations inspired by nature.
24. Embroider on Paper for a Unique Finish

Take your stitching beyond fabric by embroidering directly onto heavy cardstock or a cloth-bound book cover.
The essential first step is to gently pre-pierce your stitching holes along the design lines with a sharp needle before you begin to thread.
This prevents the paper from tearing and allows you to create clean, crisp stitches.
This technique turns your embroidery into a stunning mixed-media piece and is one of the best paper art projects that turn simple stitches into stunning decor.
25. Display Tiny Art on a Miniature Easel

Give your smallest creations the prominence they deserve with a thoughtful display choice.
A miniature wooden easel instantly elevates a tiny embroidered piece, framing it as a work of art and preventing it from getting lost on a crowded shelf.
This simple prop gives your work presence and intention, turning a small stitch study into a charming focal point for a desk or bookshelf.
26. Use a Hoop Stand for Modern Versatility

Move beyond traditional wall hanging and display your hoop art as a modern, sculptural object.
A simple metal or wooden stand holds your hoop upright, making it perfect for styling shelves, mantels, or entry tables.
This method allows you to easily move your art and integrate it with other decorative objects, giving you more flexibility than a permanent wall fixture.
It provides a clean, contemporary finish that highlights your work beautifully.
27. Blend Threads for a Natural Variegated Leaf

To capture the multi-tonal beauty of an autumn leaf, avoid using single, flat colors.
Instead, use the long-and-short stitch to seamlessly blend sections of red, orange, and yellow, creating a soft, organic gradient across the surface.
For a quicker, more rustic effect, try threading your needle with two or three different colors at once and stitching with the combined strands.
This technique instantly adds depth and realism to any botanical subject.


