

Working with burlap, jute, and other natural fibers can feel like a departure from delicate linens, but it’s an opportunity to embrace texture in a way that transforms your embroidery.
These rustic fabrics invite you to think differently about your stitches. Instead of fighting their open weave, you can use it to your advantage—choosing thicker threads, bolder stitches, and dimensional techniques that stand up to the material’s inherent character.
Here, you’ll discover how to create pieces that feel both grounded and refined. We’ll explore how to achieve clean lines, build sculptural textures, and blend fibers to create farmhouse-style art that is authentic, intentional, and deeply personal.
1. Layered Botanicals with Braided Yarn Accents
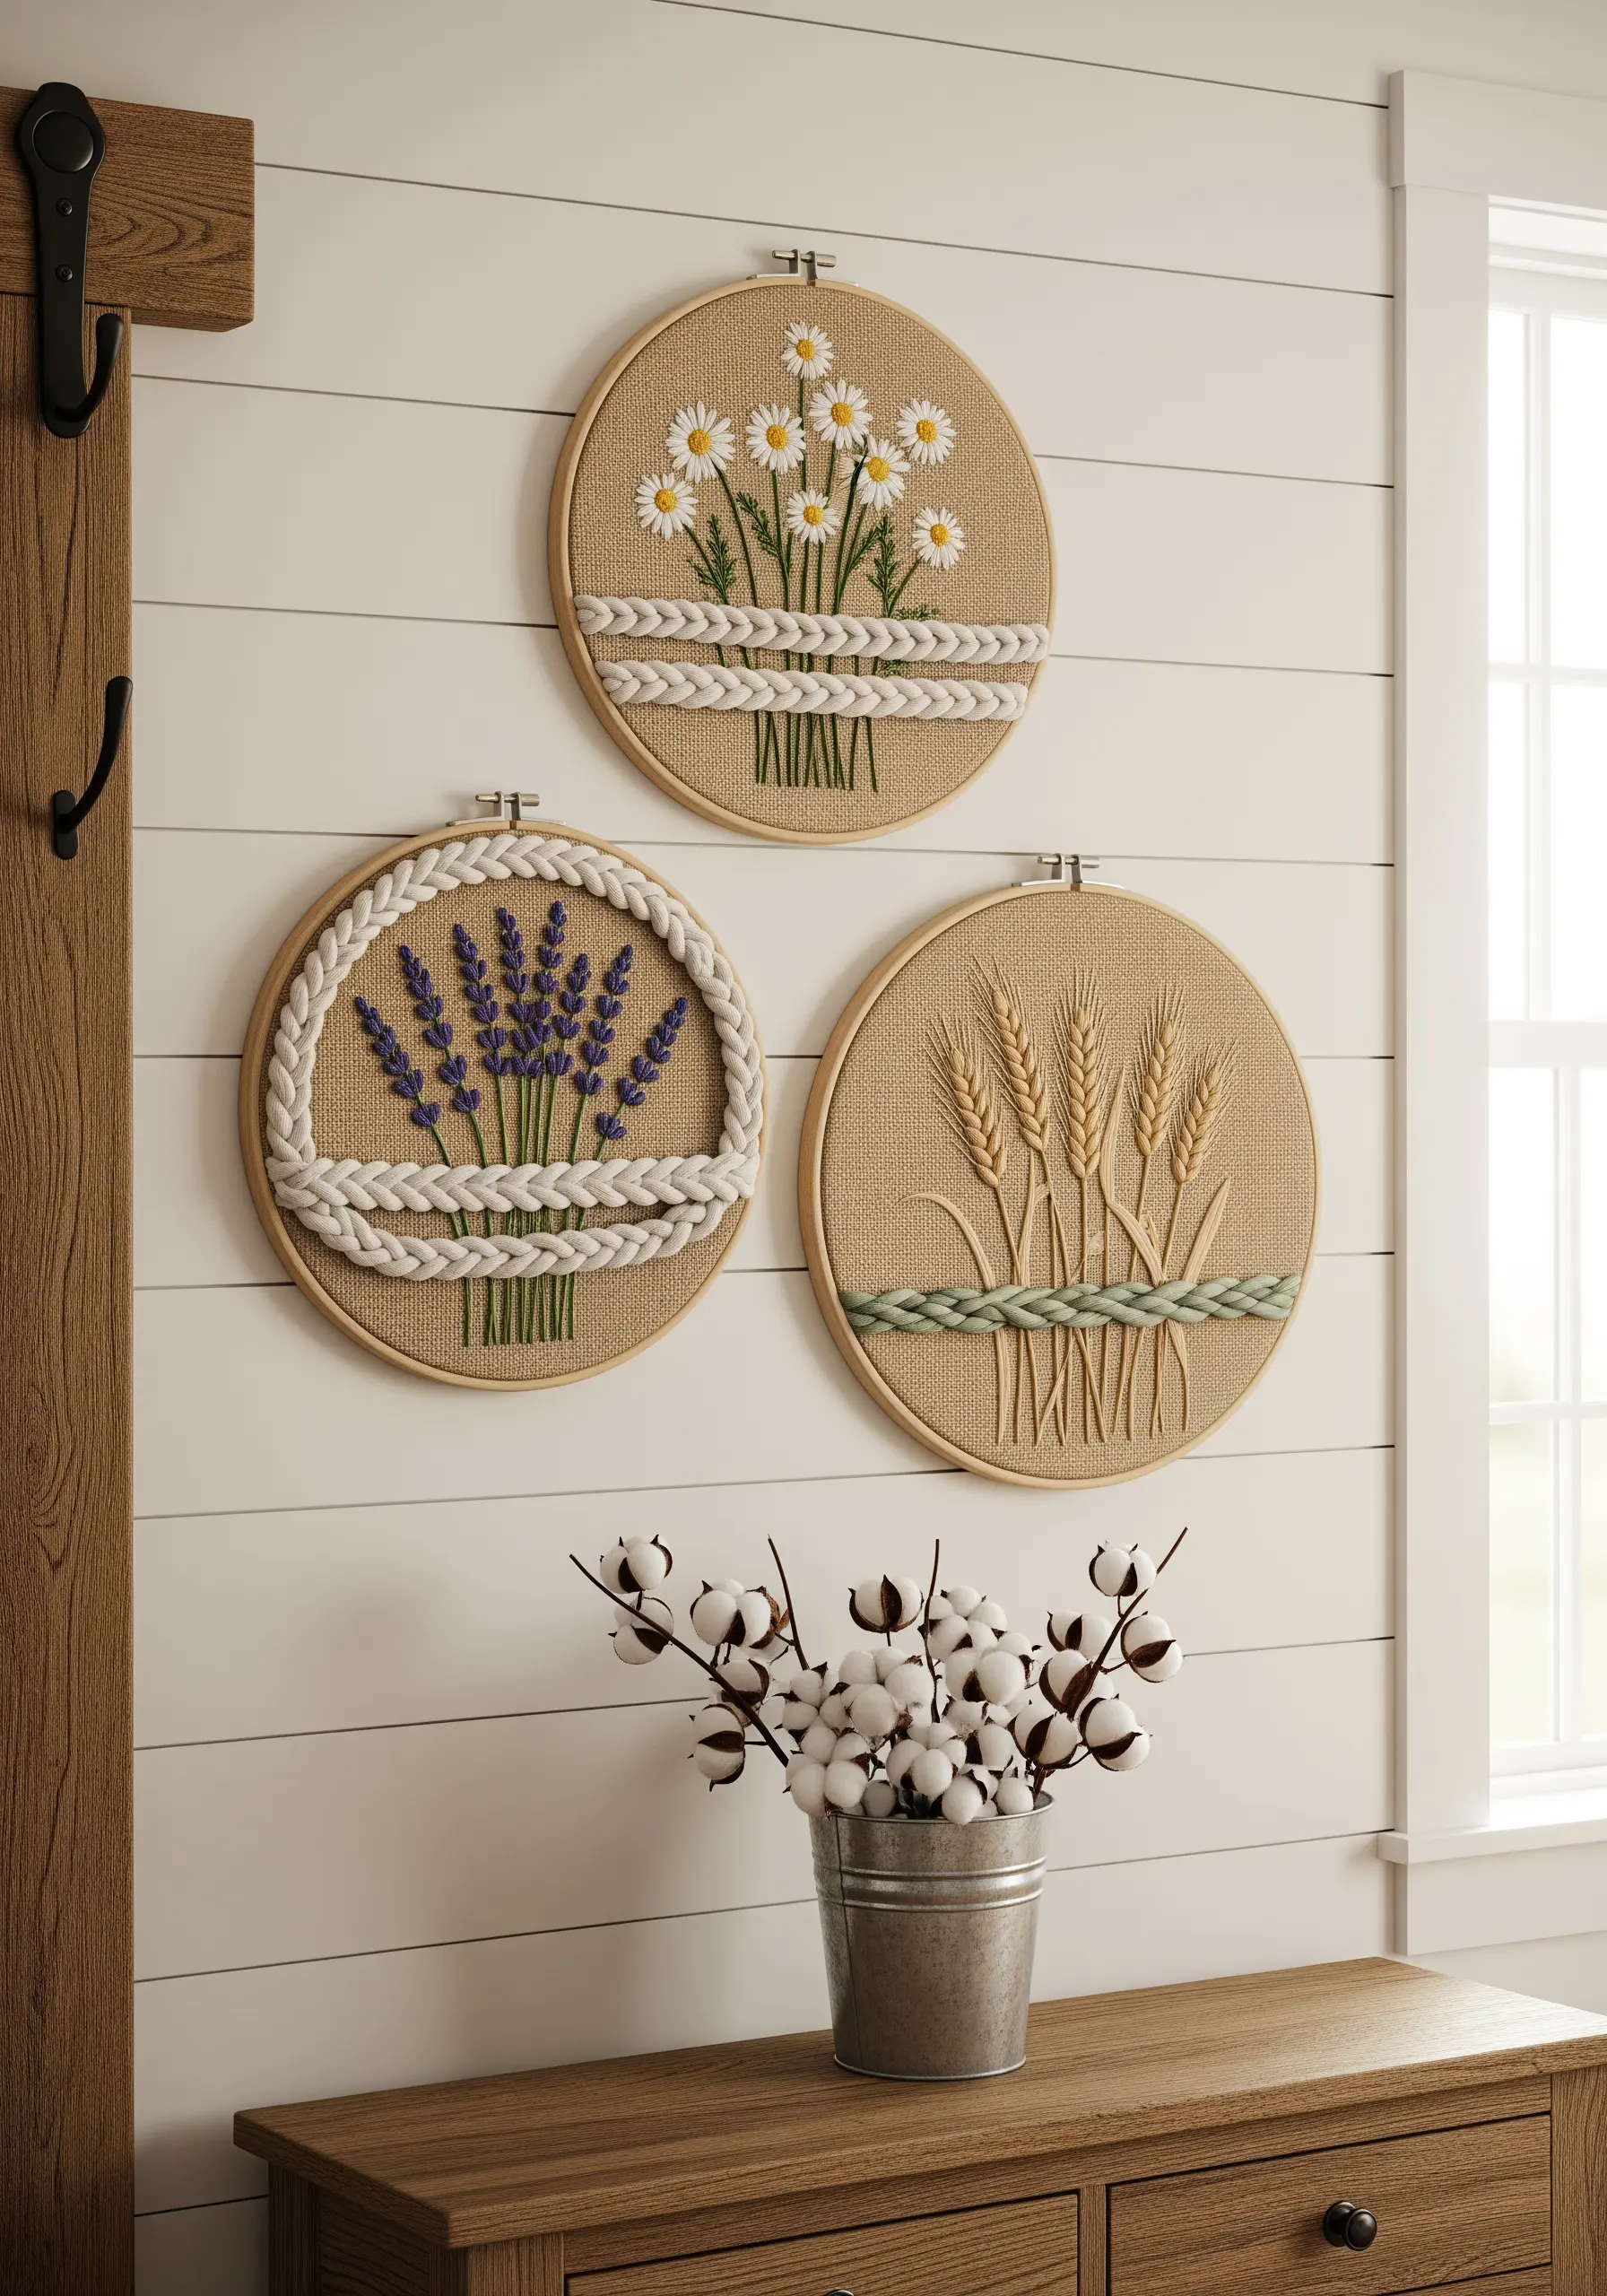
Create a stunning trio by combining delicate floral embroidery with chunky, three-dimensional elements.
First, stitch your lavender, daisies, or wheat stalks using classic satin and stem stitches on a tightly woven burlap.
Then, create a thick braid from soft, off-white yarn and carefully couch it onto the fabric with a matching fine thread, forming a border or accent.
This contrast between the fine embroidery and the plush braid adds a sophisticated textural depth that elevates simple hoop art into a coordinated wall display.
2. High-Pile Wool Roving for Sculptural Effect

Move beyond thread to create a bold, textural statement piece using wool roving and a punch needle.
Mount a large piece of burlap onto a sturdy frame, ensuring it’s drum-tight.
Using a punch needle, fill in your design—like this Highland cow—with thick wool roving, creating a dense, high-pile surface that feels almost sculptural.
Outline the design with a darker color to define its shape and add contrast. This technique transforms a simple illustration into impactful textile wall art.
3. Elegant Lettering on a Linen-Blend Banner

For crisp, professional-looking typography on looser weaves like linen or burlap, a stabilizer is your best friend.
Iron a sheet of lightweight, tear-away stabilizer to the back of your fabric before transferring the design.
Use a simple backstitch or stem stitch with three to four strands of floss to ensure the letters are bold and legible from a distance.
The stabilizer prevents the fabric from stretching and your stitches from sinking, resulting in perfectly formed letters and delicate botanical wreaths.
4. Minimalist Herb Studies in a Triptych

Create a serene, high-end look by framing simple botanical line drawings embroidered on raw burlap.
Select three complementary herbs—like rosemary, thyme, and sage—and stitch them using only two or three shades of green for a cohesive palette.
Use a fine two-strand backstitch to capture the delicate details of each leaf and stem. The rustic texture of the burlap against the clean, dark frames provides a beautiful study in contrast and simplicity.
5. Capturing Movement with Varied Thread Weights
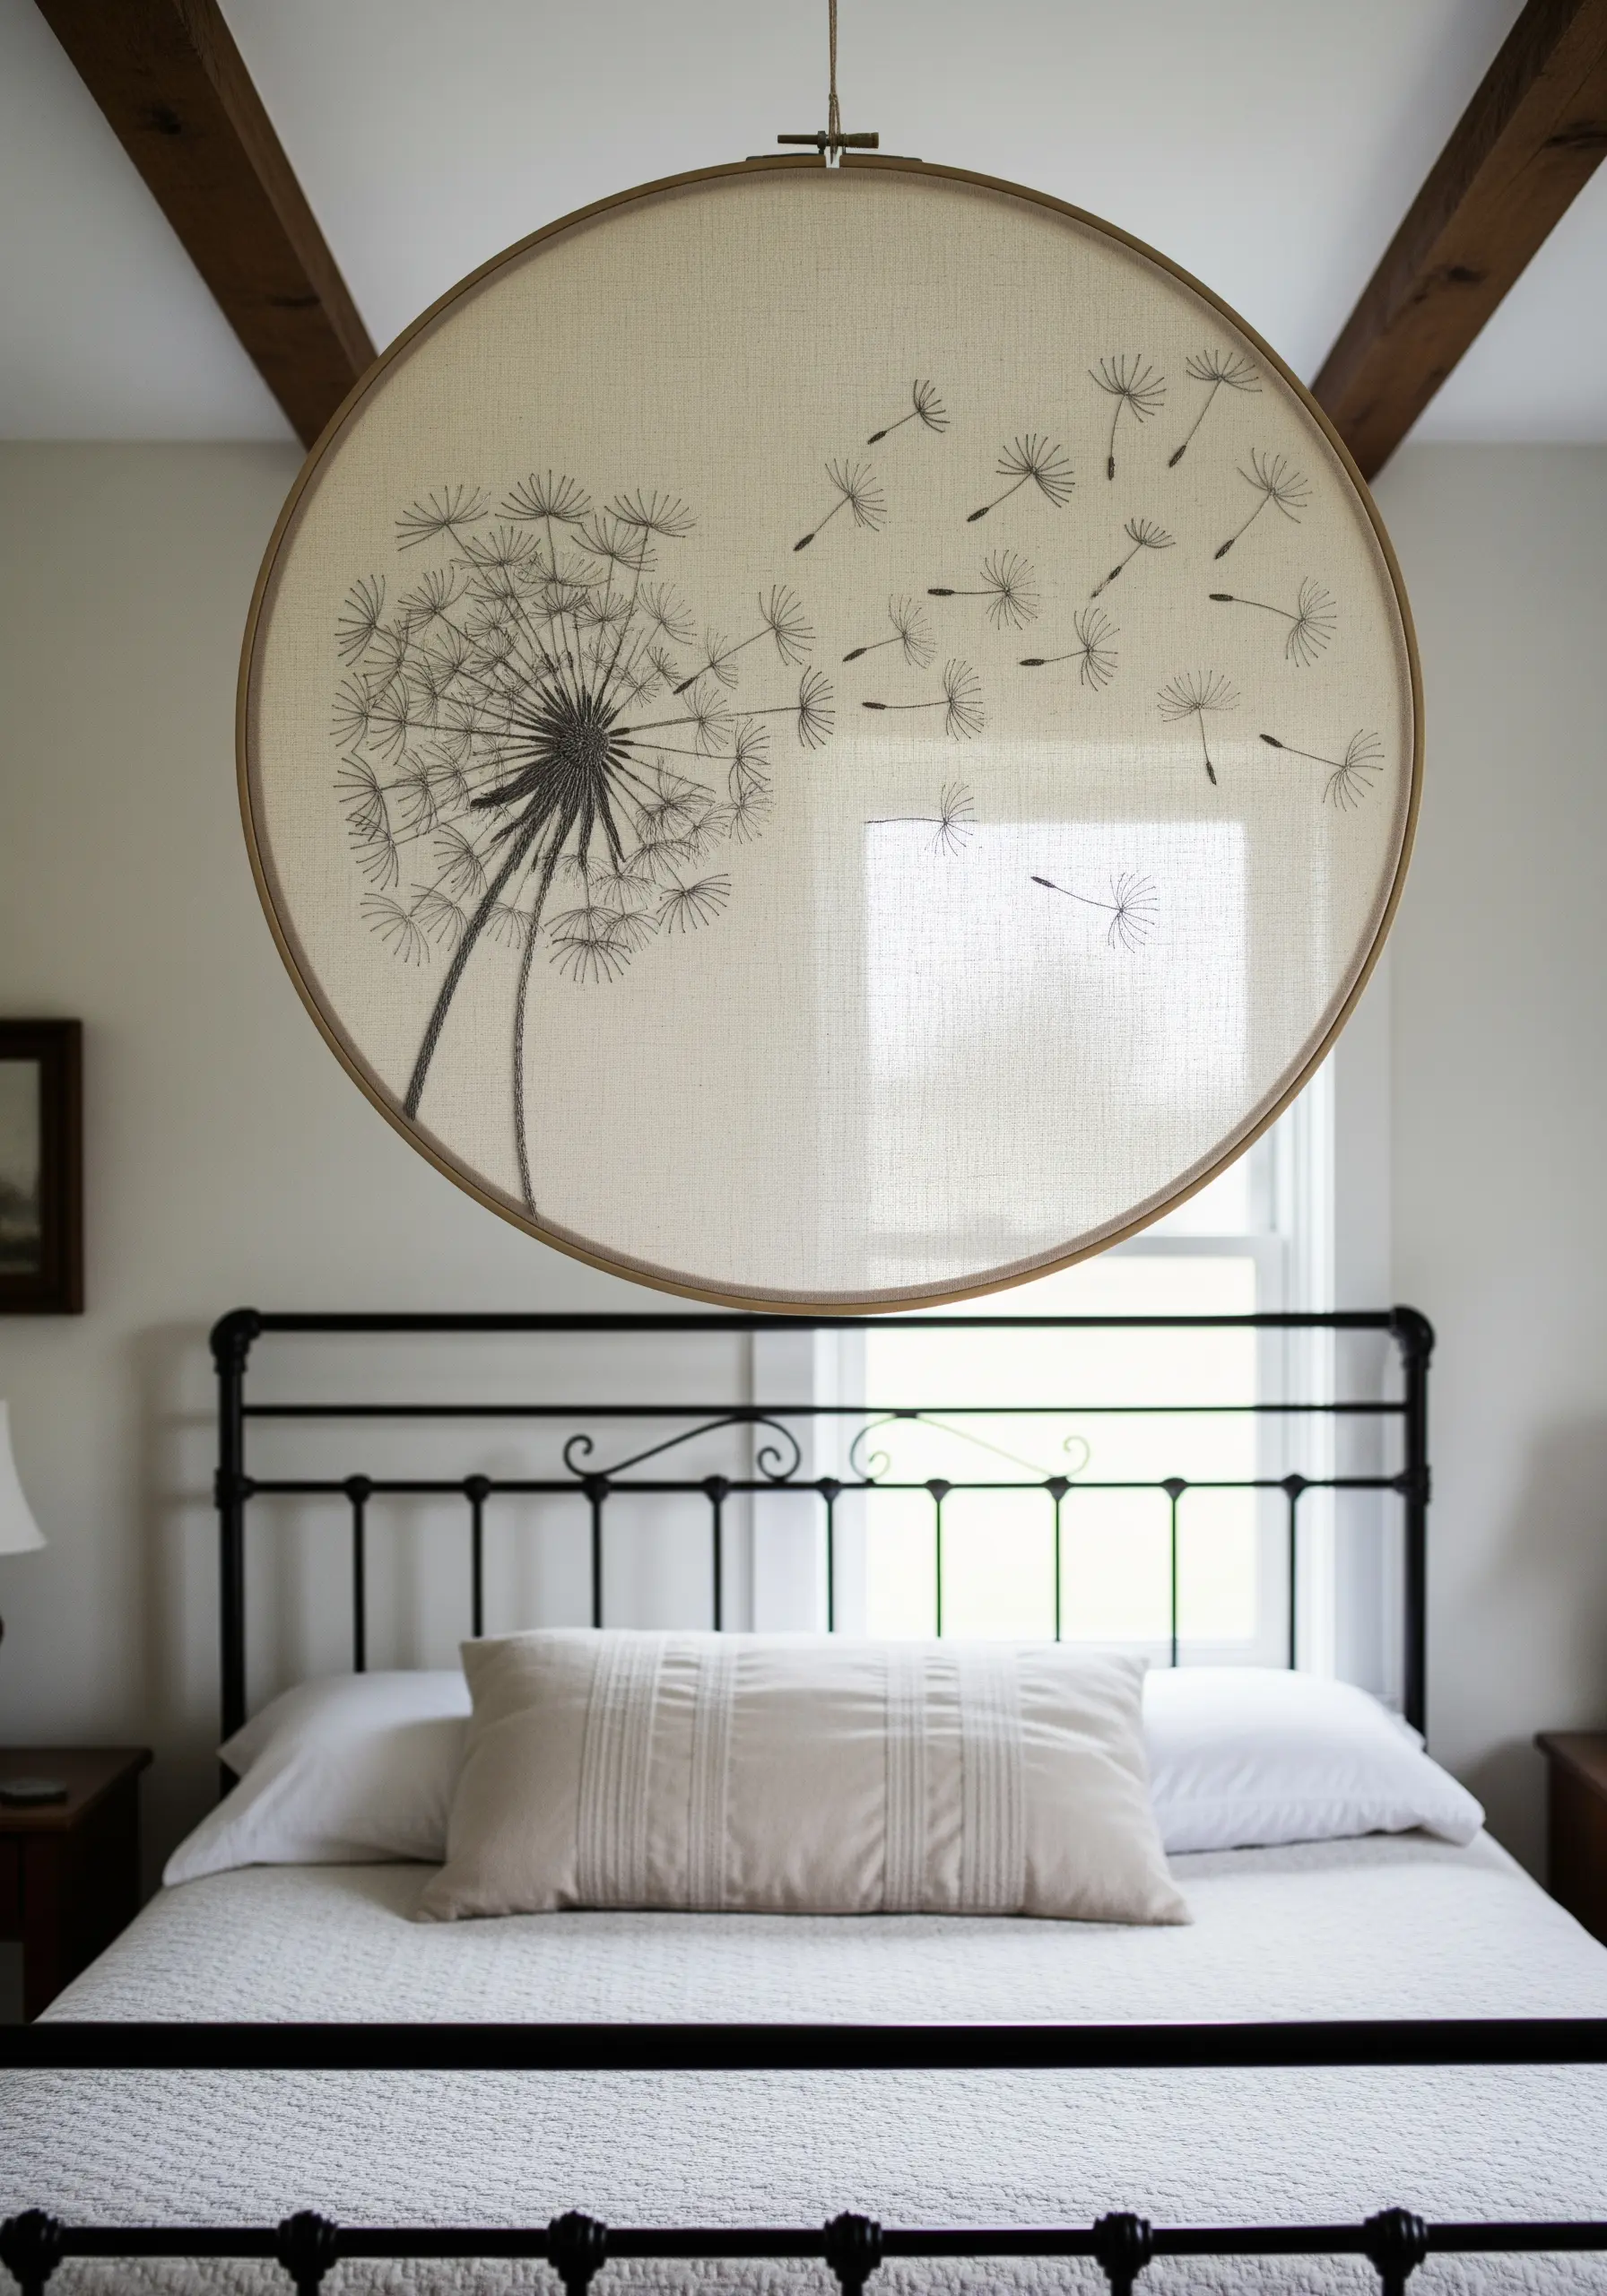
To give your embroidery a sense of lightness and motion, play with the weight of your thread within a single design.
For this dandelion, use a full six strands of floss for the stem and the dense center of the seed head, establishing a strong anchor point.
As you stitch the seeds blowing away, reduce the thread count to two strands, then finally to a single strand for the most distant seeds.
This subtle shift creates an illusion of depth and delicacy, making the piece feel alive and ethereal.
6. Playful Woodland Creatures with Felt Appliqué

Combine the speed of appliqué with the charm of embroidery for a cozy, dimensional gallery wall.
Cut the main body shapes of your animals from felt and secure them to the burlap with a simple blanket stitch around the edges.
Then, add embroidered details like eyes, whiskers, and textured fur using satin stitch and French knots.
This mixed-media approach allows you to fill space quickly while focusing your detailed stitch work on the elements that bring each character to life.
7. A Living Heirloom: The Embroidered Family Tree
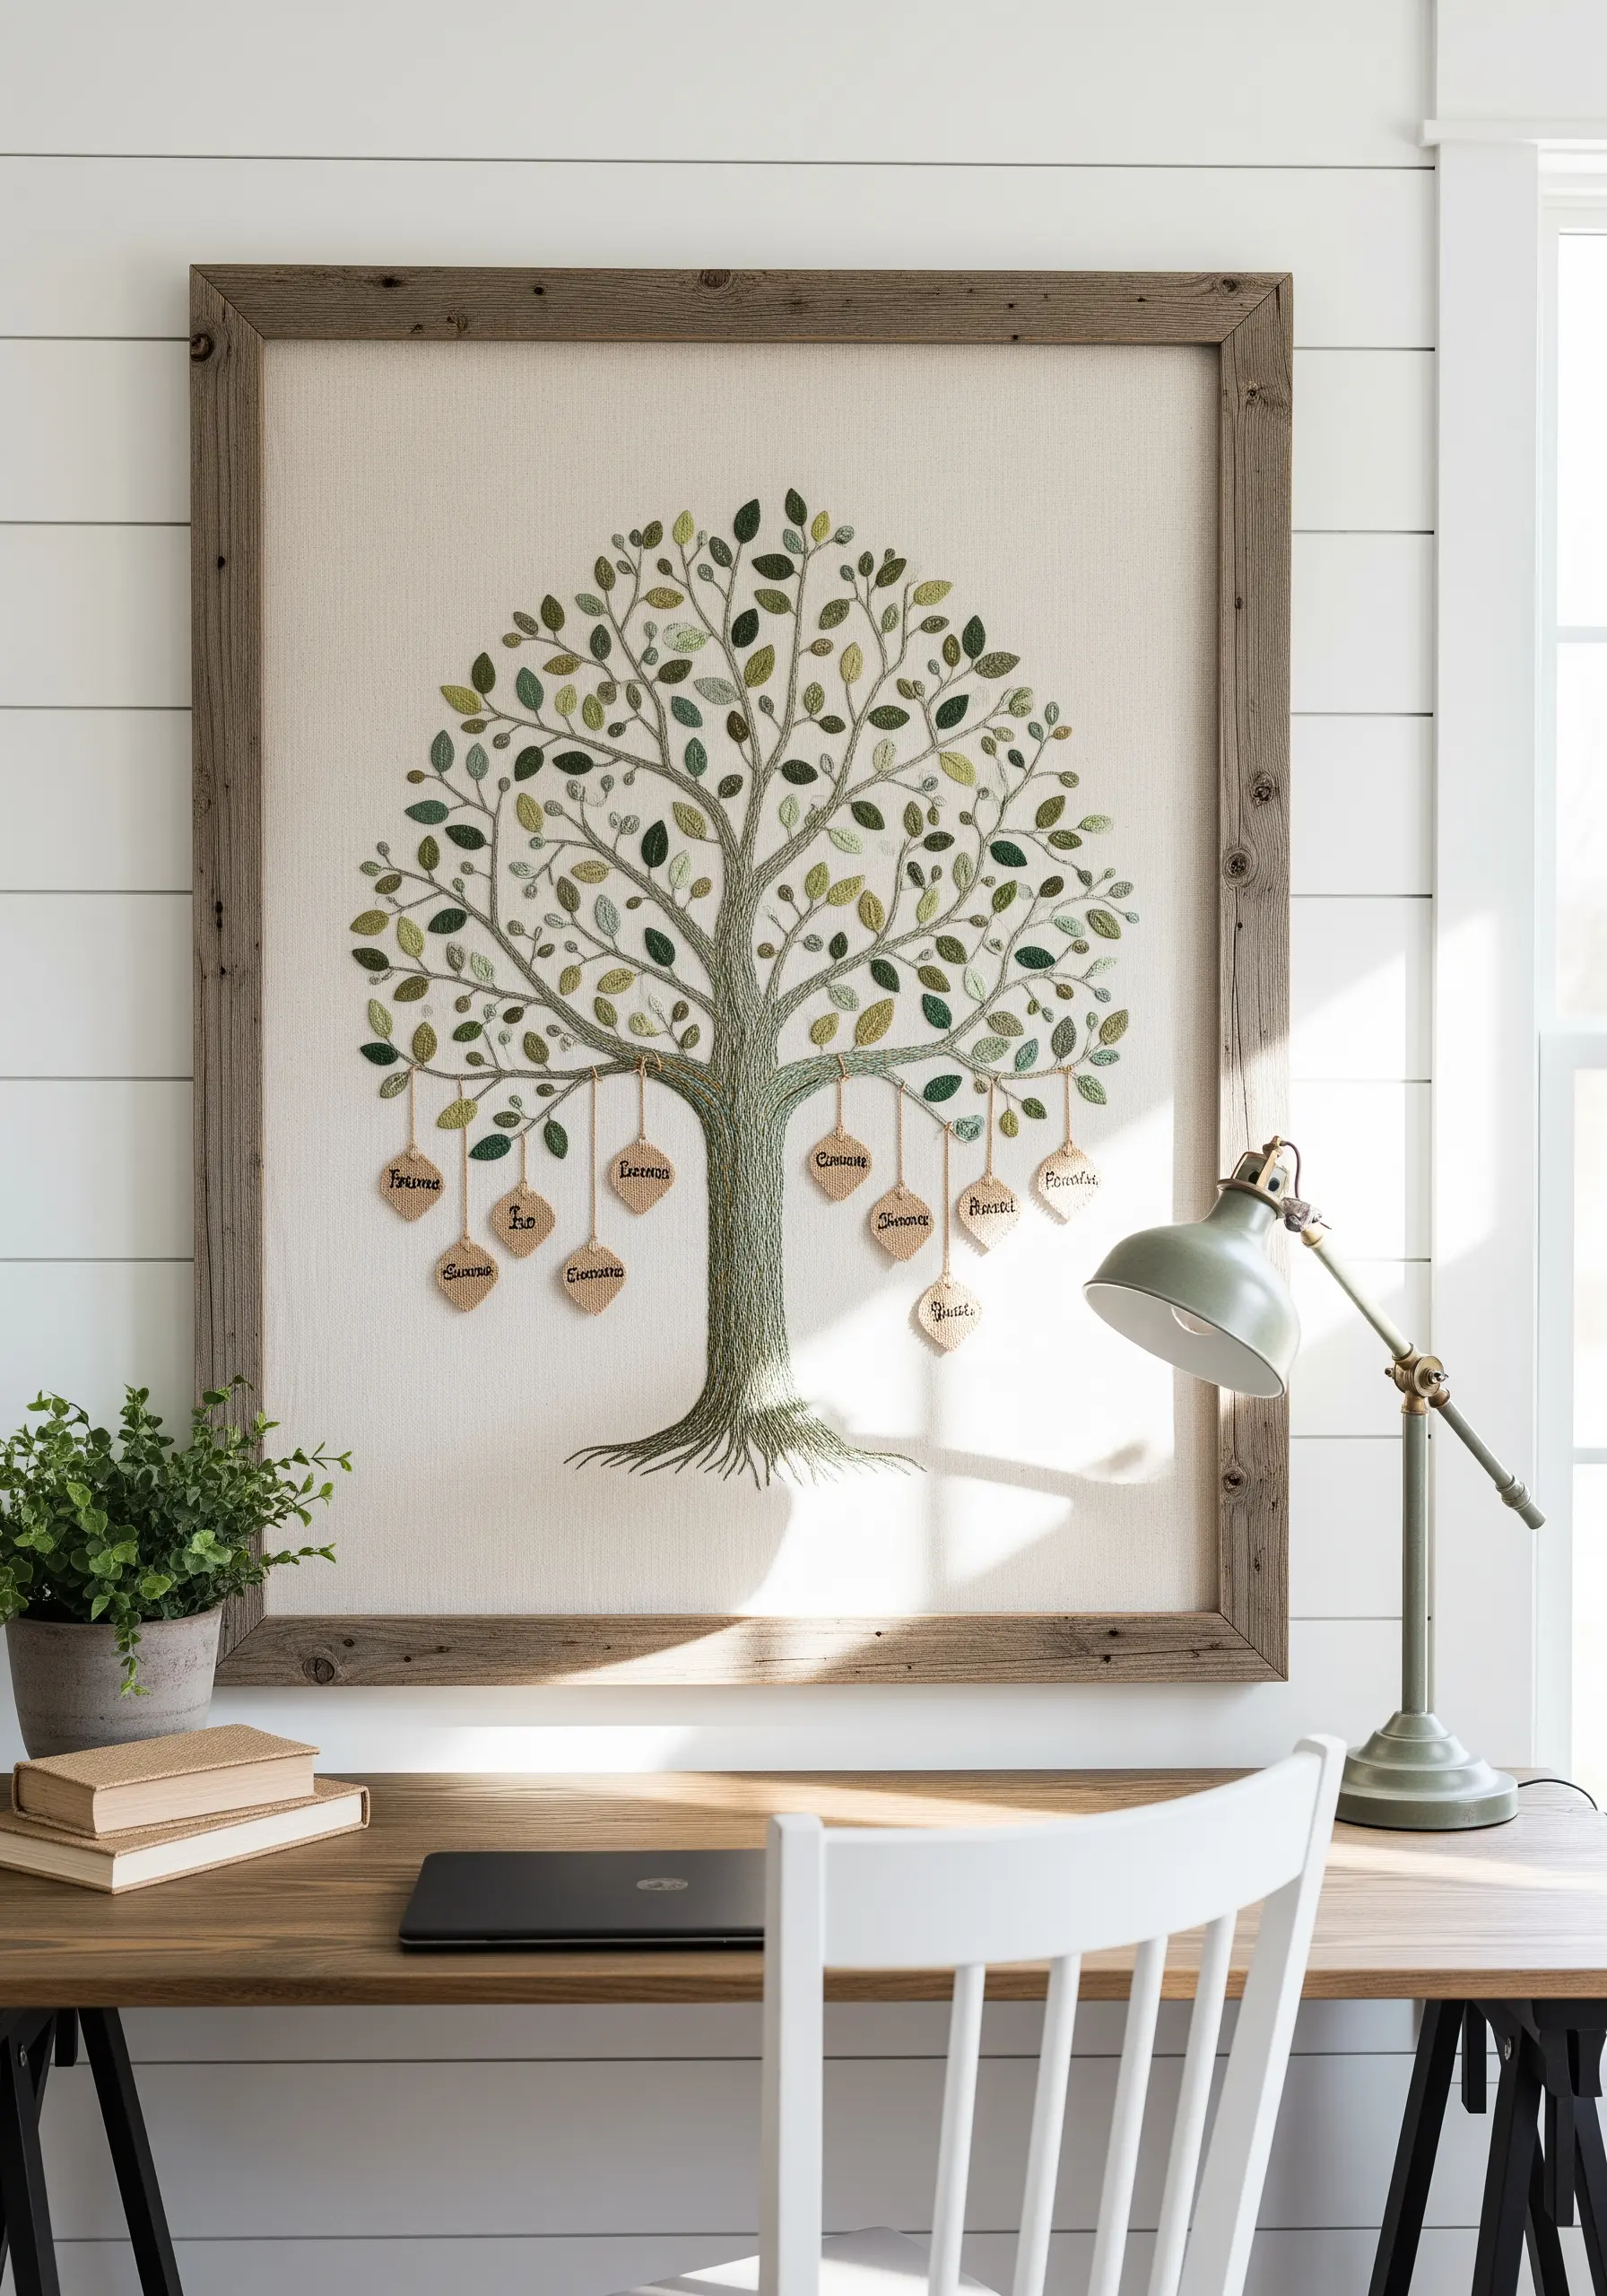
Transform a traditional concept into a personal masterpiece by focusing on textural variety and customization.
Use a mix of stitches for the leaves—satin stitch, fishbone stitch, and lazy daisies—in a range of greens to give the tree depth and realism.
For the names, stitch them onto small, raw-edged burlap tags and attach them with a single thread, allowing them to hang freely.
This interactive element makes the piece a living document you can add to over time.
8. Geometric Precision with Woven Wheel Stitches
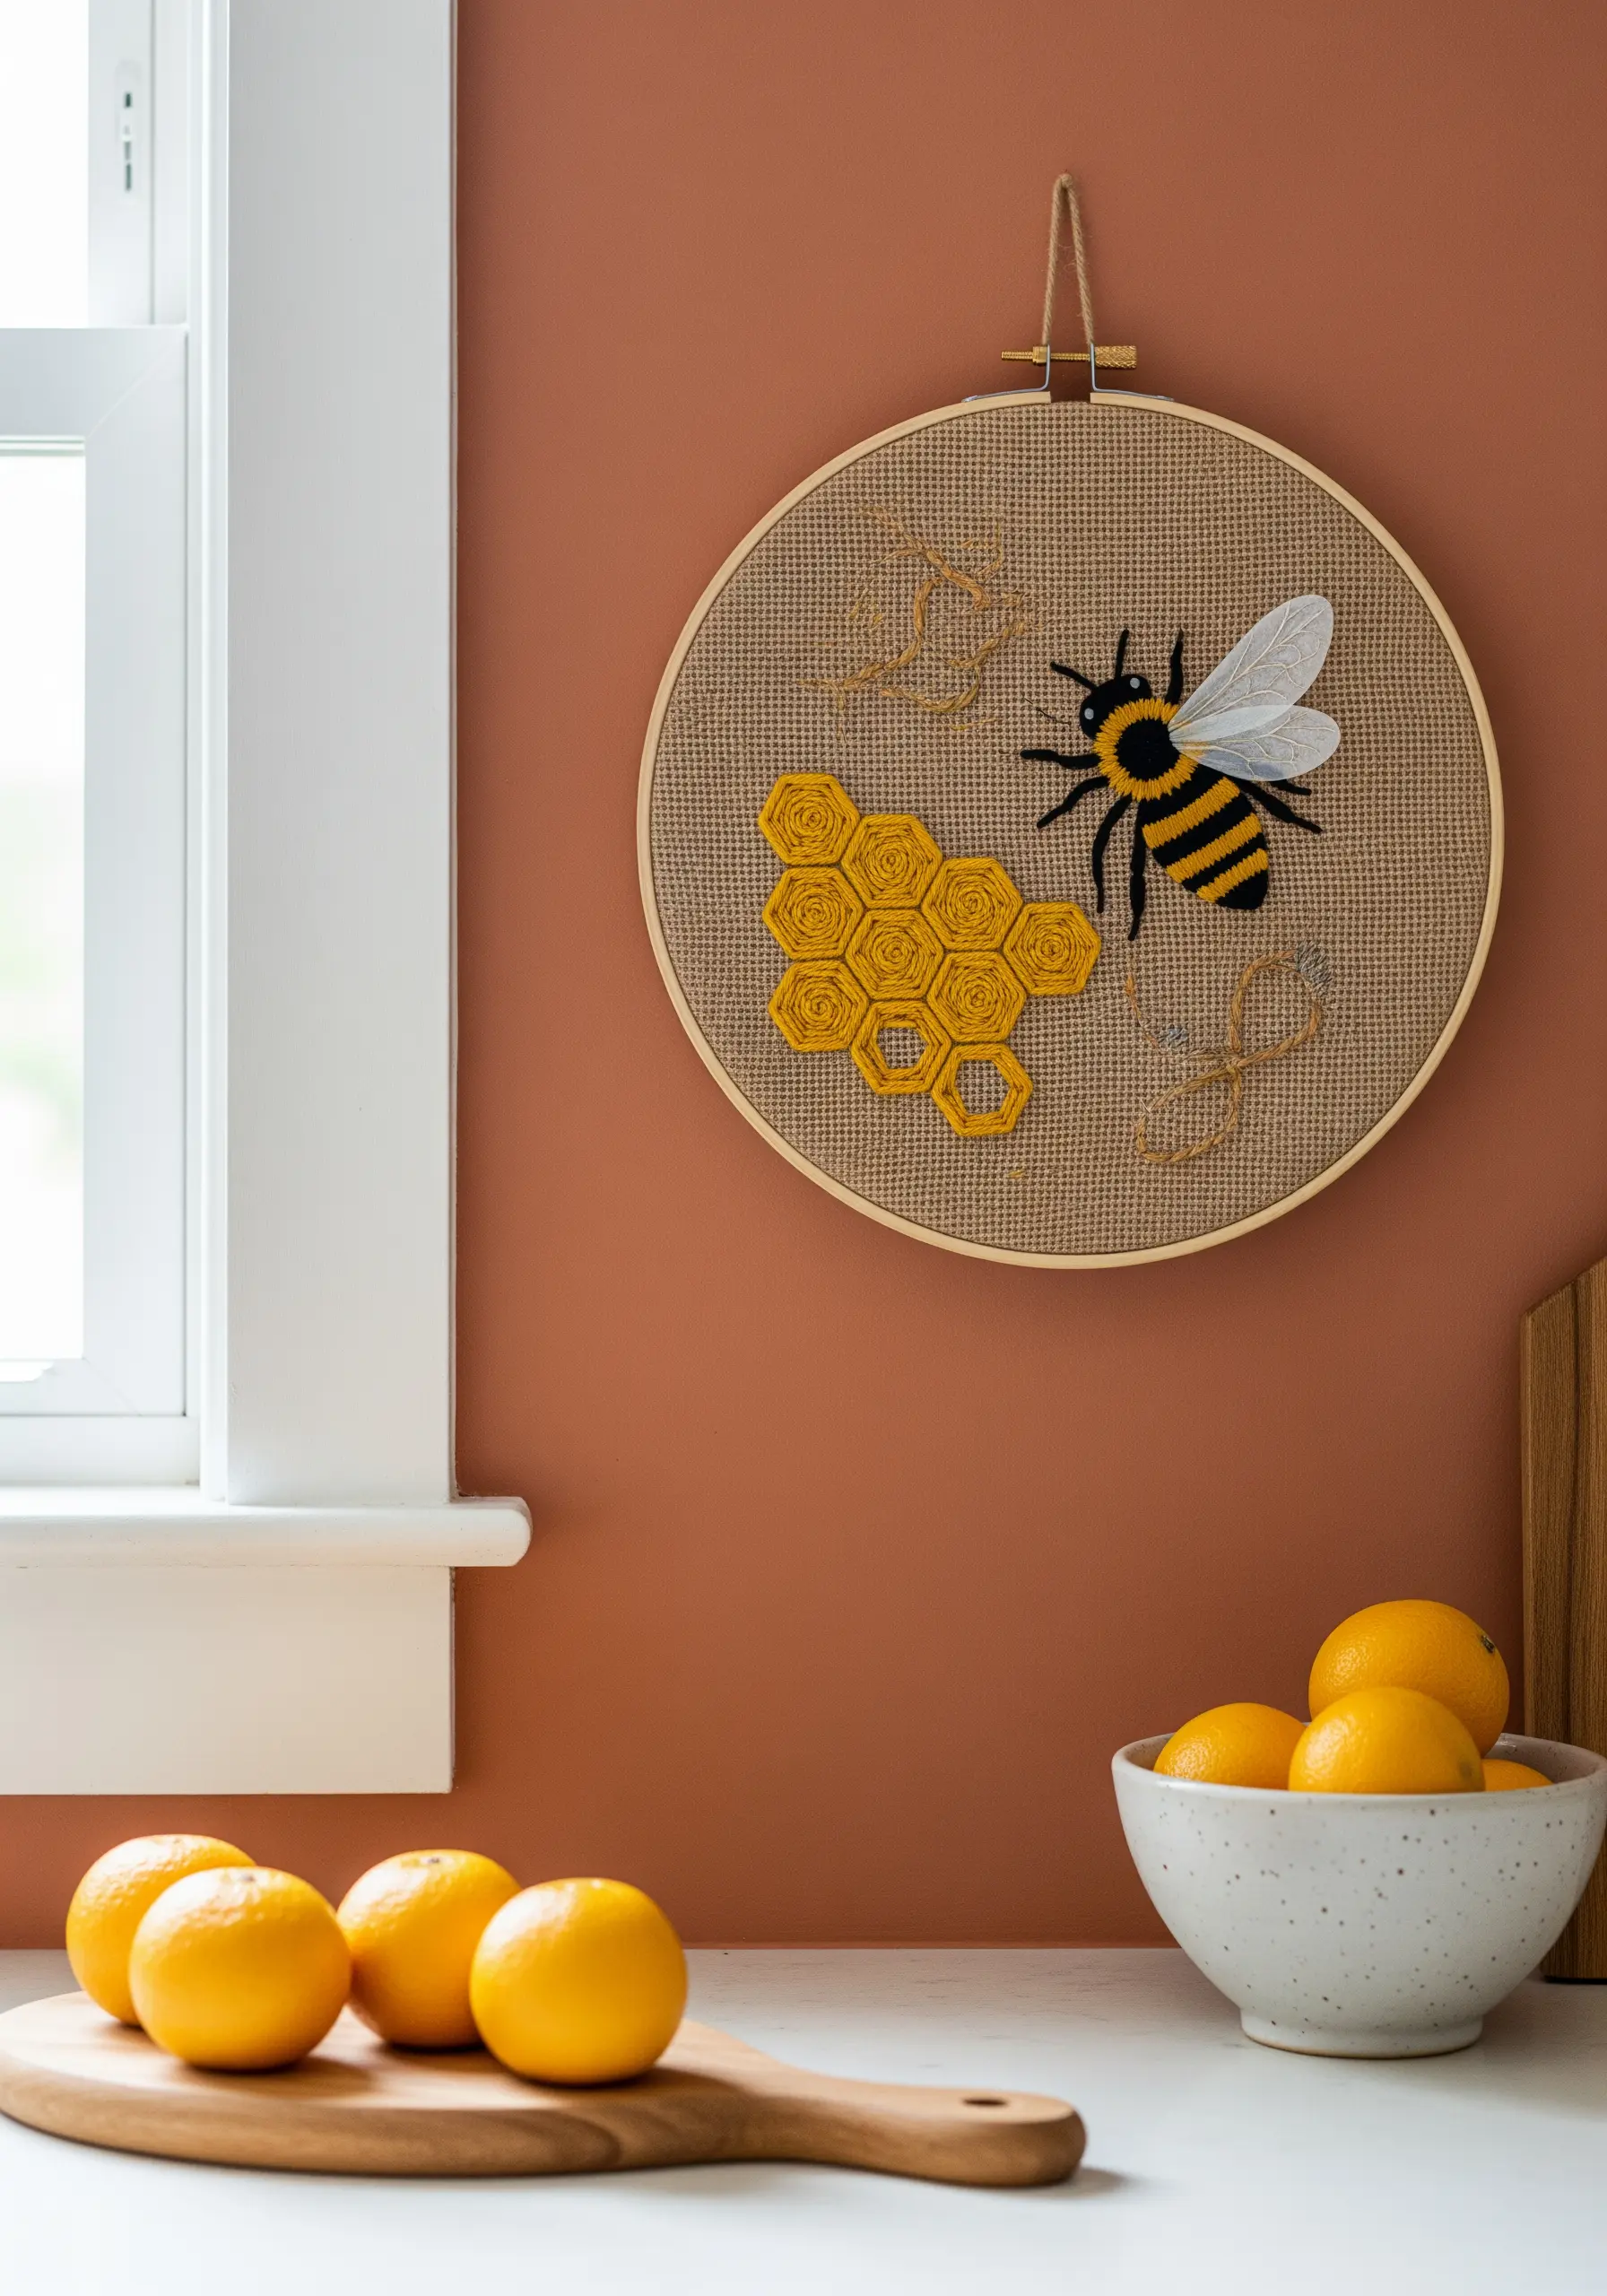
Contrast the organic shape of a bee with the perfect geometry of its honeycomb using a specific stitch choice.
Create the honeycomb cells by first stitching a star-like base of straight stitches (with an odd number of spokes) and then weaving your thread over and under them to form a raised, circular shape.
For the bee’s wings, use a sheer piece of organza appliquéd onto the burlap and outlined with a single backstitch. This adds a delicate, translucent quality that mimics reality.
9. Bold Appliqué Lettering for Outdoor Banners

When creating a piece for an entryway or porch, legibility is key. Achieve bold, clean letters on coarse burlap by using fabric appliqué.
Cut your letters from a contrasting, tightly woven cotton fabric and use a fusible web to adhere them in place first.
Then, secure the edges with a neat satin stitch or a simple backstitch just inside the raw edge. This technique ensures your letters pop and won’t get lost in the burlap’s texture.
10. Landscape Contours with Couched Jute Twine
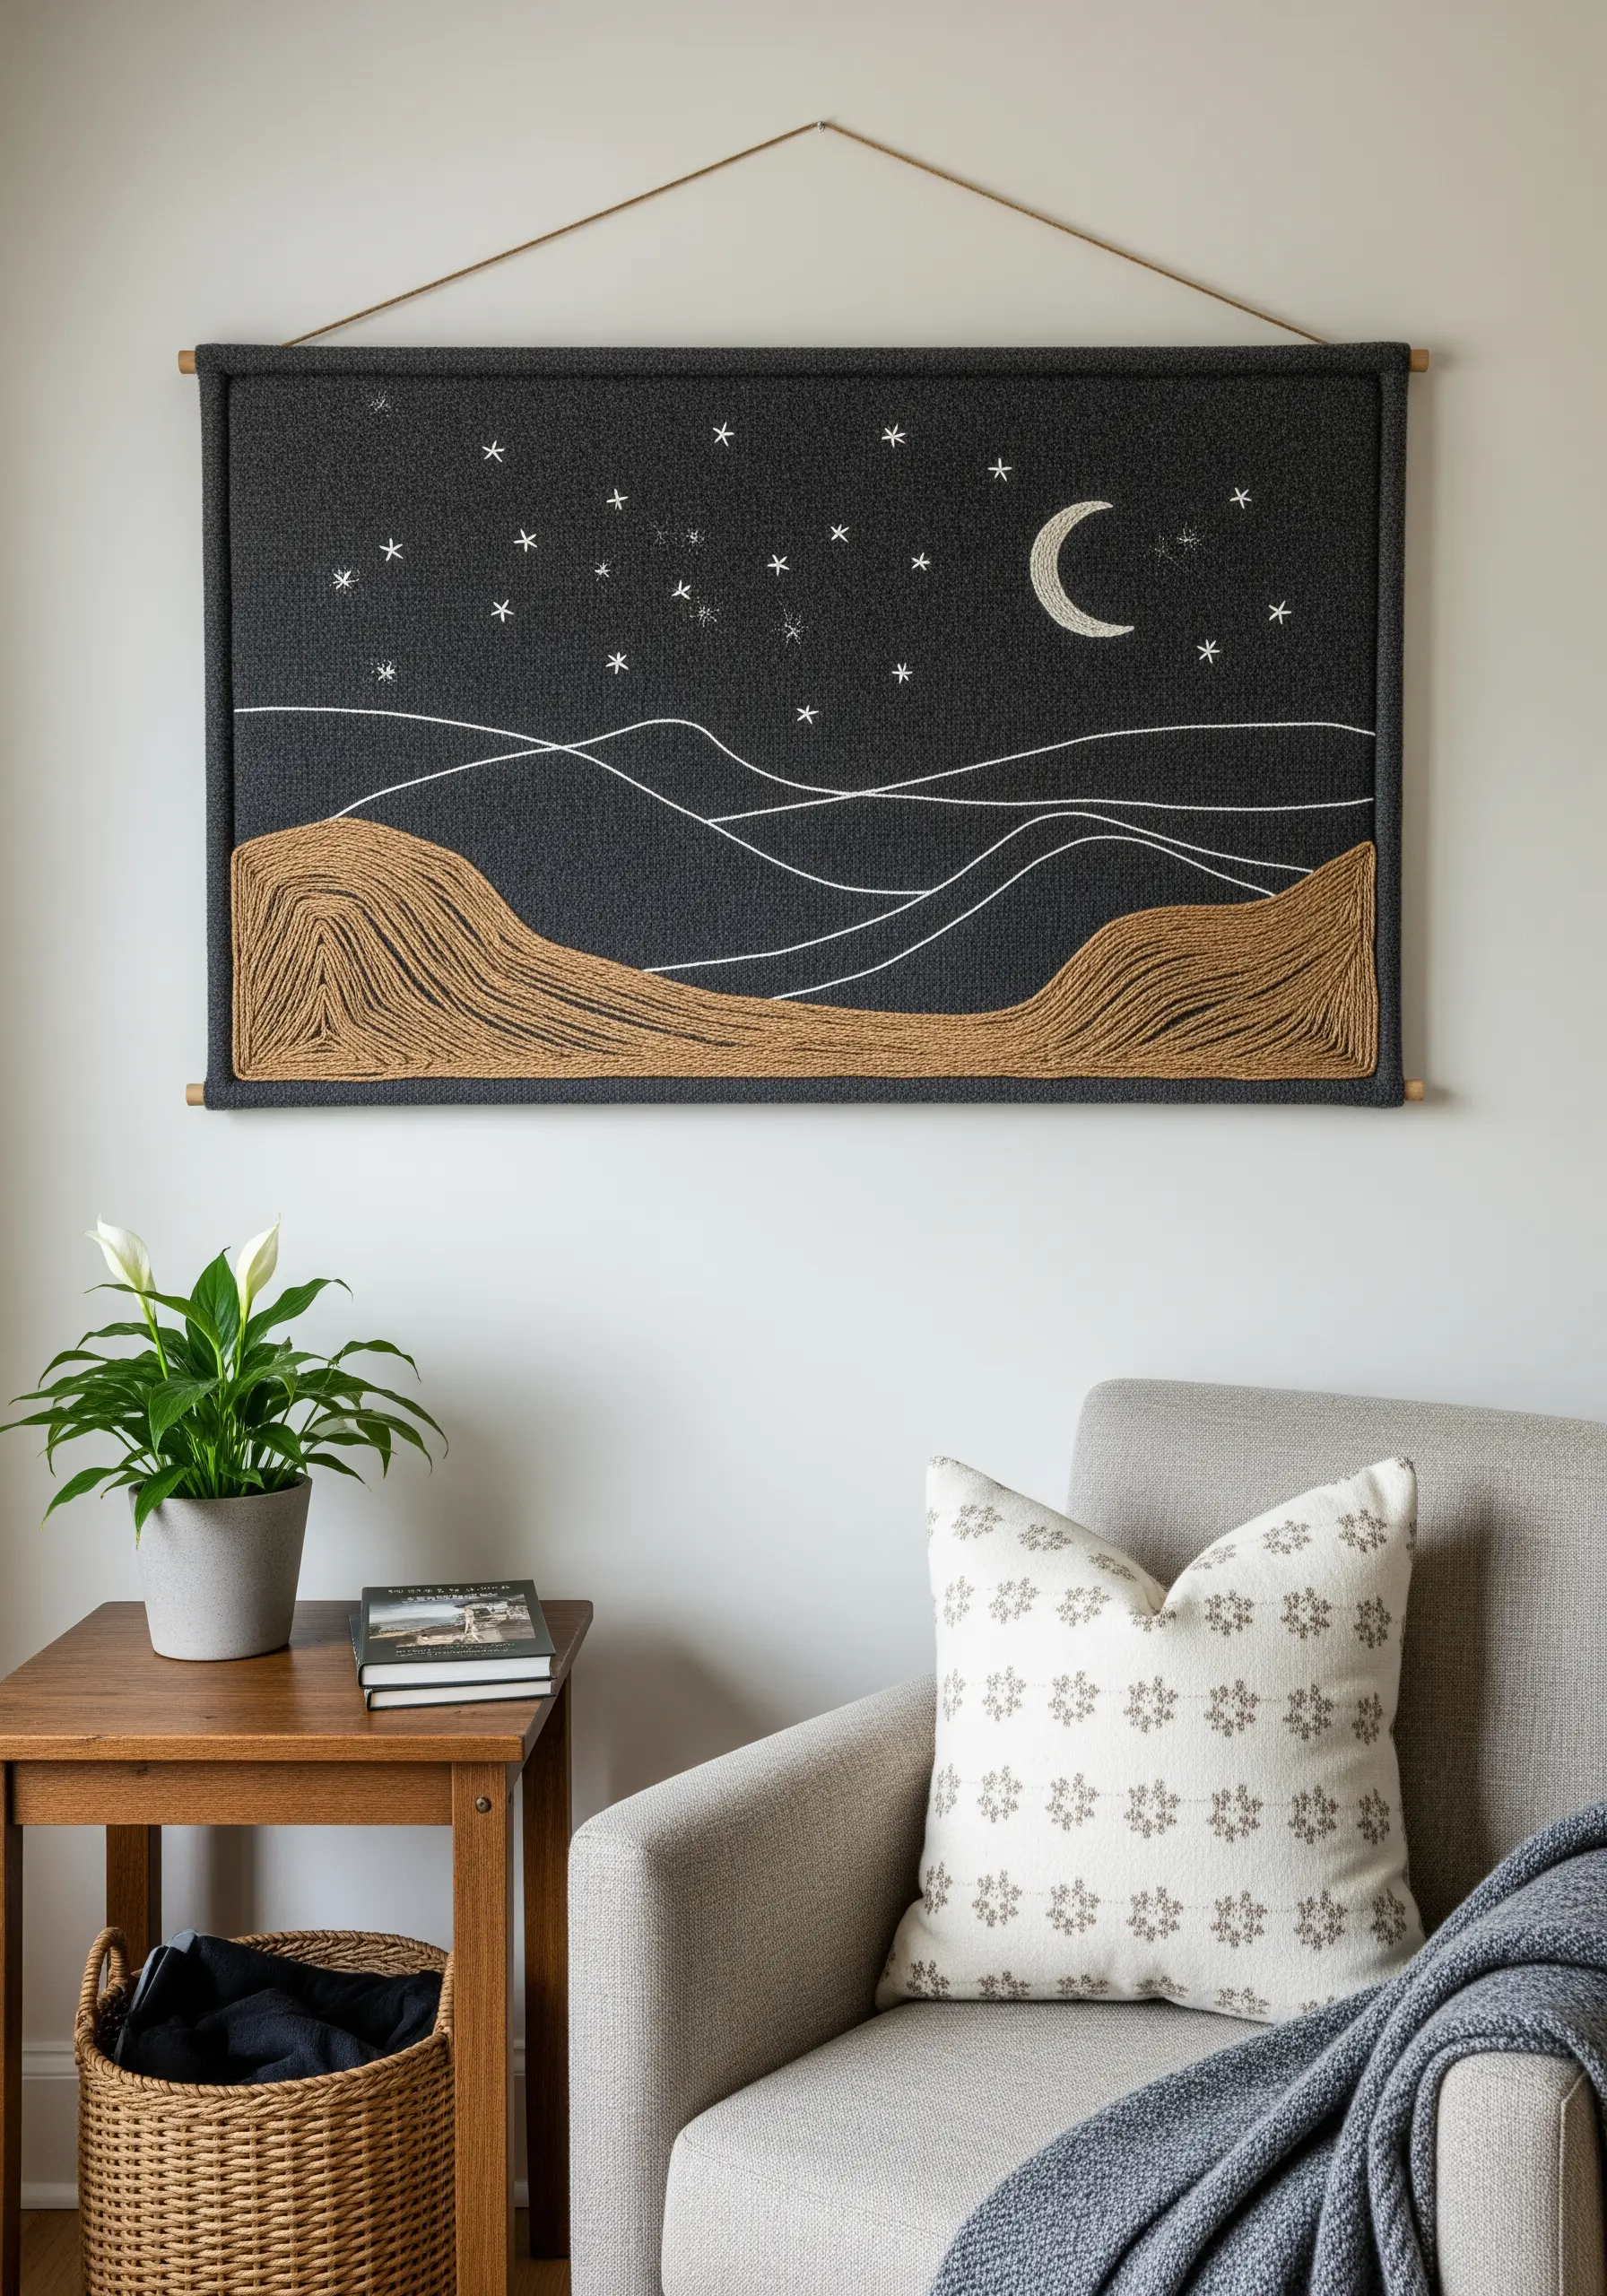
Create a dramatic, minimalist landscape by using thick jute twine against a dark background.
Instead of trying to stitch with the bulky twine, use the couching technique: lay the twine along your design lines and tack it down with a finer, matching thread every quarter-inch.
This method gives you complete control over the placement of the thick fiber, creating clean, raised lines that define the rolling hills.
The combination of dark burlap, natural jute, and fine white thread for the stars creates a powerful graphic landscape.
11. A Study in Seasons with French Knot Foliage
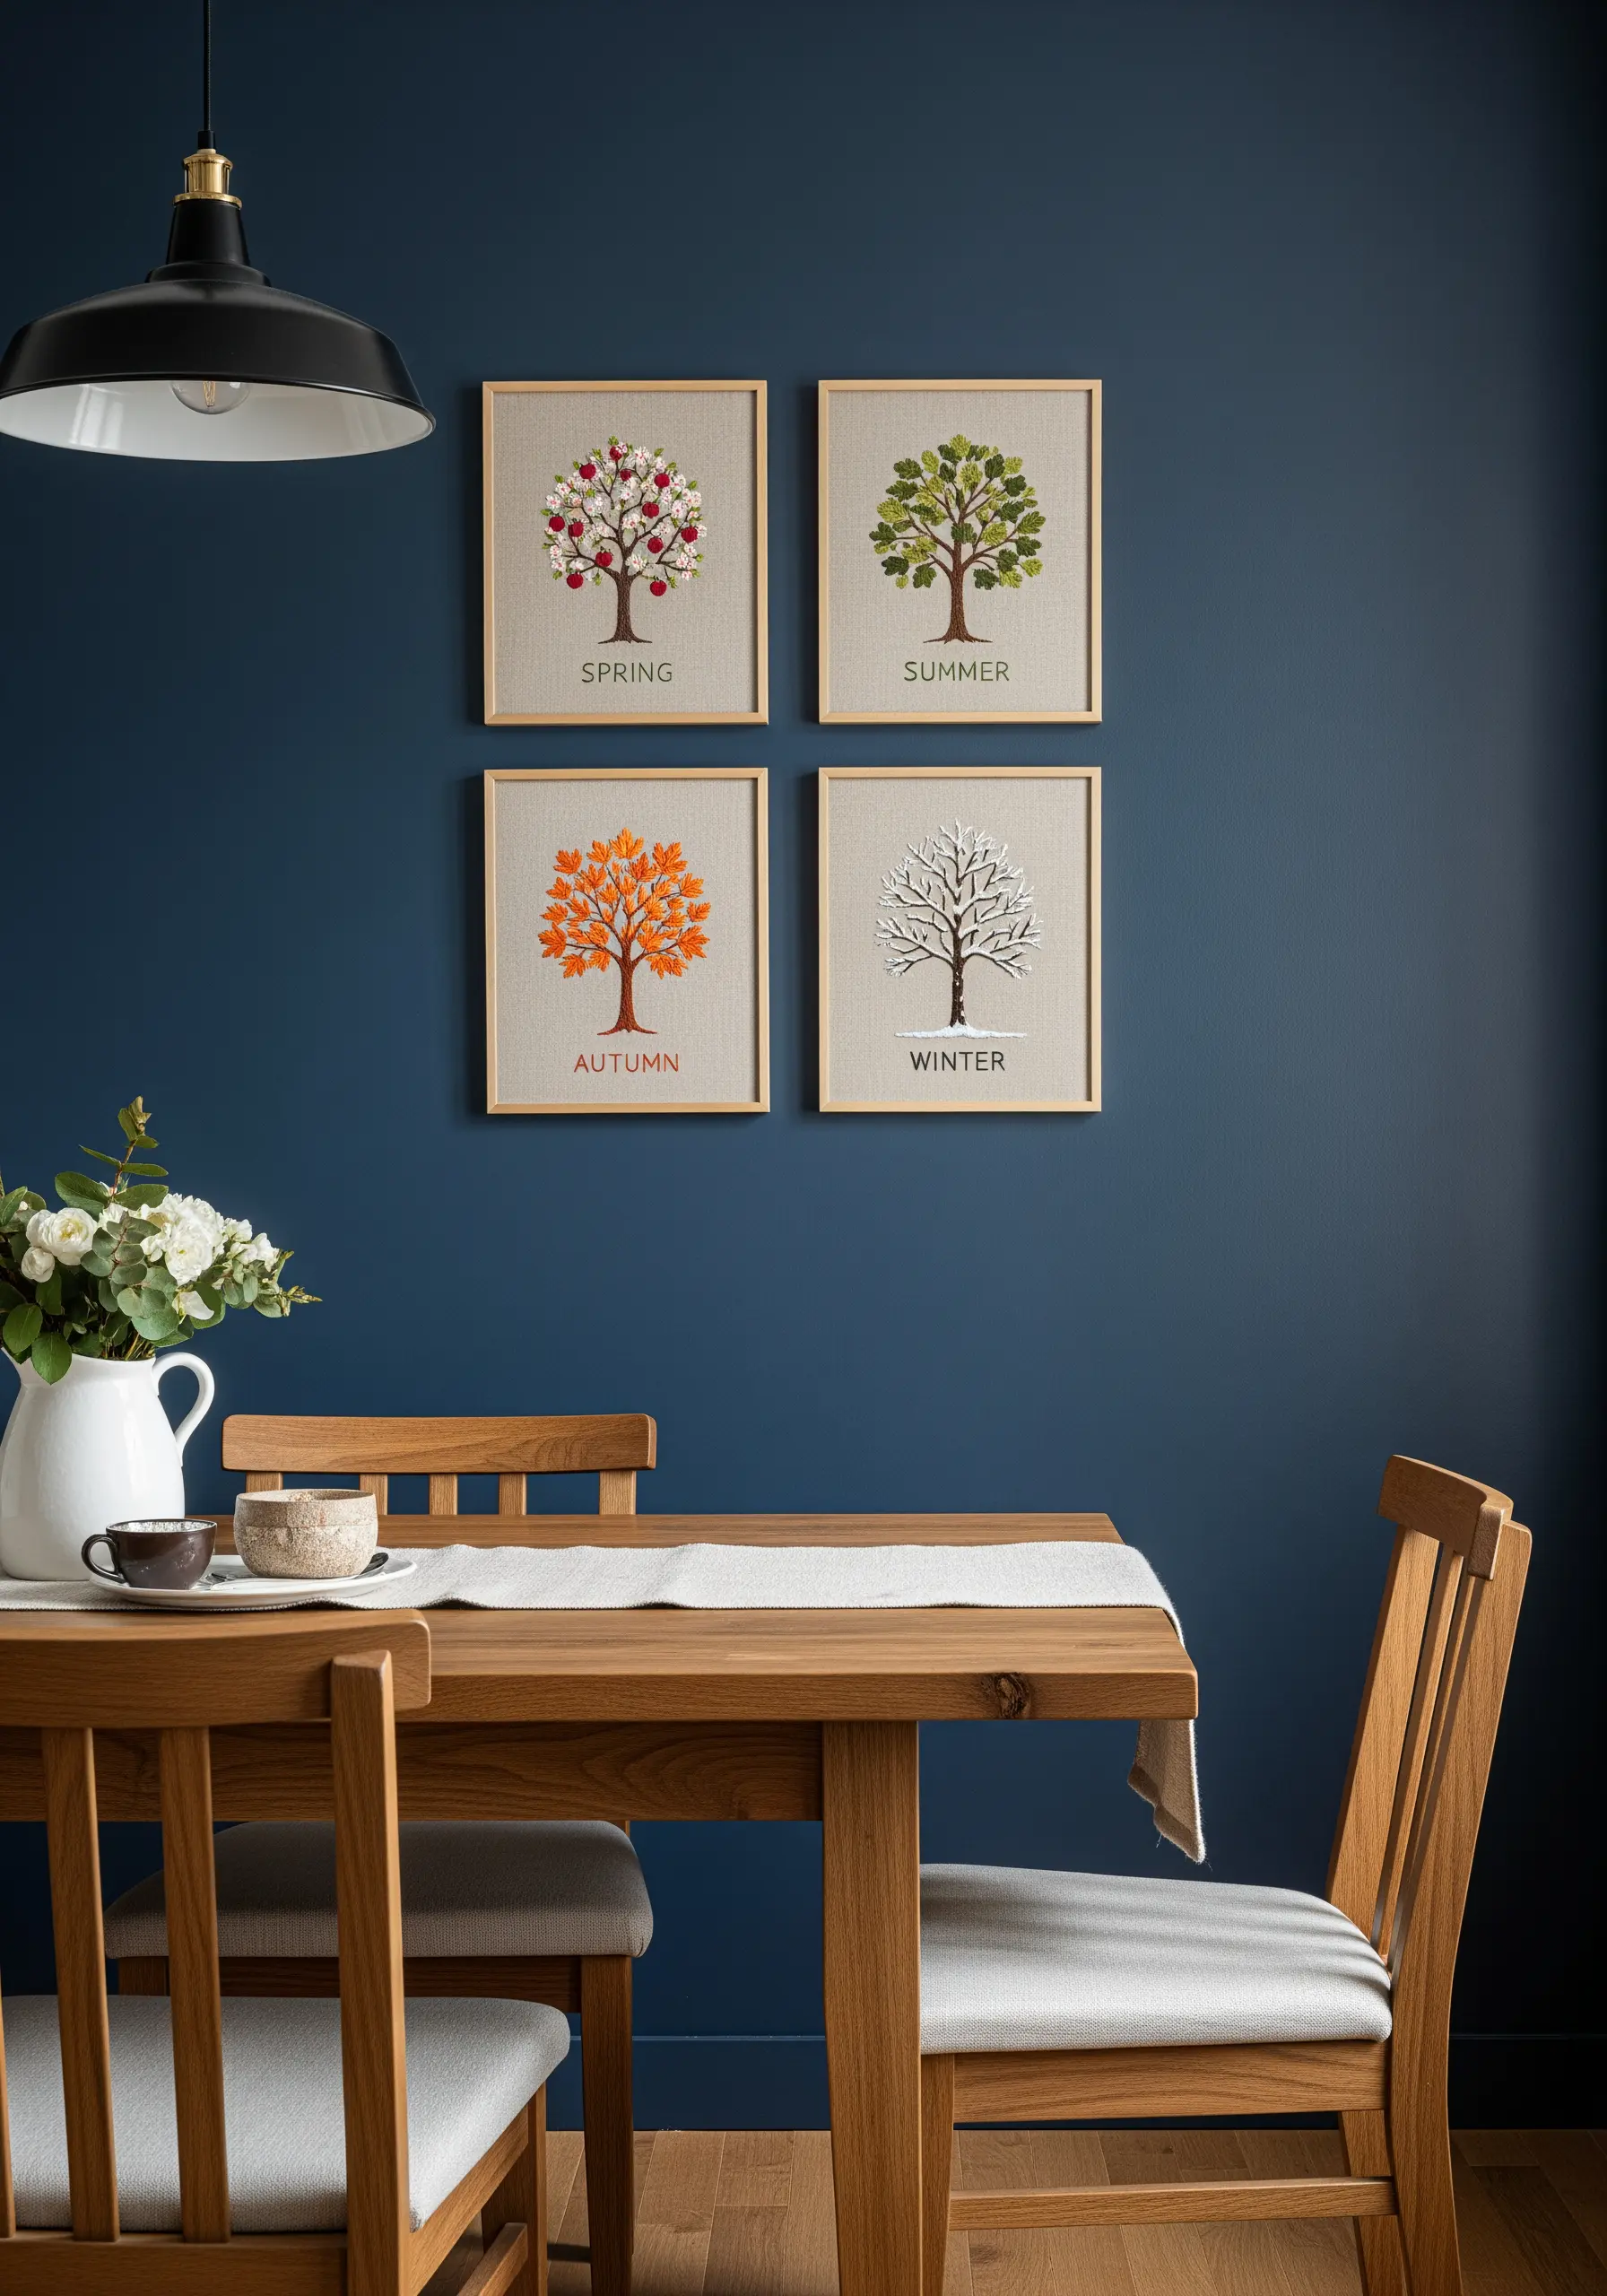
Capture the essence of each season by varying the color and density of a single stitch: the French knot.
For spring, use pinks and whites for blossoms. In summer, create a lush canopy with dense clusters of green knots.
Transition to autumn with a vibrant mix of orange, red, and yellow, and finish with sparse white and gray knots for a stark winter tree.
This focused technique allows you to create a cohesive yet distinct seasonal collection that highlights the power of color and texture.
12. Whimsical Dimension with Appliqué and Roving
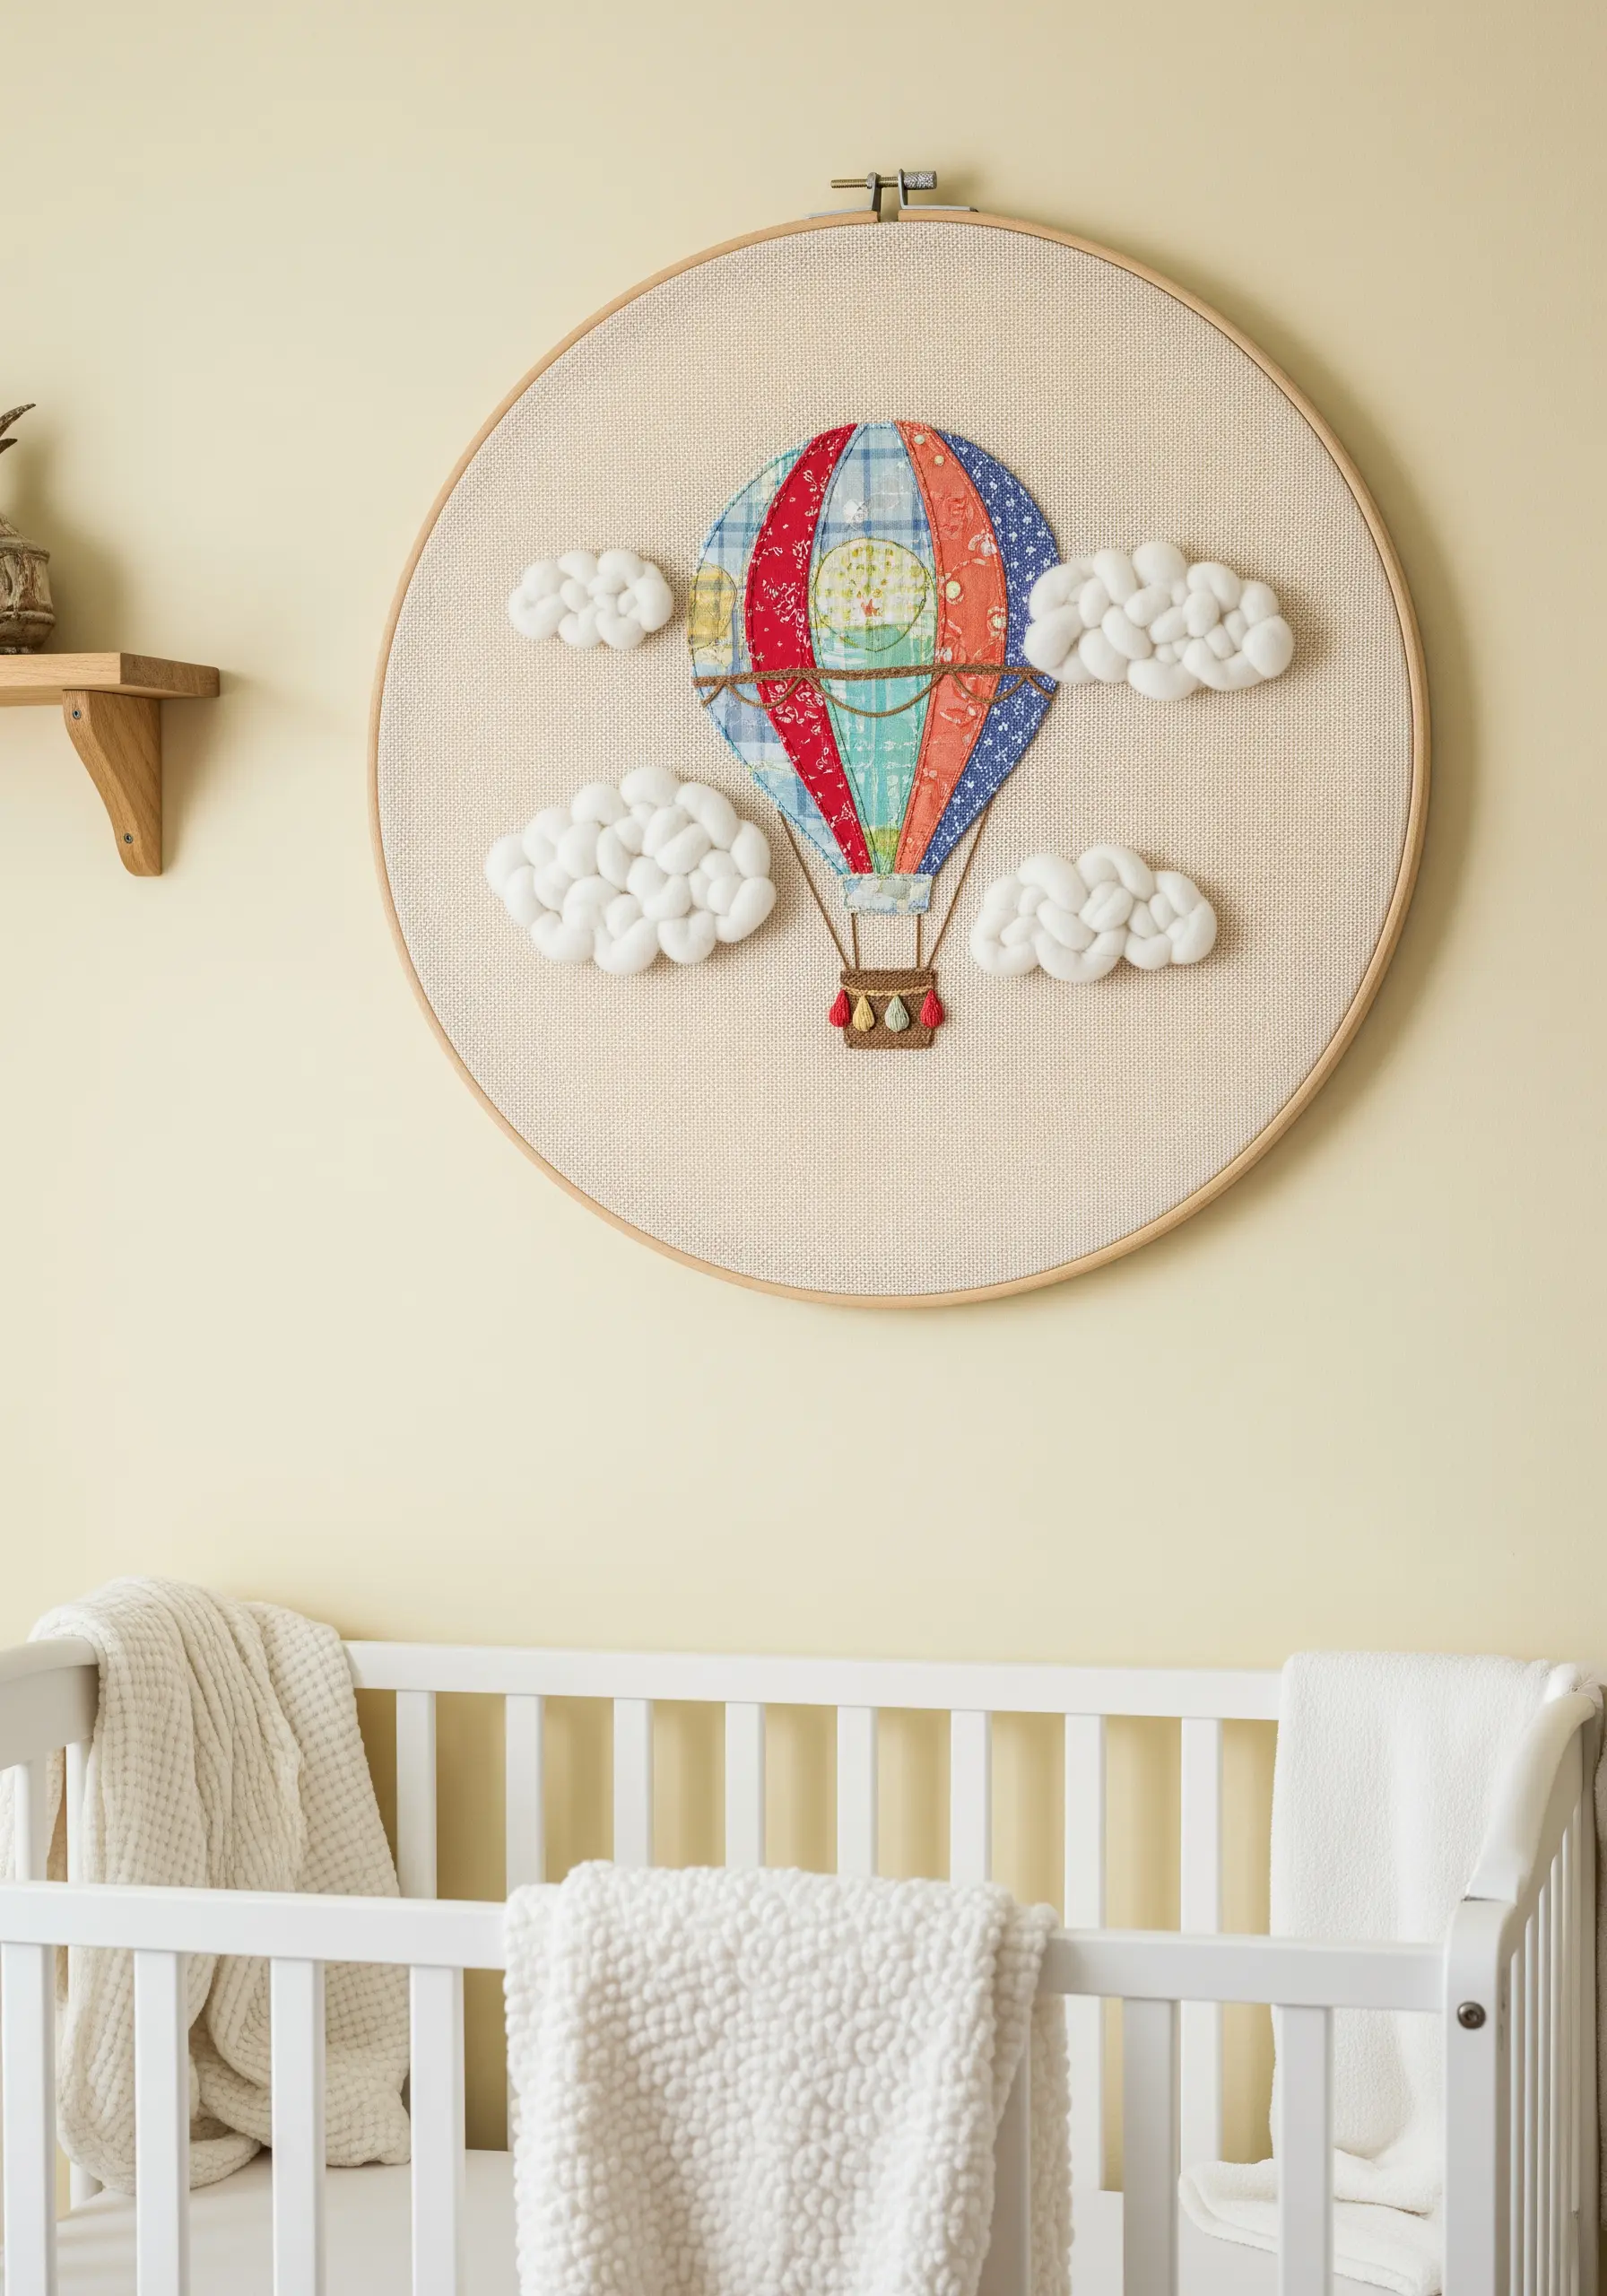
Bring a nursery design to life by incorporating multiple textures and materials.
Create the balloon’s panels with colorful fabric scraps using appliqué, defining each section with a simple backstitch.
For the clouds, use a punch needle or felting needle to attach soft, white wool roving directly to the fabric.
This creates fluffy, cartoon-like clouds that stand out from the flat surface, making the entire piece a delightful tactile experience for a child’s room.
13. Utilitarian Burlap Organizer with Stenciled Lettering

Combine function and farmhouse style by creating a practical wall organizer. The key to perfect lettering on this project is precision.
Instead of freehand stitching, use a stencil and a fabric marker to create flawless outlines for your letters.
Then, fill in the letters with a dense satin stitch or a clean, bold backstitch using a thick, dark thread that stands out against the natural burlap.
This ensures your labels are not only beautiful but also perfectly clear and easy to read.
14. Large-Scale Thread Painting for an Immersive Scene

To create an expansive landscape like a wheat field, thread painting is the ideal technique.
Work in sections, using long-and-short stitches to blend shades of gold, ochre, and brown, creating a sense of light and shadow across the field.
Keep your stitches directional to mimic the natural growth of the wheat, and use fewer strands for distant elements to create atmospheric perspective.
This technique turns your fabric into a canvas, allowing you to create rich, painterly embroidered tapestries.
15. Graphic Impact with Symmetrical Yarn Couching
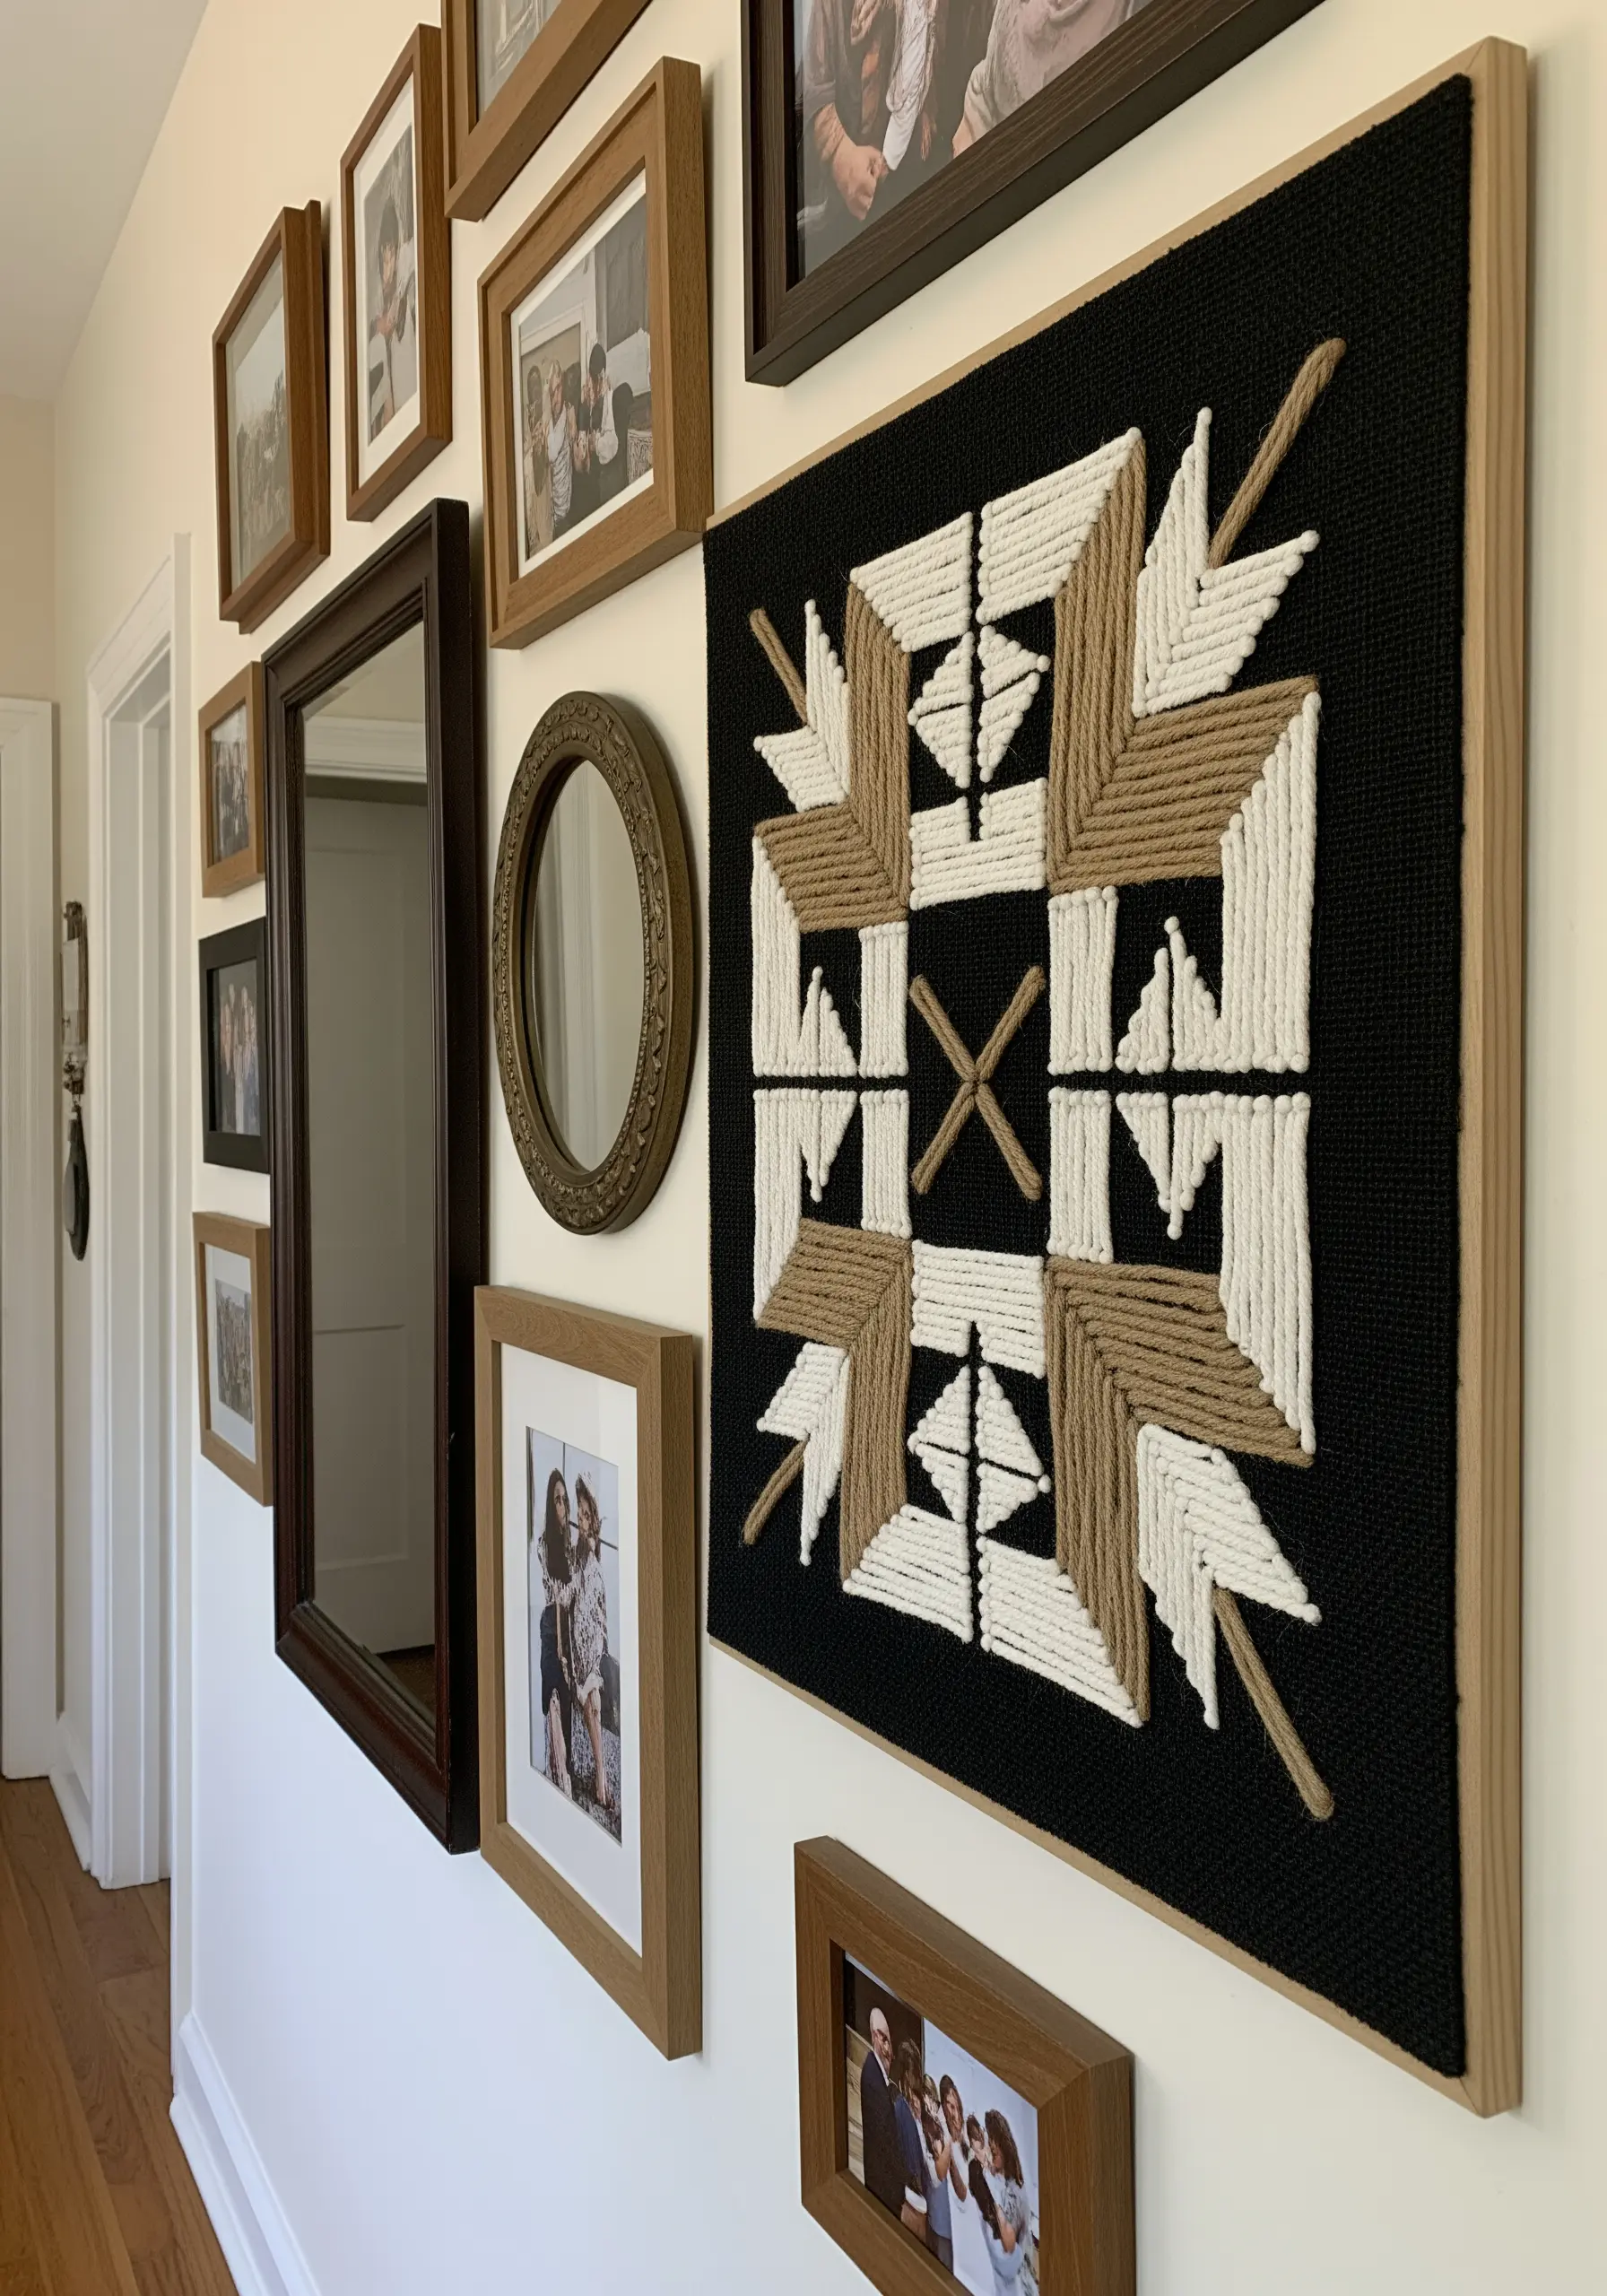
Achieve a bold, geometric design by laying down thick yarn or jute rope and securing it with the couching technique.
Mount your fabric (a dark canvas works well for contrast) onto a wooden frame to keep it taut.
Map out your symmetrical pattern with chalk first. Then, lay down your thick yarn and use a thinner, durable thread to tack it into place, focusing on sharp corners and clean lines.
This method is faster than traditional stitching and creates a high-impact, graphic piece that complements a modern gallery wall.
16. Delicate Line Art for a Serene Botanical Print
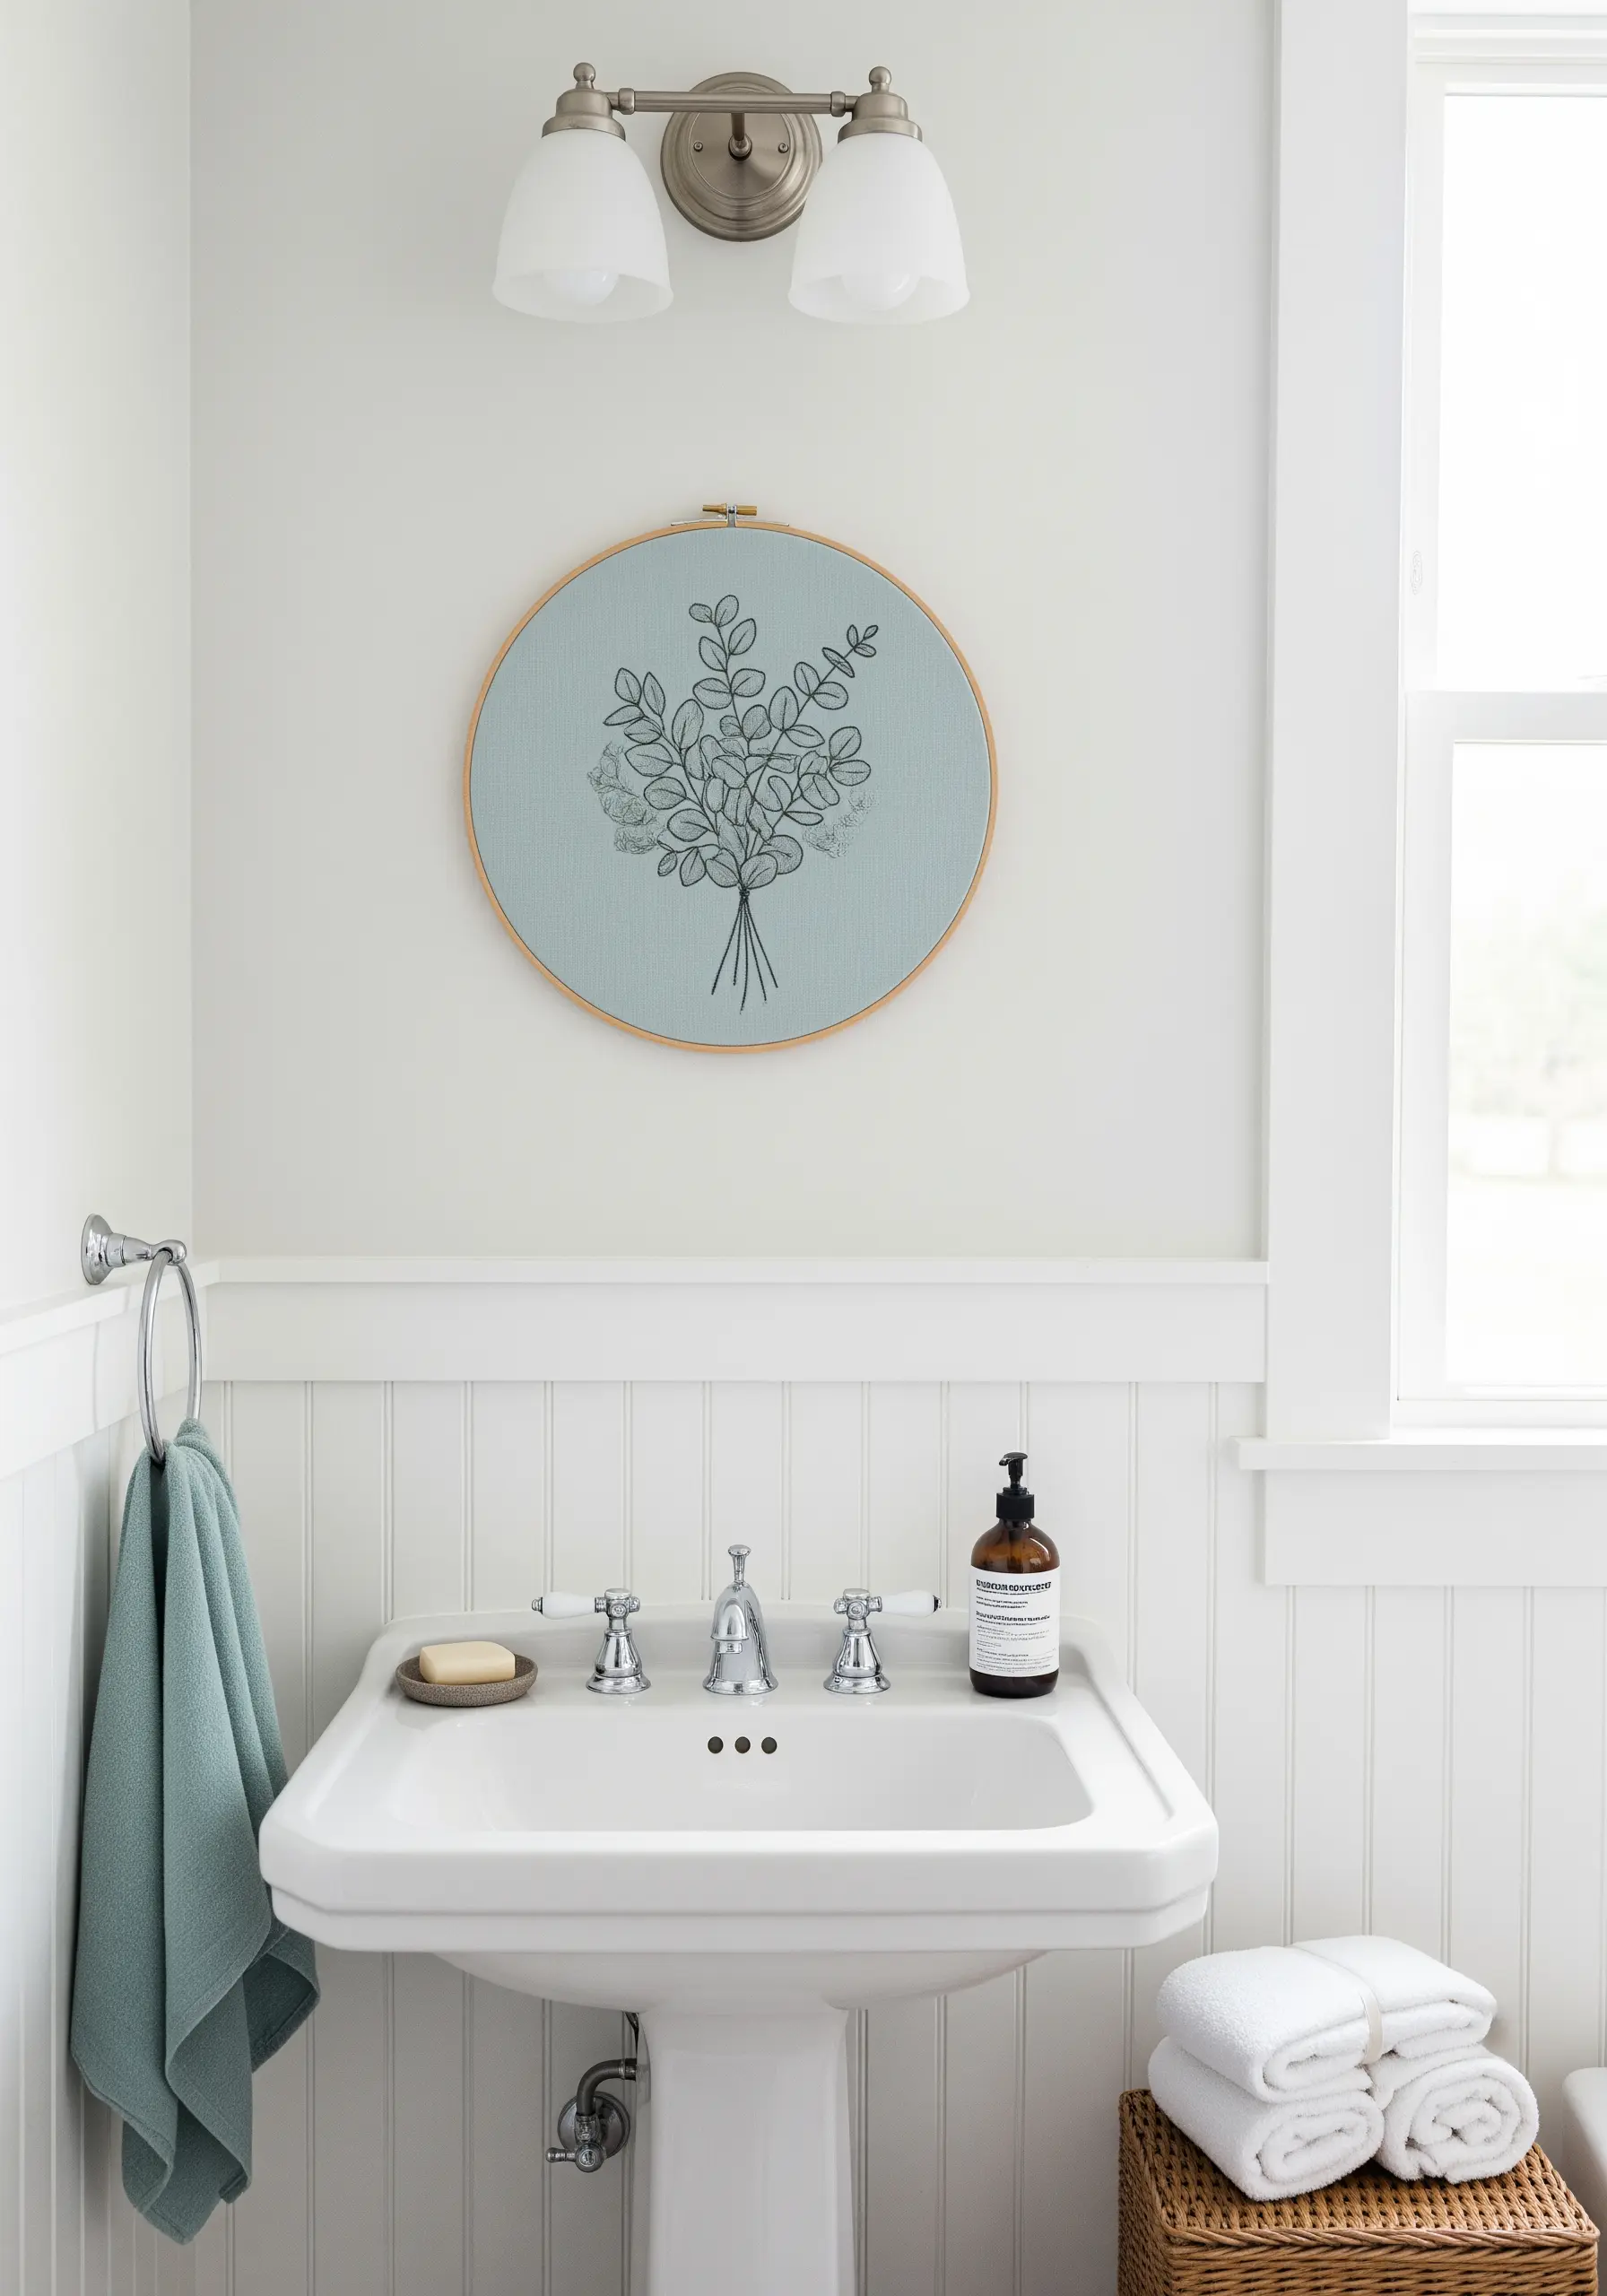
Create the look of a fine art print by using a single, continuous line where possible.
Trace a bouquet design onto a soft, colored linen and use a two-strand backstitch to outline the leaves and stems.
The goal isn’t realism but a graceful, illustrative quality. By using a dark thread on a muted background, the focus remains on the clean, elegant lines of your drawing.
This minimalist approach is perfect for creating a calm, spa-like atmosphere in a bathroom or bedroom.
17. Miniature Appliqué for Playful Laundry Room Decor
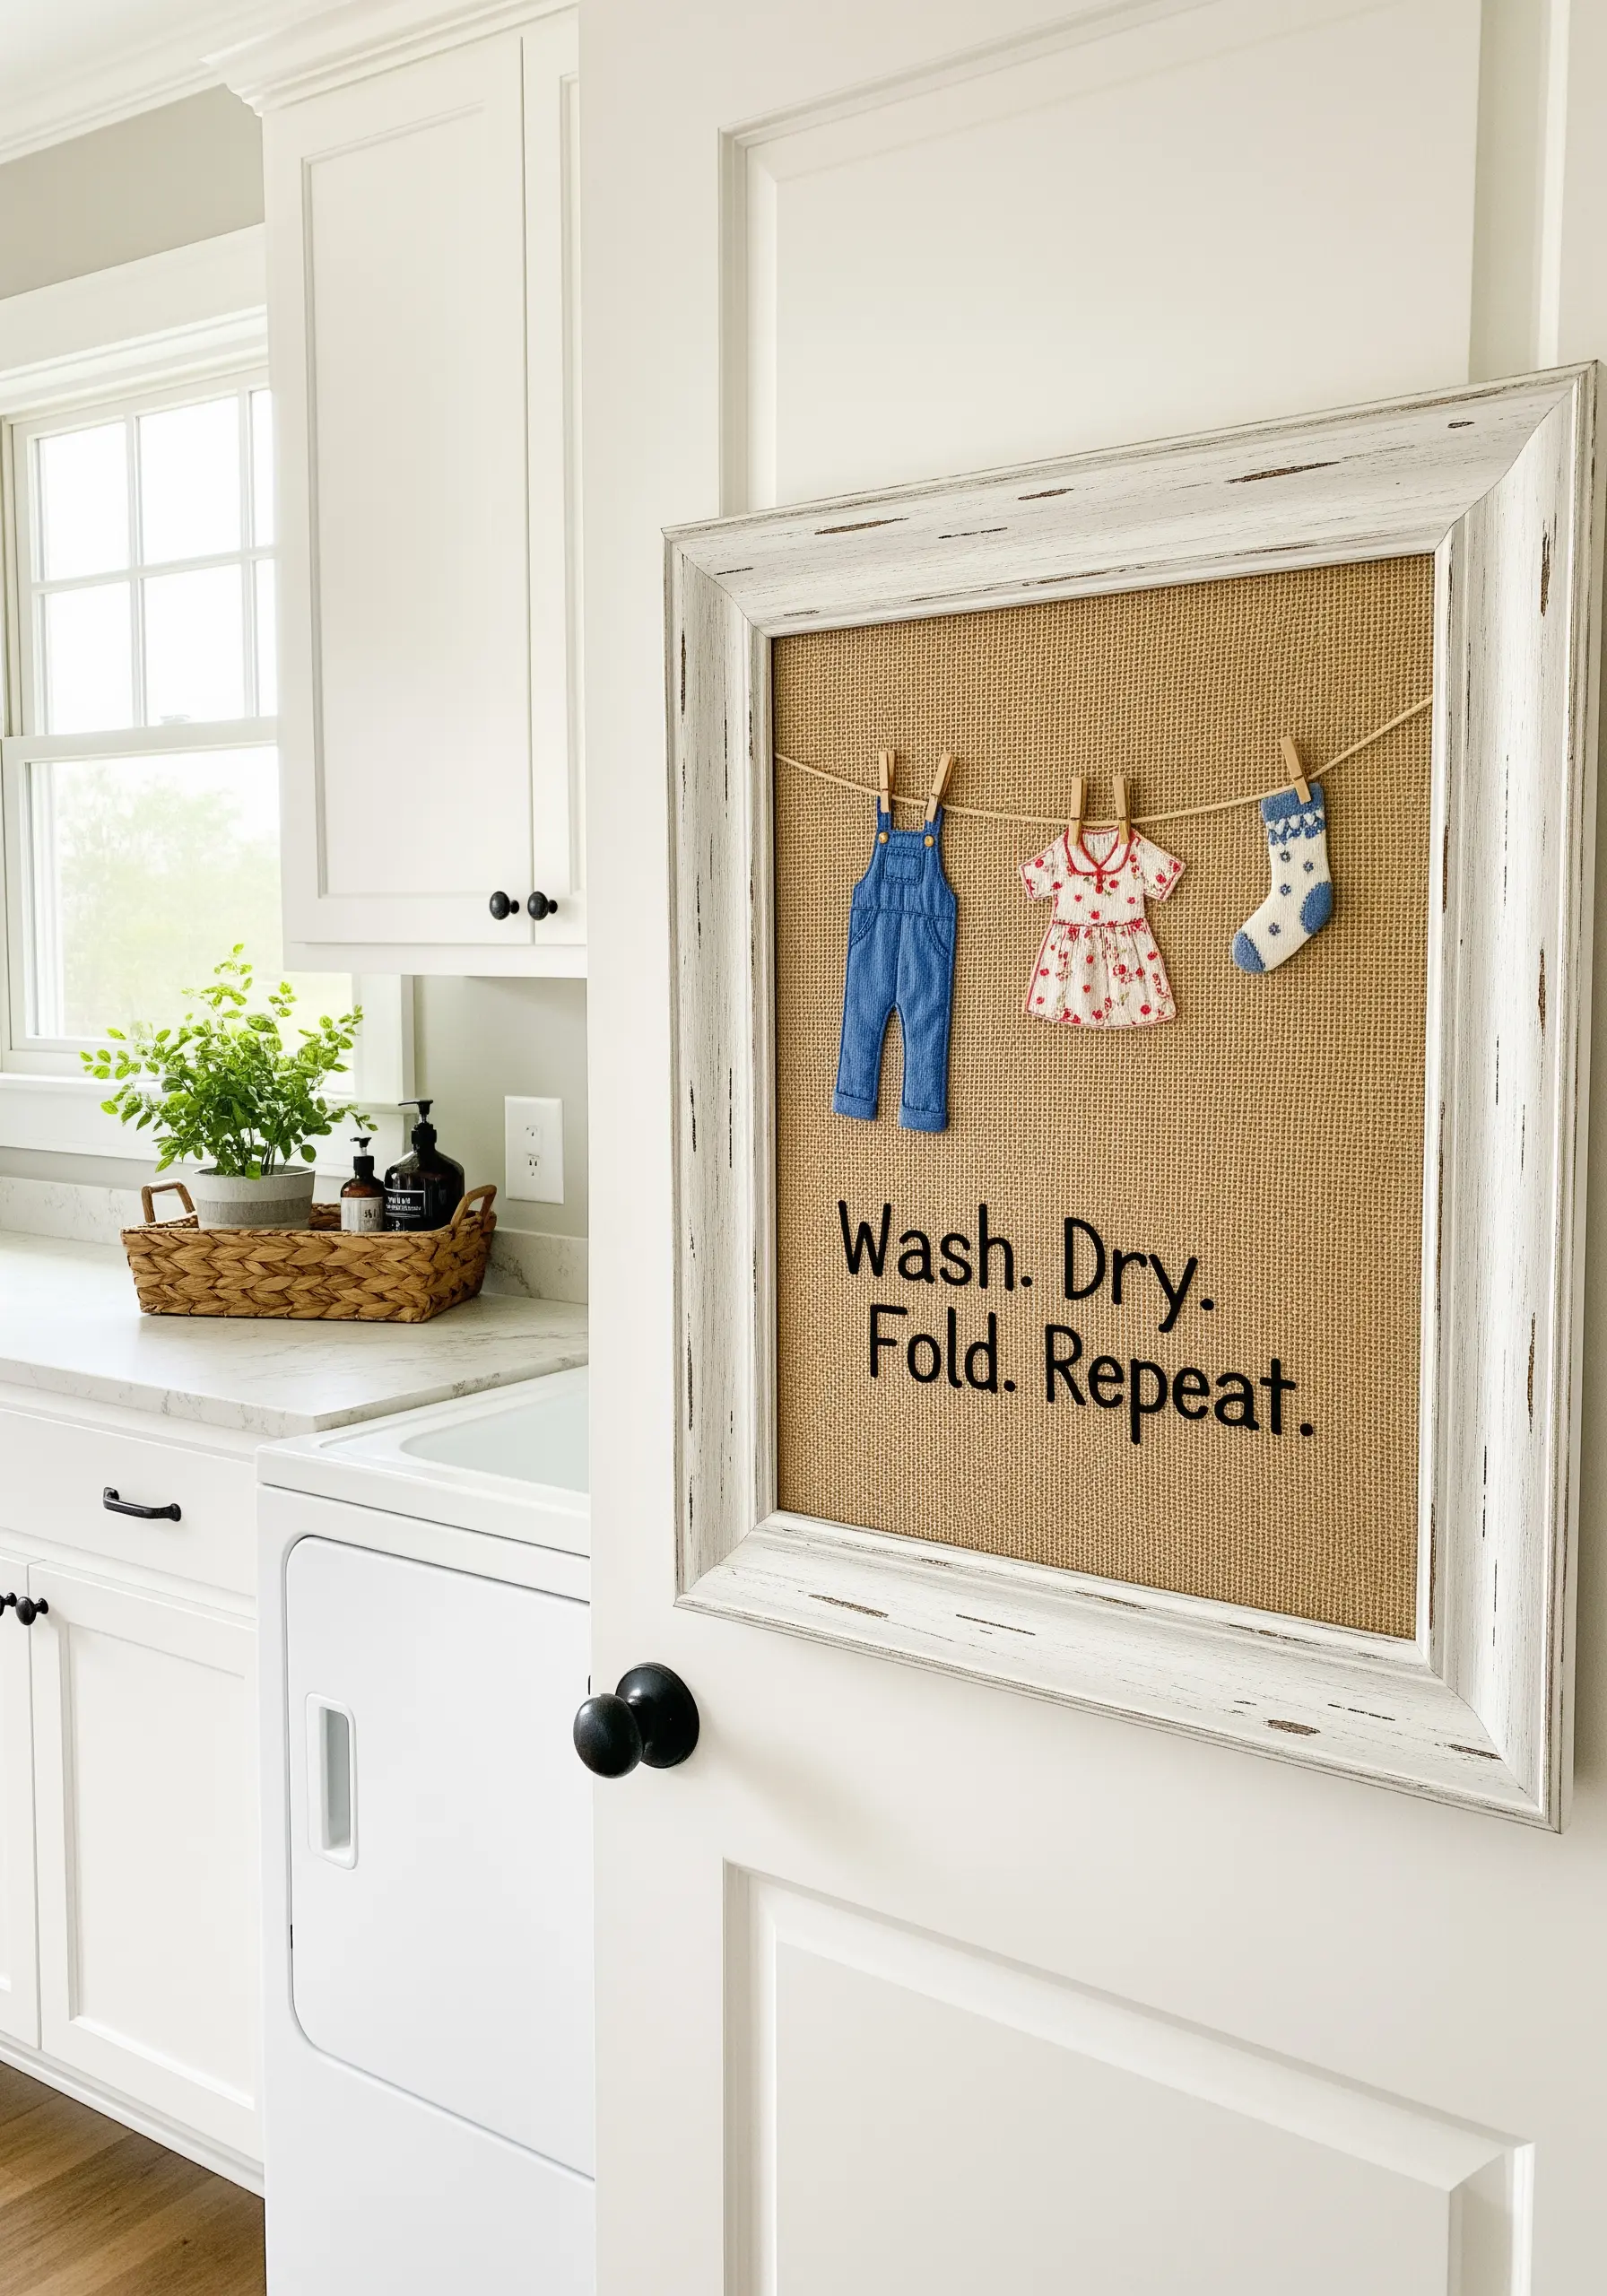
Add a touch of whimsy to a functional space with this charming mixed-media concept.
Create tiny clothing items using fabric scraps—felt works well as it doesn’t fray—and add miniature embroidered details before cutting them out.
Stretch a piece of twine across your framed burlap and hang the tiny garments with miniature clothespins.
This turns a simple embroidered quote into a delightful, three-dimensional scene that is sure to make you smile.
18. Sculptural Florals with Woven Wheel Roses
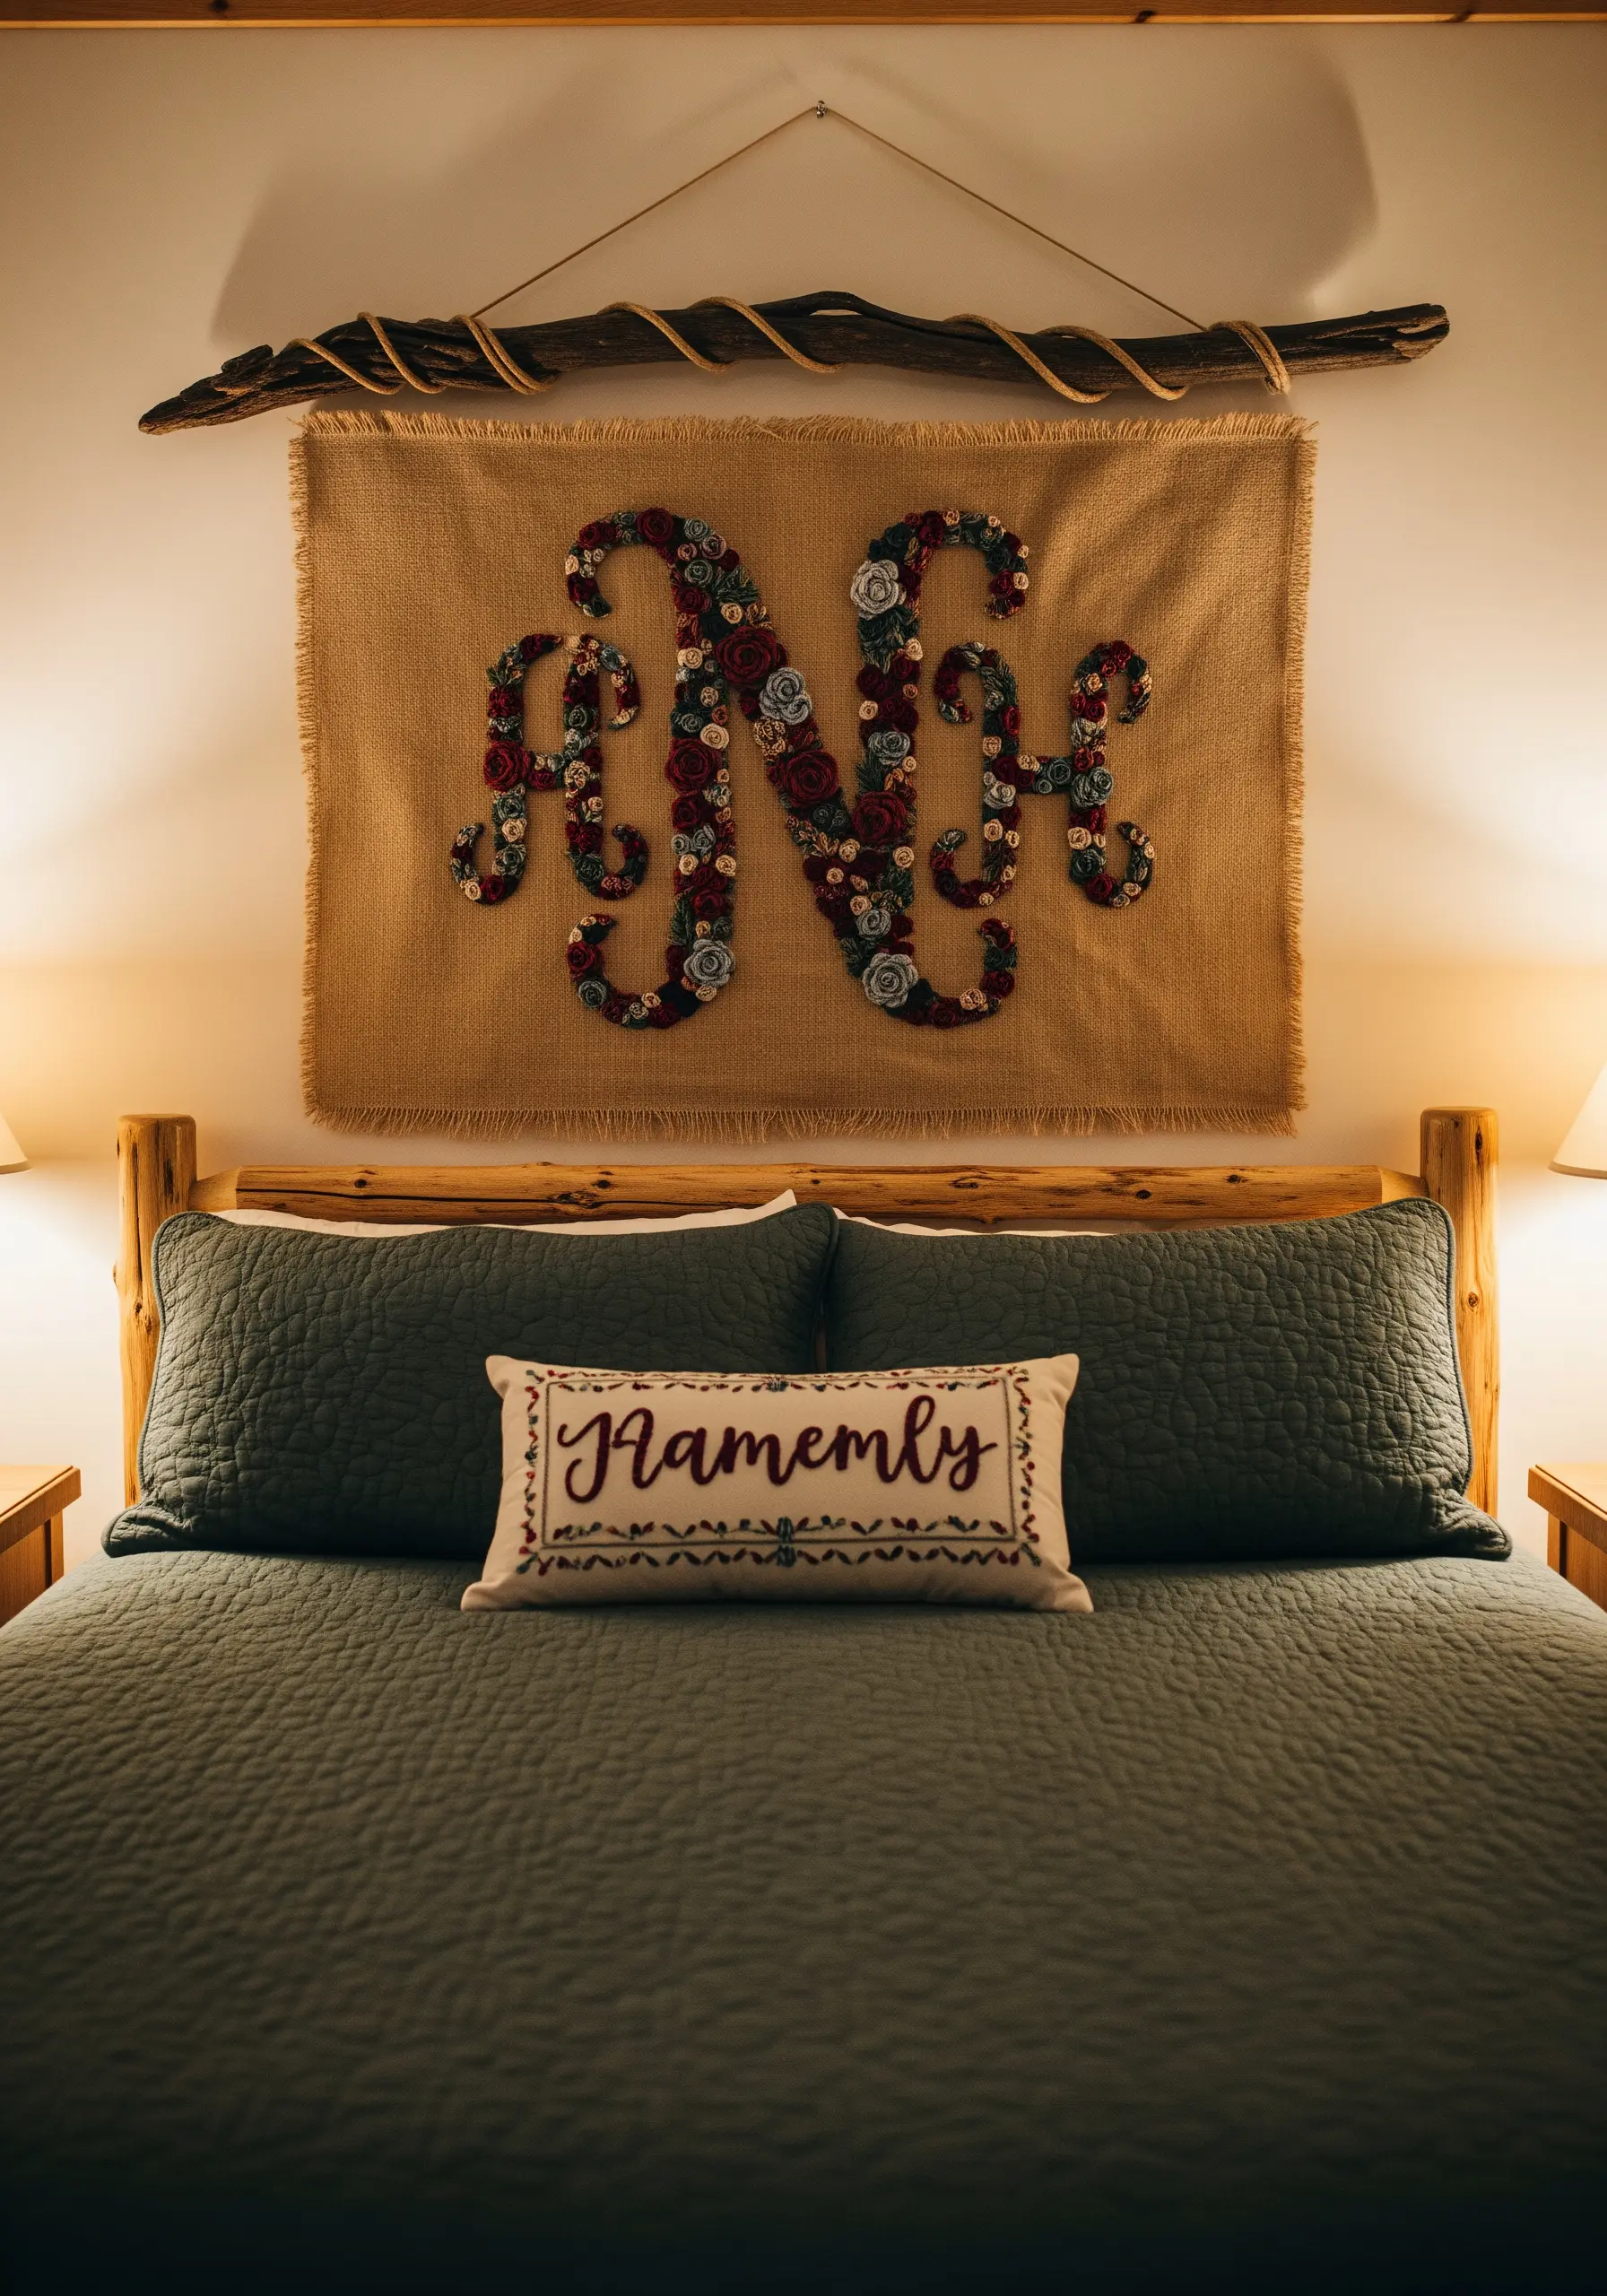
Build a lush, dimensional monogram by layering various floral stitches on a rugged burlap base.
The star of this technique is the woven wheel (or wagon wheel) rose, which creates a dense, raised flower.
Complement these with smaller bullion knot roses and French knot fillers to create a rich tapestry of textures.
Using a dark, moody color palette for your floral monogram adds a layer of romantic sophistication, perfect for a bedroom wall hanging.
19. Achieving Cactus Texture with Turkey Work
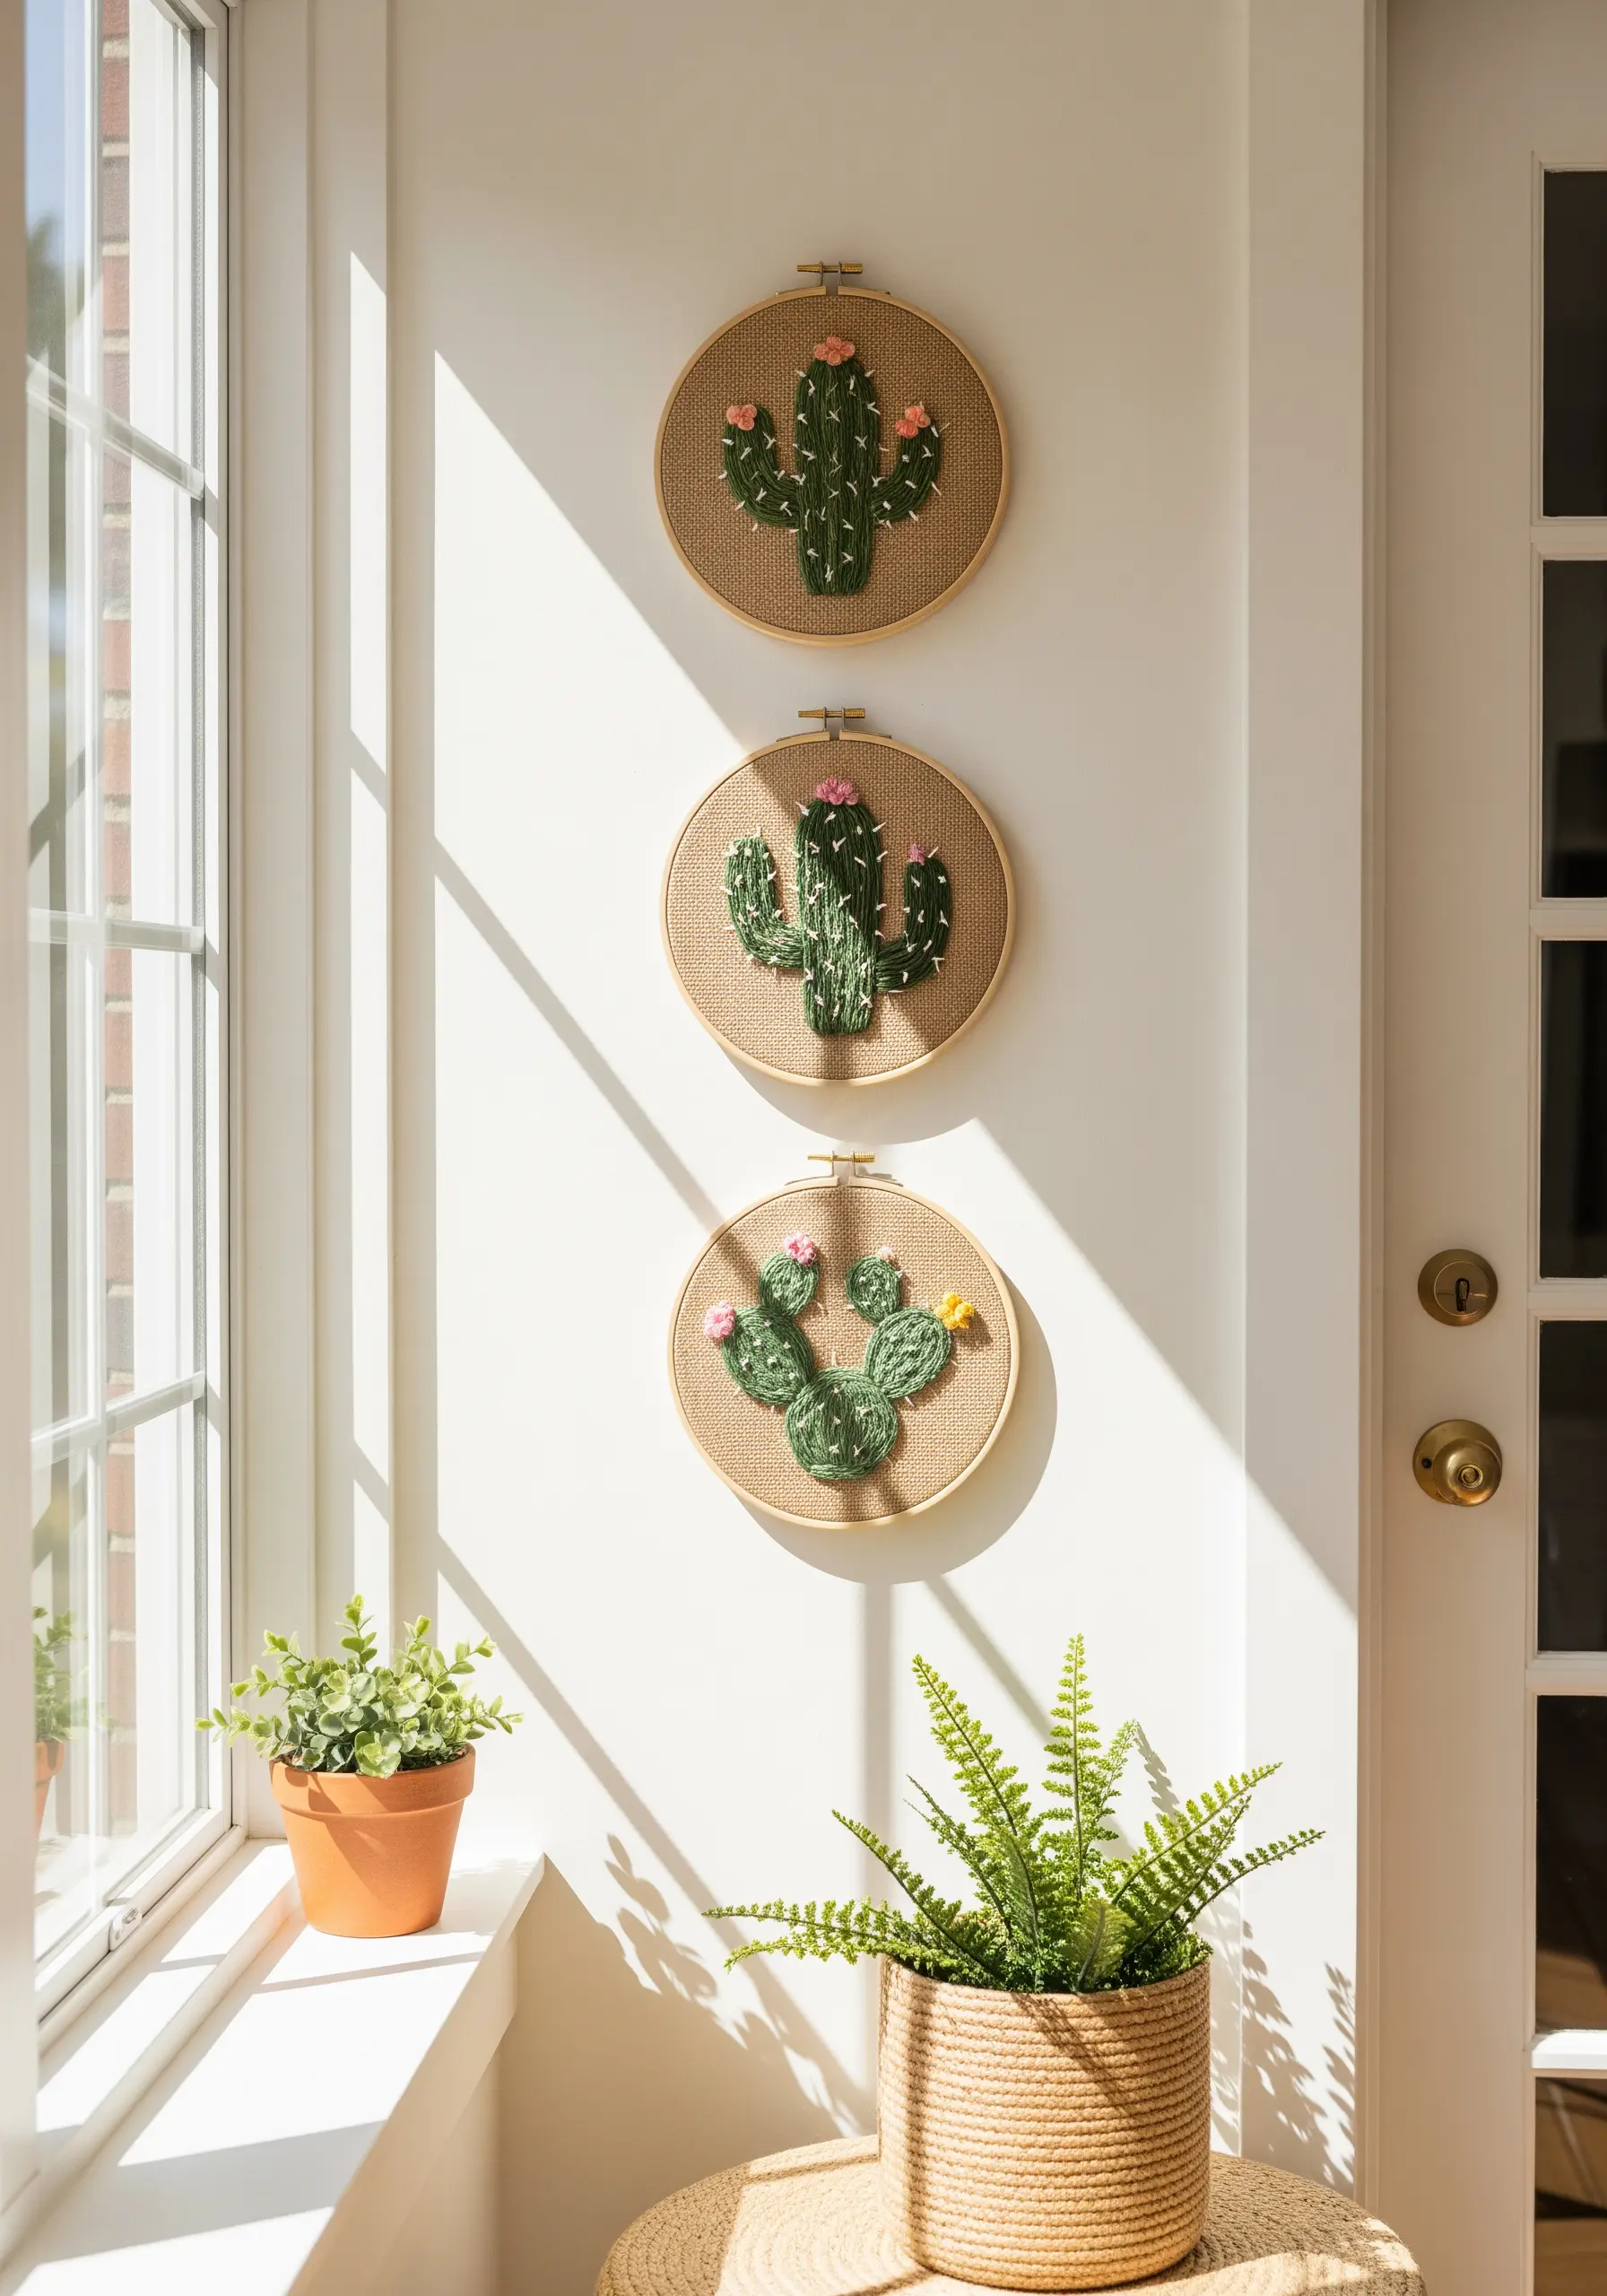
To mimic the spiky, dense texture of a cactus, the Turkey work stitch (or Ghiordes knot) is your best tool.
This stitch creates loops on the surface of your fabric, which you can then trim to your desired length to create a plush, brush-like texture.
Fill the body of each cactus with rows of Turkey work, then add French knots or woven wheel stitches for the delicate flowers.
This highly textural approach makes your embroidery wonderfully tactile and visually interesting.
20. Authentic Coffee Stains as a Design Element
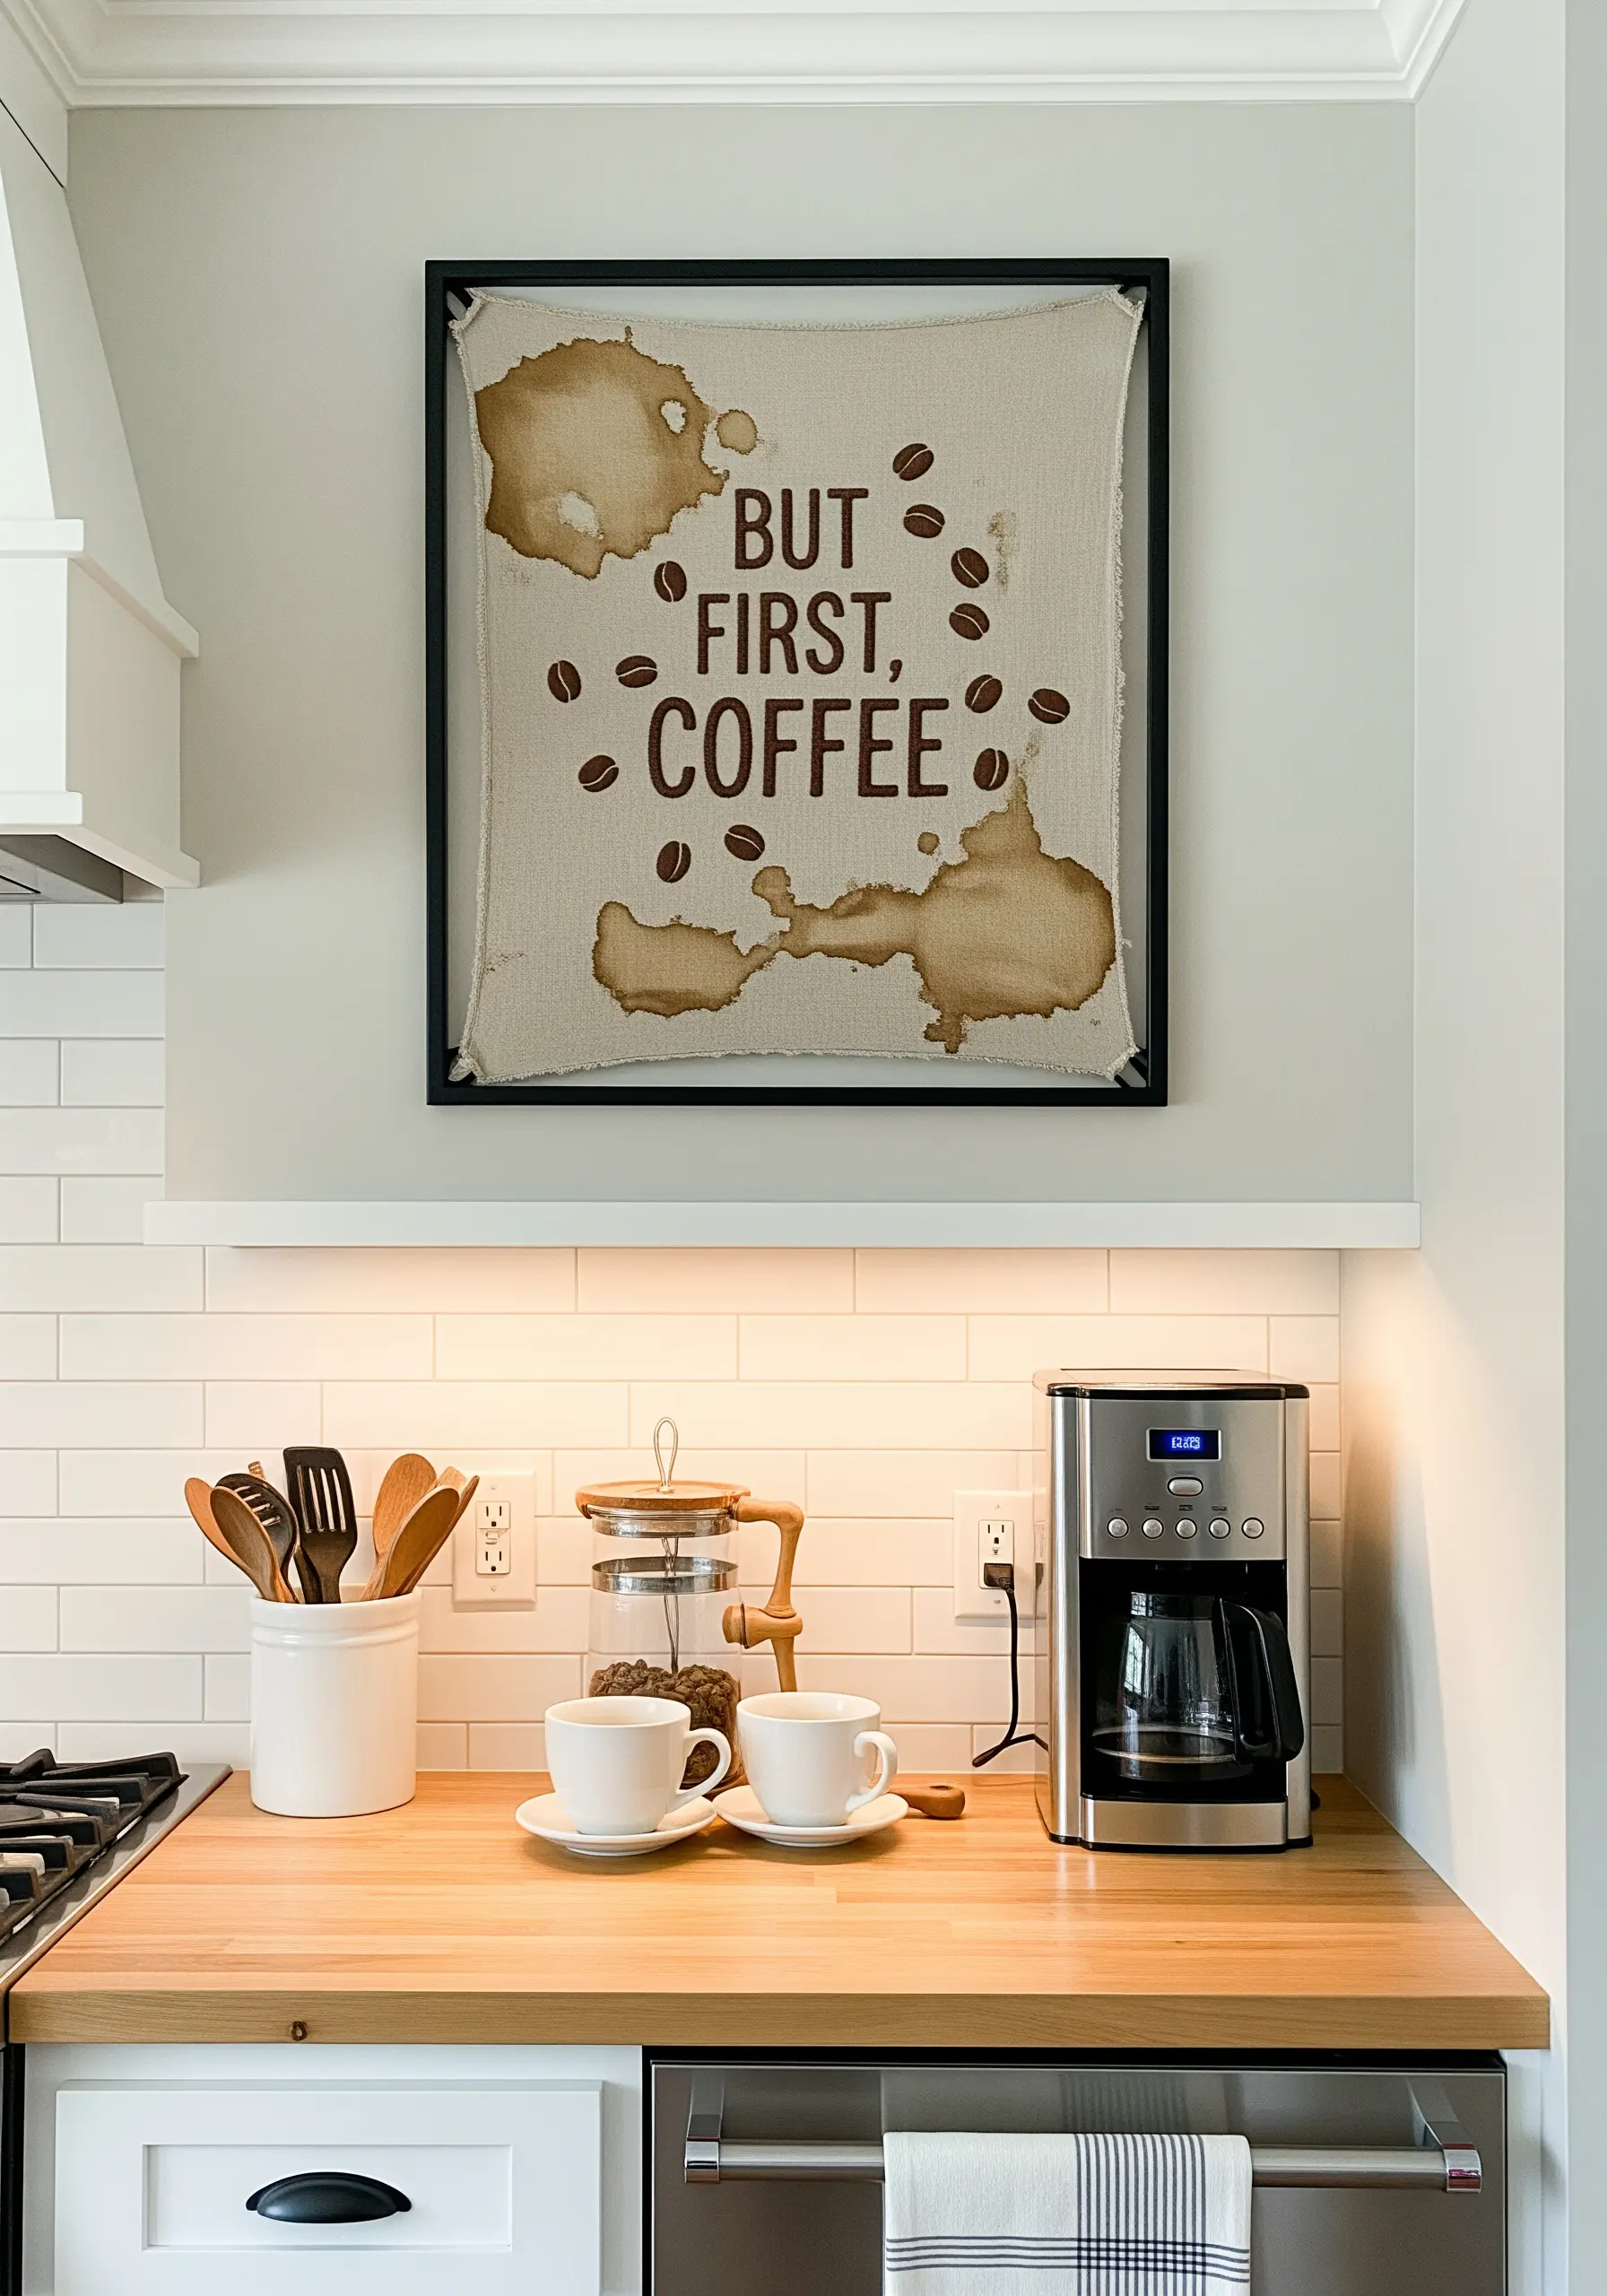
Integrate mixed media by using real coffee to stain your fabric, turning it into part of the artwork.
Before you begin stitching, brew strong coffee and use a brush or the bottom of a mug to create authentic-looking stains on your burlap or linen canvas.
Once it’s completely dry, stitch your lettering over the top and add a few satin-stitched coffee beans for a playful touch.
This unconventional method adds a layer of storytelling and rustic charm that can’t be replicated with thread alone.
21. Grand-Scale Florals for Architectural Impact
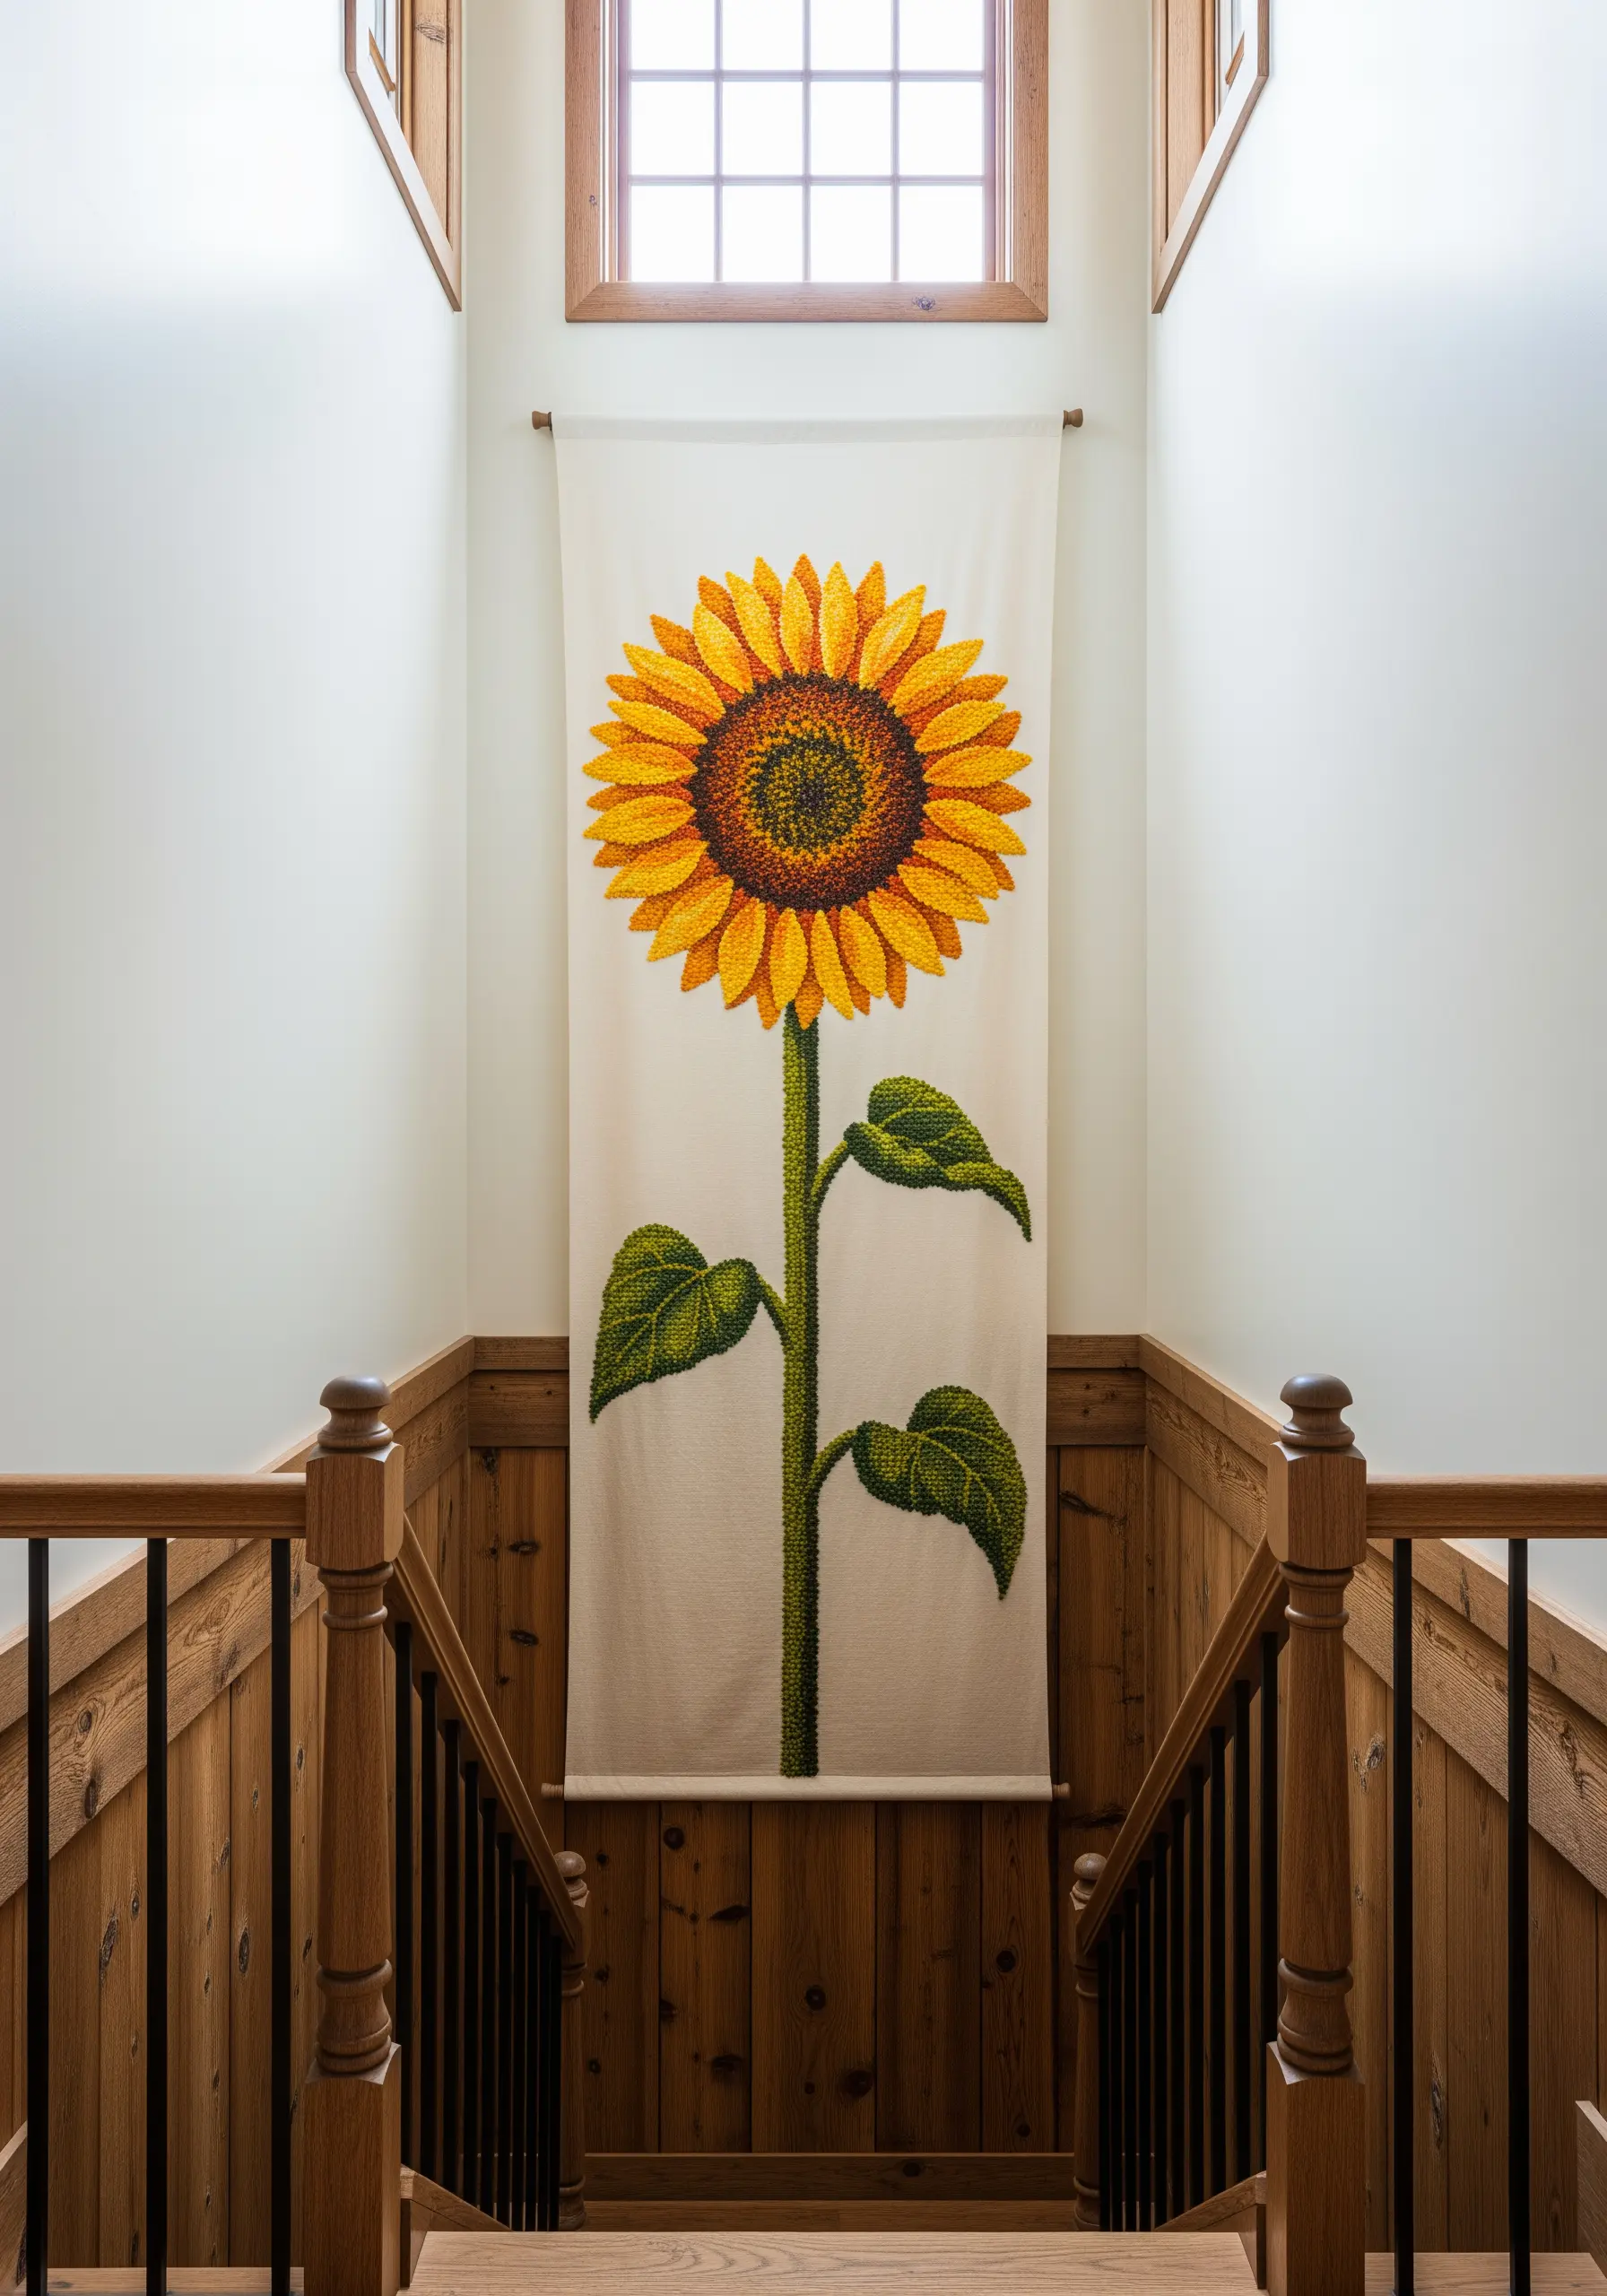
When working on a large scale, like this oversized sunflower tapestry, you need to think like a painter.
Use the long-and-short stitch technique to blend dozens of shades of yellow, gold, and brown, creating realistic gradients and depth in the petals and center.
Keep your stitches flowing in the natural direction of the plant’s growth to enhance the illusion of form.
A statement piece of this size can define an entire space, such as a tall stairwell or entryway.
22. Personalized Map Art with Minimalist Lines

Celebrate a favorite city, state, or journey by transforming a map into minimalist line art.
Trace the primary outline and major roads onto burlap using a water-soluble marker.
Then, use a simple backstitch or chain stitch in contrasting colors to define the shapes. You don’t need to include every detail; the power of this design lies in its abstraction.
It’s a sophisticated, modern way to create personalized art that tells a story about a place you love.


