
Before you begin a new project, take a moment to look at your blank tote bag or pouch not just as an object, but as a canvas. You already have the skills, but the secret to creating embroidery that feels truly special lies in the small, intentional choices you make before the first stitch.
It isn’t about mastering dozens of complex techniques. Instead, it’s about learning to see—to notice how a single French knot can mimic a flower bud, how changing the direction of a satin stitch can create shadow, or how a simple backstitch, when done with care, can tell a complete story.
These small stitches are your vocabulary. They are the simple tools you can use to add a whisper of personality, a touch of texture, and a quiet mark of artistry to the things you use every day. Let this be your guide to choosing your words with intention.
1. Render Lavender with Tactile French Knots
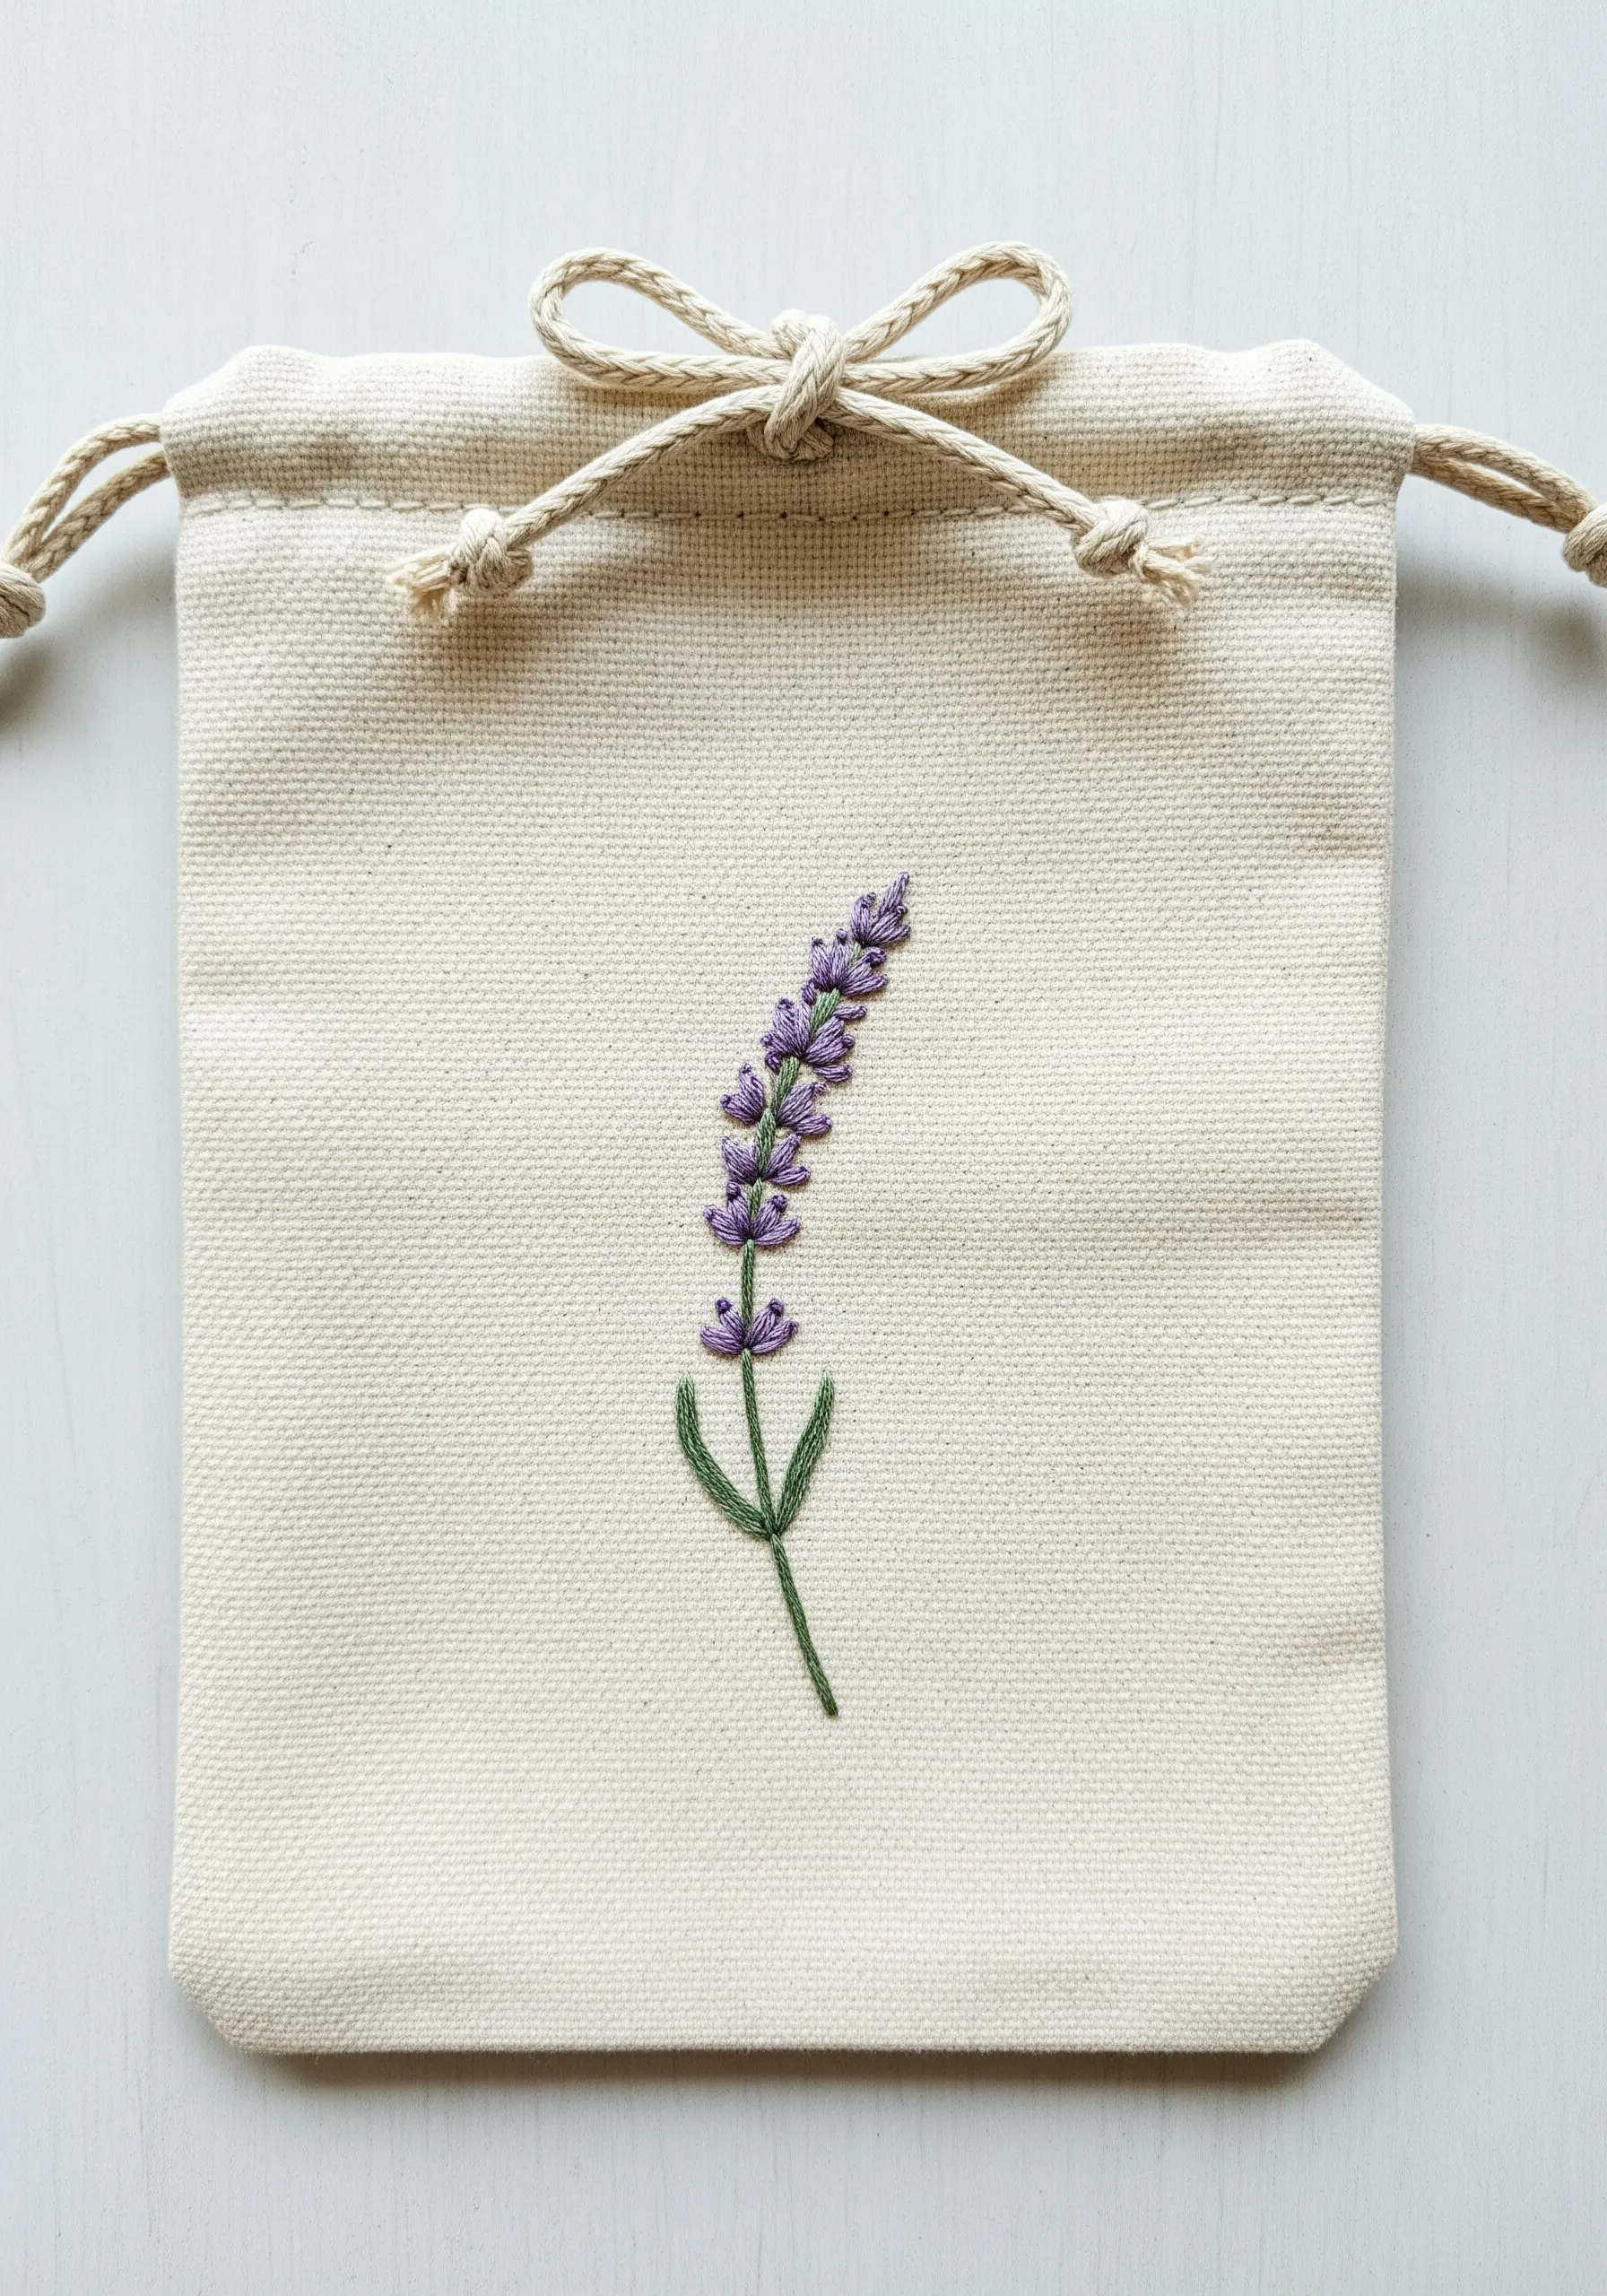
To capture the delicate texture of lavender buds, use single-wrap French knots clustered along the top of the stem.
This technique adds dimension that simple satin stitches lack, creating a motif that feels wonderfully tactile and realistic.
For the stem, a fine split stitch using two strands of floss will give you a clean, elegant line that doesn’t overpower the delicate florals.
Choose three shades of purple—light, medium, and dark—and scatter them randomly to mimic the natural variation in a real lavender sprig.
2. Combine Solid Fills with Airy Outlines
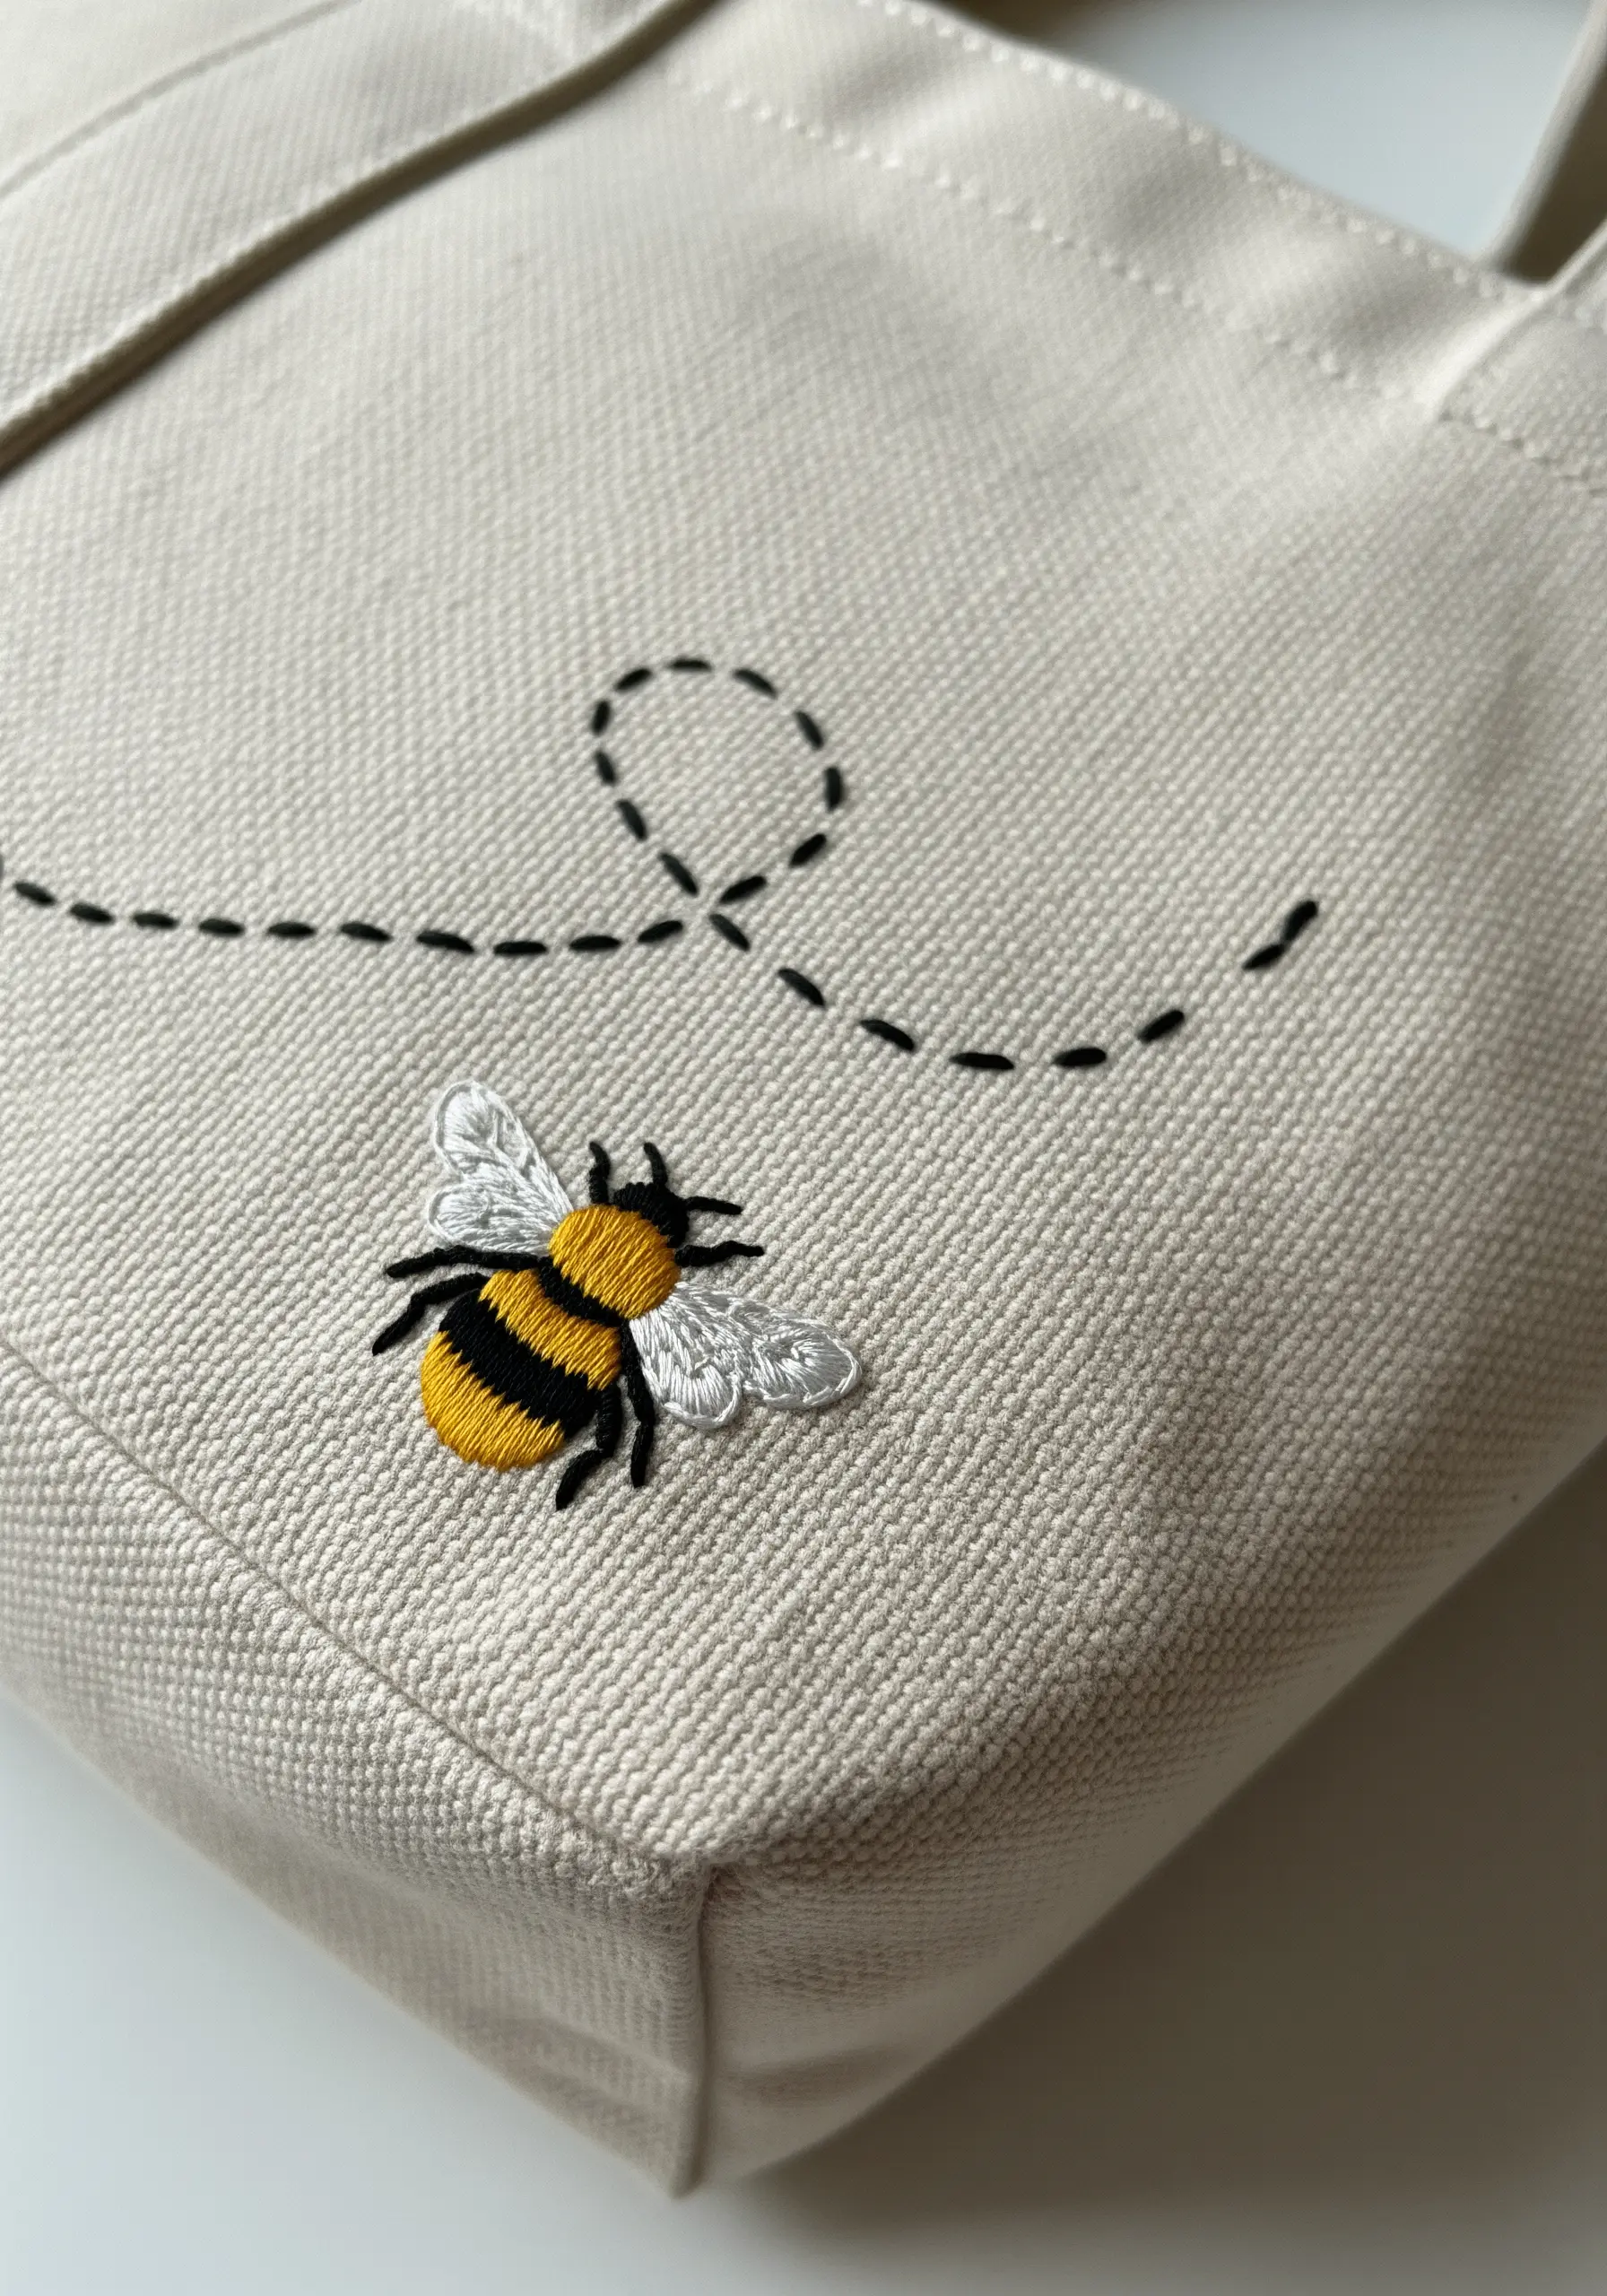
Create a dynamic bee by contrasting a solidly filled body with delicate, almost transparent wings.
Use a tight satin stitch with two strands of floss for the yellow and black stripes, ensuring each stitch lays flat and parallel for a smooth, glossy finish.
For the wings, switch to a single strand of white or pale gray thread and use an open backstitch or split stitch for the outline and veins, leaving the interior empty.
This juxtaposition of dense fill and open line work makes the bee feel both substantial and light enough to fly off the fabric.
3. Define Landscapes with a Bold Whipped Backstitch
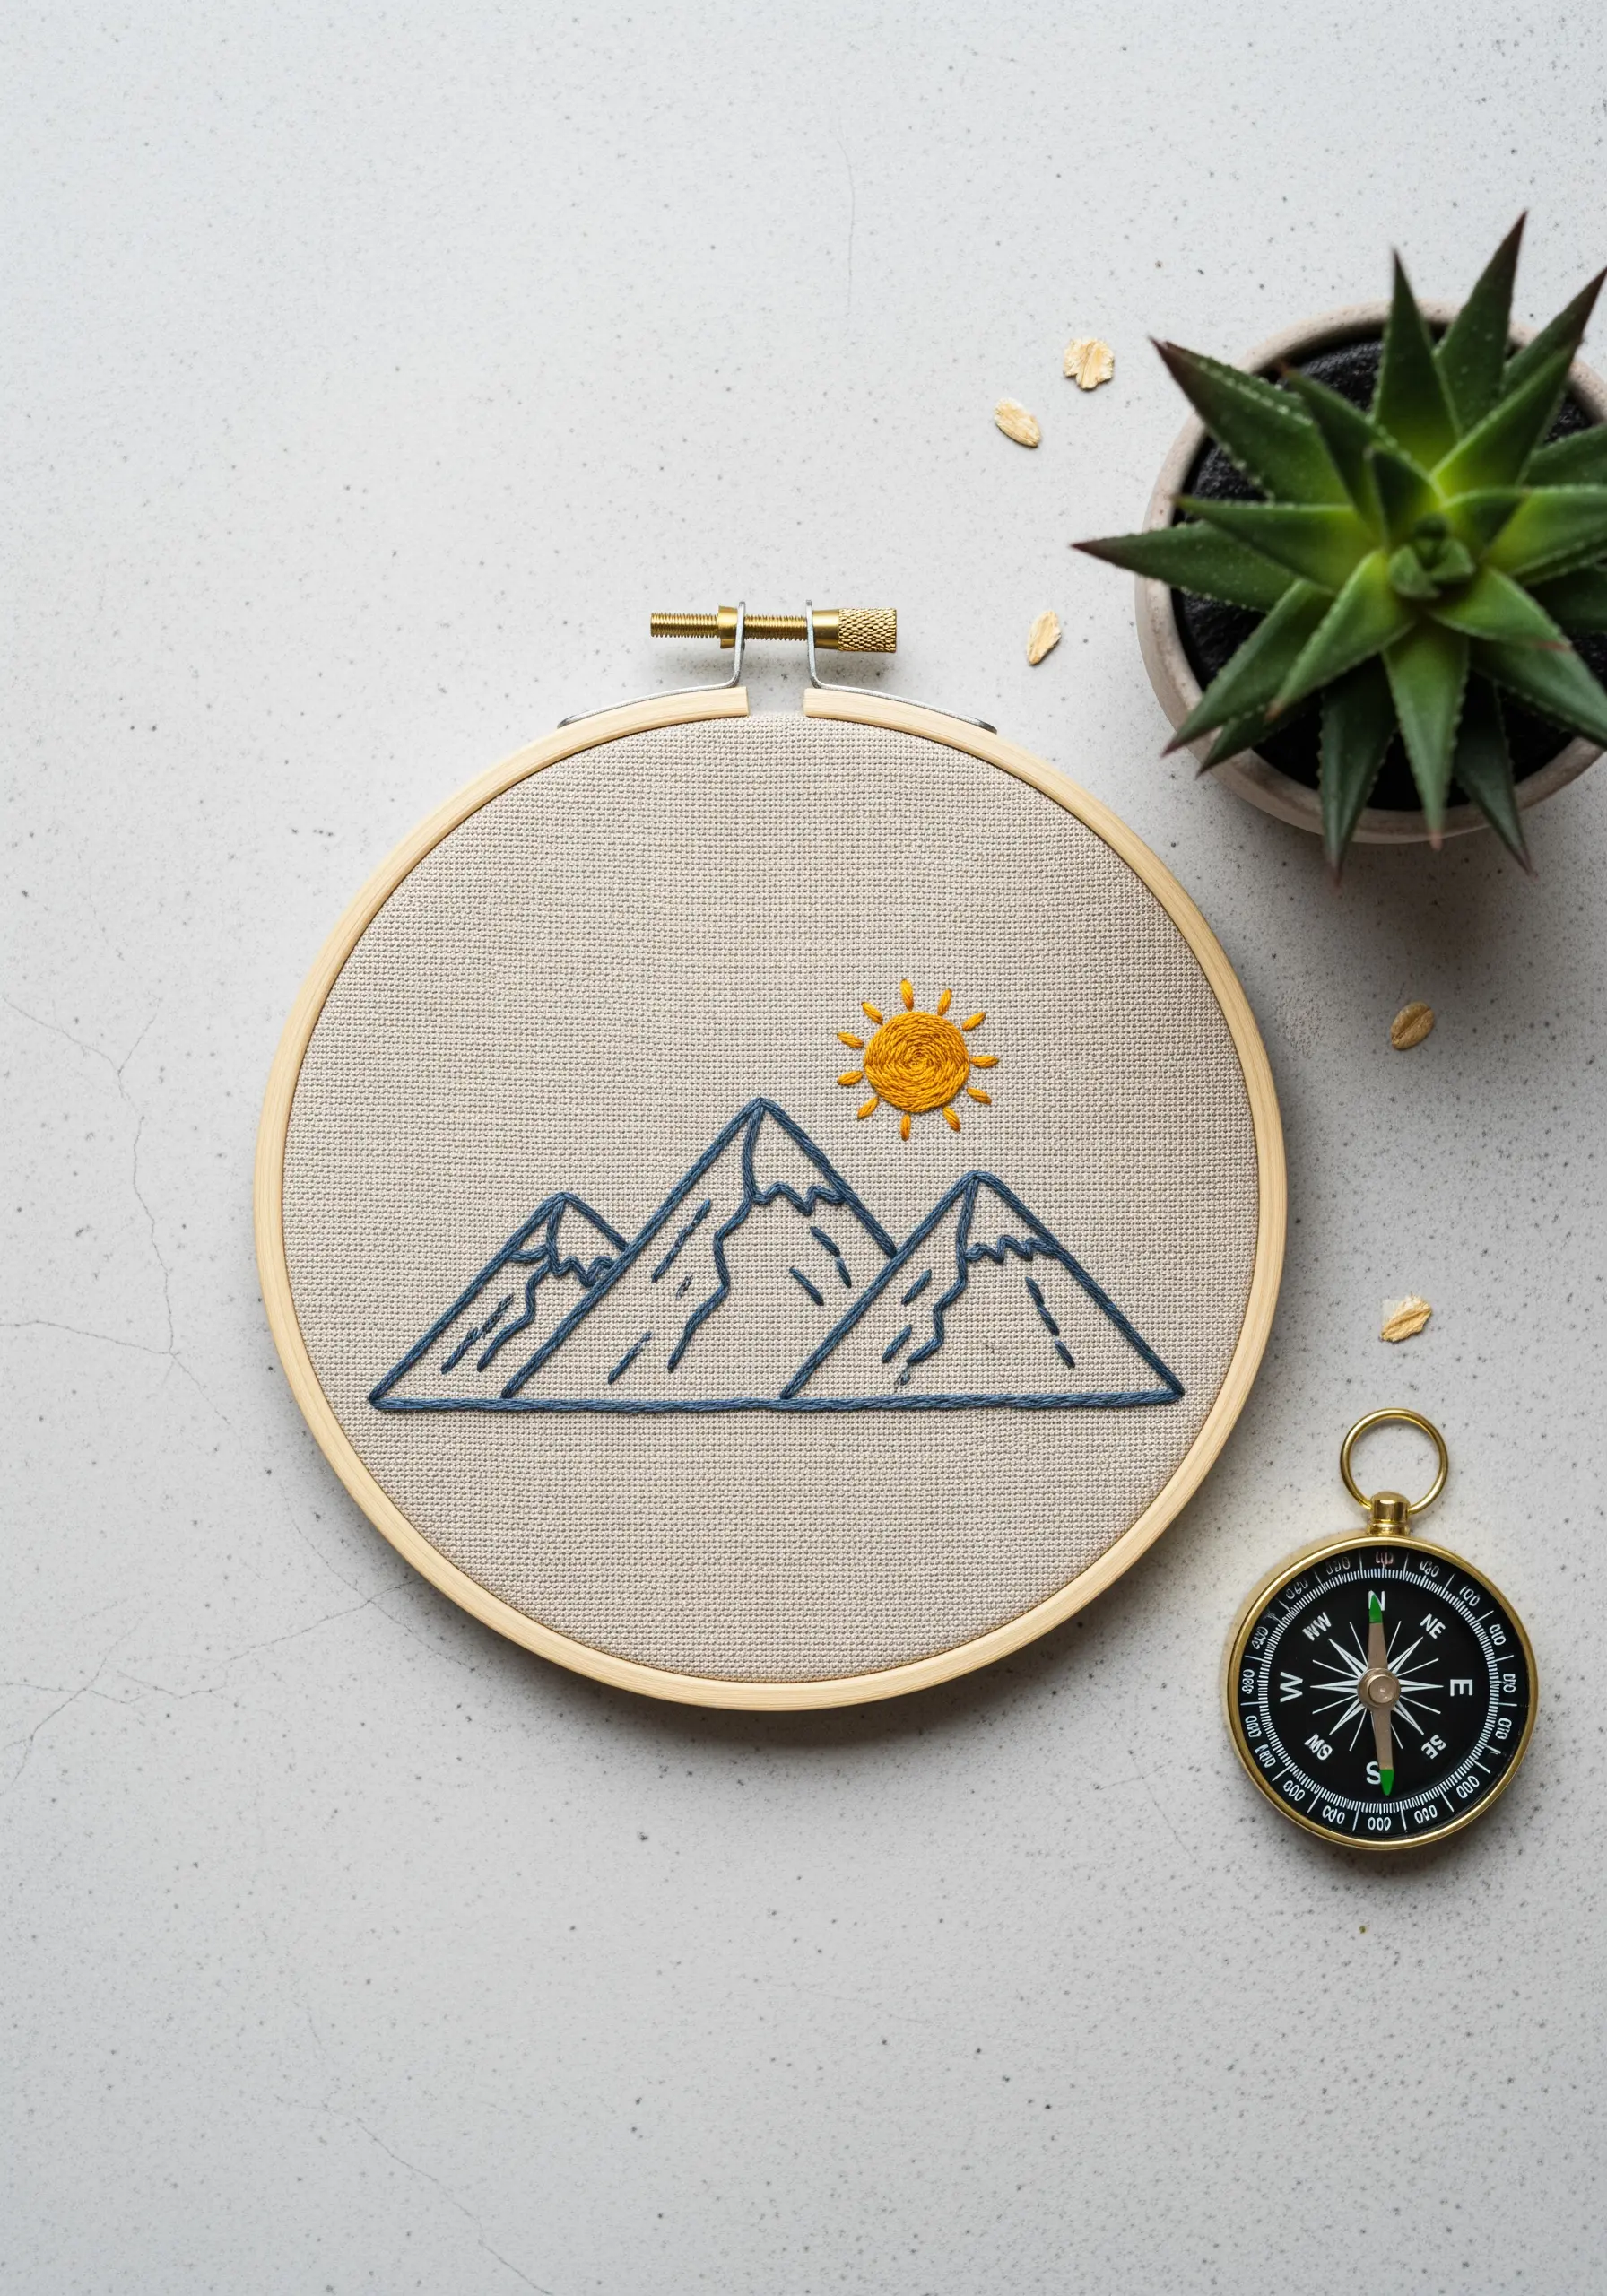
For clean, graphic mountain ranges or simple landscapes, a standard backstitch can sometimes look disjointed.
Elevate your outlines by using a whipped backstitch instead; first create a standard backstitch line, then whip a second thread around each stitch without piercing the fabric.
This technique creates a solid, rope-like line with a subtle texture that gives your minimalist designs a more substantial and polished feel.
Use a contrasting color for the whipping thread to add an extra layer of detail to your composition.
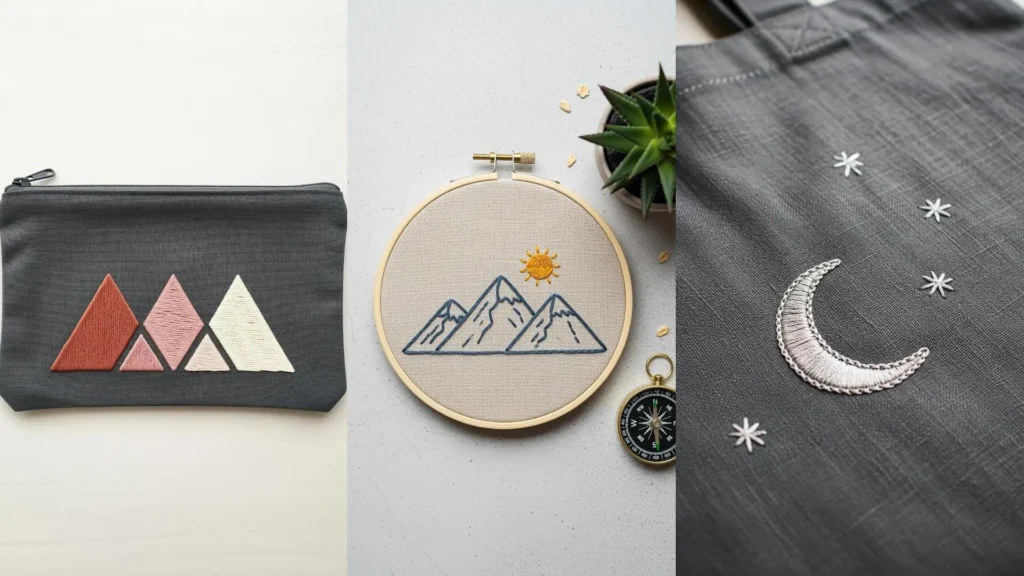
4. Master Geometric Fills with Directional Satin Stitch
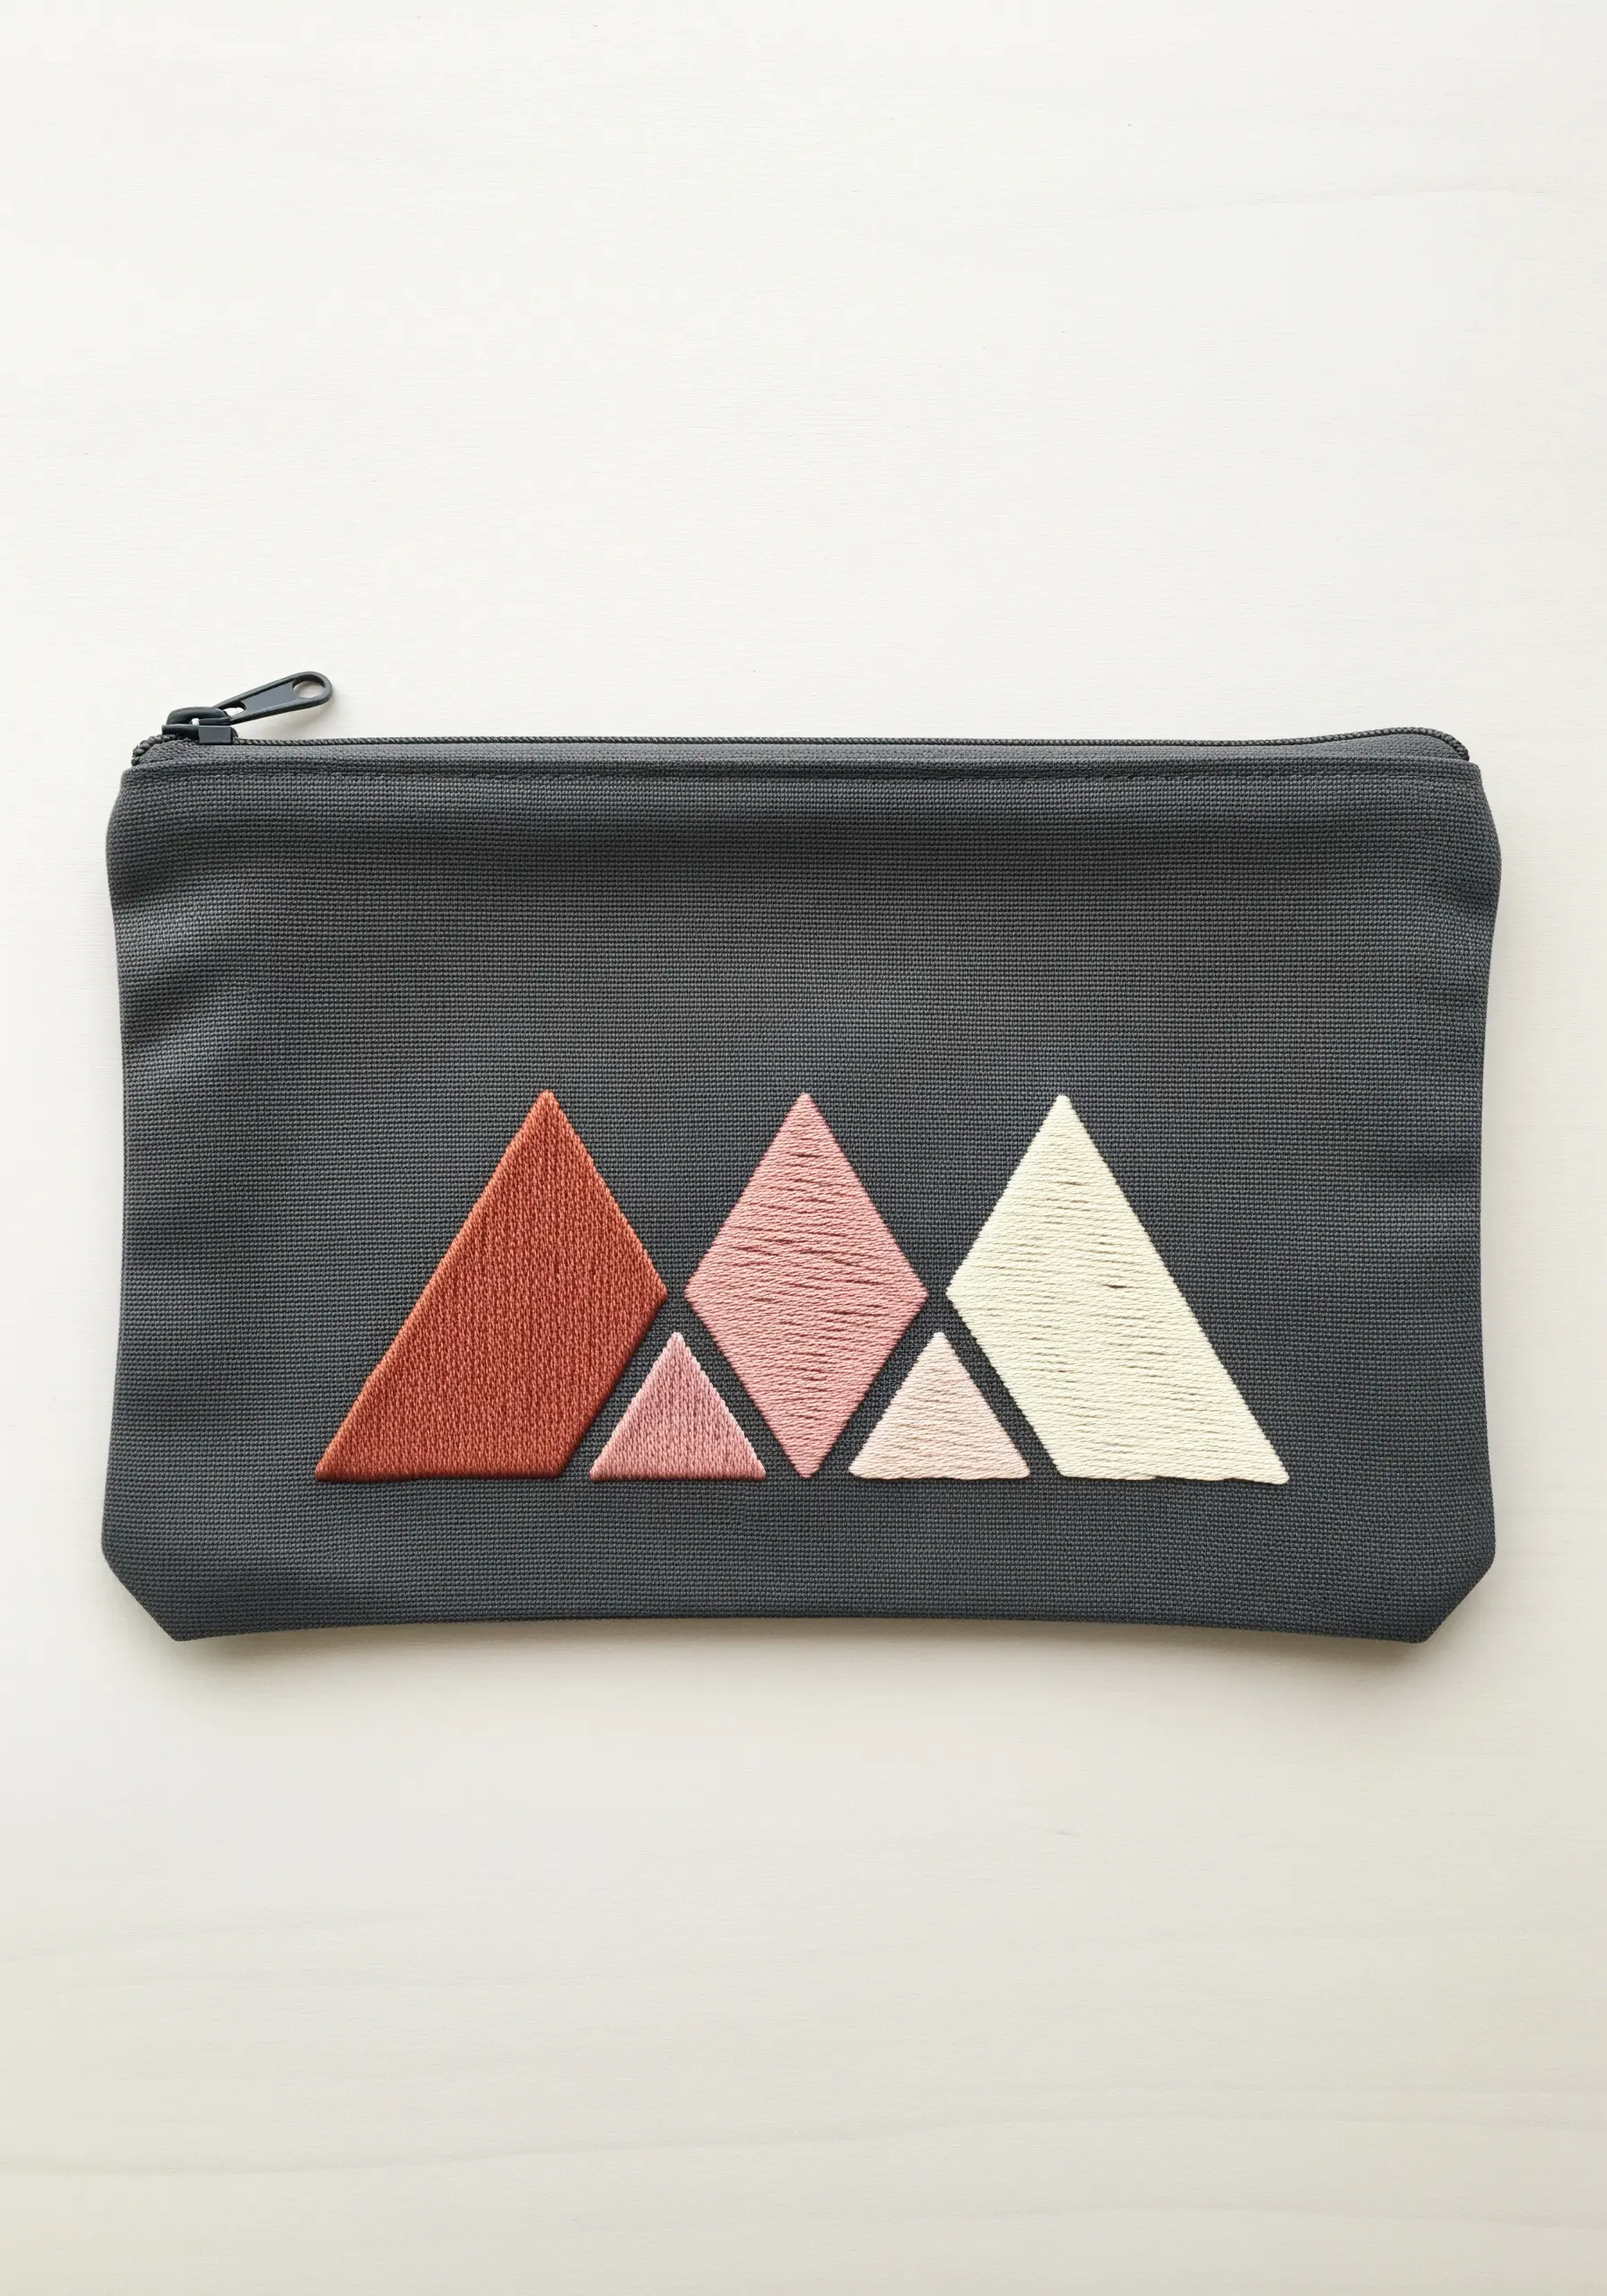
When filling geometric shapes like these triangles, the direction of your satin stitch is everything.
Stitch each shape with uniform, parallel stitches that run in a single direction—horizontally, vertically, or diagonally—to create a smooth, light-reflecting surface.
To keep your edges perfectly sharp, outline the shape first with a tiny split stitch in the same color before filling it in.
This underlying structure prevents the satin stitches from pulling or distorting the fabric, ensuring your geometric motifs look clean and intentional.
5. Create Delicate Dandelions with Radiating Stitches
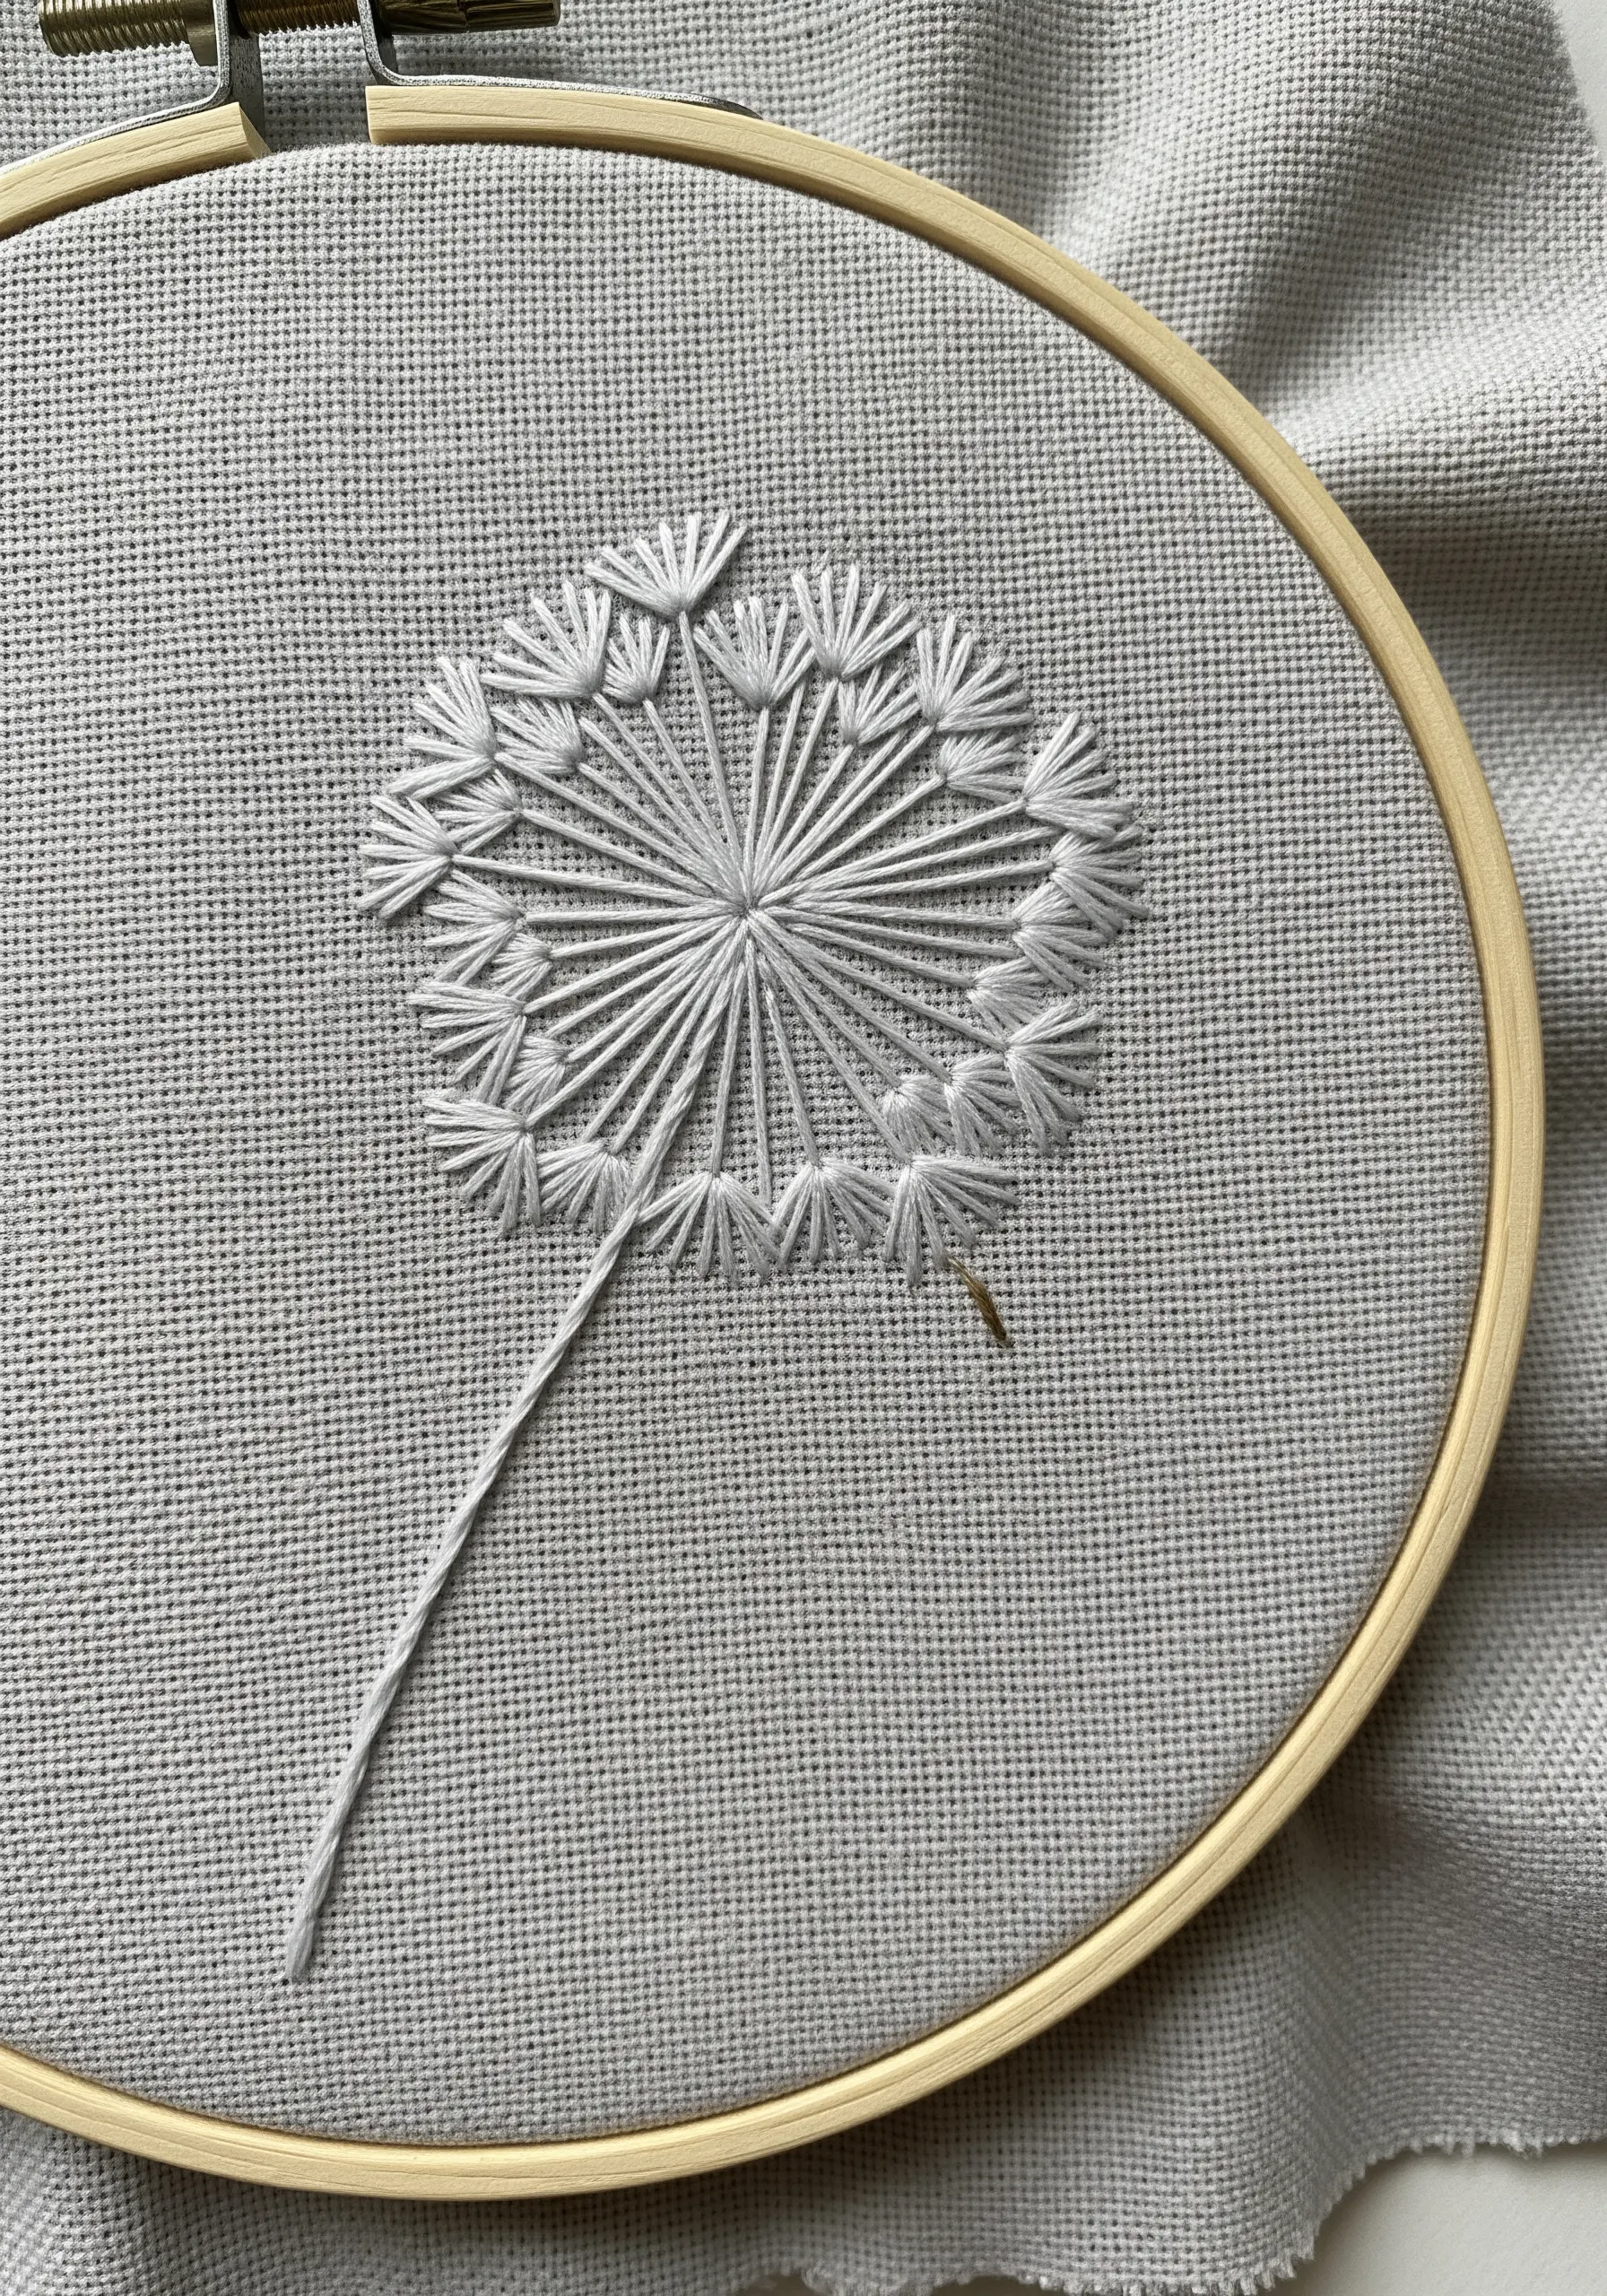
Capture the weightless quality of a dandelion head by building it with layers of simple stitches radiating from a central point.
Start with long straight stitches to form the main structure, then add shorter straight stitches in between to build density.
Finish each spoke with a detached chain stitch (or lazy daisy) to form the delicate seed heads, giving the motif a soft, feathery appearance.
Using a single color of thread forces the eye to focus on the texture you’ve created, making it a powerful exercise in stitch placement.
6. Articulate Crisp Lines for Graphic Motifs
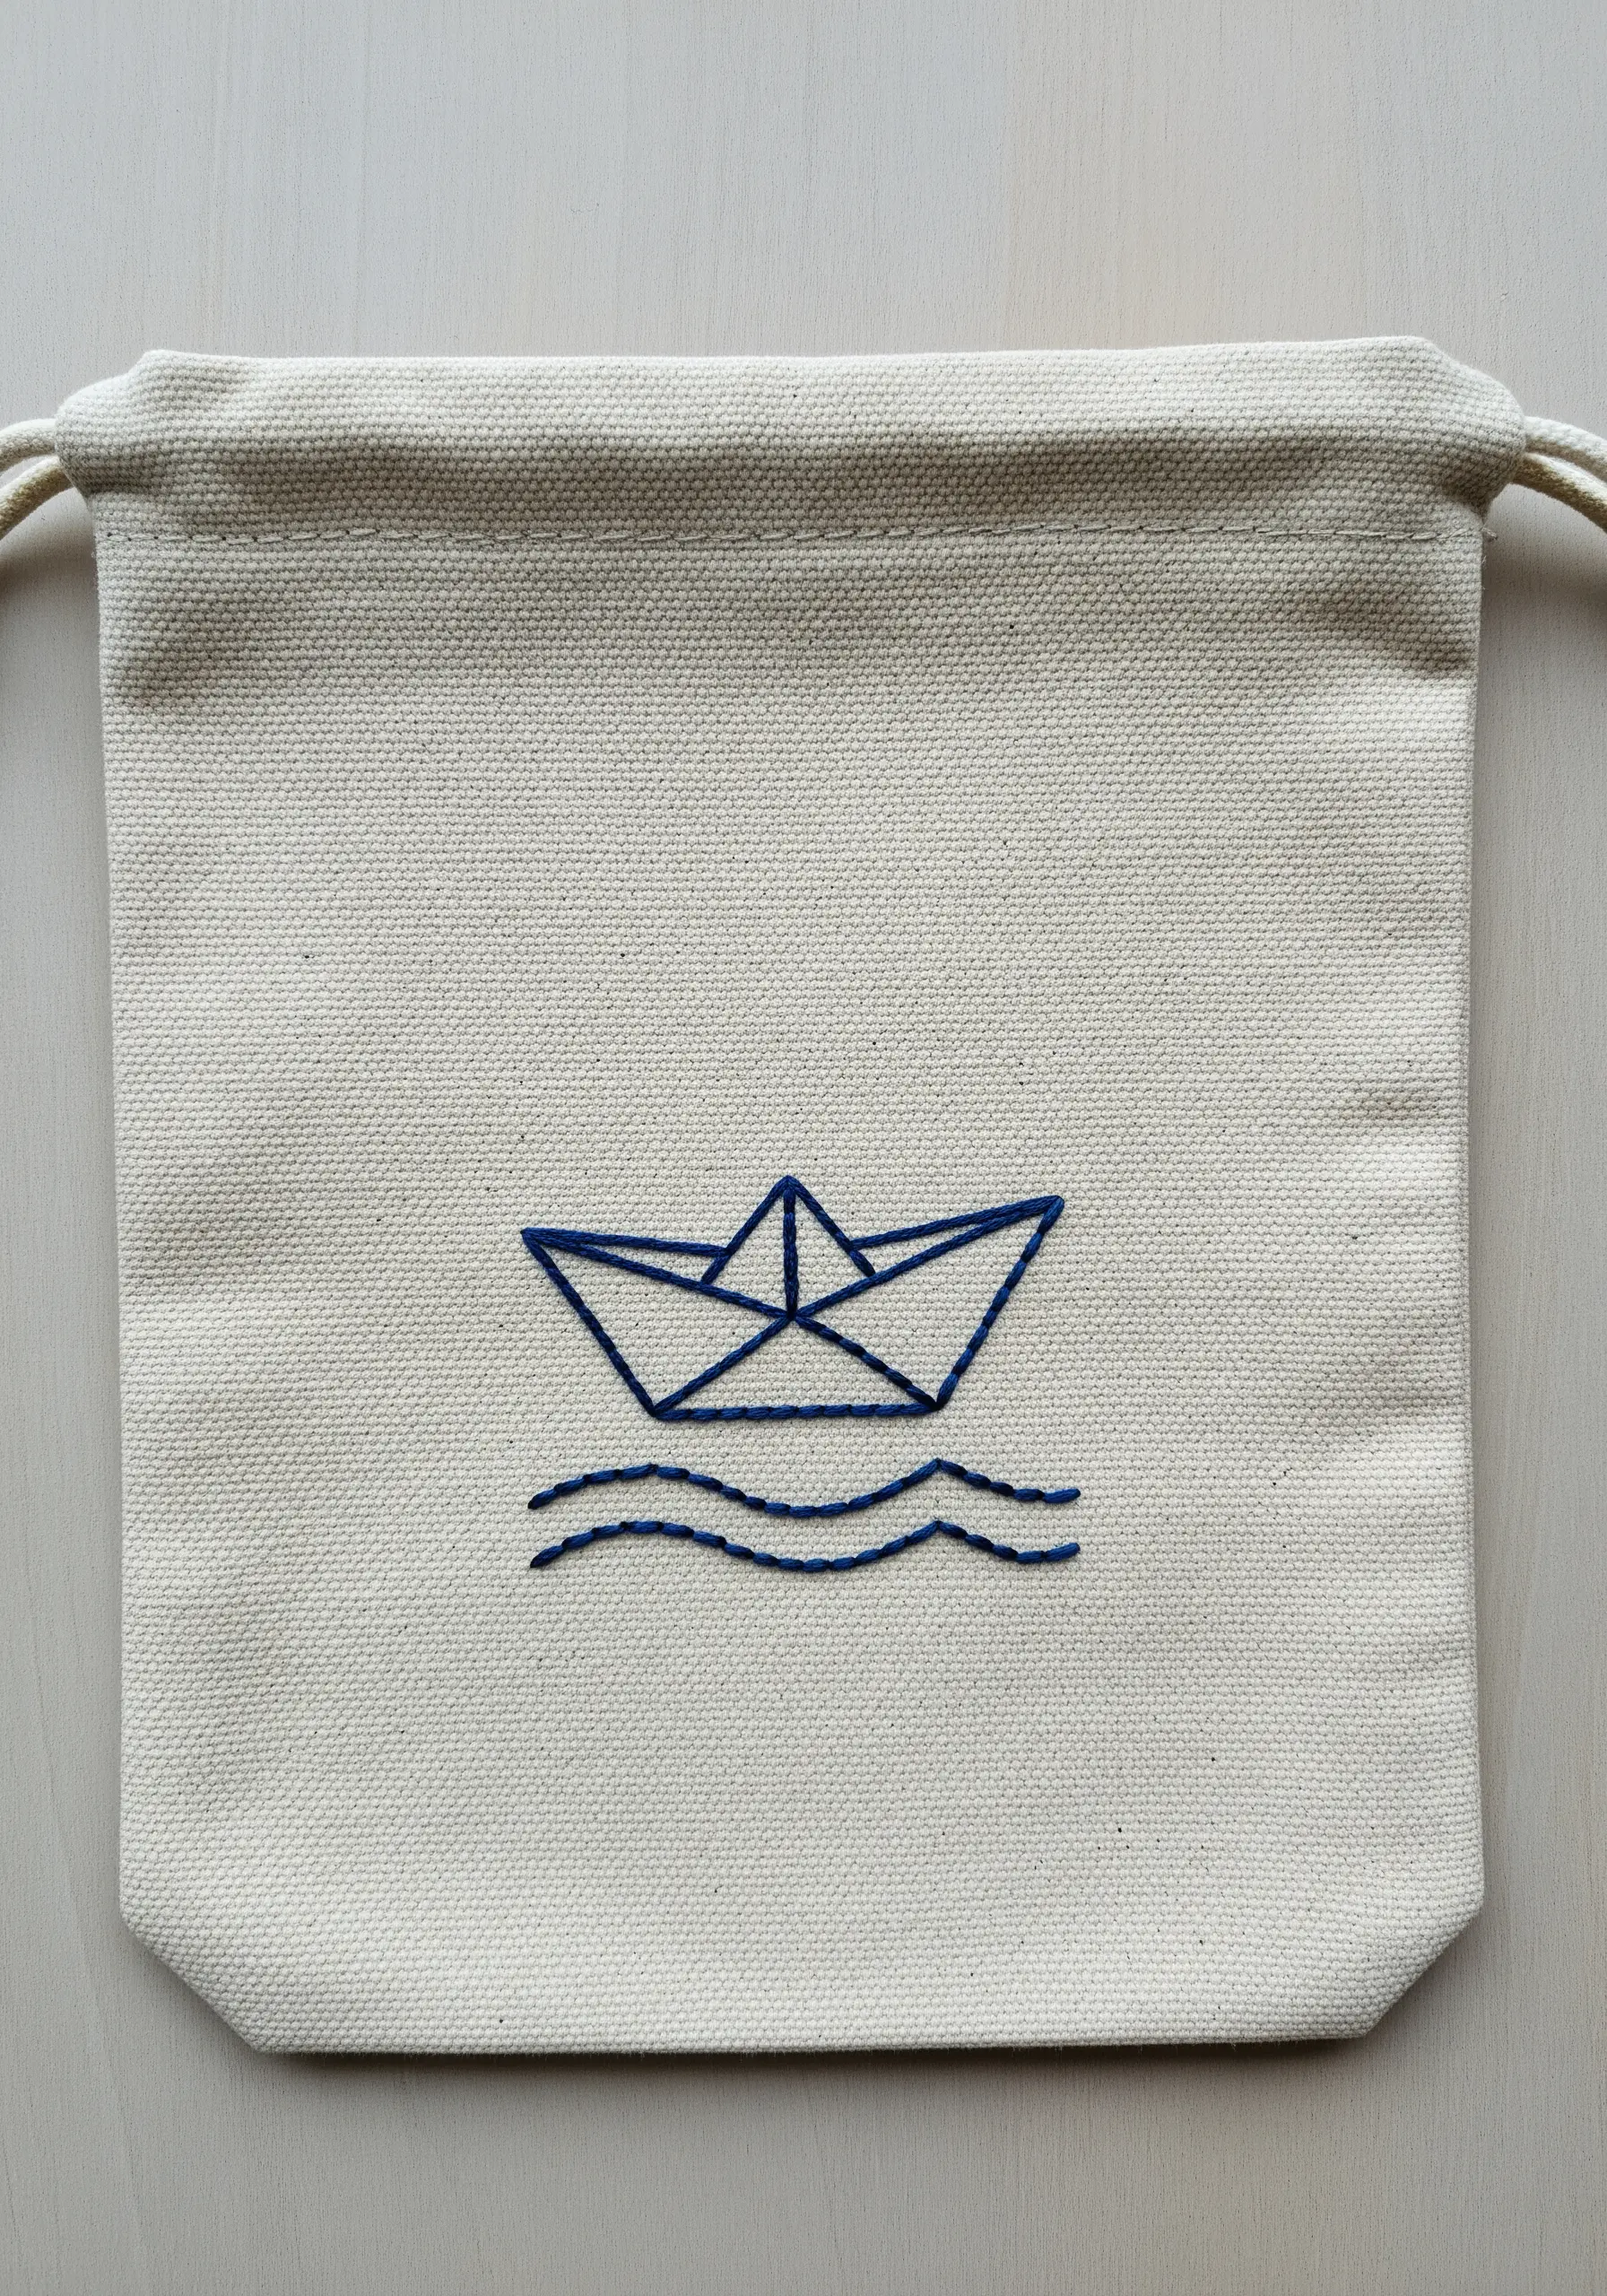
For simple, graphic designs like a paper boat, precision is more important than complexity.
Use a meticulous backstitch with two strands of floss, focusing on keeping each stitch exactly the same length.
This consistency transforms a basic outline into a sharp, architectural drawing on fabric.
For the waves, use a stem stitch with a slightly looser tension to create soft, flowing curves that contrast beautifully with the boat’s rigid lines.
7. Build Dimension with Clustered French Knots
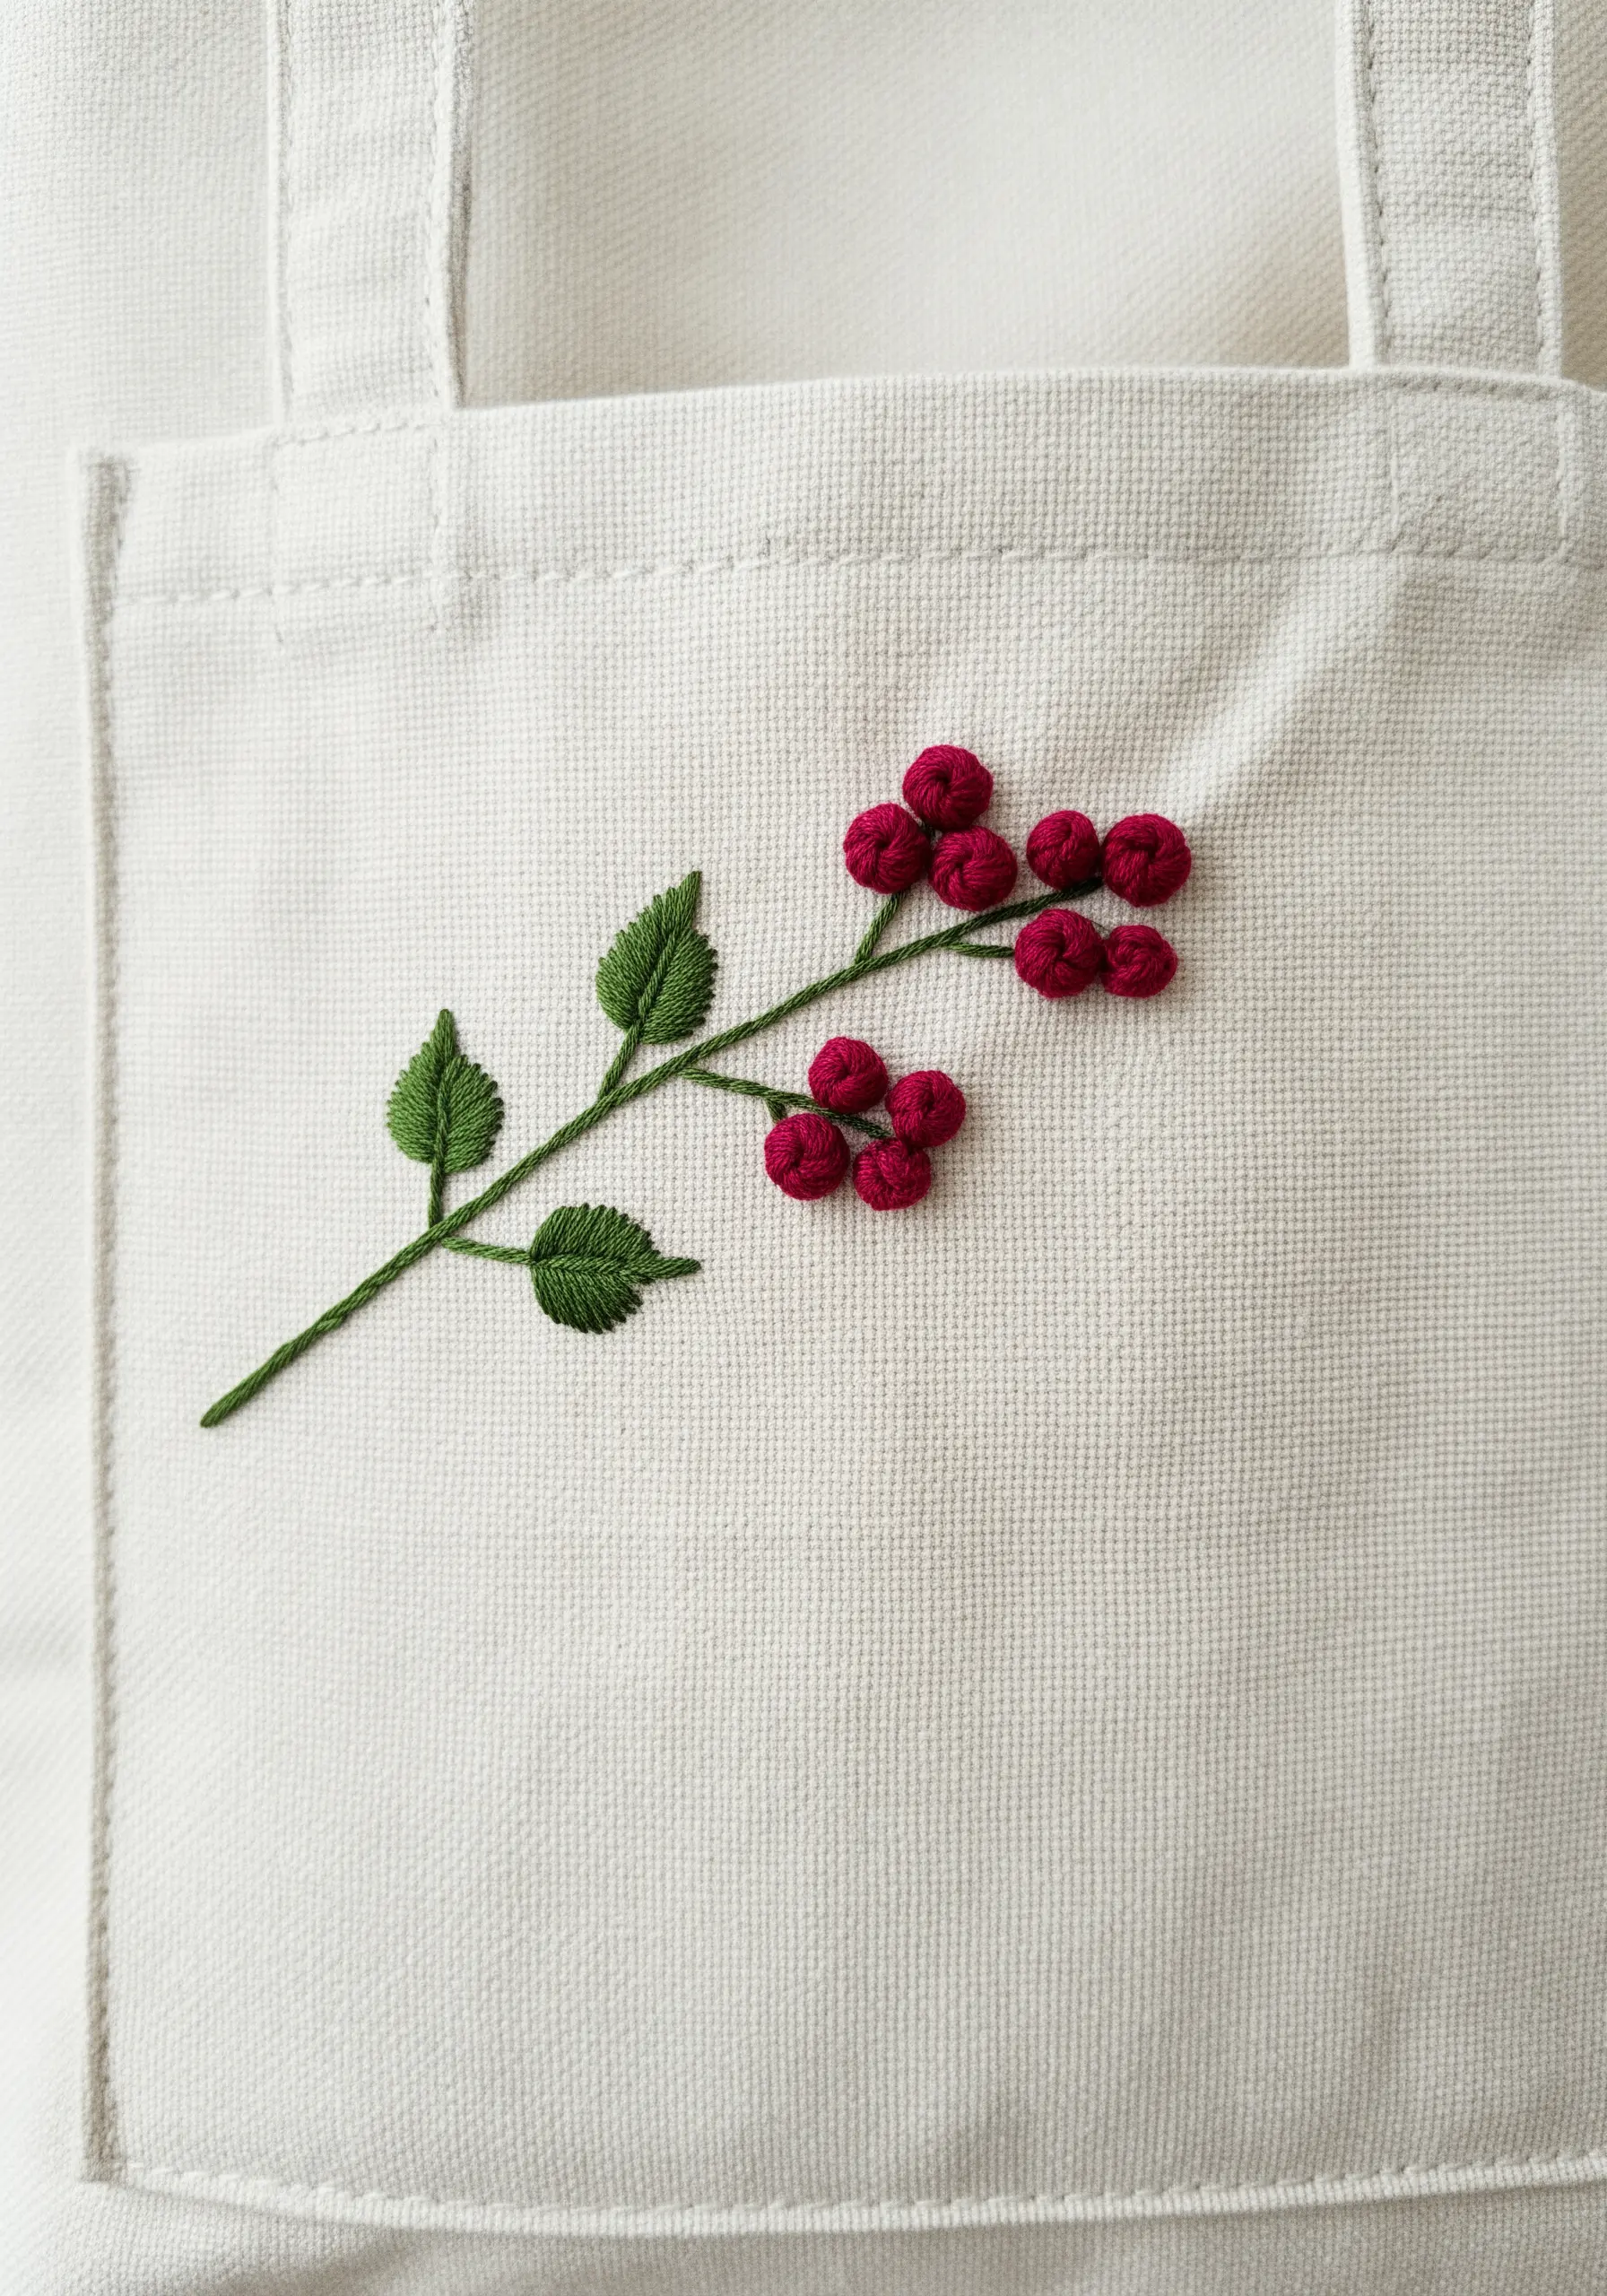
To give berries or small buds a plump, three-dimensional form, use multi-wrap French knots.
Wrap the thread around your needle two or three times to create larger, more substantial knots that stand out from the fabric surface.
Cluster them closely together, allowing them to push against one another to create a full, rounded shape.
Contrast this high texture with smooth, flat satin-stitched leaves to make the berries the undeniable focal point of your botanical design.
8. Stitch Delicate Constellations on Dark Fabric
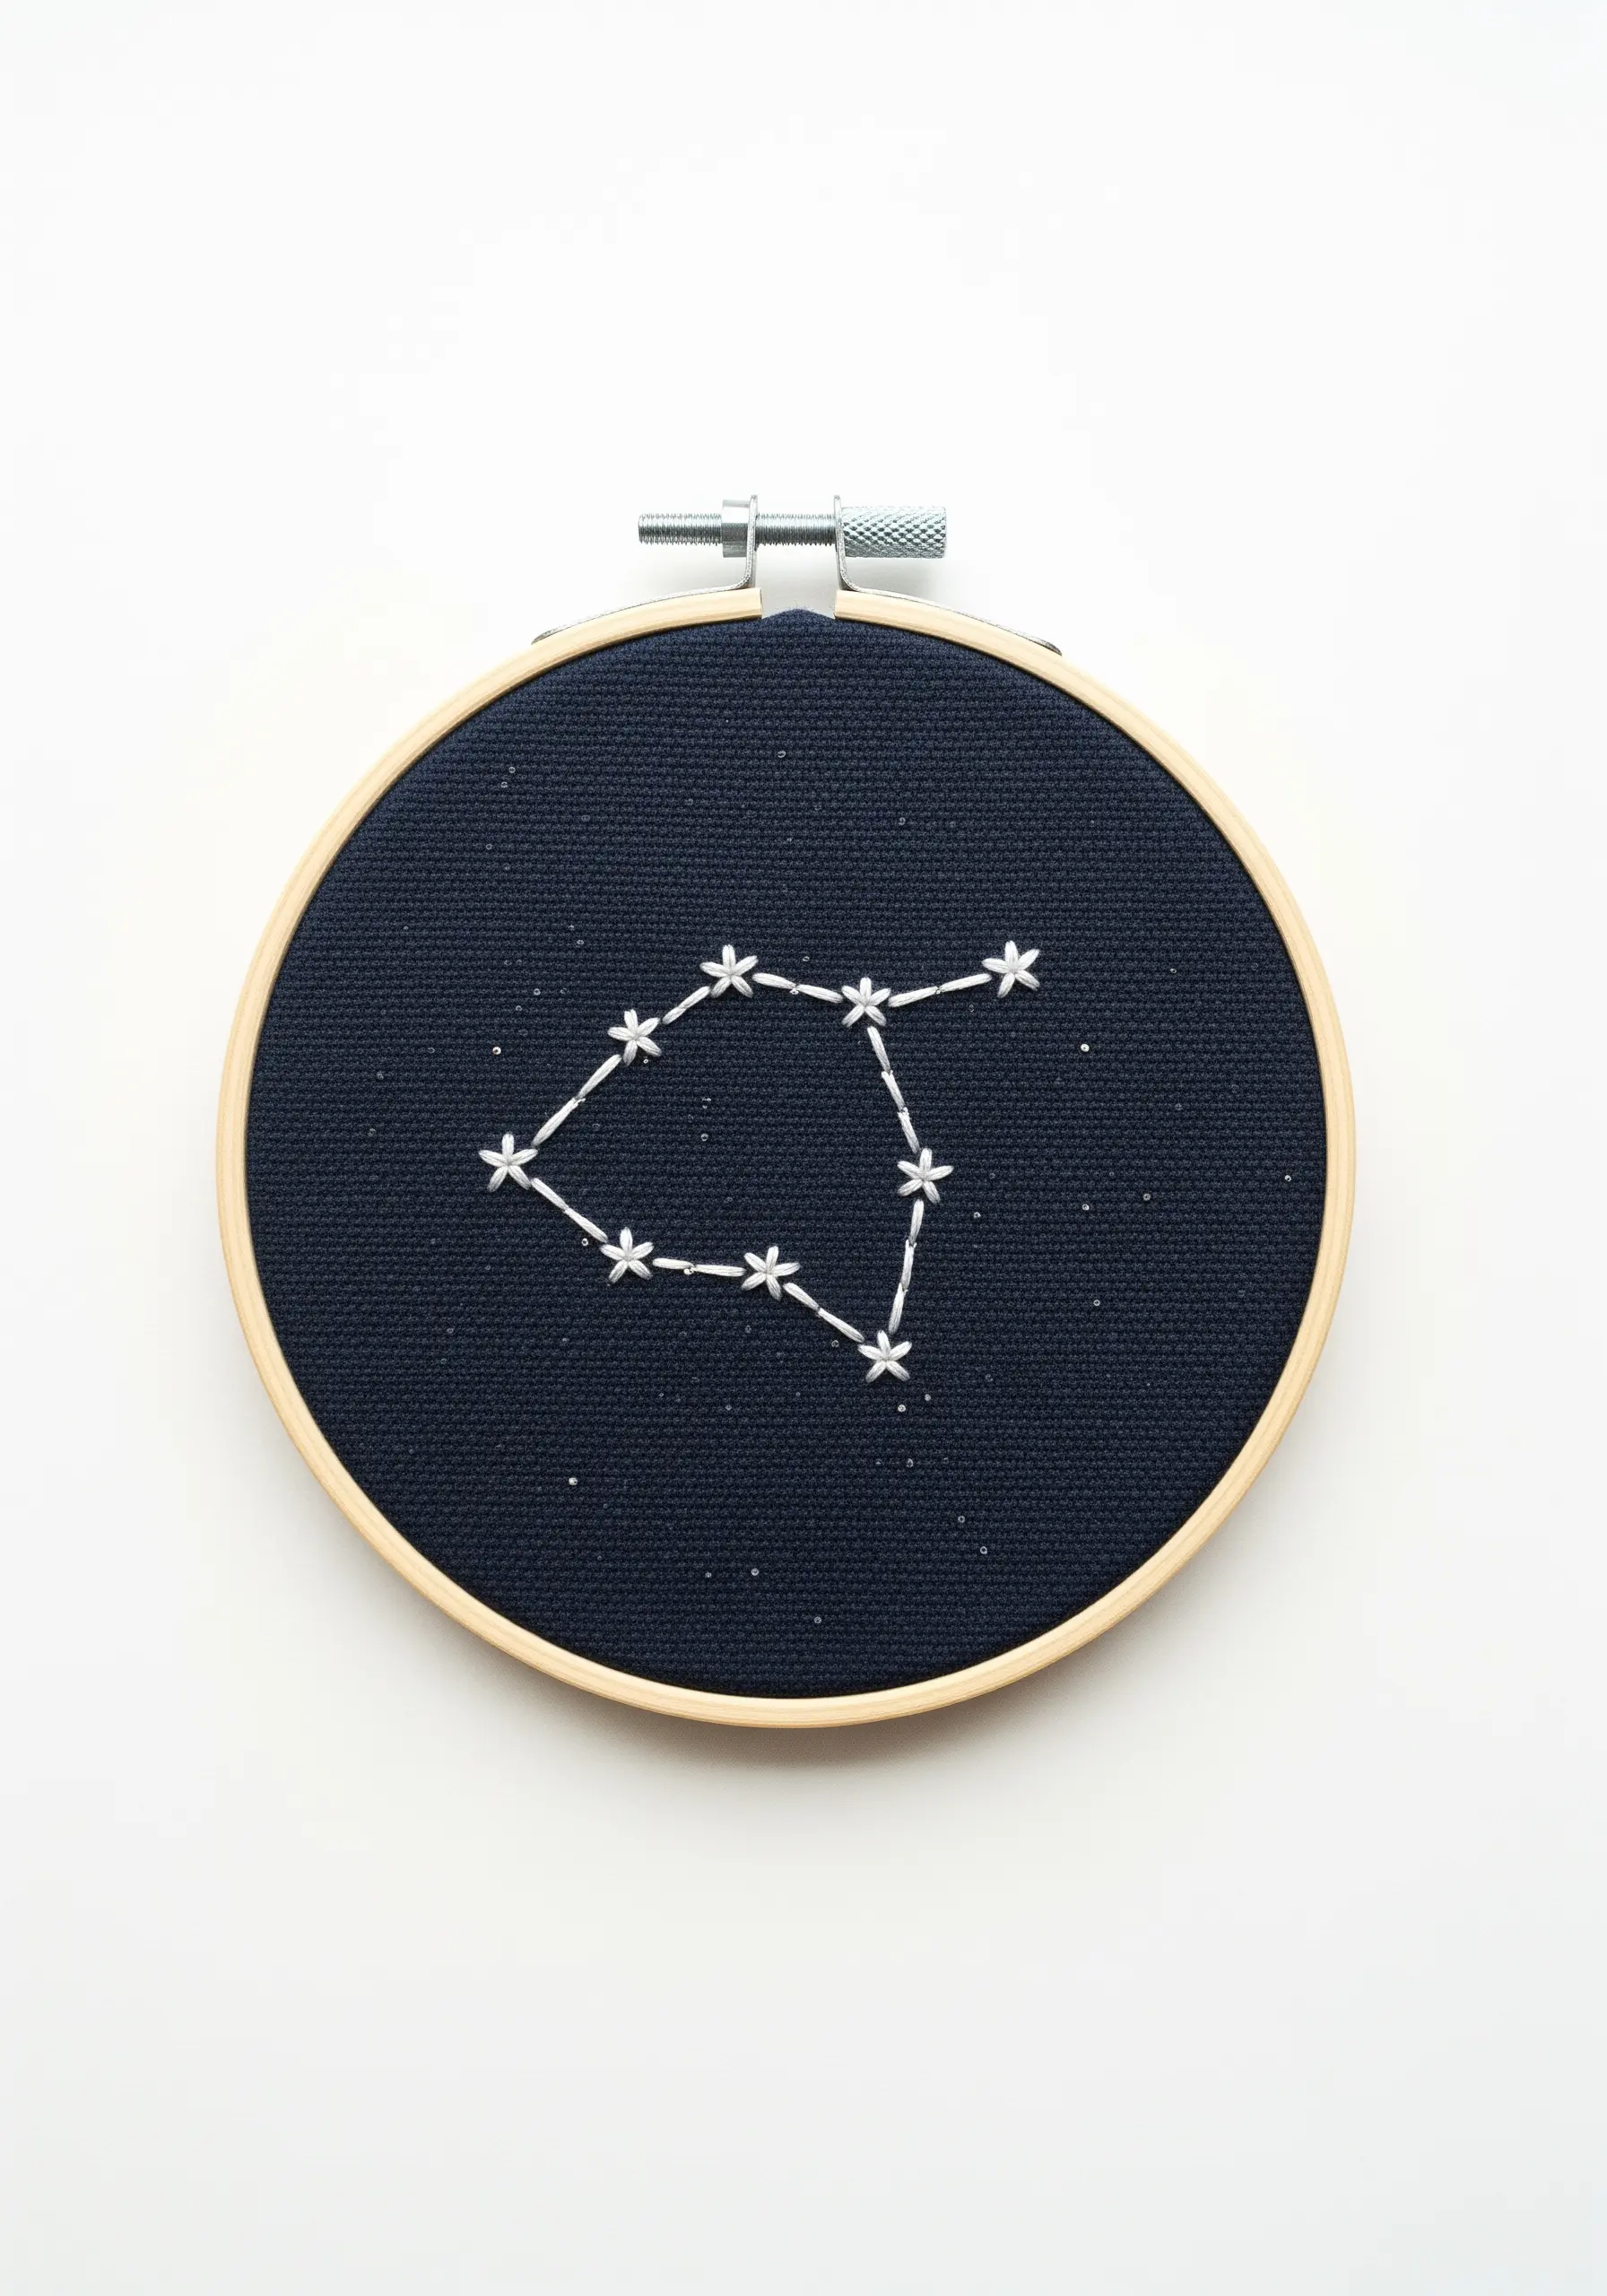
A dark tote or pouch is the perfect canvas for celestial embroidery, where the negative space becomes the night sky.
Use a single strand of bright white or metallic silver thread to make your stitches pop against the deep background.
Form each star with five small, straight stitches radiating from a central point, creating a simple starburst shape.
Connect them with a delicate backstitch to map out your favorite constellation, adding a few scattered French knots to represent distant stars.
9. Add Sophistication with Shaded Satin Stitch
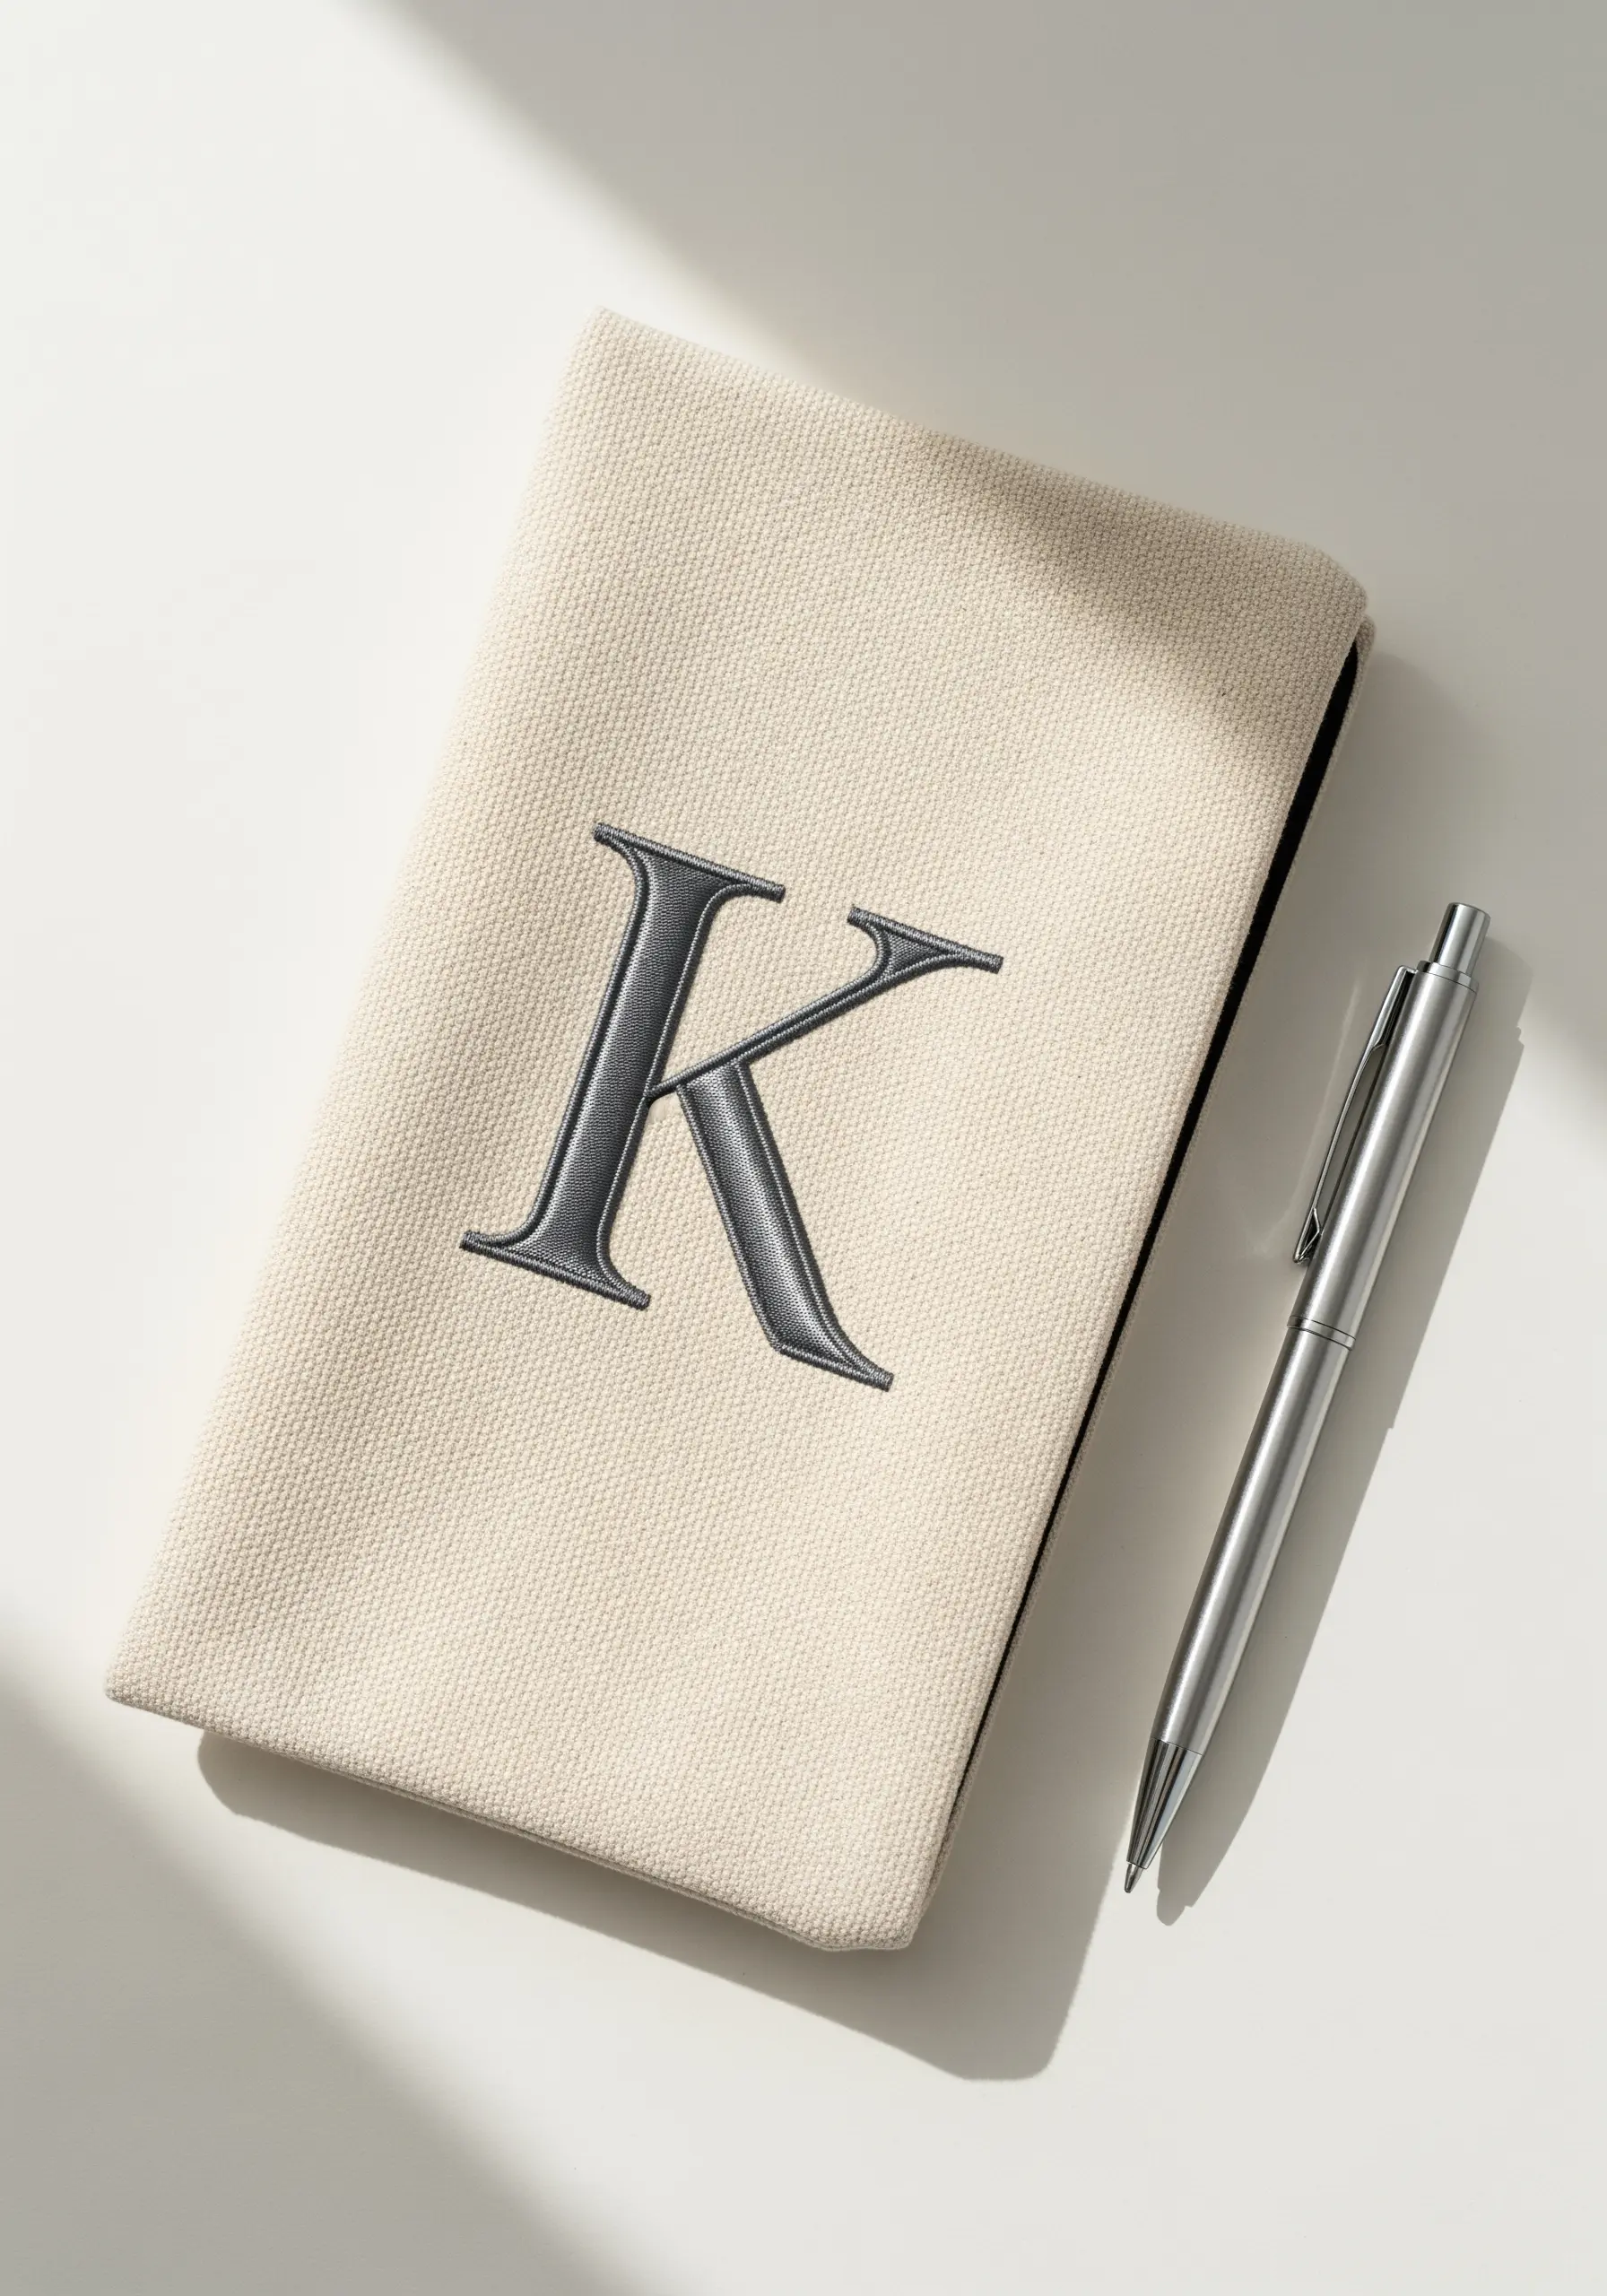
Transform a simple monogram into a statement of elegance by incorporating subtle shading.
Divide the letter into sections based on where light and shadow would naturally fall, then fill each section with a directional satin stitch.
Use a darker thread for the shadowed areas and a lighter one for the highlights to create a beveled, almost 3D effect.
Outlining the entire letter with a single, fine backstitch in the darkest shade will give it a crisp, finished edge.
10. Imply Warmth with Expressive Steam Stitches
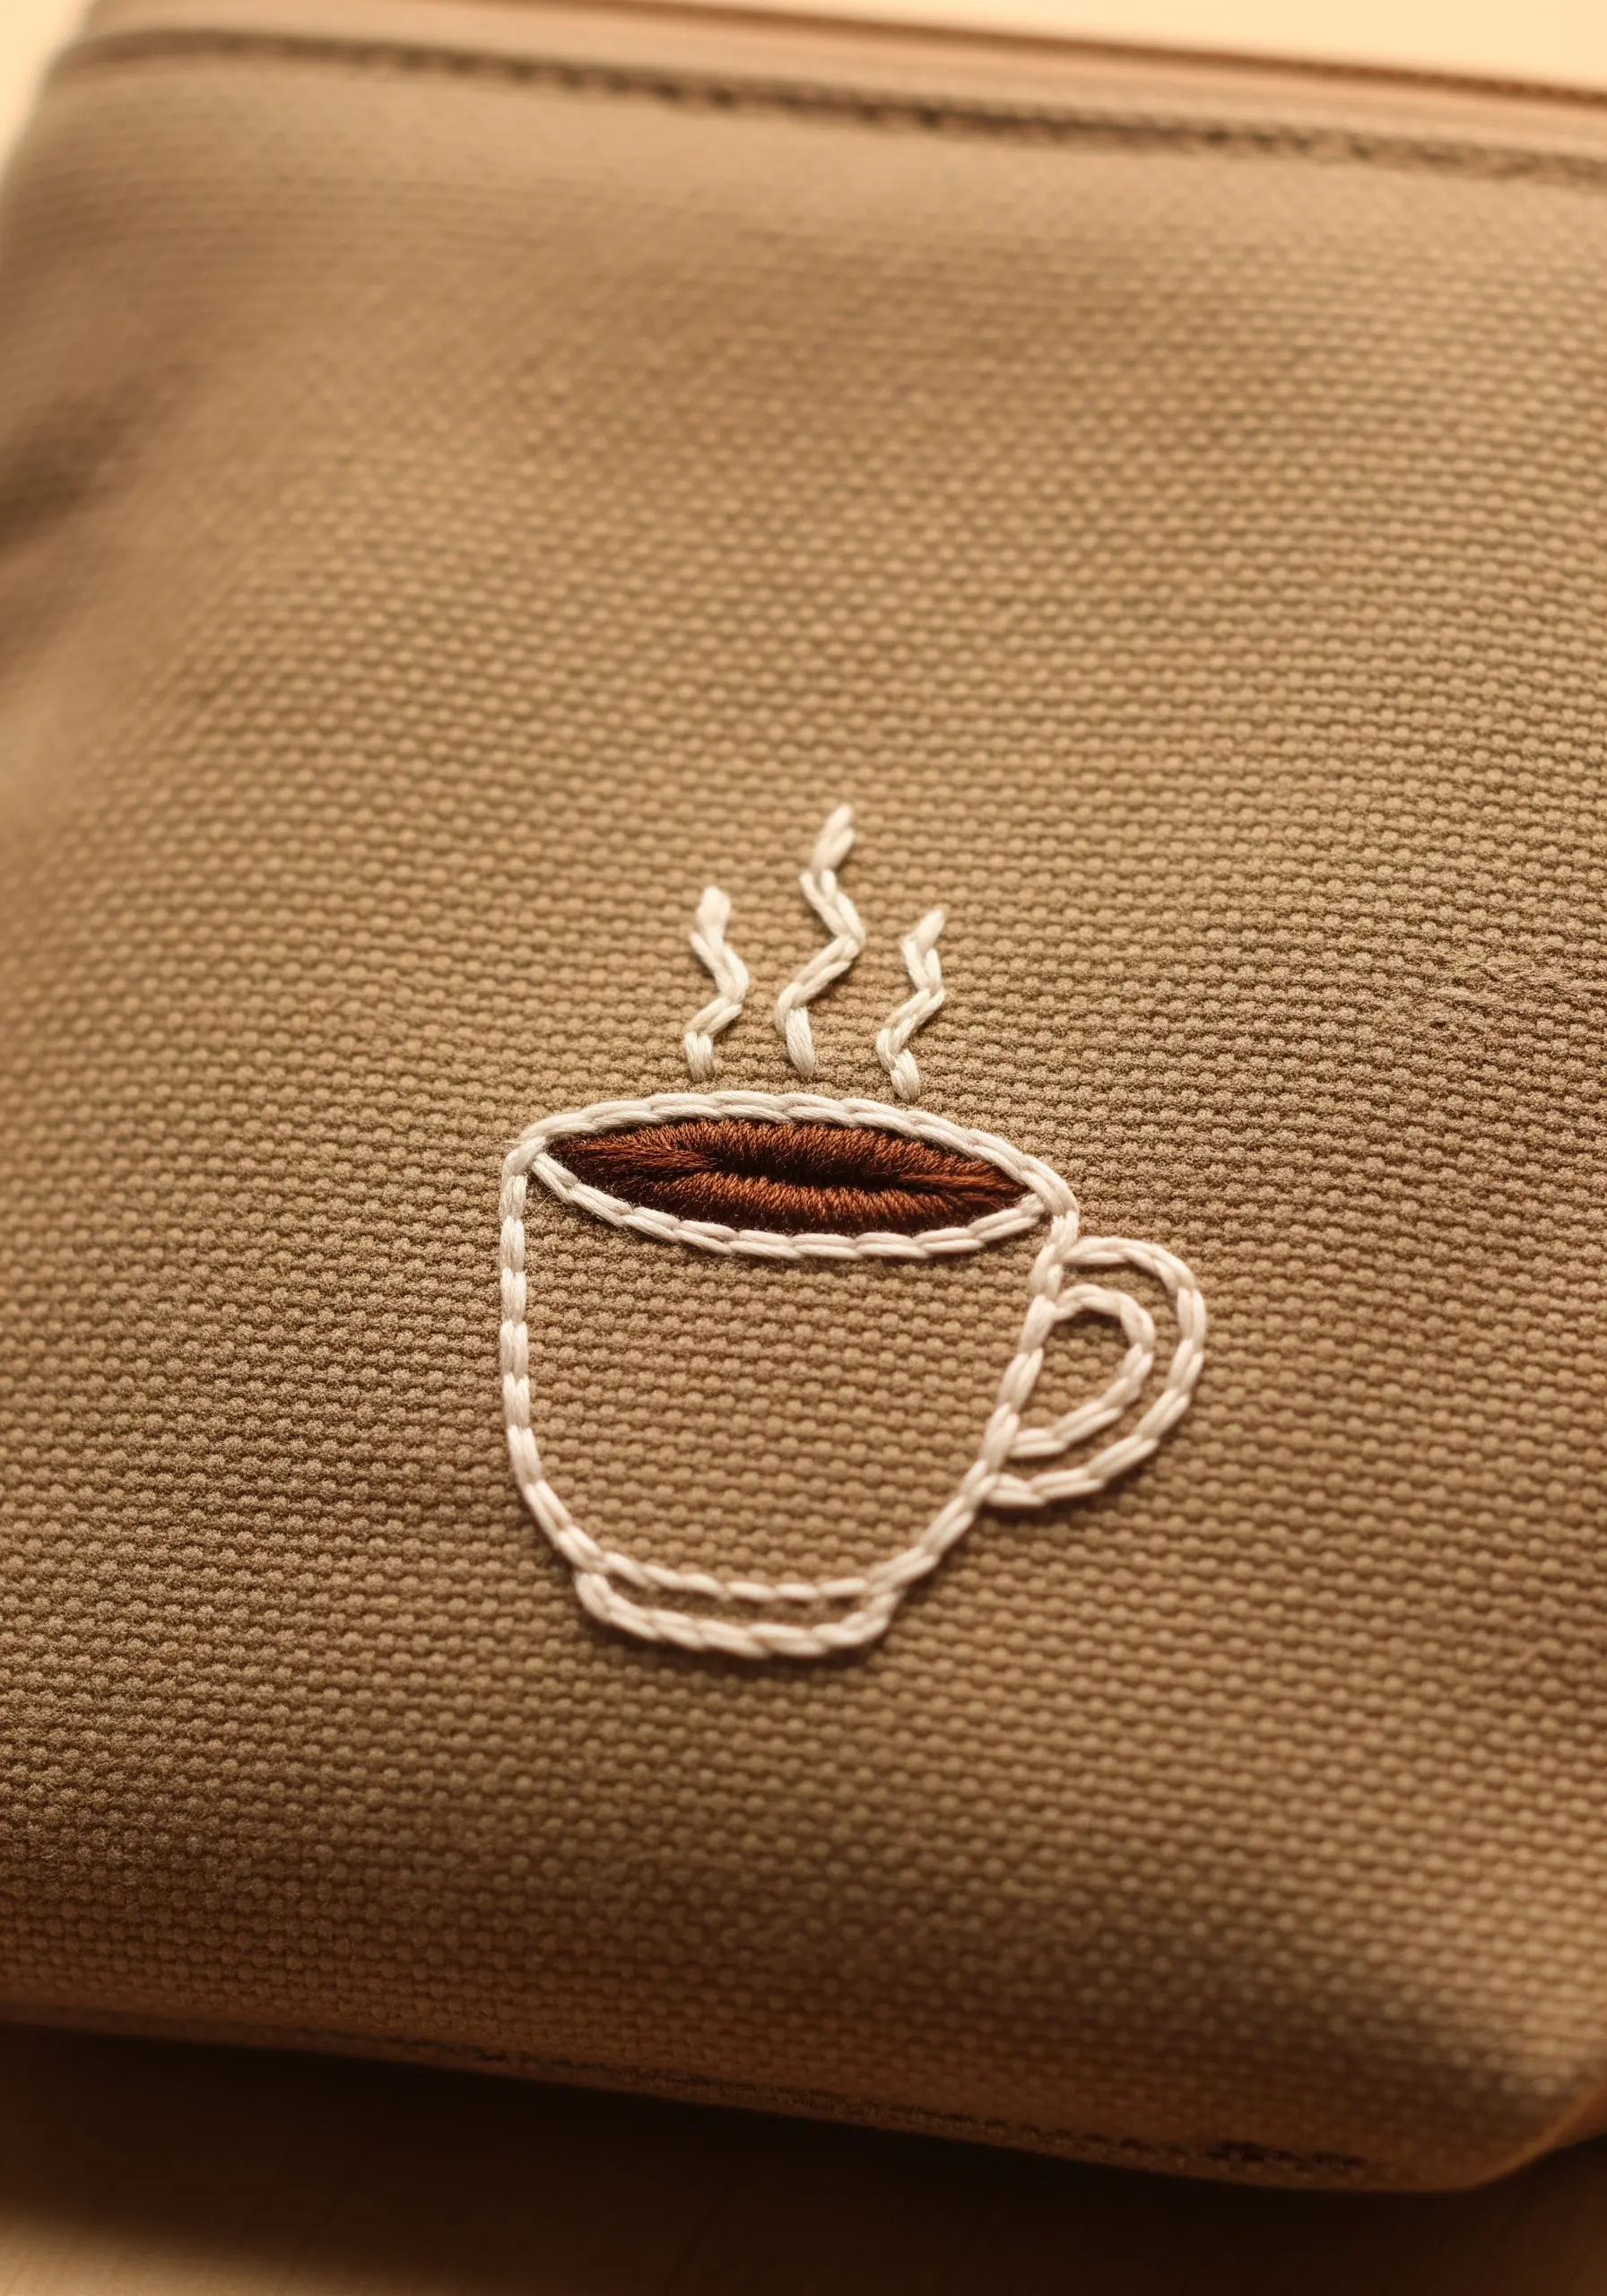
Bring a simple coffee cup motif to life by focusing on the steam.
Instead of rigid lines, use a light, airy stem stitch with a single strand of thread to create gentle, undulating waves.
Vary the height and curve of each line of steam to suggest movement and warmth.
For the cup’s outline, a thicker whipped backstitch provides a satisfying contrast, making the delicate steam appear even more ethereal.
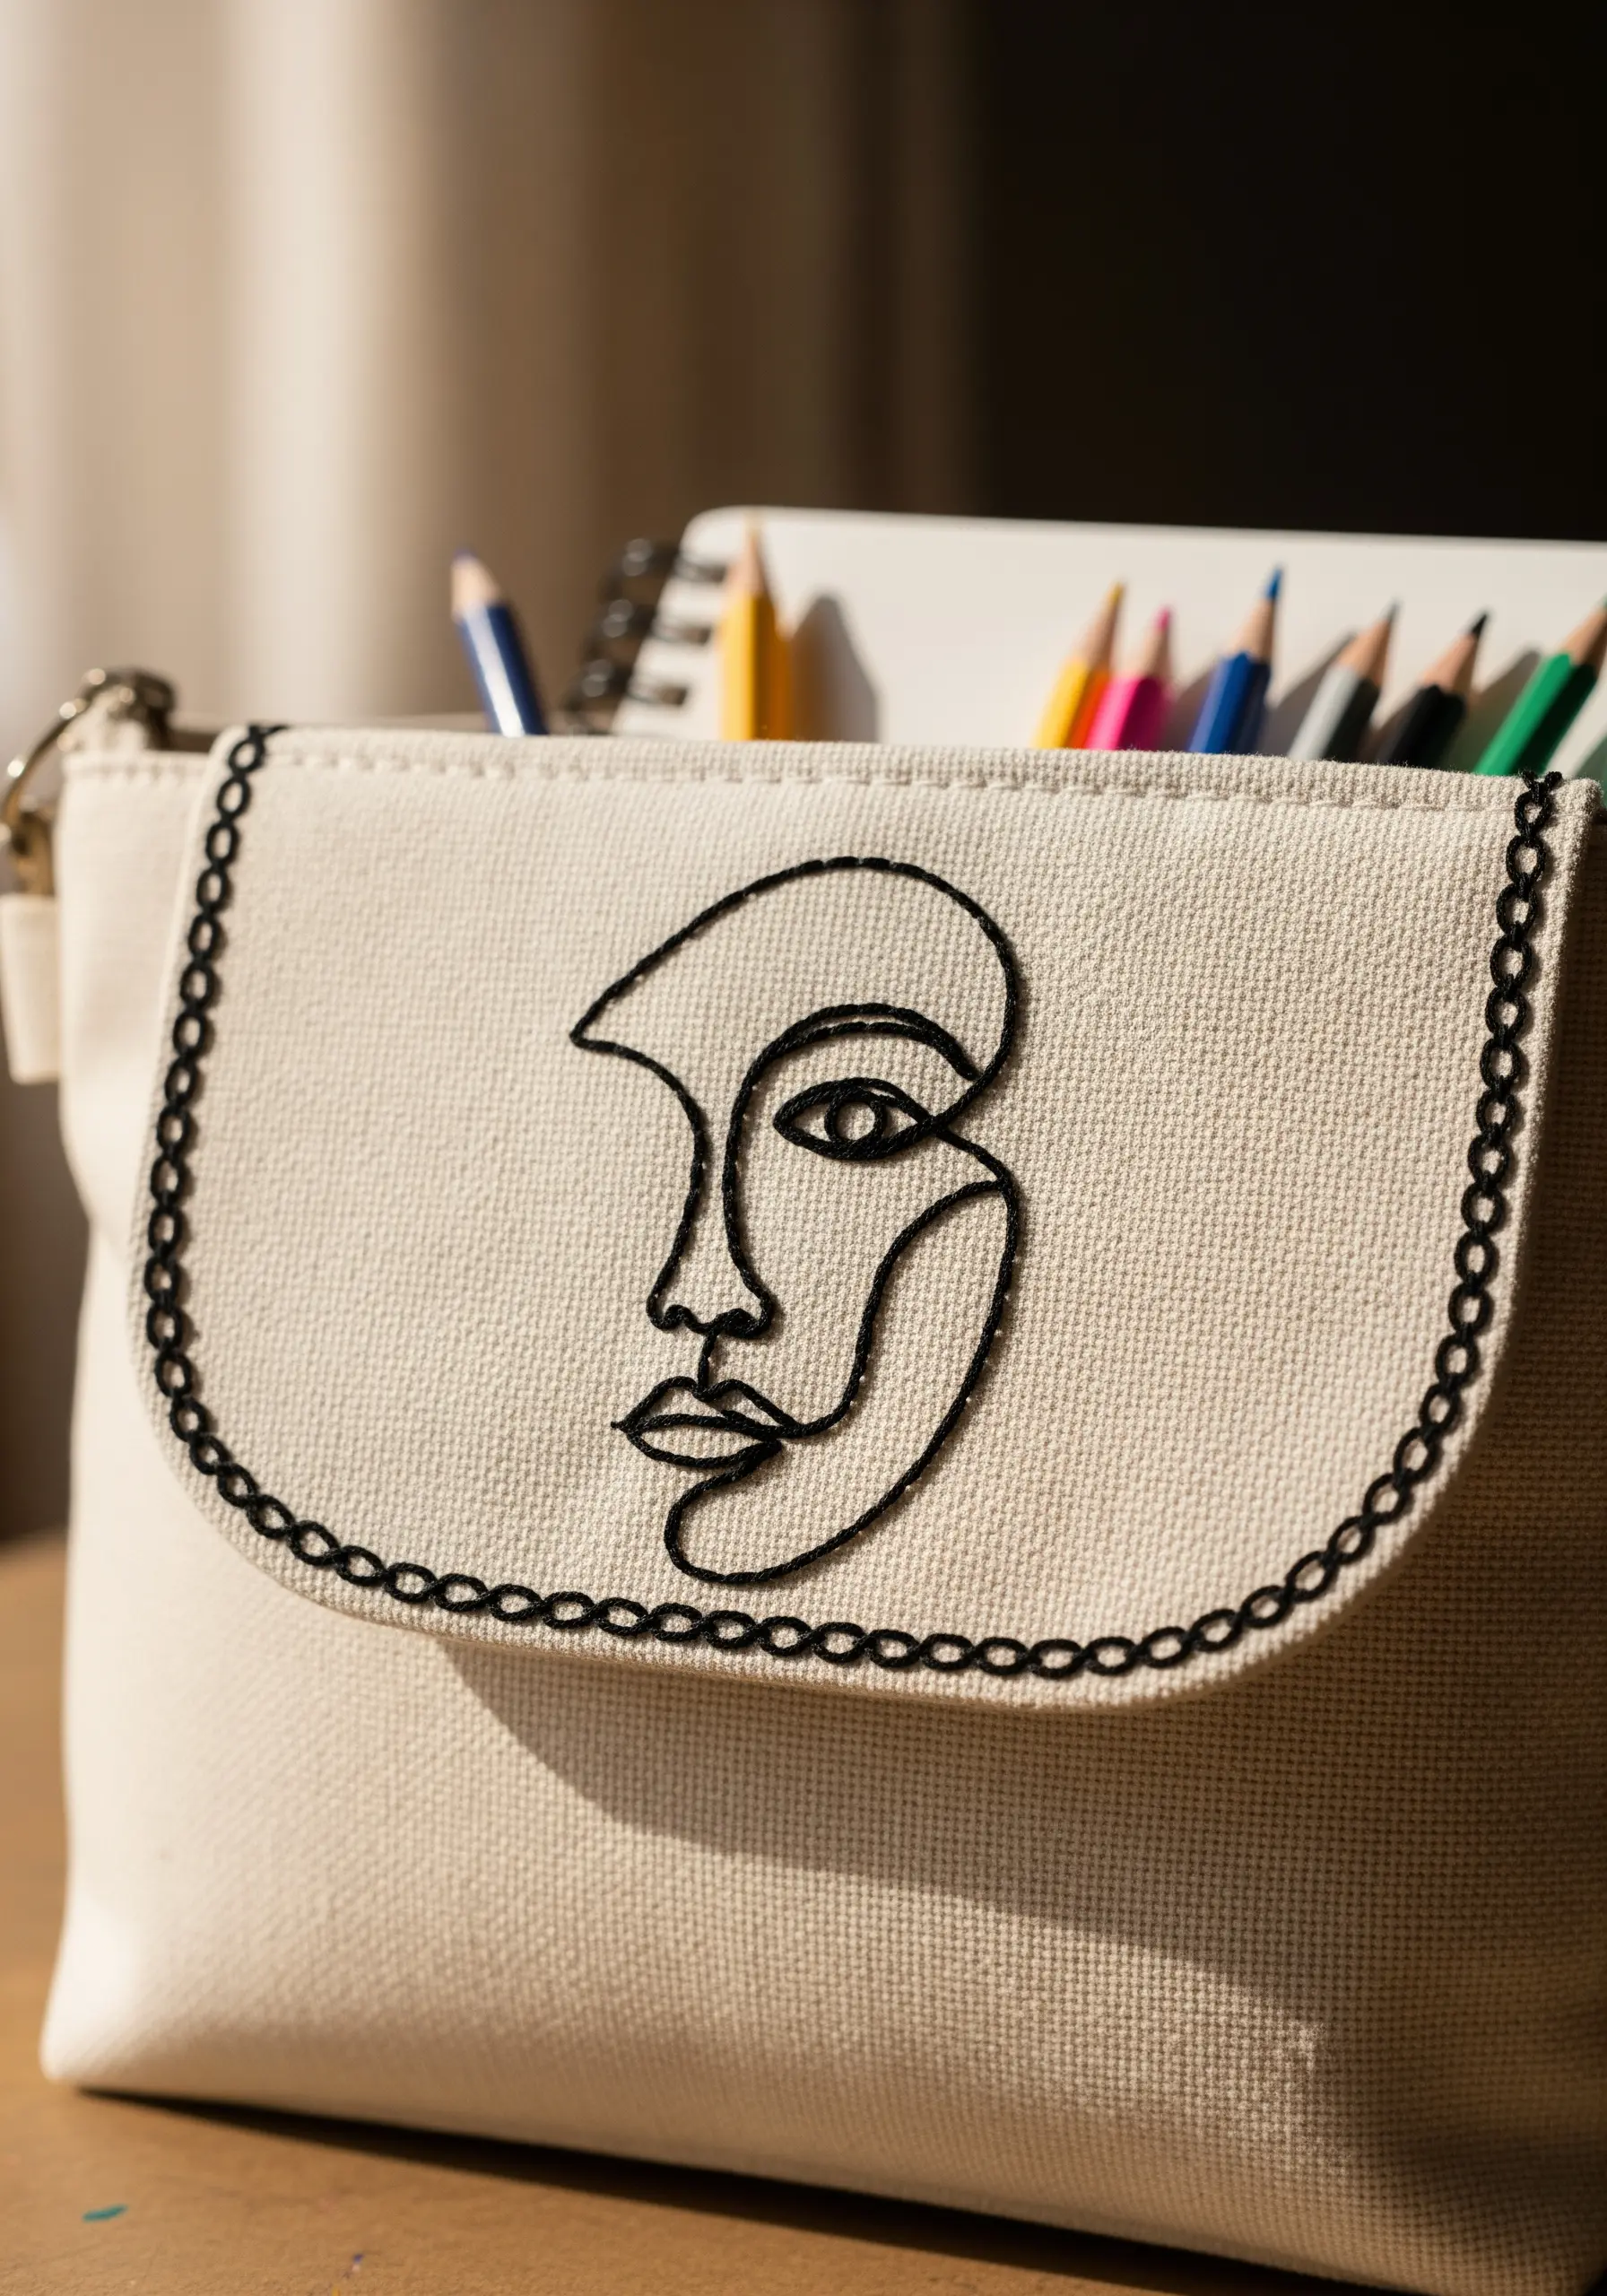
11. Master Fluidity with Continuous Line Art
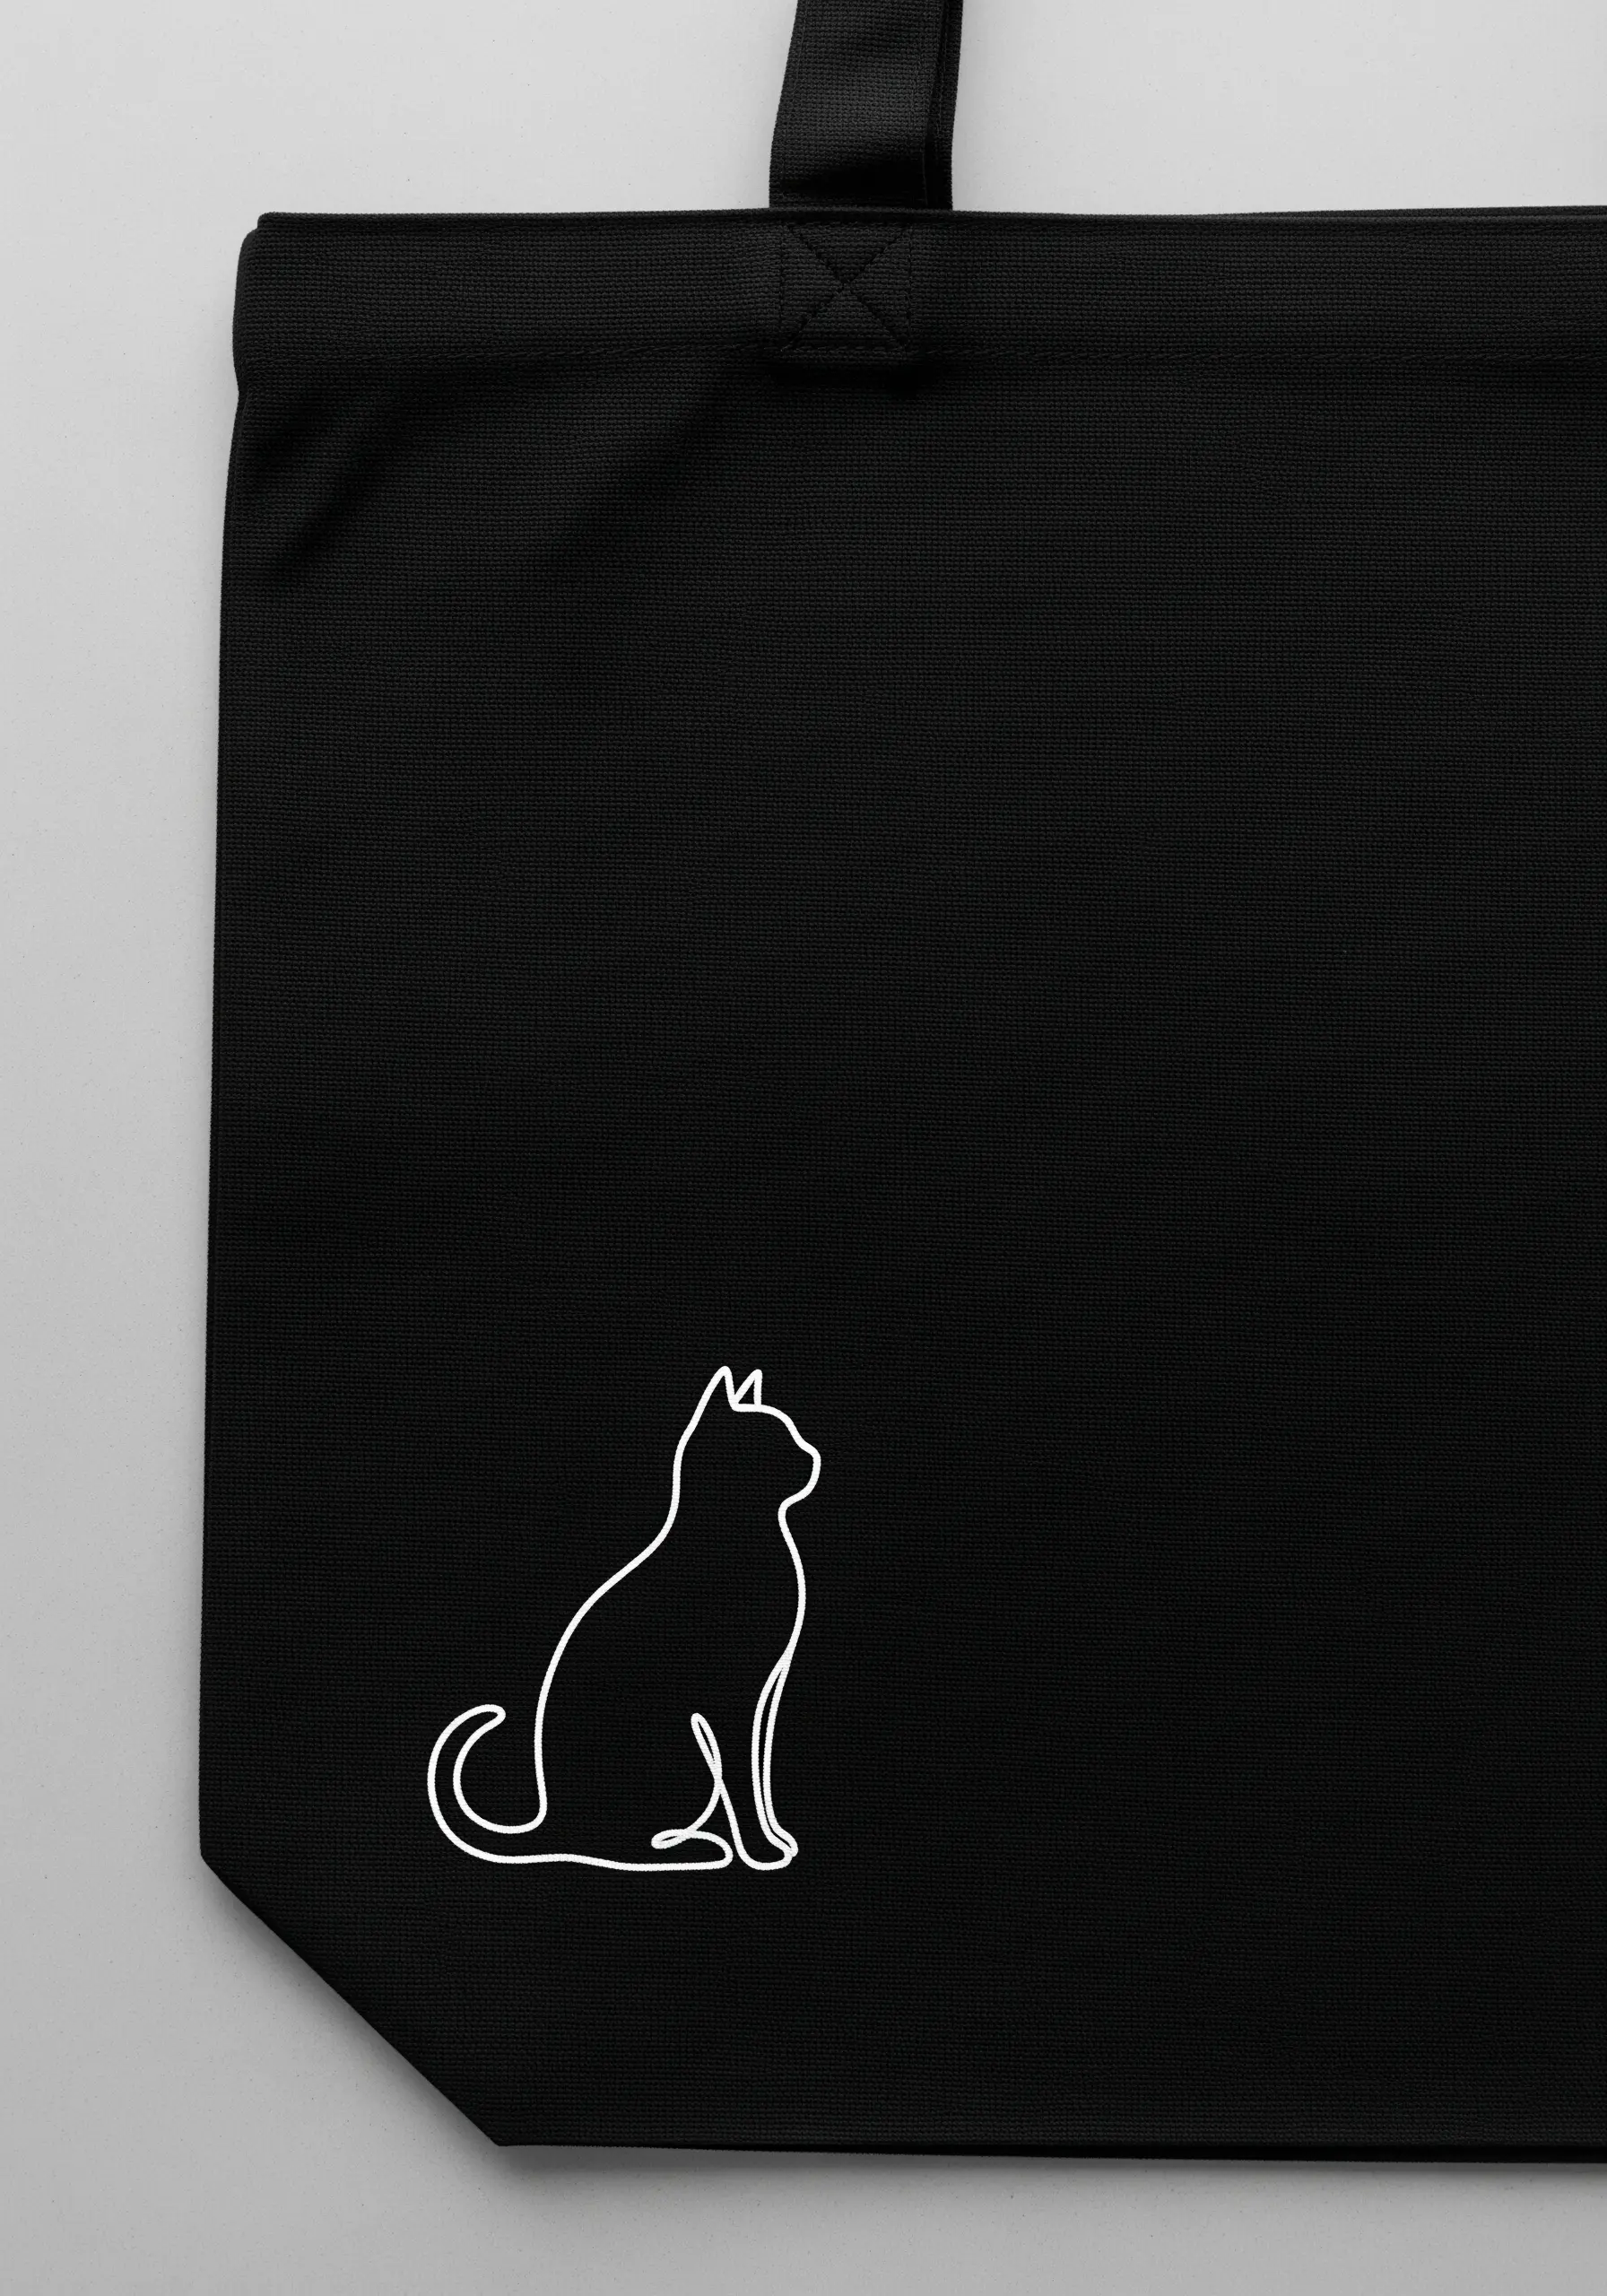
The elegance of single-line art relies on a smooth, unbroken contour.
Choose a stitch that flows easily around curves, like a stem stitch or a split stitch, using three strands of floss for a bold, graphic presence.
The key is to maintain consistent tension and stitch length, especially when navigating tight corners or curves, to avoid any puckering or sharp angles.
This technique is a beautiful way to celebrate form and silhouette, allowing the negative space to play a crucial role in defining the subject.
12. Capture Detail in Miniature with Fishbone Stitch
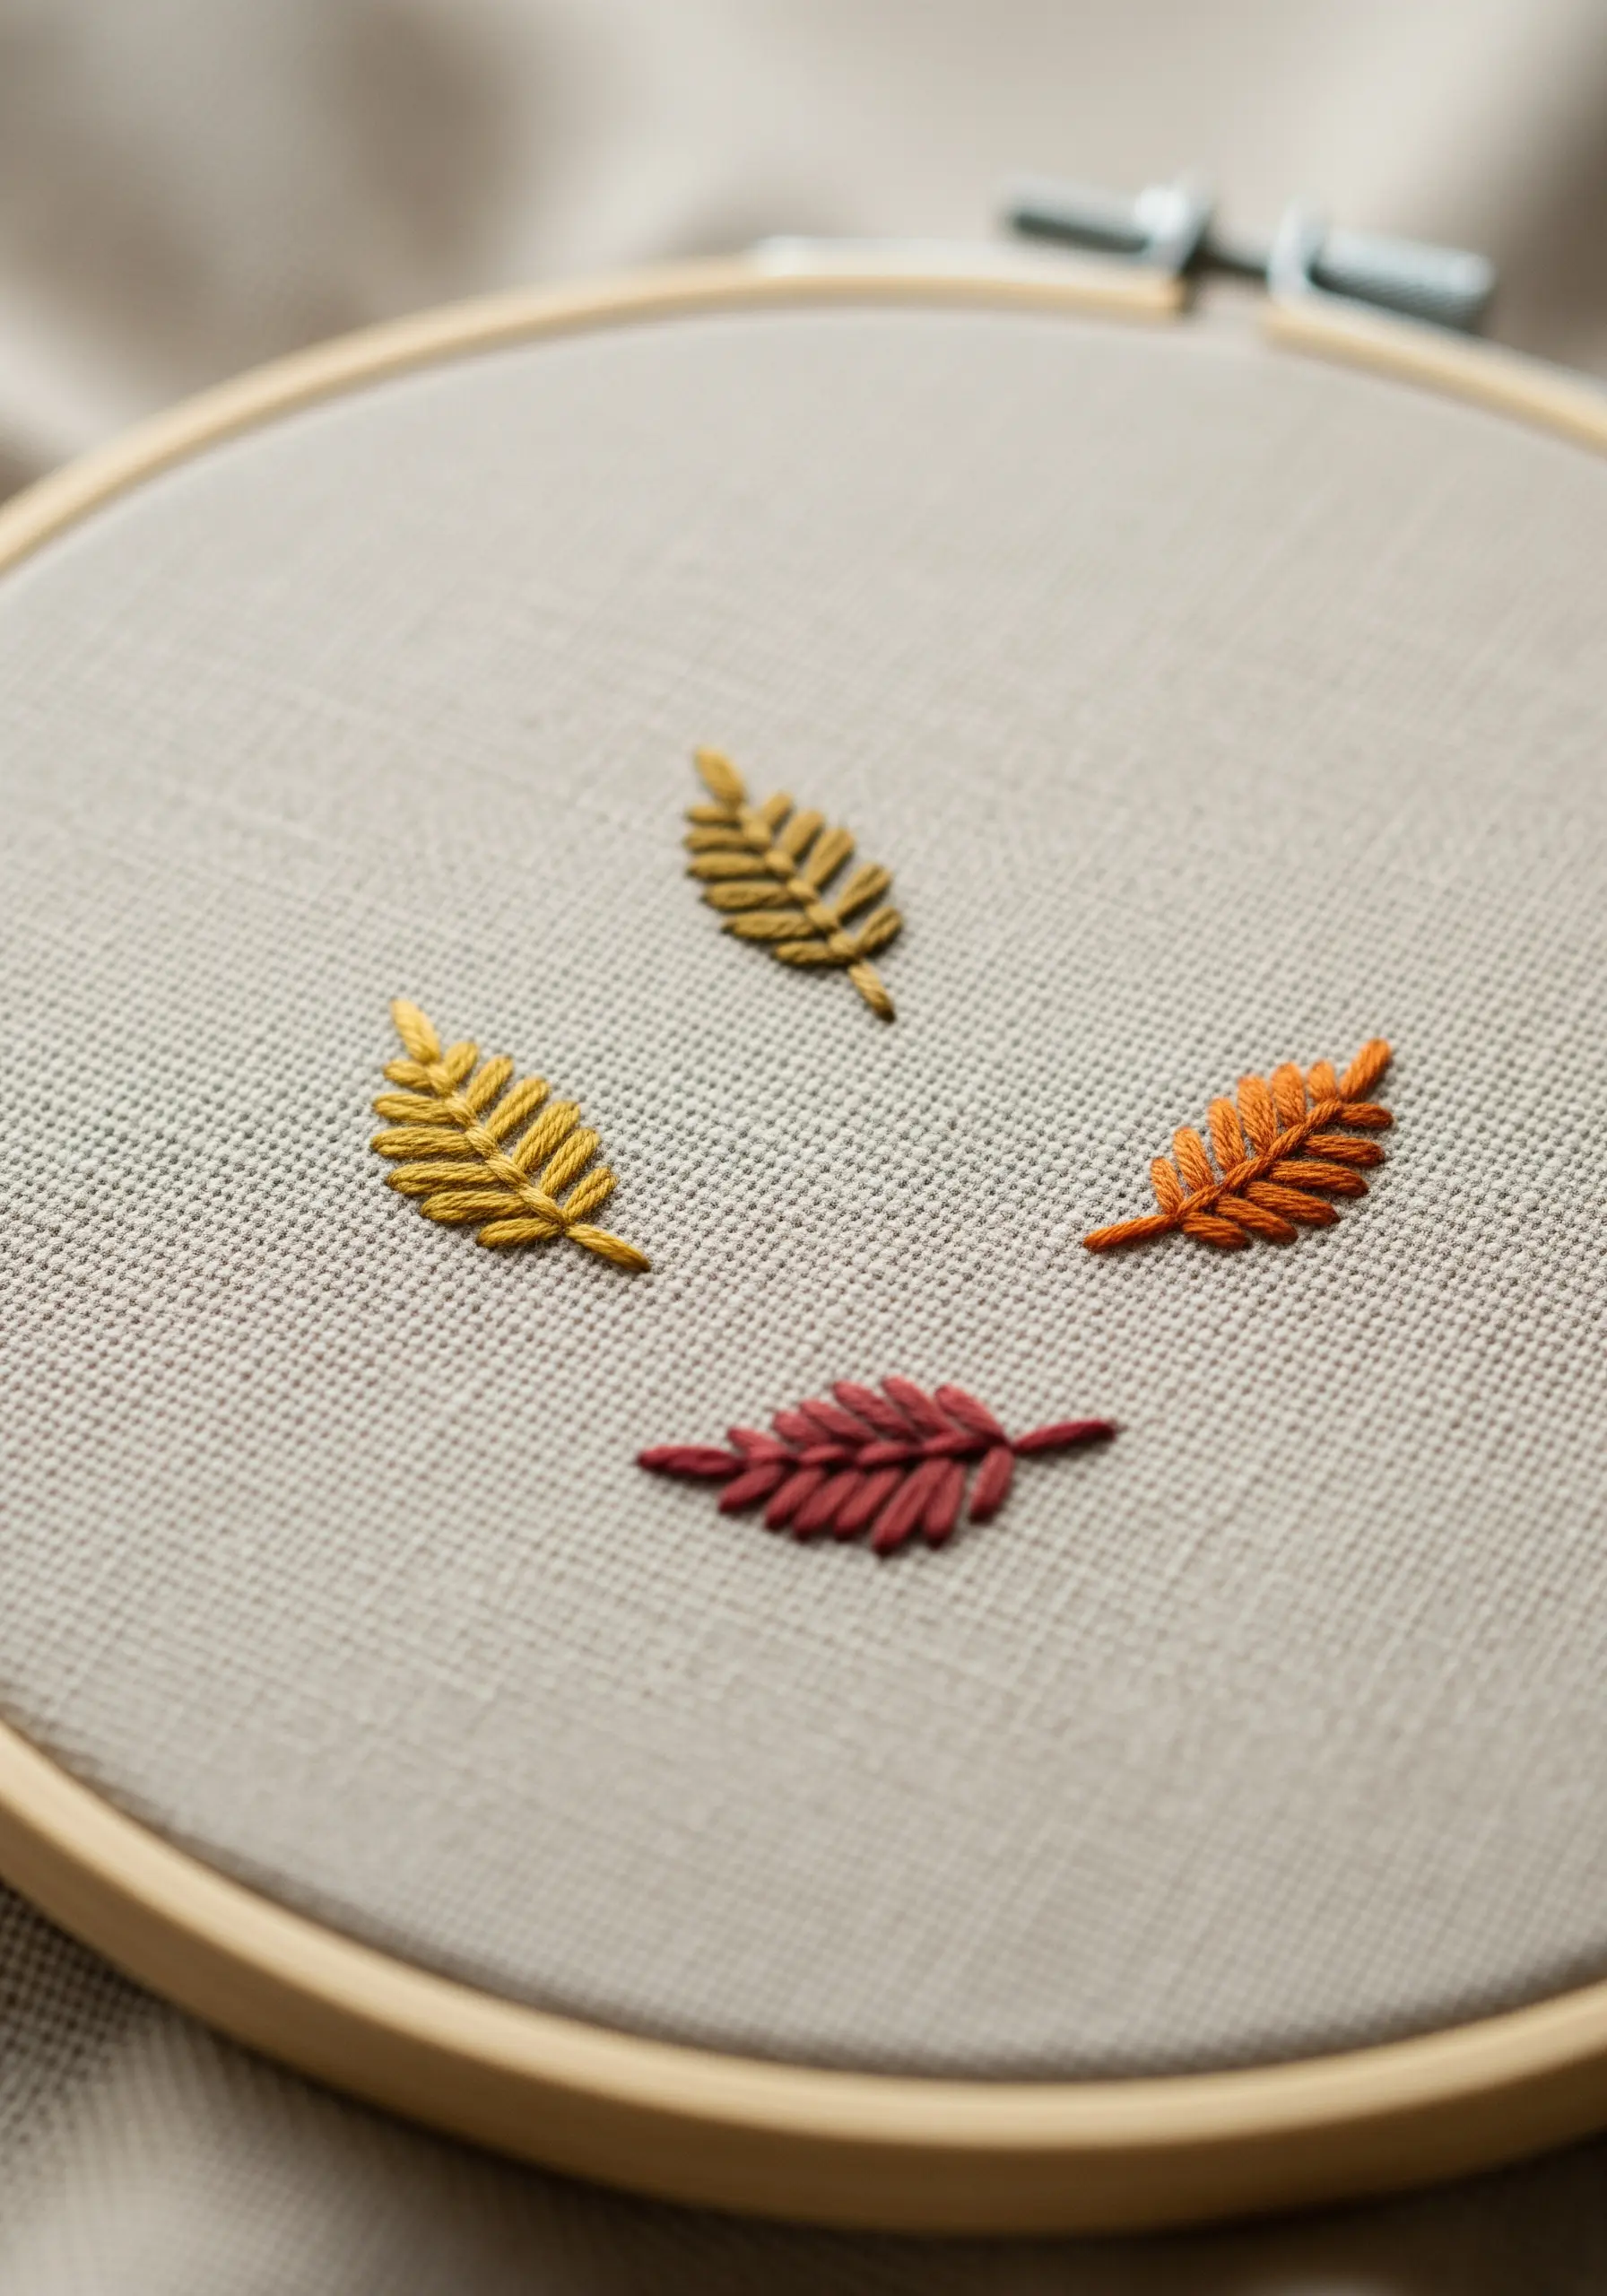
Fishbone stitch is perfect for these tiny leaves, as it simultaneously creates a central vein and fills the shape with angled stitches.
This single stitch gives small leaves a naturalistic texture and shape that satin stitch often can’t achieve at such a small scale.
Use just two strands of floss and a sharp needle to keep your stitches precise.
Grouping several leaves in an autumn color palette creates a scattered, windswept effect that adds subtle charm to any corner of a bag.
13. Frame Your Designs with a Decorative Border
Elevate a central motif by adding a simple, complementary border stitch along the edge of a pocket or flap.
A detached chain stitch, spaced evenly, creates a delicate scalloped or looped effect that frames the primary artwork without overwhelming it.
This approach makes your composition feel complete and intentional, turning a simple pouch into a more thoughtfully designed piece.
Pair a bold line art motif with a delicate border for a balanced and modern look.
14. Create a Luminous Moon with Padded Satin Stitch

Make your celestial motifs stand out by giving them a raised, three-dimensional surface.
First, fill the crescent moon shape with a foundation of small seed stitches or a grid of straight stitches.
Then, cover this padding with horizontal satin stitches using a metallic or high-sheen silver thread.
The underlying layer lifts the satin stitch away from the fabric, allowing it to catch more light and create a beautiful, touchable texture that truly shines.
15. Build Colorful Arcs with Chain Stitch
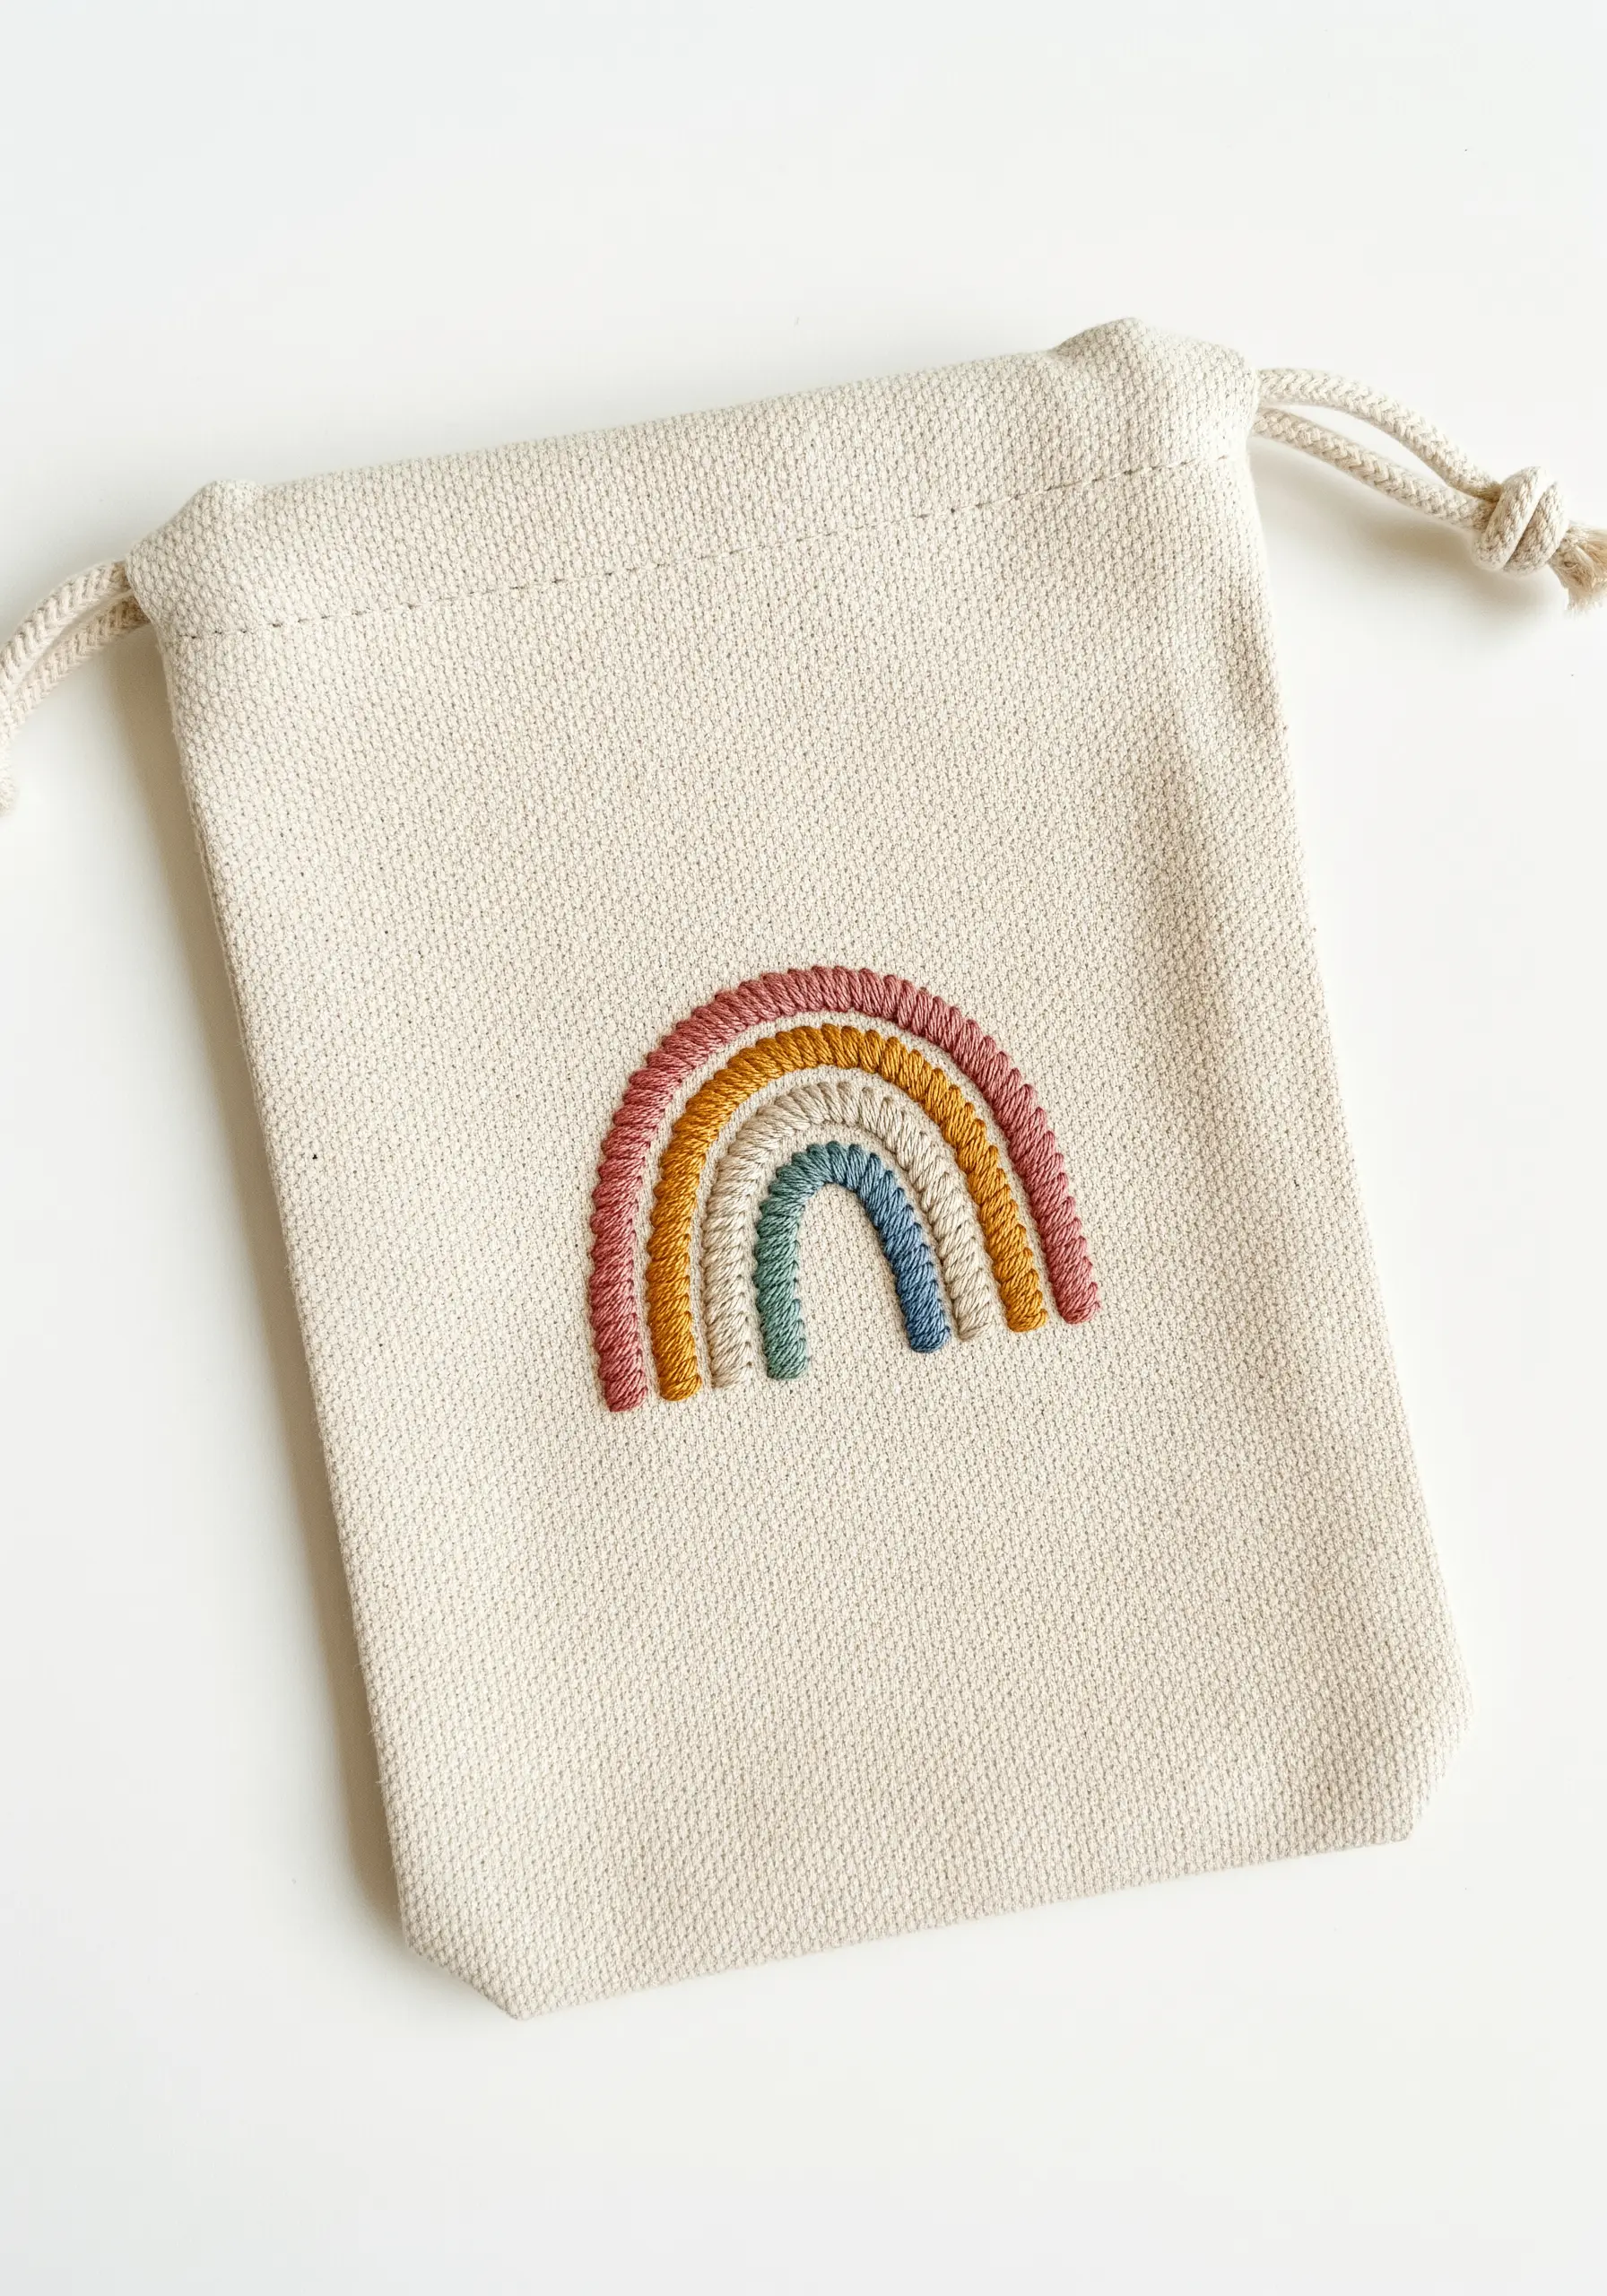
For a rainbow with satisfying texture and bold color, the chain stitch is an excellent choice.
Its looped structure creates a braided line that is more substantial than a simple backstitch, making each colorful arc stand out.
To ensure your rainbow is perfectly shaped, draw concentric guidelines with a water-soluble fabric pen before you begin stitching.
This method allows you to focus on creating even, consistent chain stitches, resulting in a clean and cheerful design.
16. Depict Intricate Details with Fine Backstitch
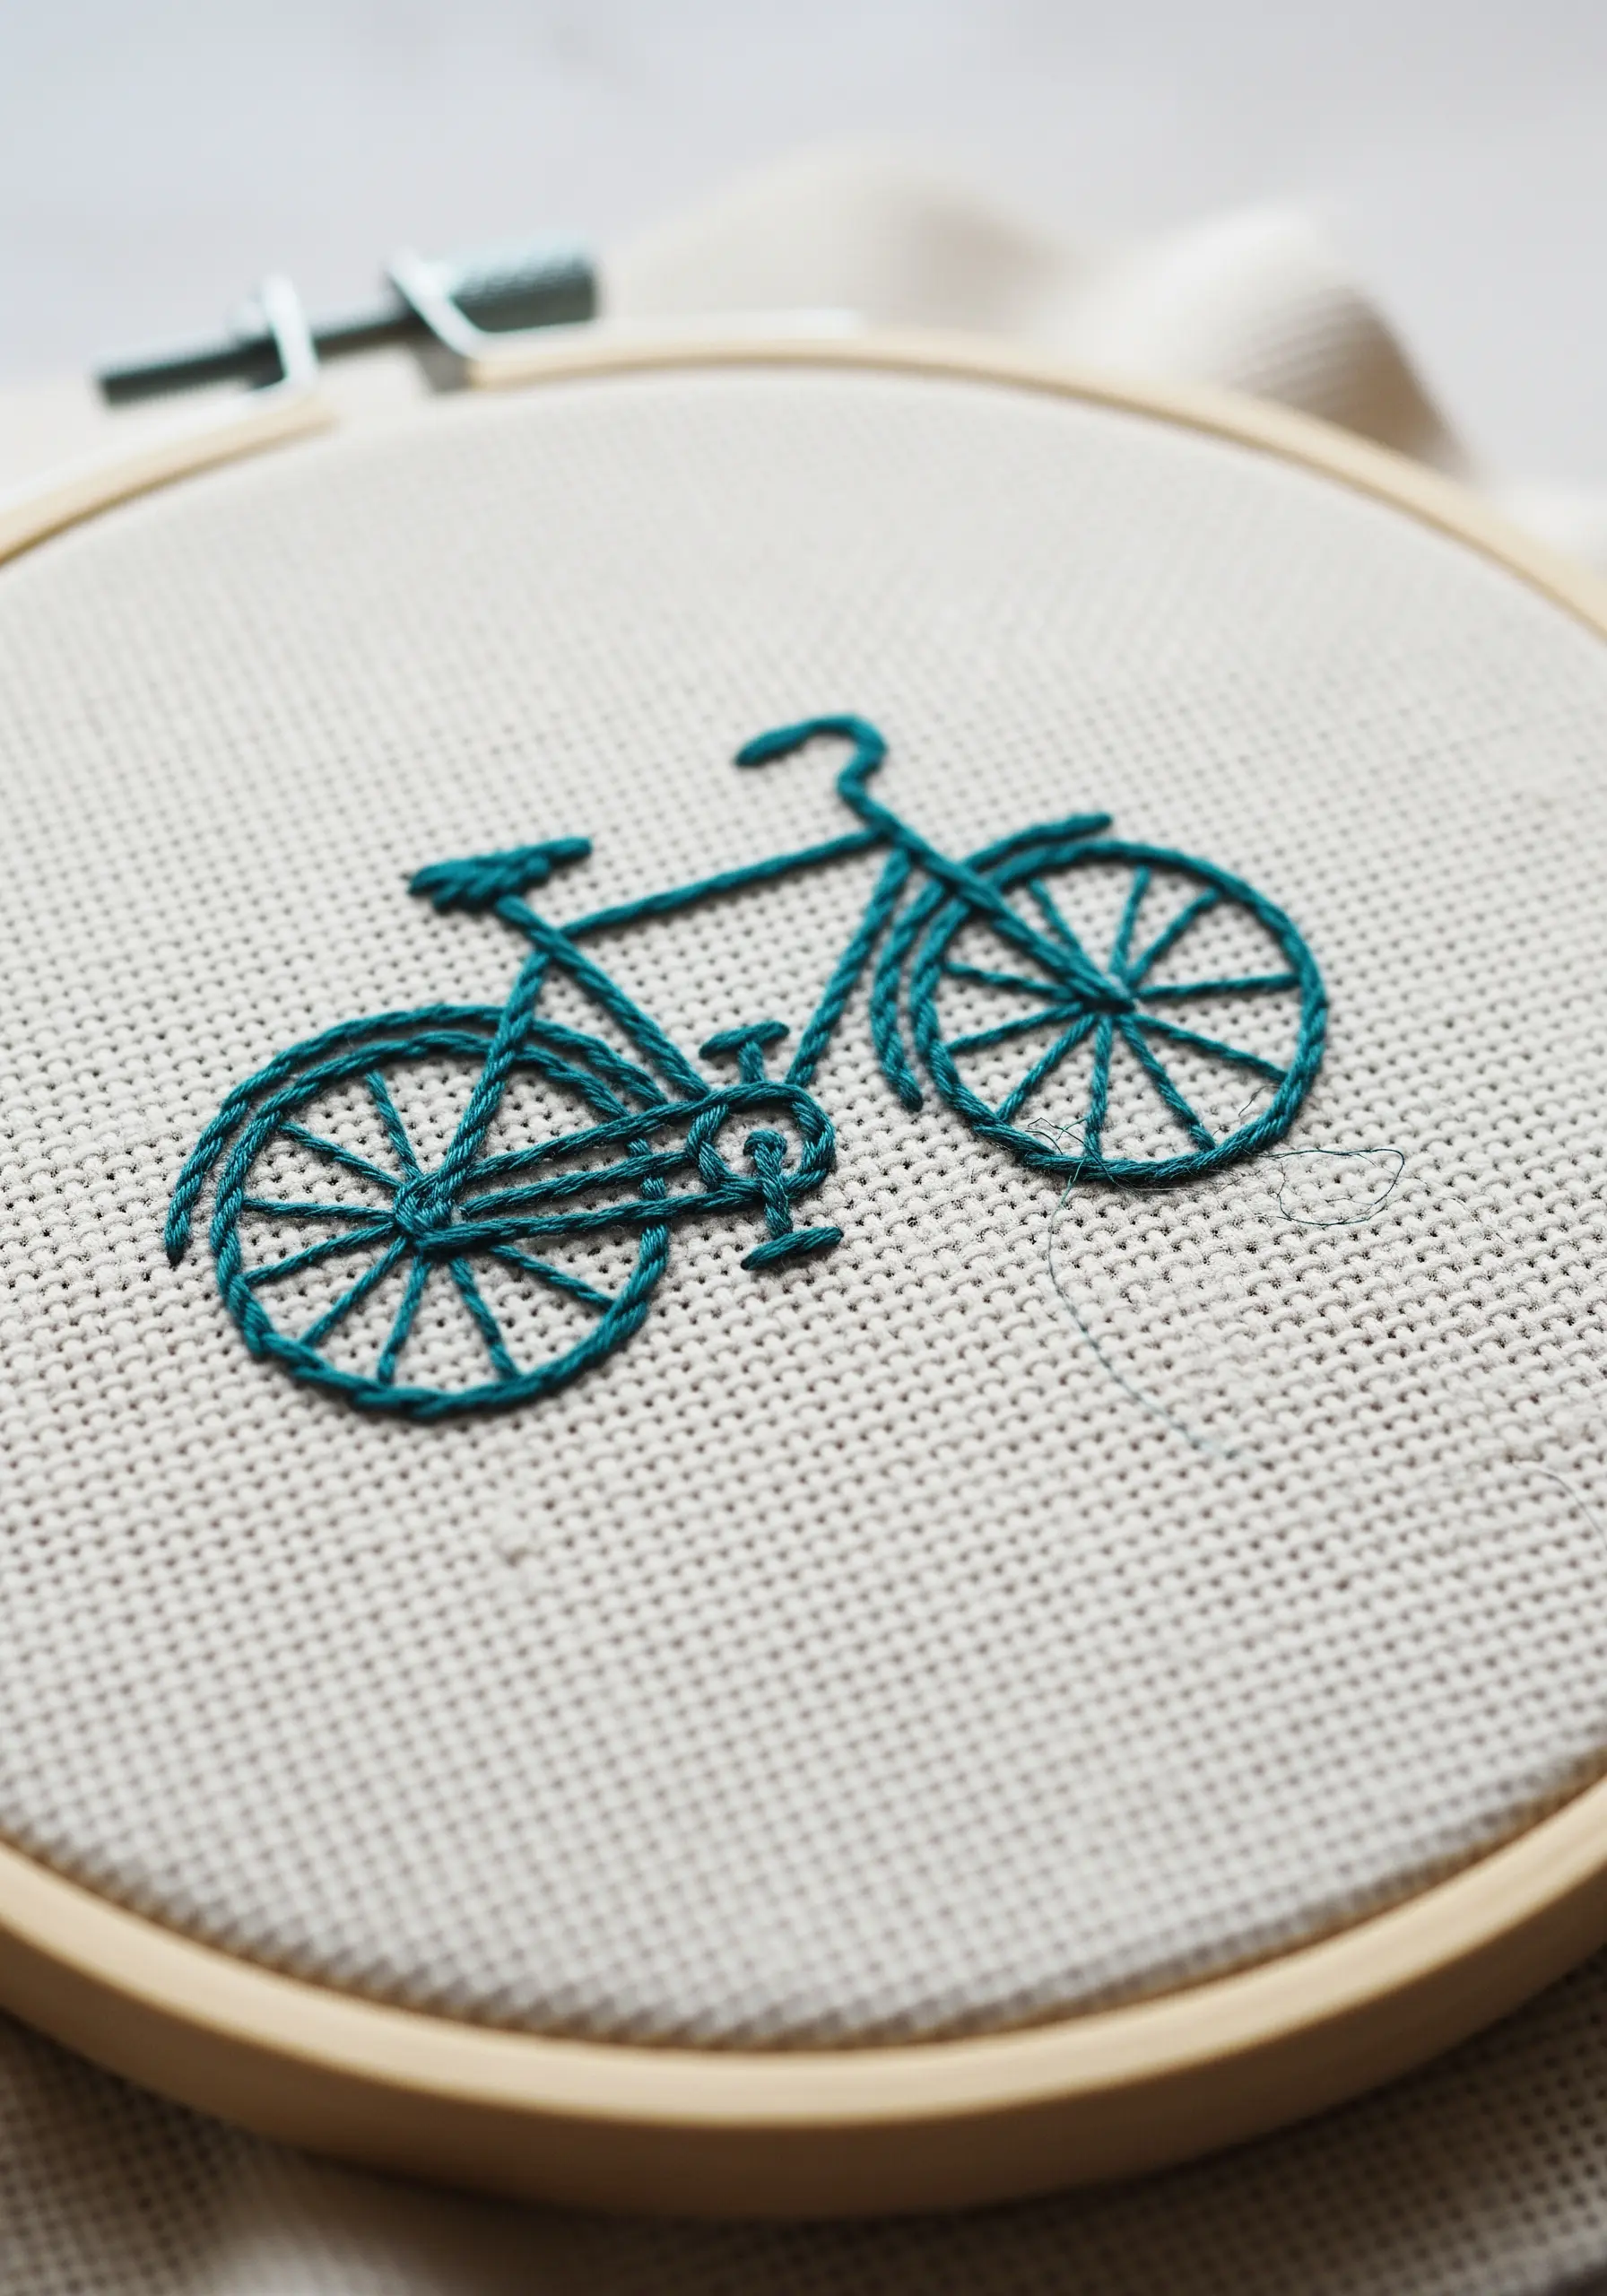
When embroidering complex objects like a bicycle, clarity is achieved by reducing your thread count.
Use just one or two strands of floss to execute a precise backstitch, allowing you to capture fine details like wheel spokes and pedals without the lines becoming thick or cluttered.
A lighter thread weight ensures that each component of the design remains distinct and legible.
This approach turns a potentially messy motif into a crisp and delicate illustration in thread.
17. Achieve Naturalism with Feathery Fly Stitches
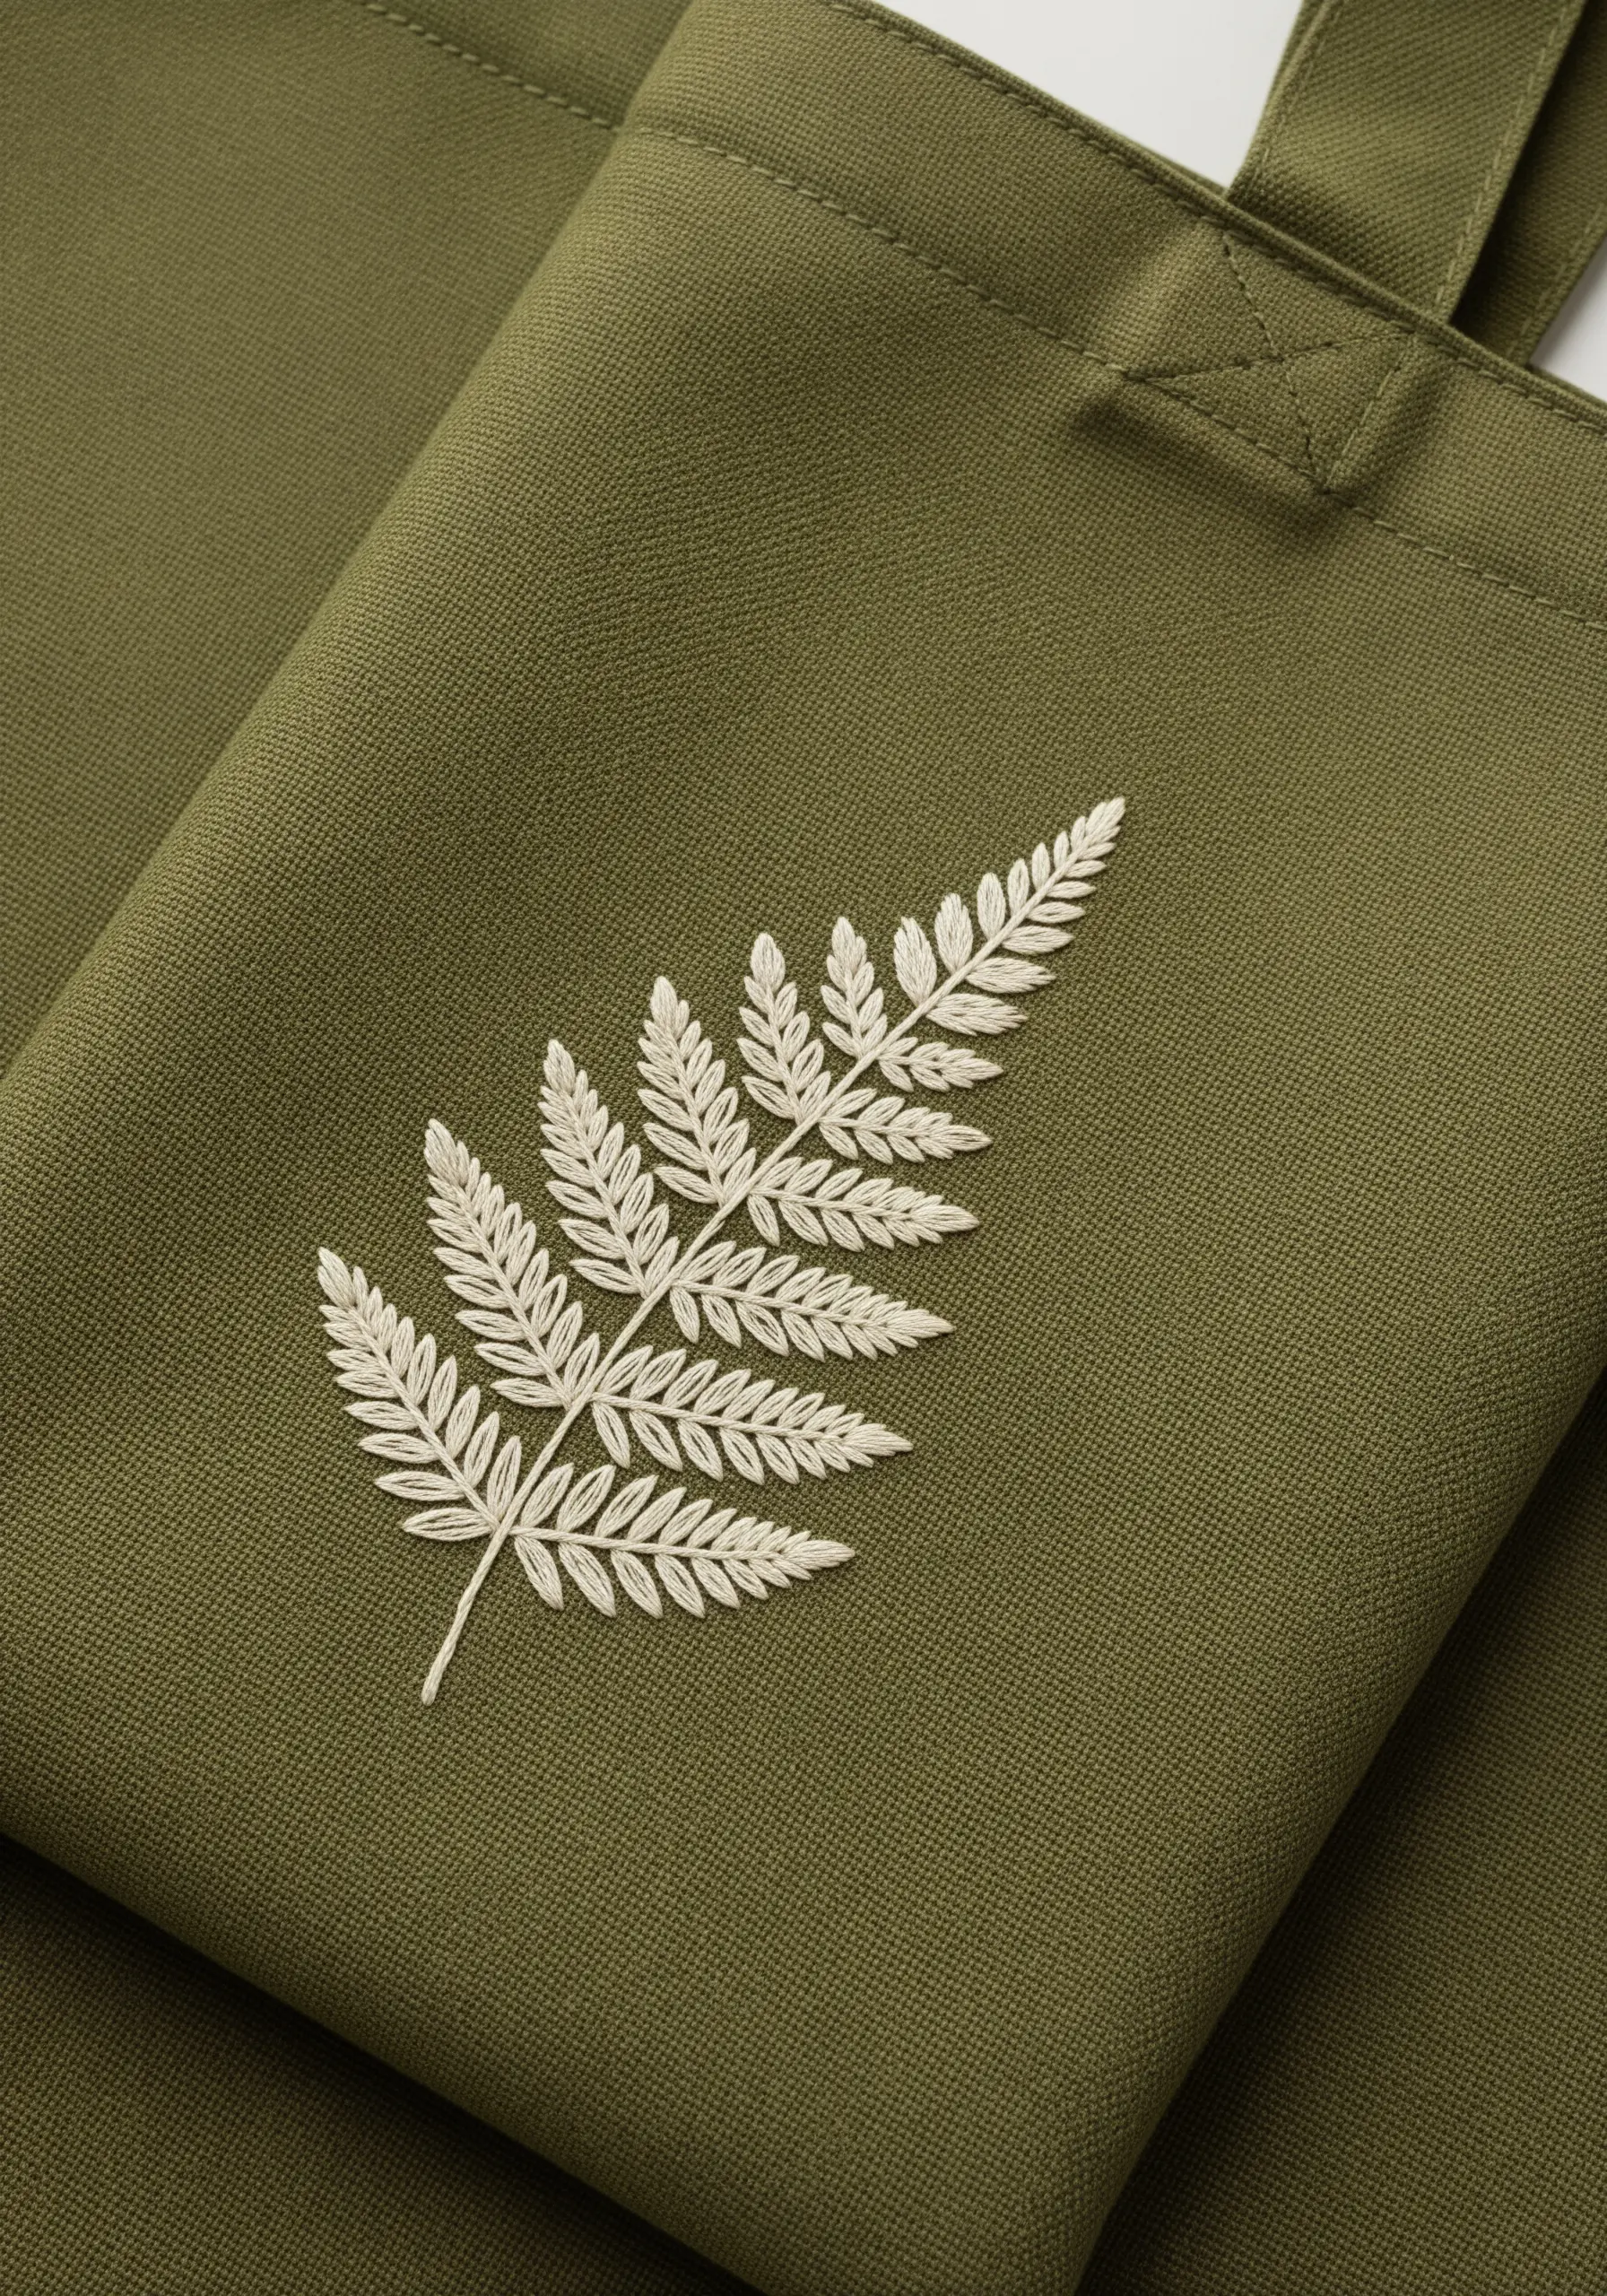
To replicate the intricate structure of a fern, use fly stitches worked in close rows.
Stitch a central stem line, then work individual fly stitches out from the stem on both sides to create the leaflets.
This method beautifully mimics the way a real fern frond grows, resulting in a delicate, feathery texture.
Using a single, high-contrast color like off-white on a dark fabric allows the complex, realistic form of the plant to take center stage.
18. Create a Focal Point with a Pop of Color
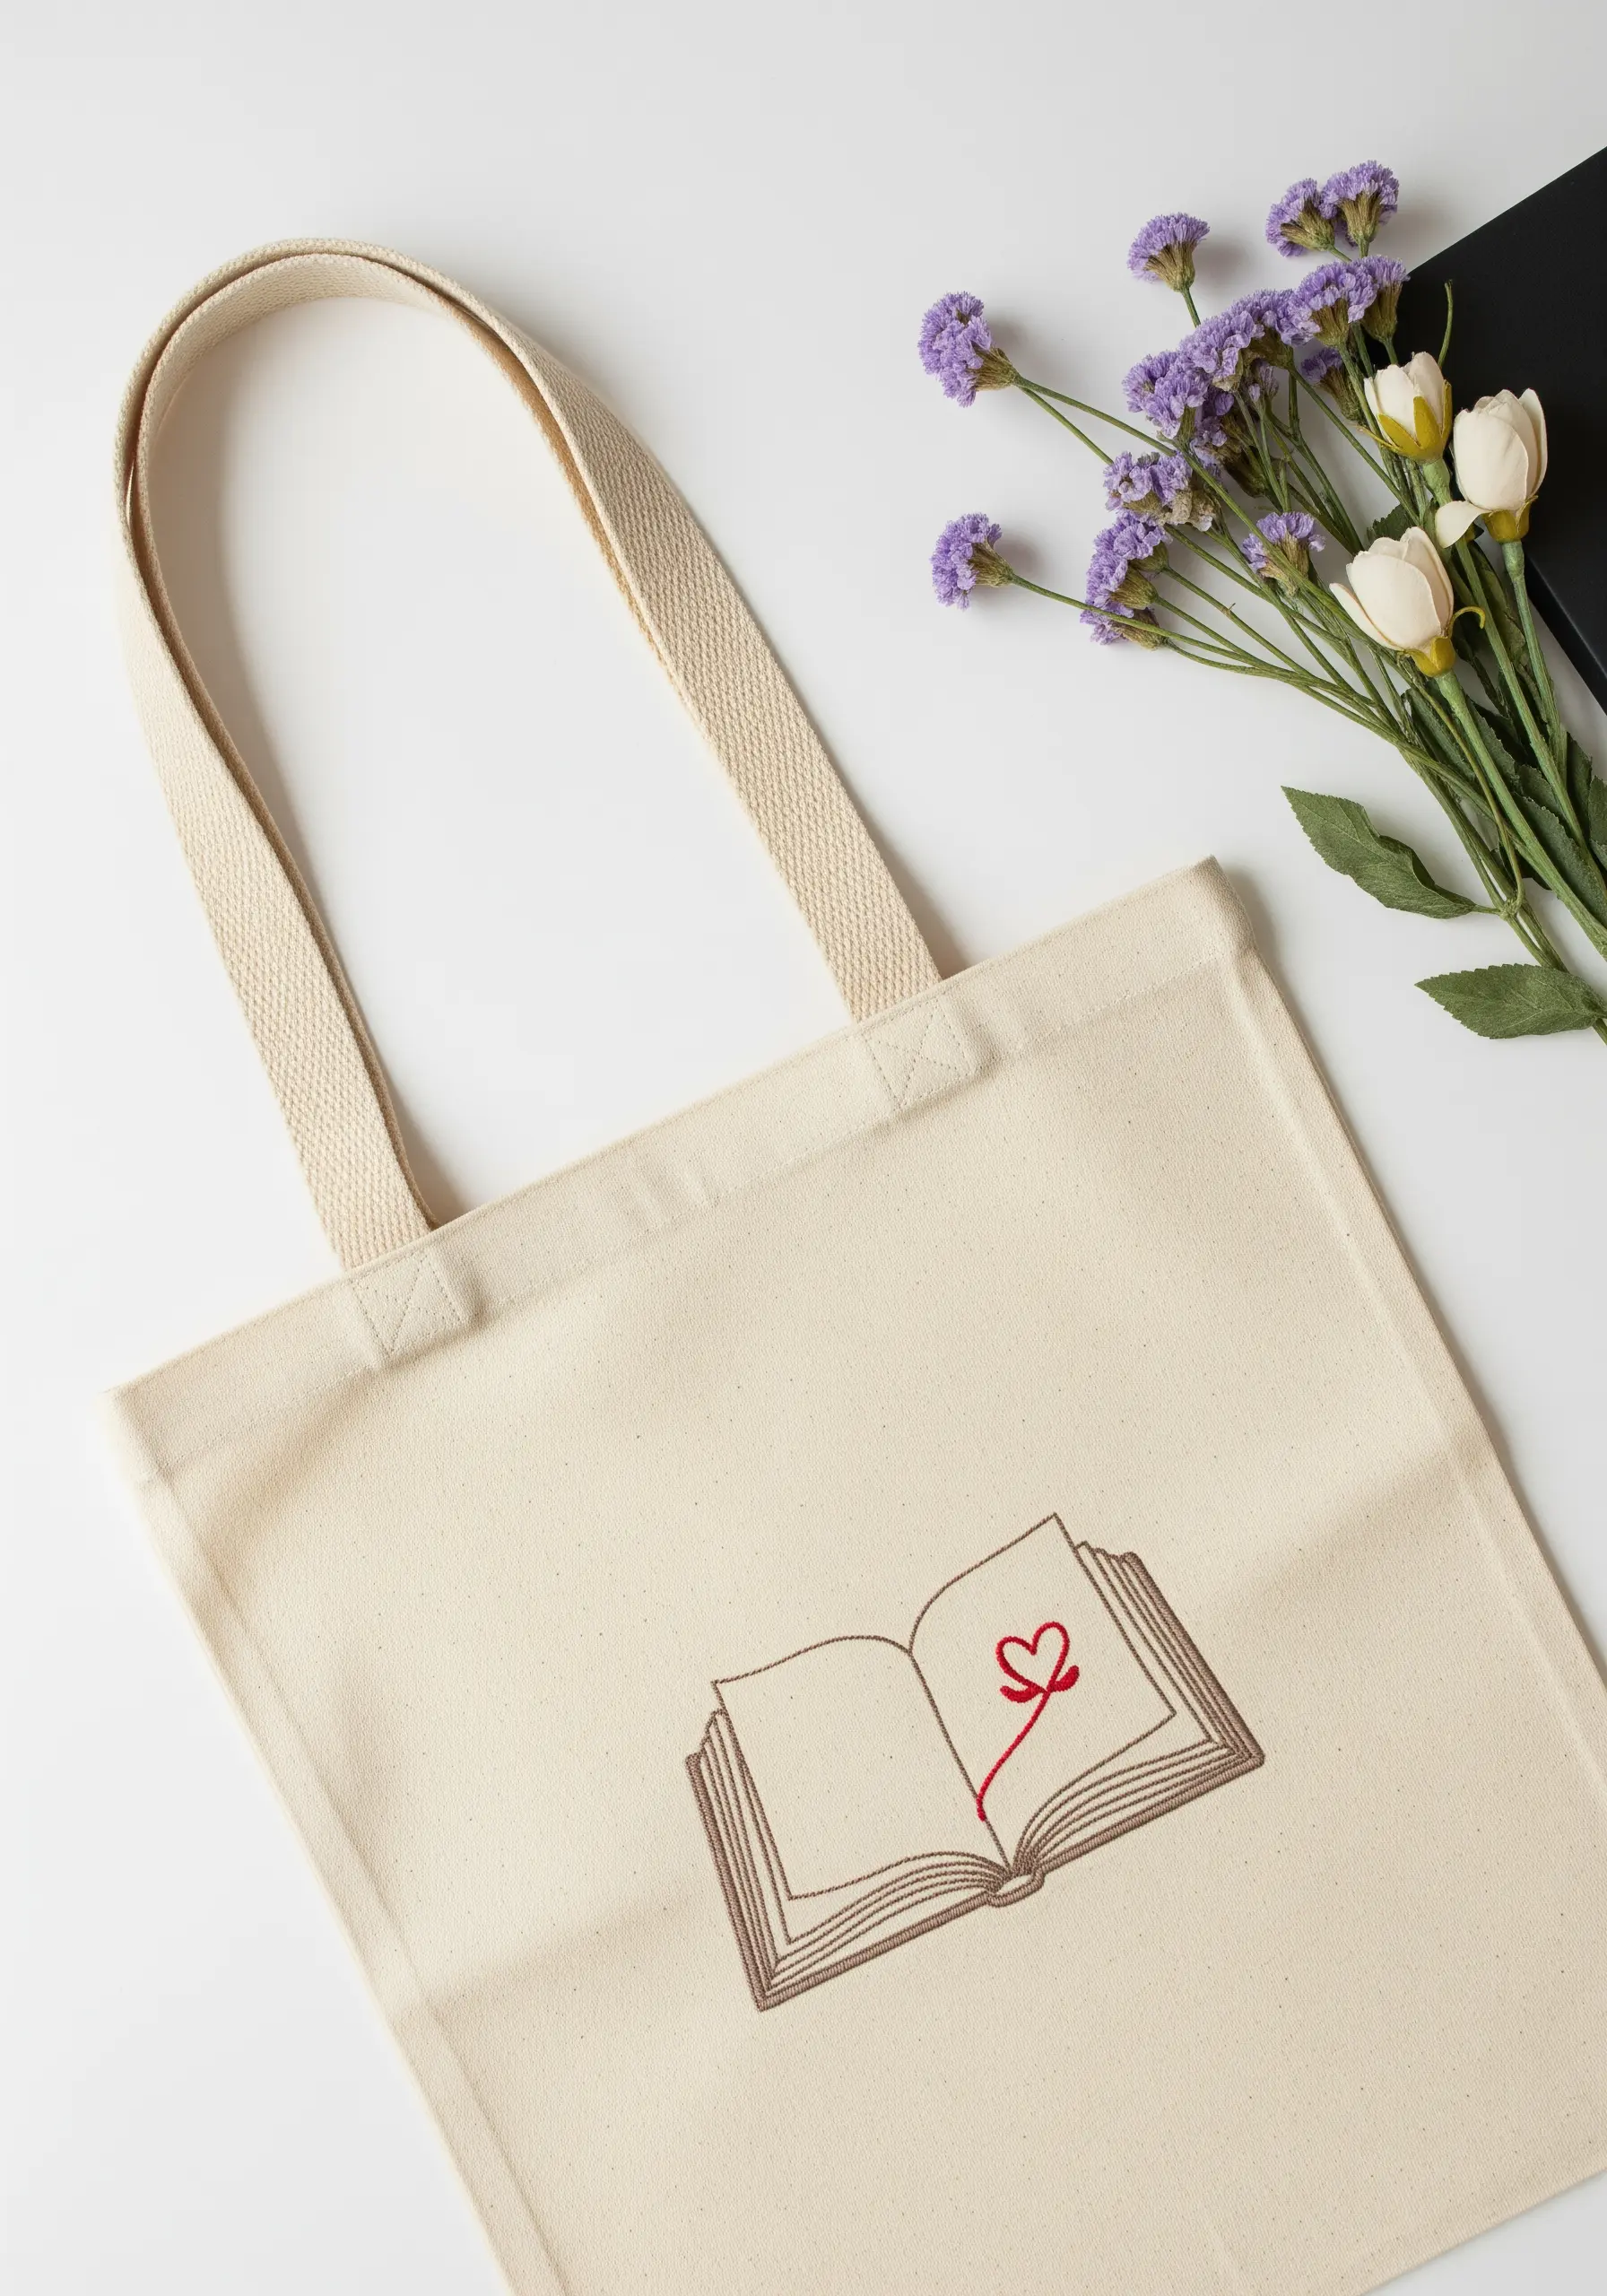
Guide the viewer’s eye and add meaning to a simple design by introducing a single, contrasting accent color.
Embroider the main motif—like this open book—in a neutral, unassuming shade using a simple backstitch.
Then, introduce a small, vibrant detail, such as this red heart, stitched in a smooth satin stitch.
This small but powerful addition instantly becomes the focal point, infusing the entire piece with emotion and a clear narrative.
19. Use Simple Geometric Marks for a Minimalist Accent
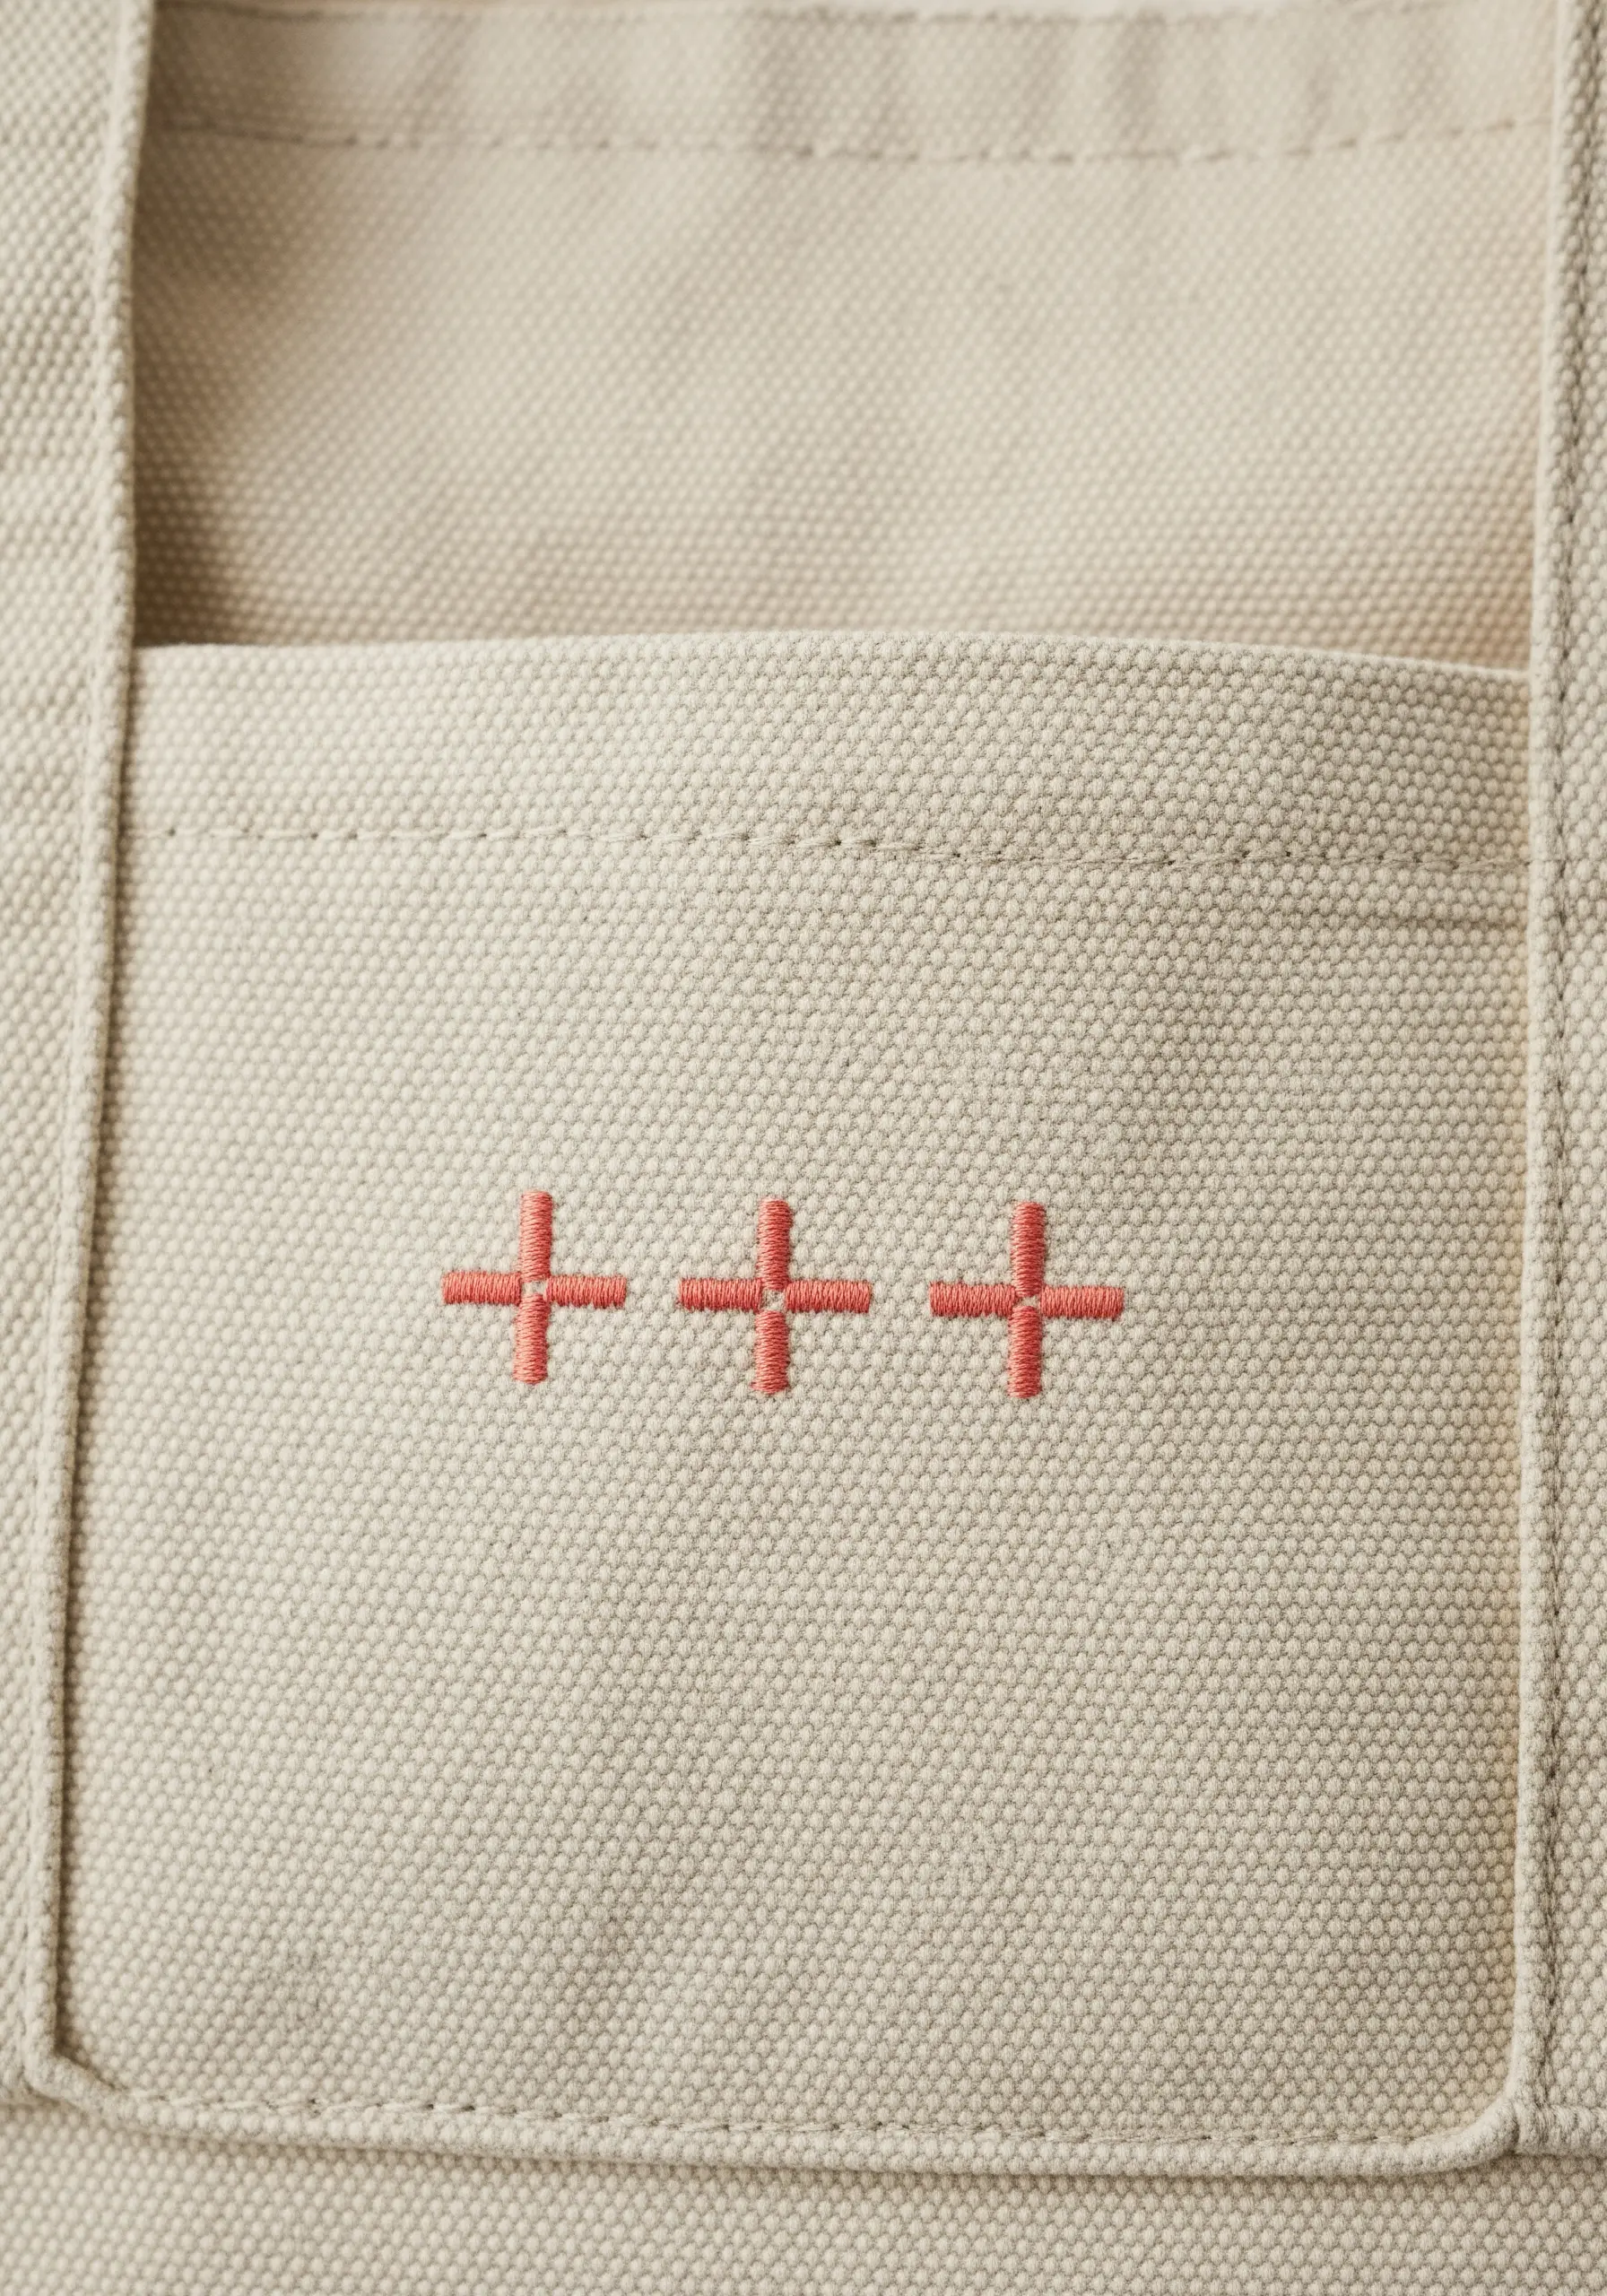
You don’t need an elaborate design to make a statement; sometimes, a few carefully placed stitches are all it takes.
Create a repeating pattern of small plus signs or crosses using simple straight stitches.
The charm of this technique lies in its precision—ensure each stitch is the same length and perfectly perpendicular.
Placing these minimalist marks on a pocket or near a seam adds a subtle, modern detail that feels both handmade and thoughtfully designed.


