

A throw blanket shouldn’t just be cozy; it should be a quiet statement of your personal style. But finding a design that feels both personal and peacefully integrated into your living room can feel like a challenge. You want something more intentional than a store-bought pattern, but bold colors don’t always suit a calm, neutral space.
This is where the artistry of texture and tone comes into play. A soft white, cream, and taupe palette isn’t limiting—it’s an invitation to focus on what truly elevates embroidery: the sculptural quality of a French knot, the fluid line of a stem stitch, the graphic punch of a couched cord. By shifting your focus from color to texture, you can create a piece that is rich with detail and character, yet seamlessly belongs in your home.
Consider your favorite throw blanket a blank canvas. These ideas are designed to give you a starting point, a new technique to try, or simply the confidence to stitch a design that brings you a sense of quiet joy. Let’s create something beautiful that feels like you.
1. Add Bold Dimension with Couching
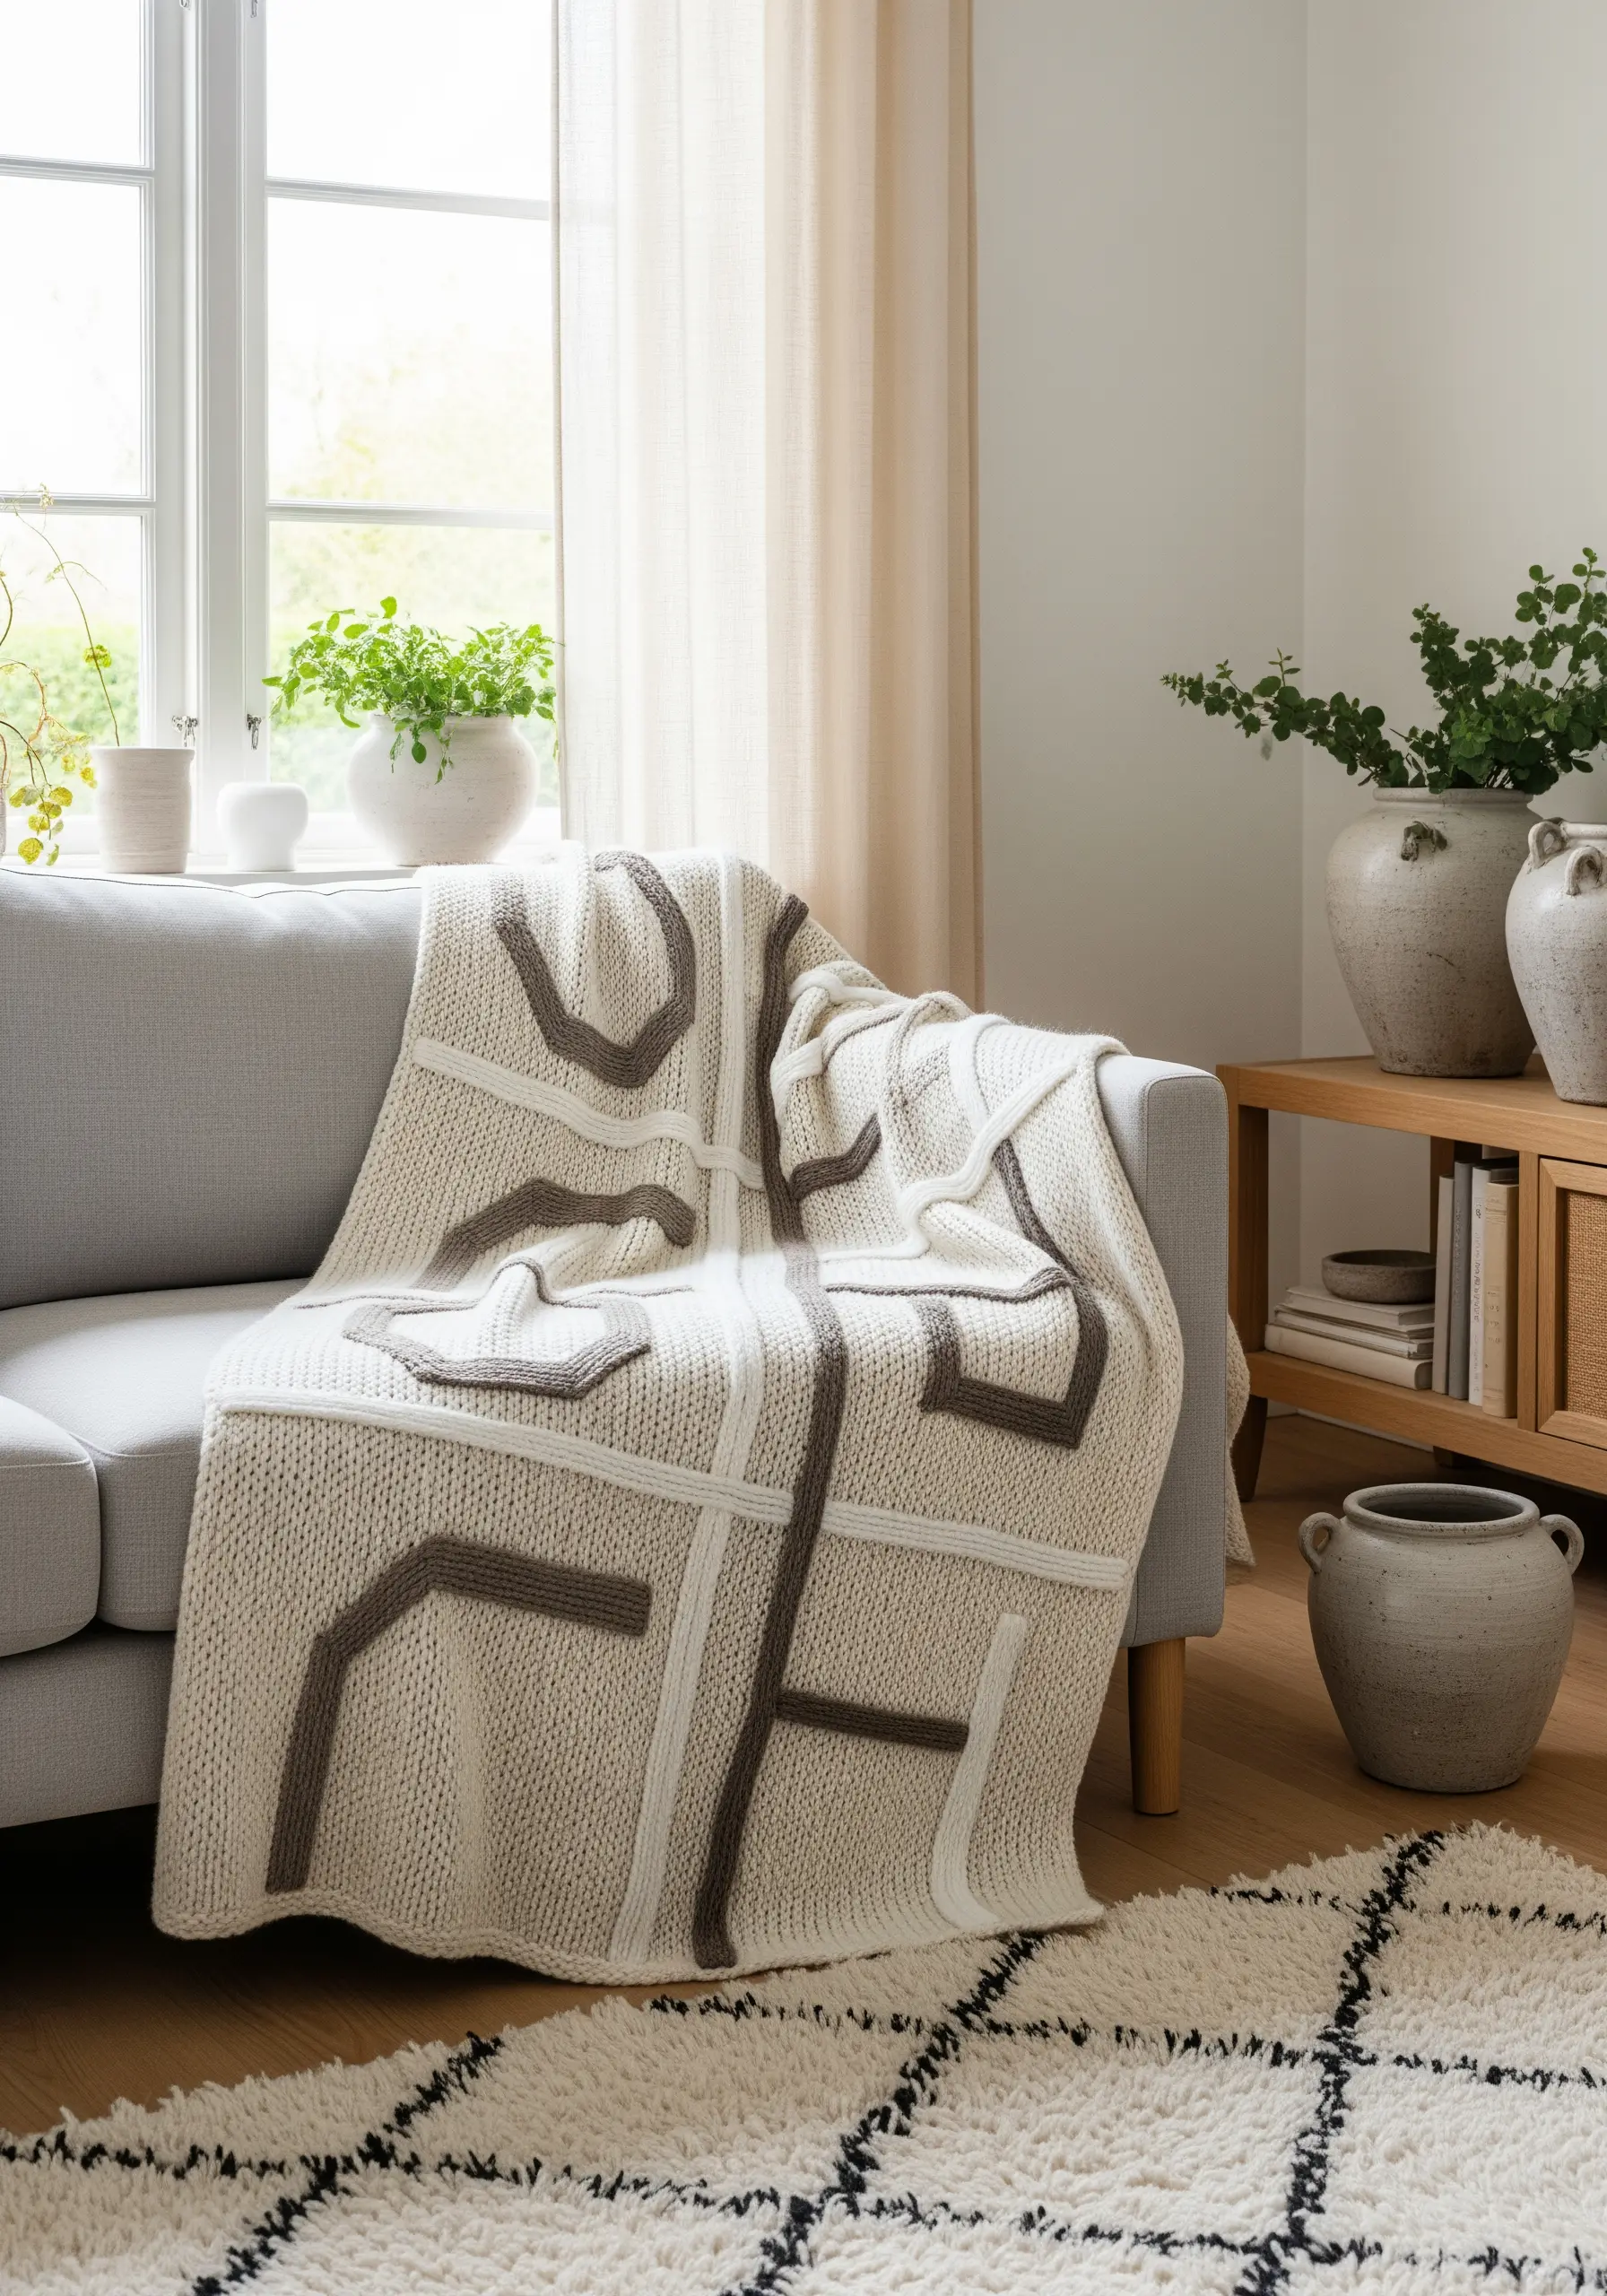
To achieve this high-impact, graphic look on a knit throw, bypass standard embroidery floss and opt for chunky yarn or cotton cord.
Instead of stitching *through* the knit, which can cause stretching and distortion, use a technique called couching.
Lay the chunky yarn on the surface of the blanket in your desired pattern and use a regular, finer thread in a matching color to tack it down with small, evenly spaced stitches.
This method adds sculptural relief and texture without compromising the integrity of the knit fabric, creating a design that is both visually bold and structurally sound.
2. Master the Delicate Botanical Outline
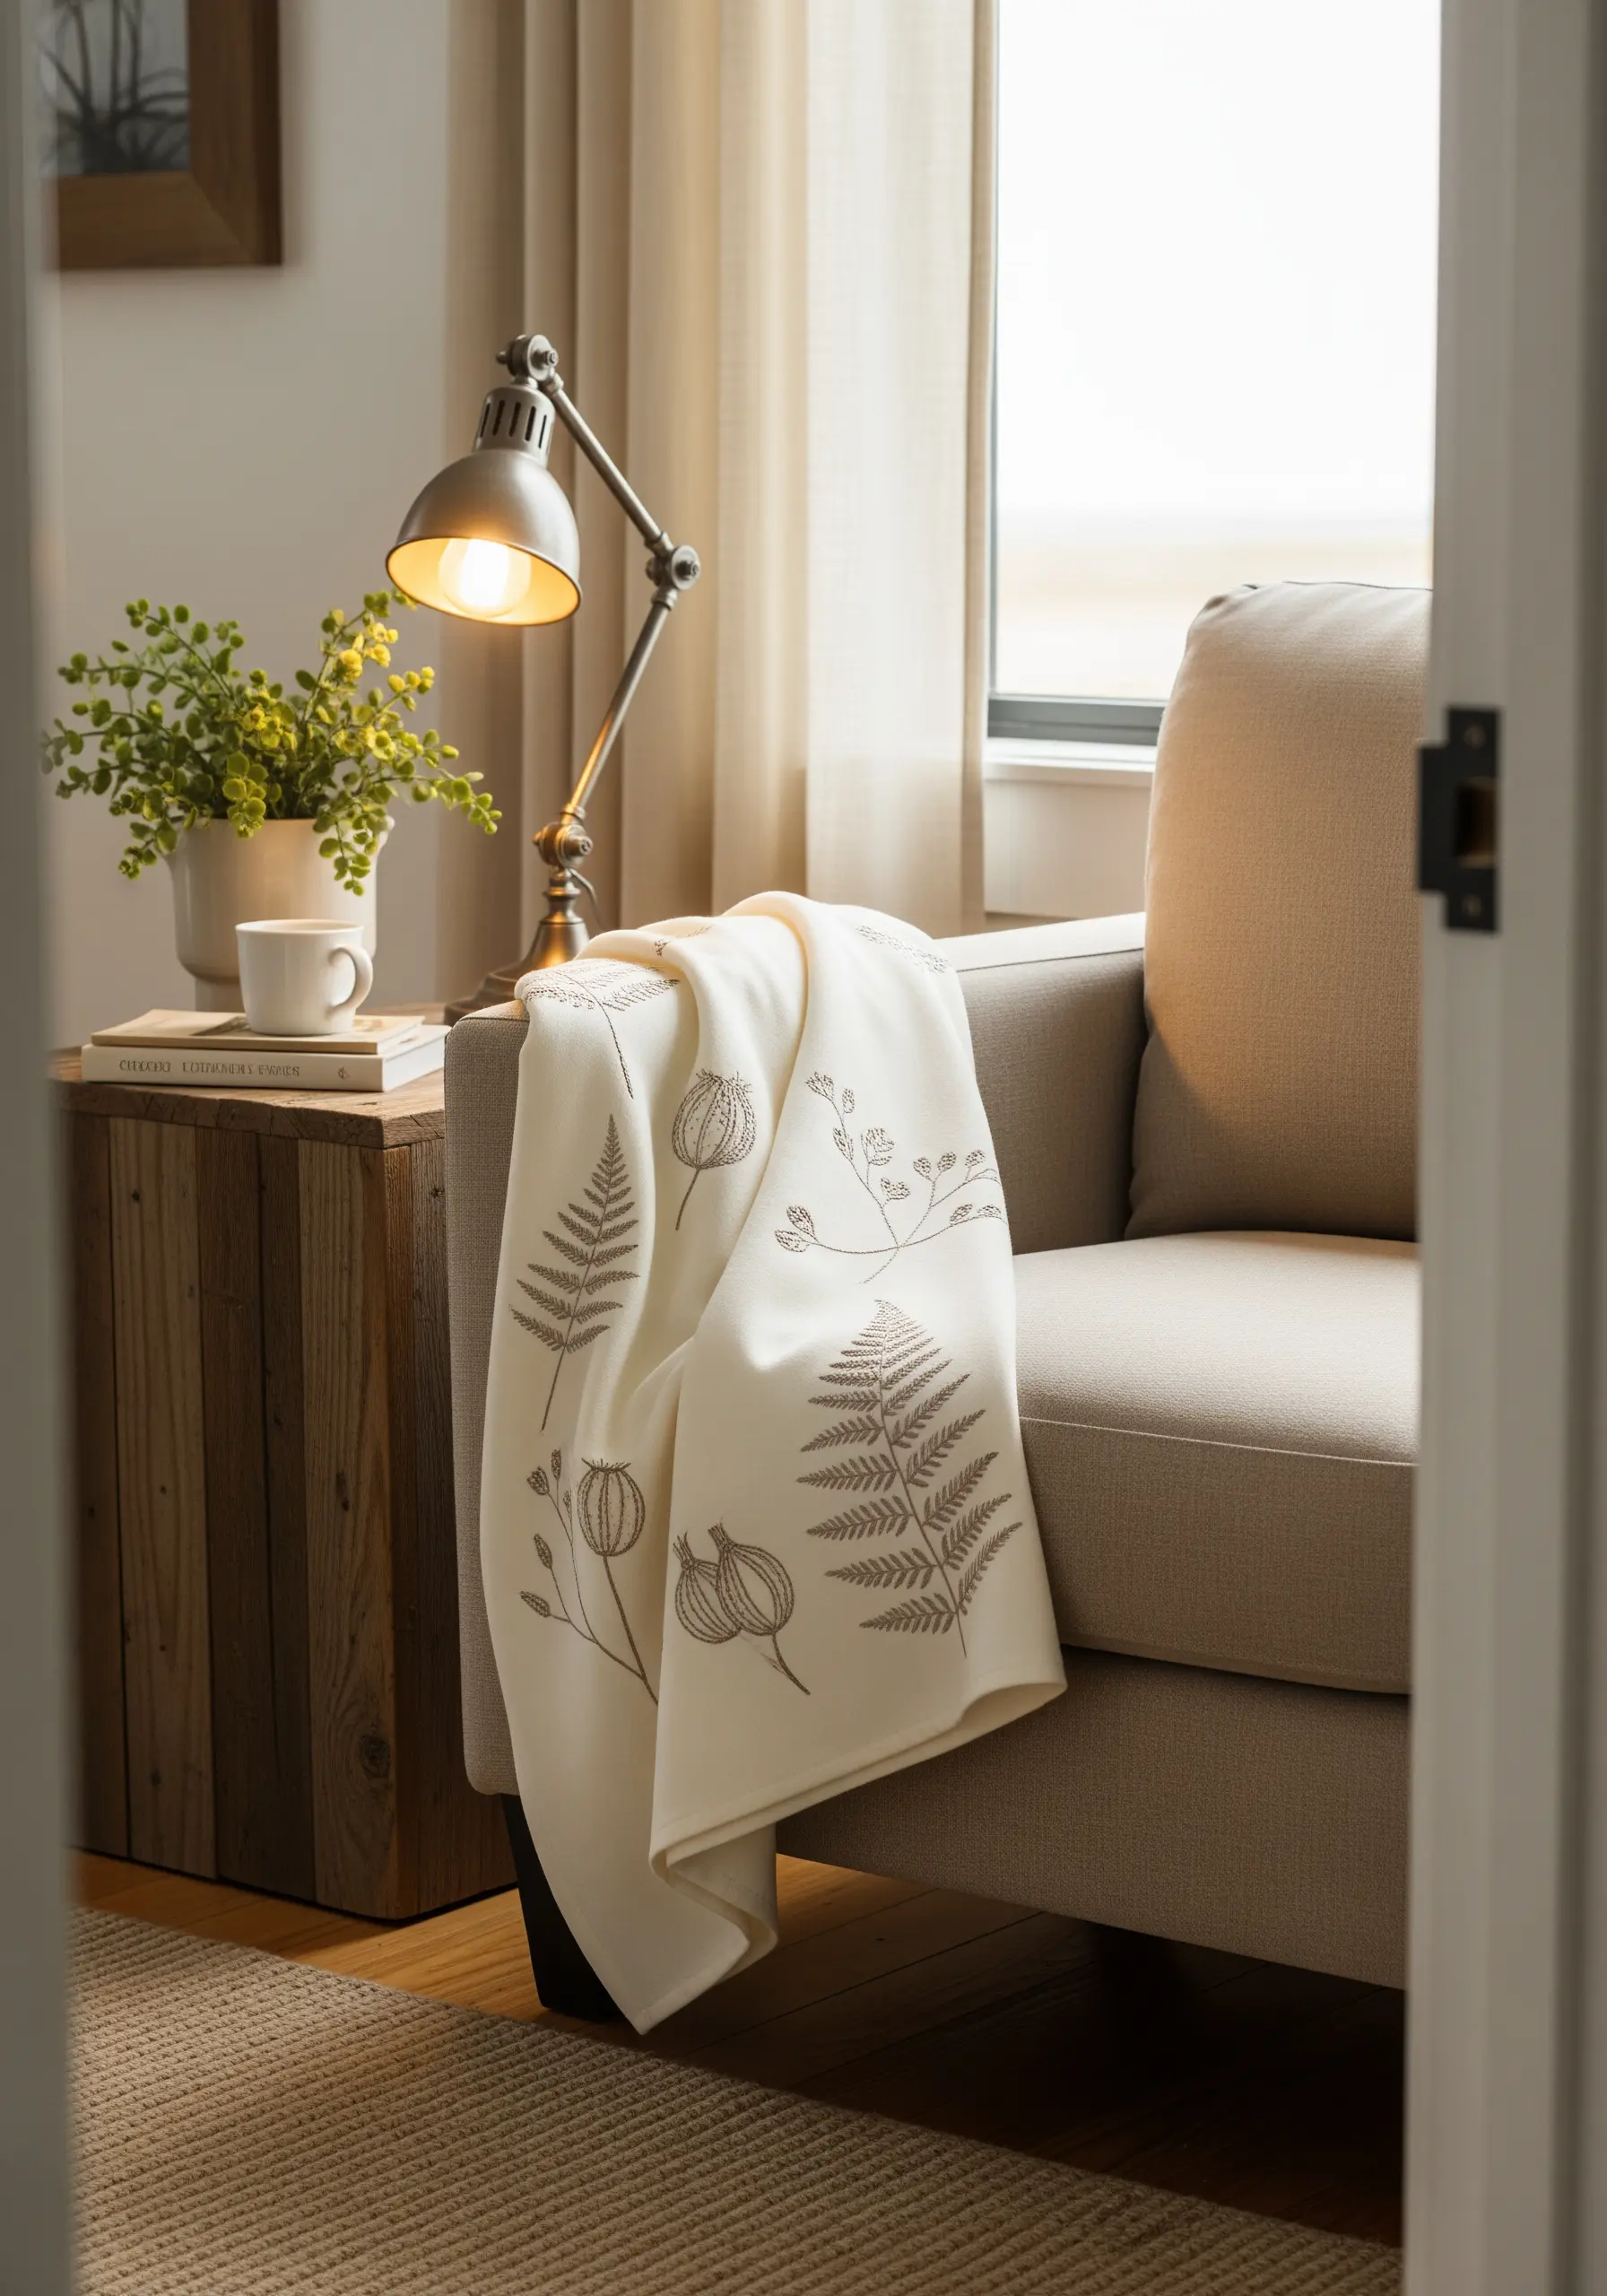
For ethereal, illustrative botanicals, the key is restraint and precision.
Use only one or two strands of a six-strand floss in a soft taupe or muted brown to contrast gently against a cream background.
A perfectly executed backstitch or stem stitch will create clean, consistent lines that mimic a fine ink drawing.
Pay close attention to your stitch length, keeping it short on curves and slightly longer on straight lines to maintain fluidity and prevent sharp angles.
This technique elevates simple line art into a sophisticated, delicate statement.
3. Create a Refined Grid with Running Stitches
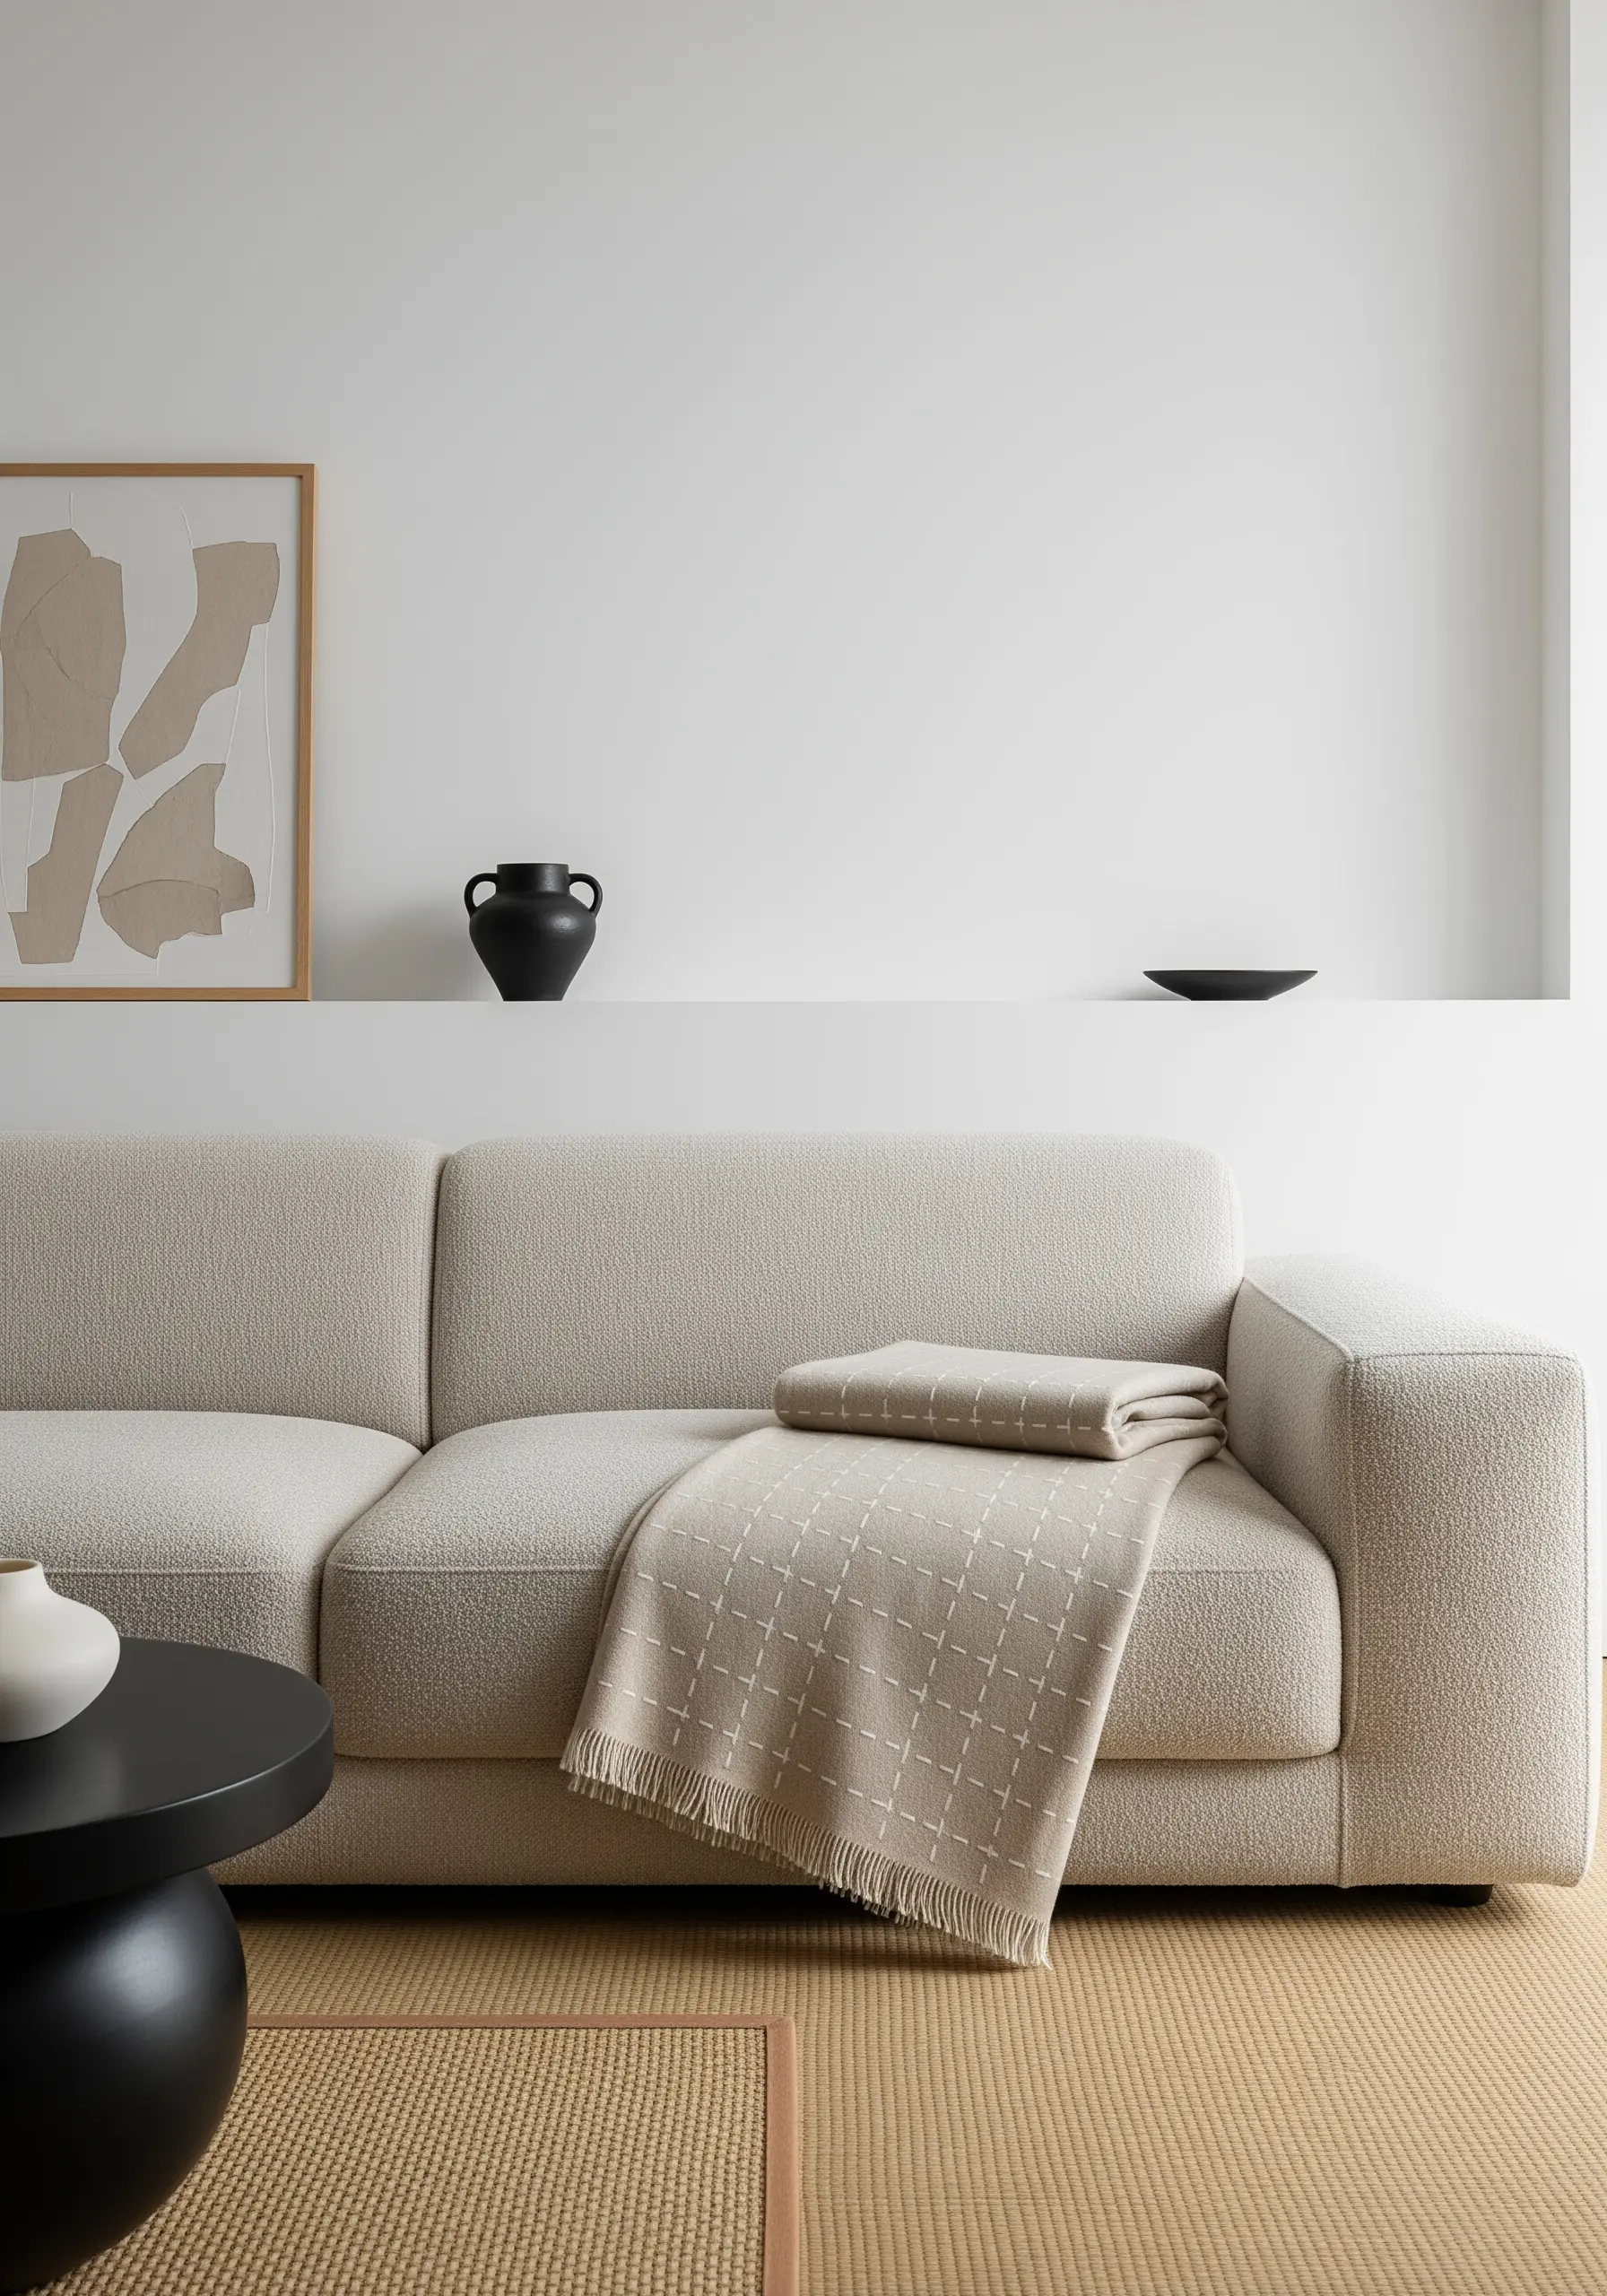
Transform a simple throw with a geometric pattern that feels both modern and handmade.
Use a water-soluble fabric pen and a clear ruler to mark your grid precisely before you begin stitching.
Work rows of simple running stitches in an off-white thread on a taupe base for a subtle, tone-on-tone texture.
The quiet elegance of this design lies in its uniformity, so focus on keeping your stitch and gap lengths as consistent as possible.
It’s a meditative process that yields a highly sophisticated result.
4. Stitch Organic Forms with a Wabi-Sabi Feel

Capture the beauty of imperfection by embroidering organic, concentric shapes that feel hand-drawn.
Use a simple running stitch with a mid-tone taupe thread, but intentionally vary the length of your stitches ever so slightly.
This subtle inconsistency prevents the design from looking machine-made, giving it a warm, wabi-sabi character that celebrates natural forms.
The goal isn’t perfect circles, but rather fluid lines that ripple across the fabric like rings in water or the grain of wood.
5. Combine Stitches for a Dynamic Coastal Scene

Create a sophisticated coastal theme by pairing two different line stitches to represent distinct textures.
Use a smooth, flowing stem stitch for the wavy lines of water, which helps create elegant curves without sharp breaks.
For the seashell outlines, switch to a crisp backstitch to give their forms definition and structure.
This deliberate contrast in stitch style adds subtle depth and visual interest, making the simple motifs feel more dynamic and thoughtfully rendered.
6. Design with Repetition for Maximum Impact

A single, well-drawn motif can become a powerful design element when repeated across a surface.
Create a simple template for your chosen shape—like this seashell—to ensure consistency in size and form.
Arrange the motifs in a dense, overlapping pattern to create an effect that reads as a complex, luxurious texture from a distance.
Using a single color thread, like this warm grey on cream, keeps the overall look cohesive and elegant rather than busy.
7. Capture Airiness with Detached Stitches

To embroider something as light and airy as dandelion seeds, your stitch choice is everything.
Use straight stitches for the stems and a single detached chain stitch (or lazy daisy stitch) for each individual parachute.
This creates a small loop that perfectly captures the delicate, floating quality of the seeds.
Anchor the base of each seed with a tiny straight stitch. Using a bright white floss on a muted taupe background makes the design appear to lift right off the fabric.
8. Embellish Textured Fabrics with Chain Stitch
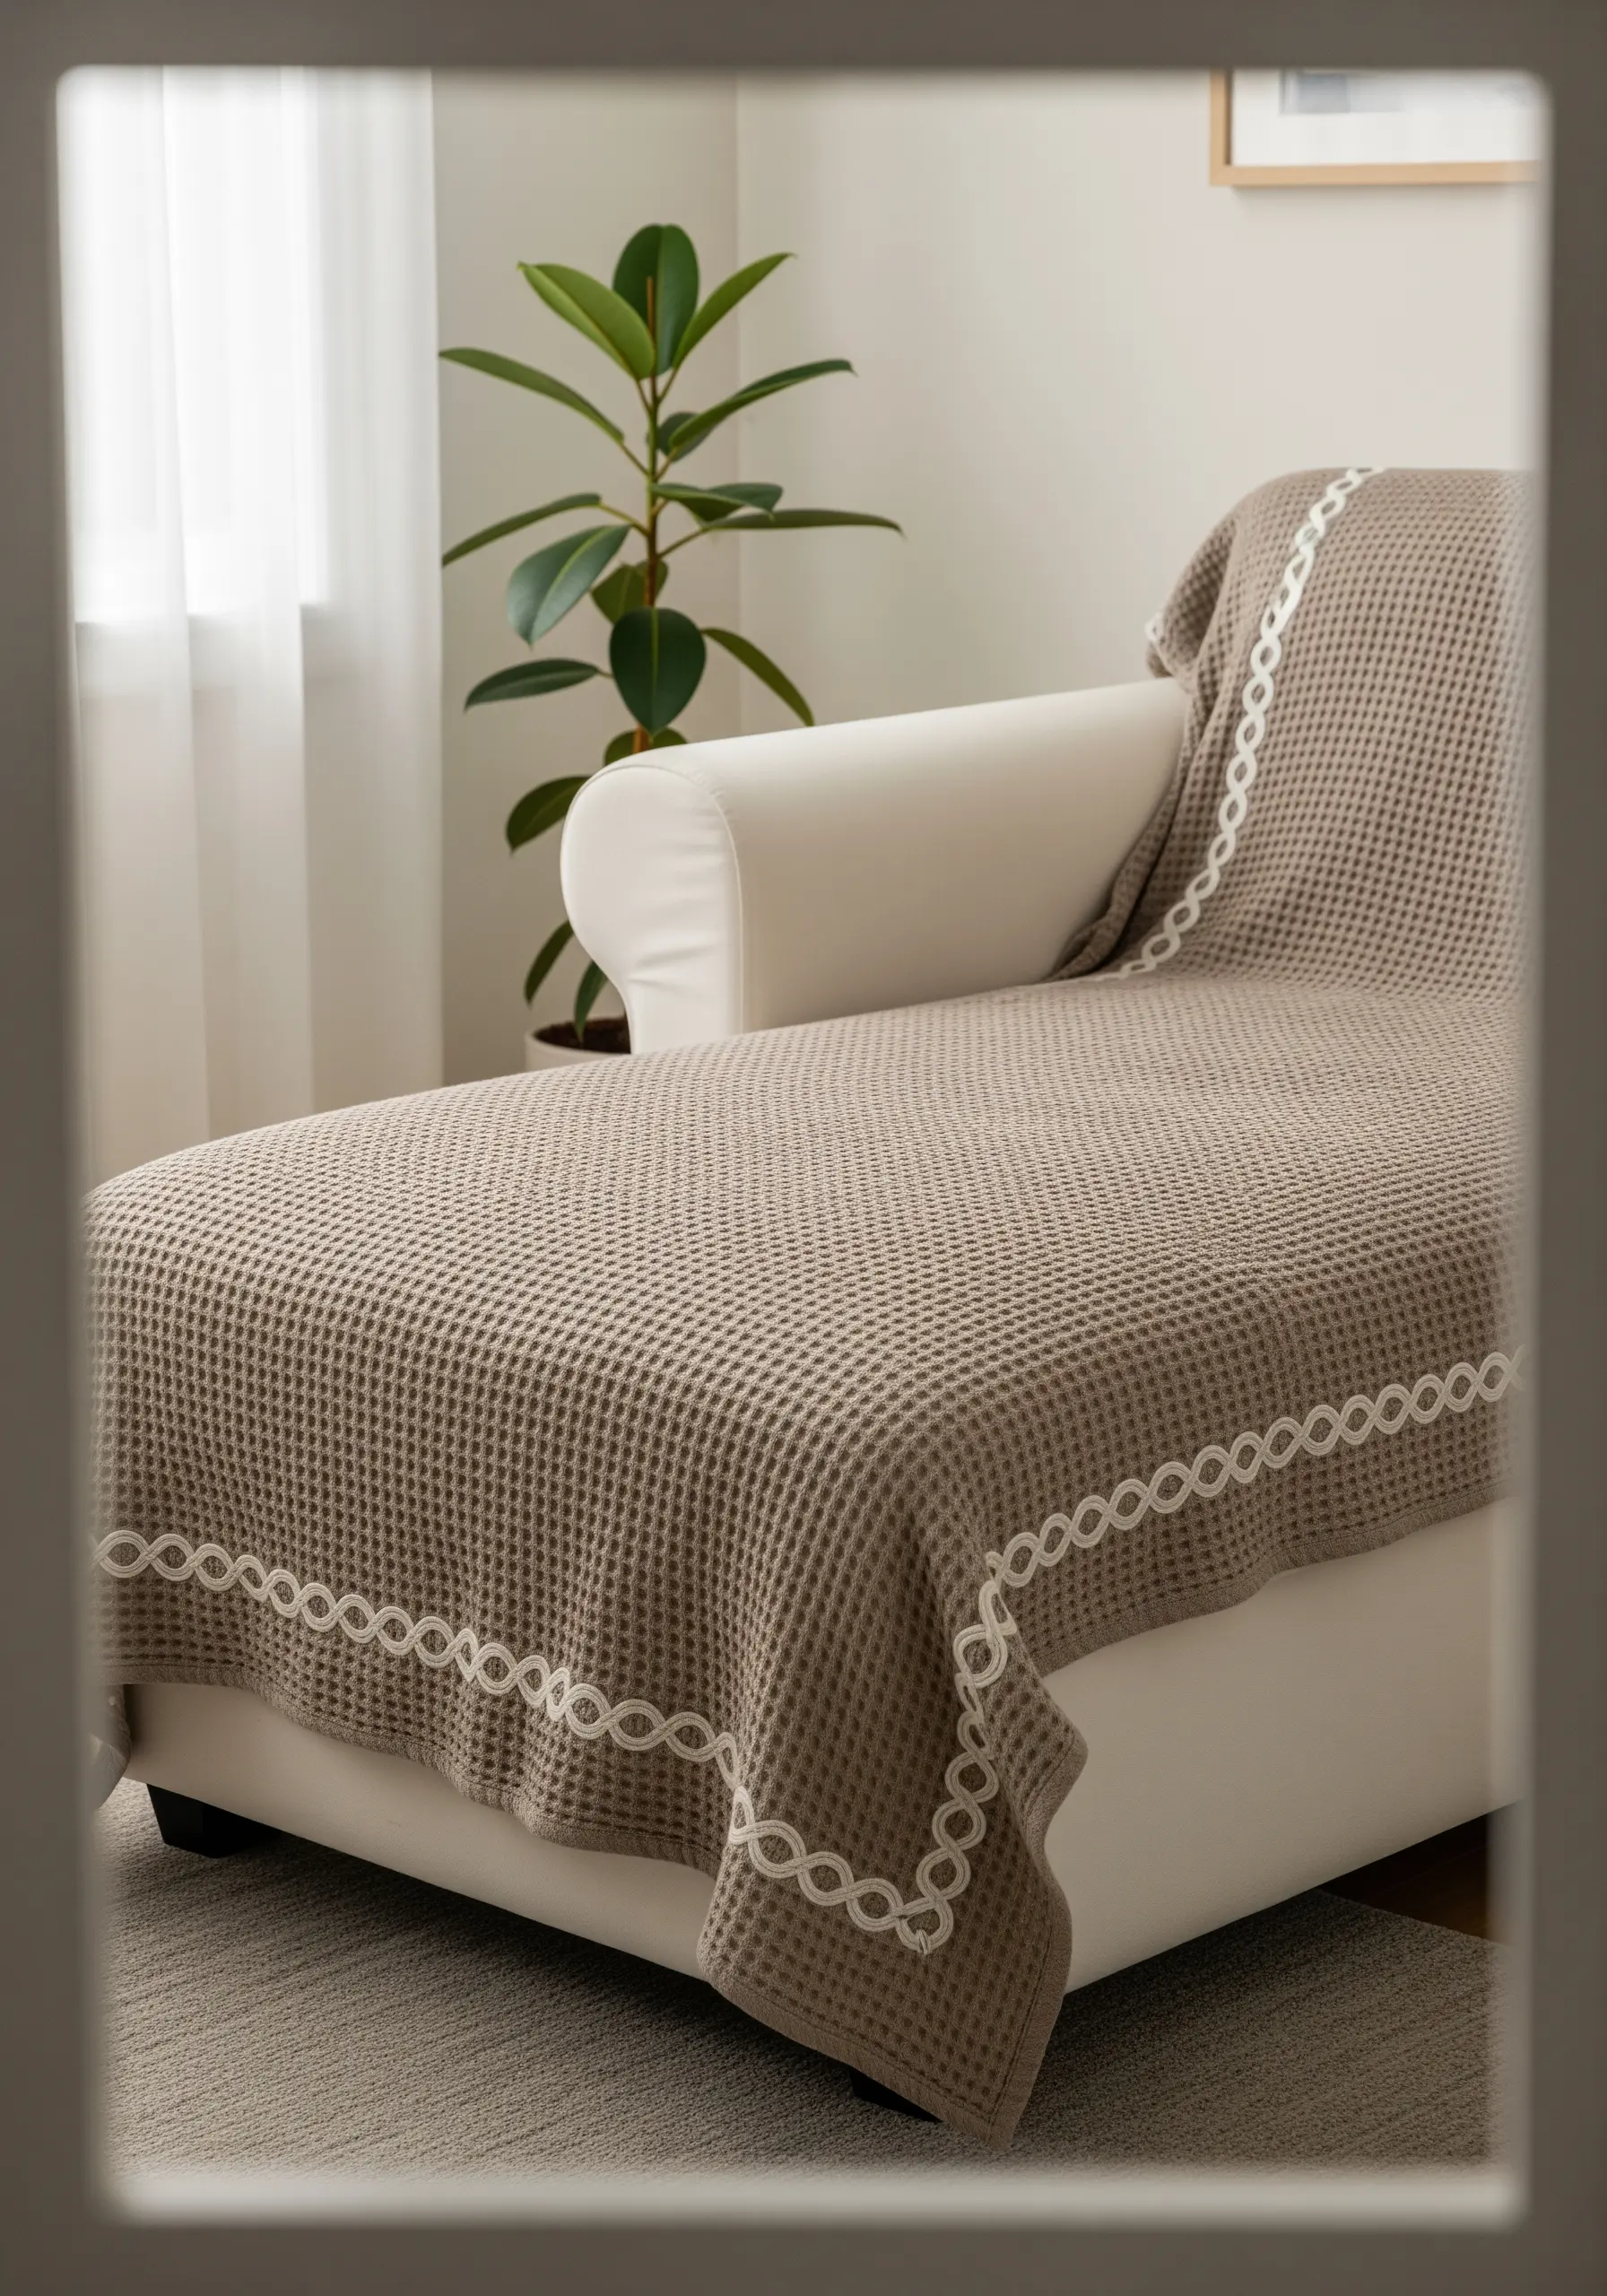
Stitching on a textured fabric like this waffle weave requires a stitch that won’t get lost in the grid.
A chain stitch is the perfect solution because it creates a raised, rope-like line that sits neatly on top of the fabric’s surface.
Trace a simple, looping border pattern and use a contrasting off-white pearl cotton thread, which has a beautiful twist and substance that will stand out against the taupe background.
The result is a decorative edge that complements the fabric’s inherent texture instead of competing with it.
9. Create Bold Appliqué on Rustic Knits
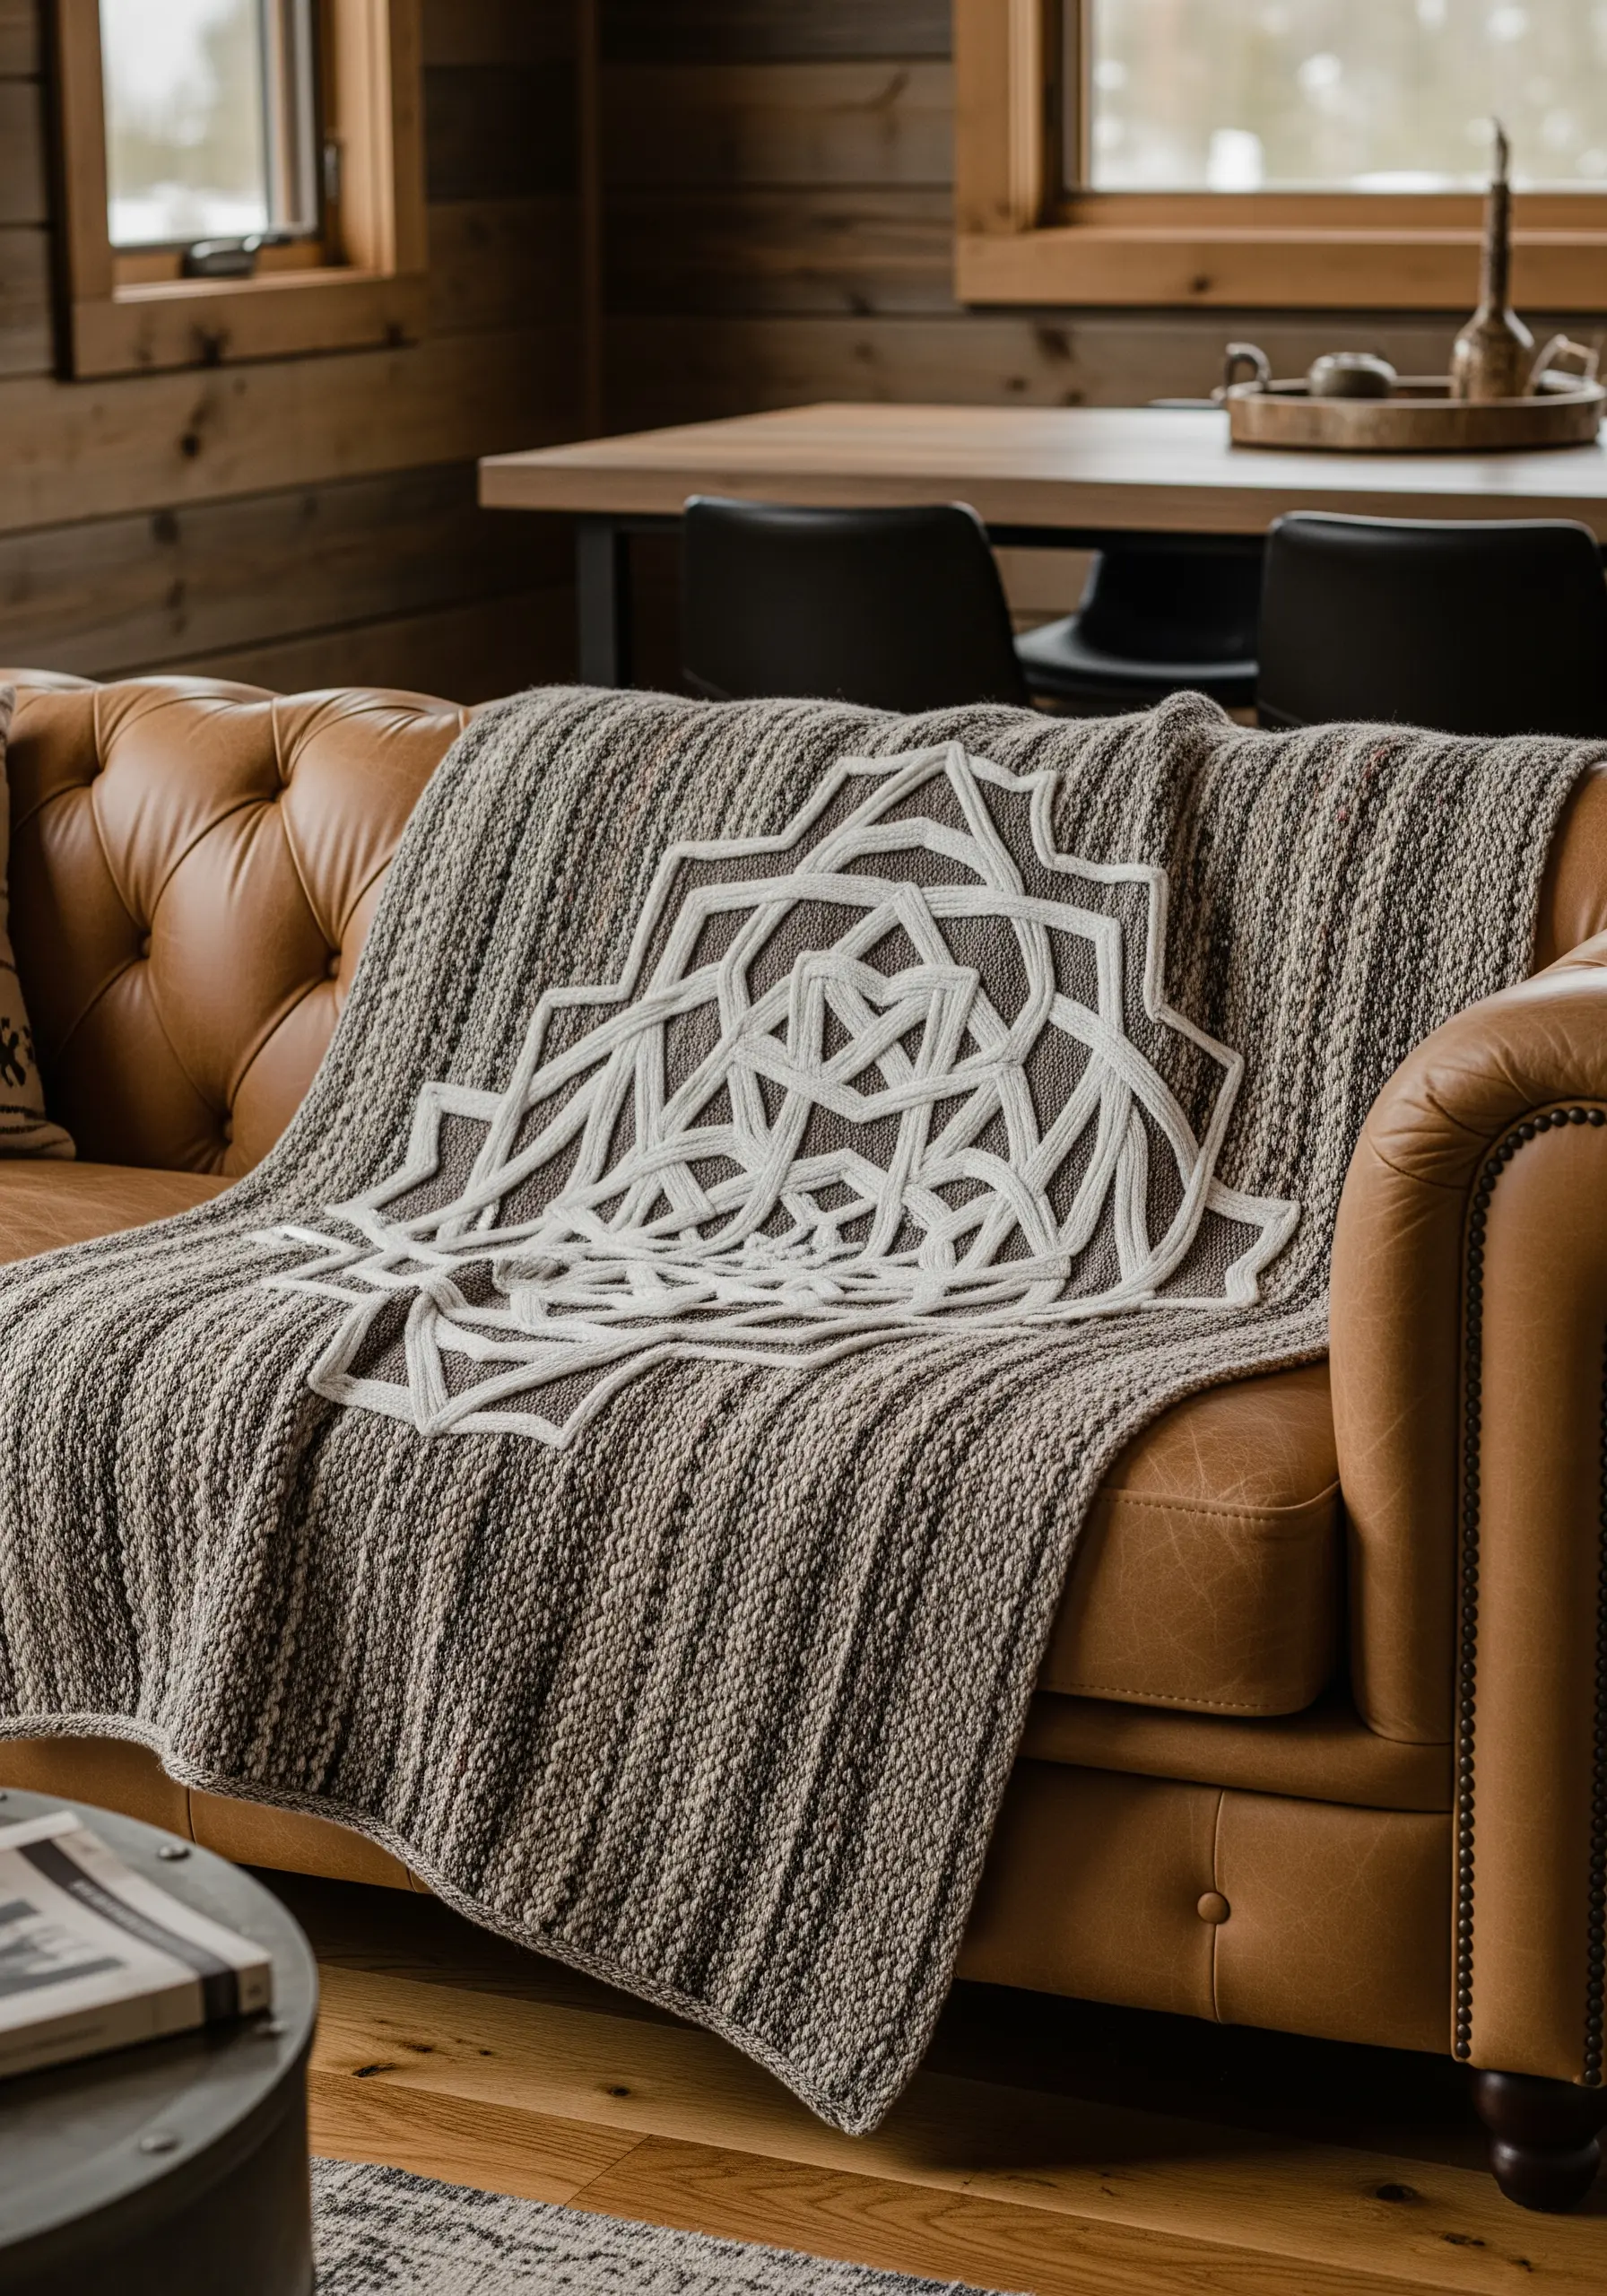
For a statement piece on a heavily textured or hand-knit throw, traditional embroidery can be challenging.
Instead, create your geometric design using thick, braided cord or yarn, which you can then couch or appliqué onto the surface.
This technique allows you to achieve crisp, intricate lines that would be impossible with a needle and thread alone.
The high contrast between the smooth white cord and the rustic, marled taupe knit creates a visually arresting piece with incredible tactile appeal.
10. Fill Organic Shapes with Directional Satin Stitch

When filling abstract, rounded shapes, don’t default to a standard horizontal or vertical satin stitch.
Instead, orient your stitches to follow the curve of the shape, creating a sense of movement and dimension.
Think of it as thread painting; the direction of your stitches acts like a brushstroke. To add even more depth, work with two strands of floss: one off-white and one light beige.
This subtle color variation will give your textural fill stitches a gentle, heathered look with a soft sheen.
11. Render Fine Detail with Single-Thread Backstitch
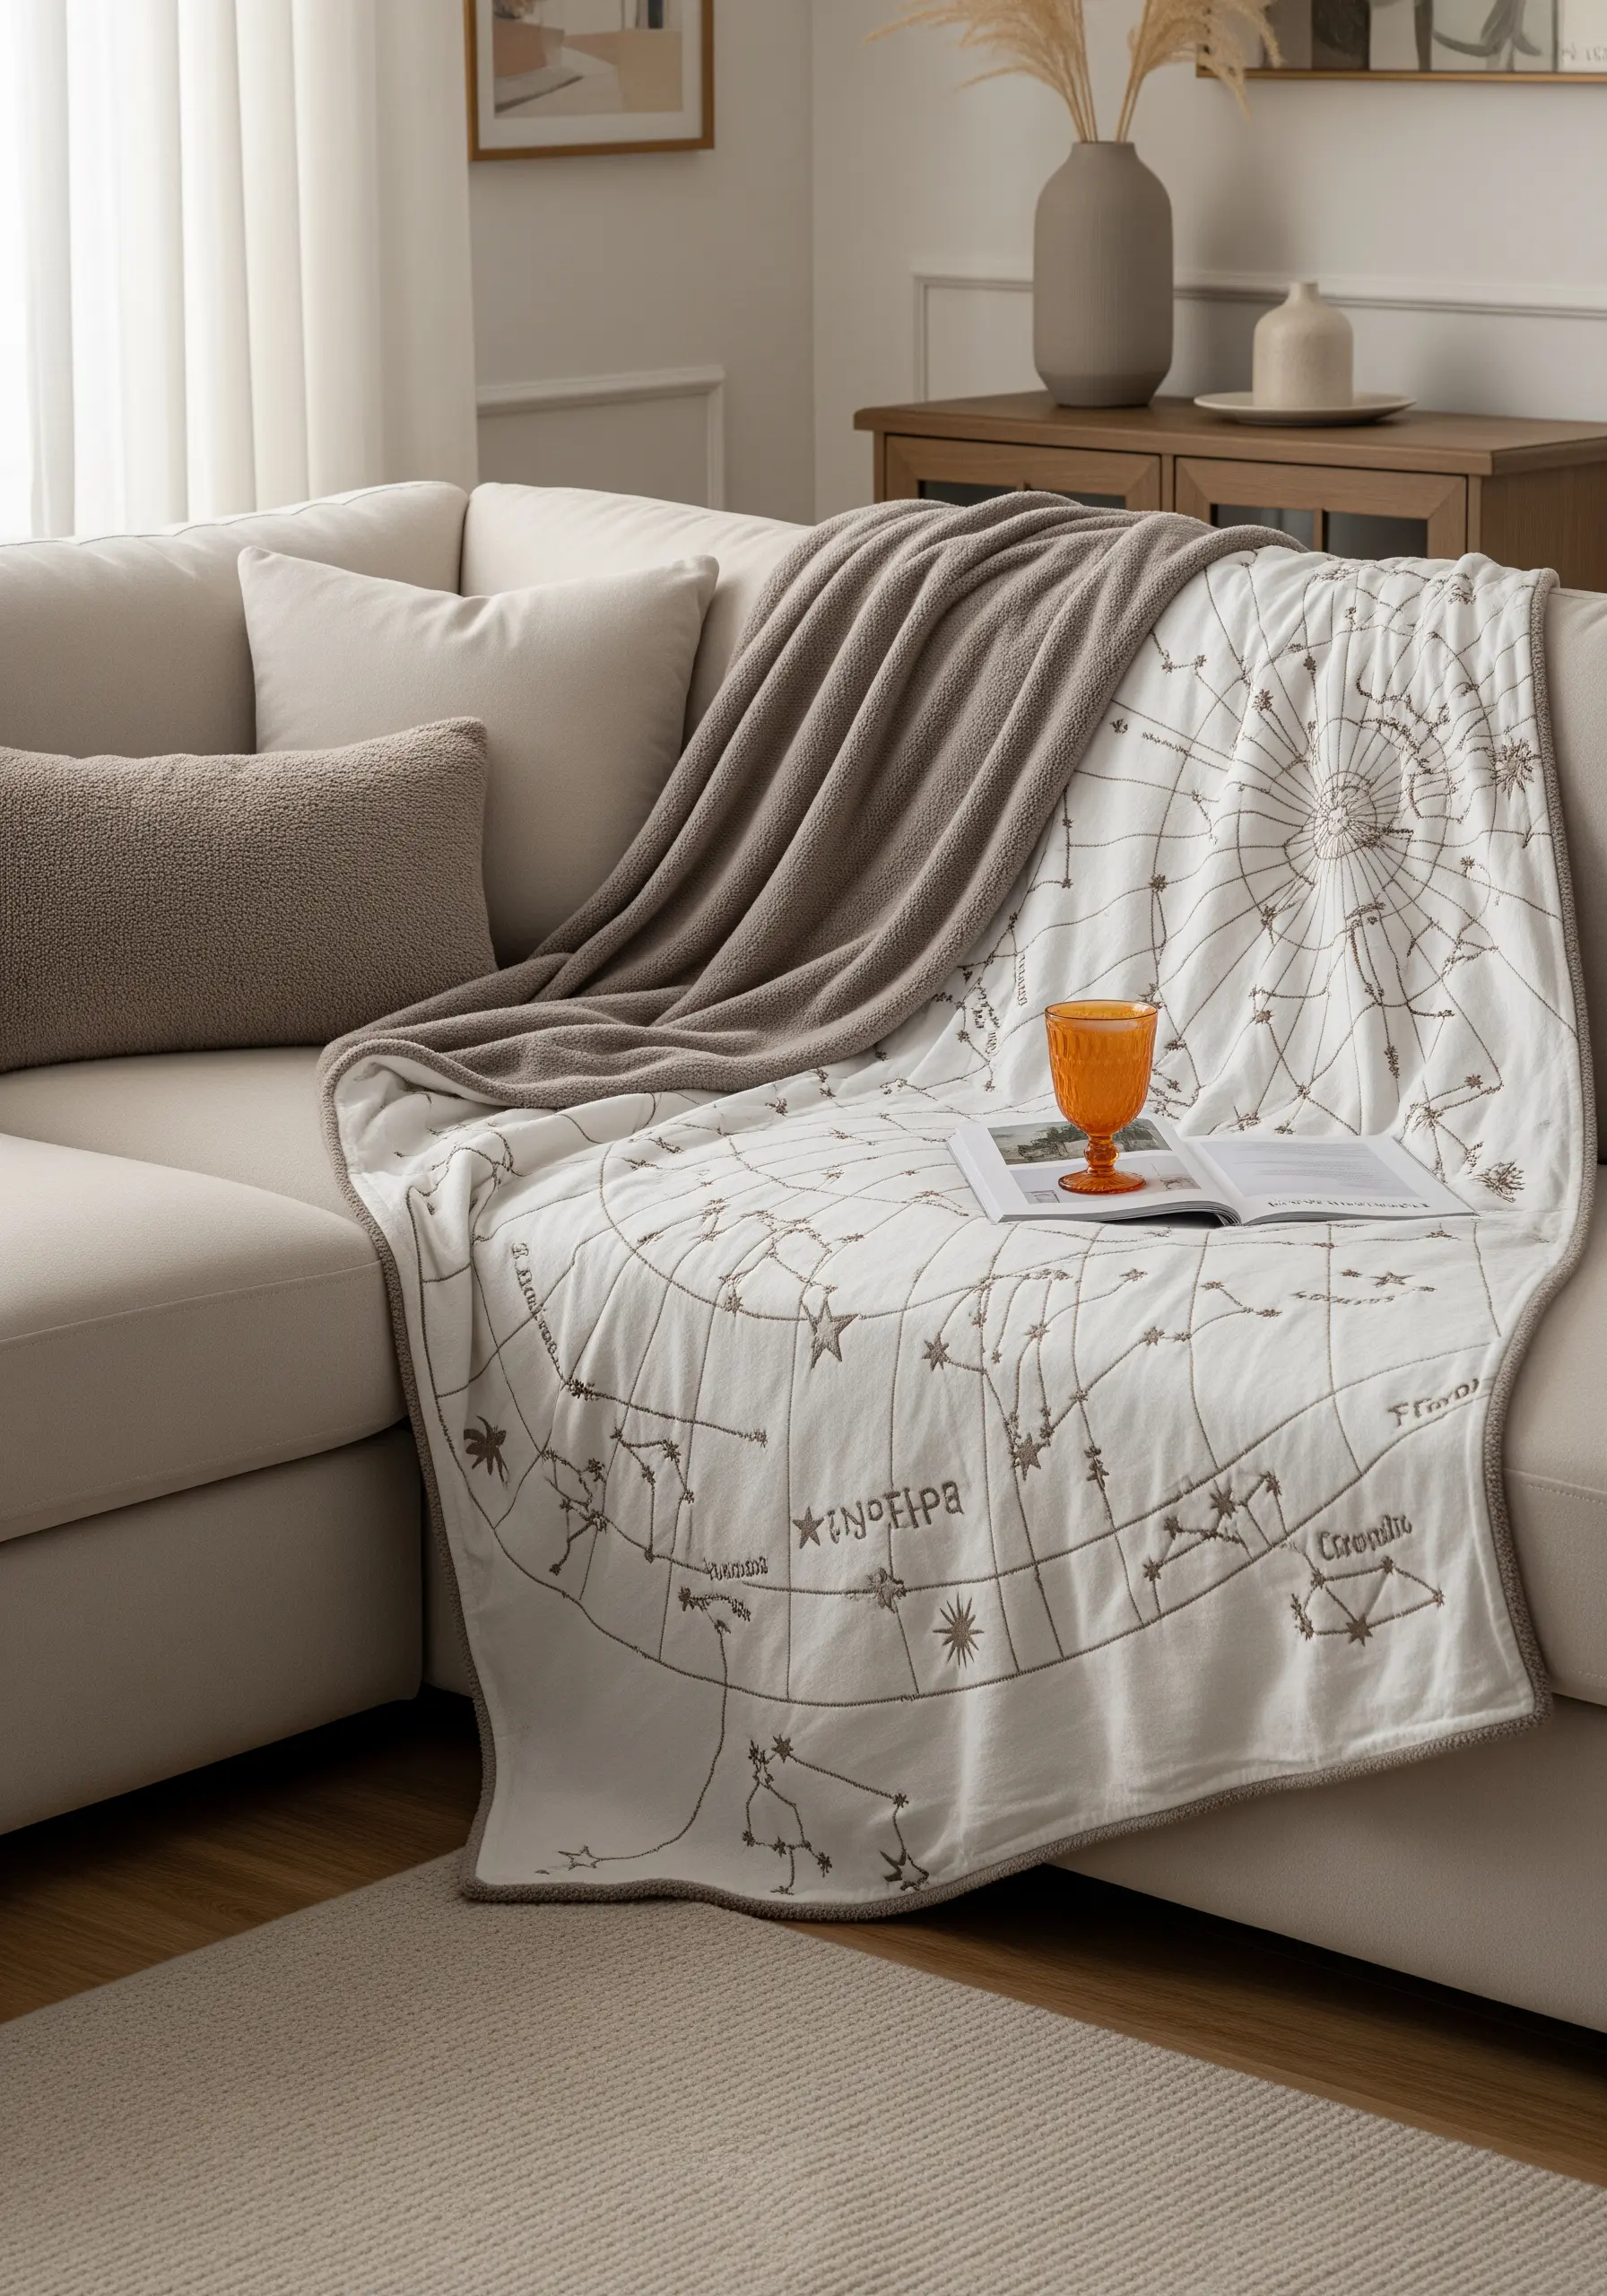
For intricate designs like constellations or maps, clarity is paramount.
Transfer your design using a fine-tipped, heat-erasable pen for unmatched precision.
Then, using only a single strand of six-strand floss, work the entire piece in a tiny, meticulous backstitch.
This method produces the finest possible line, ensuring that even the smallest details and text are sharp and legible. It transforms the throw into a delicate work of illustrative art.
12. Achieve Uniformity with Satin-Stitched Blocks

The power of this geometric design comes from its flawless repetition.
To achieve this, work on your throw in sections using a large embroidery hoop to keep the fabric perfectly taut.
Fill each triangle with a satin stitch, ensuring all stitches lie parallel to one another at a consistent angle.
Using a slightly darker taupe thread on a lighter beige blanket creates a sophisticated, tonal pattern that adds rhythm and structure without overwhelming the eye.
13. Define Motifs with Negative Space
This intricate, folk-art-inspired design is created not by stitching the motifs themselves, but by filling in the space around them.
Start by outlining your floral and geometric shapes with a simple backstitch.
Then, fill the entire background area with dense seed stitches or French knots using a creamy white thread.
This technique, known as voiding, makes the un-stitched taupe fabric become the focal point, creating a rich, textural piece with a stunning visual effect.
14. Elevate a Single Motif with Whipped Stitch

To turn a simple outline into a refined focal point, enhance its texture.
First, stitch your ginkgo leaf design using a standard backstitch.
Then, using the same thread, pass your needle under each backstitch without piercing the fabric. This ‘whipping’ motion wraps the base stitch, creating a smooth, raised, cord-like line.
This simple extra step gives your line work more substance and presence, making these kinds of minimalist embroidery designs inspired by nature feel deliberate and beautifully finished.
15. Mimic Cable Knits with Padded Stitches

You can replicate the cozy texture of a cable-knit sweater on any plain-weave blanket.
First, lay down a foundation of long, straight stitches or running stitches within your cable shapes. This is your padding.
Then, cover the padding entirely with a dense layer of satin stitch, using a thick yarn or pearl cotton in a creamy off-white.
The underlying stitches will give your satin stitch a raised, three-dimensional quality that convincingly mimics the plush, interwoven texture of knitting.
16. Create Topographic Texture with Contoured Stitches

For these organic, stone-like shapes, build texture from the inside out.
Instead of a flat fill, use a stem stitch or chain stitch worked in concentric, contoured lines that echo the main shape.
Alternate between three shades—a light sand, a mid-taupe, and a deeper brown—to create a layered, topographic effect.
This technique turns simple shapes into sculptural elements with a palpable sense of depth and form, perfect for earth-inspired embroidery textures.
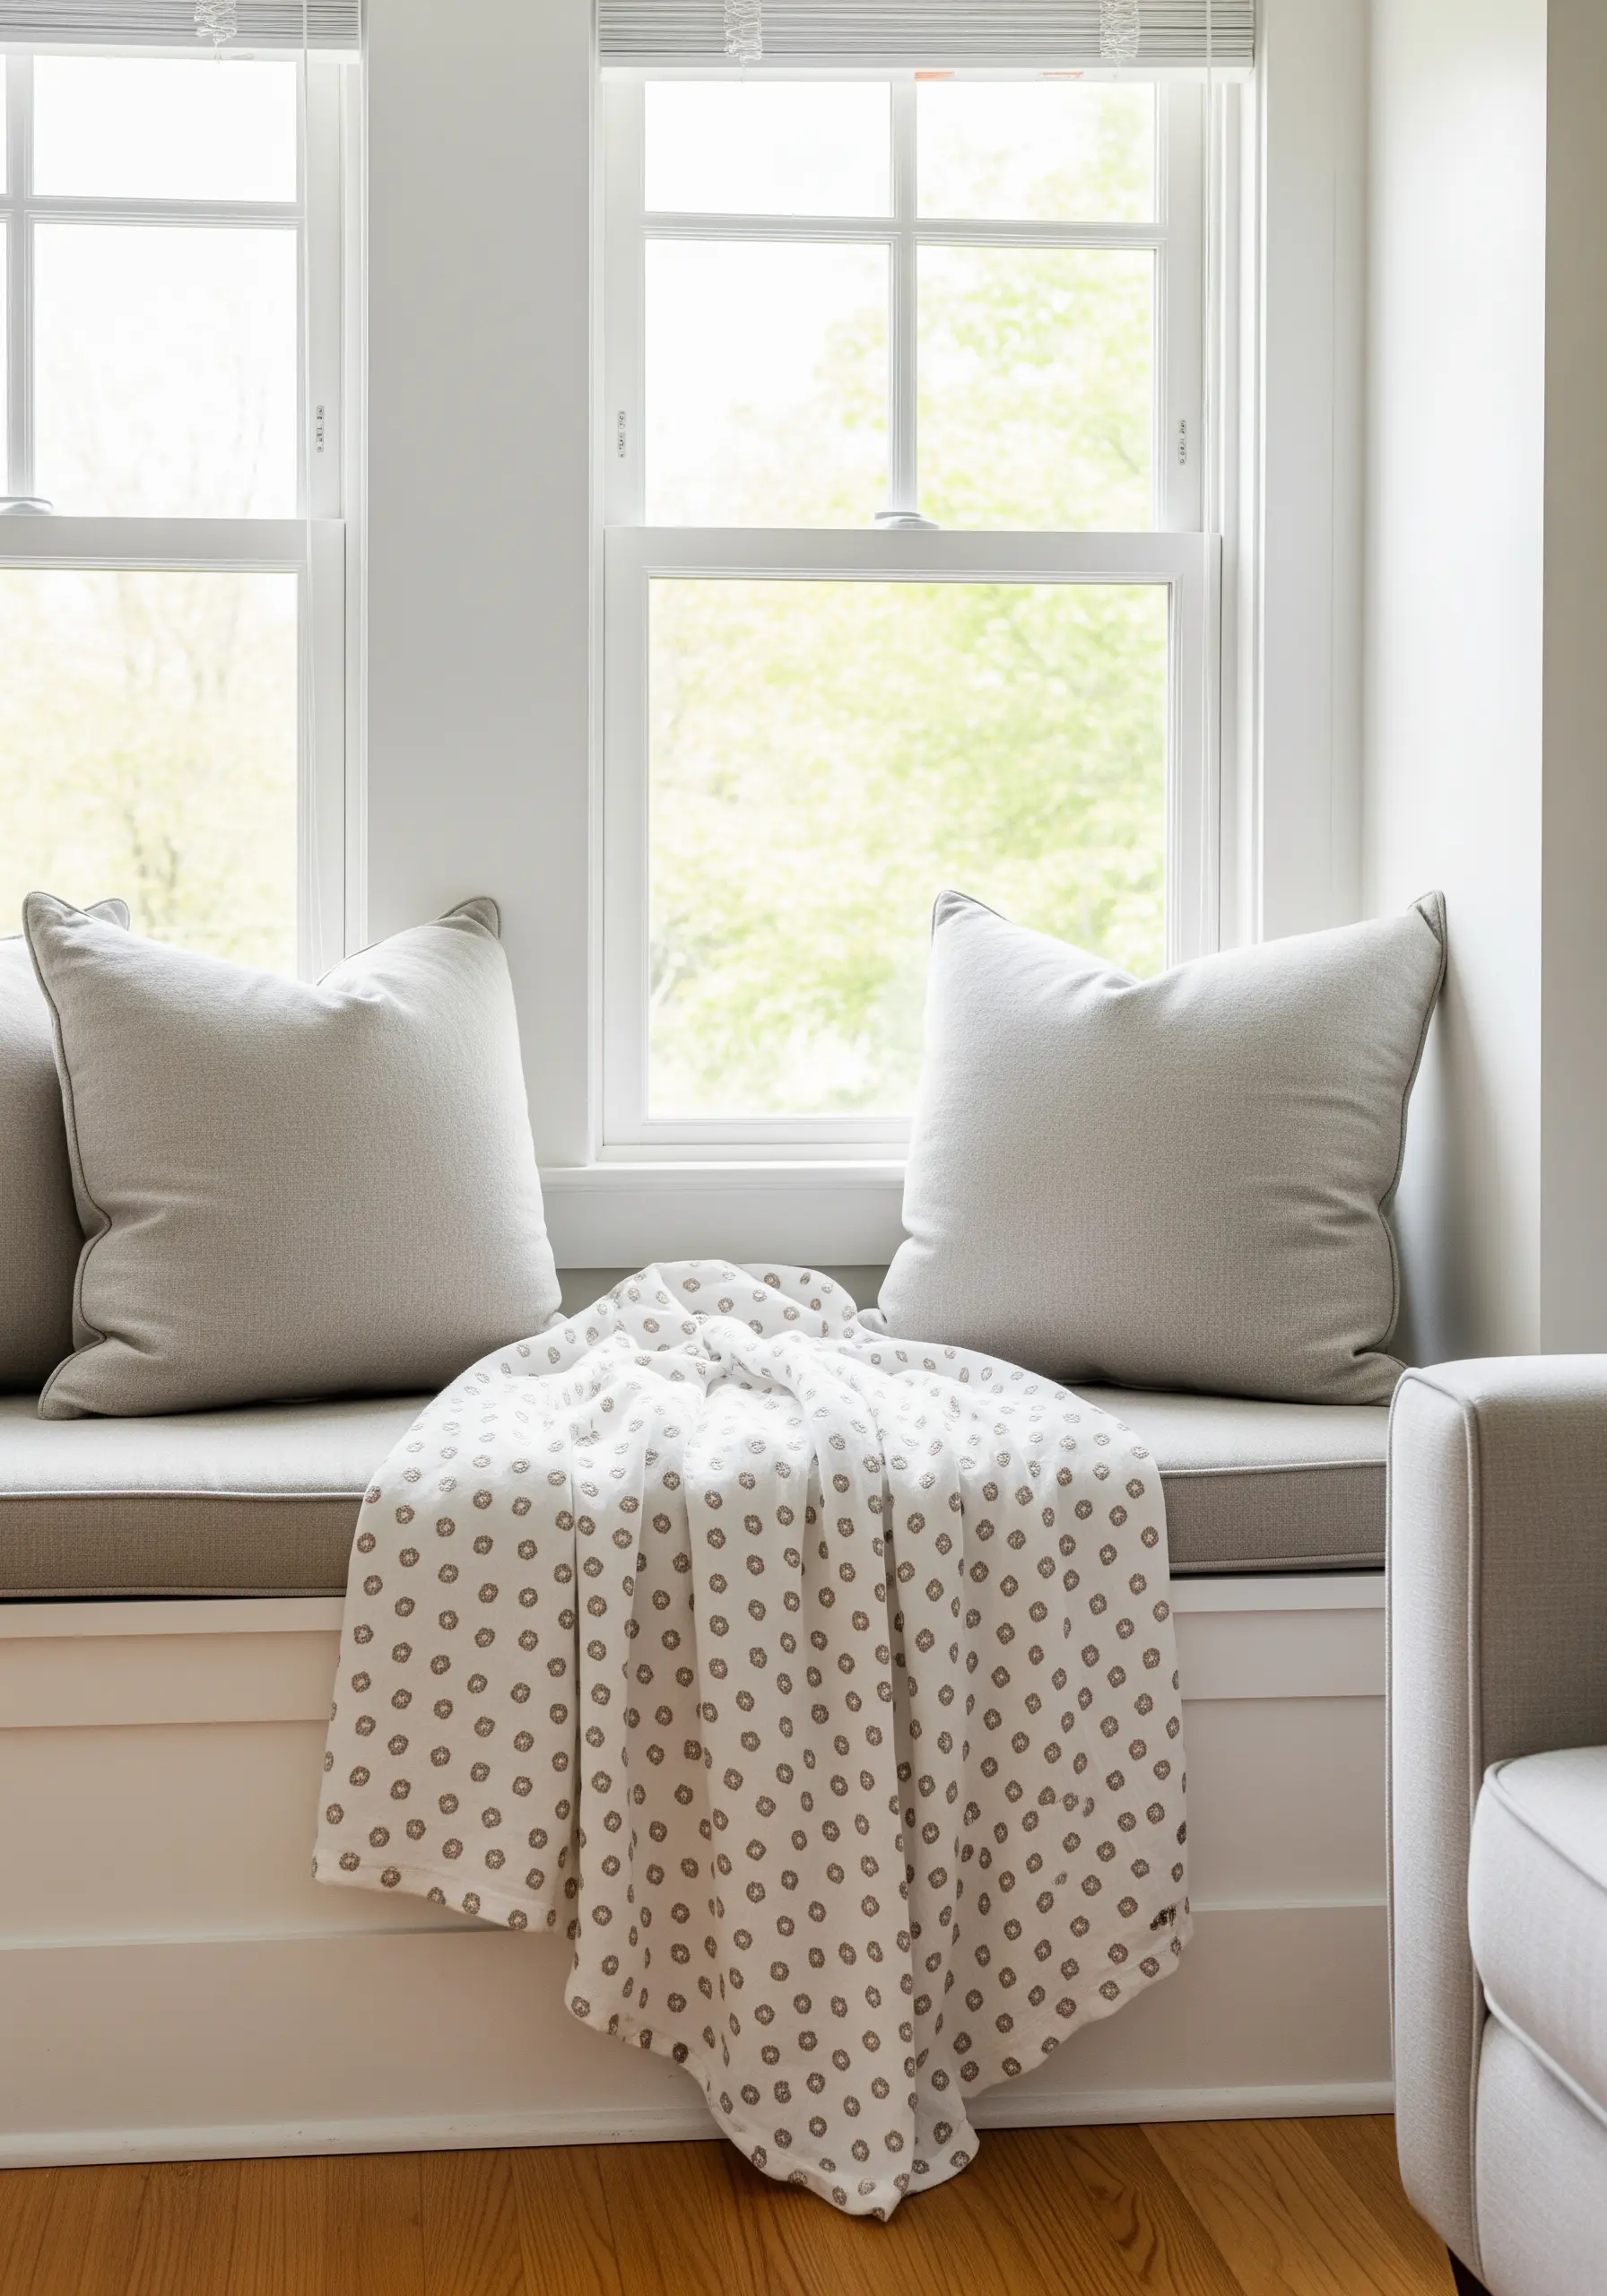
17. Perfect the Polka Dot with Colonial Knots
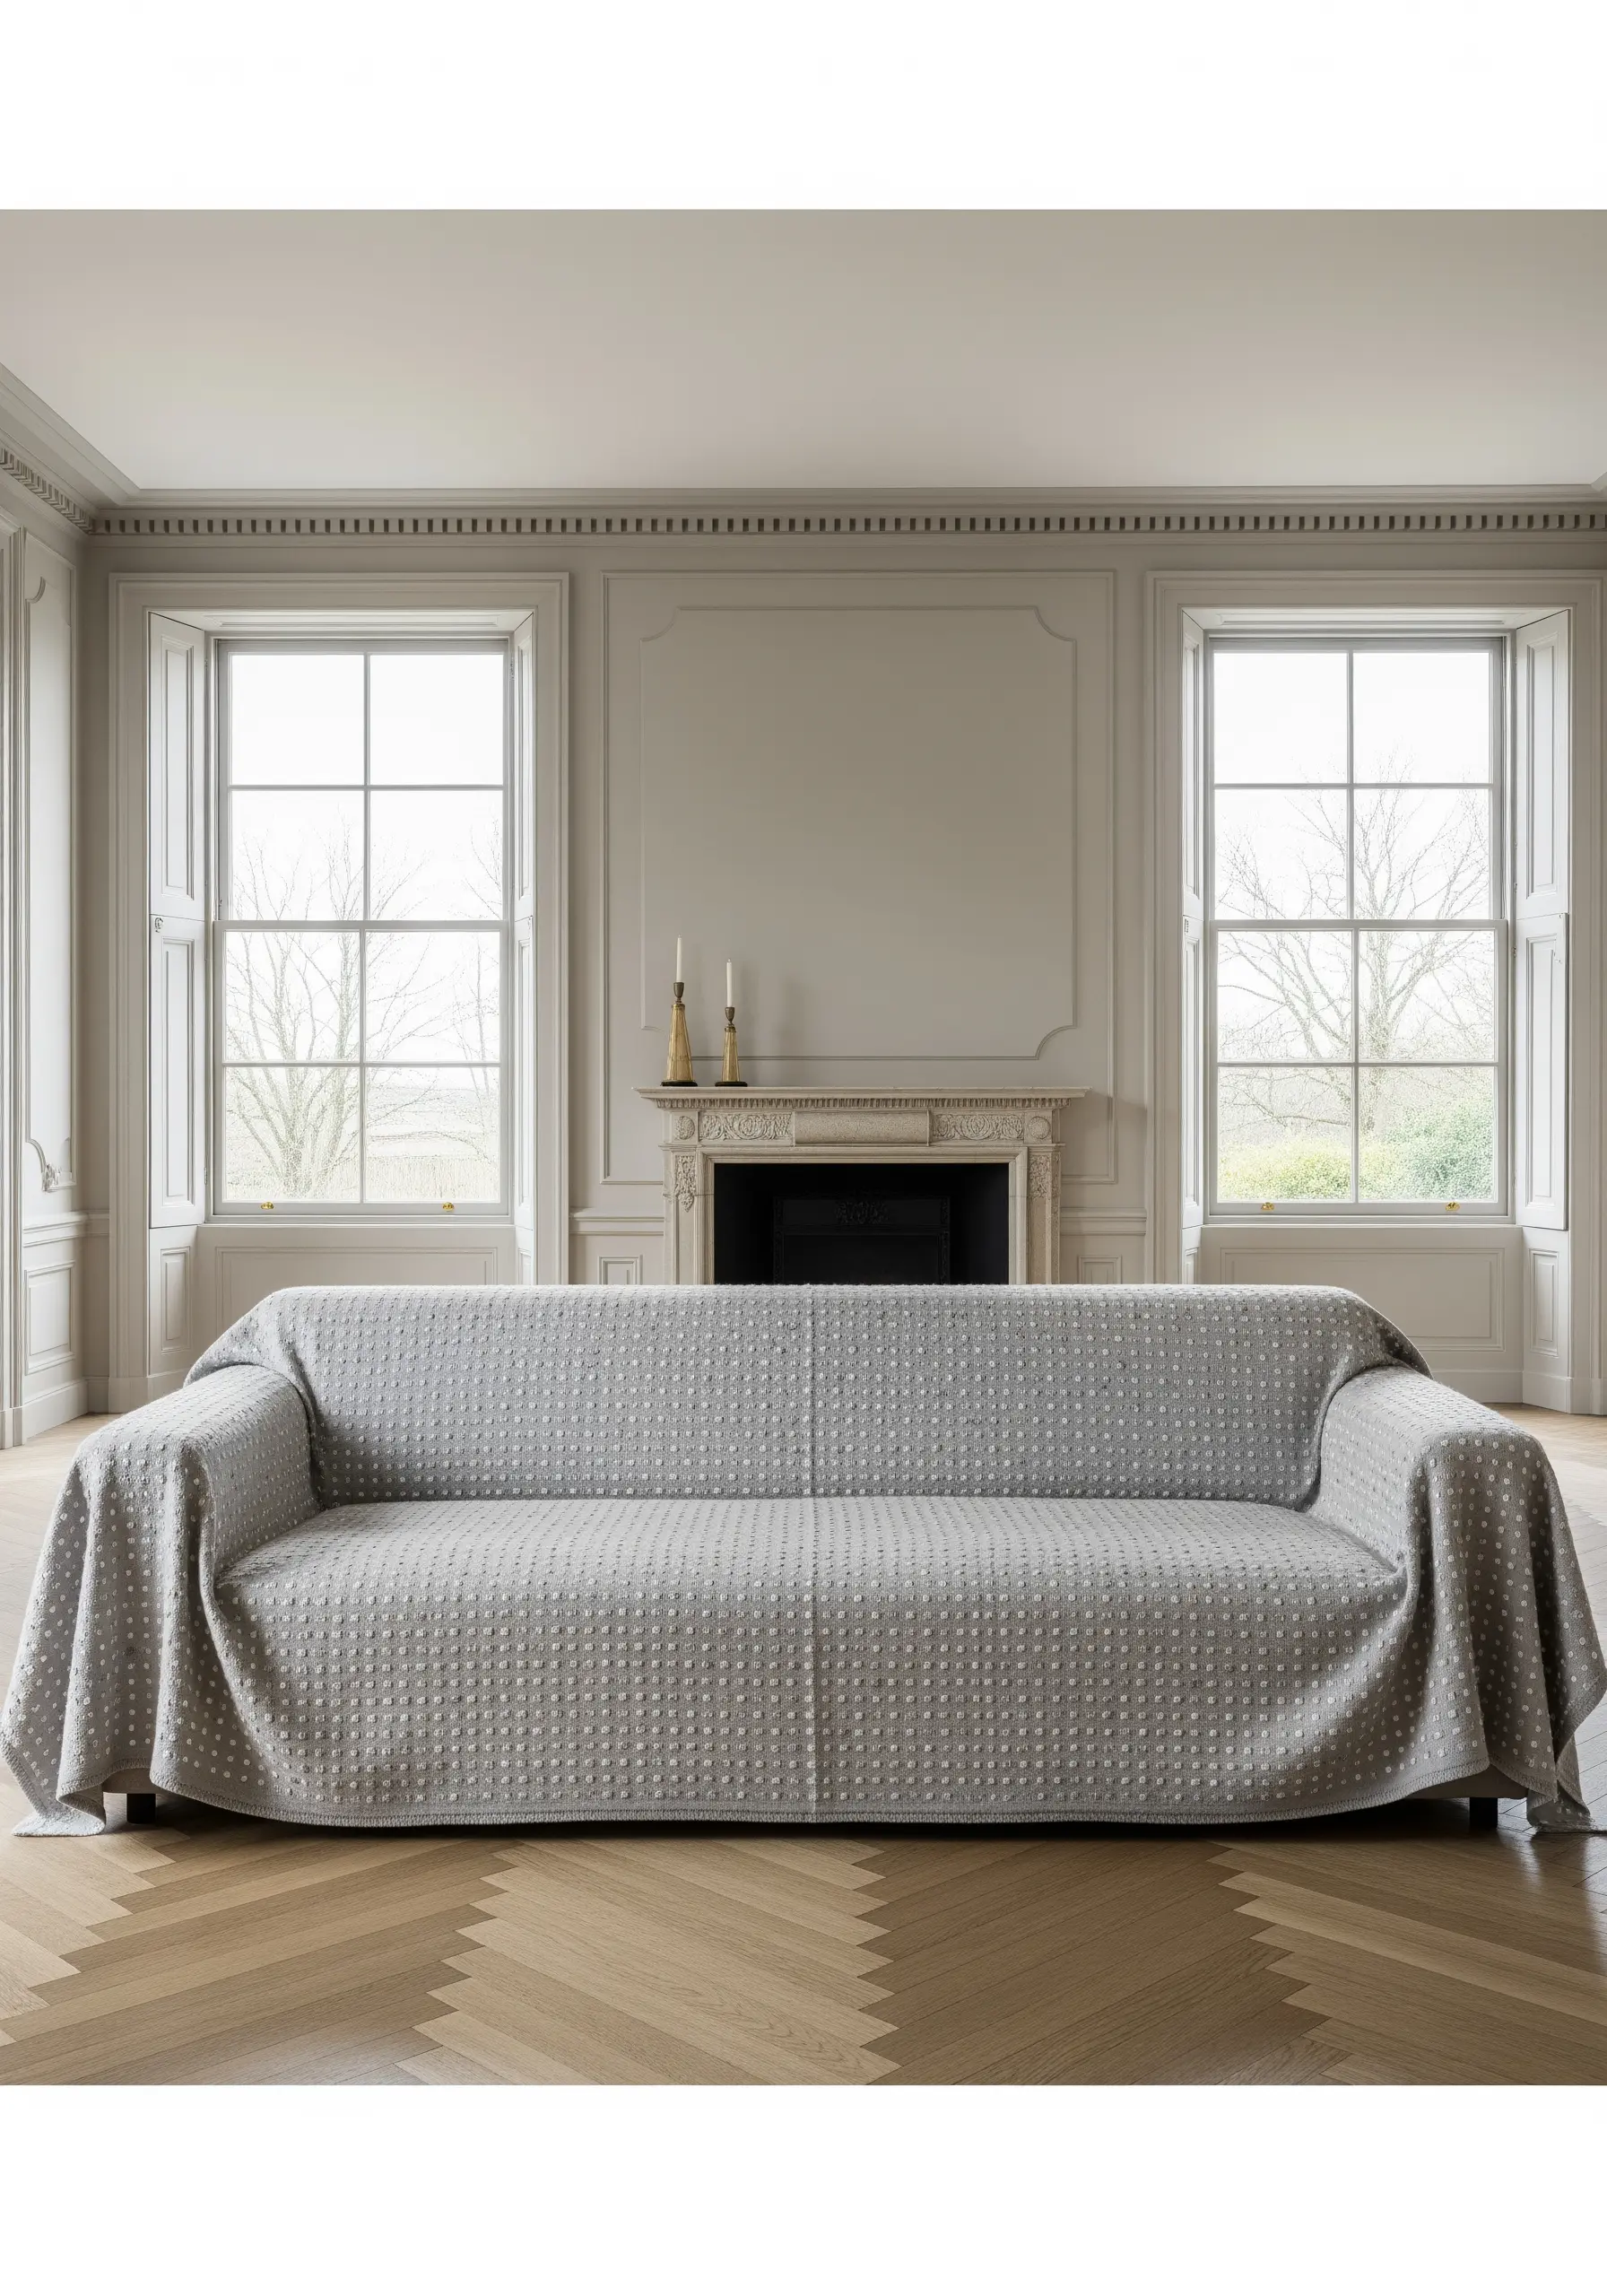
While French knots are popular, the colonial knot often produces a rounder, more uniform dot that’s ideal for a polished polka dot pattern.
To make one, bring the thread over and then under the needle to form a figure eight, then insert the needle back into the fabric right next to where it emerged.
This method secures the knot more tightly, preventing it from pulling through the fabric and ensuring each dot is a neat, high-profile nub. Use a bright white thread for a crisp, clean finish.
18. Achieve Architectural Lines with a Split Stitch

For a bold, modern grid, you need a stitch that creates a solid, uninterrupted line.
A split stitch is superior to a backstitch for this purpose. Instead of placing stitches end-to-end, you bring the needle up through the middle of the previous stitch.
This technique creates a smooth, chain-like line with no visible gaps, resembling a miniature braid.
Use a crisp white pearl cotton on a dark taupe throw for a high-contrast, architectural statement that feels clean and contemporary.
19. Stabilize Gauzy Fabrics for Celestial Motifs

Stitching on lightweight, open-weave fabrics like muslin or gauze requires stabilization to prevent puckering.
Iron a fusible, tear-away stabilizer to the back of your fabric before hooping. This provides the necessary support for your stitches.
Use a simple backstitch for the delicate sun and moon motifs in a contrasting charcoal grey thread.
Once finished, gently tear away the excess stabilizer. Adding thick, handmade tassels in a matching cream color completes the soft, bohemian look.
20. Finish Edges with a Contrasting Blanket Stitch

Elevate a simple fleece or felted throw with a decorative and functional edge.
Use a thick pearl cotton or tapestry wool in a contrasting taupe to work a blanket stitch evenly around the entire perimeter of the white fabric.
To ensure perfect spacing, use a ruler and a disappearing ink pen to mark your stitch points beforehand.
This classic technique not only prevents the edges from curling but also frames the piece, giving it a polished, handcrafted finish that looks intentional and complete.
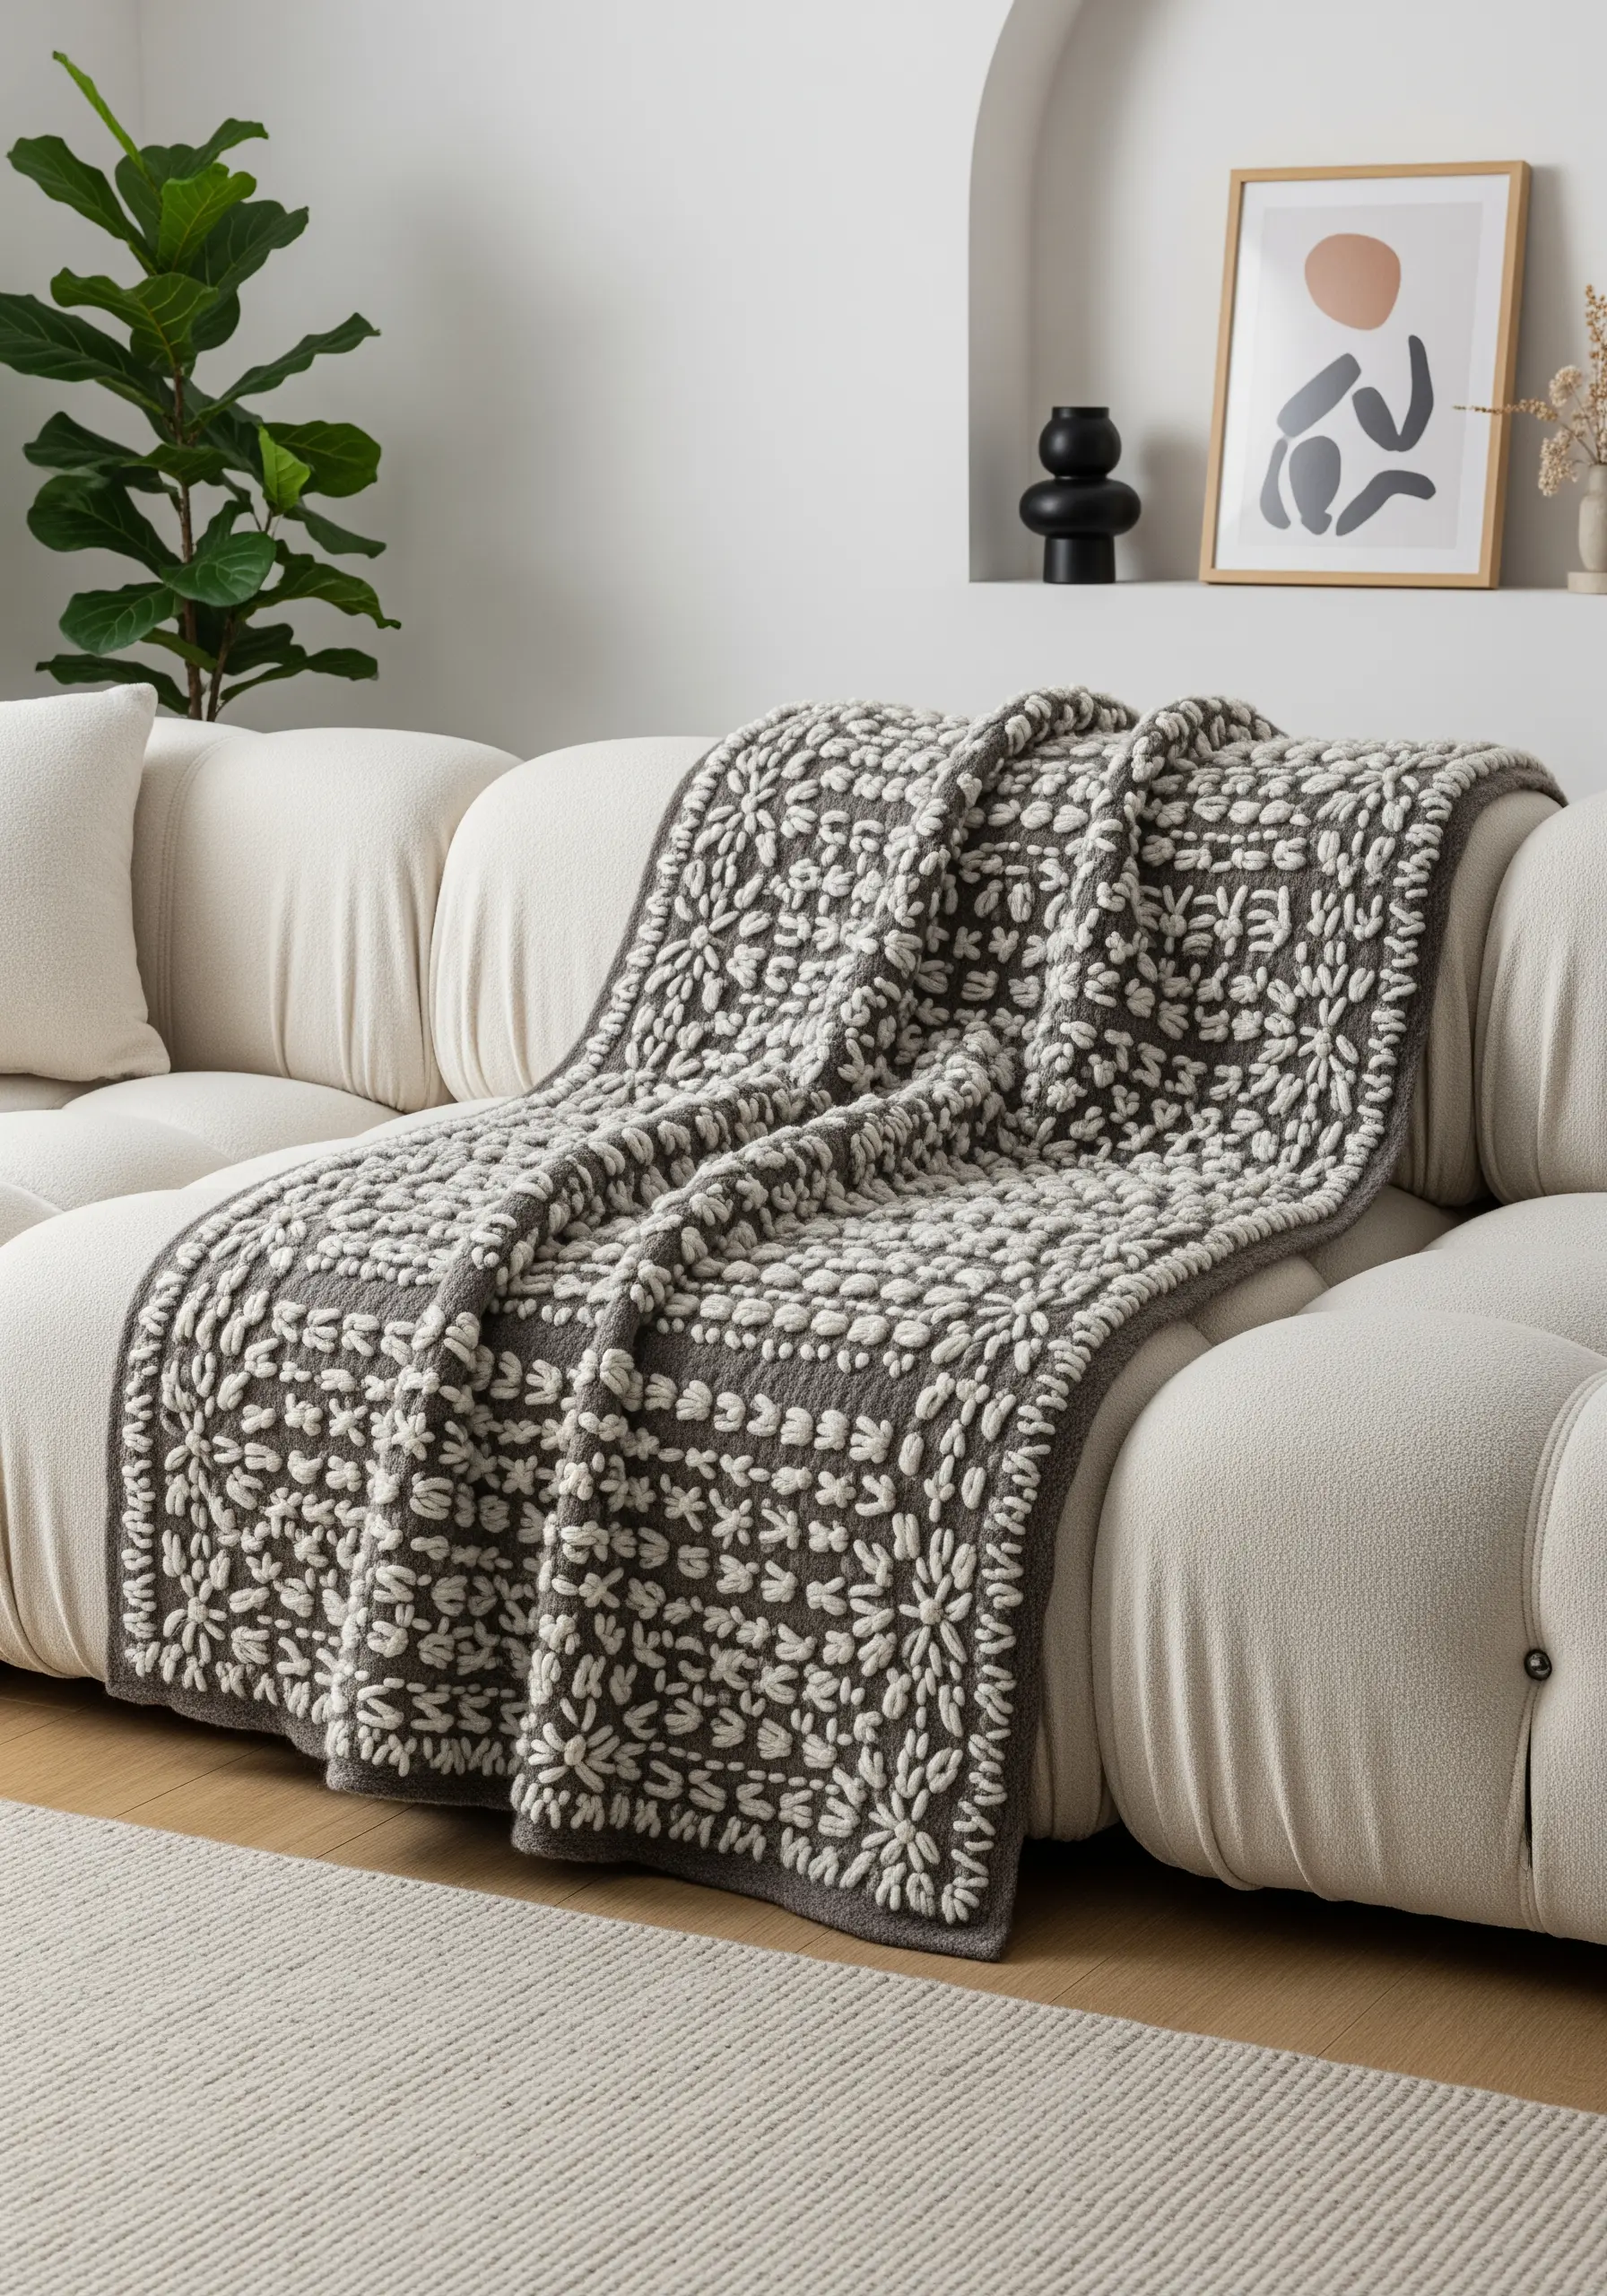
21. Embrace Modern Folk Art with Block Fills

To give simple folk-art motifs a contemporary feel, focus on clean shapes and texture rather than intricate detail.
Use a vertical satin stitch to fill in the house and tree shapes directly, without an outline. This creates soft, touchable blocks of color.
Working on a waffle-weave fabric adds an underlying grid texture that interacts beautifully with the smooth floss.
A simple running stitch border in a quiet grey thread contains the design and adds a final, subtle layer of detail.
22. Interpret Damask with Tone-on-Tone Outlines
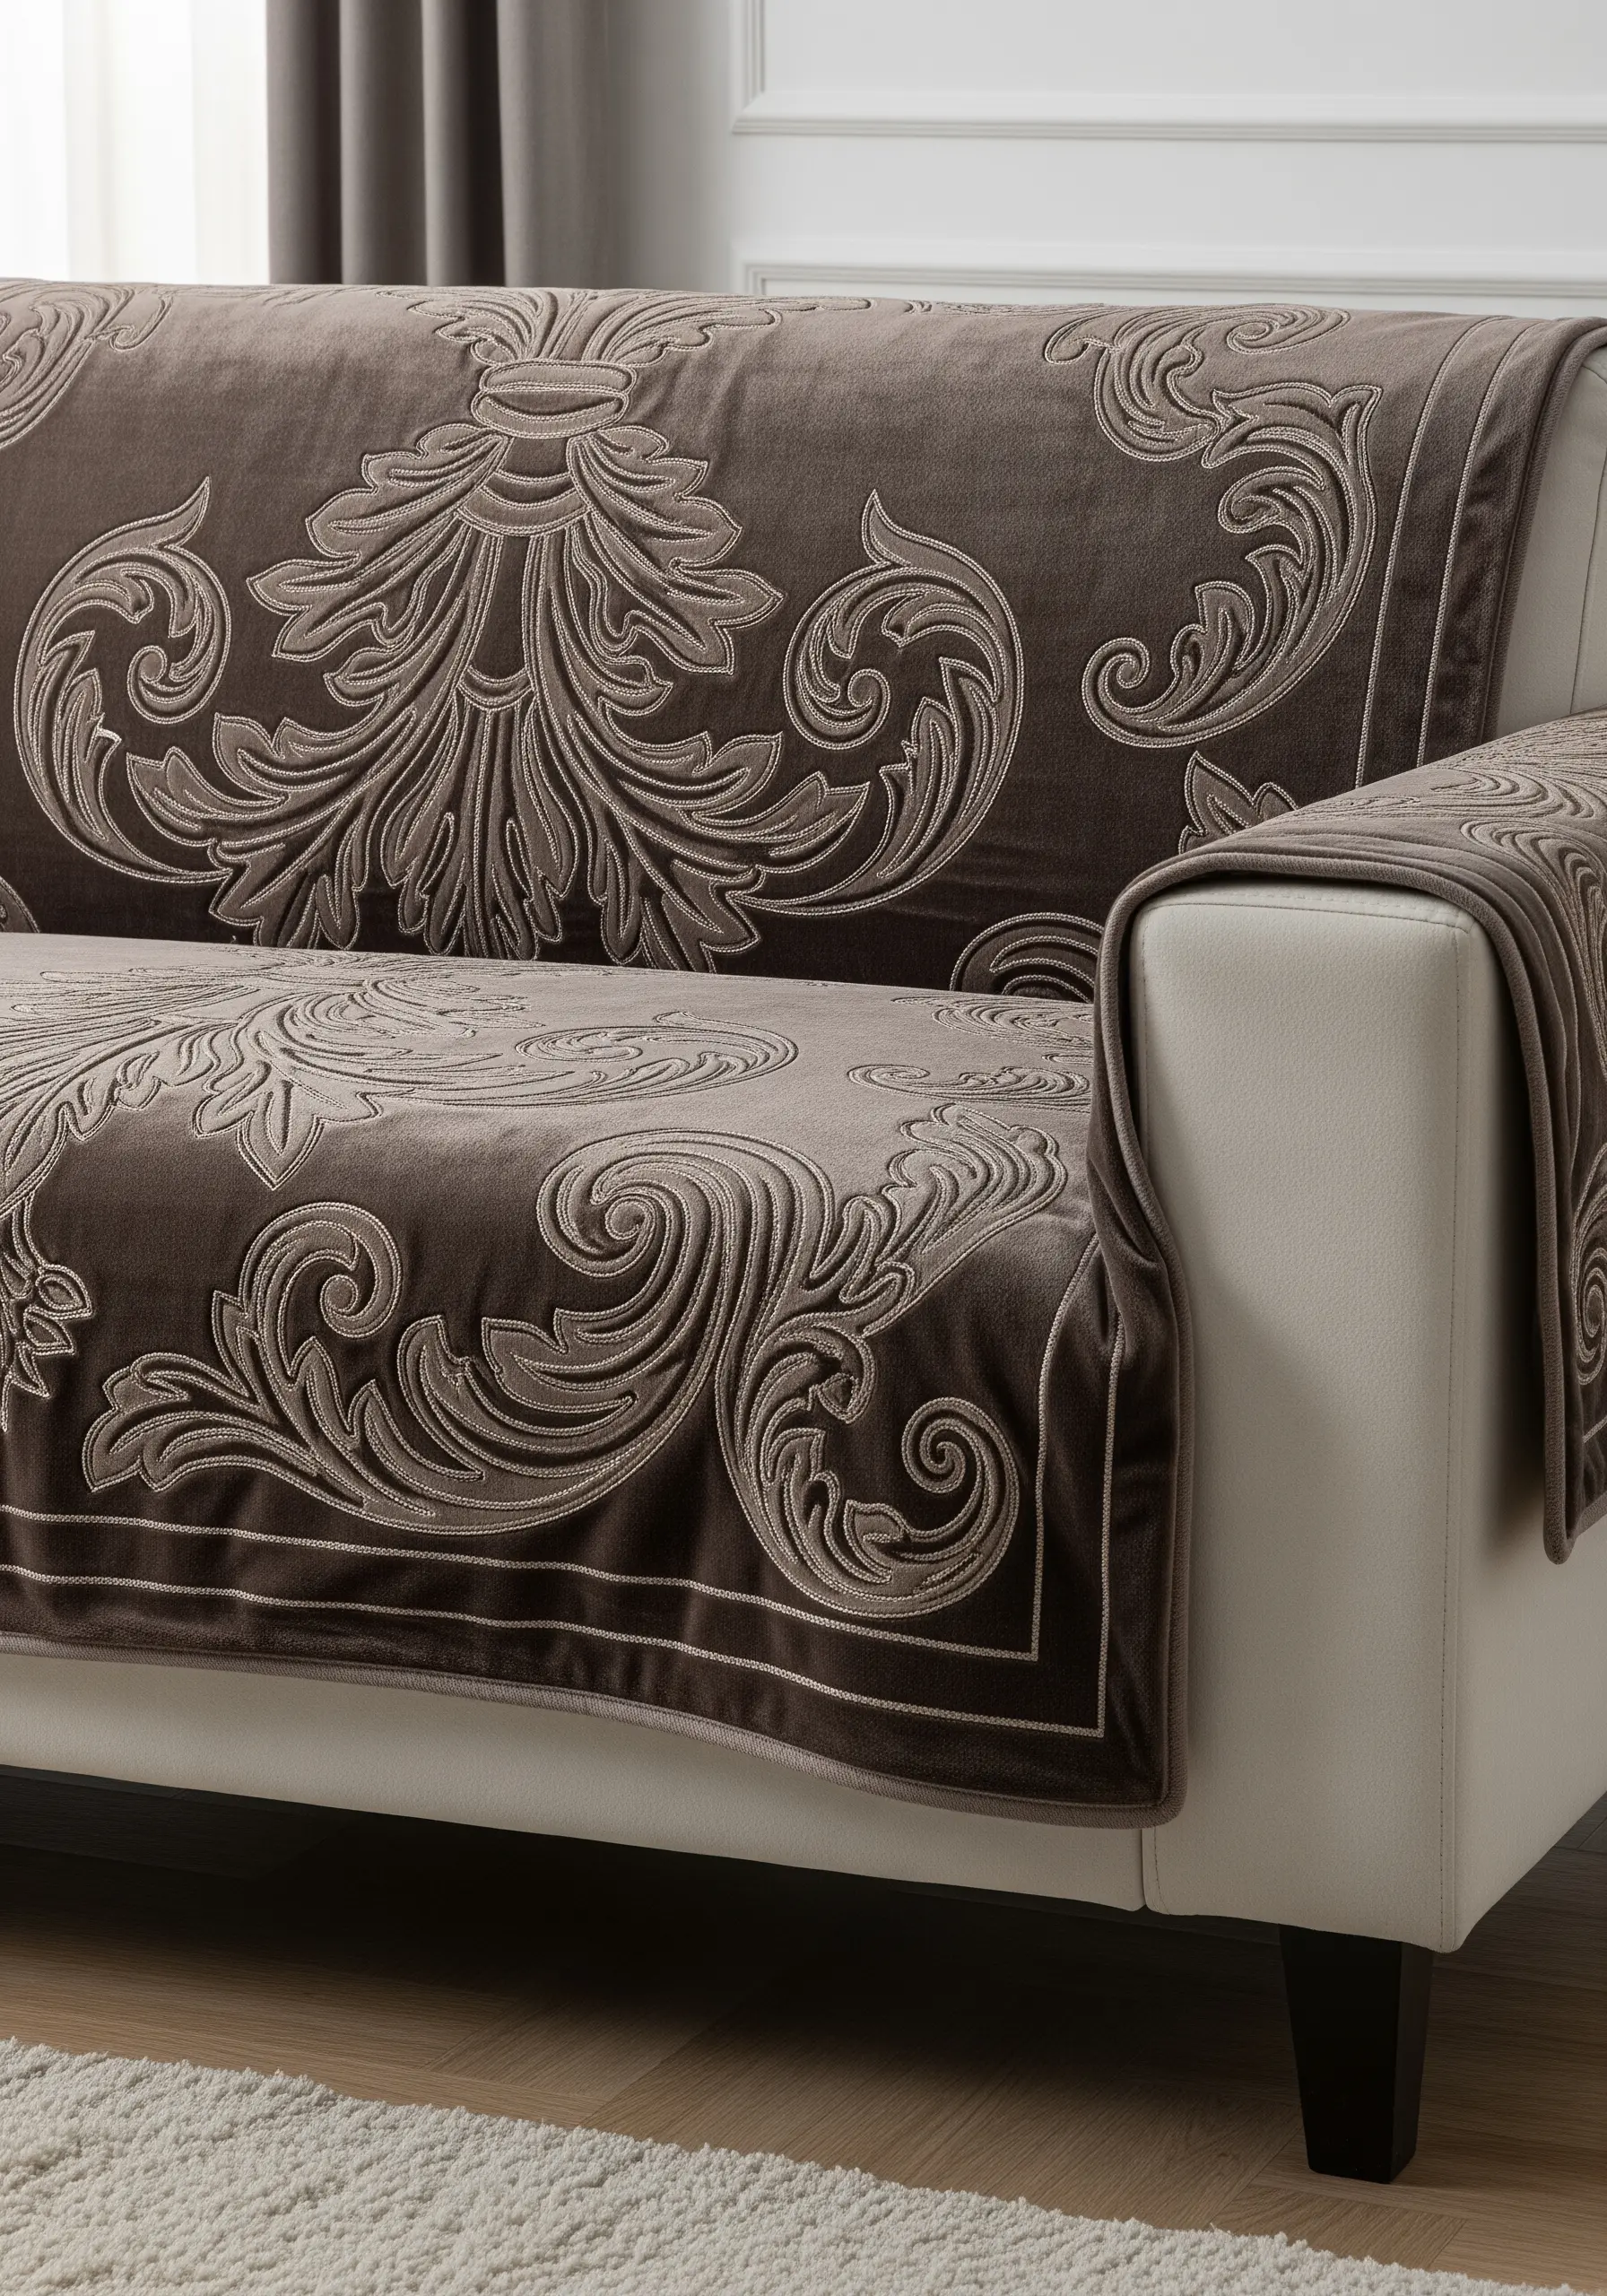
Embroidering a full, ornate damask pattern can be overwhelming. To capture its essence with modern subtlety, opt for a tone-on-tone approach.
Choose a thread that is just one or two shades lighter than your base fabric—here, a light beige on a deep taupe velvet.
Instead of filling the entire design, trace only the primary outlines using a stem stitch or whipped backstitch.
This technique highlights the elegant curves of the pattern while creating a luxurious, low-contrast effect that shimmers as it catches the light.
23. Weave a Plush Panel with French Knots
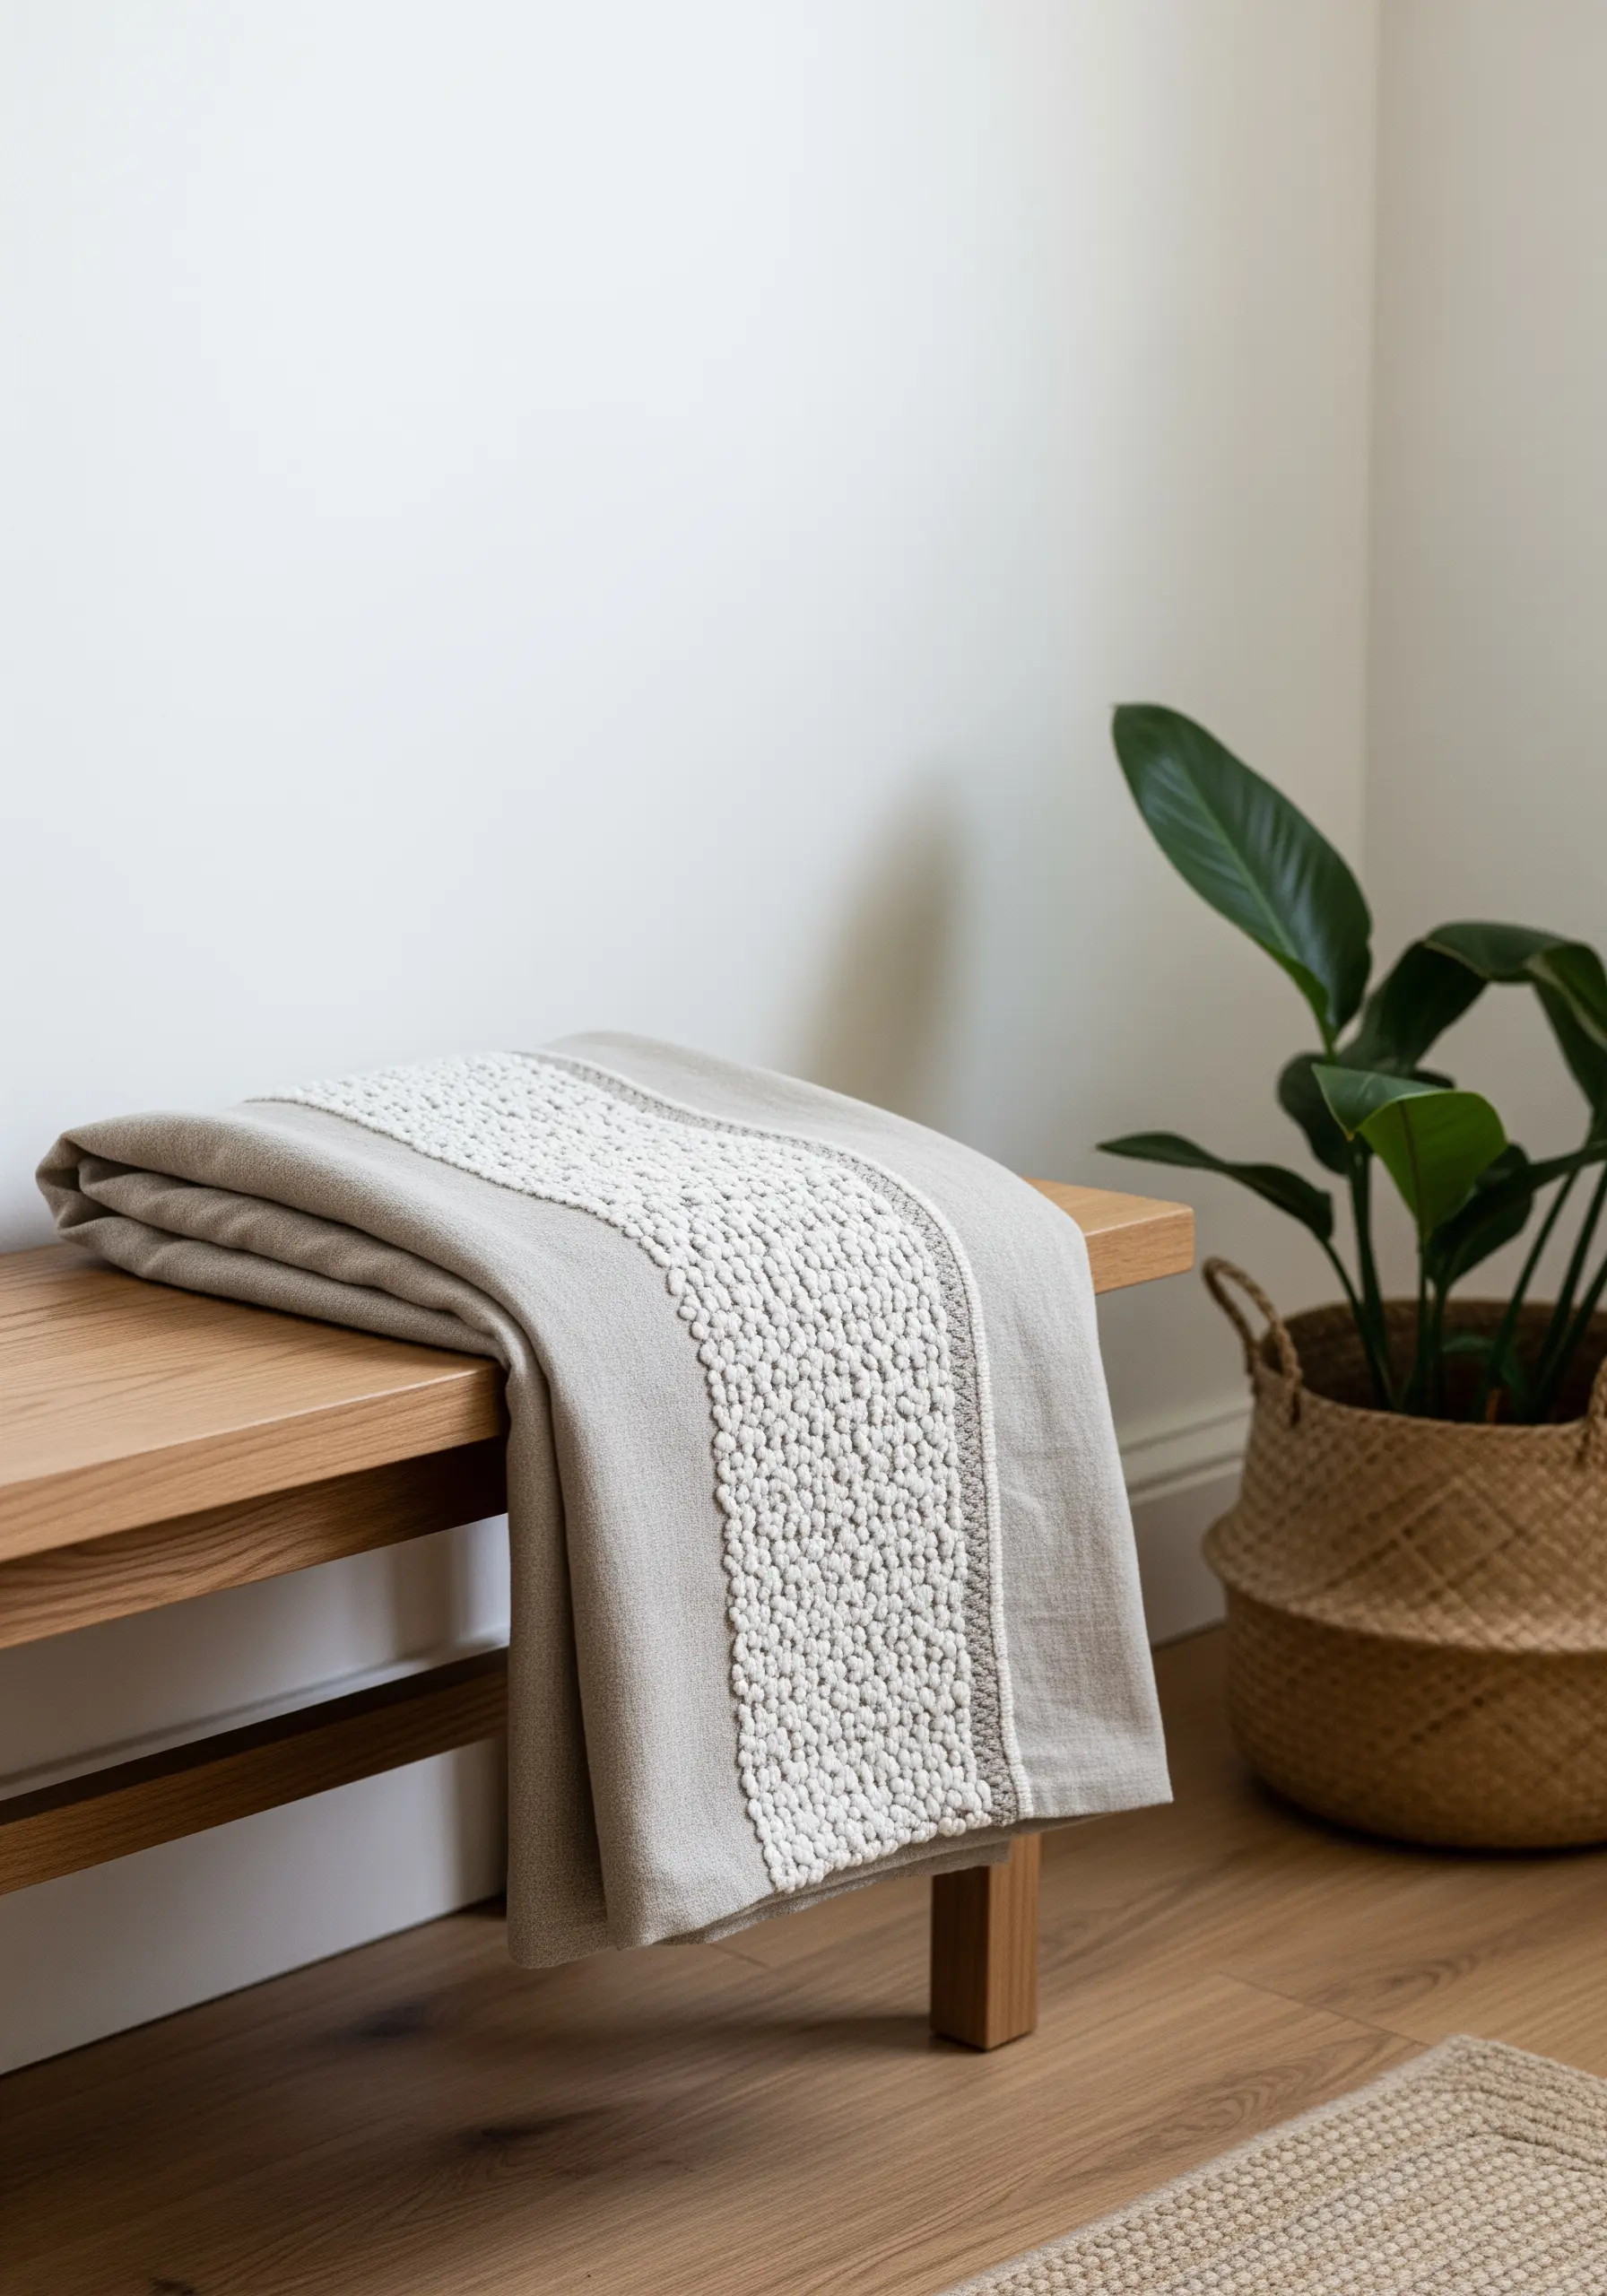
Create an incredibly lush, tactile band of texture by densely packing French knots together.
Draw two parallel lines on your throw to define the panel. Then, using a thick, soft cotton thread in a creamy white, begin filling the area with knots, placing them as close together as possible.
Work in rows to ensure even coverage. The result is a raised, plush strip that resembles uncut velvet or bouclé, adding a focal point of pure texture to an otherwise simple linen throw.
24. Stitch Radiant Starbursts for Graphic Appeal
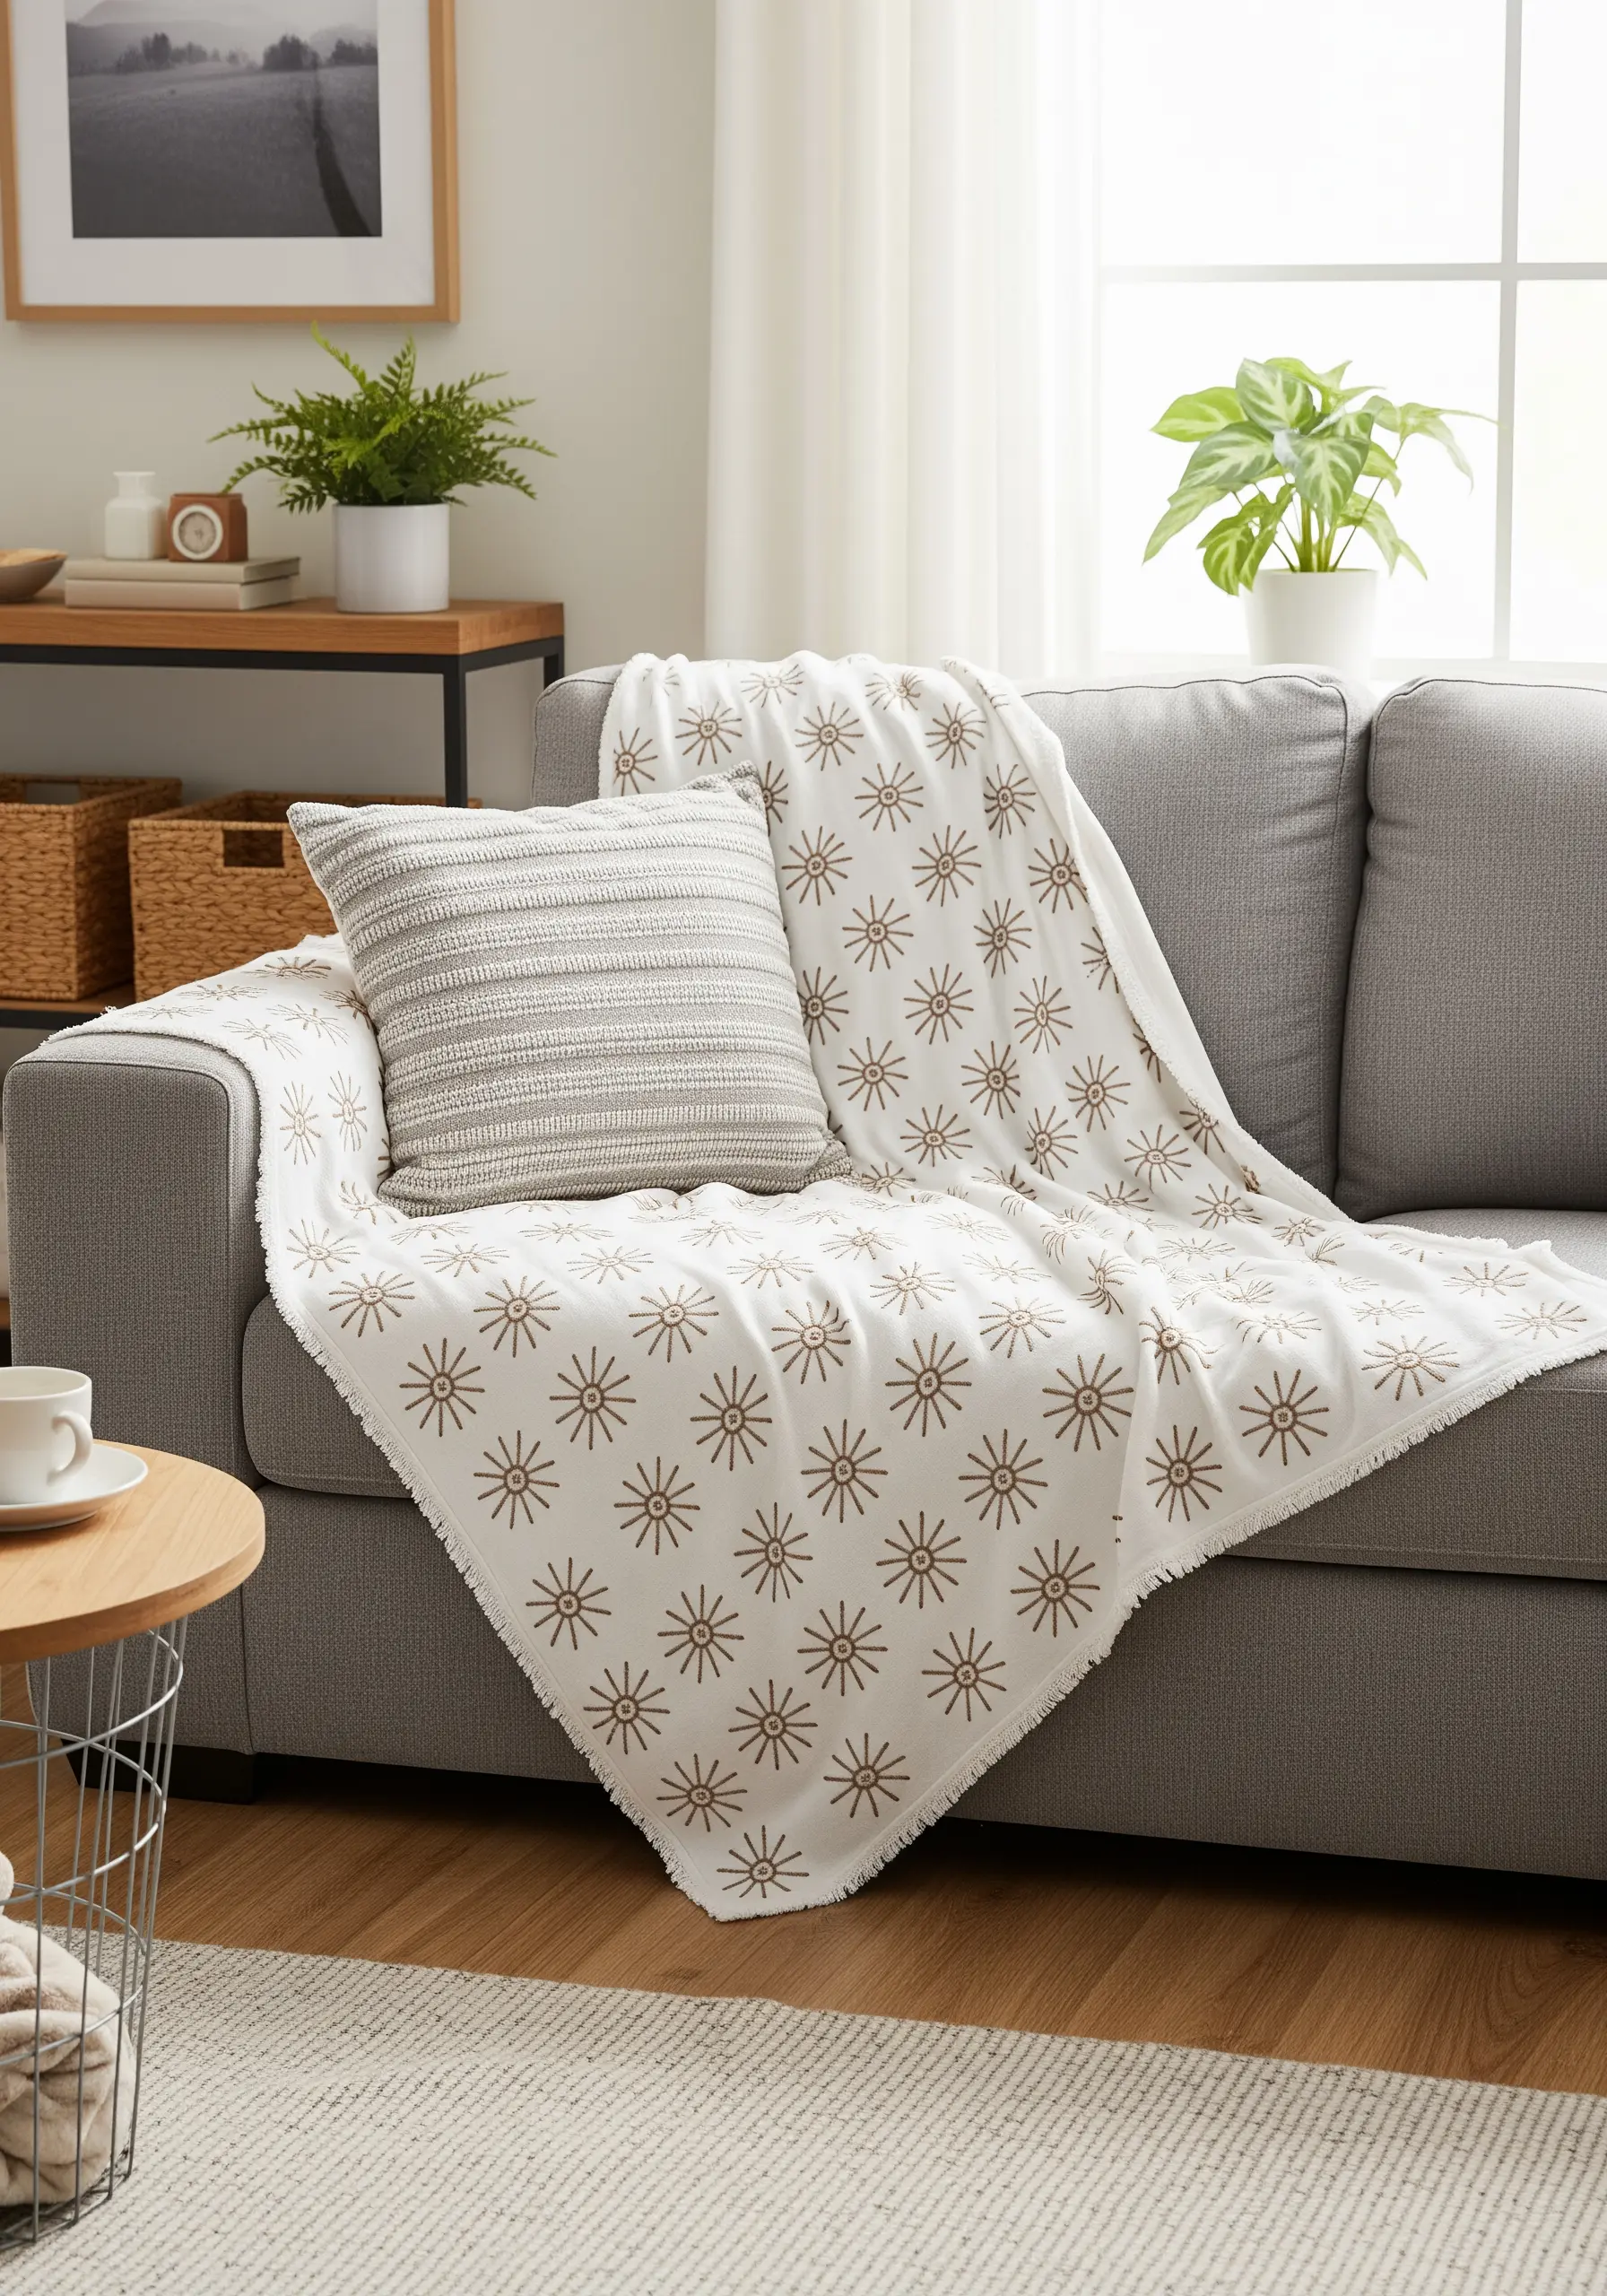
This simple starburst or asterisk motif is a perfect example of how basic straight stitches can create a striking graphic pattern.
To ensure each starburst is uniform, create a small circular template with marked points for your stitches (like numbers on a clock).
Use a darker taupe thread on a white background for clear contrast. The beauty of this design is its simplicity and rhythm, making it an ideal project for meditative, repetitive stitching that yields a big visual reward.
25. Trail a Delicate Floral Border
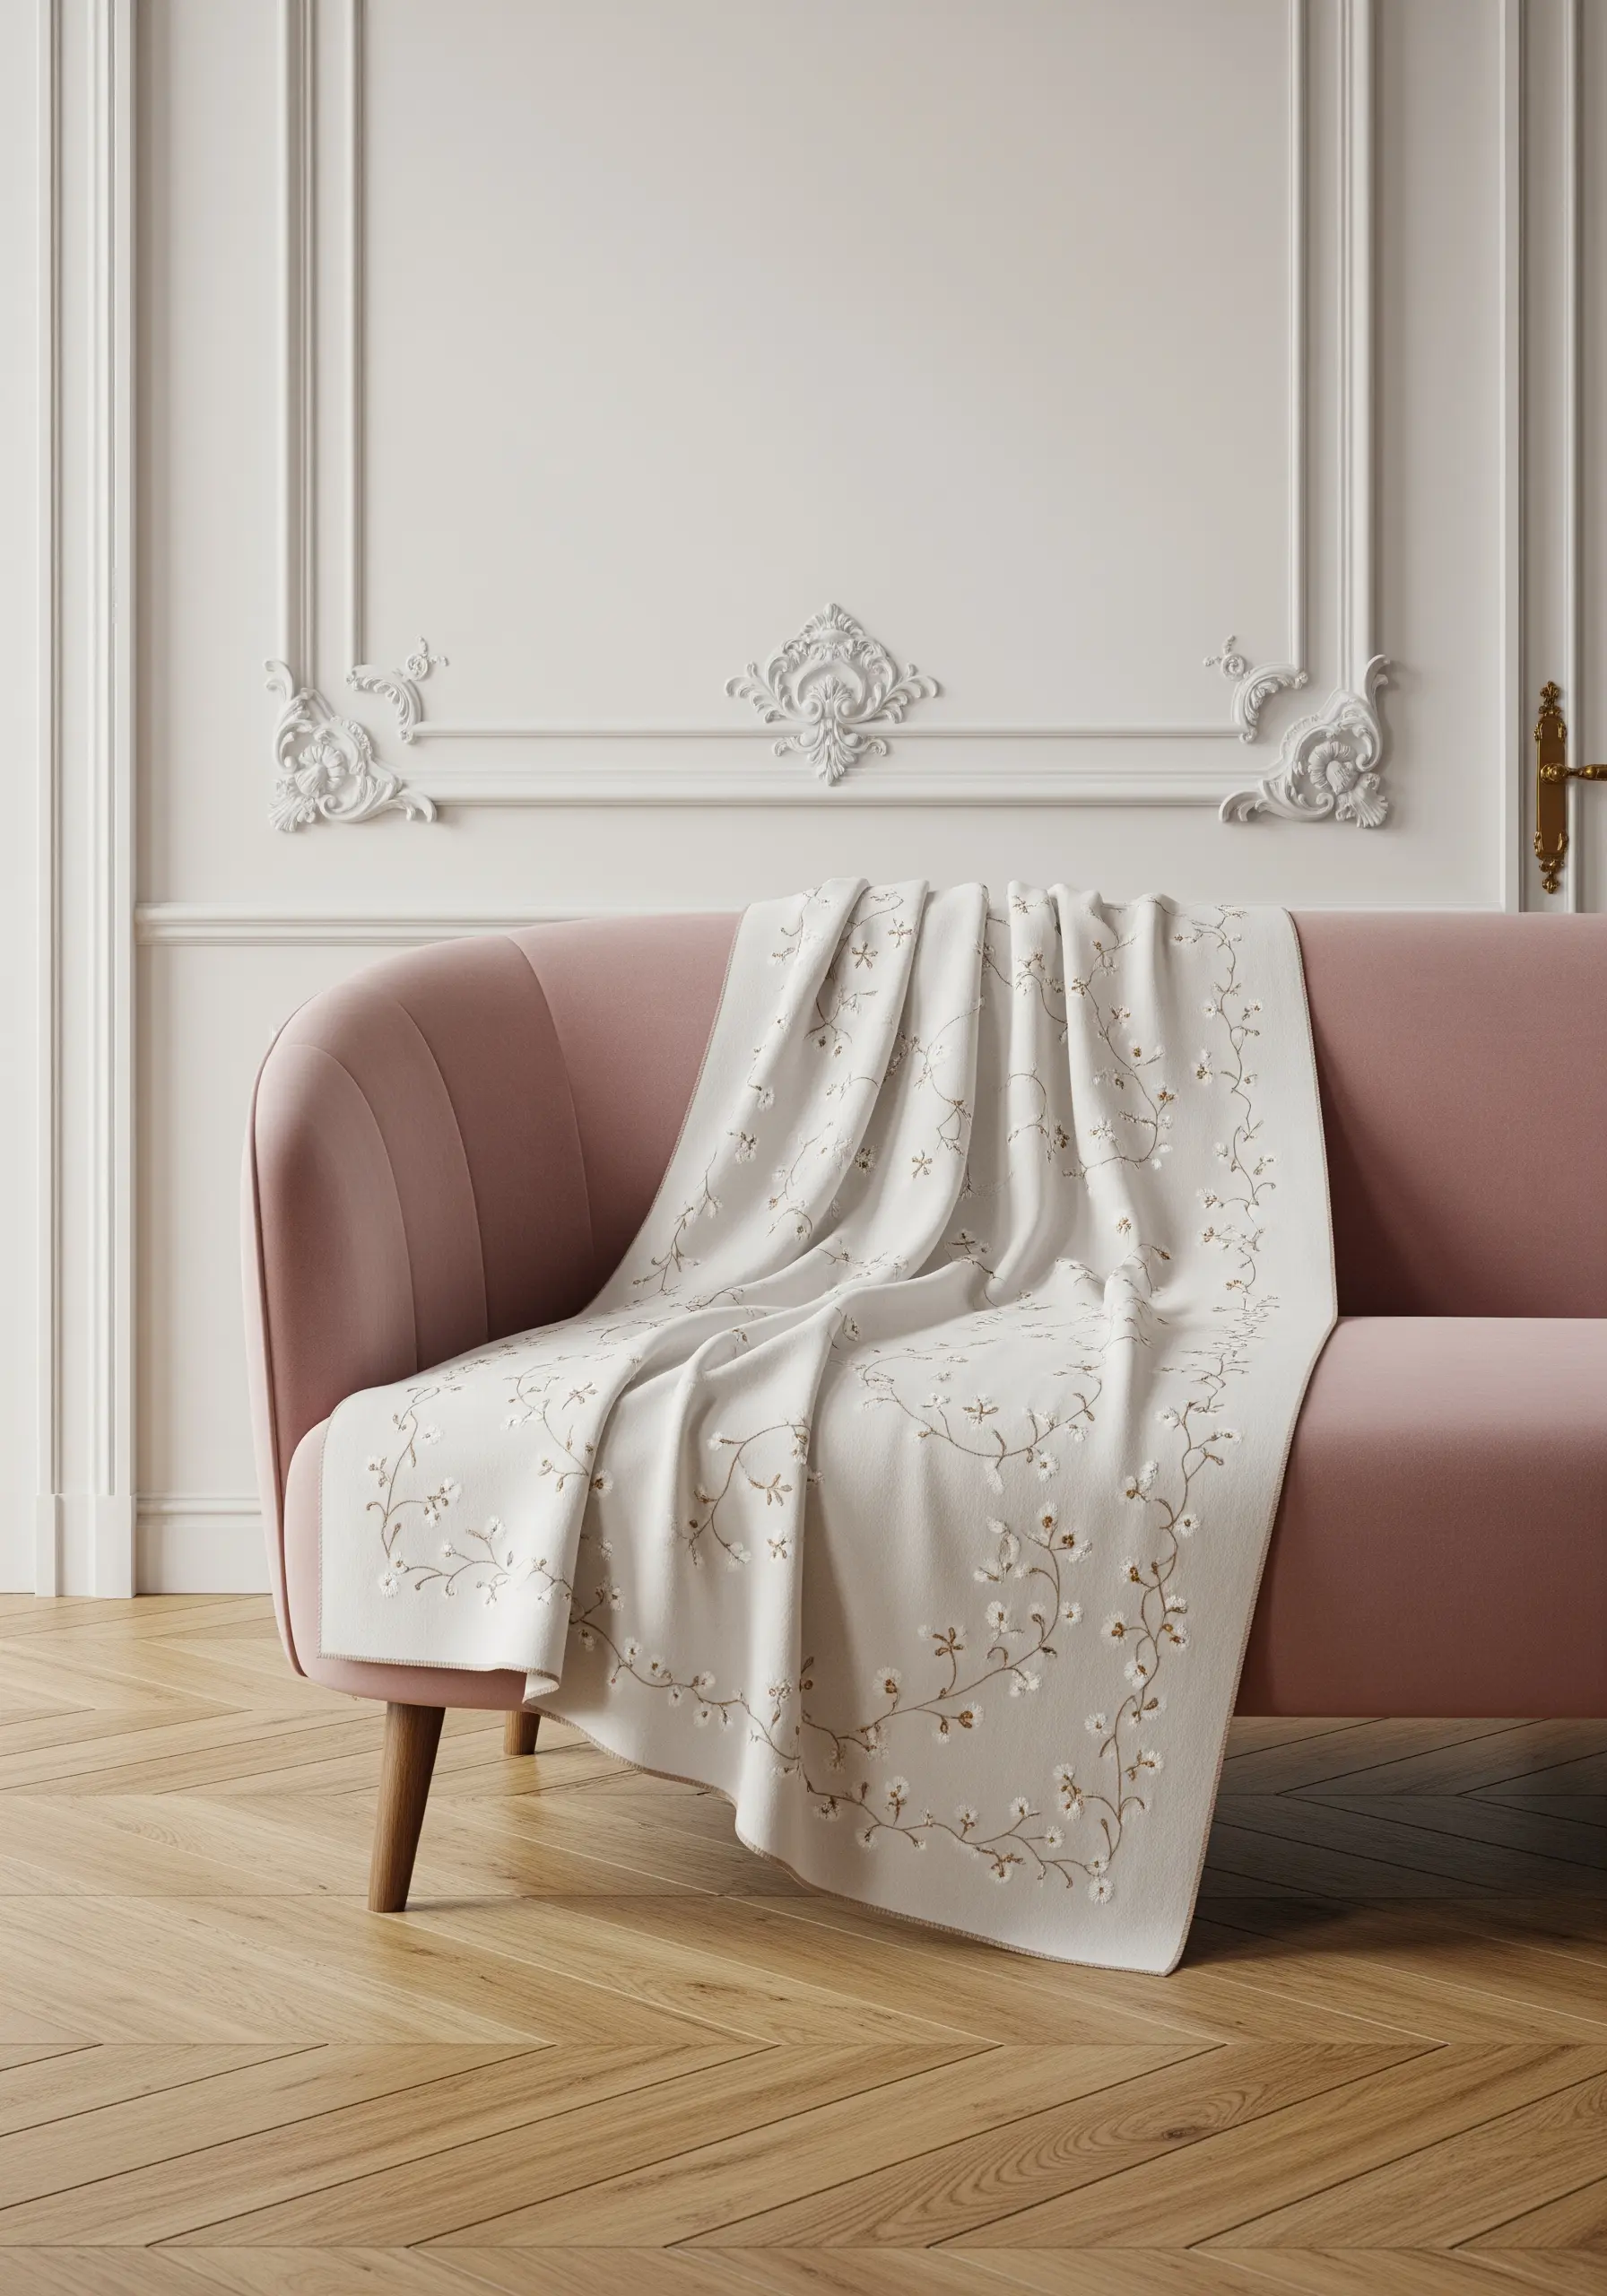
To create a floral border that feels delicate and not overwhelming, focus on asymmetry and negative space.
Use a fine stem stitch for the trailing vines, allowing them to meander naturally around the edge of the throw.
Scatter small clusters of lazy daisy stitches for petals and tiny French knots for flower centers and buds. Use a mix of off-white and pale gold threads to add subtle warmth.
This sparse approach makes the gentle floral embroidery feel like it’s growing organically across the fabric.
26. Create a Subtle Pattern with Spaced Motifs
For a minimal yet patterned effect, precision in placement is key.
Choose a small, simple geometric or stylized floral motif. Use a quilting ruler and a water-soluble marker to create a grid on your fabric, marking the center point for each repetition.
Stitching each motif perfectly centered within its grid square ensures the final pattern feels balanced and intentional.
A soft taupe thread on a creamy white fabric gives a quiet, sophisticated finish that adds interest without demanding attention.
27. Mix Stitches for a Bohemian-Inspired Texture

Achieve a rich, bohemian look by combining multiple stitch types to create varied textures within one piece.
Use bold chain stitches for strong outlines, parallel rows of running stitch for a linear fill, and dense satin stitches for solid shapes.
Working in a simple palette of off-white on a dark taupe base allows the different textures to stand out.
This layered approach gives the throw a tactile, handcrafted quality that feels curated and deeply personal. The fringed edge enhances the global-inspired, artisanal vibe.
28. Replicate Modern Art with Satin Stitch Blocks

Translate the clean lines and bold shapes of modern art, like a Mondrian painting, onto fabric using embroidery.
Outline your rectangular shapes with a crisp split stitch in black. Then, fill each block with a dense, smooth satin stitch.
For the white and cream sections, make sure your stitches are perfectly parallel and tightly packed to create a solid, woven appearance.
This technique turns your throw into a piece of abstract textile art, perfect for a minimalist or contemporary living room.
29. Convey Movement with Overlapping Line Art
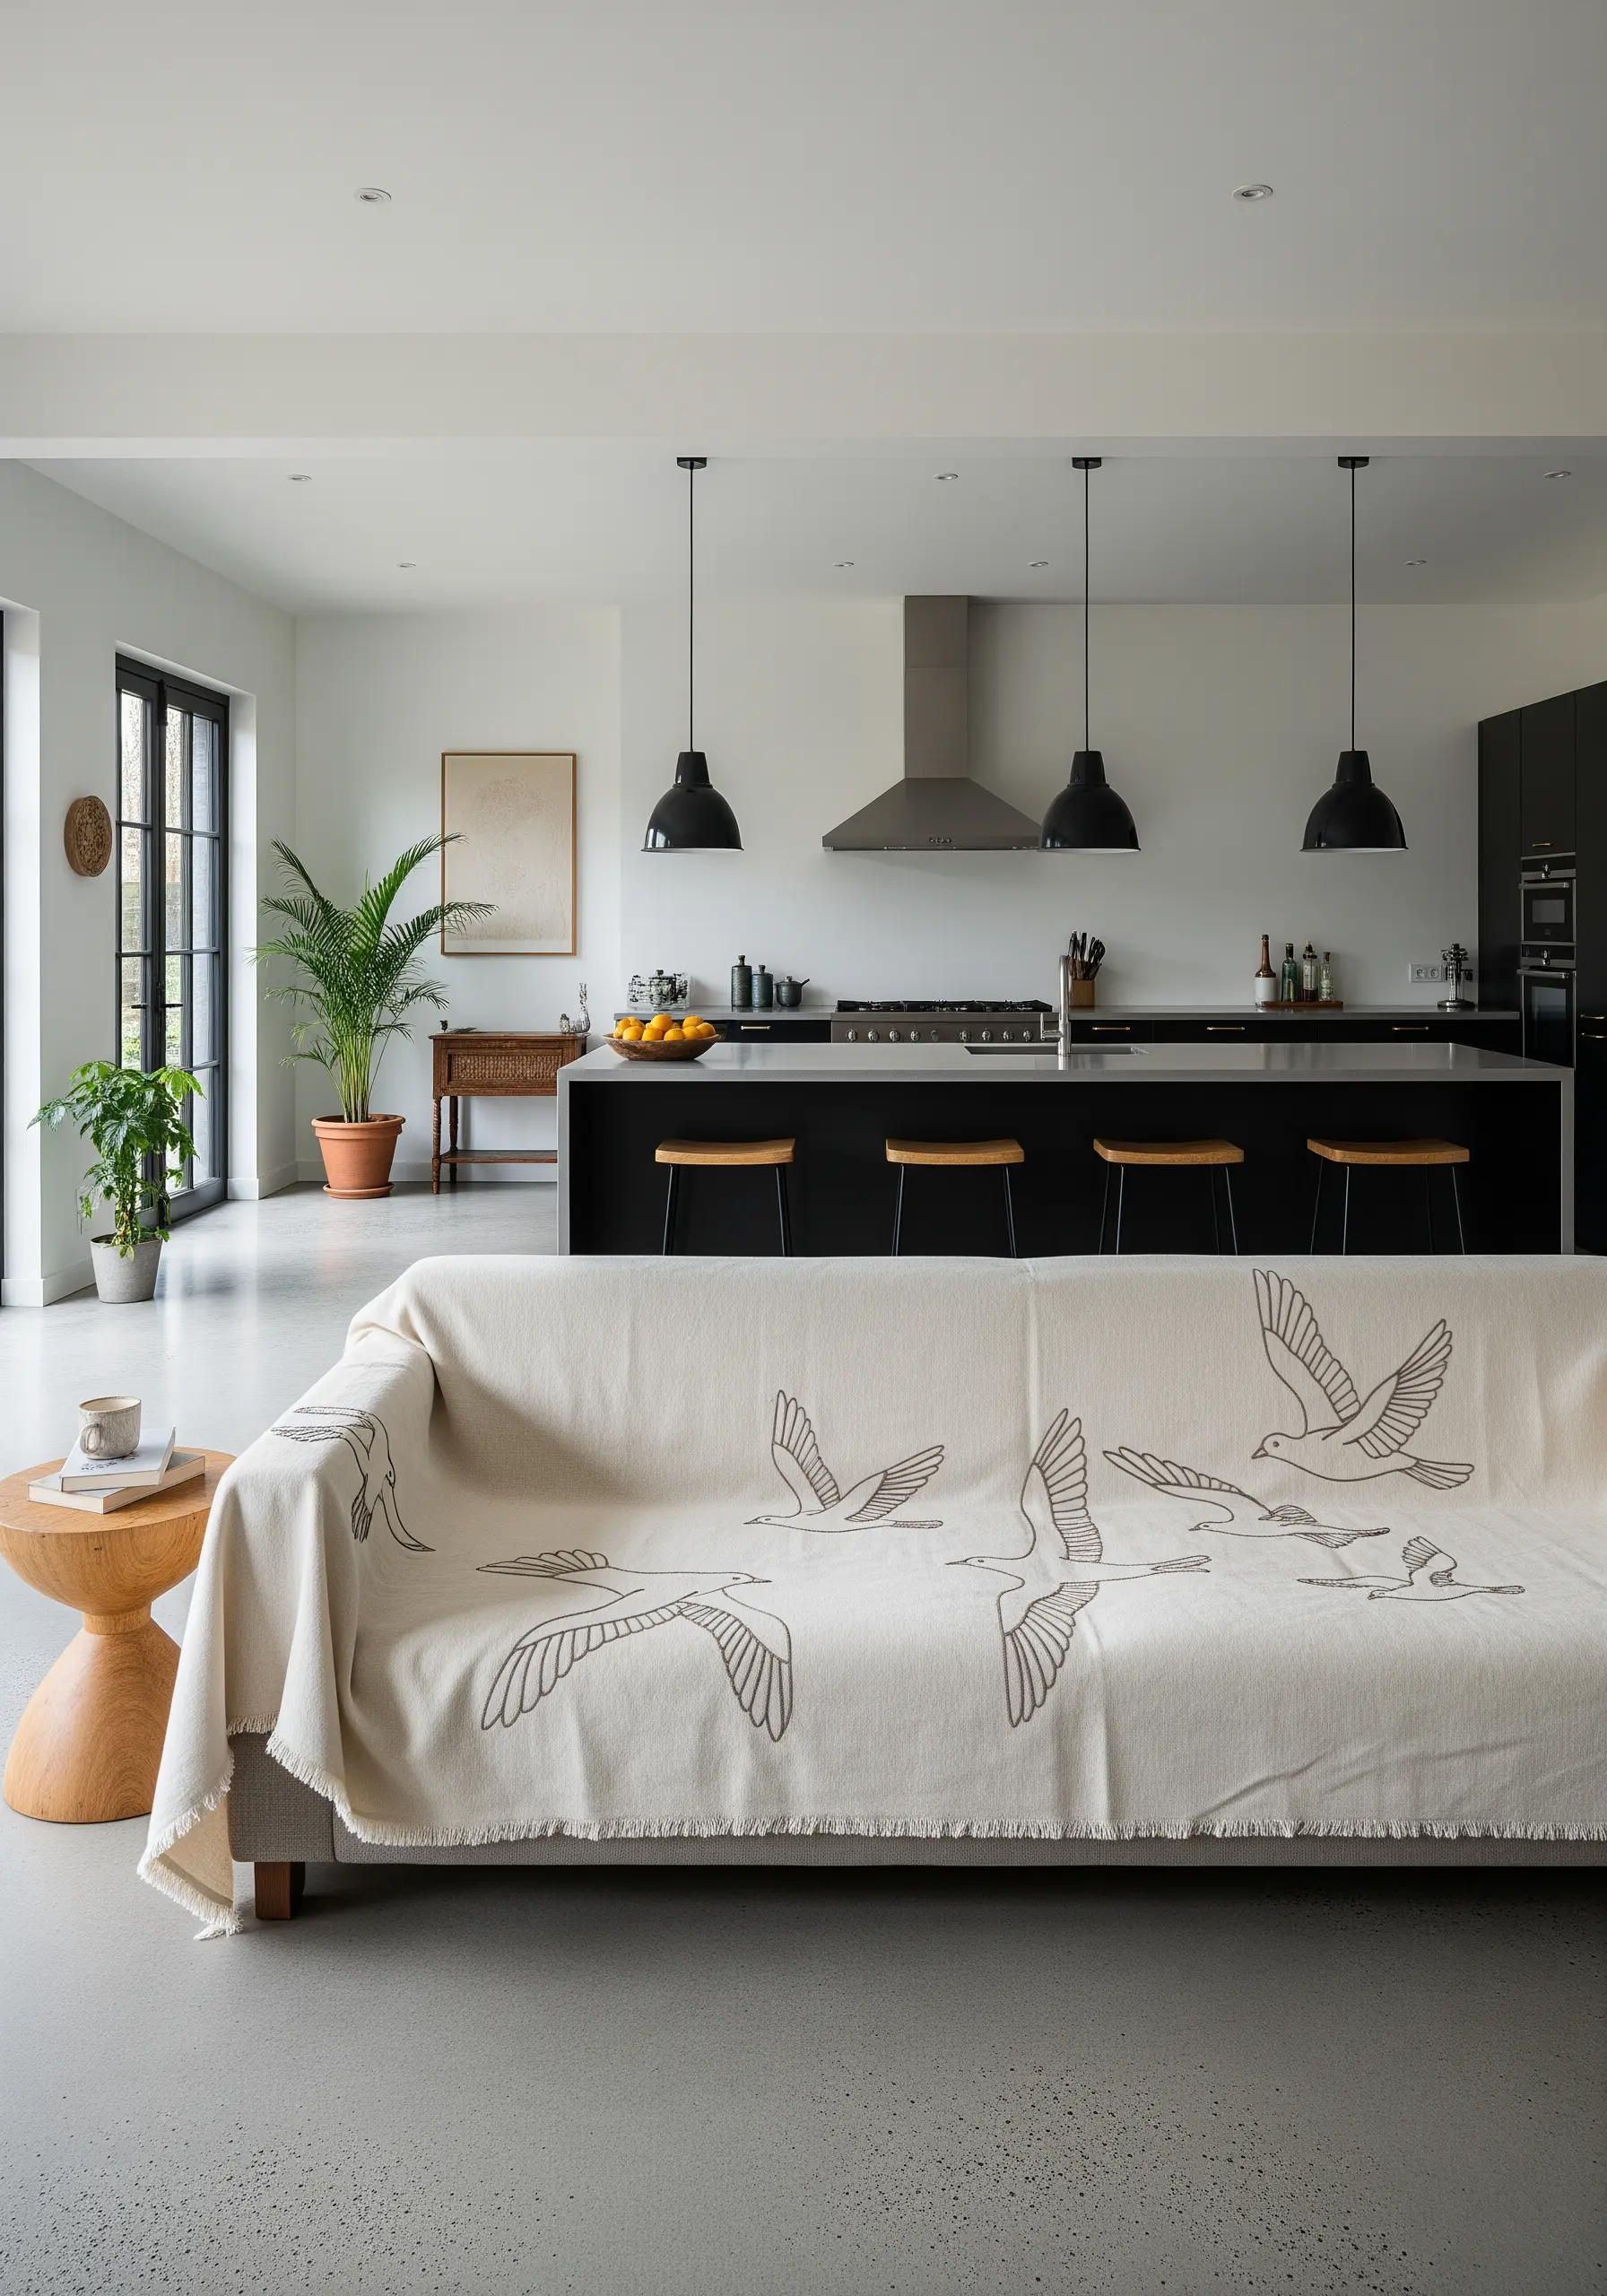
To capture the dynamic motion of birds in flight, think like an animator drawing storyboards.
Layering the simple line drawings so they overlap creates a sense of progression and depth.
Use a smooth whipped backstitch or a stem stitch to ensure your lines are fluid and unbroken, enhancing the sense of graceful movement.
A single, muted taupe thread on a natural off-white canvas keeps the focus entirely on the form and energy of the birds.
30. Add Monograms to Fleece with a Topper
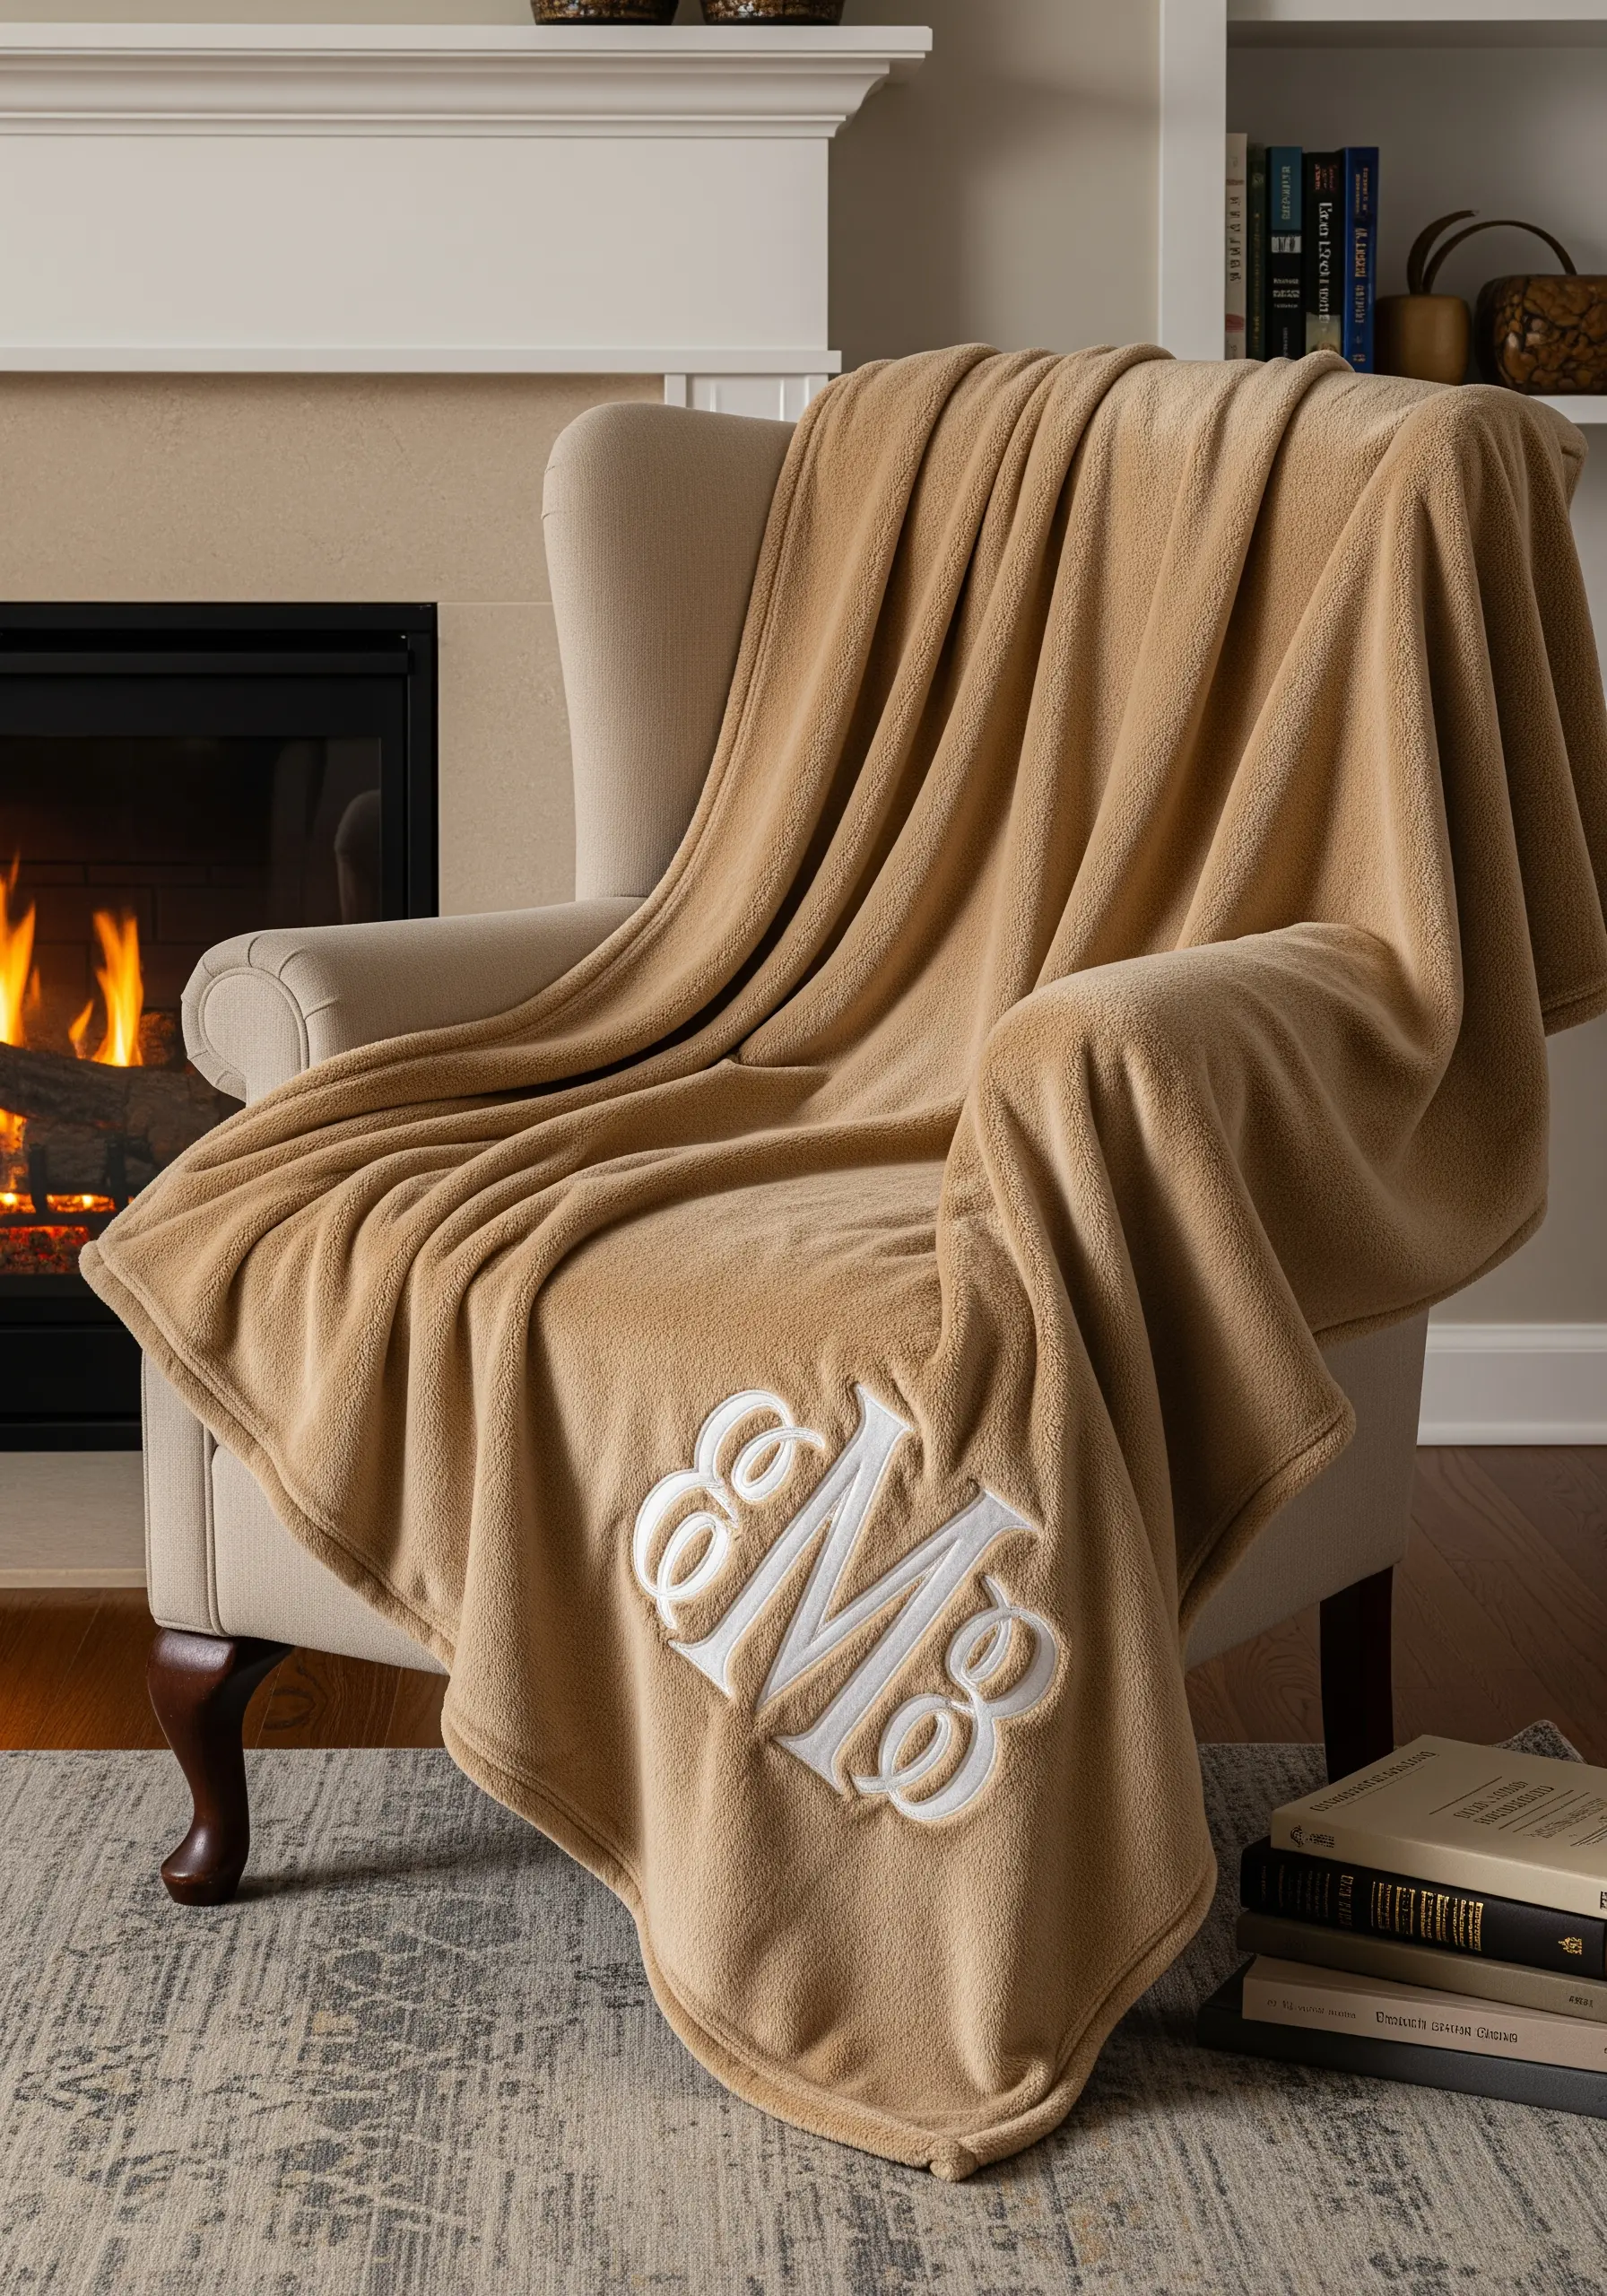
To prevent your stitches from sinking into the plush pile of a fleece blanket, you must use a water-soluble stabilizer on top of the fabric.
Hoop the fleece with the stabilizer layered over your design area. This topper creates a smooth surface for your needle and ensures your stitches sit proudly on the fleece.
For a bold monogram, use a padded satin stitch—a foundation of split stitches covered by dense satin stitches—in a crisp white for a classic, high-end finish.
Once done, simply wash or spritz away the stabilizer.
31. Add Realism to Leaves with Fishbone Stitch
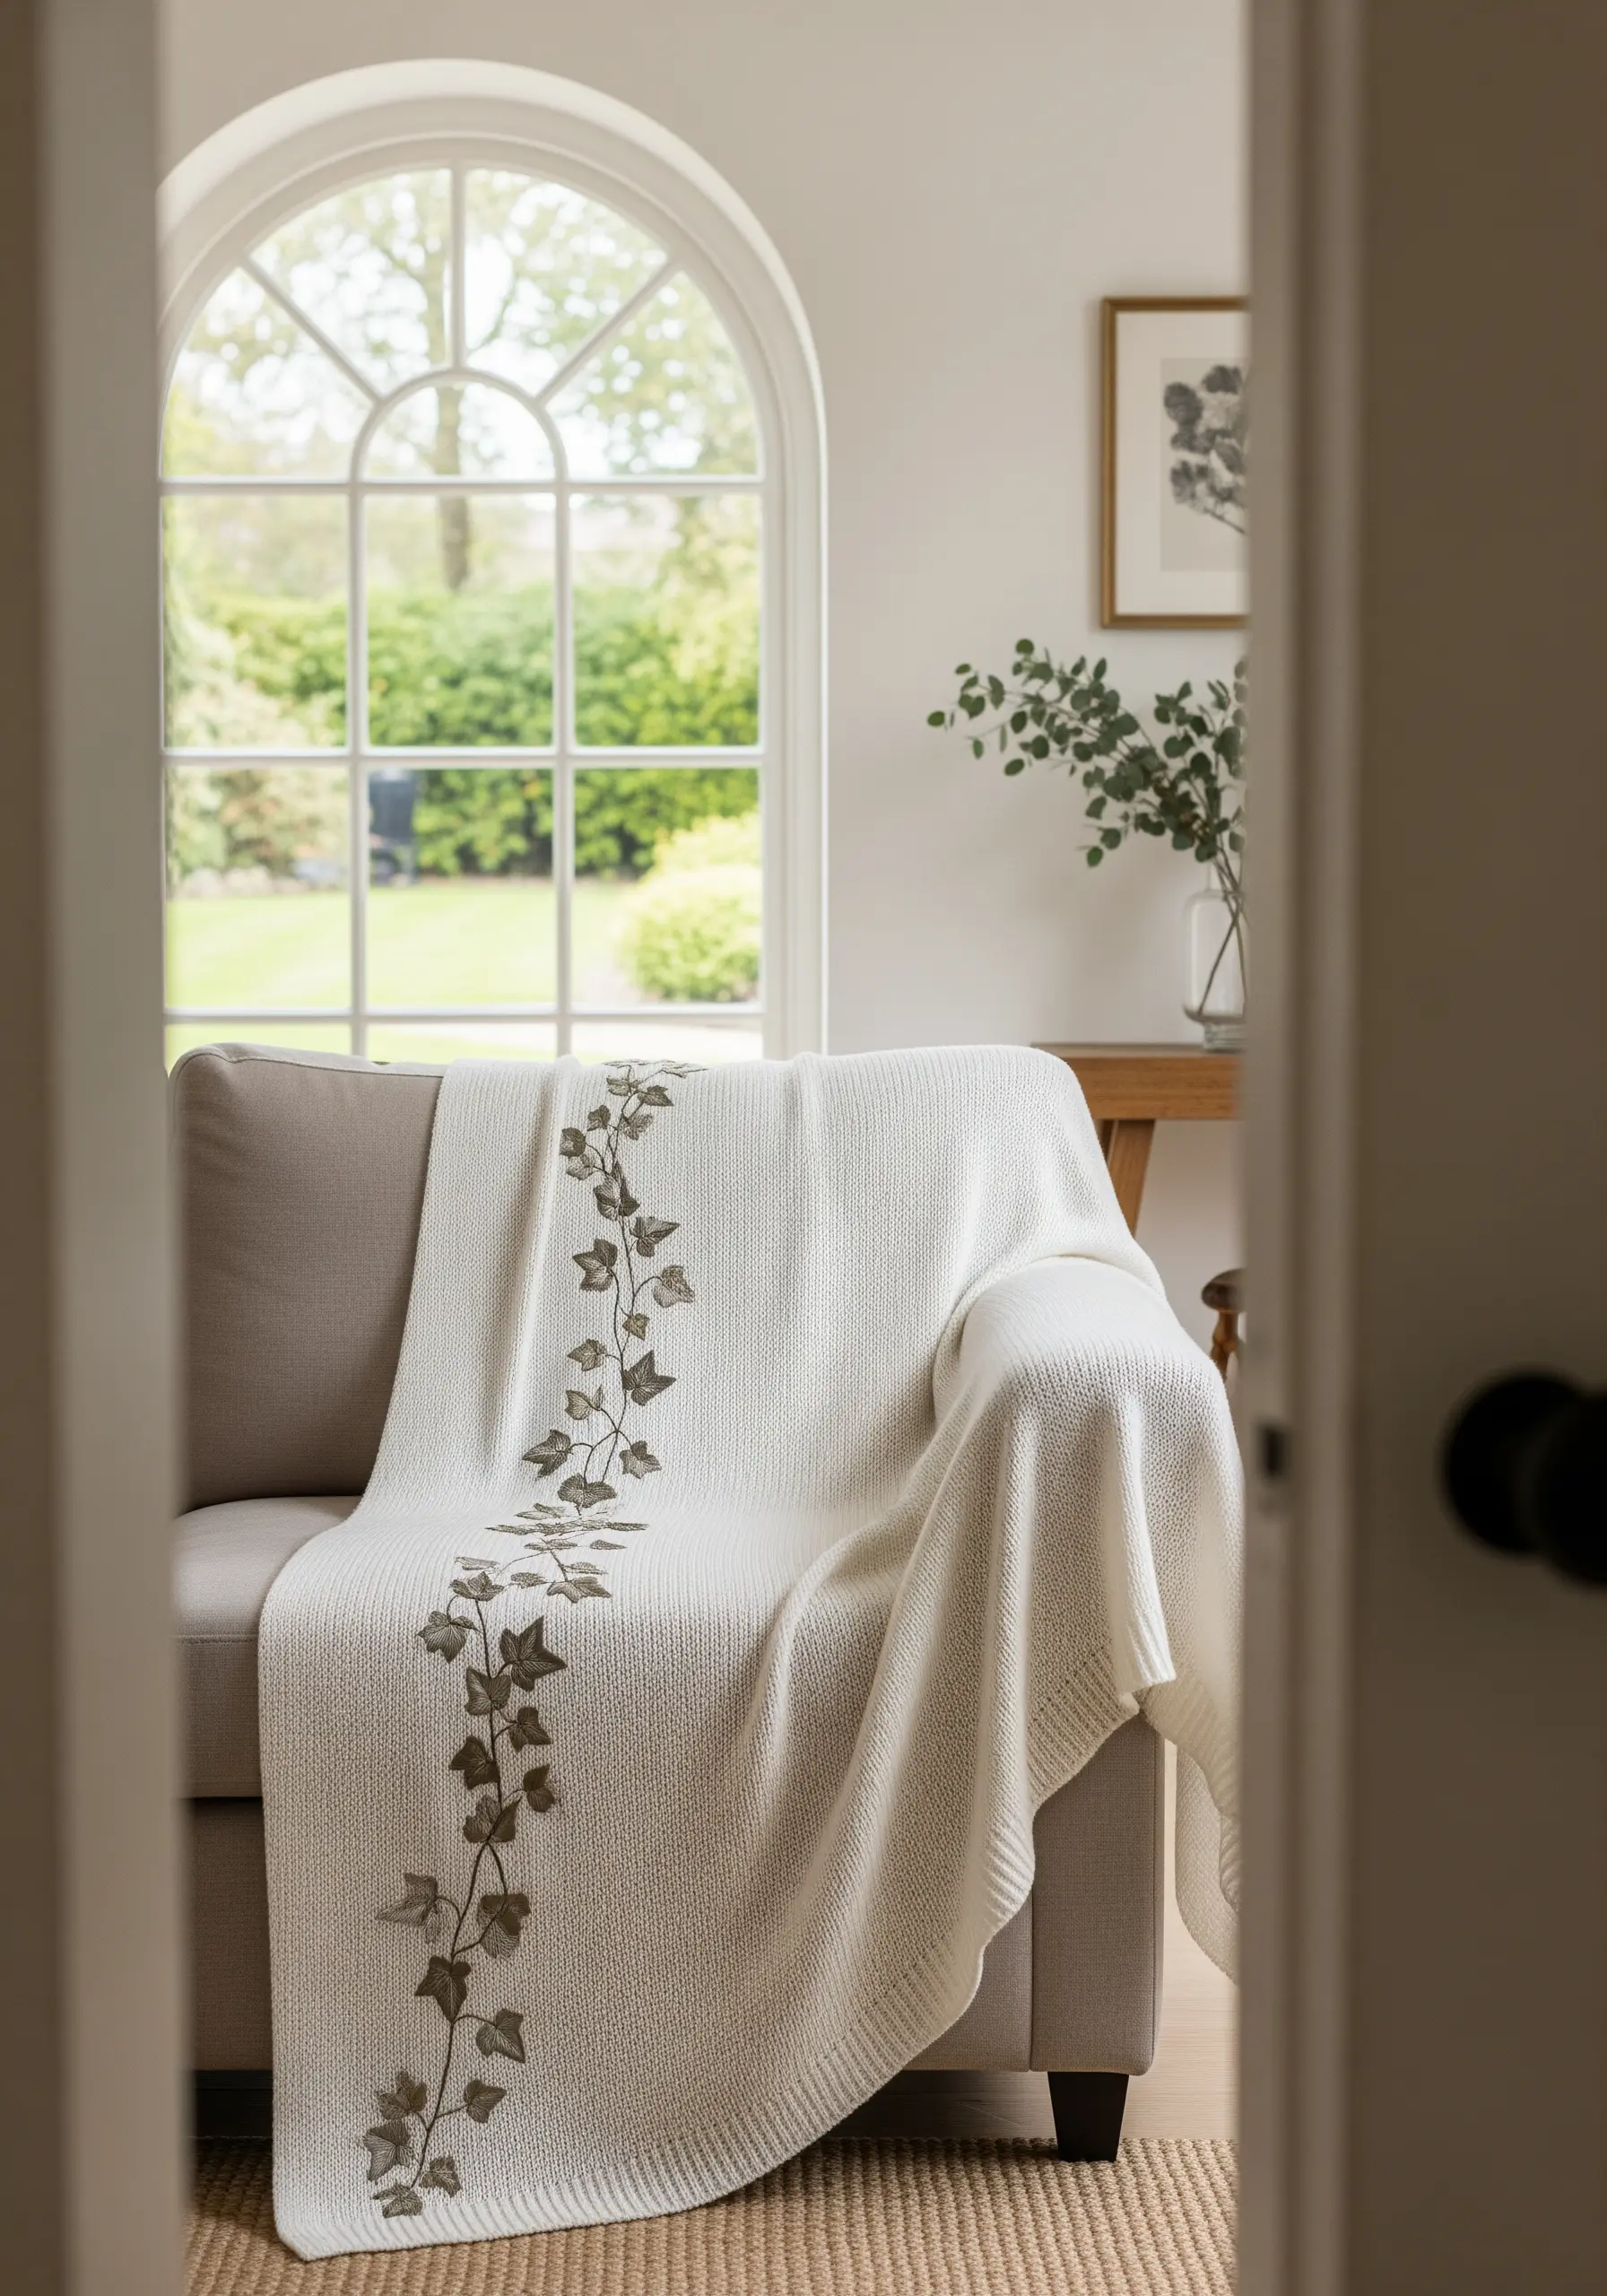
The fishbone stitch is the best choice for creating realistic, veined leaves with a single, continuous thread.
The stitch works from the tip of the leaf downwards, with alternating stitches crossing over a central line, perfectly mimicking the structure of a real leaf.
Using a variegated thread in shades of taupe and dusty green will add natural-looking color variation without any extra effort.
This technique allows you to create a beautiful trailing vine that feels both organic and exquisitely detailed. The fishbone stitch for the leaves gives them incredible dimension.
32. Stitch on Satin with a Whipped Chain Stitch

Embroidering on slick, satin-like fabric requires careful technique to prevent pulls and puckers.
Always use a hoop to maintain even tension, and work with a sharp, fine needle (like a size 10 crewel) to pierce the fabric cleanly.
A whipped chain stitch is an excellent choice for bold, decorative lines. It creates a substantial, rope-like texture that contrasts beautifully with the fabric’s smooth sheen.
The interlocking circles in a soft white thread look particularly luxurious against the shimmering taupe background.
33. Capture an Illustrated Map with Fine Backstitch
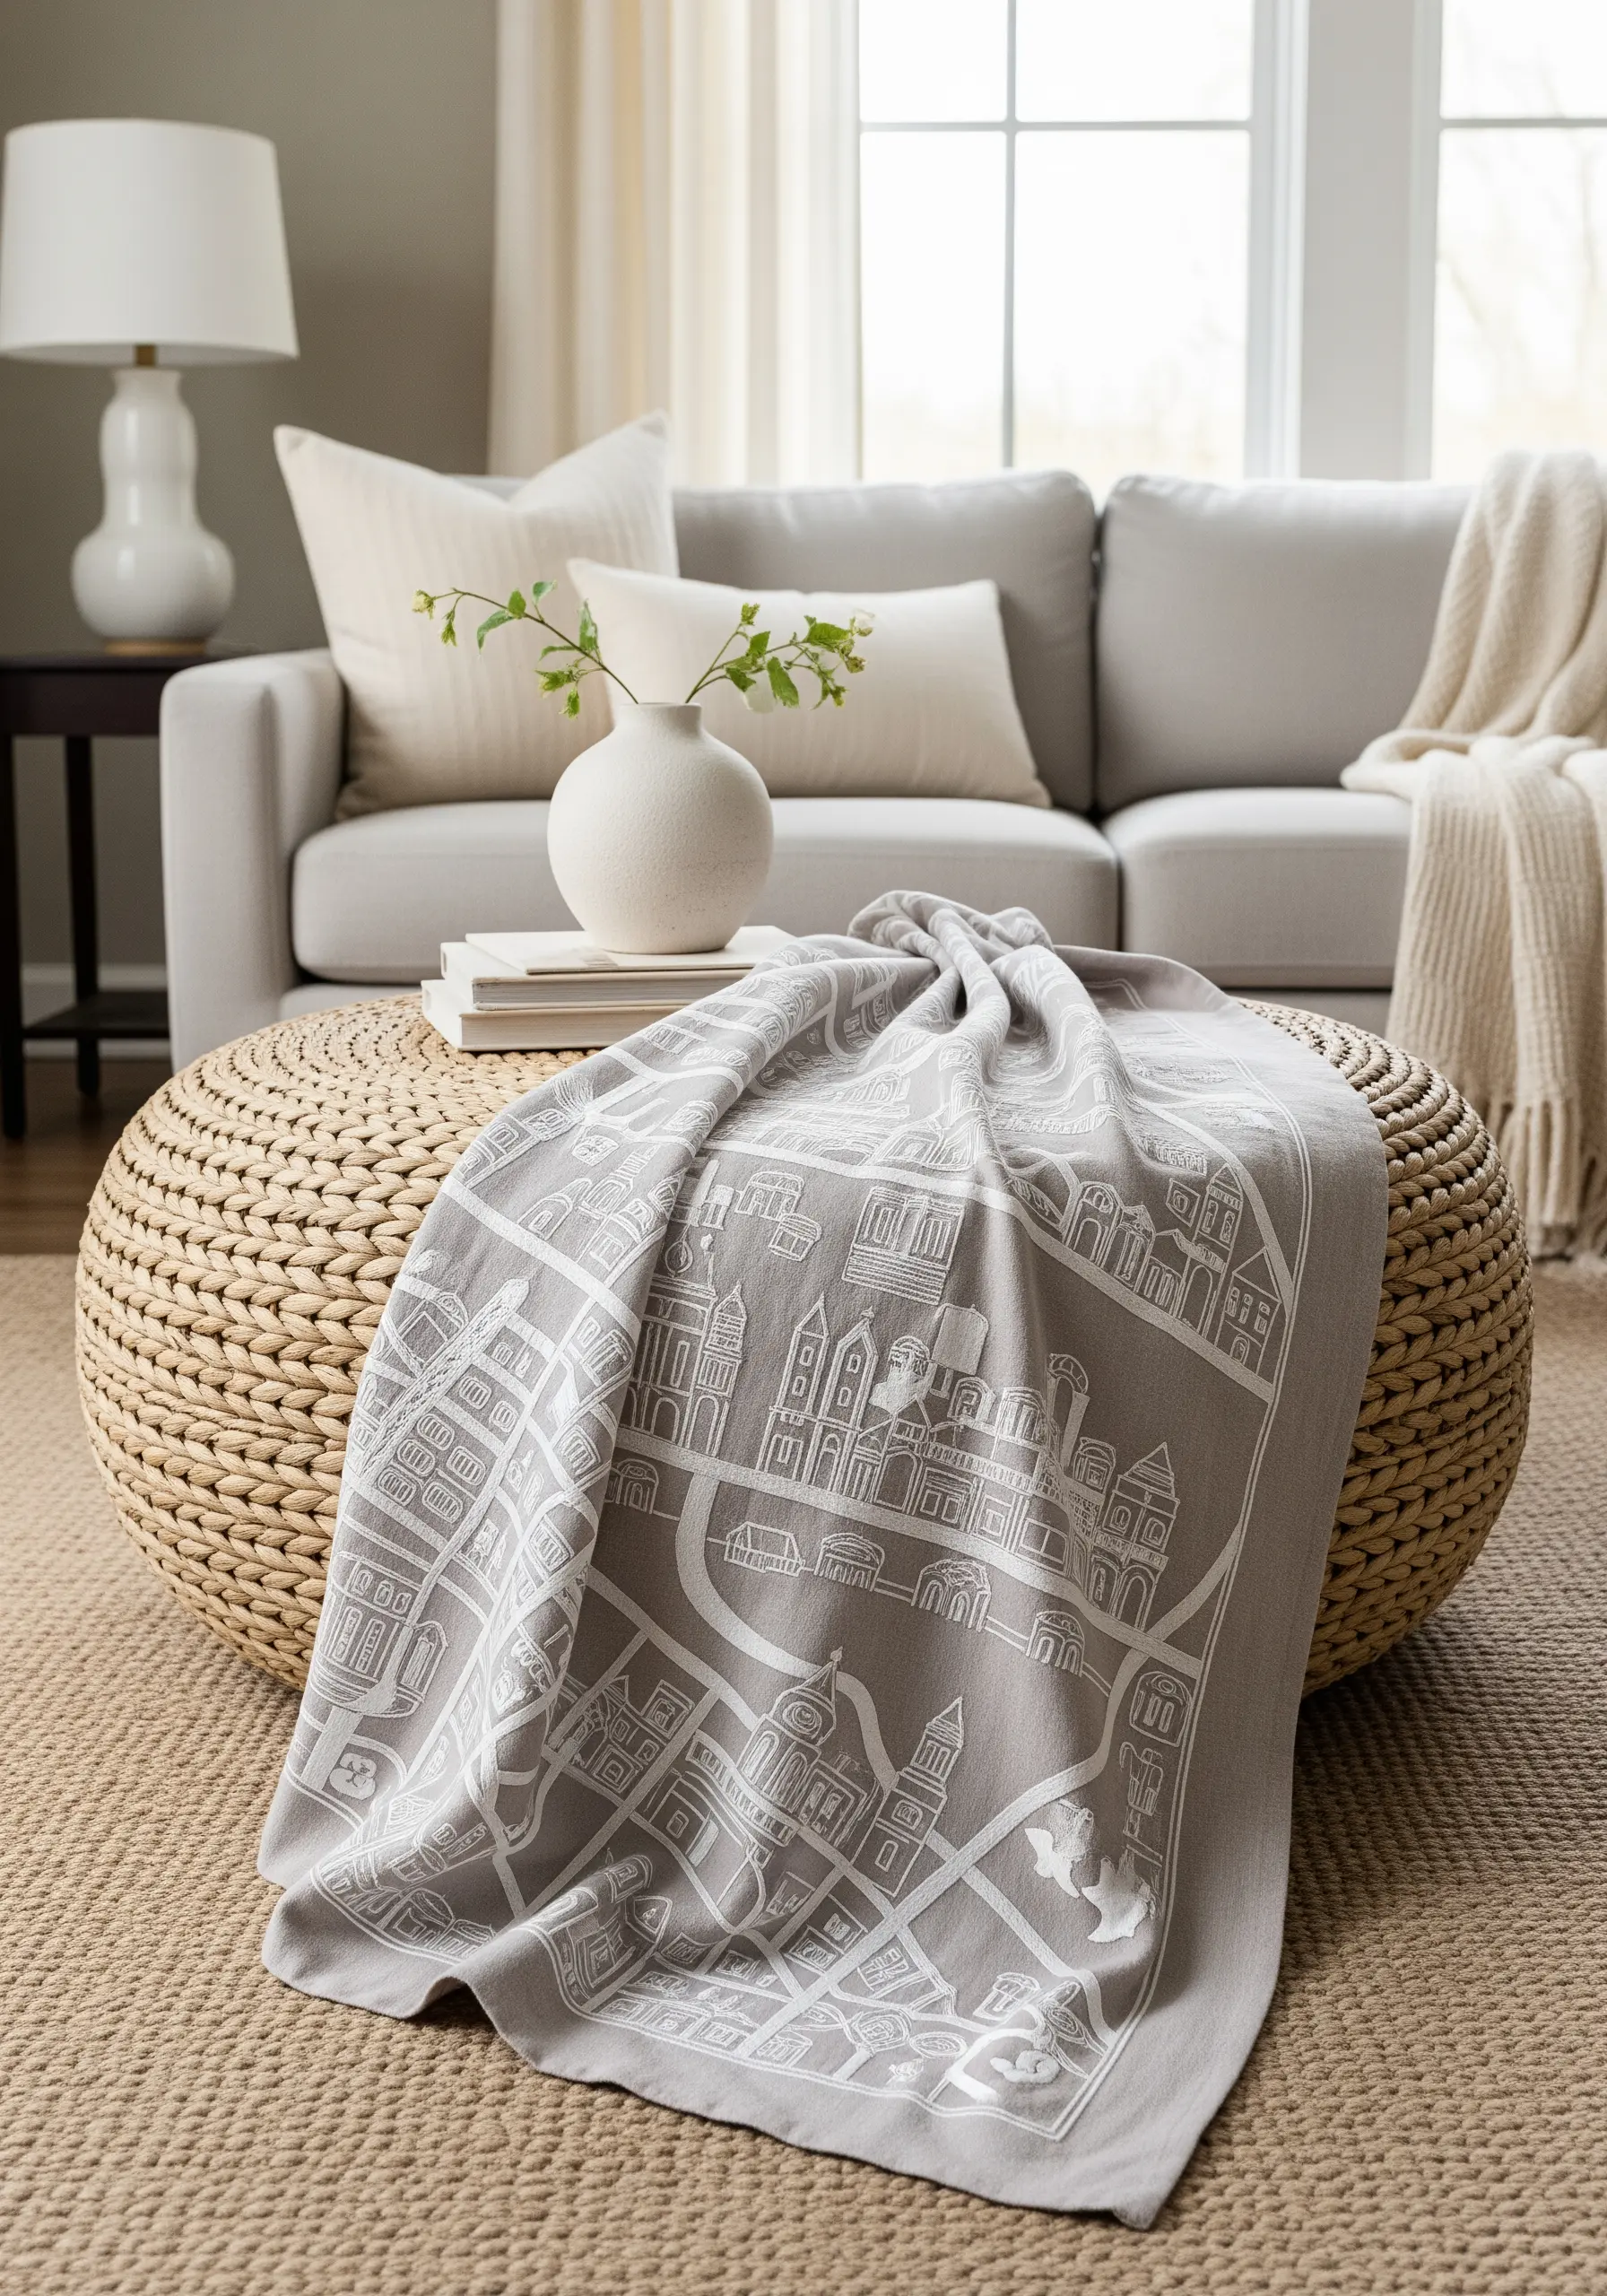
To translate the detailed charm of a hand-drawn map onto fabric, your focus should be on creating clean, crisp lines.
This is a project where a single strand of floss is your best friend. Paired with a tiny, meticulous backstitch, it allows you to render fine details, sharp corners, and legible text.
Using a high-contrast palette—like this bright white on a medium grey—ensures that every little building and street stands out, turning the throw into a meaningful and personal piece of art.


