
You don’t need loud colors to make a statement. Sometimes, the most profound artistic expression is found in the quiet interplay of thread and texture. The goal isn’t just to fill a space on the wall, but to create a piece that calms the room and invites a closer look.
Here, we move beyond basic stitches and explore how subtle shifts in technique can create incredible depth and sophistication. Think of your needle less as a tool for coloring in and more as a pen for drawing lines, a brush for building texture, and a chisel for sculpting form.
These ideas are designed to build your confidence and refine your eye. You’ll learn how to use neutral tones—from warm ivory to cool charcoal—to let your craftsmanship speak for itself. Each technique is a quiet revolution, proving that the gentlest touch can leave the strongest impression.
1. Weave Interlocking Lines with Running Stitch
Create a sense of movement by stitching intersecting waves of simple running stitches.
Use a slightly thicker thread, like a pearl cotton #8, so the texture is visible from a distance.
The key to this design’s calm is precision: use a ruler and a heat-erasable pen to draw your guide paths first, ensuring the curves are fluid and balanced.
By keeping your stitch length and spacing consistent, you create a rhythmic pattern that feels both handmade and impeccably clean.
This technique elevates a basic stitch into sophisticated, monochrome embroidery wall art.
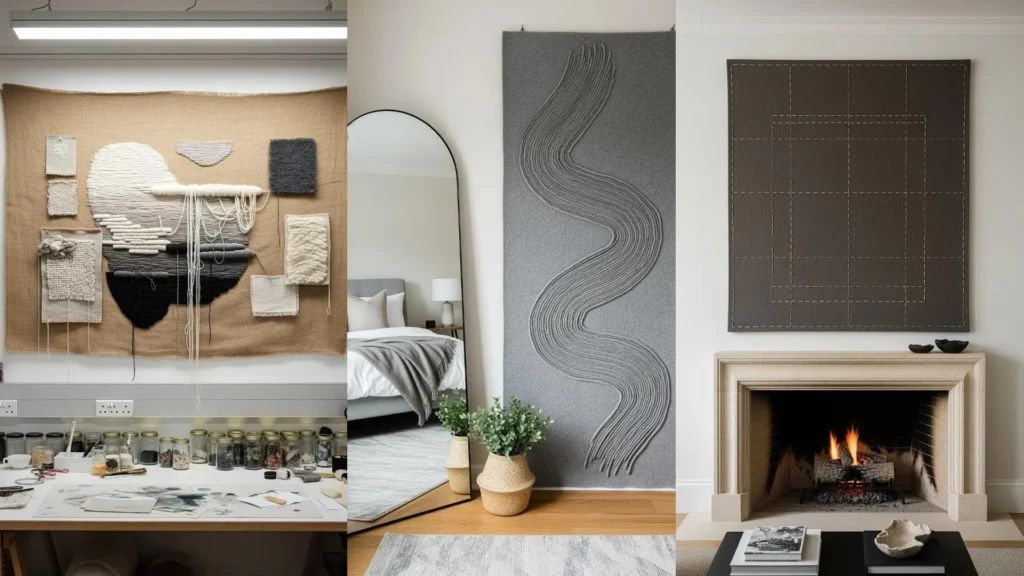
2. Curate a Trio of Textural Samplers

Move beyond flat stitches by dedicating each hoop in a series to a different texture.
In one, try basic macrame knots like the square knot, attached directly to the fabric for a raised, graphic effect.
For another, couch chunky yarn in rows to create plush, chenille-like lines.
Fill the third with traditional textural stitches like woven wheel stitches or French knots, creating a balanced collection of fiber art techniques.
A unified neutral palette ensures the varied textures feel cohesive, not chaotic.
3. Elevate Line Art with a Single Confident Stitch
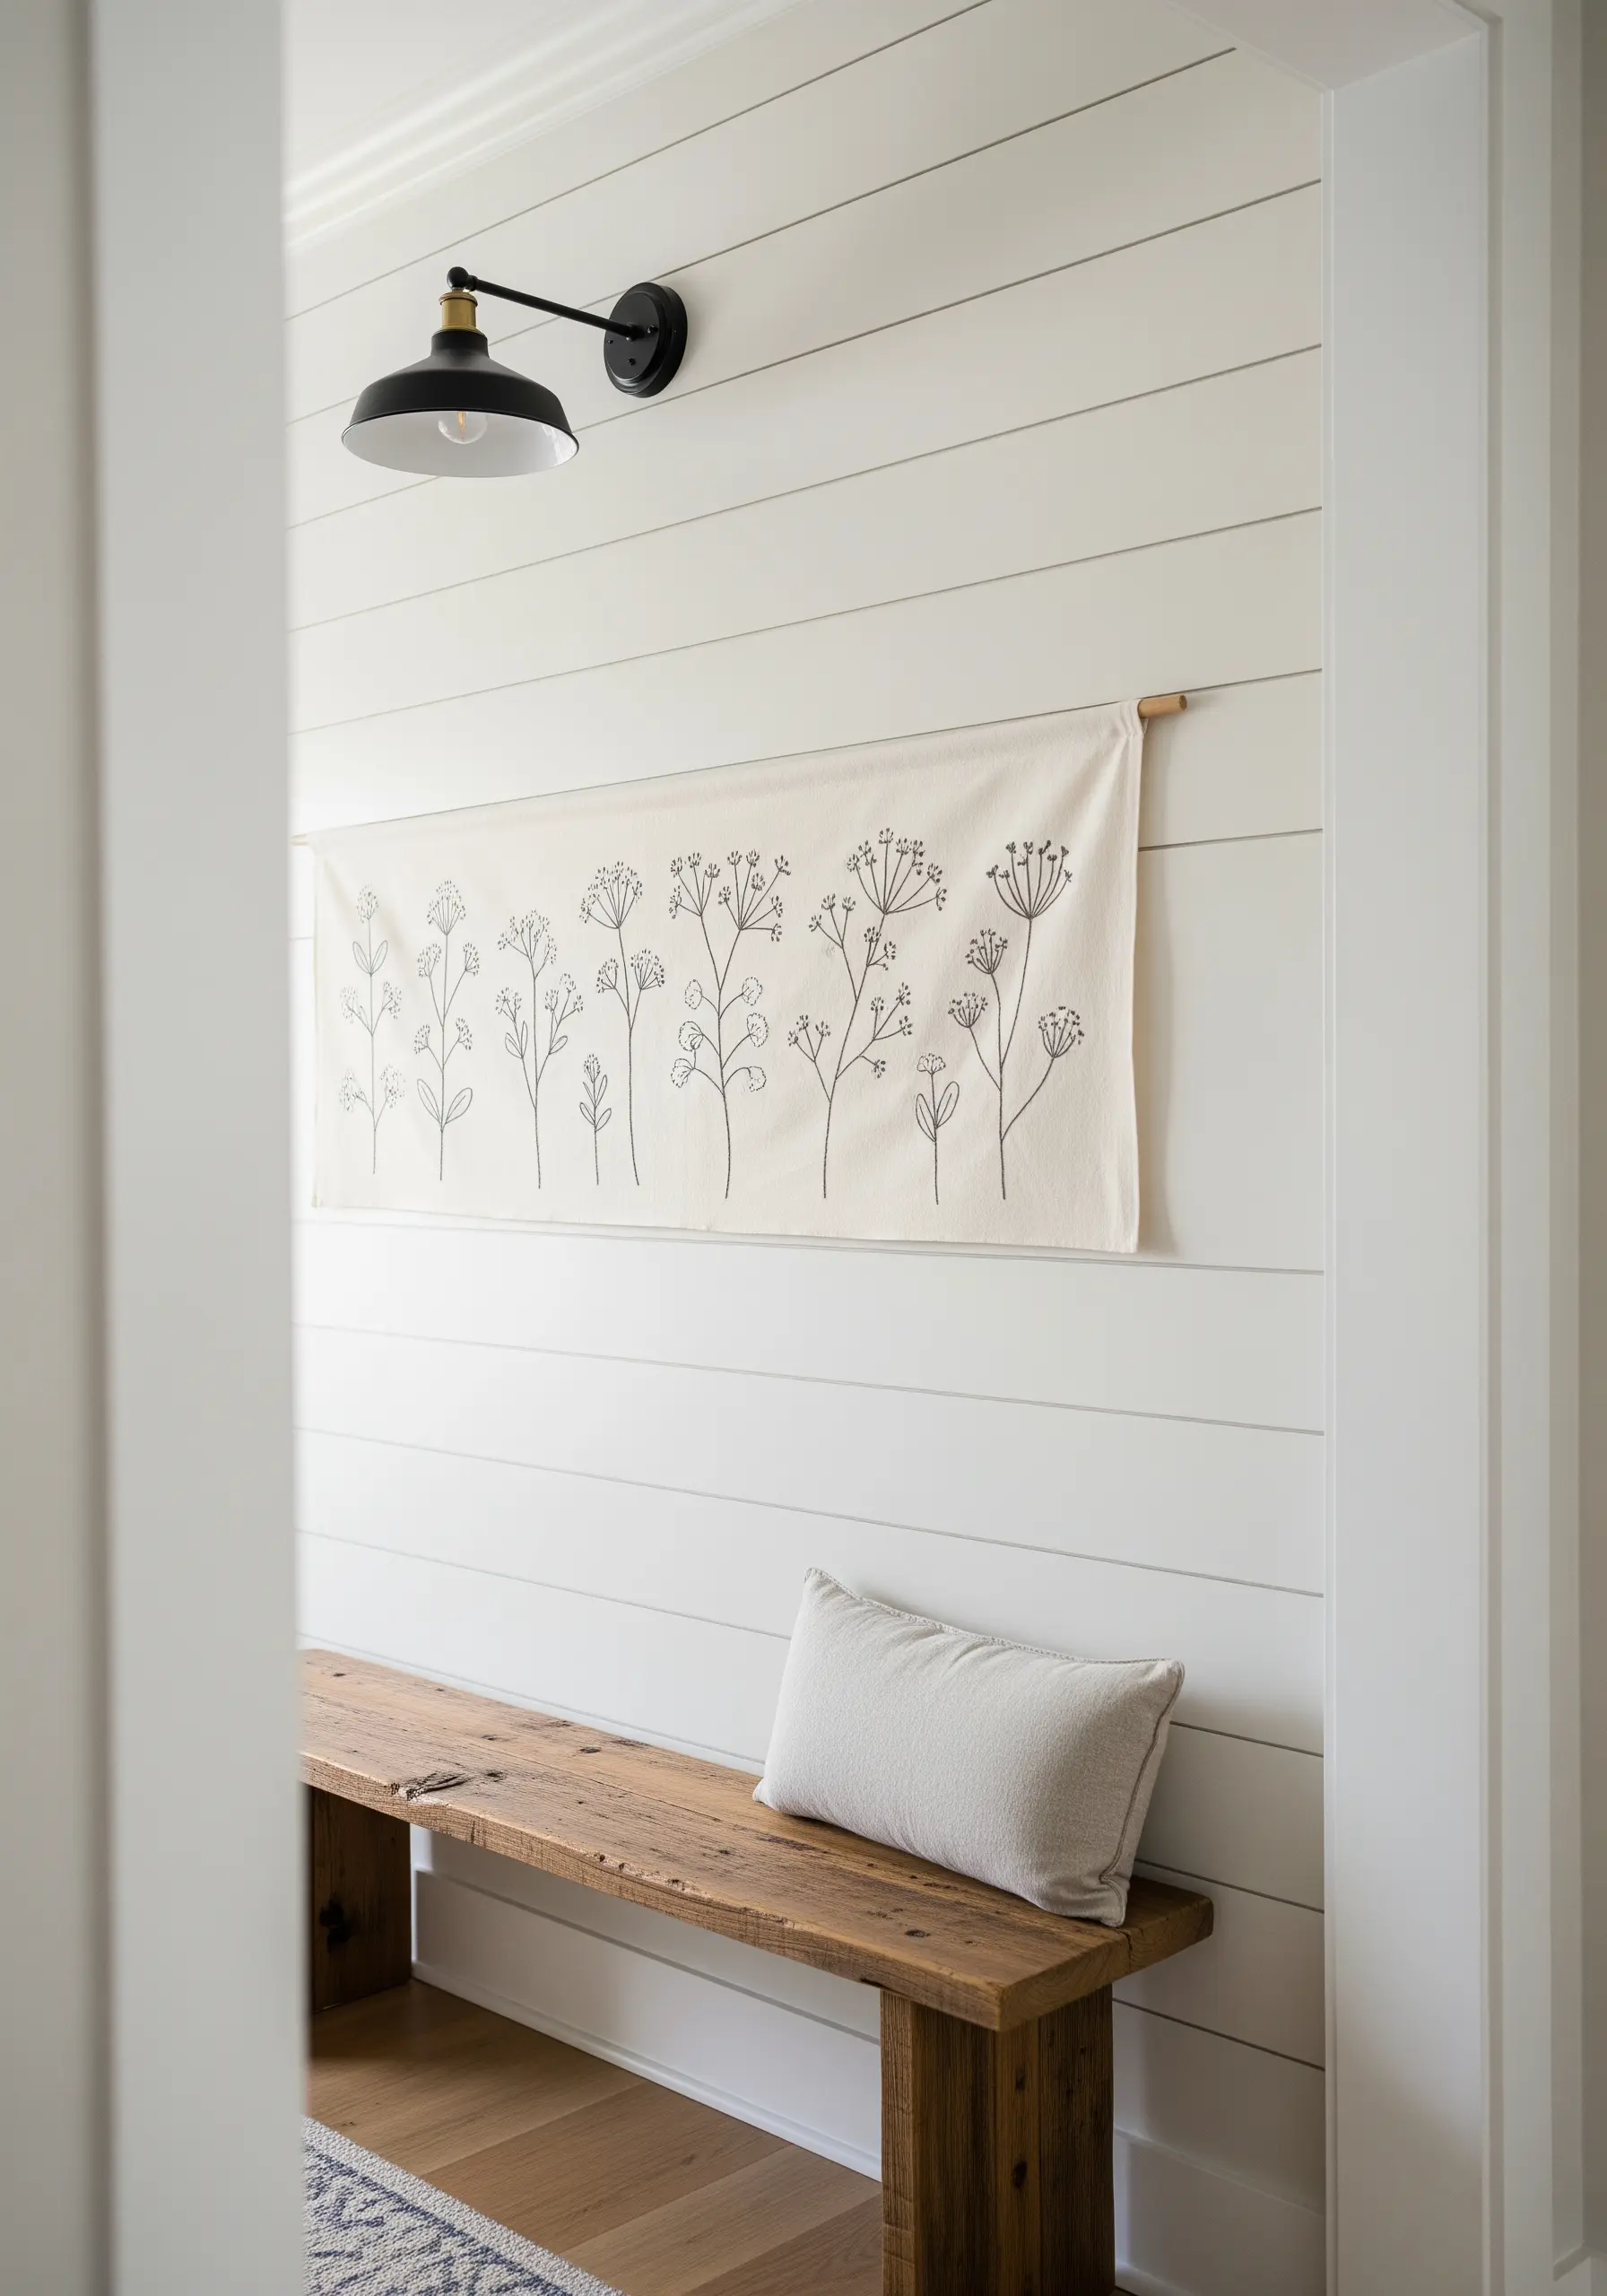
For minimalist botanicals, the elegance is in the simplicity of the line.
Use a single strand of black or dark gray six-strand floss and a crisp stem stitch or backstitch to trace your design.
This high-contrast approach on unbleached cotton or linen canvas allows the negative space to become part of the composition.
Focus on creating clean, unbroken lines—this gives your work a polished, illustrative quality that makes minimal embroidery wall designs feel intentional and modern.
4. Construct Geometric Forms with Felt Appliqué
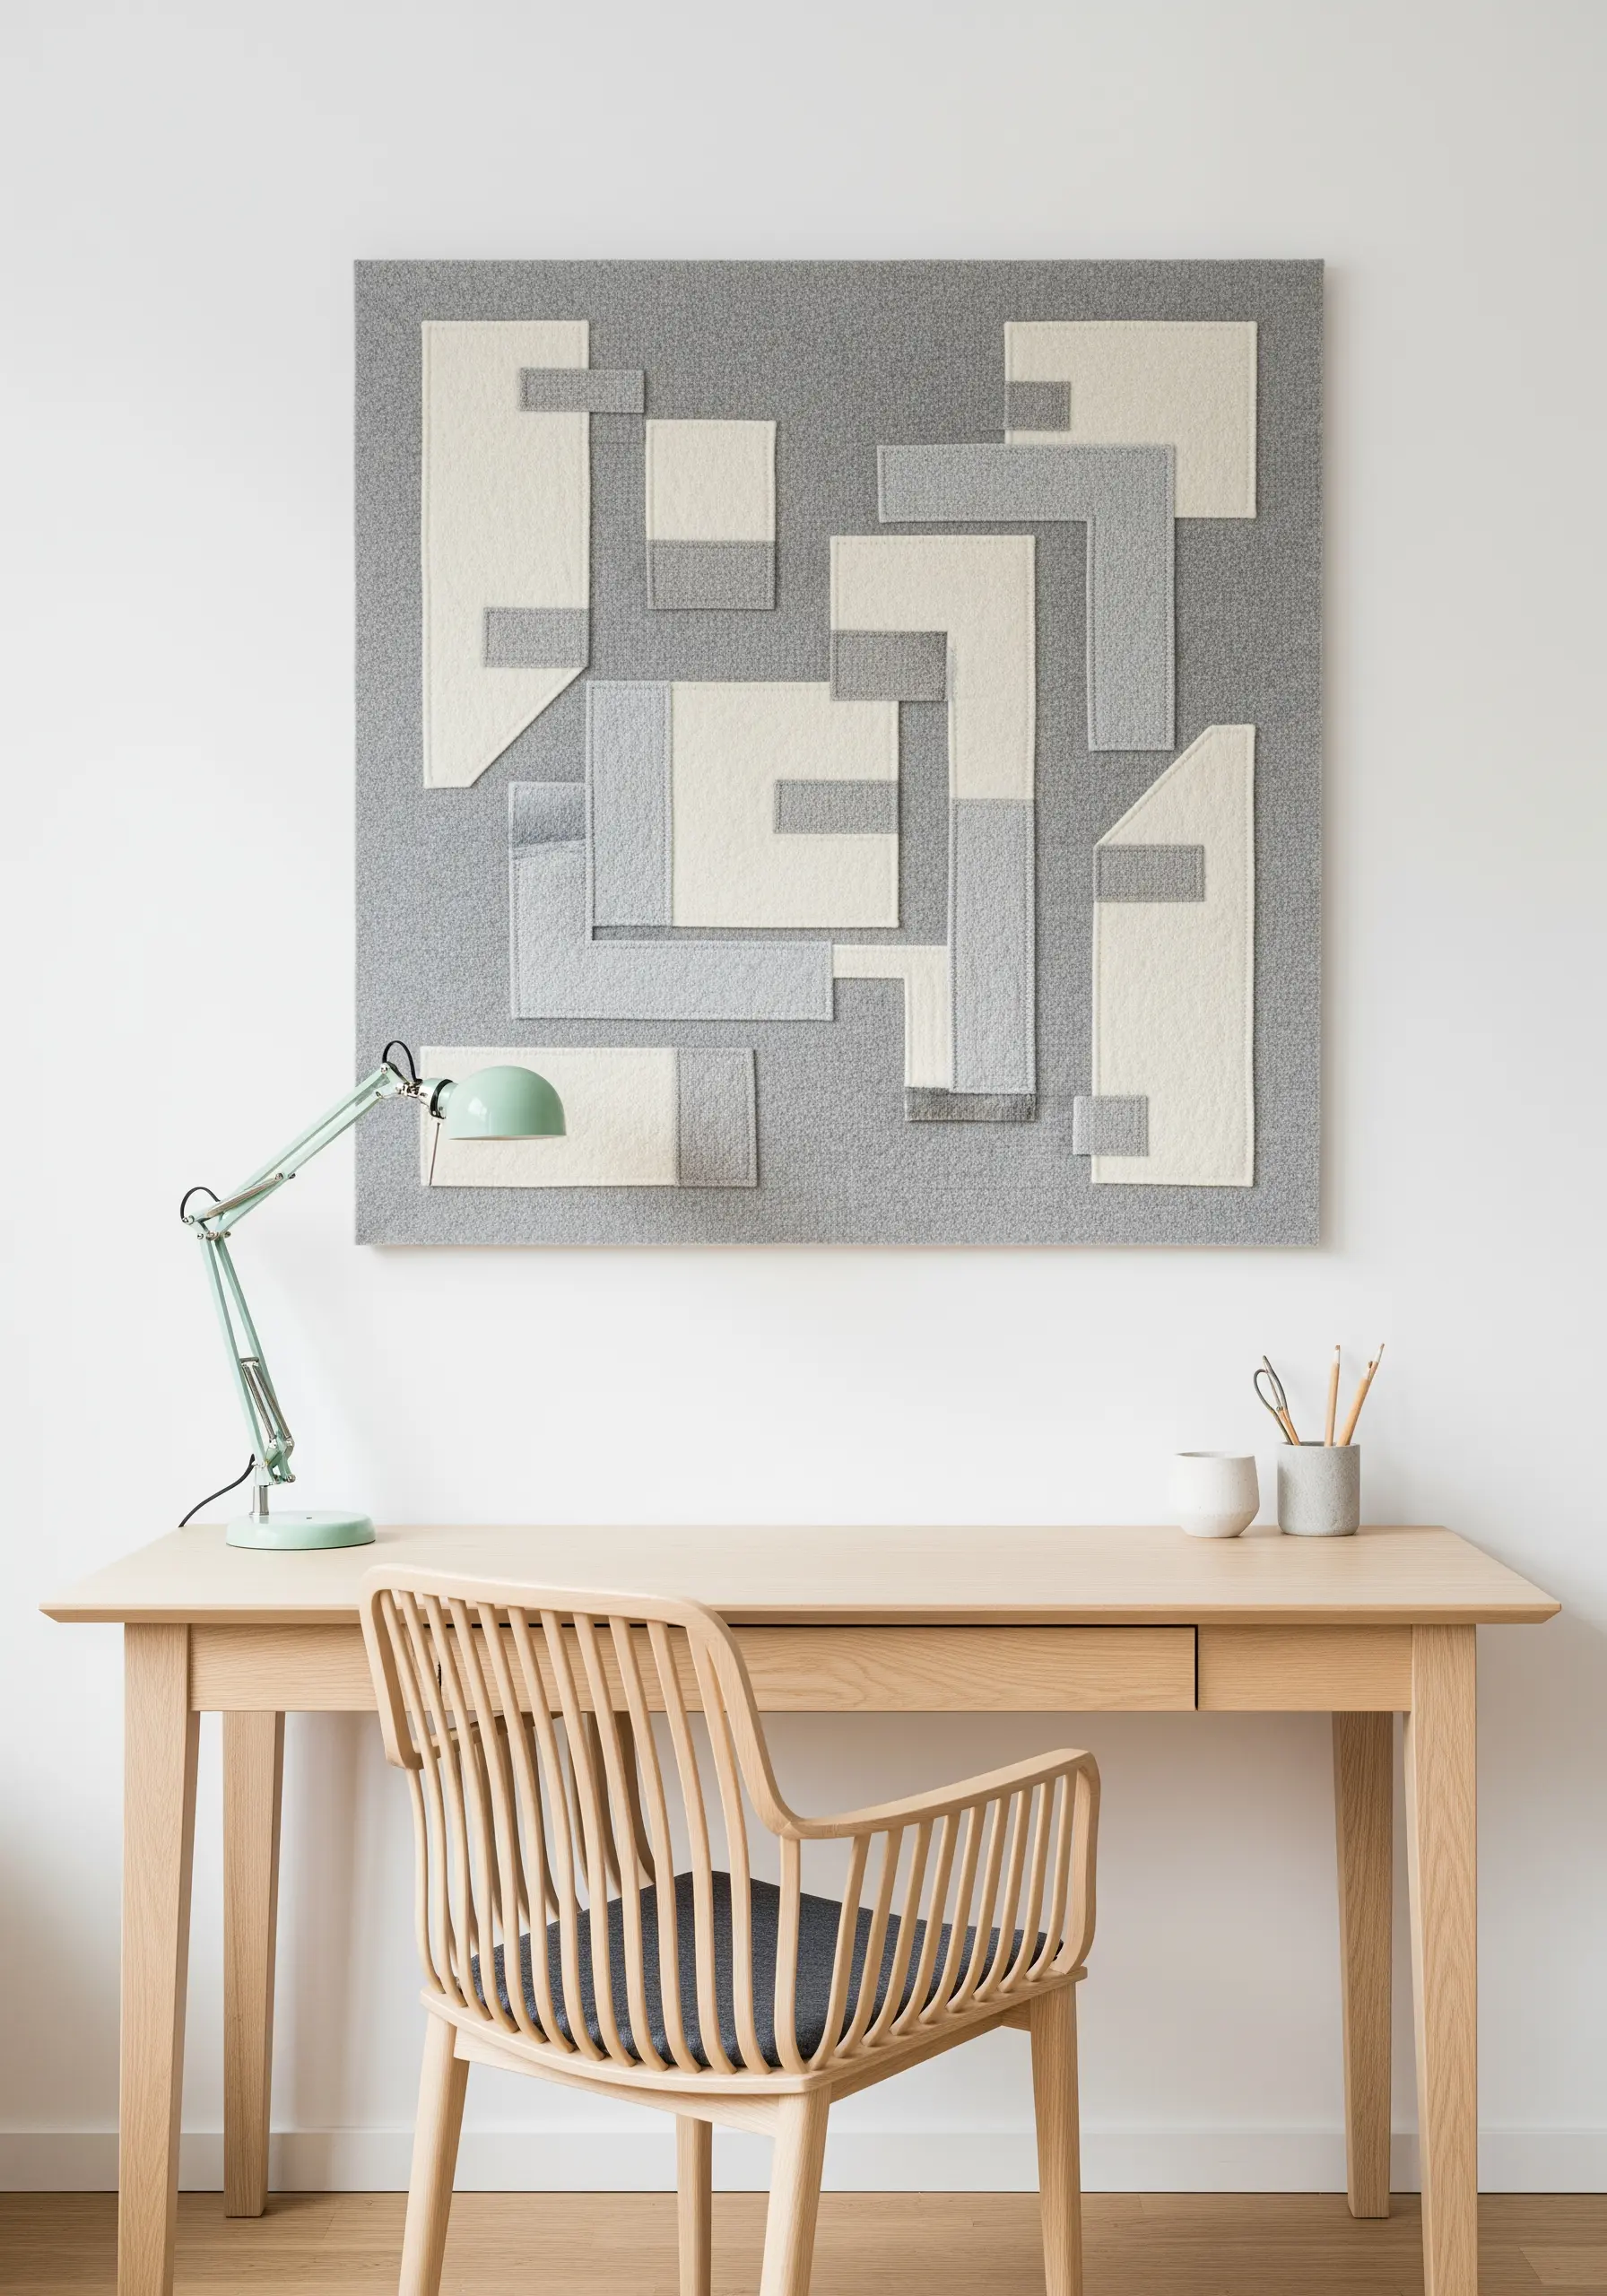
Create bold, architectural wall art by layering cut felt shapes instead of filling areas with thread.
Choose high-quality wool-blend felt, which has clean edges and a satisfying weight.
Secure each piece with a nearly invisible whipstitch using a matching thread color.
Alternatively, use a contrasting running stitch just inside the edge of each shape to add a subtle, graphic detail.
This method allows you to build large-scale, impactful compositions quickly and effectively.
5. Paint with Yarn Using a Couching Technique
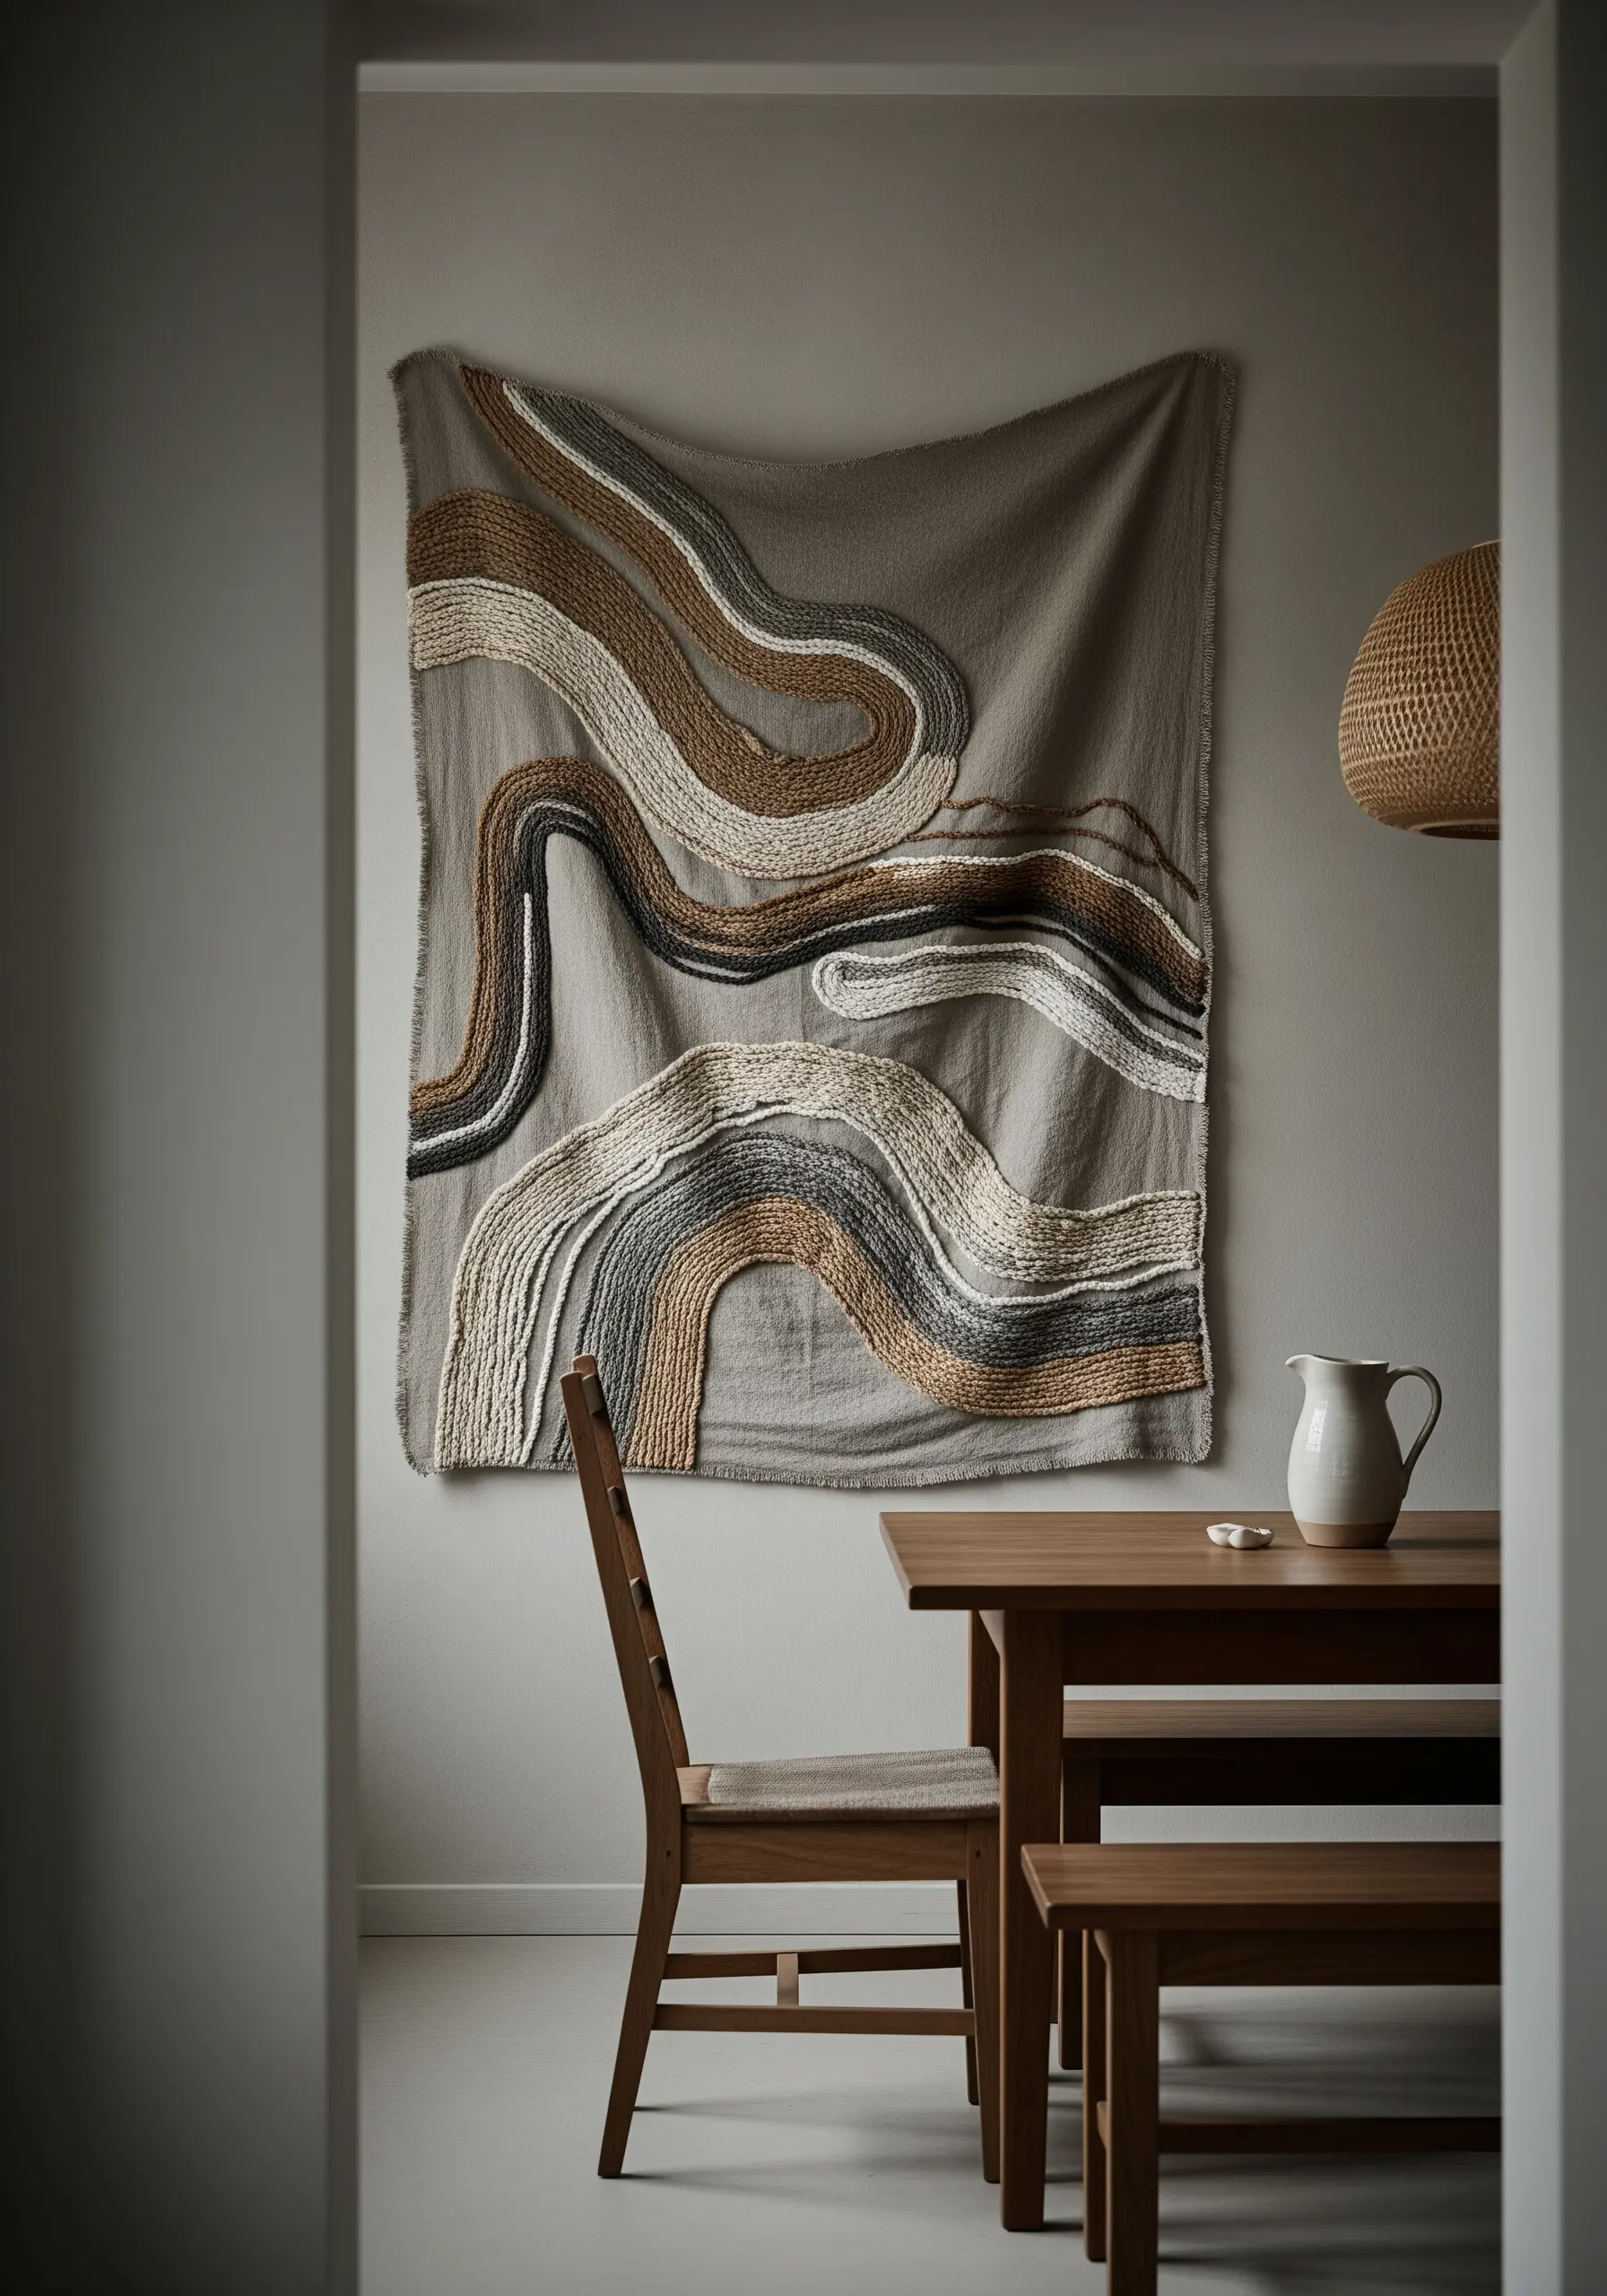
For dramatic, flowing lines, lay thick yarn or wool roving directly onto your fabric and stitch it down with a thinner, matching thread.
This technique, called couching, allows you to create bold textures and sweeping curves that would be impossible with traditional stitches.
Vary the thickness of your yarn and the density of your lines to build depth and movement.
Group multiple strands together for a heavier line, or use a single strand for more delicate curves in your abstract thread embroidery ideas.
6. Sculpt a Landscape with Punch Needle Loops
Use a punch needle to create a highly textural, carpet-like surface that adds tangible depth to your wall art.
You can create rolling hills and subtle contours by varying the height of your loops—a simple adjustment on most punch needle tools.
Work in blocks of solid, neutral color to let the texture itself be the focus.
A single, clean line stitched with a traditional needle can then be used to add a sharp, defining contour against the soft loops.
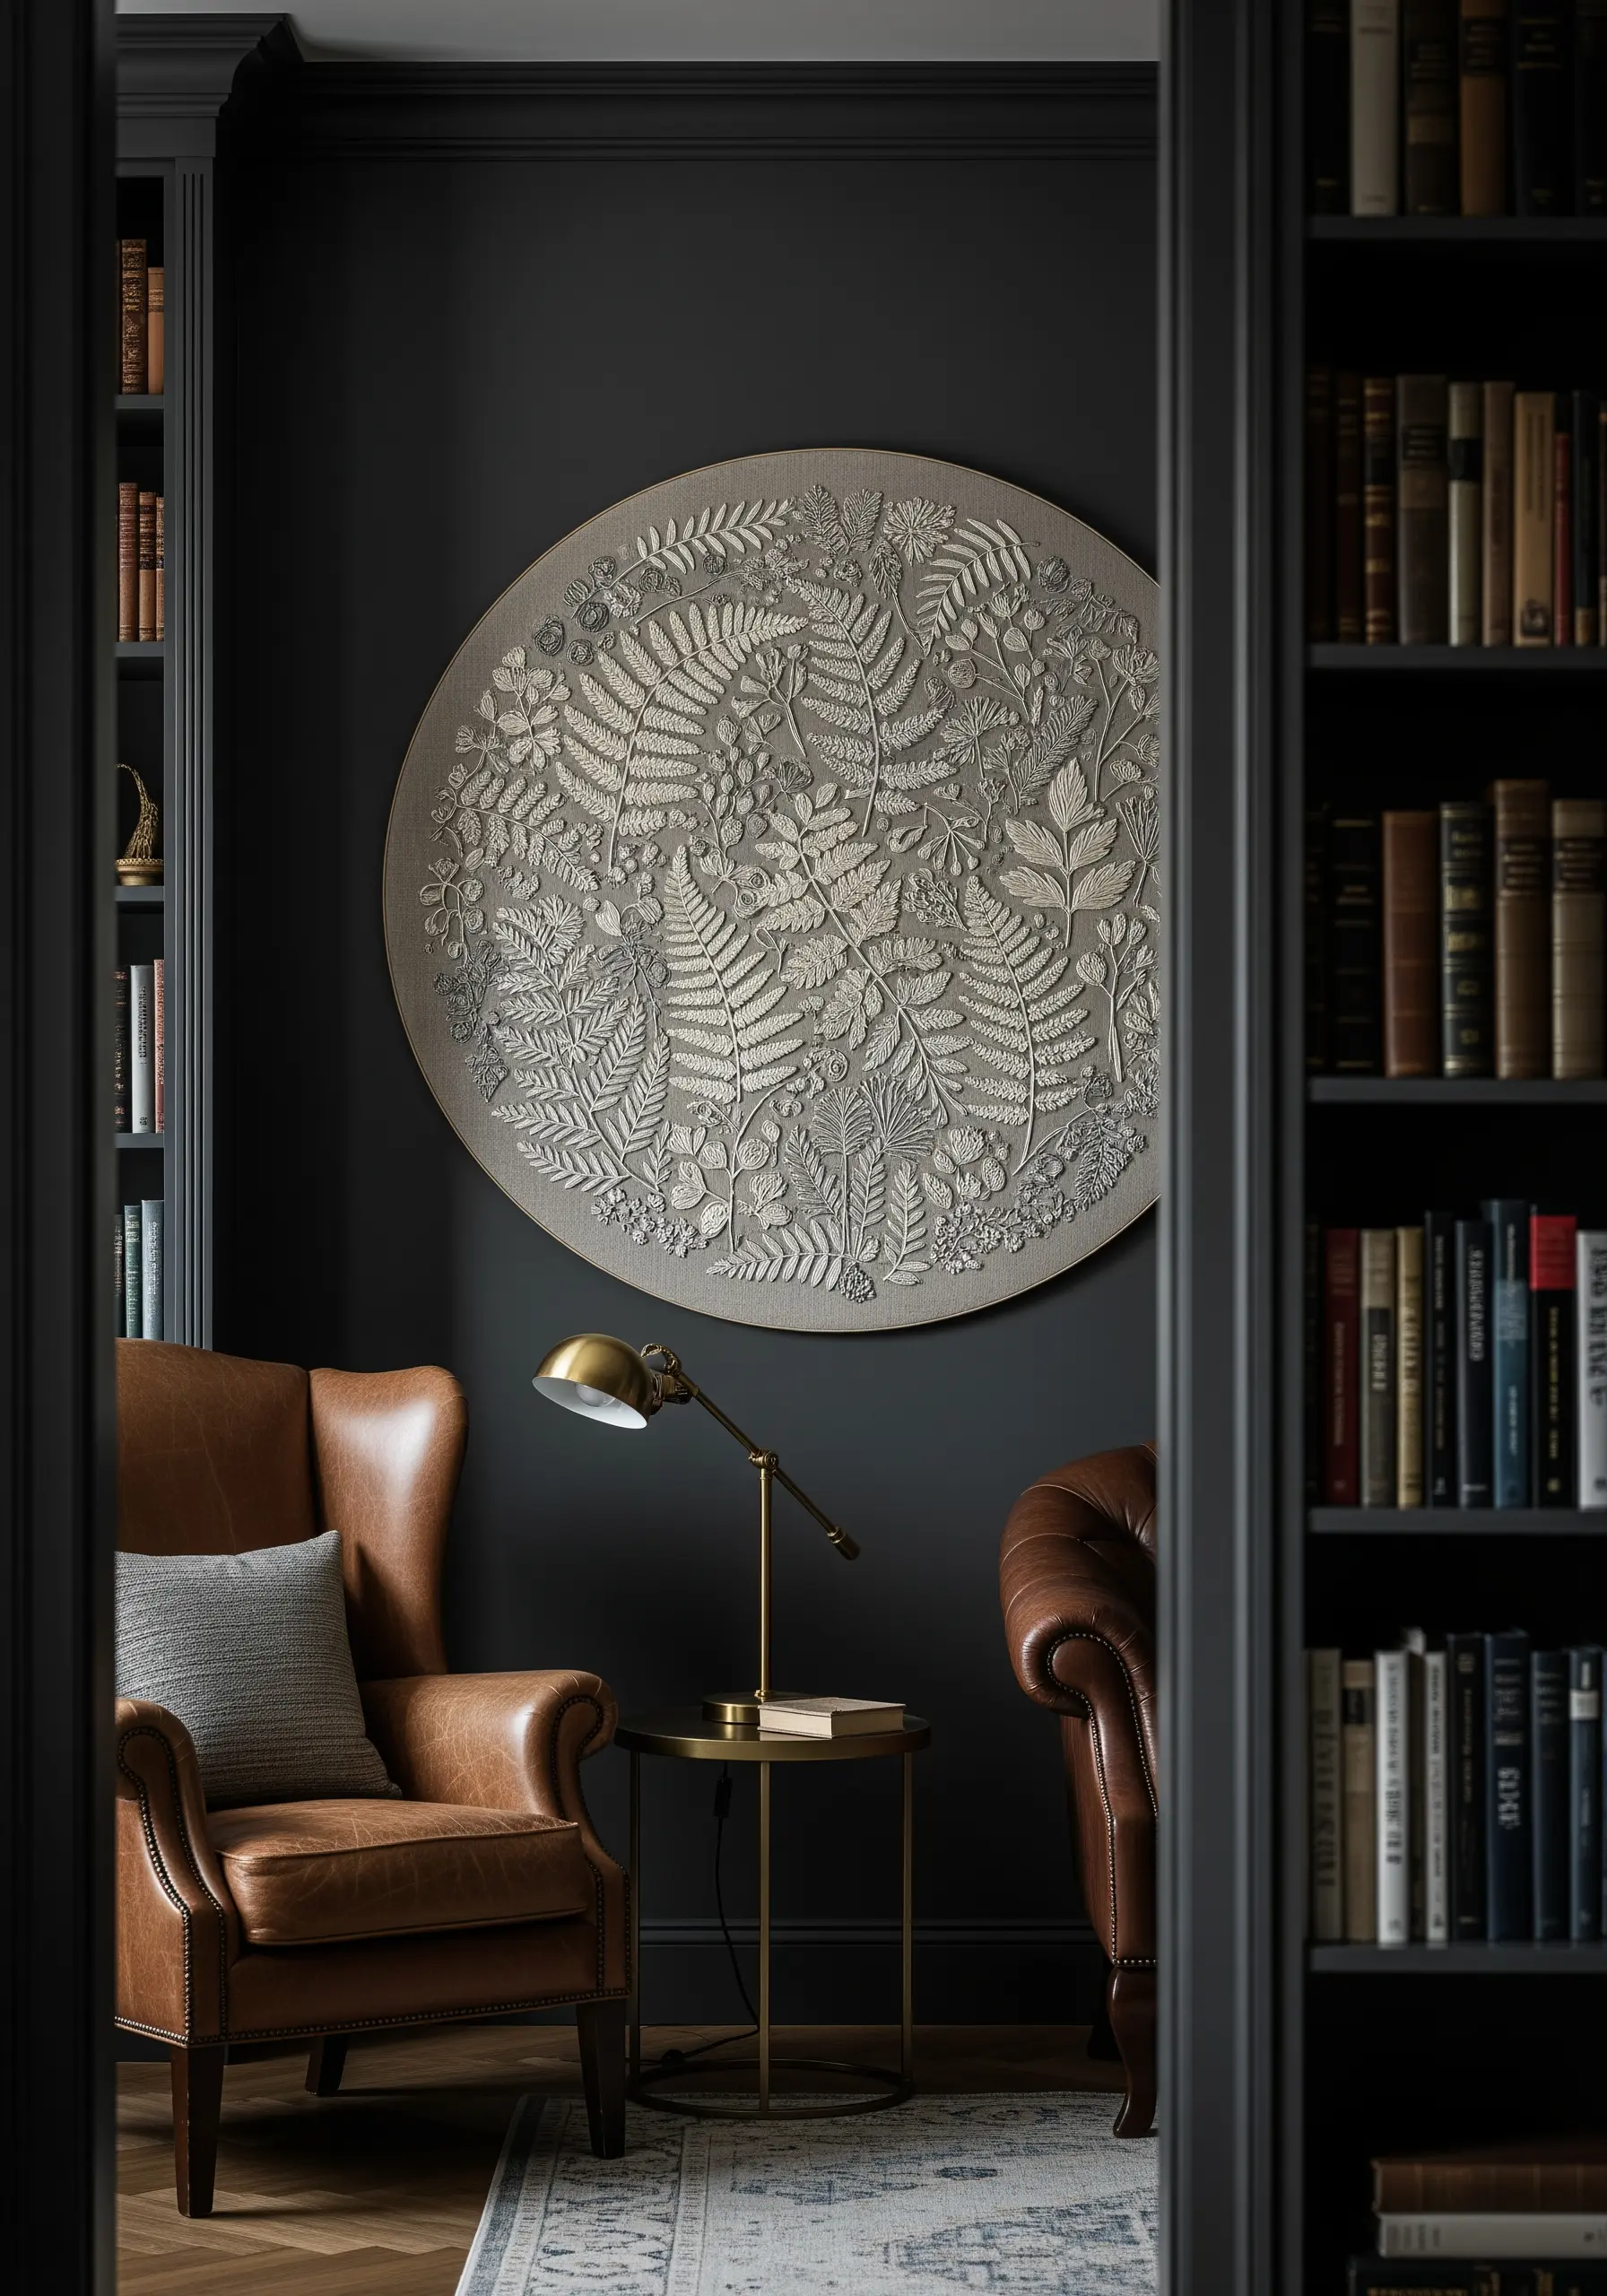
7. Draft a Geometric Mandala with Precision
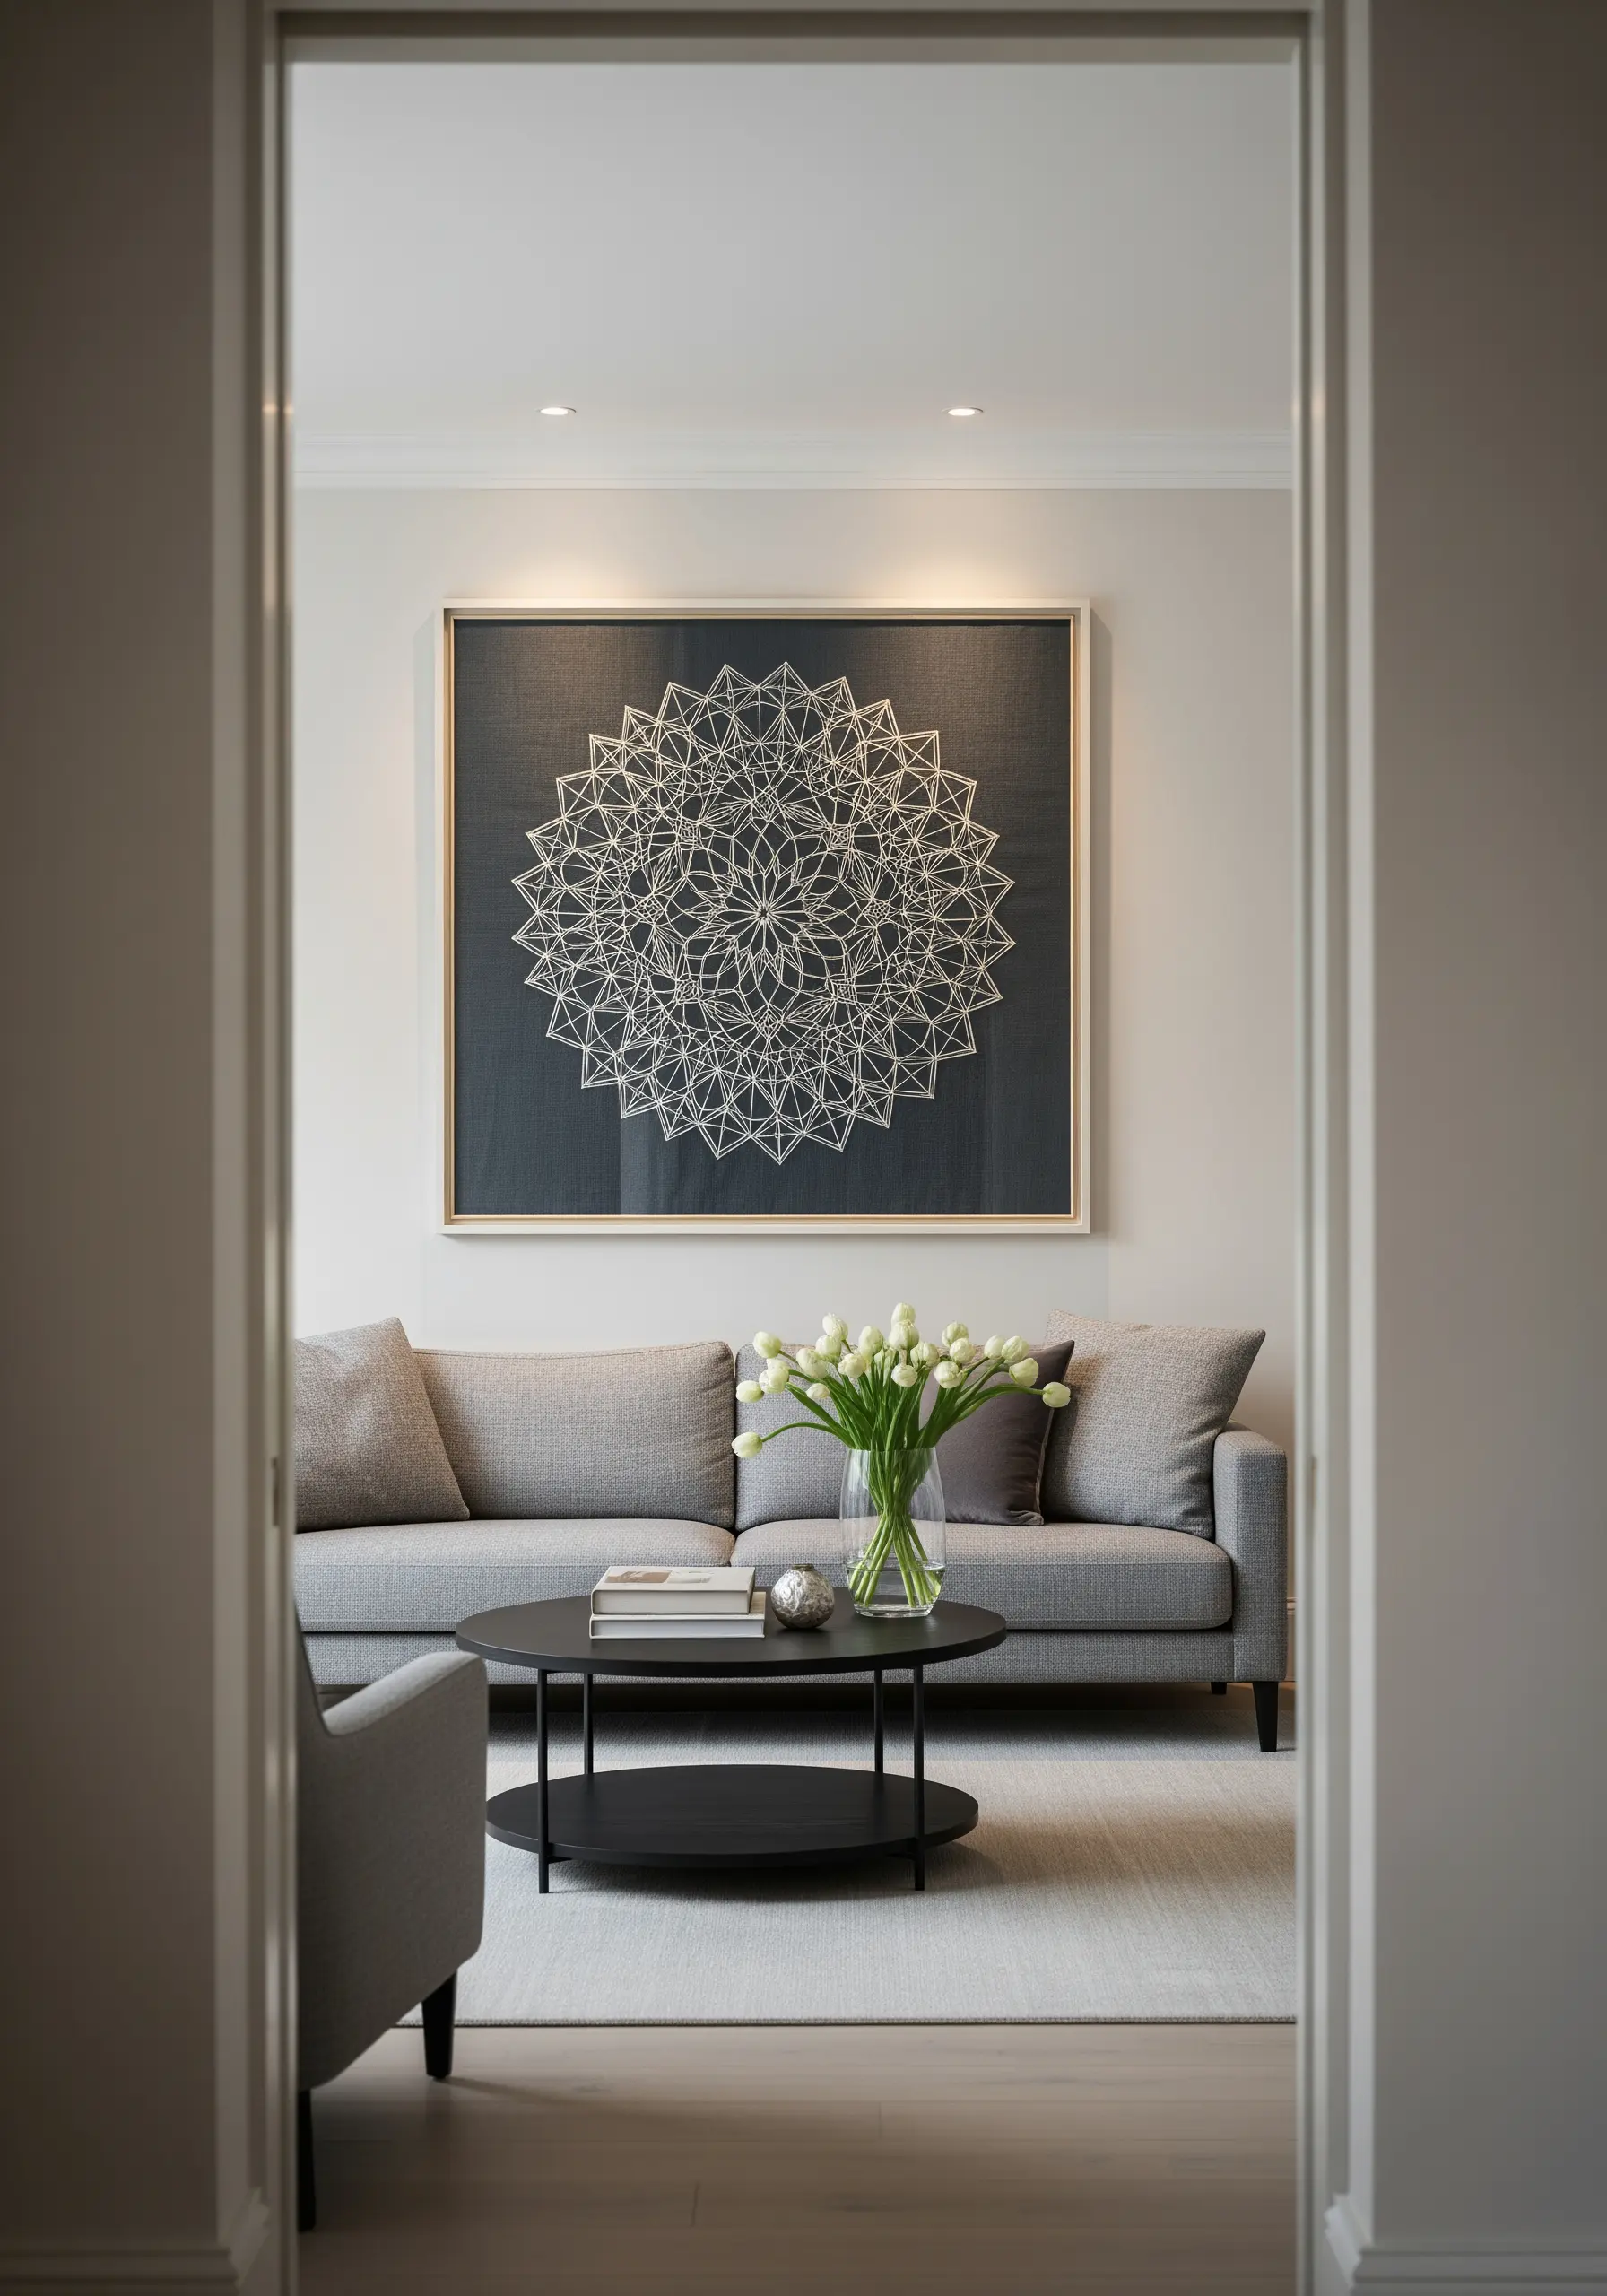
Create a mesmerizing focal point by stitching a complex geometric pattern on a dark, contrasting fabric.
Begin by drawing your design with a white gel pen or chalk pencil for accuracy.
Use a consistent whipped backstitch or stem stitch to create clean, raised lines that feel like a single, continuous thread.
The power of this piece comes from the repetition and symmetry, turning simple lines into an intricate, meditative work of art.
8. Compose a Gallery Wall of Neutral Textures
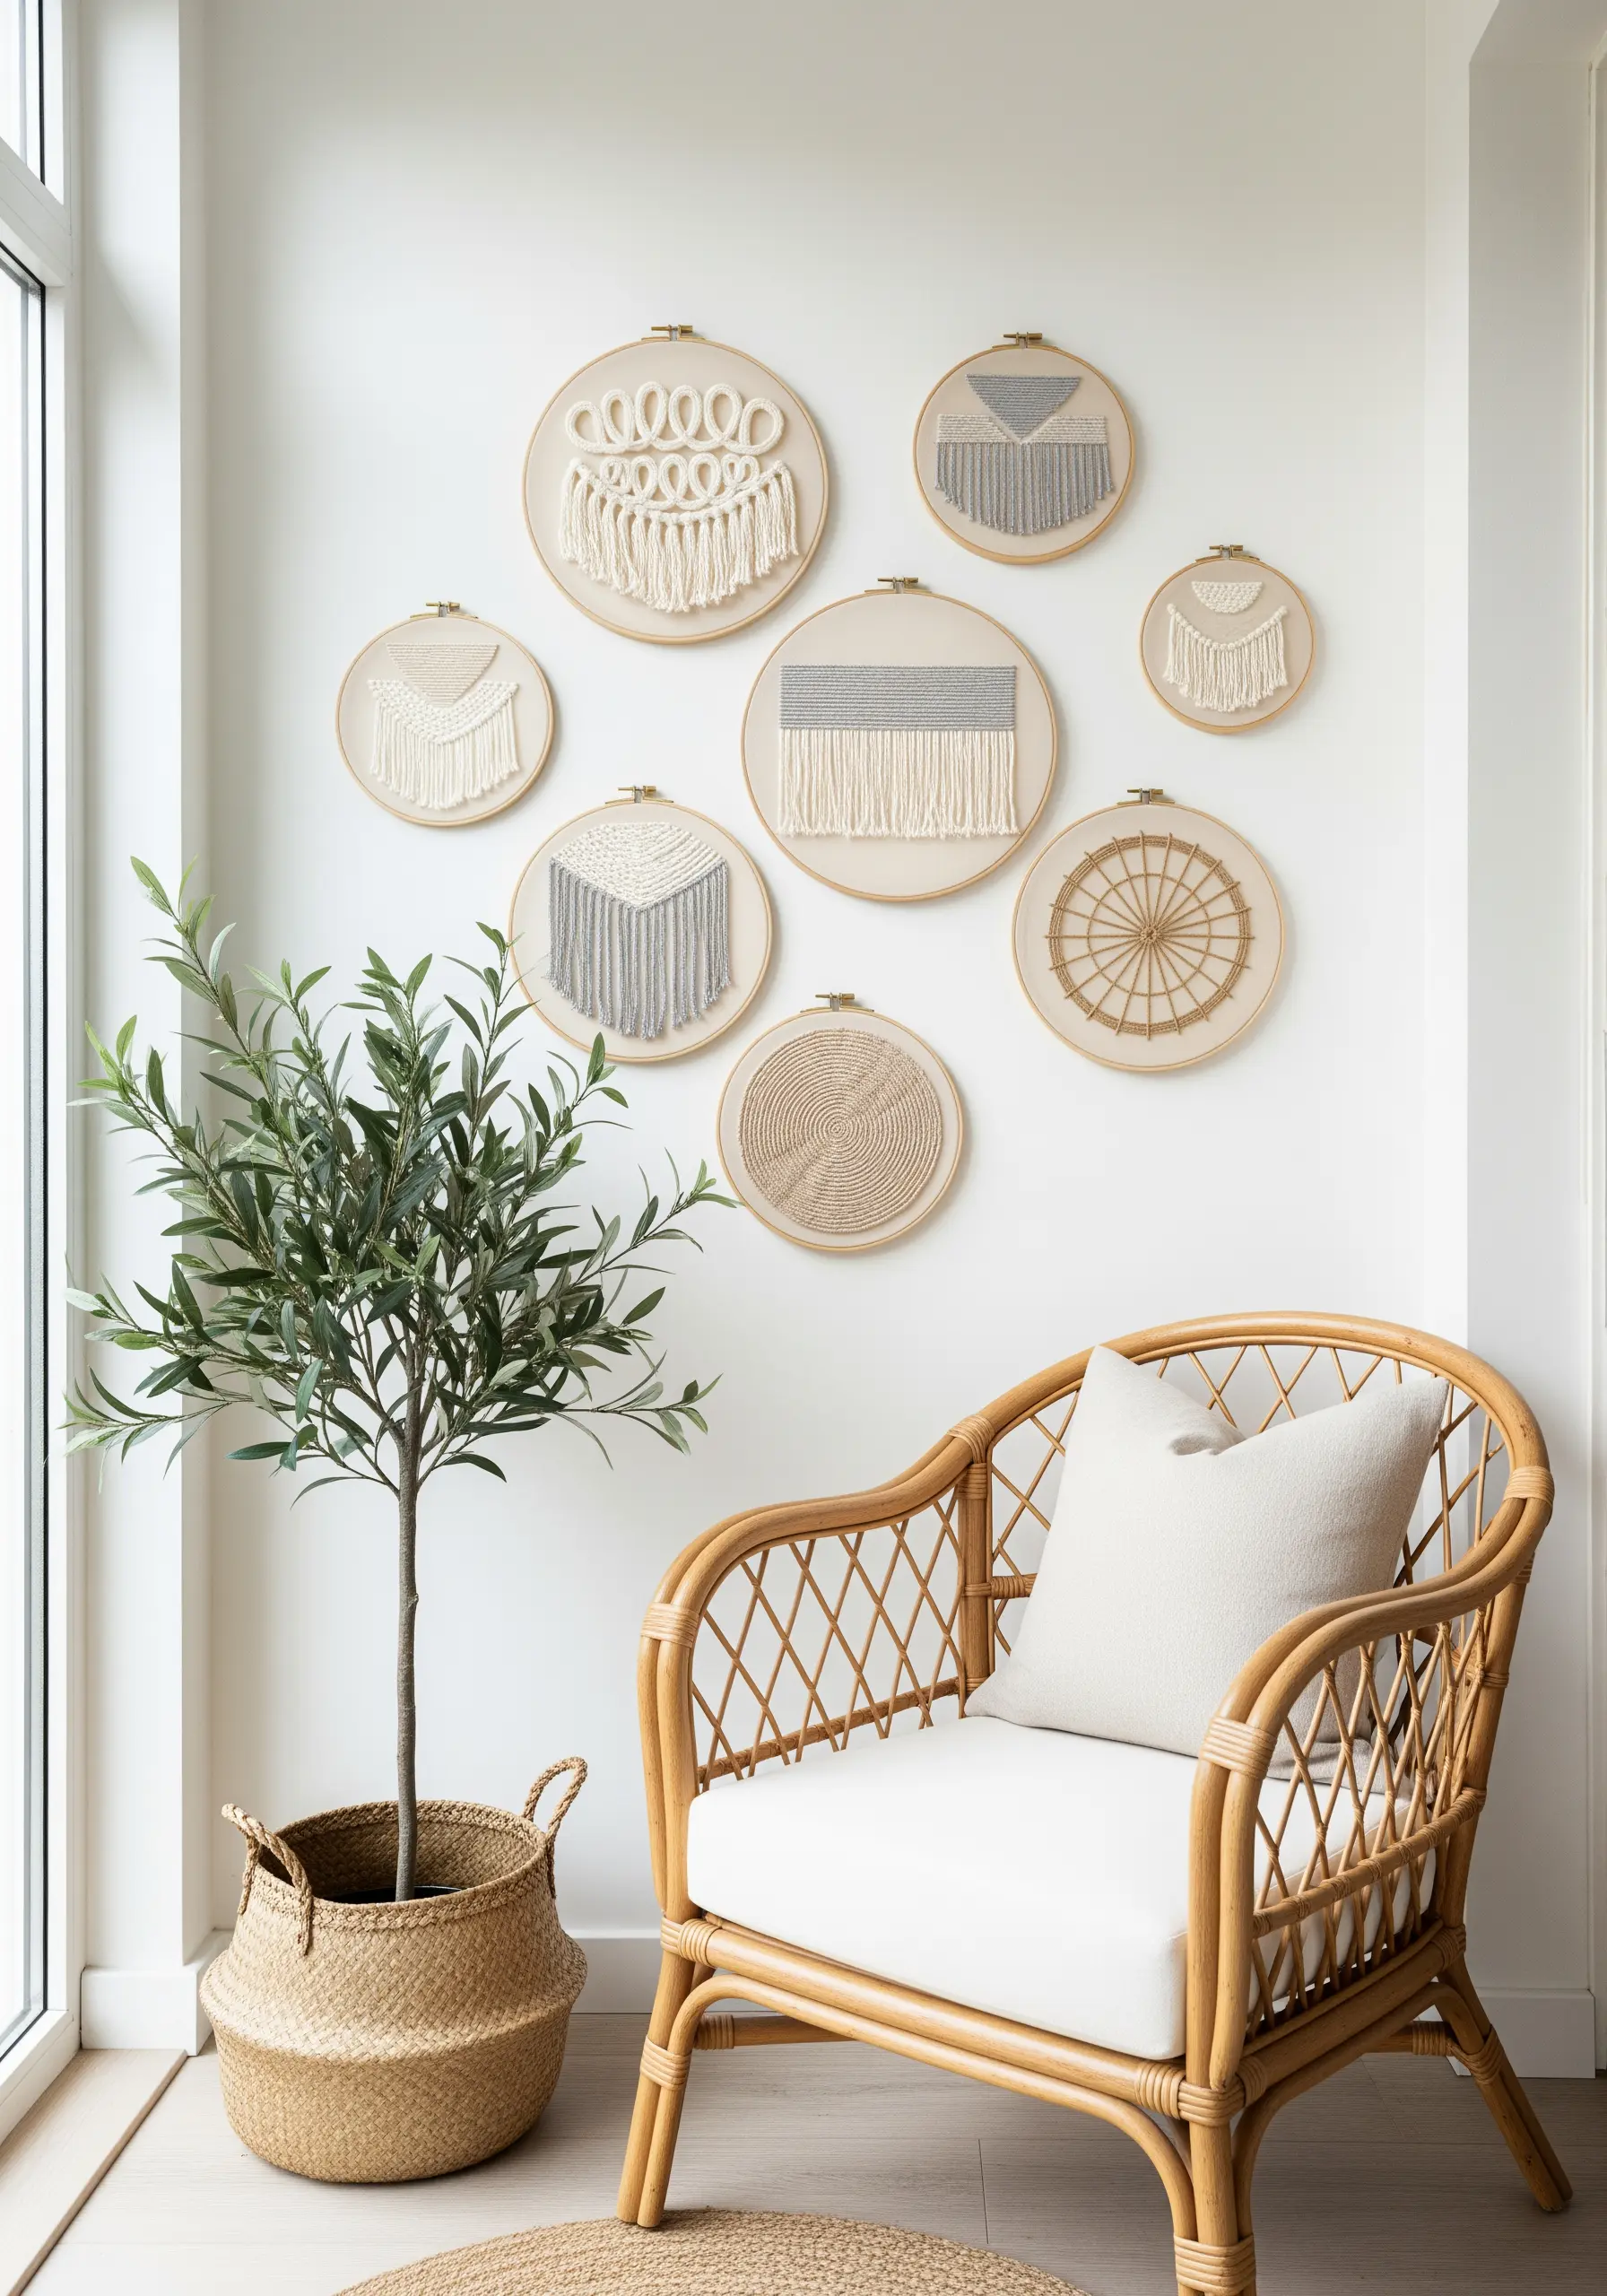
Create a large-scale art installation by grouping several small hoops, each exploring a different neutral texture.
Combine macrame fringes, sections of simple weaving, and densely packed stitches like French knots or seed stitch.
Keep the color palette restrained—shades of cream, gray, and taupe—to ensure the collection feels harmonious.
Varying the hoop sizes and their placement on the wall adds rhythm and visual interest to the overall composition.
9. Layer Translucent Fabrics with a Hint of Gold
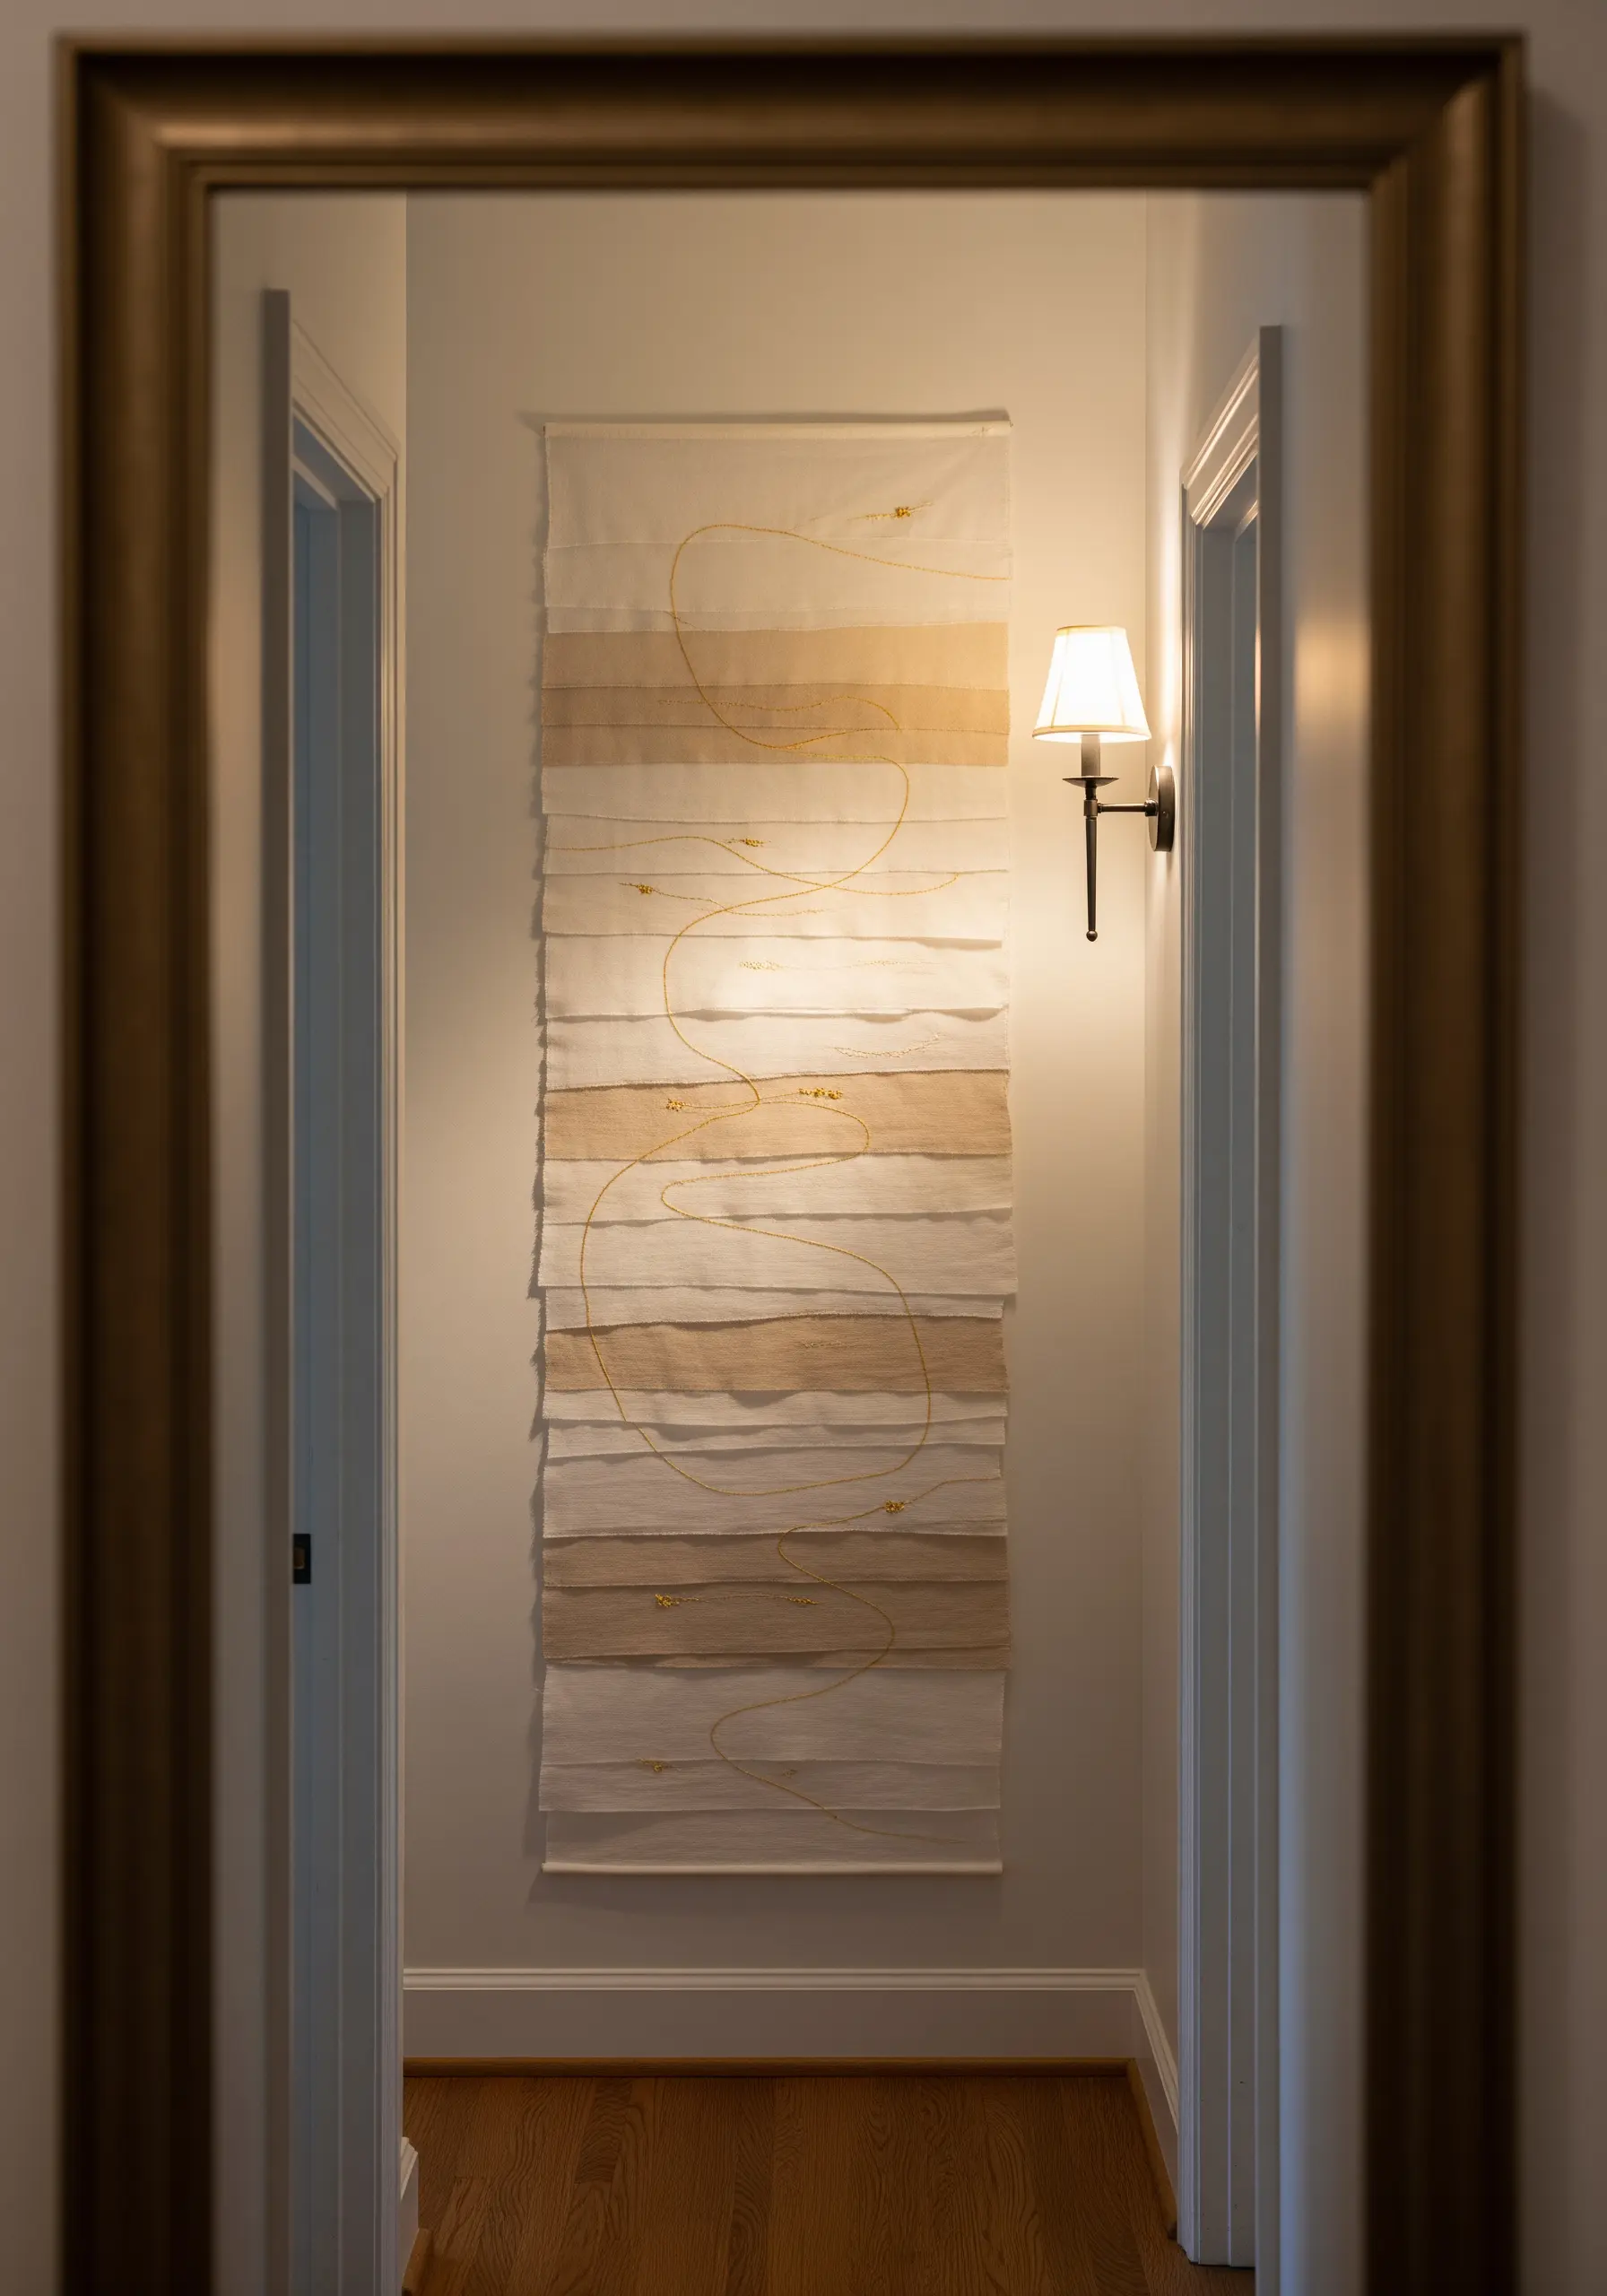
Build subtle depth by layering strips of lightweight fabrics like linen, muslin, or silk organza with raw, torn edges.
Arrange them in horizontal bands of soft, neutral tones to create a gentle, stratified effect.
Then, add a single, meandering line of a fine metallic thread using a simple running stitch.
This unexpected touch of gold catches the light and adds a quiet line of energy, turning a simple fabric collage into gold thread luxury wall art.
10. Create Sculptural Circles with Couched Cord
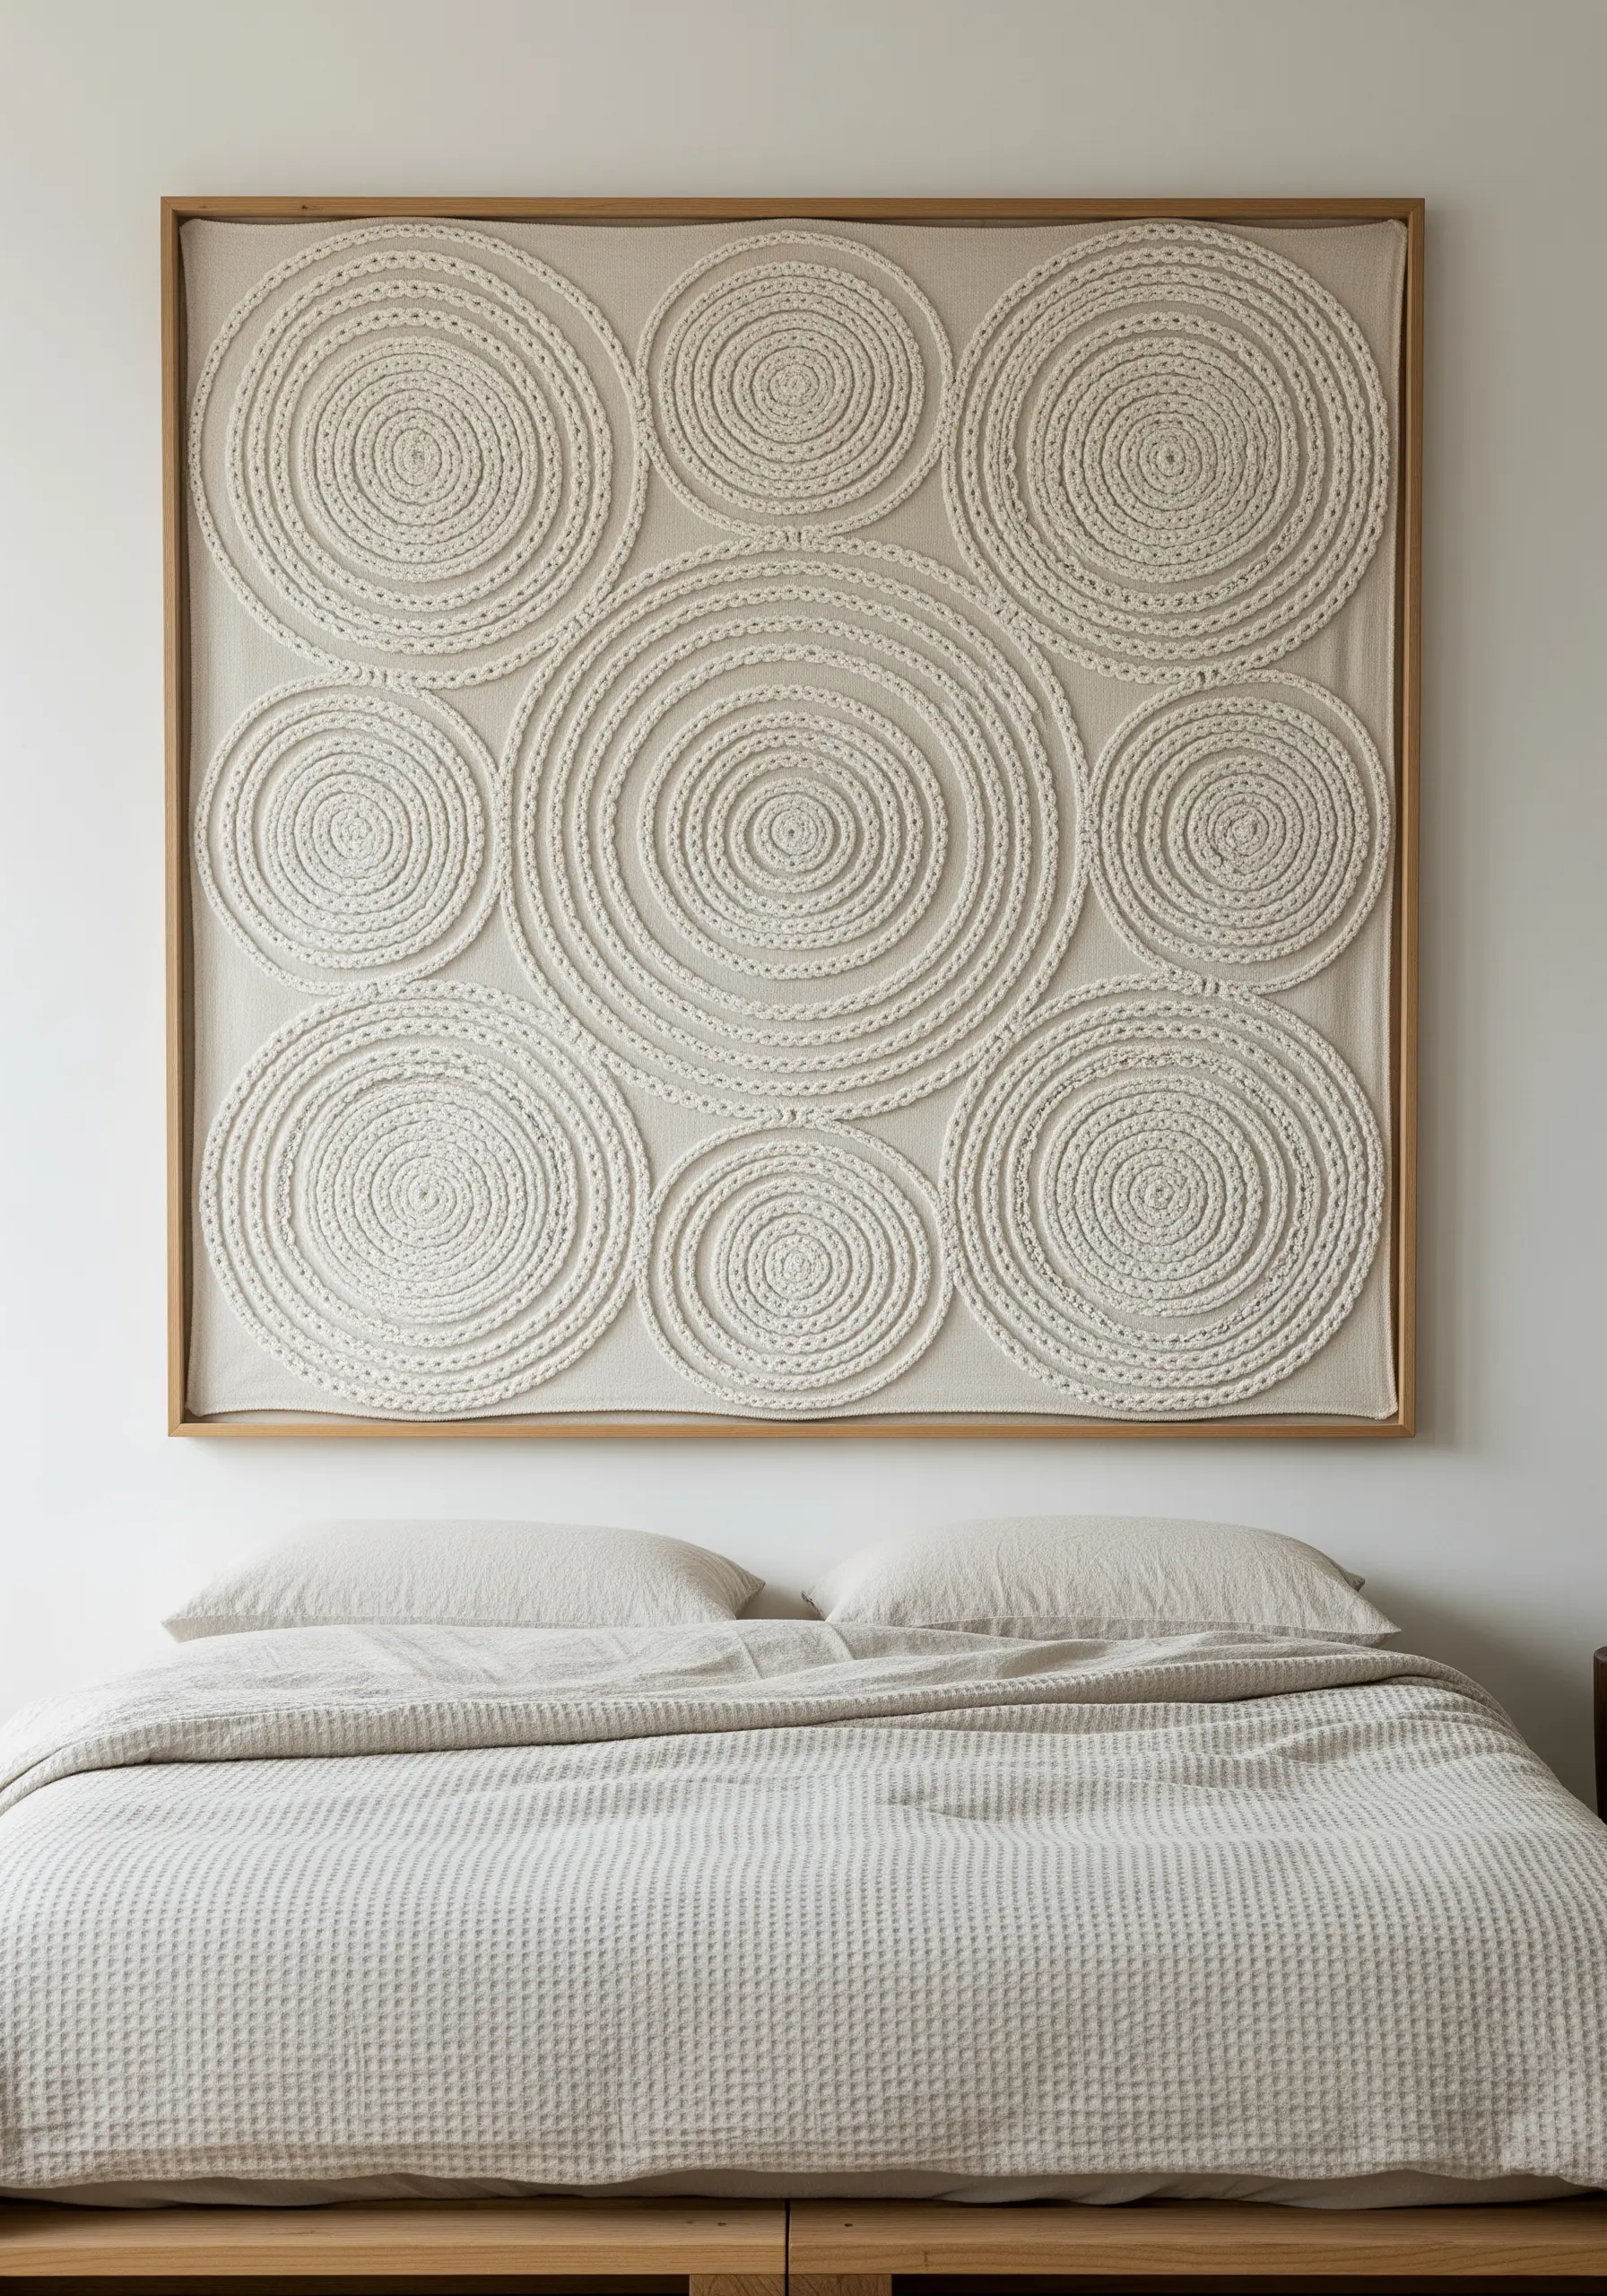
For a bold, three-dimensional effect, couch thick cotton piping cord onto your canvas.
Lay the cord in concentric circles and secure it with small, evenly spaced tacking stitches in a matching thread color.
The result is a highly graphic and tactile piece where the shadows cast by the raised cord become part of the design.
This technique uses minimal stitching to produce maximum impact, exploring form and texture in a clean, modern way.
Explore these contemporary texture techniques to create raised sculptural embroidery effects and see the difference.
11. Form Bold Organic Shapes with Chunky Roving
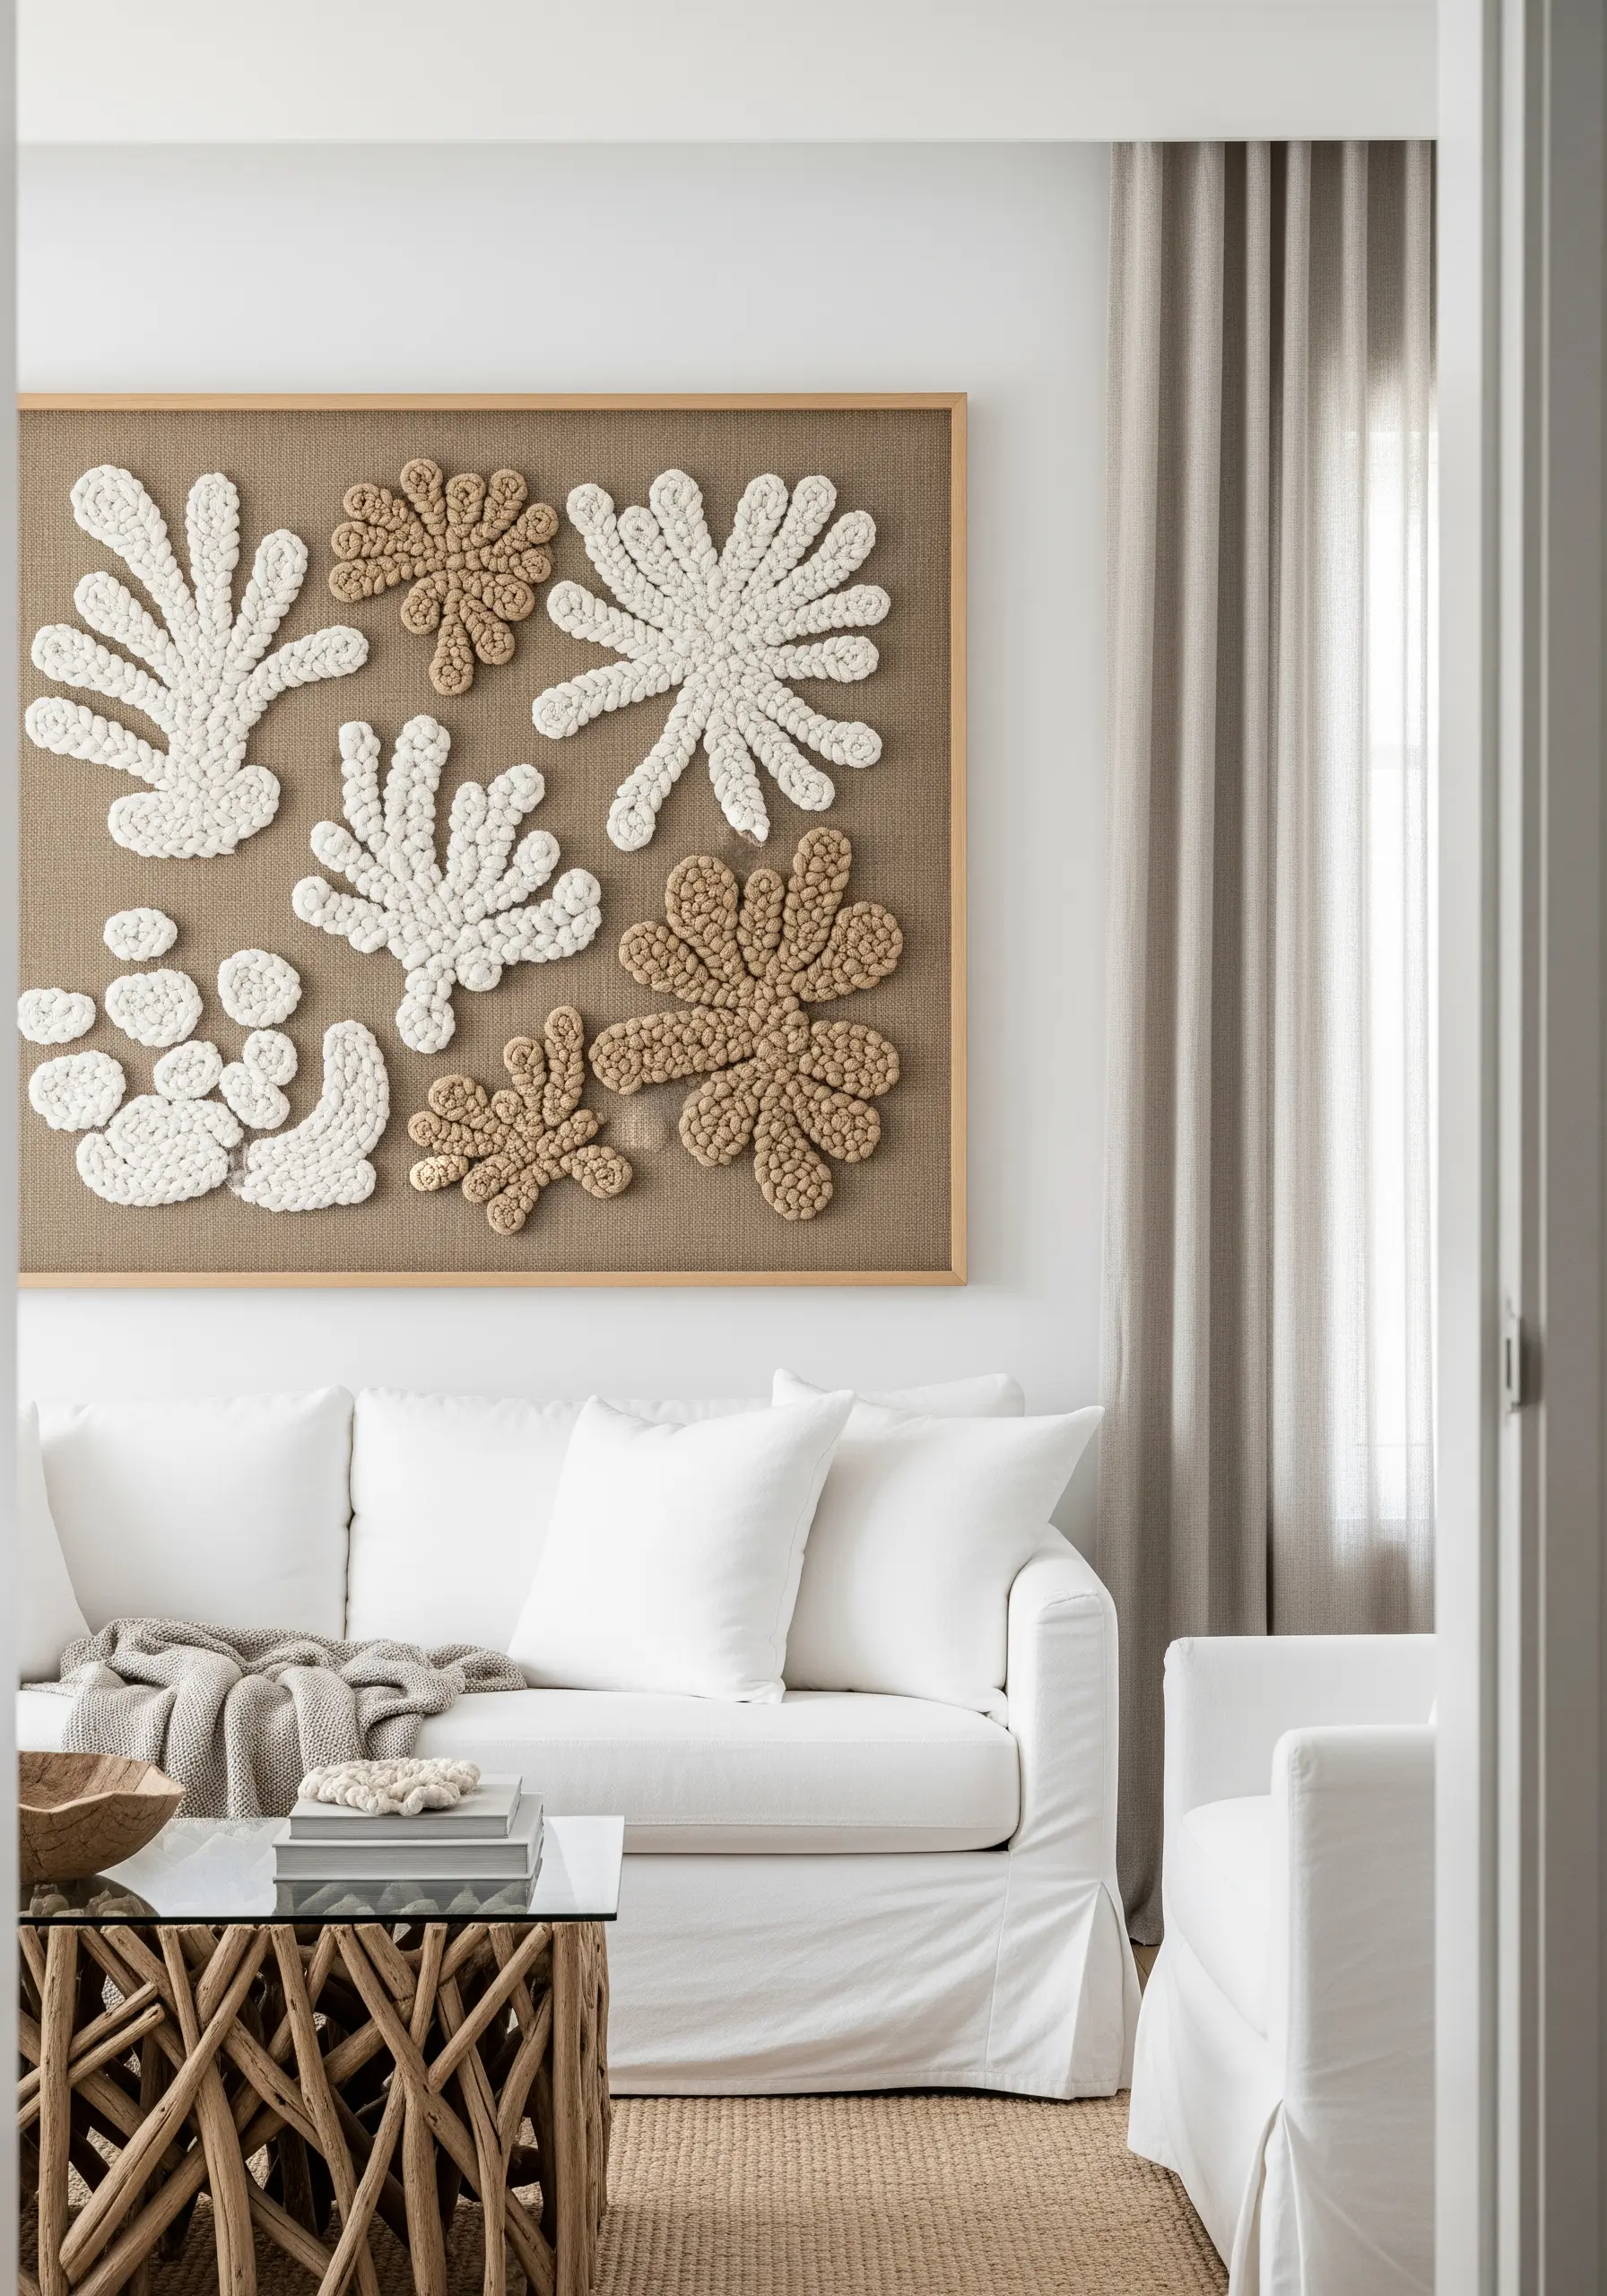
Instead of delicate floss, work with unspun wool roving or super-chunky yarn to create oversized, soft-sculpture motifs.
Use oversized French knots or a couching stitch to build up organic, coral-like shapes.
The exaggerated scale of the fiber transforms the stitches into the main focal point.
Place your shapes asymmetrically on a rustic linen or burlap background to balance the softness of the wool with a more raw, natural base.
12. Imply Form with a Minimalist Grid
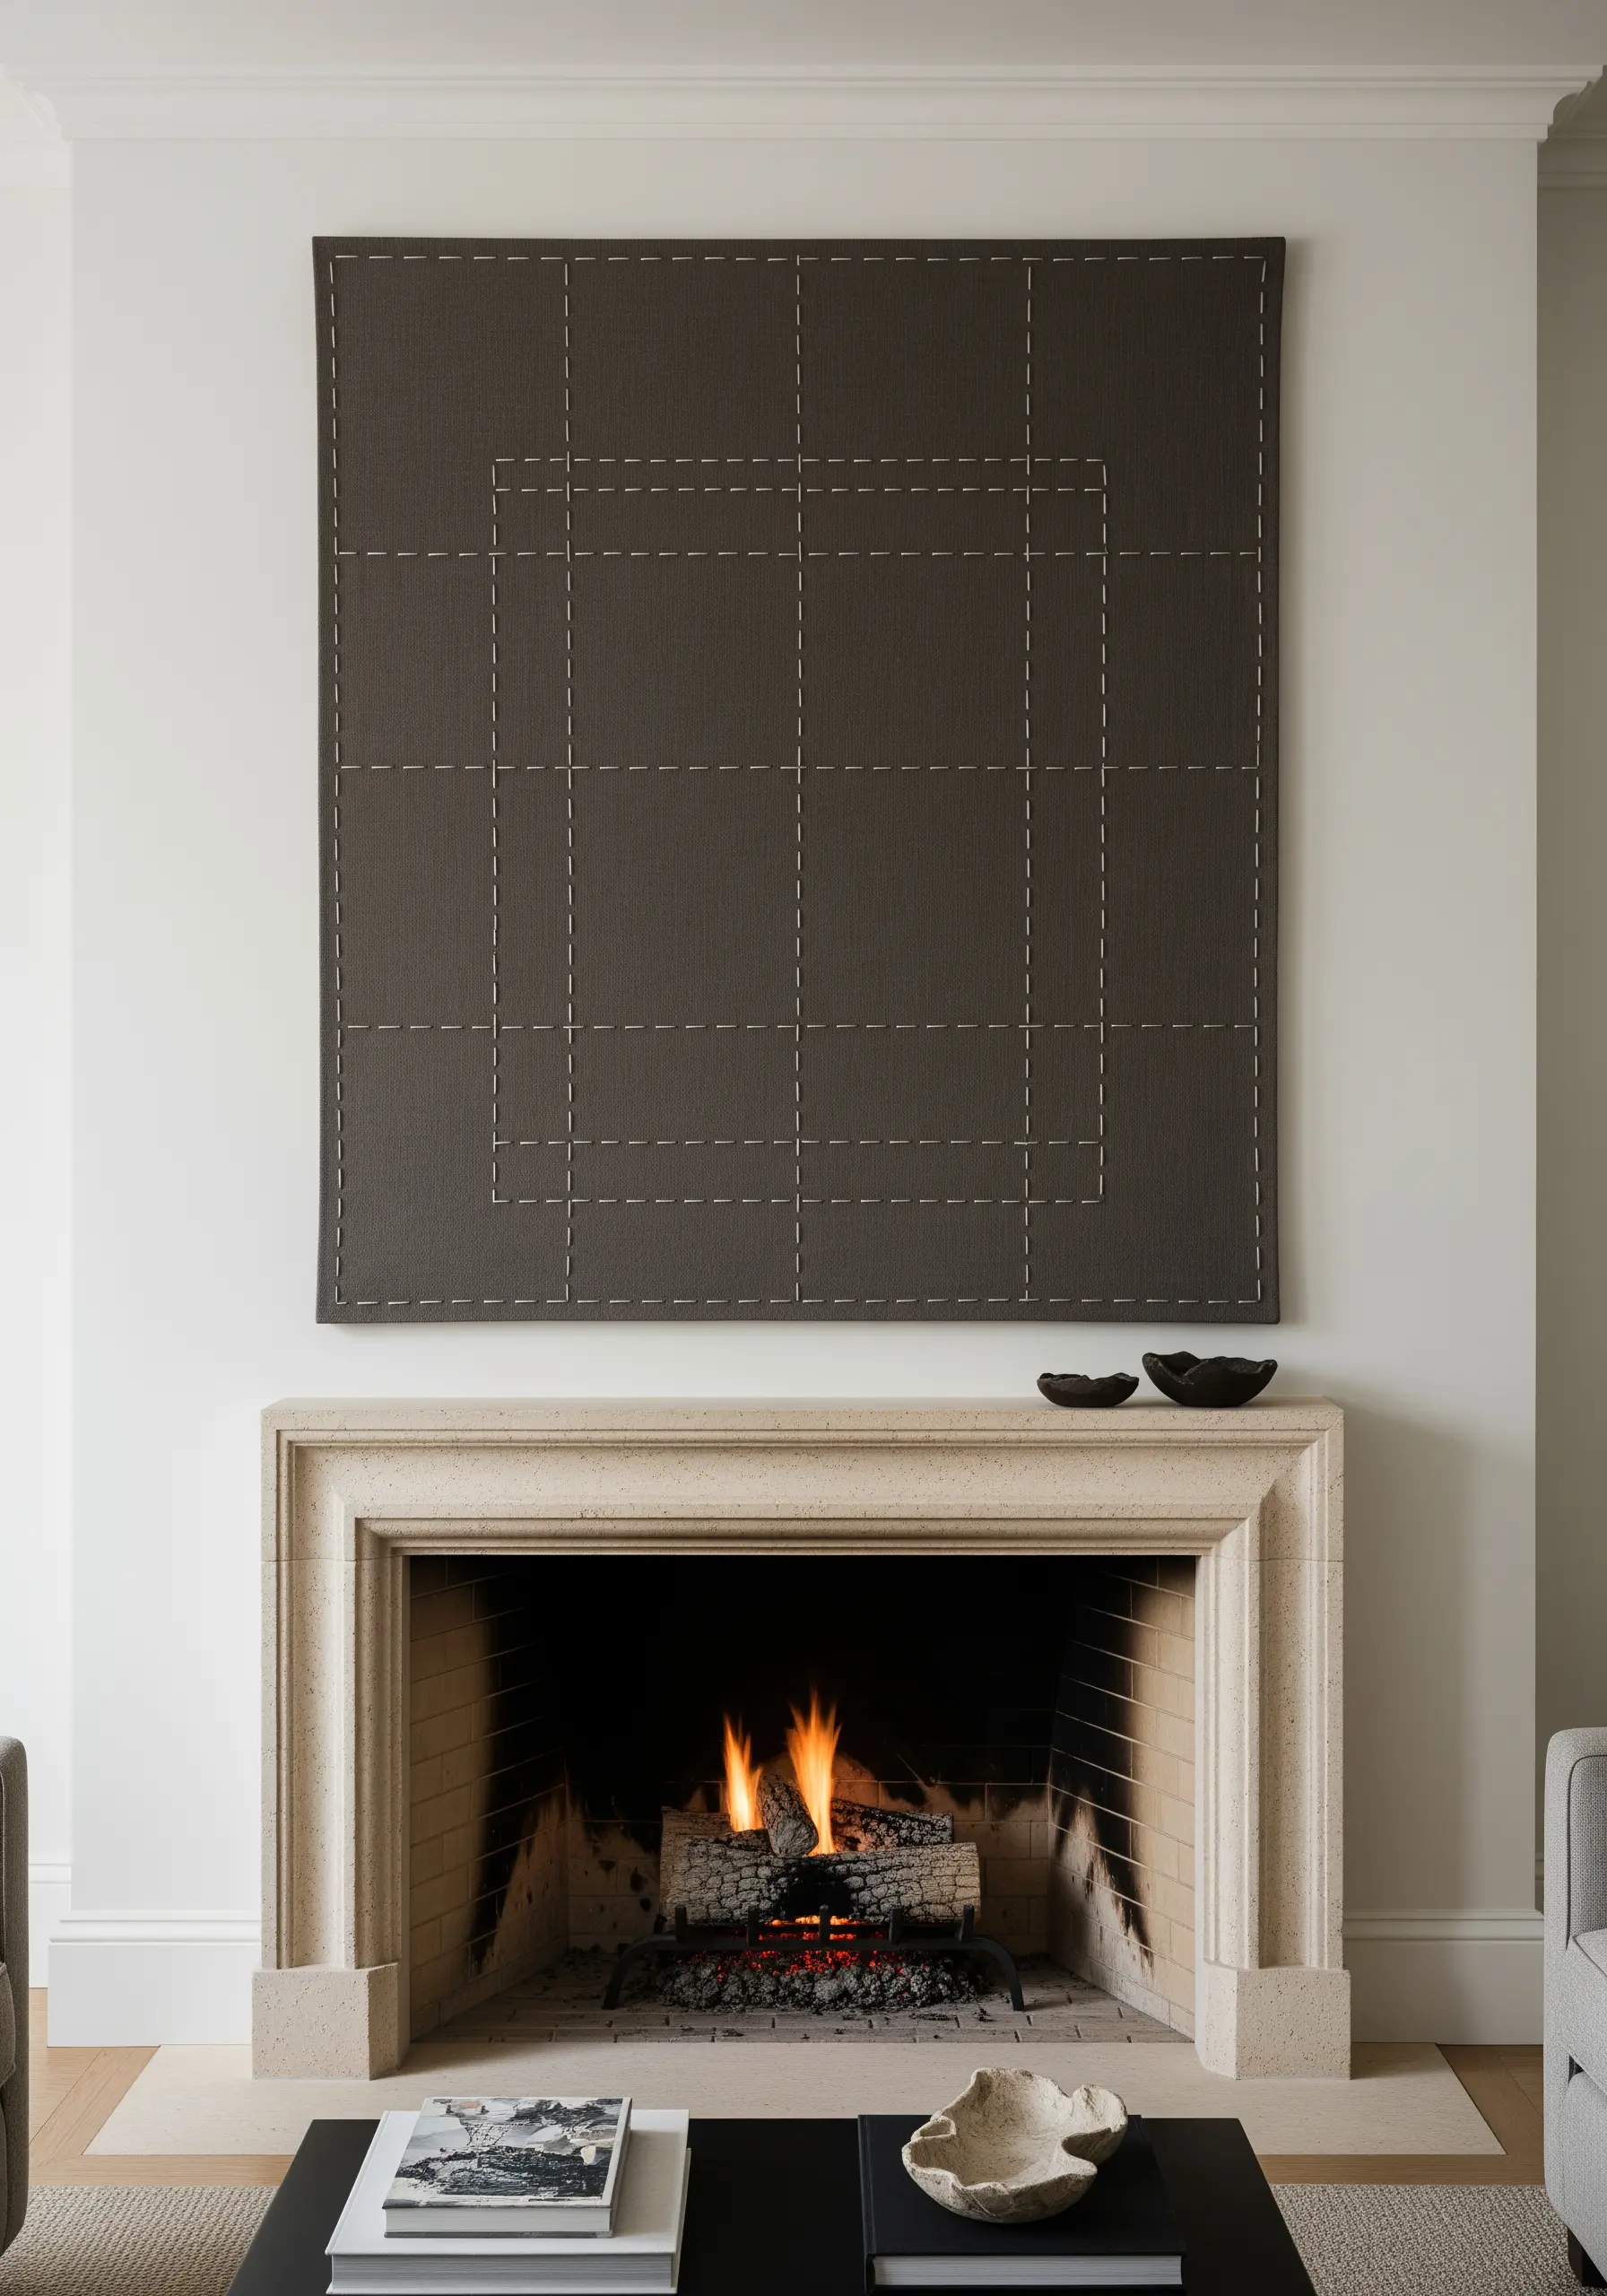
Suggest structure and form with the most minimal of marks: the running stitch.
On a dark, tightly woven fabric like charcoal canvas, a simple grid of evenly spaced running stitches in an off-white thread creates a powerful graphic statement.
The negative space within the stitched lines is just as important as the stitches themselves.
This technique is a study in restraint, proving that depth can be achieved through simplicity and contrast.
13. Divide and Conquer with Mixed-Media Texture
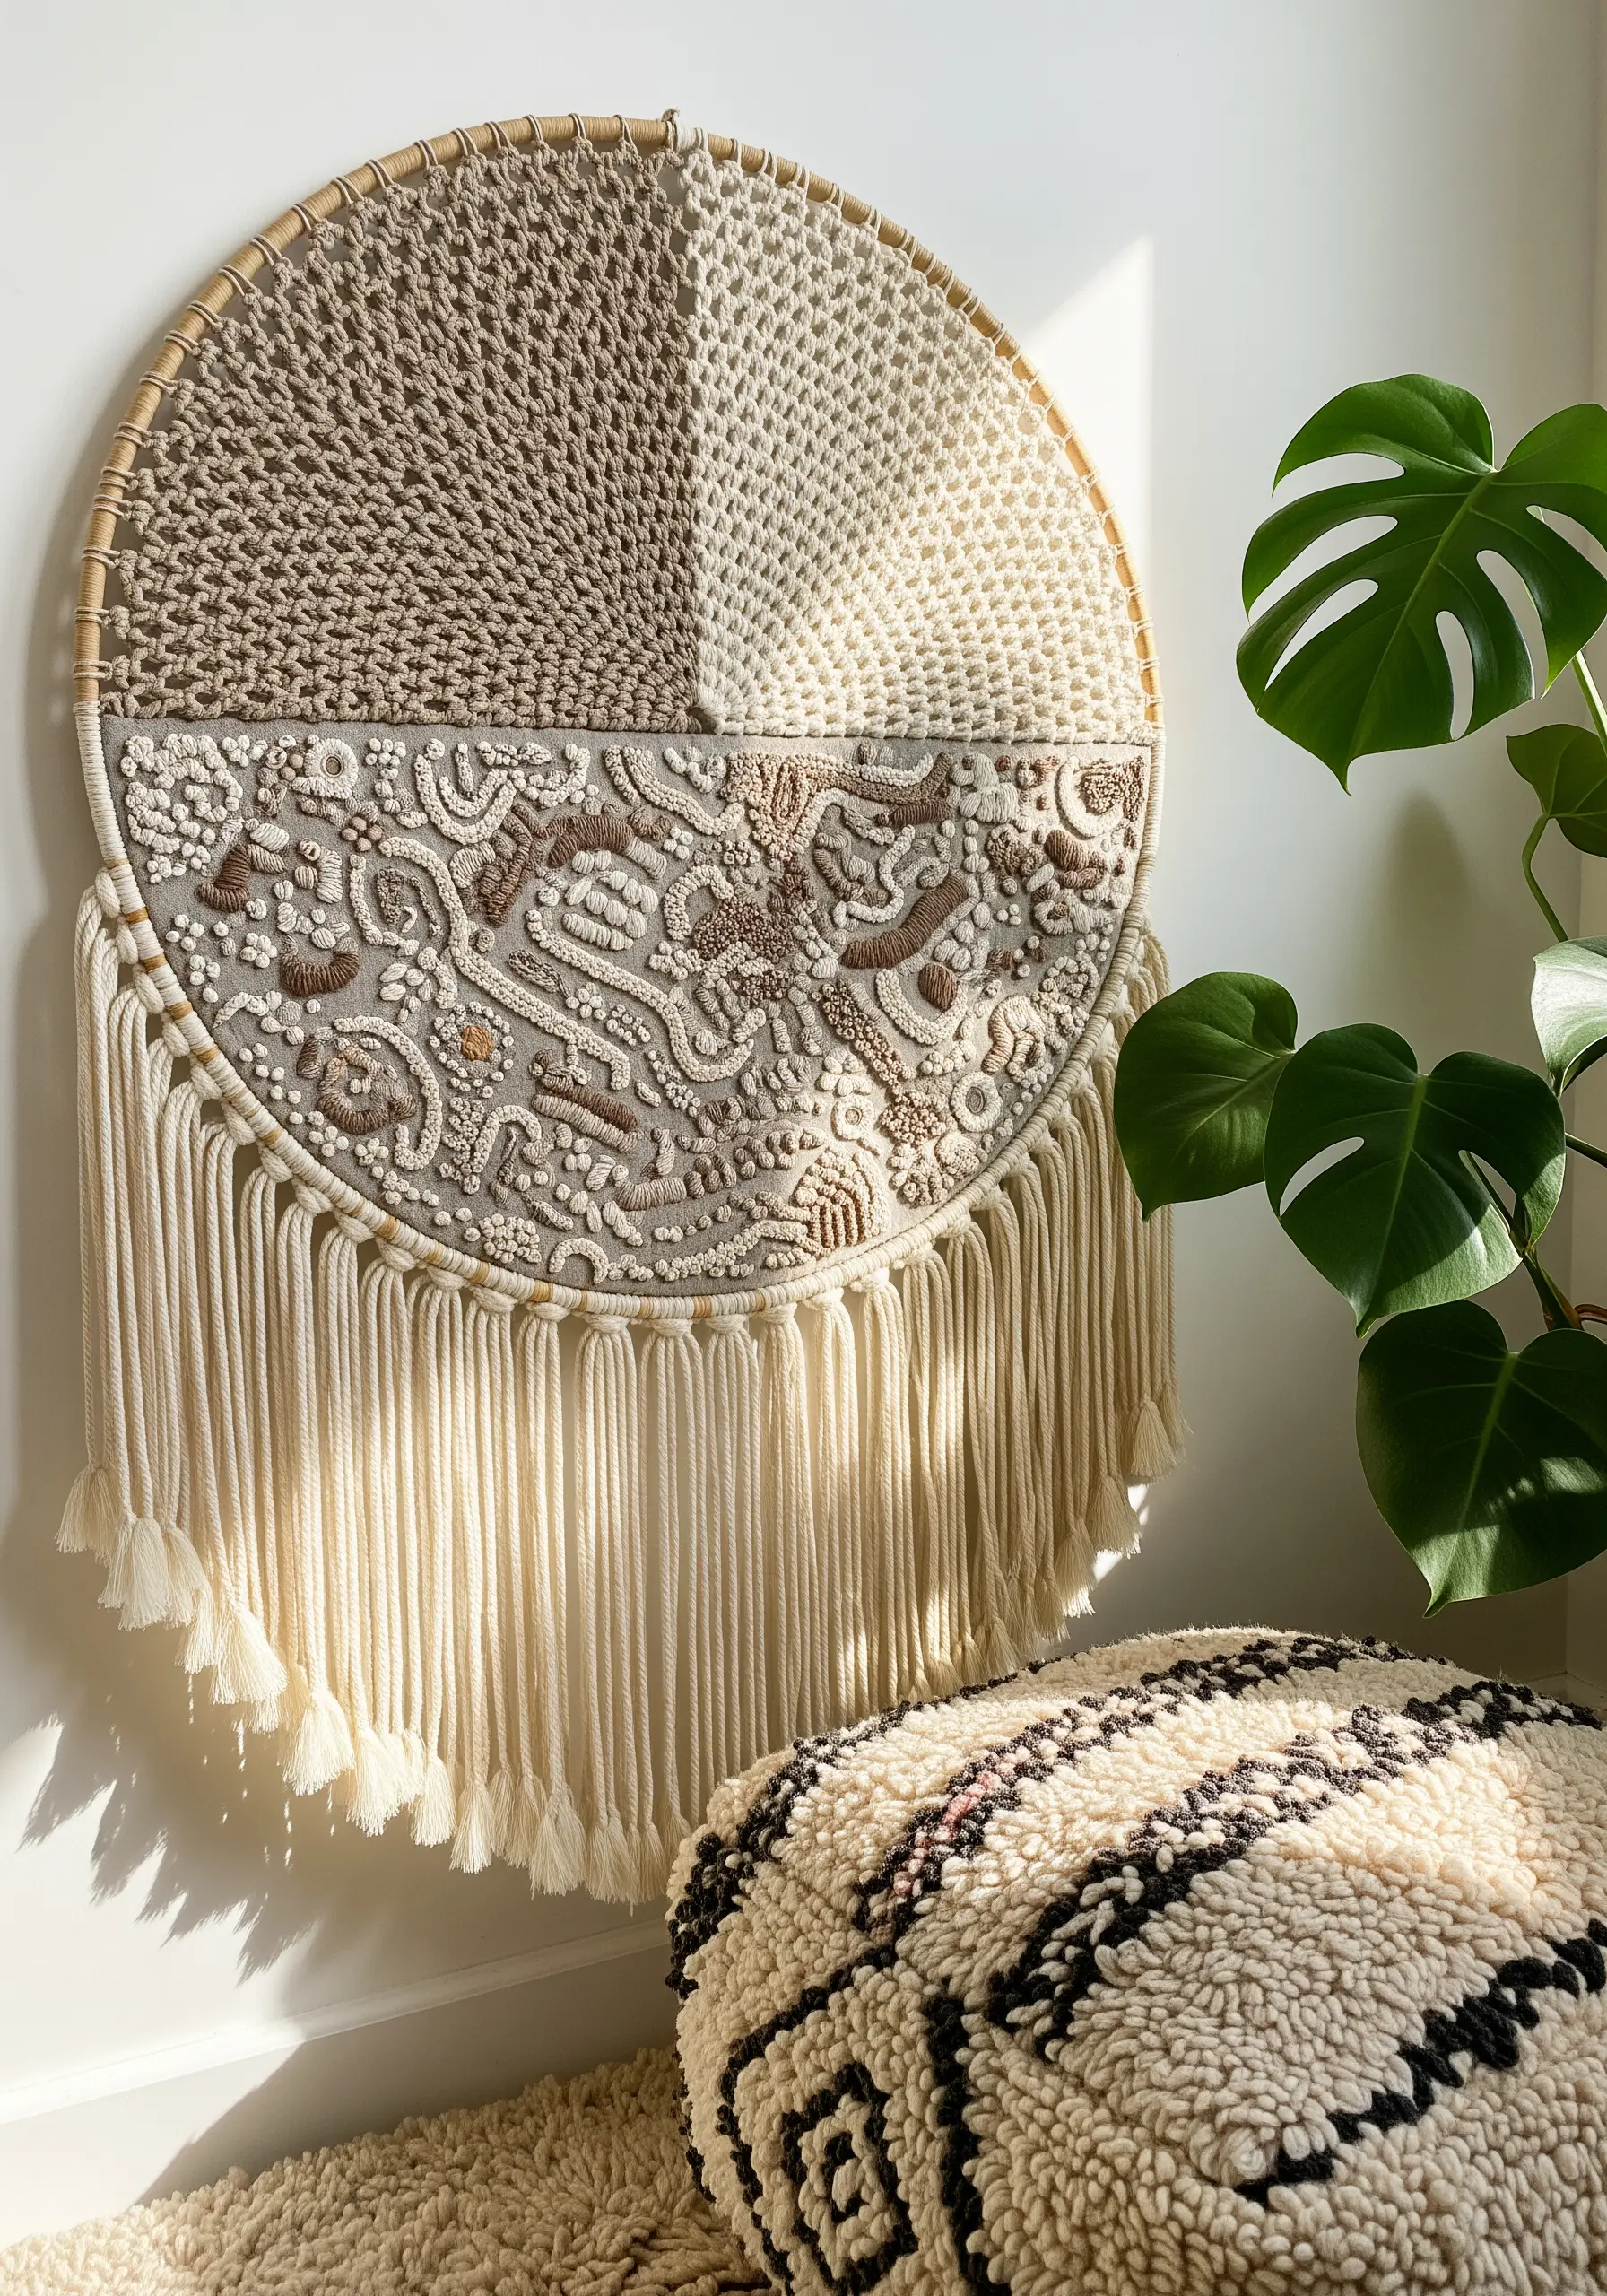
Create a visually dynamic piece by dividing your hoop into distinct textural zones.
Dedicate the top half to a simple woven or knitted texture, creating a calm, orderly pattern.
In the bottom half, let your creativity run wild with a dense, freeform composition of French knots, bullion stitches, and seed beads in coordinating neutral tones.
Finish with a macrame fringe to add softness and length, tying all the elements together.
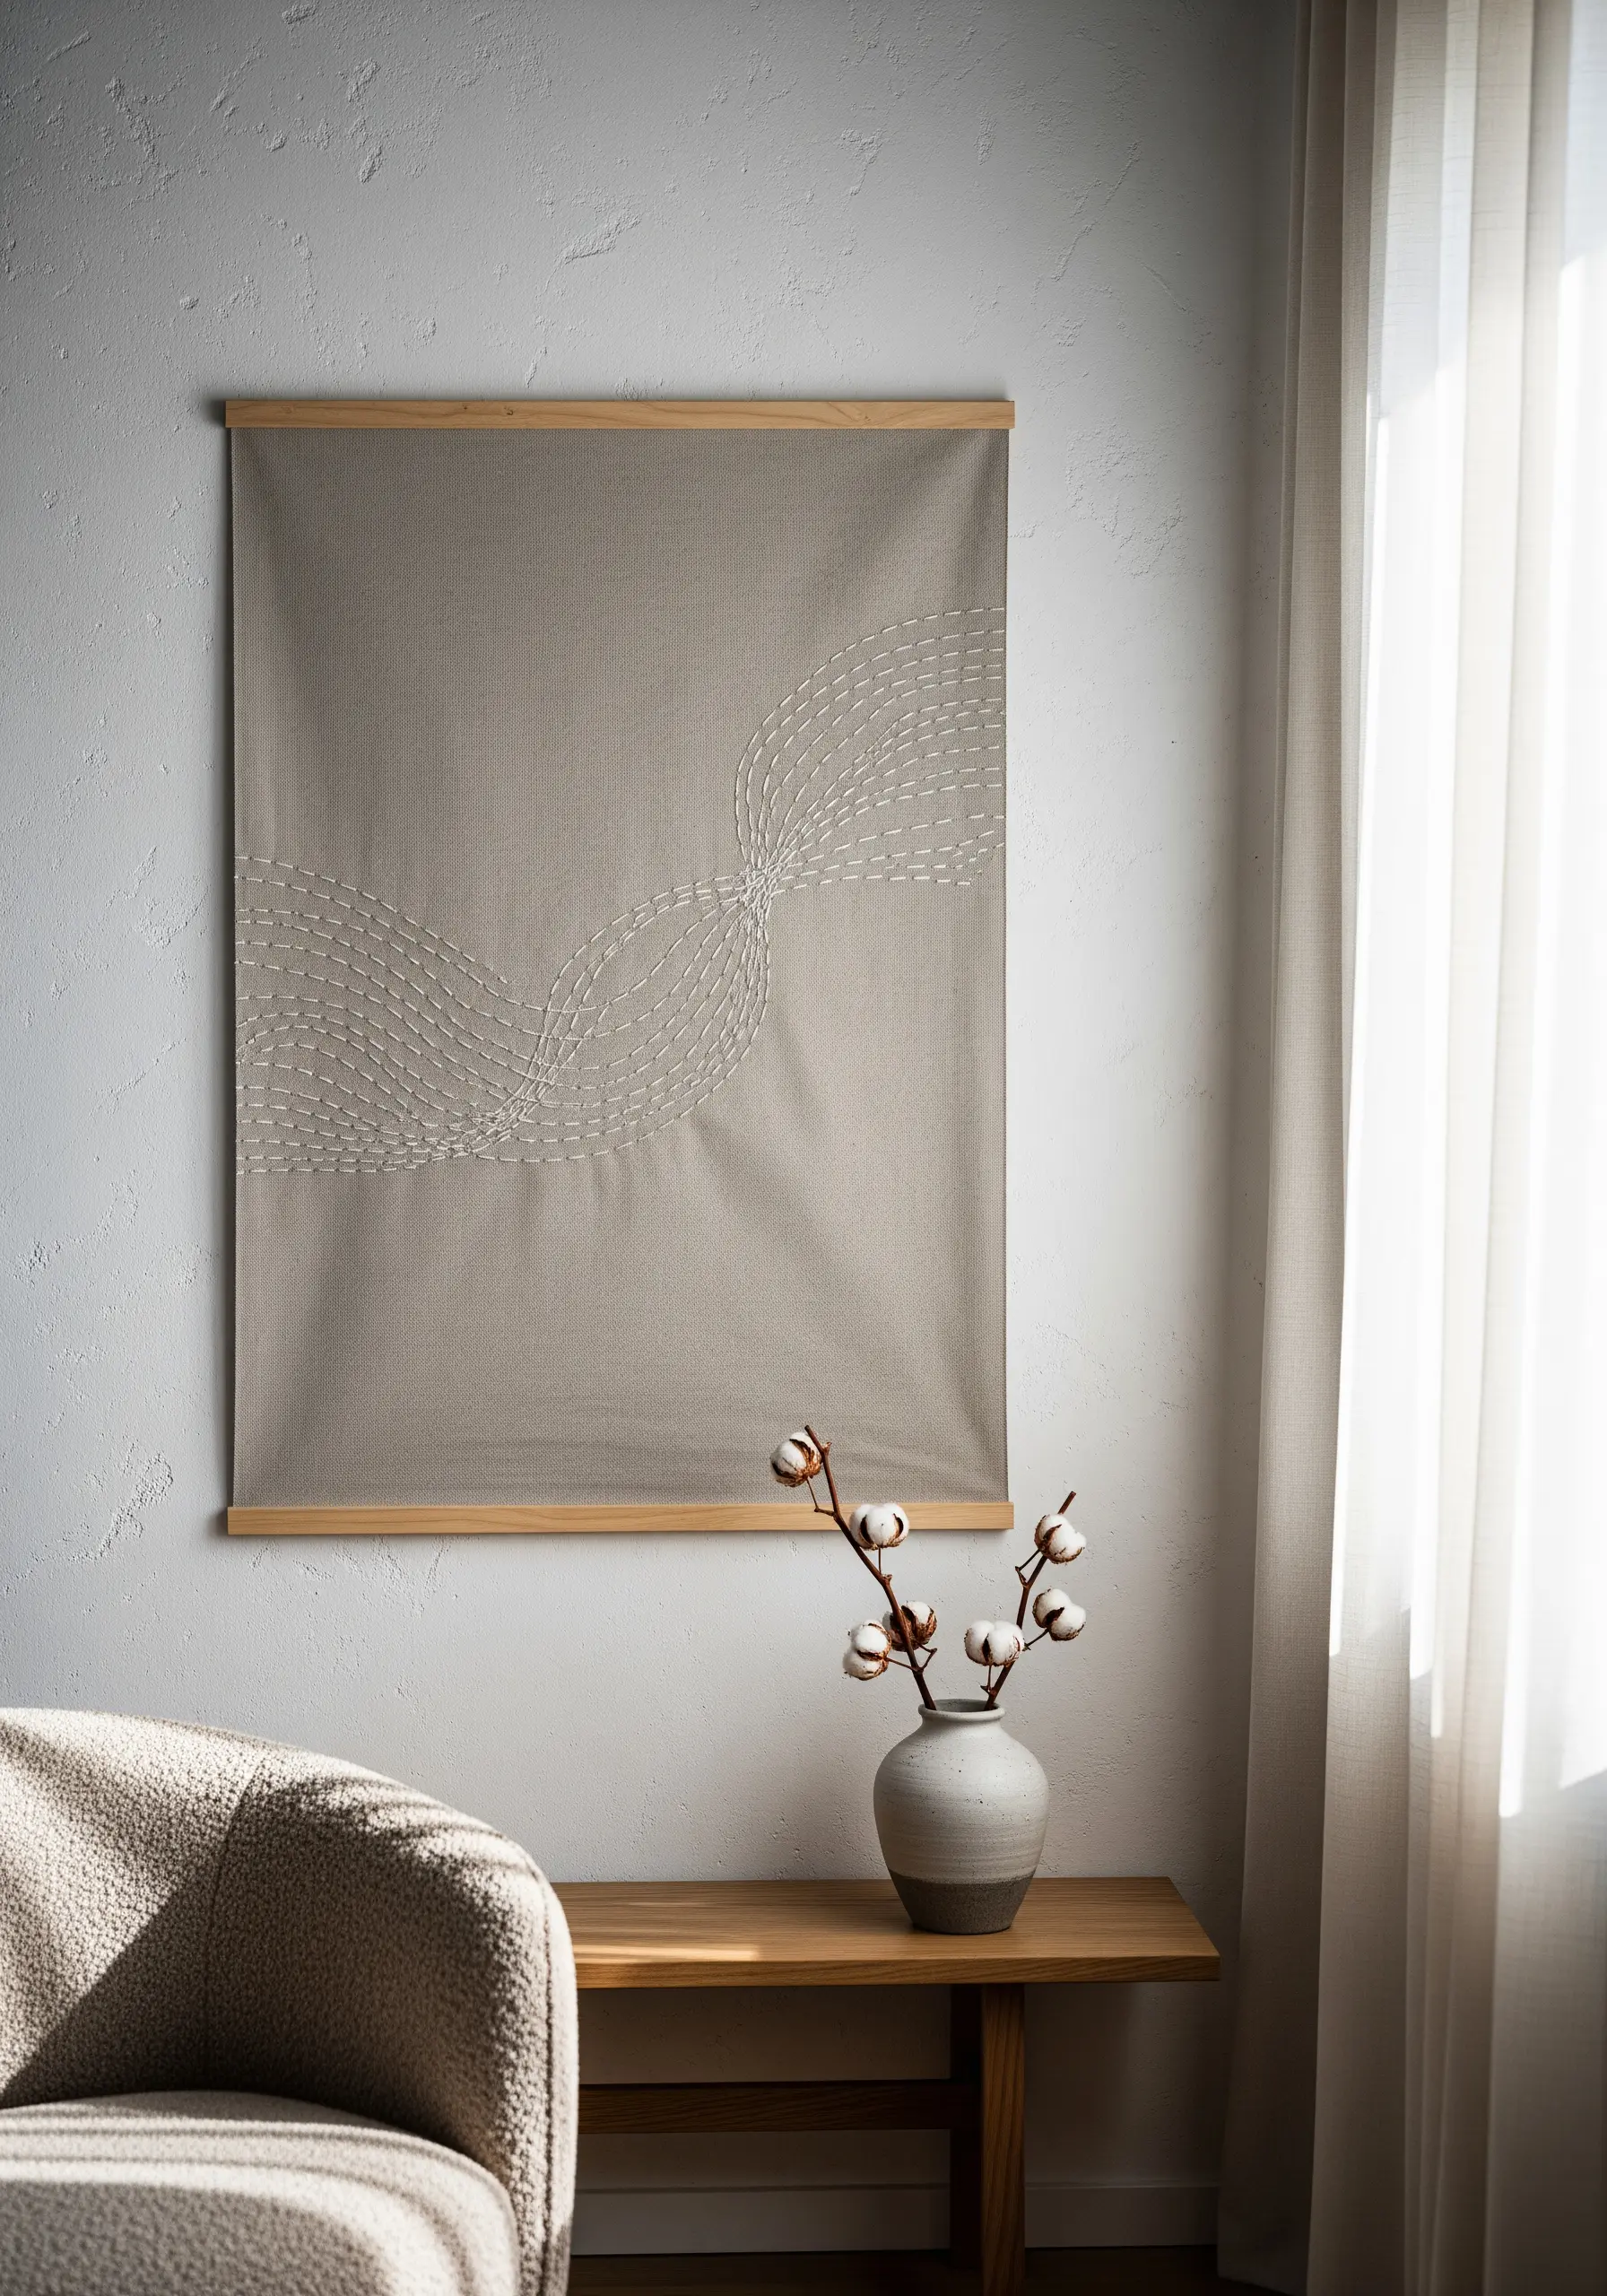
14. Isolate a Single Motif on a Scroll
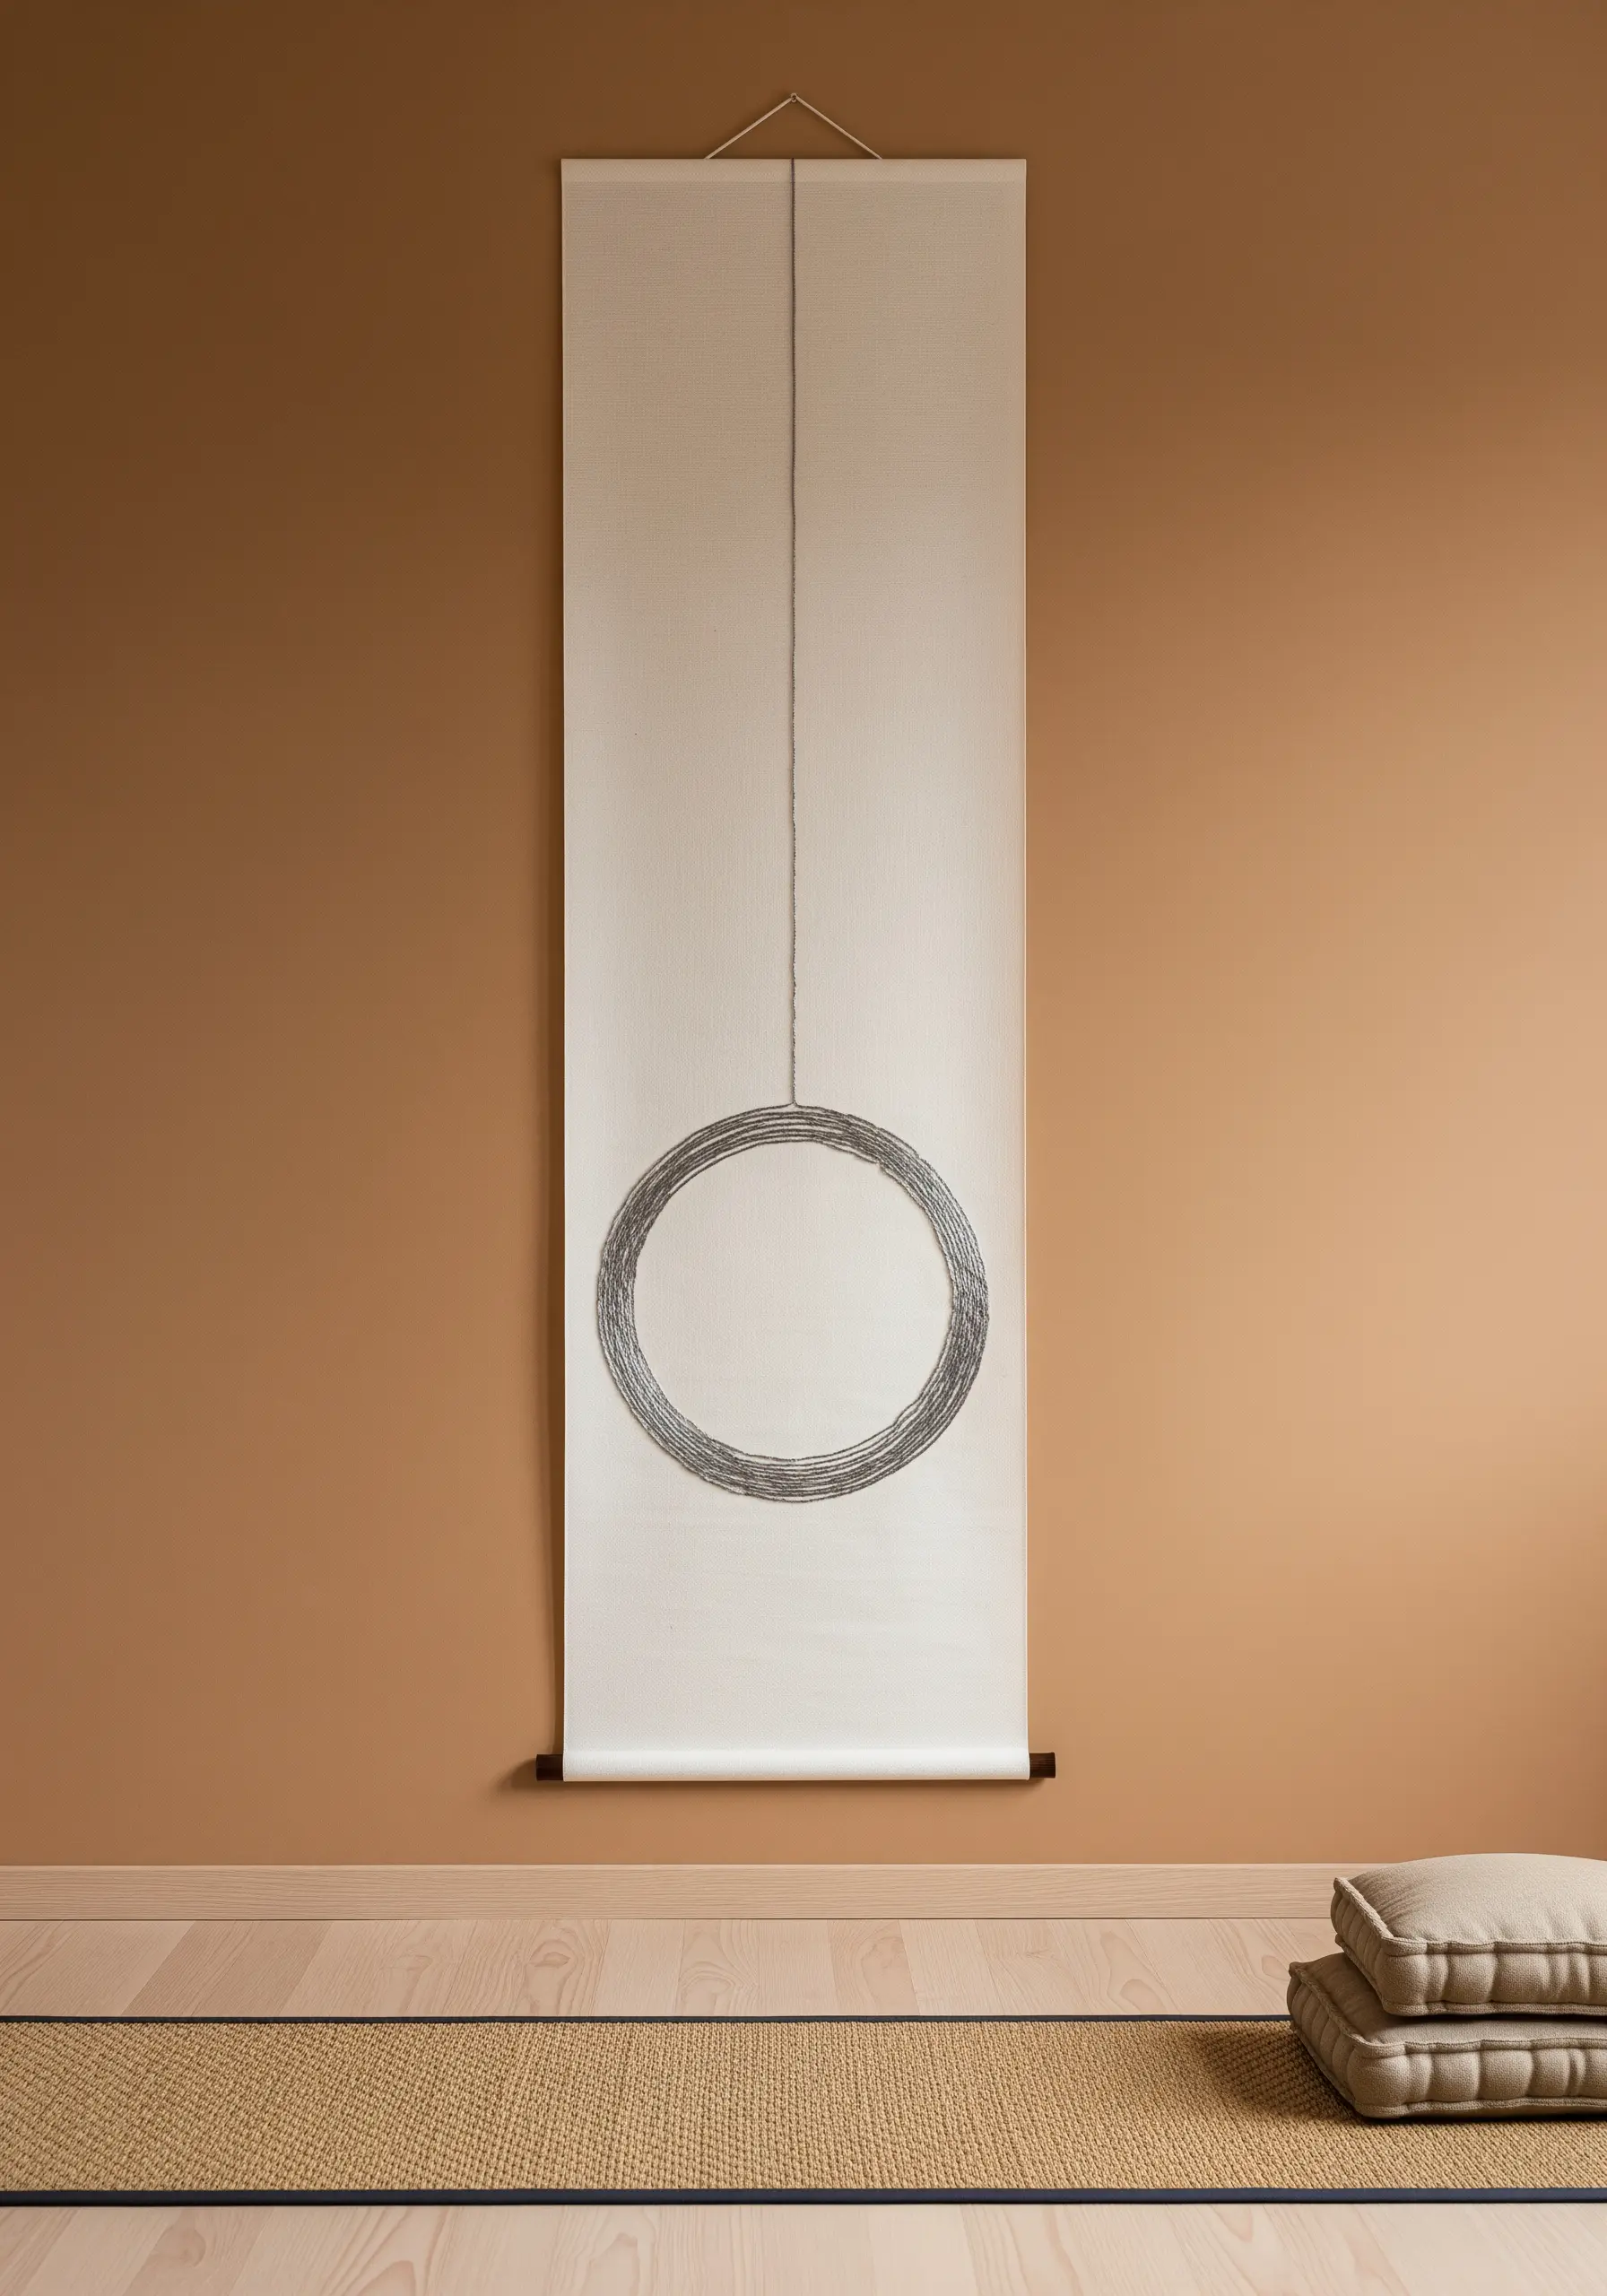
Amplify the impact of a single, beautifully stitched element by placing it on a long, narrow fabric scroll.
This format, inspired by traditional Japanese kakemono, draws the eye directly to your handiwork and creates a sense of elegance and focus.
Choose a simple, symbolic design—like a circle stitched with thousands of tiny, layered straight stitches—and let the surrounding negative space give it room to breathe.
The simplicity of the presentation makes the texture of the stitching the undeniable star.
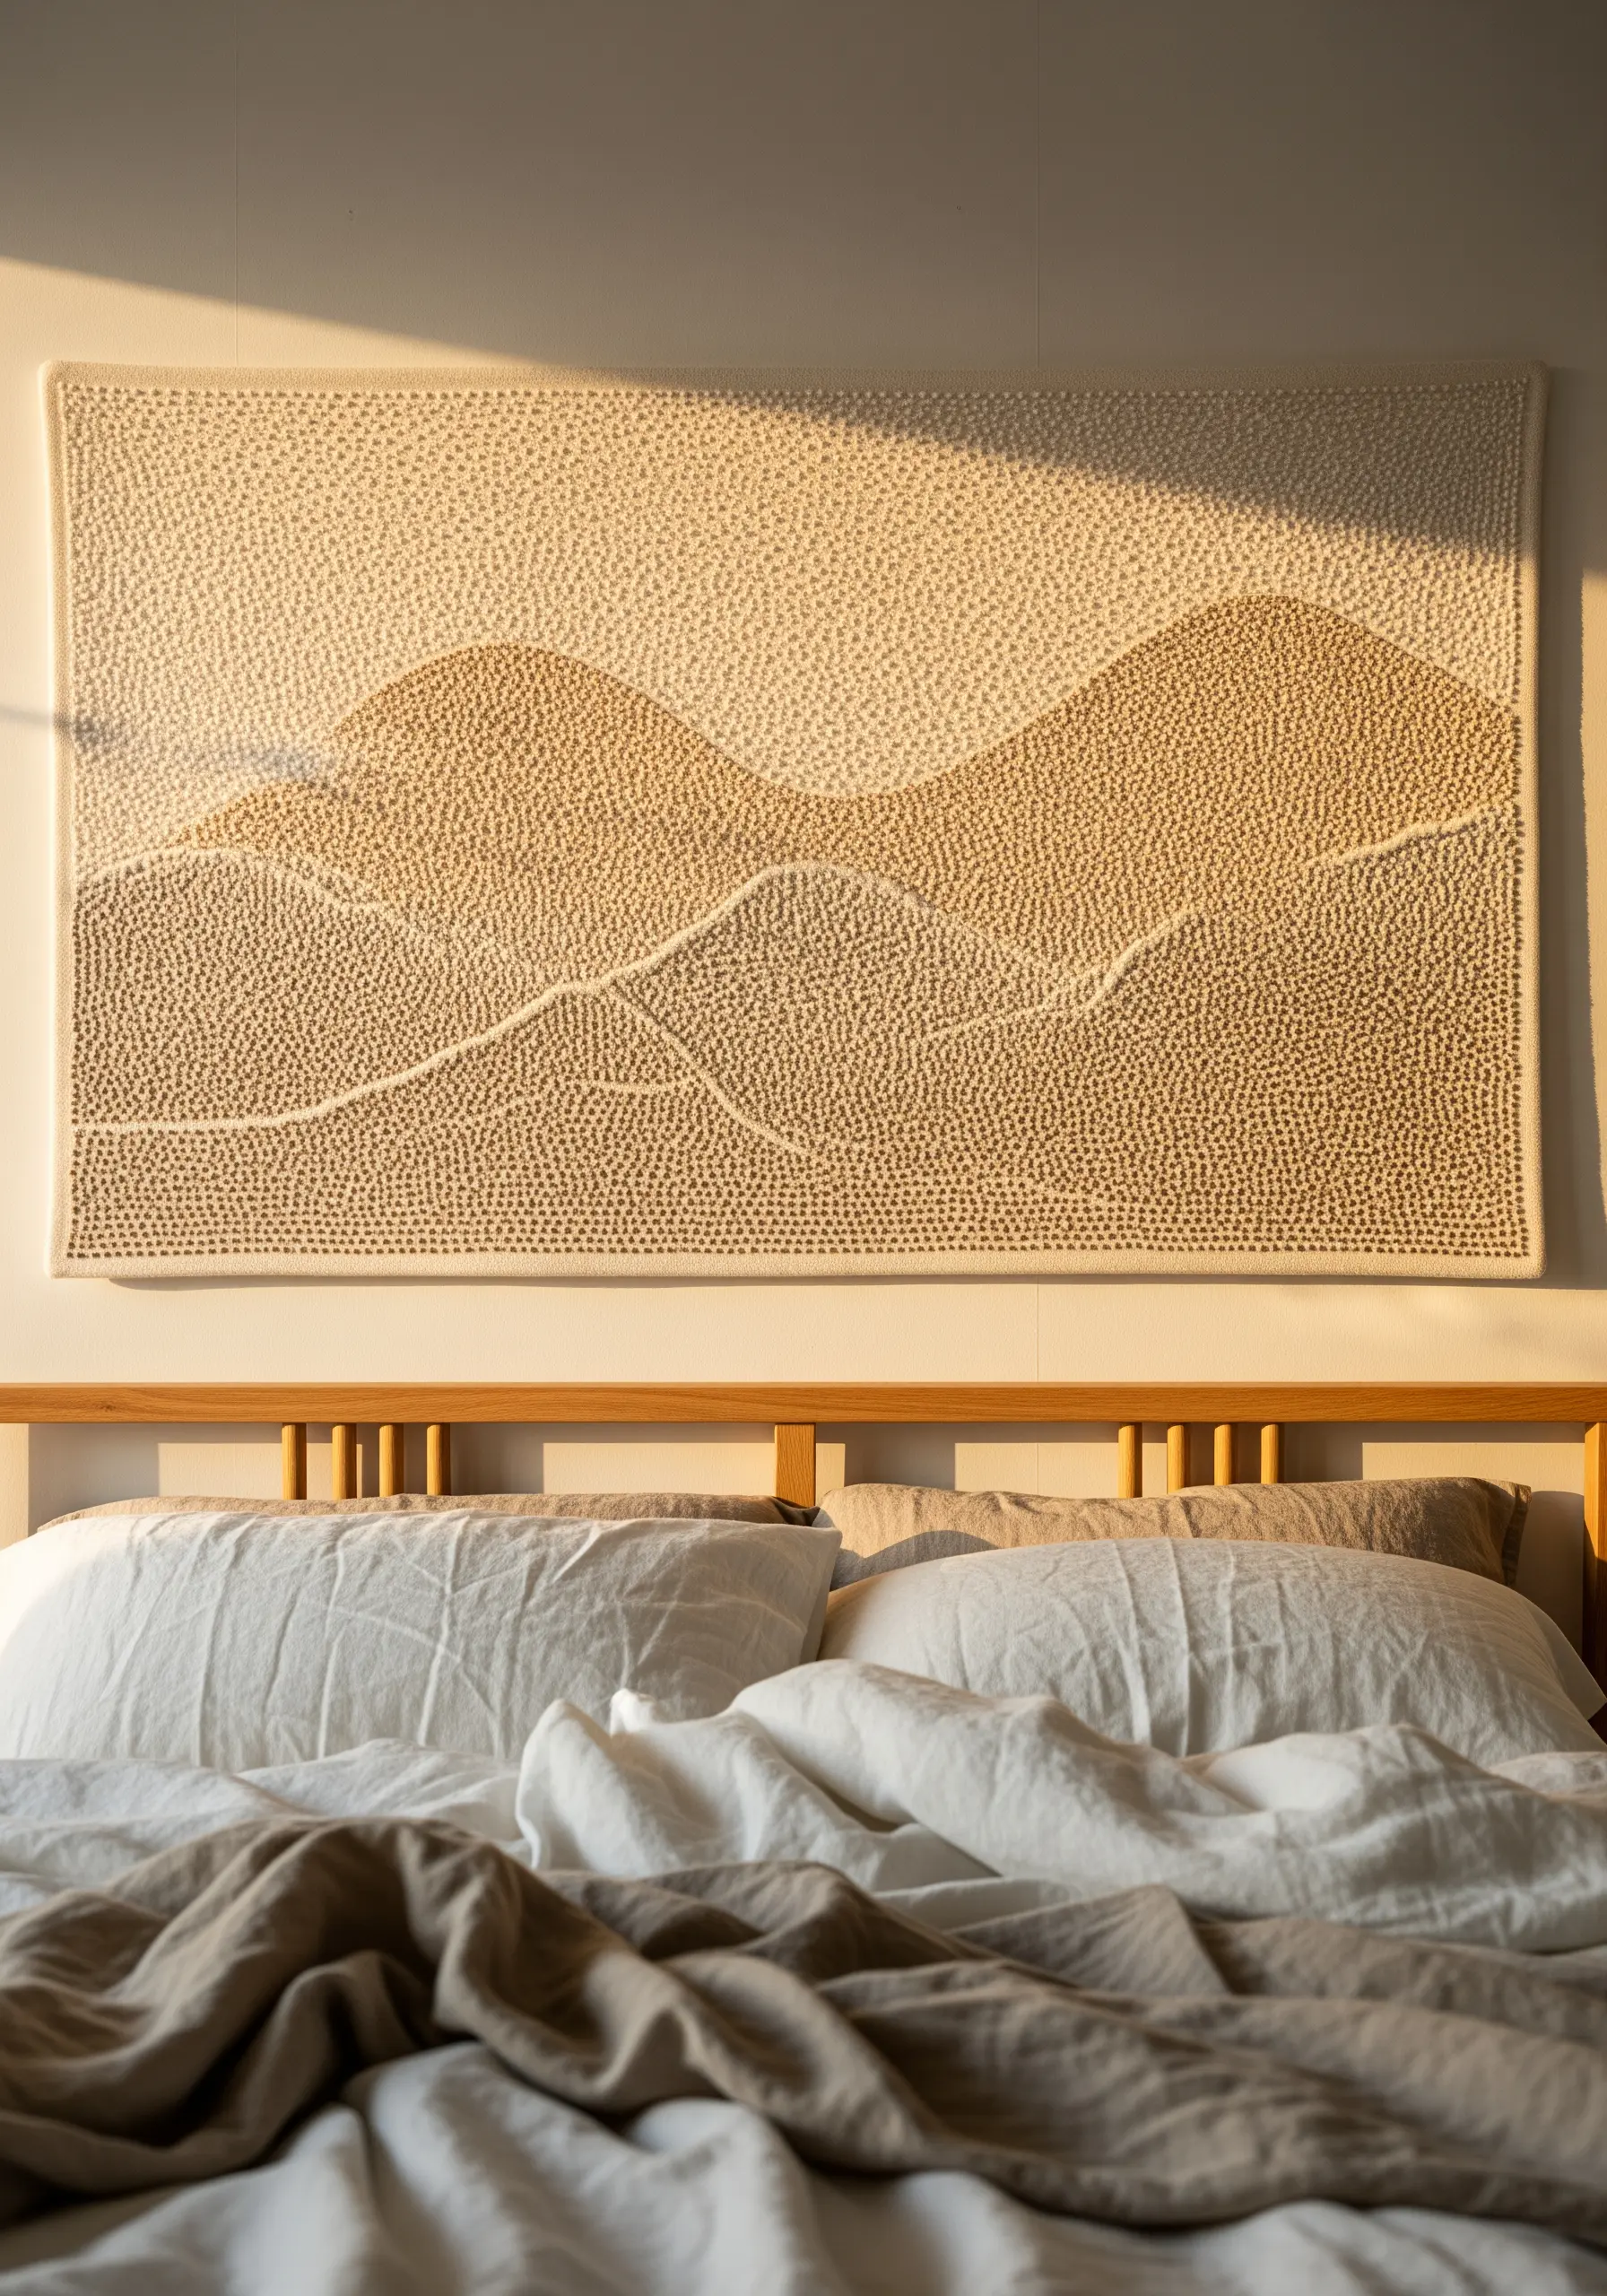
15. Draw with Dots Using French Knots
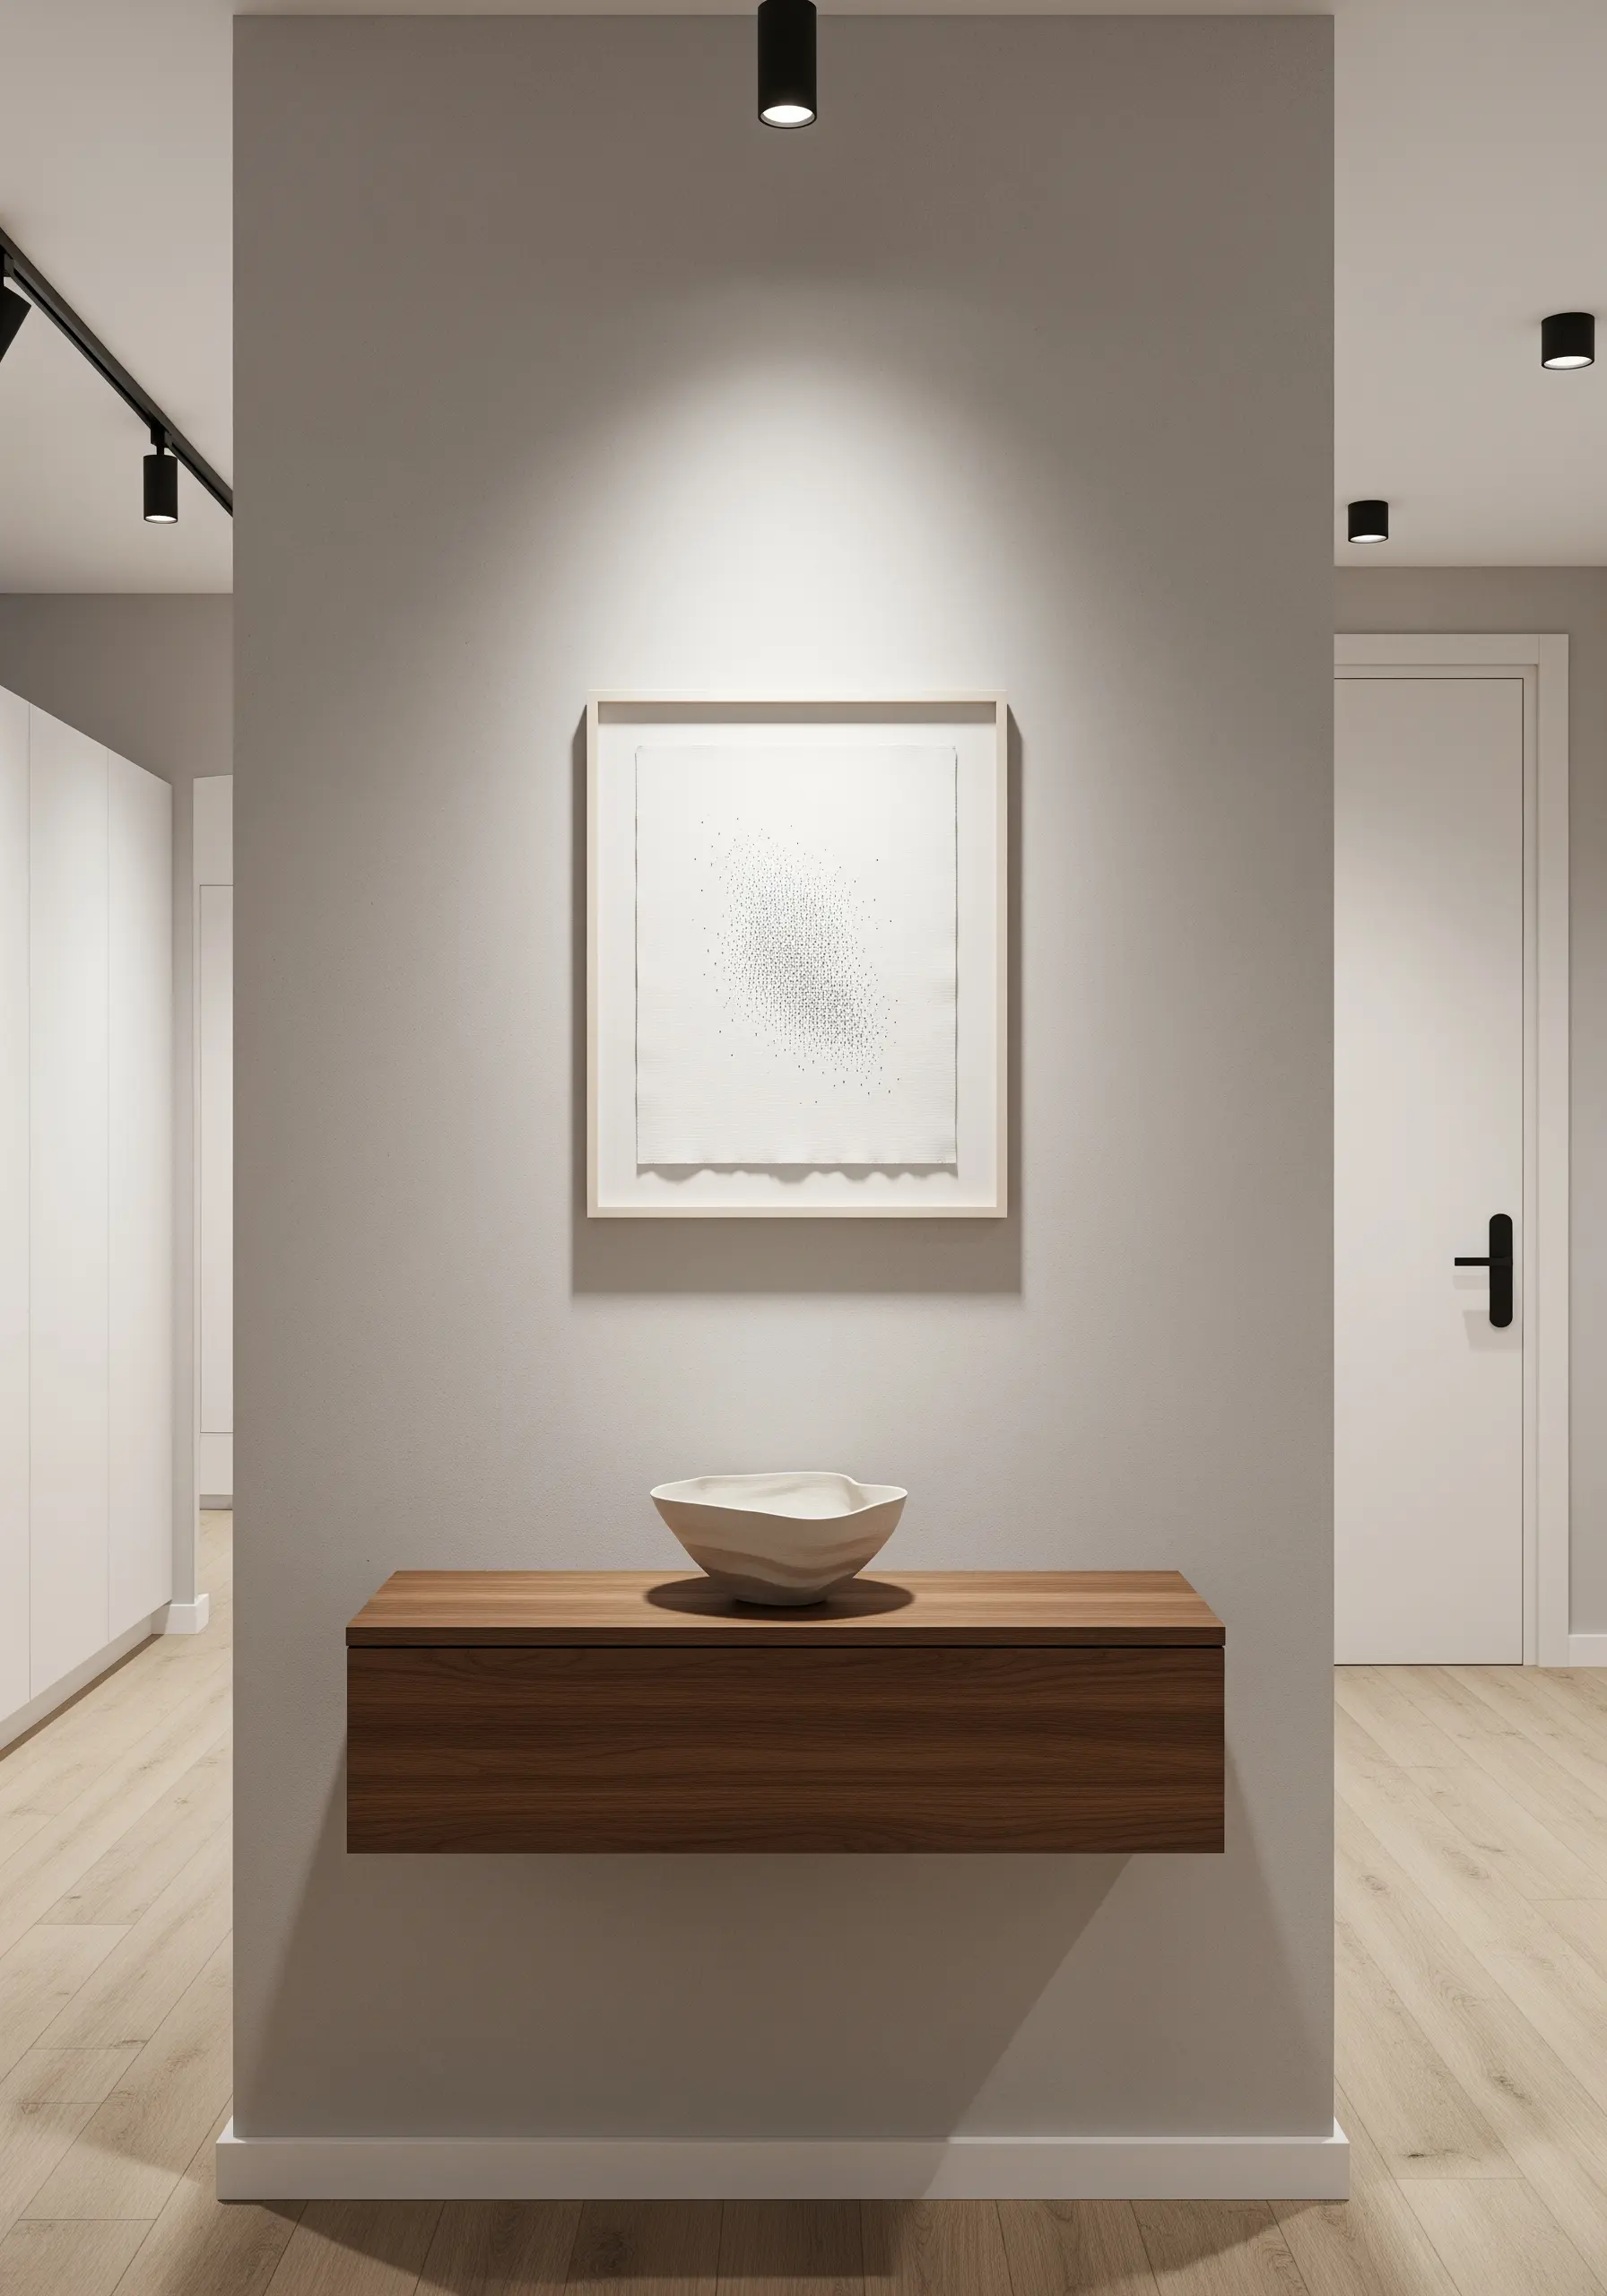
Create shading, depth, and form using only French knots, a technique similar to pointillism in painting.
Instead of lines or blocks of color, you’ll build your image with thousands of tiny, textural dots.
Create denser, darker areas by placing knots very close together, and lighter areas by spacing them further apart.
This meticulous method produces a stunning, stippled effect that invites viewers to look closer and appreciate the incredible texture.
16. Stitch a Triptych of Abstract Landscapes
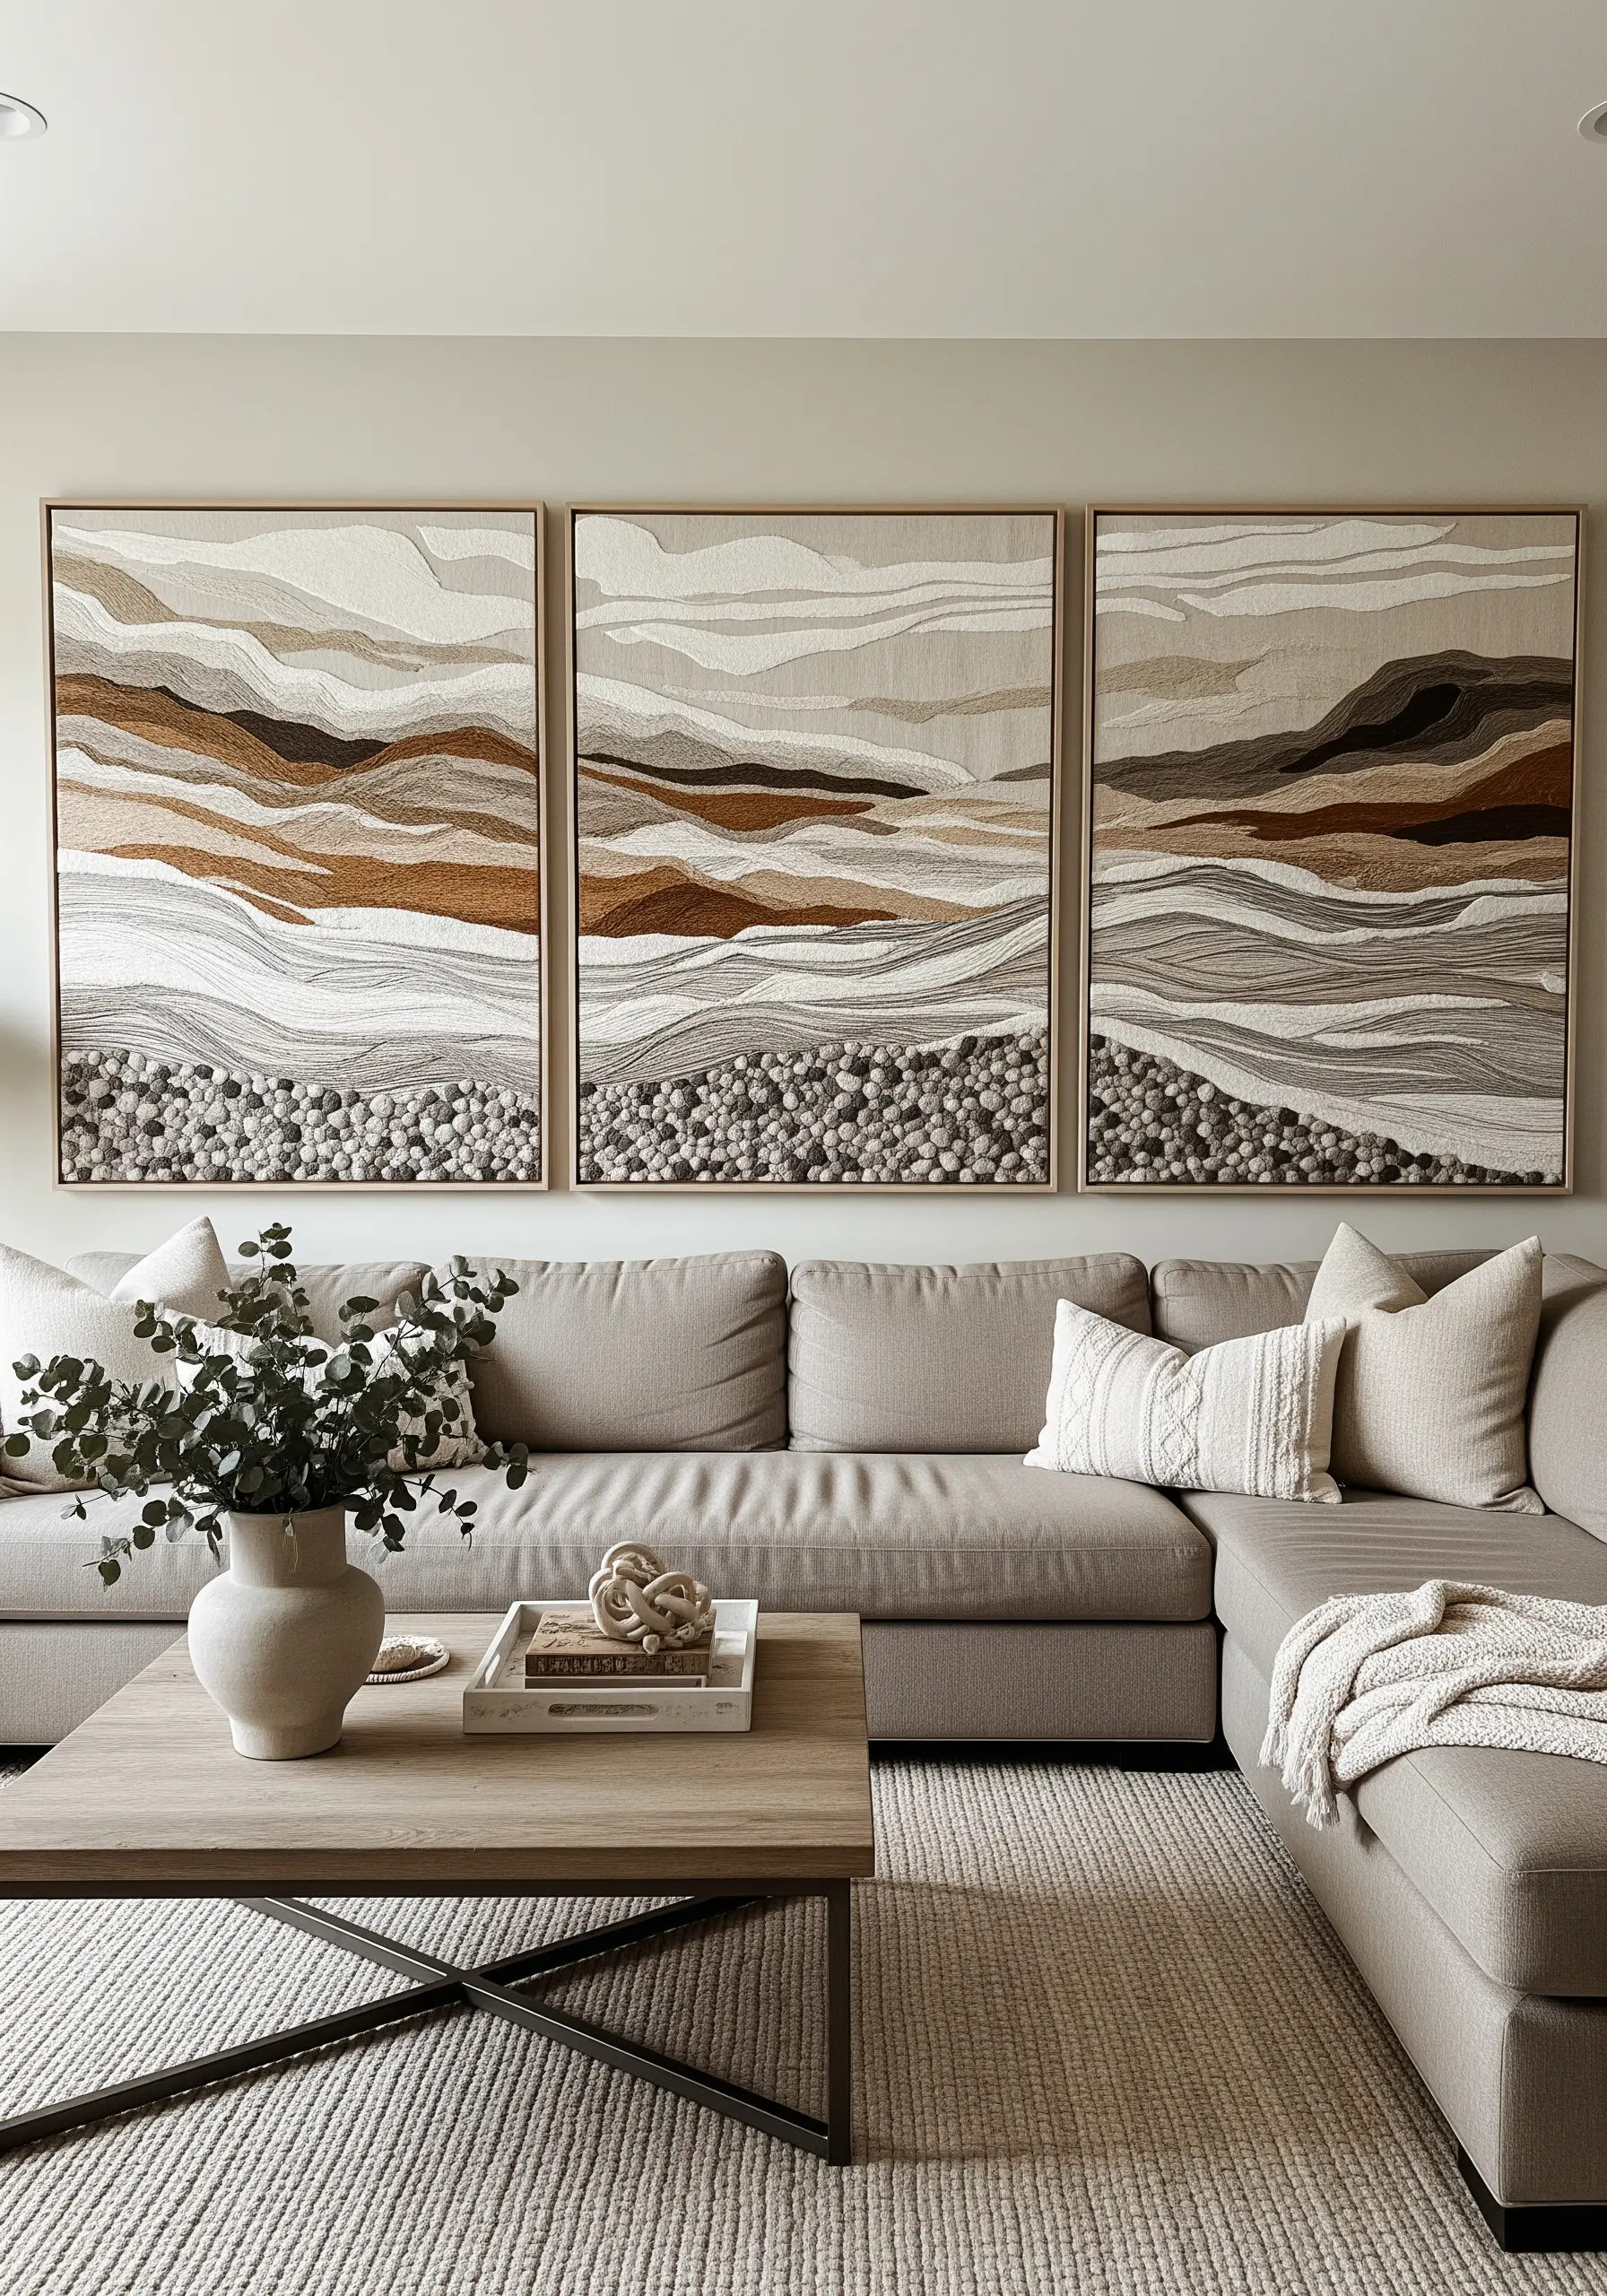
Tell a larger story by creating a single composition that flows across three separate panels.
Use directional long-and-short stitches to create the sense of sweeping hills and valleys, using a palette of earthy neutrals.
In the foreground, use dense clusters of French knots or tufted loops to represent a more rugged, stony texture.
Carefully plan your design so that the lines and shapes connect seamlessly when the panels are hung together, creating immersive abstract thread landscapes.
17. Achieve Botanical Relief with Padded Satin Stitch
Give your embroidered foliage a lifelike, three-dimensional quality using padding techniques.
First, stitch a base layer of felt cut to the shape of your leaf, or build up the area with underlying layers of satin or chain stitches.
Then, cover this entire padded area with a final, smooth layer of satin stitches.
The raised surface catches the light beautifully, creating natural highlights and shadows that make your botanicals pop. It’s perfect for adding realistic leaf vein details you can stitch to give your embroidery stunning depth and texture.
18. Develop a Cohesive Geometric Series
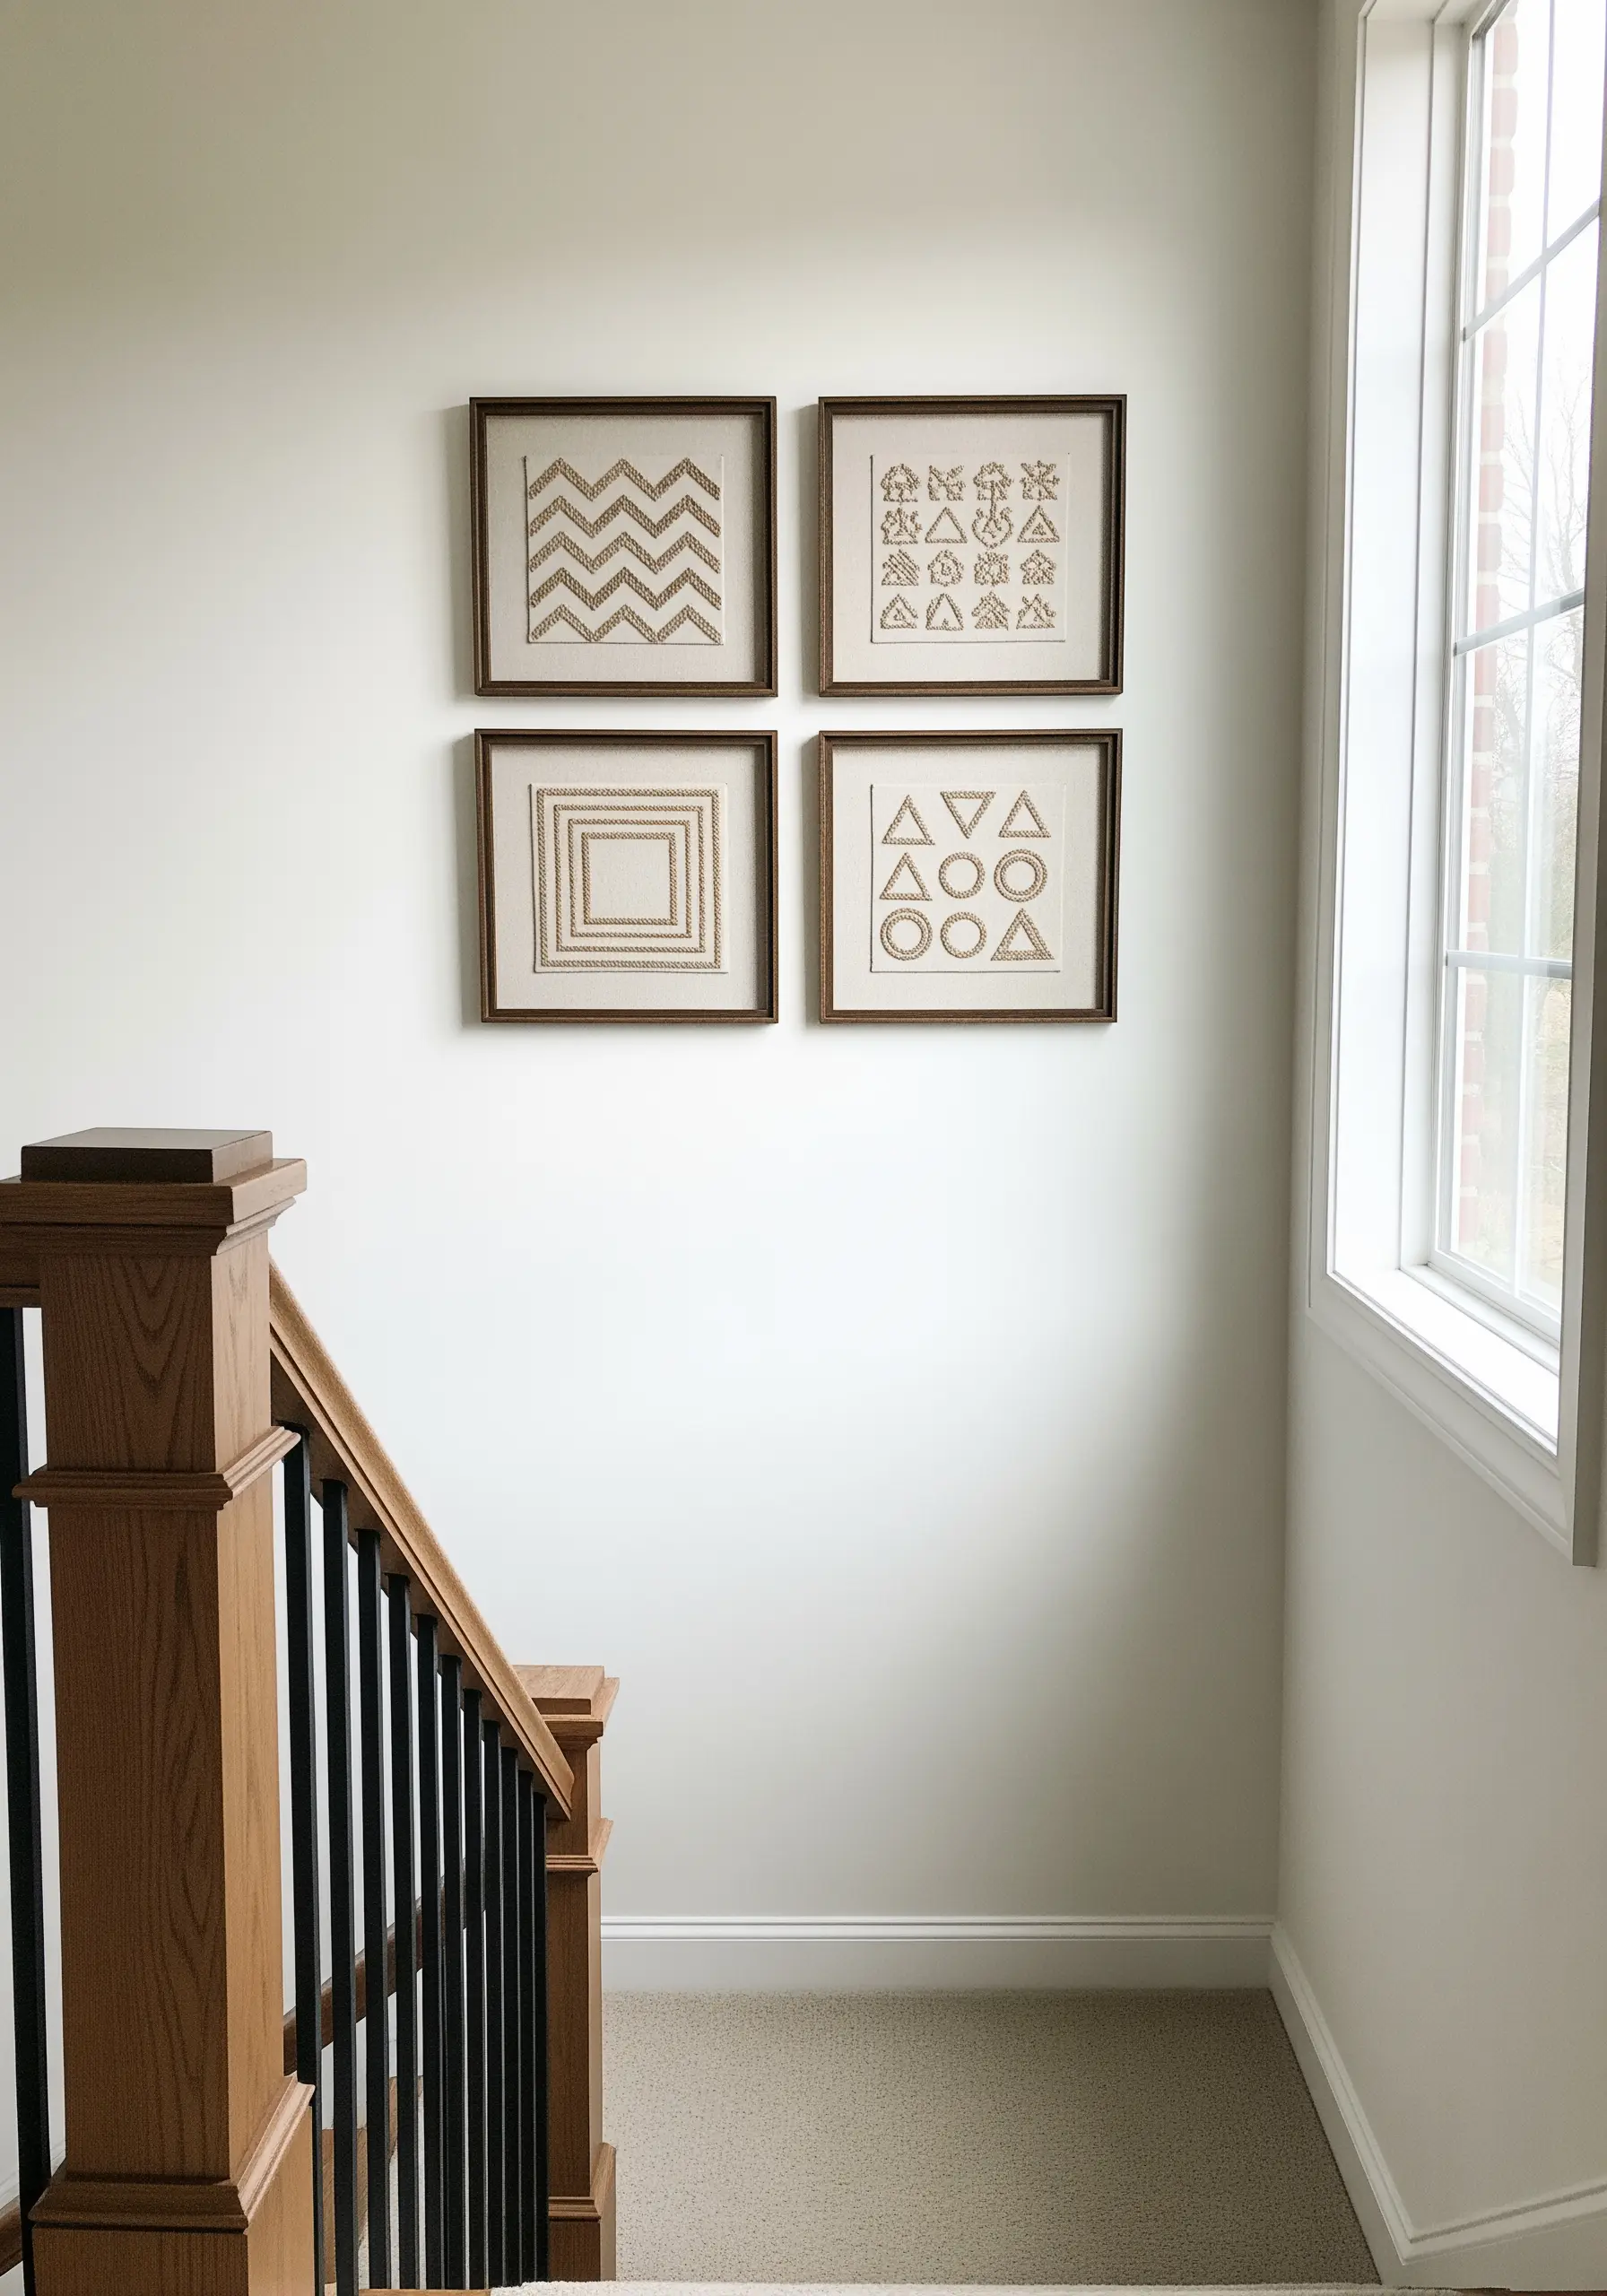
Elevate simple patterns by stitching them as a coordinated set.
Choose a single color of thread—like a warm gold or deep bronze—and use it across four separate pieces of the same neutral linen.
Dedicate each piece to a different geometric exploration: chevrons, squares, circles, or a sampler of small symbols.
Framing and hanging them together as a quadriptych transforms basic practice stitches into a sophisticated, intentional art installation.
19. Define Color Blocks with Braided Stitches
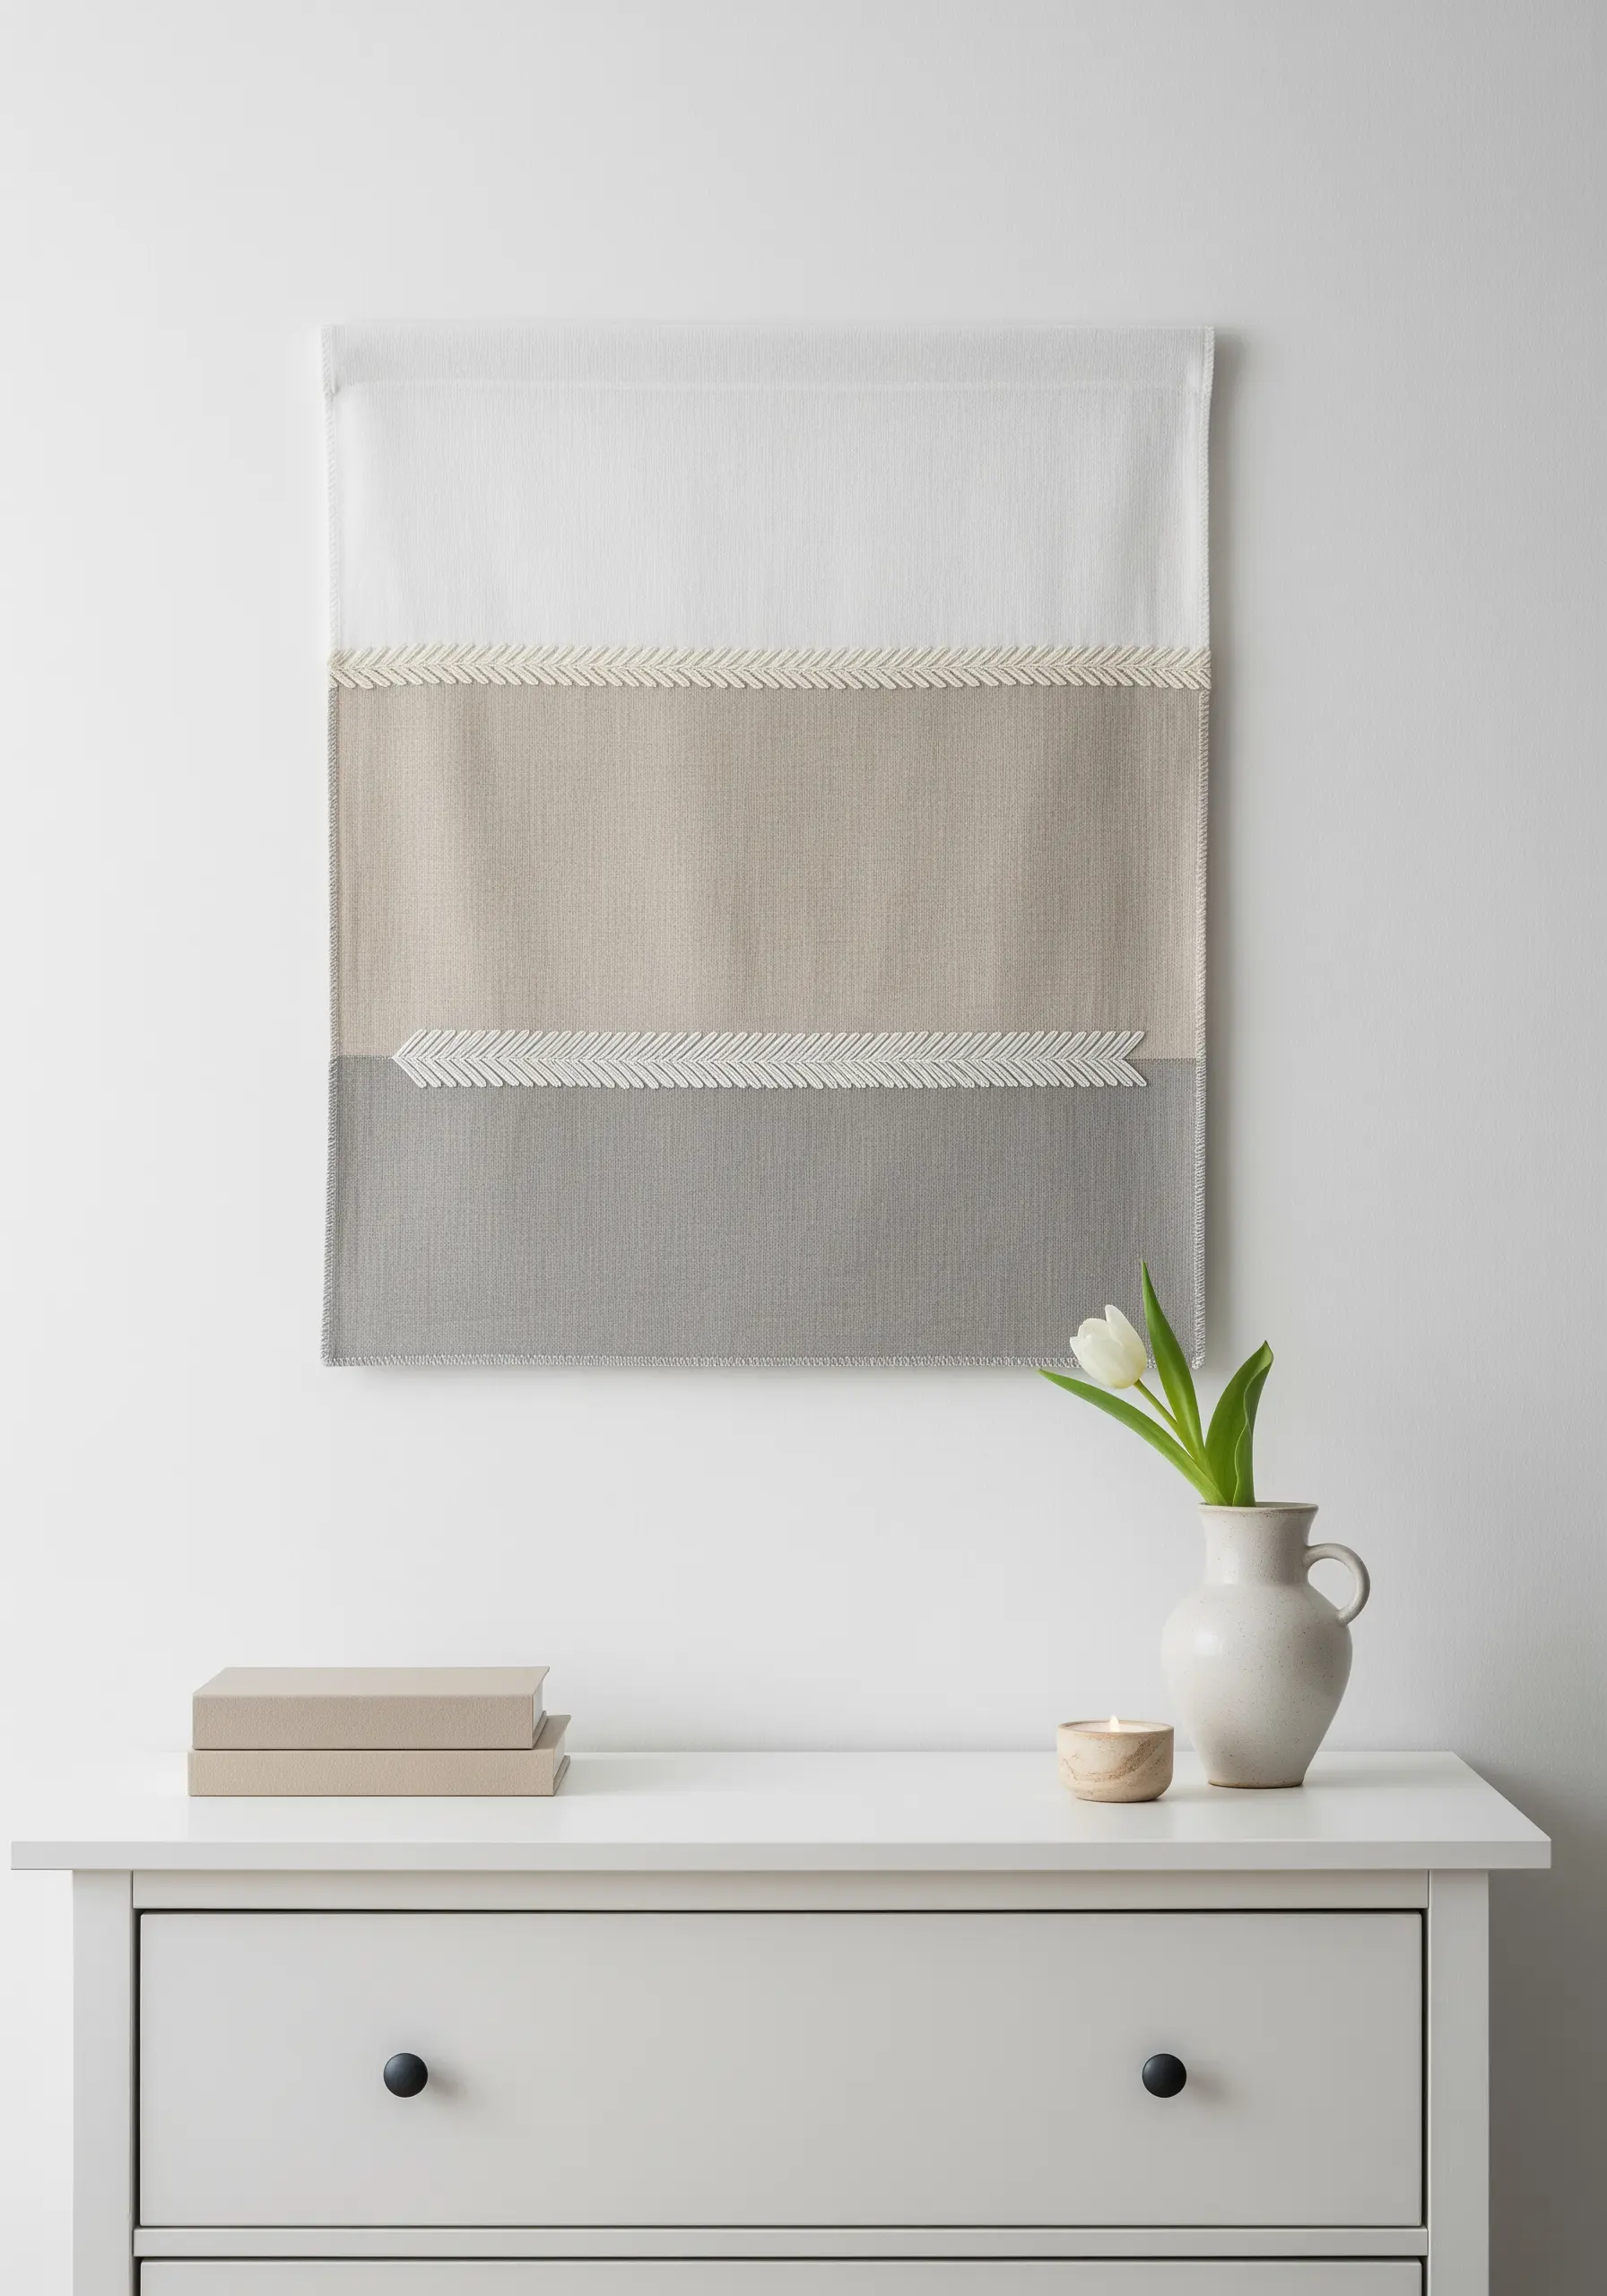
Add a refined, textural border where two blocks of color meet on your fabric.
A raised stitch, like a plaited braid stitch or a heavy chain stitch, creates a clean, dimensional line that elevates a simple color-blocked design.
Use a contrasting thread in a neutral shade like ivory or pale gray to make the stitch detail stand out.
This technique adds a touch of classic embellishment to a modern, minimalist composition, highlighting your craftsmanship.
20. Draw Fluid Lines with Chain Stitch
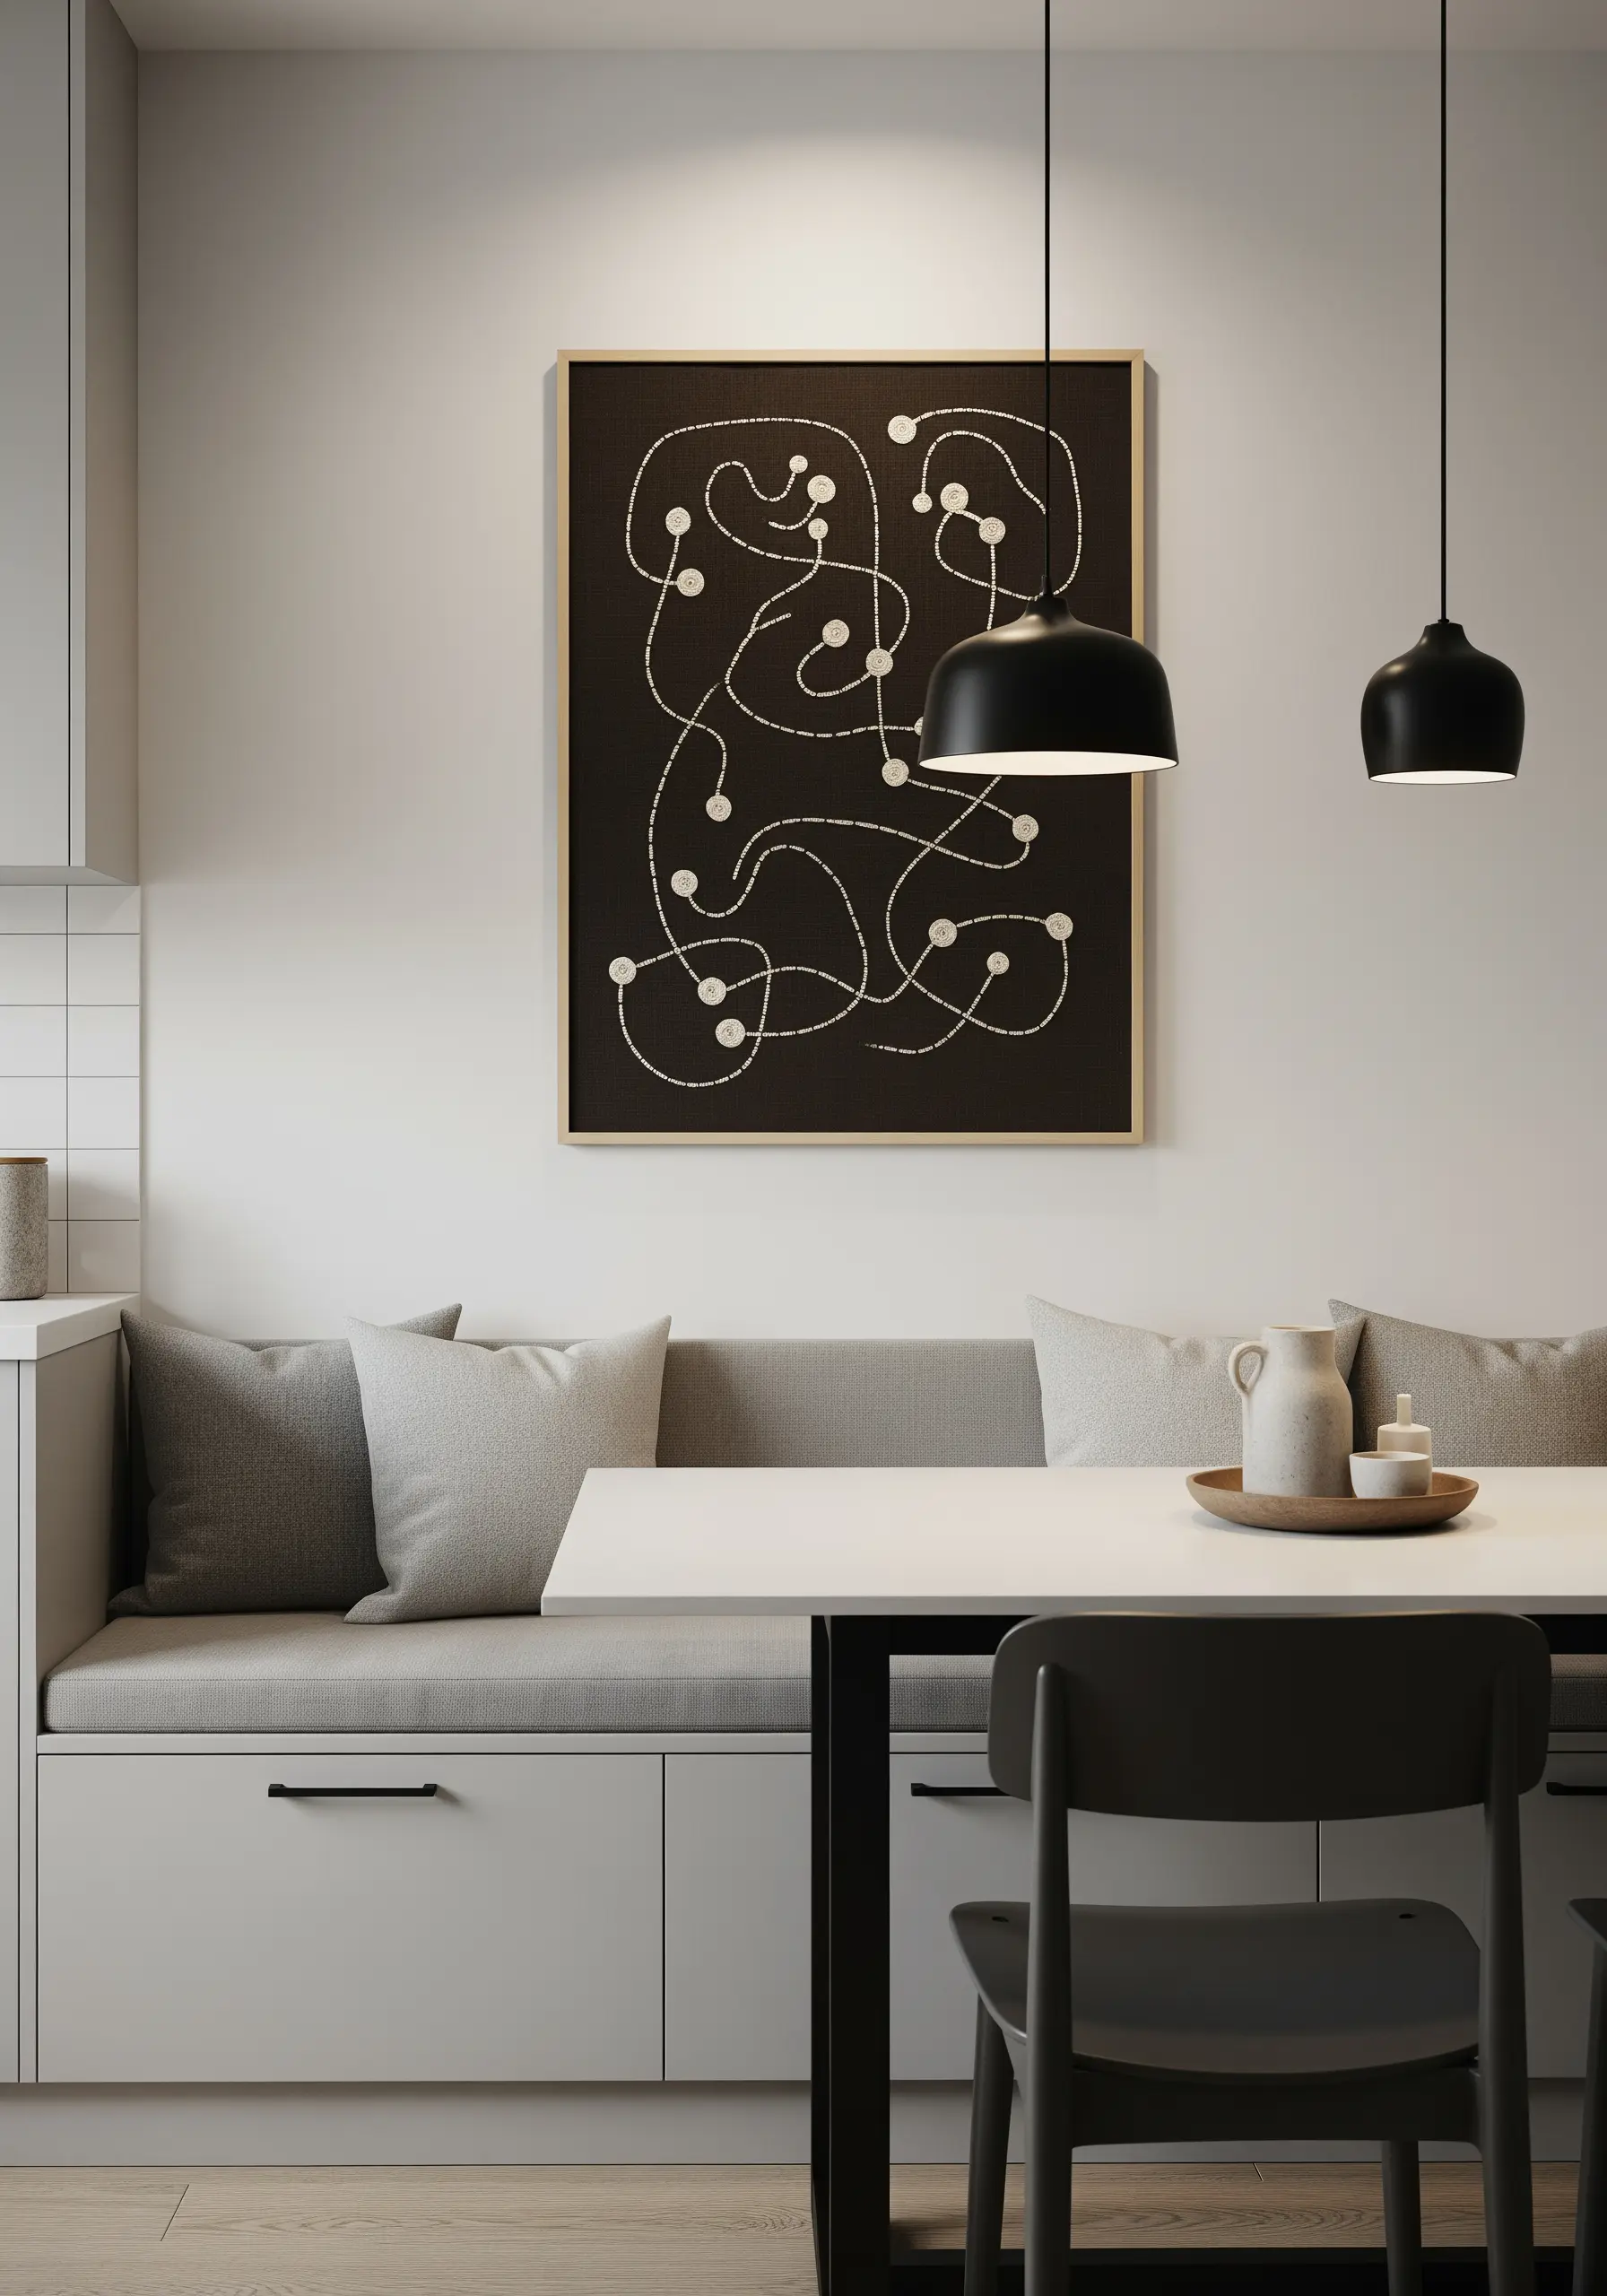
For continuous, meandering lines that need more presence than a simple backstitch, choose the chain stitch.
Its looped structure creates a line that is both delicate and substantial, almost like a fine rope.
Use this stitch to create abstract, calligraphic art on a dark background.
The contrast highlights the unique texture of the stitch, while the small circles of satin stitch add punctuation and focal points to the flowing composition.
21. Overlap Forms with Wrapped Cord
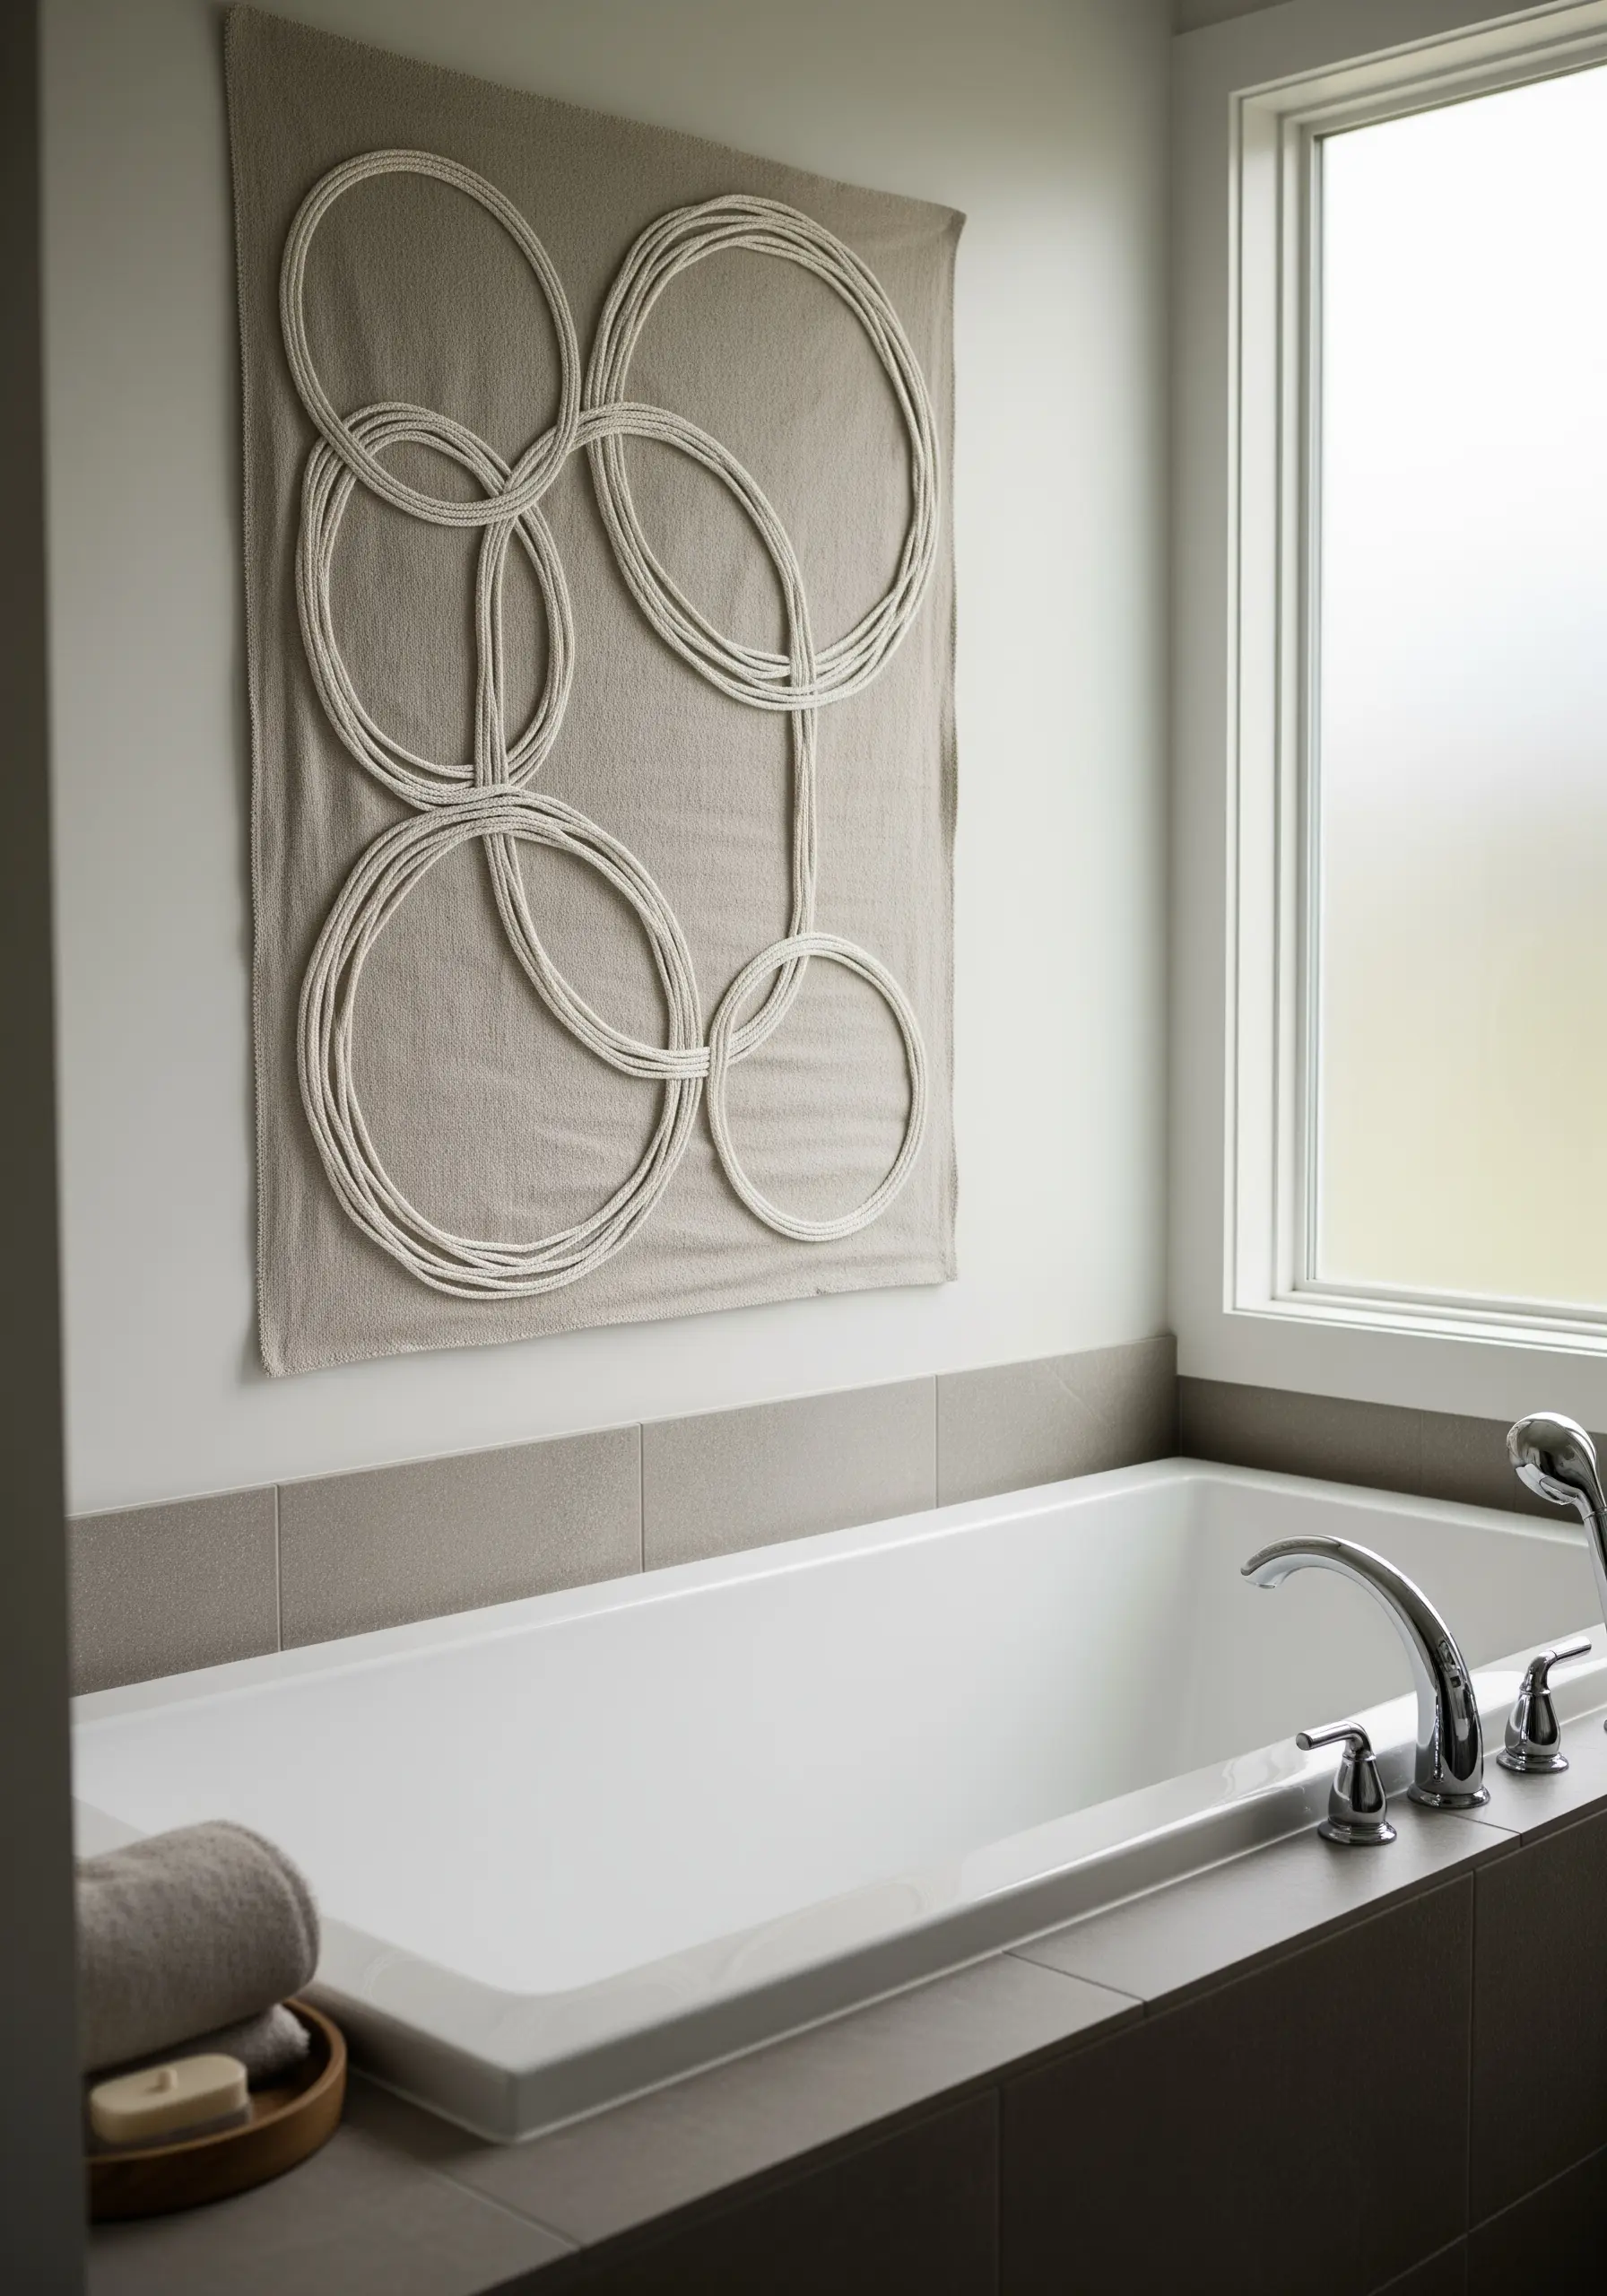
Create an illusion of depth and transparency by creating interlocking circular forms with wrapped cording.
Wrap a neutral-colored yarn or thick thread tightly around a cotton cord before couching it onto your canvas.
This wrapping adds a subtle, ribbed texture and unifies the material.
By overlapping the circles, you create a design that feels both lightweight and structurally complex, playing with line and form in a uniquely tactile way.
22. Display Your Process as the Final Piece
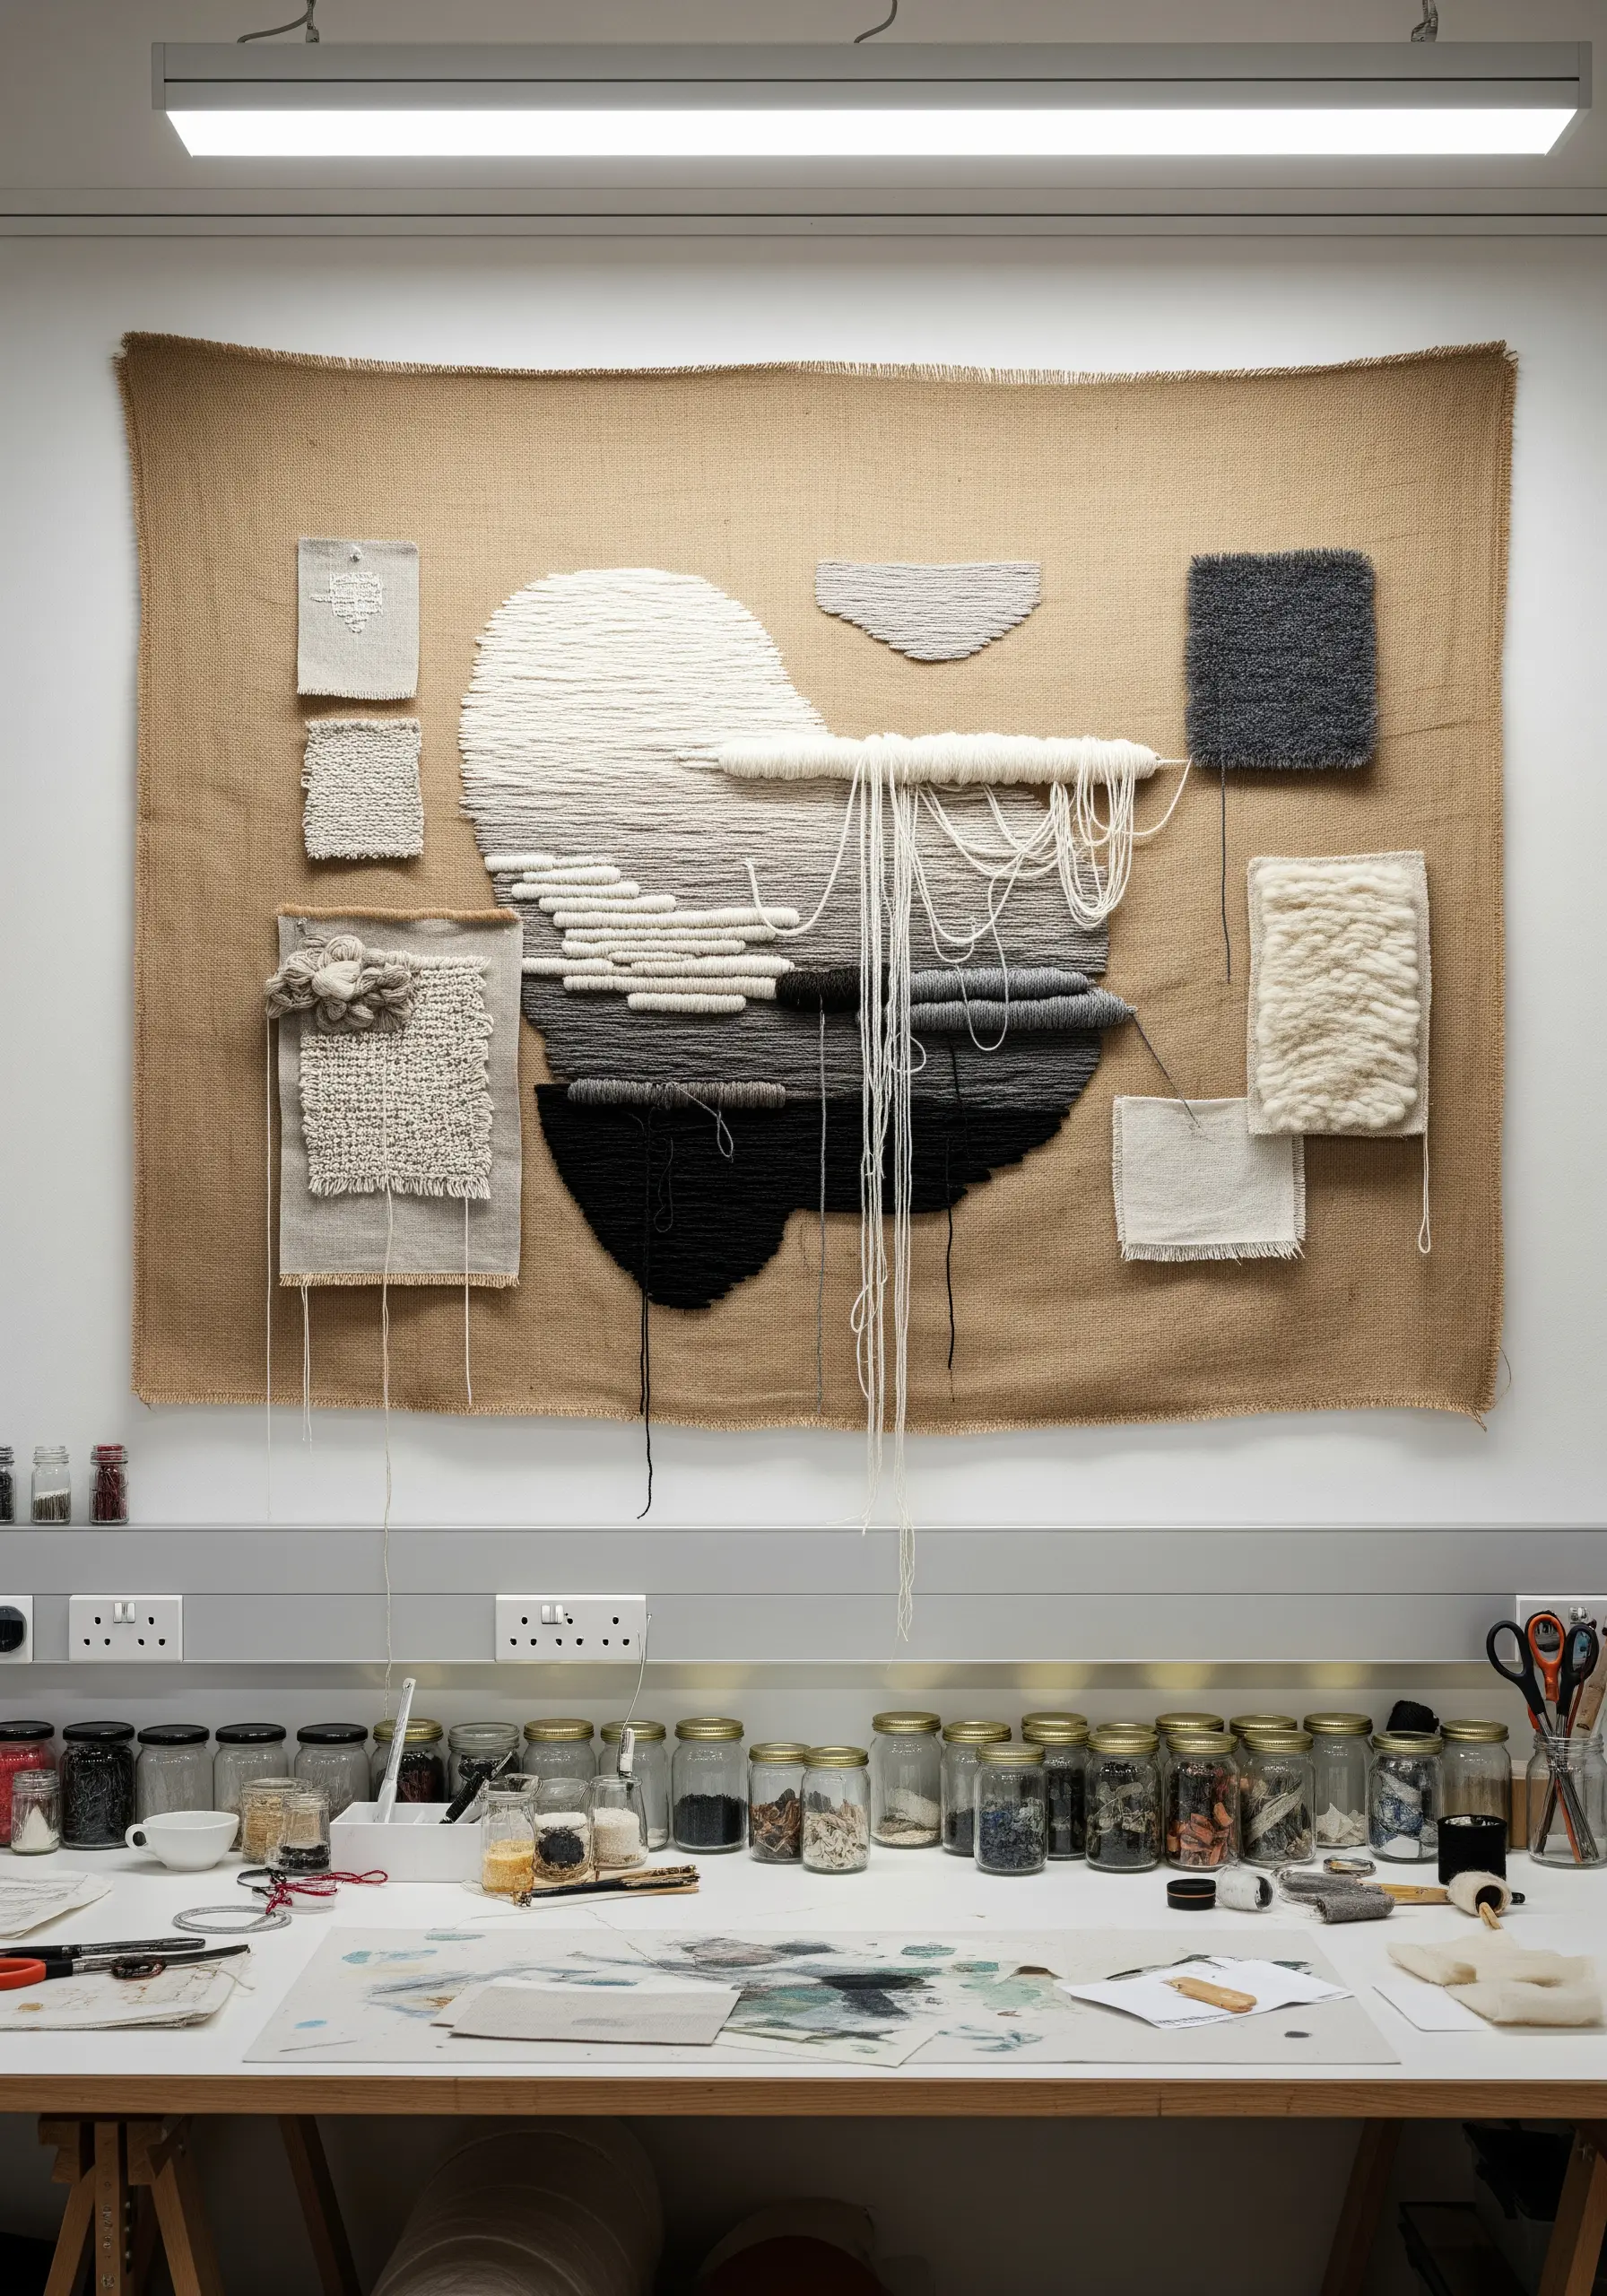
Turn your stitch experiments into a finished work of art by creating a process-based sampler.
Work on a large piece of rustic fabric like burlap, and fill it with abstract shapes and small swatches of different techniques: weaving, satin stitch blocks, tufting, and French knot clusters.
Allowing threads to hang loose and showing the unfinished edges of your explorations celebrates the act of making.
This approach creates a raw, authentic piece that tells the story of your creative journey.
23. Combine Quilting and Embroidery for Soft Definition
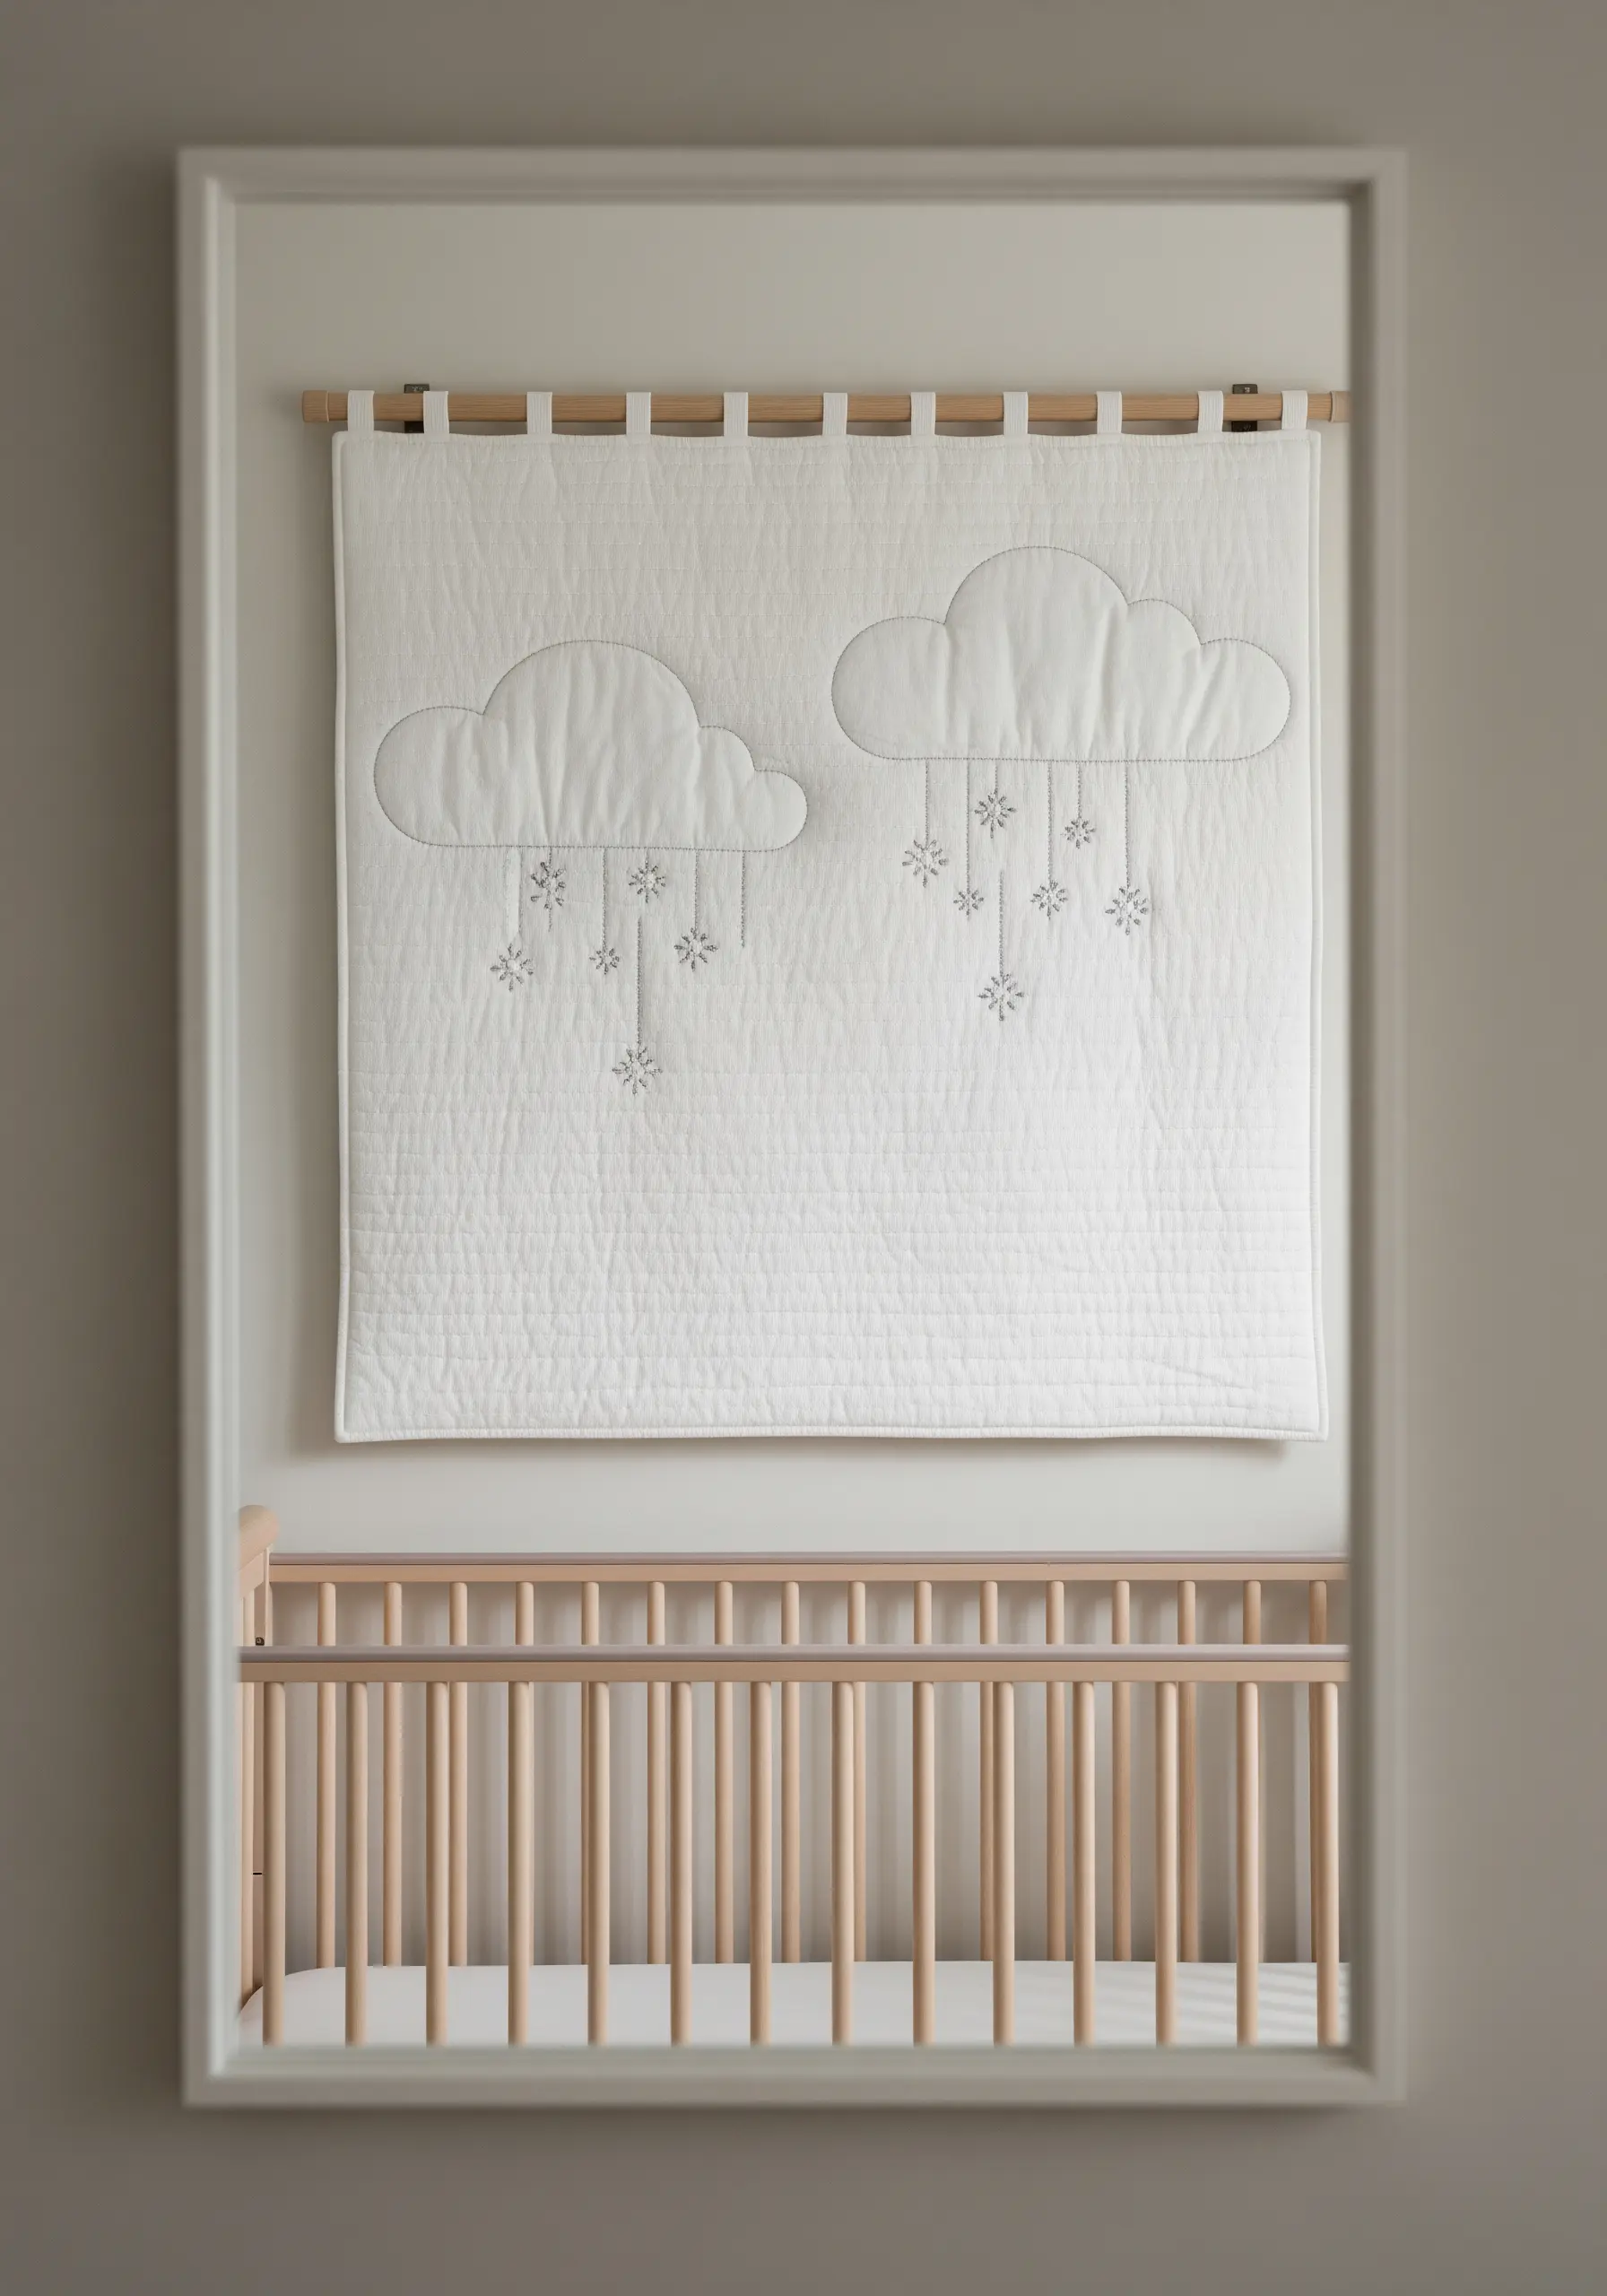
Add a subtle, illustrative quality to a quilted surface by outlining shapes with a simple stitch.
Create a wholecloth quilt by layering a top fabric, batting, and backing, then stitch your design through all three layers.
Use a backstitch or stem stitch to define simple motifs like clouds or stars.
The stitching will create a gentle, embossed effect as it pulls the fabric down into the batting, resulting in a piece that is both visually and texturally soft.
24. Create a Shimmering Surface with Seed Stitch
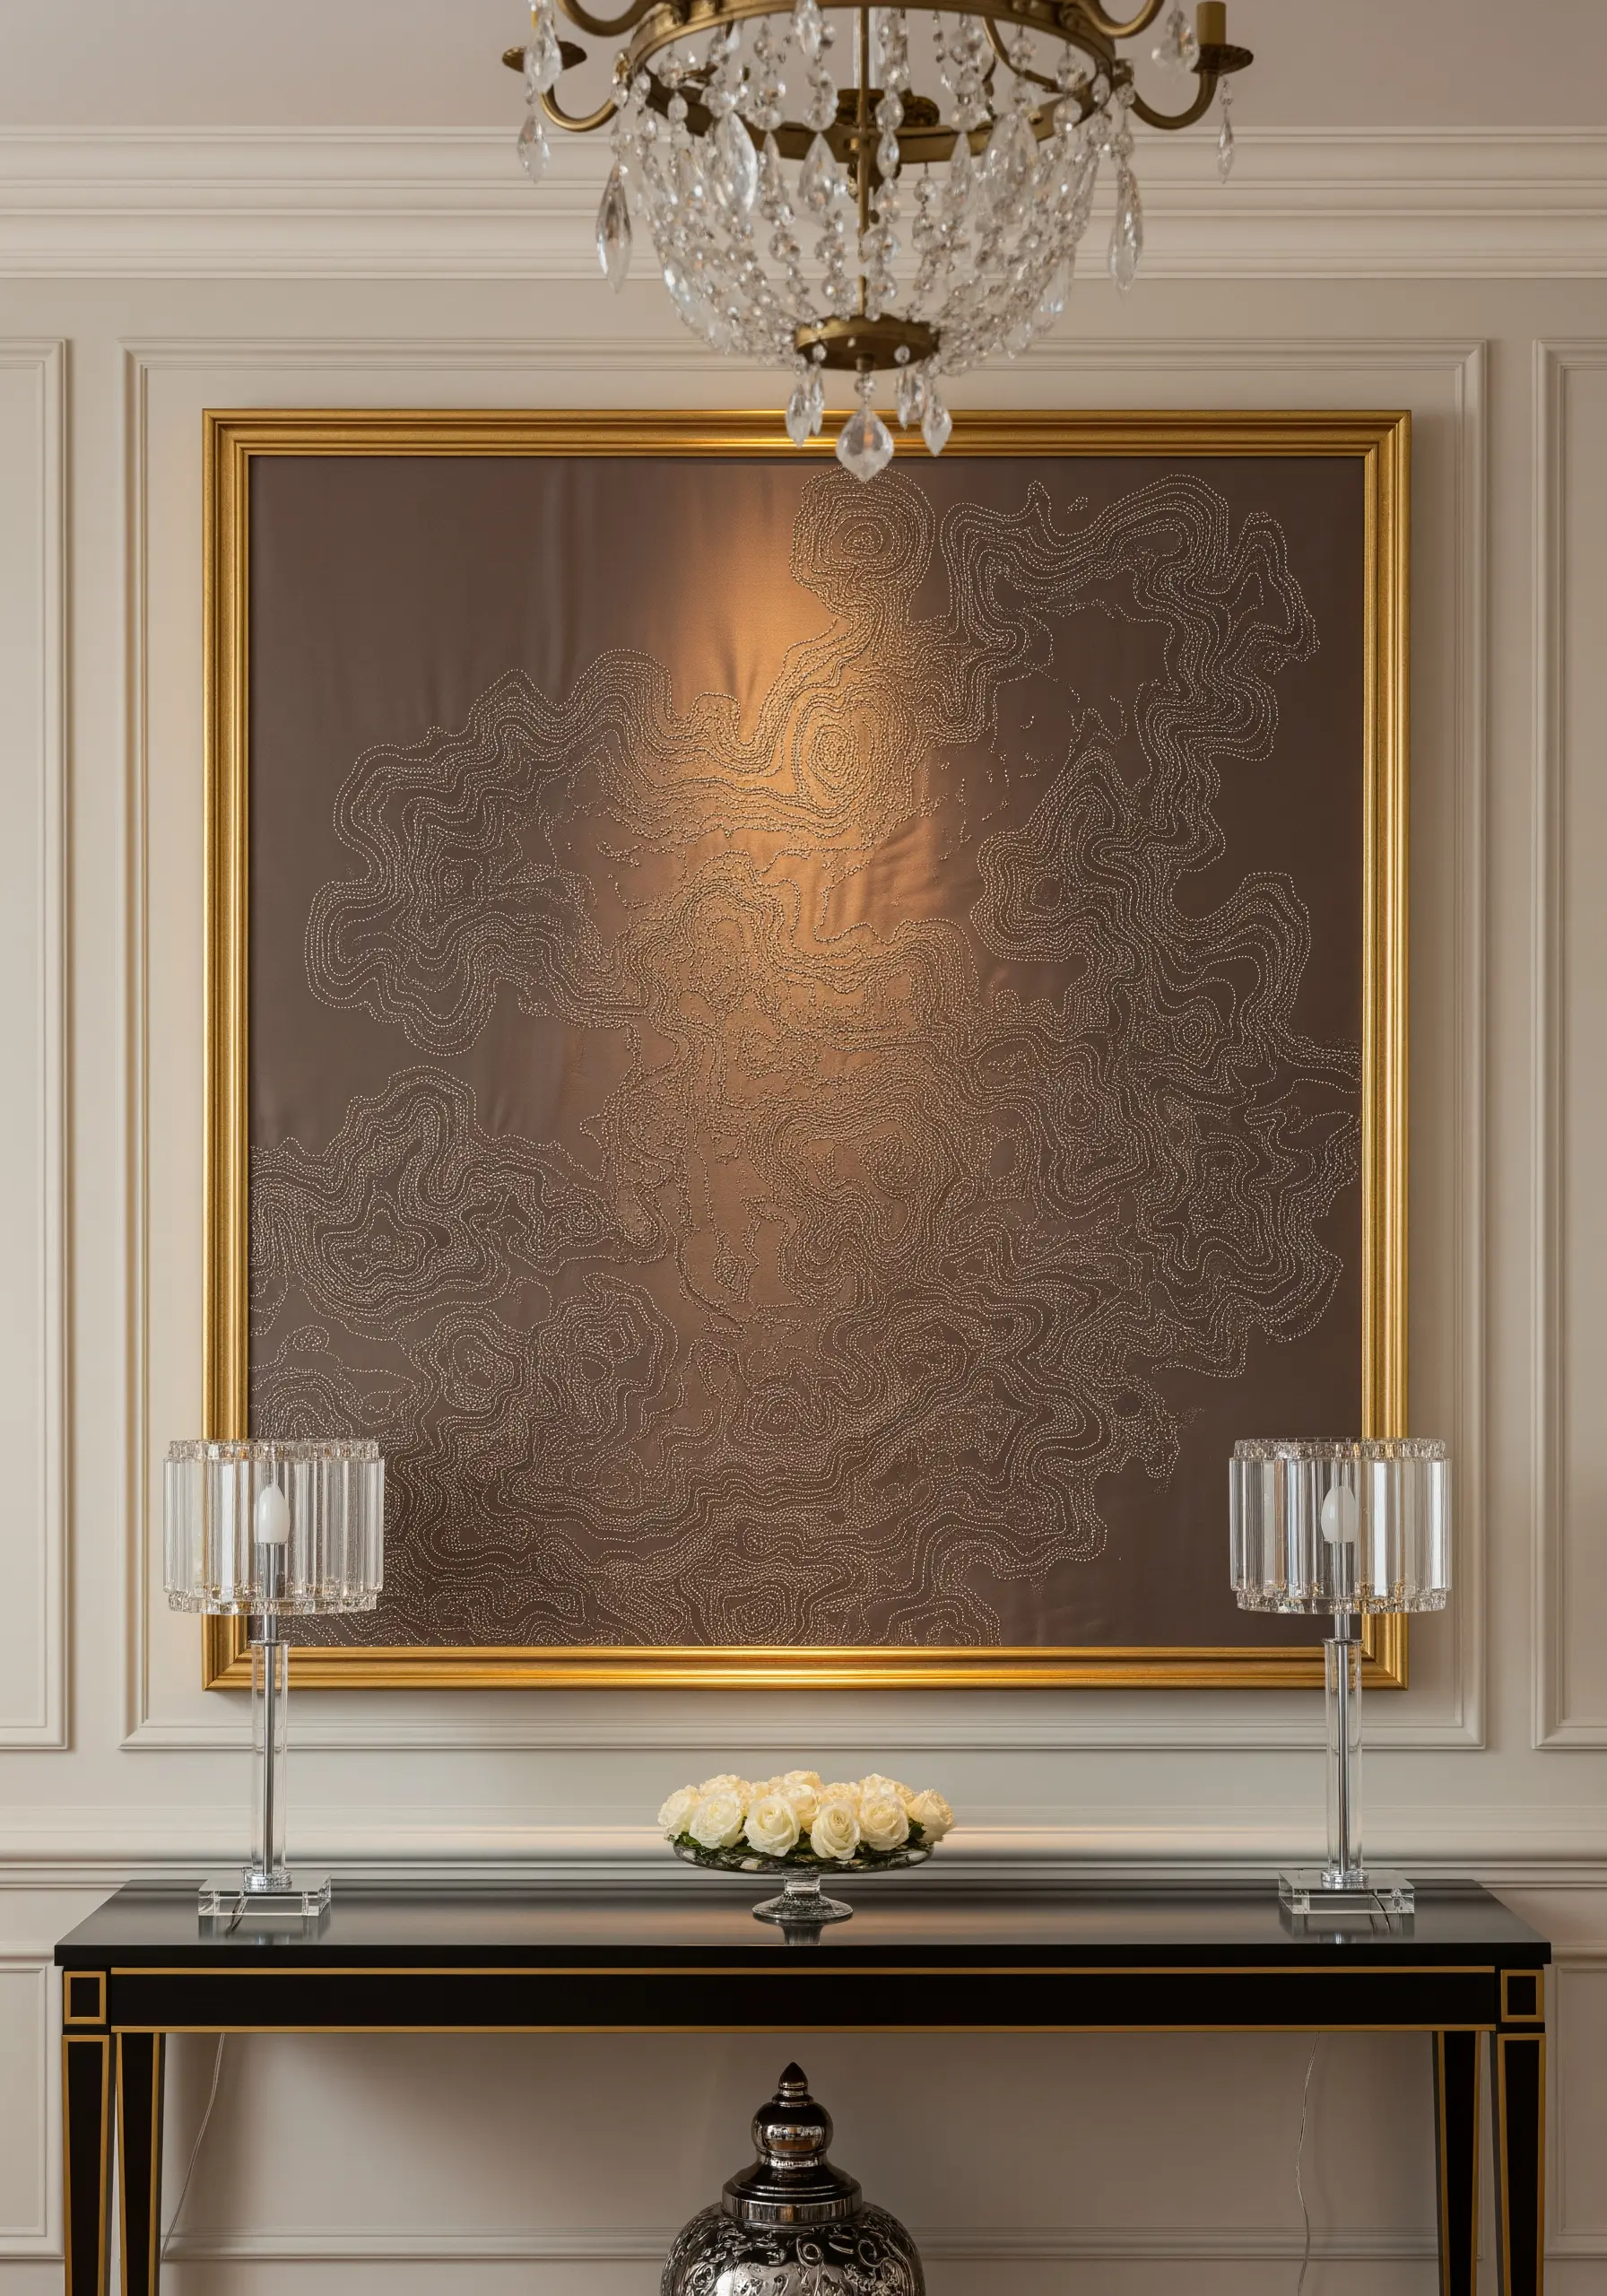
For a subtle, elegant texture that catches the light, fill a large area with thousands of tiny seed stitches (also known as rice stitches).
These are small, straight stitches scattered in random directions.
When stitched on a fabric with a slight sheen, like a silk blend or sateen, the varied angles of the stitches reflect light differently, creating a shimmering, almost topographical effect.
Use this technique to create abstract, contour-like patterns that feel both organic and luxurious.
25. Radiate Energy with a String Art Sunburst
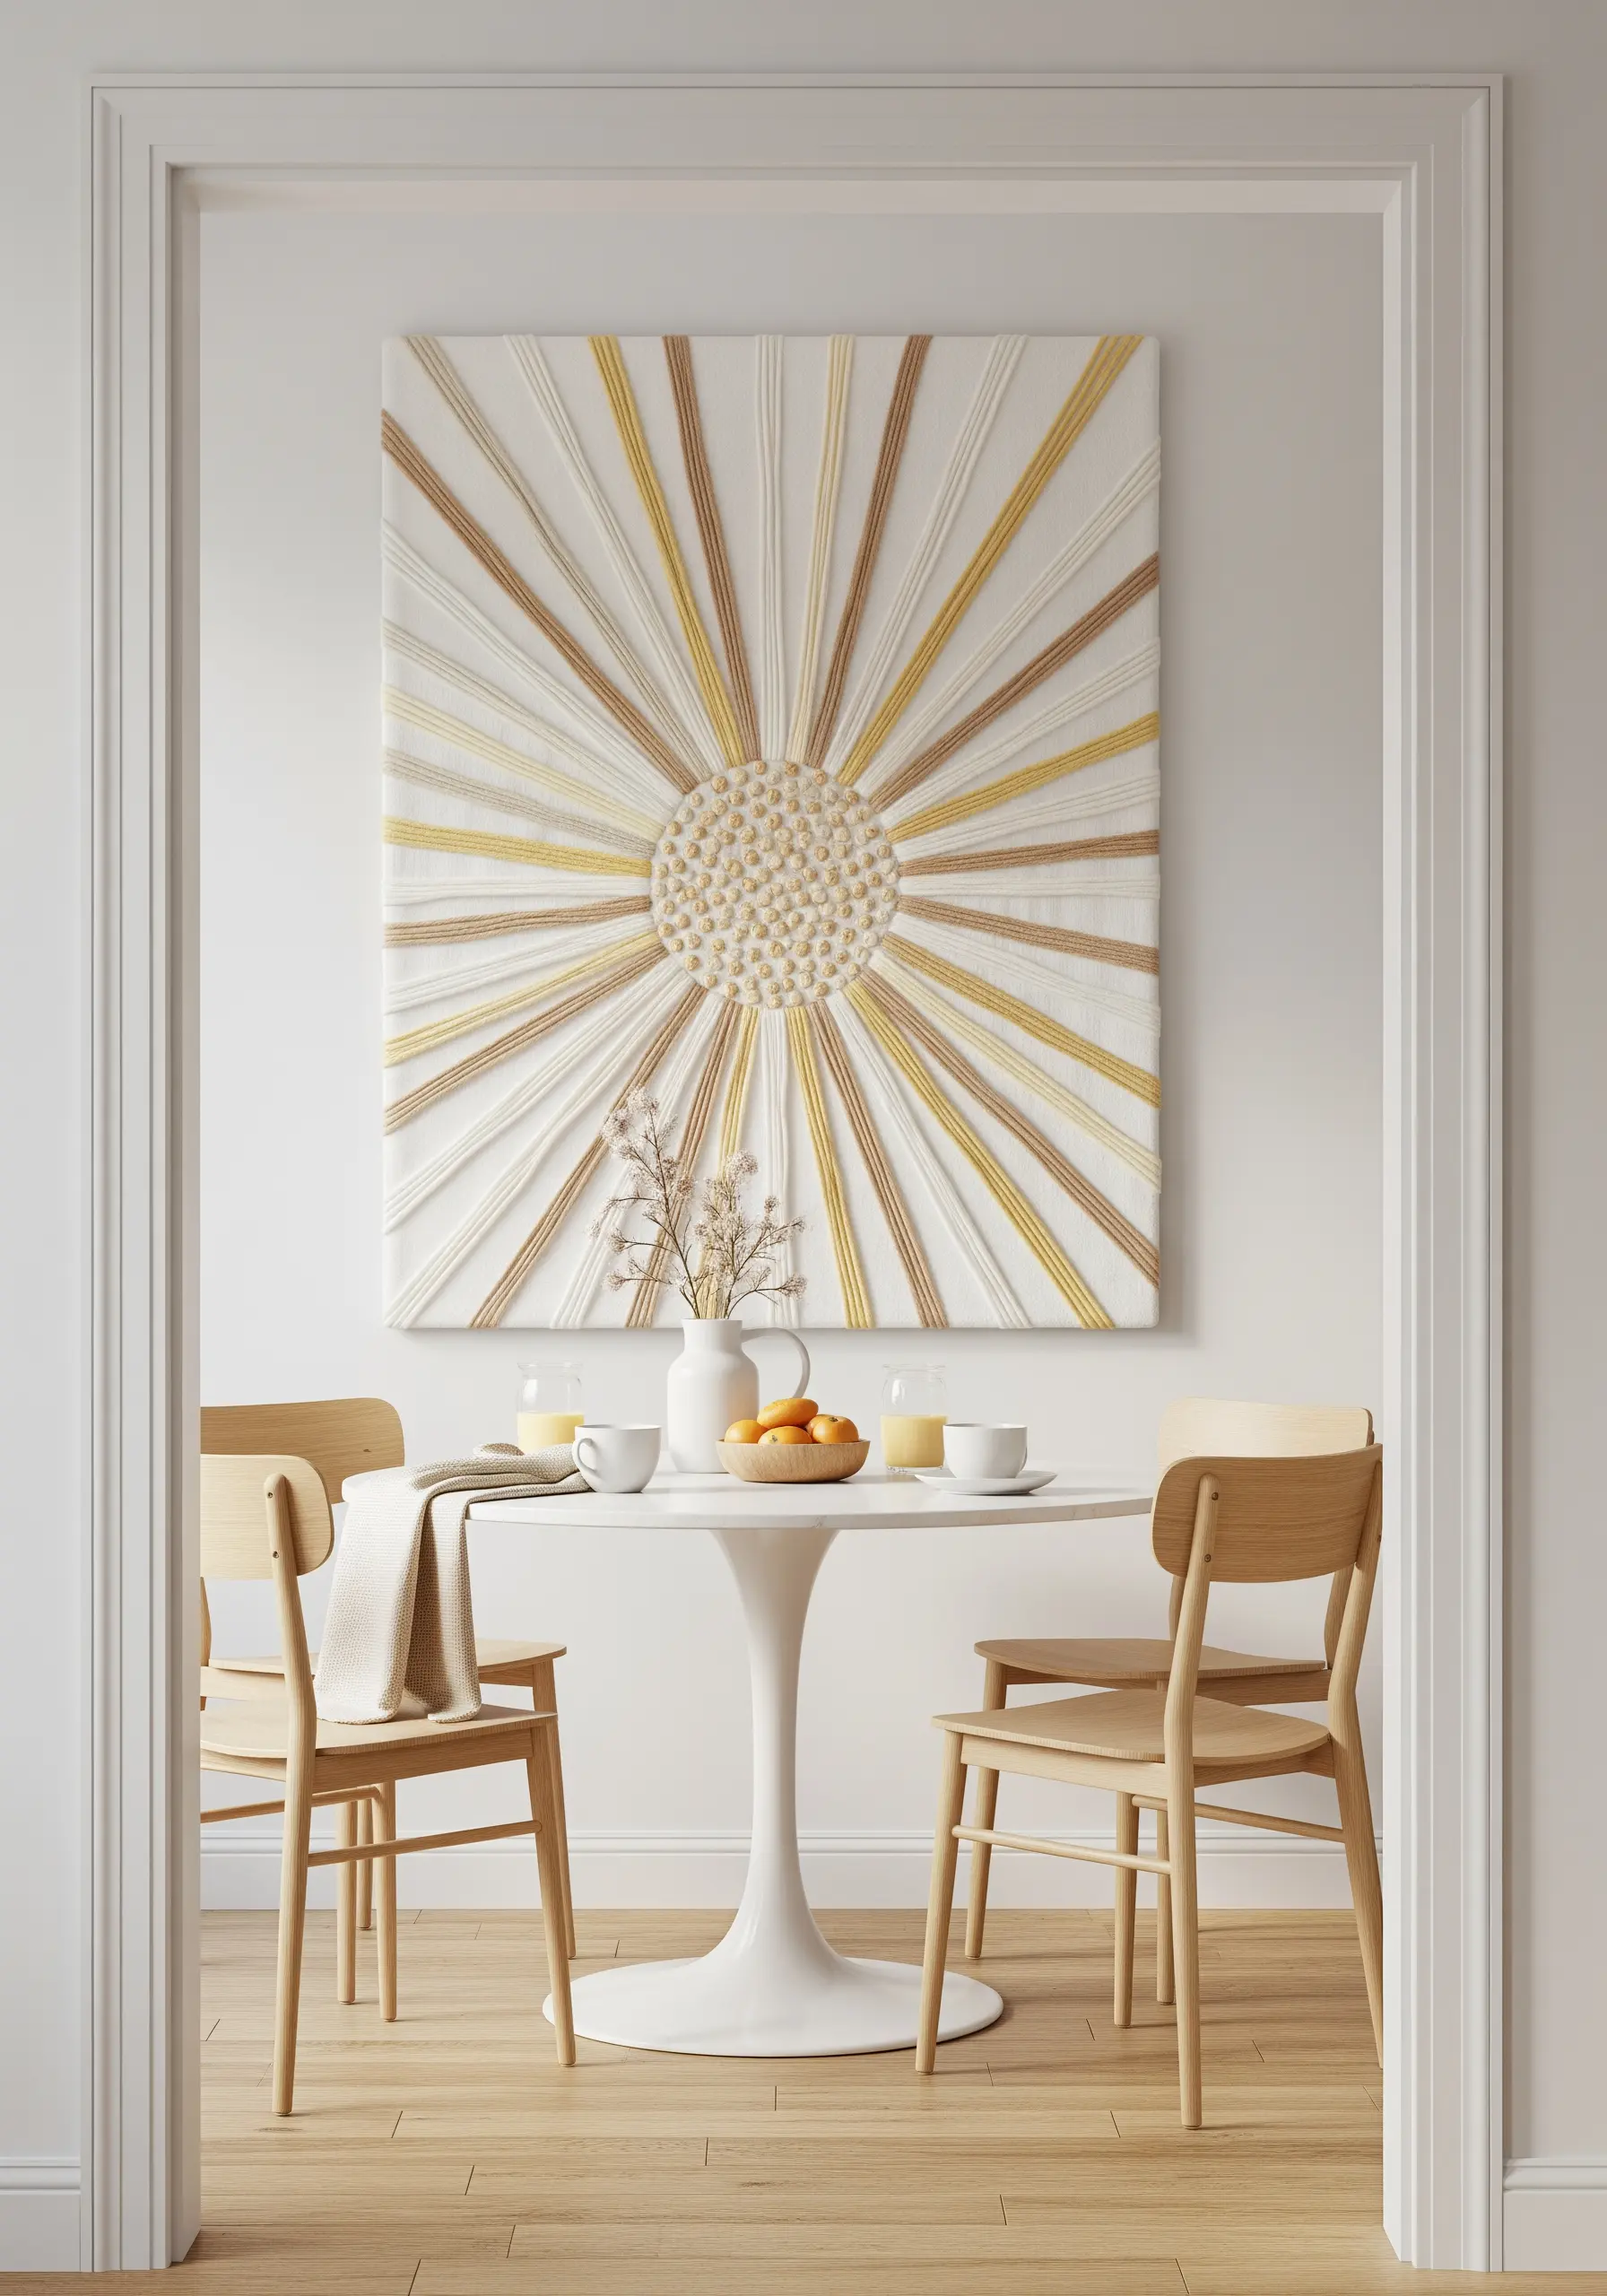
Create a powerful focal point by combining the principles of string art with embroidery techniques.
First, fill the center of your design with a dense circle of French knots for a highly textural core.
Then, stitch long, straight stitches radiating from this center to the edges of your canvas.
Use several shades of neutral and metallic yarns to create visual vibration and the illusion of light. These abstract thread illusion techniques create depth without adding complexity.
26. Make a Singular, Sculptural Statement
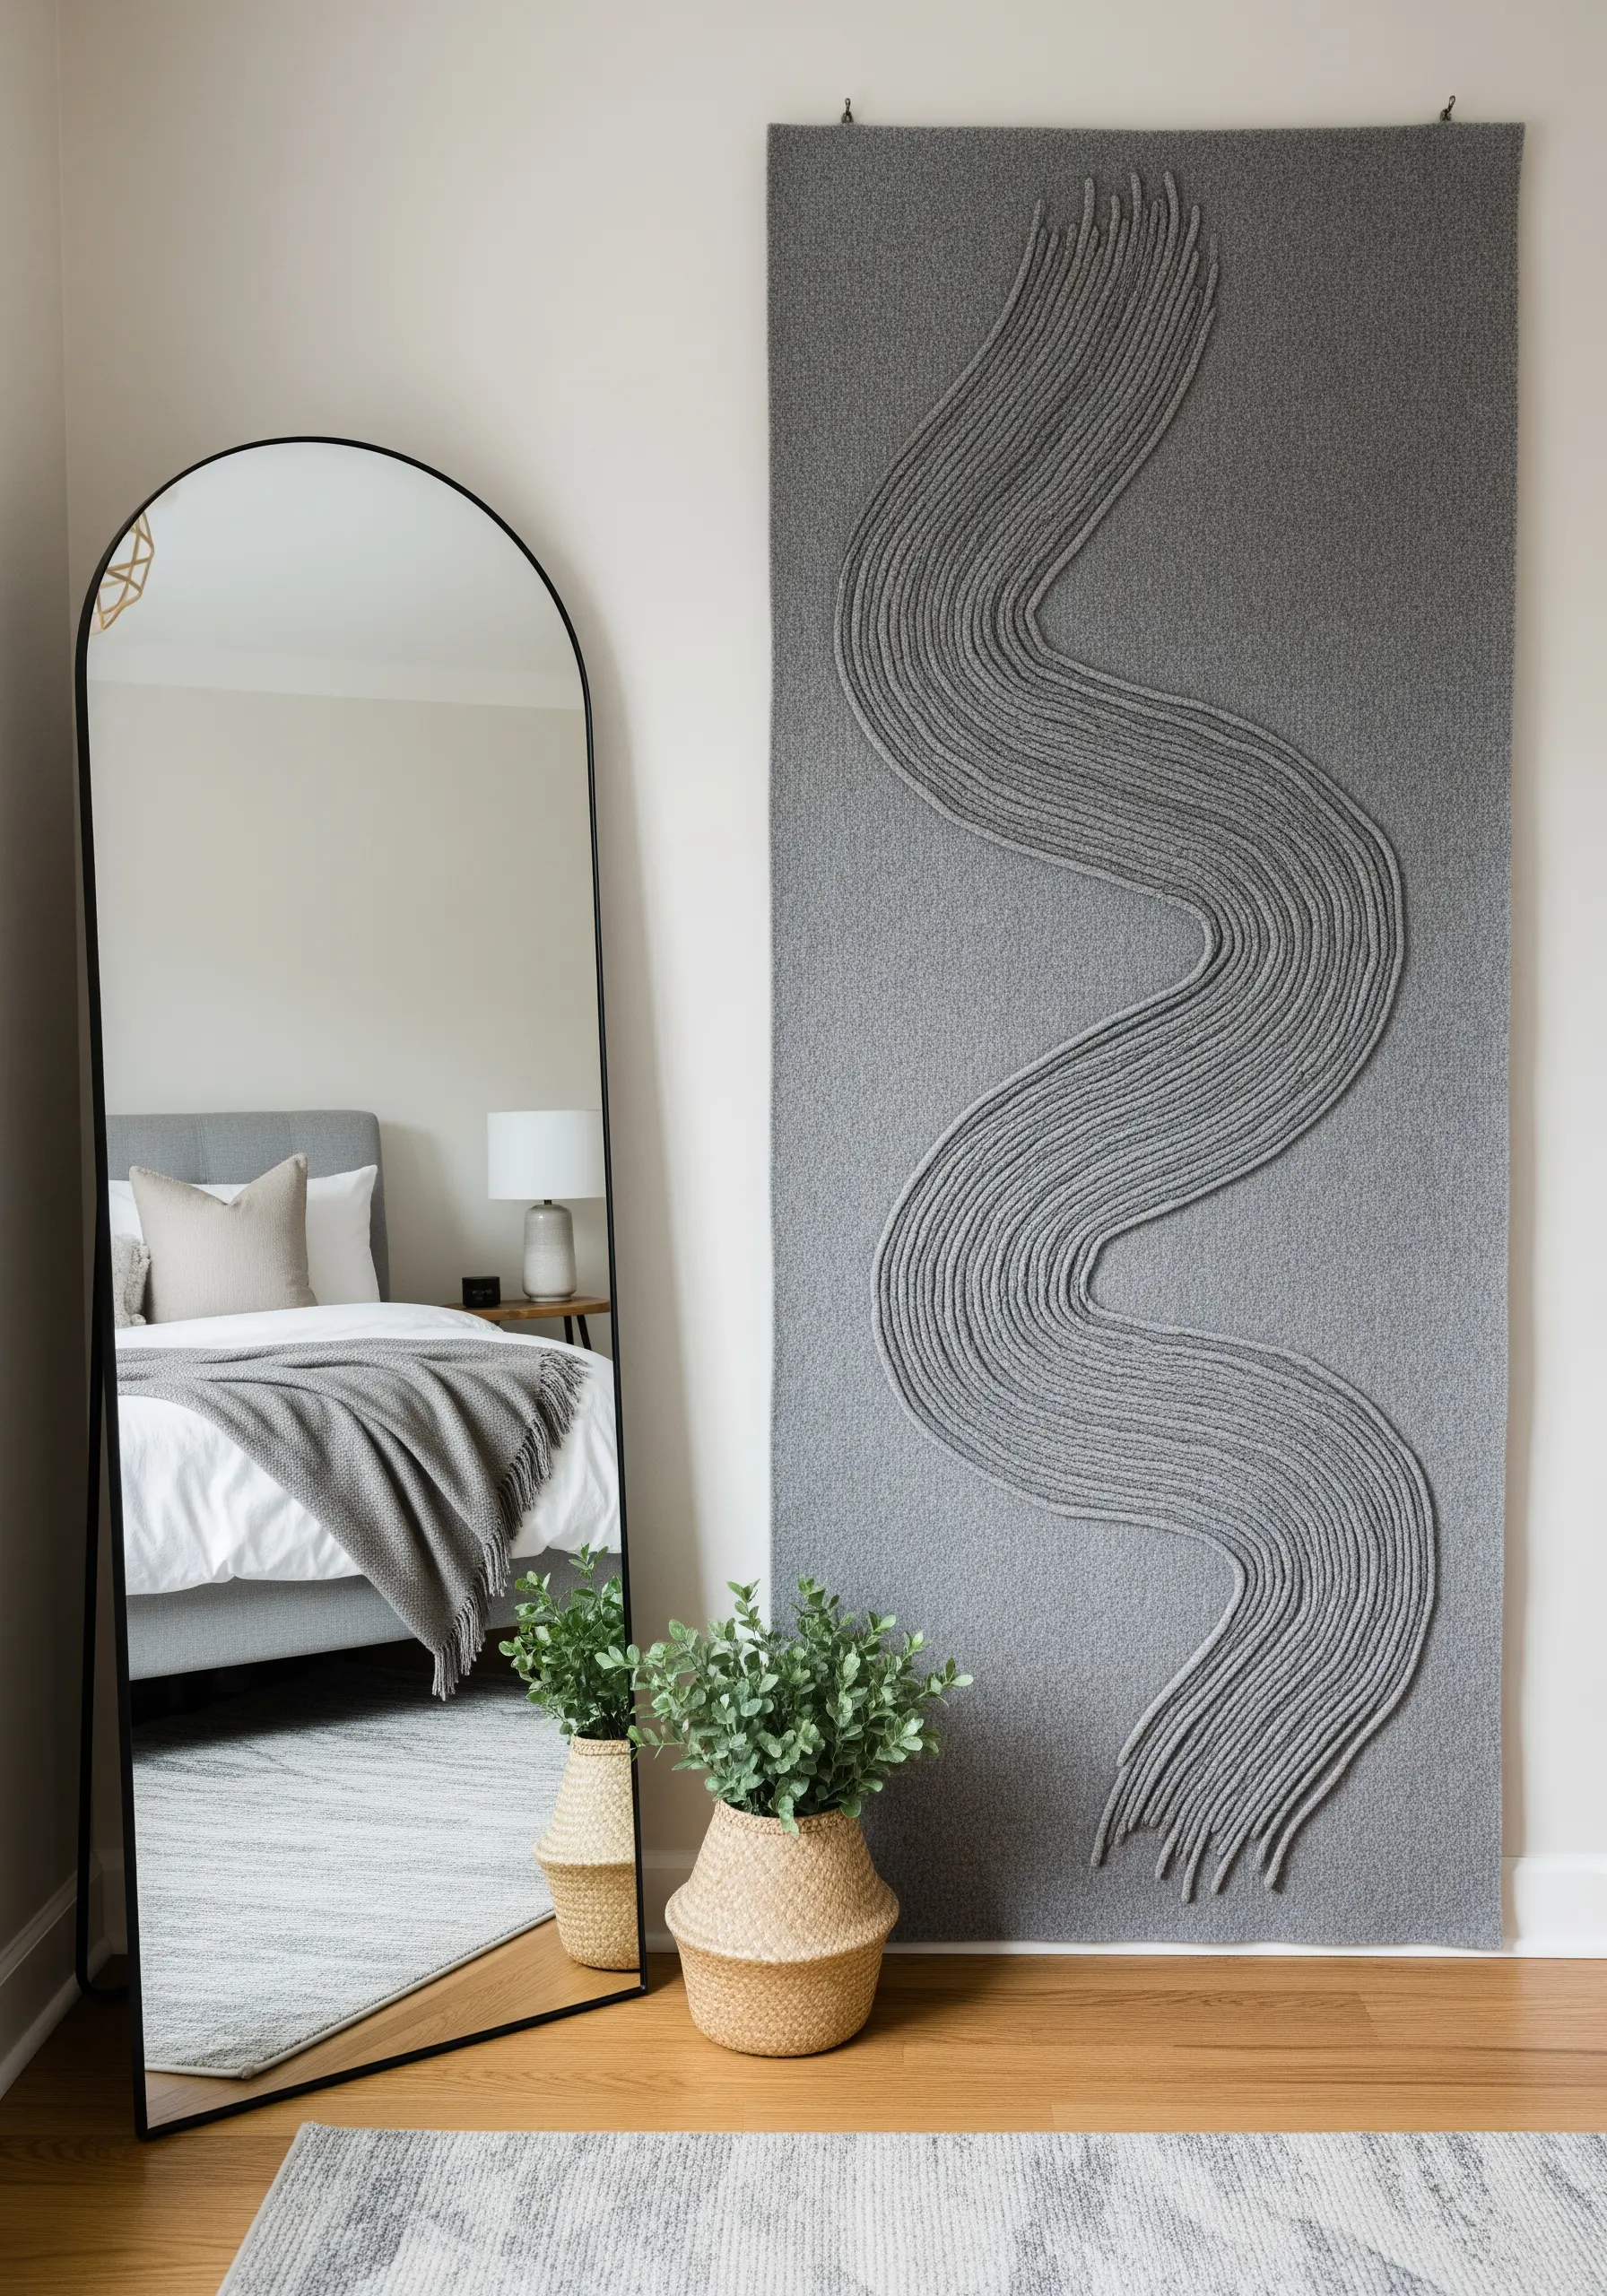
Command attention in a room with a single, bold, sculptural line on a large-scale canvas.
Bundle multiple strands of thick yarn or soft rope together to create one substantial ‘thread’.
Couch this bundle onto a heavy felt or canvas background, guiding it in a single, confident, serpentine curve.
The high-relief texture creates dramatic shadows that change throughout the day, making the piece feel alive and dynamic.
This monochromatic approach ensures the focus remains entirely on form and texture.
27. Compose a Tapestry of Textural Blocks
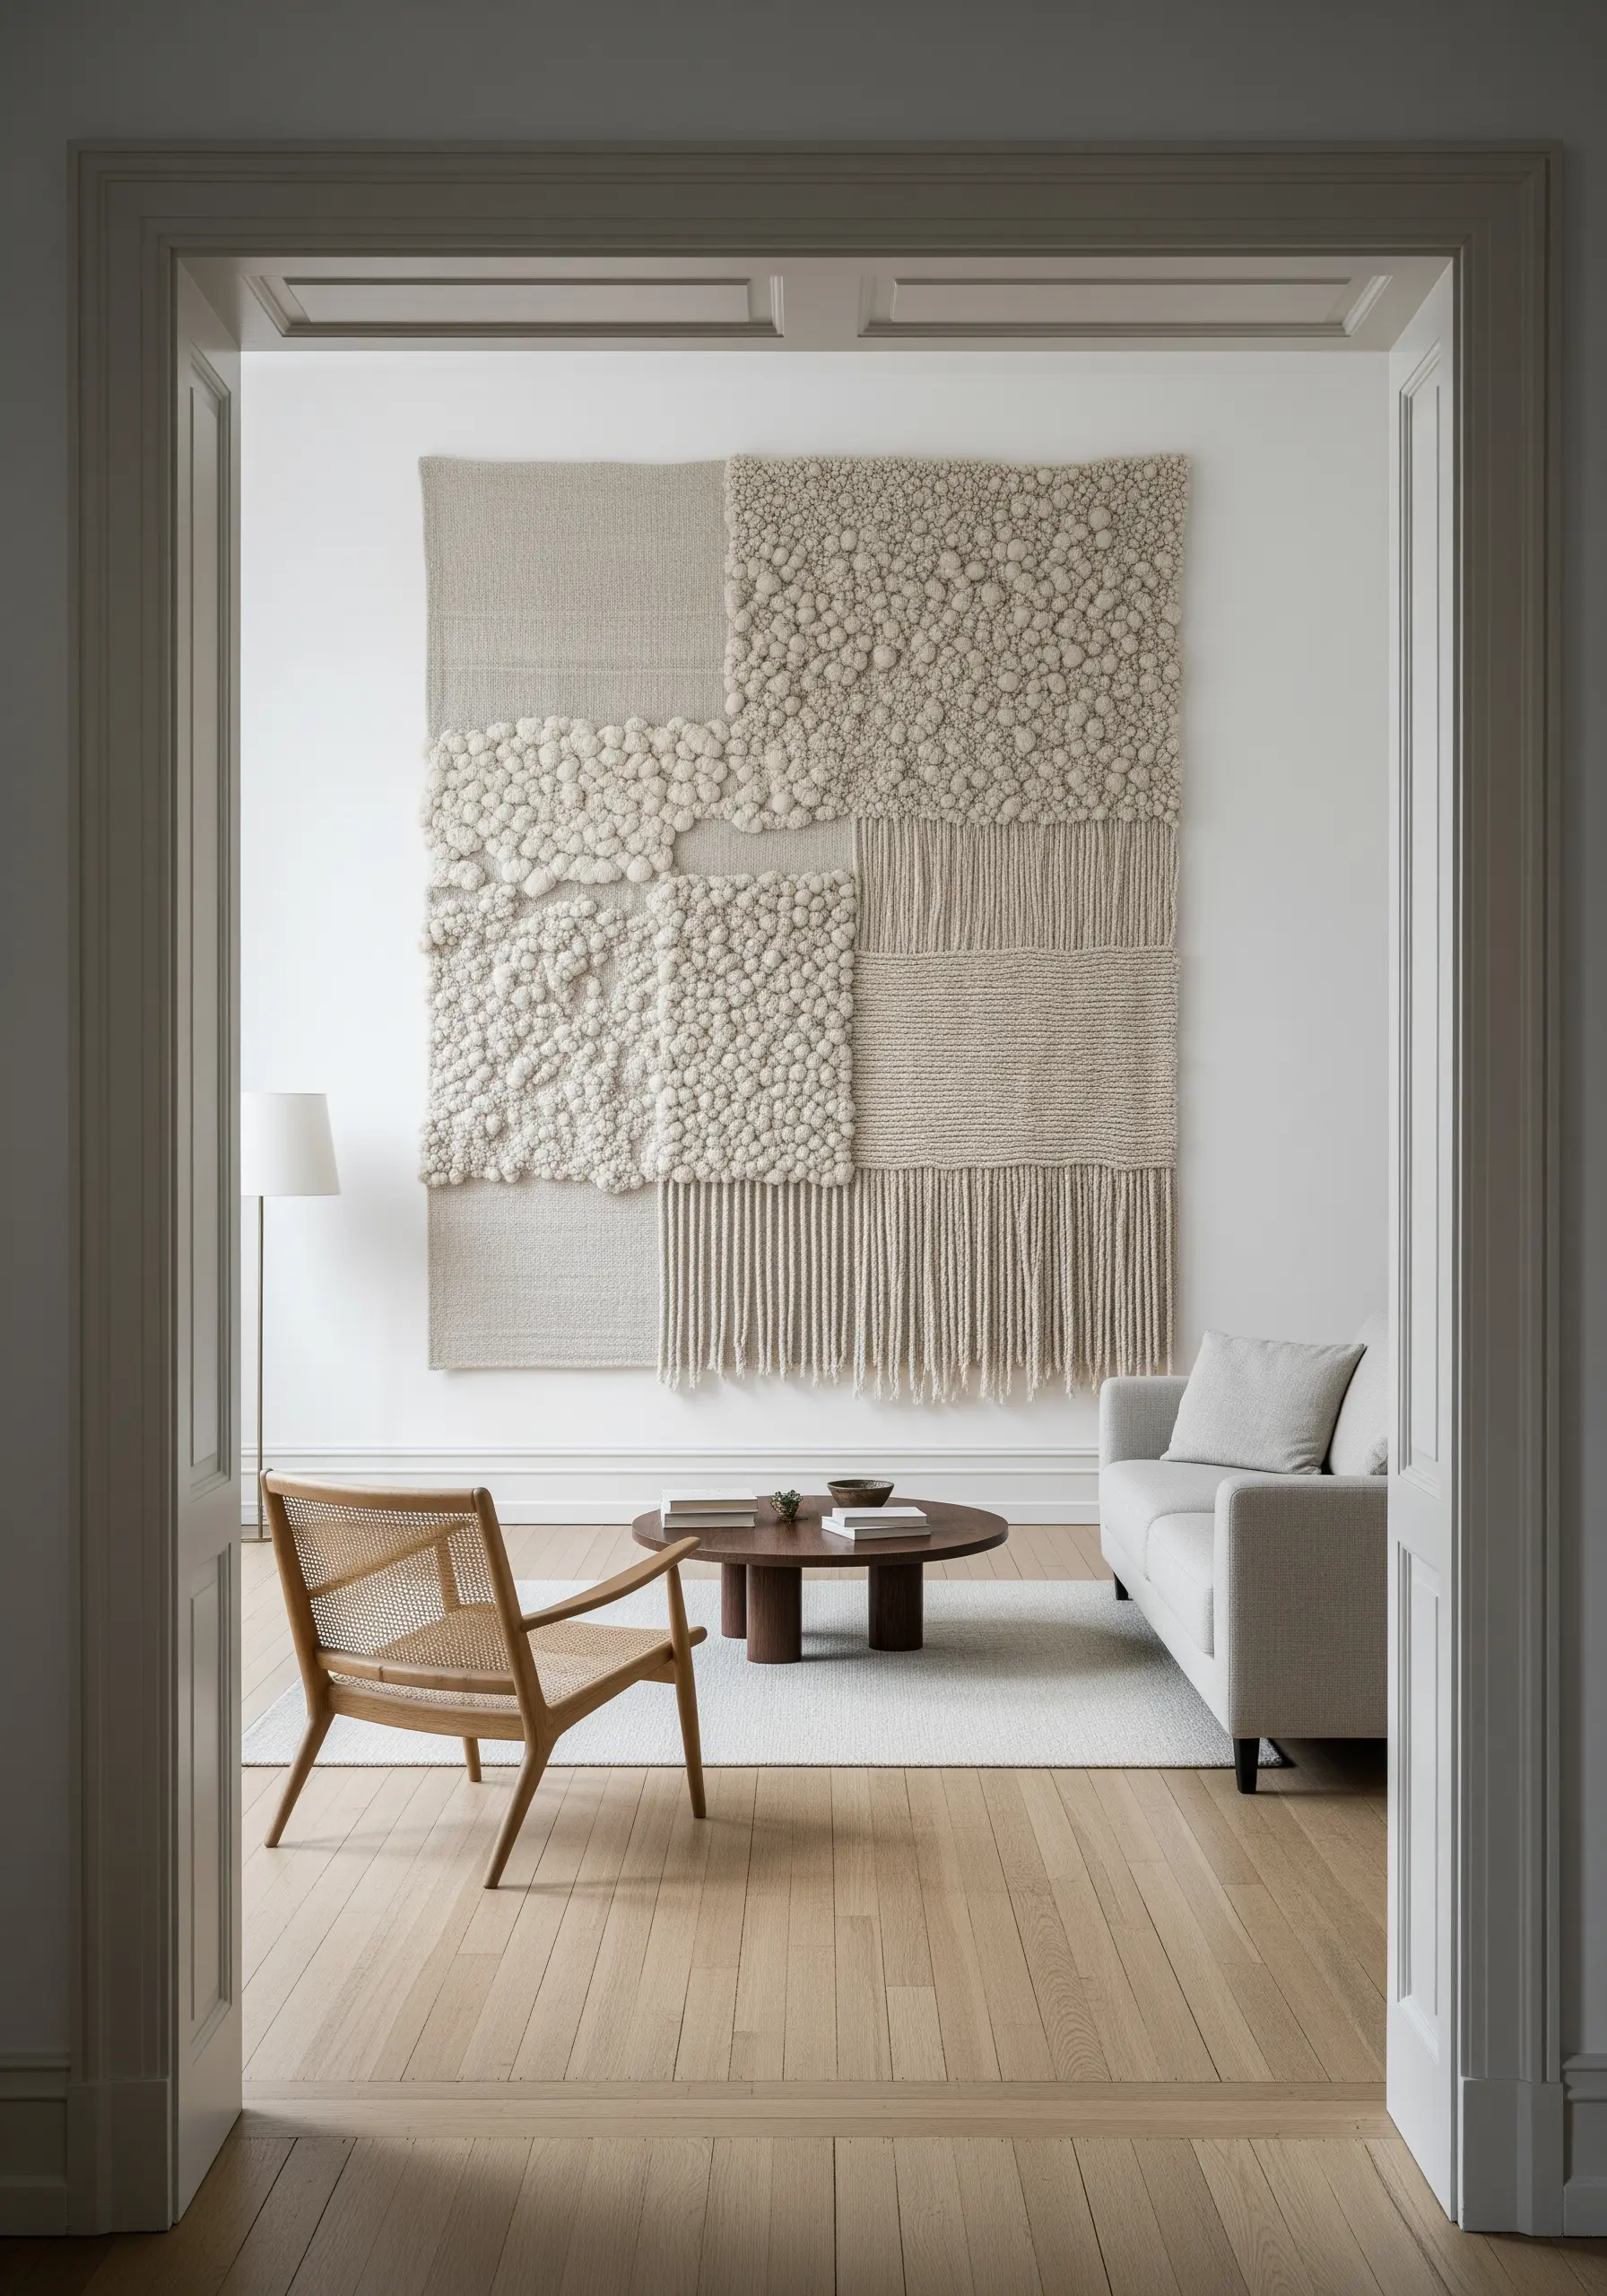
Build a large-scale wall hanging by assembling different textural ‘canvases’ into a single, cohesive patchwork.
In each block, explore one specific technique: dense French knot clusters, neat rows of turkey work (or Ghiordes knots), simple weaving, or long satin stitches.
Stitch these blocks together, allowing some to overlap, to create a rich tapestry of neutral tones and tactile surfaces.
Finishing with a simple fringe along the bottom edge adds a final touch of softness and grounds the entire piece.


