
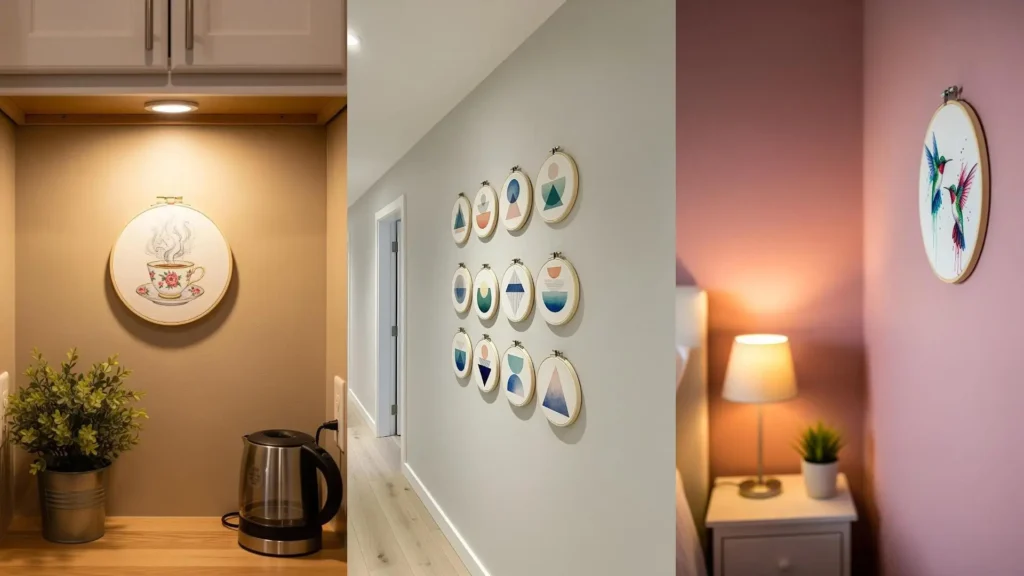
You don’t need complex patterns or dozens of colors to create embroidery that feels like fine art. Often, the most elegant pieces are born from a thoughtful choice of stitch, a subtle shift in thread, or a unique way of seeing a simple subject.
Think of your needle as a paintbrush and your thread as the pigment. This collection is designed to help you move beyond merely filling in shapes and start thinking about texture, light, and composition. Each idea is a small study in how to make your stitches speak with intention.
Whether you’re filling a narrow hallway or creating a quiet corner for reflection, these tiny, watercolor-inspired pieces prove that the most impactful art isn’t always the largest. It’s the most considered. Let’s begin.
1. Curate a Vertical Botanical Story
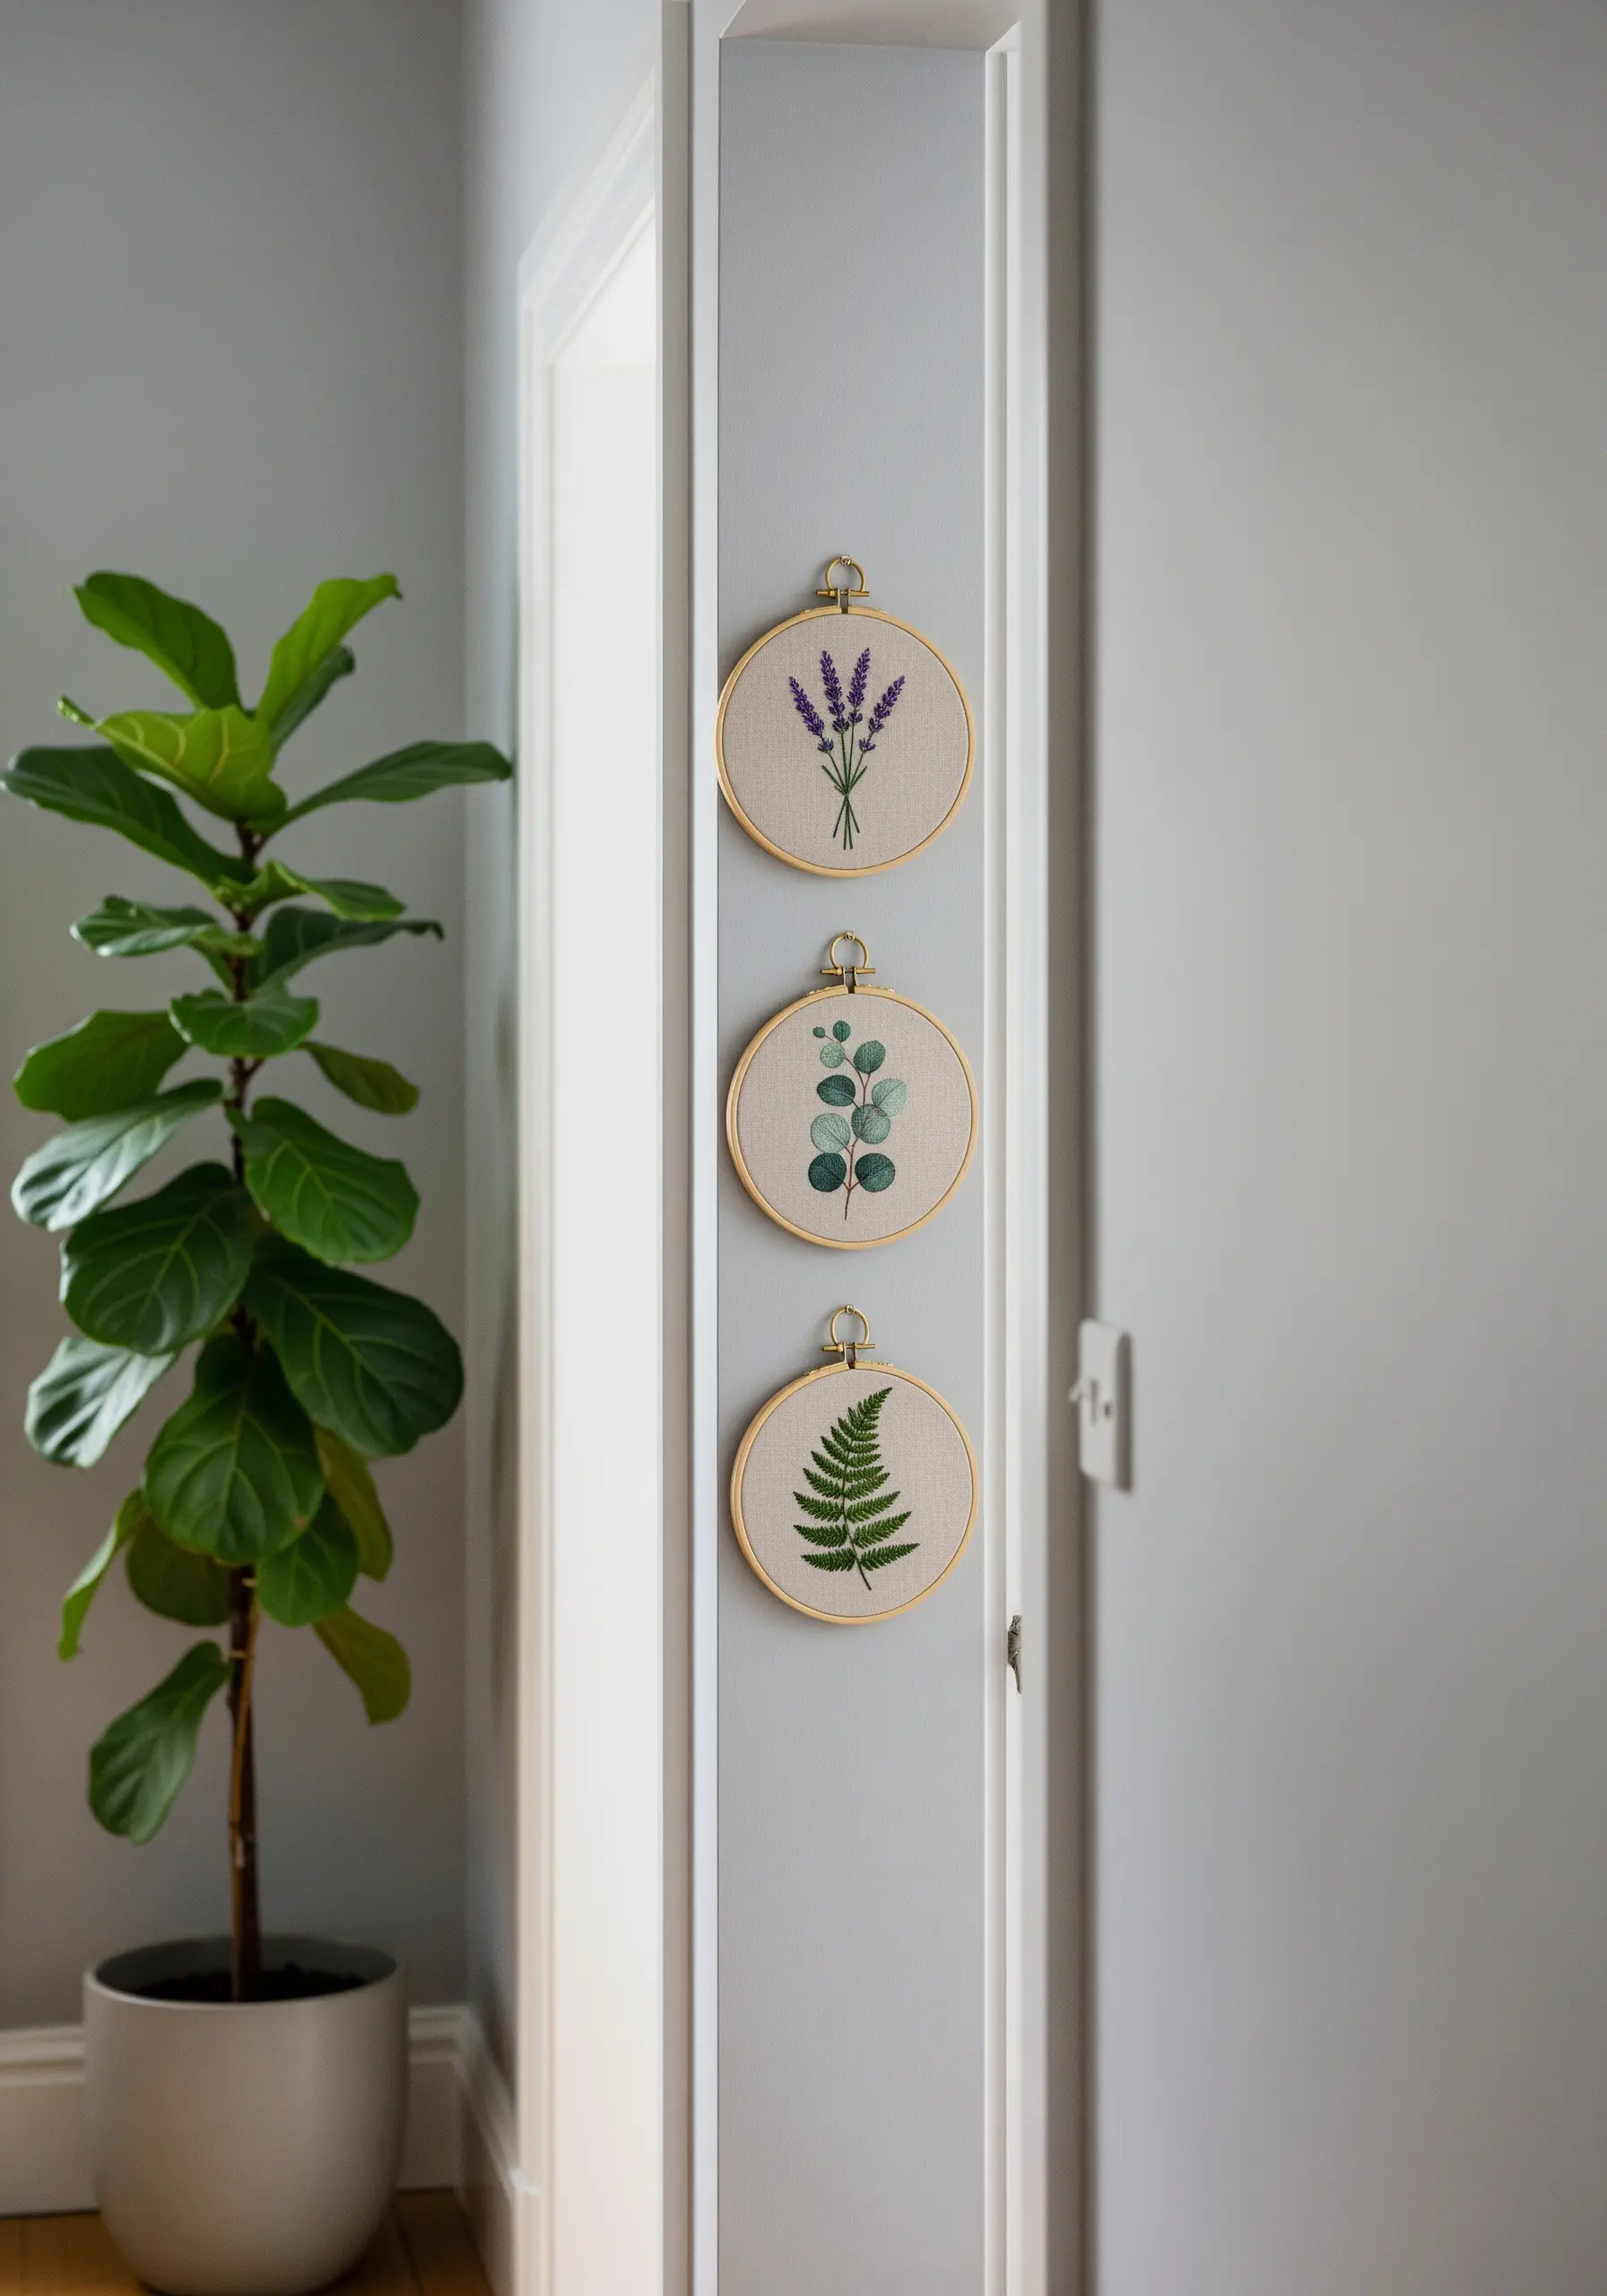
Group three to five small hoops vertically to draw the eye upward, making it a perfect solution for narrow wall spaces between doors or windows.
Assign a different stitch to each plant to create distinct textures.
Use fishbone stitch for the layered look of fern fronds, satin stitch for the smooth surface of eucalyptus leaves, and clusters of French knots for lavender buds.
This approach transforms simple motifs into a cohesive, gallery-like installation.
2. Stitch a Celestial Nook with Metallic Thread

Create a high-contrast galaxy effect by working on black or navy blue cotton fabric.
Use a single strand of variegated thread in purples and blues, stitched in random directions, to form a nebula cloud that looks almost painted.
For the stars and constellations, switch to a fine metallic thread and use tiny straight stitches or French knots to make them sparkle under a spotlight.
This technique turns a simple stitch into a dramatic focal point.
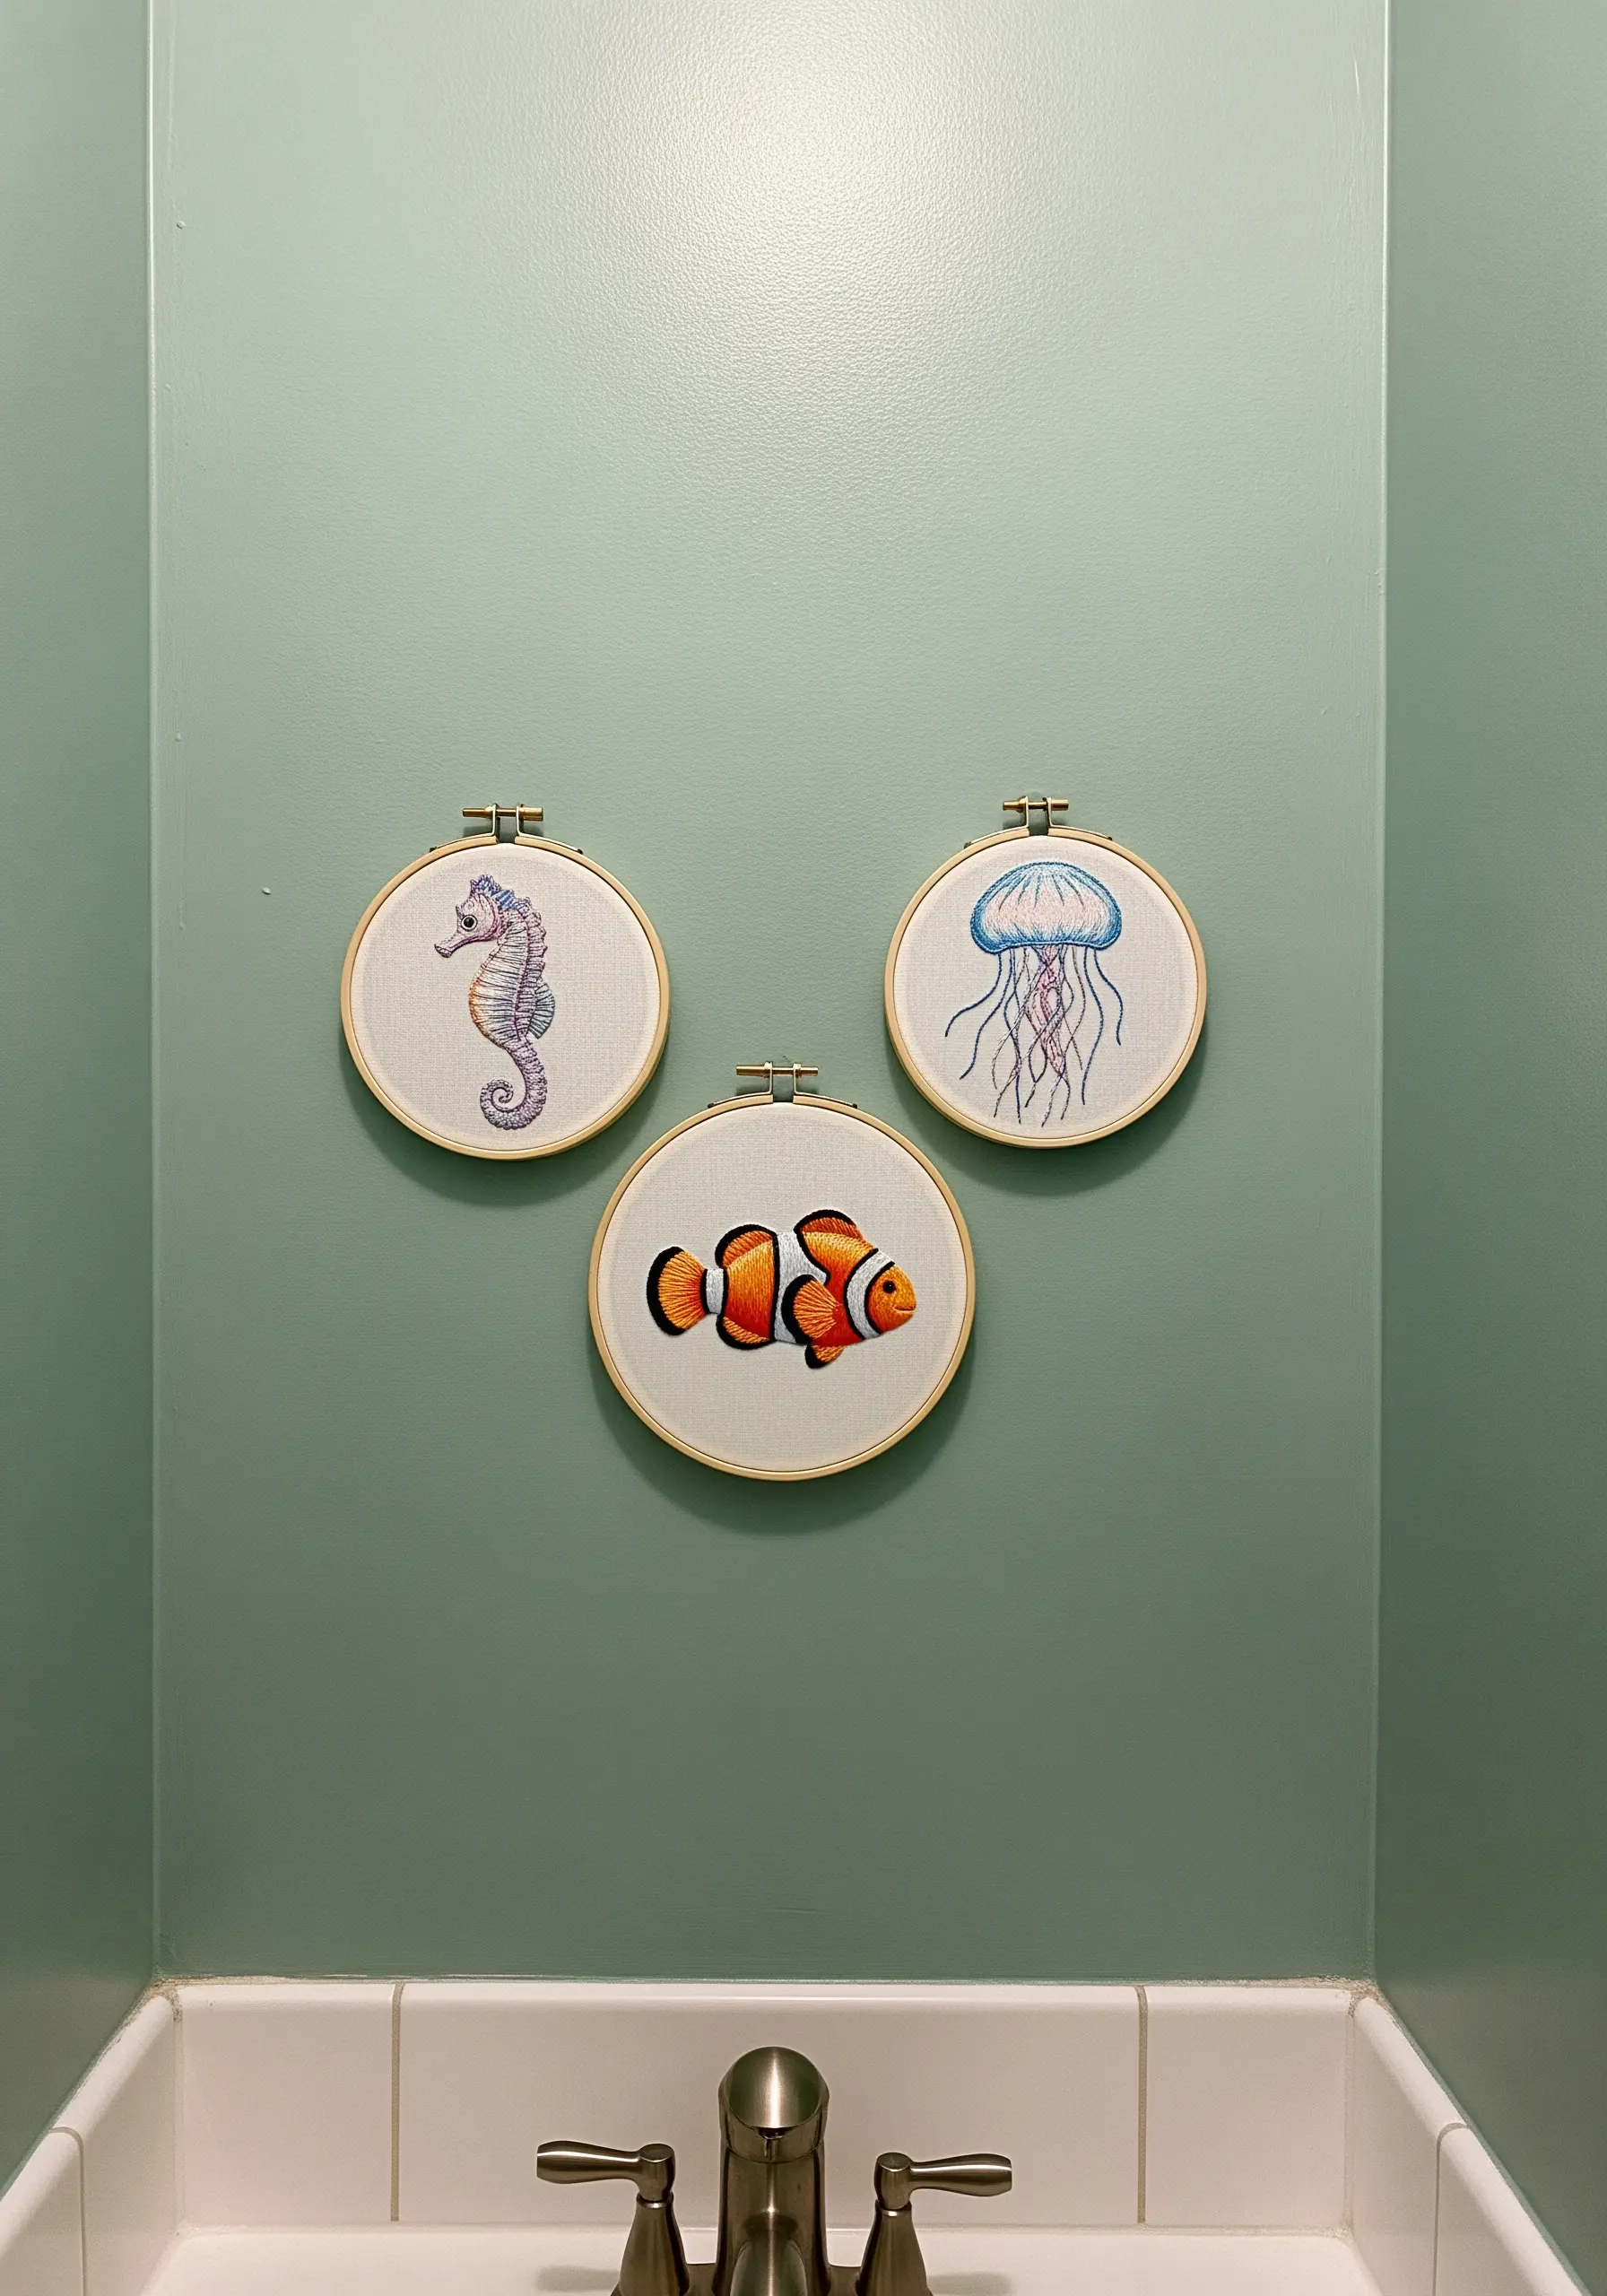
3. Divide a Landscape for a Modern Triptych
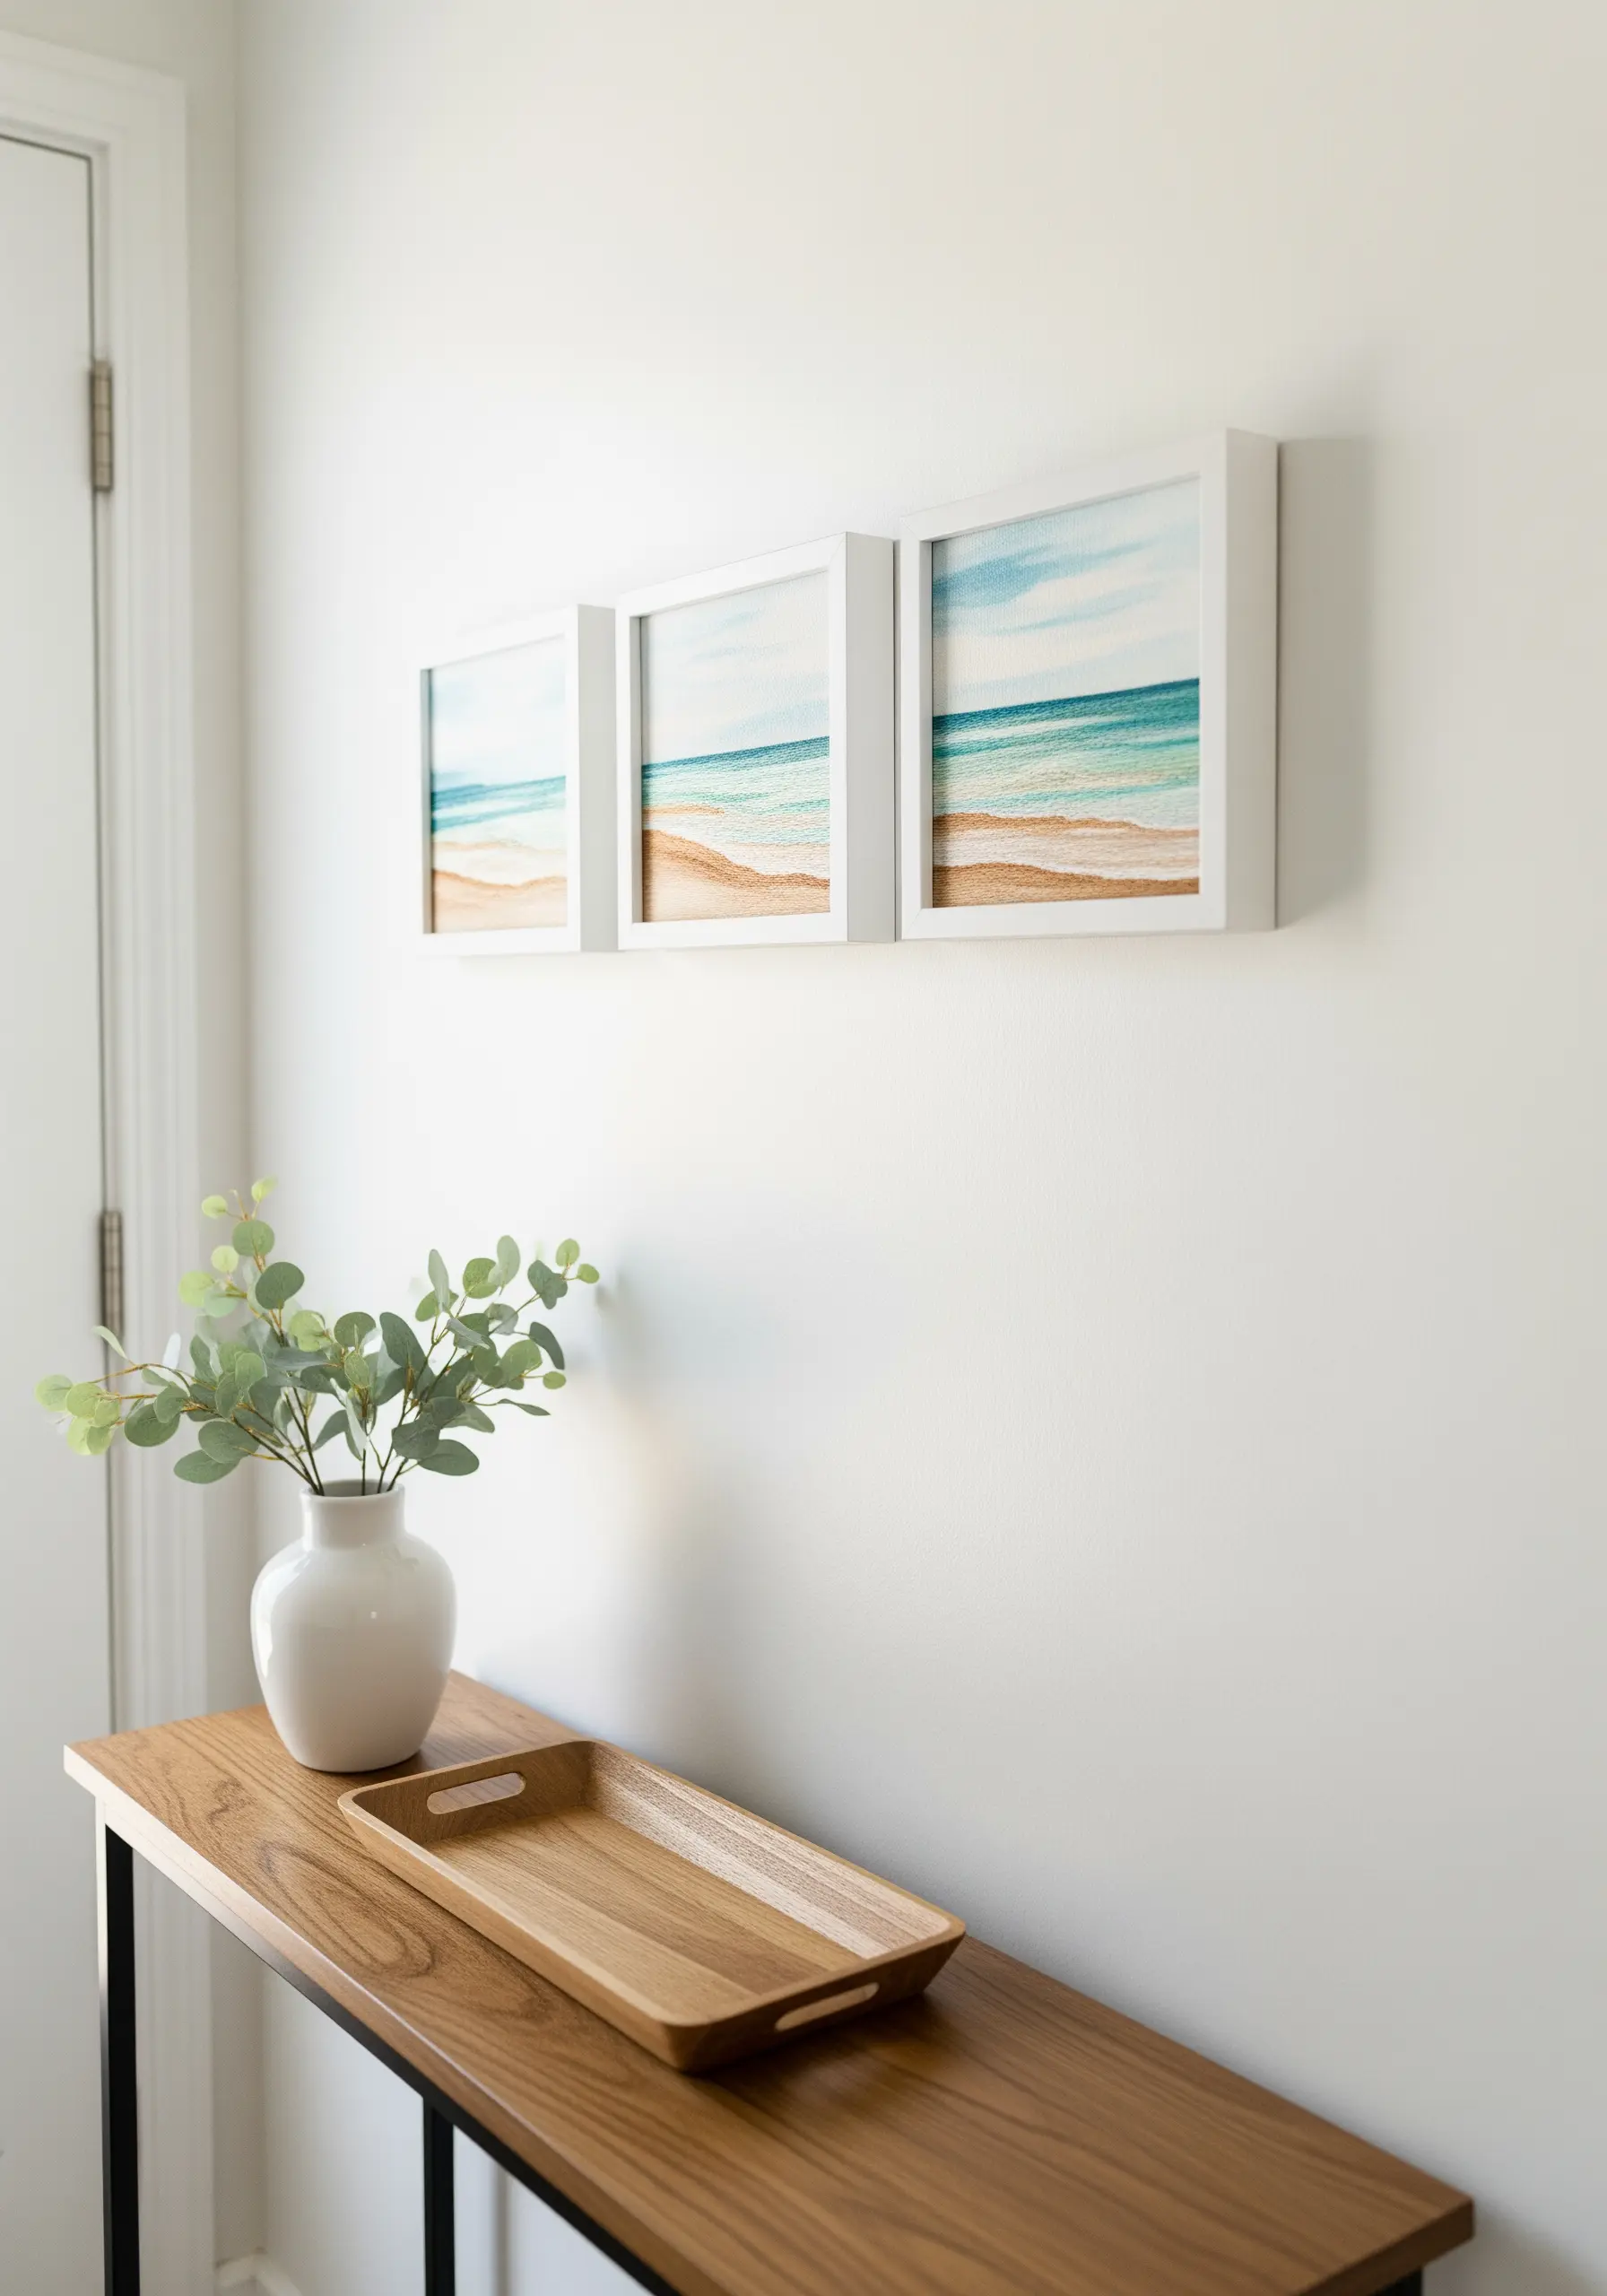
To achieve a soft, watercolor-style seascape, use single-strand floss and long, sparse stitches that allow the fabric to show through.
Instead of one large piece, divide your design across three separate frames to create a modern, panoramic effect.
This method not only makes a larger statement but also gives each section a focused, artful quality, transforming a simple scene into a sophisticated display.
4. Master Architectural Thread Sketching
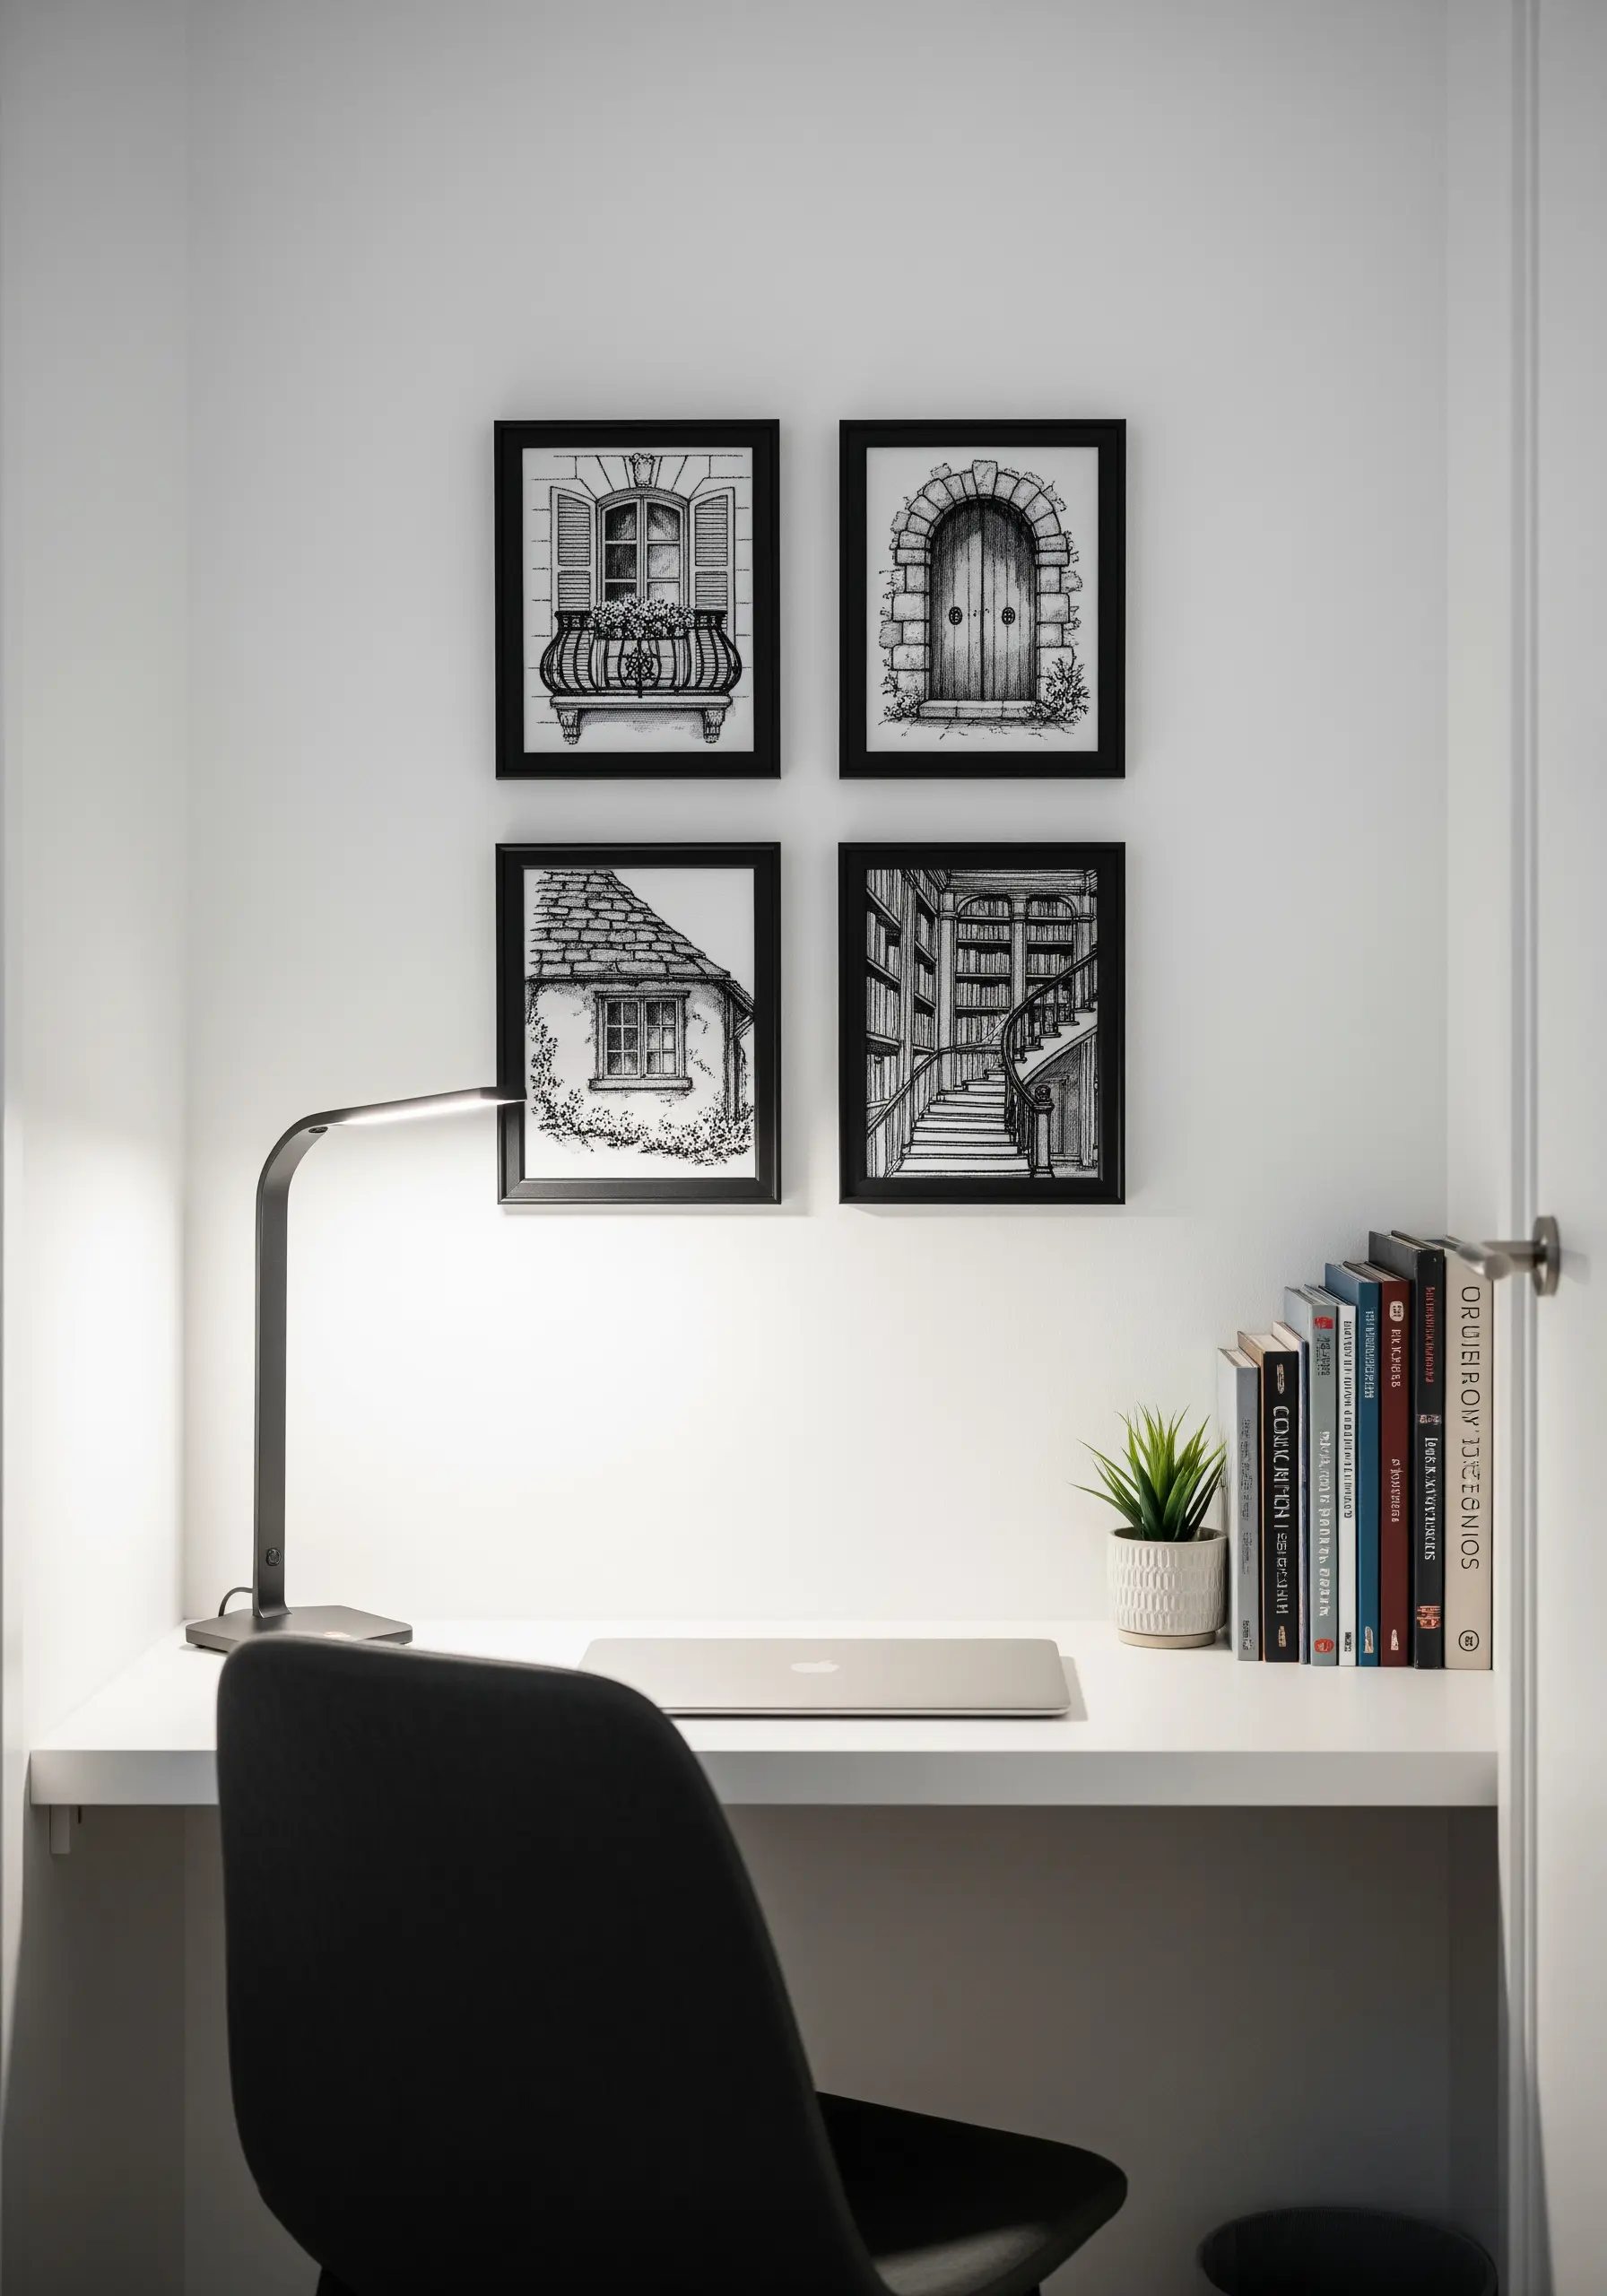
Recreate the feel of an artist’s sketchbook by using only black thread on a stark white or cream background.
Vary the length and direction of your backstitch to mimic the energetic lines of an ink pen.
Use dense cross-hatching instead of satin stitch for shaded areas—this adds texture and depth while maintaining the hand-drawn aesthetic.
This technique is less about perfection and more about capturing character.
5. Capture the Essence of Delicate Herbs
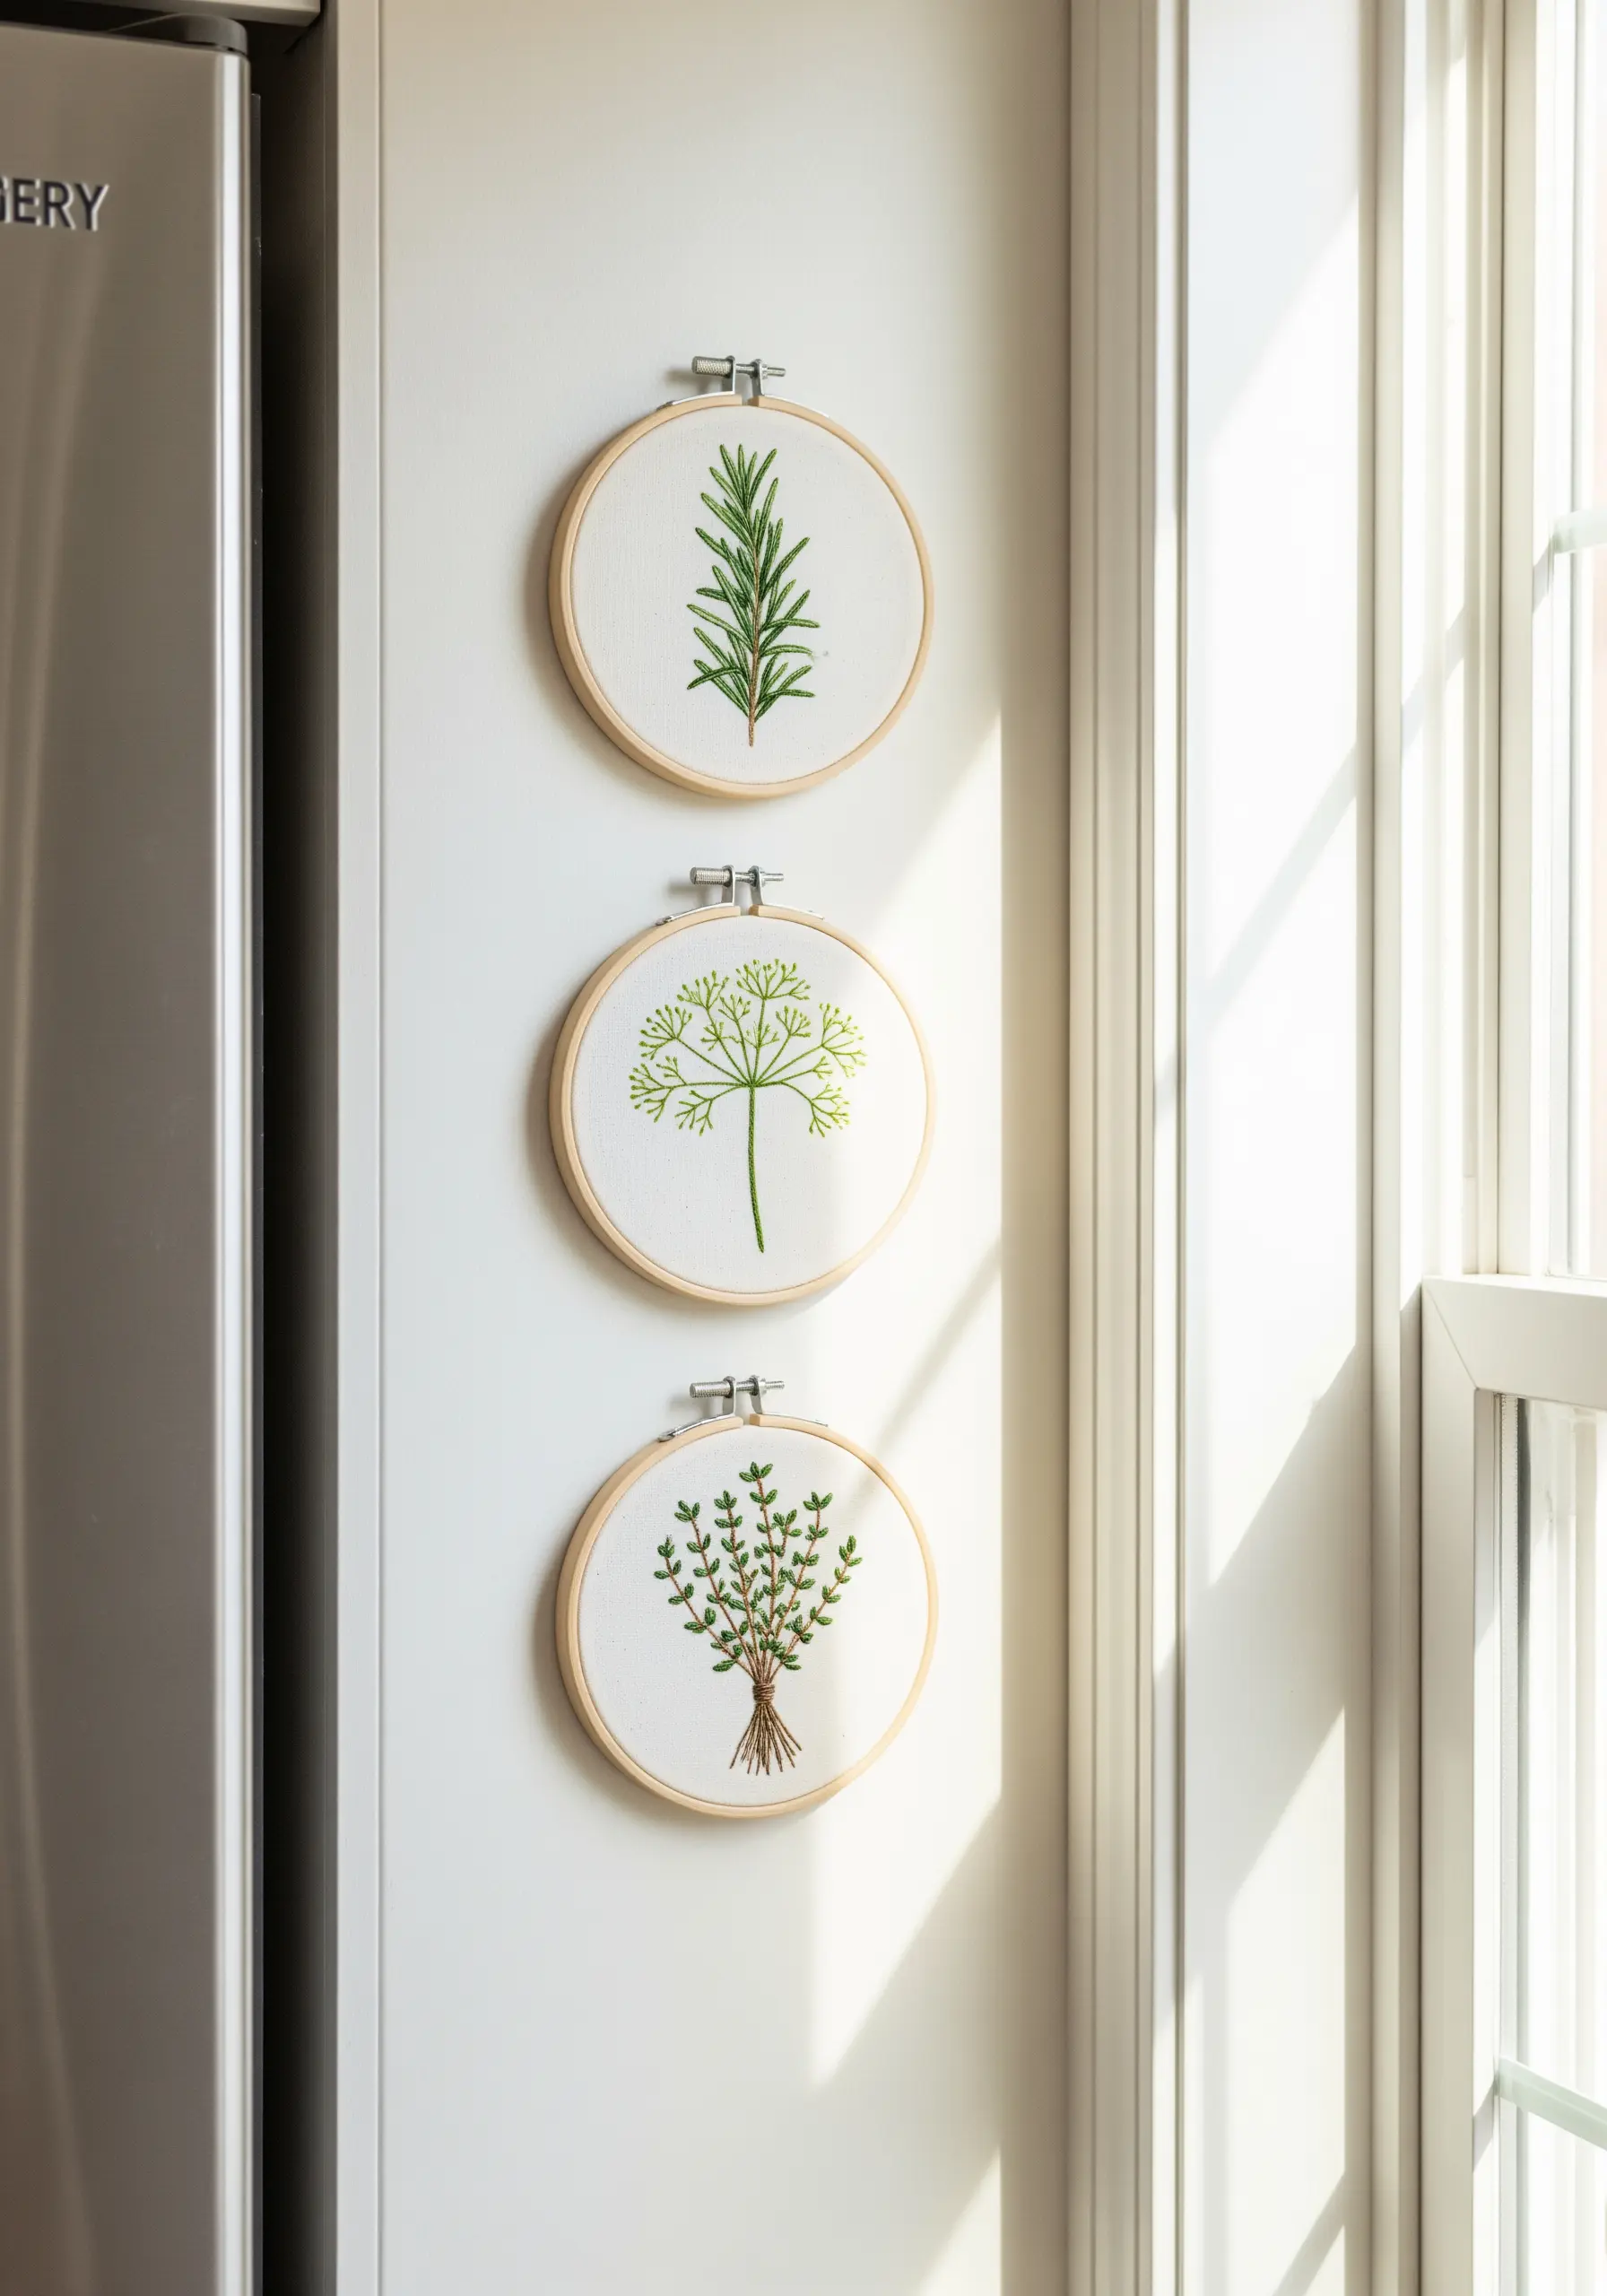
When stitching herbs, focus on capturing their unique growth patterns.
For dill, use splayed, open straight stitches to convey its airy, feathery texture.
For rosemary, a thicker stem stitch gives it a woody, robust look, while thyme can be created with tiny detached chain stitches (lazy daisies) for its clustered leaves.
This attention to detail makes each herb instantly recognizable and lifelike.
6. Create a Watercolor Bleed with Trailing Stitches
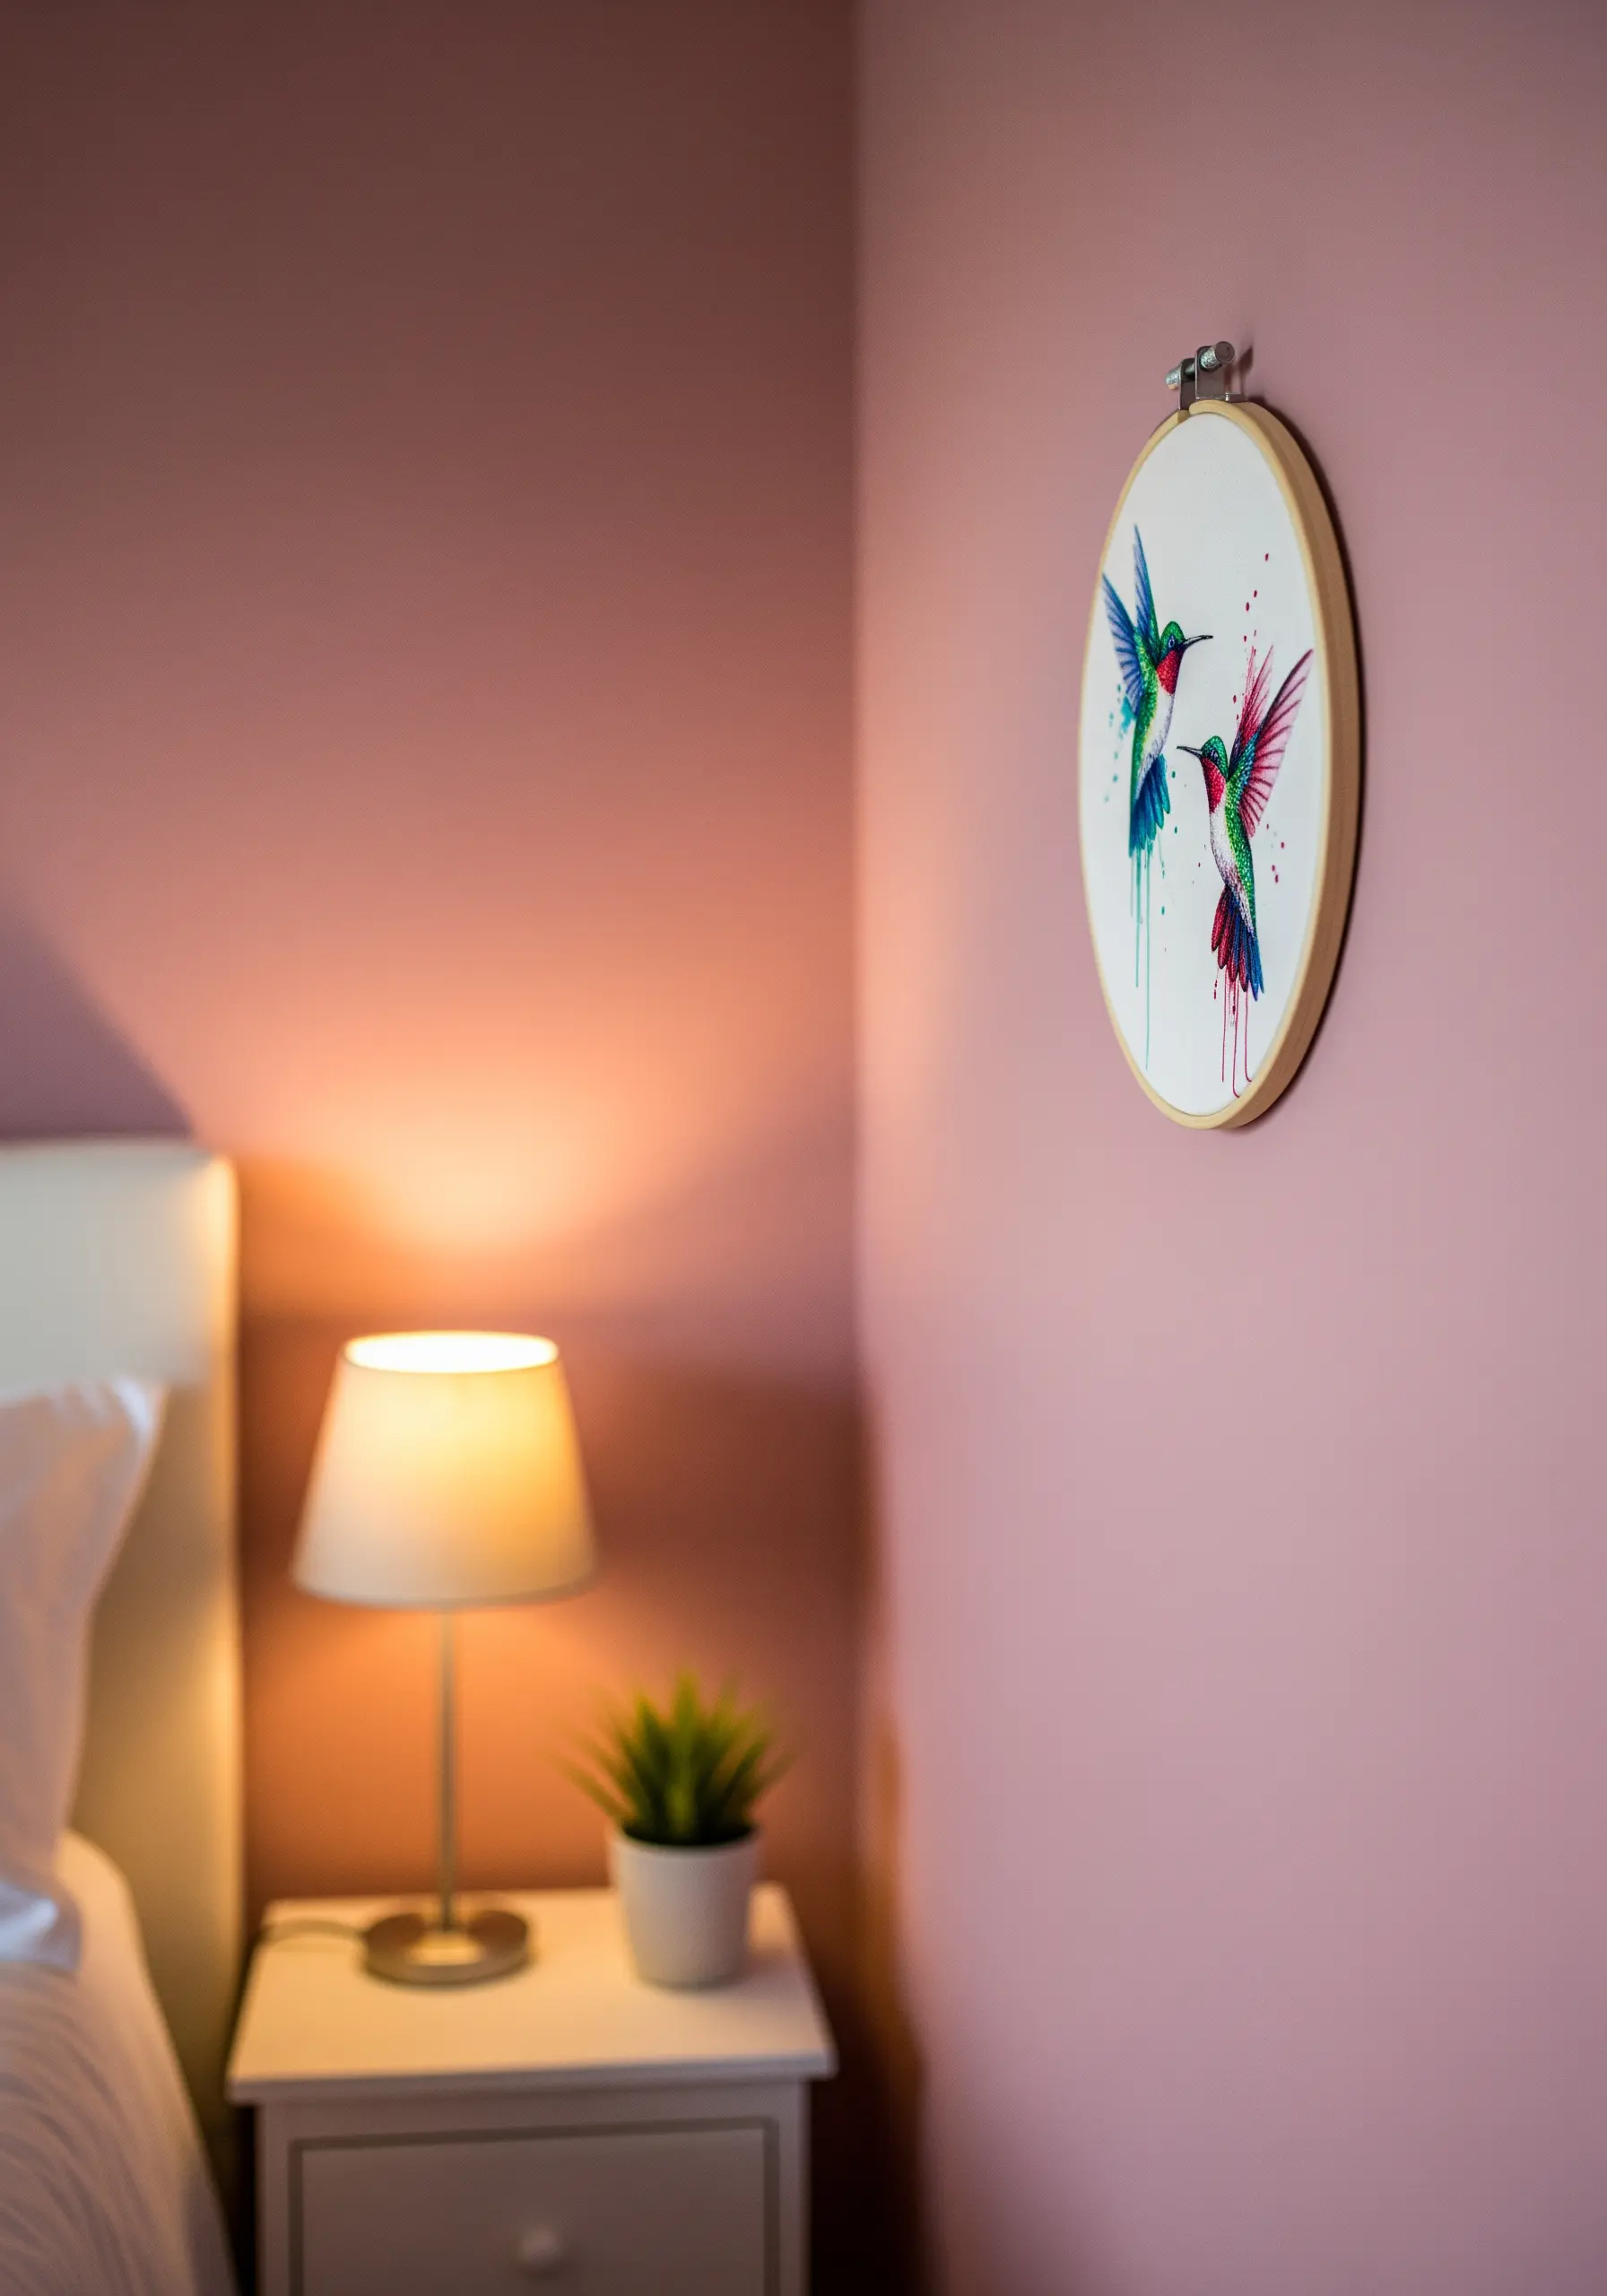
To mimic the effect of watercolor paint dripping down the canvas, use just one or two strands of floss.
After stitching your main motif, add long, trailing straight stitches that extend downward from the design.
Allow these stitches to be slightly loose and uneven to create an organic, fluid look that feels both intentional and effortlessly artistic.
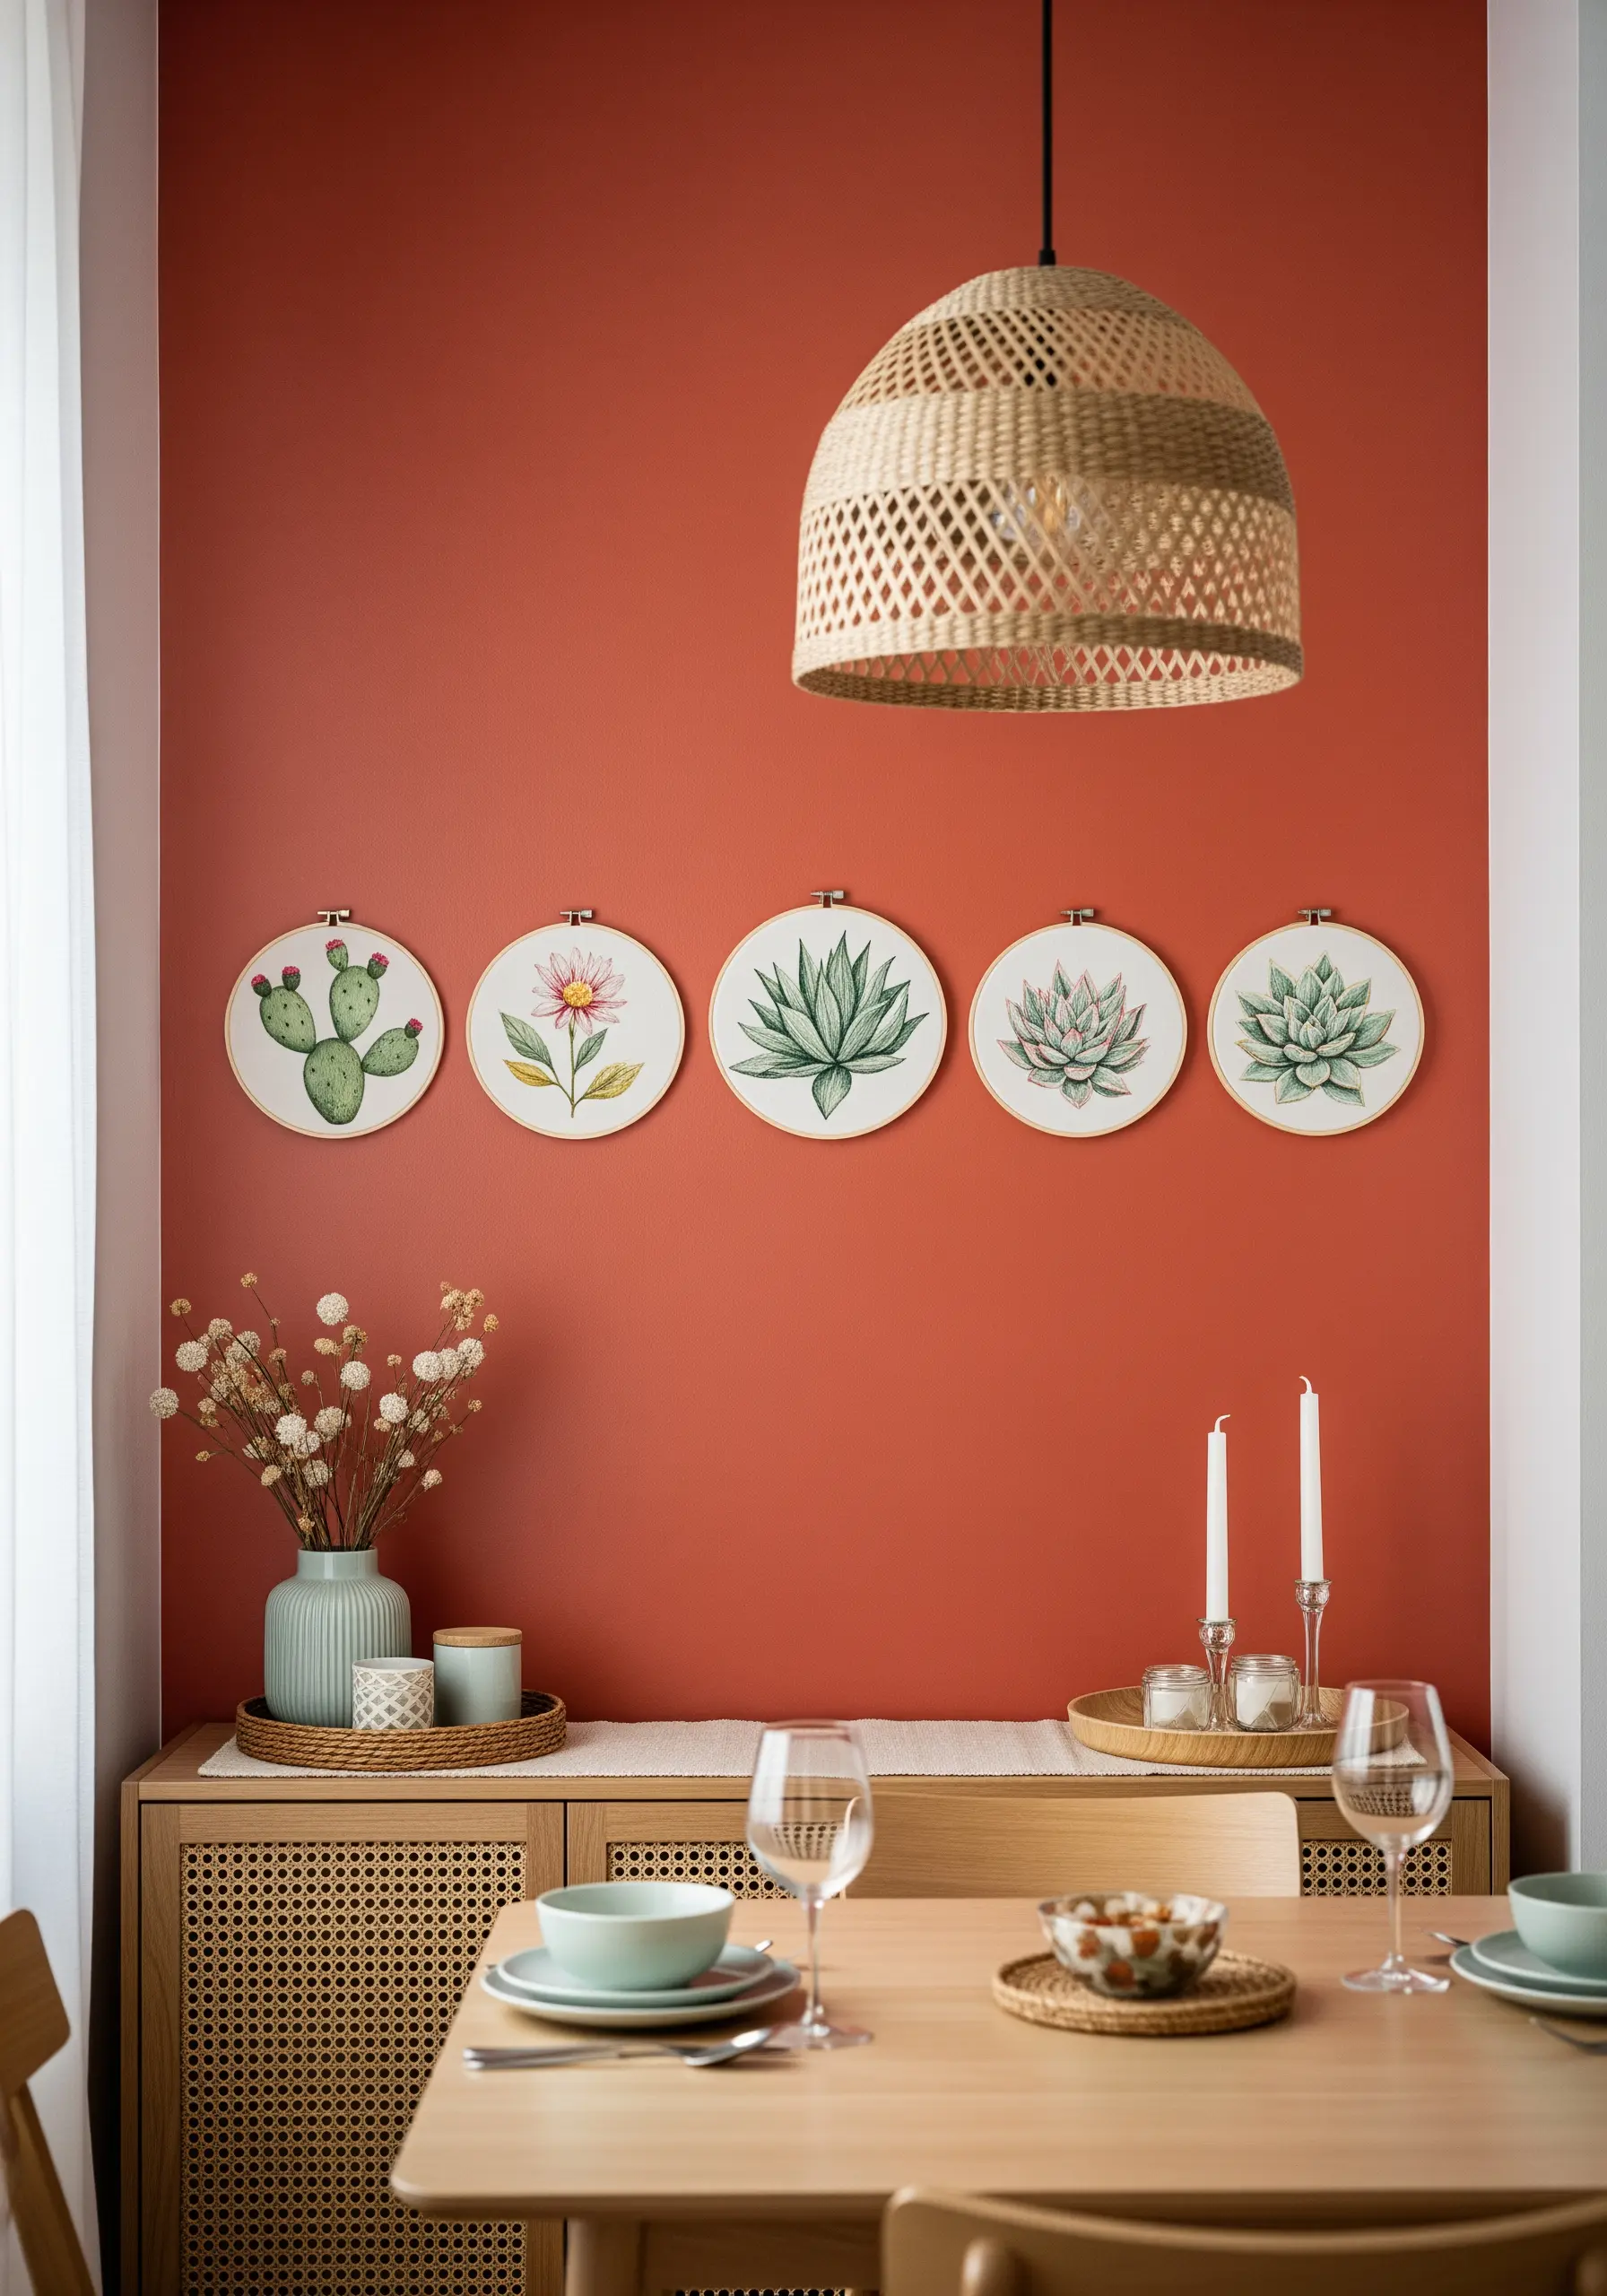
7. Unify a Floral Gallery with a Single Frame Color
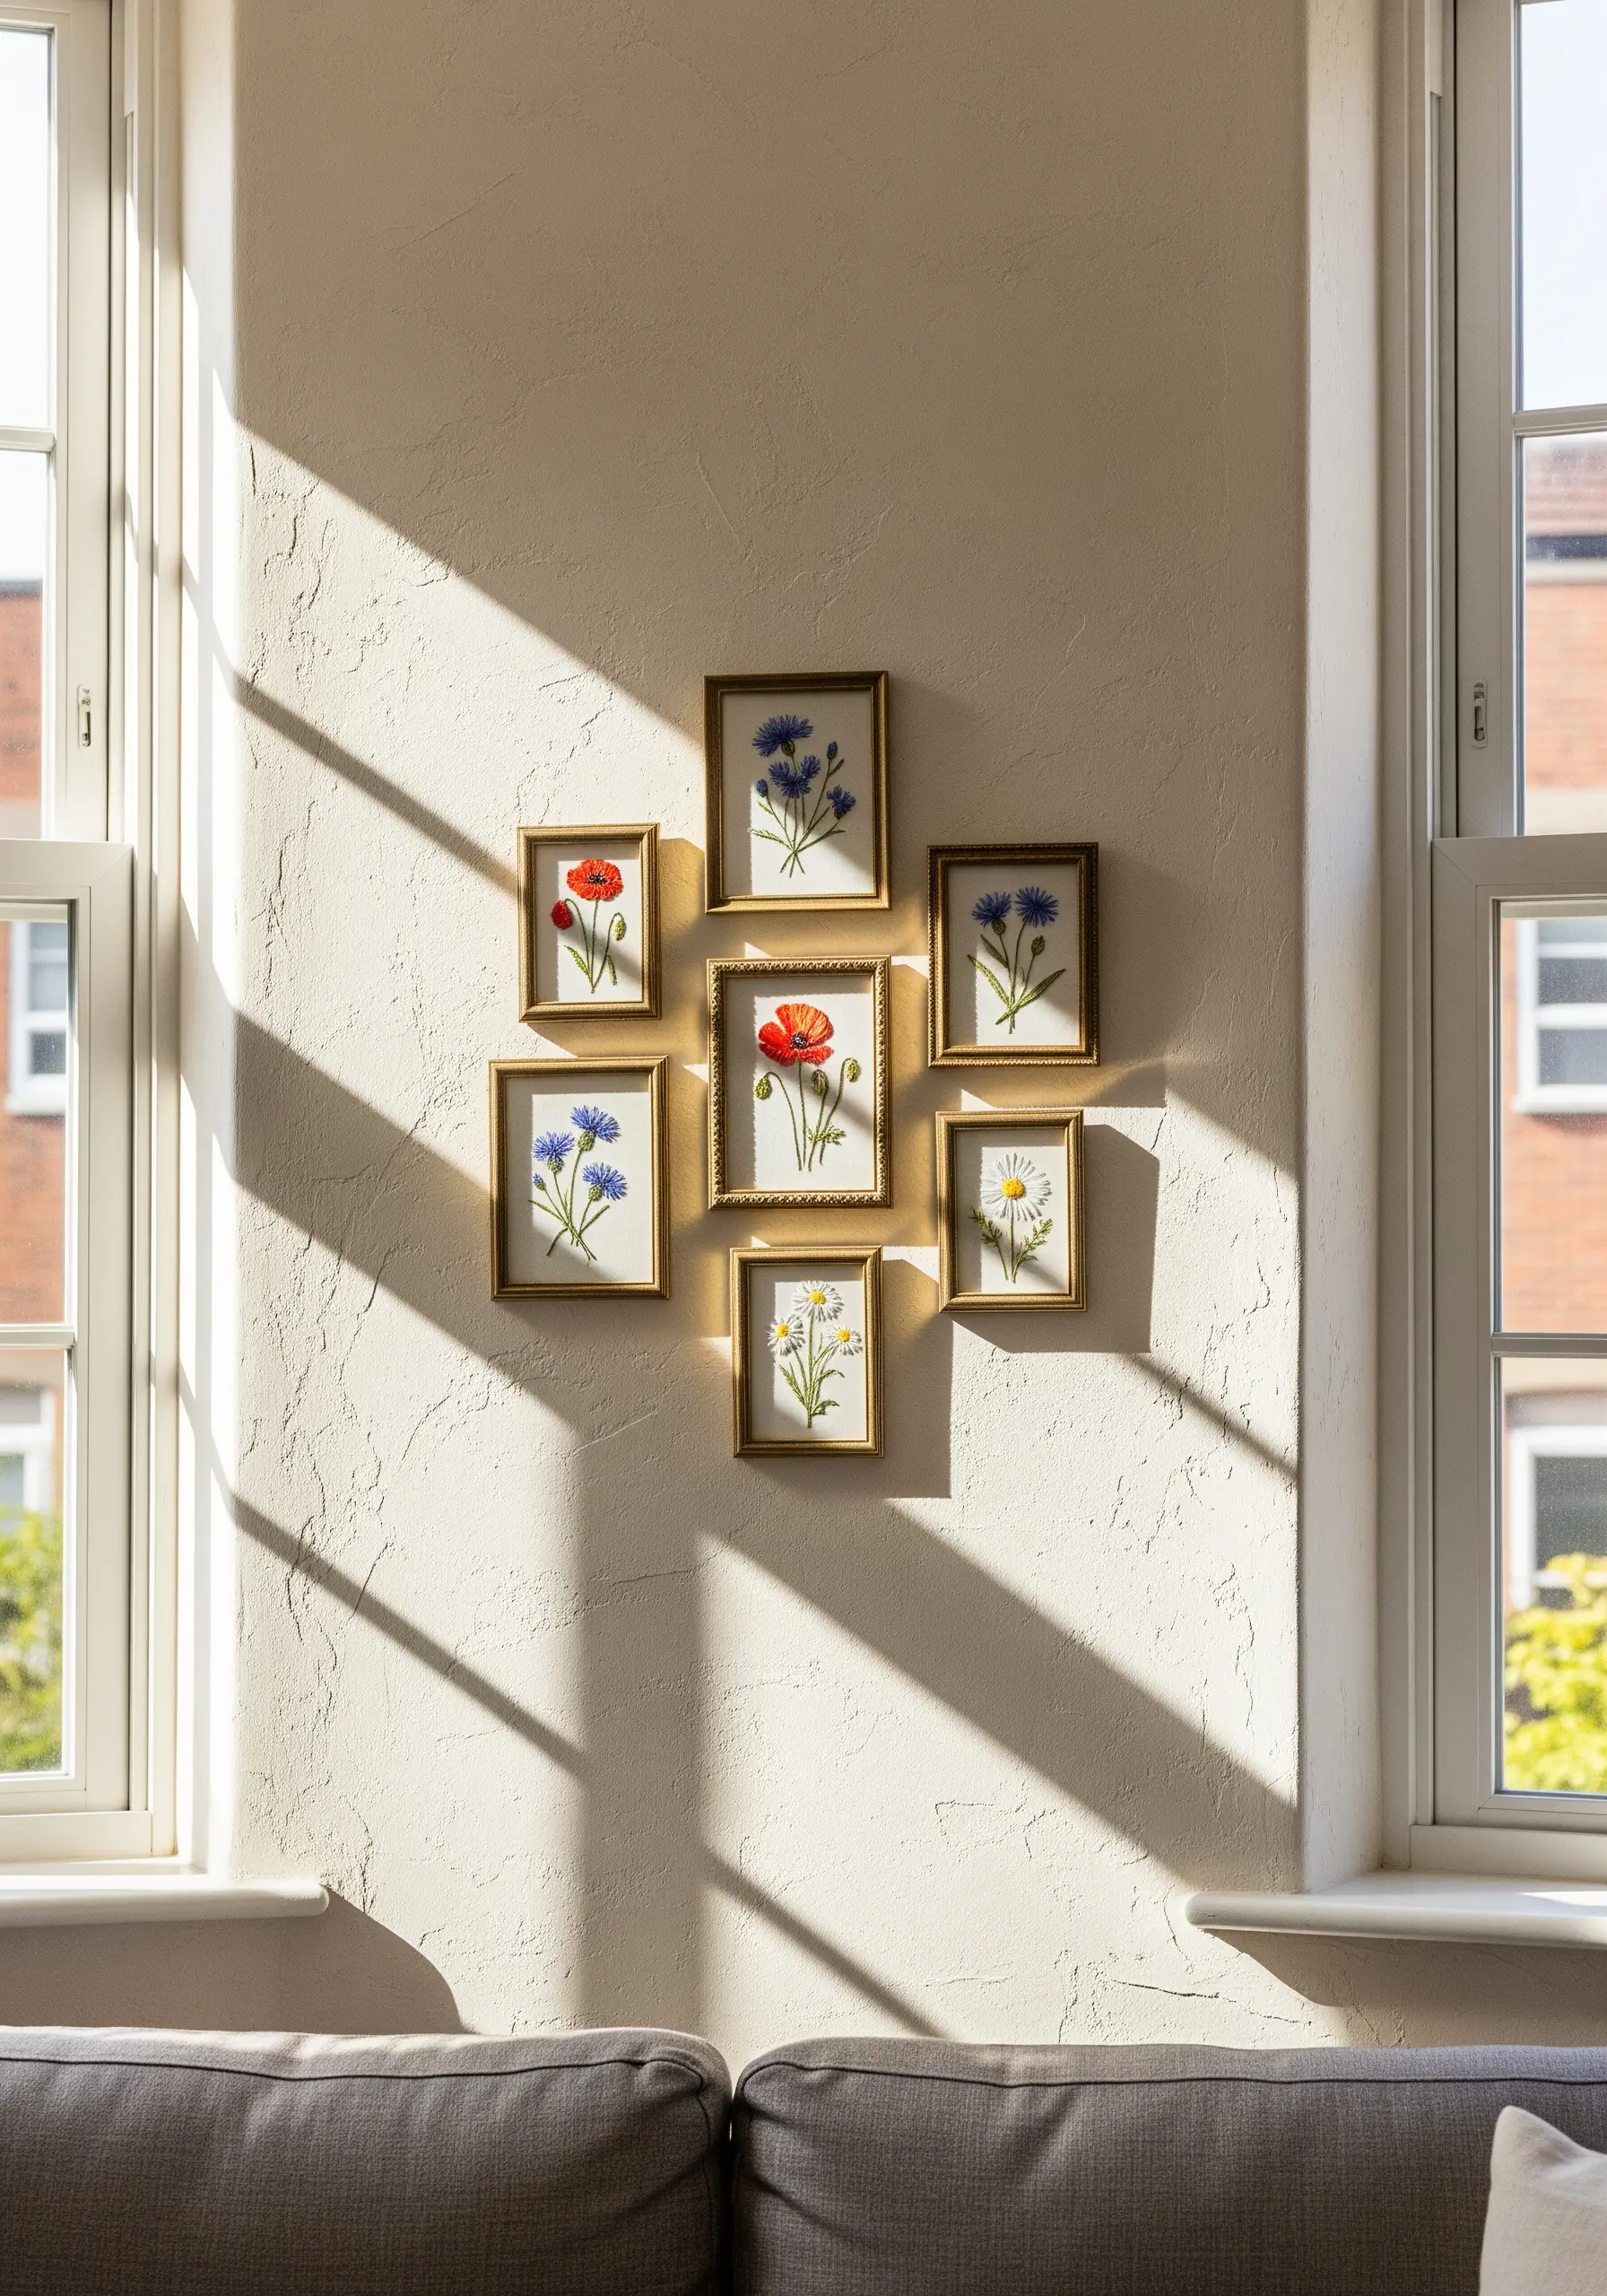
Create a stunning focal point by grouping multiple small floral pieces.
The key to making this feel cohesive instead of cluttered is consistency in framing—choose one frame style and color, like simple gold or black, for every piece.
This allows the individual artworks to shine while creating a unified, high-end gallery wall that feels curated and intentional.
8. Achieve Realistic Feather Textures
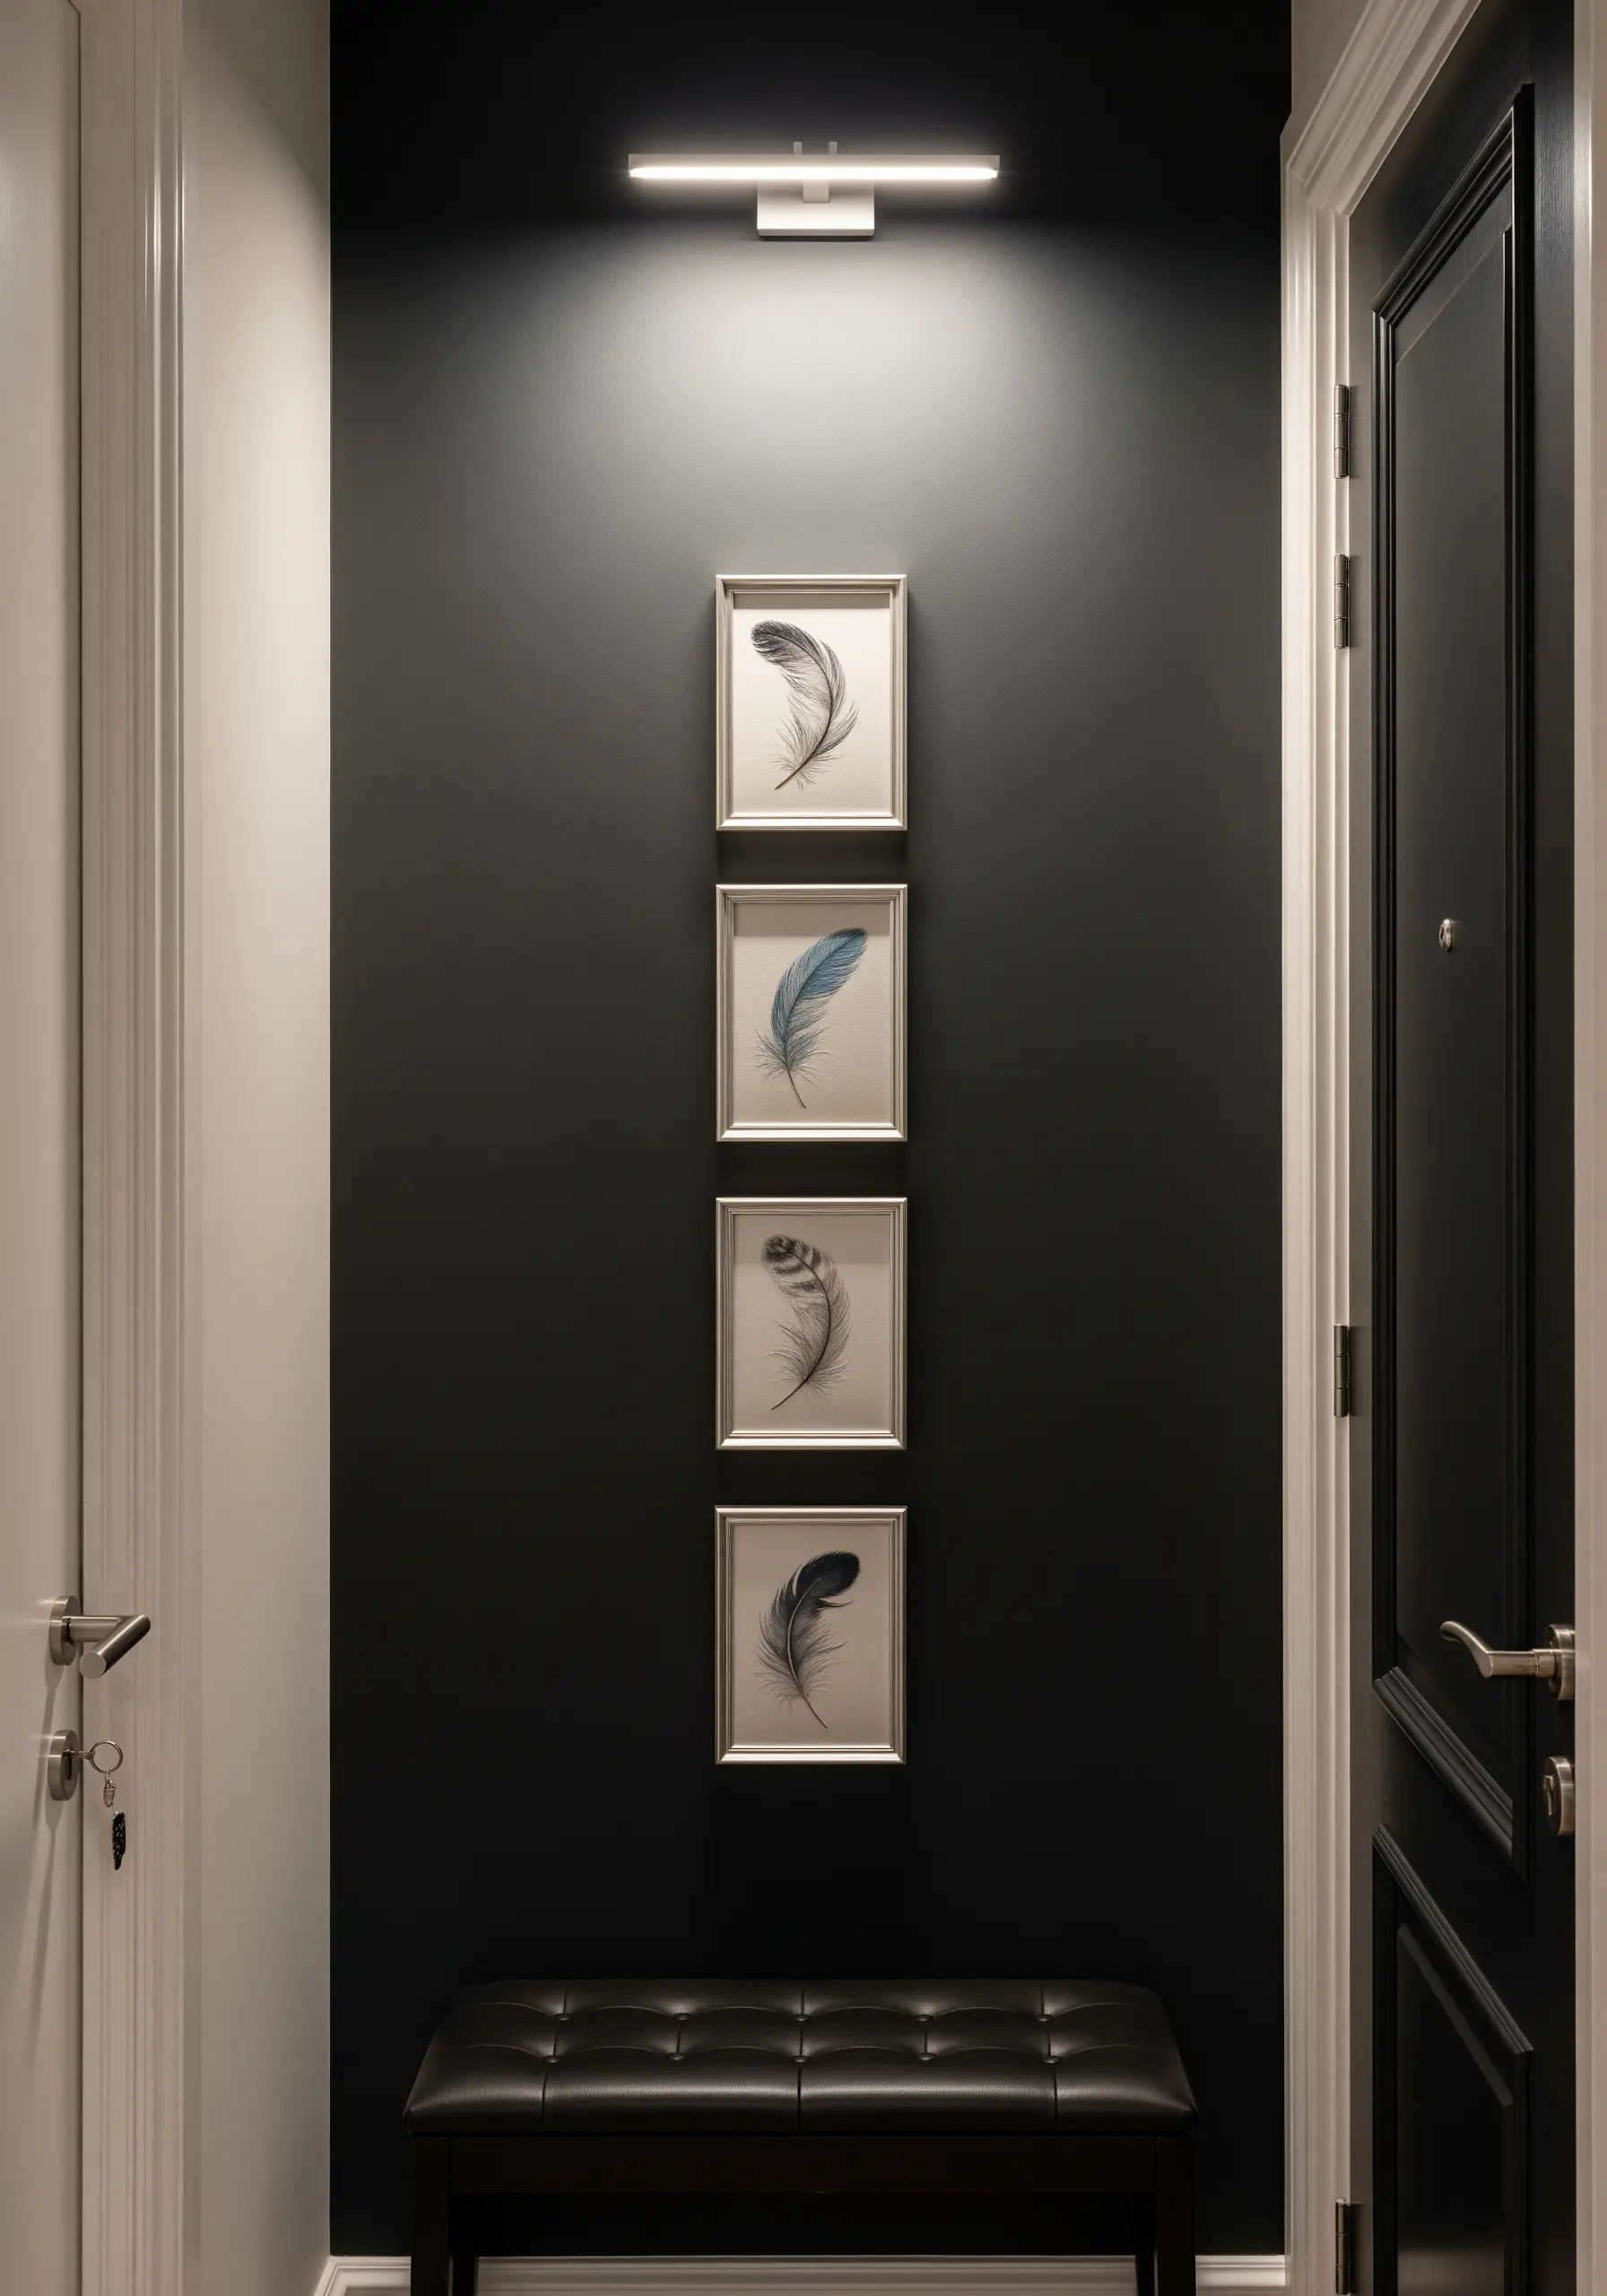
Build the delicate texture of a feather using long, angled split stitches worked from the central shaft outwards.
Using just a single strand of floss allows for subtle color blending, which can create an iridescent, light-catching effect.
Keep the stitches tight and uniform in direction on each side of the shaft to achieve a photorealistic quality that feels both soft and structured.
9. Use Padded Satin Stitch for 3D Effects
Make your motifs physically pop from the fabric with padded satin stitch.
Before you begin your satin stitch, lay down a foundation of small, dense straight stitches within the shape.
Then, work your satin stitch over this padding at a perpendicular angle. This technique gives your work a subtle, sculptural quality that adds dimension and catches the light beautifully, perfect for rounded shapes like a clownfish.
10. Create Atmospheric Depth with Thread Weight
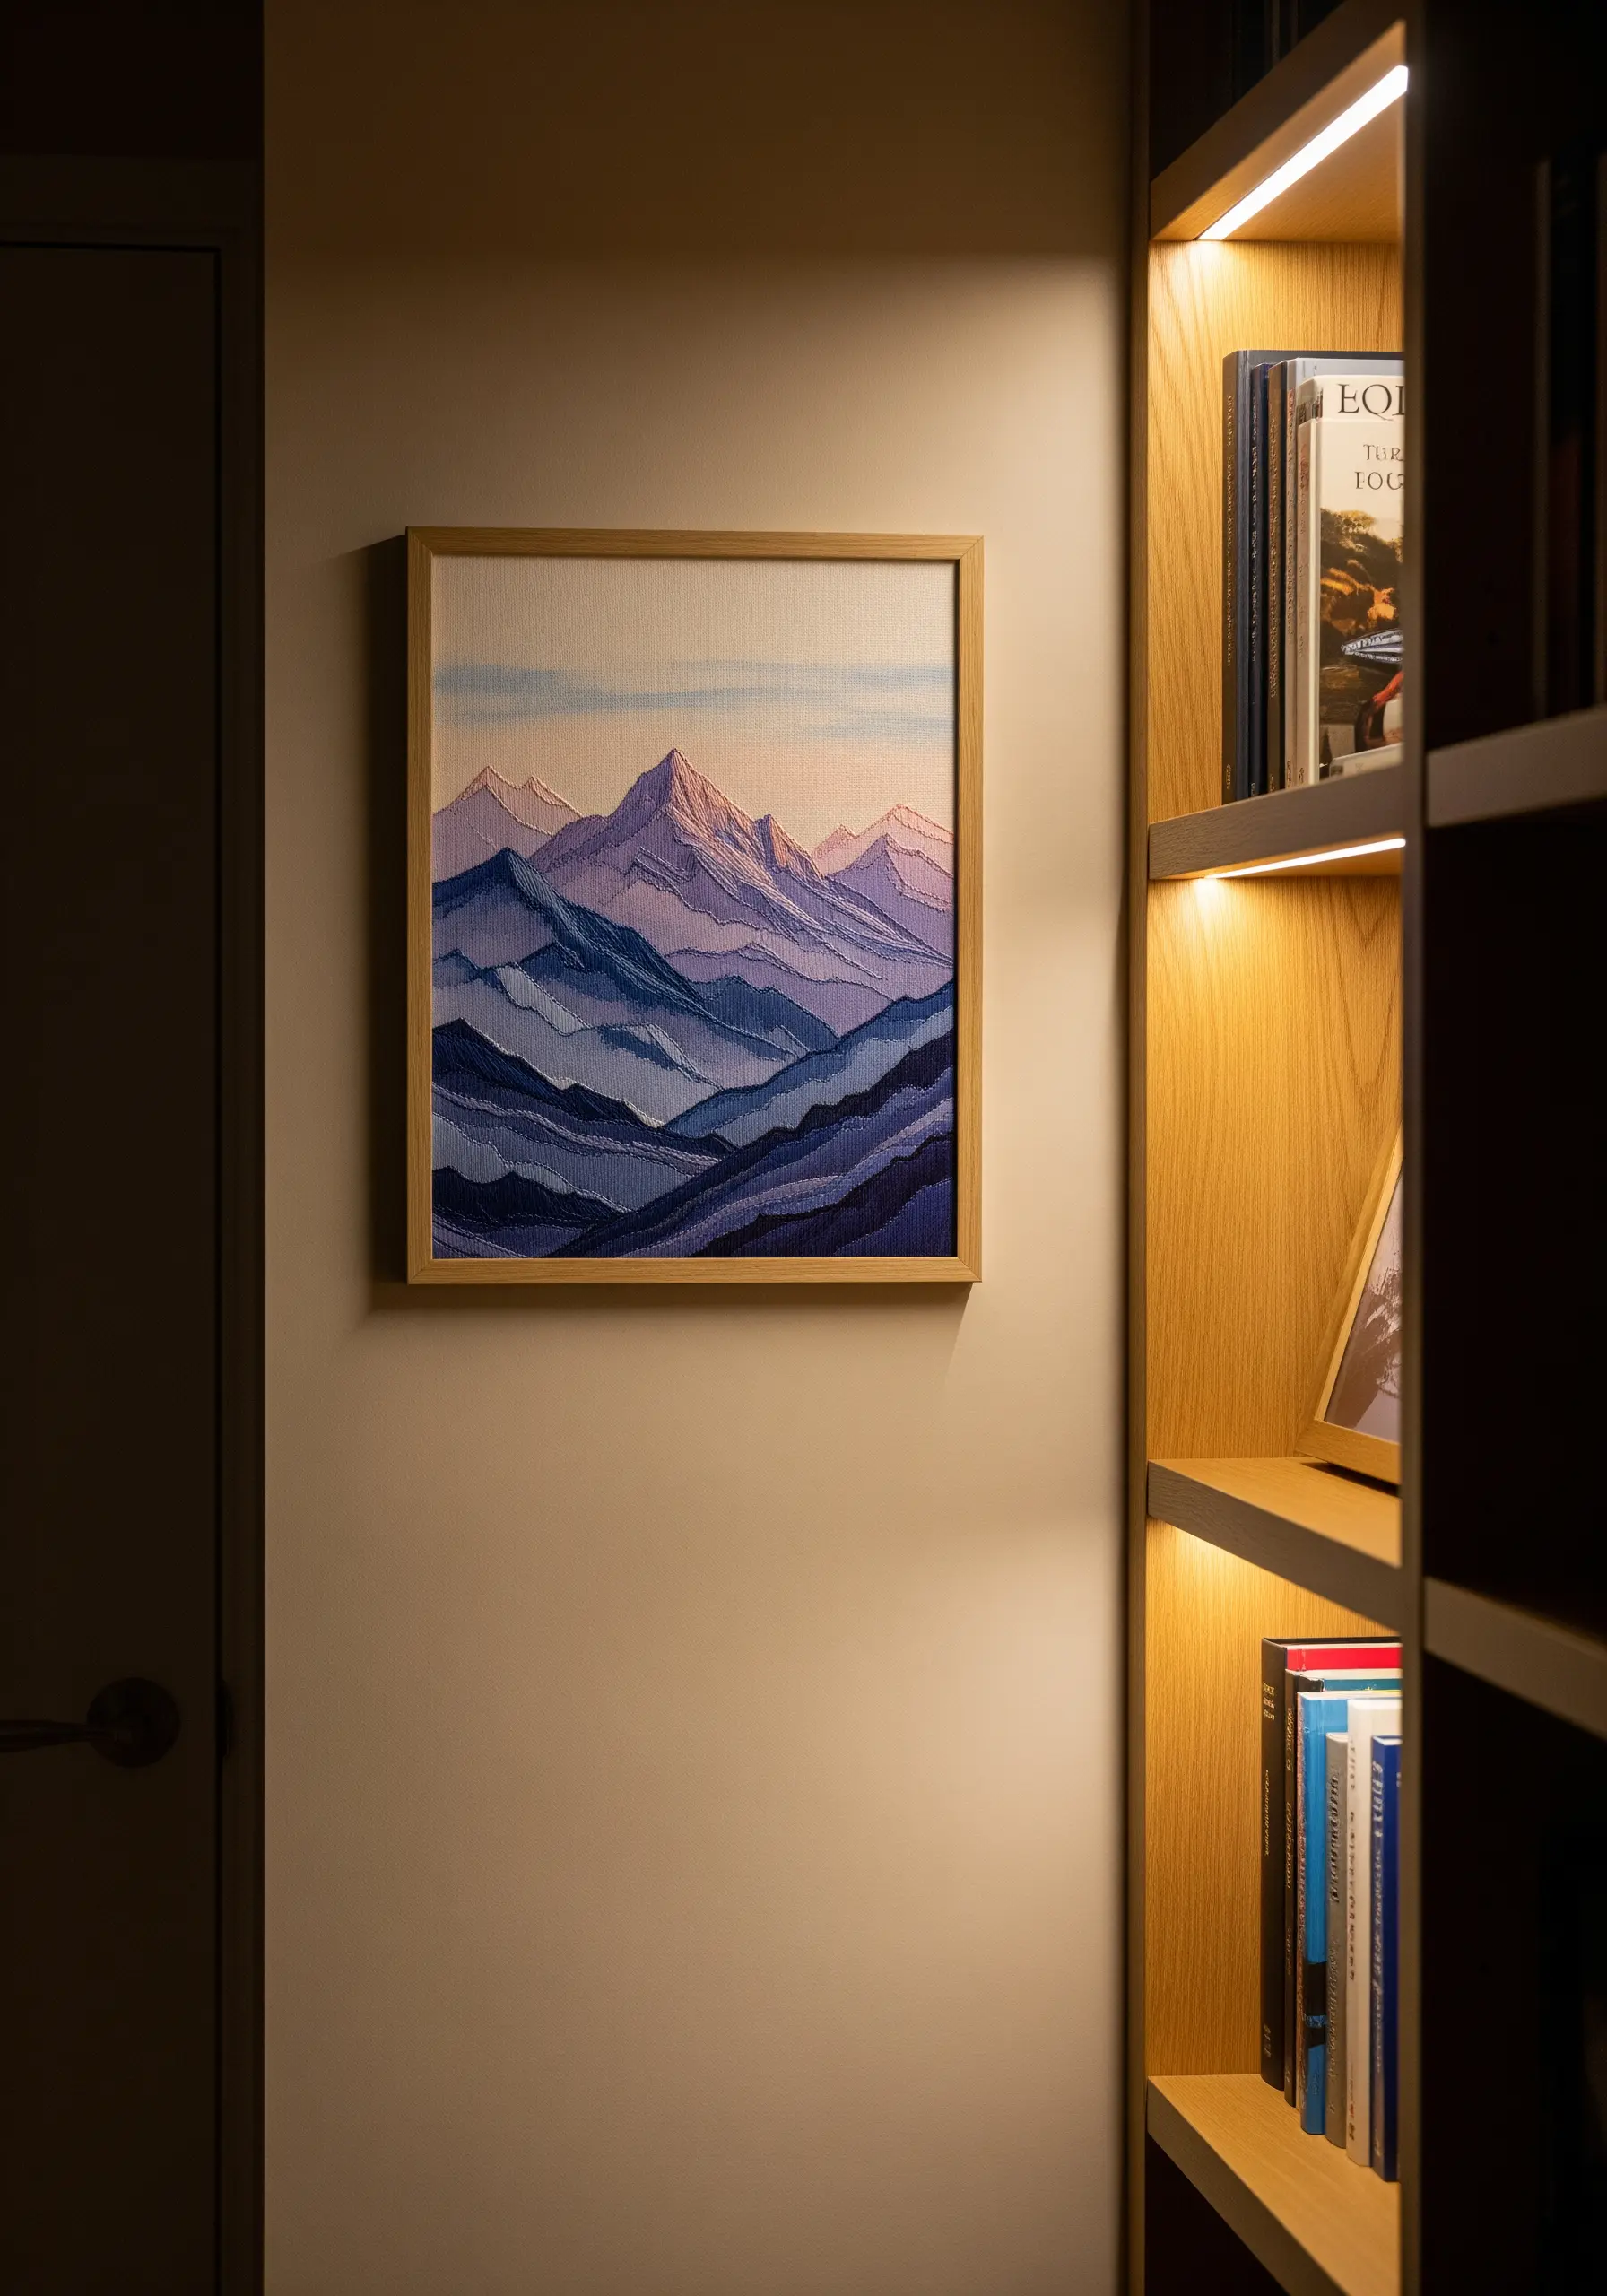
To make a landscape feel vast, use thread weight and color to create atmospheric perspective.
Stitch the mountains in the foreground with three or four strands of floss in saturated colors.
For the mountains in the distance, switch to a single strand of floss in paler, cooler tones like muted blues and lavenders. This subtle shift makes the background recede, adding incredible depth to your work.
11. Blend Fabric Paint and Minimal Stitching
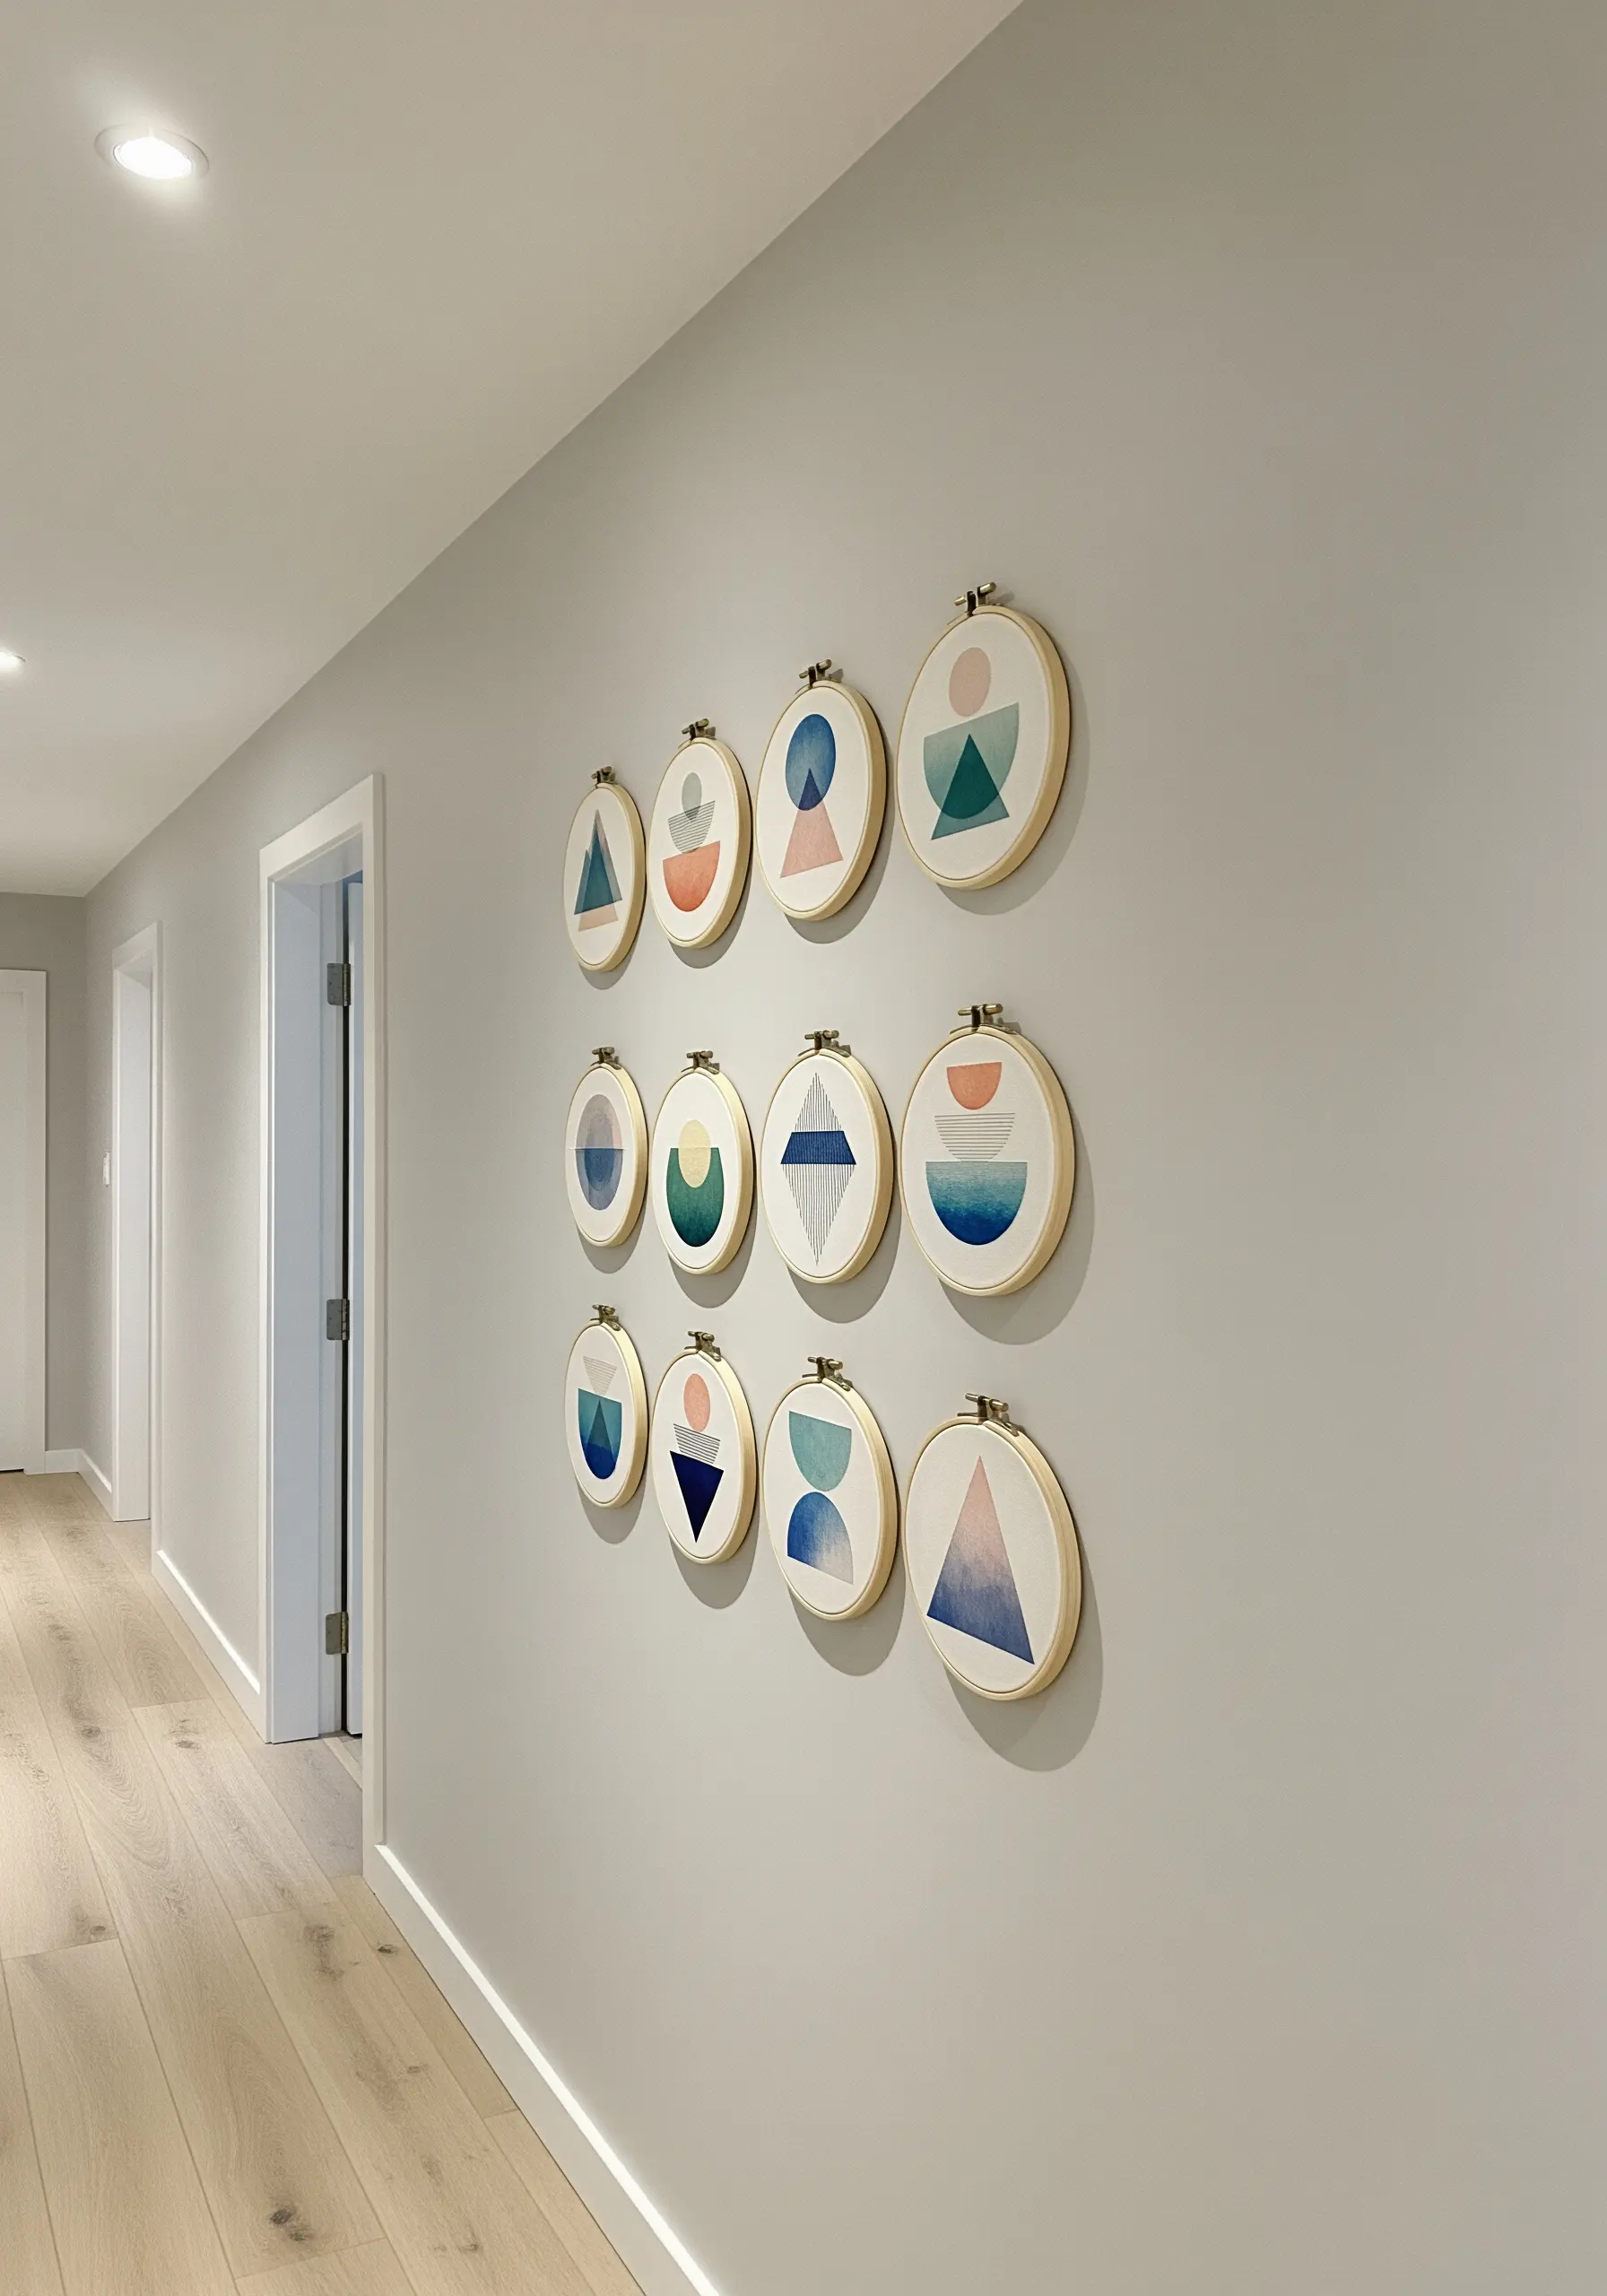
For clean, modern geometric designs, combine two mediums.
First, lightly paint your shapes onto the fabric with watercolor or diluted acrylic paint, allowing for soft, blended edges.
Once dry, add minimal stitched lines—like a simple backstitch or running stitch—to define edges or add textural details. This hybrid approach is fast, impactful, and yields a beautifully graphic result.
12. Achieve Soft Gradients with Long-and-Short Stitch
Succulents are perfect for practicing your thread painting, specifically the long-and-short stitch.
Use this stitch to seamlessly blend greens, pinks, and blues to replicate the soft, fleshy look of the leaves.
Work in concentric circles from the center out, overlapping each new color into the previous one. This creates a smooth, painterly gradient that satin stitch alone cannot achieve.
13. Design a Cascade of Motion on a Stairwell Wall
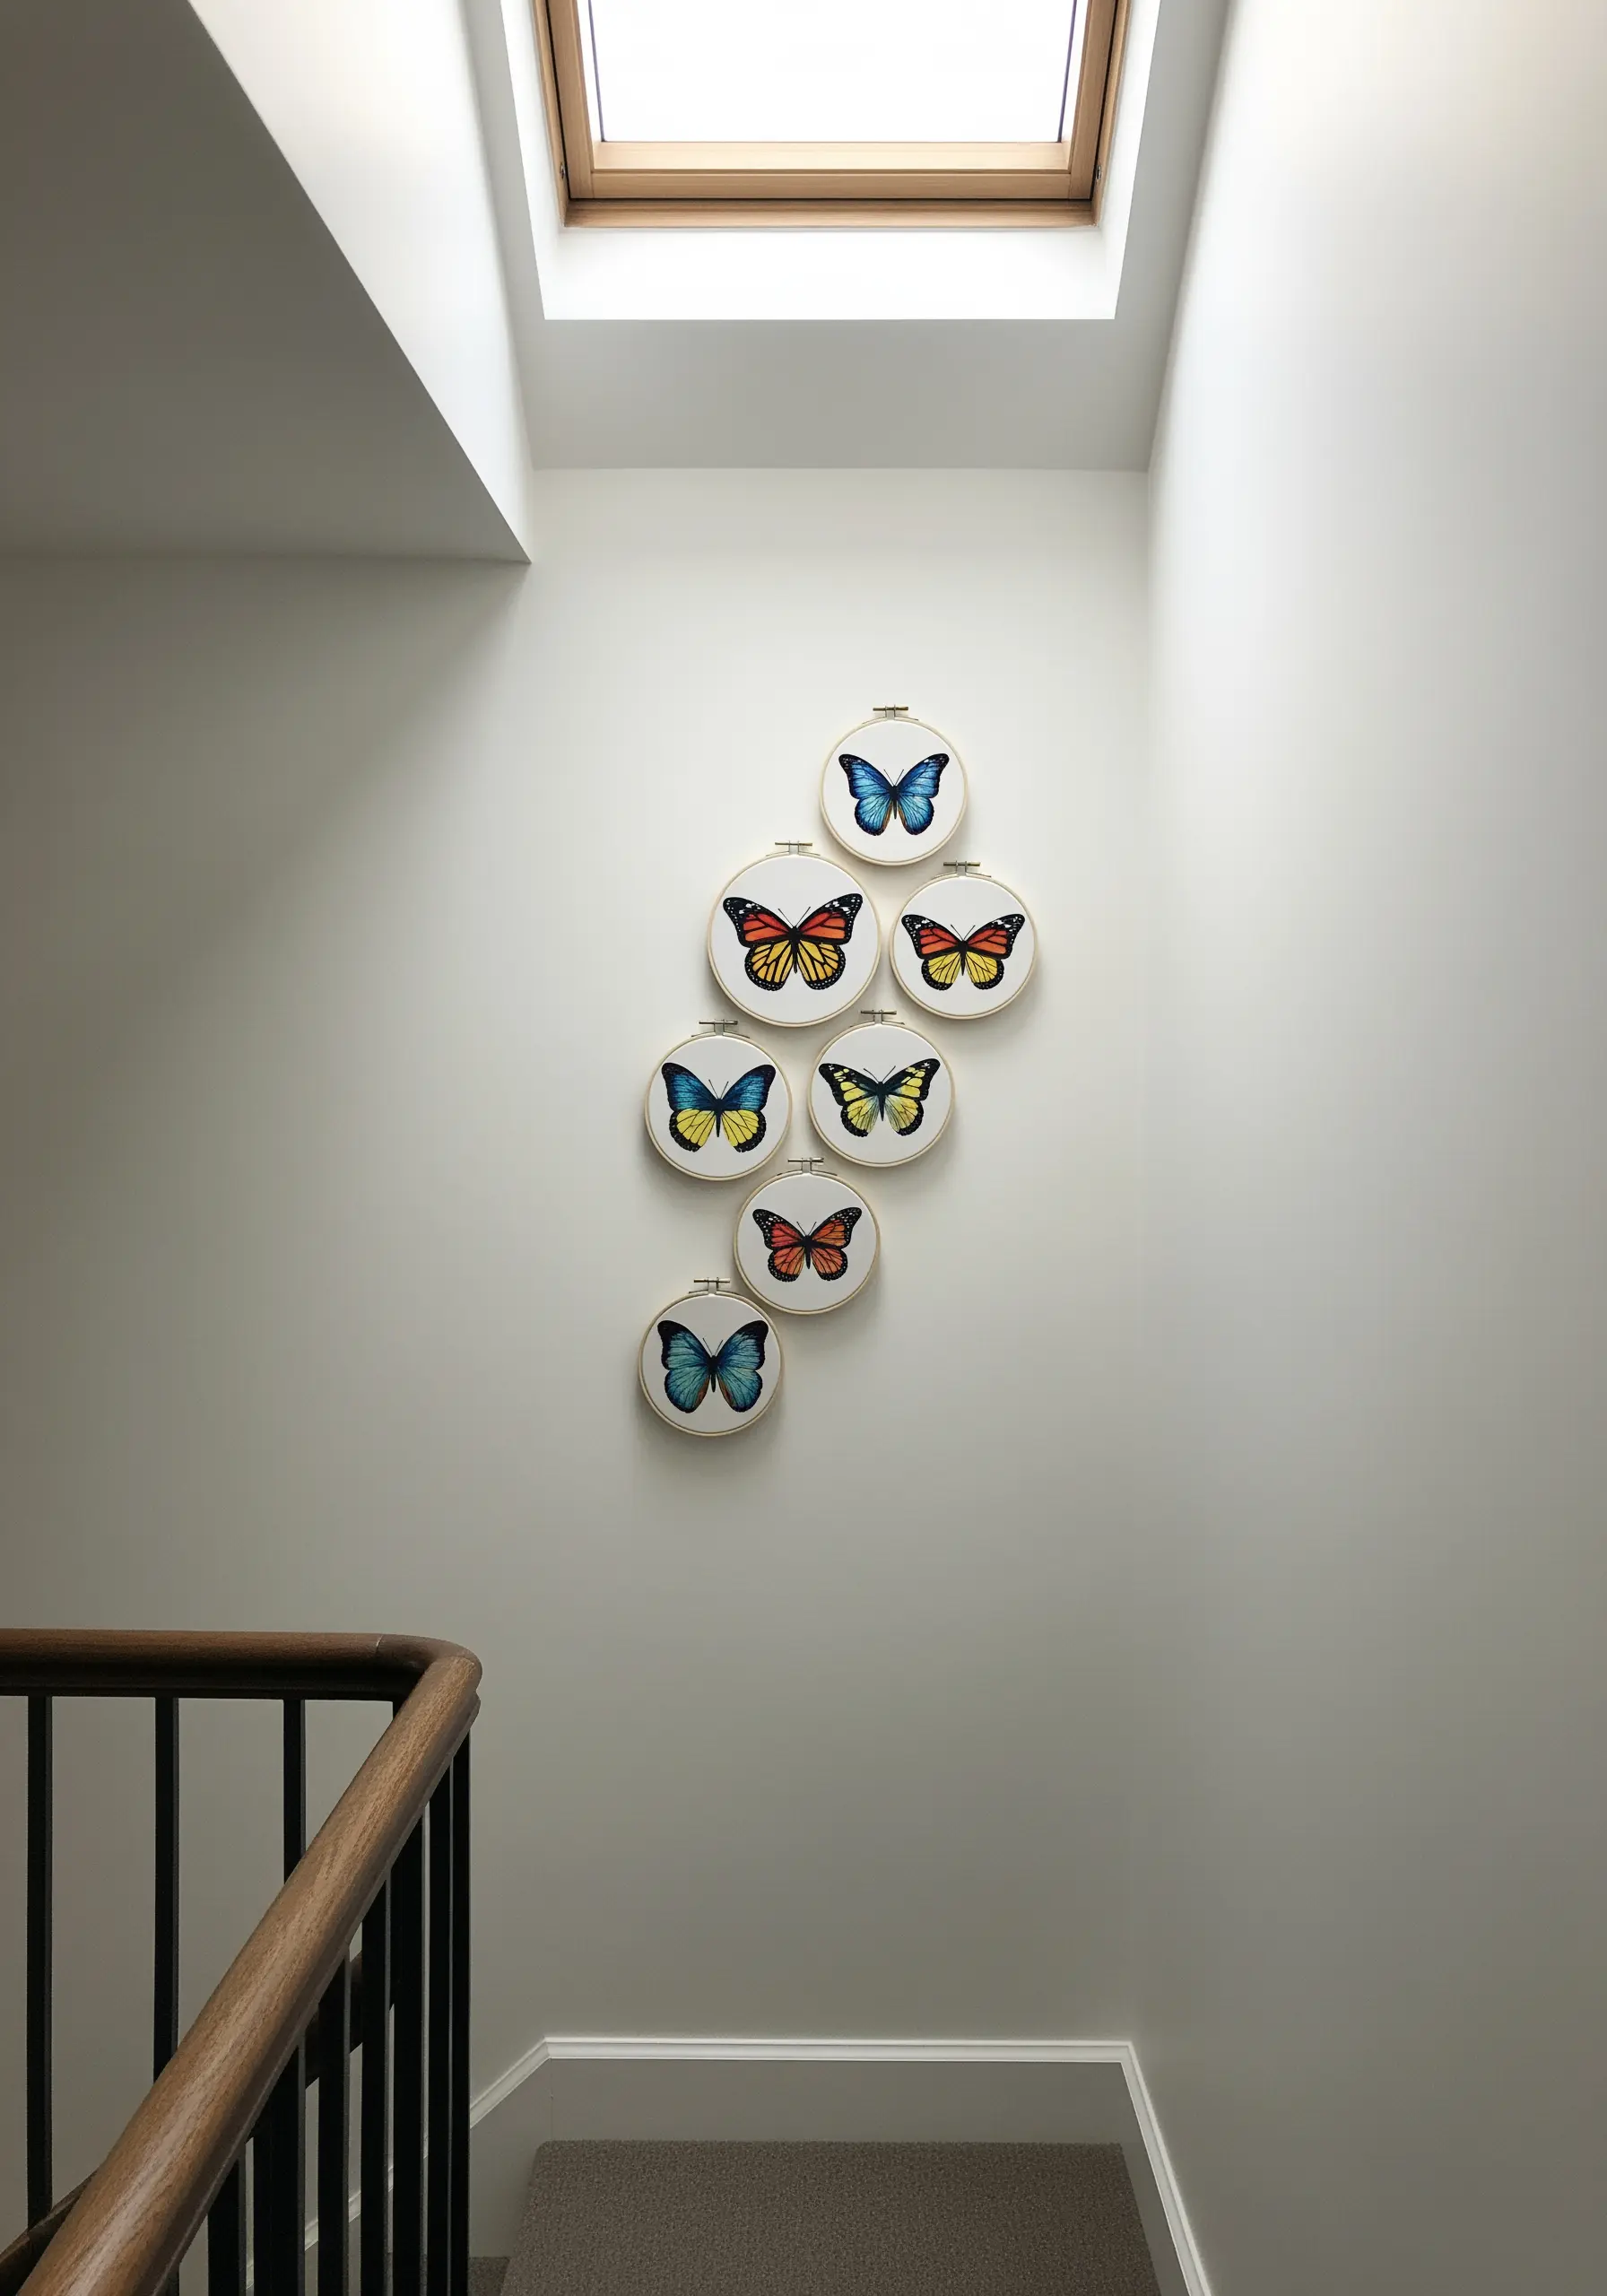
Use the natural verticality of a staircase to your advantage by arranging hoops in a cascading or ascending pattern.
This creates a powerful sense of movement that guides the eye along the path of the stairs.
Vary the size of the hoops and the orientation of the motifs, like these butterflies, to enhance the illusion of flight and make the display feel dynamic and alive.
14. Convey Softness with Directional Fur Stitching
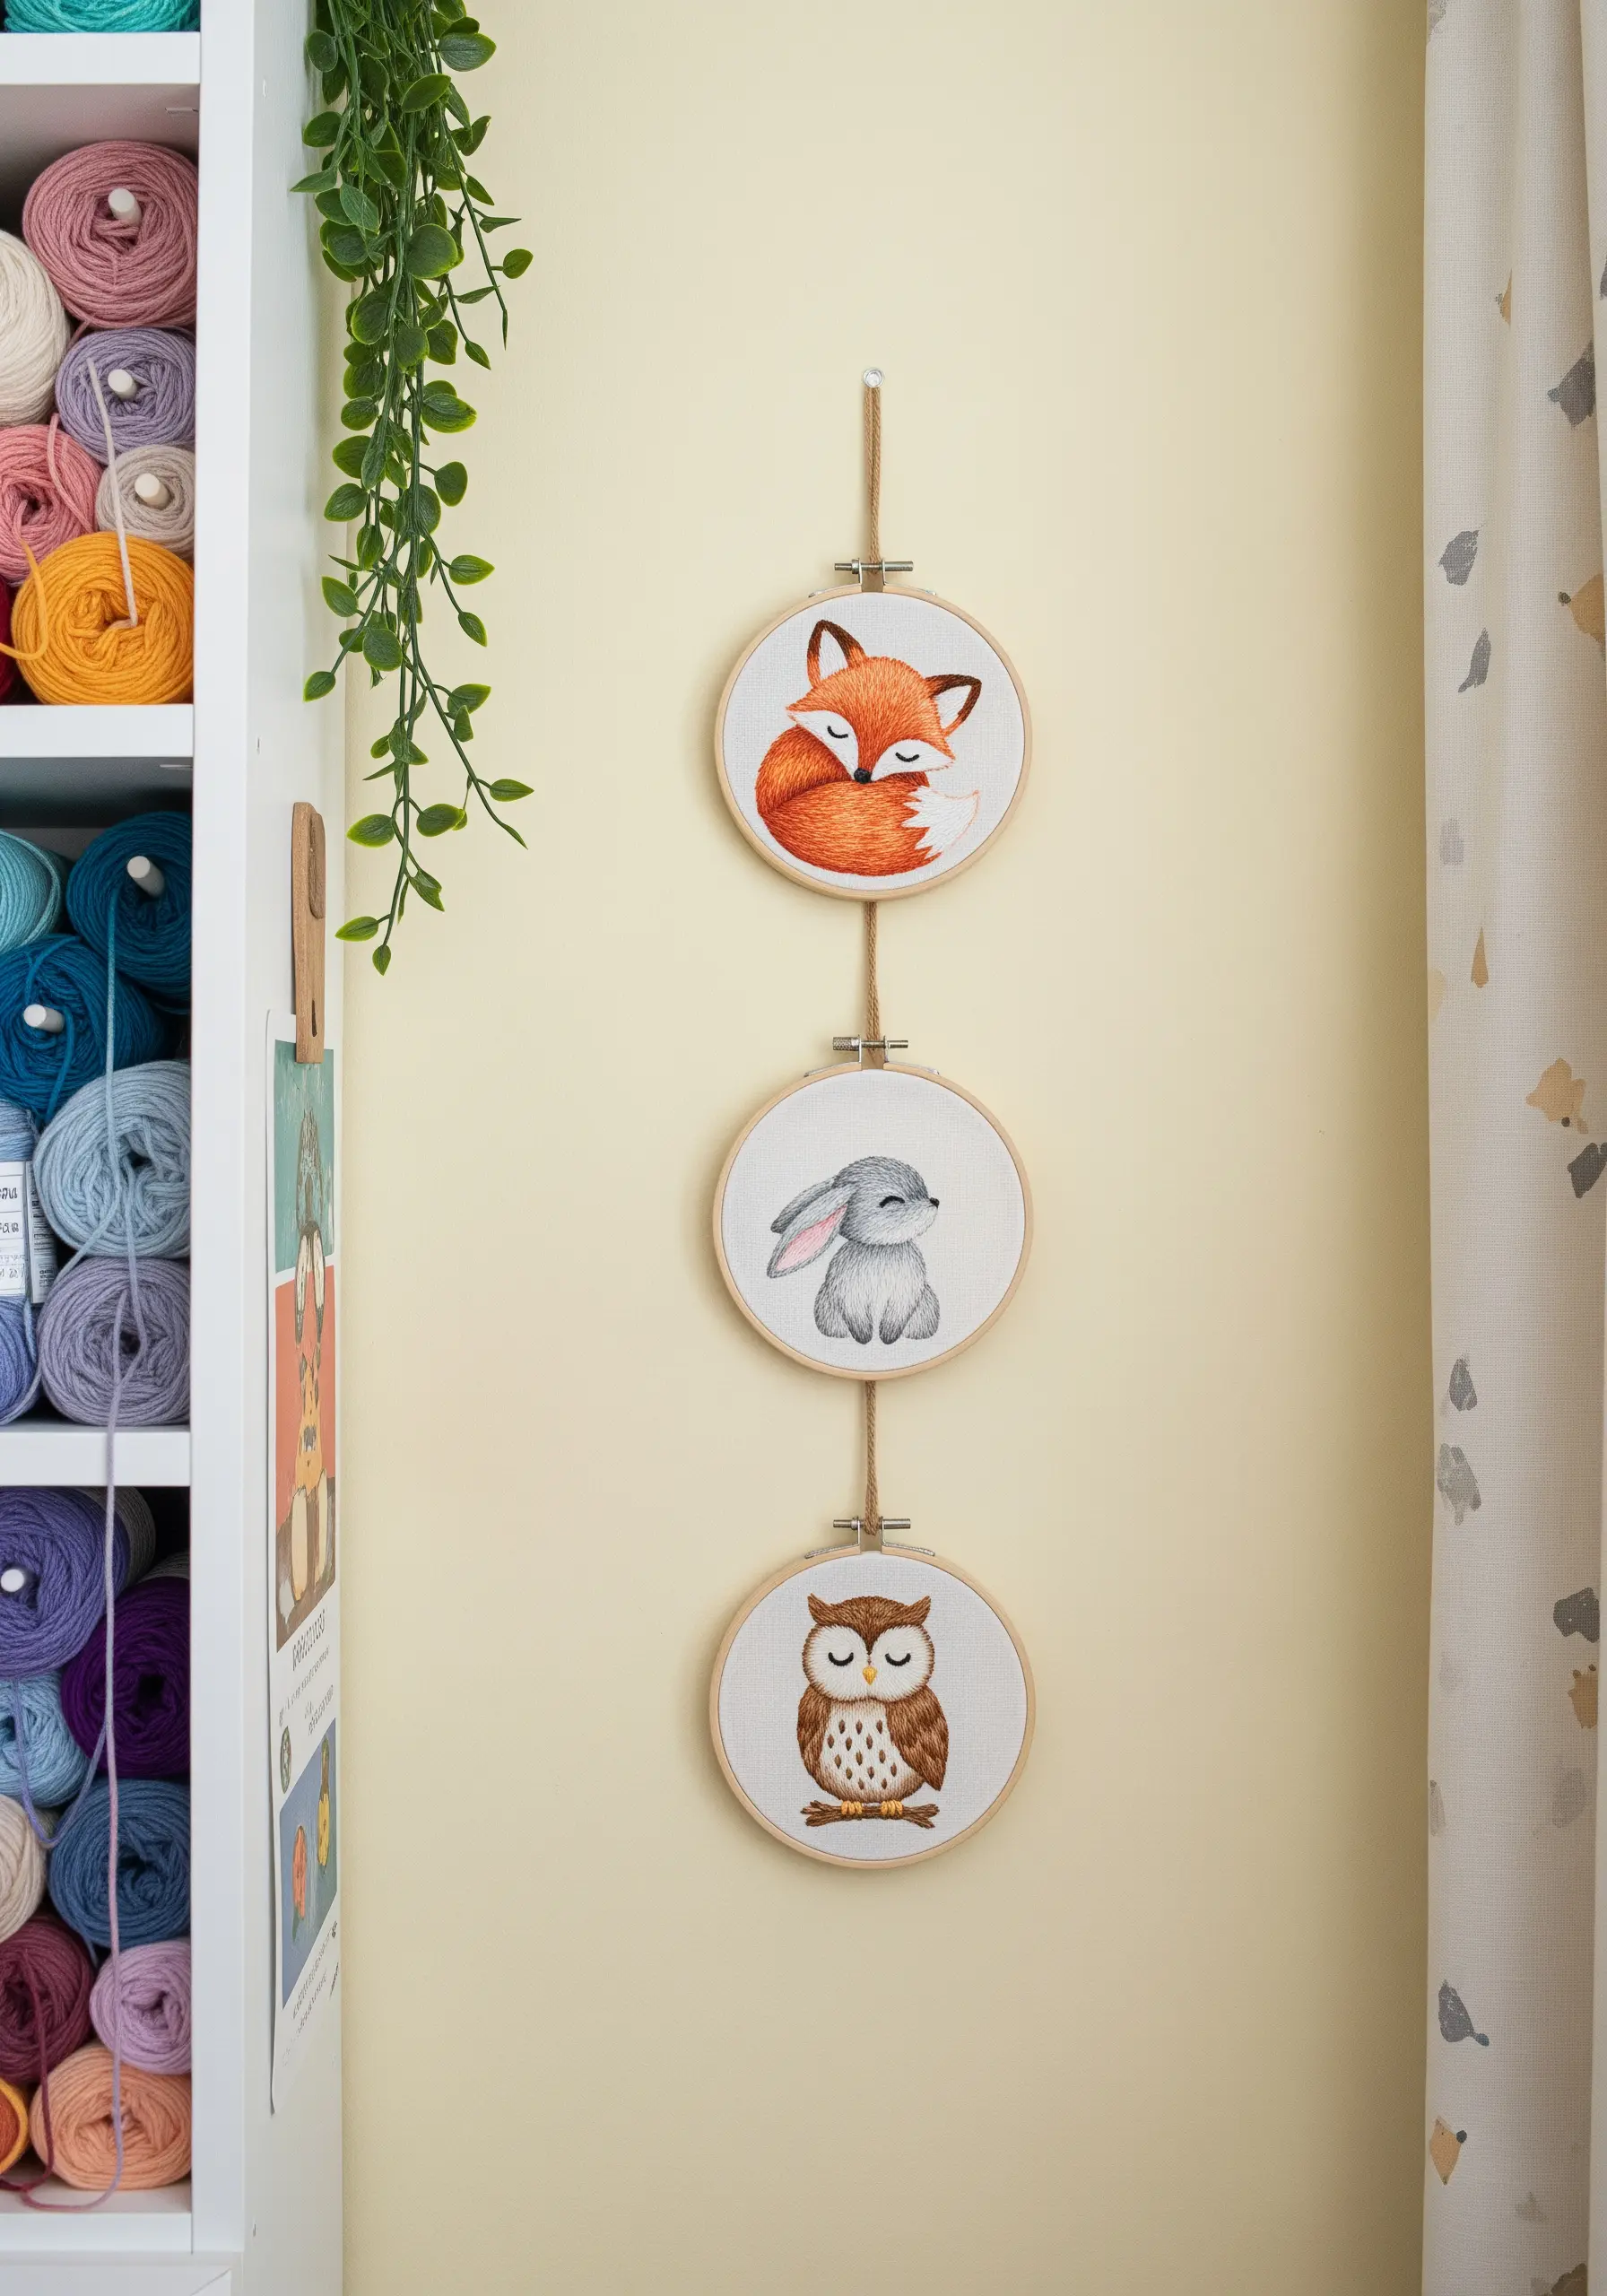
When stitching animals, the direction of your stitches is everything.
To create soft, realistic fur, use long-and-short stitch and ensure your stitches follow the natural direction of the animal’s hair growth.
For a sleeping fox, curve the stitches around its body. For a bunny’s face, keep the stitches short and radiating from the nose. This directional work is what breathes life into your creatures.
15. Mimic String Art with Taut, Layered Stitches

You can achieve a string art effect directly in the hoop by using long, straight stitches pulled taut across a central point.
Layer different colors over one another to create gradients and a sense of depth.
This technique relies on precision and tension—each stitch acts as a single line, and together they build a complex, geometric form that feels both mathematical and organic.
16. Build Dense Texture with Colonial Knots
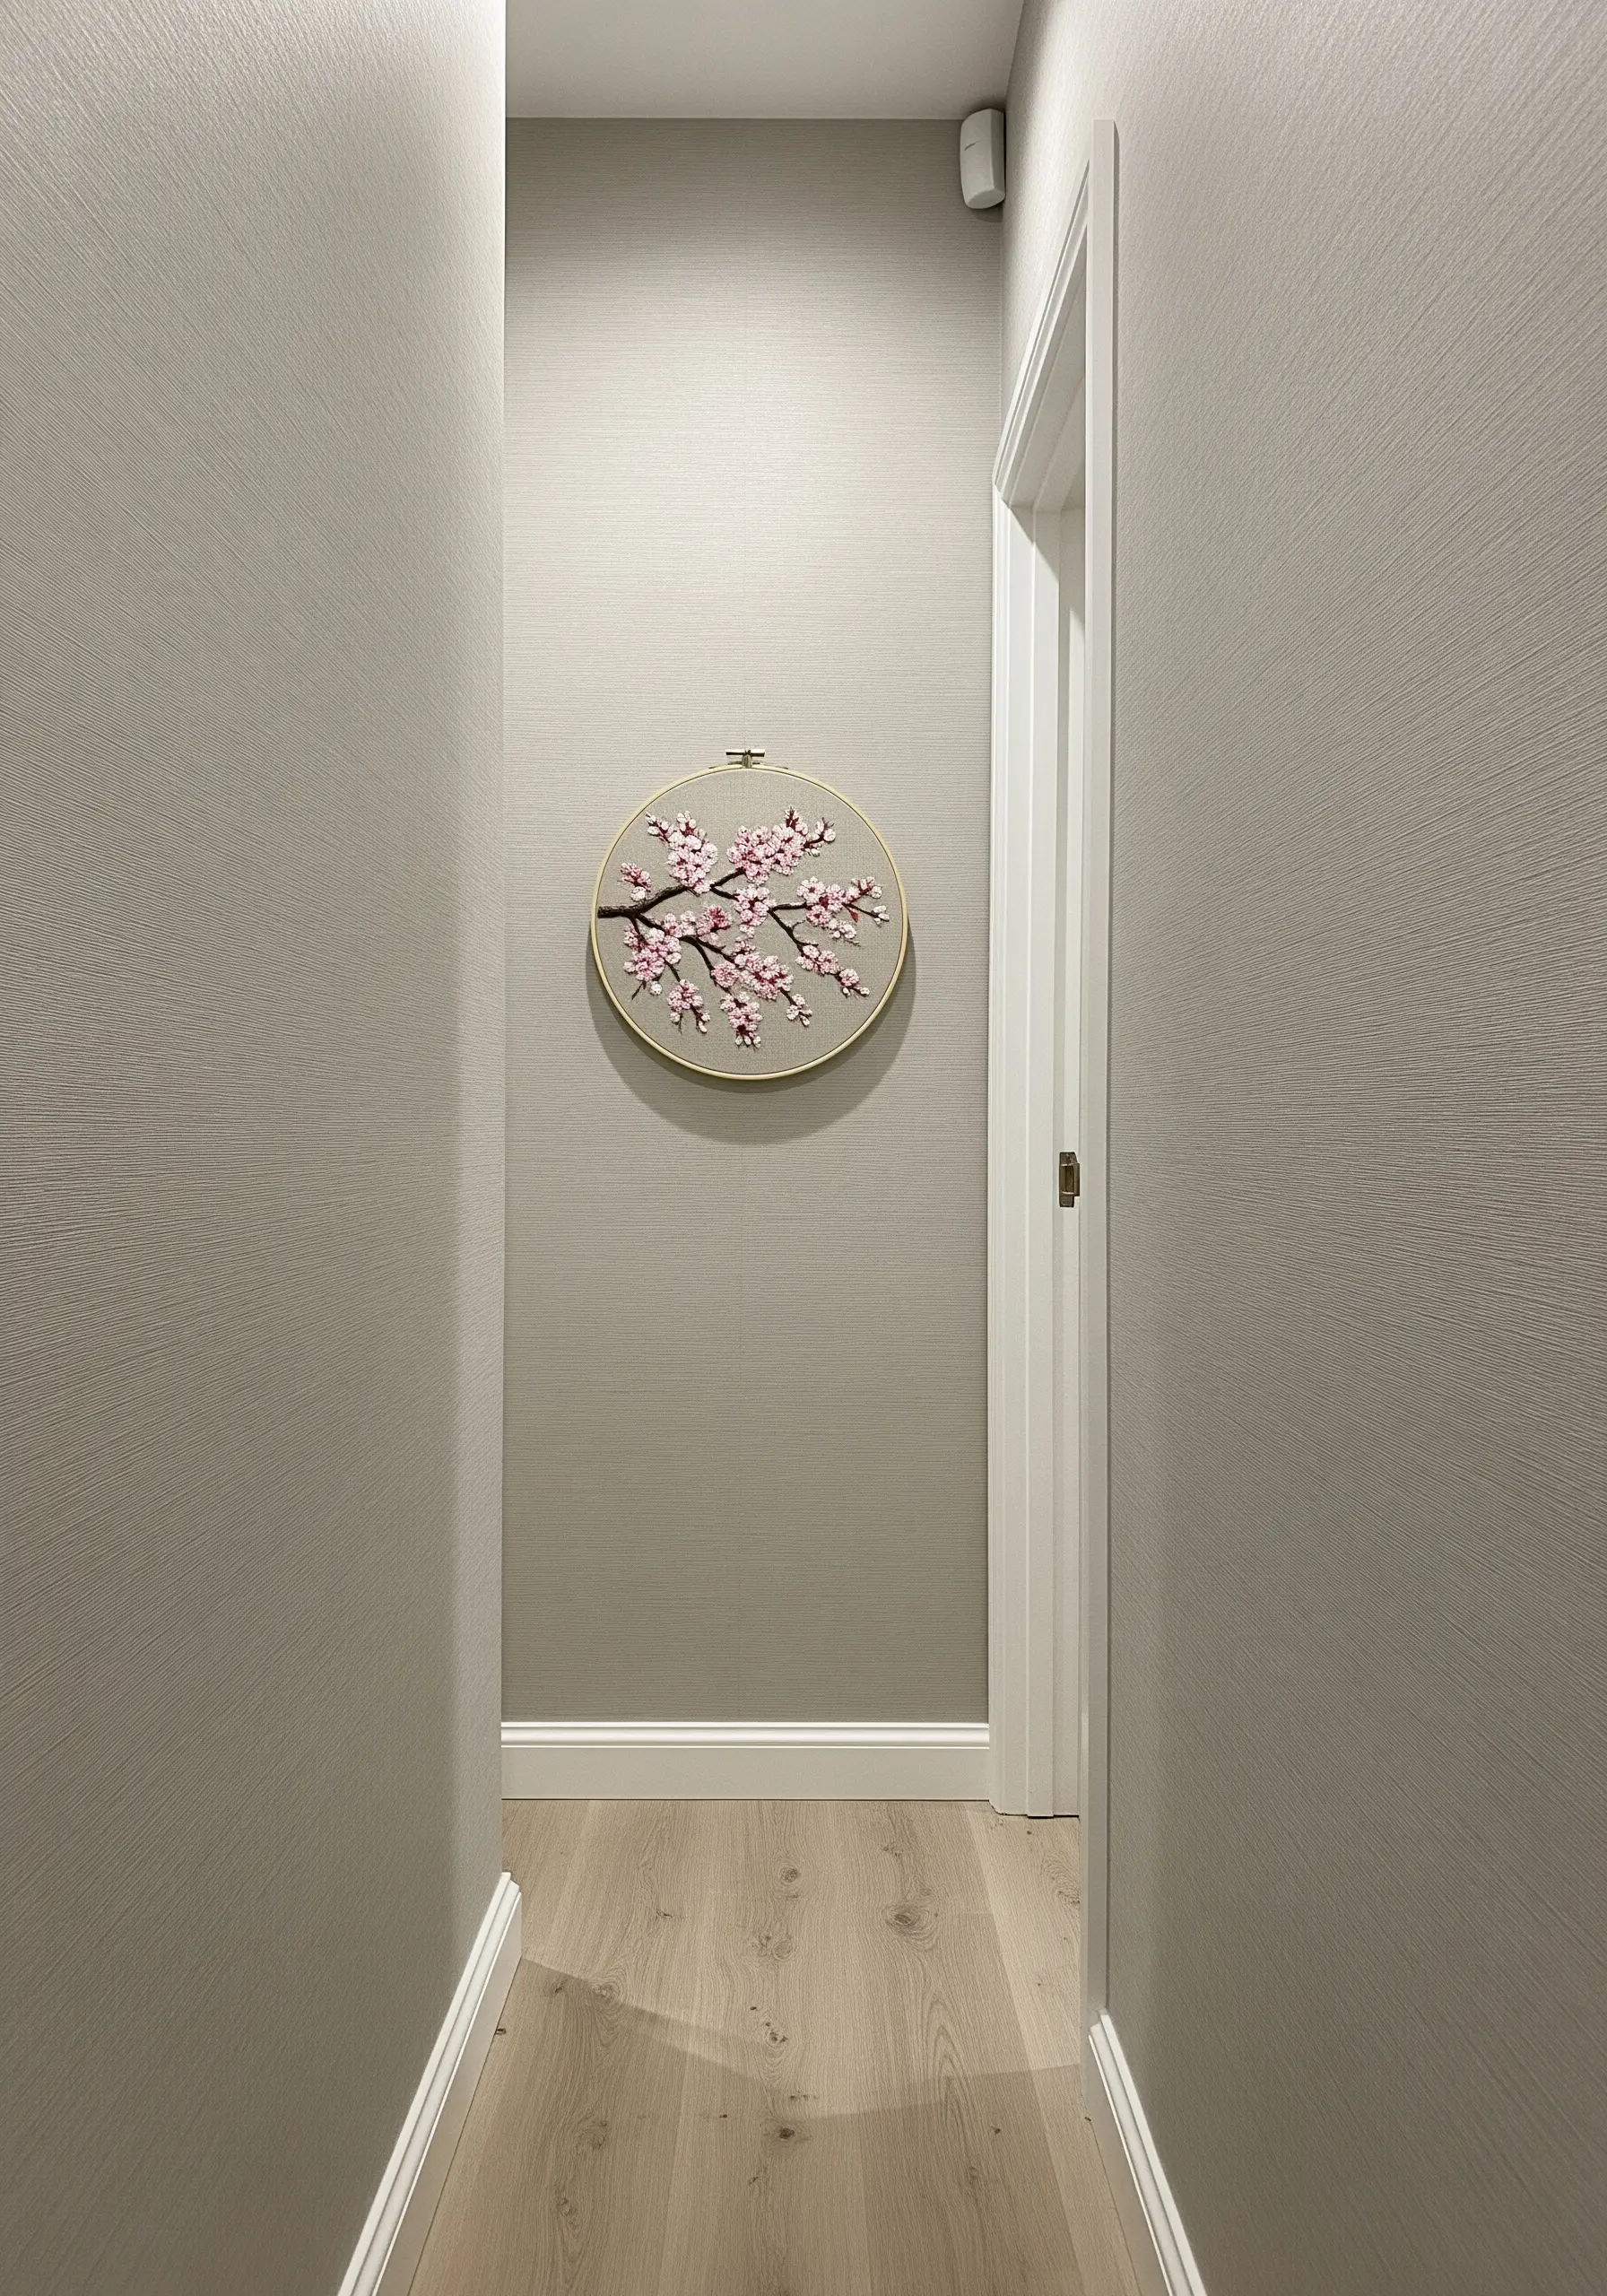
For a full, blossoming effect on a cherry tree branch, opt for Colonial knots instead of French knots.
Colonial knots are slightly rounder and more robust, and they tend to sit more securely on the fabric.
Cluster them tightly together in varying shades of pink and cream to create a lush, textured canopy that contrasts beautifully against a simple, clean branch made with stem stitch.
17. Create an Organic Gallery with an Asymmetrical Layout
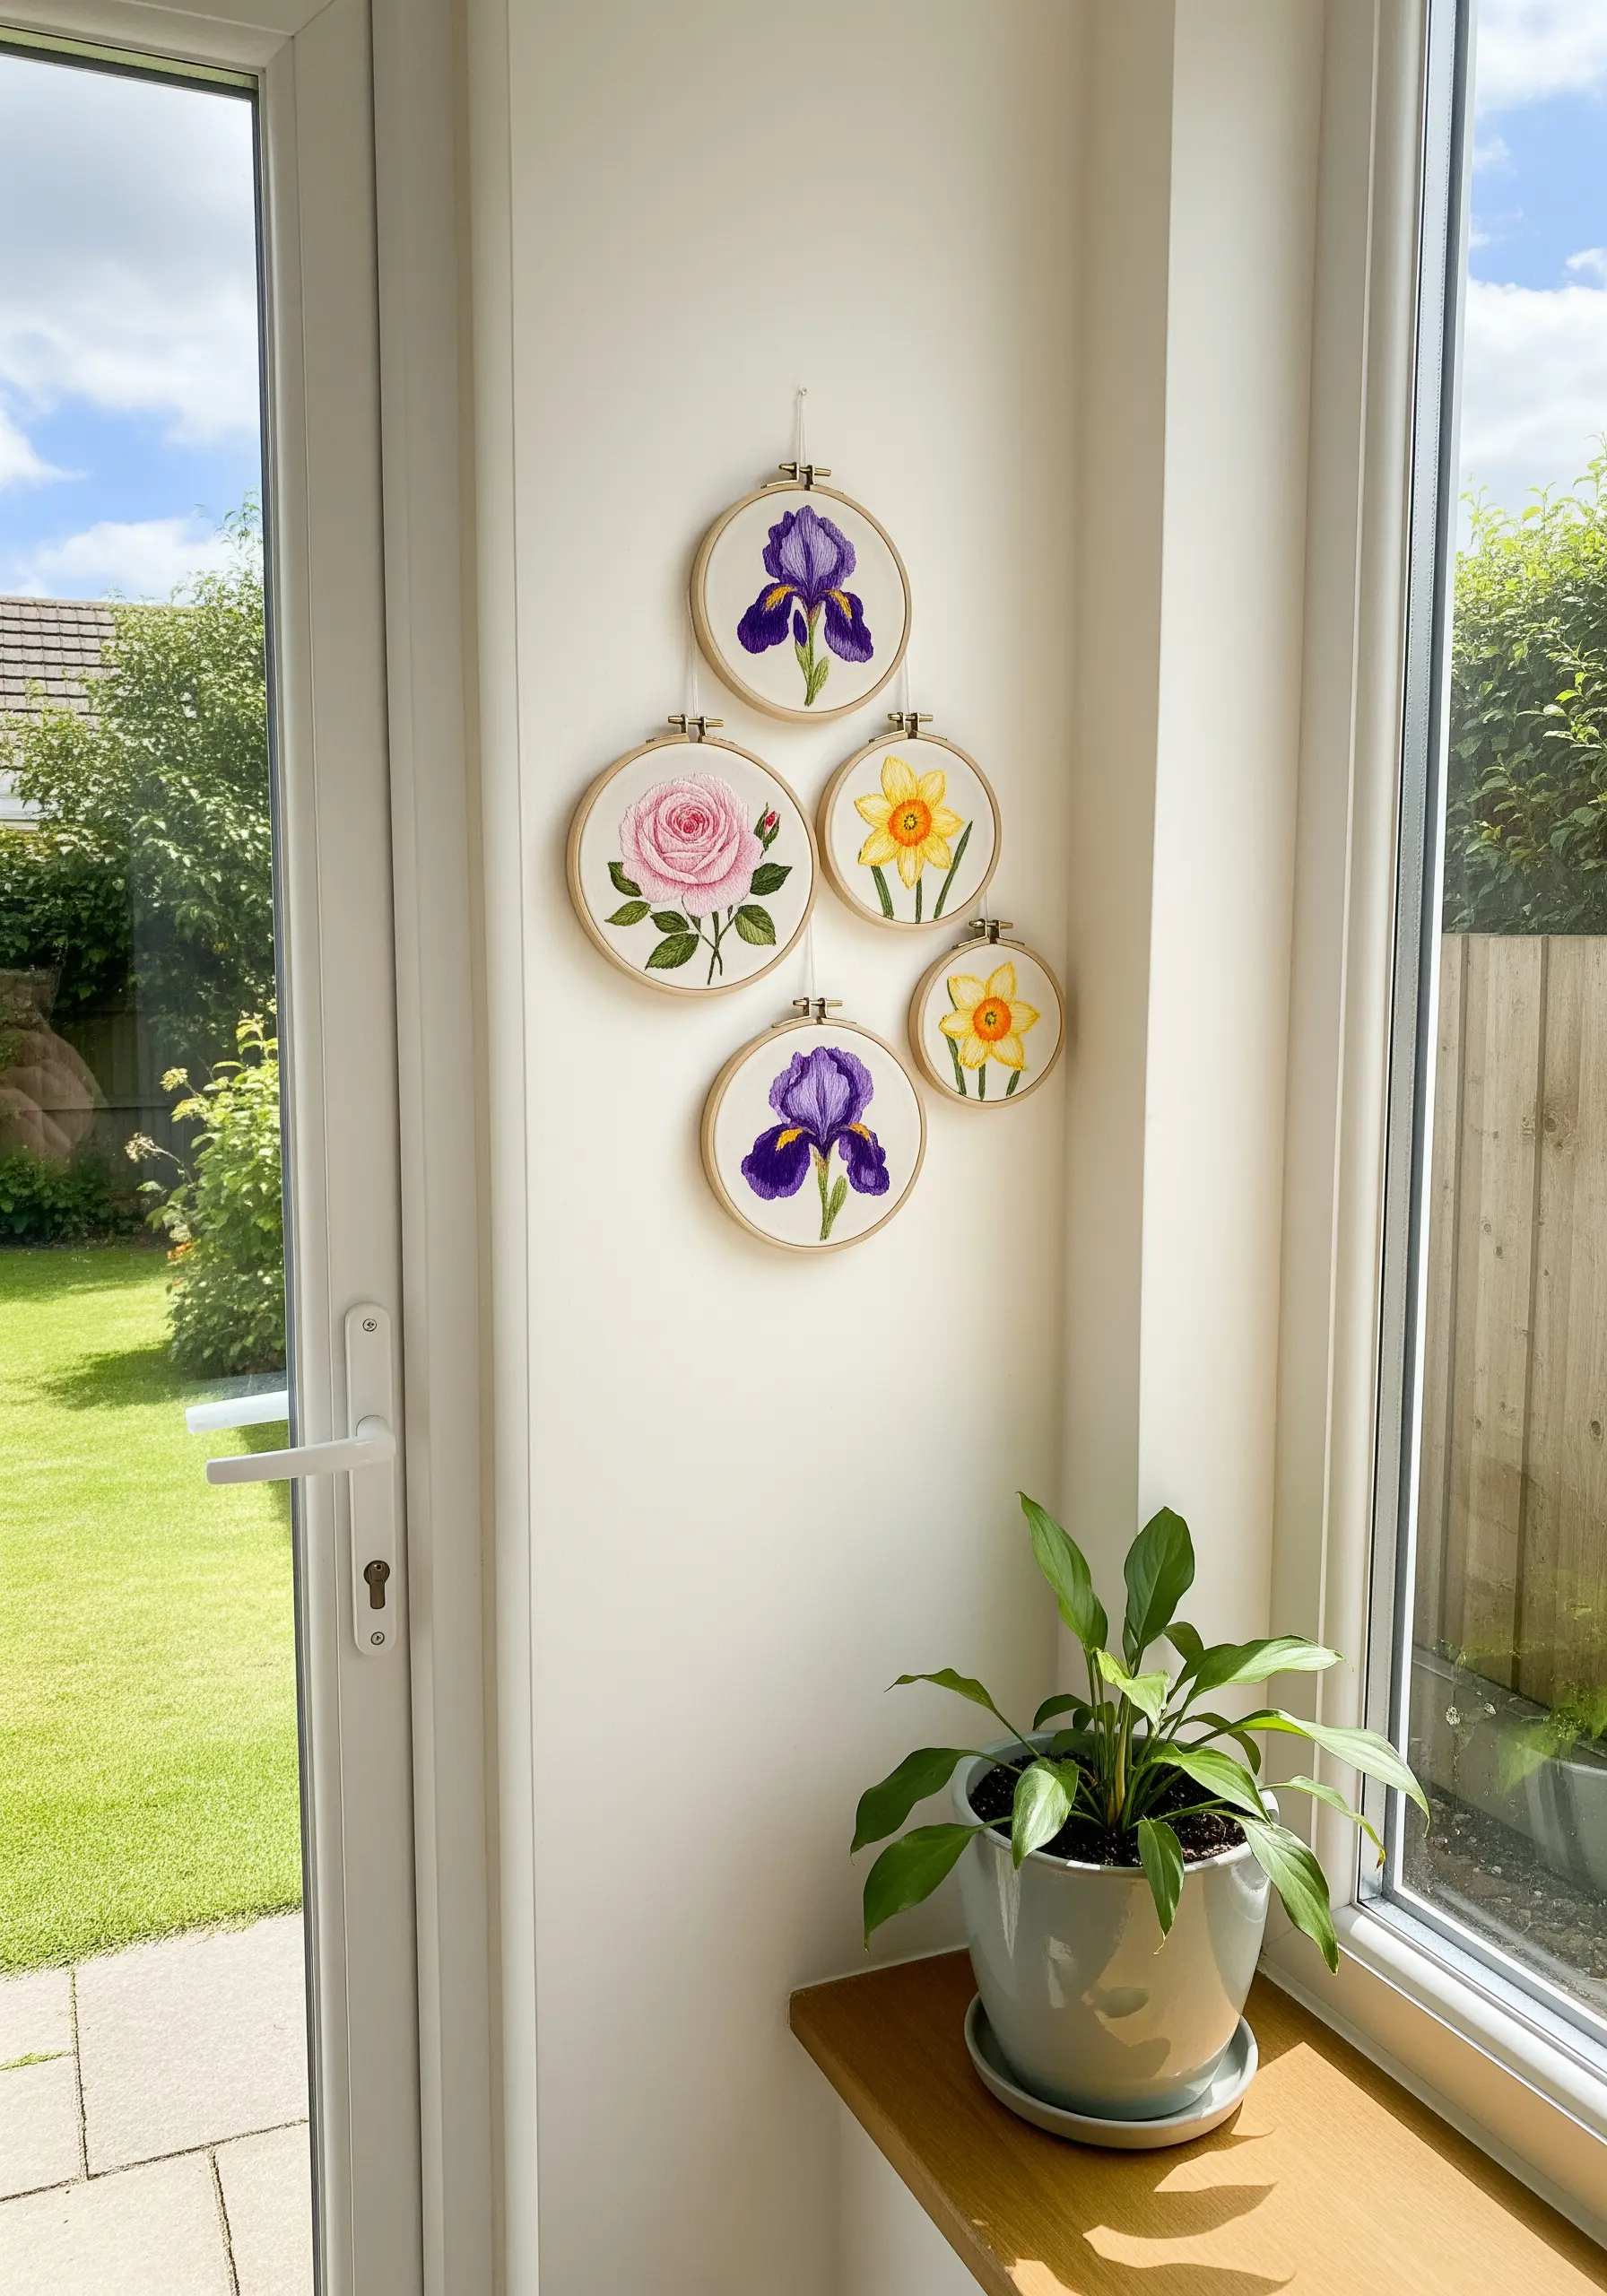
Instead of a rigid grid, arrange your floral hoops in an organic, vine-like cluster.
Start with a larger central piece and build smaller ones around it, varying the spacing and height.
This asymmetrical layout feels more natural and dynamic, as if the flowers are growing on the wall. It’s a perfect way to fill an awkward corner or a space beside a window.
18. Use Seed Stitch for Subtle Lunar Texture
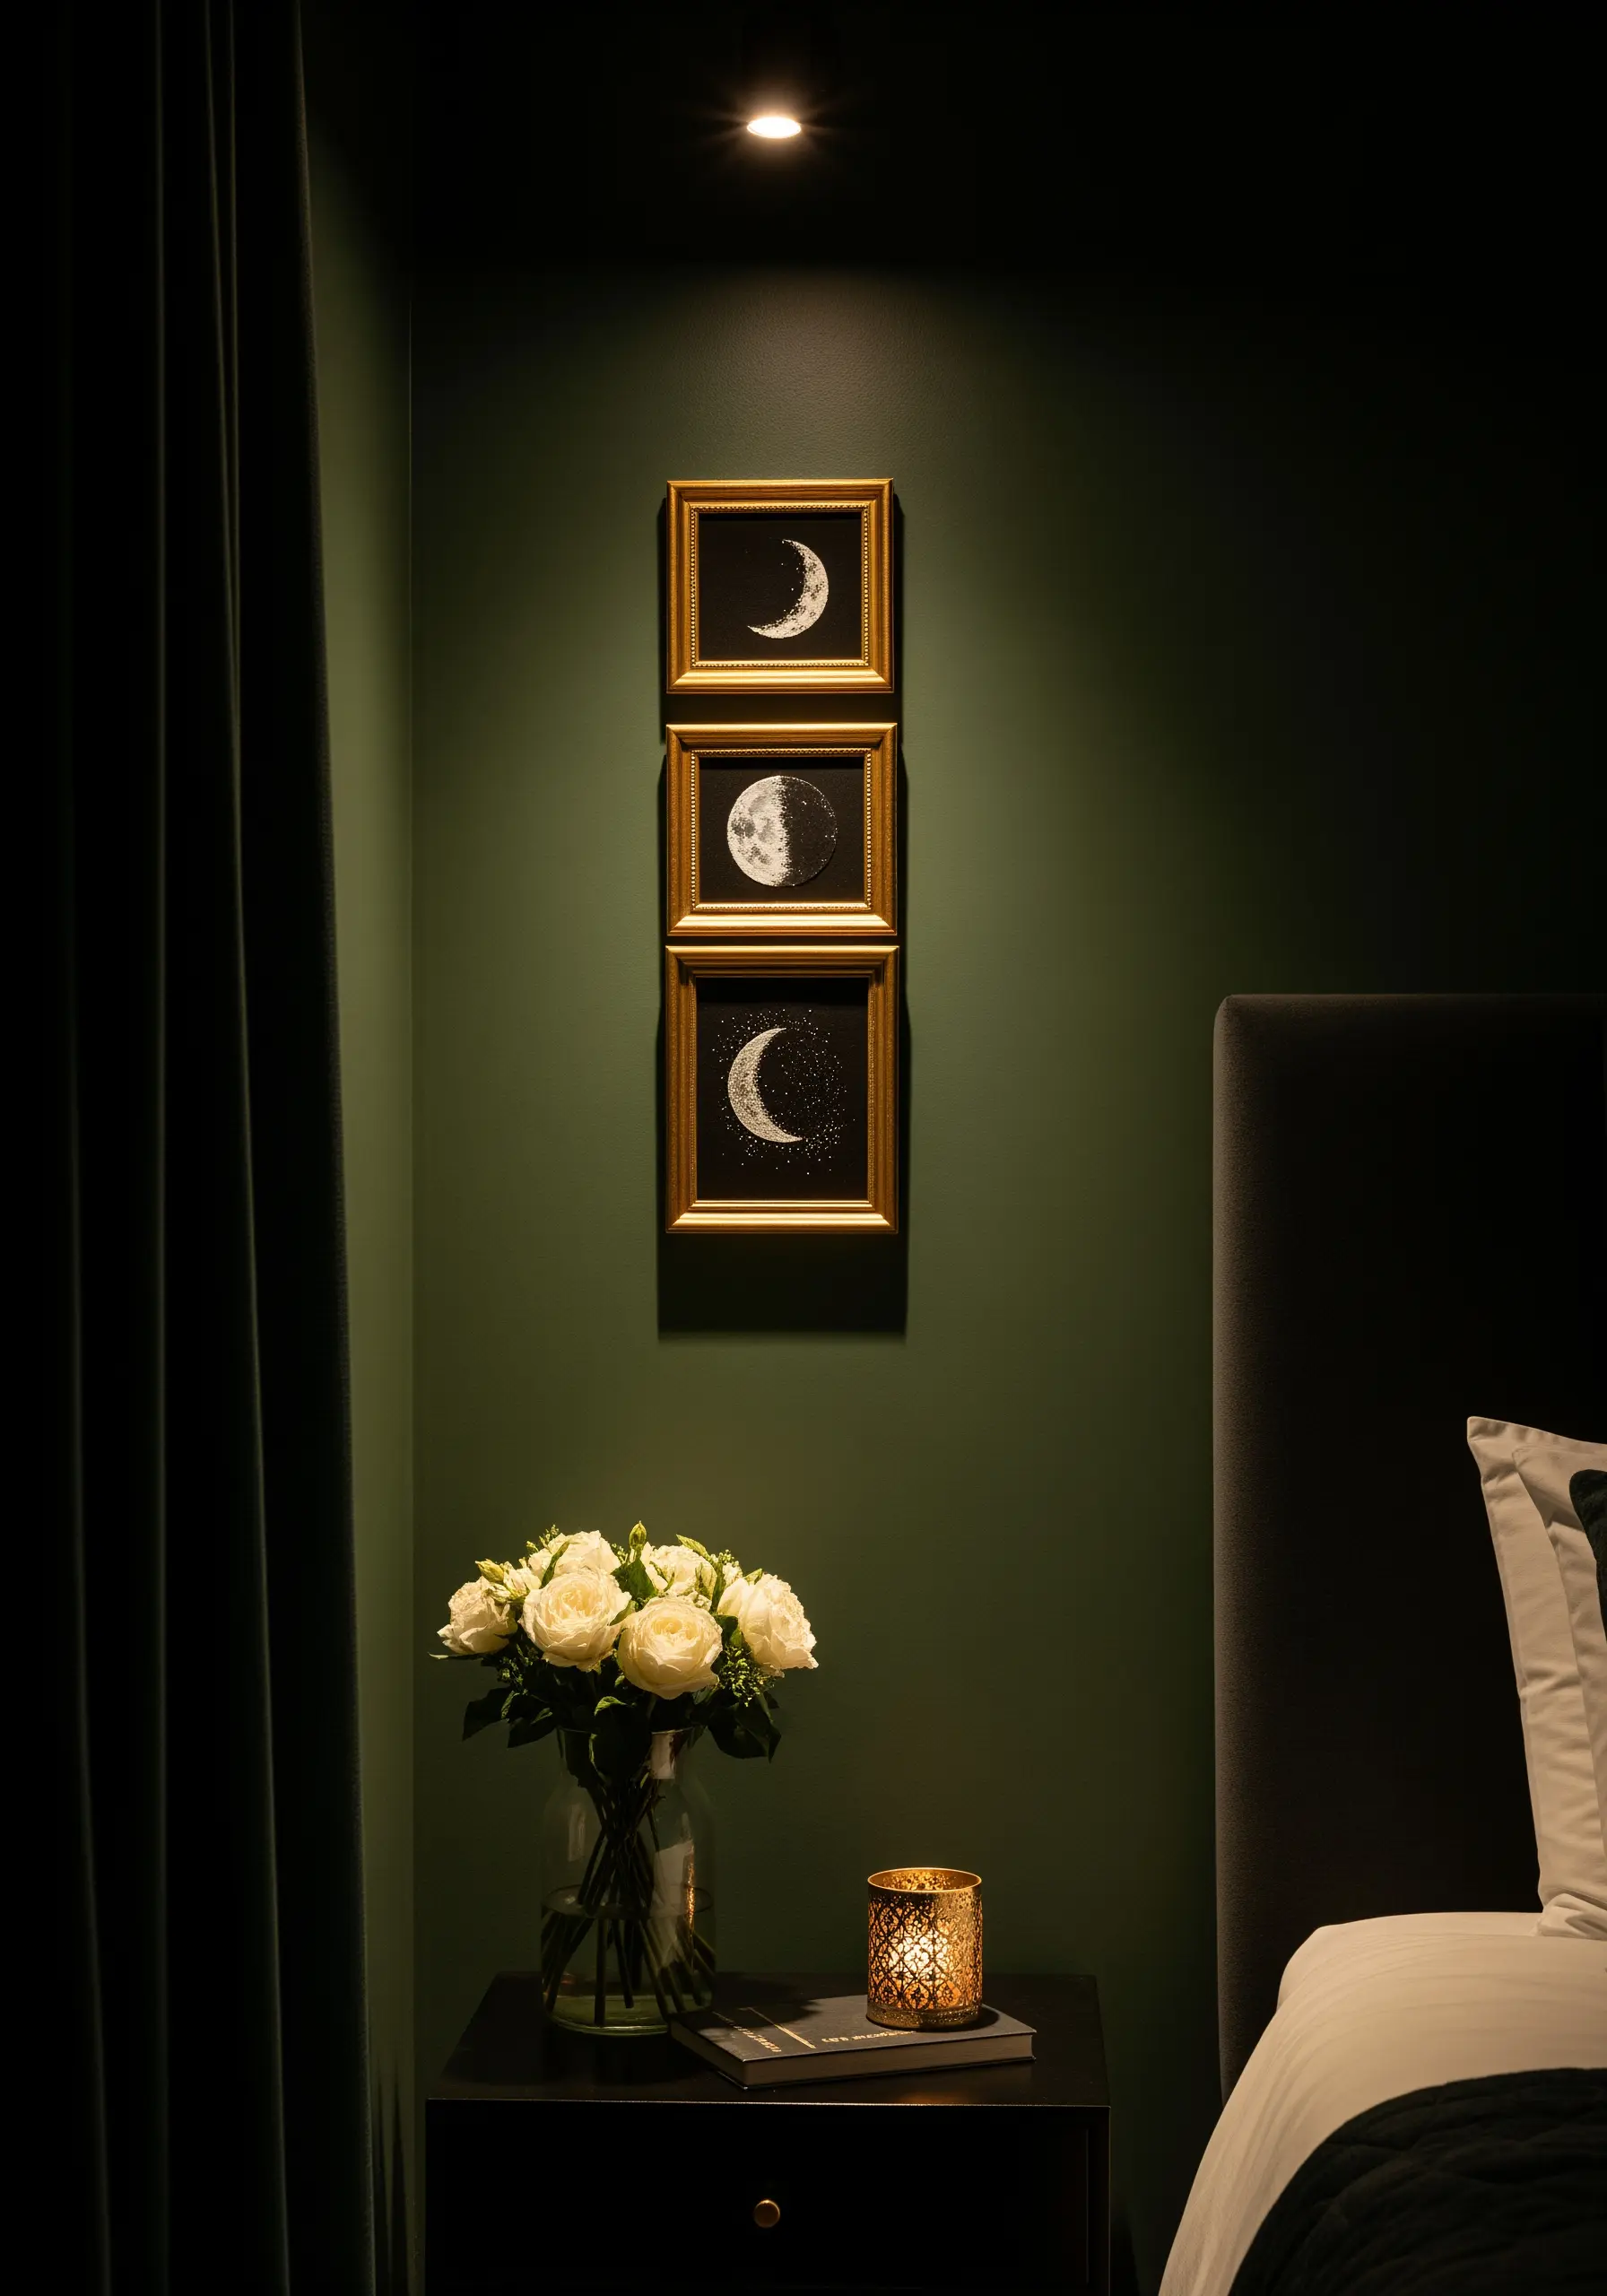
To create the cratered, textured surface of the moon without overpowering the design, fill the shape with dense seed stitches.
These tiny, randomly placed straight stitches add a delicate texture that suggests detail rather than explicitly showing it.
Use a silvery-grey or off-white thread on a dark fabric for a sophisticated, high-contrast effect that feels both minimal and intricate.
19. Capture Water’s Motion with Directional Stitches

A panoramic wave is all about conveying energy and movement.
Use the direction of your stitches to define the water’s flow—long, curved satin stitches for the smooth face of the wave, and chaotic French knots and short straight stitches for the crashing foam.
Blending multiple shades of blue, green, and white will give the water a translucent, realistic quality.
20. Replicate Paint Splatters with Variegated Thread
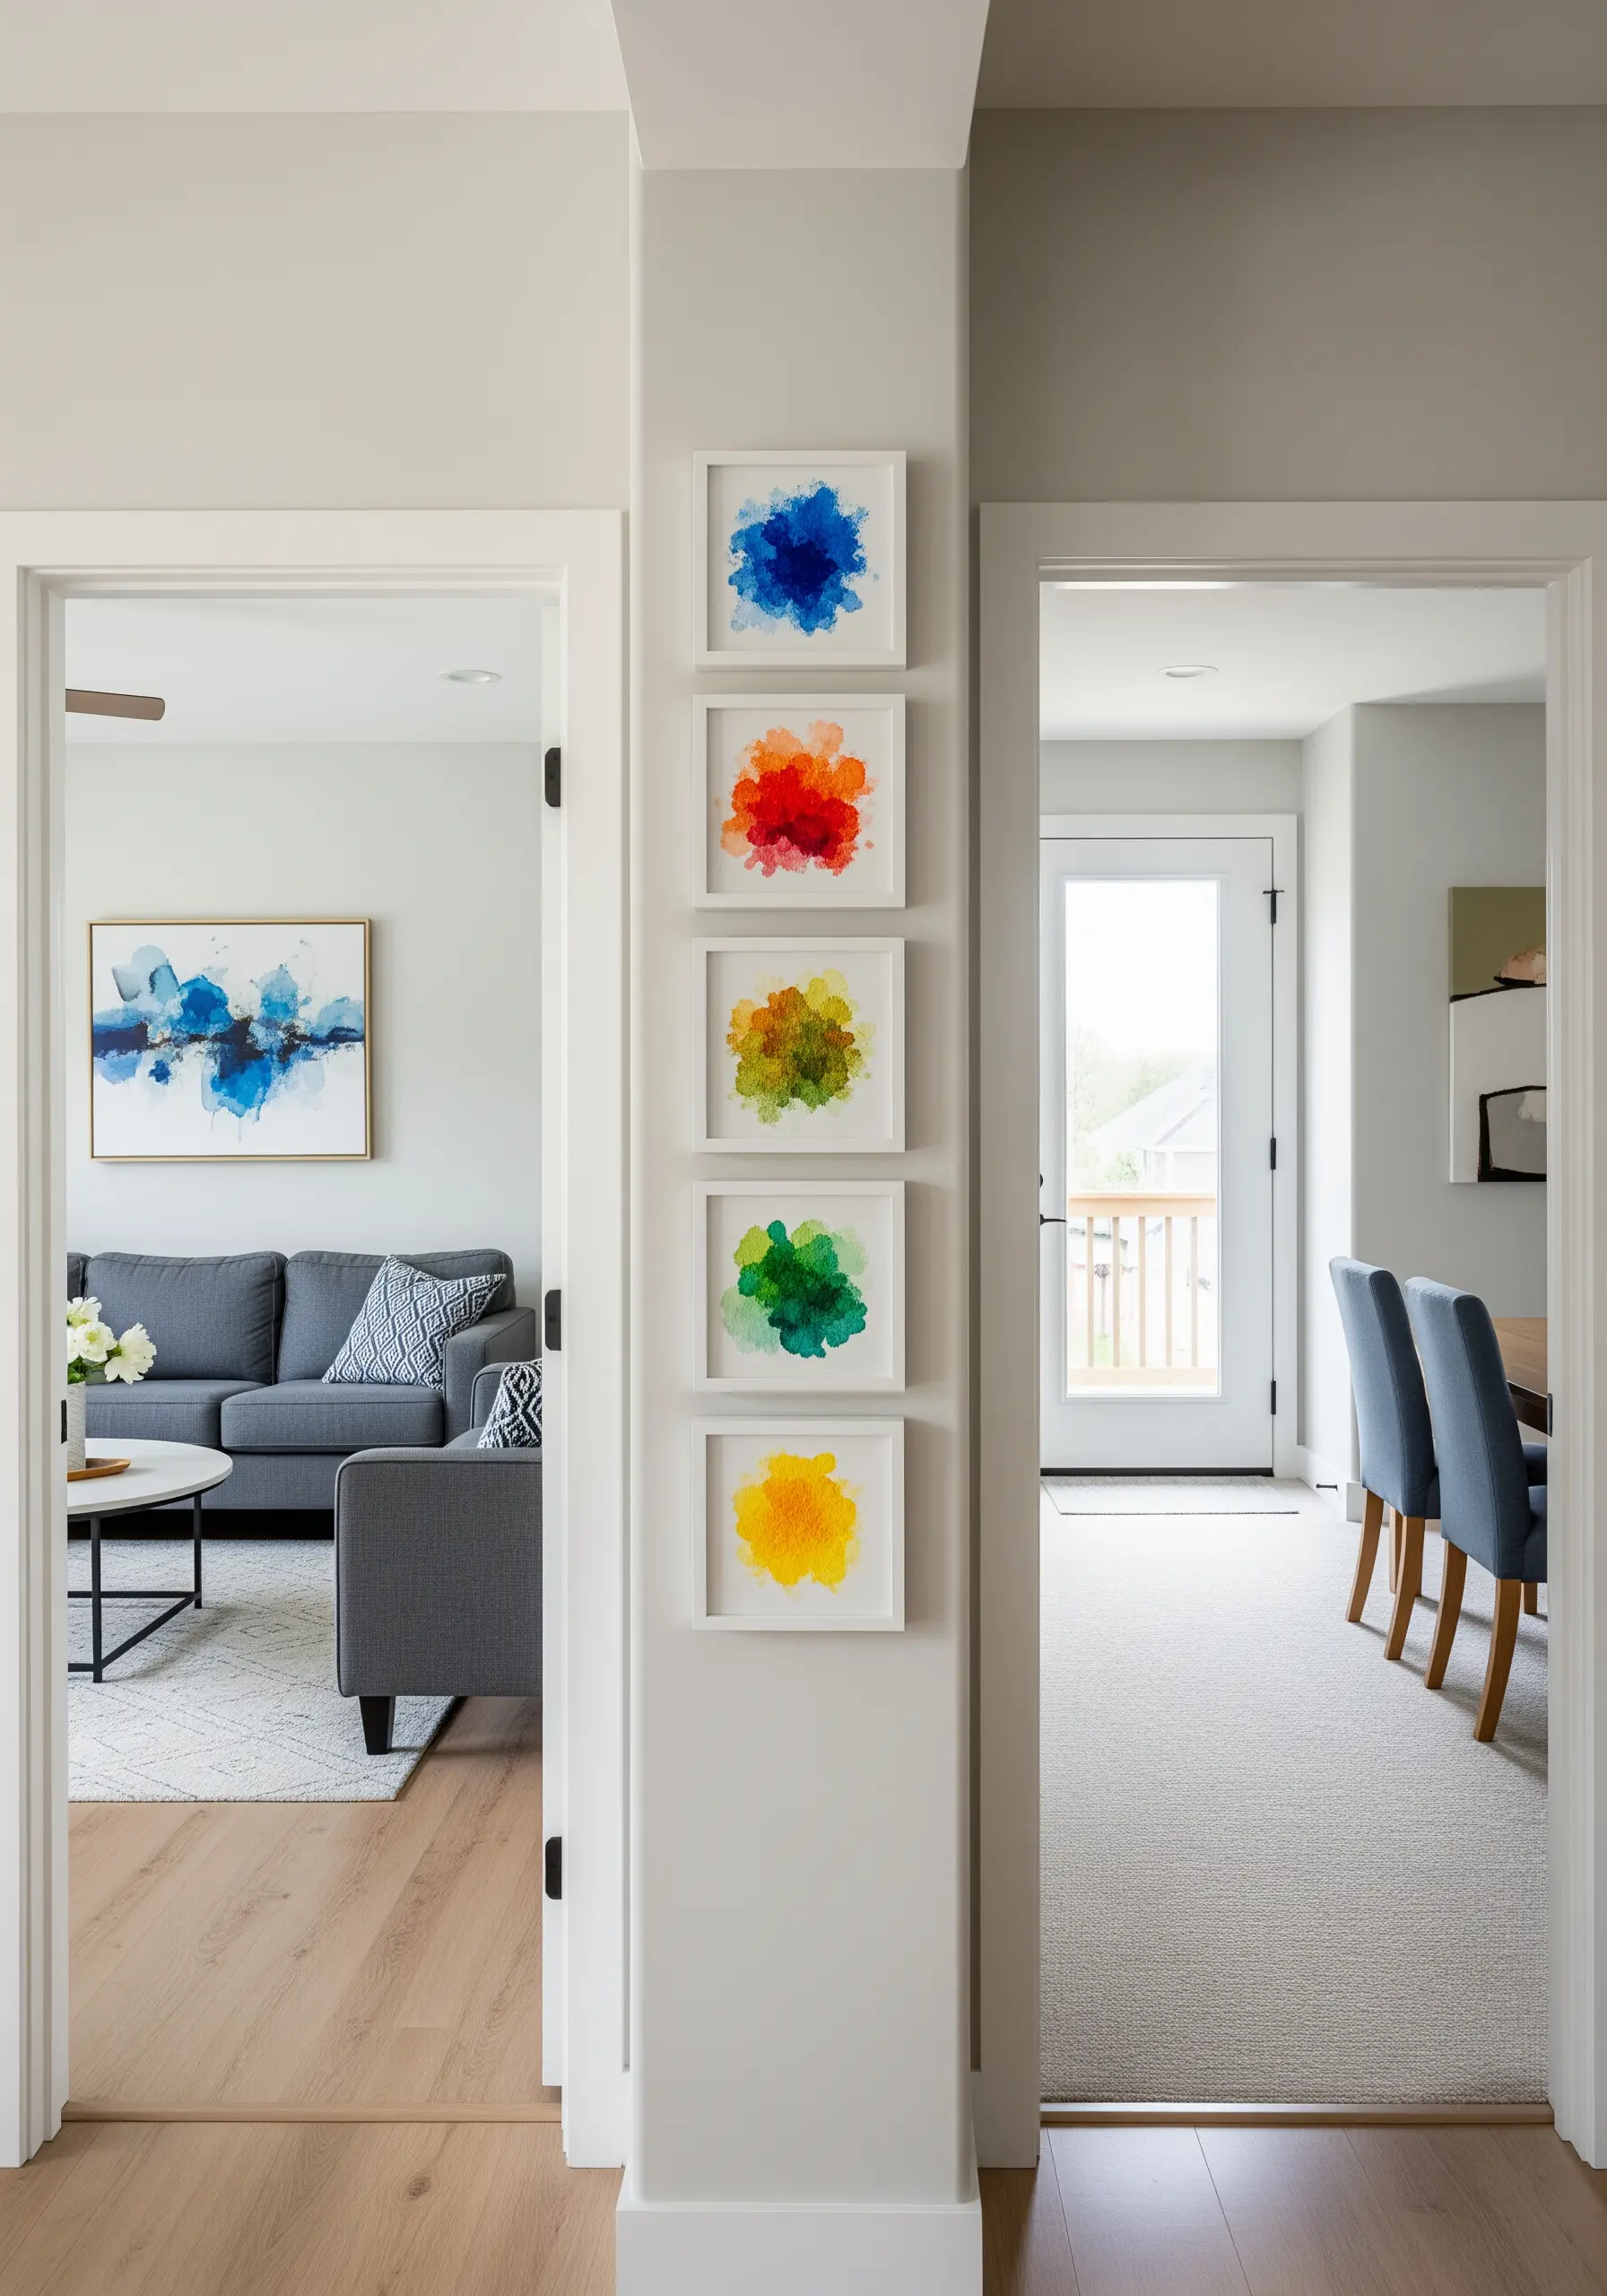
Achieve a vibrant, abstract watercolor look by using variegated floss.
Fill a loose, circular shape with a dense mix of French knots and seed stitches.
The variegated thread will do the color-blending work for you, creating a spontaneous and multi-toned effect that looks like a burst of wet paint. It’s a quick technique with maximum visual impact for a modern gallery wall.
21. Stitch Delicate, Transparent Steam
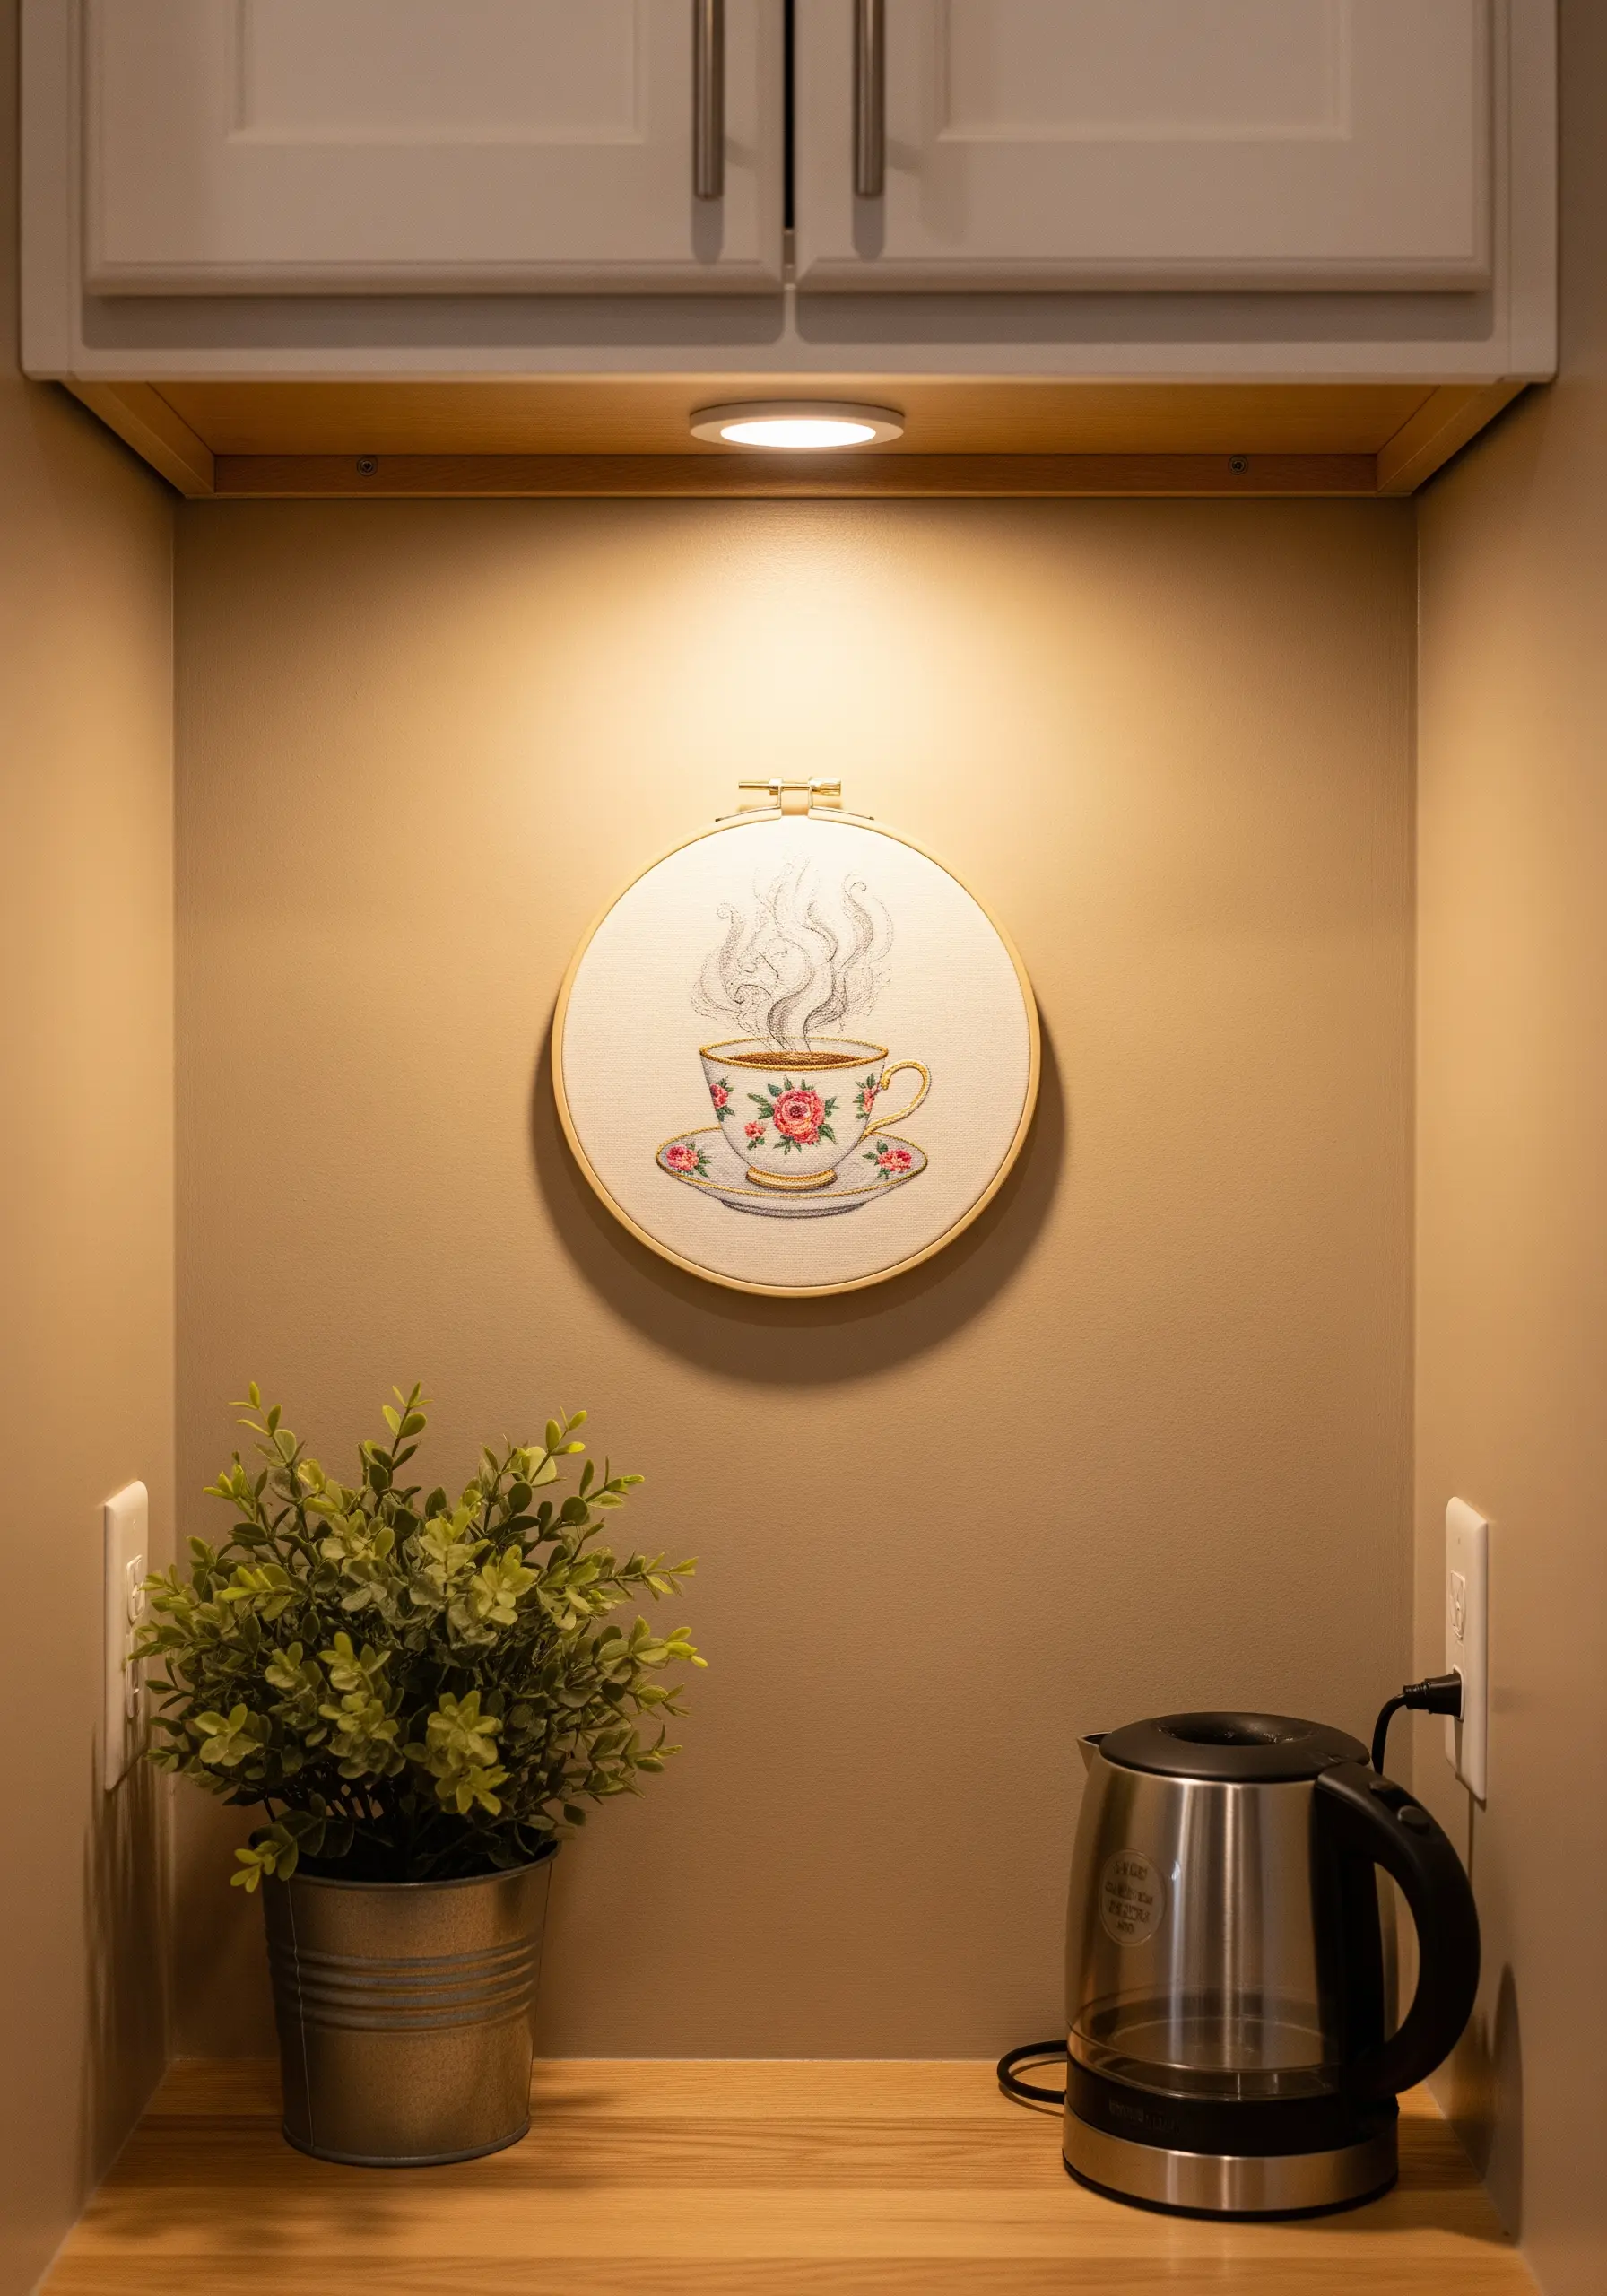
The key to stitching realistic steam or smoke is subtlety.
Use a single strand of a light grey or silvery-white floss and work in loose, wavy stem stitches.
Space the stitches far apart to allow the background fabric to show through, creating an ethereal, transparent quality. This restraint is what makes the effect believable and elegant.
22. Blend Autumnal Hues with Fishbone Stitch
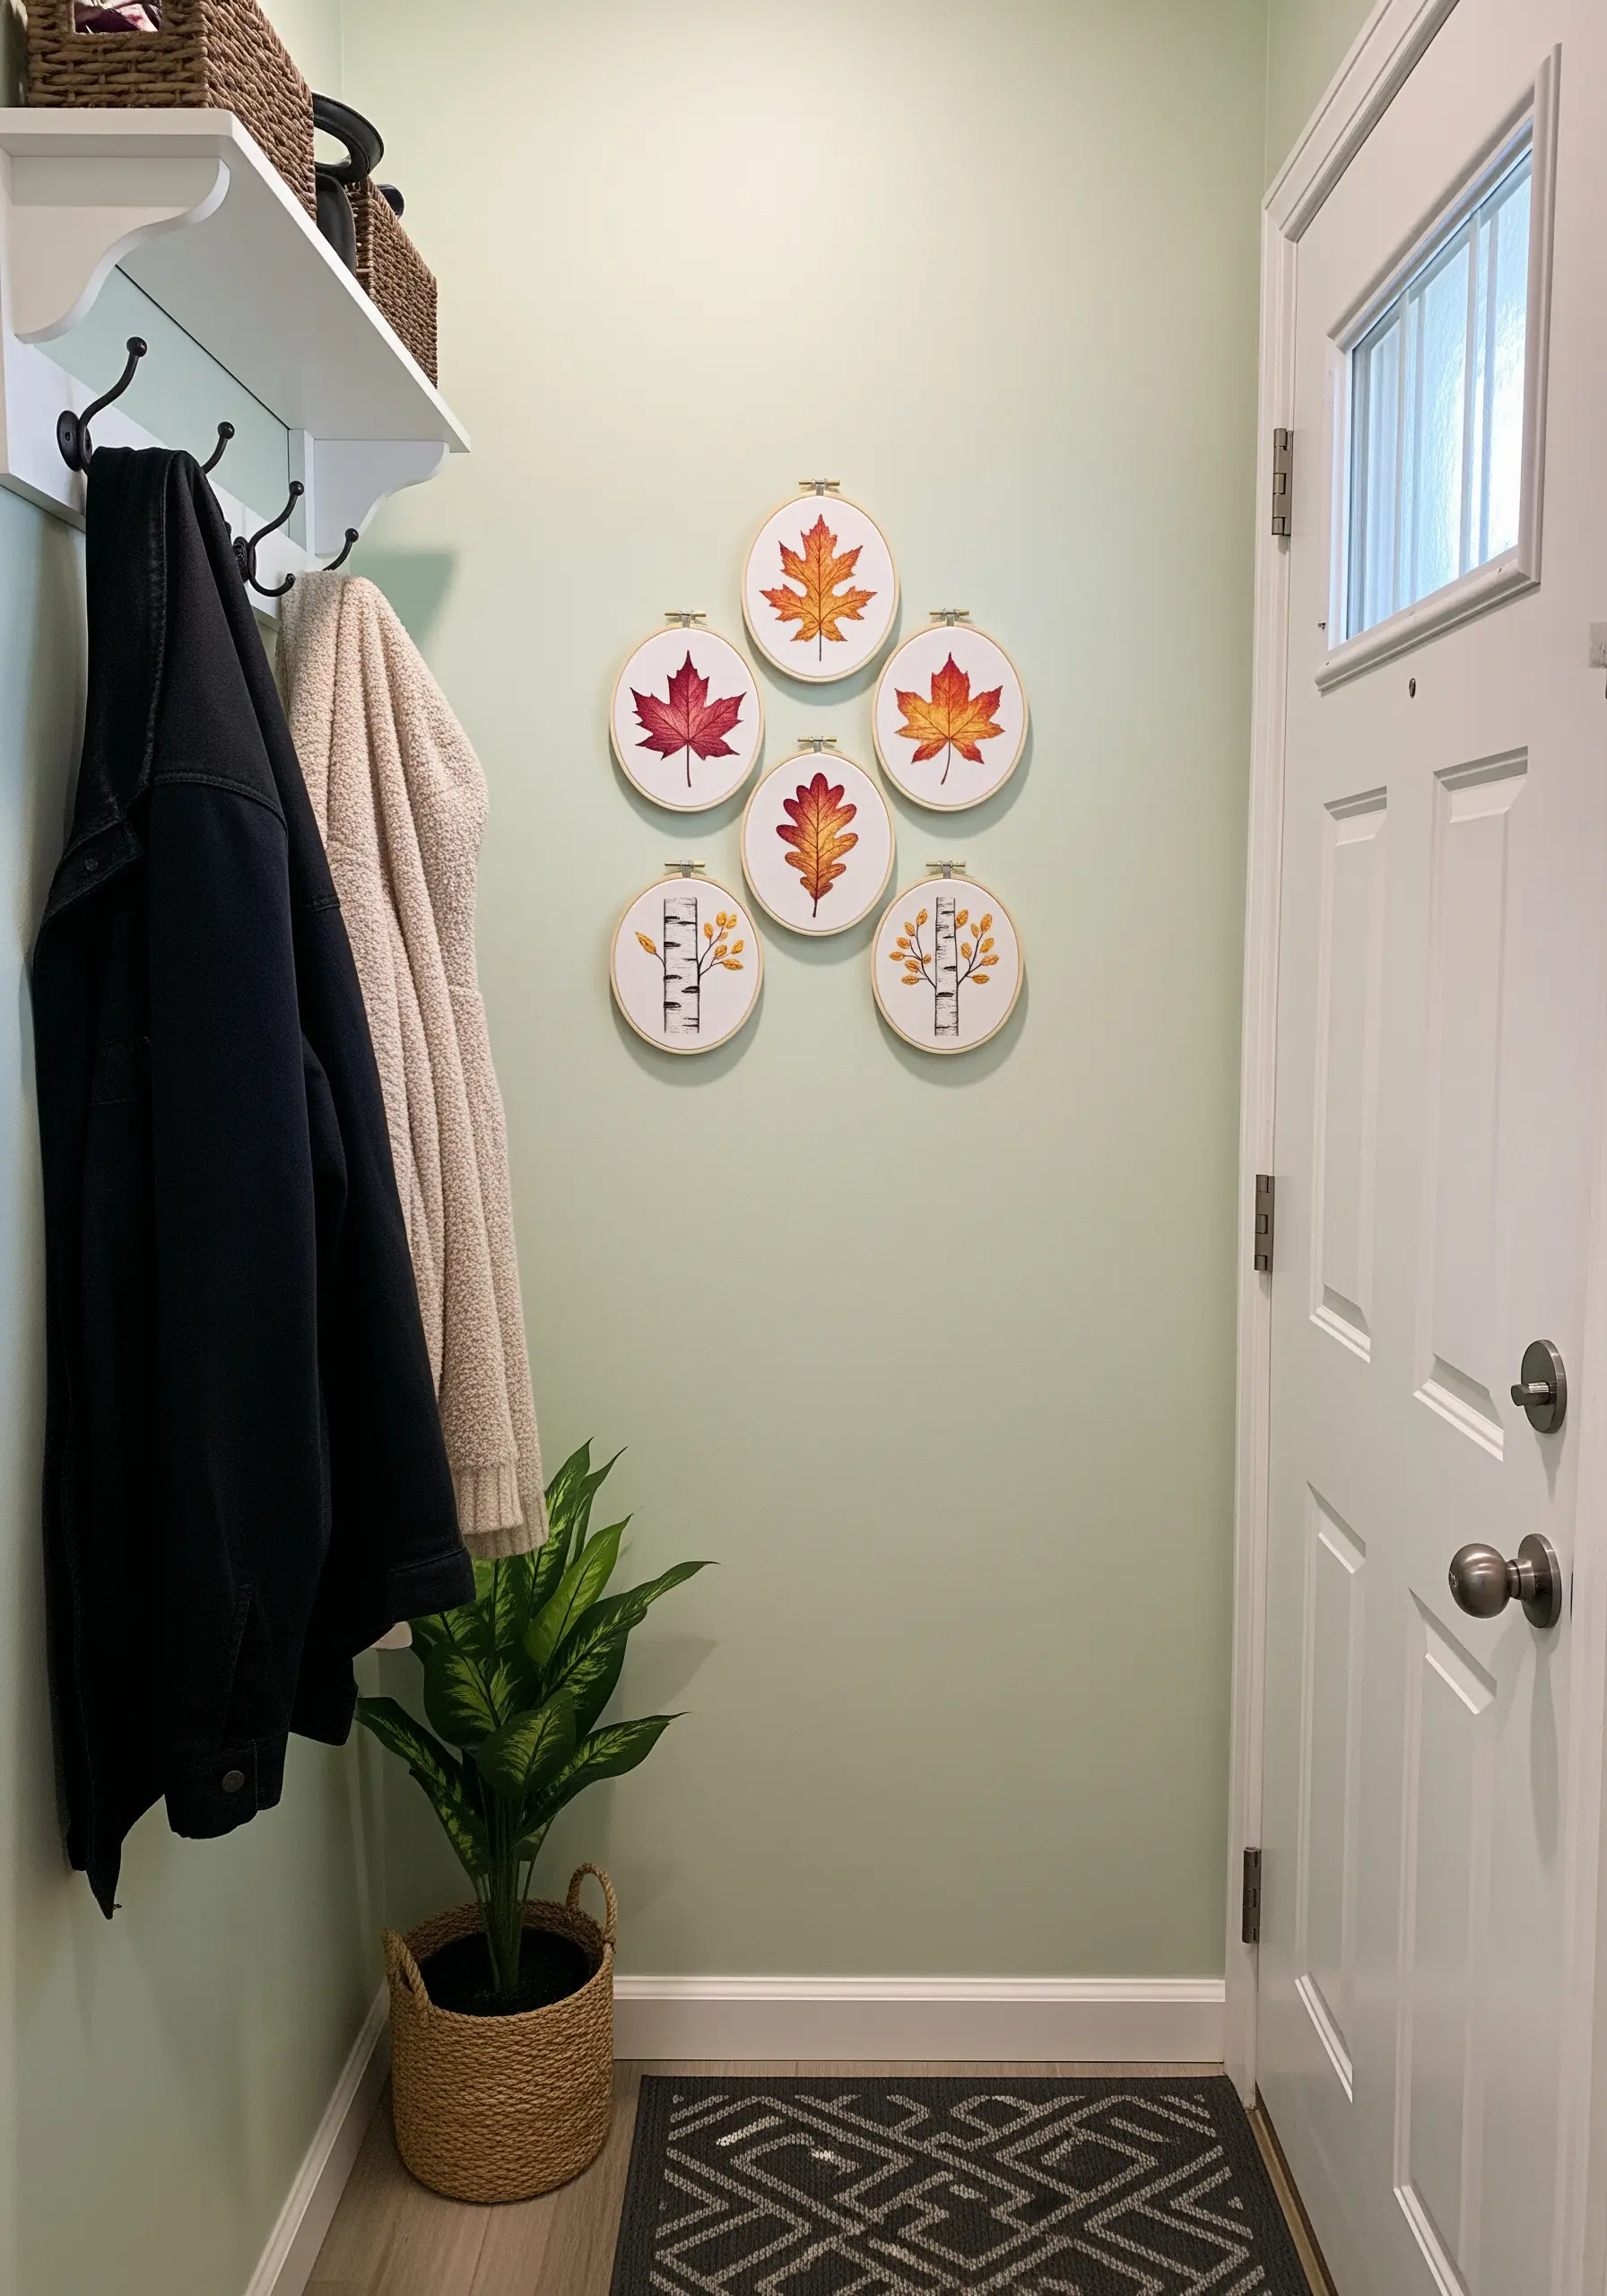
Fishbone stitch is ideal for creating the natural color gradients found in autumn leaves.
Start at the tip of the leaf with your lightest color and work your way down, introducing darker reds, oranges, and yellows.
The overlapping nature of the stitch blends the colors seamlessly, creating a smooth transition that looks incredibly realistic and painterly.
23. Convey Brushstroke Energy on Raw Linen
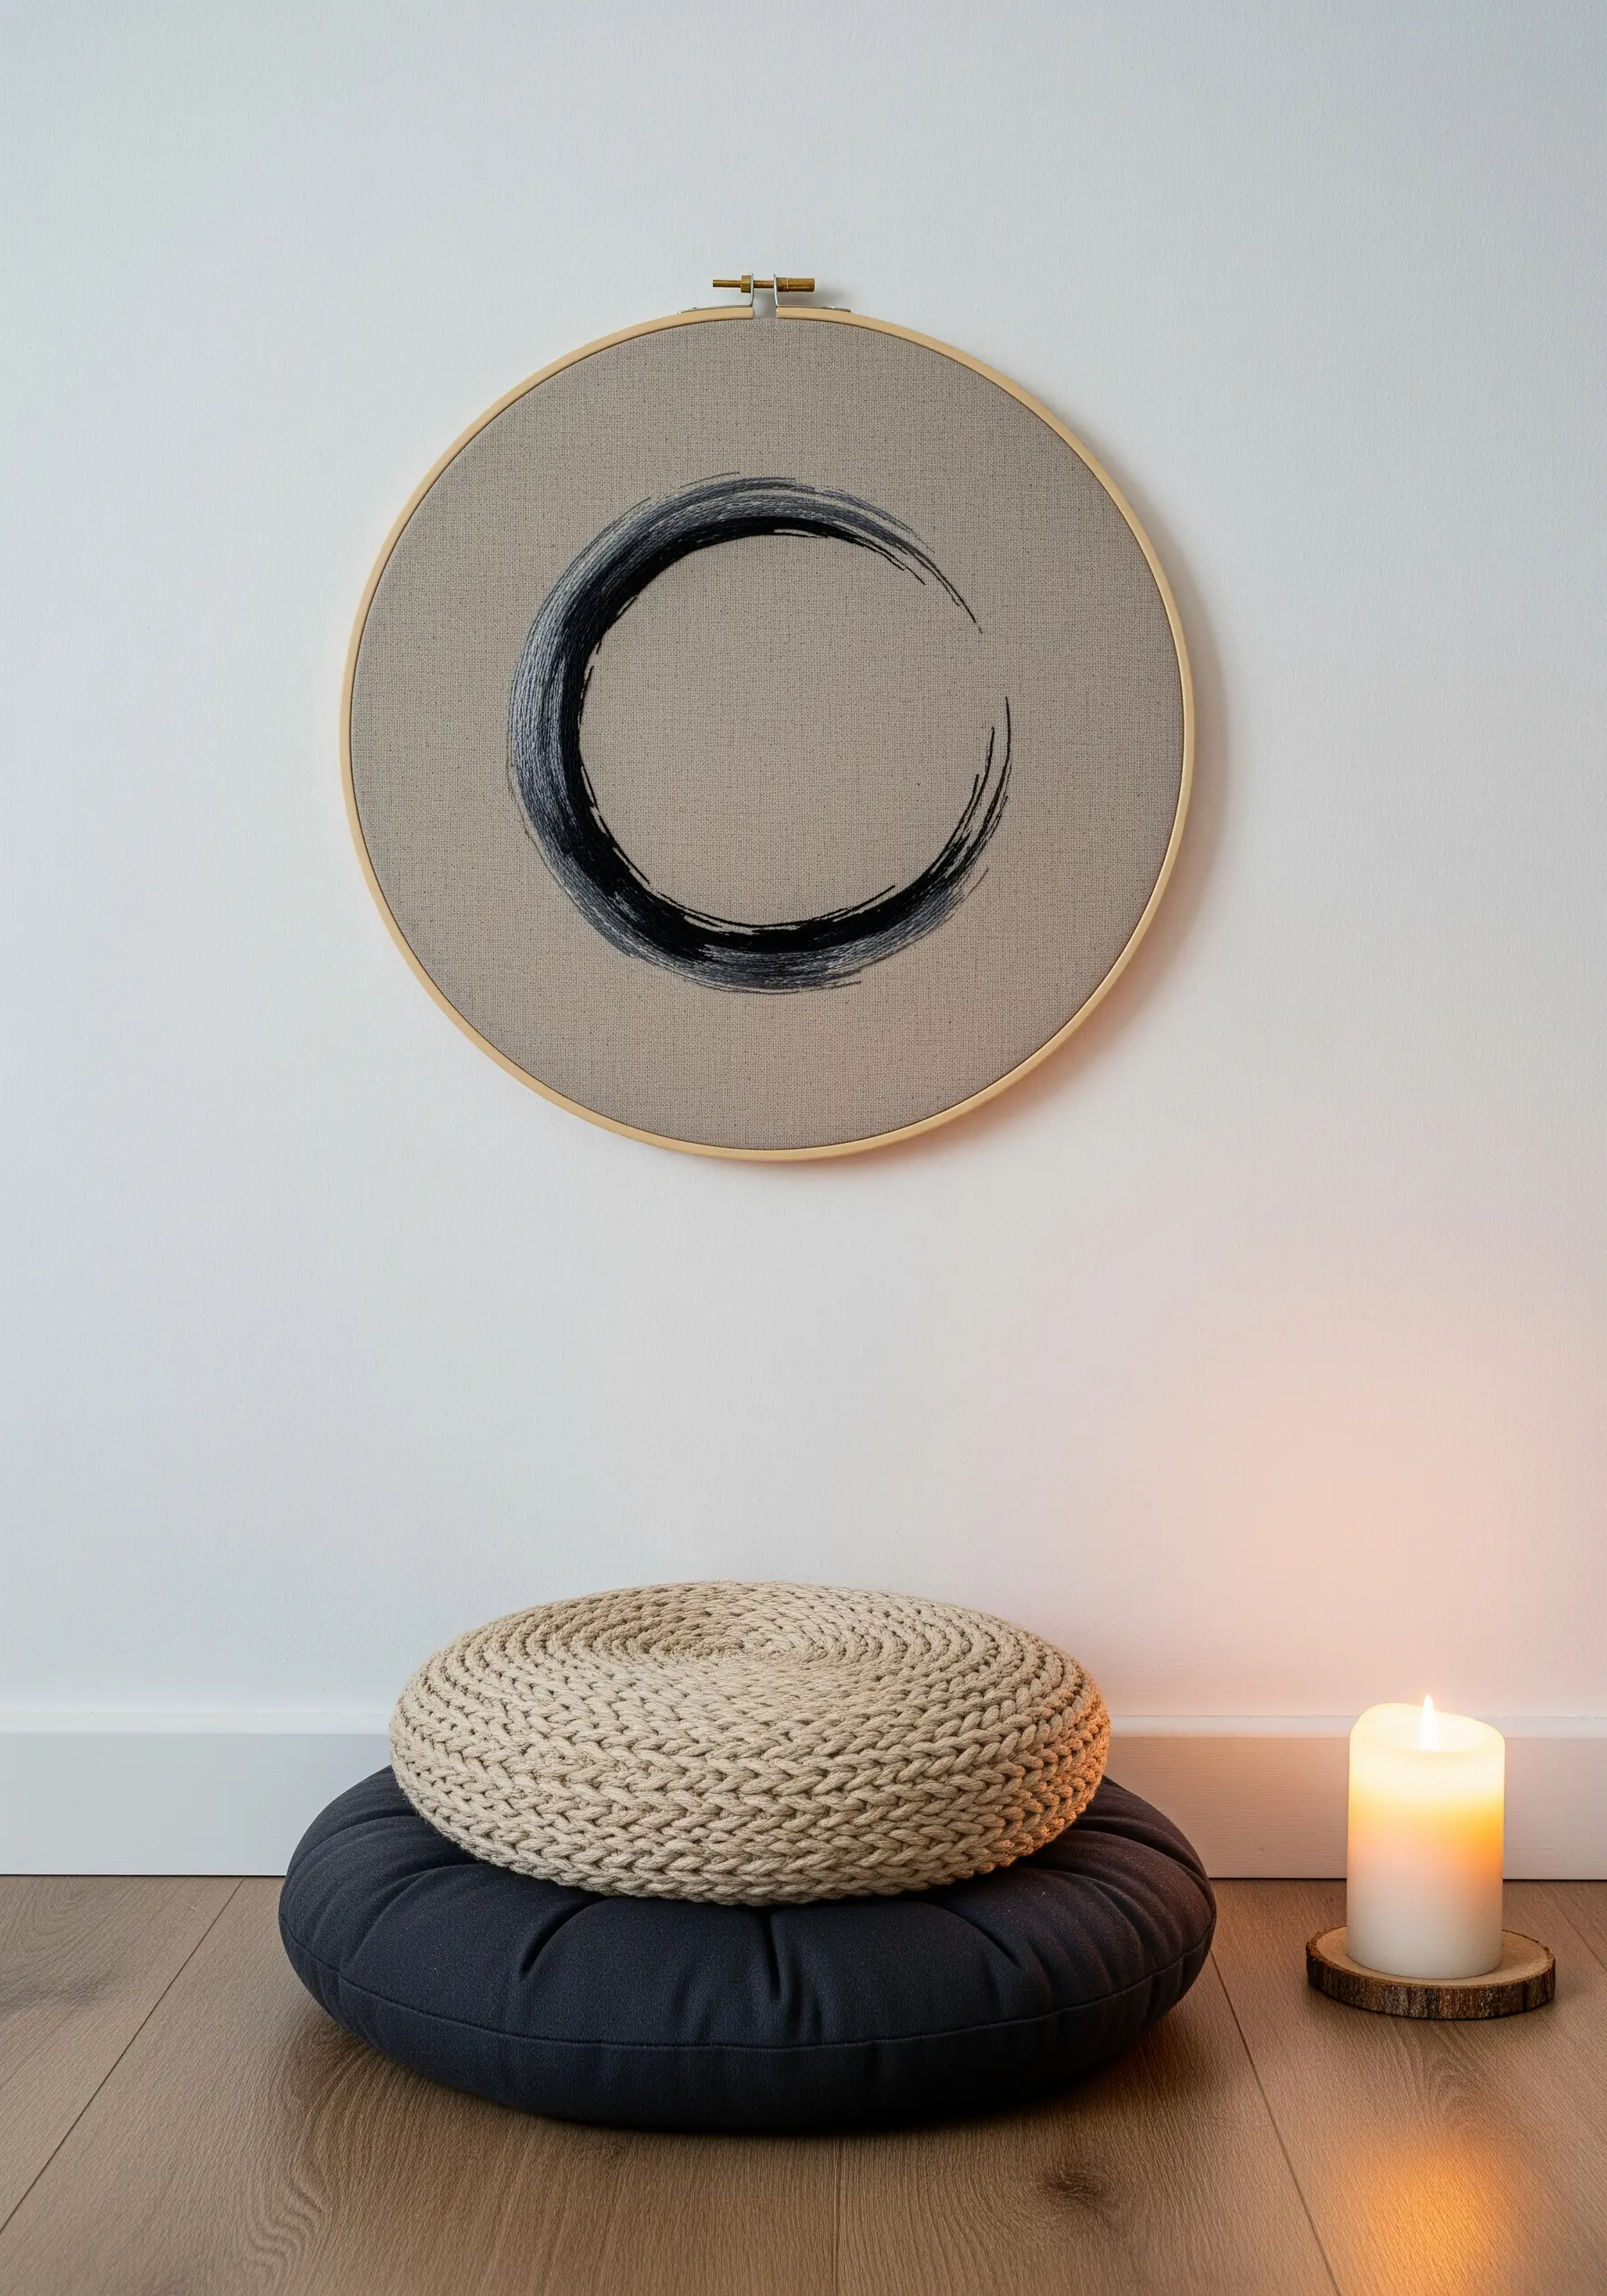
To capture the expressive energy of a Zen enso circle, choose your materials carefully.
Stitch on a textured, neutral fabric like raw linen or Osnaburg cotton to enhance the organic feel.
Instead of a perfect satin stitch, use a wider, slightly uneven laid stitch to mimic the thick-and-thin quality of a calligraphy brushstroke. The imperfection is the point.
24. Create Sculptural Clouds with Turkey Work
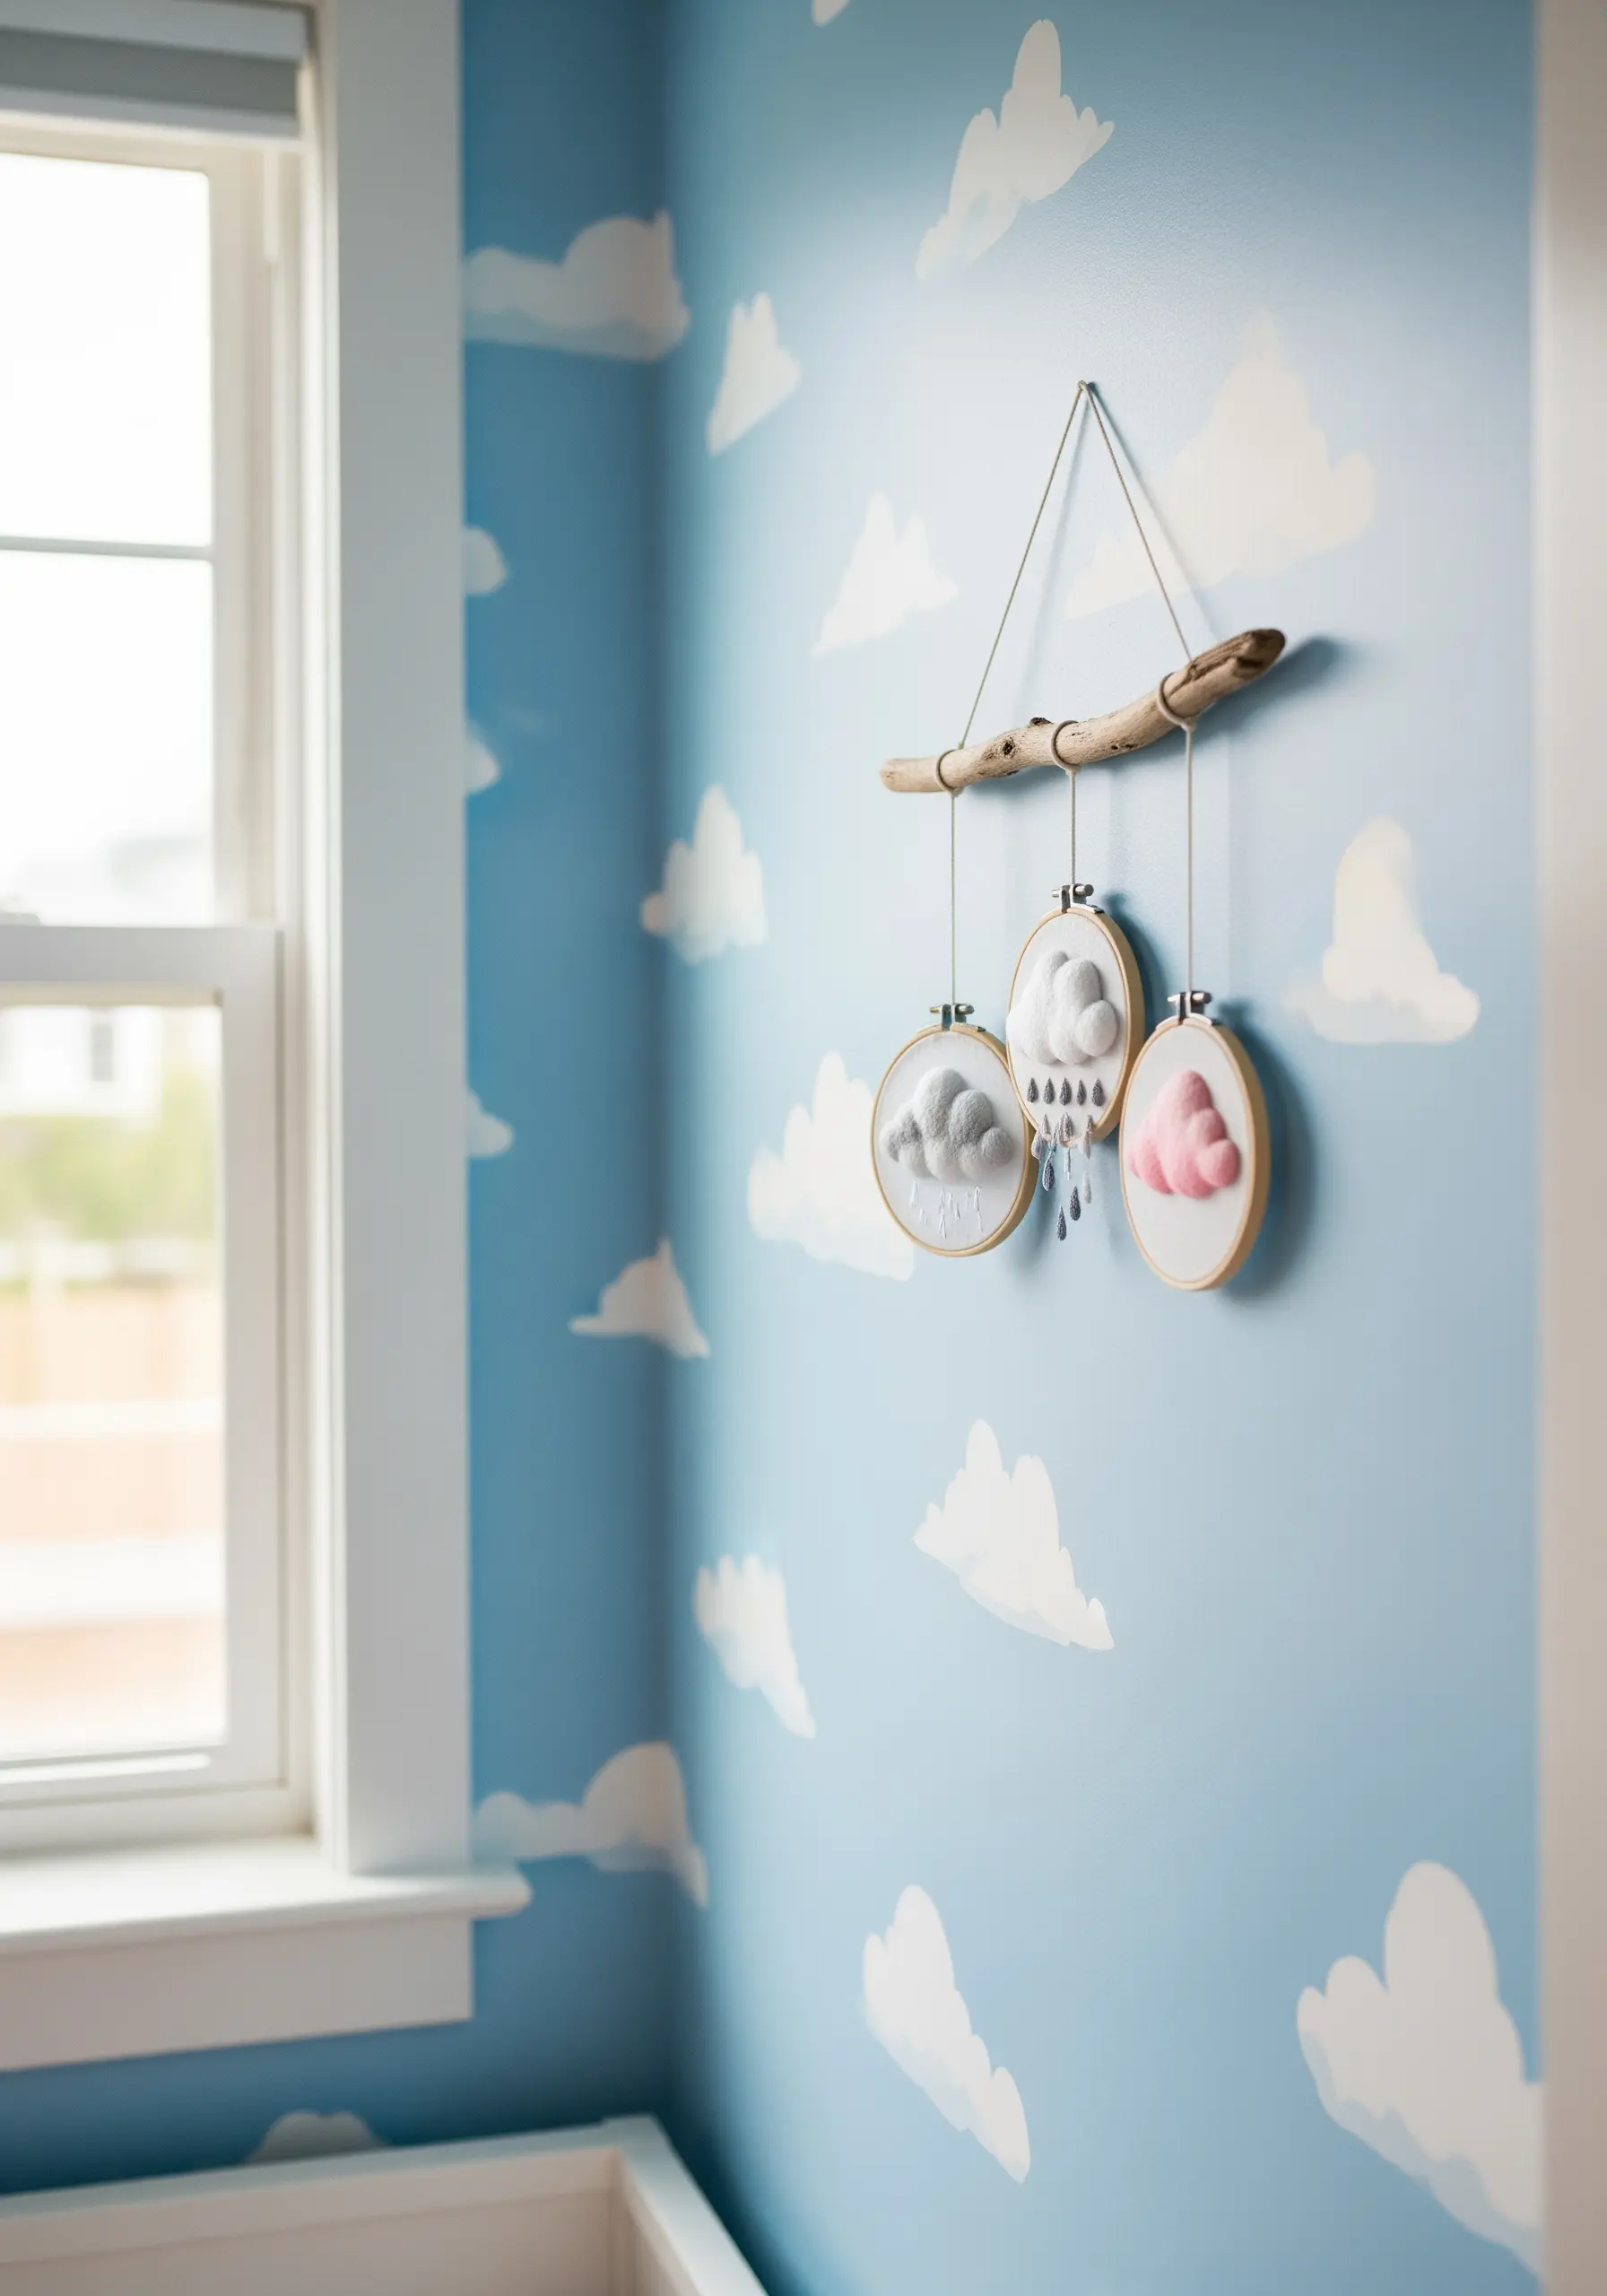
For fluffy, three-dimensional clouds in a nursery mobile, turkey work is the ultimate stitch.
This technique creates loops that you can then trim to your desired length, resulting in a soft, plush texture that invites touch.
Use a soft, bulky yarn or multiple strands of cotton floss for an extra-puffy effect that stands out from the wall.
25. Use Single-Strand Thread Painting for Realism
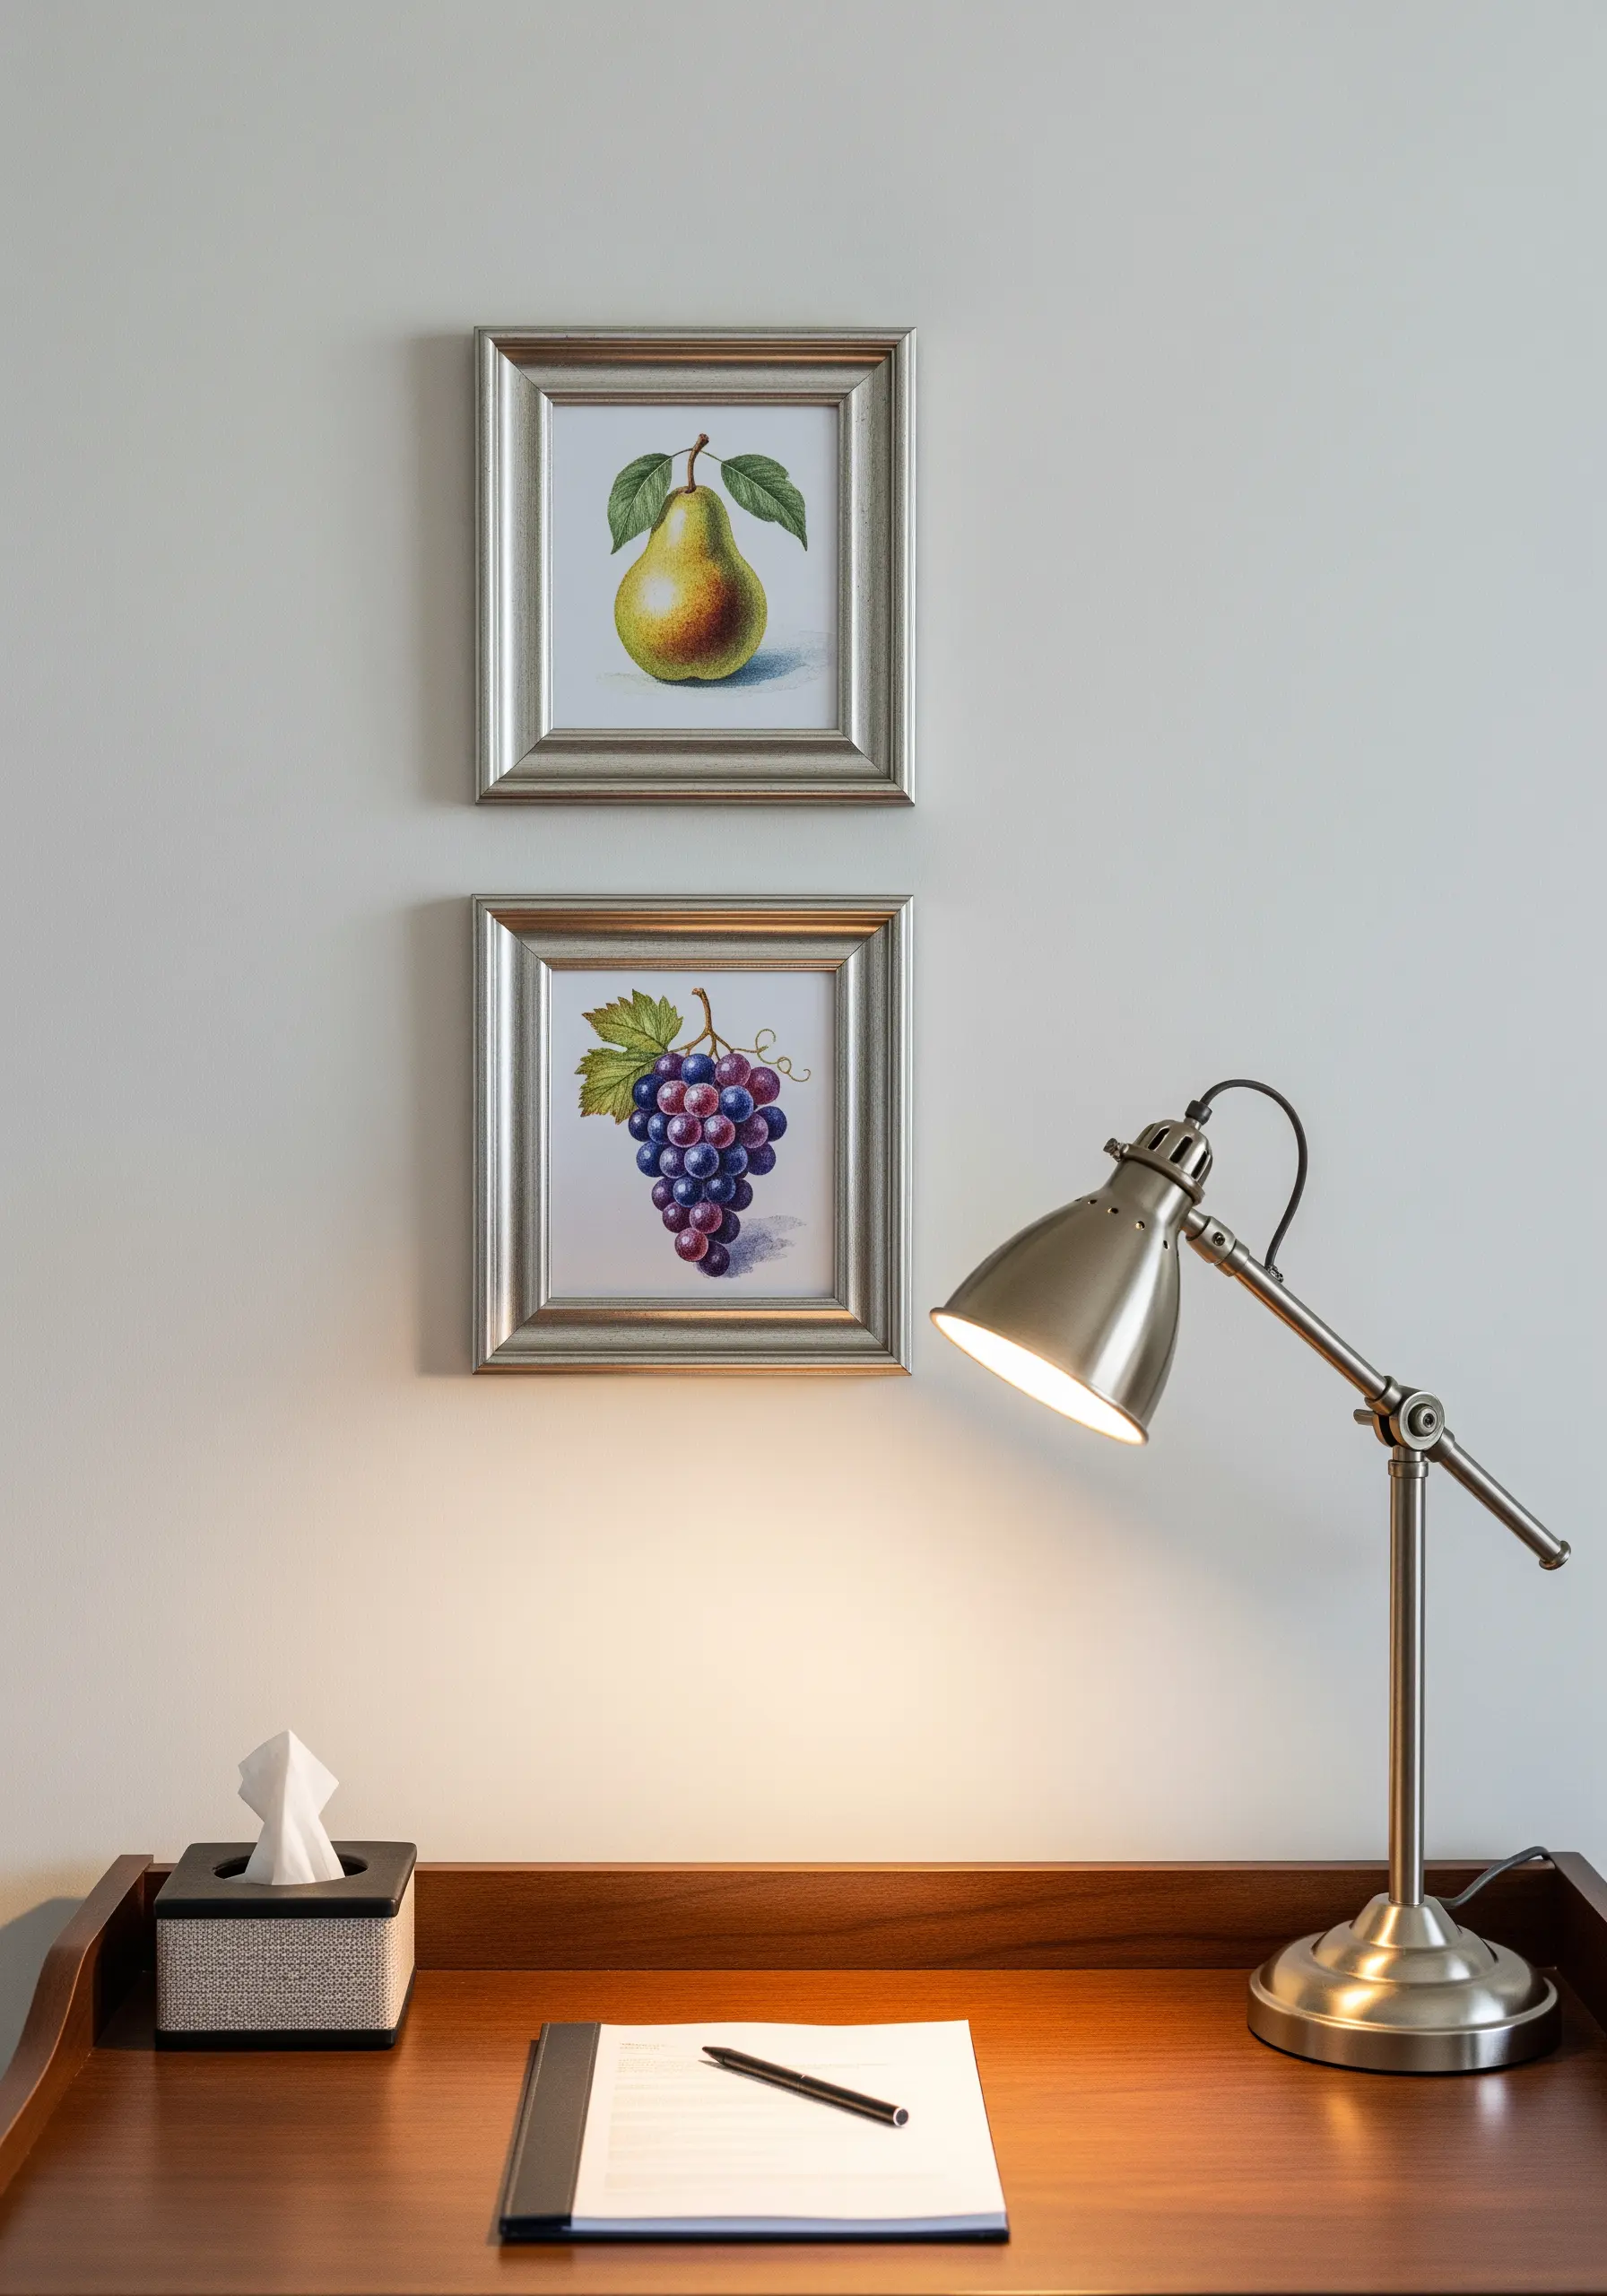
For photorealistic still life, the secret is single-strand thread painting.
Working with just one strand of floss at a time allows you to blend colors with the precision of a paintbrush, creating smooth gradients for shading and highlights.
This meticulous technique is what gives fruit its rounded, dimensional appearance and makes your work look like a classical painting.
26. Imply Transparency with Sheer Fabric Appliqué
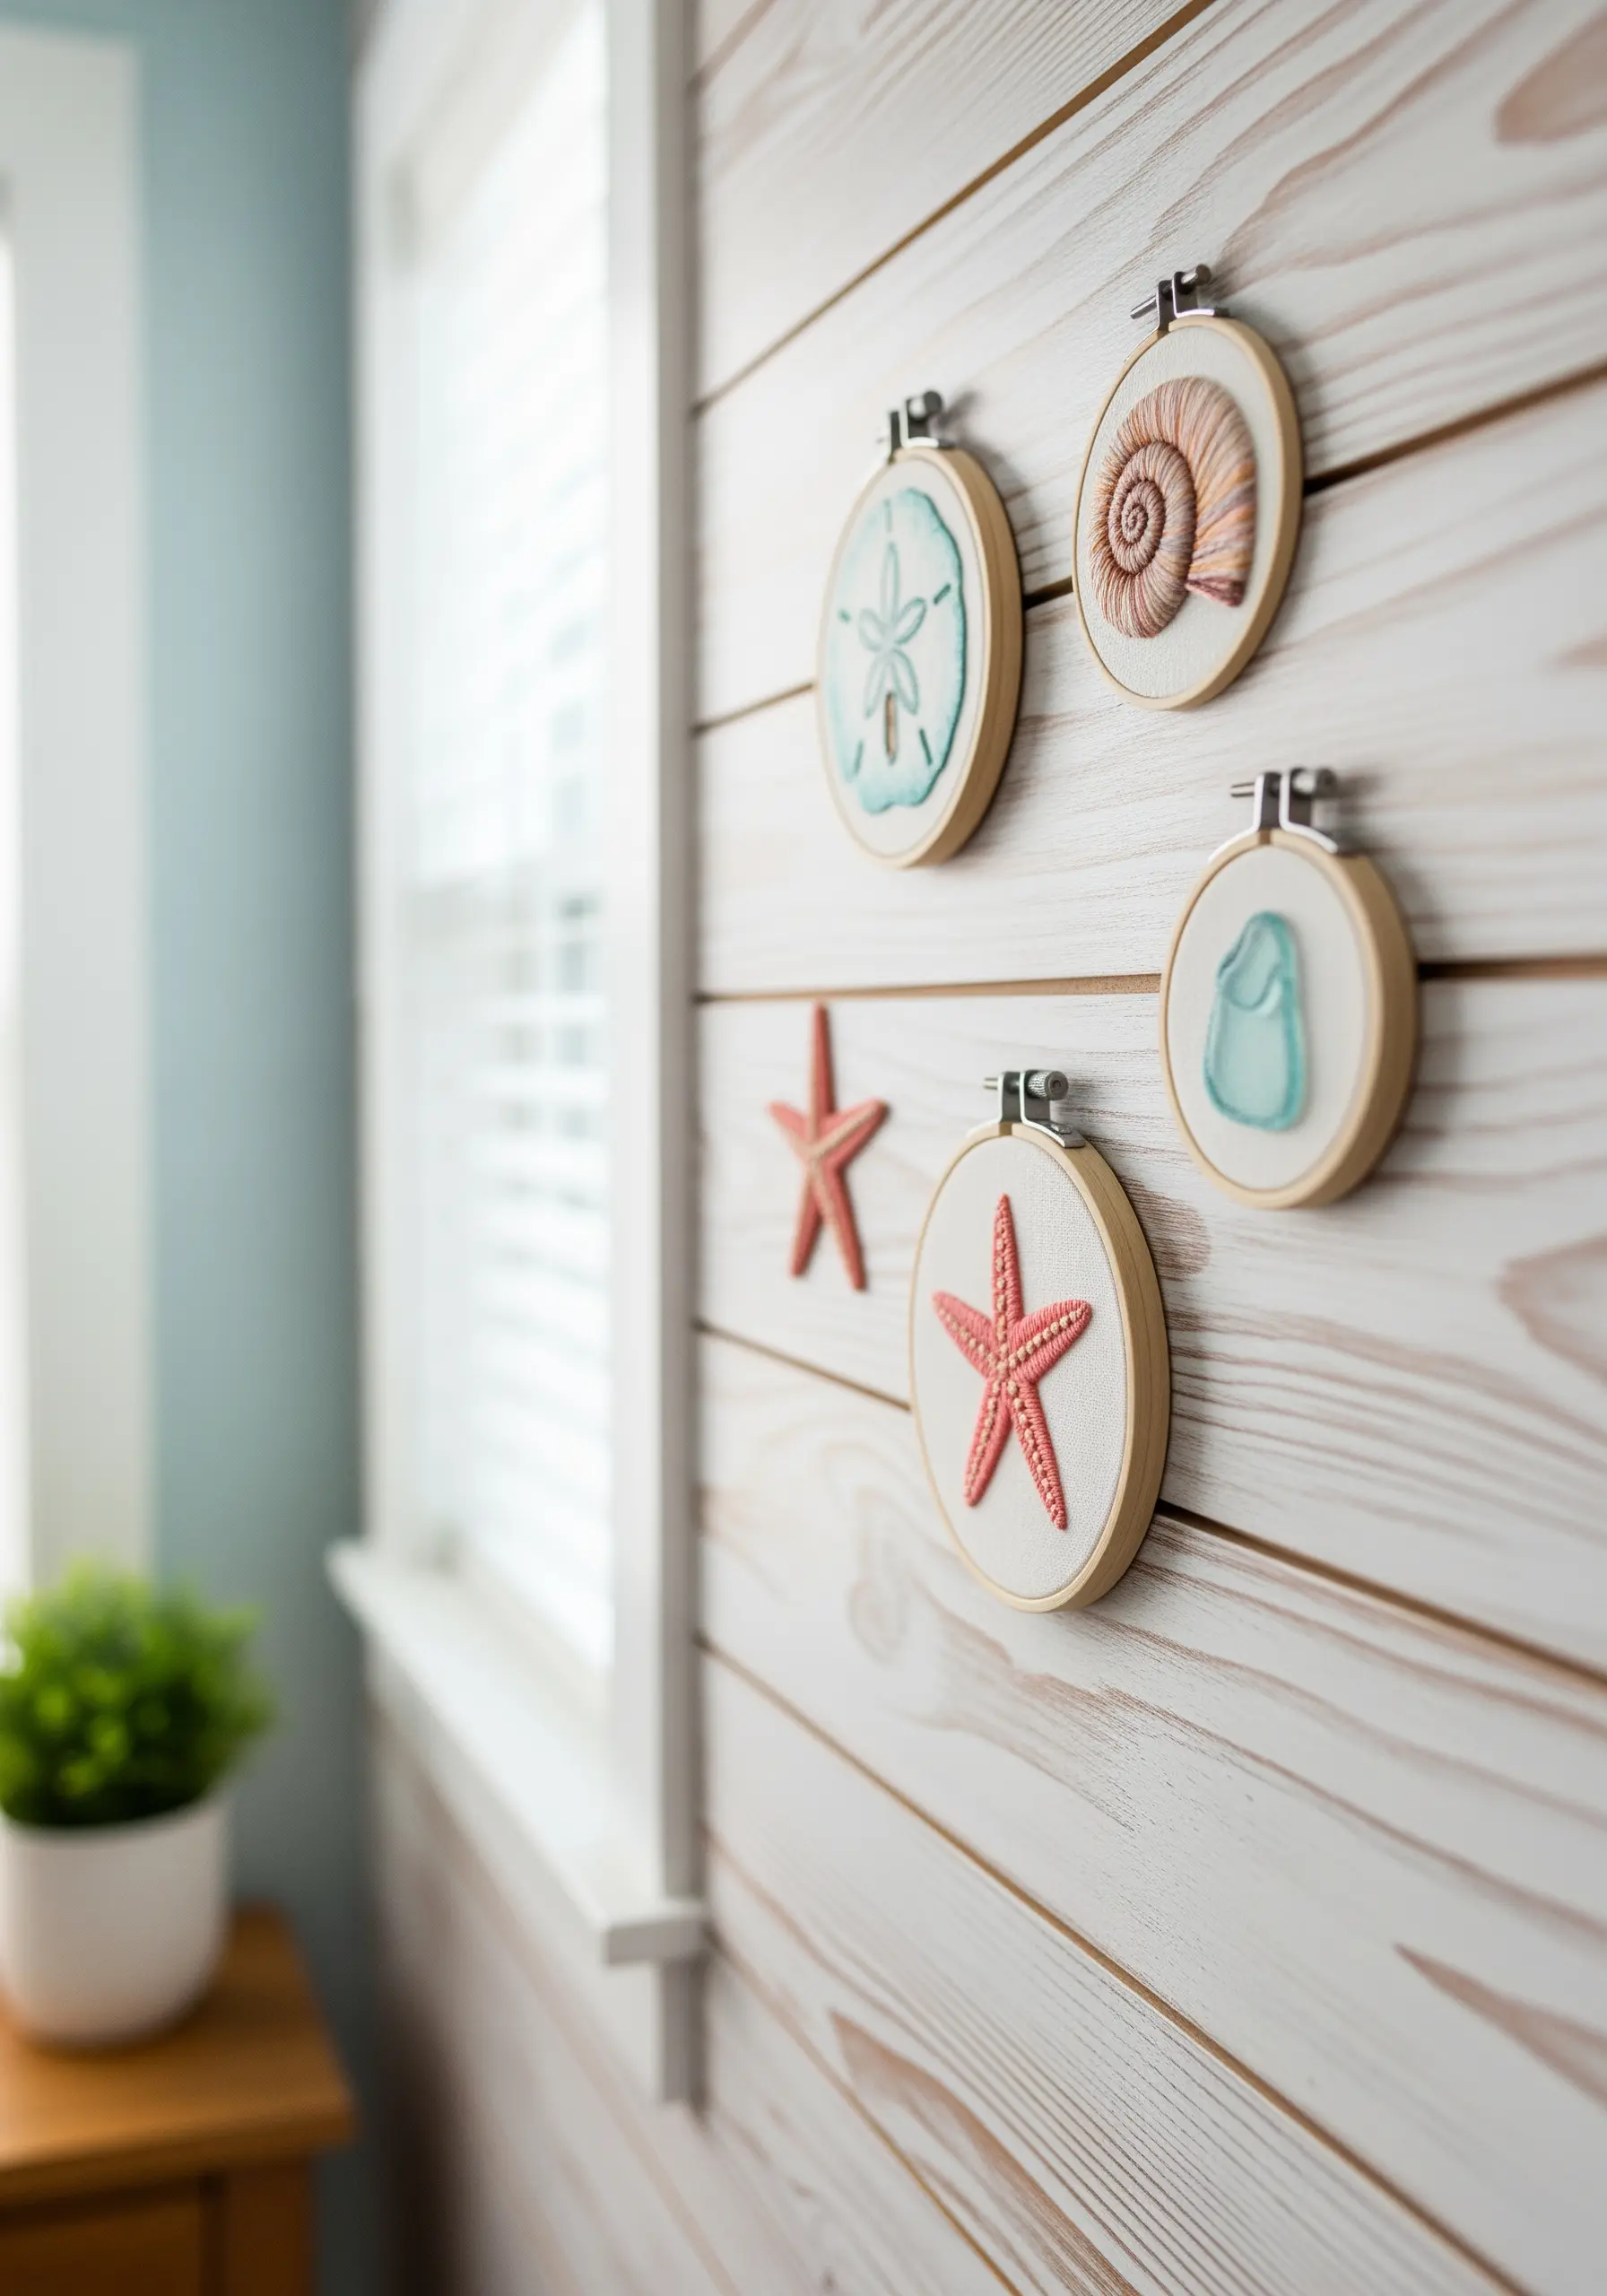
To recreate the frosted, translucent look of sea glass, incorporate a small piece of appliqué.
Cut your shape from a light-colored organza or other sheer fabric and tack it down with tiny, discreet stitches around the edge.
Embroidering a few white highlights on top will complete the illusion. This mixed-media approach adds a layer of texture and realism that thread alone can’t replicate.
27. Translate Digital Soundwaves into Texture
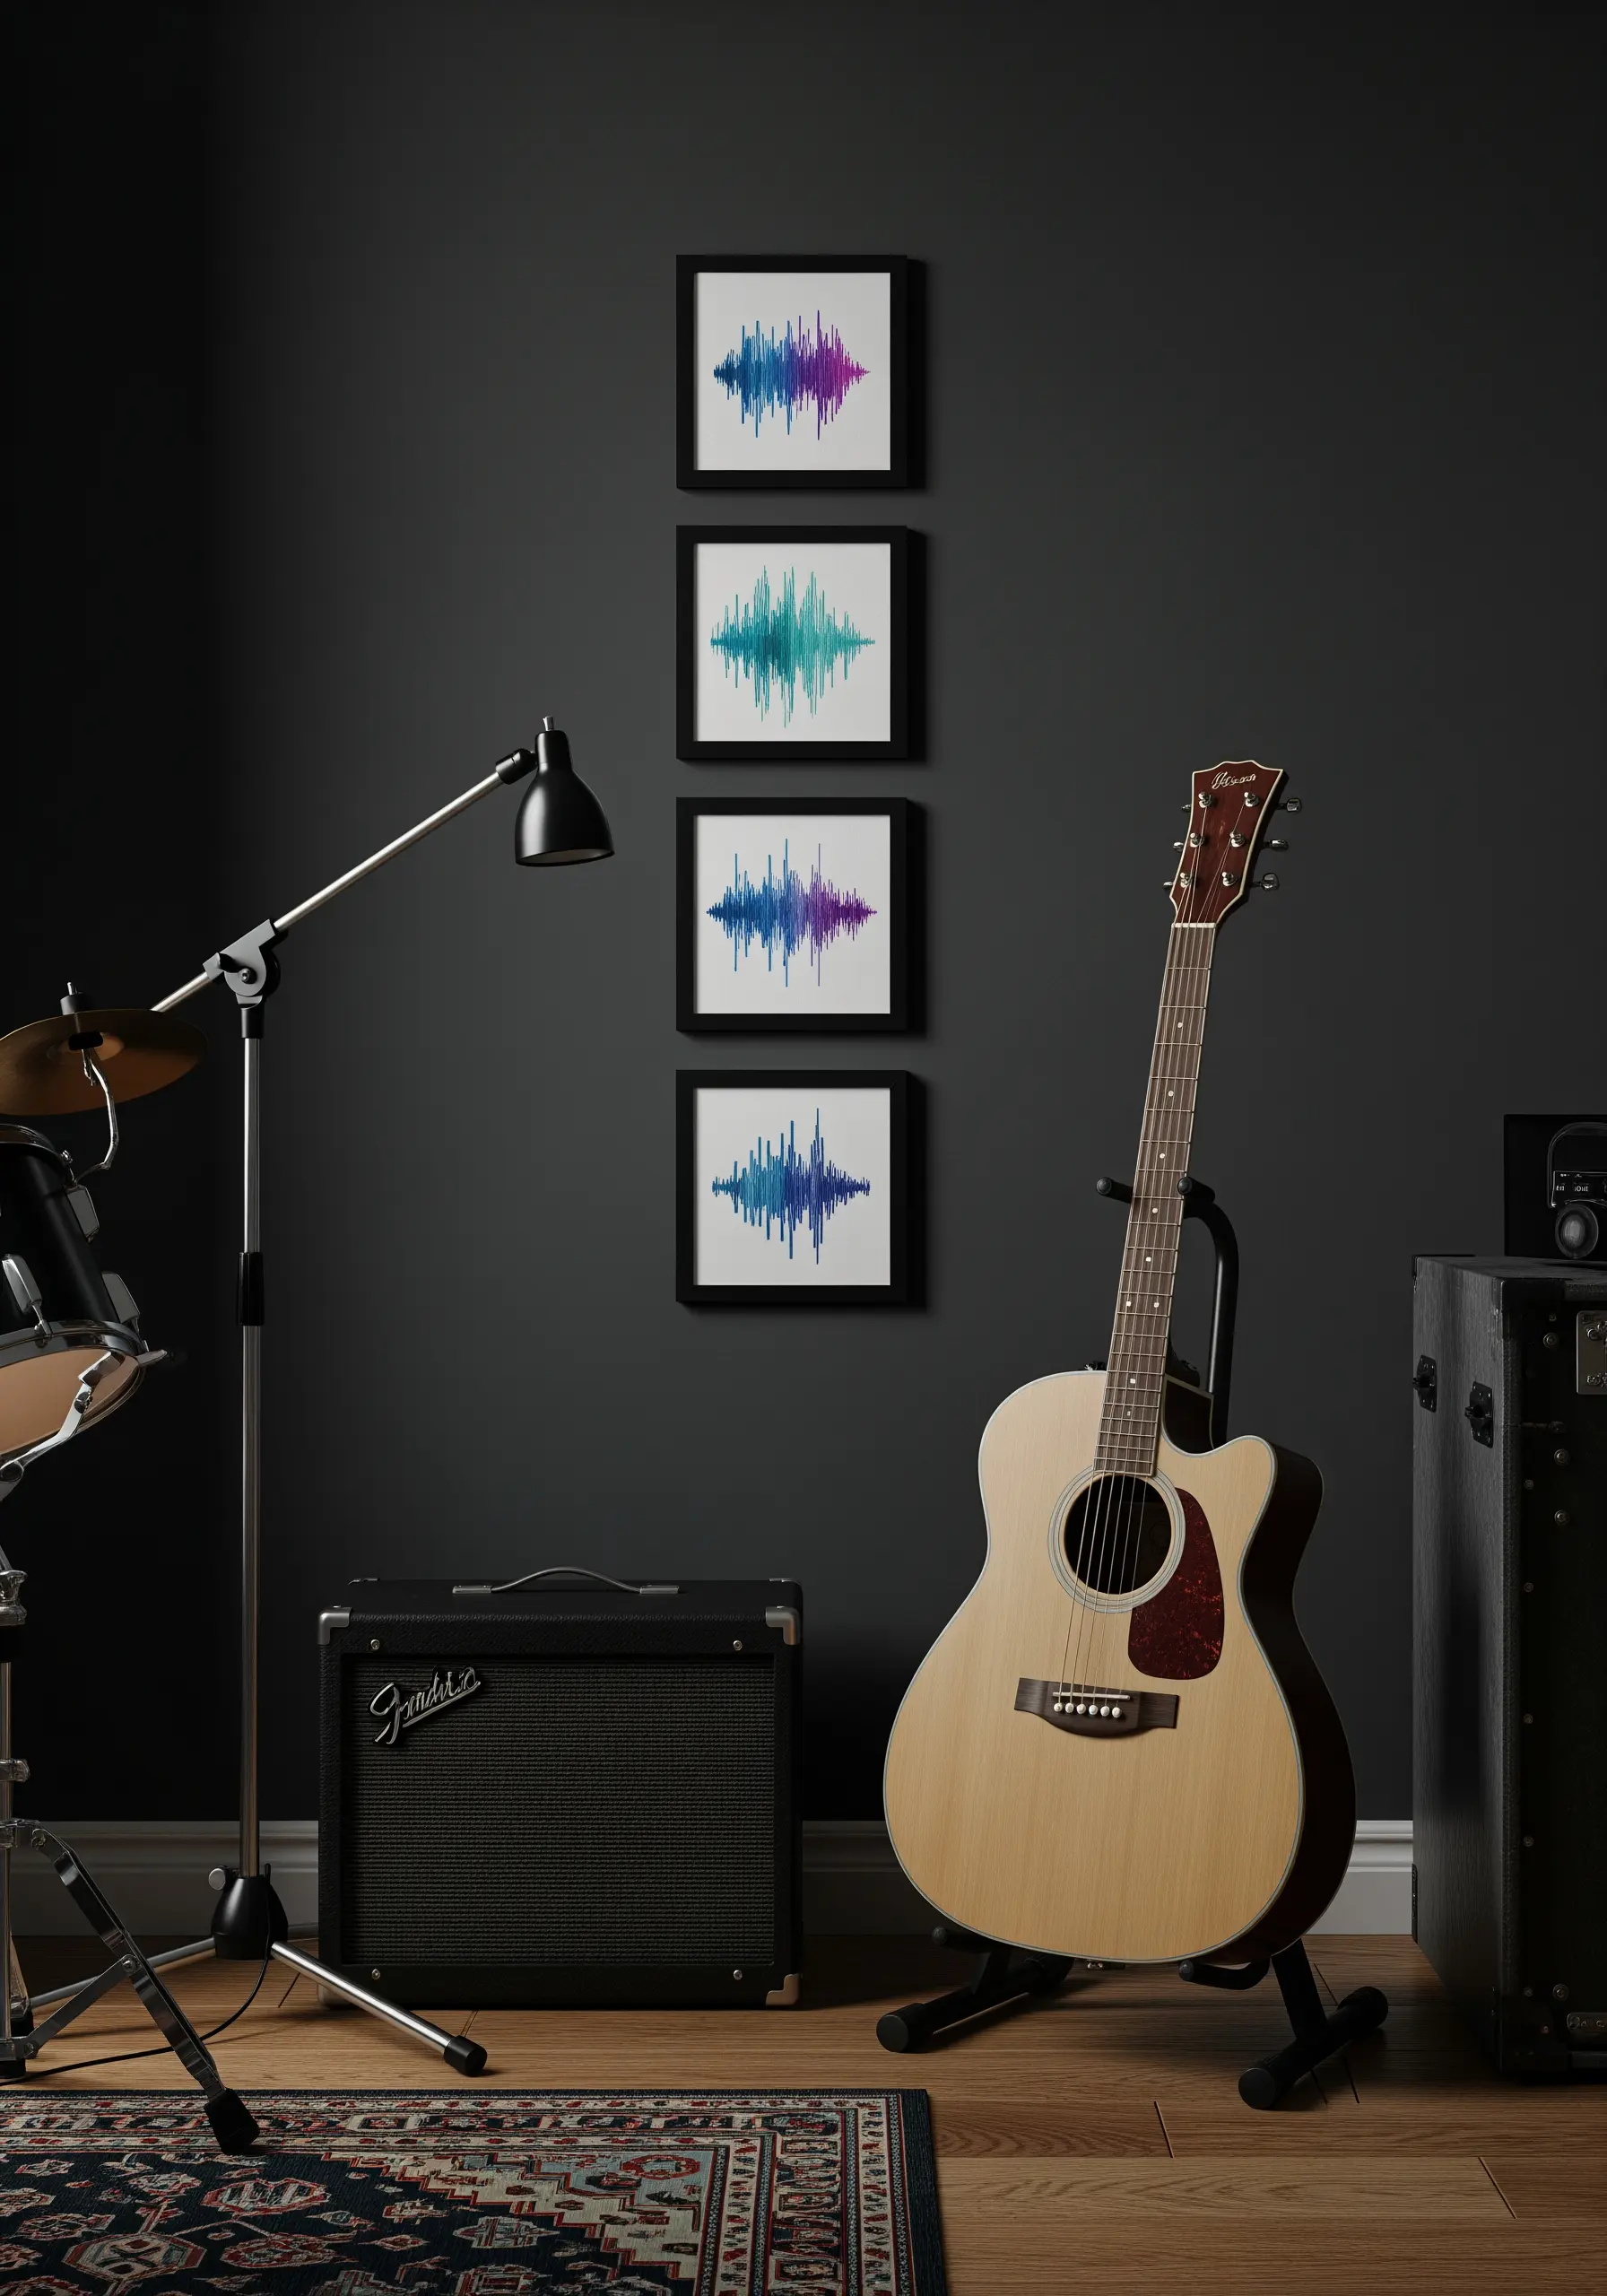
Turn a meaningful sound—a favorite song, a laugh, a heartbeat—into a piece of modern art.
Use a screenshot of a soundwave as your pattern and replicate it with vertical satin stitches.
Using a variegated thread in a modern color palette adds an immediate gradient and painterly quality, transforming a digital file into a personal, textural keepsake.
28. Suggest Glass with Minimal Outlines and Highlights

When embroidering glass, what you don’t stitch is as important as what you do.
Use a fine backstitch or split stitch to create the outline of the glass, leaving the inside mostly empty to imply transparency.
Then, add a few strategically placed straight stitches in white or a very light grey to represent reflections and highlights. This minimalist approach is far more effective than trying to fill the entire shape.


