

Your travel memories are more than just photographs in a folder—they’re a collection of feelings, colors, and textures. With a needle and thread, you can translate those sensory details into art that tells a story right on your wall.
Think of your embroidery hoop as a window to another place. Instead of just replicating a scene, I want you to consider how you can capture its essence. How can you use the direction of a stitch to show the rolling hills of Tuscany, or the texture of a French knot to mimic the granular spices in a Moroccan souk?
This collection isn’t about complex patterns; it’s about learning to see like an artist. You’ll discover how a limited color palette can create a powerful graphic impact, how layering simple stitches can build incredible depth, and how a single line can trace a journey. Let’s begin.
1. Blend Line Art with 3D Texture for a Paris View
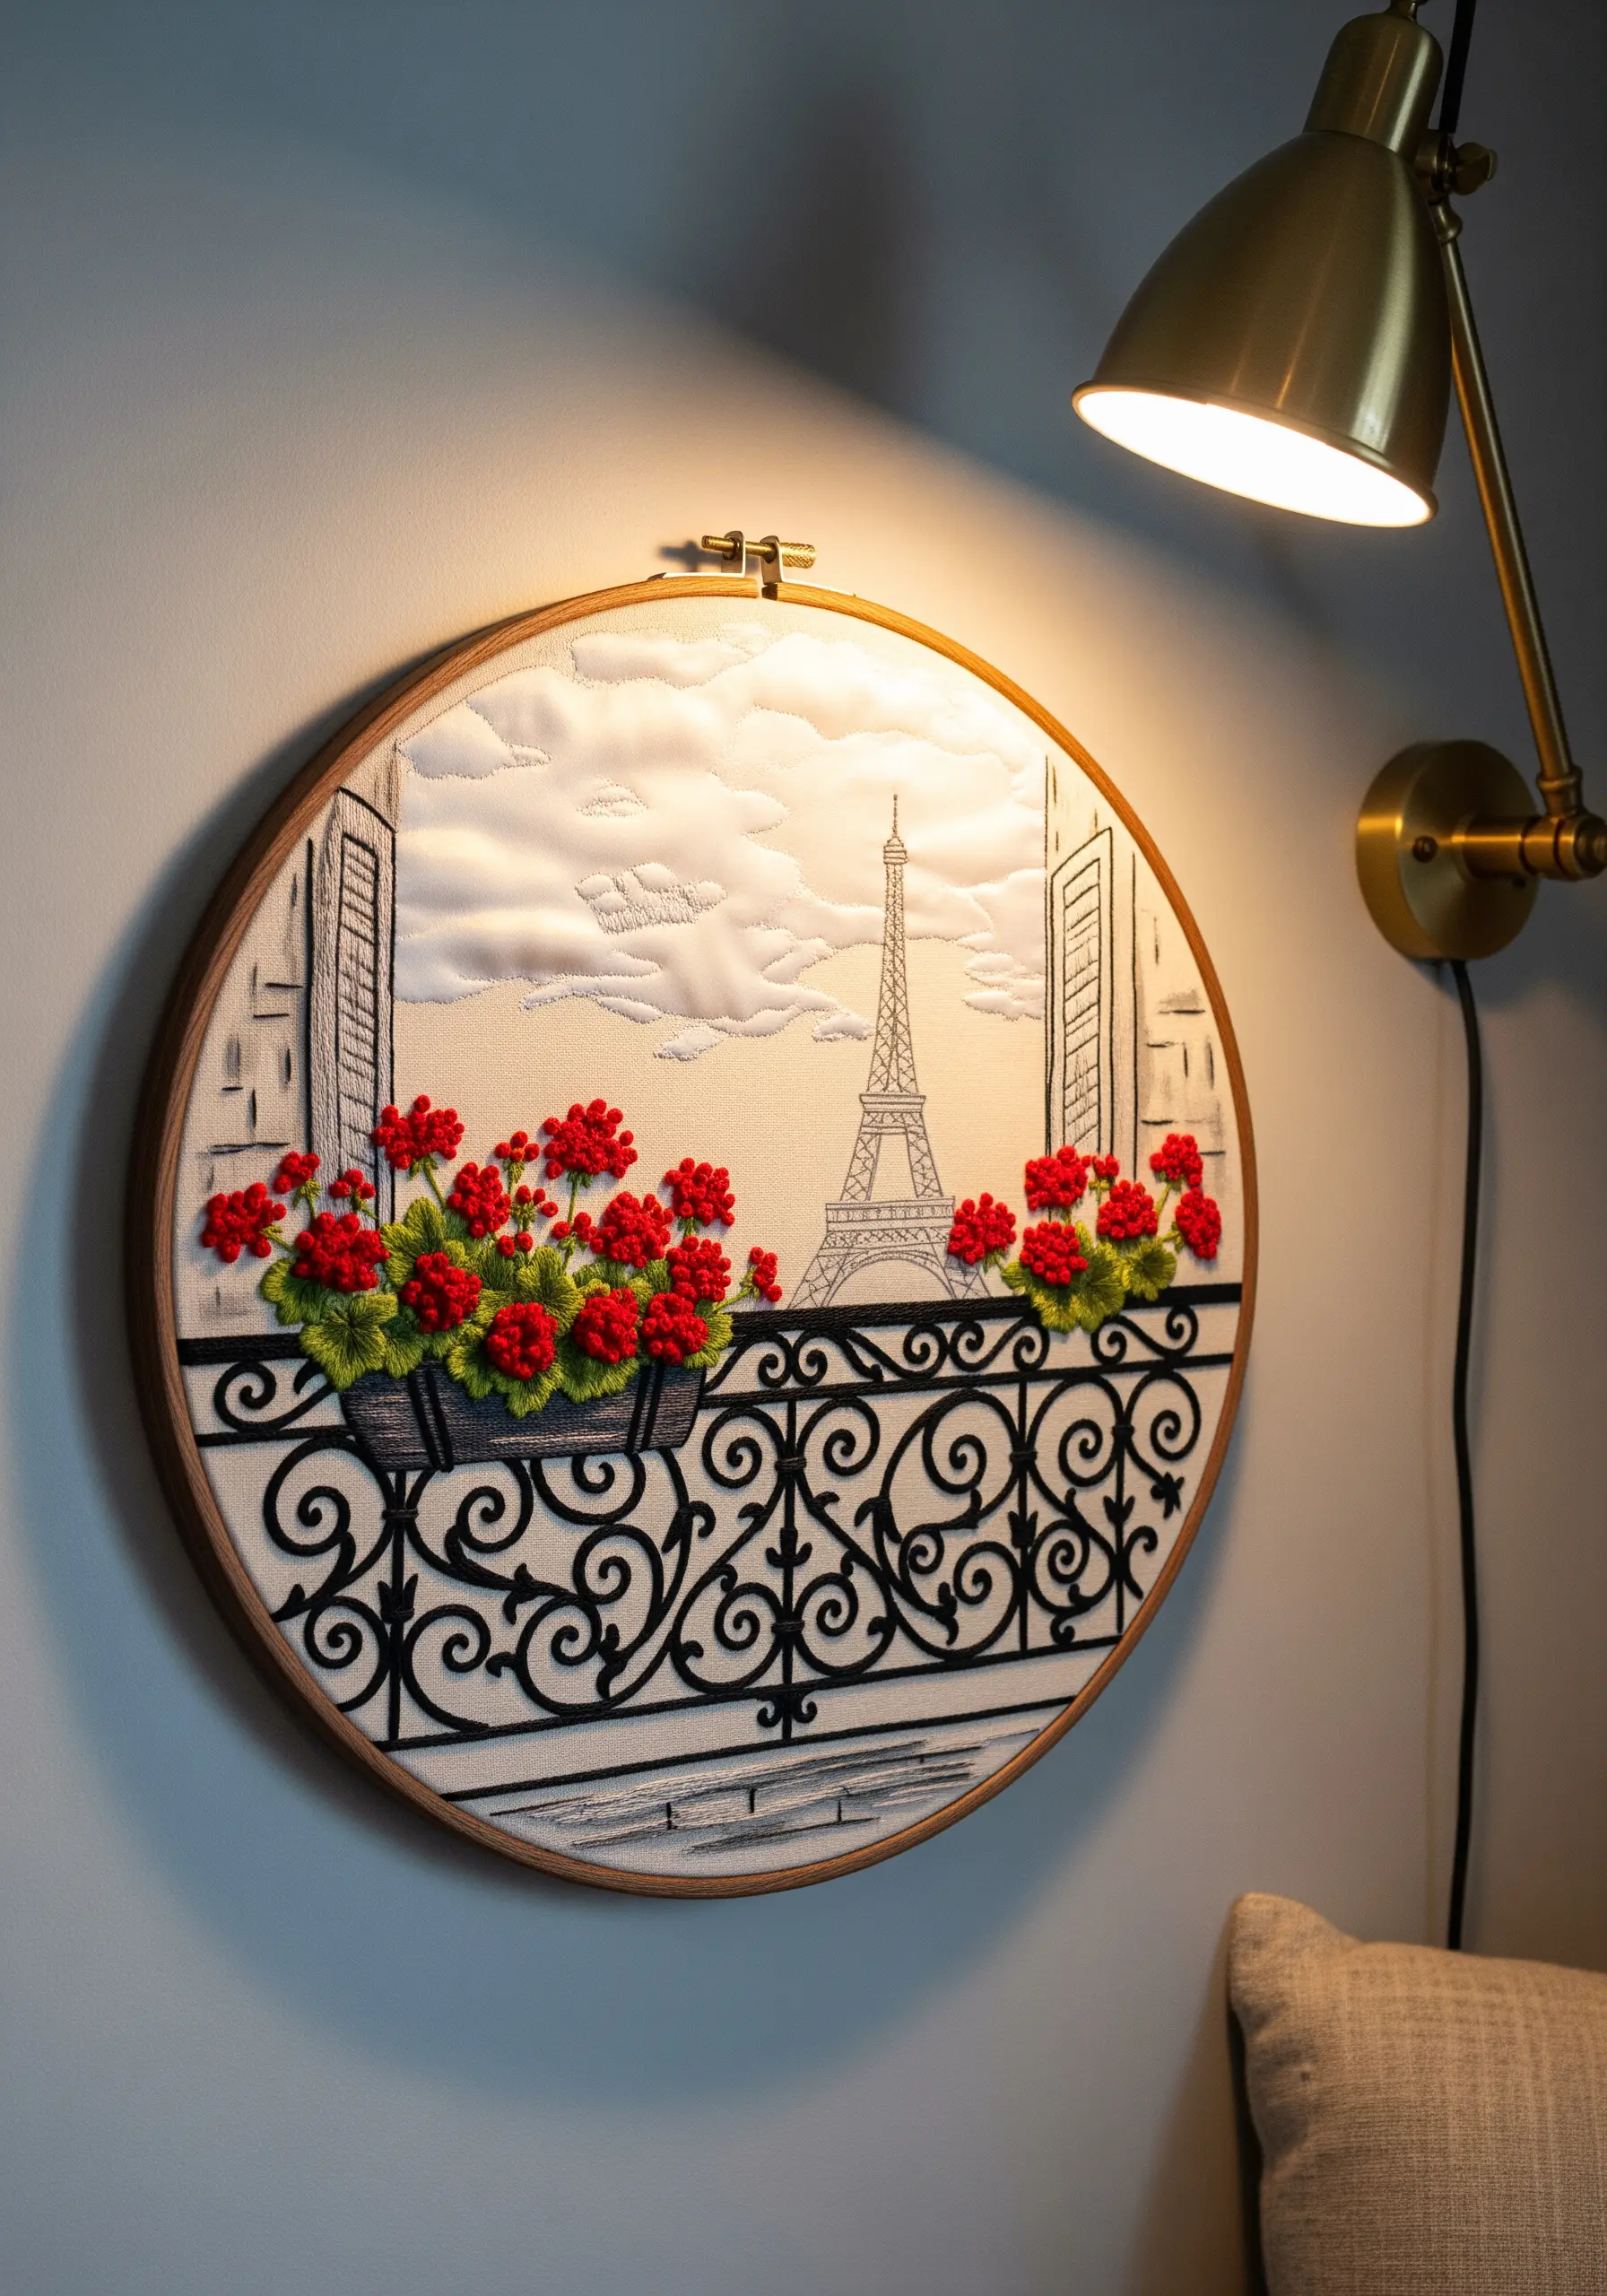
Create a stunning sense of depth by combining flat line work with dimensional stitches.
Use a simple backstitch in black or gray for the architectural details, like the balcony railings and the Eiffel Tower in the distance.
For the vibrant geraniums, build up layers of red French knots or bullion knots, which gives them a lush, realistic volume that pops against the flat background.
To achieve the soft, puffy clouds, try a trapunto technique: stitch the outline, then carefully push small bits of batting underneath from the back before closing the shape. This adds a subtle, quilted dimension to your hoop art.
2. Capture Santorini with a Crisp, Graphic Palette
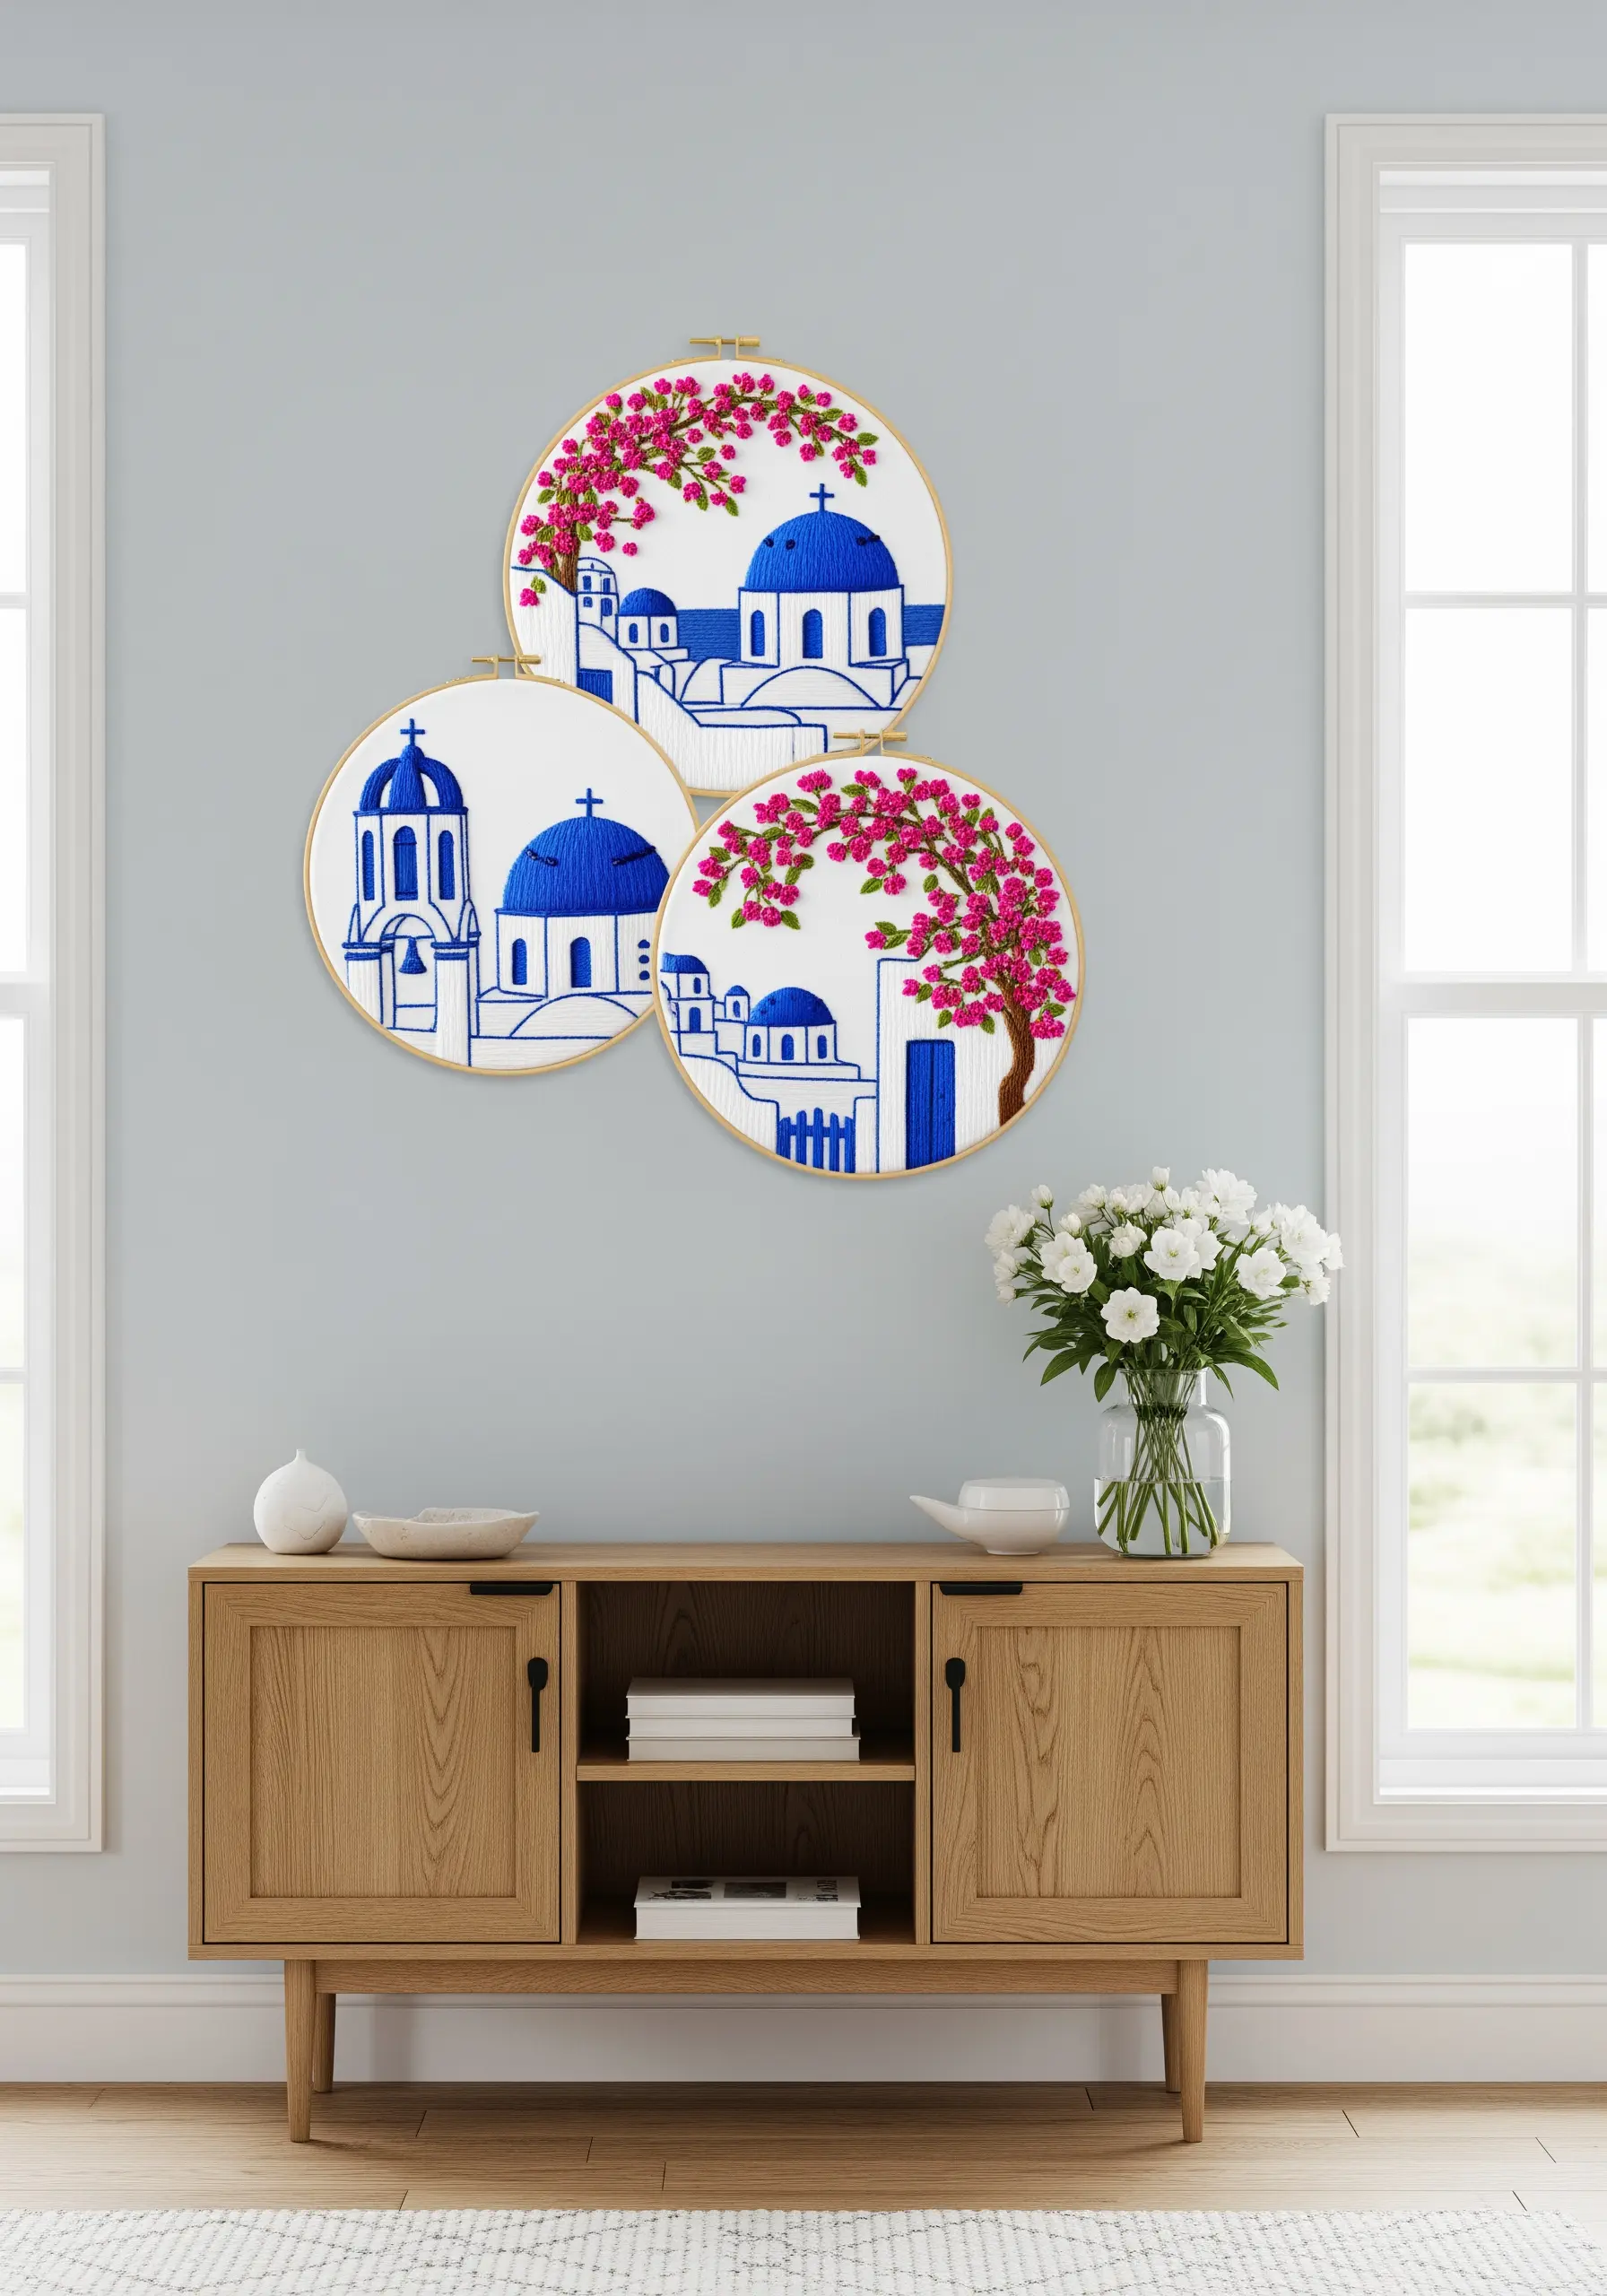
Evoke the iconic look of the Greek isles by committing to a strict color palette of brilliant blue, crisp white, and a single accent color like magenta.
Use a dense, neat satin stitch to fill the architectural shapes, ensuring all your stitches lie in the same direction for a smooth, reflective finish that mimics sun-bleached walls.
Define the domes and doorways with a sharp backstitch or split stitch outline. This clean separation between color blocks is what gives the design its graphic, illustrative power.
Add clusters of French knots for the bougainvillea to introduce a soft, organic texture that contrasts beautifully with the sharp lines of the buildings in your embroidery wall art.
3. Layer Simple Stitches for Delicate Cherry Blossoms
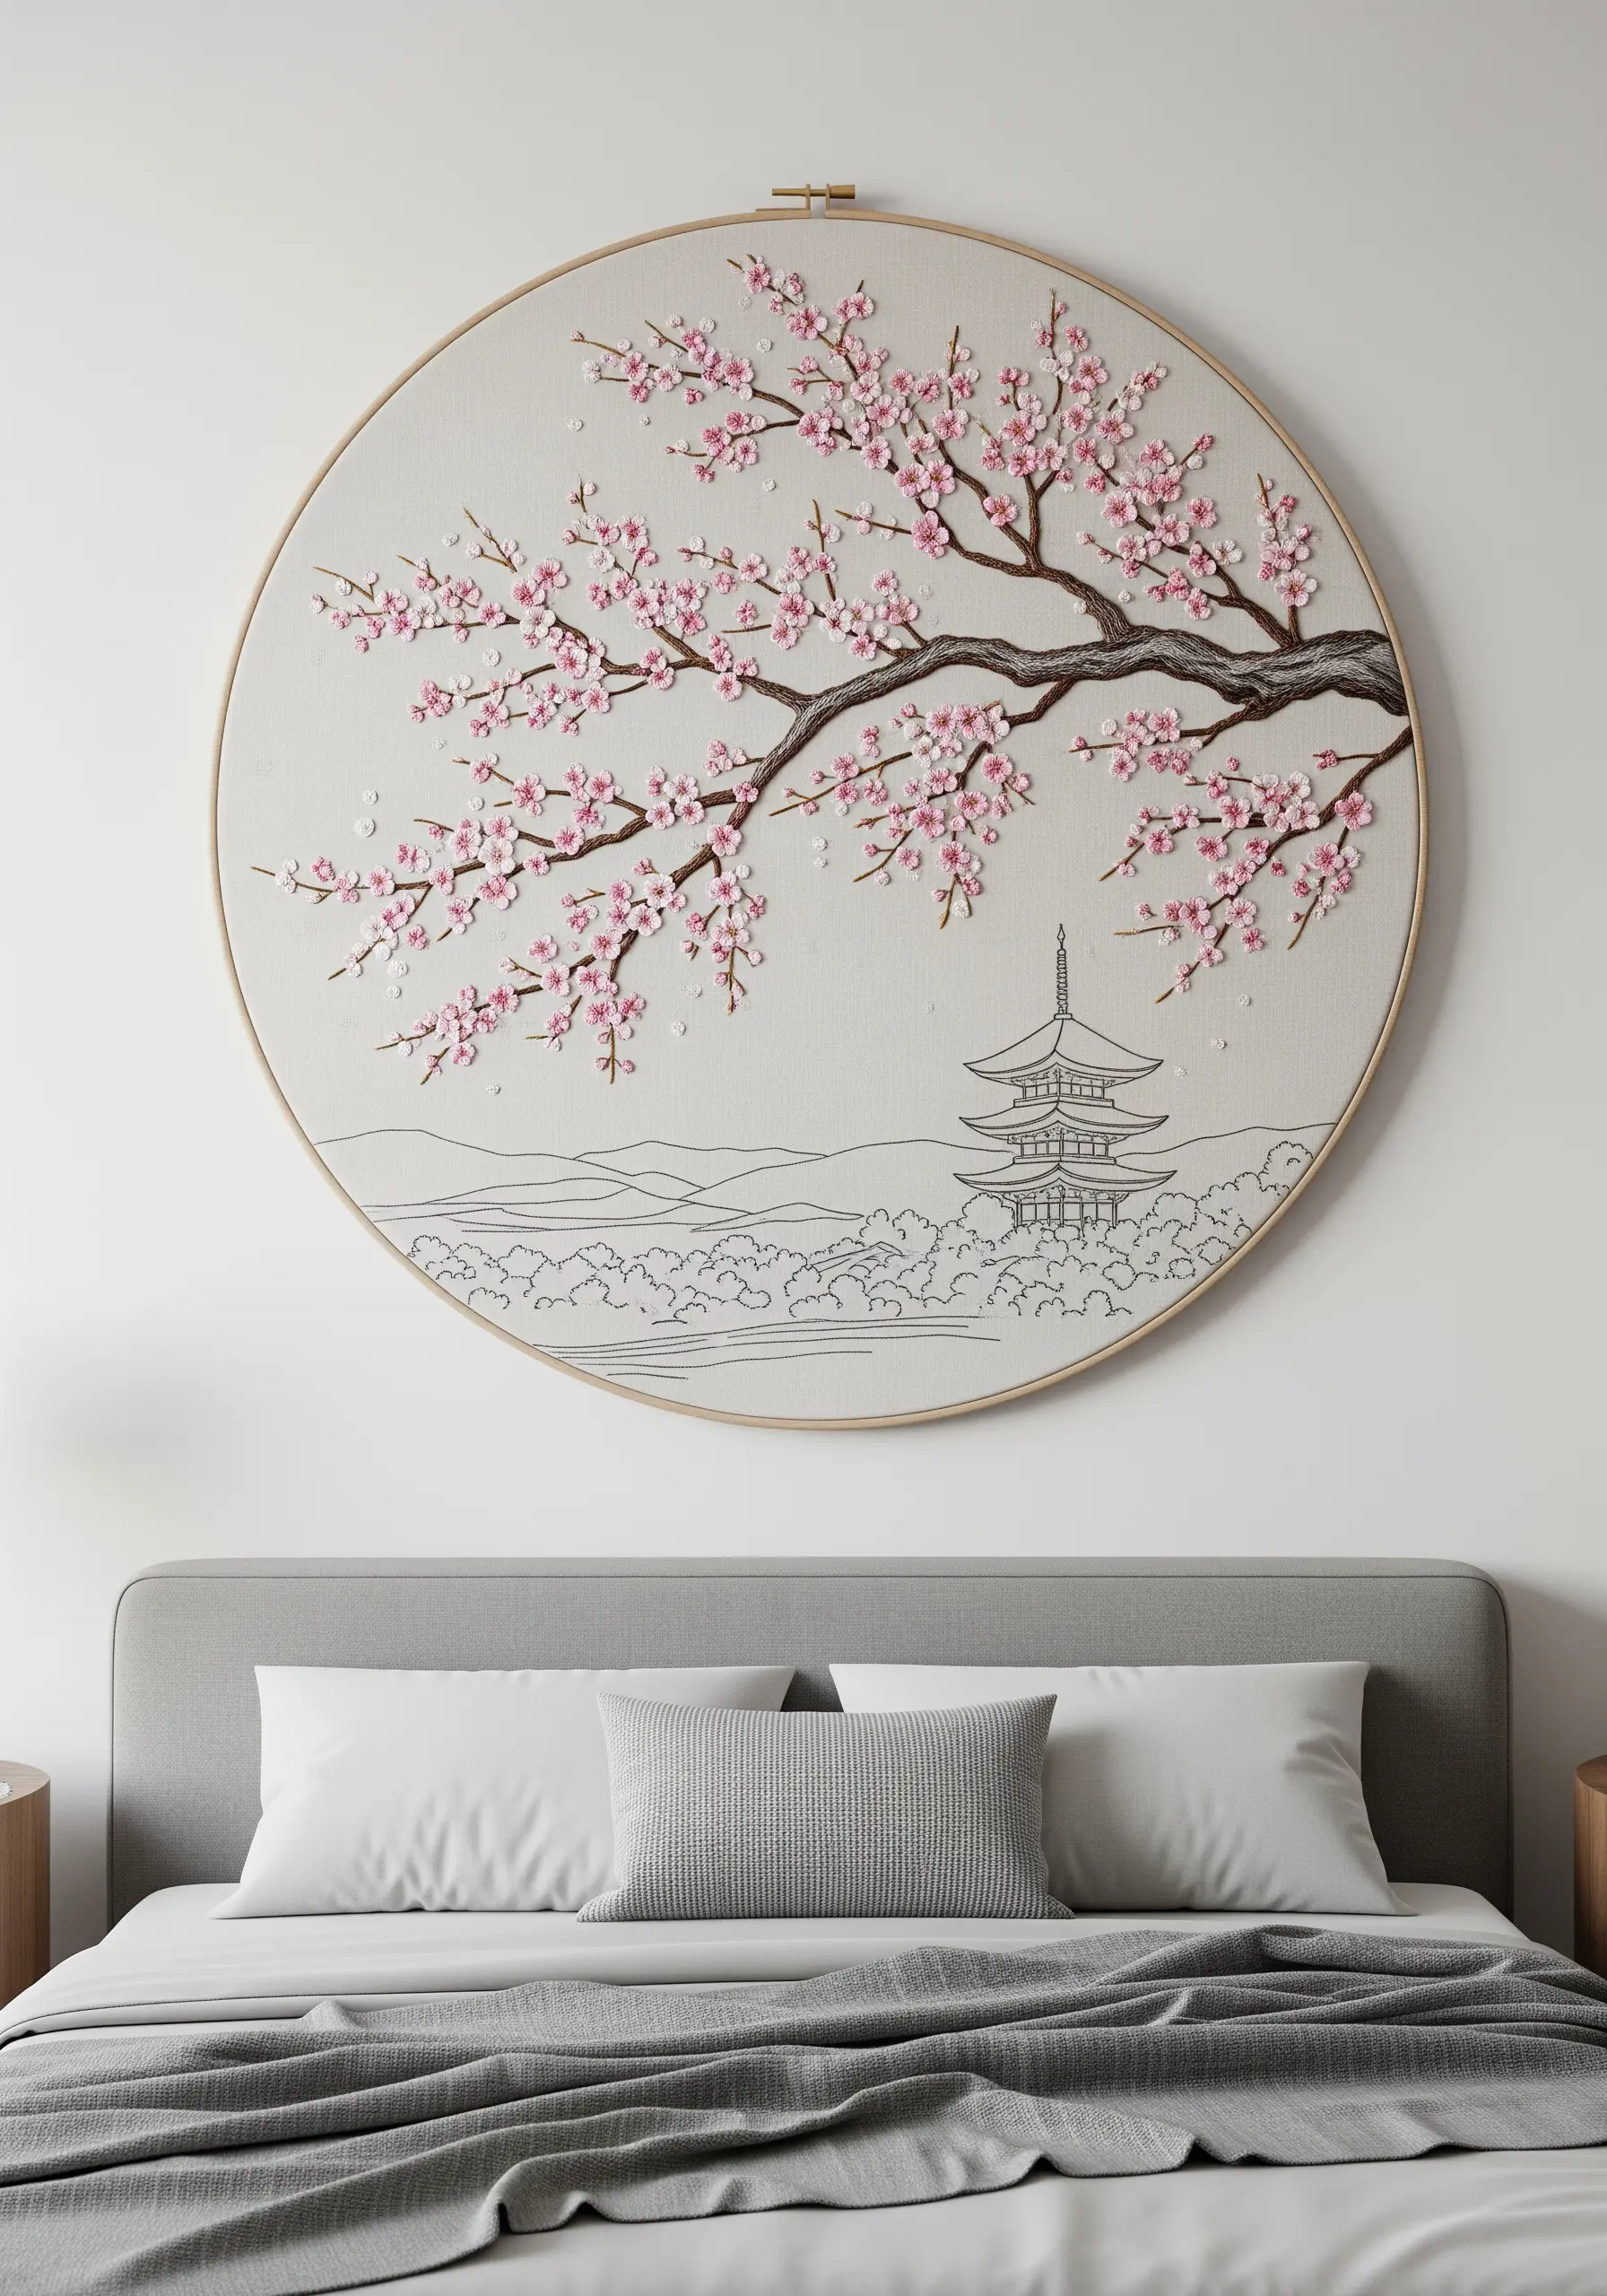
Create the illusion of a full, blossoming cherry tree by focusing on layering and subtle variation, turning a simple motif into statement-size wall art.
Use a whipped backstitch or stem stitch with a dark brown thread for the branches to give them a solid, rounded appearance.
For the blossoms, scatter French knots and lazy daisy stitches across the branches. Vary the size and shade—using pale pink, soft white, and a deeper rose—to create a natural, less uniform look.
Keep the background landscape minimal with simple backstitch outlines. This ensures the textured, colorful tree remains the undisputed focal point of your Japanese-inspired scene.
4. Paint a Tuscan Sunset with Directional Stitches

Translate the warmth of a vineyard landscape into thread by using directional stitching to create light, shadow, and perspective.
For the sky, use long-and-short stitch, blending shades of orange, pink, and purple horizontally to create a smooth gradient. This technique is the foundation of contemporary thread painting.
Define the vineyard rows with small, diagonal satin stitches or seed stitches. By changing the angle of your stitches for each row, you create the illusion of rolling hills receding into the distance.
Use darker green threads for the rows in the foreground and lighter, more muted shades for those farther away to enhance the sense of atmospheric depth.
5. Recreate Moroccan Mosaics with Rich Texture

Capture the opulence of a Moroccan riad by combining vibrant, jewel-toned threads with a variety of textural stitches.
For the intricate tilework (zellige), fill tiny geometric shapes with dense satin stitch. Use a high-sheen rayon or silk thread to mimic the glaze of ceramic tiles.
Outline architectural elements, like the archway, with a heavier thread using couching or a thick stem stitch. This defines the shapes and adds a bold, structural feel.
Incorporate French knots and seed stitches to represent detailed carvings or textiles. This mix of smooth and bumpy textures is key to replicating these rich cultural embroidery motifs.
6. Tell Your Story with an Embroidered Map

Turn a map into a personal travel diary using simple line work and meaningful details. This is a perfect way to visualize your favorite journeys.
Use a neat backstitch with two strands of black floss to create a clean, modern outline of a country or continent.
Trace your travel route with a single strand of brightly colored thread—like red or gold—using a running stitch or backstitch. This line becomes the narrative focus of the piece.
Mark special locations with tiny icons stitched in a contrasting color or style. These line art travel adventure symbols, like a tiny bridge or mountain, add a layer of personal storytelling.
7. Stitch a Dramatic Sunset with Color Blocking
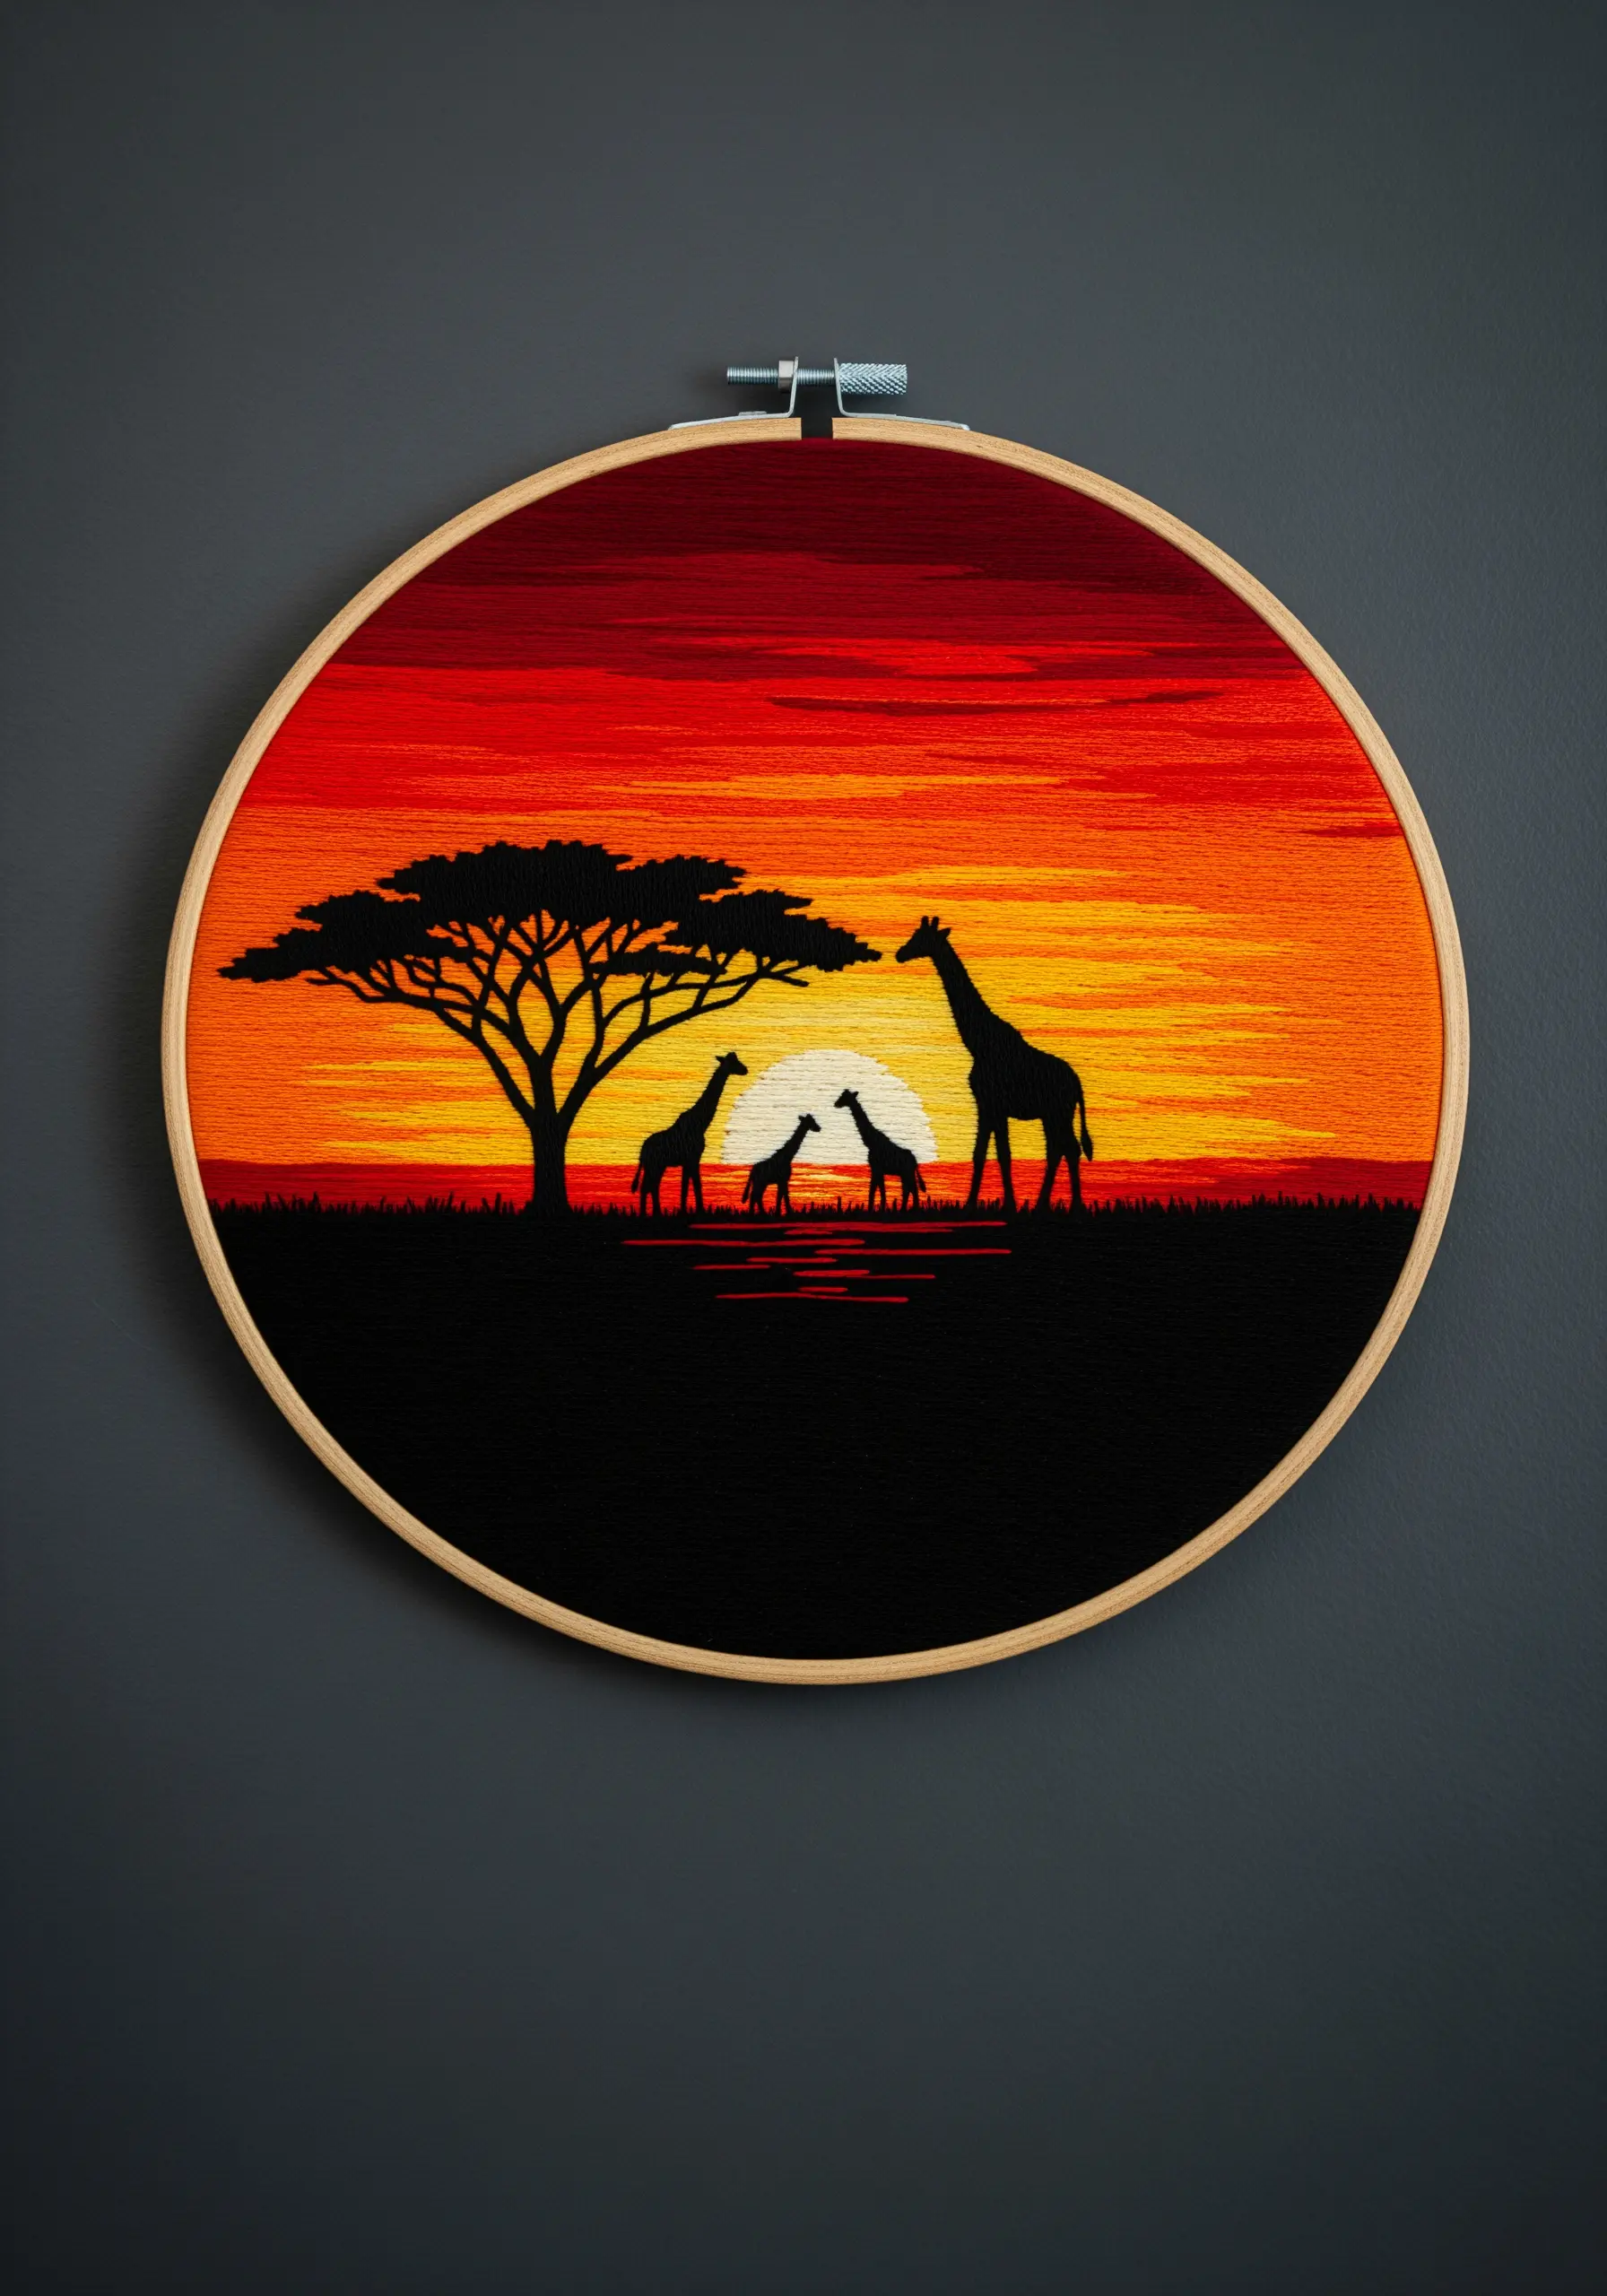
Create a powerful African savanna scene by focusing on a bold sunset gradient and solid silhouettes.
Fill the entire background with horizontal satin stitches, transitioning smoothly from a bright yellow at the horizon to a deep crimson at the top. This dense stitching creates a solid, fabric-like block of color.
To make the gradient seamless, use a technique where the next color’s stitches slightly overlap the previous one, like in long-and-short stitch. This technique makes for beautiful, texture-rich thread art.
For the giraffes and acacia tree, use a solid black thread and fill the shapes completely with vertical satin stitch. The contrast between the dark, flat silhouettes and the vibrant, textured sky is what gives this design its dramatic impact.
8. Build a Lush Jungle with Layered Leaf Stitches
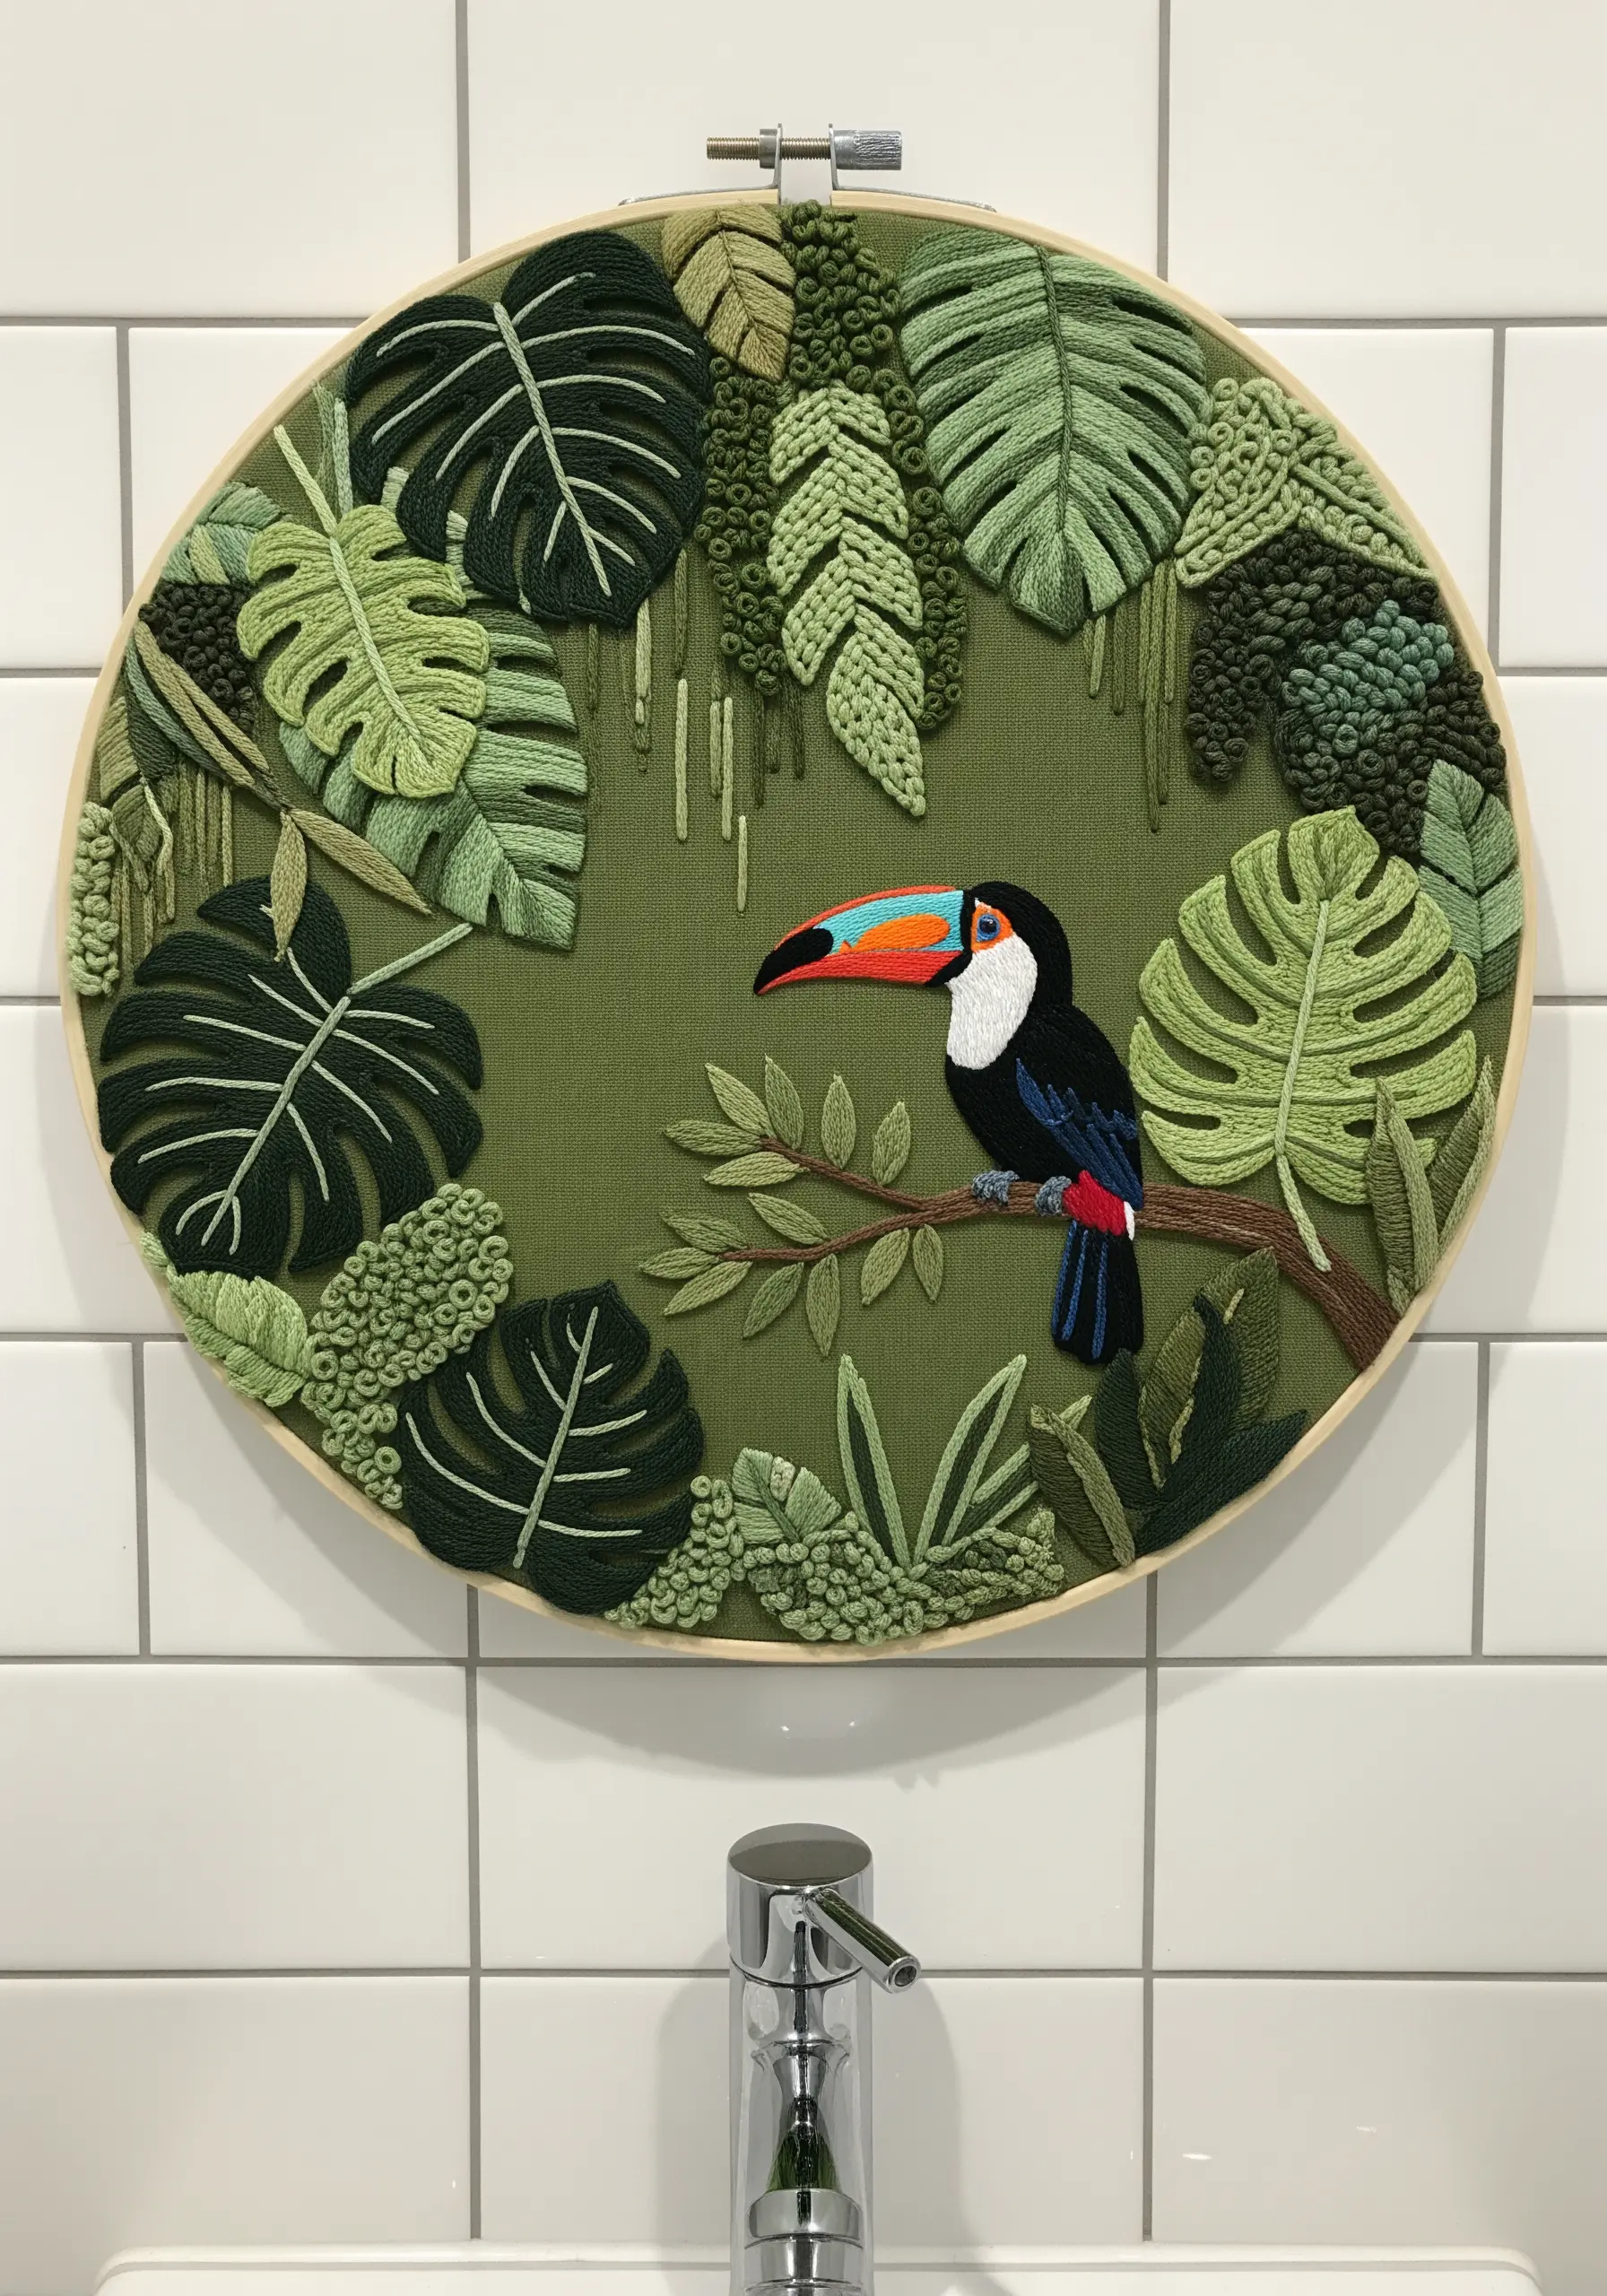
Give your jungle scene a dense, 3D feel by layering different leaf stitches and textures. The key is to create an impression of overlapping foliage.
For large leaves like the Monstera, use a fishbone stitch. This creates a central vein and allows the stitches to angle outwards, mimicking natural leaf growth.
Incorporate detached chain stitches (lazy daisies) and French knots in clusters to suggest dense, mossy textures or background foliage. Use several shades of green to add depth.
Don’t be afraid to let your stitched leaves overlap. Embroider the background elements first, then stitch the foreground leaves right over them. This technique is perfect for framing tropical flower embroidery ideas or wildlife.
9. Create Realistic Water Reflections in Venice

Capture the magic of a Venetian canal by stitching the illusion of moving water. This technique relies on thread choice and stitch direction.
Work on a dark, moody fabric like navy or charcoal gray. This base color provides the depth of the water and makes the reflections pop.
Use a mix of white, silver, and light blue threads—including one metallic or satin floss for shine. Lay down long, horizontal straight stitches, varying their length and placement to mimic shimmering light.
Don’t pack the stitches too tightly; let the dark fabric show through in gaps. This negative space is crucial to capture motion and flow, suggesting the dark water beneath the surface highlights.
10. Illustrate a Skyline with Minimalist Line Work
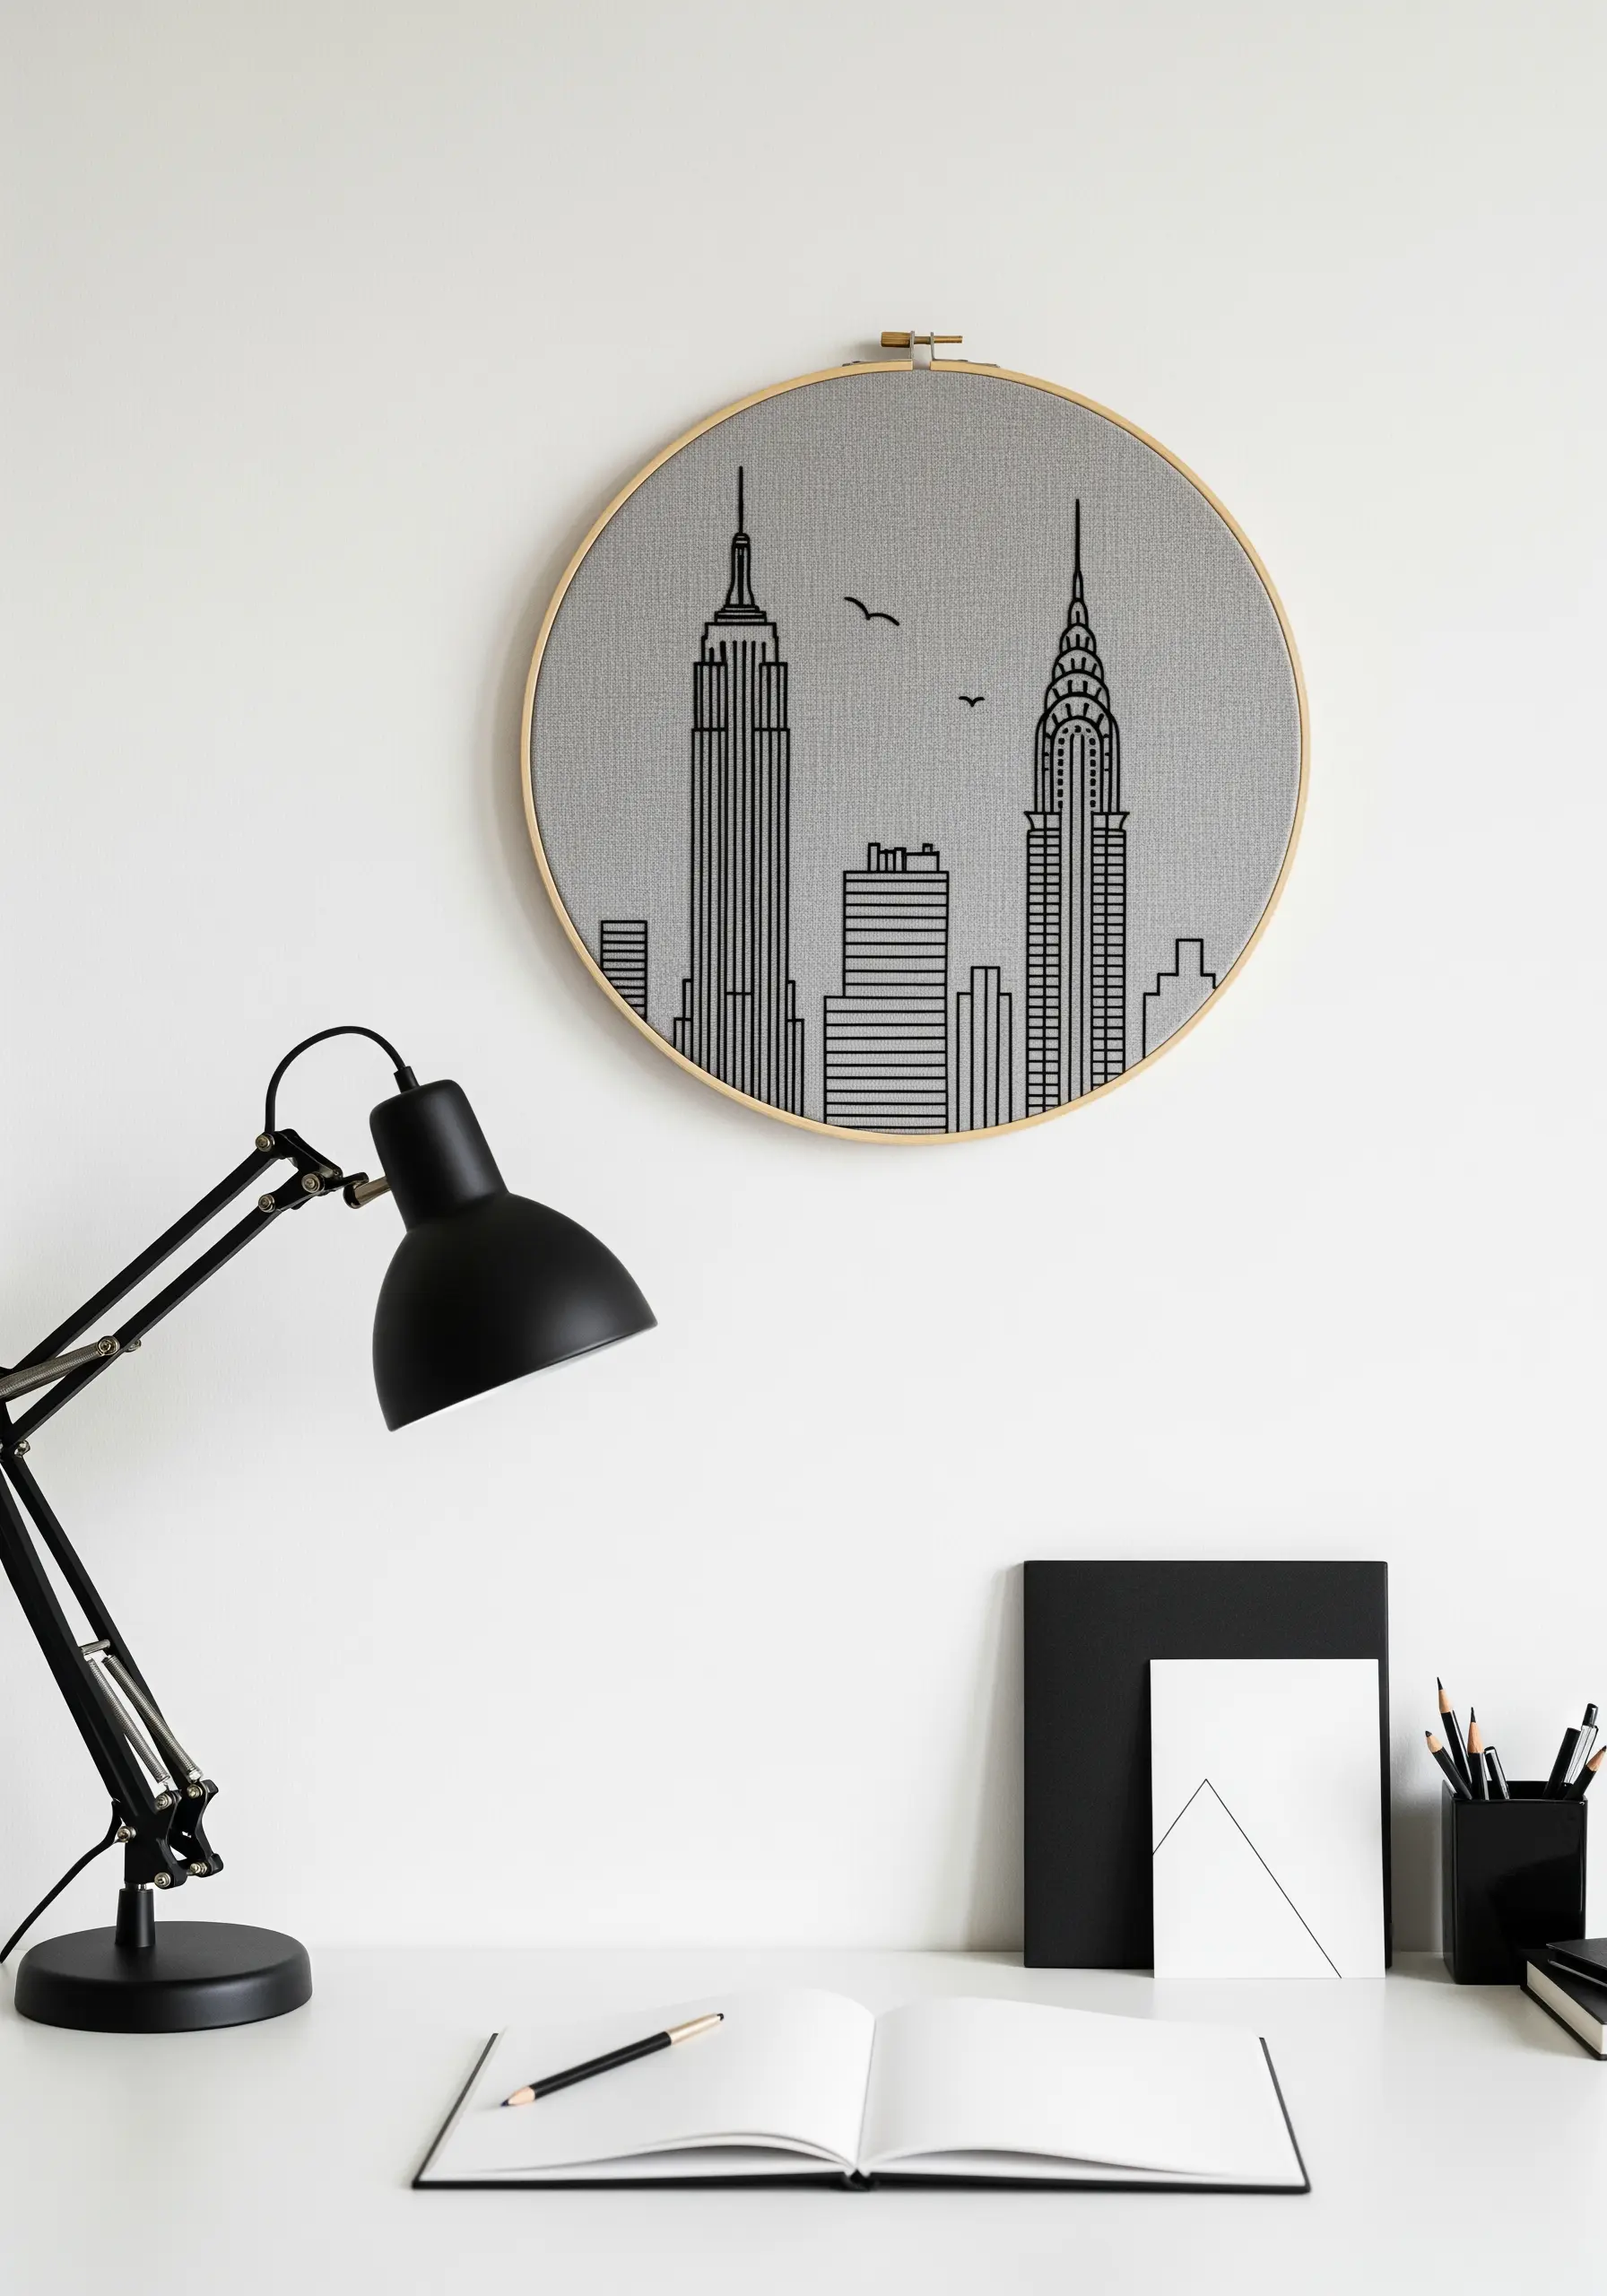
Evoke a modern, sophisticated cityscape using nothing more than clean lines and negative space.
Choose a high-quality, textured fabric like linen or a fine evenweave. The fabric itself becomes part of the design, adding subtle depth to the minimalist aesthetic.
Use a simple backstitch or stem stitch with two or three strands of black floss for a bold, graphic line. Keep your stitch length consistent for a polished, architectural feel.
This style of minimalist embroidery wall art is all about precision. Focus on capturing the most iconic elements of the skyline and trust the negative space to do the rest of the work.
11. Stitch the Northern Lights with Vertical Gradients
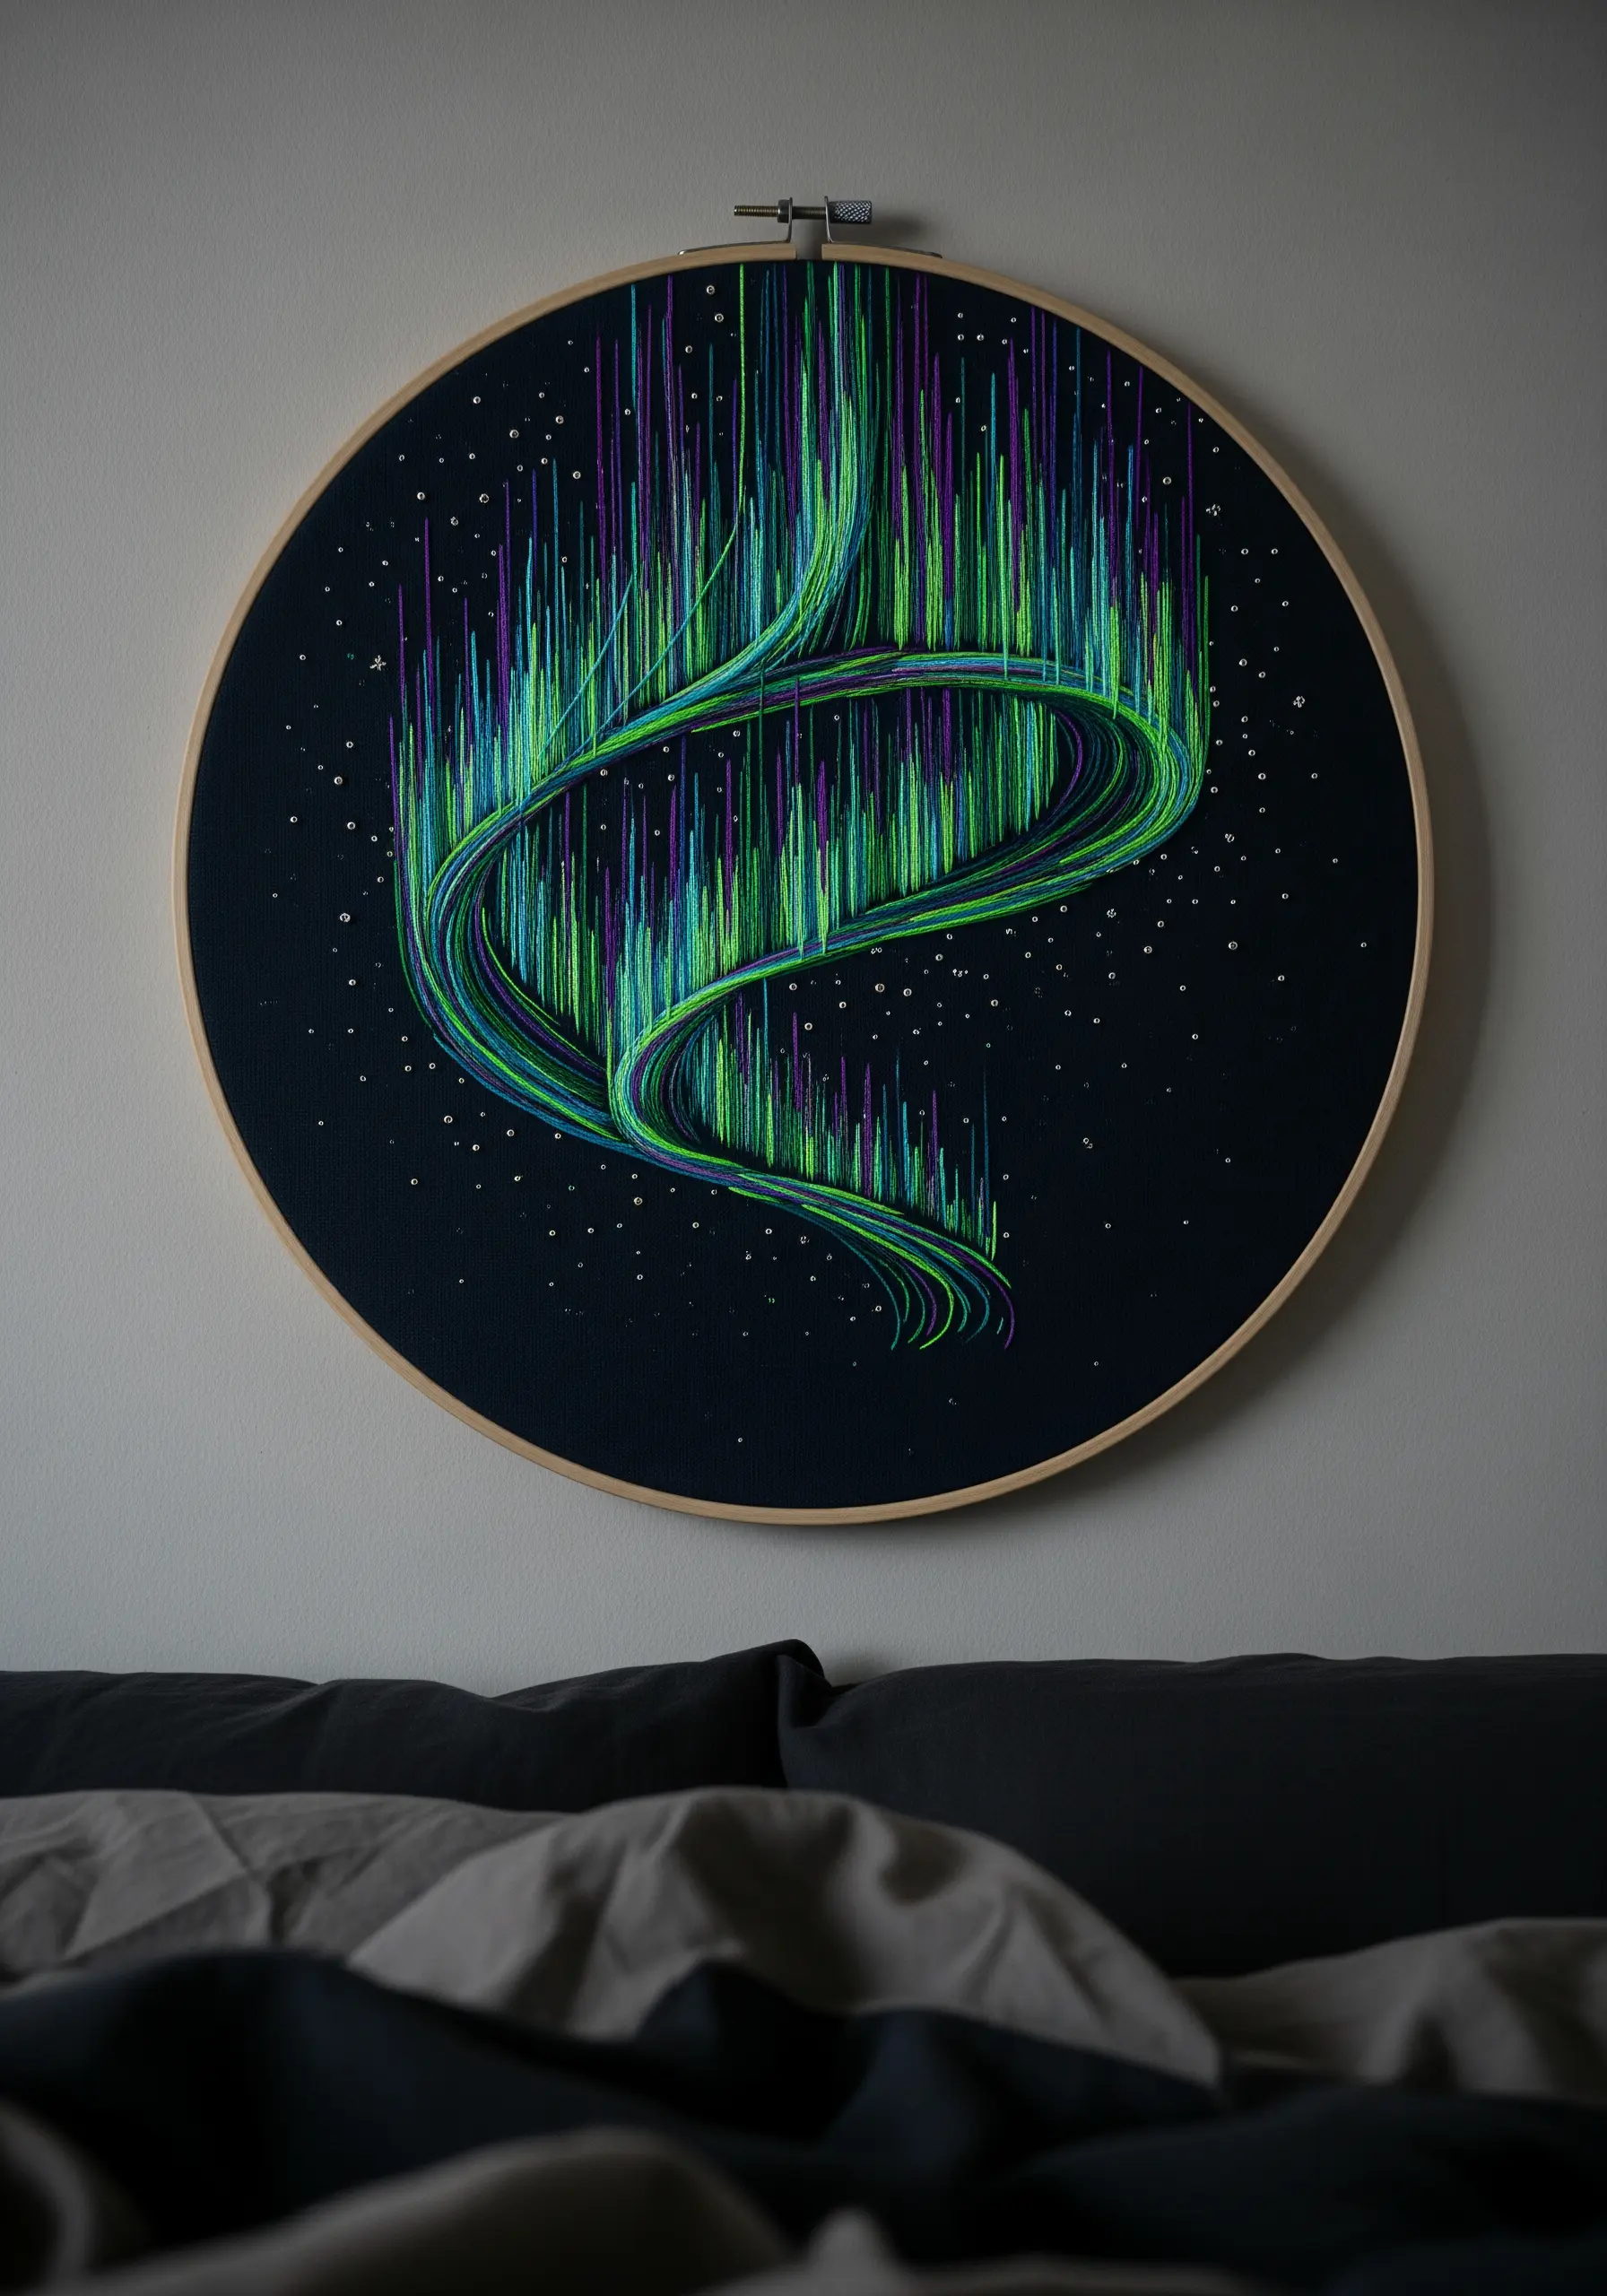
Capture the ethereal movement of the aurora borealis using vertical stitches and clever color blending on a dark background.
Use long, straight stitches of varying lengths, letting them fall like curtains of light. For the flowing ribbons of color, gently curve your stitches to follow the desired shape.
Work with multiple shades of green, blue, and purple simultaneously. You can achieve this by threading your needle with one strand of each color, or by stitching small sections of one color next to another.
Add tiny, scattered seed stitches or French knots in white or silver metallic thread to represent stars. This simple detail makes the scene feel vast and magical, like many abstract metallic thread projects.
12. Build a Cozy Winter Scene with Textural Stitches
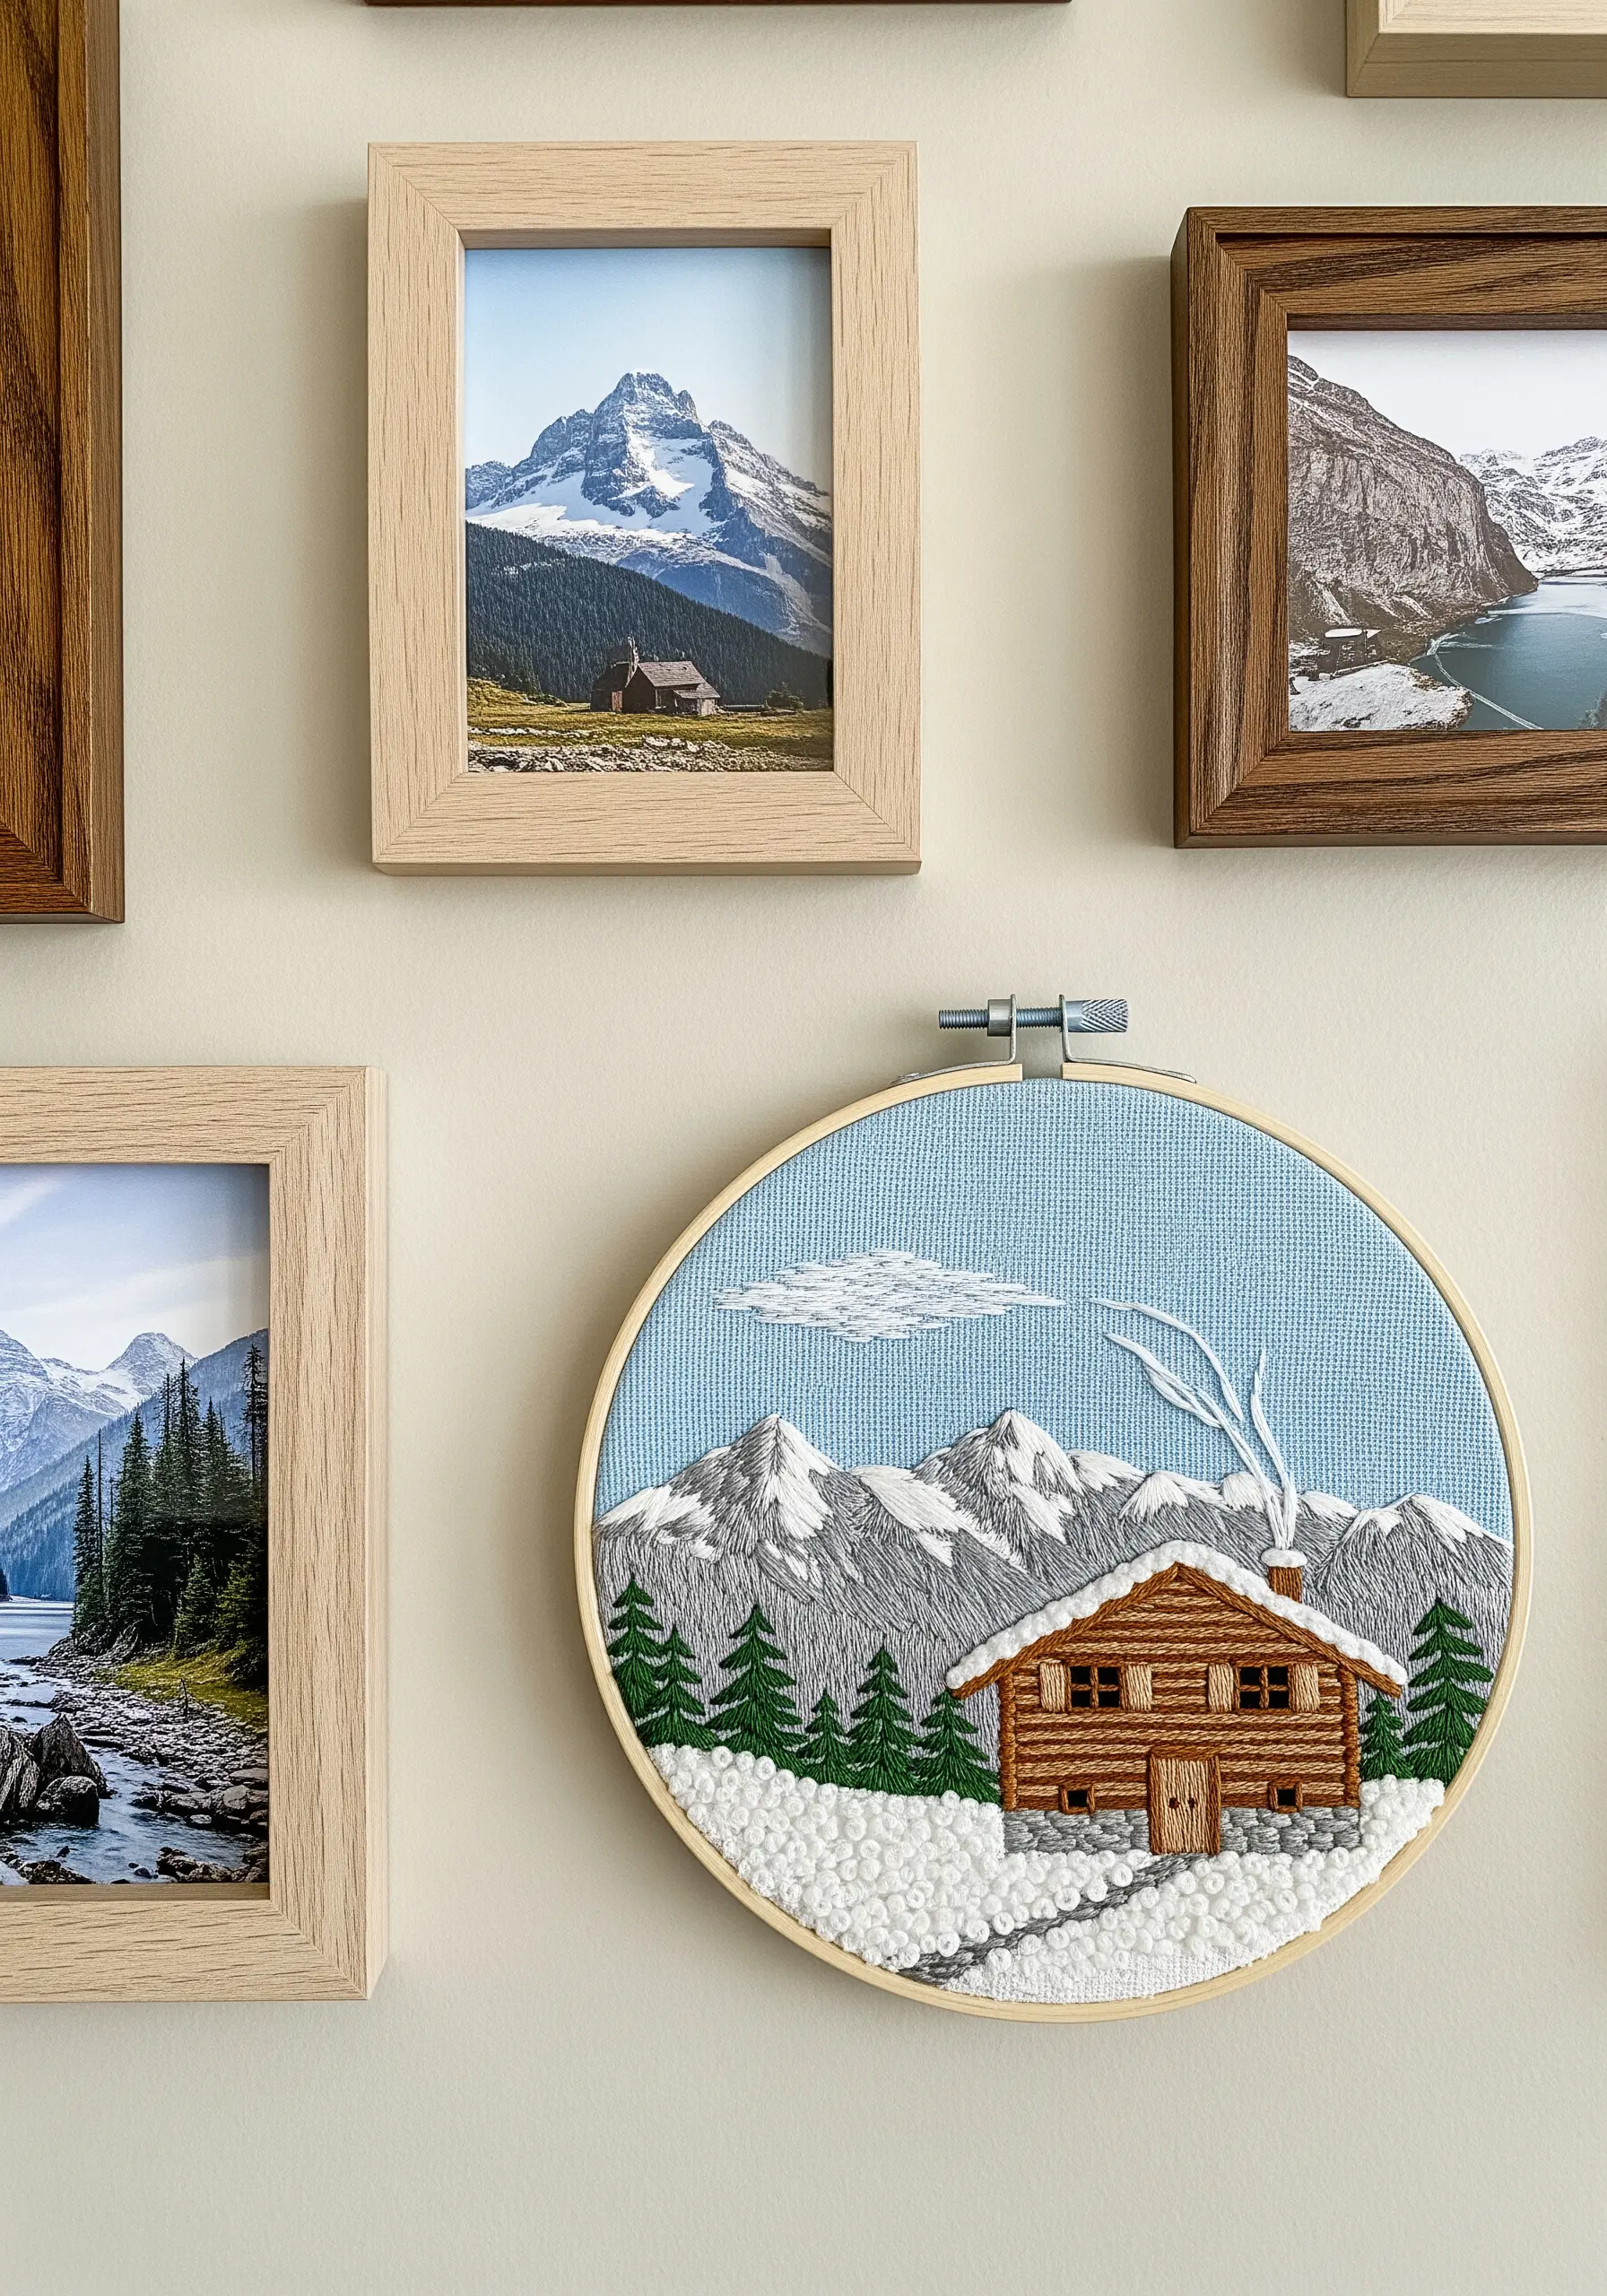
Bring a snowy mountain cabin to life by using distinct stitches to represent different natural textures.
For the snow, use a dense scattering of French knots in white and off-white. Varying the size of the knots will give the snowdrifts a more organic, uneven appearance.
Render the wooden walls of the cabin with long-and-short stitch in shades of brown. This technique allows you to blend colors subtly and mimic the grain of wood.
Fill the sky with a simple darning stitch or rows of seed stitches on a light blue fabric. This creates a subtle texture that feels different from the fluffy snow and solid cabin, helping you capture nature’s textures effectively.
13. Embrace Joyful Color with Mexican Folk Art

Channel the spirit of Mexican alebrijes by using unrestrained color and playful patterns. This style is about energy and vibrancy, not realism.
Outline your fantastical animal shapes with a bold backstitch. Then, divide the bodies into sections and fill each with a different color or pattern.
Use simple fills like satin stitch, seed stitch, or basic stripes and checks. The magic comes from the unexpected color combinations—pair hot pink with turquoise, or orange with bright blue.
These bold, cartoon-style embroidery ideas look best when you use a six-strand floss for a thick, graphic finish that makes every color pop.
14. Depict the Outback with a Monochromatic Palette
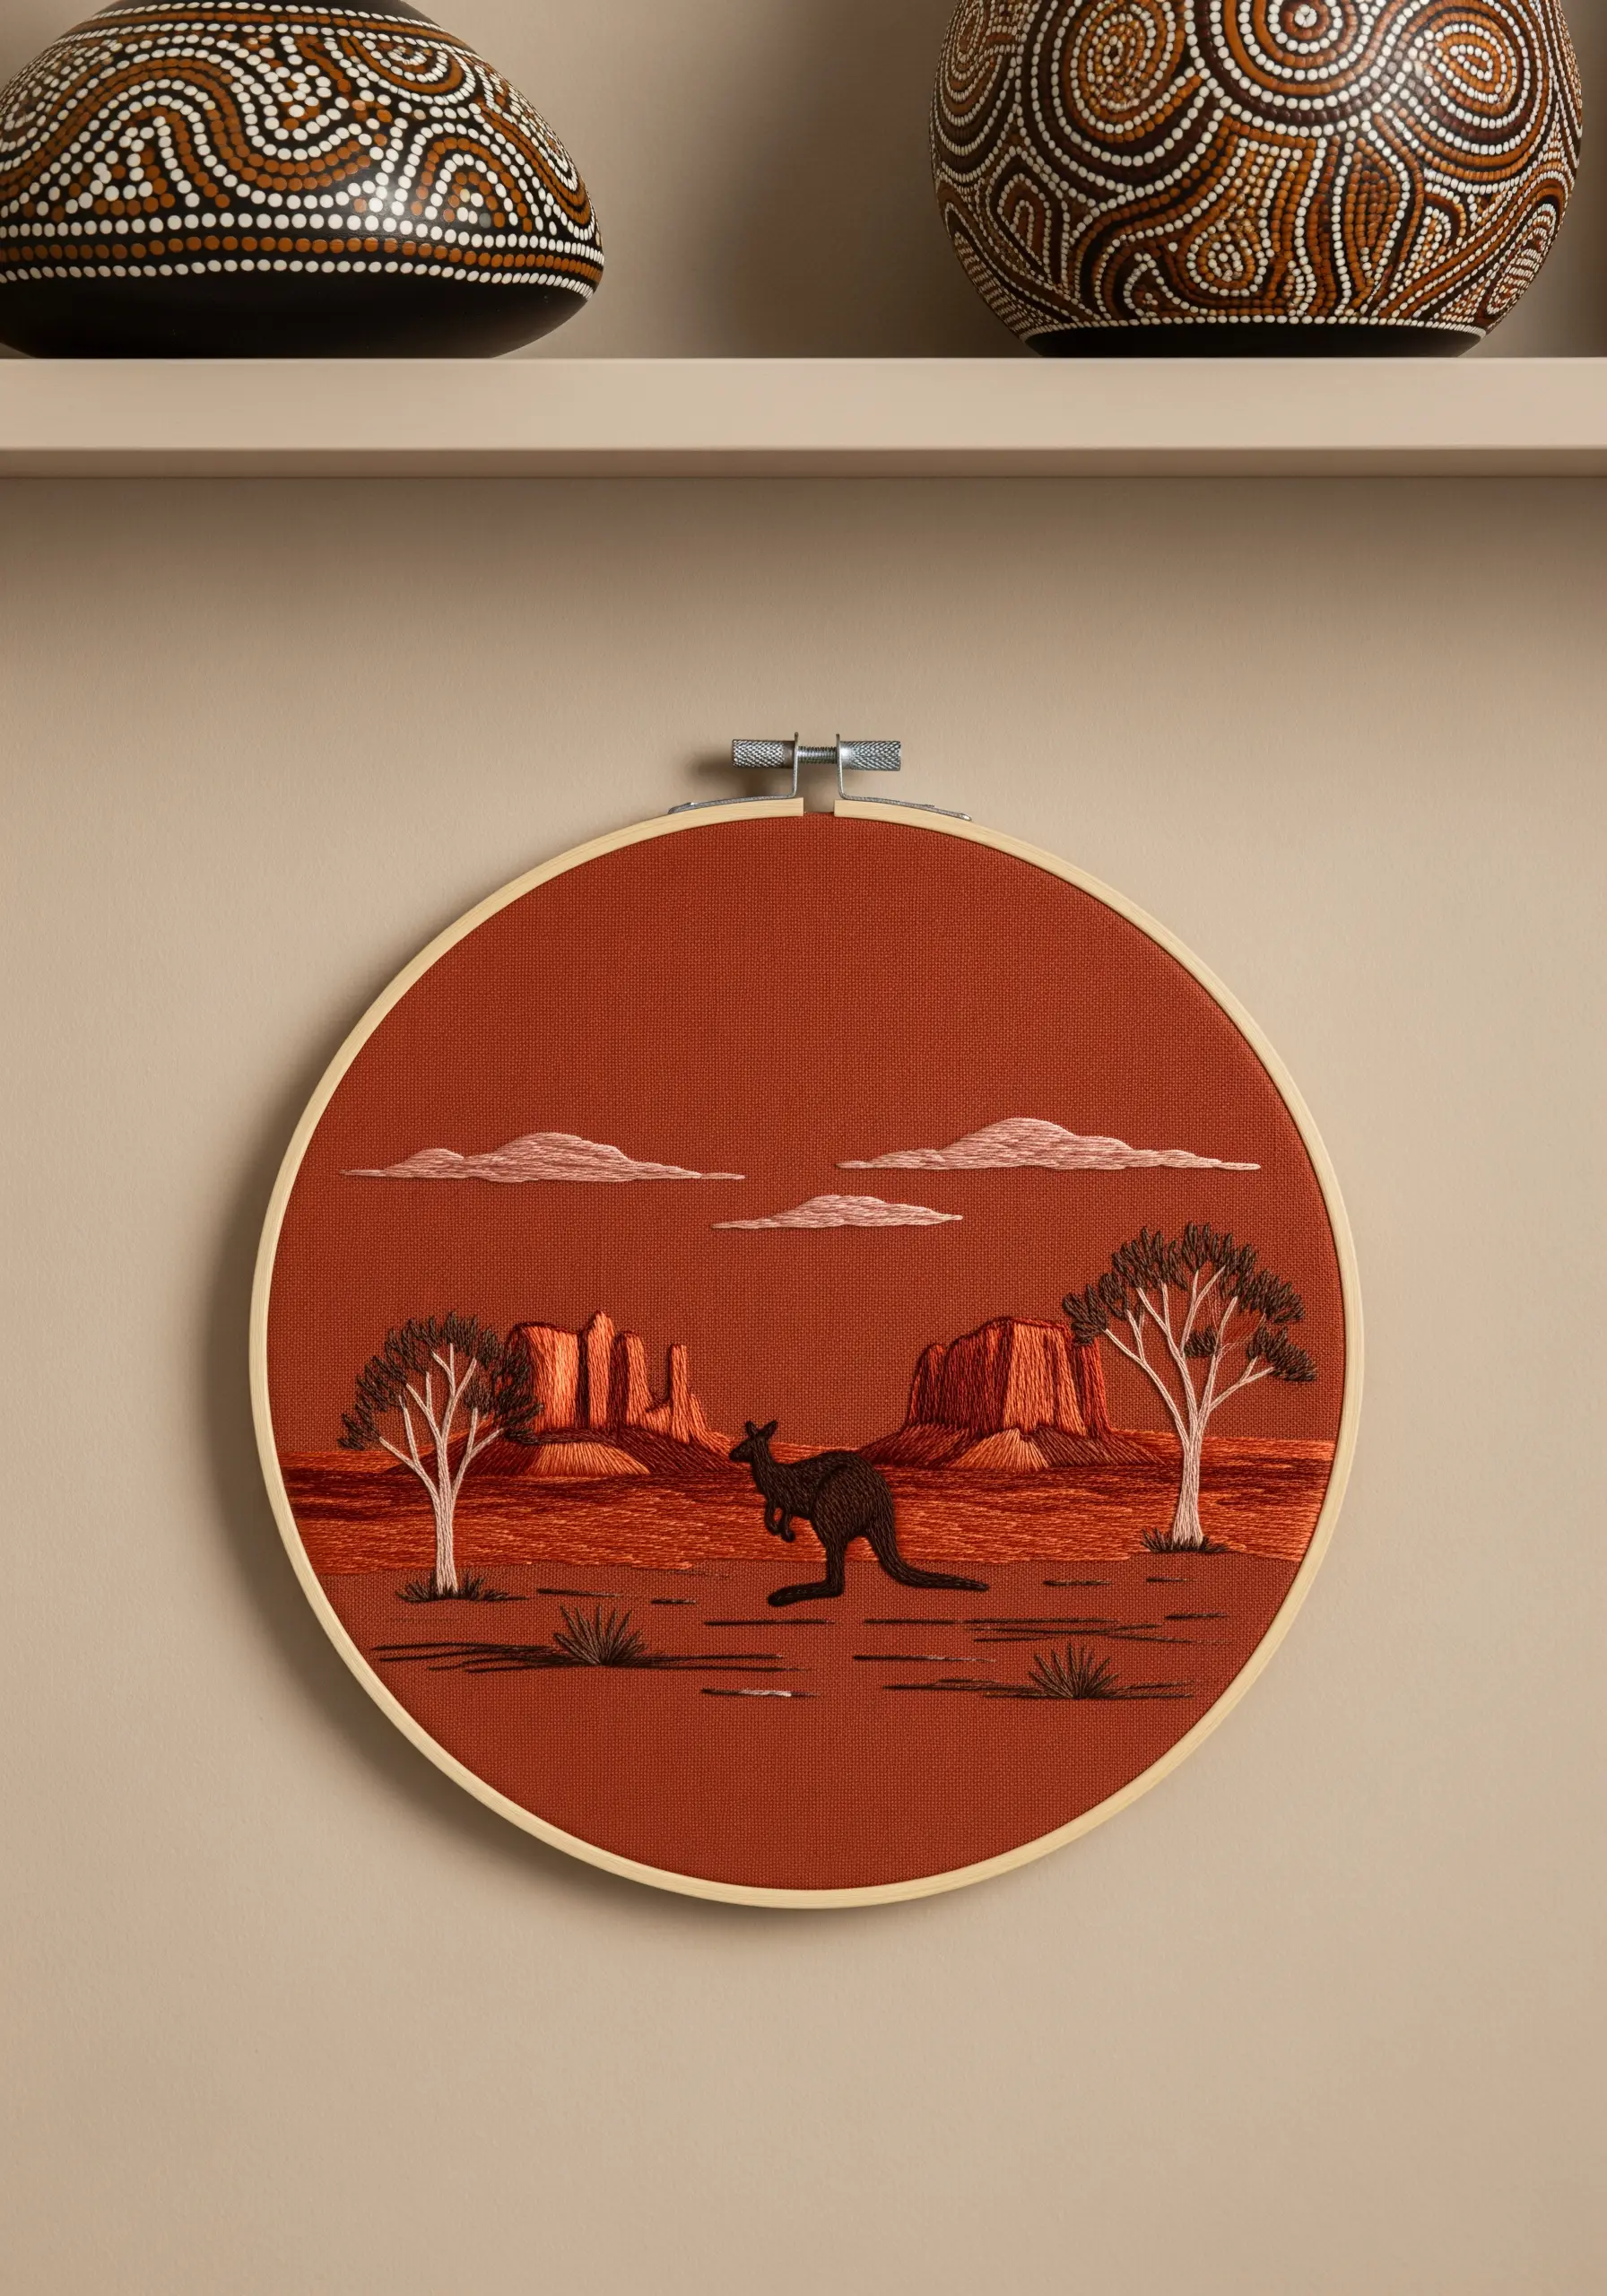
Convey the unique, sun-drenched atmosphere of the Australian outback by working with a limited, monochromatic color scheme.
Choose a rust-colored fabric as your base and select several shades of thread in the same family, from deep terracotta to pale sand.
Use directional satin stitch to fill in the rock formations, changing the angle of your stitches to define different planes and shadows. This adds dimension without needing a different color.
This approach forces you to focus on texture and form, creating a sophisticated and evocative landscape. These earth-tone patterns feel both modern and timeless.
15. Create Swirling Water for a Koi Pond
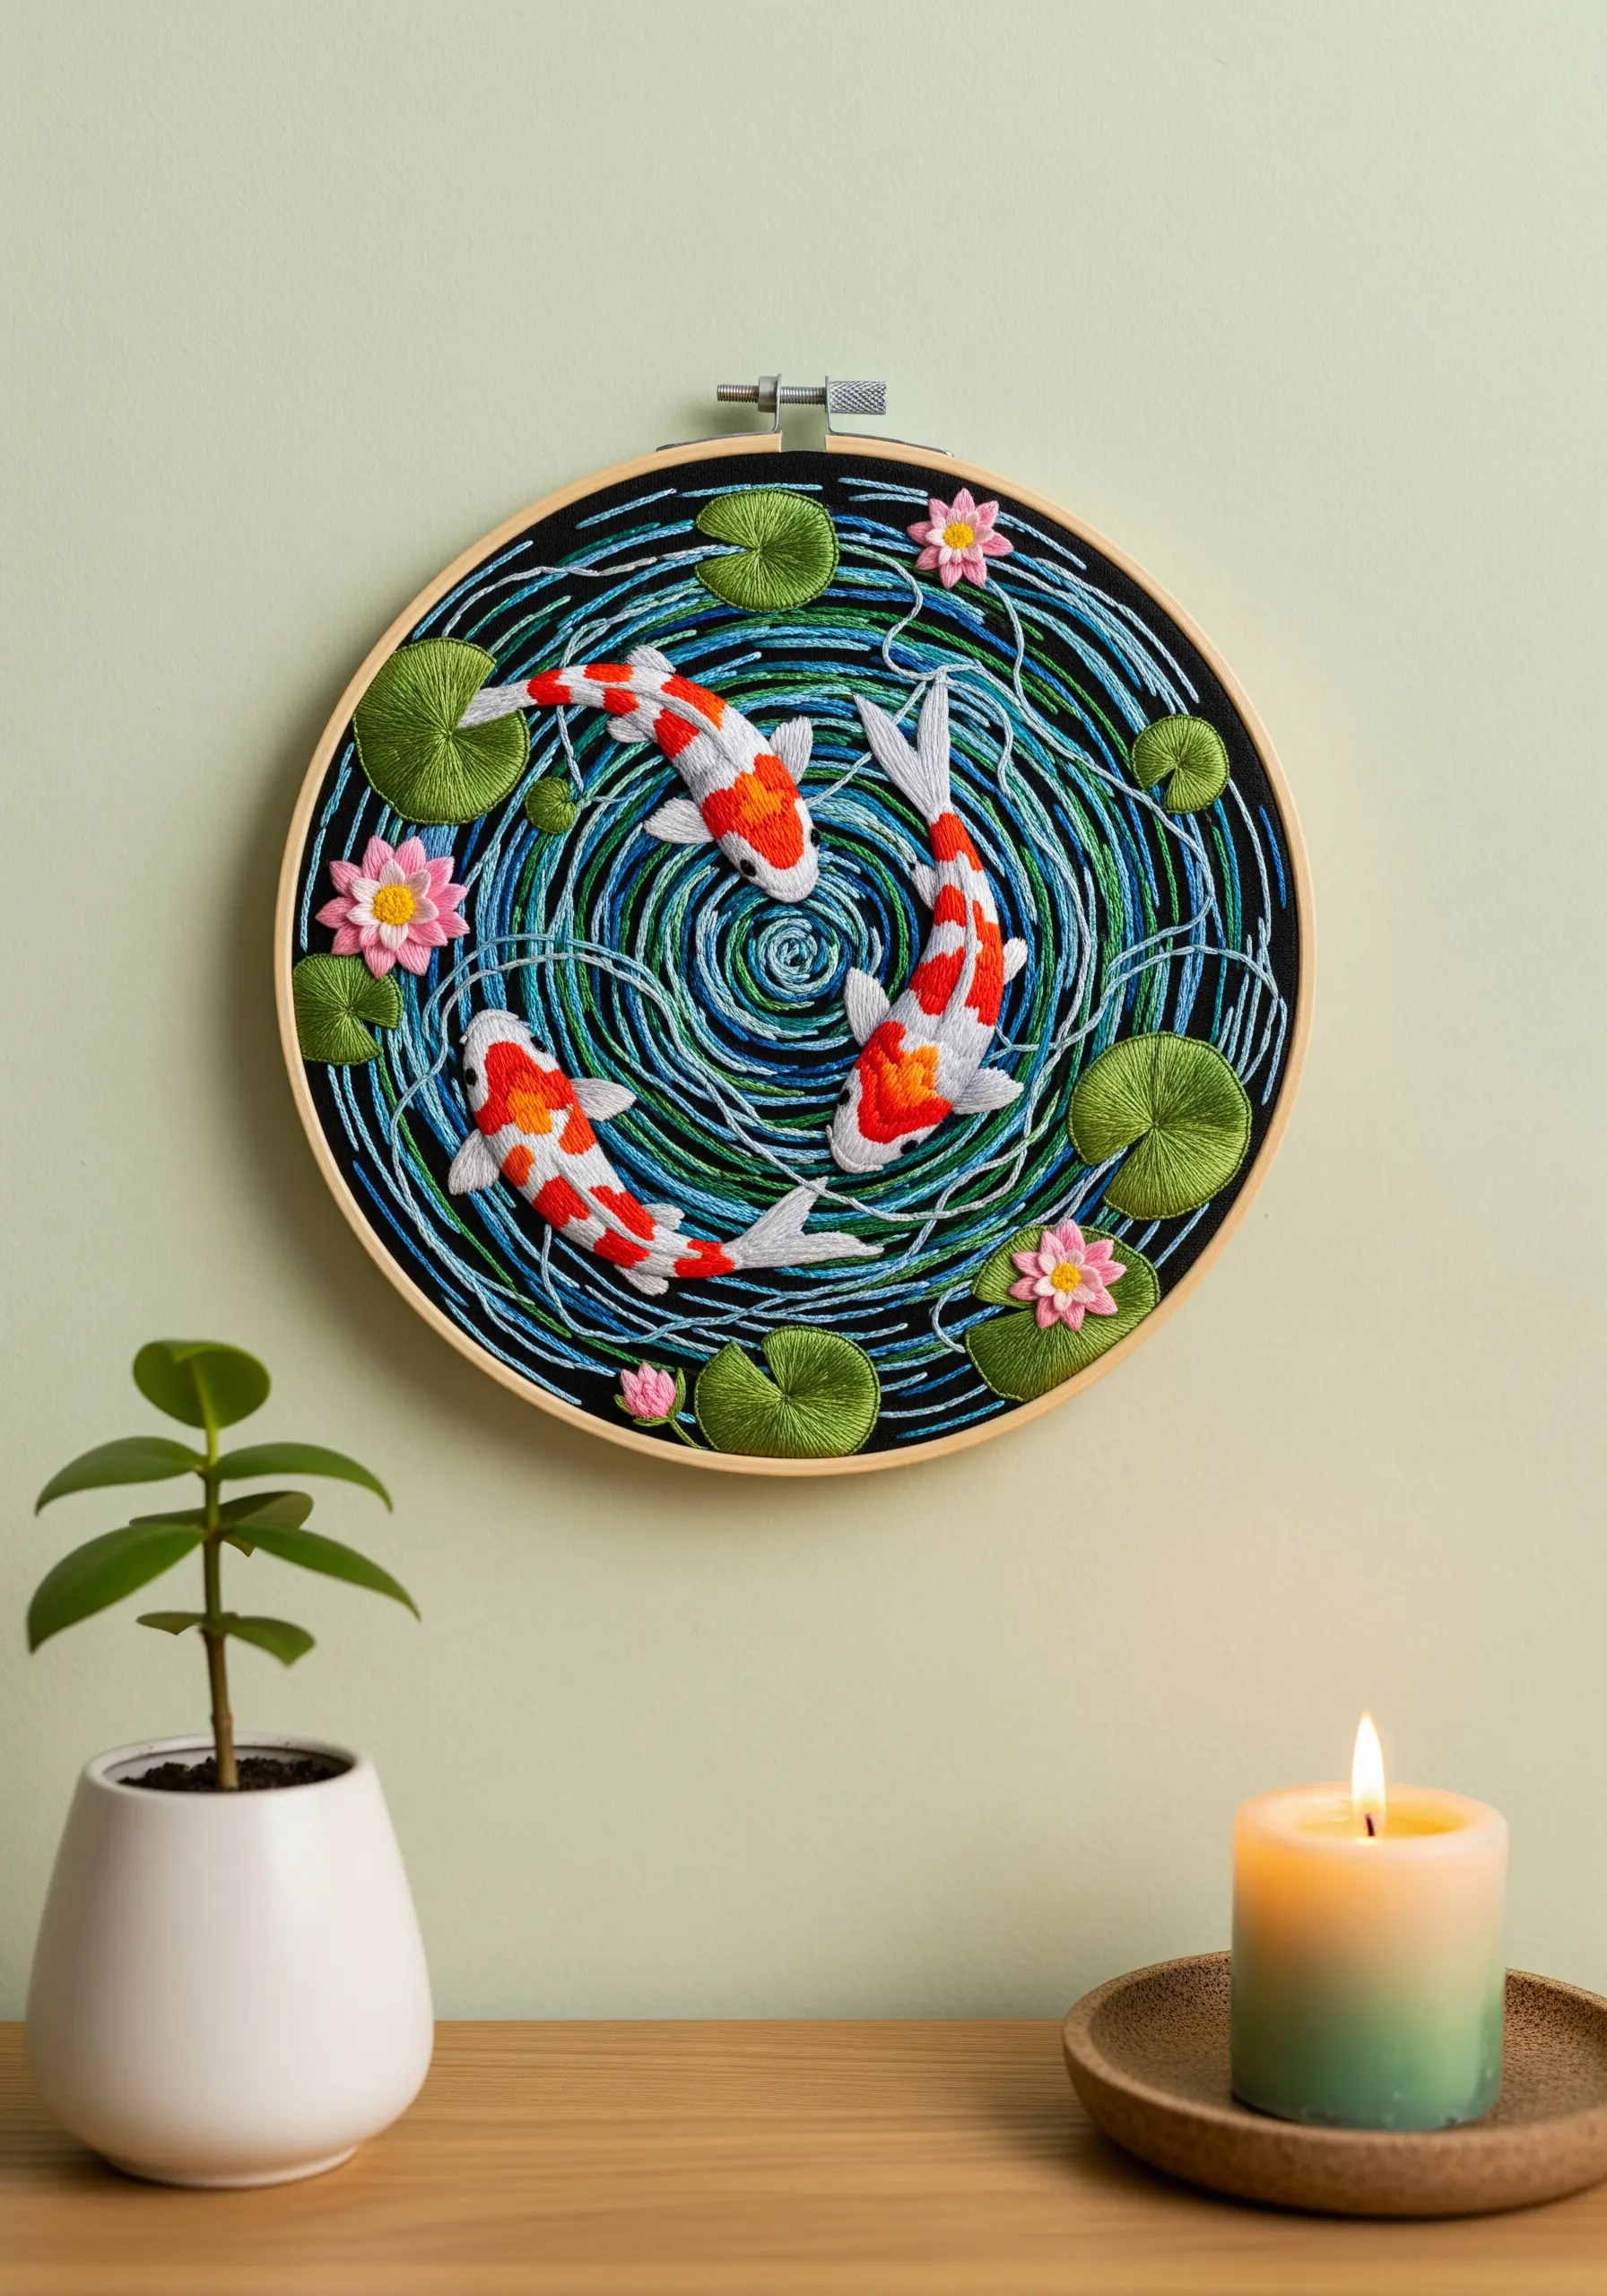
Suggest the gentle movement of water in a koi pond by using circular stitching and variegated thread.
Start from the center of your pond and work your way outwards, using a stem stitch, split stitch, or even a simple backstitch in concentric circles.
Choose a variegated thread with shades of blue, green, and turquoise. The thread will change color as you stitch, creating a natural, swirling effect with minimal effort.
Stitch your koi and lily pads on top using satin stitch. Their solid forms will stand out beautifully against the dynamic water, creating a composition that feels shockingly intricate but are beginner-friendly.
16. Use French Knots to Mimic Spice Textures

Capture the essence of a bustling spice market by using texture to differentiate the goods. French knots are perfect for this.
Outline the sacks with a simple backstitch, then fill them with dense French knots using colors that correspond to different spices—turmeric yellow, paprika red, and cumin brown.
Pack the knots tightly together for a full, granular appearance. For finer spices, make smaller, tighter knots; for coarser ones, wrap the thread an extra time to create a larger knot.
This technique turns simple shapes into a tactile experience, making these food motifs not just visual, but textural representations of your travels.
17. Build Atmosphere with Light and Shadow

Give an ancient alleyway a sense of depth and mystery by carefully stitching light and shadow.
Use long-and-short stitch to render the textures of stone and wood. For surfaces hit by light, use lighter shades of beige and tan. For recessed areas and shadows, switch to darker grays and browns.
Pay close attention to the direction of your stitches. Have them follow the form of the object—vertical for walls, horizontal for steps—to enhance the three-dimensional illusion.
For the deepest shadows, like inside a doorway, use a dark navy or black thread. This high contrast makes the illuminated areas feel even brighter, drawing the viewer into the scene.
18. Add Playful Texture with Turkey Work Stitch
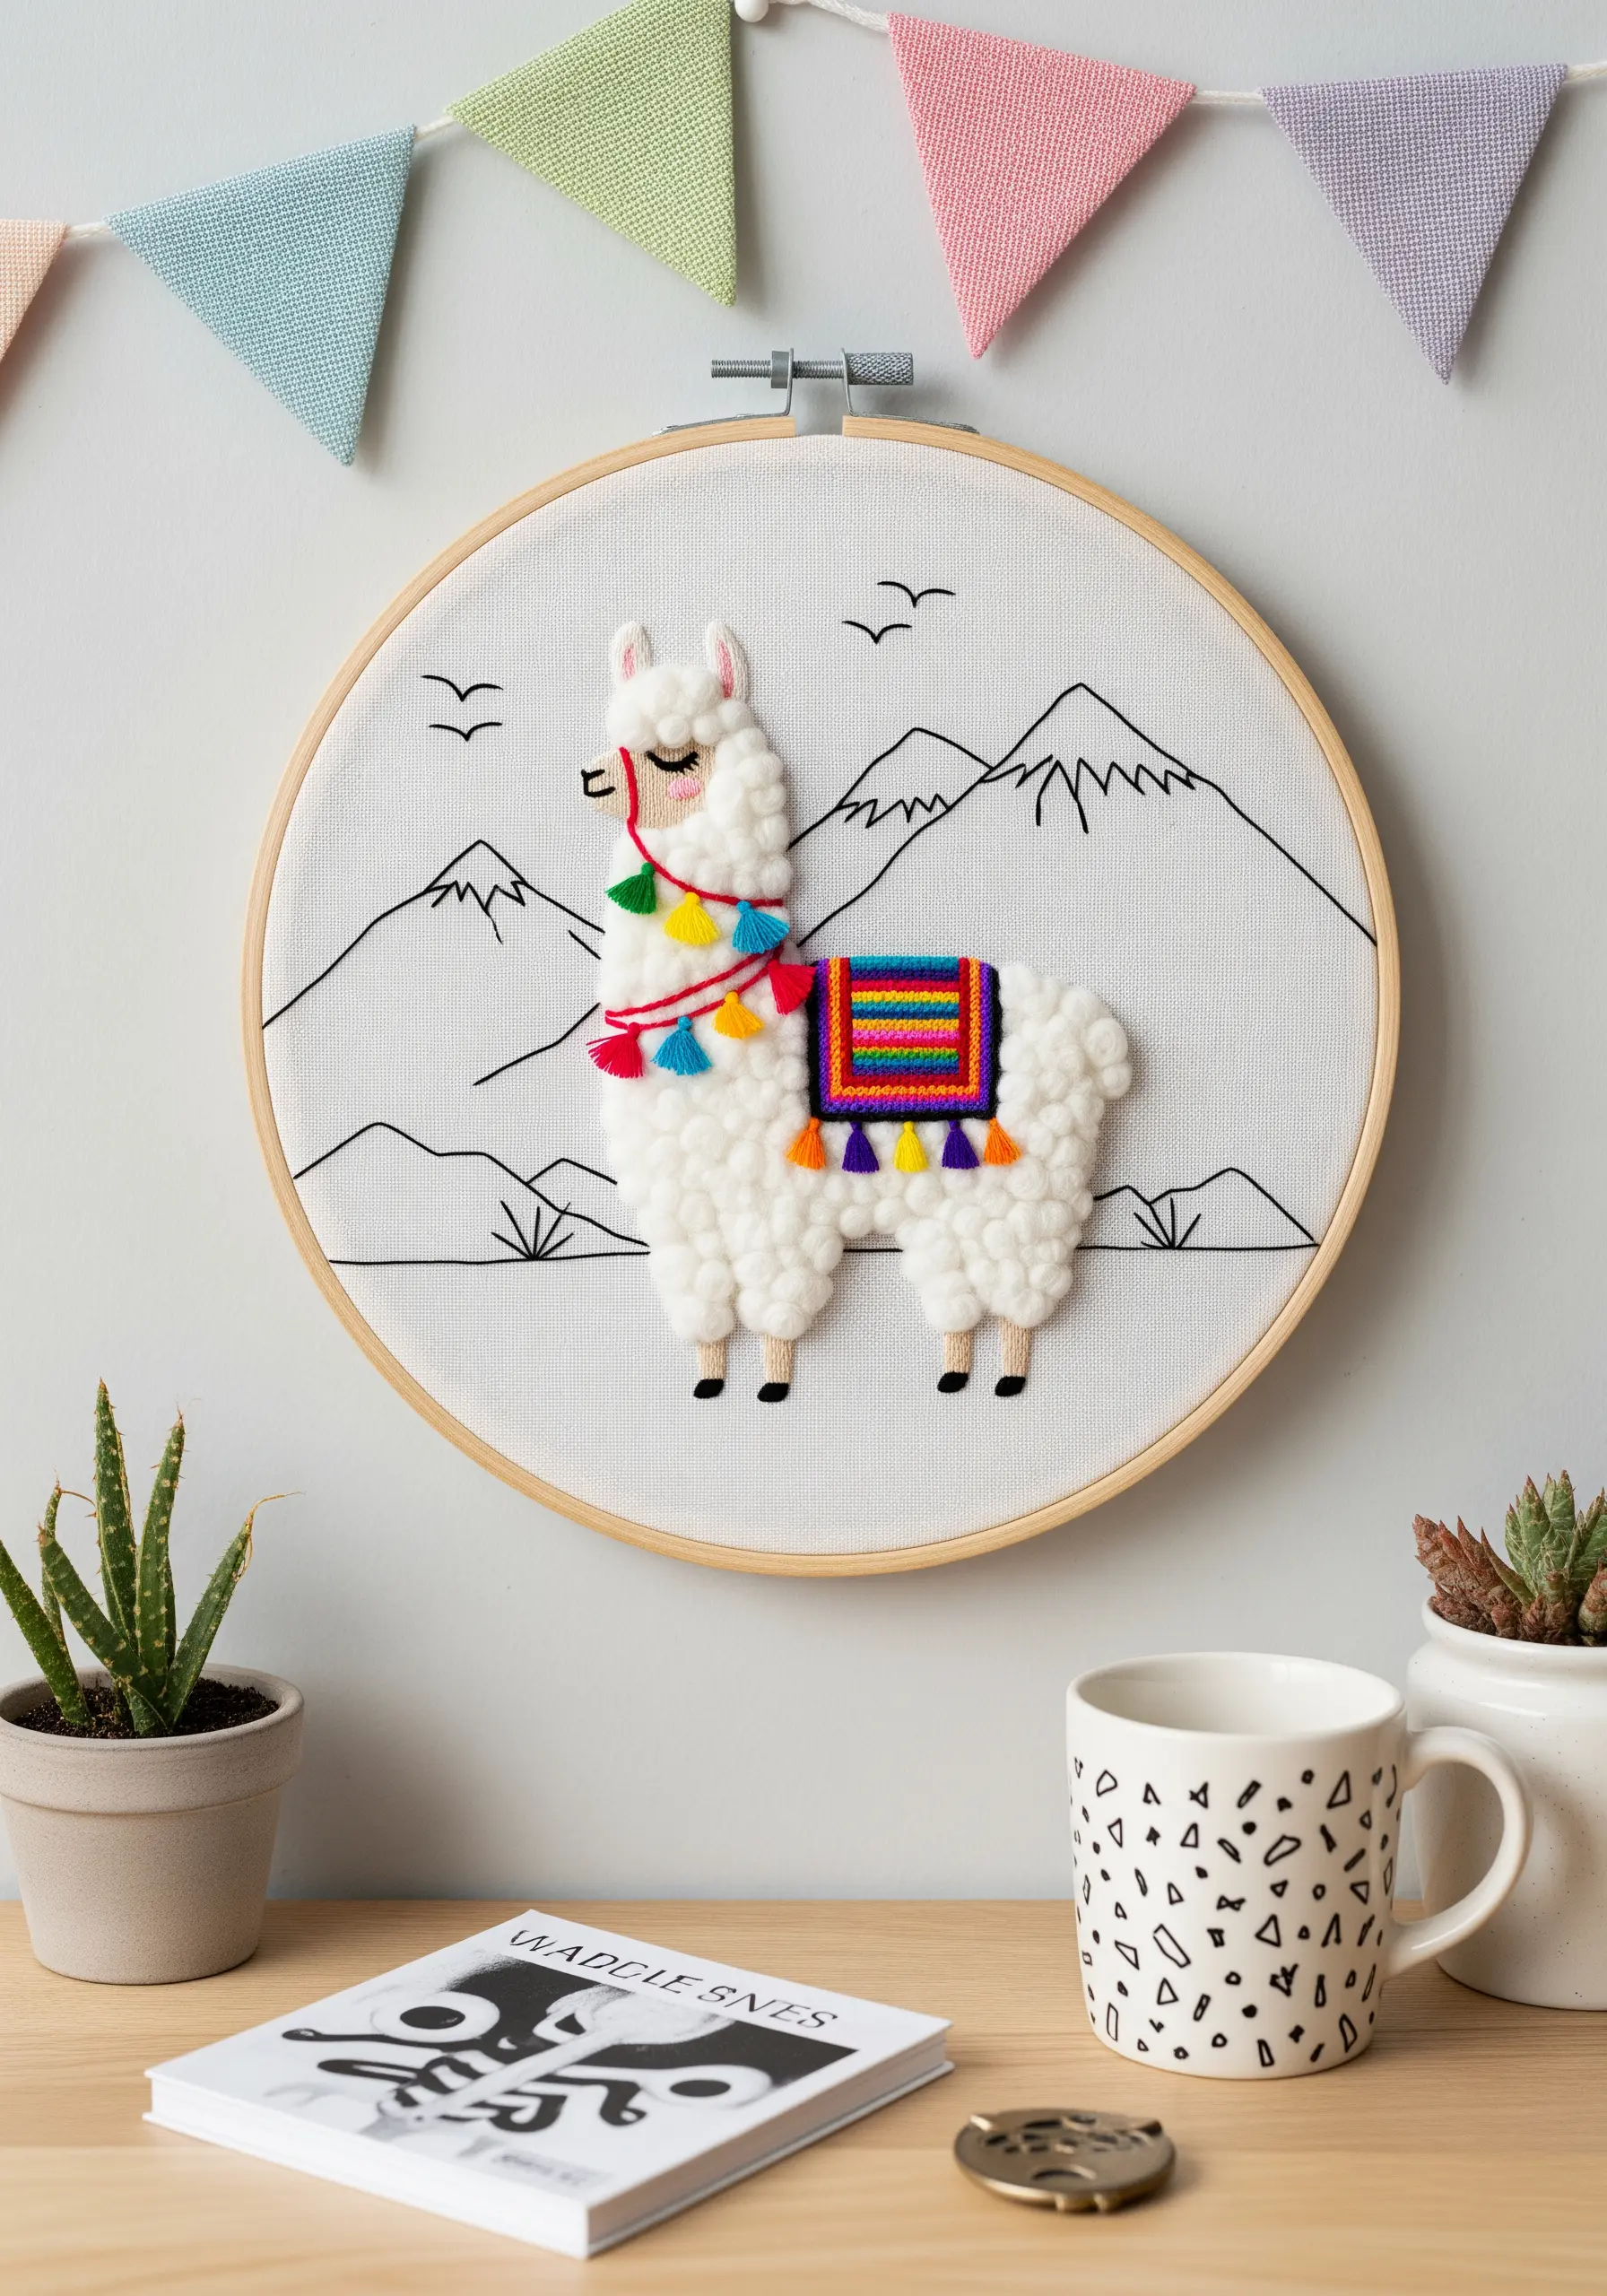
Create a wonderfully fluffy and tactile llama using the Turkey work stitch, a technique that forms loops you can either leave as is or trim.
Fill the body of the llama with rows of Turkey work stitch. Once you’ve filled the area, snip the tops of the loops to create a soft, fuzzy pile that resembles wool fleece.
Contrast this high-texture area with simple, flat stitches for the rest of the design. Use a clean backstitch for the mountain outlines and satin stitch for the colorful blanket.
This combination of textures makes the animal-themed subject delightfully touchable and visually engaging.
19. Stitch a Lavender Field with Silk Ribbon
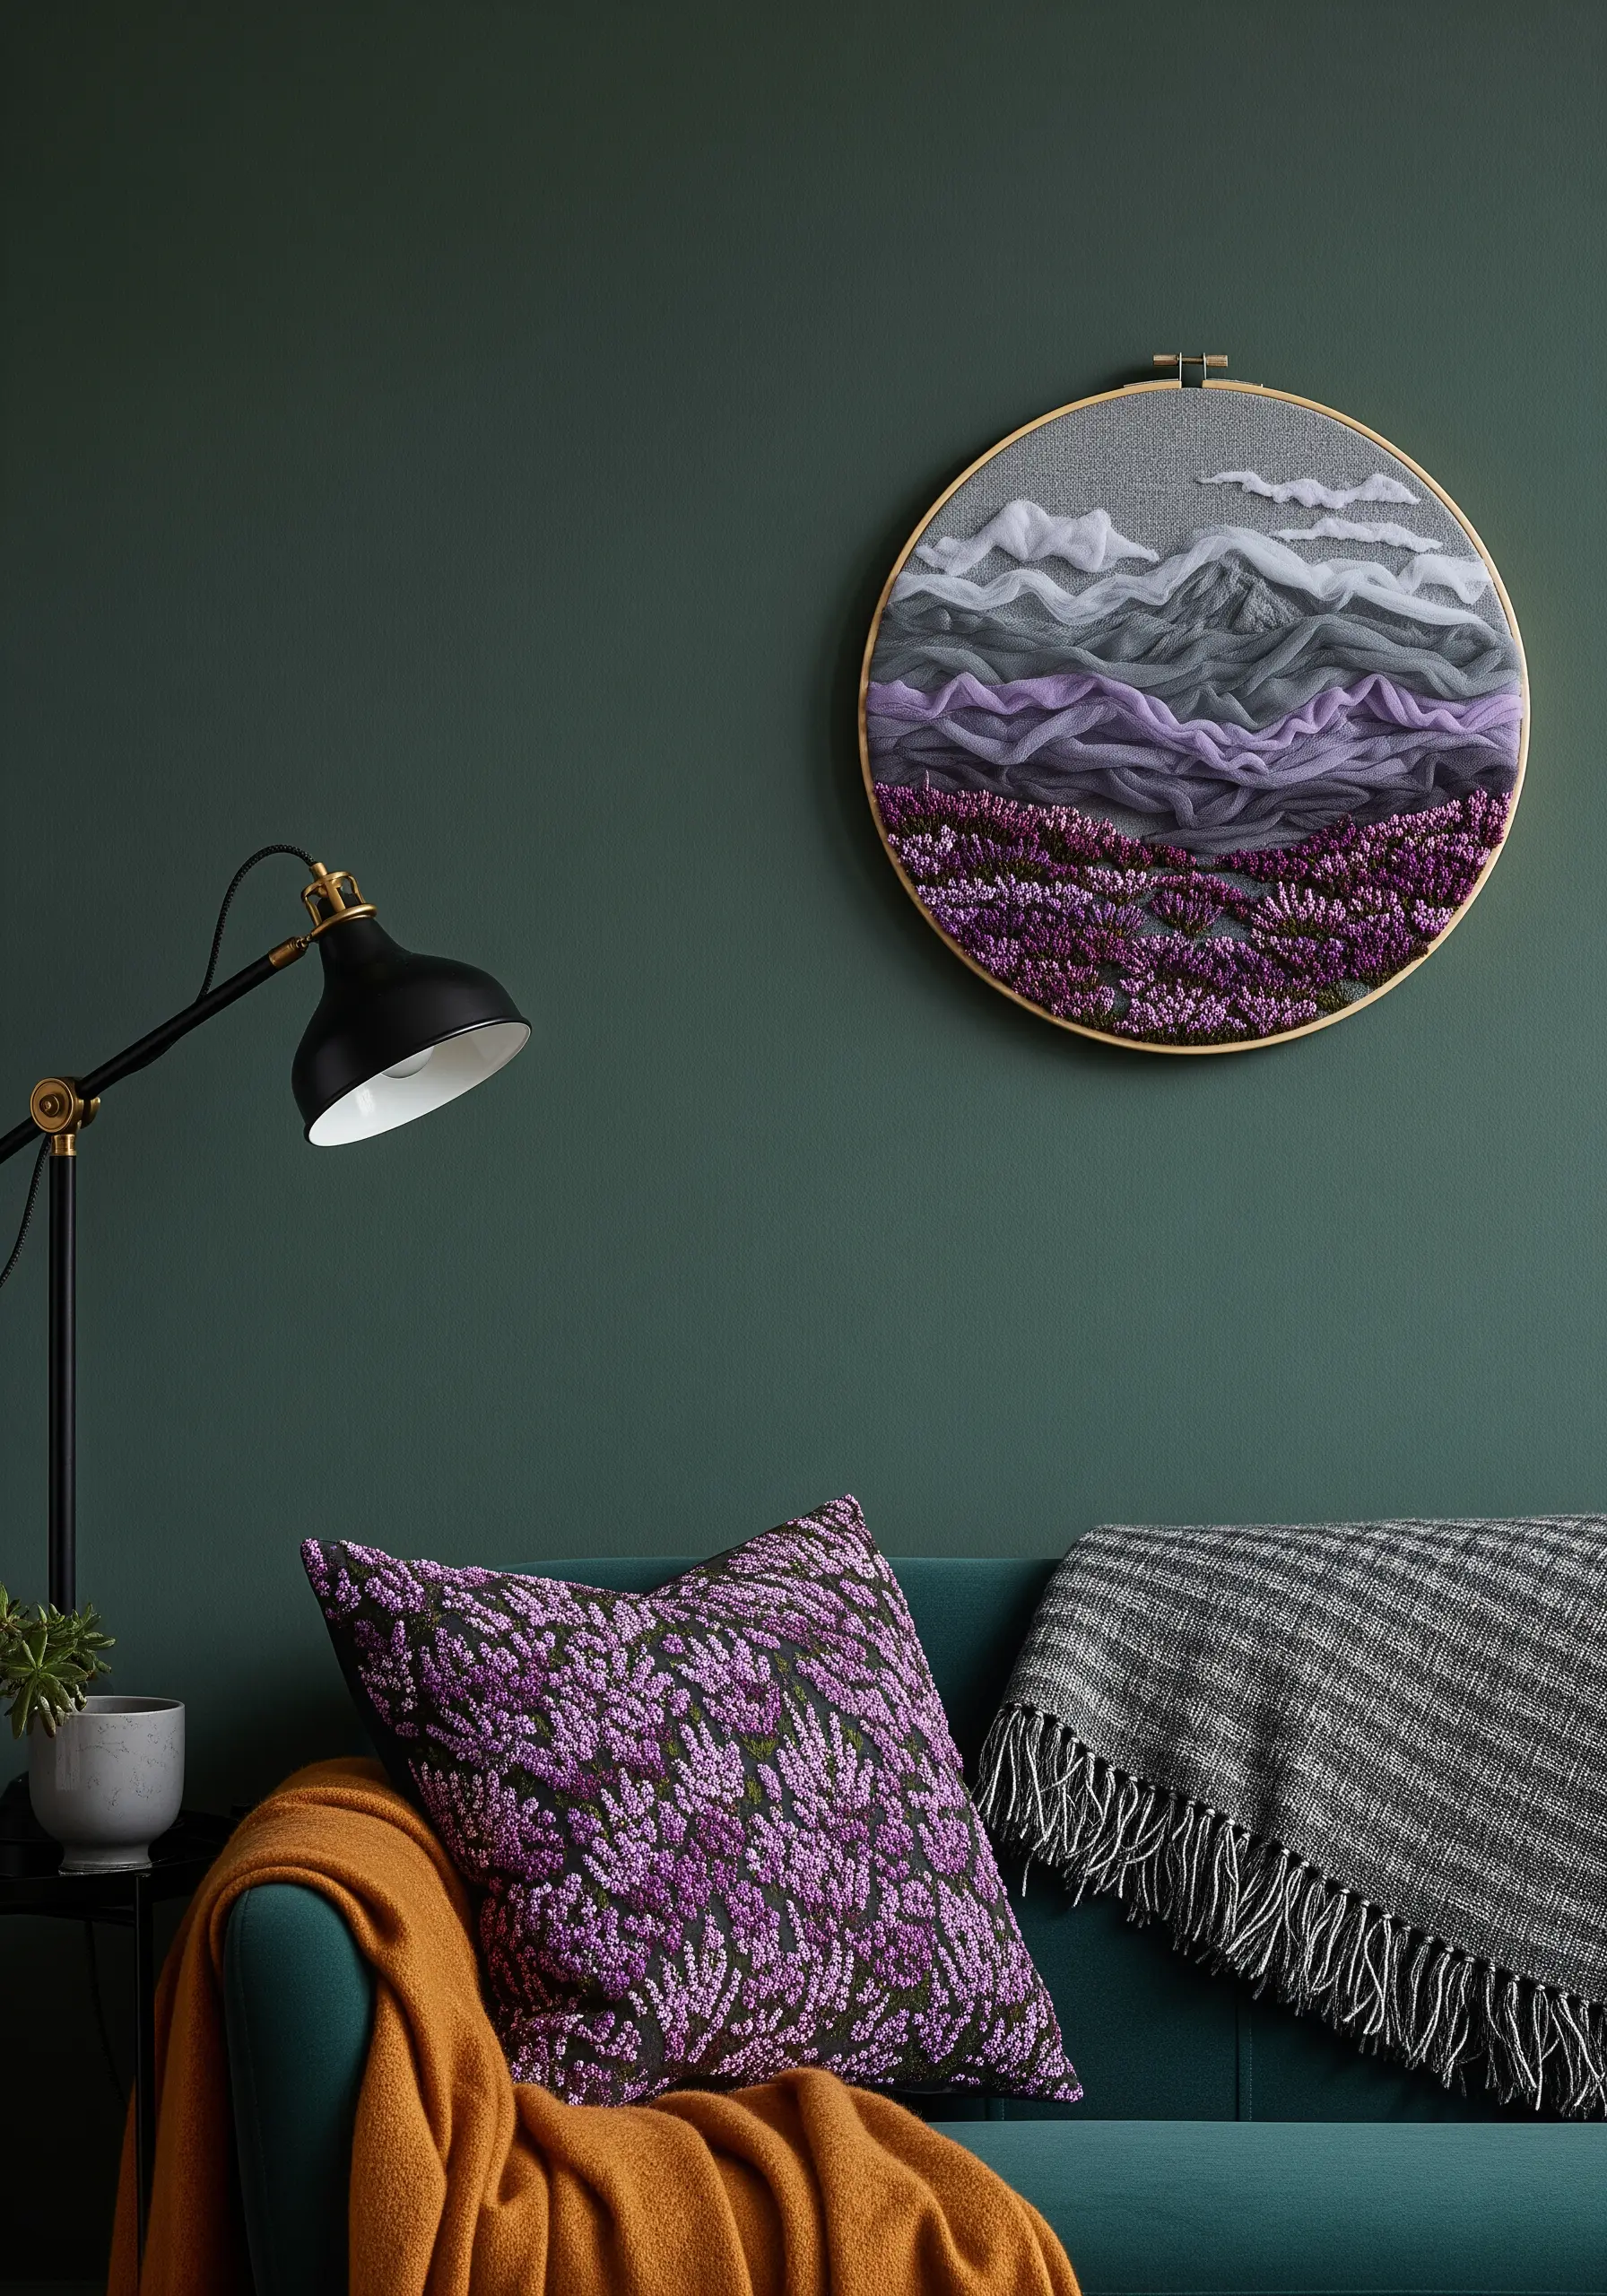
Achieve a lush, dimensional lavender field by incorporating silk ribbon embroidery alongside traditional thread.
For the lavender stalks in the foreground, use a ‘ribbon stitch’ with 4mm or 7mm silk ribbon. This stitch creates a naturally folded, petal-like shape that perfectly mimics lavender blossoms.
As you move into the background, switch to French knots using standard embroidery floss in lighter shades of purple and mauve. Making these knots smaller and less defined will create atmospheric perspective.
This mix of materials not only adds incredible texture but also makes your delicate lavender stitch ideas appear more realistic and dynamic.
20. Create Graphic Reflections of Amsterdam Houses

Capture the iconic look of Amsterdam’s canal houses with a bold, graphic approach that extends to their reflections.
Use a dense satin stitch or even cross-stitch to create solid blocks of color for each house. A crisp backstitch outline in black or dark gray will make the colors pop and define the architecture.
For the water’s reflection, replicate the shapes of the houses below the canal line, but use wavy, horizontal satin stitches and slightly distorted color blocks.
Break up the reflected colors with lines of dark blue or gray thread to simulate ripples. This transforms a static scene into one with movement, perfect for architectural string art designs.
21. Replicate Portuguese Azulejos with Precise Linework
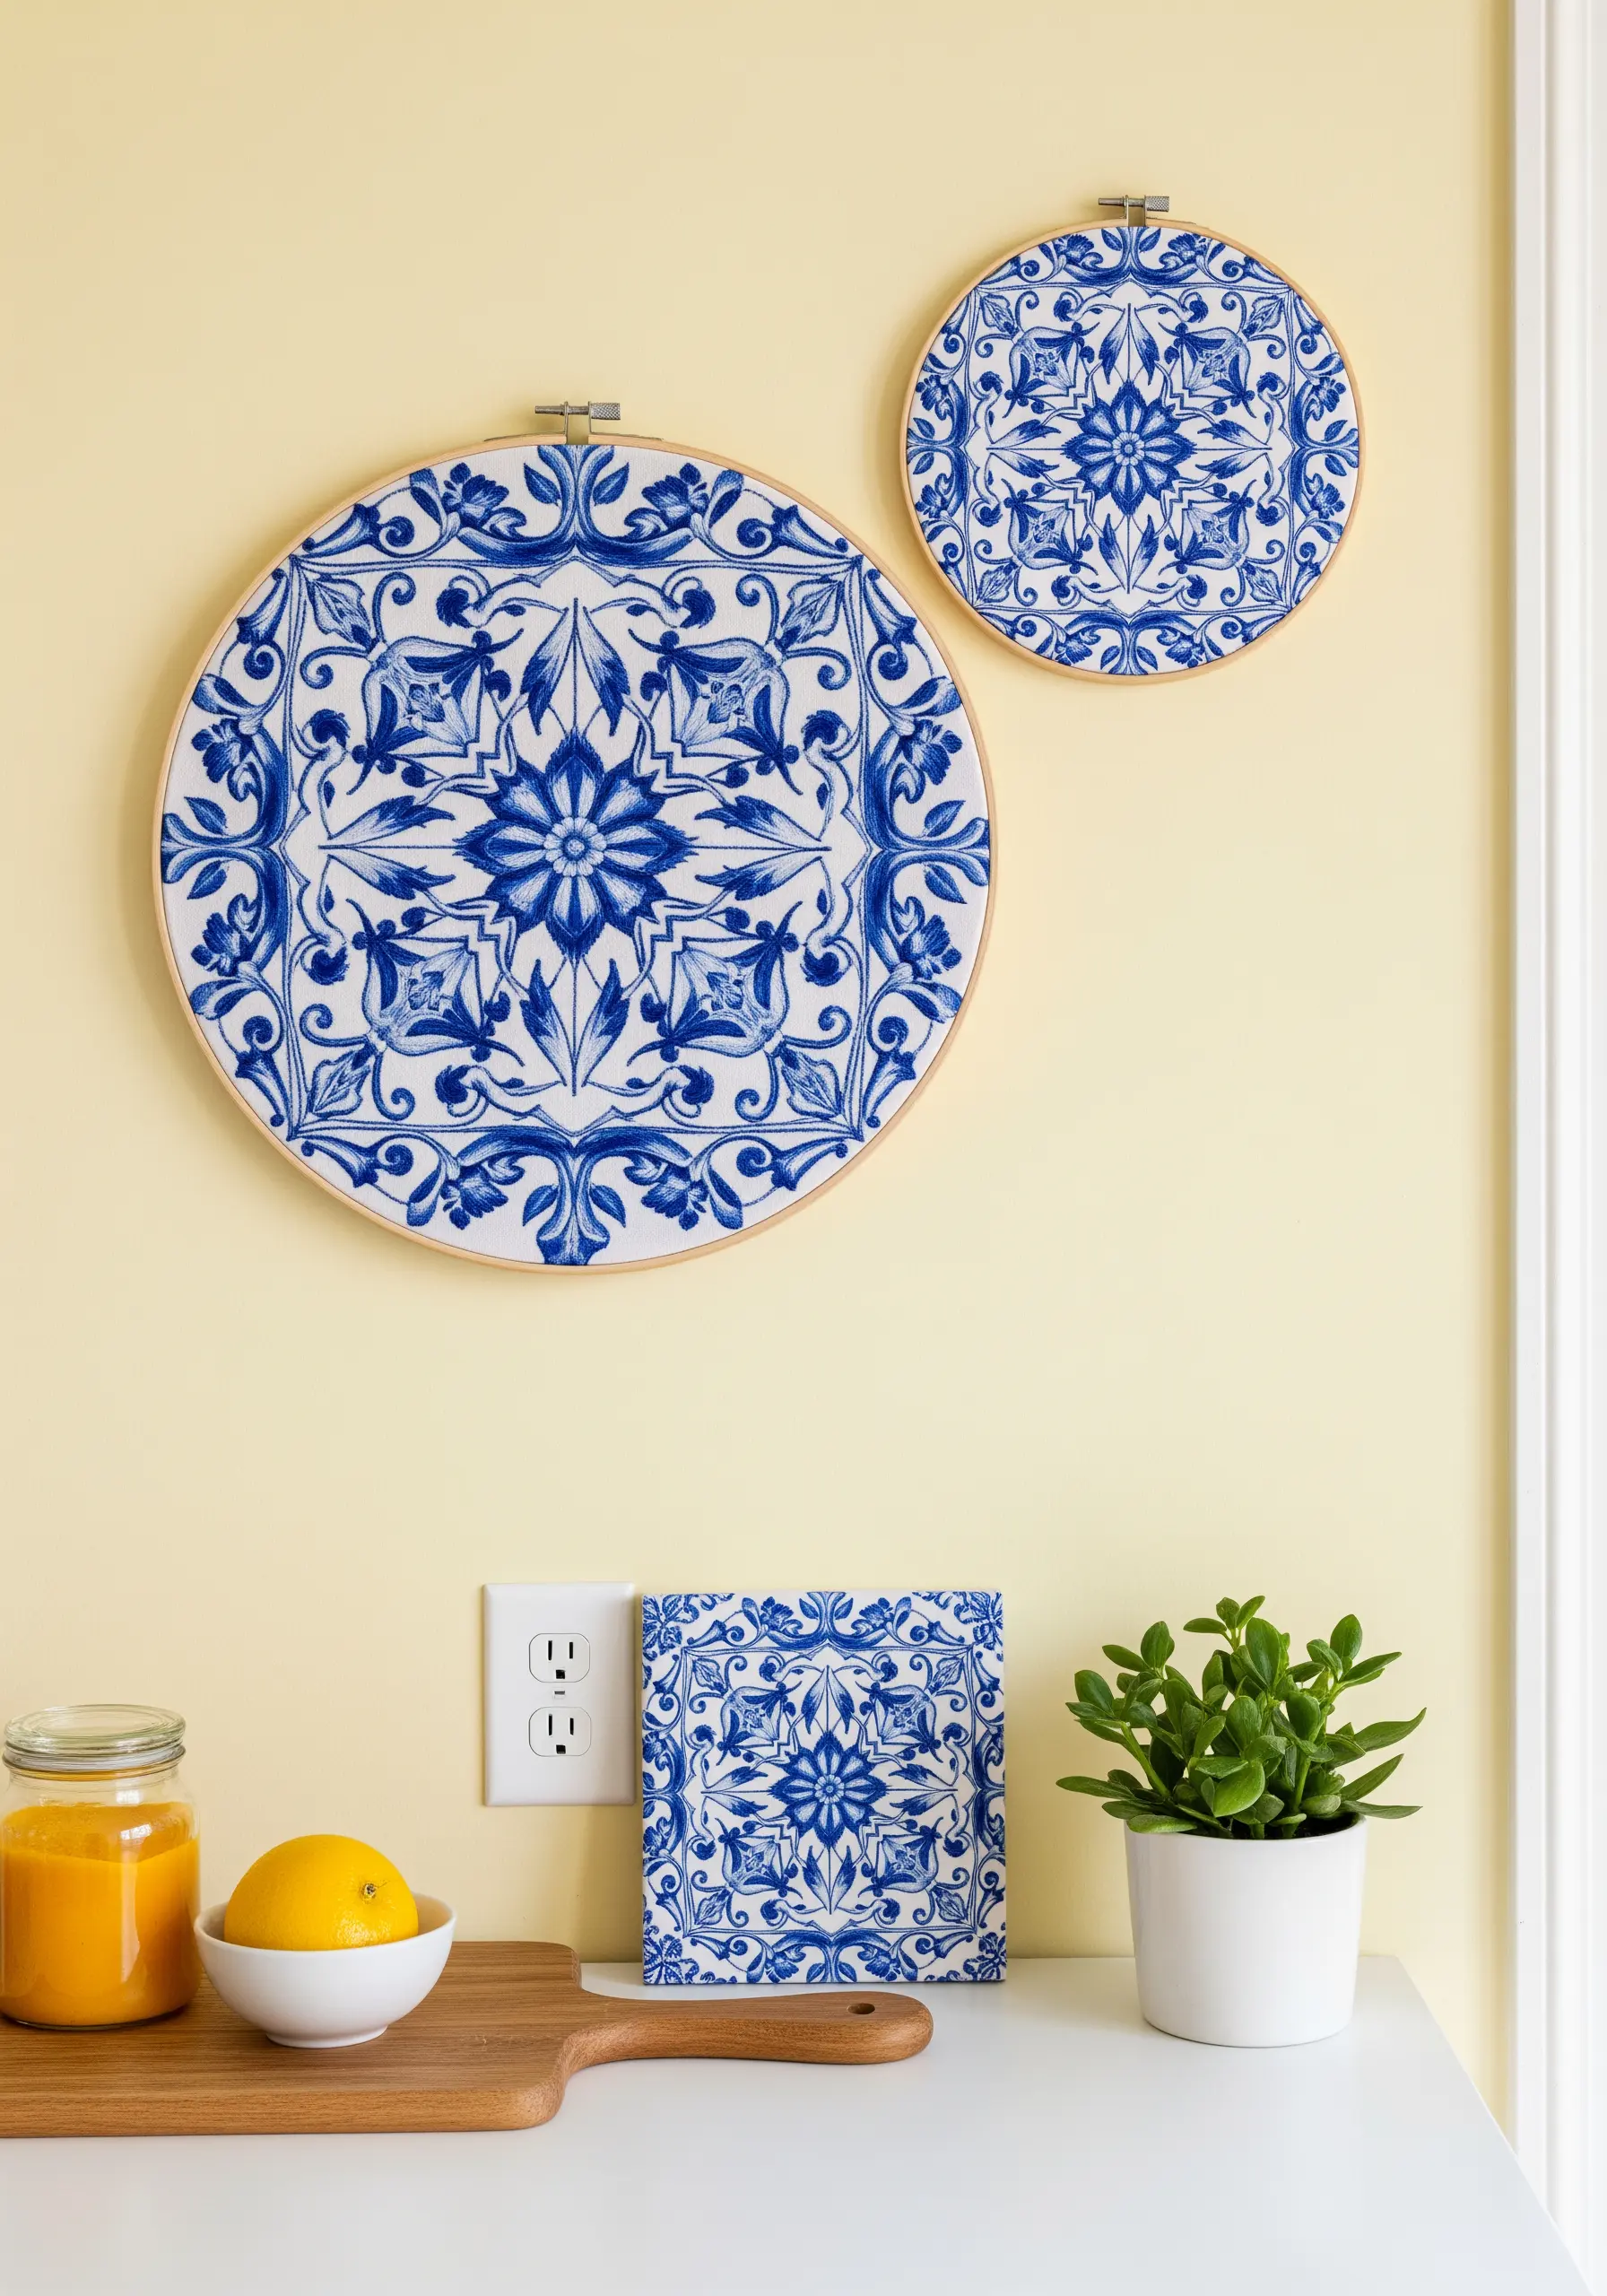
Translate the beauty of Portuguese tiles into thread by focusing on clean, precise stitching in a classic blue-and-white palette.
Use a light-colored linen or cotton fabric to mimic the ceramic base. Transfer your intricate floral or geometric pattern carefully.
Select a single, rich shade of blue—like cobalt or navy. Use a fine split stitch or backstitch with only one or two strands of floss to achieve delicate, flowing lines.
For filled-in areas, use a light seed stitch or a carefully executed satin stitch. The consistency of your stitching is key to creating elegant, modern minimal border designs that honor the original art form.
22. Use Contour Stitching for Rolling Rice Terraces

Convey the stunning topography of Asian rice terraces by using the direction of your stitches to follow the contours of the land.
Instead of filling shapes randomly, work in long, curved rows that mimic the layered levels of the terraces. A stem stitch or split stitch is perfect for creating these flowing lines.
Use a range of greens, yellows, and even blues (for water) to differentiate the levels. Placing lighter shades at the top of a ridge and darker shades below will enhance the 3D effect.
This methodical approach not only looks beautiful but is also a meditative way to stitch, allowing you to create depth in your embroidery through line alone.
23. Paint an Iceberg with Cool-Toned Gradients

Capture the stark, crystalline beauty of an iceberg using the long-and-short stitch technique with a palette of blues, grays, and whites.
Divide the iceberg into distinct planes and facets based on a reference photo. Fill each section with long-and-short stitch, angling your stitches to match the direction of that plane.
Blend shades of color within each section to show shadows and highlights. Use dark blues for deep crevasses and bright white or silver metallic thread for sunlit edges.
These detailed nature texture embroidery projects depend on subtle color shifts to create a realistic, three-dimensional form on a flat surface.
24. Curate a Travel Gallery Wall with a Cohesive Style

Design a collection of your travel memories by unifying them with a consistent artistic style and a central anchor piece.
Choose a simple, repeatable style for each landmark—for instance, a clean backstitch outline with minimal color fill using satin stitch.
Unify the collection by using the same fabric and hoop size for each destination piece. A large, central compass rose acts as a perfect focal point to tie everything together.
This approach allows you to continuously add new destinations to your wall, helping you build a gallery wall without visual clutter that tells the ongoing story of your travels.


