

Your embroidery deserves to be more than just a hobby—it can be the art that defines your personal space. If you’ve ever felt that your stitches lacked polish or your finished pieces didn’t quite capture the vision in your head, it’s often a matter of technique, not talent.
In your hands, a needle and thread are tools for creating texture, sculpting with color, and building atmosphere. Moving beyond basic stitches into more intentional applications is what separates a simple craft from a stunning piece of textile art. It’s about learning how to make the thread do exactly what you want it to.
Here, you’ll find clear, actionable ways to elevate your work. From achieving perfectly crisp edges on geometric shapes to blending colors for a painterly effect, these techniques will empower you to create large-scale wall panels that feel both professional and deeply personal, transforming your bedroom into a vibrant sanctuary.
1. Create Botanical Depth with Layered Satin Stitch

To achieve the bold, graphic look of tropical leaves without the stiffness of appliqué, use a directional long-and-short stitch.
Fill each leaf section by angling your stitches away from the central vein, creating a natural sense of light and shadow.
For the vibrant Bird of Paradise flowers, work the petals in distinct, solid sections of satin stitch, but use a slightly lighter thread (one or two strands) for the edges to give them a subtle, sharp outline.
This method prevents large areas from puckering and gives your botanicals a dynamic, painterly quality that feels both modern and lush.
2. Master Tension with Radiating Straight Stitches

This dramatic effect relies on the precision of a simple straight stitch, repeated with perfect tension.
Start by marking a central focal point on your fabric, then draw radiating guidelines.
Use a high-contrast, dark canvas and a fine but strong thread, like a perle cotton, to ensure each line is crisp and defined.
Stitch each line individually from the outer edge toward the center, ensuring you don’t pull too tightly, which can warp the fabric.
Grouping three panels together turns this simple technique into a powerful piece of modern thread art.
3. Elevate Mandalas with Couching and Shisha Mirrors
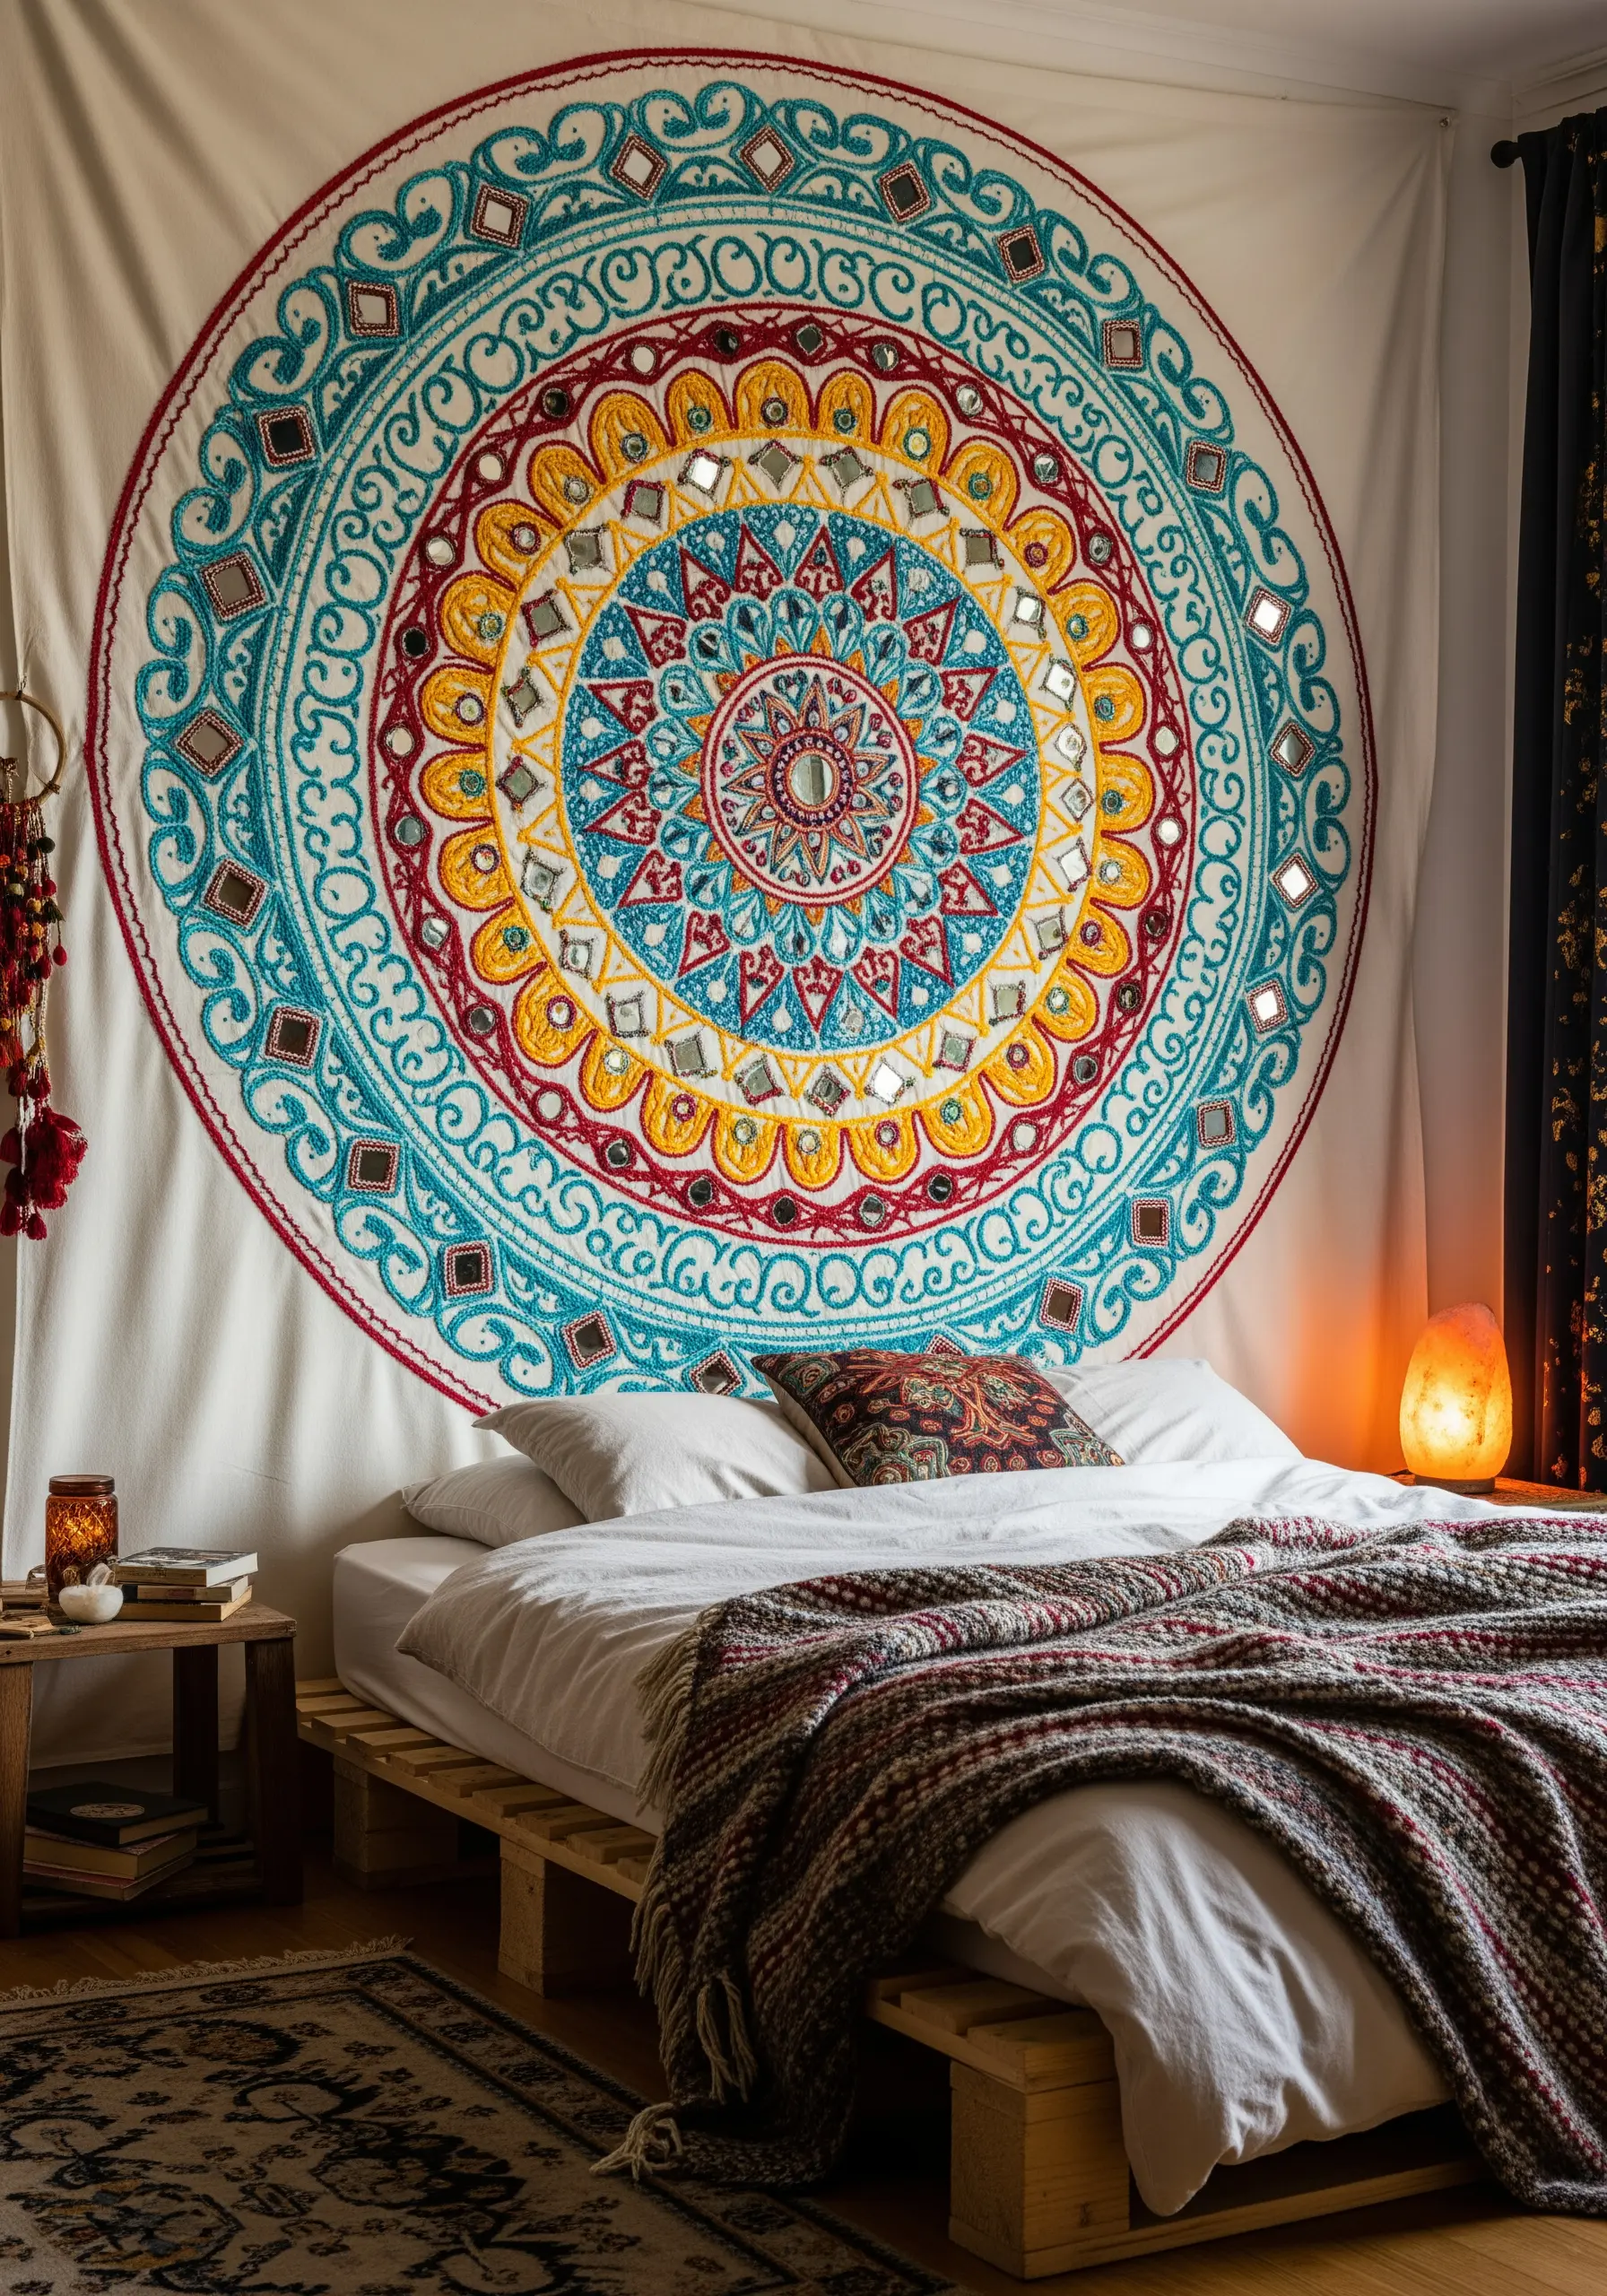
For a large-scale mandala, create bold, textured outlines by couching thick yarn or multiple strands of embroidery floss together.
This technique adds dimension and works up much faster than a standard satin stitch outline.
Incorporate shisha mirrors by creating a frame of straight stitches around the mirror, then securing it with a tight buttonhole stitch worked over the frame.
The combination of soft, matte thread and reflective surfaces creates a rich, tactile piece that interacts beautifully with the light in your bedroom.
4. Amplify Color with Neon Thread on Black Fabric

Make your botanical stitches vibrate with energy by using fluorescent threads on a deep black linen or velvet background.
The dark, matte fabric absorbs light, making the neon colors appear to glow.
To ensure your outlines are exceptionally sharp, first lay down a foundation of split stitch, then stitch over it with a satin stitch or whipped backstitch.
This simple preparation gives your thread a slightly raised base, preventing it from sinking into the fabric and keeping your colors intensely saturated.
5. Translate Portraits into Graphic Thread Blocks
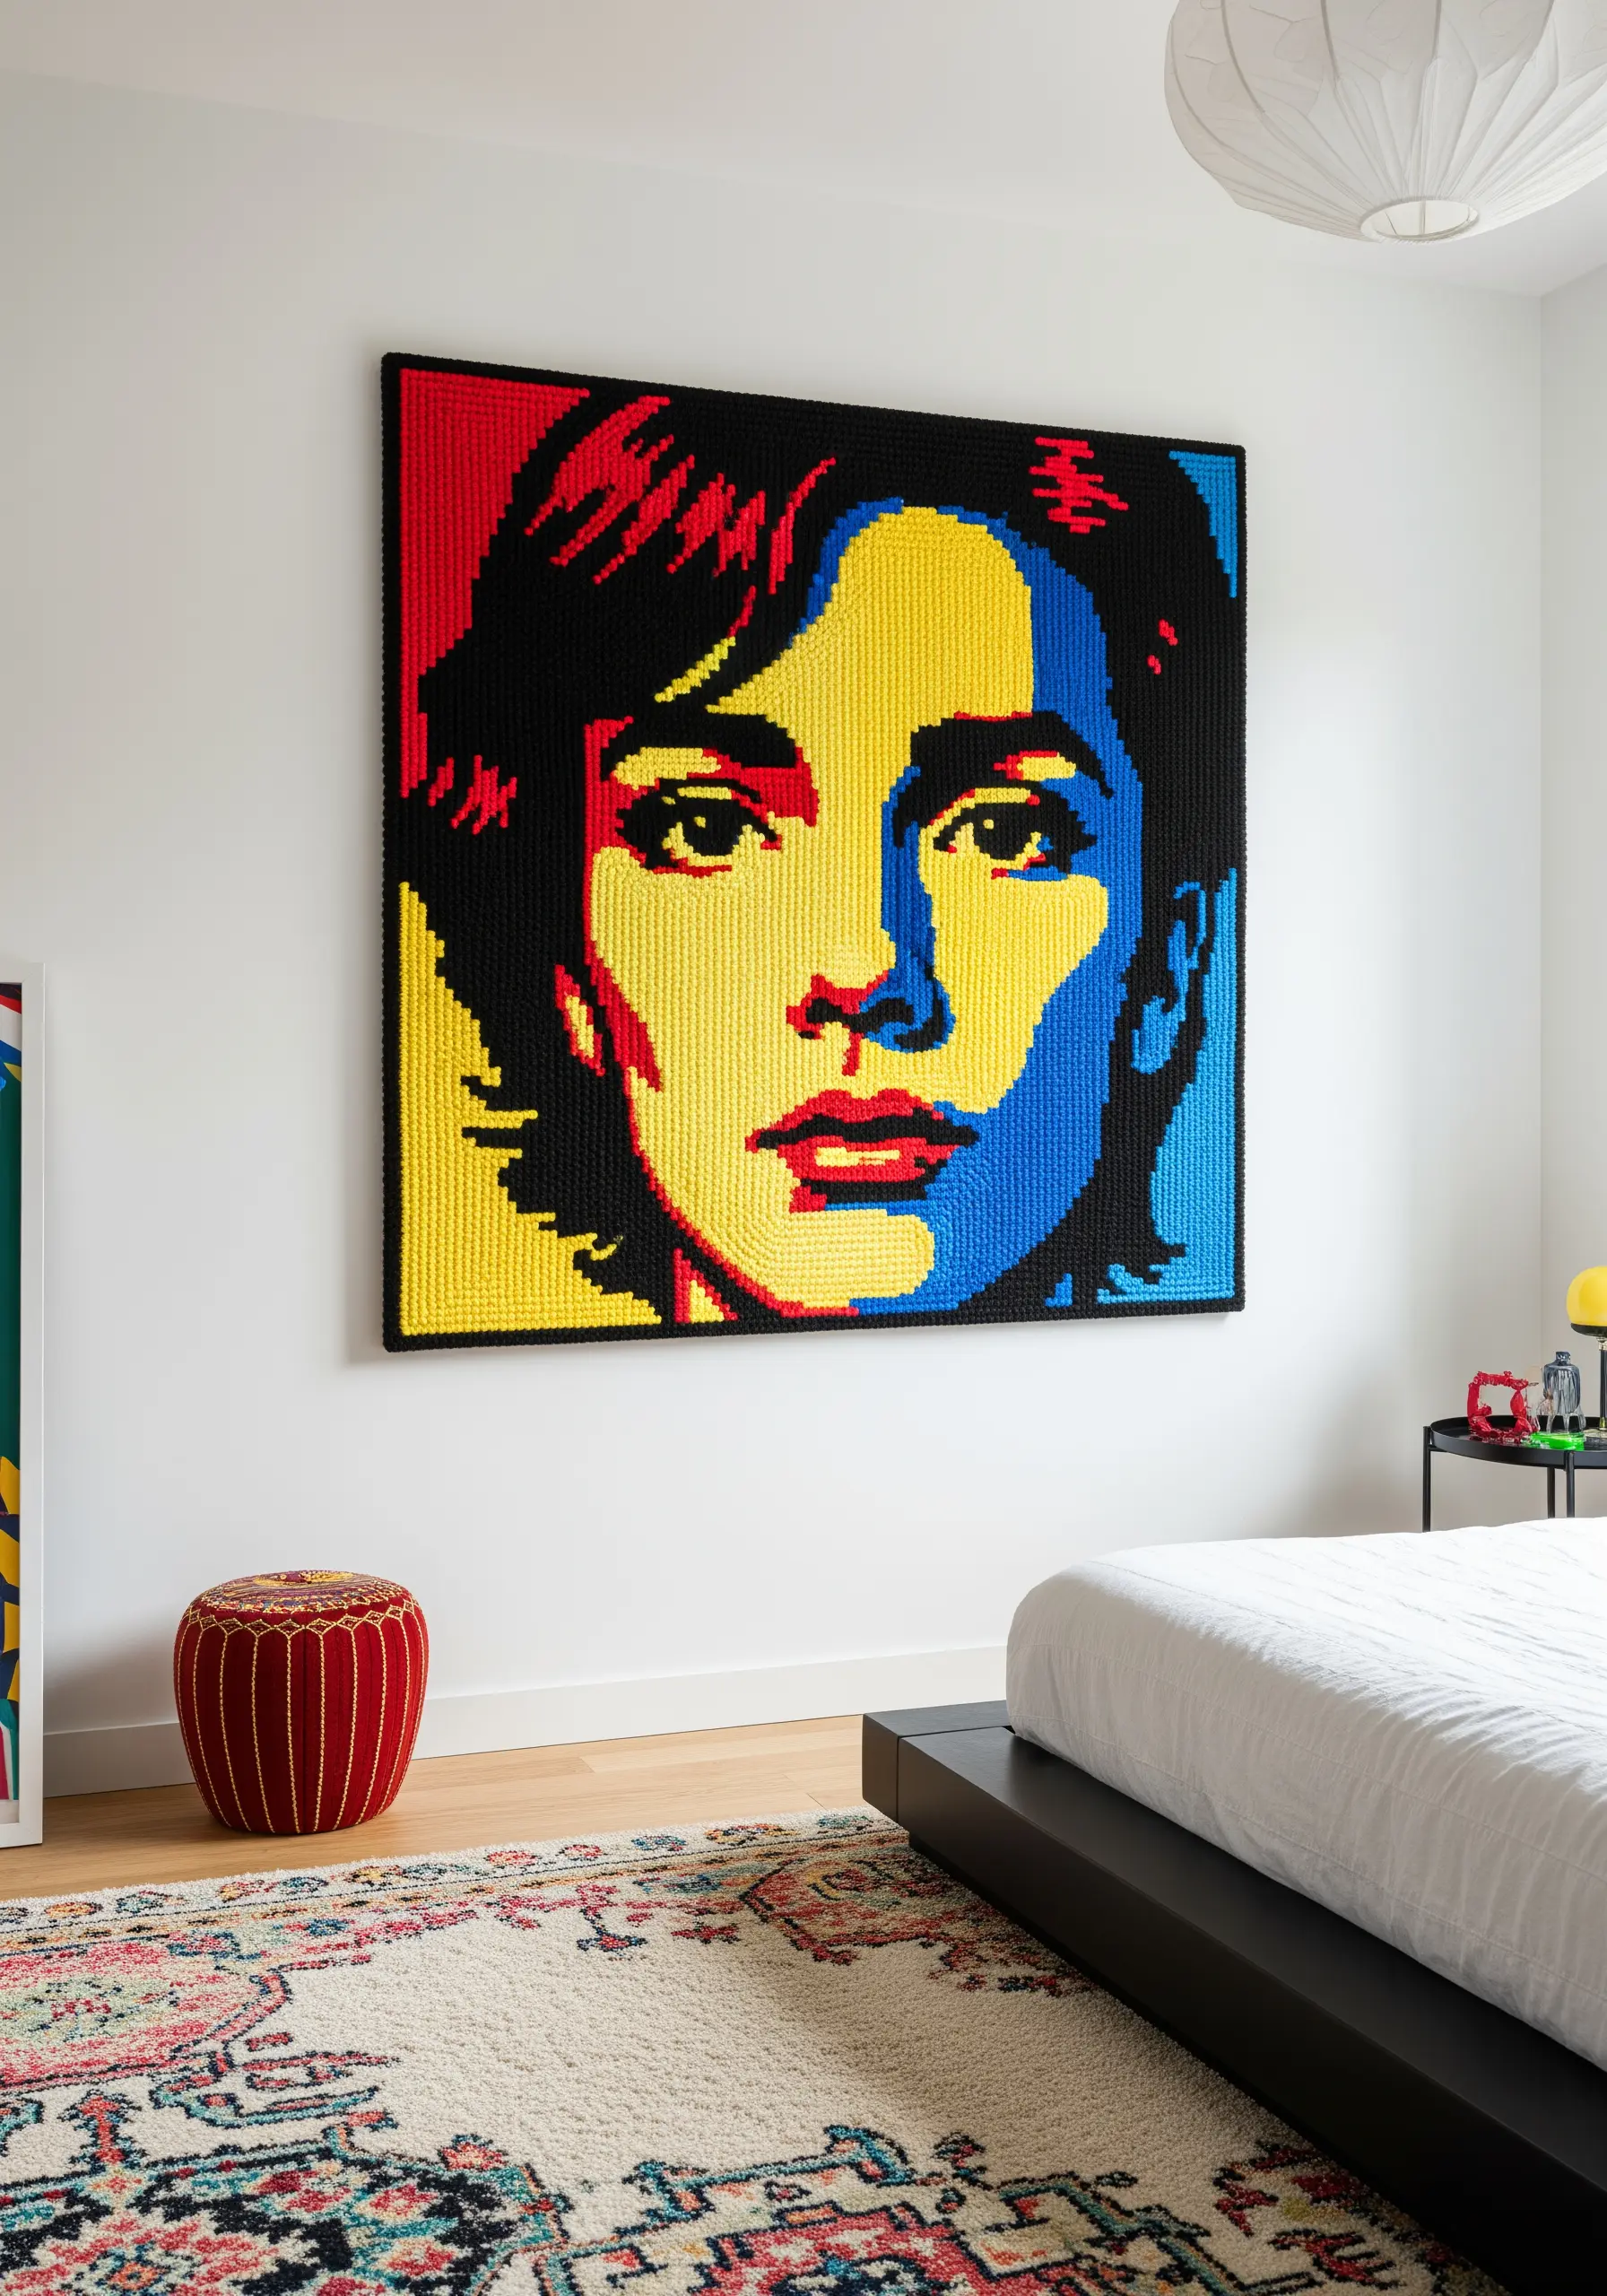
This pop-art effect is achieved by simplifying a photograph into blocks of solid color, a technique known as posterization.
Transfer your simplified design onto canvas using a grid method for accuracy.
Fill each block with dense, straight stitches—like you would in needlepoint—keeping all stitches within a single block facing the same direction.
This creates a clean, graphic texture that reads beautifully from a distance and turns a personal portrait into a bold statement piece.
6. Construct Architectural Depth with Overlapping Lines

Create a sense of futuristic, architectural space using only straight stitches on a dark, heavy canvas.
Map out your perspective lines first with a temporary fabric marker, establishing several vanishing points to add complexity.
Use a fine, glossy thread in electric blues, purples, and white to represent glass and steel.
By strategically overlapping the lines, you can create the illusion of transparency and depth, transforming simple line art geometry-based stitches into a dynamic cityscape.
7. Sculpt an Underwater World with Textural Knots

Bring a coral reef to life by focusing on texture above all else.
Use dense clusters of French knots to form the rounded shapes of brain coral, varying the number of thread wraps (from one to three) to create an uneven, organic surface.
For branching corals, use bullion knots or a raised stem stitch band.
The key is to pack your stitches tightly together, allowing the textures to overlap and build upon one another, creating a truly three-dimensional underwater scene.
8. Guide the Eye with Rhythmic, Flowing Stitches

To capture the groovy, retro feel of this piece, use stitches that emphasize movement and direction.
A thick chain stitch or whipped running stitch is perfect for following the undulating curves, as it creates a raised, rope-like line that guides the viewer’s eye across the panel.
When filling the circular motifs, work your stitches in a spiral, starting from the center and working your way out.
This ensures every part of the design contributes to the overall sense of fluid, psychedelic motion.
9. Paint Landscapes with Bold Strokes of Thread
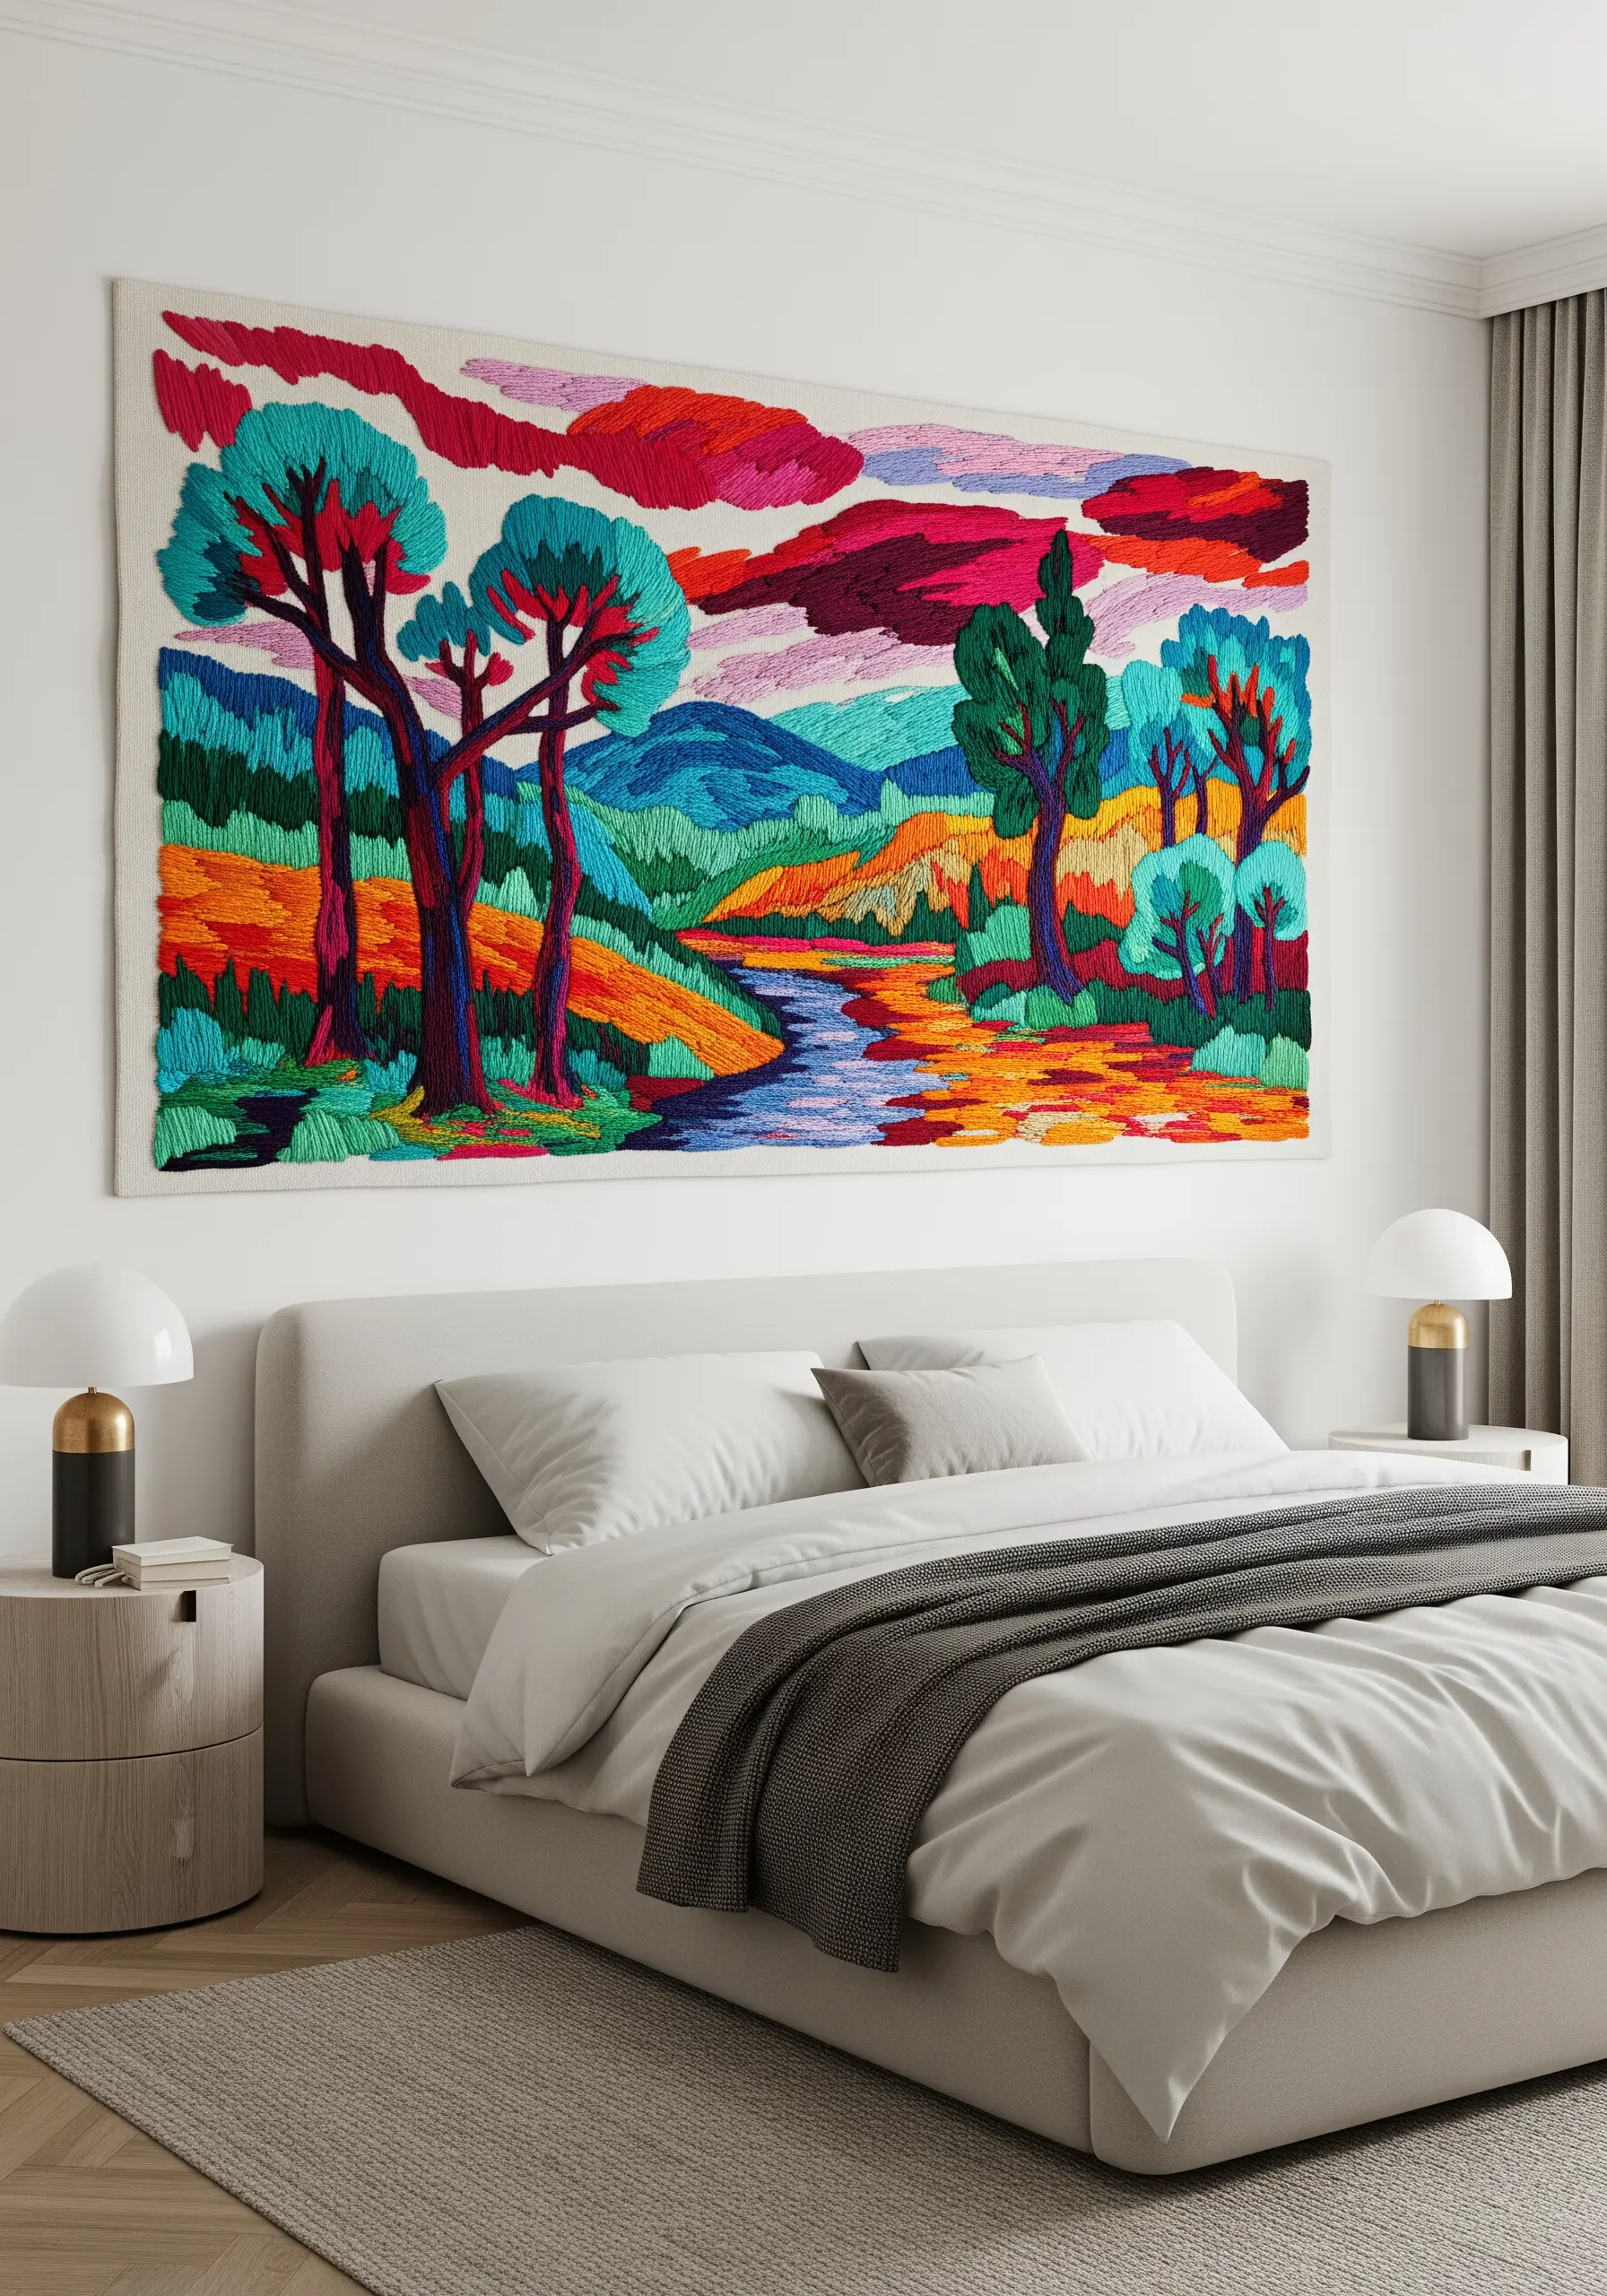
Instead of blending colors smoothly, treat your thread like paint in a Fauvist masterpiece.
Fill large areas like skies, hills, and trees with blocks of long-and-short stitch, but don’t worry about seamless transitions.
Lay bold, unexpected colors next to each other and vary the direction of your stitches to create texture and energy.
This expressive technique, often called thread painting, allows you to build a vibrant, stylized landscape that feels alive with color and emotion.
10. Design a Celestial Burst with Radiating Stitches
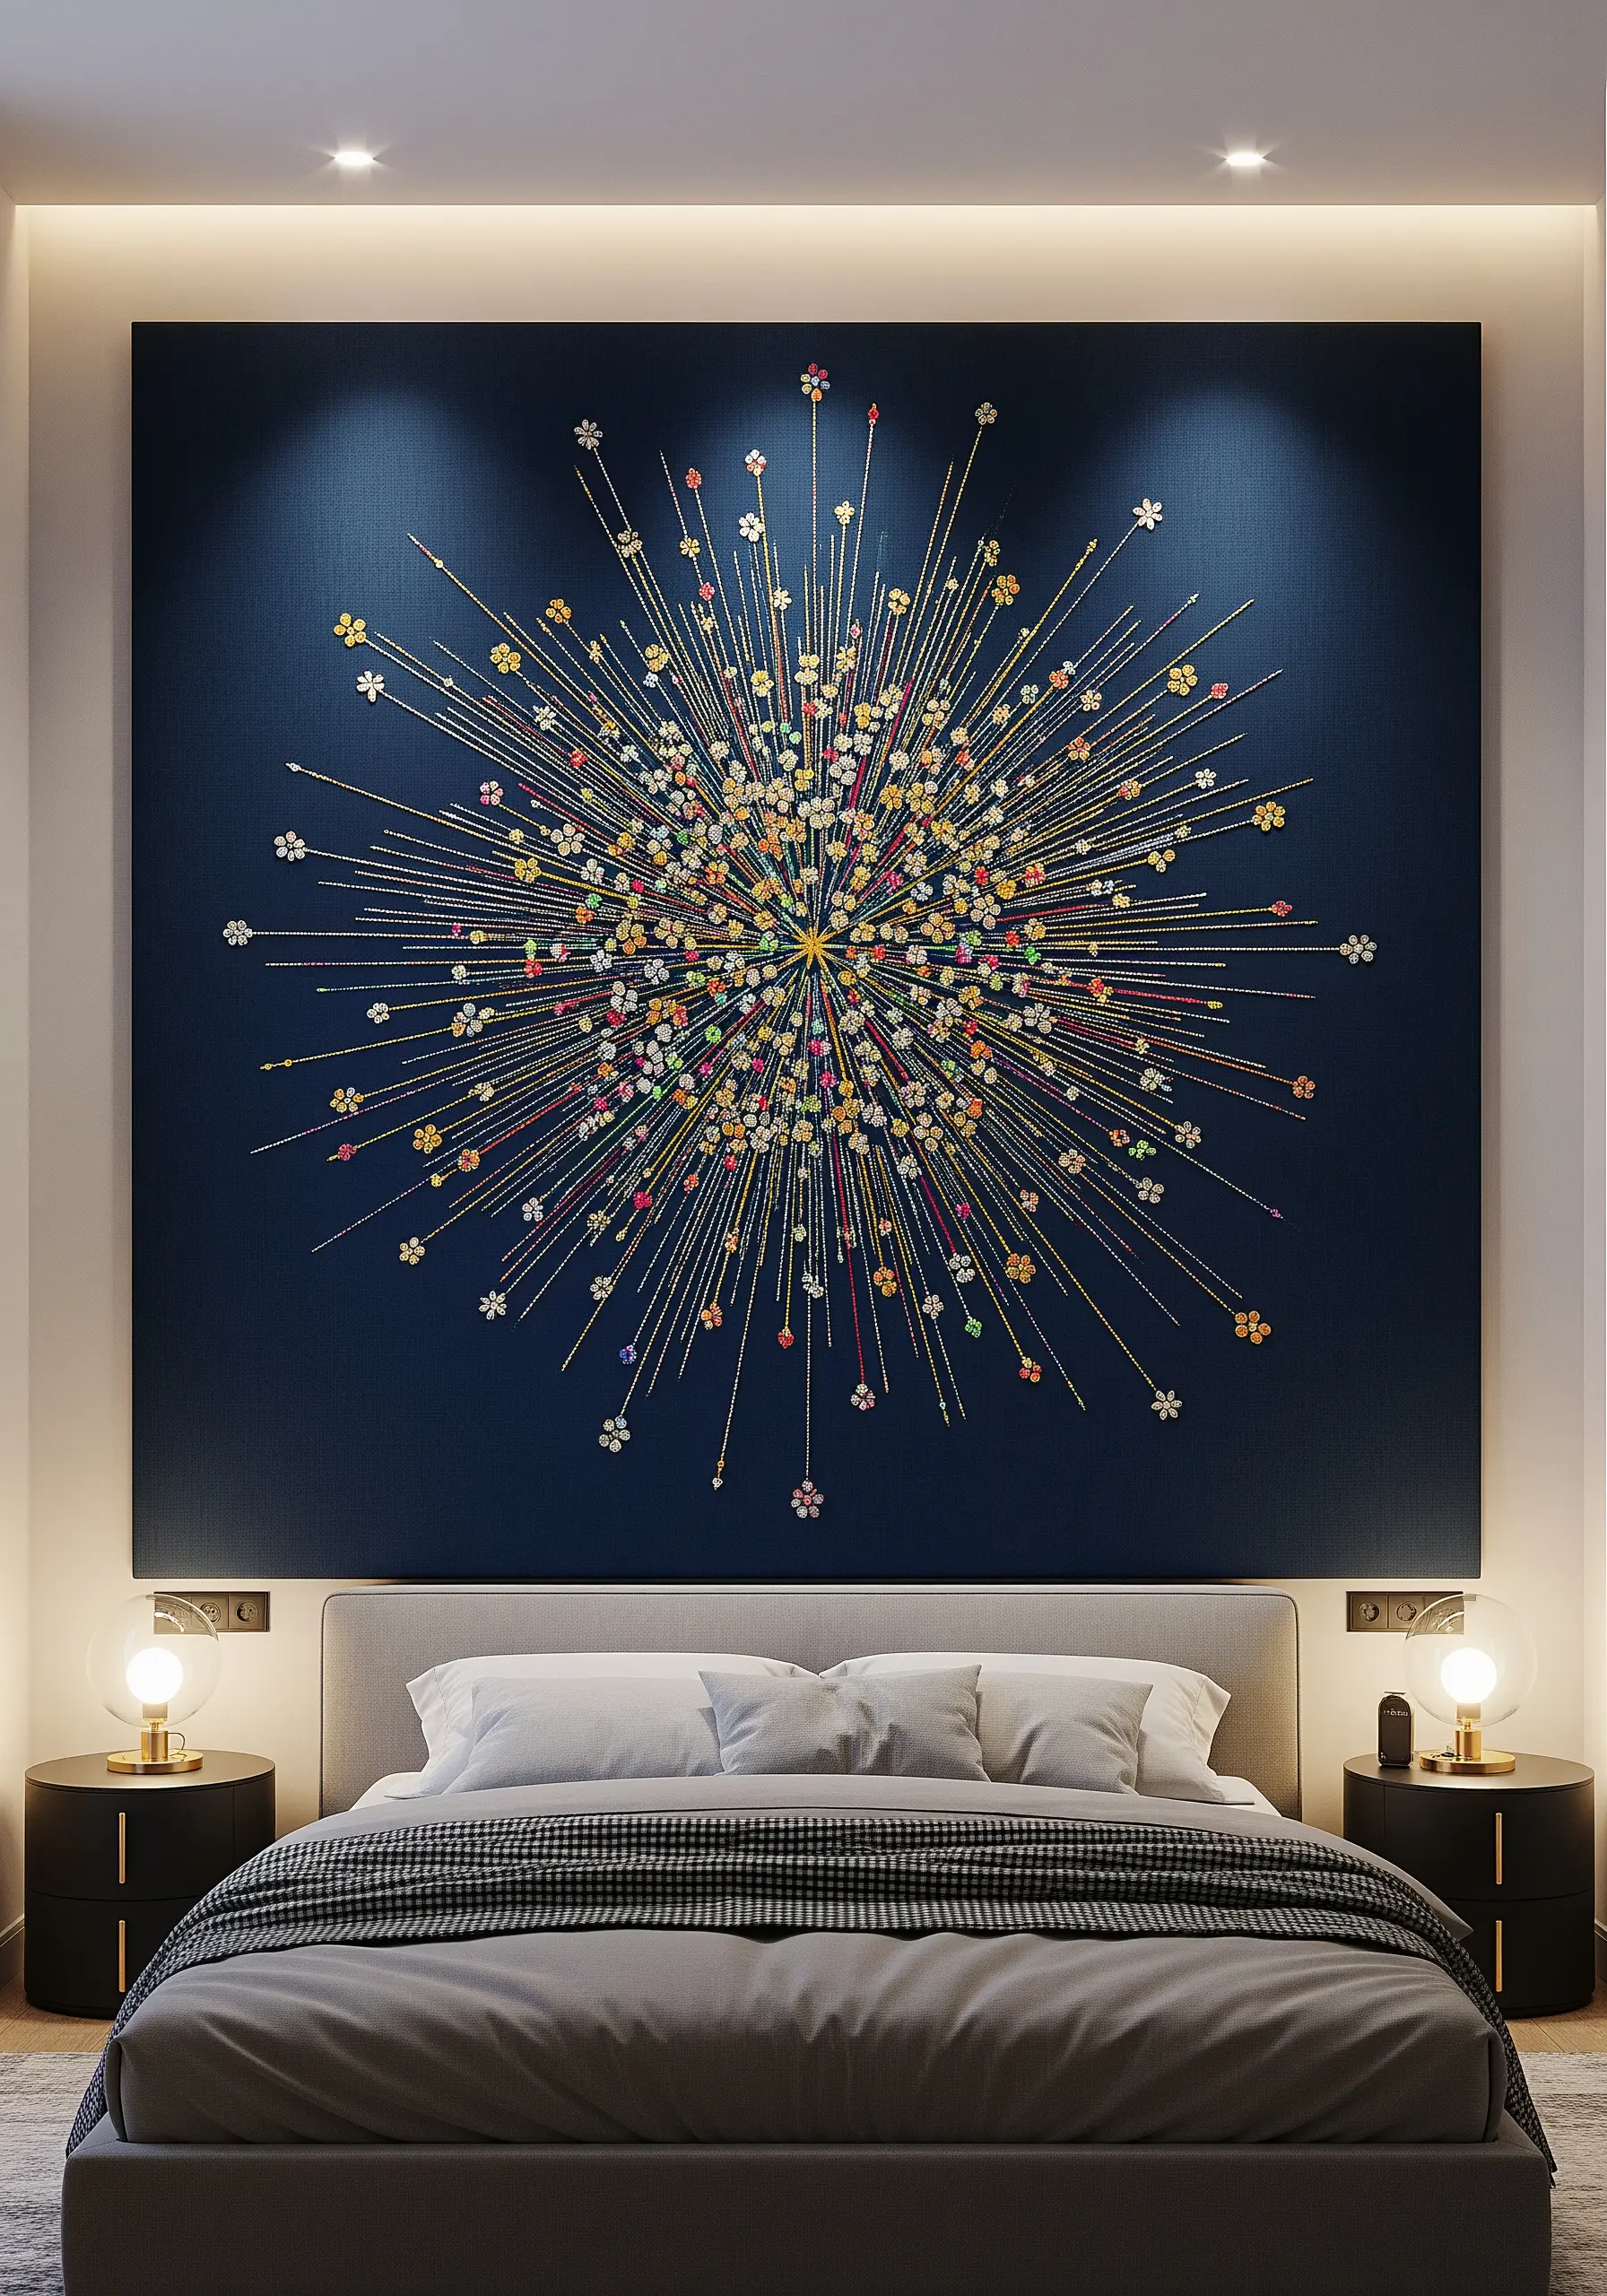
This explosive design is deceptively simple and highly effective for a dramatic headboard piece.
Begin with a central point—perhaps a single, large French knot or a small metallic bead.
From there, work hundreds of single straight stitches radiating outwards, varying their length and color to create a sense of dynamic movement.
Finish the ends of some rays with a tiny lazy daisy stitch or another knot to suggest bursting blossoms. Using metallic thread for some of the rays will add a sophisticated, starlit shimmer.
11. Integrate Embroidery into Patterned Surfaces

For a maximalist bedroom, don’t limit your embroidery to a blank canvas. Choose a fabric with a bold print and use thread to selectively enhance it.
You can outline specific motifs, fill in leaves with textural seed stitches, or add French knot berries to printed branches.
This approach transforms a two-dimensional pattern into a layered, tactile experience. Coordinate your headboard, pillows, and even a throw to create a cohesive, immersive embroidered environment.
12. Achieve Art Deco Precision with Couching

The elegance of Art Deco design lies in its clean lines and geometric symmetry.
To replicate this, fill the fan shapes with perfectly smooth satin stitch, ensuring all your stitches lie parallel.
For the definitive gold outlines, use a couching technique. Lay down a strand of thick metallic thread along your design line and tack it into place with a second, finer thread using tiny, near-invisible stitches.
This method creates a perfectly sharp, raised metallic line that satin stitch alone cannot achieve.
13. Add Dimension to Fruit with Padded Satin Stitch
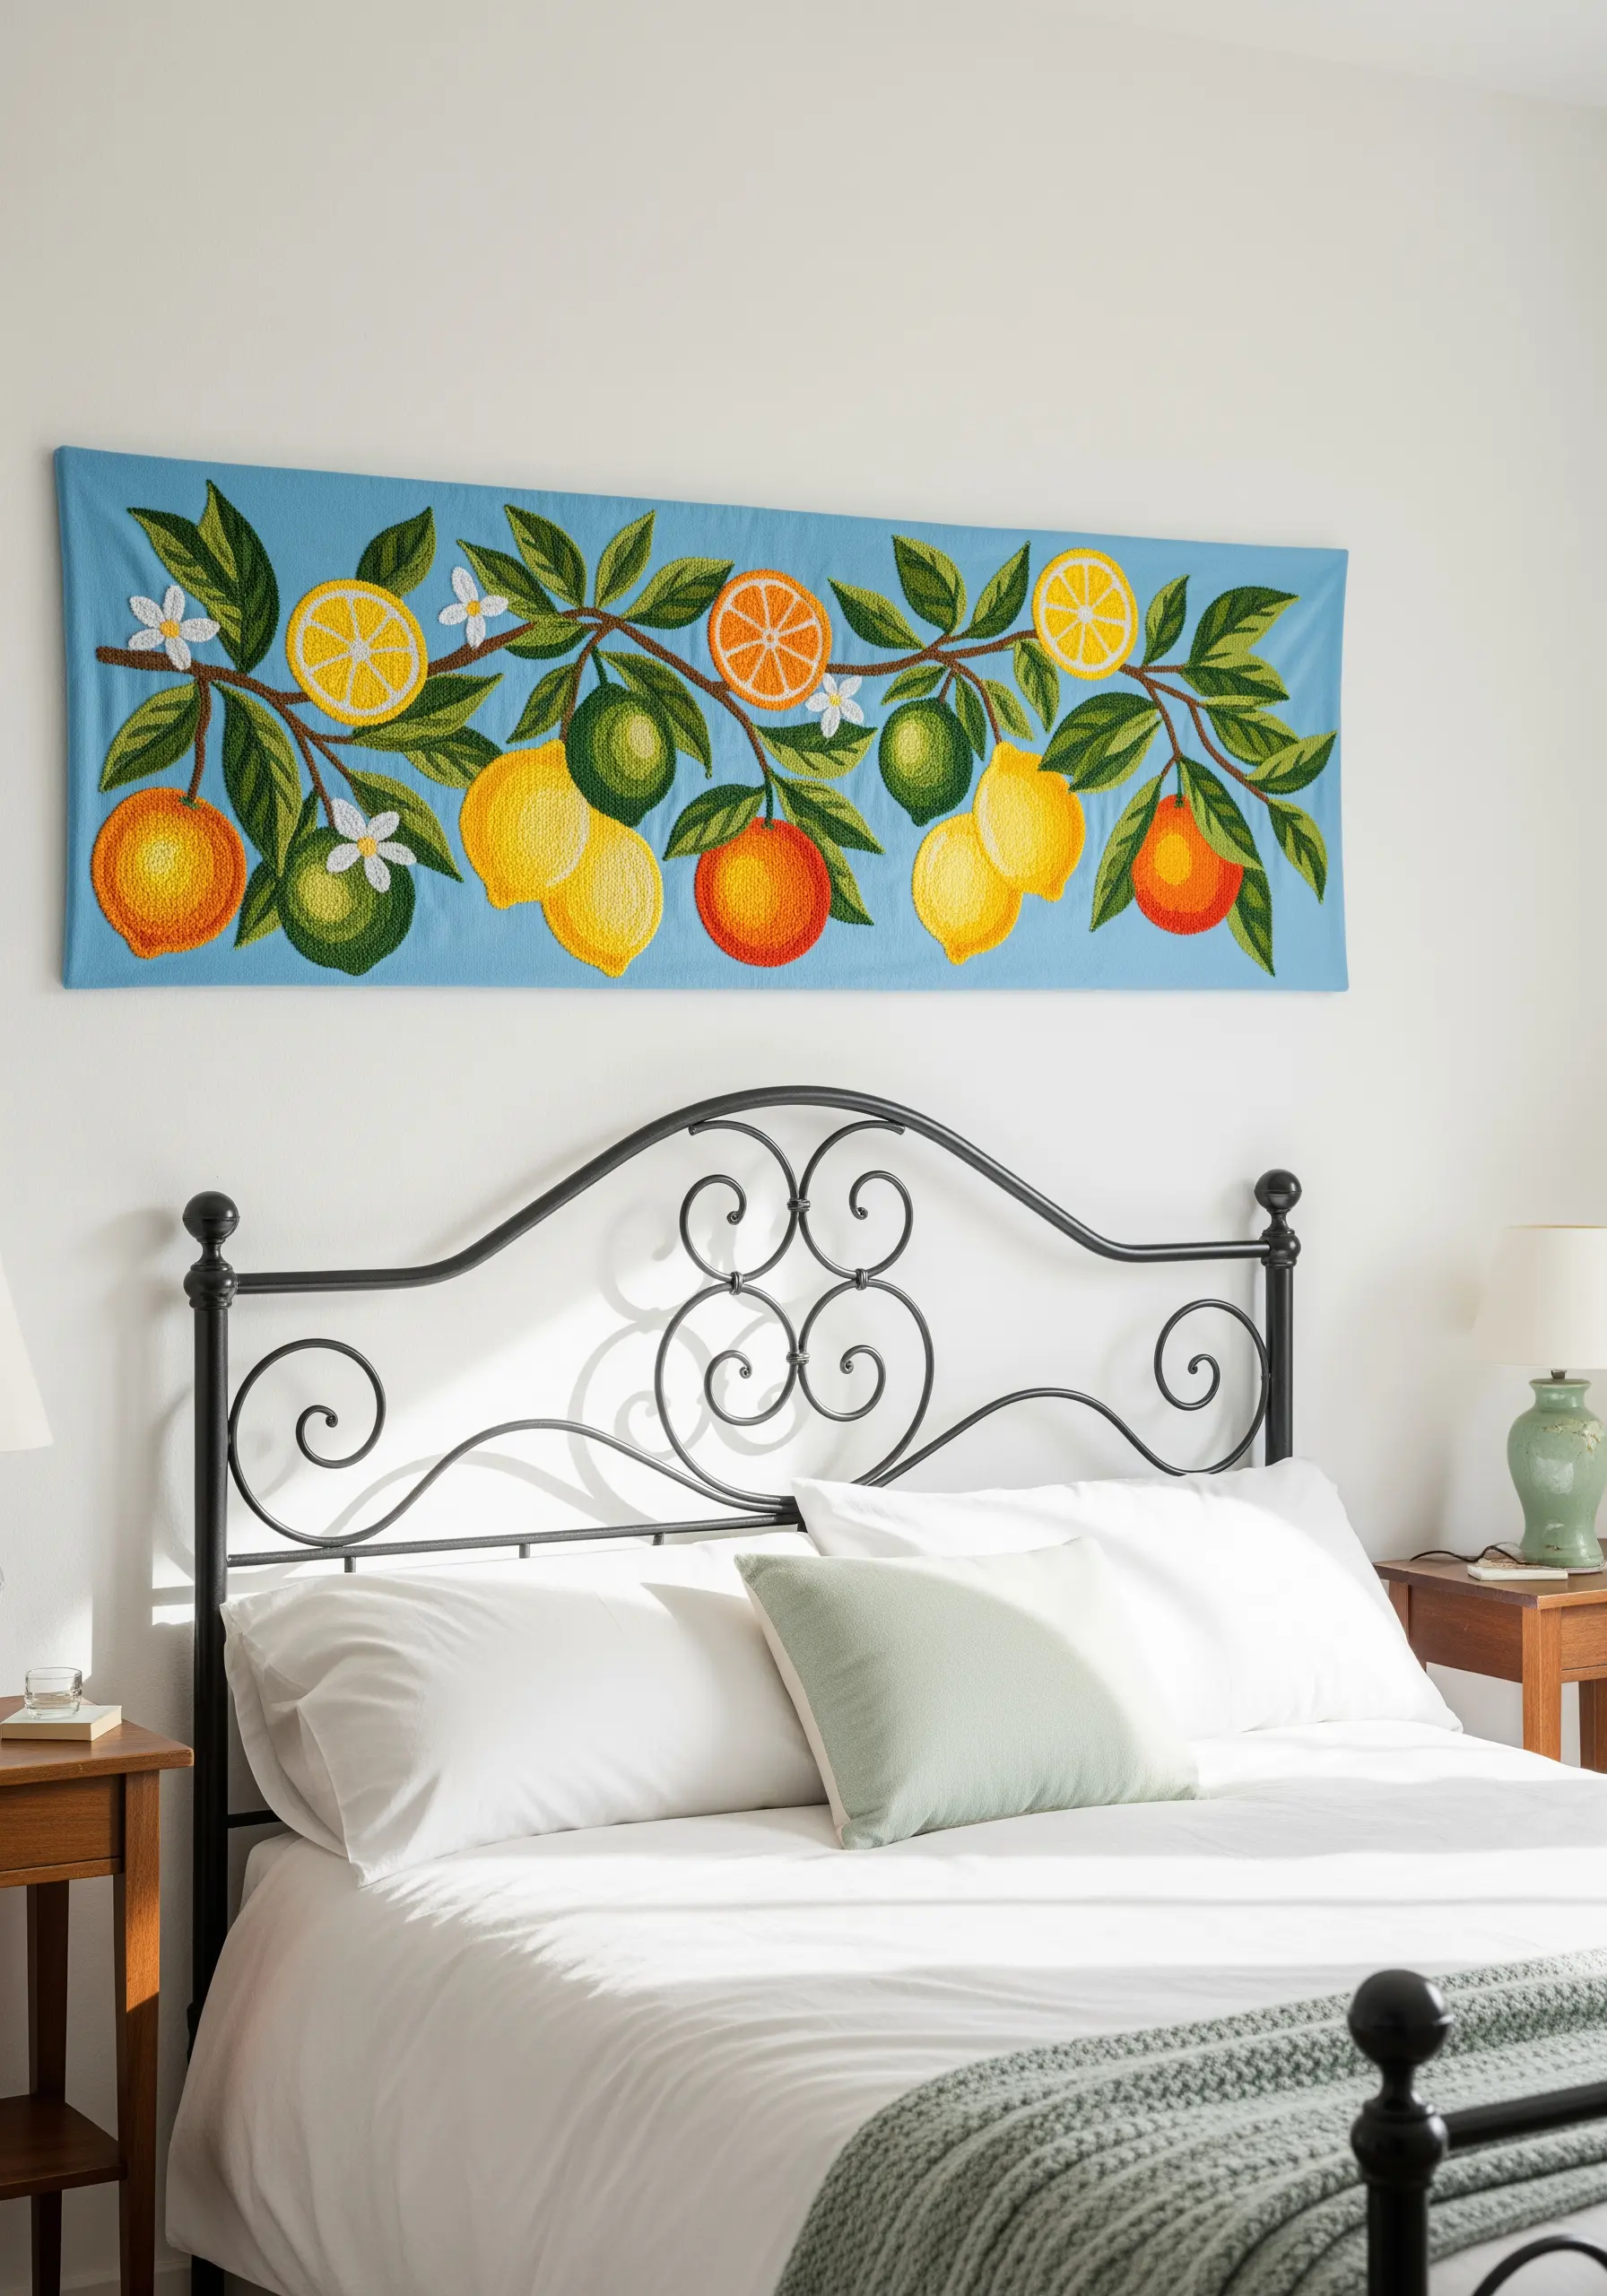
To make your embroidered fruit look plump and realistic, give it dimension with padding.
Before you begin your top layer of color, fill the shape of the lemon or orange with a base layer of small, straight stitches or seed stitches.
Then, work your final satin stitch over this padded foundation. The extra height lifts the thread, allowing it to catch the light and create a subtle, rounded highlight that makes the fruit feel three-dimensional.
14. Define Geometric Shapes with Split Stitch Outlines

When working with bold, geometric blocks of color, crisp edges are non-negotiable.
Before filling each colored square with satin stitch, outline the shape with a precise split stitch using the same color thread.
This creates a firm, slightly raised border for your satin stitches to press against, preventing gaps and ensuring a perfectly sharp line where colors meet.
This technique is the secret to achieving a clean, graphic finish worthy of a Mondrian-inspired piece.
15. Capture Abstract Expression with a Stitch Sampler Approach
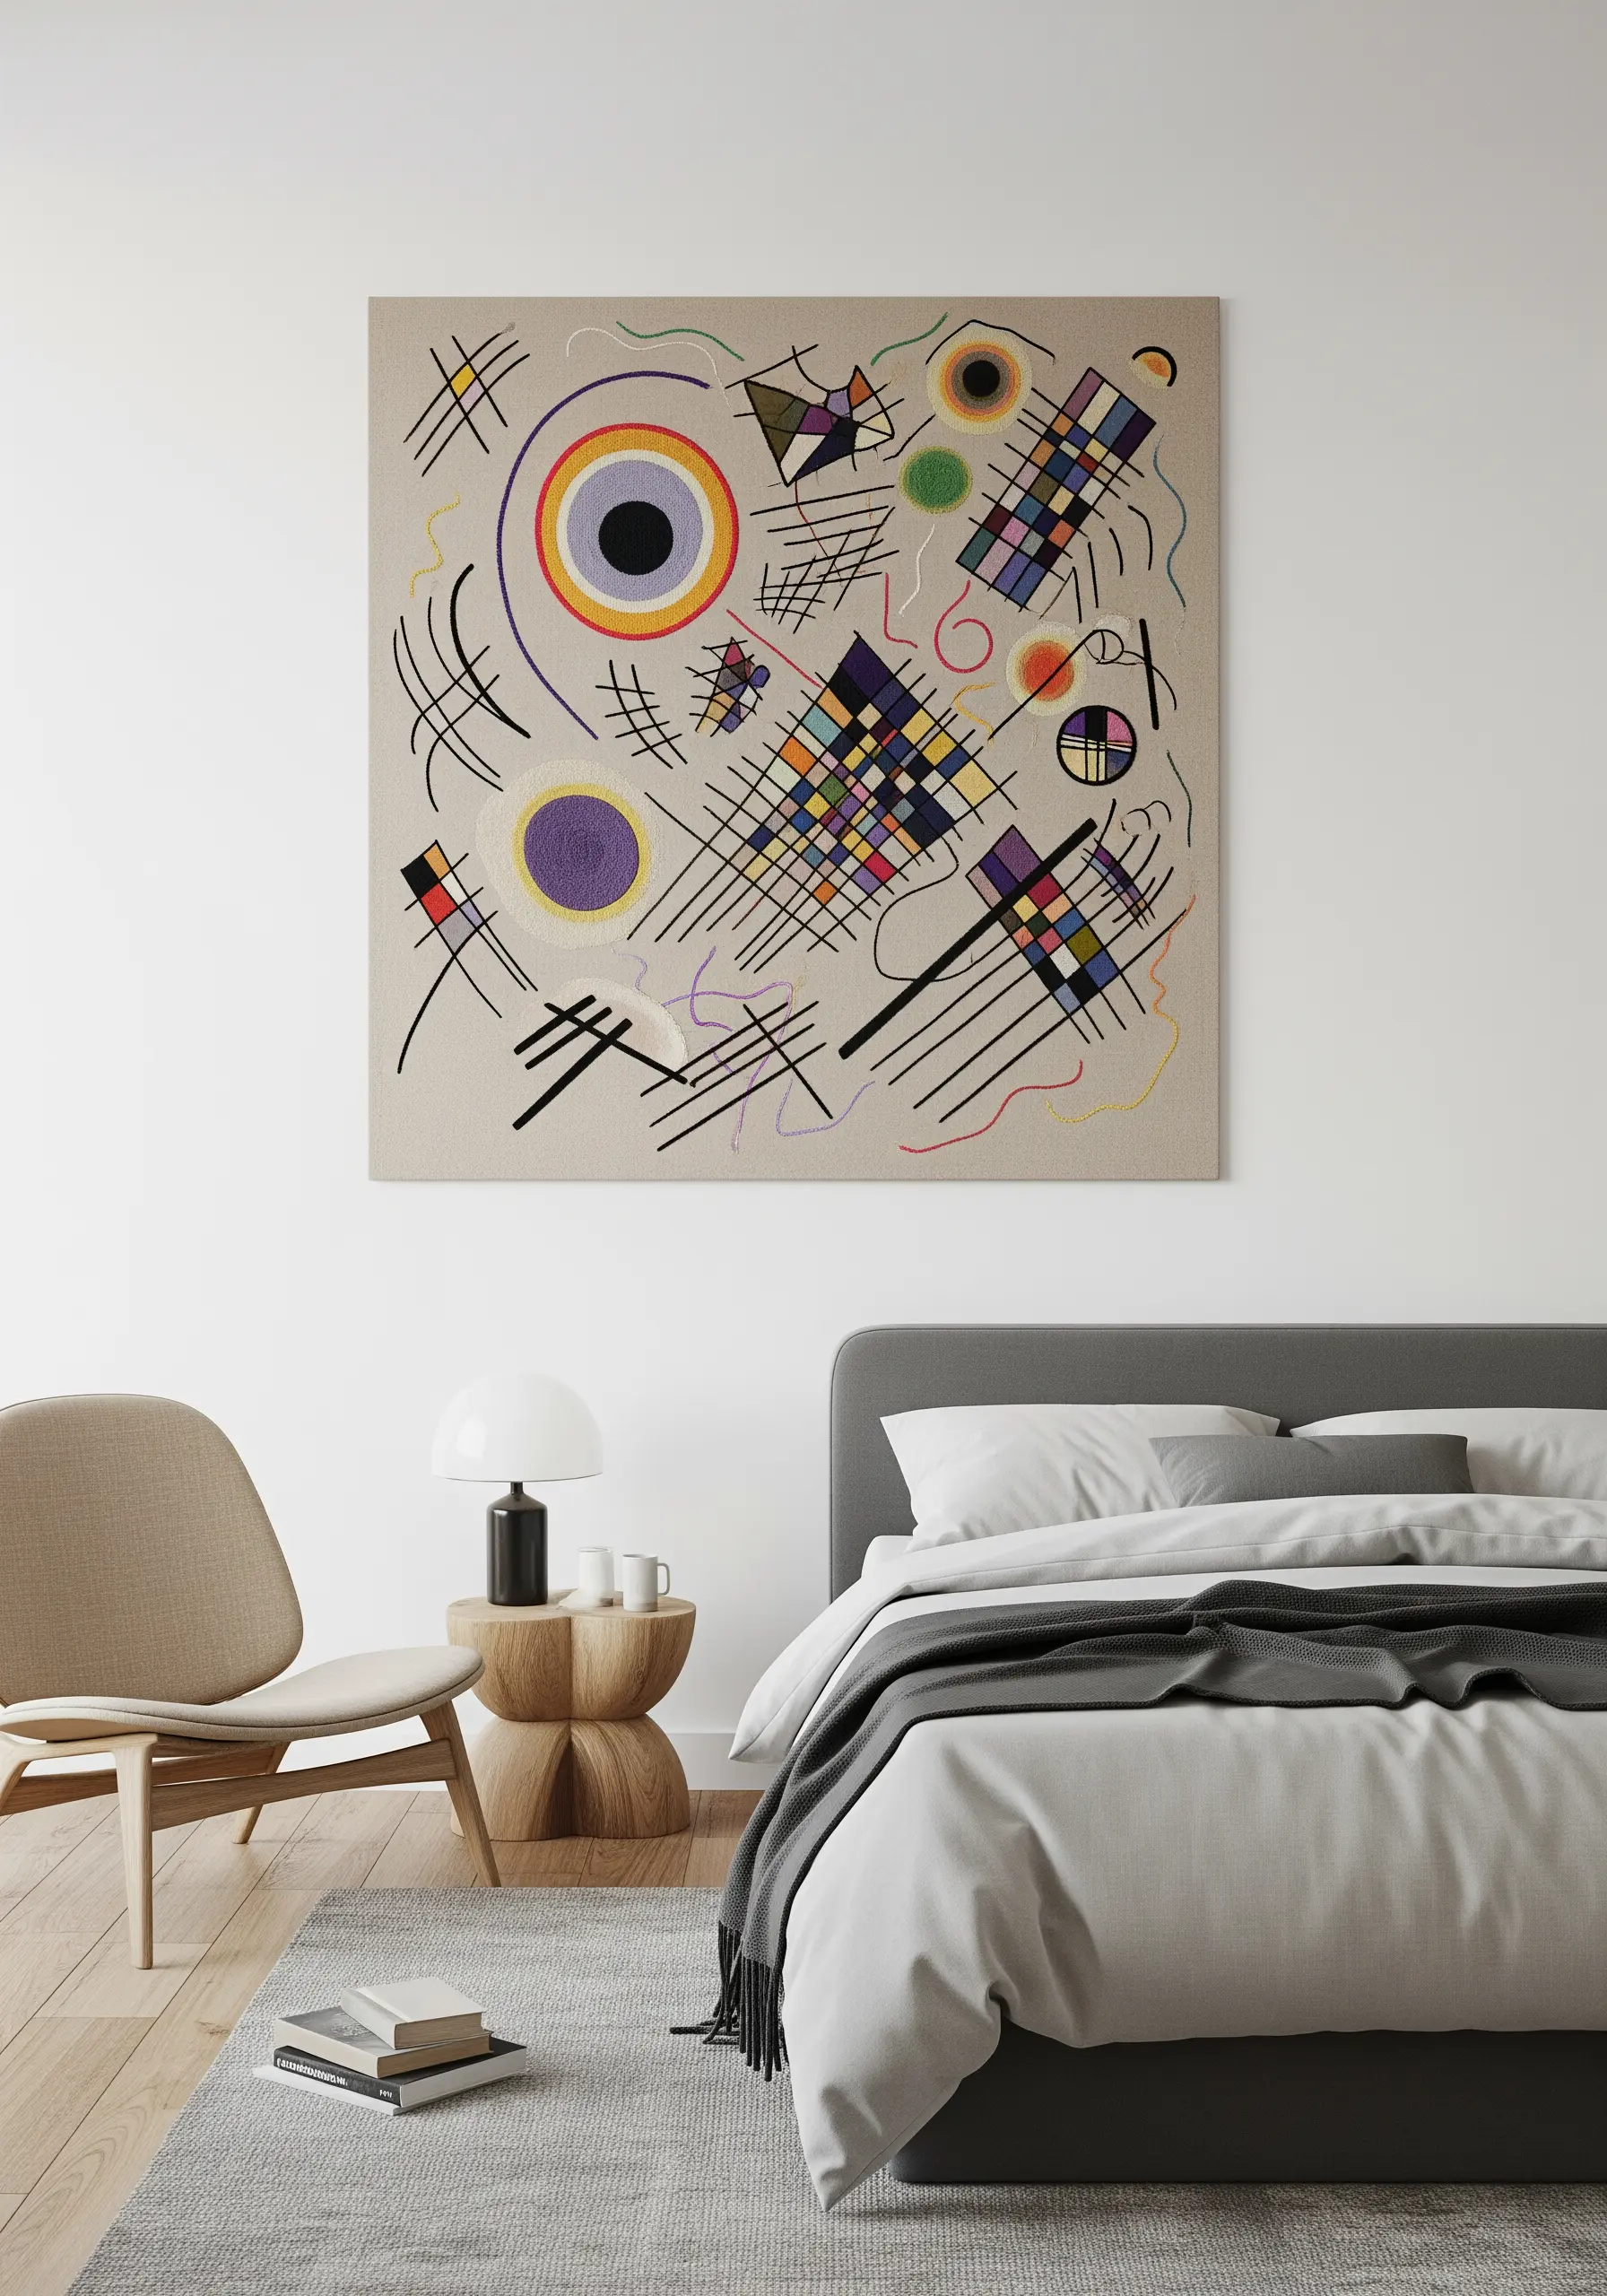
Recreate the dynamic energy of a Kandinsky painting by treating your panel as a sampler of different stitches and textures.
Use clean backstitches for the sharp, intersecting lines. Fill circles with smooth satin stitch and create checkerboard patterns with woven bars or cross-stitches.
Let wavy lines flow with stem stitch. By combining multiple techniques in one piece, you translate the visual language of abstract painting into a rich, tactile embroidery that invites closer inspection.
16. Create Luminous Feathers with Thread Blending

To capture the fiery glow of a phoenix, use the long-and-short stitch technique for seamless color blending.
Work with several needles at once, each threaded with a different shade of red, orange, and gold. As you fill the feathers, alternate between colors to create a gradient that looks like it’s lit from within.
Ensure your stitches follow the natural direction of the feathers to enhance the sense of movement. A final touch of fine metallic gold thread will add that essential, mythical shimmer.
17. Achieve Otomi-Style Density with Closed Herringbone Stitch
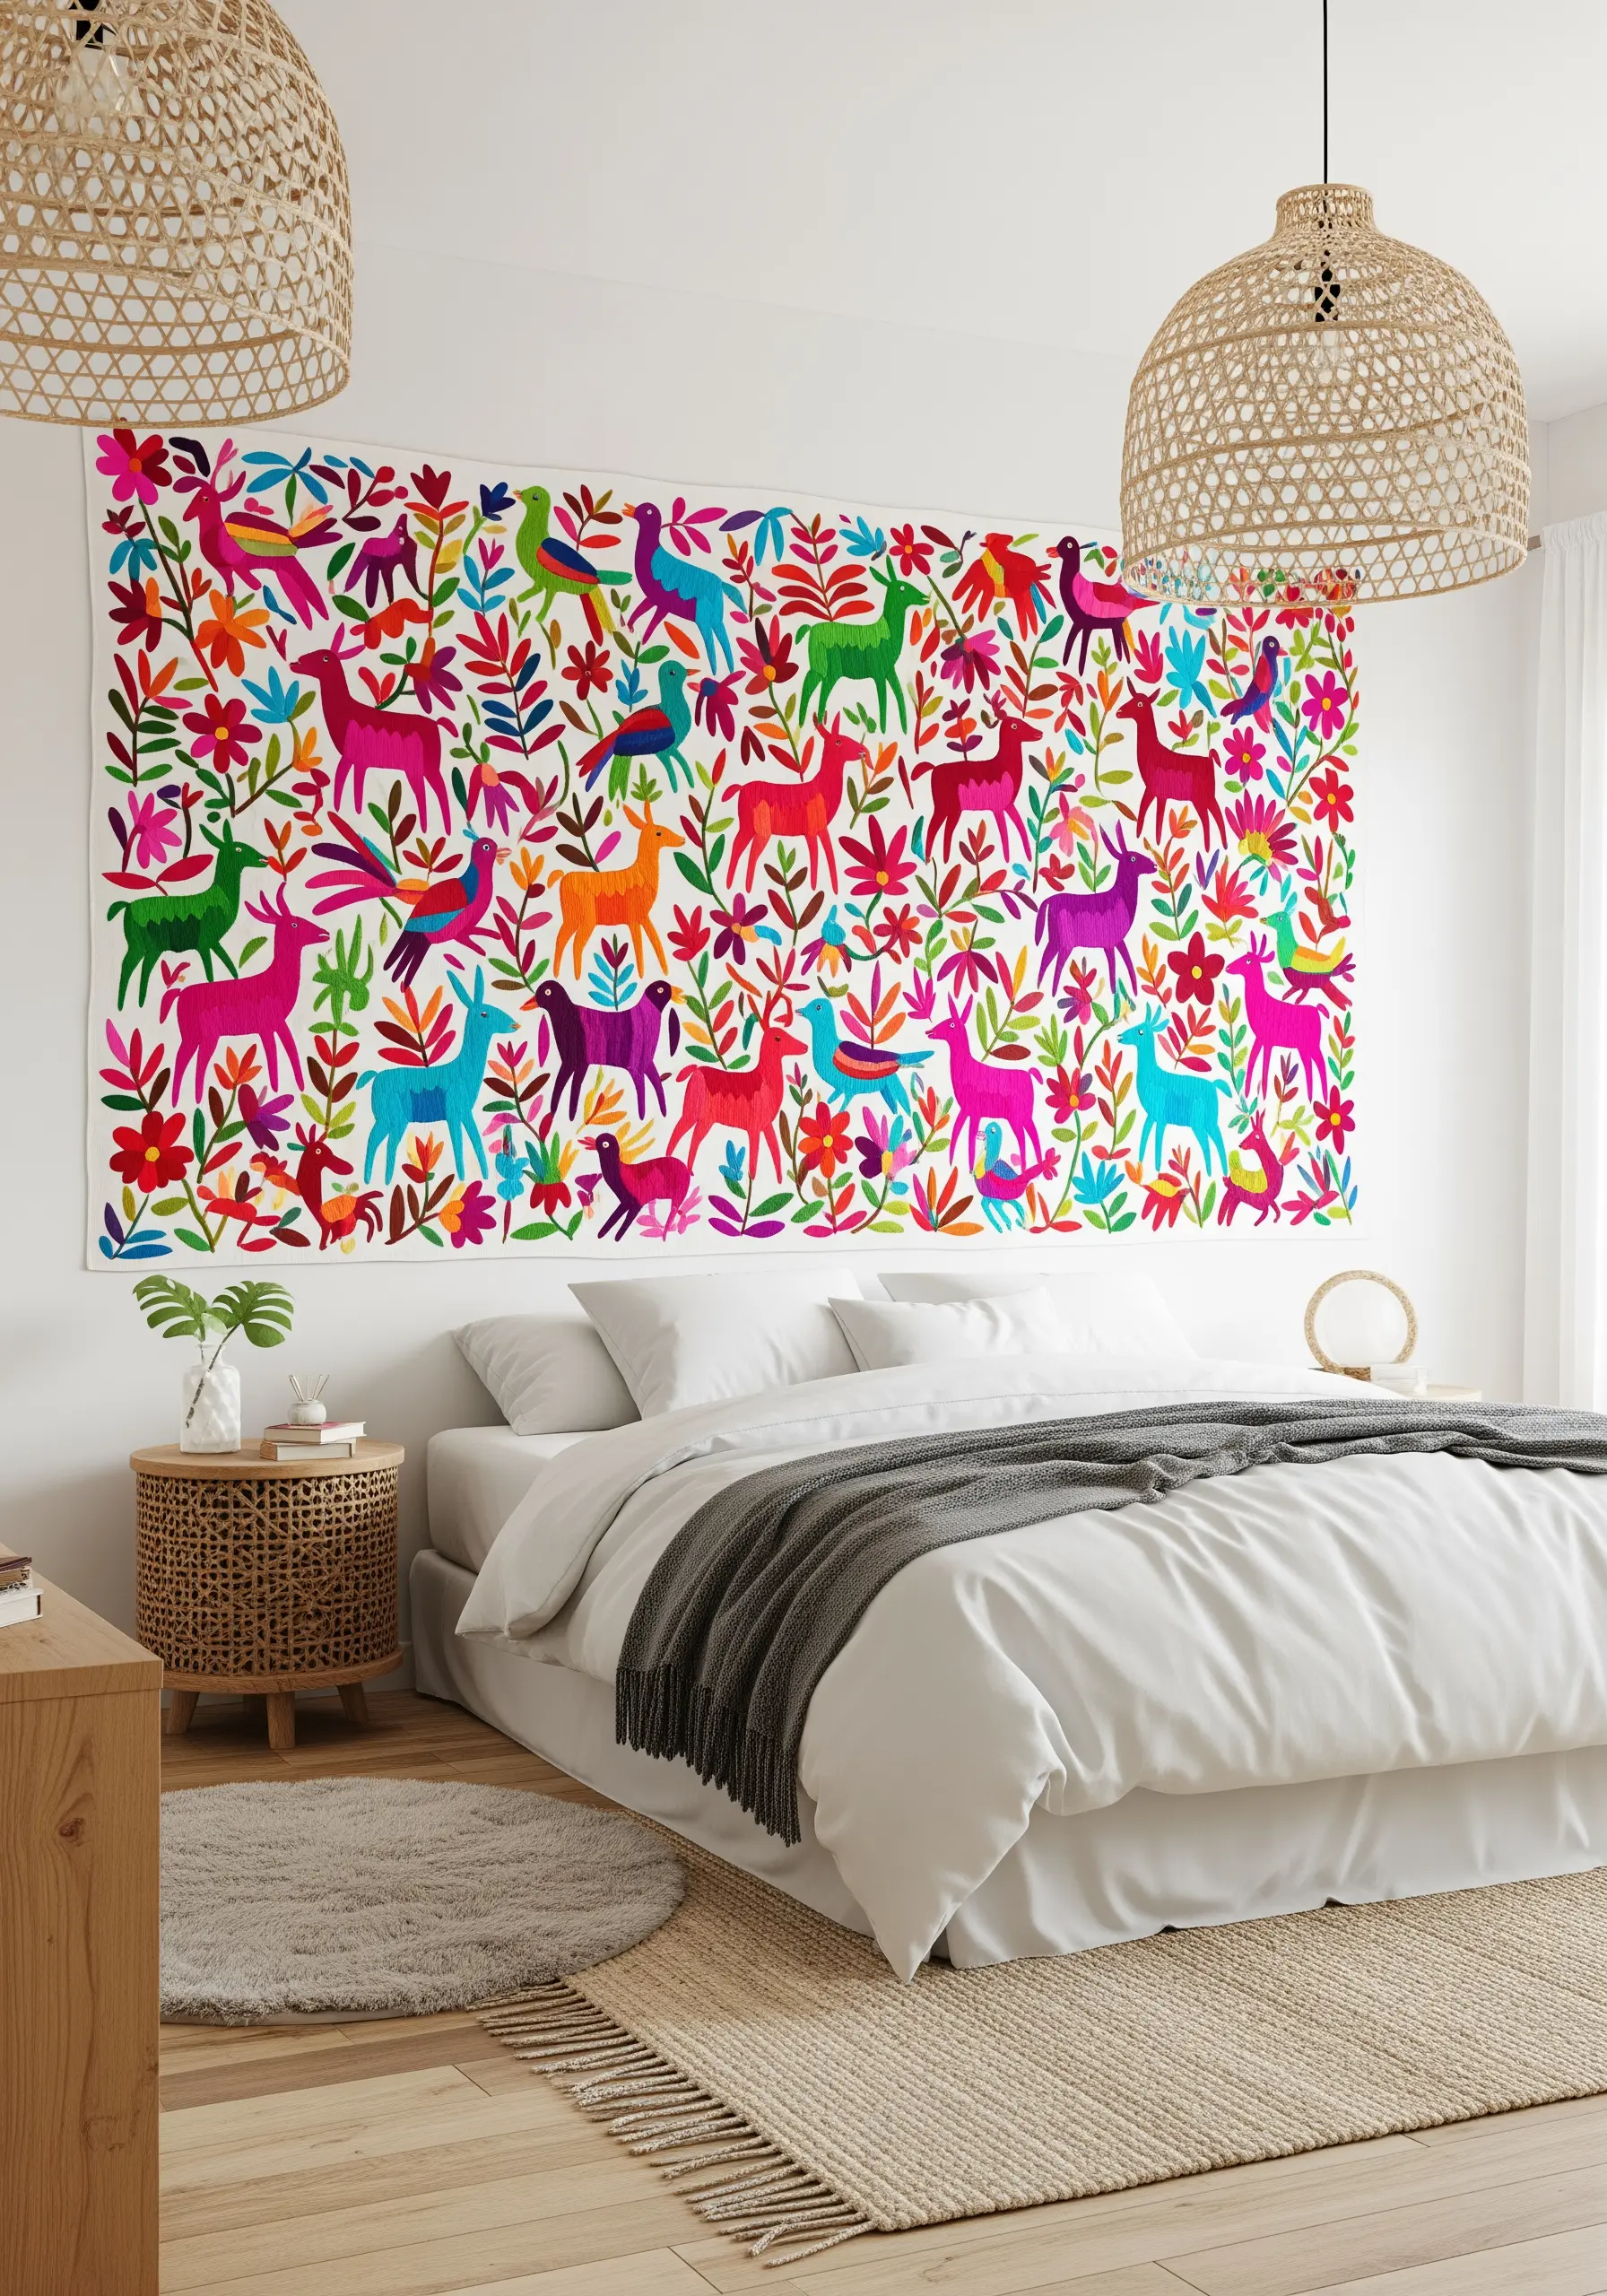
The signature look of vibrant Otomi embroidery comes from a specific technique: a very dense, closed herringbone stitch.
This stitch creates the appearance of a satin stitch on the surface but is worked in a way that conserves thread on the back.
By filling your stylized animal and floral motifs completely with this stitch, you achieve a unique, slightly padded texture and incredible color saturation.
The result is a joyful, graphic tapestry that radiates energy.
18. Simulate Stained Glass with Backlit Appliqué
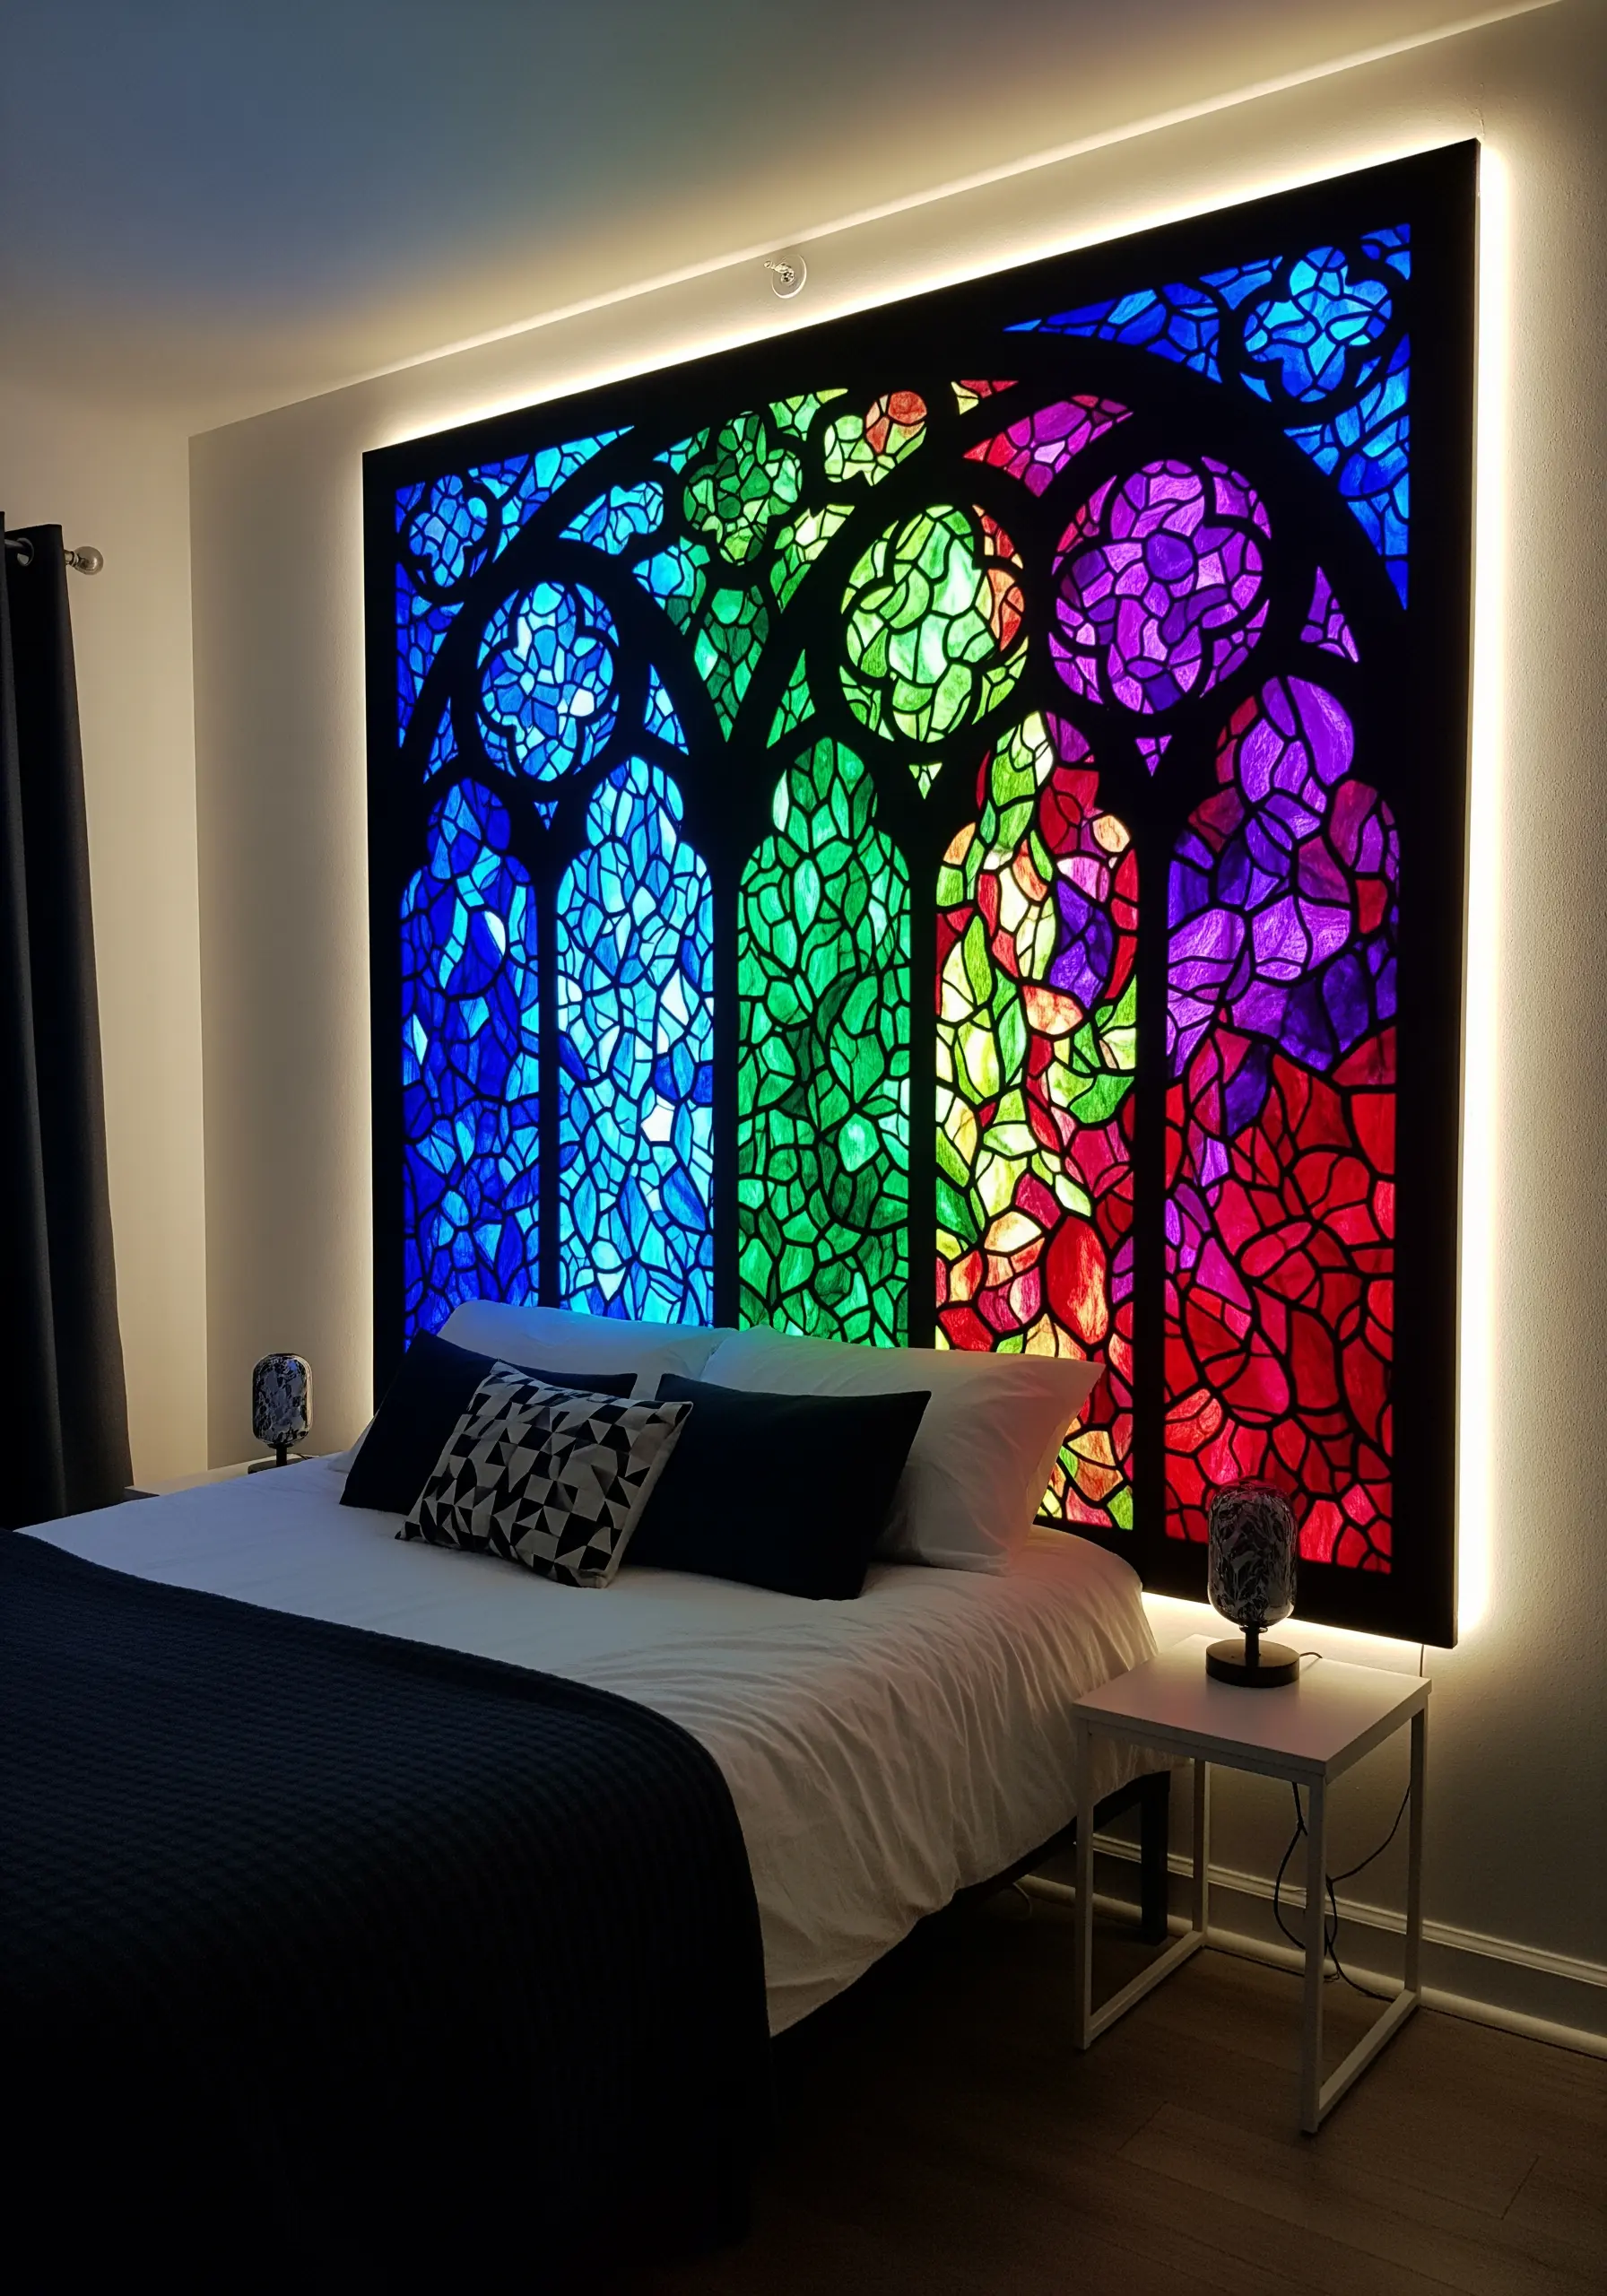
Create a stunning, luminous headboard by mimicking the look of stained glass.
On a sheer base fabric like black organza, couch thick black yarn to create the strong ‘leading’ lines of the window pane design.
Fill the sections with small, colorful scraps of silk or organza, attaching them with a few tiny stitches.
Finally, mount the entire piece in a shadowbox frame with LED strip lighting behind it. The light will diffuse through the colored fabrics, creating a breathtaking glow.


