

Perhaps you feel that the small corners of your home are too modest for art. I want you to reconsider that. A tiny, beautifully stitched hoop is not just a craft project; it’s a quiet anchor of warmth and personality that can transform a space.
In these small circles of fabric, you have the power to tell a story, evoke a feeling, or simply celebrate a color or texture you love. It’s not about filling every wall, but about placing a single, intentional piece that makes you pause and smile.
Let’s explore how these small acts of creativity can bring immense character to your home. I’ll show you how simple adjustments in stitch, color, and placement can elevate your work, making every tiny hoop a cherished piece of art that feels perfectly, personally yours.
1. Curate a Themed Collection for a Quiet Corner
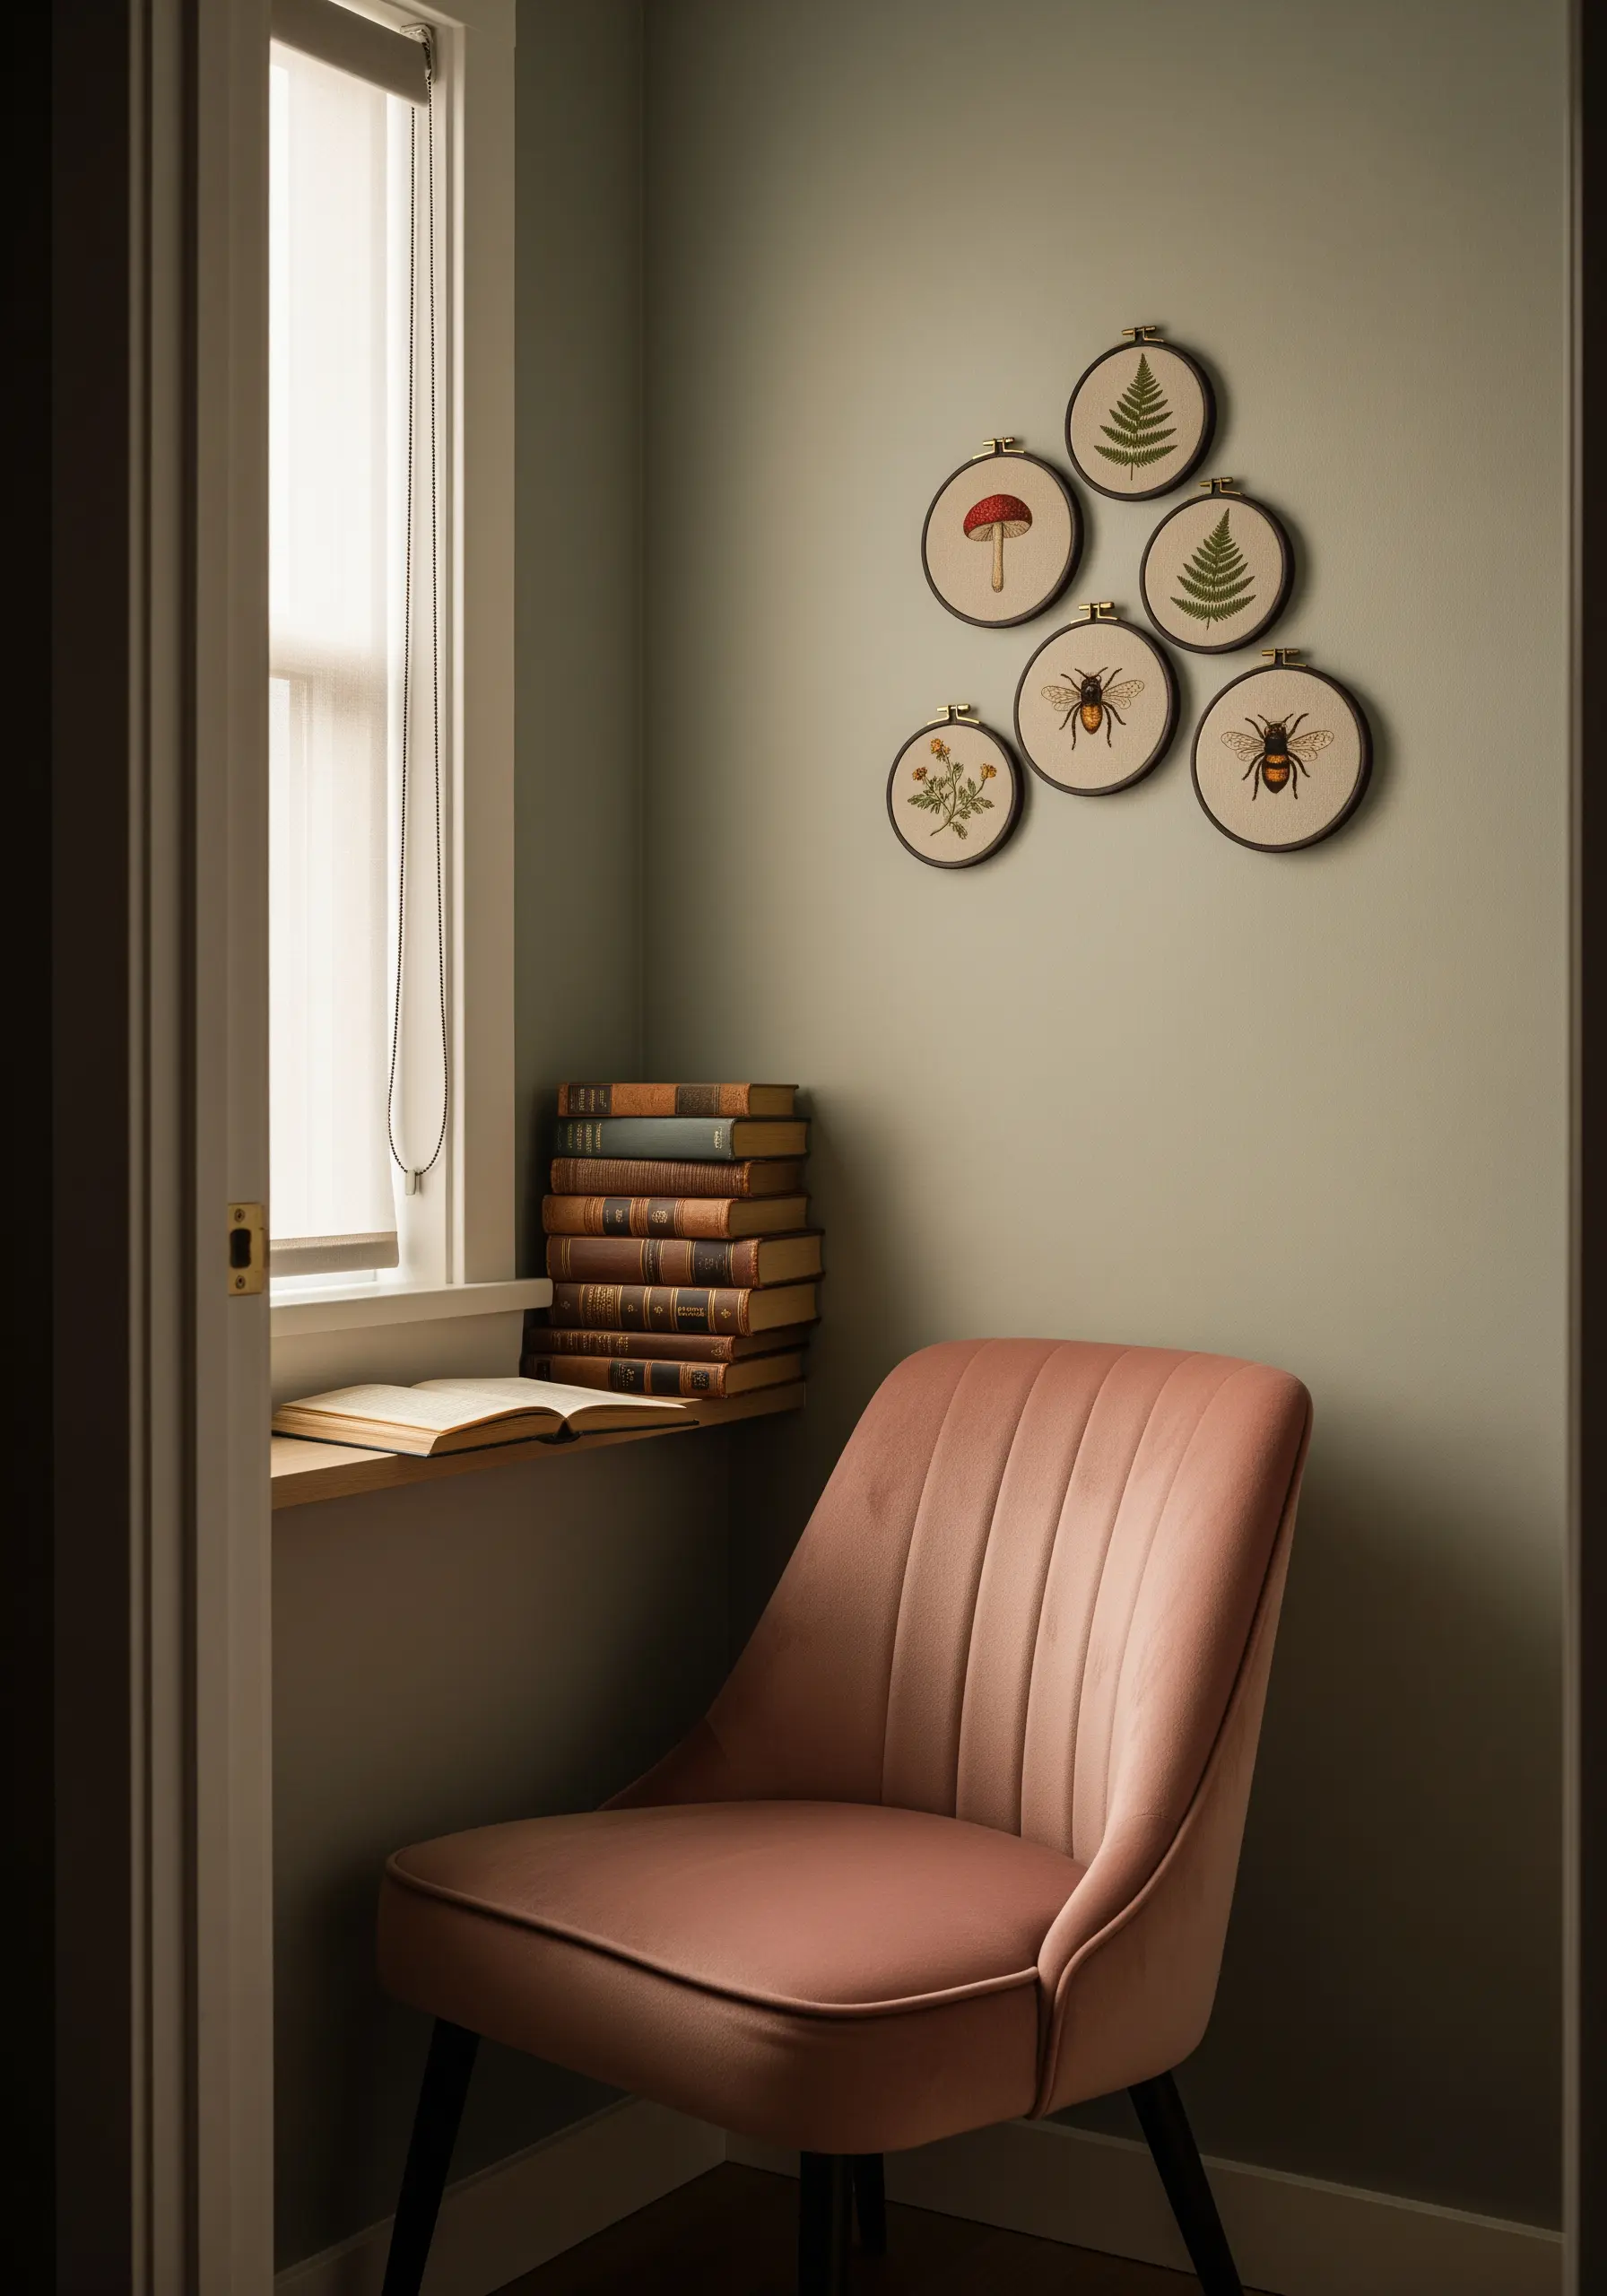
Create a small gallery wall by grouping hoops around a single theme, like the woodland motifs shown here.
Choosing a consistent background fabric, such as unbleached linen, and a limited color palette will make your collection feel intentional and cohesive, not random.
Arrange them in a loose, asymmetrical cluster for a modern, organic feel that adds personality to a reading nook or any small, forgotten corner.
This technique turns individual pieces into a single, impactful work of art.
2. Anchor a Minimalist Space with Geometric Repetition

In a minimalist bedroom, a series of simple geometric designs can create a powerful visual anchor above a bed or dresser.
Stitch your patterns using a warm, earthy color palette on a neutral fabric to add warmth without overwhelming the space.
The key to making this work is precise alignment. Use a ruler and painter’s tape to ensure your hoops are perfectly level and evenly spaced, creating a sense of calm and order.
This approach elevates simple stitches into sophisticated geometric embroidered wall decor.
3. Tell a Personal Story in Your Entryway
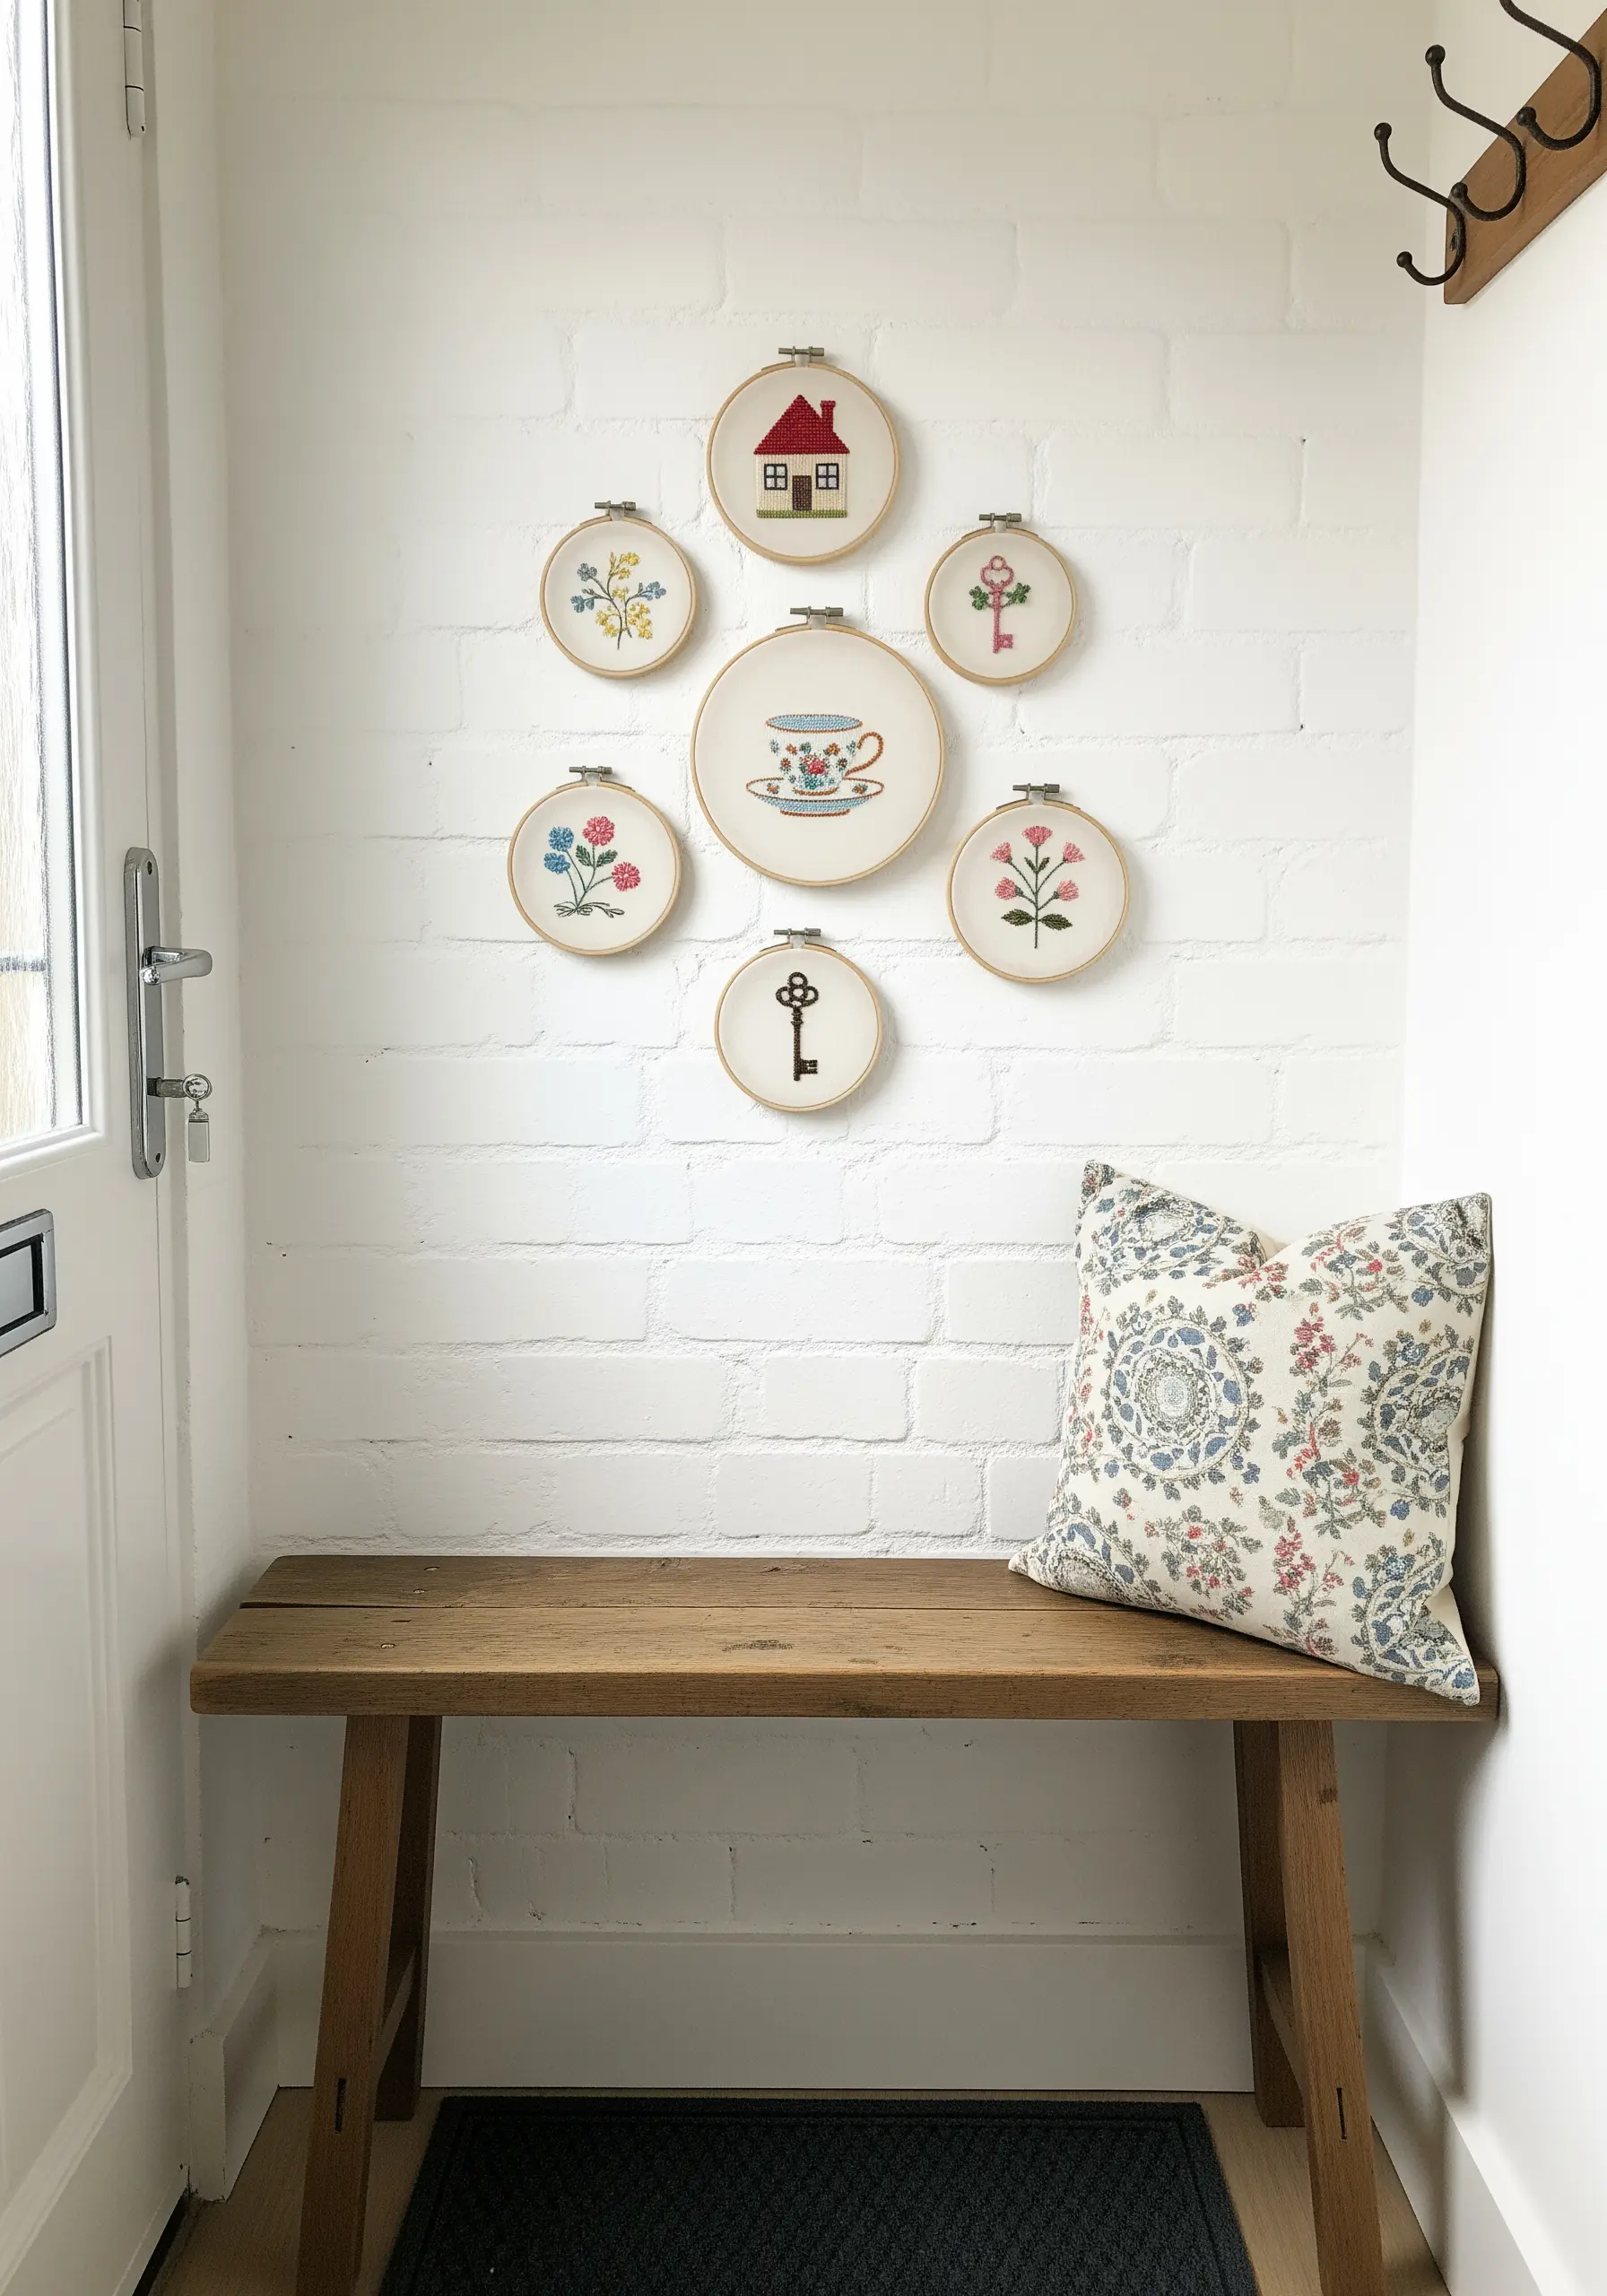
Your entryway is the first impression of your home, so make it personal.
Create a charming cluster of hoops that tell a story about you—a teacup, a key, your favorite flower, a tiny house.
To create balance in your arrangement, place the largest or most detailed hoop near the center and arrange smaller pieces around it.
A unified color palette across all the hoops ensures the collection looks cohesive rather than cluttered.
4. Use Vertical Hanging for Narrow Spaces

For awkward, narrow walls or tight corners, hanging your hoops vertically is an elegant solution that draws the eye upward and creates an illusion of height.
Connect two or three hoops with a simple ribbon that complements your decor or the thread colors in your work.
When stitching fine details like the birds shown here, switch to a single strand of embroidery floss. This allows you to create delicate, illustration-like lines that add realism and sophistication.
5. Soften Functional Spaces with Organic Motifs
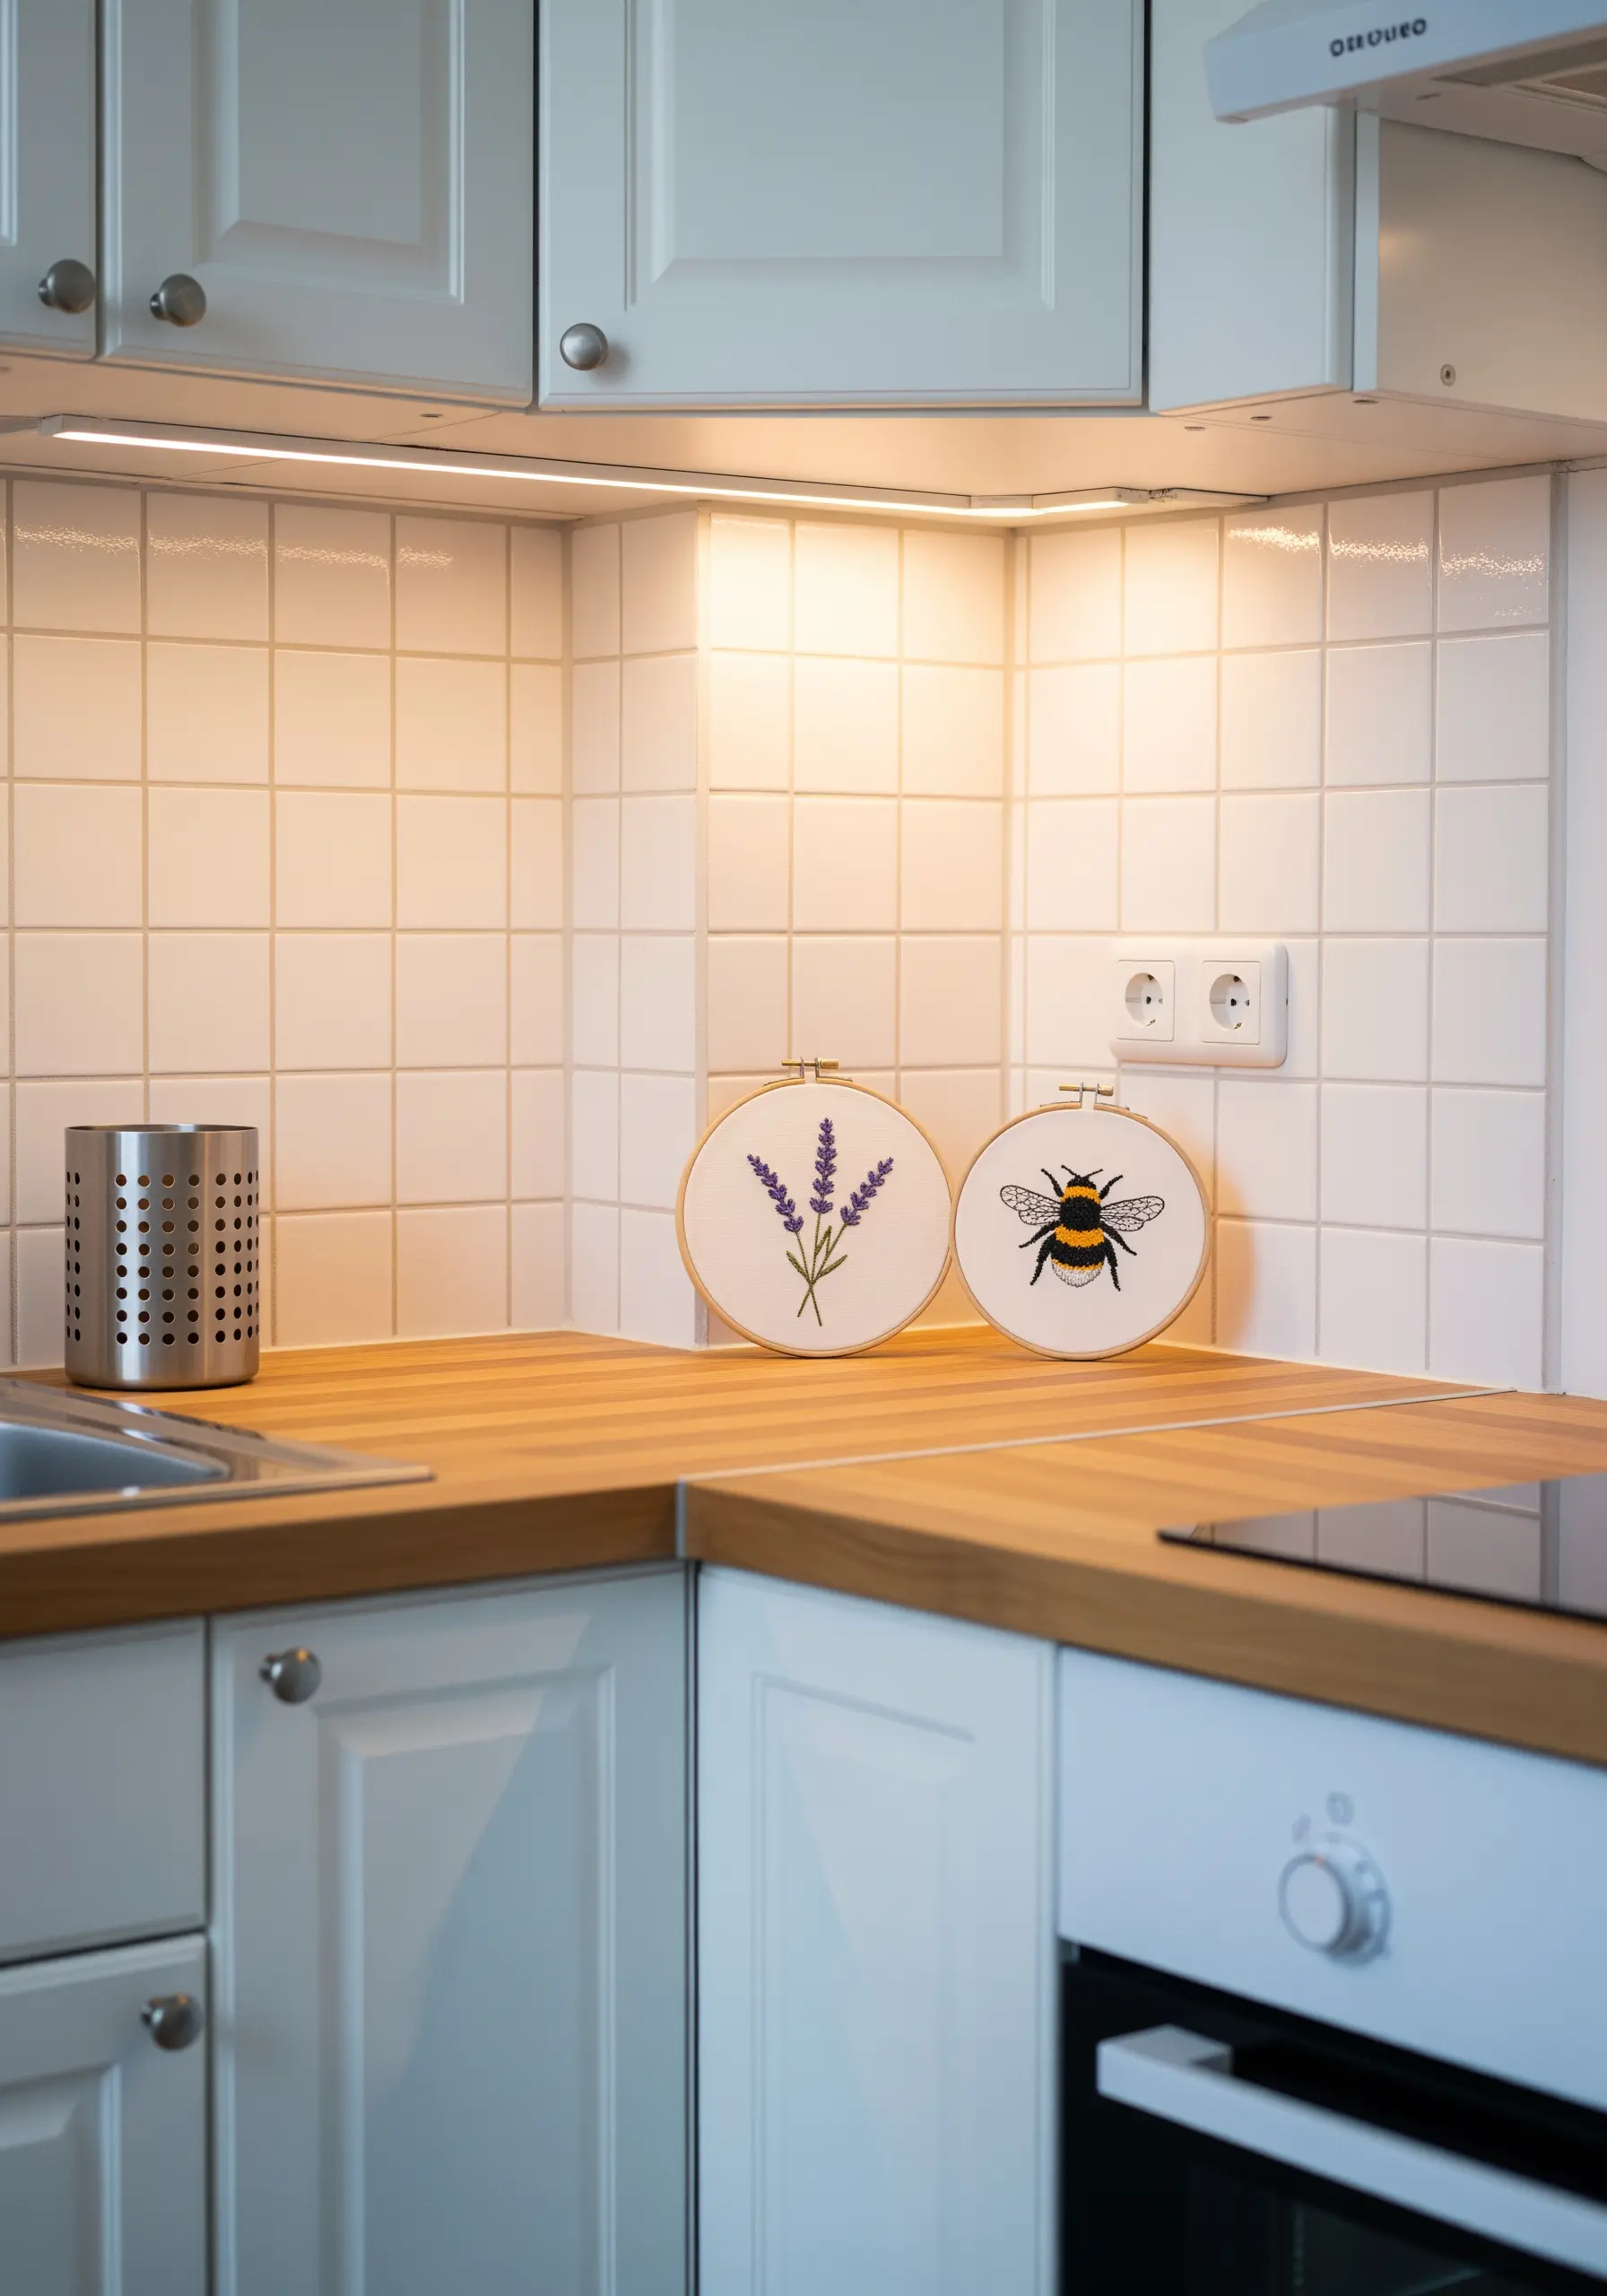
Bring warmth to functional areas like your kitchen or laundry room by displaying a pair of nature-inspired hoops.
To give the bee’s wings a delicate, translucent quality, avoid a heavy satin stitch. Instead, use a sparse seed stitch or a few straight stitches with a single strand of light gray or metallic thread.
This contrast between the solid body and the light wings adds a touch of realism and artistic flair.
6. Create Depth with Interlaced Monograms

Elevate a simple monogram by interlacing it with botanical vines for a three-dimensional effect.
First, stitch your letter using a padded satin stitch to give it a raised profile. You can do this by creating an underlay of small straight stitches before covering it with the final satin stitch.
Then, carefully add the vines with stem stitch, planning your path so the thread realistically weaves over and under the initial, making the design come alive.
Explore more botanical monogram embroidery ideas to personalize your space.
7. Evoke Serenity with a Tonal Coastal Theme
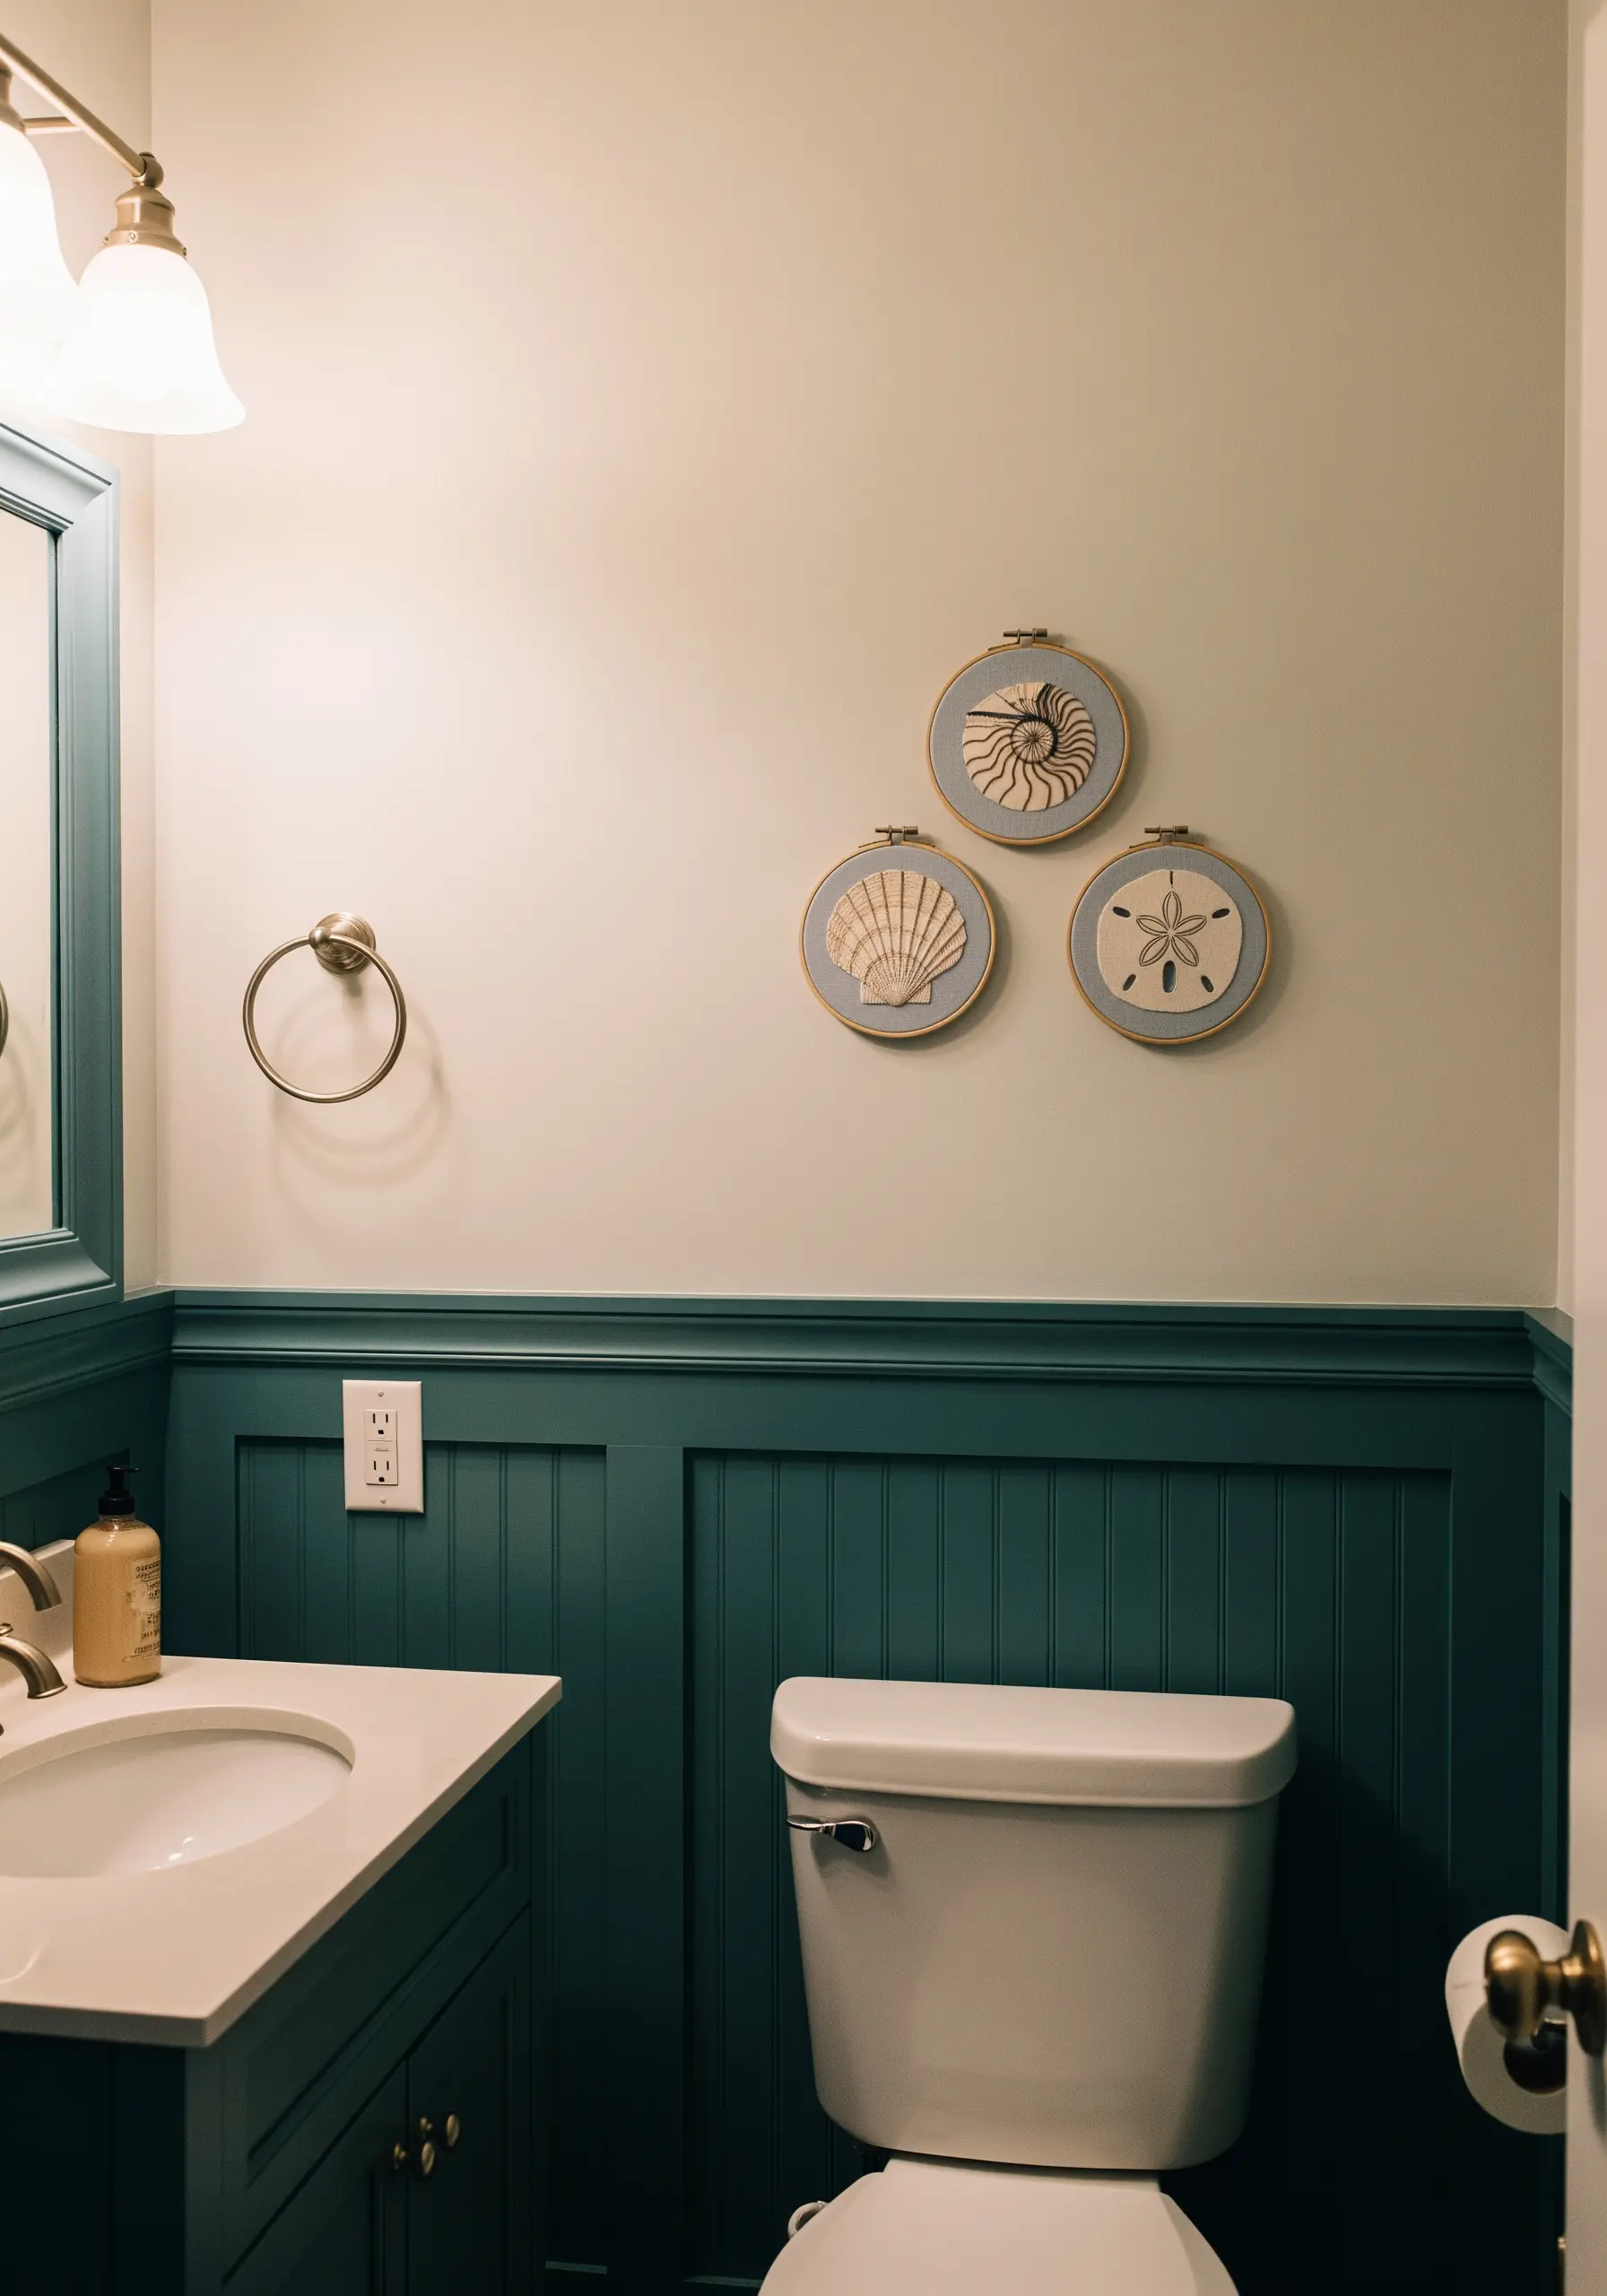
A bathroom is the perfect space for a calm, serene theme. Using a subtly colored fabric, like pale blue or sandy beige, instantly sets a coastal tone.
For the shells, use a variegated neutral thread. This type of thread has multiple shades in one strand, which naturally creates subtle color shifts and highlights as you stitch.
It gives your work a realistic, watercolored look without the complexity of changing threads constantly, making these ideal coastal vibe embroidery projects.
8. Build a Dramatic Celestial Gallery Wall

Transform a blank wall, like a staircase, into a dramatic focal point with a celestial collection.
The key to this stunning effect is high contrast. Use a metallic gold or silver thread on a dark navy or black fabric to make your stitches pop and shimmer in the light.
Arrange the hoops in a dense, flowing column rather than a rigid grid. This organic placement creates a sense of movement and guides the eye upward, telling a cosmic story.
9. Define a Nook with a Single Statement Hoop

You don’t always need a collection; sometimes, a single, larger hoop is all it takes to define a space.
For crisp, professional-looking lettering, always outline your text with a tiny backstitch or split stitch before filling it in with satin stitch.
This technique creates a raised, sharp edge that contains your fill stitches, preventing them from looking uneven. It’s a small step that makes a huge difference in the final quality of your contemporary typography stitch designs.
10. Craft a Gentle, Handmade Nursery Mobile

Transform a set of tiny embroidery hoops into a beautiful, personalized mobile for a nursery.
Choose simple, high-contrast animal shapes that are easily recognizable for a baby looking up from below.
Stitch the designs on lightweight fabric, and be sure to finish the back of each hoop neatly with a circle of felt to hide the threads.
Attach them with strong, fine thread to a larger hoop, ensuring they are balanced to spin and move with the gentle air currents in the room.
11. Document Your Stitch Journey on a Pegboard
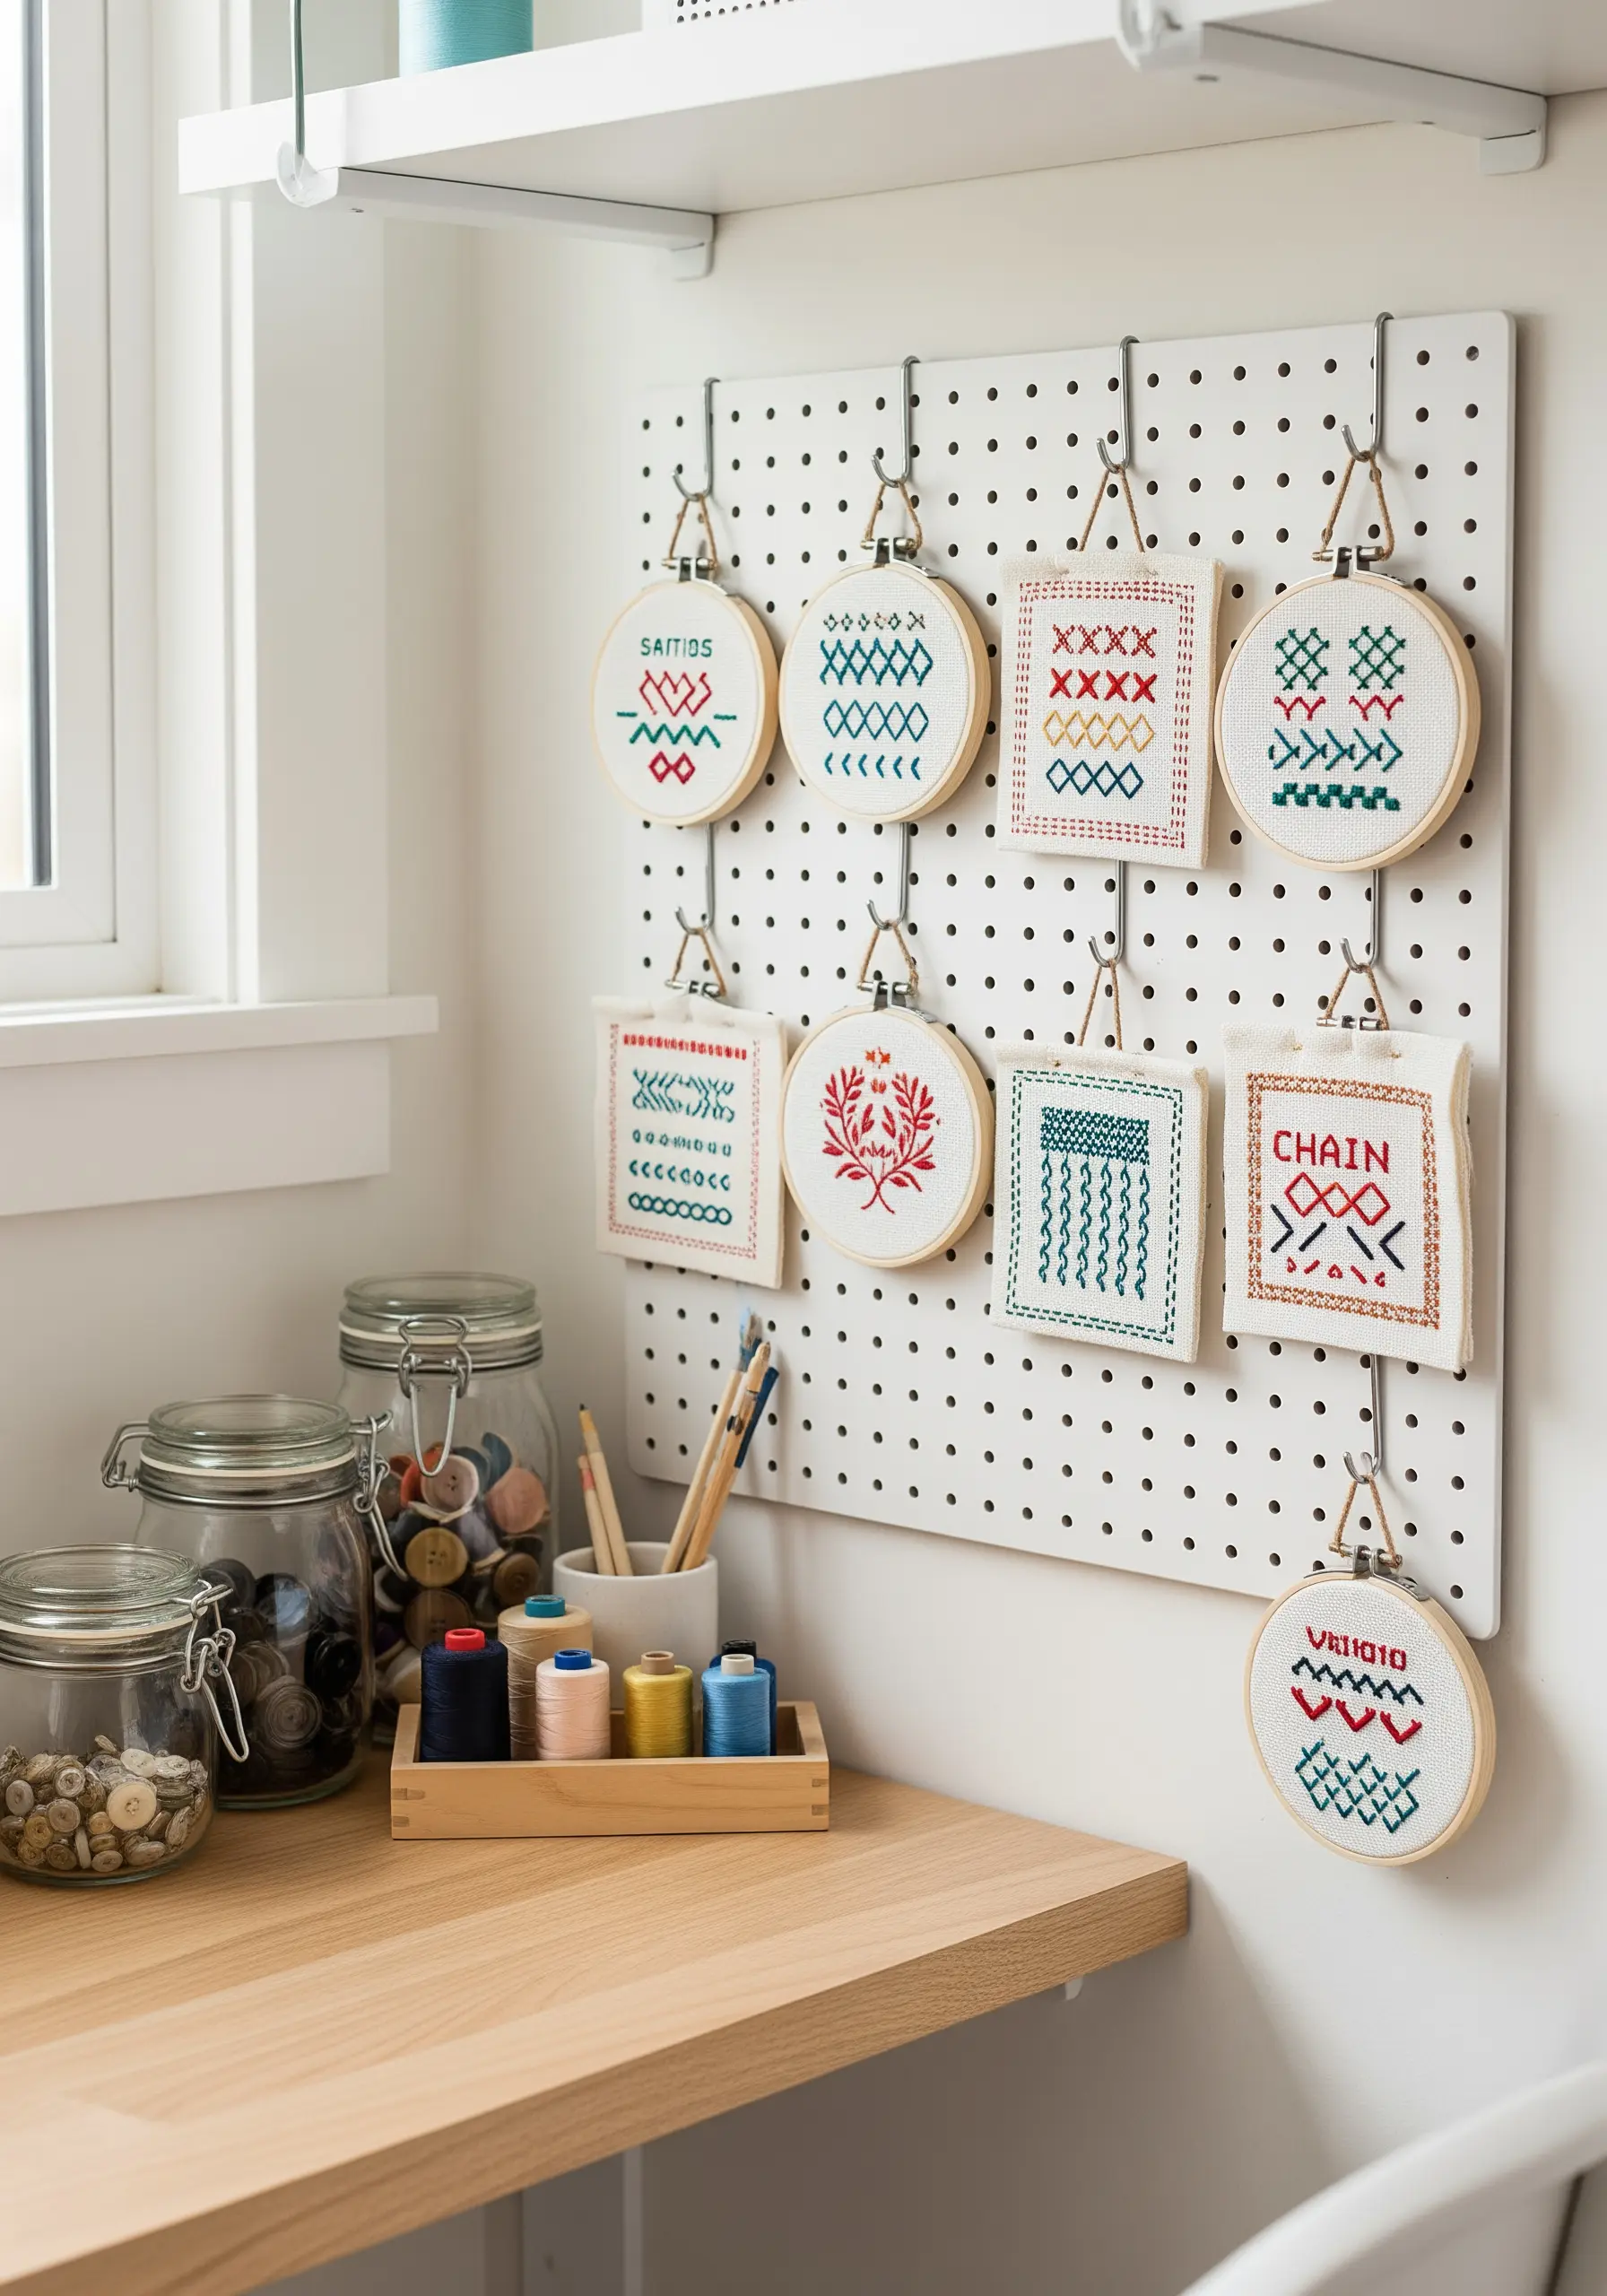
Turn your stitch practice into a dynamic piece of wall art. A pegboard allows you to create a modular, ever-changing display of your work.
Dedicate each mini hoop to practicing a new stitch, testing color combinations, or perfecting a small motif.
This not only keeps your craft space tidy but also creates a beautiful and personal visual library of your growing skills. These inspirational small hoop samplers celebrate the process, not just the finished project.
12. Add Energy to a Hallway with a Formal Grid
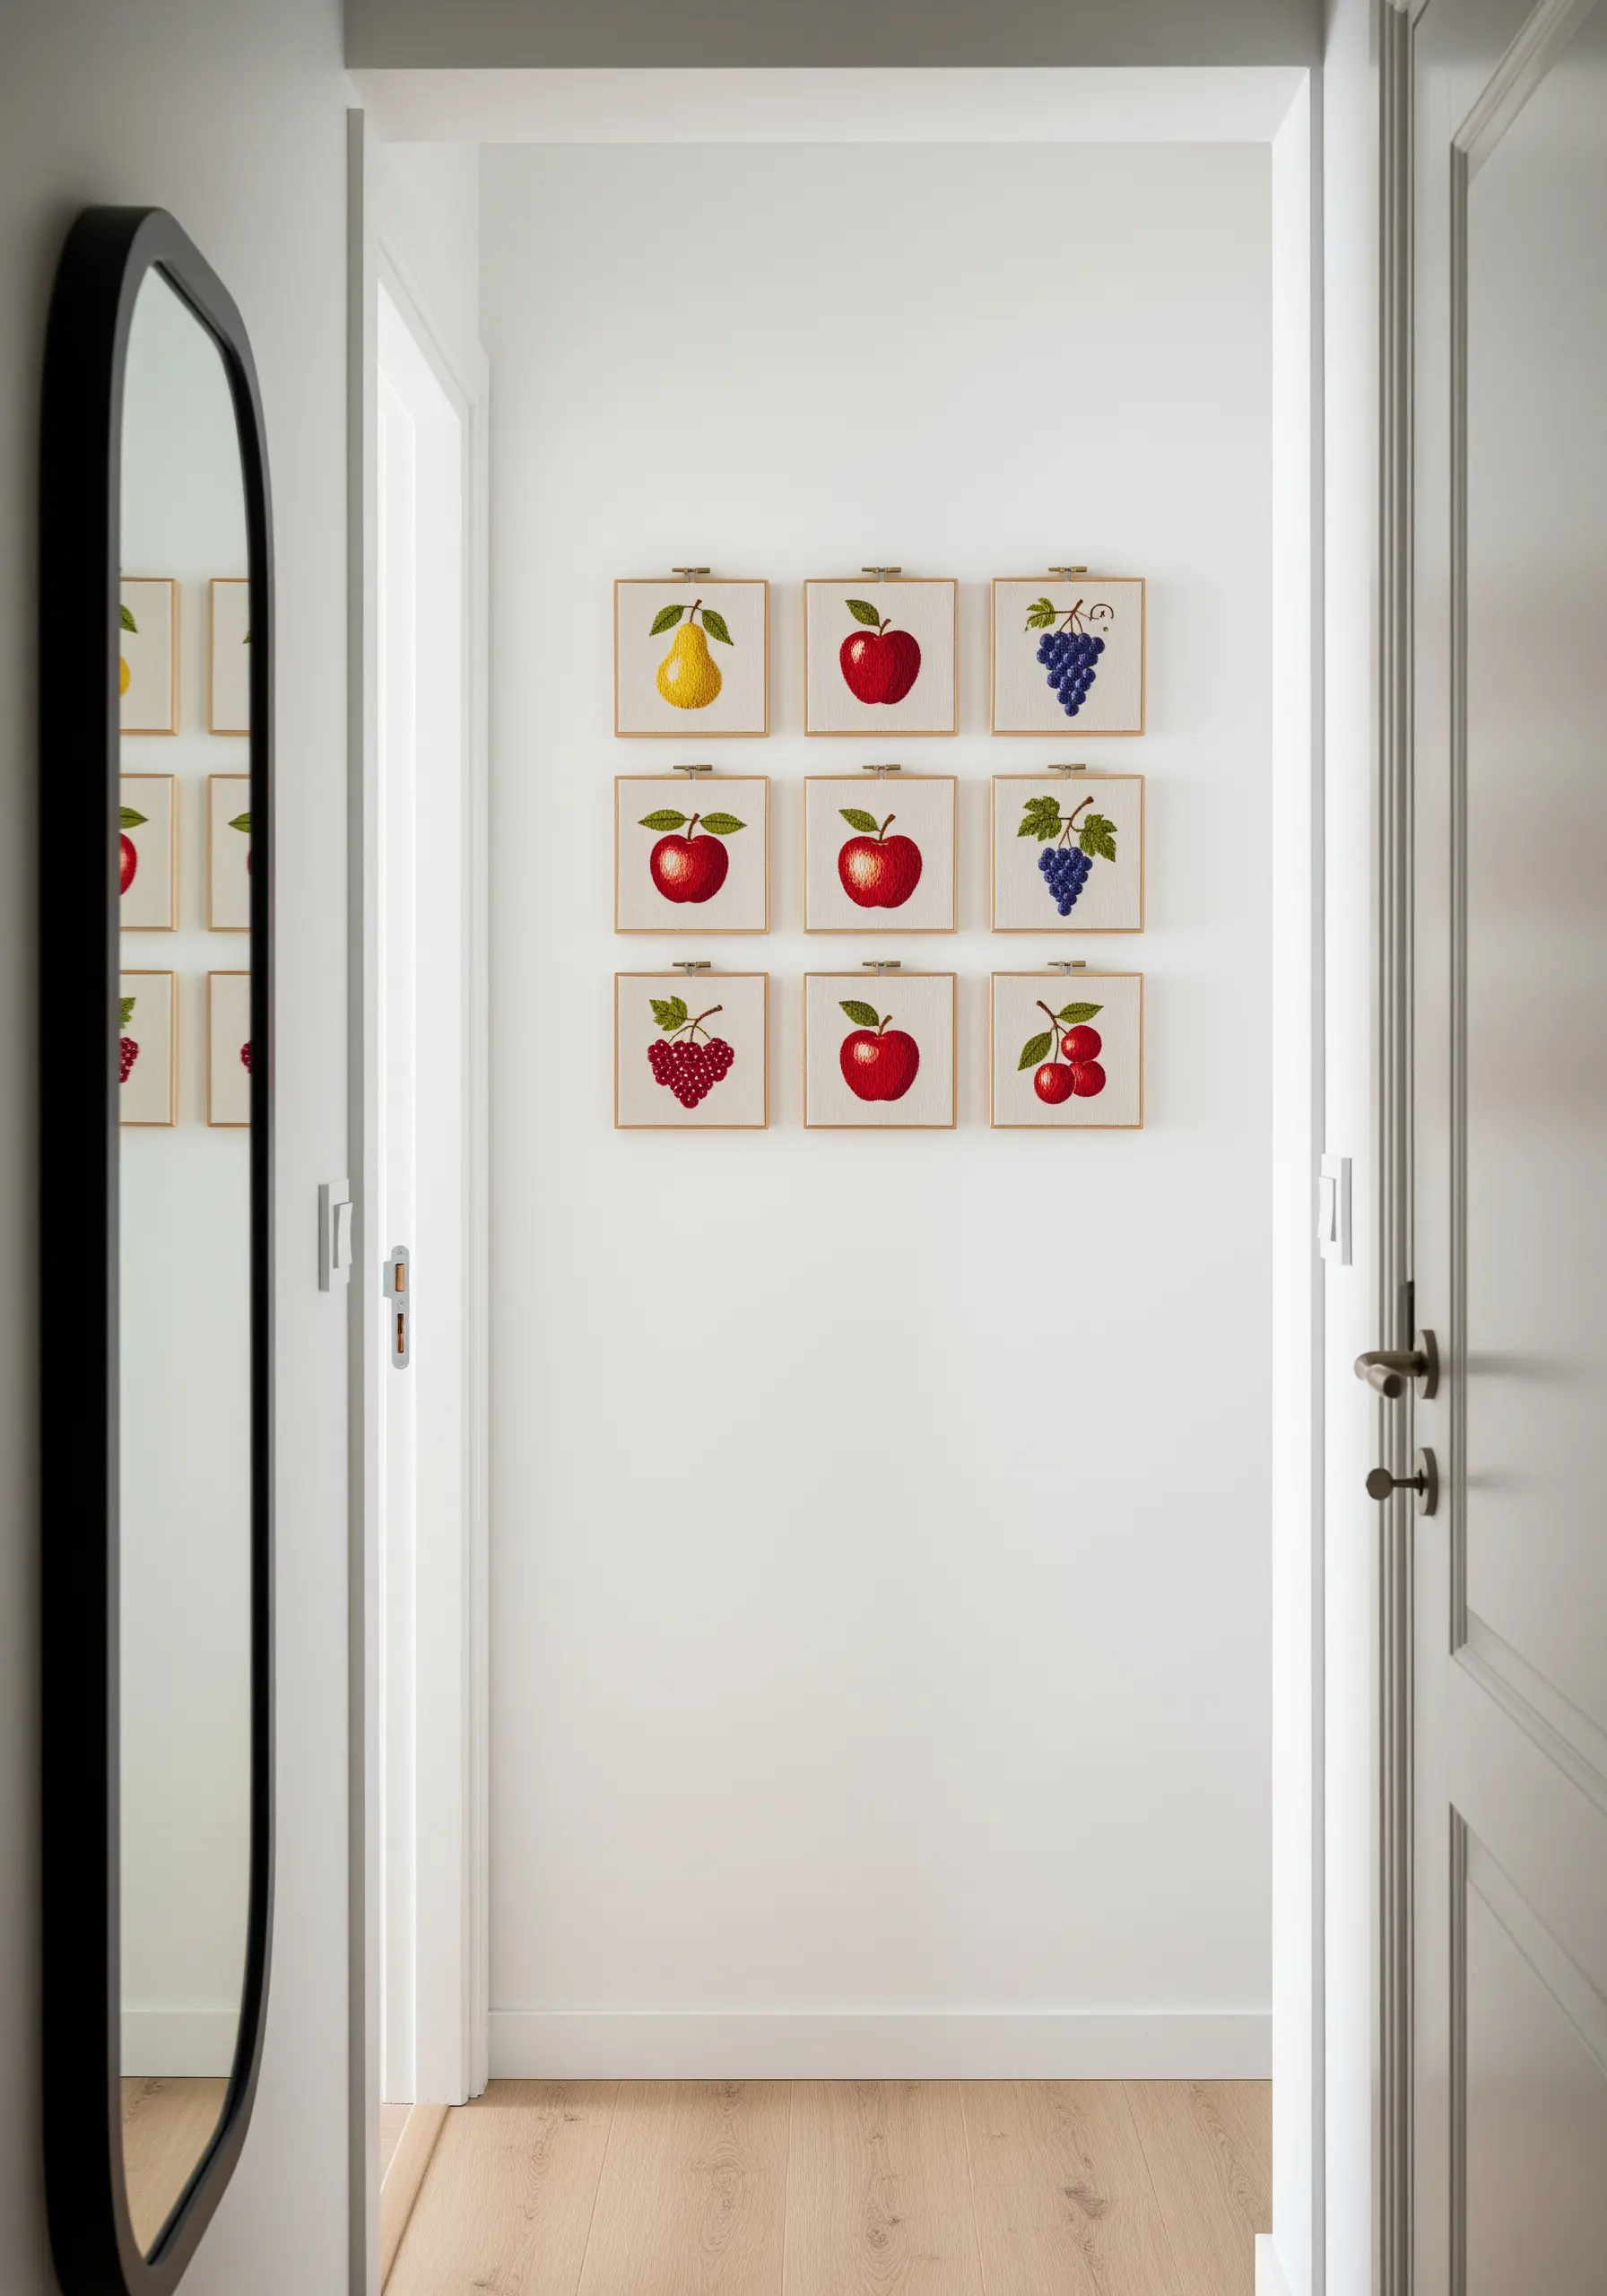
A narrow hallway or transitional space is the perfect canvas for a structured grid of small hoops.
The clean, formal arrangement provides a sophisticated contrast to the vibrant, organic shapes of the fruit motifs.
To achieve this polished look, precision is everything. Use a tape measure and a level to ensure the spacing between each hoop—both horizontally and vertically—is identical.
This disciplined approach transforms simple designs into an impressive, cohesive art installation.
13. Style Hoops as Temporary Textile Accents
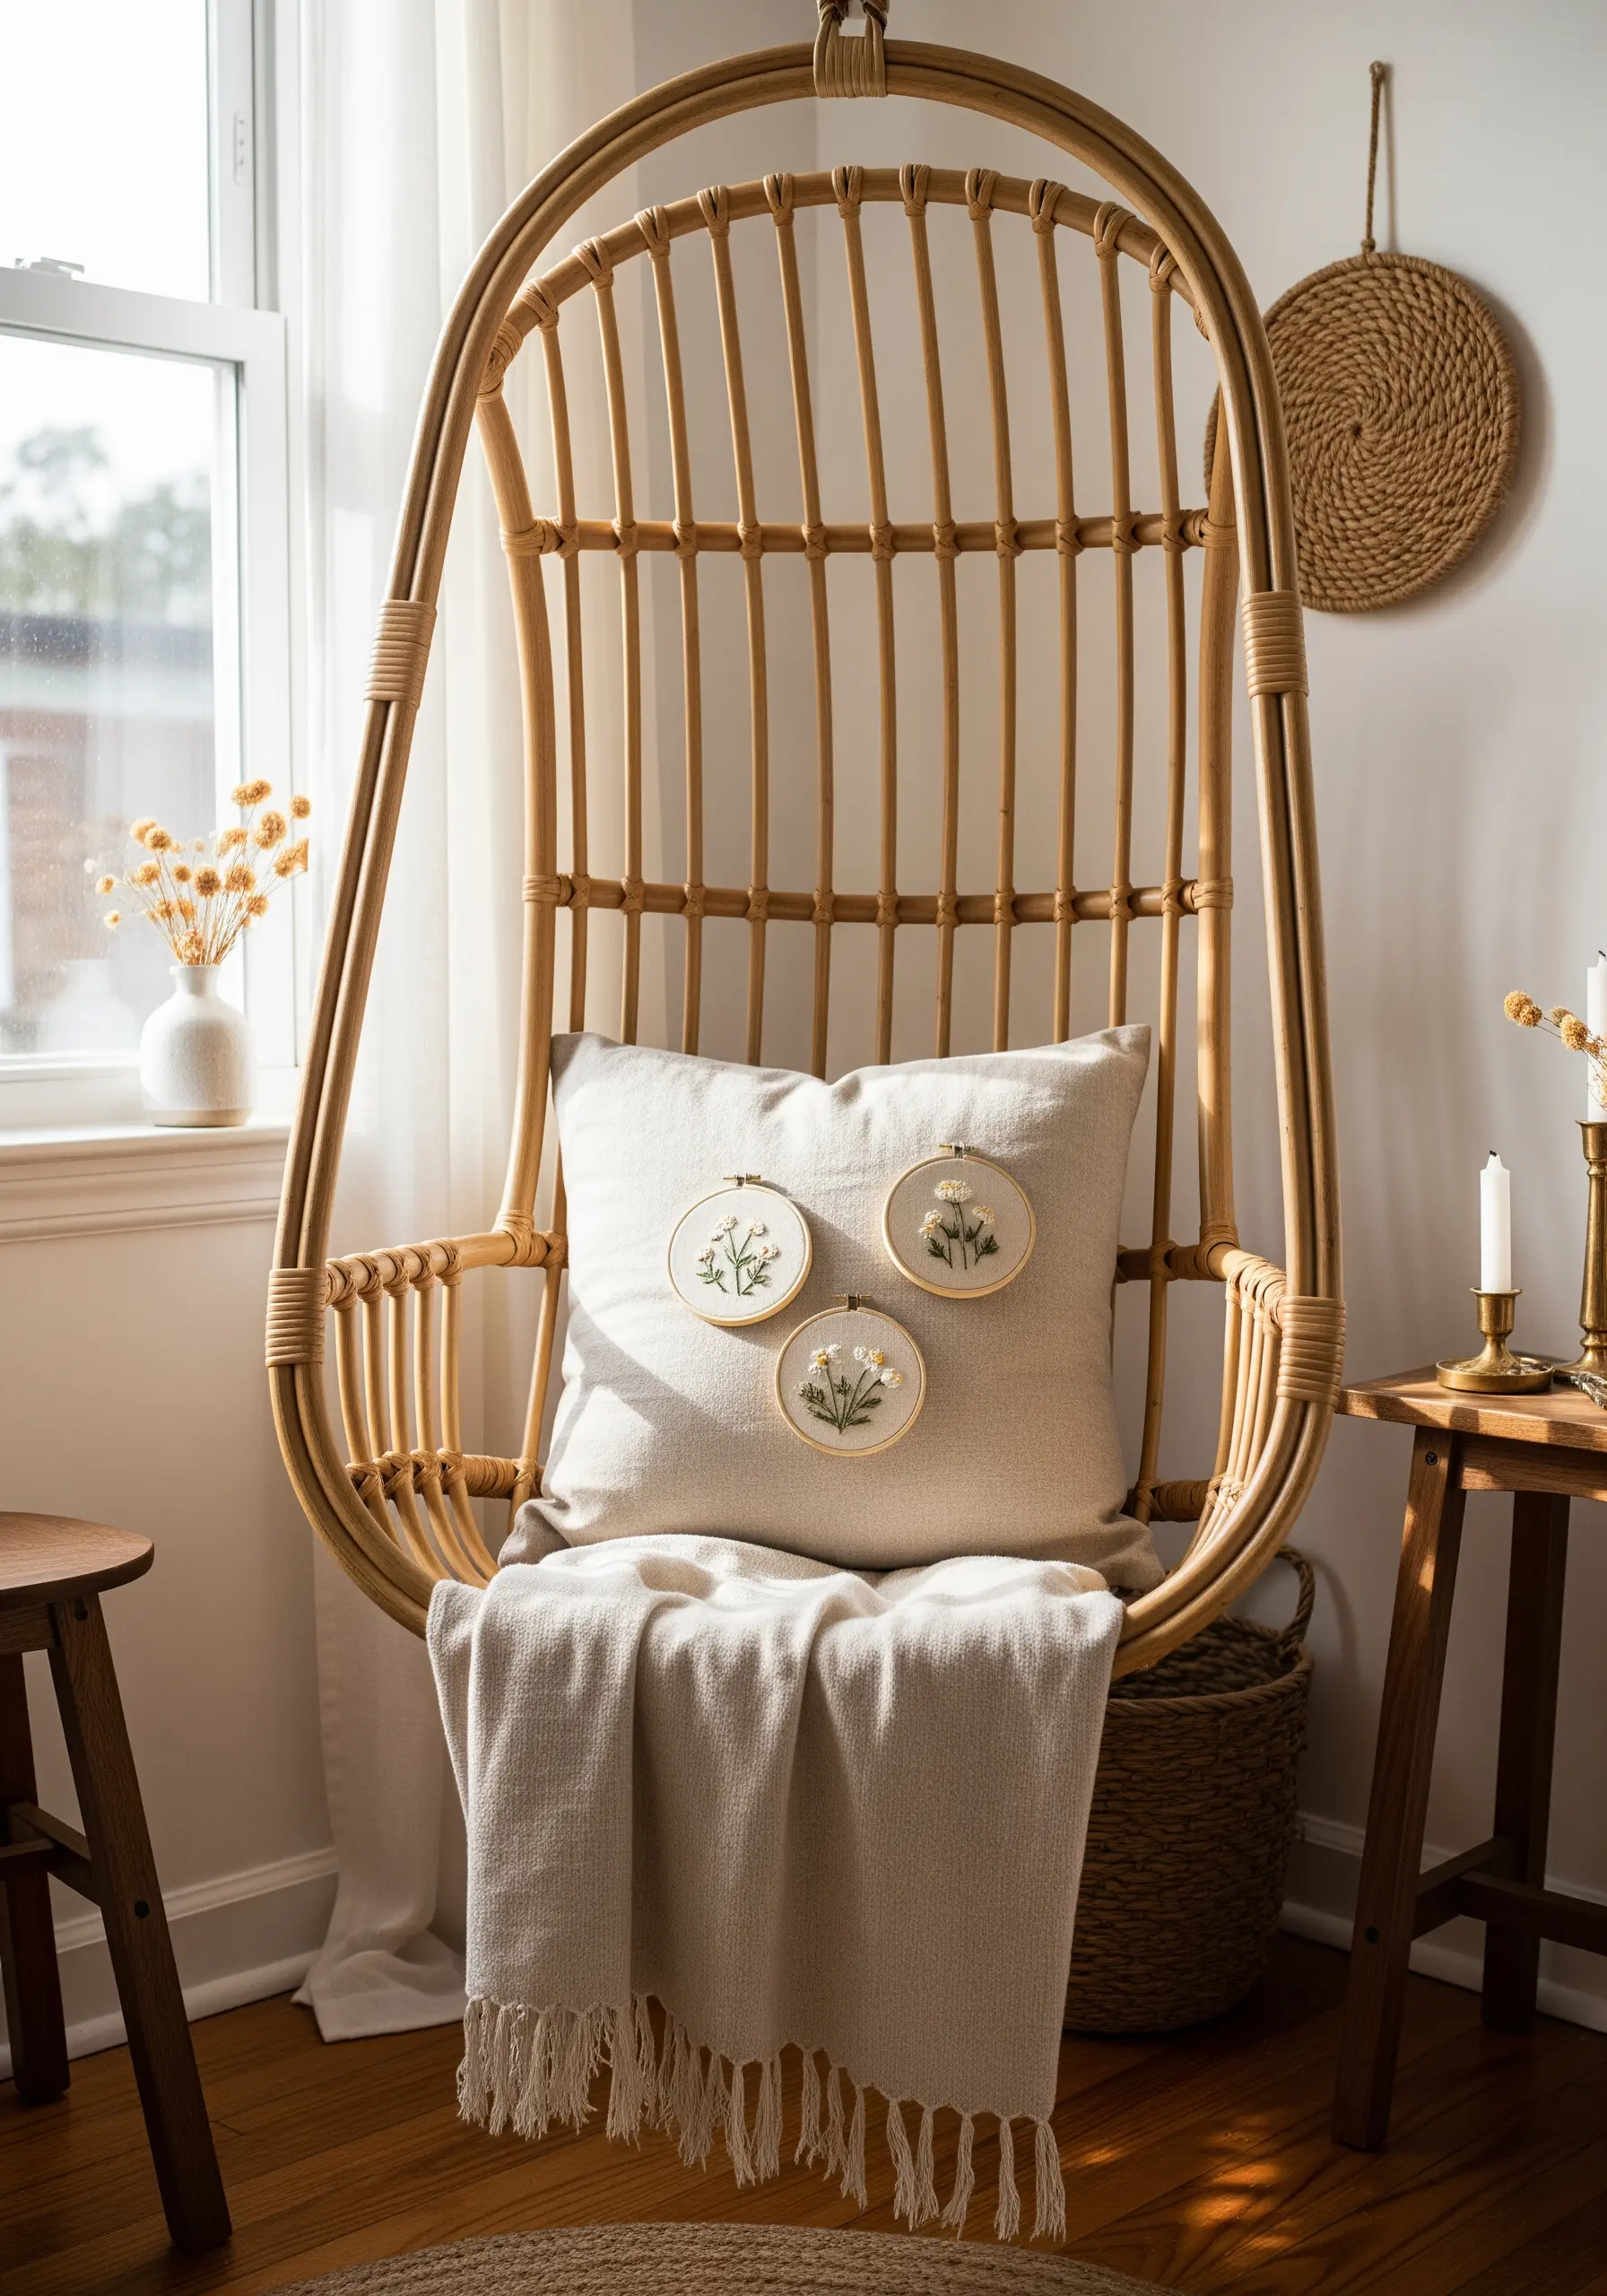
Your finished hoops don’t always have to be hung on a wall. For a softer, more layered look, try grouping them on a pillow or a draped throw blanket.
This is a wonderful, non-permanent way to add a touch of handmade artistry to your textiles, allowing you to switch them out with the seasons.
Choose delicate, airy designs like the wildflowers shown here to complement the cozy, relaxed feel of the fabric. You can even create hand-stitched cushion borders for a more permanent look.
14. Mix Hand-Stitching with Found Textiles

Create a wall with rich texture and history by combining your embroidery with framed textiles.
Hunt for vintage lace doilies, interesting fabric scraps, or pieces of old quilts at flea markets. Framing these finds in hoops alongside your own stitched work adds depth and a personal story.
To keep the collection feeling unified, stick to a consistent element, such as using the same style of wooden hoop or a complementary color palette across all pieces.
15. Craft Whimsical Embroidered Plant Markers
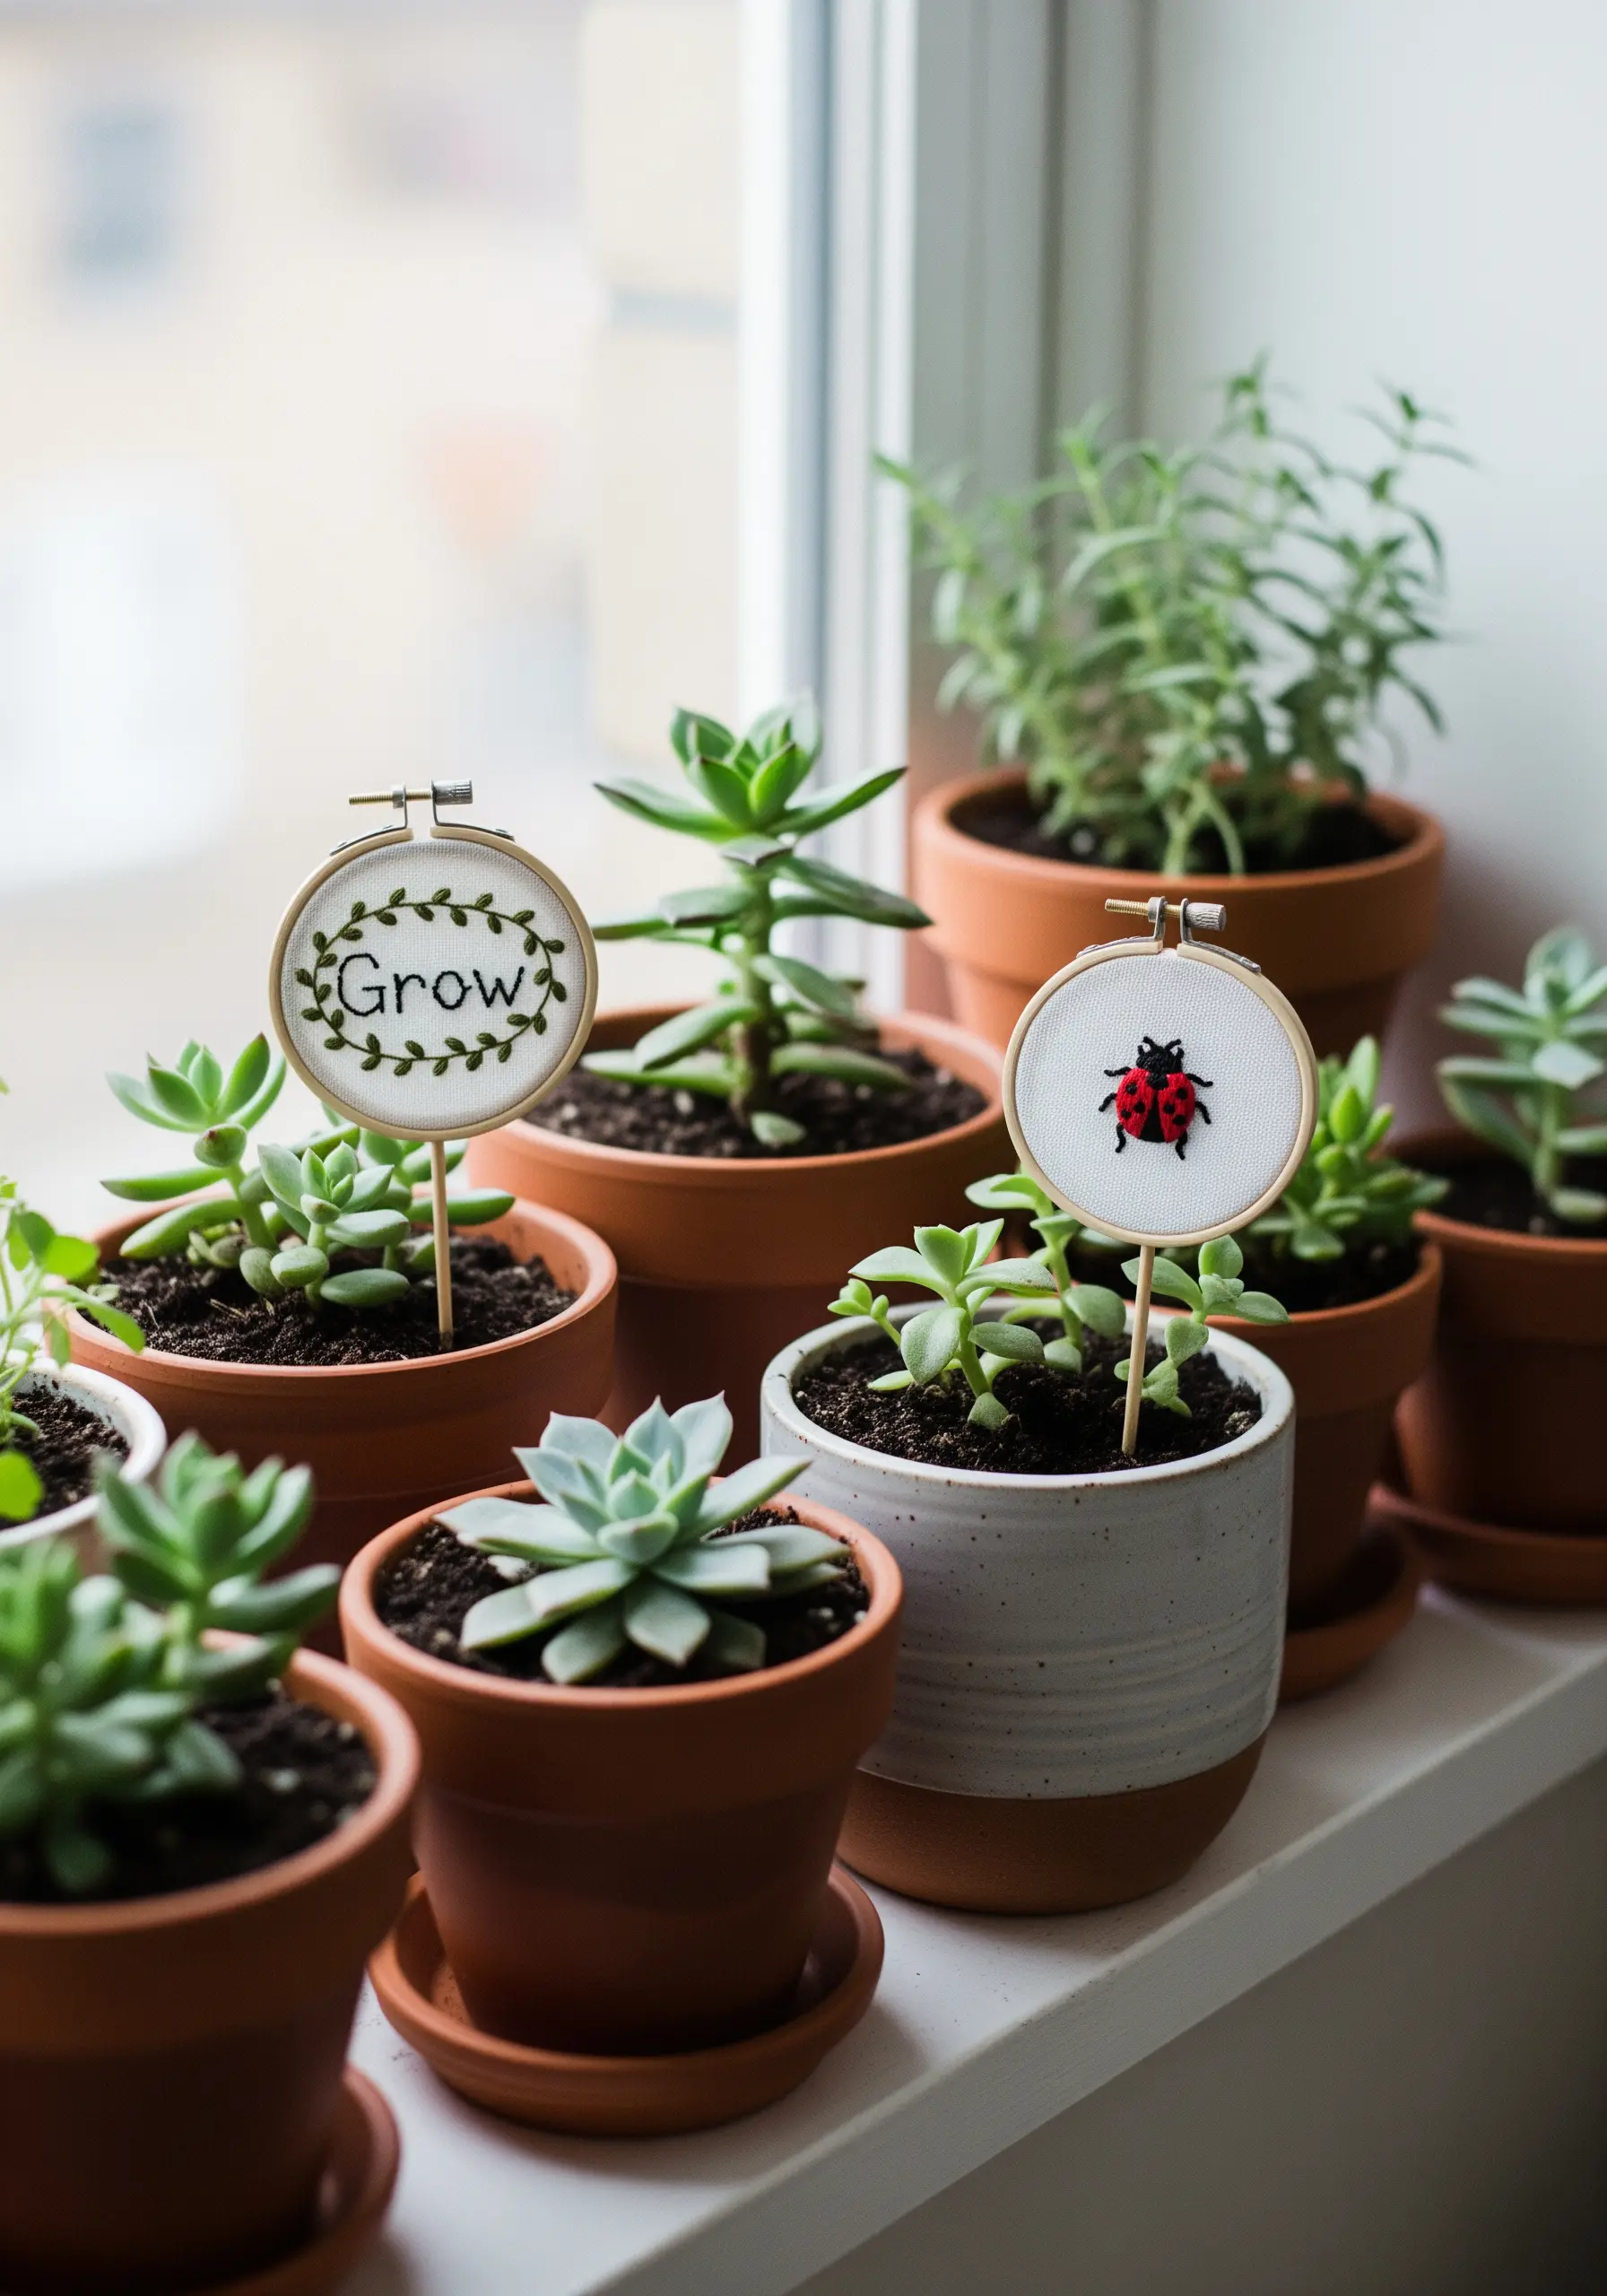
Add a touch of handmade personality to your indoor garden with tiny embroidered plant markers.
Stitch a simple, cheerful motif—like a ladybug or a single word—in a very small hoop, then hot glue it to a thin wooden dowel or bamboo skewer.
Before placing it in a pot, give the finished piece a light spray with a clear, waterproof craft sealant. This will help protect your stitching from moisture and stray splashes during watering.
16. Create Hierarchy with Varied Hoop Sizes
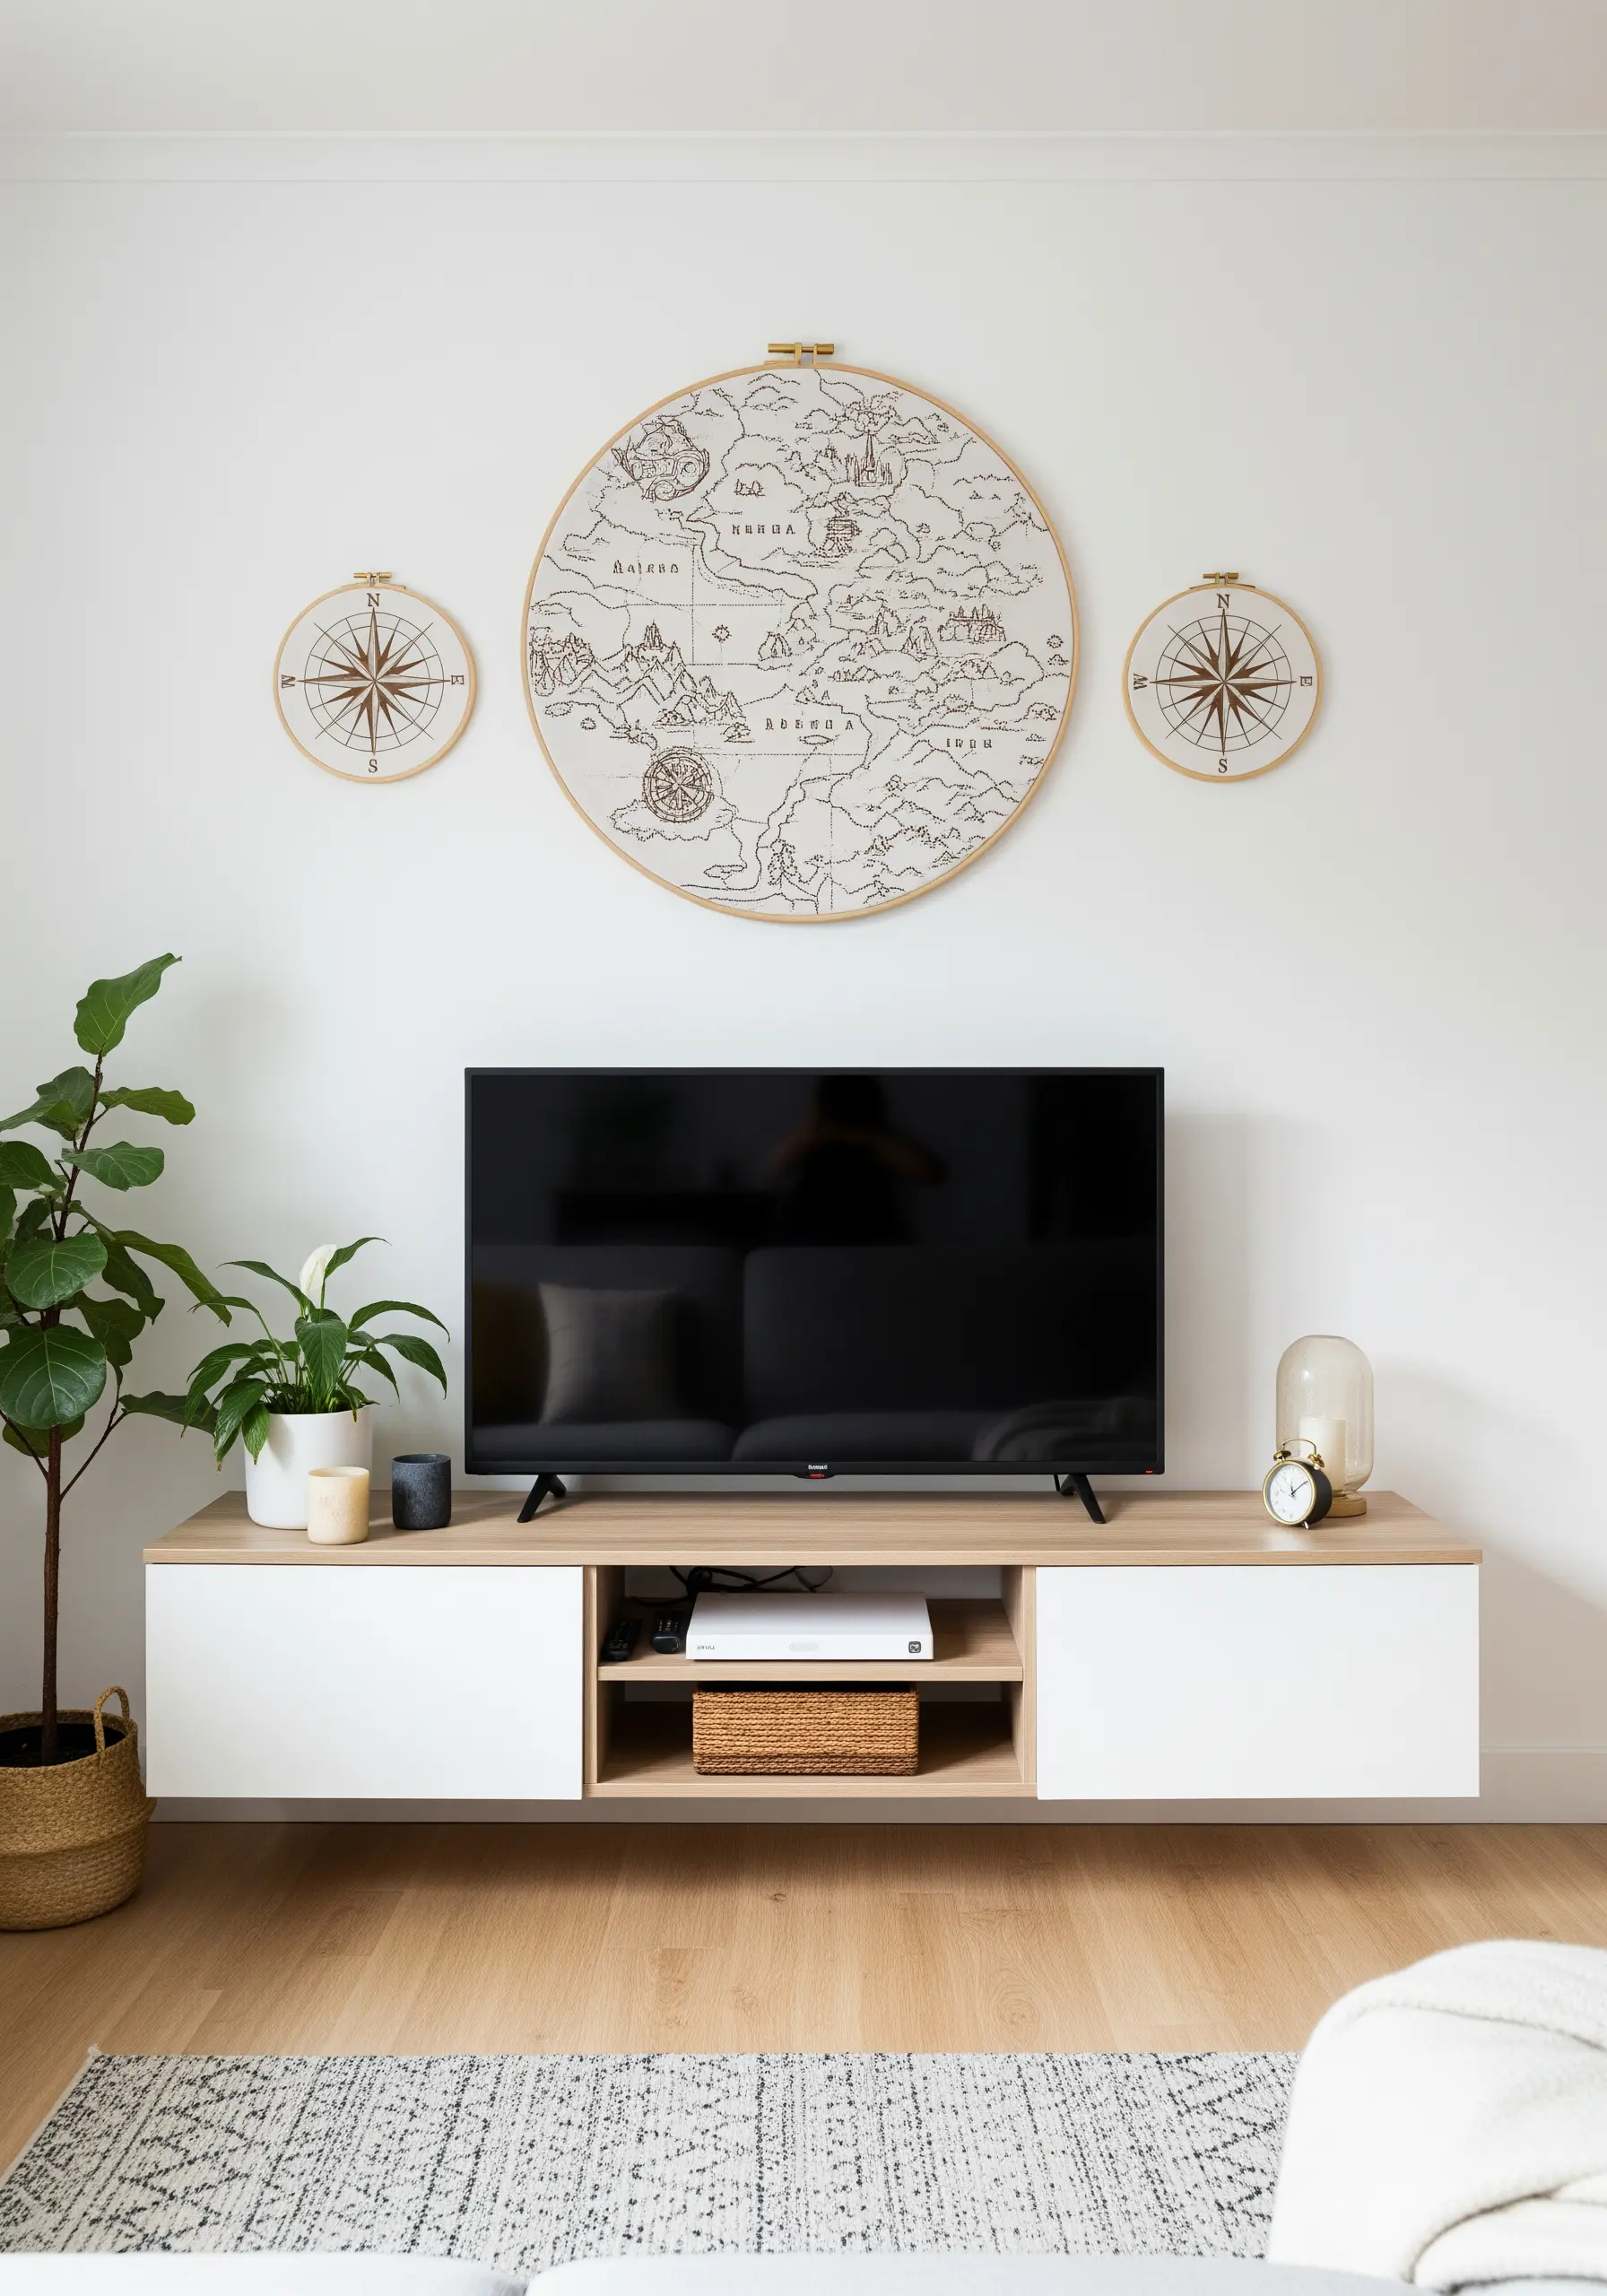
Design a compelling focal point by playing with scale. Use one significantly larger hoop for your most complex and detailed piece, like a map or intricate floral arrangement.
Then, flank it with two smaller, simpler hoops that echo the theme, such as the compass roses here.
This creates a clear visual hierarchy that draws the eye to the main event while the smaller pieces provide support and balance. Stitching the map in a single thread color enhances its vintage, illustrative quality.
17. Embellish a Utilitarian Curtain with a Hoop Border

Elevate an ordinary item, like a plain linen laundry curtain, into a piece of decor without a single permanent stitch.
Simply clamp a series of mini hoops along the edge of the fabric. The hoops themselves act as both the frame and the fastener.
You can stitch a tiny, minimalist design in each one or even leave some with just the plain fabric showing through. It’s a clever, high-impact, and completely removable way to add character.
18. Personalize Your Mudroom with Elegant Monograms
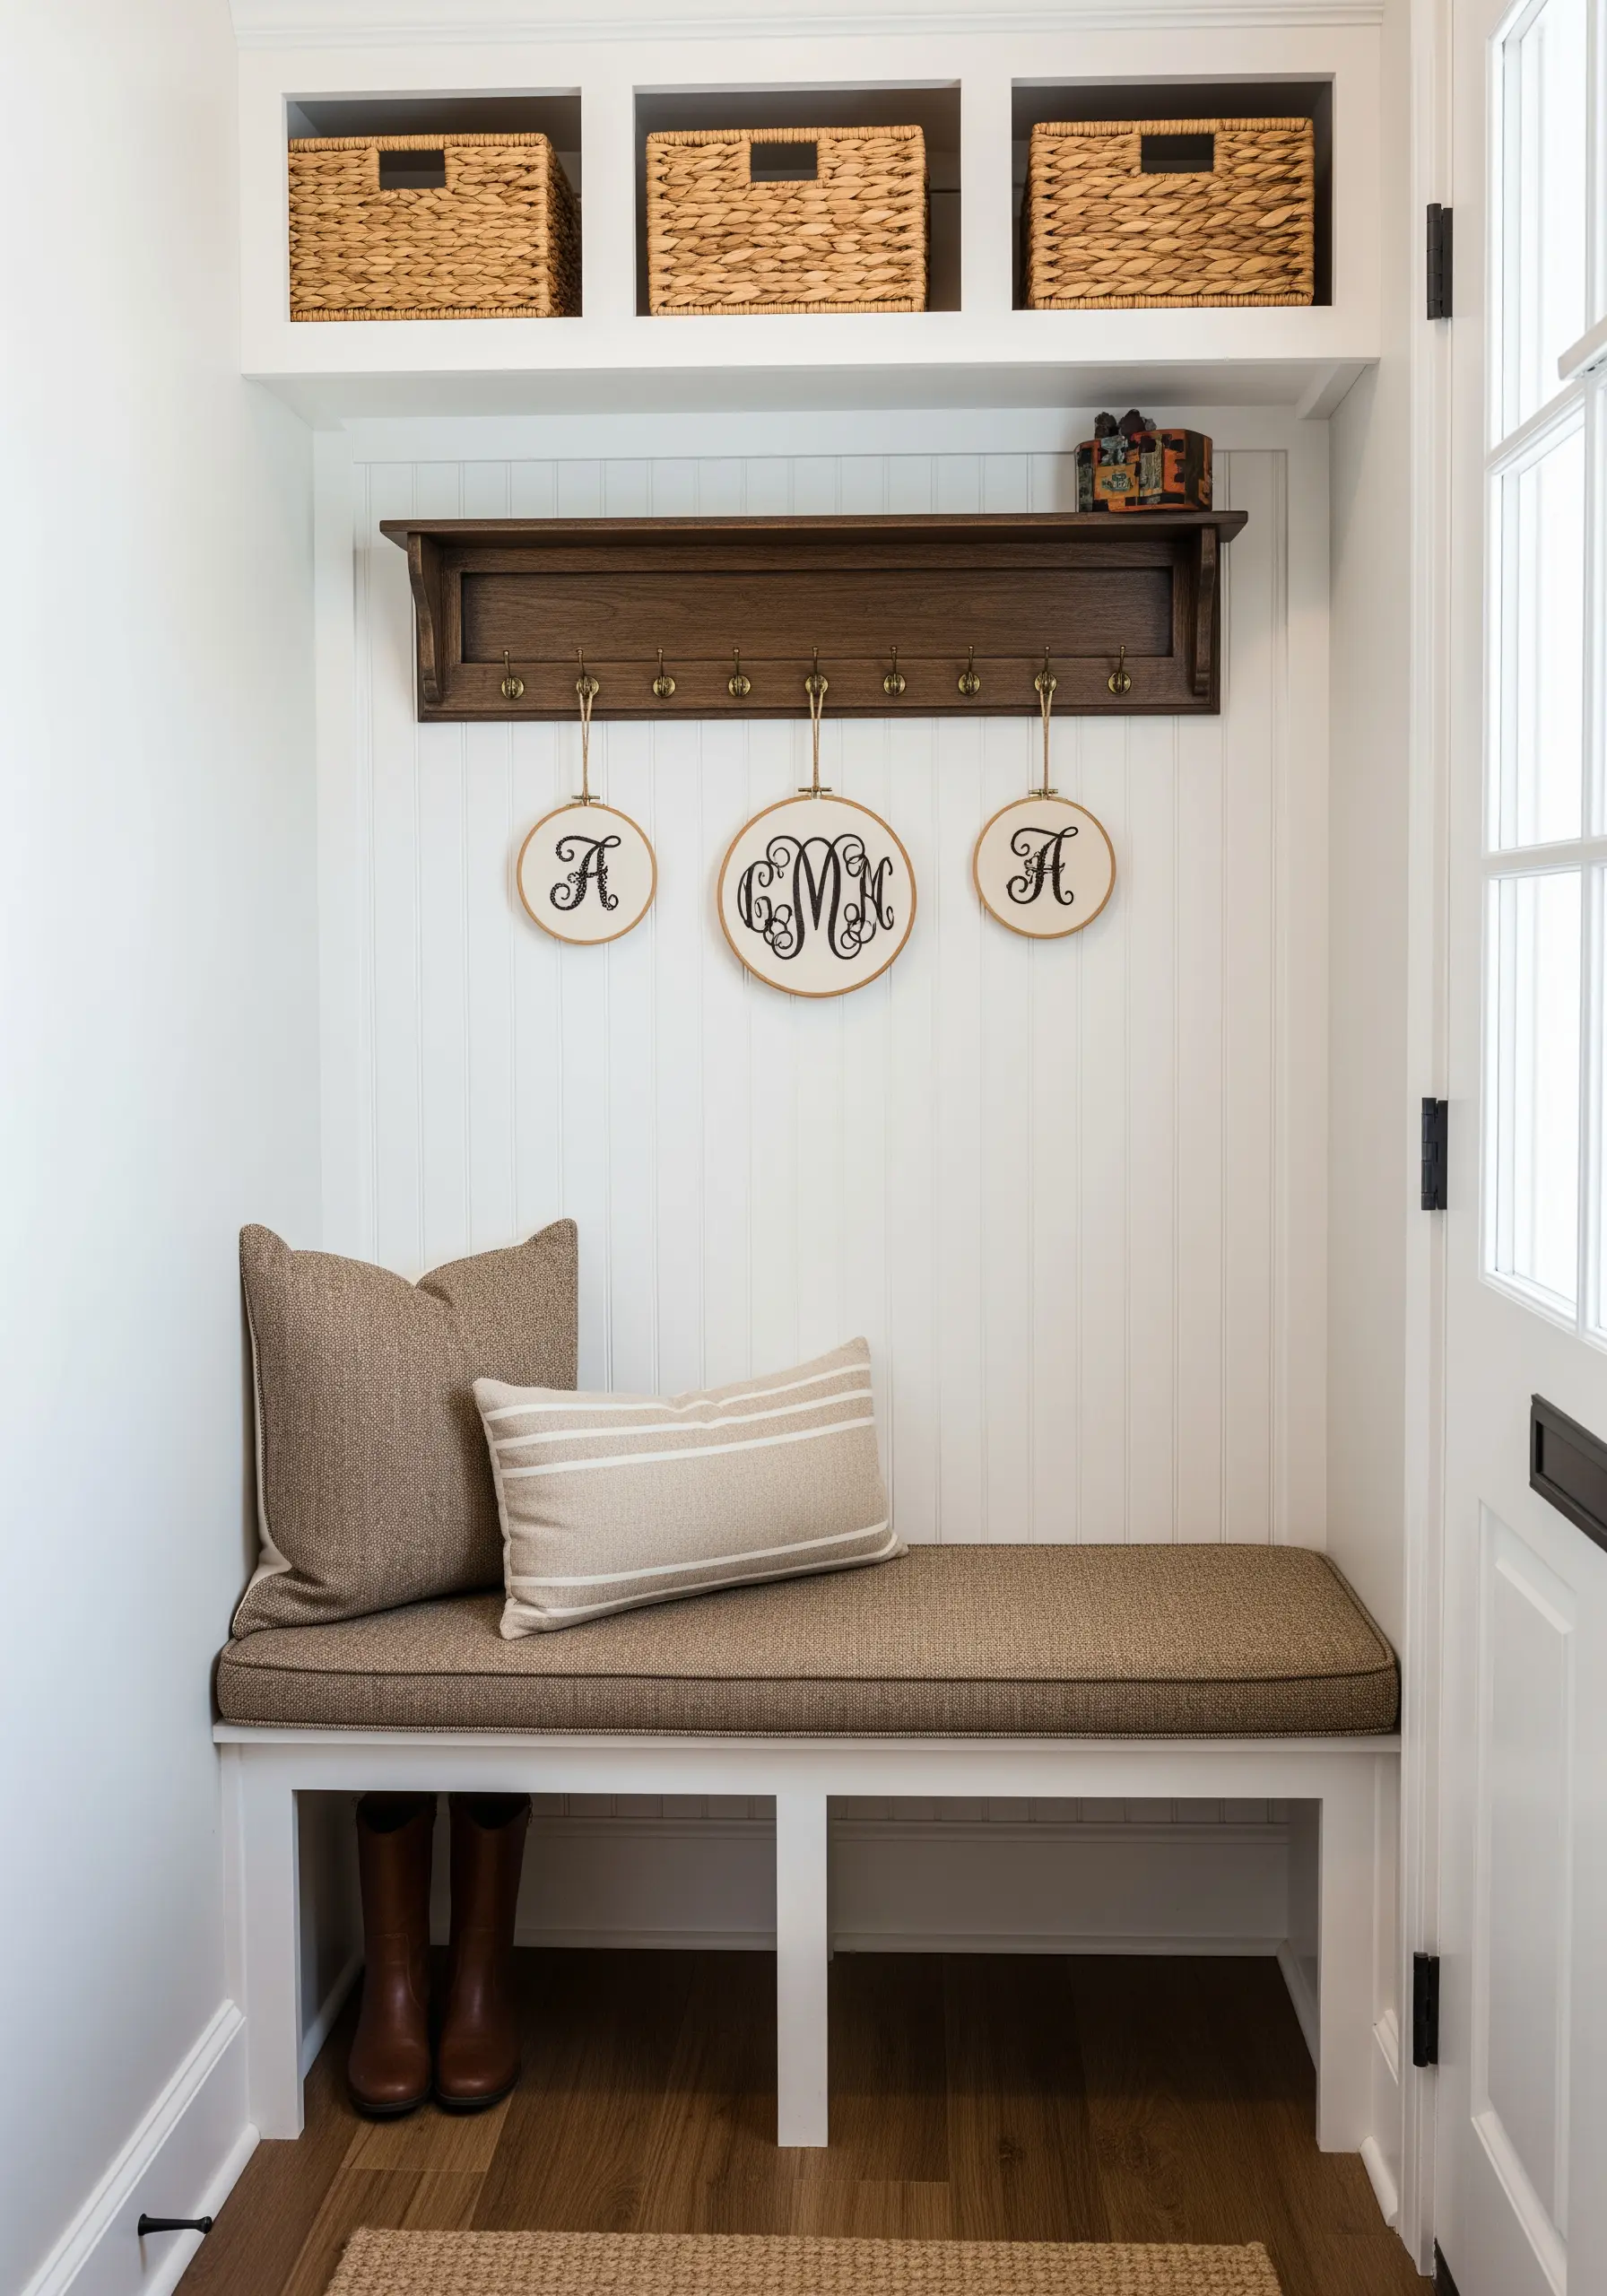
Bring a sense of order and personal touch to a busy entryway by hanging a stitched monogram above each family member’s hook.
To achieve a truly elegant, flowing script, use split stitch for the foundational lines. This stitch creates a smooth, chain-like path that is much easier to cover flawlessly with satin stitch.
This technique prevents gaps and gives your letters a raised, professional finish that looks truly refined.
19. Add Playful Dimension with Dangling Motifs

Bring a touch of whimsical charm to your kitchen by hanging tiny hoops from a shelf or pot rack.
To make simple shapes like these vegetables feel more substantial and three-dimensional, use a padded satin stitch.
First, fill the shape with a foundation of small straight stitches or seed stitches. Then, work your final satin stitch over this padding. The result is a plump, raised motif that really pops off the fabric.
20. Anchor a Quiet Space with a Meditative Mandala

A single, intricate piece can set the entire tone for a meditation corner or a quiet reading nook.
Creating the soft, seamless color gradients in a mandala is easier than it looks. Instead of changing colors constantly, try blending them in the needle.
Use one strand of your first color and one strand of your second color threaded together. Stitching with this combined thread creates a beautiful, heathered transition that adds depth and sophistication. You can find more inspiration with tiny mandala embroidery wall art ideas.
21. Weave a Dreamy Narrative in a Child’s Nook
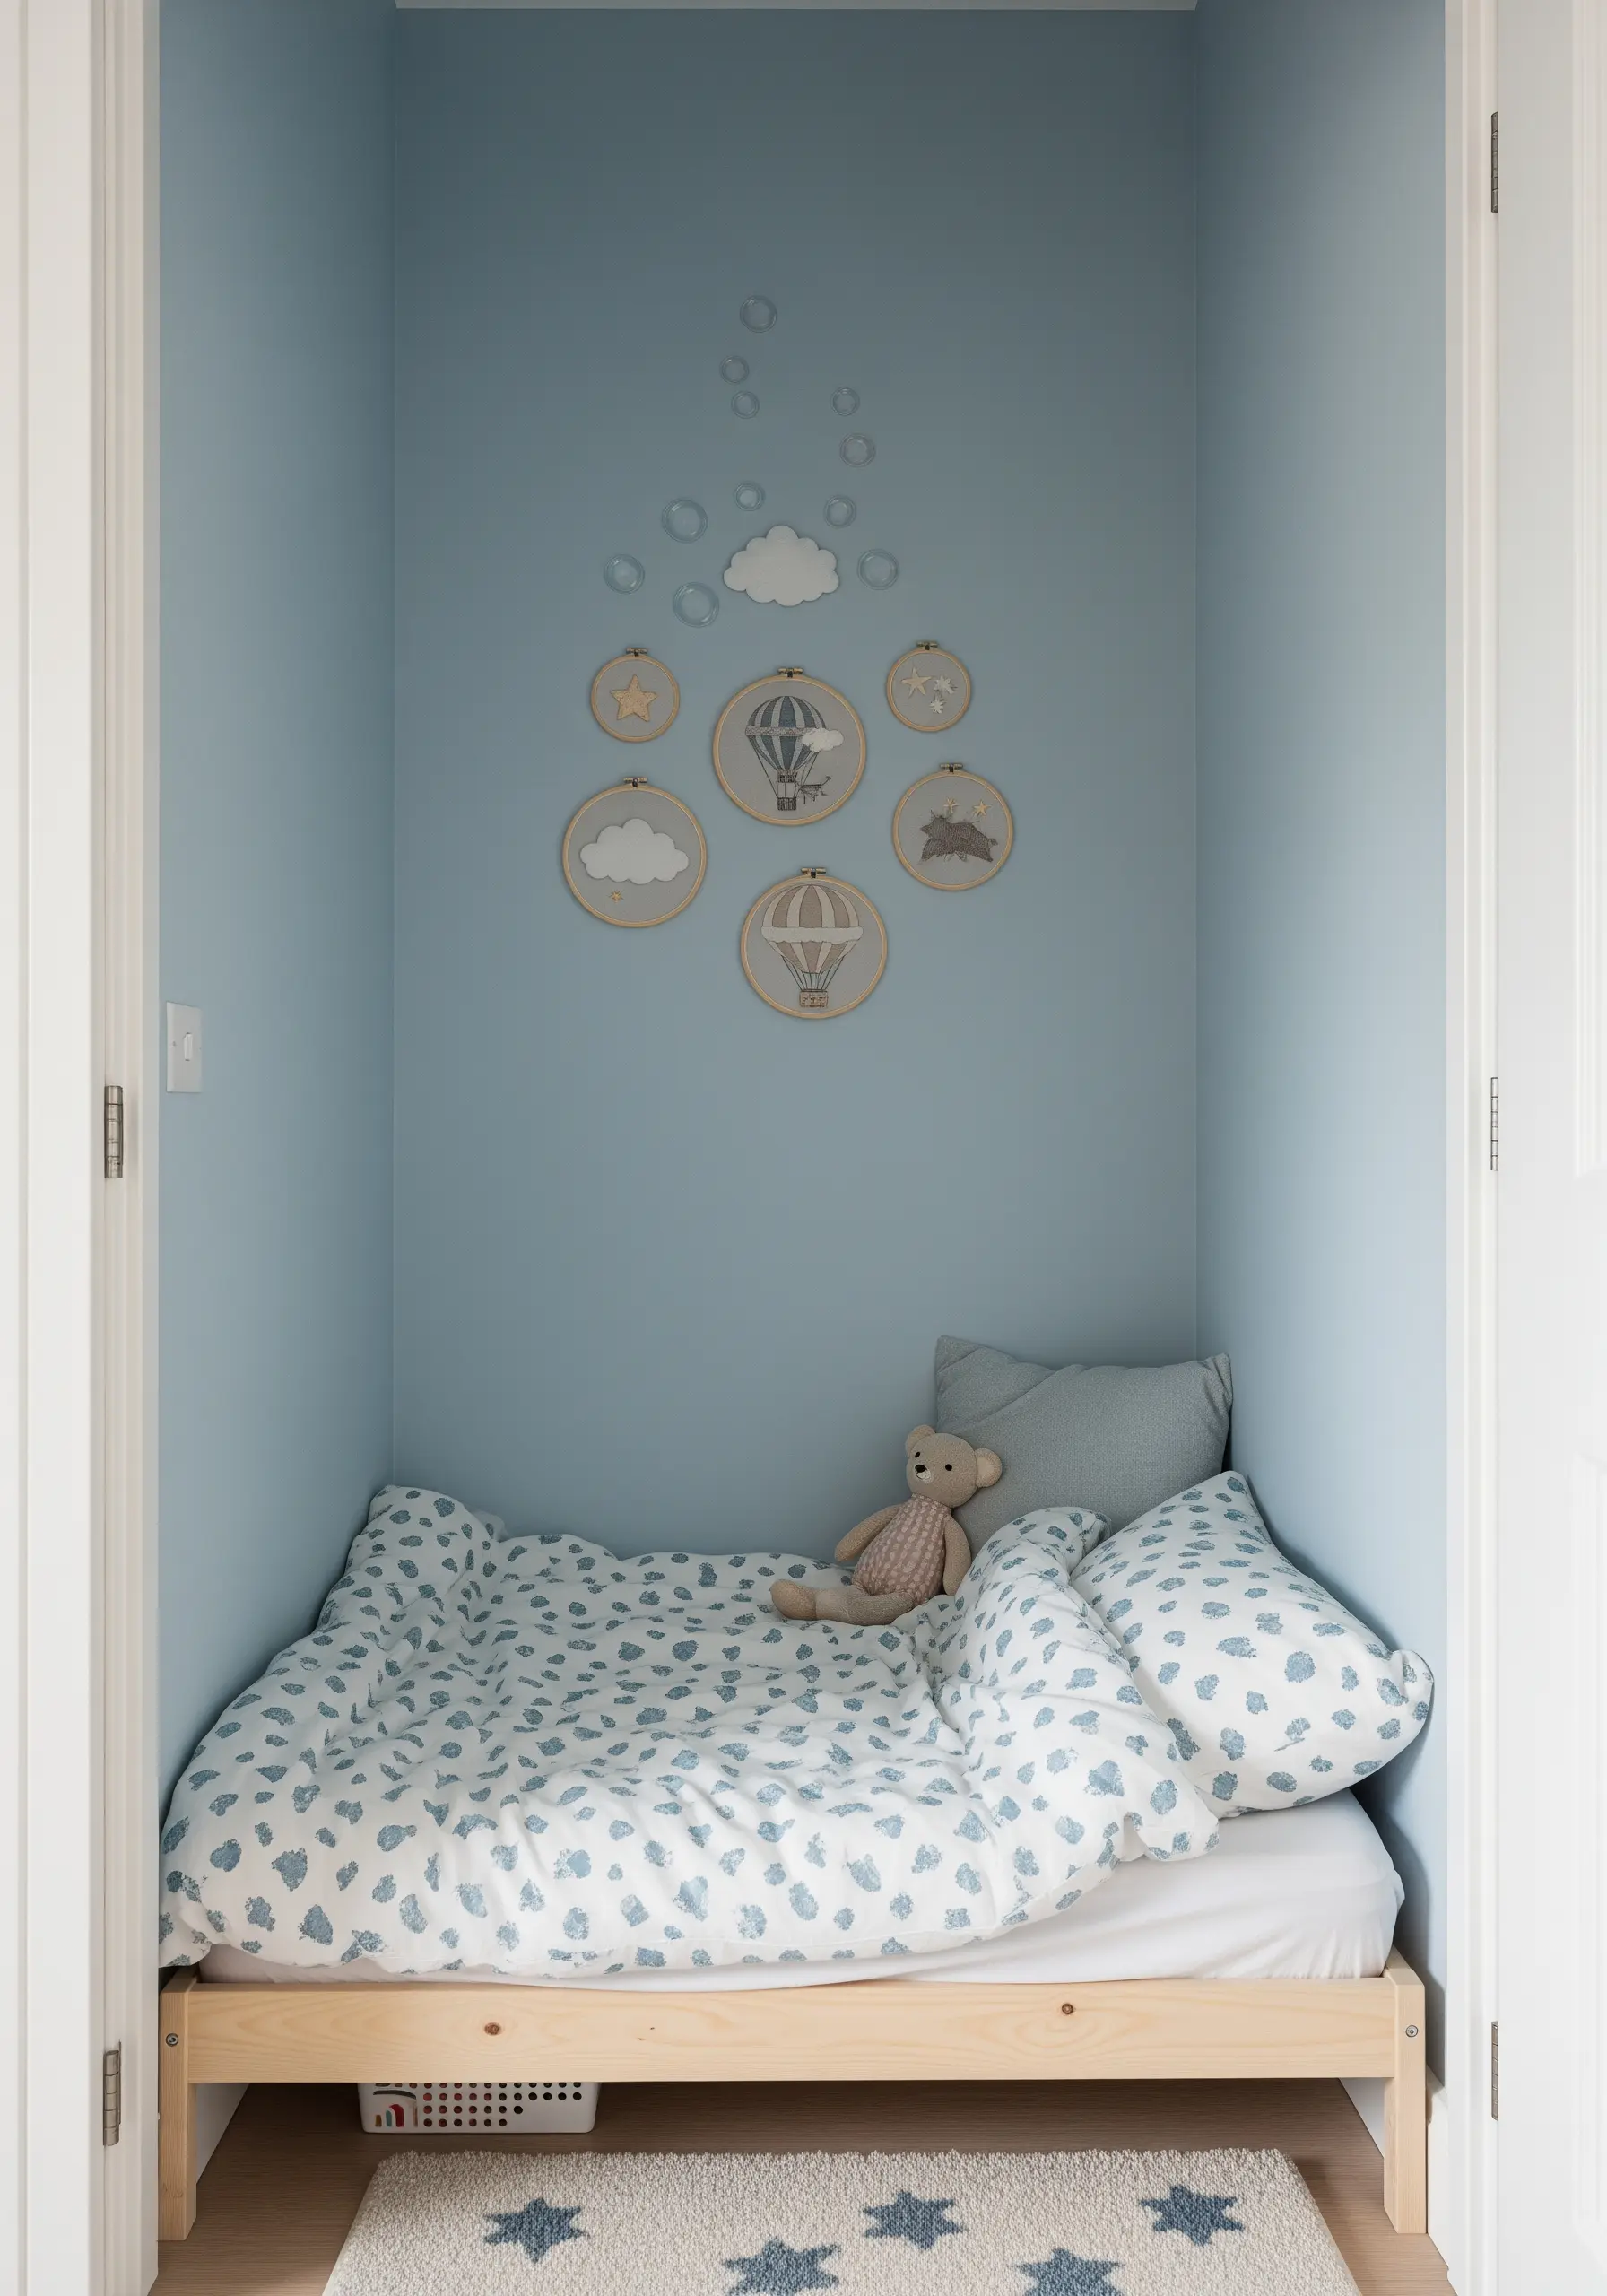
Create a soothing and magical atmosphere in a small sleeping space with a collection of gentle, dreamy motifs.
For the tiny, delicate details like the bubbles shown here, a French knot is the perfect stitch. Use a single strand of white or silver metallic thread for a subtle sparkle.
You can vary the size of your knots by changing how many times you wrap the thread around the needle (once for a tiny dot, twice for a larger one). This creates a more organic, floating effect.
22. Capture Your Pet’s Spirit in a Thread Portrait

A stitched pet portrait is a beautiful way to honor a furry family member.
The key to realistic fur is the long and short stitch. Pay close attention to the direction of your stitches, making sure they flow in the same direction that the animal’s fur naturally grows.
Use three to five similar shades of thread to create highlights and shadows, which will give your portrait incredible depth and life. Pairing it with a simple, backstitched name keeps the focus on your beautiful hand-stitched portrait wall art.


