

It’s easy to think of embroidery as something small, contained within a hoop. But I want you to consider a different canvas for your stitches—one with history, presence, and a touch of quiet grandeur: the banner.
A well-made banner doesn’t just decorate a hallway; it defines it. It transforms a transitional space into a destination, telling a story with thread, texture, and elegant form. It’s an opportunity to let your work breathe, to command a space with artistry that feels both personal and timeless.
Here, you’ll discover how to adjust your techniques for this classic format. We’ll explore how fabric choice, from rich velvet to airy linen, changes the entire mood of your piece, and how specific stitches can create effects that are bold, delicate, or deeply textural. This is your guide to creating work with lasting, classic appeal.
1. Achieve Regal Opulence with Couching on Velvet
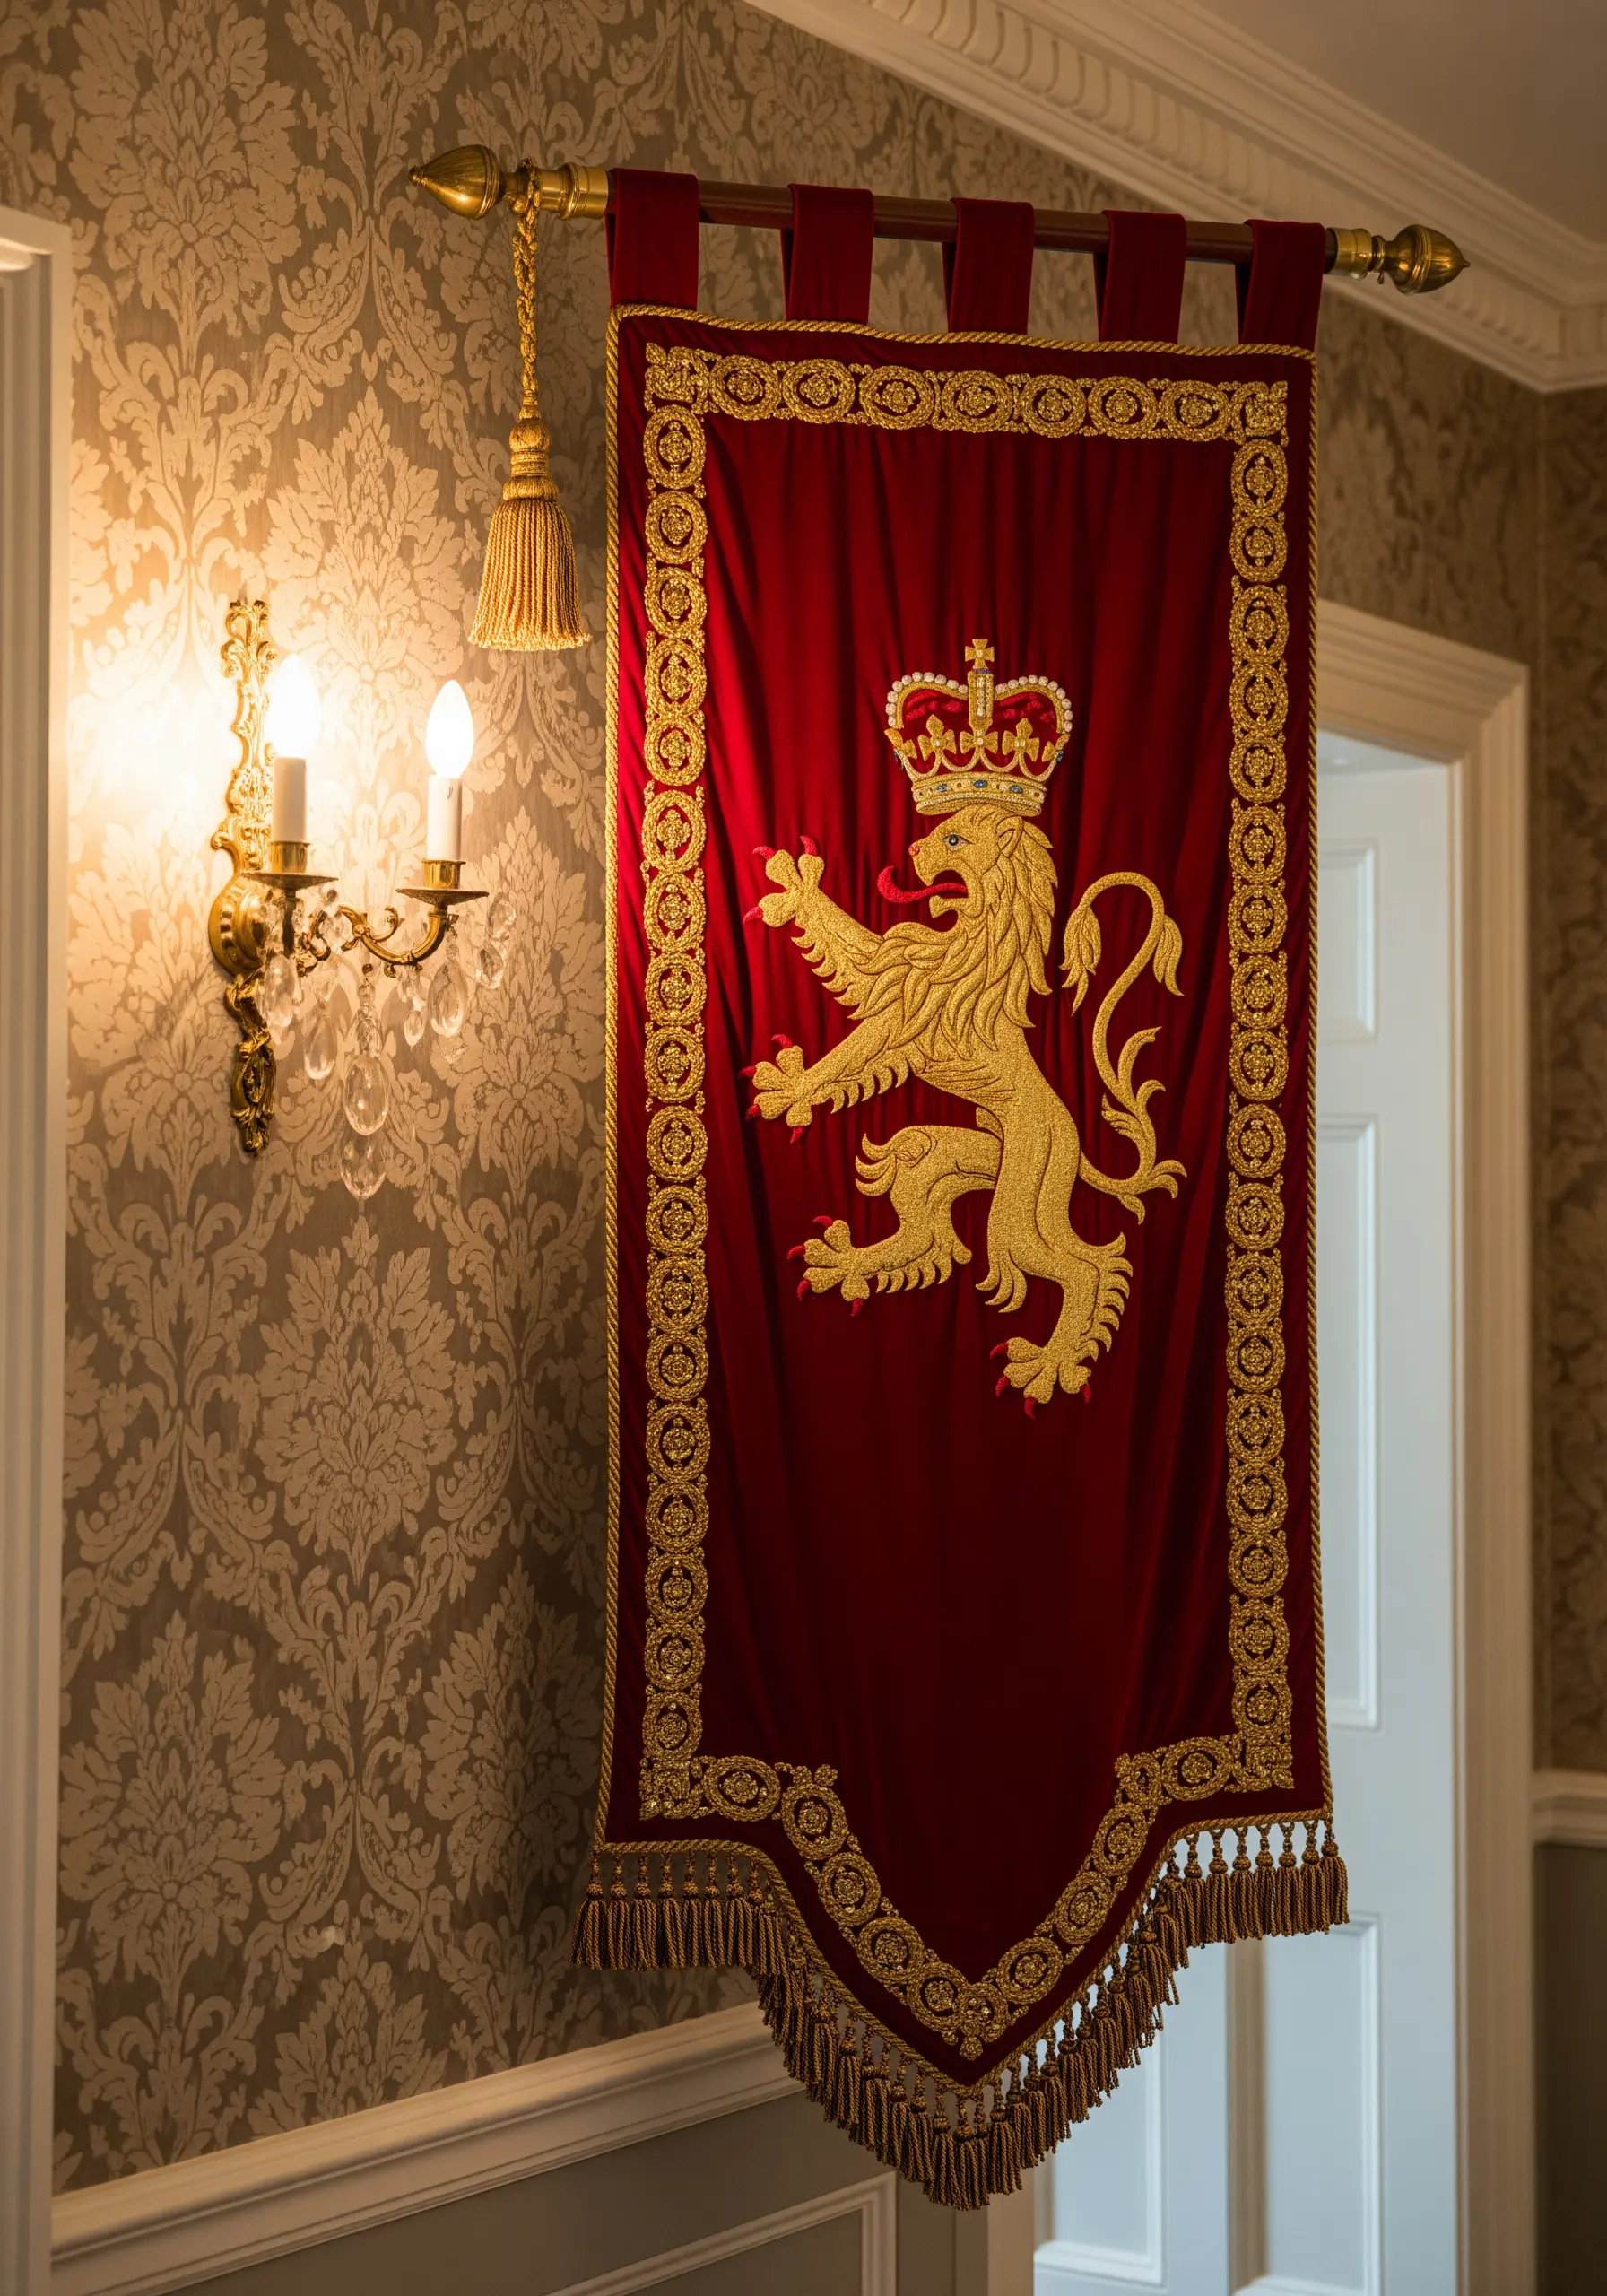
To create a truly royal banner, choose a deep-hued velvet as your canvas—its plush texture absorbs light, making your threadwork appear richer.
Instead of struggling to pull metallic threads through the dense pile, use the couching technique: lay the metallic cord on the surface and tack it down with a finer, matching thread.
This method keeps the metallic thread’s sheen intact and allows you to create sharp, regal outlines that sit proudly on top of the fabric, not lost within it.
The result is a raised, sculptural effect that gives motifs like this lion a commanding presence.
2. Use Sheer Linen for a Delicate Botanical Display

For an airy, conservatory-inspired feel, switch from heavy canvas to a semi-sheer linen or cotton voile.
The fabric’s translucence allows light to pass through, giving your stitches a gentle, floating quality that is perfect for delicate botanical subjects.
Use only two or three strands of floss for your long-and-short stitch to keep the florals from feeling heavy or bulky.
This restraint in thread weight ensures the botanicals appear as if they were sketched directly onto the fabric, preserving the banner’s light and elegant aesthetic.
3. Create Celestial Precision with Fine-Line Backstitch
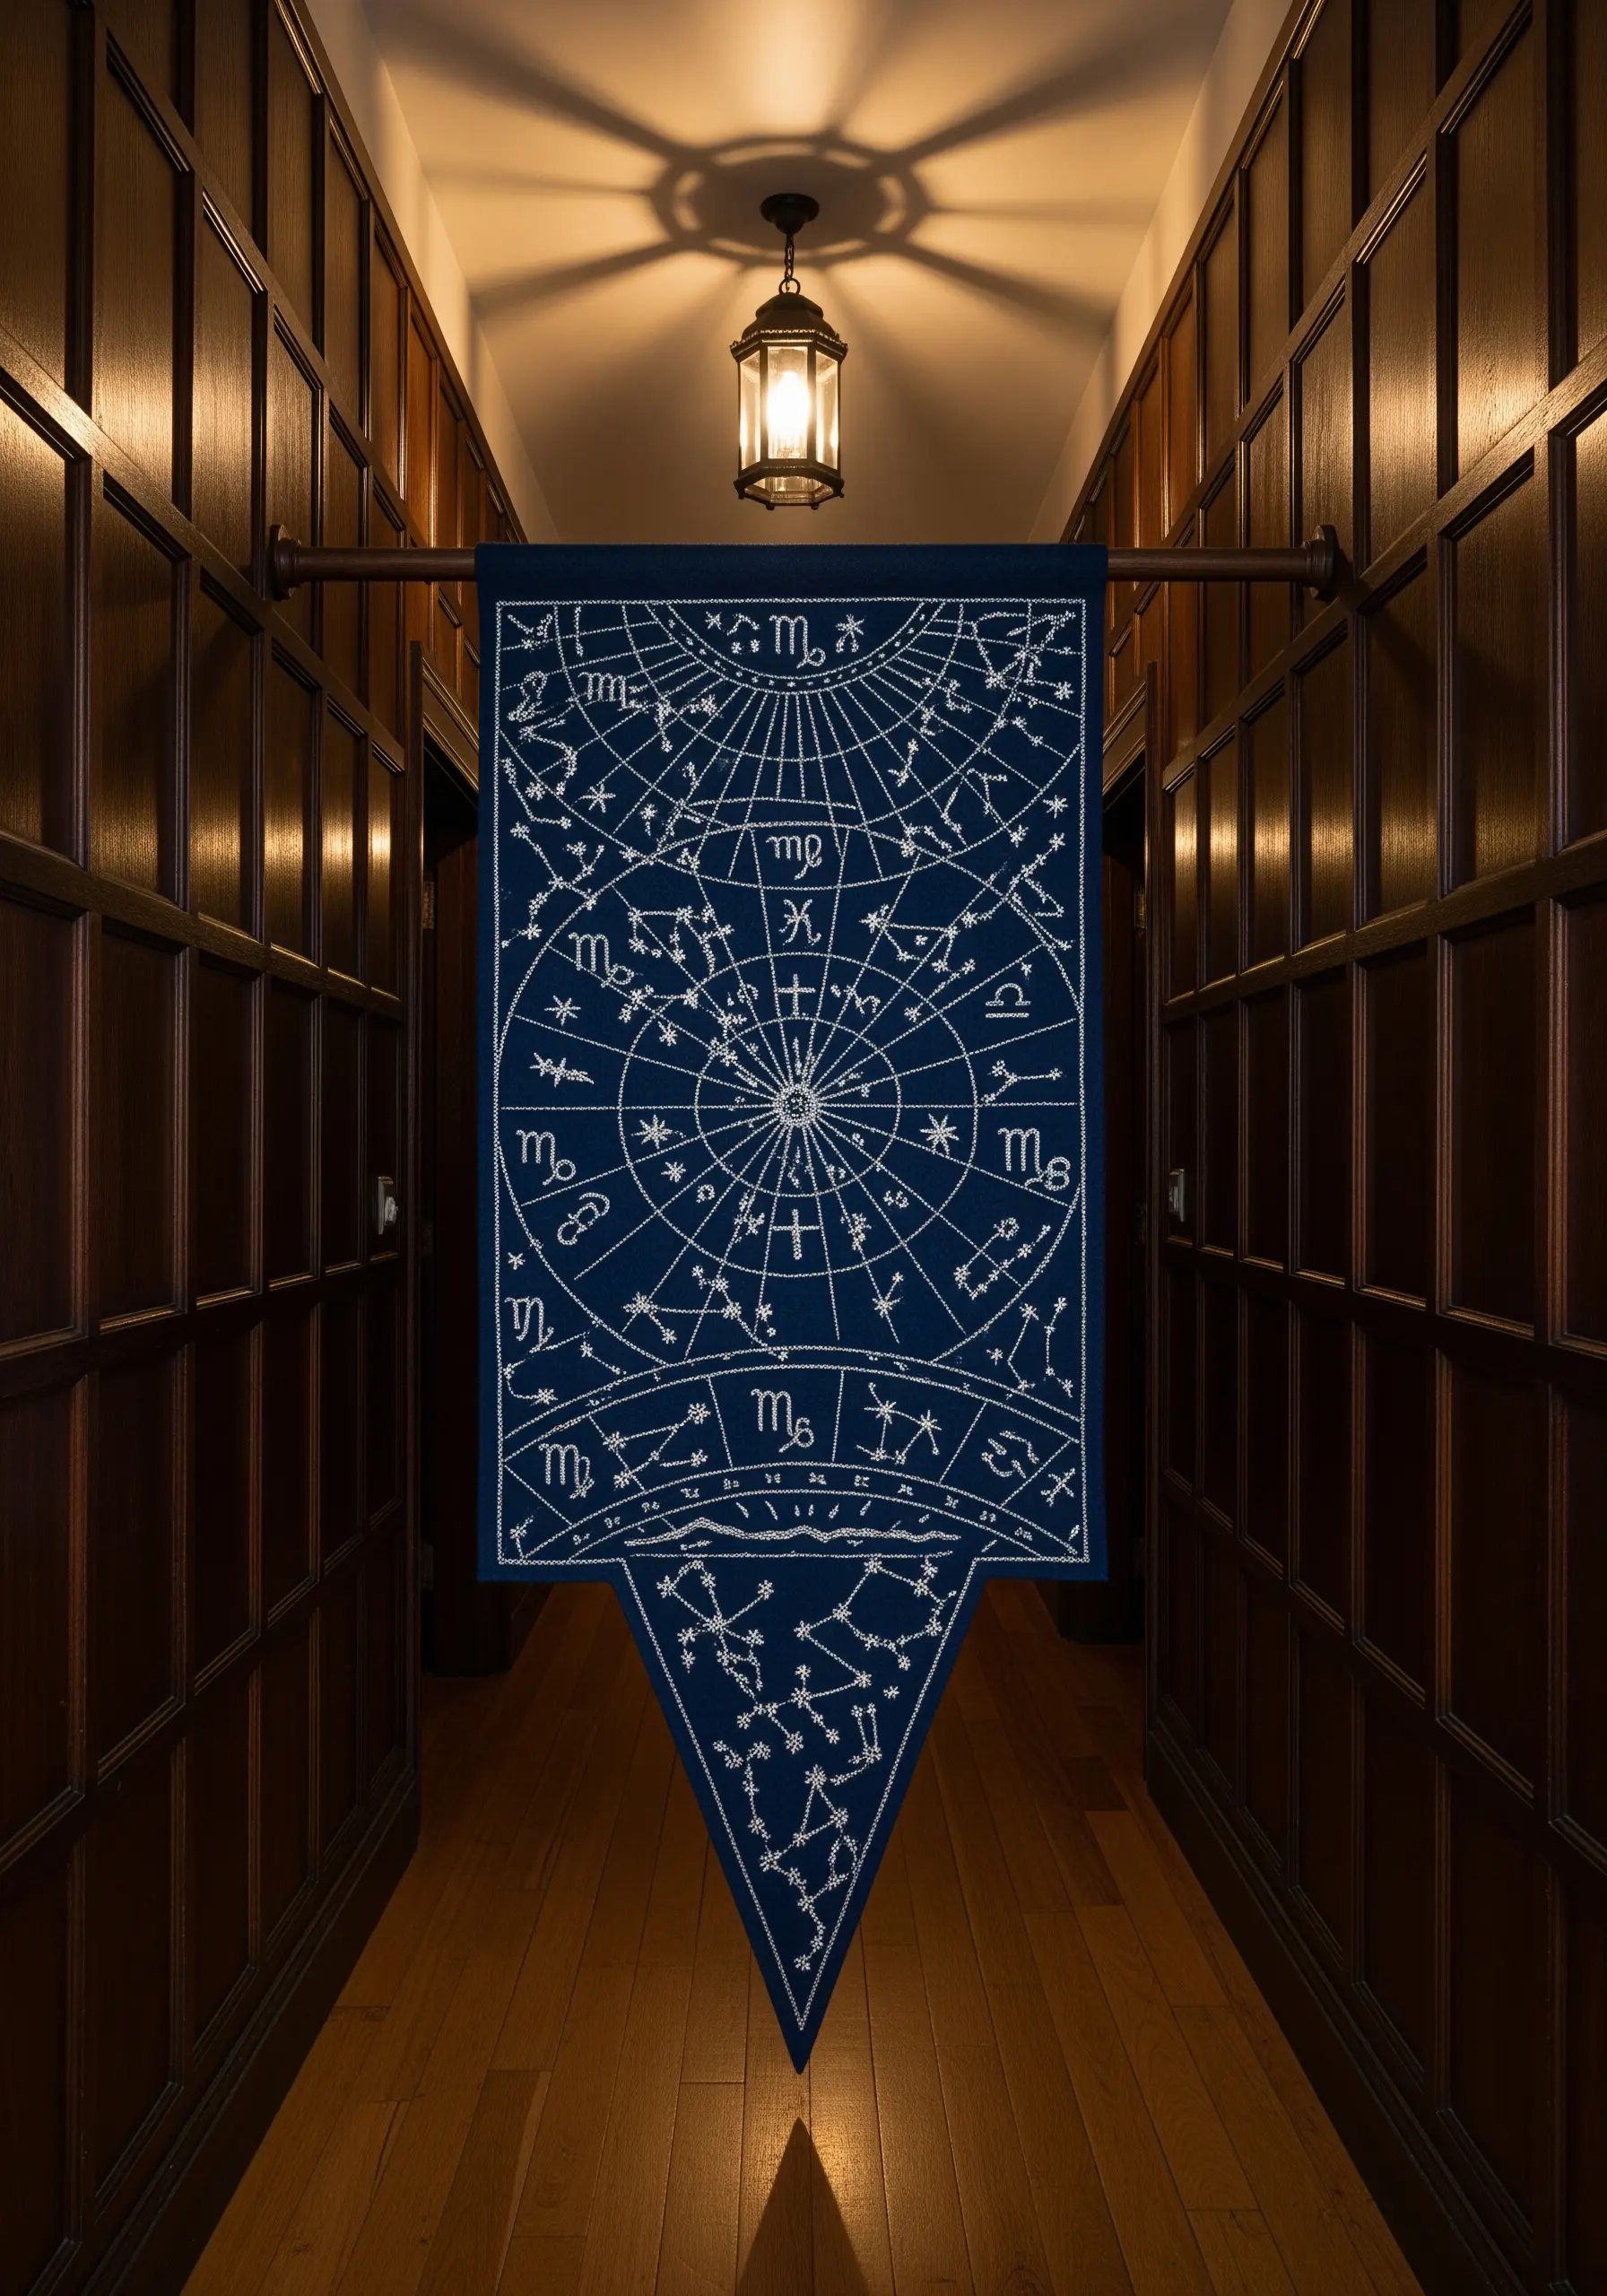
To render intricate designs like star charts, precision is everything. Choose a high-contrast palette, like white thread on navy blue cotton twill, for maximum clarity.
Use a single strand of floss and a sharp needle to execute a tiny, meticulous backstitch or whipped backstitch for all lines.
This creates a crisp, unbroken line that mimics the precision of an astronomical engraving.
For the constellations and symbols, small seed stitches or single straight stitches will provide texture without overwhelming the delicate linework.
4. Capture Art Nouveau’s Flow with Bold Outlines
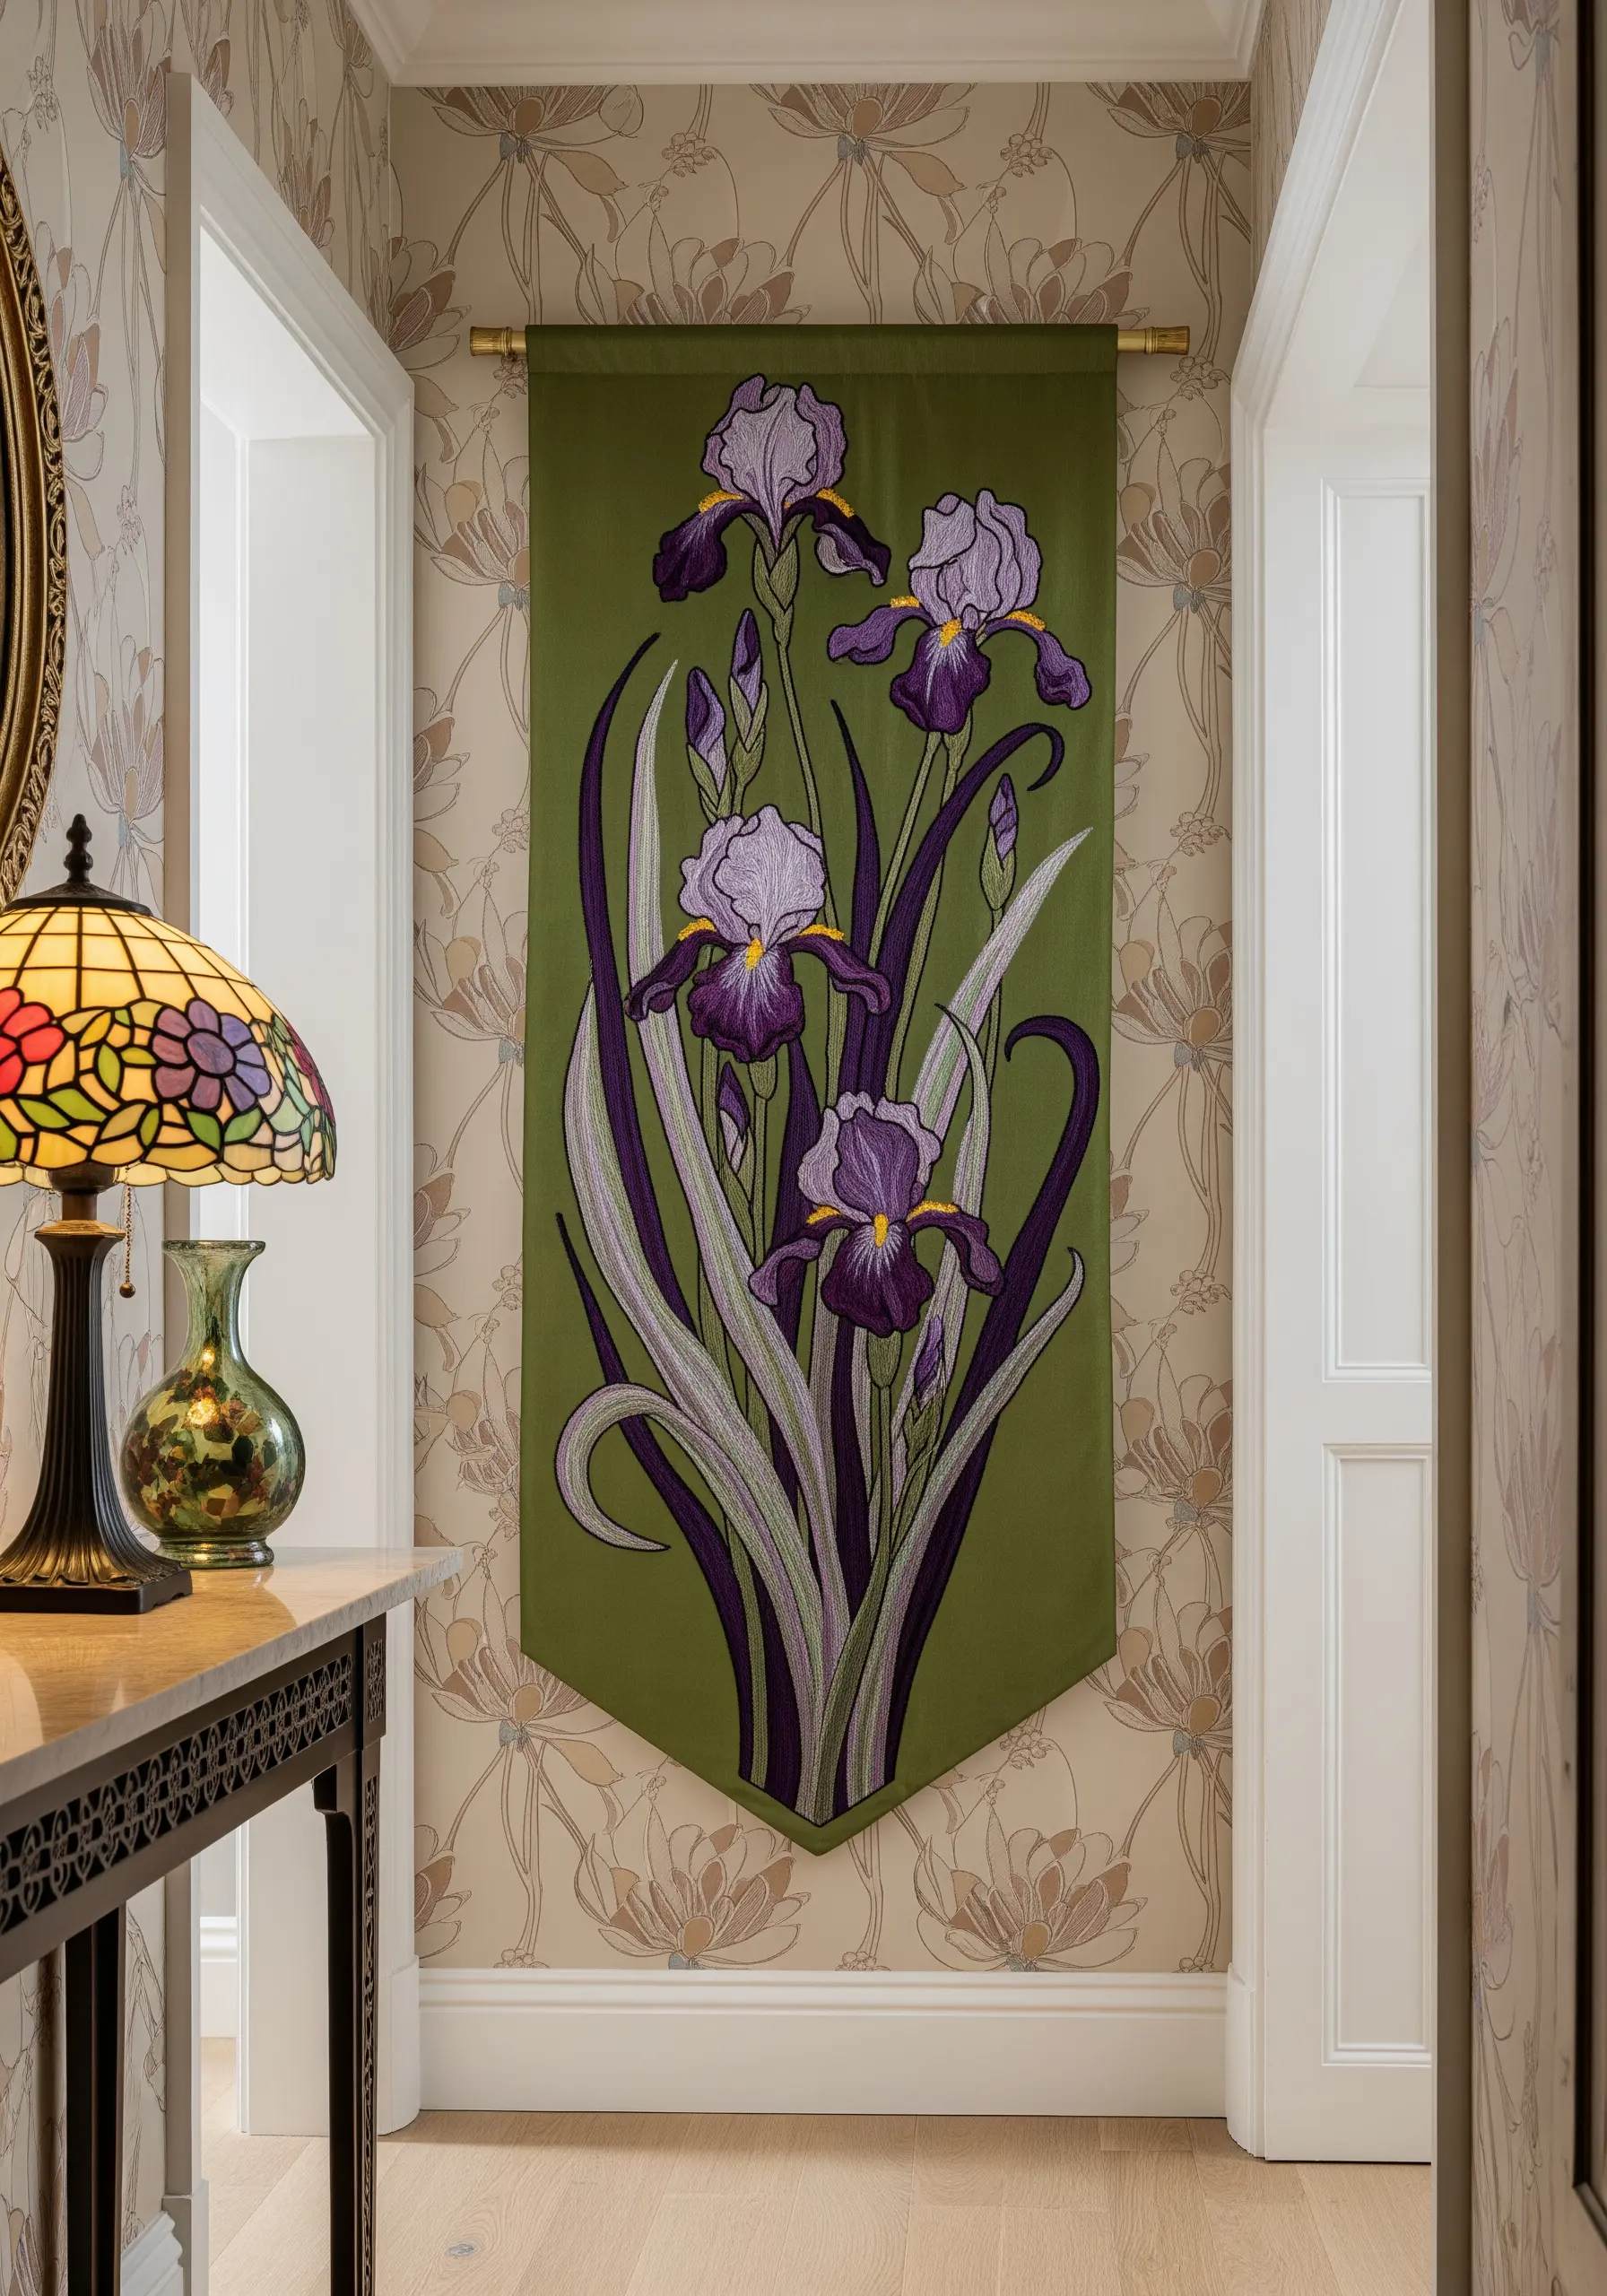
Emulate the iconic elegance of Art Nouveau by emphasizing strong, flowing outlines in your floral compositions.
First, trace your design onto a medium-weight cotton in a solid, earthy color like olive green. Then, outline every shape with a dark, contrasting chain stitch or whipped backstitch.
Fill the shapes with a smooth, directional satin stitch, making sure the angle of your stitches follows the curve of the petals and leaves.
This combination of bold outlines and fluid fills is the hallmark of the style, creating movement and graphic impact.
5. Combine Delicate Florals with a Statement Monogram

Elevate a personal monogram by encircling it with a delicate floral wreath. This design balances boldness with softness for a timeless appeal.
Work the botanical monogram wreath first using long-and-short stitch for the petals and fishbone stitch for the leaves, which creates realistic texture.
For the central letters, switch to a lustrous gold thread and use a padded satin stitch. To do this, create a base layer of stitches within the letter shape before covering it with your final satin stitches.
This padding raises the monogram slightly, giving it prominence and a luxurious, three-dimensional finish against the rich velvet.
6. Illustrate a Narrative with Graphic Stitch-Painting
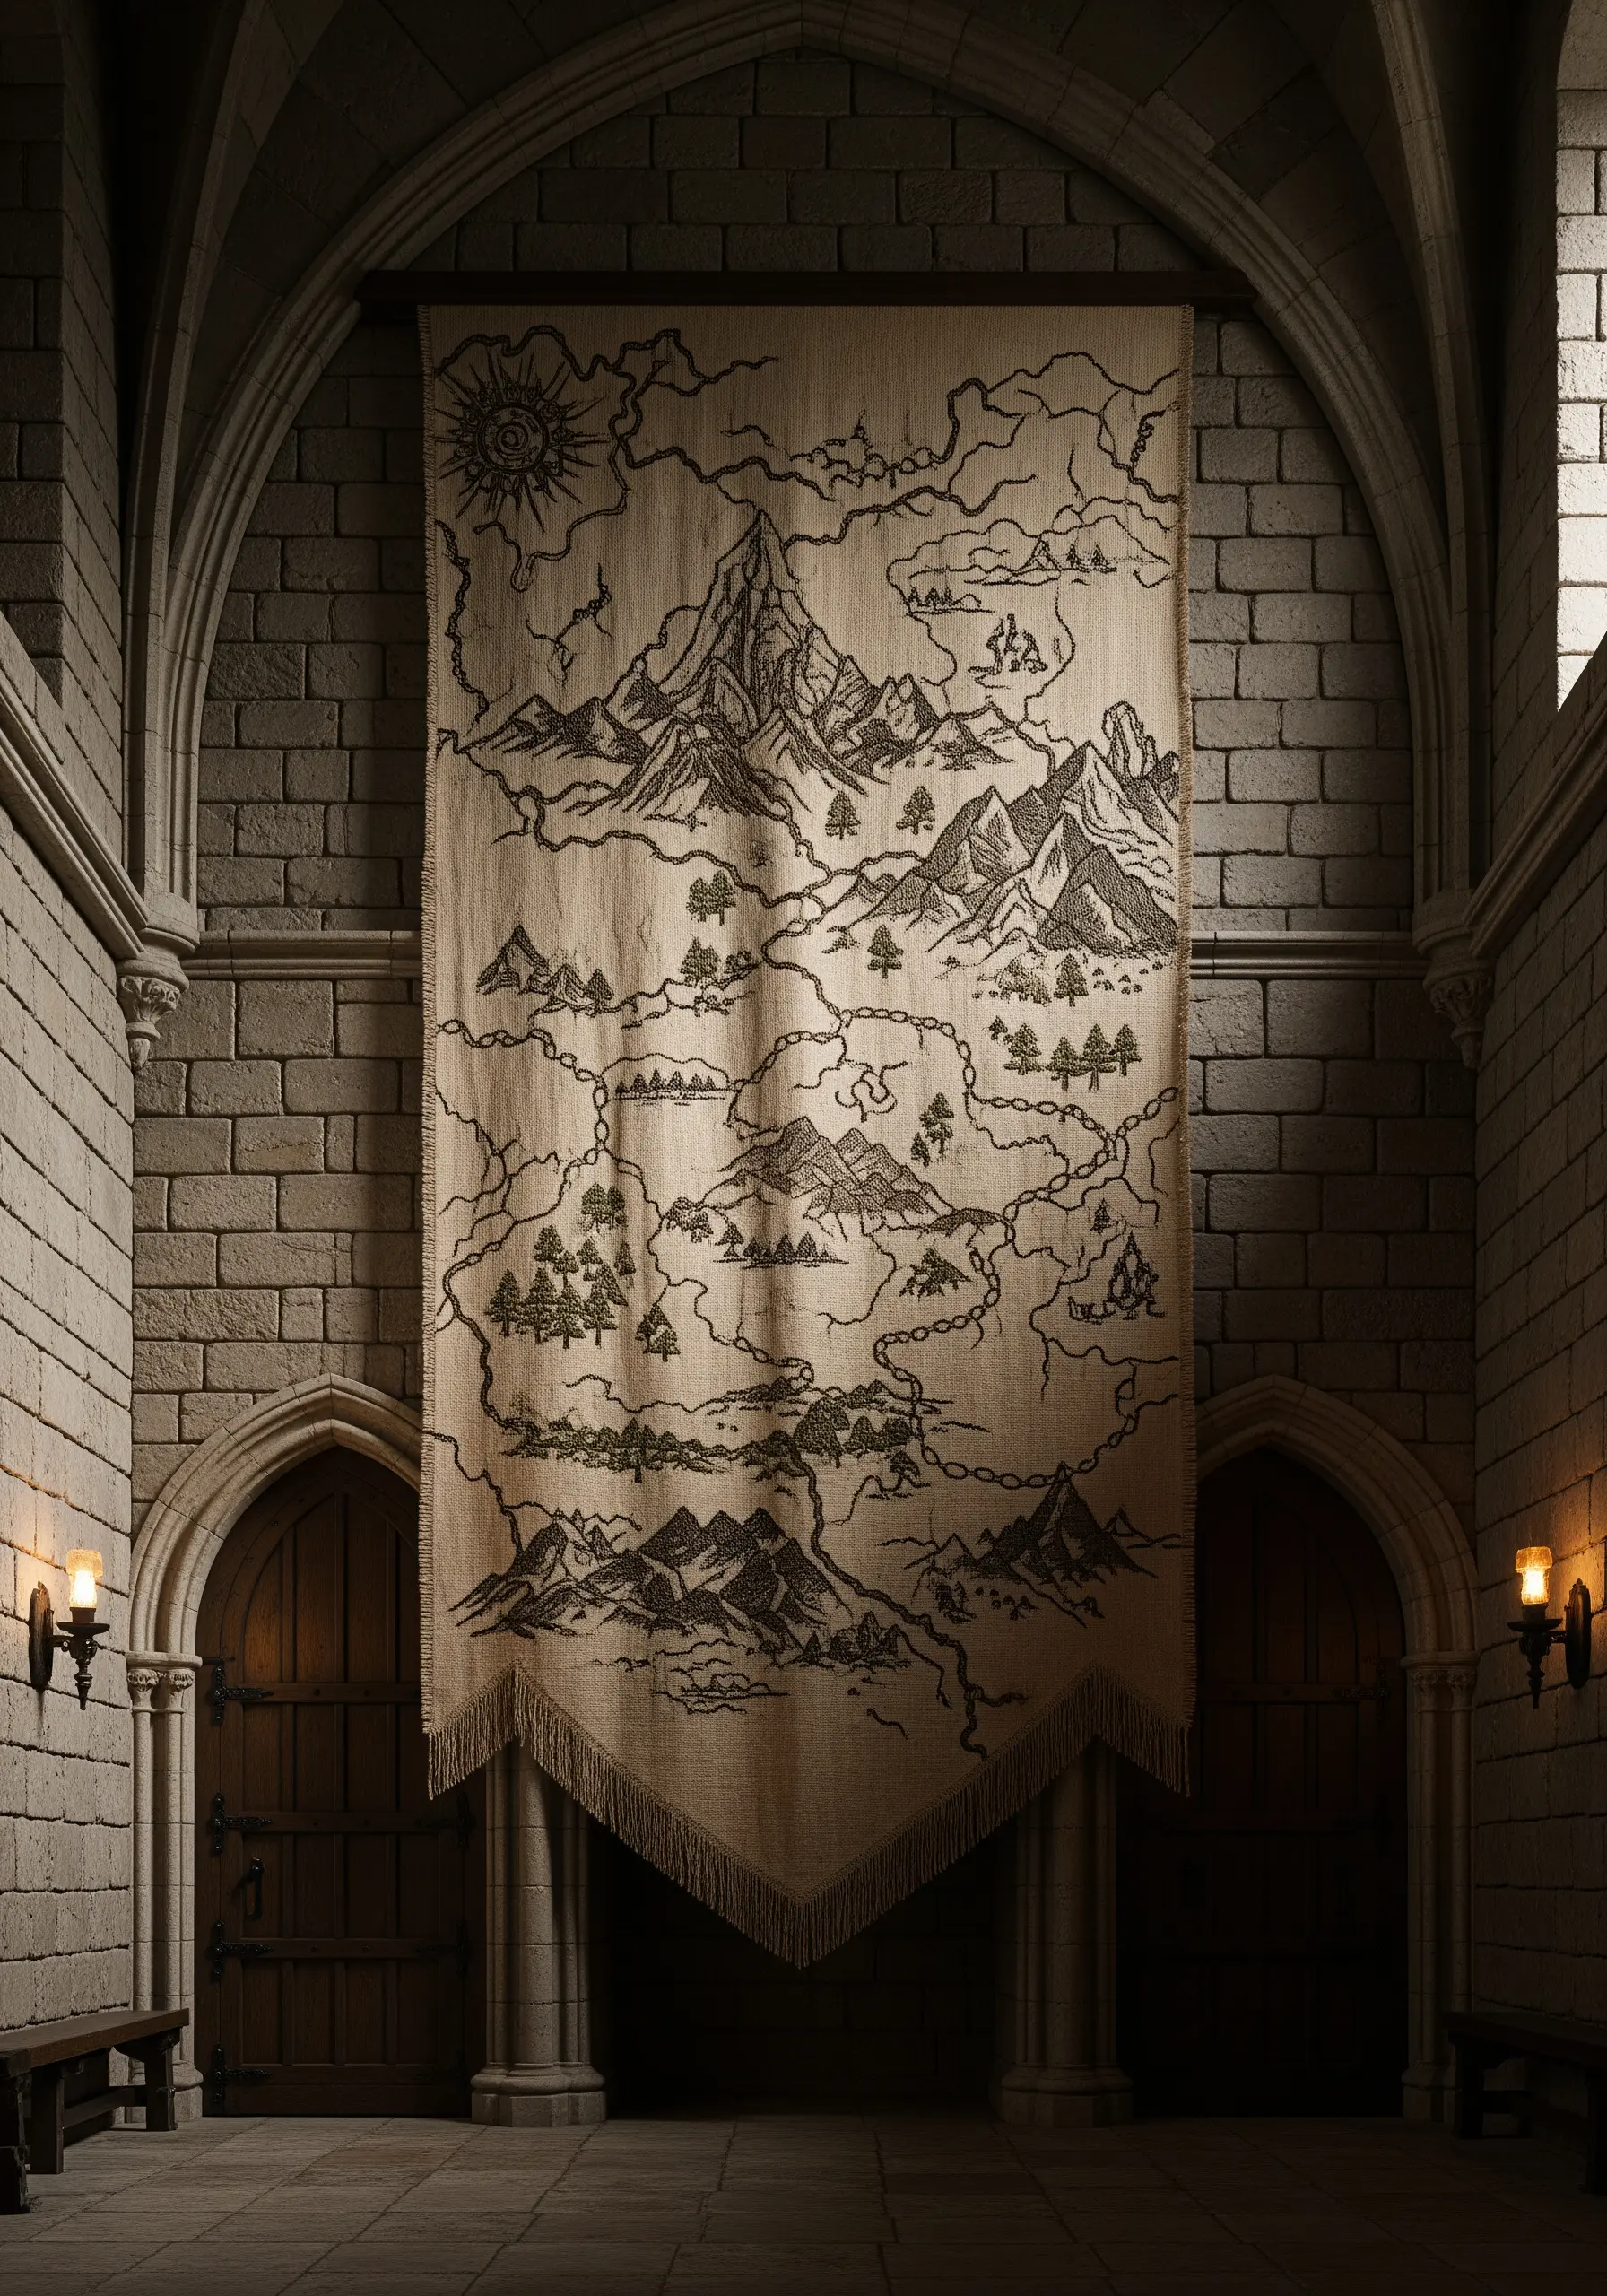
Transform a simple banner into an epic map or story using only a few basic stitches. The key is to think like an illustrator, not just a stitcher.
Use a sturdy, neutral-colored fabric like unbleached canvas or linen that can support dense stitching without puckering.
Vary your stitch textures to define different landscape elements: use backstitch for sharp outlines, seed stitch for grassy plains, and tightly packed French knots for forests.
This textural variation creates visual interest and depth, turning a monochrome design into a rich, tactile world.
7. Integrate Beadwork for Refined Opulence
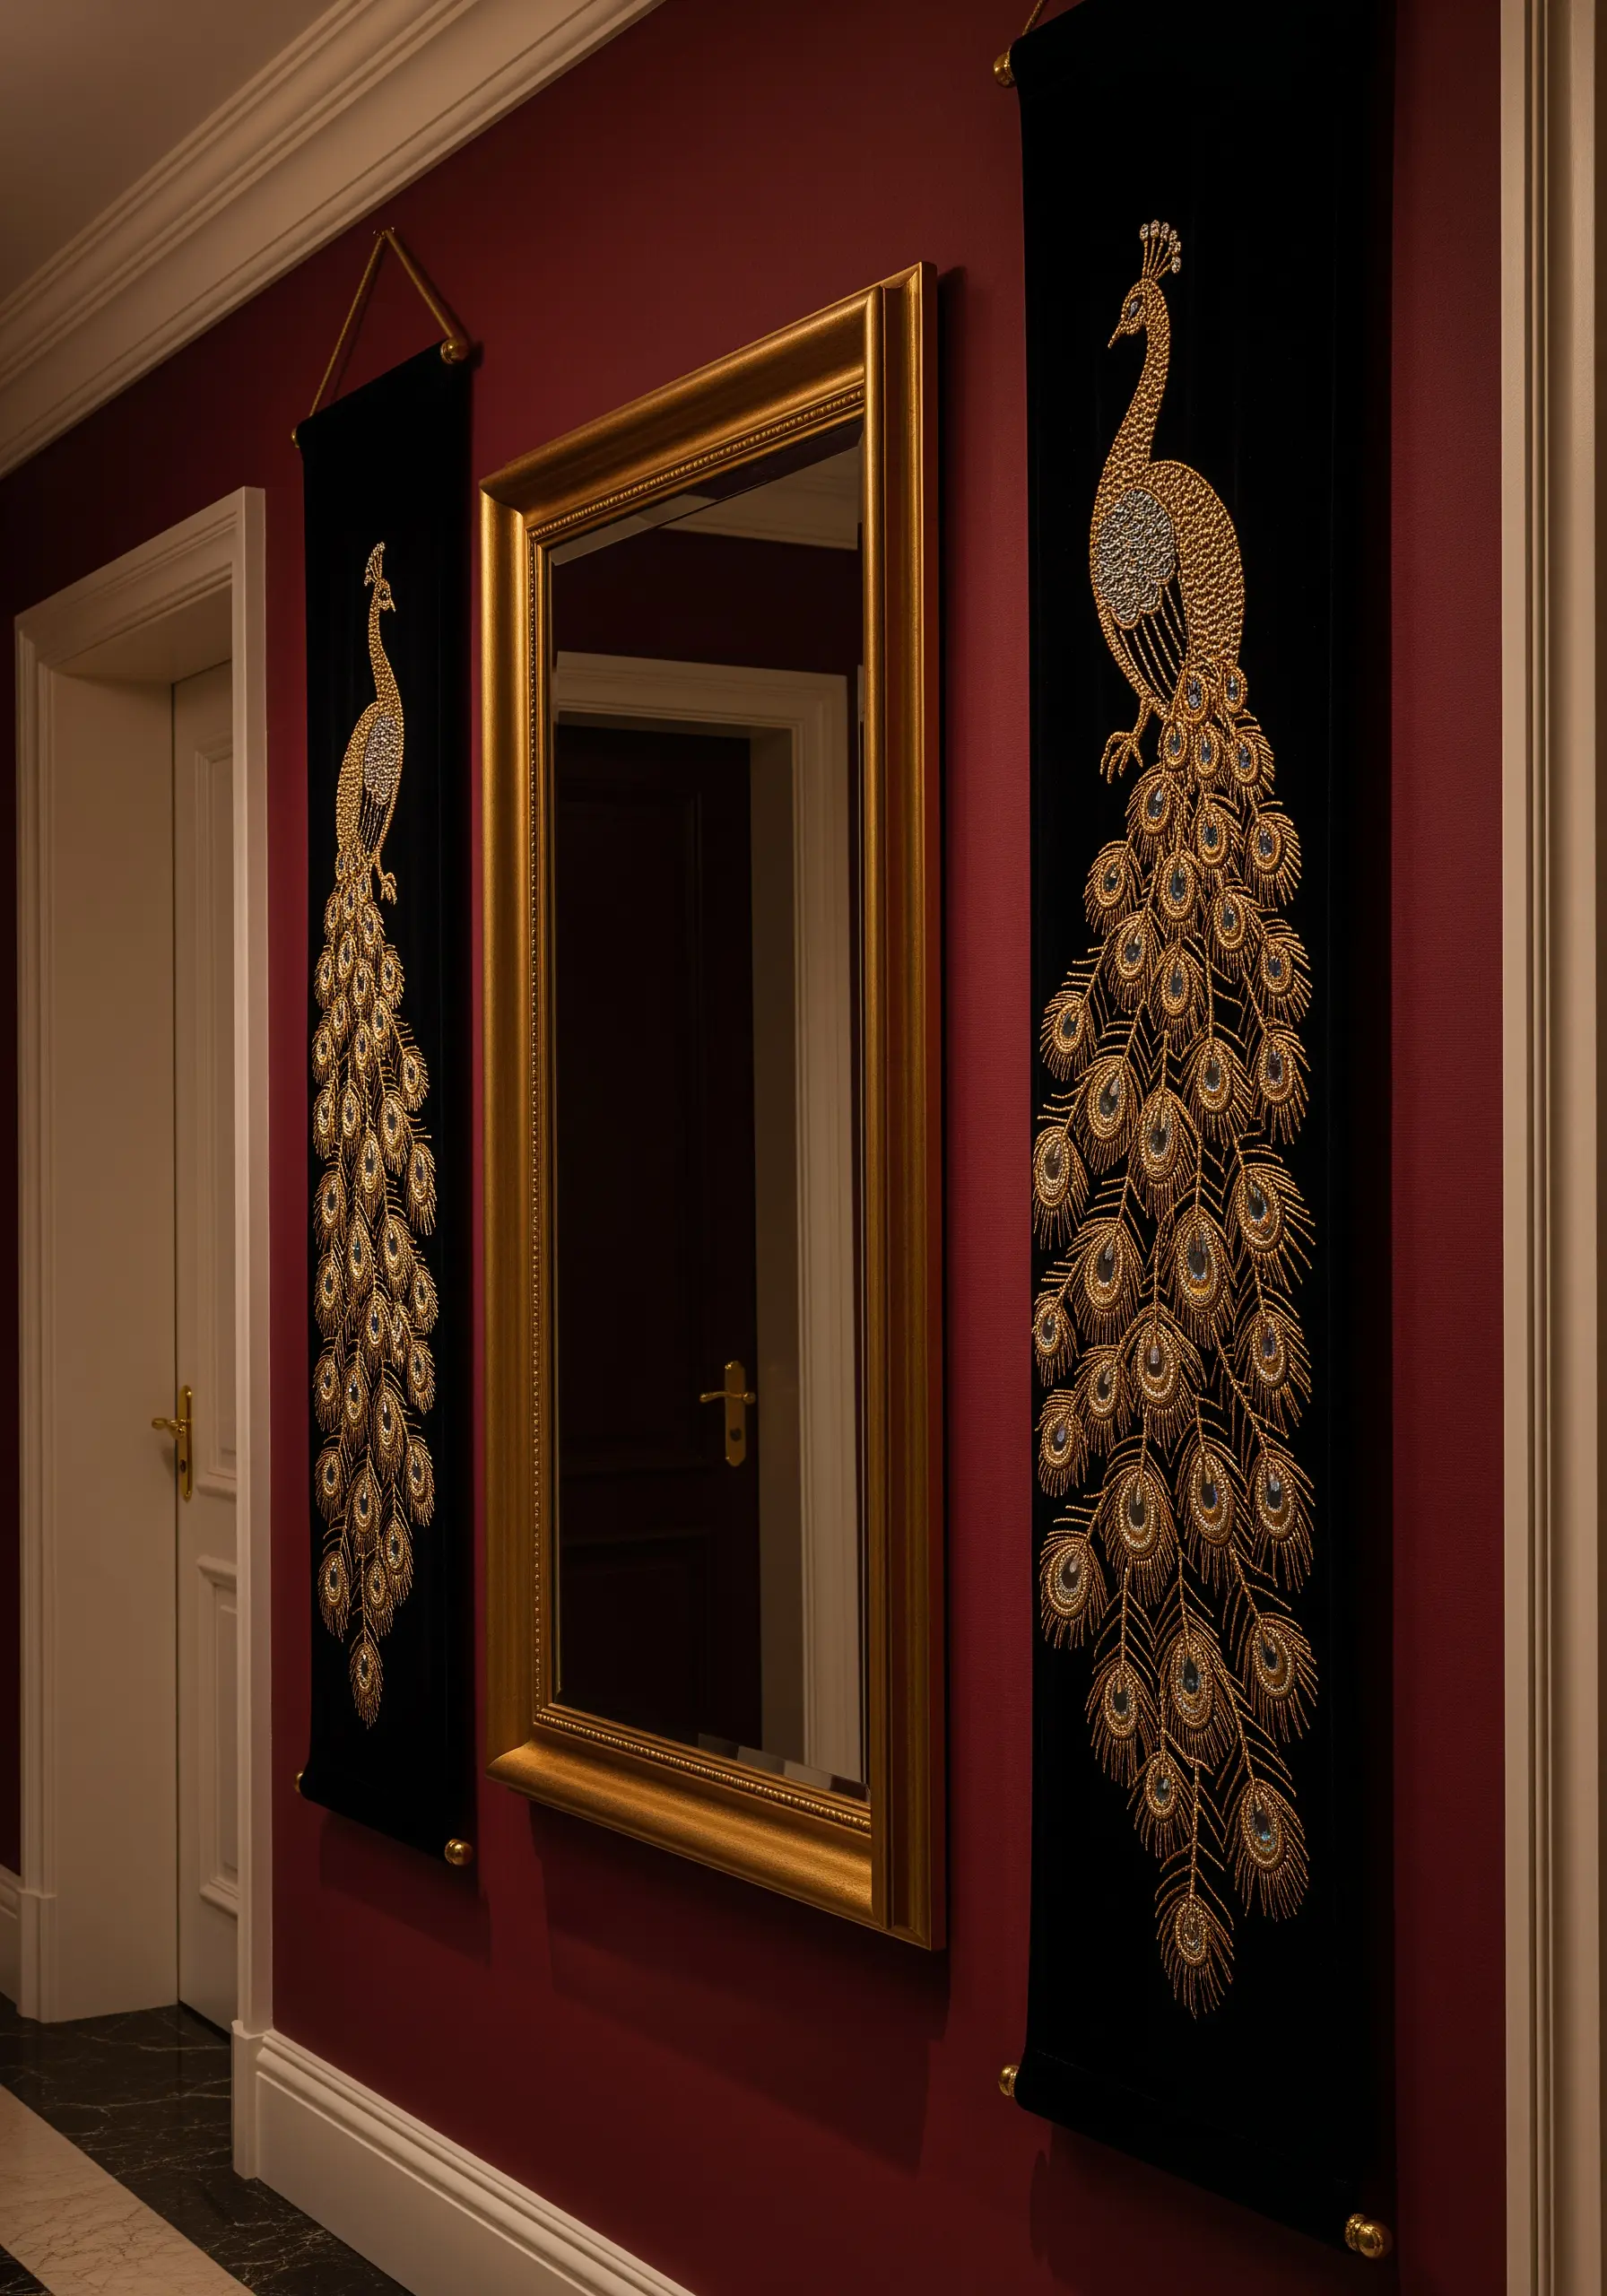
Introduce subtle luxury by incorporating beads and metallic threads, especially on a dark fabric like black velvet where they will catch the light.
Instead of filling an entire motif, use beads selectively to highlight specific details—the eyes of a peacock’s feather or the center of a flower.
Secure each bead with a tiny stitch, ensuring your thread matches the fabric to become invisible. Outline the beaded sections with a fine metallic chain stitch or couched cord.
This technique adds a sophisticated shimmer and texture that elevates the entire piece from flat embroidery to dimensional textile art.
8. Balance Florals and Typography on Satin
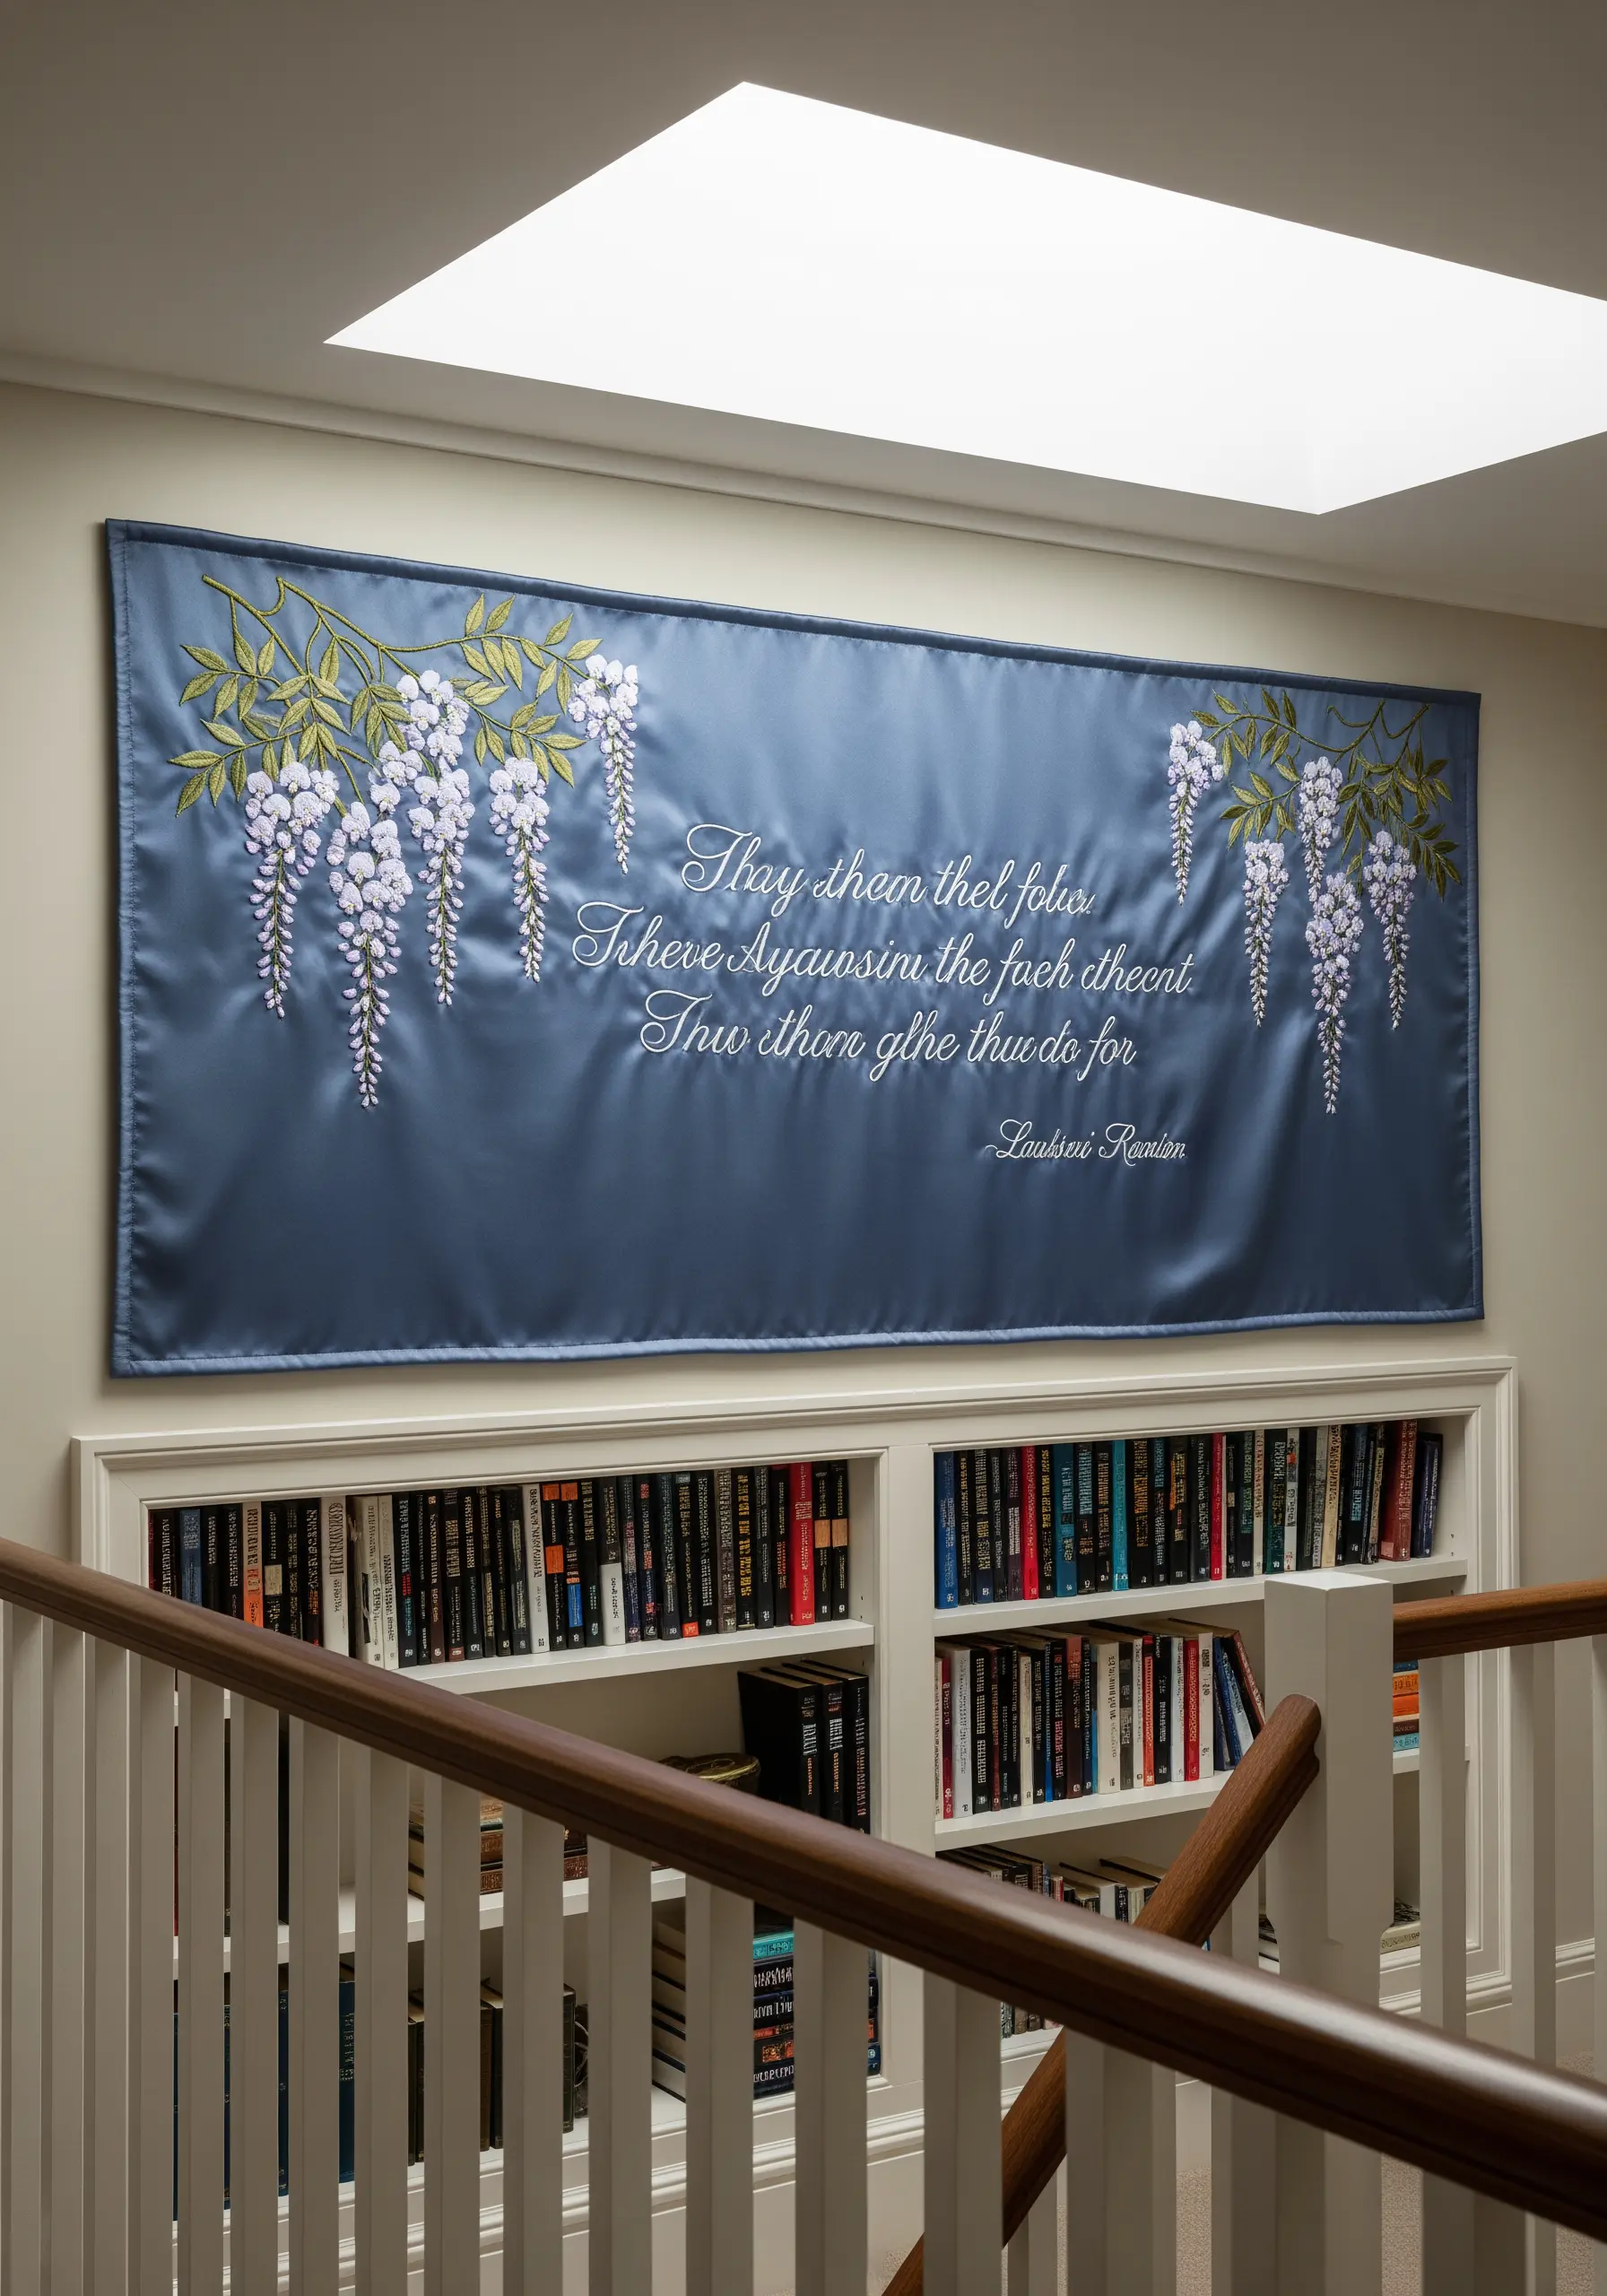
When combining imagery and text, create a visual hierarchy. The soft luster of a satin background provides a perfect stage for this balance.
Stitch the wisteria first, using a gradient of purples in a long-and-short stitch to give the petals a soft, realistic blend.
For the text, choose a simple, elegant script and use a delicate, two-strand backstitch. This ensures the words are legible but don’t compete with the more complex florals.
By framing the text with the botanical elements, you create a composition that guides the eye naturally from the art to the message.
9. Juxtapose Rustic Fabric with Fine Stitches
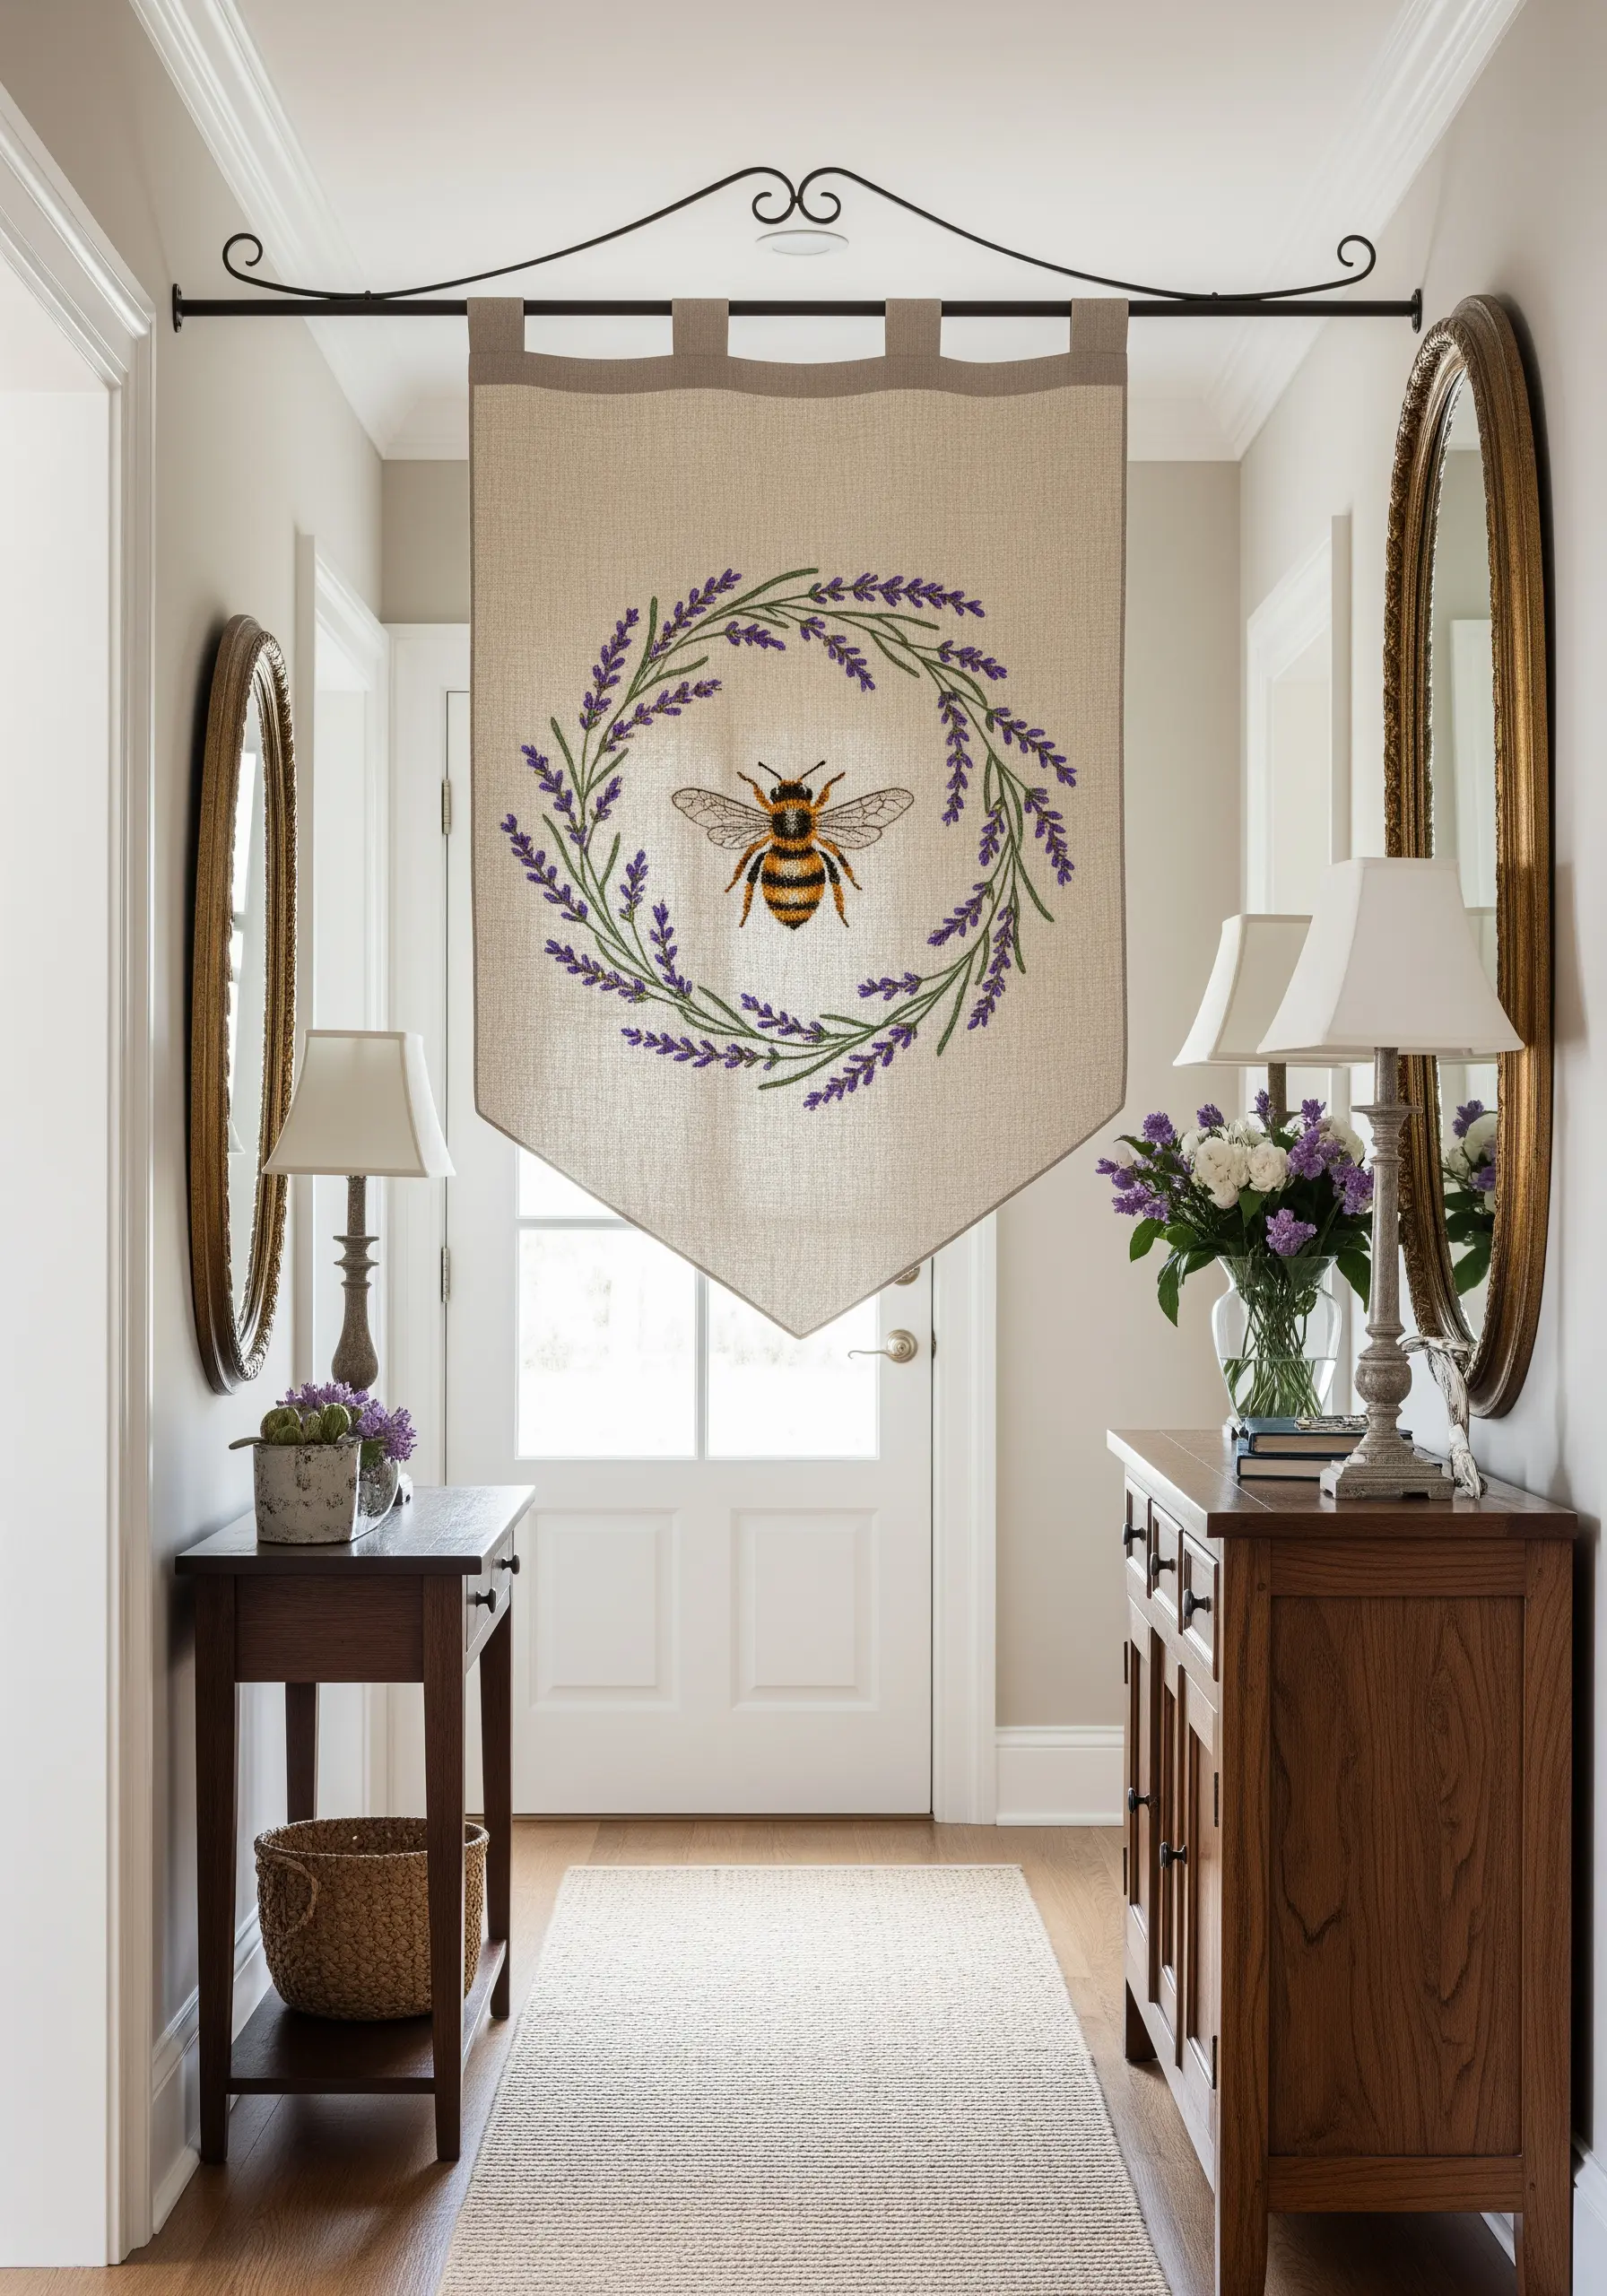
Create a stunning textural contrast by stitching a detailed, delicate motif onto a rustic, open-weave fabric like burlap or heavy linen.
The key to success is using a stabilizer on the back of the fabric to prevent the loose weave from distorting your stitches.
For the lavender, use a fishbone stitch for the leaves to create a central vein, and packed French knots for the blossoms. For the bee, use a split stitch for the fuzzy body and single-strand backstitch for the delicate wings.
This pairing of a refined subject with a raw-textured ground feels both earthy and sophisticated.
10. Command Attention with Grand-Scale Appliqué
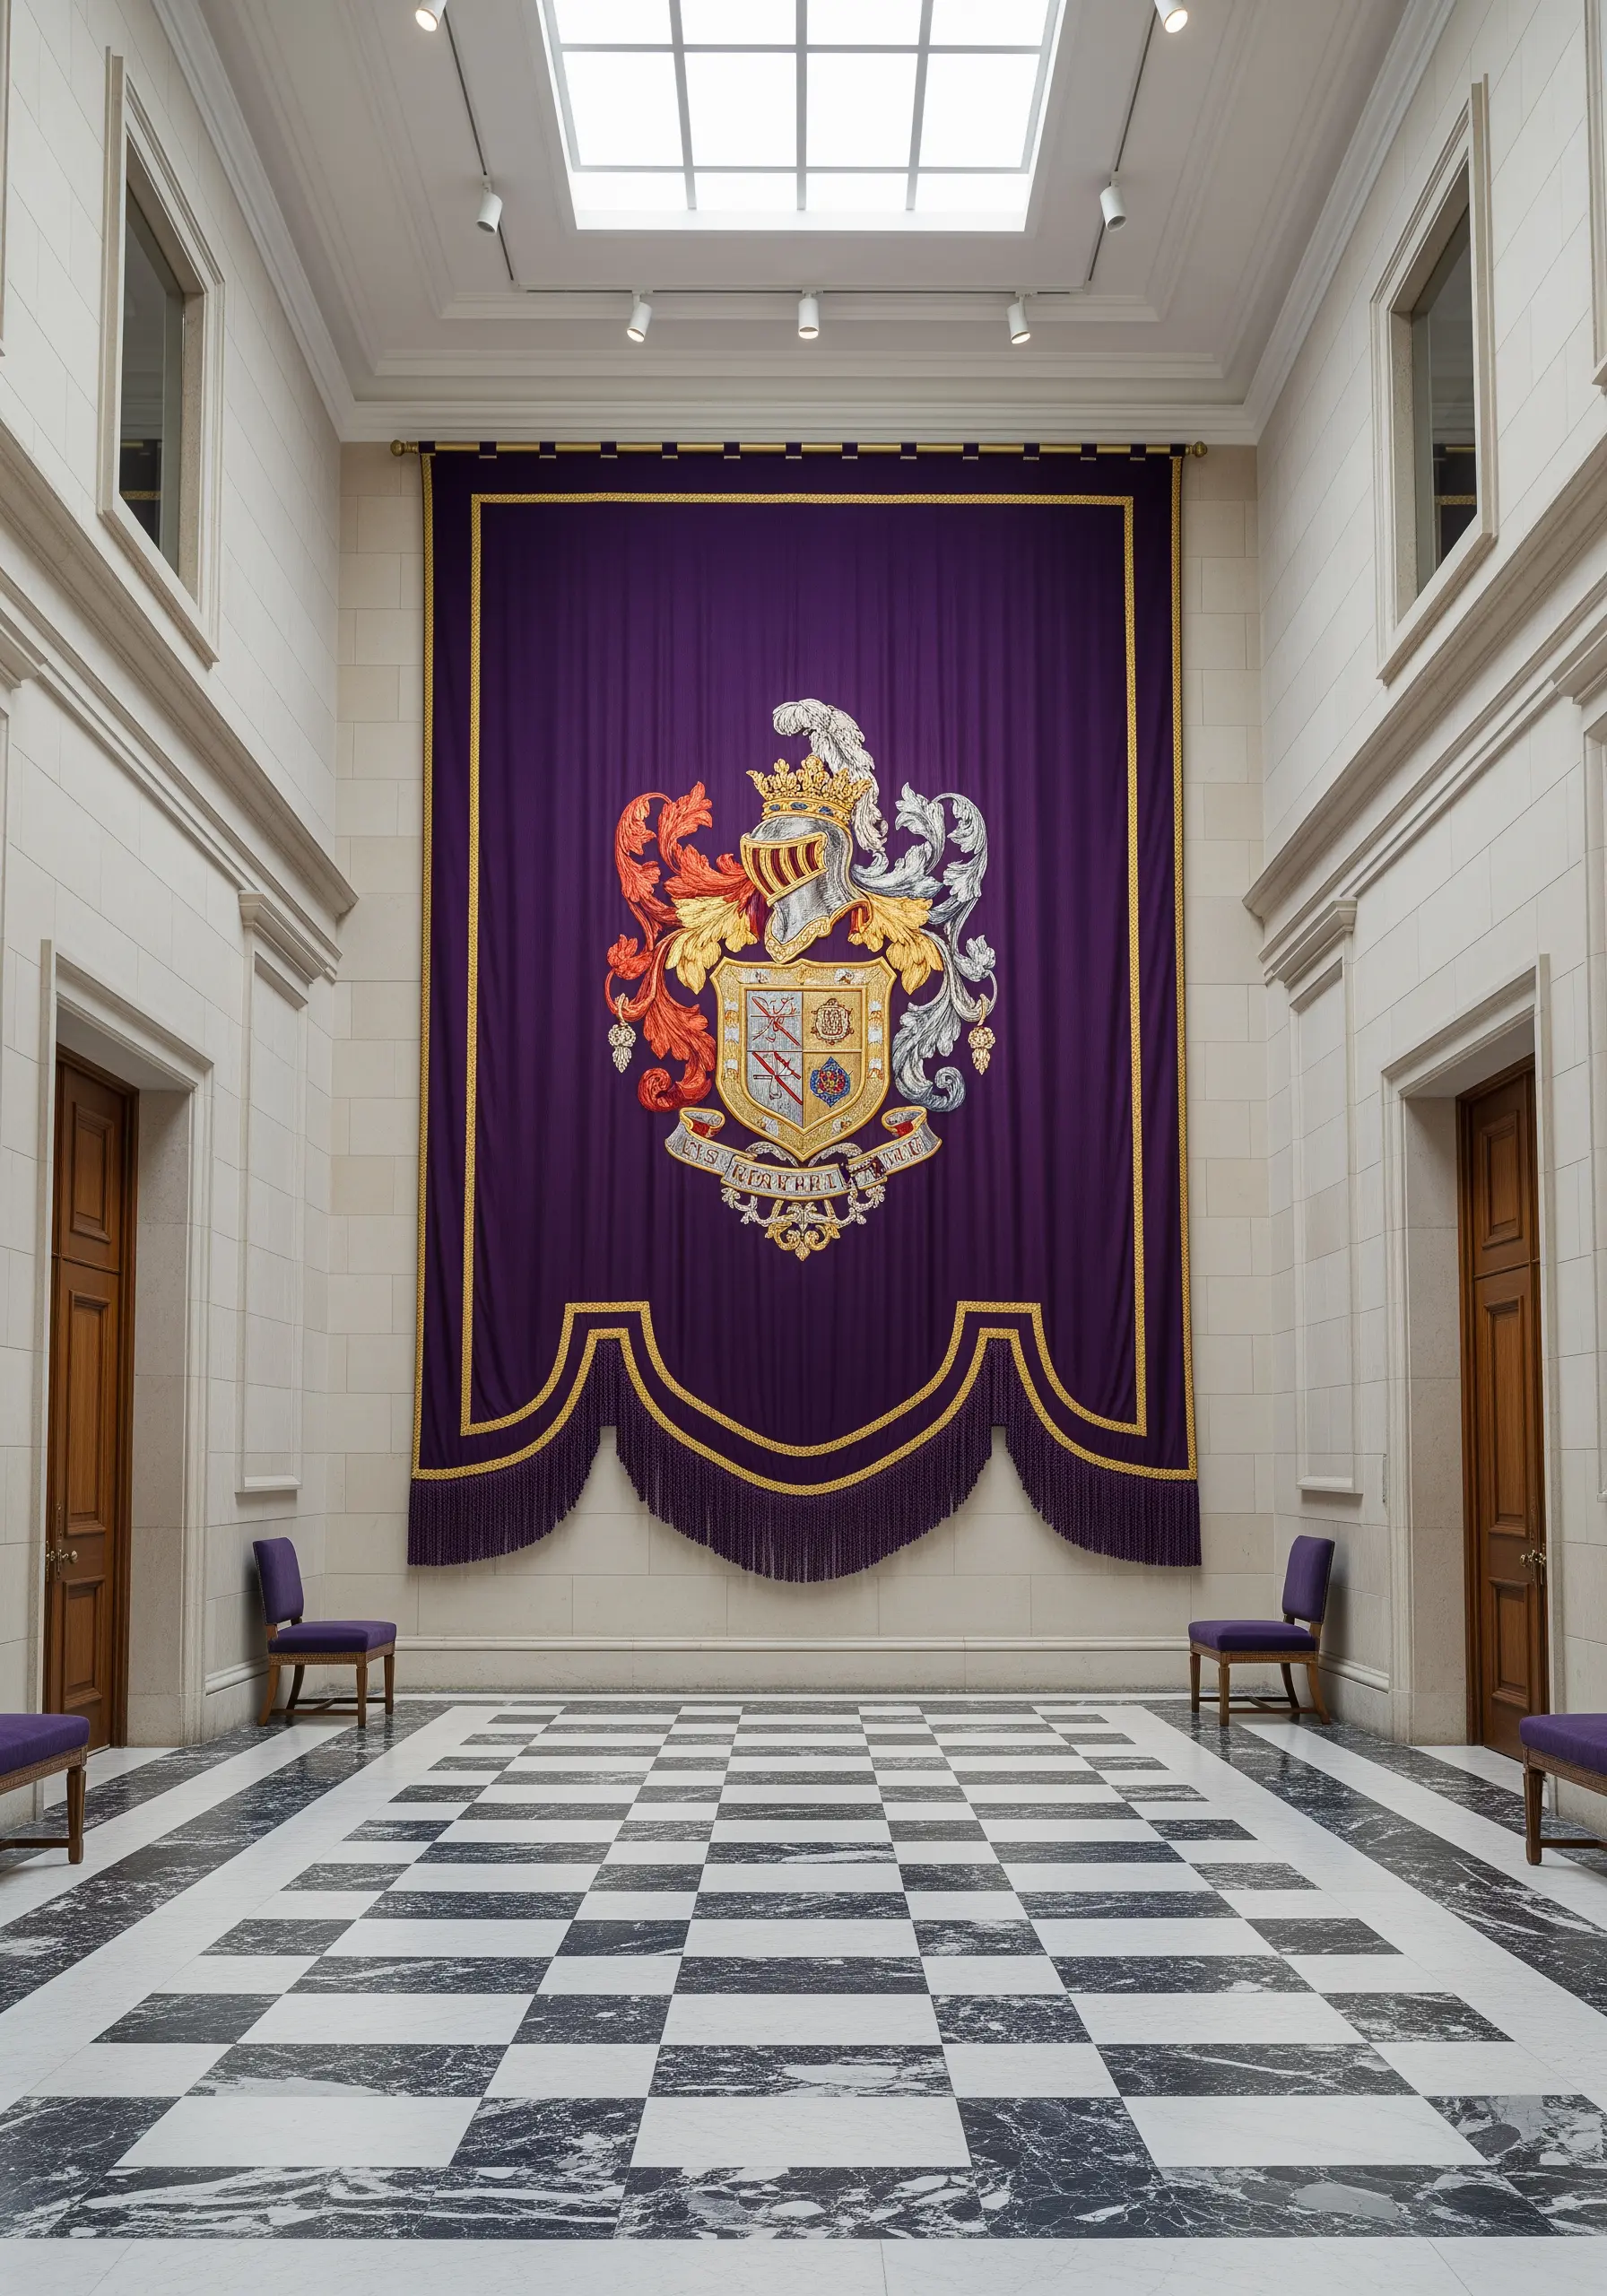
For exceptionally large banners, hand embroidery alone can be impractical. Combine it with appliqué for a powerful, graphic result.
First, cut your main shapes (like the shield and flourishes of a crest) from fabrics like felt or silk, choosing colors that contrast with your base fabric.
Tack these shapes into place, then secure the edges with a tight, neat blanket stitch or satin stitch border using a matching or contrasting thread.
Finally, add the finer details—shading, outlines, and small elements—with traditional embroidery stitches directly onto the appliqué pieces. This layered approach creates depth and allows you to cover large areas with bold color and texture.
11. Build Rich Texture with Crewel Wool Threads
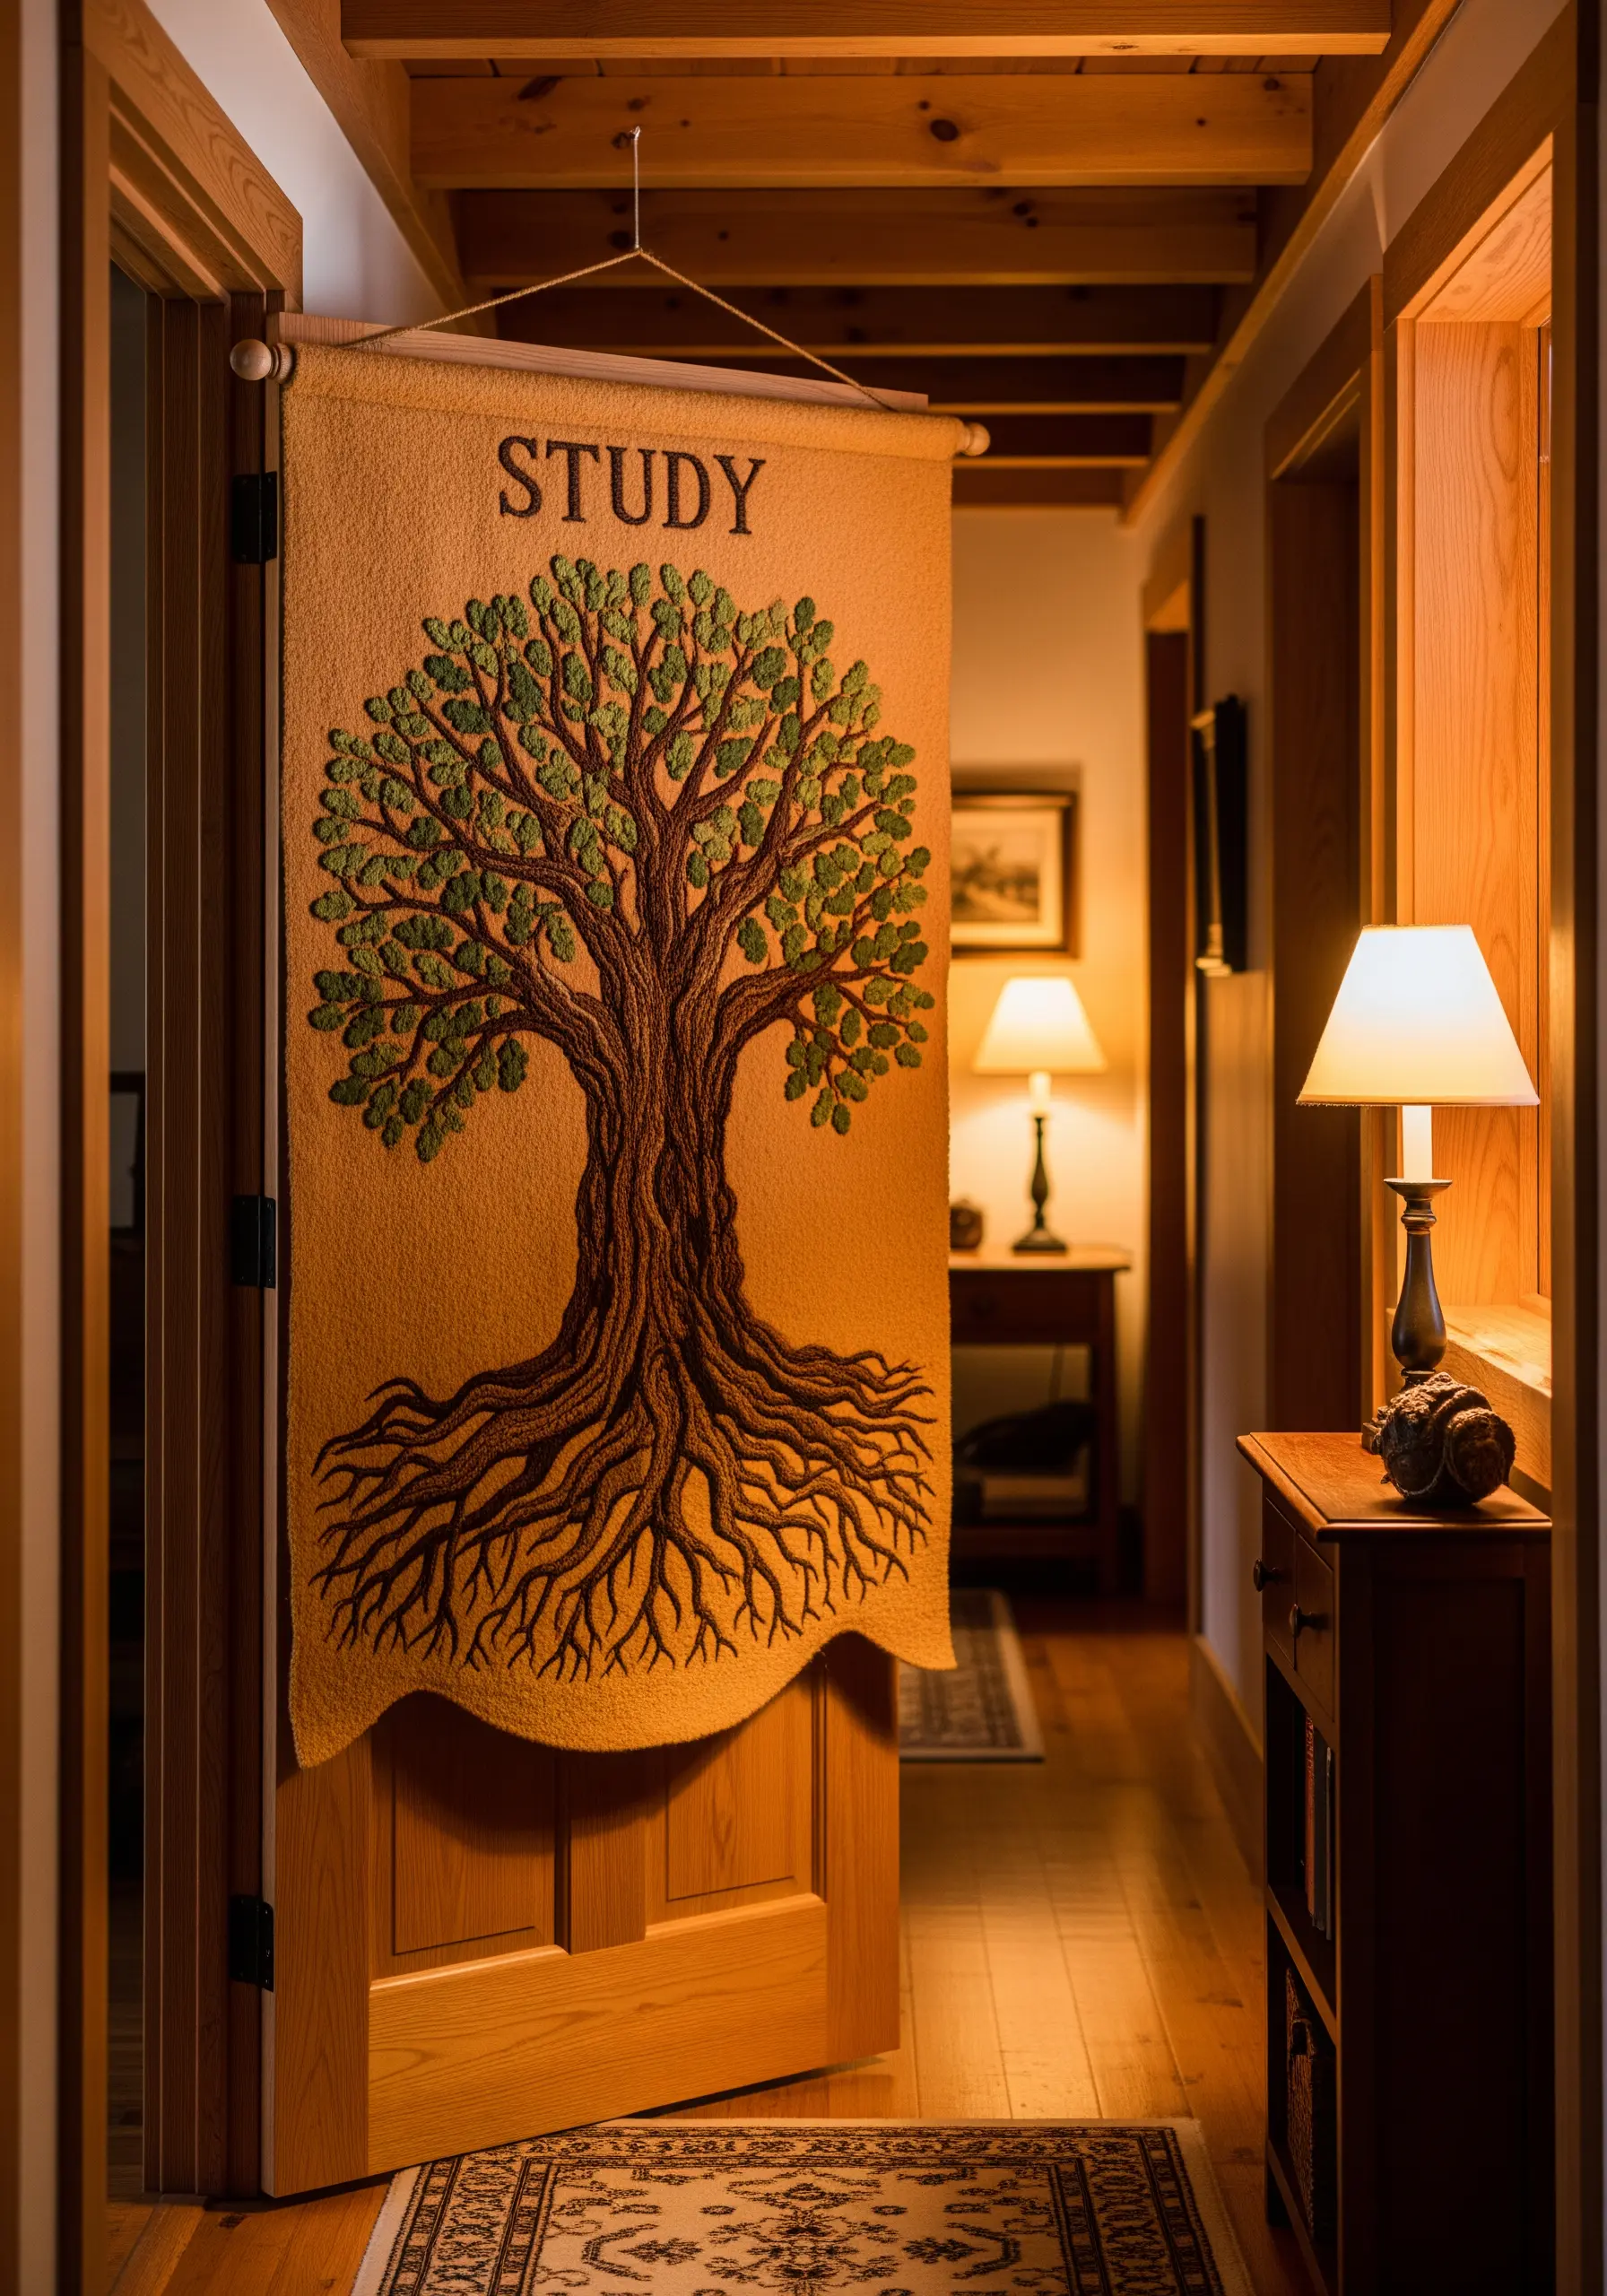
To achieve a dense, tactile surface reminiscent of historic tapestries, work with crewel wool instead of cotton floss.
Choose a fabric with a slightly looser weave, like a wool blend or heavy linen, to accommodate the thicker threads without puckering.
Use stitches that maximize texture: tightly packed satin stitch for the trunk, bullion knots for gnarled roots, and French knots in varying sizes for the leafy canopy.
The natural thickness and soft sheen of the wool create an inherently rich and dimensional piece that invites touch.
12. Embrace Art Deco with Geometric Precision
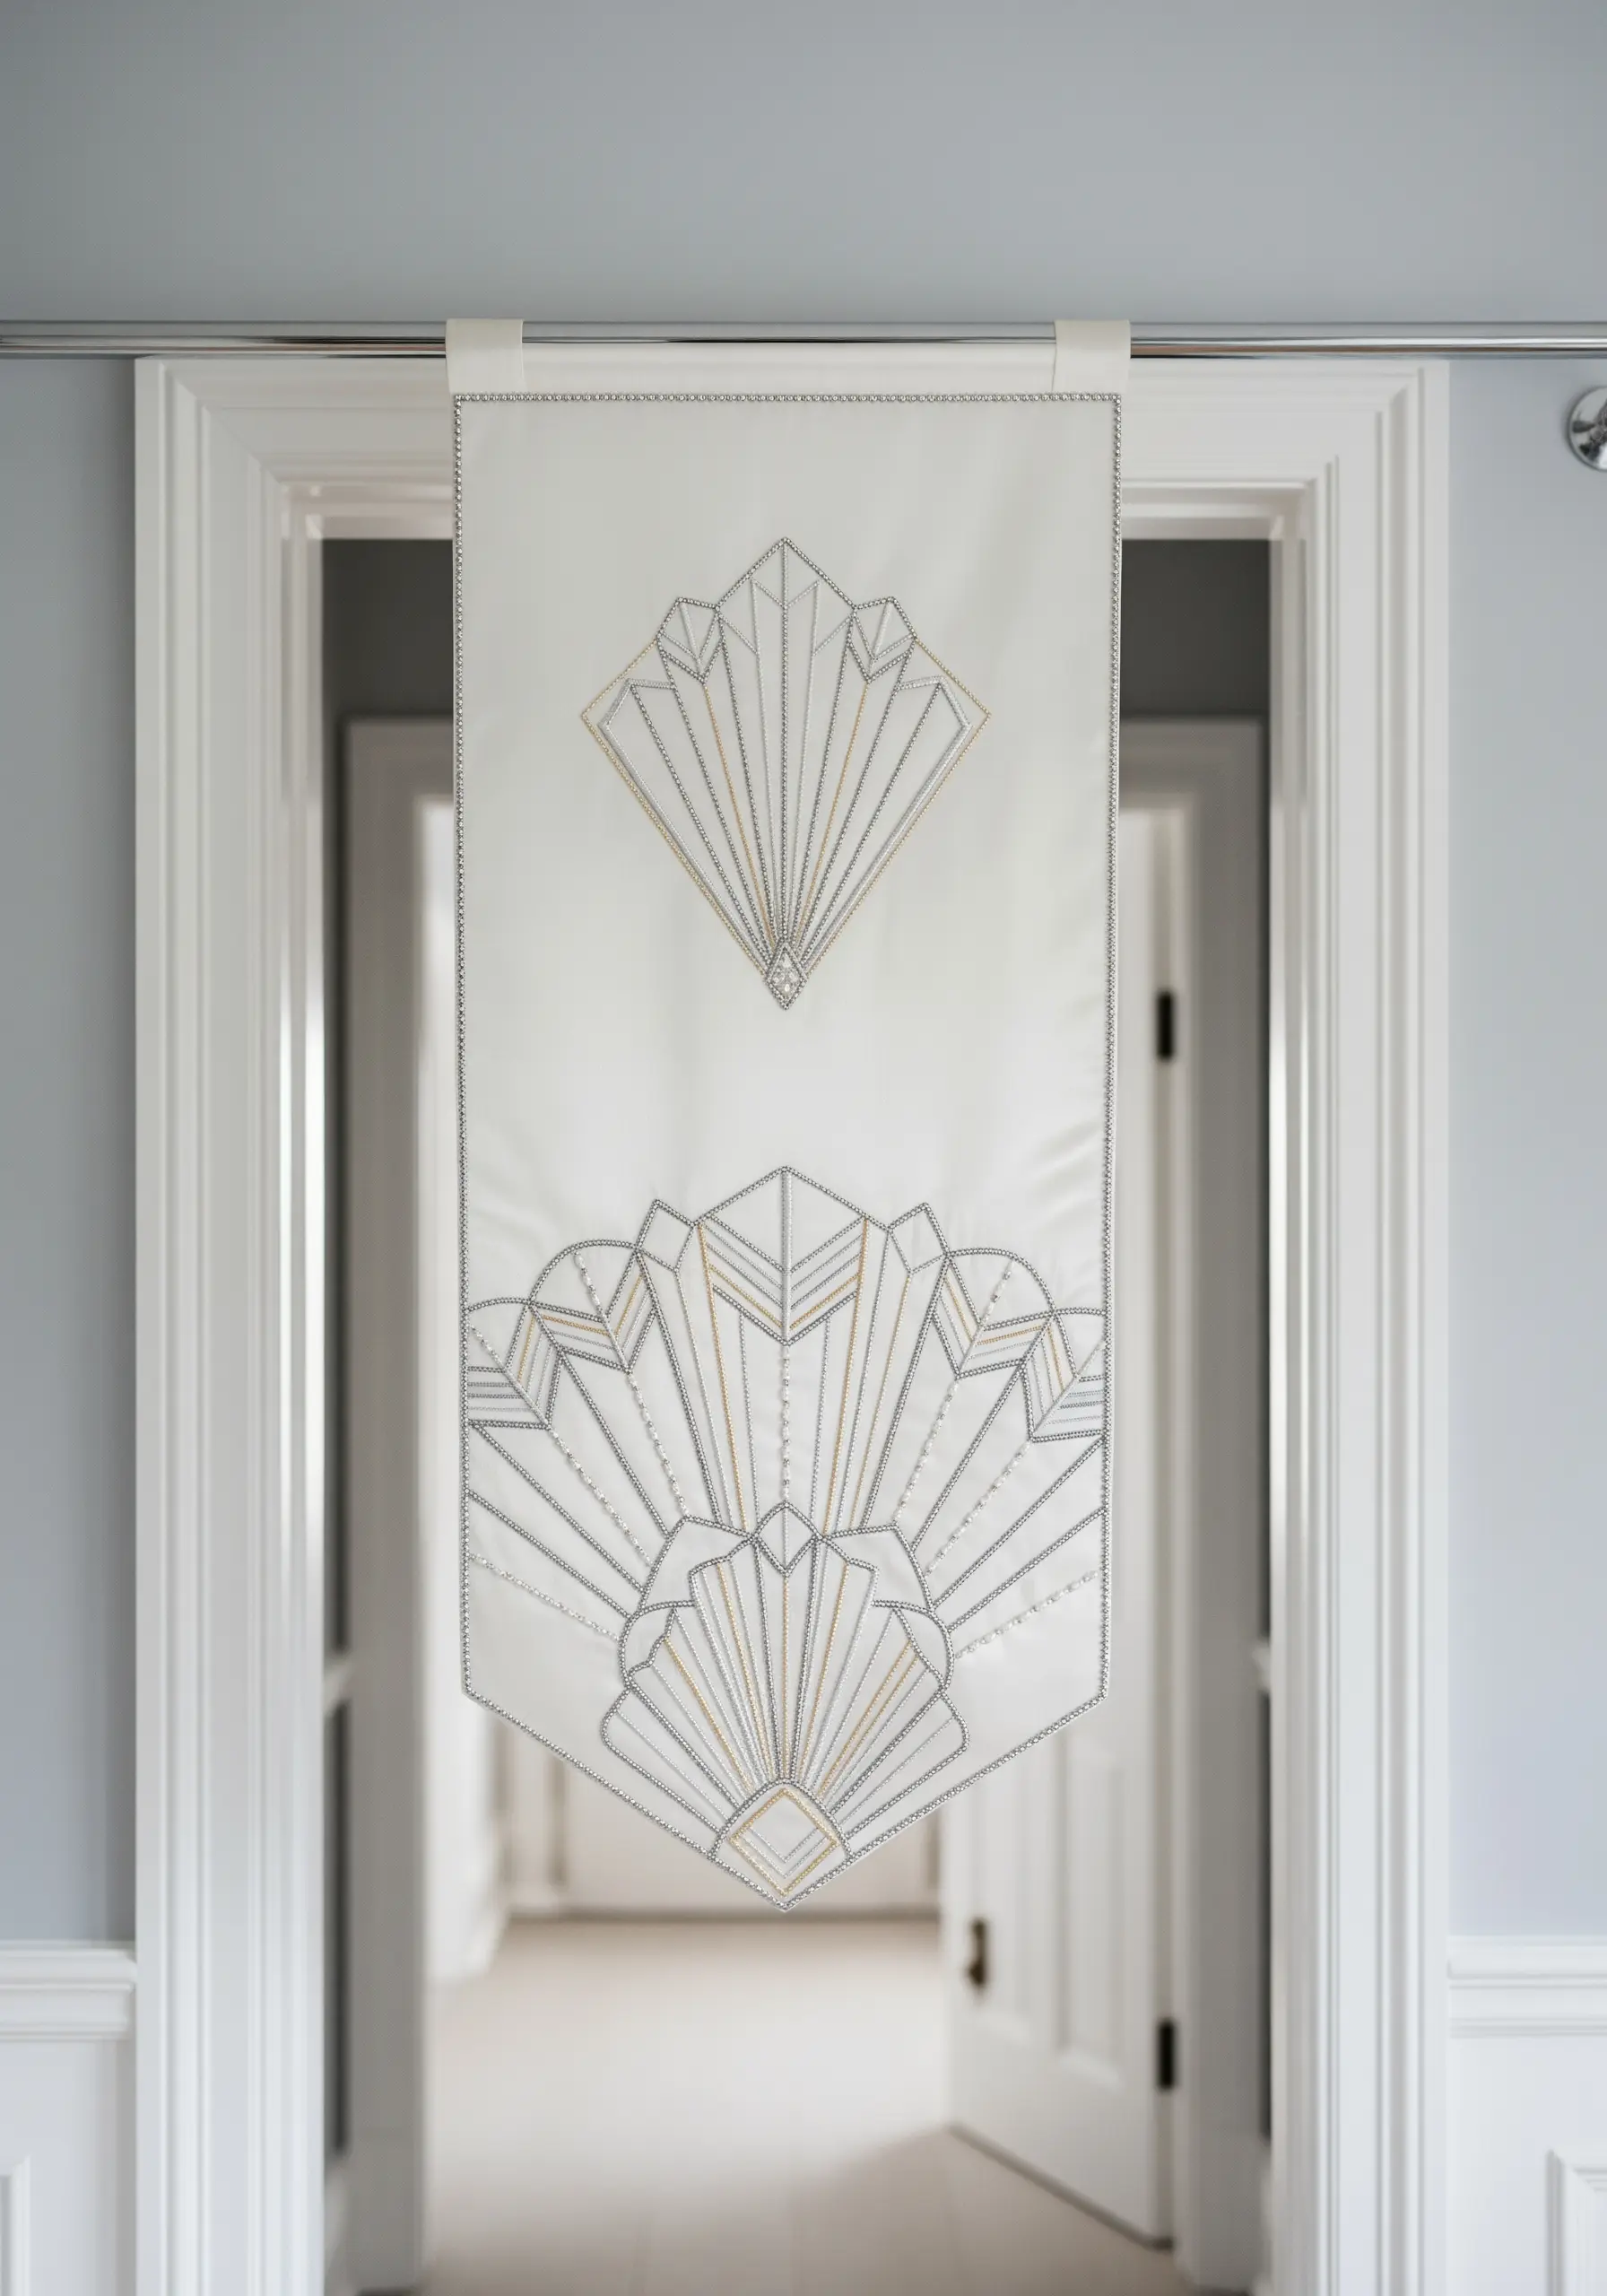
Capture the sleek glamour of the Art Deco era by focusing on symmetry, sharp lines, and a limited, high-contrast color palette.
Use a smooth, lustrous fabric like silk or sateen as your base. To ensure perfectly straight lines, use a couching stitch for your metallic threads or a whipped backstitch for standard floss.
Don’t be afraid to leave areas of the fabric showing. Negative space is a crucial element in Art Deco design, providing balance and emphasizing the clean geometry of your stitched motifs.
The interplay of shimmering thread on a simple background creates an effect of understated luxury.
13. Design a Cohesive Triptych for Greater Impact
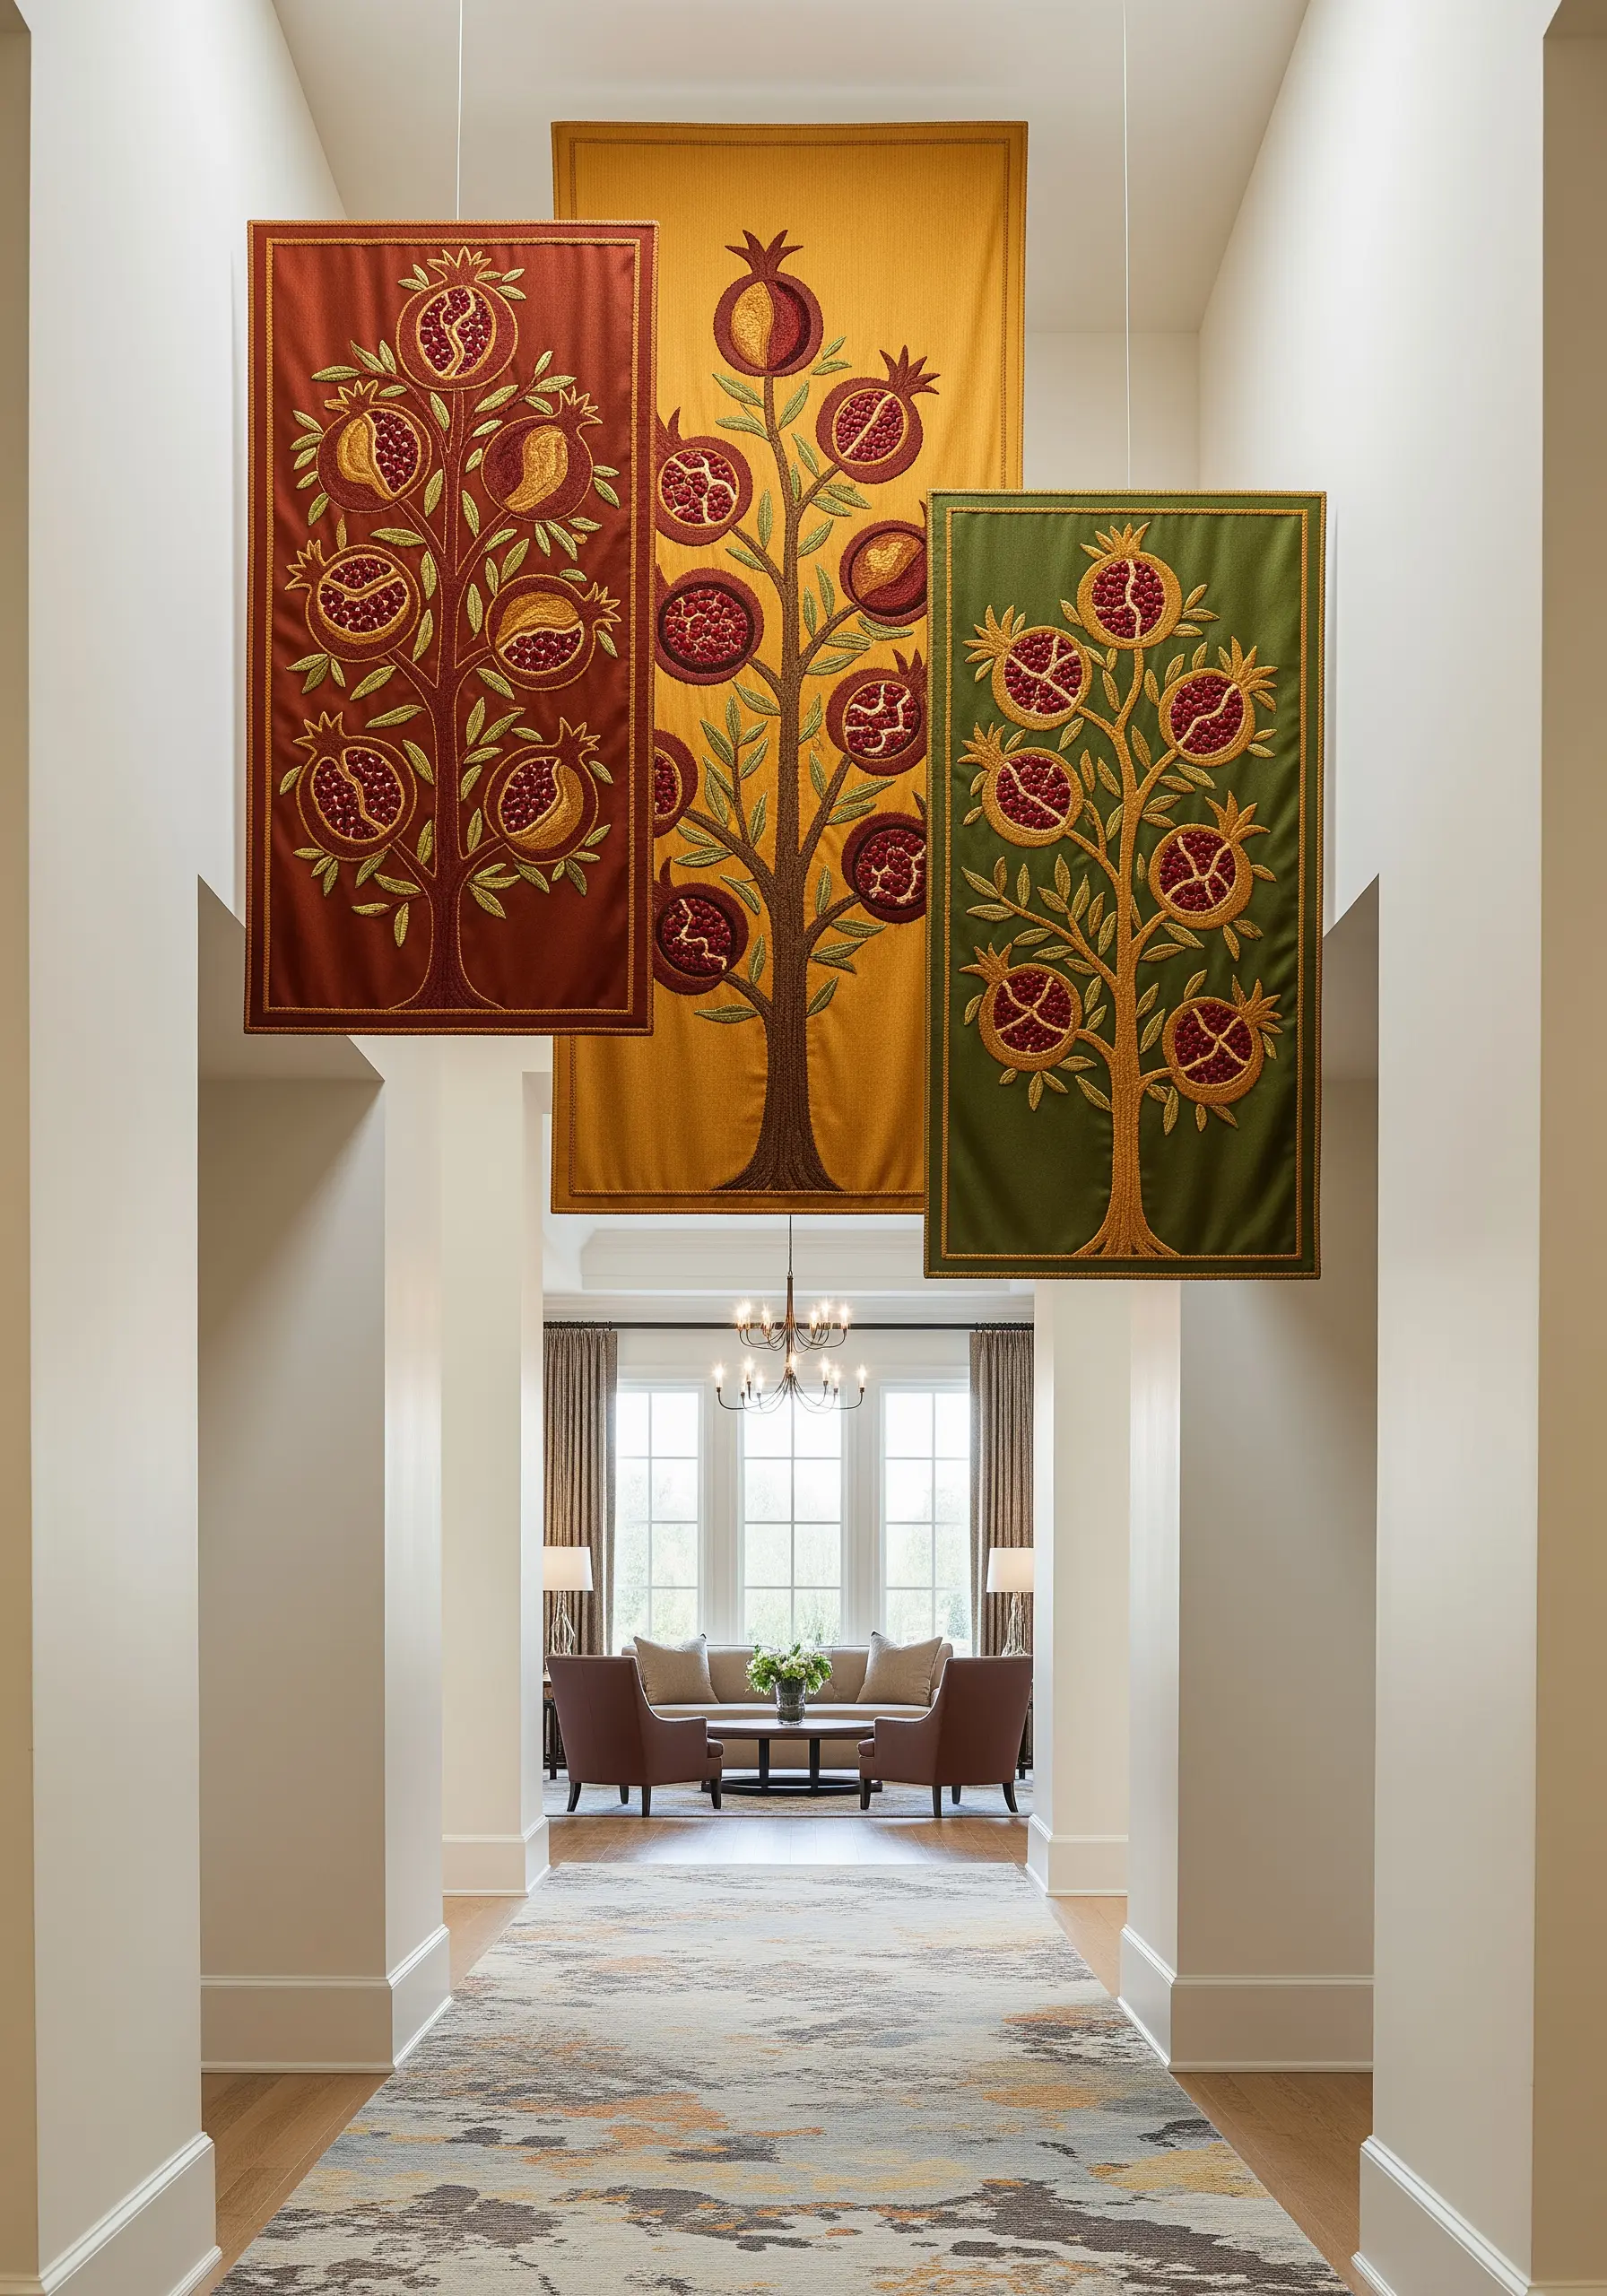
Amplify the presence of your embroidery by creating a series of three banners that work together as a single art piece.
To ensure cohesion, use the same central motif—like a pomegranate tree—but vary the color palette for each panel, drawing from a unified scheme of autumnal tones like rust, gold, and olive.
Keep the design’s scale and placement consistent across all three banners. This repetition provides rhythm and allows the color variations to stand out.
Hanging them together creates a more immersive and commanding visual statement than a single banner ever could.
14. Master High-Contrast Shading with Thread Painting
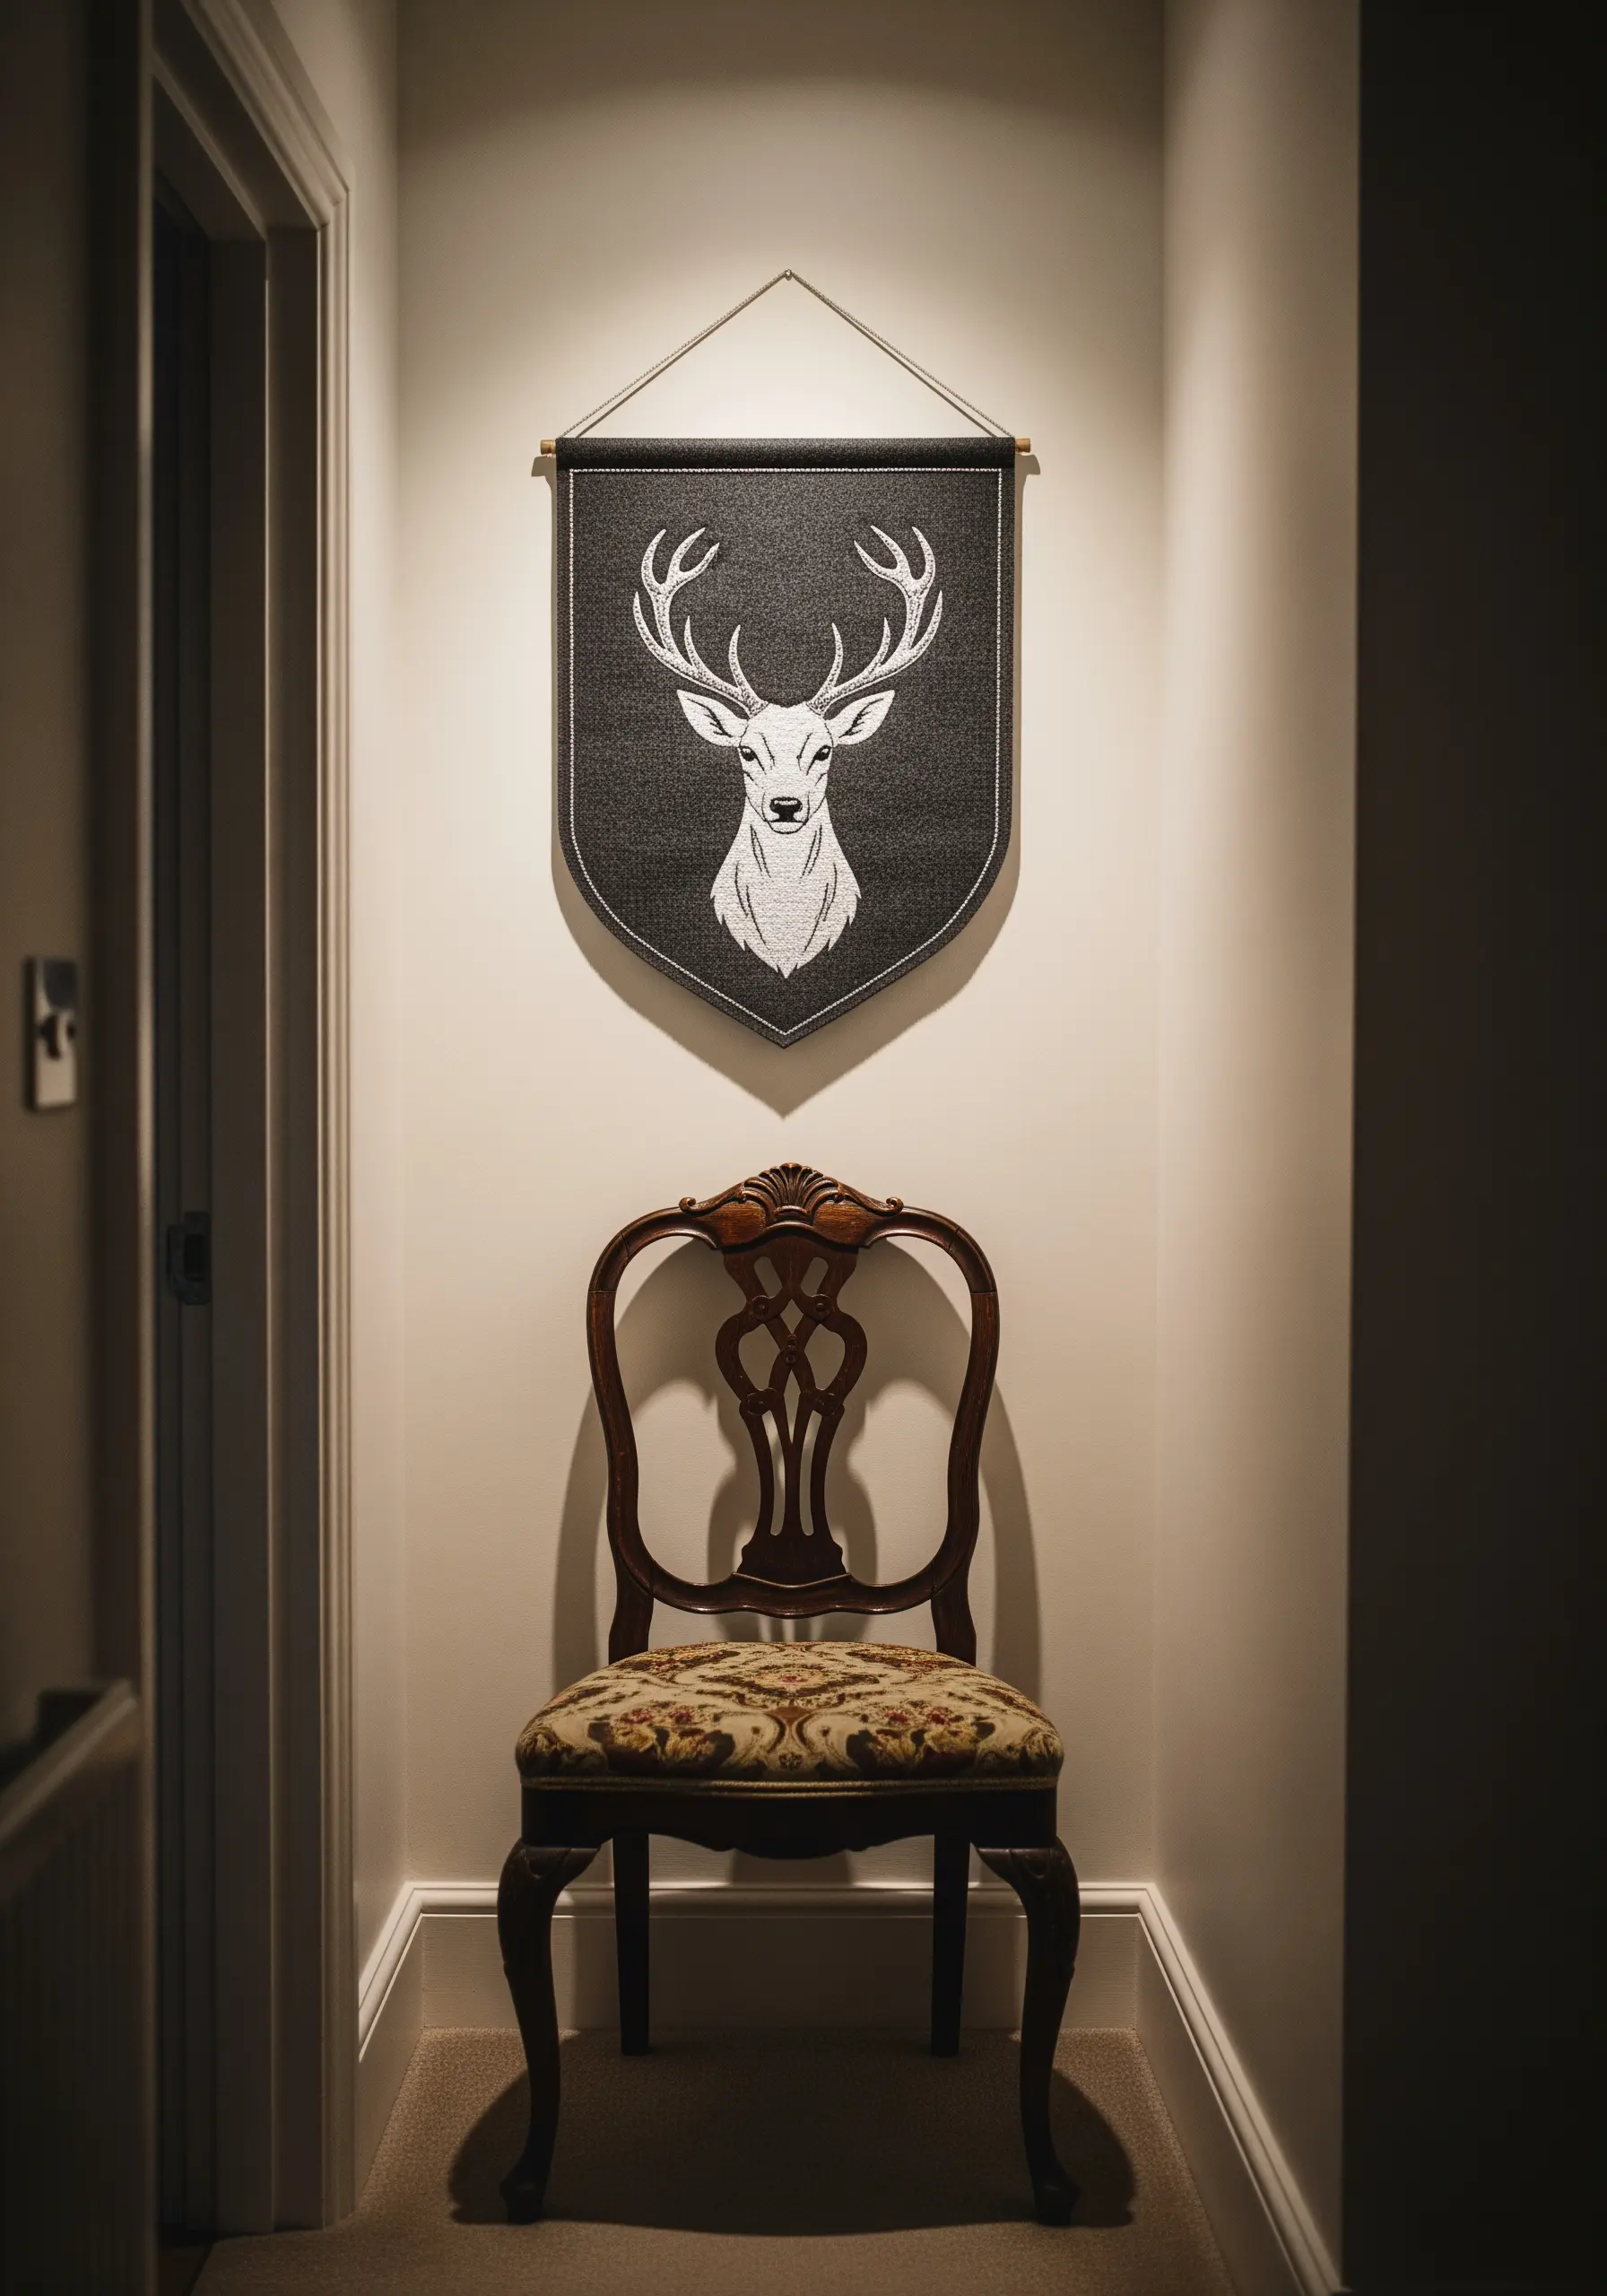
Create a dramatic, almost graphic-novel effect by limiting your palette to black, white, and grey on a dark background.
Use the long-and-short stitch technique to blend your shades seamlessly, creating the illusion of light and shadow. Start with the darkest grey thread, gradually introducing lighter tones to build highlights.
For the brightest areas, use pure white thread, but apply it sparingly to create focal points, like the glint in an eye or the edge of an antler.
This controlled approach to thread painting gives your subject a powerful, sculptural quality.
15. Create Formal Repetition with a Classic Motif
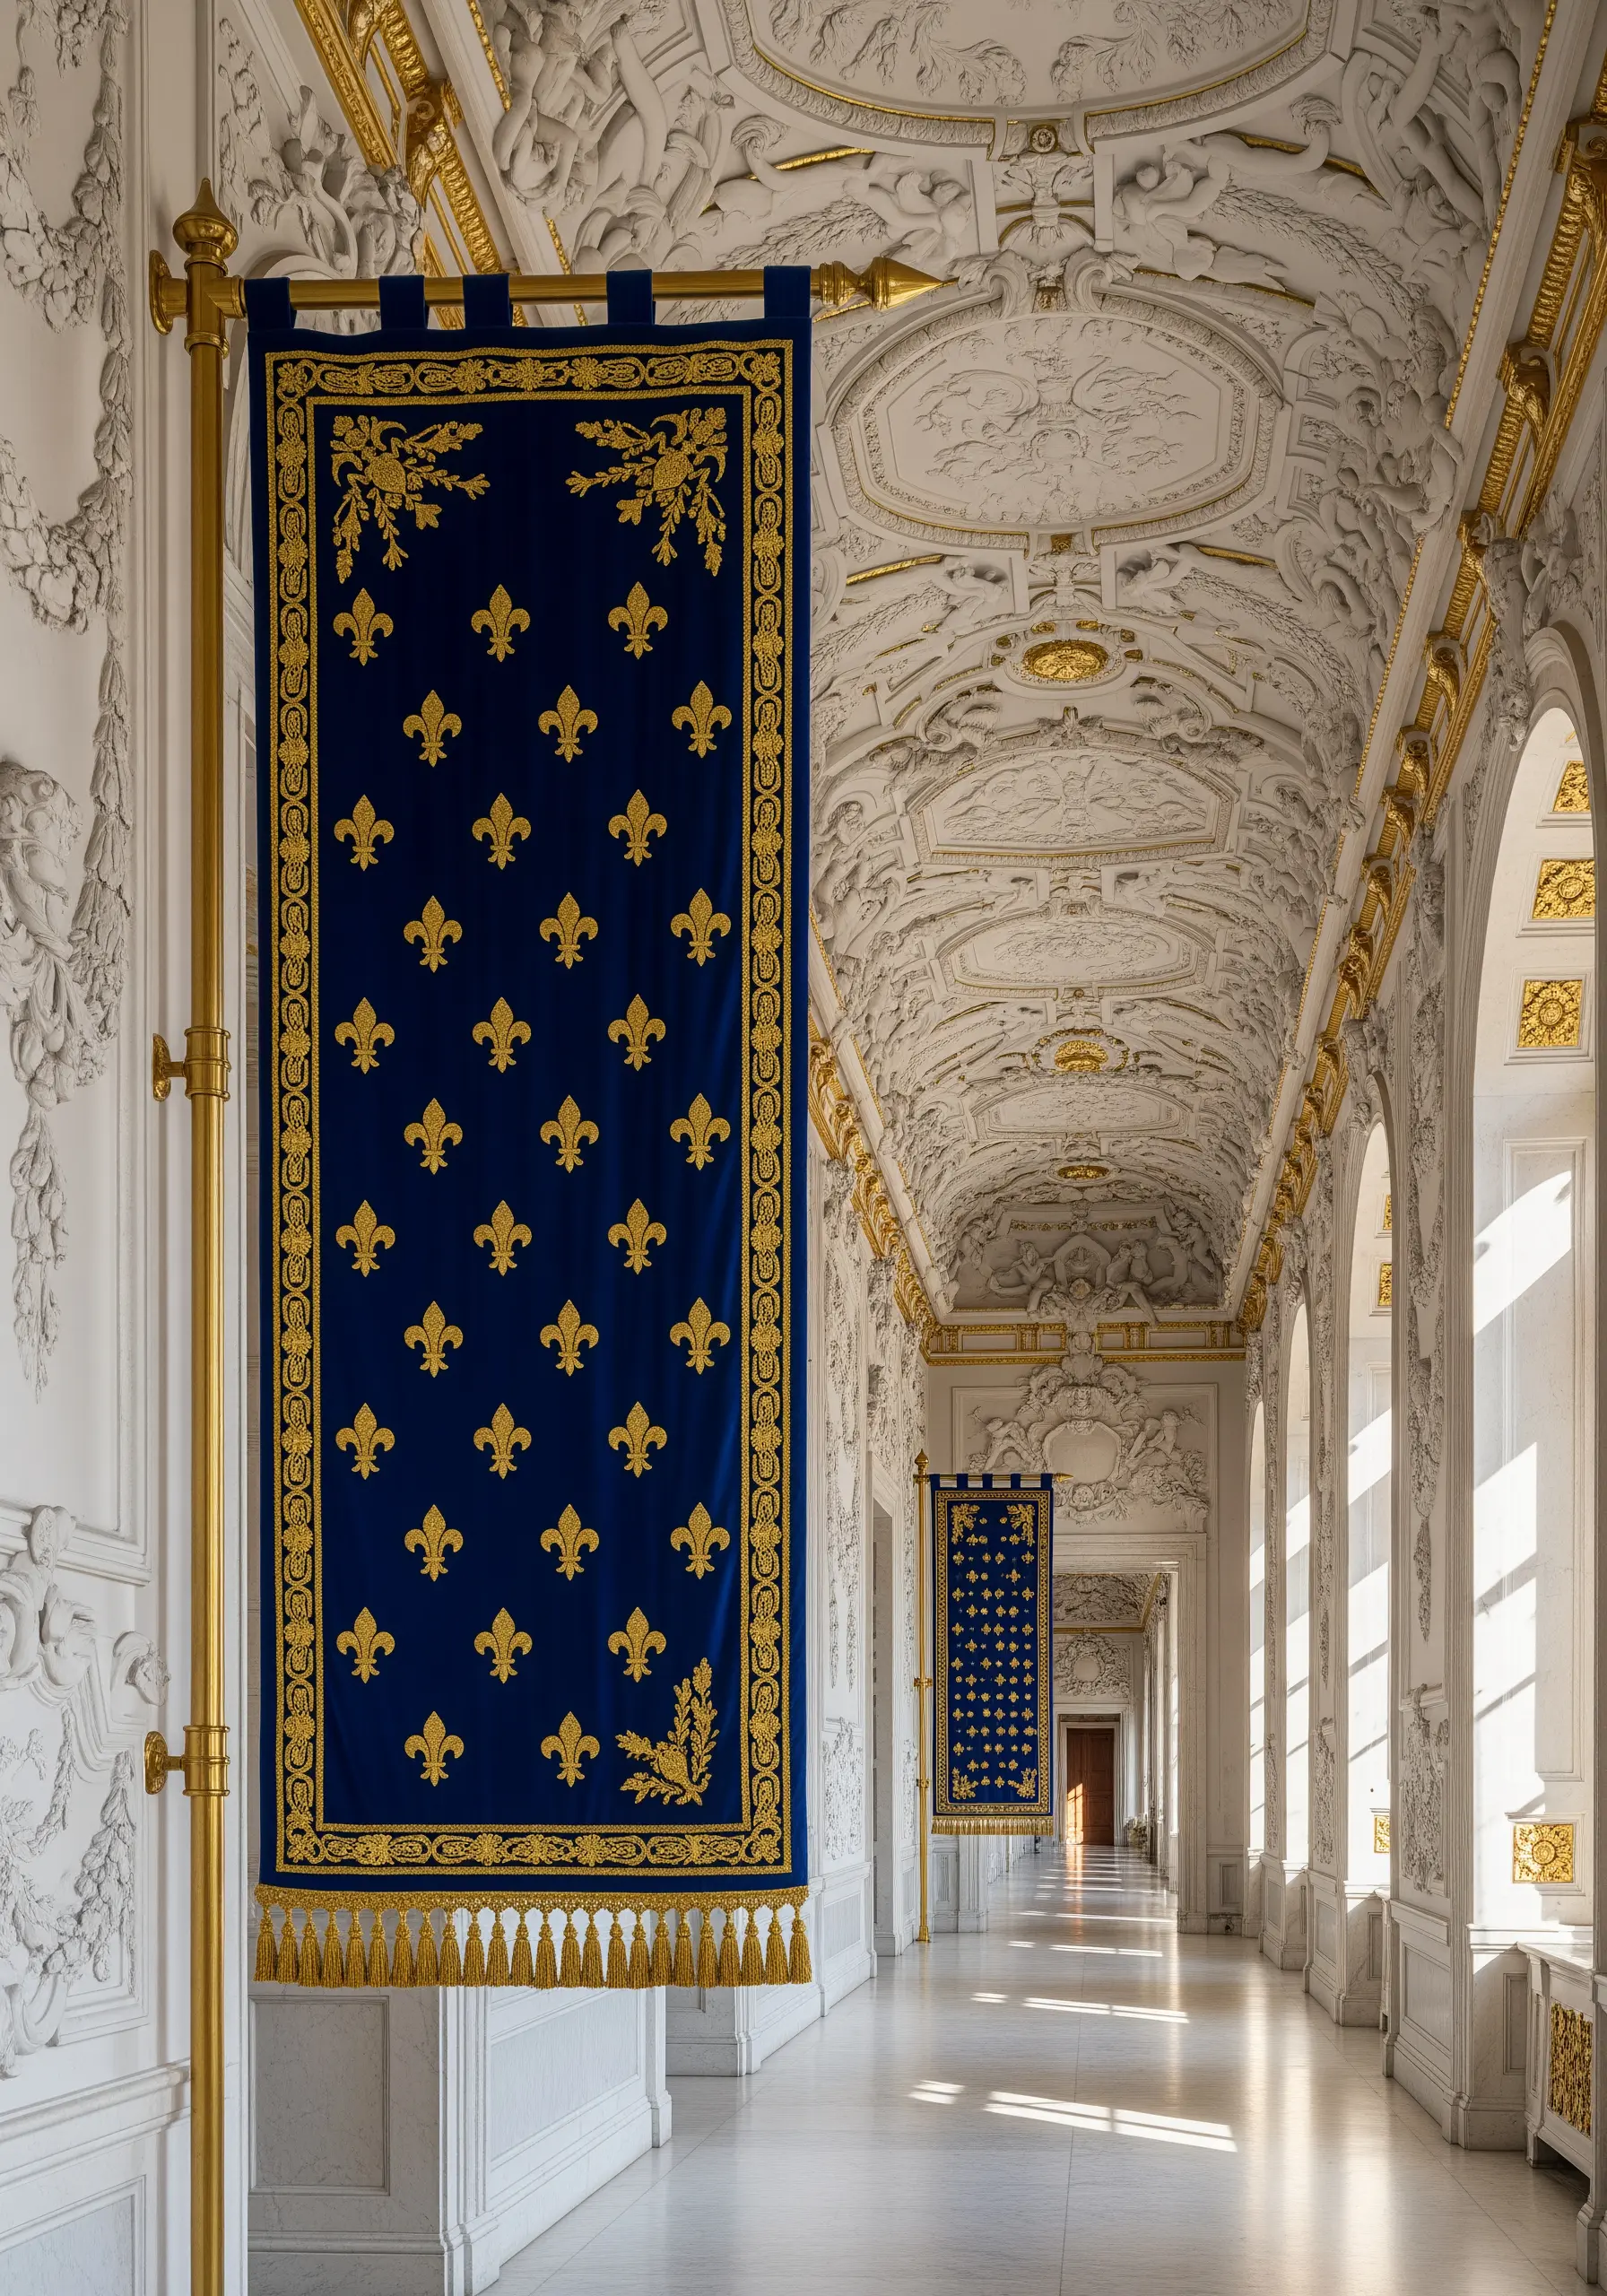
For a look of classic, stately elegance, choose a single, iconic motif like the fleur-de-lis and arrange it in a formal, repeating pattern.
Use a disappearing ink pen and a stencil to ensure each motif is perfectly placed and identical in size. This precision is what gives the final piece its regal authority.
Stitch with a high-contrast, high-sheen thread, like gold rayon or silk, on a deep velvet background. The simple satin stitch is perfect here, as the focus is on the flawless repetition, not complex stitchwork.
Finish with an ornate border and tassels to complete the ceremonial aesthetic.
16. Chronicle a Legacy with Embroidered Typography

Turn your banner into a treasured heirloom by creating a stitched family tree. The beauty lies in its personal significance and clean execution.
Choose a simple, legible font and use a fine two-strand backstitch for the names and dates. Consistency in letter height and spacing is crucial for a polished look.
Stitch the tree itself with a slightly heavier thread or a different stitch, like stem stitch, to differentiate it from the text.
Working in a simple, monochrome palette on natural linen keeps the focus on the names, giving the piece a timeless, archival quality.
17. Achieve Graphic Punch with Color Blocking
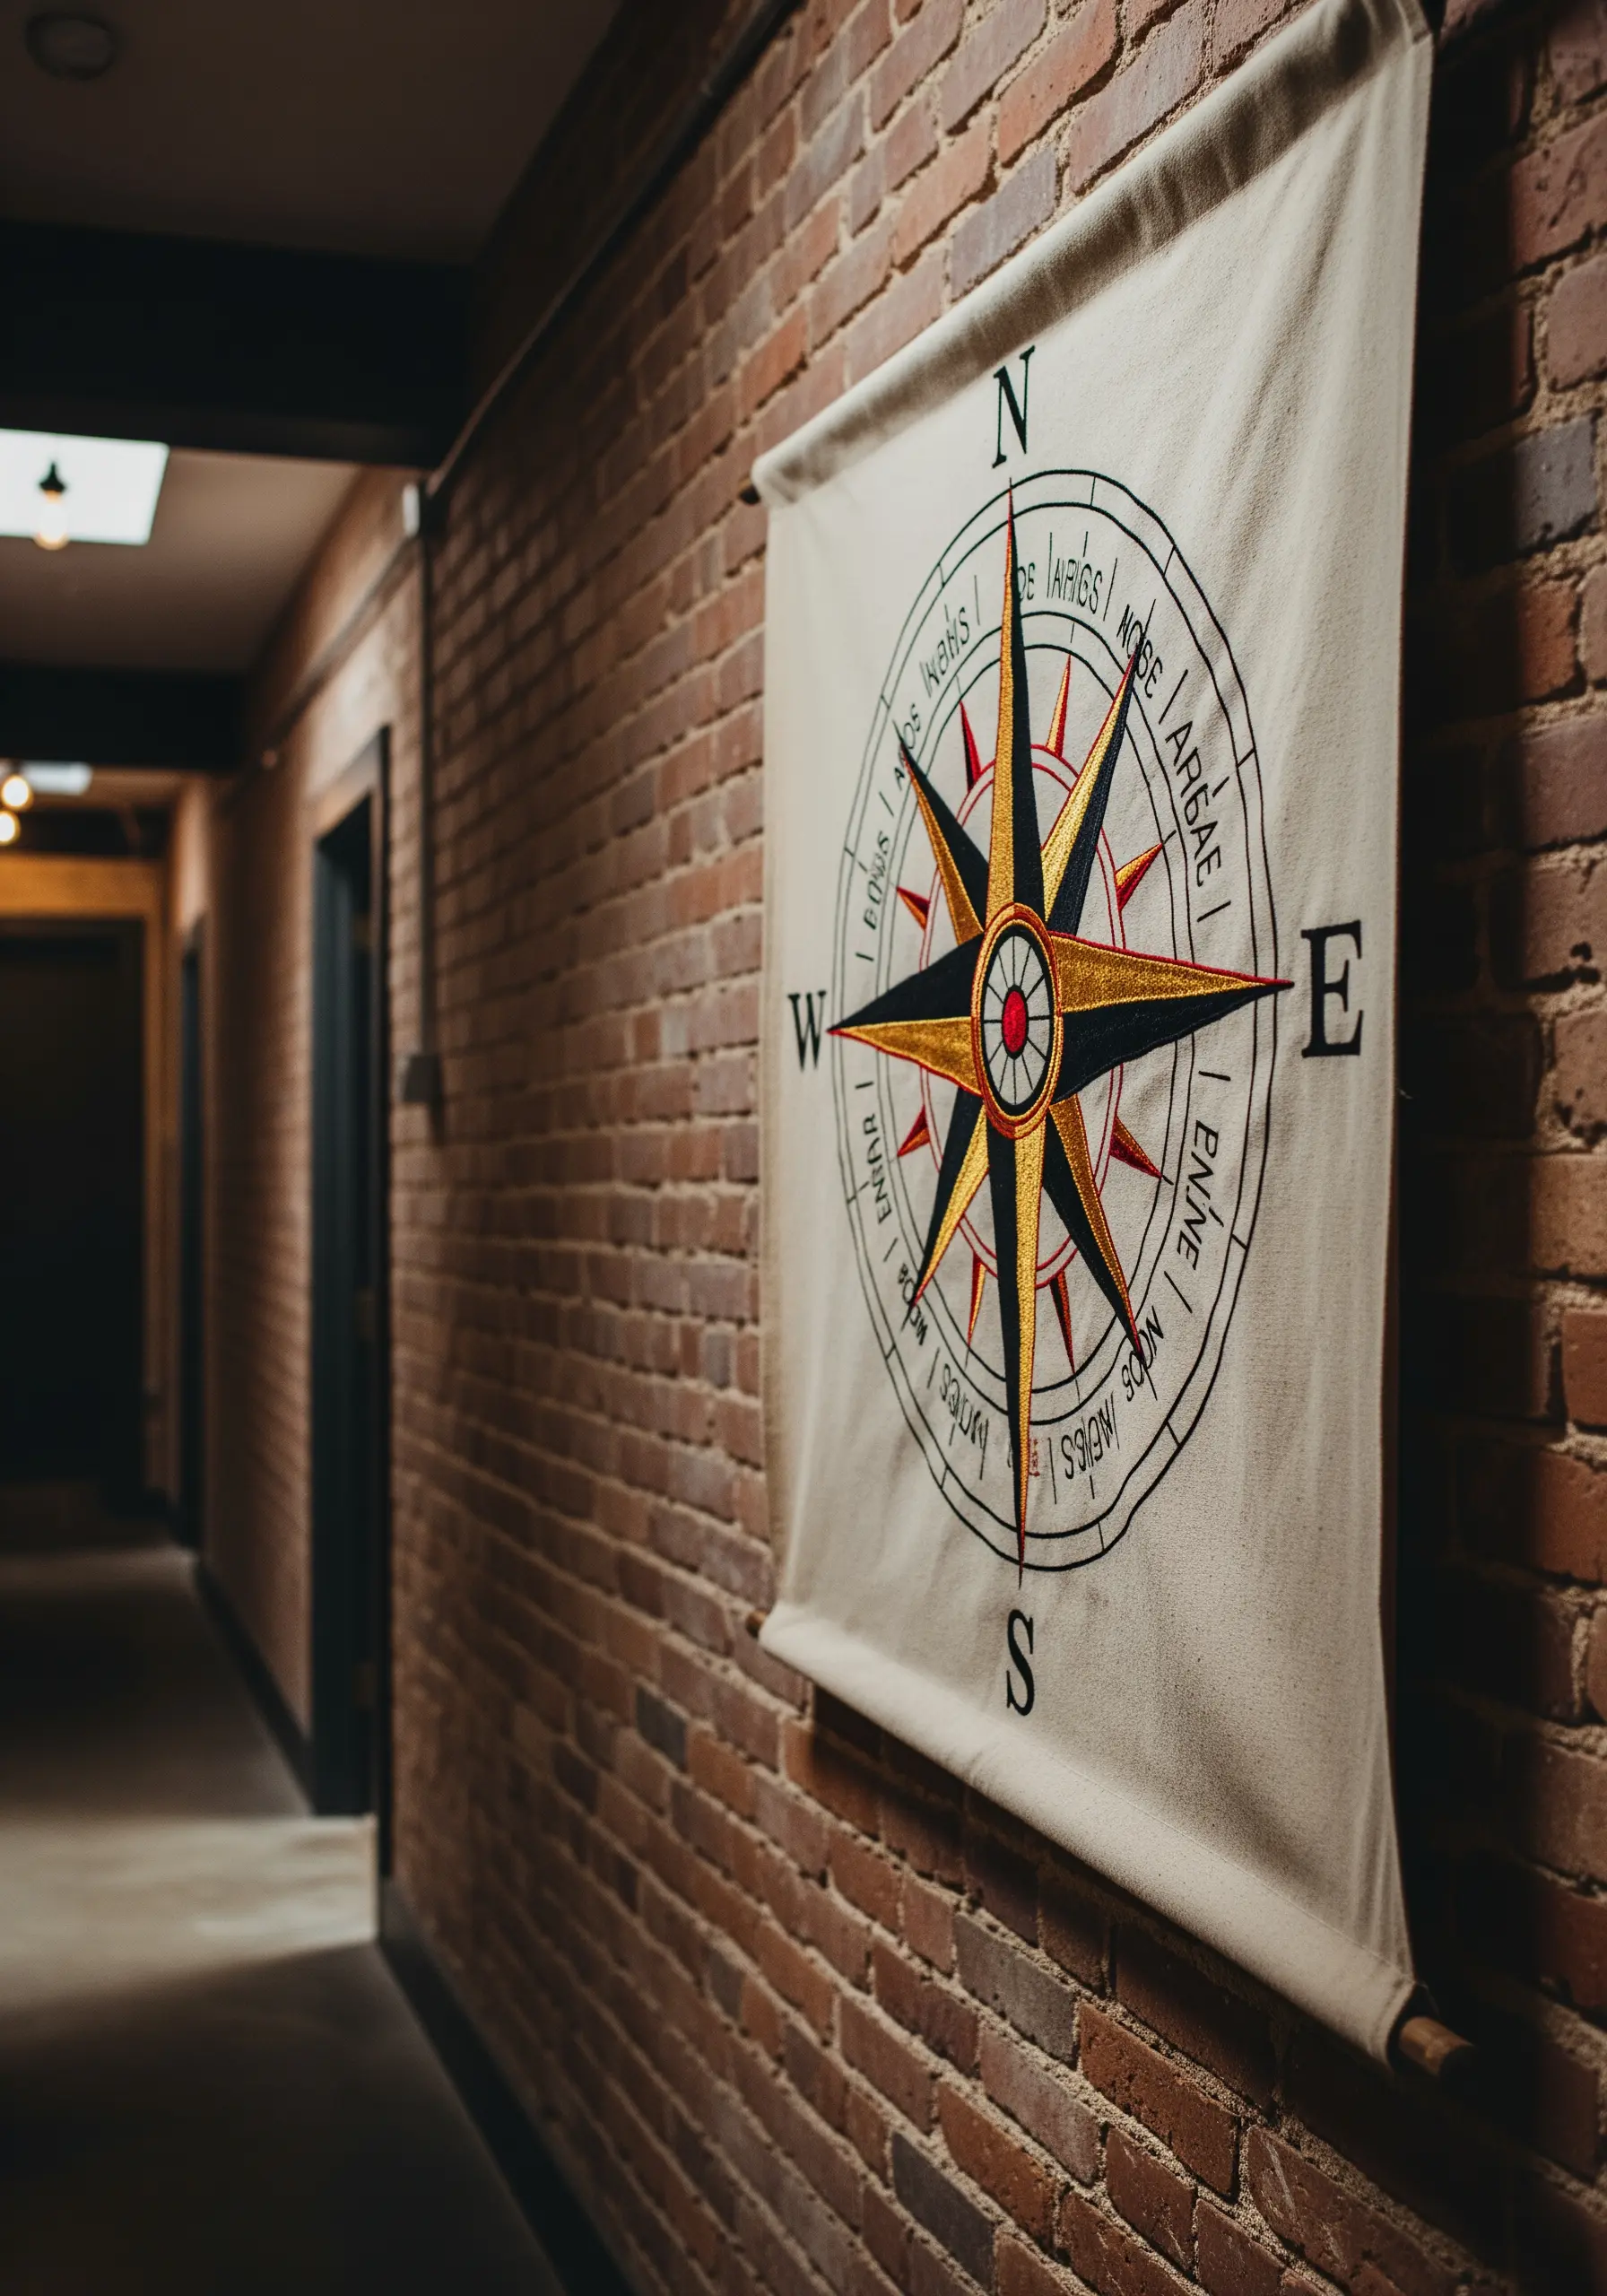
Give a traditional motif like a compass rose a modern, graphic update through bold color blocking and sharp outlines.
Use a dense, perfectly smooth satin stitch to fill each colored section. To achieve those crisp edges, first outline each shape with a split stitch, then bring your satin stitch needle up just outside this line.
Encase the entire design in a heavy black outline using a chain stitch or whipped backstitch. This grounds the design and makes the colors pop, creating a clean, high-impact visual.
18. Capture the Essence of a Drawing with Minimalist Line Art
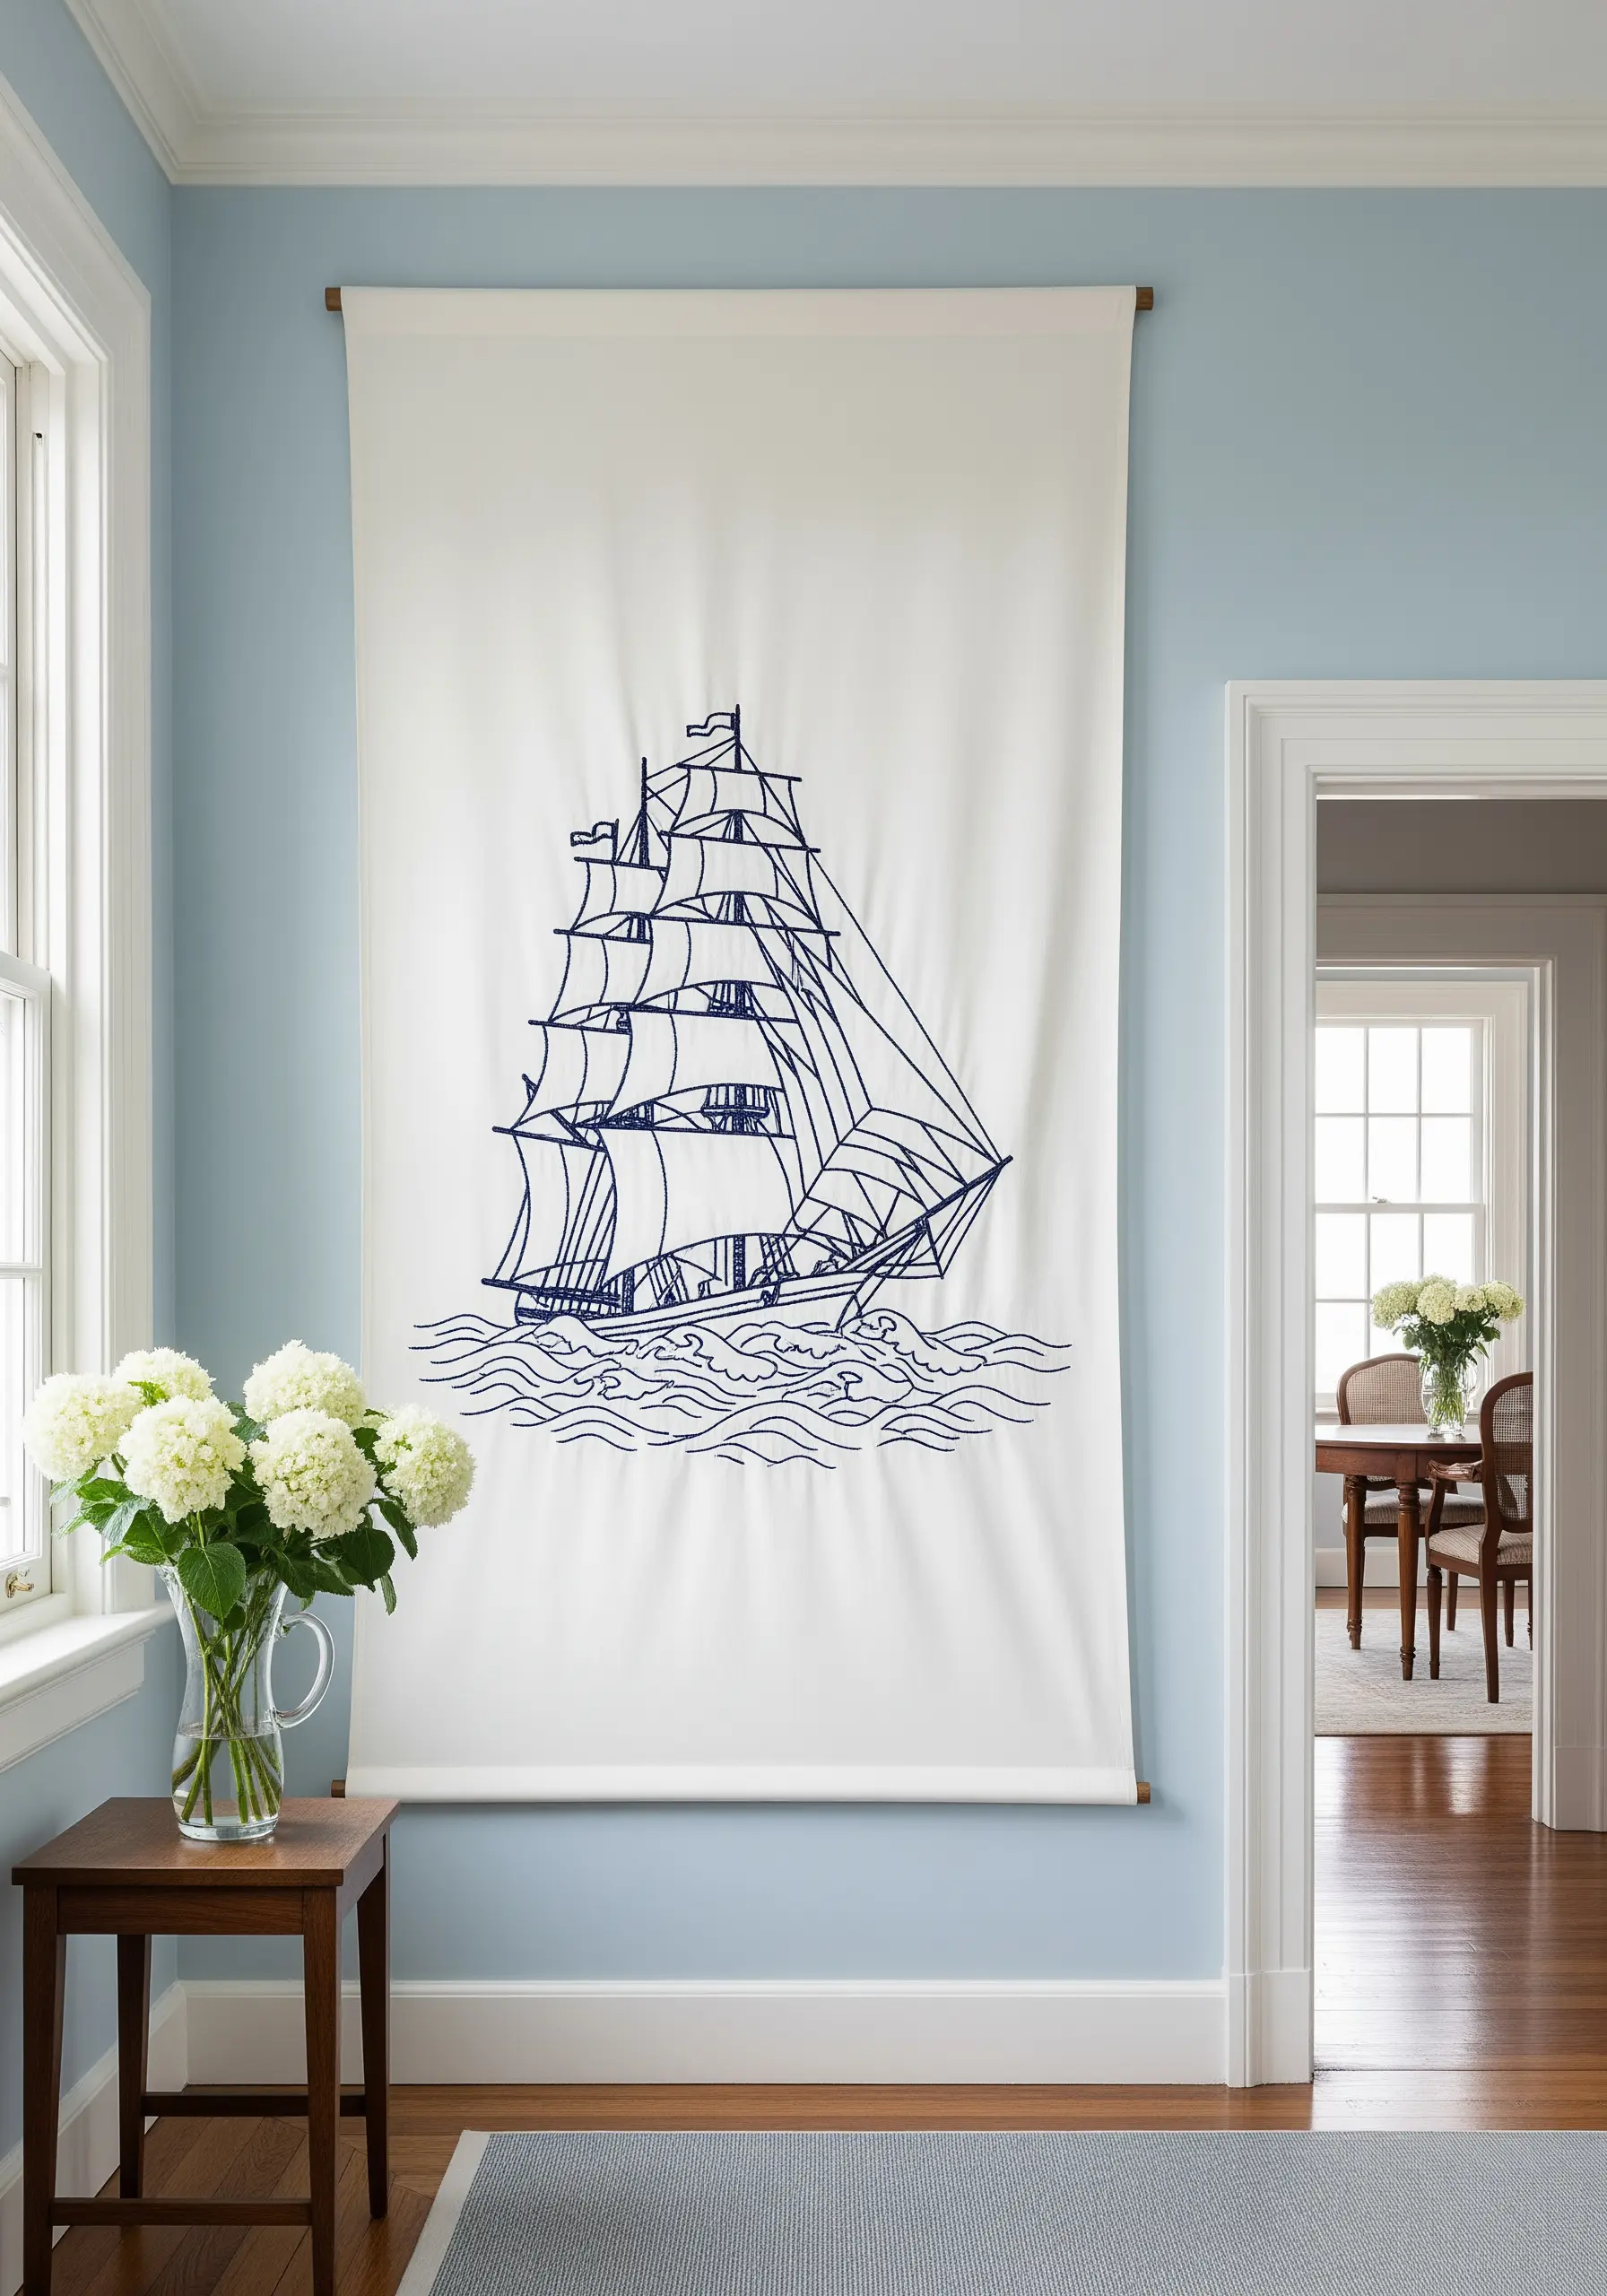
Prove that less is more by translating a simple line drawing into thread. This technique celebrates the purity of line and the beauty of negative space.
Choose a smooth, plain-weave cotton in a light color to act as your paper. Use a single, dark color of floss—like navy or black—to mimic ink.
A simple backstitch or stem stitch is all you need. The challenge isn’t the stitch itself, but maintaining a consistent stitch length and fluid curves.
This minimalist line art approach feels fresh, modern, and confident, allowing the elegant form of the subject to speak for itself.
19. Sculpt with Thread for a High-Relief Effect
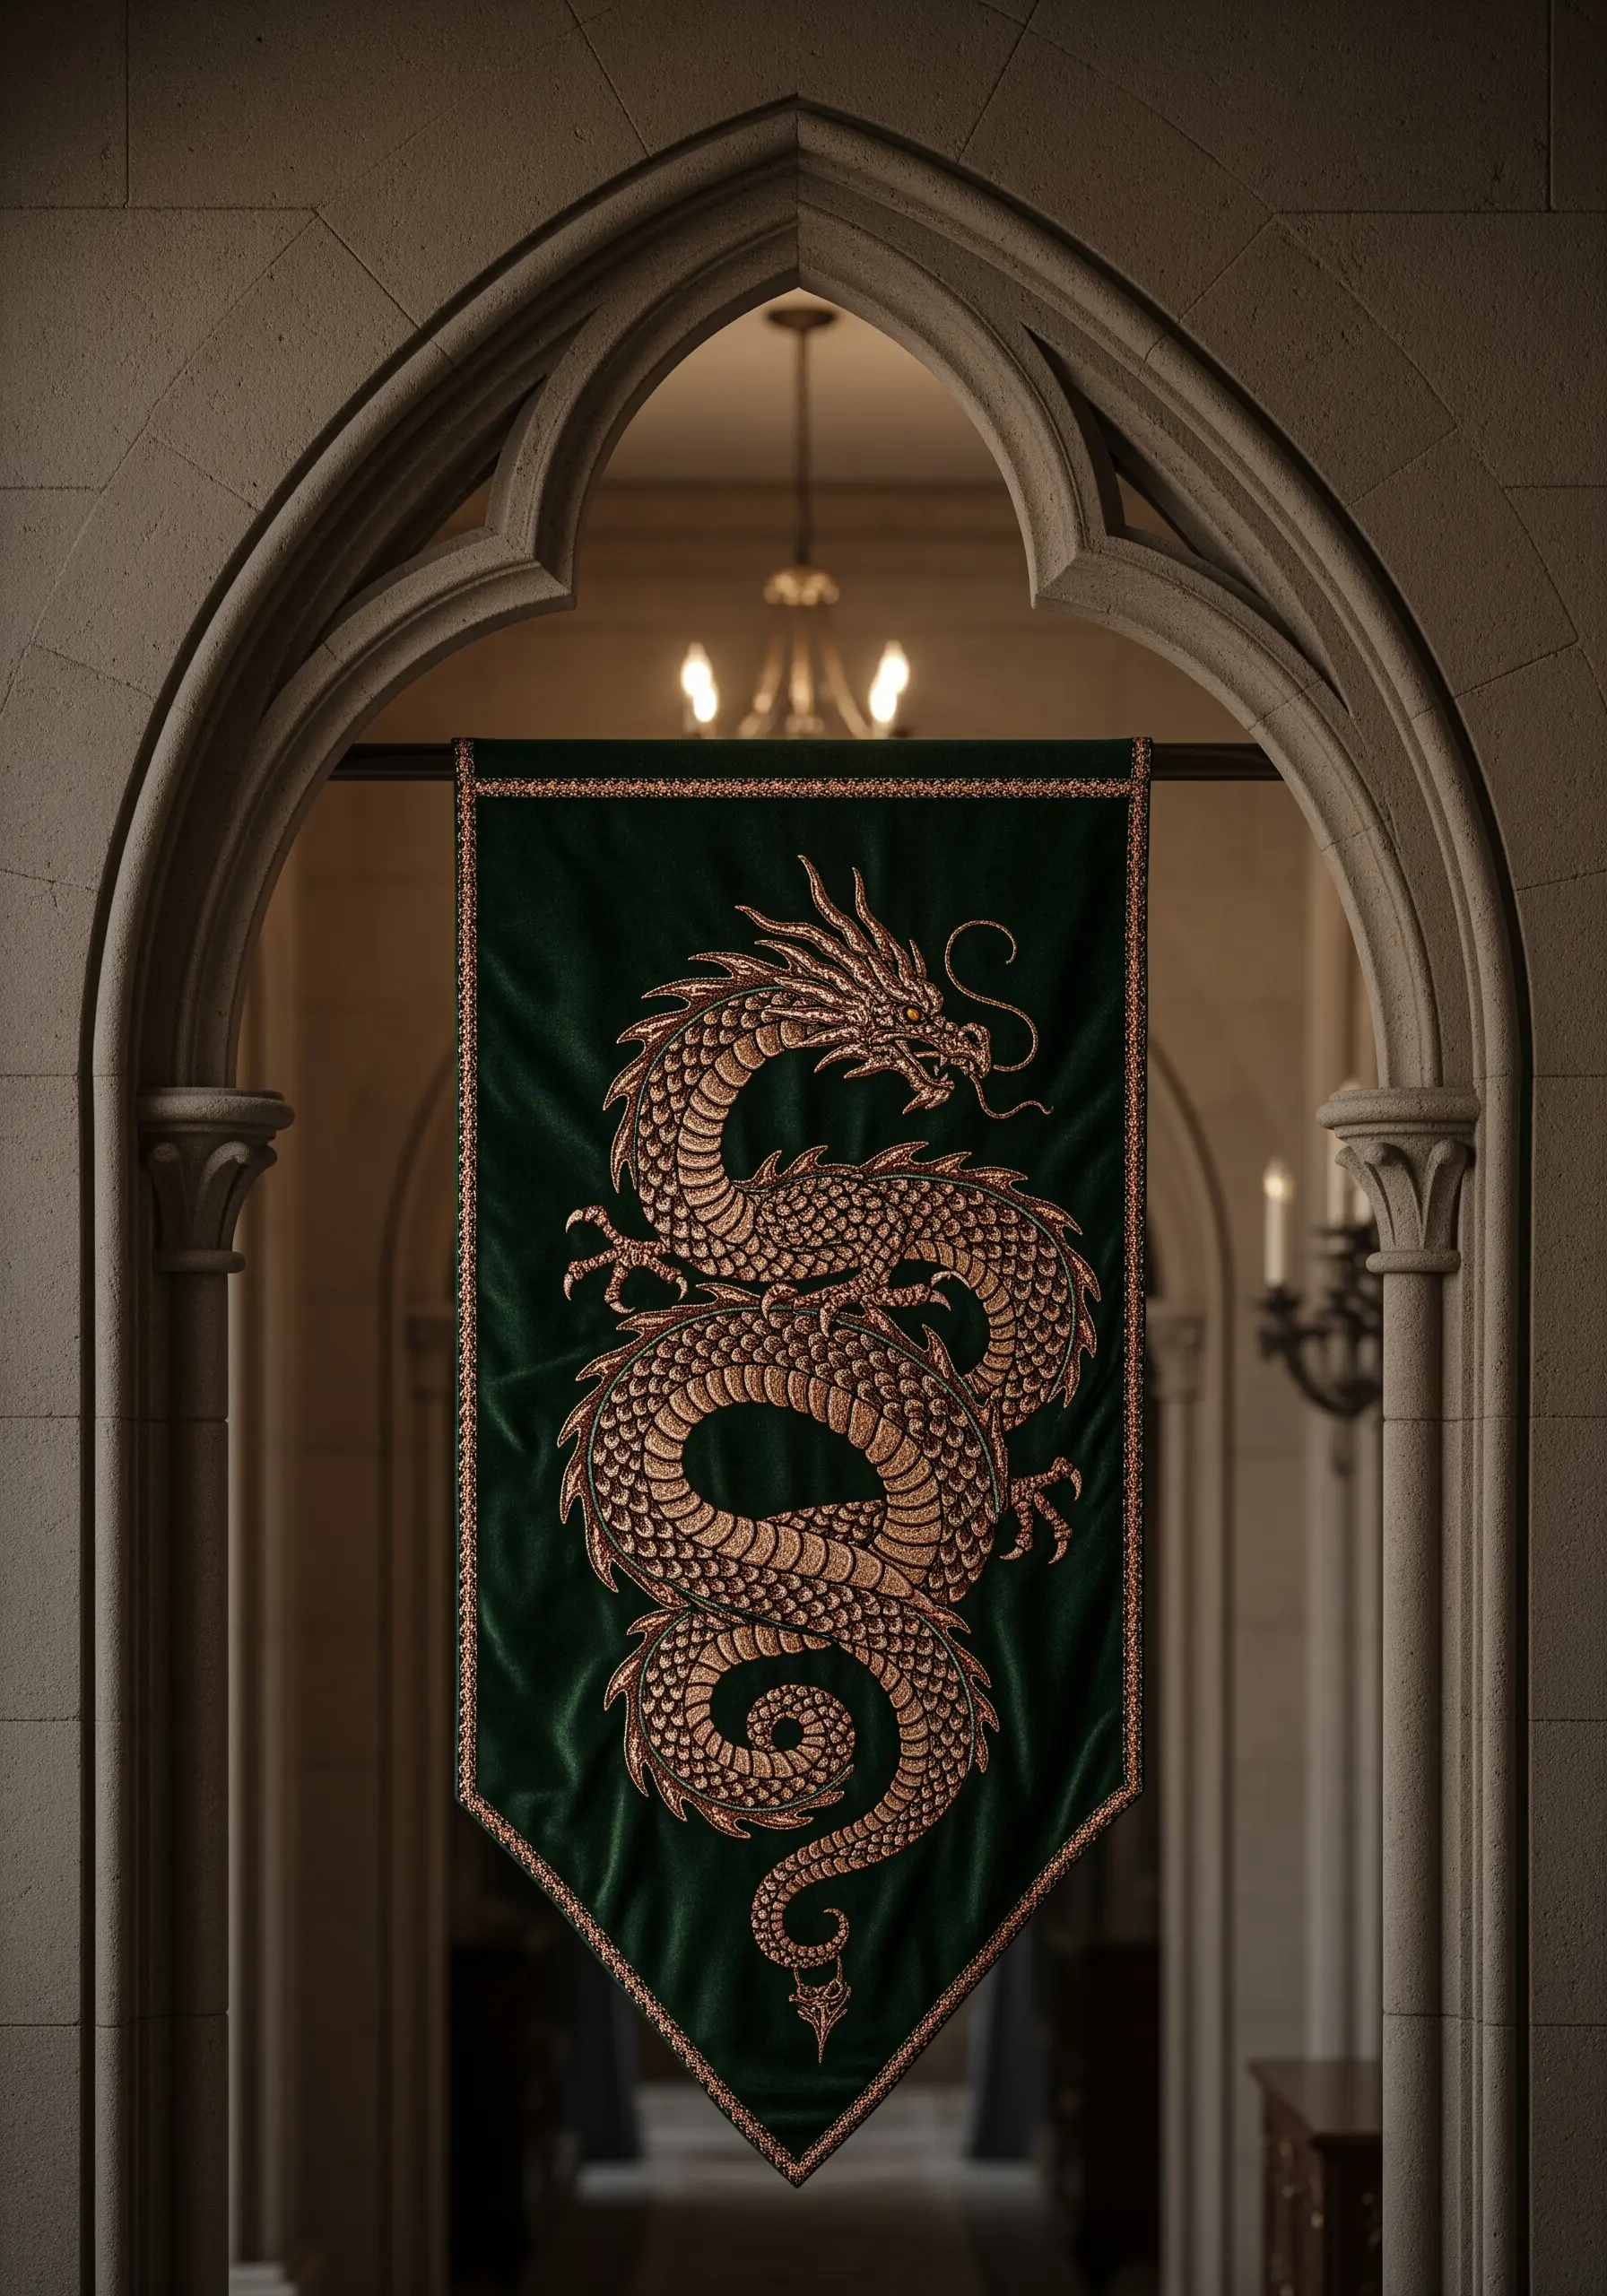
Make your motif physically stand out from the fabric by using a padded satin stitch on a grand scale.
On a rich fabric like emerald velvet, the contrast in texture will be especially dramatic. First, create a foundation of felt padding cut to the shape of your motif’s sections, like the dragon’s scales.
Stitch the felt down, then cover it completely with dense satin stitches using a high-sheen gold or bronze thread. The thread will stretch over the padding, creating a rounded, three-dimensional surface.
This technique gives the creature a powerful, sculptural presence that feels both ancient and alive.
20. Reframe Your Art: The Banner-in-a-Hoop
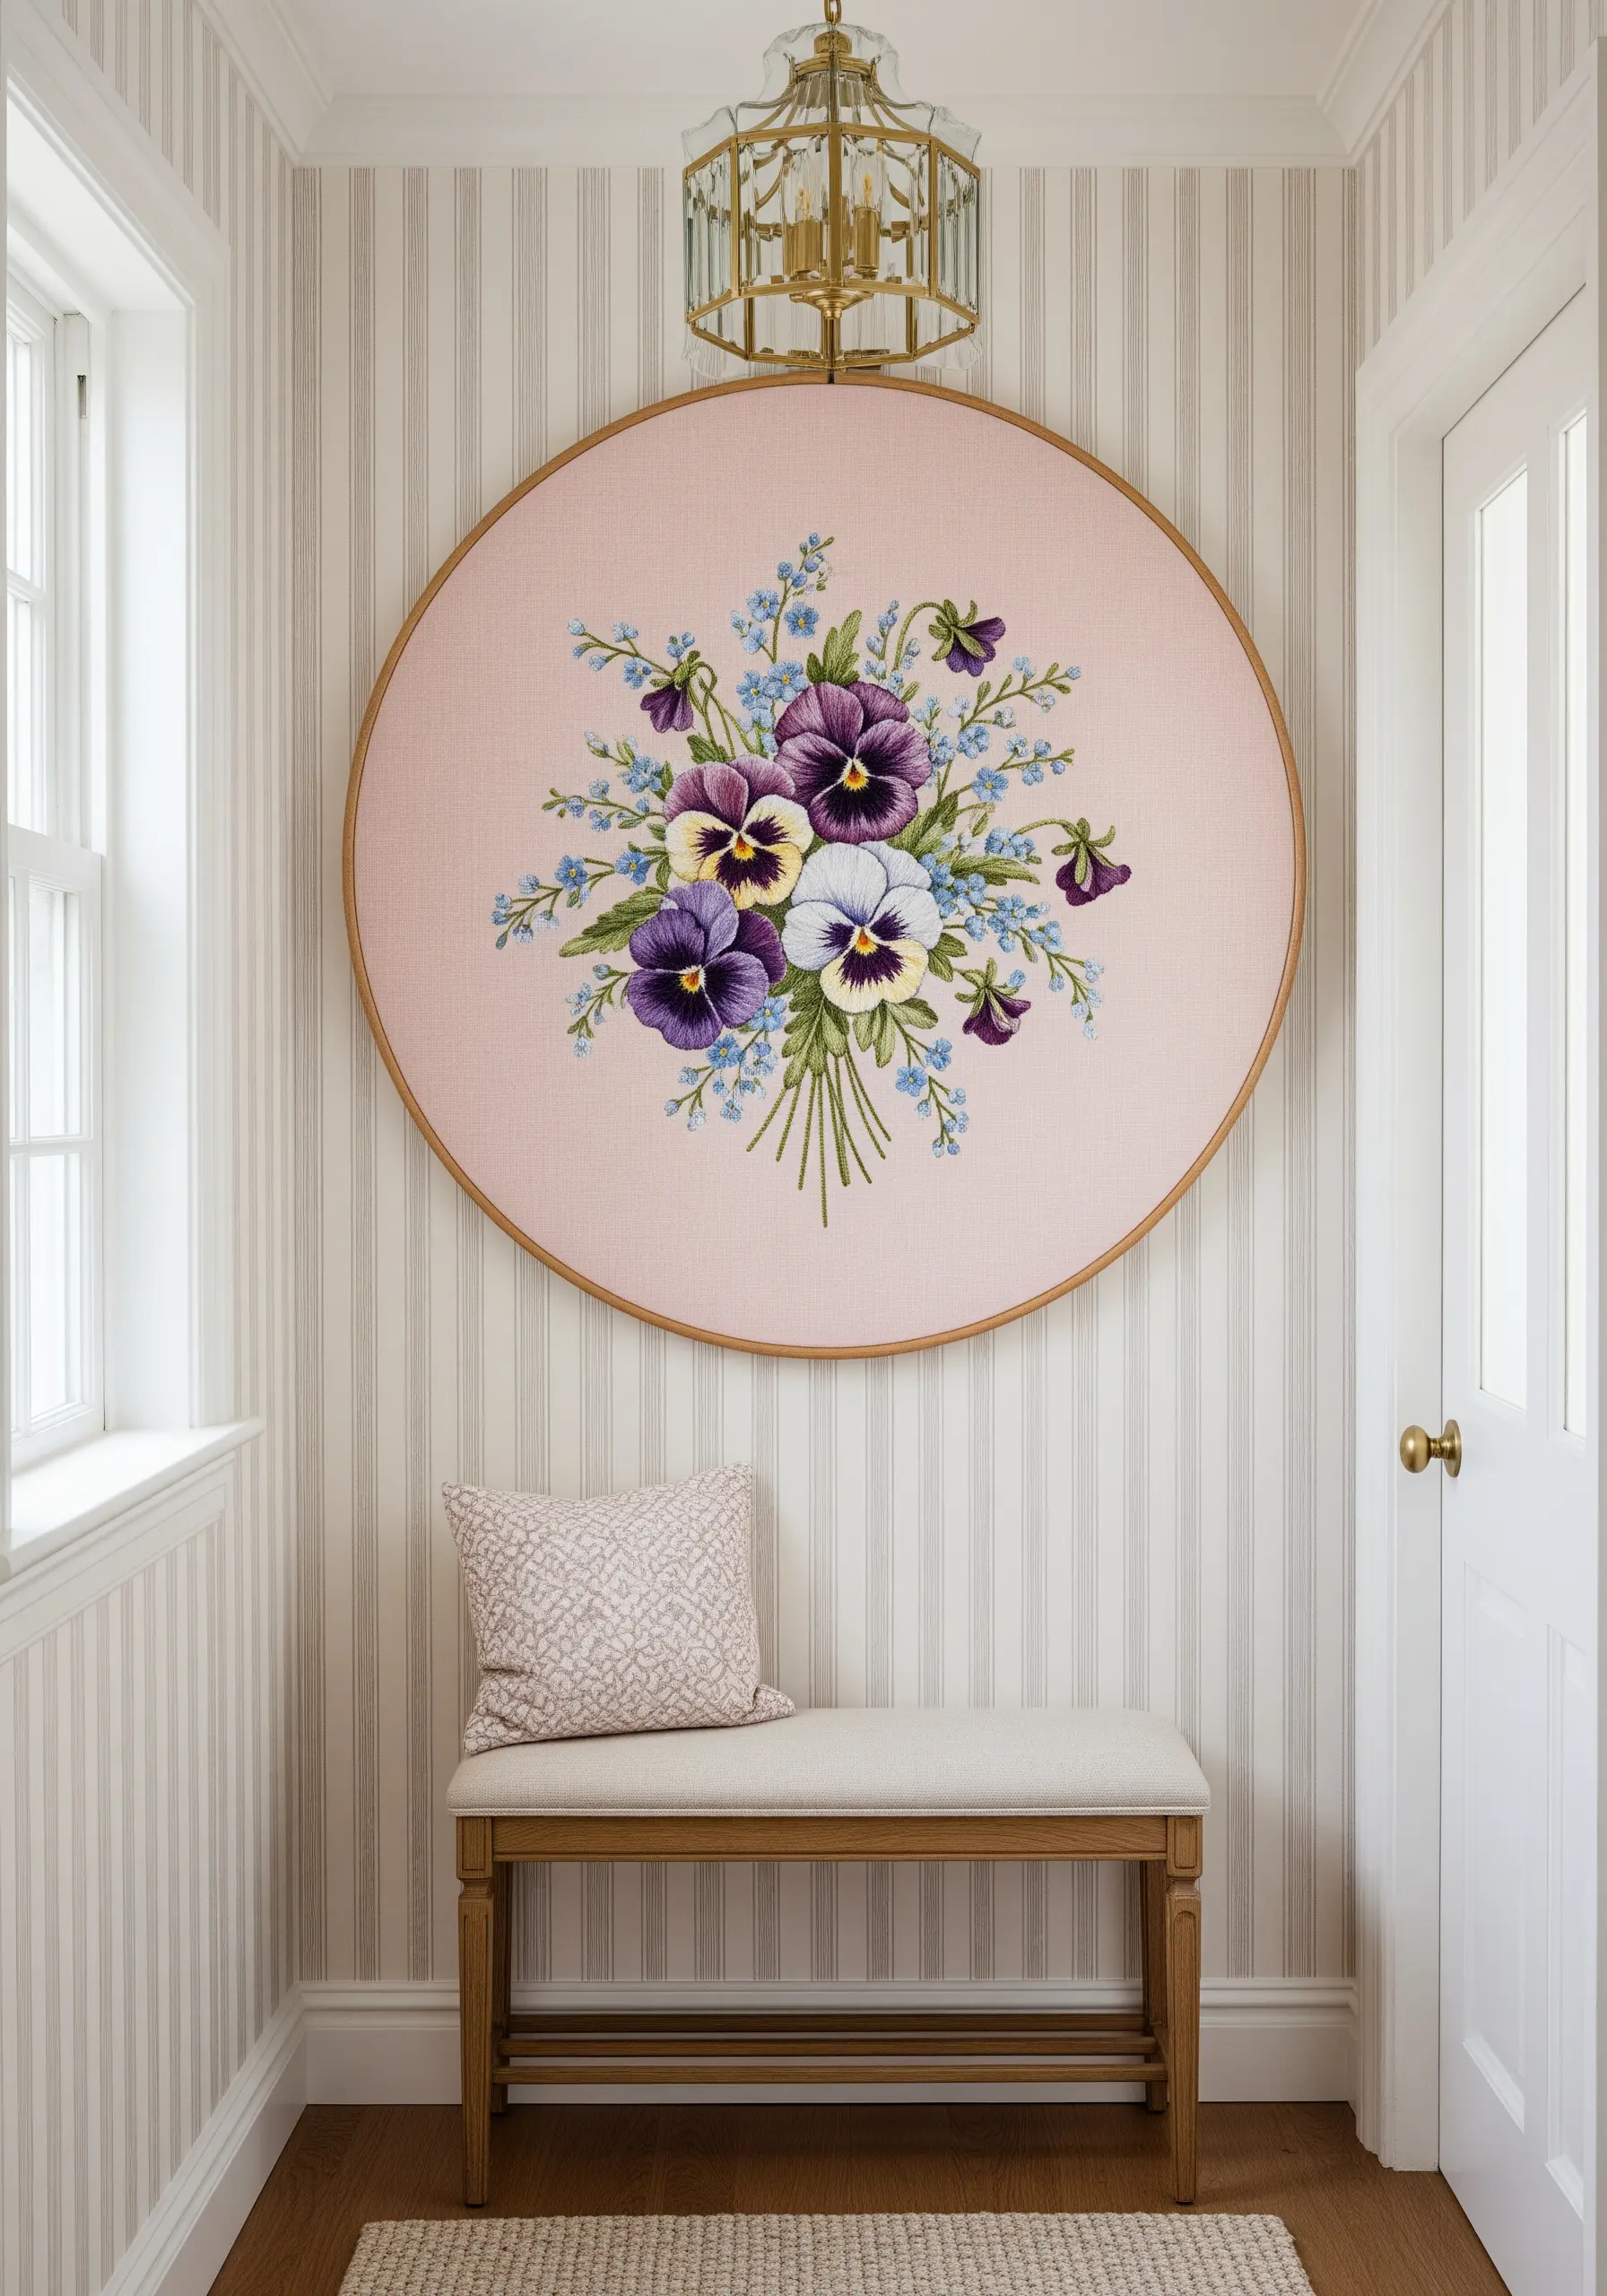
For a modern twist on the banner format, use a very large embroidery hoop as the frame for your finished piece.
Instead of finishing your embroidery on a rectangular banner, keep it in the hoop, trimming and securing the fabric neatly at the back.
This approach works wonderfully for classic floral bouquets, as the round frame contains the composition like a vintage portrait. The wooden hoop adds a warm, natural element that complements the softness of the thread.
It’s a perfect way to give a traditional subject a fresh, contemporary display format that feels intentional and complete.
21. Weave a Story with Meandering Composition
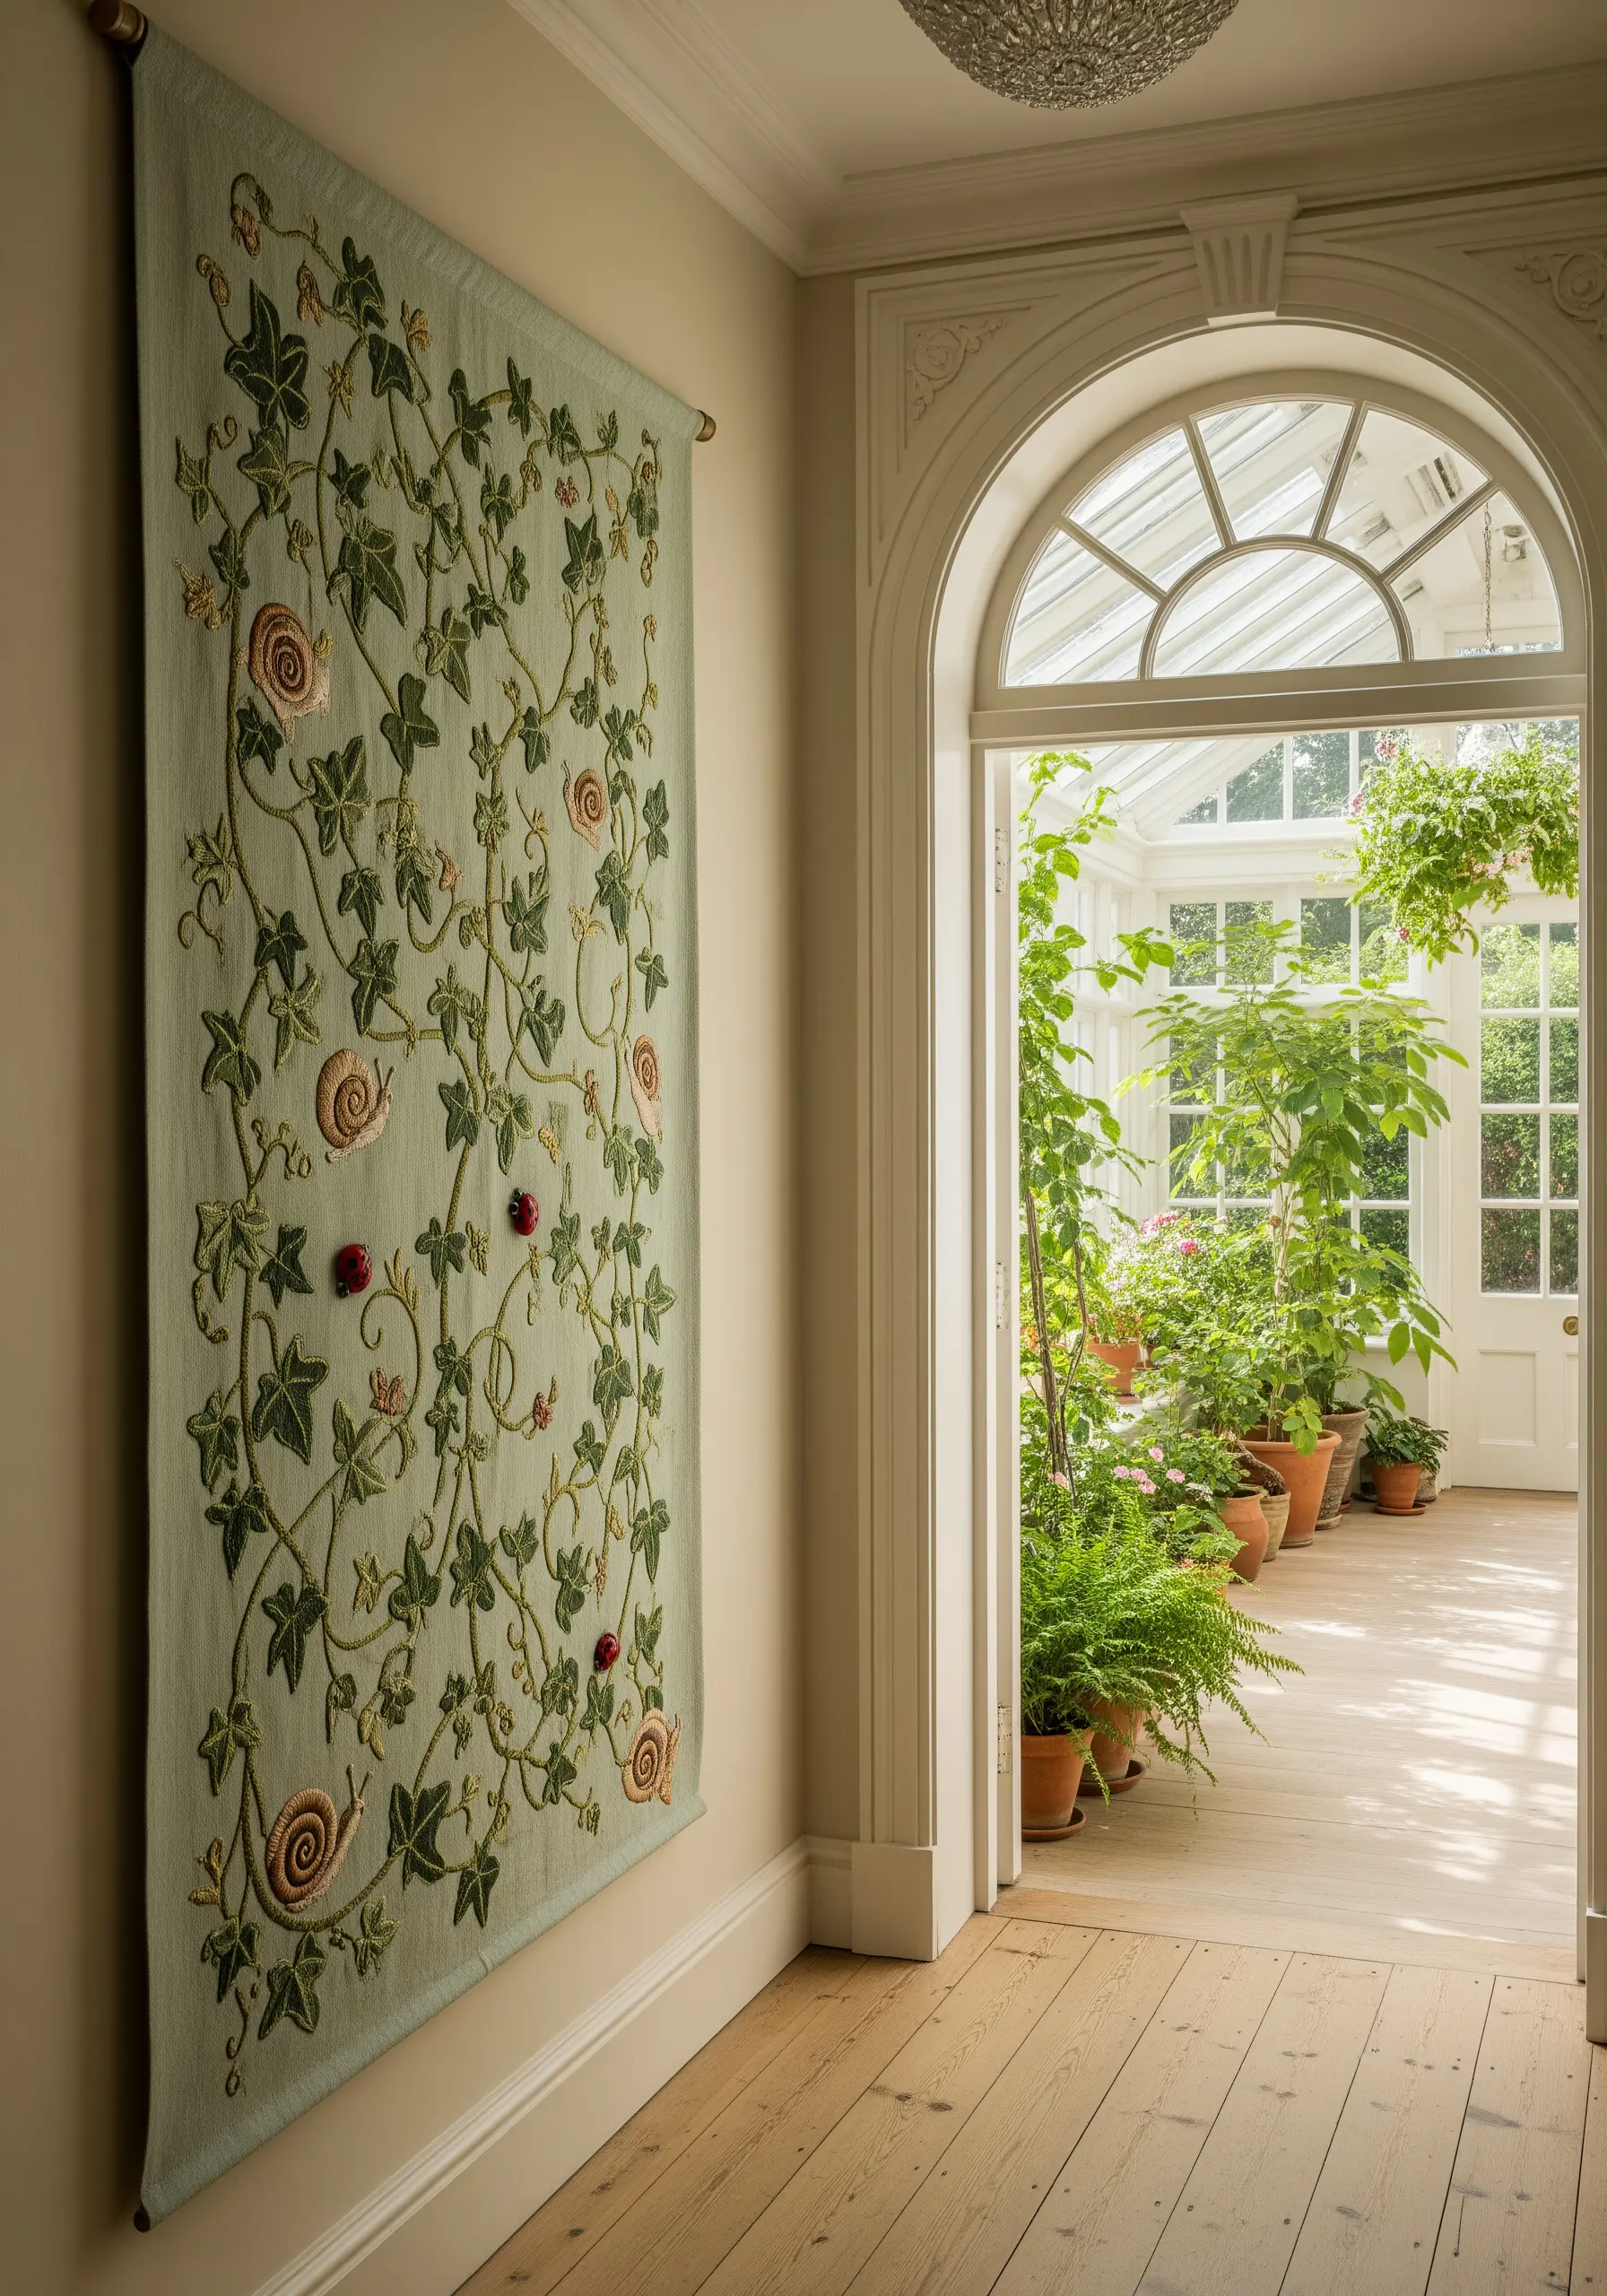
Instead of a single, central motif, create a sense of life and movement by letting your design wander across the length of the banner.
Design a trailing vine or branch that snakes organically from top to bottom. This provides a natural structure to place smaller elements like snails, insects, or tiny flowers.
Use a variety of stitches to differentiate textures: stem stitch for the vines, satin stitch for leaves, and French knots or bullion knots for the creatures.
This narrative style of composition invites the viewer to look closer and discover the tiny details hidden within the foliage.
22. Enhance Woven Patterns with Tone-on-Tone Stitching
To create a banner with unparalleled depth and subtlety, start with a beautifully patterned fabric like damask or brocade.
Instead of stitching a new design over it, use embroidery to selectively highlight the existing woven pattern.
Choose a thread that is the same color as the fabric but with a different finish—for example, a silk thread on a matte linen brocade, or a matte cotton on a shiny satin damask.
Trace elements of the woven design and go over them with a simple backstitch or stem stitch. This tone-on-tone technique adds a layer of handcrafted texture that feels incredibly luxurious and intentional.
23. Create Graphic Energy with Symmetrical Florals
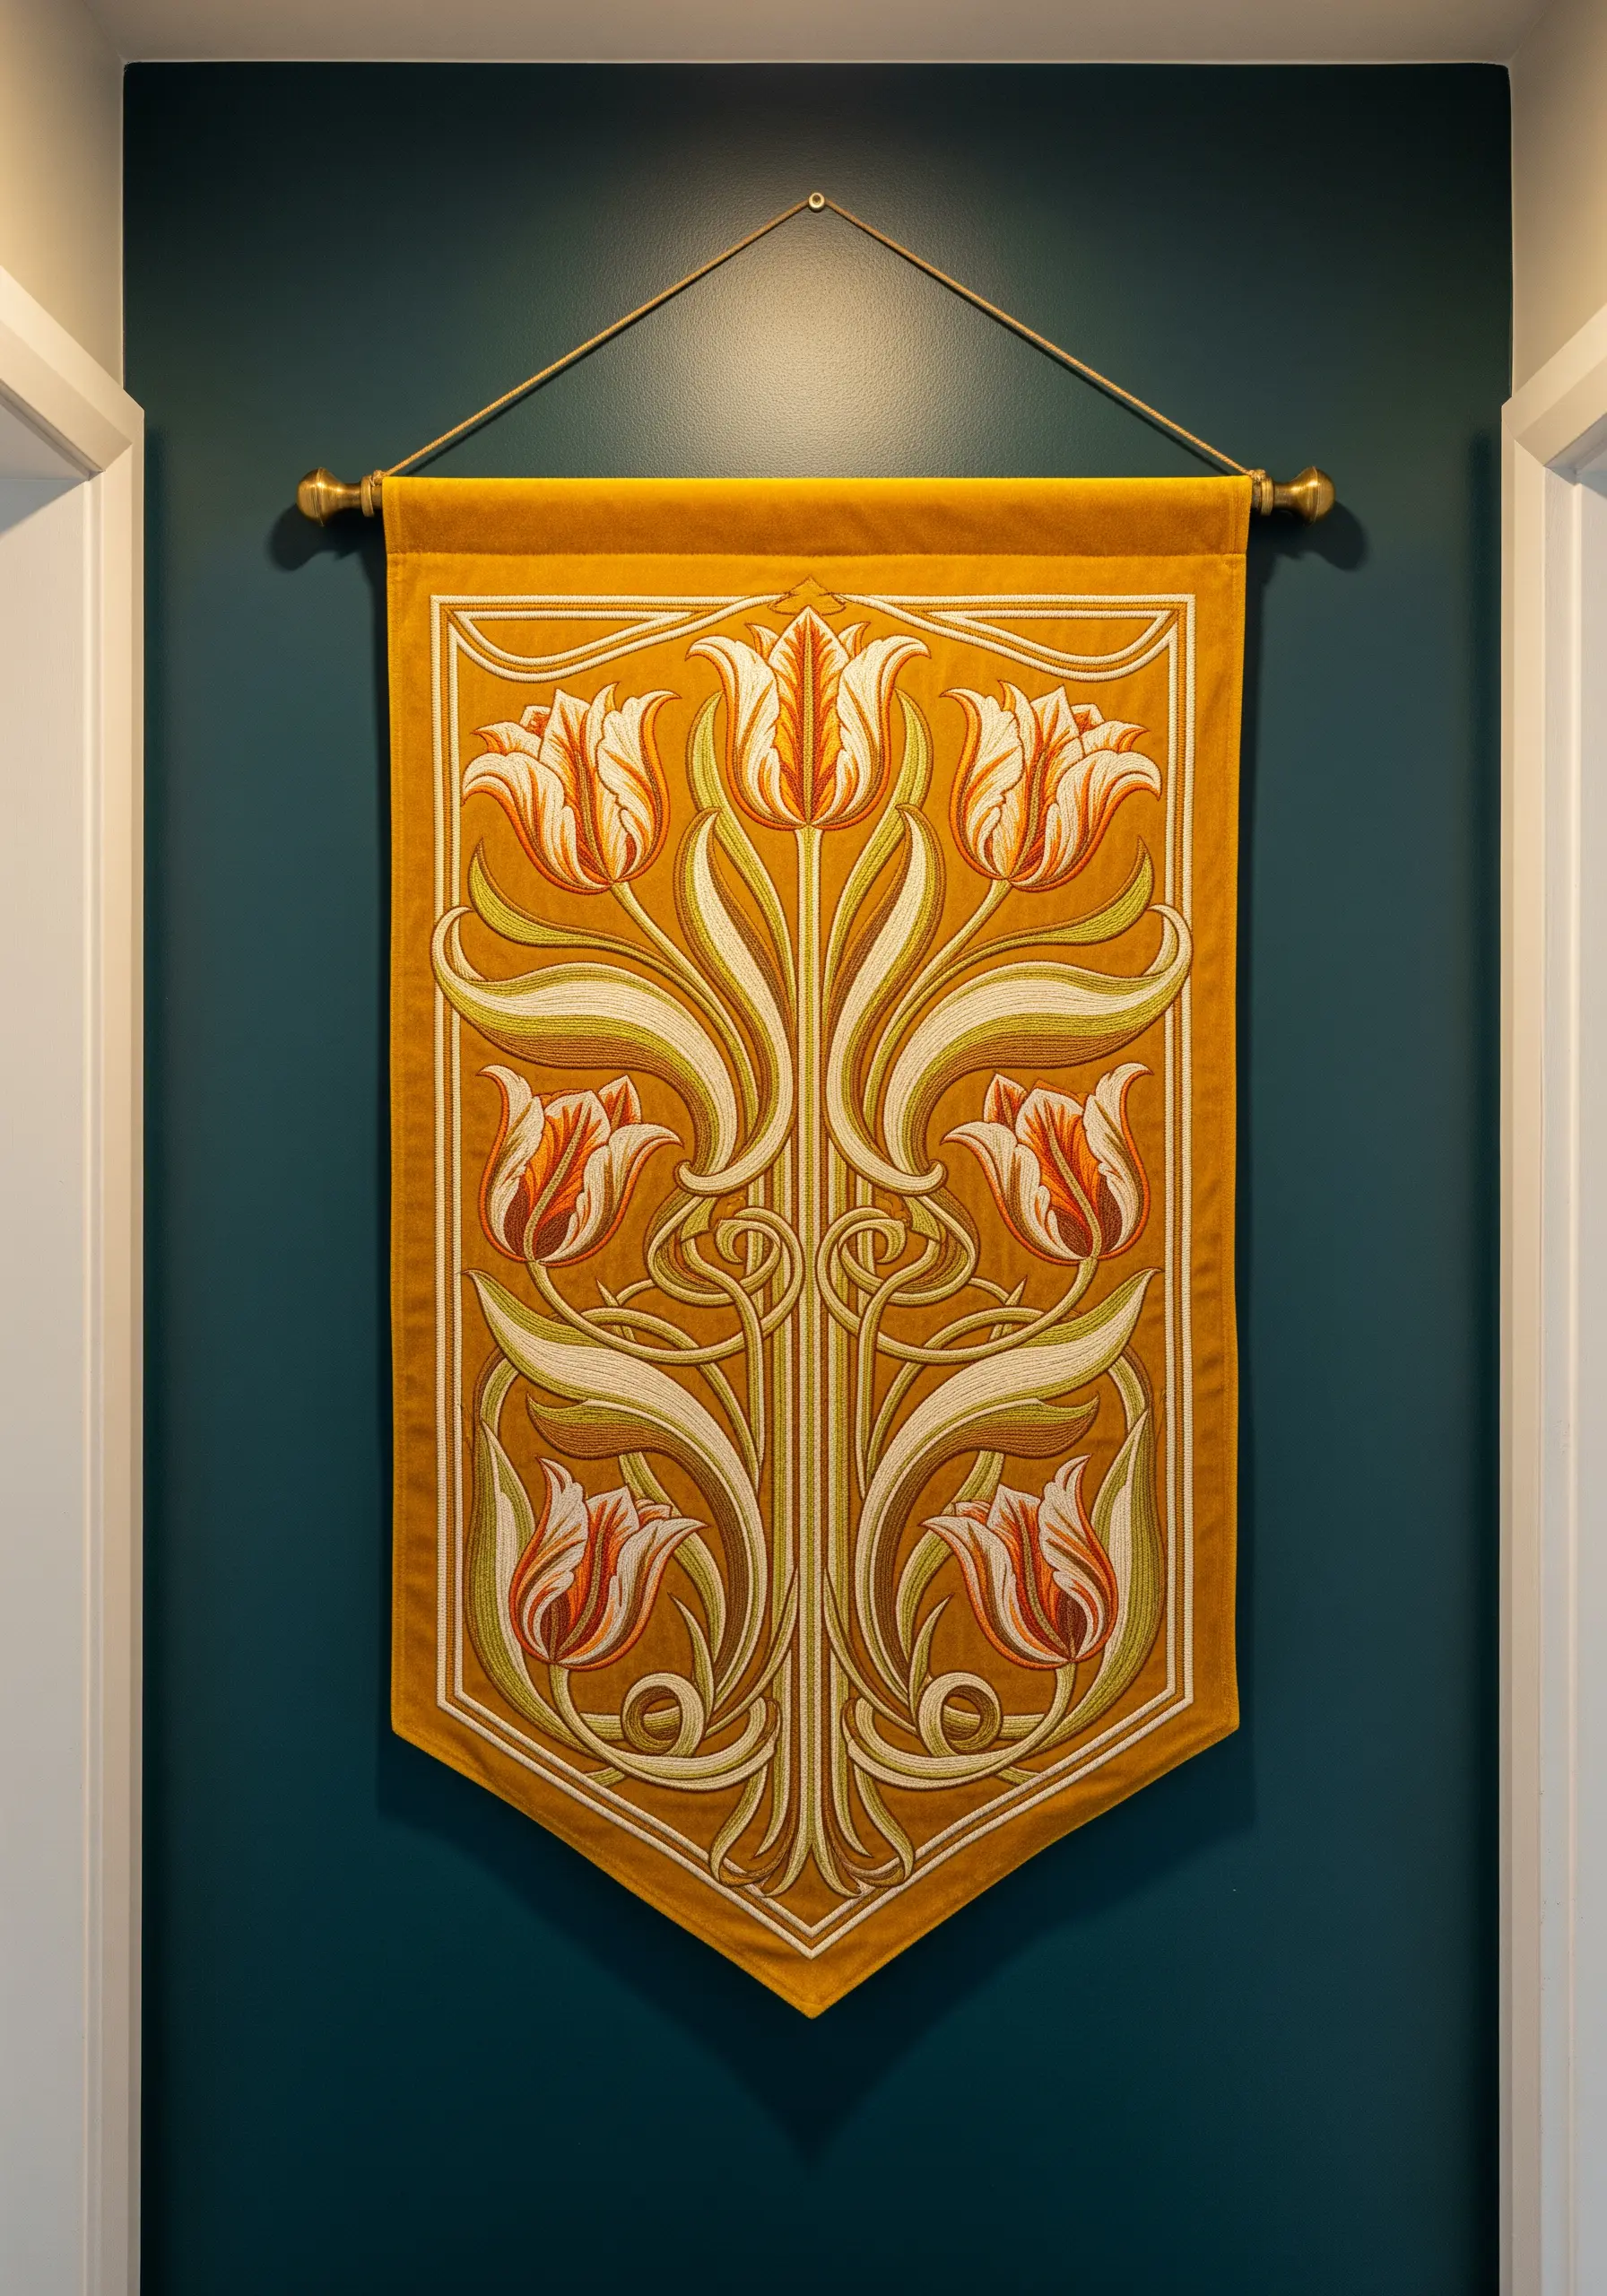
Give your floral banner a strong, graphic presence by arranging the motifs in a perfectly symmetrical layout.
This Art Nouveau-inspired approach uses symmetry to create a sense of order and deliberate design, transforming simple flowers into a powerful emblem.
Use a bold, contrasting outline for every shape, such as a dark whipped backstitch. Fill the shapes with directional satin stitch, paying close attention to how the lines flow and interact.
The combination of a vibrant, warm color palette with the rigid symmetry creates a captivating tension between natural forms and graphic structure.
24. Make a Statement with a Single, Symbolic Motif

You don’t need a complex scene to create a meaningful banner. A single, well-executed symbol can carry immense weight and elegance.
Choose a small piece of high-quality fabric, like wool felt or linen, and a simple, resonant motif like a key, a feather, or an anchor.
Render the object with care, using stitches that enhance its form. For a key, a combination of satin stitch for the solid parts and backstitch for the intricate details works beautifully.
This focused approach results in a piece that feels like a quiet, personal emblem, perfect for a library, study, or any contemplative space.
25. Achieve Rococo Grace with Whitework and Pearls
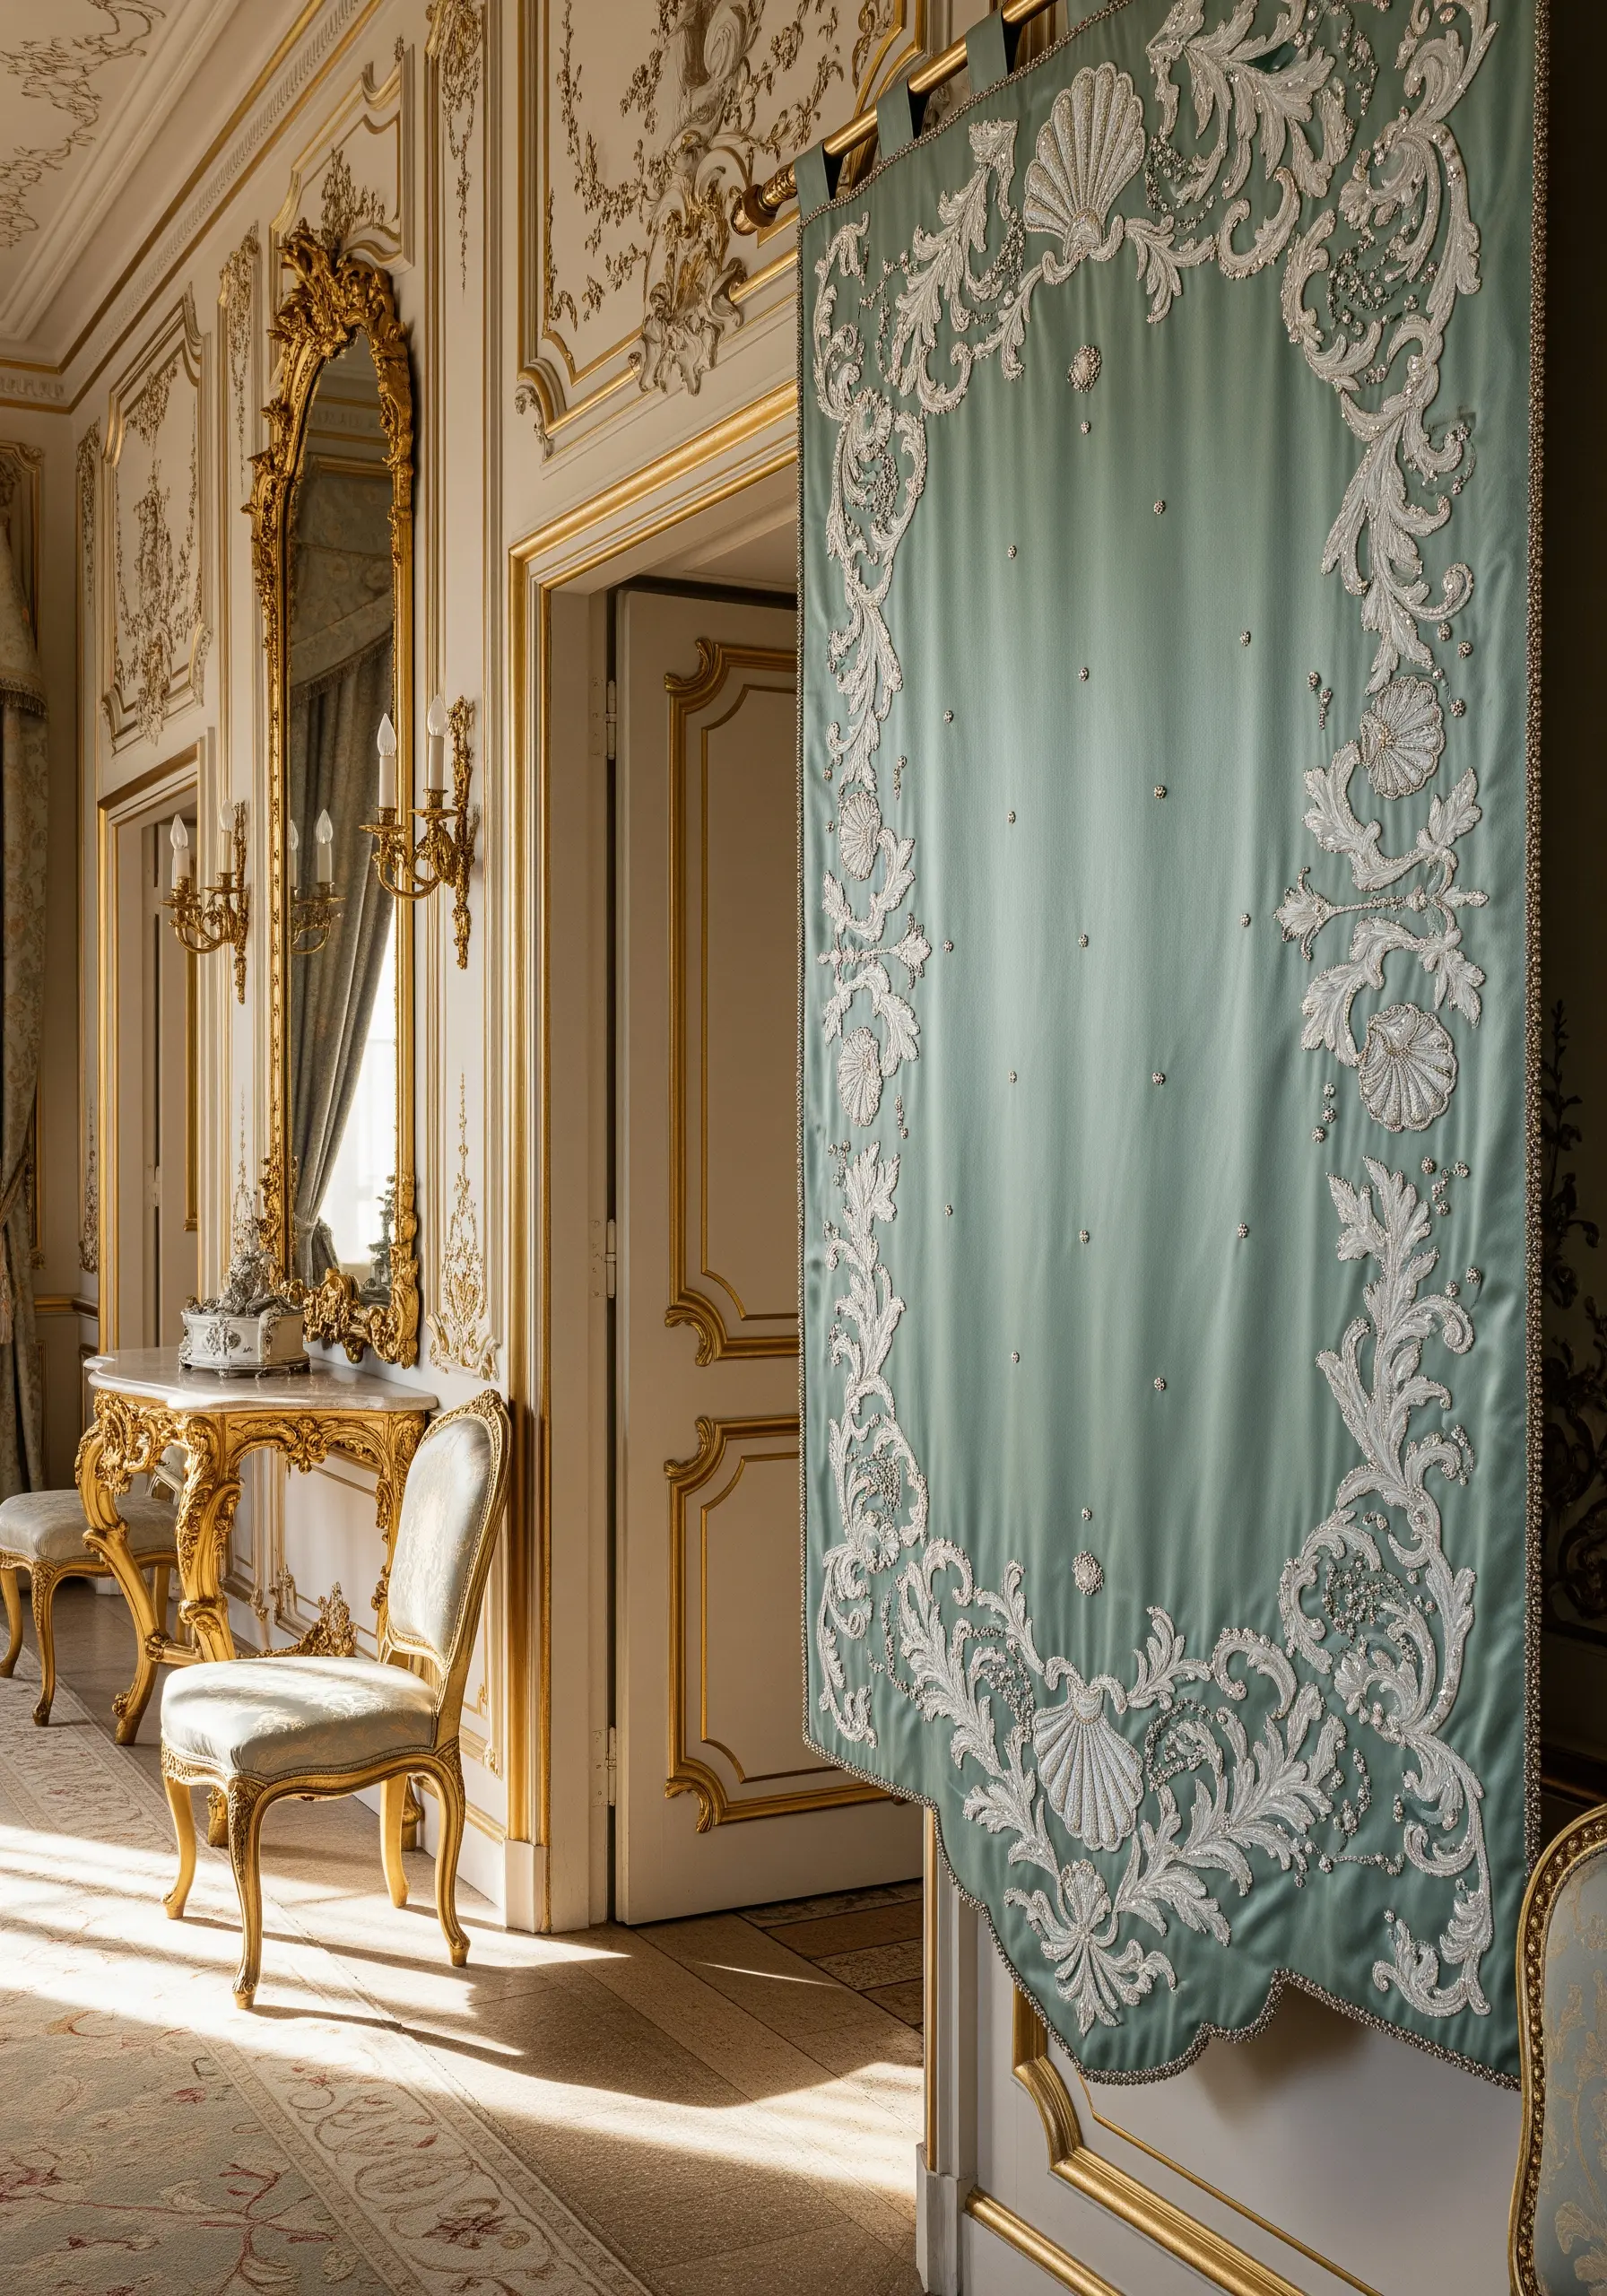
Capture the light, airy elegance of the Rococo era with delicate whitework on a colored silk or satin ground.
Use a combination of white and off-white threads to create subtle depth in your scrolls and shell motifs. Vary your stitches for texture: smooth satin stitch for petals, and tiny, packed French knots for a dotted effect.
For the ultimate touch of luxury, sparingly add tiny seed pearls or white beads at the intersections of scrolls or the center of flowers.
This technique creates a frothy, ethereal design that seems to float on the surface of the fabric, full of light and refined detail.
26. Tell the Story of a Year with a Seasonal Series
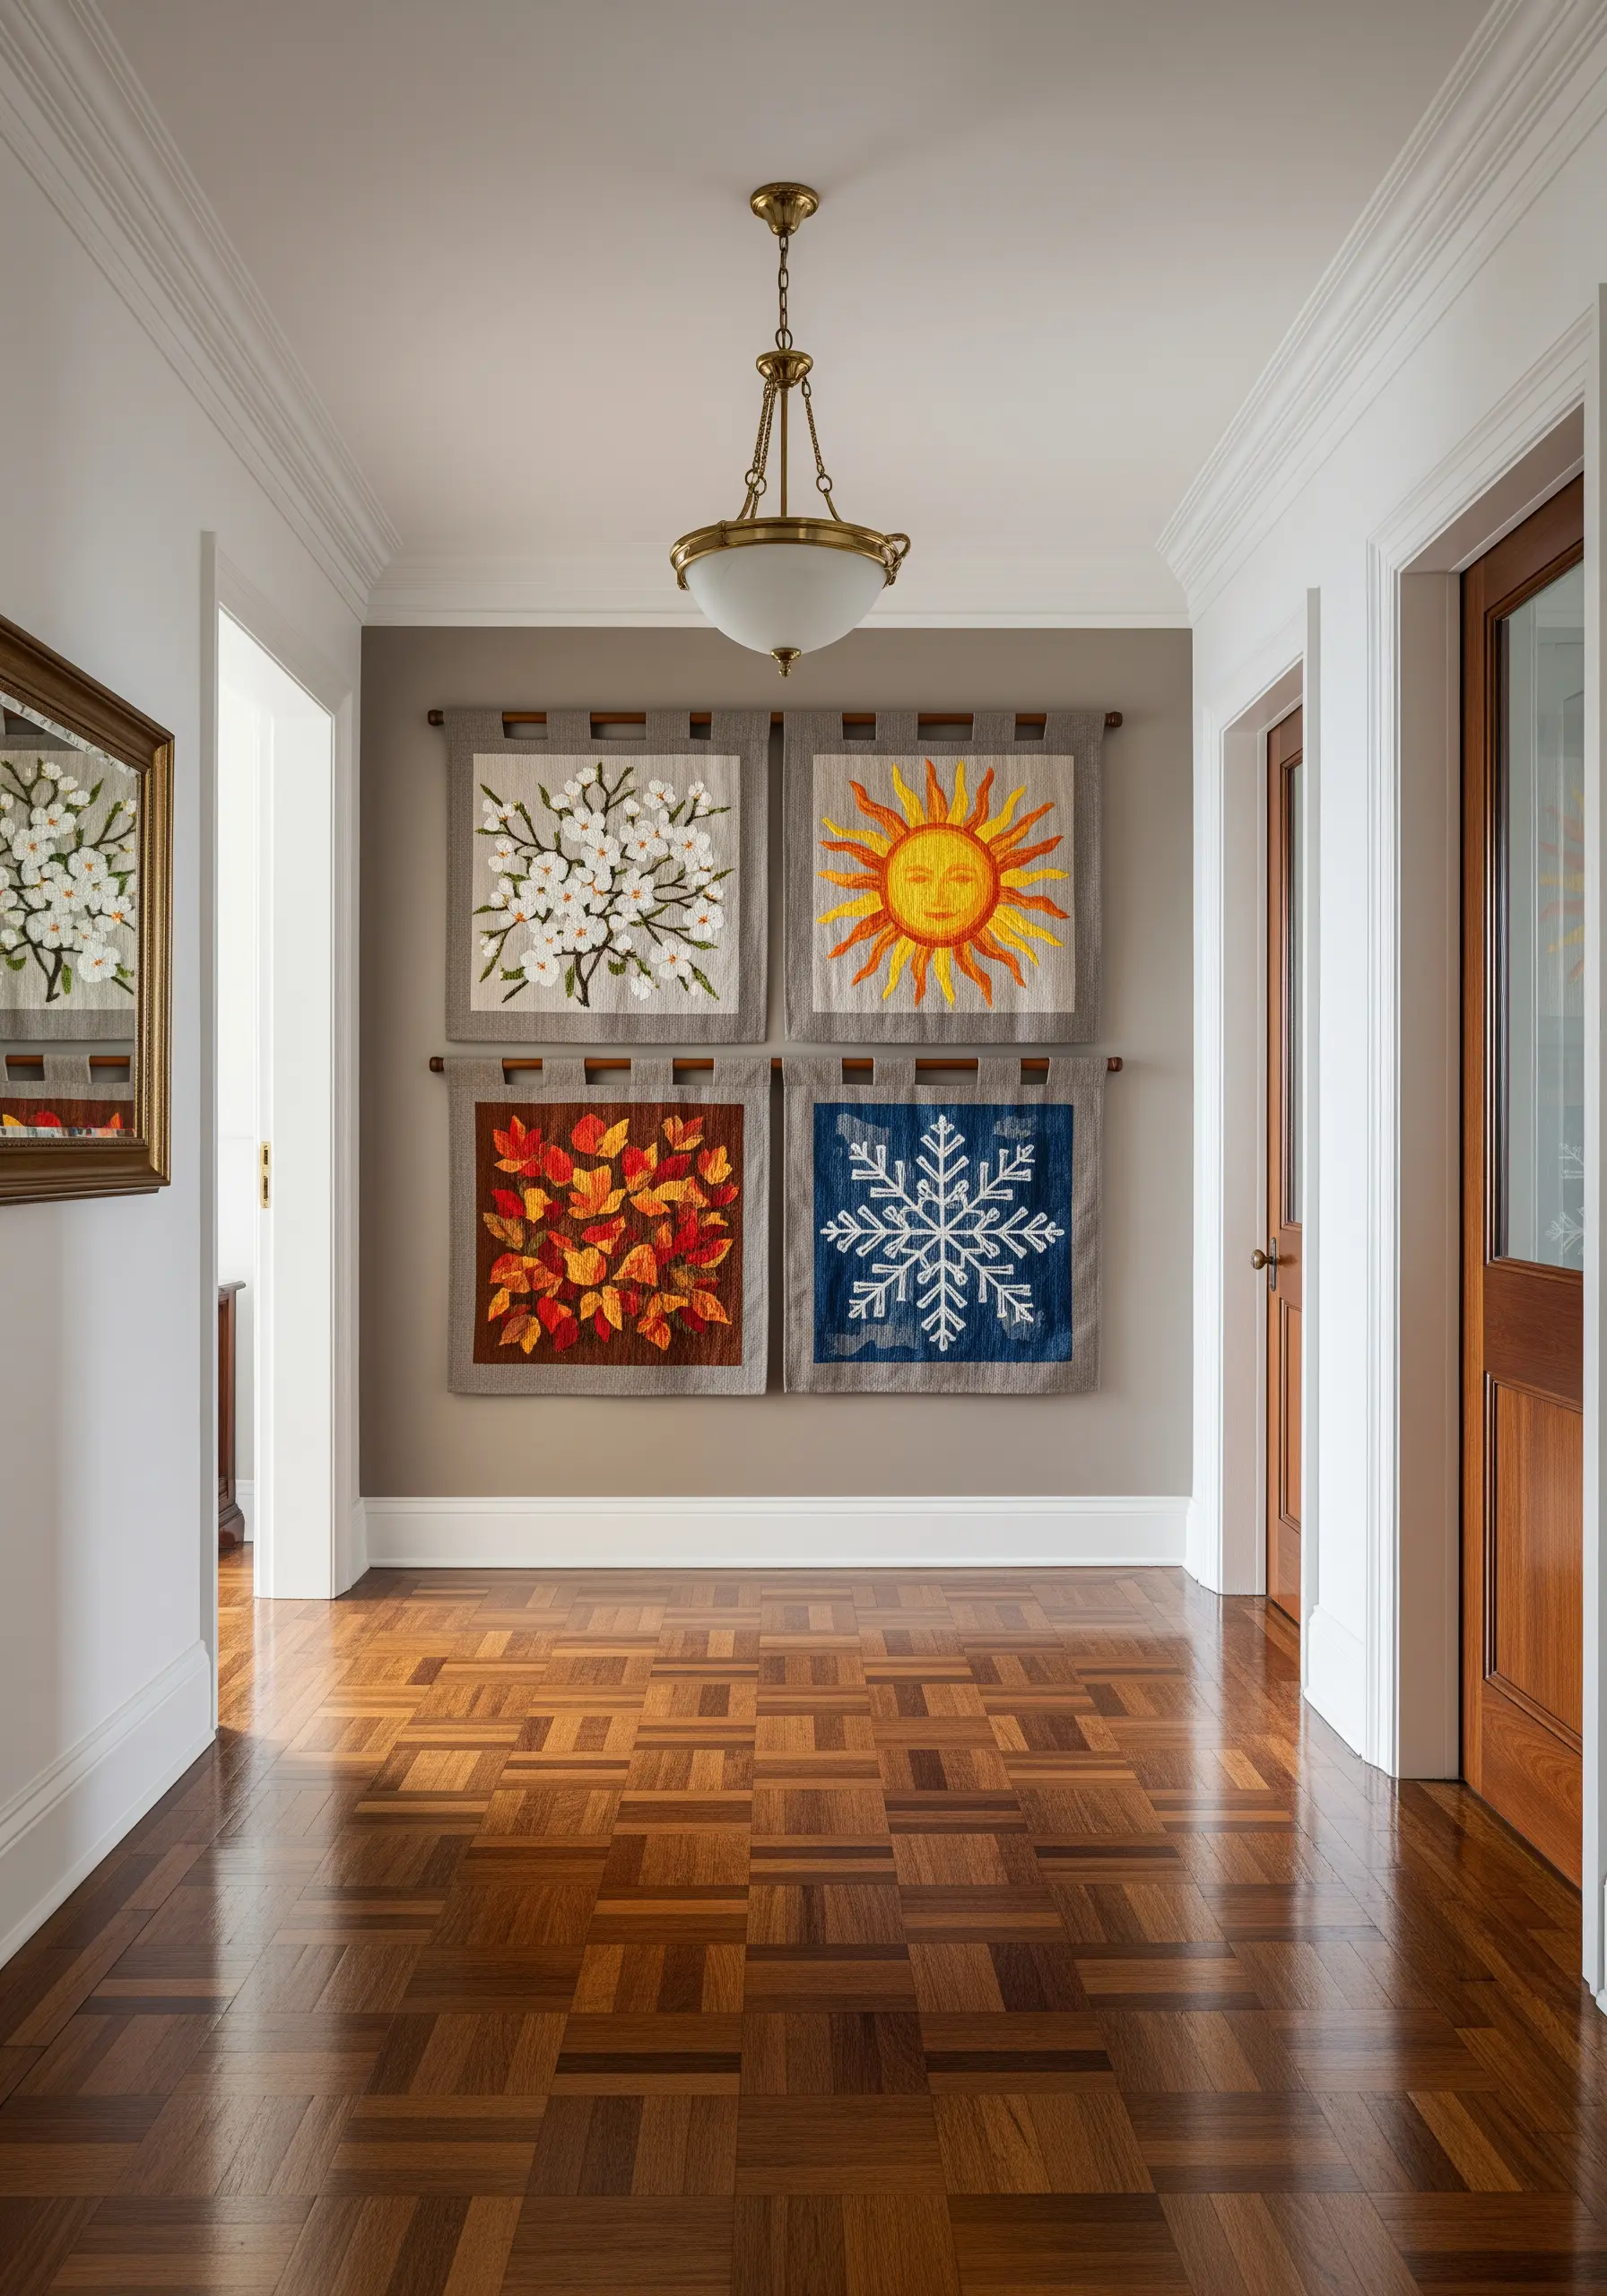
Create a dynamic display by designing a set of four smaller banners, each representing a season. It’s a wonderful way to practice different motifs and color palettes.
To keep the collection cohesive, use the same size and type of fabric for all four panels, such as a neutral-toned linen blend.
Assign a simple, iconic motif to each season: blossoms for spring, a sun for summer, falling leaves for autumn, and a snowflake for winter.
This quartet becomes a piece of seasonal wall art that you can rotate or display all at once for a celebration of the entire year.
27. Convey Softness with Delicate Thread Painting
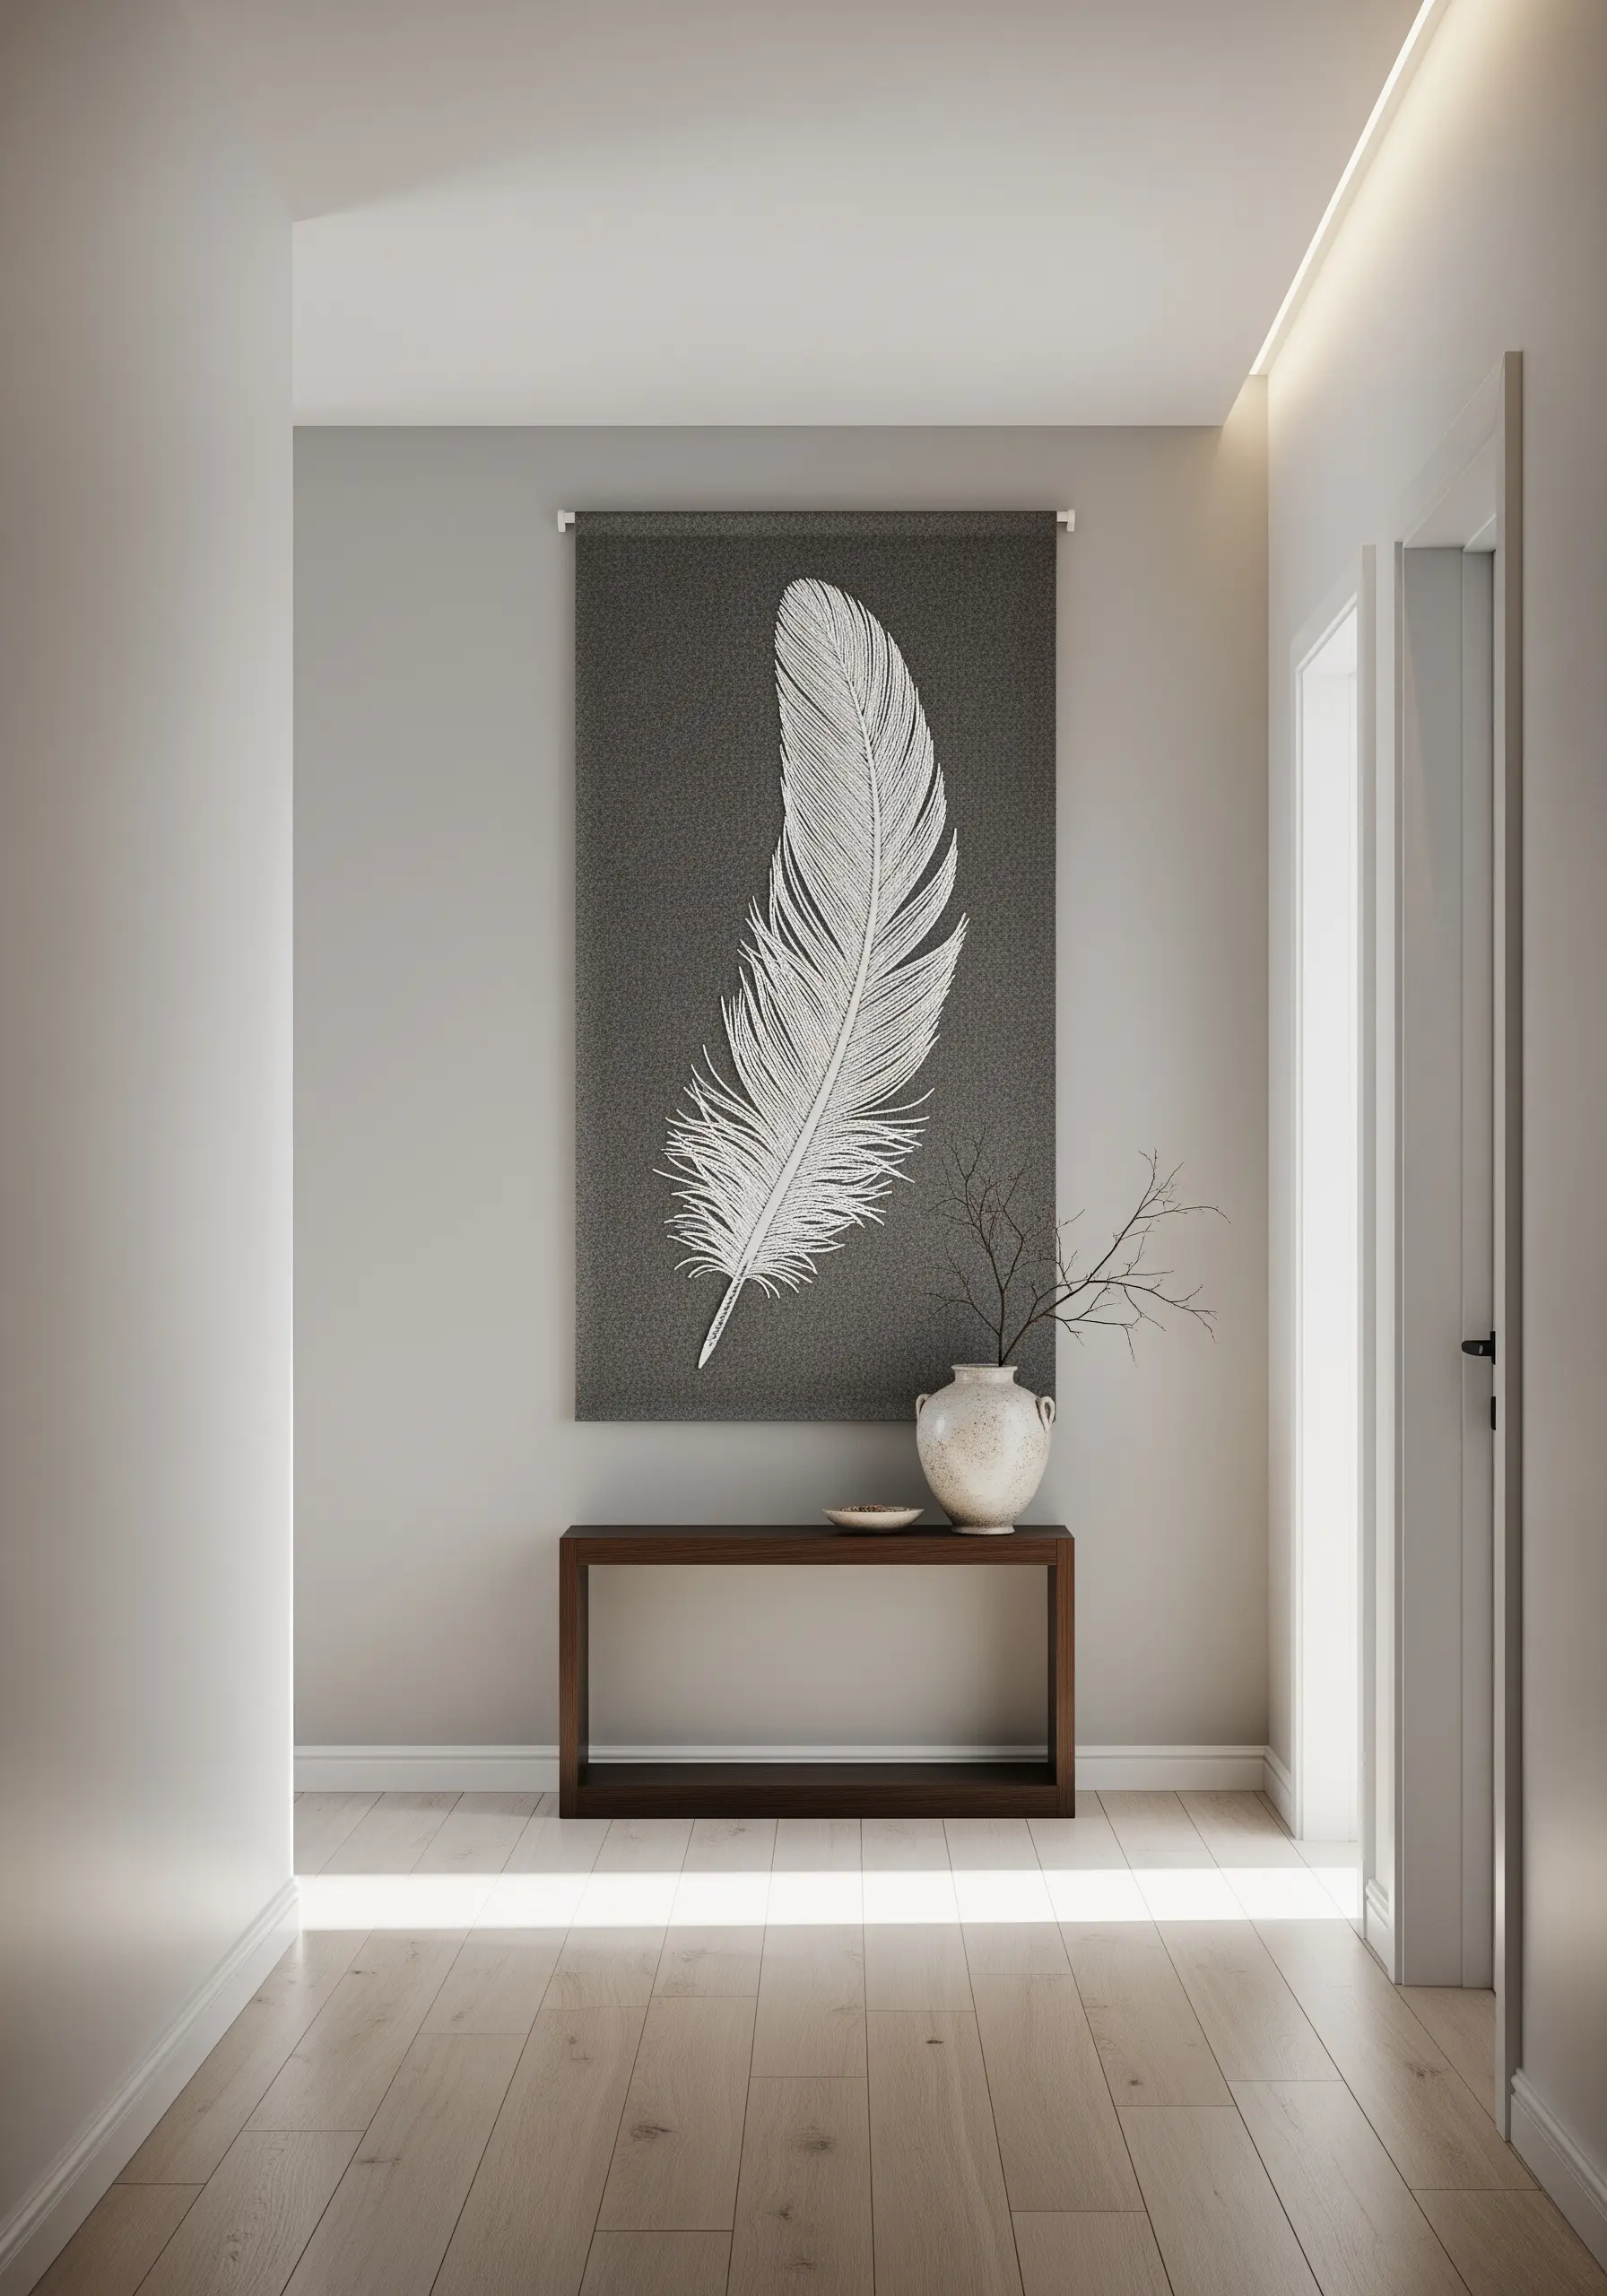
To embroider something as light and ethereal as a feather, your stitchwork must be exceptionally delicate.
Use a single strand of white or off-white silk floss for its subtle sheen. The long-and-short stitch is essential here for creating the soft, blended texture of the feather’s barbs.
For the central shaft, or rachis, use a slightly darker grey thread and a single line of stem stitch to give it structure without being harsh.
Your stitches should be long and directional, flowing outwards from the center, mimicking the natural growth of the feather. This meticulous approach results in a piece that feels weightless and incredibly realistic.
28. Create a Lustrous Mosaic with Seed Beads
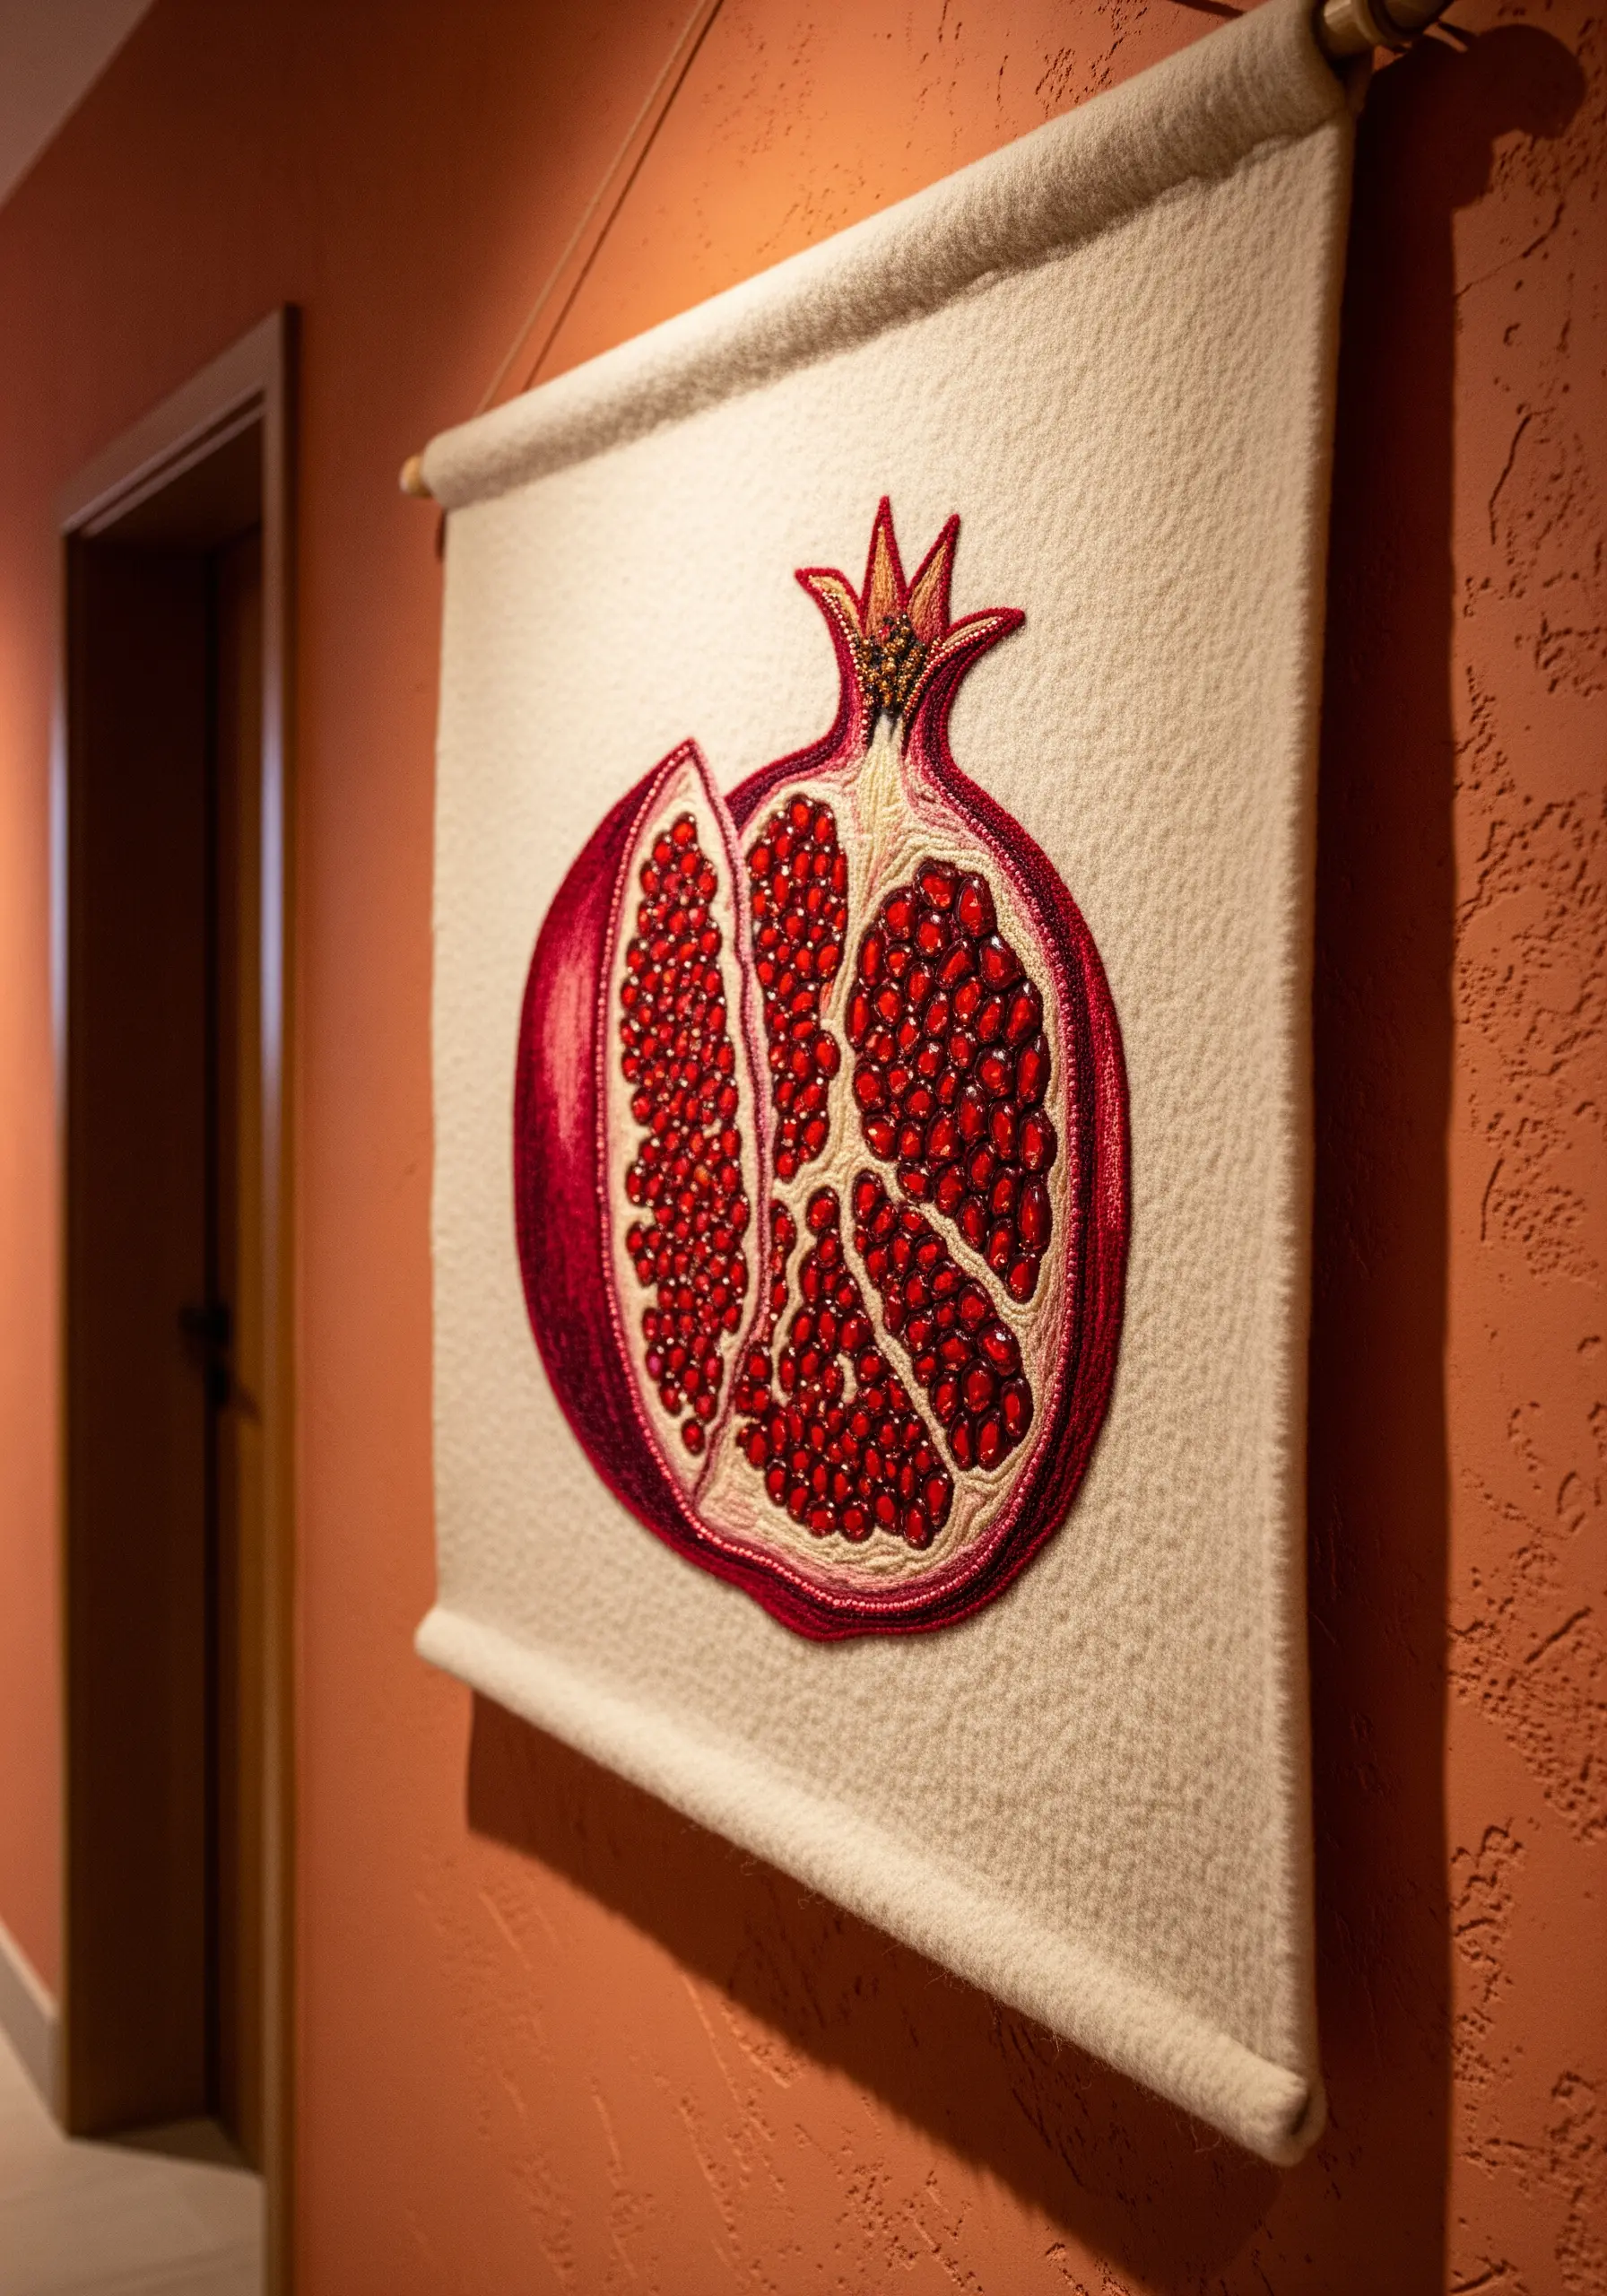
Give your embroidery a vibrant, jewel-like quality by incorporating beads as a fill texture, not just an accent.
For the pomegranate seeds, use high-quality glass seed beads in shades of red and pink. Stitch them down individually within the outlined sections, packing them tightly to create a dense, light-reflecting surface.
Contrast this beaded texture with smooth satin stitch for the fruit’s pith and skin.
The interplay between the lustrous, bumpy beads and the flat, smooth thread creates a feast for the eyes and a stunningly rich tactile experience.
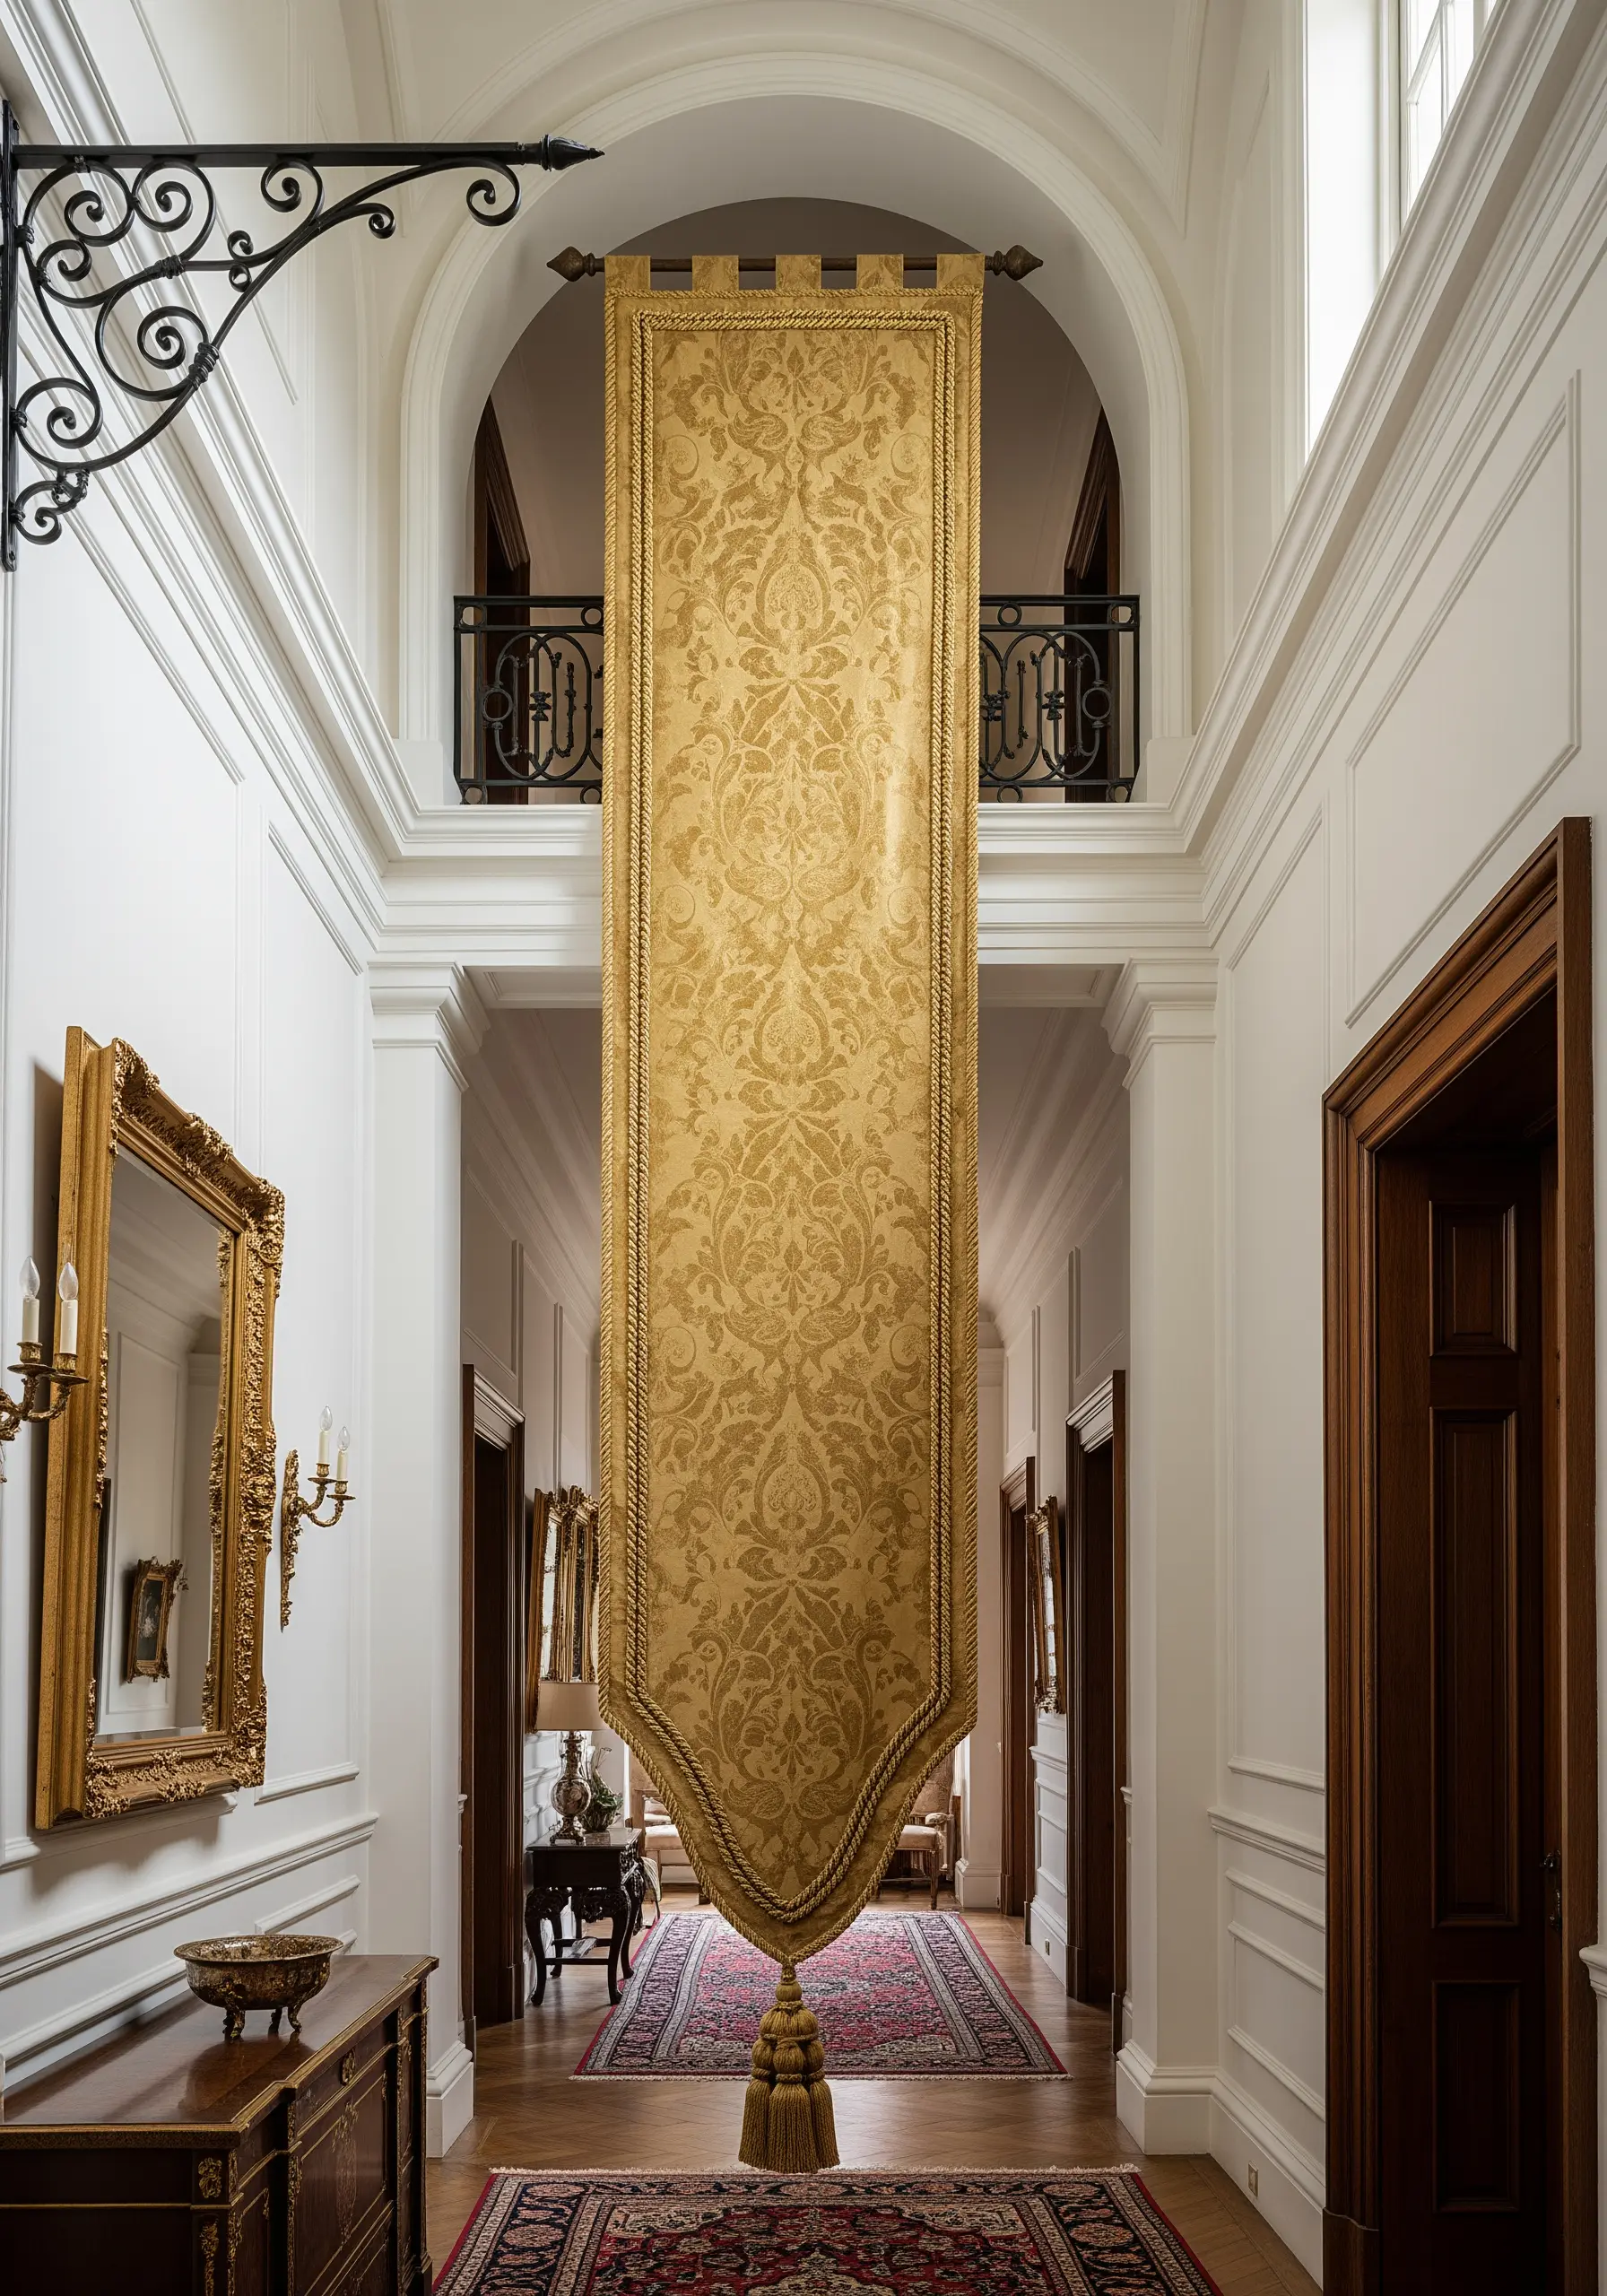
29. Design for Architecture with Dramatic Scale
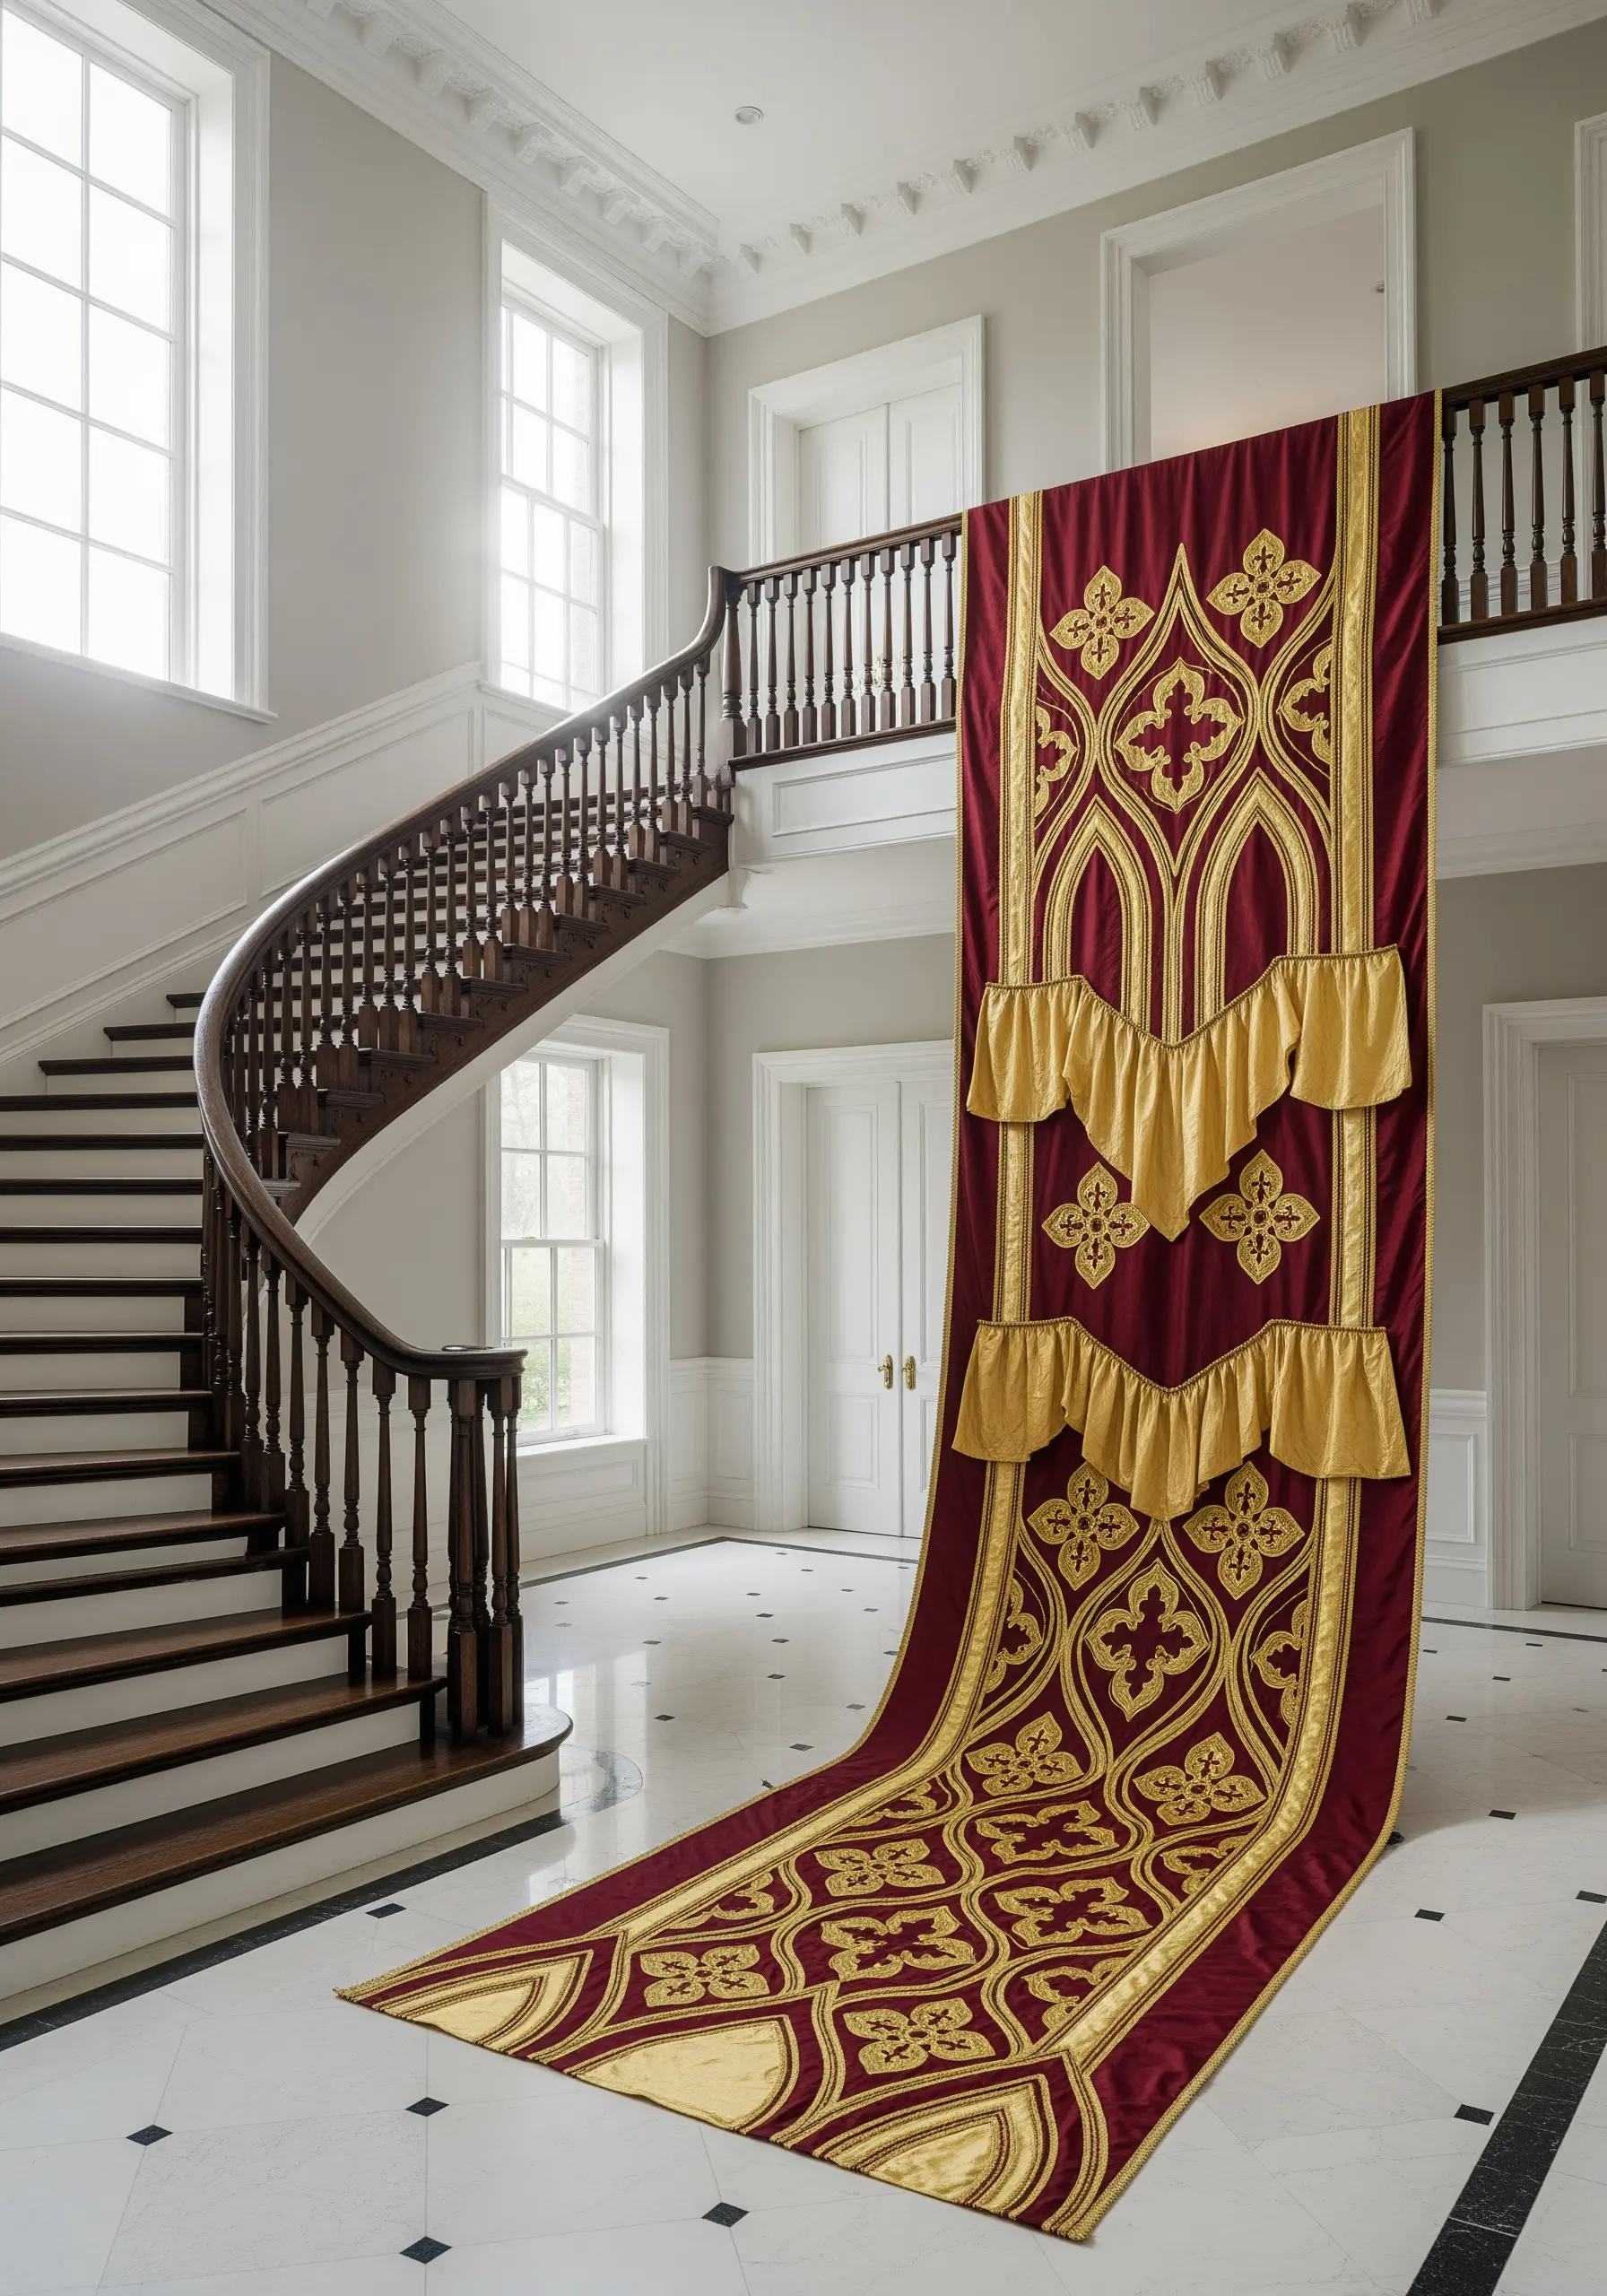
When creating a banner for a grand space like a staircase, think architecturally. The piece should complement, not shrink within, its surroundings.
Use appliqué for the large, repeating gold shapes to cover ground efficiently and ensure bold, clean lines. Choose a fabric with some weight and drape, like a silk-blend satin, that will hang beautifully.
Embroider the finer details, like the outlines and interior motifs, with a high-sheen rayon or metallic thread to catch the light.
The sheer scale and dramatic length of such a piece transform it from a mere decoration into an integral part of the architectural experience.
30. Embrace the Charm of Folk Art Simplicity
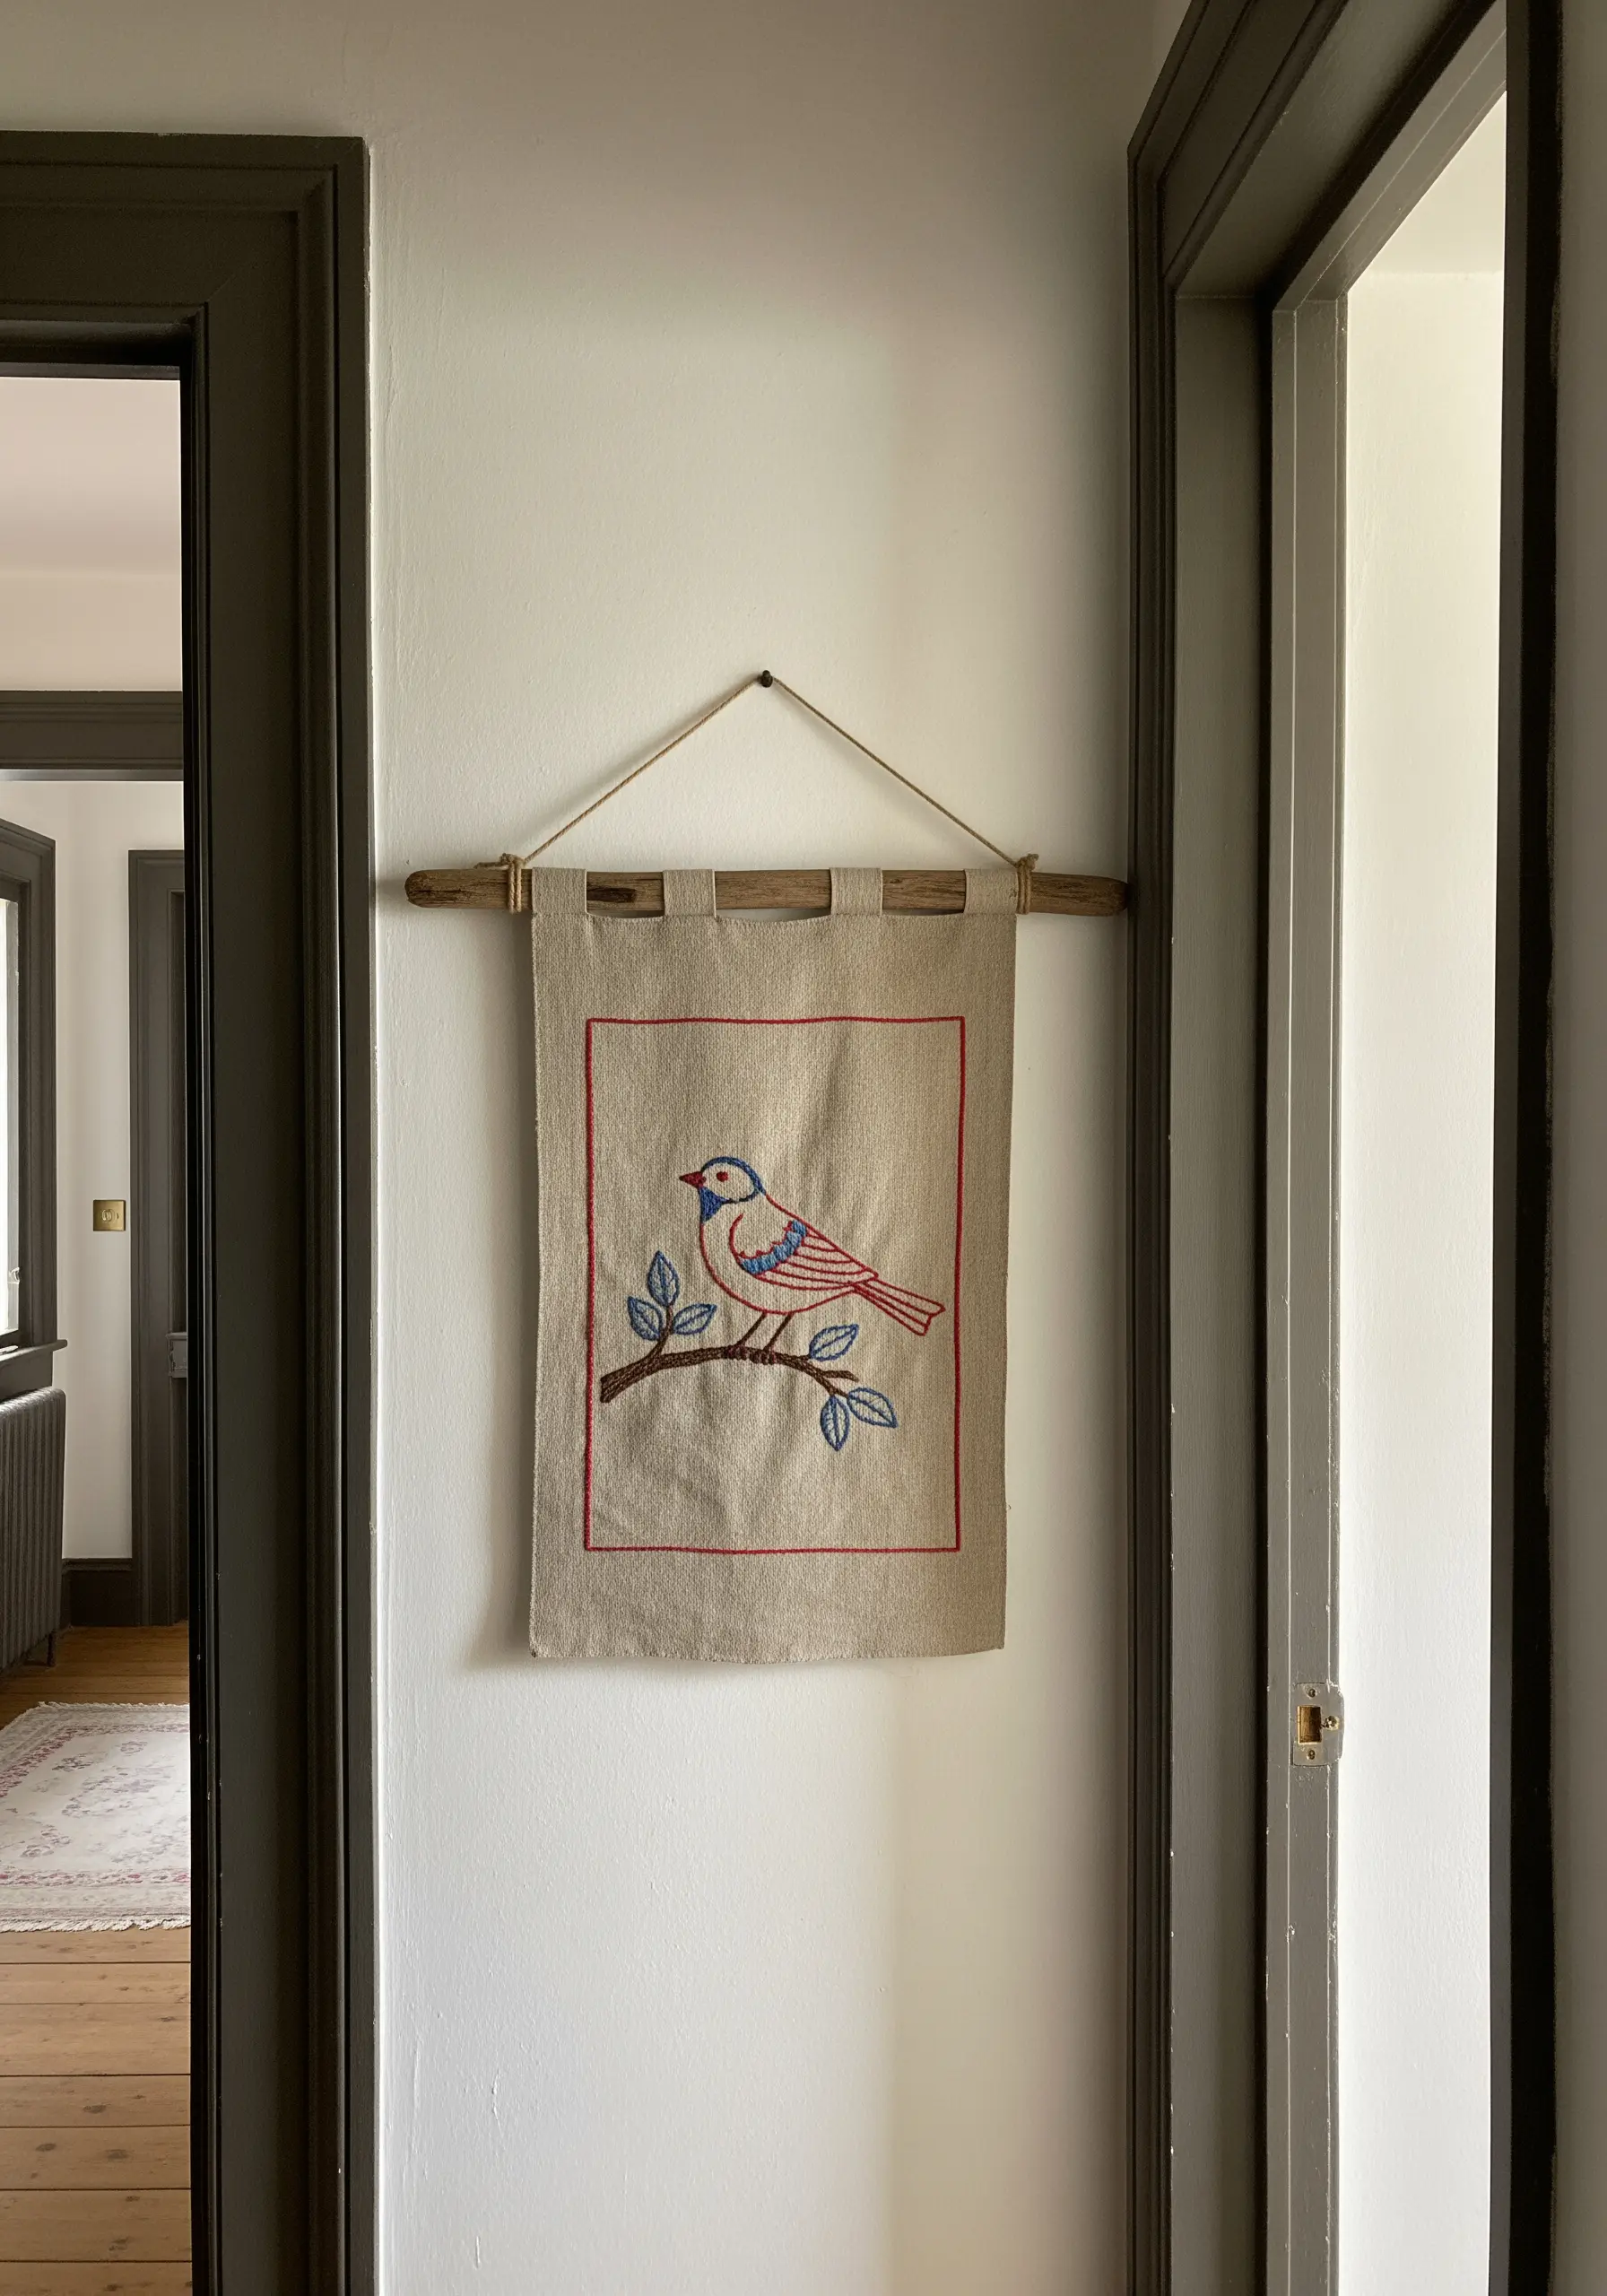
Capture the heartfelt, unpretentious appeal of folk art by simplifying your motifs and embracing a handmade aesthetic.
Work on a natural, undyed fabric like linen or osnaburg. Use basic stitches like backstitch for outlines and simple satin stitch or seed stitch for fills.
Don’t strive for perfect realism; instead, focus on clear shapes, a limited color palette, and a balanced composition.
The charm of this style lies in its honesty and simplicity, creating a piece that feels warm, welcoming, and timeless.
31. Use Negative Space to Define Your Subject
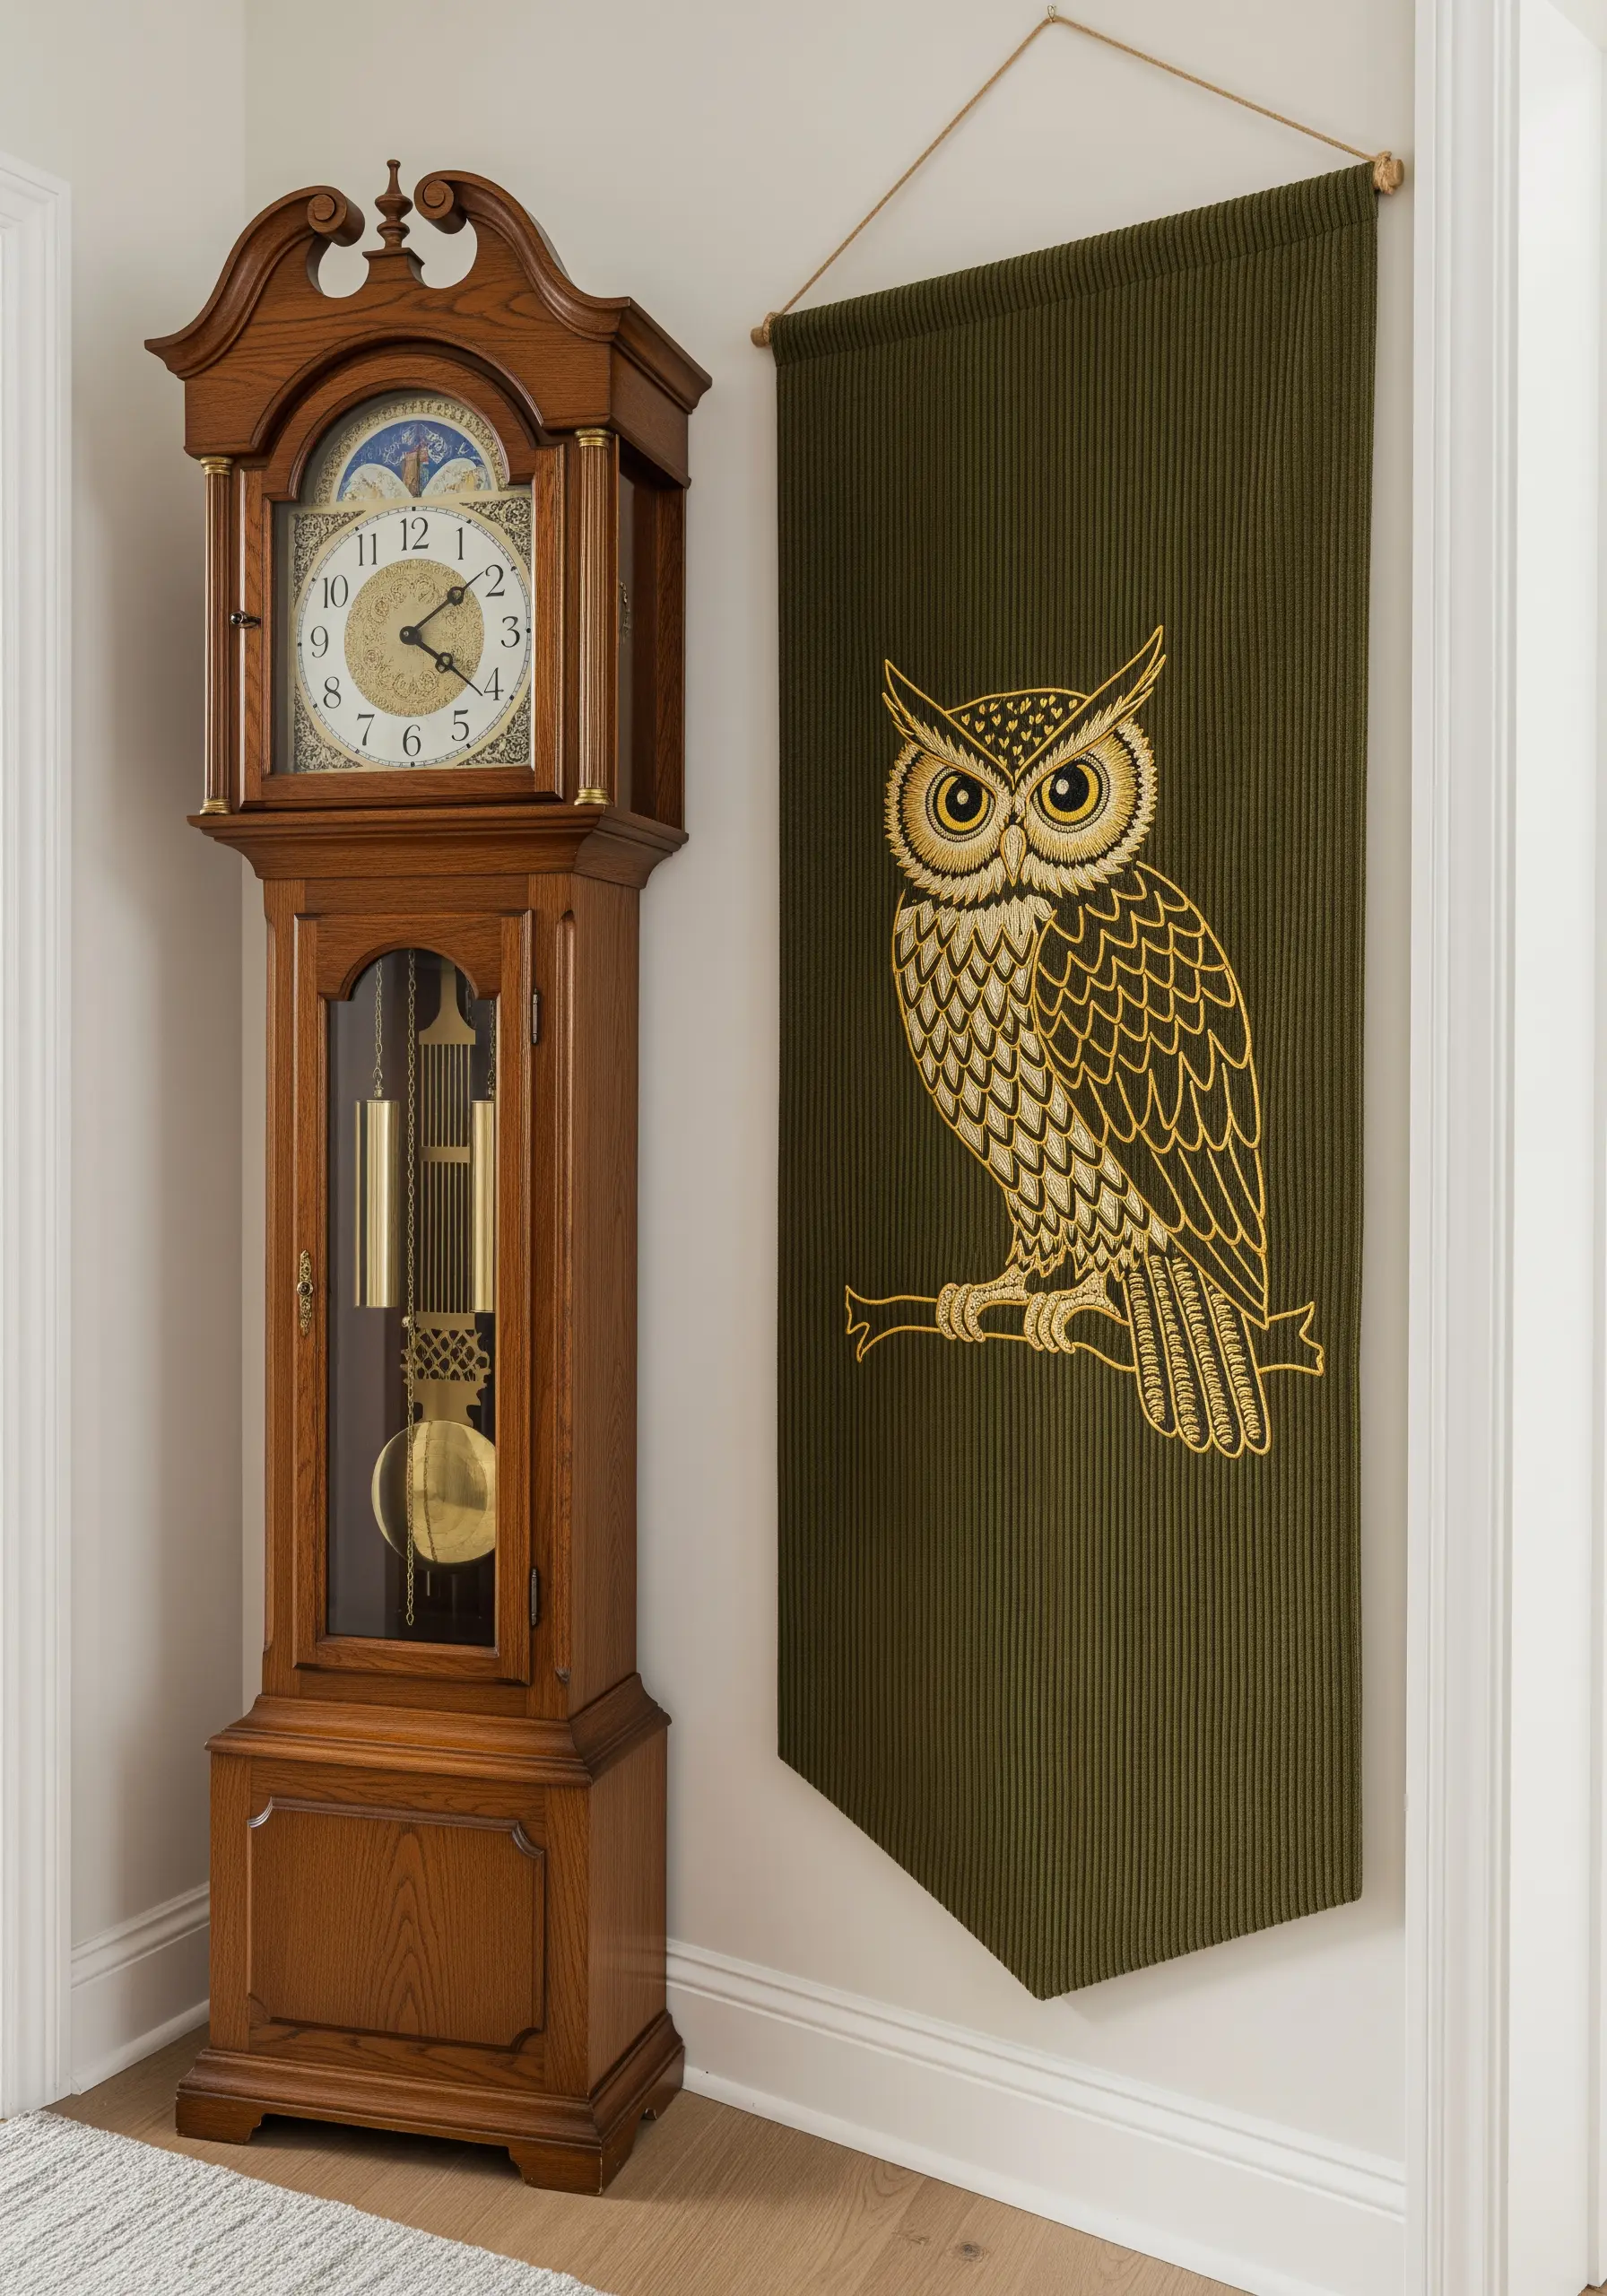
When working with a single color of thread, the parts you *don’t* stitch are just as important as the parts you do.
On this owl, the lines of gold backstitch merely suggest the edges of feathers and shapes. The ribbed green fabric showing through becomes the darker, shaded part of the bird.
This clever use of negative space creates detail and dimension without needing multiple colors or complex shading stitches.
It’s a sophisticated, graphic approach that requires careful planning but results in a strikingly modern and efficient design.
32. Paint a Landscape with Textured Stitches
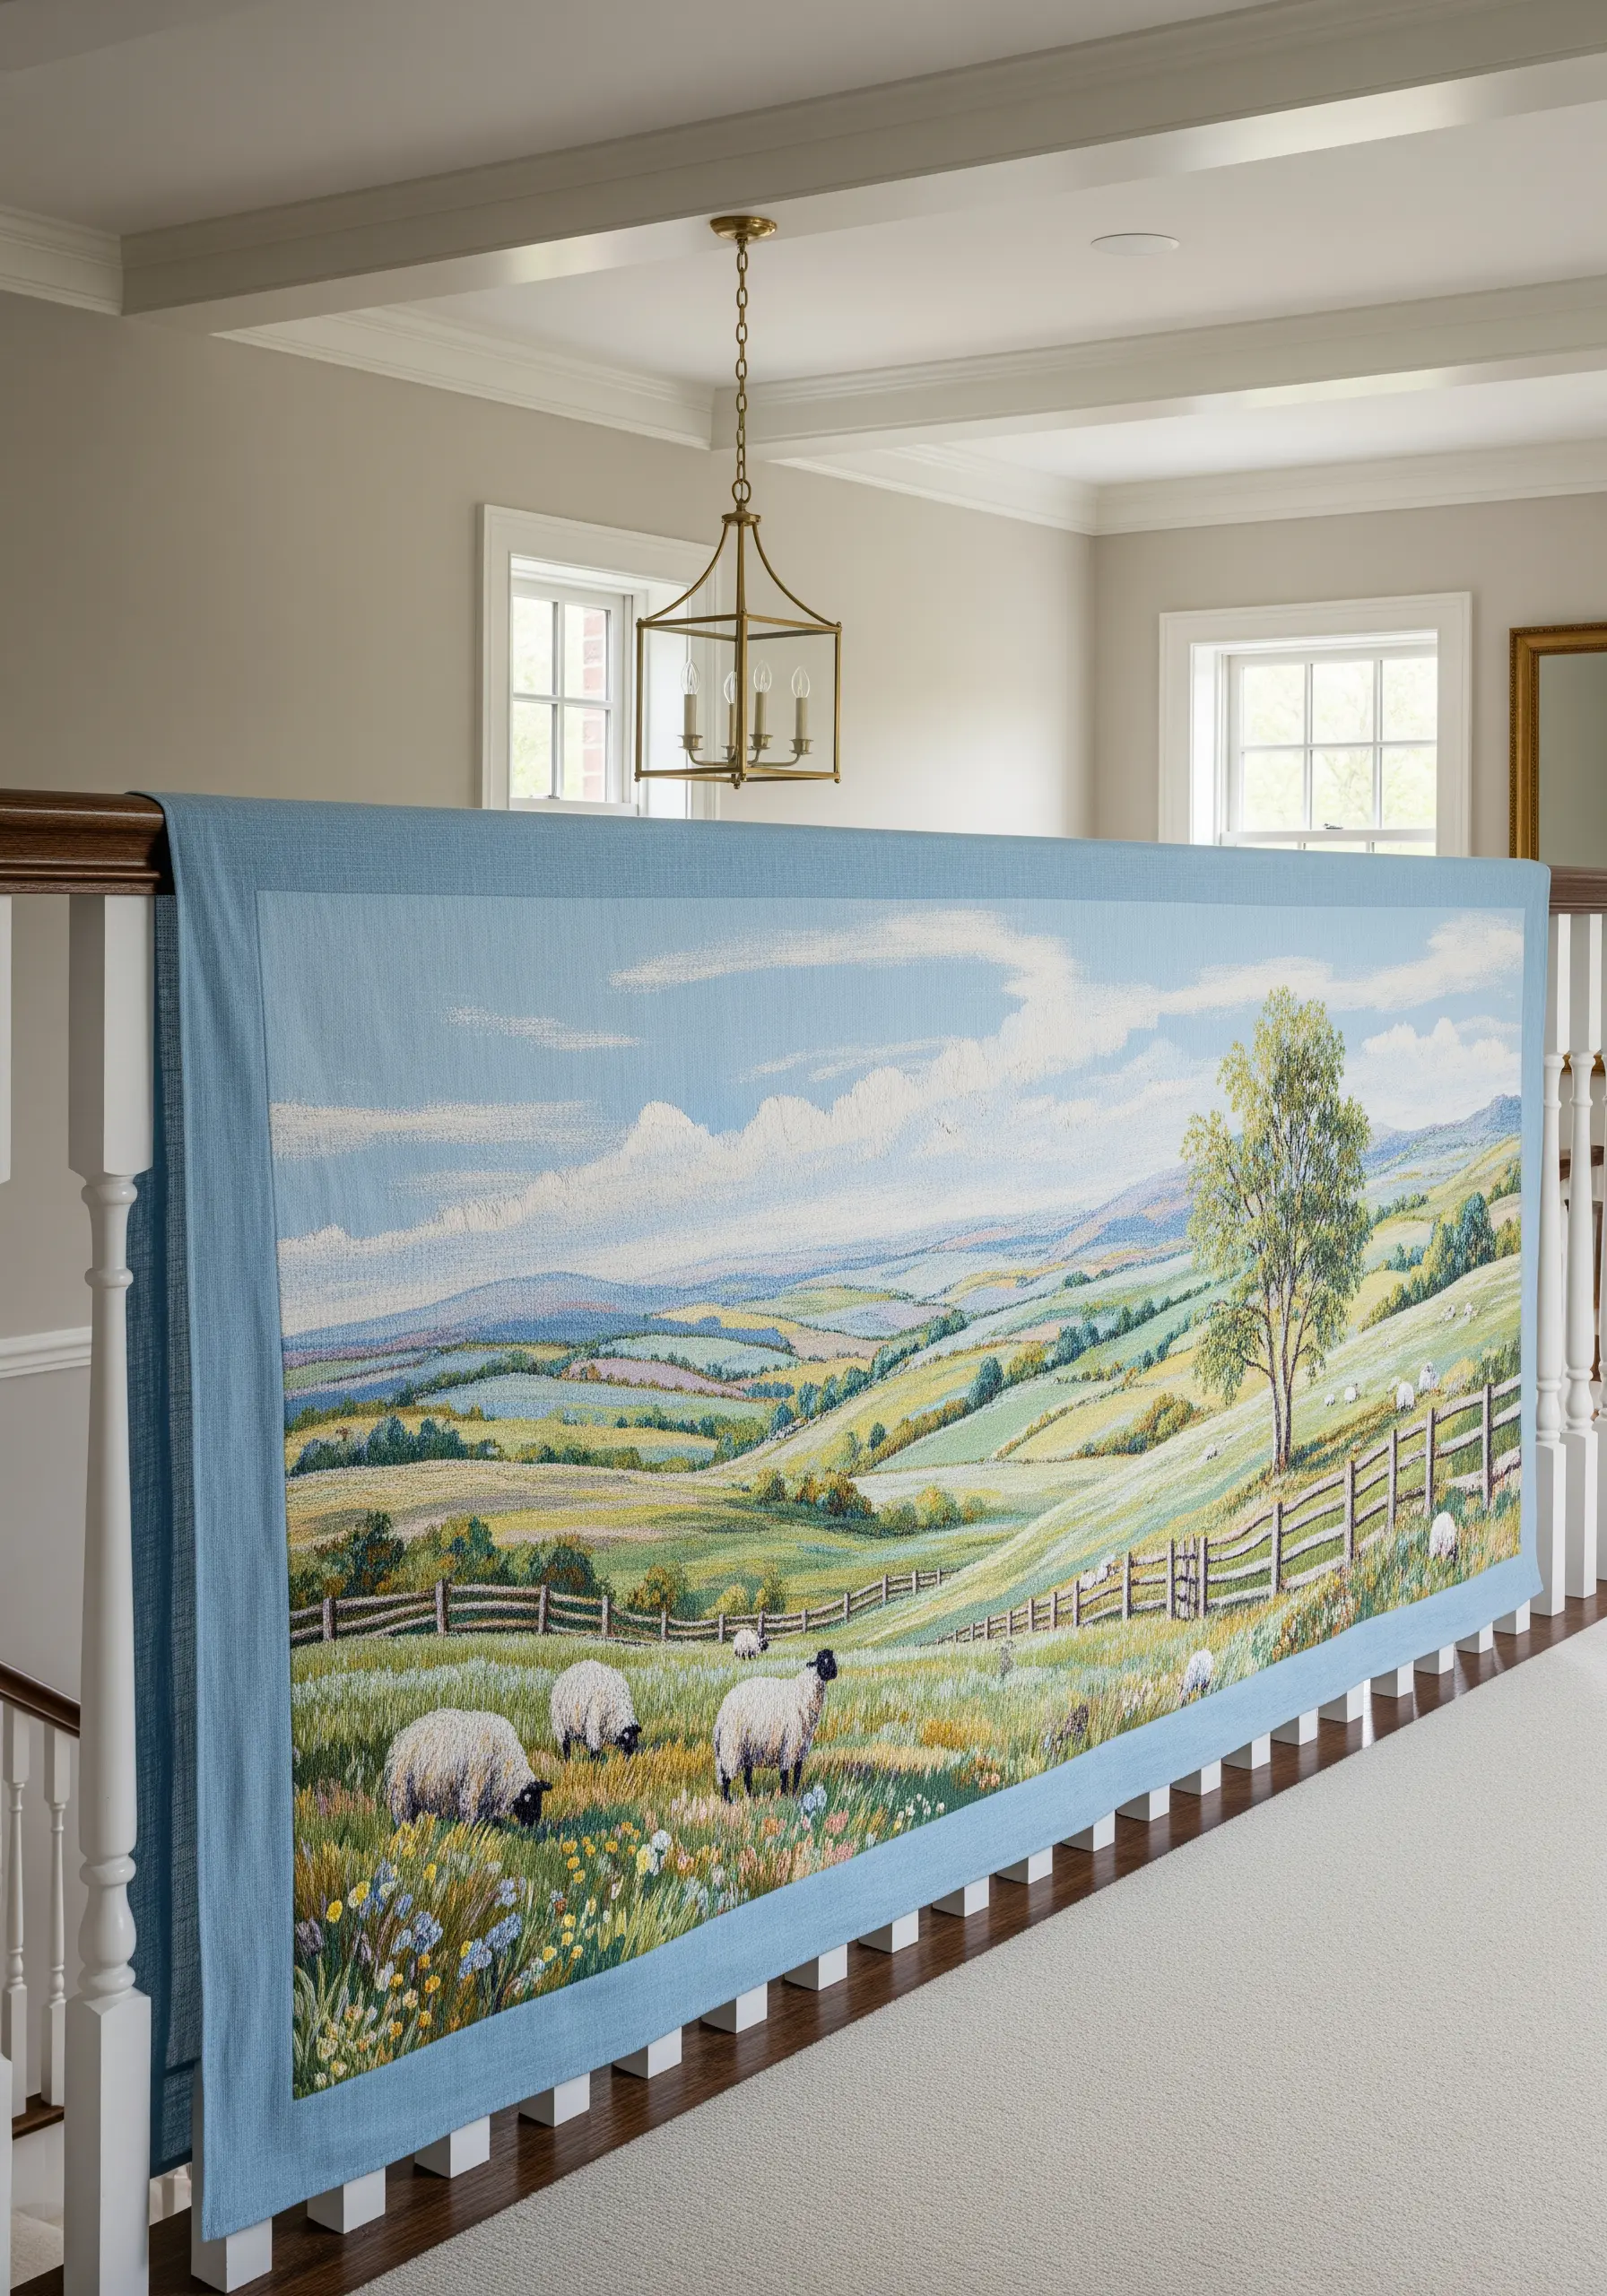
Create a full-scale pictorial tapestry by thinking of your threads as paint and your stitches as brushstrokes.
Use a vast array of colors to capture the subtle shifts in a landscape. For distant hills, use short, blended long-and-short stitches in muted blues and greens.
In the foreground, build up texture: use French knots for wildflowers, turkey work for bushy shrubs, and straight stitches for blades of grass.
This multi-stitch approach, often called thread painting, transforms the flat surface of the fabric into a deep, immersive scene with incredible detail and life.
33. Convey Grace with Satin Stitch on Silk
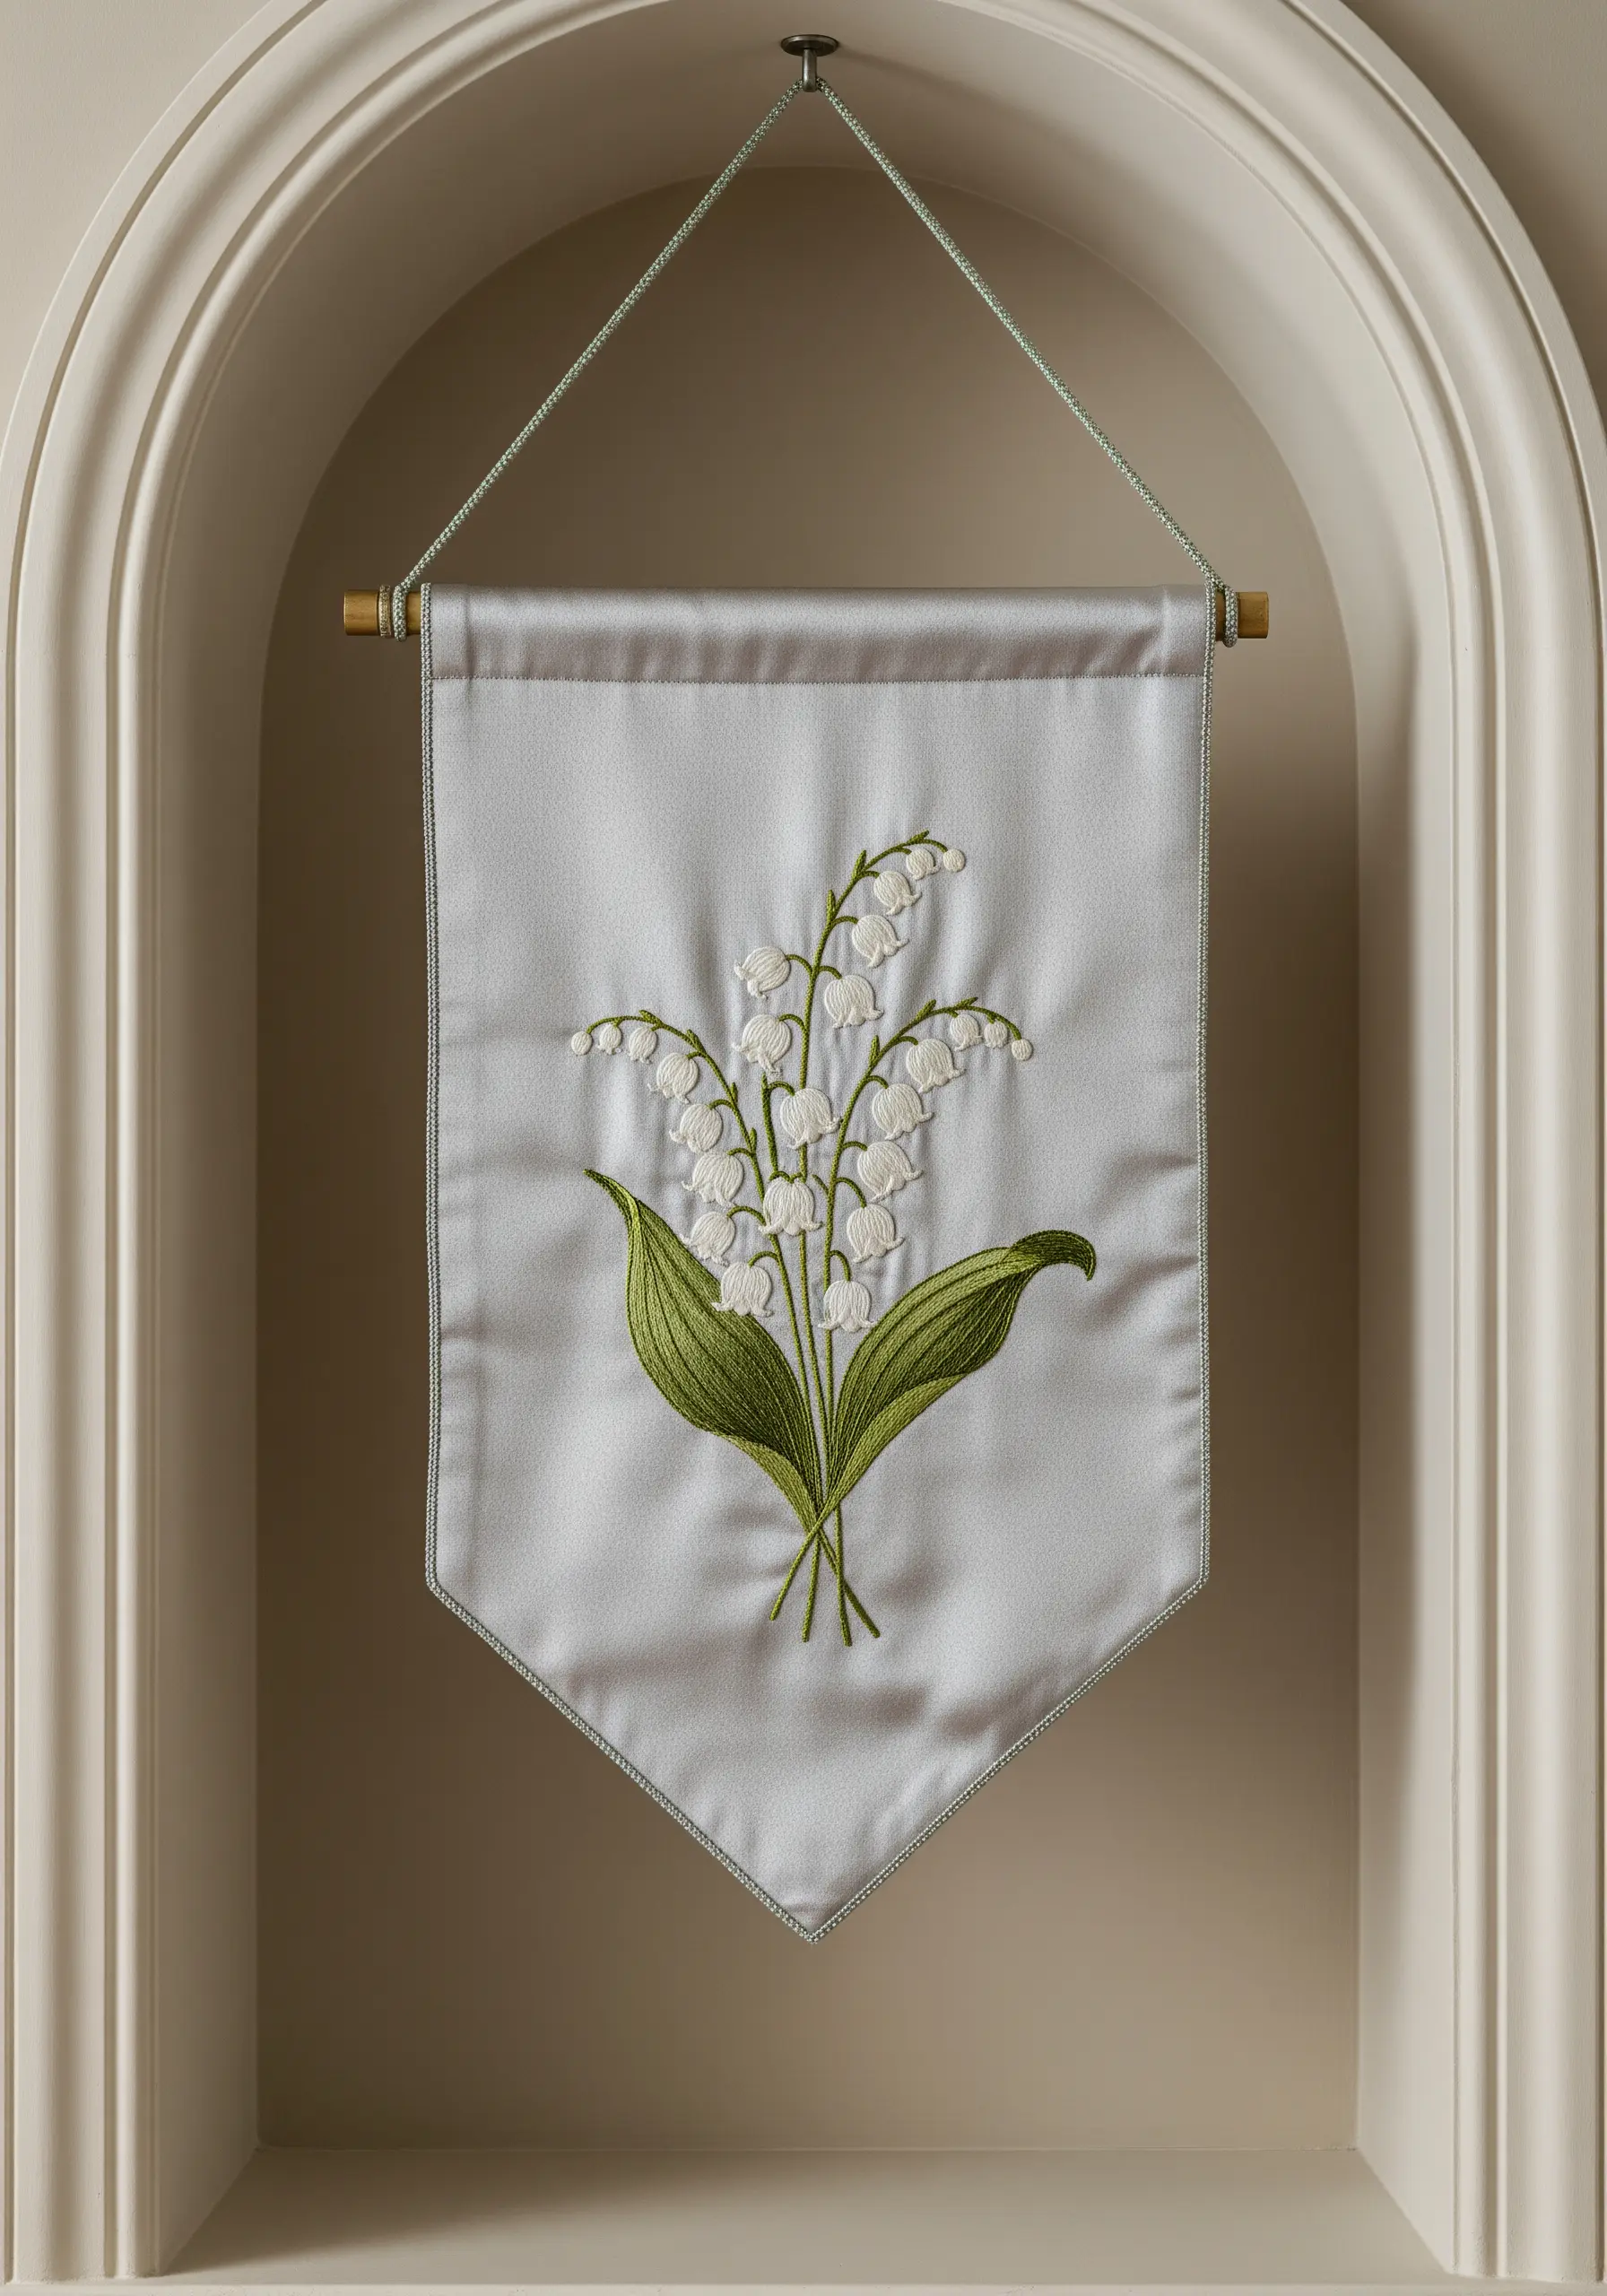
For a project that exudes pure elegance, pair the delicacy of a flower like lily of the valley with a luminous silk or satin background.
The smooth surface of the fabric allows your satin stitches to lie perfectly flat, creating an unbroken sheen that enhances the thread’s natural luster.
Use a fine silk floss and a sharp needle, ensuring each stitch is laid closely against the last. For the leaves, use a fishbone stitch to create a central vein and subtle dimension.
The combination of delicate subject matter and luxurious materials results in a piece that is timelessly graceful and refined.
34. Create a Modern Gallery with Graphic Motifs
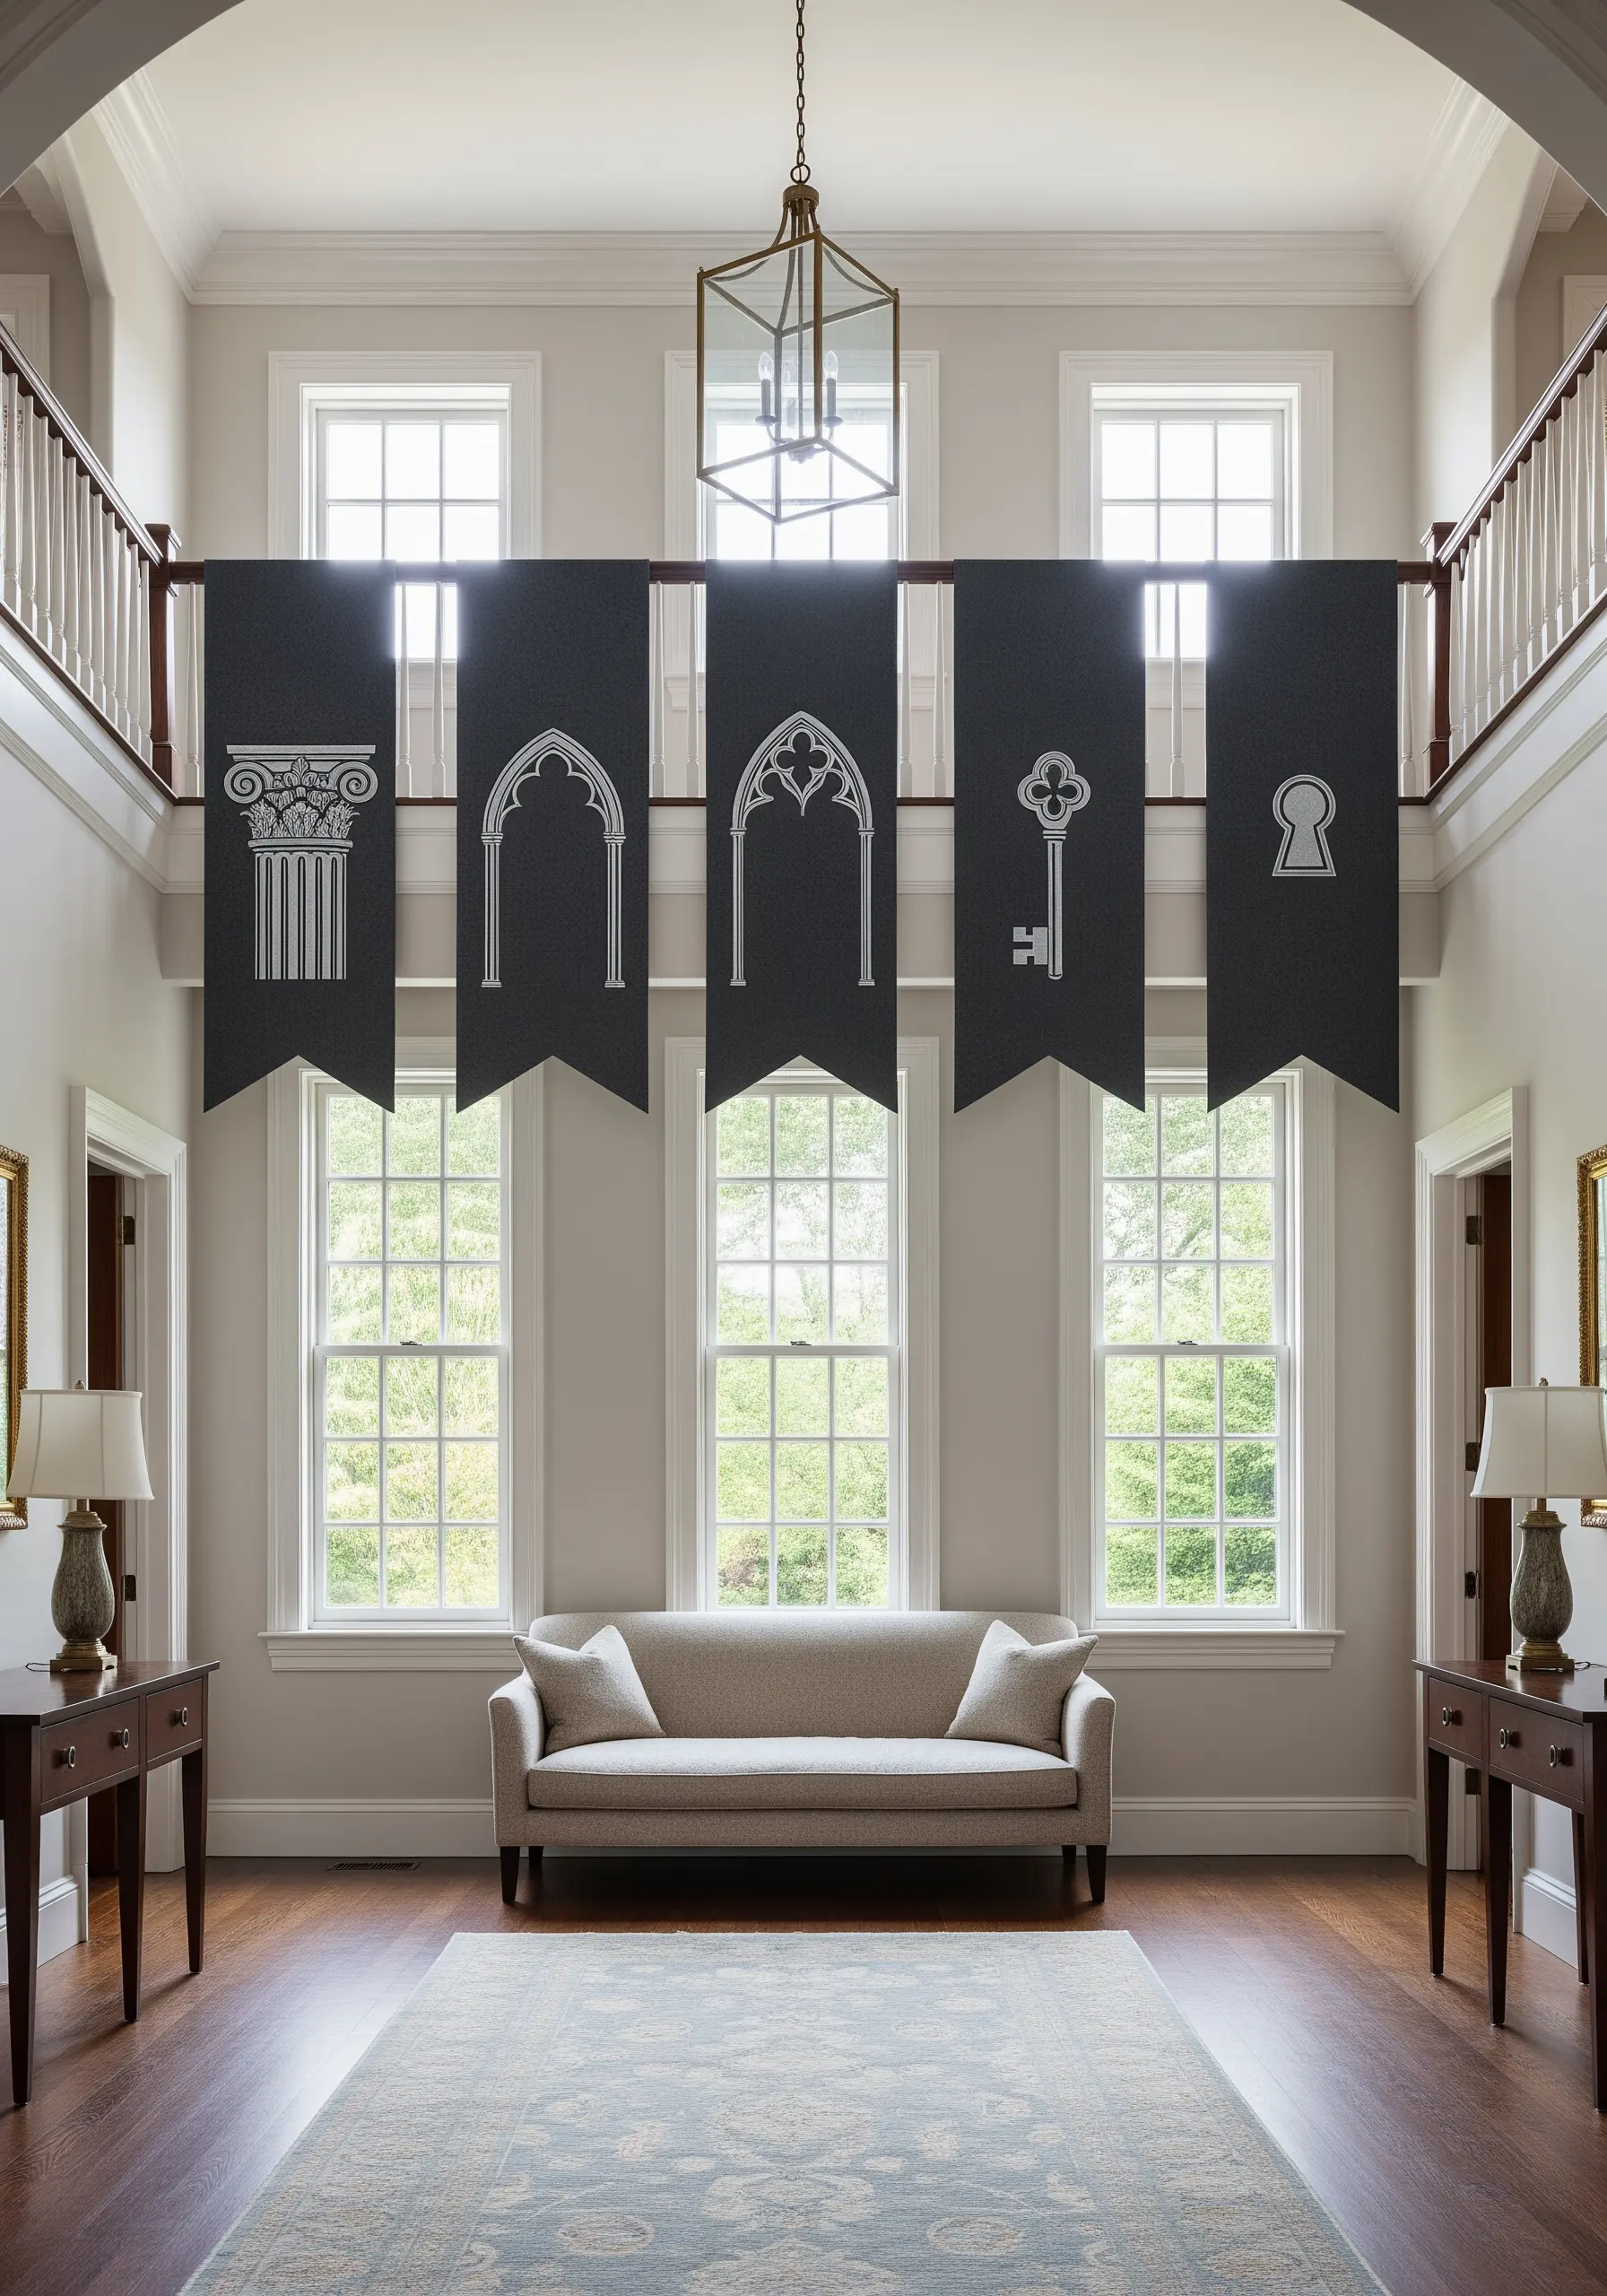
Arrange a series of simple, graphic banners to create a high-impact installation that feels like a modern art gallery.
Choose a stark, high-contrast palette—white thread on black felt or canvas is incredibly effective. Select a theme for your motifs, such as architectural elements, and render them in a clean, minimalist style.
Use a single, confident stitch like a whipped backstitch or chain stitch to create your outlines.
The power of this display comes from the repetition of the format and the bold, simple clarity of each individual design, turning your hallway into a curated exhibition.
35. Stitch Fiery Energy with Blended Gradients
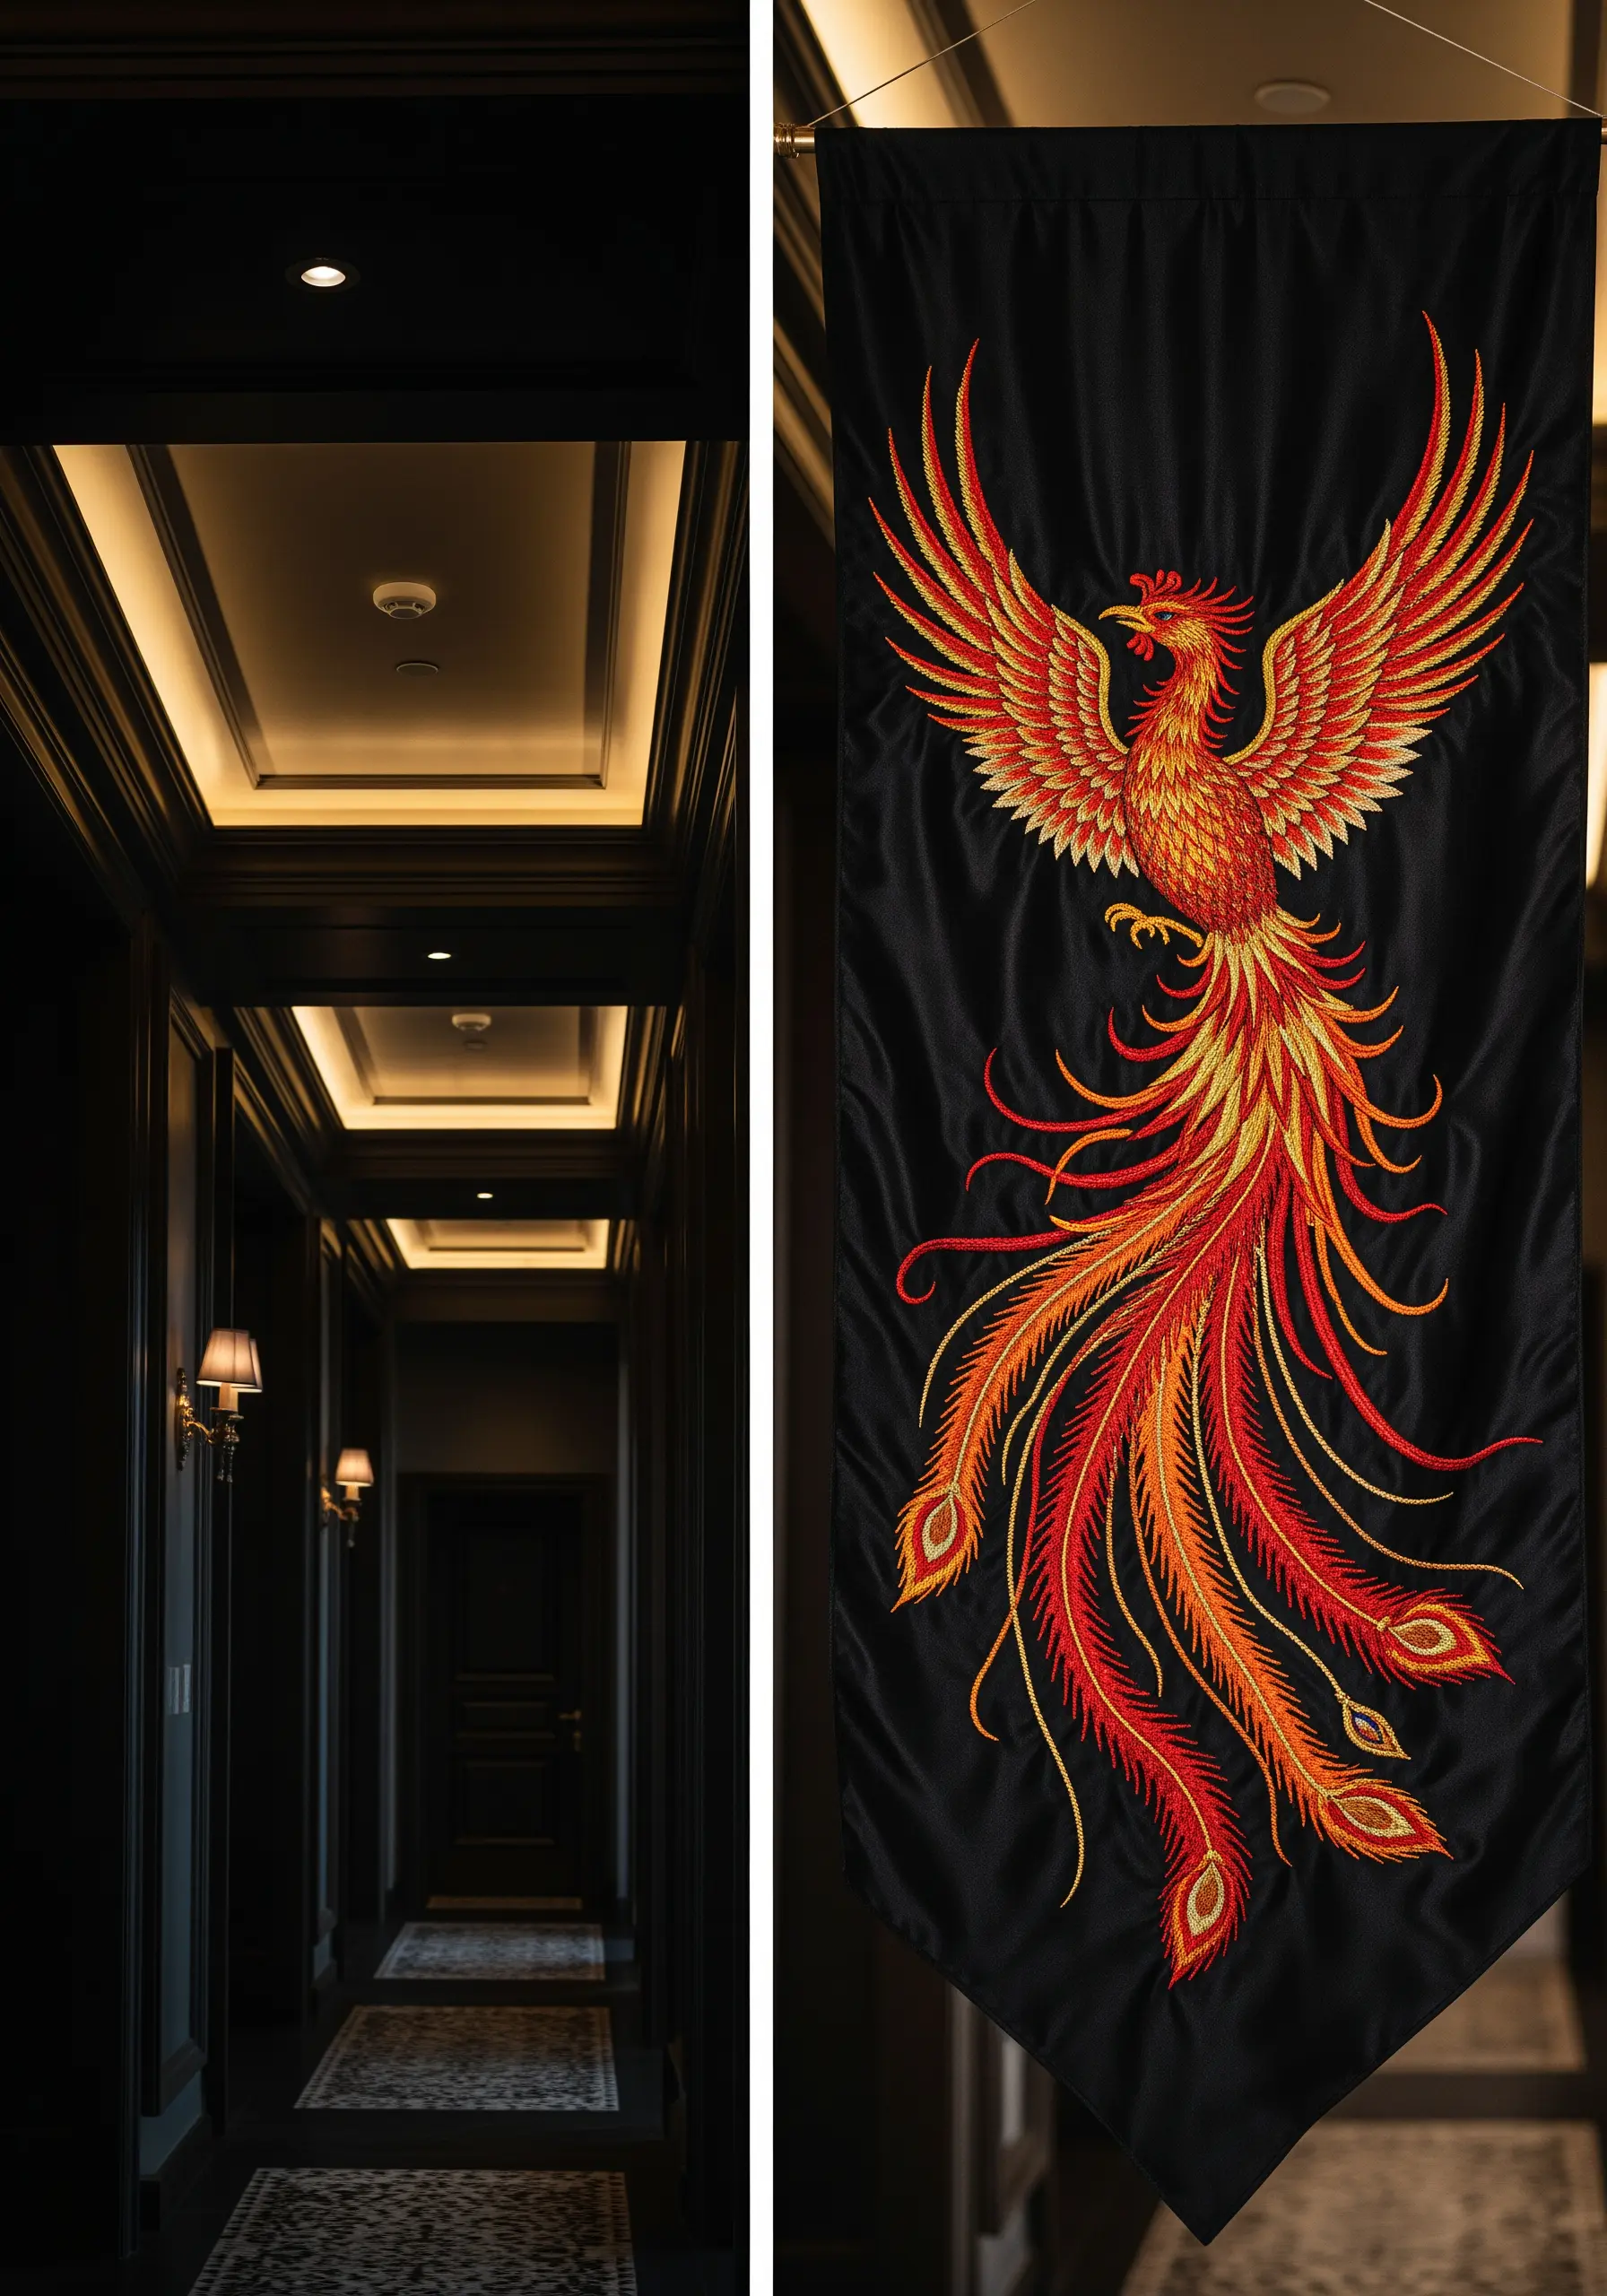
To capture the dynamic energy of a subject like a phoenix, you must master the art of color blending.
Work on a dark background to make your warm colors appear to glow. Use the long-and-short stitch, and instead of just two shades, create a smooth gradient using at least four or five tones, from deep red to bright yellow.
Randomize the placement of your stitches where colors meet, using a single strand of thread to seamlessly feather one shade into the next.
This careful blending technique is what transforms static threads into a dynamic representation of fire, light, and movement.


