

Have you ever finished a beautiful piece of embroidery, only to feel it looks a little lost on its own? The secret to transforming your stitches into intentional home décor isn’t about creating one massive, complex piece. It’s about thinking like a curator.
A collection of micro-hoops allows you to build a significant, impactful art installation one small, manageable piece at a time. By unifying your hoops with a consistent theme, color palette, or layout, you create a visual story that feels cohesive, personal, and perfectly scaled for your space.
Here, you’ll discover how to group your work to create rhythm, how to use texture to add depth, and how to arrange your hoops to tell a story on your walls. This is where your craft becomes art.
1. Curate a Graphic Abstract Collection

Create a sophisticated gallery wall by limiting your palette to three complementary colors—like black, mustard, and a soft neutral.
Use simple backstitch for clean lines and dense satin stitch for solid shapes to achieve a bold, graphic quality.
Arrange your hoops in an organic cloud formation, varying the sizes and orientations to create a sense of movement and balance.
This method turns abstract embroidery motifs into a cohesive, architectural statement piece perfect for a minimalist workspace.
2. Unify a Botanical Collection with Consistent Fabric
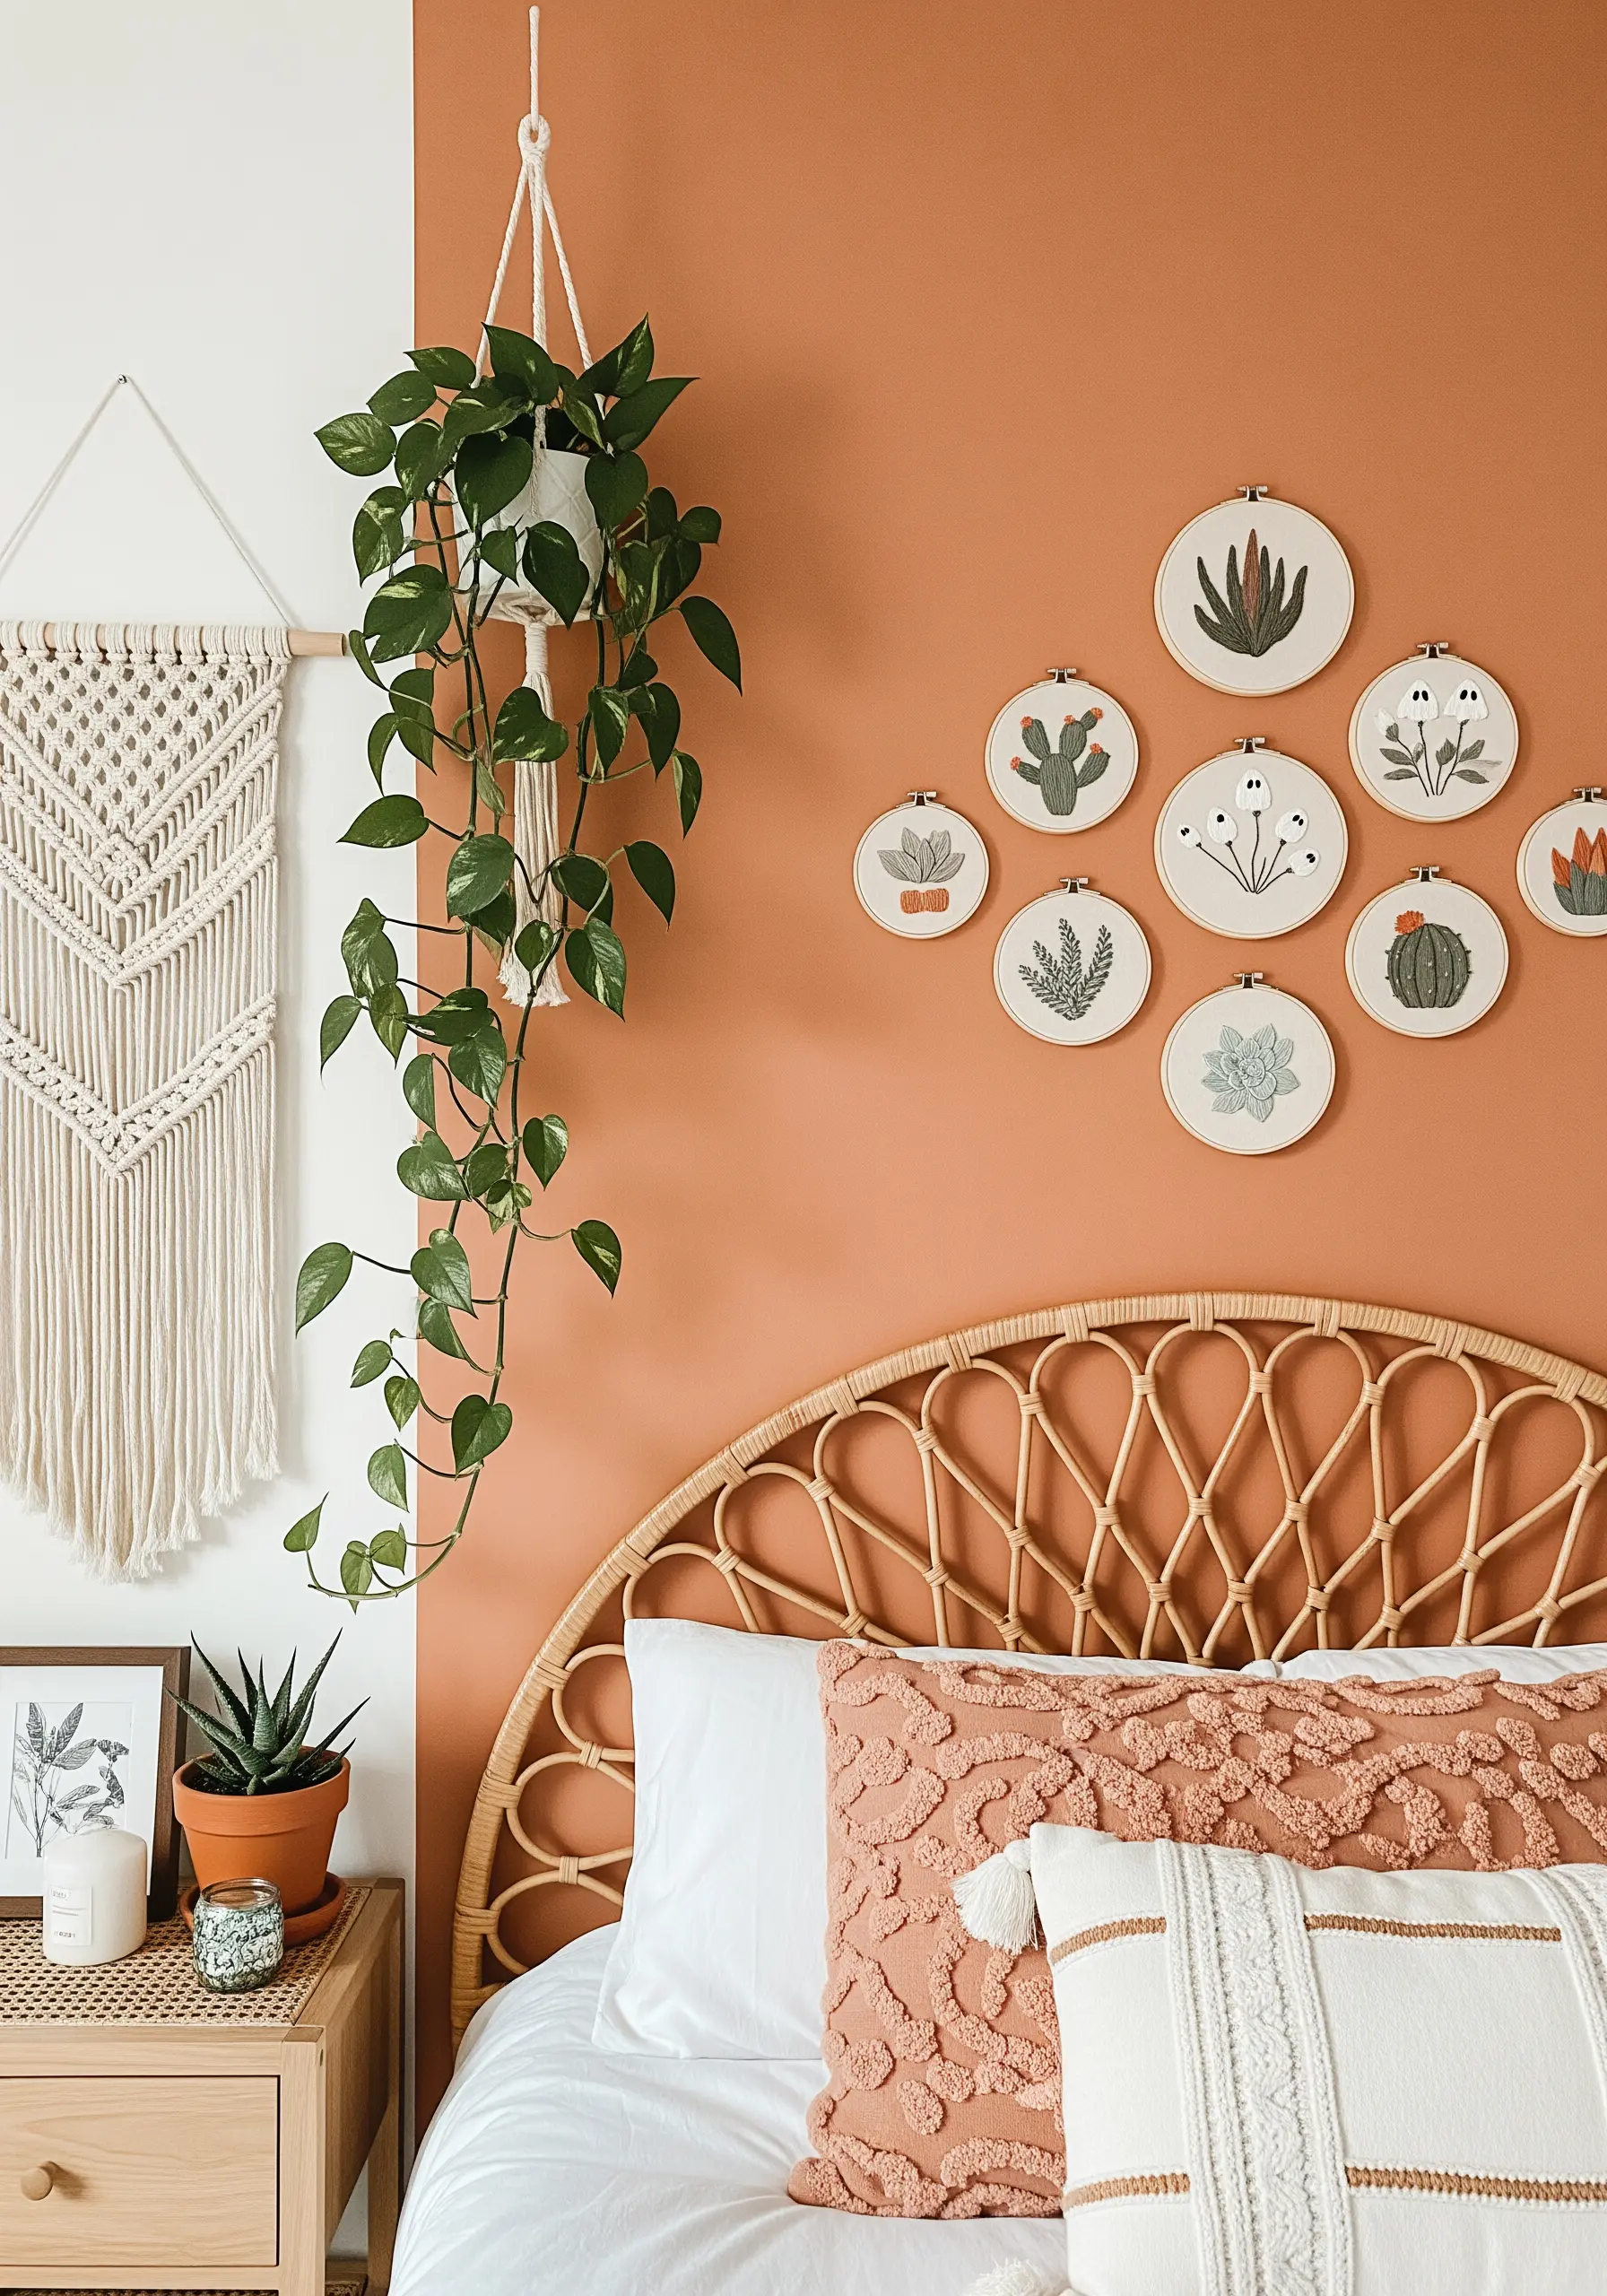
When stitching a collection of different motifs, like various succulents and cacti, a uniform fabric choice is your strongest unifying element.
Select an off-white or neutral linen as your canvas to make the subtle greens and earthy tones of your thread pop.
Vary your stitch techniques to mimic natural textures: use French knots for spiky cacti, split stitch for leafy outlines, and long-and-short stitch for smooth, blended succulent petals.
This approach allows each plant’s unique character to stand out while ensuring the entire collection feels harmonious and intentional.
3. Blend Fabric Appliqué with Thread Outlines

For bold, graphic color-blocking, combine fabric appliqué with simple embroidery outlines.
Start by cutting your abstract shapes from felt or cotton fabric and affixing them to your base fabric with a fusible web adhesive.
Then, use a contrasting color of thread to secure and define the edges with a clean backstitch or running stitch.
This fabric collage embroidery technique gives you perfectly filled, vibrant shapes with a handcrafted finish, creating art that feels both painterly and tactile.
4. Create a Polished Look with Linear Repetition
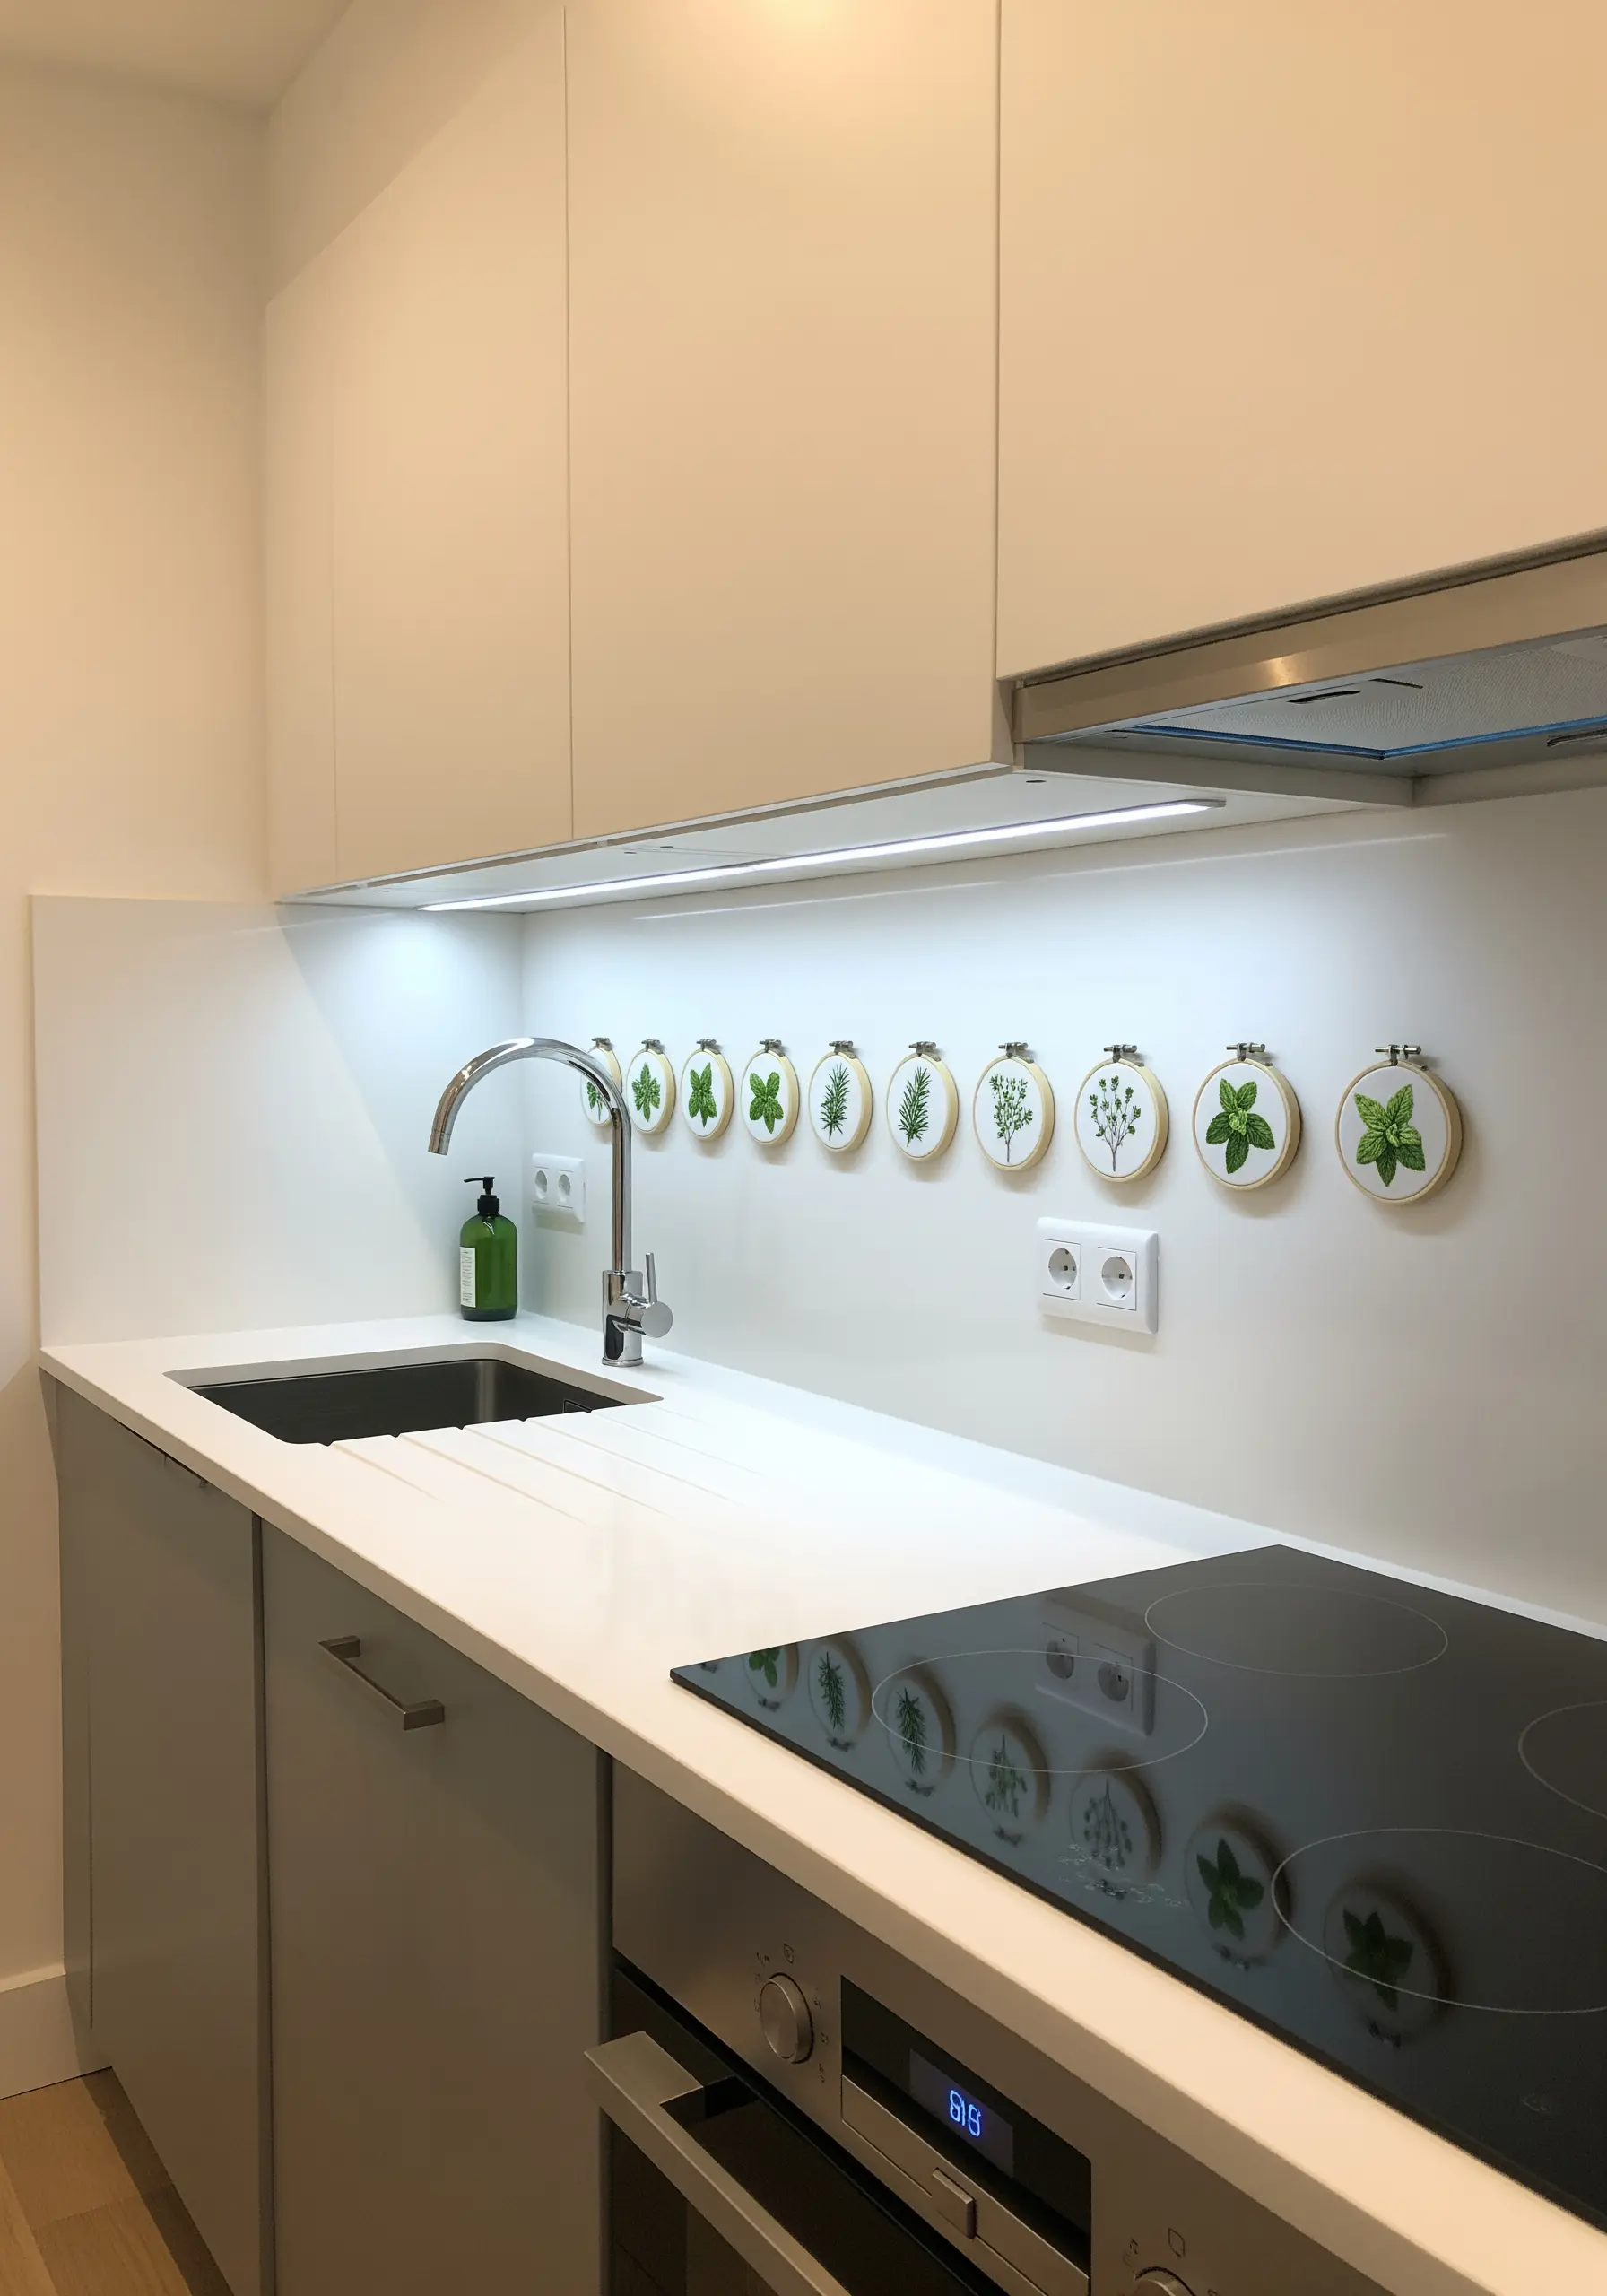
Elevate simple motifs by arranging them in a clean, linear series, which is particularly effective in functional spaces like kitchens or hallways.
Choose a single theme, such as culinary herbs, and stitch one distinct specimen per hoop.
Use a delicate backstitch or stem stitch to keep the designs crisp and legible, especially for smaller hoops.
This disciplined arrangement transforms a set of medicinal herb embroidery designs into a sophisticated, intentional design element that celebrates your theme with clarity.
5. Master High-Contrast Celestial Stitching
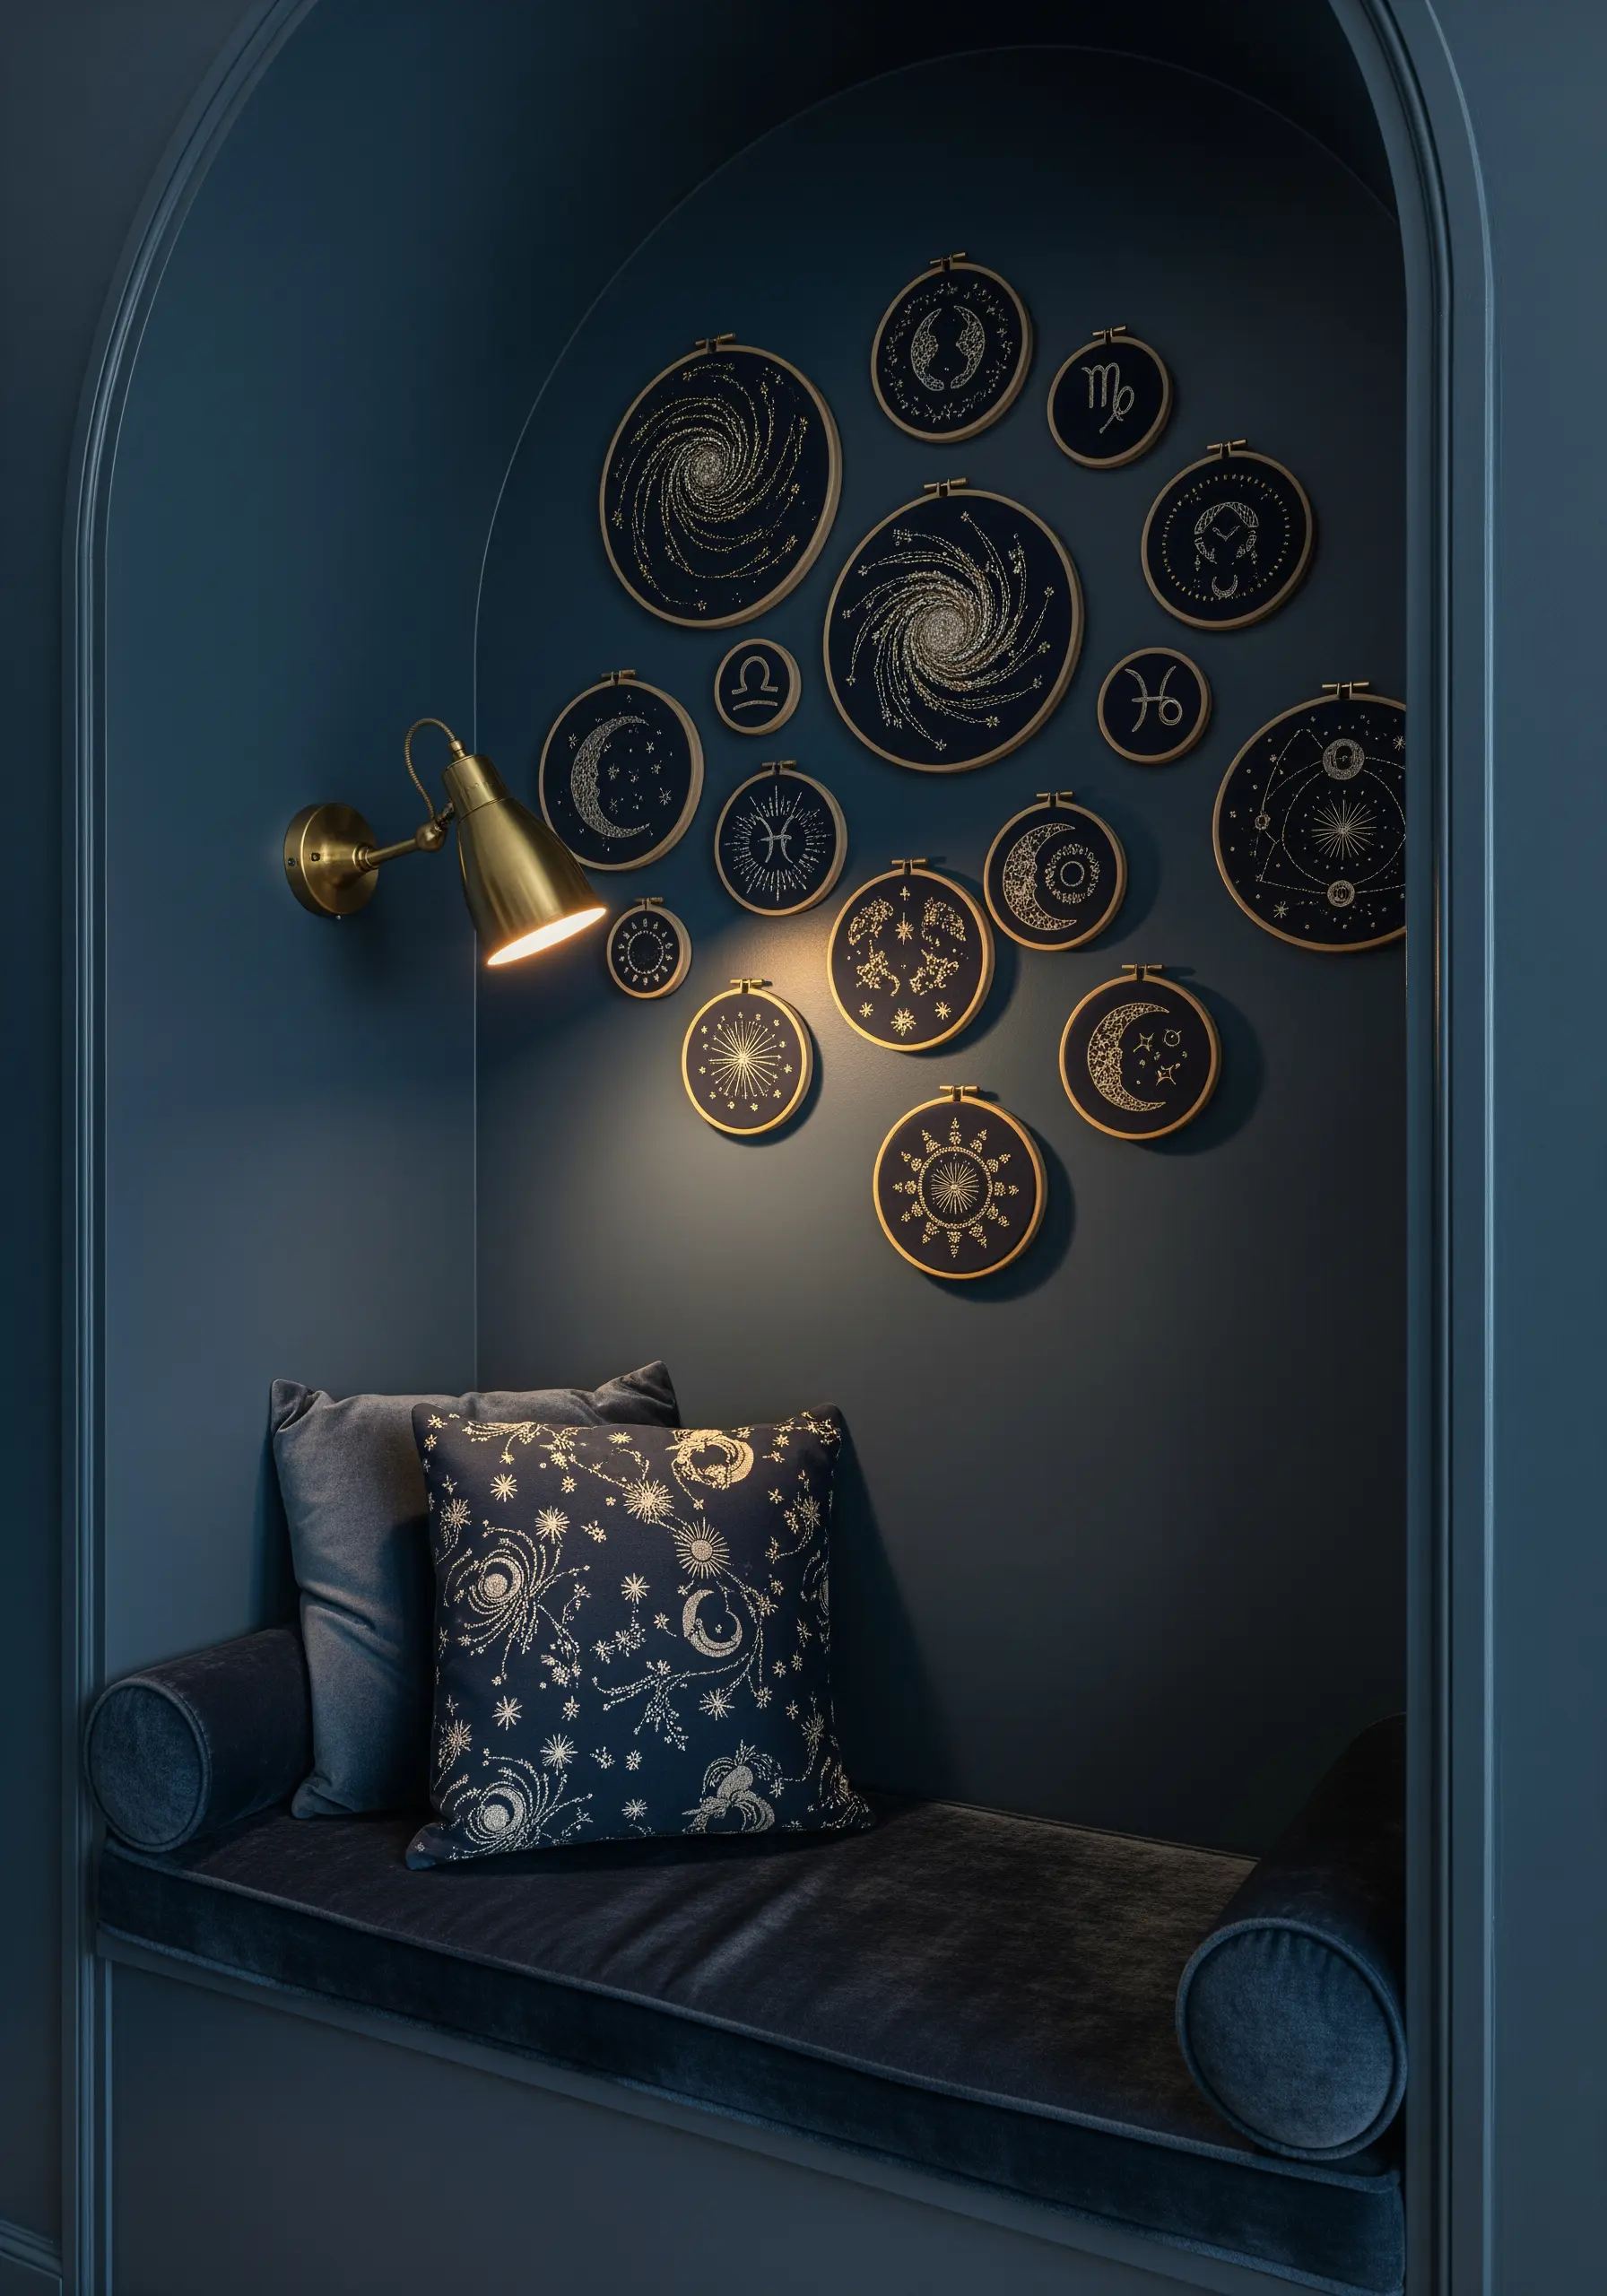
Create a dramatic, enchanting atmosphere by stitching with metallic or high-sheen thread on dark navy or black fabric.
A single strand of gold or silver thread is enough to catch the light beautifully, making spirals, stars, and zodiac symbols appear to glow.
For fine lines, use a simple backstitch; for shimmering starbursts, combine straight stitches of varying lengths radiating from a central point.
Displaying these tiny night sky embroidery designs in a cozy, intimate nook enhances their magical, secret-galaxy feel.
6. Design a Rhythmic Grid with a Single Motif
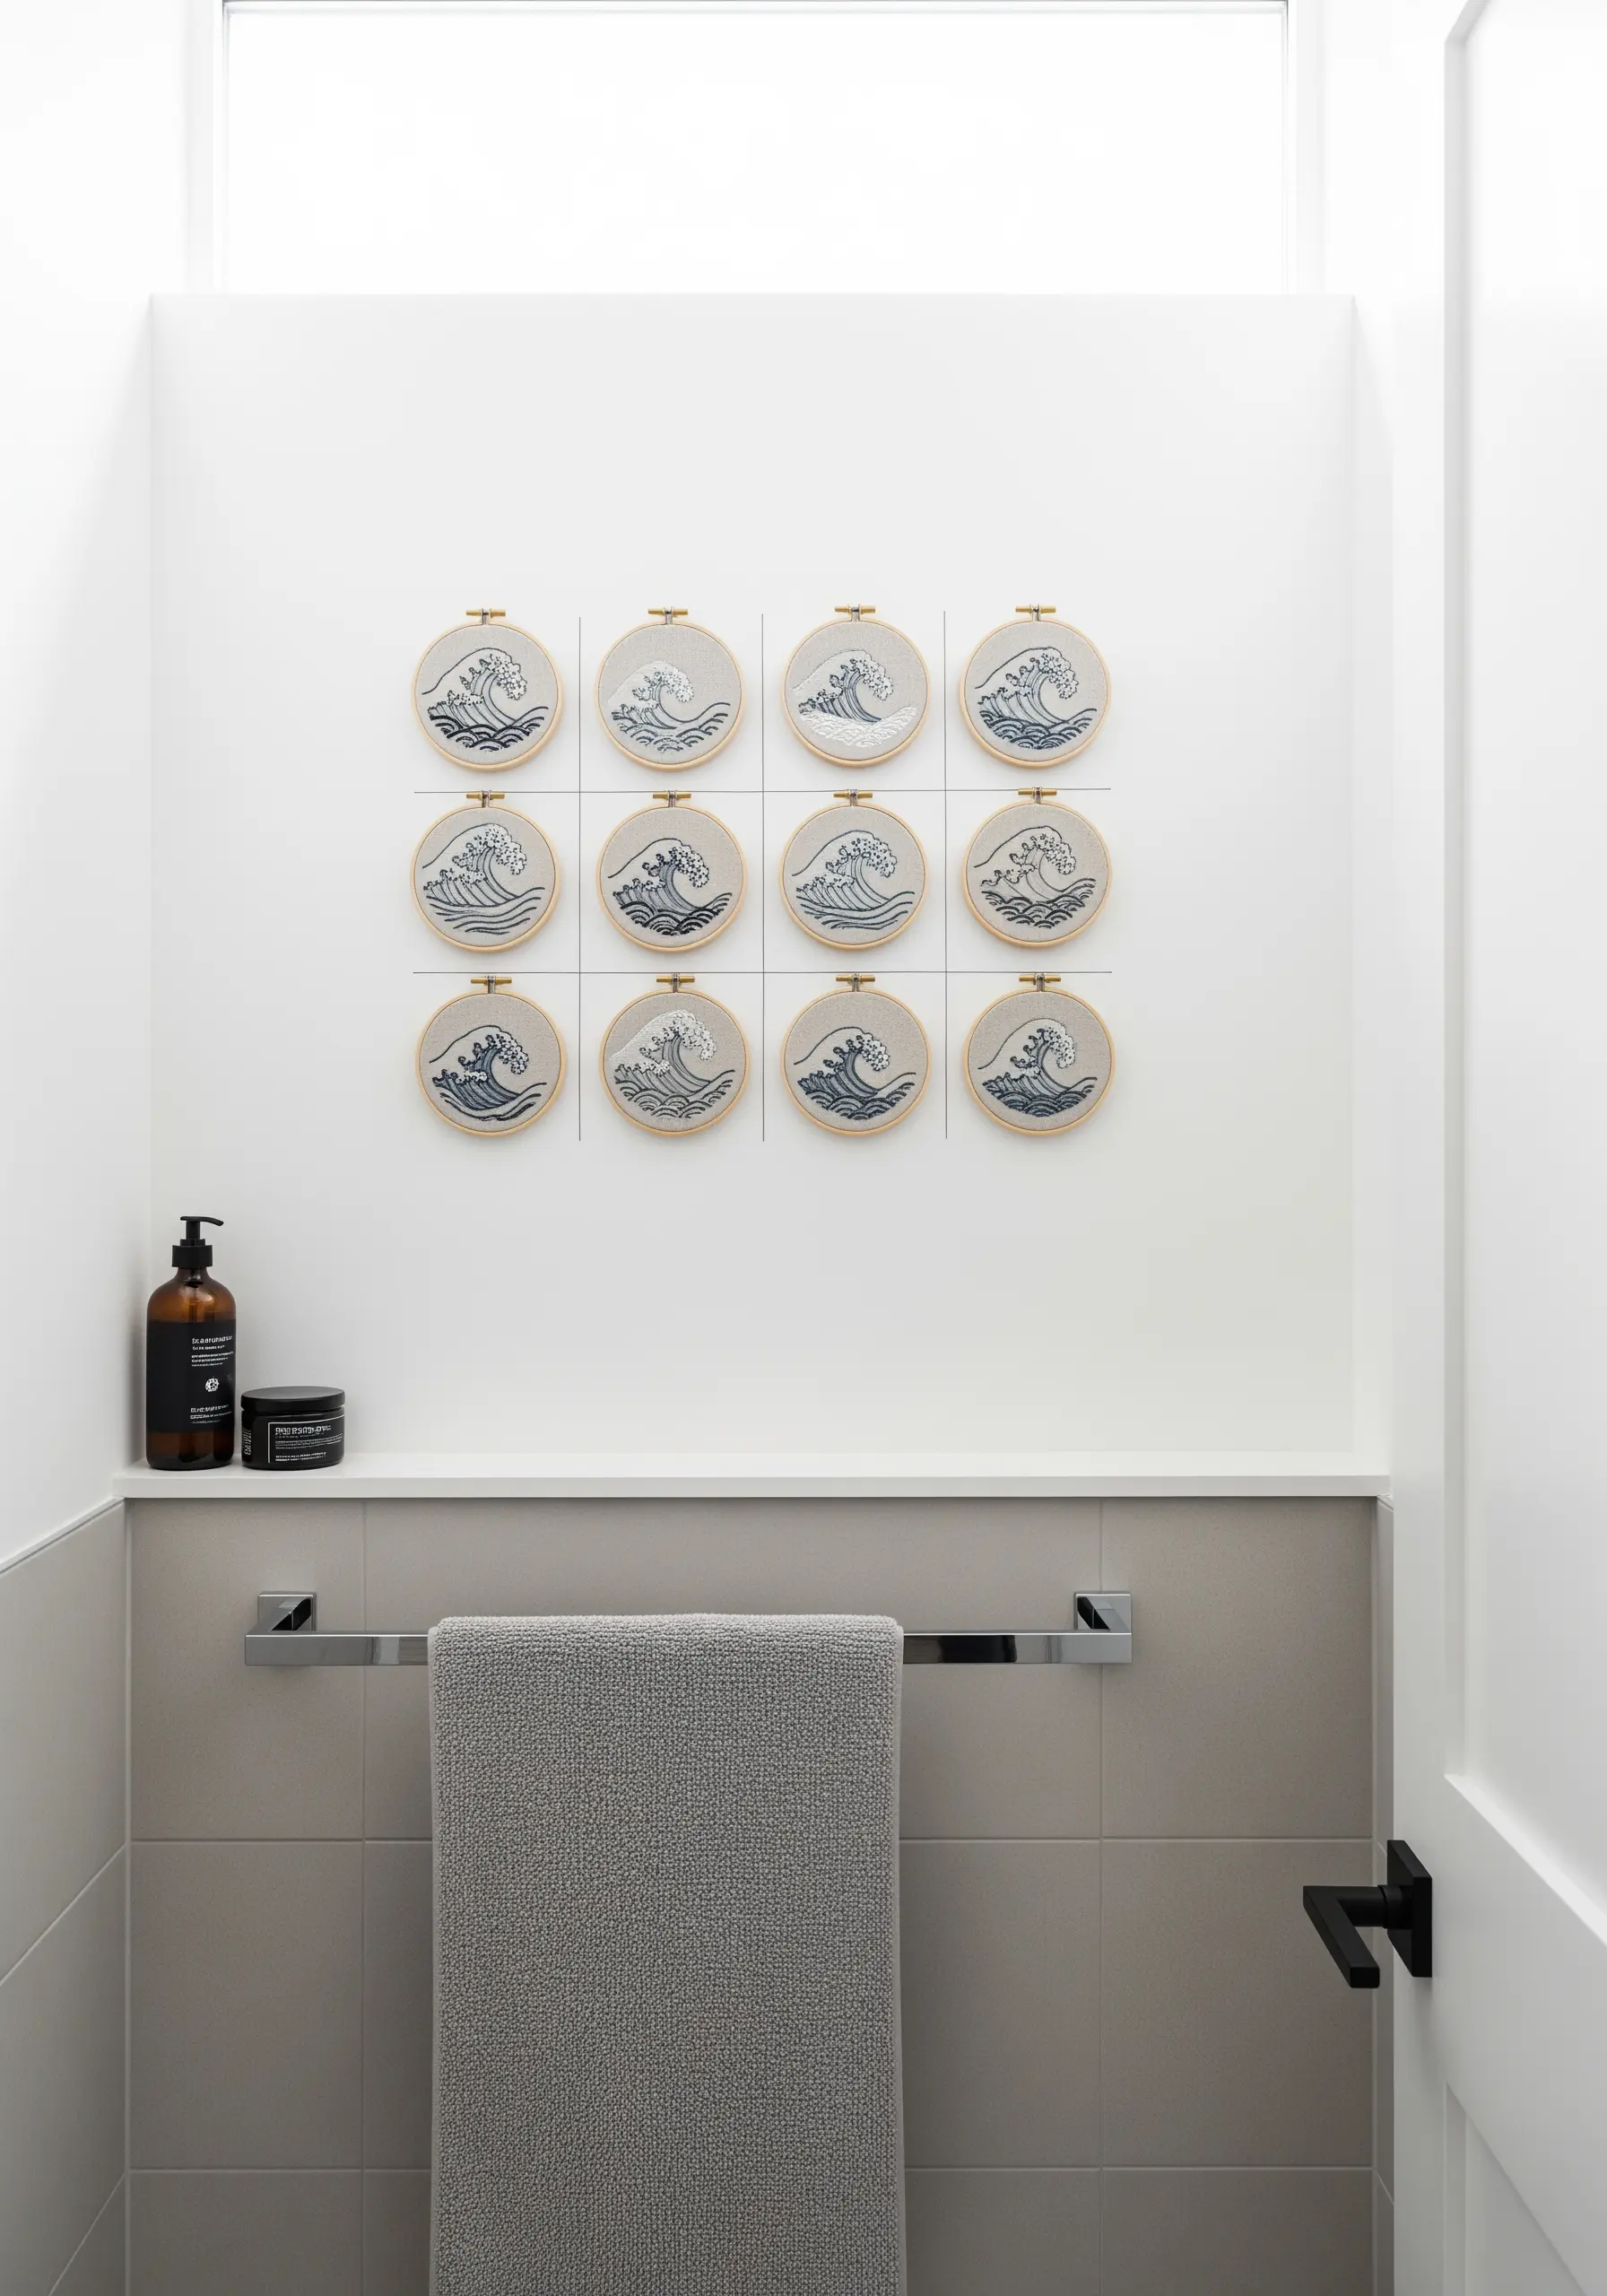
Transform a simple motif into a powerful art installation by stitching variations of it and arranging the hoops in a precise grid.
Choose one subject, like an ocean wave, and alter the colors or stitch density in each hoop to suggest movement and variation.
To create different line weights within the waves, vary the number of thread strands you use—from a single strand for fine foam to three strands for bold crests.
This structured display of coastal-inspired fabric collage embroidery scenes creates a calming, rhythmic effect perfect for a bathroom or serene space.
7. Compose an Organic Floral Cluster
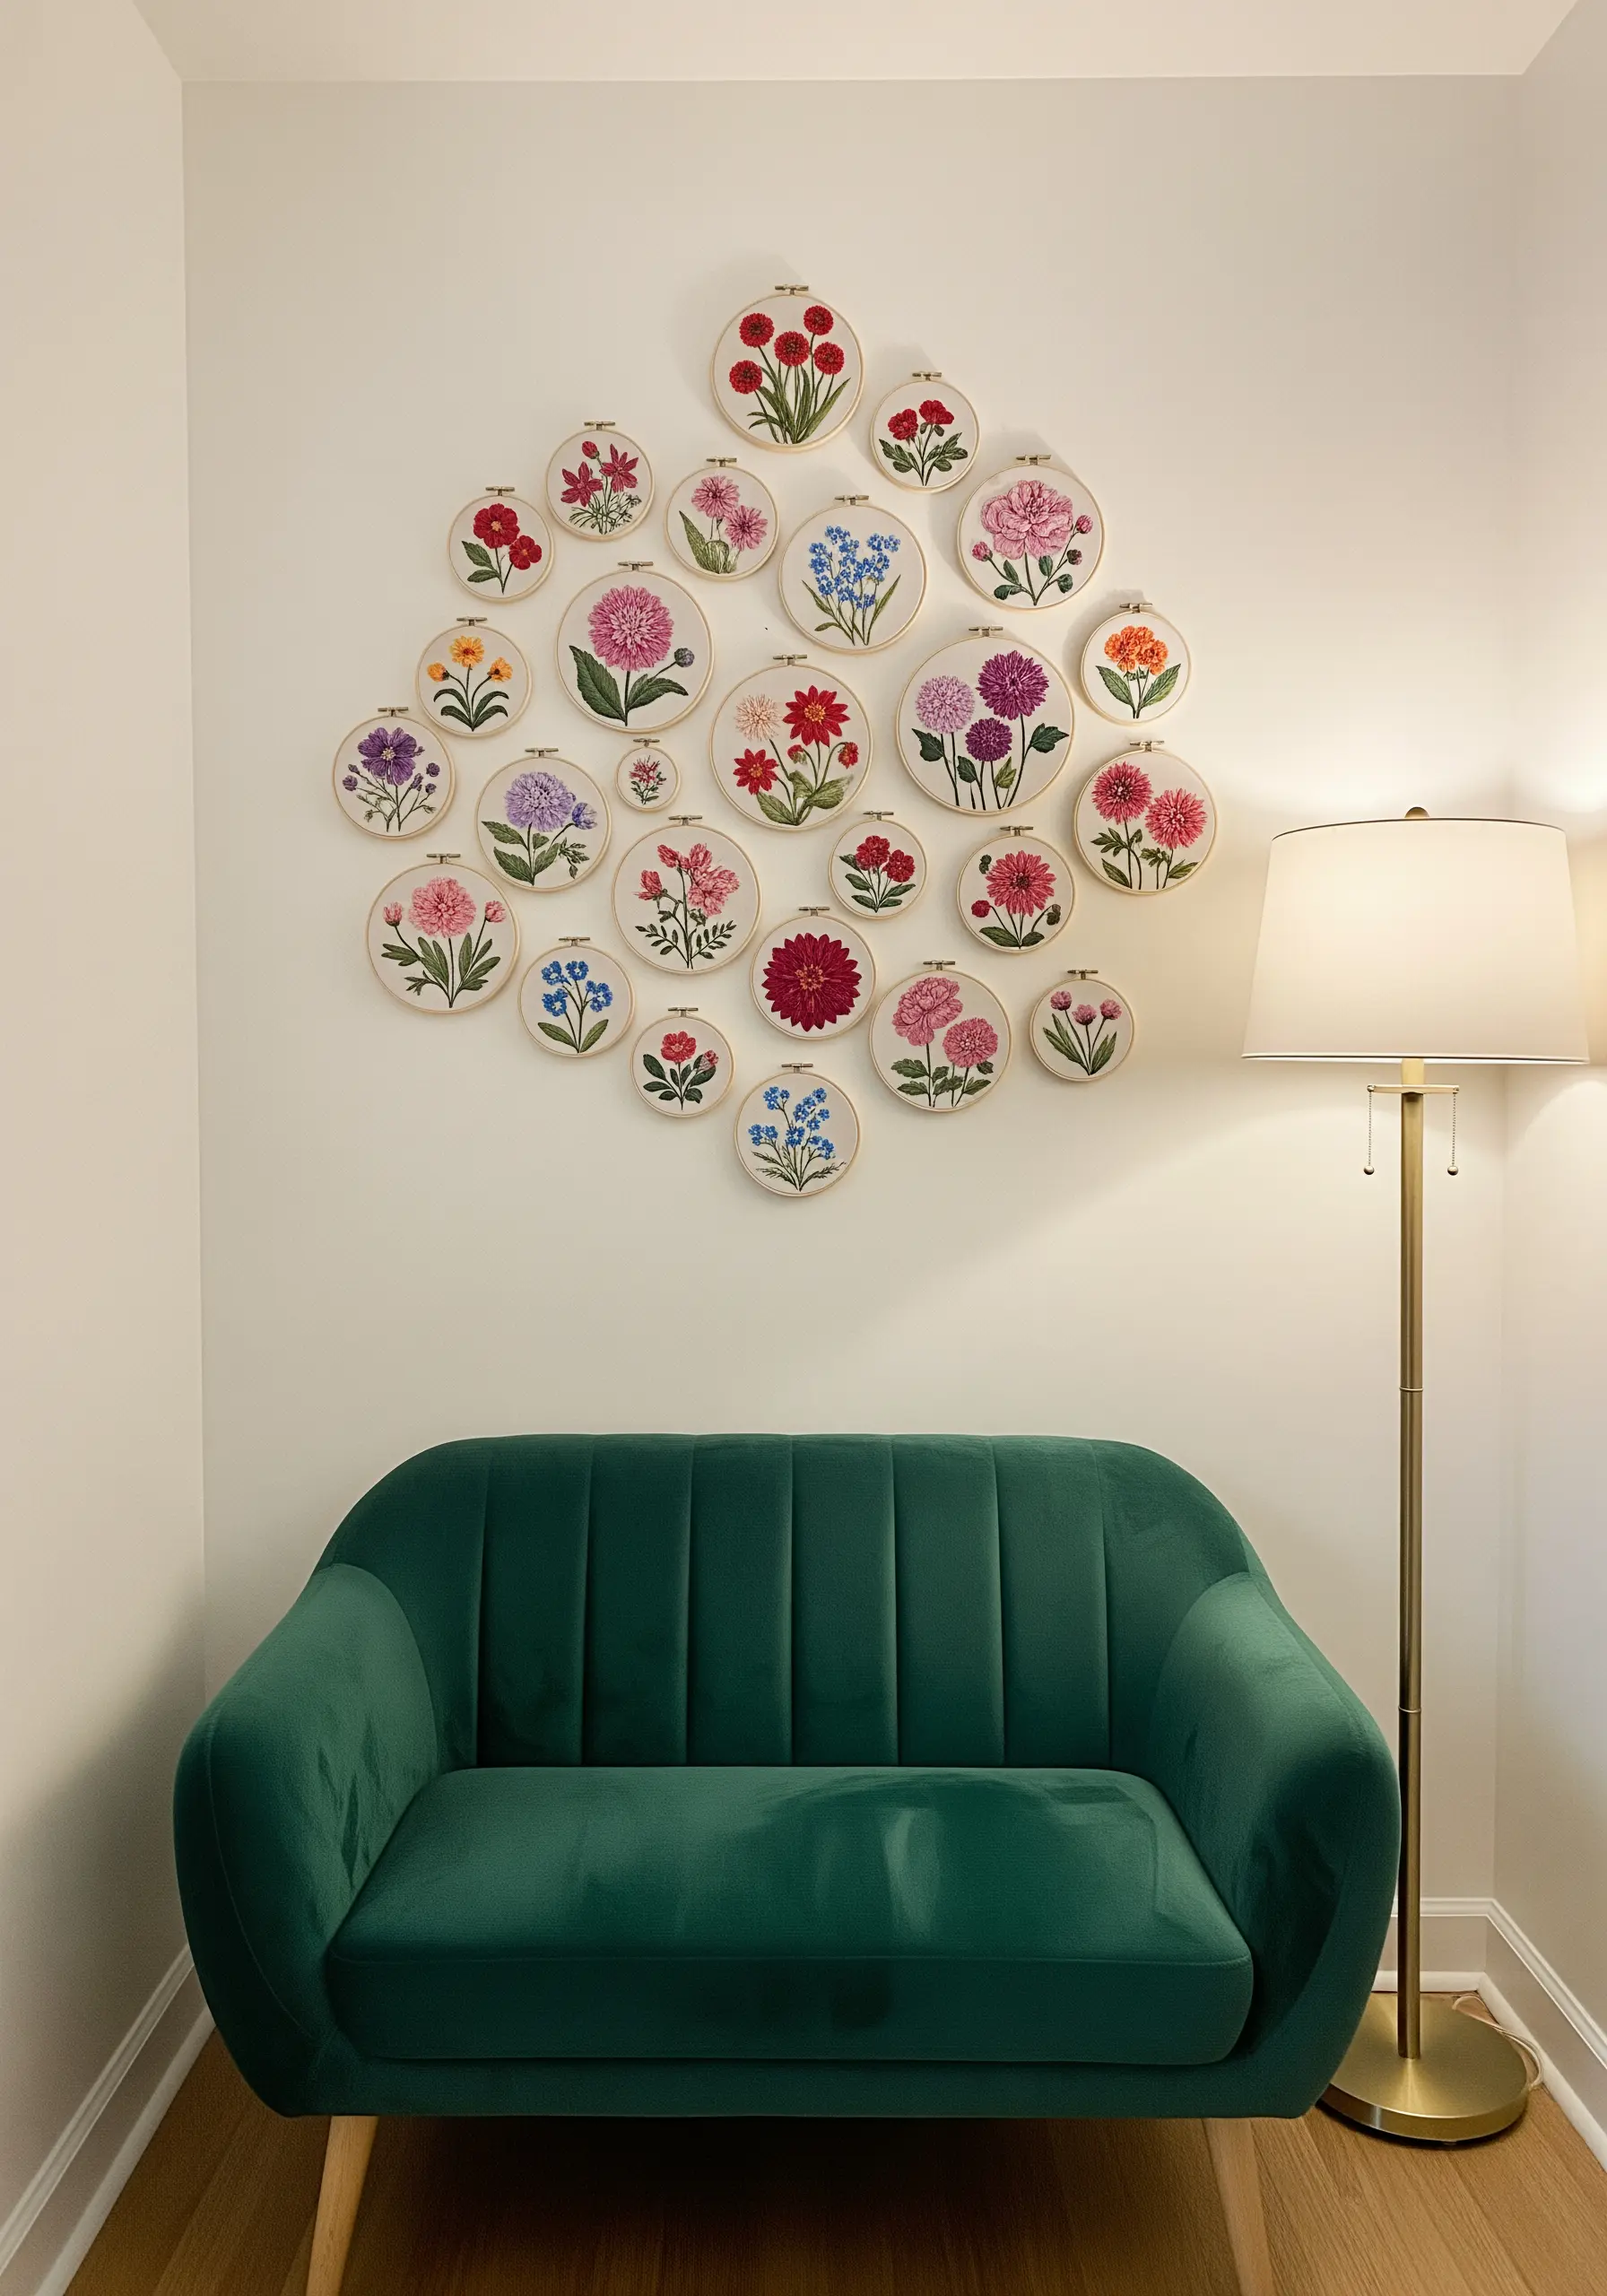
Create the feeling of a blooming meadow on your wall by arranging floral hoops in a free-flowing, organic cluster.
To achieve a natural look, vary the size of your hoops and the scale of the flowers within them, placing larger, denser blooms near the center and smaller buds toward the edges.
Unify the collection by using the same neutral background fabric for every piece, allowing the vibrant thread colors to become the focus.
This composition feels lush and dynamic, turning your wall into a permanent indoor garden.
8. Tell a Story with a Vertical Arrangement
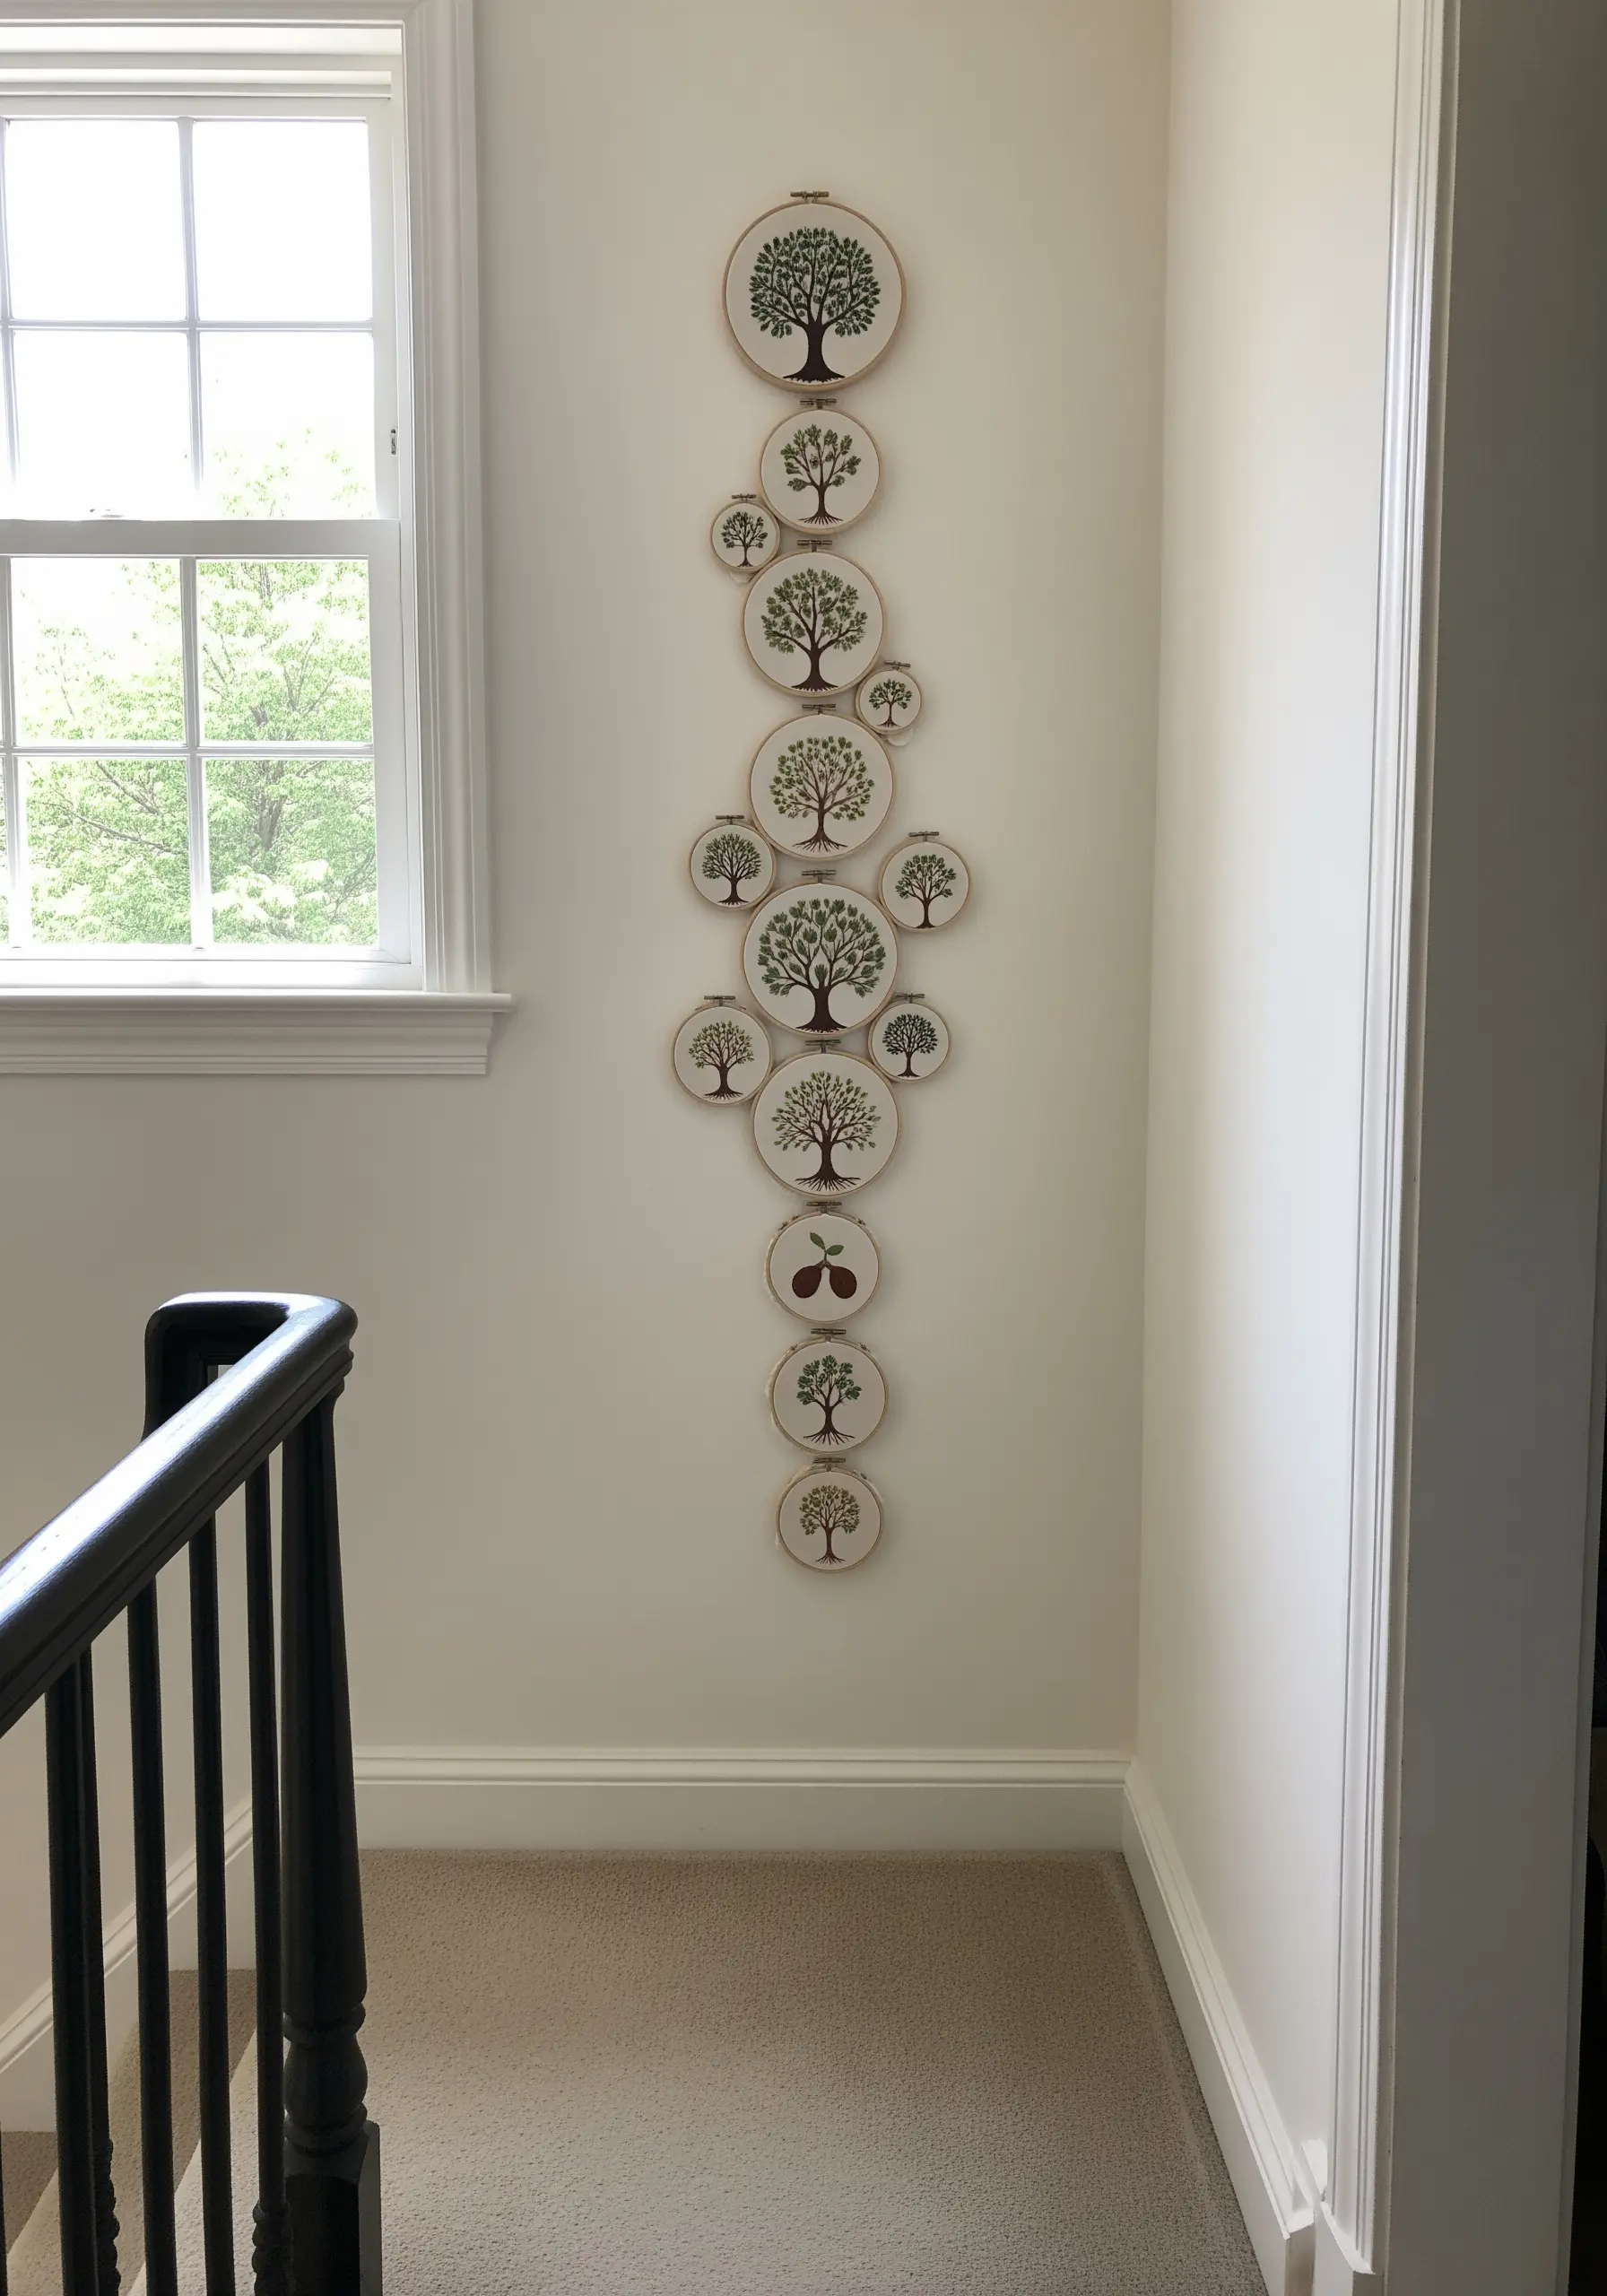
Utilize narrow vertical spaces, like stairwells or the space between windows, by creating a ‘story’ collection that draws the eye upward.
Stitch variations on a single theme, such as a family tree, where each hoop represents a generation or family member through slight changes in the design.
Use French knots for foliage to add dimension and texture that catches the light from different angles as you move past it.
This linear, narrative approach turns nature-inspired embroidery projects into a meaningful and personal installation.
9. Capture Architecture with Minimalist Line Work
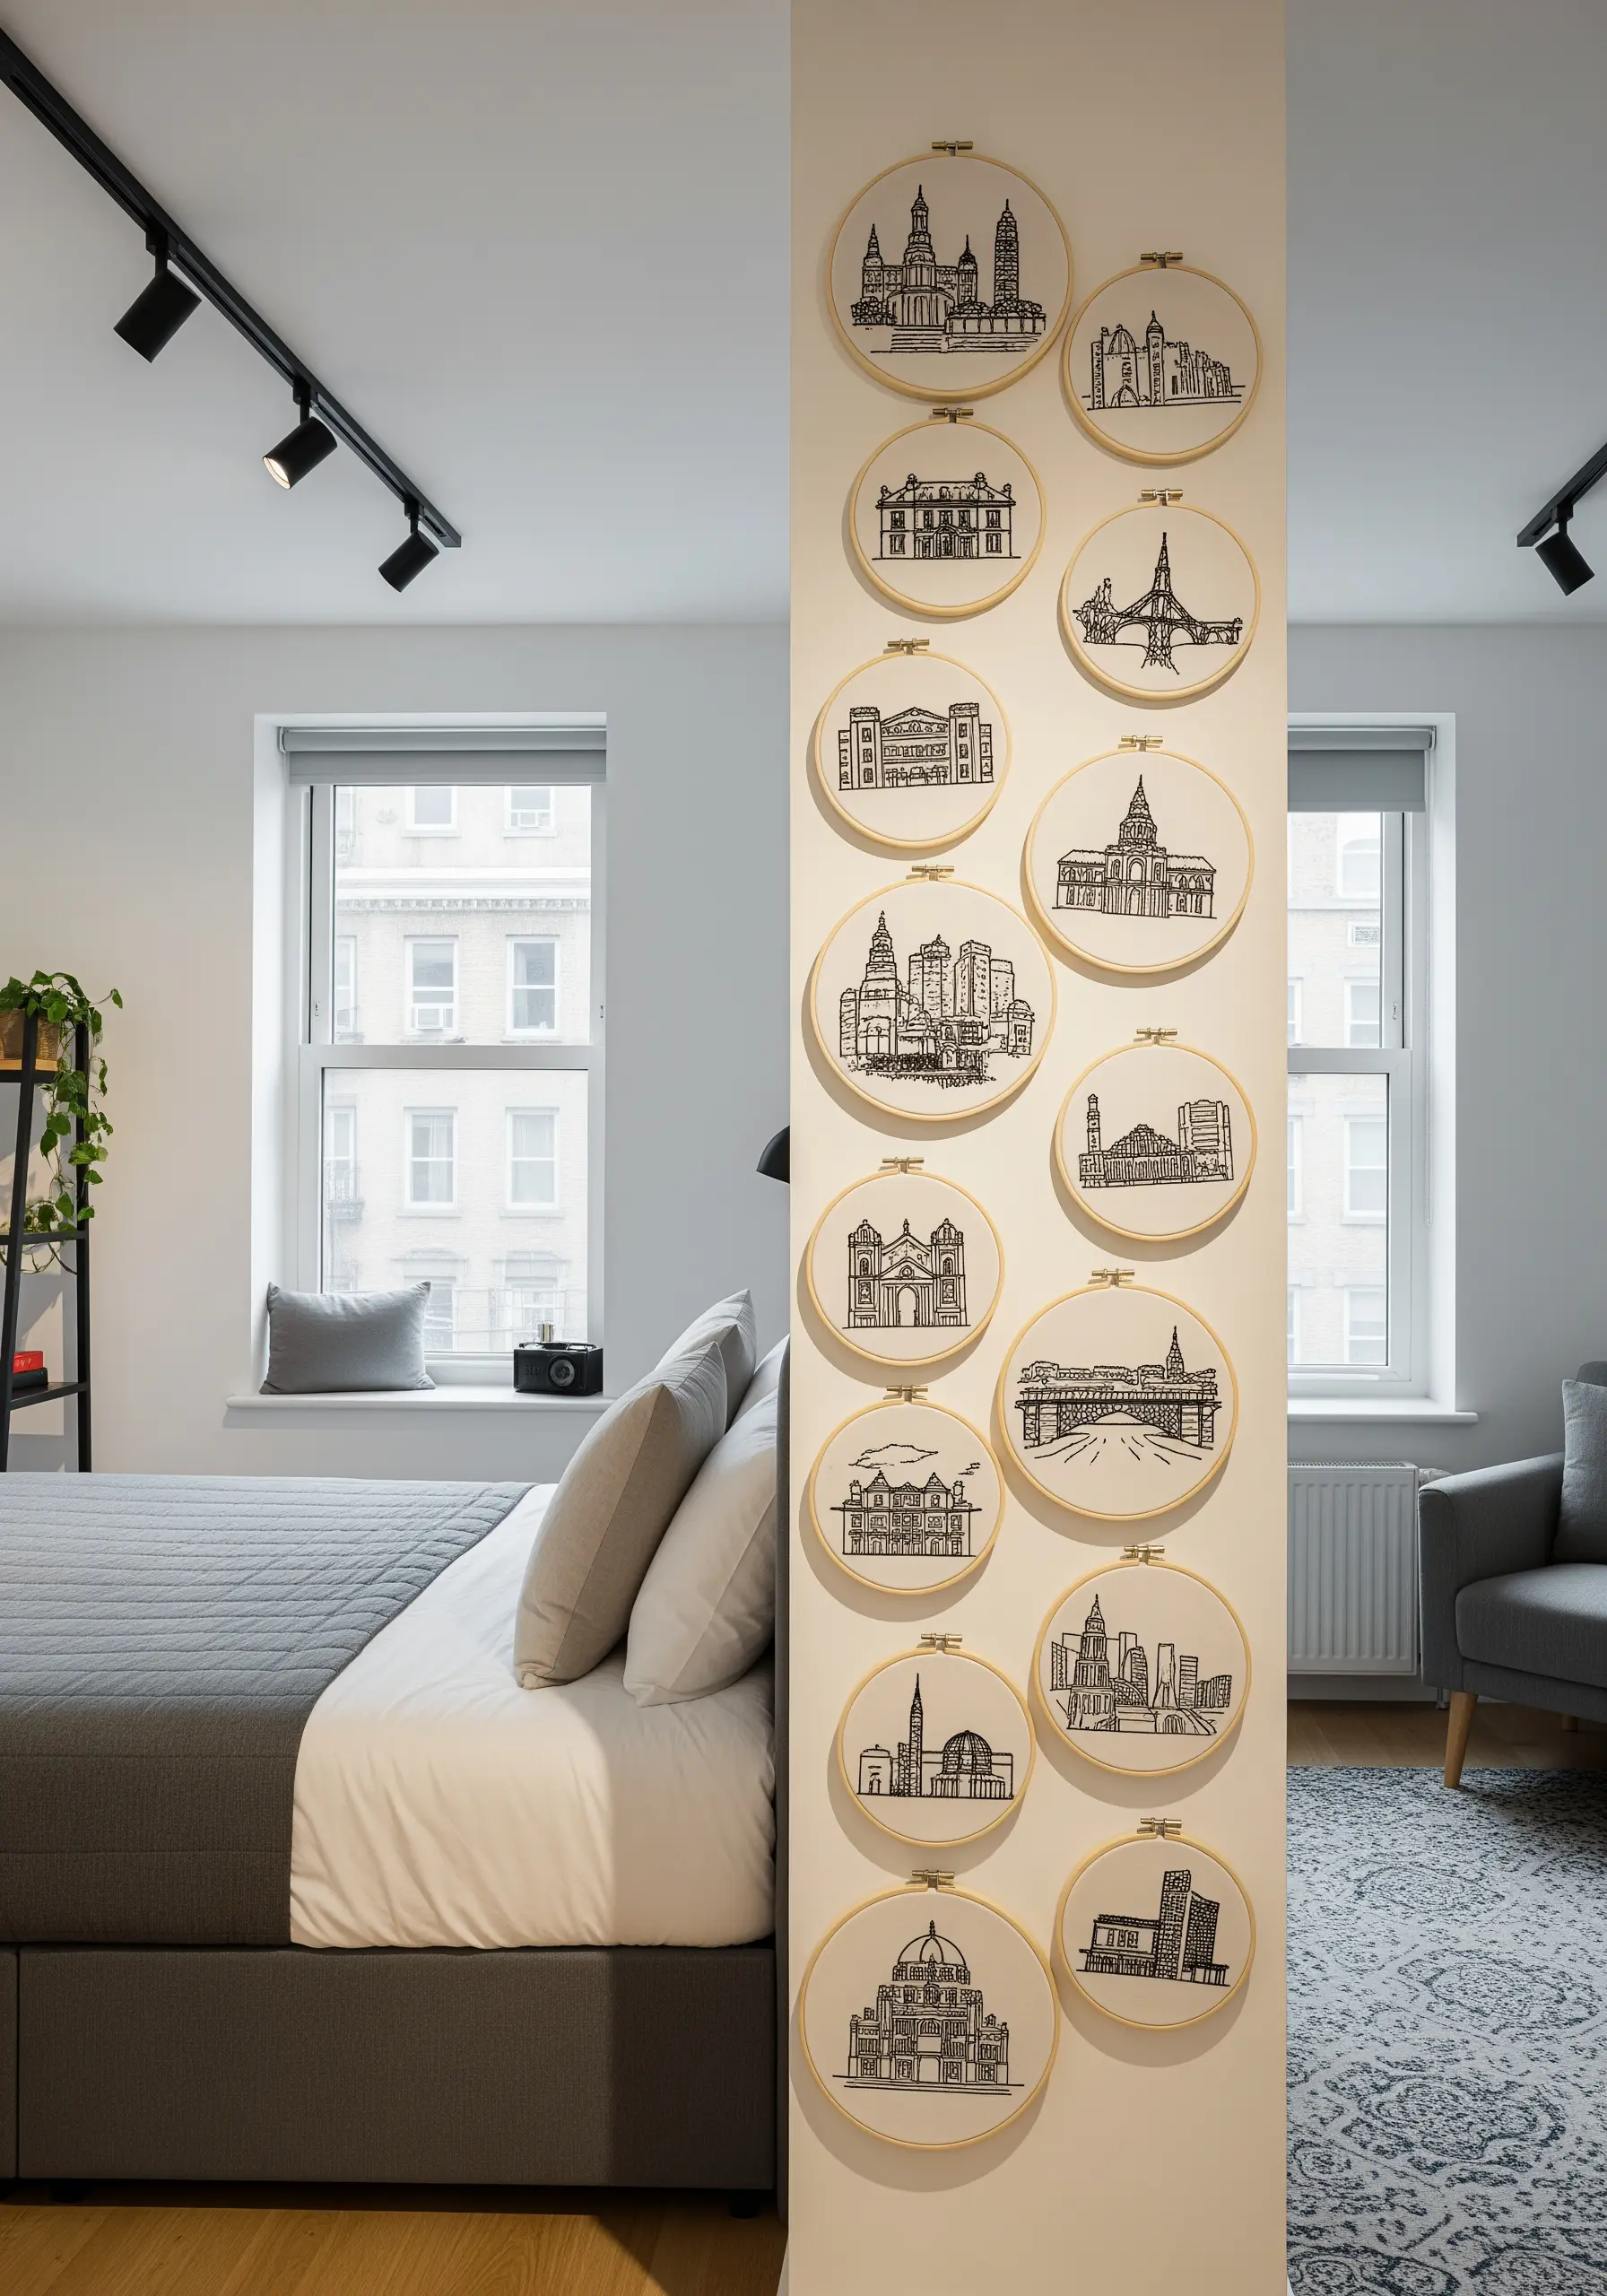
Achieve a clean, sophisticated look by focusing on single-color line art to depict architectural landmarks.
Use a single strand of black thread and a precise backstitch to capture the fine details of buildings without overwhelming the composition.
The negative space within the hoop is just as important as the stitched lines; it gives the design room to breathe and maintains a modern aesthetic.
This collection of minimalist line art nature embroidery transforms a structural element like a pillar into a gallery-style feature.
10. Frame Your Stitches Against a Bold Background
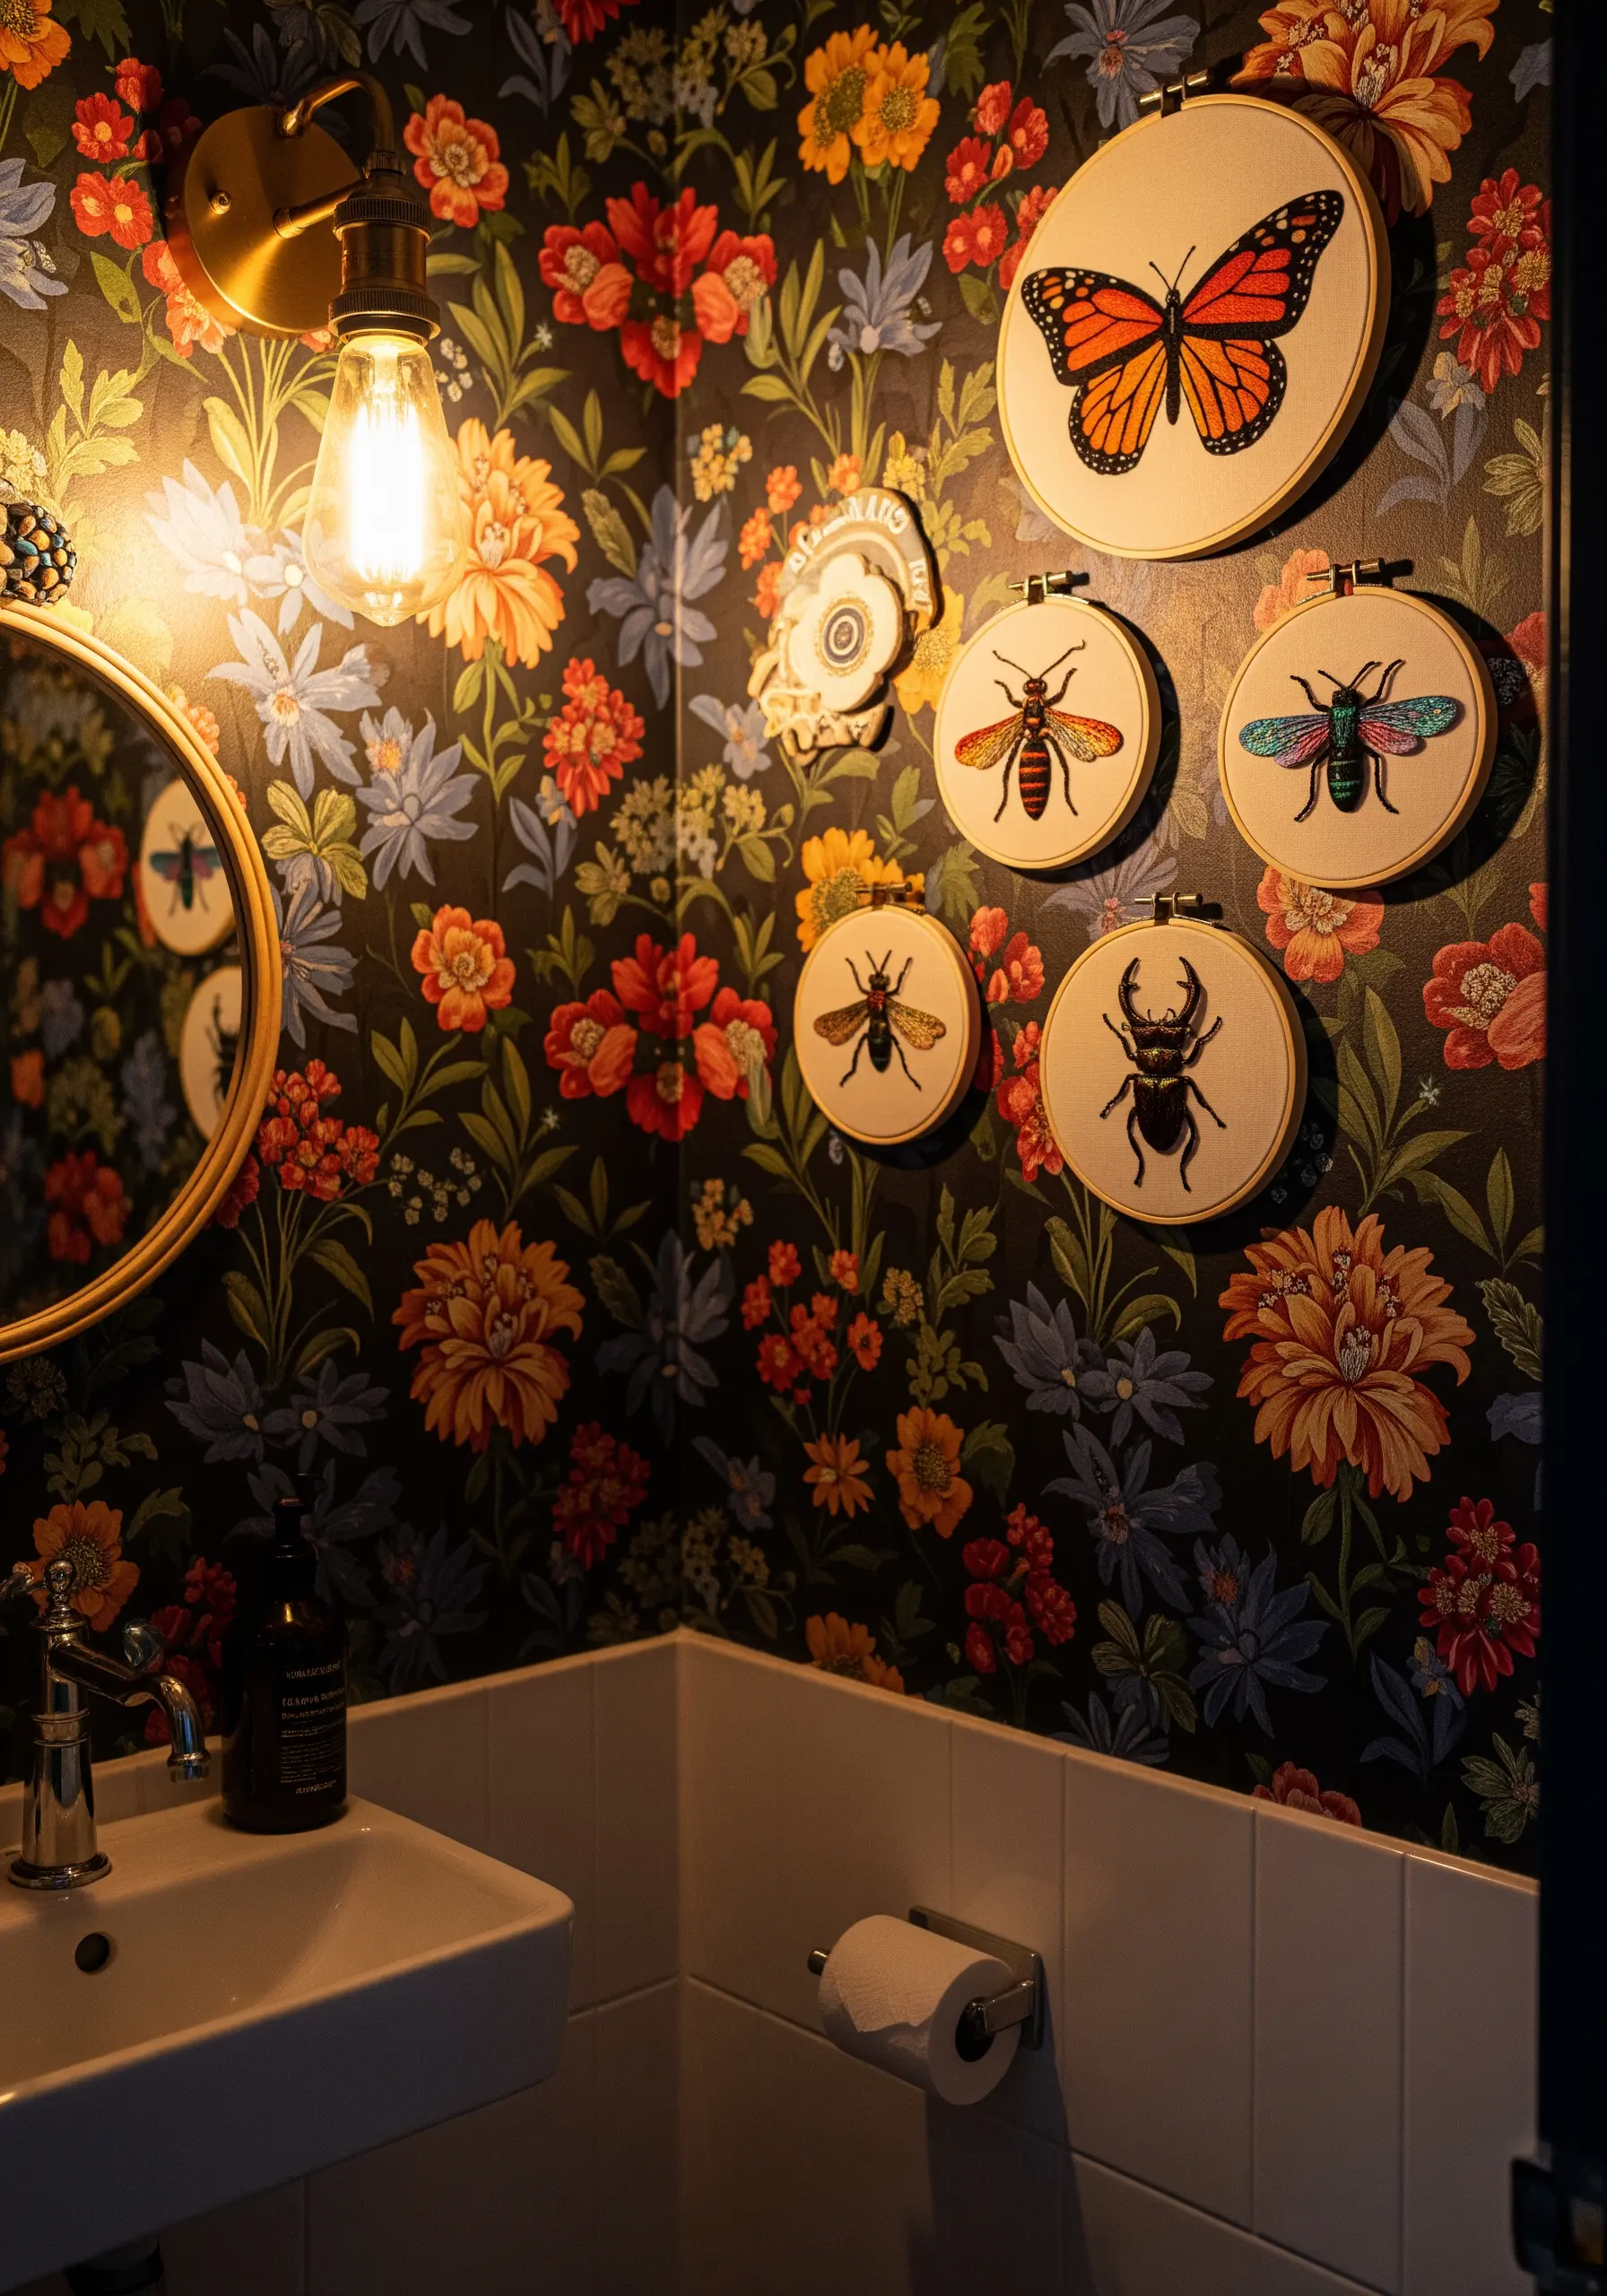
When displaying embroidery against a busy, patterned wallpaper, your fabric choice is key to creating visual clarity.
Use a solid, neutral-colored fabric like off-white linen or cotton to create a visual ‘mat’ that separates your stitched motif from the background pattern.
Choose subjects with bold, clean outlines, like insects or botanicals, and fill them with dense satin stitch to ensure they stand out.
This technique allows your intricate embroidery to command attention without competing with its vibrant surroundings.
11. Design a Nursery Collection with Soft Shapes

Create a gentle, cohesive collection for a nursery by using a soft, muted color palette and simple, rounded motifs.
Introduce a custom-shaped frame, like a cloud, as a central focal point to add a touch of whimsy and break the monotony of circular hoops.
Use a simple split stitch for outlines to keep the animal illustrations looking soft and storybook-like.
This approach ensures your dreamy baby clothing embroidery ideas translate perfectly to wall art, creating a serene and playful atmosphere.
12. Mix Hoops and Canvases for Dynamic Display
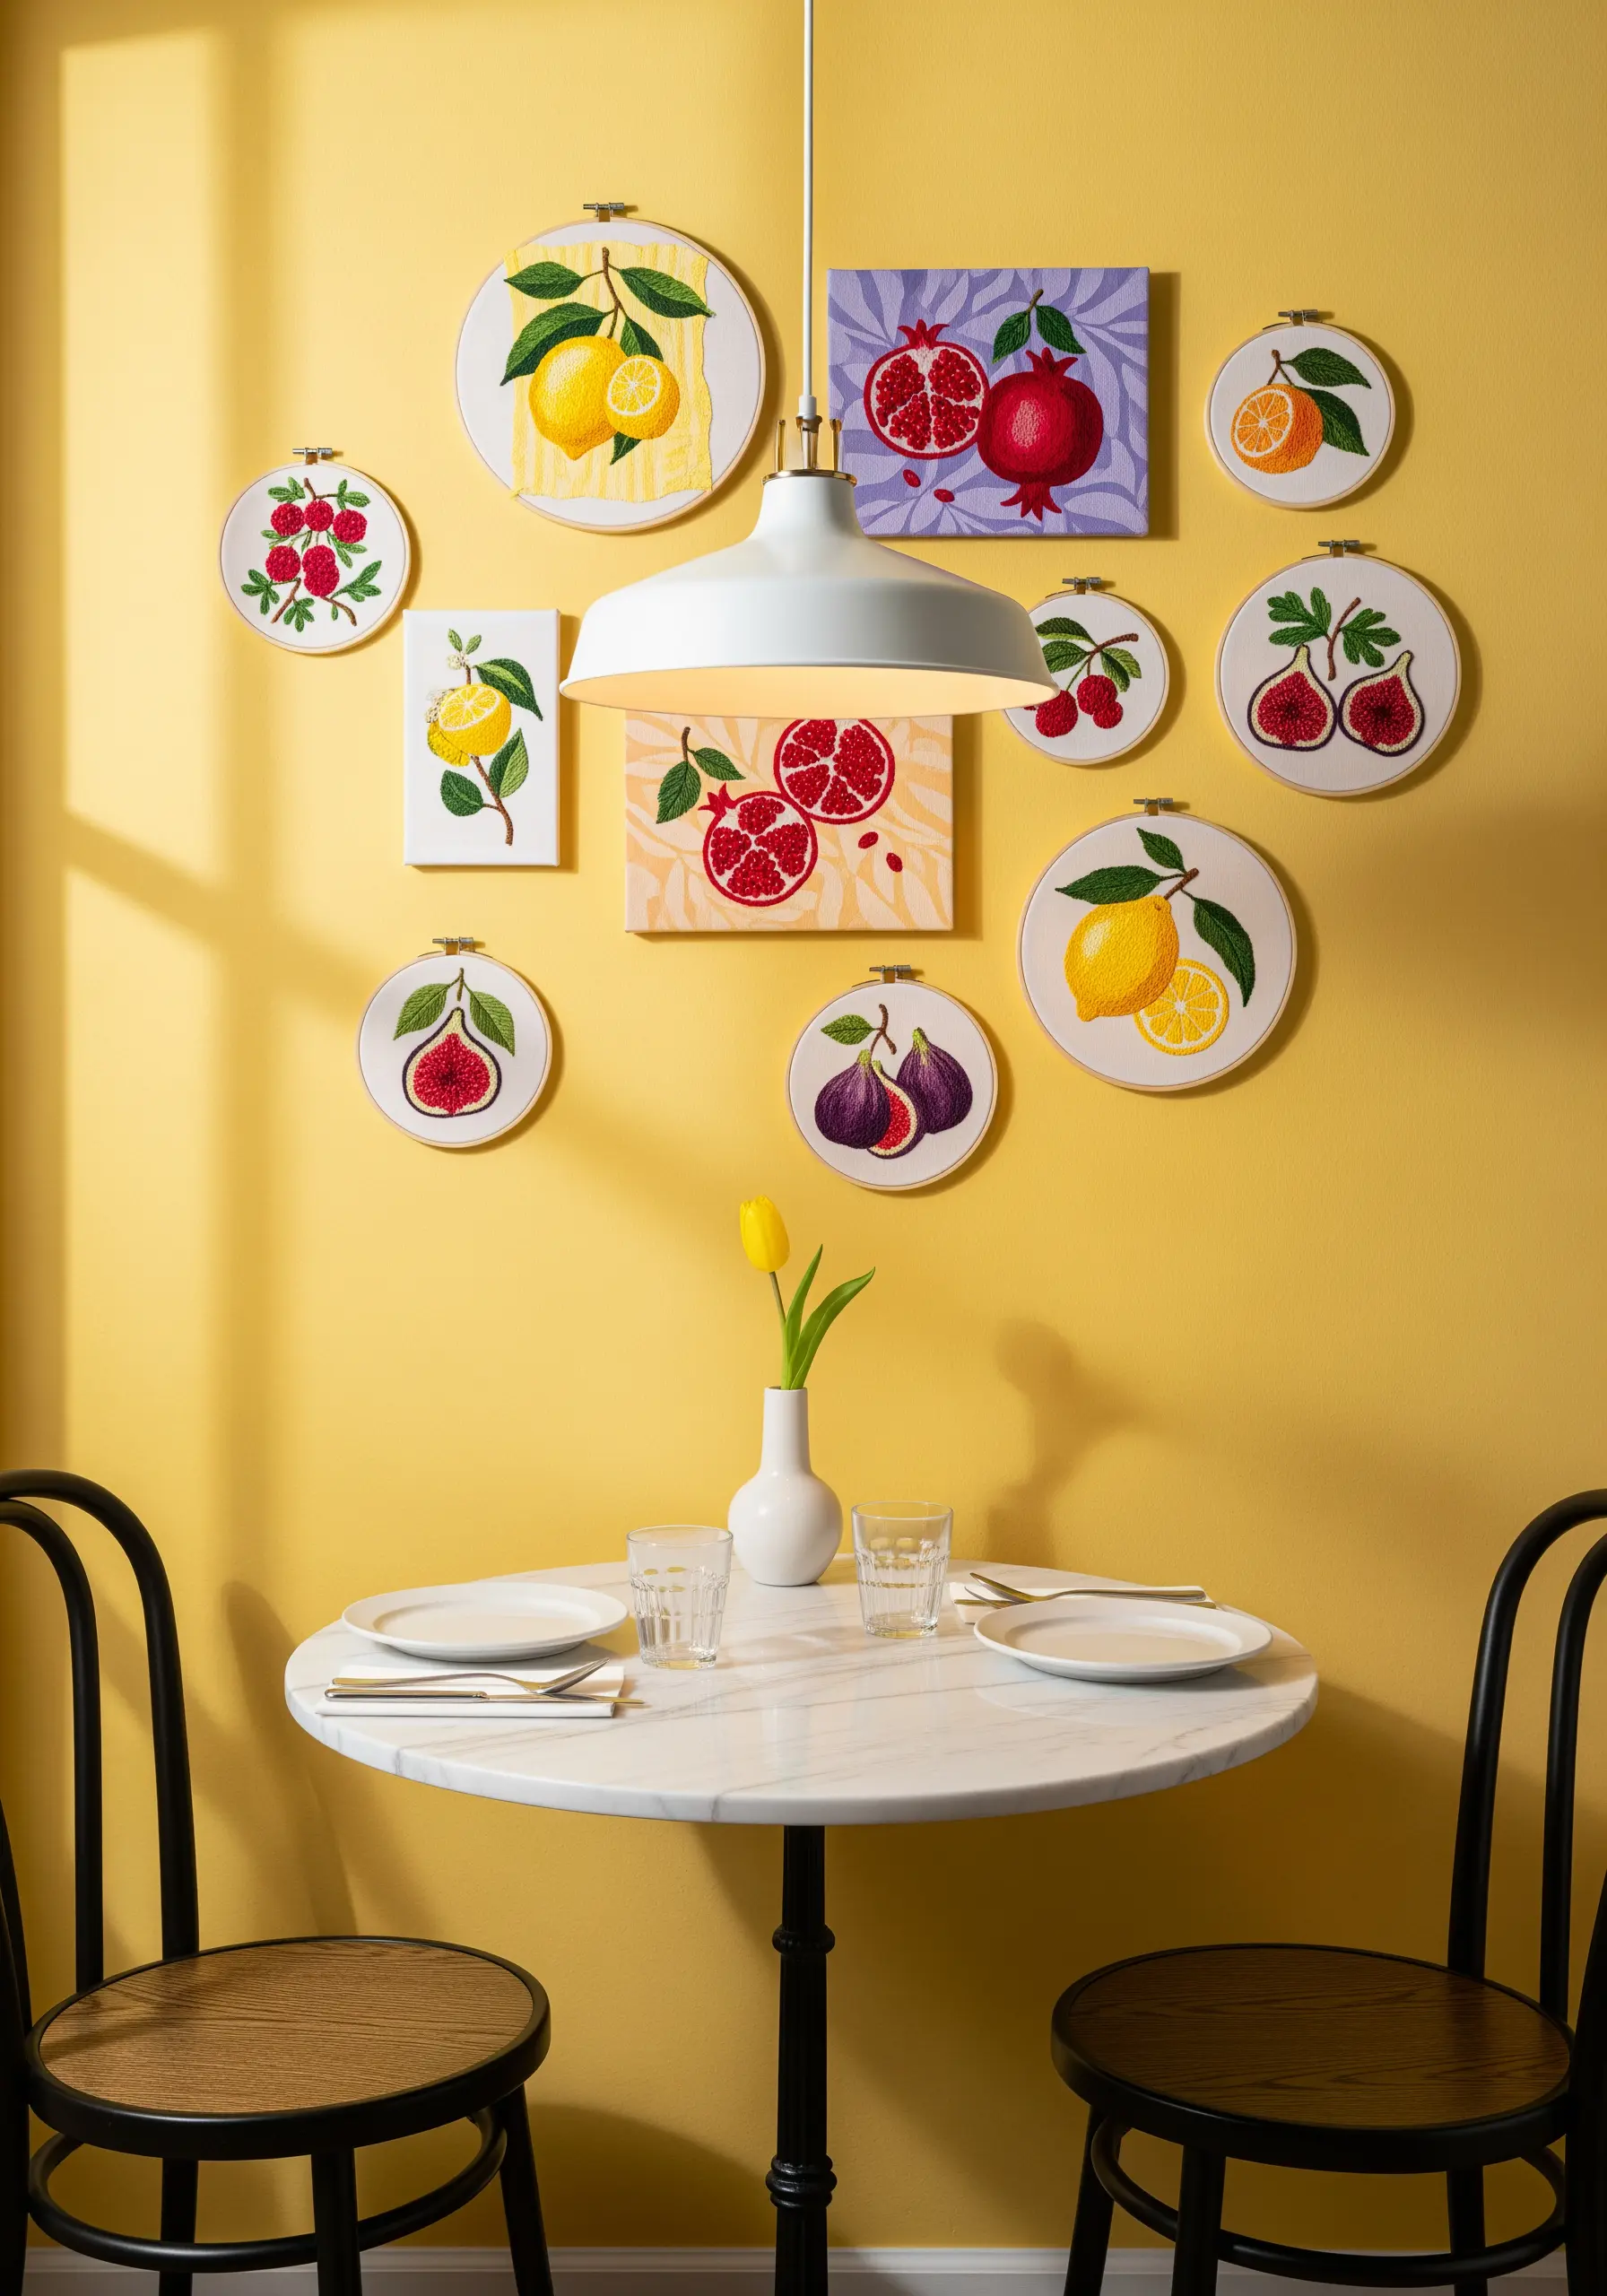
Add visual interest to your embroidery gallery wall by mixing traditional round hoops with square or rectangular stretched canvases.
To ensure the collection remains cohesive, stick to a strong, unified theme—like vibrant, juicy fruits.
Use dense, glossy satin stitches to give the fruits a plump, realistic sheen that contrasts beautifully with the matte texture of the background fabric.
This mixed-media approach makes your wall feel more like a curated art exhibit, full of texture and varied shapes.
13. Create a Visual Travel Diary
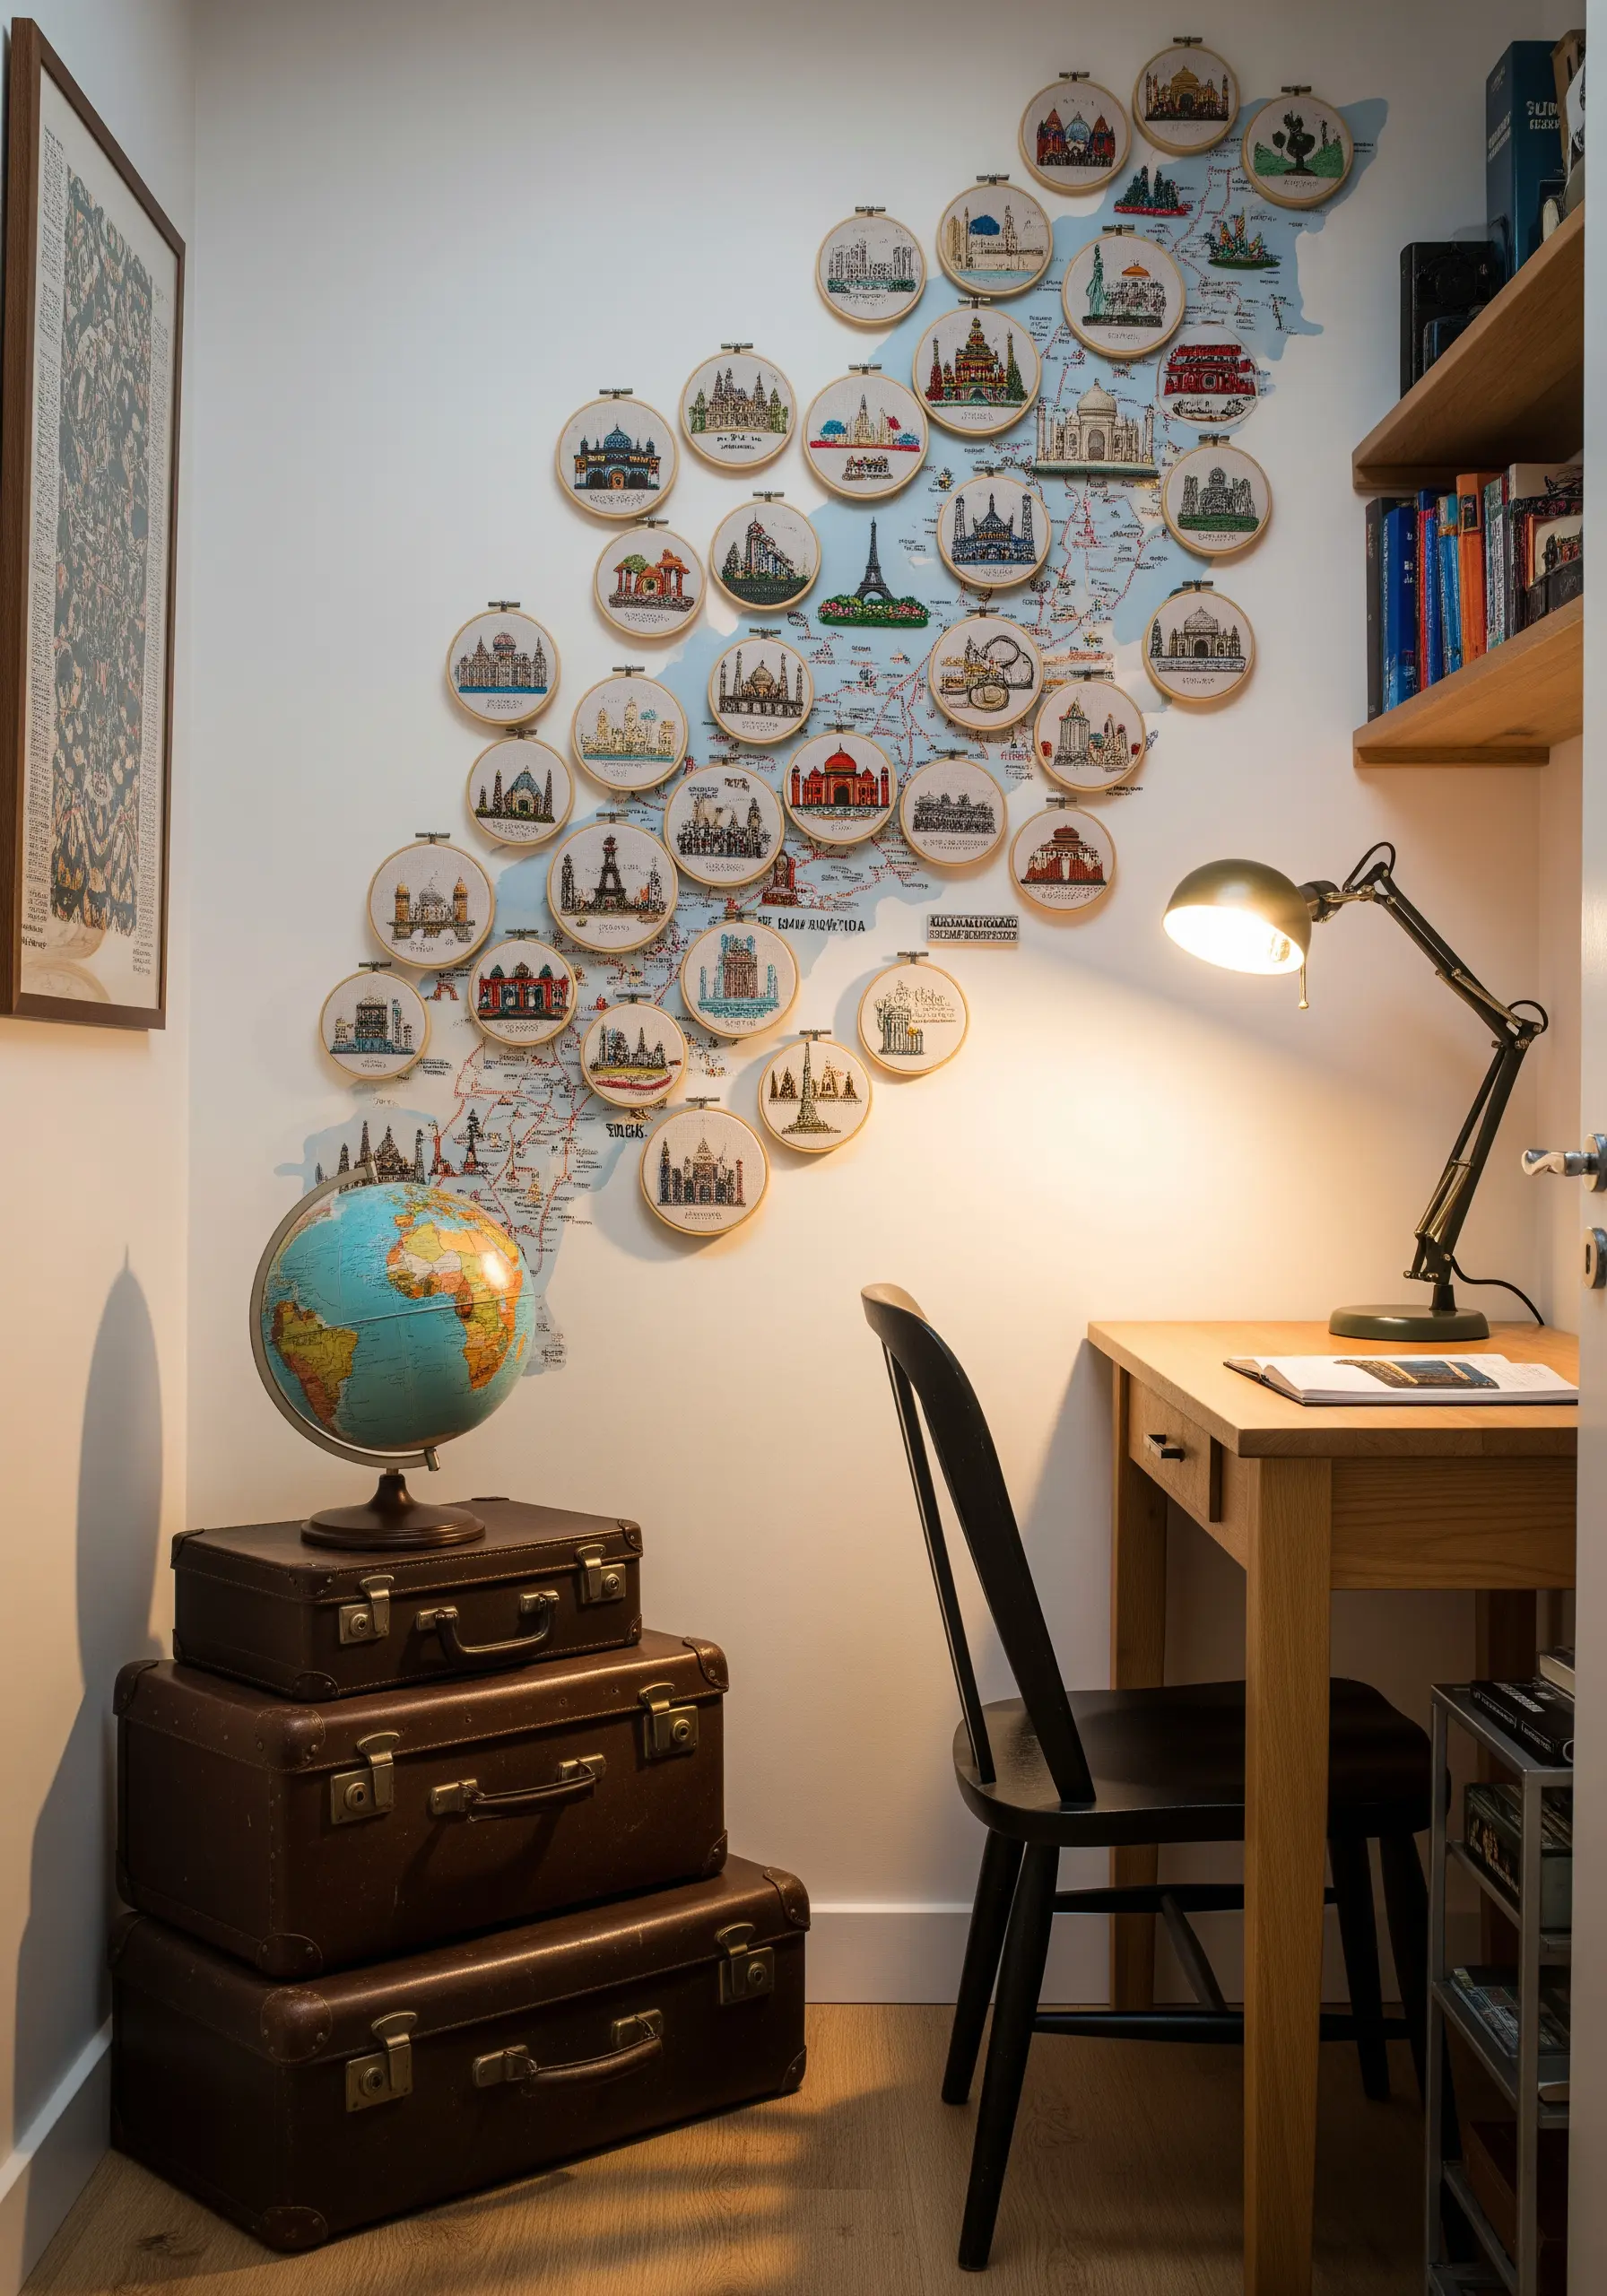
Turn your gallery wall into a personal narrative by using micro-hoops to document your travels on a world map.
Stitch a significant landmark or symbol for each place you’ve visited and position the hoop directly over its location on the map.
This transforms your embroidery from decorative objects into meaningful story markers that spark conversation and memories.
It’s a beautiful way to combine your passion for stitching with your love for adventure, creating a truly unique and evolving piece of art.
14. Evoke Coastal Textures with dimensional Stitches
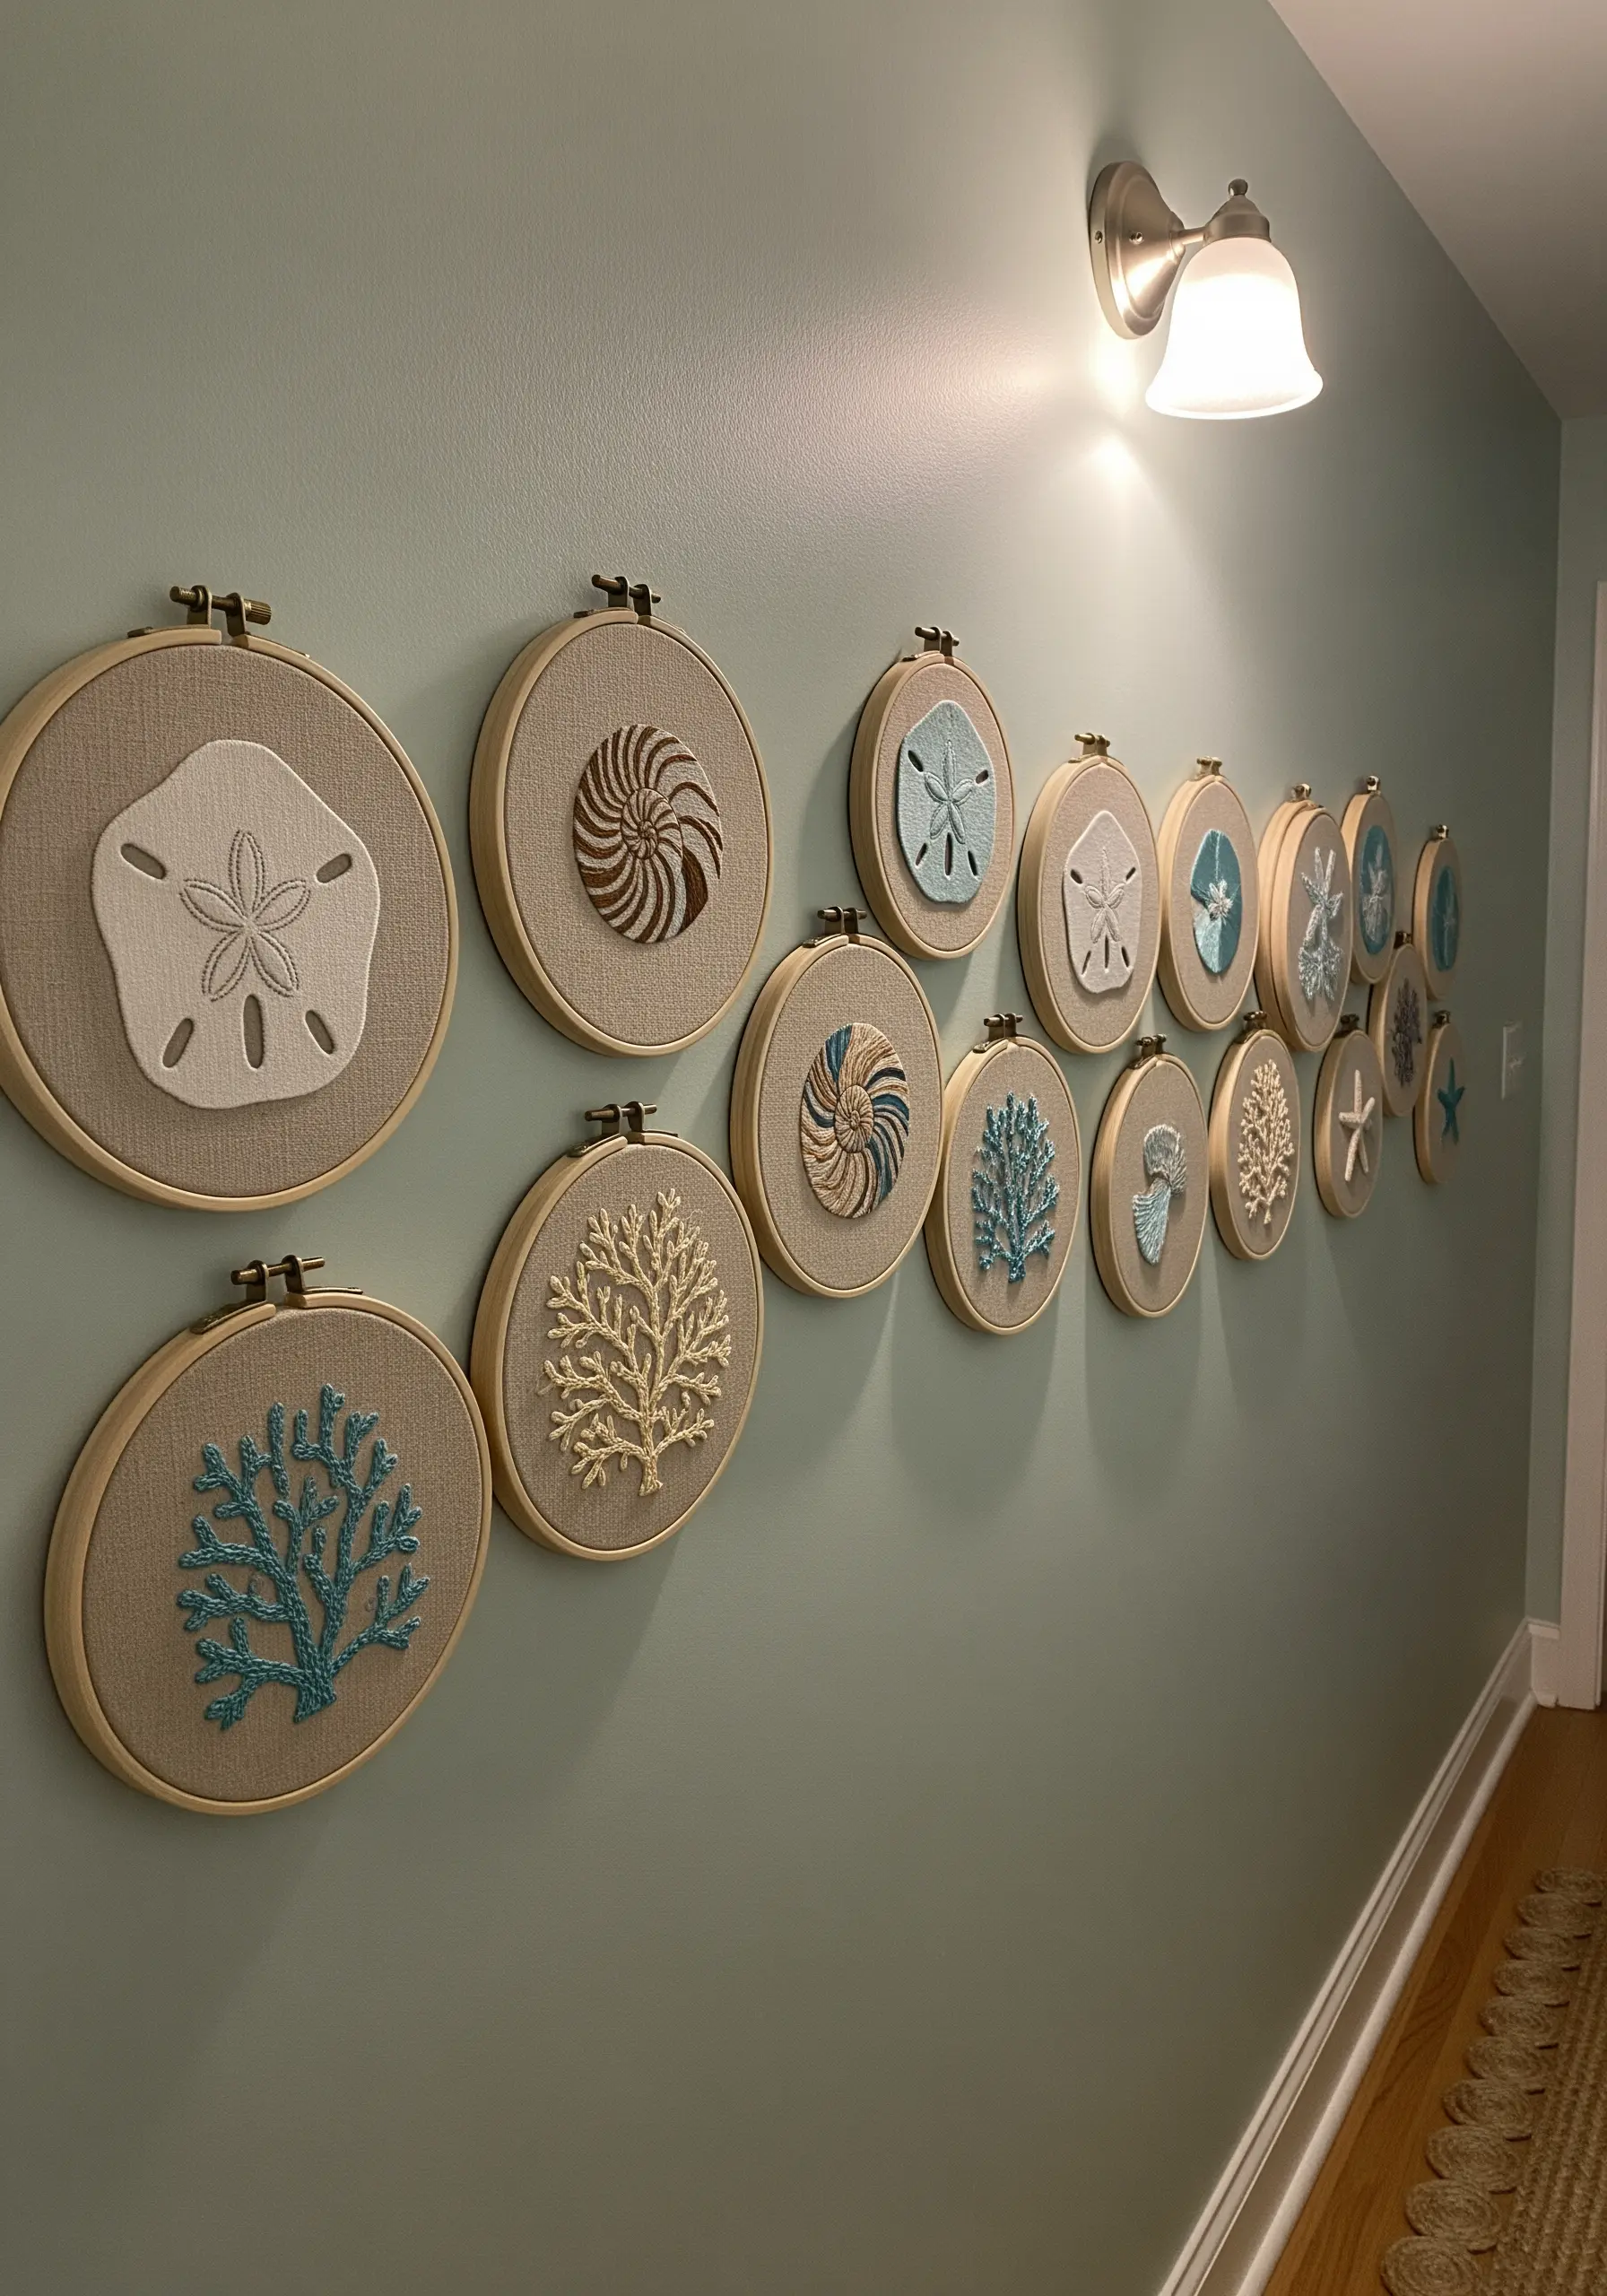
Capture the essence of the coast by focusing on texture rather than just color.
Use French knots and bullion knots packed tightly together to mimic the bumpy texture of coral or the intricate patterns on a sea urchin.
For the delicate structure of a sand dollar, outline the shape with a split stitch and fill the interior with sparsely placed seed stitches for a sandy effect.
Stitching on a neutral, linen-like fabric enhances the organic, natural feel of these ocean-inspired hoop embroidery ideas.
15. Embrace the Abstract Stitch Sketchbook

Use a collection of small hoops as a ‘stitch sketchbook’ to explore color, texture, and abstract forms without the pressure of a single, large project.
Dedicate each hoop to experimenting with a different technique: one for blended threads, another for geometric lines, and a third for dense French knot clusters.
This is the perfect way to use up leftover thread scraps, turning them into miniature works of abstract art.
Arranged together, these experimental pieces create a vibrant, dynamic collection that celebrates creative freedom.
16. Build a Collection Around a Central Mandala
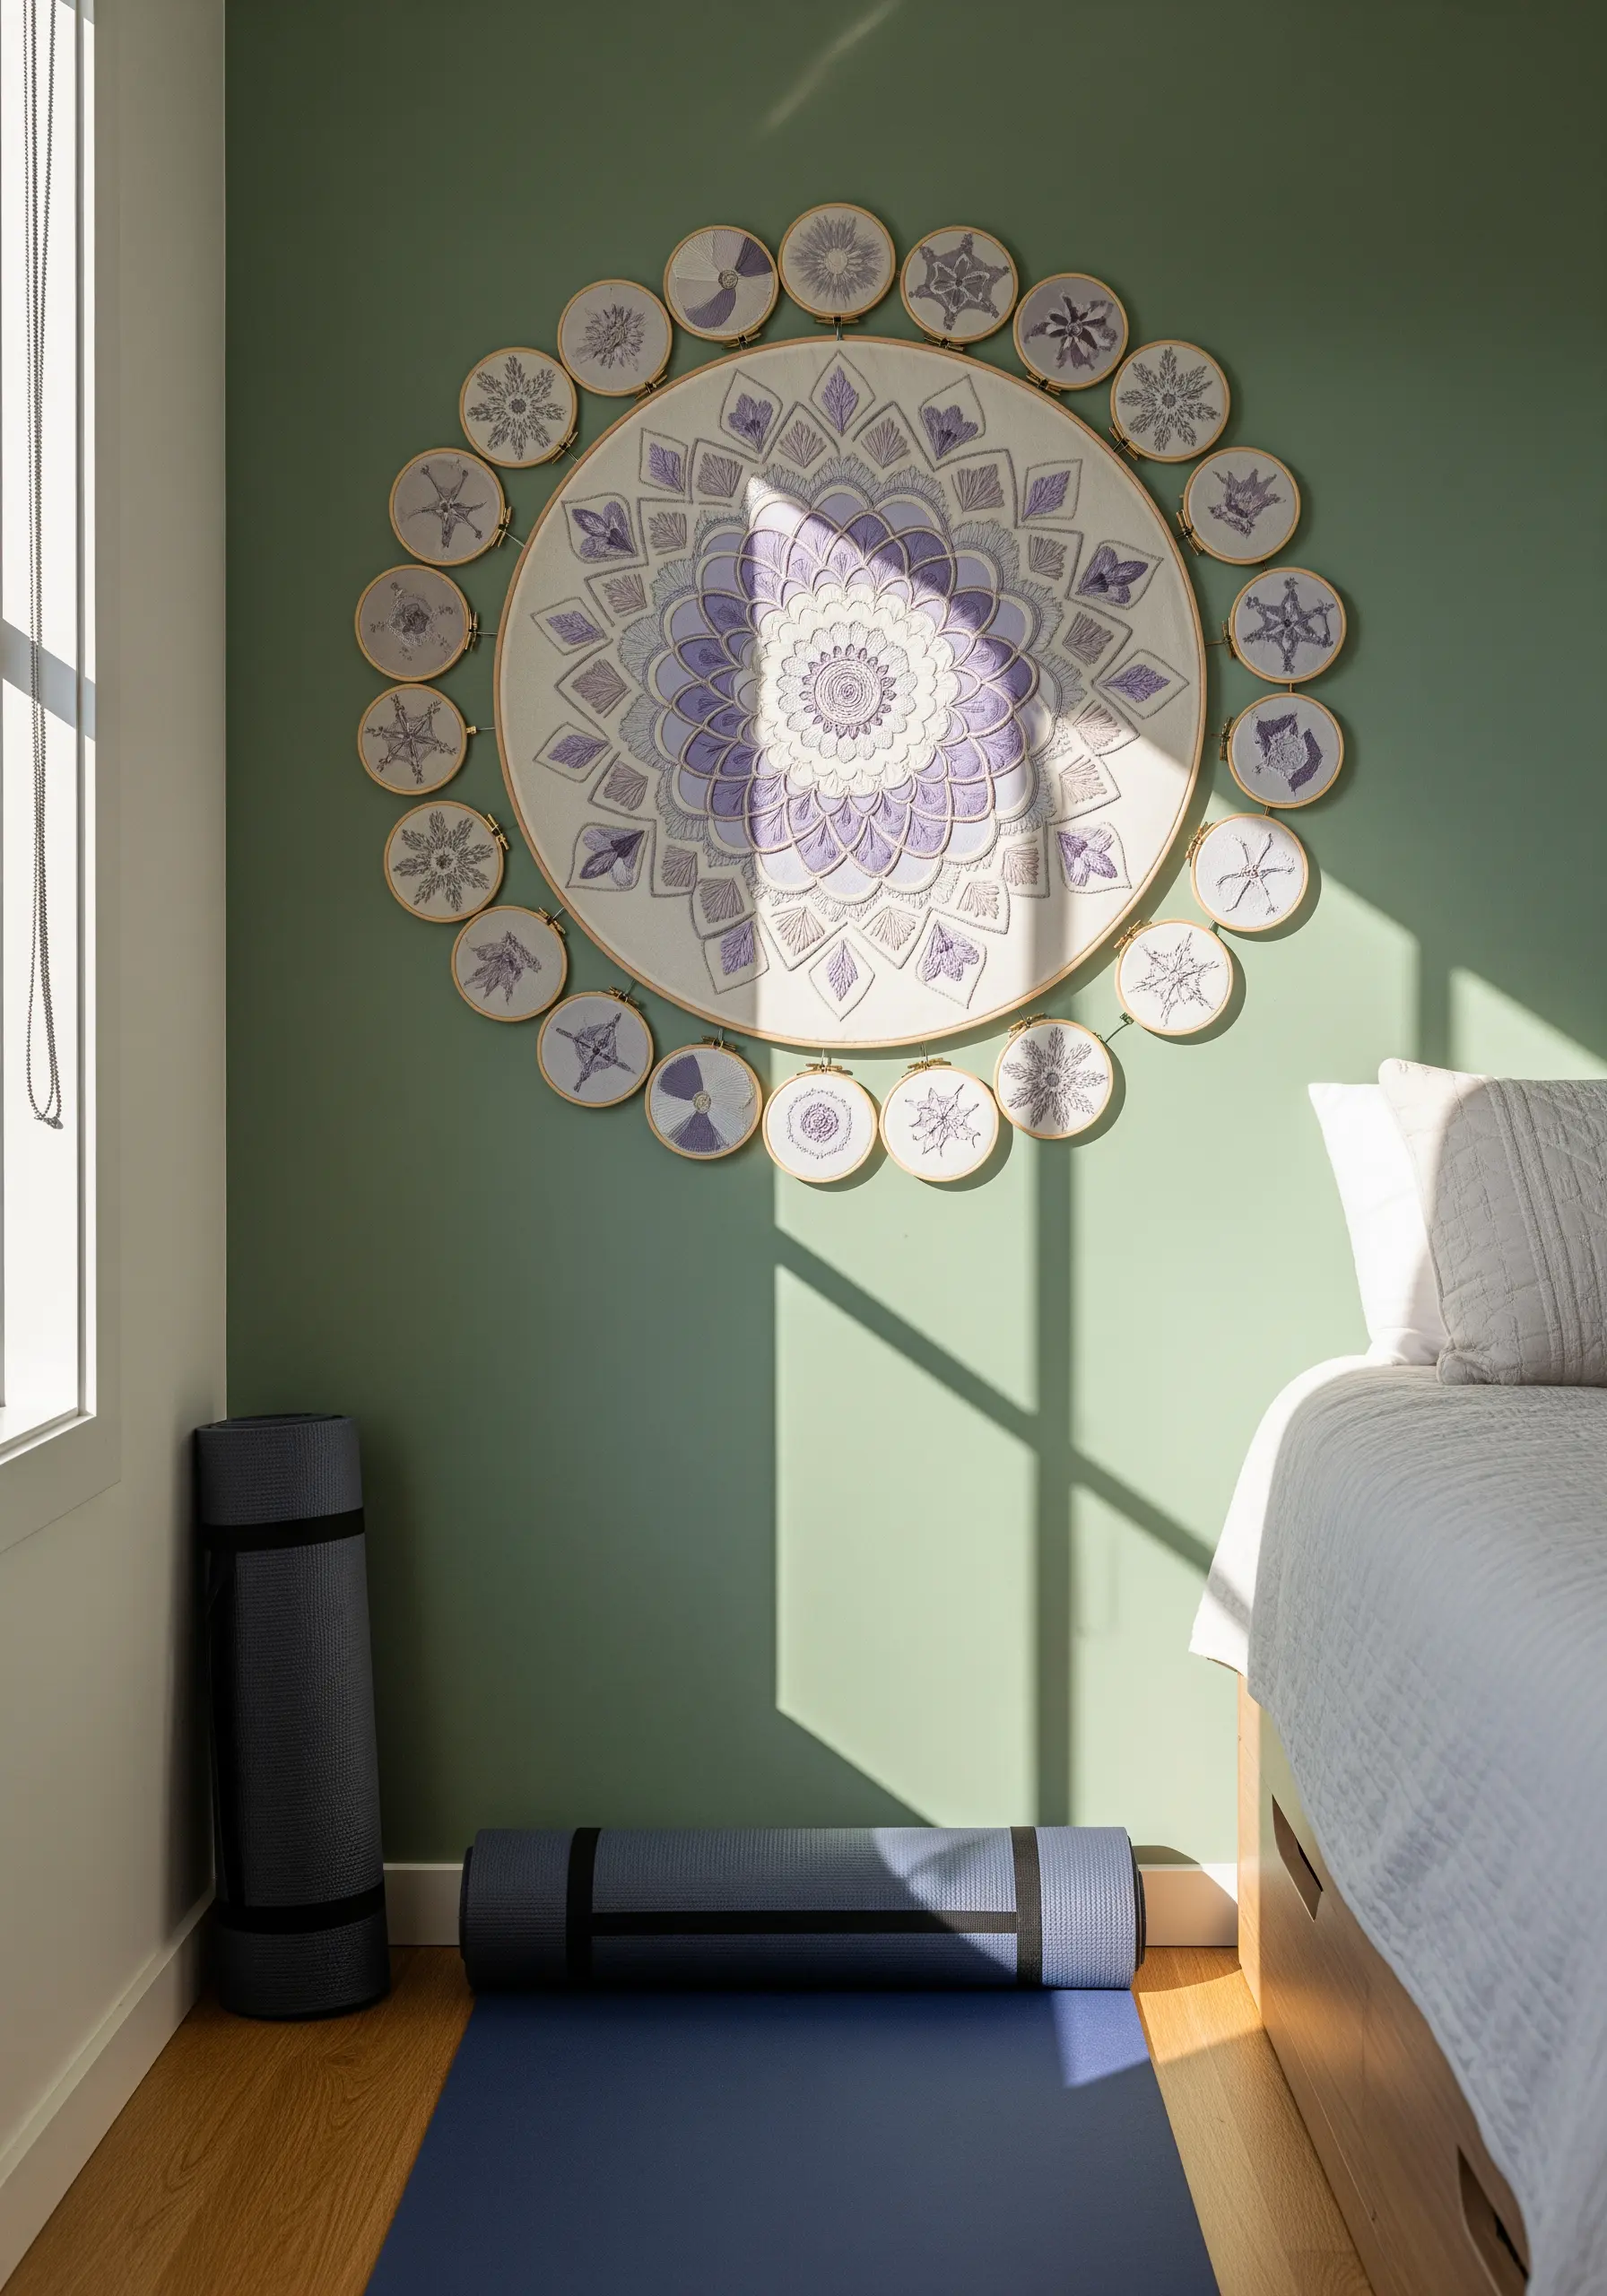
Create a stunning focal point by designing your collection around one large, intricate centerpiece and surrounding it with smaller, complementary hoops.
Embroider a detailed mandala in the large hoop, then pull out smaller elements or color motifs from it to stitch in the micro-hoops.
This ‘macro-to-micro’ approach creates a beautiful sense of harmony and rhythm, drawing the eye to the center while celebrating its details on the periphery.
It’s a perfect way to build a meditative and visually balanced modern minimal mandala embroidery wall.
17. Form a Shape with Typographic Hoops
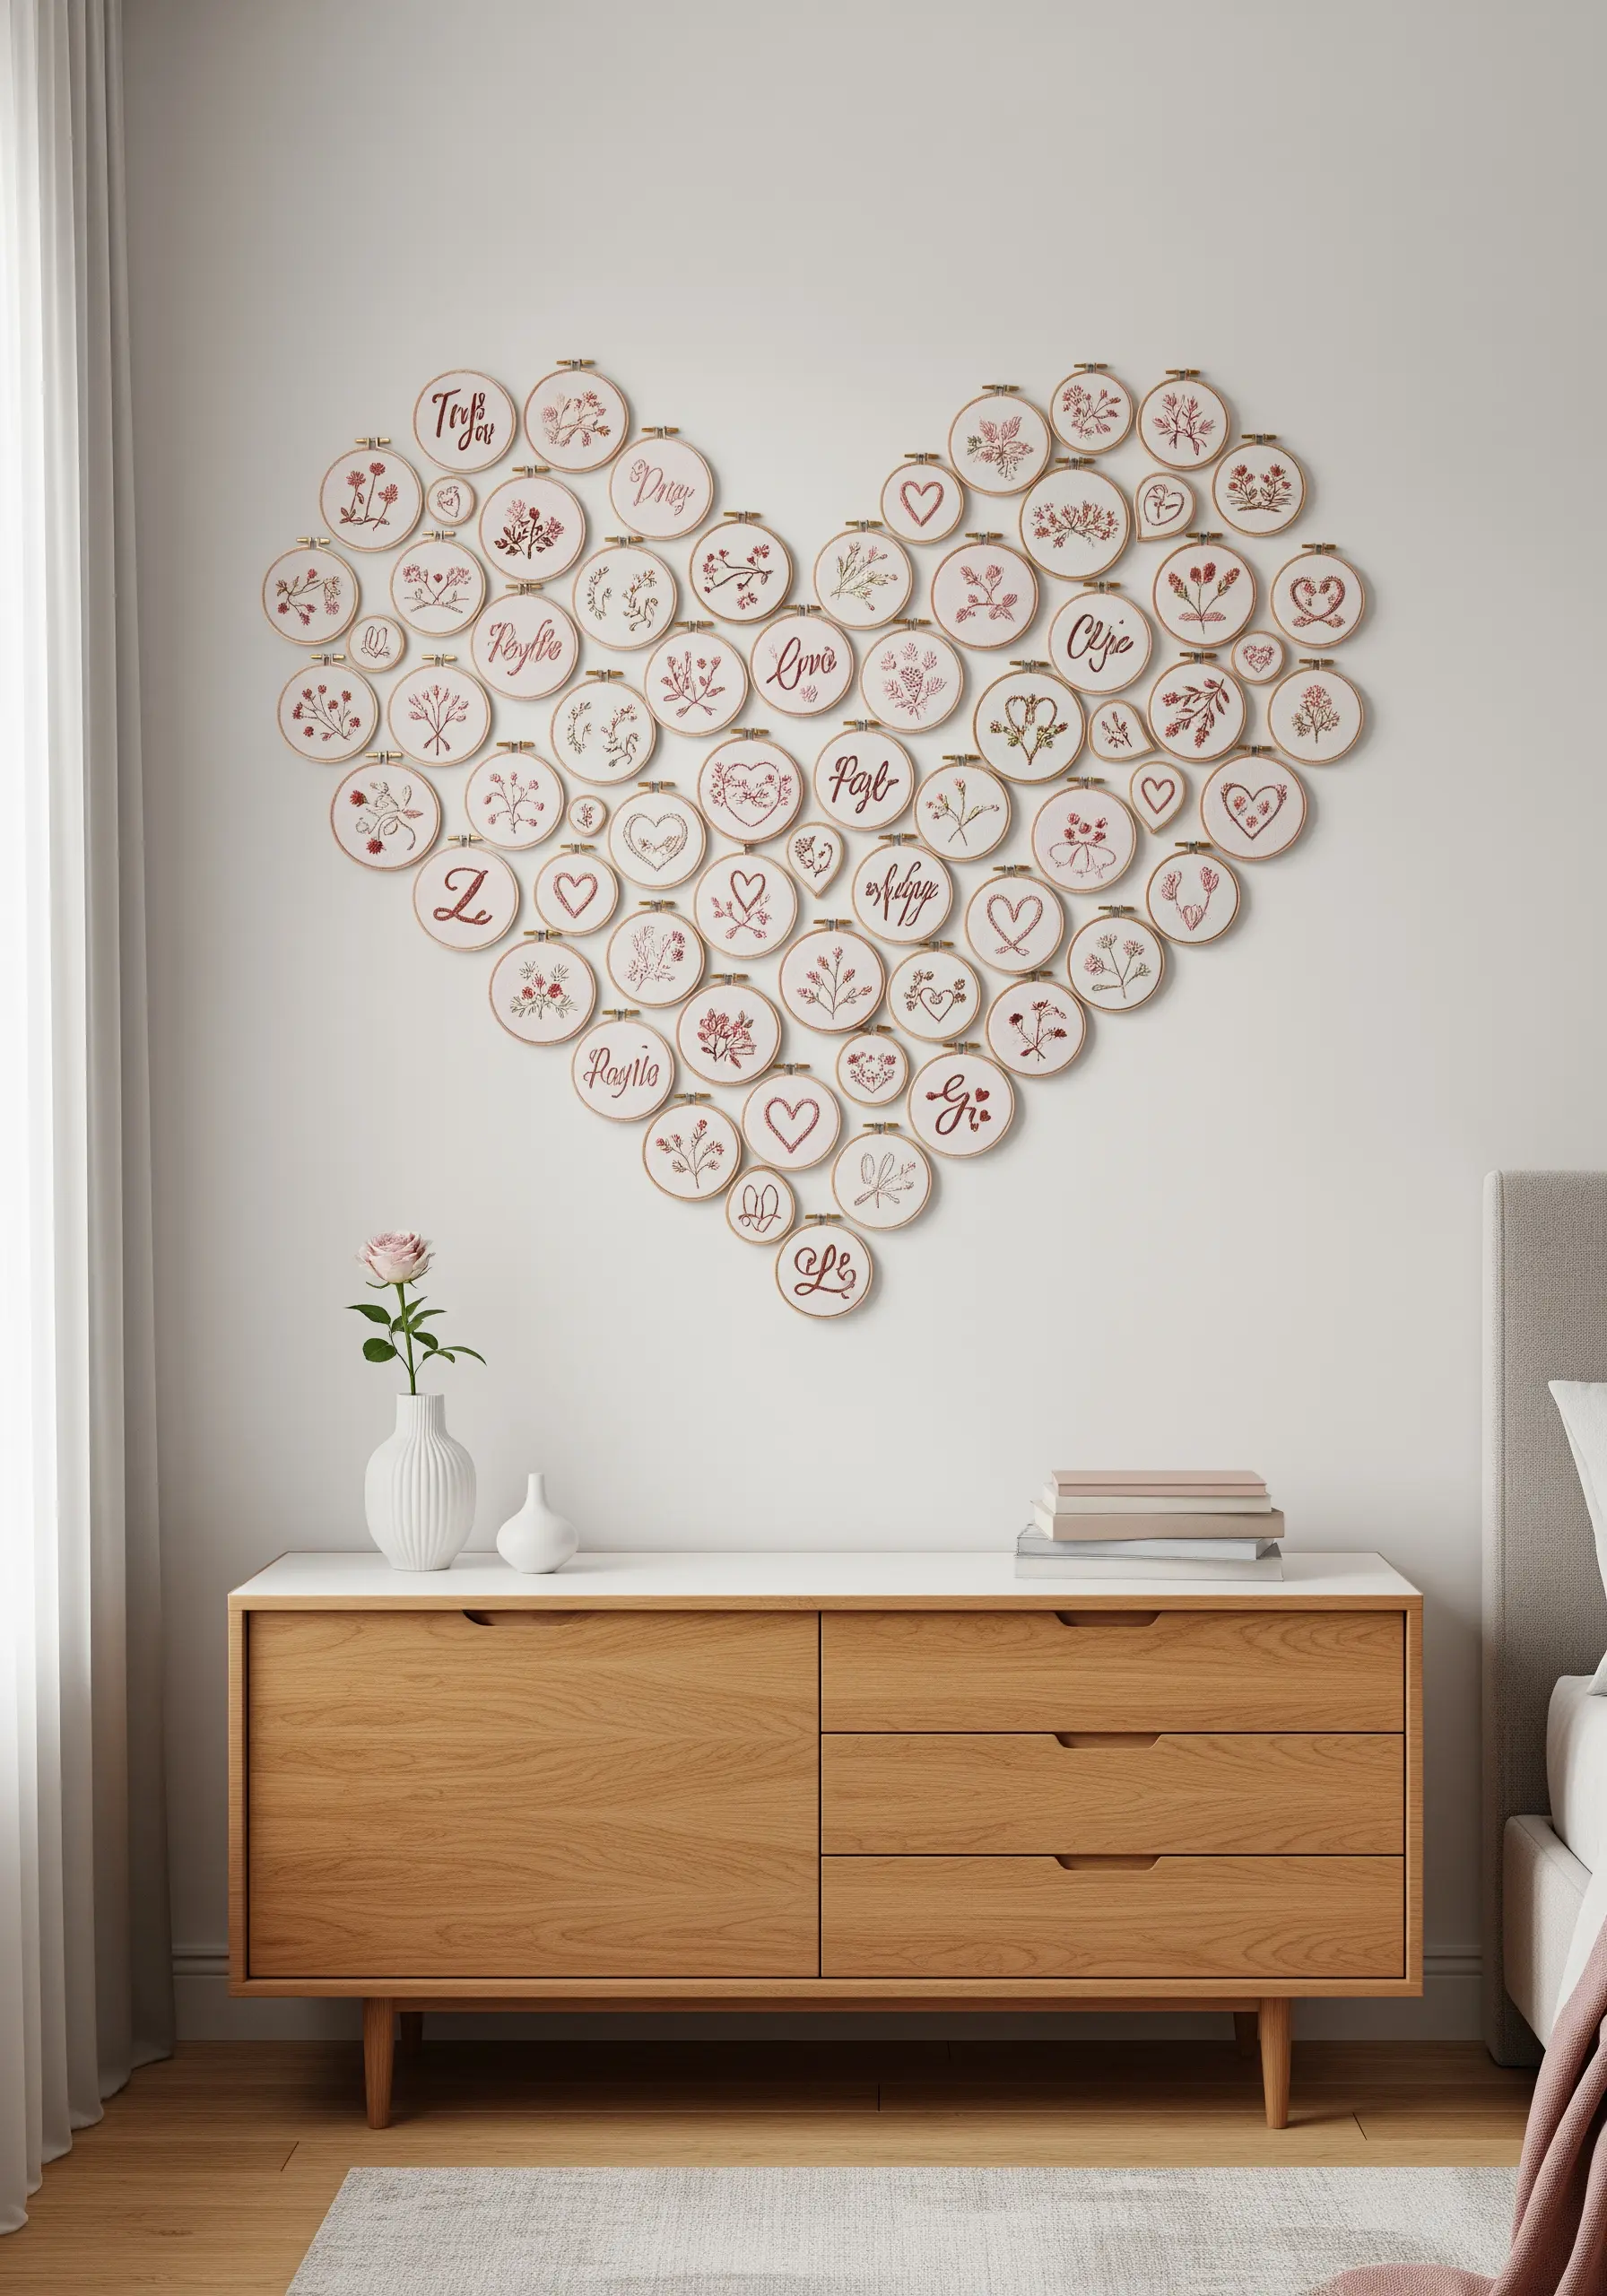
Design a large-scale shape, like a heart, by carefully arranging dozens of small hoops on your wall.
To maintain visual clarity, keep the embroidery inside each hoop minimal—focus on a single monogram, a simple word, or a delicate botanical sprig.
Use a single thread color, like a soft red or charcoal grey, to unify the entire installation and emphasize the overall shape you’ve created.
This technique turns tiny, individual stitches into a grand, meaningful statement piece.
18. Curate a Hyper-Specific Thematic Nook
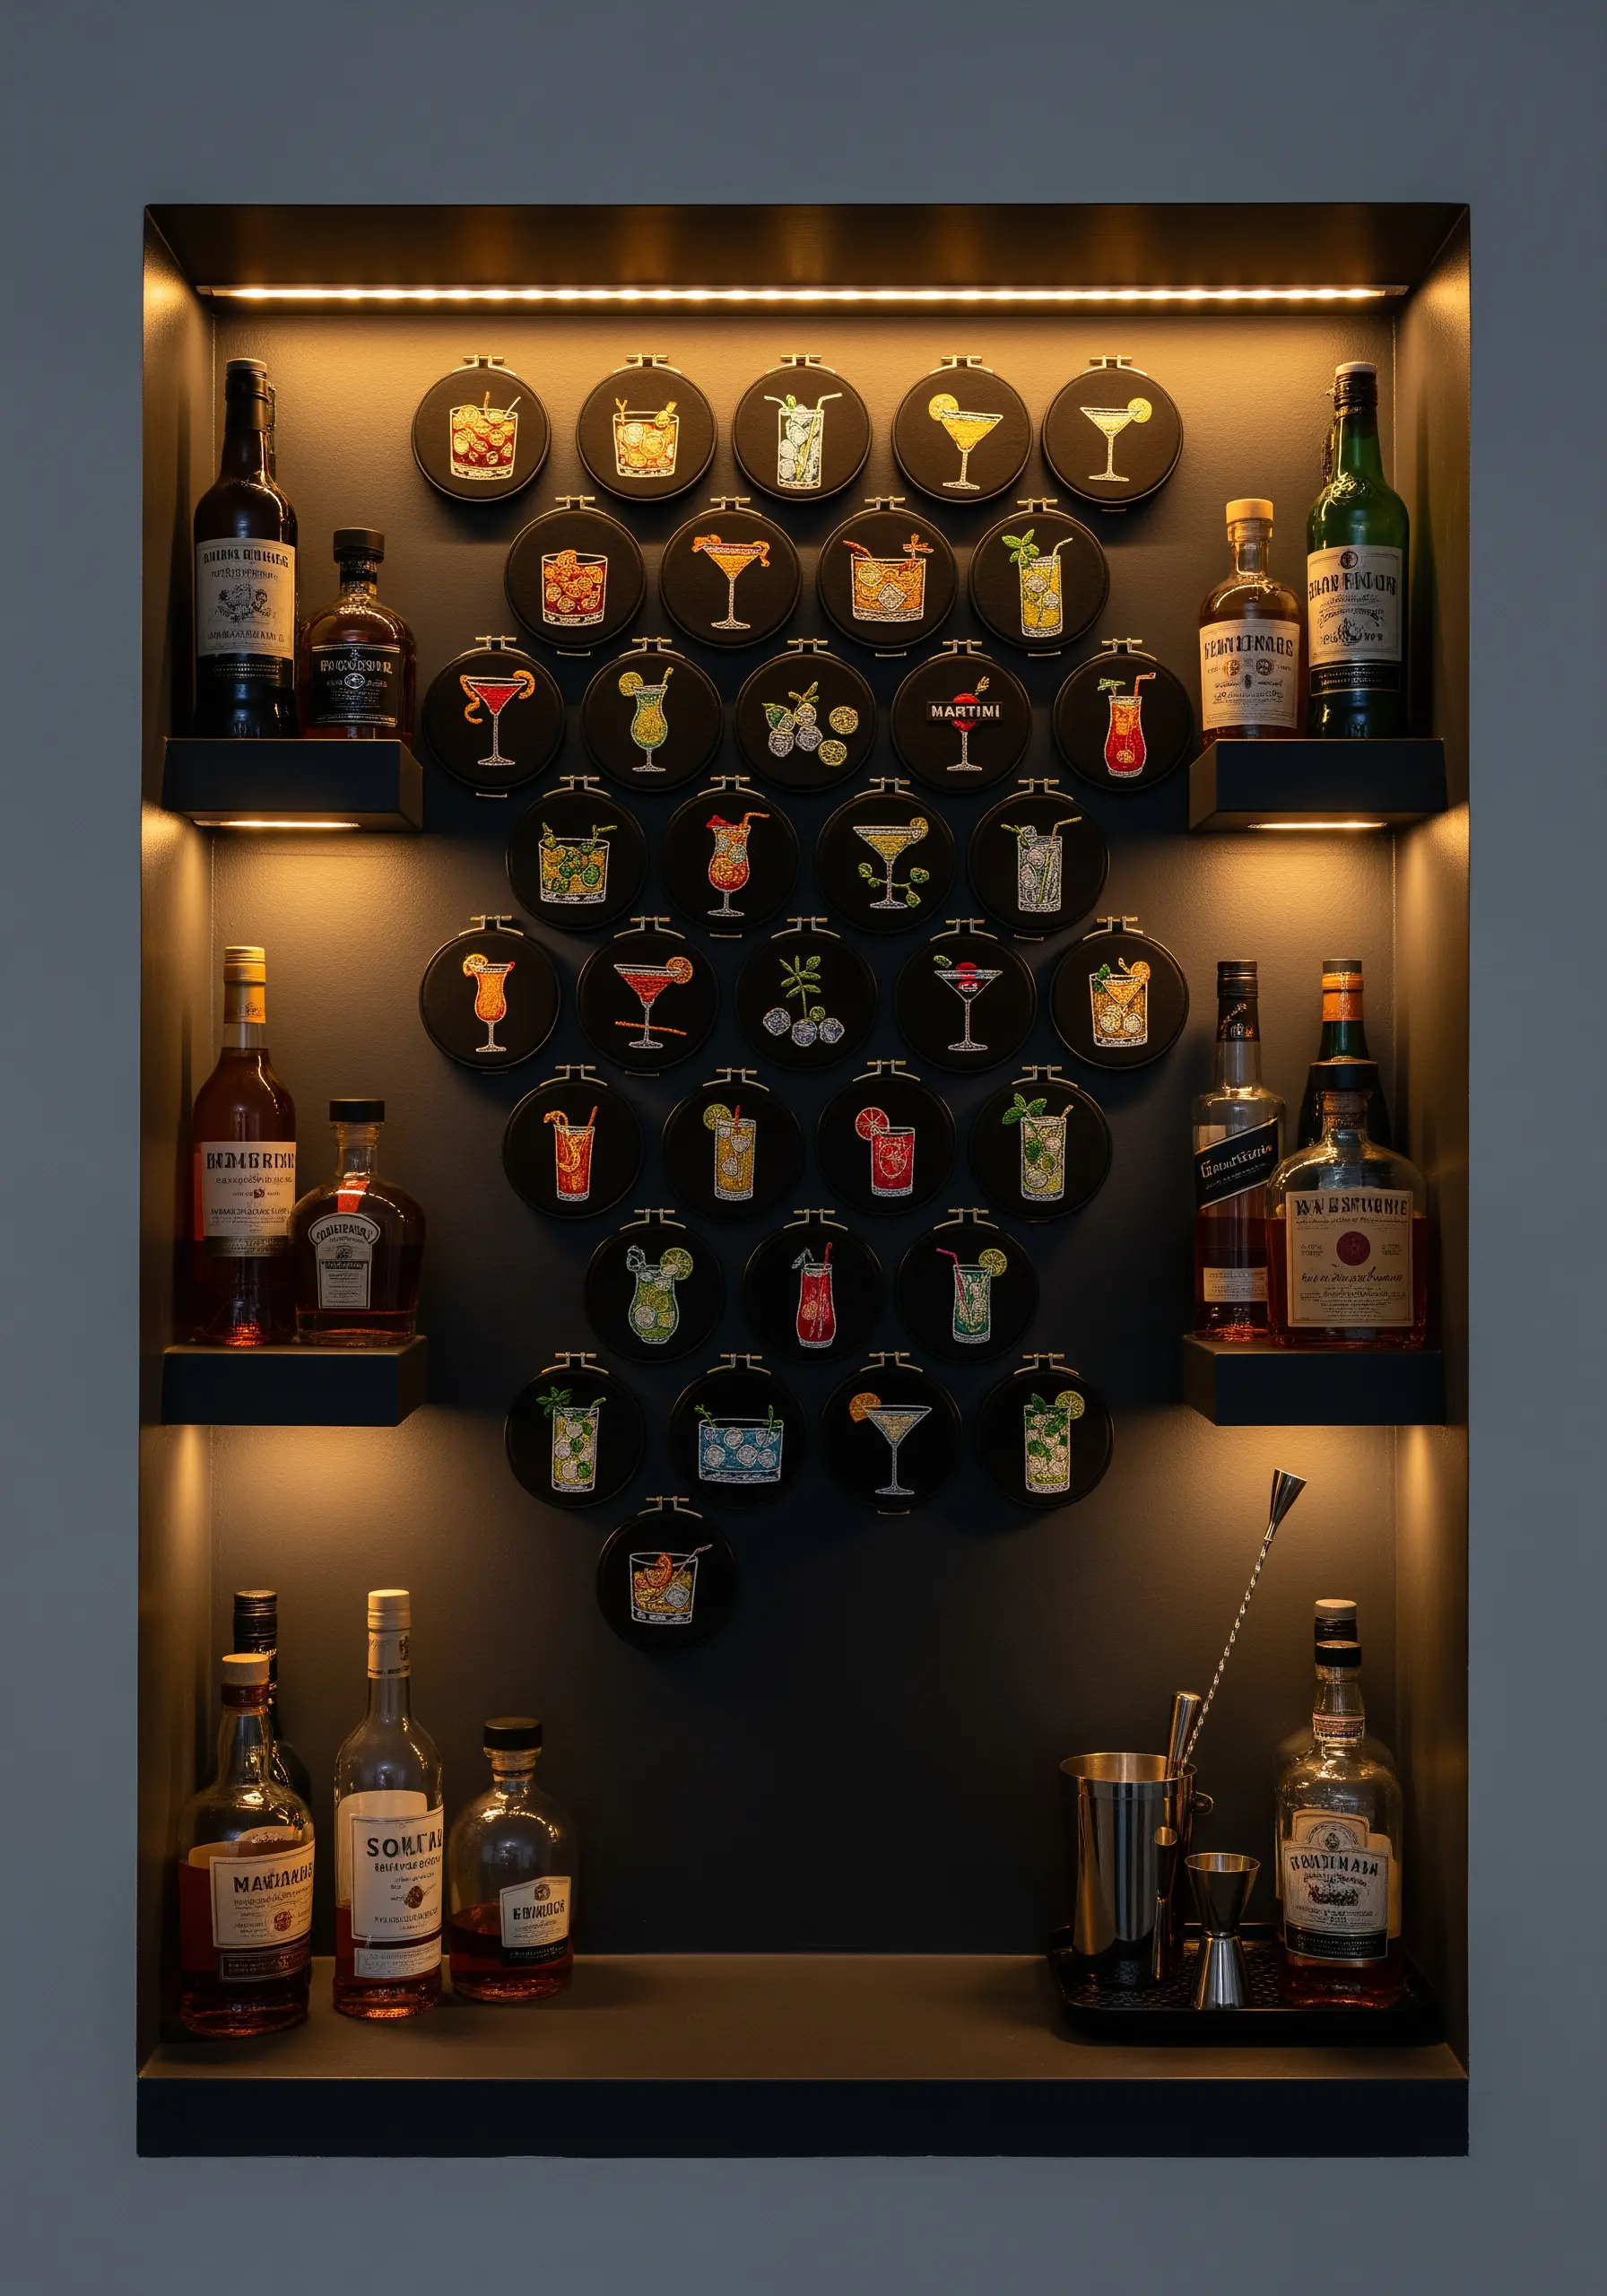
Make a bold statement by dedicating a collection to a single, vibrant theme, like classic cocktails.
Use high-contrast black fabric to make the bright colors of your satin-stitched citrus slices, cherries, and liquids pop with intensity.
Displaying the collection in a dedicated space, like an illuminated bar cabinet, elevates the hoops from simple decorations to a curated part of the room’s function and atmosphere.
This approach shows how embroidery can be both artistic and playfully integrated into your lifestyle.
19. Honor Your Pets with a Portrait Gallery
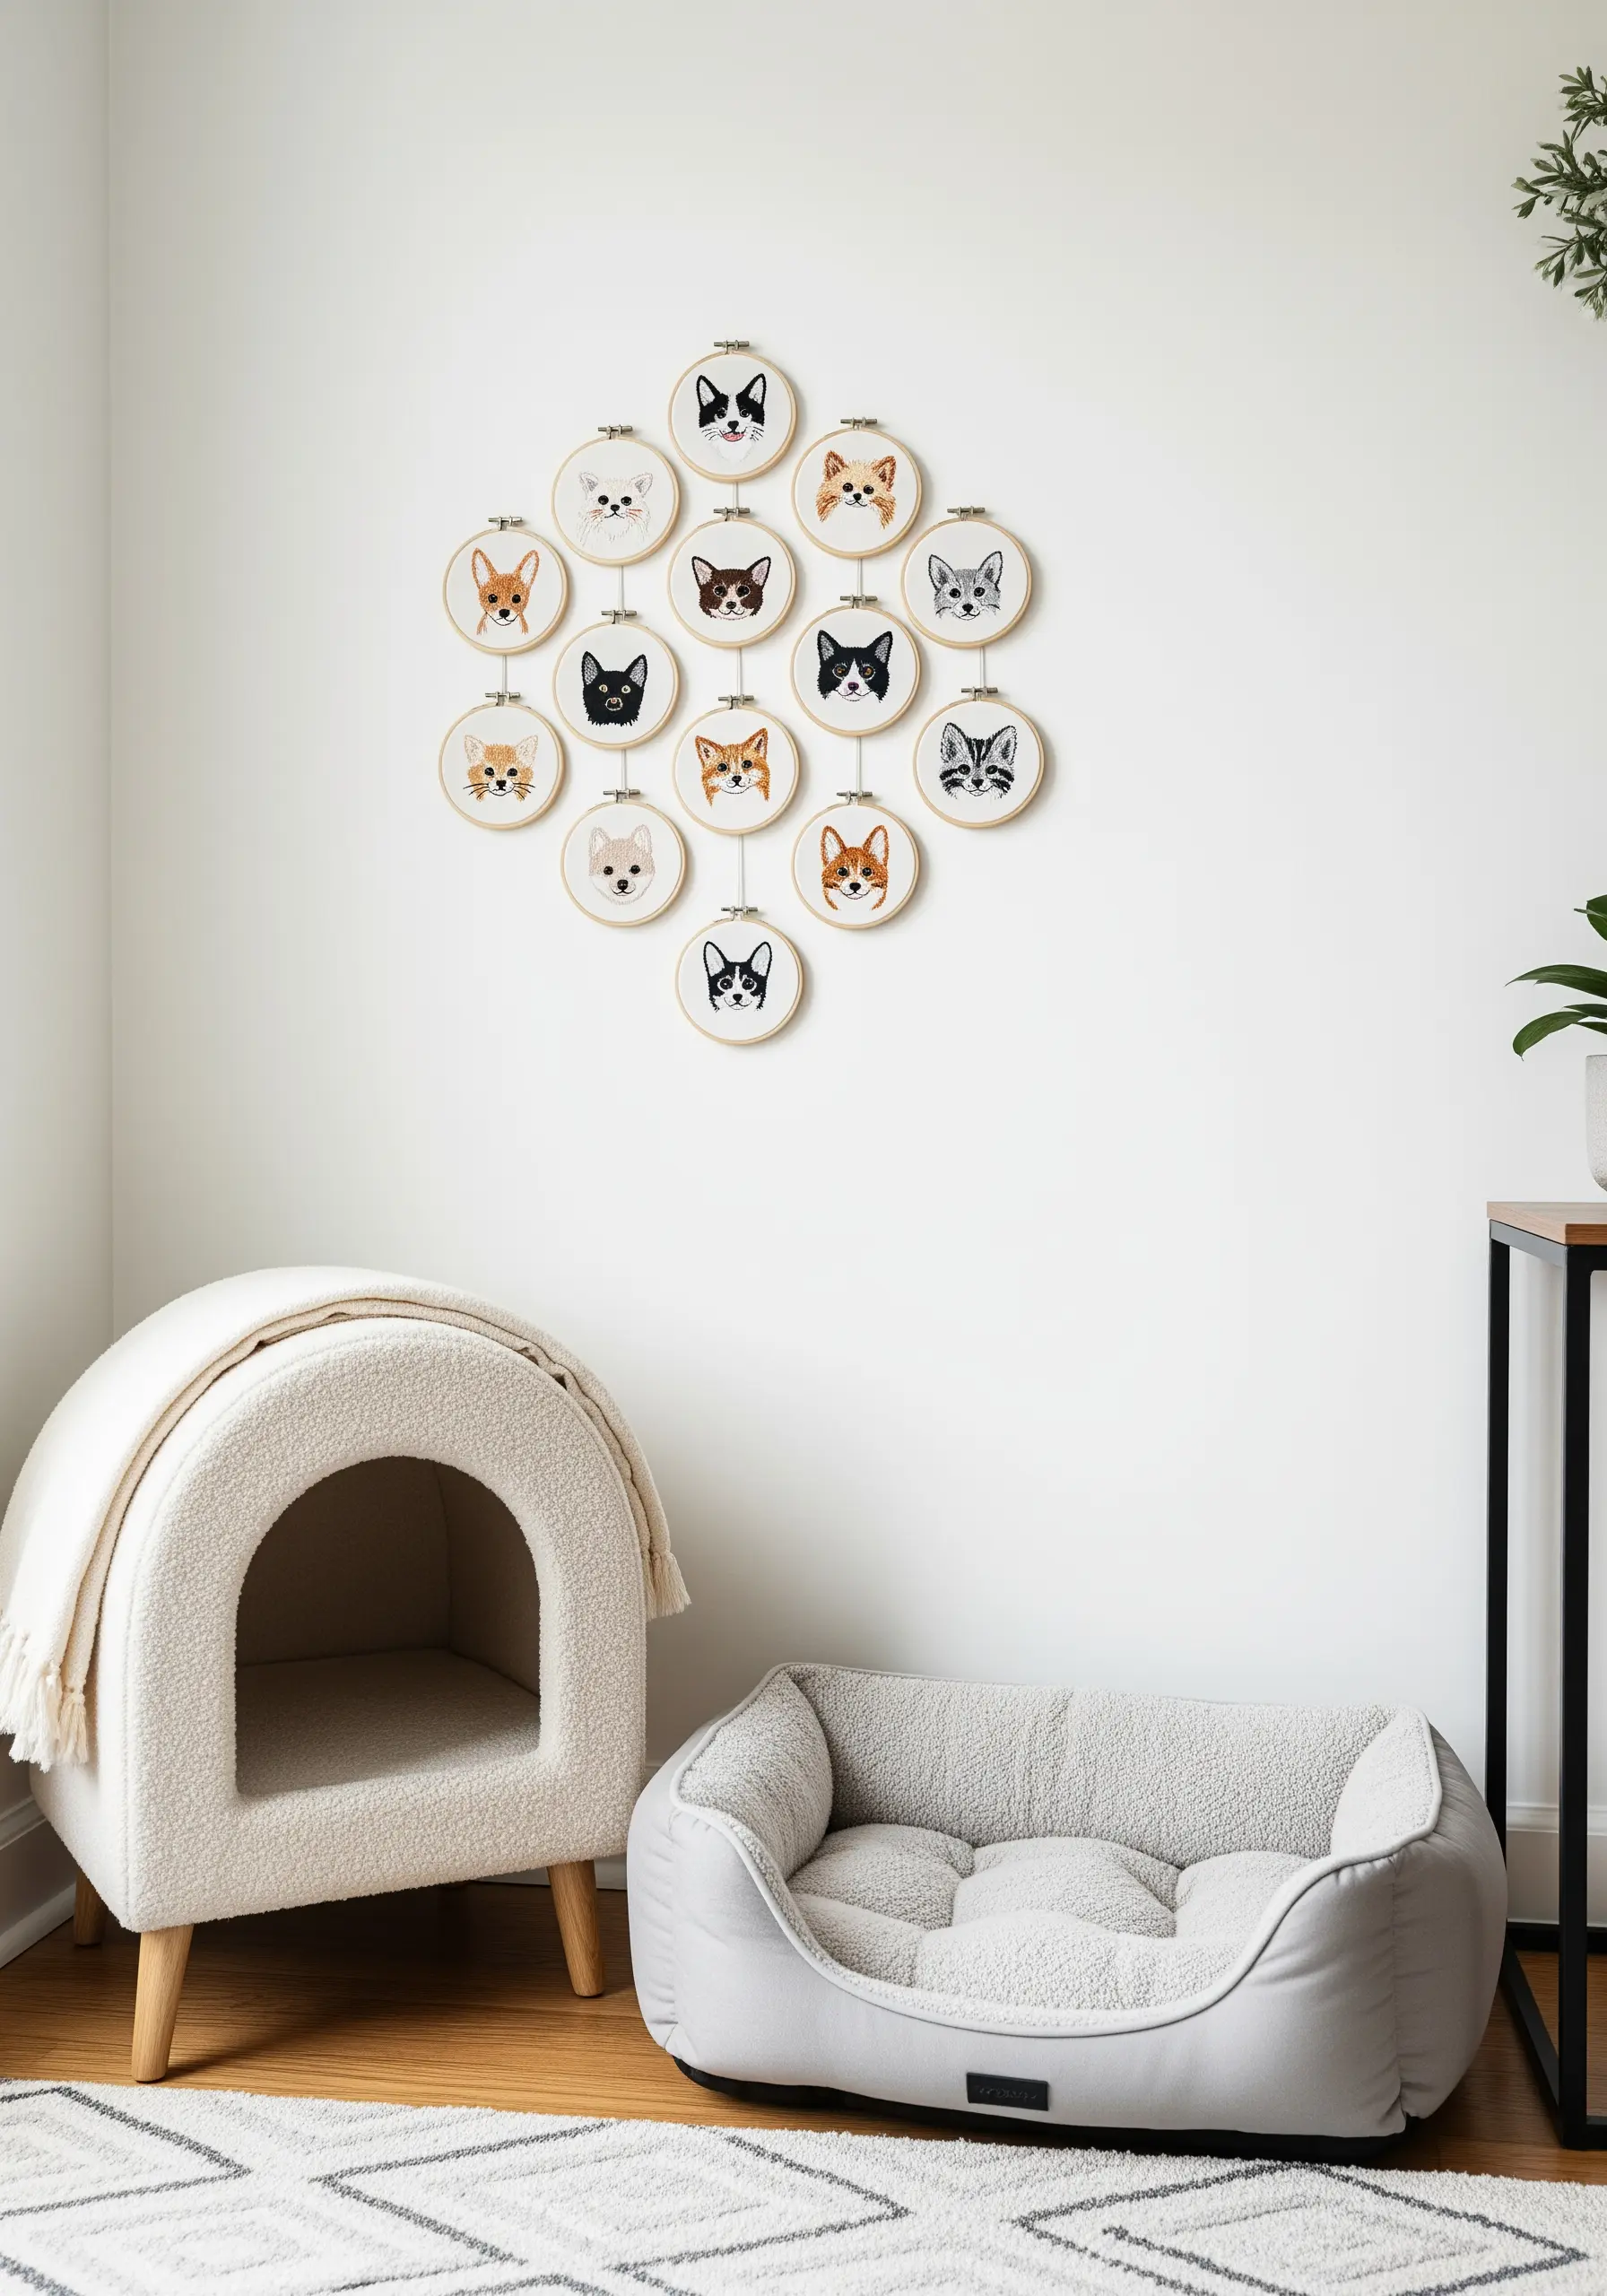
Create a heartfelt and charming gallery wall by stitching a collection of minimalist pet portraits.
To ensure consistency, use the same size hoop and neutral background fabric for each animal.
Focus on capturing the unique markings and expressions of each pet with simple backstitch outlines and small, targeted areas of satin stitch for color.
This approach celebrates each pet’s individuality while creating a cohesive and deeply personal collection of delicate pet line art embroidery ideas.
20. Explore the Graphic Power of Monochrome
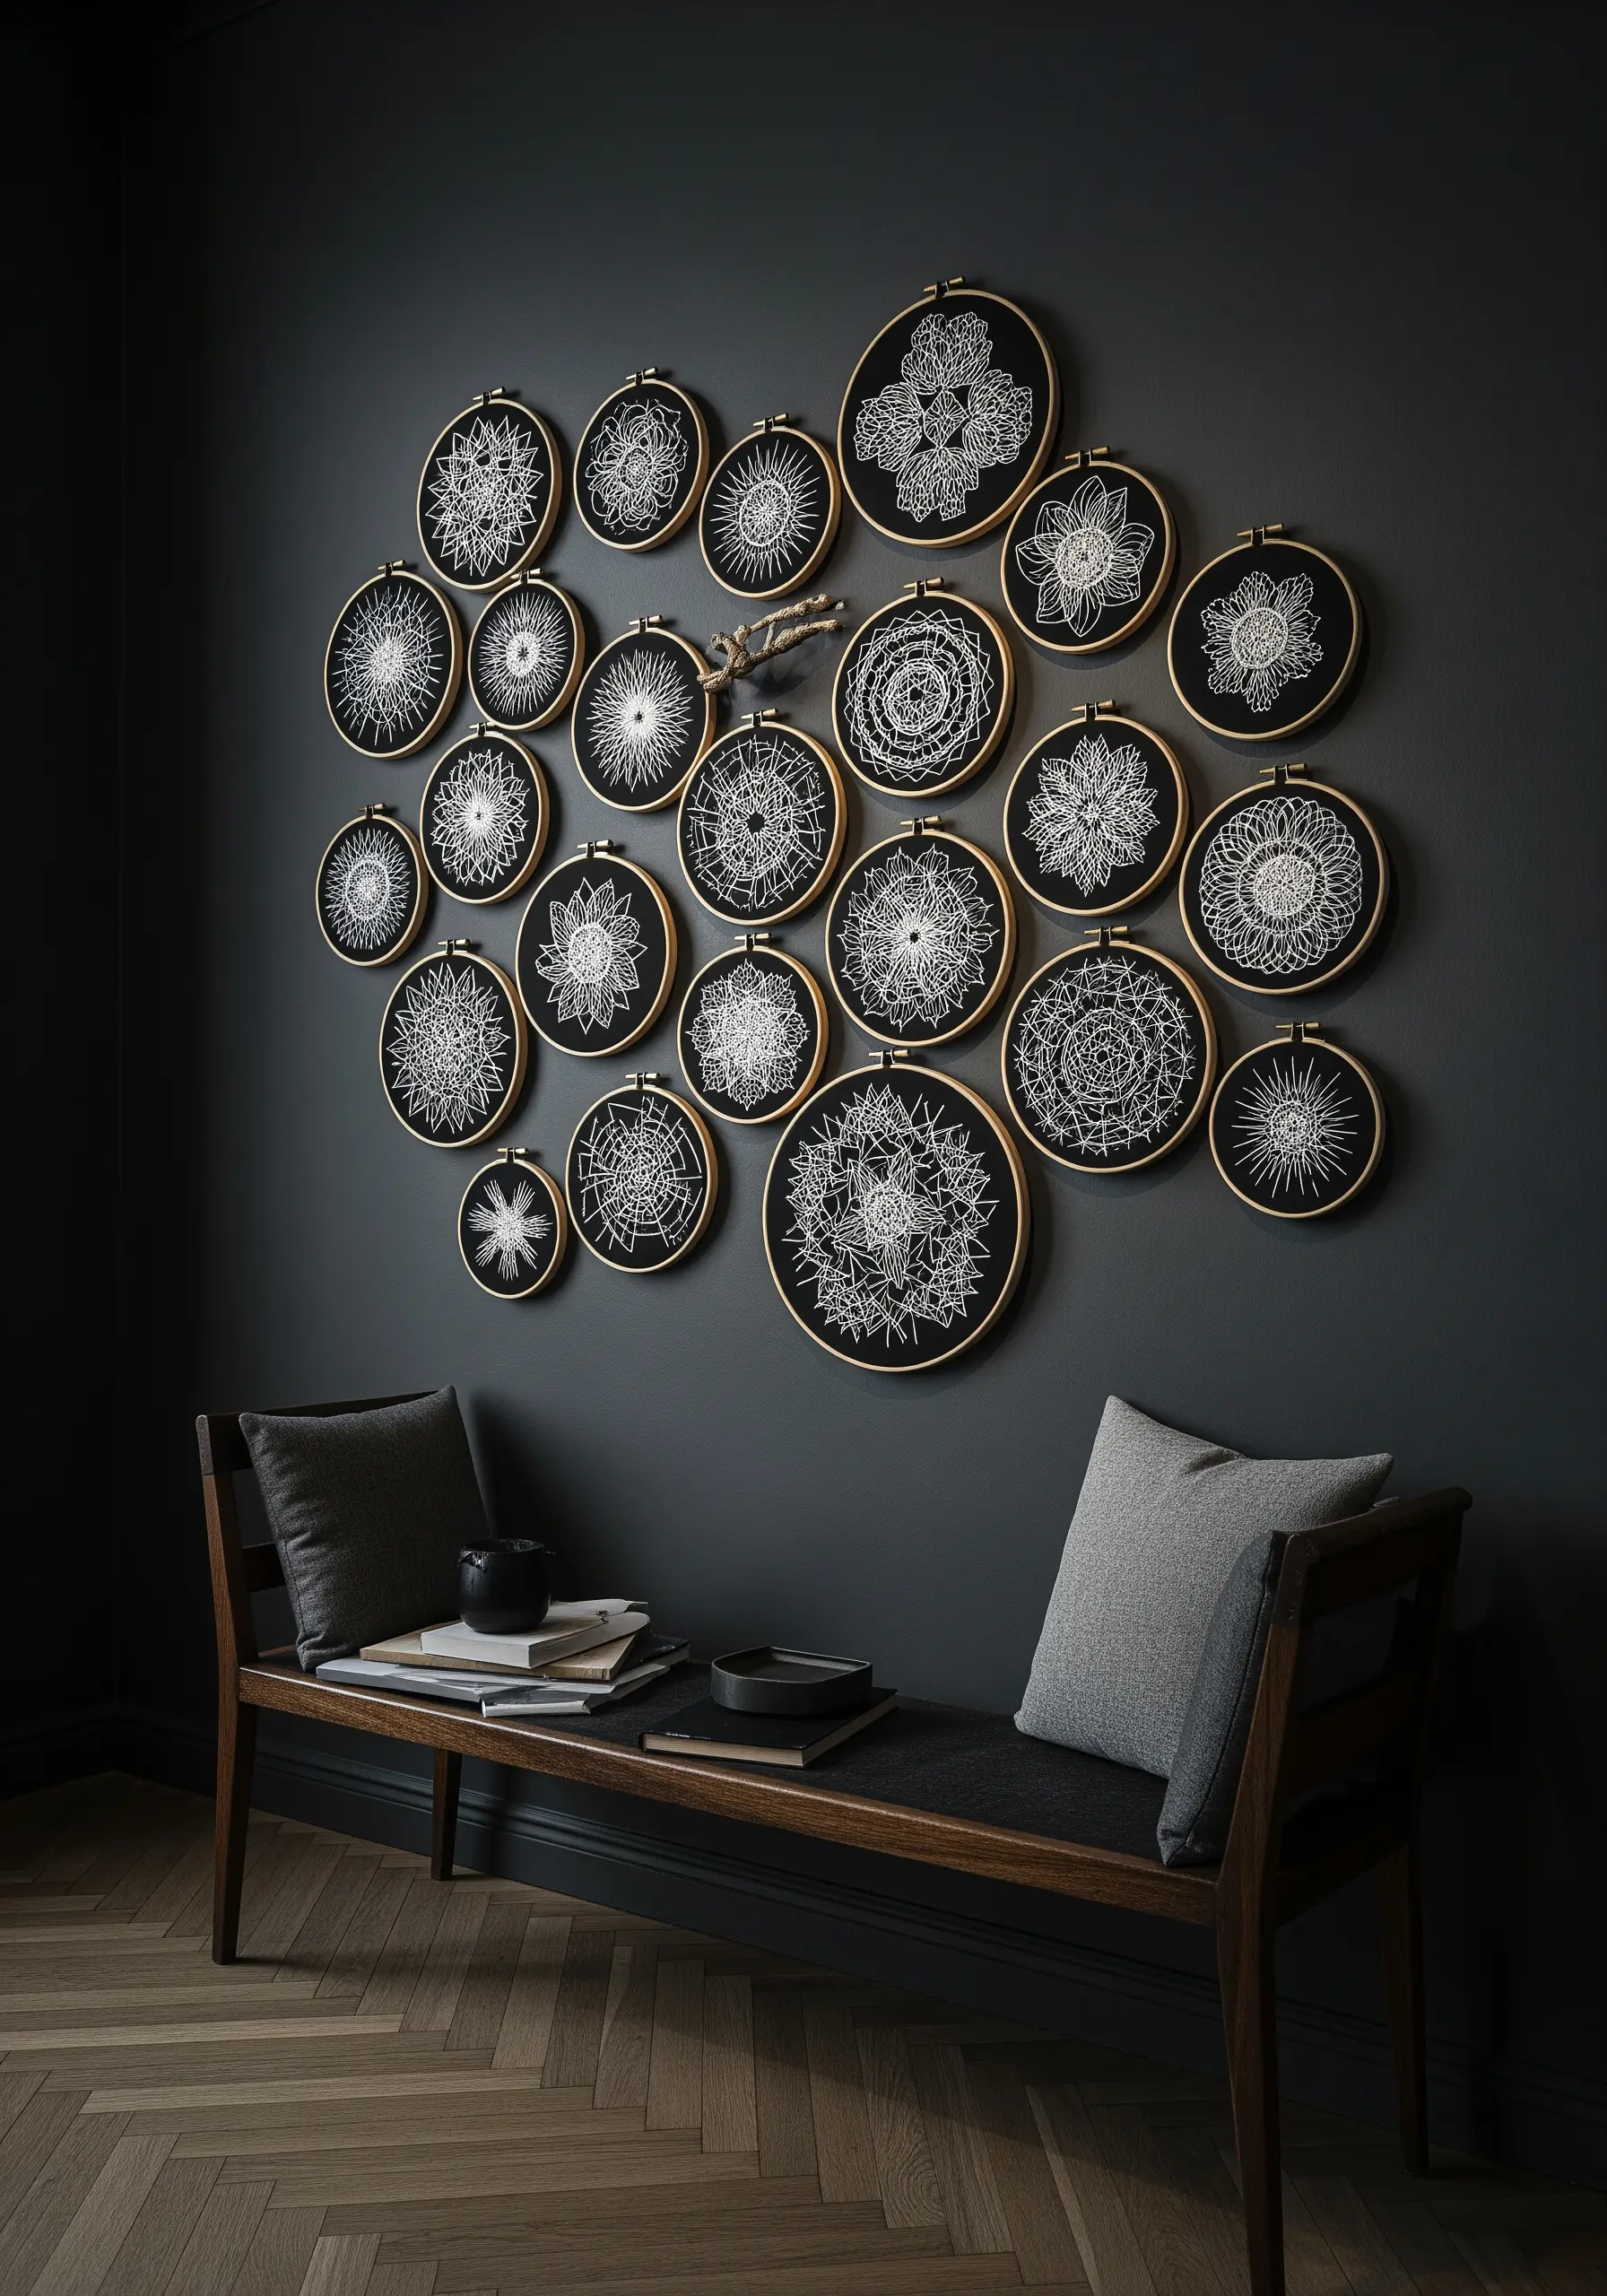
Create a strikingly modern and elegant collection by limiting your palette to white thread on black fabric.
To add depth and visual interest without color, vary your stitch textures: use dense satin stitch for bold, solid areas, fine backstitch for delicate lines, and scattered seed stitches for a subtle, speckled effect.
Arrange the hoops in a dense, organic cluster to create a powerful graphic statement that feels both intricate and minimalist.
This high-contrast approach turns mandala embroidery wall art ideas into sophisticated, dramatic art.
21. Create a Sense of Motion with a Cascading Layout
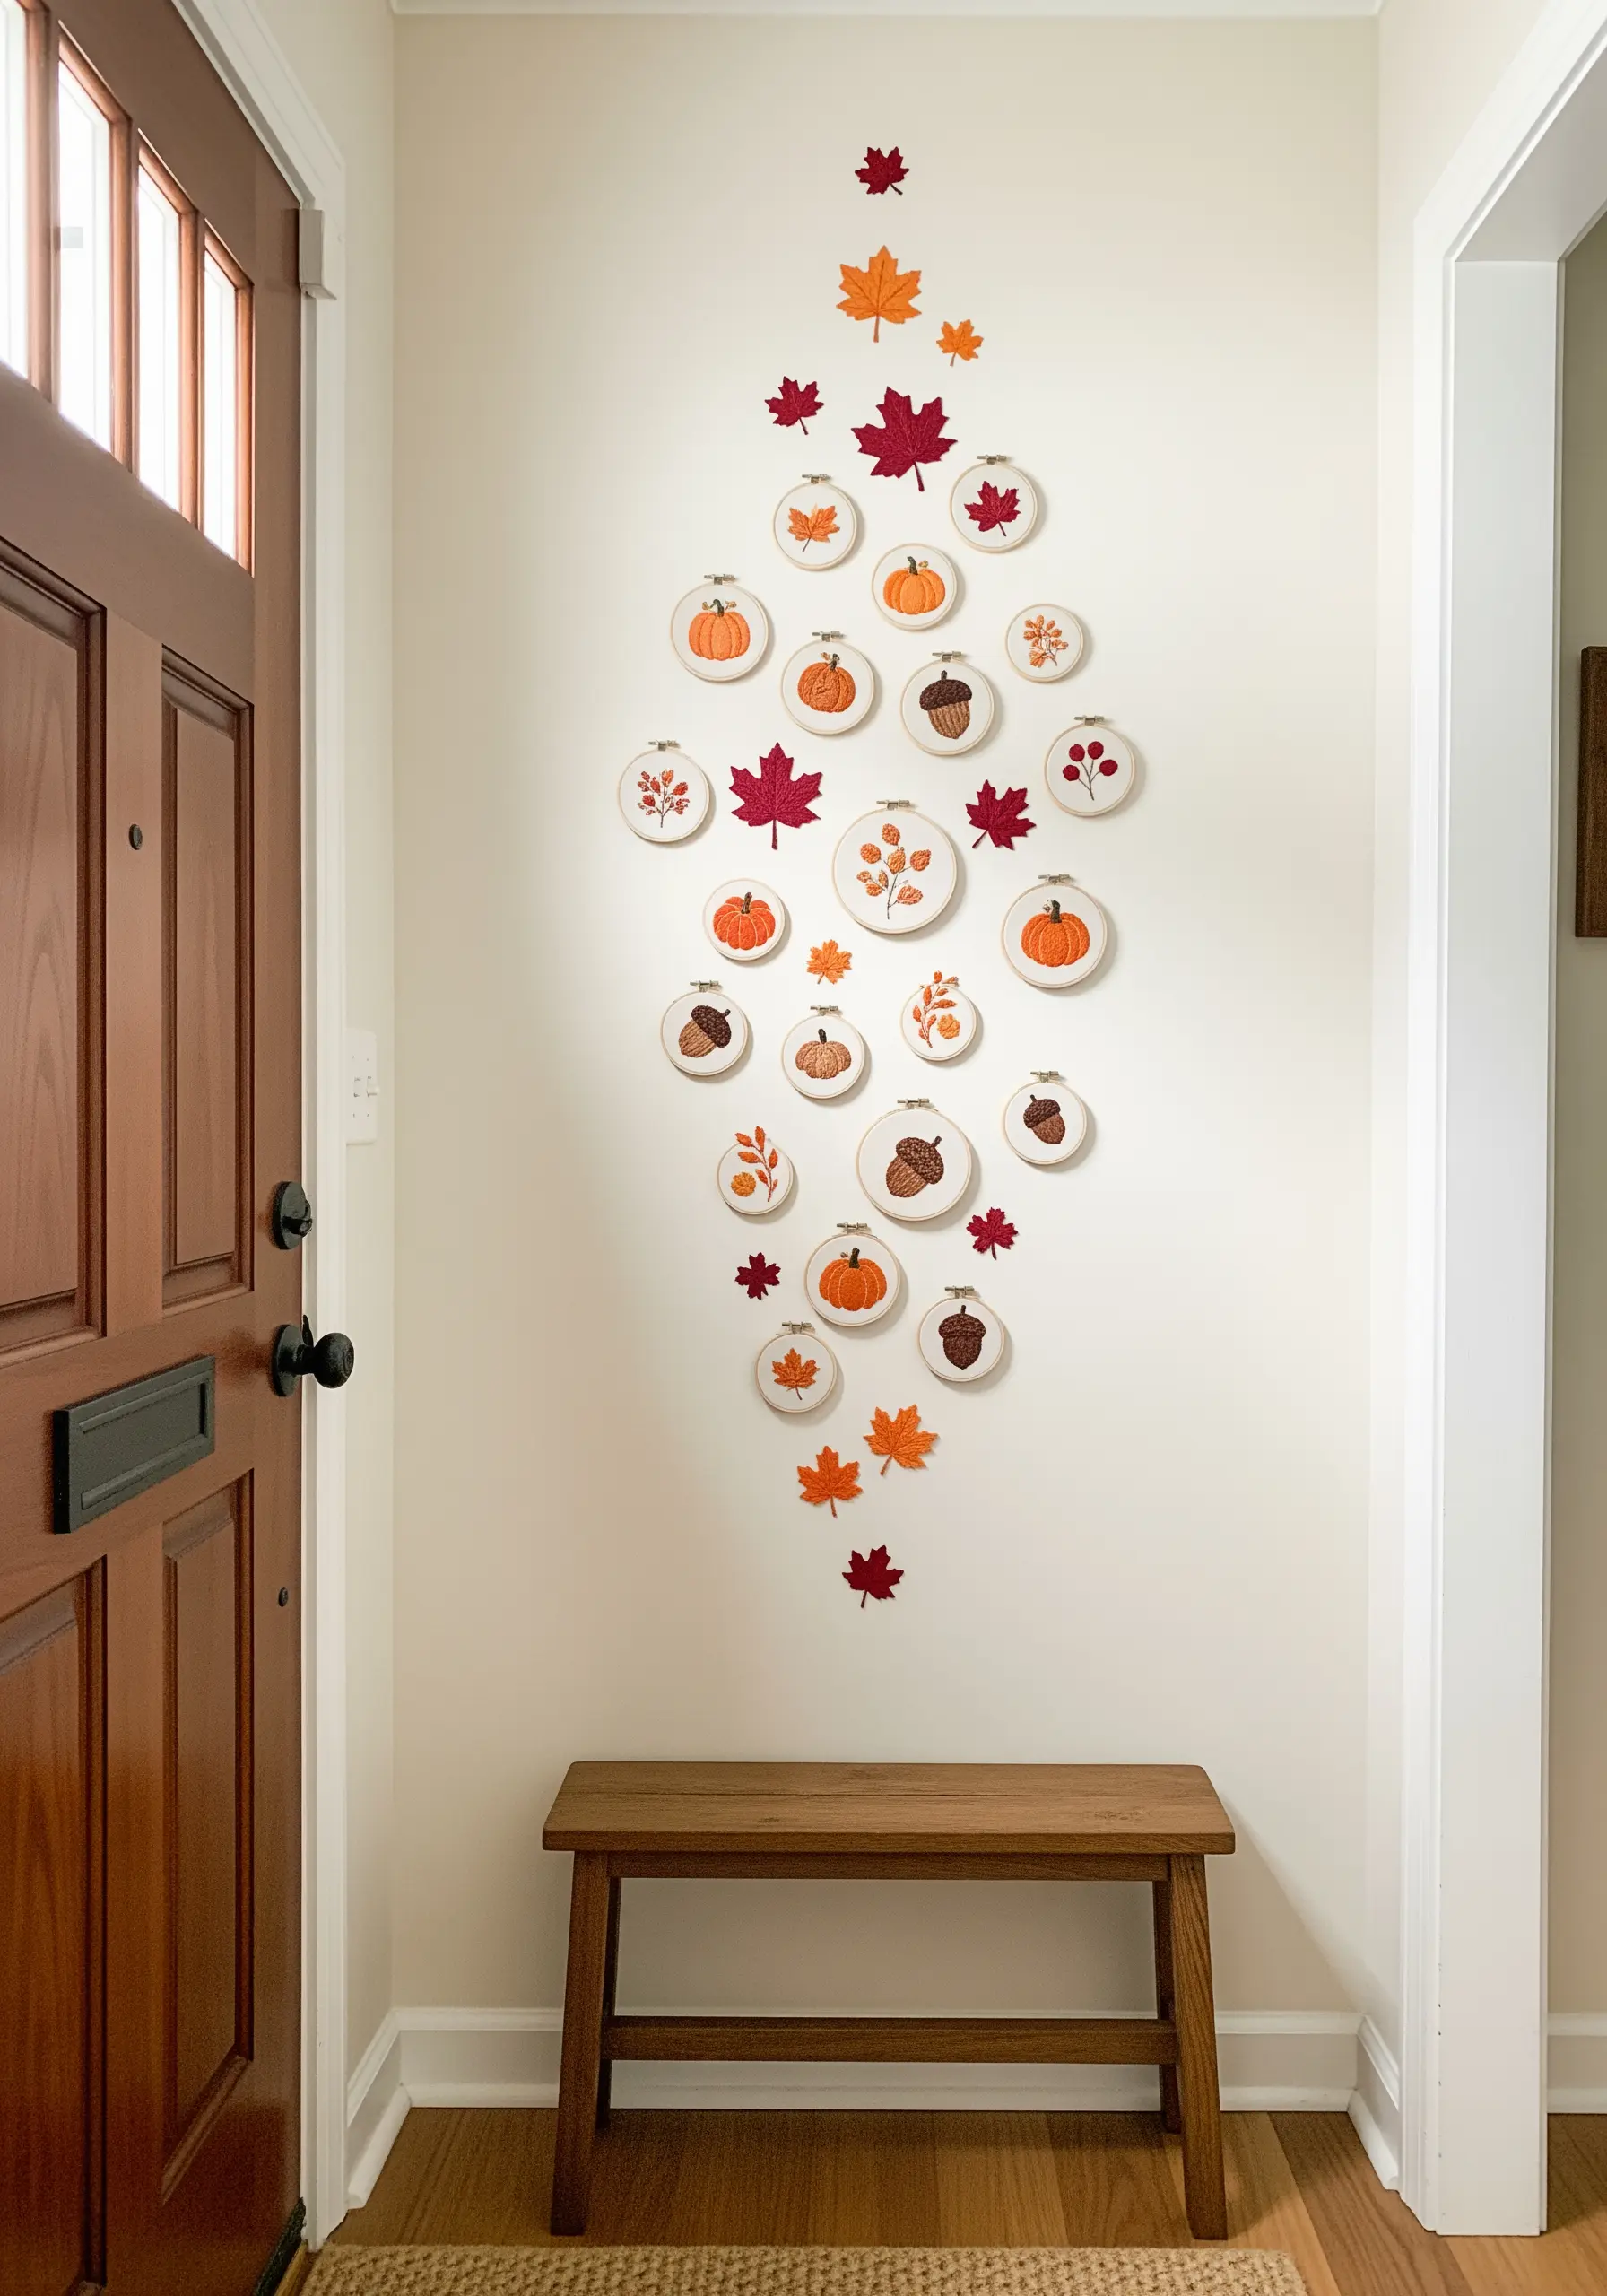
Design a dynamic installation by arranging your hoops to suggest movement, like autumn leaves falling down the wall.
Start with a denser cluster of hoops at the top and let them become more sparse as they descend, creating a natural sense of flow.
Enhance the theme by incorporating non-embroidered elements, such as pressed or fabric leaves, tucked between the hoops to bridge the gaps and add another layer of texture.
This technique turns a seasonal embroidery wall decor collection into an immersive, flowing piece of art.
22. Visualize the Abstract, Like Sound
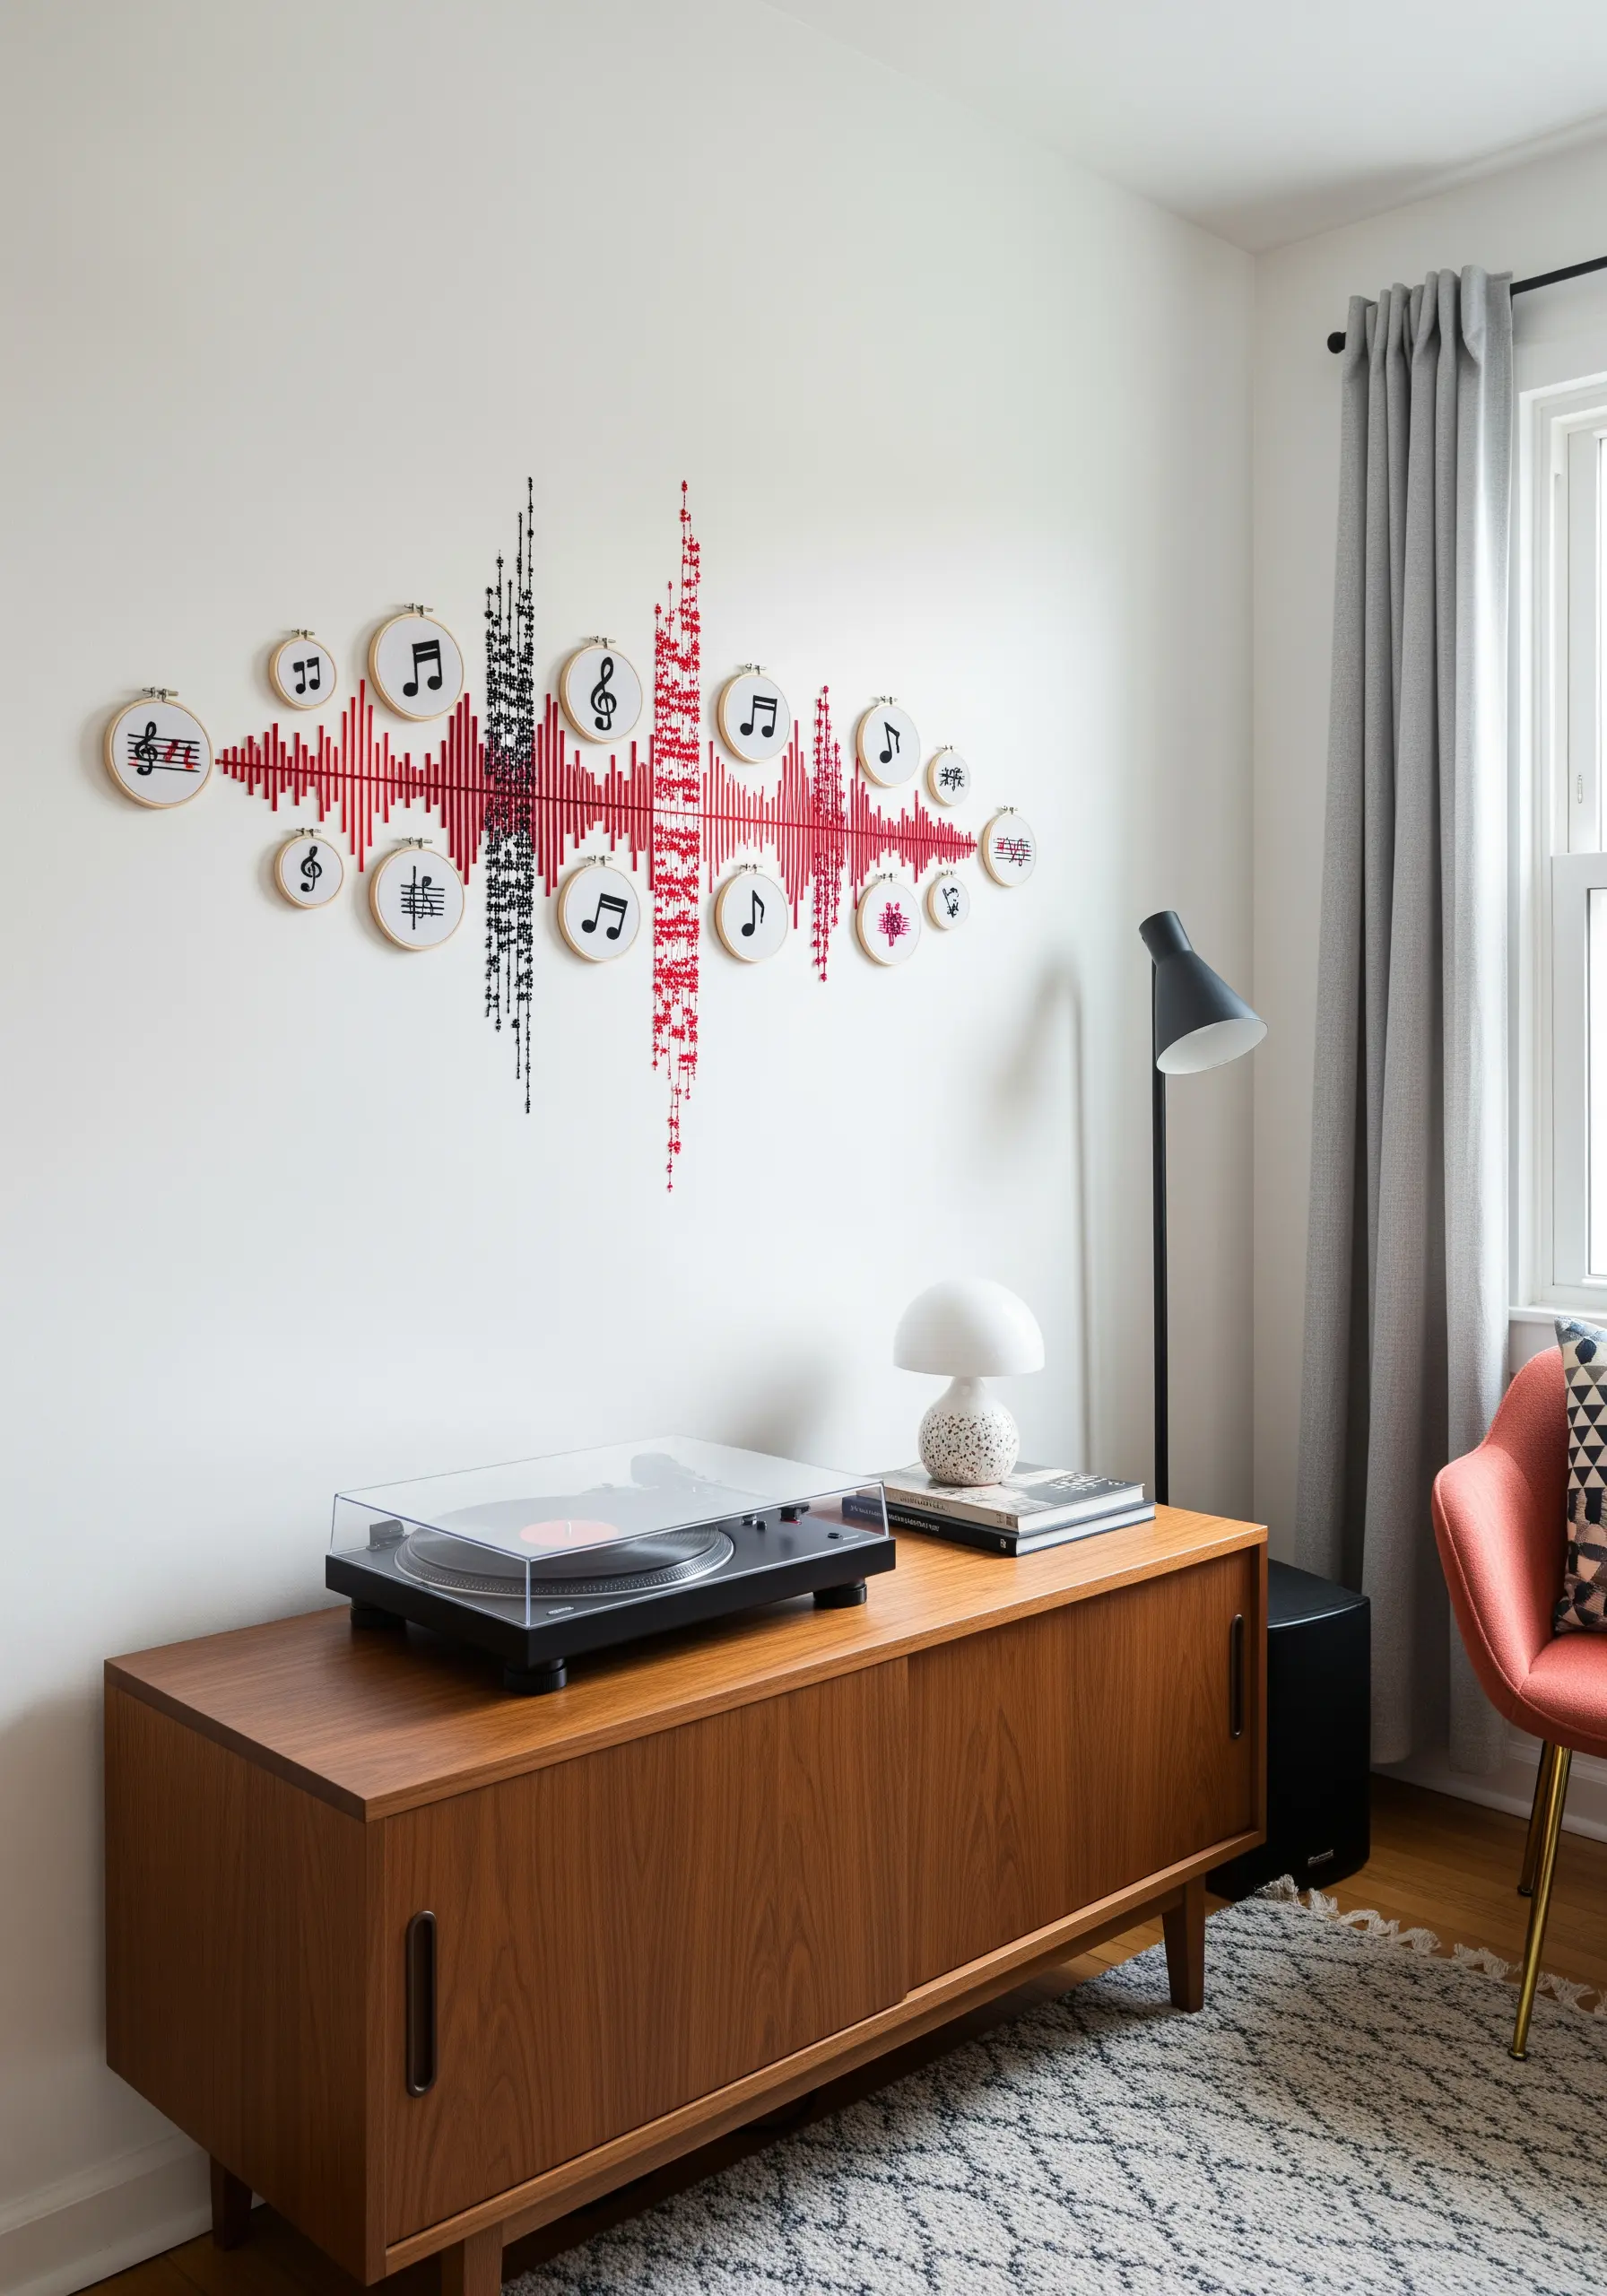
Challenge yourself by translating an abstract concept, like a sound wave, into a tangible embroidered form.
Use dense, bold stitches in a vibrant color like red to represent the peaks of the sound, and fine black backstitches for the intricate vibrations in between.
Incorporate smaller hoops with related symbols, like musical notes, to provide context and anchor the abstract centerpiece.
This innovative approach transforms your embroidery from purely decorative to conceptual art, literally allowing you to stitch sound.


