
Often, the most stunning fiber art isn’t about mastering hundreds of complex stitches. It’s about understanding how to combine simple techniques and materials in an intentional way. It’s about letting texture, color, and composition do the heavy lifting for you.
You don’t need more skill; you just need a new perspective. Think of this as your guide to working smarter, not harder. You’ll learn to see yarn, rope, and felt not just as supplies, but as elements you can layer, coil, and combine to create pieces with surprising depth and sophistication.
Forget the pressure to be perfect. These projects invite you to play with materials, to embrace the handmade feel of a visible stitch, and to discover the quiet joy of creating something beautiful and tactile with your own two hands. You can do this, and the results will be more impressive than you ever imagined.
1. Weave with Roving on a Macrame Frame

Create a stunning focal point by combining two simple techniques: macrame and weaving.
First, wrap a metal hoop with cord using basic lark’s head knots to build your frame—this provides structure and a clean, nautical feel.
Next, warp thin, strong thread across the center and weave chunky wool roving through it using a simple over-under pattern.
The dramatic contrast between the thick, soft roving and the delicate warp threads is what gives this piece its sophisticated look without requiring complex skills.
A single strand of metallic thread woven between the roving sections adds a subtle highlight that catches the light beautifully.
2. Crochet Color-Blocked Coasters
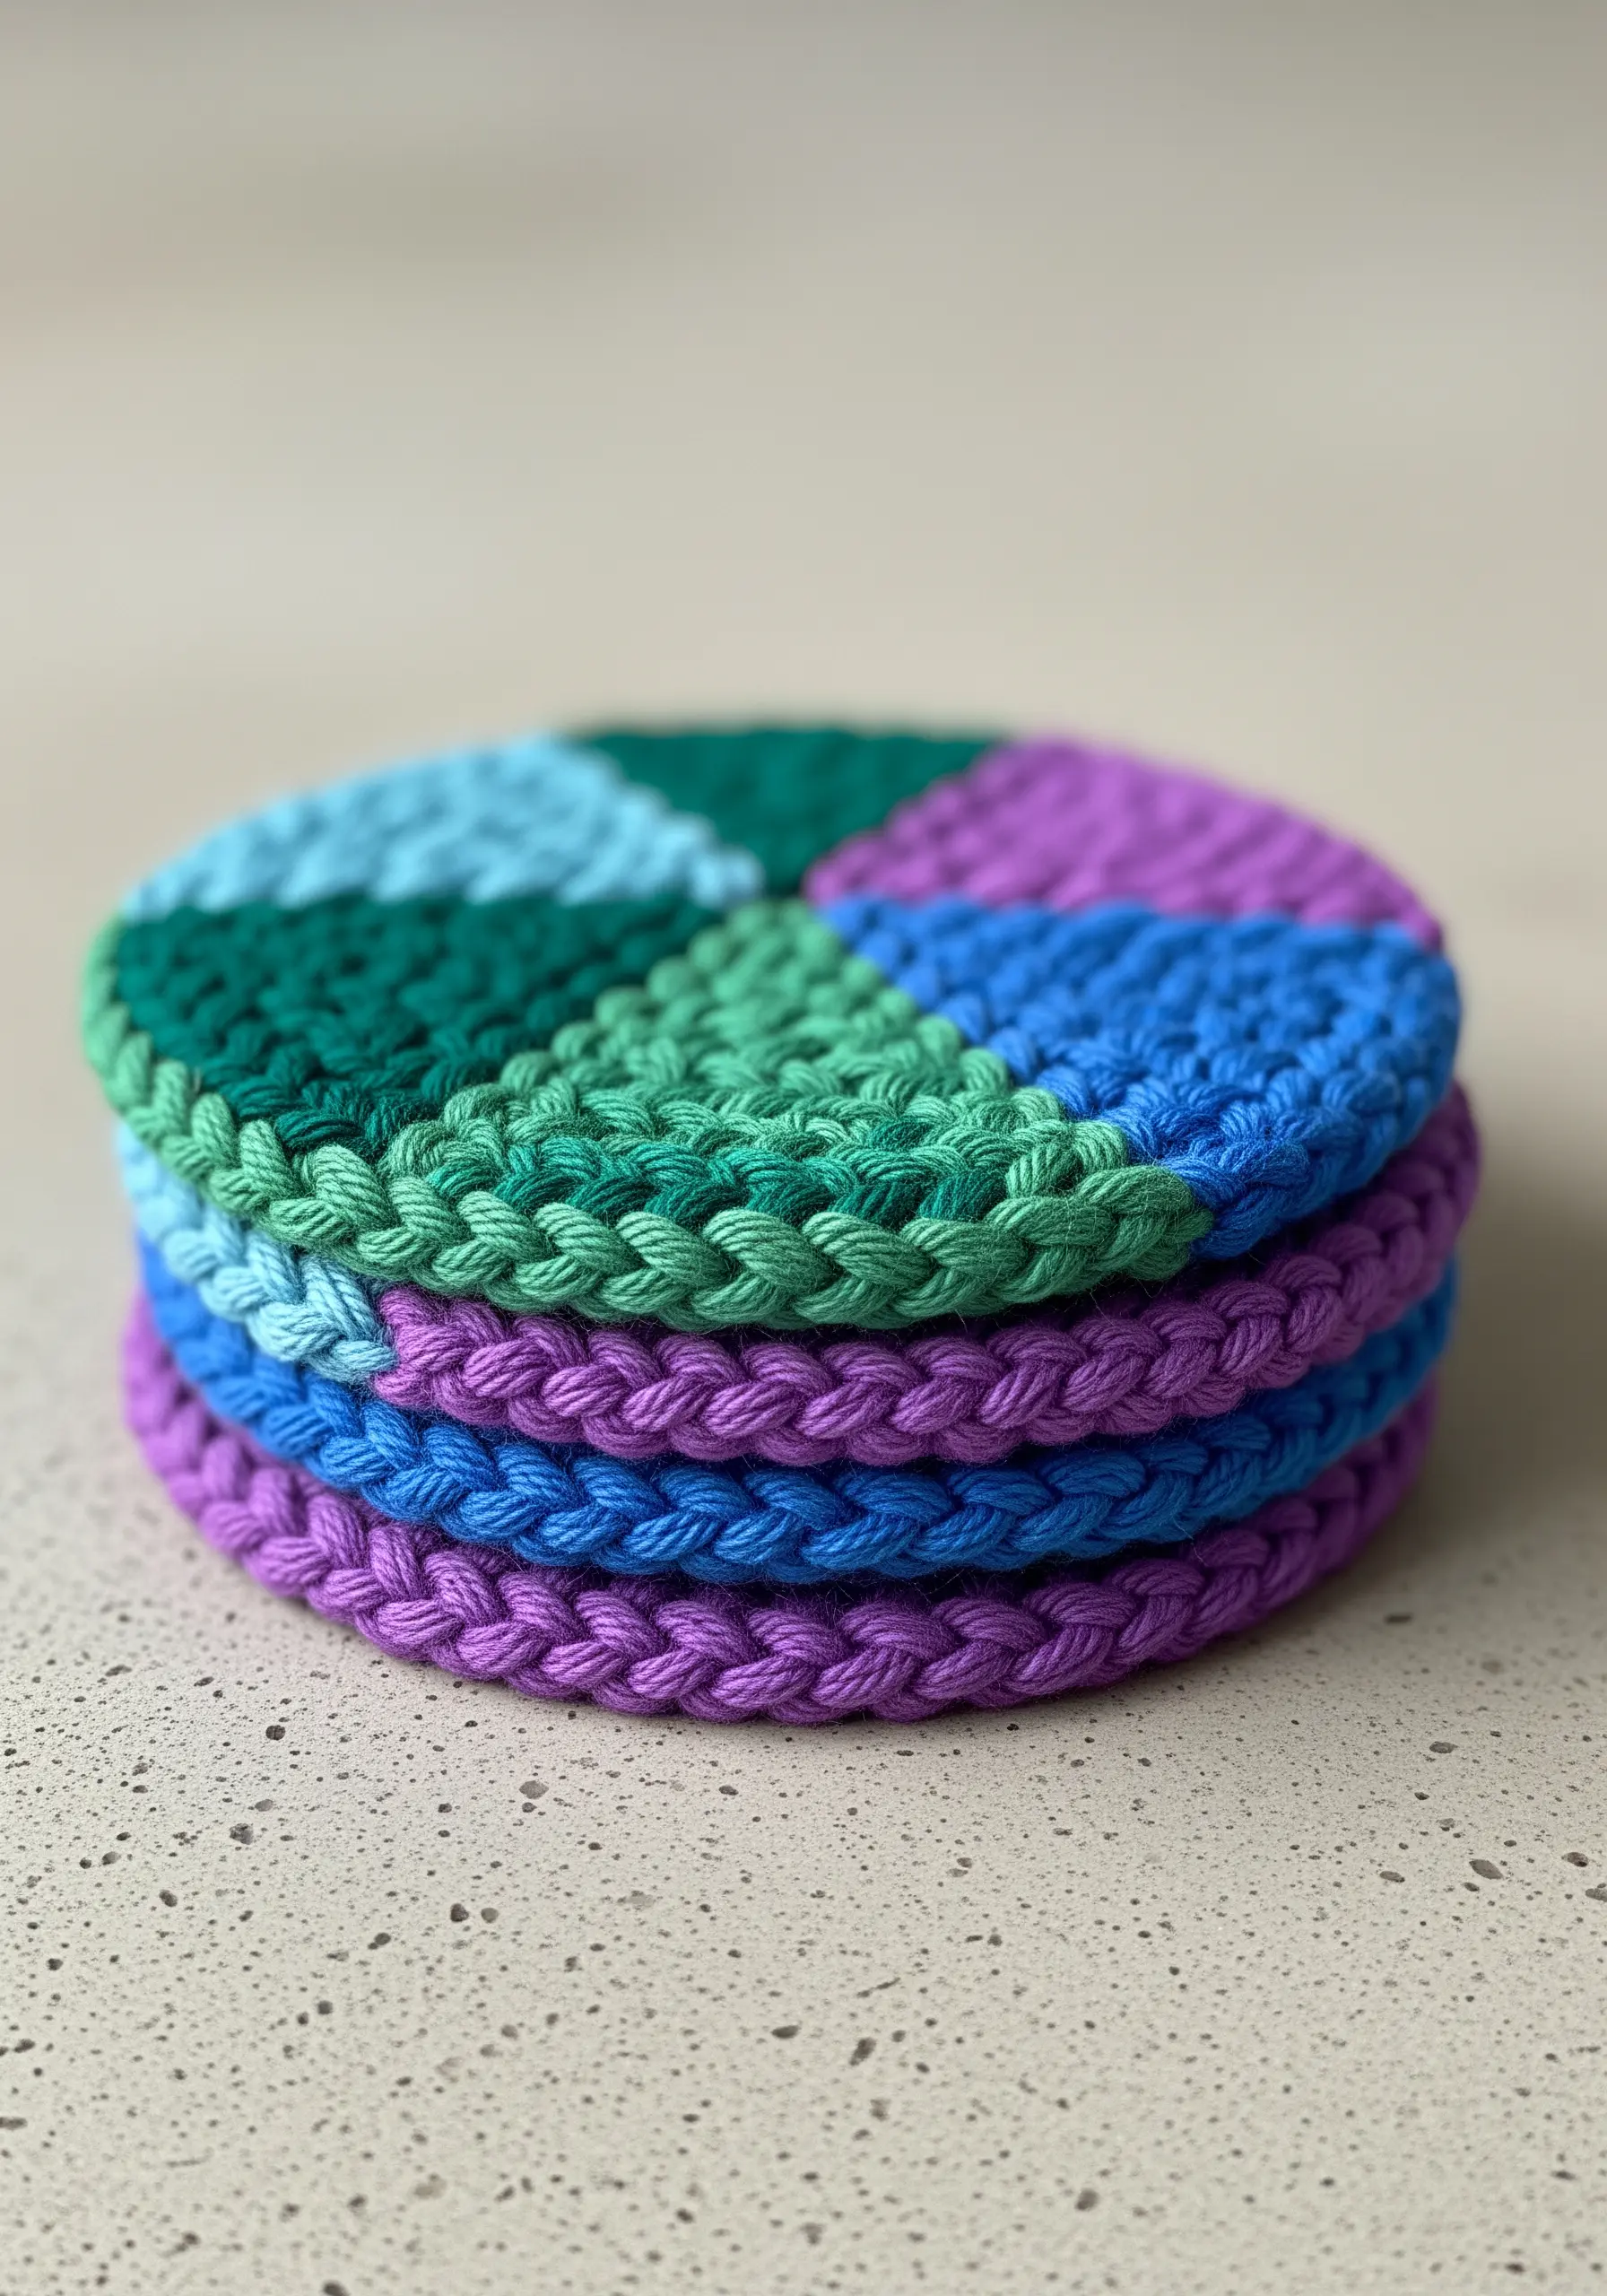
This project relies on the simple magic of a single crochet stitch worked in the round.
Instead of intricate patterns, the visual appeal comes from bold, geometric color-blocking.
To achieve this, simply switch yarn colors at set intervals as you work your circle, creating clean wedges of color.
This method allows you to explore color theory without learning complex stitches, making it a perfect entry point for adding handmade textiles to your home.
3. Craft a Coiled Rope & Fabric Bowl
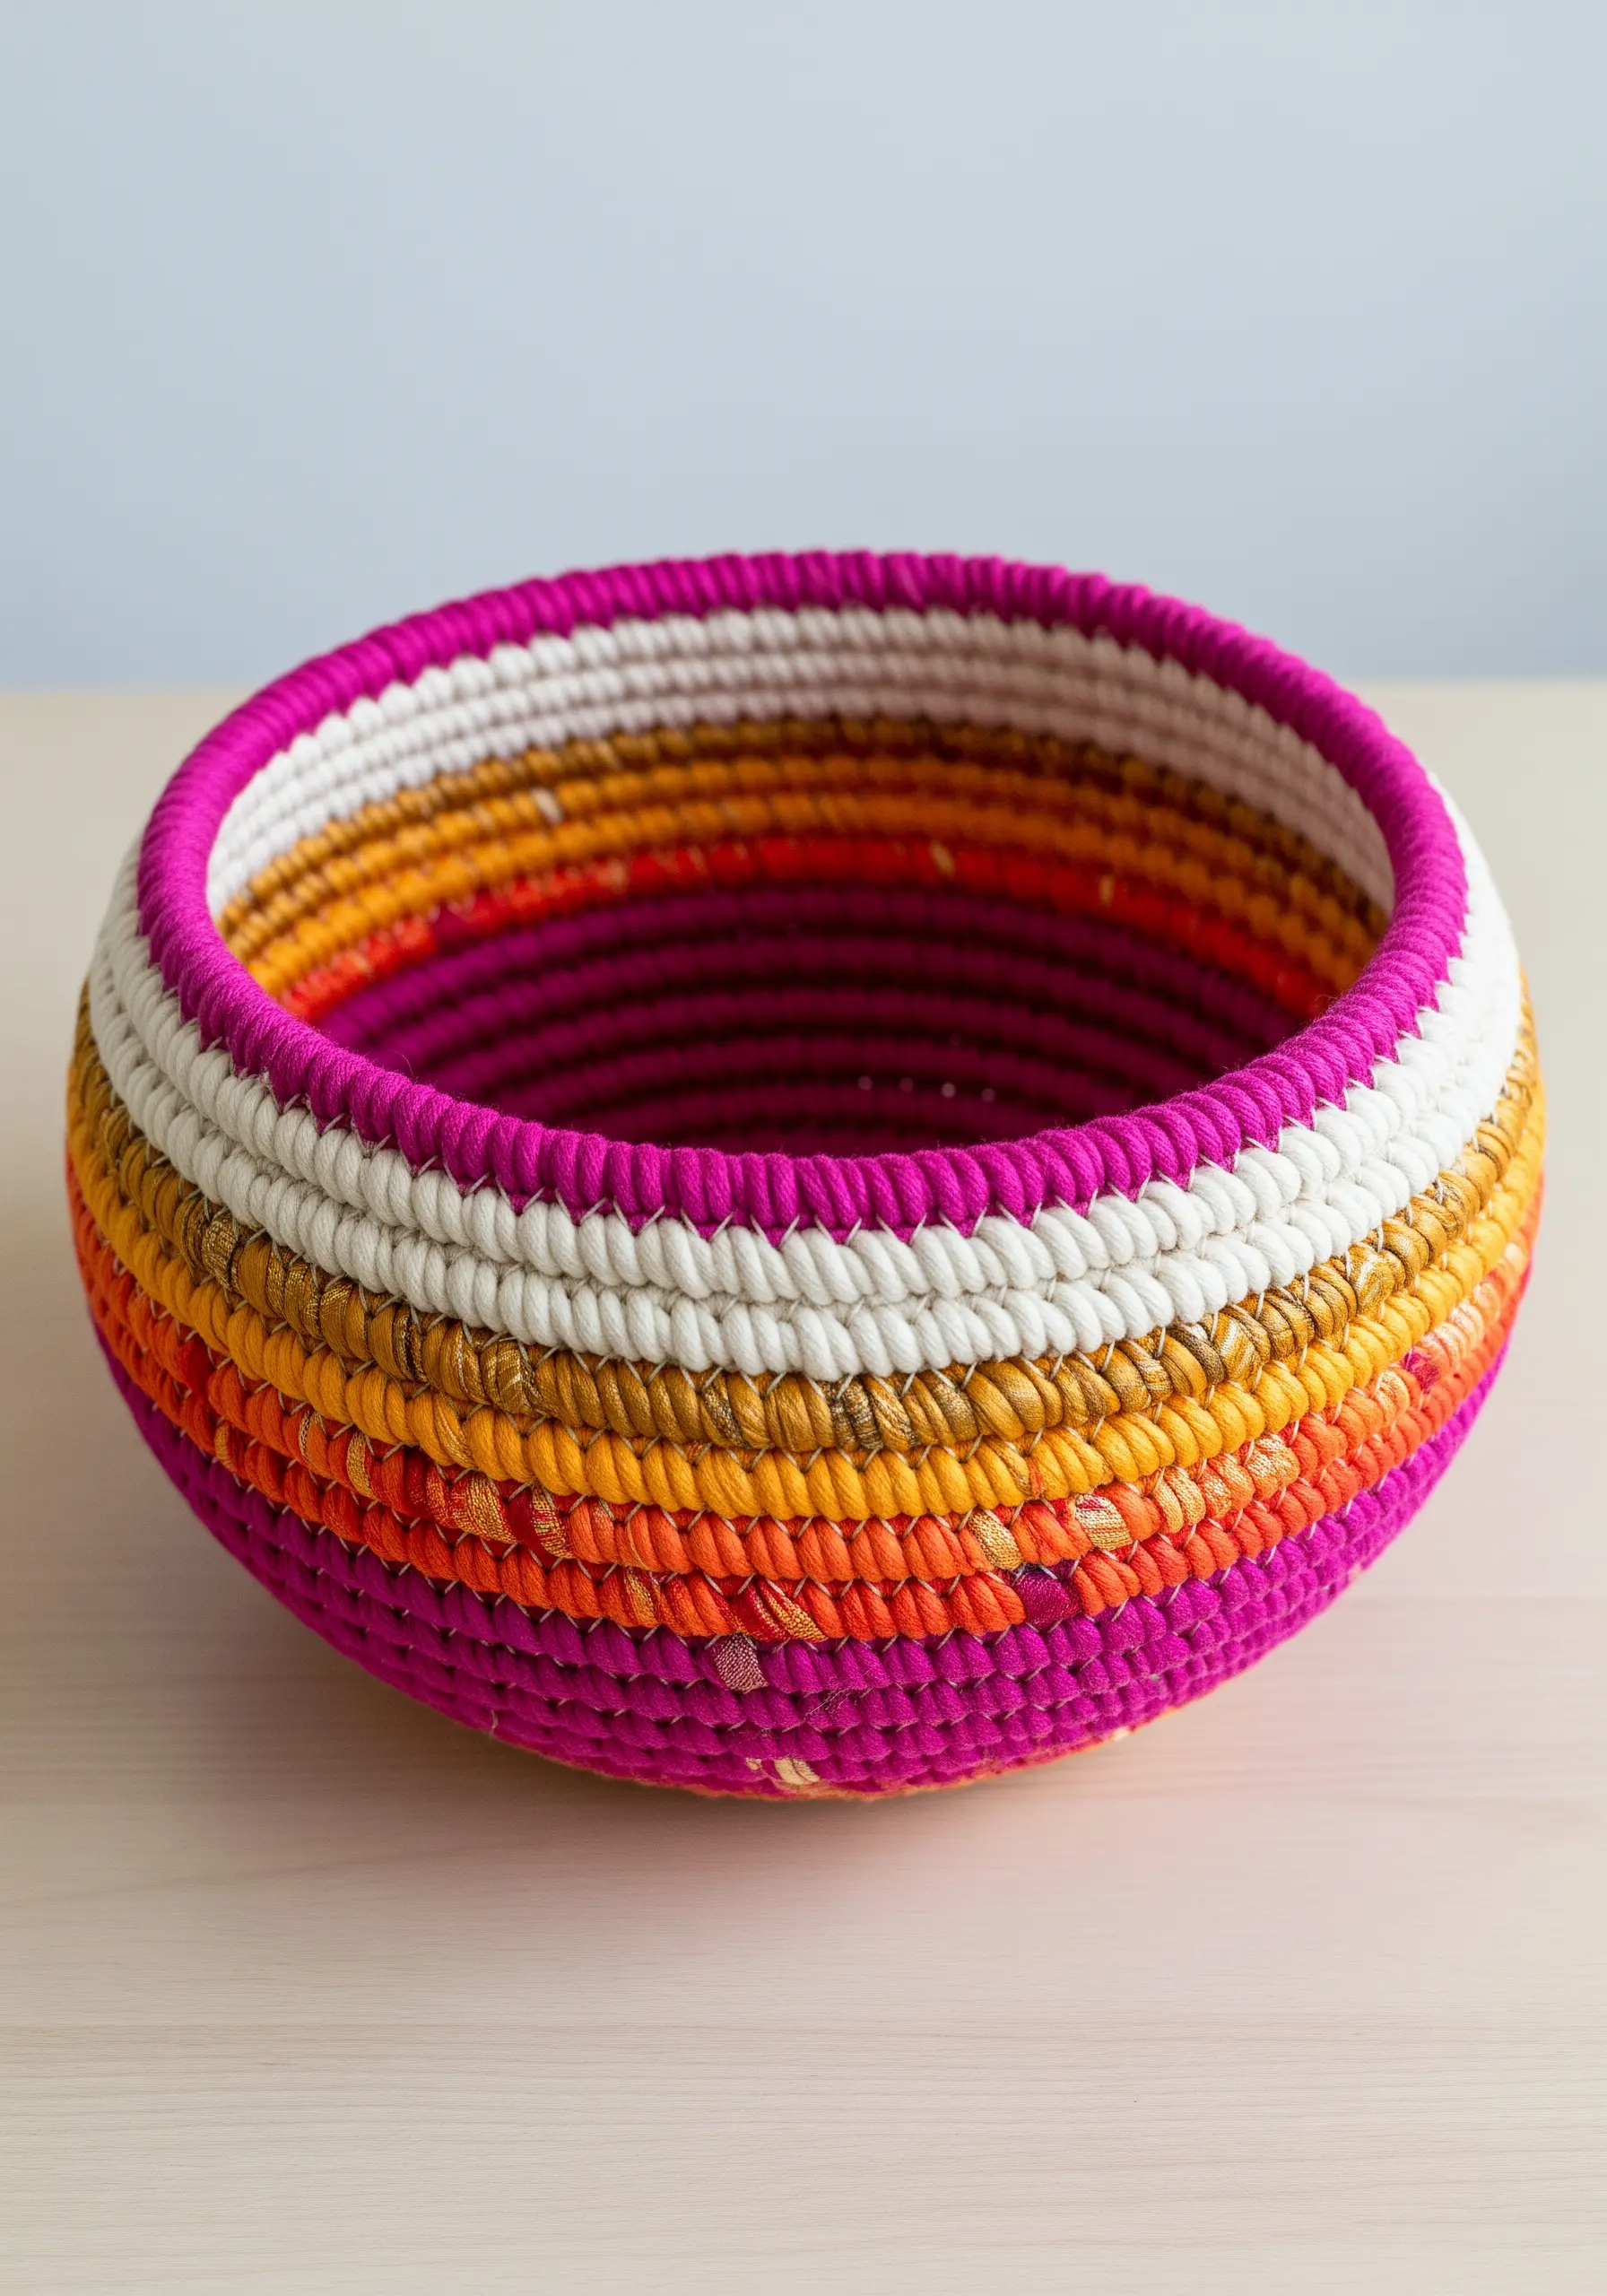
This technique requires no loom or special tools, just a needle, thread, and rope.
Start by wrapping cotton rope with thin strips of fabric or colorful yarn, completely covering the rope’s surface.
Then, begin coiling the wrapped rope into a flat spiral for the base, stitching the coils together as you go.
To build the walls, simply stack the coils vertically instead of horizontally, continuing to stitch them securely.
The result is a sturdy, structural bowl where the fabric’s color and pattern do all the aesthetic work for you.
4. Layer Felt and Yarn for a 3D Landscape
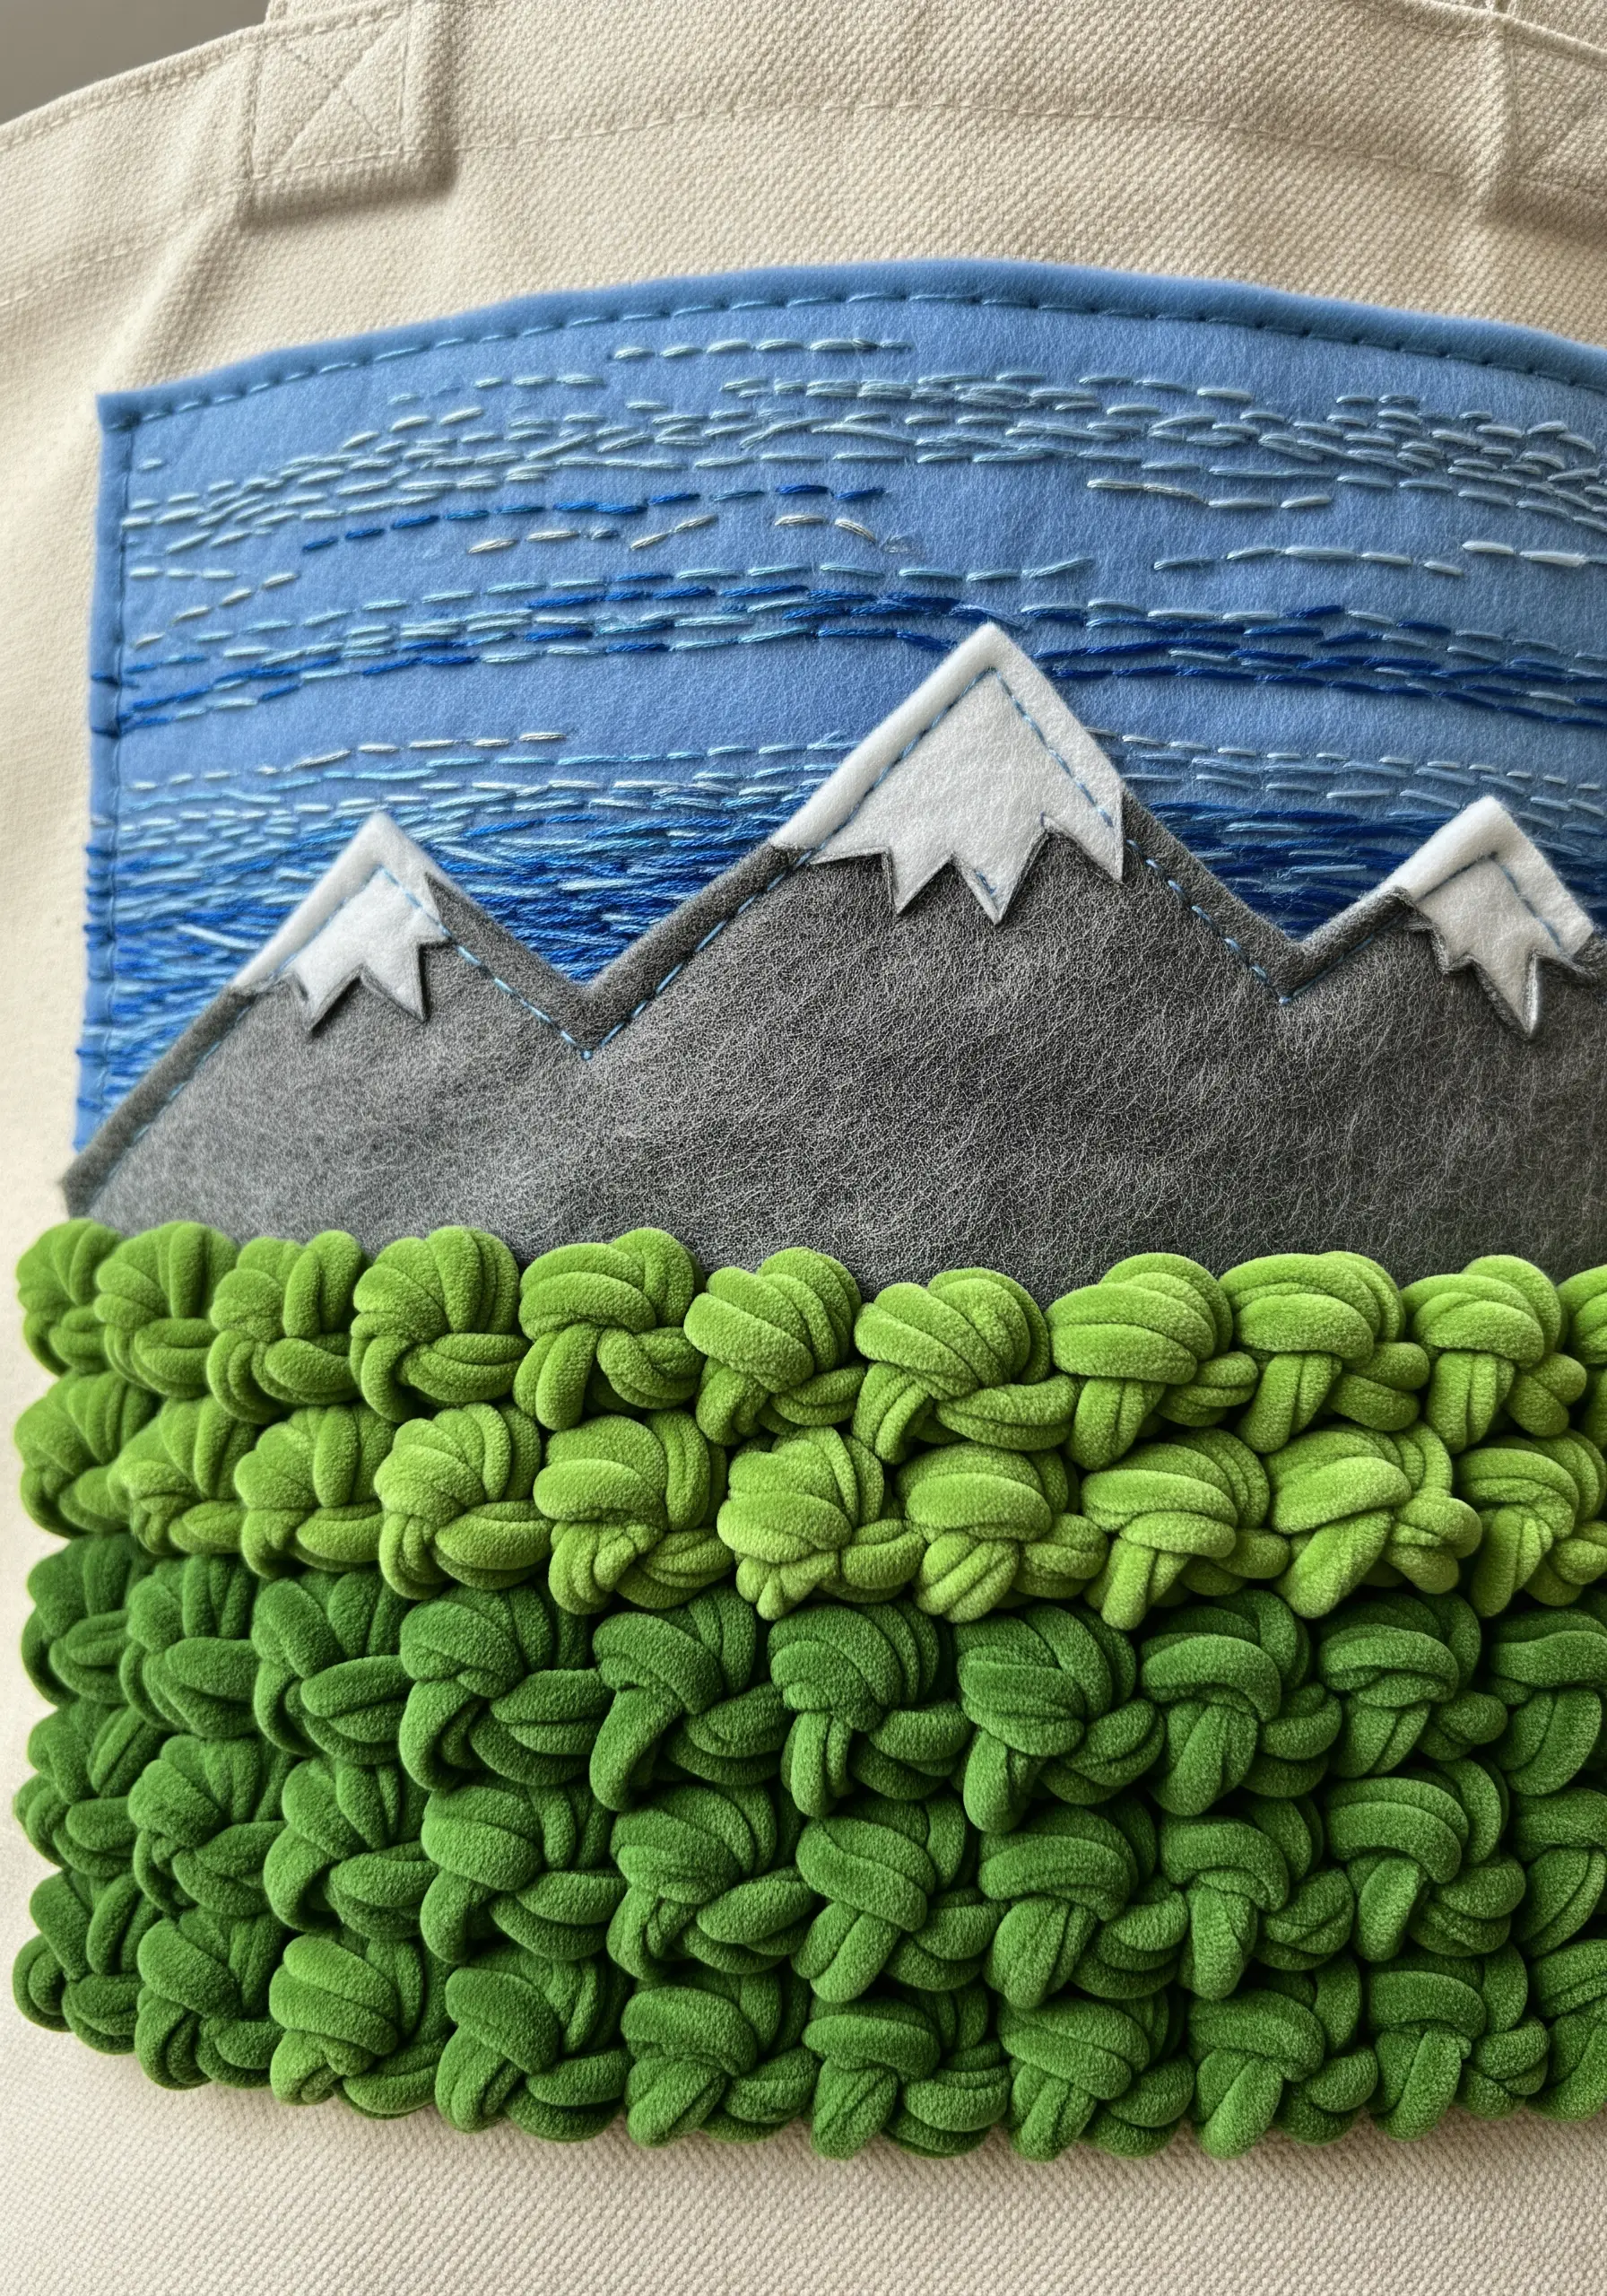
Create depth and surprising texture by treating your fabric like a canvas for mixed materials.
Start by cutting simple mountain shapes from felt and appliquéing them onto your base fabric—felt provides a flat, matte foundation that doesn’t fray.
For the sky, use varied straight stitches with a lighter thread to mimic wind or clouds, a technique that adds movement with minimal effort.
The true magic is in the foreground: use a chunky, soft yarn to create bullion knots or oversized French knots, which form a lush, three-dimensional forest floor that invites touch.
5. Weave a Wall Hanging with Texture Blocks
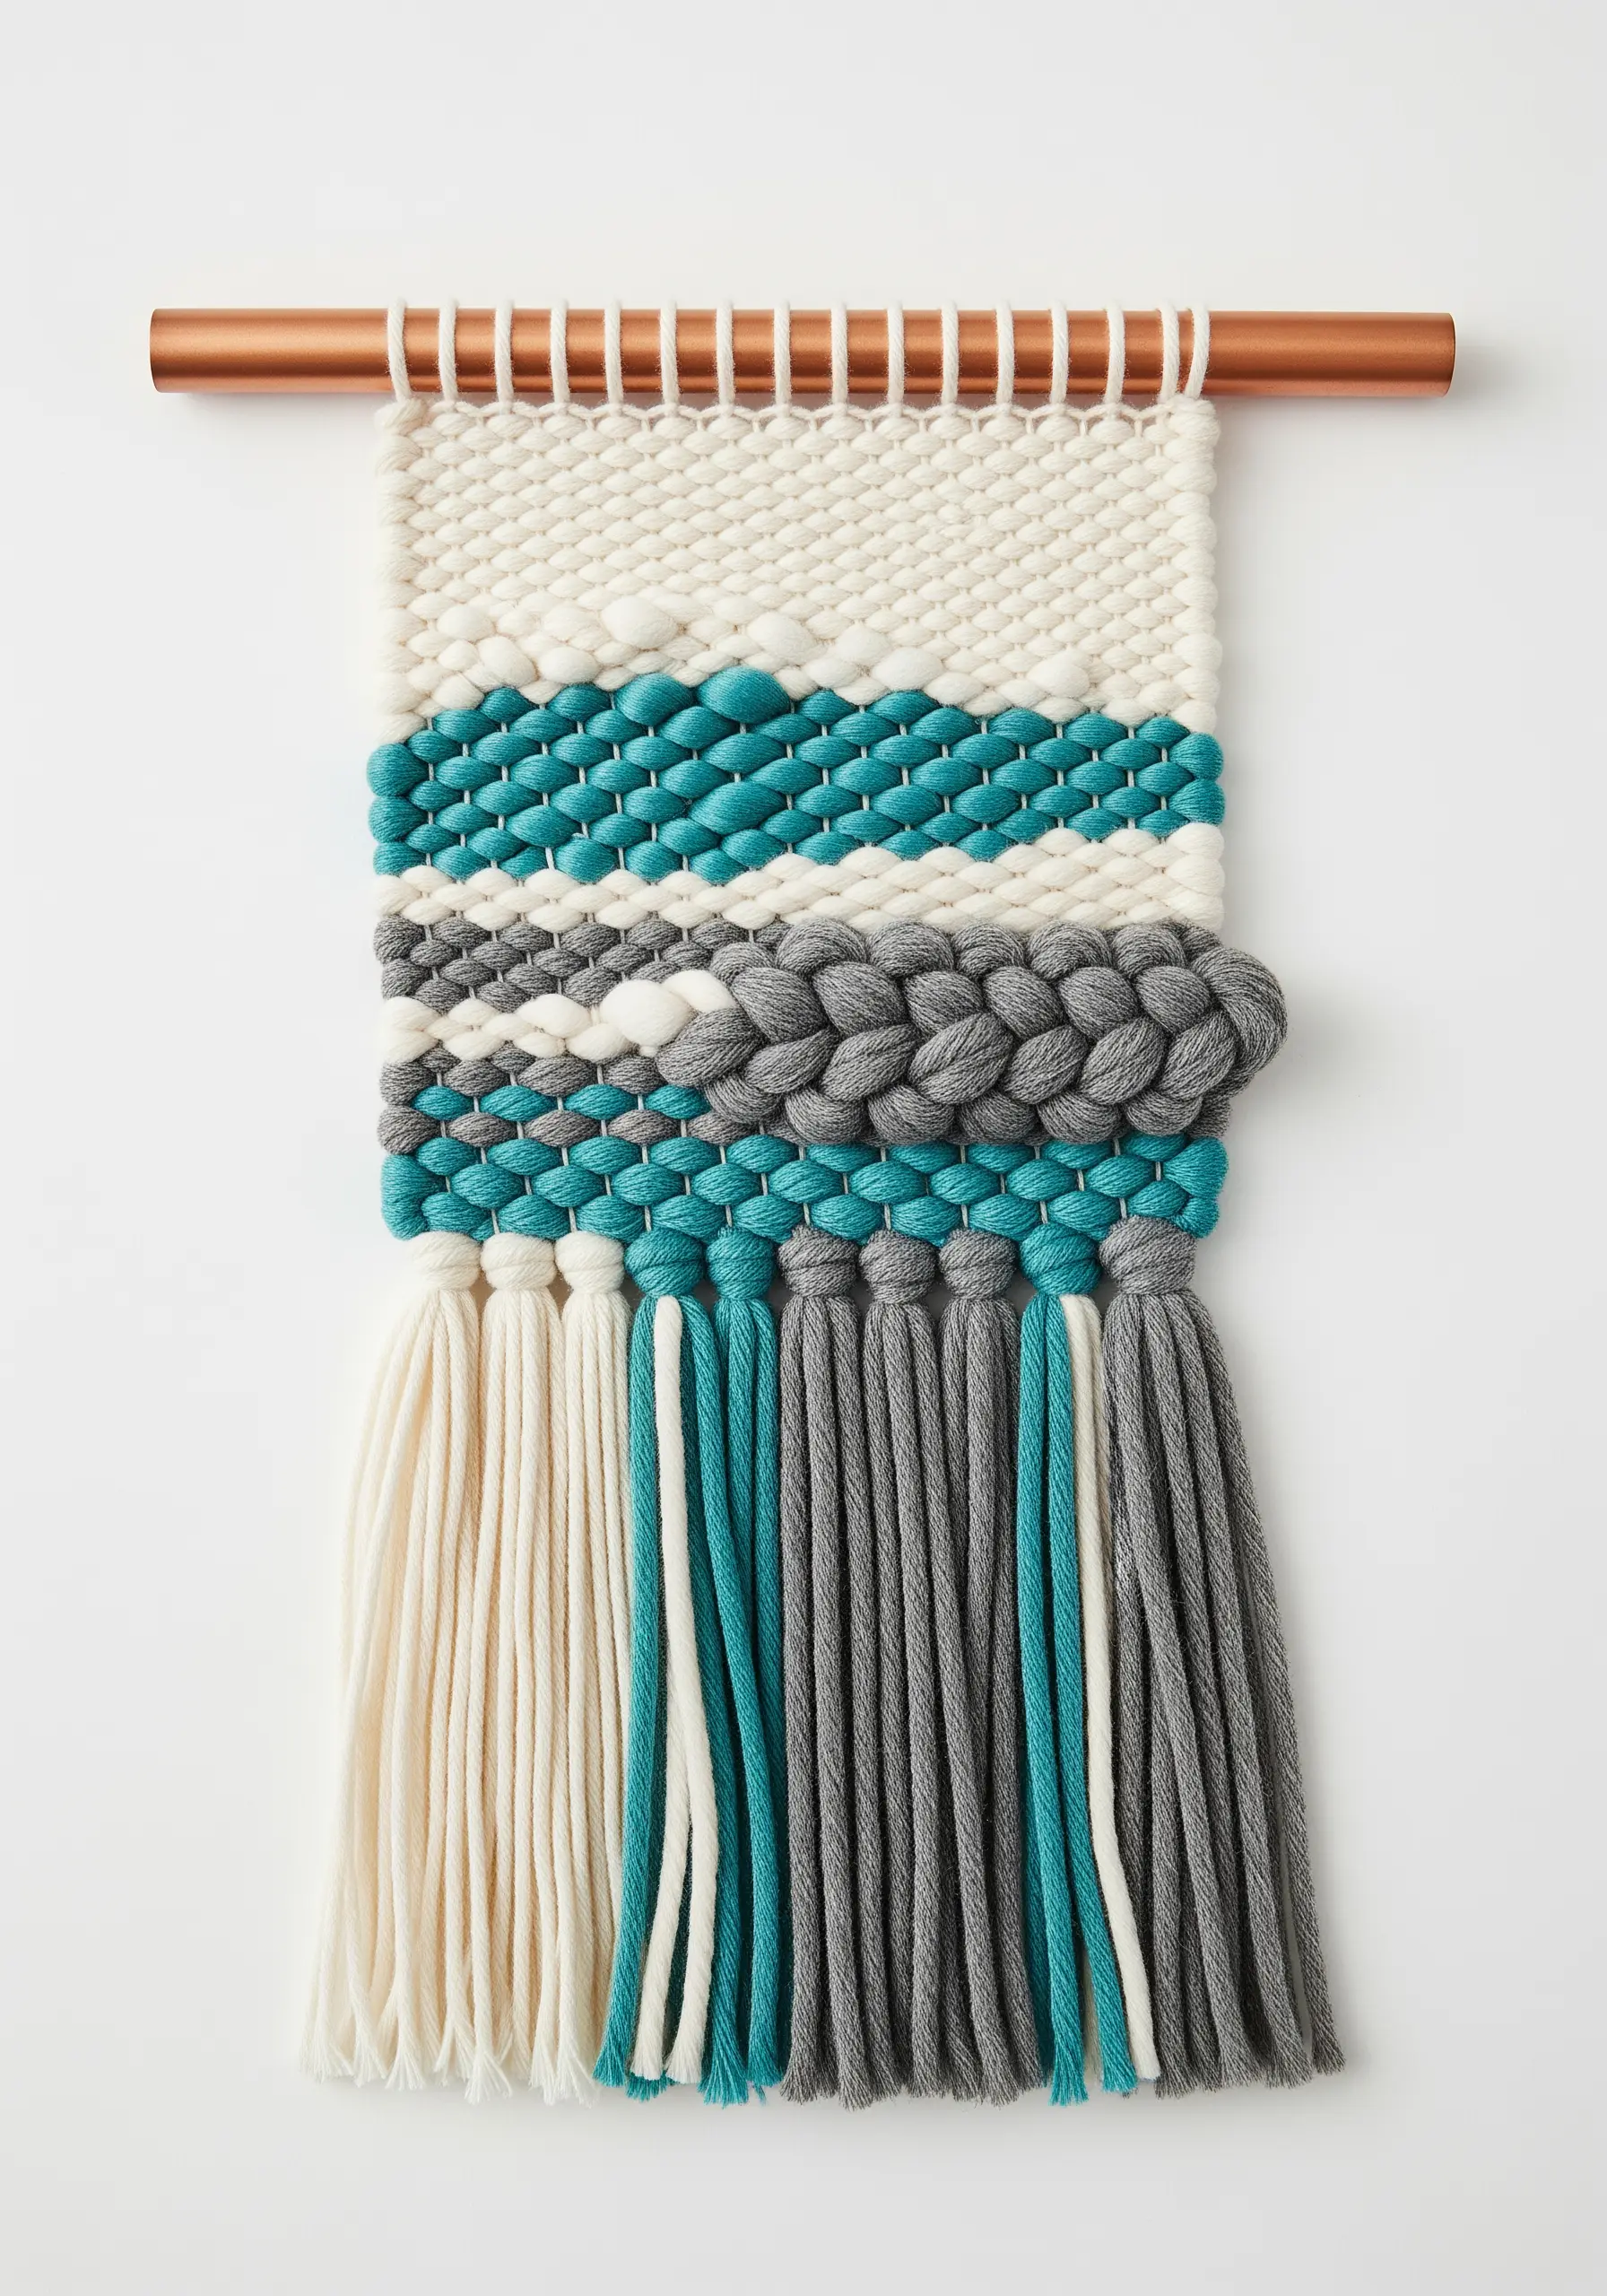
A small frame loom is all you need to create a piece that looks incredibly intricate.
The secret is to divide your weaving into distinct textural sections rather than creating a complex overall pattern.
Alternate between a simple tabby weave (over-one, under-one), a chunky soumak braid for a raised effect, and sections of unspun wool roving.
This block-by-block approach allows you to experiment with different fibers and techniques in a controlled way, resulting in dynamic mixed-fiber wall hangings that feel balanced and professional.
6. Combine Weaving and Macrame for Plant Hangers
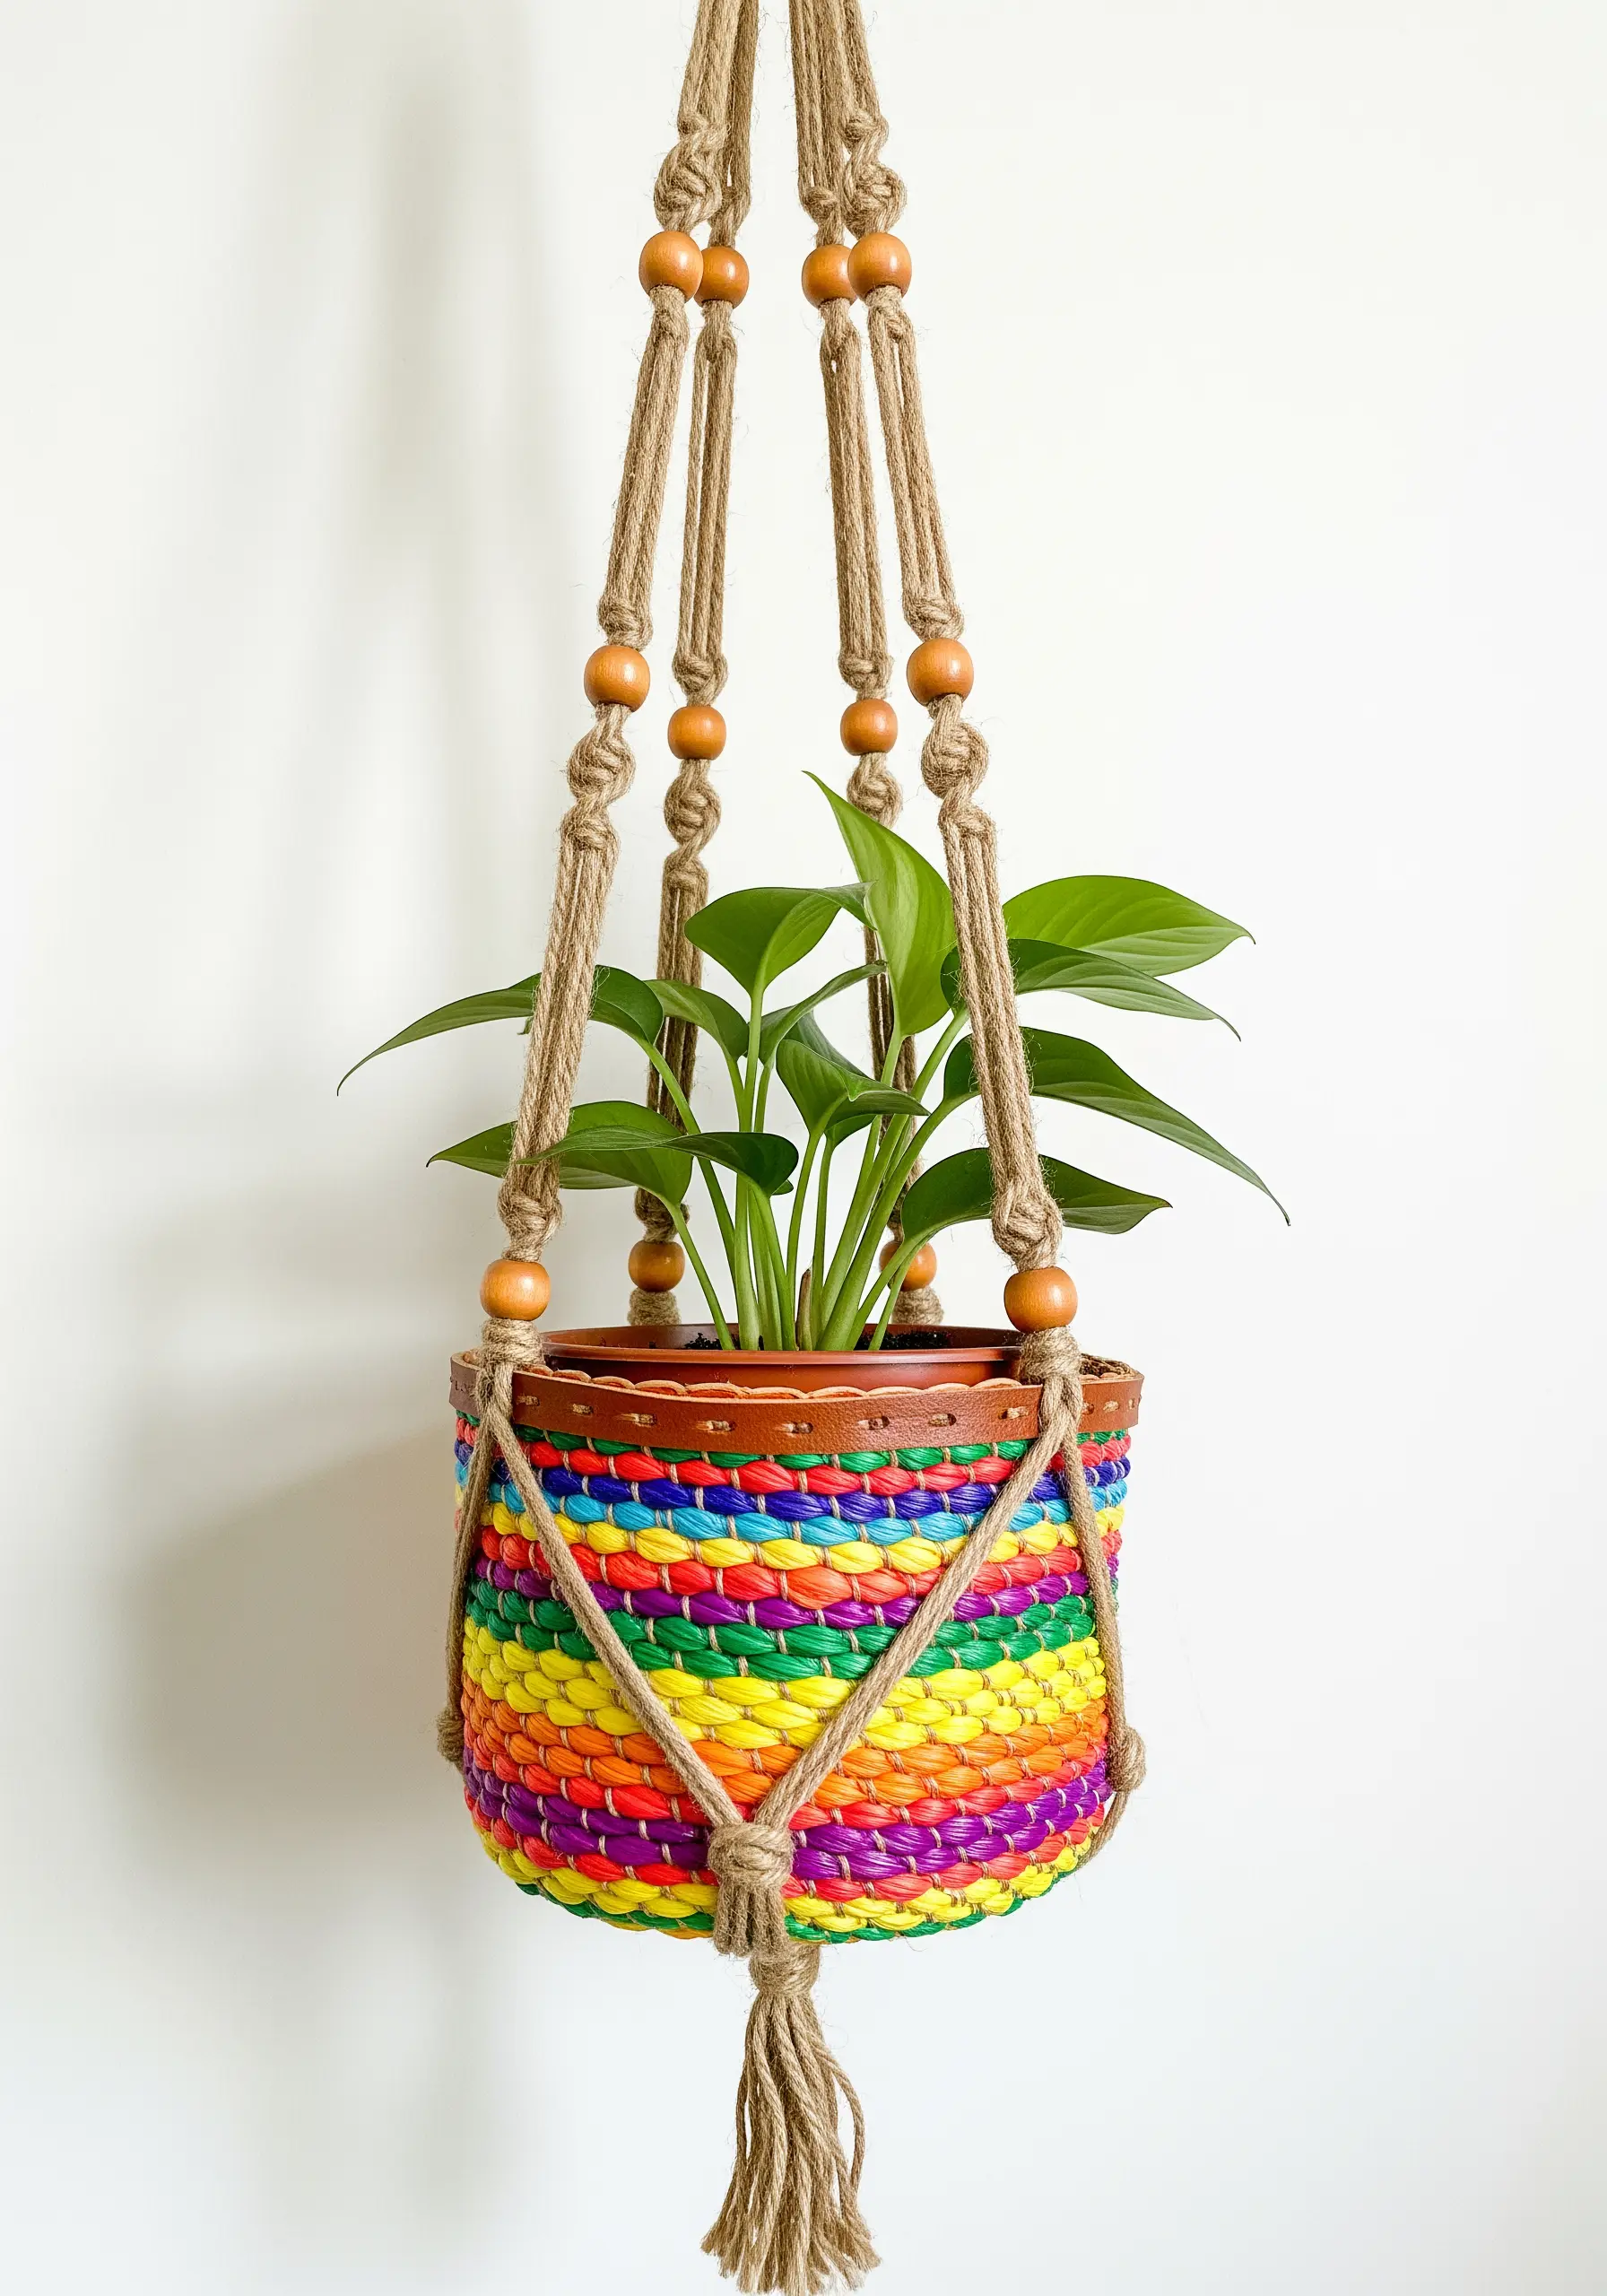
Elevate a standard macrame plant hanger by incorporating a woven basket element.
Use colorful plastic lacing or rattan to weave a simple basket around the pot itself—the bright colors provide a vibrant contrast to natural jute.
For the hanger, use basic macrame square knots and add wooden beads for a classic bohemian touch.
By separating the two techniques, you simplify the process while creating a unique, two-part design that looks more complex than it is.
7. Create Abstract Art with Couching and Needle Felting
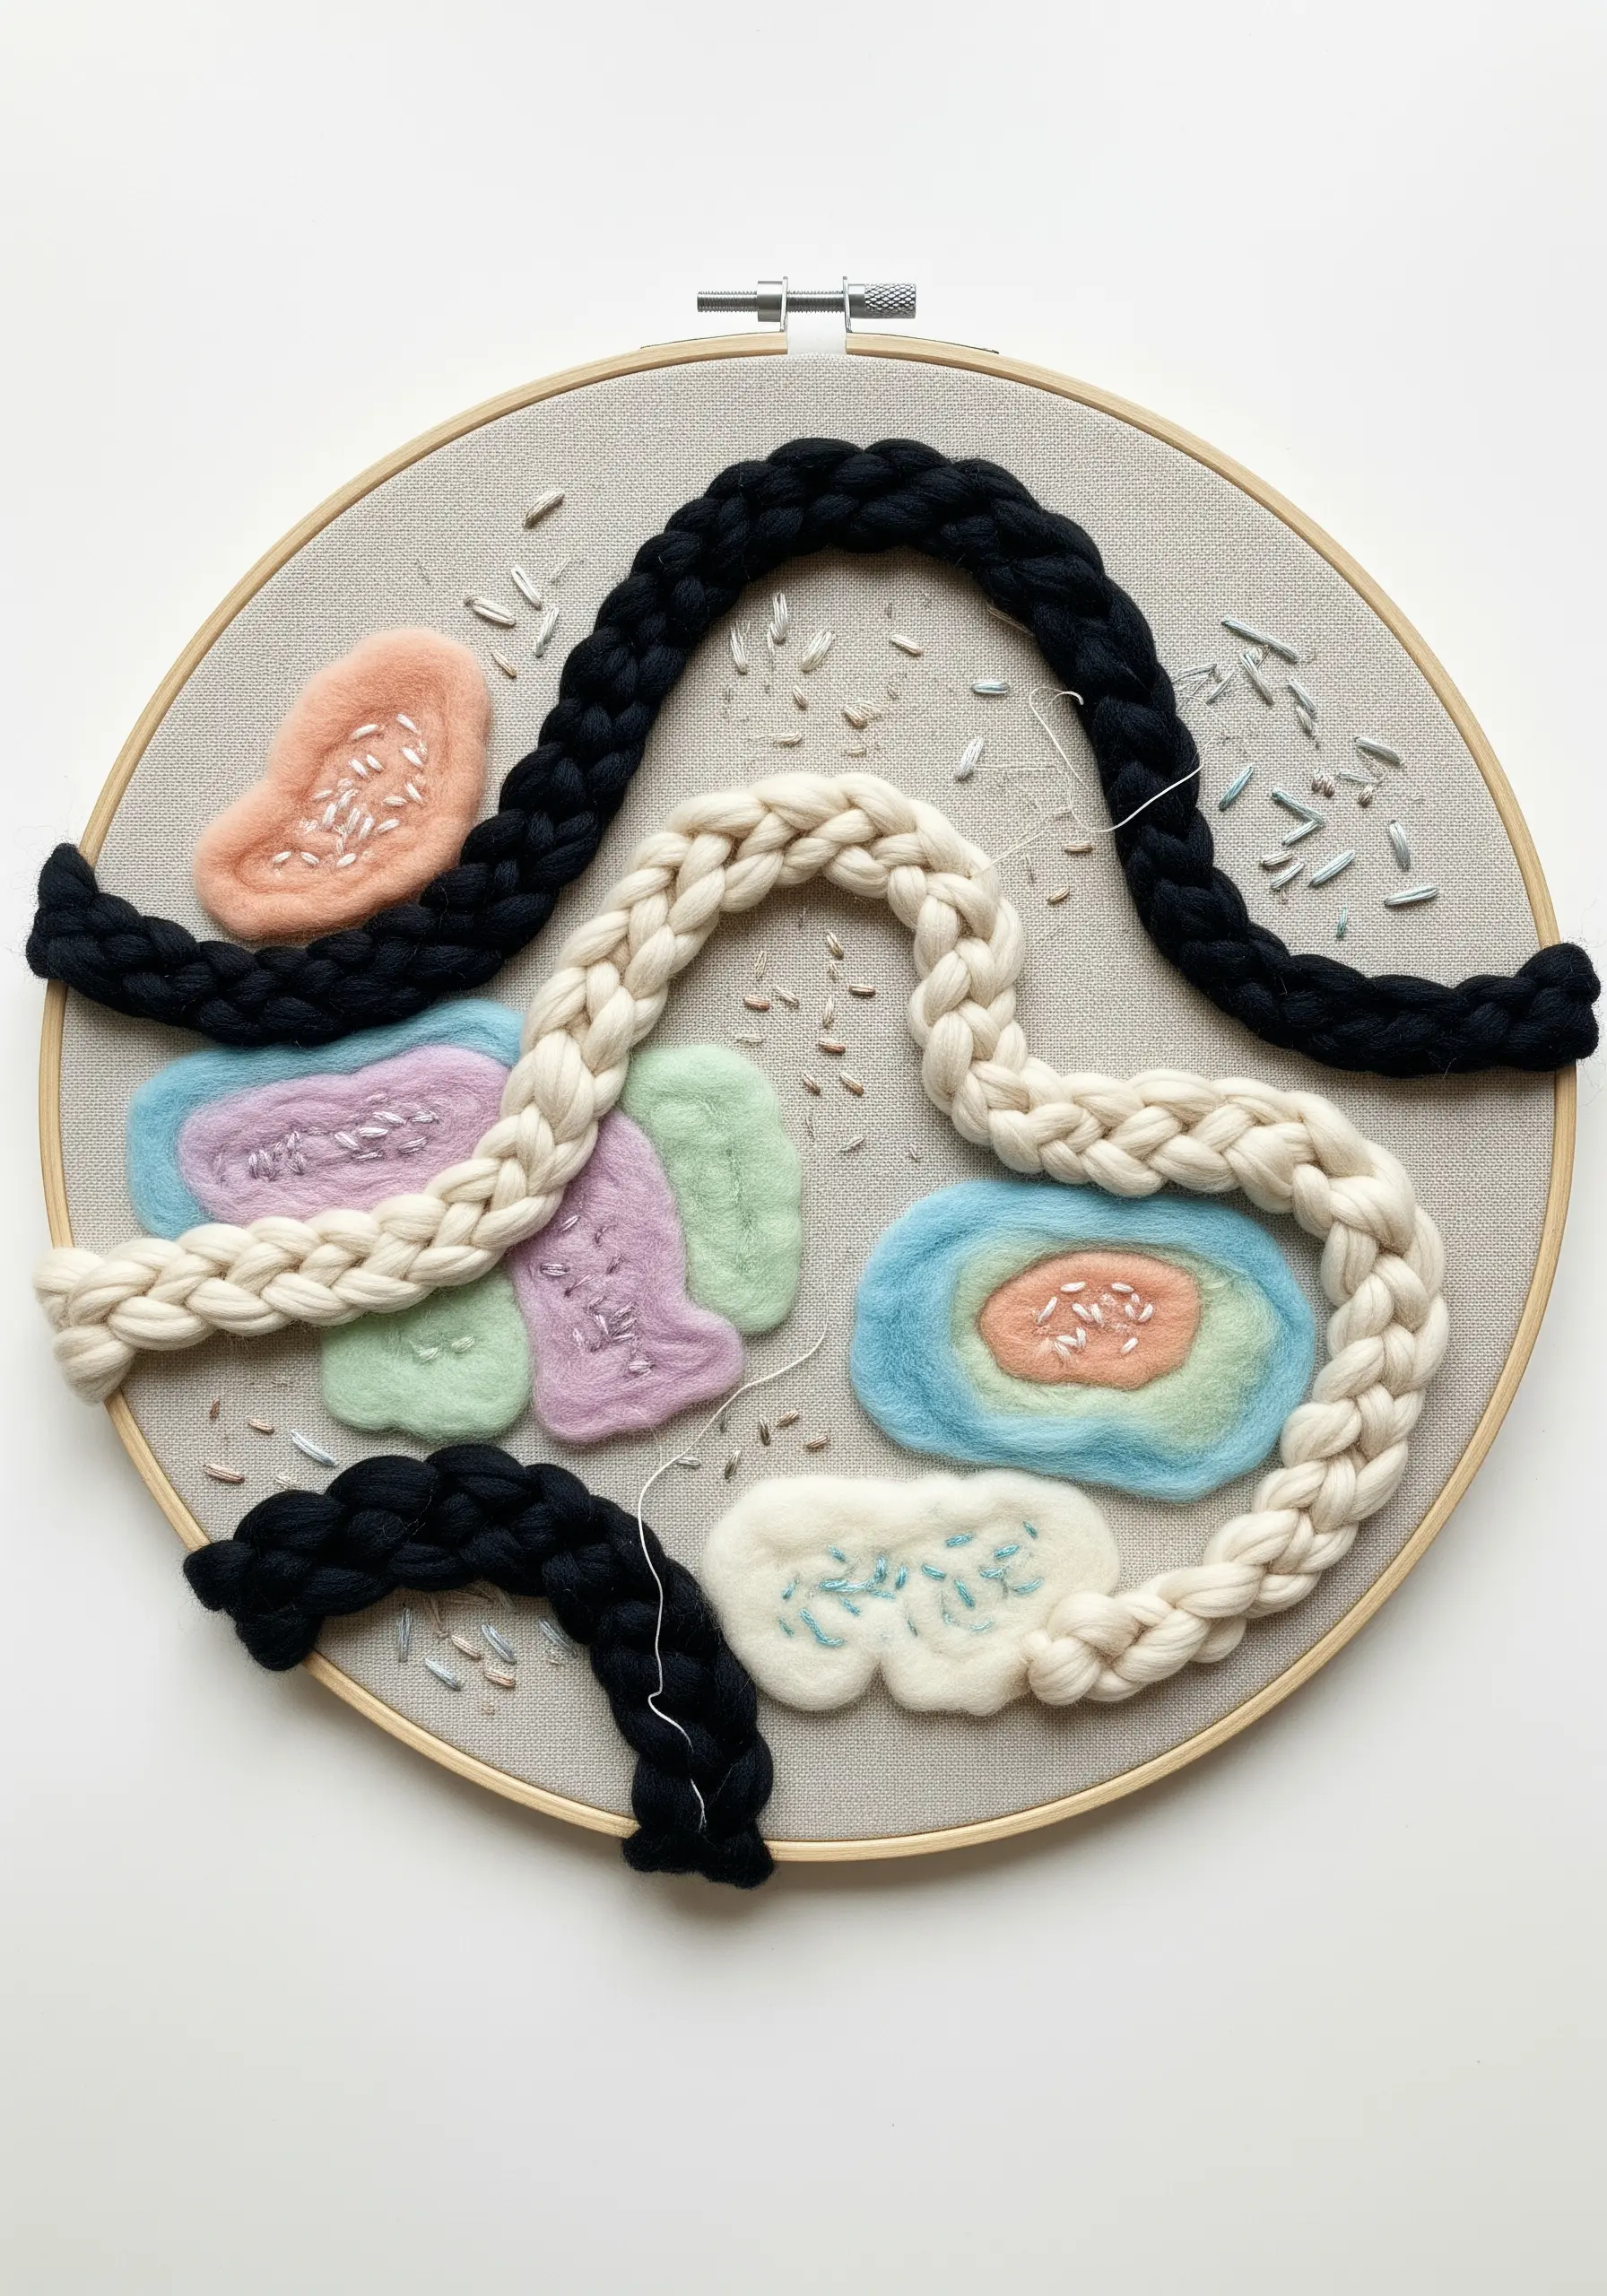
Explore abstract composition by attaching different fibers directly onto stretched fabric in a hoop.
Lay down pre-braided chunky yarn in organic curves and secure it with small, discreet stitches—a technique called couching.
For the soft, cloud-like shapes, use a needle-felting tool to apply wool roving directly to the background fabric.
This method feels like painting with fiber, and the freeform placement combined with a sprinkle of beads for sparkle makes for an expressive piece without the pressure of a pattern.
8. Assemble a Statement Tassel Necklace
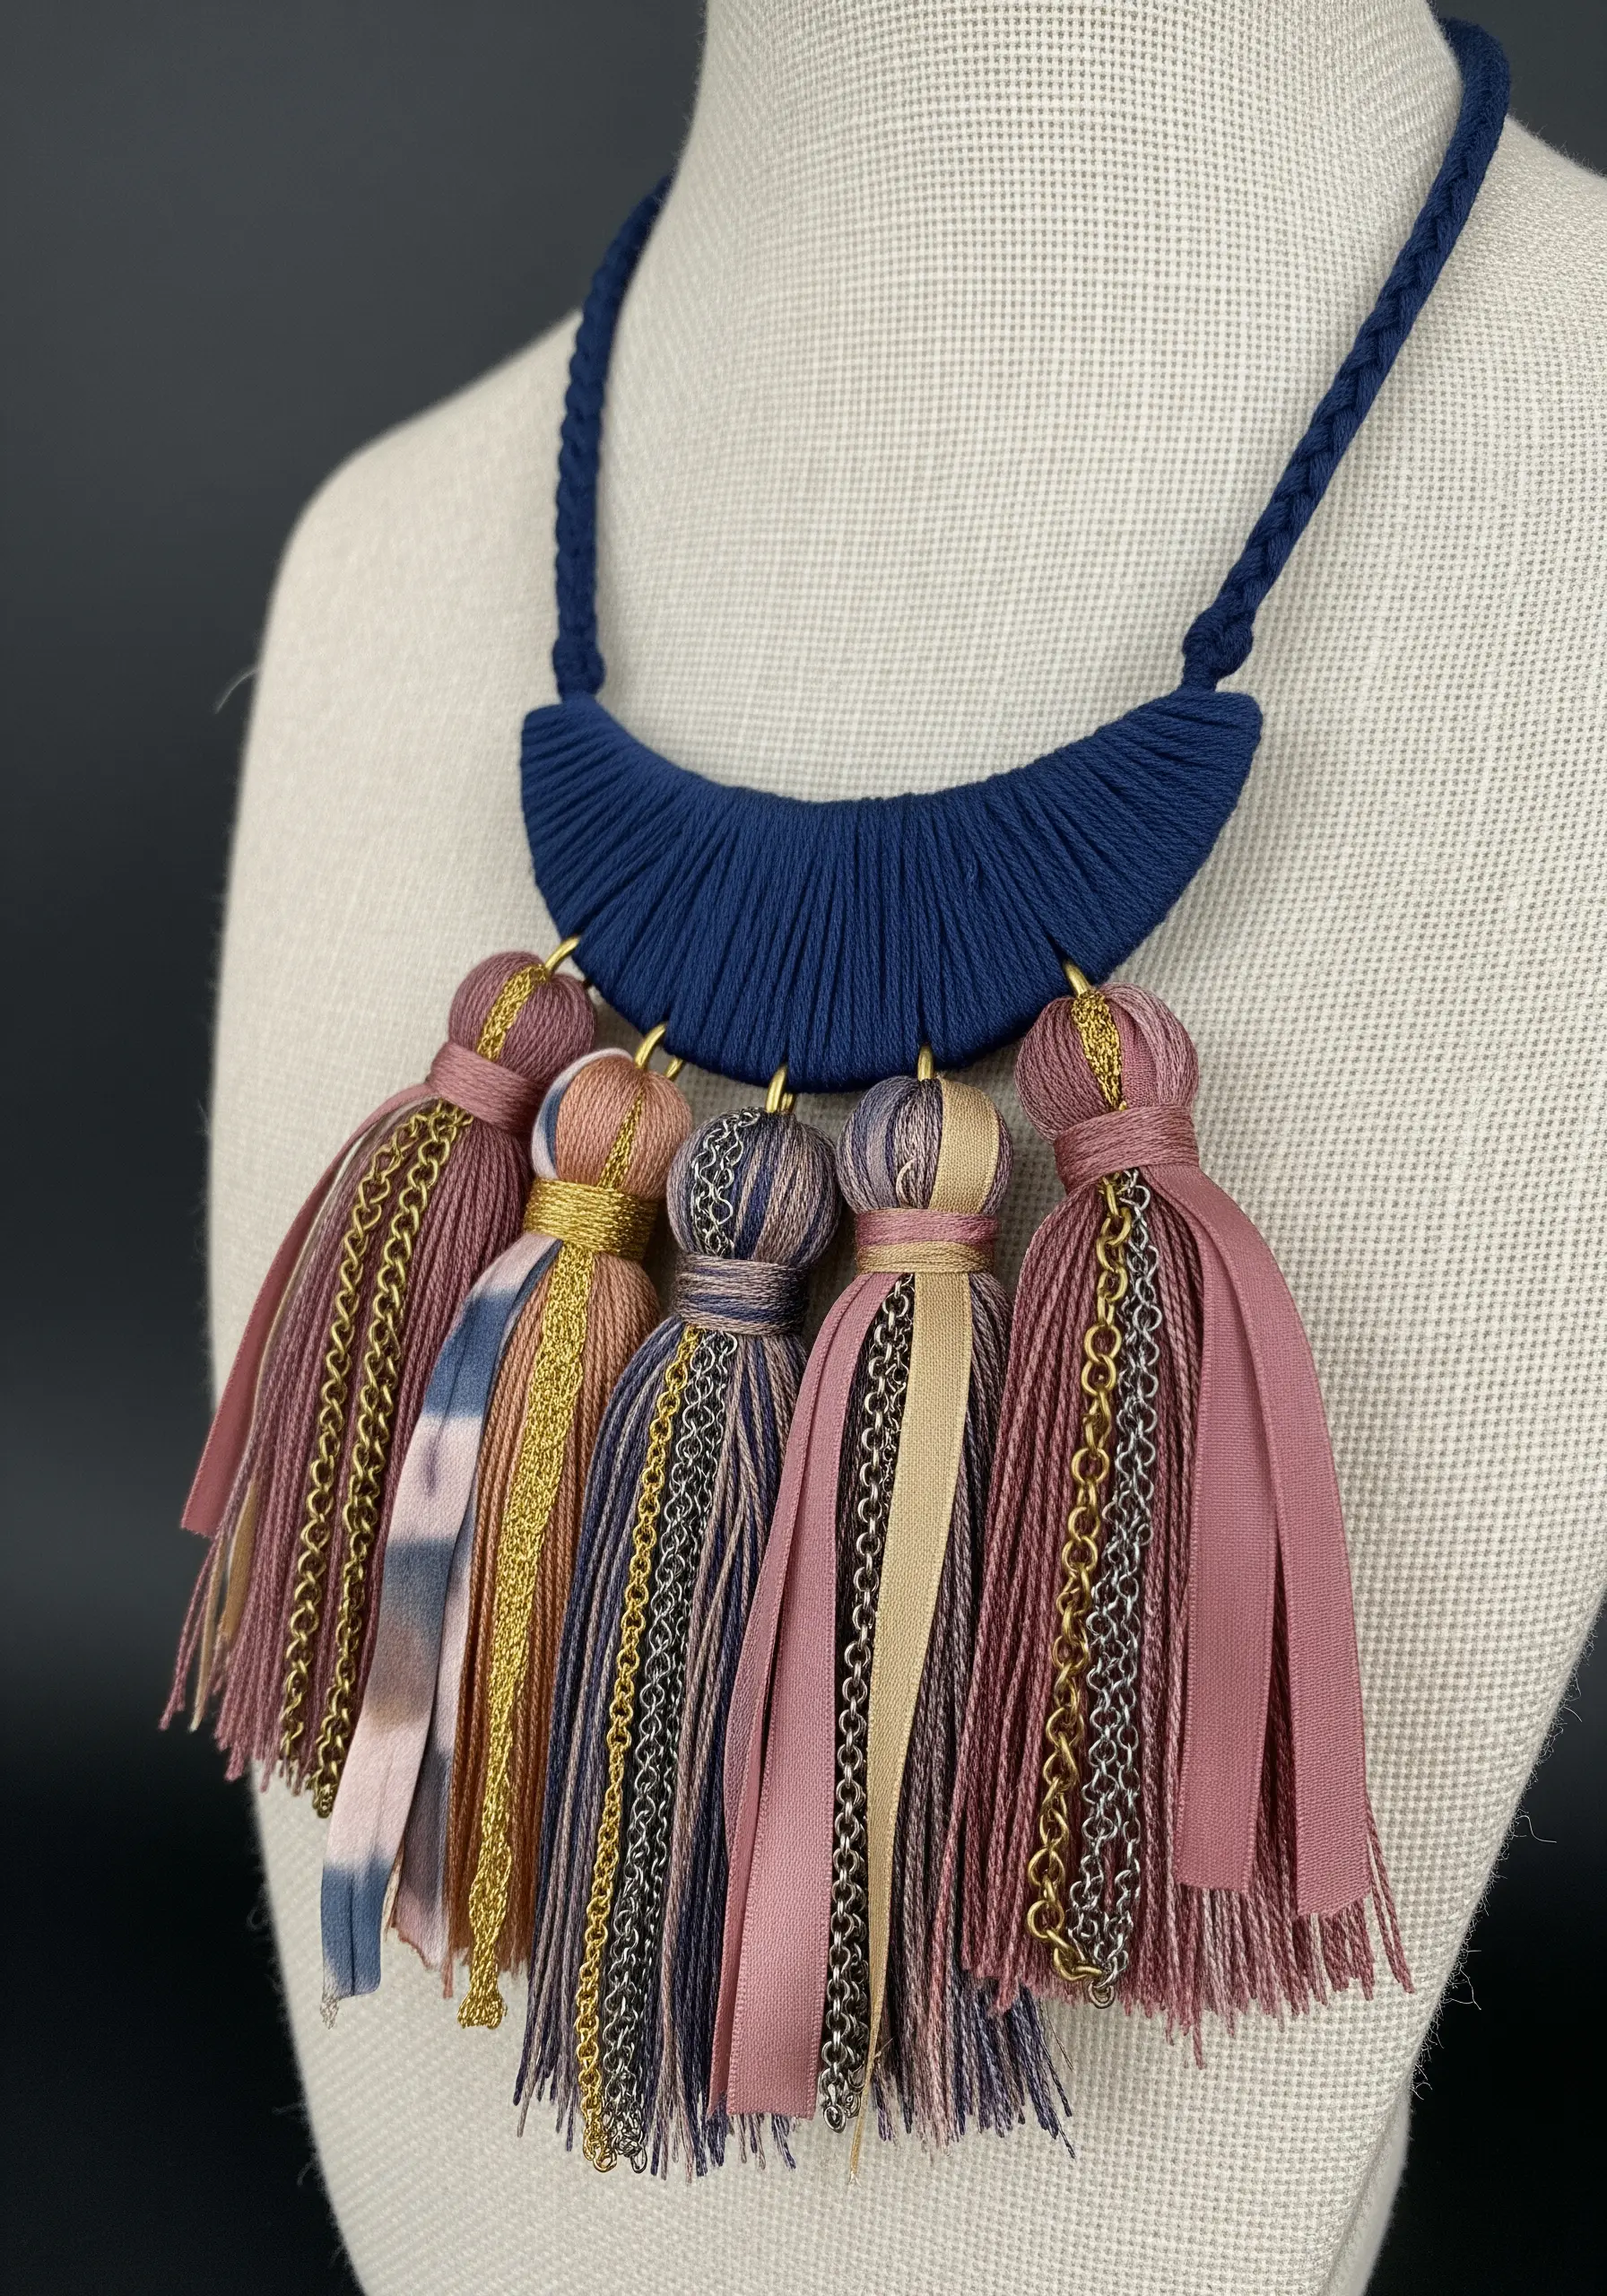
The beauty of this project is in the curation of materials, not the complexity of the technique.
First, create a solid base by wrapping a crescent shape with embroidery floss.
Then, craft individual tassels using a mix of fibers: standard embroidery floss, variegated threads, strips of silk ribbon, and even fine jewelry chains.
To assemble, simply attach each tassel to the wrapped base. The rich, layered look comes from the variety of textures and sheens you choose to combine.
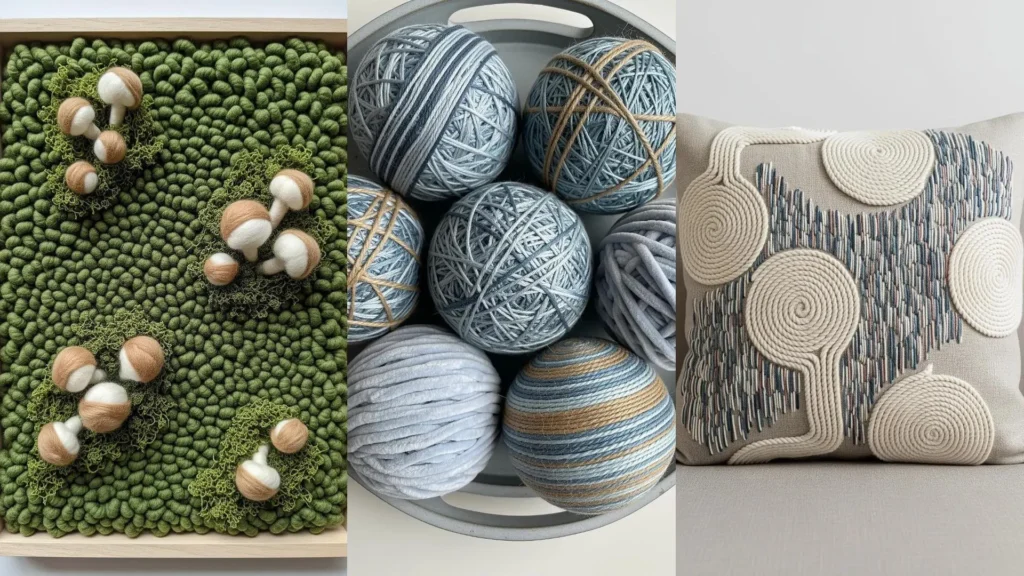
9. Build a 3D Moss Garden with French Knots
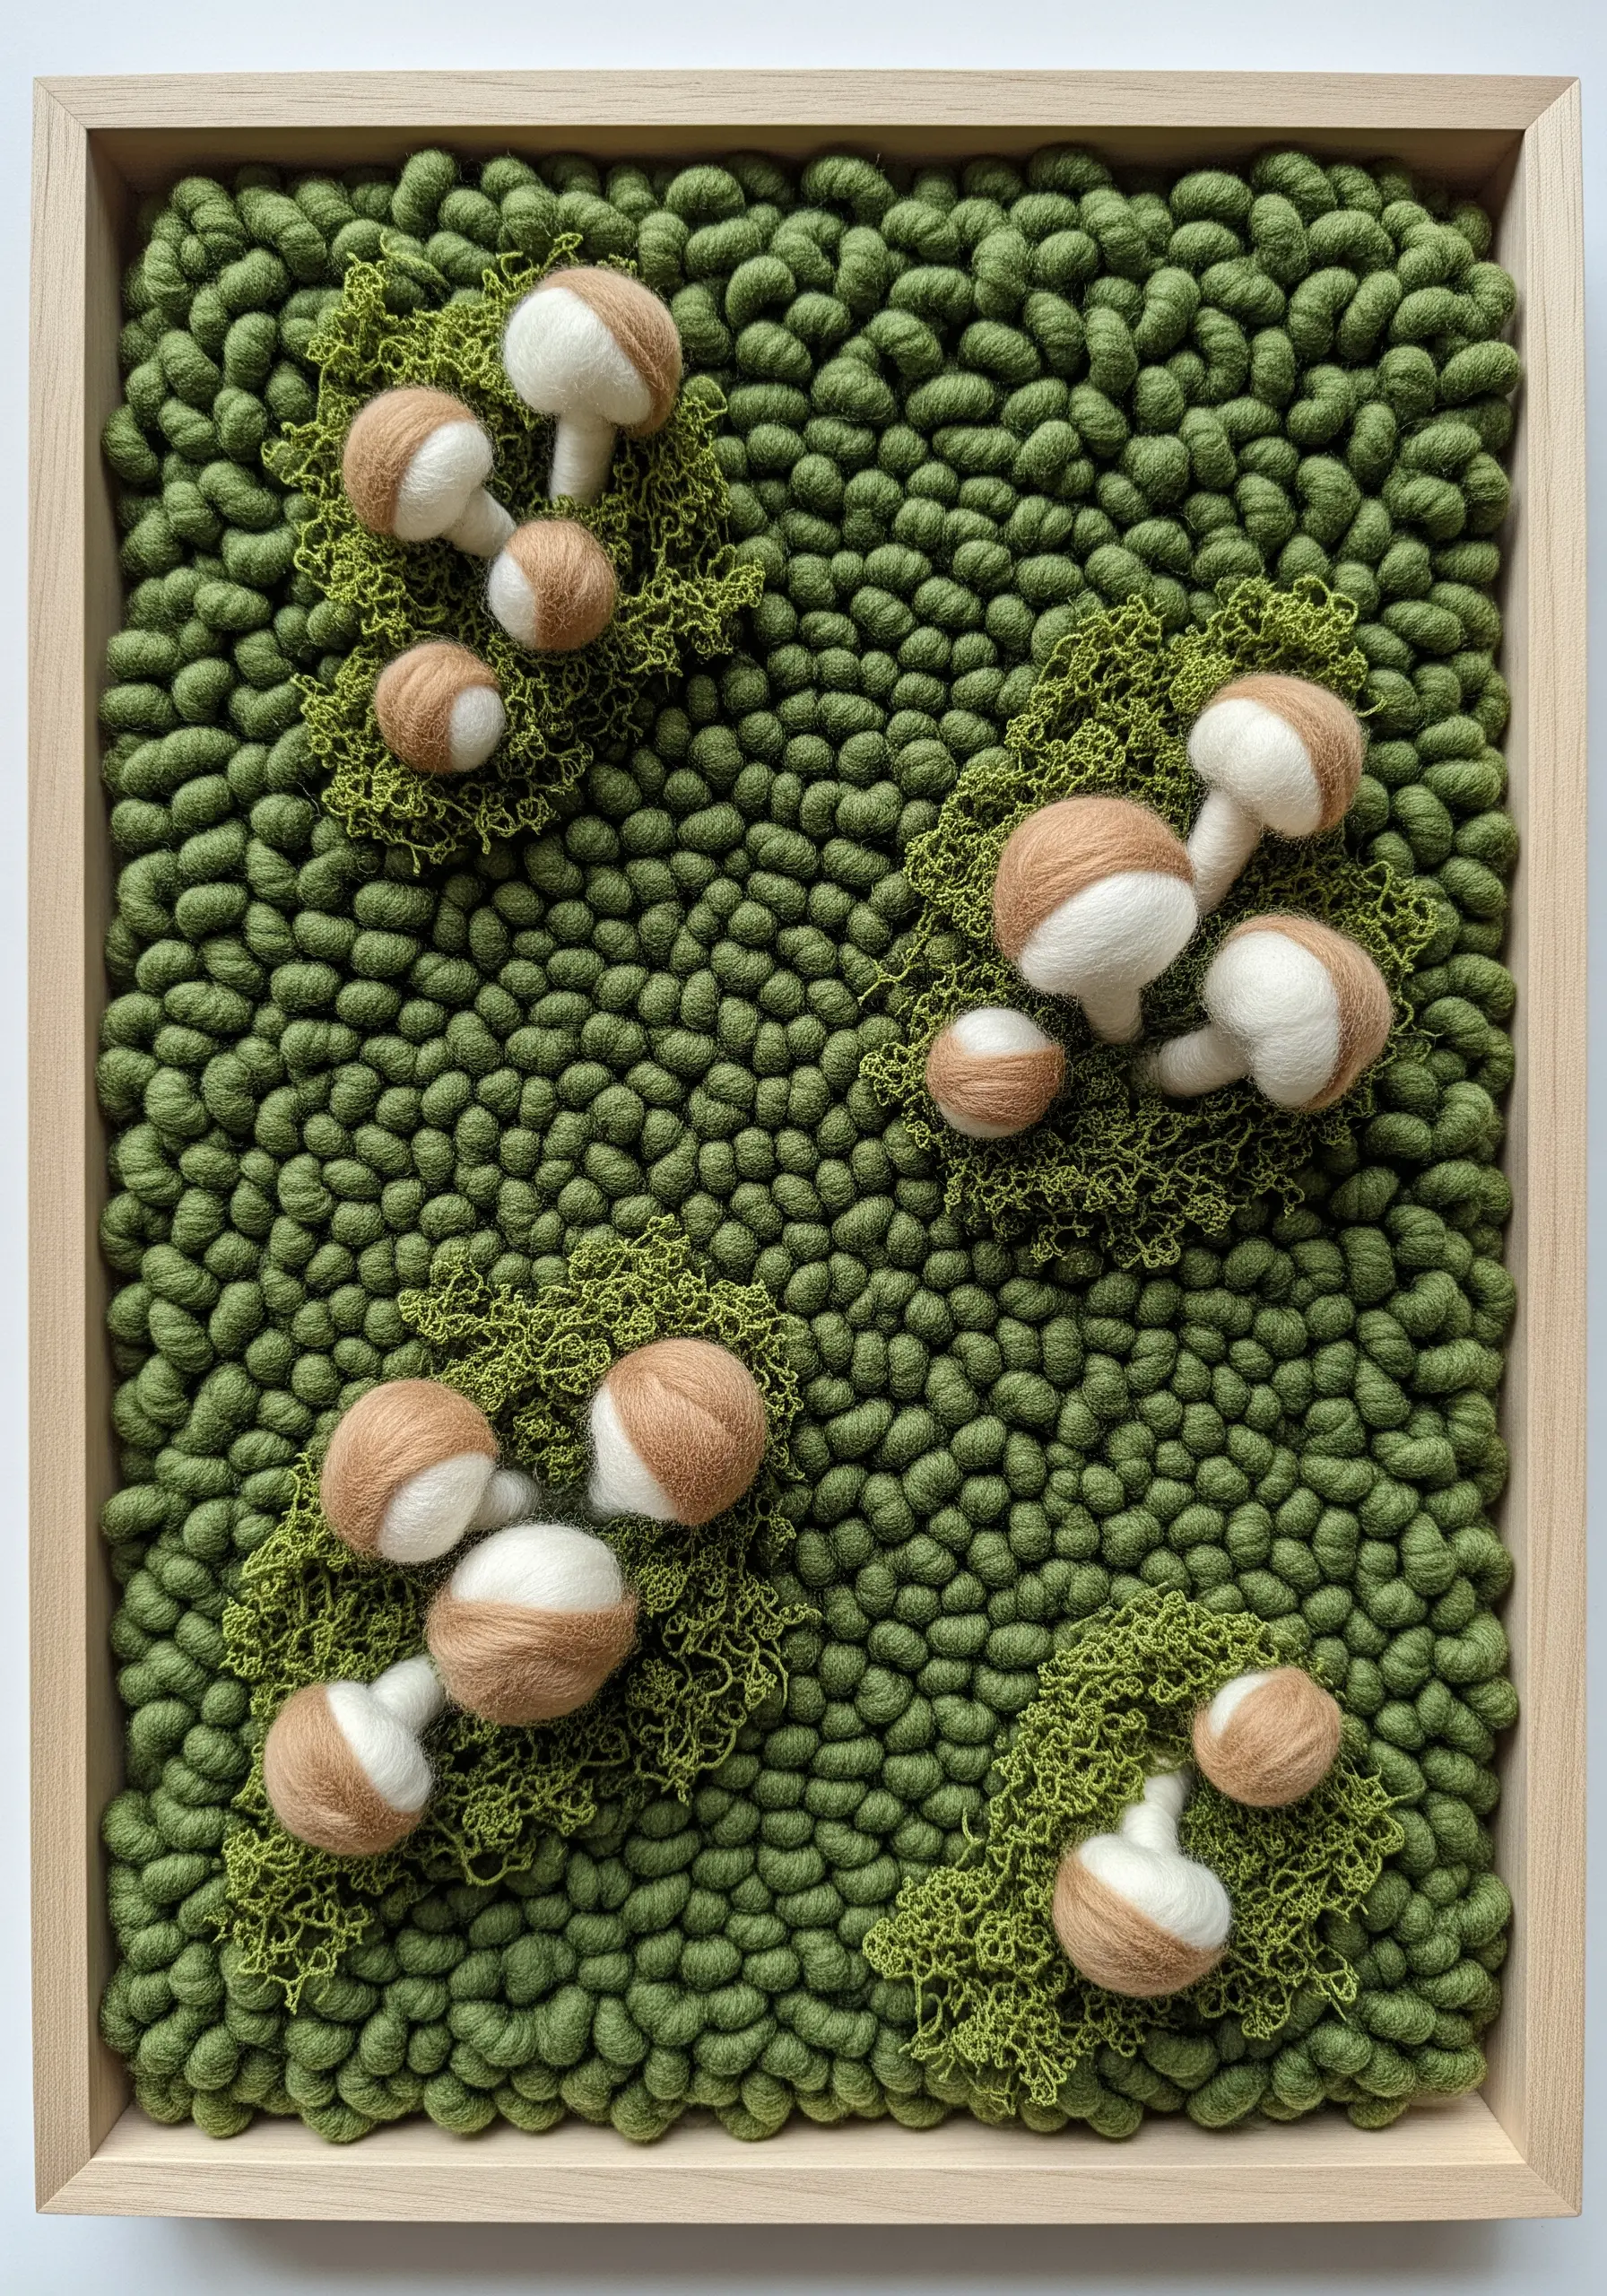
Achieve a lush, mossy texture by filling a space with hundreds of tightly packed French knots using a soft, textured yarn.
While repetitive, the technique itself is simple, and the cumulative effect is breathtaking.
For the mushrooms, create the shapes separately using needle felting—a forgiving technique that lets you sculpt wool roving into solid forms.
Finally, stitch the finished mushrooms onto your bed of French knots. This modular approach breaks a complex scene down into easy, manageable steps.
10. Craft a Festive Garland from Fiber Scraps
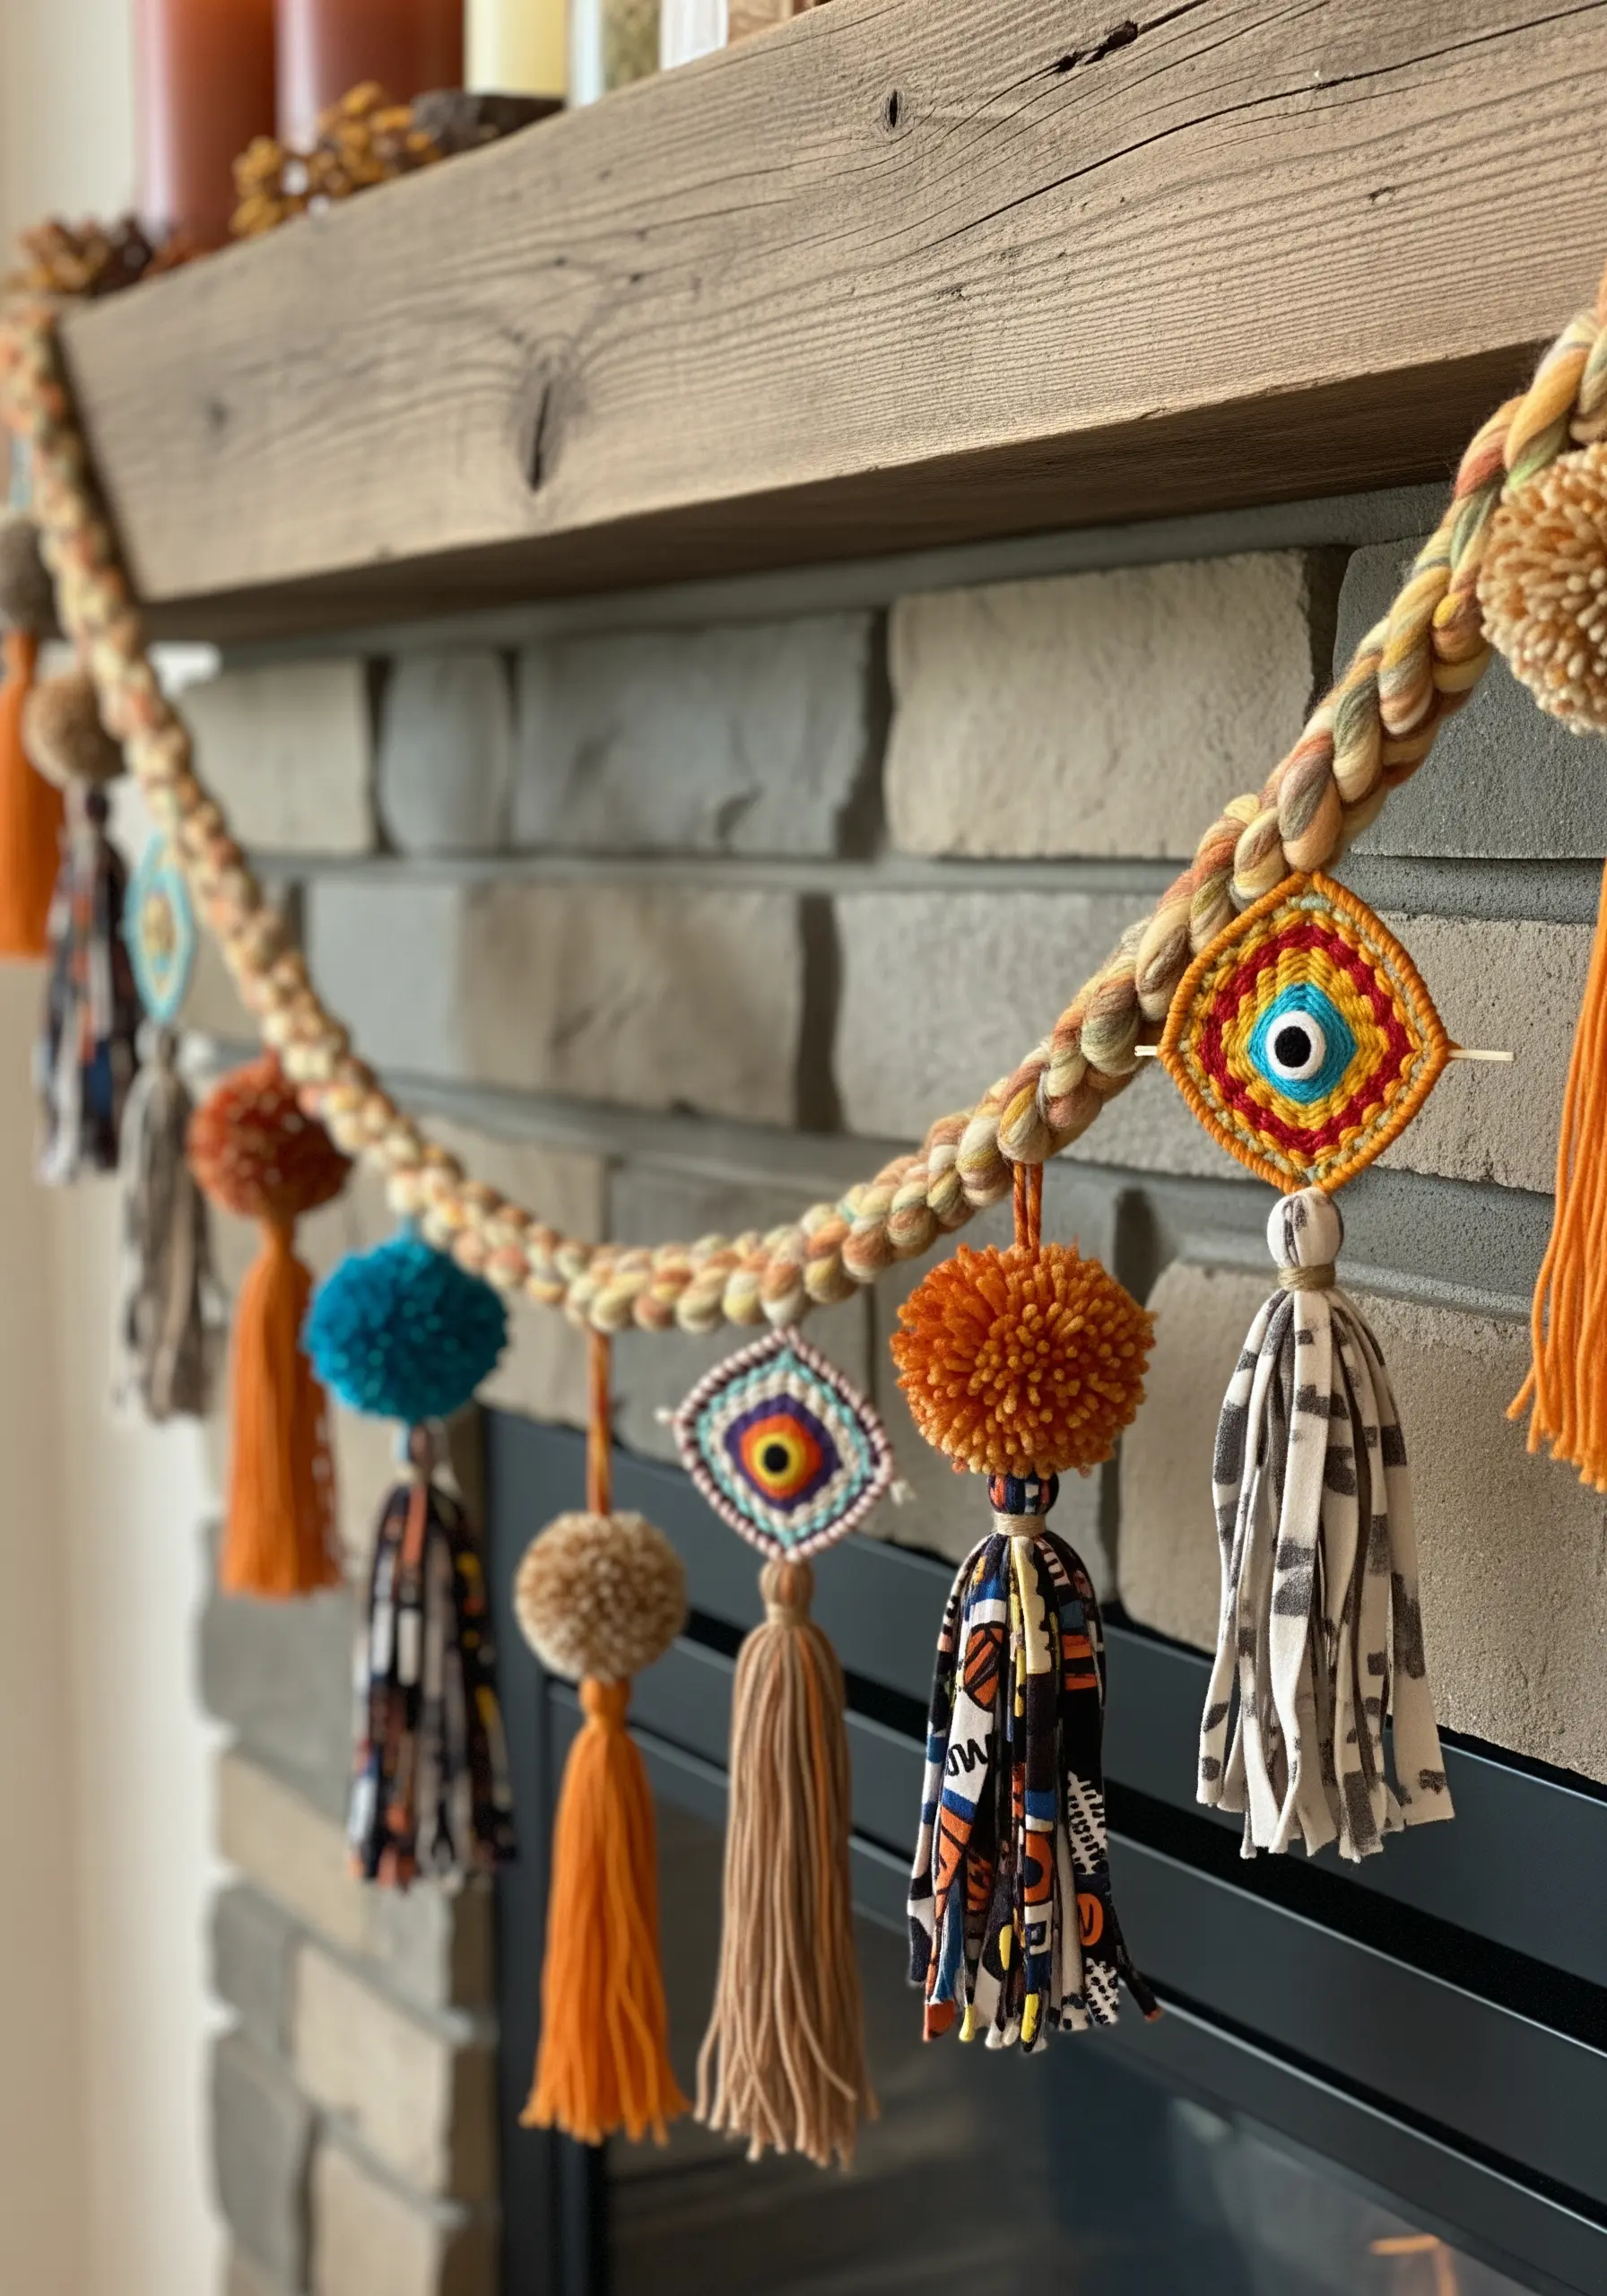
A garland is the perfect project for using up leftover materials and practicing simple fiber techniques.
Create a braided rope base from thick, multi-toned yarn to serve as your foundation.
Then, make an assortment of embellishments: fluffy pom-poms, tassels made from scrap fabric and yarn, and small crocheted motifs.
Stringing them all together creates a joyful, eclectic piece where the charm comes from the mix-and-match variety, not from perfect uniformity.
11. Wrap a Rainbow with Varied Textures
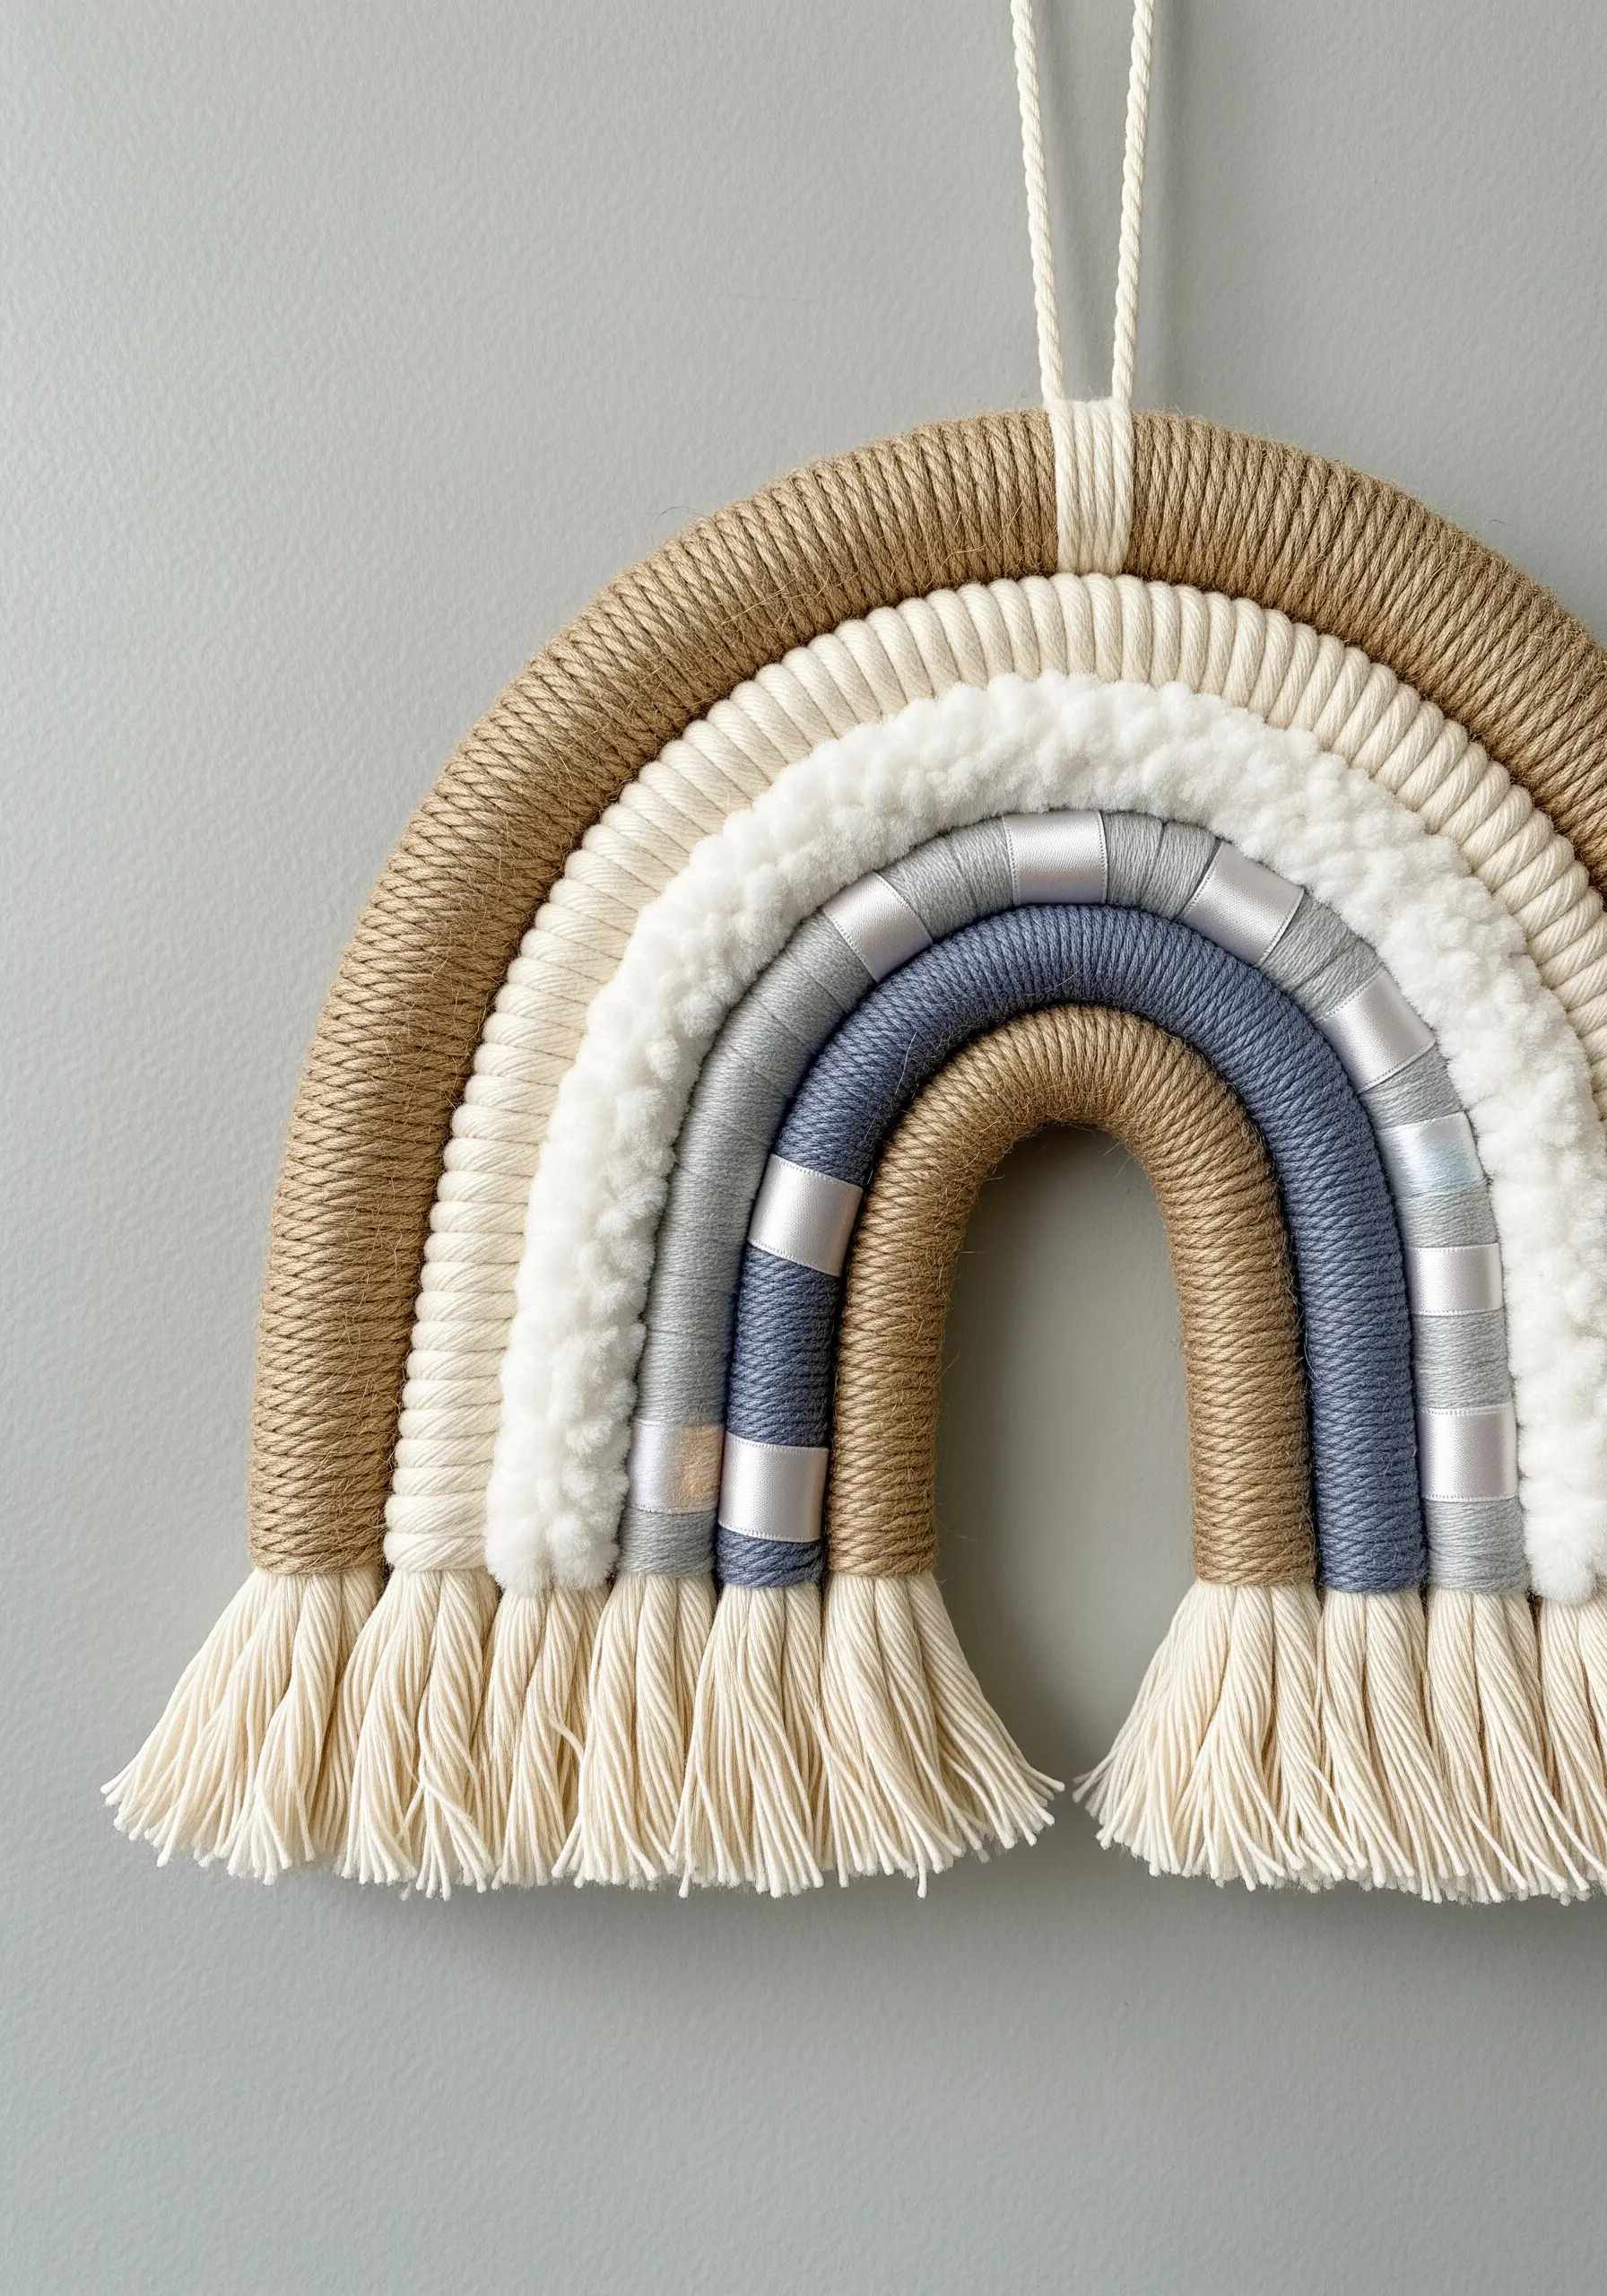
This popular project is an exercise in wrapping, which requires patience but very little technical skill.
Form arches with thick cotton rope, then secure them together. The key to a sophisticated look is varying the texture of your wrapping material for each color band.
Alternate between smooth cotton yarn, rustic jute, fluffy chenille, and even strips of shiny satin ribbon.
This textural variation gives the simple rainbow form a rich, tactile quality that elevates it beyond a basic craft project.
12. Design Textural Bookmarks with Felt and Couching
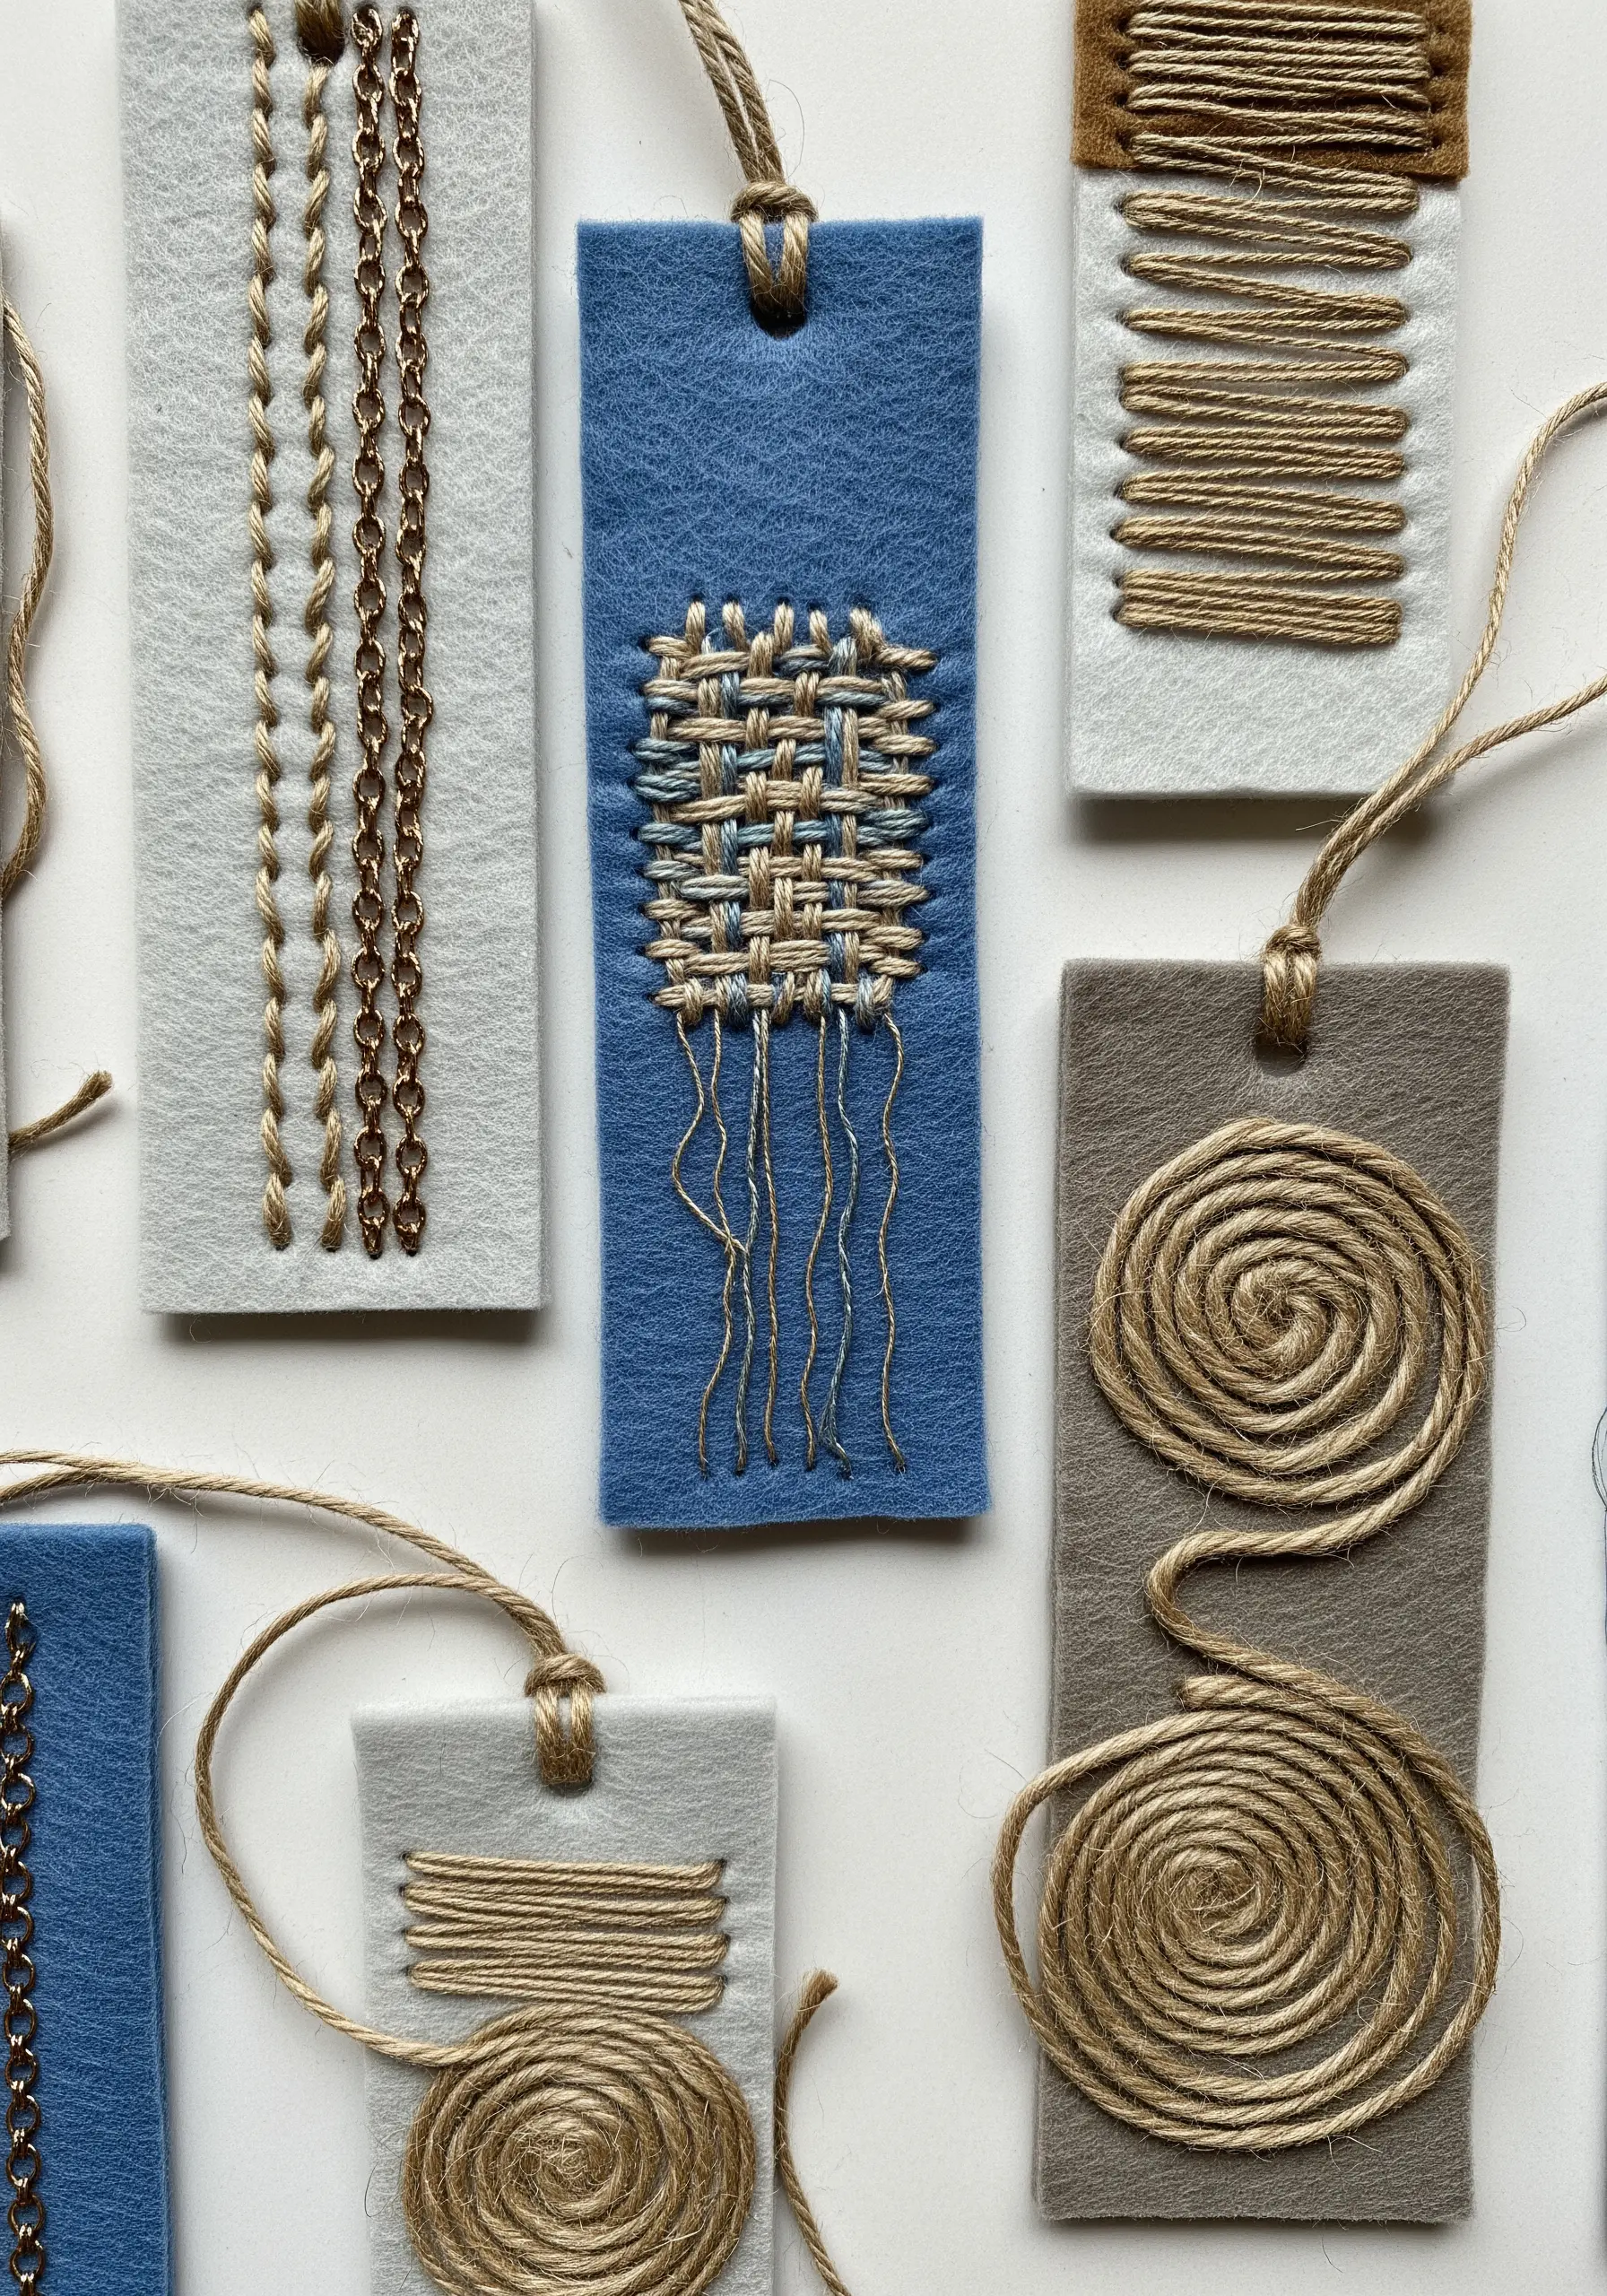
Felt is an ideal base for mixed-fiber experiments because it’s sturdy and won’t fray, eliminating the need for finished edges.
Use felt rectangles as mini-canvases to try out simple techniques.
Try couching down a small piece of chain with contrasting thread, weaving threads through a small stitched grid, or wrapping twine into a spiral and stitching it in place.
These mini-embroidery projects are quick to complete and let you play with texture on a small scale.
13. Add Sculptural Dimension with Coiled Rope
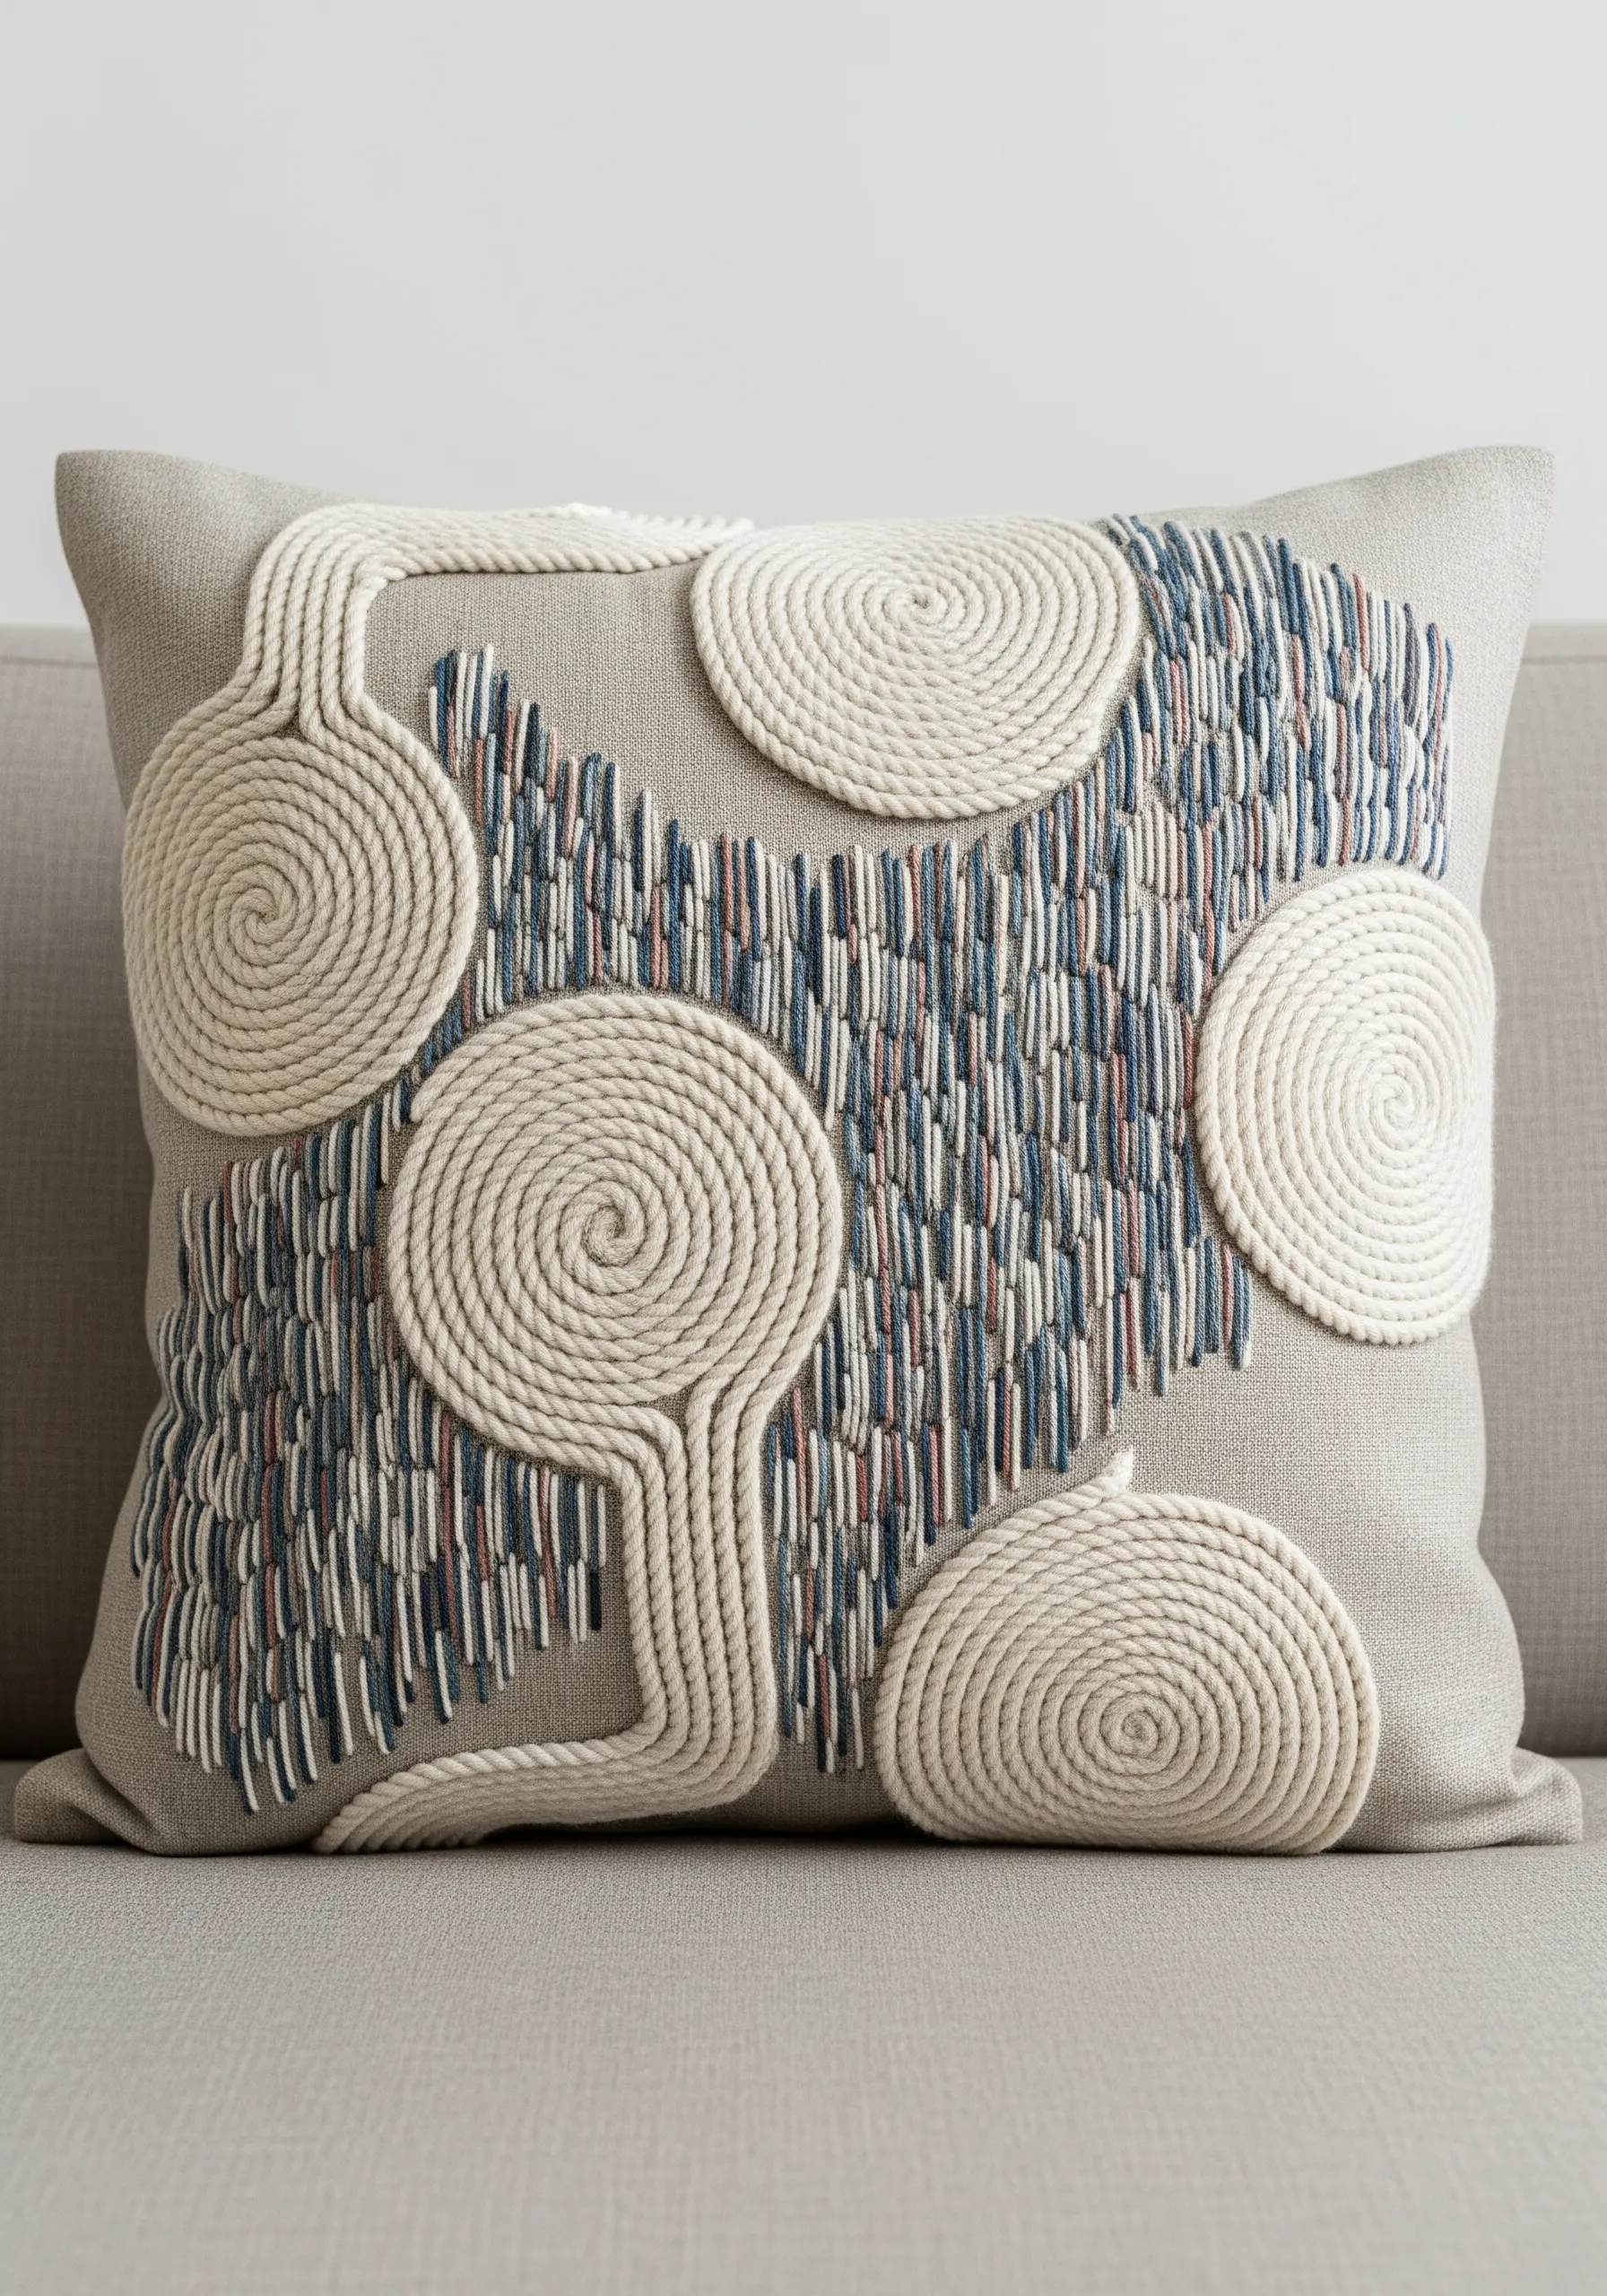
This project achieves its high-impact, sculptural look with just two core techniques: couching and satin stitch.
To create the bold, raised outlines, lay thick cotton rope onto your pillow cover and use a matching, thinner thread to stitch it down with small, evenly spaced tacking stitches.
For the contrasting fill, use a simple vertical satin stitch. The combination of the smooth, linear fill against the thick, coiled rope creates a powerful visual and tactile contrast that looks exceptionally modern.
14. Knot a Two-Tone Macrame Table Runner
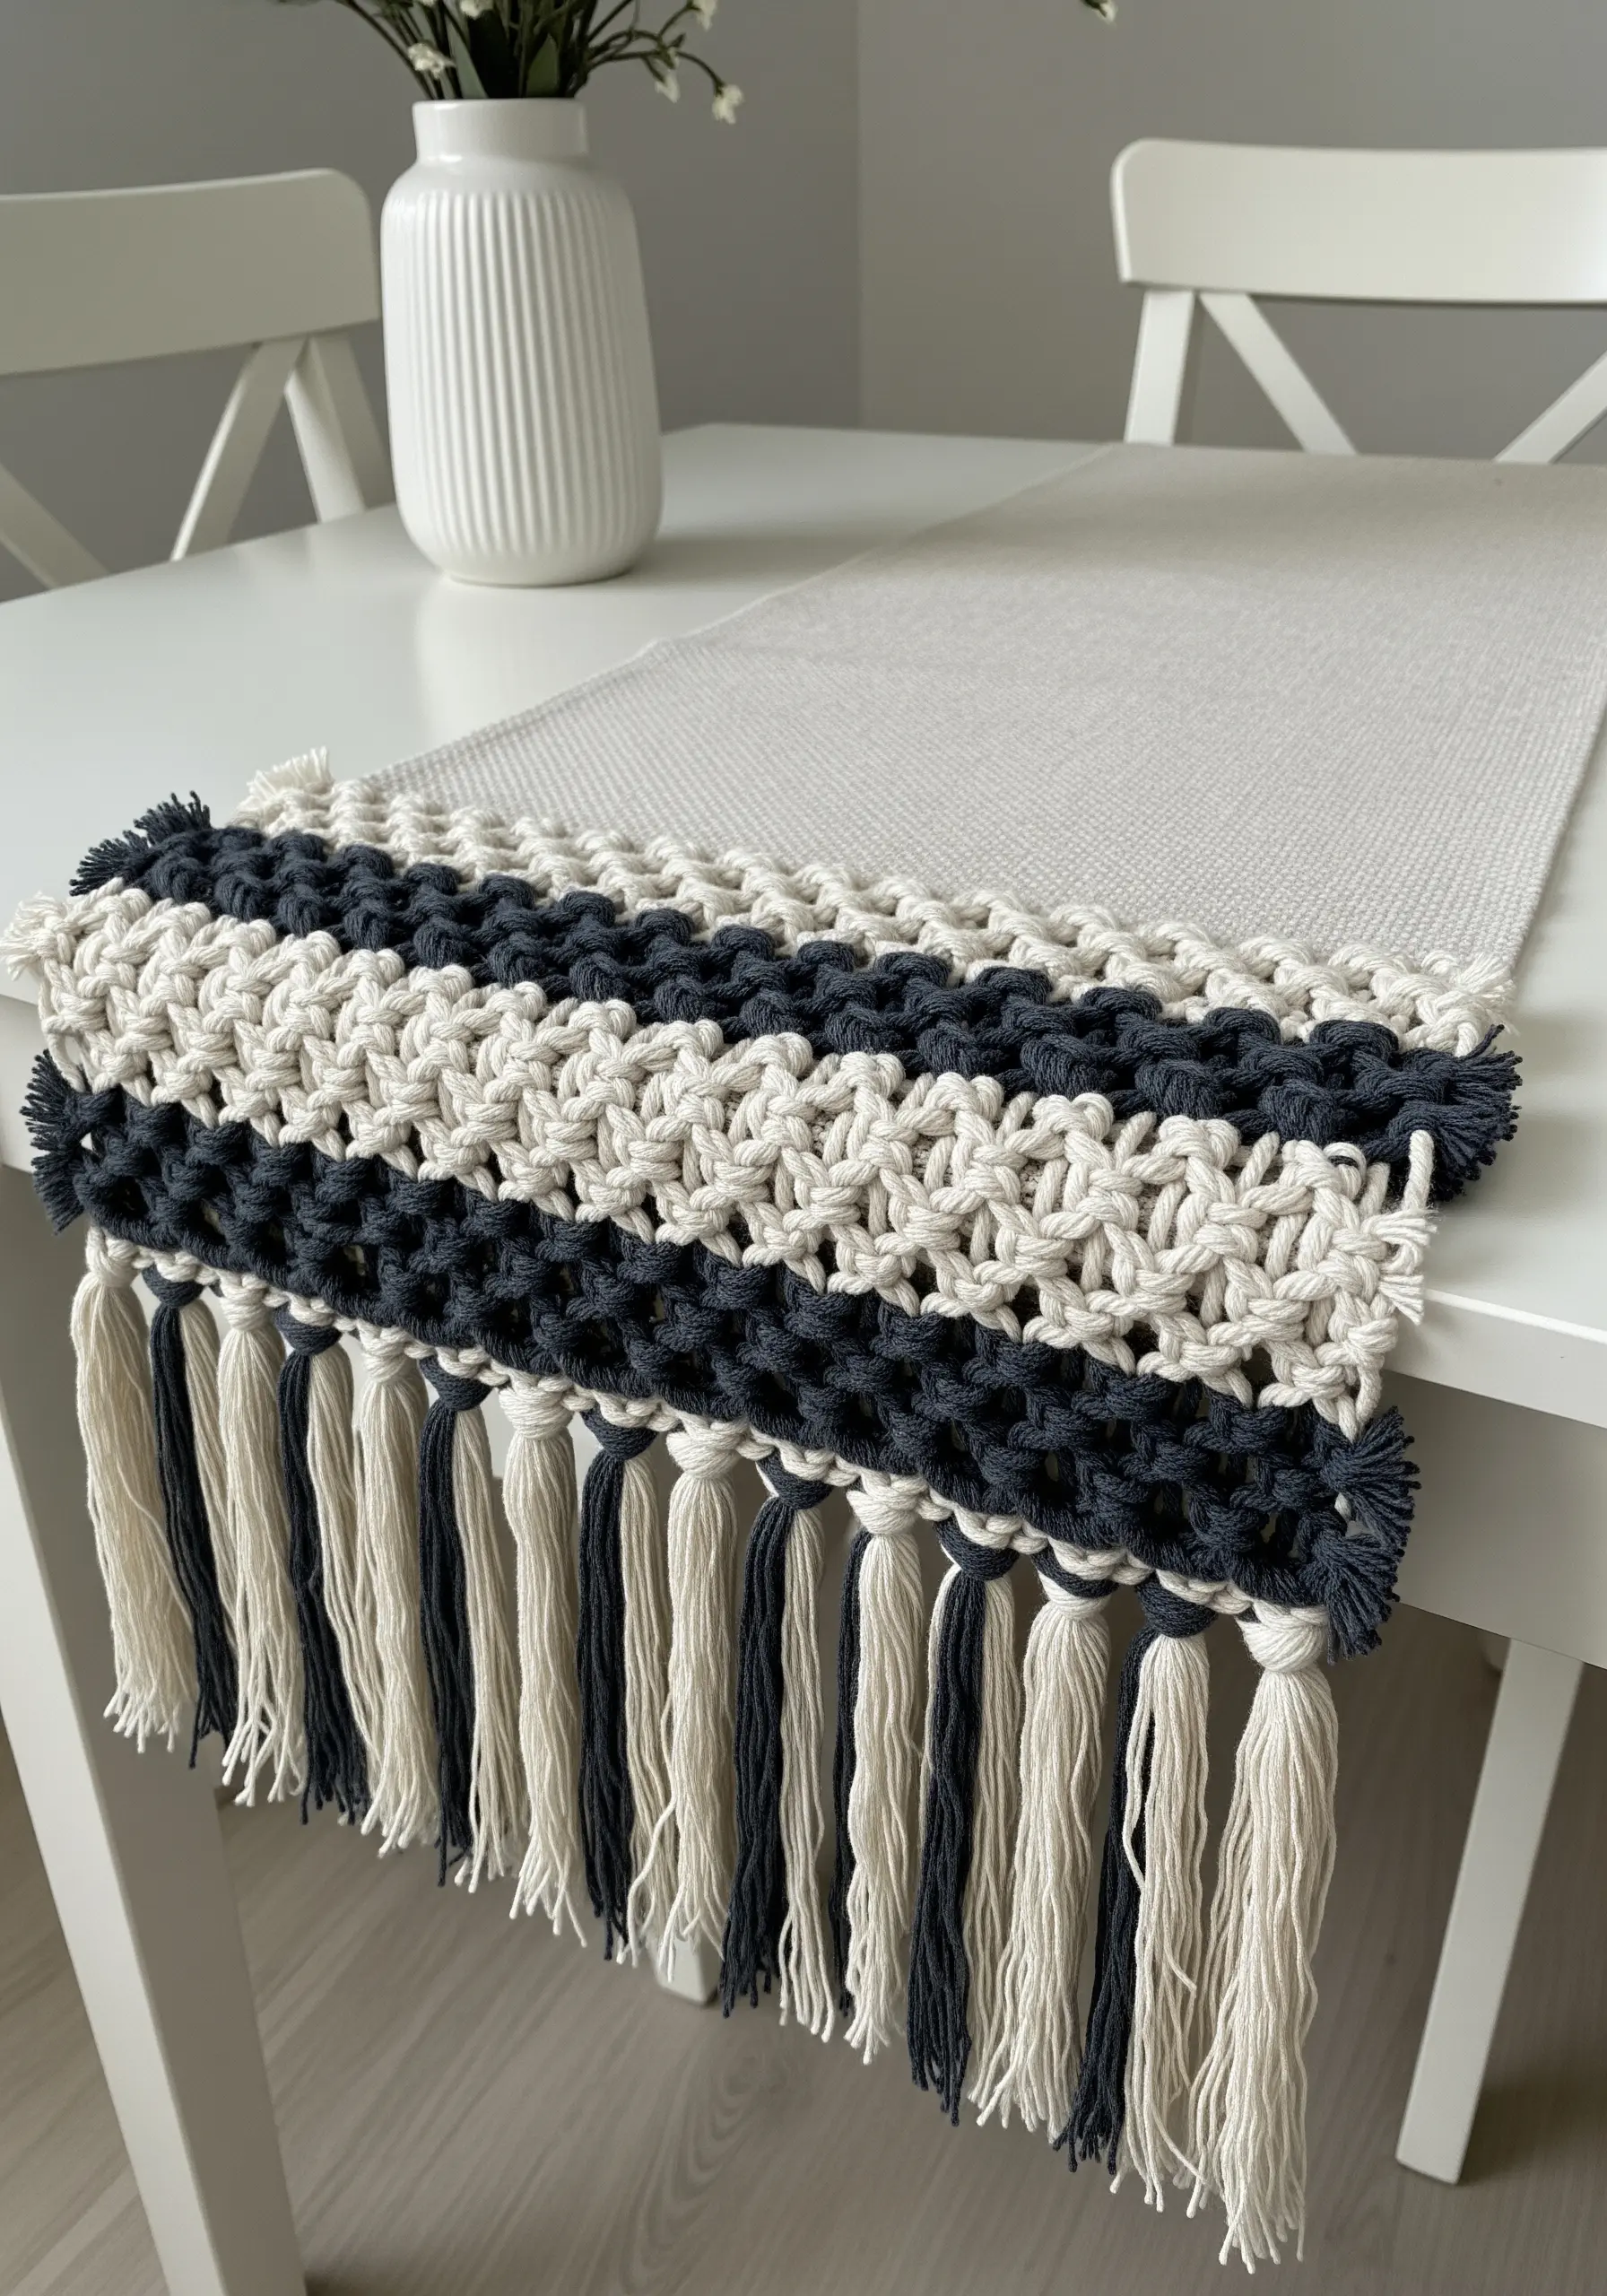
You can create this intricate-looking table runner using just one or two basic macrame knots, like the square knot.
The visual complexity comes from the strategic use of two contrasting colors and the creation of a dense, fabric-like texture.
By alternating rows of knots and working with your cords held close together, you build a solid textile rather than an open, airy design.
The striped pattern emerges naturally from your color placement, giving it a polished, woven appearance with minimal effort.
15. Weave Rustic Placemats on a Frame Loom
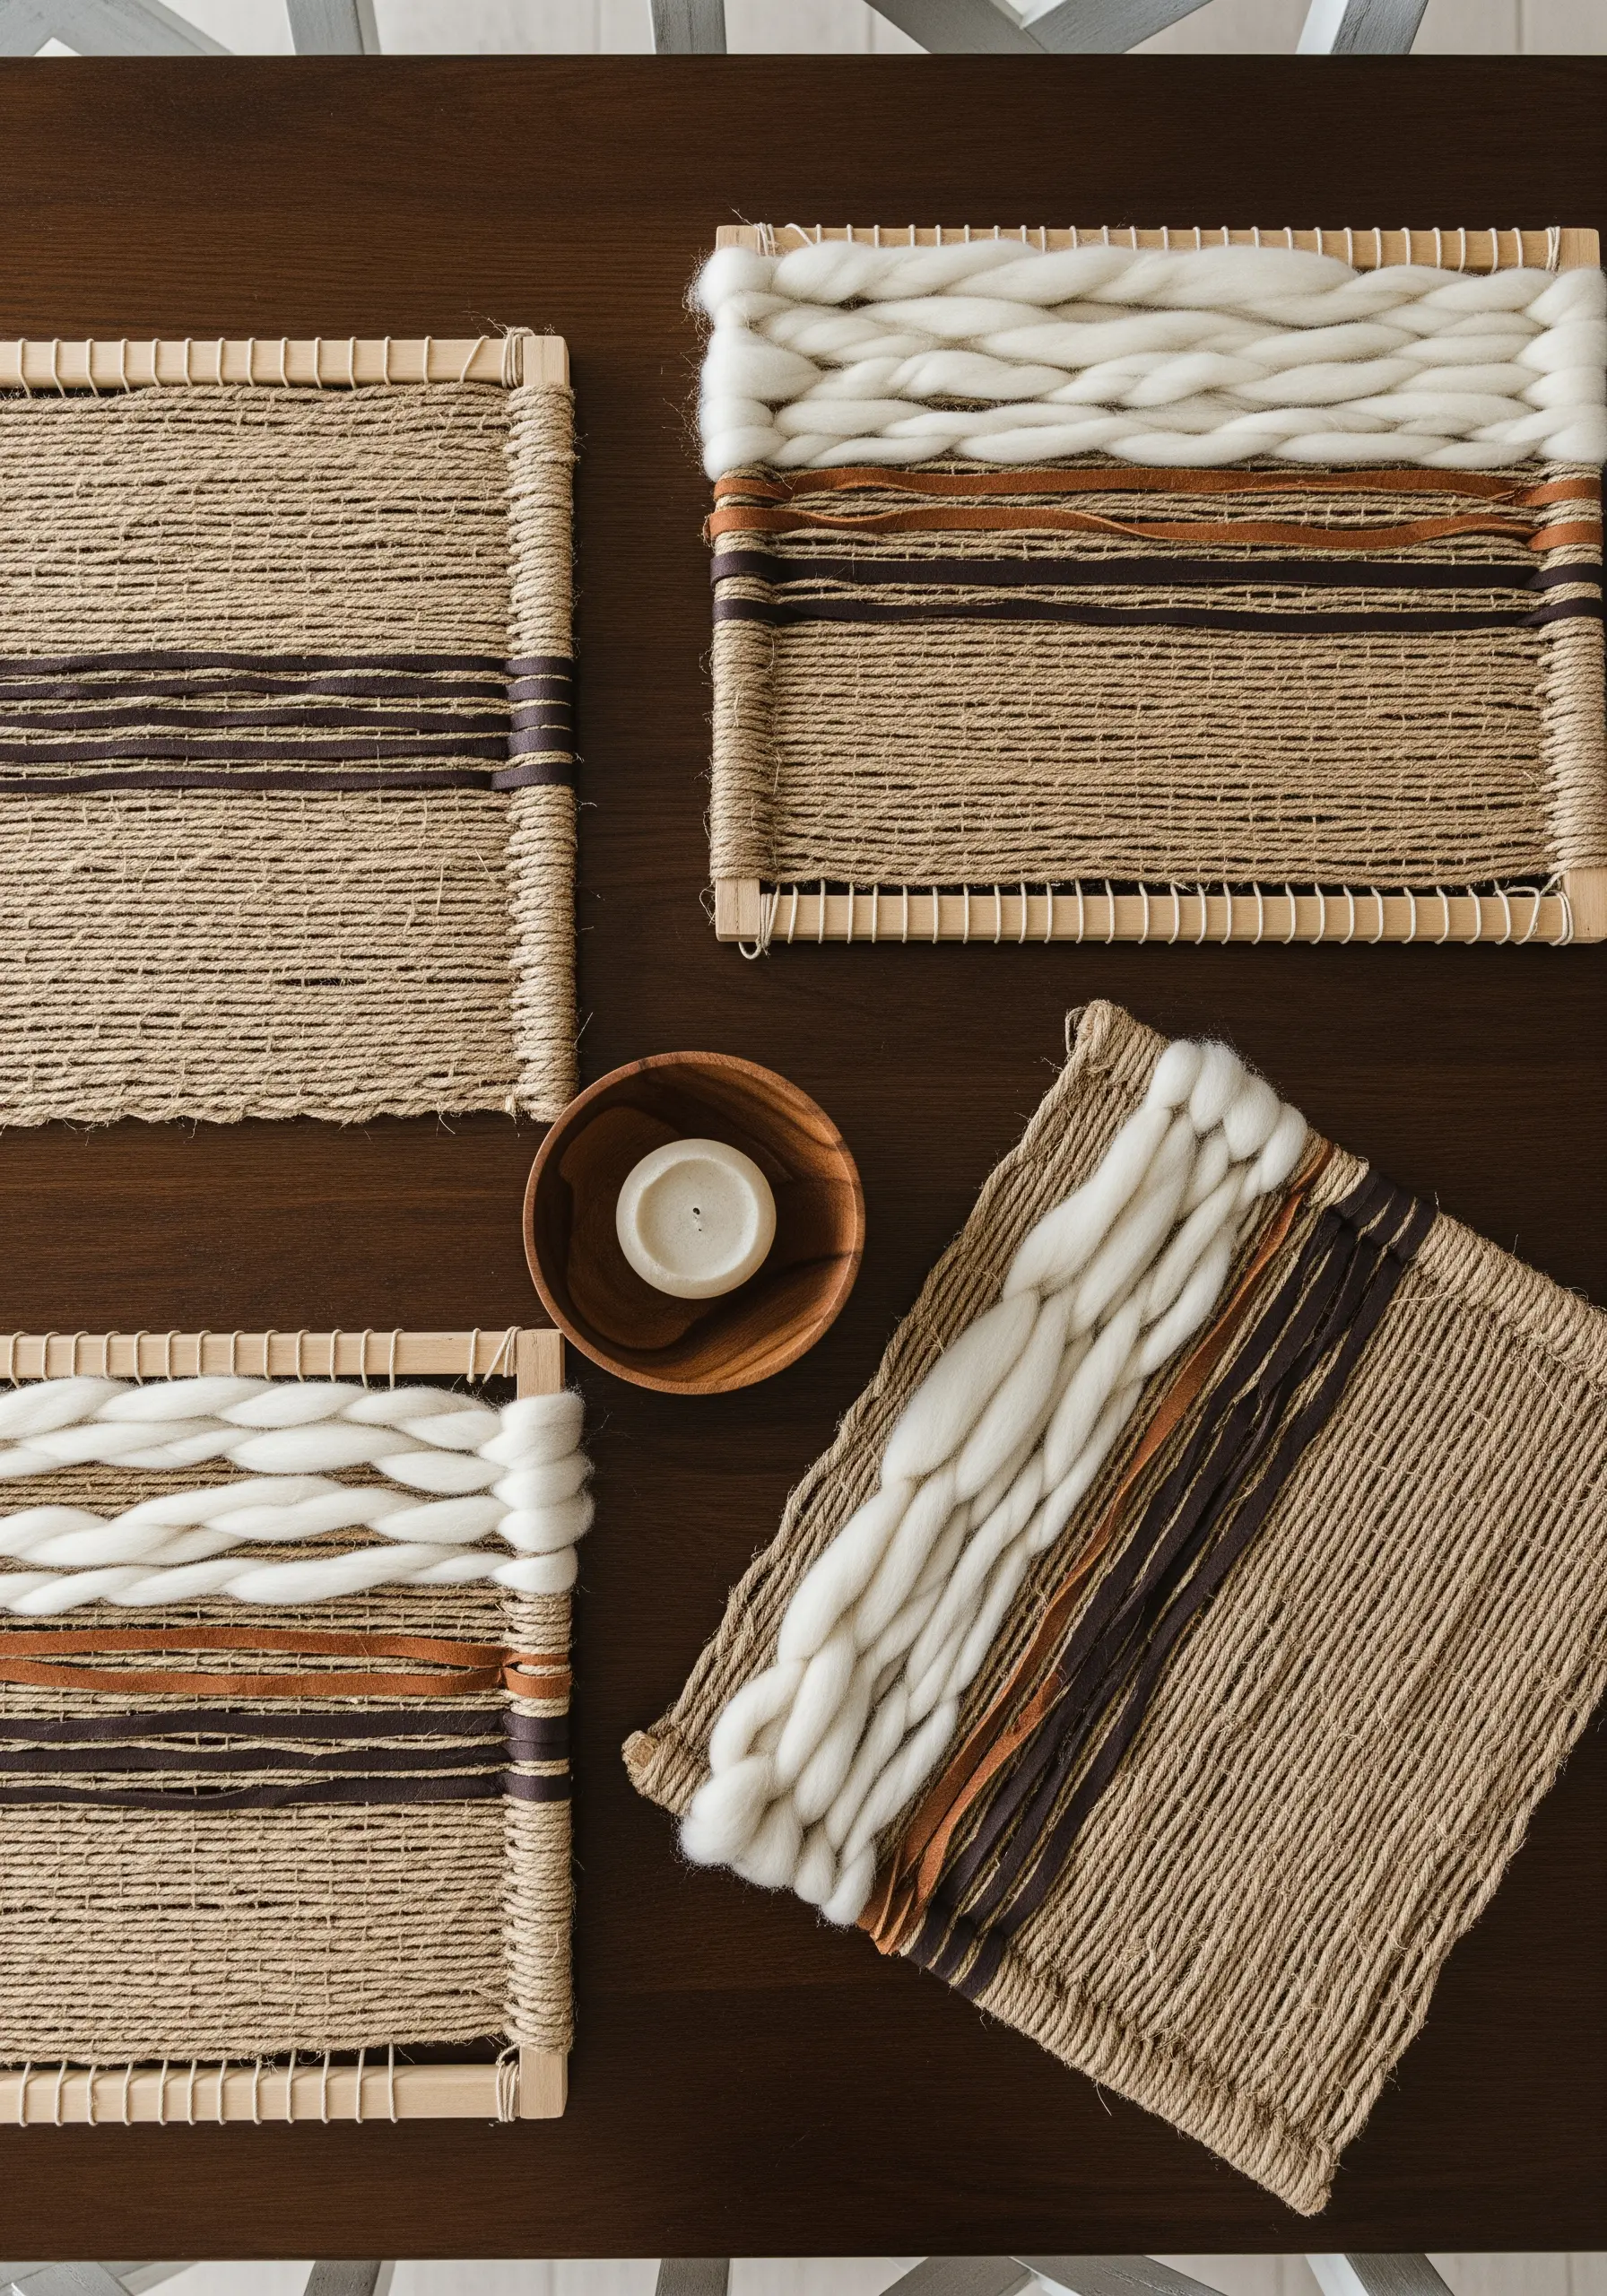
Create earthy, textural placemats using a simple wooden frame as your loom.
Use a durable material like jute or twine for the warp (vertical threads) and weft (horizontal threads).
The ‘wow’ factor comes from weaving in thick, unspun wool roving to create bold, soft stripes.
This contrast between the coarse jute and the plush wool is what makes these pieces feel special and artisanal, yet the weaving technique is the most basic over-under pattern imaginable.
16. Embellish a Lampshade with 3D Yarn Flowers
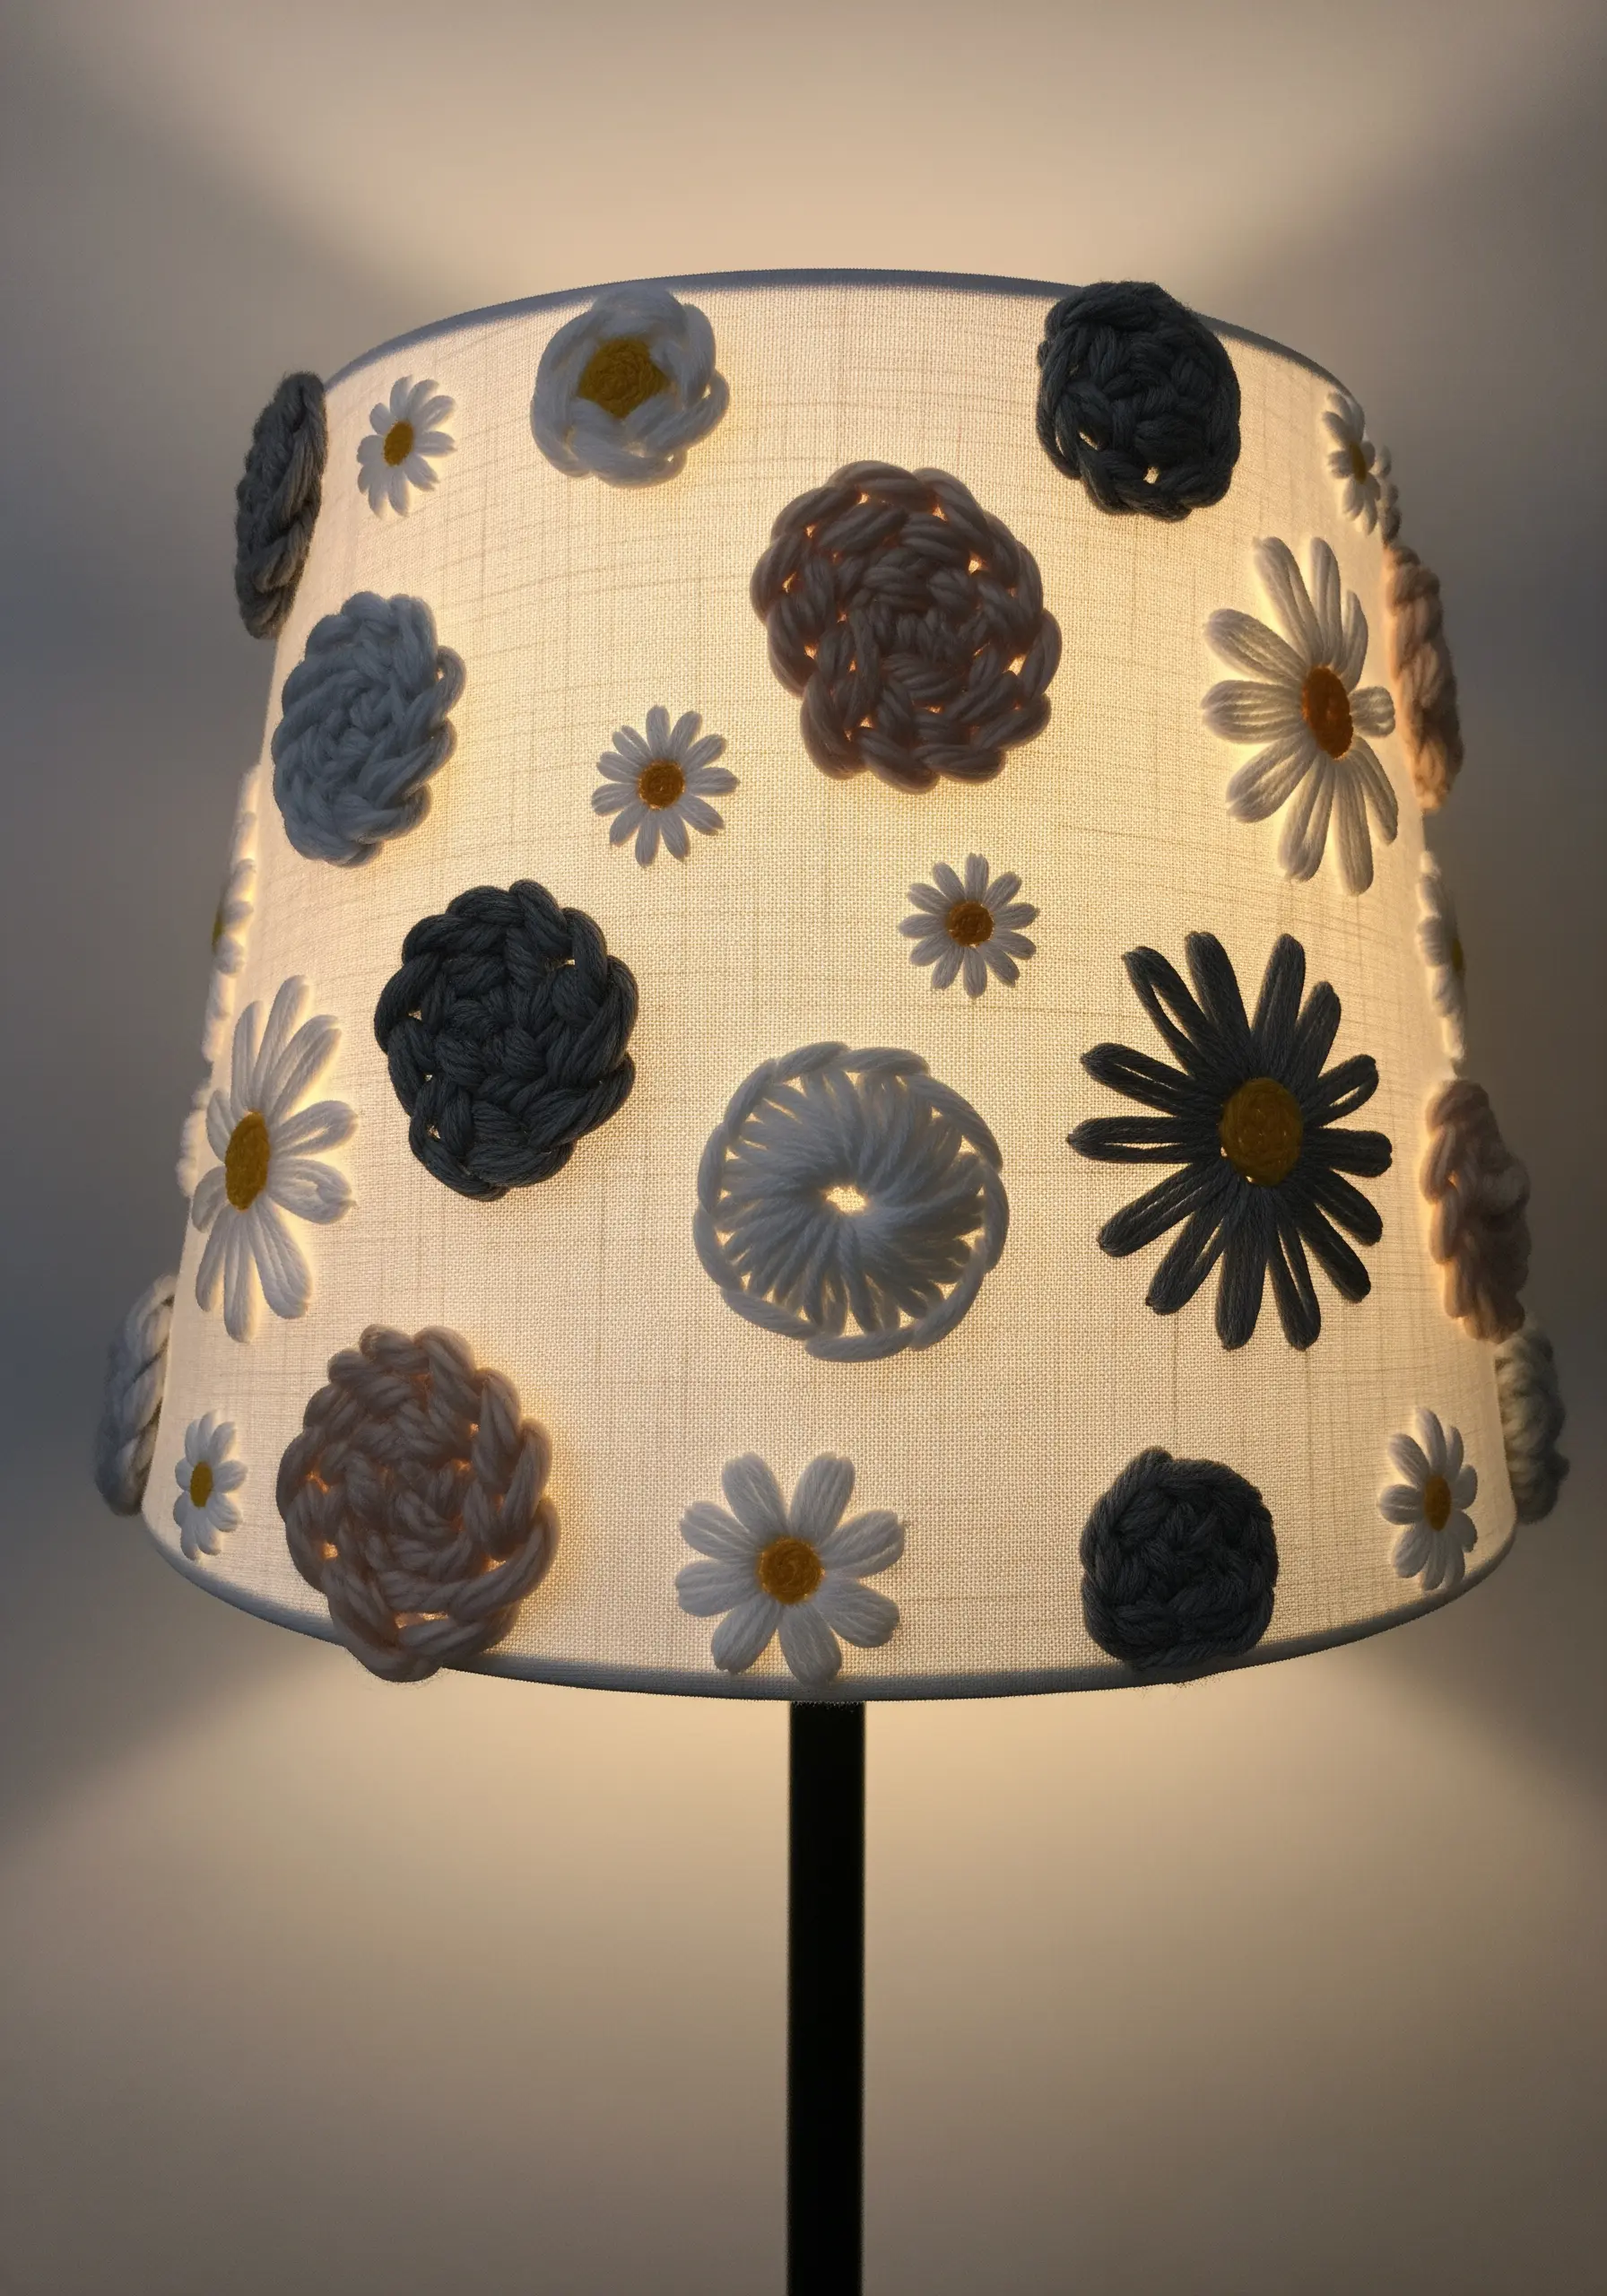
Transform a plain lampshade into a whimsical piece of decor by attaching simple, three-dimensional yarn flowers.
Create the flowers separately using easy techniques like the woven wheel stitch (also known as the spider web rose stitch) or by crocheting small floral motifs.
Make them in various sizes and complementary colors for a more organic, meadow-like feel.
Once finished, you can attach them to the lampshade with a hot glue gun or a few simple stitches, creating an instant custom look.
17. Create a Wall Hanging with Knots, Weaves, and Braids

This stunning piece looks like a masterclass in fiber arts, but it’s actually just a sampler of three easy techniques combined.
Start by mounting your warp threads to a piece of driftwood.
Dedicate one section to a series of simple macrame knots, another to a block of basic tabby weave, and leave the final section as a dramatic, thick braid of unspun roving.
The asymmetrical composition and the bold textural shifts are what make this design so captivating and unique.
18. Layer Felted Orbs on a Thread Web
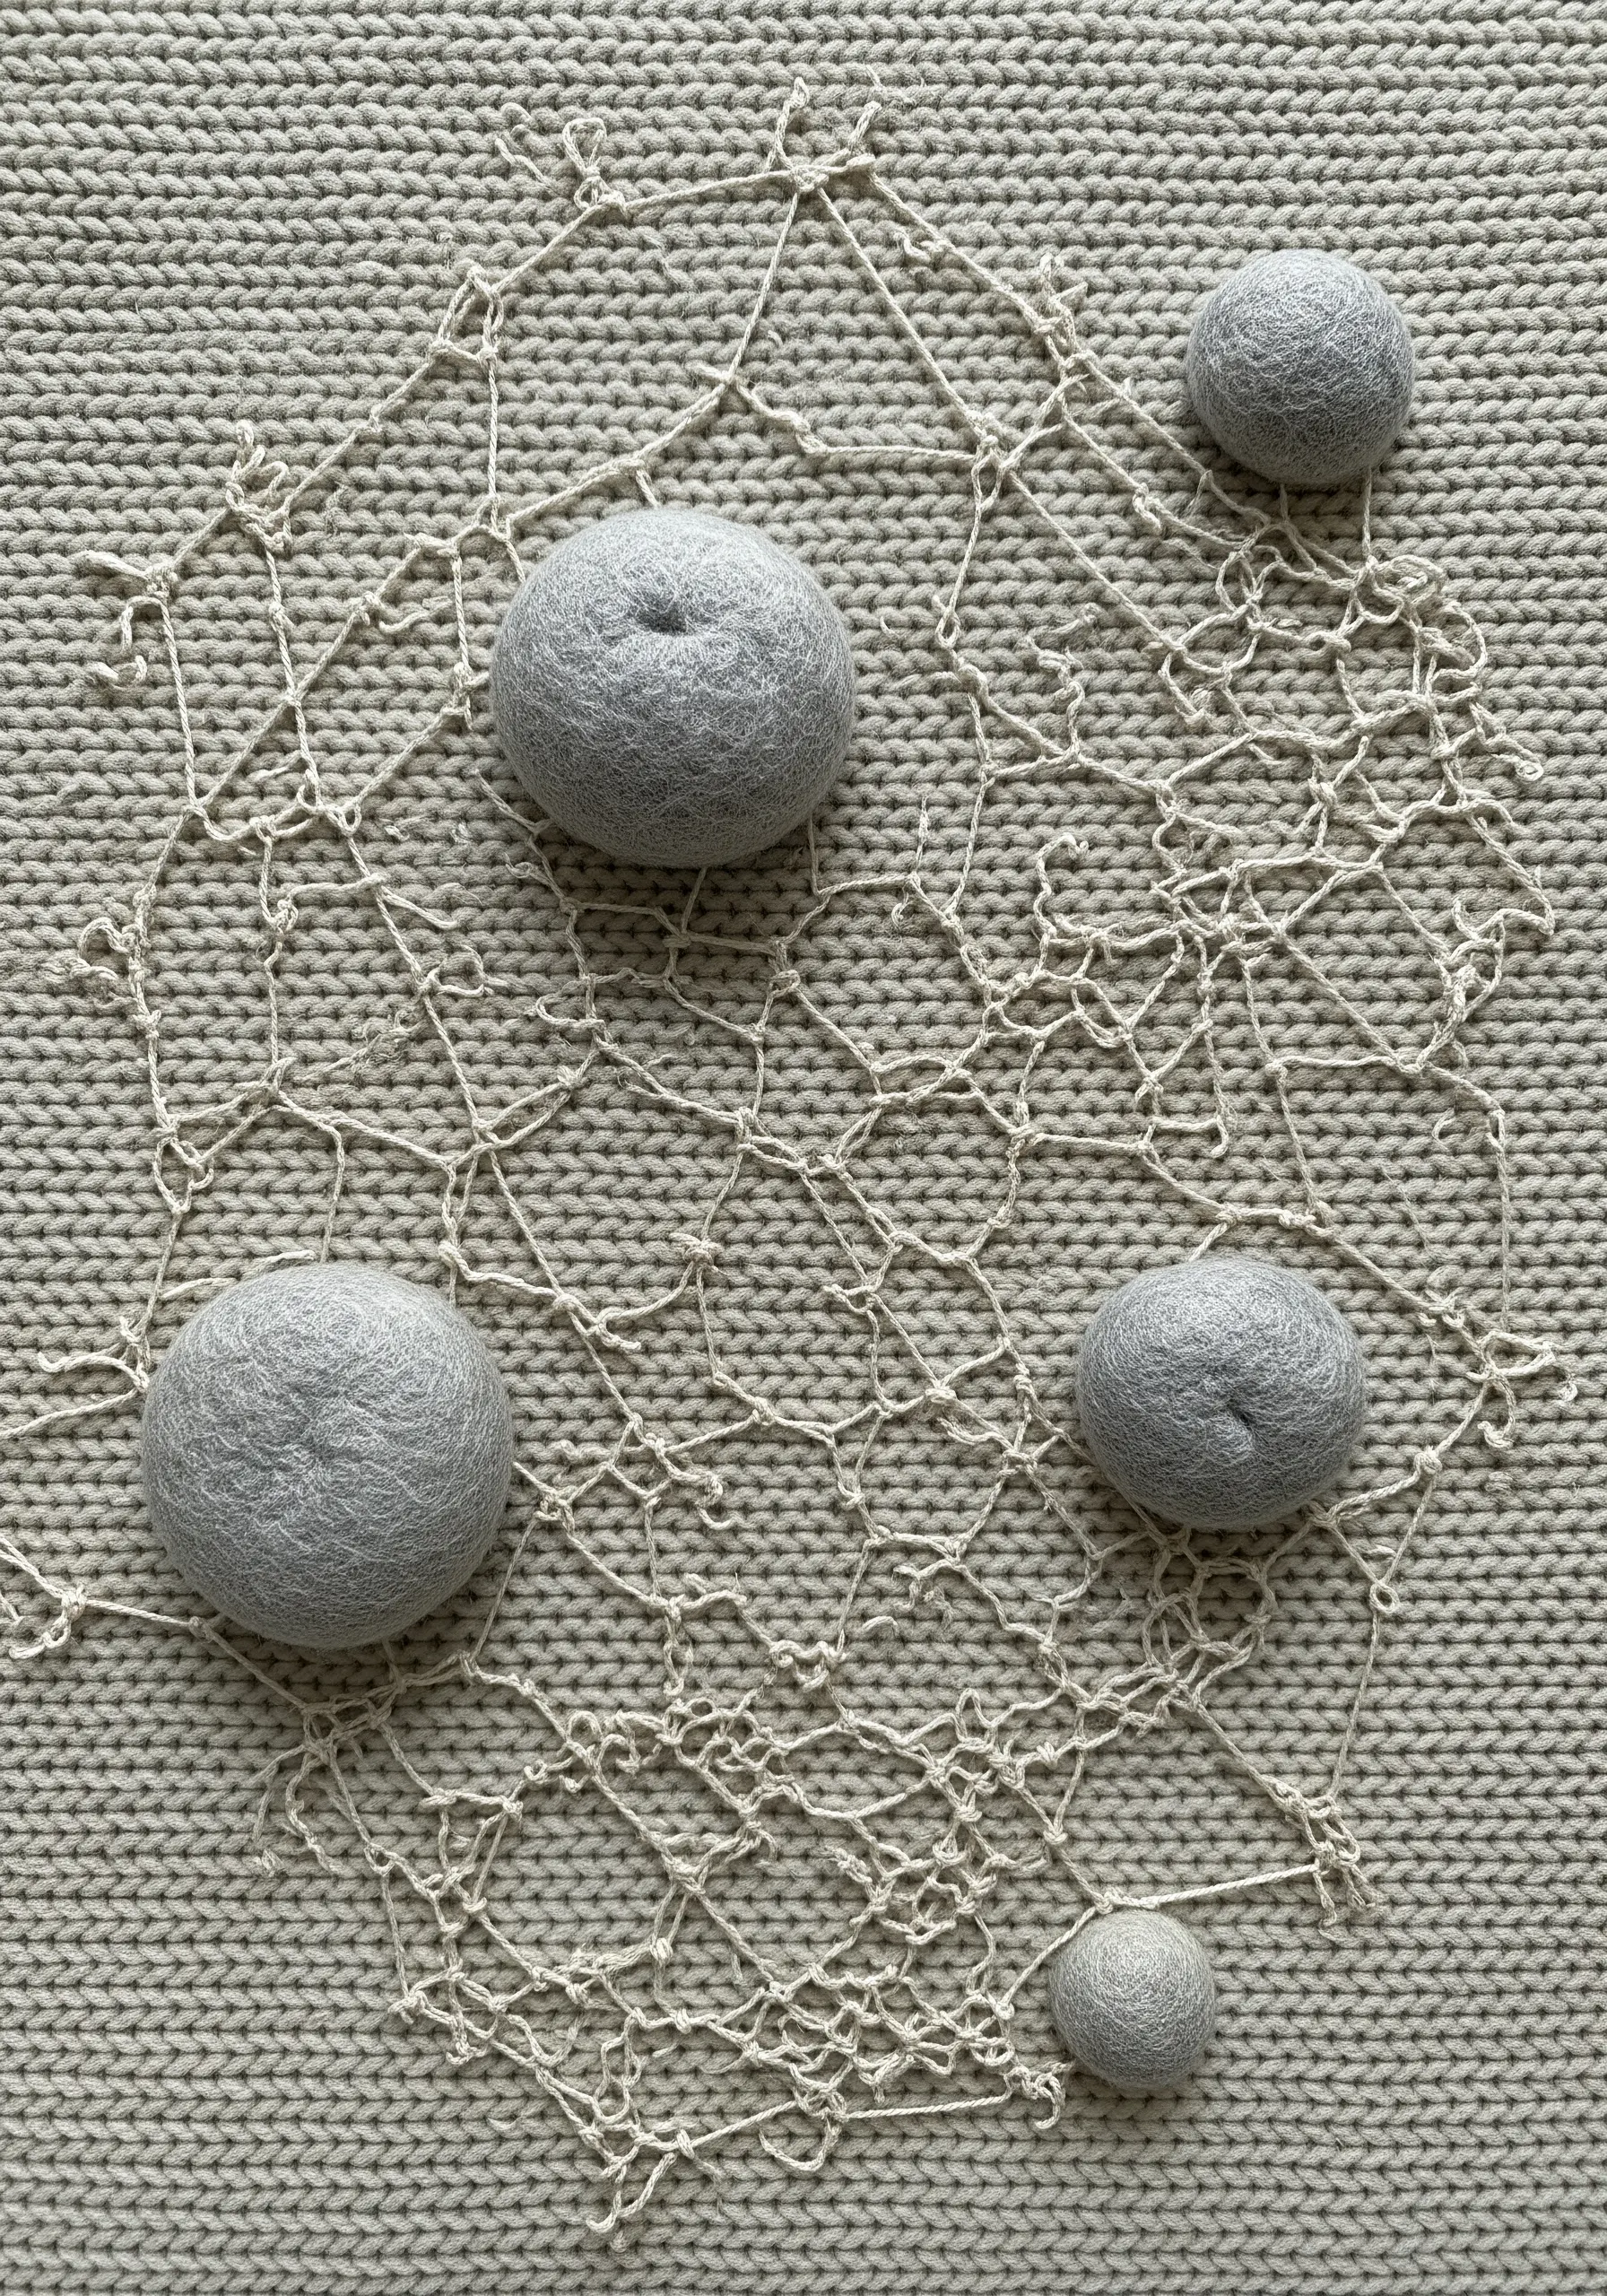
This project creates an ethereal, organic texture on top of a pre-existing textile, like a knit sweater or blanket.
First, create a delicate, web-like structure by stitching long, intersecting lines of fine thread across your chosen area.
Then, craft soft spheres of varying sizes using wool roving and a needle-felting tool.
Finally, attach the felted orbs to the intersections of your thread web. The final piece feels layered and complex, evoking natural forms like water droplets on a spiderweb.
19. Decorate a Journal with Burlap and Couching
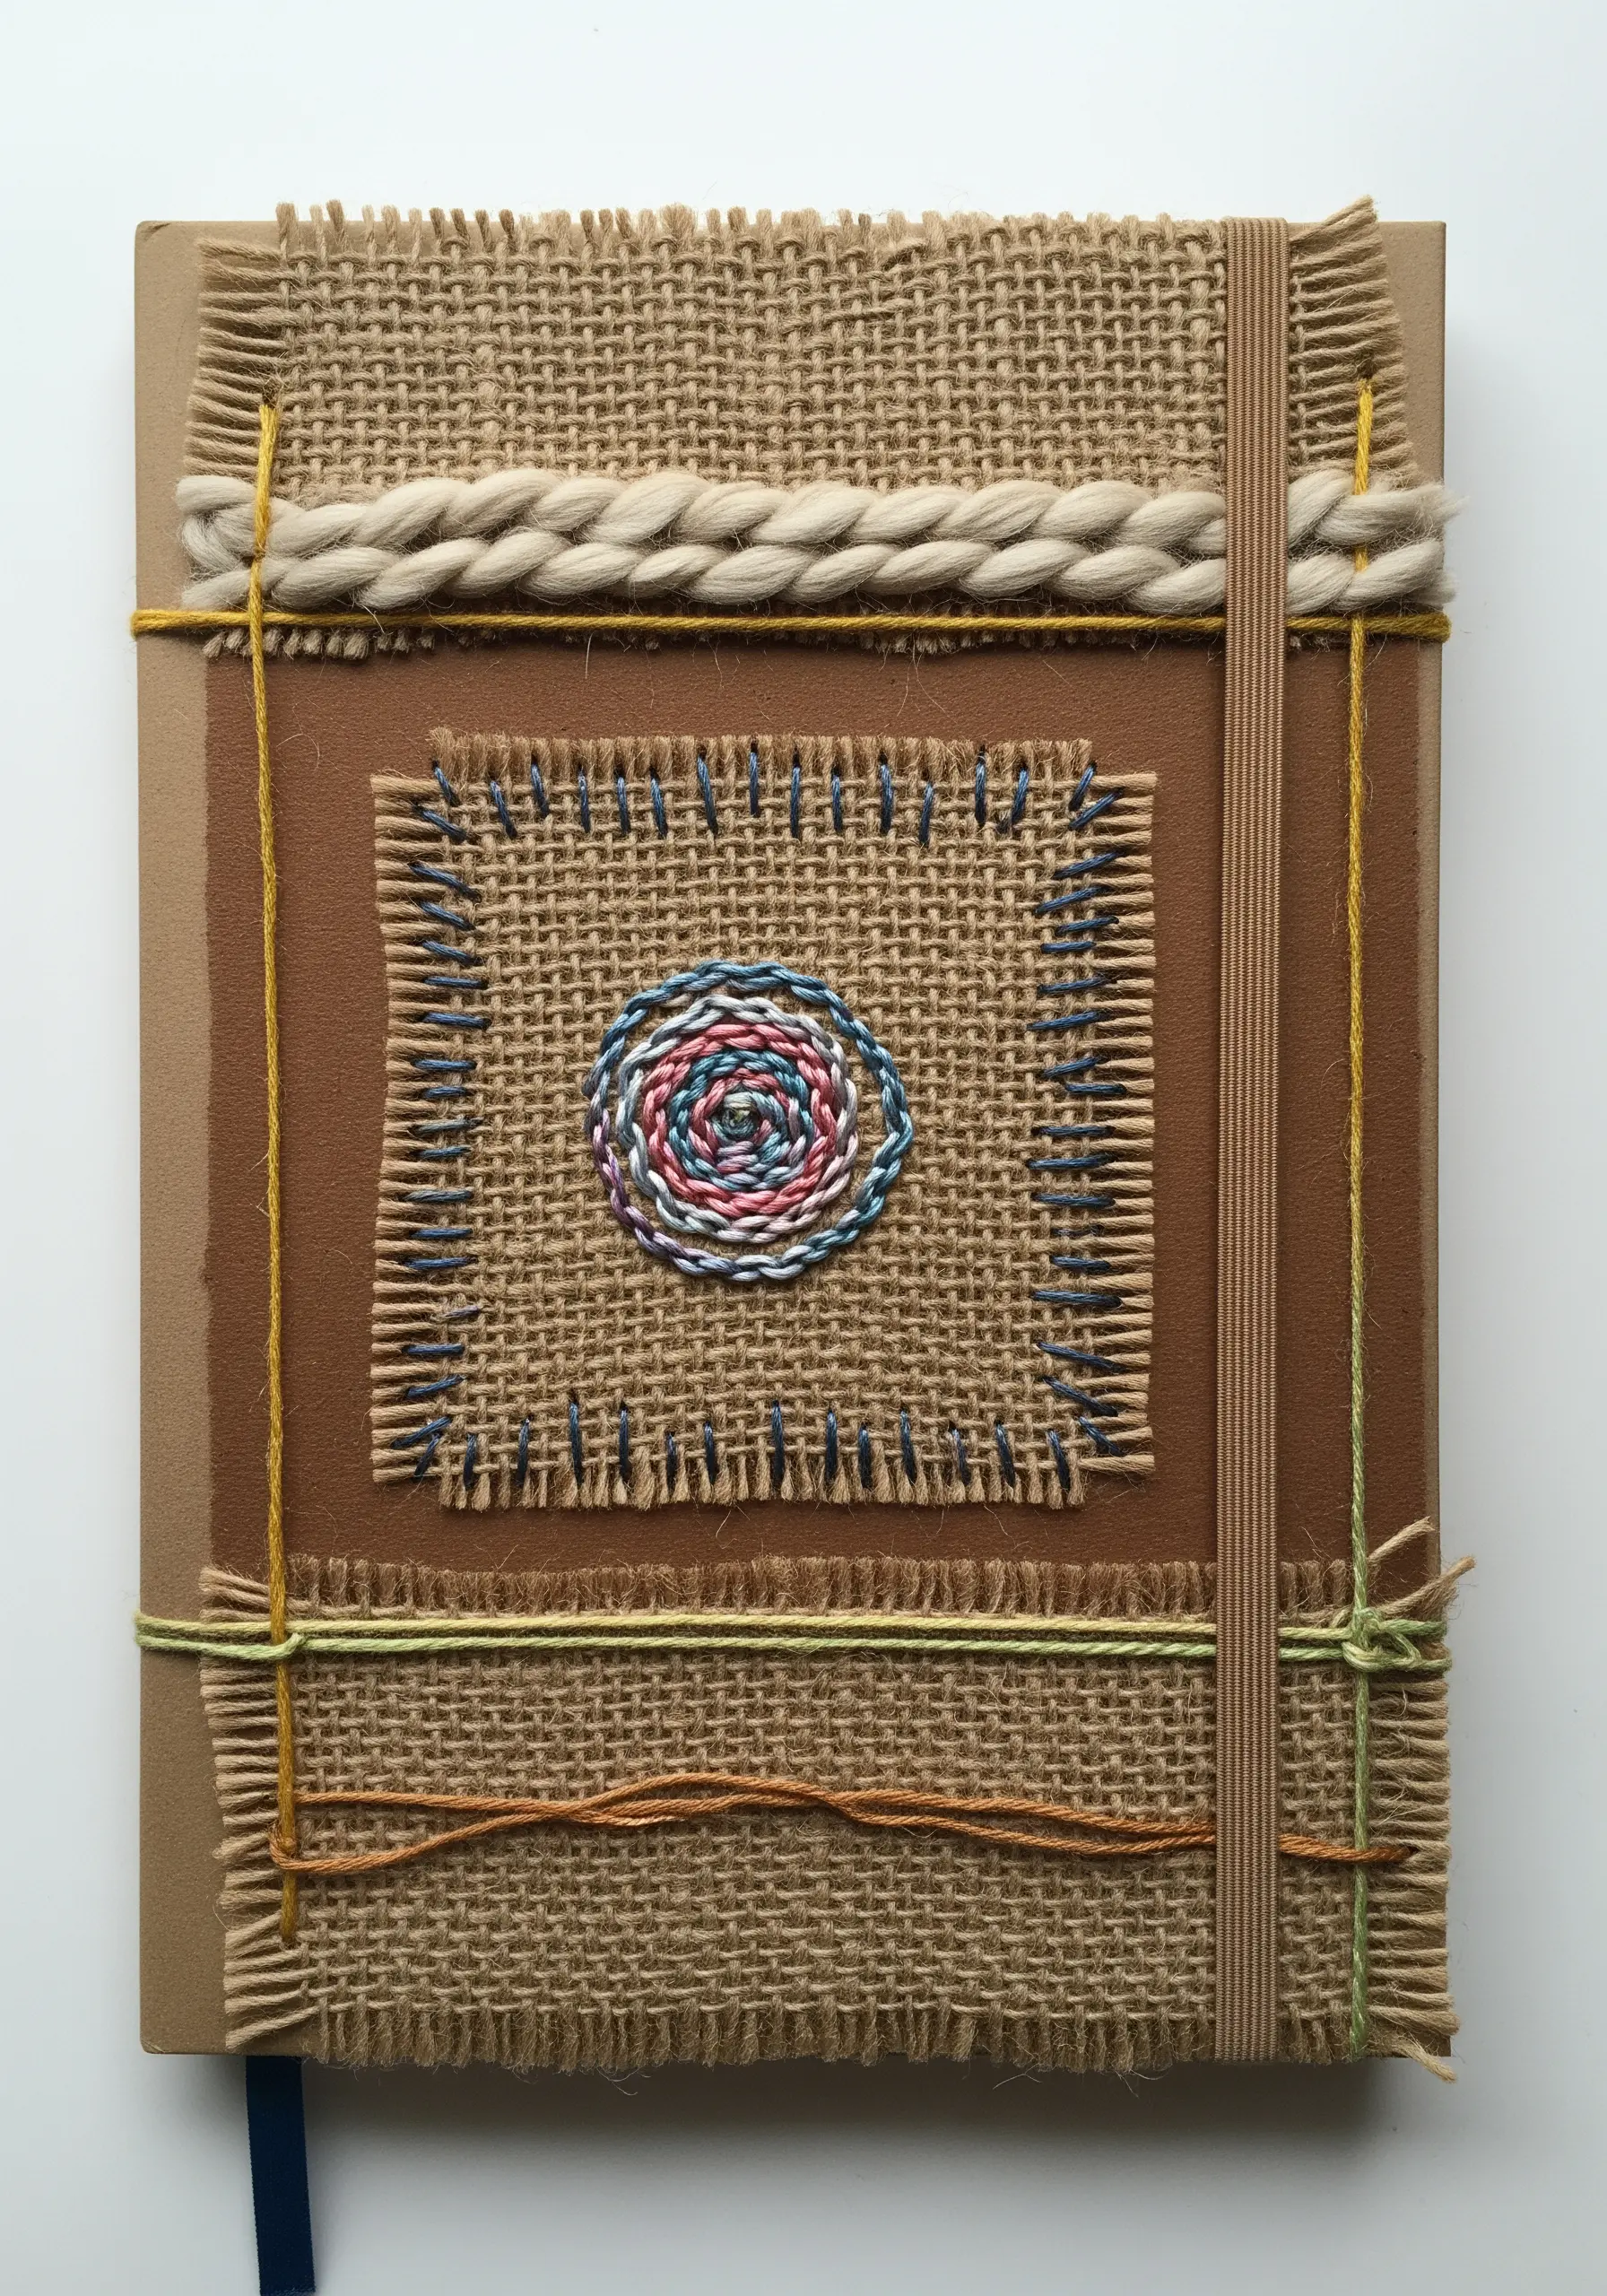
Elevate a simple notebook with a richly textured, multi-layered cover made from accessible materials.
Use burlap patches as your base; their coarse weave is perfect for stitching into, and the frayed edges add rustic charm.
Secure the patches with a simple, visible running stitch in a contrasting color.
For the central element, couch a variegated thread in a spiral pattern. The thread-color blending tricks the eye into seeing more complexity, while the technique is just laying down thread and tacking it in place.
20. Construct a Modern Dream Catcher
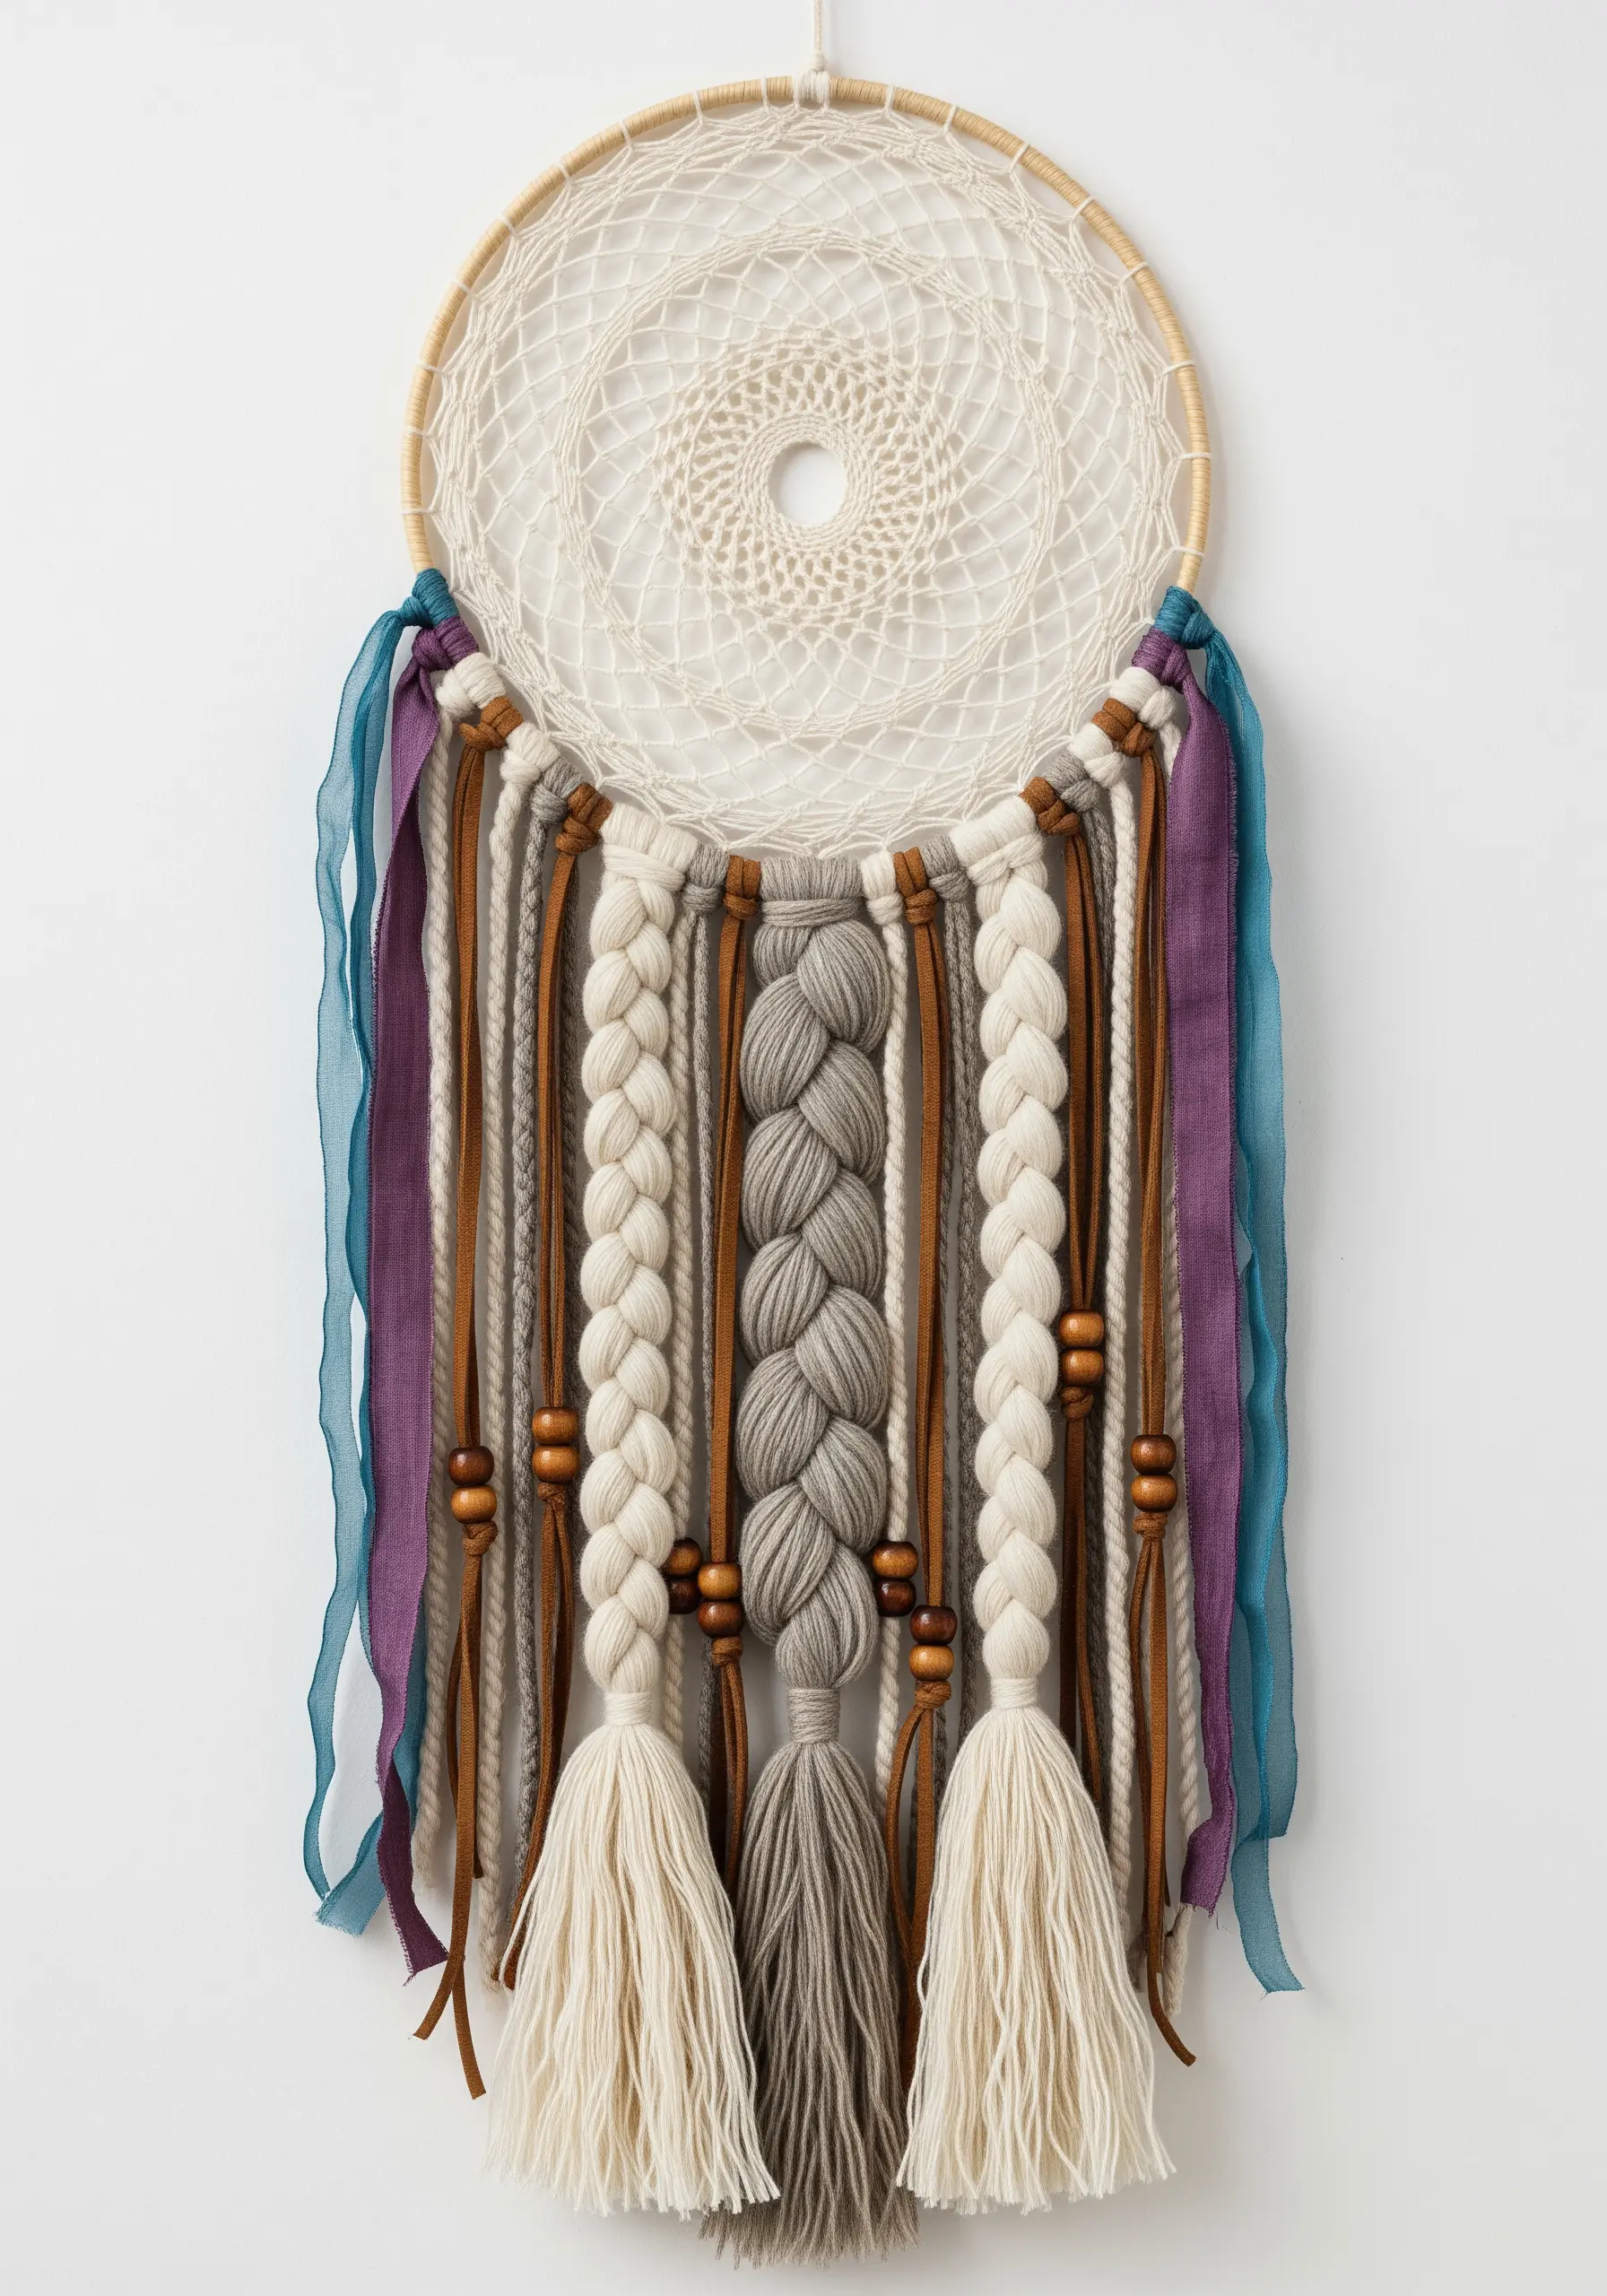
This design reimagines the traditional dream catcher with a focus on mixed fibers and textures.
The center is created by weaving a simple geometric web onto a hoop with fine, neutral-colored thread.
The real artistry comes from the tail, where you can attach an assortment of materials: thick, braided wool yarn, strips of faux leather, sheer organza ribbons, and wooden beads.
It’s an assembly project that allows for endless personalization, and the variety of materials creates a rich, bohemian look.
21. Make a Tufted Mat with Punch Needle
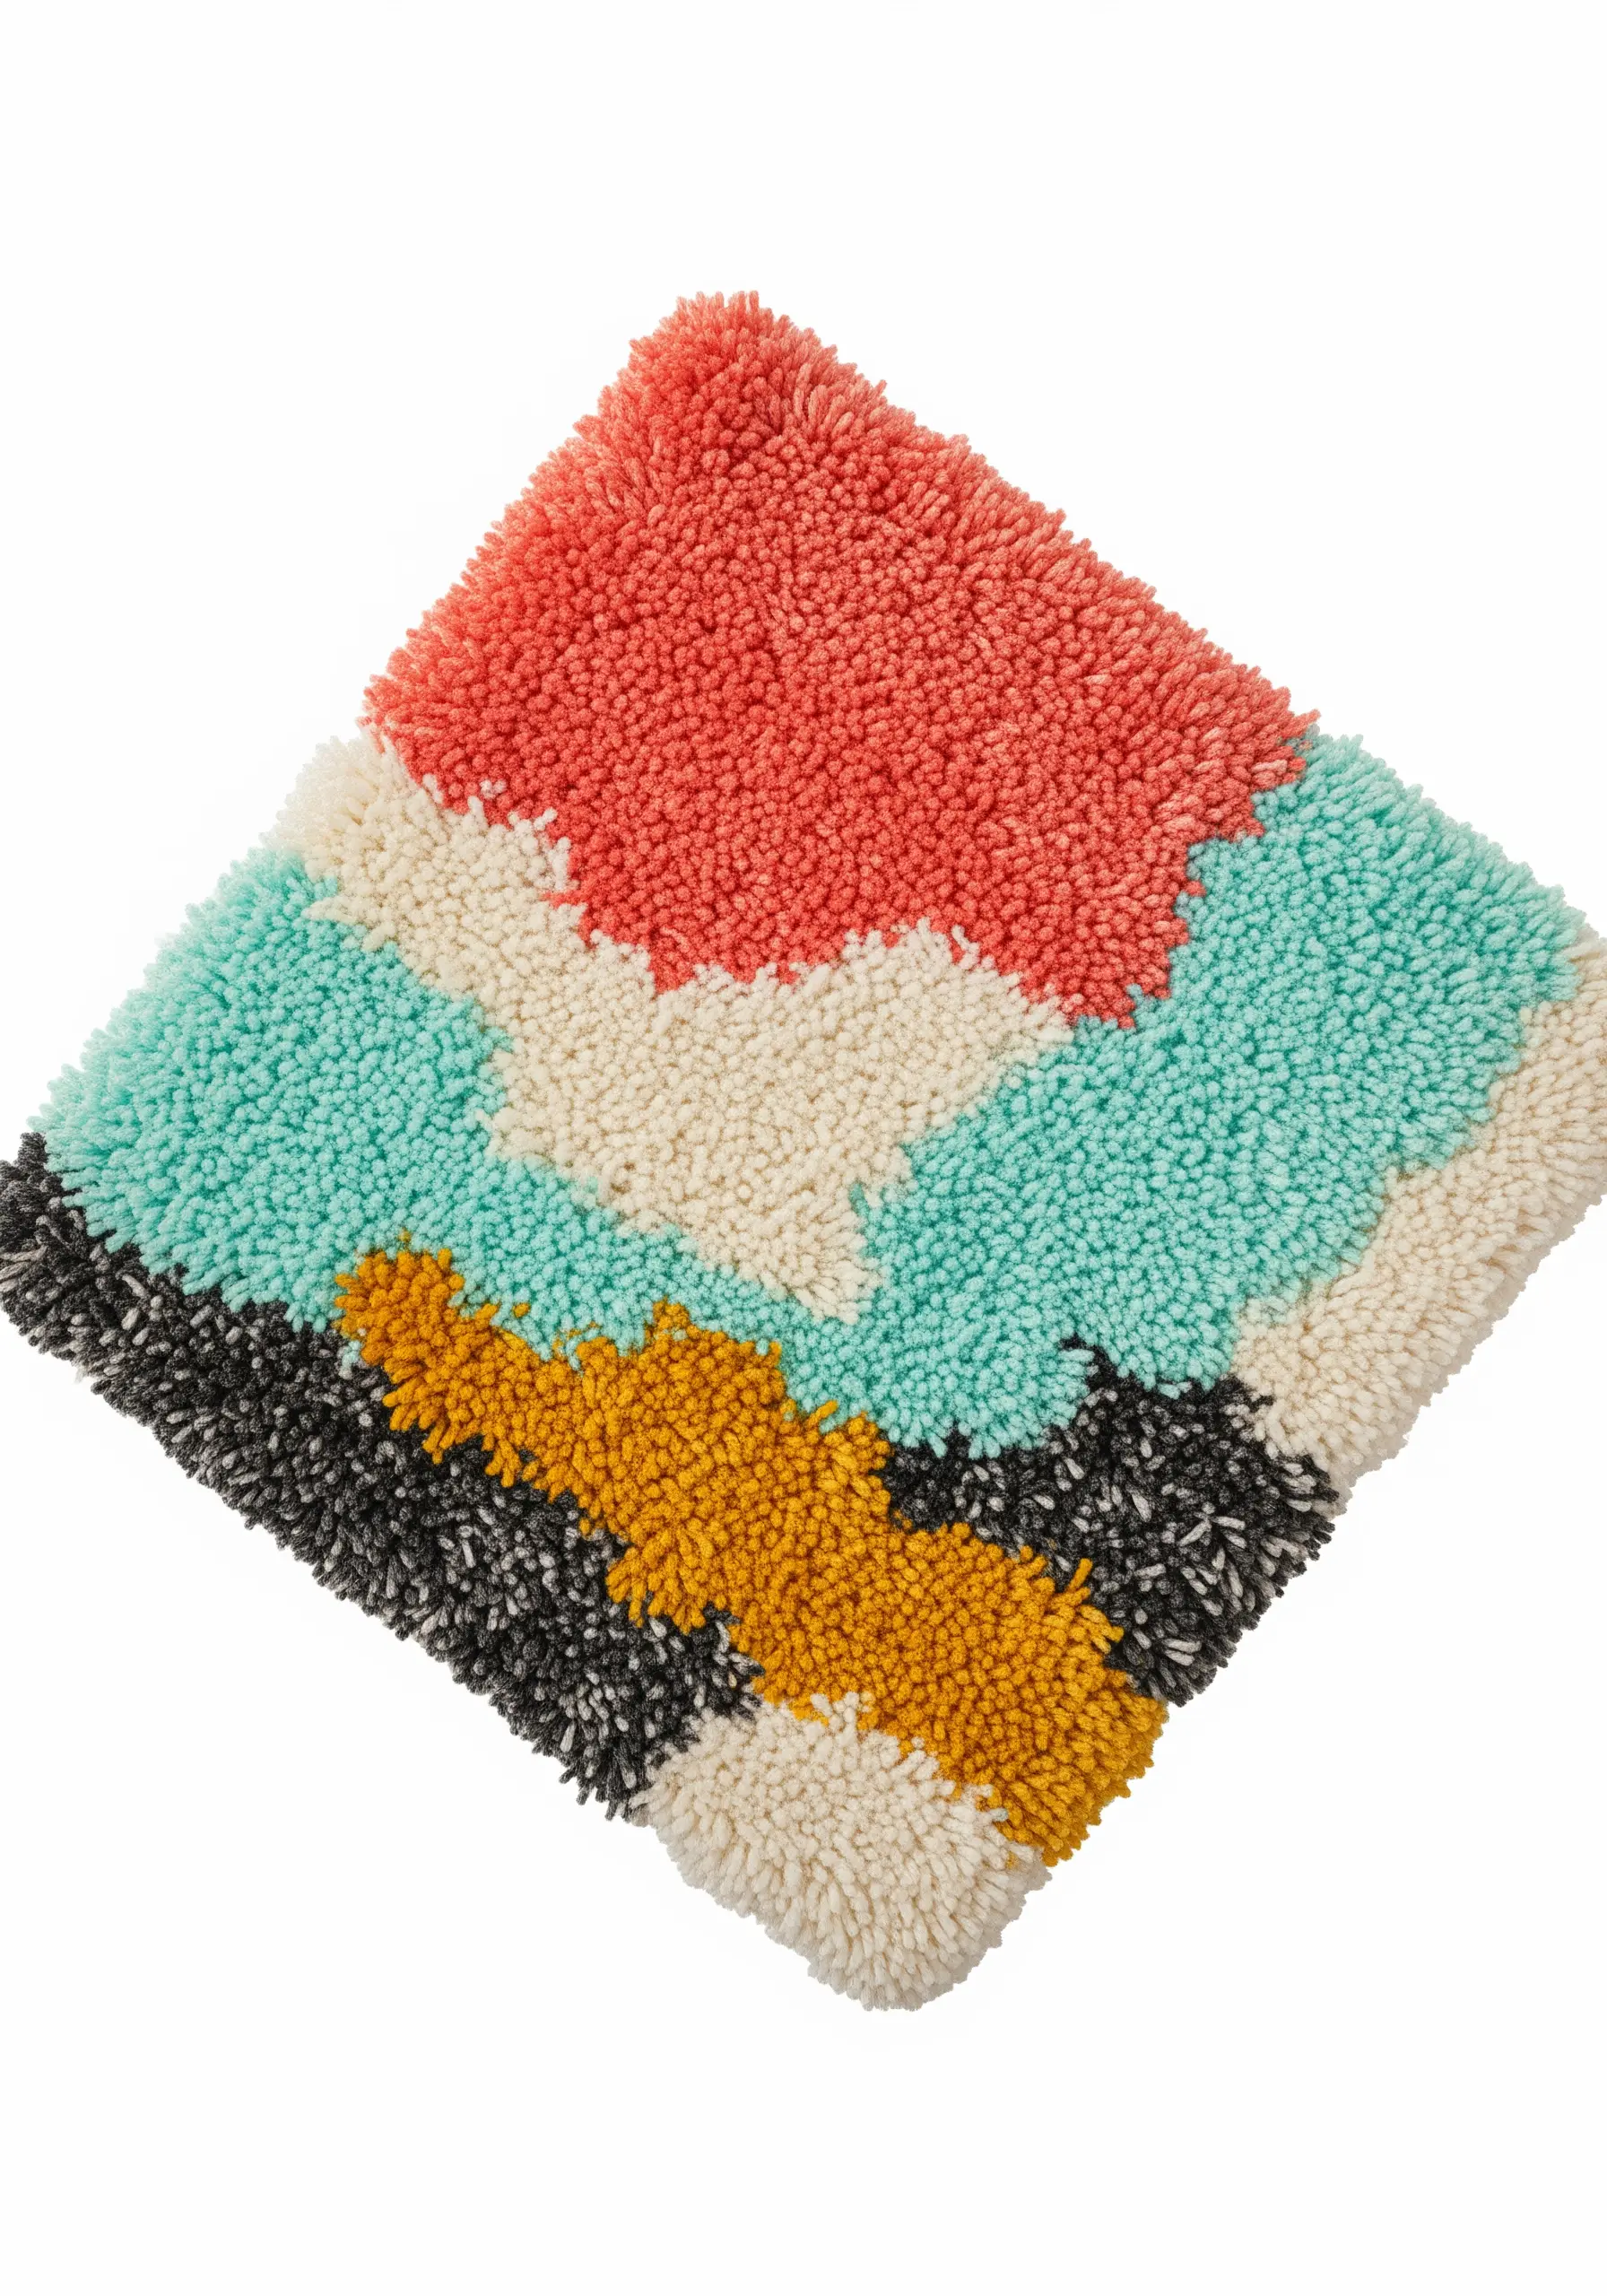
Punch needle is a wonderfully satisfying technique that allows you to create a lush, rug-like texture with surprising speed.
Using a special punch needle tool, you push loops of yarn through a weaver’s cloth backing.
The design may look complex, but the process is as simple as coloring within the lines of your pattern.
The tool does the hard work of creating uniform loops for you, making this one of the easiest ways to achieve a professional, tufted finish.
22. Frame Simple Textures as Abstract Art
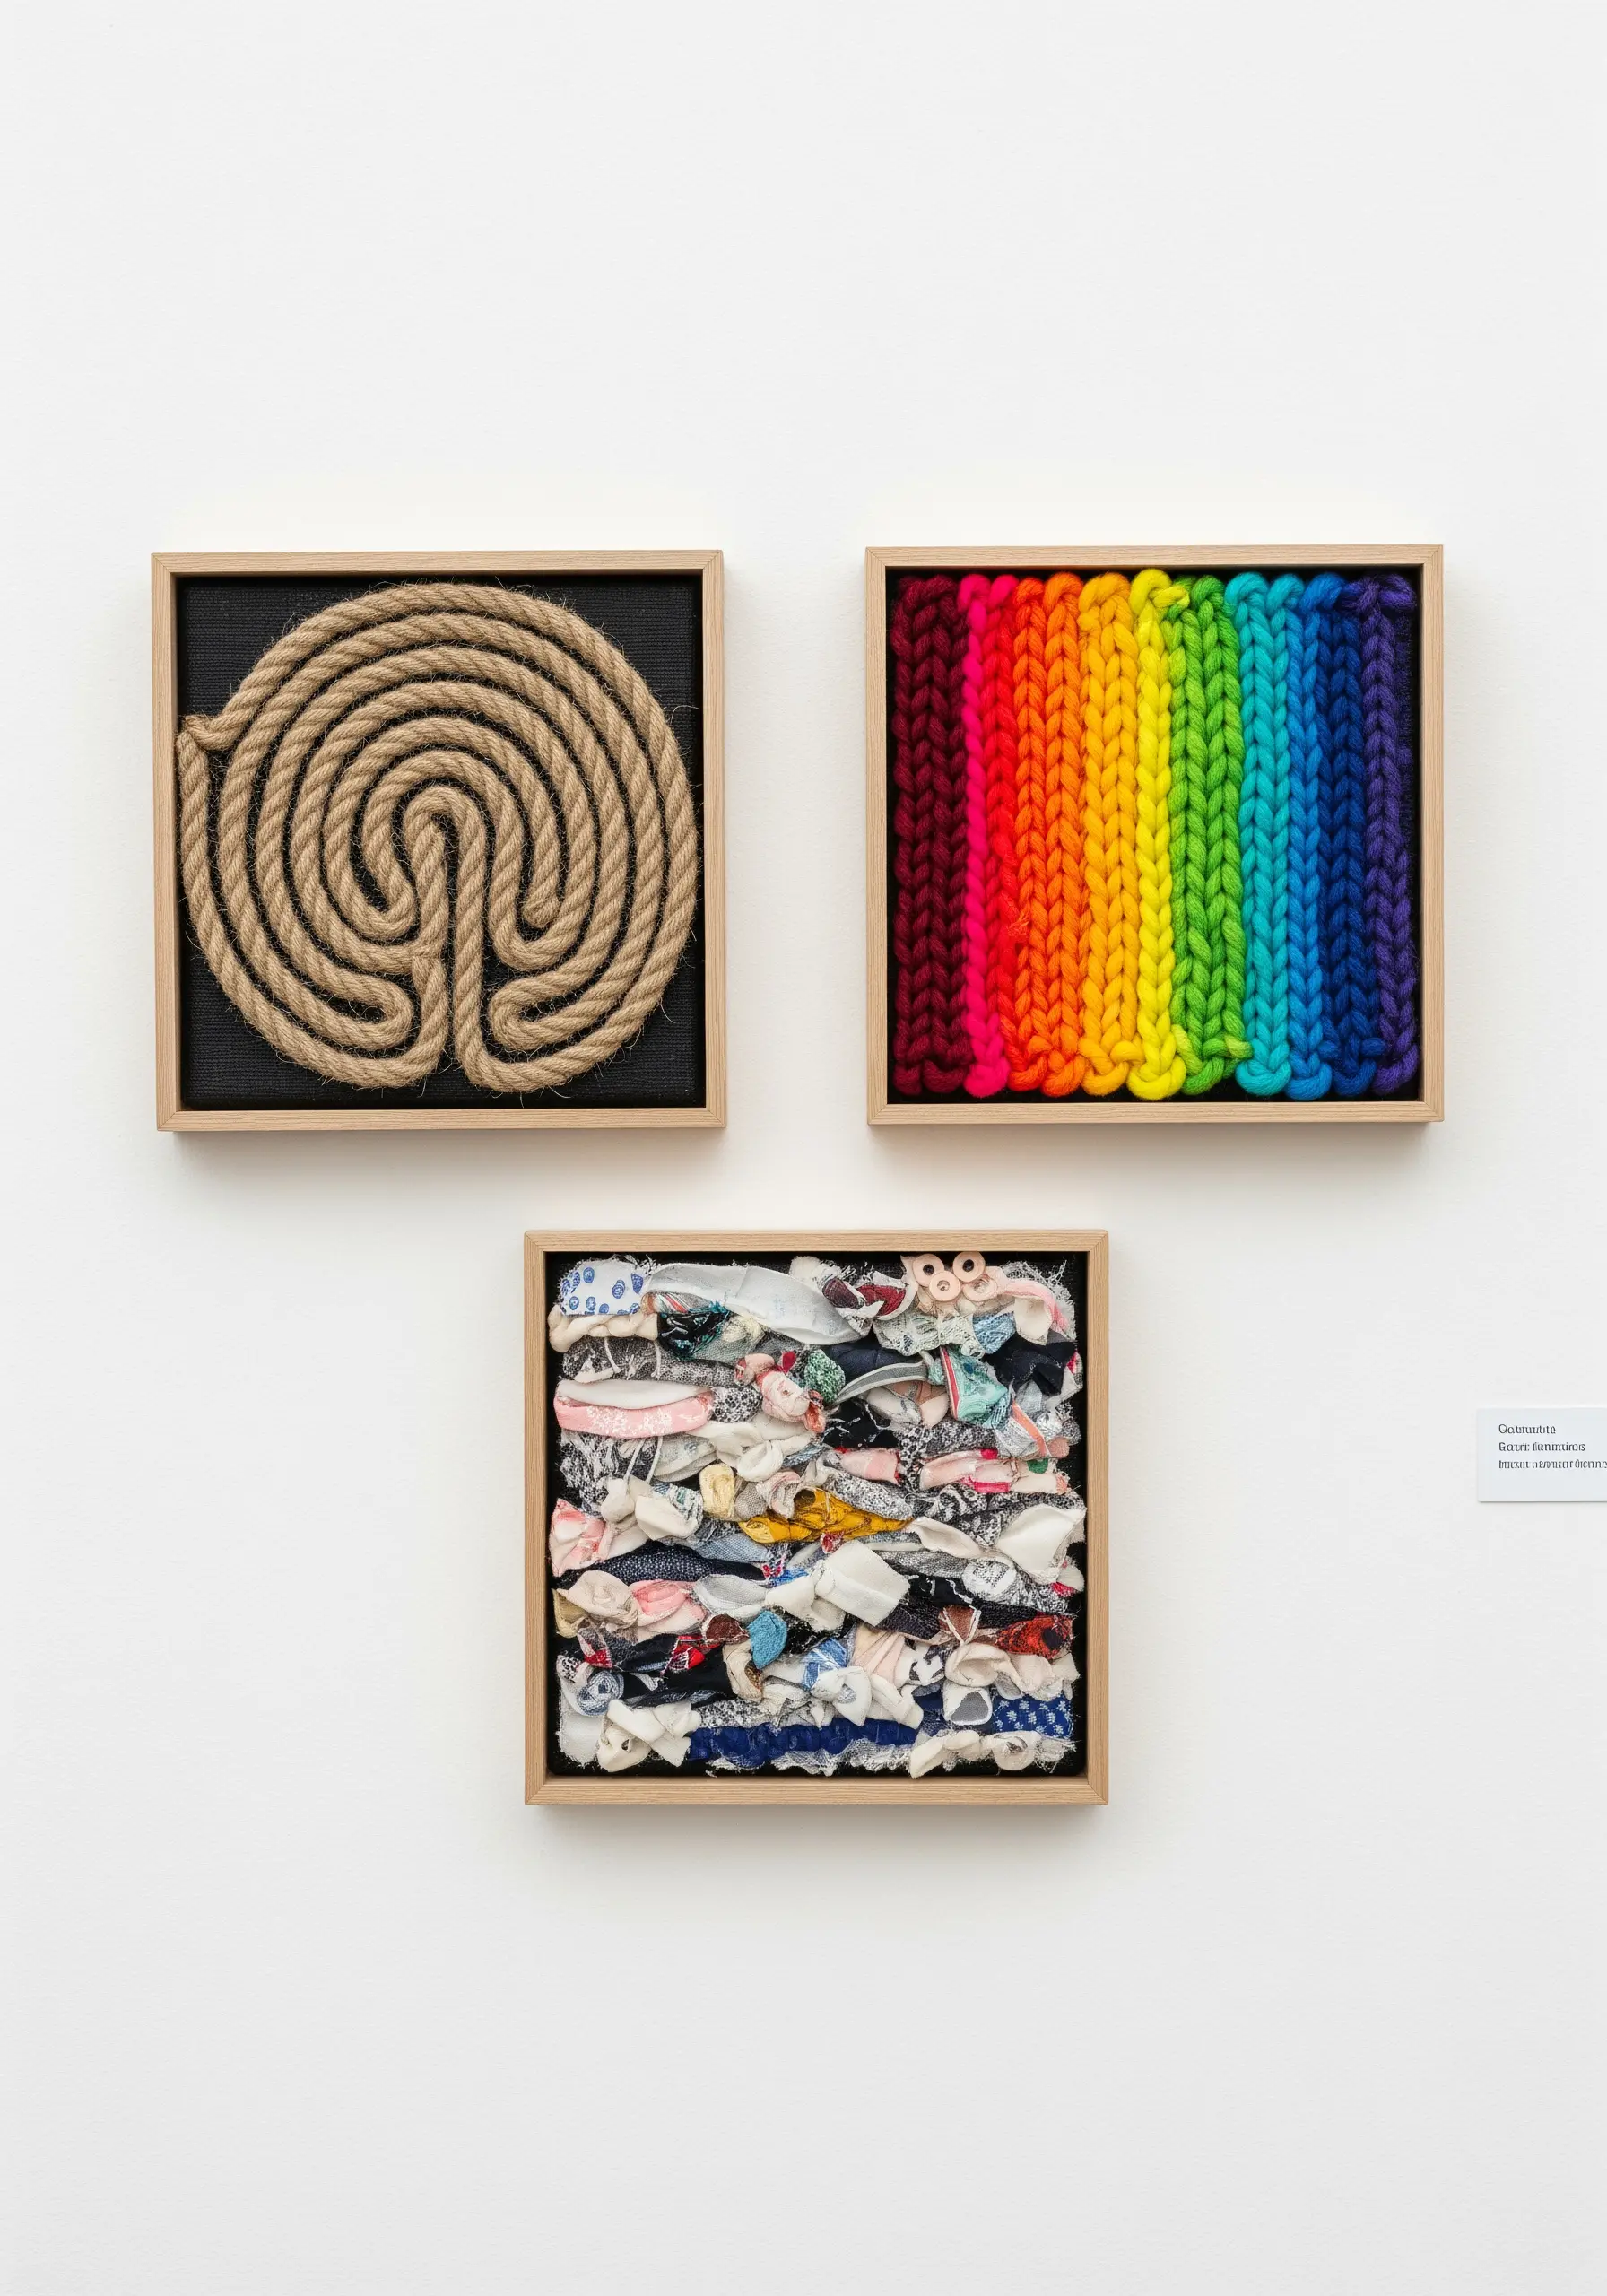
Elevate everyday fibers into modern art by isolating and framing them.
This triptych demonstrates the power of this concept. In one frame, simply coil a piece of jute rope into a labyrinth shape and glue it to a dark background.
In another, arrange rows of chunky, colorful yarn. In the third, create a textured surface with knotted fabric scraps.
By placing these simple fiber manipulations in minimalist frames, you encourage viewers to appreciate their form, color, and texture as abstract framed embroidery patterns.
23. Create Decorative Orbs with Scrap Yarn
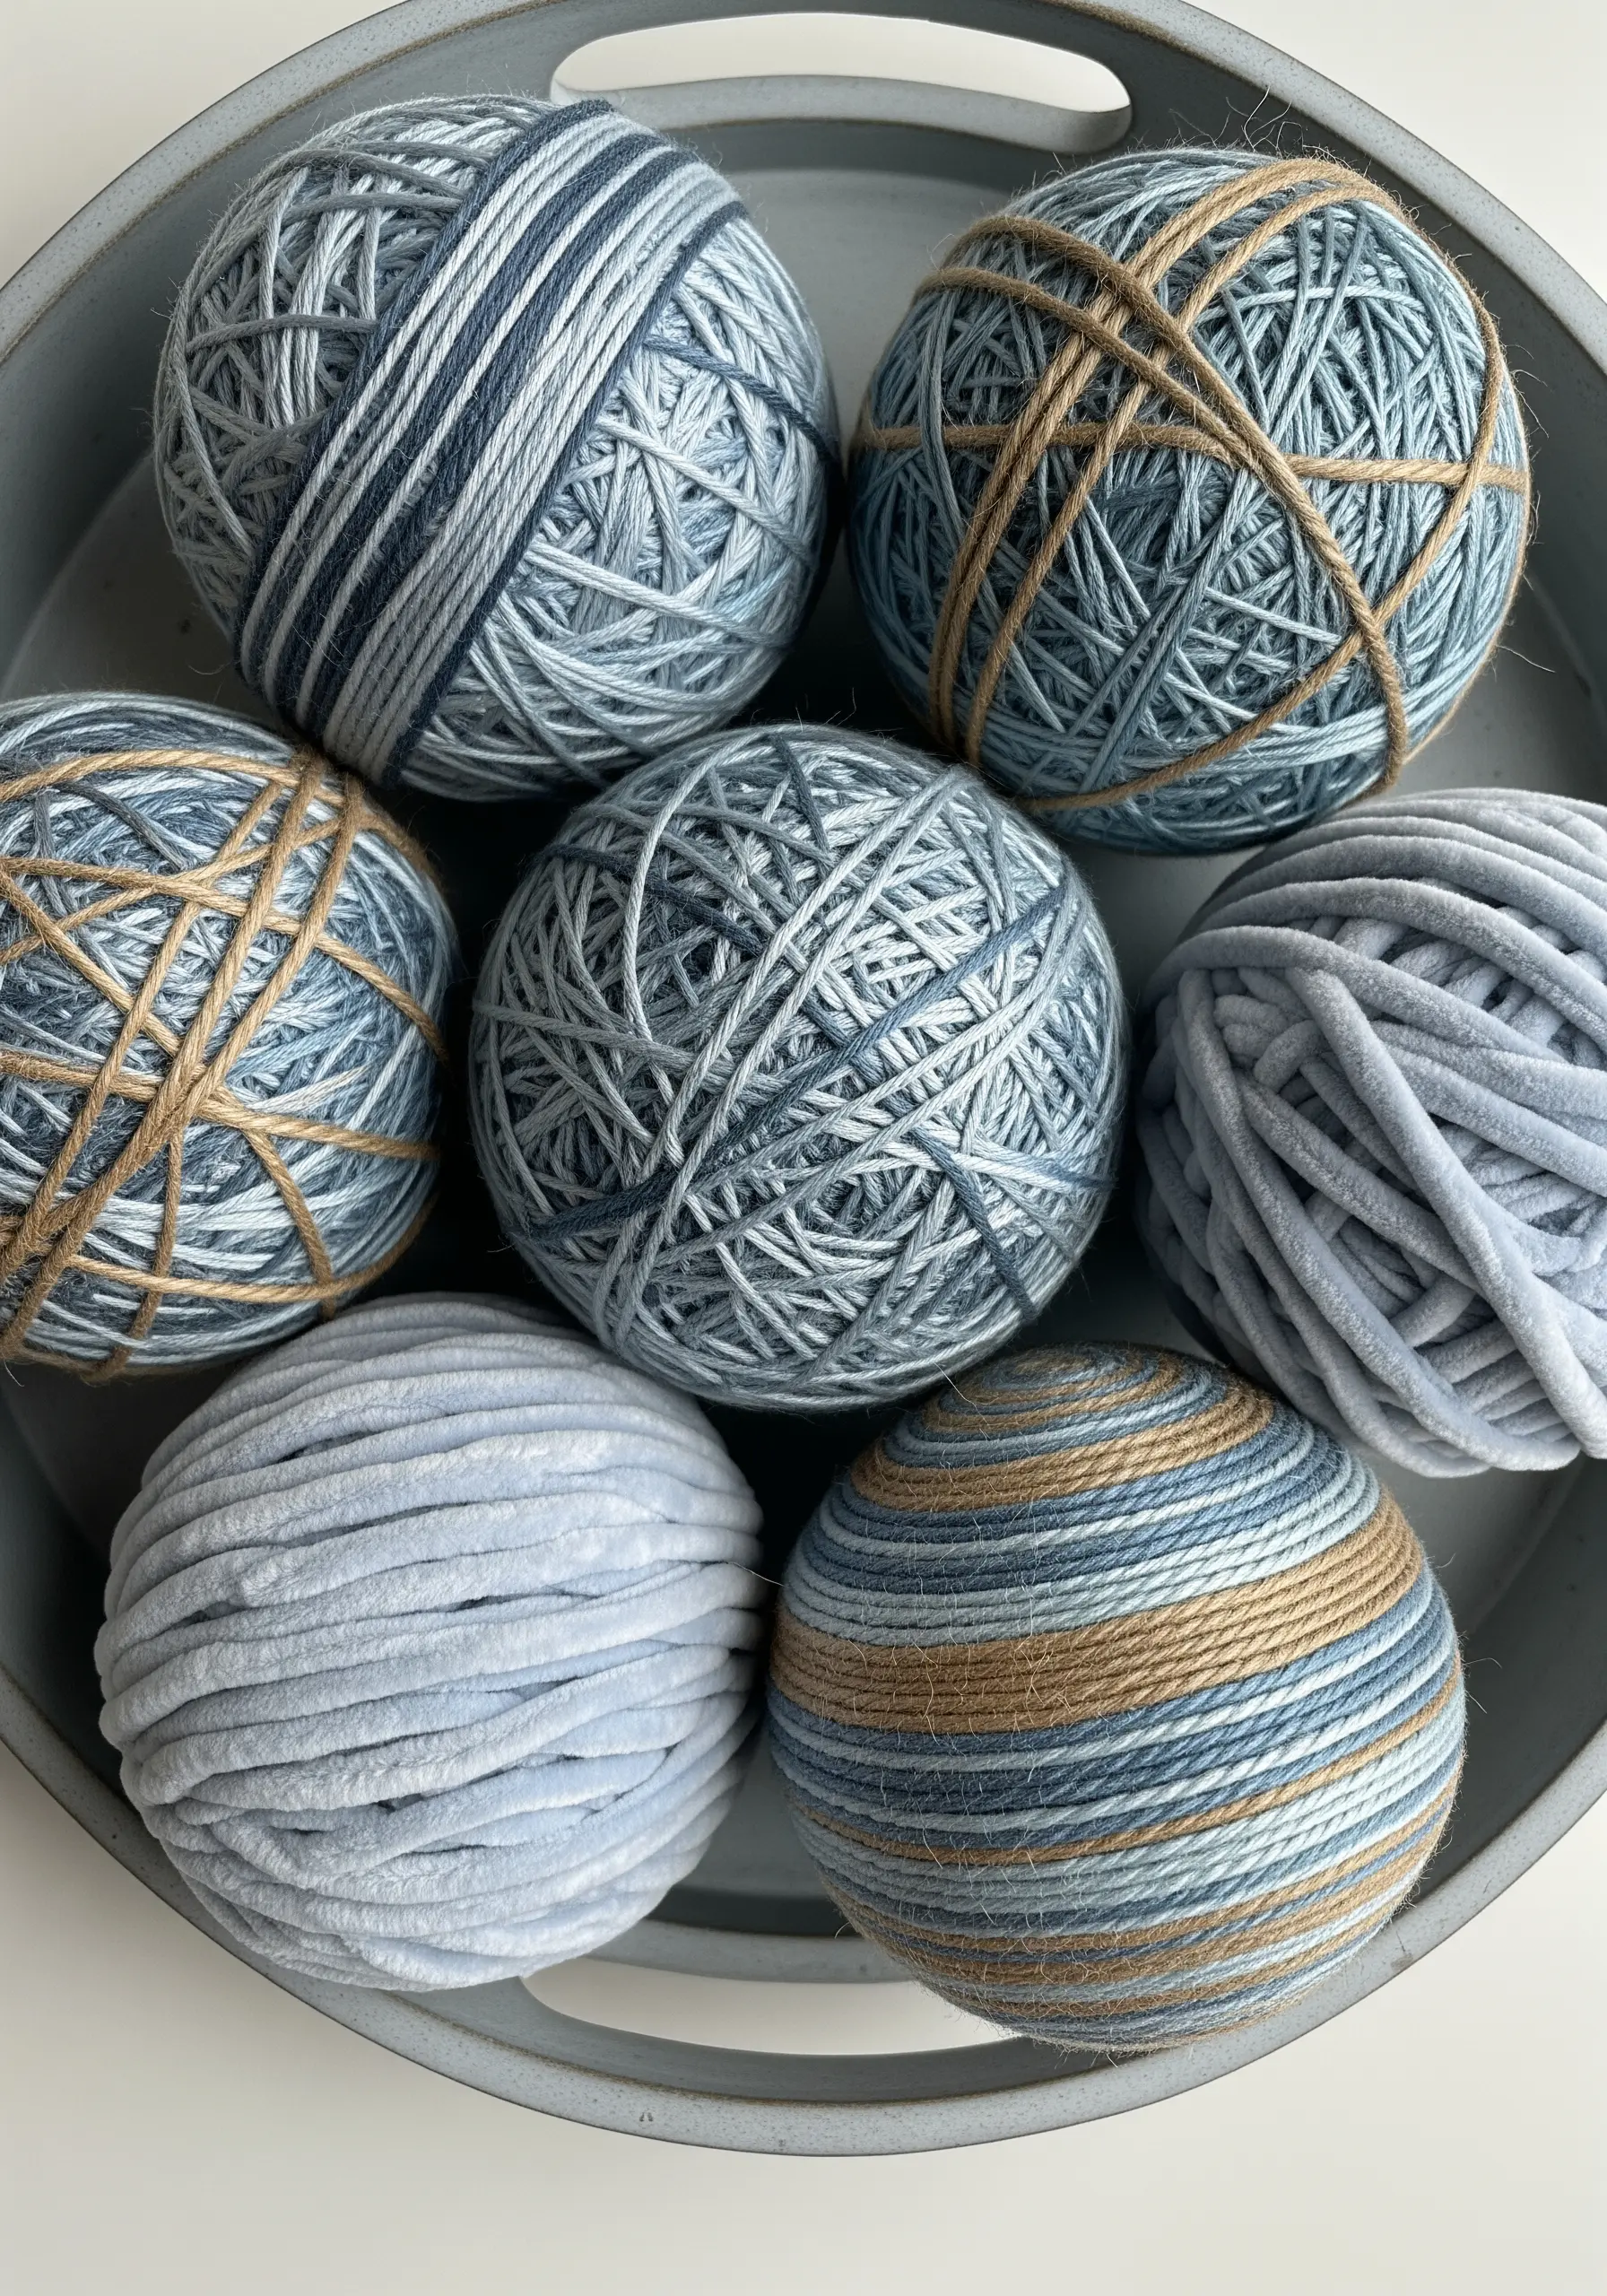
This is one of the easiest ways to turn a tangled mess of leftover yarn into chic, decorative objects.
Start with a core, such as a styrofoam ball or even a wadded-up ball of scrap fabric.
Then, simply begin wrapping yarn around it until the core is completely covered.
Create visual interest by mixing different yarn weights, colors, and materials like jute twine on a single ball, or by creating a collection of balls in a cohesive color palette.
They look beautiful grouped together in a bowl or tray.
24. Appliqué a Blanket with Bold, Organic Shapes
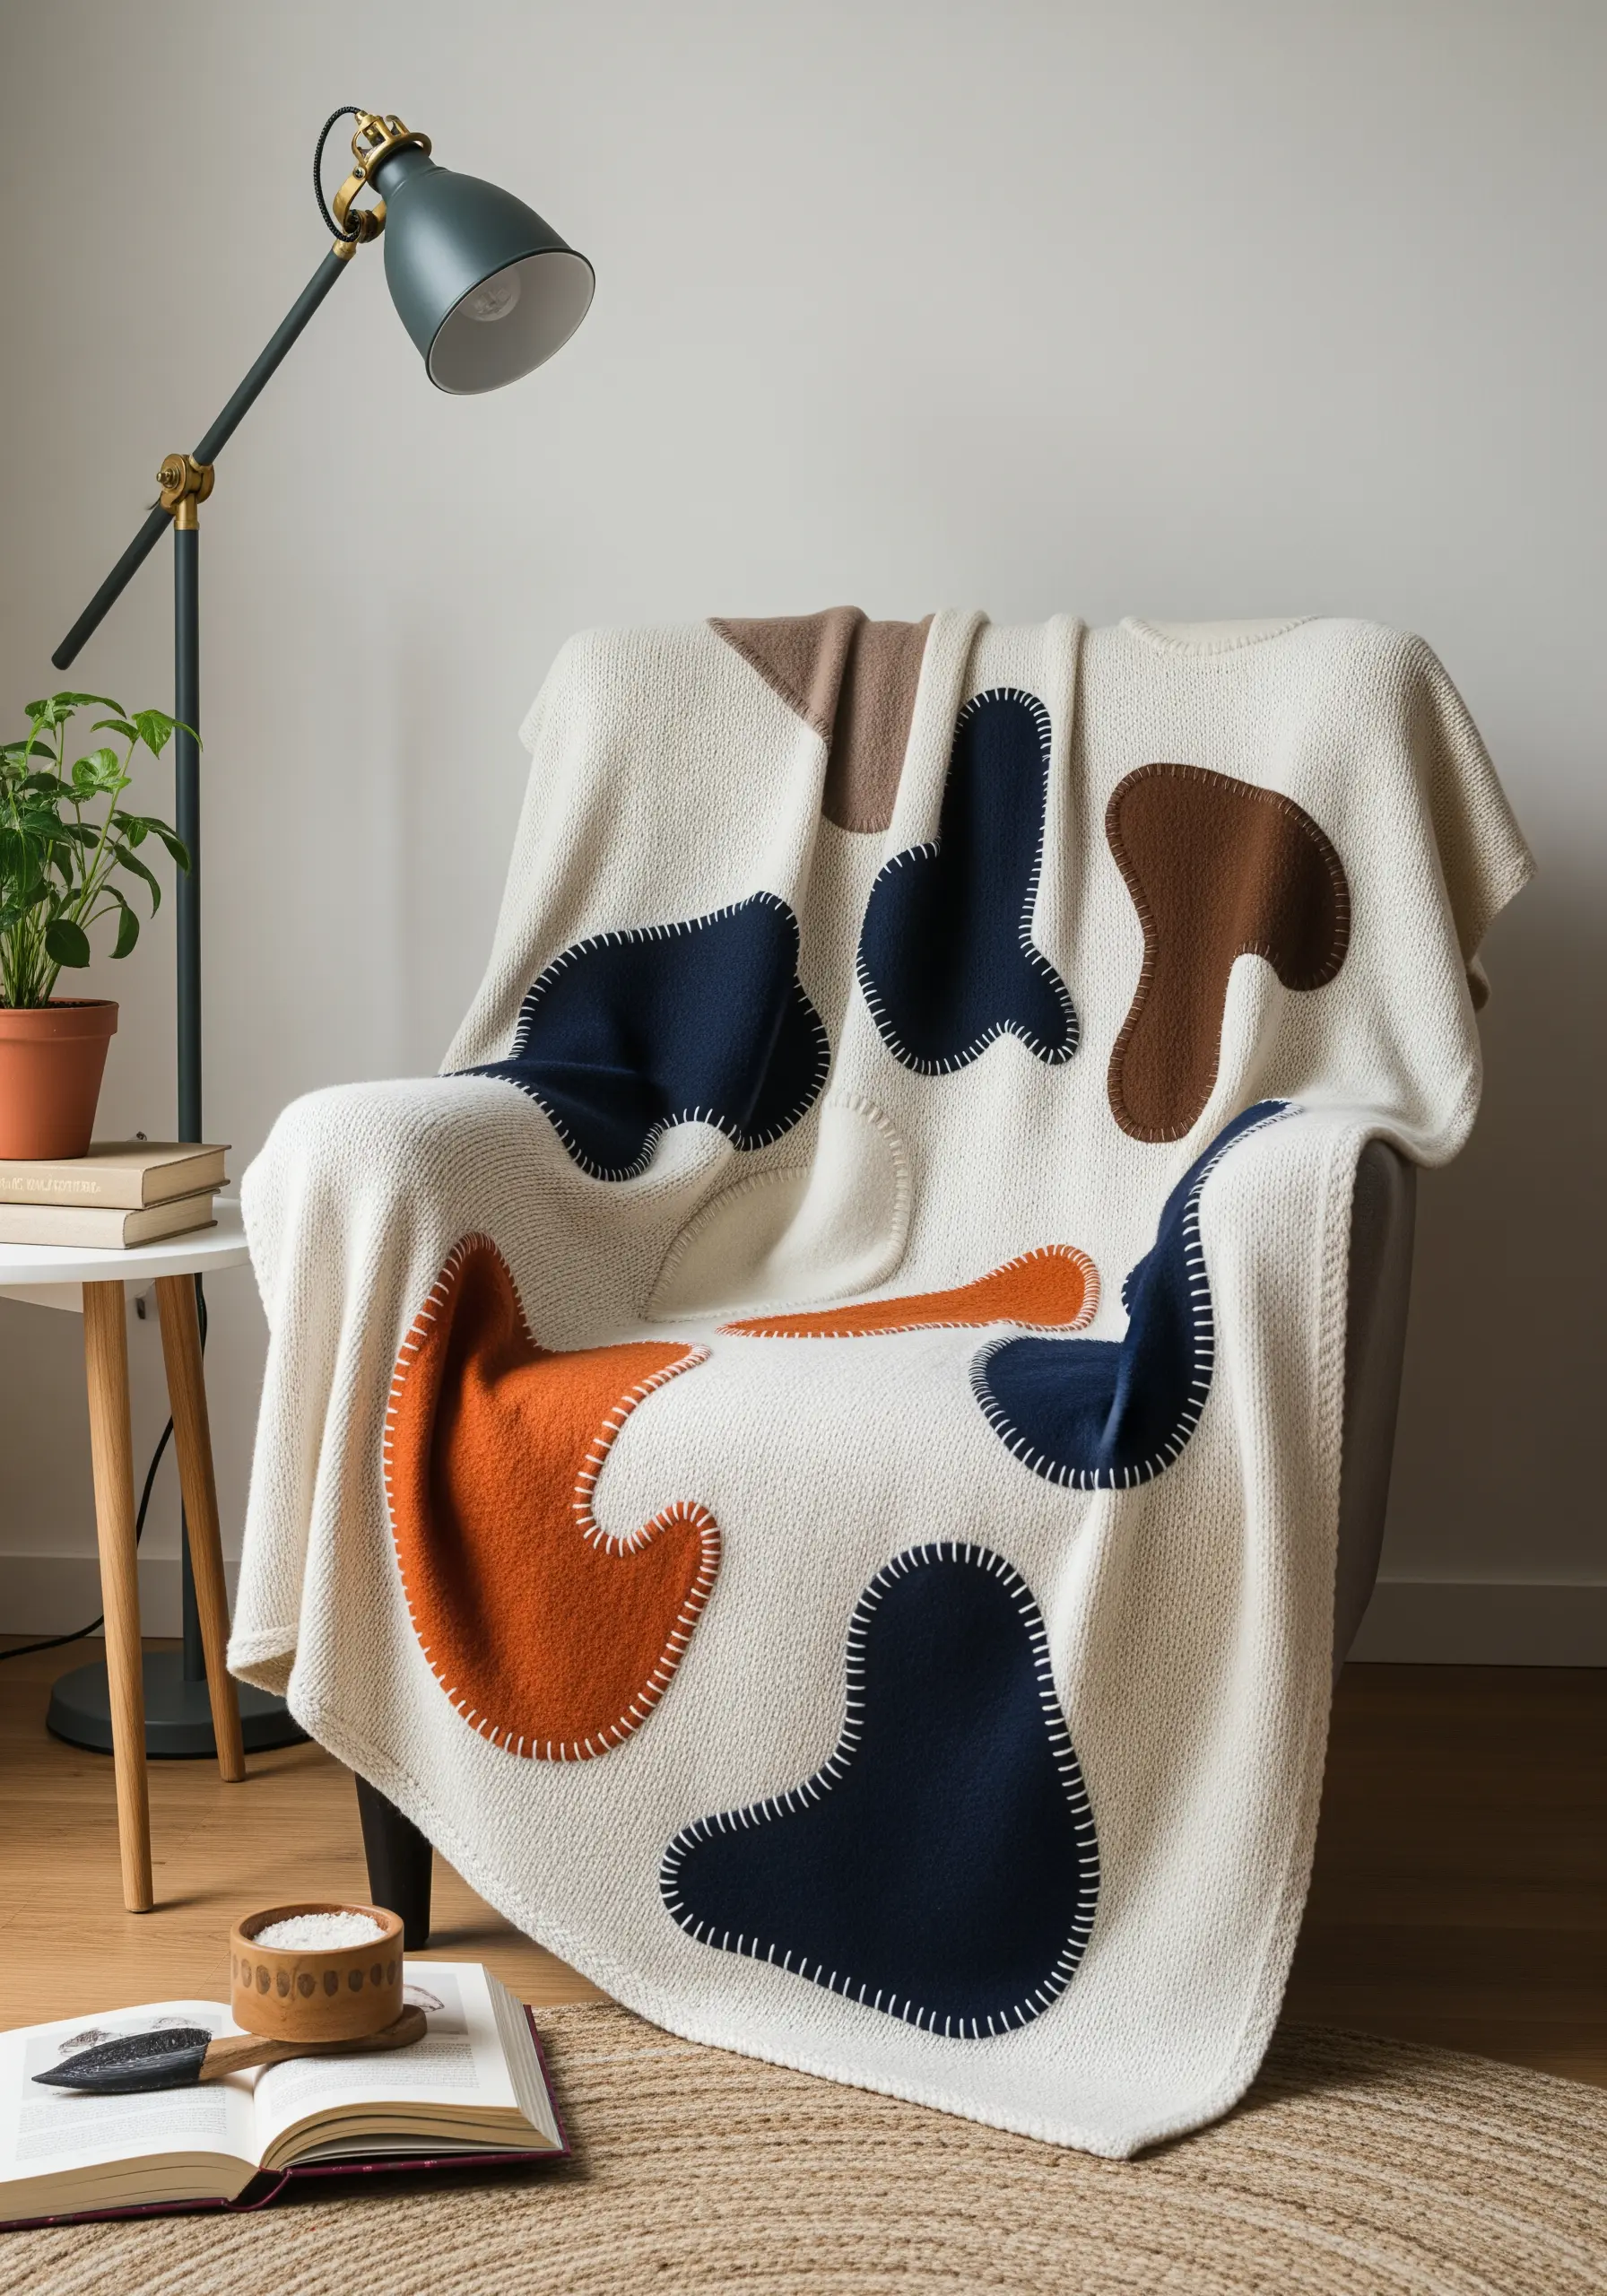
Instantly customize a plain throw blanket with large-scale appliqué.
Cut organic, abstract shapes from a non-fraying fabric like felt or boiled wool in contrasting colors.
Arrange the shapes on your blanket until you’re happy with the composition.
Then, use a thick thread or yarn to attach them with a simple, oversized running stitch or blanket stitch. The visible, slightly imperfect stitches are a key part of the design’s charm, celebrating its handmade nature.
25. Weave a Meditative ‘Ojo de Dios’
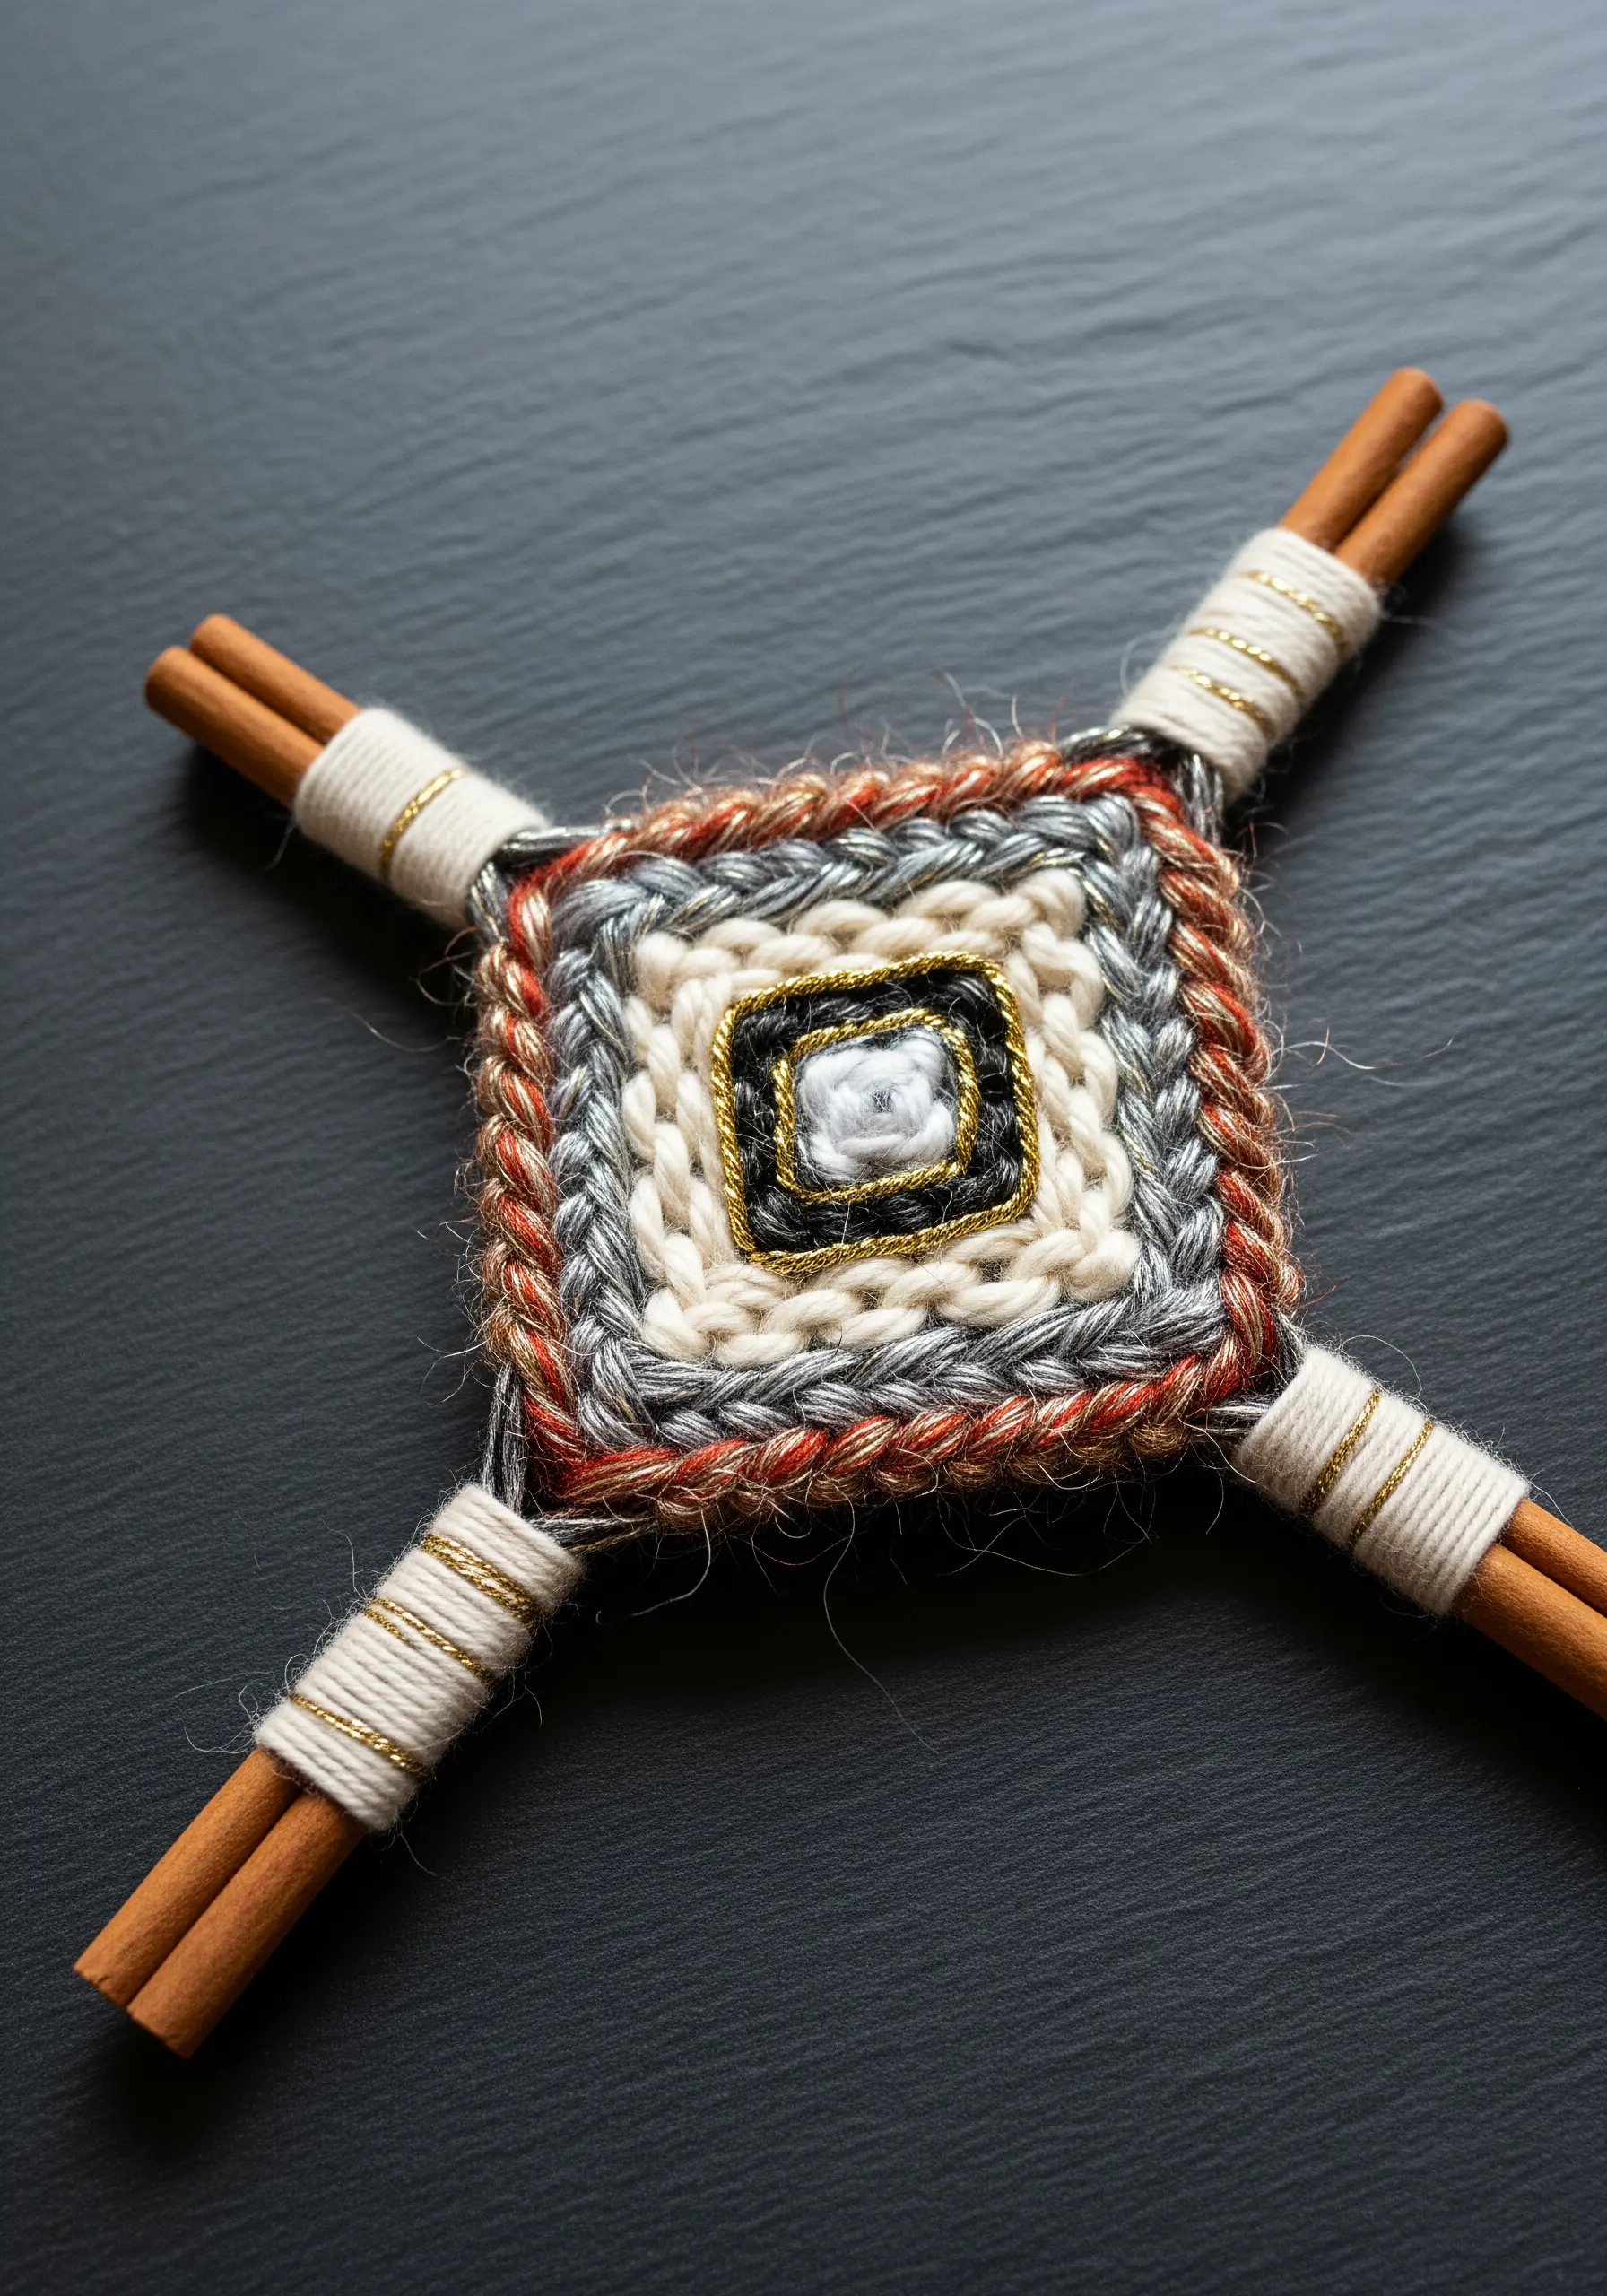
The God’s Eye, or Ojo de Dios, is a traditional craft that produces a complex-looking pattern through a very simple, repetitive weaving motion.
Create a cross using two sticks (cinnamon sticks add a lovely scent and rustic look).
Anchor your yarn in the center and begin wrapping it around each stick in succession, building outwards.
The diamond and square patterns form automatically as you layer colors. Adding a wrap of metallic thread creates a beautiful, reflective accent with no extra effort.
26. Embellish a Tassel with Chains and Beads
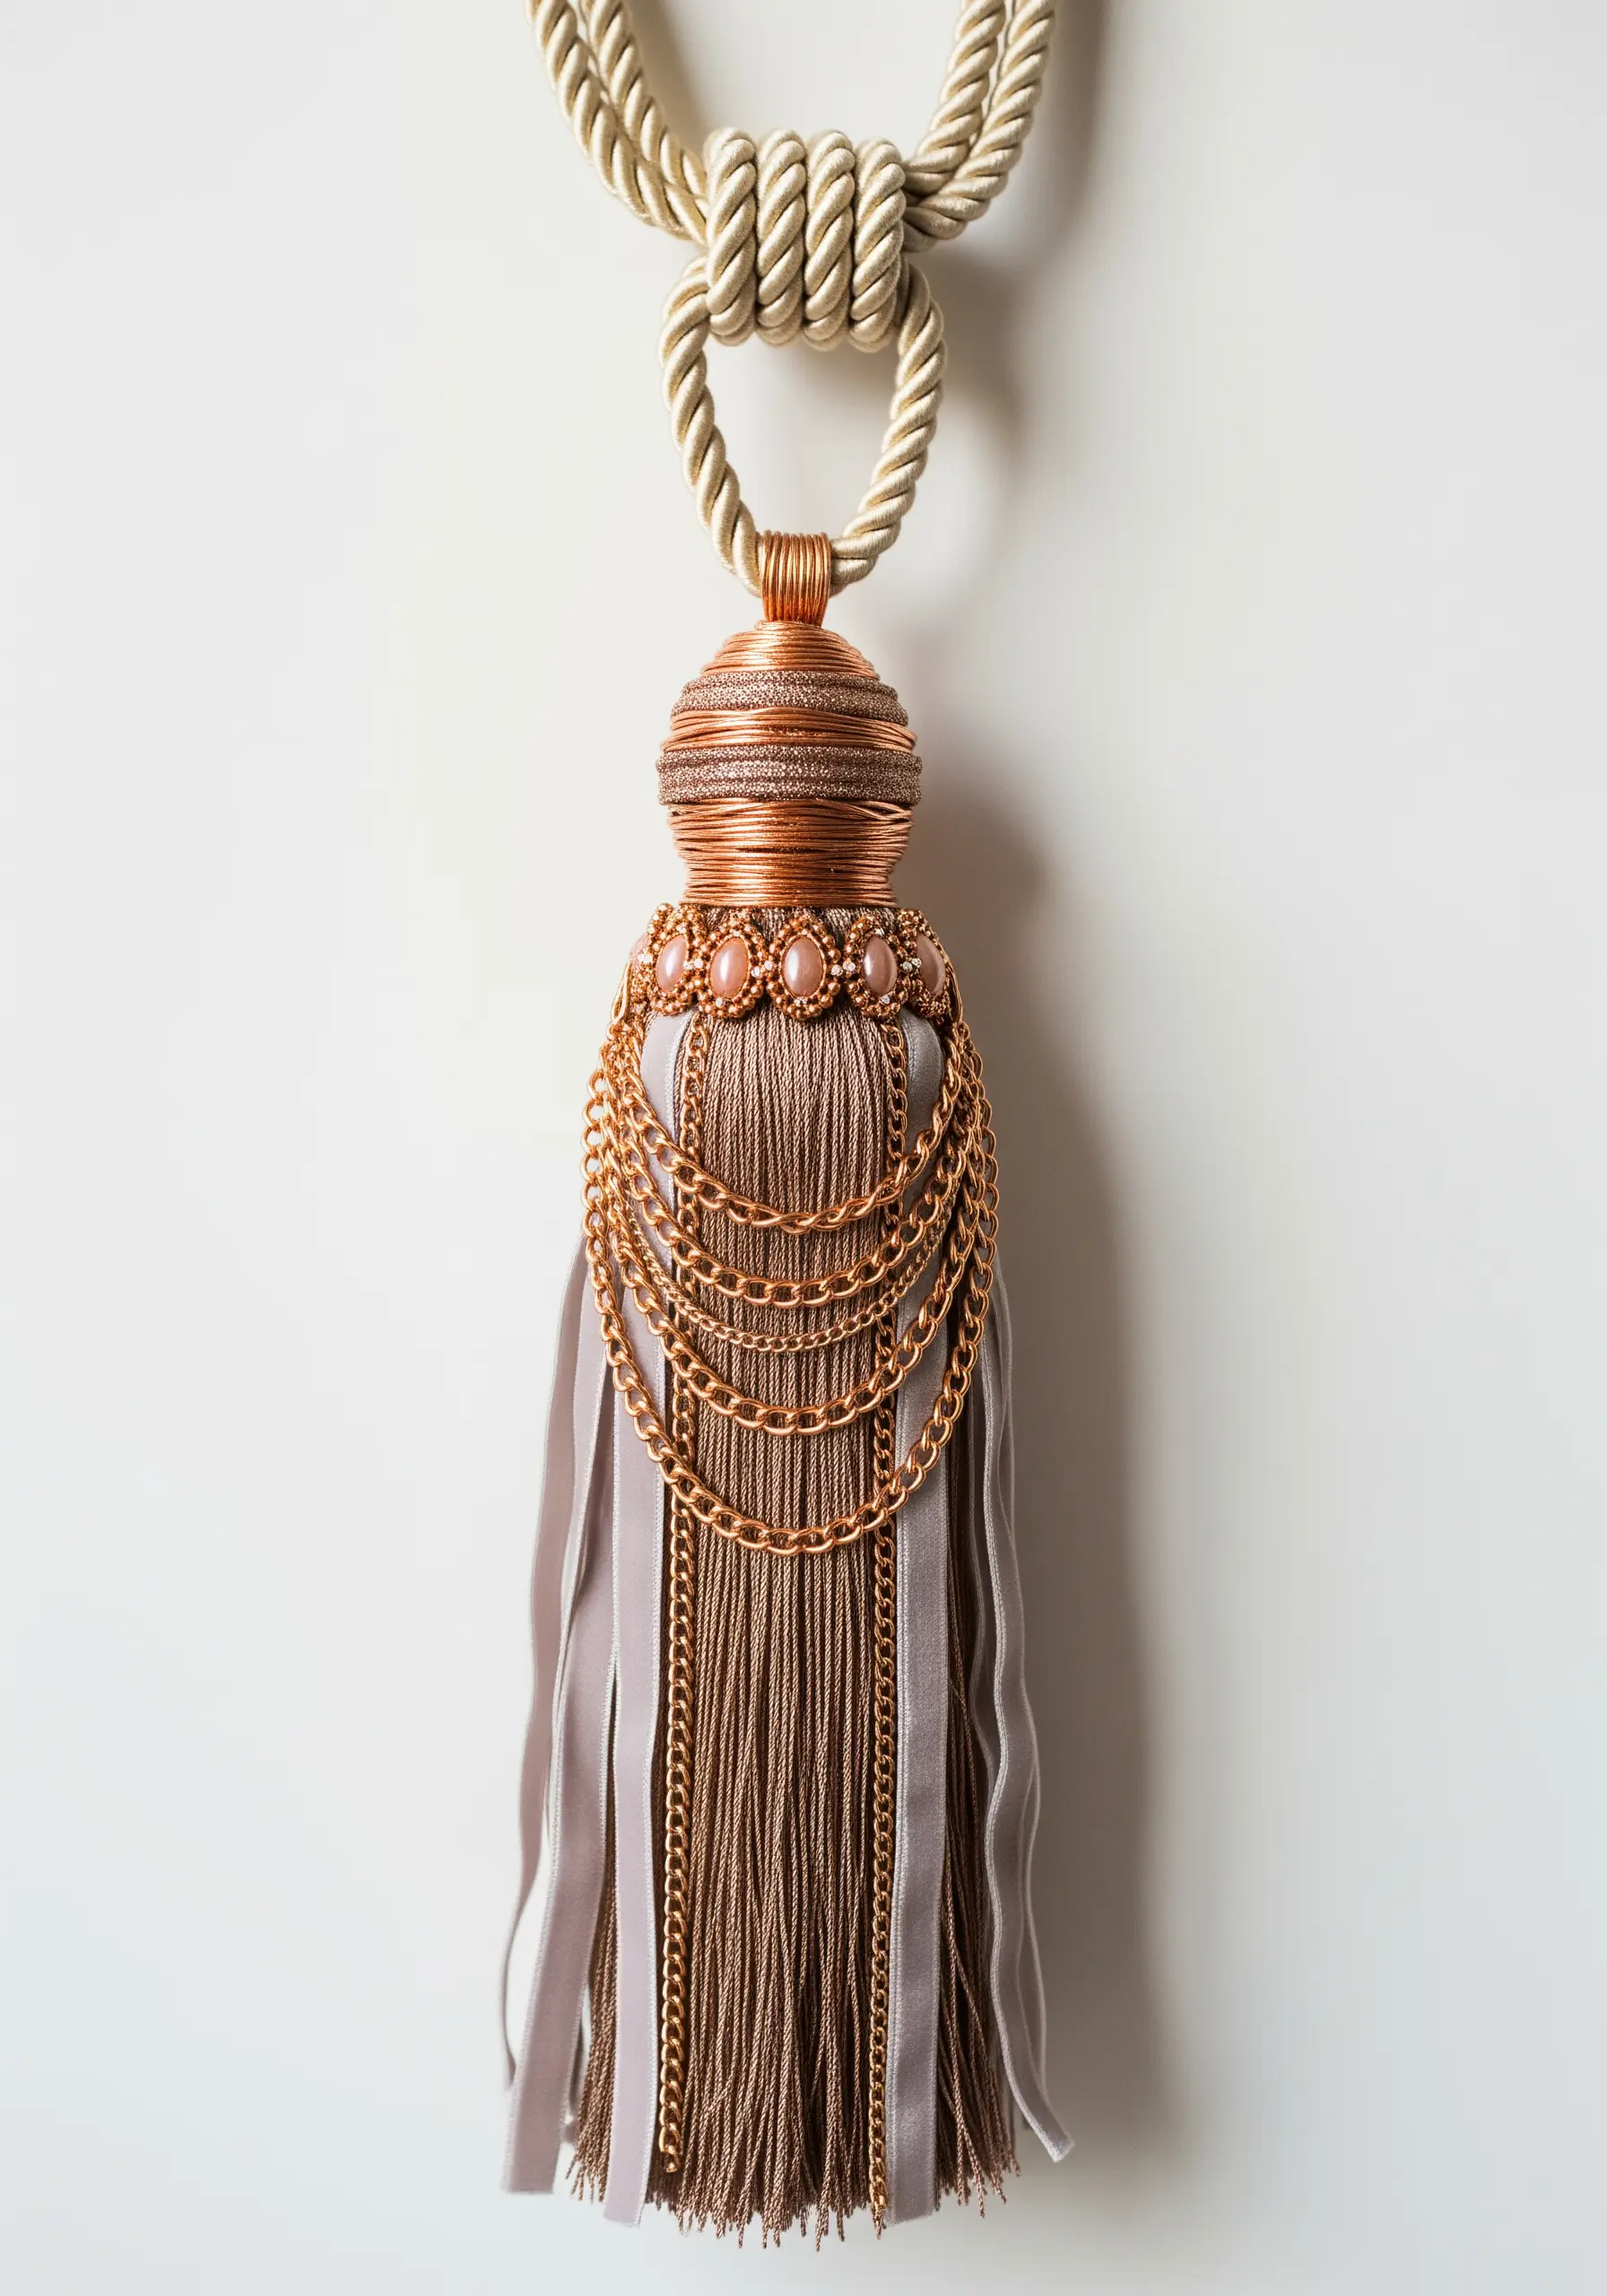
Take a simple, store-bought or handmade tassel to the next level with luxe embellishments.
The key is to layer different materials around the tassel’s head.
Start by wrapping the neck with a fine metallic thread to create a polished foundation.
Then, drape and secure fine jewelry chains, add a row of small beads, or wrap a contrasting silk ribbon over the top. These small additions instantly transform a basic tassel into a custom, high-end decorative piece.
27. Combine Textured Paint and Fiber for a Sculptural Piece
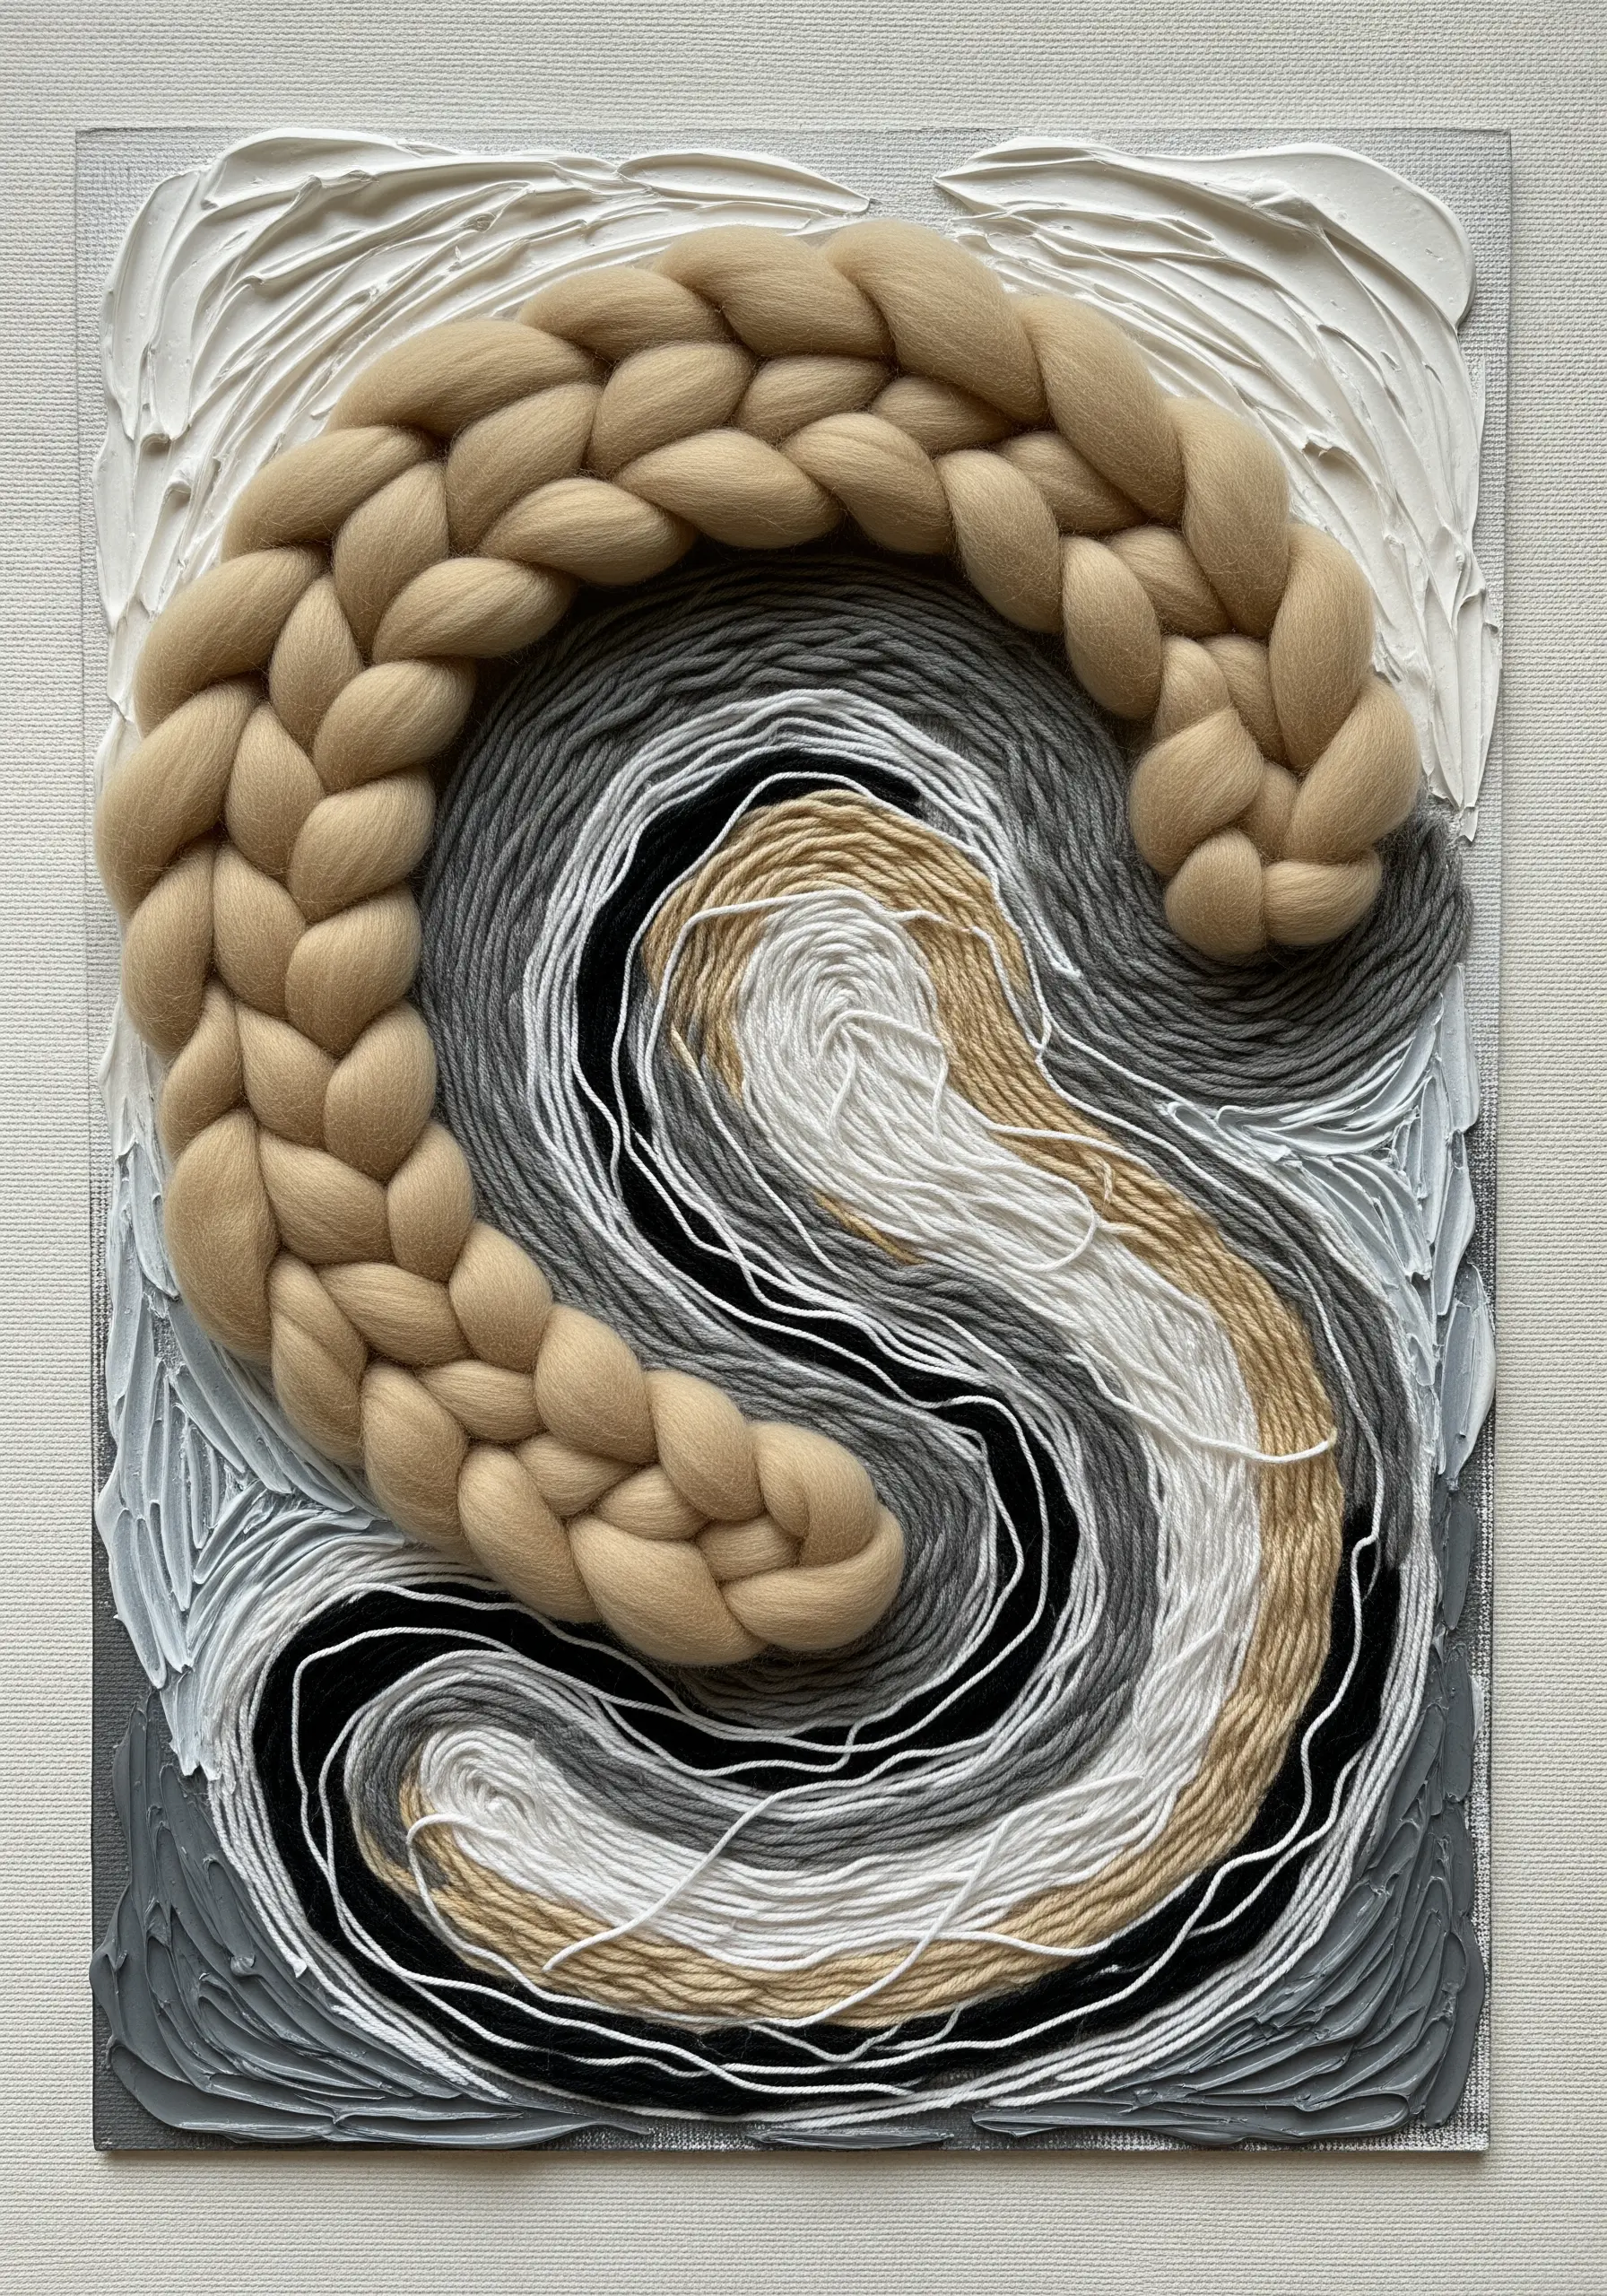
Merge painting and fiber art by creating a heavily textured canvas as your base.
Apply thick acrylic paint, gesso, or modeling paste to a canvas and use a palette knife to create deep grooves and swirls.
Once it’s dry, use the painted texture as a guide for your fiber.
Couch or glue down a chunky wool braid along a main swirl, then wrap and weave finer threads through the painted grooves. This technique creates a dynamic piece where the two mediums are fully integrated.
28. Weave a Clutch on a Simple Frame Loom
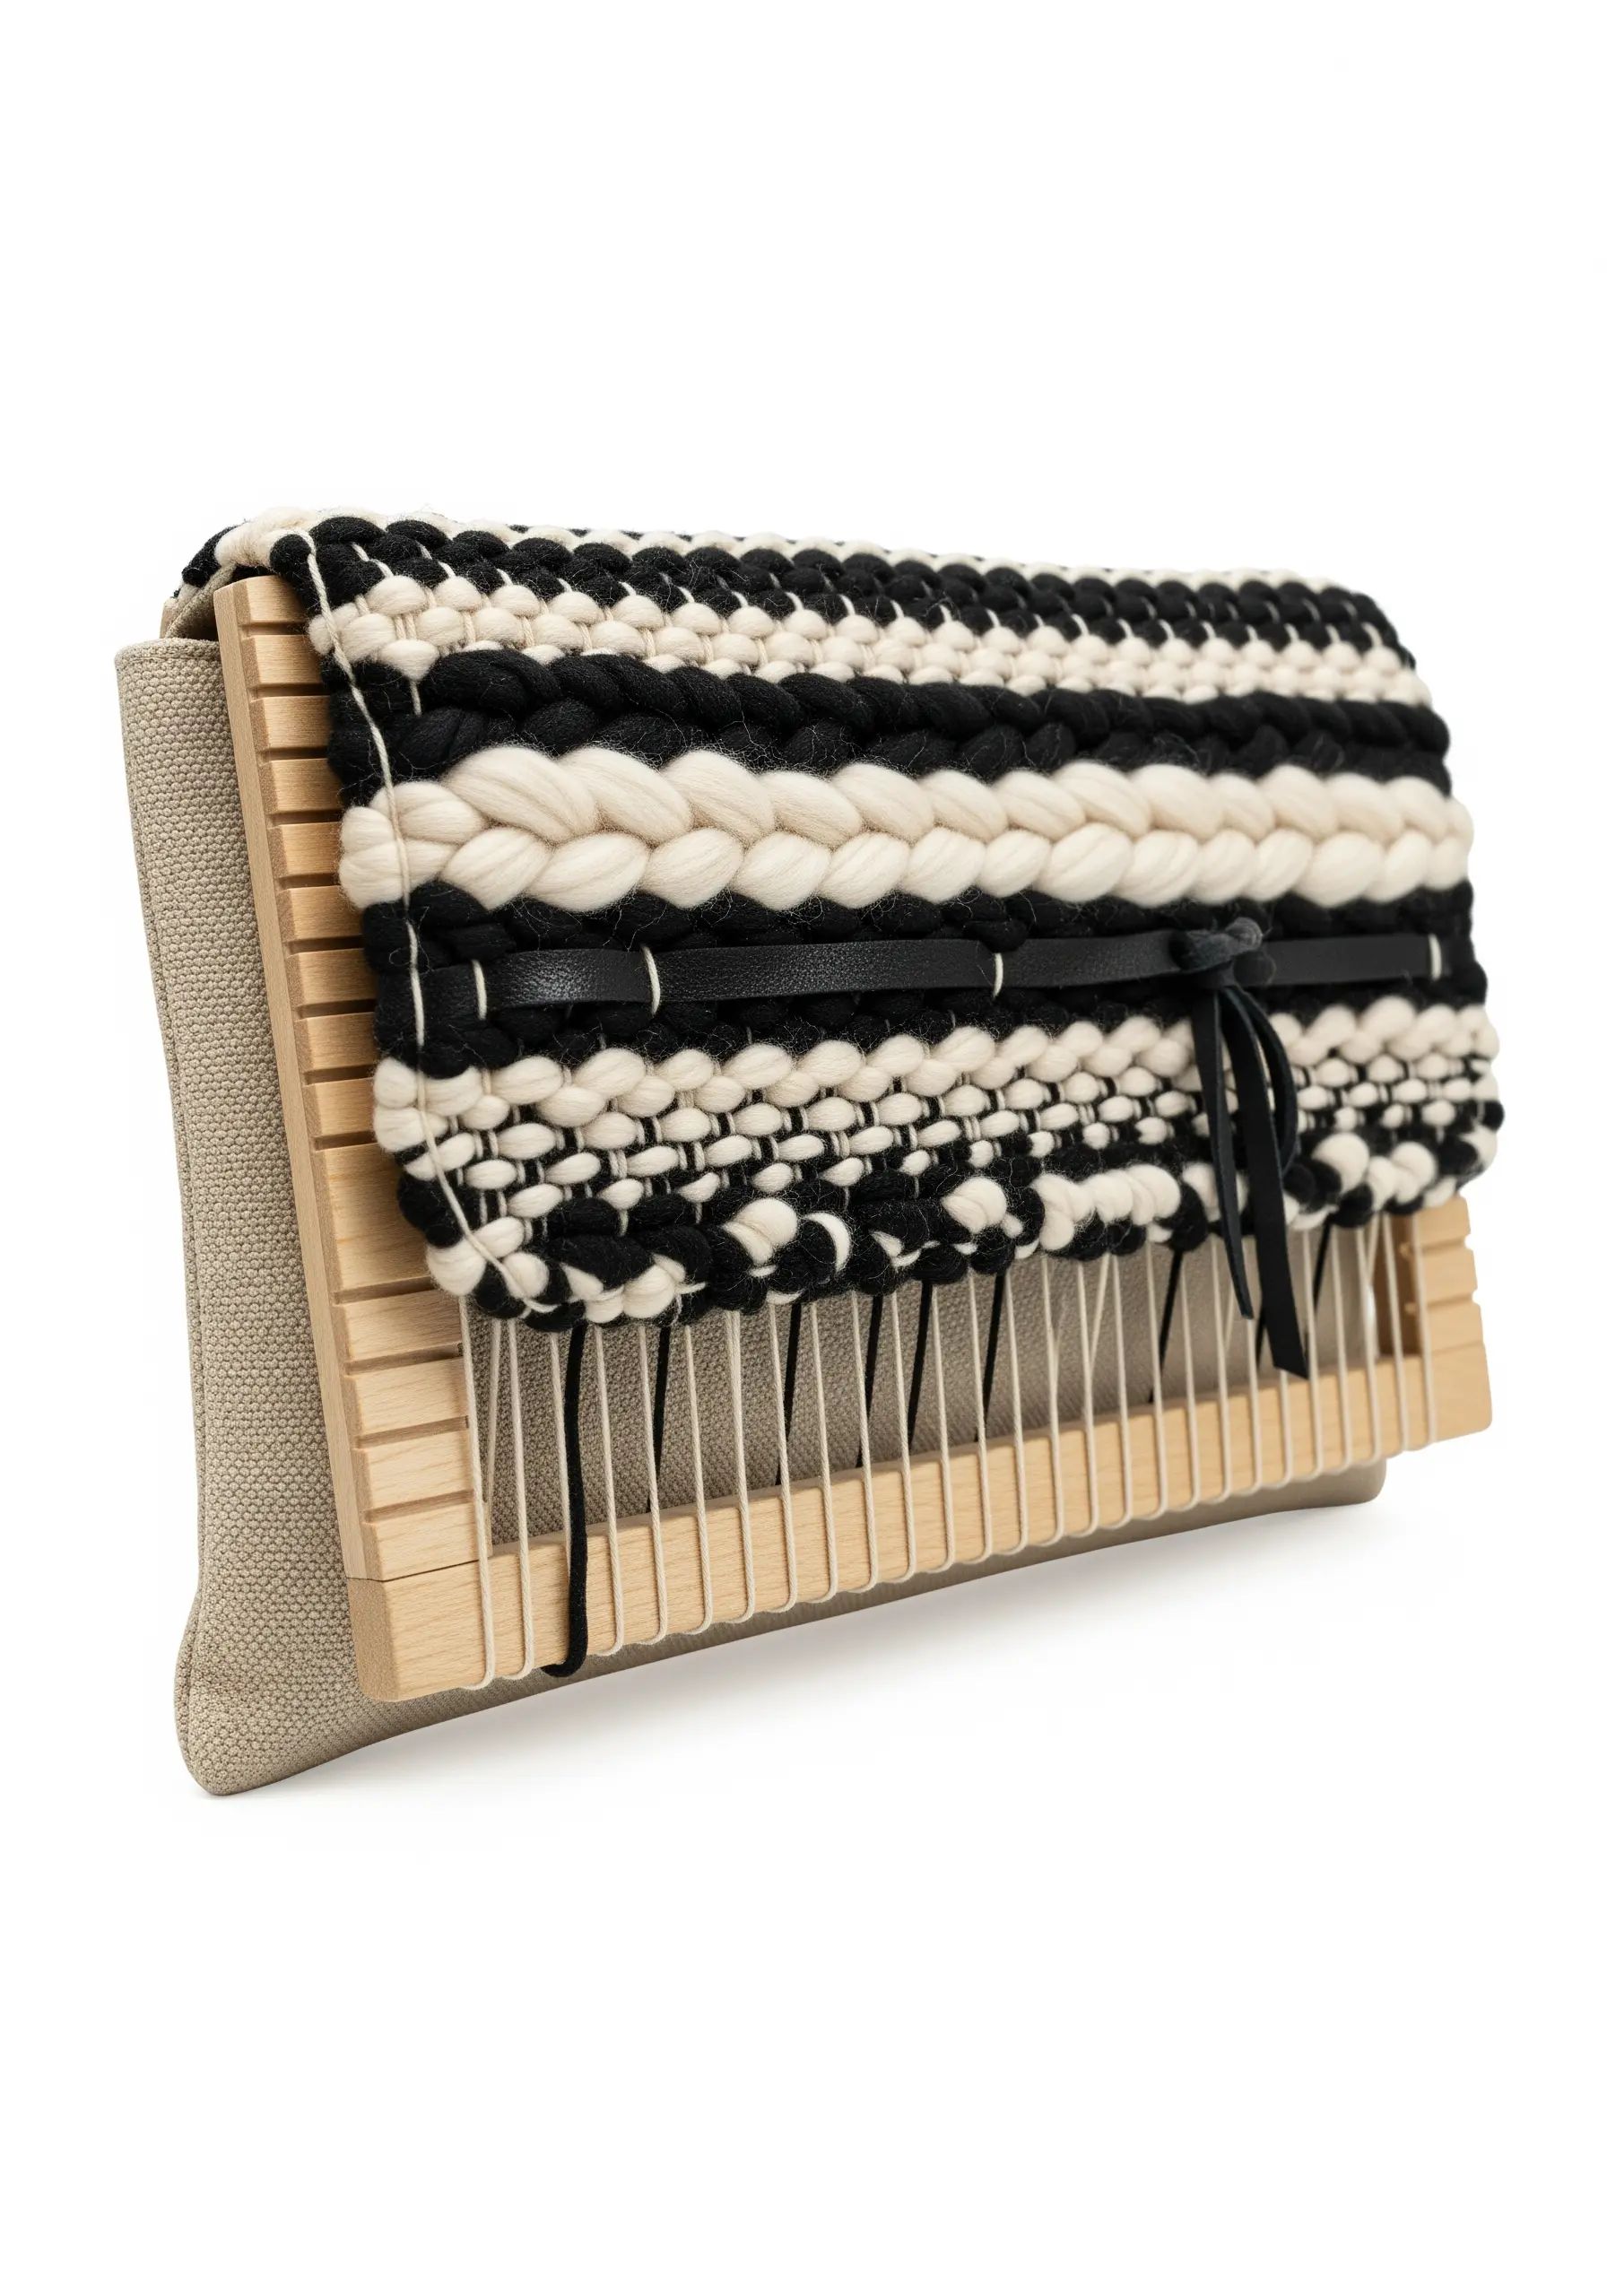
You don’t need a full-sized loom to create your own custom fabric.
Use a small, portable frame loom to weave a rectangular panel that’s the perfect size for a clutch purse.
Vary the texture by alternating between thin cotton yarn and chunky wool roving to create bold, graphic stripes.
Once you slide the finished weaving off the loom, simply fold it in half, stitch up the sides, and attach it to a simple linen pouch. Adding a leather tie closure provides a professional finishing touch.


