
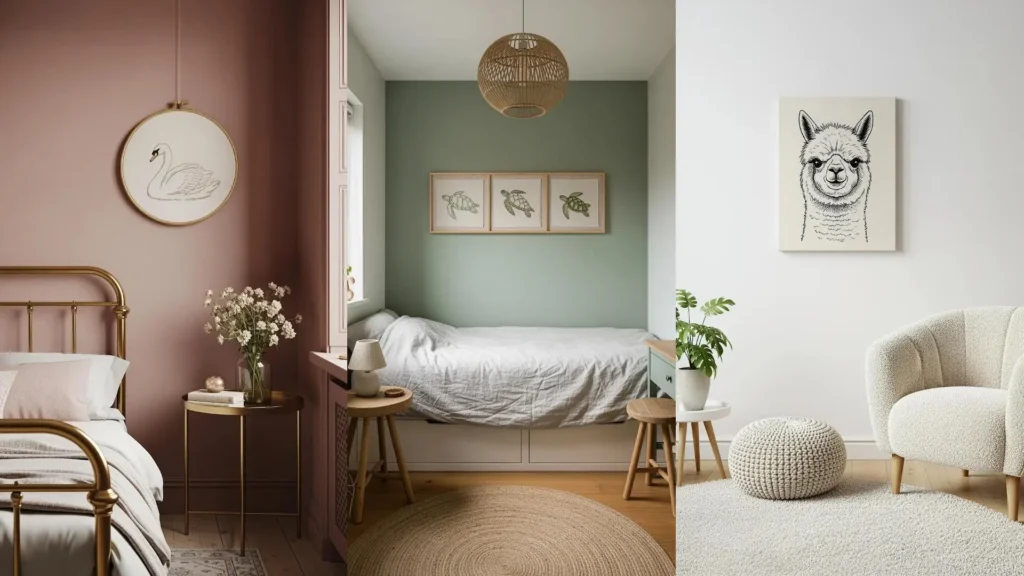
Sometimes the most charming statements are made in the smallest of spaces. If you’re looking to add a touch of handmade warmth to a child’s room, you don’t need a grand canvas—just a needle, some thread, and a gentle idea.
These tiny animal sketches are more than just patterns; they’re opportunities to practice precision and playfulness. It’s in the careful choice of a stitch to create fur, the curve of a single line to show movement, or the clever grouping of hoops to tell a silent story.
Let these ideas guide you beyond just following lines. Think about texture, composition, and even how the final piece will interact with the light in the room. This is how you transform a simple craft into a cherished piece of art.
1. Curate a Narrative Hoop Cluster
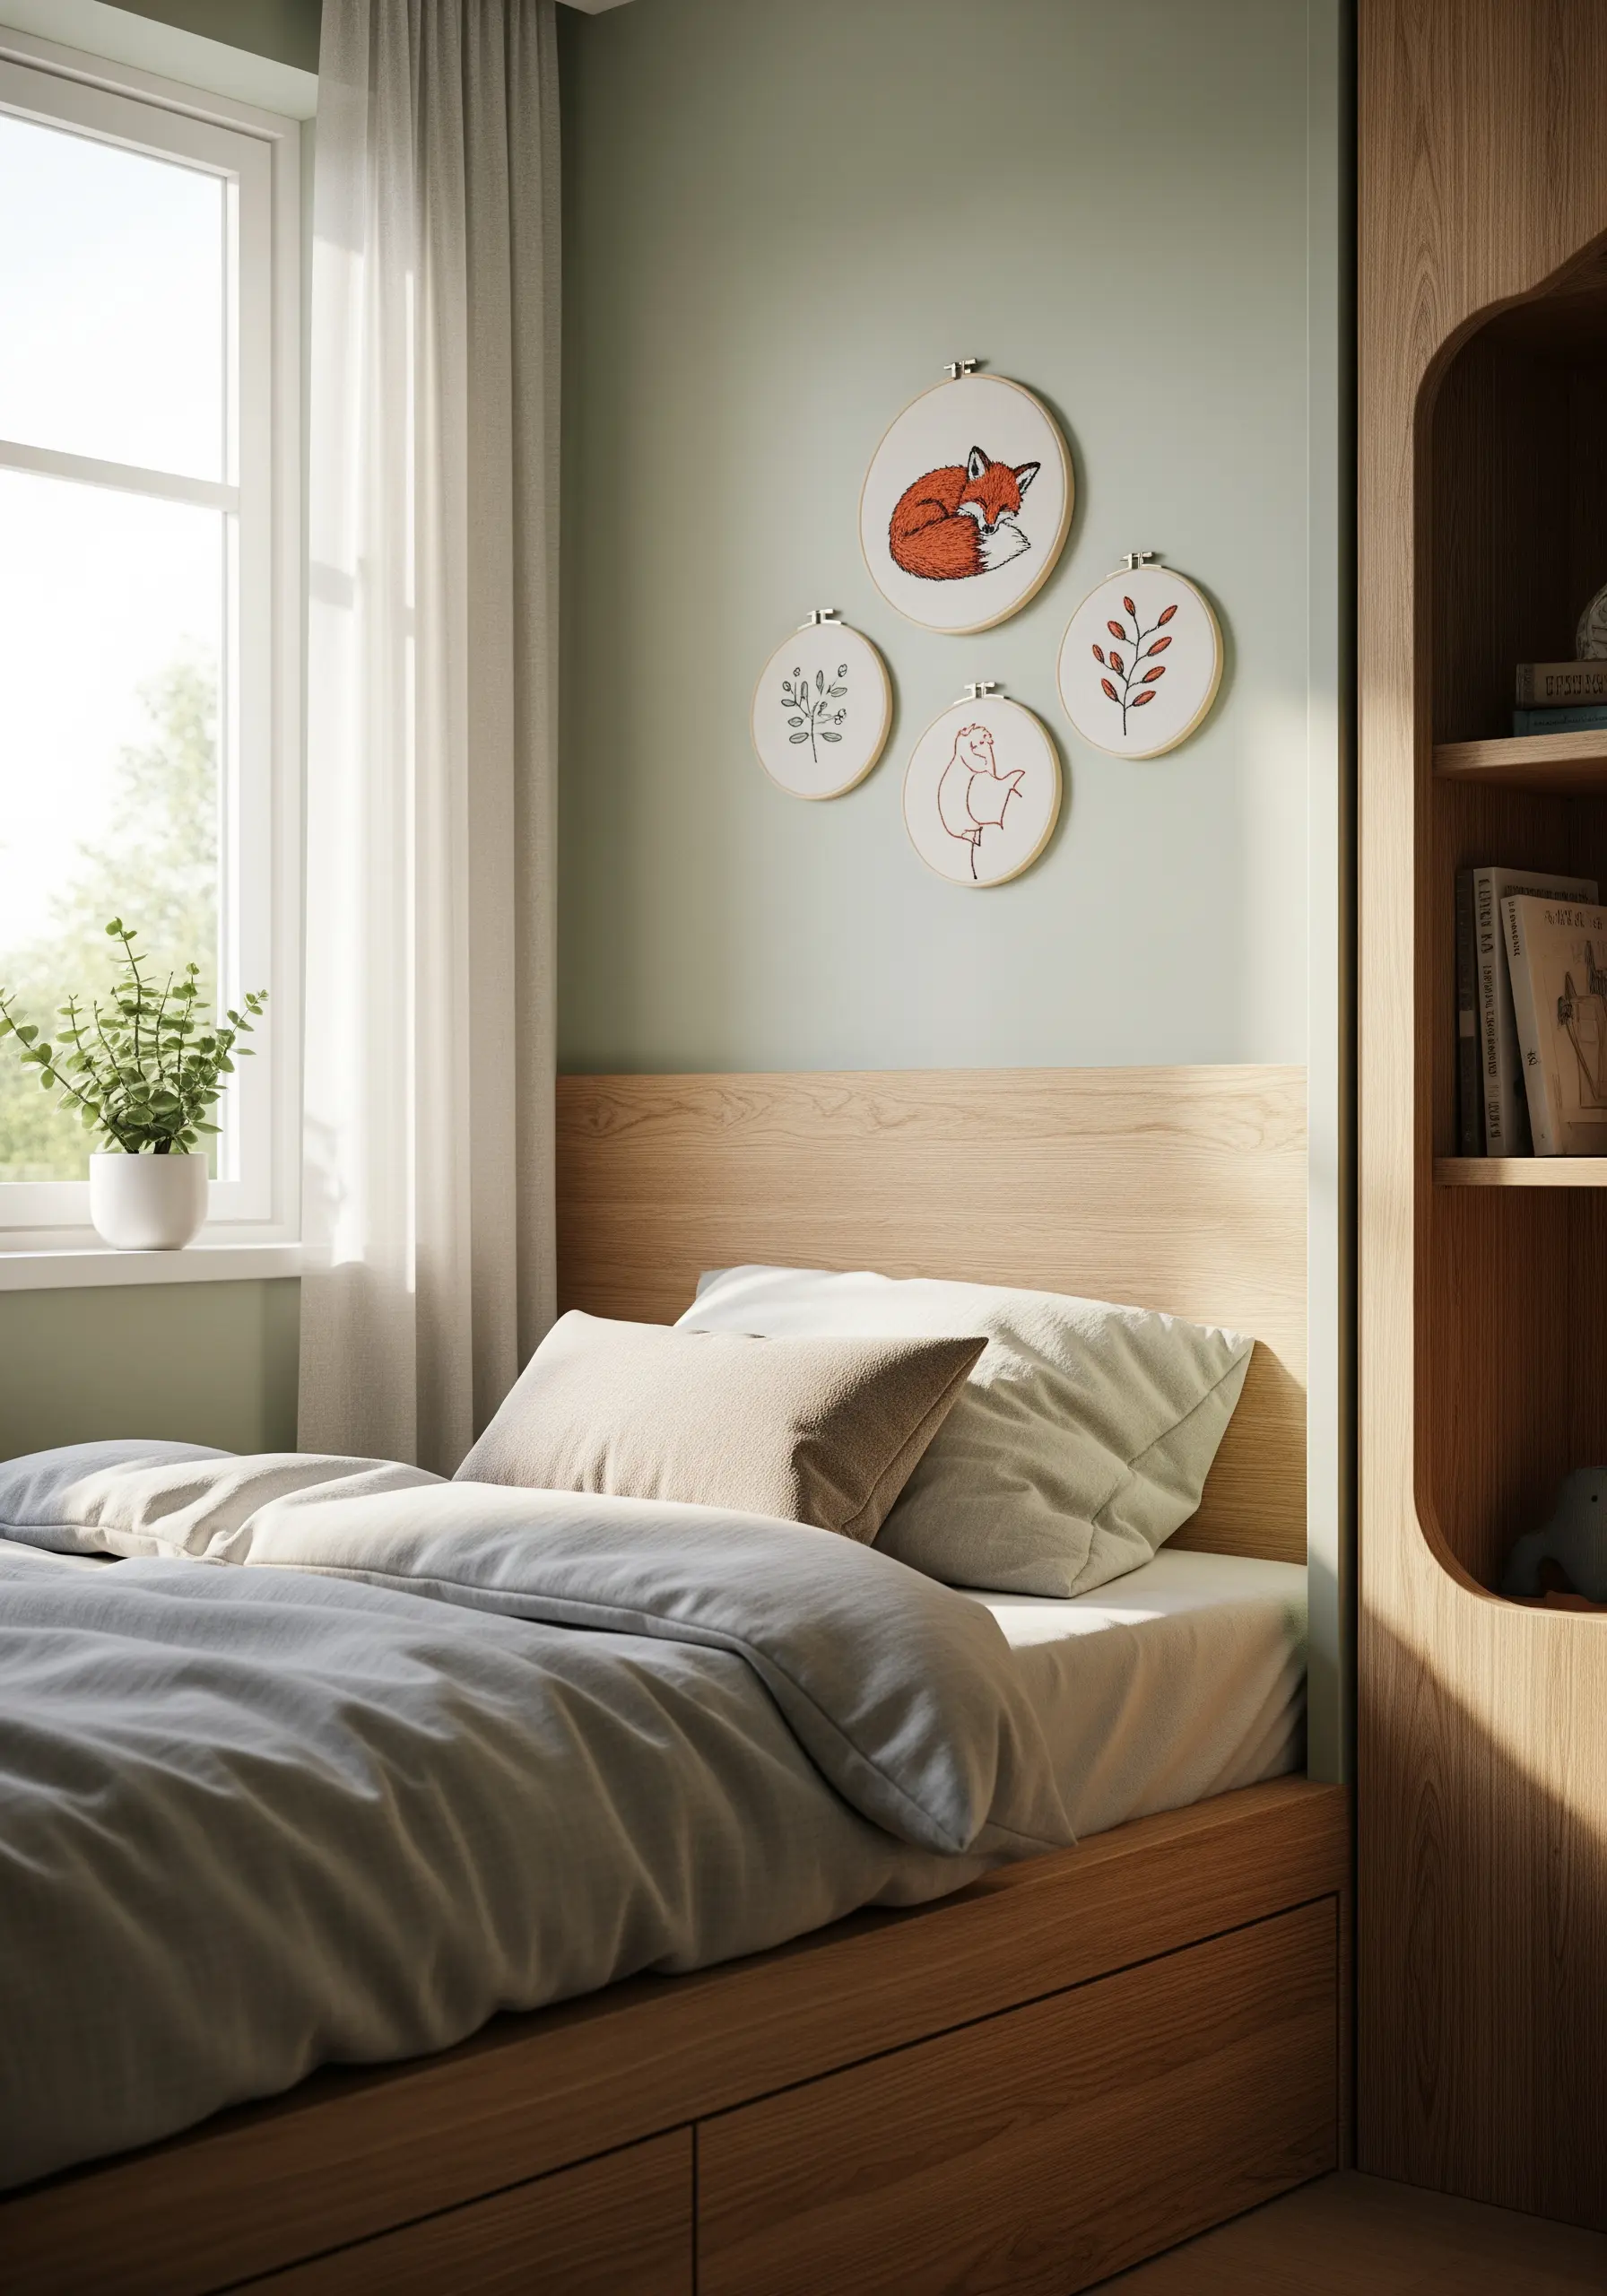
Group several small hoops together to tell a simple story, like a sleeping fox surrounded by botanicals.
To create a cohesive feel, use a consistent color palette across all pieces—here, warm oranges, earthy reds, and a single black for outlines.
For the fox’s fur, use a directional satin stitch or long-and-short stitch to suggest softness and form.
This method turns simple sketches into a charming gallery wall, perfect for adding a focal point above a bed or dresser.
2. Master the Graphic Portrait with Bold Lines
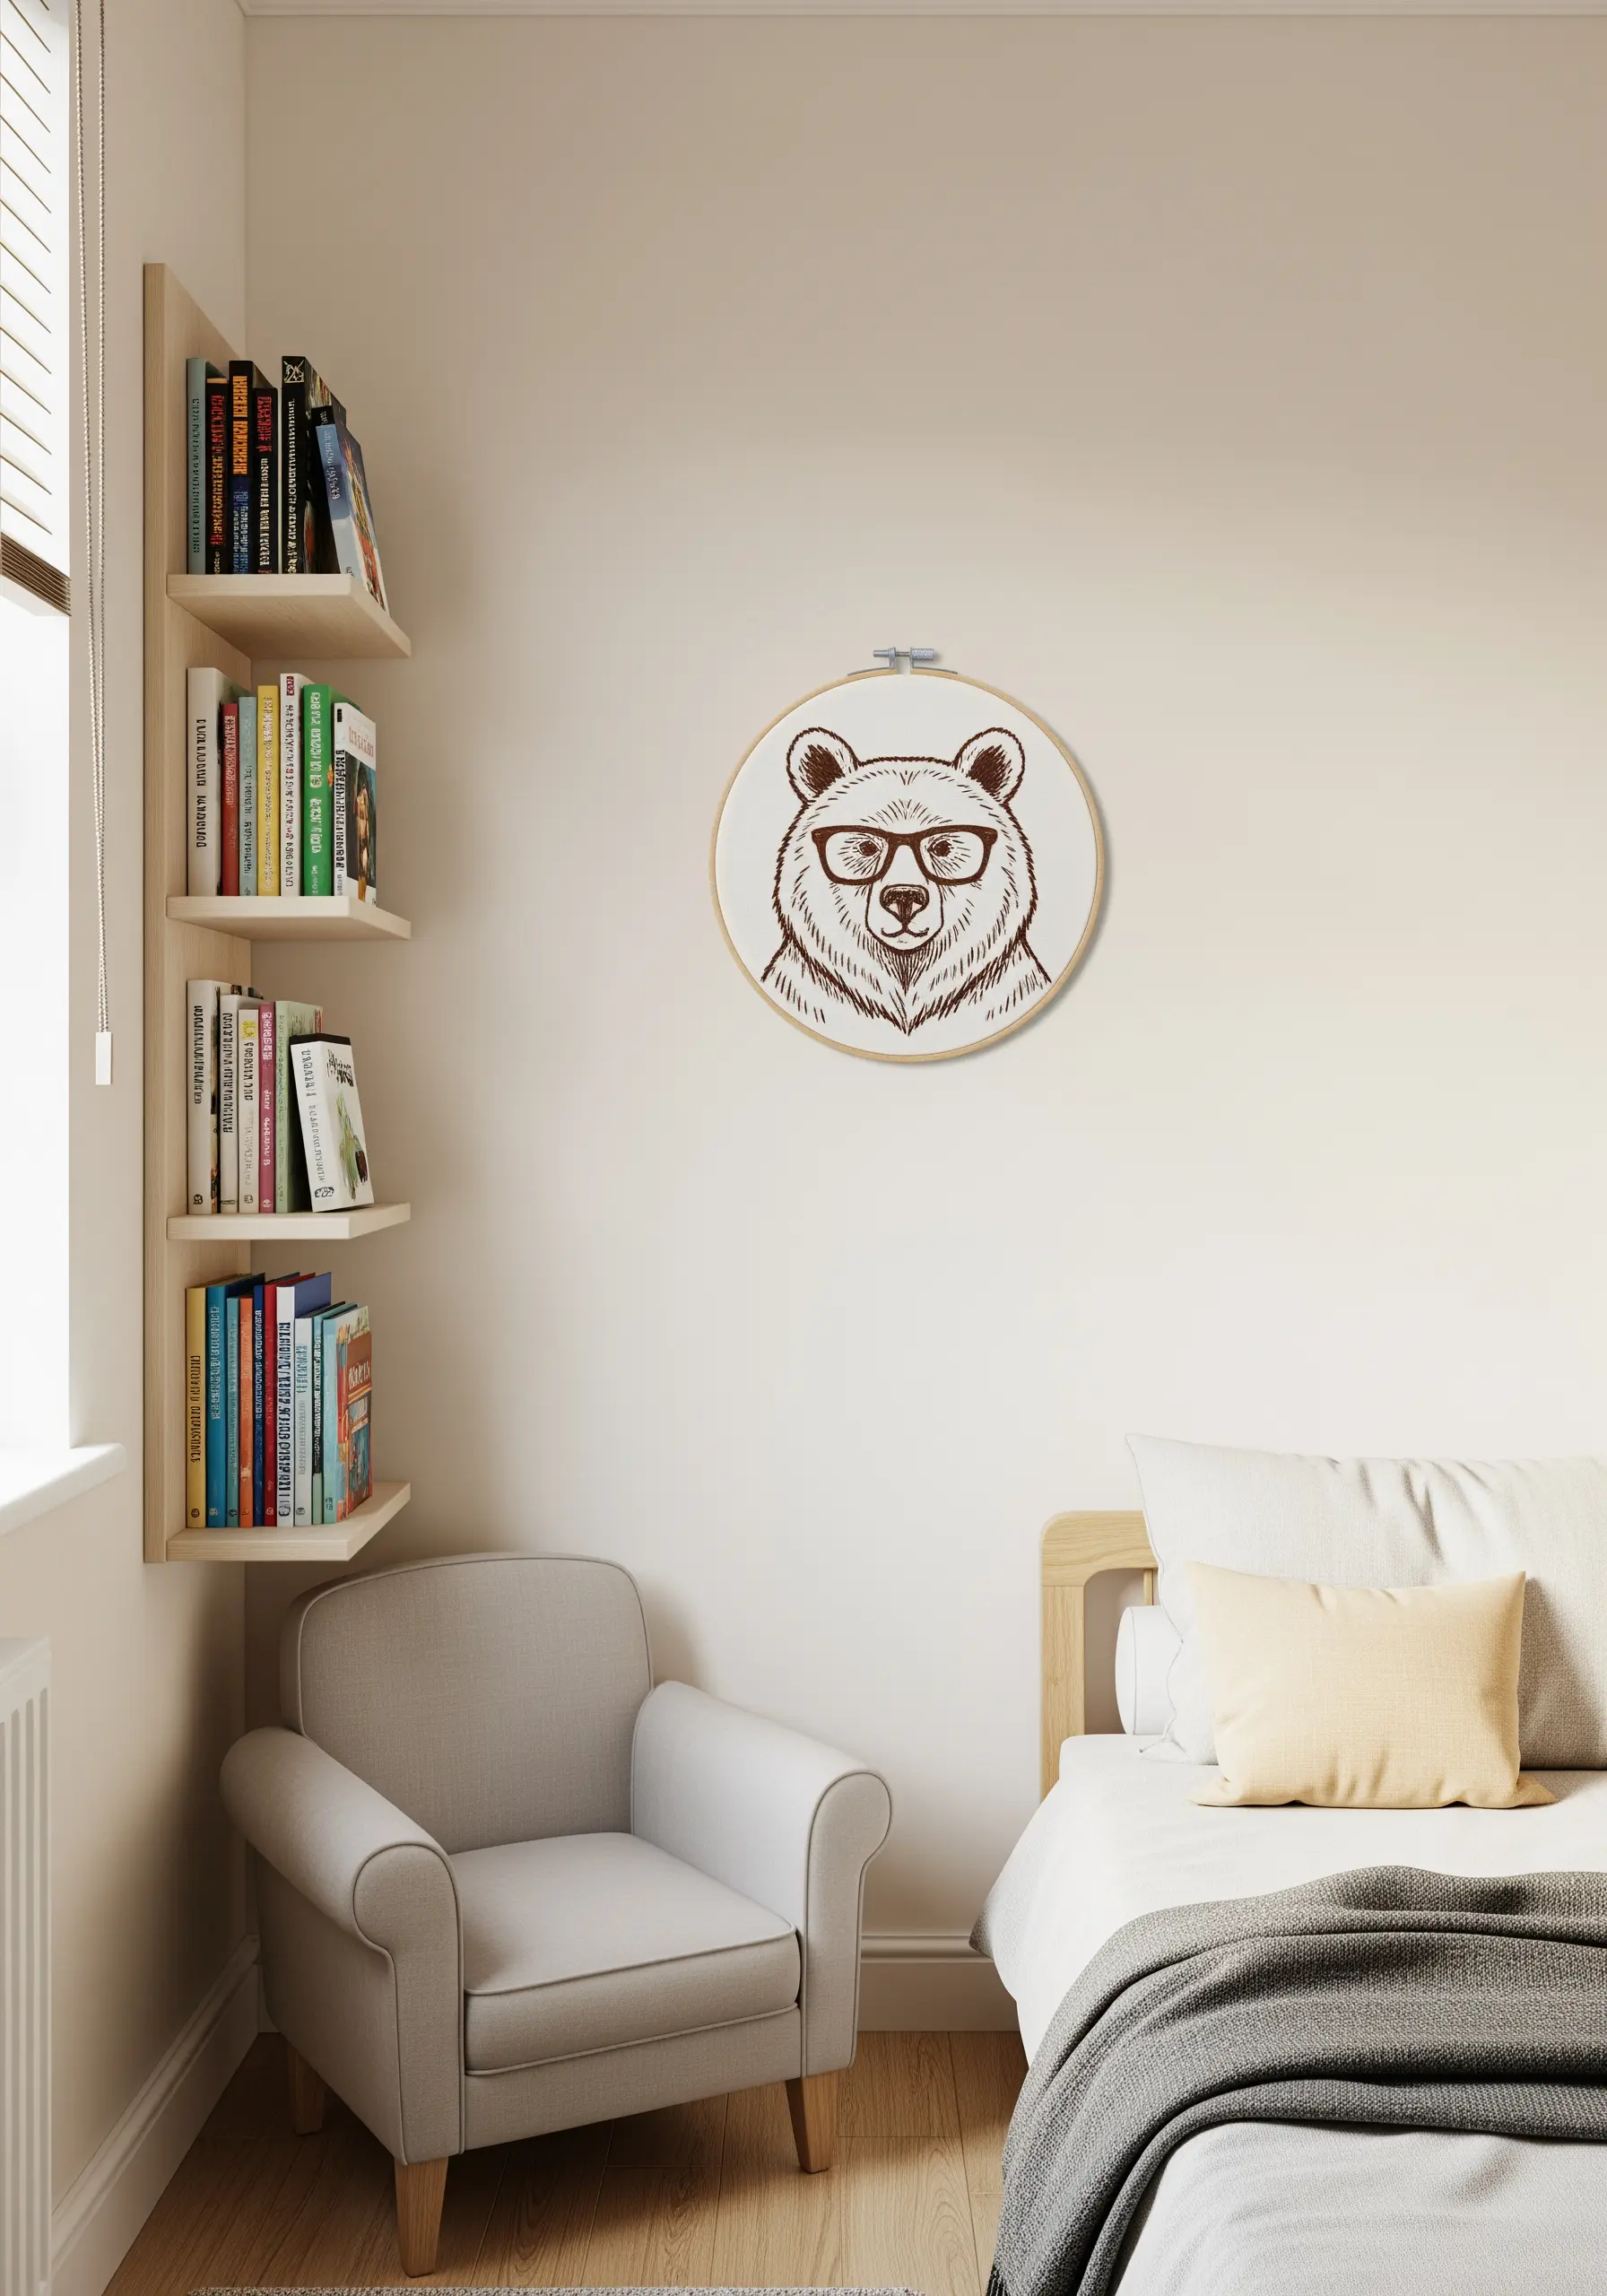
Achieve a clean, illustrative look by focusing entirely on strong outlines rather than filled color.
Use a stem stitch or a whipped backstitch with three strands of floss to create a smooth, rope-like line that stands out against the fabric.
Sticking to a single dark thread color, like deep brown or black, enhances the graphic novel aesthetic.
This technique is perfect for creating sophisticated, modern animal portraits that feel both playful and polished.
3. Display Stitches Creatively on a Pegboard System
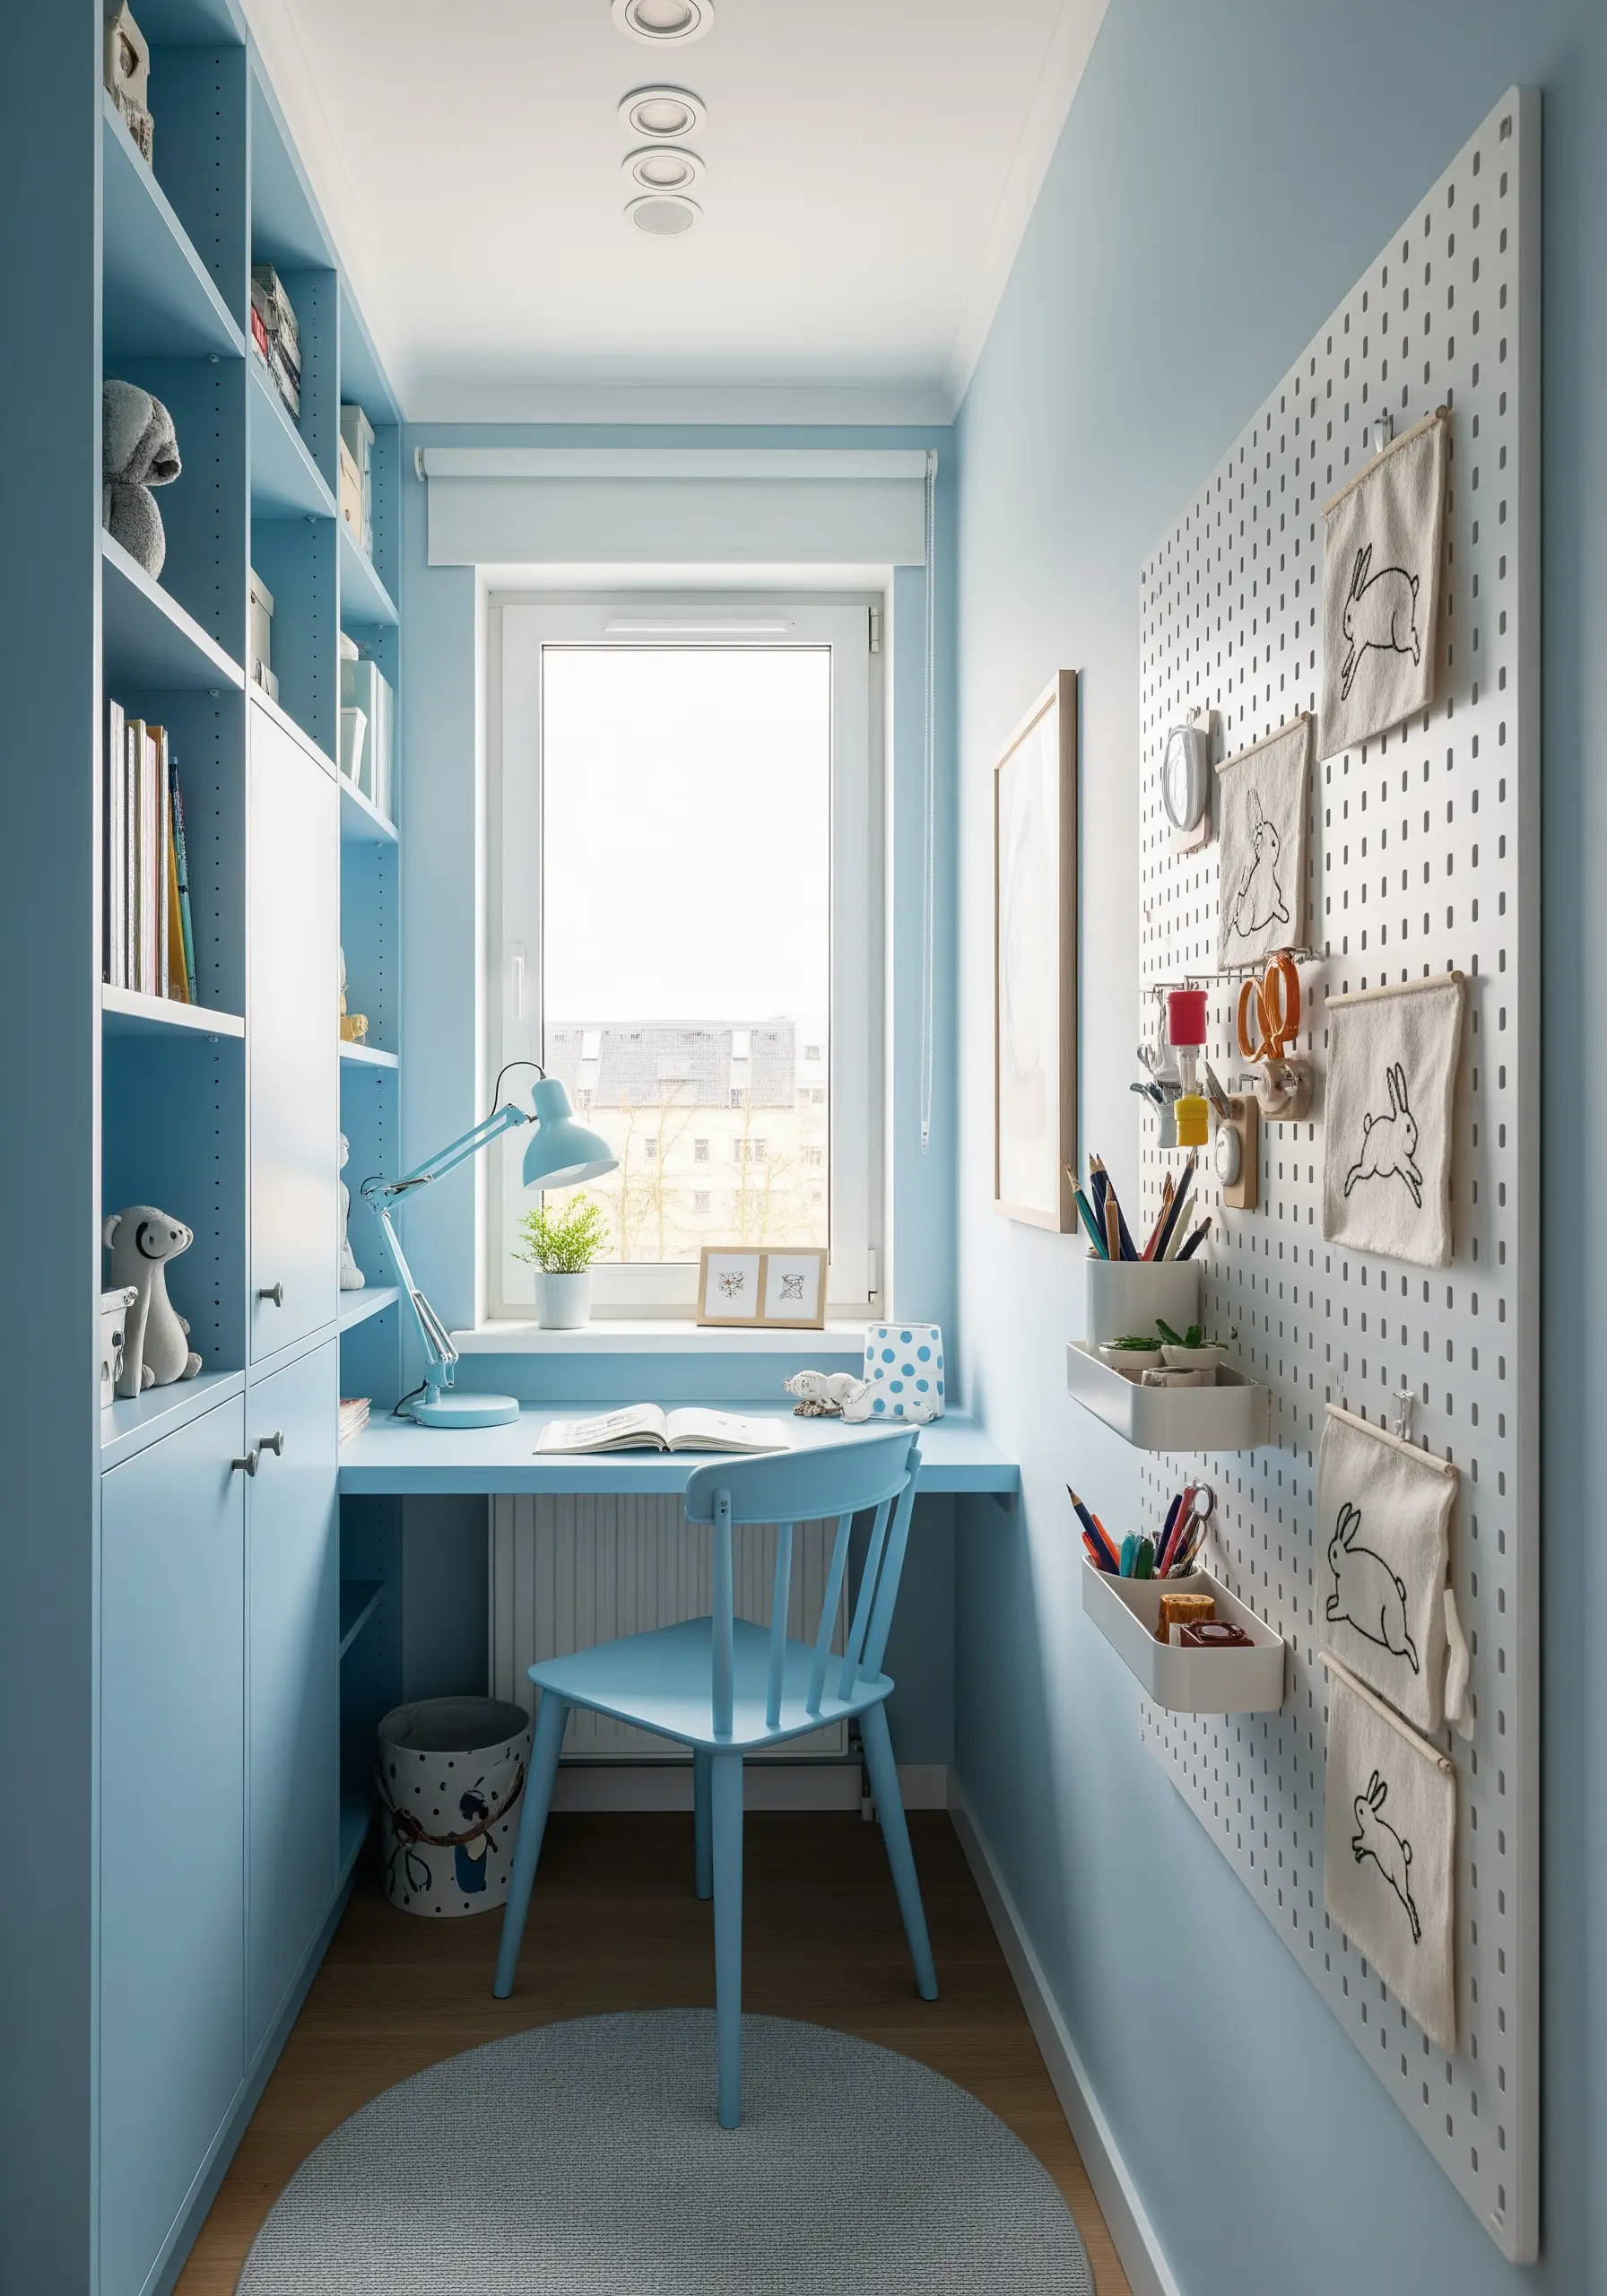
Move your embroidery beyond the hoop by stitching minimalist animal sketches onto small, raw-edge canvas squares.
Use a simple running stitch to maintain a hand-drawn, sketchy quality that feels light and effortless.
Finish each piece with a simple grommet or hole in the corner, allowing you to hang them from pegboard hooks.
This modular display is perfect for a creative corner, letting you easily rearrange your art as the collection grows.
4. Create a Generational Trio with Scaled Motifs
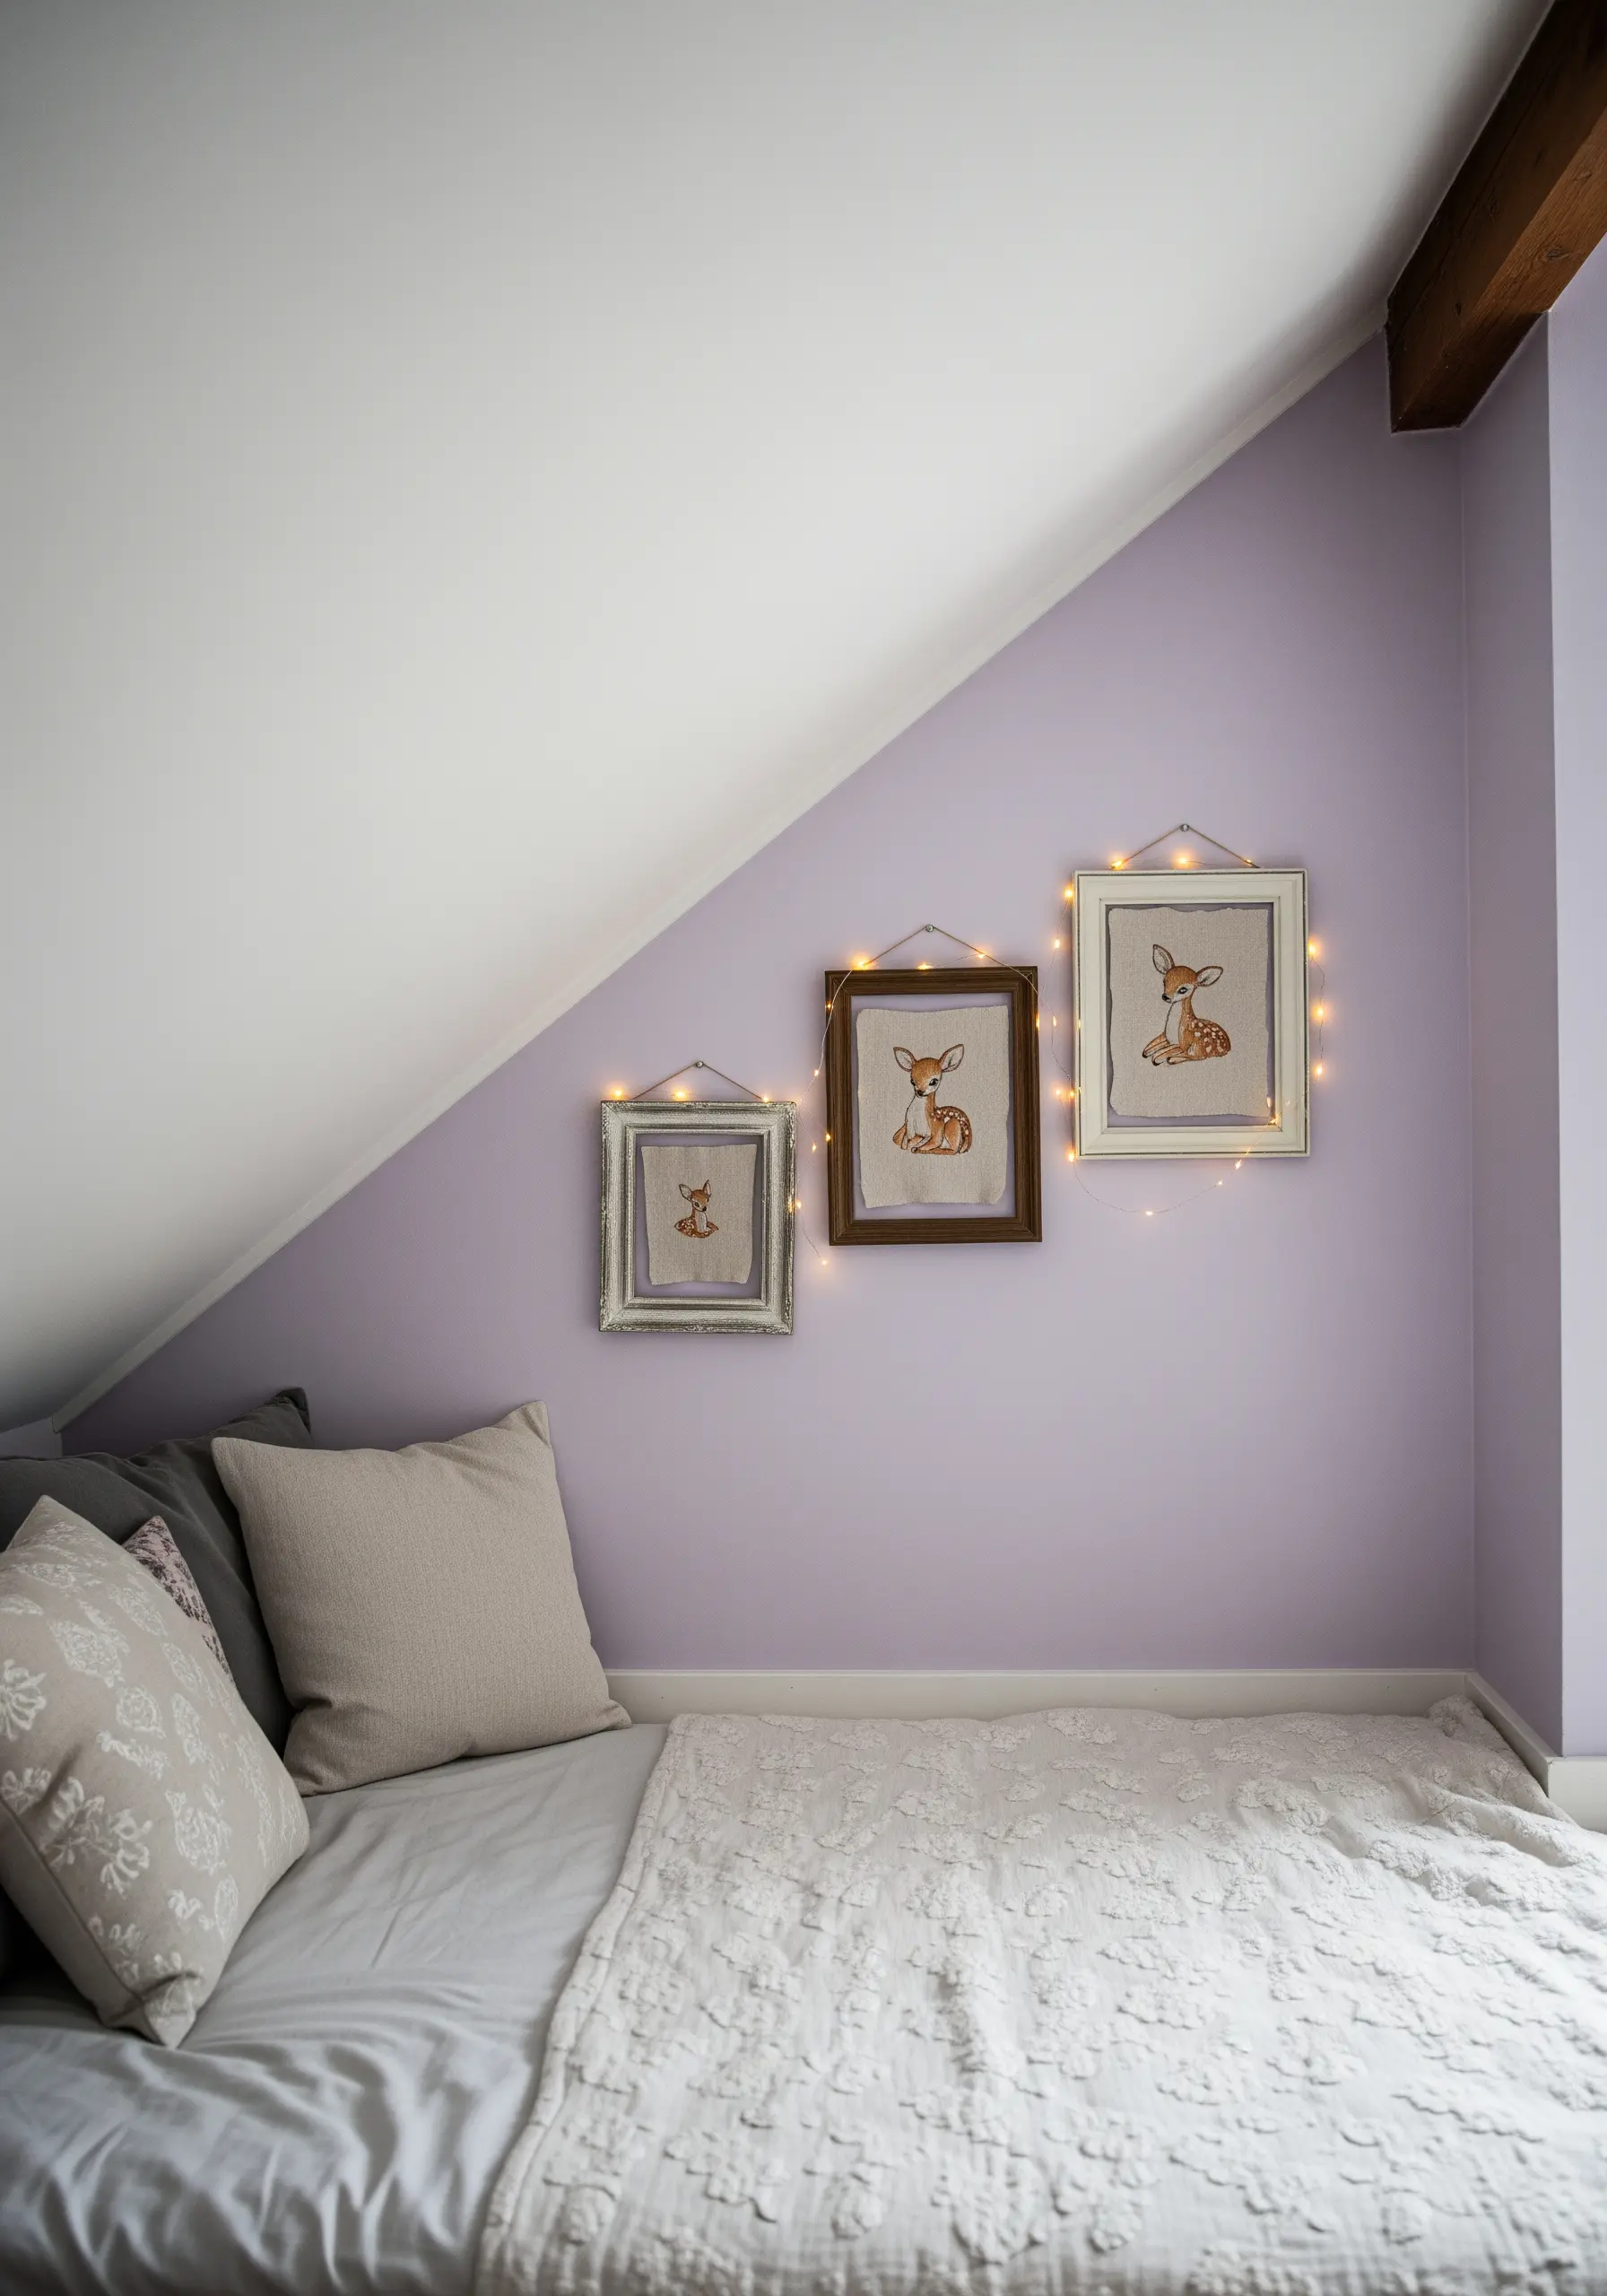
Tell a sweet story by stitching the same motif in three different sizes, suggesting a family of fawns.
To elevate the presentation, use coordinating but distinct frames—this adds visual interest without looking cluttered.
Keep the stitching style identical across all three pieces to unify them as a set.
Wrapping the frames in delicate fairy lights adds a magical, whimsical glow perfect for a cozy corner under a sloped ceiling.
5. Use Varied Linework for Dynamic Feather Textures
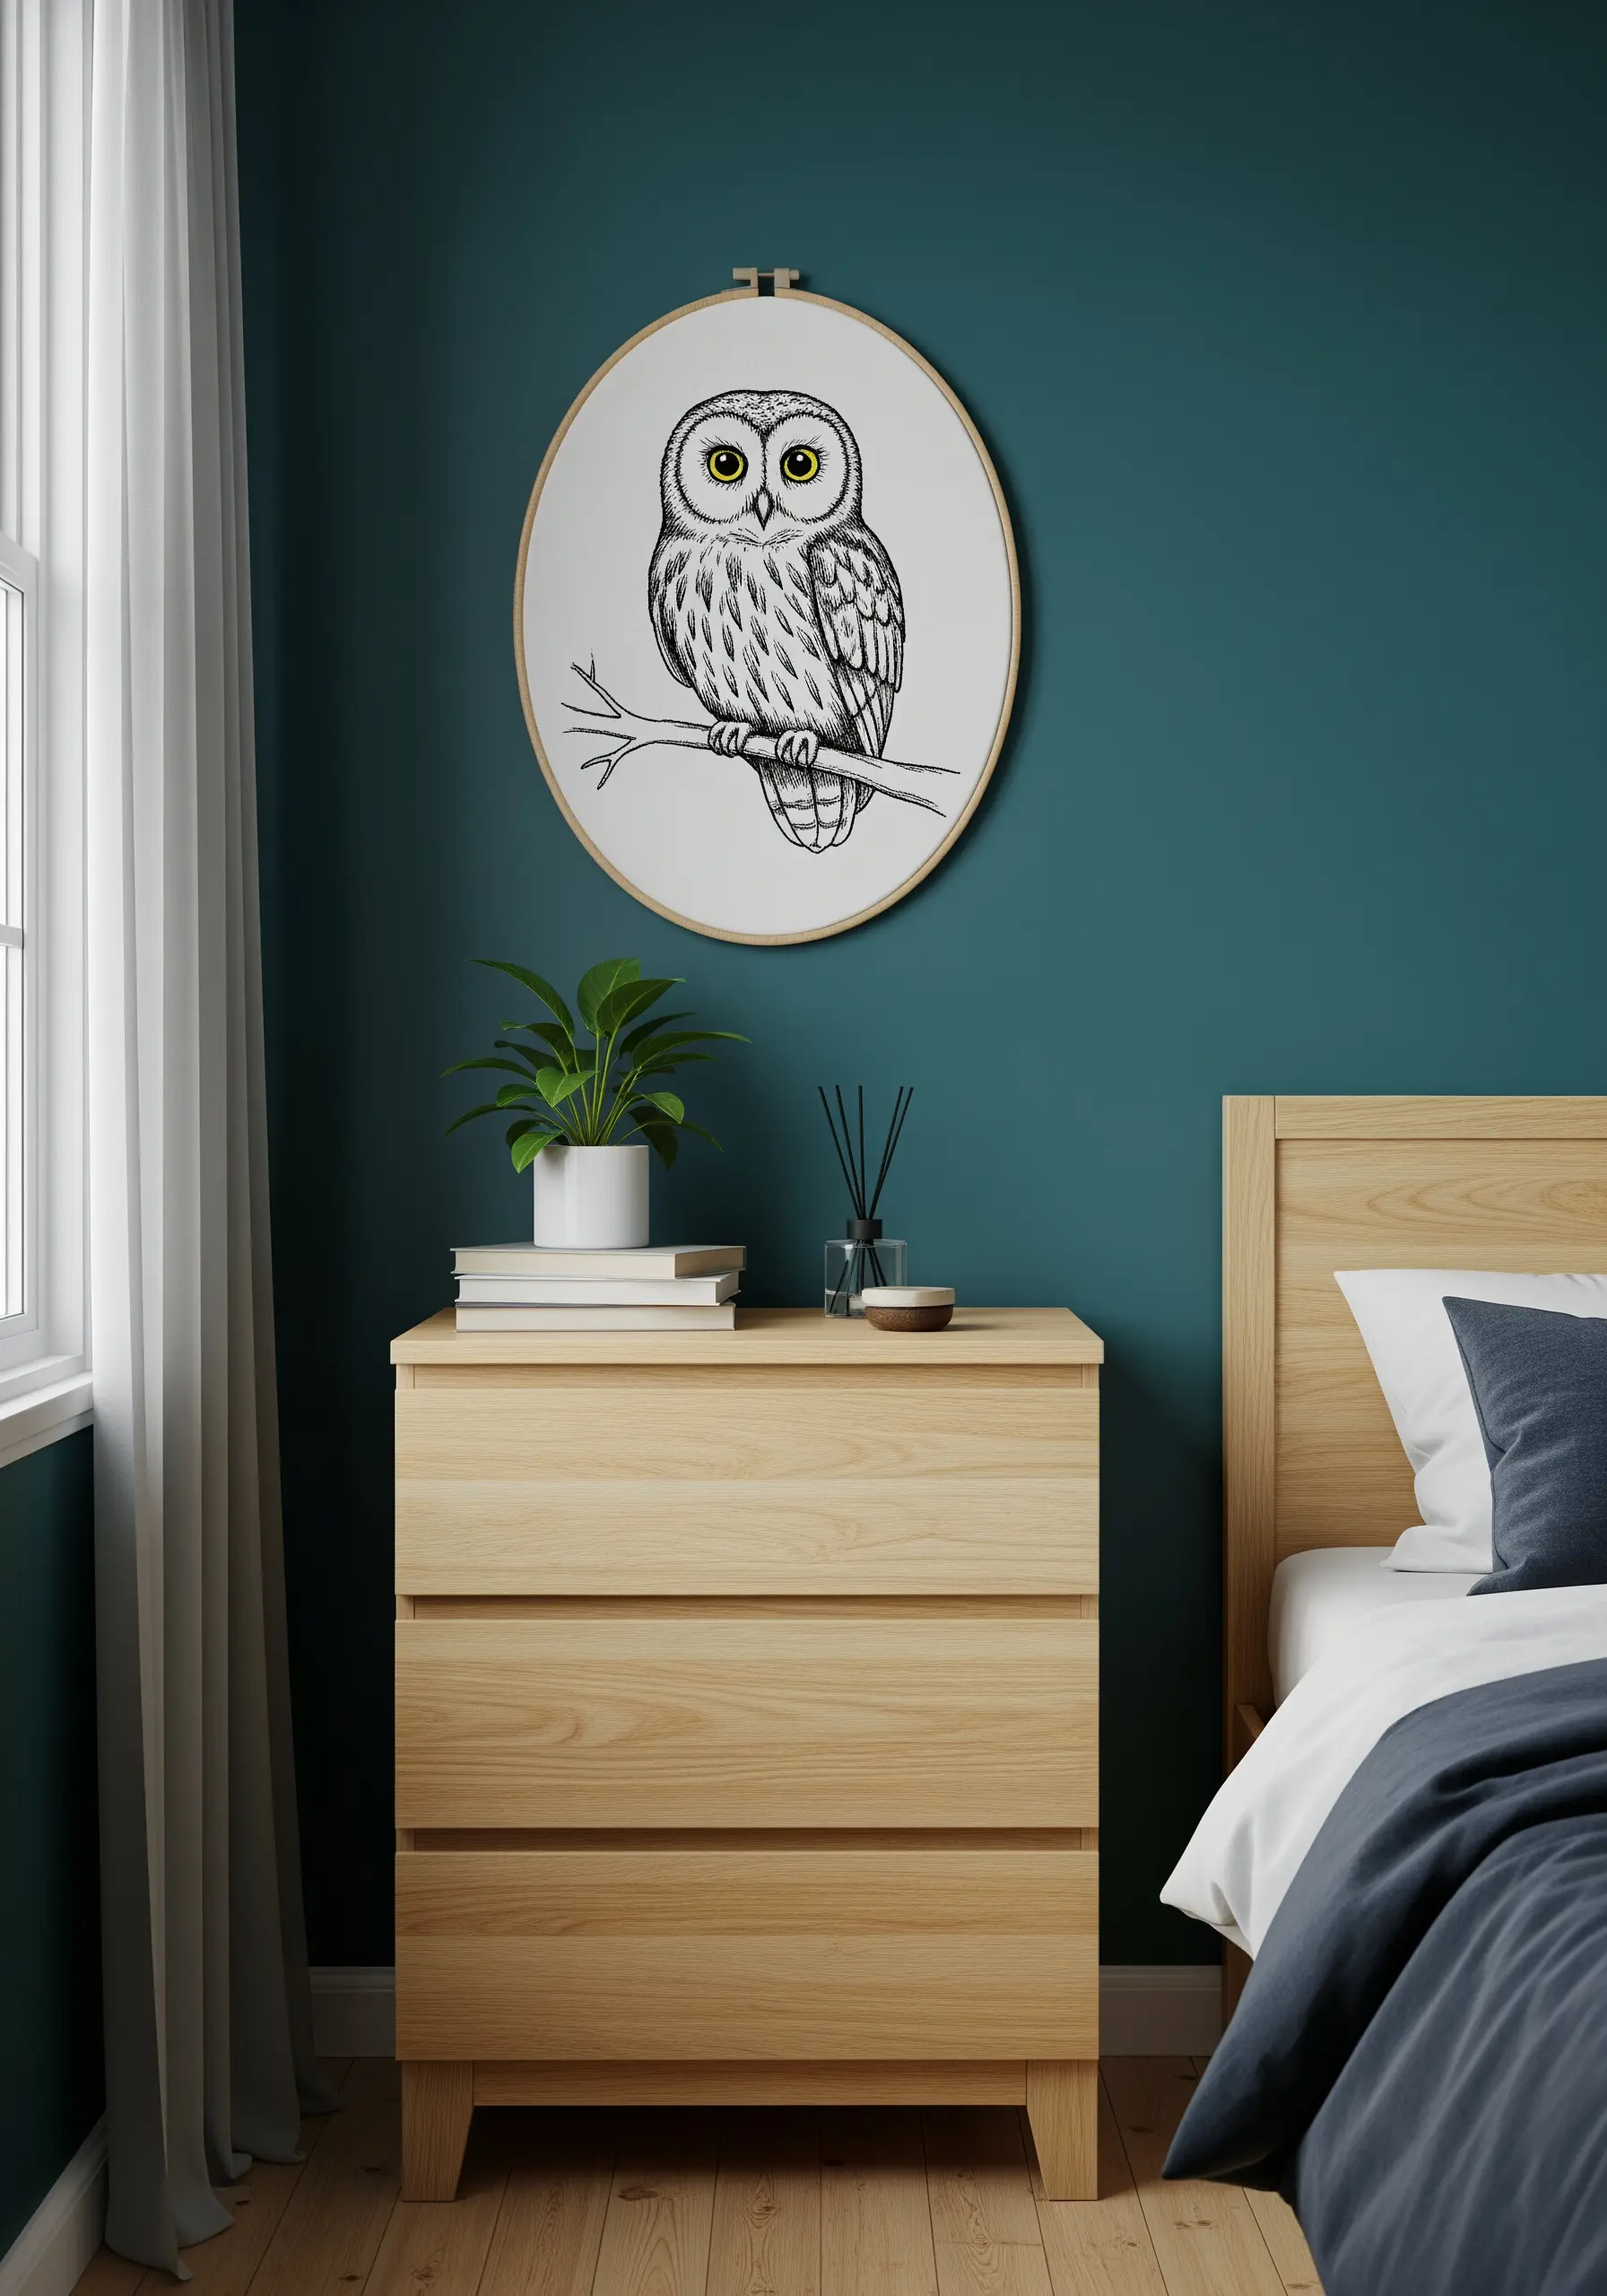
Bring an illustrated owl to life by using varied stitch direction and density to mimic feathers.
Combine short, straight seed stitches on the chest with longer, directional backstitches on the wings to create visual texture.
Use a single strand of black floss for the finest details, like the delicate lines around the eyes, to achieve a crisp, pen-and-ink look.
Mounting the finished piece in a large oval hoop emphasizes the portrait style and complements the subject’s shape.
6. Stitch a Storyboard Sequence
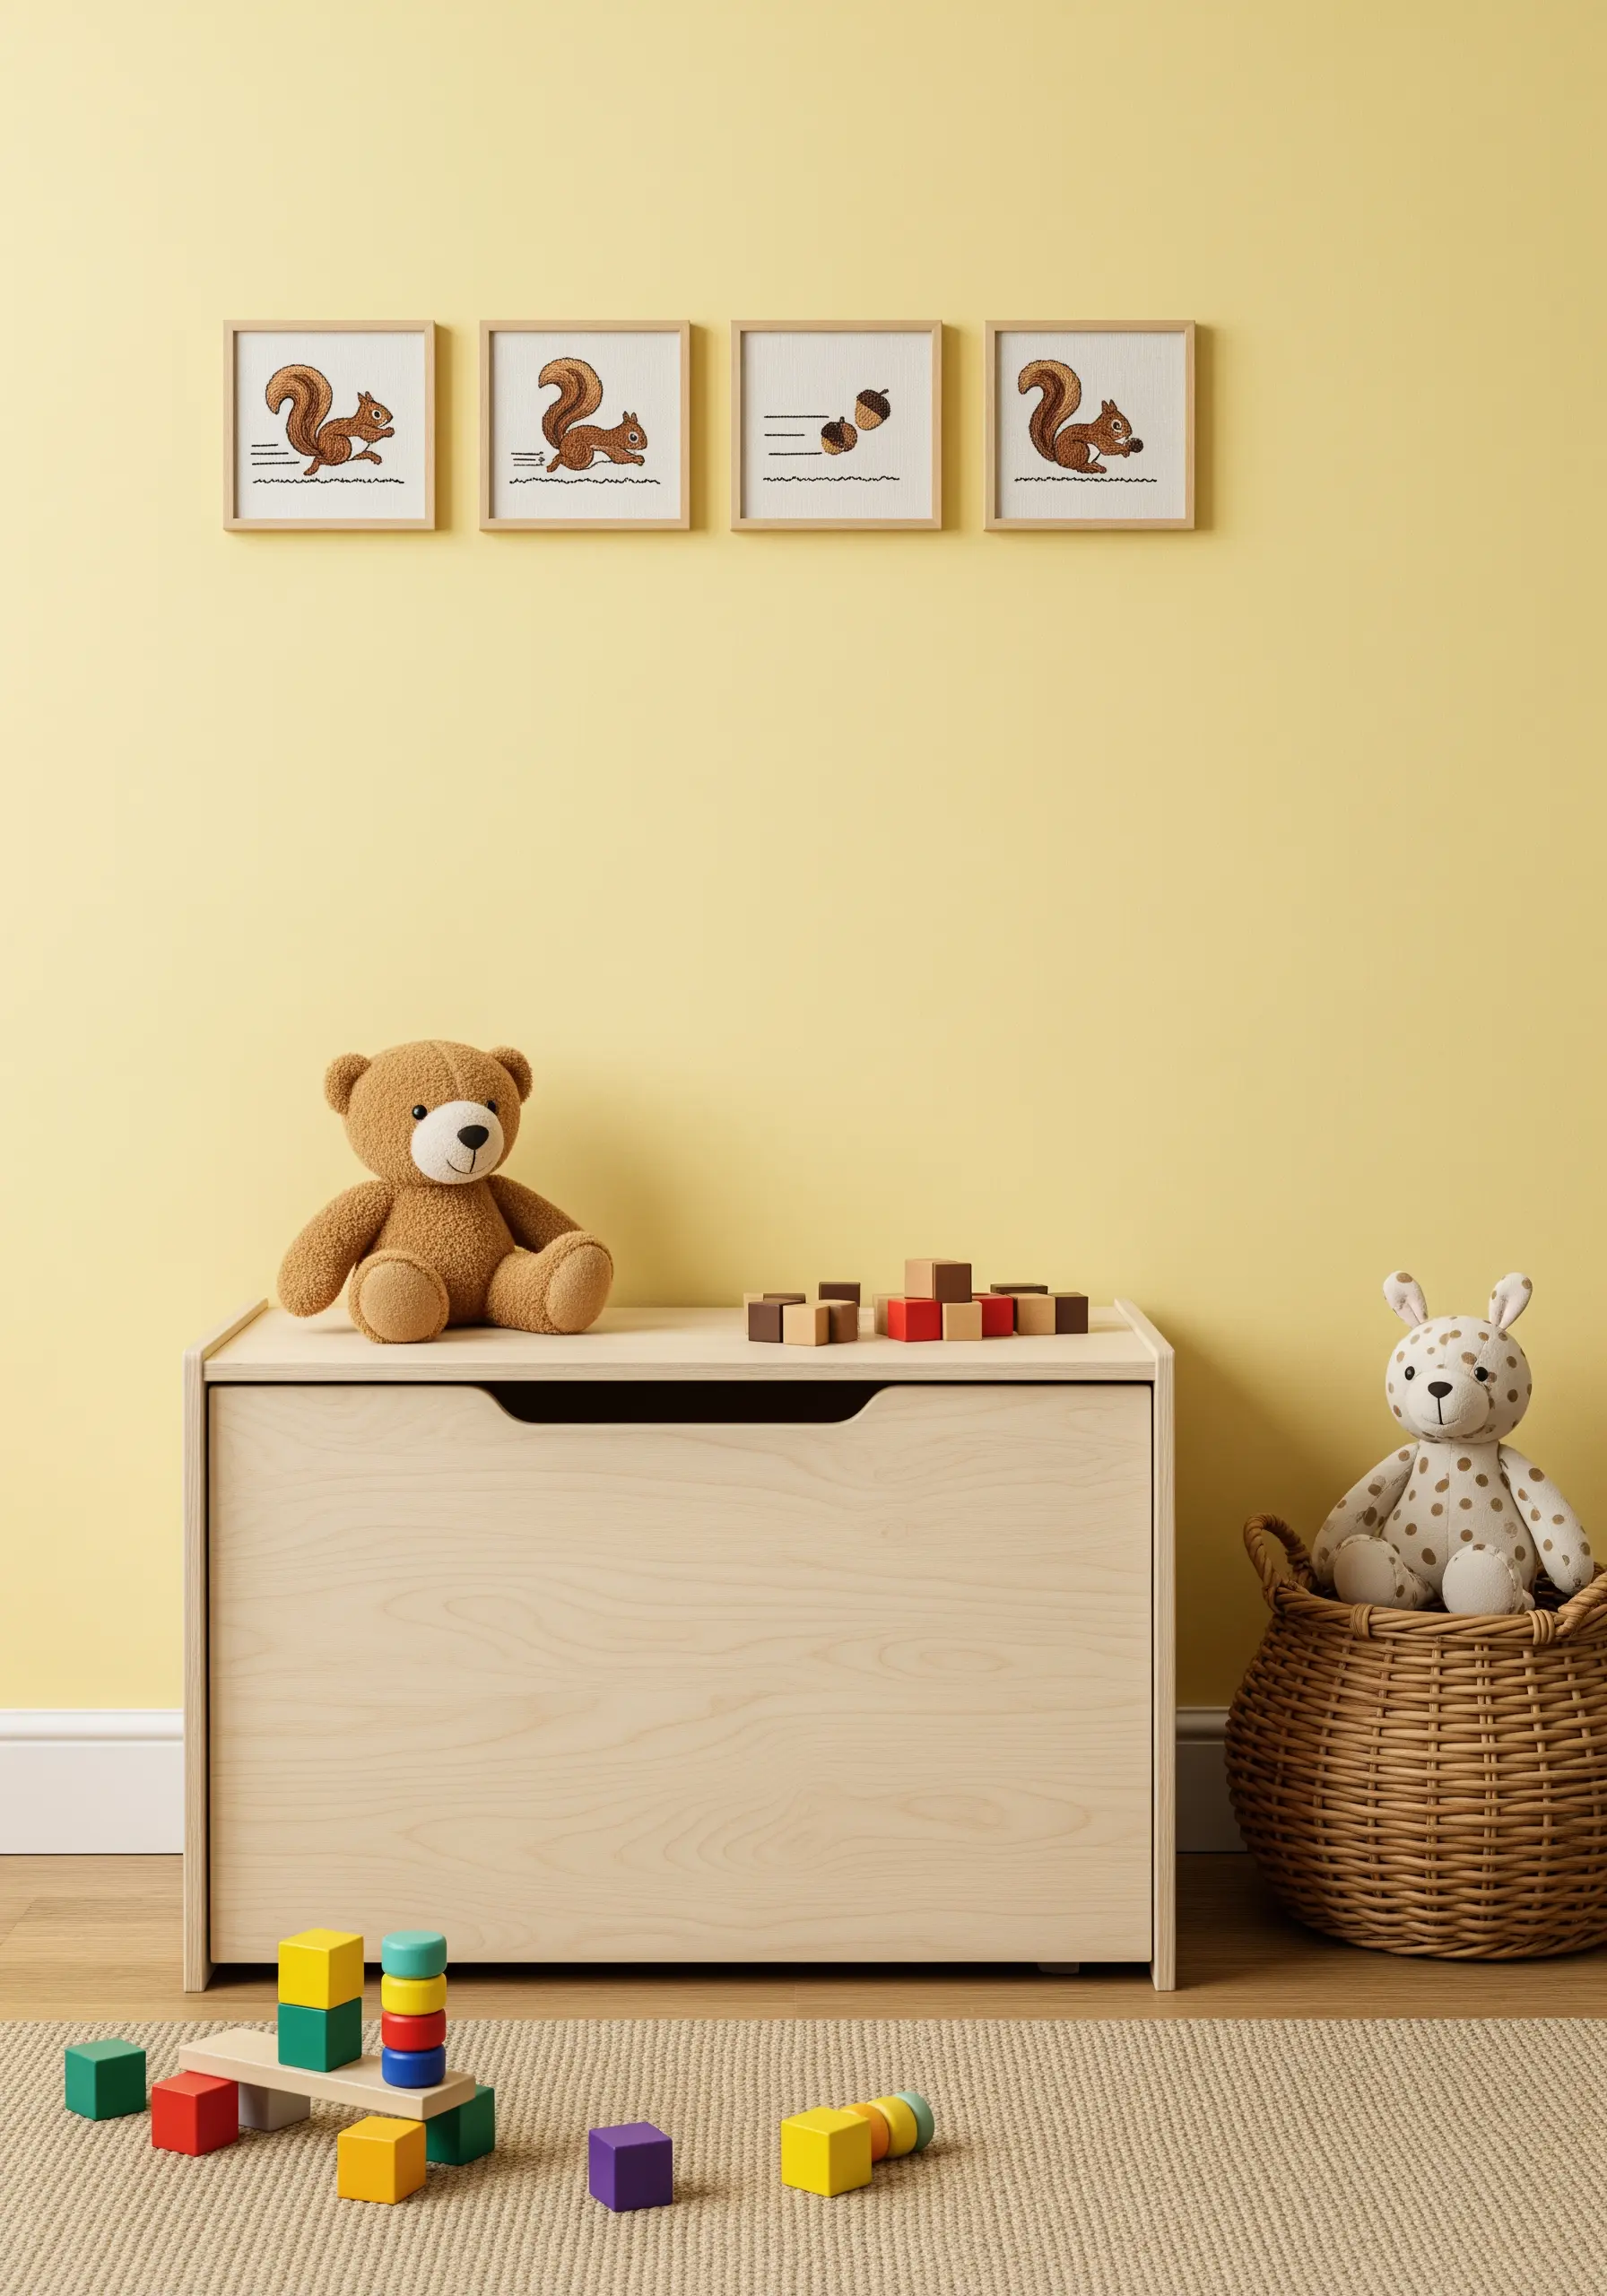
Create a playful narrative by breaking down an action into a series of four small, framed scenes.
Stitch a simple character, like a squirrel, in different stages of motion—running, jumping, finding a nut.
Using identical frames and maintaining the same scale and stitch style across the series makes the story feel intentional and connected.
This technique is a wonderfully creative way to fill a horizontal space above a toy chest or bookshelf.
7. Hang Hoops from a Natural Branch for Rustic Charm
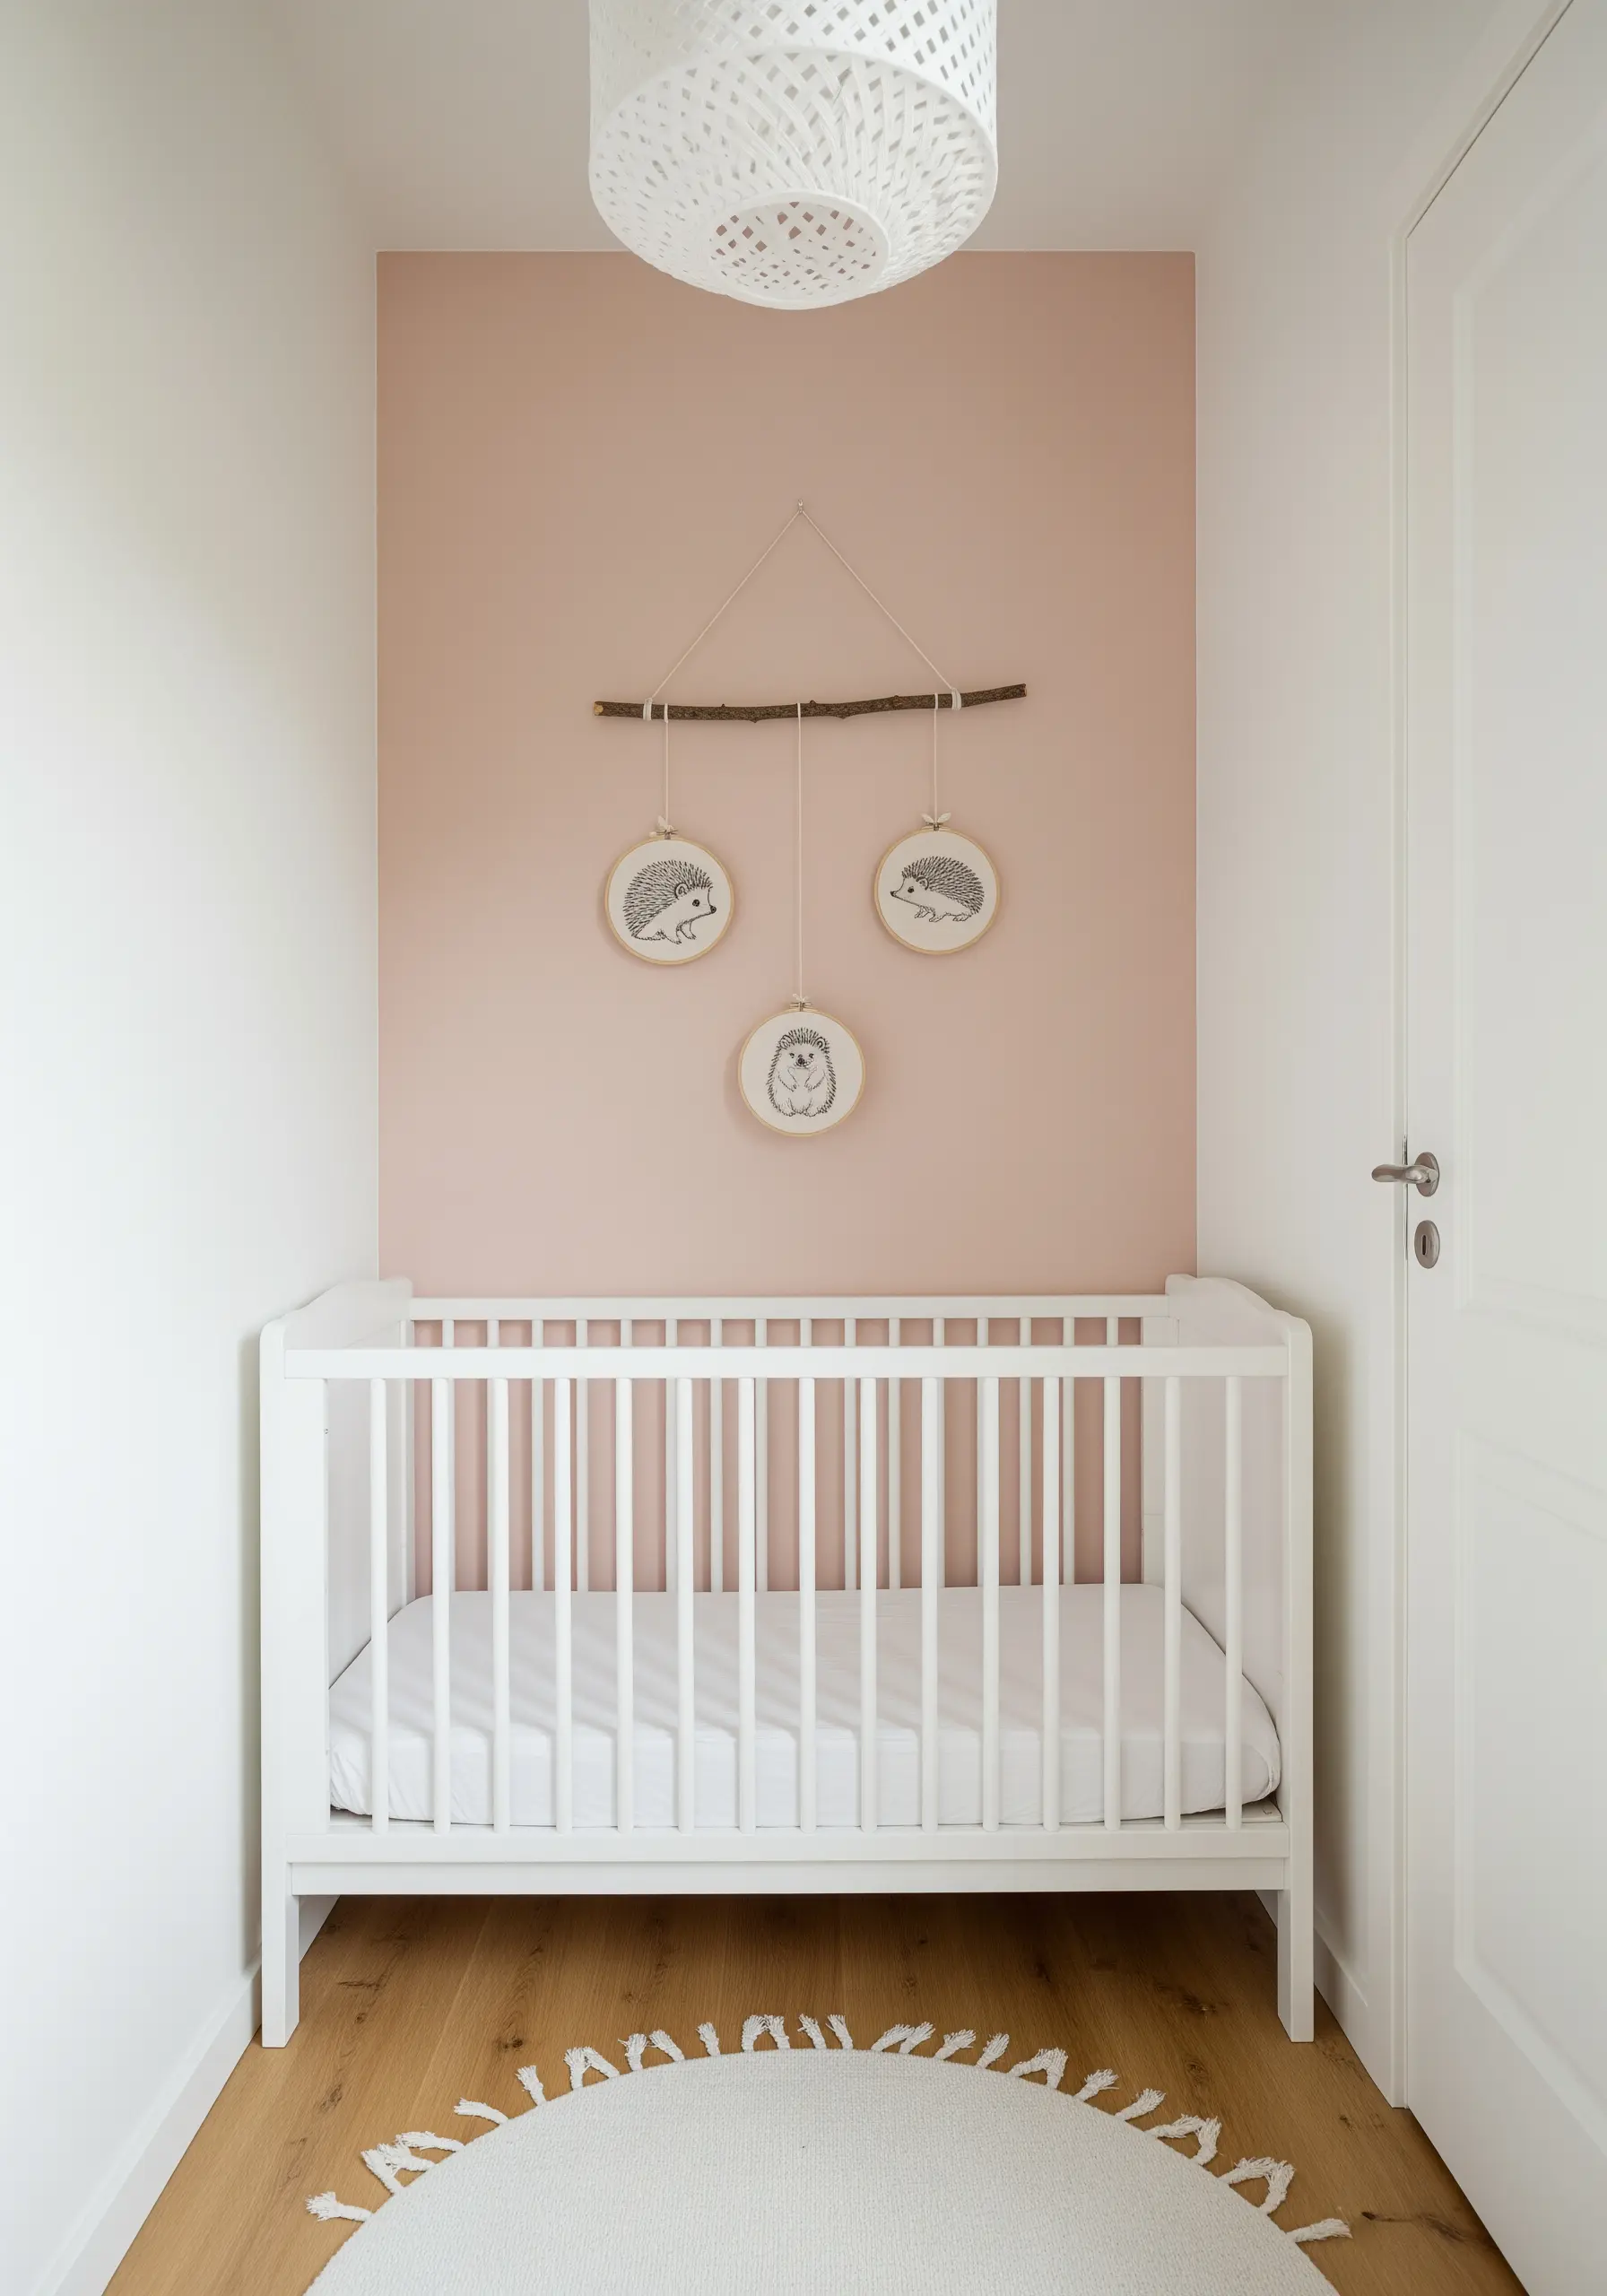
Forage a beautiful branch to use as a rustic, organic hanger for a trio of small hoops.
Use French knots or colonial knots to create the spiky texture of the hedgehogs, varying the tension for a more natural look.
Hang the hoops at slightly different lengths using twine or ribbon to create a balanced yet dynamic composition.
This display method adds a touch of nature to the nursery and perfectly complements woodland-themed animals.
8. Suggest Motion with Watercolor-Style Stitches
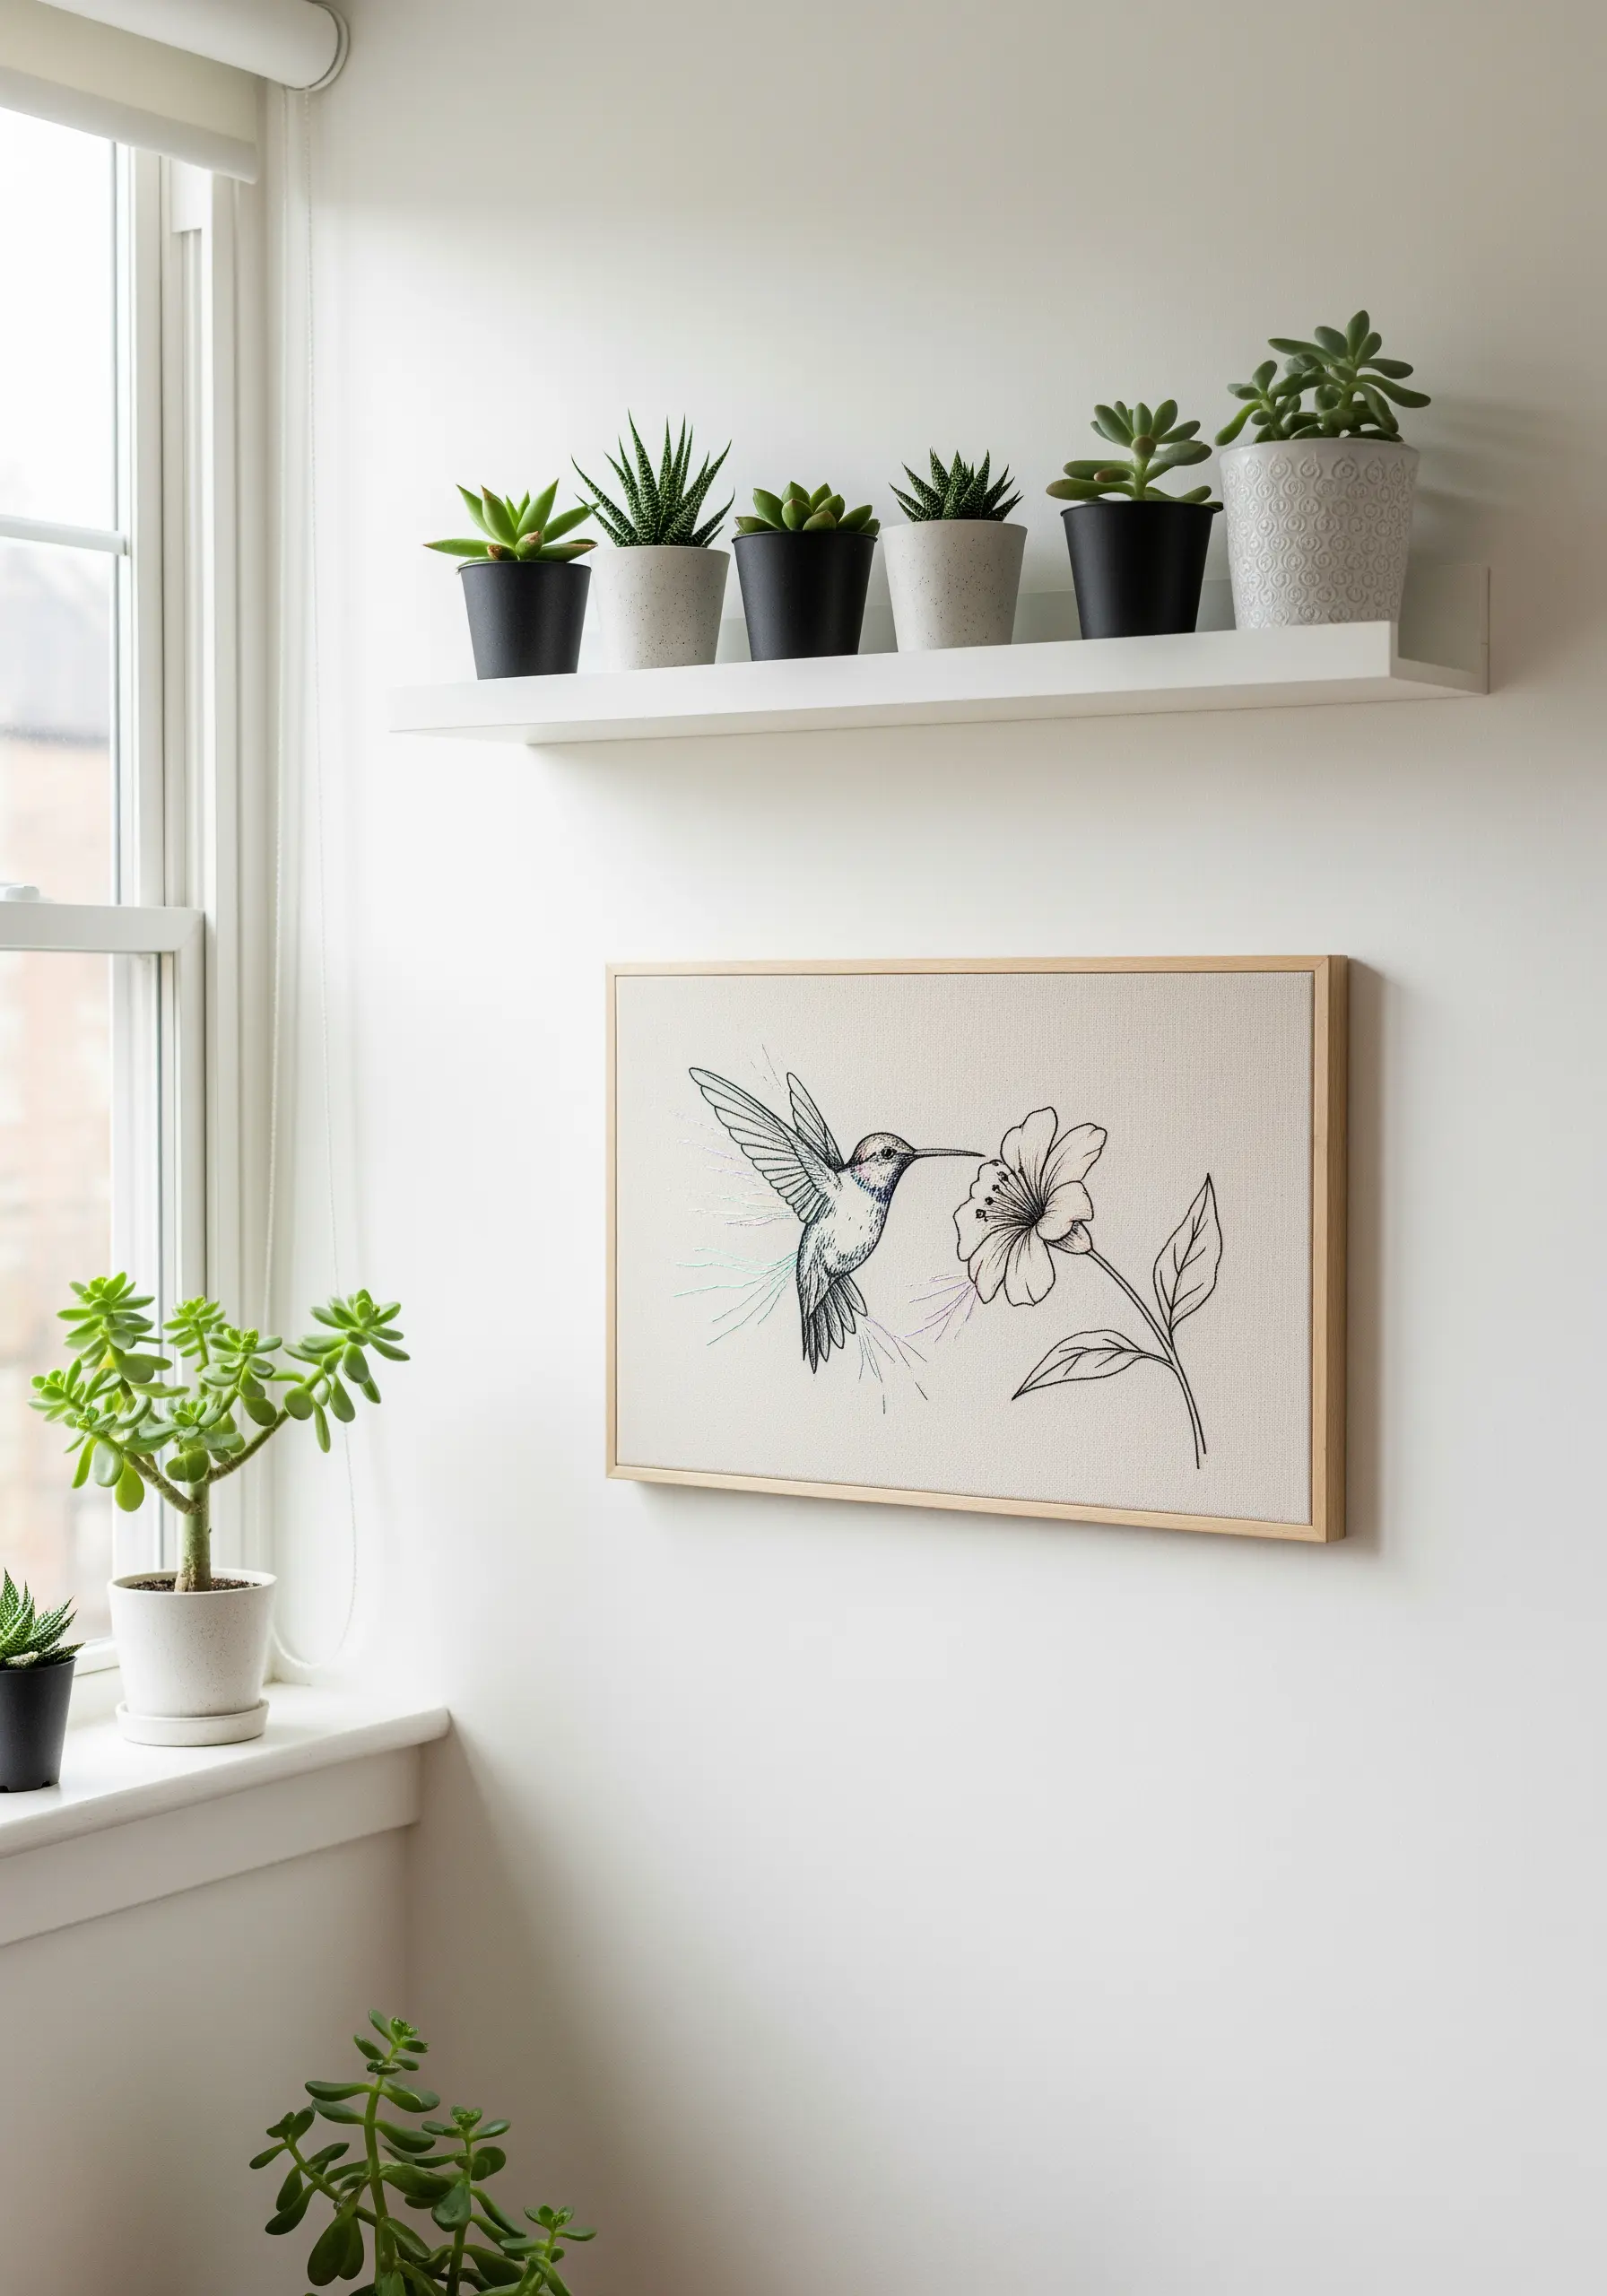
Achieve a delicate, painted effect by using sparse, open stitches that allow the background fabric to show through.
Instead of dense satin stitch, use single, long straight stitches in varying shades to create a splash of color, mimicking the flutter of a hummingbird’s wings.
This technique adds a sense of light and movement, making the embroidery feel more like an illustration.
These abstract color blend stitch ideas are perfect for capturing fleeting moments in nature.
9. Embrace the Power of Minimalist Line Art
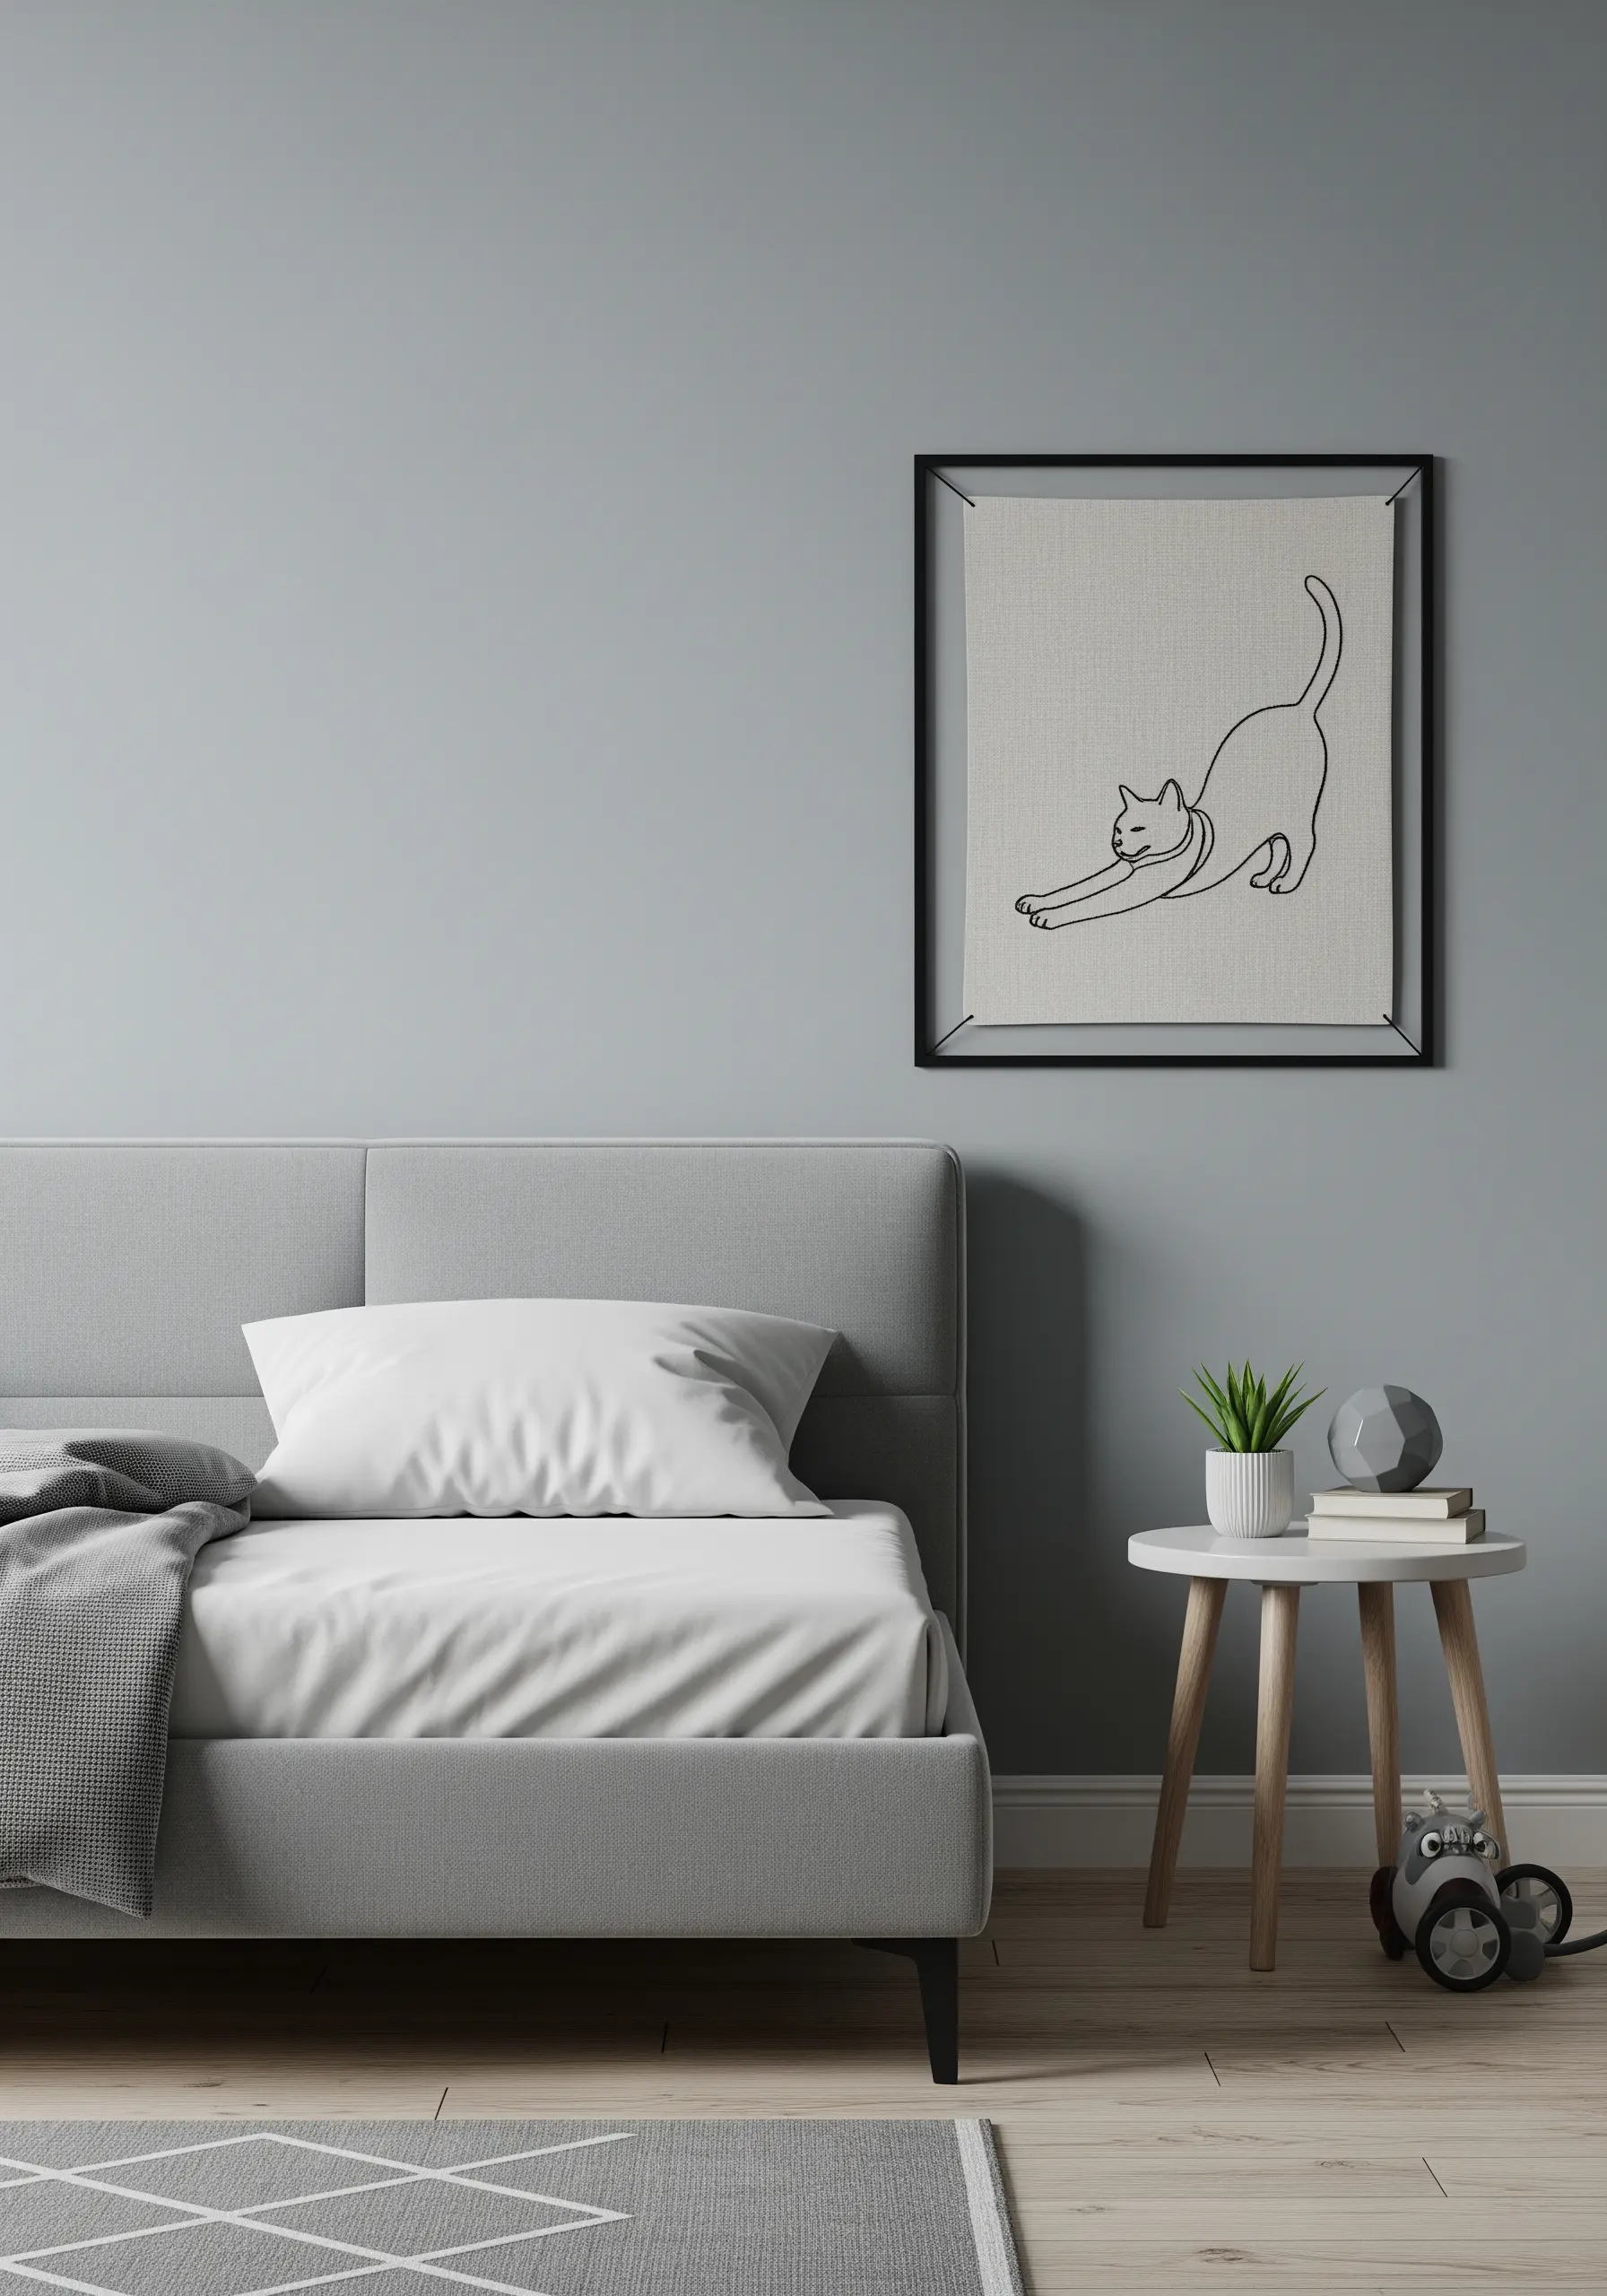
Capture the essence of an animal’s movement with a single, unbroken line.
Choose a smooth, consistent stitch like the stem stitch or split stitch to ensure your curves are fluid and your lines are clean.
The high contrast of black thread on a neutral linen canvas is essential for this style, making the form the undisputed hero of the piece.
These minimalist line art animal designs bring a sophisticated, modern elegance to any room.
10. Create Rhythm with a Repetitive Motif
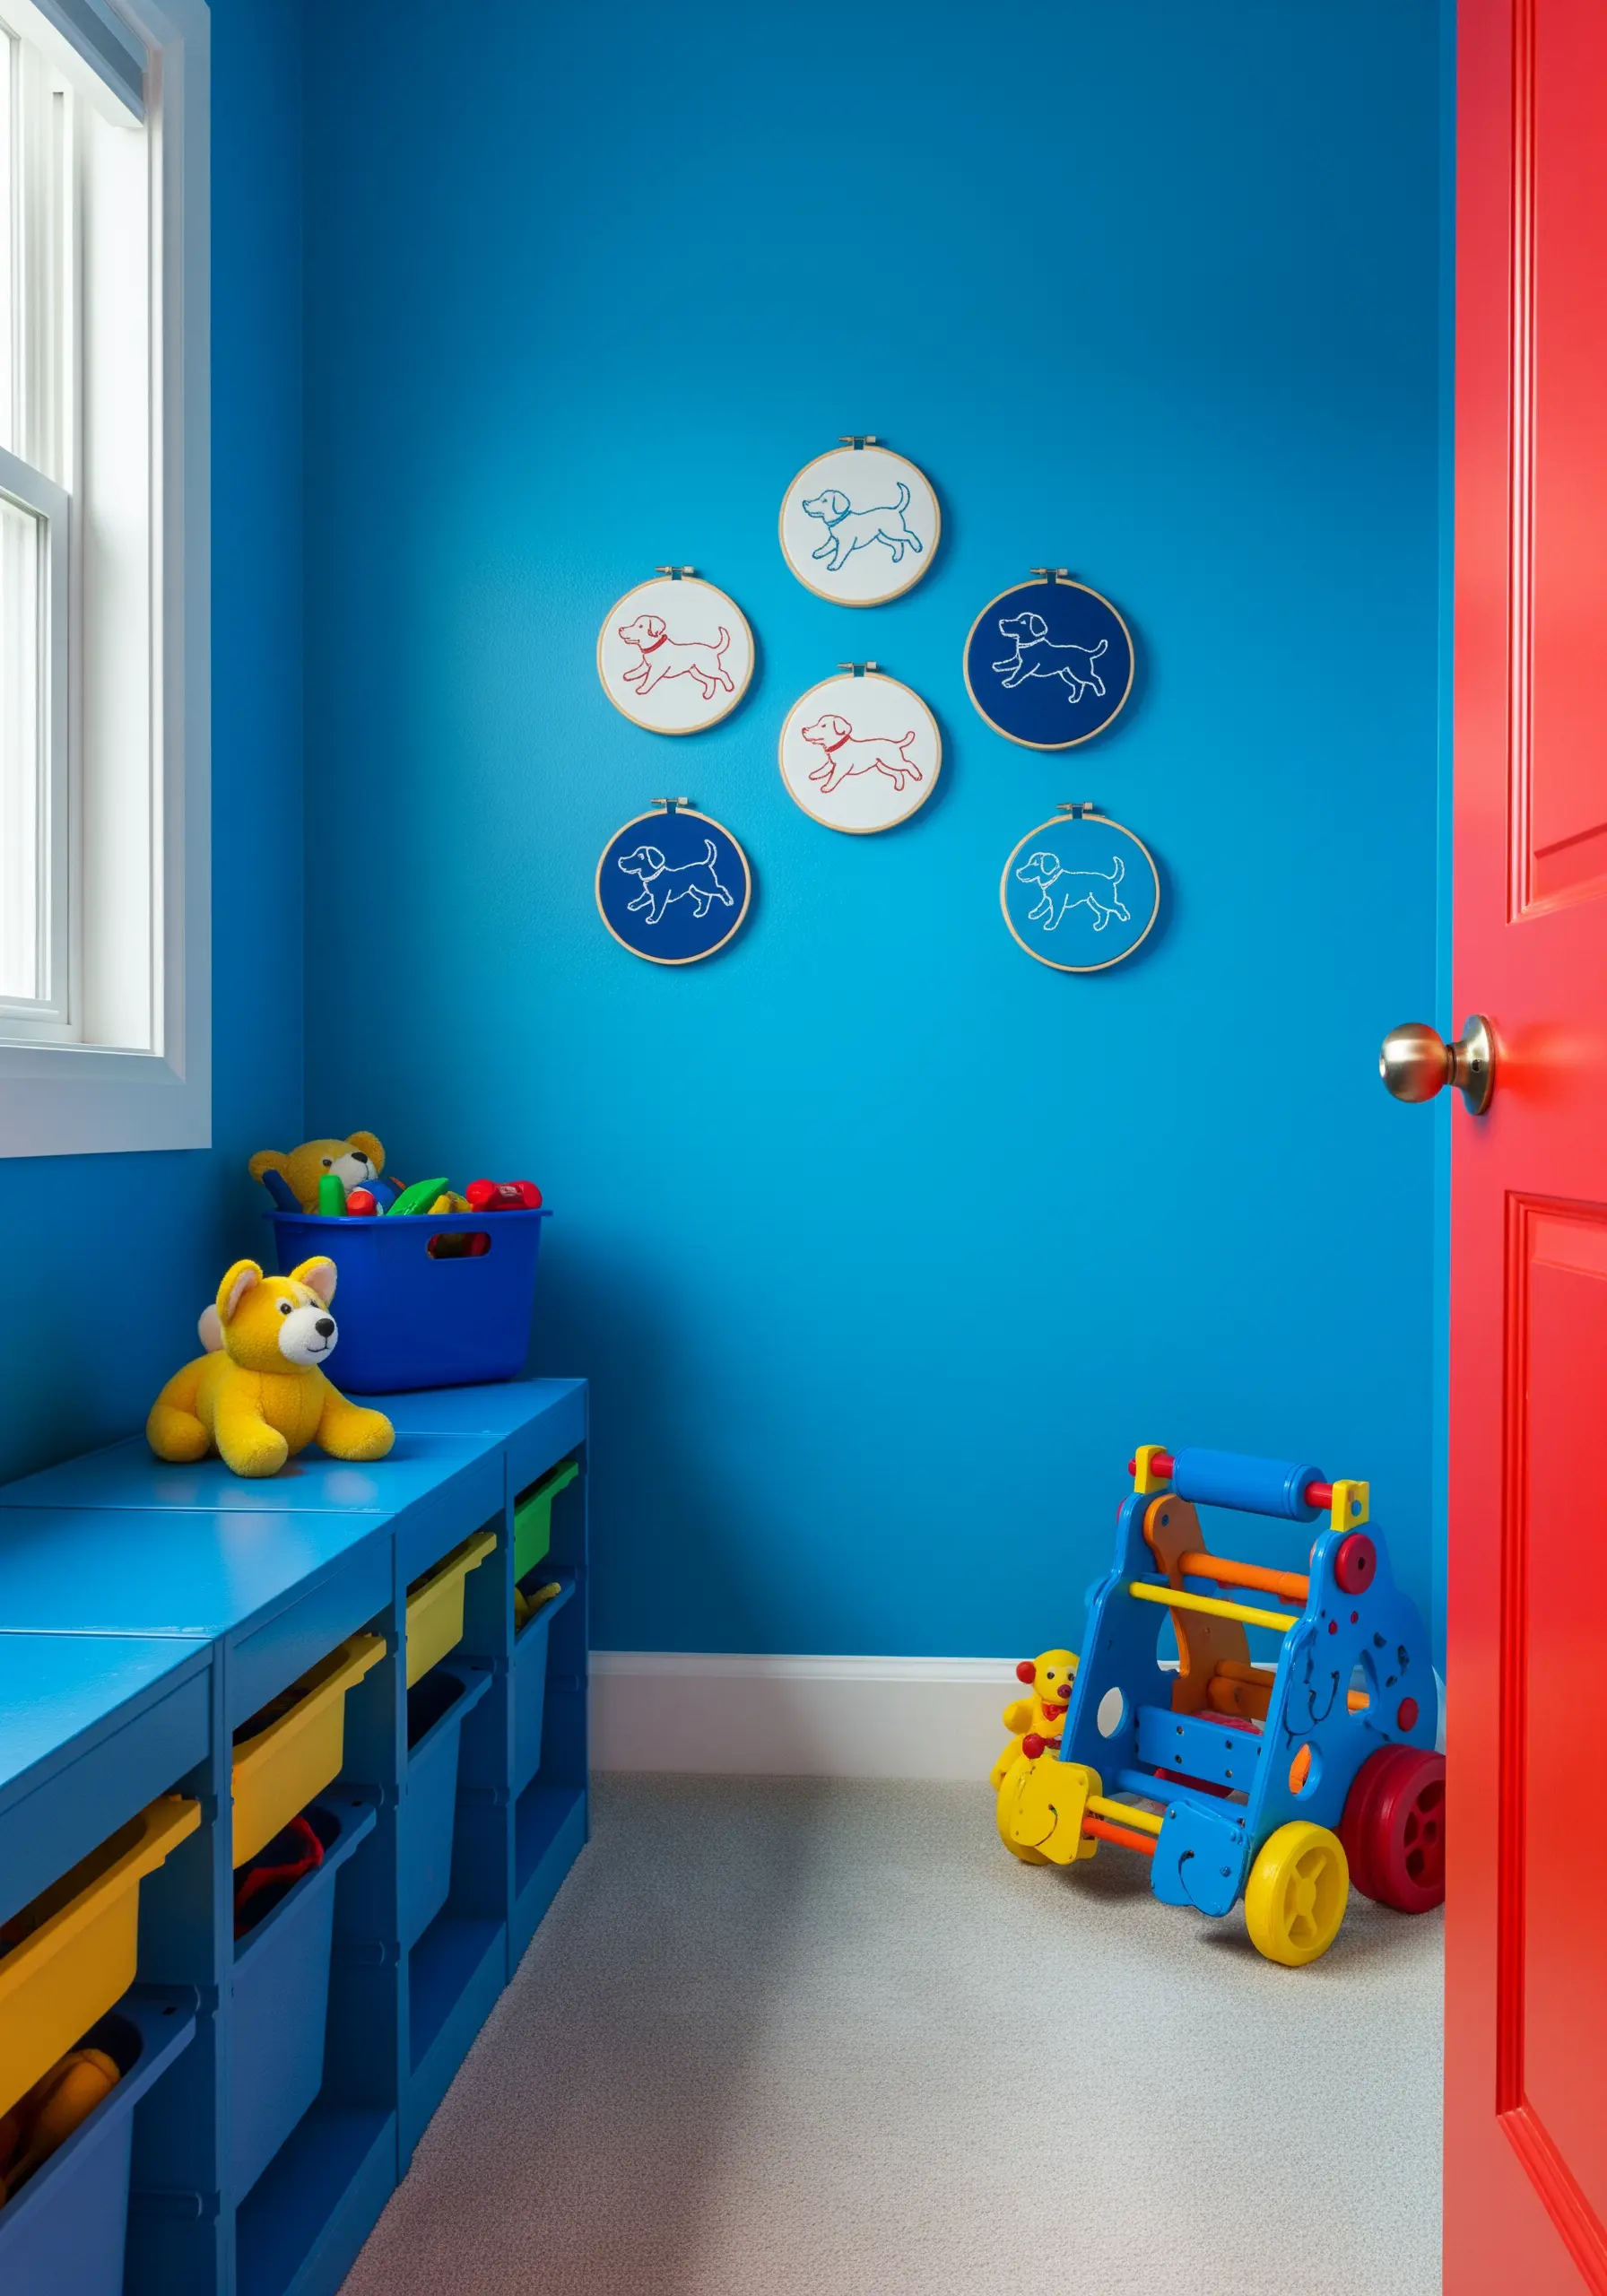
Design a vibrant wall display by repeating a simple dog silhouette in a bold, primary color scheme.
Alternate the background and thread colors within a limited palette (like red, white, and navy) to create a sense of playful rhythm and cohesion.
Arranging the hoops in a gentle, organic cluster adds energy and movement, preventing the display from feeling too rigid.
This approach is highly effective for brightening up a colorful playroom.
11. Emulate Engraving with Dense Linework
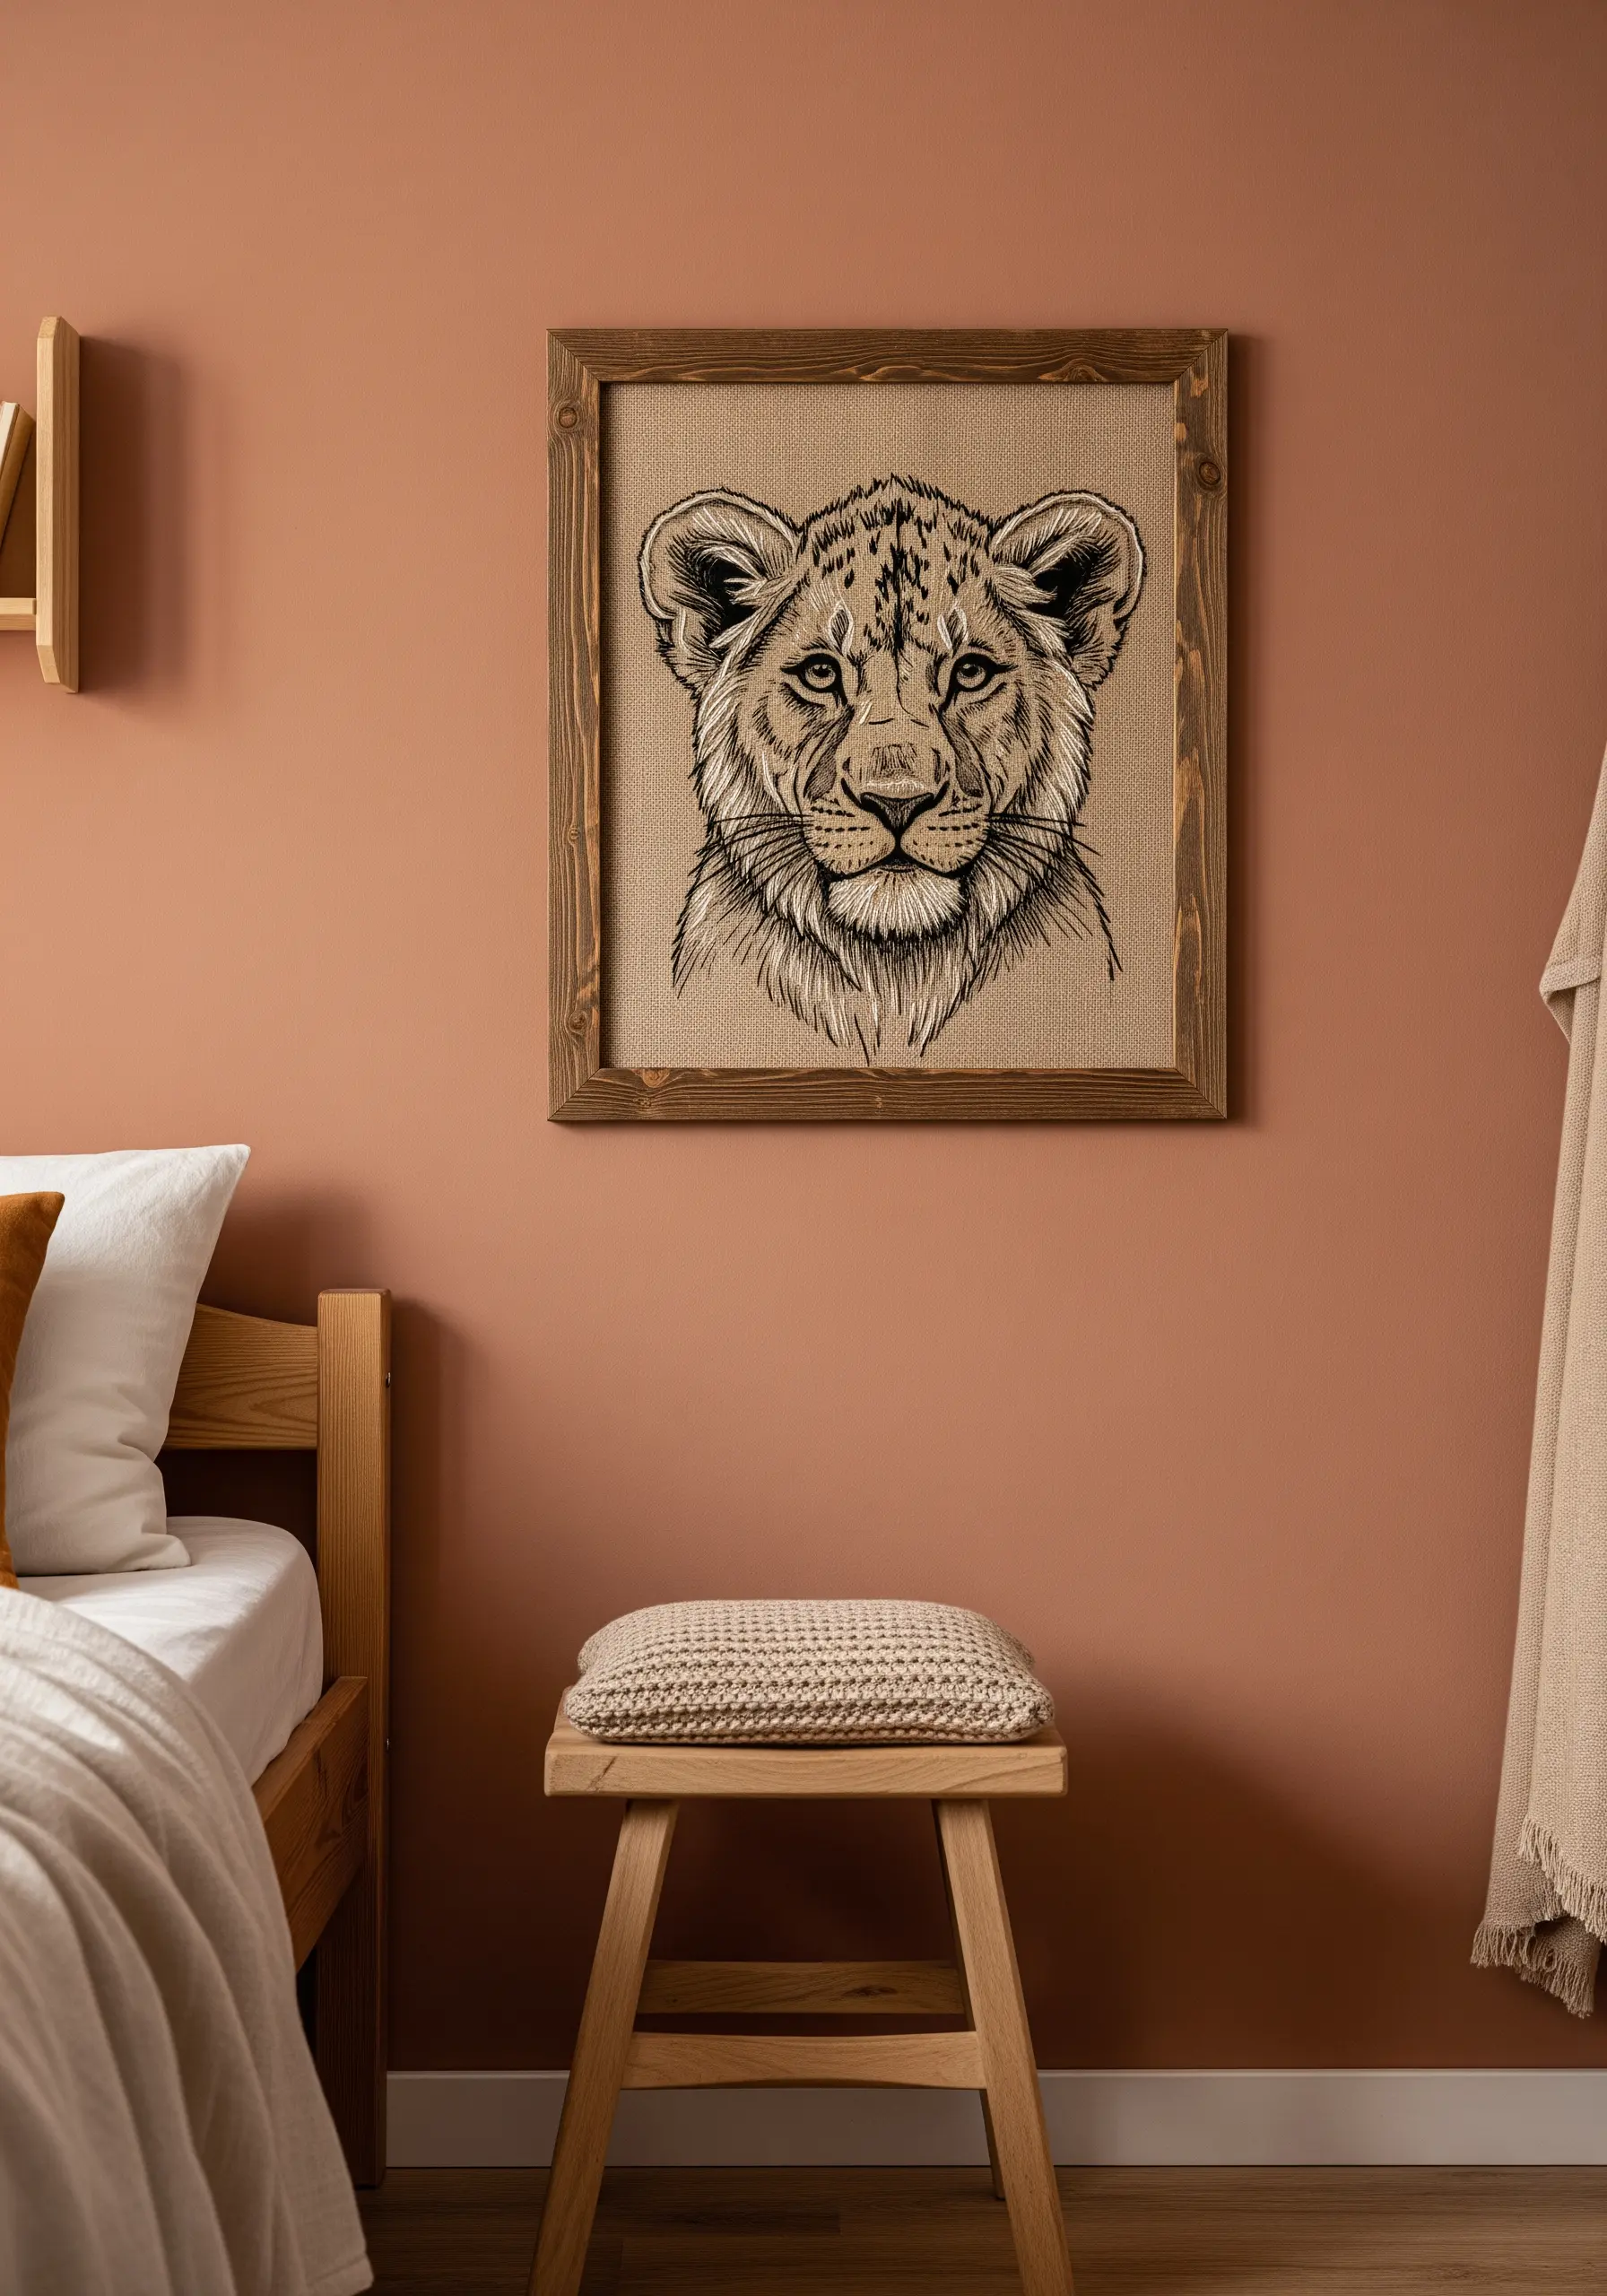
Create the detailed look of a woodcut or engraving by using fine, dense linework instead of fill stitches.
Use a single strand of black floss and tiny backstitches or split stitches to build up shading and texture.
Work on a coarse fabric like burlap or a heavy linen; its natural texture will enhance the rustic, hand-printed aesthetic.
This technique gives animal portraits a wonderfully serious and soulful quality.
12. Let Negative Space Define the Form
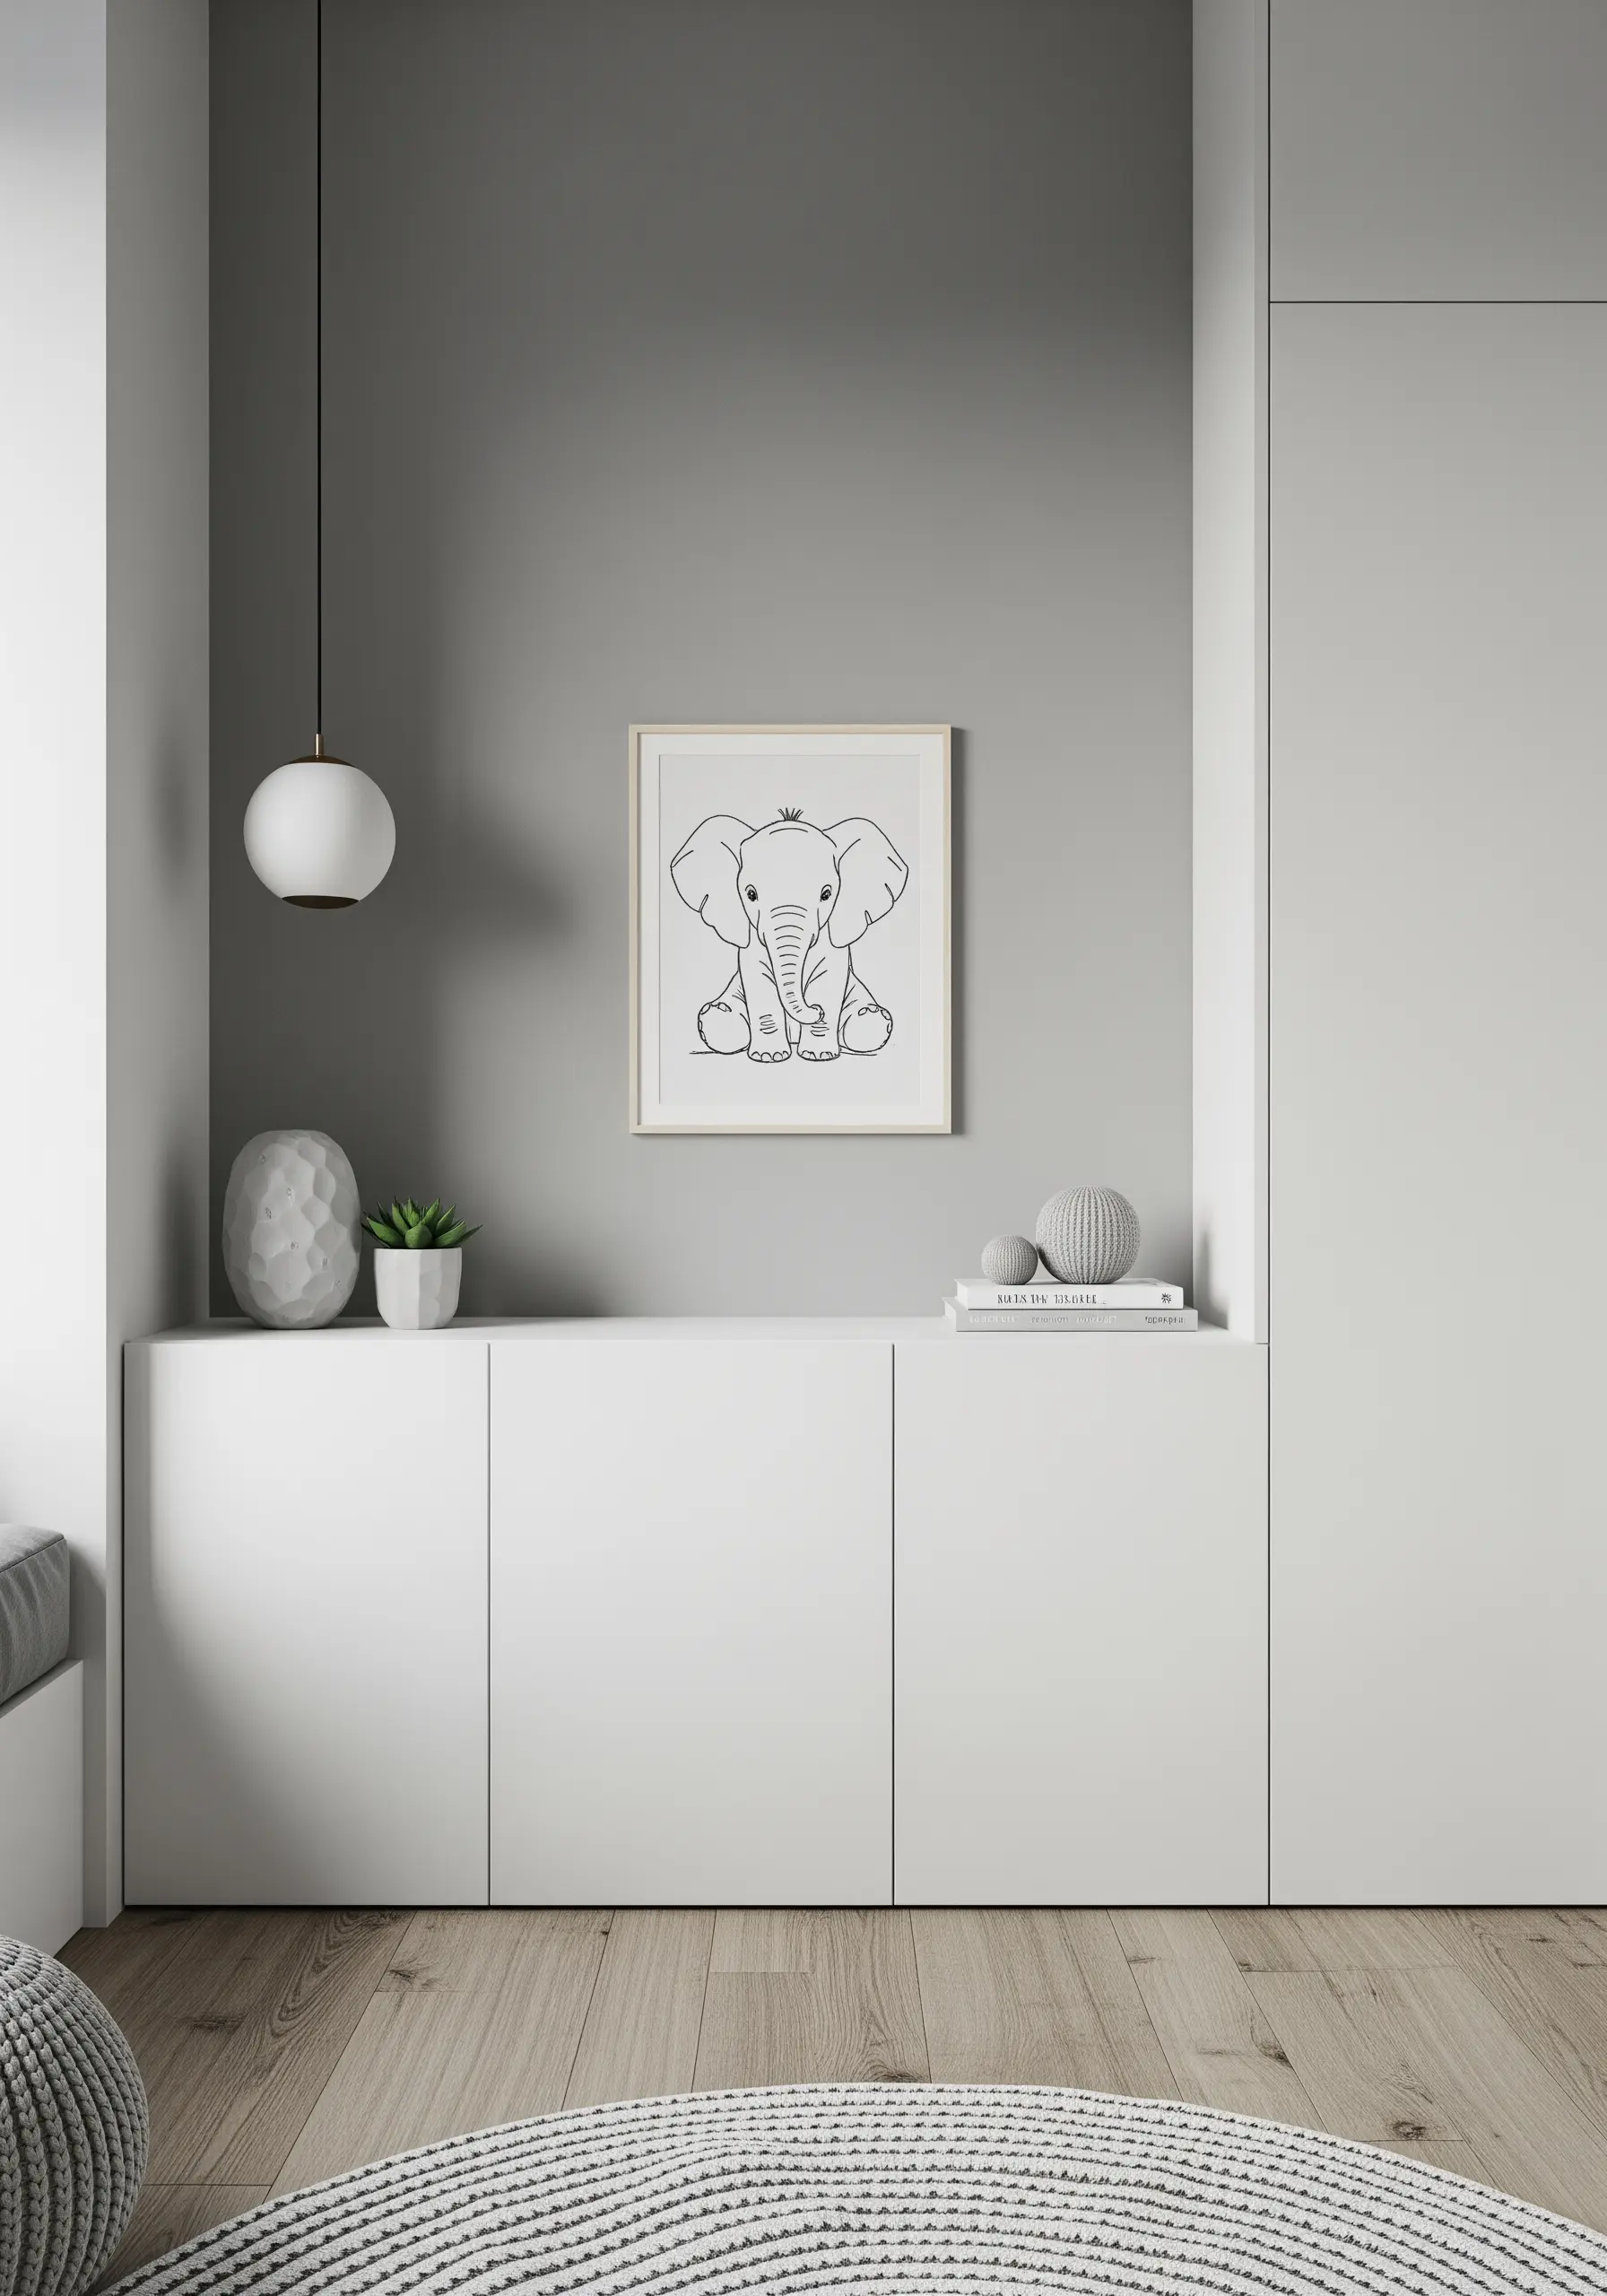
For a clean and modern look, rely on the power of a simple outline and let the unstitched fabric do the work.
This approach is perfect for minimalist nurseries, where simplicity fosters a sense of calm.
Add one tiny, unexpected detail in a contrasting color—like a small golden crown—to draw the eye and add a touch of personality.
This proves that minimal embroidery wall pieces can have maximum impact.
13. Deconstruct an Animal Across Multiple Hoops
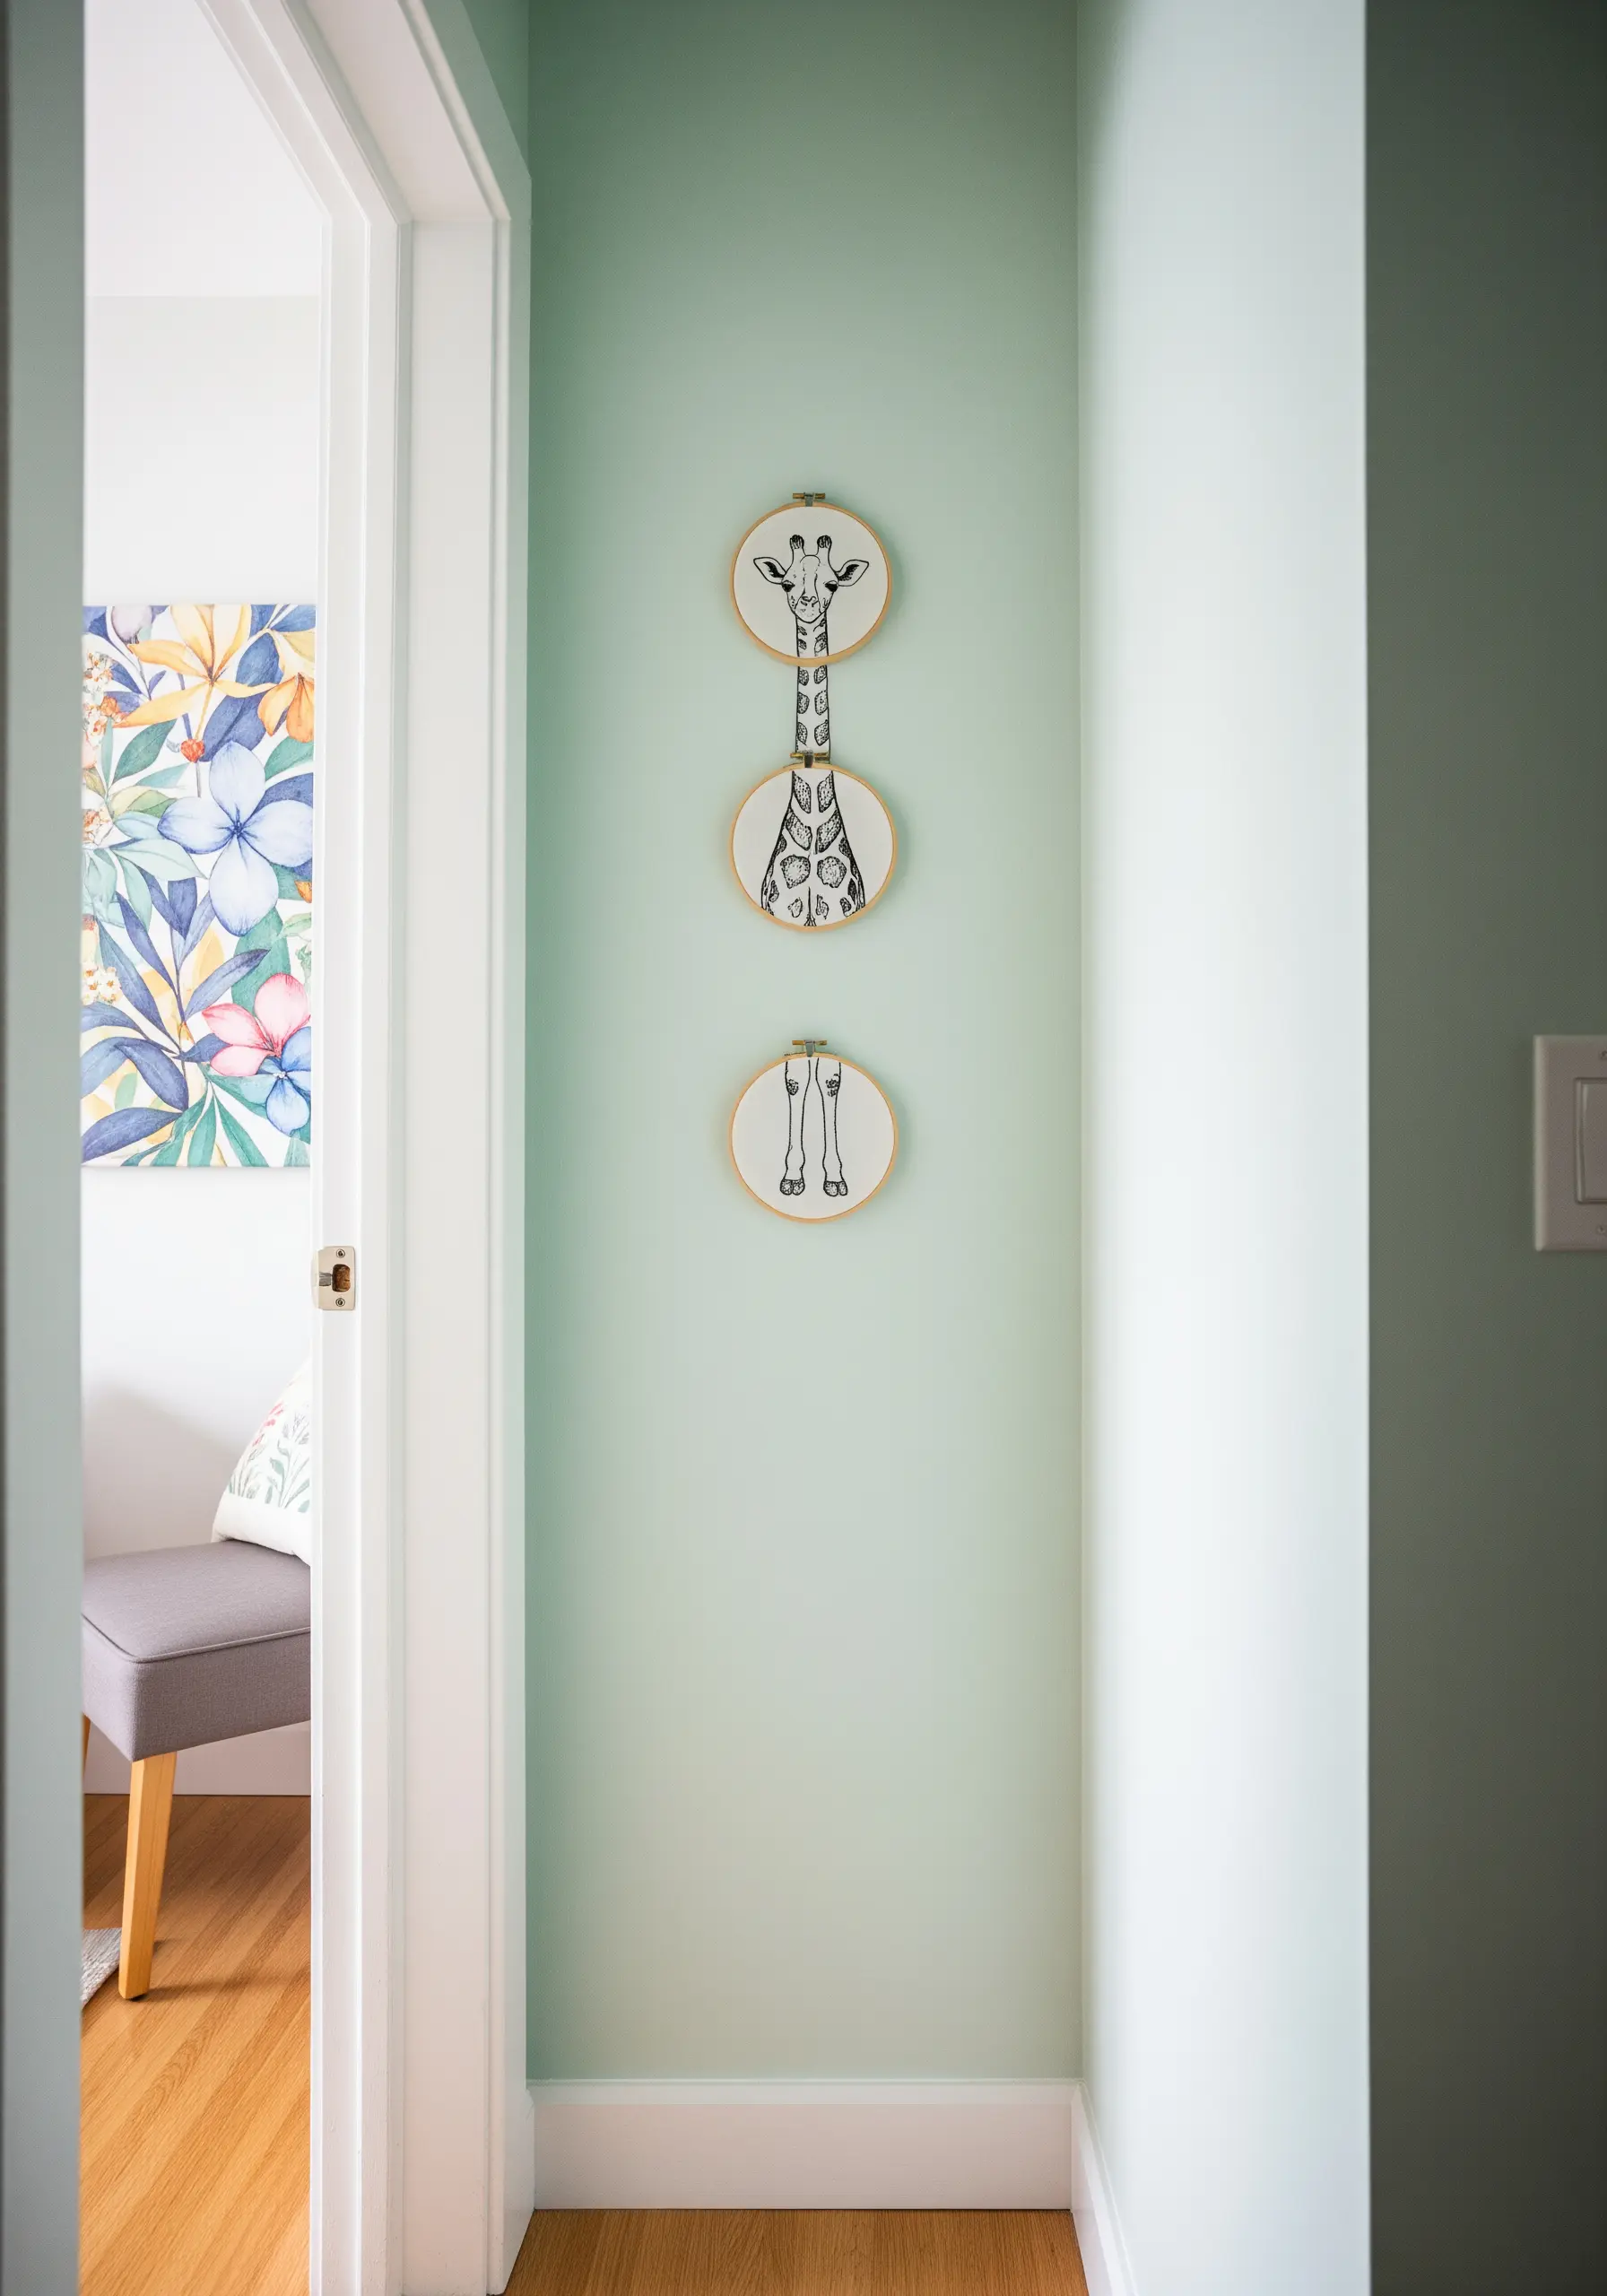
Create a tall, striking piece of wall art by splitting a single animal, like a giraffe, across three vertically stacked hoops.
Carefully plan your design to ensure the lines of the neck and body flow seamlessly from one hoop to the next.
This clever compositional trick is perfect for decorating narrow, awkward wall spaces, like those found in hallways or between doors.
It adds a touch of modern art and wit to a simple animal sketch.
14. Achieve Bold Contrast with Solid Fills
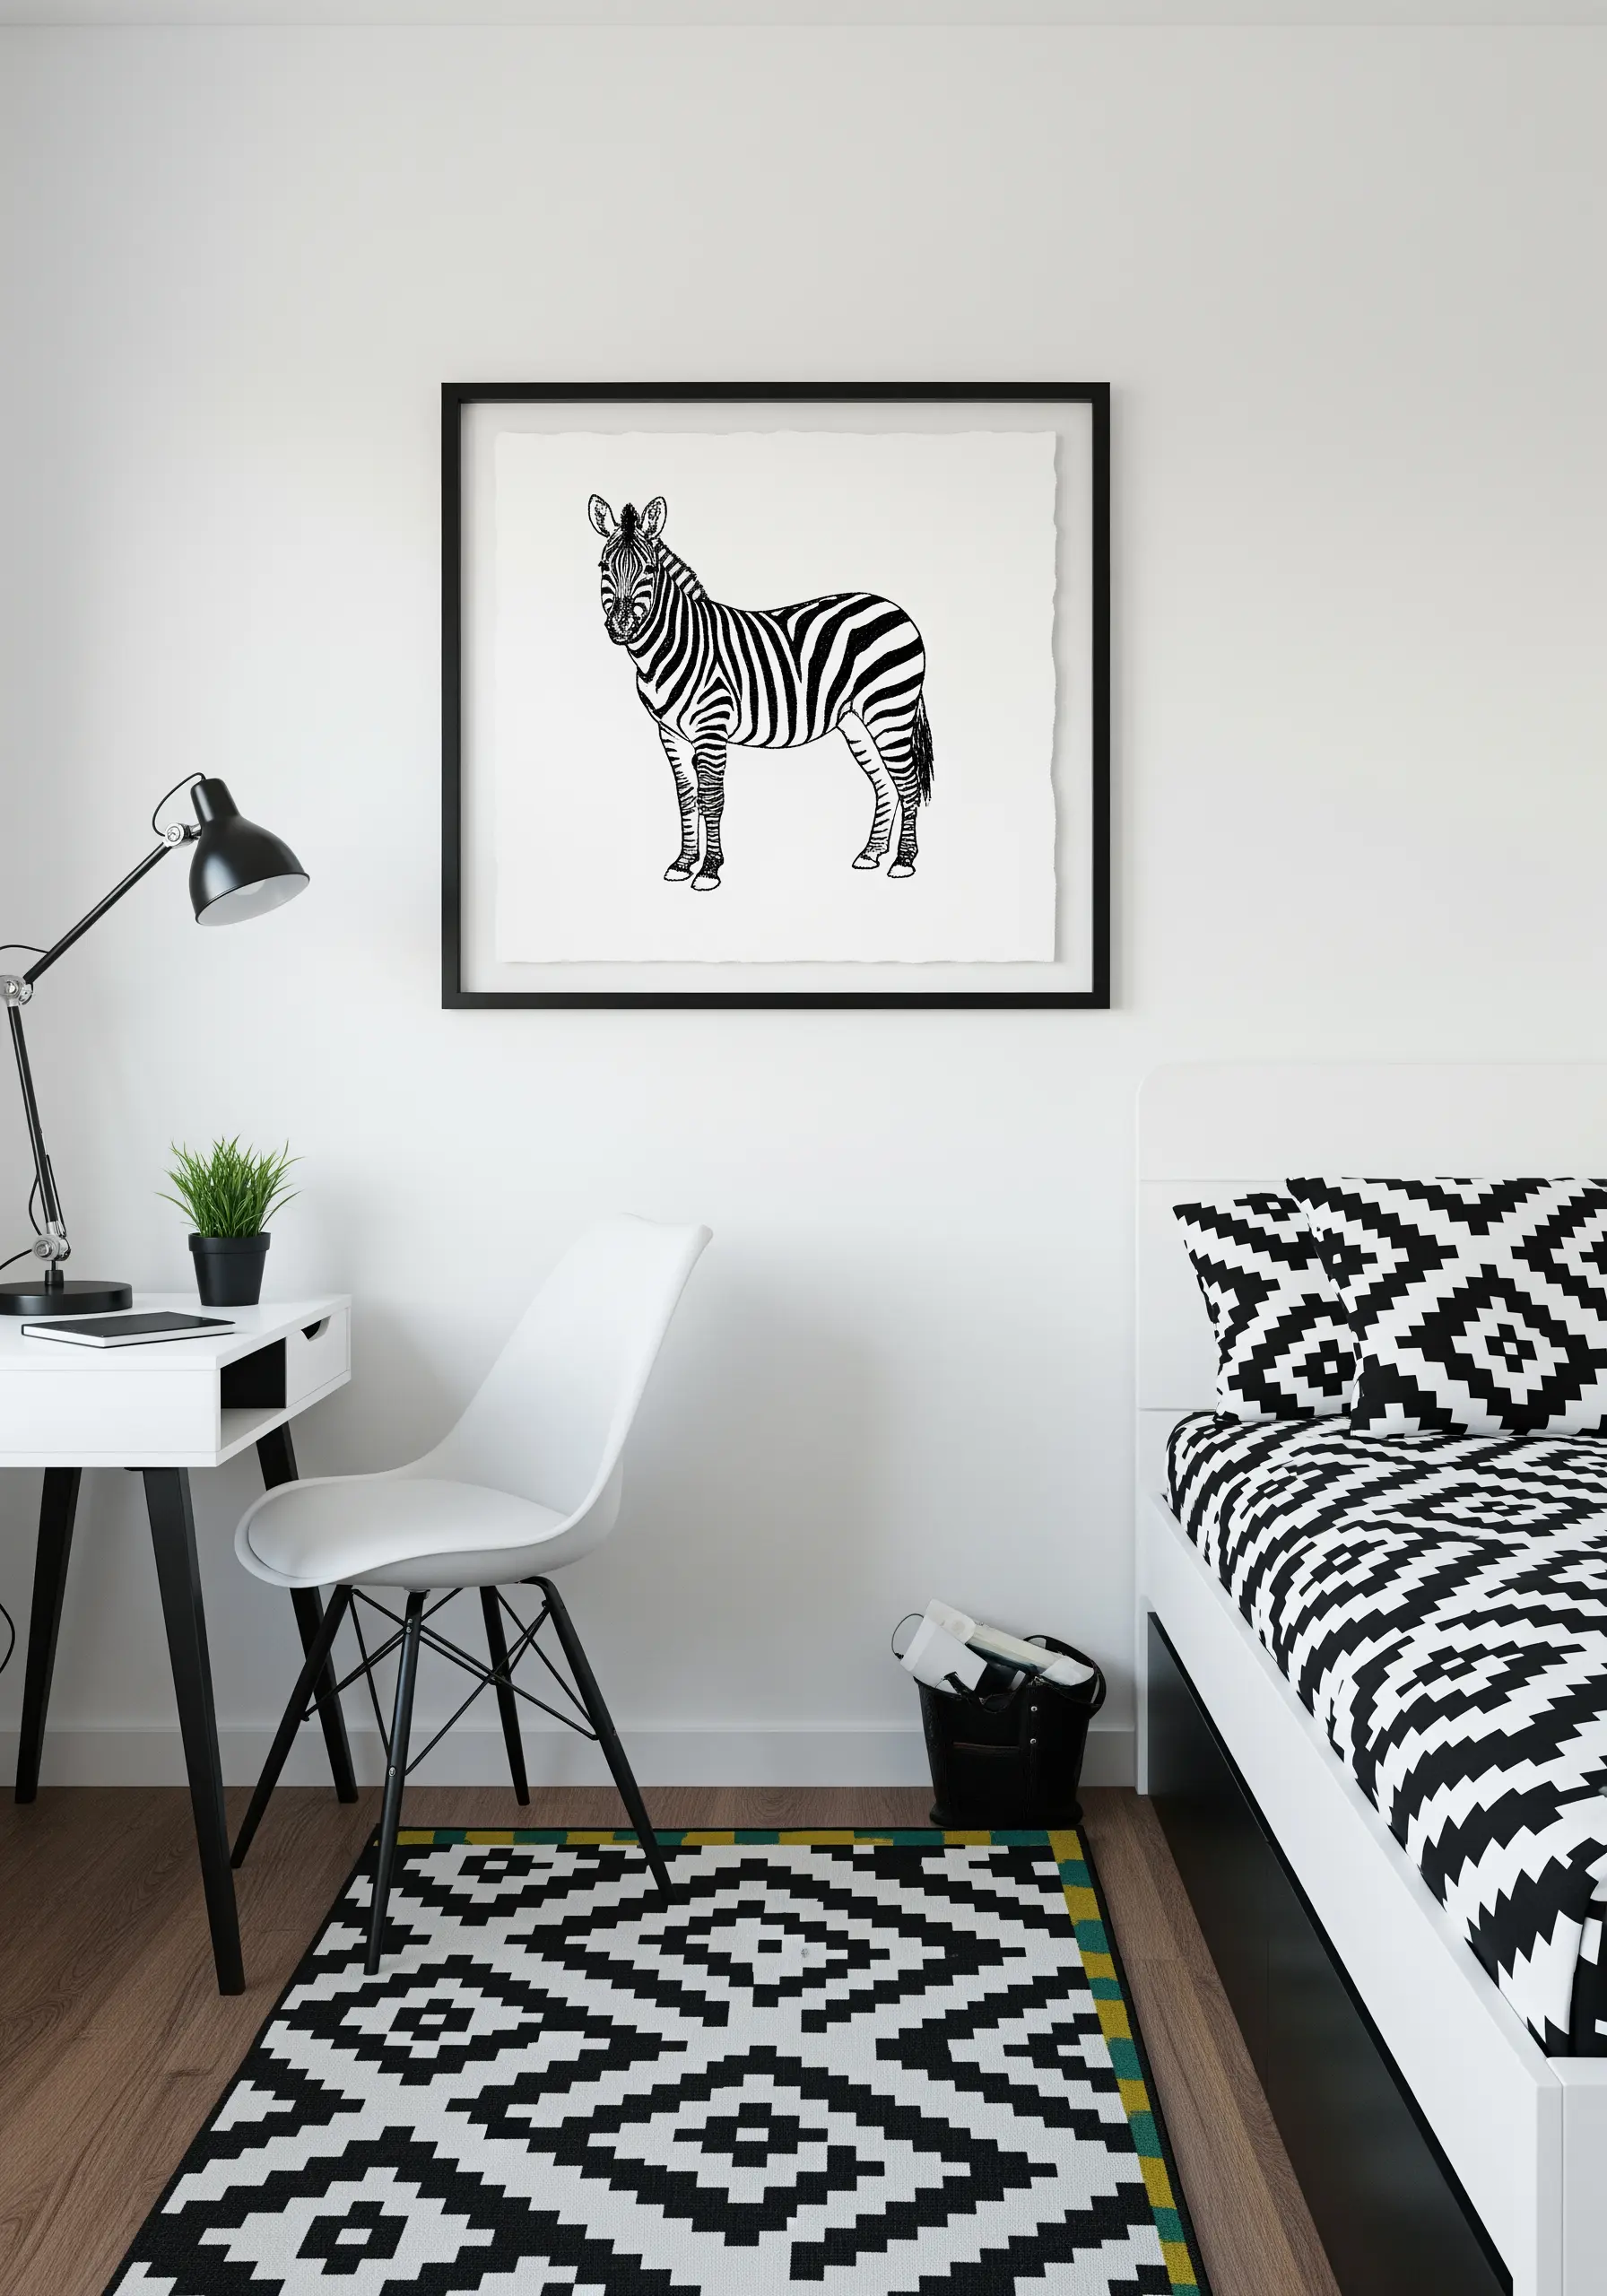
For an animal defined by its pattern, like a zebra, commit to bold, solid fills.
Use a satin stitch for the stripes, ensuring your stitches are laid close together and in the same direction for a smooth, seamless finish.
The stark contrast of black thread on white fabric is essential here; it creates a powerful graphic impact that feels both classic and contemporary.
Mounting the fabric with a torn edge adds a soft, artistic touch to the sharp design.
15. Animate a Collection with Varied Poses
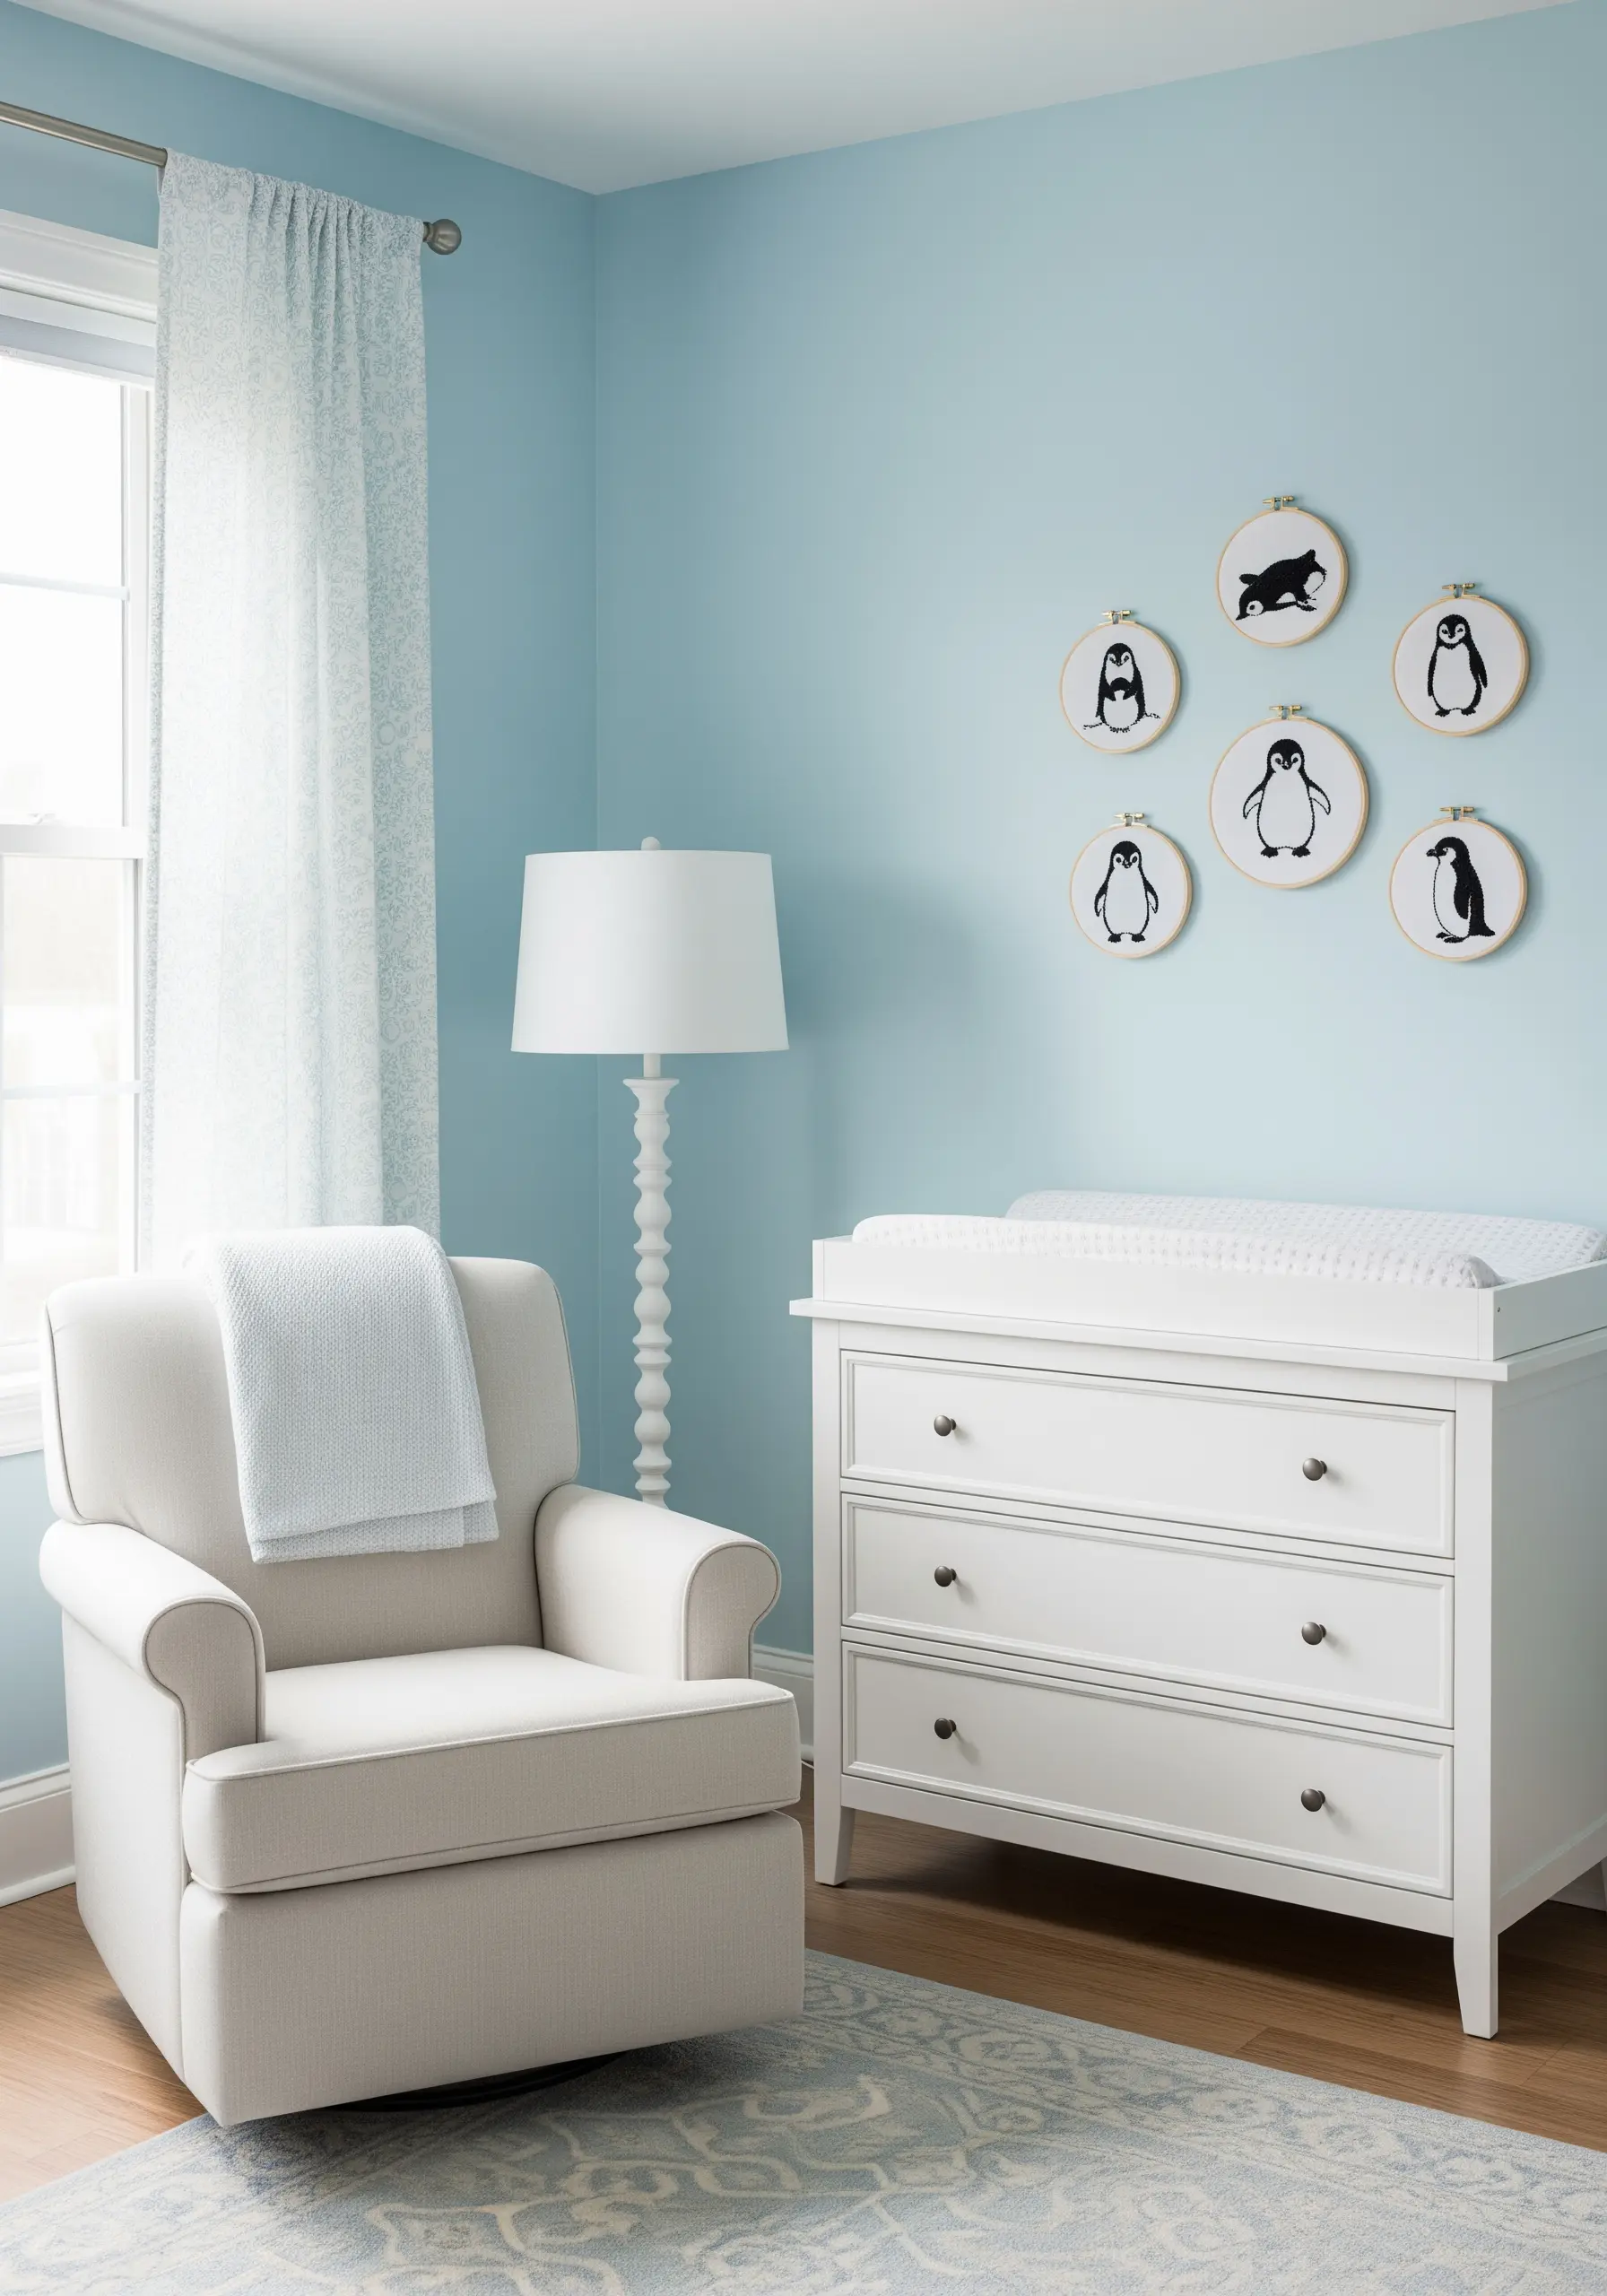
When creating a gallery of the same animal, stitch them in slightly different poses to inject personality and a sense of animation.
A standing penguin, a sliding one, a waddling one—each small variation contributes to a larger, more dynamic story.
Keep the style and scale consistent across all hoops to ensure the collection feels unified.
This turns a simple set of embroidery wall hoops into a lively scene.
16. Create an Ethereal Look on Sheer Fabric
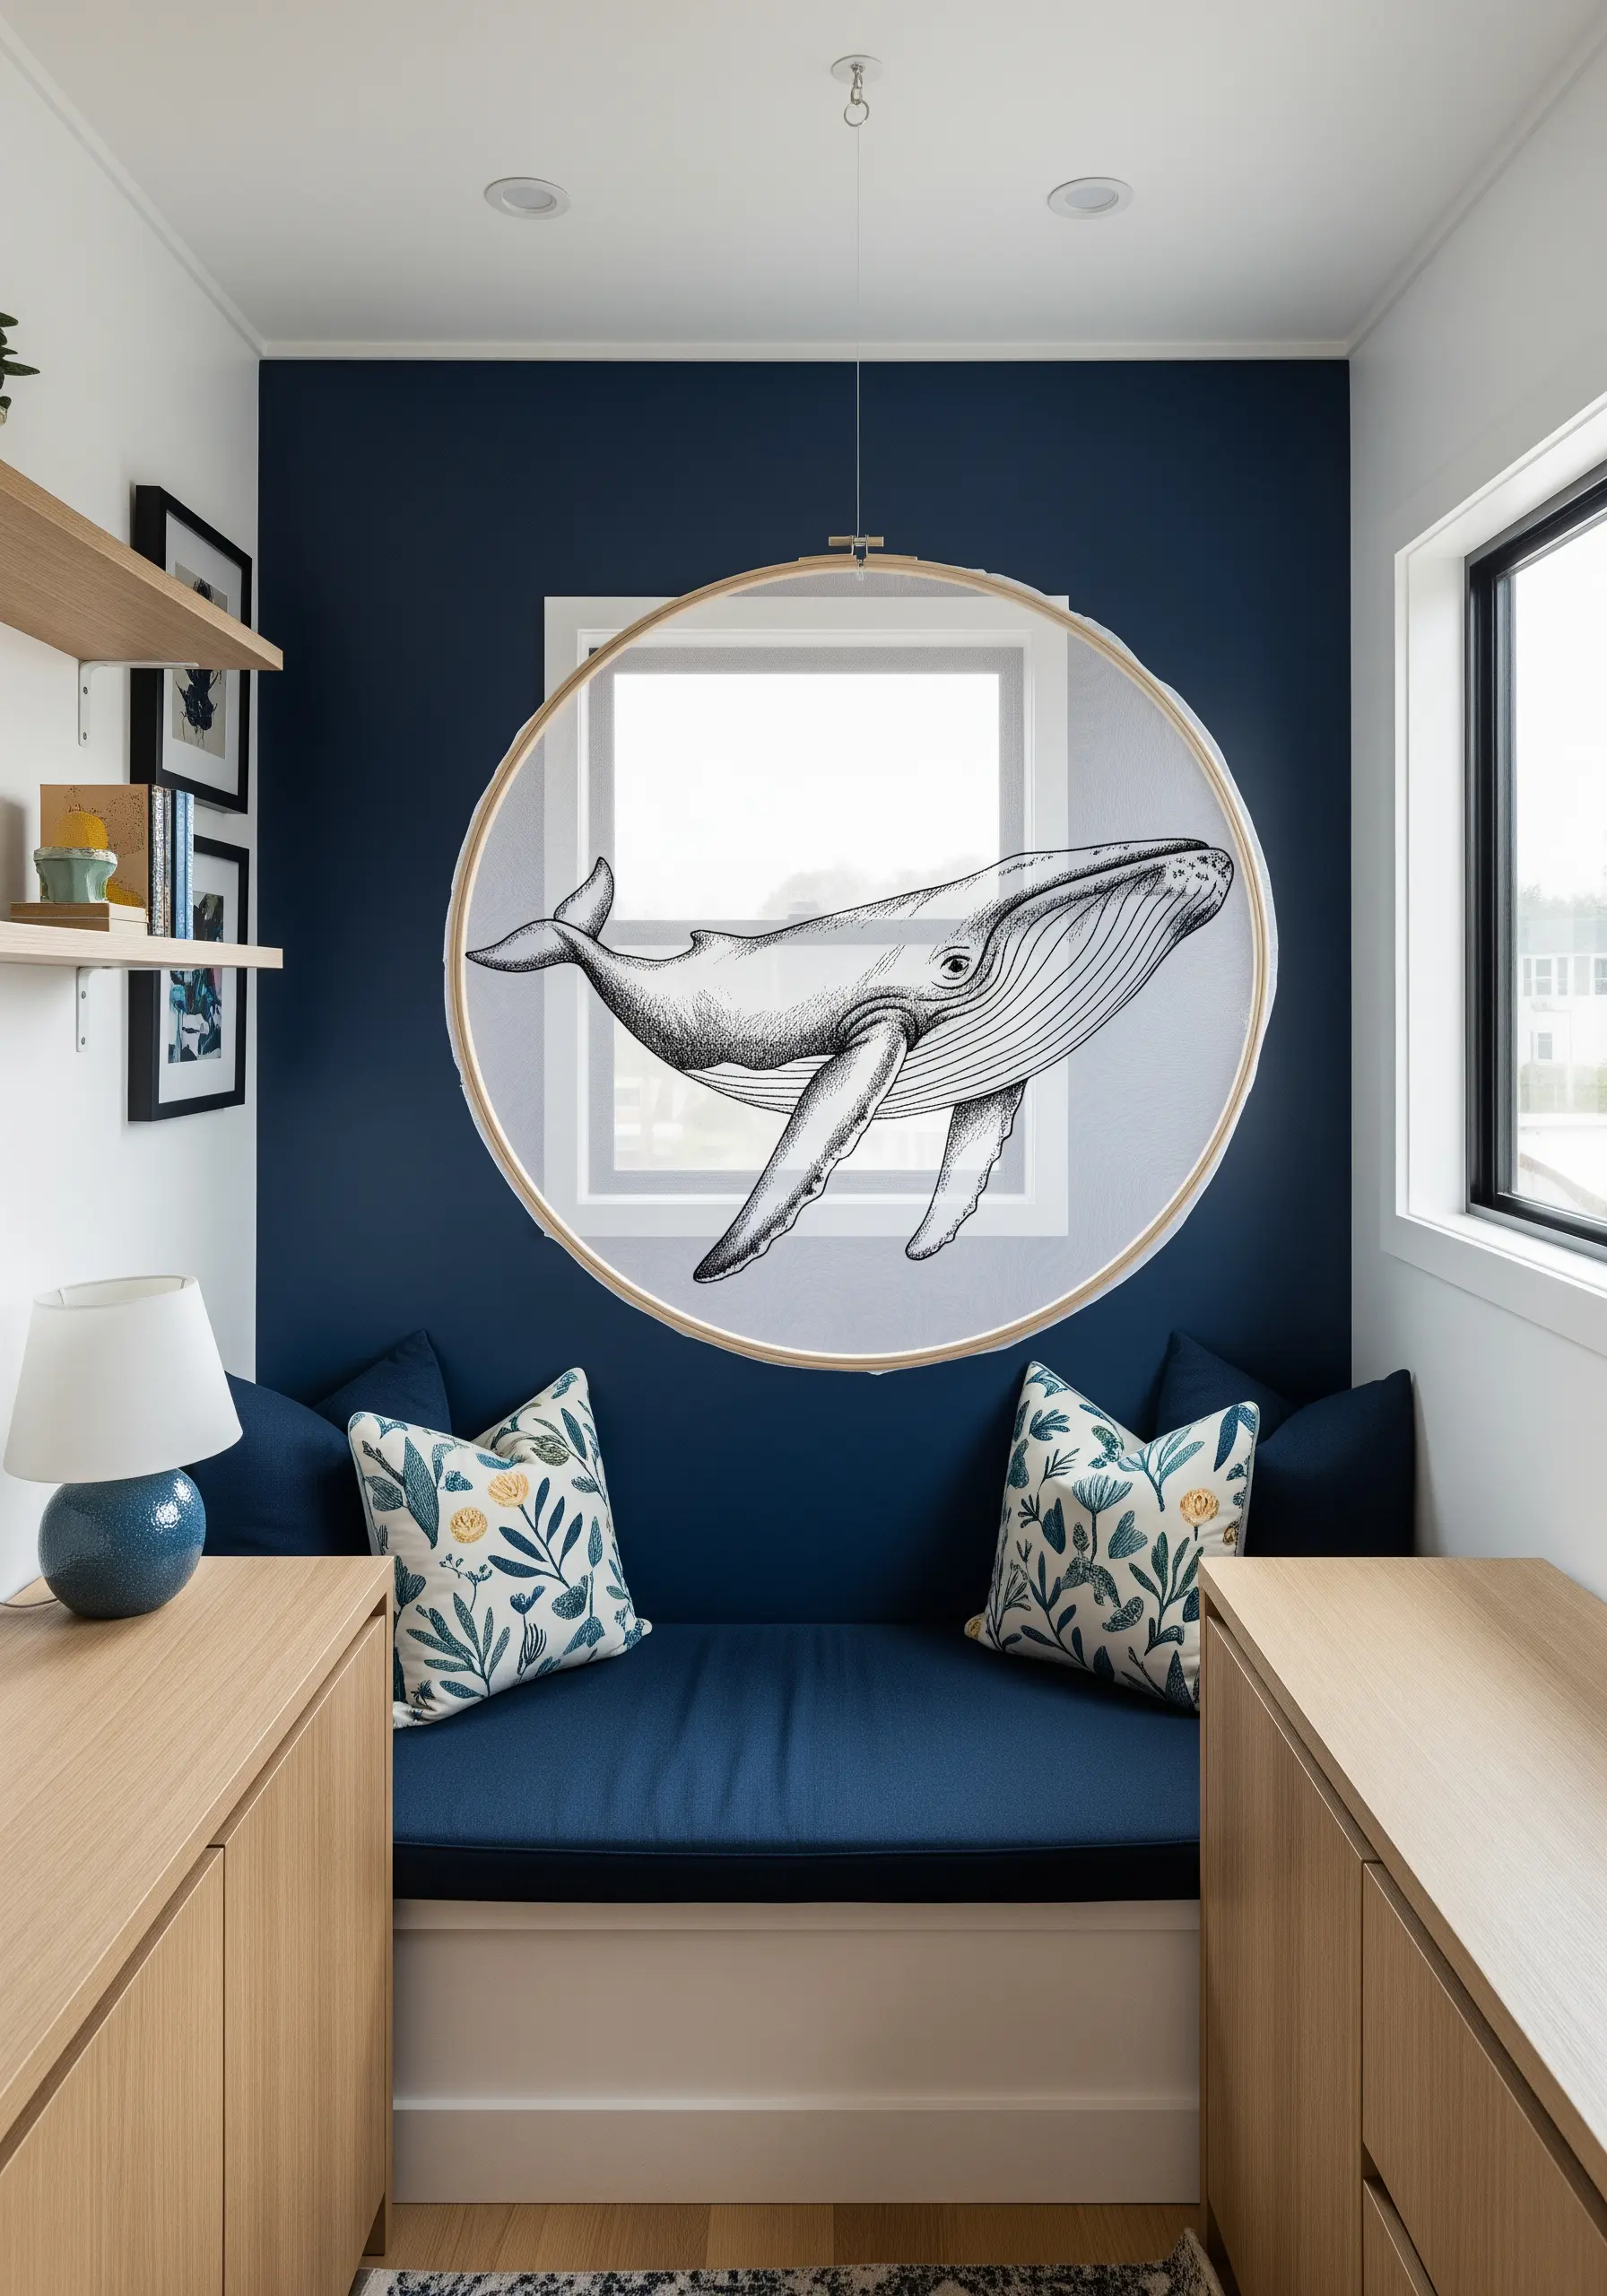
Stitch directly onto a sheer fabric like organza or tulle for a magical, floating effect.
You must use a stabilizer (either stick-on or hoop-on) to prevent the delicate fabric from puckering and stretching as you stitch.
When hung in a window, the light will pass through the fabric, making your embroidered animal appear suspended in mid-air.
This technique is perfect for creating dreamy, ocean-inspired hoop embroidery ideas like this majestic whale.
17. Imply Graceful Motion with Circular Composition
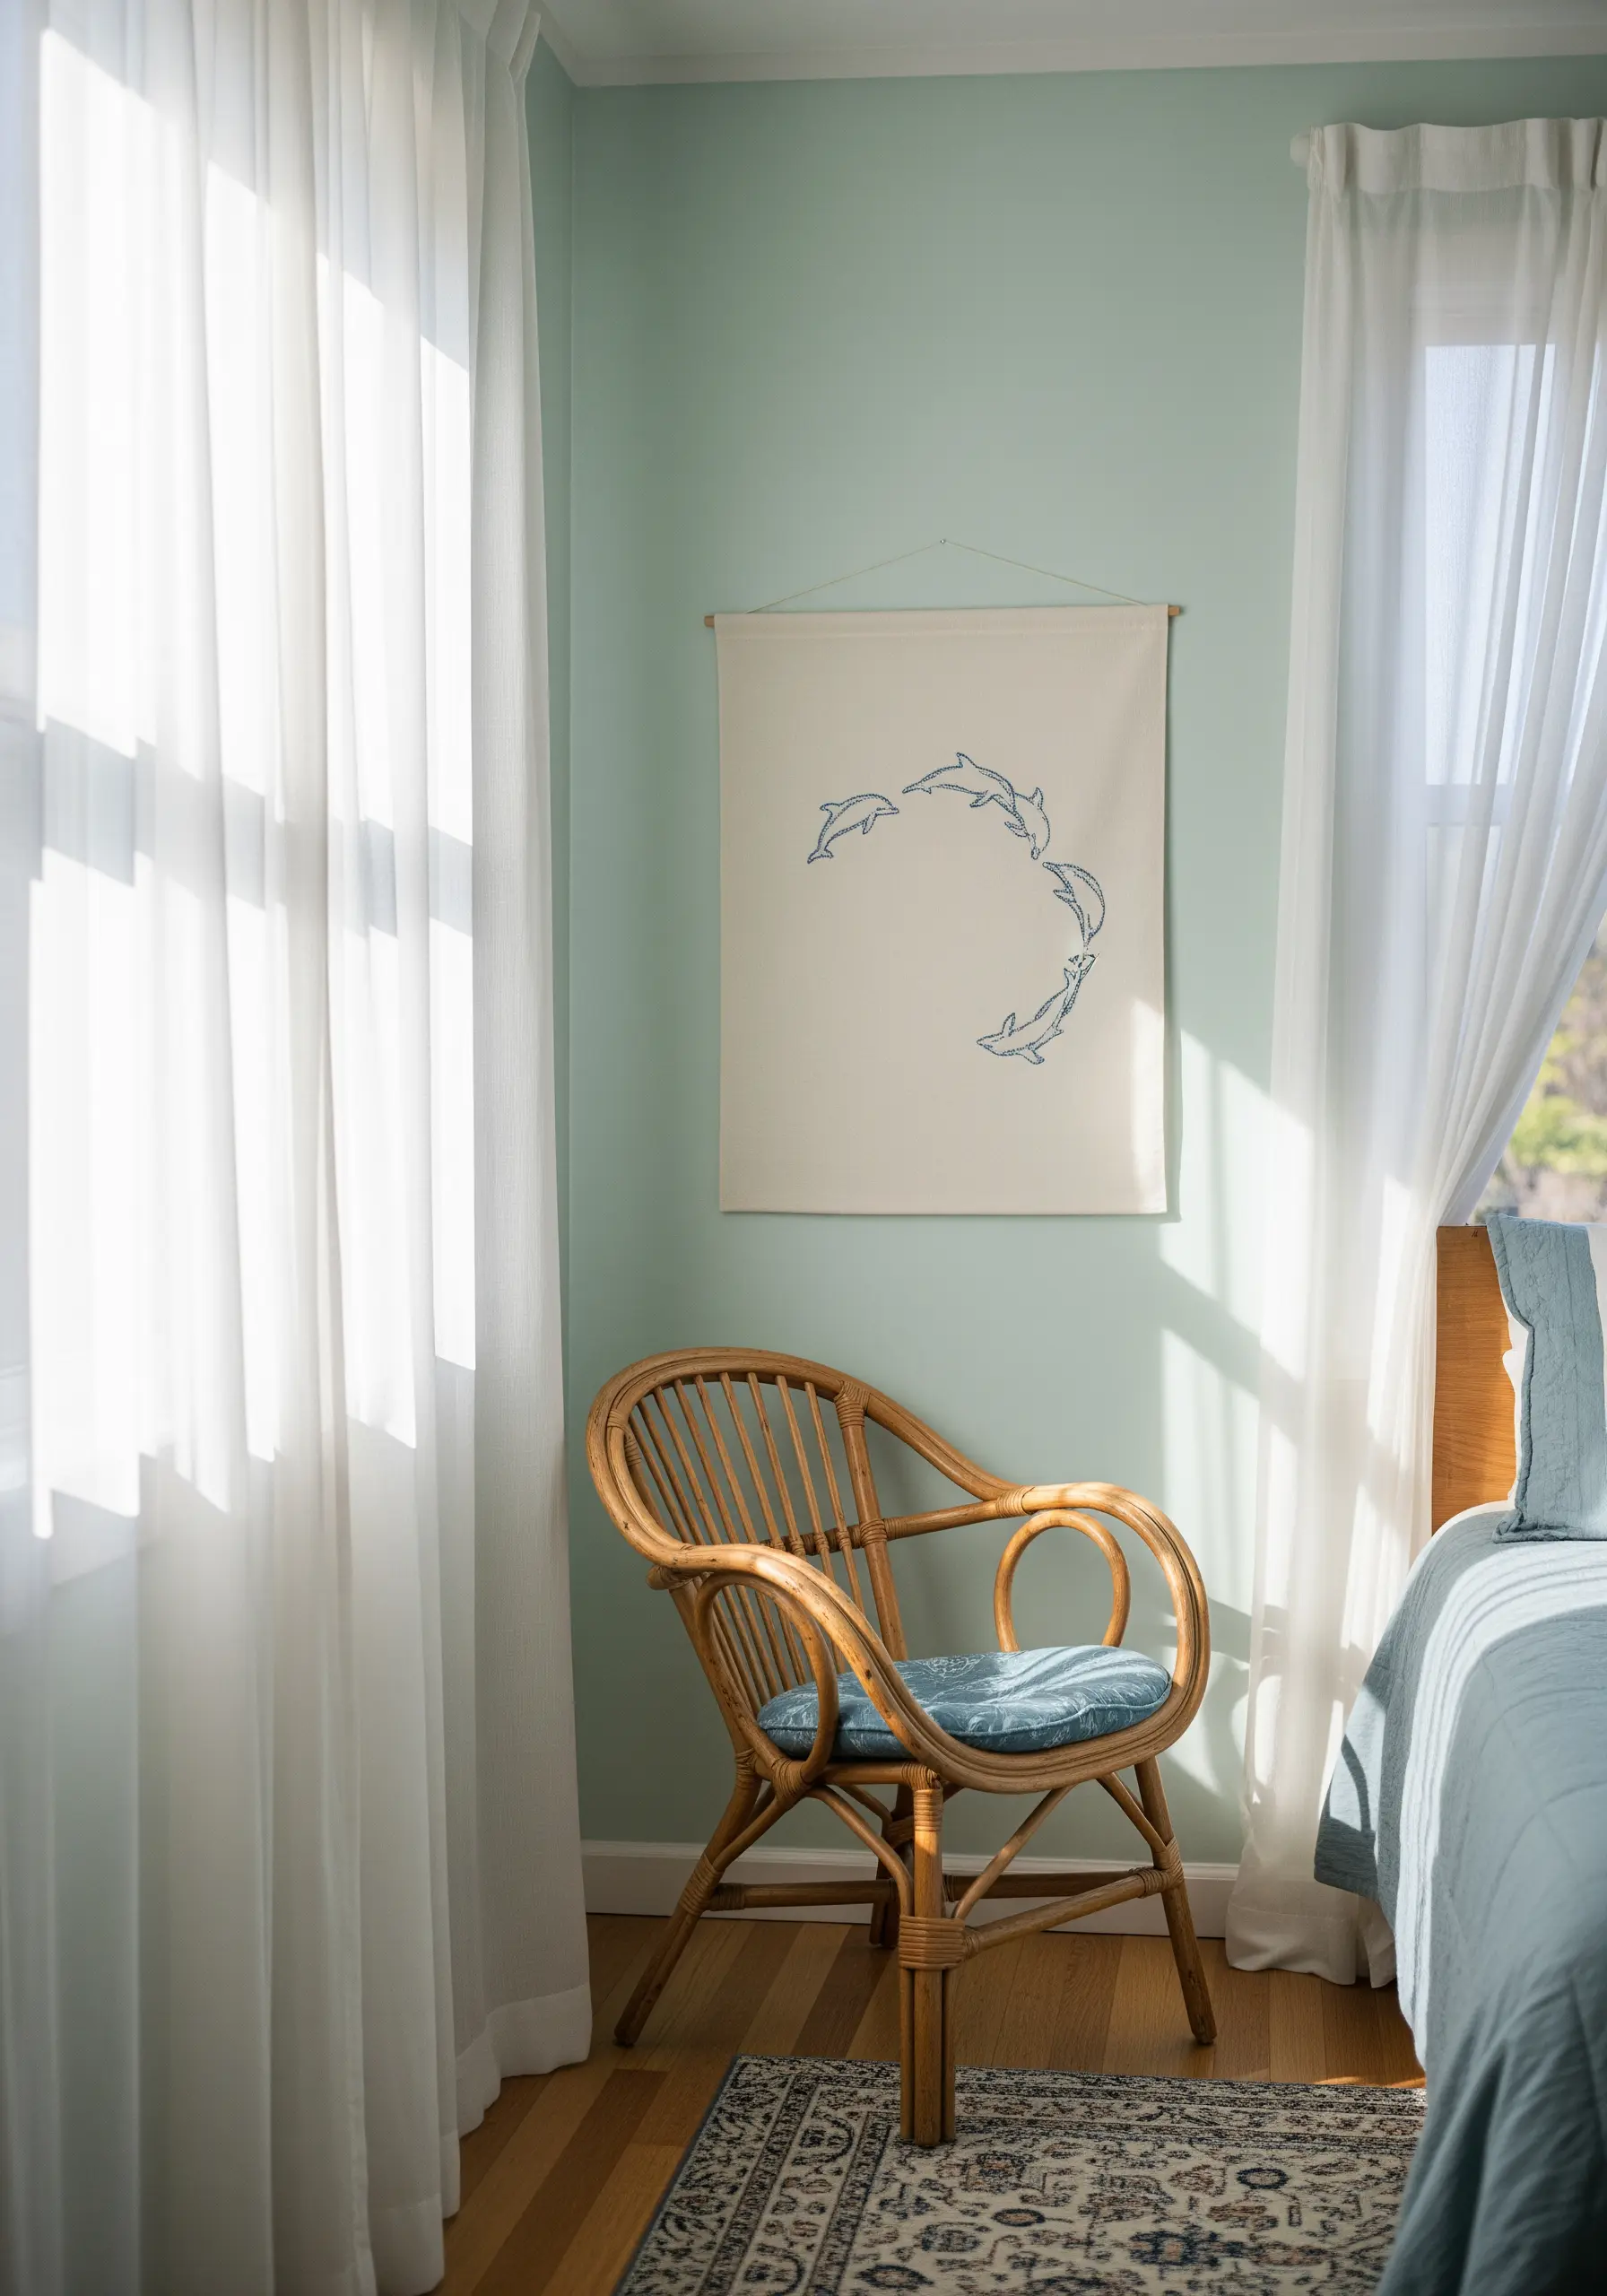
Arrange simple animal outlines in a circular formation to create a powerful sense of movement and flow.
Use a single, calming color of thread and a basic backstitch to keep the focus entirely on the graceful composition.
Displaying the design as a simple banner, hung from a wooden dowel, enhances the minimalist, serene aesthetic.
This is a beautiful way to bring a feeling of calm energy to a bedroom wall.
18. Add Detail and Texture with Chain Stitch
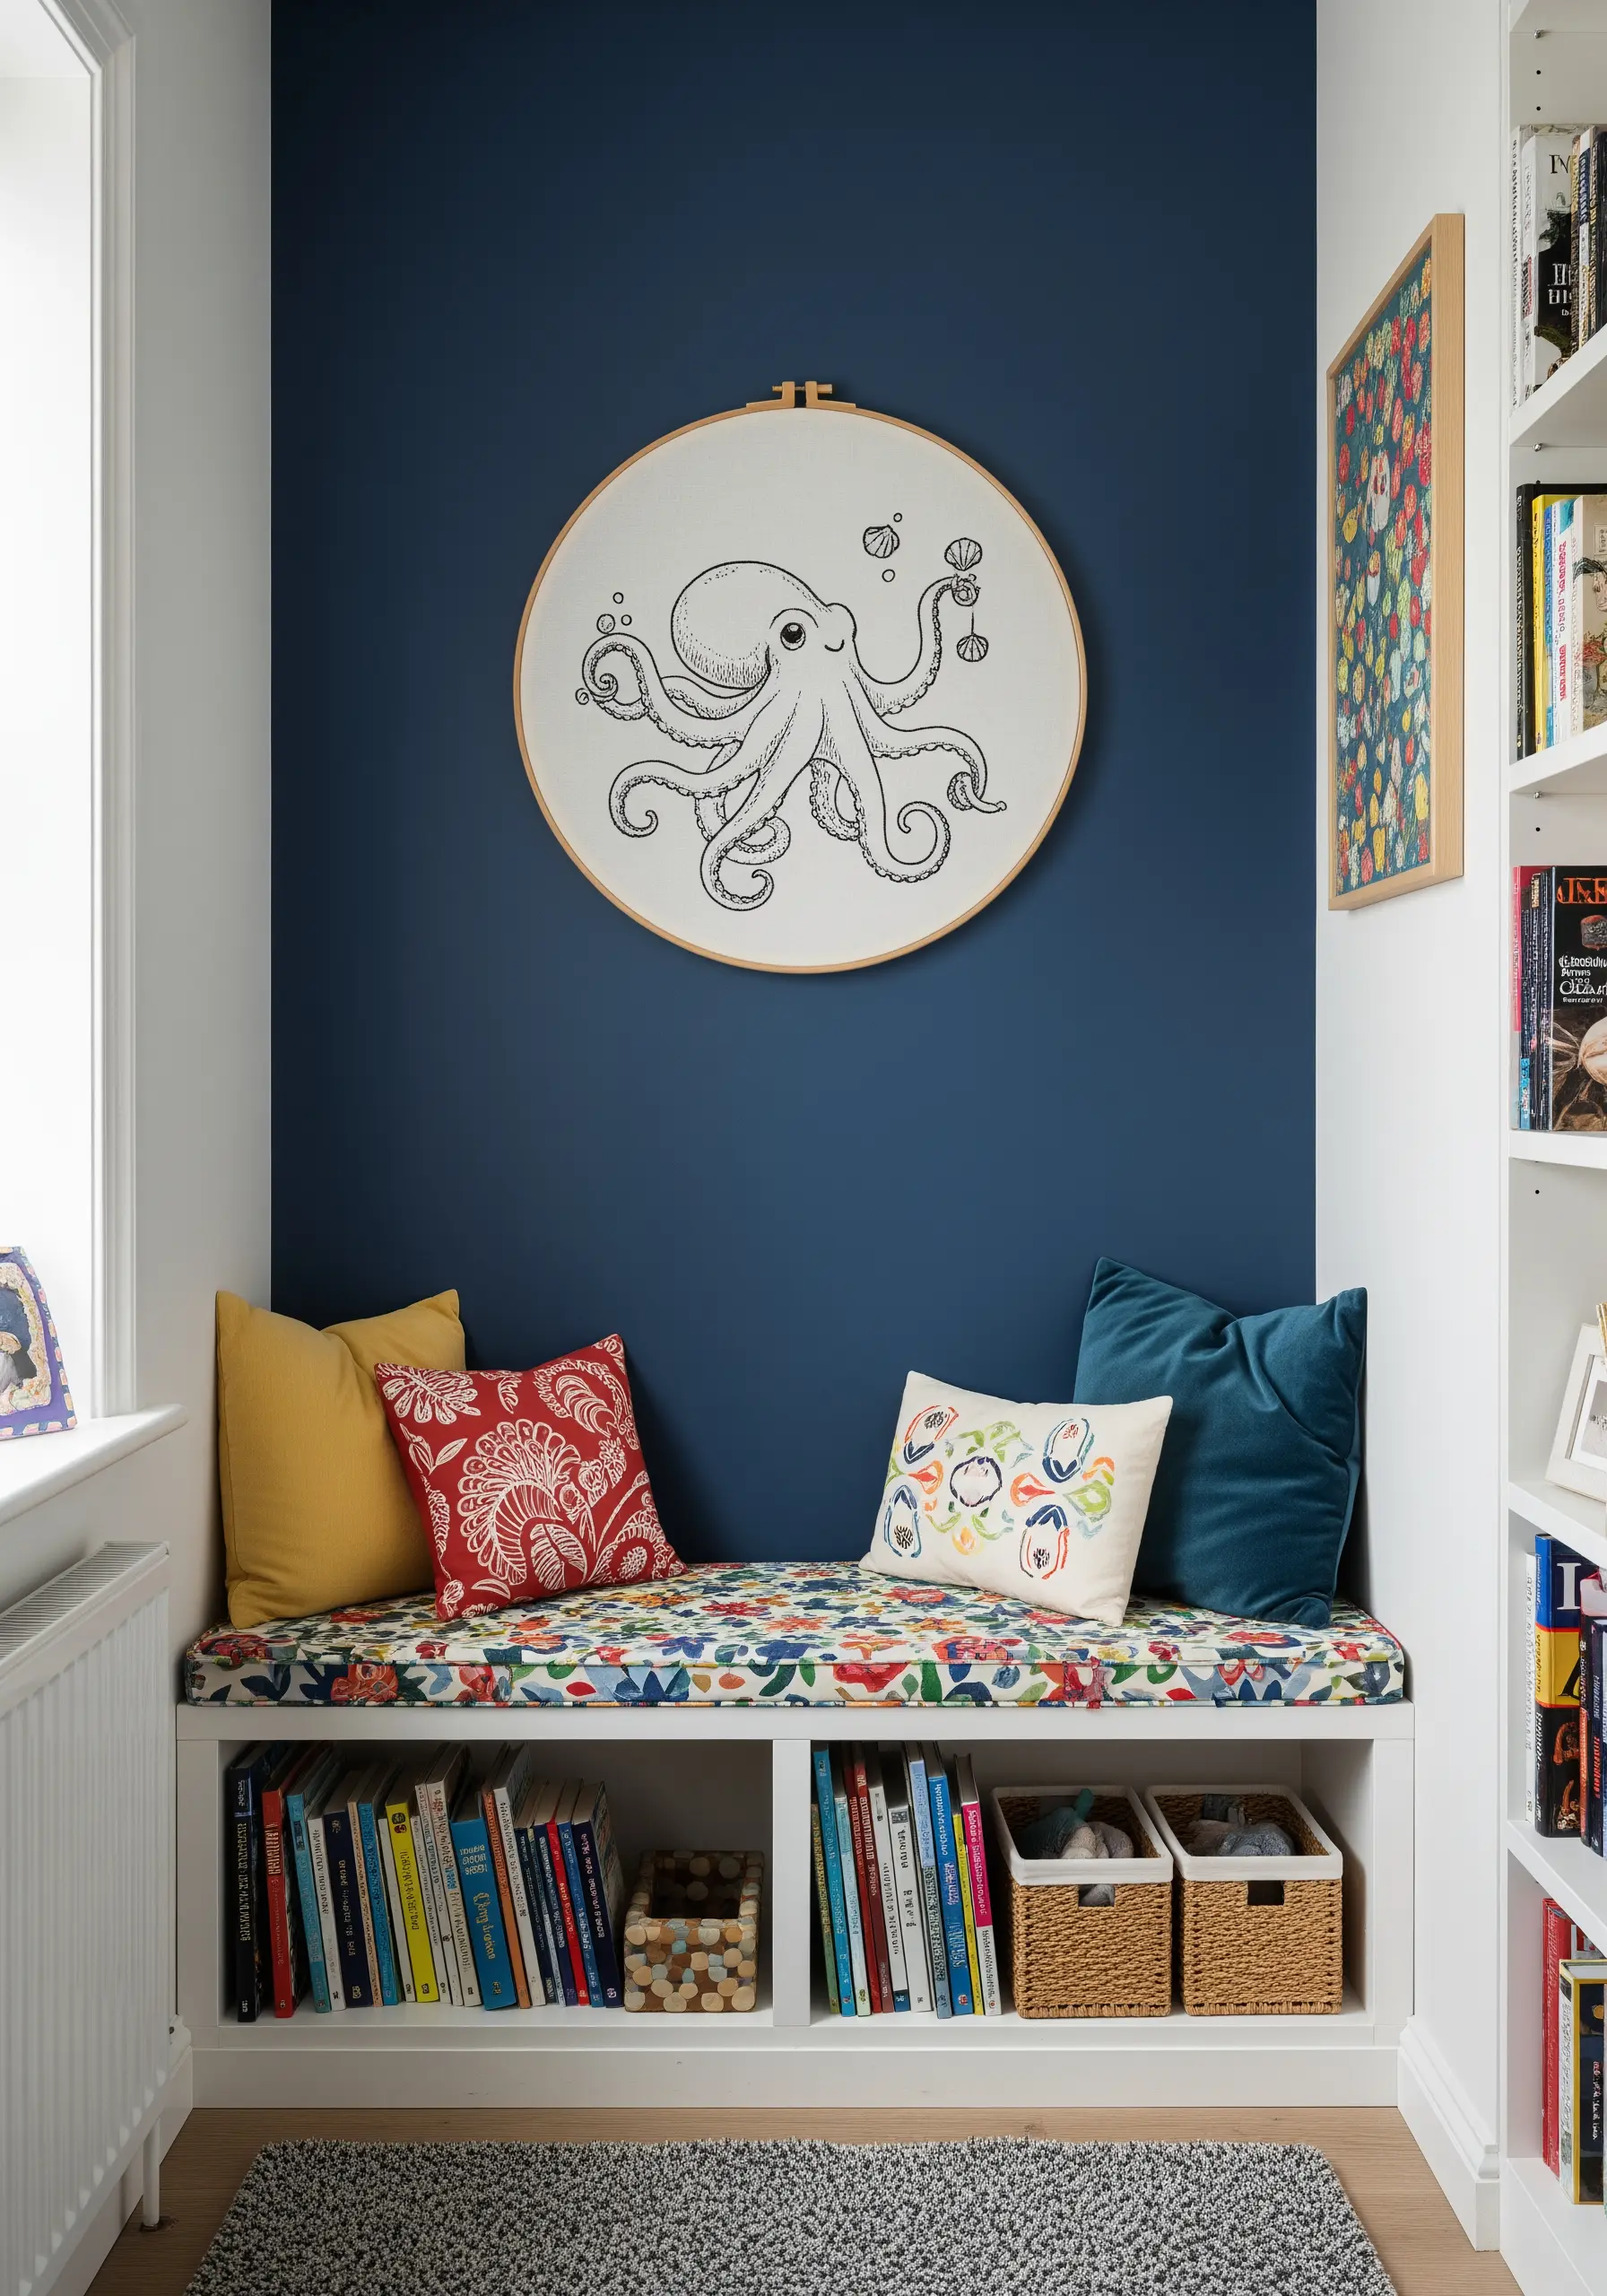
Instead of a simple backstitch, use a chain stitch for your outlines to give them more texture and visual weight.
This stitch is particularly effective for the curving tentacles of an octopus, as it follows bends beautifully and adds a subtle, dimensional quality.
For the tiniest details like bubbles and shells, switch to a single strand and French knots to create a delicate contrast.
The result is a piece that invites closer inspection.
19. Tell a Story with a Triptych Display
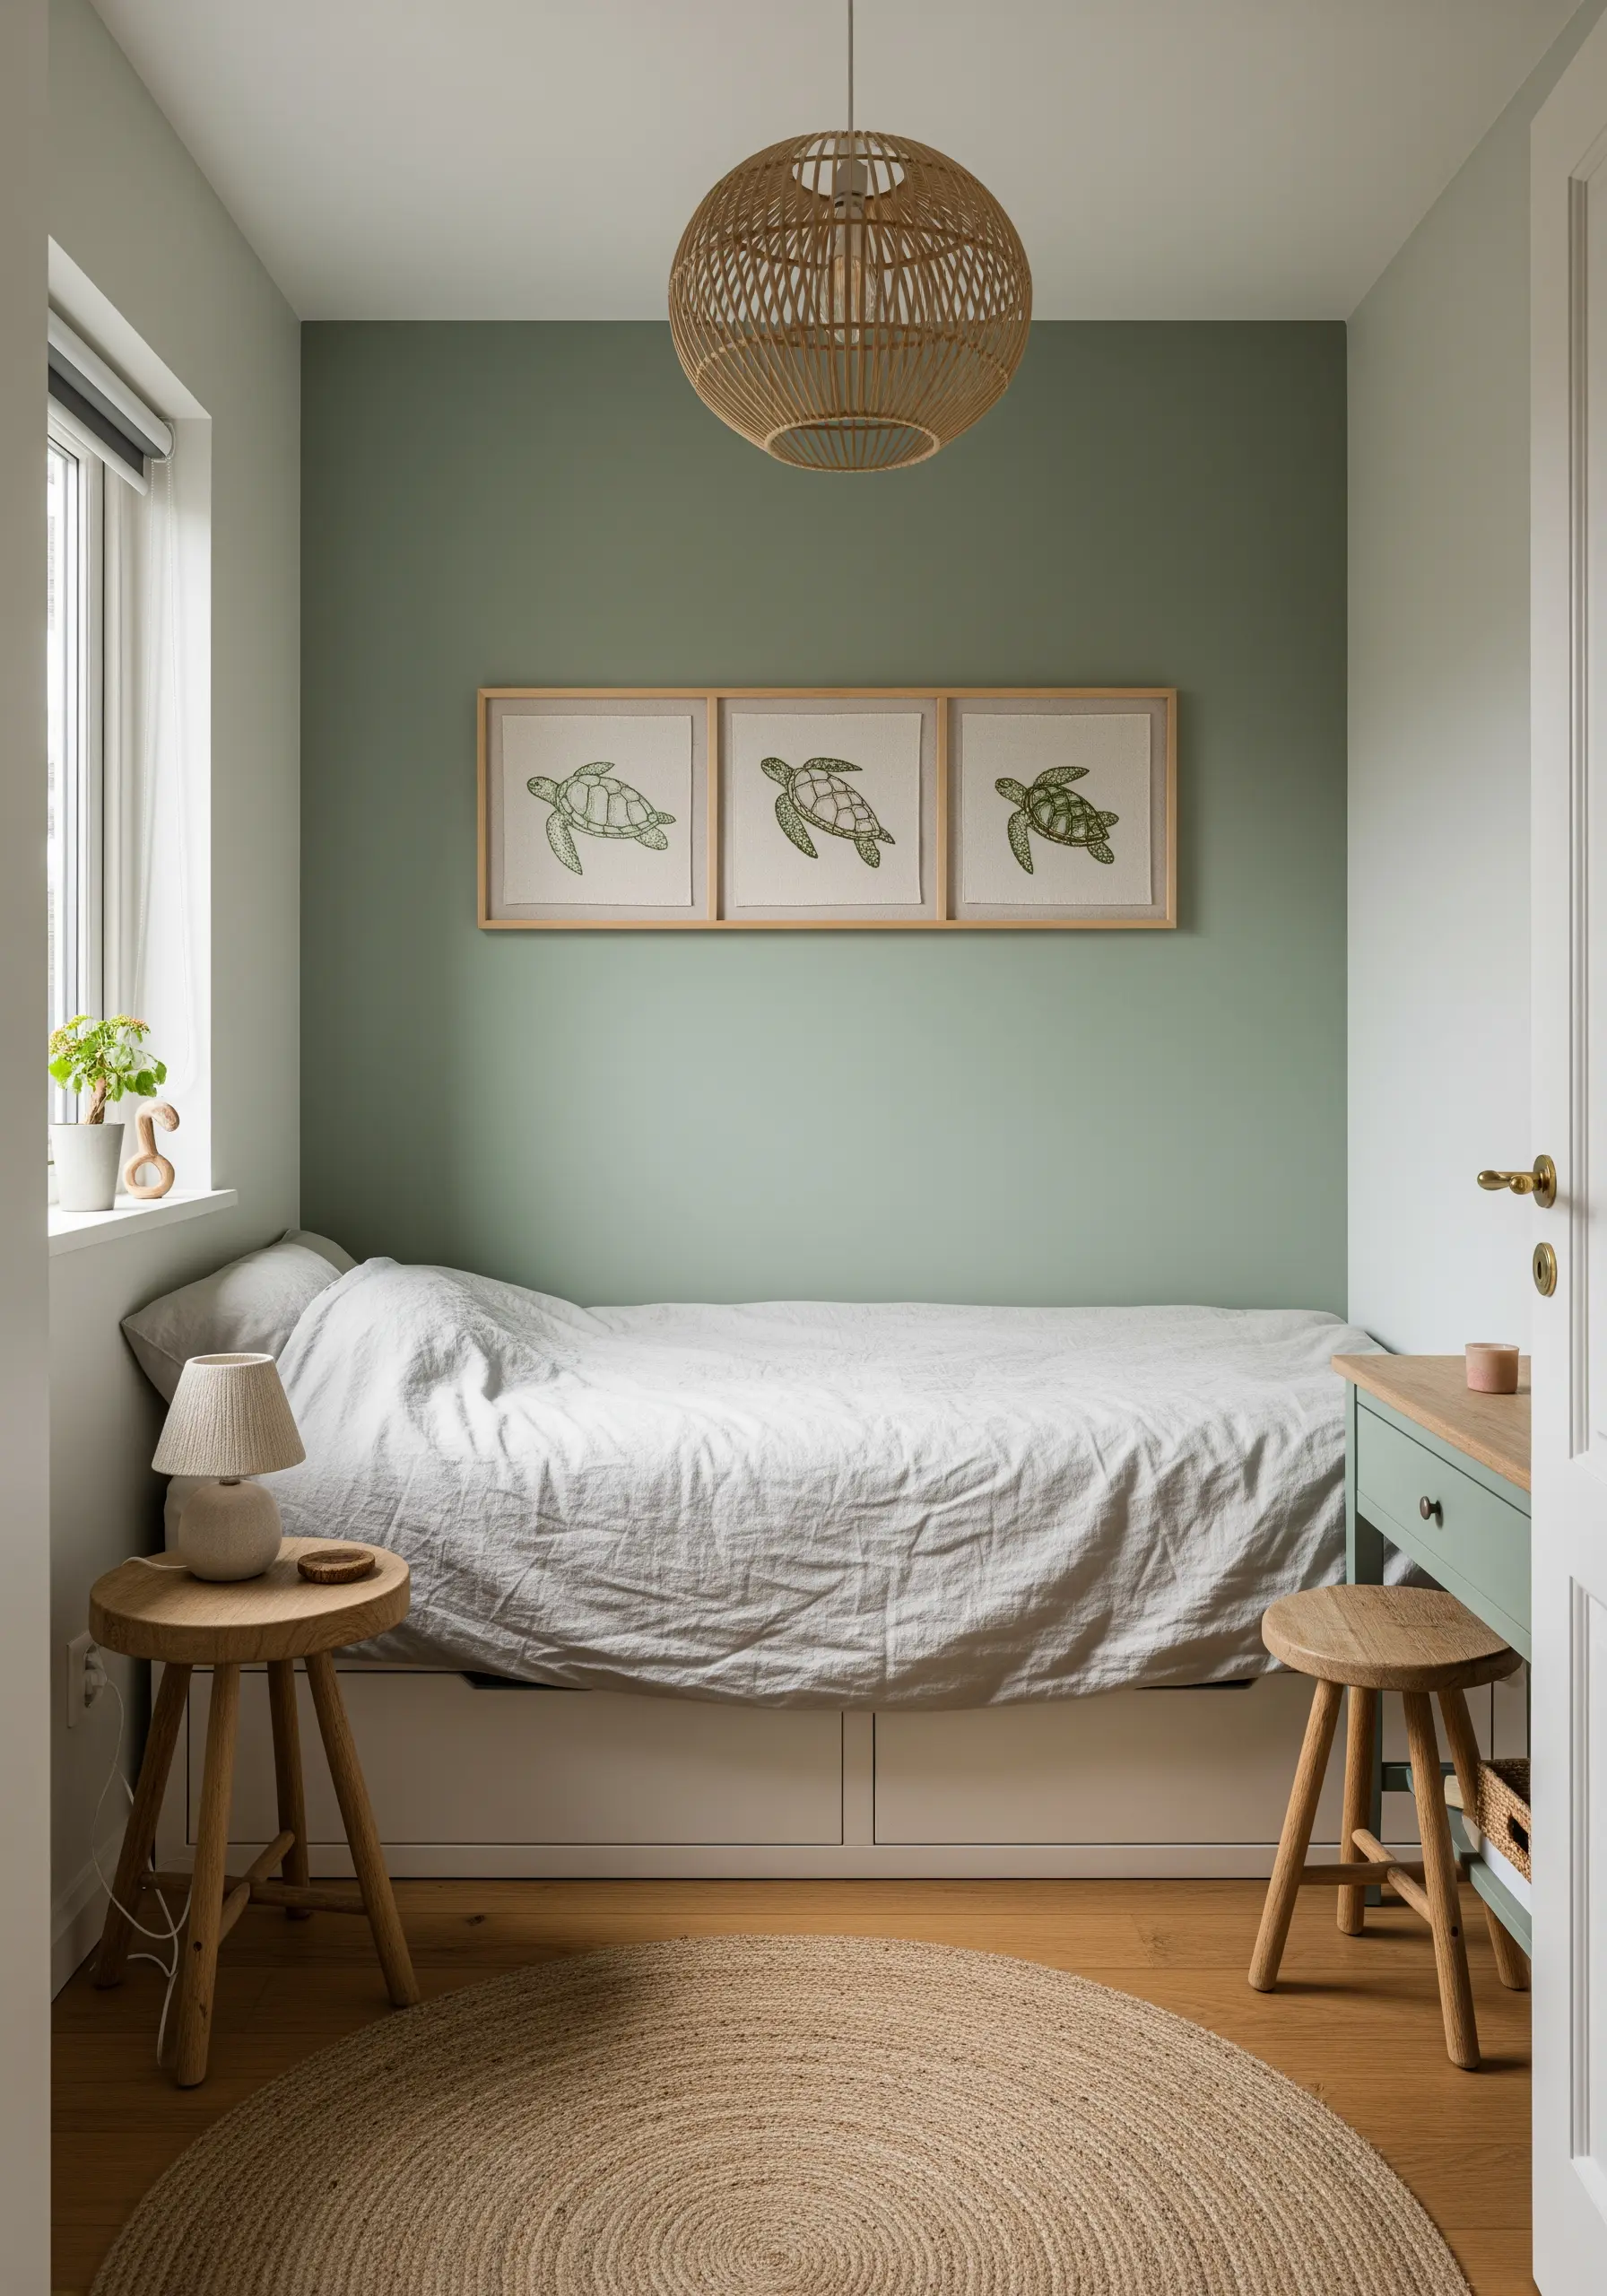
Use a set of three matching frames to create a triptych, a classic art format that lends a sense of importance and narrative.
You can show a single animal in three stages of motion or, as seen here, three similar animals to create a feeling of community.
Using a single color of thread on a neutral background creates a serene, cohesive look that works beautifully in a calm, nature-inspired room.
20. Create a Free-Flowing Butterfly Installation
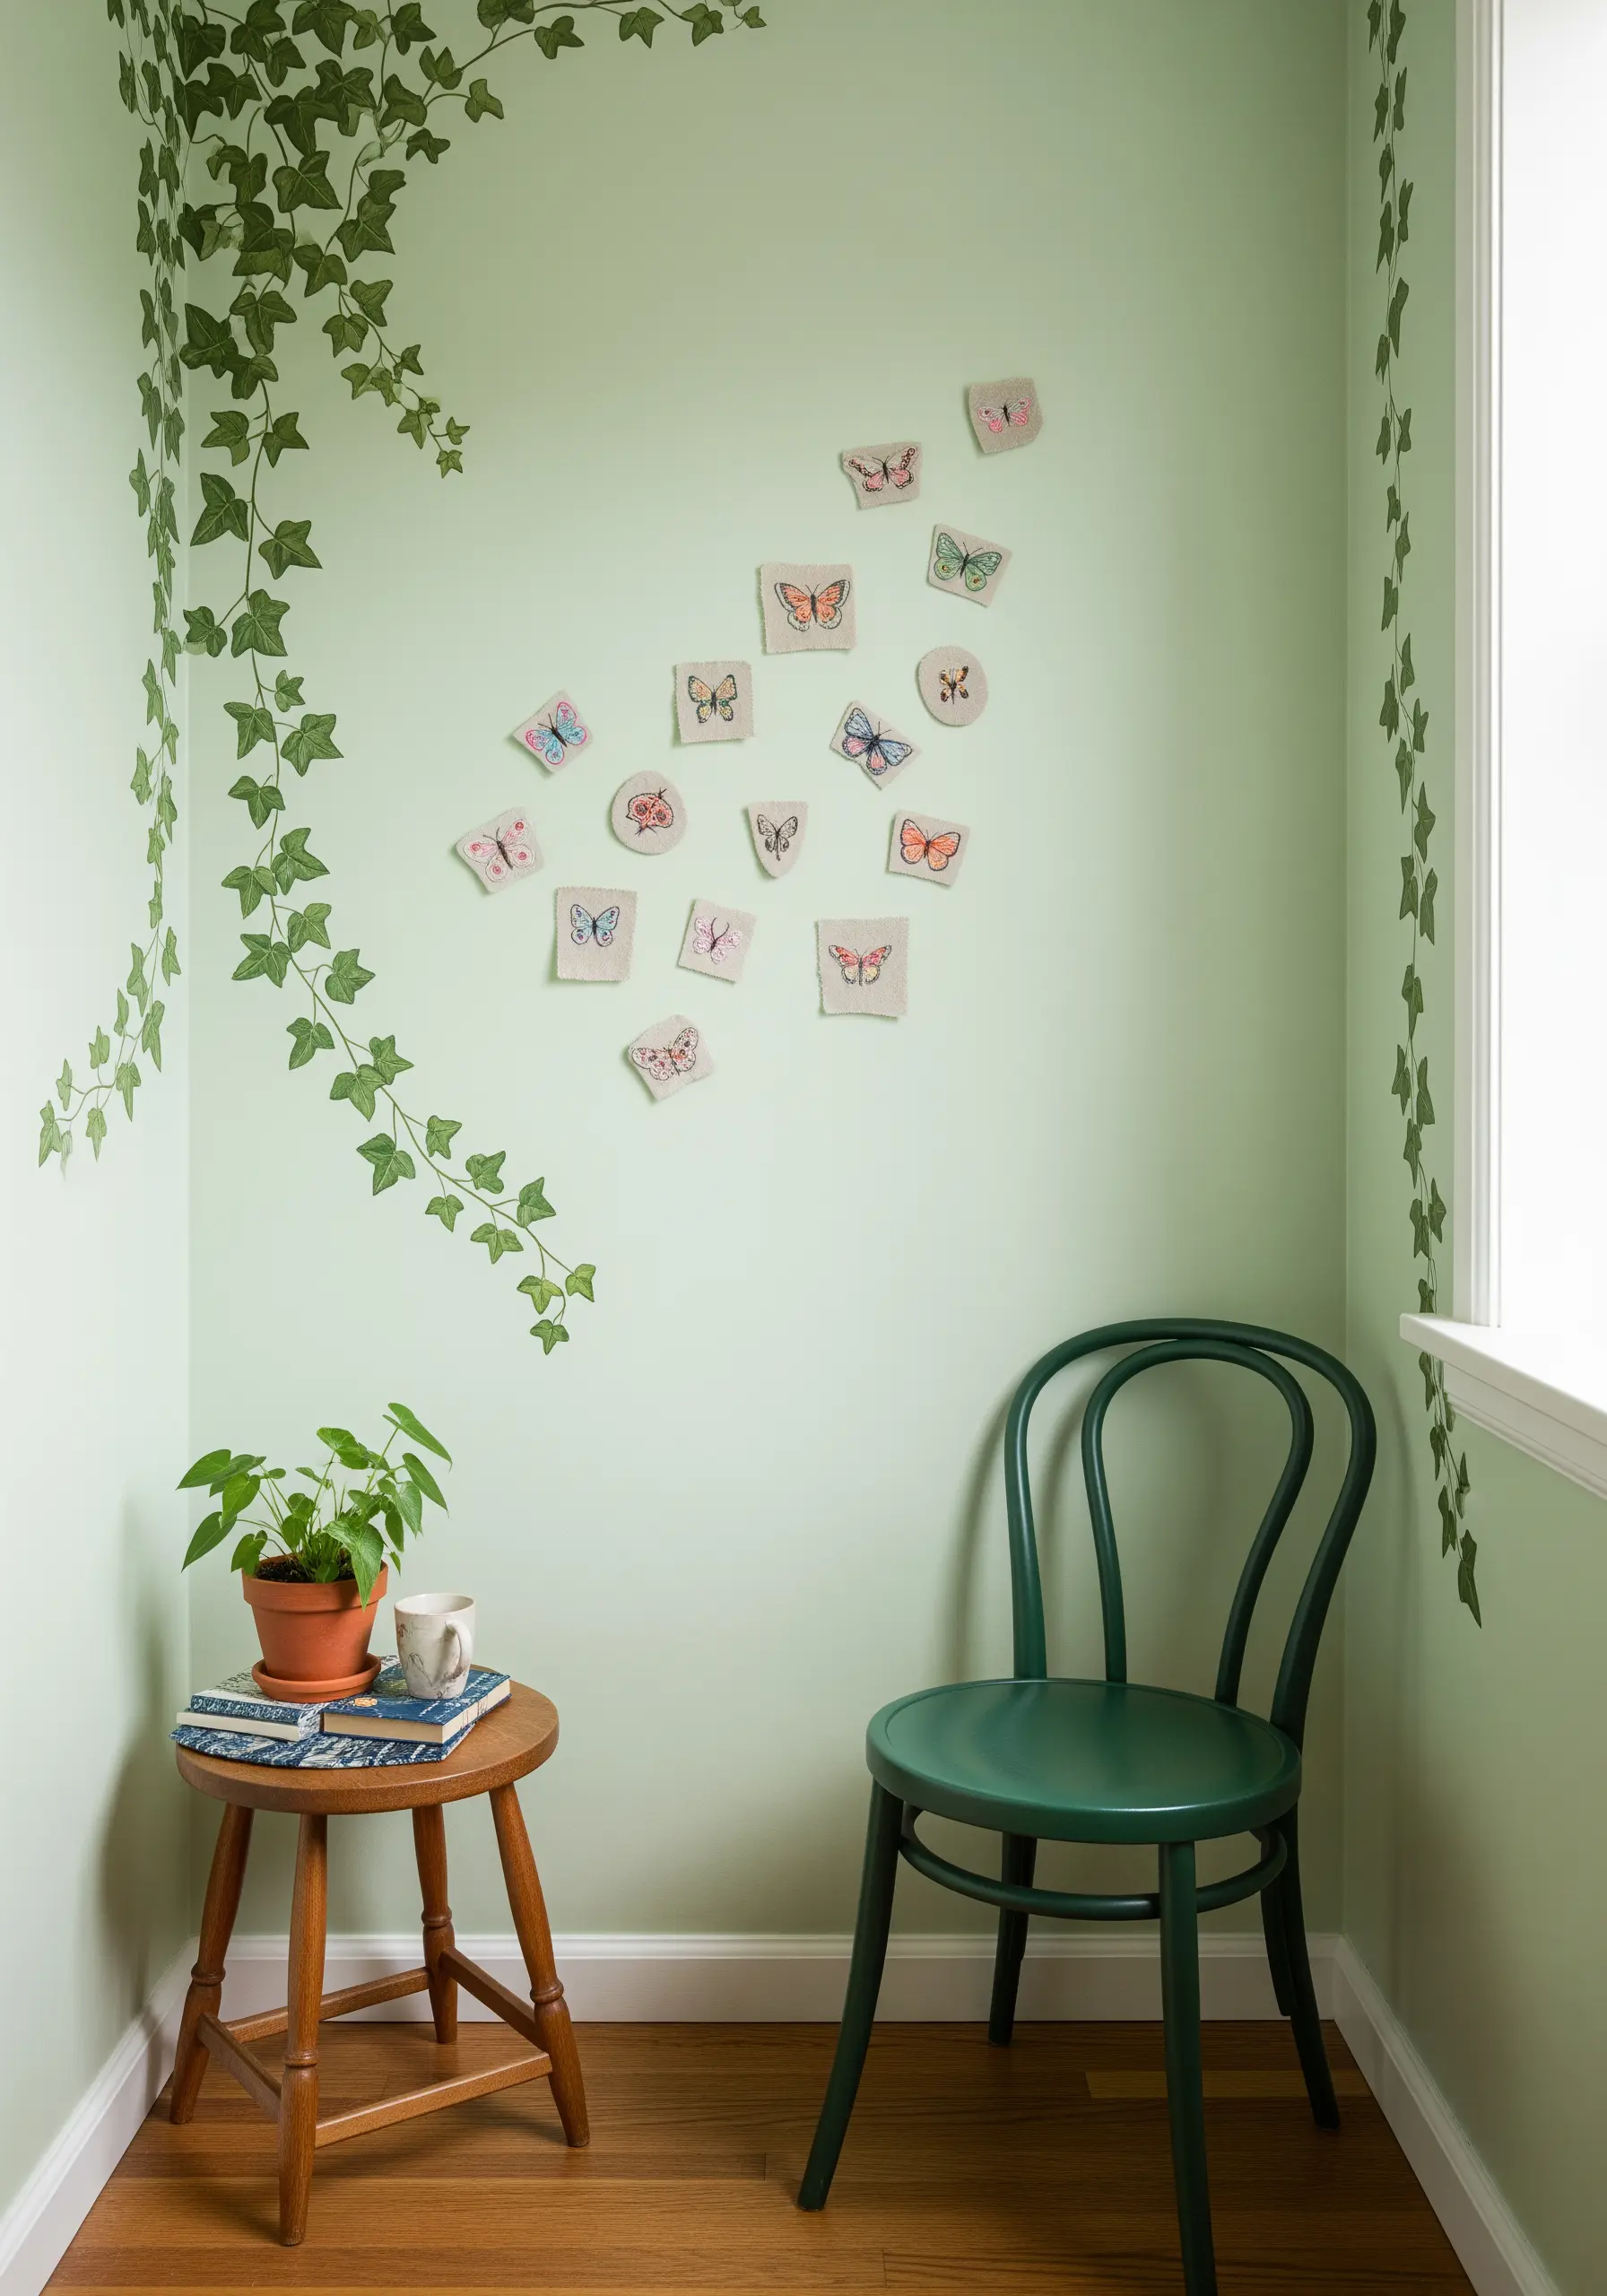
Break free from the frame entirely by creating individual embroidered patches that you can apply directly to the wall.
Stitch your butterflies on felt or heavy canvas, then cut them out, leaving a small border.
Arrange them in a swirling, organic pattern to mimic a cloud of butterflies in motion. Use temporary adhesives for a damage-free display.
This is one of the most dynamic butterfly garden embroidery ideas for a truly magical effect.
21. Use Micro-Hoops as Shelf Accents
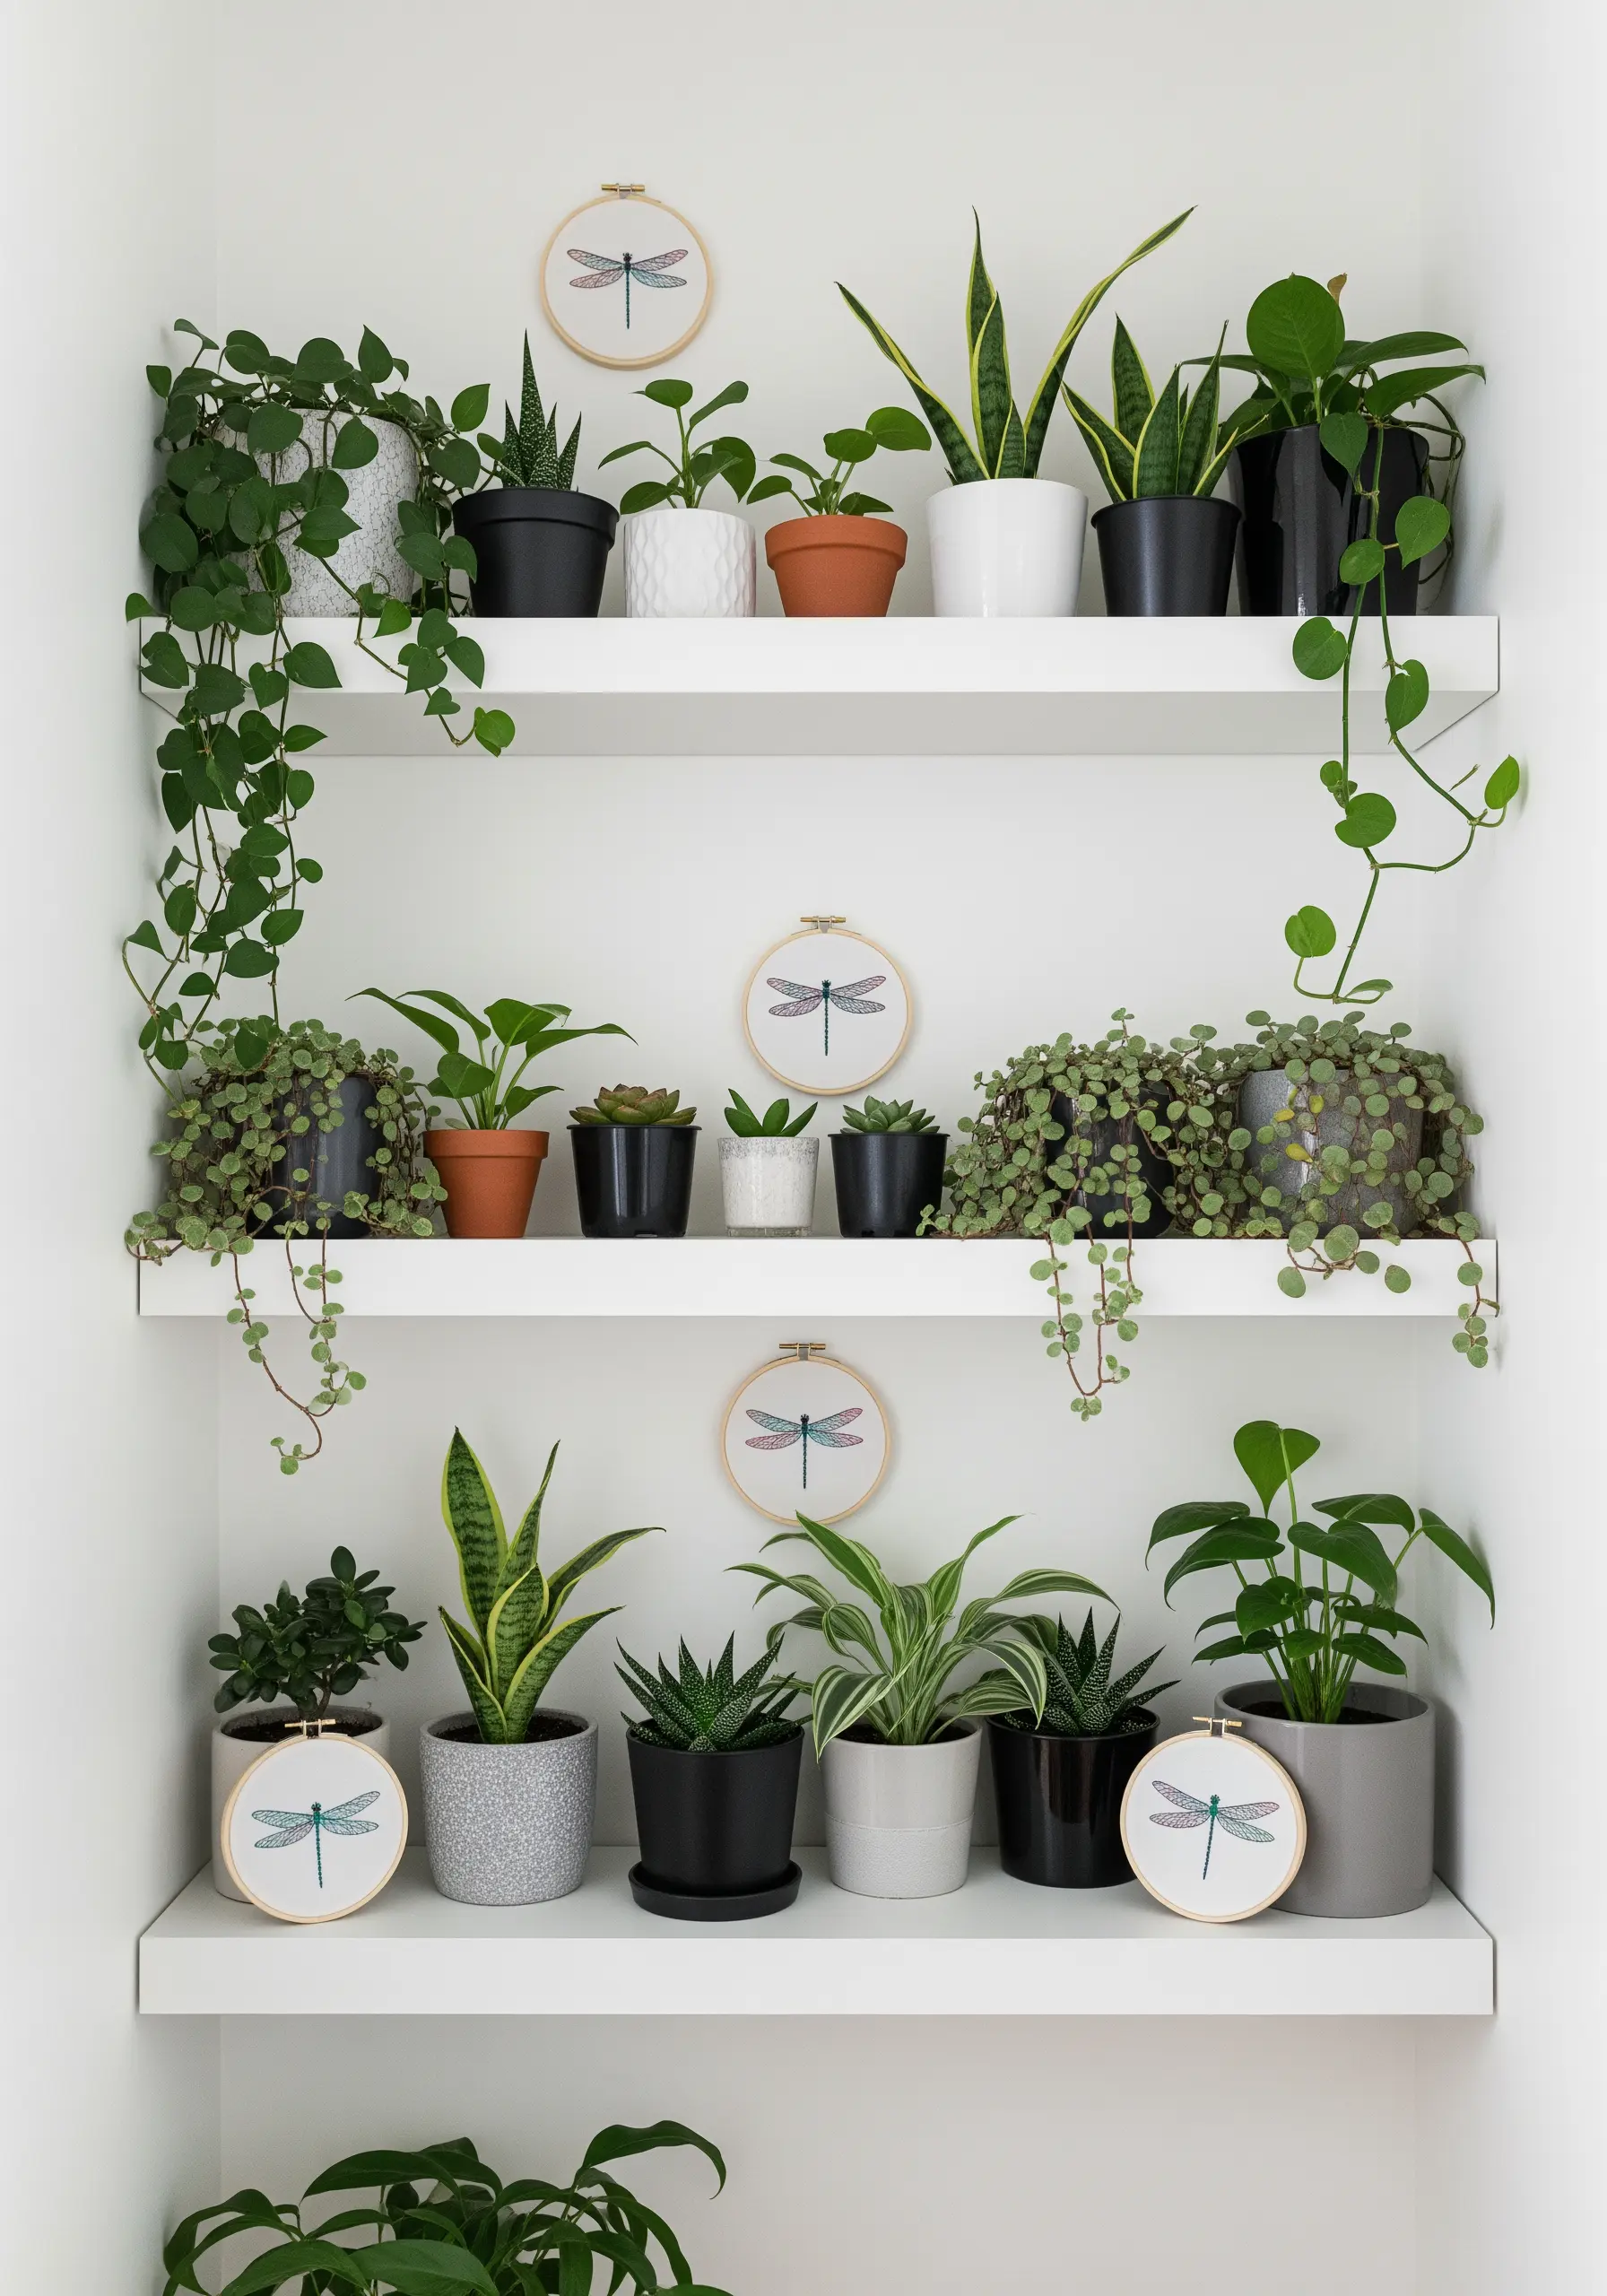
Incorporate embroidery into your decor in a subtle, surprising way by tucking tiny hoops among plants and books.
Stitch very simple, centered motifs like these dragonflies, which require minimal detail to be recognizable.
These quick embroidery accents add a handmade, personal touch to curated shelves, filling small gaps with a pop of color and texture.
It’s a perfect way to use up leftover thread and small fabric scraps.
22. Design Embroidered Decals for Furniture
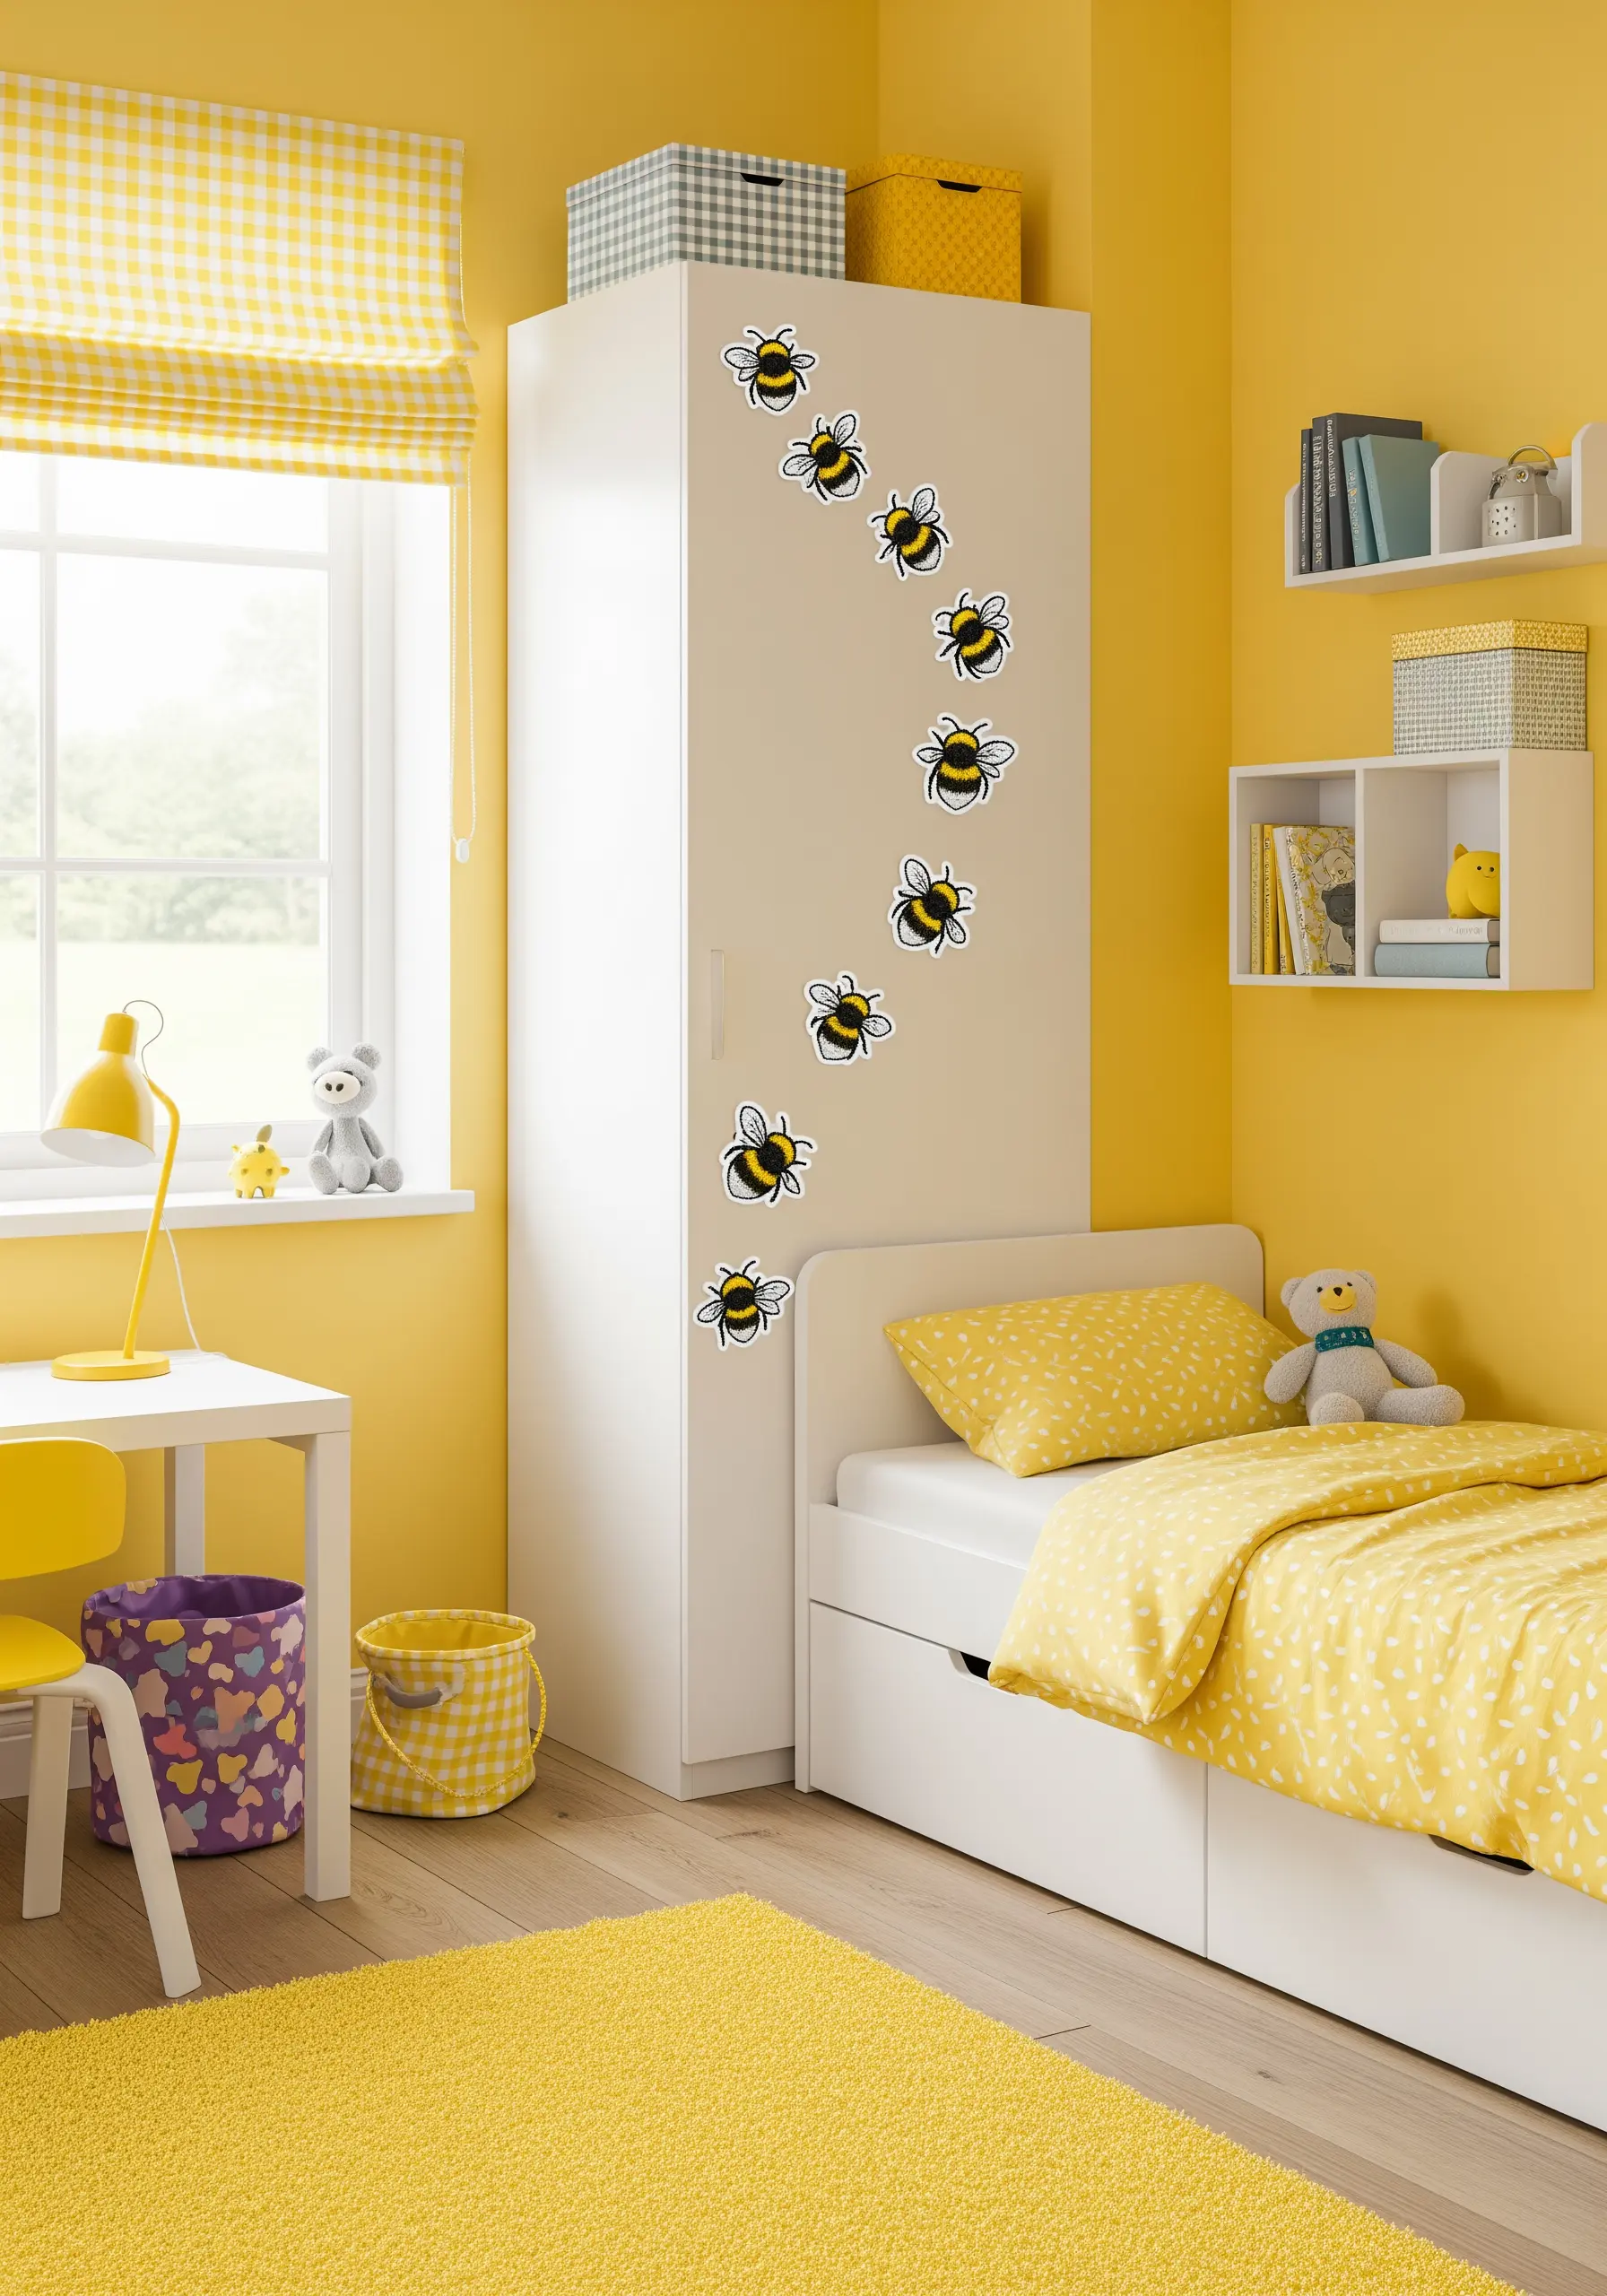
Create playful, temporary decorations by making stiffened embroidered patches that can be applied to furniture.
Stitch your bee designs on a sturdy fabric, then apply an iron-on stiffener to the back before cutting them out.
Use a gentle, removable adhesive like sticky tack to arrange them in a flying formation up the side of a wardrobe or dresser.
This is a fun, non-permanent way to add themed whimsy to a child’s room.
23. Create Dimension with Padded Satin Stitch
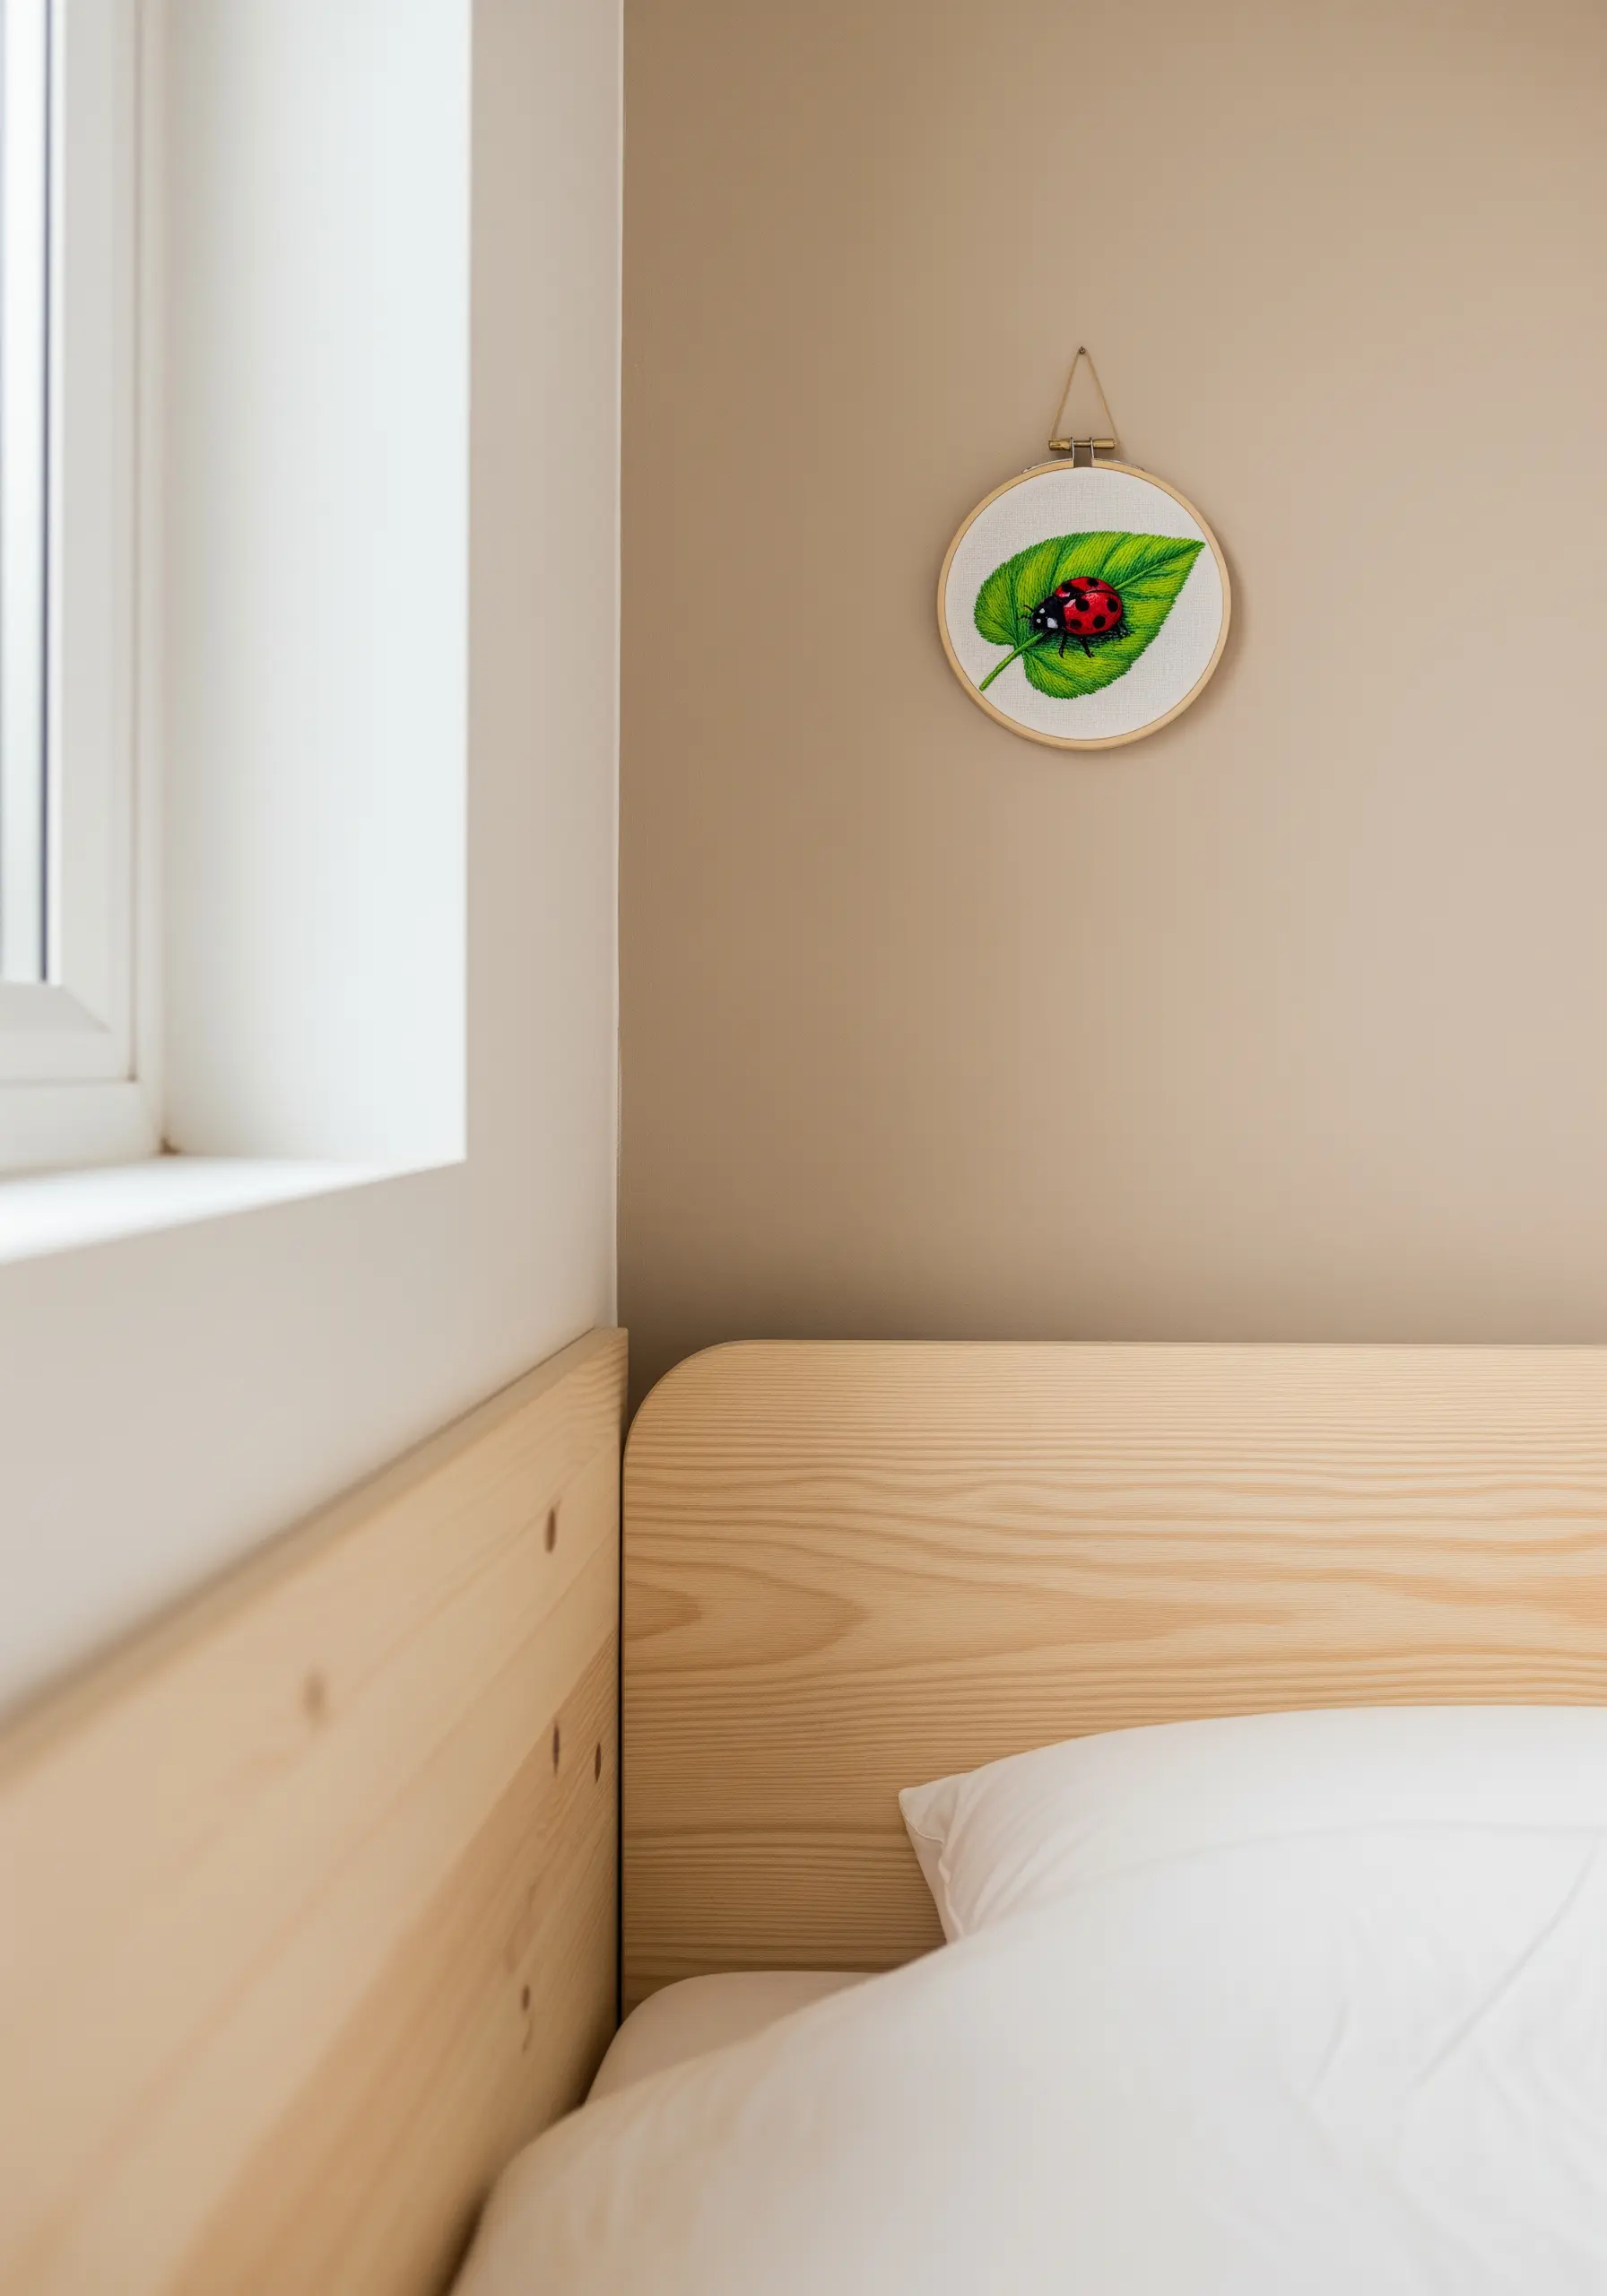
Make your central motif literally pop off the fabric by using a padded satin stitch.
First, fill the area of the ladybug’s body with a base of small, underlying stitches (like seed stitches), then cover that area with your final satin stitch.
This simple technique gives the subject a raised, three-dimensional quality that contrasts beautifully with the flatter stitches of the leaf.
It’s an easy way to add a luxe, tactile element to your work.
24. Integrate Embroidery into a Larger Scene
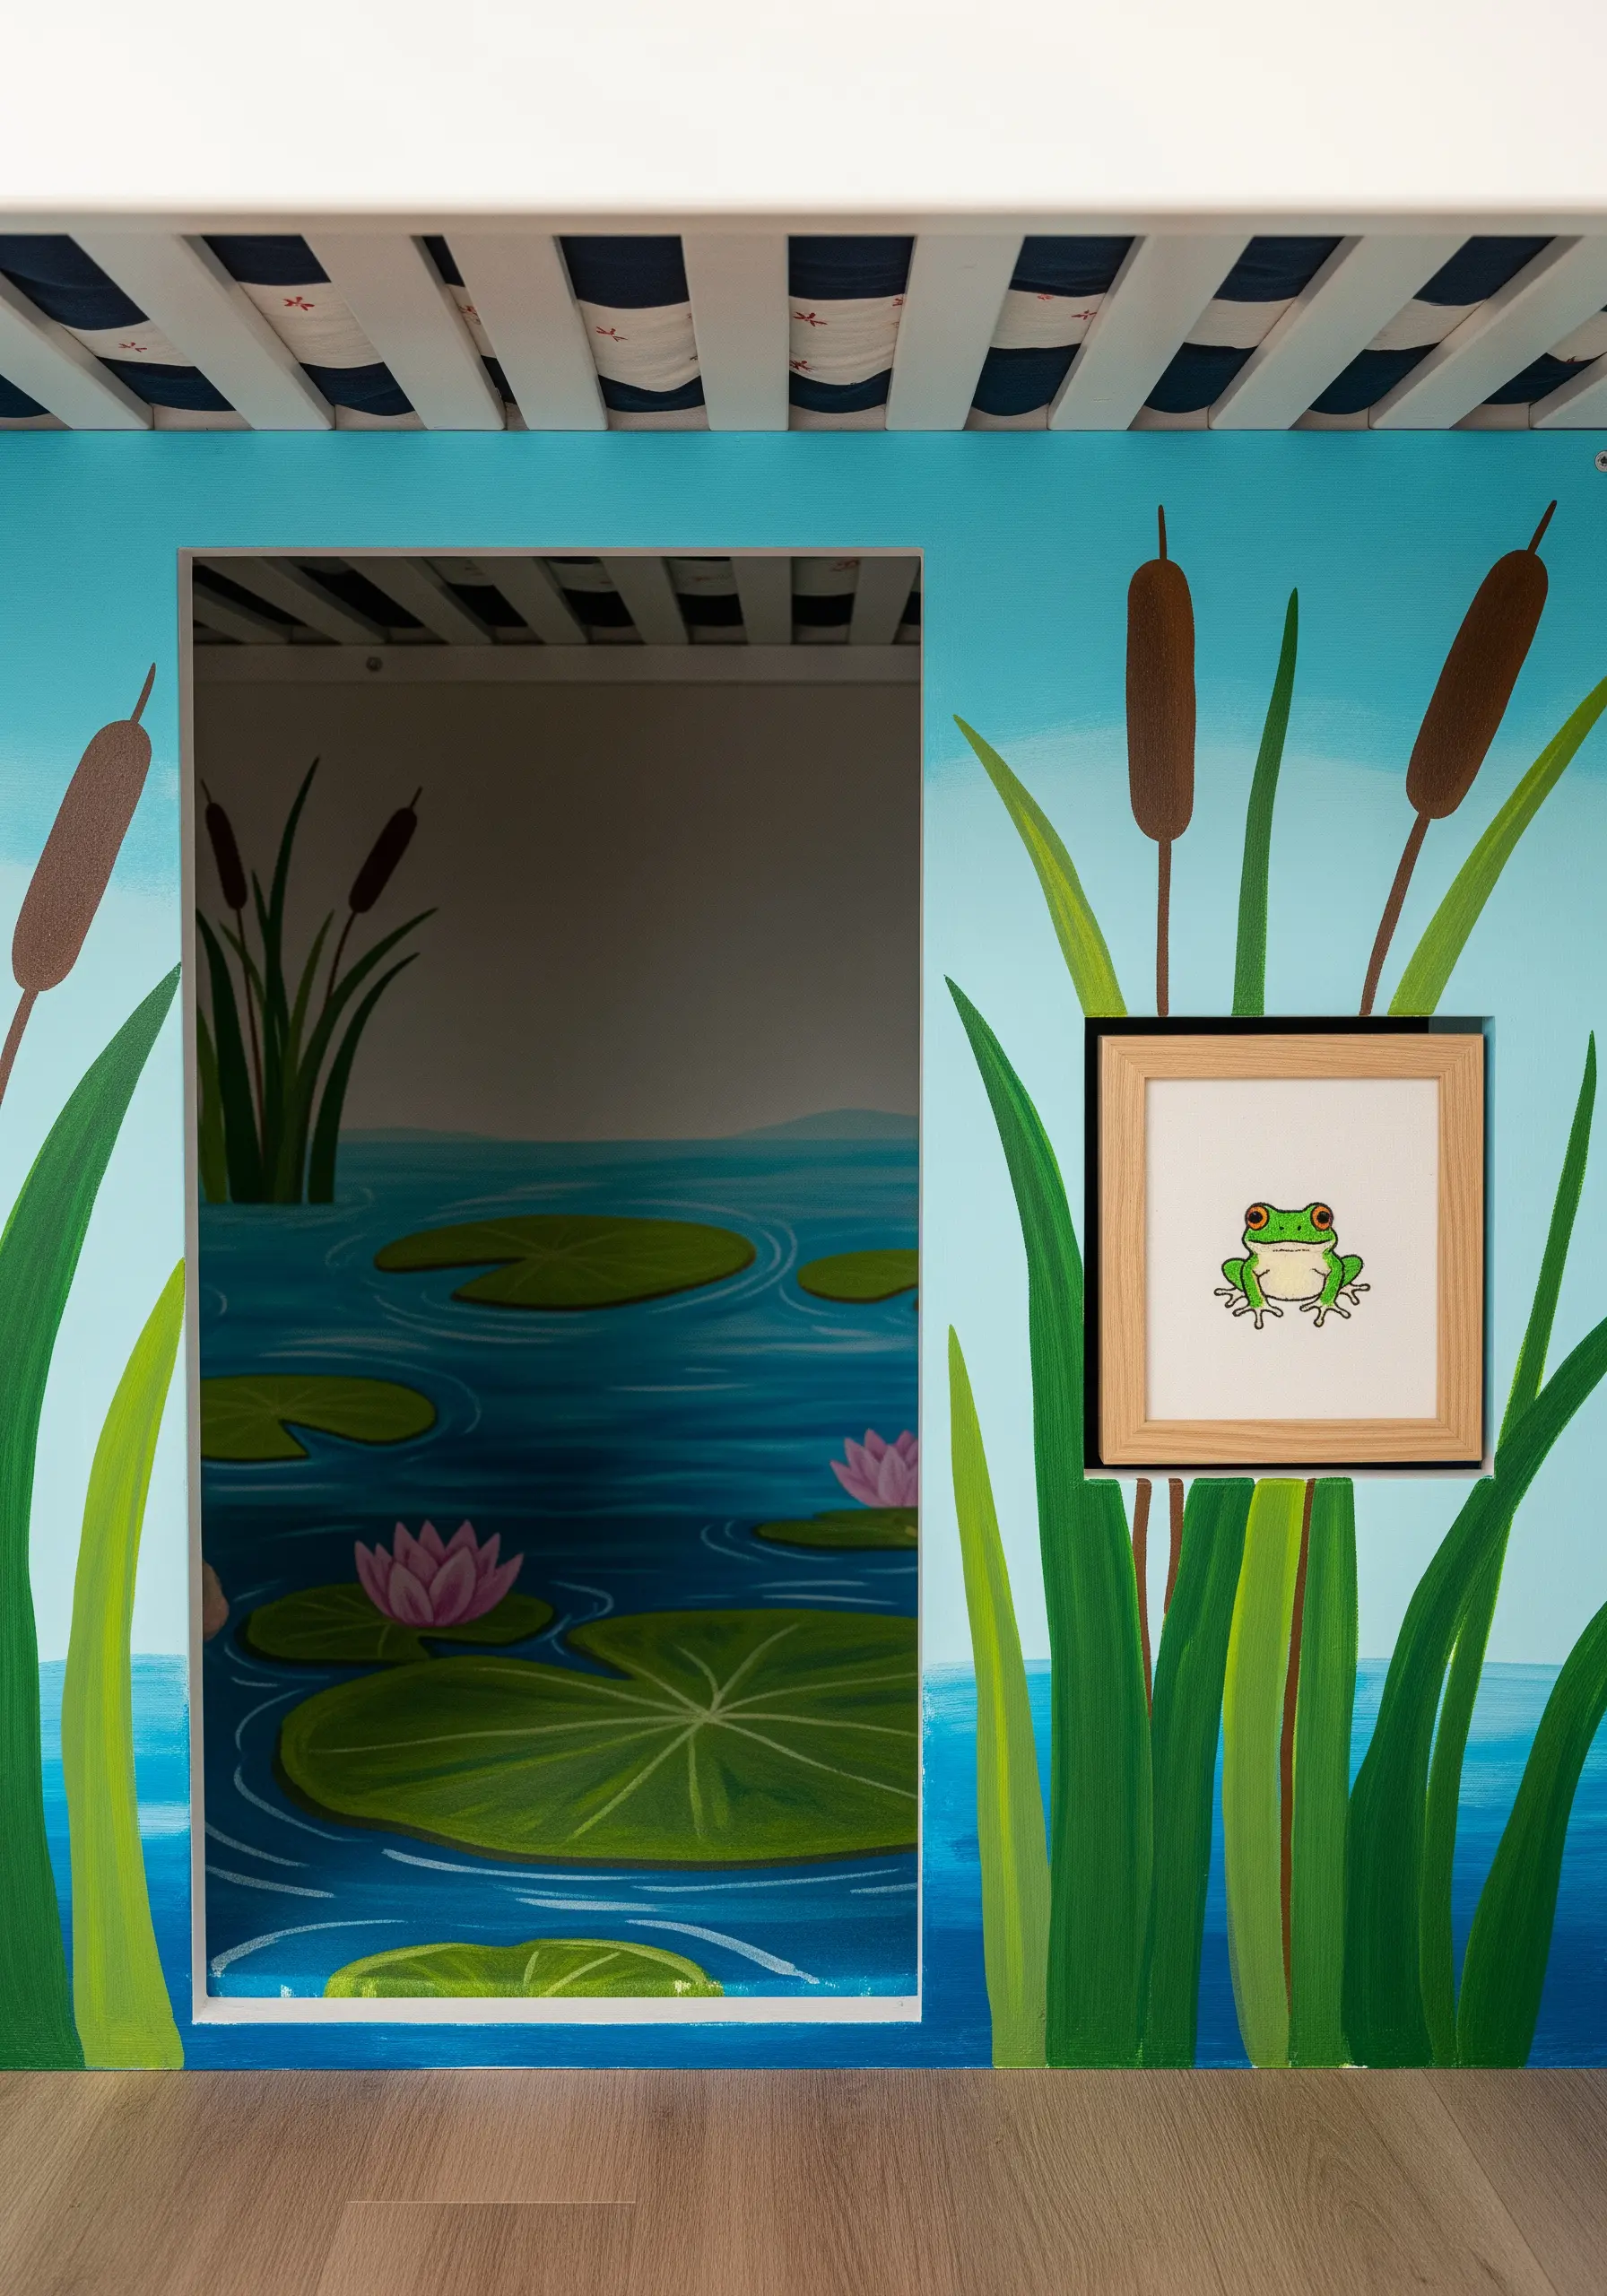
Make your embroidery a focal point by placing a small, framed piece within a larger painted mural.
The frame acts as a window, drawing the eye to the detailed texture of the thread work and setting it apart from the flat painted surface.
This clever technique creates a delightful mixed-media effect, blending two art forms into a single, cohesive world.
It adds a layer of unexpected sophistication and texture.
25. Build a Woodland Scene with a Hoop Gallery
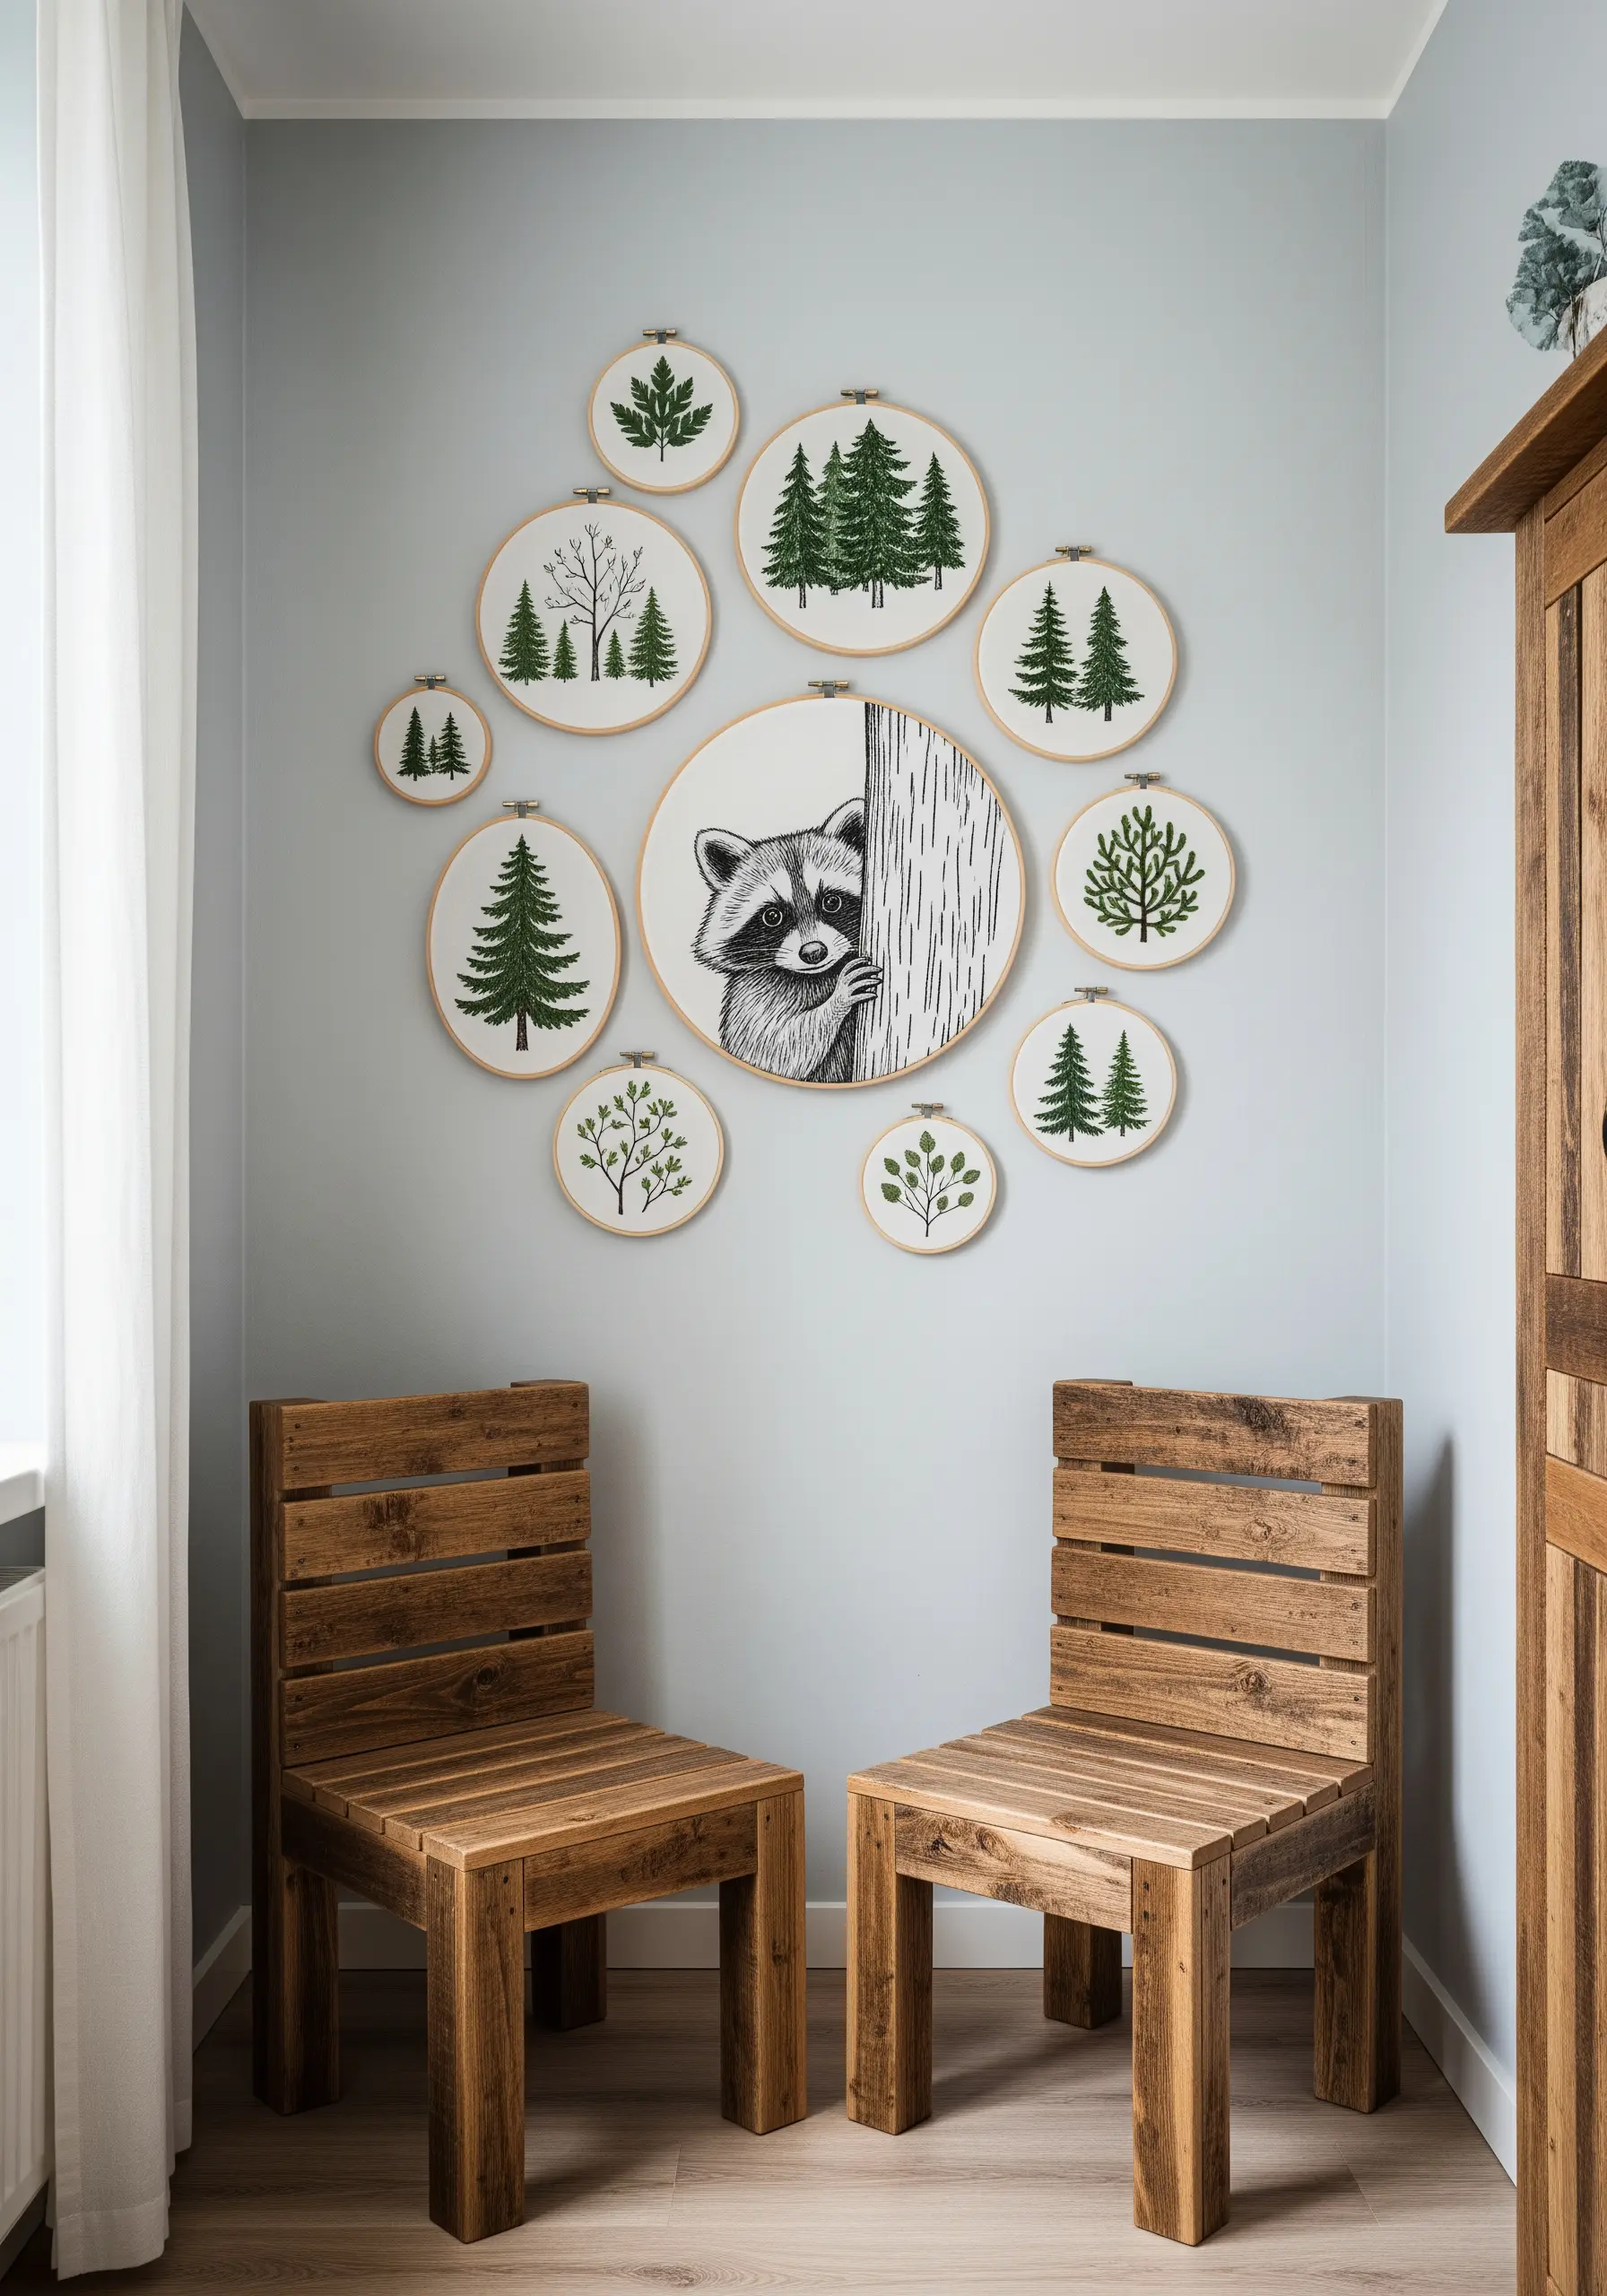
Create an immersive woodland world by surrounding a large “character” hoop with many smaller hoops depicting trees and leaves.
Vary the sizes of the smaller hoops and the types of trees to create a sense of depth and a natural, forest-like environment.
This is a fantastic way to fill a large wall space with a single, cohesive theme.
It’s perfect for rustic fox deer embroidery patterns and other forest creatures.
26. Opt for a Soft Banner Display
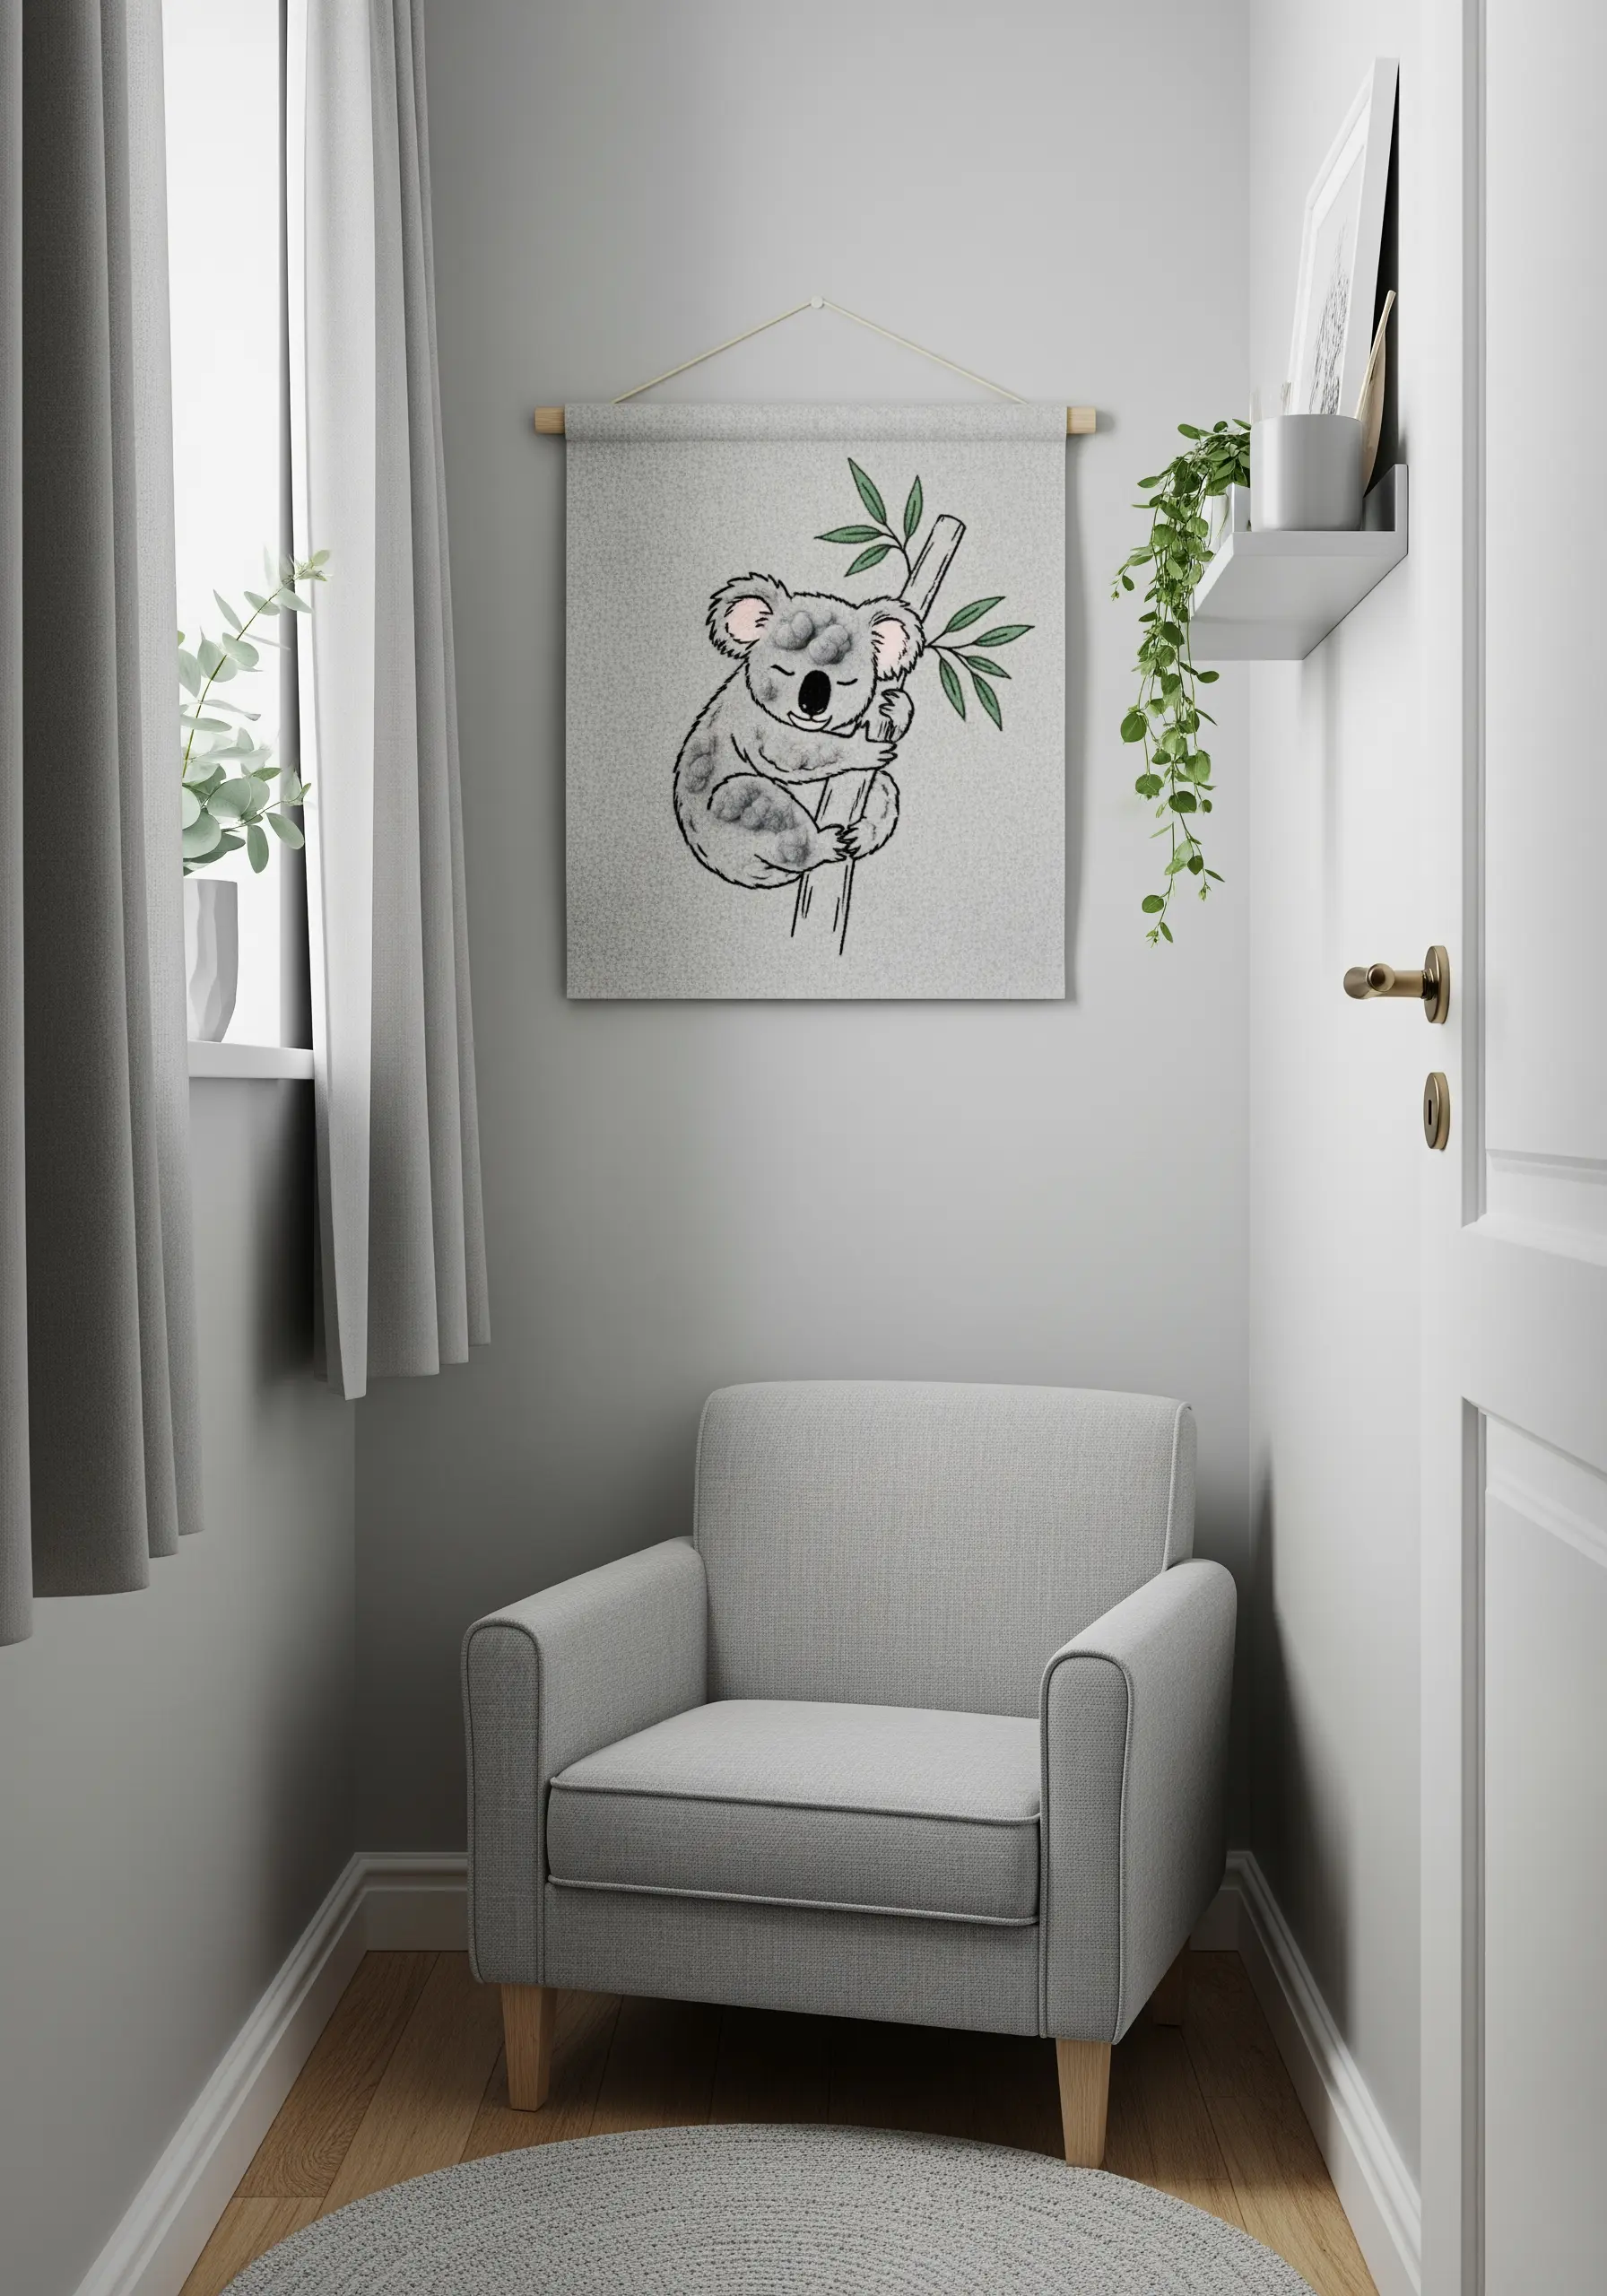
For a softer, more relaxed alternative to a rigid hoop, display your embroidery as a small wall banner.
Simply trim your fabric and fold the top edge over a small wooden dowel, securing it with a few stitches or fabric glue.
This method gives the piece a gentle, unframed look that complements soft-textured subjects like a sleepy koala.
Use a neutral, unbleached linen or cotton for an organic, calming feel.
27. Add Tactile Fur with French Knots
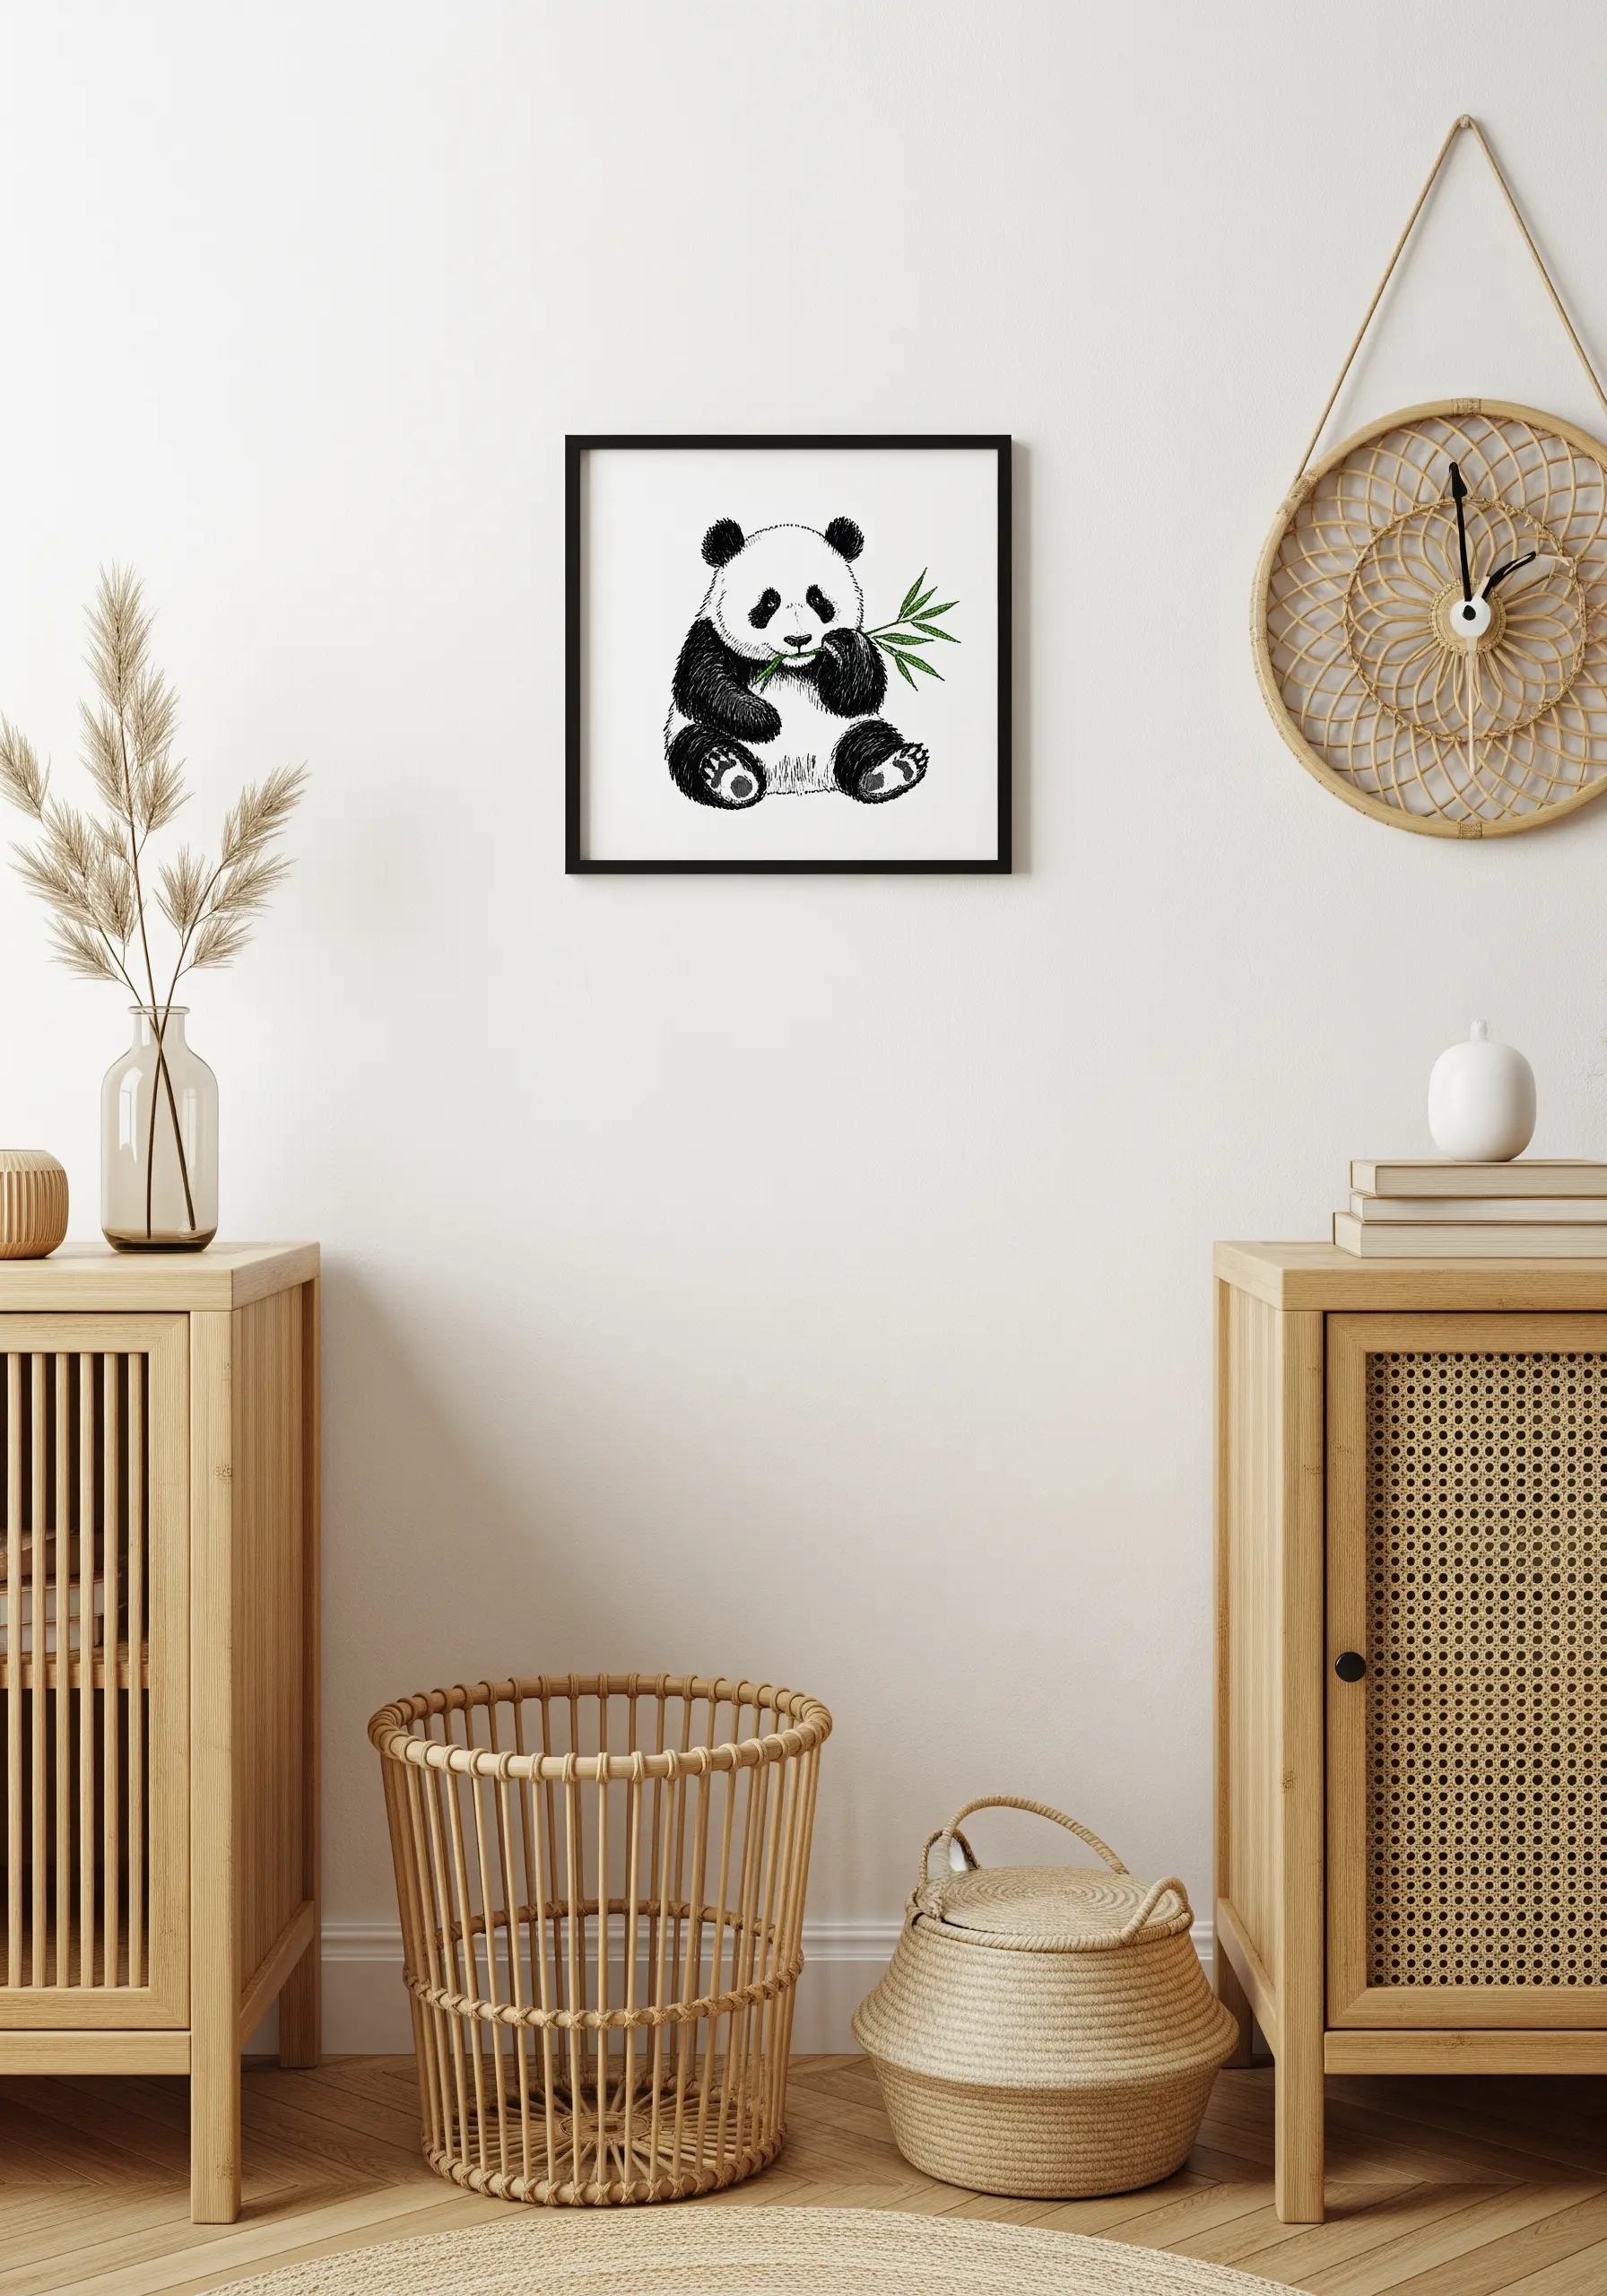
Instead of using satin stitch to fill large areas, use densely packed French knots to create a wonderfully plush, fluffy texture.
This technique is perfect for rendering the soft fur of a panda, adding a tactile dimension that invites touch.
Use a single pop of color for an accessory, like the bright green bamboo, to create a strong focal point against the monochrome animal.
28. Enhance Coziness with a Simple Wall Tapestry
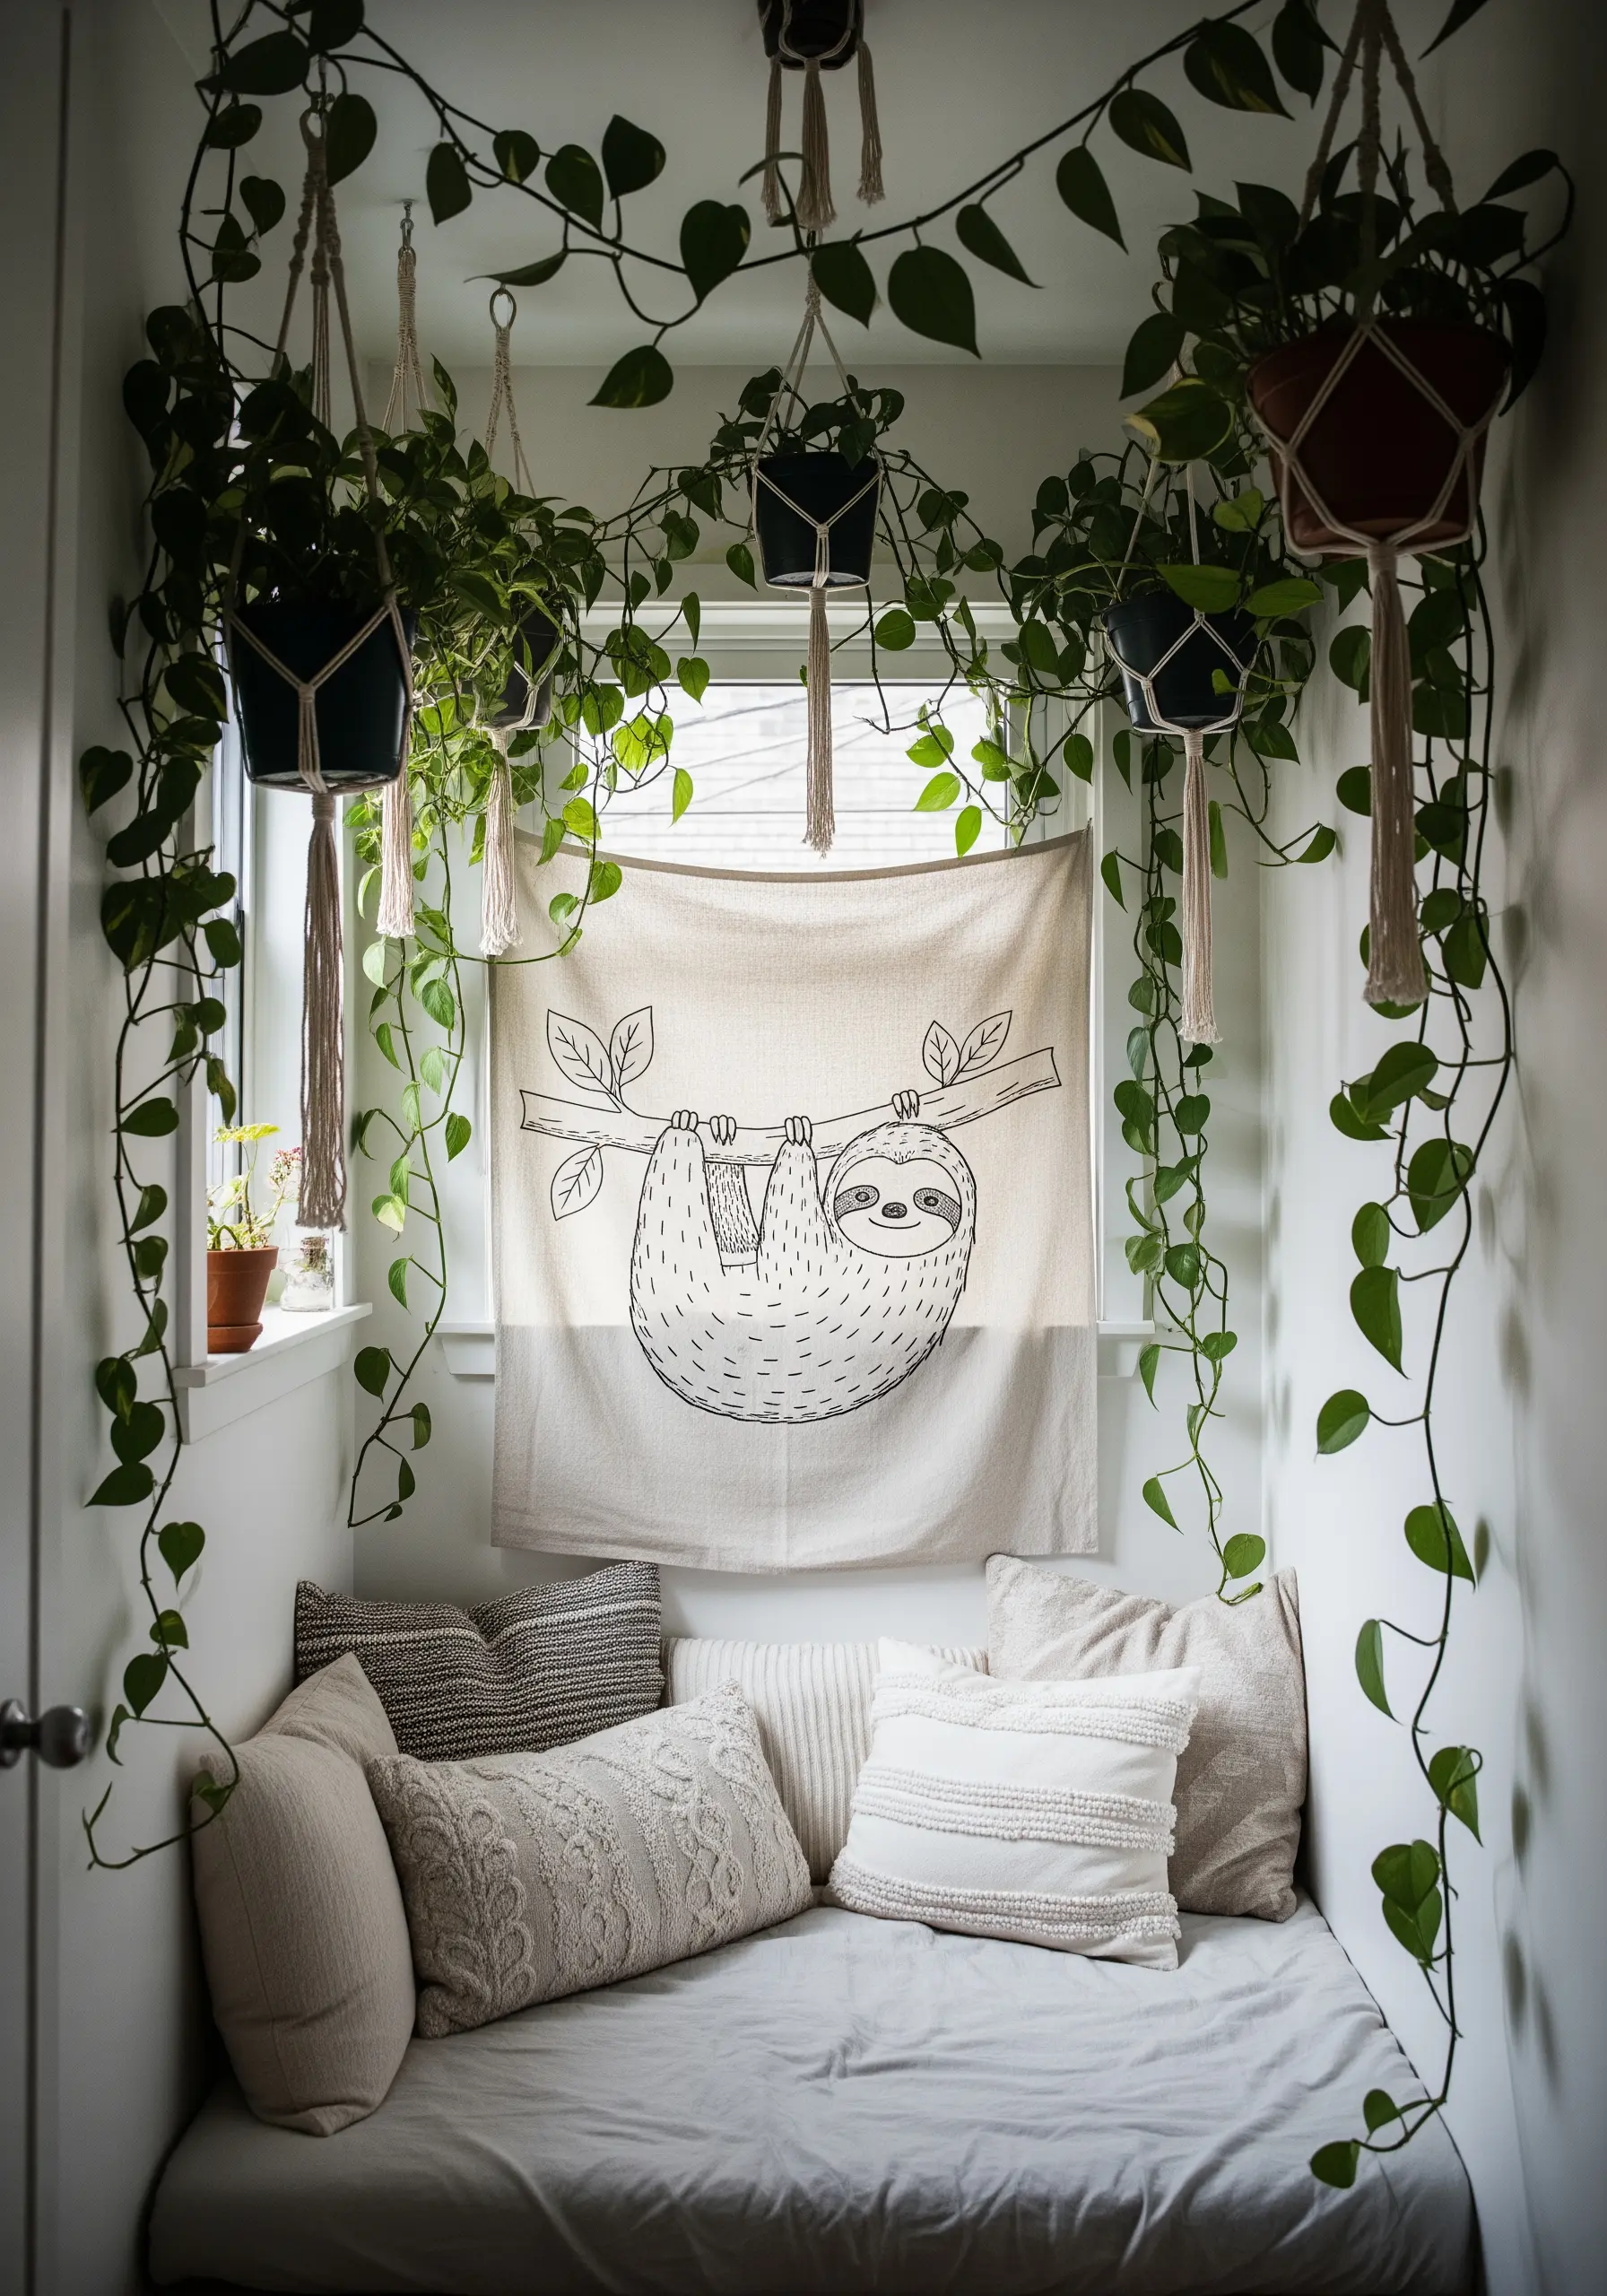
Turn a simple line-art embroidery into a cozy focal point by presenting it as a large, unstretched wall tapestry.
The natural drape of the fabric enhances the relaxed, sleepy vibe of a hanging sloth.
Stitching on a warm, neutral-toned fabric like raw cotton or linen adds to the organic, comfortable aesthetic, making it perfect for a reading nook.
These cozy embroidered wall art ideas add instant warmth.
29. Combine Embroidery with Macrame for a Bohemian Vibe
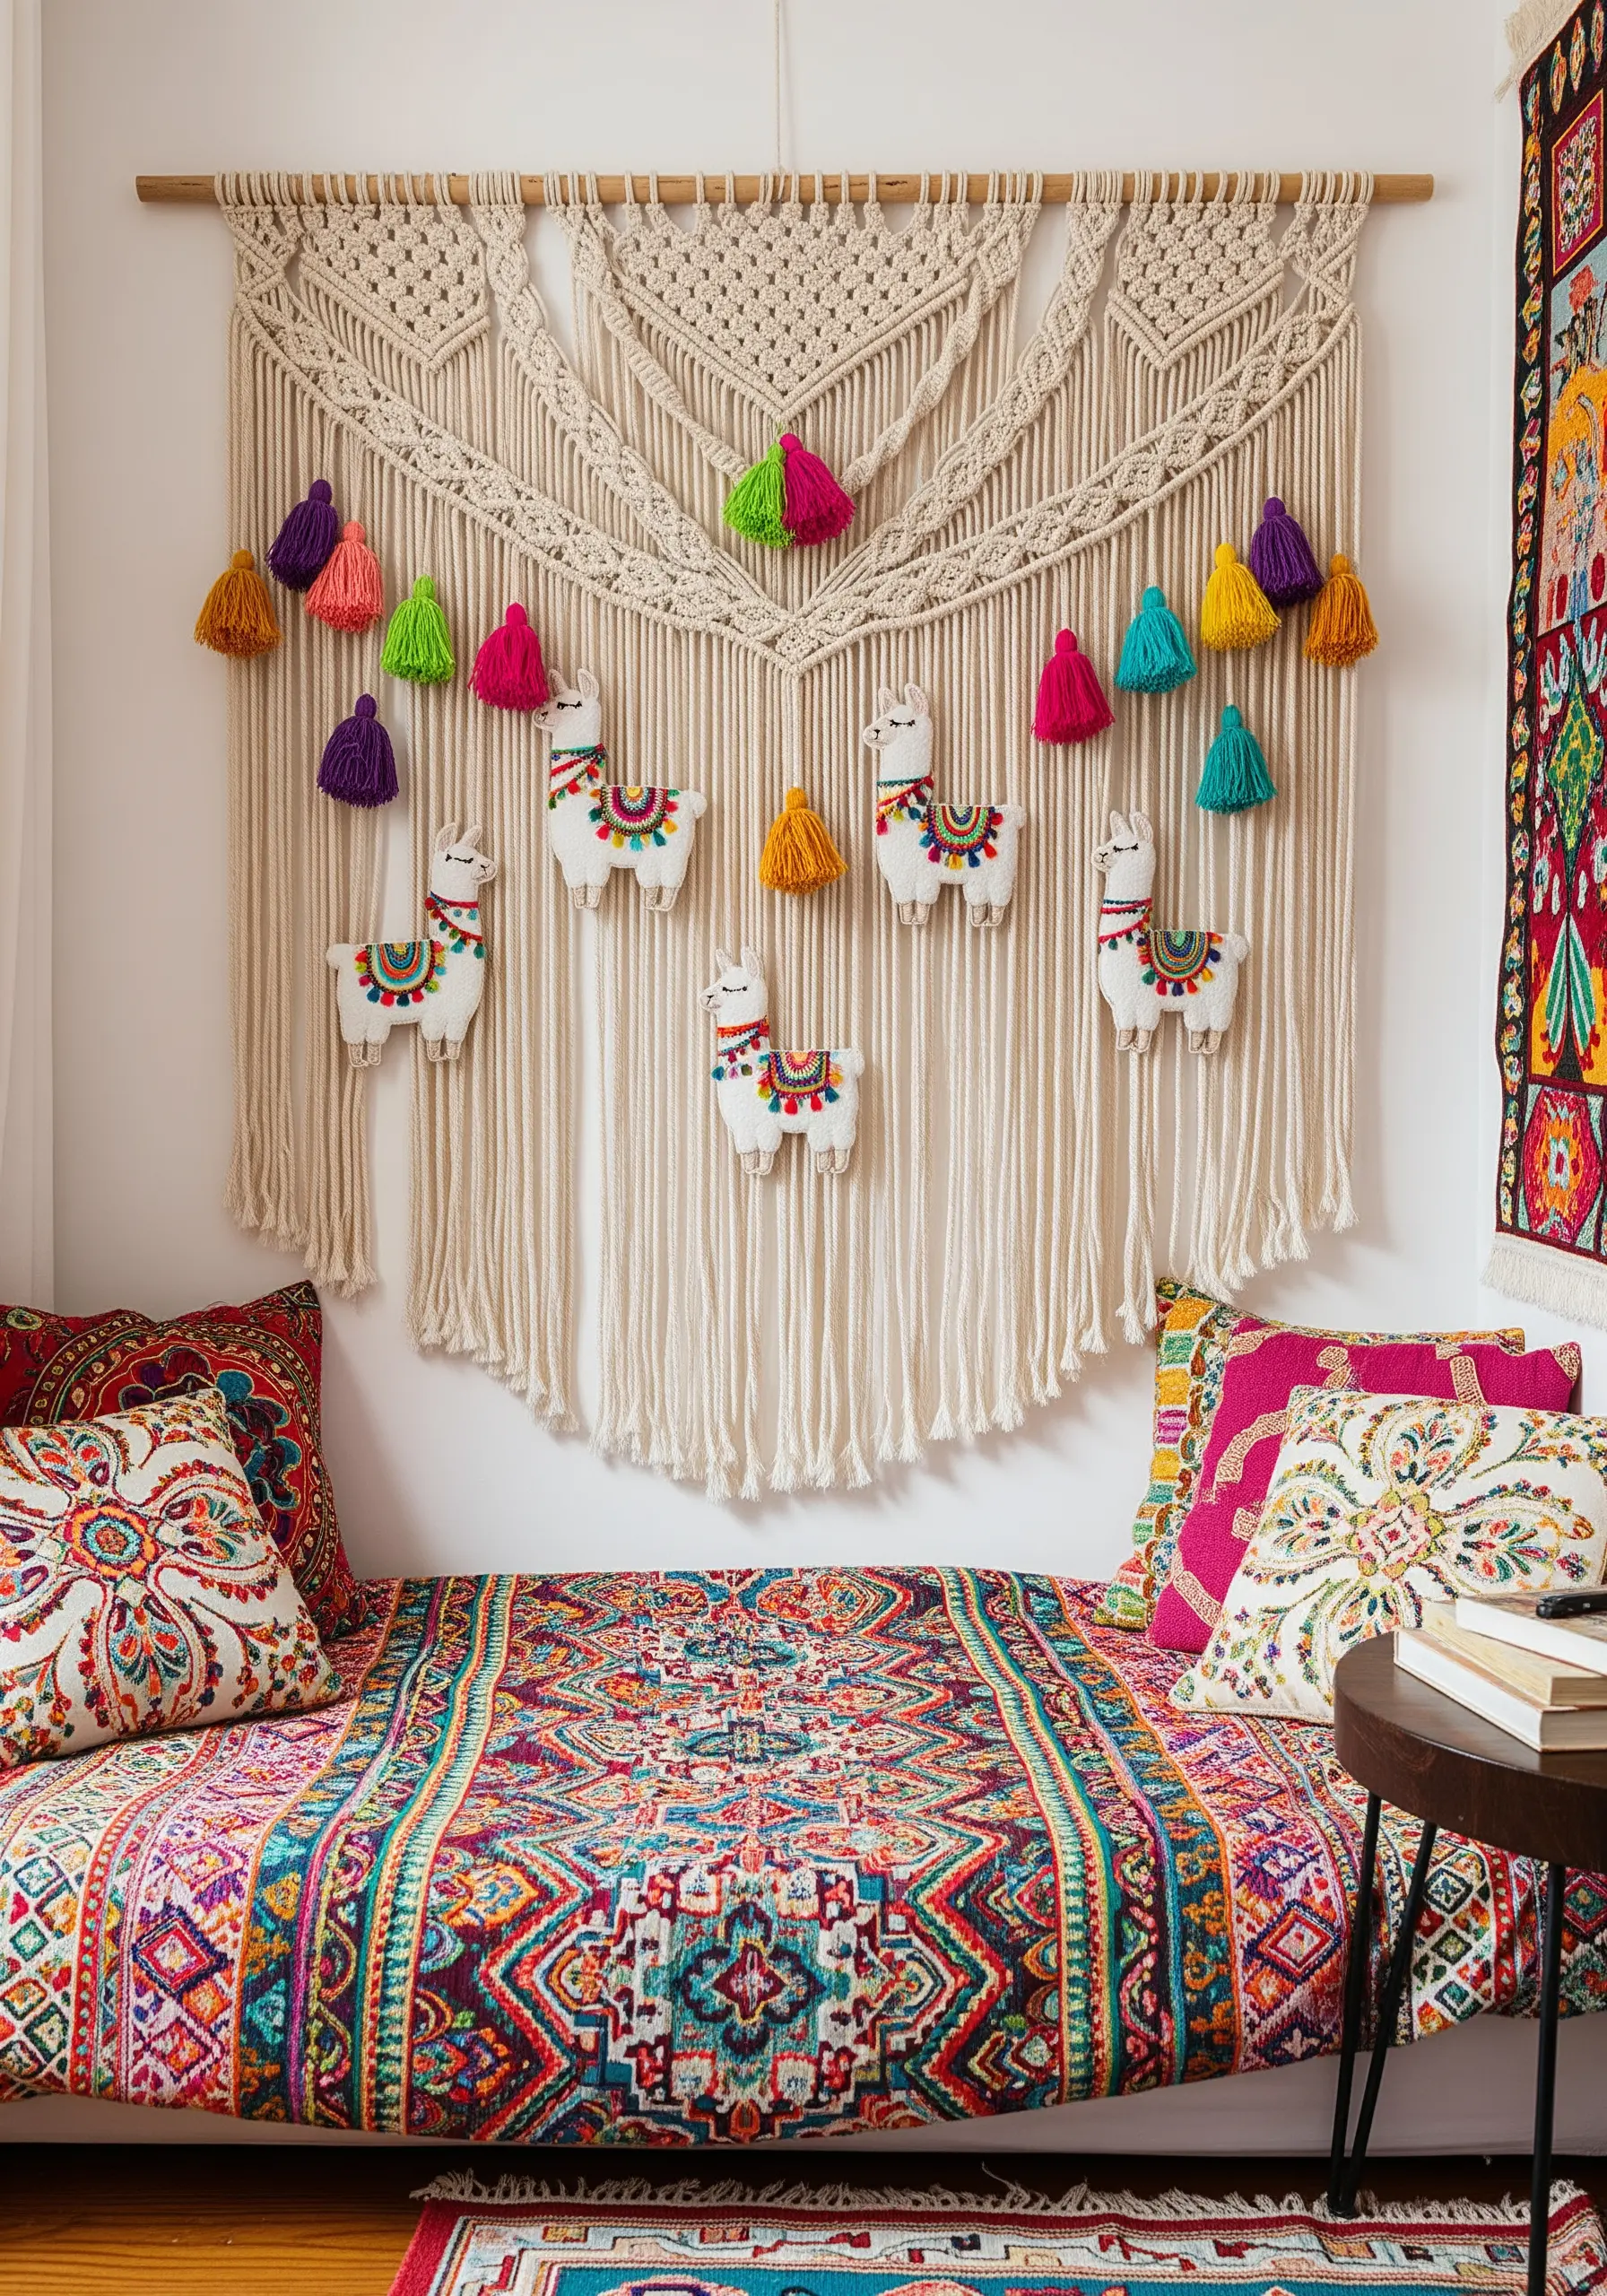
Create a stunning, texture-rich piece by combining two different fiber arts.
First, create small, stuffed and embroidered llamas. These are essentially tiny, detailed plushies.
Then, securely stitch them onto a finished macrame wall hanging, integrating them into the knotted design.
These mixed-fiber wall hangings create a playful, bohemian statement piece with incredible depth and texture.
30. Capture Fur Texture with Directional Stitches
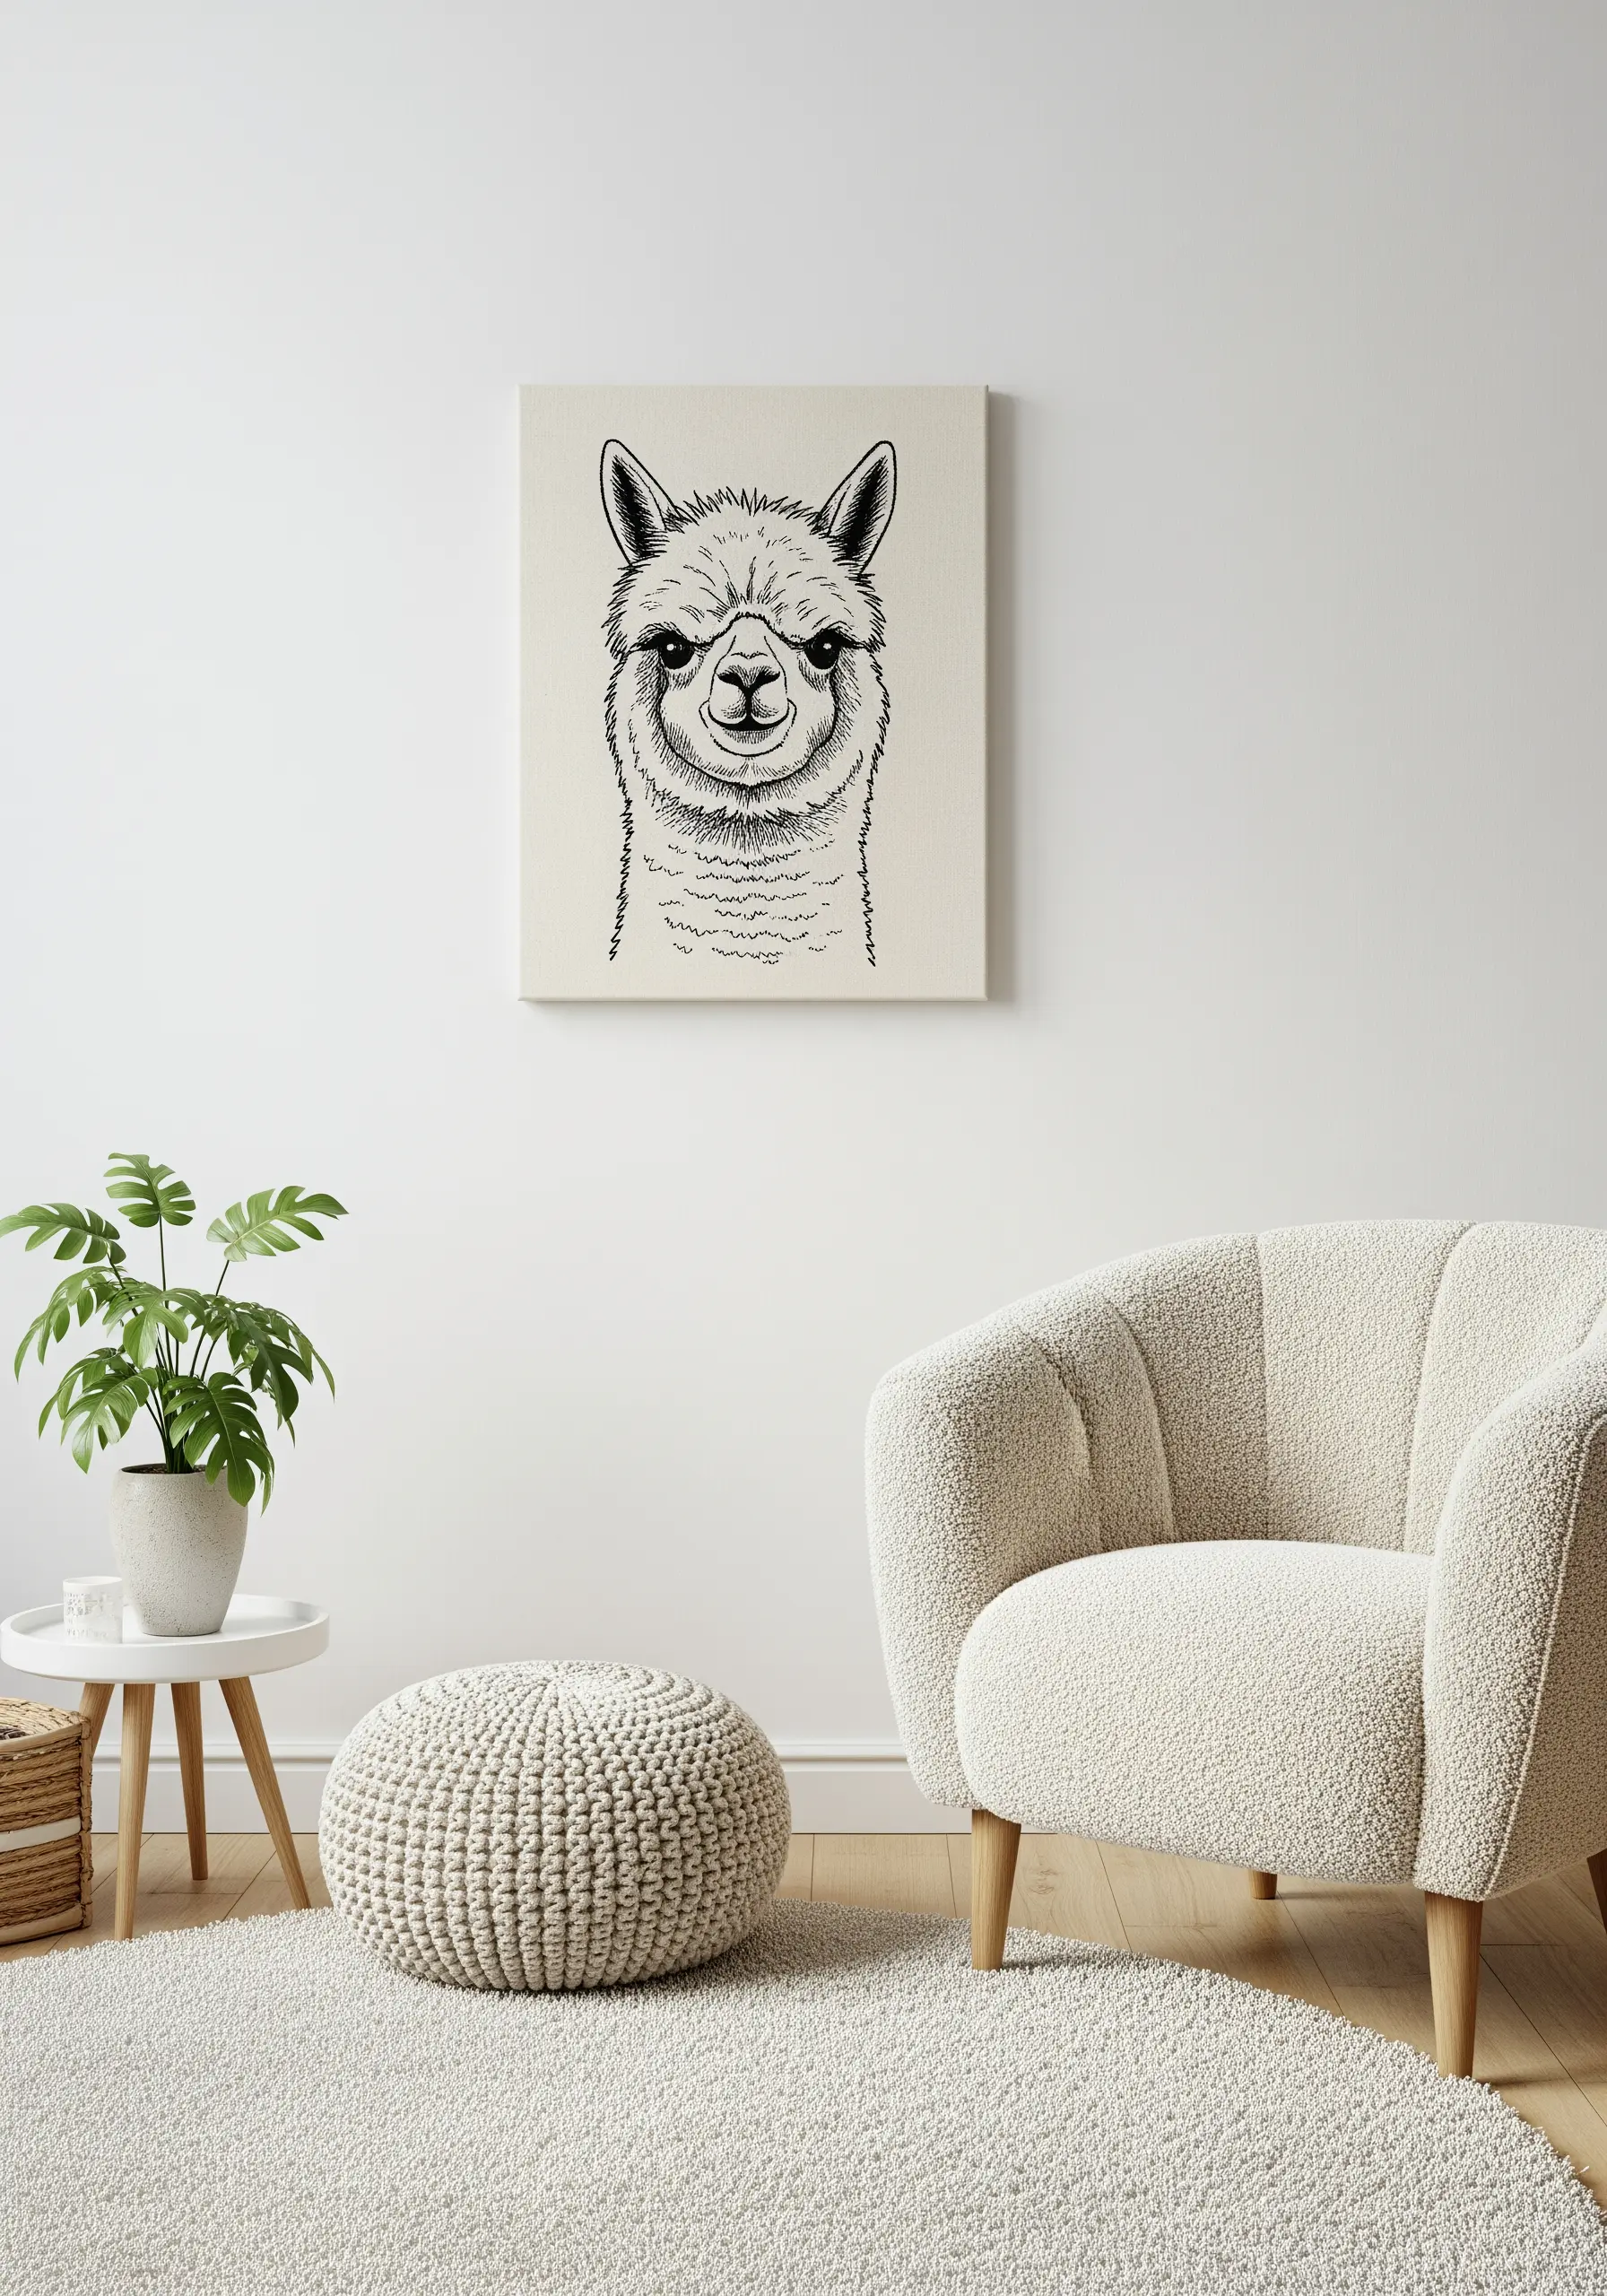
Suggest the shaggy texture of a llama’s coat without filling the entire area by using short, directional straight stitches.
Vary the length and angle of your stitches, layering them slightly to mimic the way fur grows and clumps.
This technique is faster than using French knots and creates a more illustrative, sketch-like effect.
Focus the dense stitching around the face and neck to draw attention to the animal’s expression.
31. Layer Simple Stitches Over Bold Backgrounds
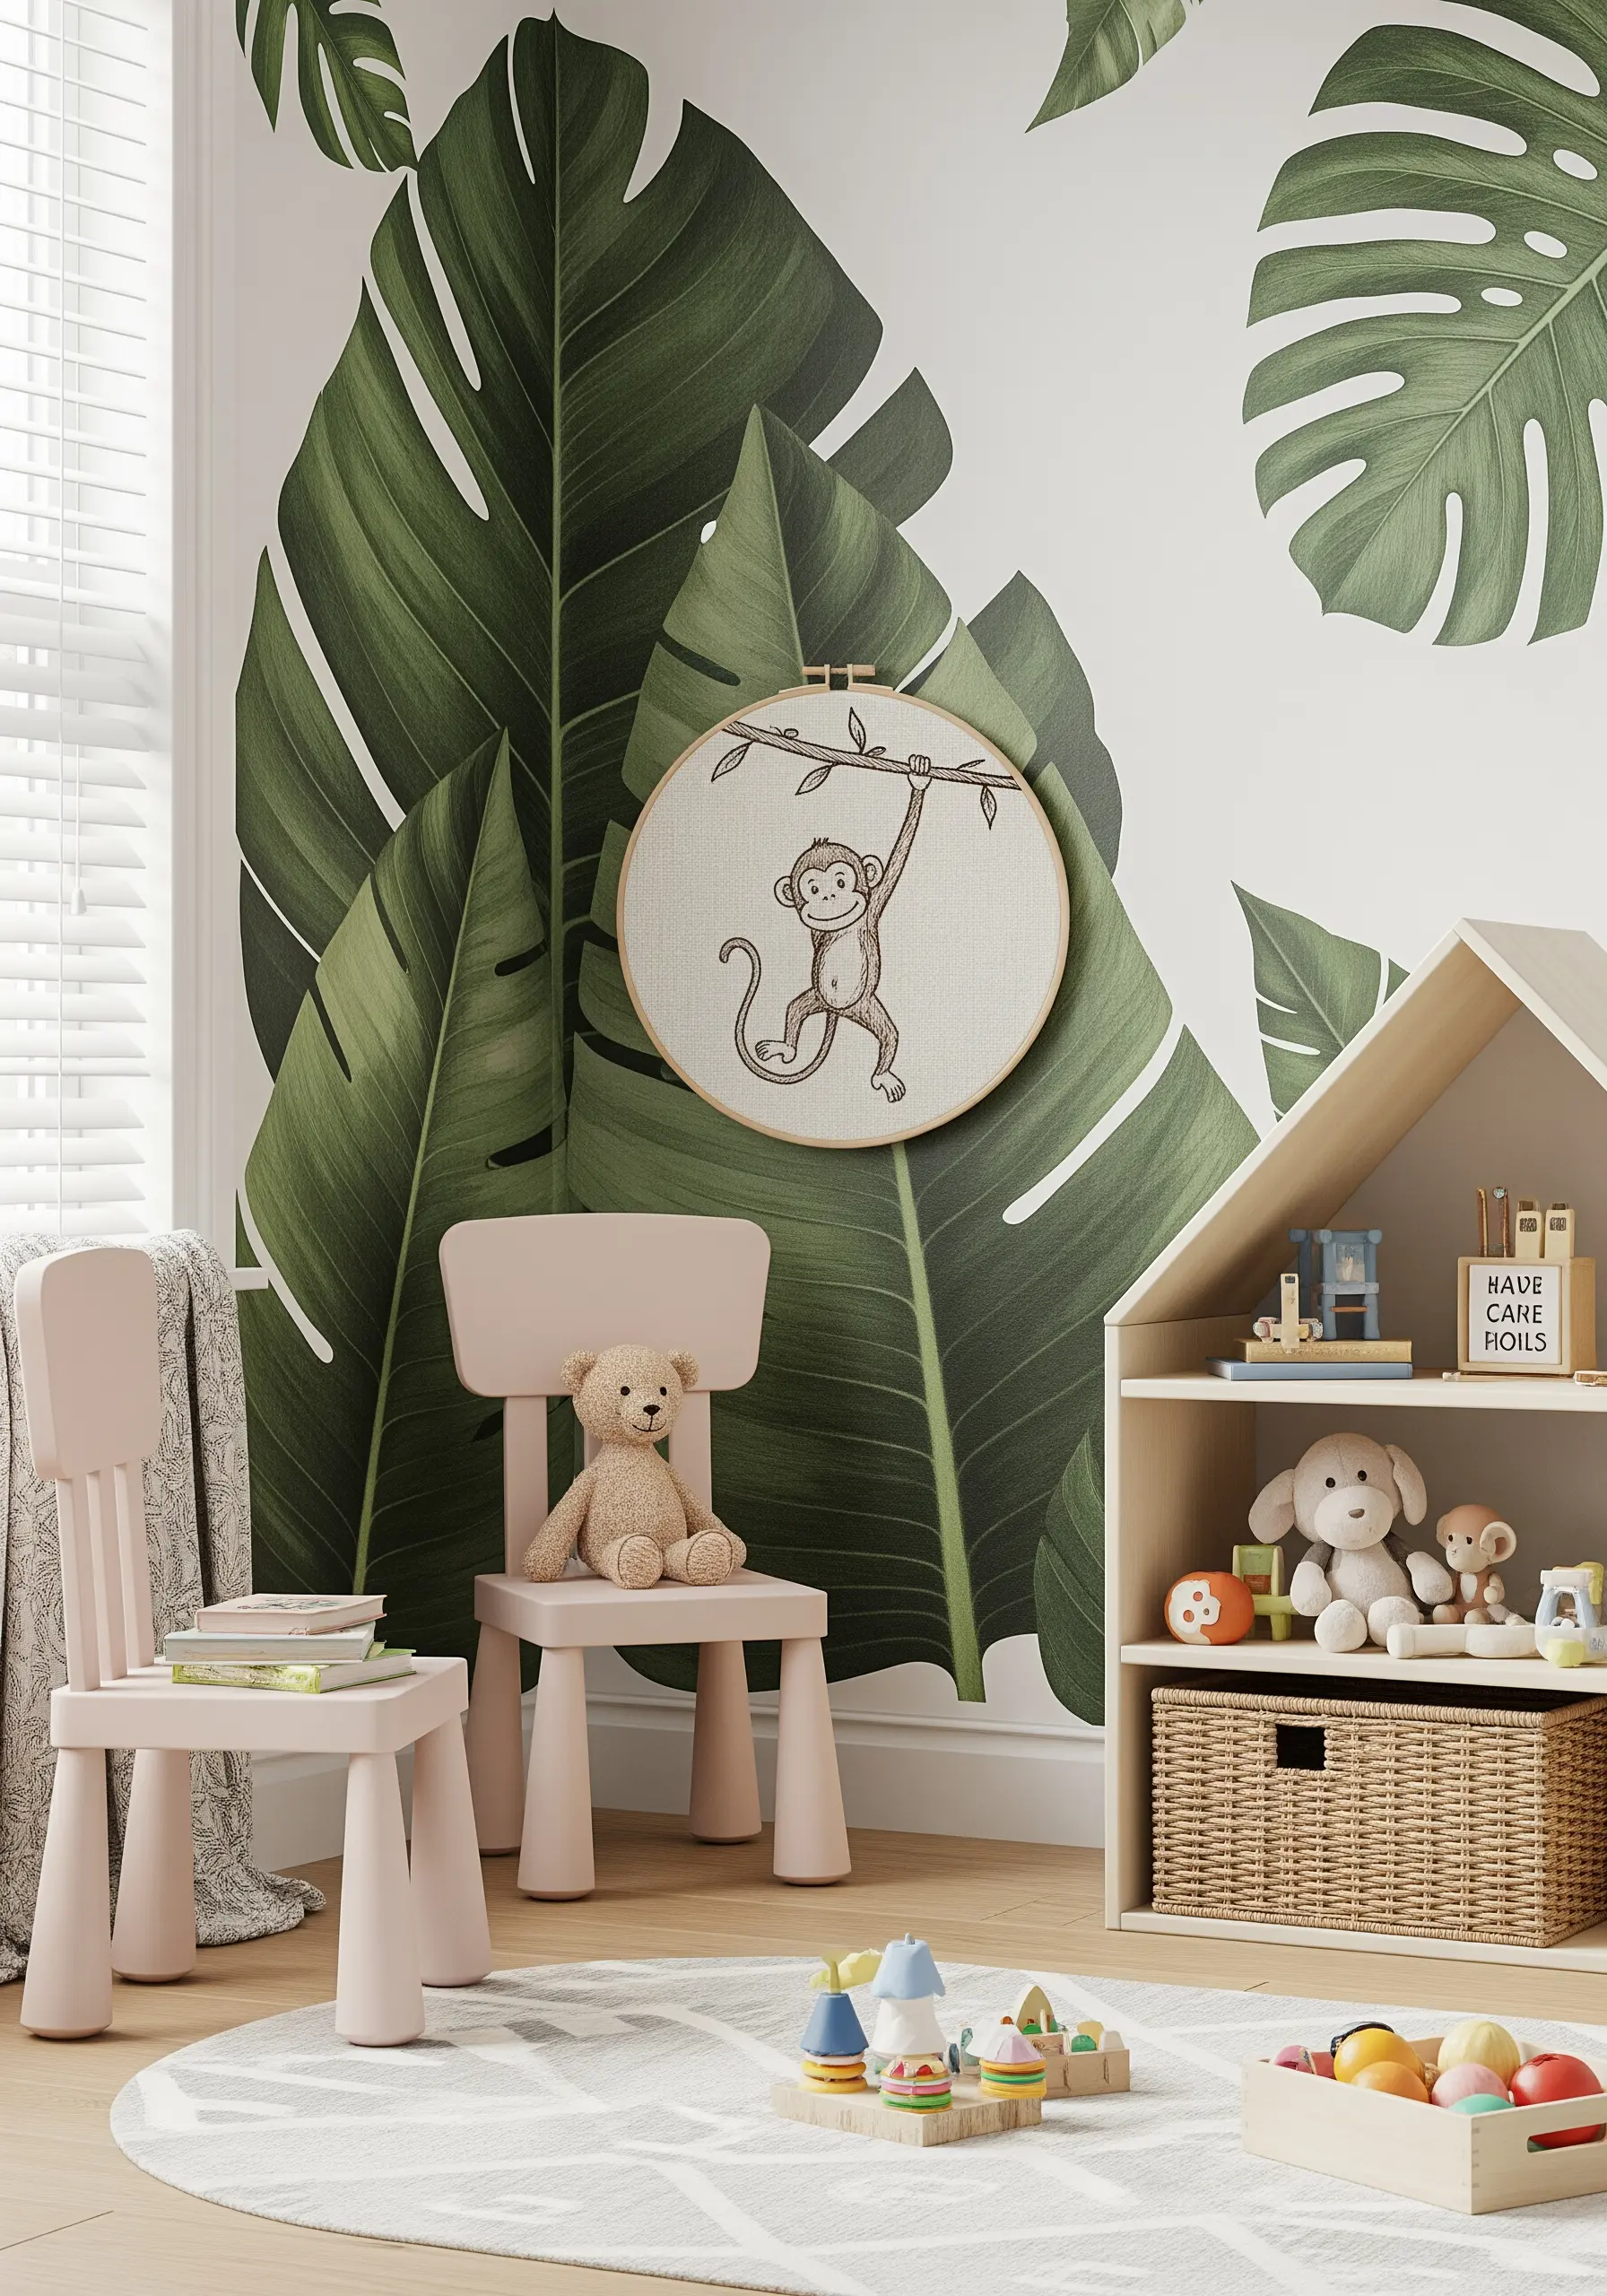
Create a dynamic, layered scene by placing a simple line-art embroidery in front of a bold, graphic wallpaper.
The simplicity of the stitched monkey, done in a single brown thread, stands out beautifully against the oversized green leaves of the mural.
This technique integrates your embroidery into the room’s decor, making it feel like part of a larger, more immersive world.
32. Achieve Elegance with a Tone-on-Tone Palette
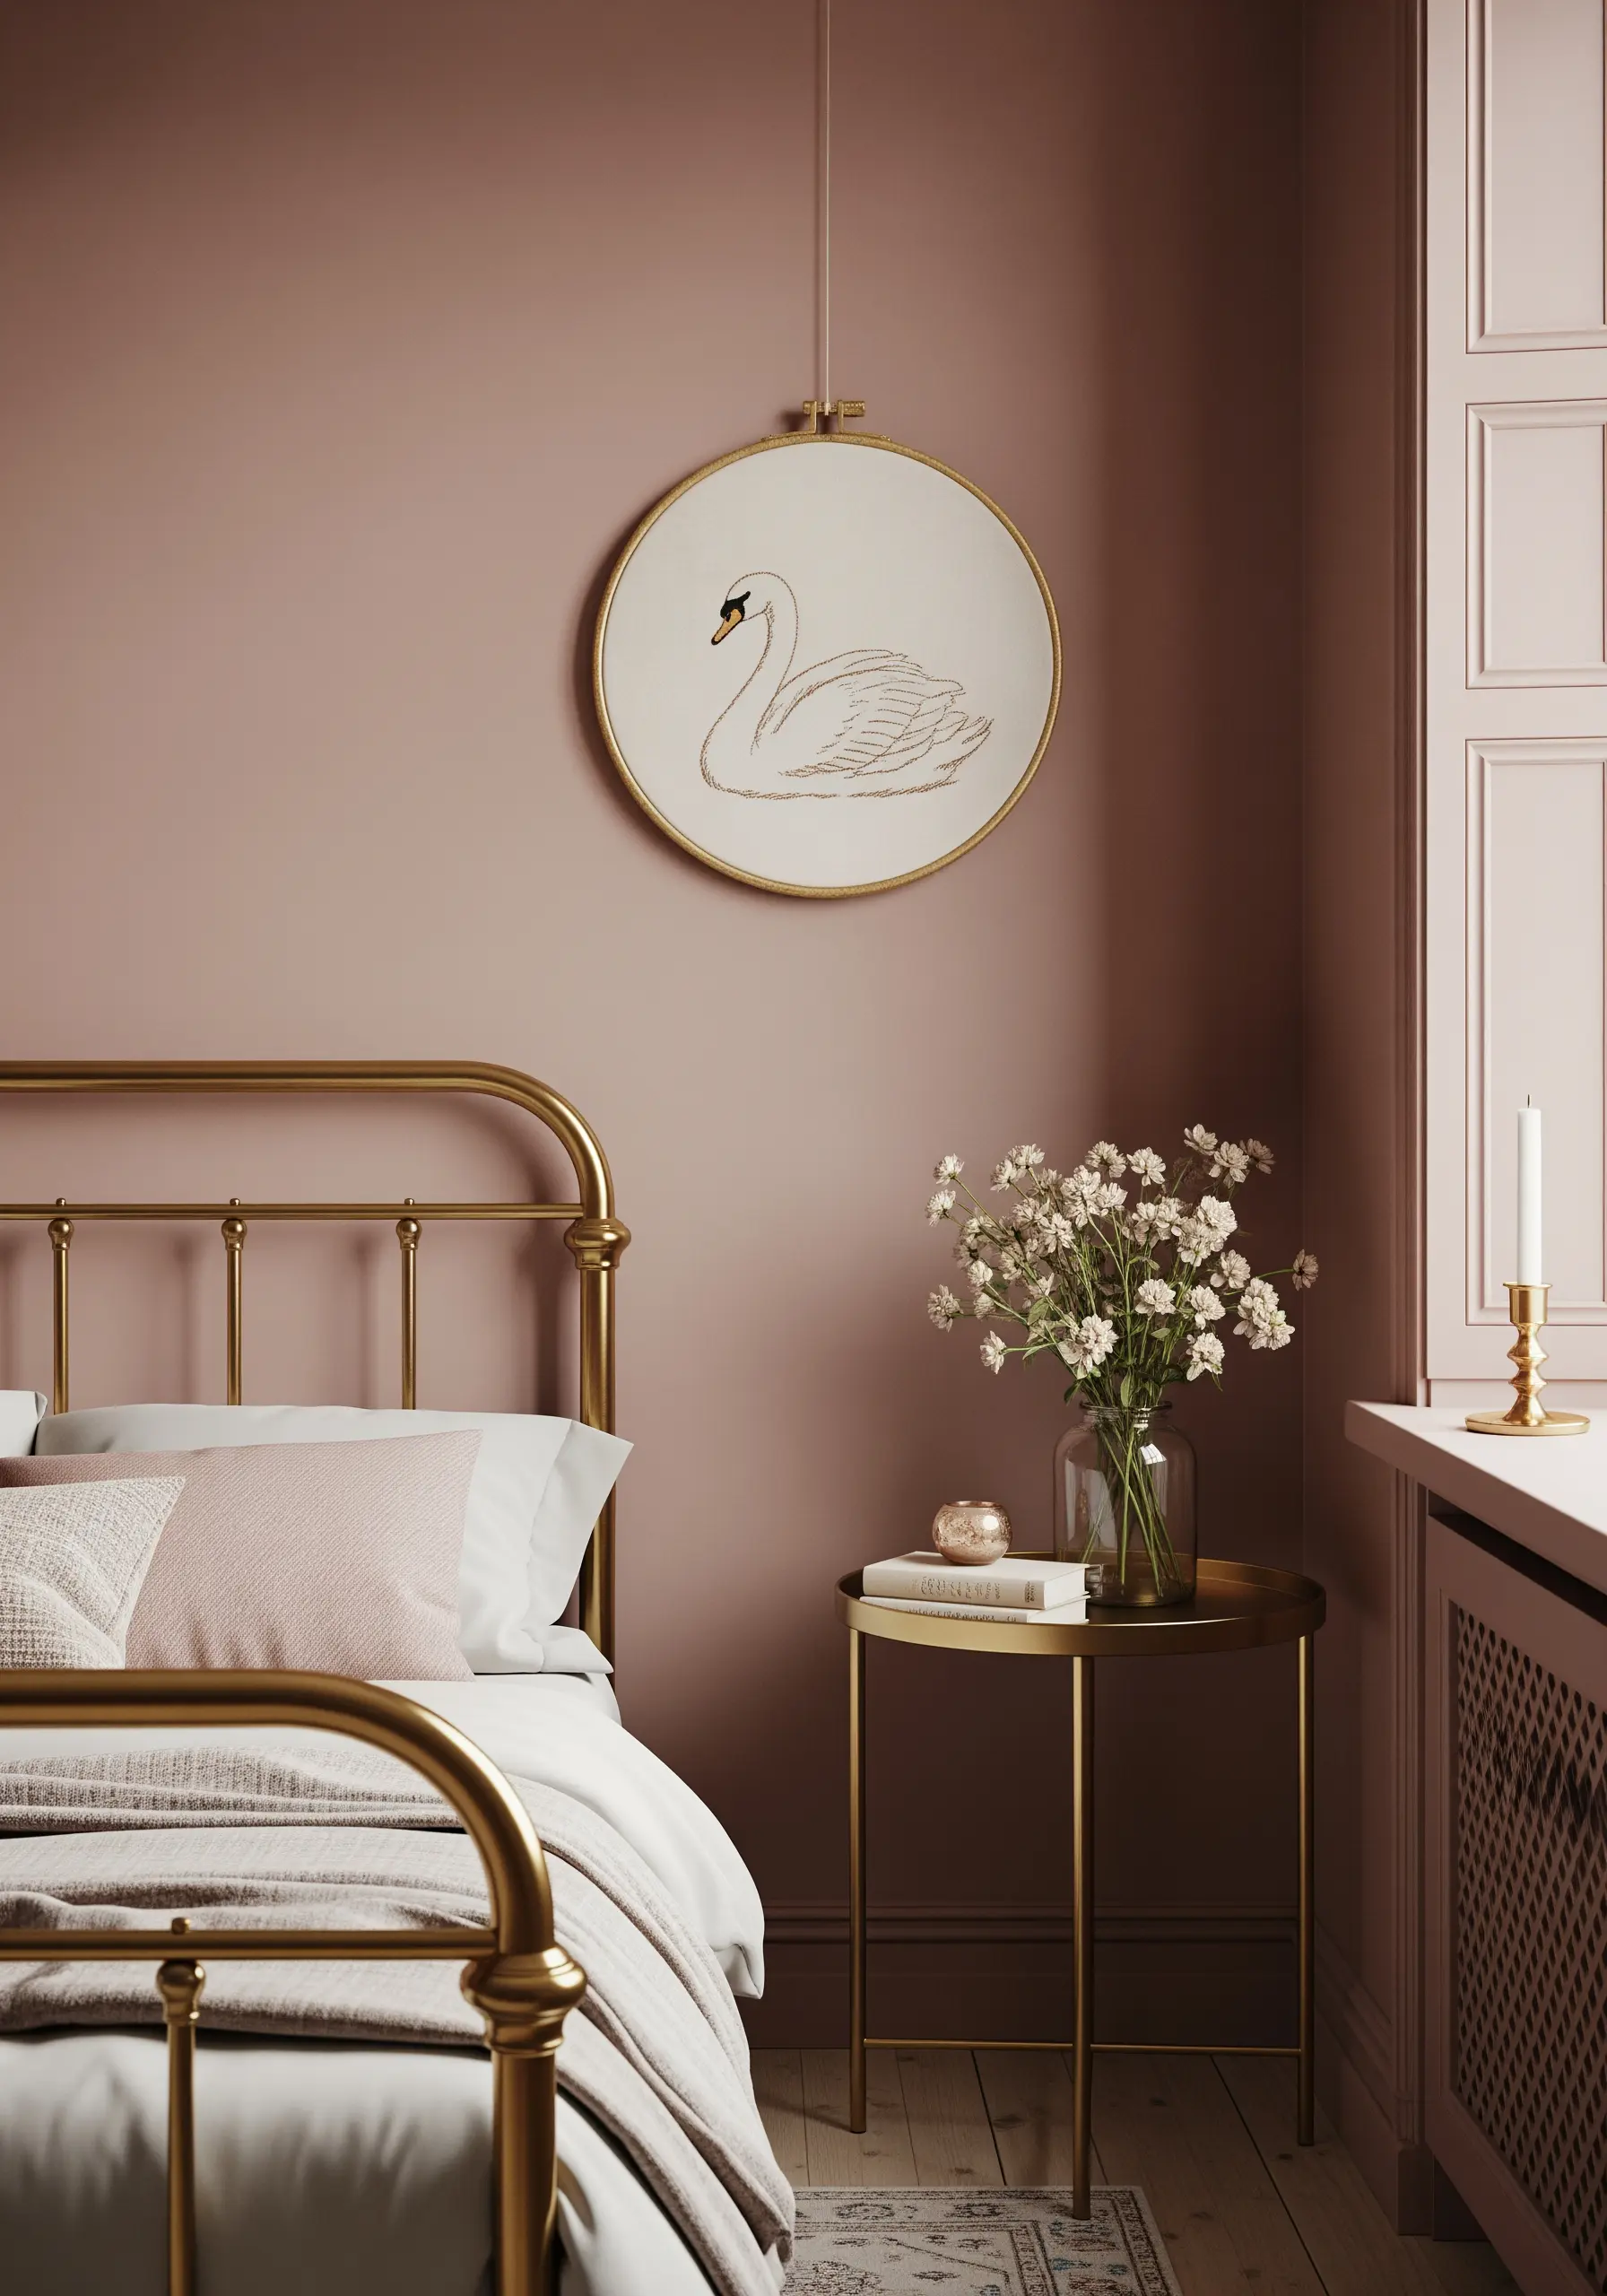
For a subtle, sophisticated look, stitch with thread that is only a shade or two different from your fabric.
Using an off-white thread on a cream fabric creates a swan that appears soft and ethereal, defined by texture rather than color.
Add a single, tiny highlight with a different color or a metallic thread—like the black eye and golden beak—to ground the design.
This tone-on-tone embroidery technique is pure, understated elegance.
33. Create a Secret World in a Tiny Nook
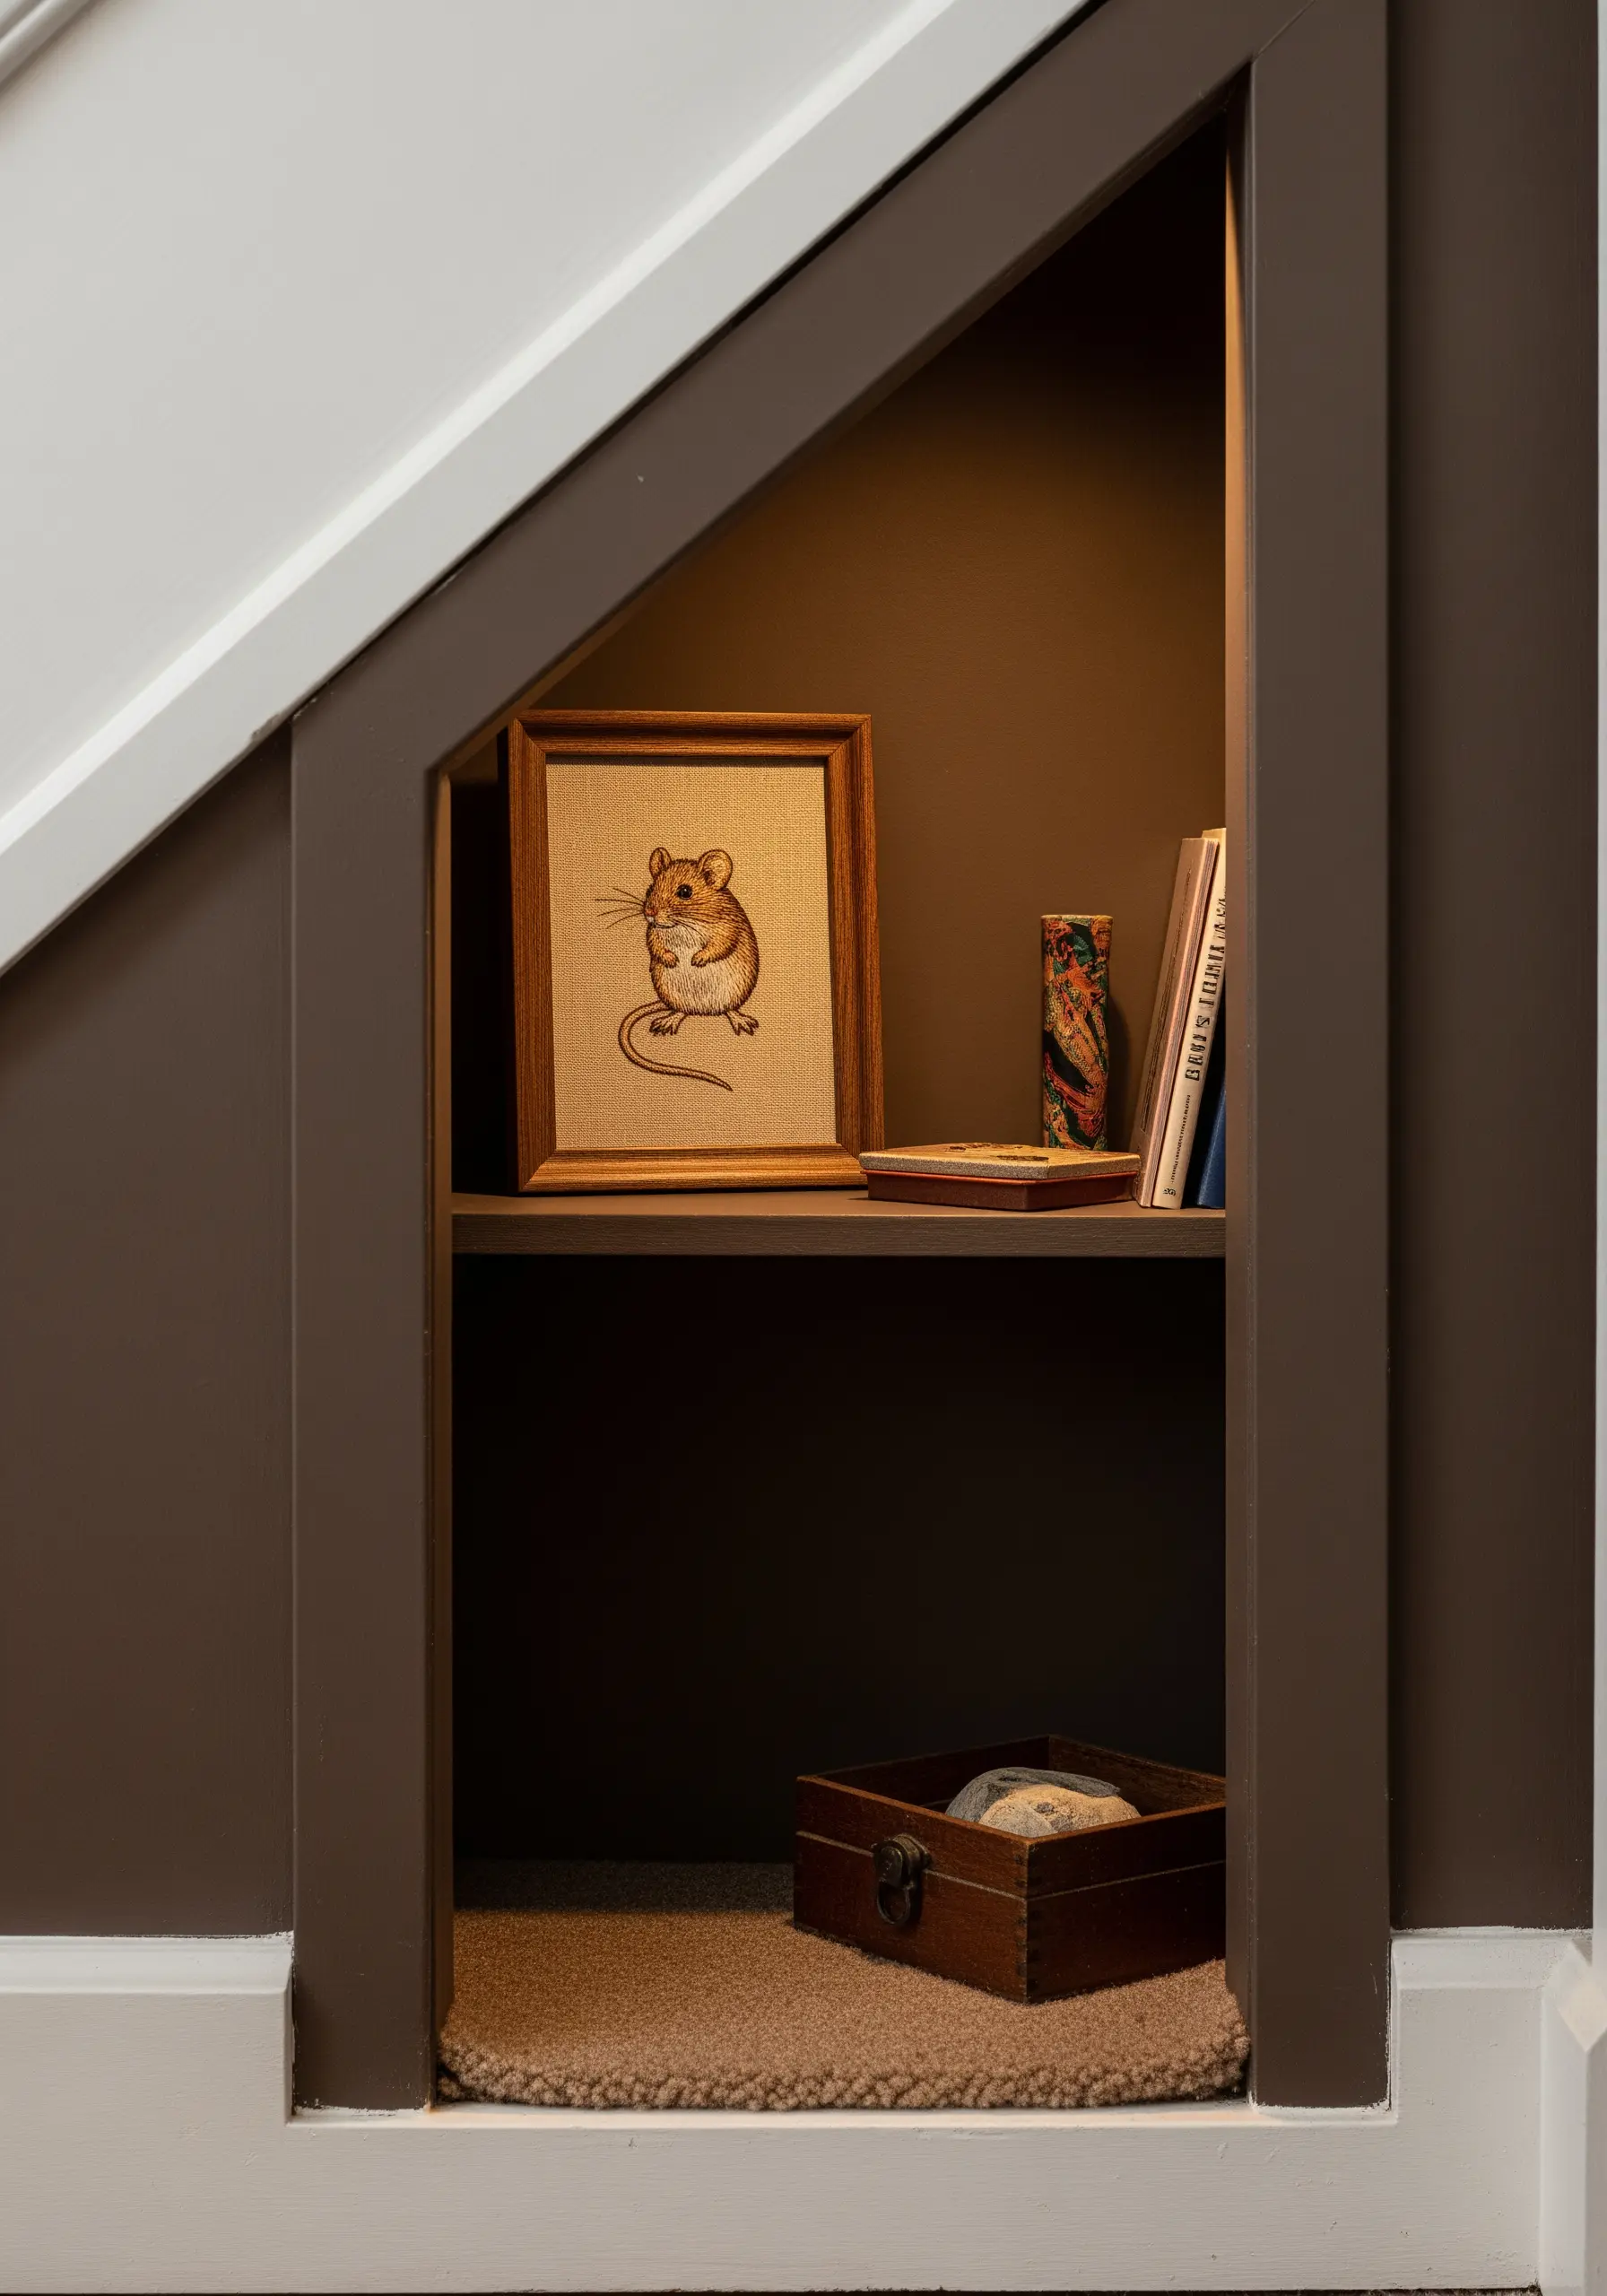
Delight and surprise by placing a tiny, framed embroidery in an unexpected place, like a built-in shelf or a nook under the stairs.
Choose a small, charming subject like a mouse to enhance the feeling that you’ve discovered a tiny creature’s hidden home.
A simple spotlight or the warm glow from a nearby lamp can turn this small detail into a magical focal point.
These tiny wall decor ideas add immense character.
34. Stitch a Design That Comes Alive at Night
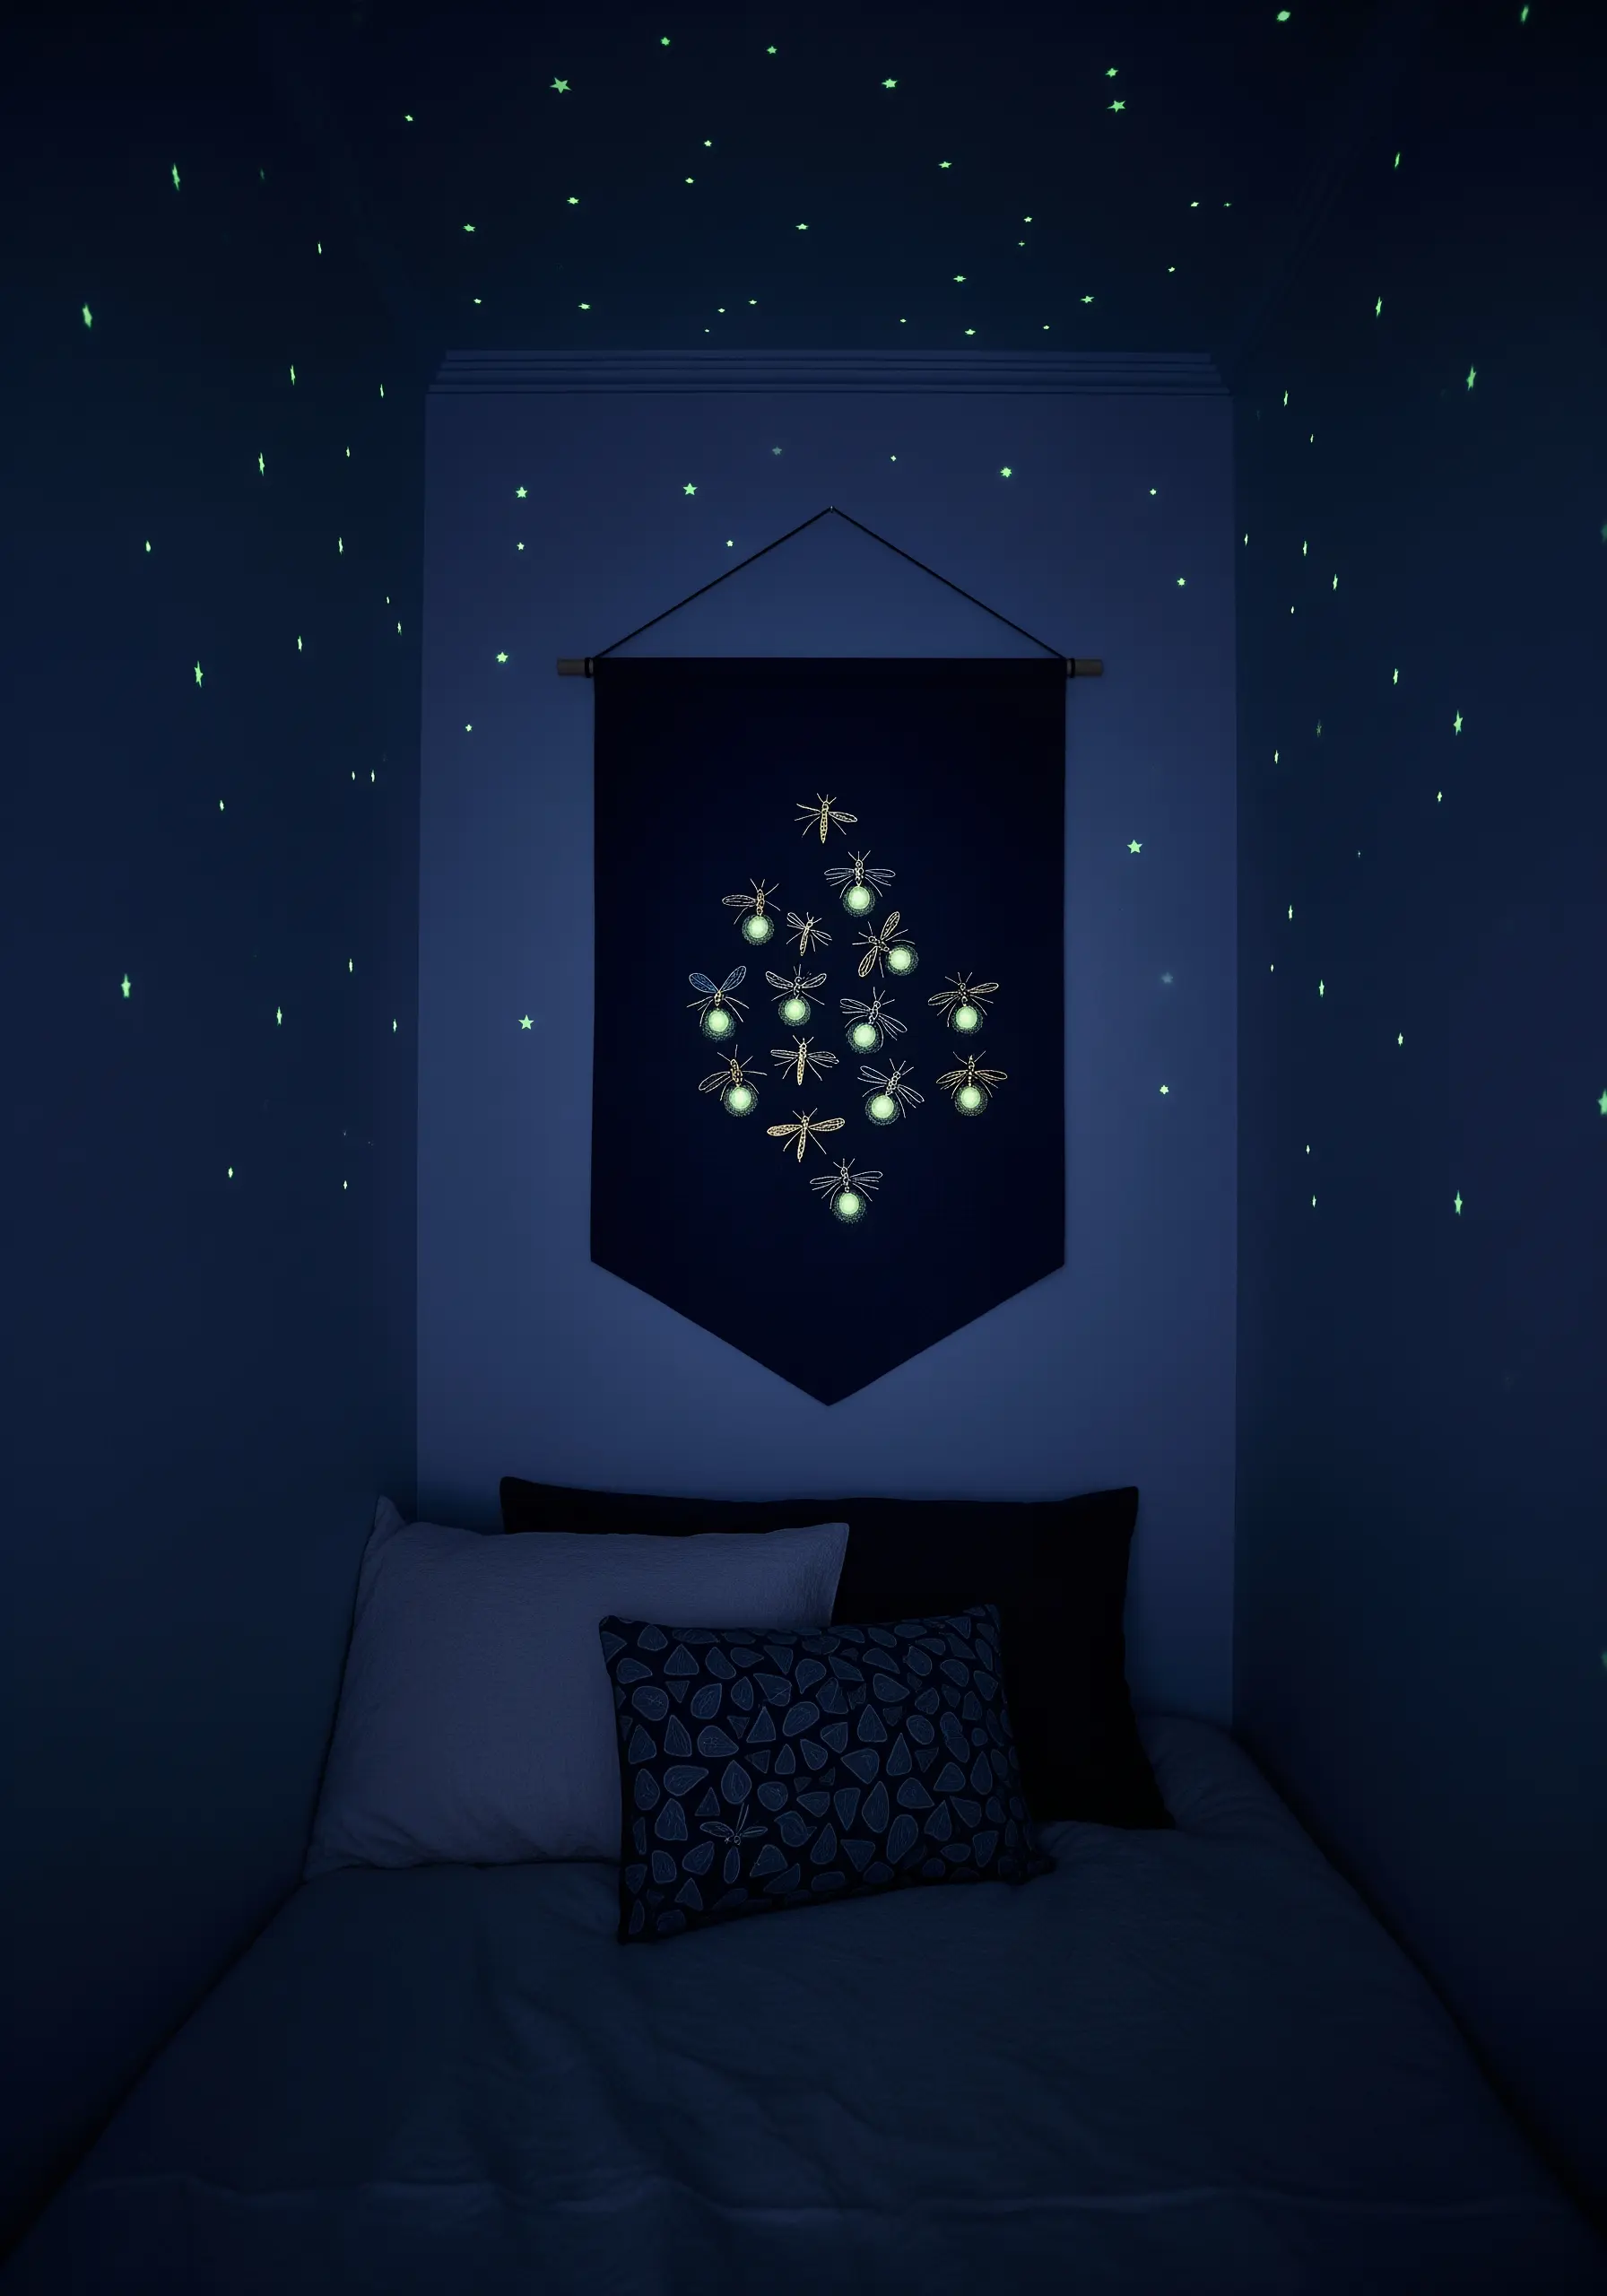
Create a magical bedtime surprise by using glow-in-the-dark embroidery floss.
Use standard black or gray thread for the wings and outlines, but stitch the bodies of the fireflies with the specialty glowing thread.
During the day, it looks like a simple insect study. At night, the bodies light up, transforming the artwork completely.
This is a wonderfully interactive way to add a comforting, magical element to a child’s bedroom.


