
Perhaps you’ve found a quiet joy in pulling a needle and thread through fabric, but now you’re wondering how to make your work feel less like a hobby and more like art. You’re looking for that subtle shift—the one that turns a simple stitch into something with presence and personality.
The secret isn’t in mastering hundreds of complex stitches or buying expensive supplies. It’s in the small, intentional choices you make: the direction of a single satin stitch, the pairing of a smooth thread with a textured bead, or the courage to stitch on paper instead of linen.
Here, you won’t find fleeting trends. Instead, you’ll discover thoughtful techniques and artistic ideas designed to fit into the small corners of your home and life. These are tiny crafts, yes, but they carry the weight of intention, ready to add a quiet layer of beauty to your everyday surroundings.
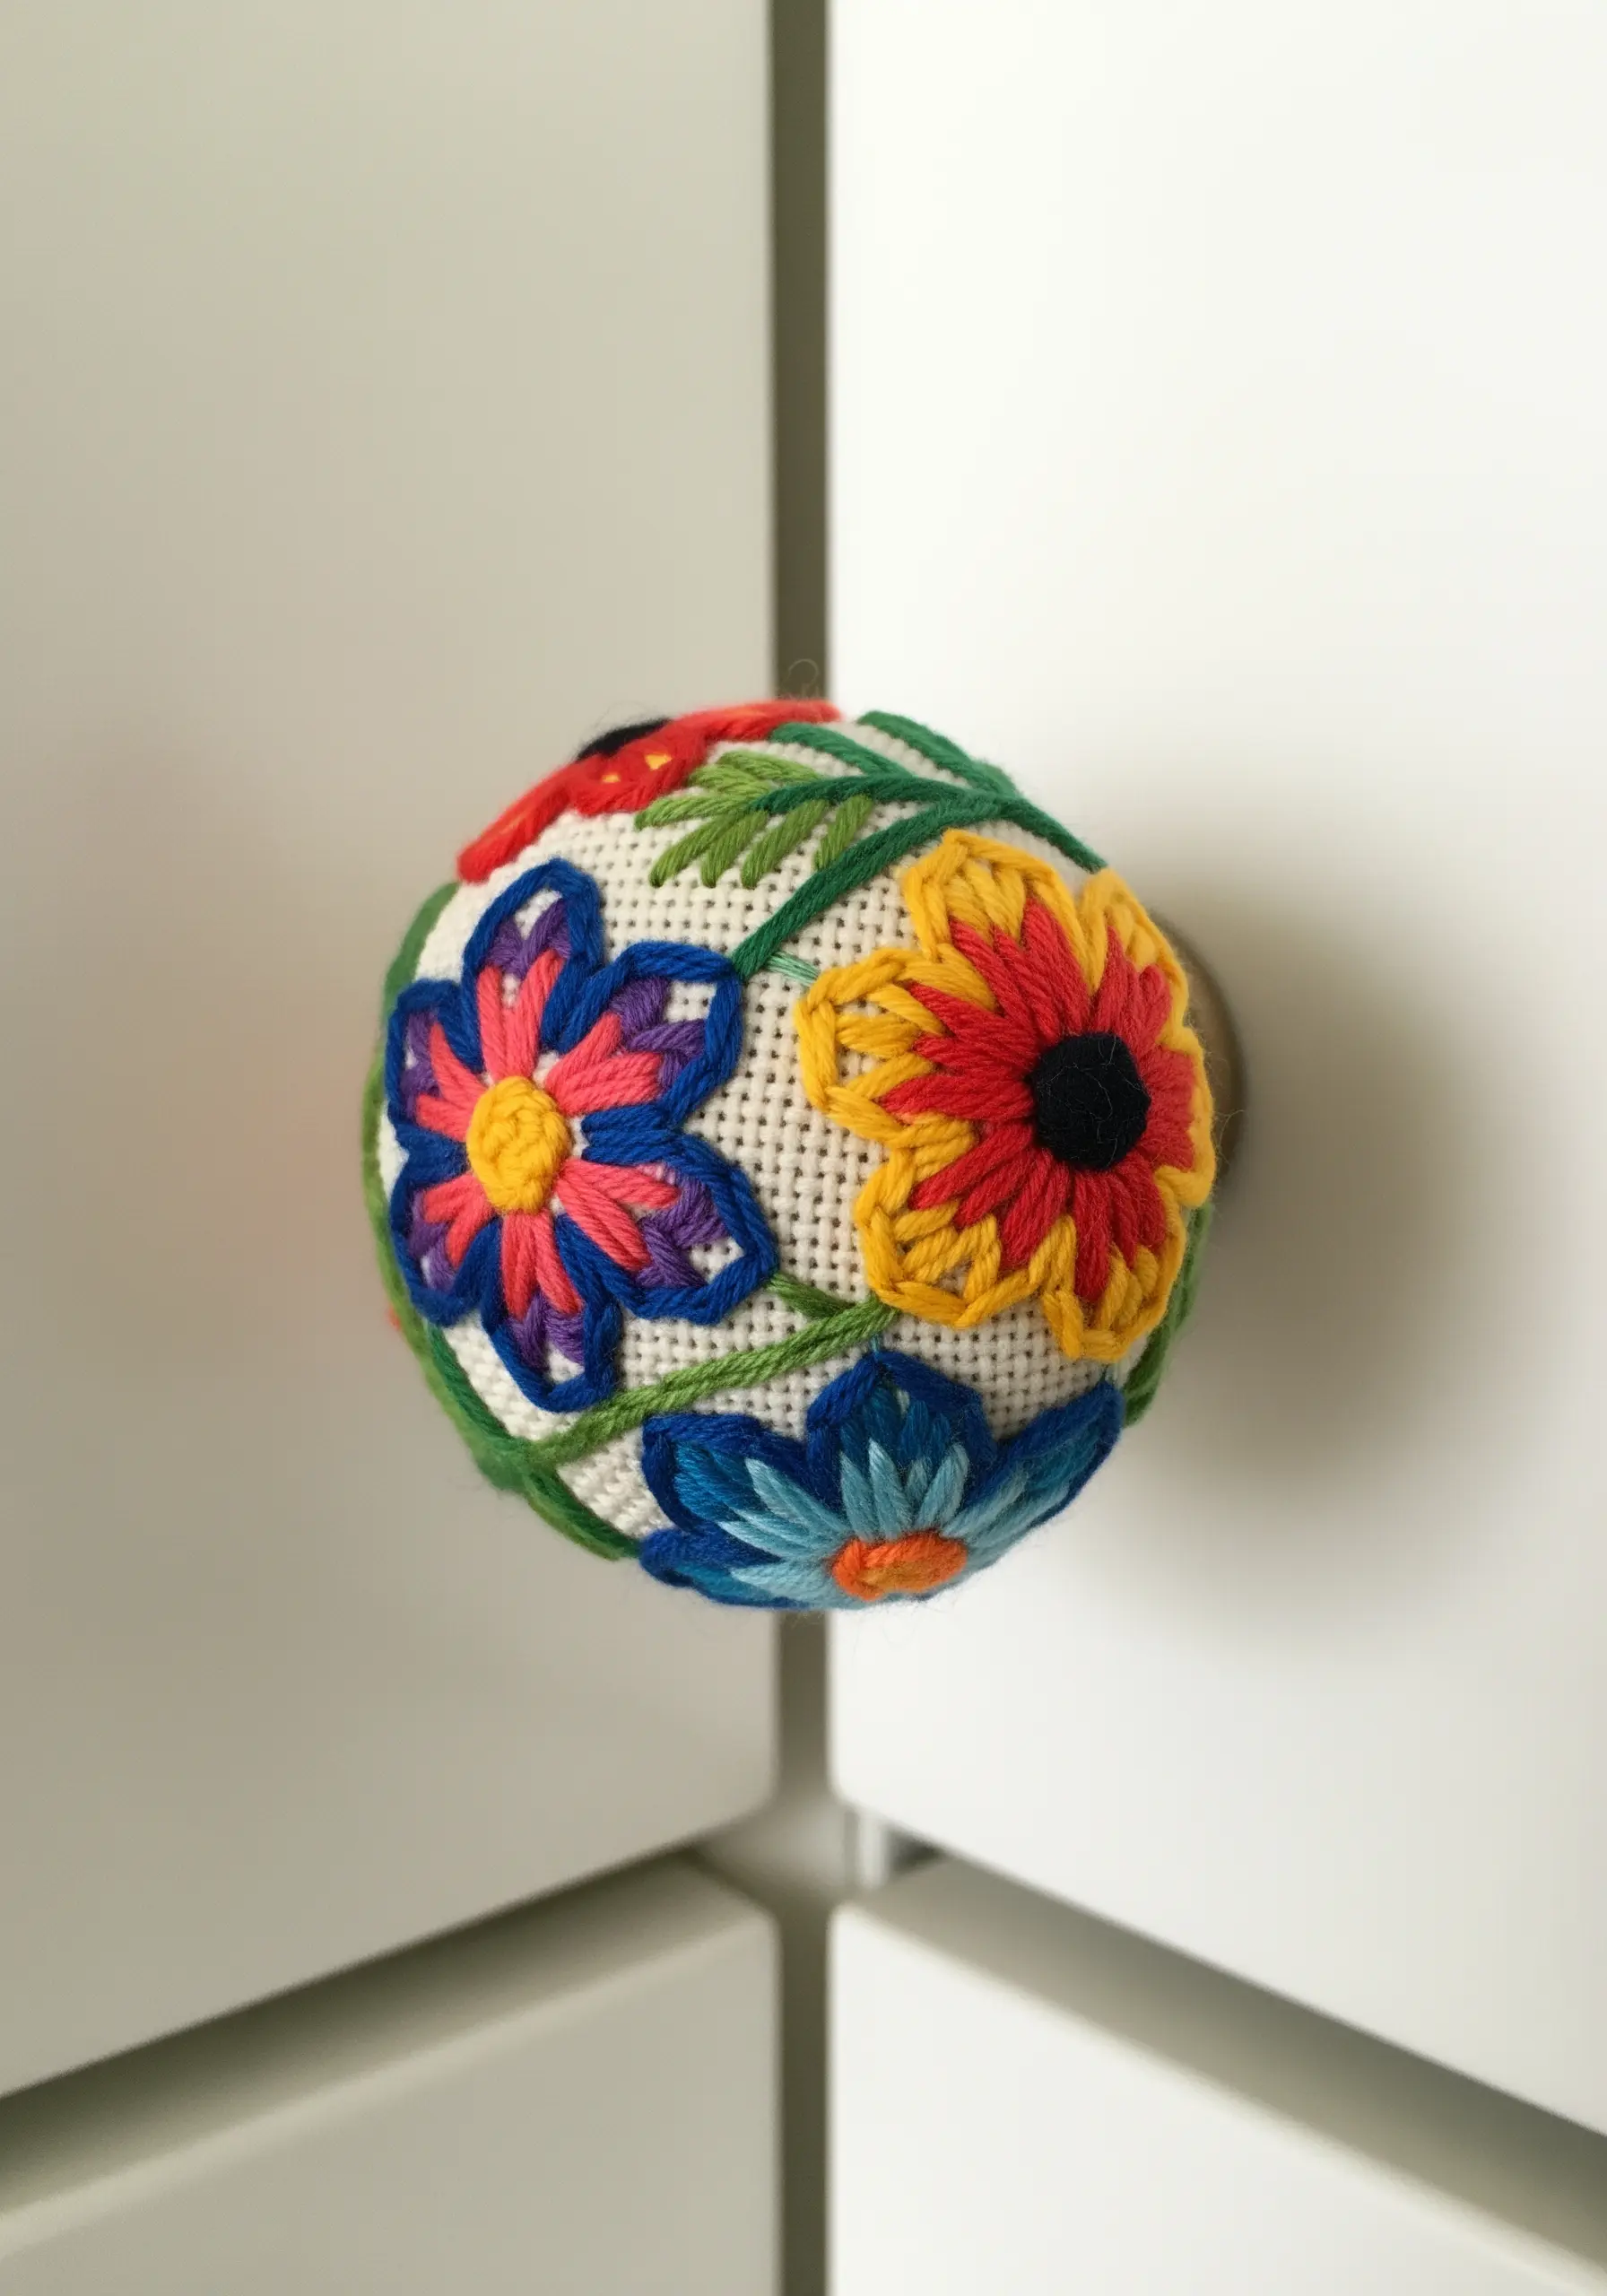
1. Create Directional Fur Texture
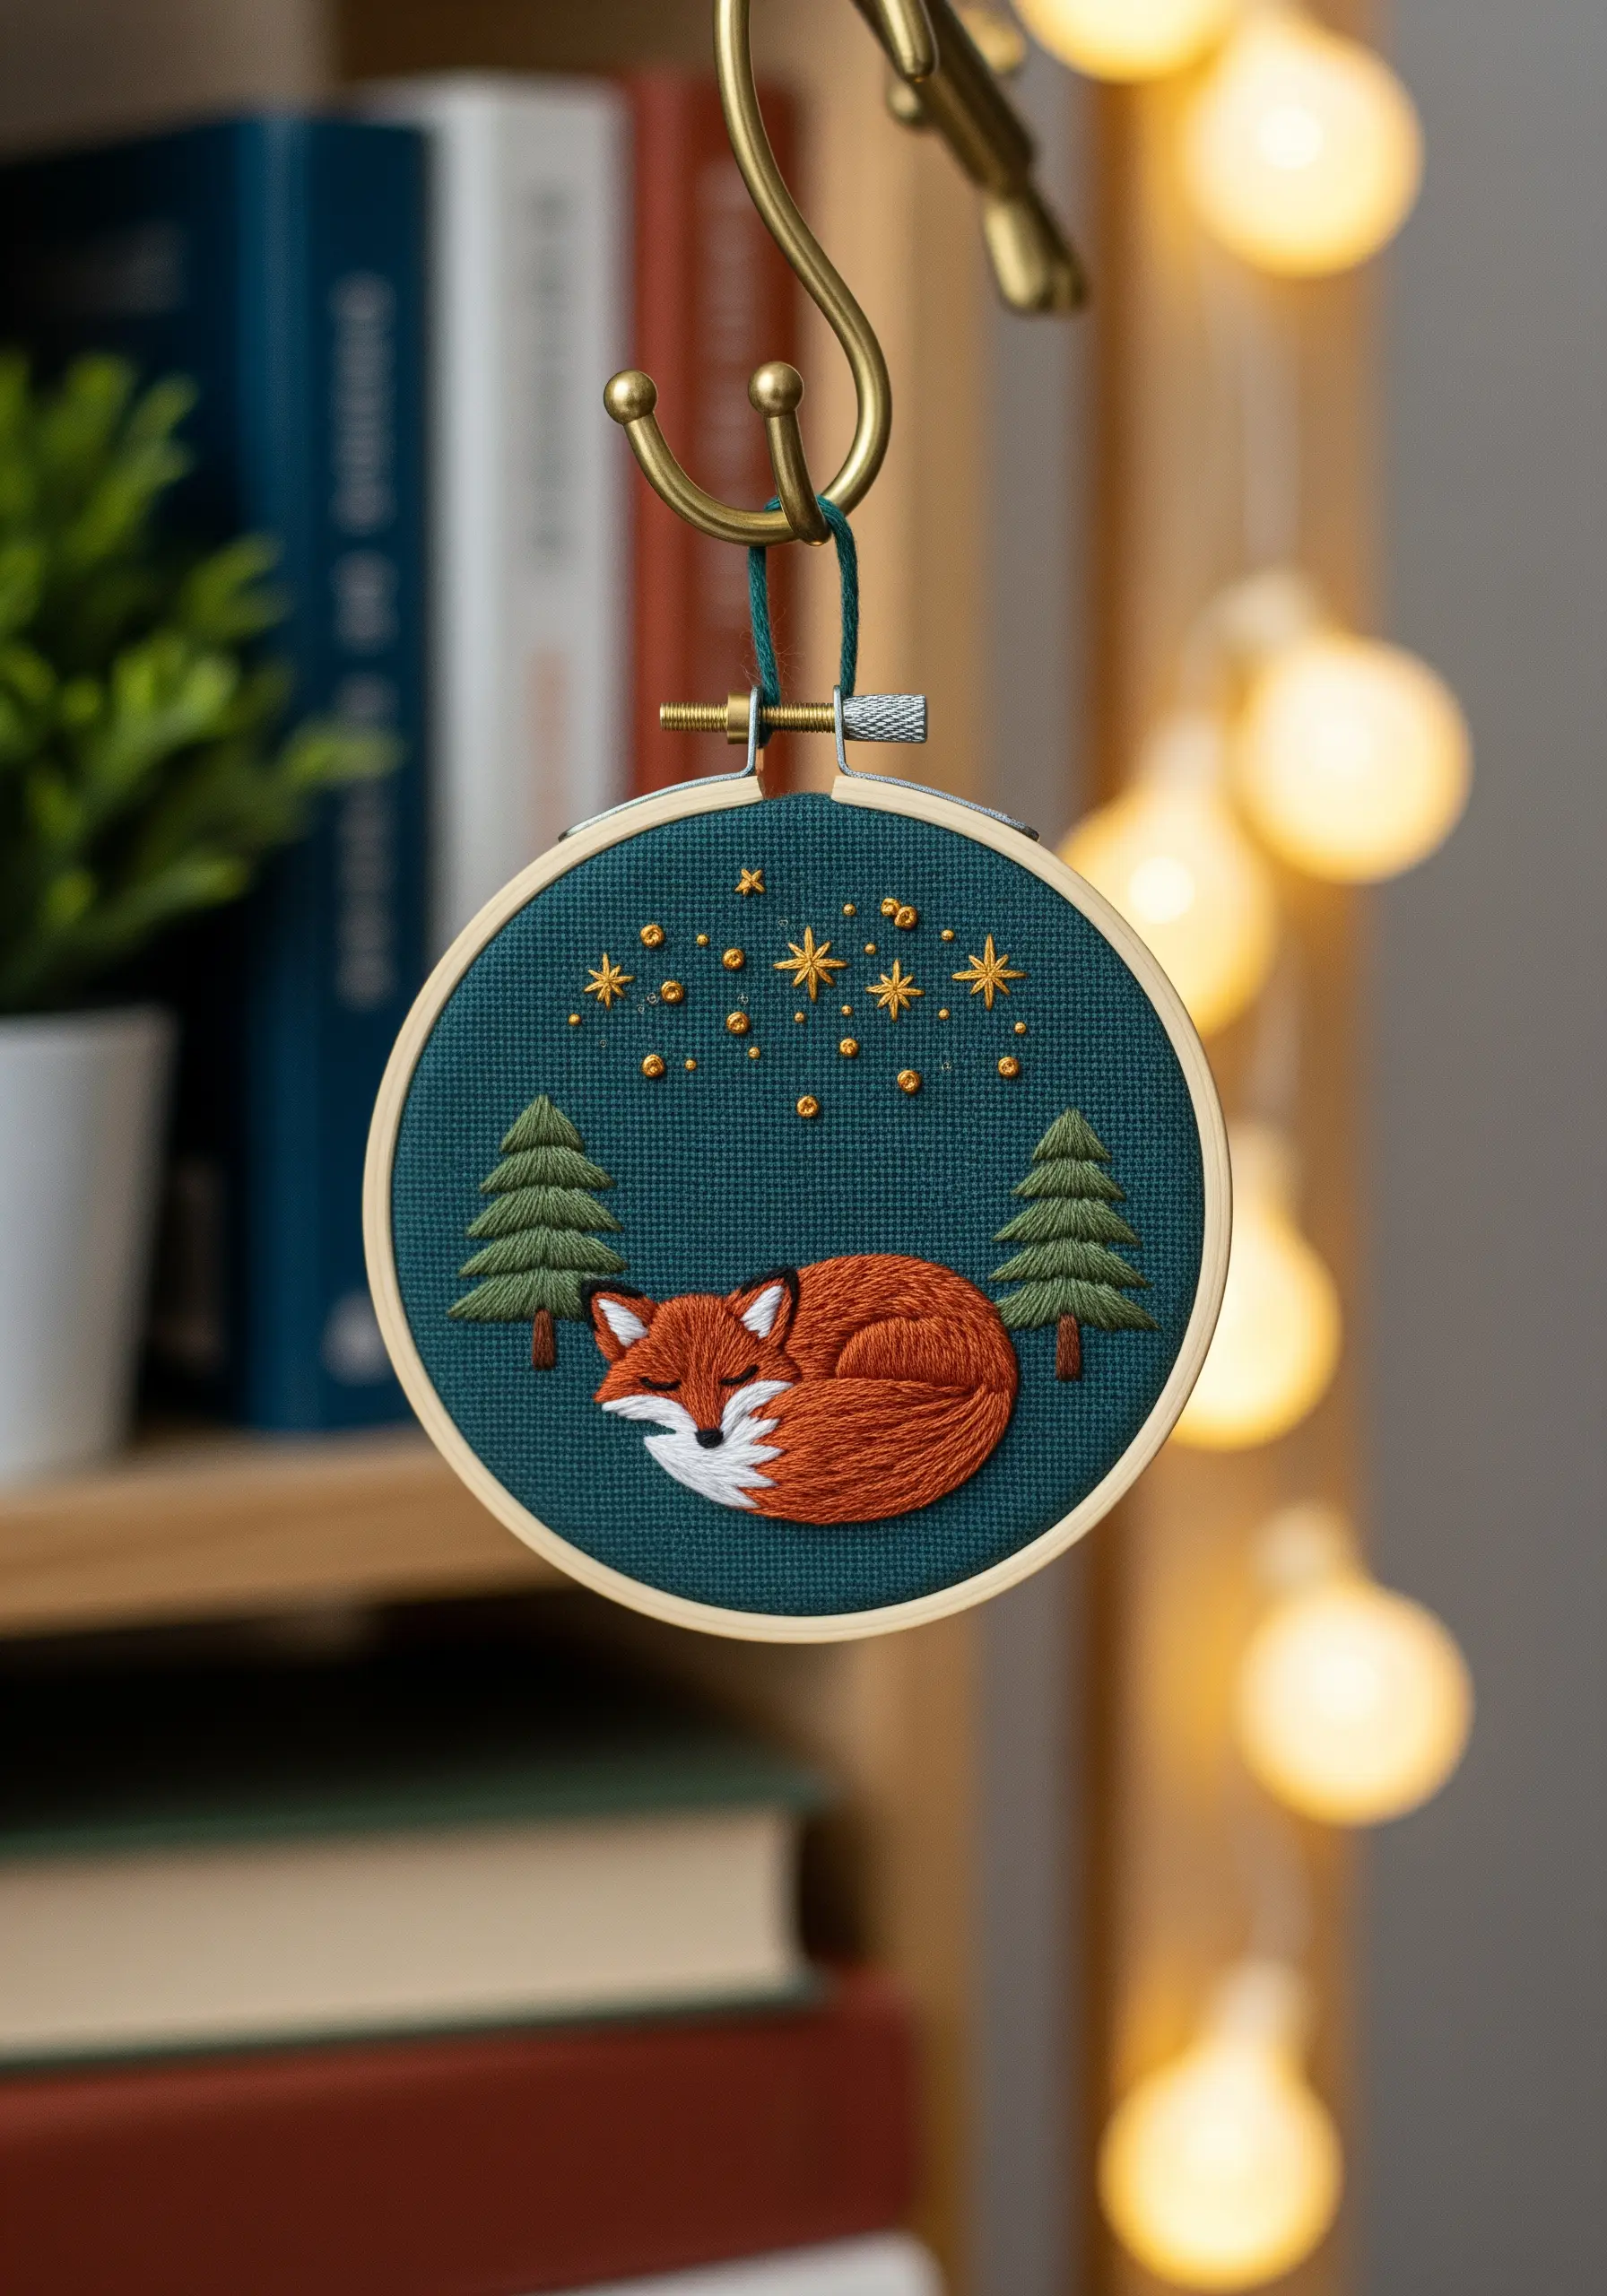
To give an animal motif a soft, realistic dimension, use long-and-short stitch instead of basic satin stitch.
Vary the direction of your stitches to follow the natural flow of fur—for instance, curving around the tail and radiating from the nose.
Use all six strands of cotton floss for a plush, high-coverage finish that looks and feels luxurious.
For the starry sky, use a single strand of gold metallic thread for the straight stitches and two strands for the French knots to make them pop against the dark fabric.
This technique elevates simple adorable forest animal embroidery ideas into treasured ornaments.
2. Sculpt with Needle-Felted Wool
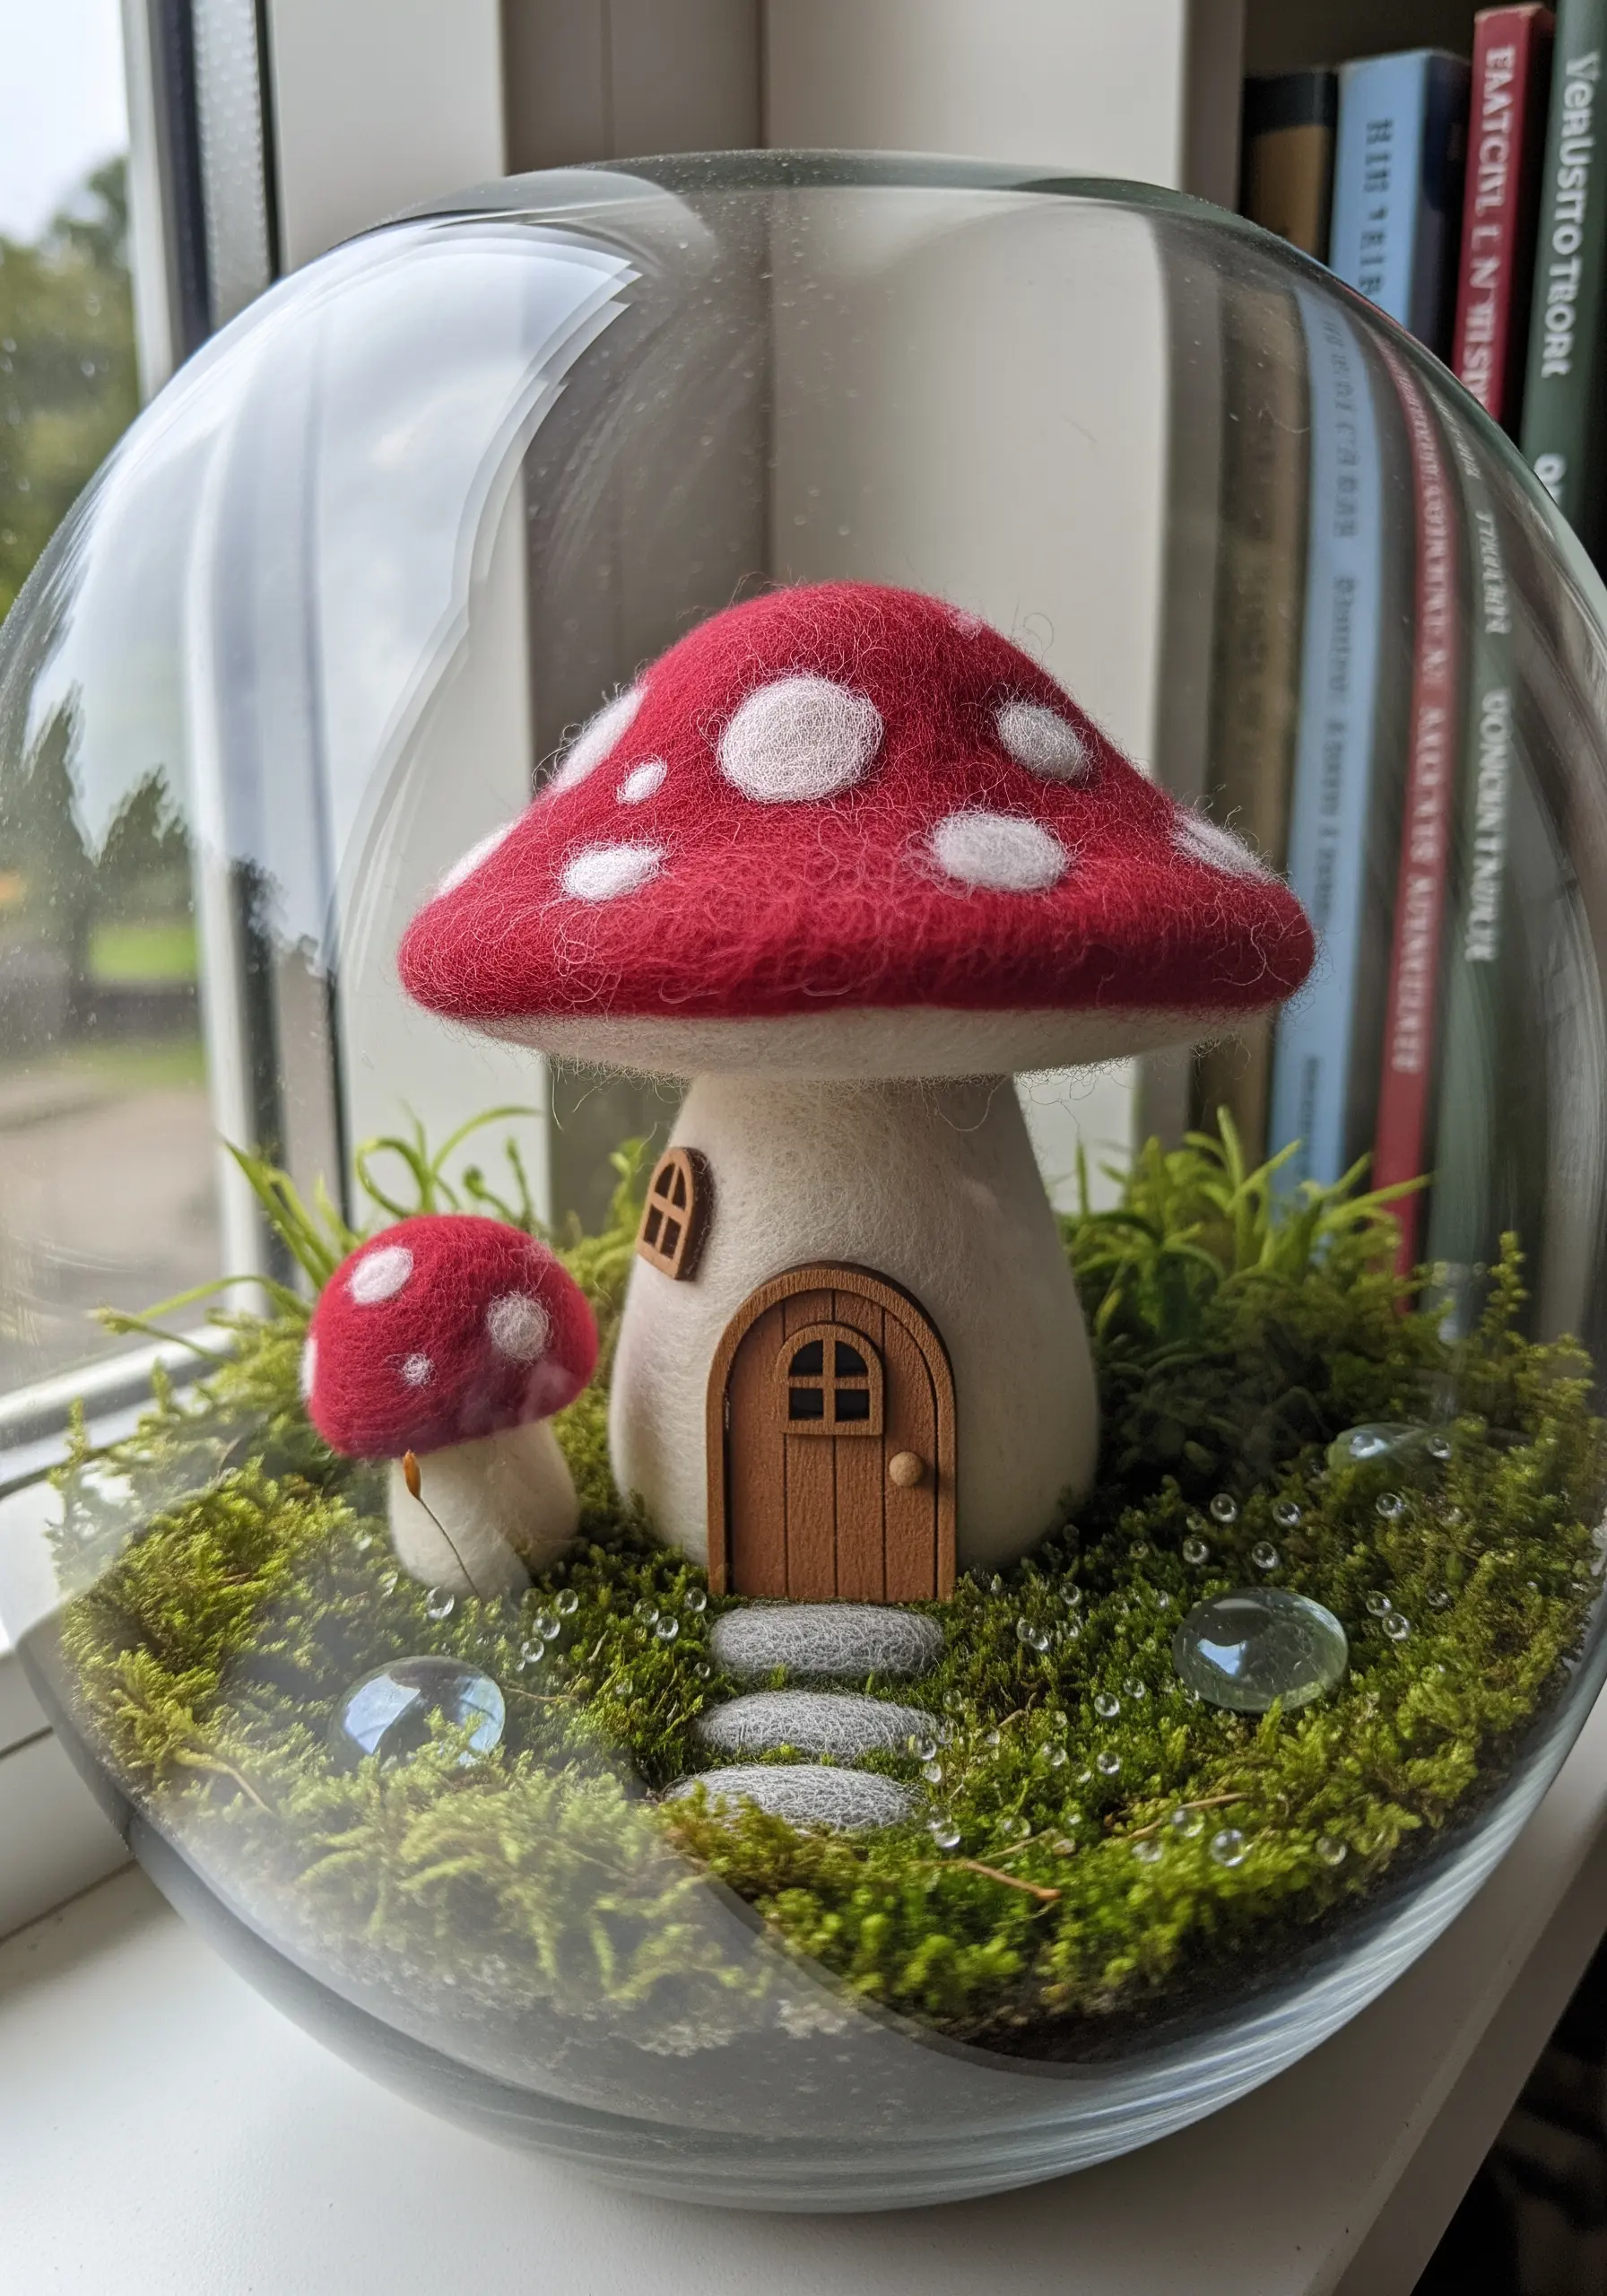
Introduce three-dimensional forms into your textile art by needle-felting wool roving directly onto a sturdy fabric base like felt or heavy linen.
You can create soft, sculptural shapes like mushrooms or stones that stand off the surface, offering a delightful contrast to flat embroidery.
First, lightly felt the primary shape, then add details by felting smaller pieces of colored wool on top.
This mixed-media approach allows you to build up volume and soft gradients in ways that thread alone cannot achieve, perfect for whimsical fabric collage embroidery scenes.
3. Master the Crisp Monogram
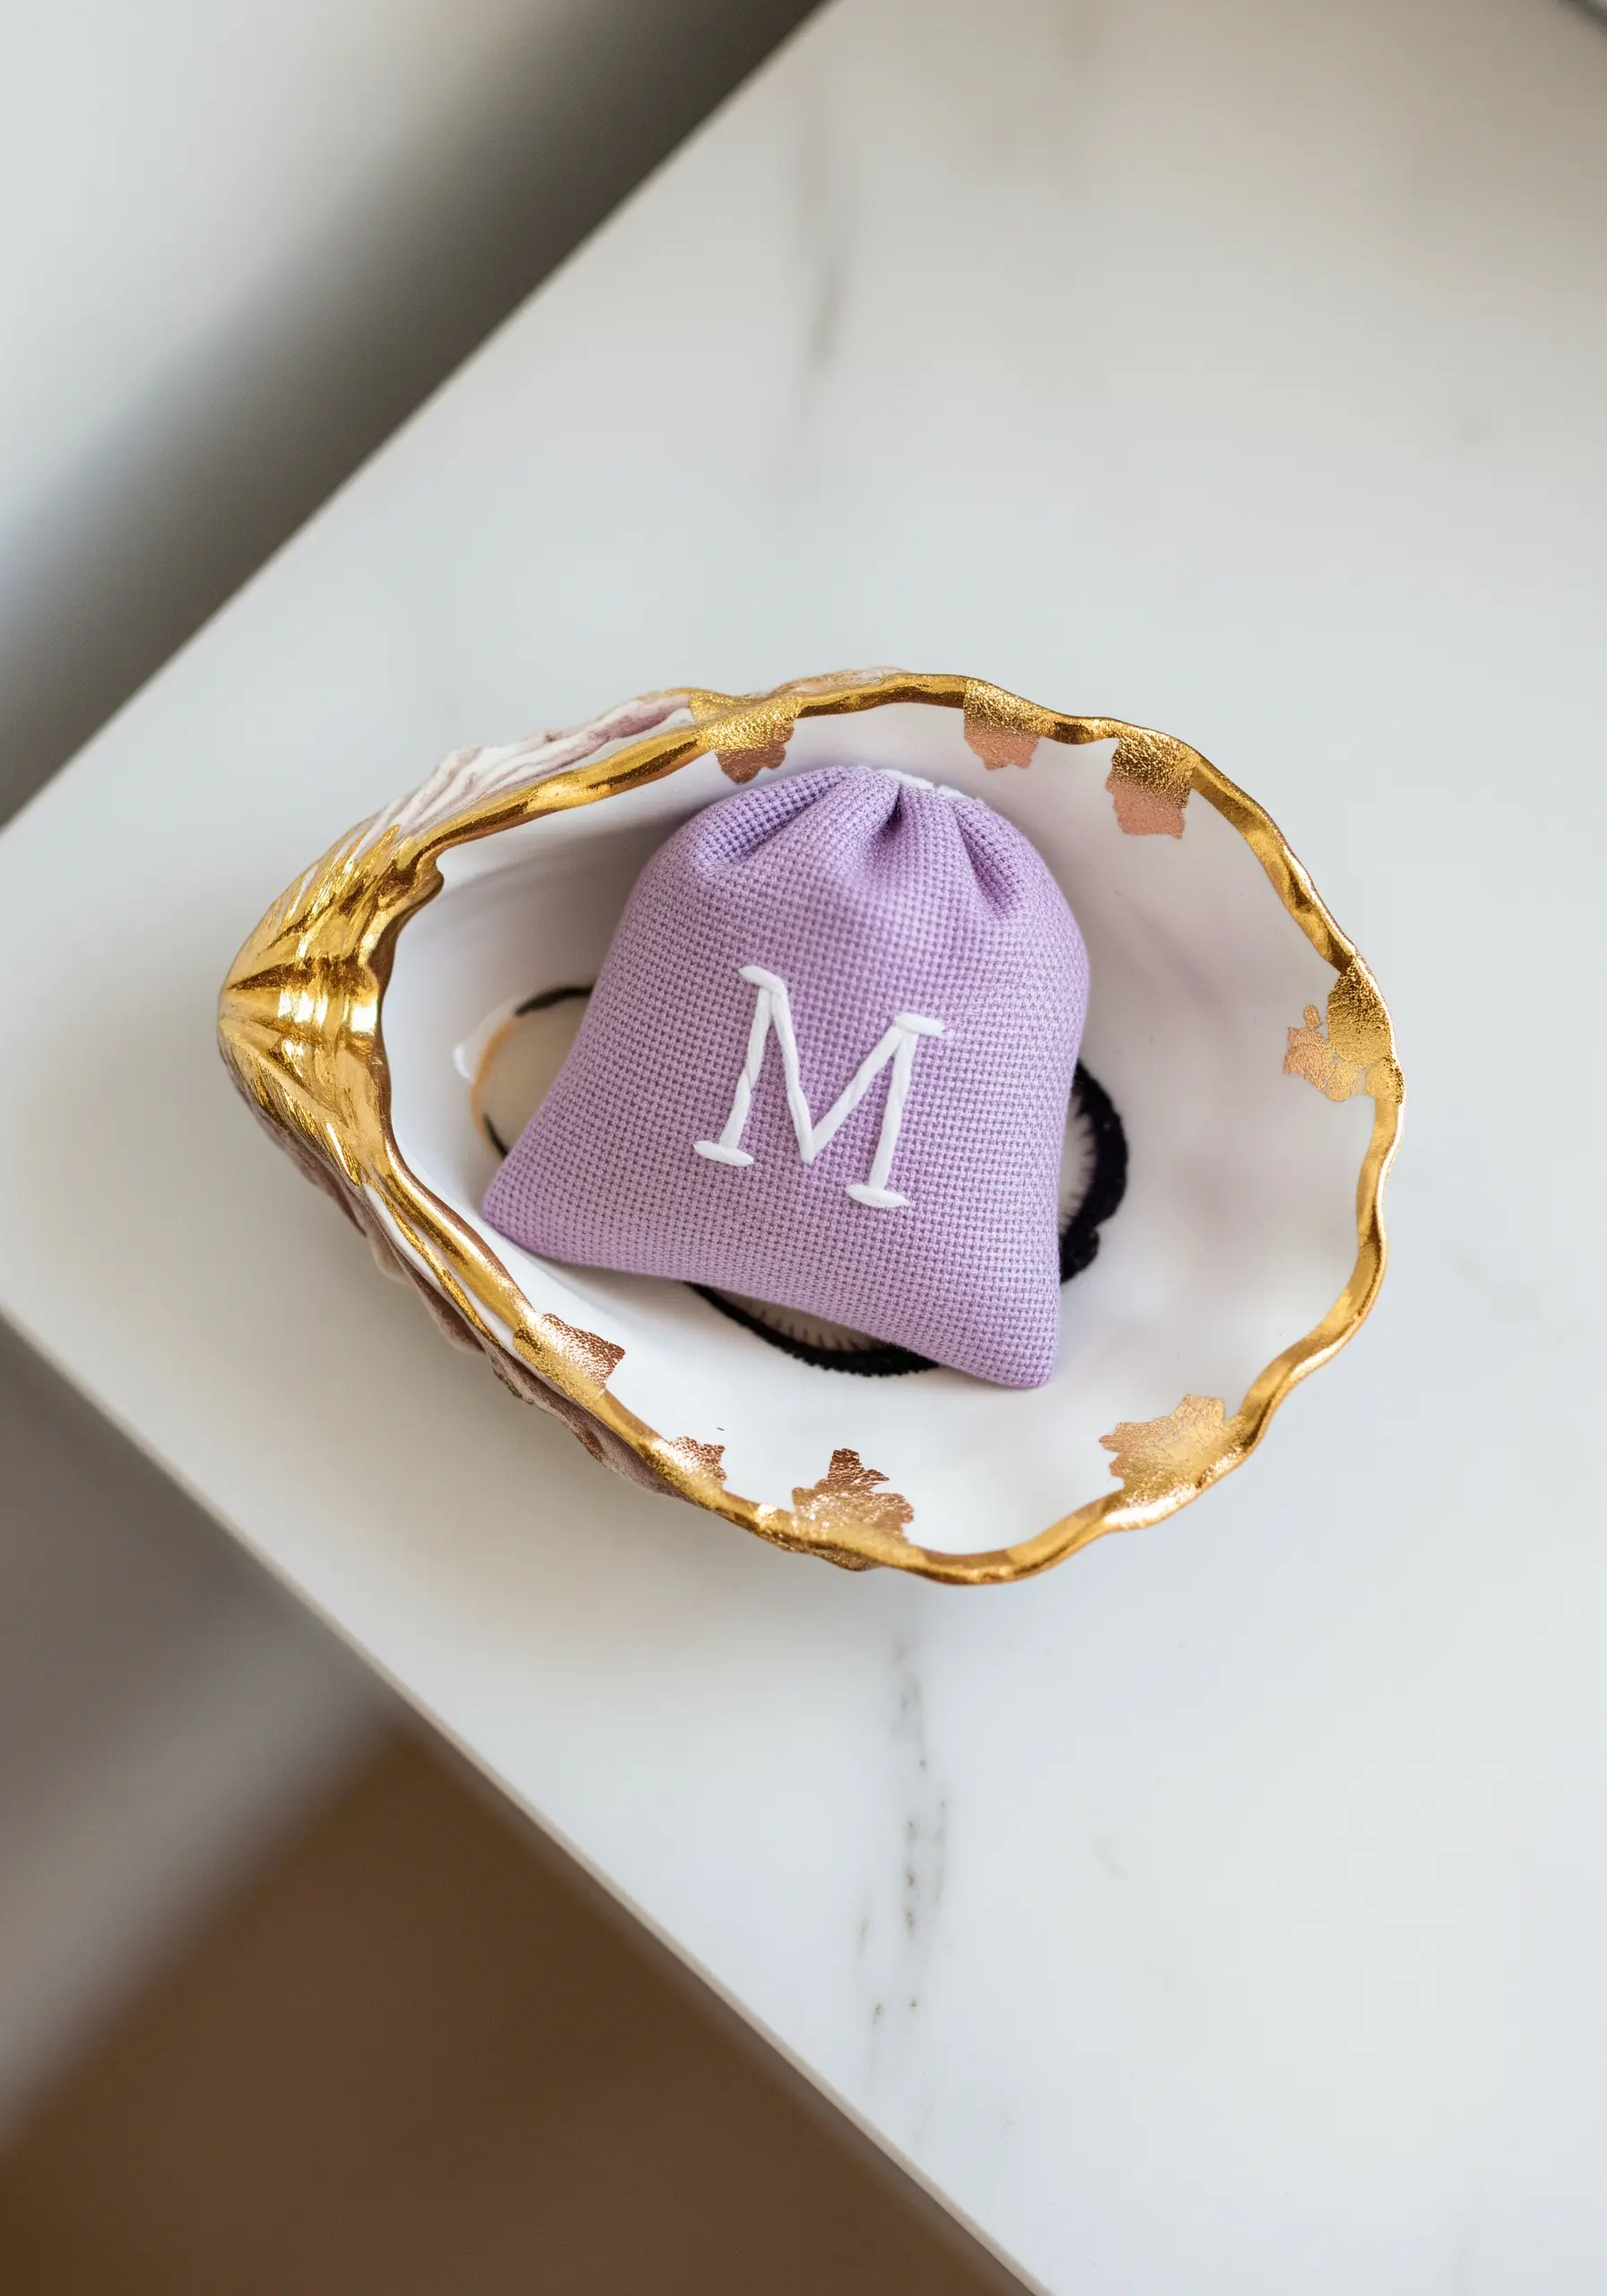
For a clean, professional-looking monogram on textured fabric, always use a stabilizer on the back.
A stick-and-stitch or iron-on stabilizer provides a smooth surface, preventing the fabric’s weave from distorting your stitches.
Use a sharp needle and two or three strands of floss for a satin stitch that is dense but not bulky.
For sharp corners on letters like ‘M’ or ‘N’, end your stitch precisely in the corner and start the next stitch in the exact same hole. This creates a razor-sharp edge that defines the letterform.
4. Weave Texture into Your Hoop
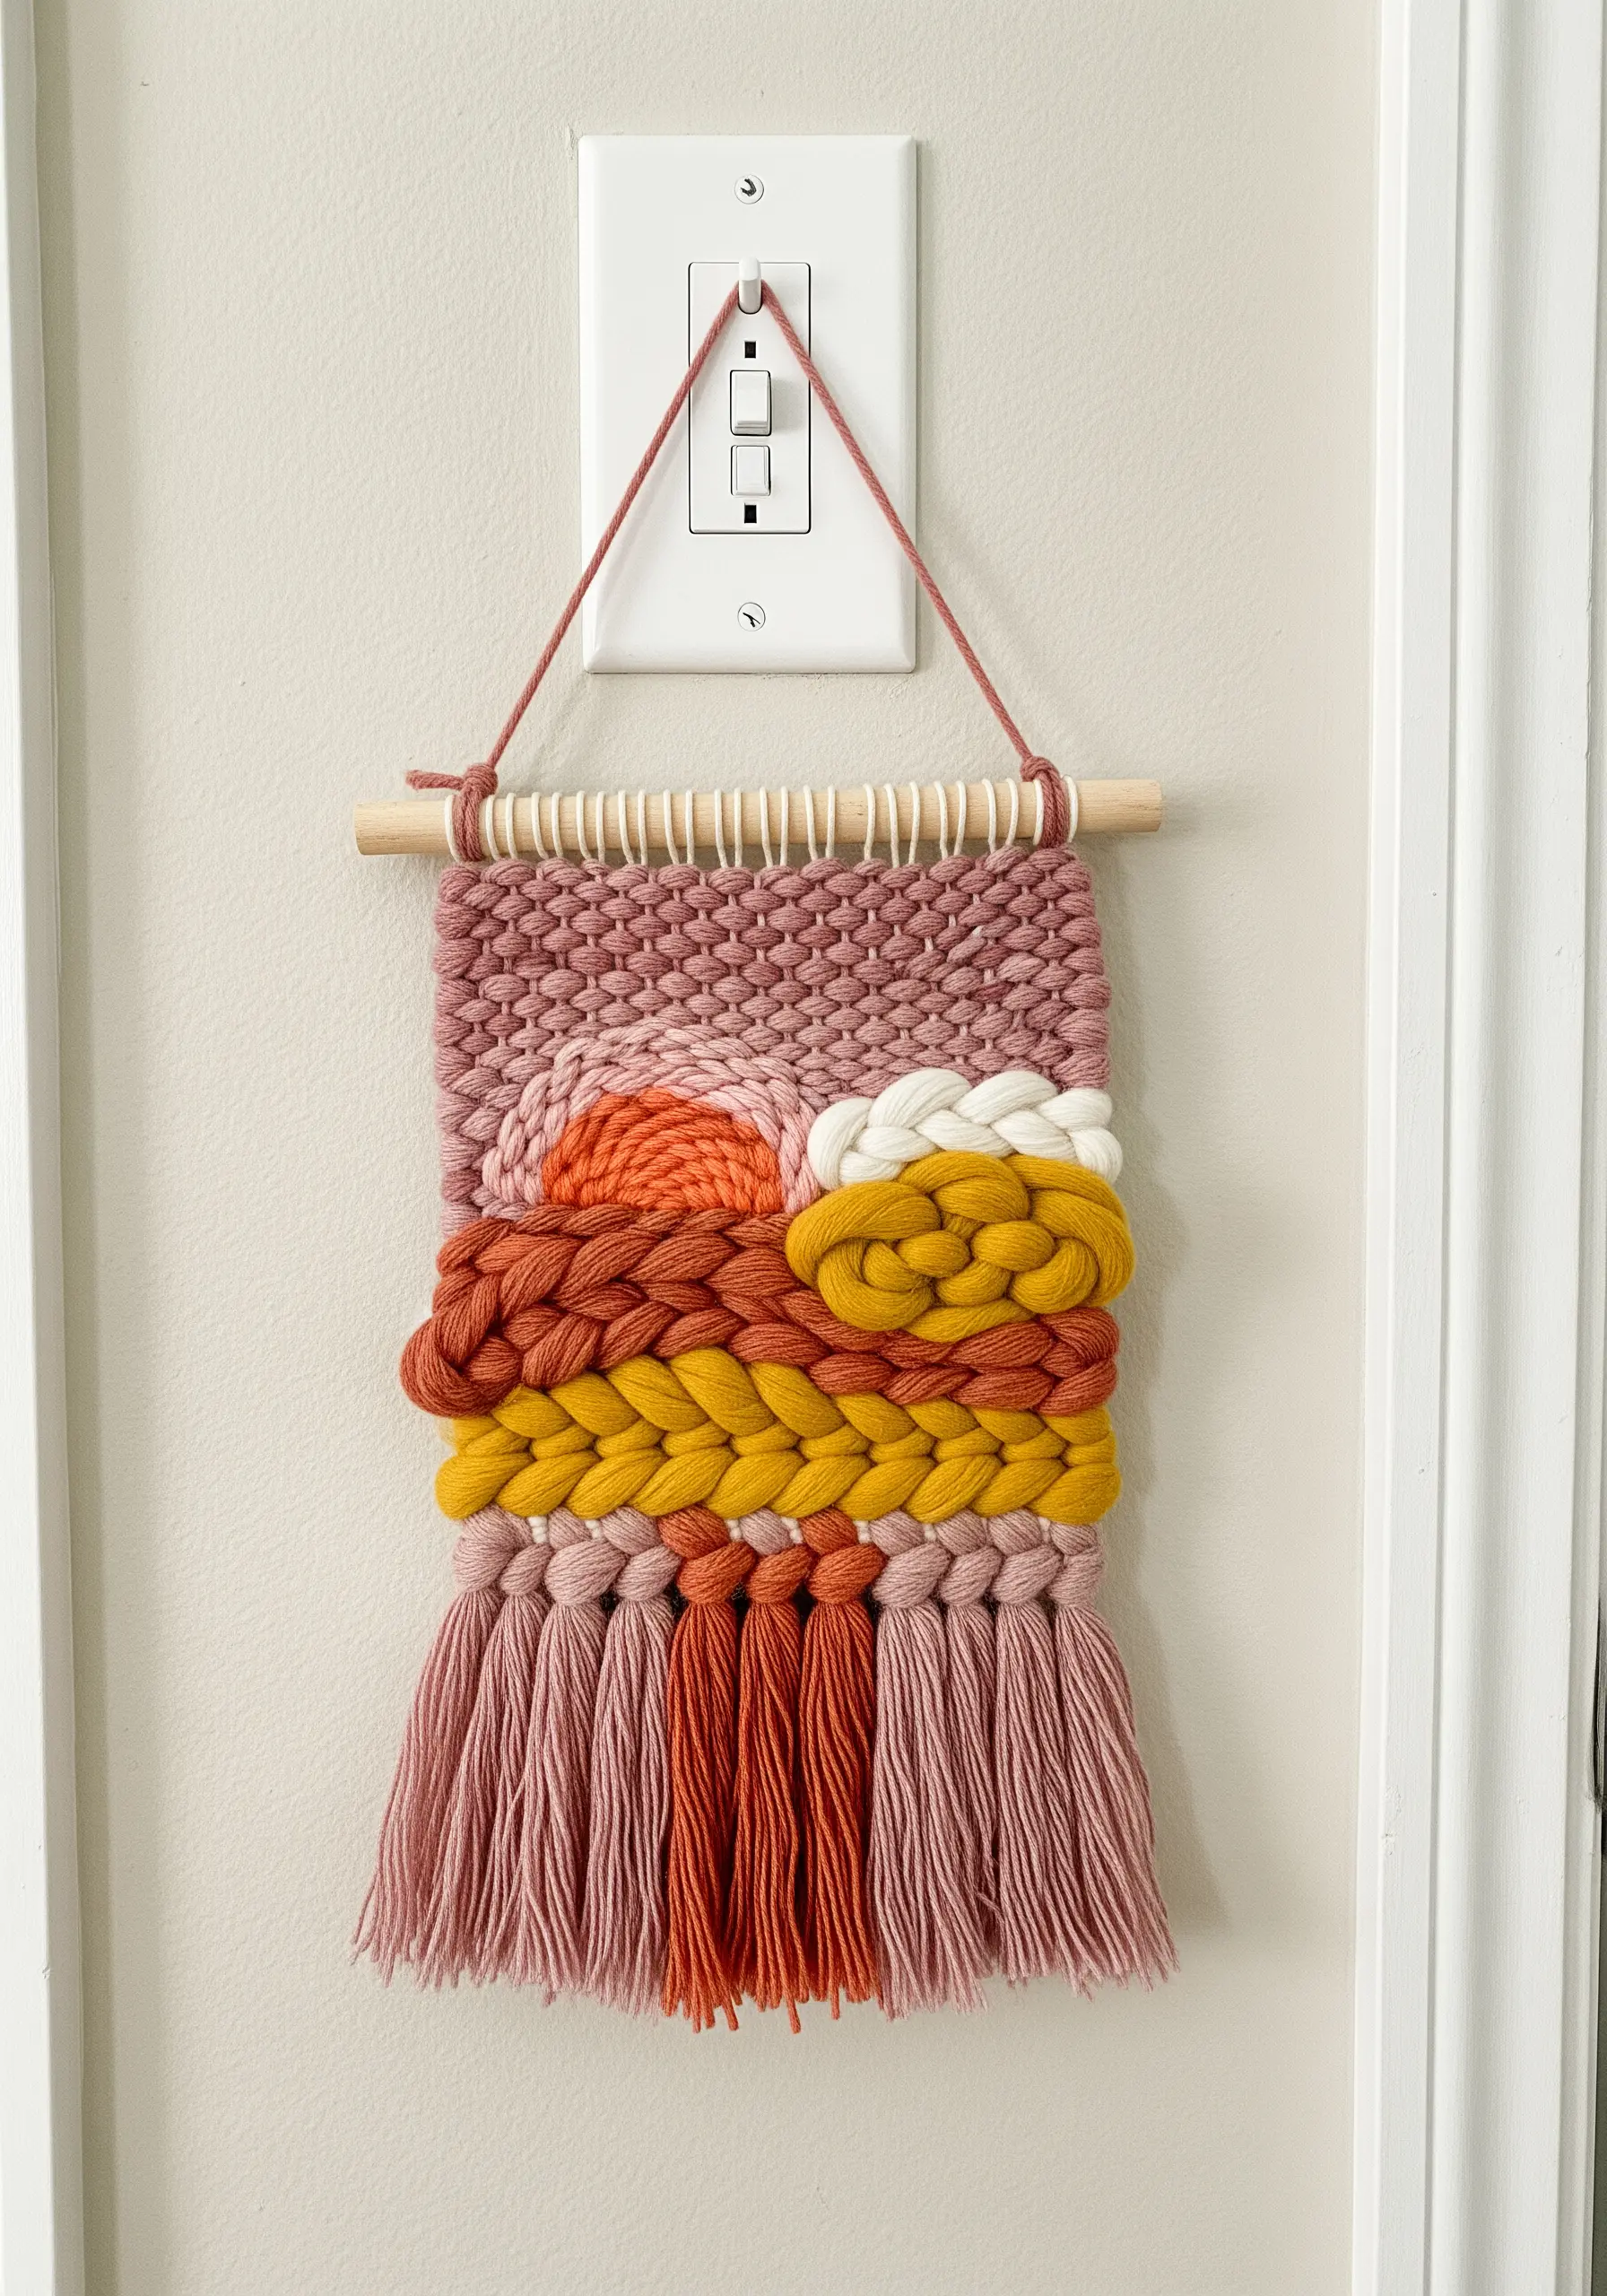
Emulate the cozy, tactile quality of a woven tapestry by incorporating weaving techniques directly into your embroidery hoop.
Use thicker fibers like wool yarn or multiple strands of floss to create bold textures that fill space quickly.
Stitches like the woven wheel, basket stitch, or couching thick braids add dimension and contrast against finer thread work.
These modern texture layering embroidery techniques are perfect for abstract landscapes or sunset-inspired compositions, turning your hoop into a miniature textile wall hanging.
5. Apply Visible Mending as an Art Form
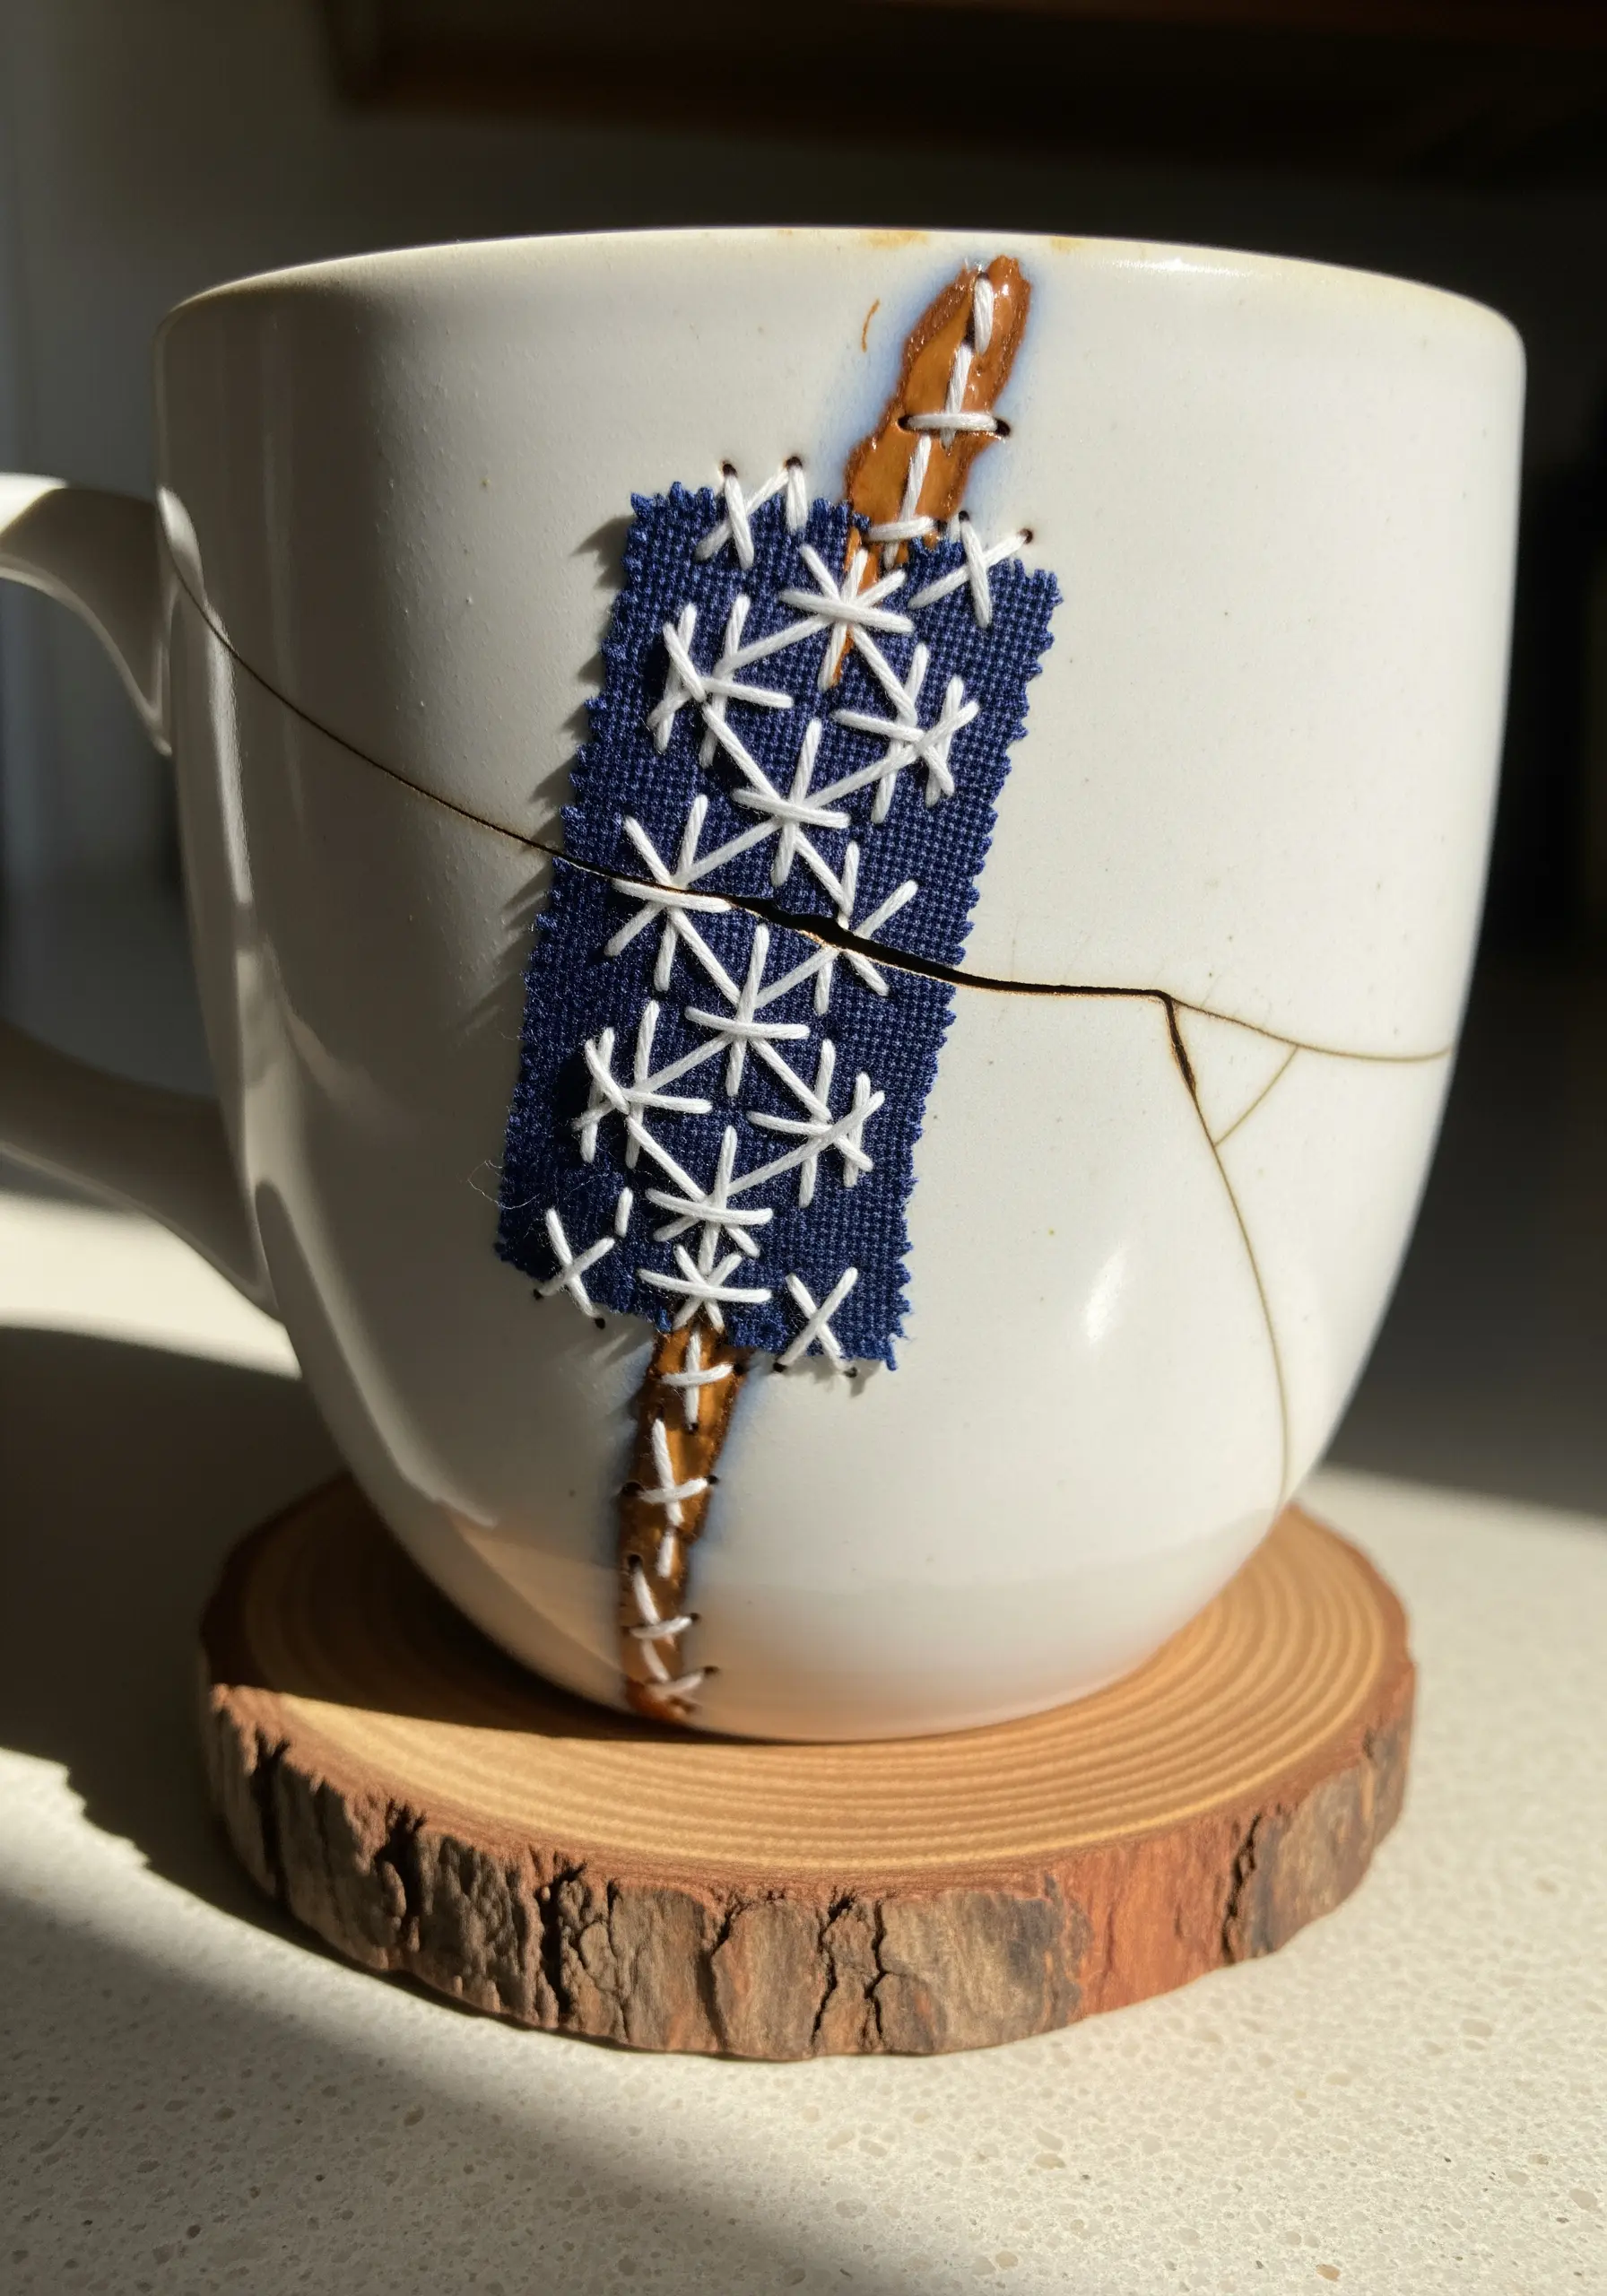
Borrow from the philosophy of Sashiko and Kintsugi to transform a flaw into a focal point, even on non-textile objects.
Secure a patch of fabric over a crack or imperfection with a strong adhesive, then use decorative stitches to frame it as a deliberate design choice.
The contrast between the clean, geometric stitches and the organic crack creates a beautiful story of repair and resilience.
This method works beautifully to give new life to chipped ceramics, worn book covers, or even cracked phone cases, proving that embroidery ideas can make fabric scraps look like magic.
6. Stitch a Metallic Gradient
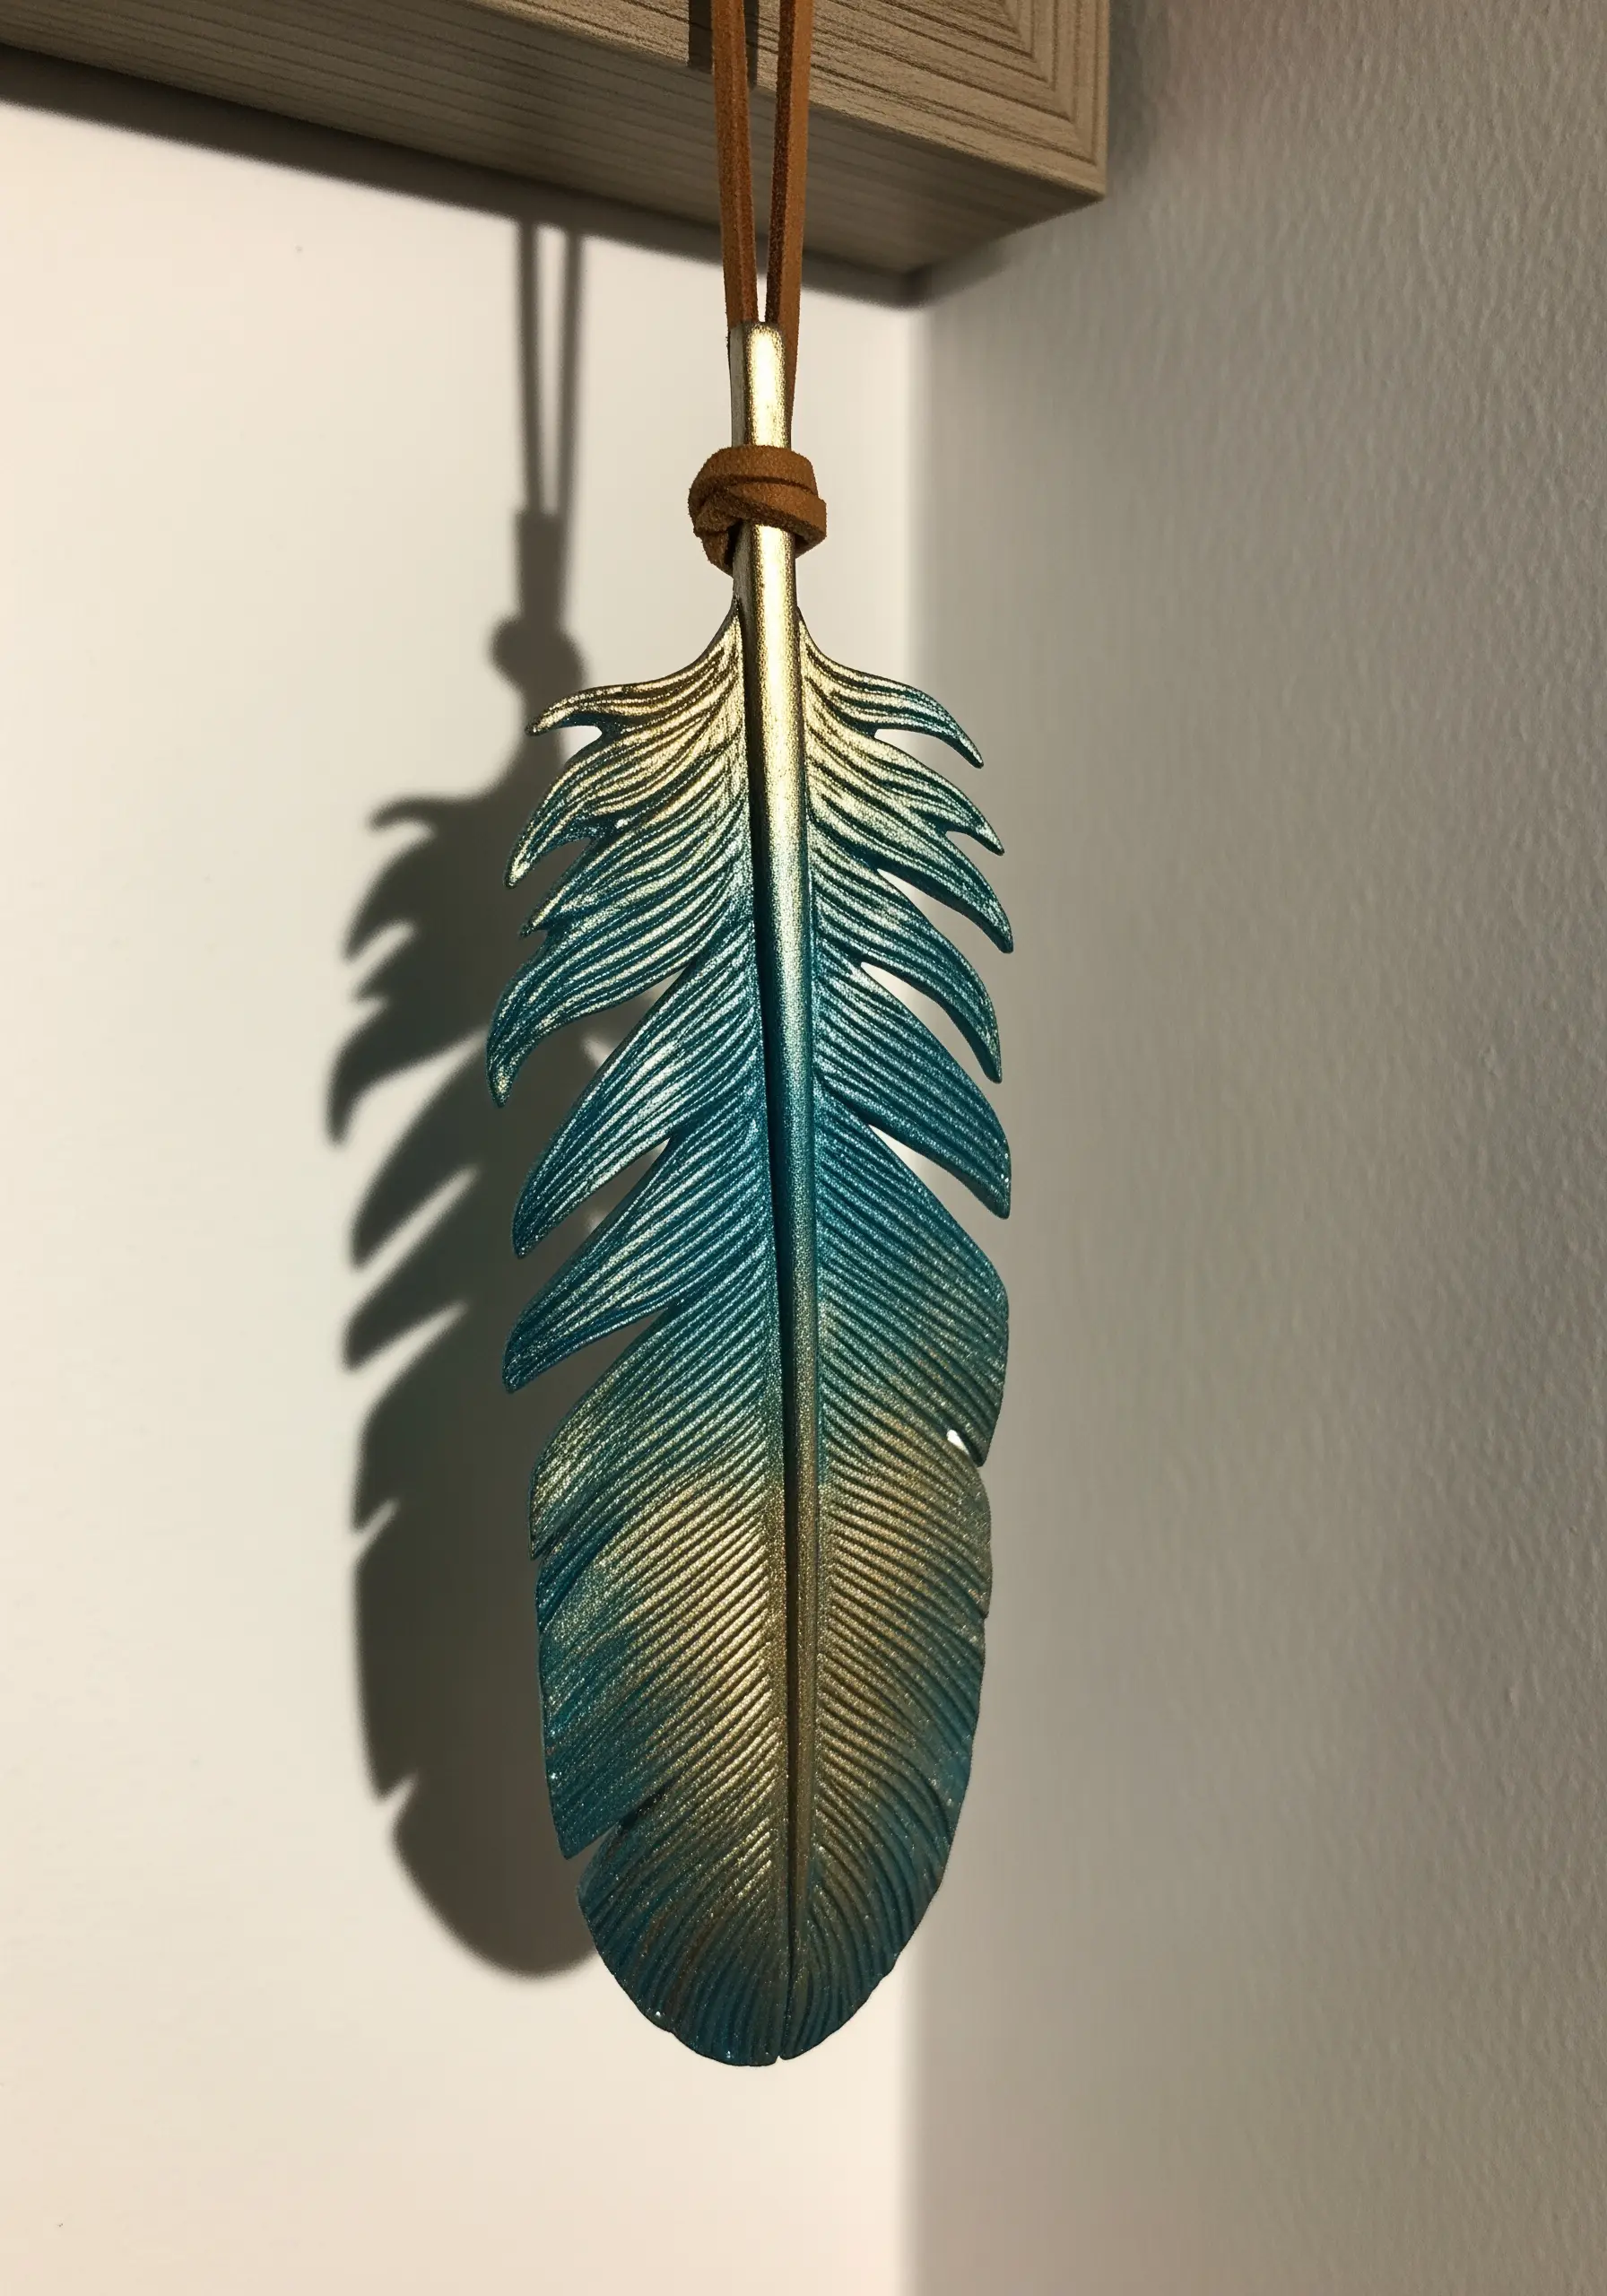
Achieve an iridescent, painted-metal effect using blending filament or metallic threads in a tight formation.
To create a smooth gradient, stitch with two strands of one color, then switch to one strand of the first color and one of the second, and finally stitch with two strands of the second color.
Lay your stitches side-by-side in a long-and-short stitch pattern to mimic the texture of brushed metal or delicate feather barbs.
This technique elevates simple shapes into metallic thread wall art designs that catch the light beautifully.
7. Create Delicate Wings with Organza
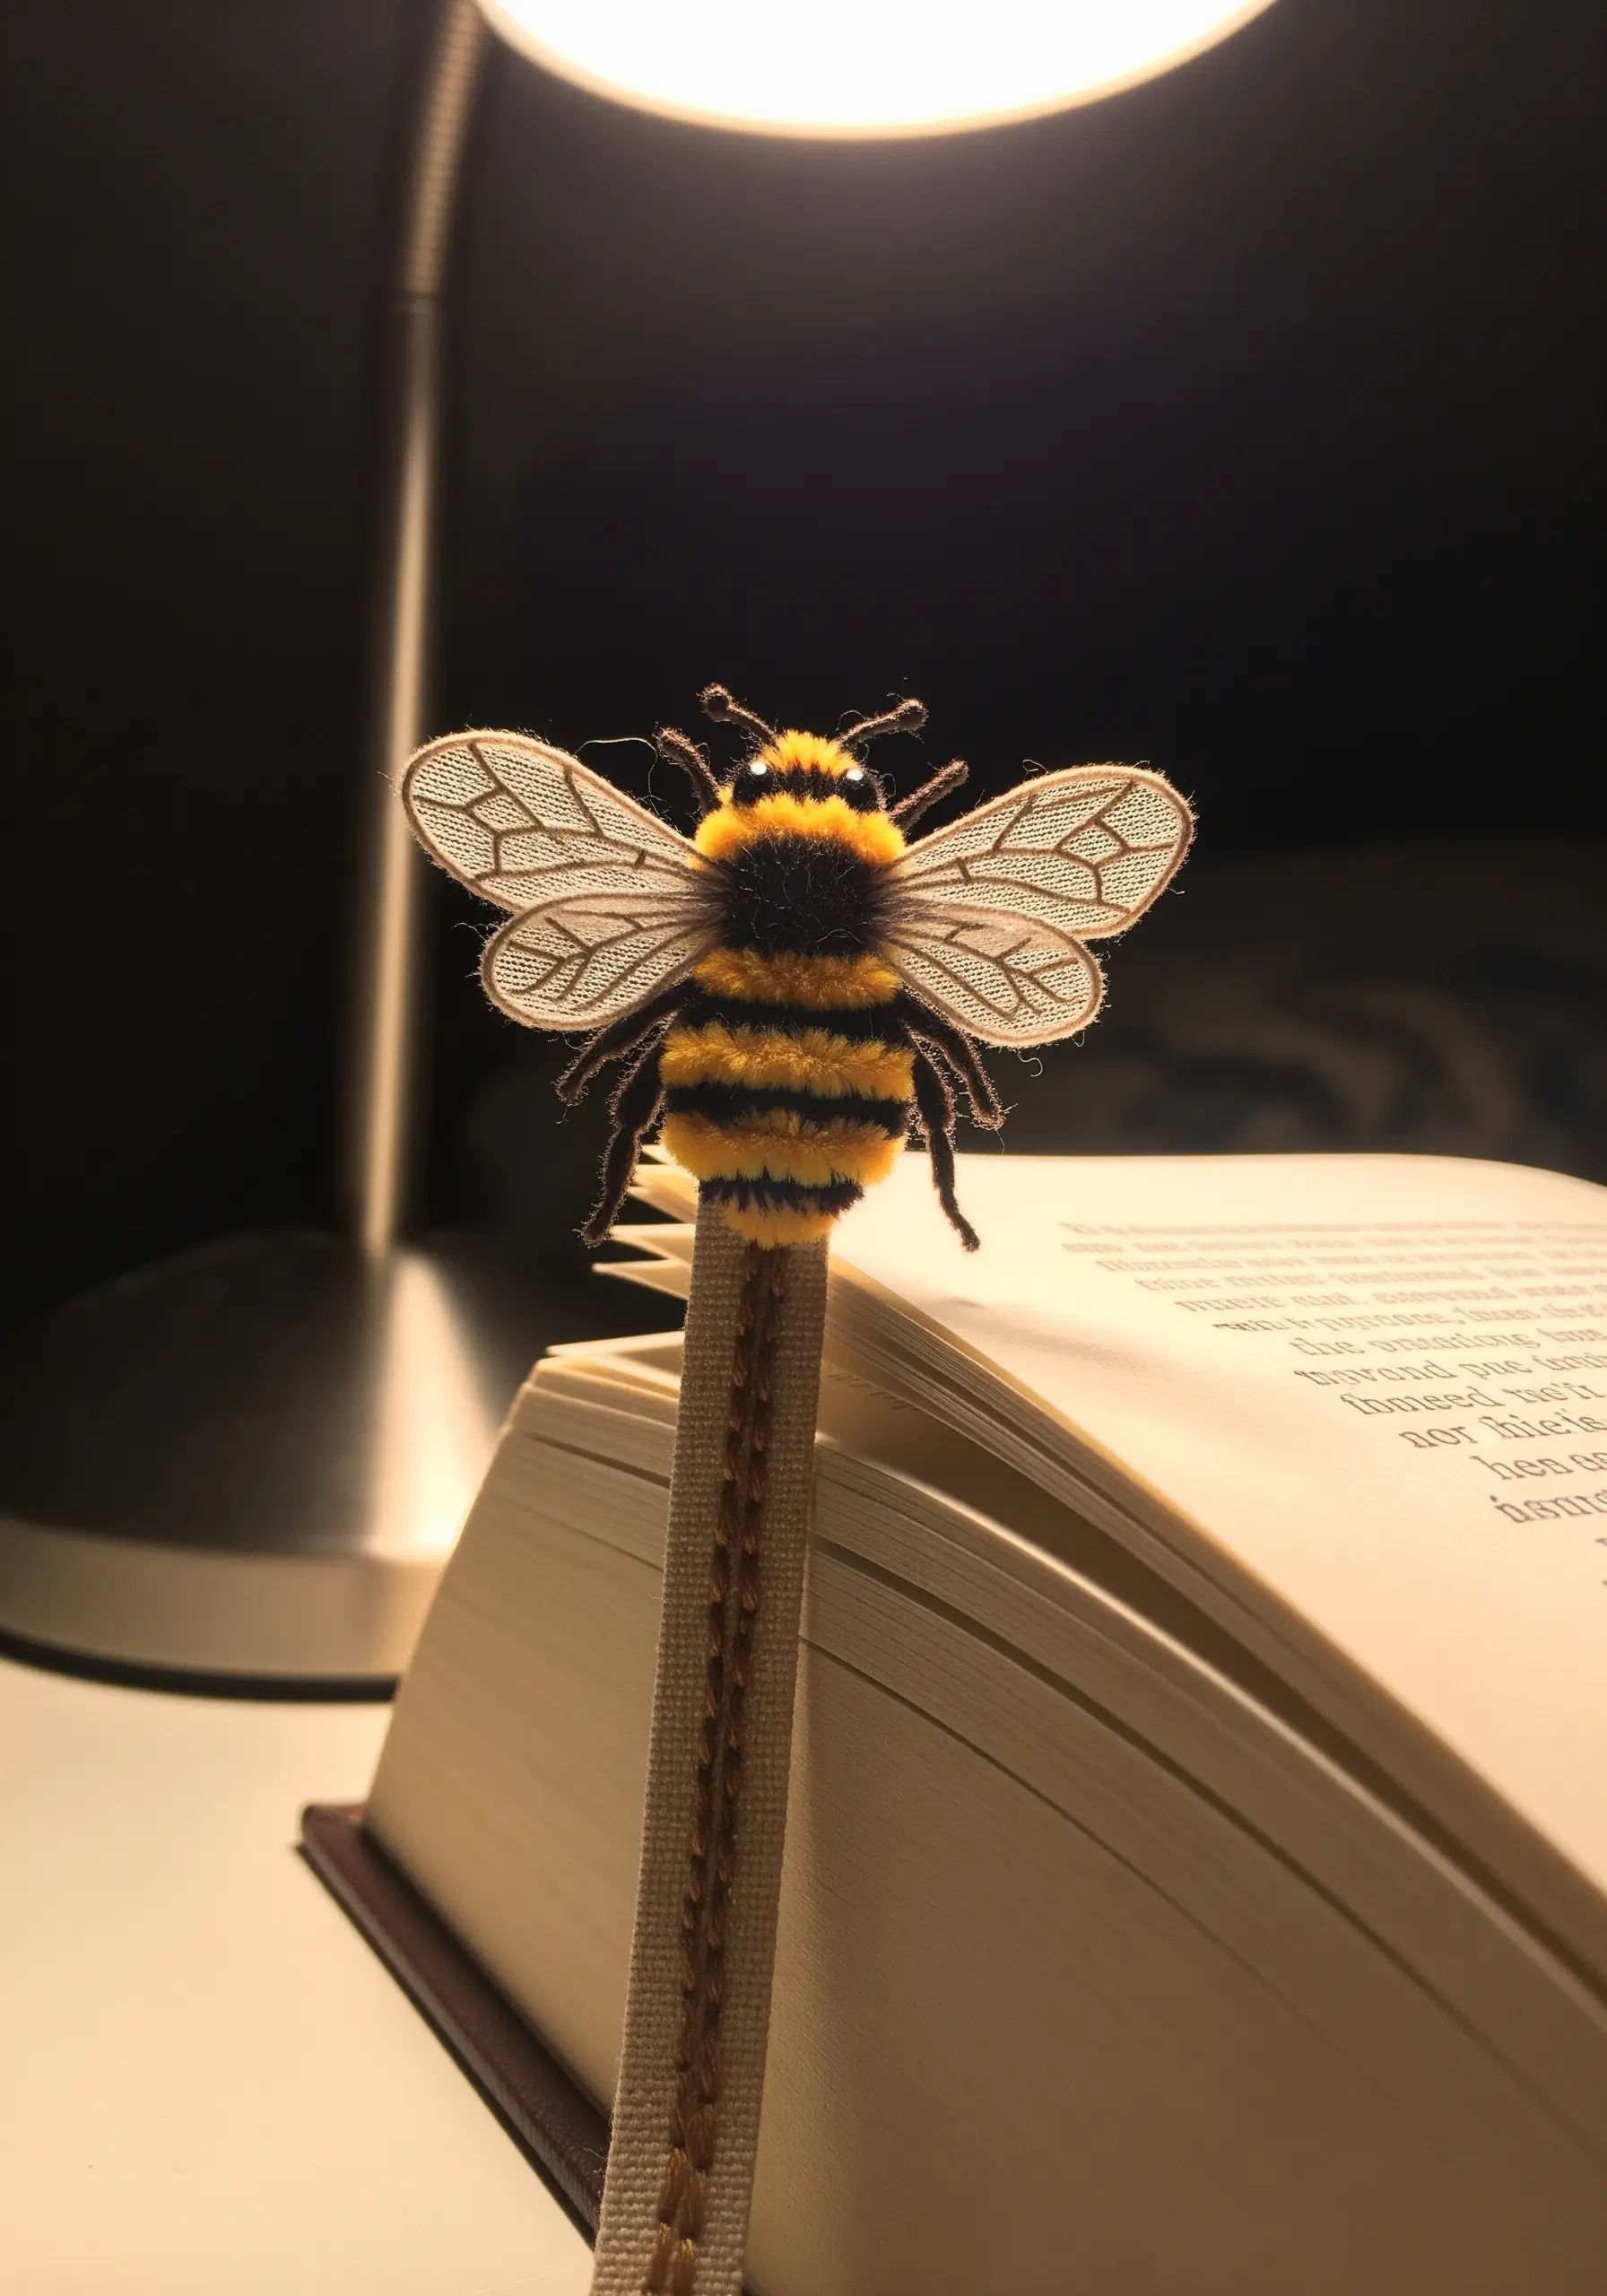
For lifelike insect wings, use a layer of sheer organza fabric appliquéd onto your main fabric.
Trace the wing design onto the organza, stitch the veins and outline with a single strand of dark thread, and then carefully trim away the excess organza close to the stitch line.
The transparency of the fabric creates a delicate, ethereal effect that is impossible to achieve with thread alone.
This stumpwork technique makes bird and butterfly embroidery patterns appear ready to take flight.
8. Craft an Embroidered Planter Cover
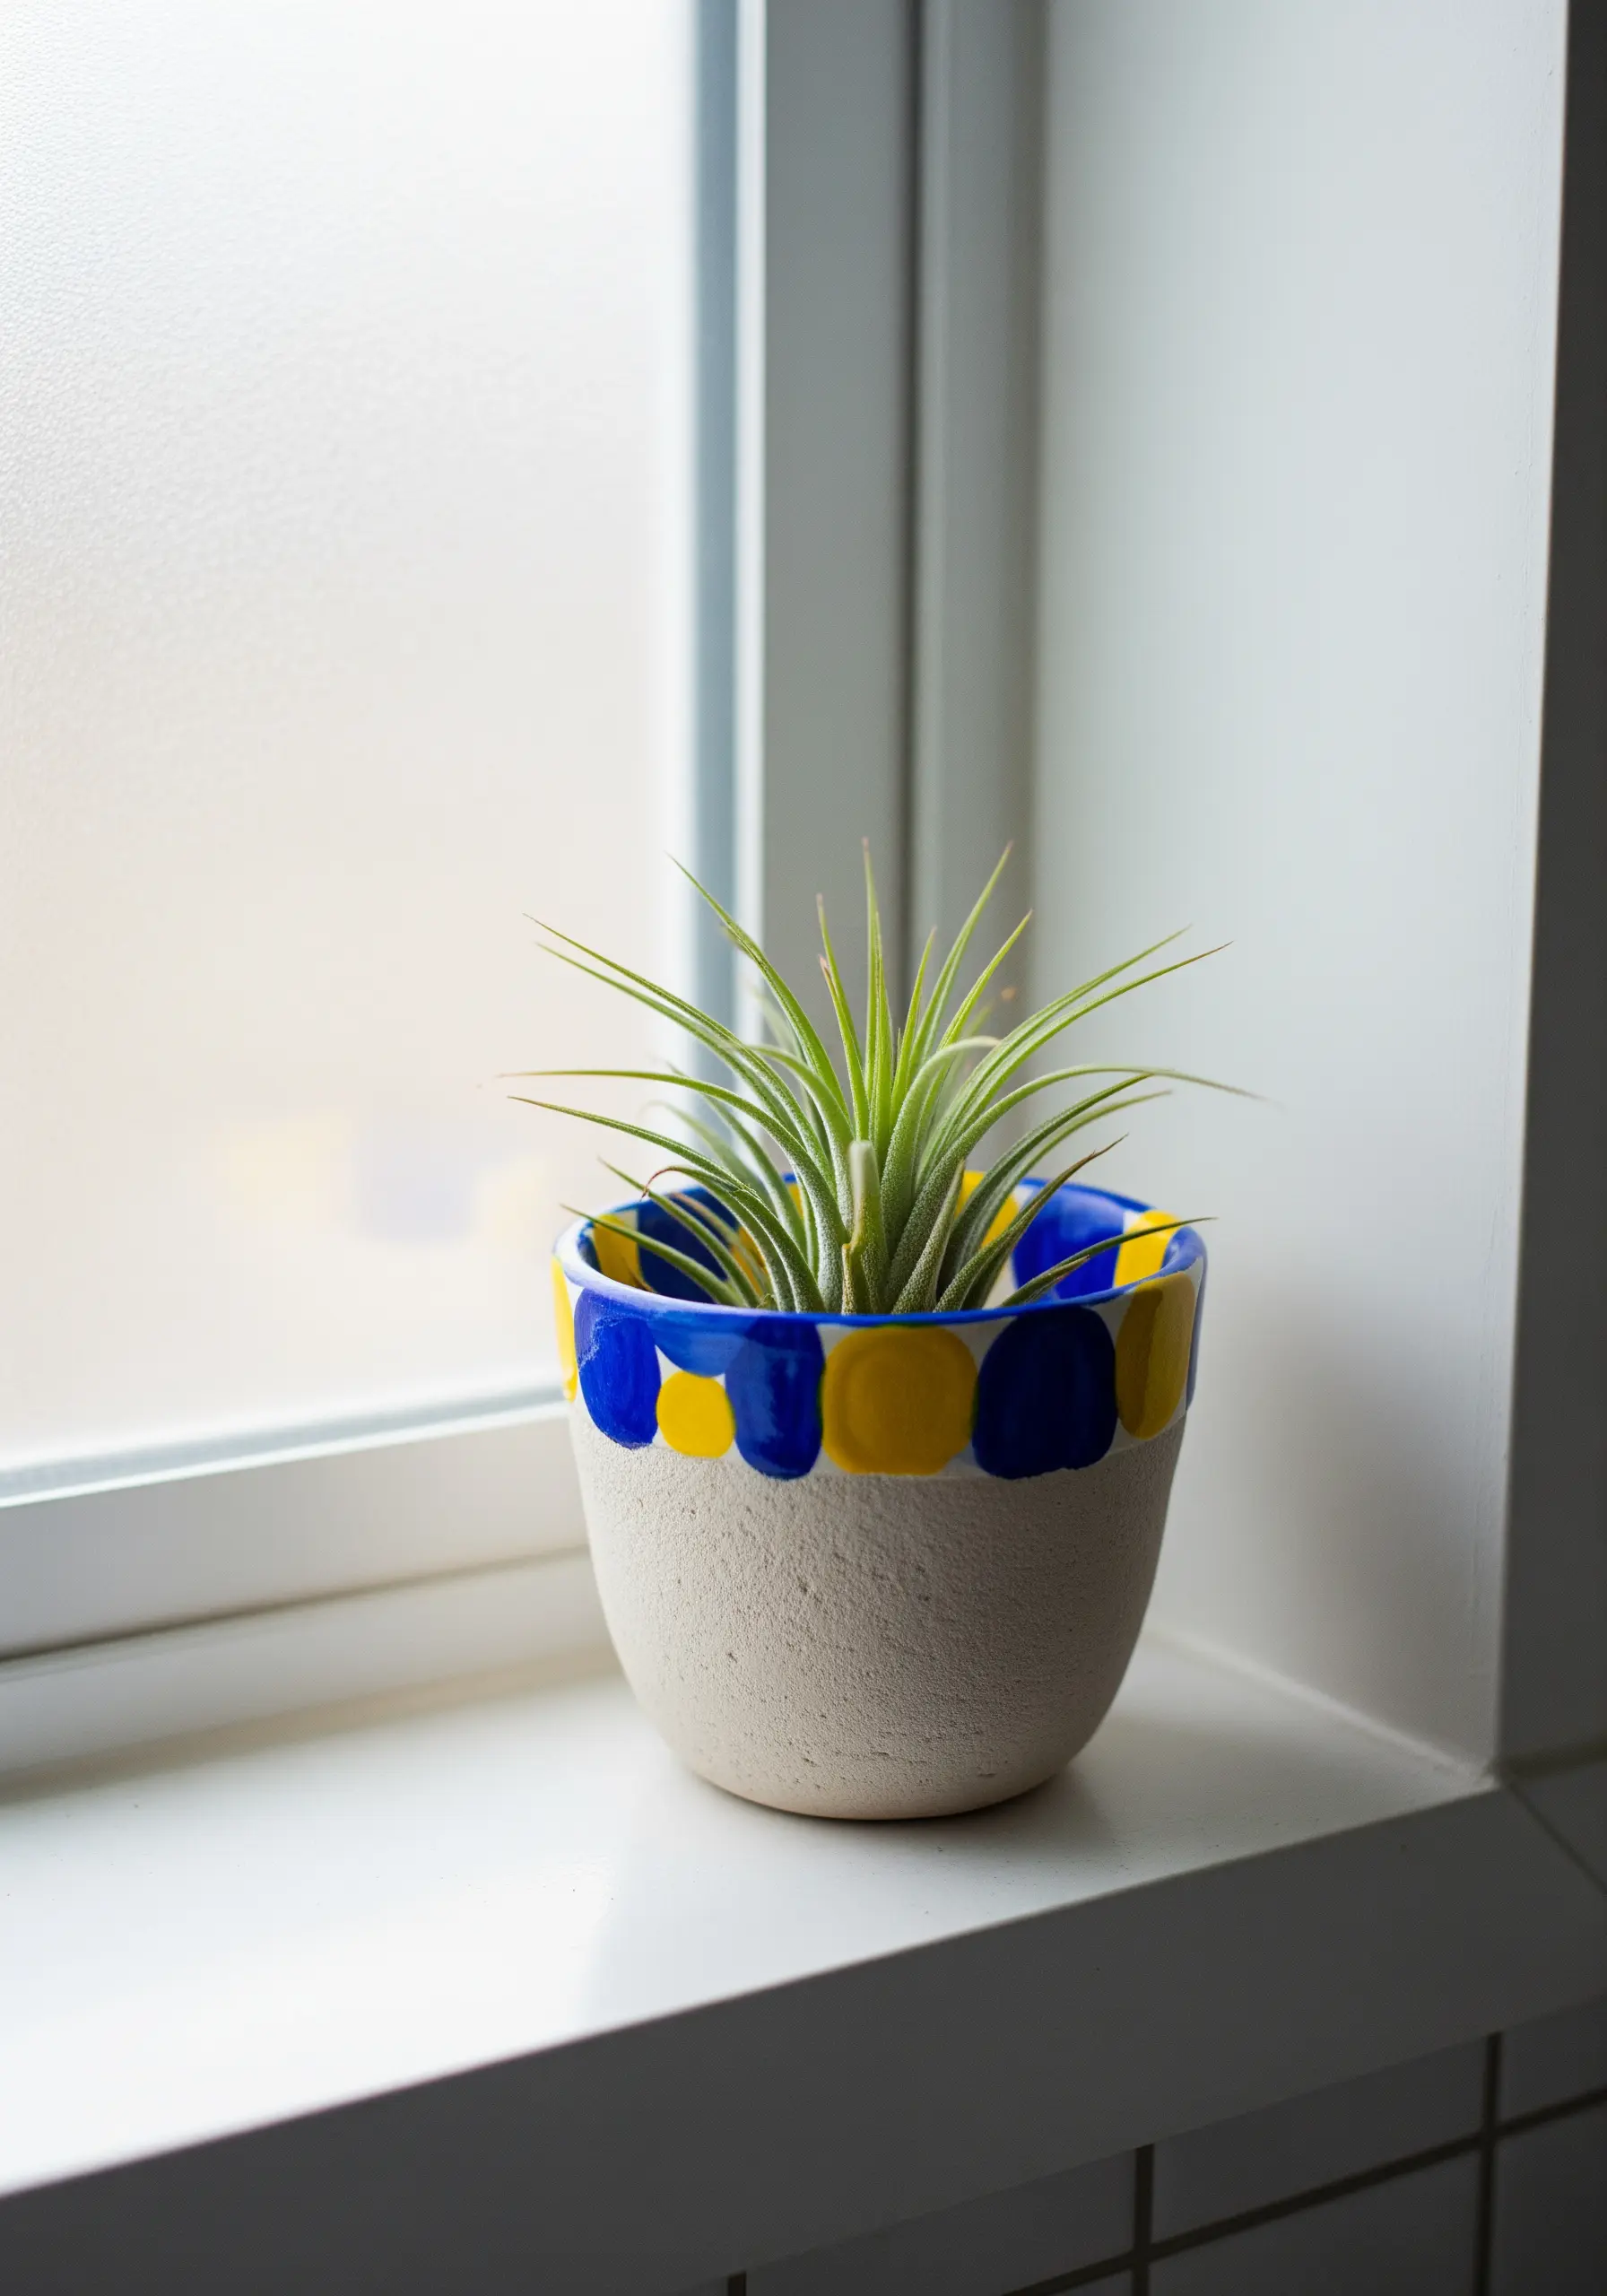
Add a soft, handmade touch to your houseplants by creating a stitched fabric wrap for a plain pot.
Choose a non-stretch fabric like linen or felt and embroider a bold, graphic pattern using a simple satin stitch or backstitch.
Cut the fabric to the height of the pot and long enough to wrap around it with a slight overlap, then secure it with a few stitches or fabric glue.
This is a quick way to create small DIY planters that coordinate with your home decor without needing to paint on ceramic.
9. Stitch with Precision on Leather
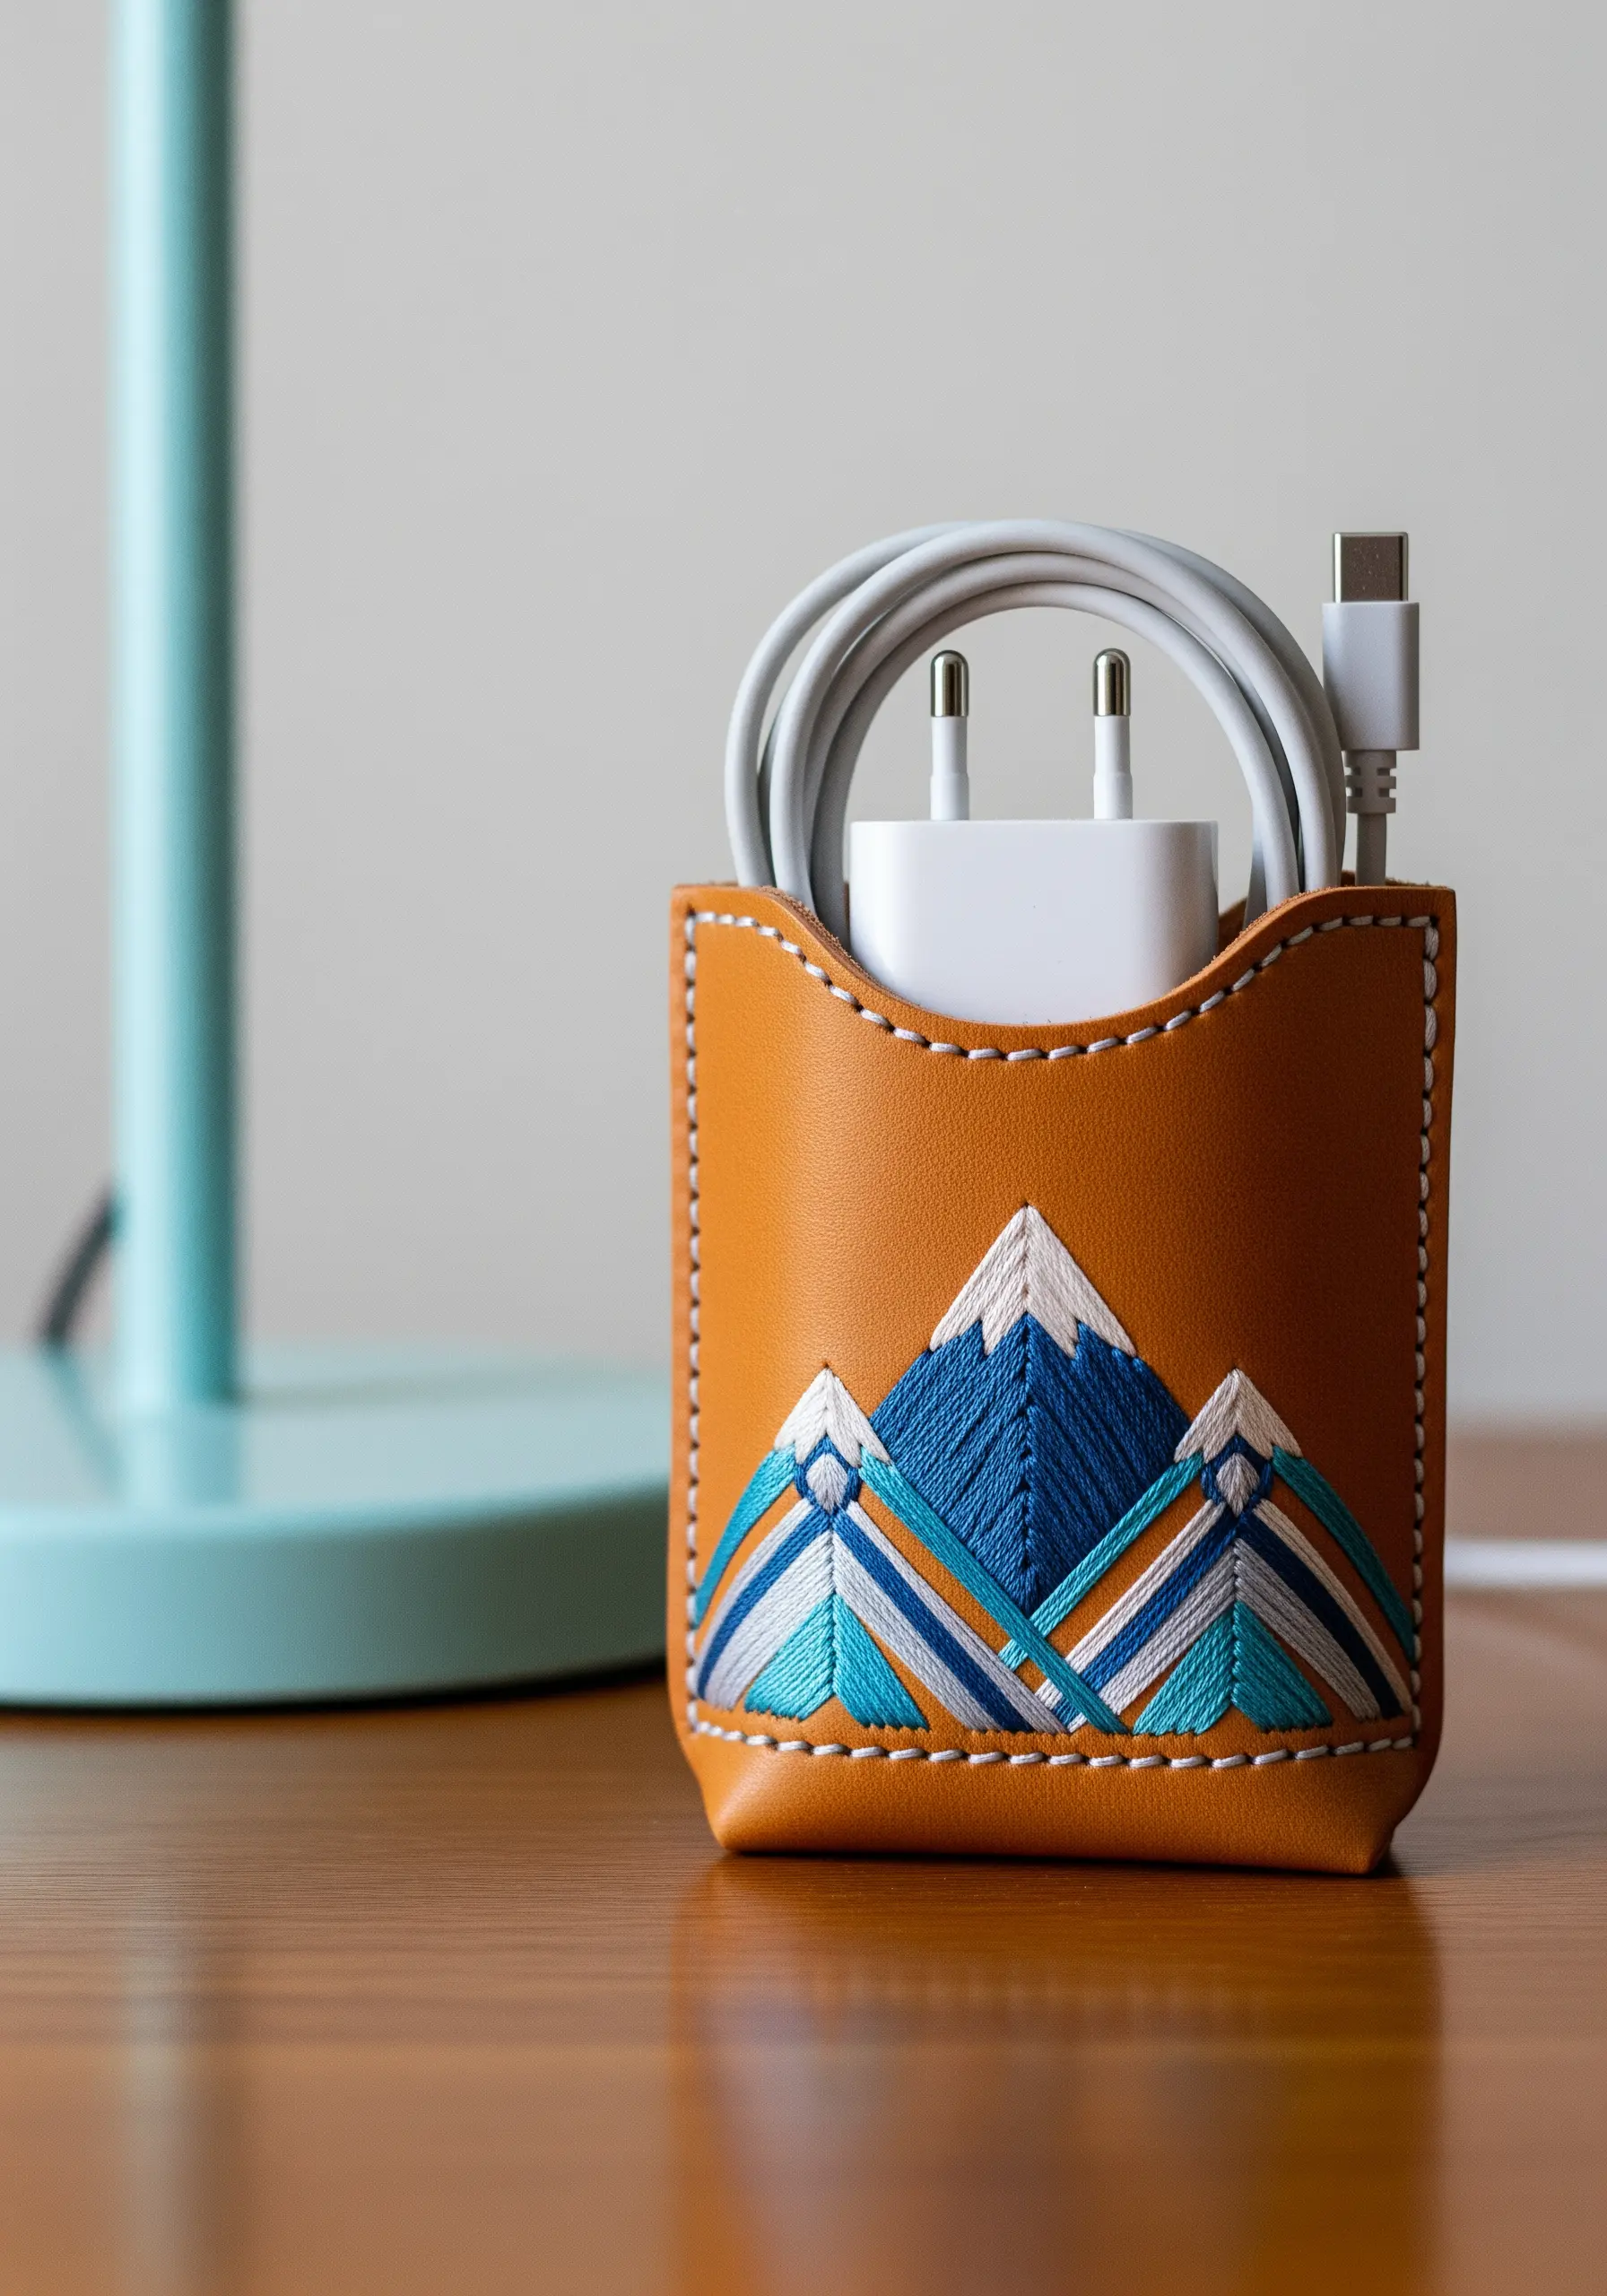
When embroidering on leather or vegan leather, the right tools are essential for a clean finish.
Use a sharp, triangular-tipped leather needle, which pierces the material without tearing it, and use a thimble to protect your fingers.
Keep your stitches slightly smaller and spaced apart to maintain the integrity of the leather.
Geometric patterns worked in satin stitch are particularly effective, as the smooth, dense thread offers a beautiful textural contrast against the leather’s surface, creating mesmerizing abstract thread embroidery ideas.
10. Embroider a Keepsake Tag
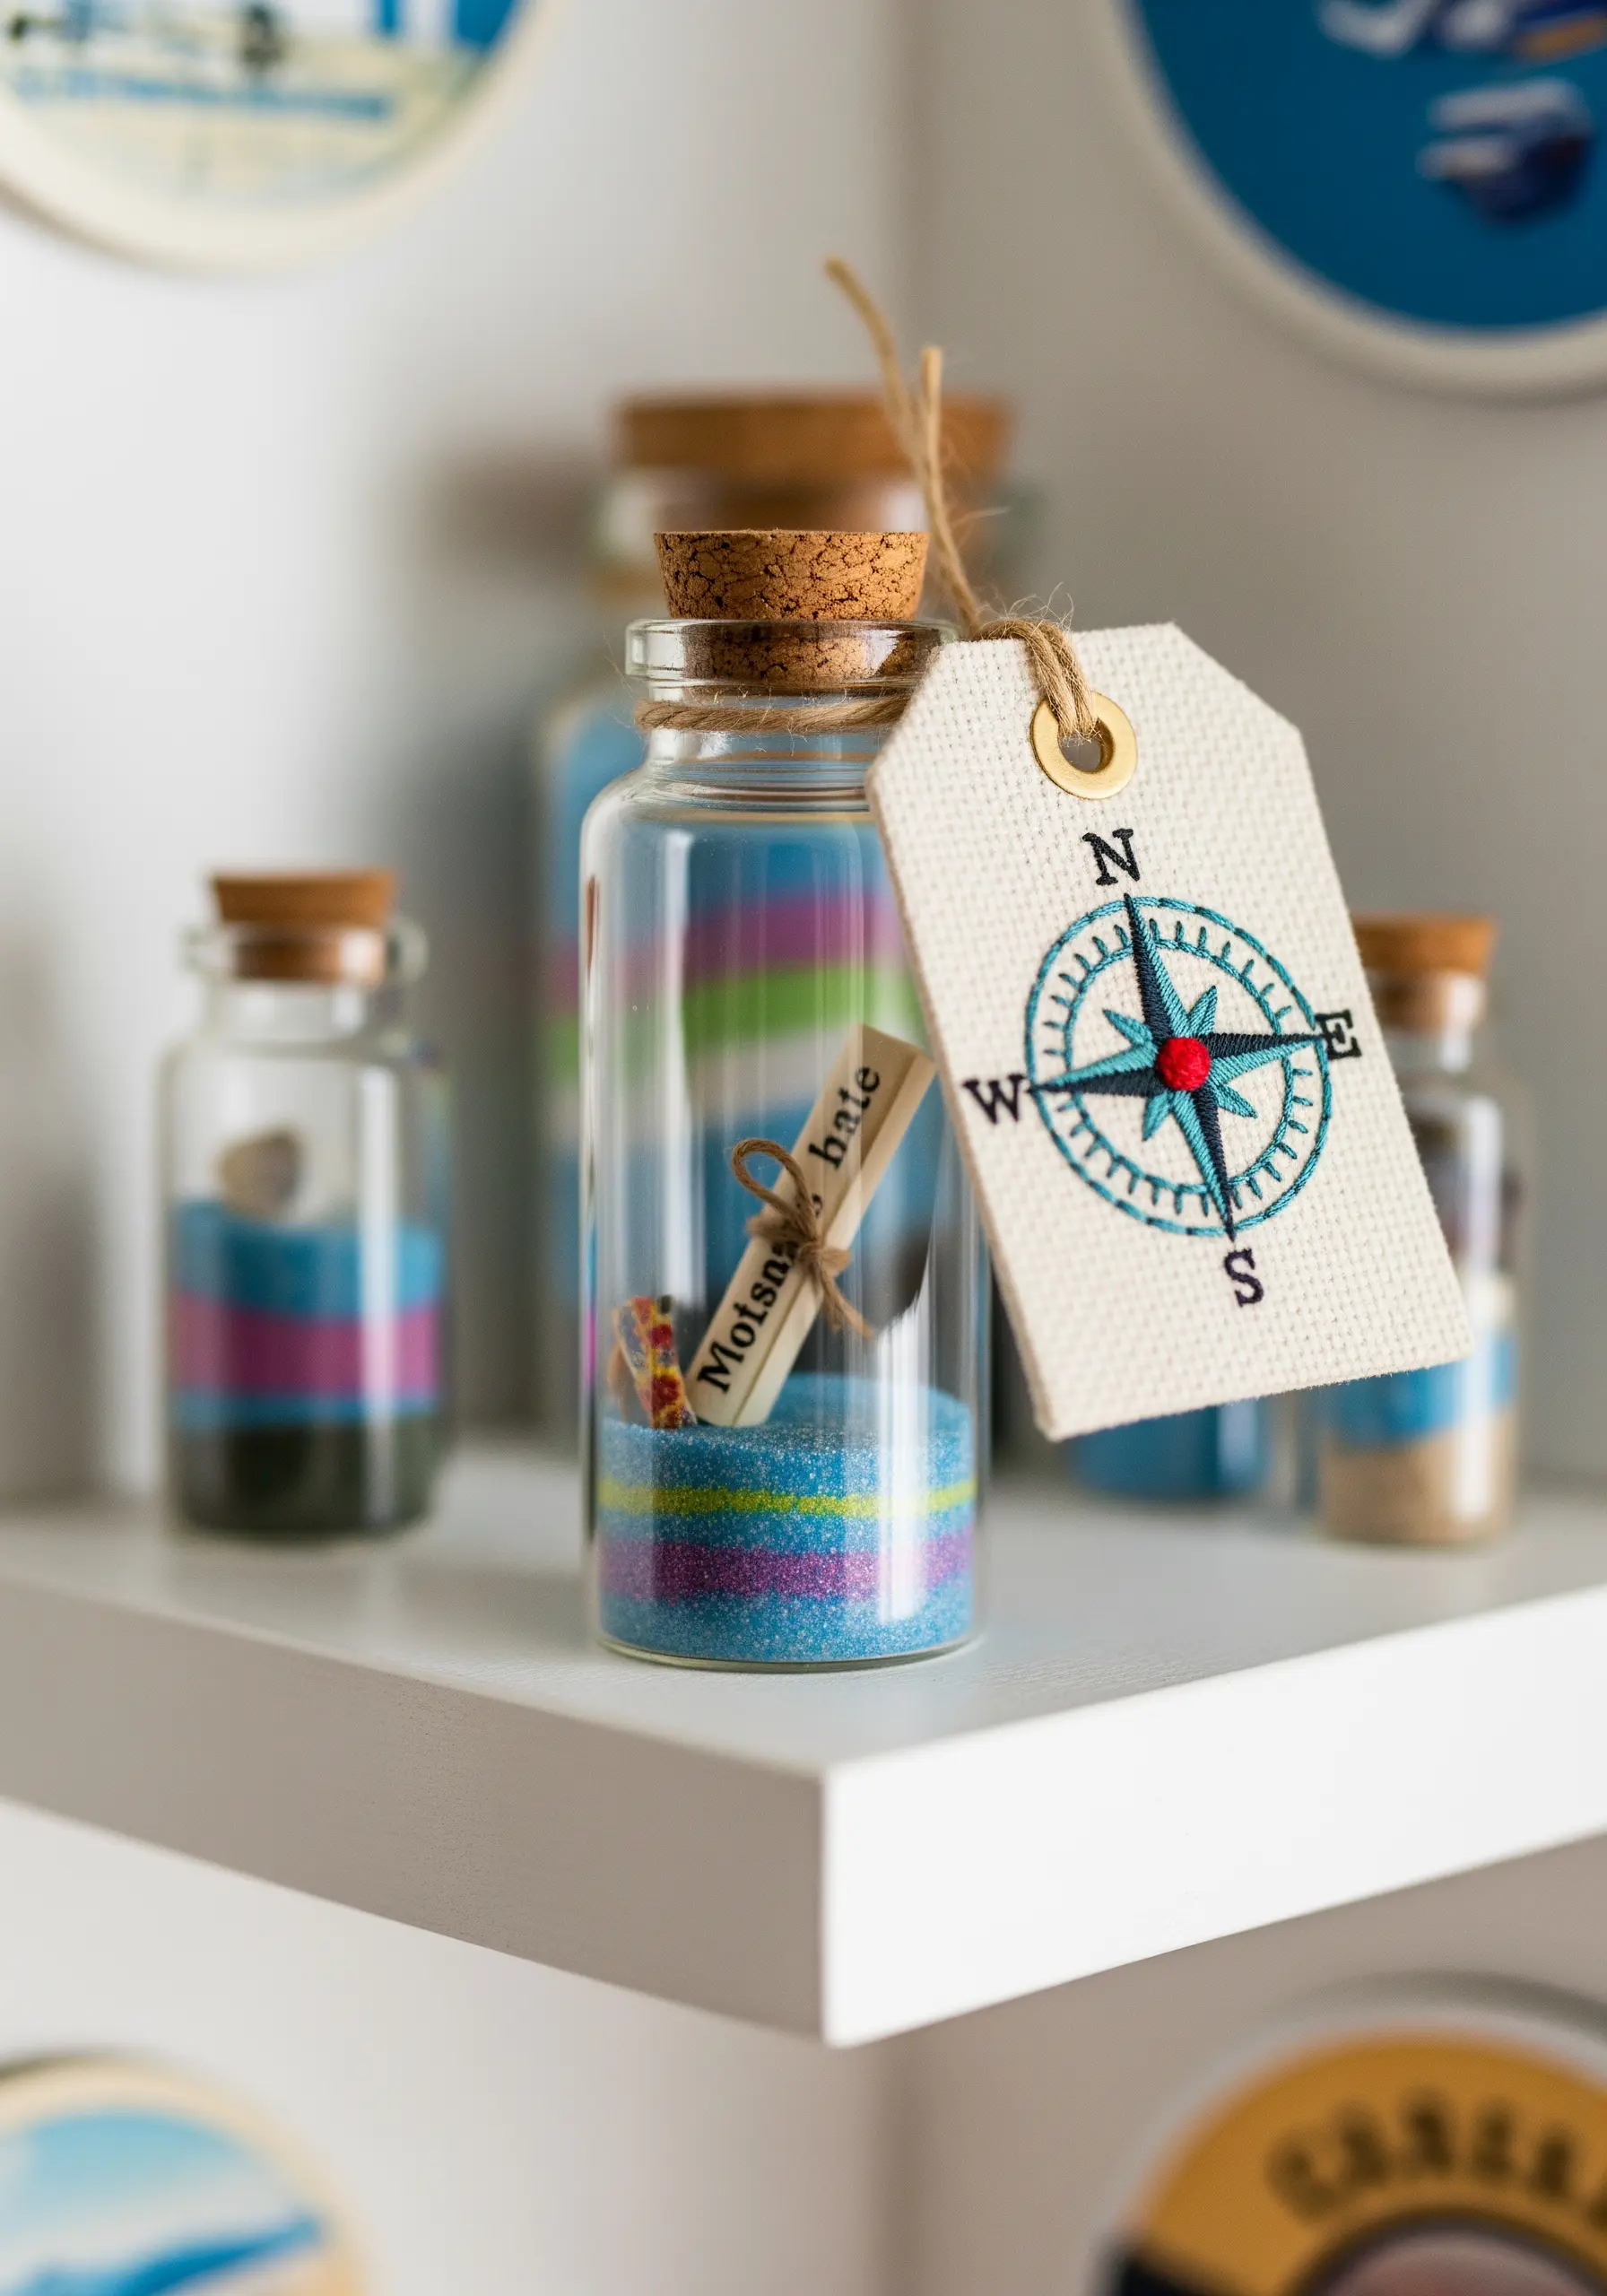
Transform a simple gift tag into a memorable keepsake by stitching directly onto heavy cardstock or thick felt.
For paper, pre-pierce your holes along the design lines with a pin to prevent tearing. For felt, a sharp embroidery needle works perfectly.
A crisp backstitch for outlines and a compact satin stitch for filled areas create a polished, miniature piece of art.
These quick stitch inspirations add a thoughtful, handmade element to gifts, bottles, or even decorative jars.
11. Mimic Punch Needle with French Knots
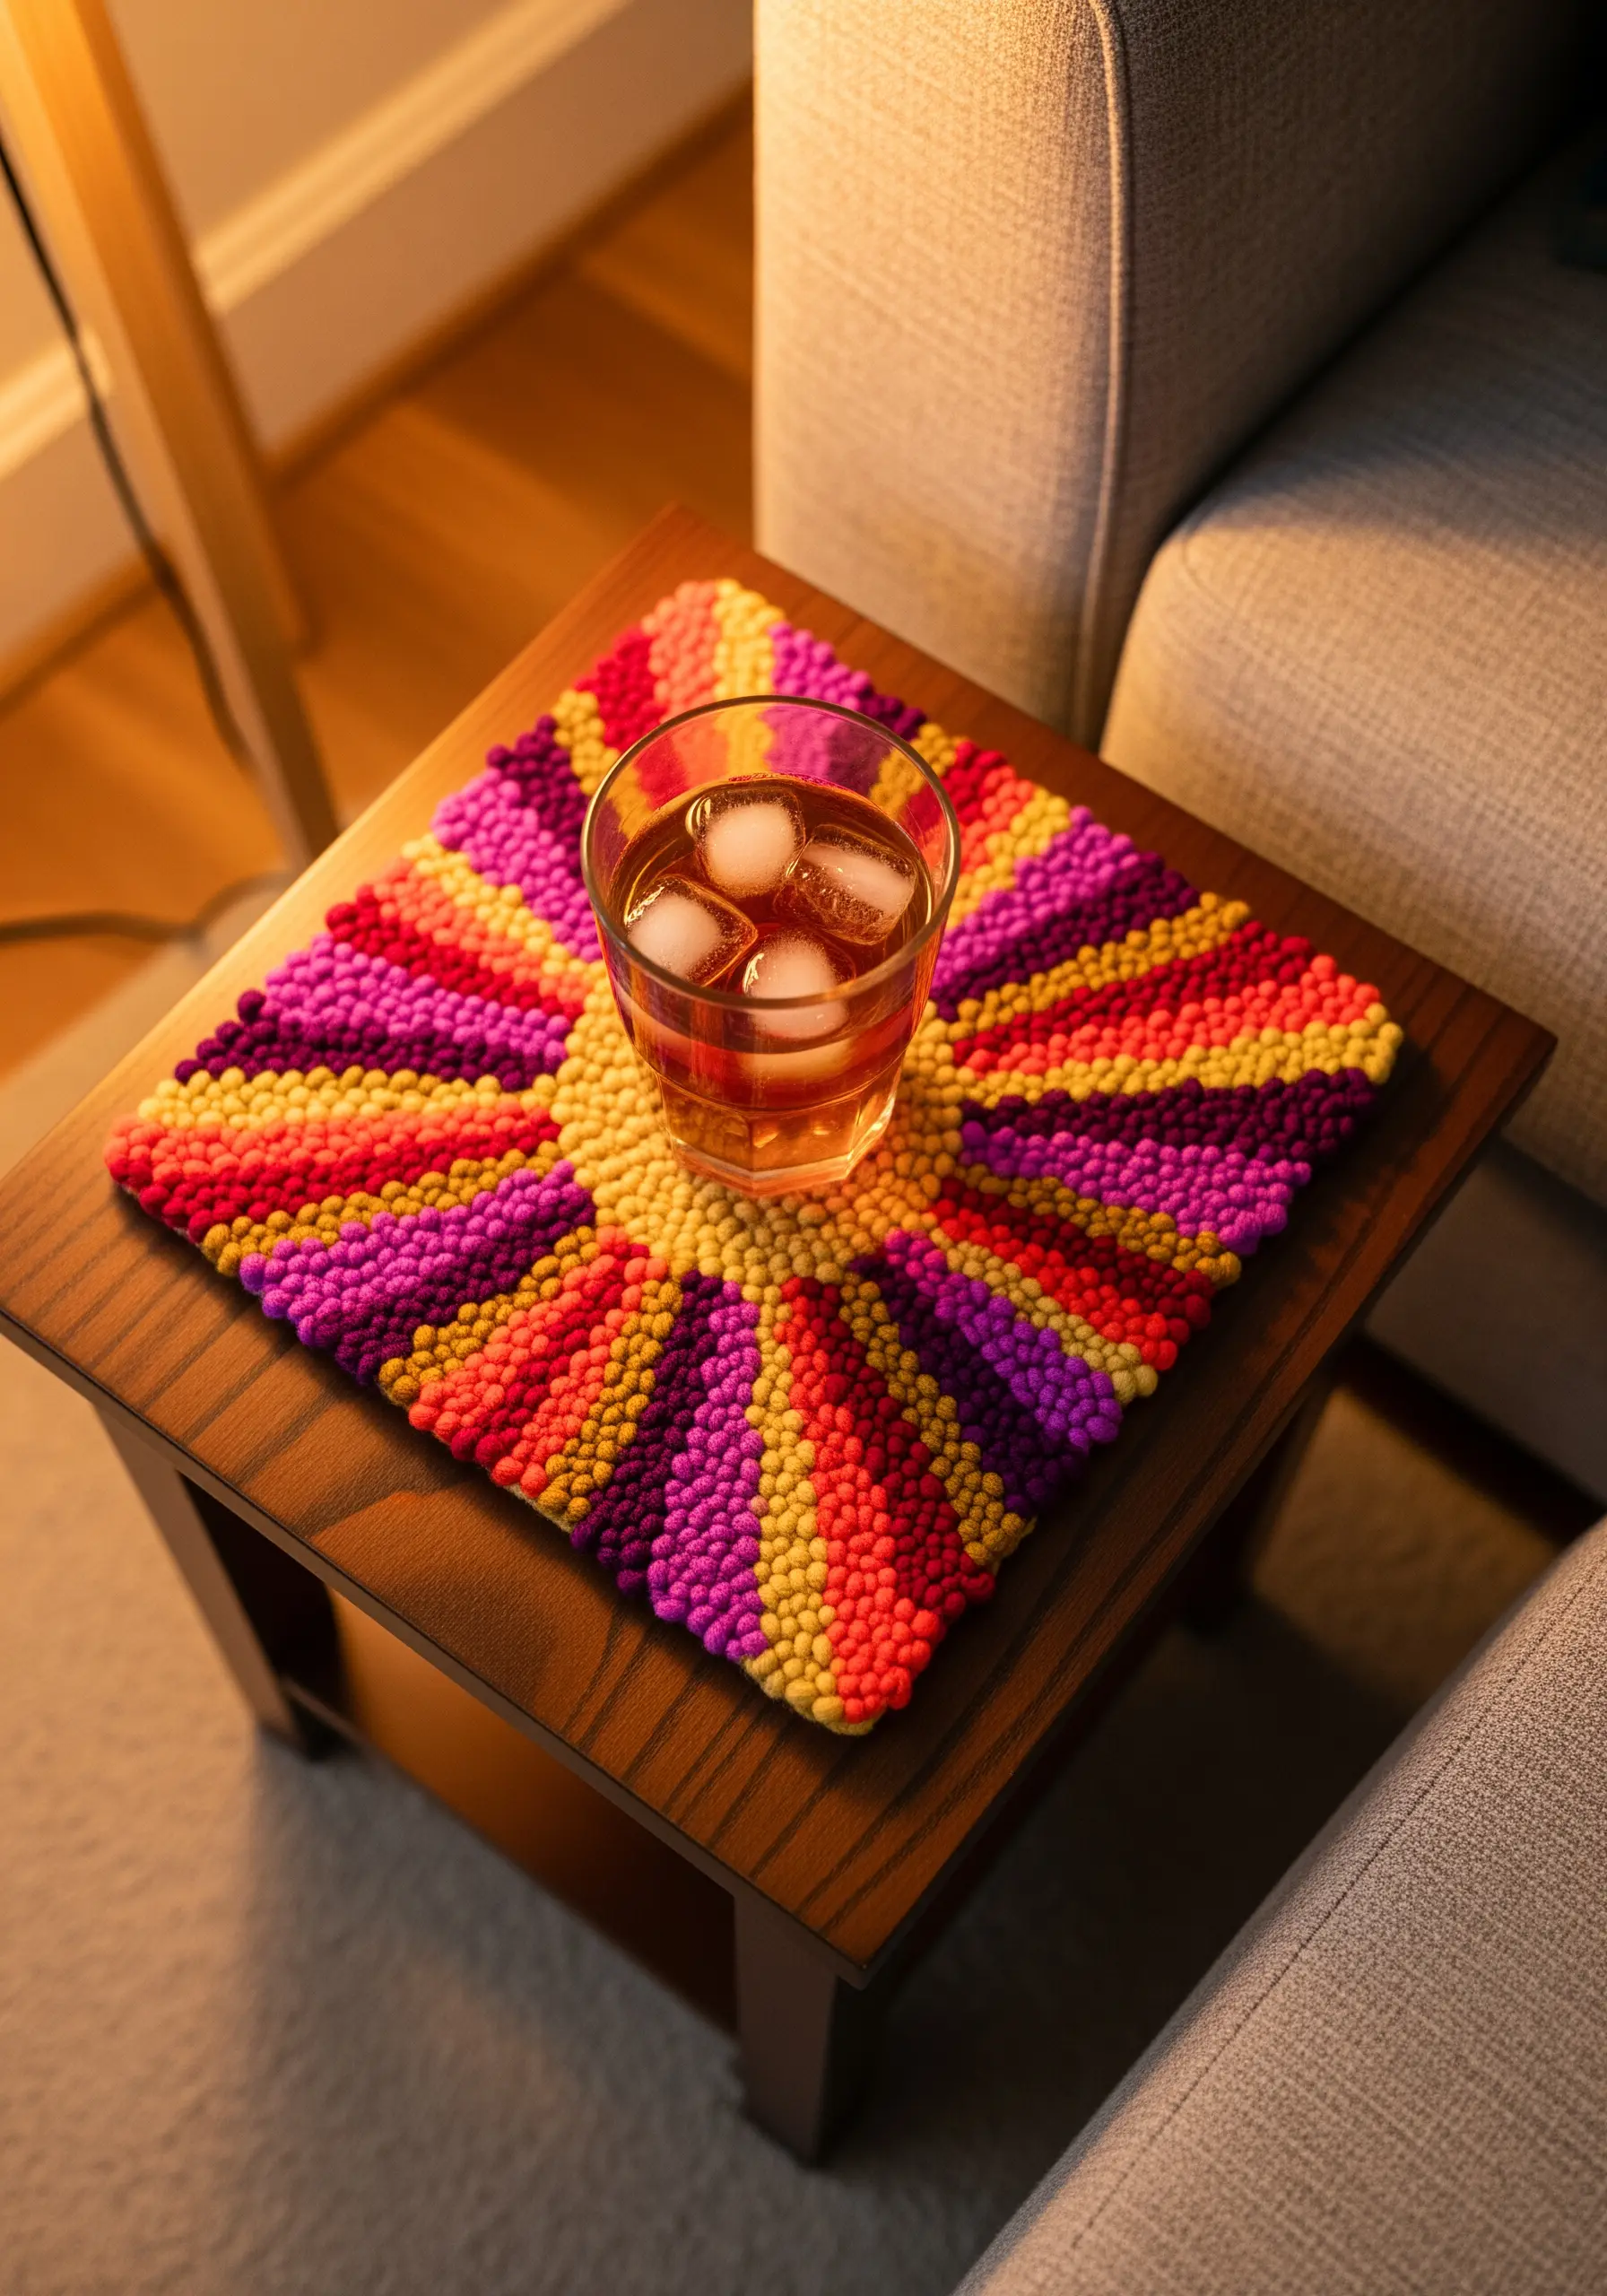
If you love the dense, nubby texture of punch needle but only have an embroidery needle, you can create a similar effect with tightly packed French knots.
Work in sections of color and fill each area completely with knots, placing them as close together as possible until no fabric shows through.
Use a thicker thread, like pearl cotton or all six strands of floss, to build up the texture more quickly.
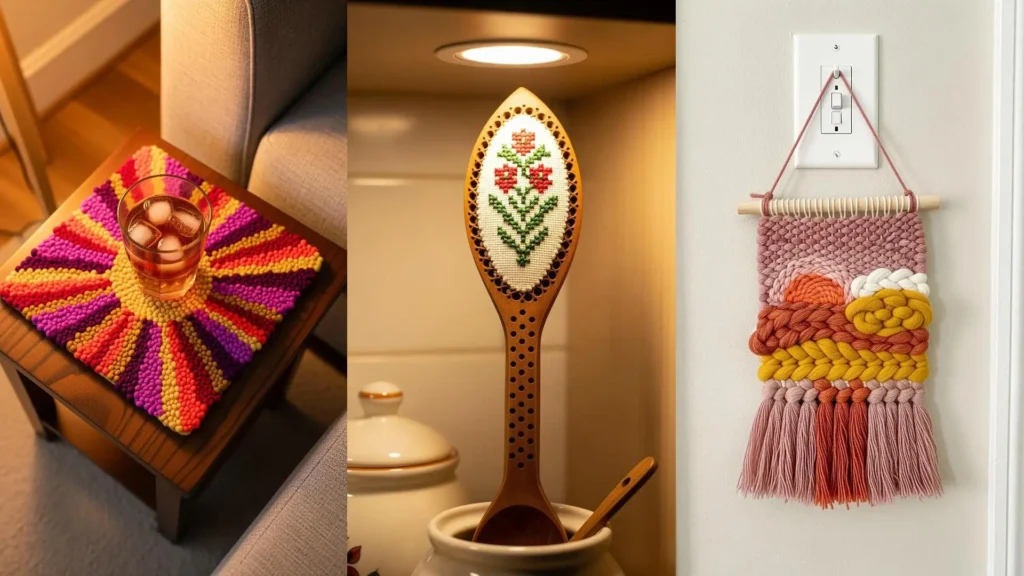
This method is perfect for creating vibrant, tactile pieces like coasters or small decorative mats that brighten any room.
12. Add Character with Decorative Stitches
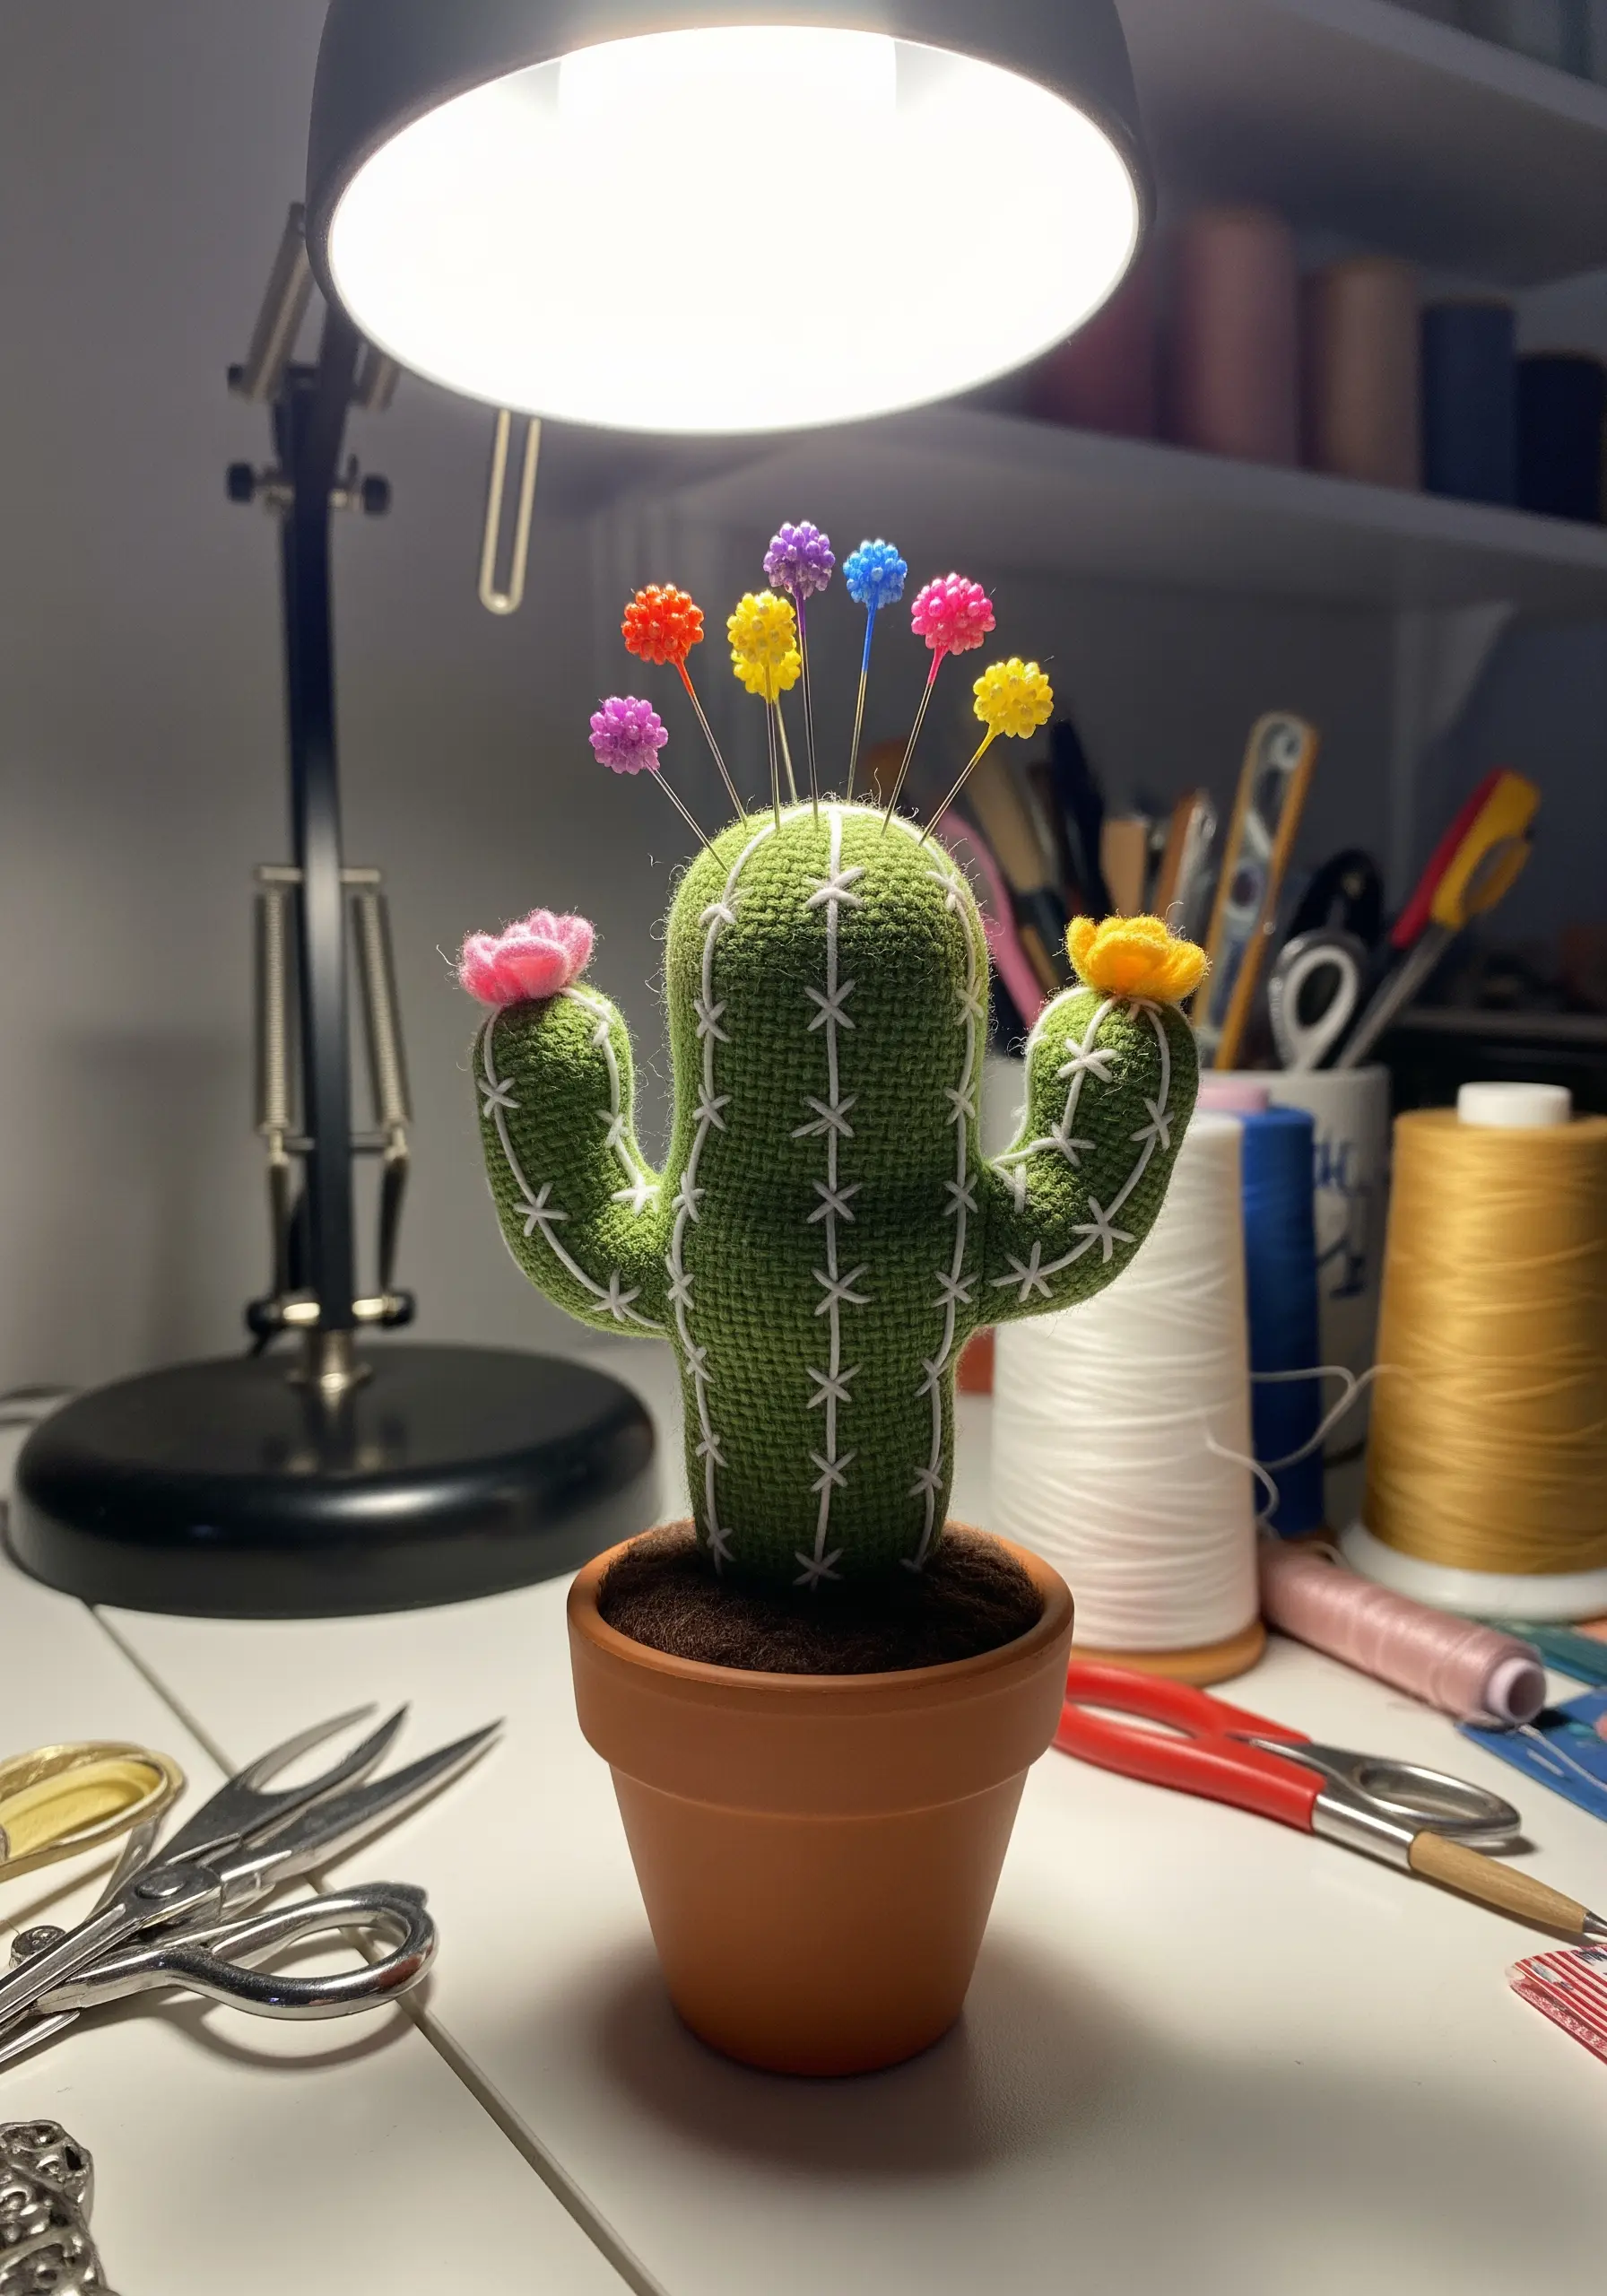
Elevate a simple three-dimensional object by adding graphic details with a contrasting thread color.
Once you have constructed a small plushie or pincushion, use a simple stitch like a running stitch, cross stitch, or backstitch to add personality.
The white stitches on this cactus define its shape and add a playful, illustrative quality that makes the piece more engaging.
This is a perfect technique for adding charm to houseplant embroidery motifs and other stuffed creations.
13. Create a Cohesive Botanical Set
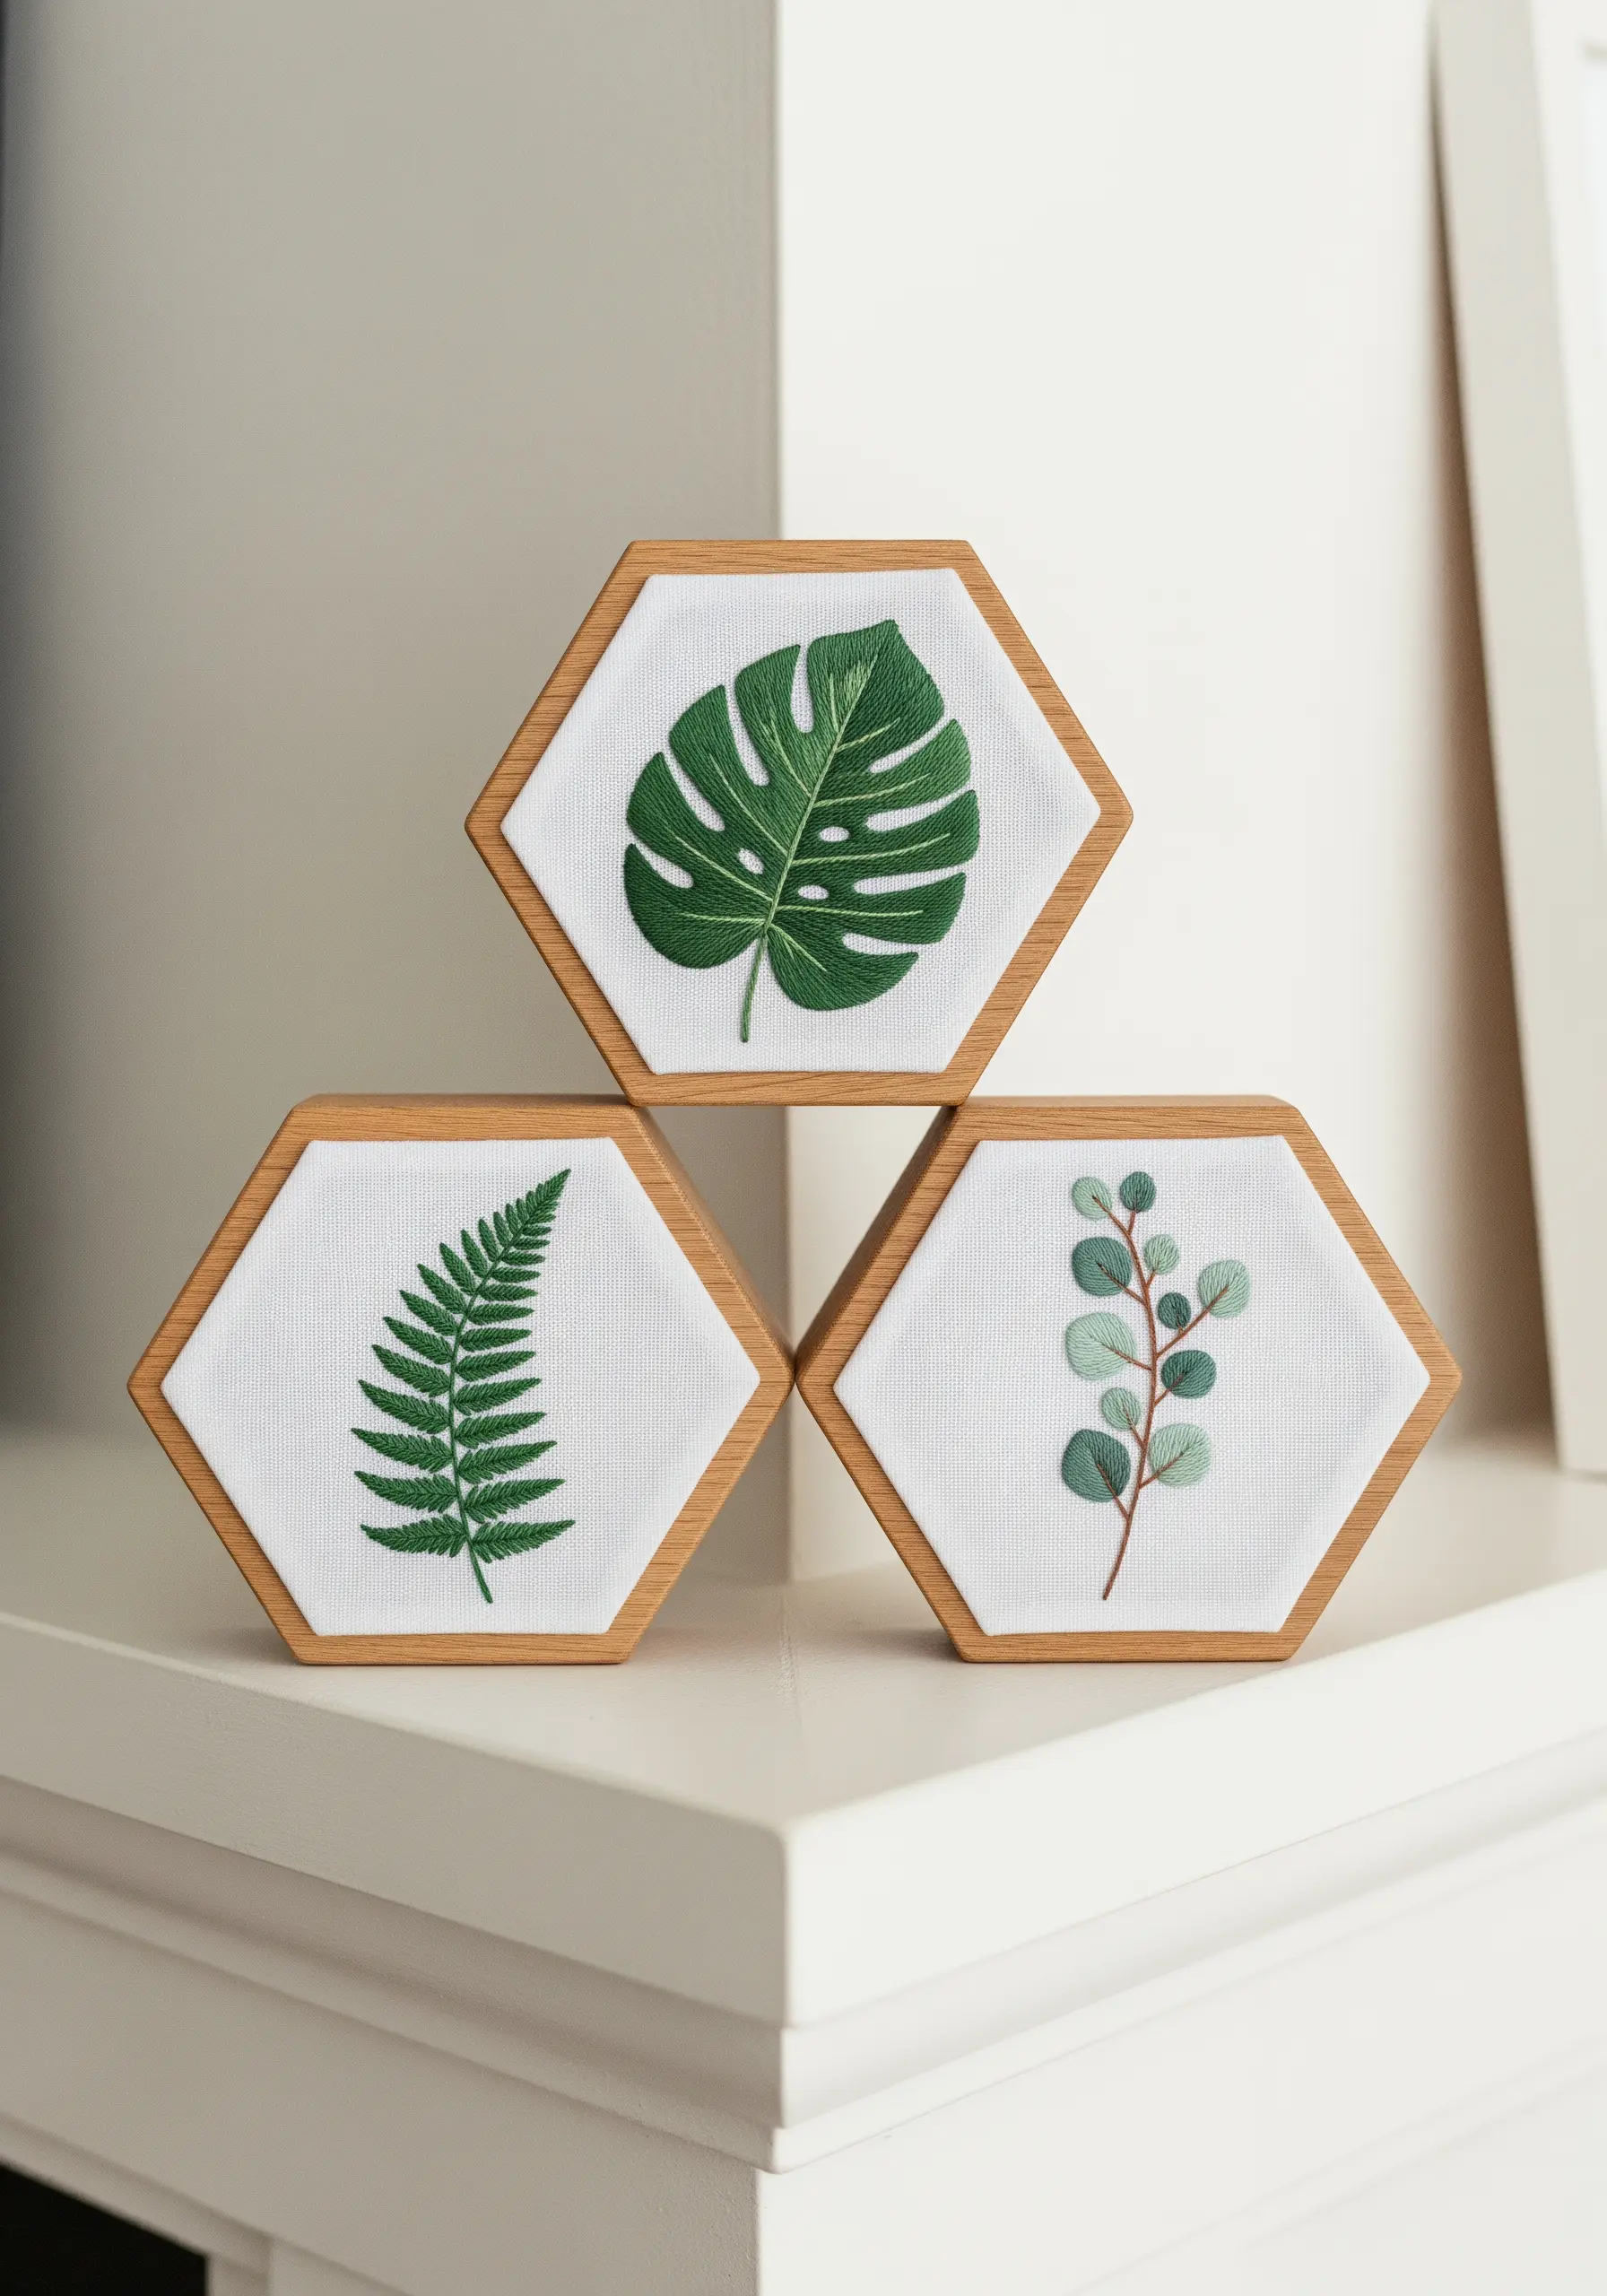
Group small, individual embroideries to create a larger, more impactful art installation.
To ensure the collection feels cohesive, use a consistent element across all pieces, such as the same color palette, fabric type, or unique frame shape.
For realistic leaves, use a long-and-short stitch to blend shades of green, creating natural-looking highlights and shadows.
These refined leaf shape ideas for embroidering realistic foliage look stunning when displayed as a triptych on a shelf or mantelpiece.
14. Explore Cross-Stitch on Wood
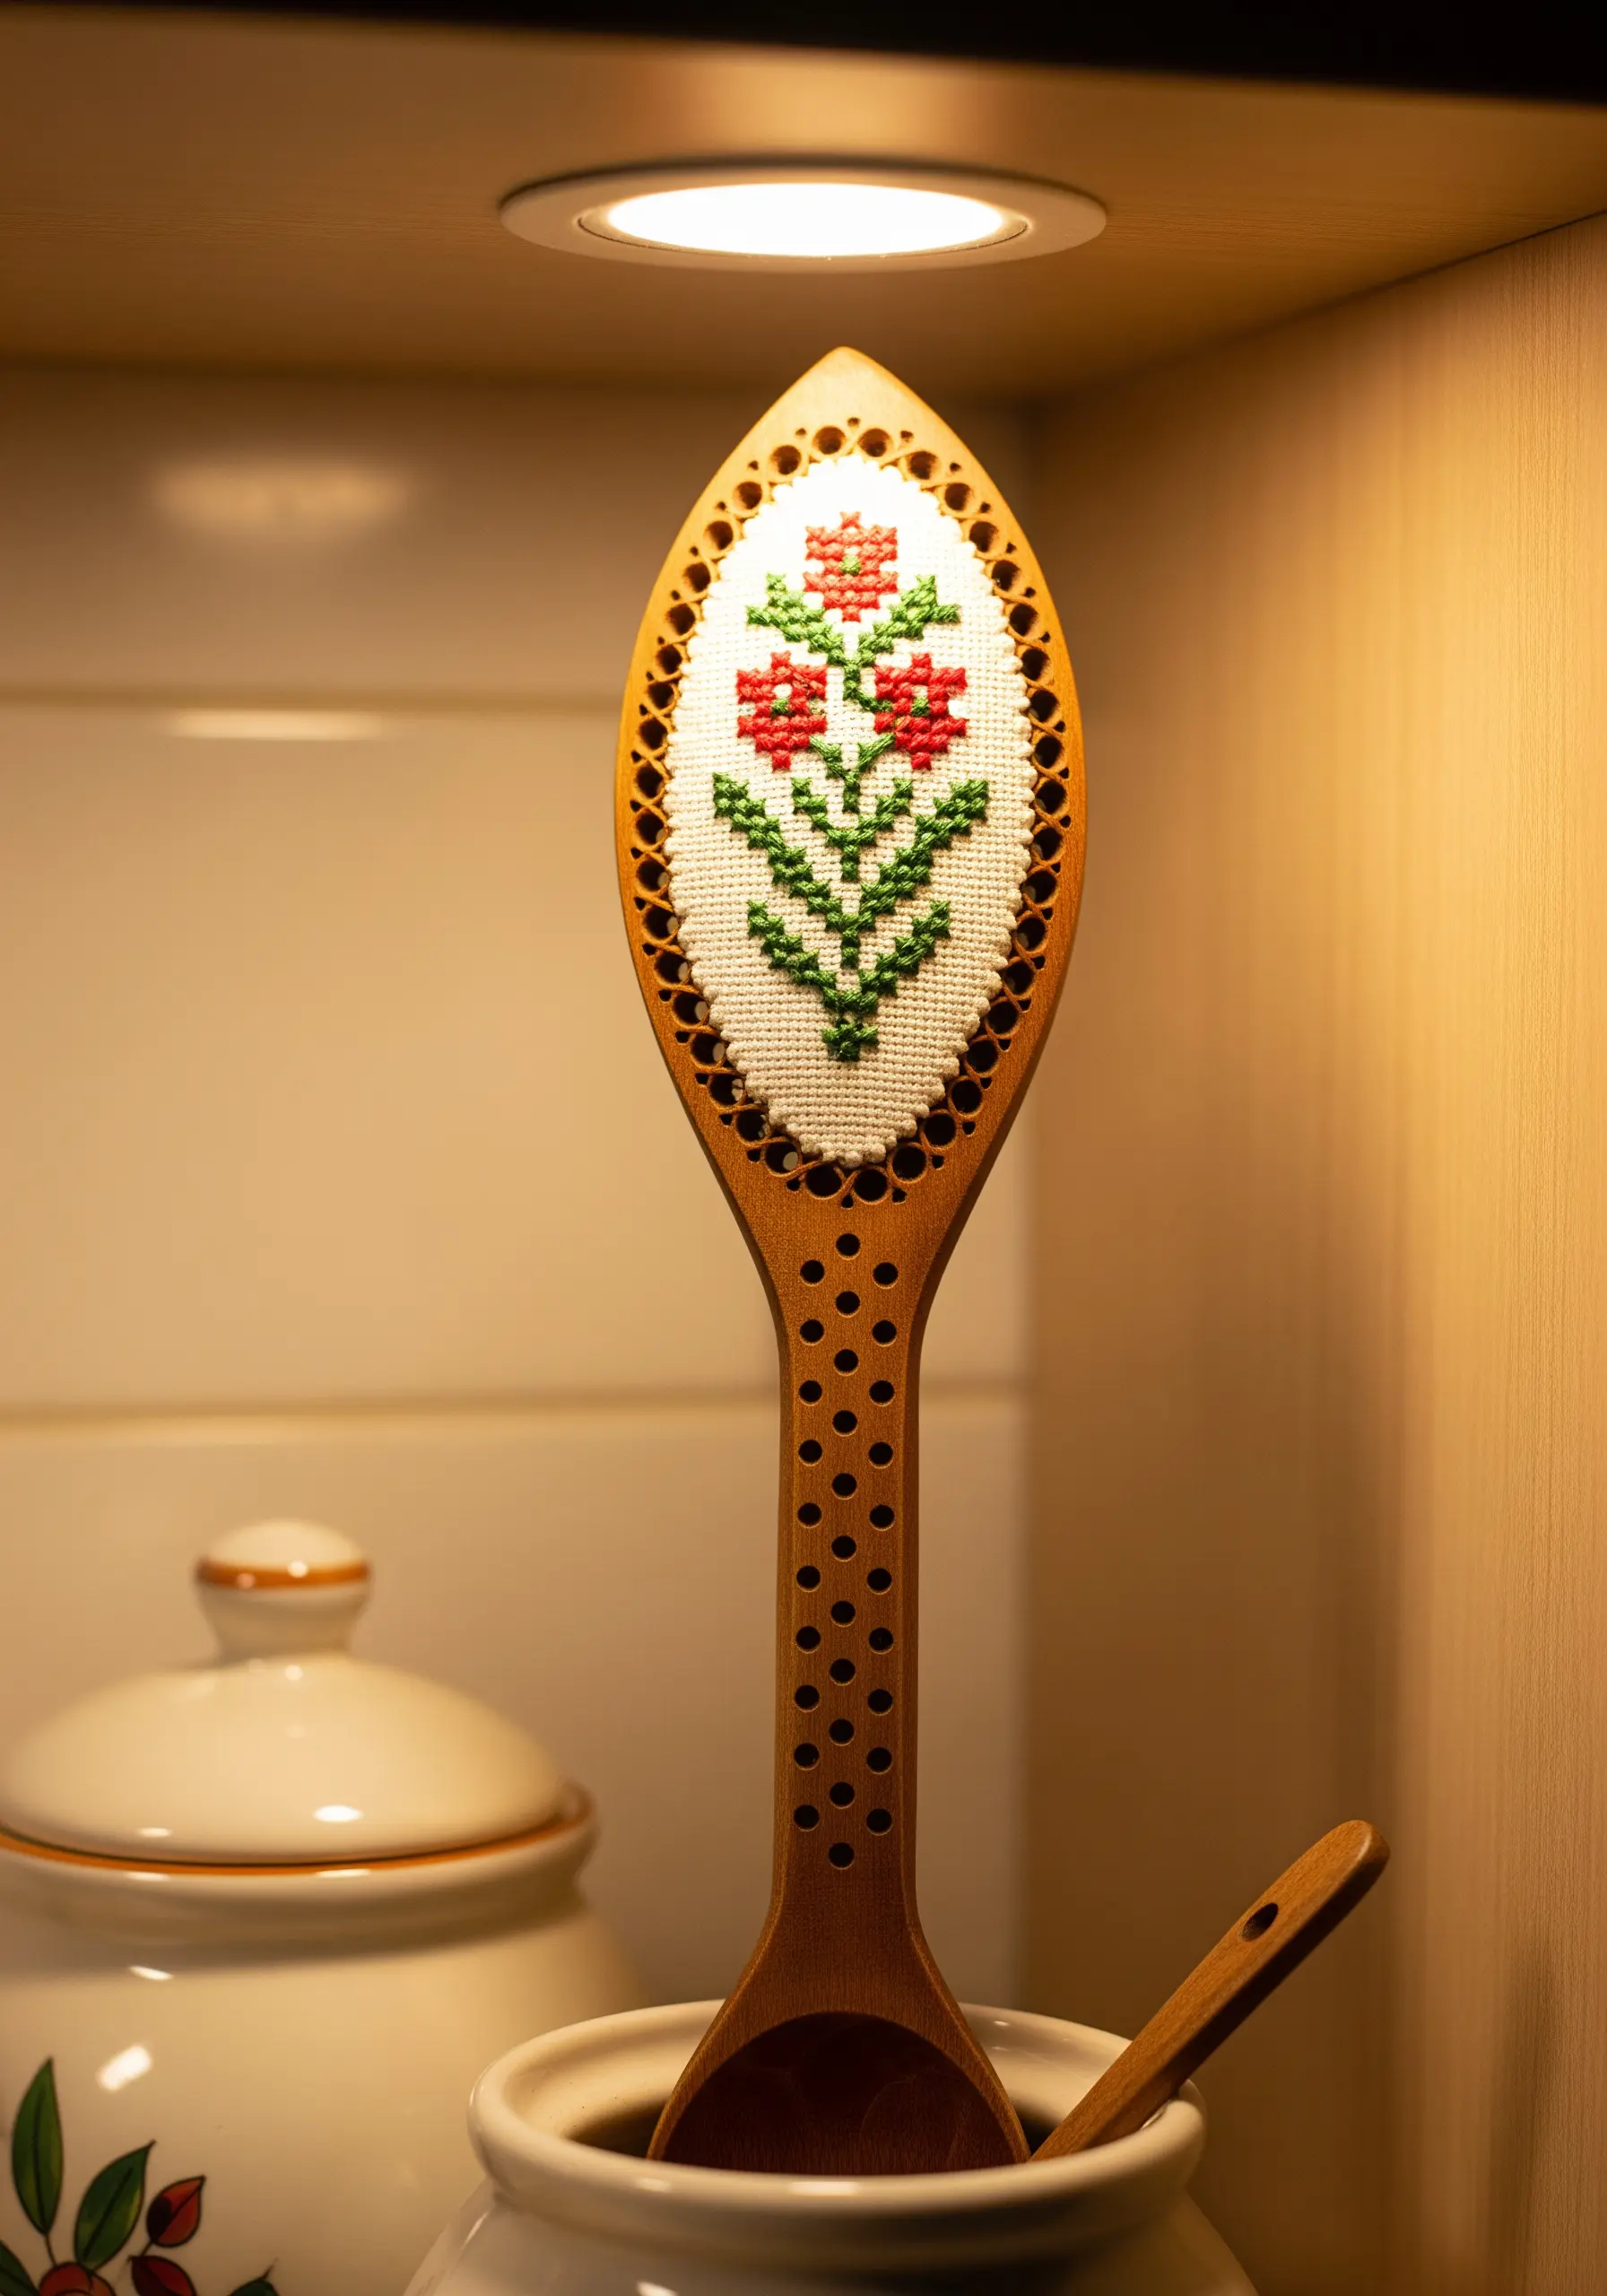
Take your cross-stitching beyond Aida cloth by working on unconventional perforated surfaces like wood, acrylic, or thick paper.
These materials provide a rigid structure that gives your work a unique, sculptural quality.
The contrast between the soft, pliable thread and the hard, natural base creates a beautiful rustic aesthetic.
Look for laser-cut blanks online or carefully drill your own grid into a thin piece of wood for truly charming DIY embroidery projects that blend craft with nature.
15. Paint with Thread and Beads
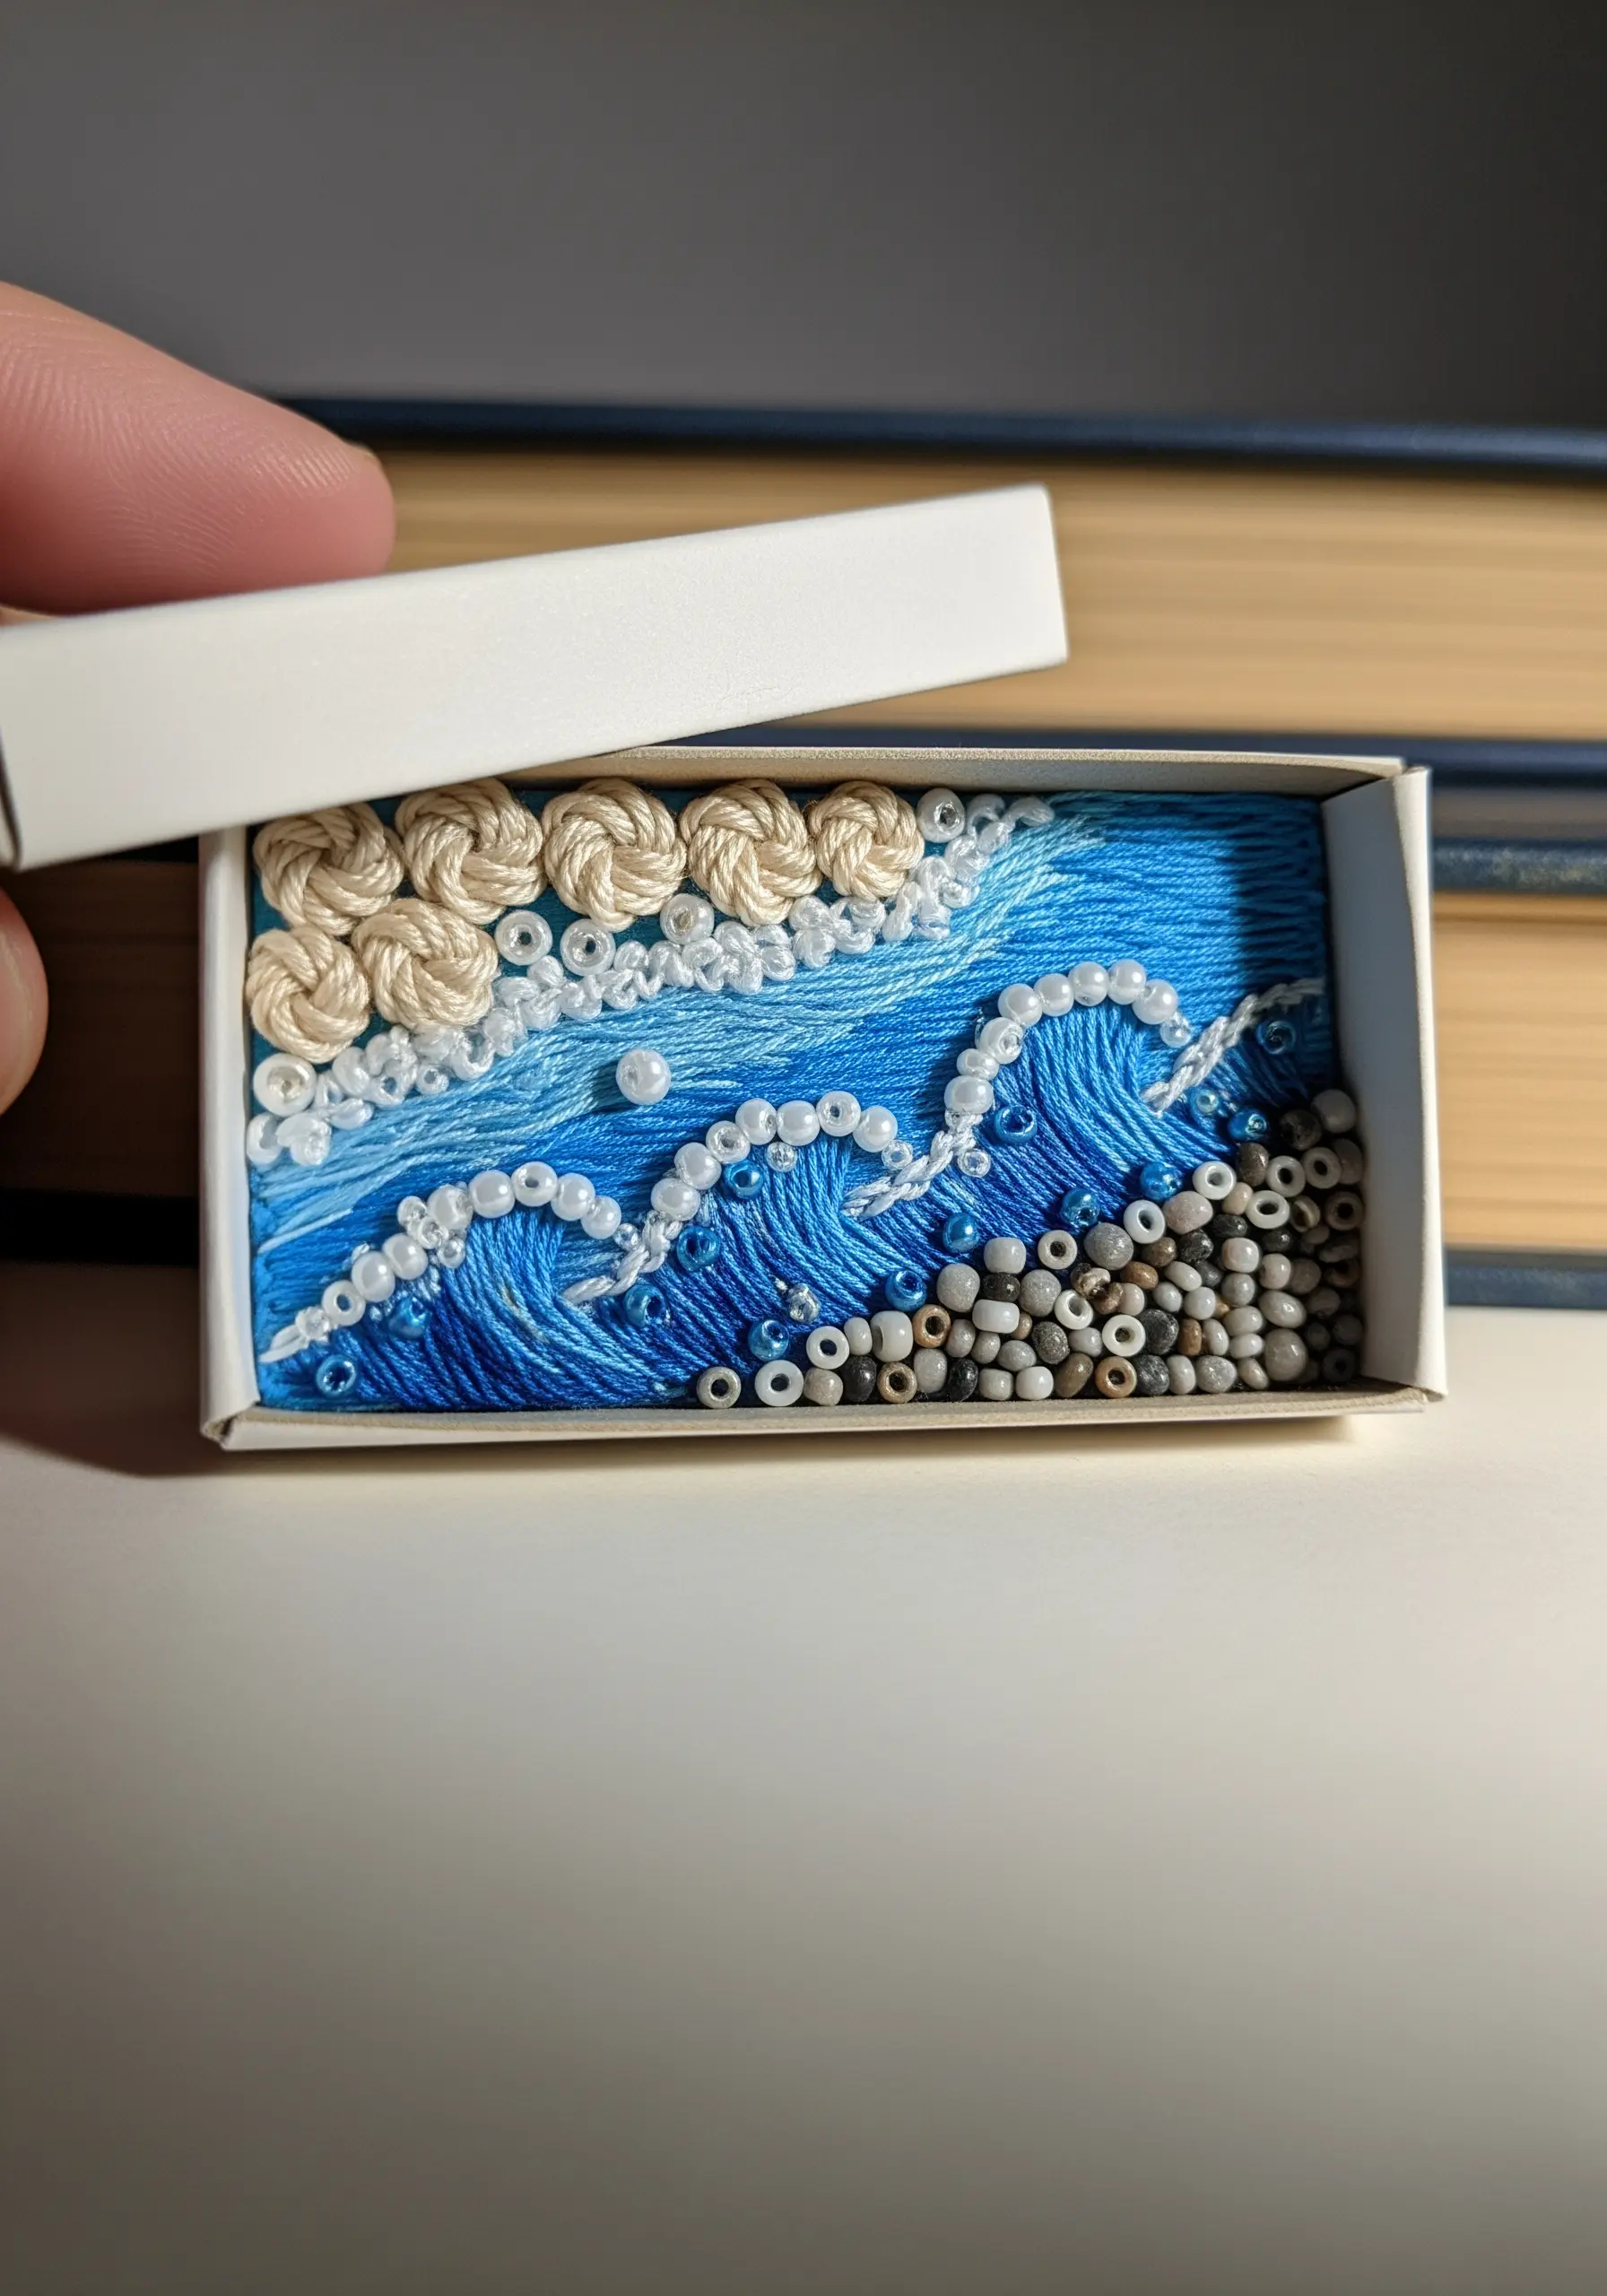
Combine beading and embroidery to create miniature scenes with incredible depth and texture.
Use satin stitch with different shades of blue to represent the movement of water, and then add a line of white seed beads to mimic sparkling sea foam.
Tiny, irregular beads in earthy tones make a perfect stand-in for a pebbled shore, providing a gritty contrast to the smooth thread.
This mixed-media approach is ideal for minimal ocean-inspired embroidery pieces, capturing the dynamic essence of the sea in a tiny space.
16. Cover an Object with Embroidery
Turn an everyday object, like a plain drawer knob, into a piece of functional art by covering it with a small piece of your embroidery.
Stitch your design on a circle of fabric that is larger than the object’s surface.
Place the object in the center and pull the fabric taut around the back, securing it with a running stitch along the edge and pulling it tight like a drawstring.
This technique allows you to create creative handmade art objects that seamlessly integrate into your living space.
17. Stitch a Padded Word
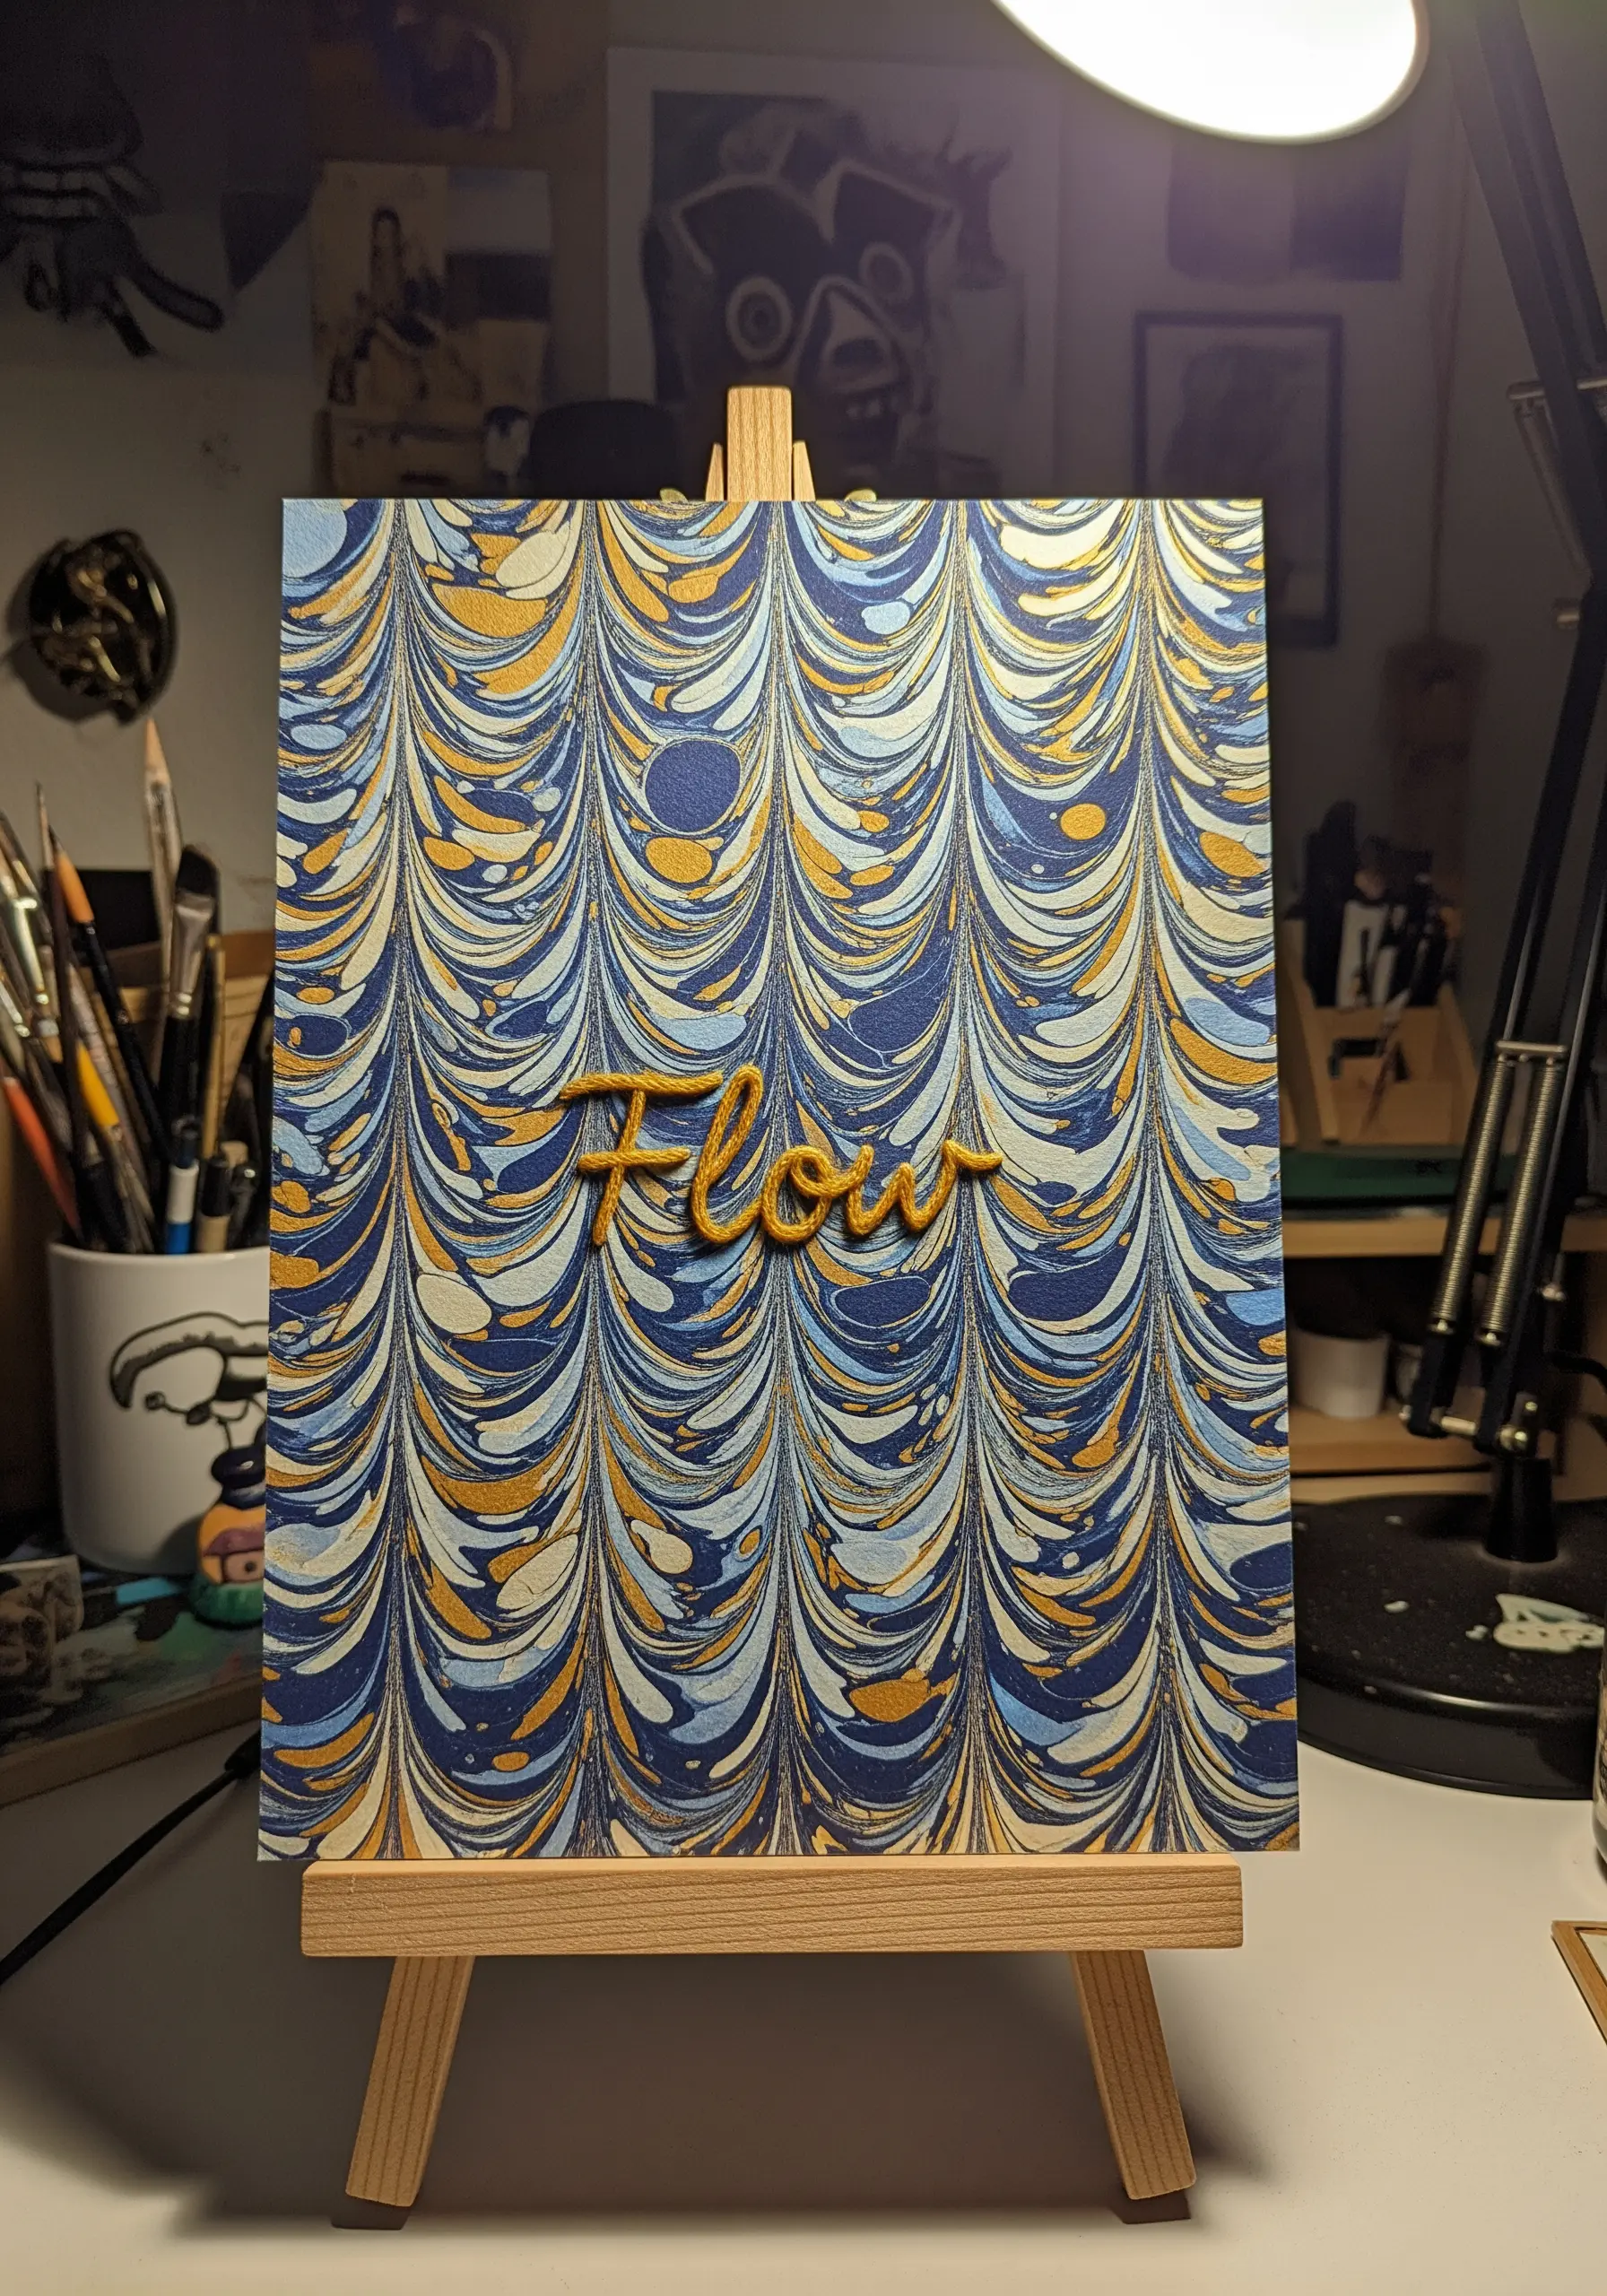
To make embroidered lettering stand out with a 3D effect, use a padded satin stitch.
First, stitch the outline of your word using a split stitch. Then, fill the inside of the letters with a layer of small, straight seed stitches.
Finally, cover the entire shape with satin stitches worked perpendicular to the underlay stitches. This padding lifts the final layer, giving it a raised, dimensional quality.
This technique turns simple text into striking paper art projects when stitched on unconventional surfaces.
18. Add Elegance to Velvet
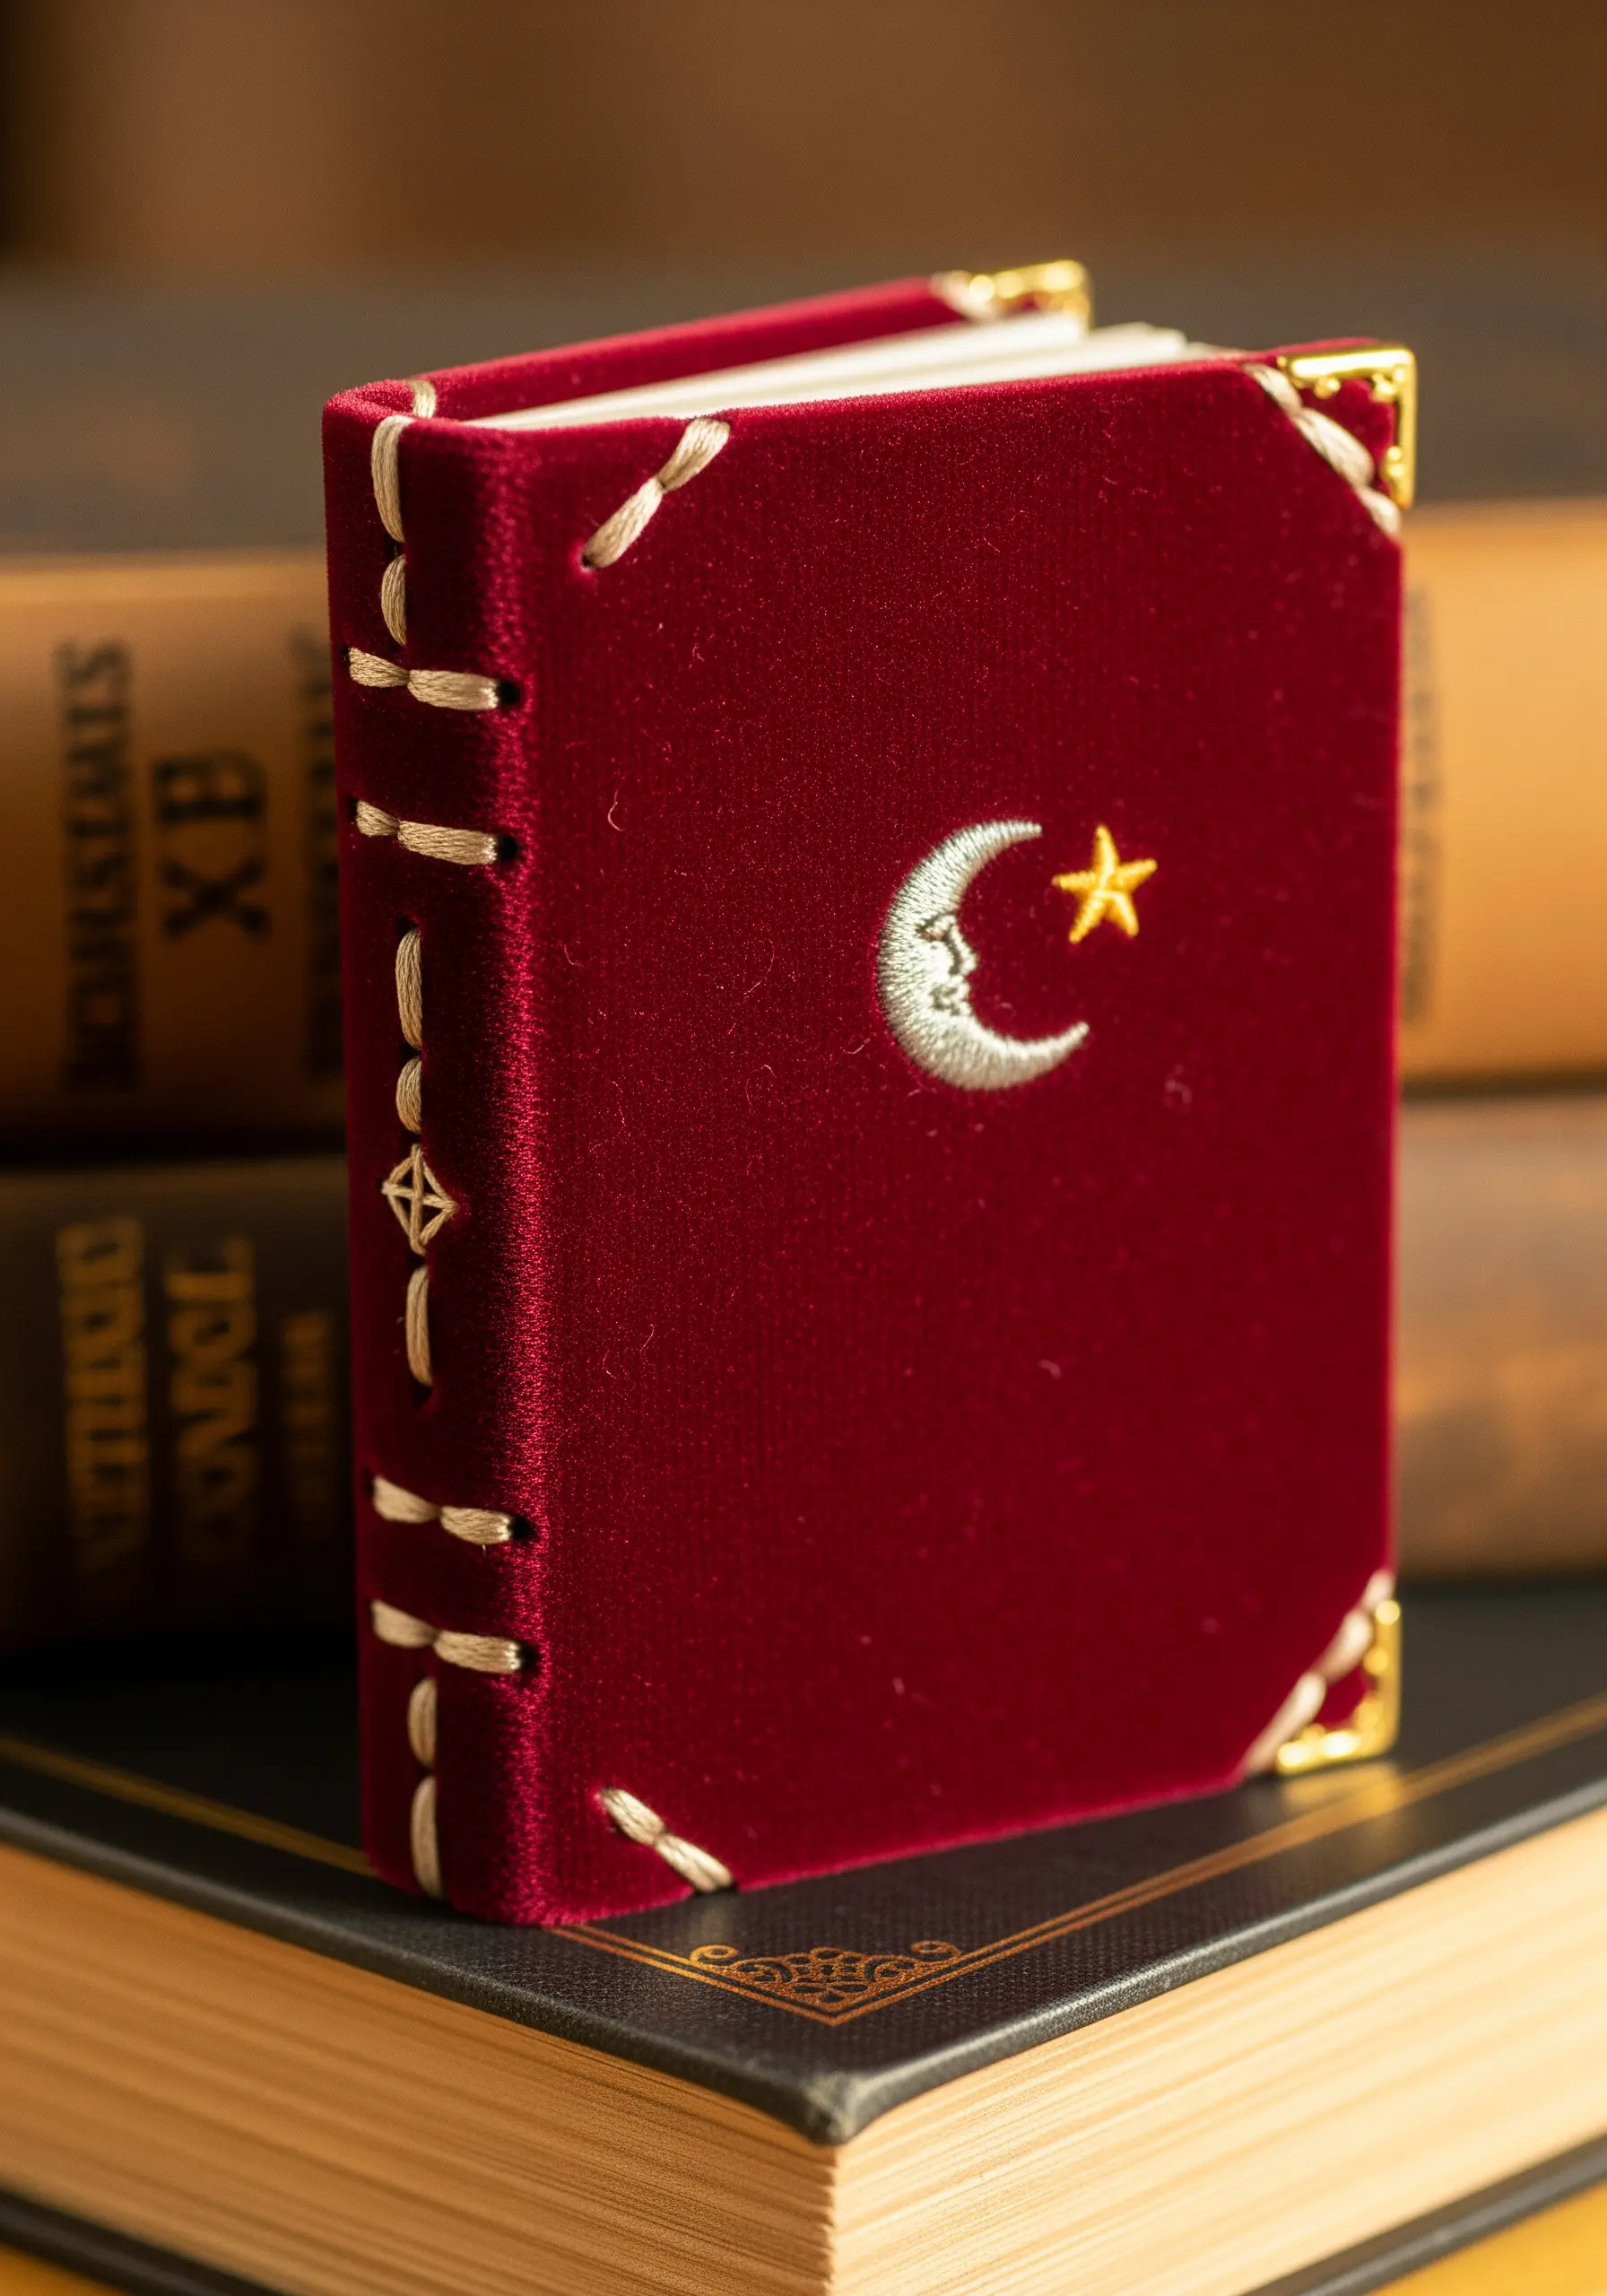
When embroidering on a high-pile fabric like velvet, choose your stitches and thread carefully to ensure they don’t get lost.
A light-reflecting metallic thread or a smooth pearl cotton will stand out beautifully against the plush texture.
Simple, bold stitches like satin stitch, chain stitch, or French knots are more effective than delicate line work.
Always use a stabilizer to prevent the fabric from shifting and to support the stitches, creating crisp motifs for small, sweet embroidery ideas on your journal covers or other precious items.
19. Create Stained-Glass Suncatchers
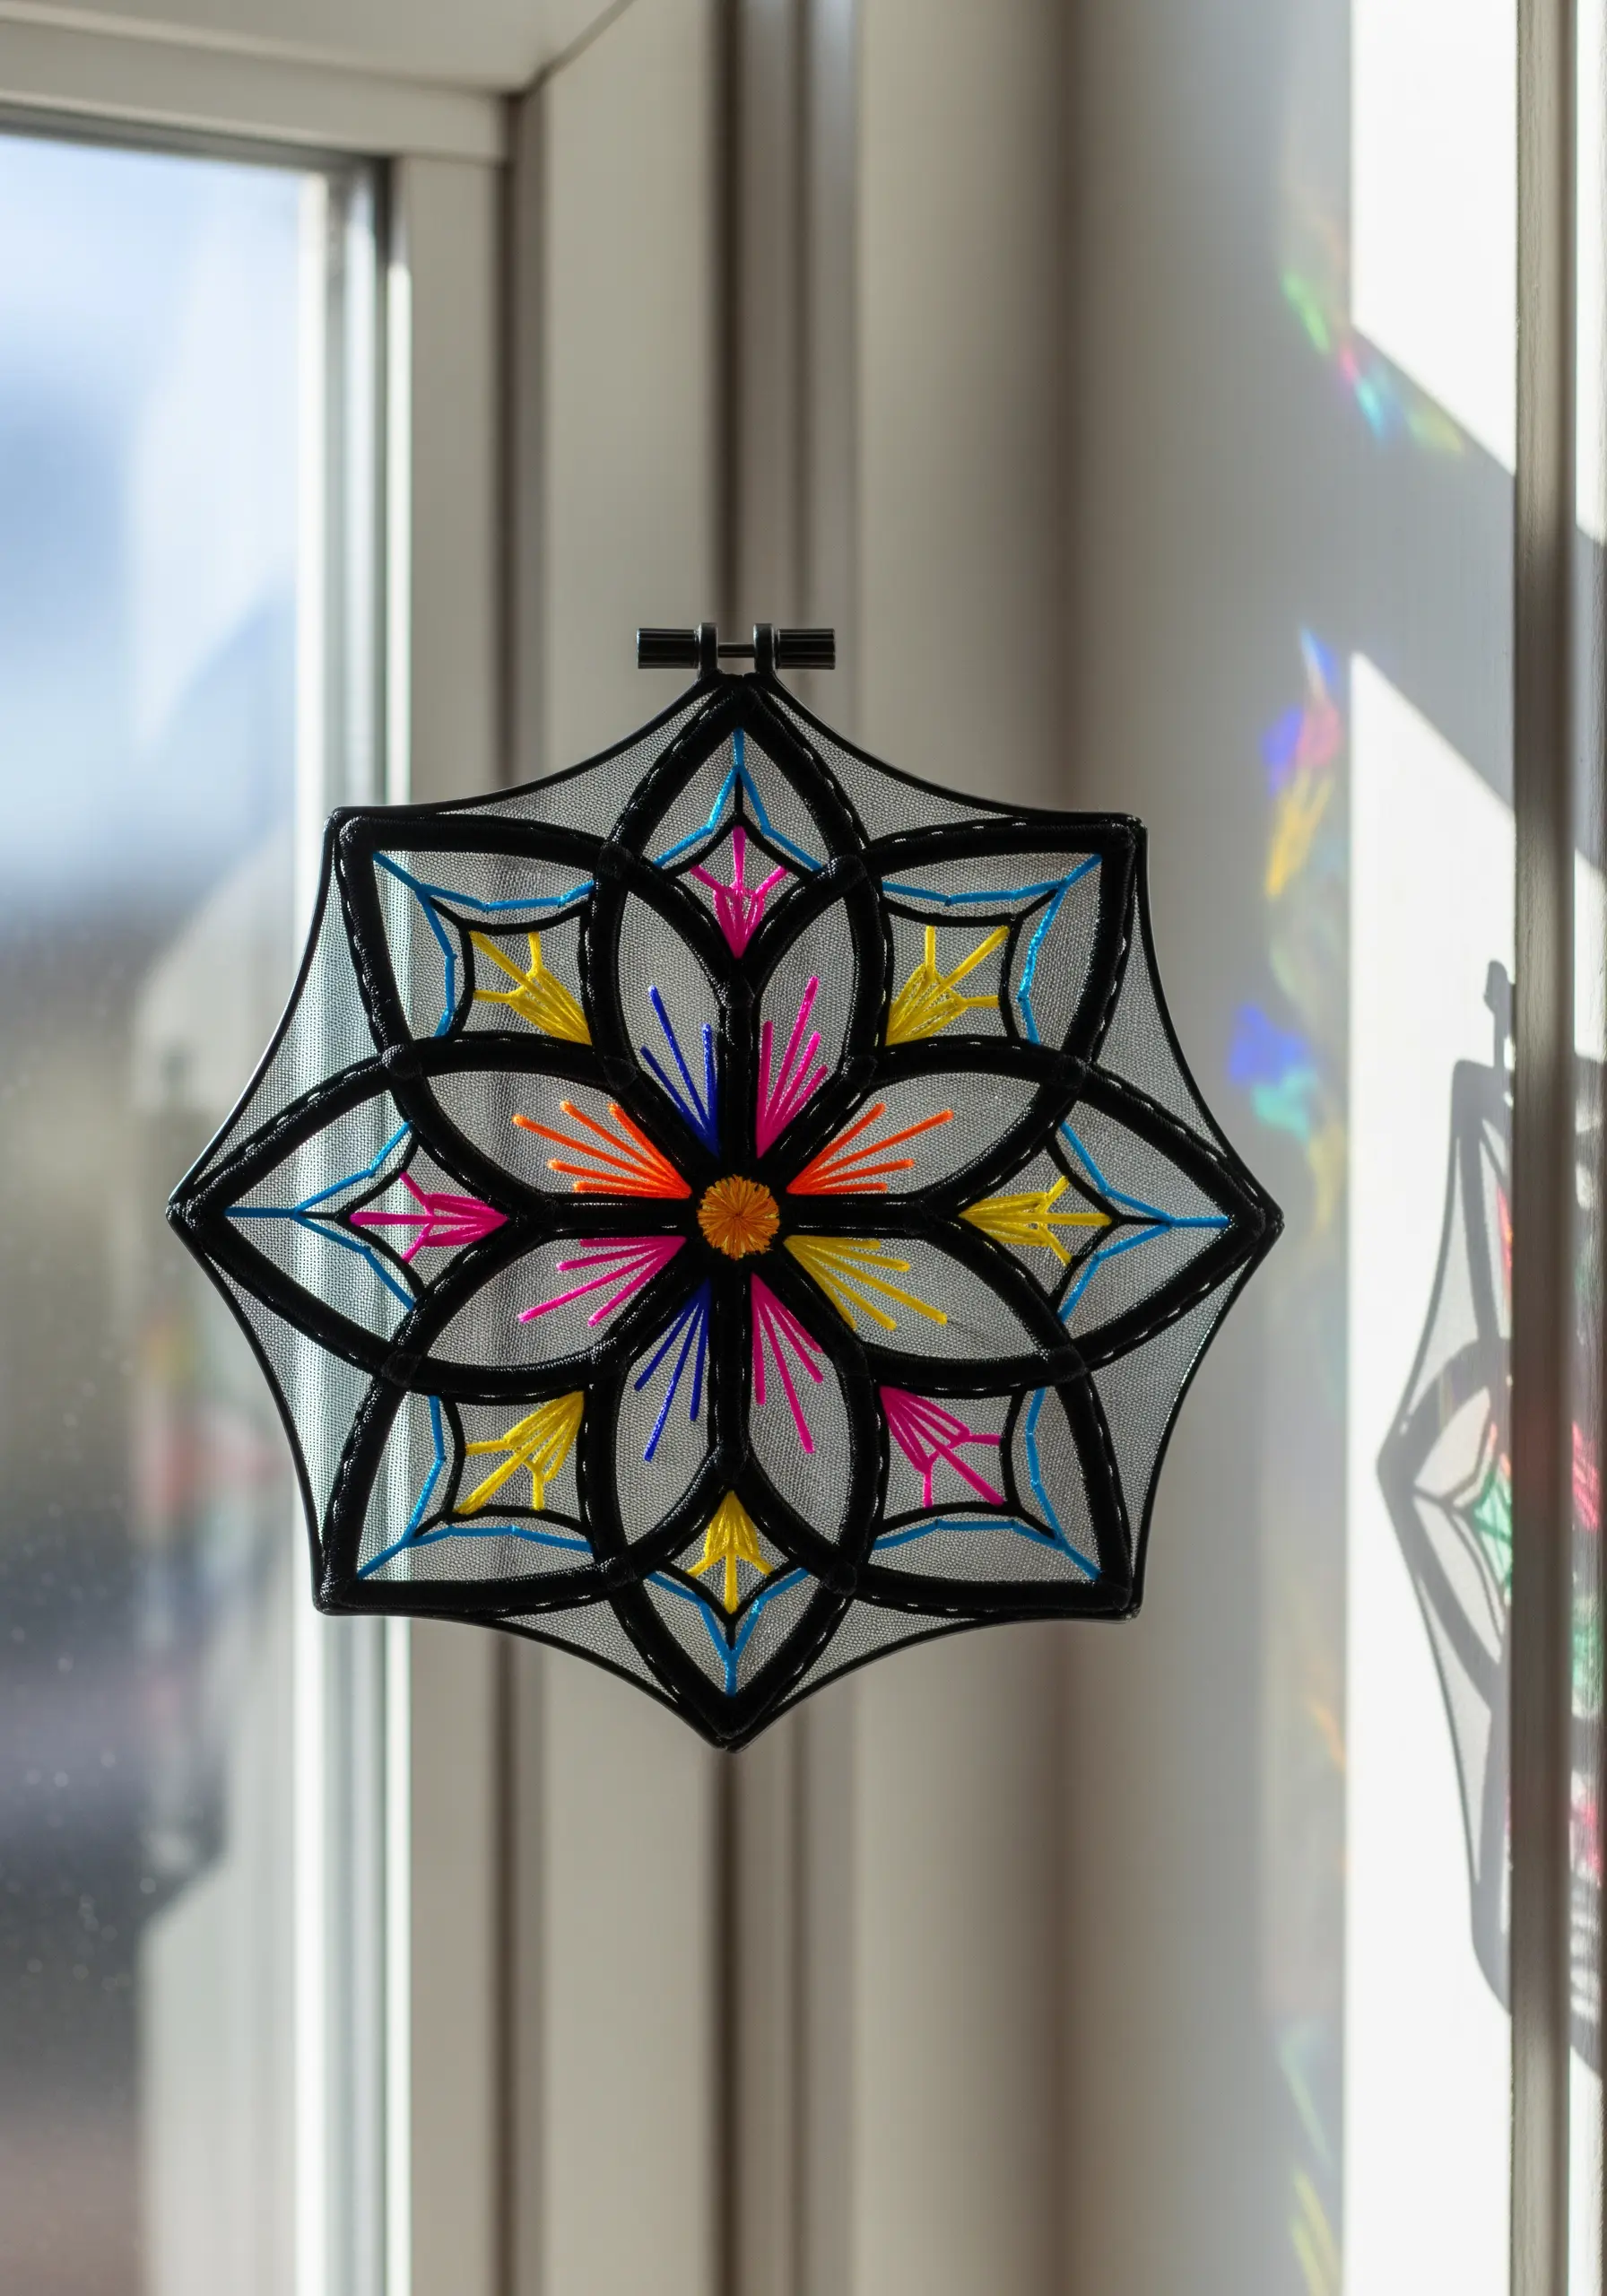
Stitch on a sheer fabric like tulle or organza to create a stunning suncatcher that plays with light and shadow.
Use a bold, dark thread for the outlines to mimic the lead lines in stained glass, then fill the sections with vibrant colors.
Since both sides of the work are visible, you must be meticulous about hiding your thread tails by weaving them discreetly behind your stitches.
These geometric framed embroidery patterns look magical when hung in a window where light can pass through them.


