

Your workspace is more than just a desk and a chair; it’s a place where you focus, create, and spend a significant part of your day. It deserves to feel like an extension of you—calm, inspiring, and personal.
Instead of thinking about a complete overhaul, consider the transformative power of a single, thoughtfully crafted detail. An embroidered accent, whether it’s a tiny motif on a pen holder or a textured cushion for your chair, can quietly redefine the atmosphere of your entire space.
These projects are designed to do just that. They aren’t about overwhelming complexity, but about showing you how precise stitches and careful material choices can turn everyday objects into small works of art. Let’s add a touch of handcrafted intention to your desk, together.
1. Botanical Depth with Layered Foliage
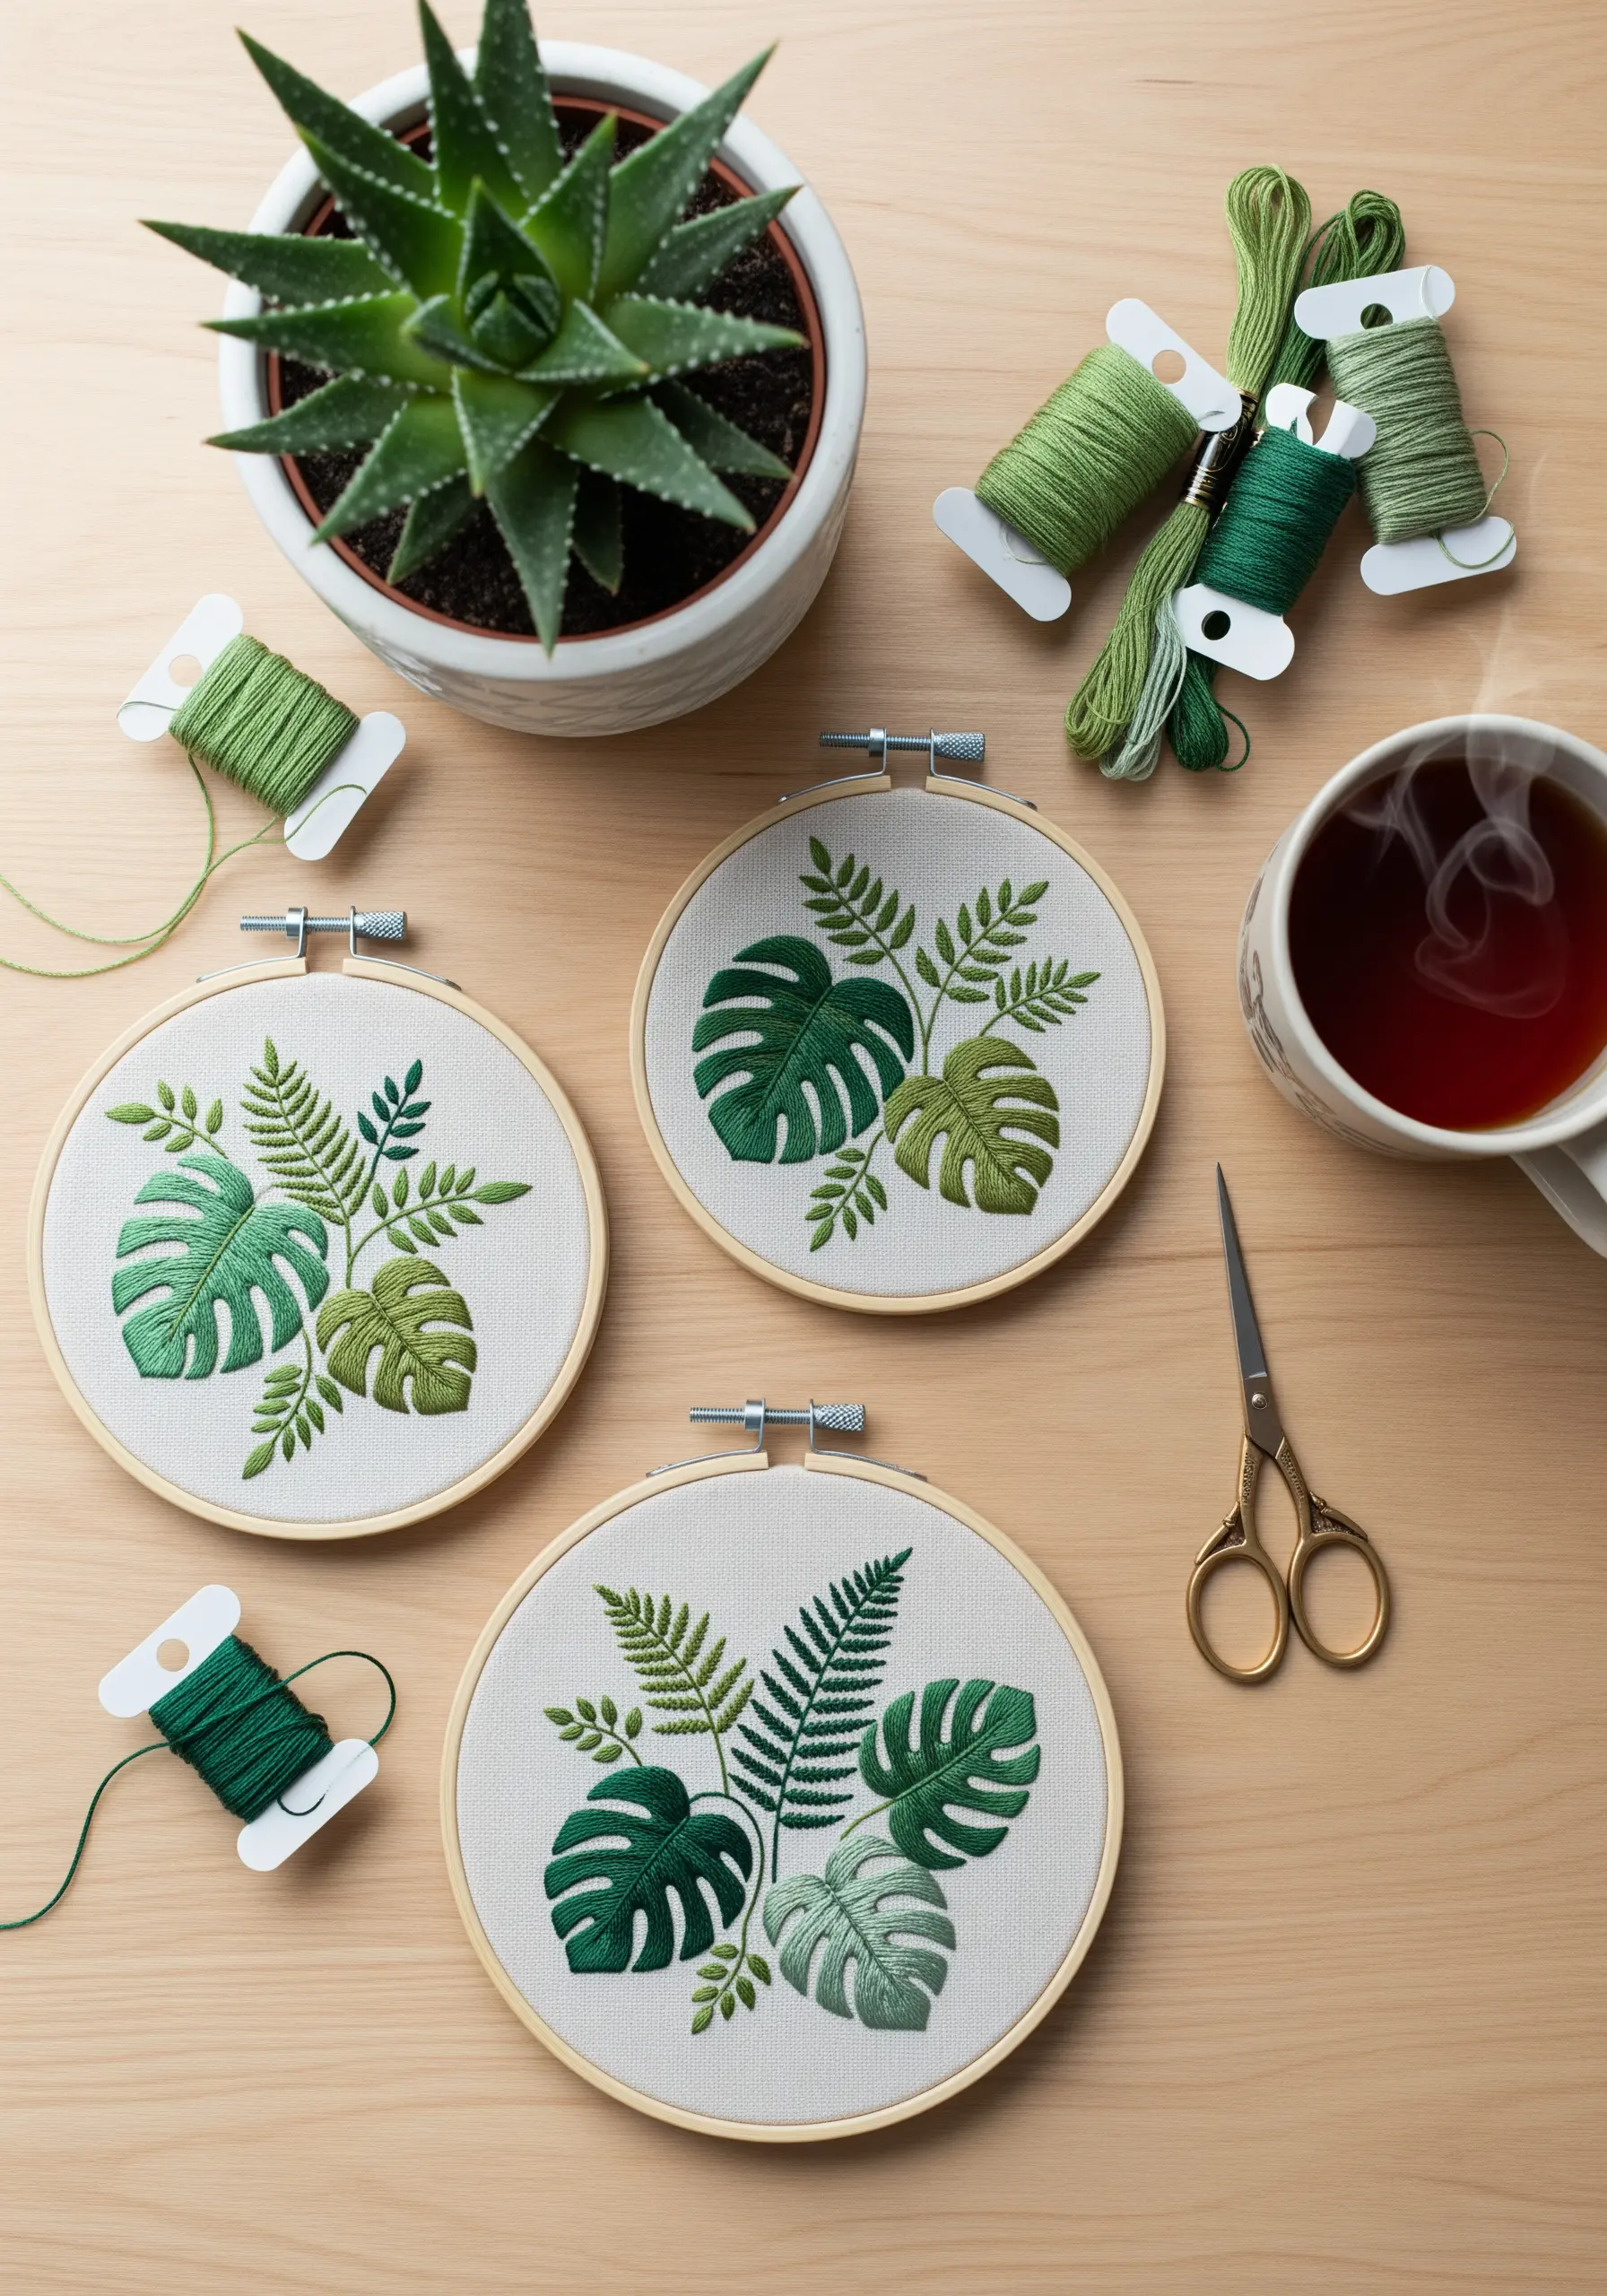
To prevent your botanical hoops from looking flat, create a sense of depth by varying your stitch direction and thread weight.
Use a dense, smooth satin stitch for the prominent Monstera leaves, ensuring your stitches follow the natural curve of each leaf section.
For the delicate fern fronds in the background, switch to a lighter weight thread (two strands instead of three) and use a simple fishbone stitch to create texture that recedes visually.
Define the edges of your most forward leaves with a single, sharp line of split stitch; this small detail acts like an artist’s ink outline, bringing focus and polish to the composition.
This approach transforms a simple pattern into a dynamic, layered botanical study, demonstrating the power of texture over color alone.
2. Ethereal Dandelions on Soft Felt

Transform a simple tin can into an elegant pen holder by wrapping it in felt, a forgiving surface for embroidery.
For the dandelion heads, use a series of straight stitches radiating from a central point, then cap them with tiny French knots to mimic the fluffy seed heads.
To create the illusion of seeds floating away, use only a single strand of silvery-white thread for the delicate, drifting parachutes.
This contrast between the dense, soft texture of the felt and the weightless quality of the single-strand stitches is what gives the design its refined, airy feel.
Secure the felt to the can with a strong fabric glue for a seamless, professional finish.
3. Graphic Texture with Couching Stitches
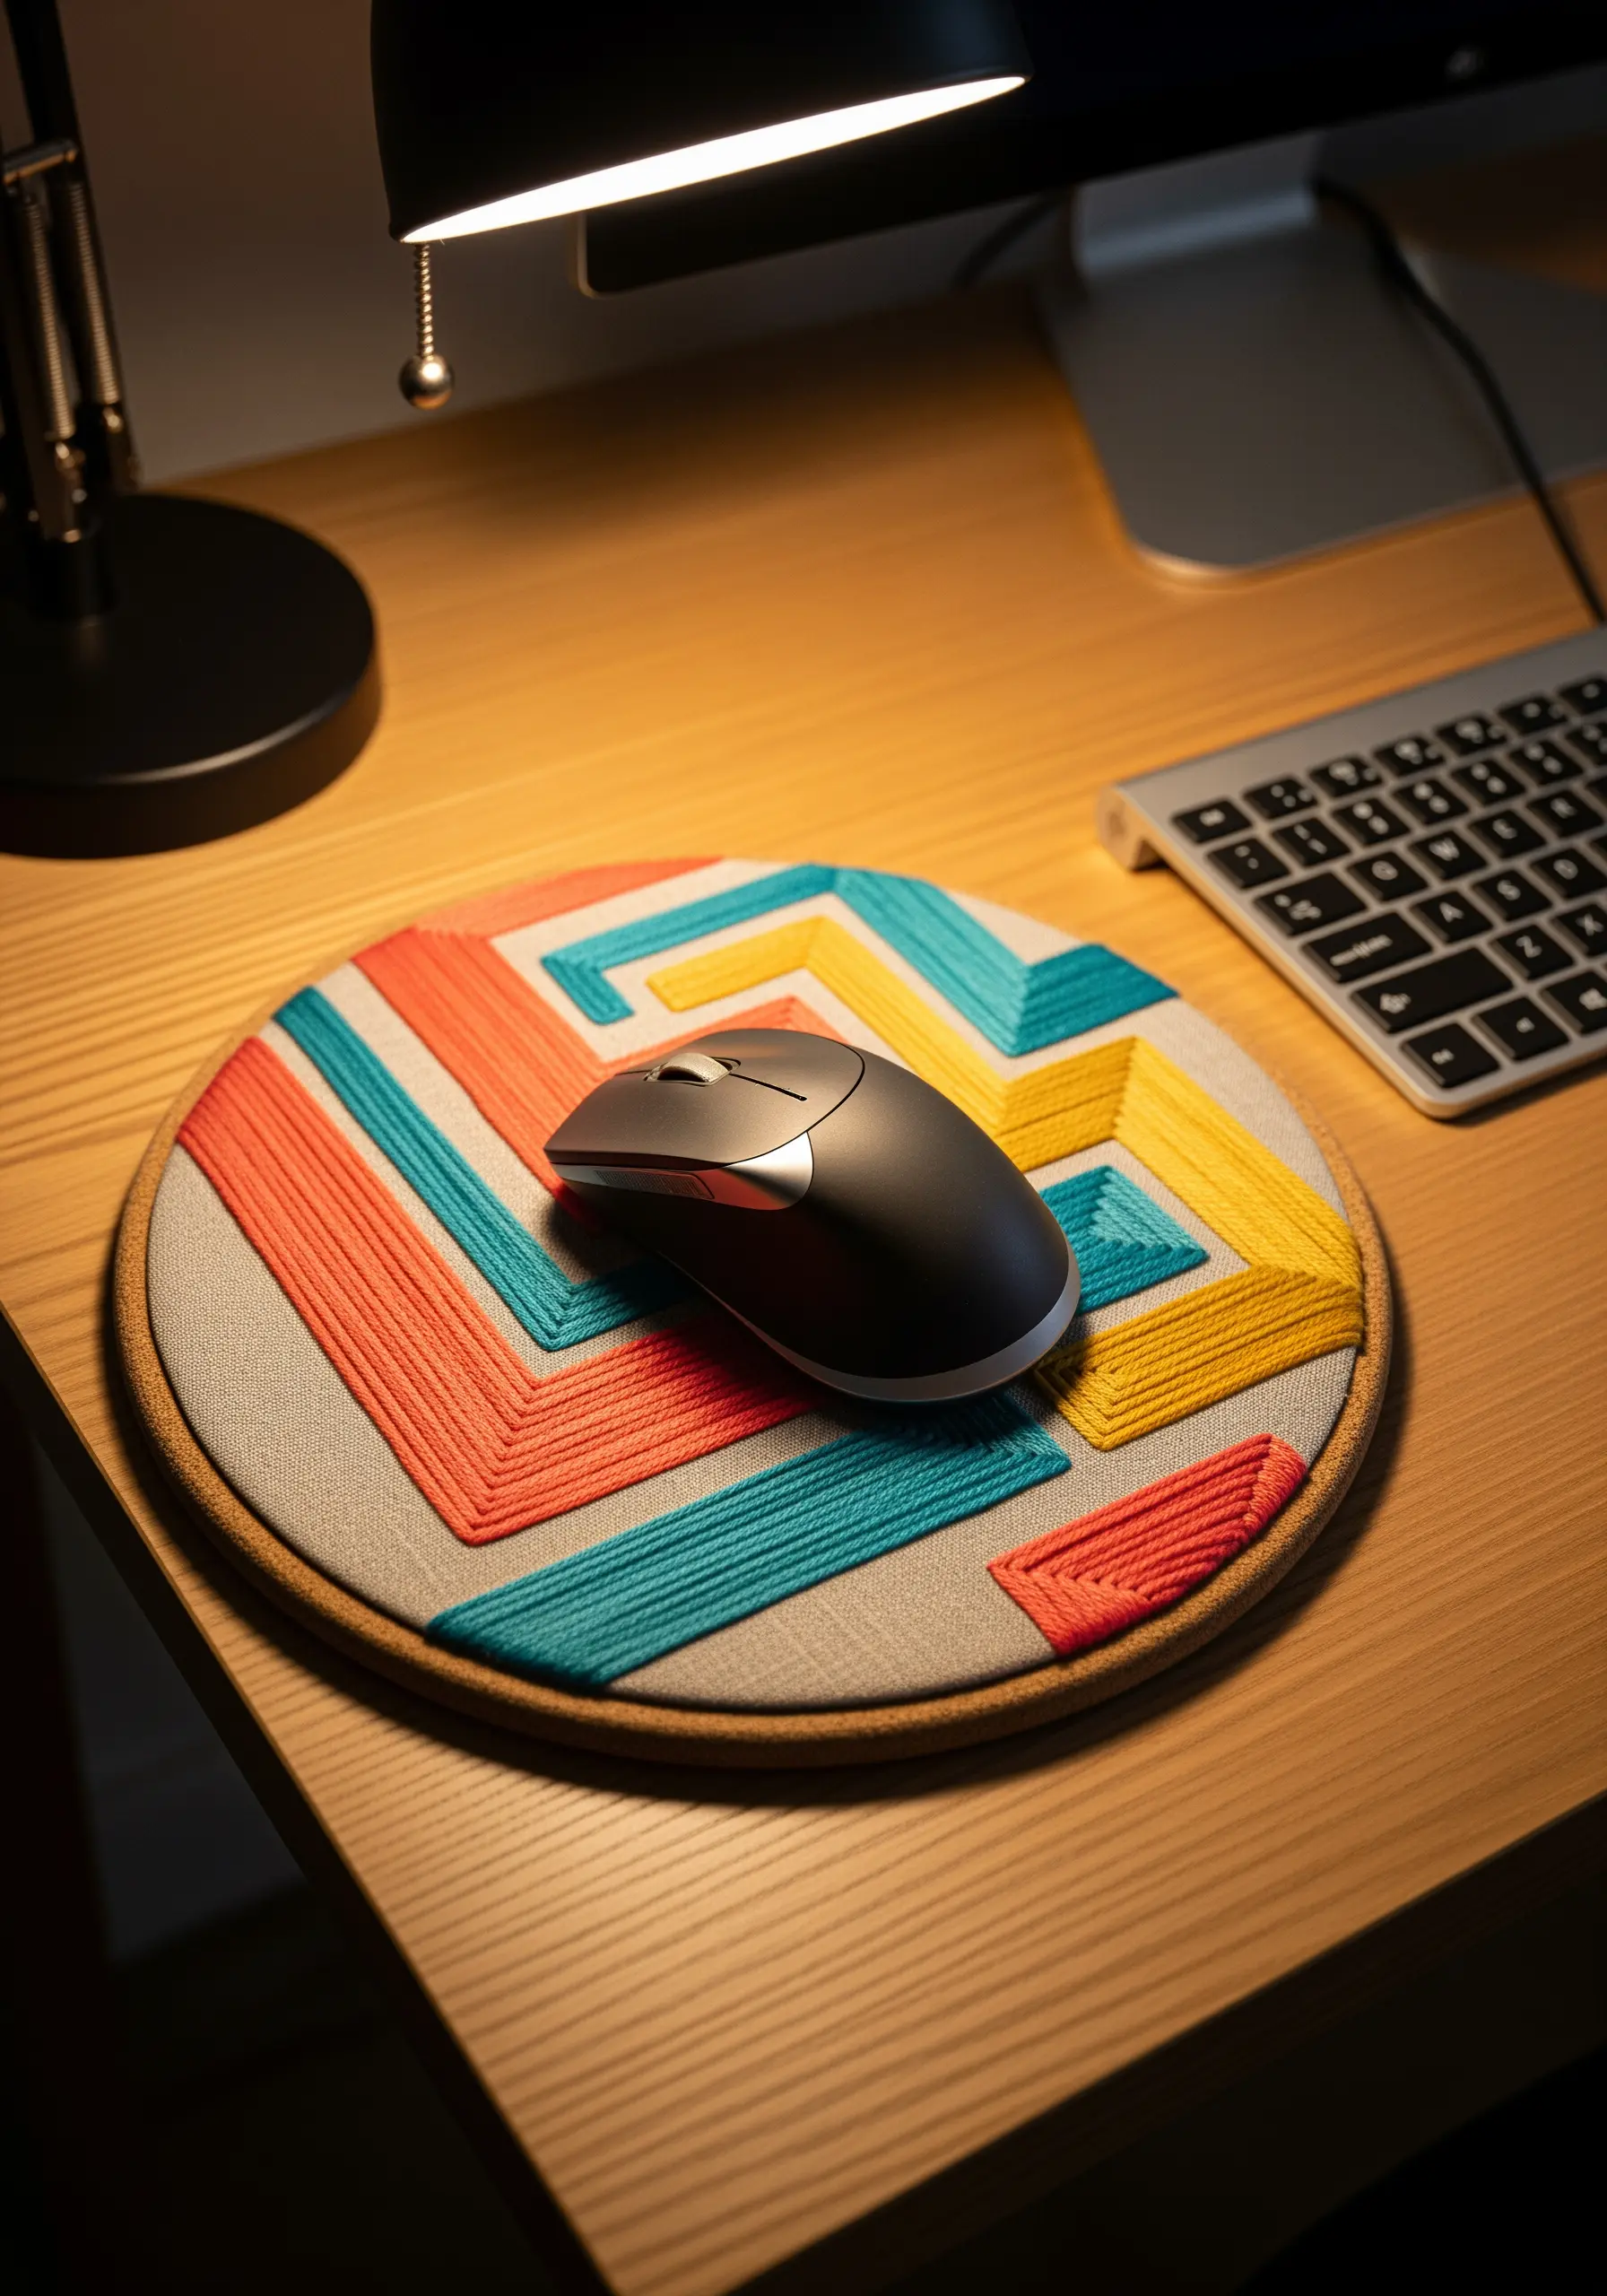
Give a plain cork mousepad a modern, graphic update using thick thread and clean lines.
Instead of a standard satin stitch which can pull and warp the fabric, achieve this bold look with couching.
Lay down a thick yarn or pearl cotton along your design lines, then use a thinner, matching thread to tack it down with small, perpendicular stitches.
This technique allows you to create perfectly straight, dense blocks of color without any risk of distortion, and it adds a pleasing, tactile dimension.
Trace your geometric pattern with a water-soluble marker first to ensure your lines are perfectly crisp and angular.
4. Minimalist Motifs on Functional Felt
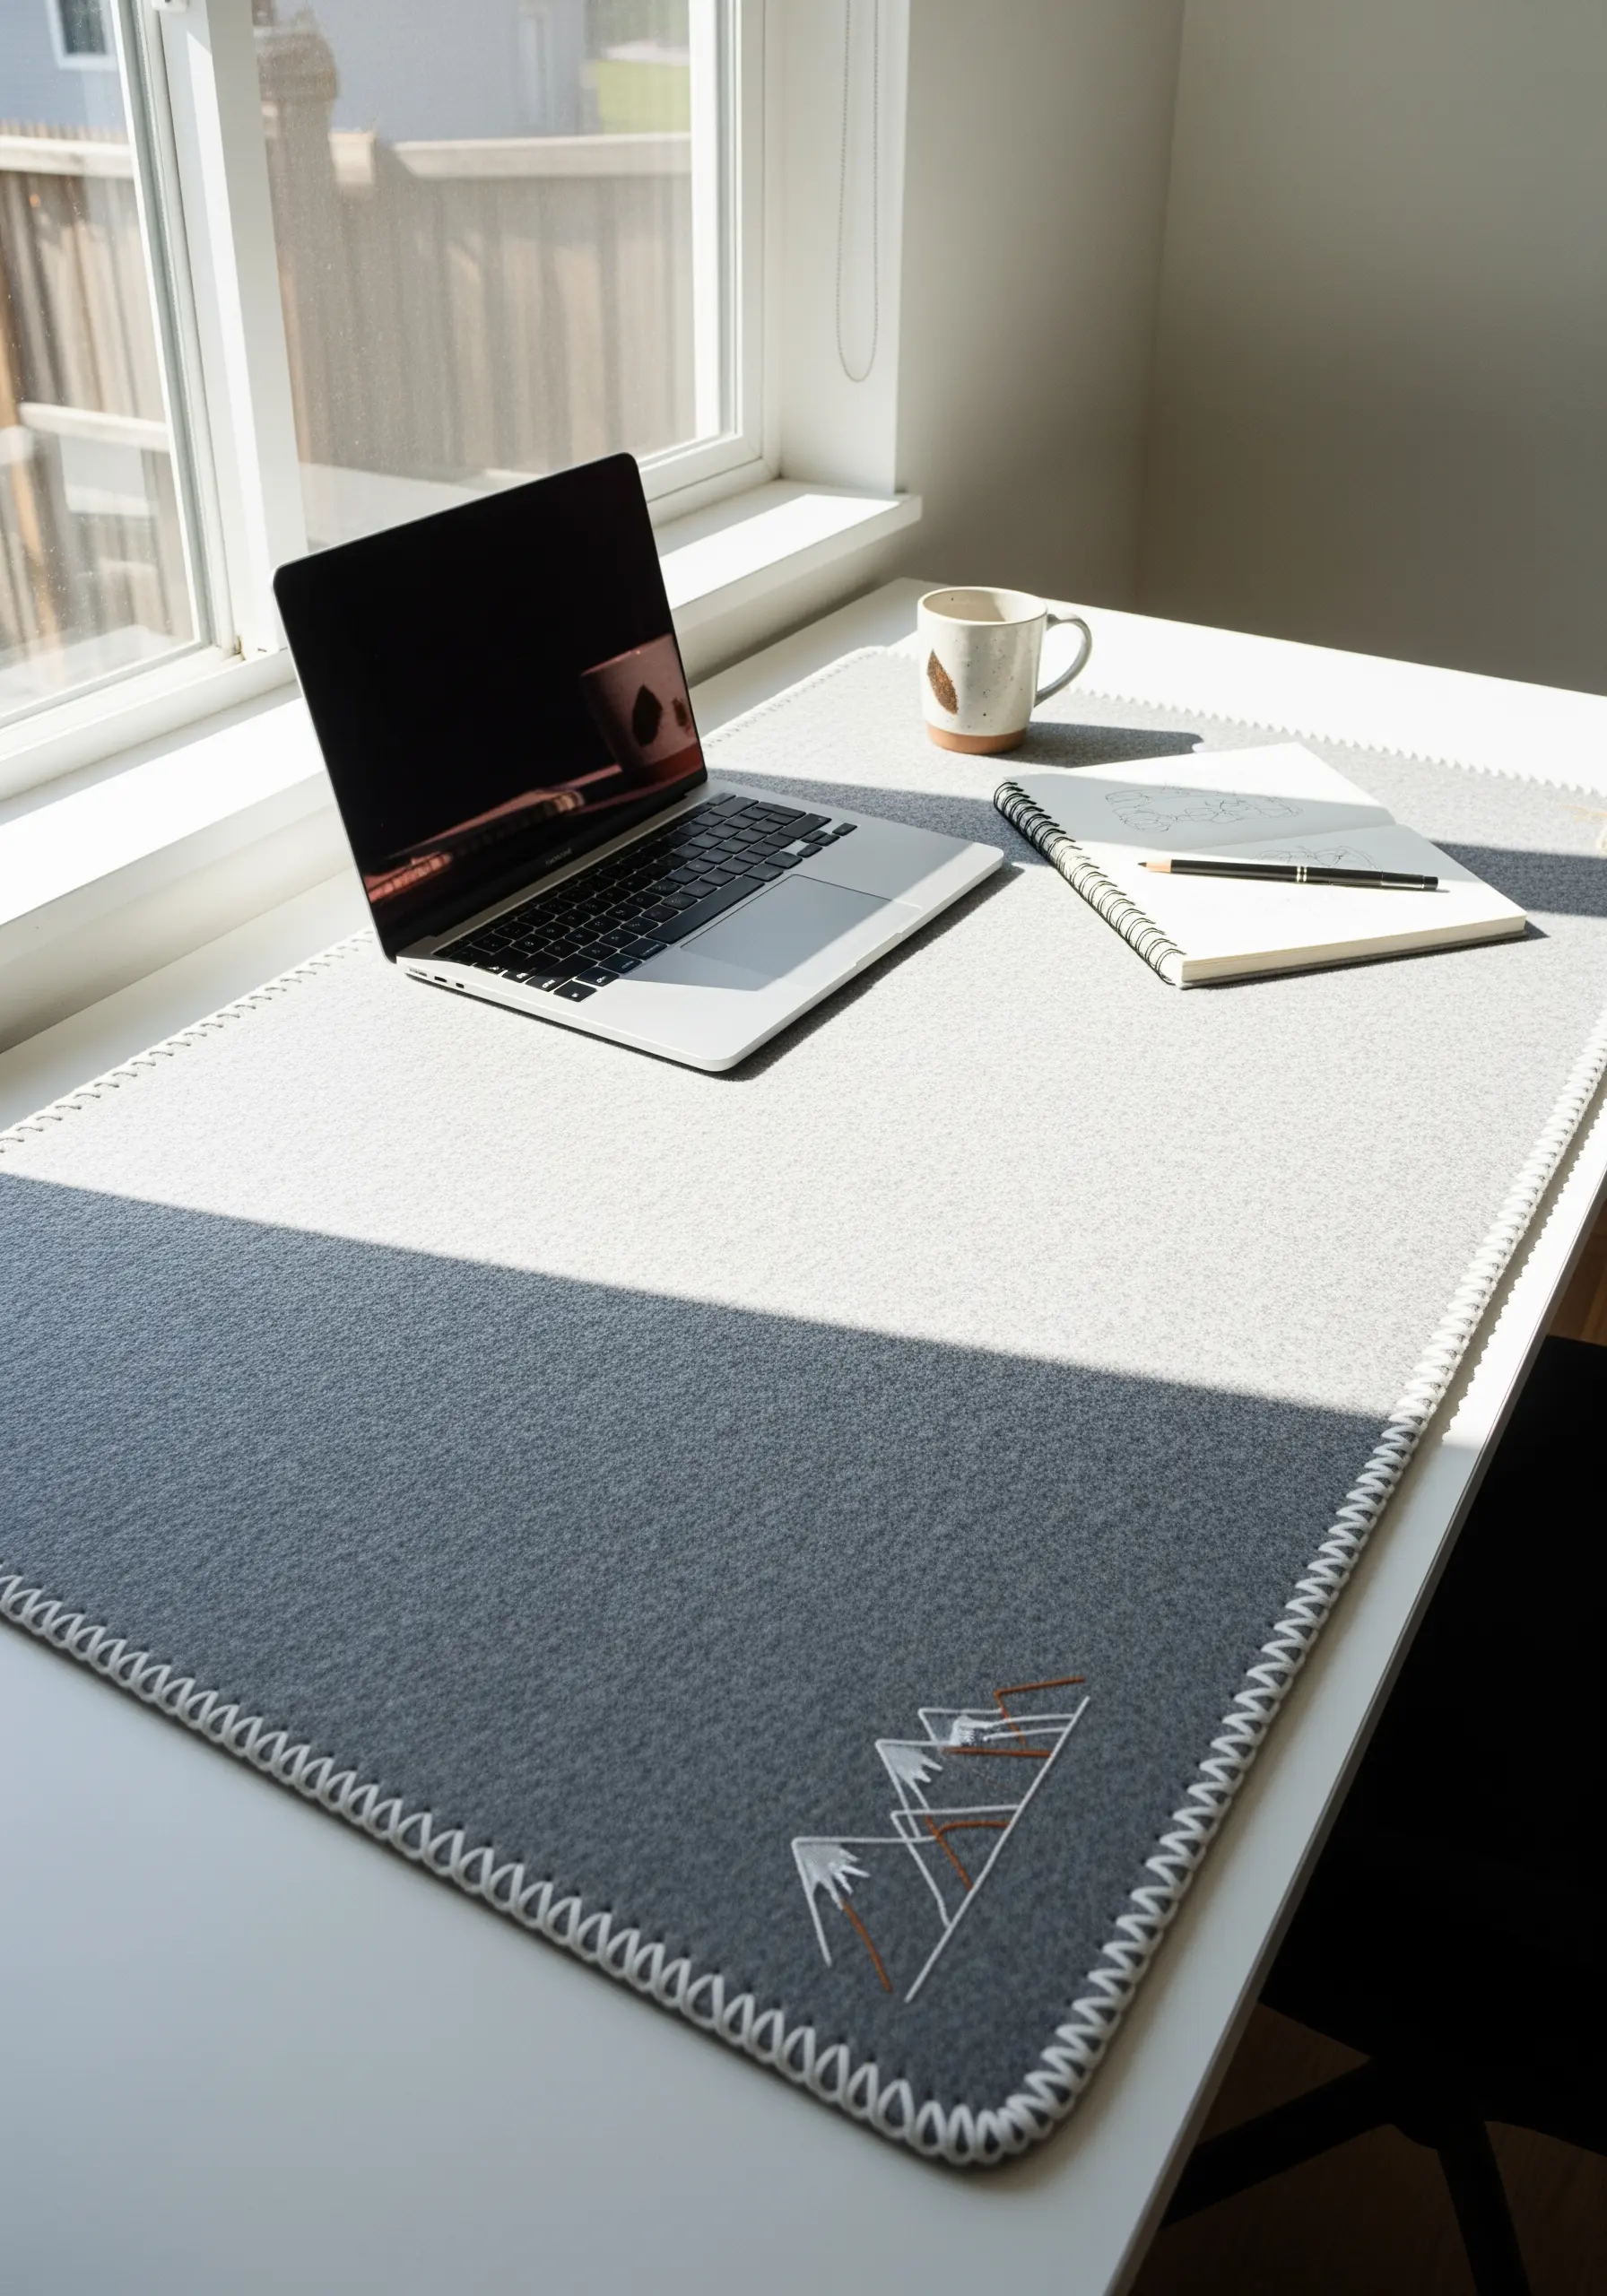
Elevate a large felt desk mat from a purely functional item to a piece of minimalist art.
Choose a small, simple line-art design and place it asymmetrically in a corner; this restraint is key to a sophisticated look.
Use a backstitch for the outlines and a sparse satin stitch for fill, allowing the texture of the felt to remain a primary feature.
The most important detail for a professional result is the edge finishing. A tidy, evenly spaced blanket stitch not only prevents fraying but also frames the entire piece, making it feel intentional and complete.
5. An Interactive Constellation Pinboard
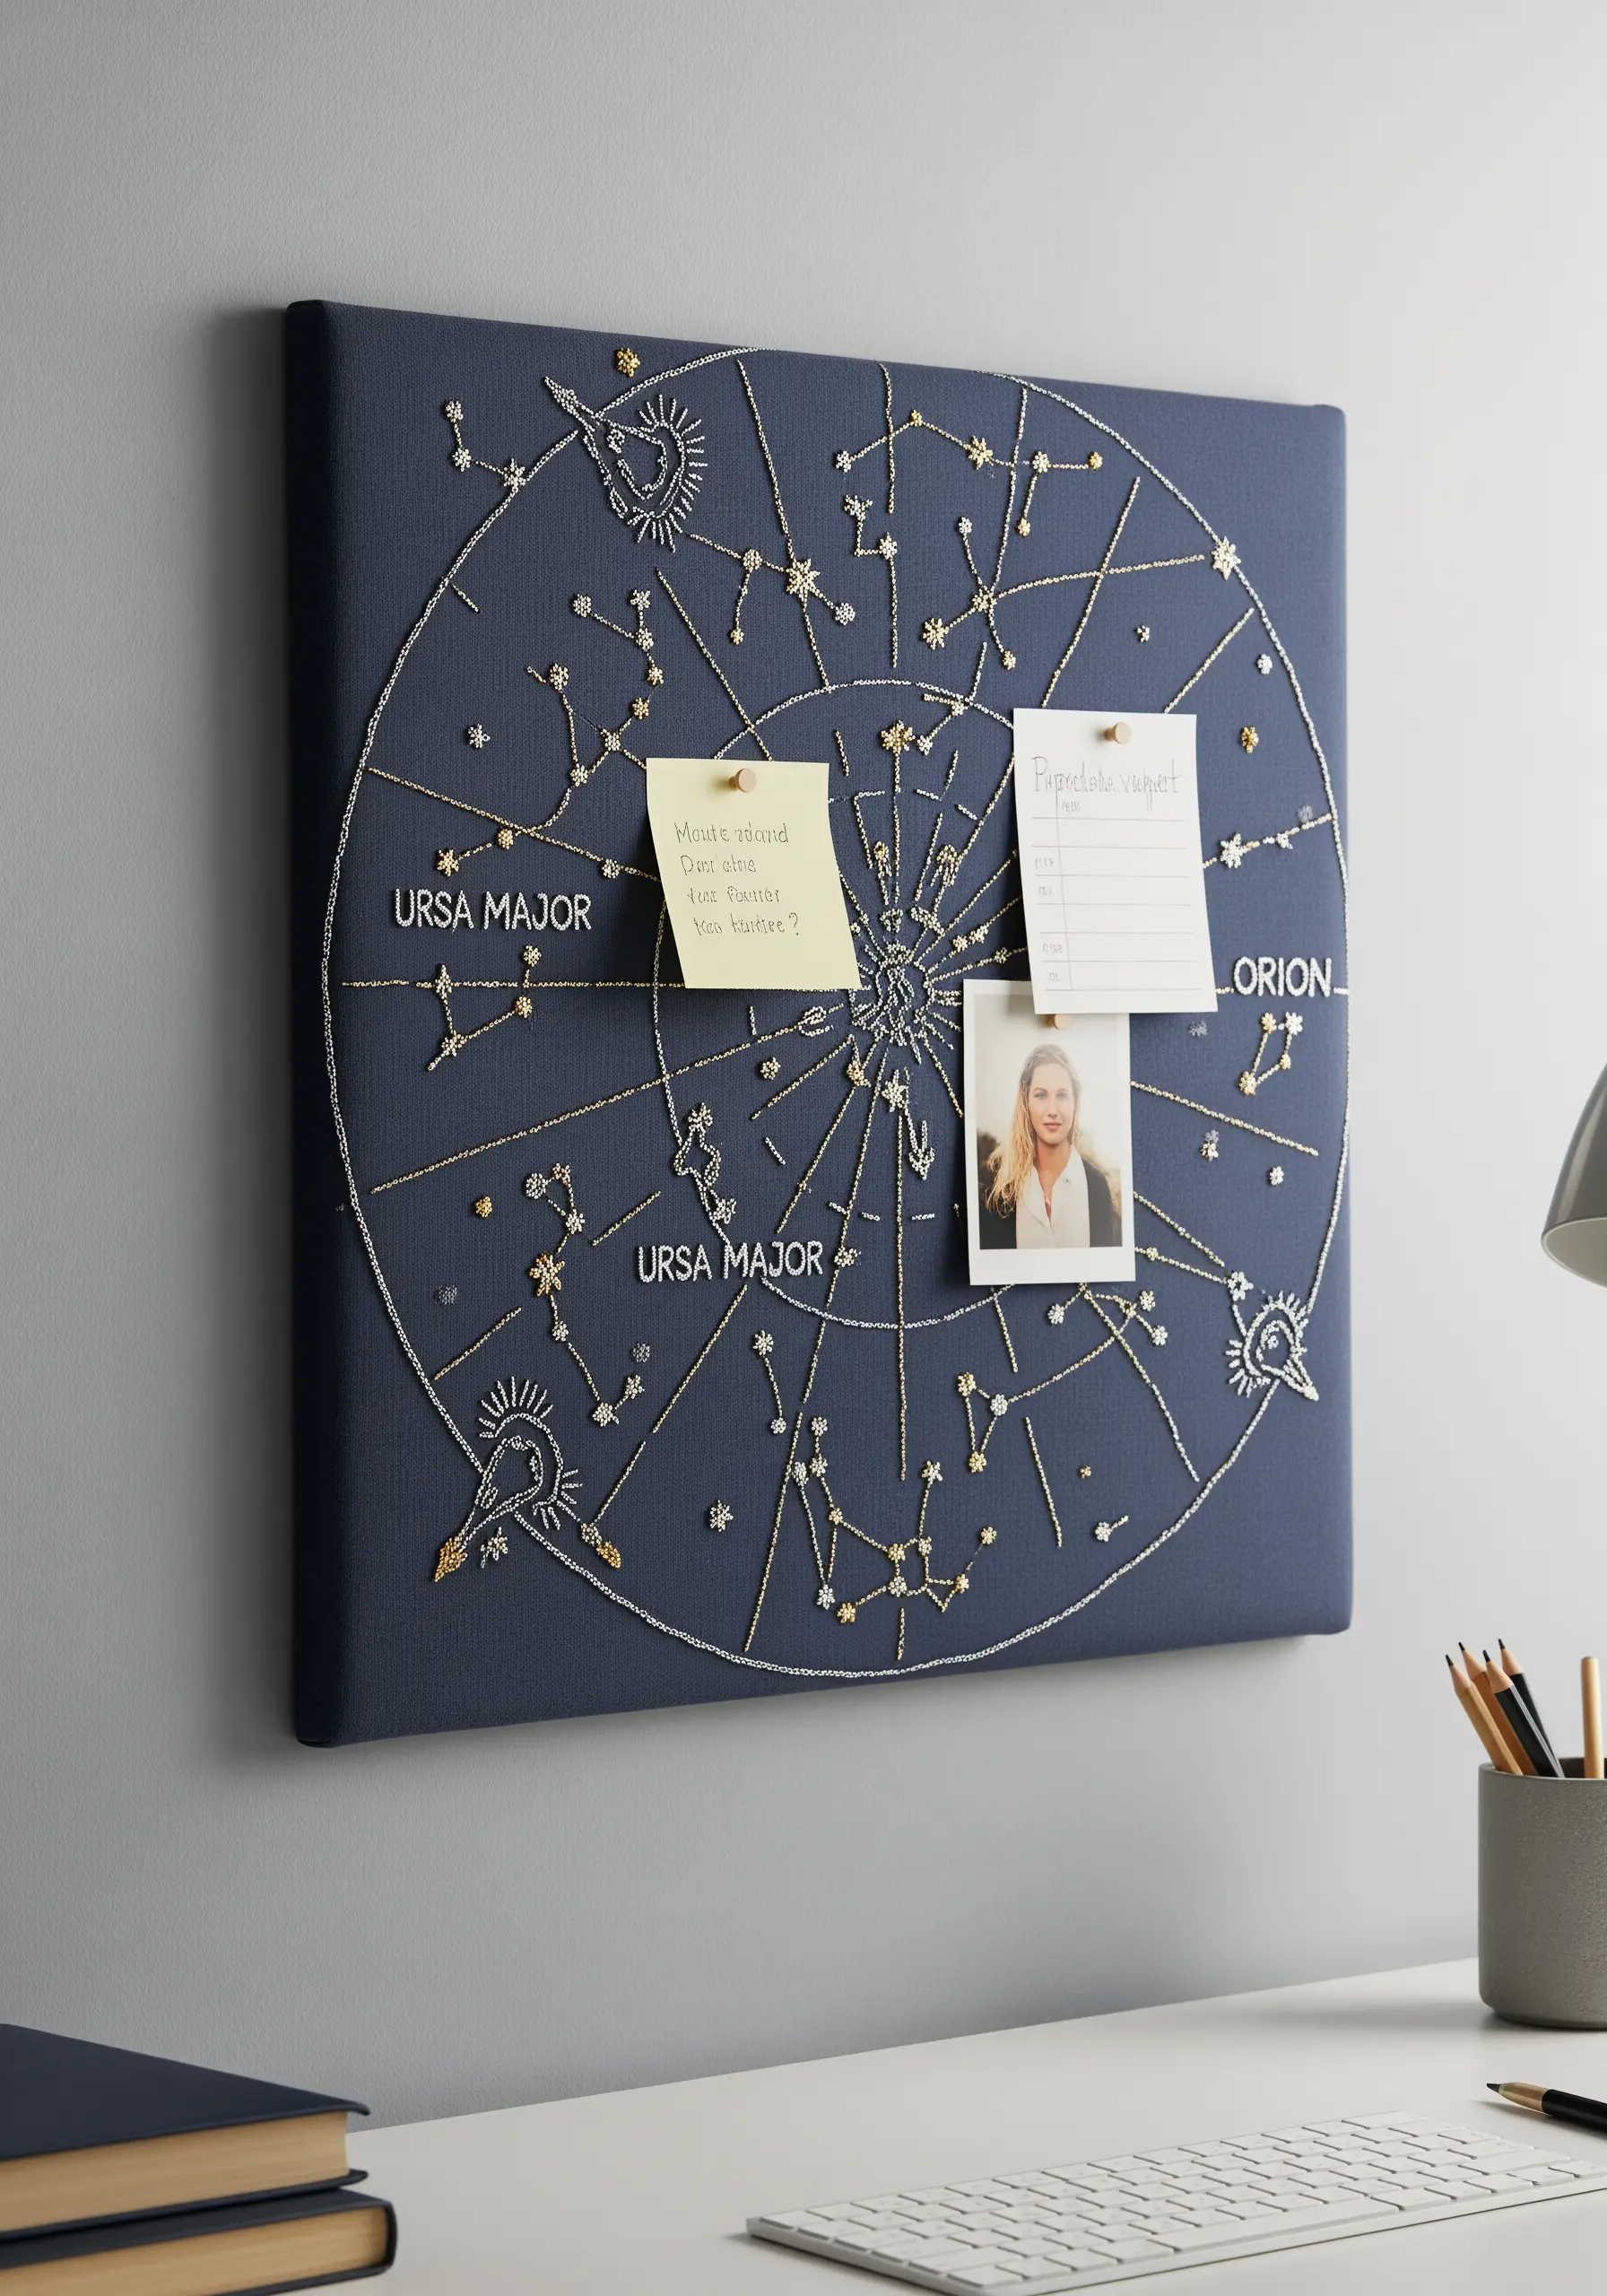
Turn a fabric-covered corkboard into an inspiring, interactive map of the stars.
Use a fine backstitch for the constellation lines, but add visual interest by mixing thread types.
Stitch the main stars using a single strand of metallic gold thread to catch the light, creating a subtle glimmer that mimics a real night sky.
For lesser stars and connecting lines, use a matte off-white or silver thread. This hierarchy guides the eye and adds sophistication.
Vary the size of your French knots (using one, two, or three wraps of thread) to represent stars of different magnitudes, turning a simple chart into a piece of data-driven art.
6. Dimensional Stitching on a Journal Cover
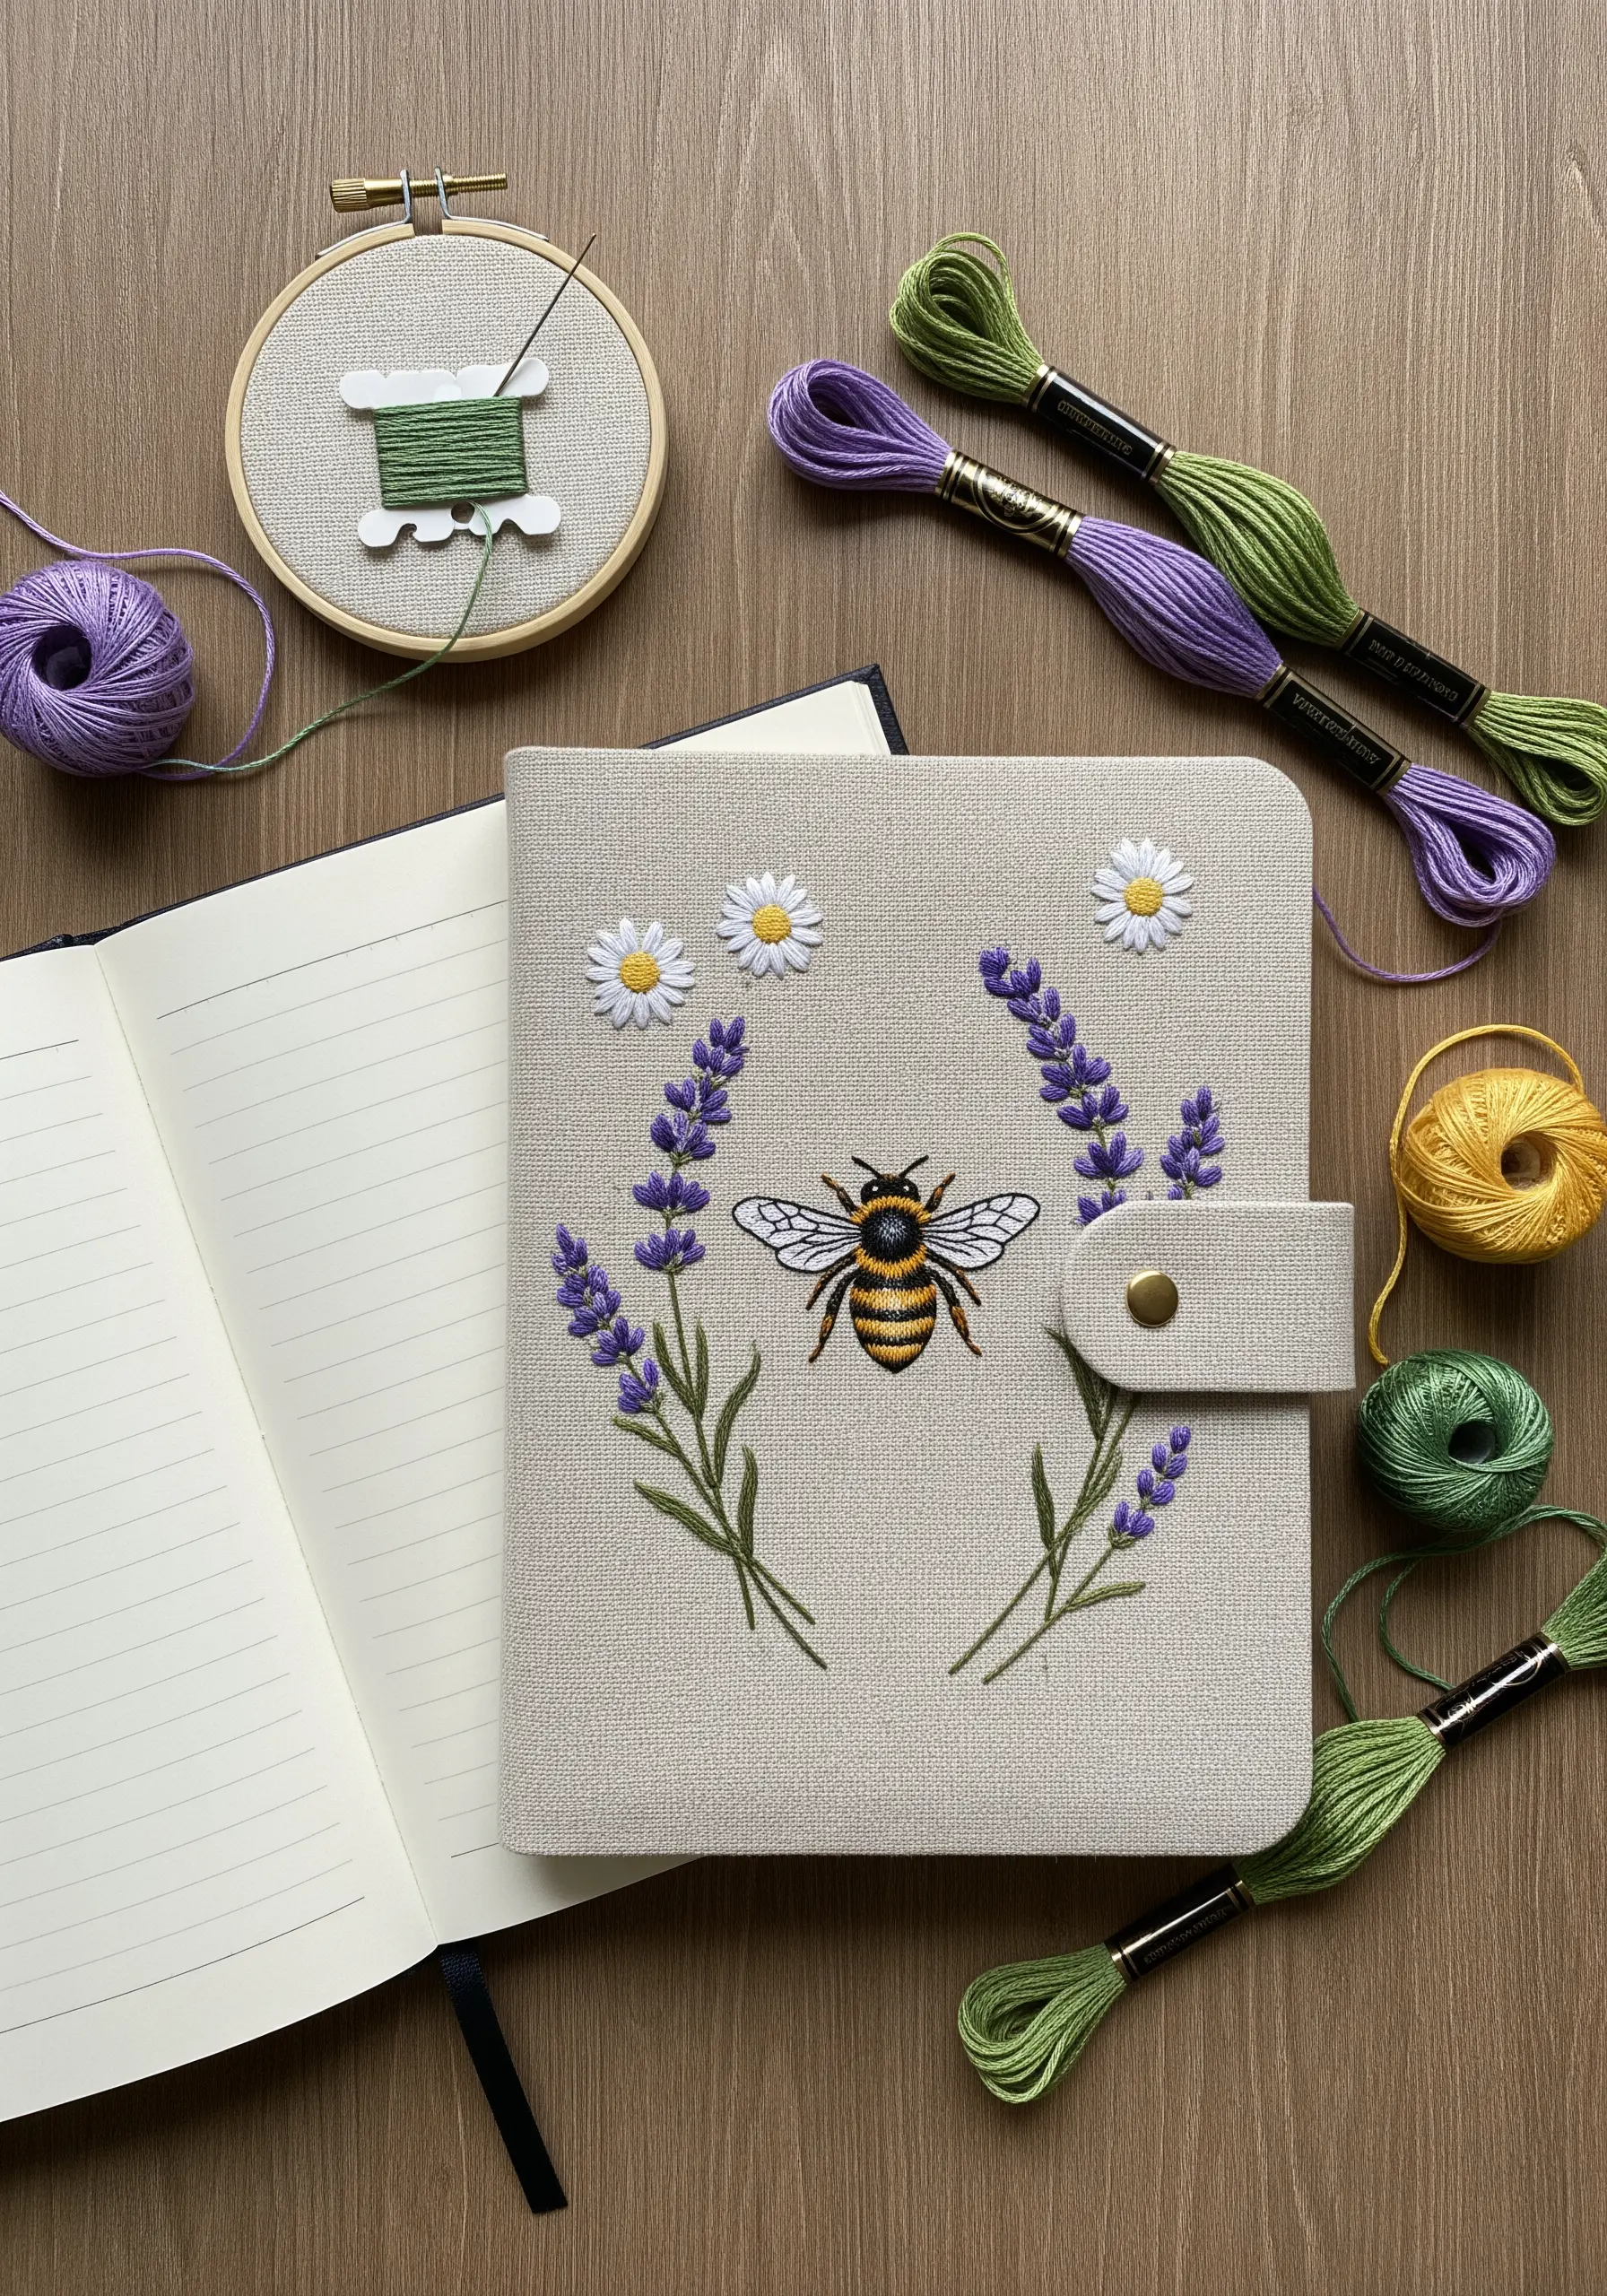
Personalize a fabric journal cover with motifs that offer both visual and tactile appeal.
To give the bee’s body a realistic, fuzzy texture, use a series of short, angled satin stitches, blending one or two shades of yellow with black thread.
For the lavender stalks, use whipped backstitch to create raised, rope-like stems that stand out from the fabric.
Combine these dimensional stitches with simple detached chain stitches for the daisies. This mix of complex and minimal embroidery patterns creates a balanced and engaging composition.
Always use a lightweight tear-away stabilizer on the inside of the cover to prevent puckering on high-contact items.
7. A Quick and Practical Cable Tidy
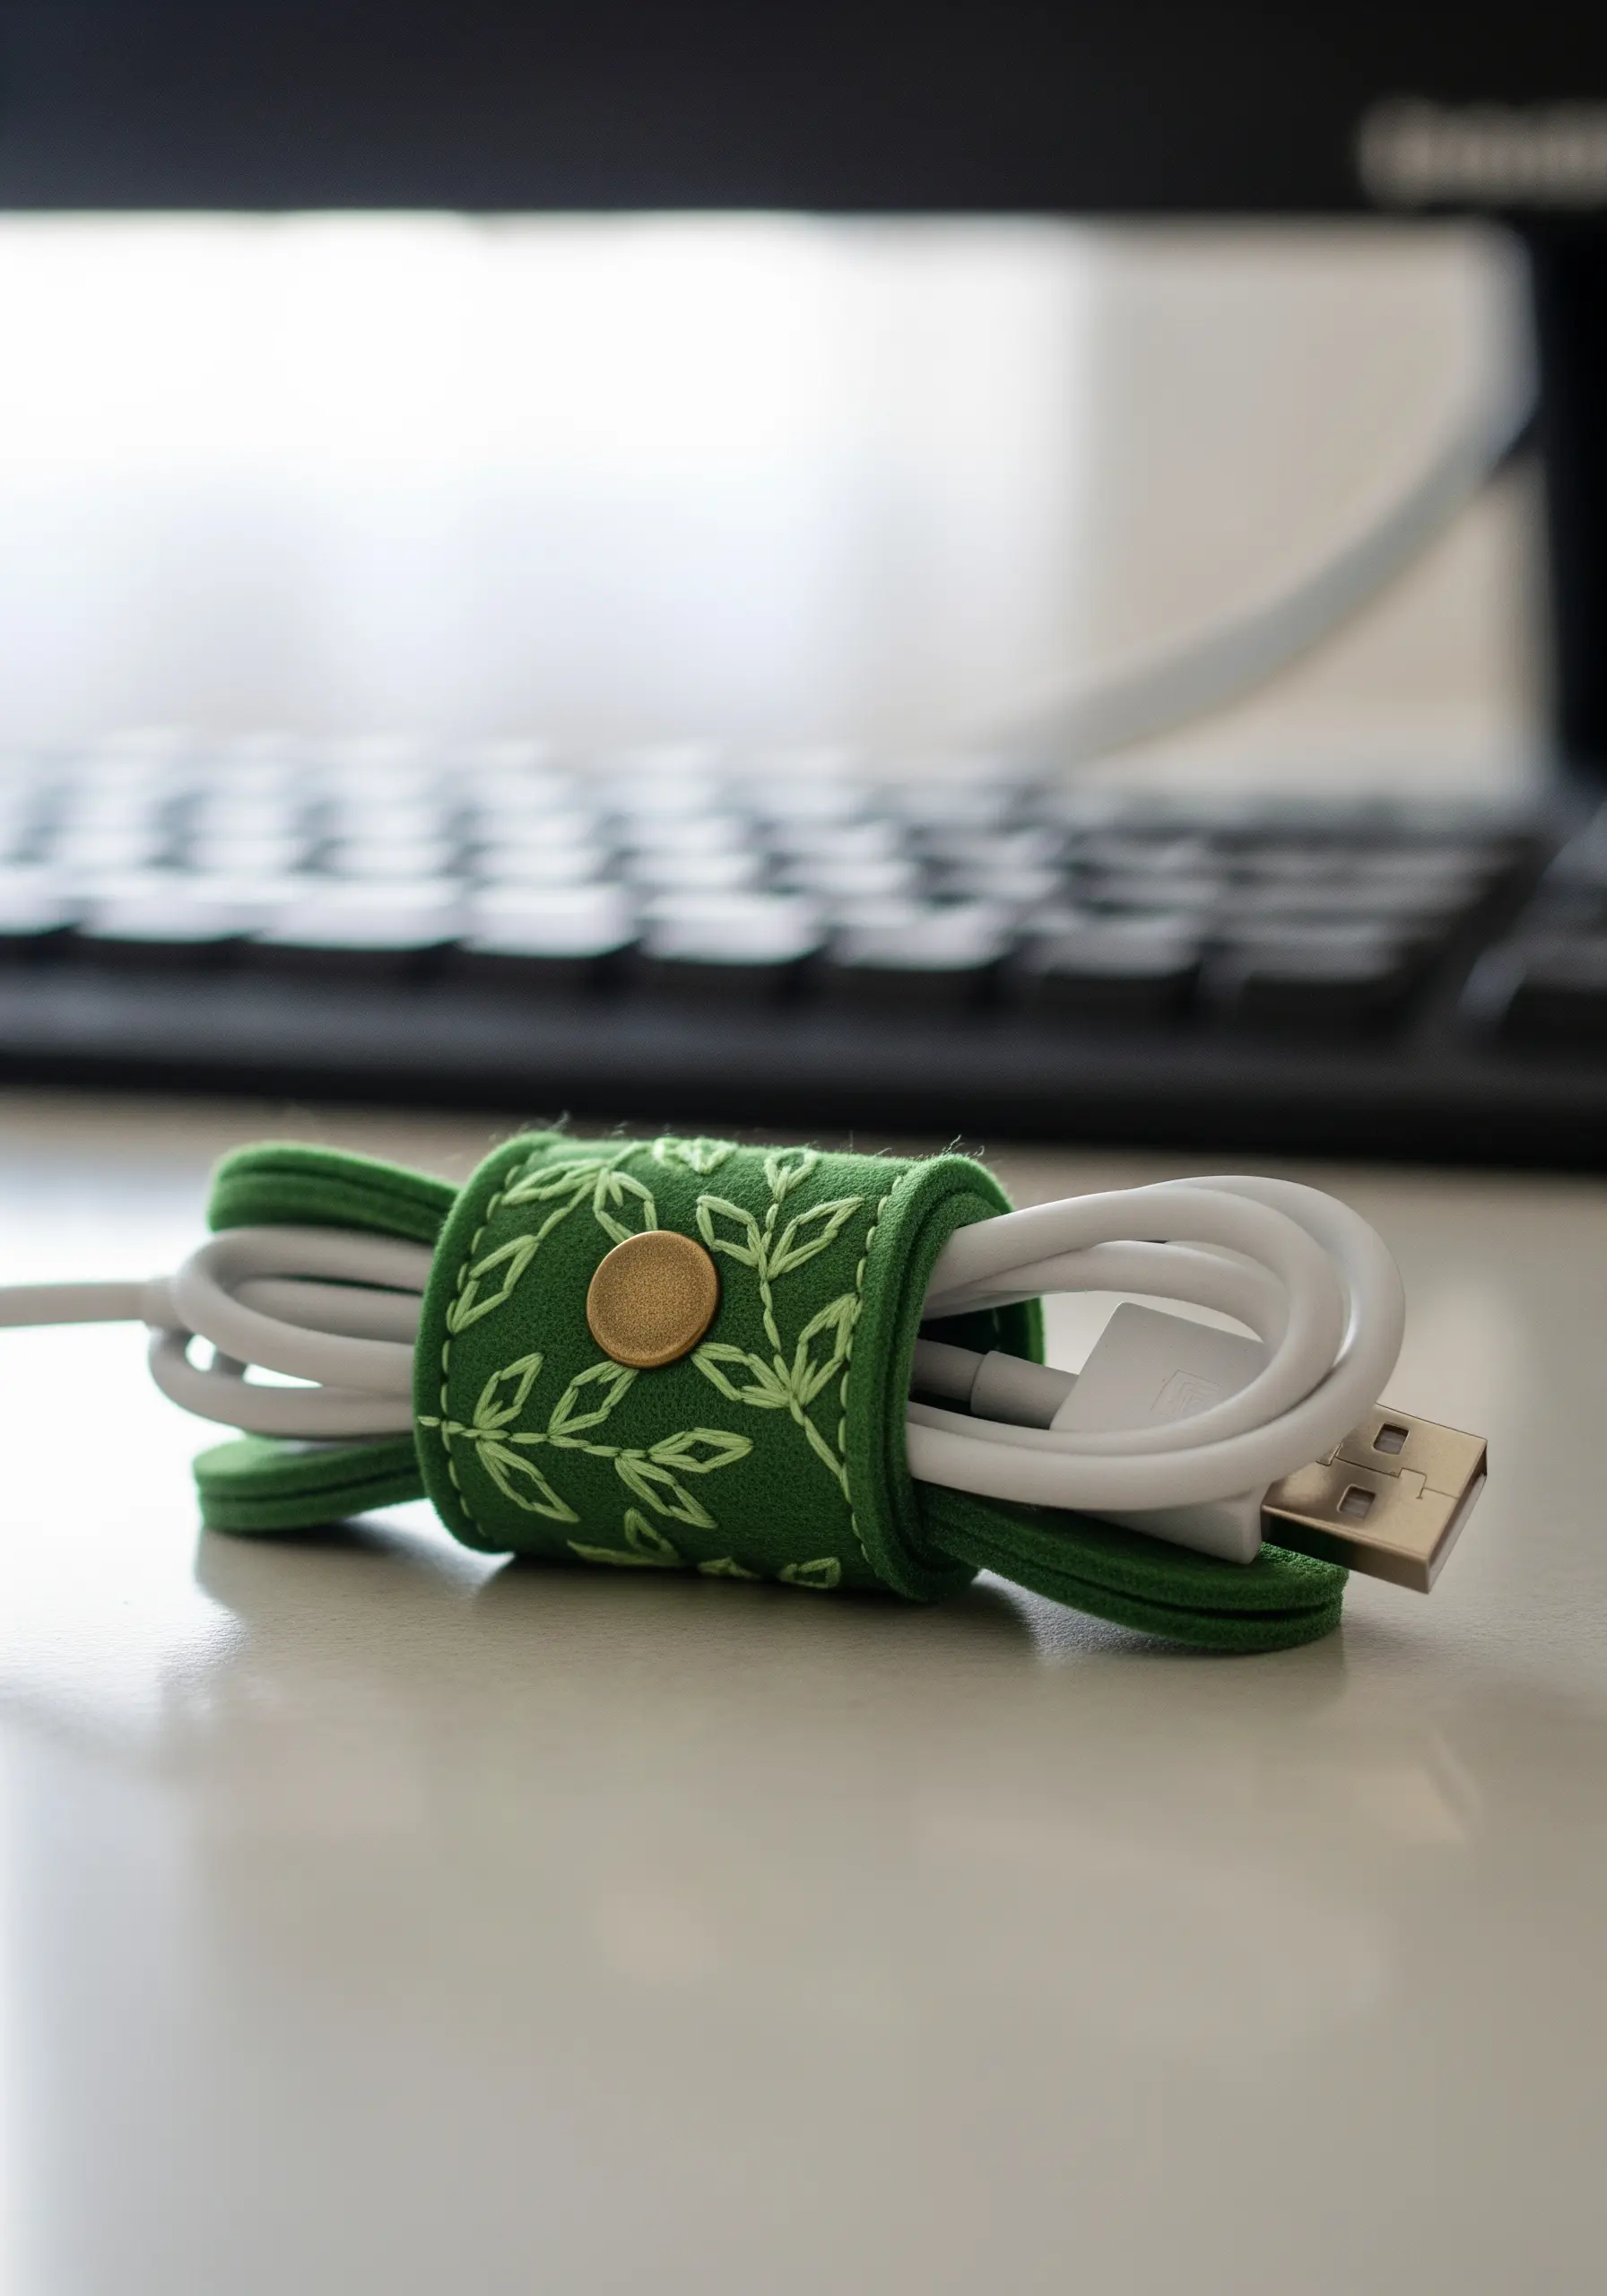
Create a charmingly practical cable tie from a scrap of felt in under an hour.
Stitch a simple, repeating leaf or vine pattern using a contrasting thread color and a basic backstitch.
For the cleanest result, complete your embroidery on a slightly larger piece of felt first, then cut out the final shape.
This ensures your edges are crisp and your stitches don’t get distorted.
A simple snap fastener is all you need to complete this project, which is a perfect way to use leftover materials while organizing your desk.
8. Raised Monogram for Textural Impact
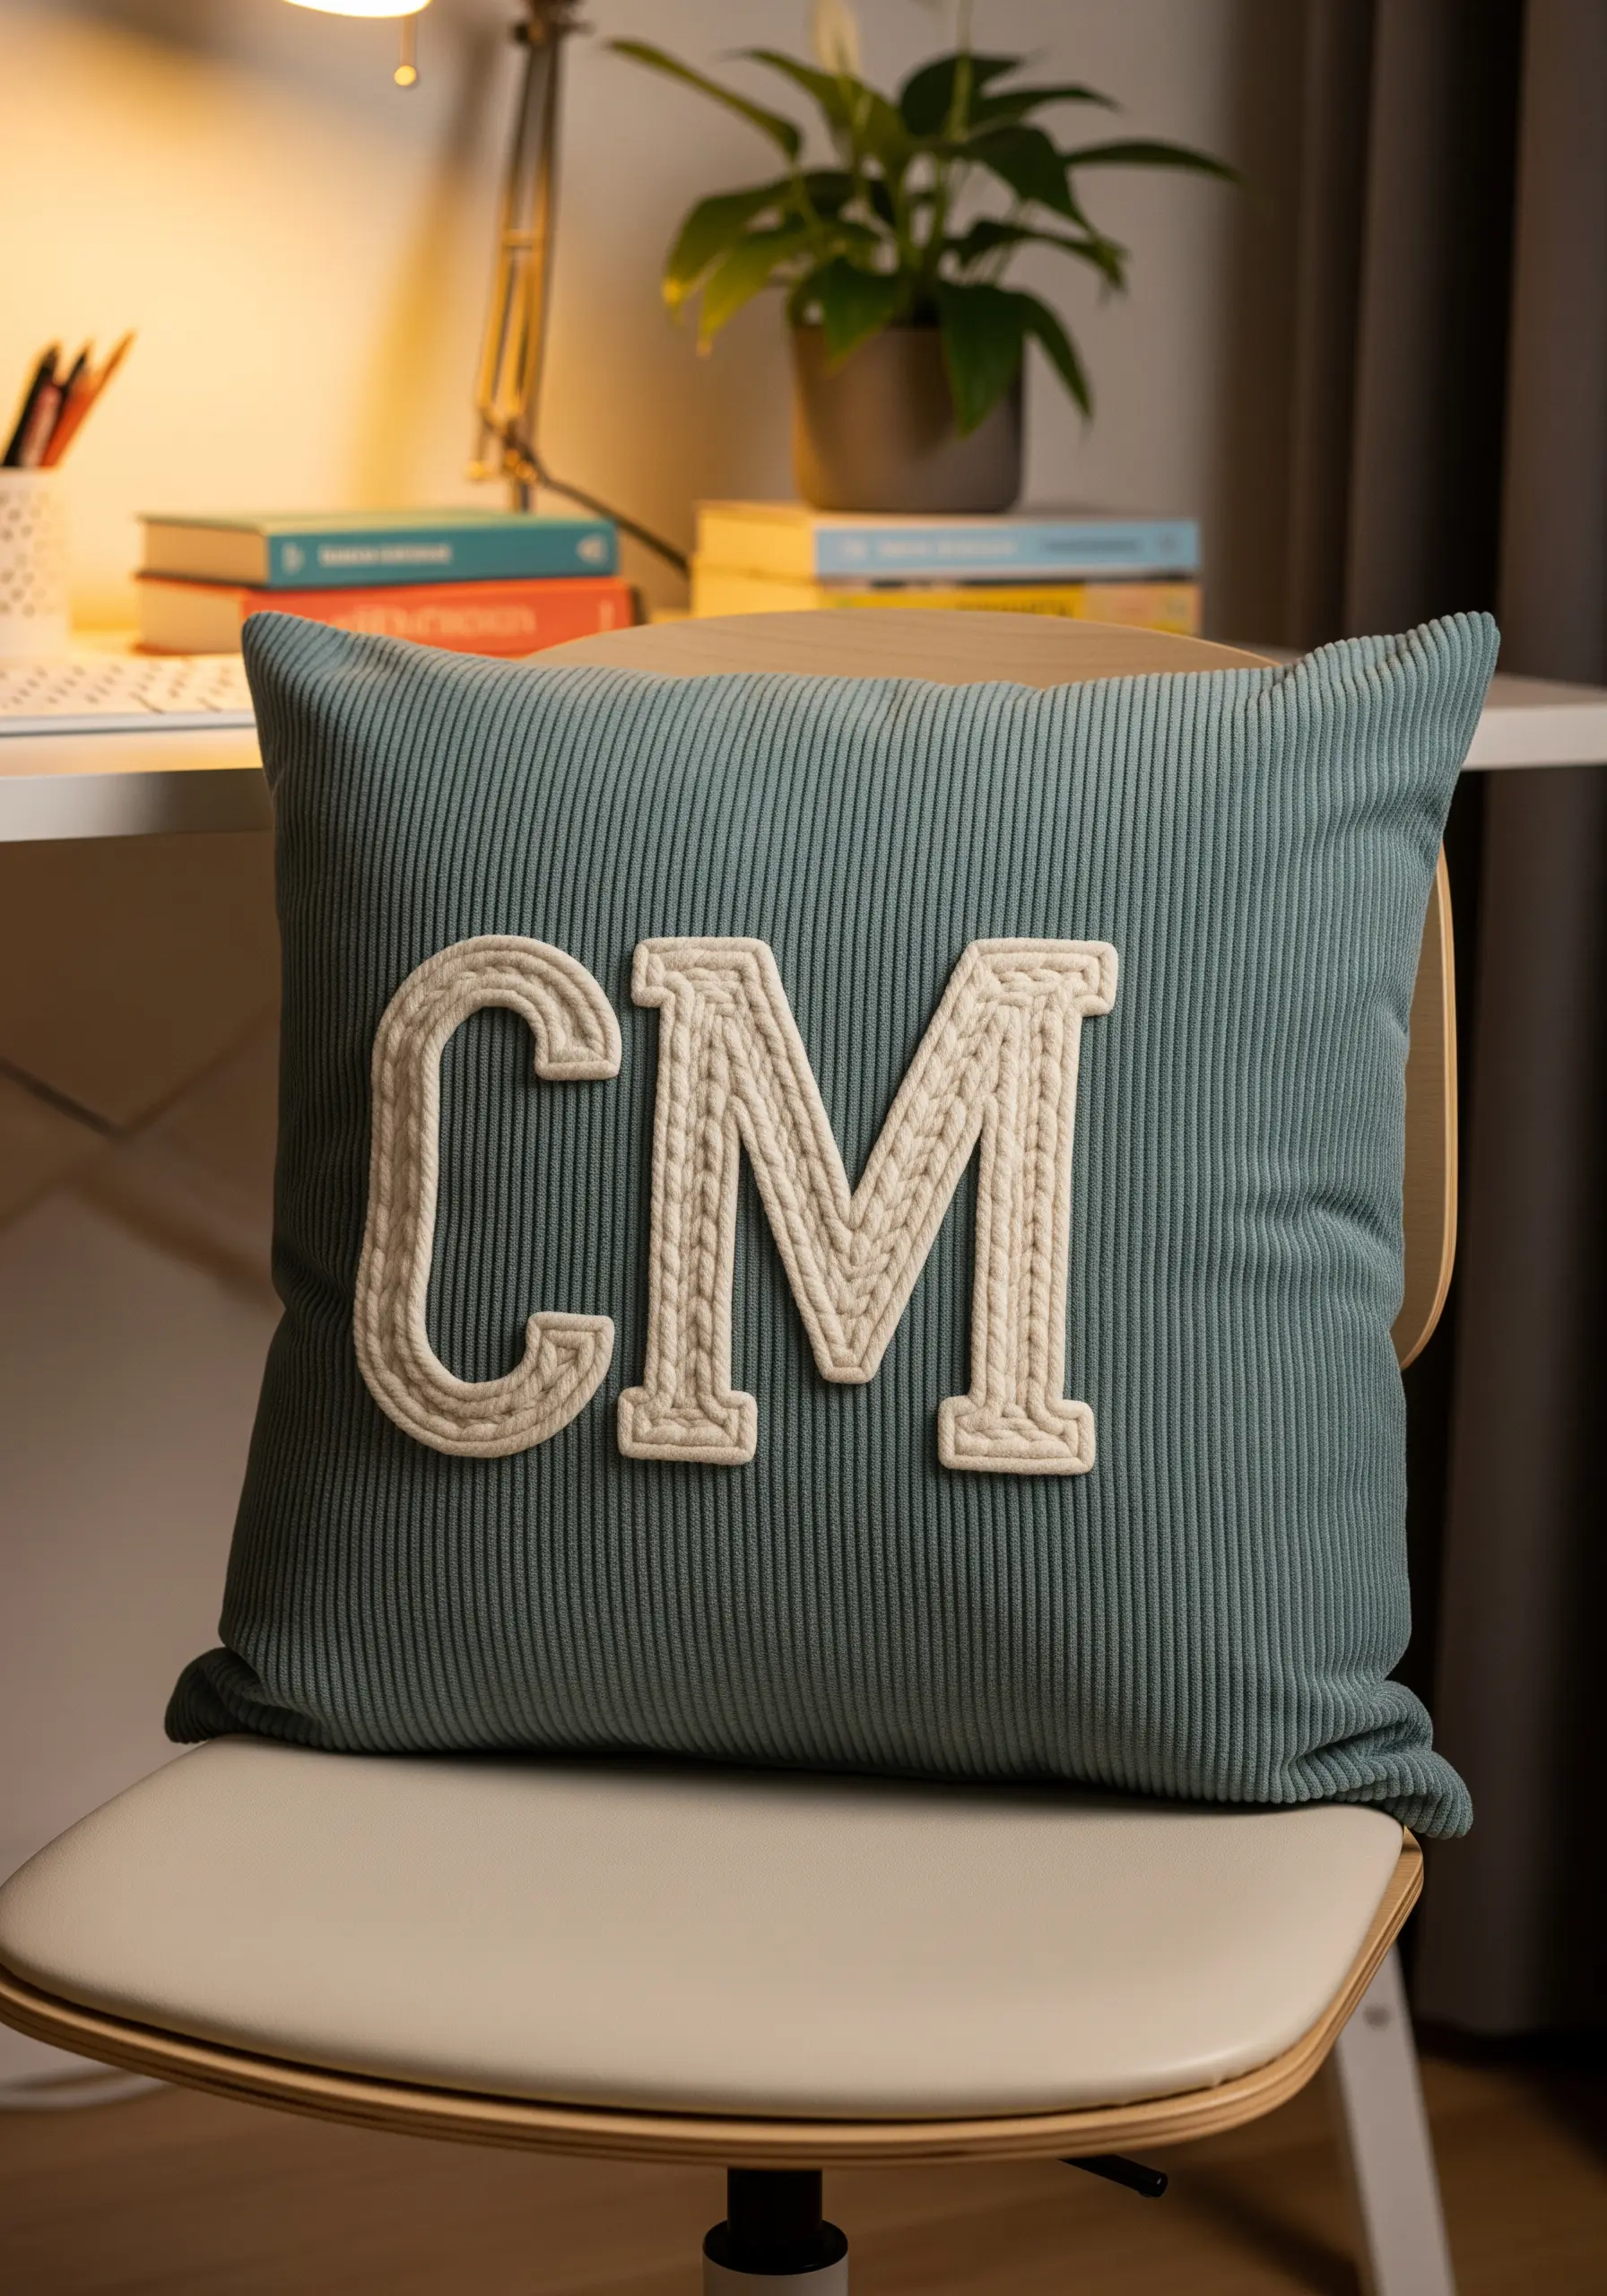
Make a bold statement on a chair cushion with a highly textural, three-dimensional monogram.
Achieve this raised effect by couching a thick cord or yarn to the fabric surface. Outline your letters with the cord, then use a matching embroidery floss to stitch it down with small, evenly spaced stitches.
Alternatively, create a padded satin stitch by first cutting your letters from a piece of felt, attaching them to the cushion, and then covering them completely with satin stitches.
The combination of the ribbed corduroy fabric and the smooth, raised letters creates a sophisticated play on texture that feels both modern and luxurious.
9. An Autumnal Wreath Wall Calendar
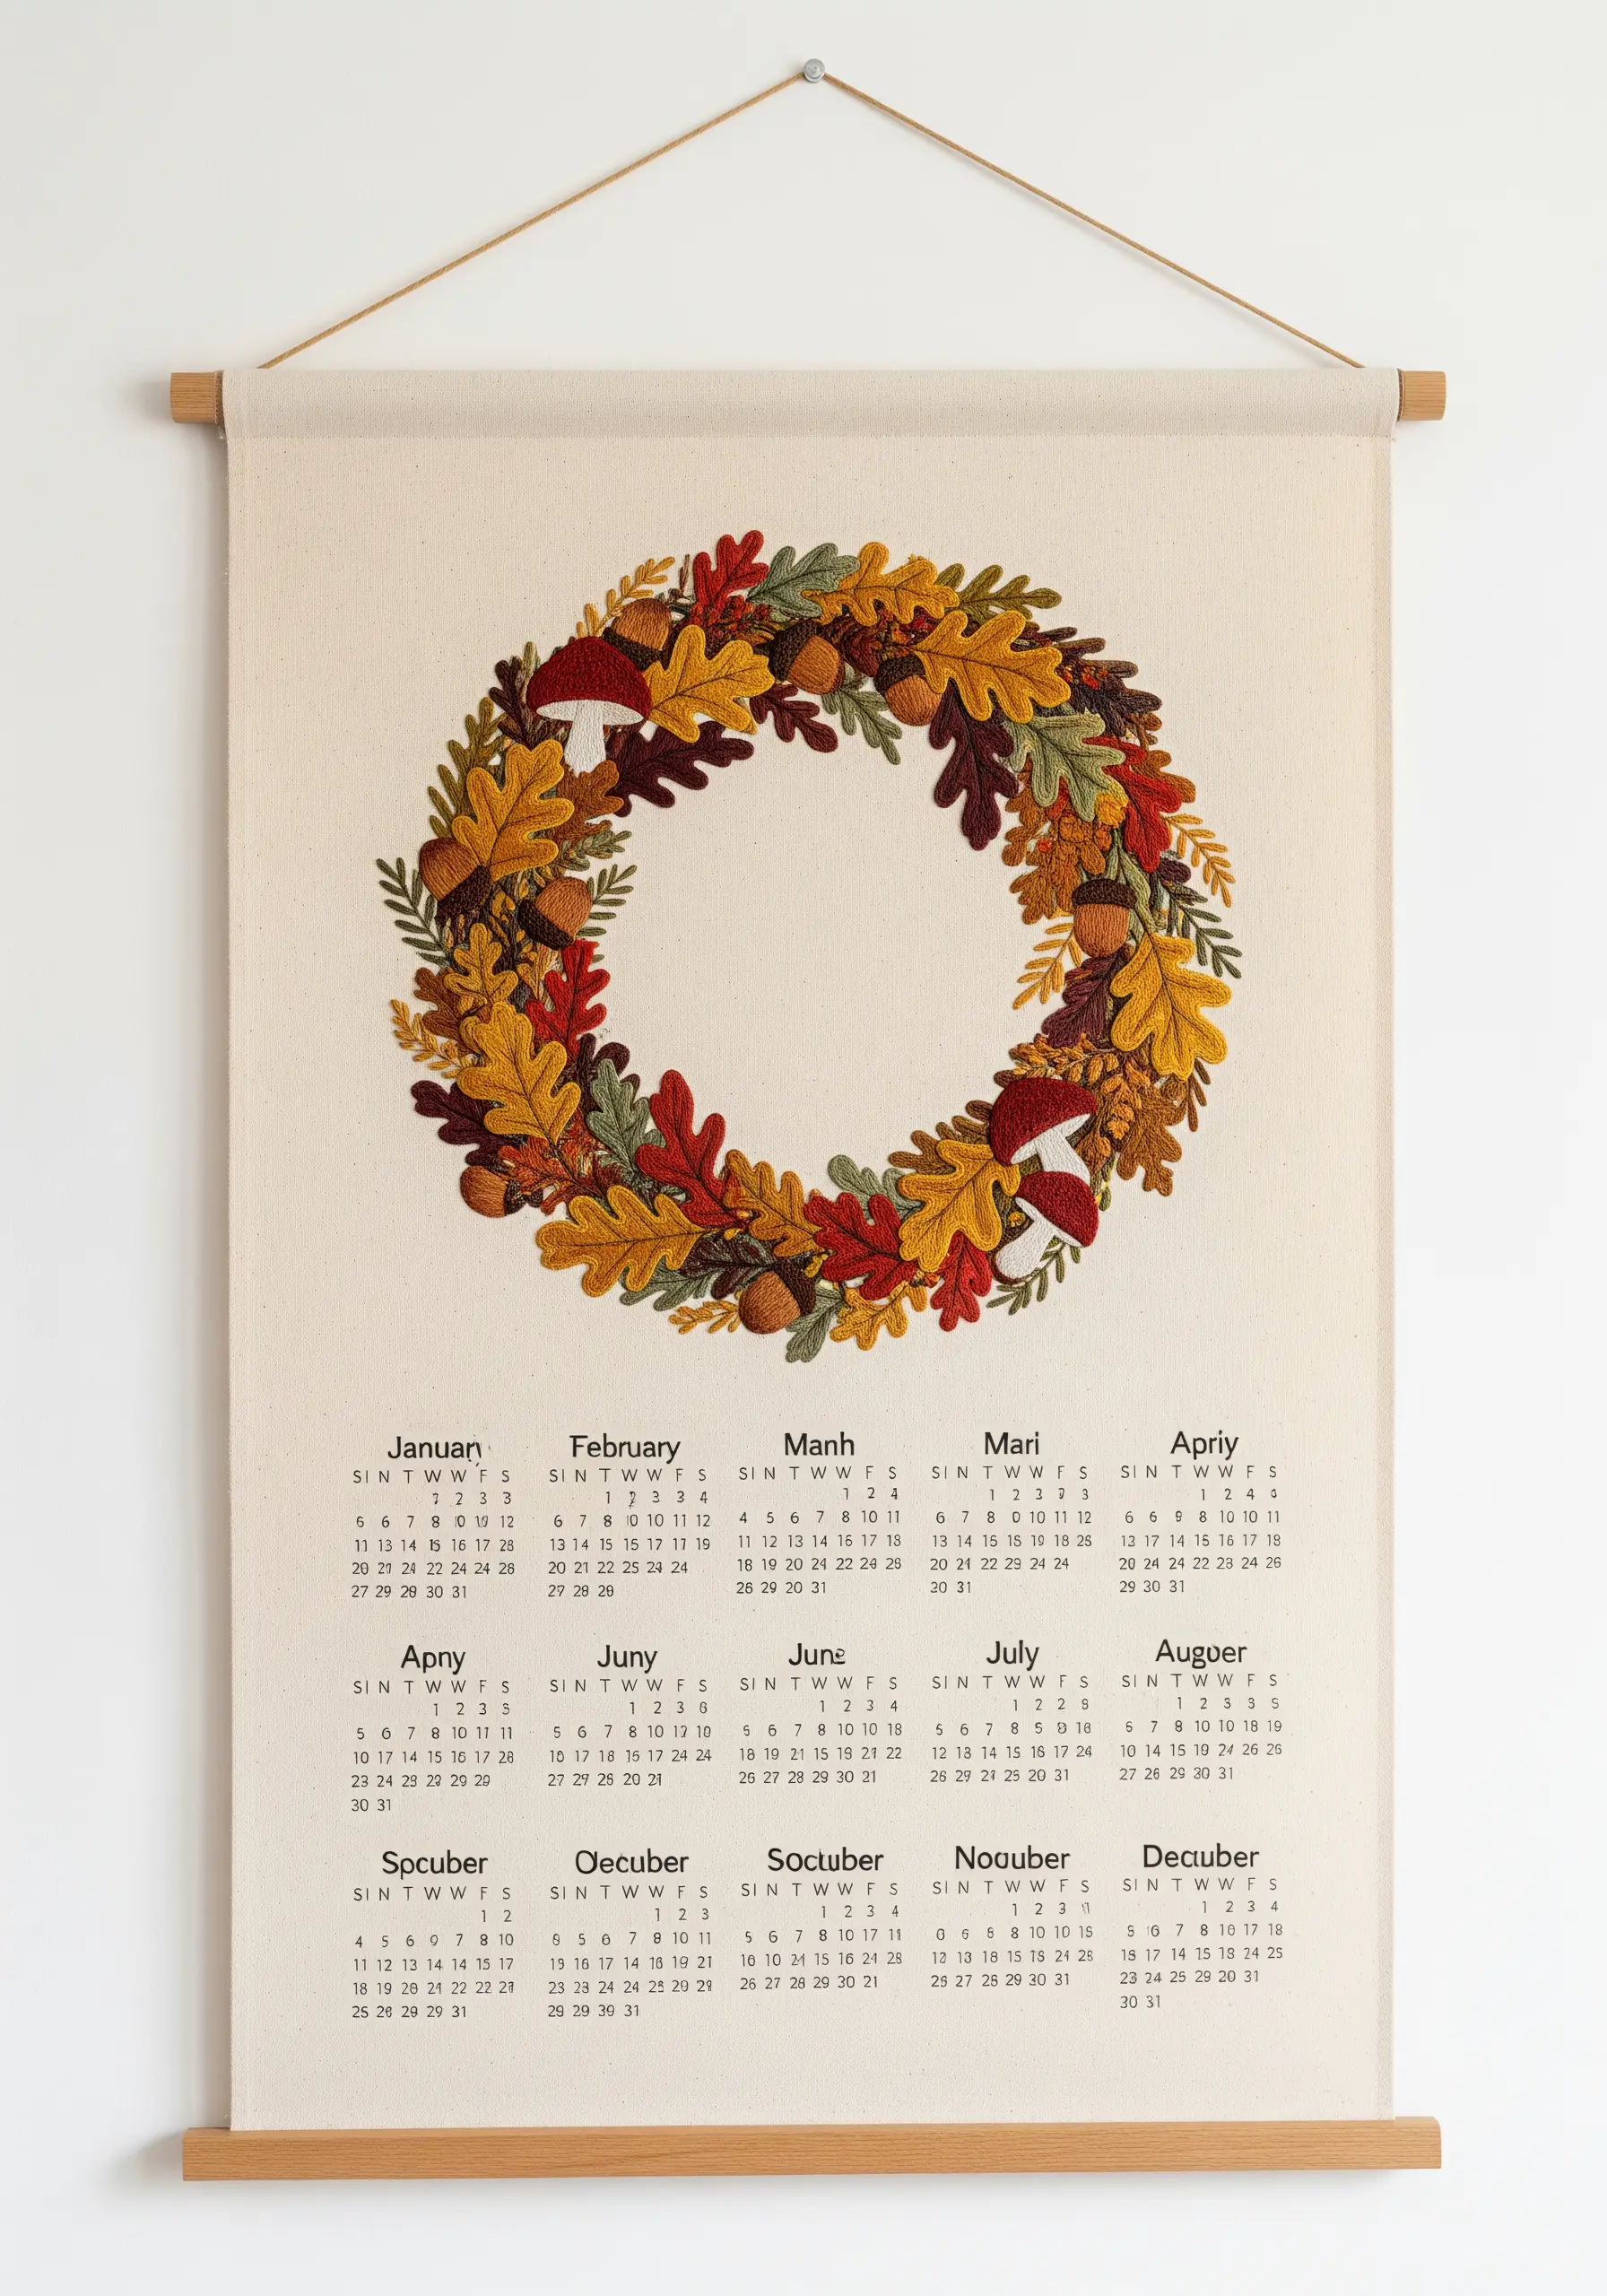
Embroider a wall hanging that is both beautiful and functional, combining intricate stitching with a practical calendar.
To create the rich texture of the autumn wreath, work from back to front. Stitch the largest, flattest leaves first using a long-and-short stitch to blend colors naturally.
Next, add overlapping elements like smaller leaves and acorns using satin stitch.
Finally, add the topmost details, like plump mushrooms and tiny berries, using dimensional French knots and woven wheel stitches.
This layering of stitches is what gives the wreath its lush, realistic feel, turning a simple hoop into a piece of nature-inspired embroidery wall decor.
10. Miniature Library Shelf-Edge Art
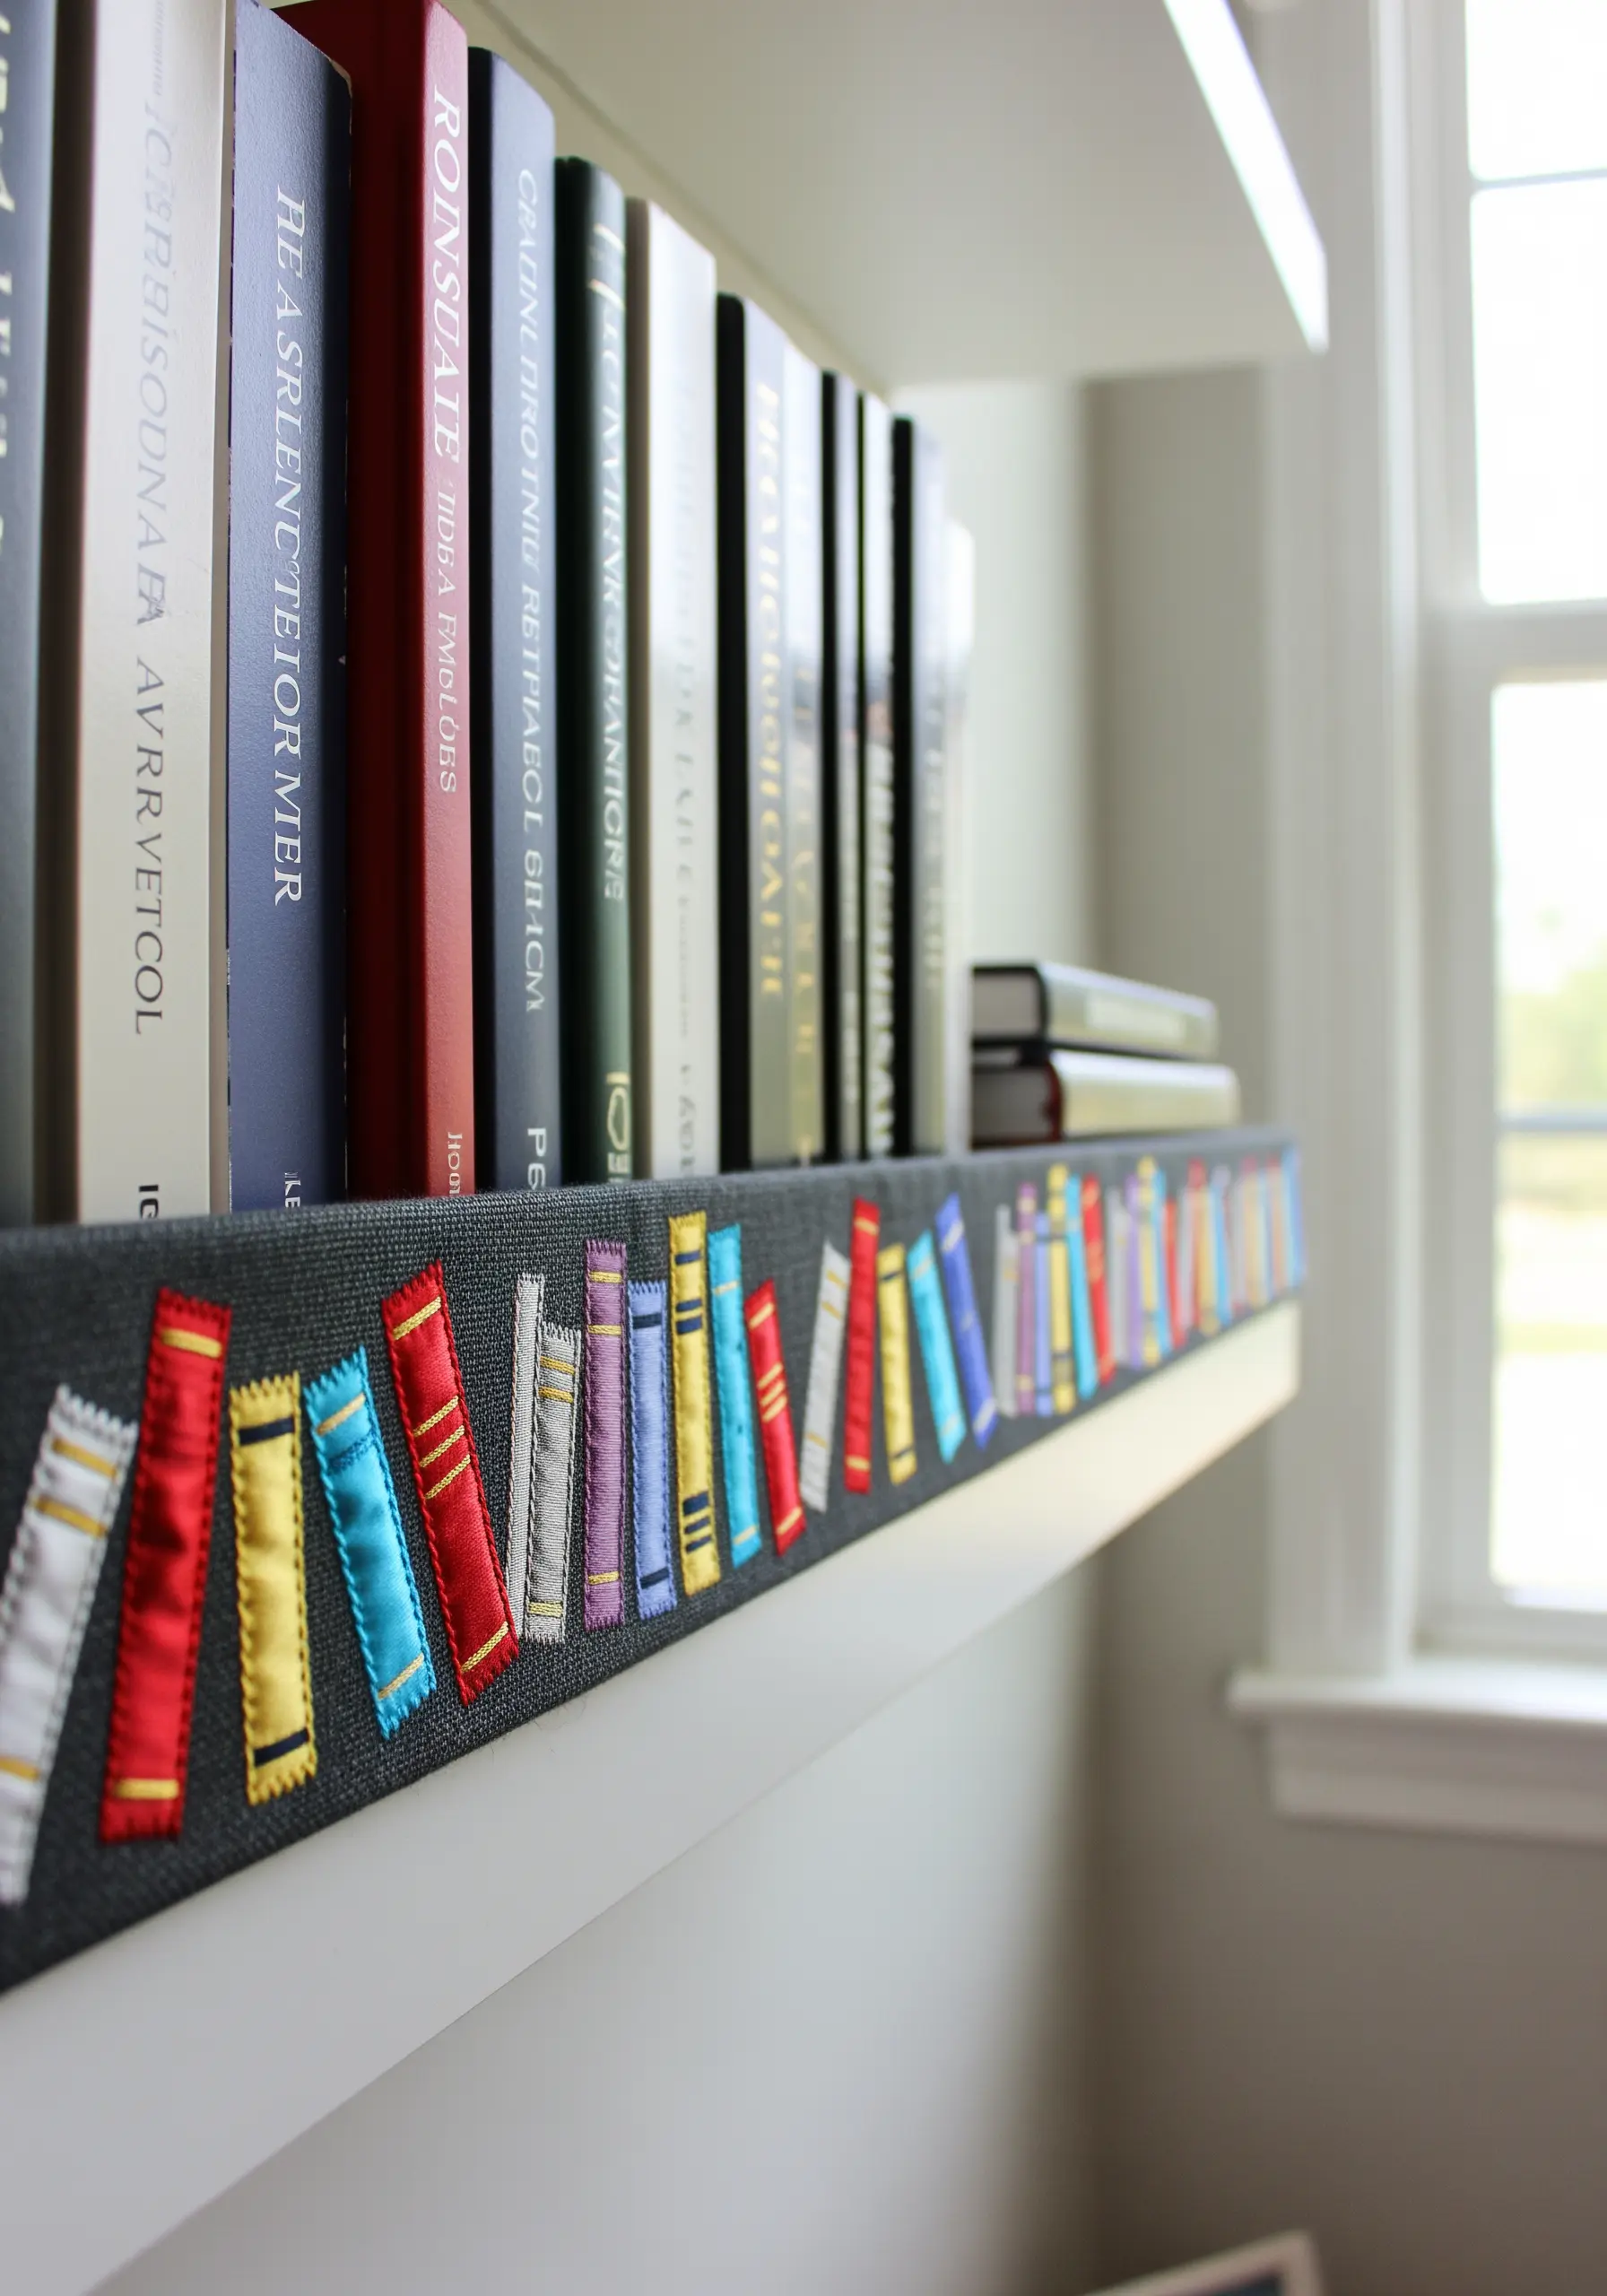
Add a playful, literary touch to your workspace by decorating a bookshelf edge with mixed-media embroidery.
Create the miniature books using small scraps of colorful satin or silk ribbon, which mimics the sheen of book covers.
Cut each ribbon to size, fold the top and bottom edges under for a clean finish, and tack them onto a strip of dark fabric with a simple running stitch around the border.
Use a single strand of metallic gold or silver thread to add tiny horizontal stitches on the spines, suggesting decorative binding.
This appliqué technique is quick, impactful, and a perfect way to use precious fabric remnants.
11. Radiant Sunrise Felt Coasters
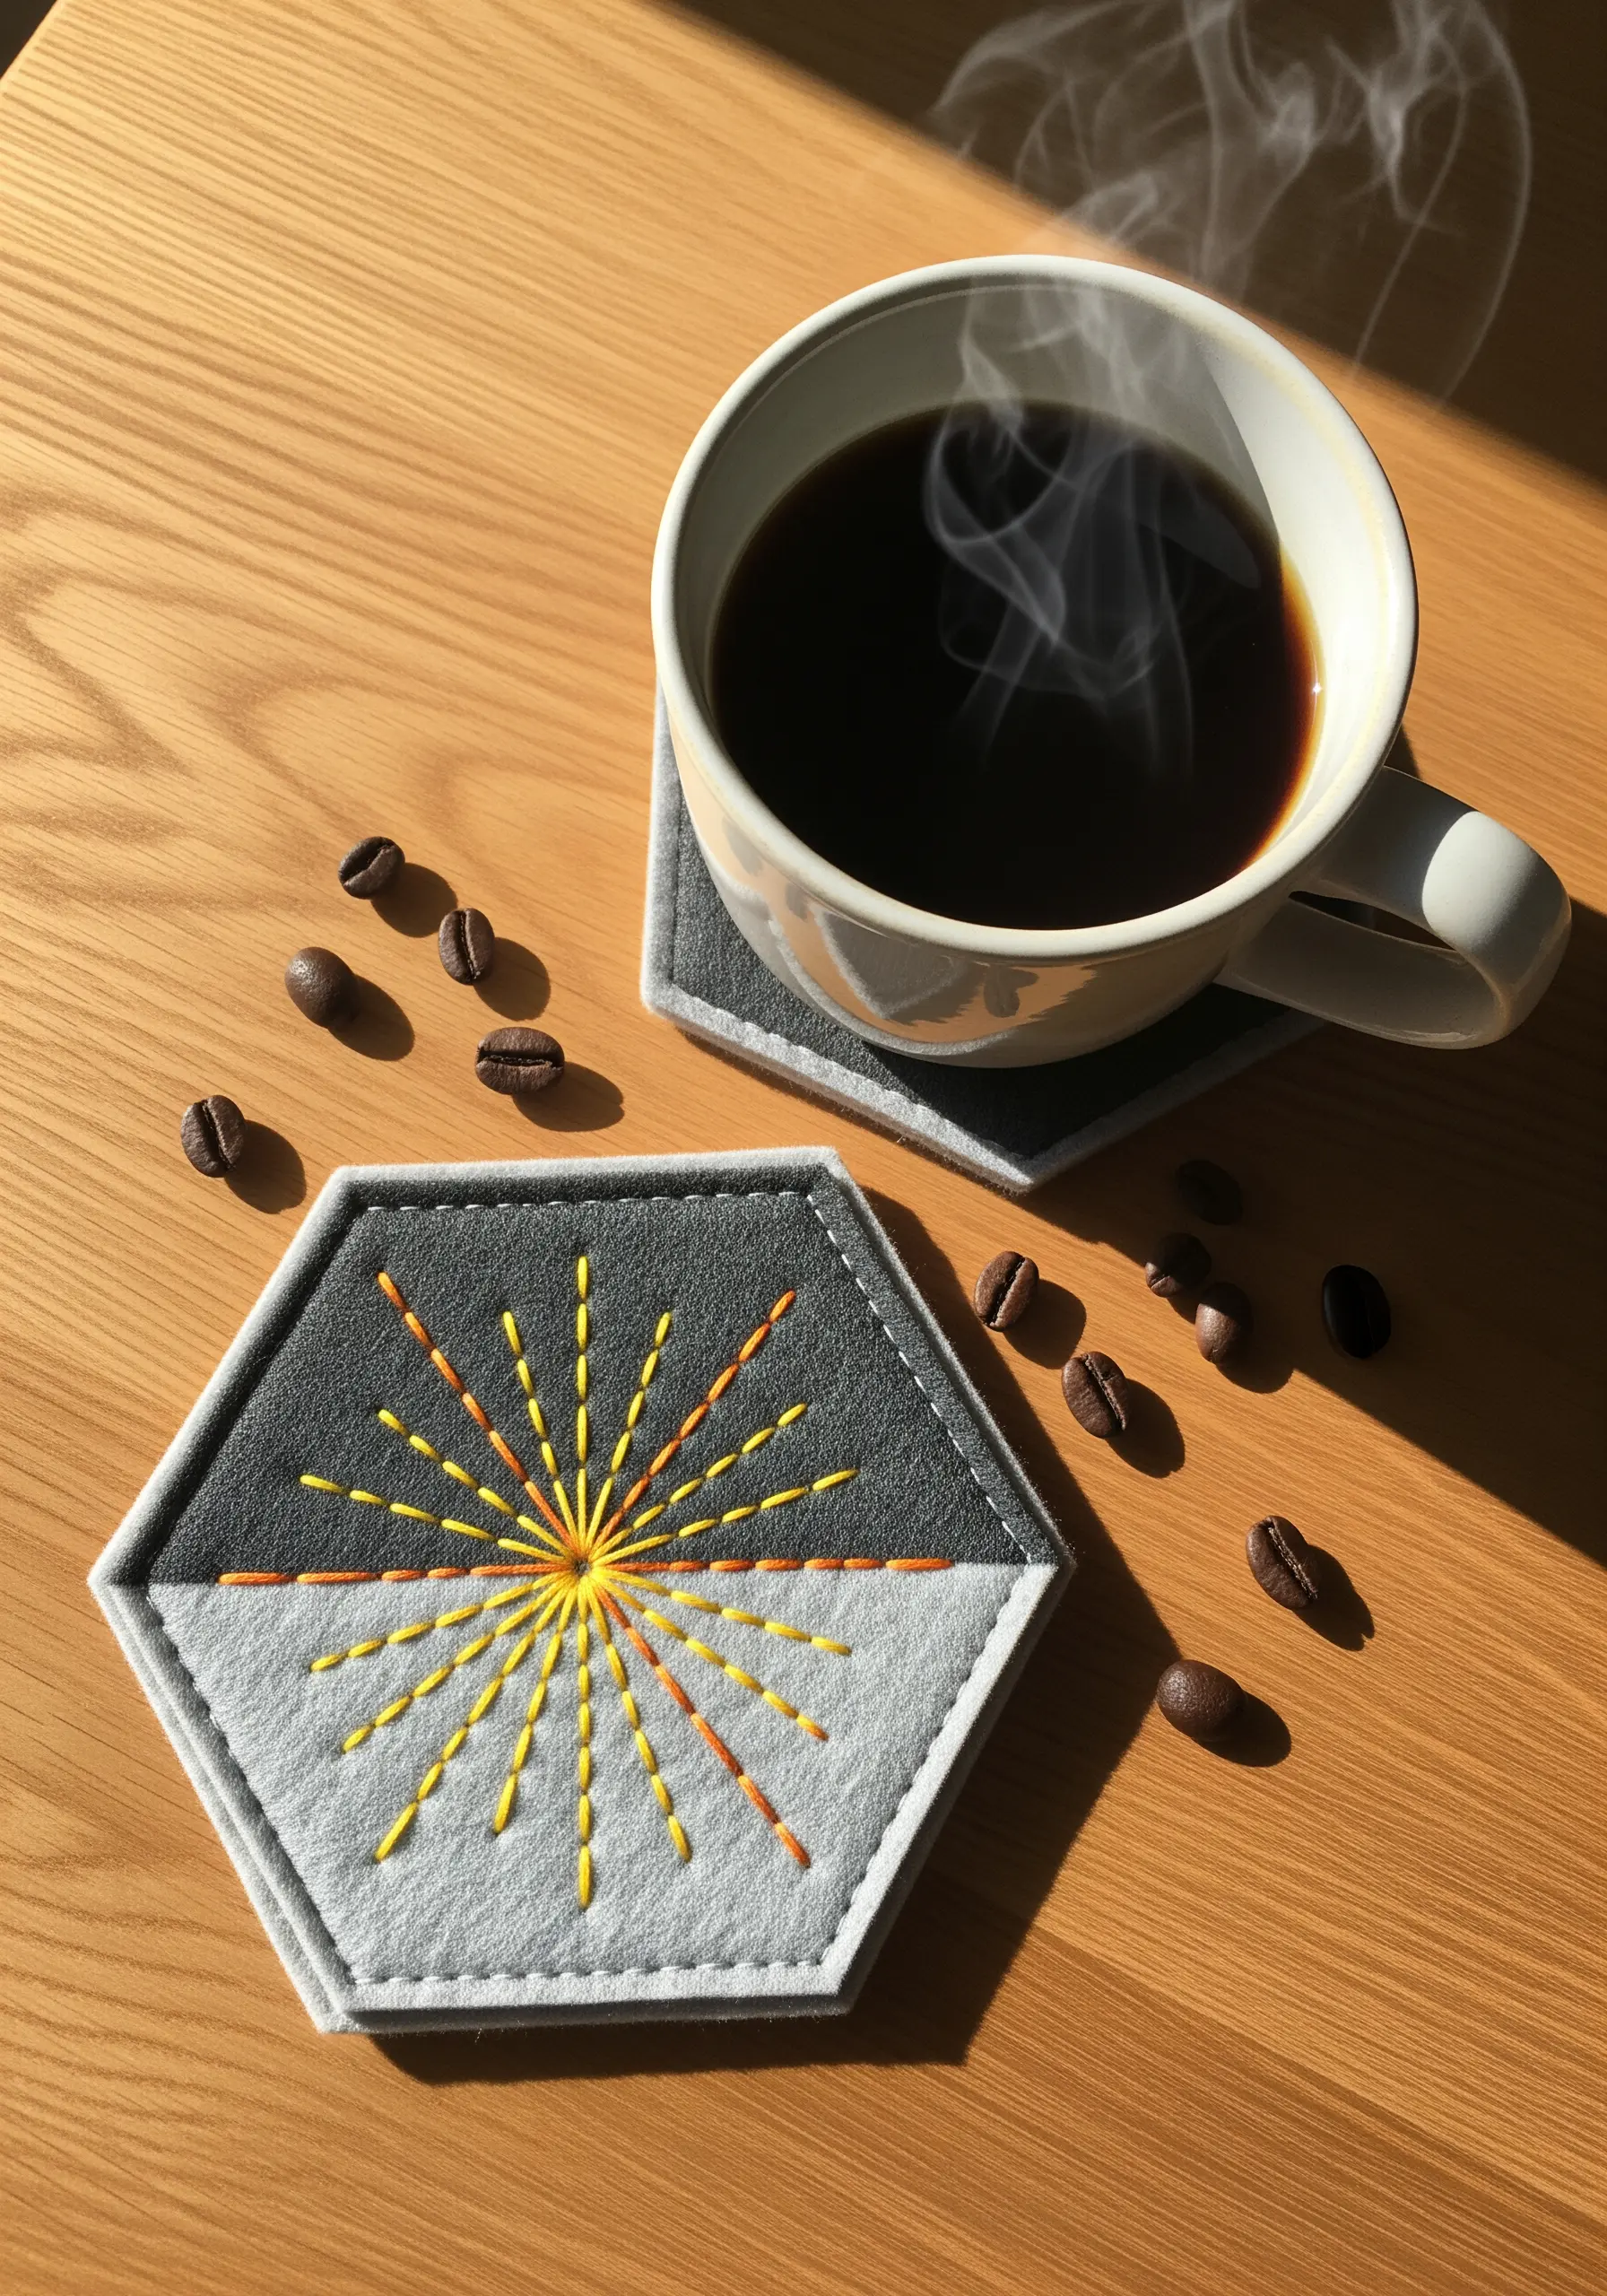
Craft a set of modern, graphic coasters that bring a touch of morning warmth to your desk.
The power of this design lies in its simplicity. Use radiating straight stitches of varying lengths to represent sunbeams.
To enhance the effect, use a gradient of color, starting with a bright yellow at the center and transitioning to orange and gold at the outer edges.
Maintaining consistent tension is crucial here to prevent the felt from puckering.
Finish by whip-stitching the decorated top piece to a backing piece of felt for a durable, double-layered coaster.
12. Ergonomic Wrist Rest with Subtle Detail

Enhance a functional wrist rest with an understated design that adds personality without sacrificing comfort.
Since this is a high-contact surface, choose a simple, flowing pattern that won’t feel bumpy under your wrists.
A gentle, wave-like line stitched with a simple backstitch is ideal.
For stitching on a pre-made cushioned item, a curved needle and a thimble are invaluable tools. They allow you to make shallow stitches through the top layer of fabric without having to push the needle all the way through.
This approach ensures the embroidery is purely decorative and doesn’t interfere with the object’s ergonomic function.
13. A Fabric Frame for Your Monitor
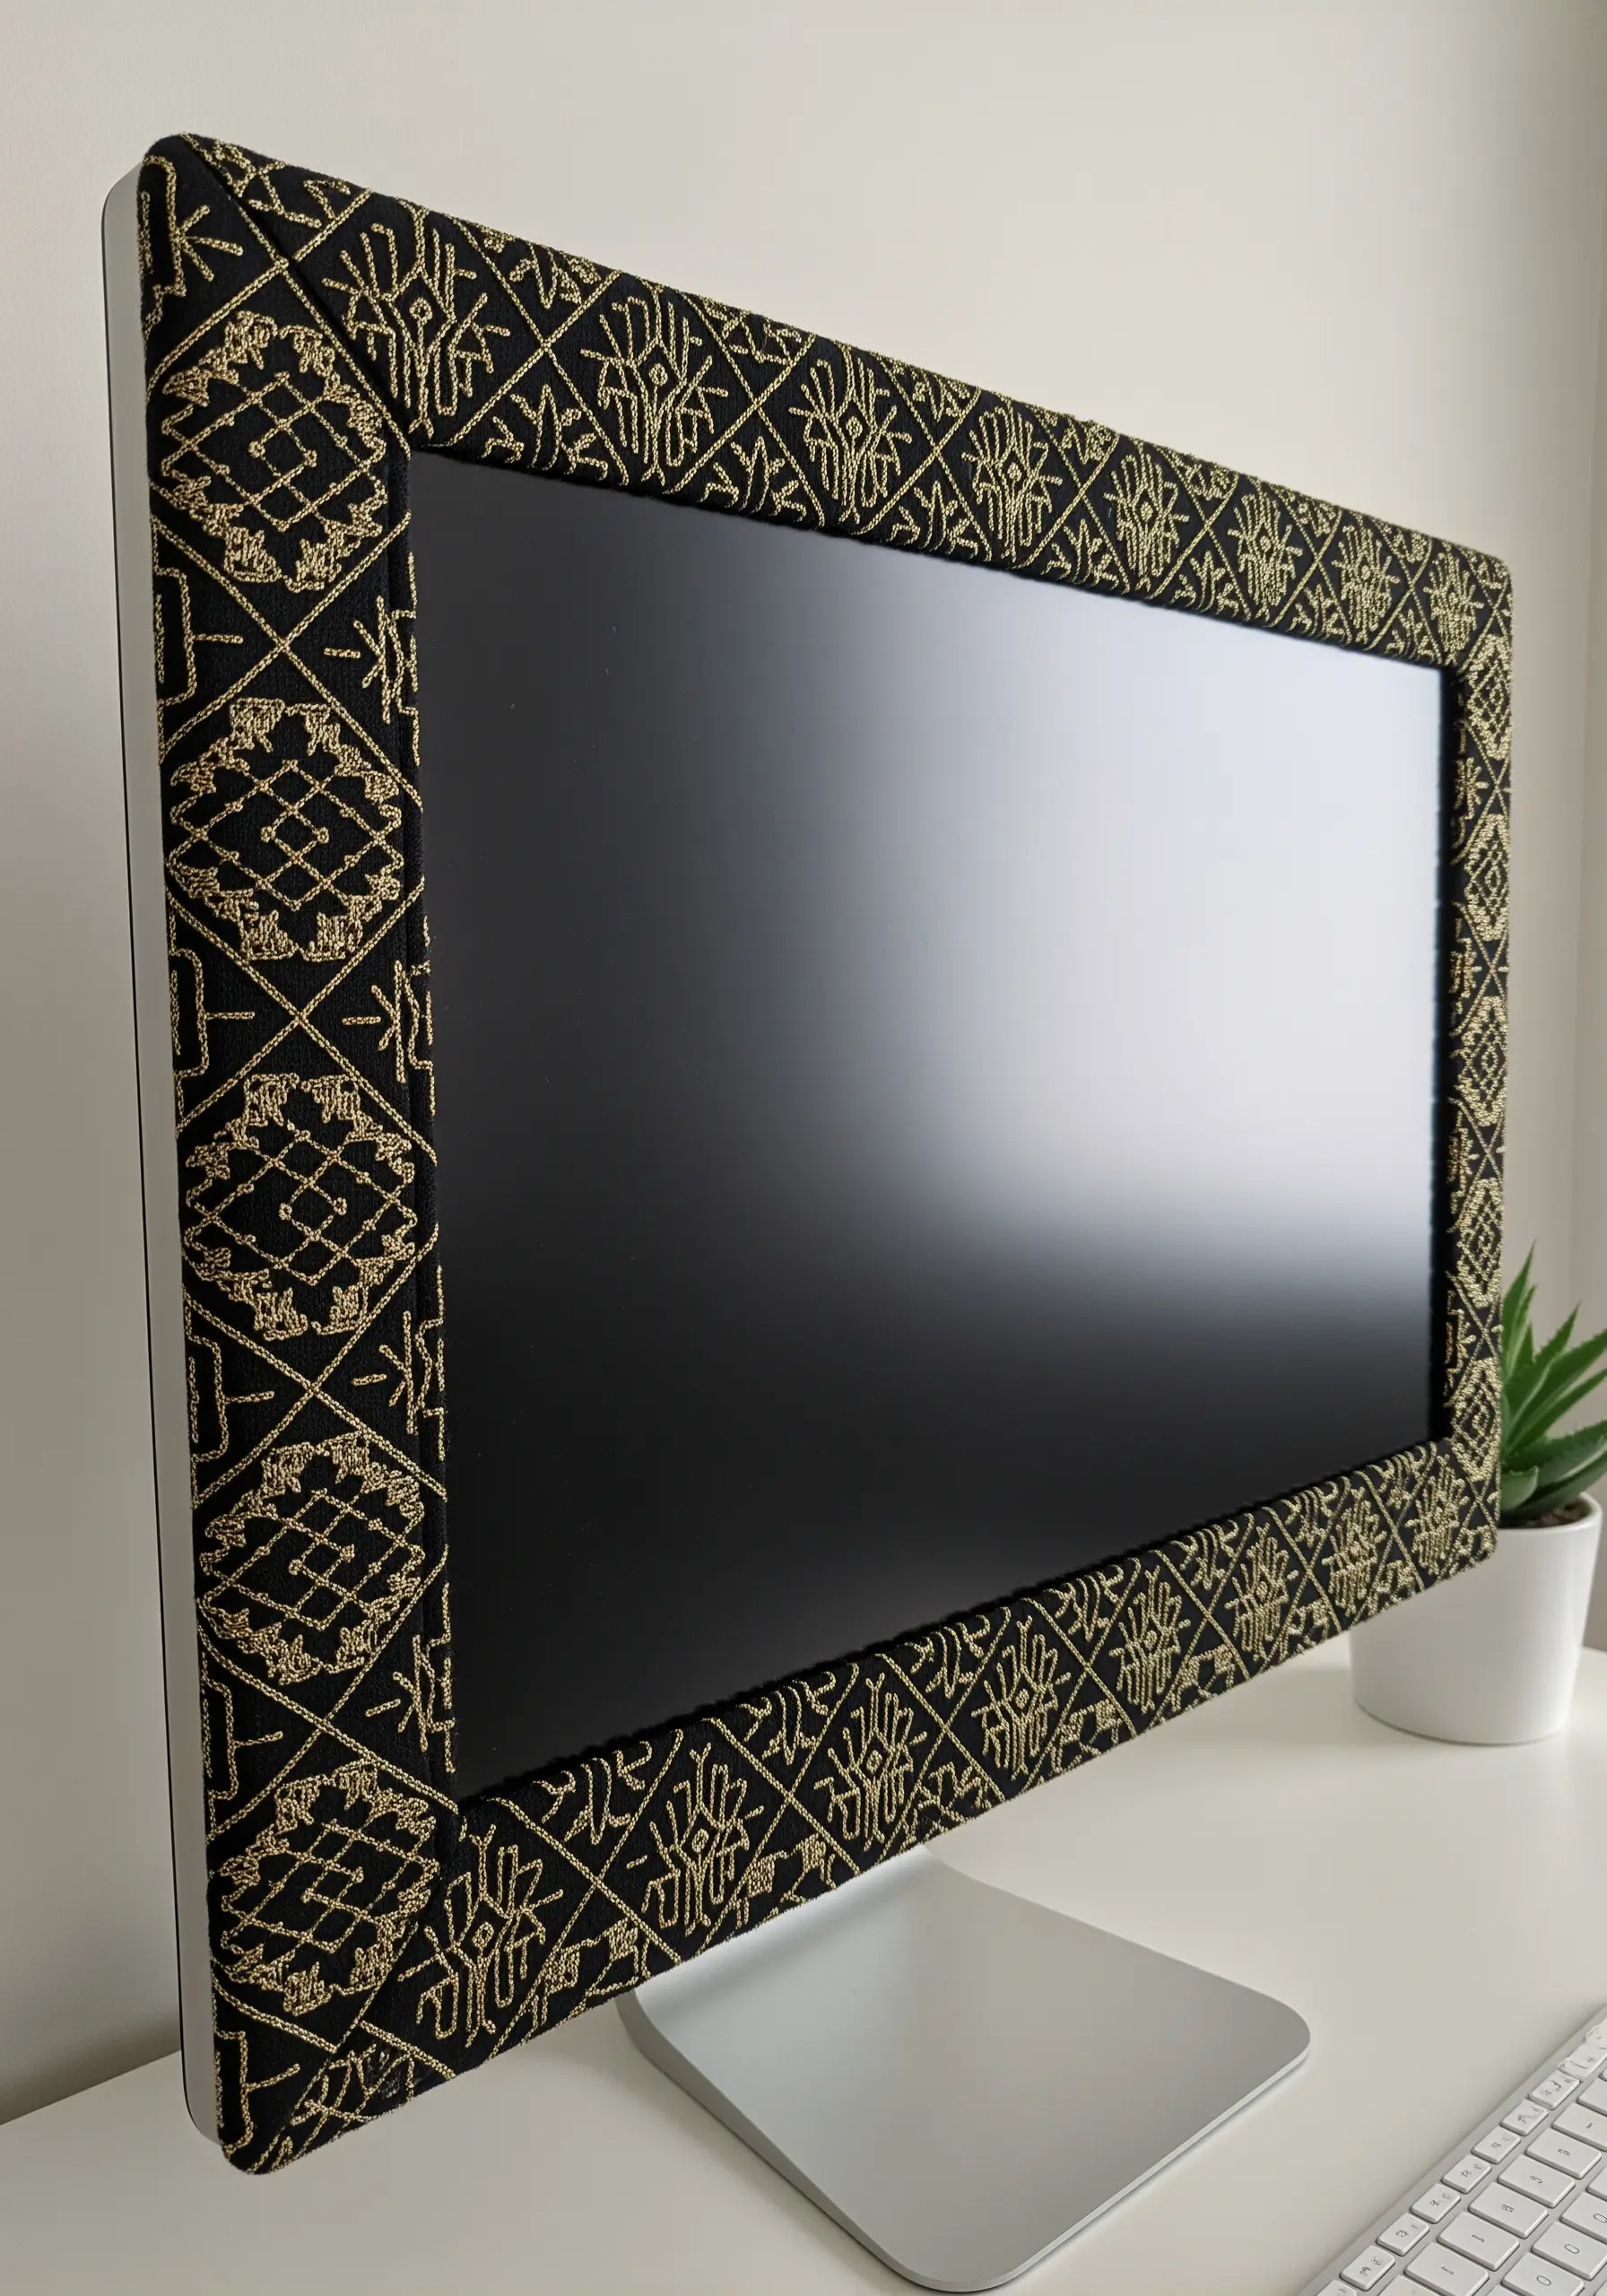
Soften the hard edges of your tech by creating a custom-fit embroidered frame for your computer monitor.
This project is more about clever construction than complex stitching. Create a sleeve from a sturdy, non-stretch fabric like canvas, tailored to the exact dimensions of your monitor’s bezel.
Choose a repeating geometric pattern that is easy to stitch over a large area. A simple backstitch or chain stitch in a high-contrast color, like gold on black, creates a sophisticated, almost jacquard-like effect.
Embroider the fabric while it is flat, before sewing the sleeve. This ensures your work is neat and your tension is even throughout.
14. Crisp Typographic Basket Labels
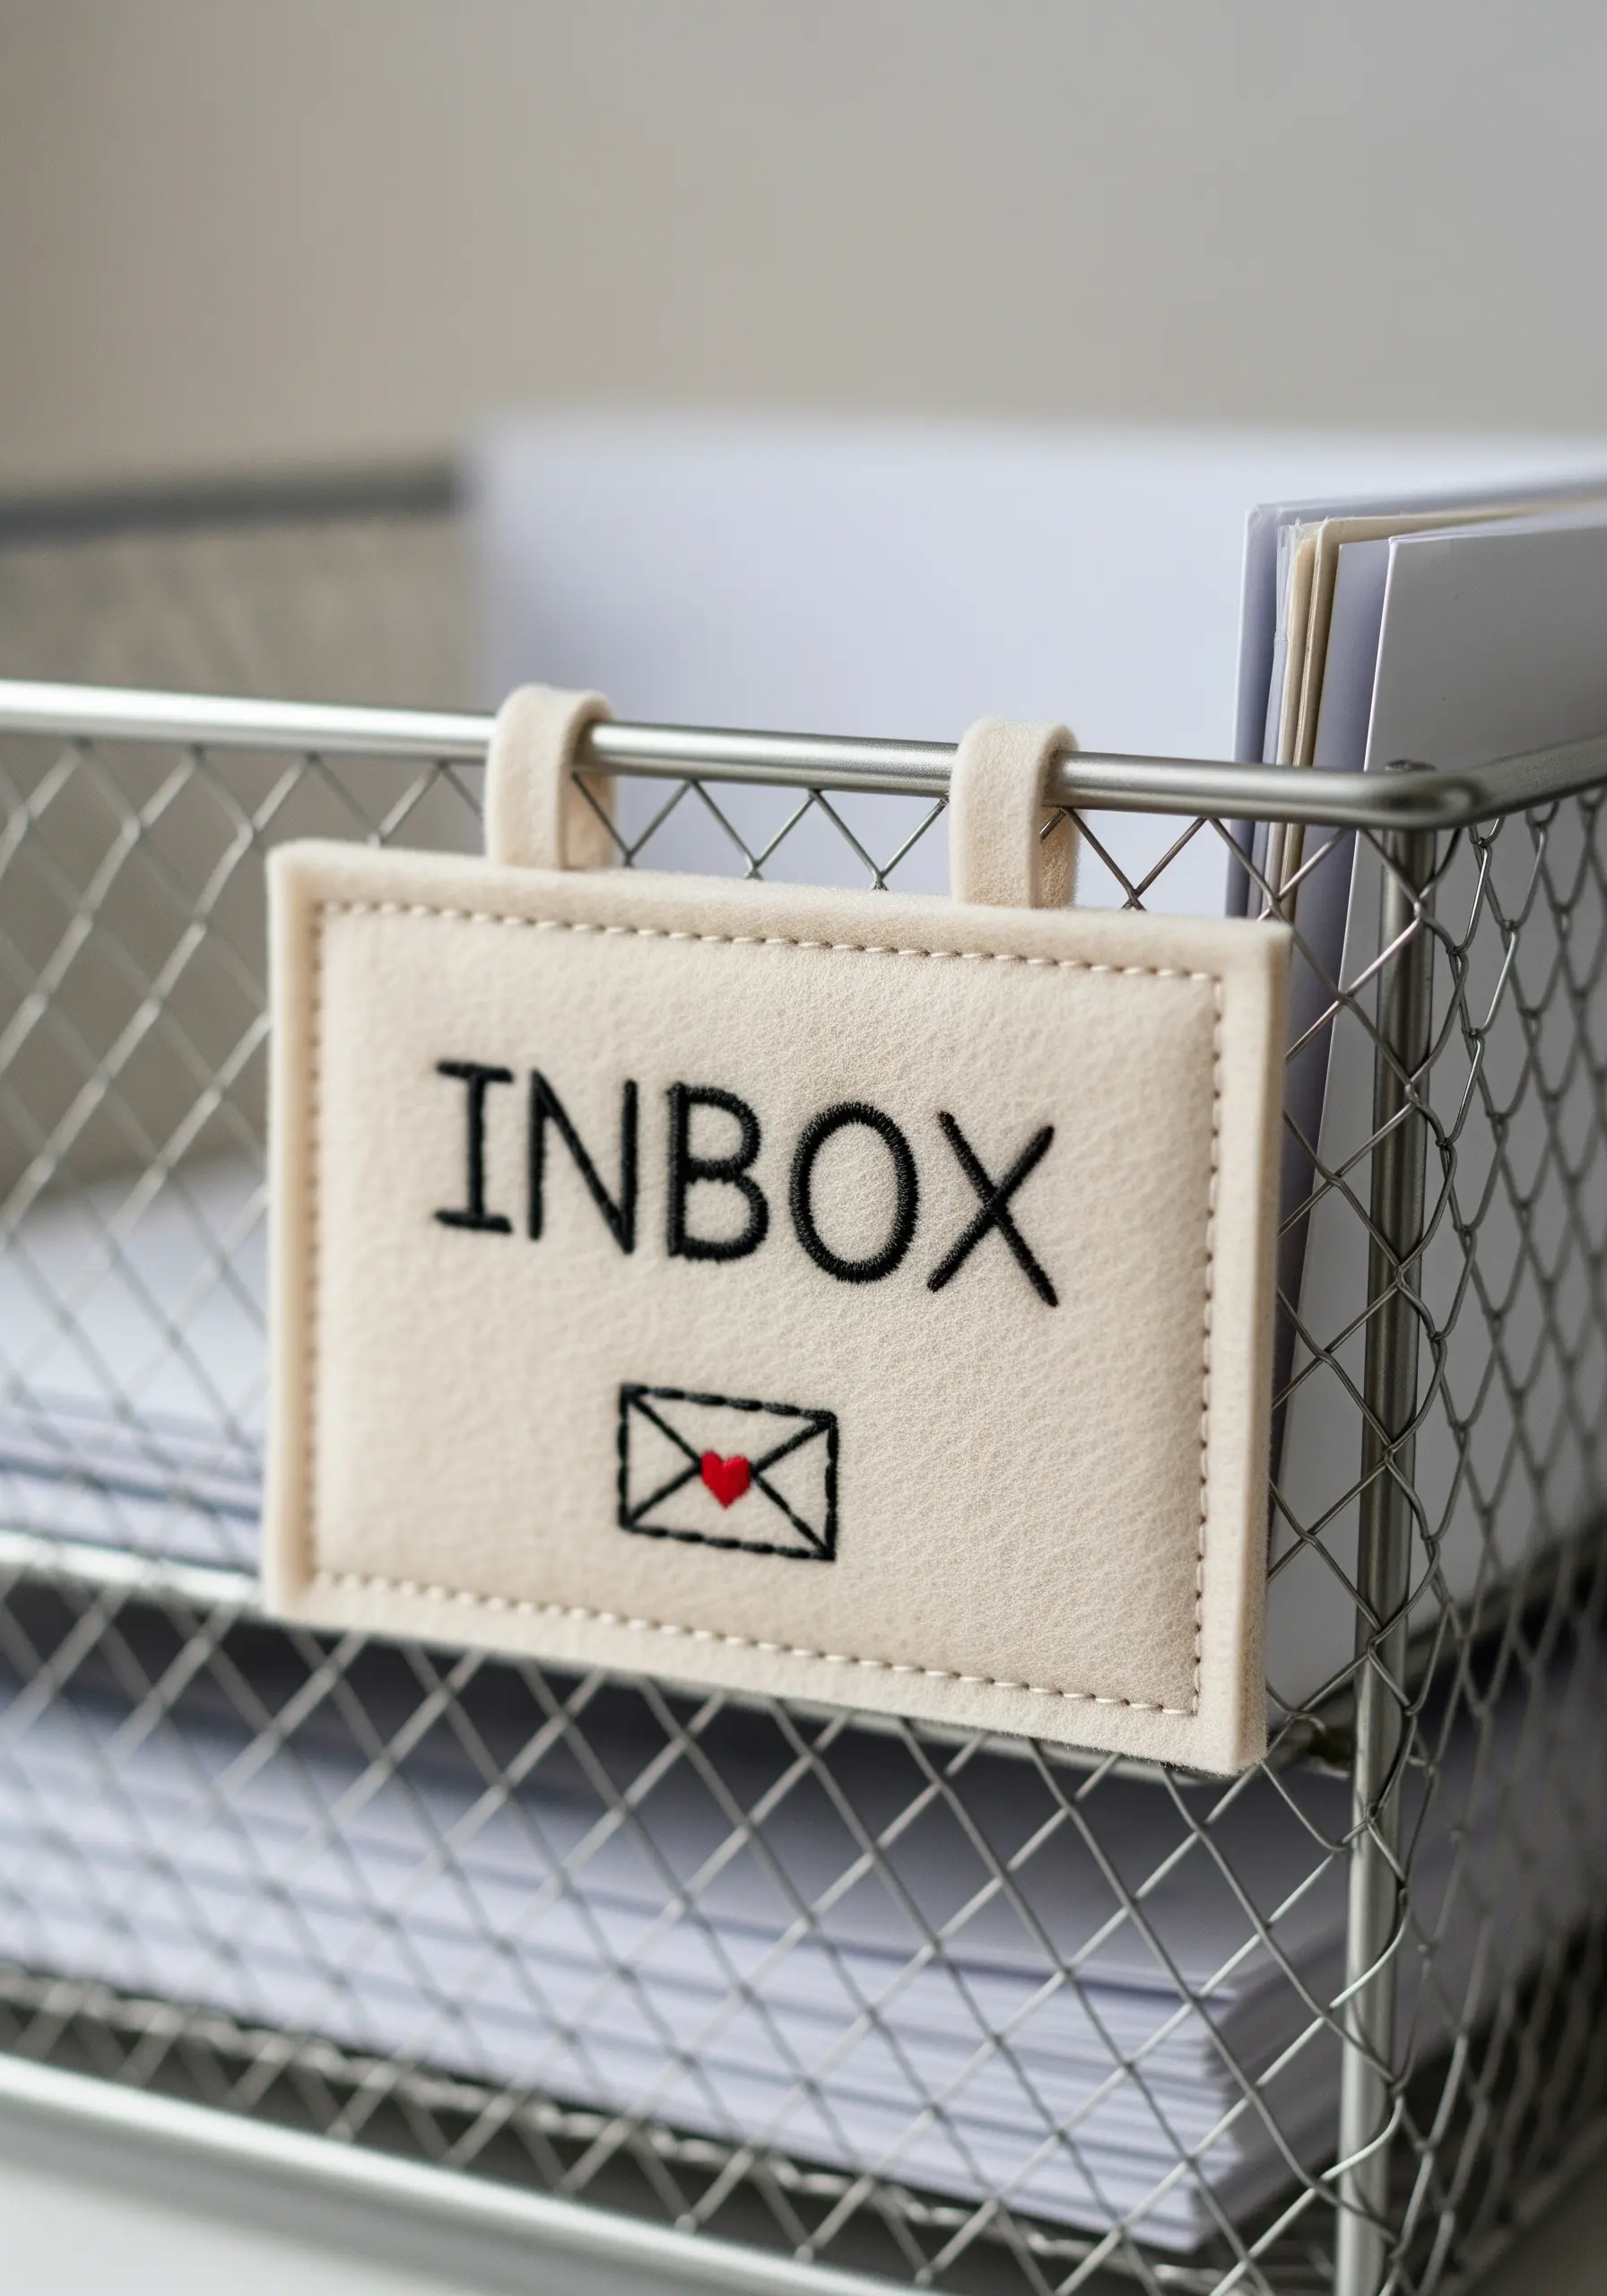
Organize your paper trays and baskets with polished, handmade labels that are both clear and charming.
The key to professional-looking embroidered text is precision. Use a fine-tipped, heat-erasable pen to transfer your letters onto the felt perfectly.
Stitch the letters using a two-strand split stitch. This stitch creates a solid, clean line that closely mimics printed text, far better than a standard backstitch.
Finish the label by sewing a backing piece on with a neat, almost invisible whip stitch for a durable and tidy result. These minimal typography embroidery patterns bring order and style to your workspace.
15. A Delicate Forget-Me-Not Bookmark

Create a beautiful bookmark that feels like a treasured keepsake, perfect for pausing your work day for a reading break.
For the tiny forget-me-not flowers, use the detached chain stitch (or lazy daisy) for the five petals. This stitch is quick and creates a perfect, small petal shape every time.
Add a single French knot in a contrasting yellow for the center of each blossom.
To ensure your bookmark lies flat and lasts for years, iron on a layer of lightweight interfacing to the back of the fabric before cutting and finishing the edges.
A coordinating tassel adds a final touch of classic elegance.
16. Illuminated Stitches on a Lampshade

Add a pop of color and pattern to your desk lamp, creating a design that comes alive when illuminated.
Choose simple, open stitches that allow light to pass through them. Woven wheel stitches (or rosettes) and eyelet stitches are perfect for this.
Arrange your stitched motifs in a scattered, random pattern for a playful, modern look.
Always work with the lampshade removed from the base, and keep one hand on the inside to guide the needle. A thimble is essential to protect your fingers when pushing the needle through the stiff lampshade material.
The magic happens when you turn on the light, and your stitches appear to glow from within.
17. A Playful Cactus Wastebasket
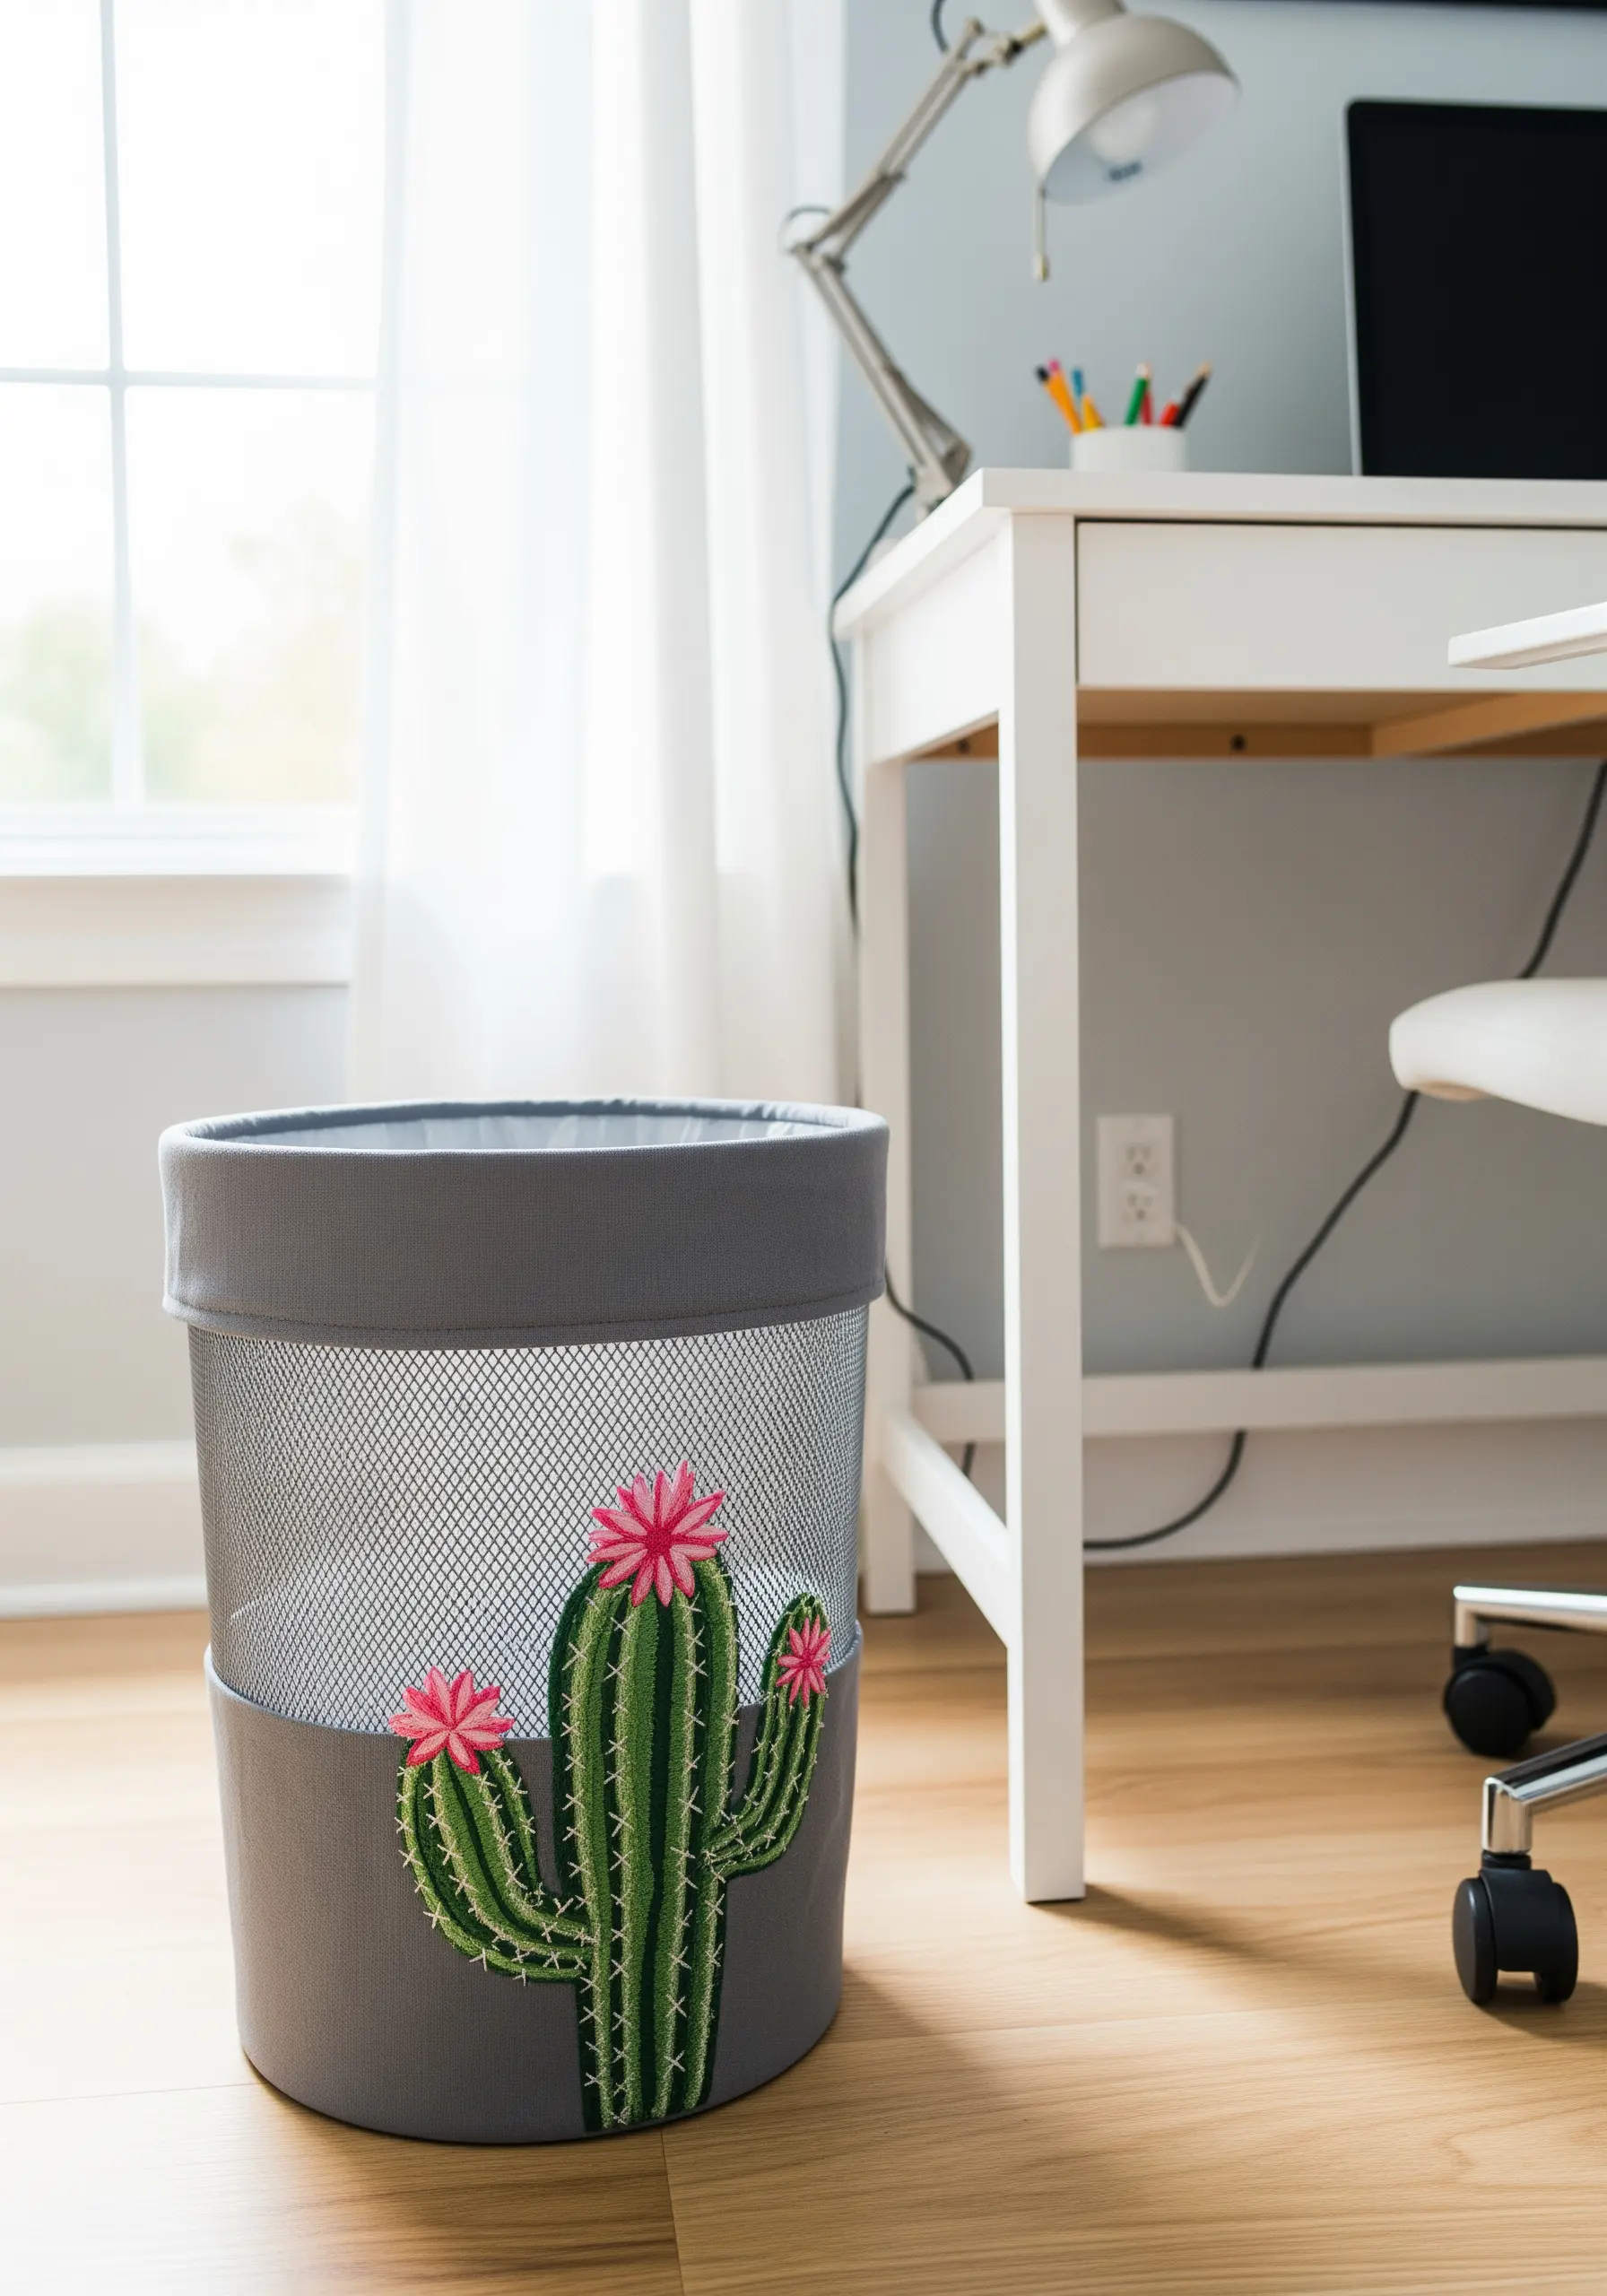
Bring unexpected joy to a purely functional item like a wastebasket with a vibrant, textural design.
For the body of the cactus, use long vertical satin stitches to mimic its natural ribbed structure. Add fine white straight stitches to represent the spines.
Create the bright pink blossoms with a dimensional woven wheel stitch. The raised, circular pattern of this stitch perfectly captures the look of a desert flower and provides a beautiful textural contrast to the flat satin stitch.
Embroider your design on a separate panel of fabric first, then attach it securely to the bin with a strong, flexible fabric adhesive for a durable and clean application.


