

Your tote bag is more than just a carryall; it’s a canvas waiting for a story. Let’s move beyond simple patterns and explore how specific stitches, textures, and color choices can bring your favorite anime and kawaii characters to life with professional polish.
In this collection, you’ll discover how to create a fluffy 3D texture for a corgi’s tail, how to blend threads to capture a cosmic gaze, and how to use metallic floss to make a magical wand shimmer. It’s not about complexity; it’s about intention.
Think of each stitch as a decision. A padded satin stitch can make a dango look plump and delicious, while a single strand of thread can define a delicate constellation. These are the details that transform a simple bag into a personal, wearable piece of art. You have the skill—now let’s refine the technique.
1. Create Edible Texture with Seed Stitches
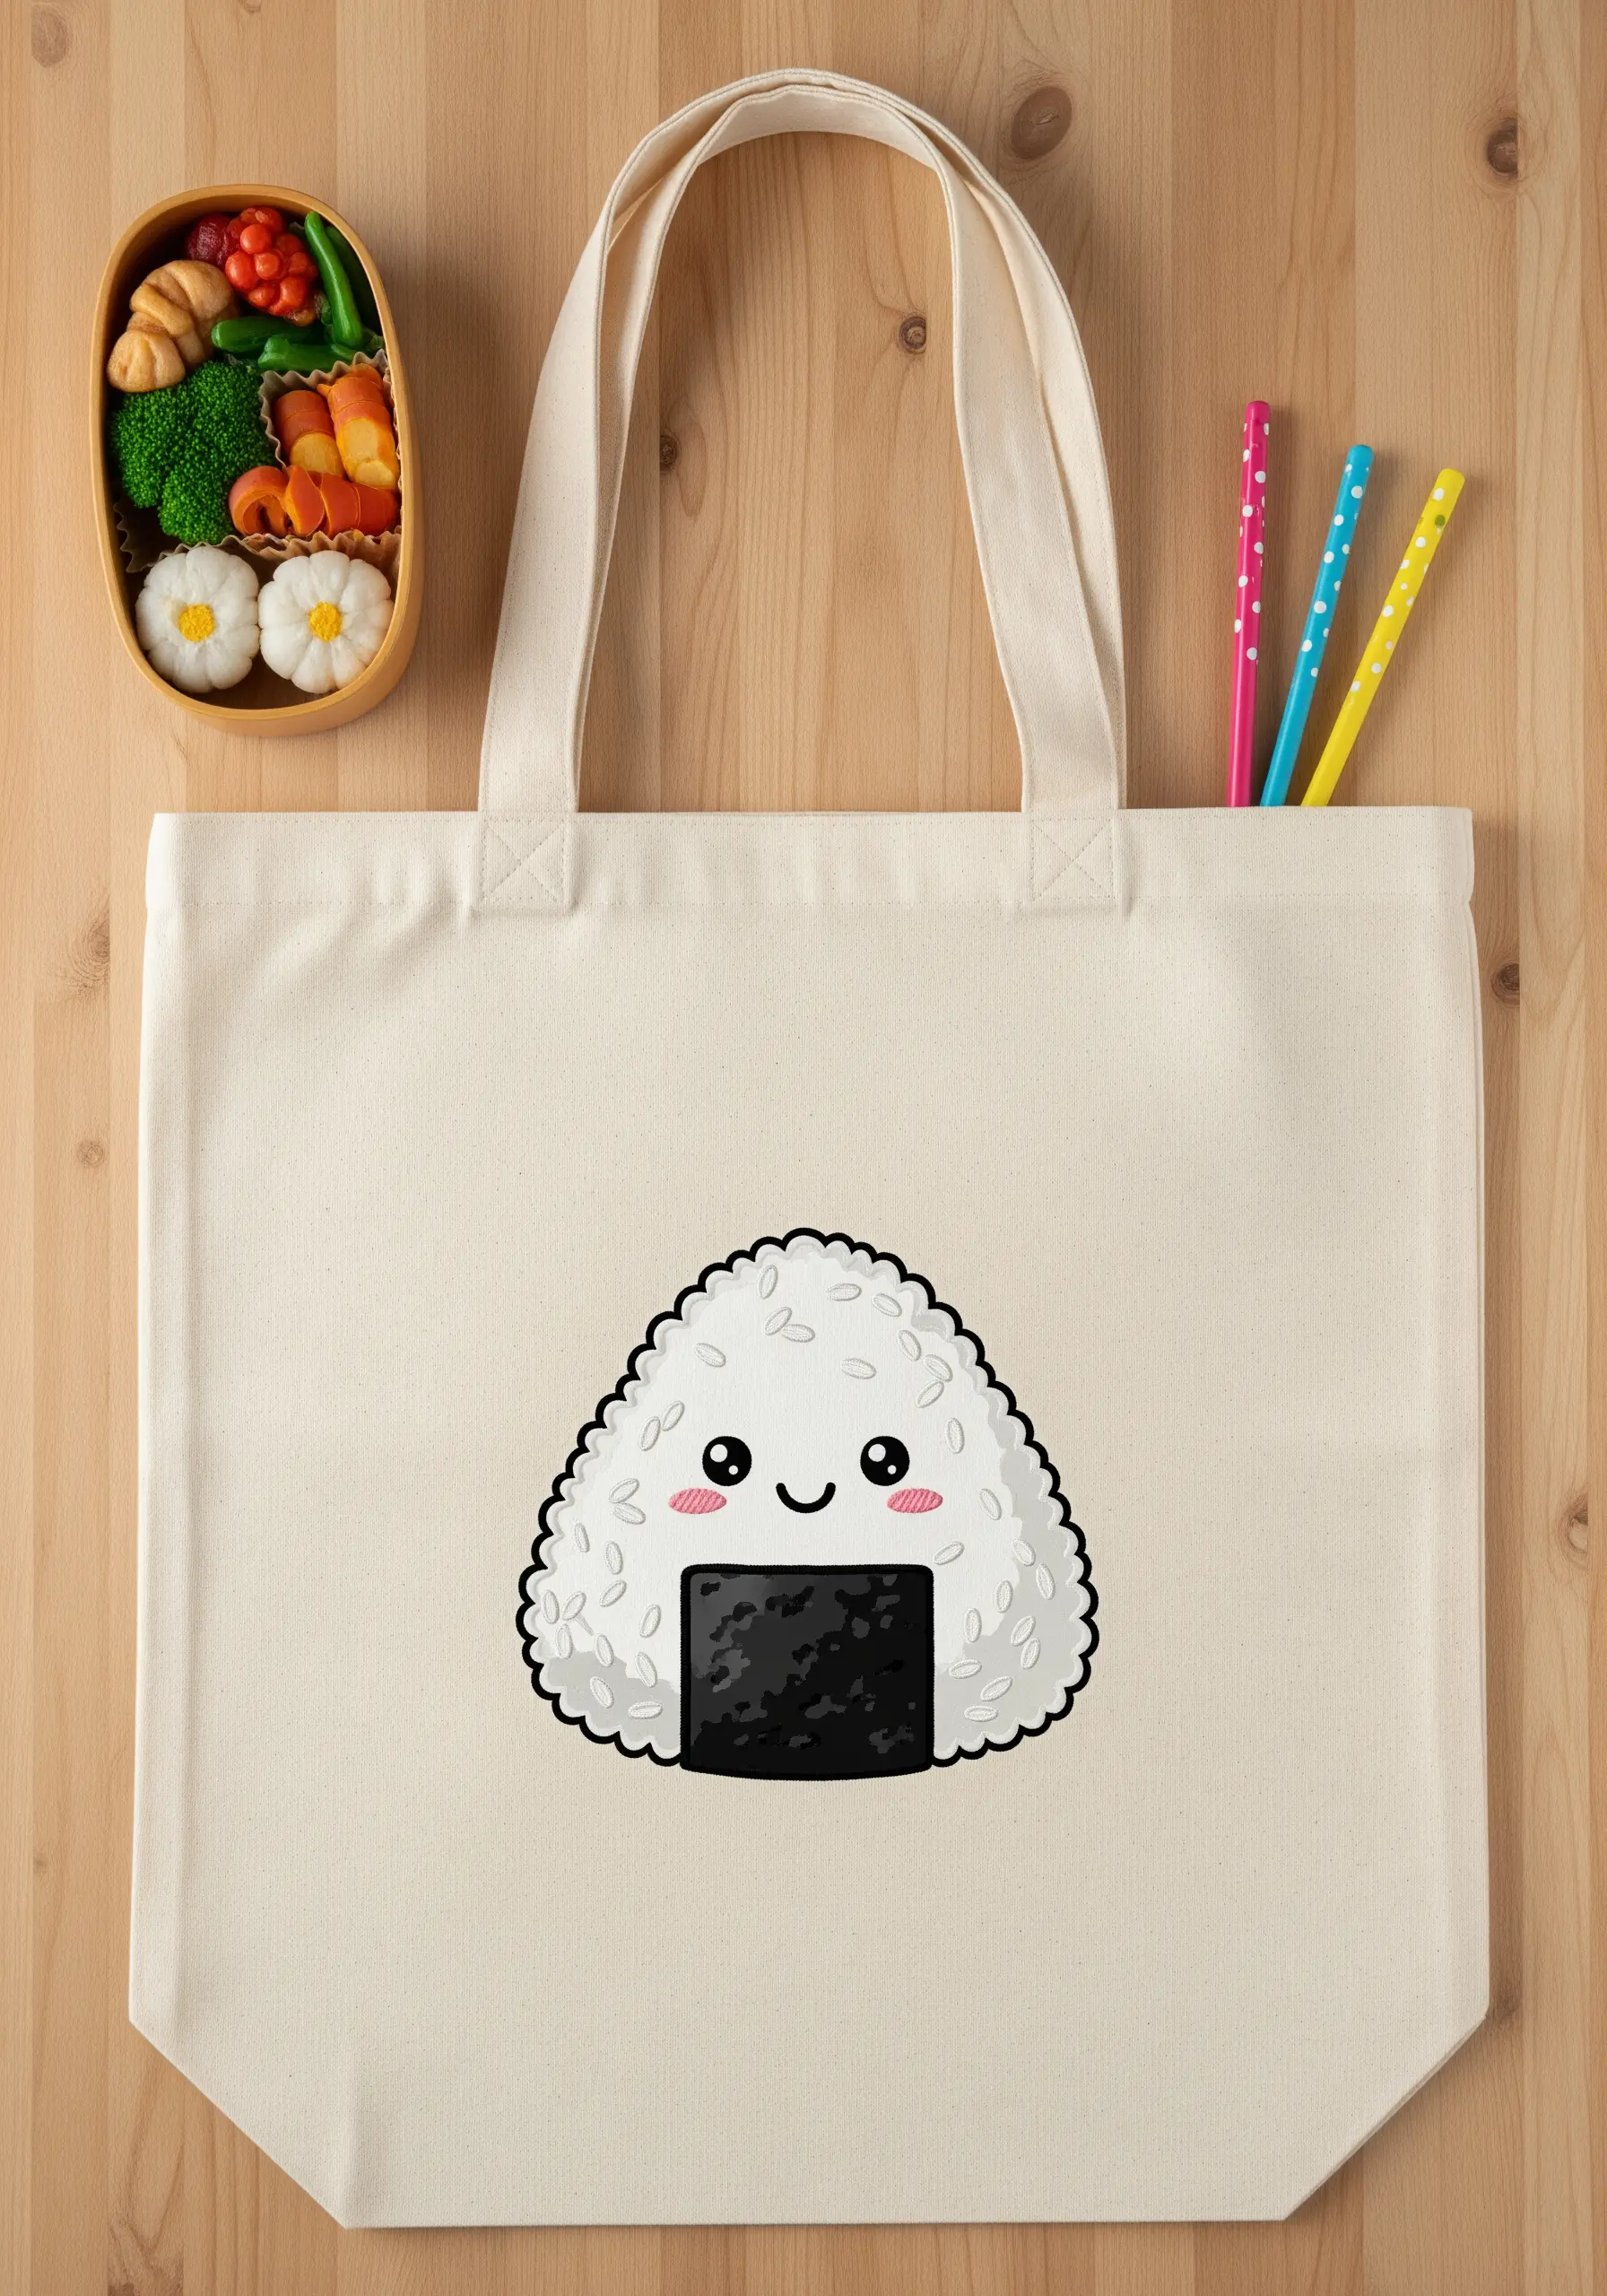
To give your onigiri a realistic rice texture, avoid flat satin stitch.
Instead, fill the area with hundreds of tiny, randomly placed seed stitches using an off-white or cream-colored thread.
This creates a subtle, granular surface that mimics individual grains of rice without adding bulk.
For the nori (seaweed), use a dense, vertical satin stitch in a dark grey or black with a slight sheen to contrast the matte texture of the rice.
2. Master the Sheen of a Magical Wand
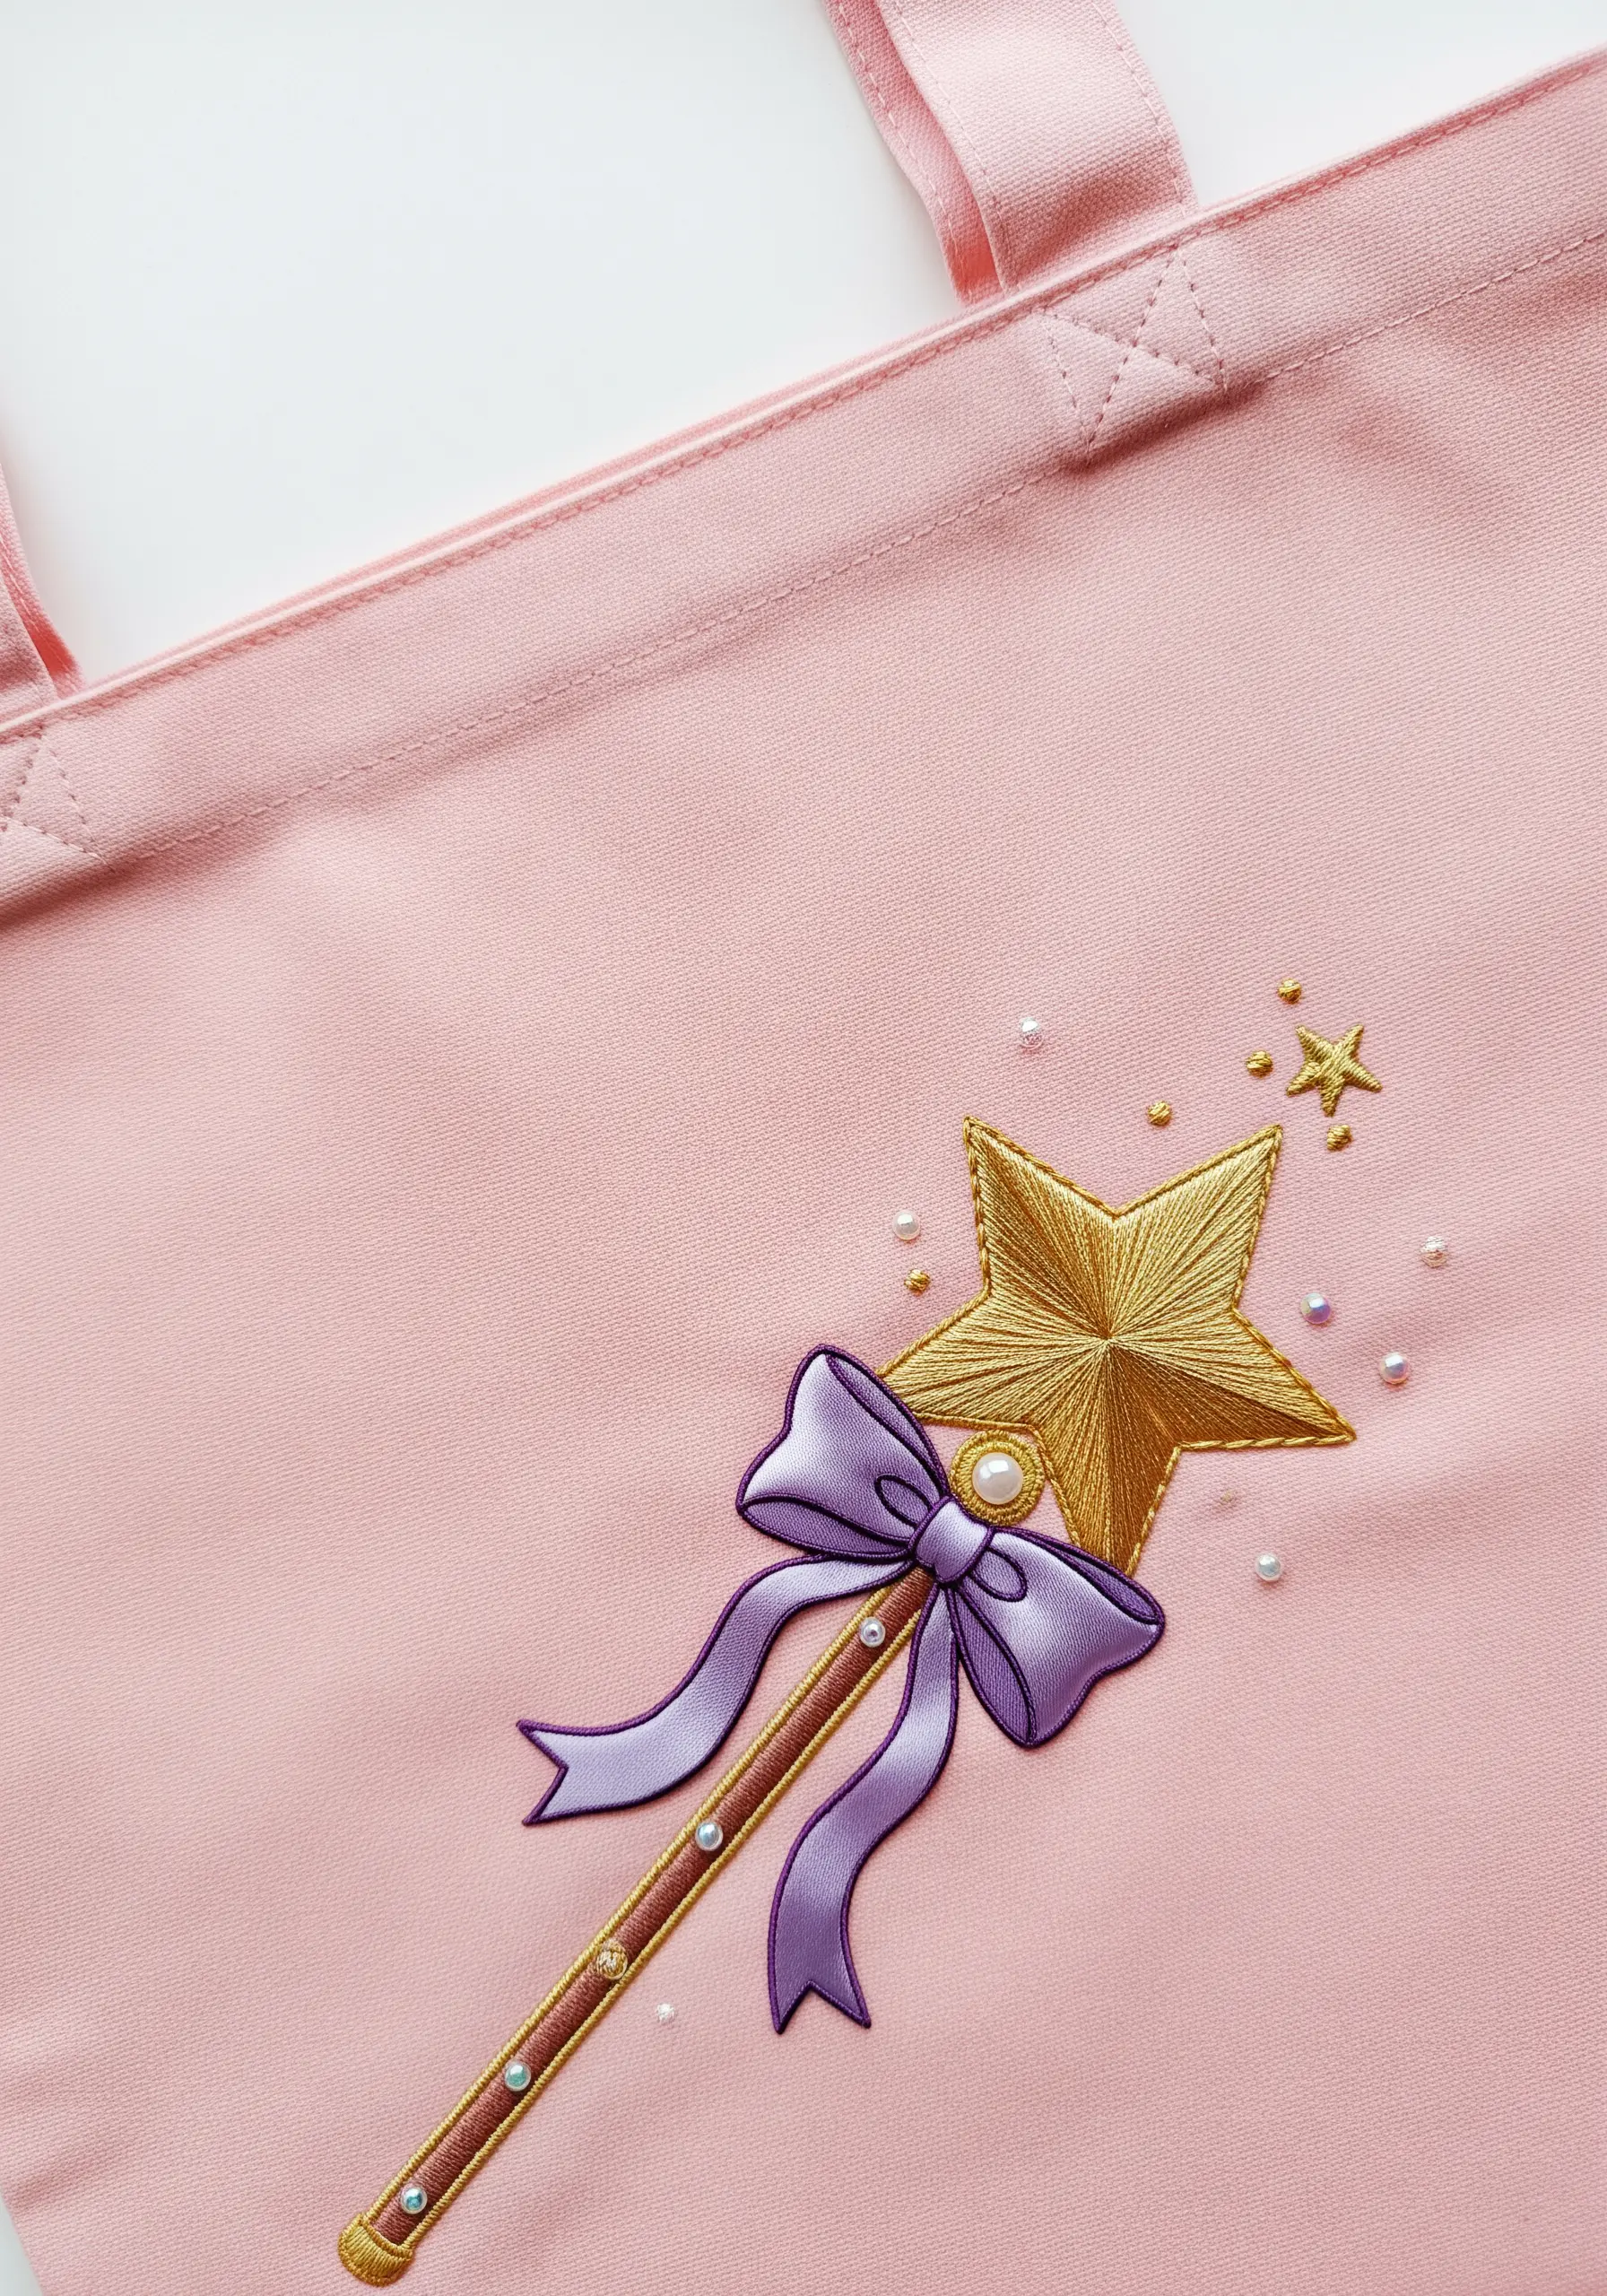
Capture a magical shimmer by choosing the right materials.
For the star, use a gold metallic thread and lay your satin stitches in a directional pattern, radiating from the center to create a light-burst effect.
To prevent metallic thread from snagging, use a shorter length of floss and a needle with a larger eye.
Elevate the design by incorporating mixed-media techniques—sew on tiny seed pearls instead of stitching French knots for a truly dimensional finish.
3. Sculpt Dimensional Dragon Scales
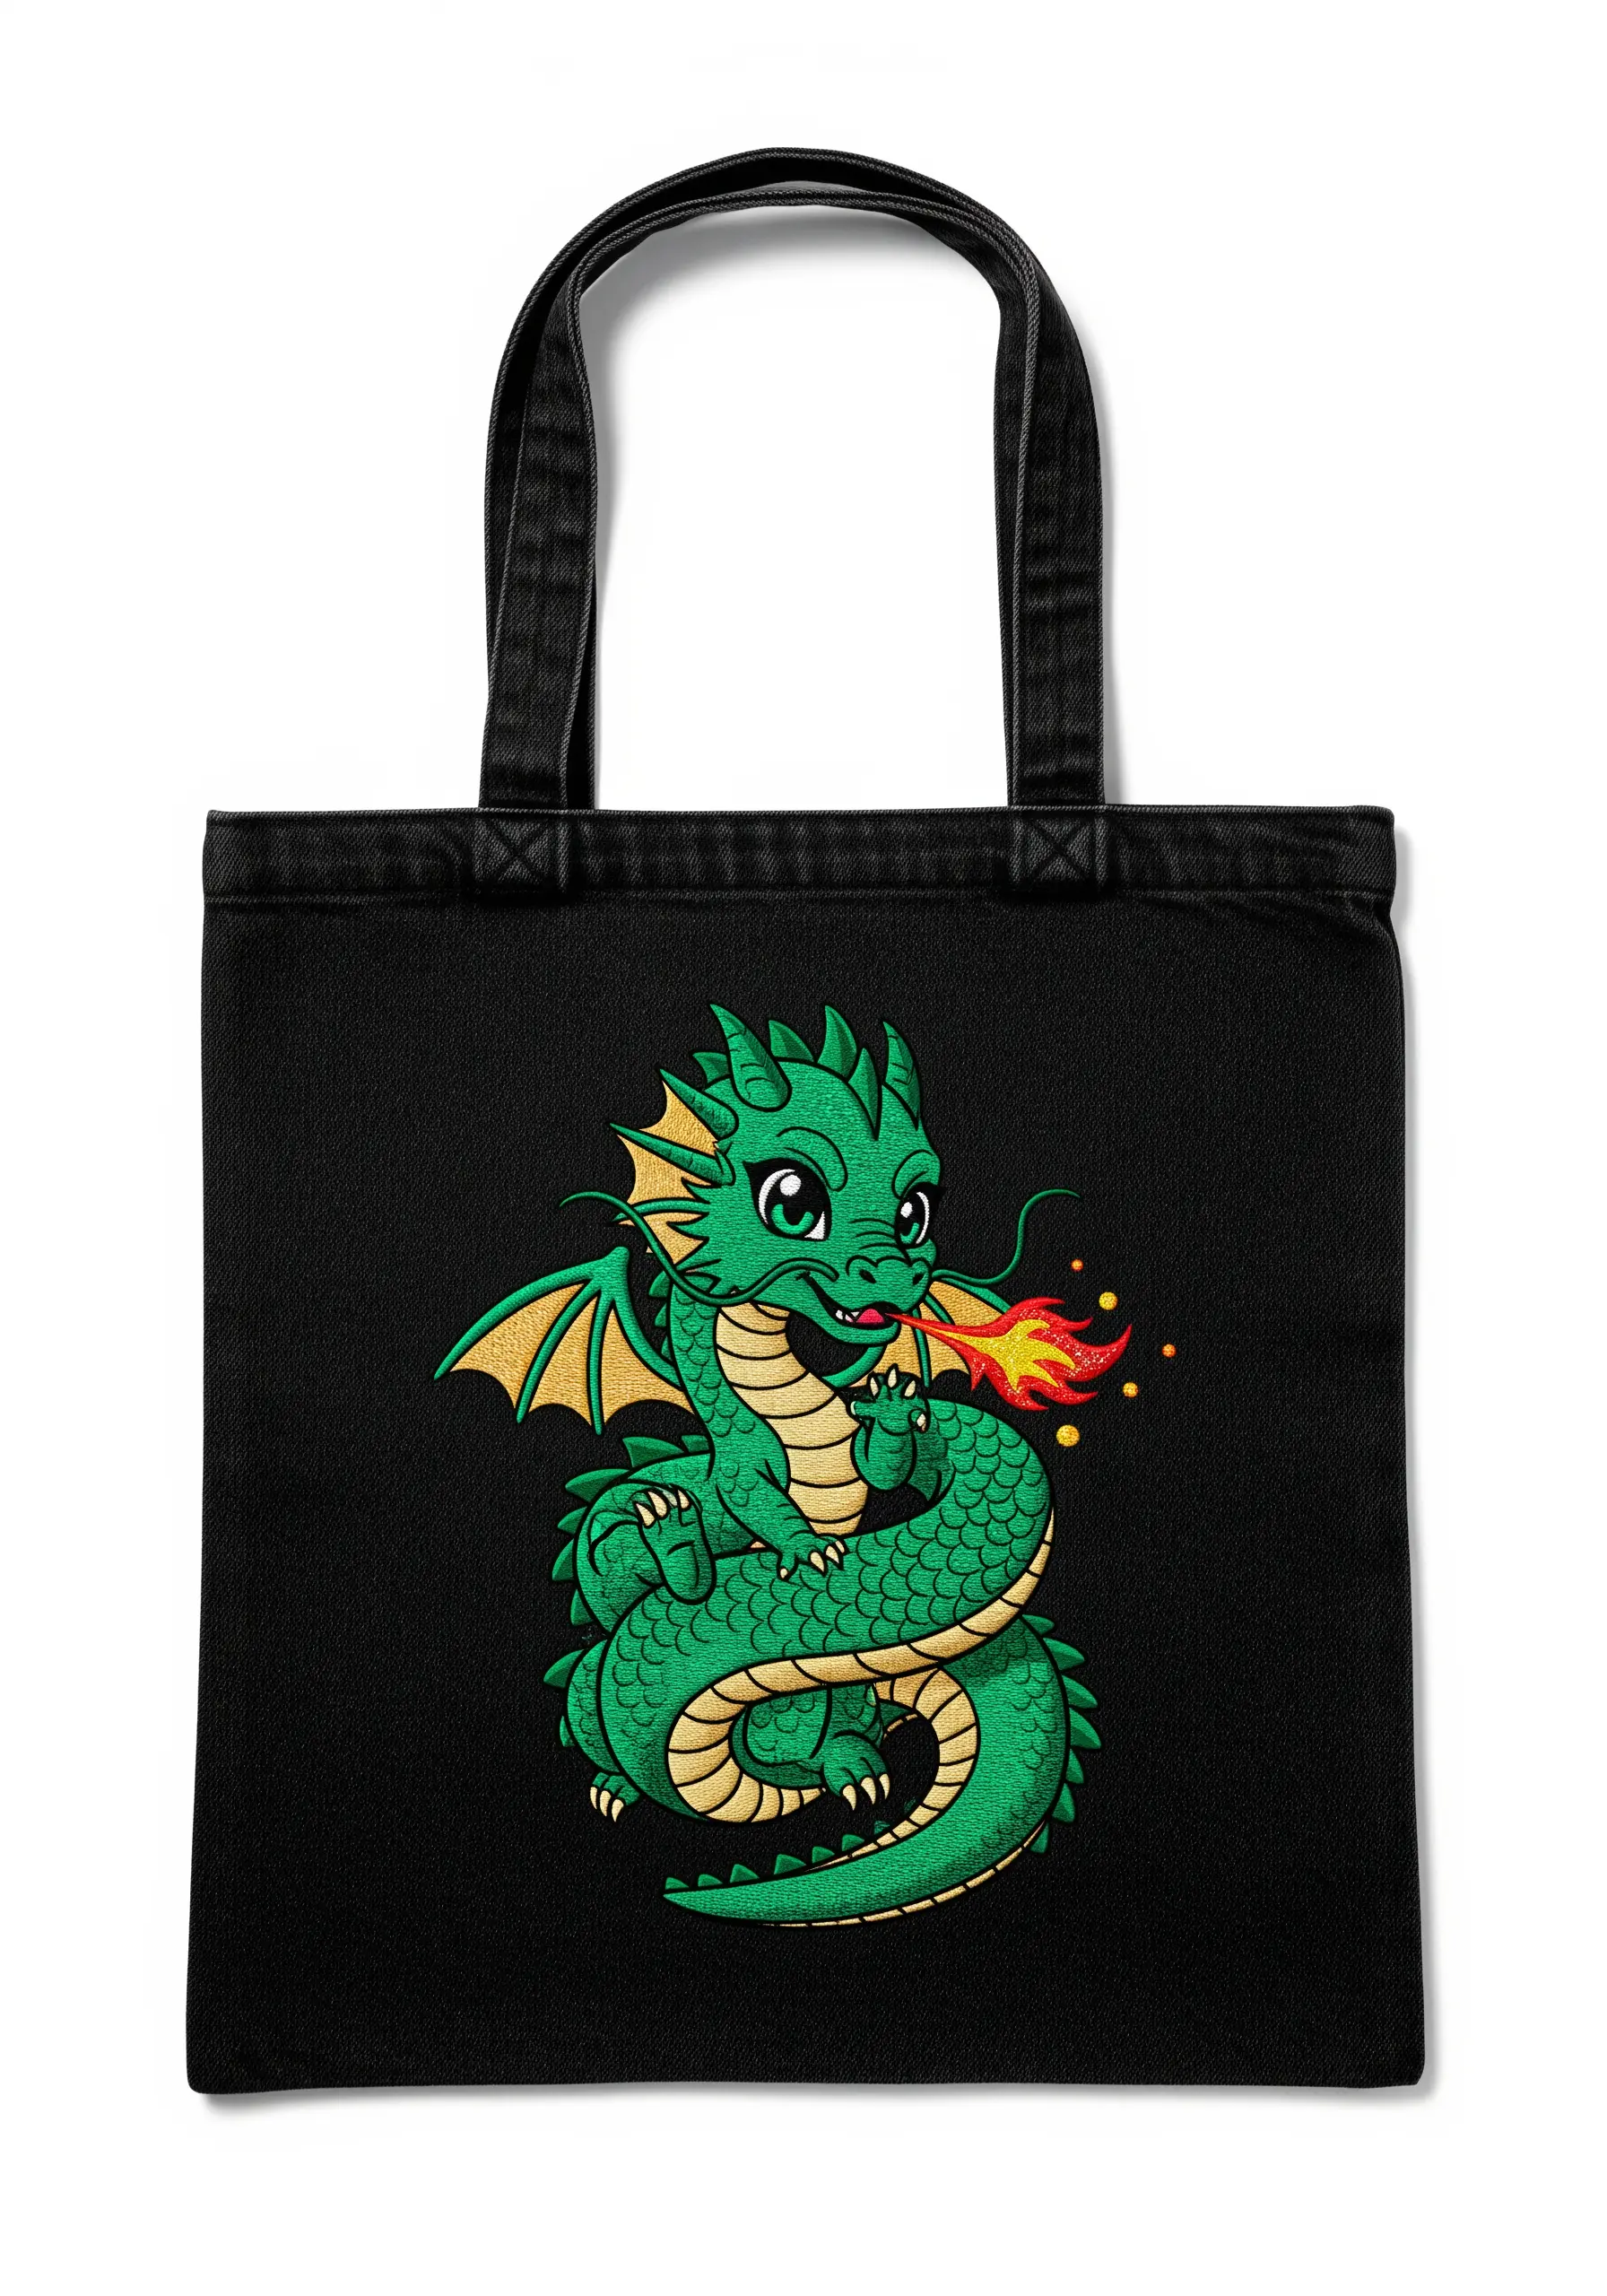
Bring your dragon to life by giving its scales texture and depth.
First, outline each scale with a single-strand backstitch.
Instead of a simple fill, use a fishbone stitch, working from the top center of each scale downward.
This technique creates a subtle ridge down the middle of each scale, mimicking the way light hits a curved surface and adding a layer of realism to the fantastical creature.
Use a slightly lighter shade of green for the top of the stitch to enhance the highlight.
4. Stitch a Savory Bowl of Ramen
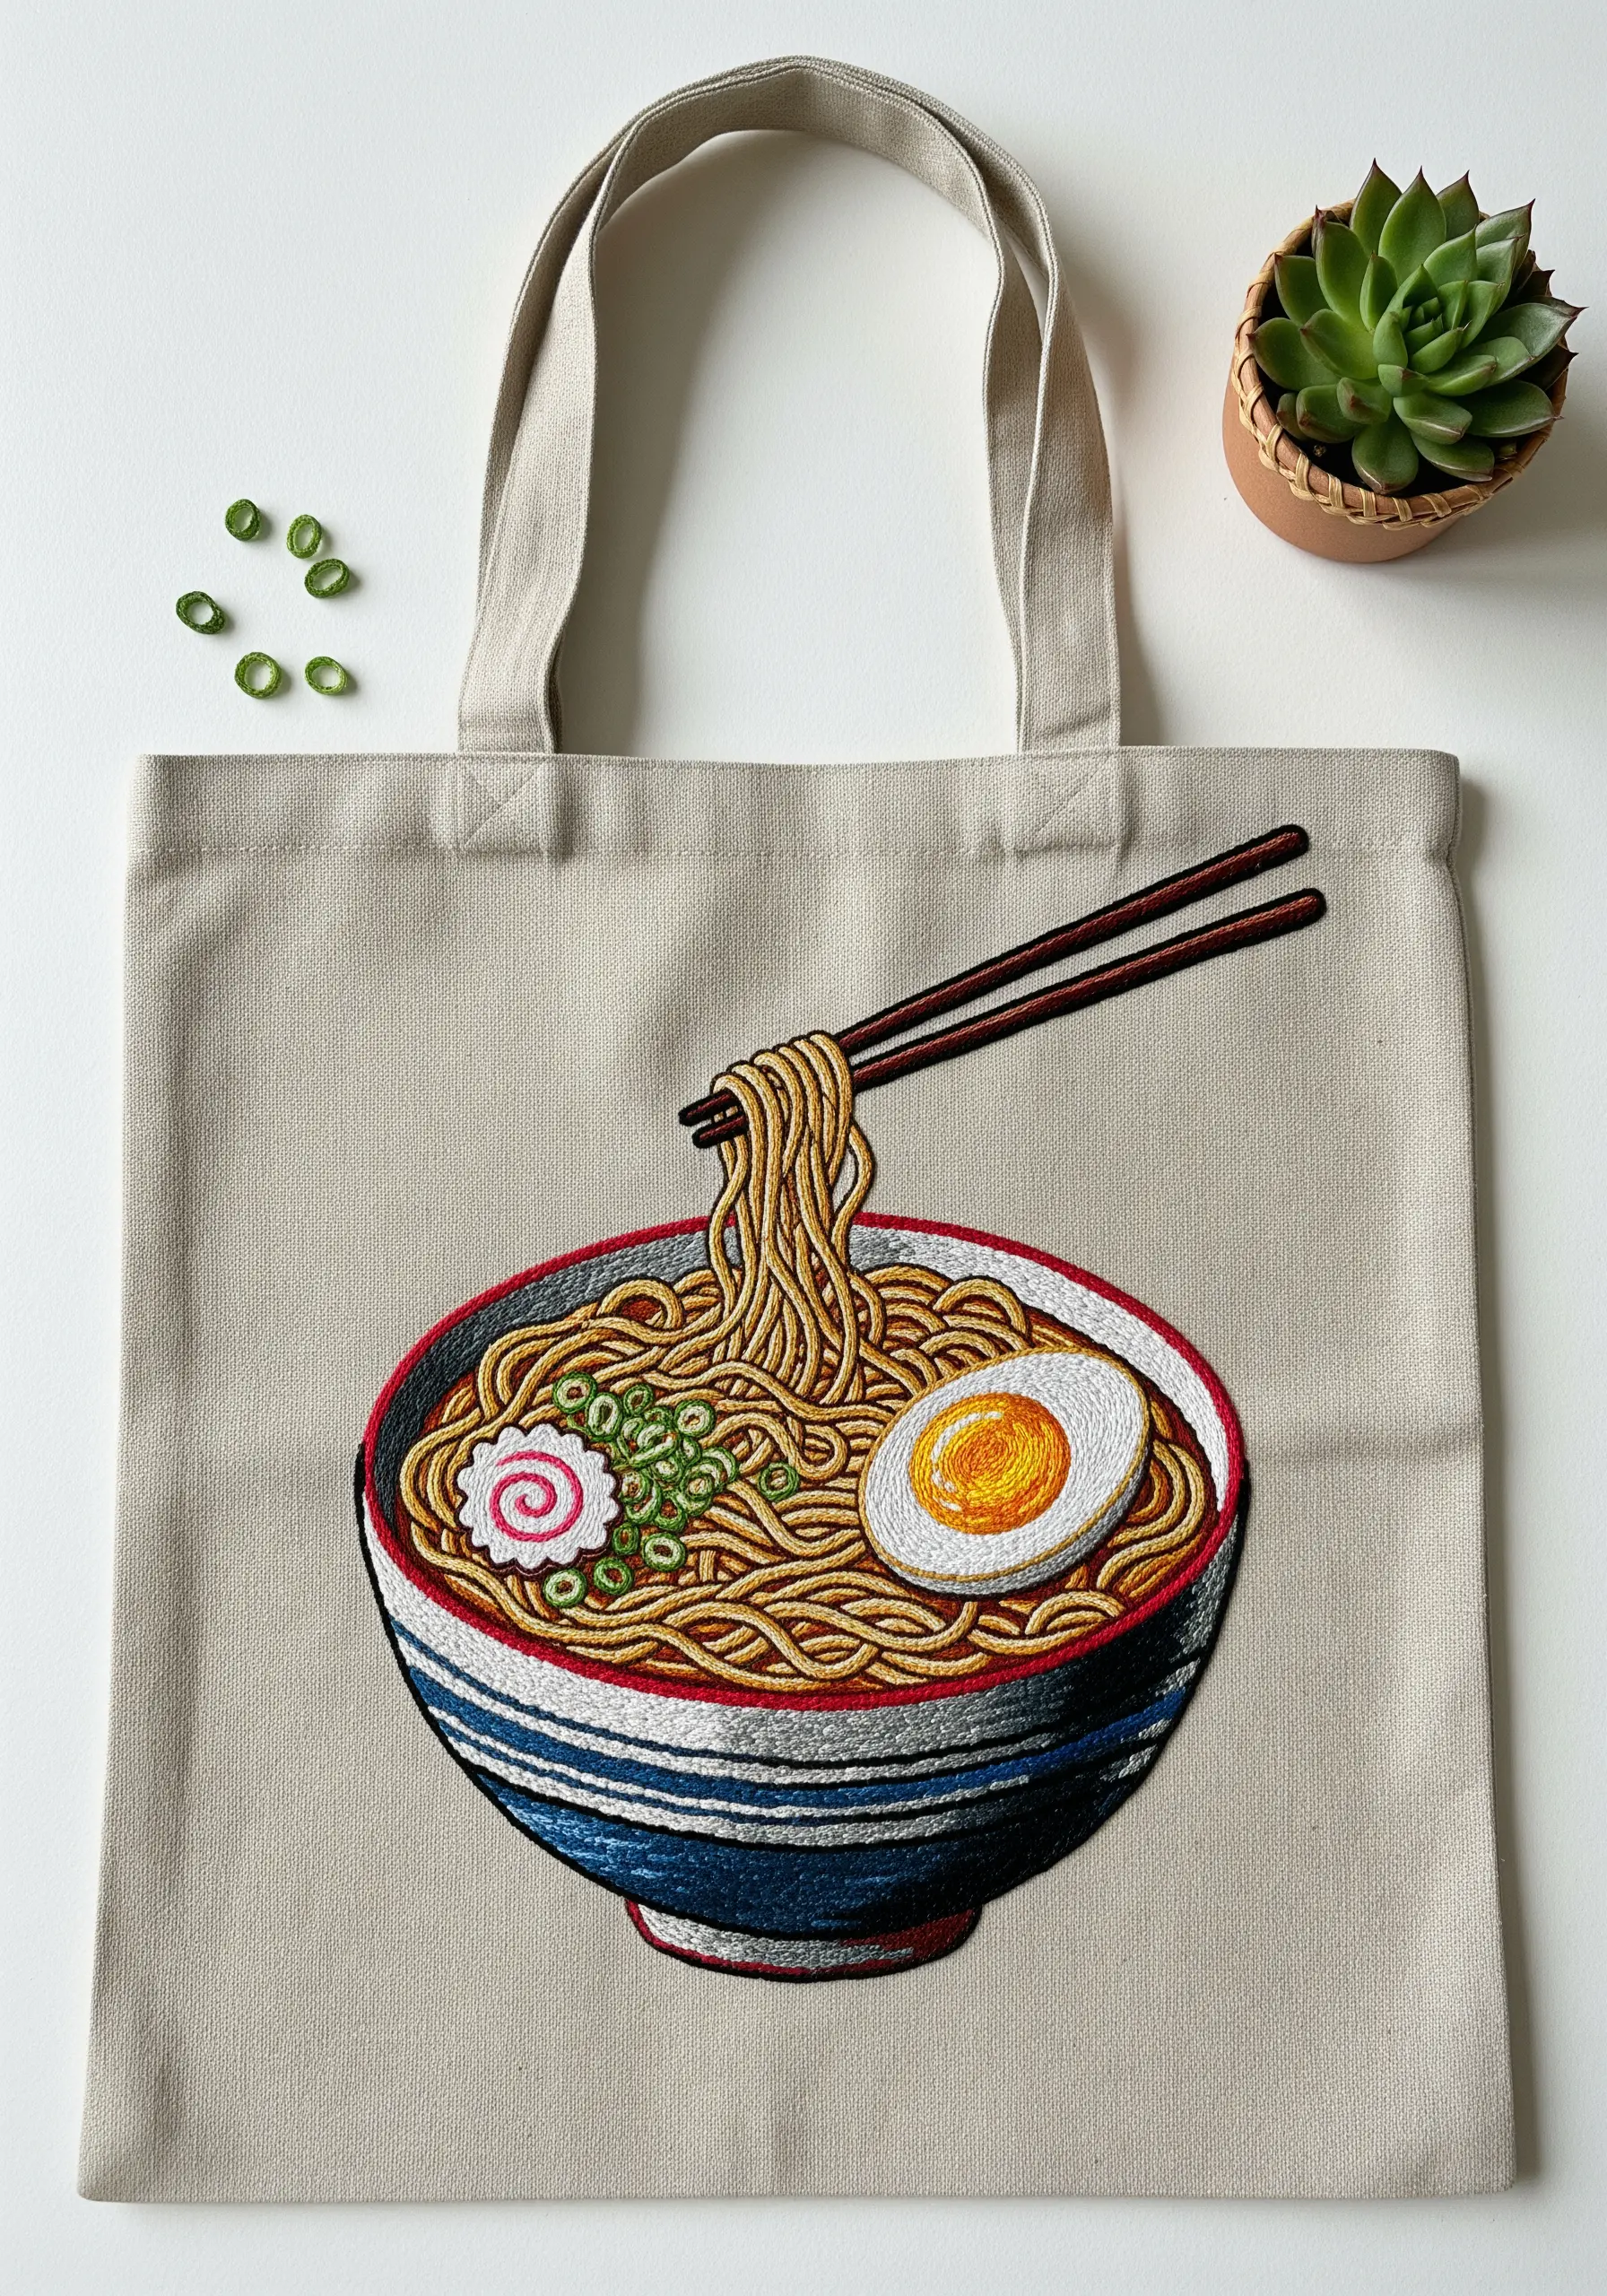
Recreate the complex textures of ramen with specific stitch choices.
Use a couching stitch for the noodles: lay down strands of beige or yellow yarn and tack them in place with a thinner, matching thread to create a looping, tangled look.
For the egg yolk, use a long-and-short stitch with three shades of yellow and orange to achieve a soft gradient.
Finish with tiny green French knots for the scallions, adding a final pop of color and texture.
5. Design Cascading Cherry Blossoms
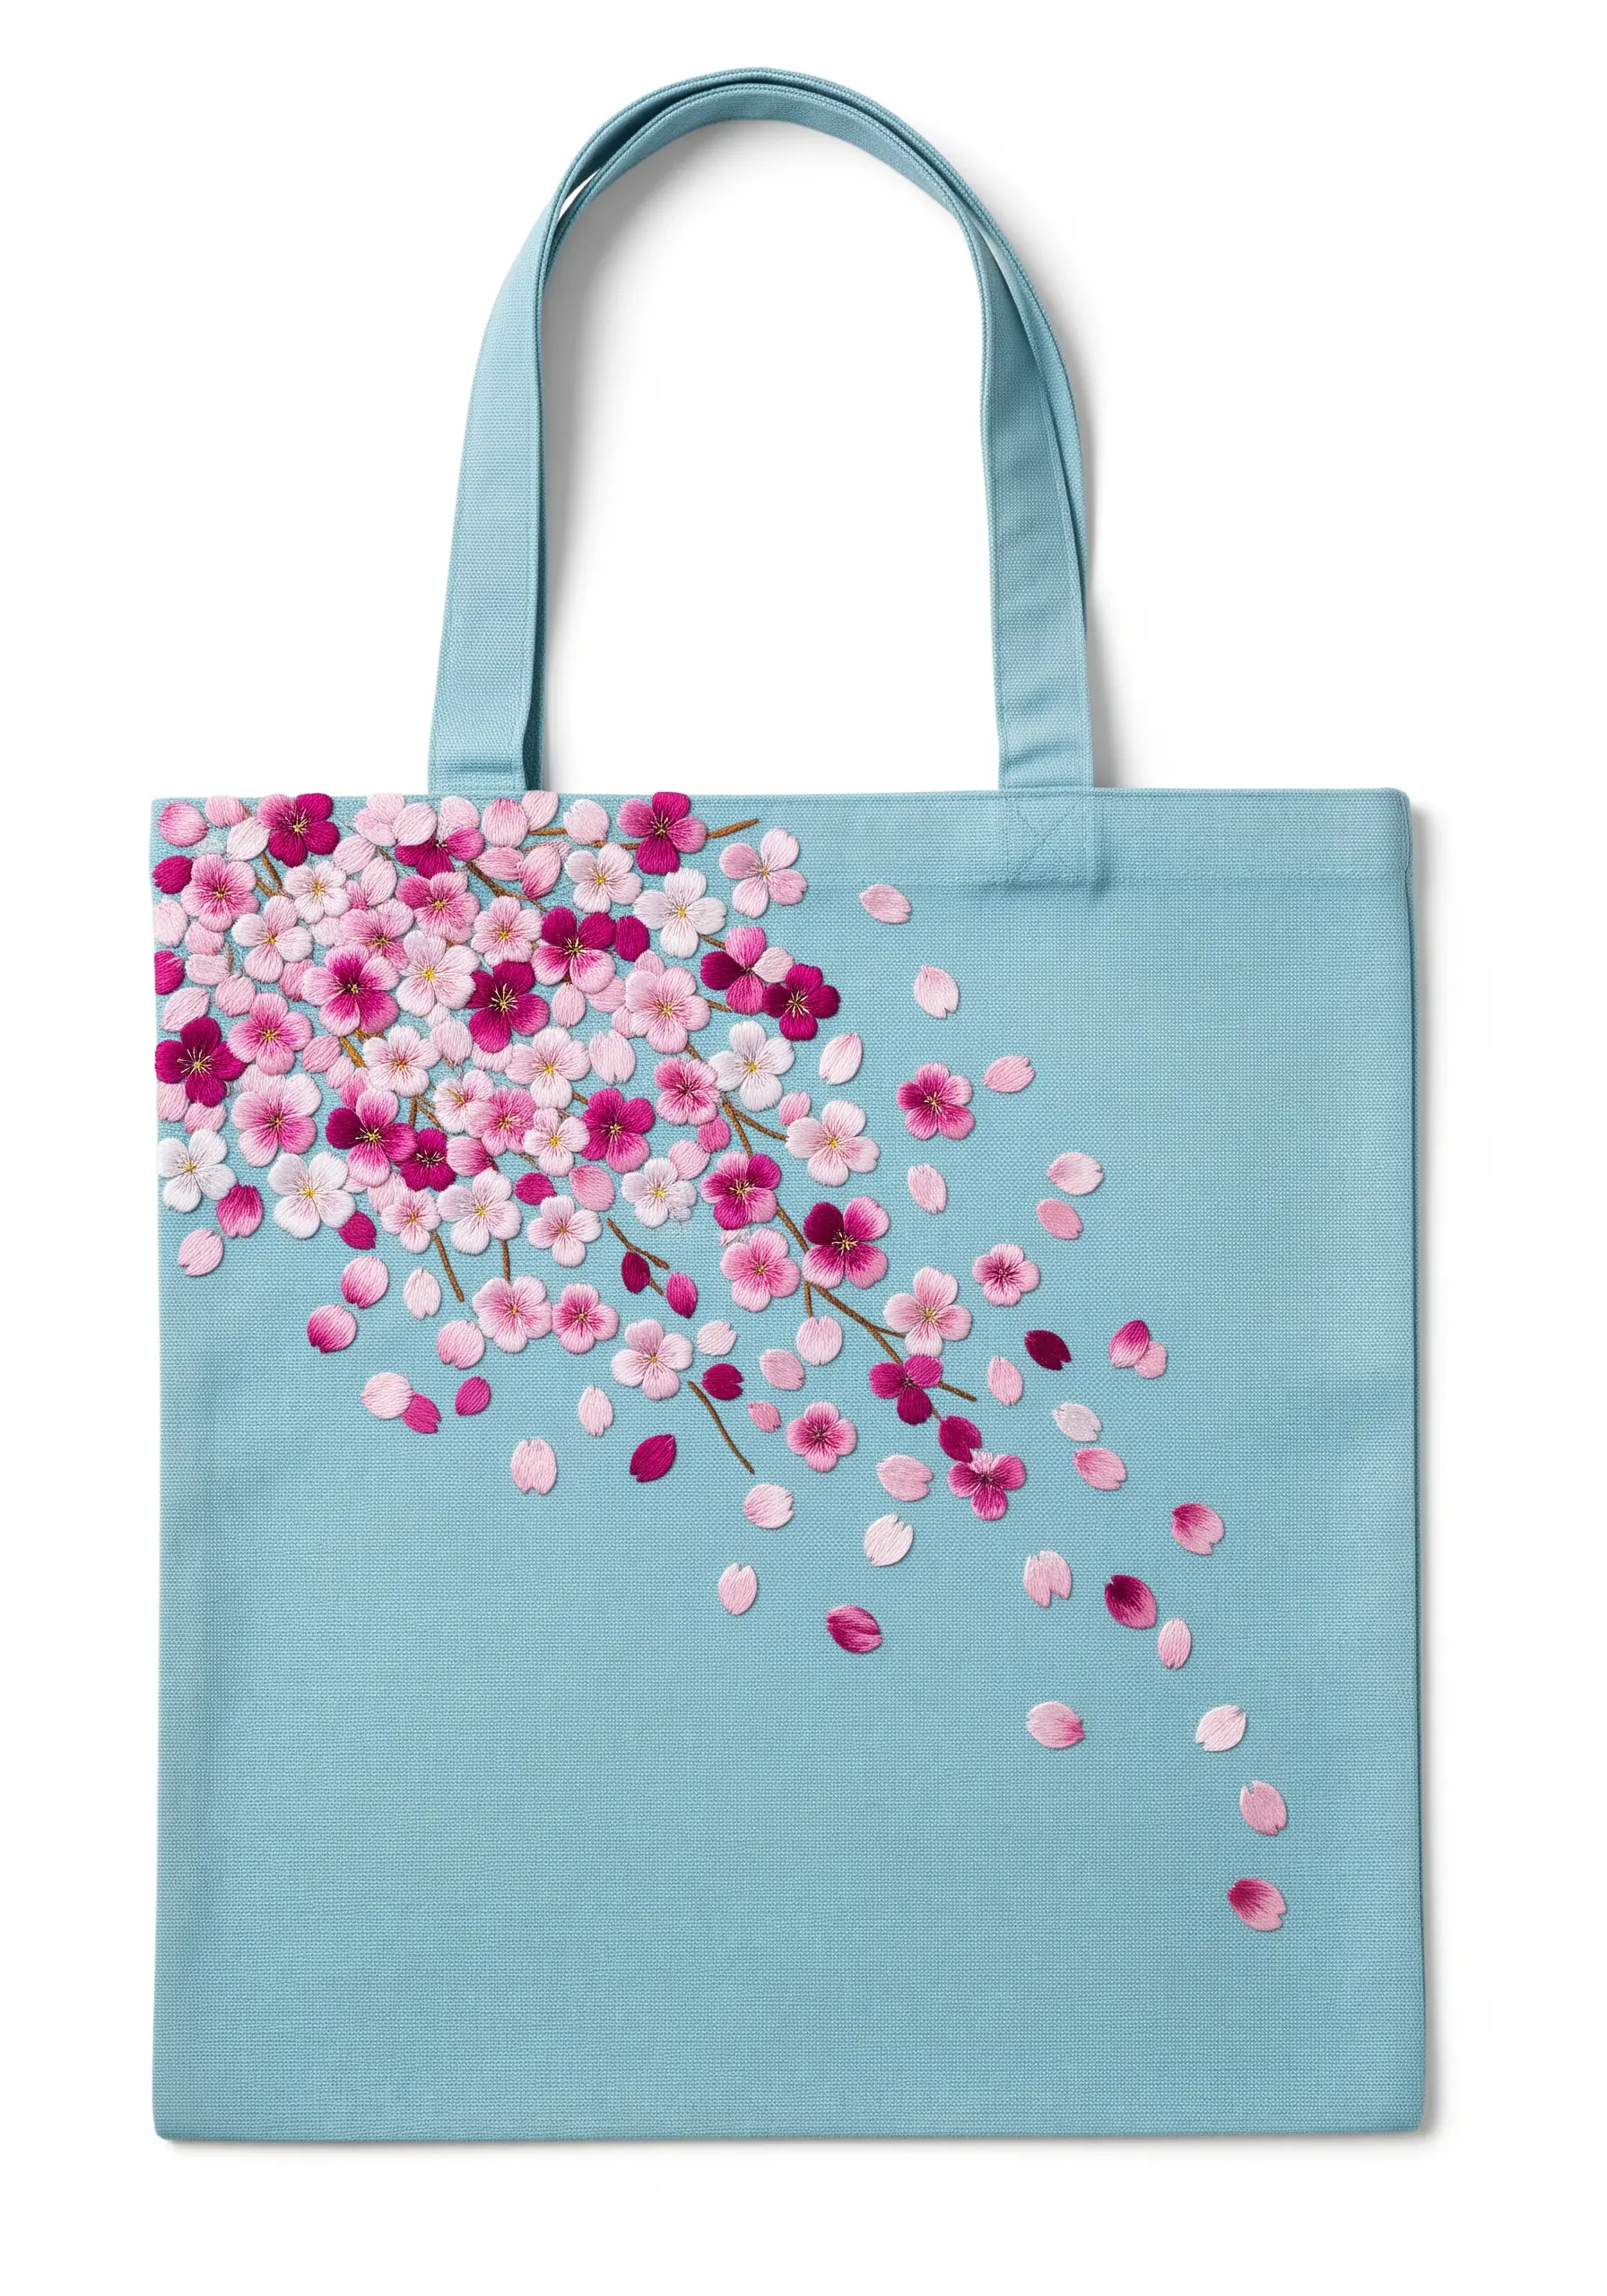
Create a sense of movement by arranging your cherry blossoms in a natural, cascading flow.
Use detached chain stitches (lazy daisies) for the petals, varying the number of petals from three to five for a more organic look.
Blend three to four shades of pink and white thread throughout the branch, concentrating the darker, vibrant pinks at the core and fading to lighter pinks and whites at the edges.
Scatter individual lazy daisy stitches away from the main branch to look like falling petals, enhancing the design’s graceful motion.
6. Achieve a Polished Maneki-neko Finish
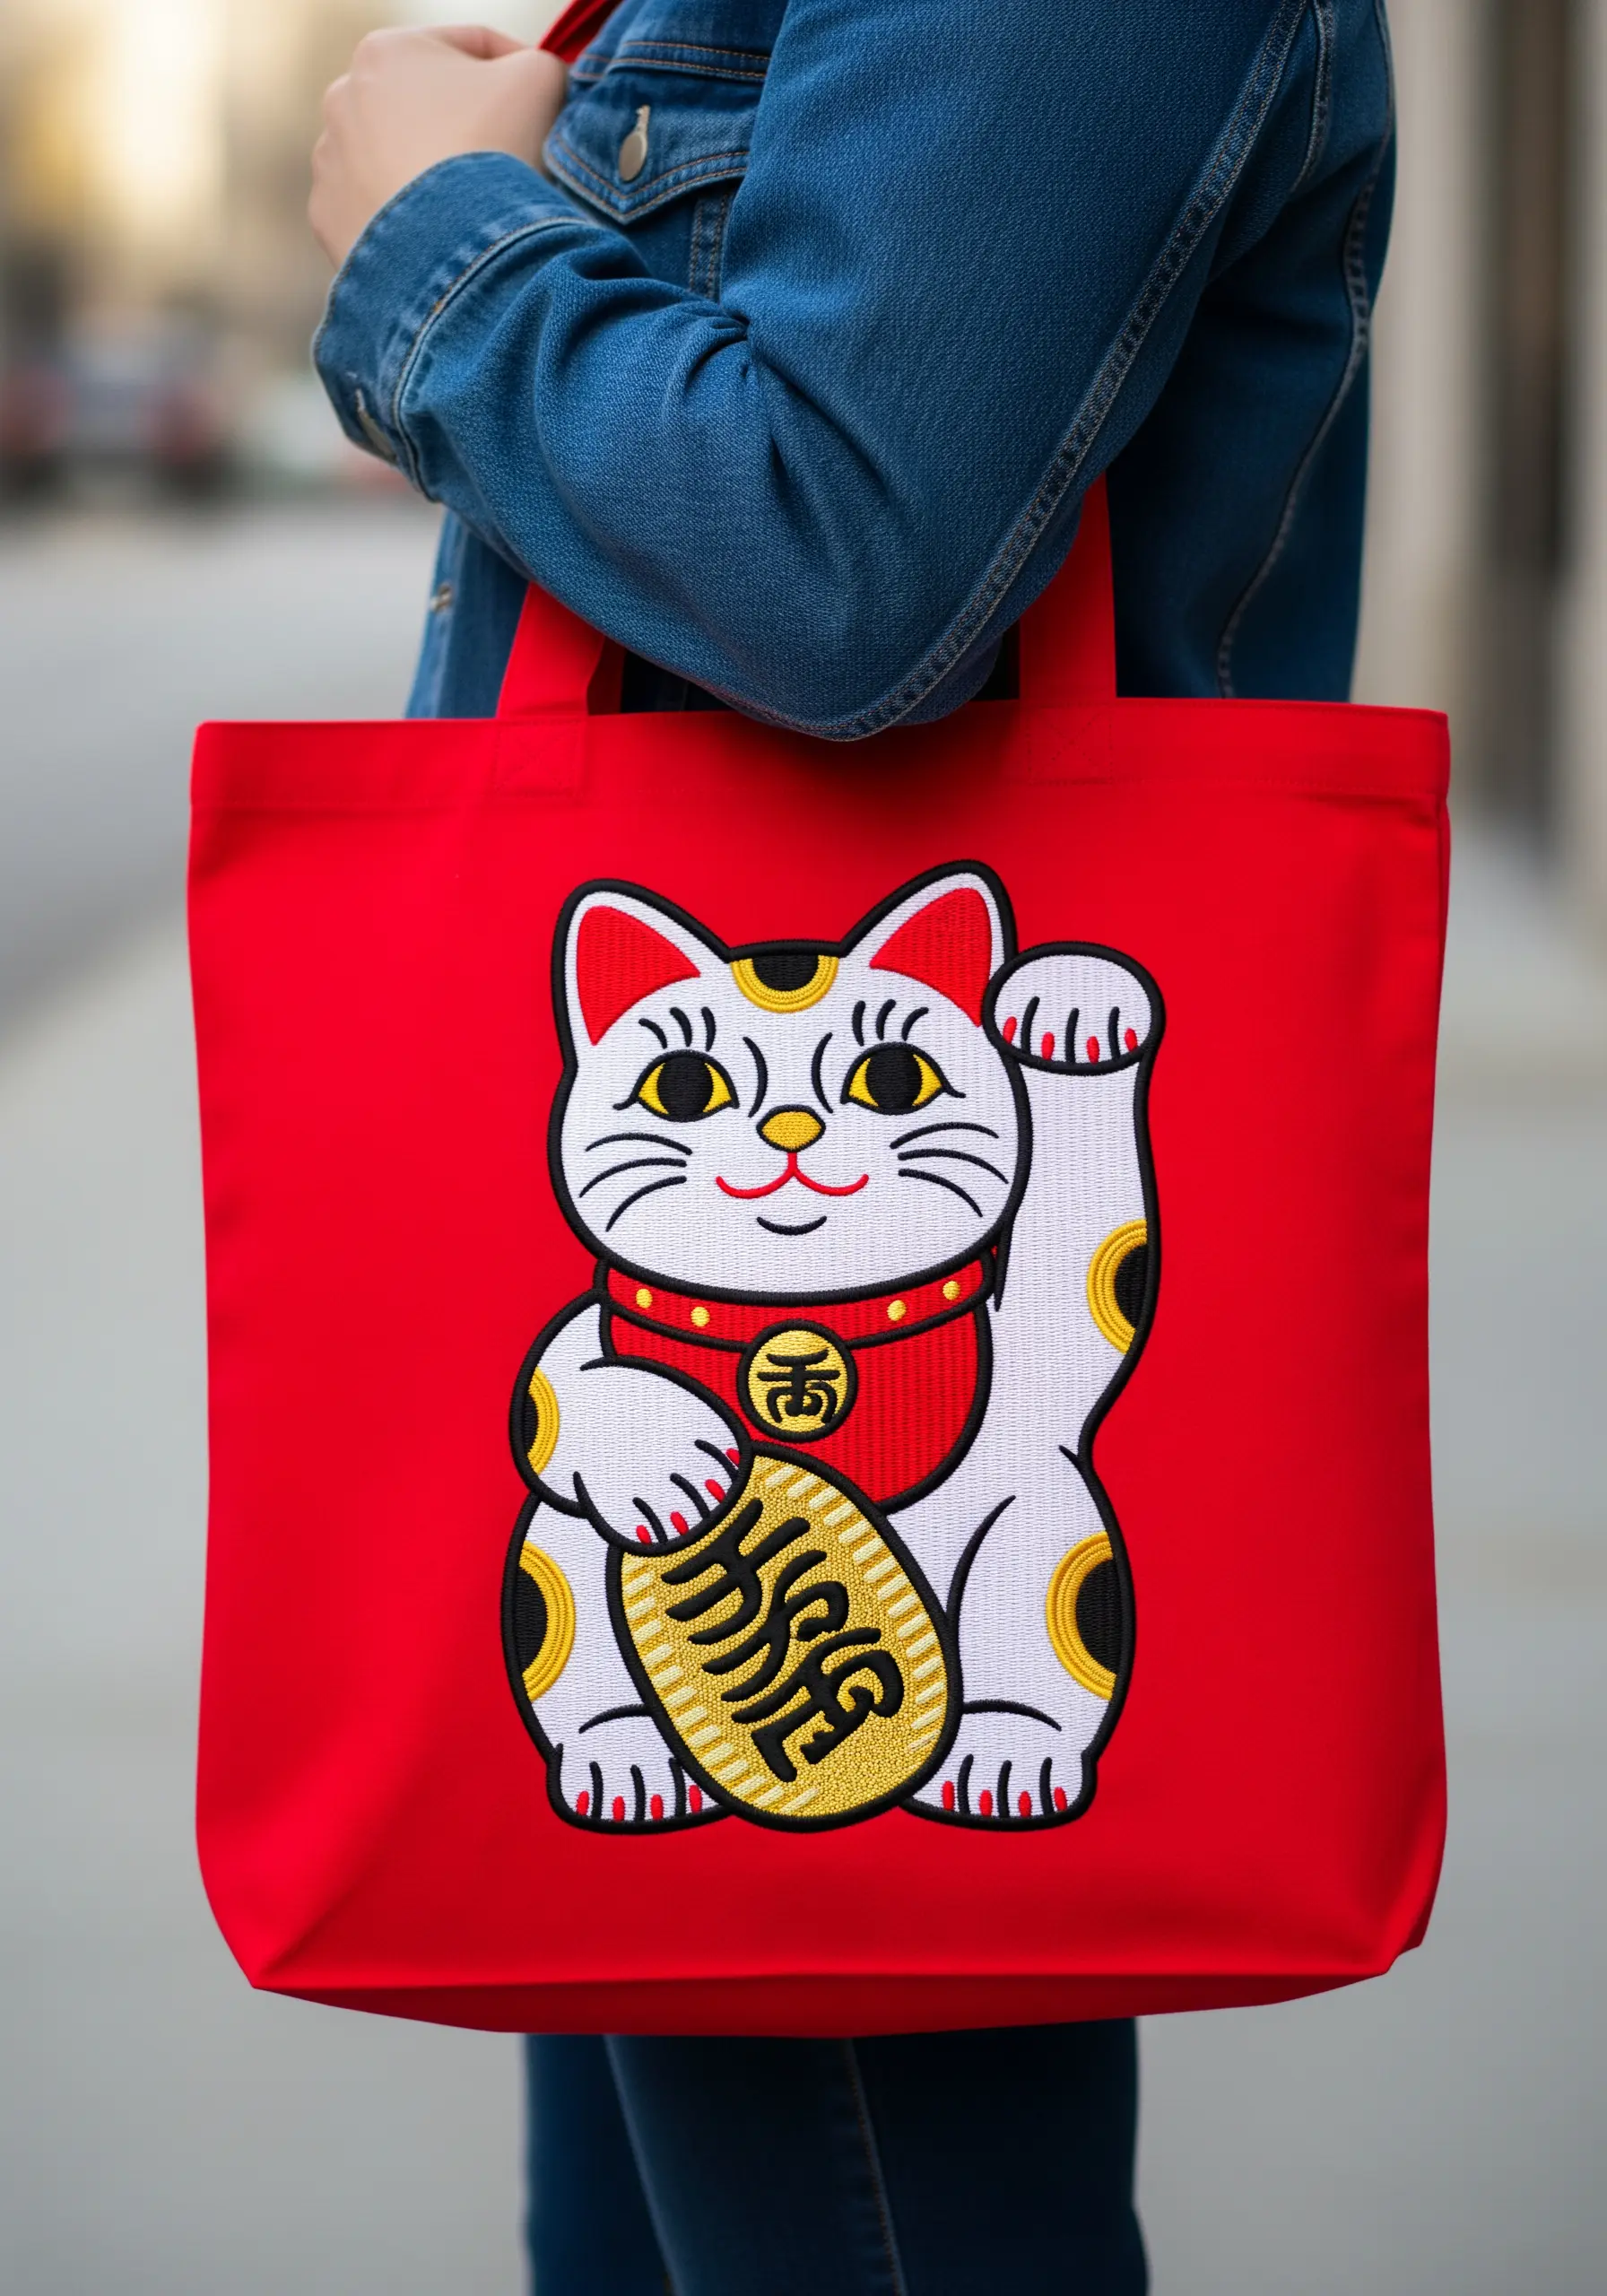
For a clean, graphic look like the Maneki-neko, the key is a flawless fill stitch.
Use a padded satin stitch for the main body—add a base layer of straight stitches perpendicular to your final satin stitches.
This raises the surface slightly and ensures complete coverage with a smooth, almost machine-embroidered perfection.
For the gold coin, use a high-sheen gold rayon or metallic thread to make it pop against the matte cotton floss of the cat’s body.
7. Create Fluffy 3D Fur with Turkey Work
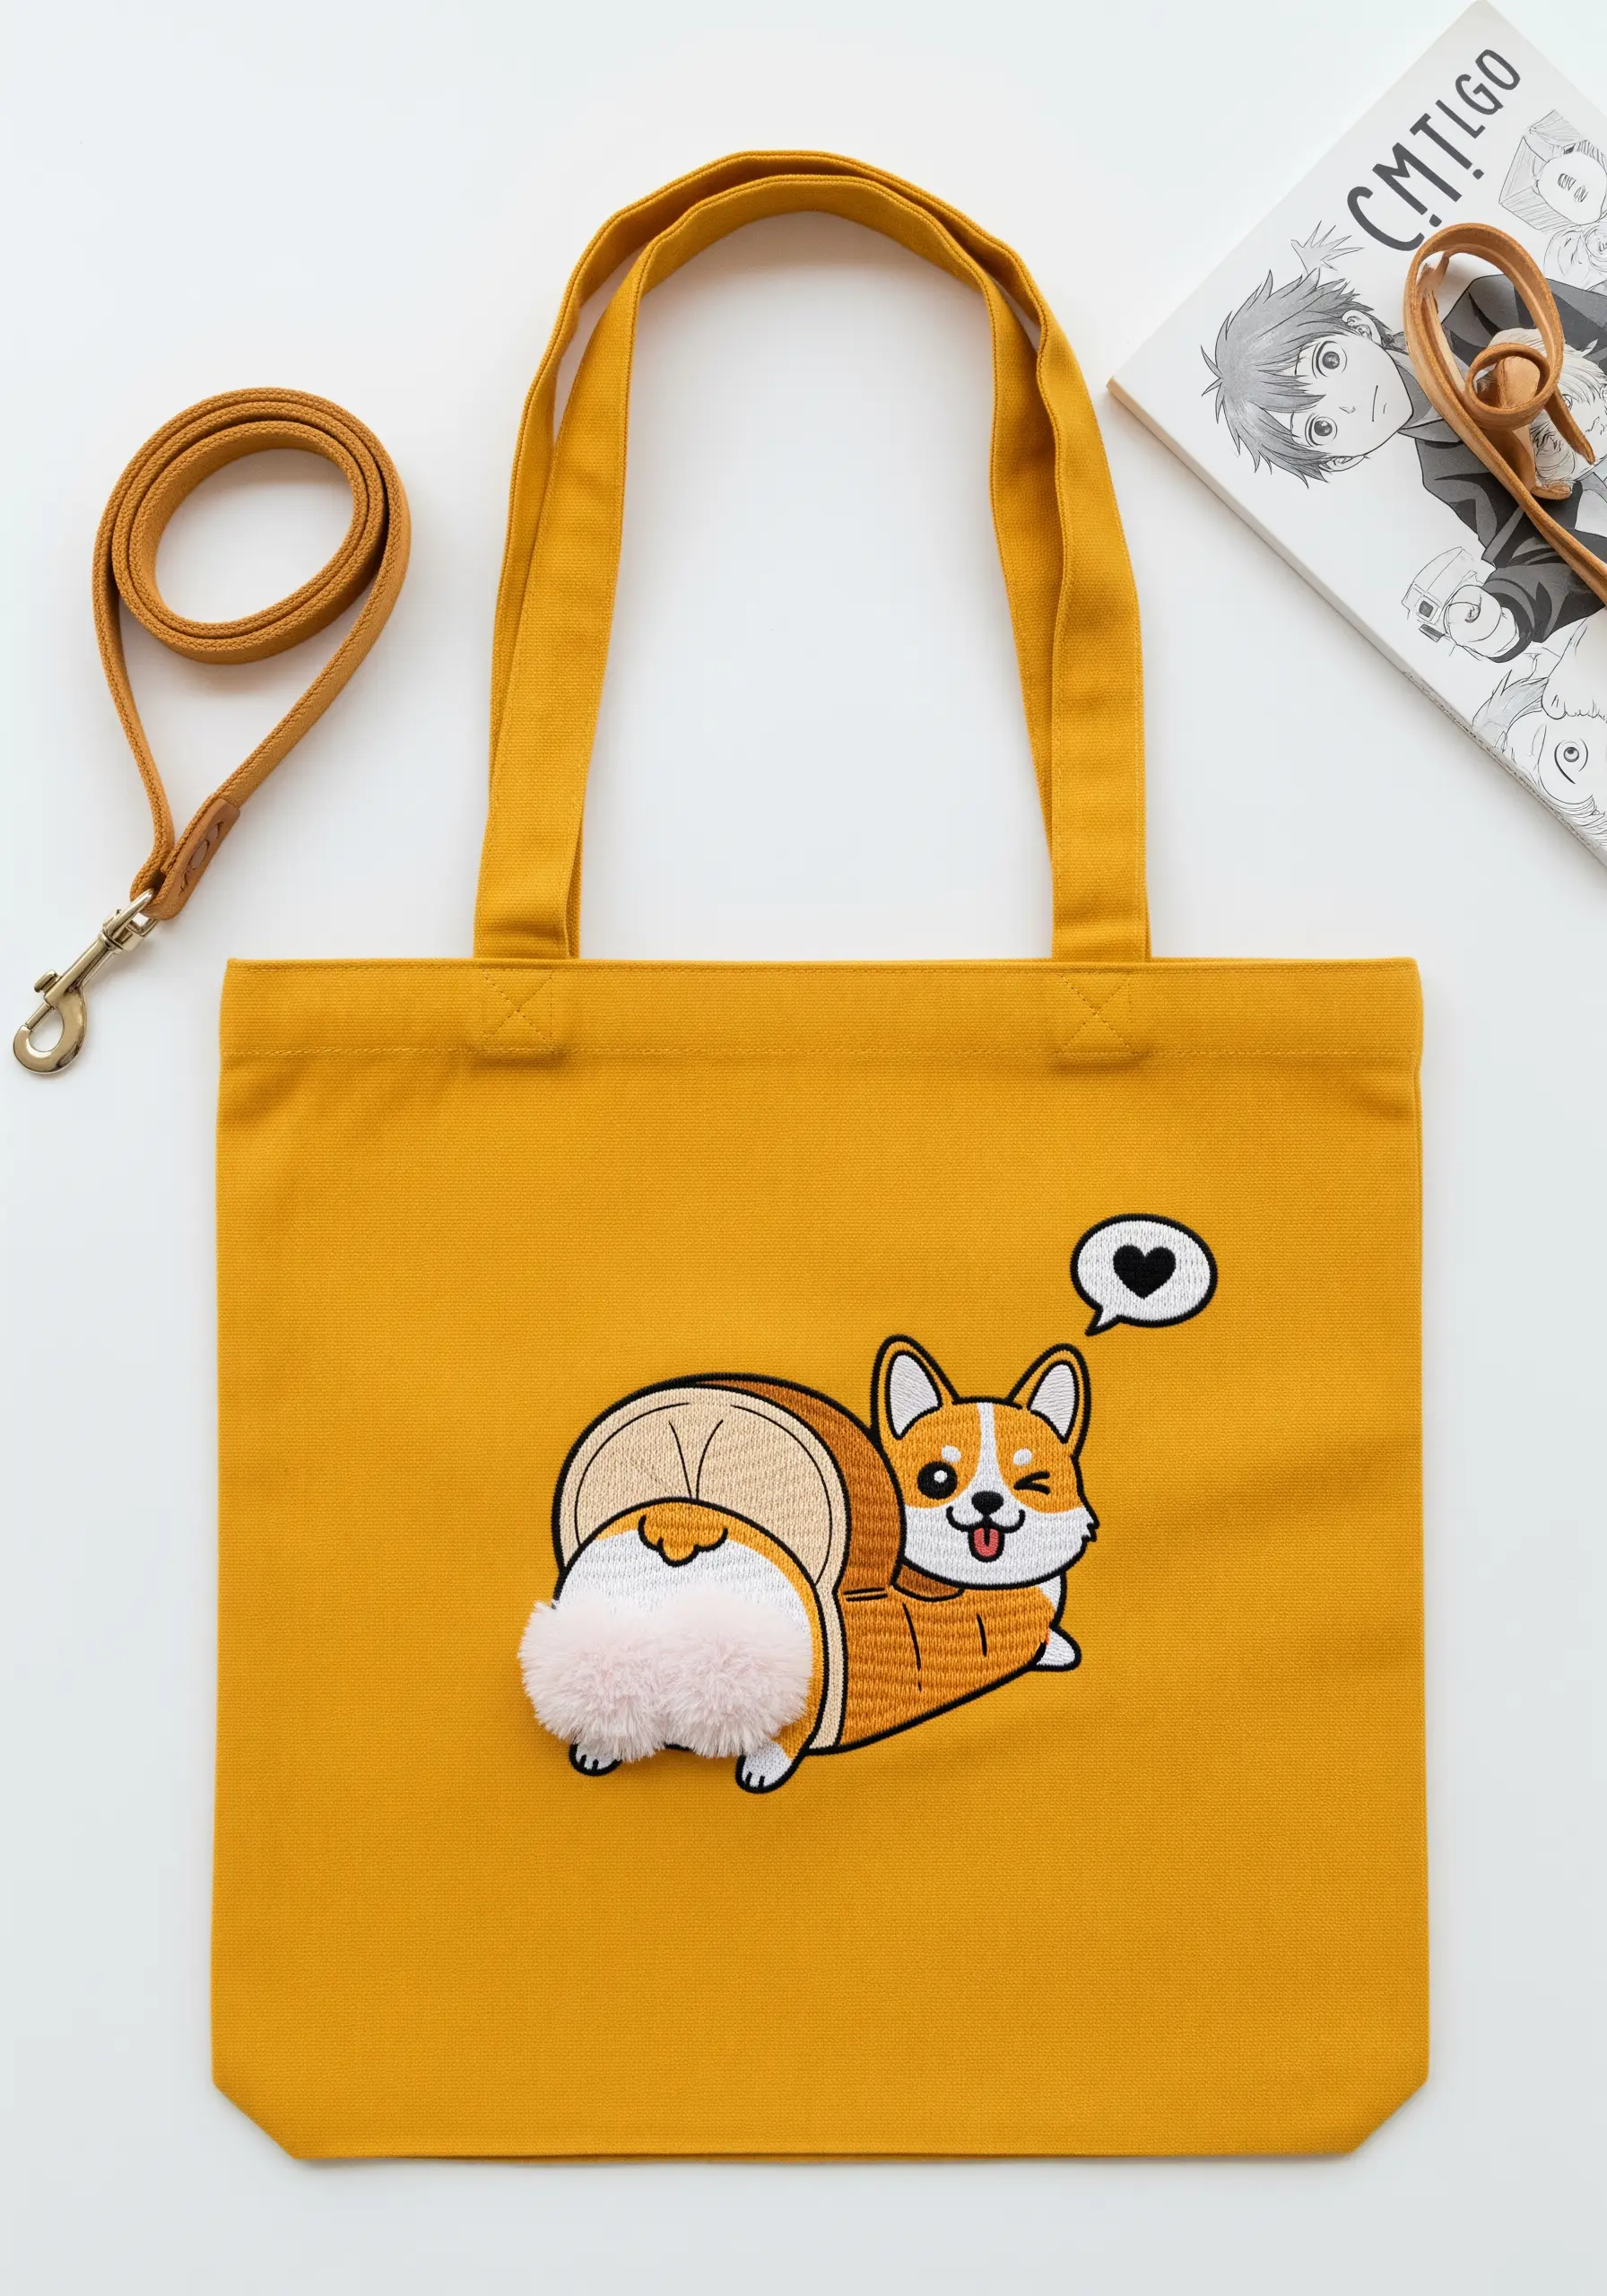
To capture the iconic fluff of a corgi’s rear, you need a stitch that creates a three-dimensional, tactile effect.
The turkey work stitch is perfect for this: you create loops of thread on the surface of the fabric, anchor them, and then snip the tops of the loops to create a soft, brush-like pile.
Trim the resulting threads to shape the fluffy area perfectly.
Contrast this high texture with a flat satin stitch for the rest of the corgi’s body to make the fluffy part the undeniable focal point.
8. Embrace Retro Gaming with Cross-Stitch
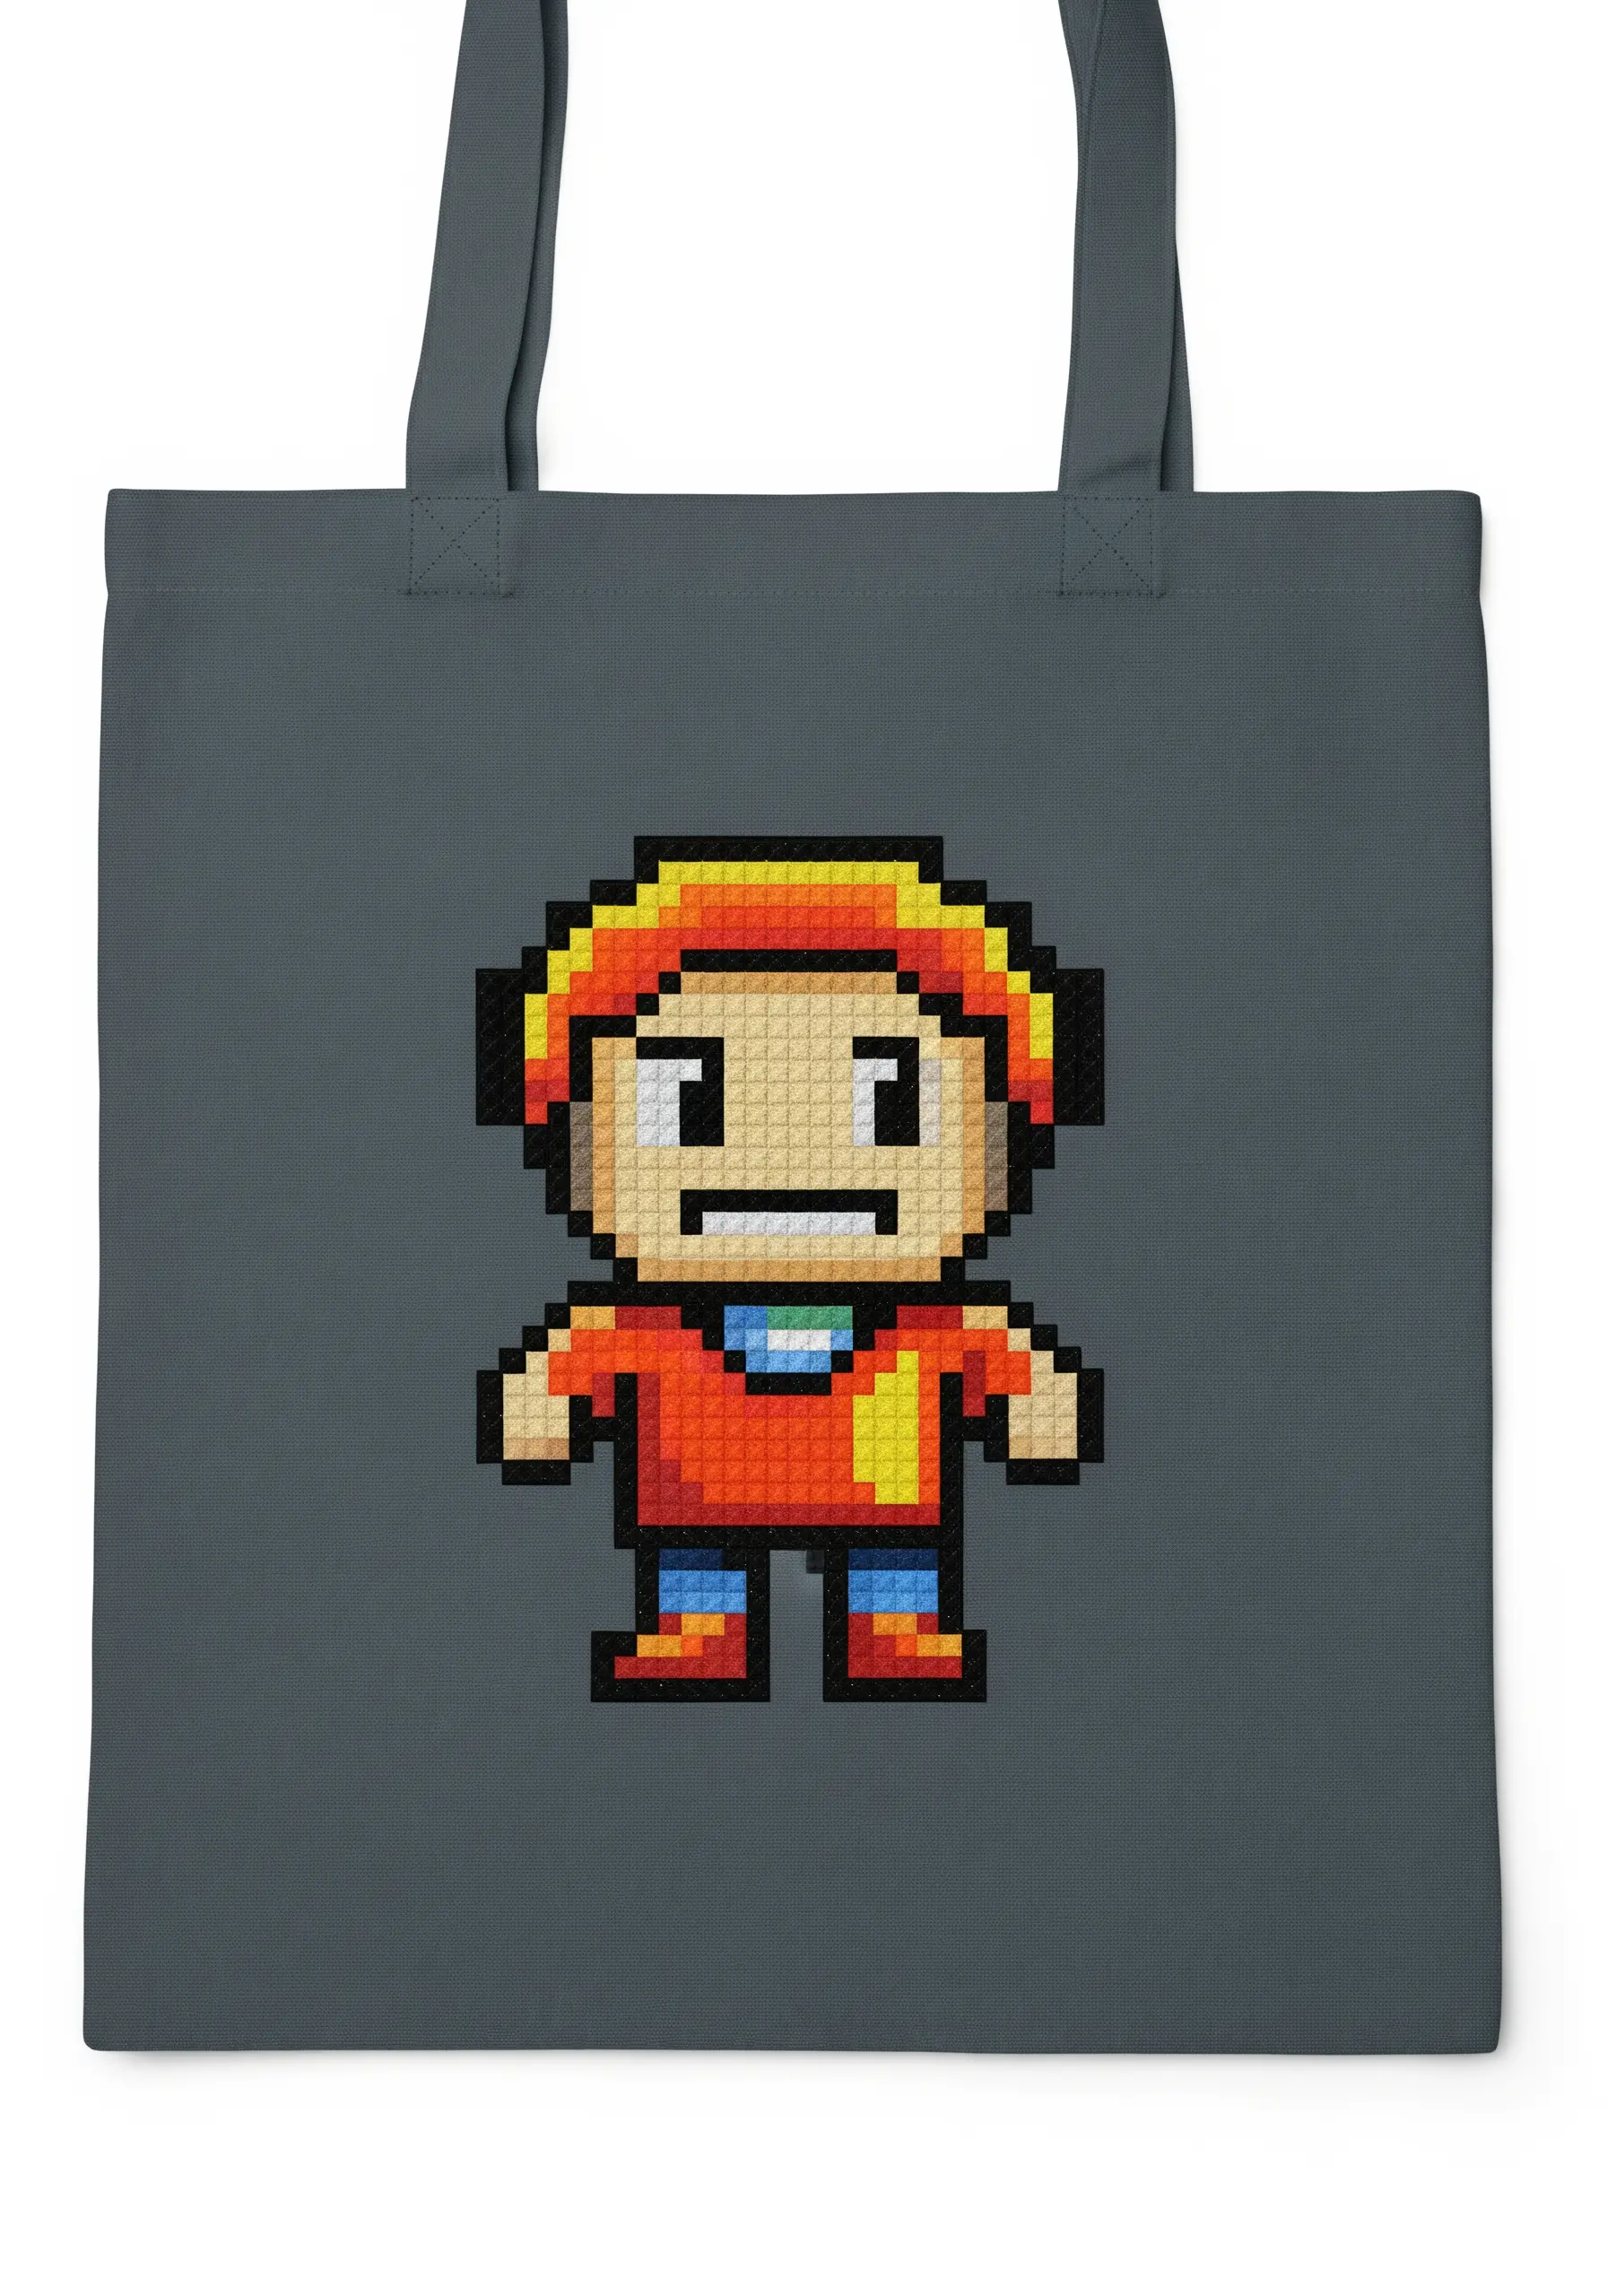
Pixel art translates perfectly to embroidery through the structured grid of cross-stitch.
To ensure your pixels are uniform, use a waste canvas or a water-soluble grid stabilizer on your tote bag.
This provides a temporary grid to guide your stitches, ensuring every ‘X’ is perfectly sized and aligned.
Once you’re finished, you simply remove the stabilizer, leaving behind a crisp, clean pixelated design that looks straight out of a classic video game.
9. Stitch a Glowing Vaporwave Scene
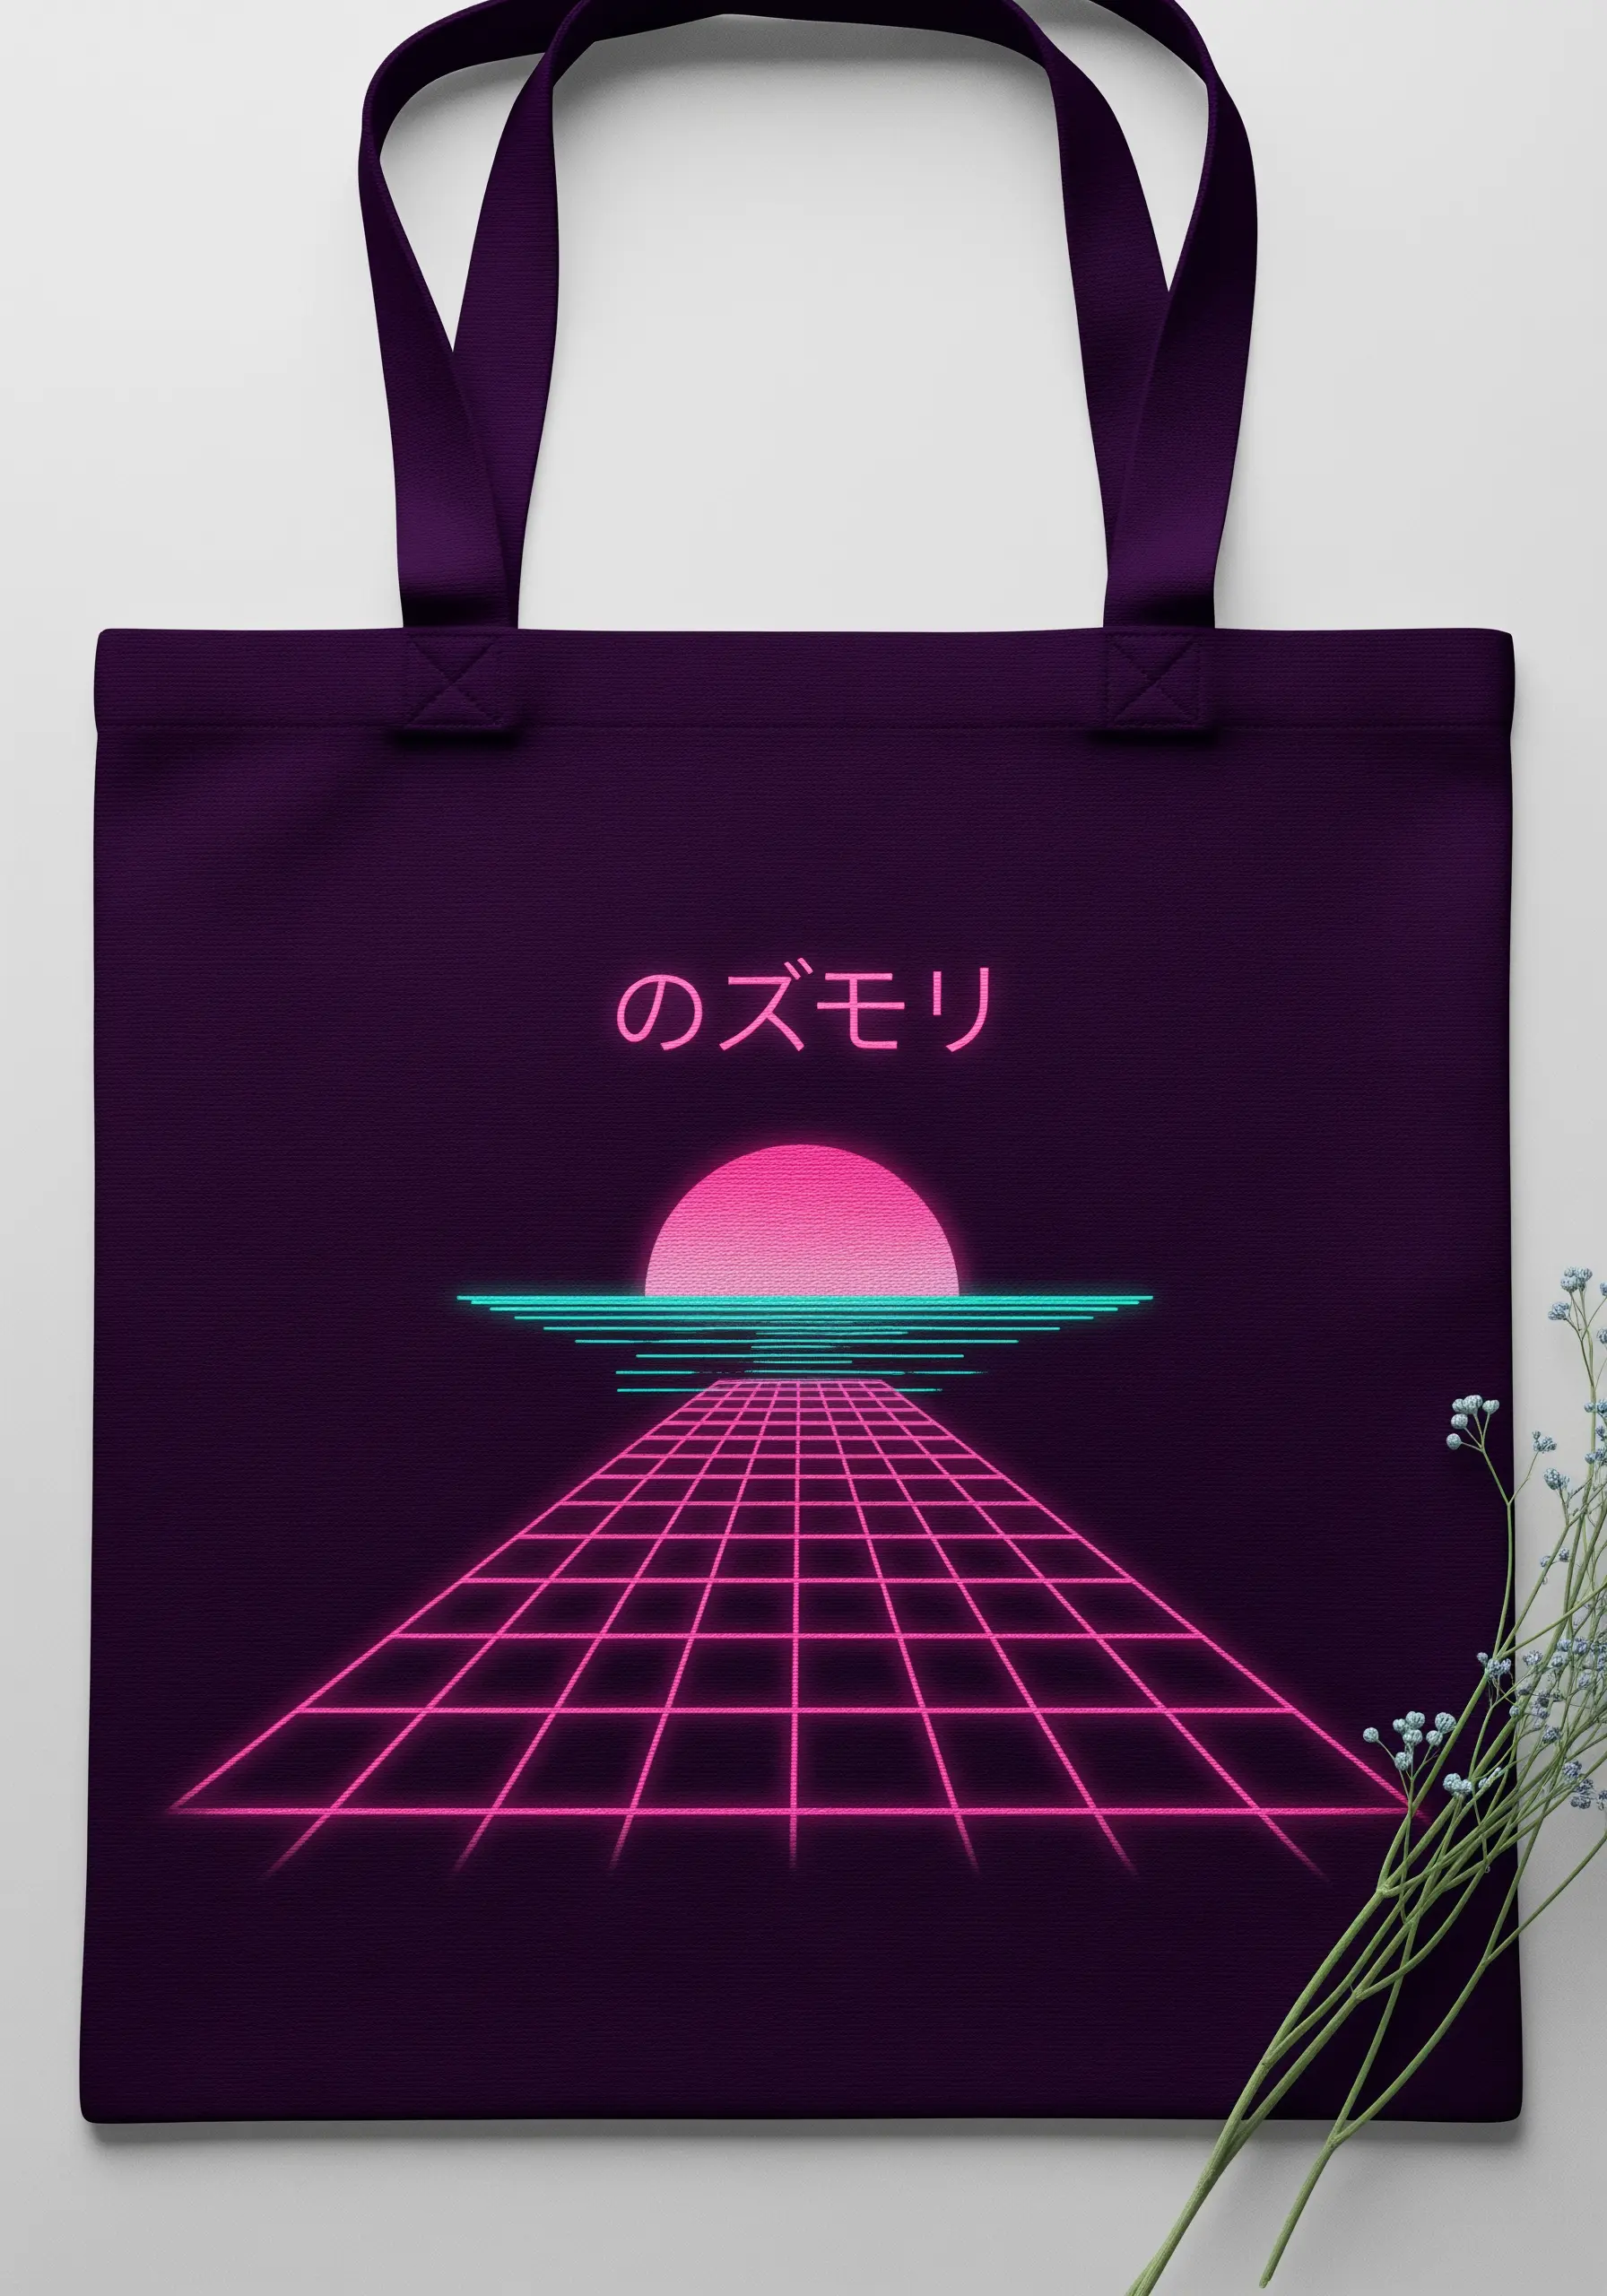
Recreate the iconic glow of vaporwave and synthwave aesthetics by using neon embroidery floss.
For the sharp grid lines and sunset, a clean, single-direction satin stitch is essential for that smooth, digital look.
To make the colors appear even brighter, stitch your design on a dark fabric like black or navy blue.
The high contrast between the neon thread and dark background creates an illusion of light that is central to the retro-futuristic style.
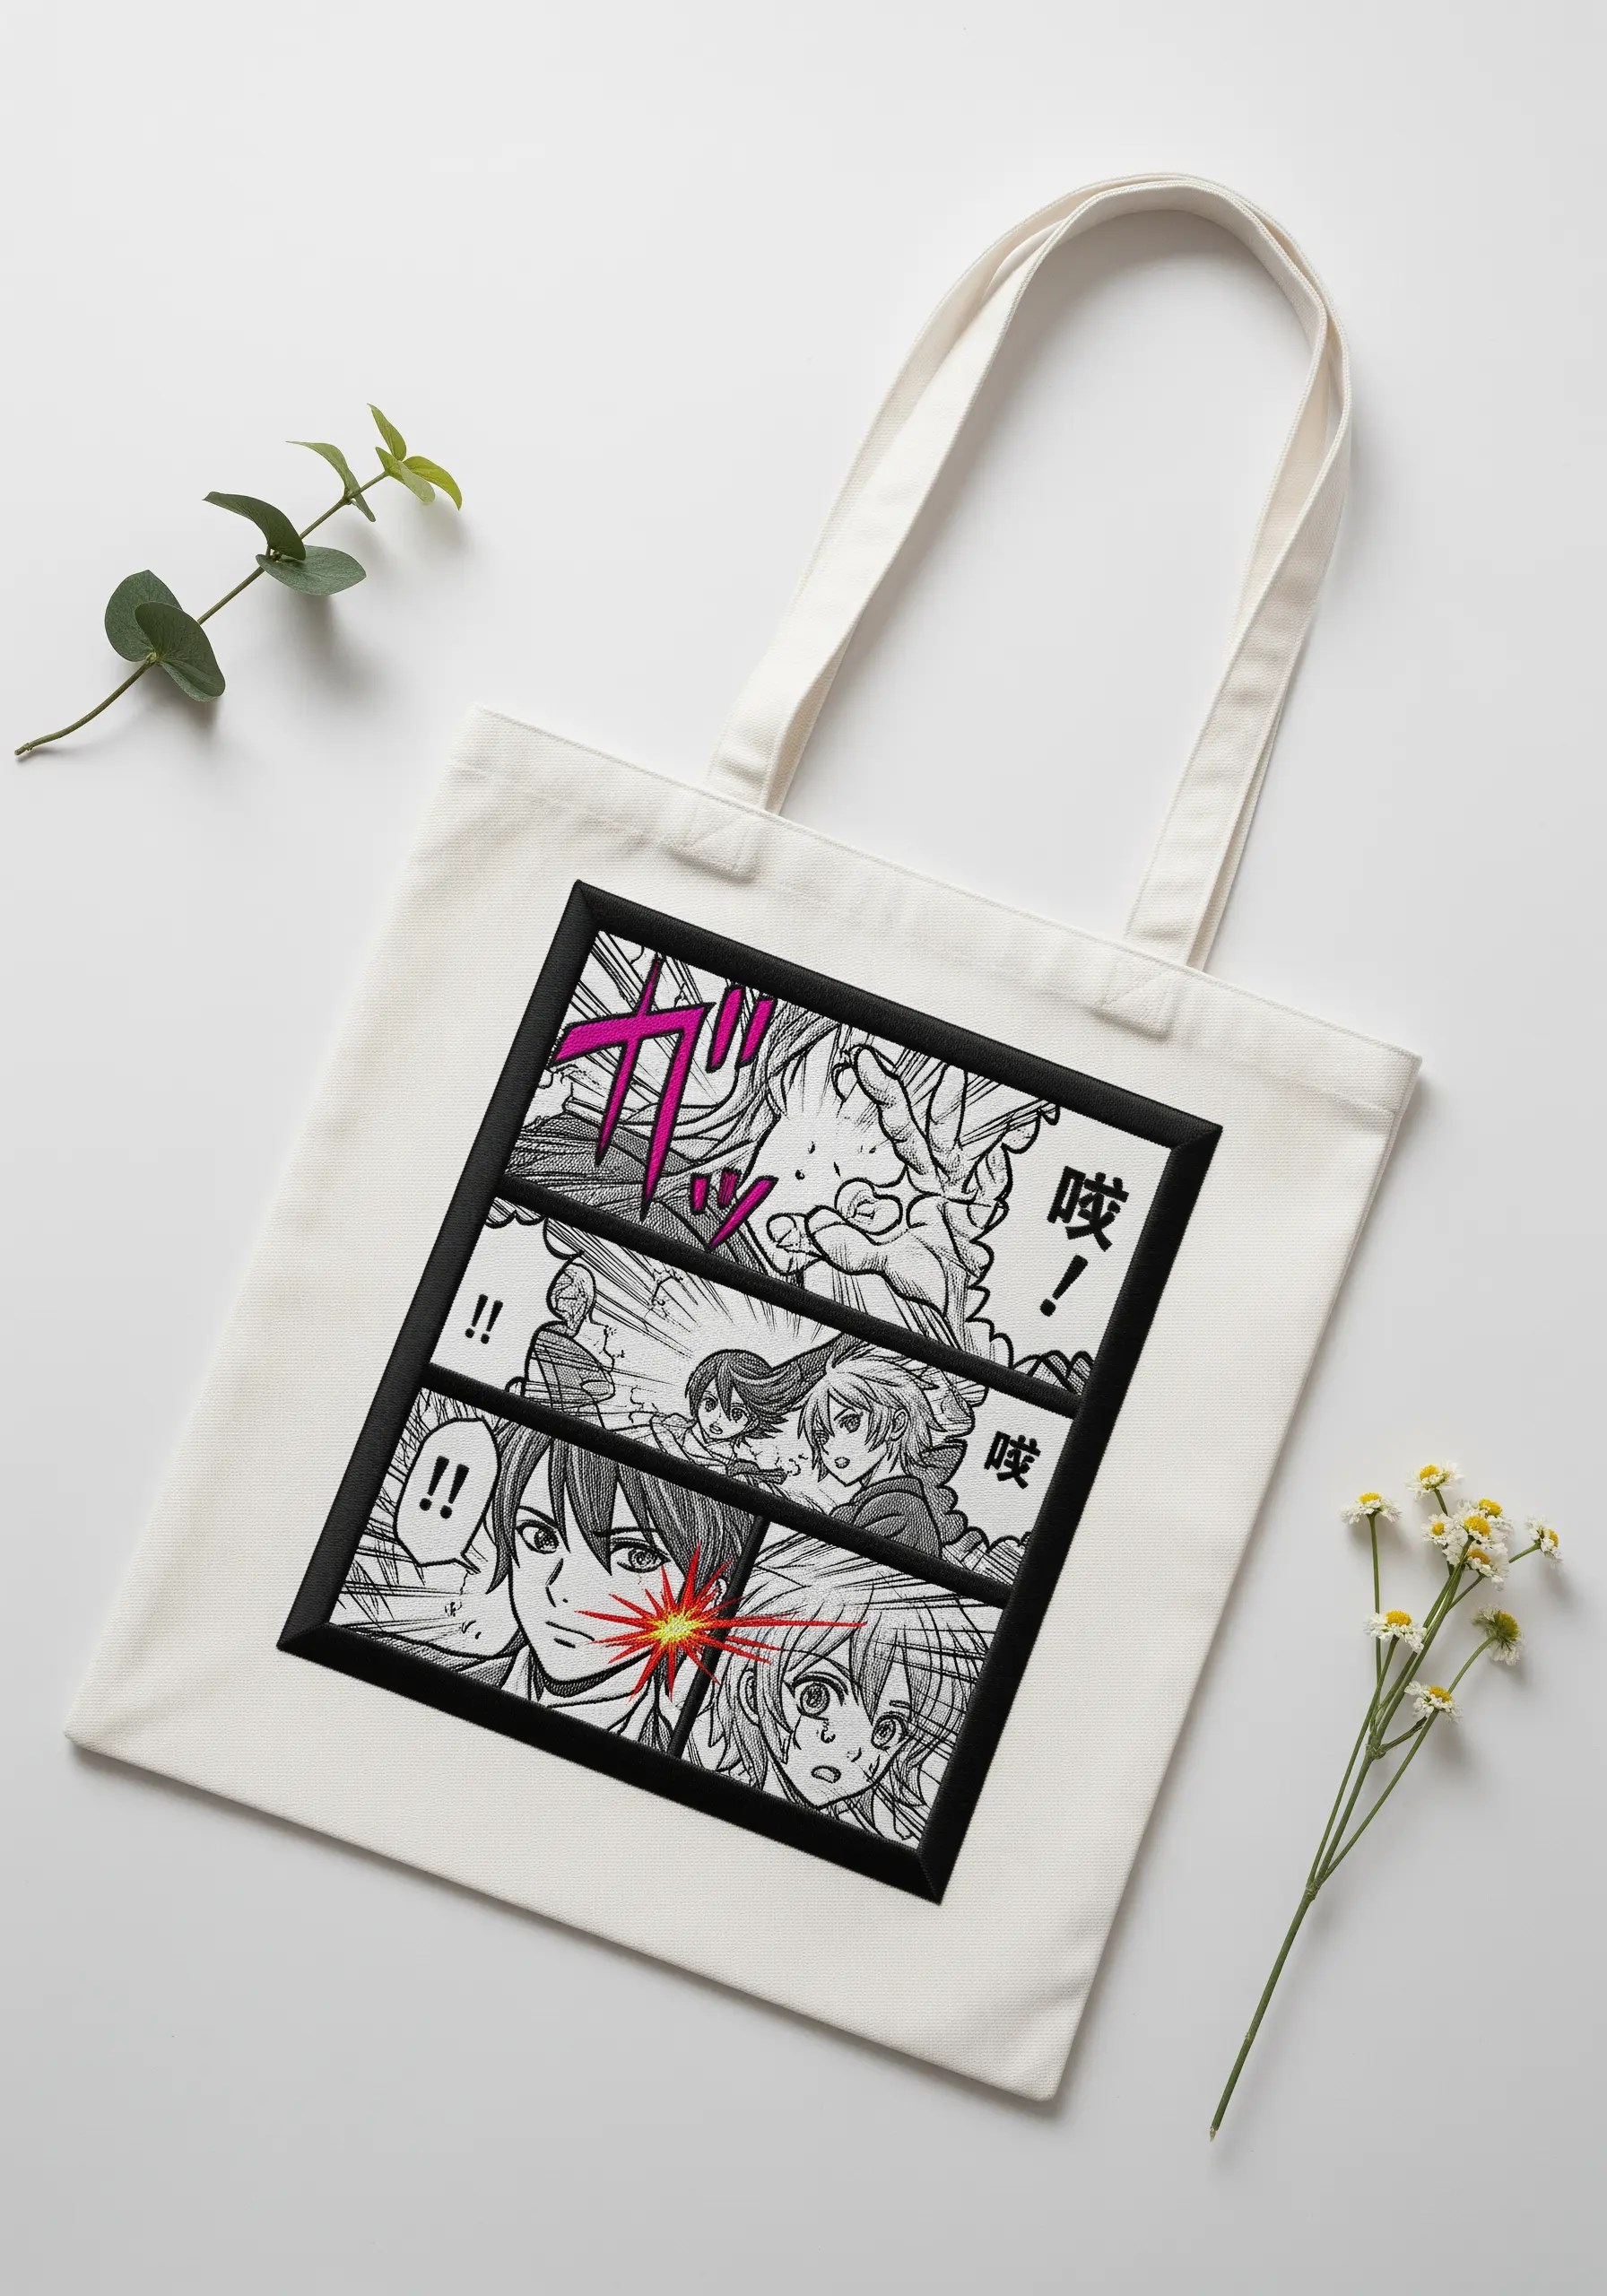
10. Capture Manga’s Bold Ink Lines
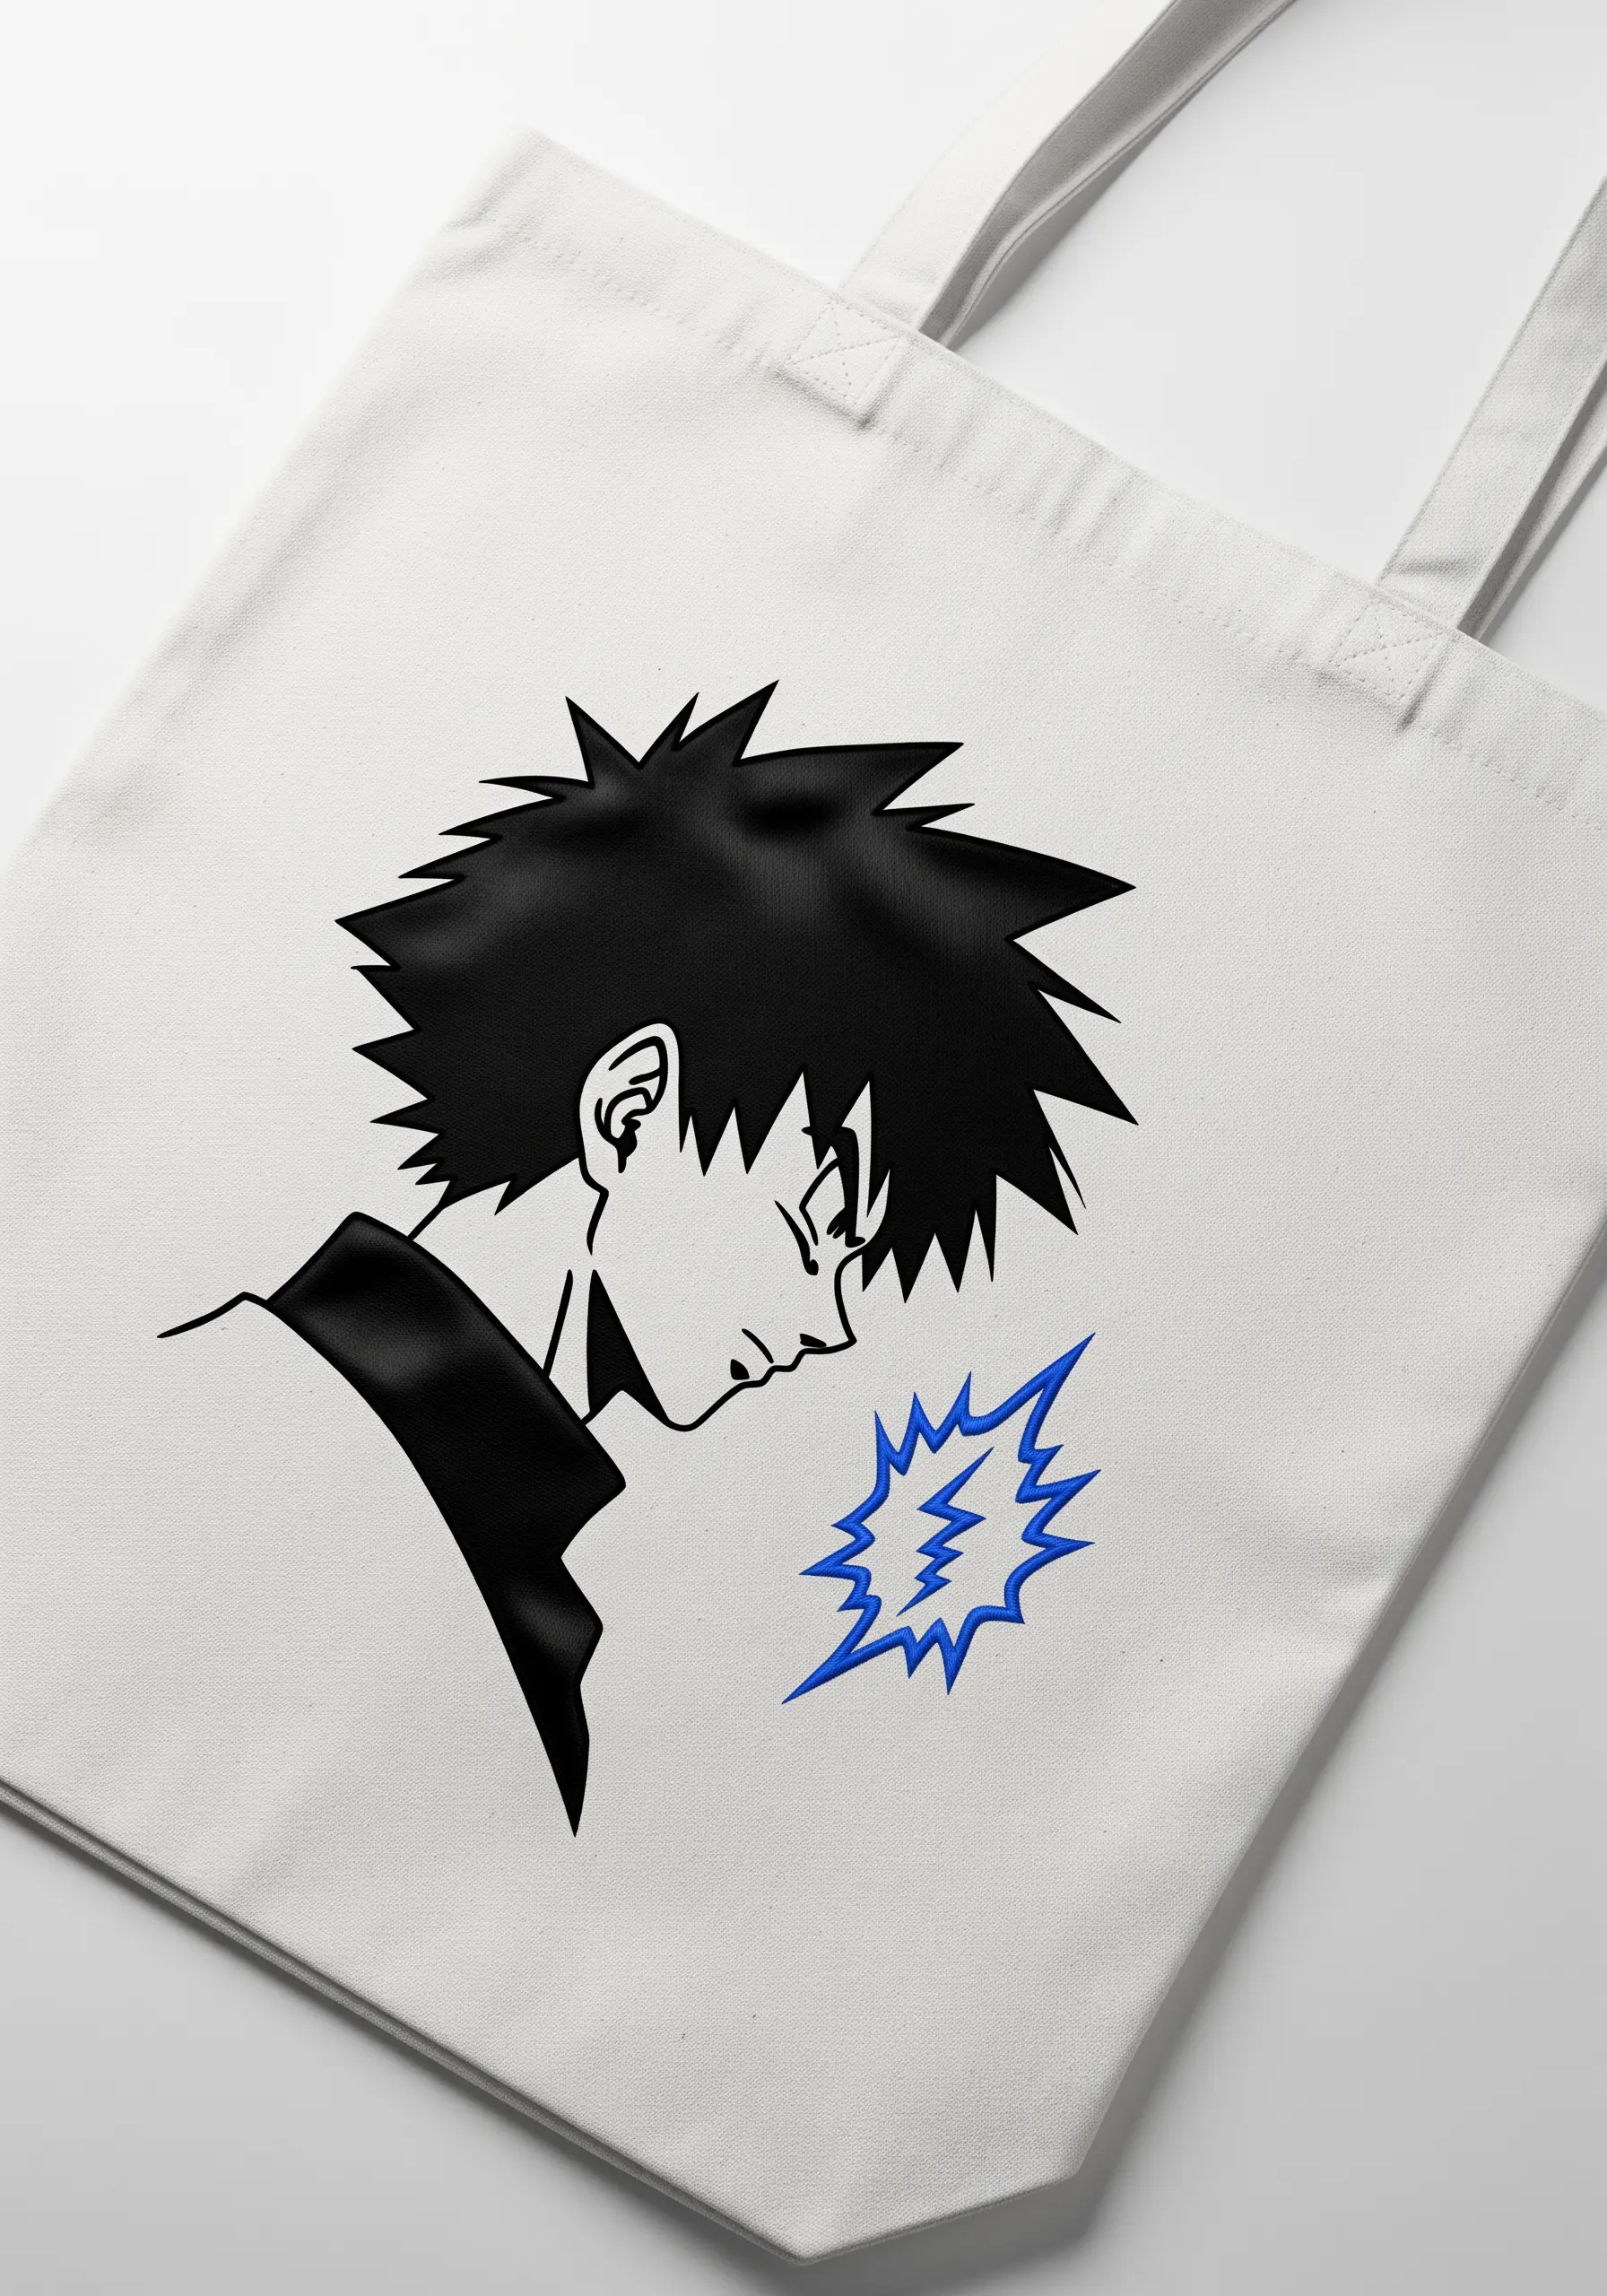
To replicate the sharp, graphic look of manga art, your outline stitch needs to be bold and clean.
Instead of a standard backstitch, use a whipped backstitch or a chain stitch with three to four strands of black floss.
This creates a solid, rope-like line that mimics the confident stroke of an ink pen.
For the accompanying sound effect, use a bright, contrasting color like electric blue to make it pop, just as it would on a manga page.
11. Weave a Celestial Constellation
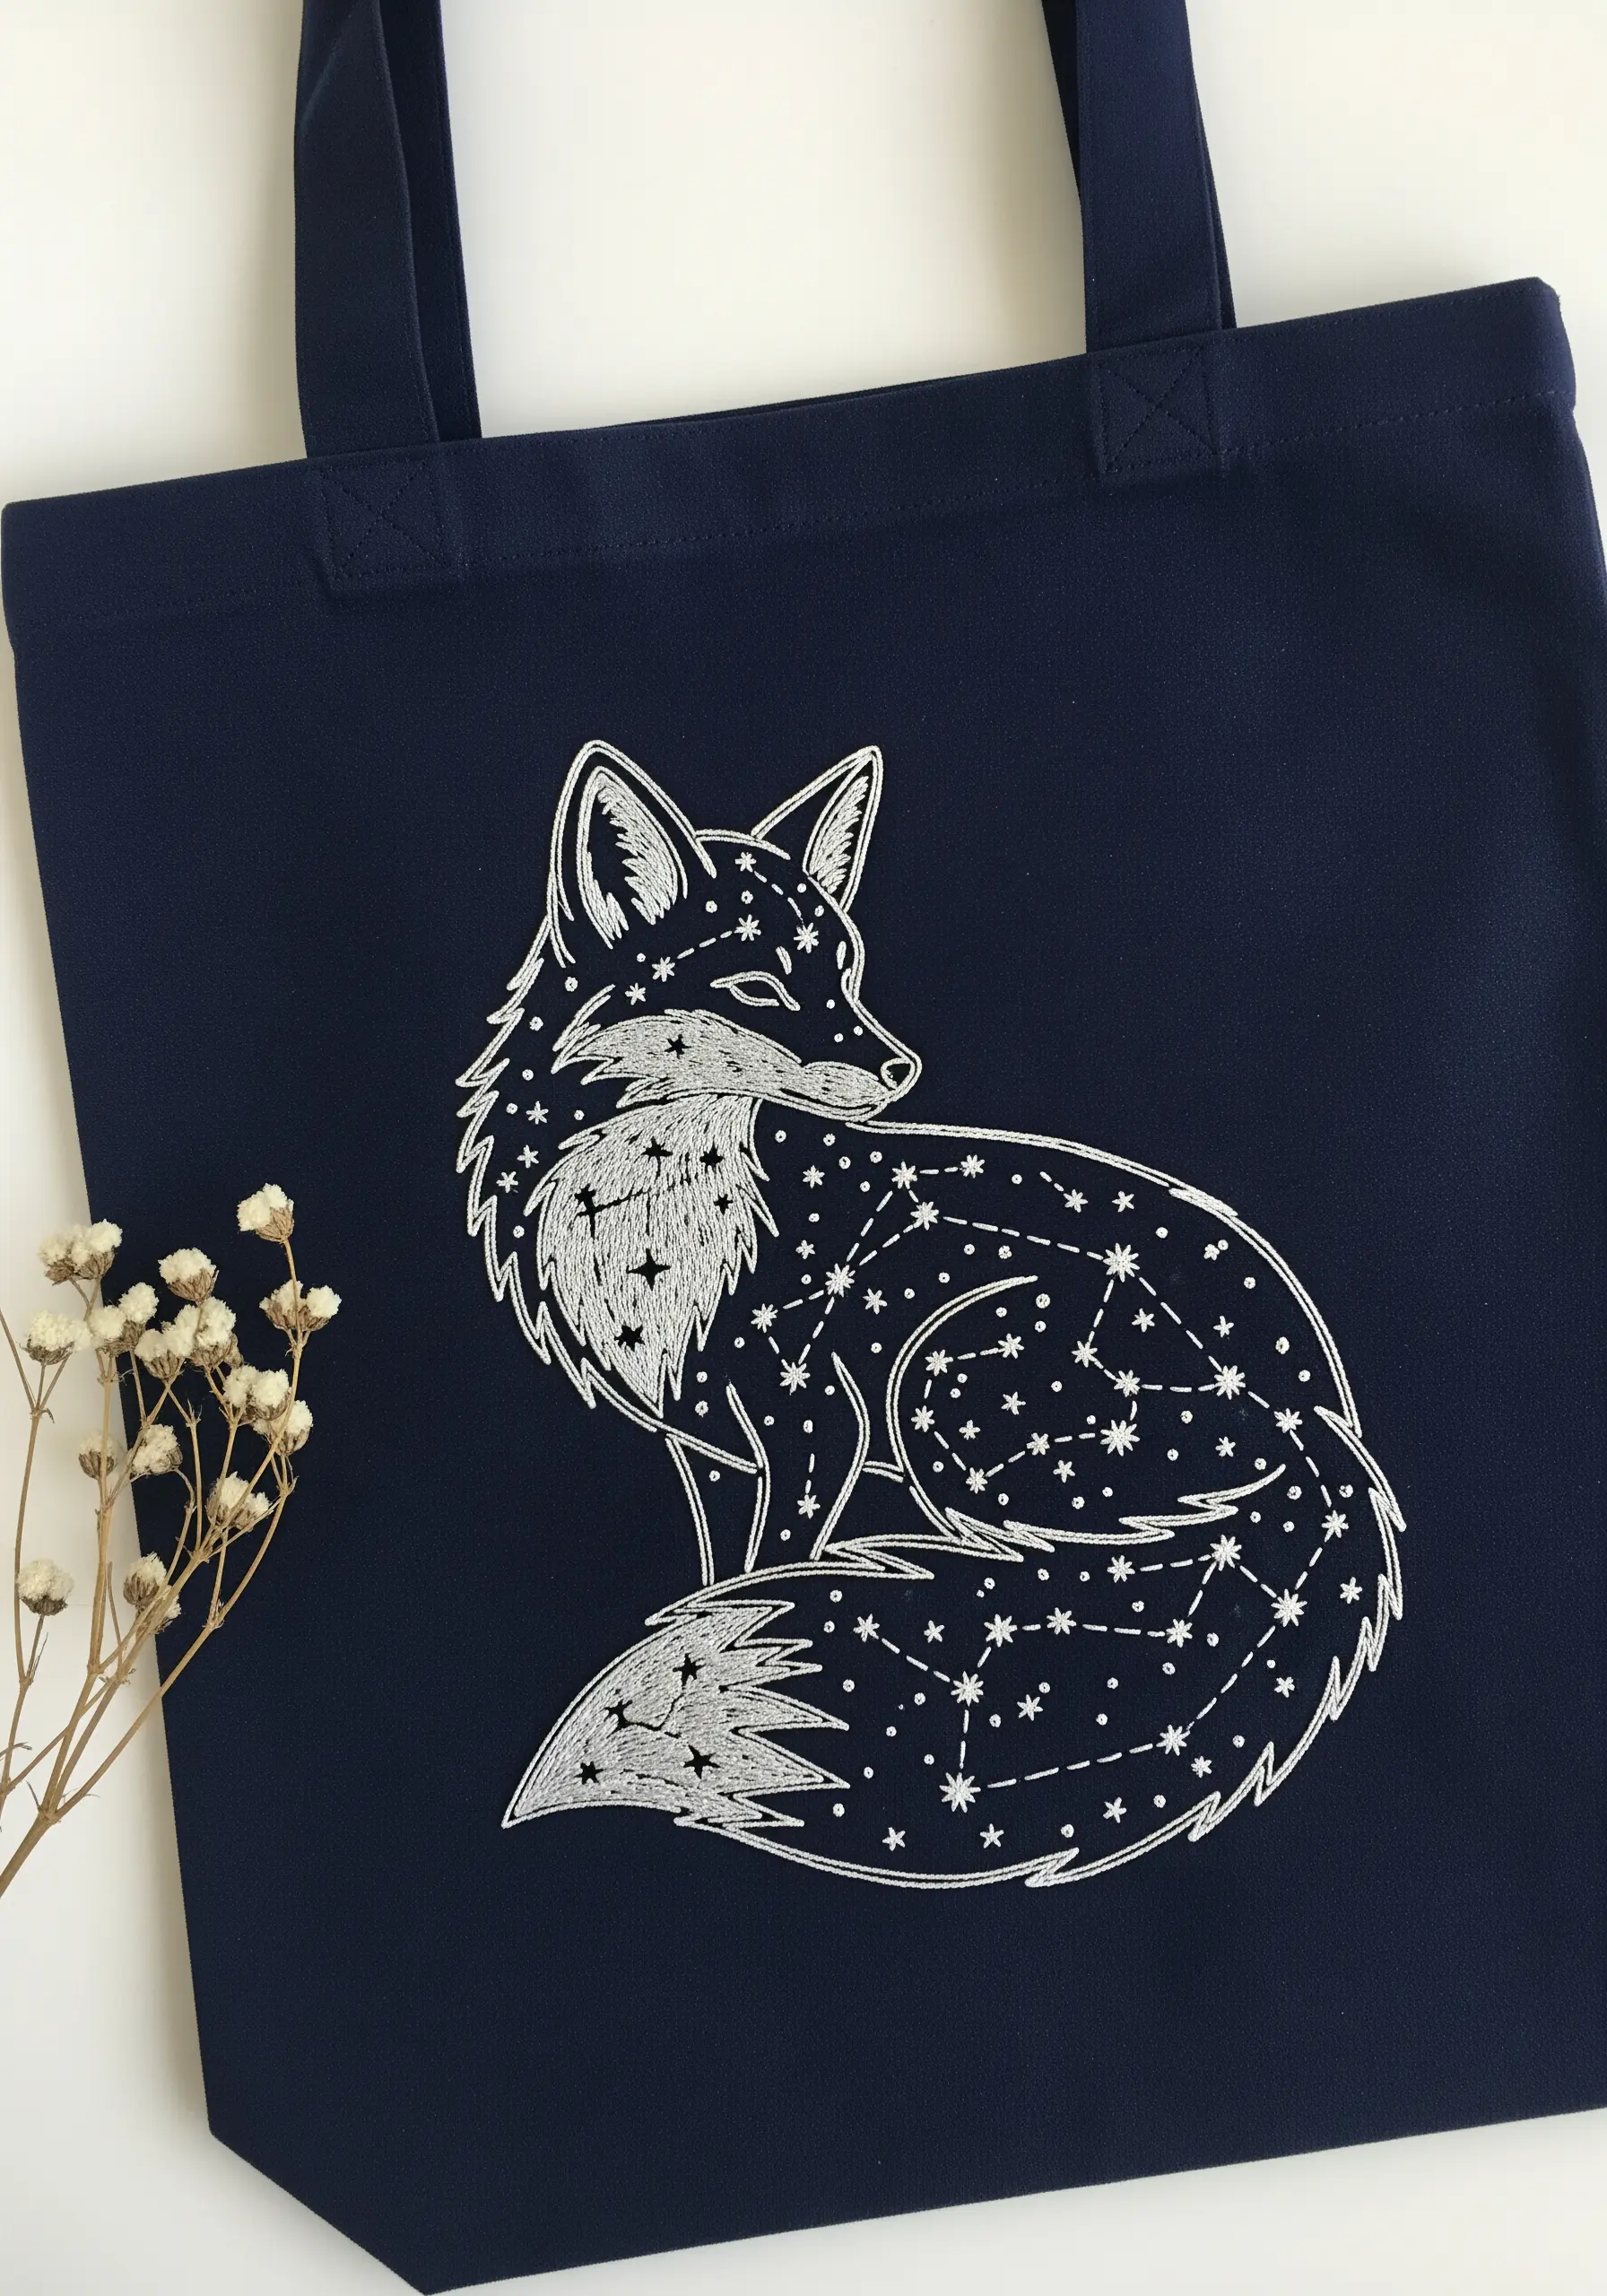
Create a delicate, starry coat on this celestial fox with careful thread choice and stitch placement.
Use a single strand of white, silver, or glow-in-the-dark thread for the constellation lines to keep them looking fine and ethereal against the dark fabric.
For the stars themselves, use a mix of tiny French knots and simple star stitches (made of three intersecting straight stitches).
Varying the size and type of star stitch adds visual complexity and makes the pattern feel more like a magical night sky.
12. Combine Appliqué for Soft Characters
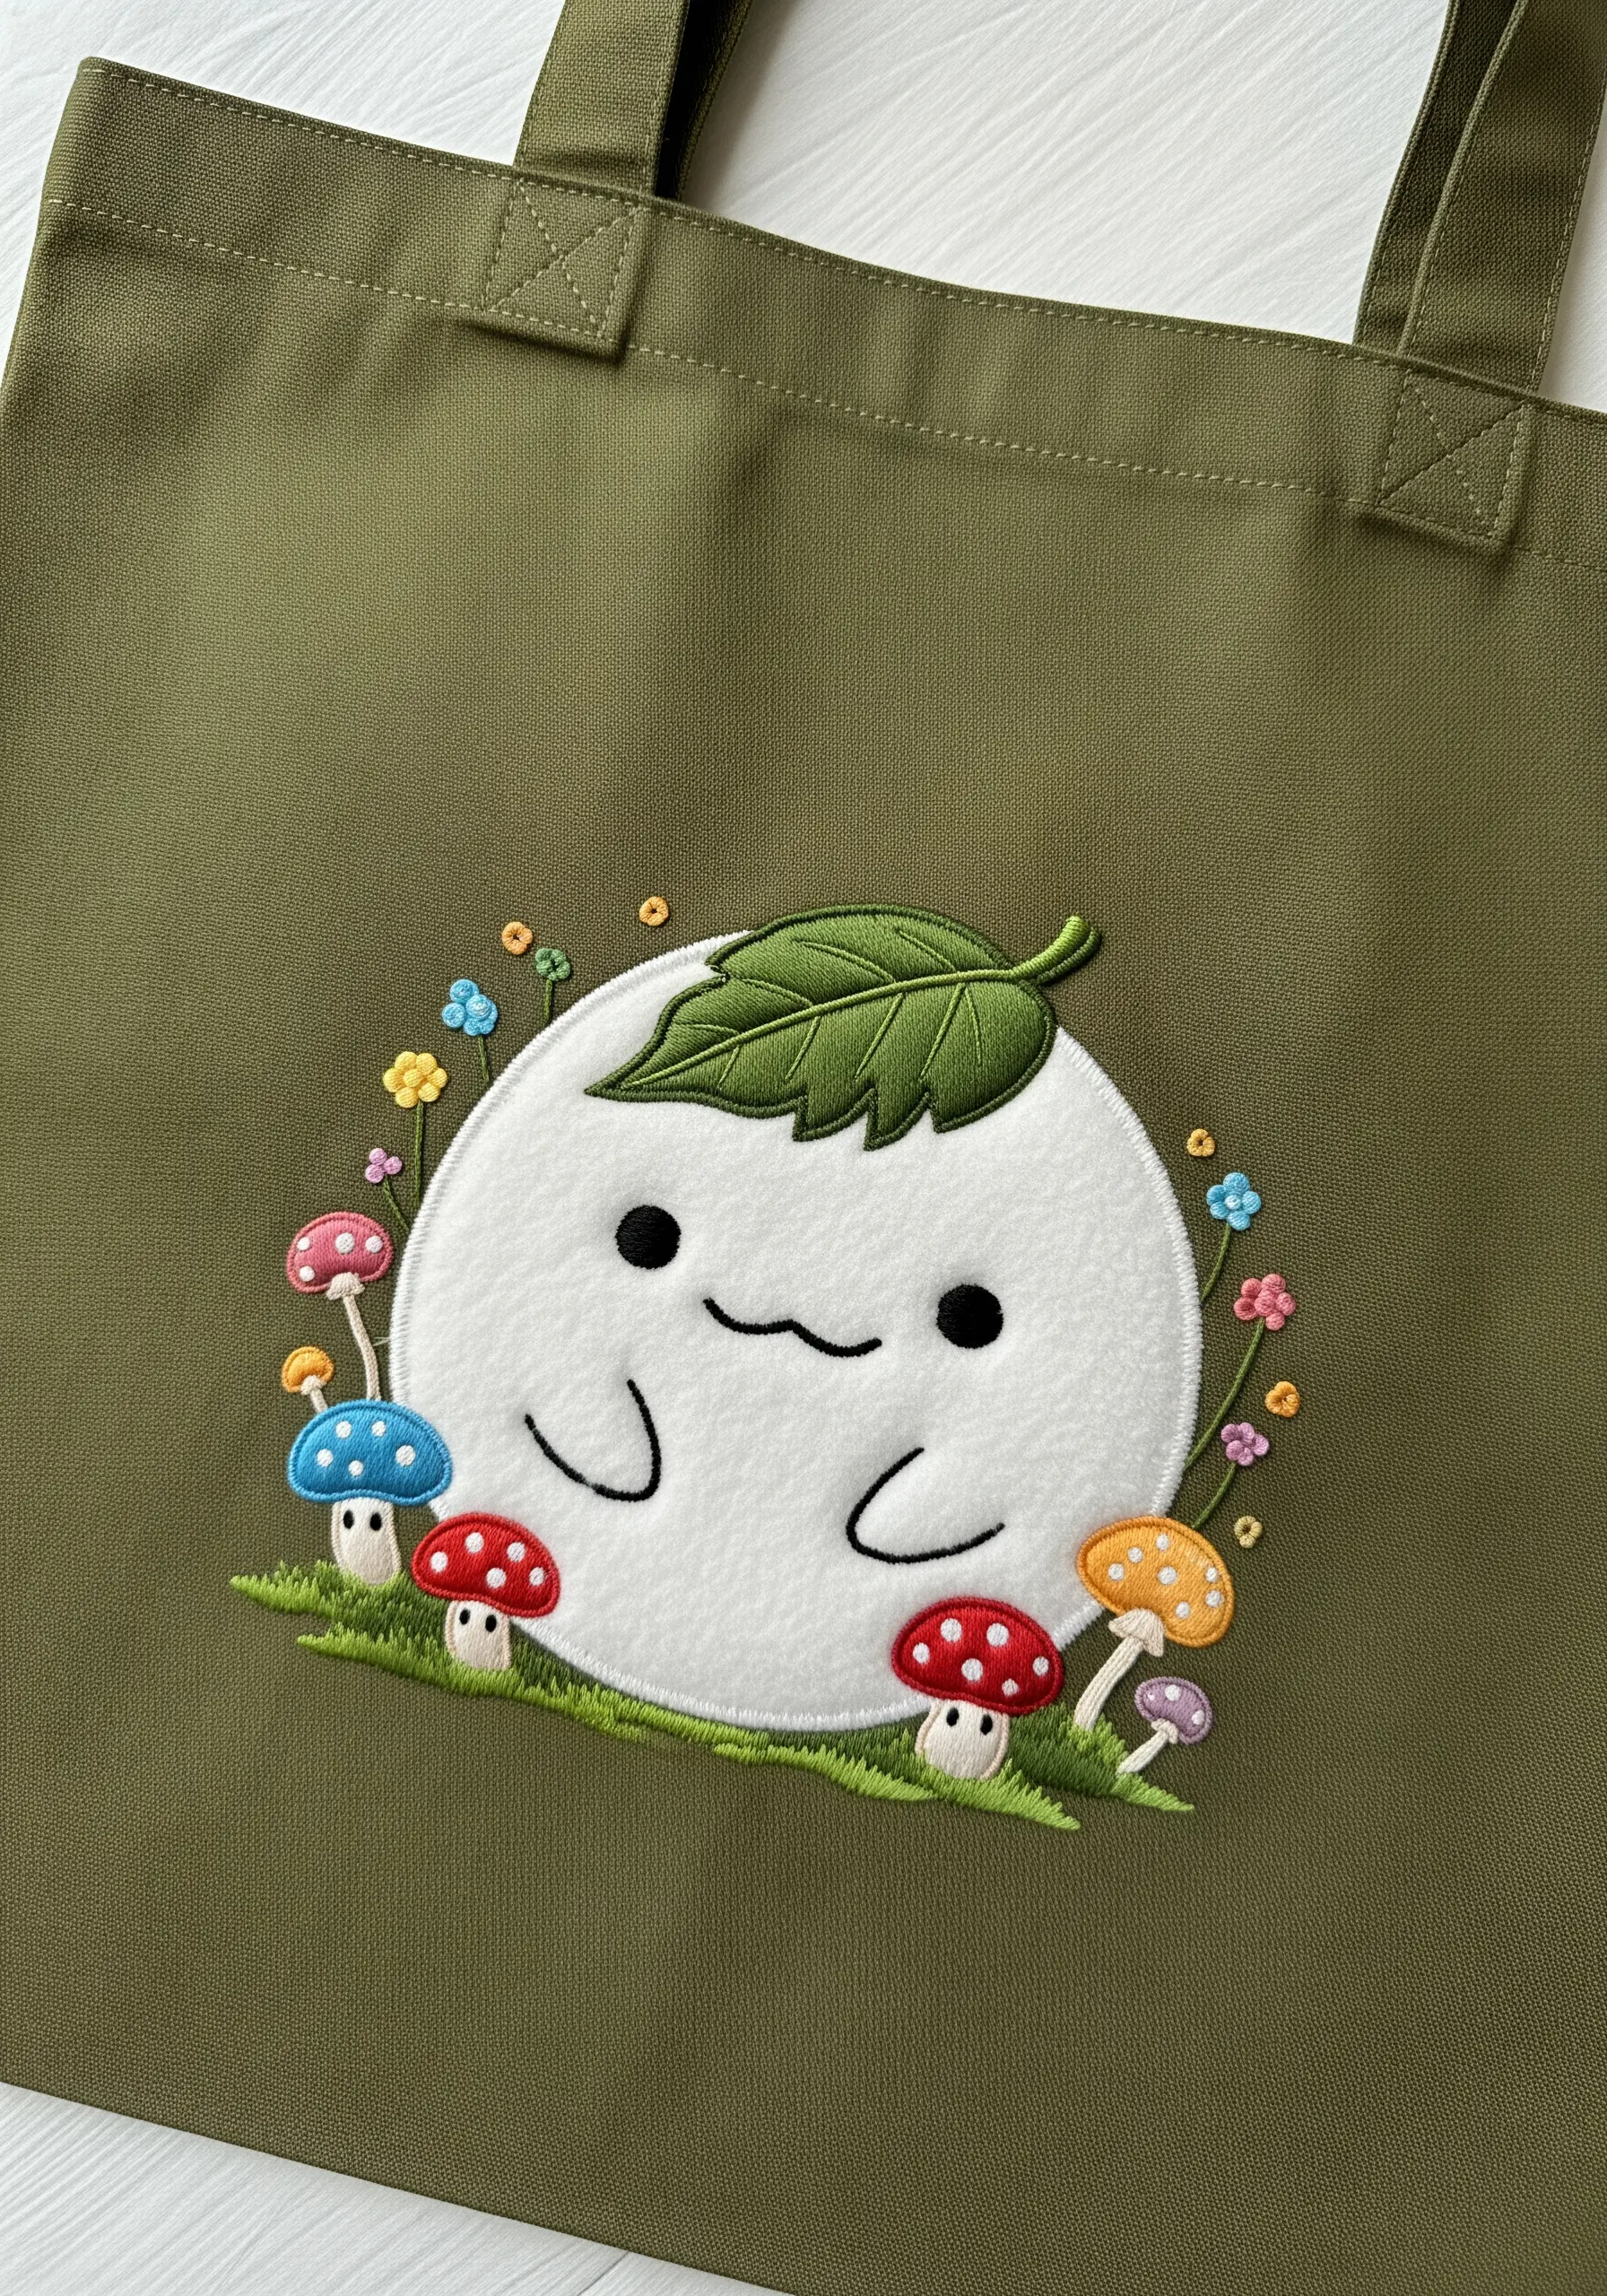
For large, simple shapes like this mochi character, combining appliqué with embroidery saves time and adds a wonderful textural contrast.
Cut the main body shape from a piece of soft white felt or fleece and secure it to the tote bag with a neat blanket stitch around the edge.
Then, add the finer details—like the eyes, mouth, and the satin-stitched leaf—with traditional embroidery directly onto the appliqué piece.
This fabric collage embroidery technique creates a soft, raised surface that’s perfect for cute characters.
13. Engineer a Graphic Patch Effect
Turn your embroidery into a sharp, graphic patch without needing an actual patch.
The key is a thick, raised border.
First, fill all the color-blocked sections with a dense, smooth satin stitch.
Then, outline the entire design with a raised satin stitch worked over a foundation of several parallel straight stitches.
This creates a dimensional edge that cleanly separates the design from the bag, giving it the crisp, defined appearance of a classic embroidered patch.
14. Paint with Neon Thread
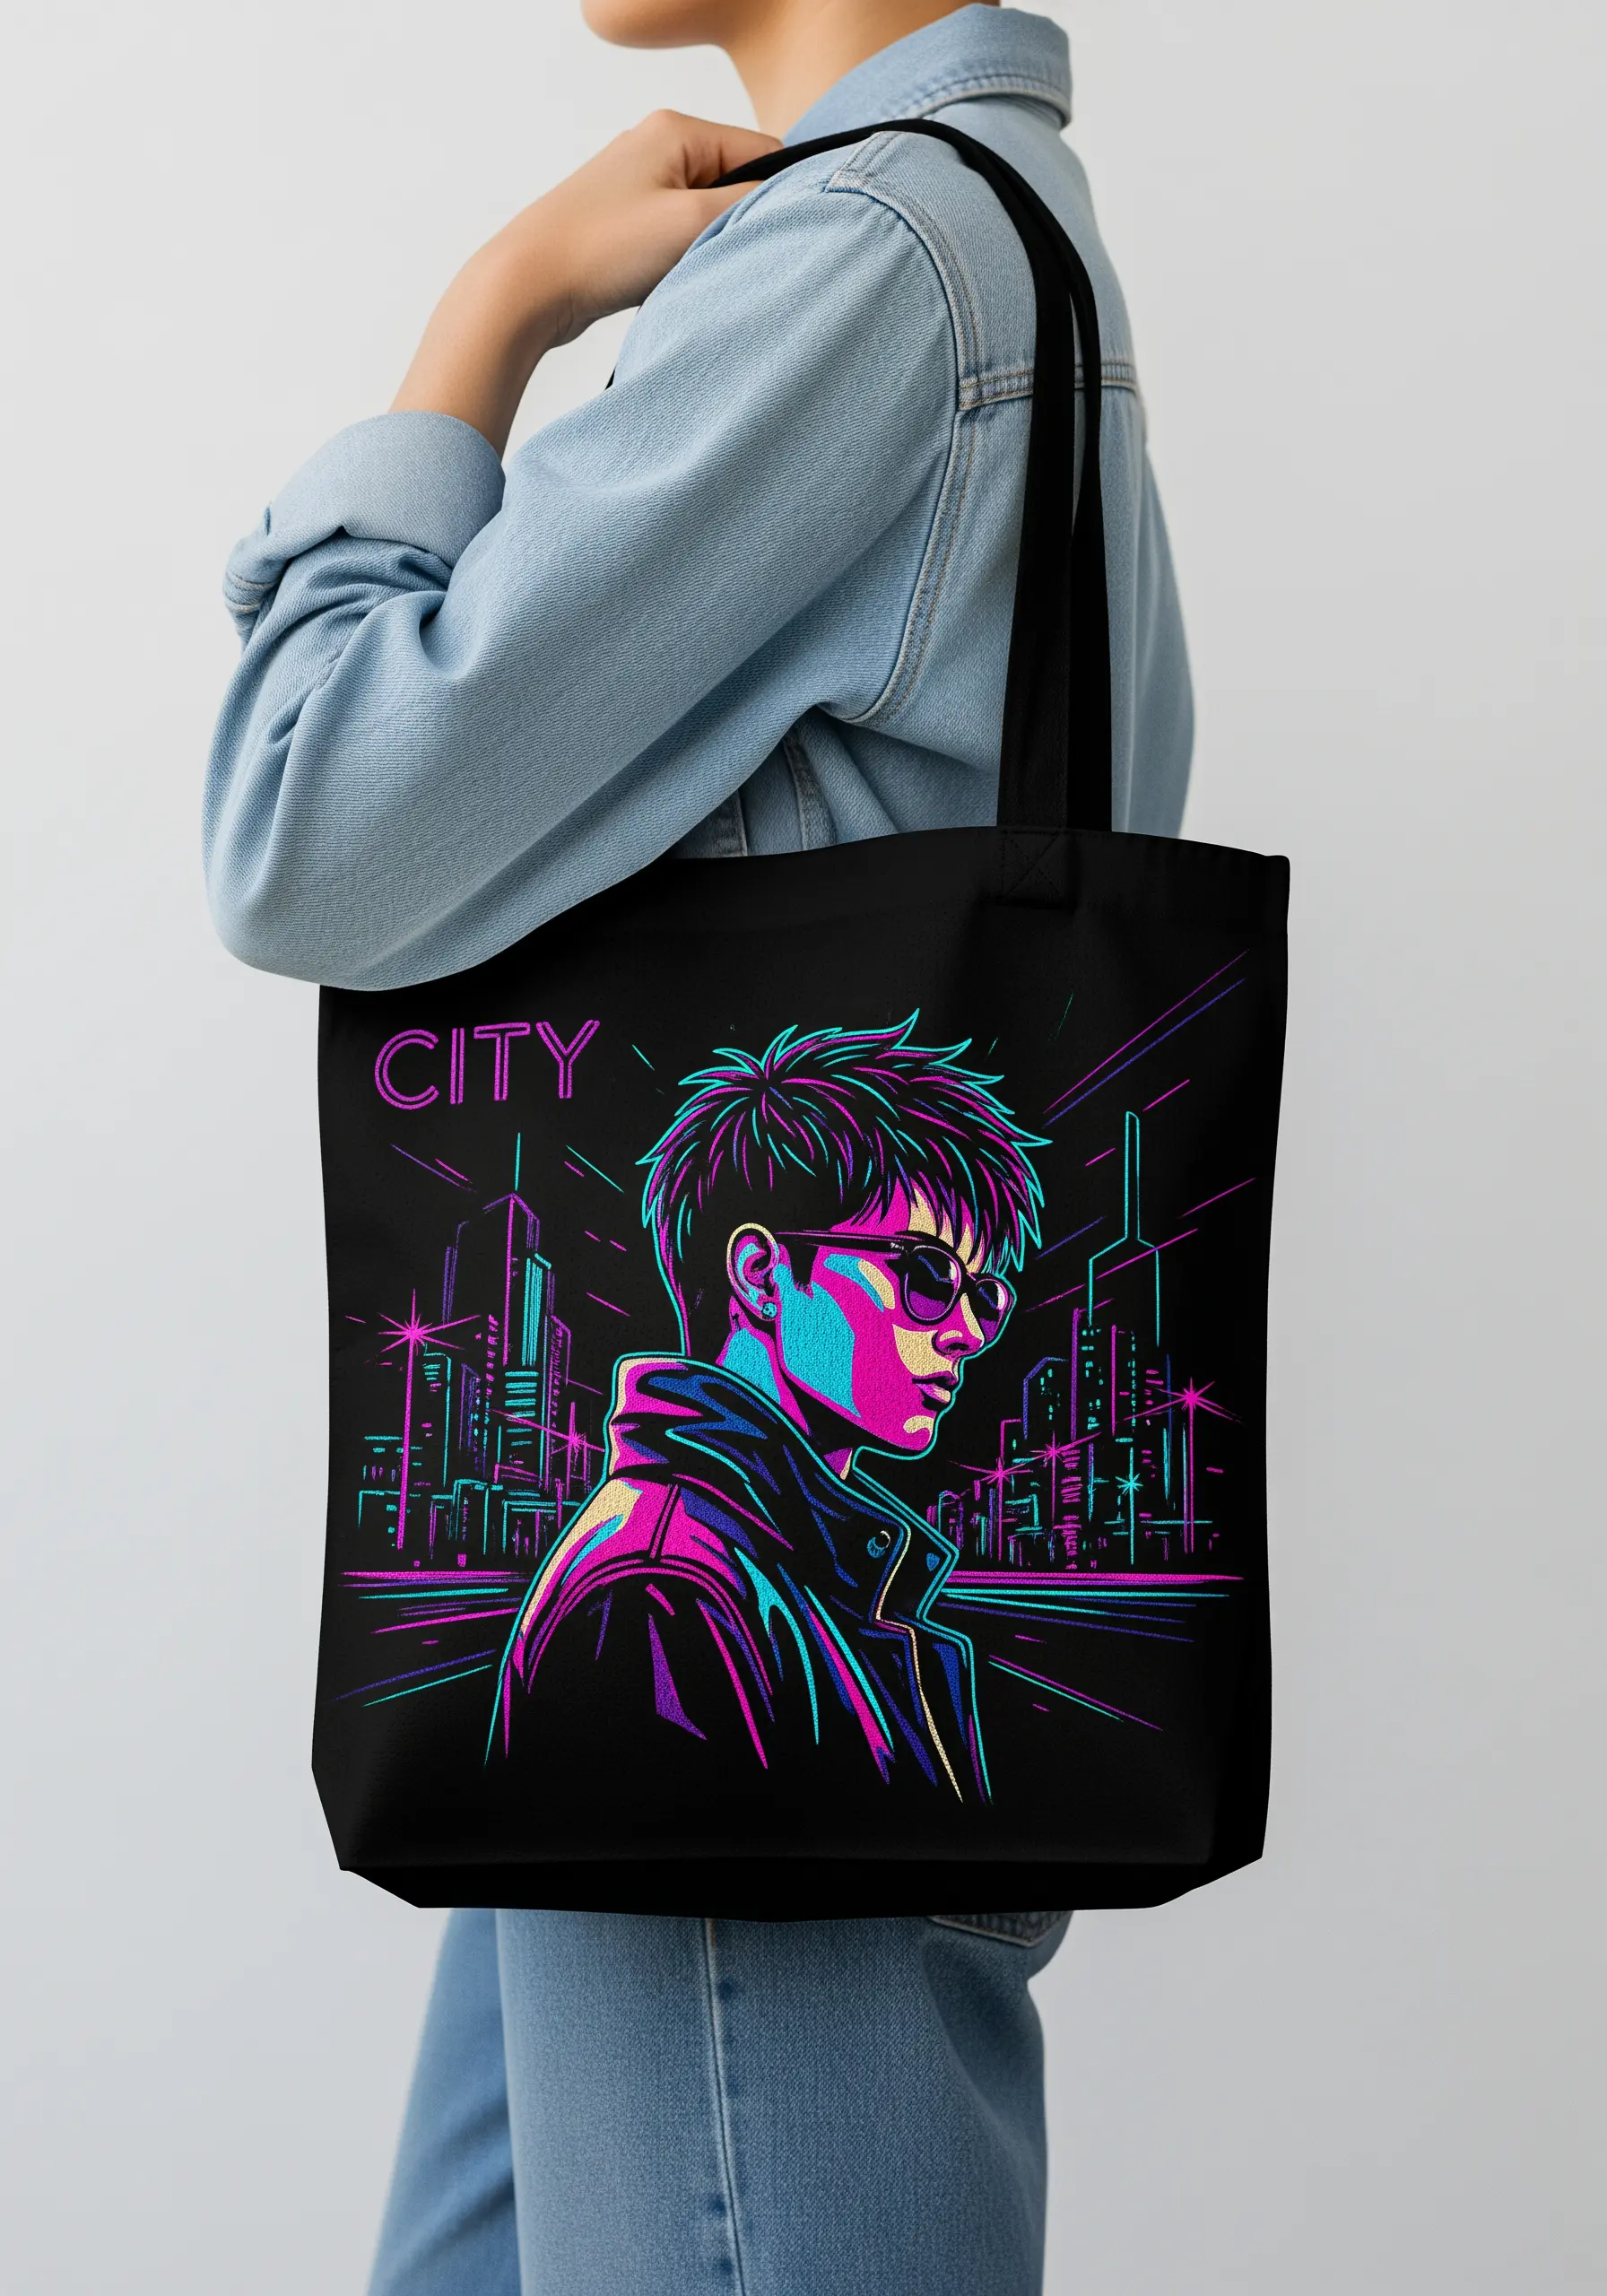
Capture the vibrant, high-contrast lighting of cyberpunk art with thread painting.
Use the long-and-short stitch technique to blend bright neon colors—pinks, blues, and cyans—to create highlights on the character’s face, hair, and clothing.
Lay your stitches in the direction that light would naturally hit these surfaces to enhance the glowing effect.
The black fabric of the tote bag acts as the deep shadows, making the bright colors appear to radiate light.
15. Differentiate Elements with Texture
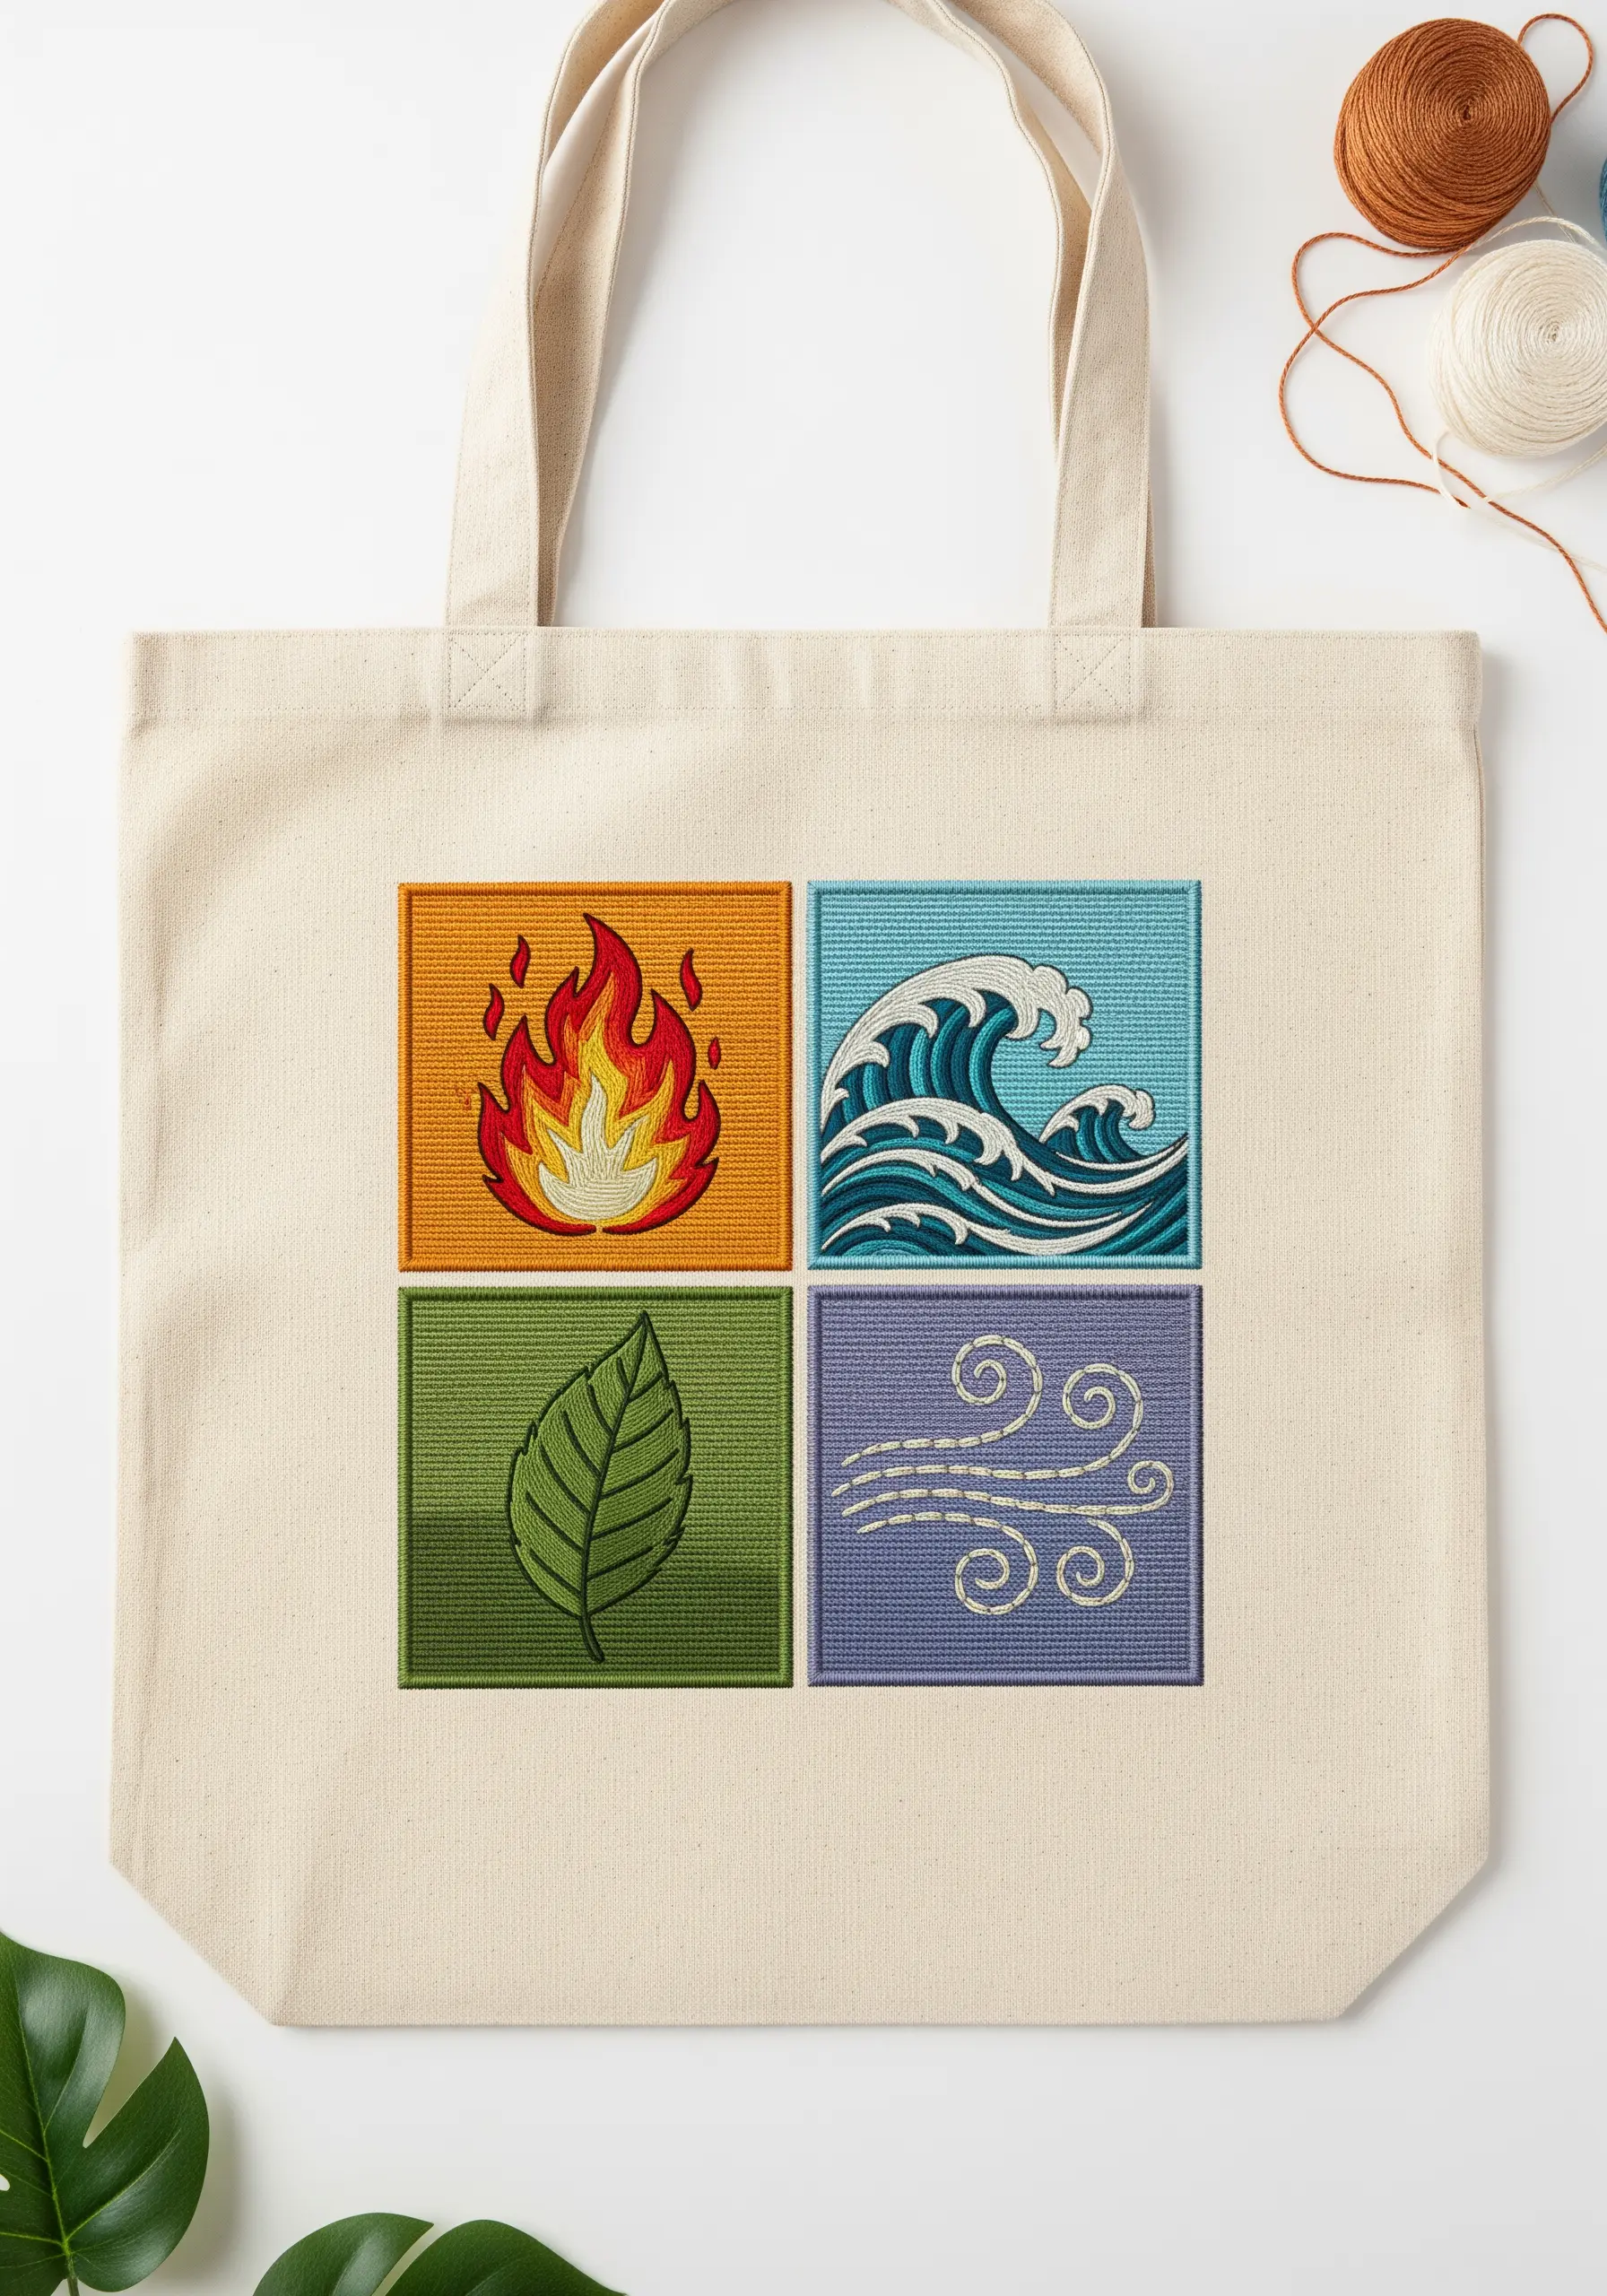
When working with a segmented design like the four elements, assign a unique stitch texture to each block to make it visually distinct.
Use long, flowing vertical stitches for the water to suggest movement, and chaotic, overlapping long-and-short stitches for the fire’s flicker.
A structured fishbone stitch gives the leaf its central vein, while swirling backstitches can represent the invisible movement of air.
This approach transforms simple squares into a tactile story.
16. Achieve a Plush Fur Effect
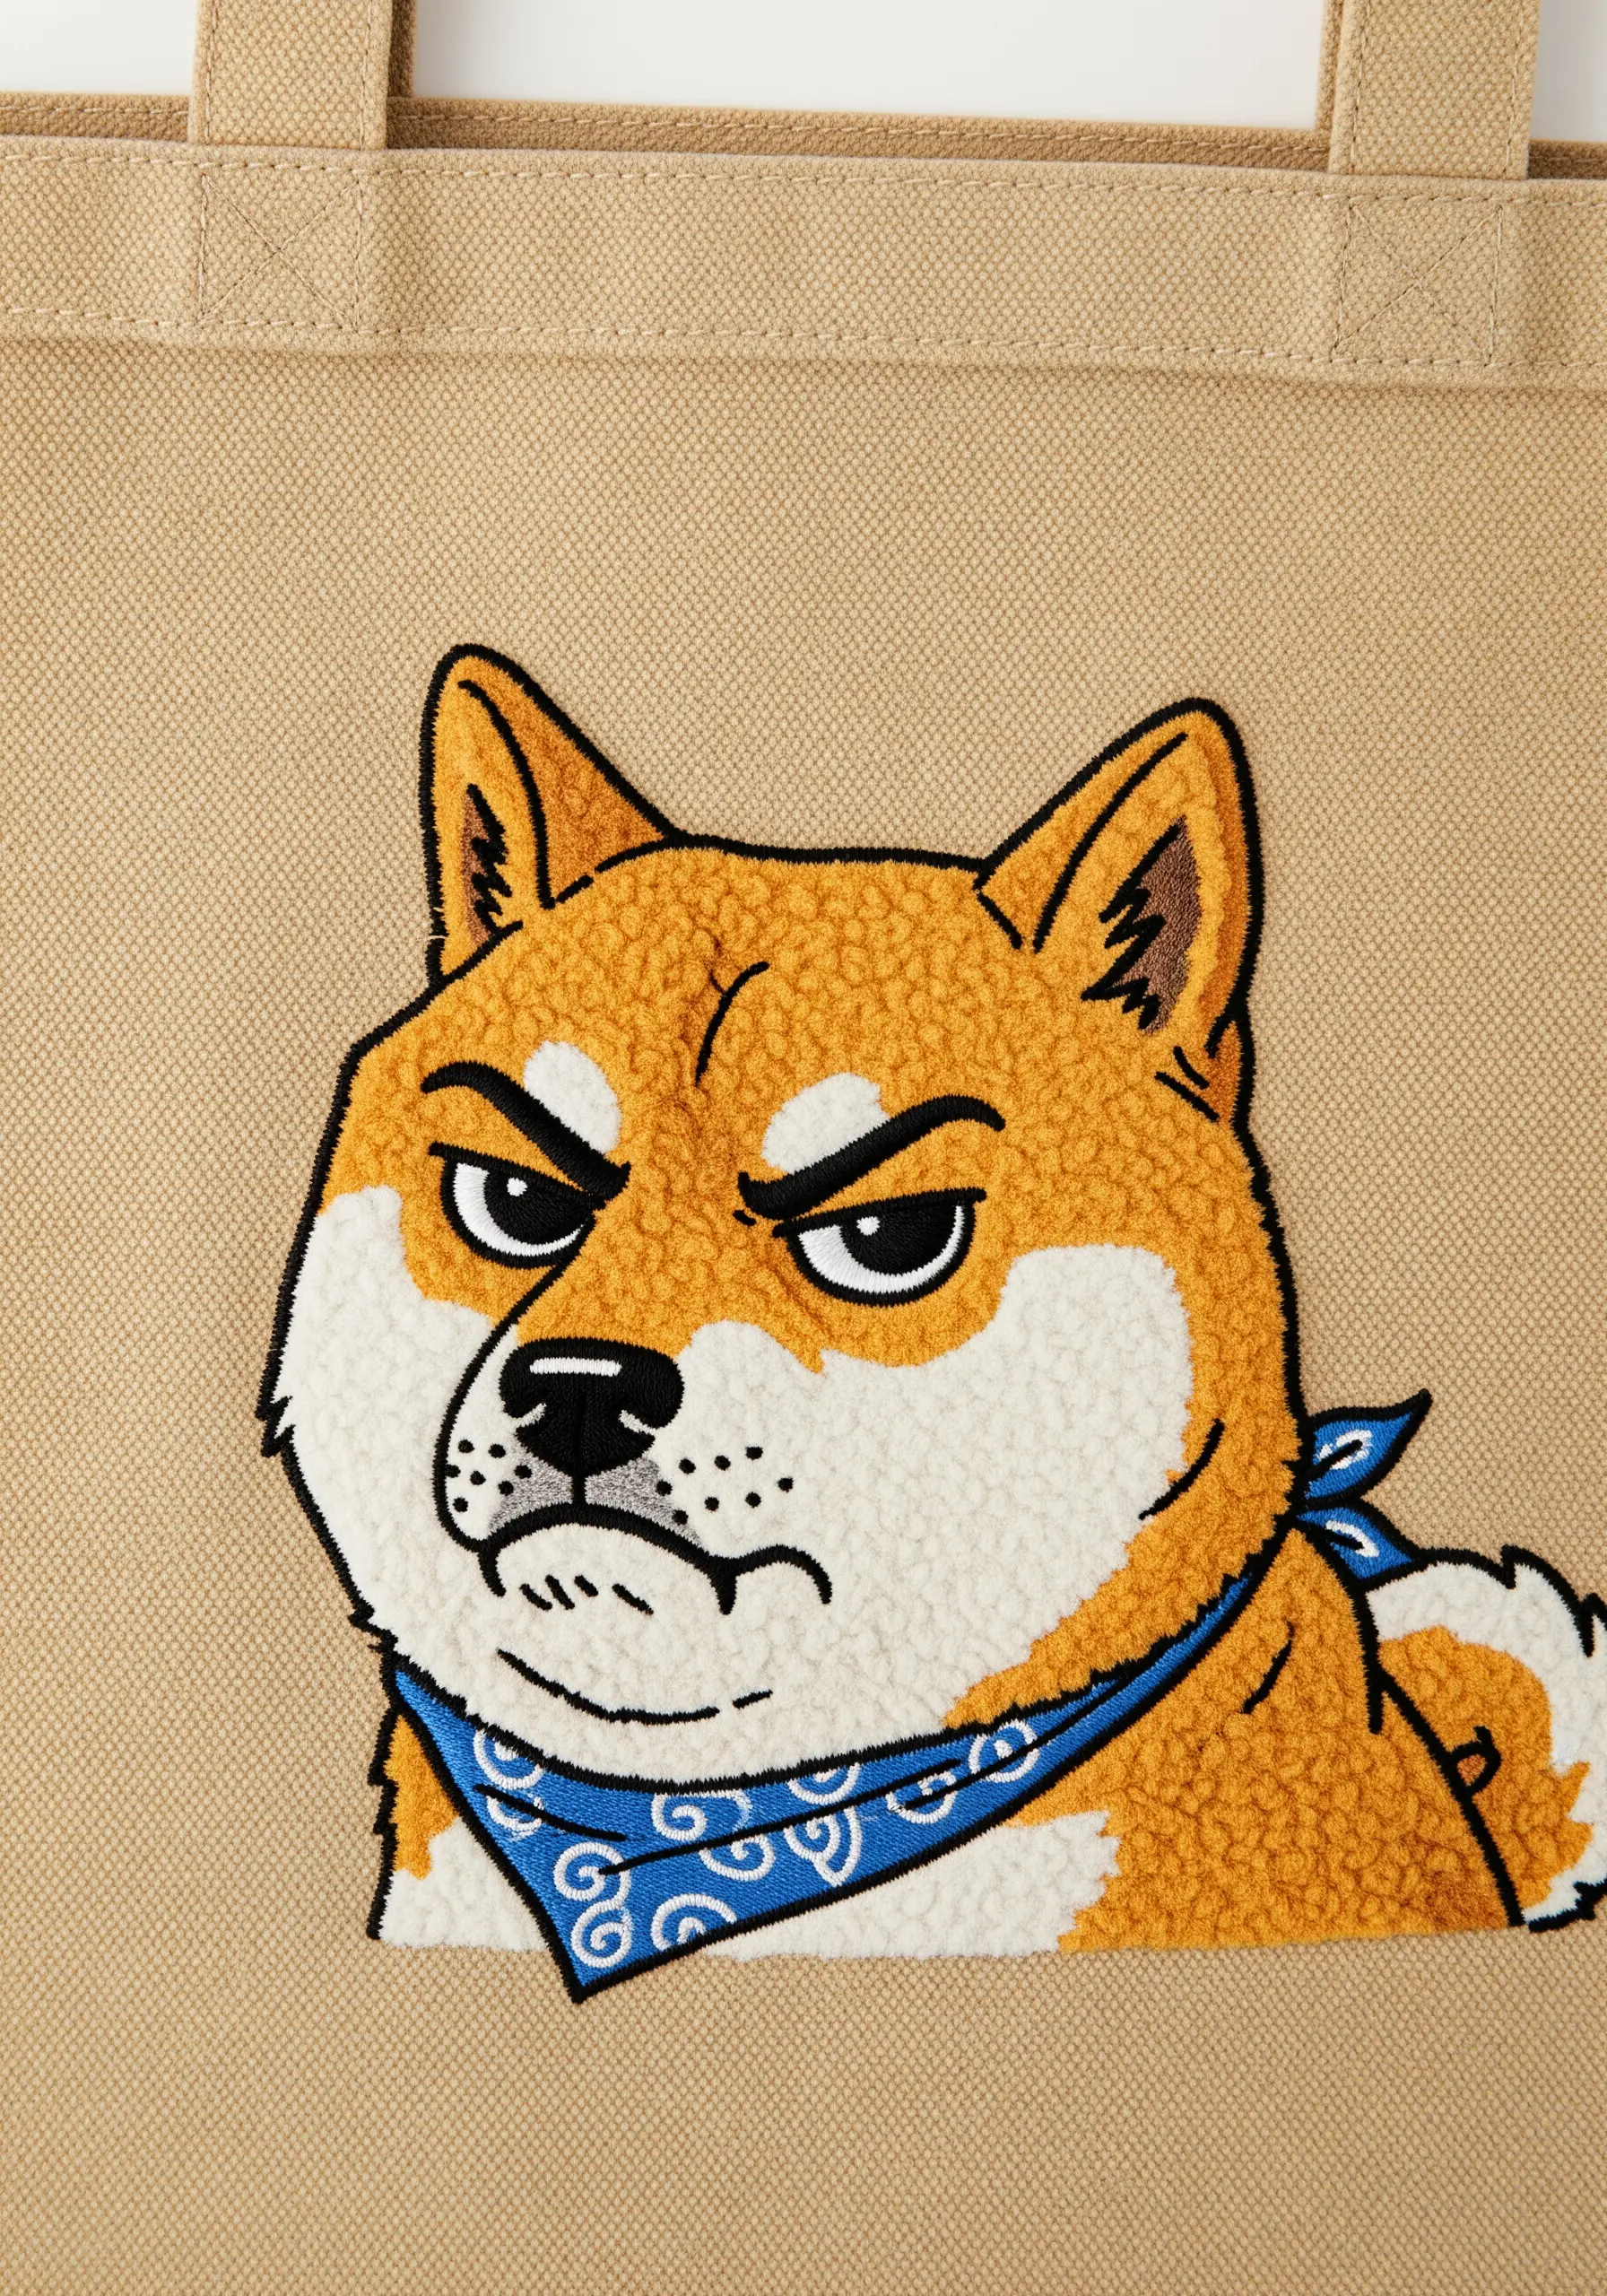
Create a dense, plush fur texture for this Shiba Inu using a punch needle or a dense field of French knots.
Punch needling is faster and creates uniform loops, while French knots offer a more nubby, hand-stitched texture.
For either method, use a slightly thicker thread, like pearl cotton or multiple strands of floss, to get a fuller look.
Contrast the plush fur with a flat satin stitch for the bandana to create a clear separation of textures.
17. Recreate the Dynamics of a Manga Panel
Translating a manga panel to thread requires focusing on line weight and clean framing.
Use a thick satin stitch for the panel borders to create a strong, graphic frame that contains the action.
Vary your thread count for the interior artwork: use two or three strands of black floss for character outlines, but switch to a single strand for fine details like facial expressions, hair, and shading lines.
This mimics an artist’s use of different pen nibs and adds professional depth to your work.
18. Add Dimension with Beads and Sheer Fabric
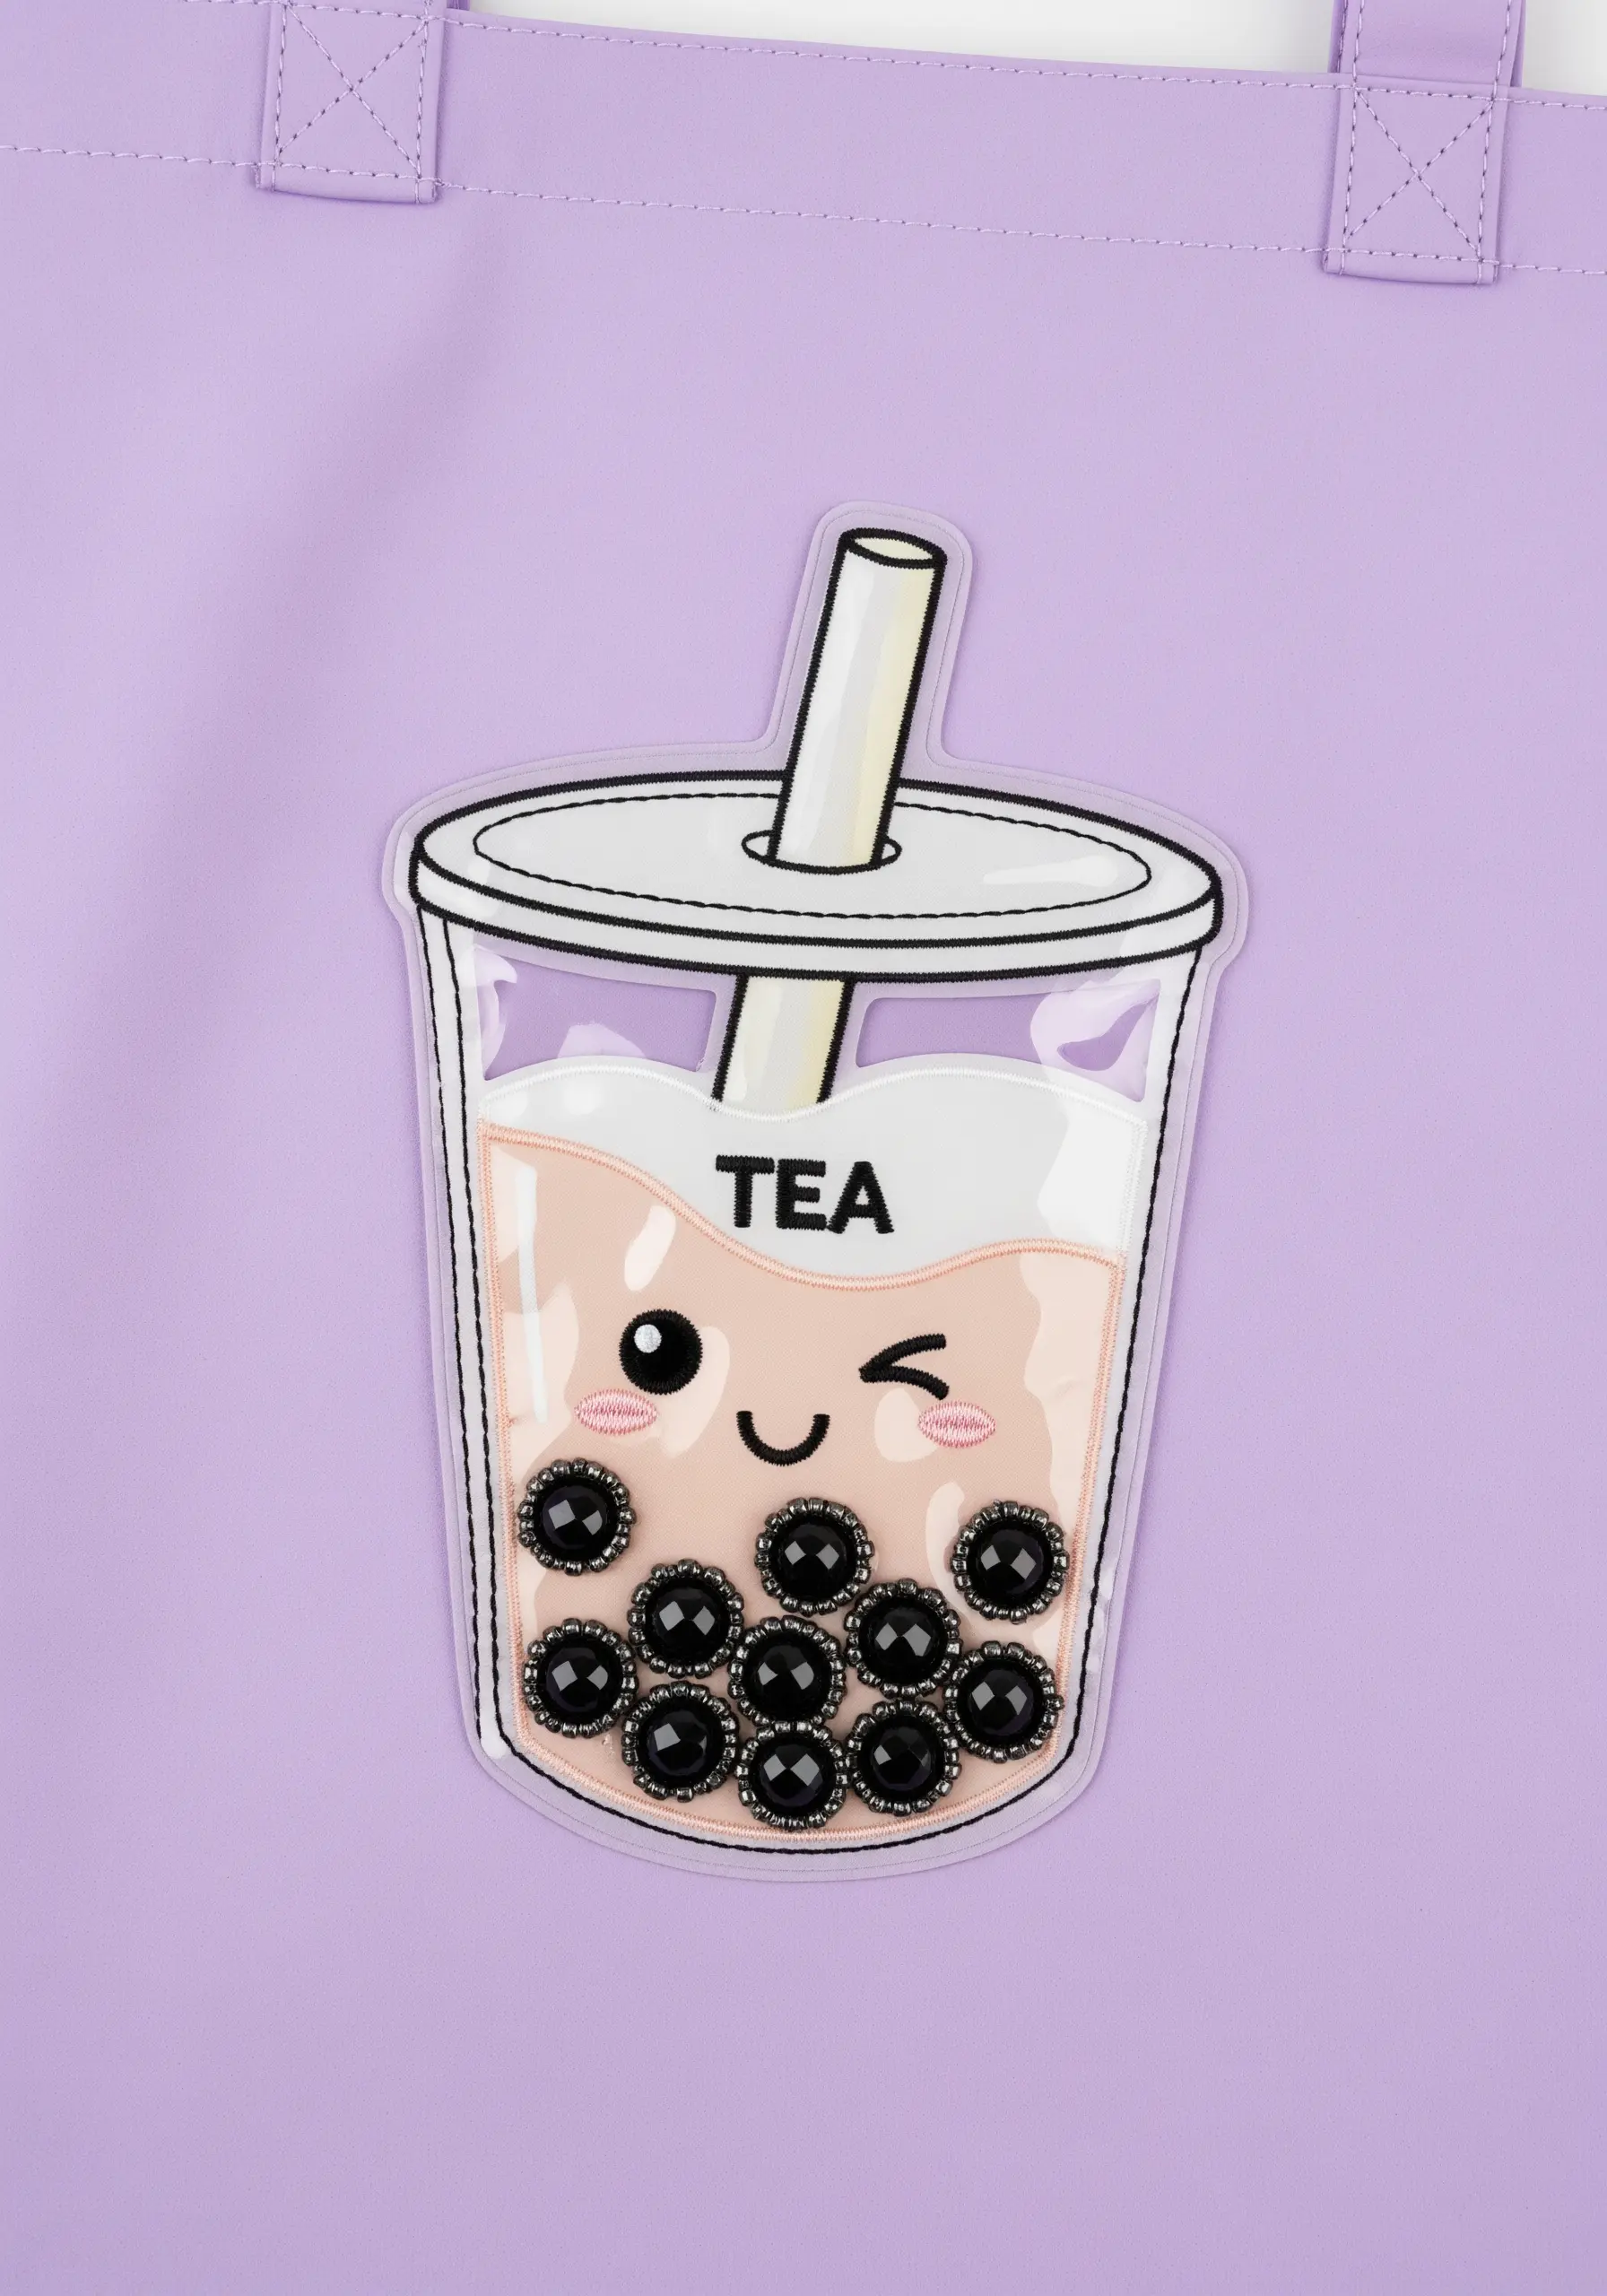
Elevate a simple boba tea design by incorporating unconventional materials.
Stitch on glossy black seed beads or small buttons to represent the tapioca pearls; their shine and dimension are far more effective than French knots.
For the plastic cup, consider adding a layer of sheer organza or vinyl over your base stitches.
Secure the sheer layer with a neat backstitch outline, creating a subtle, translucent effect that mimics a real cup.
19. Create a Polished Metallic Sheen
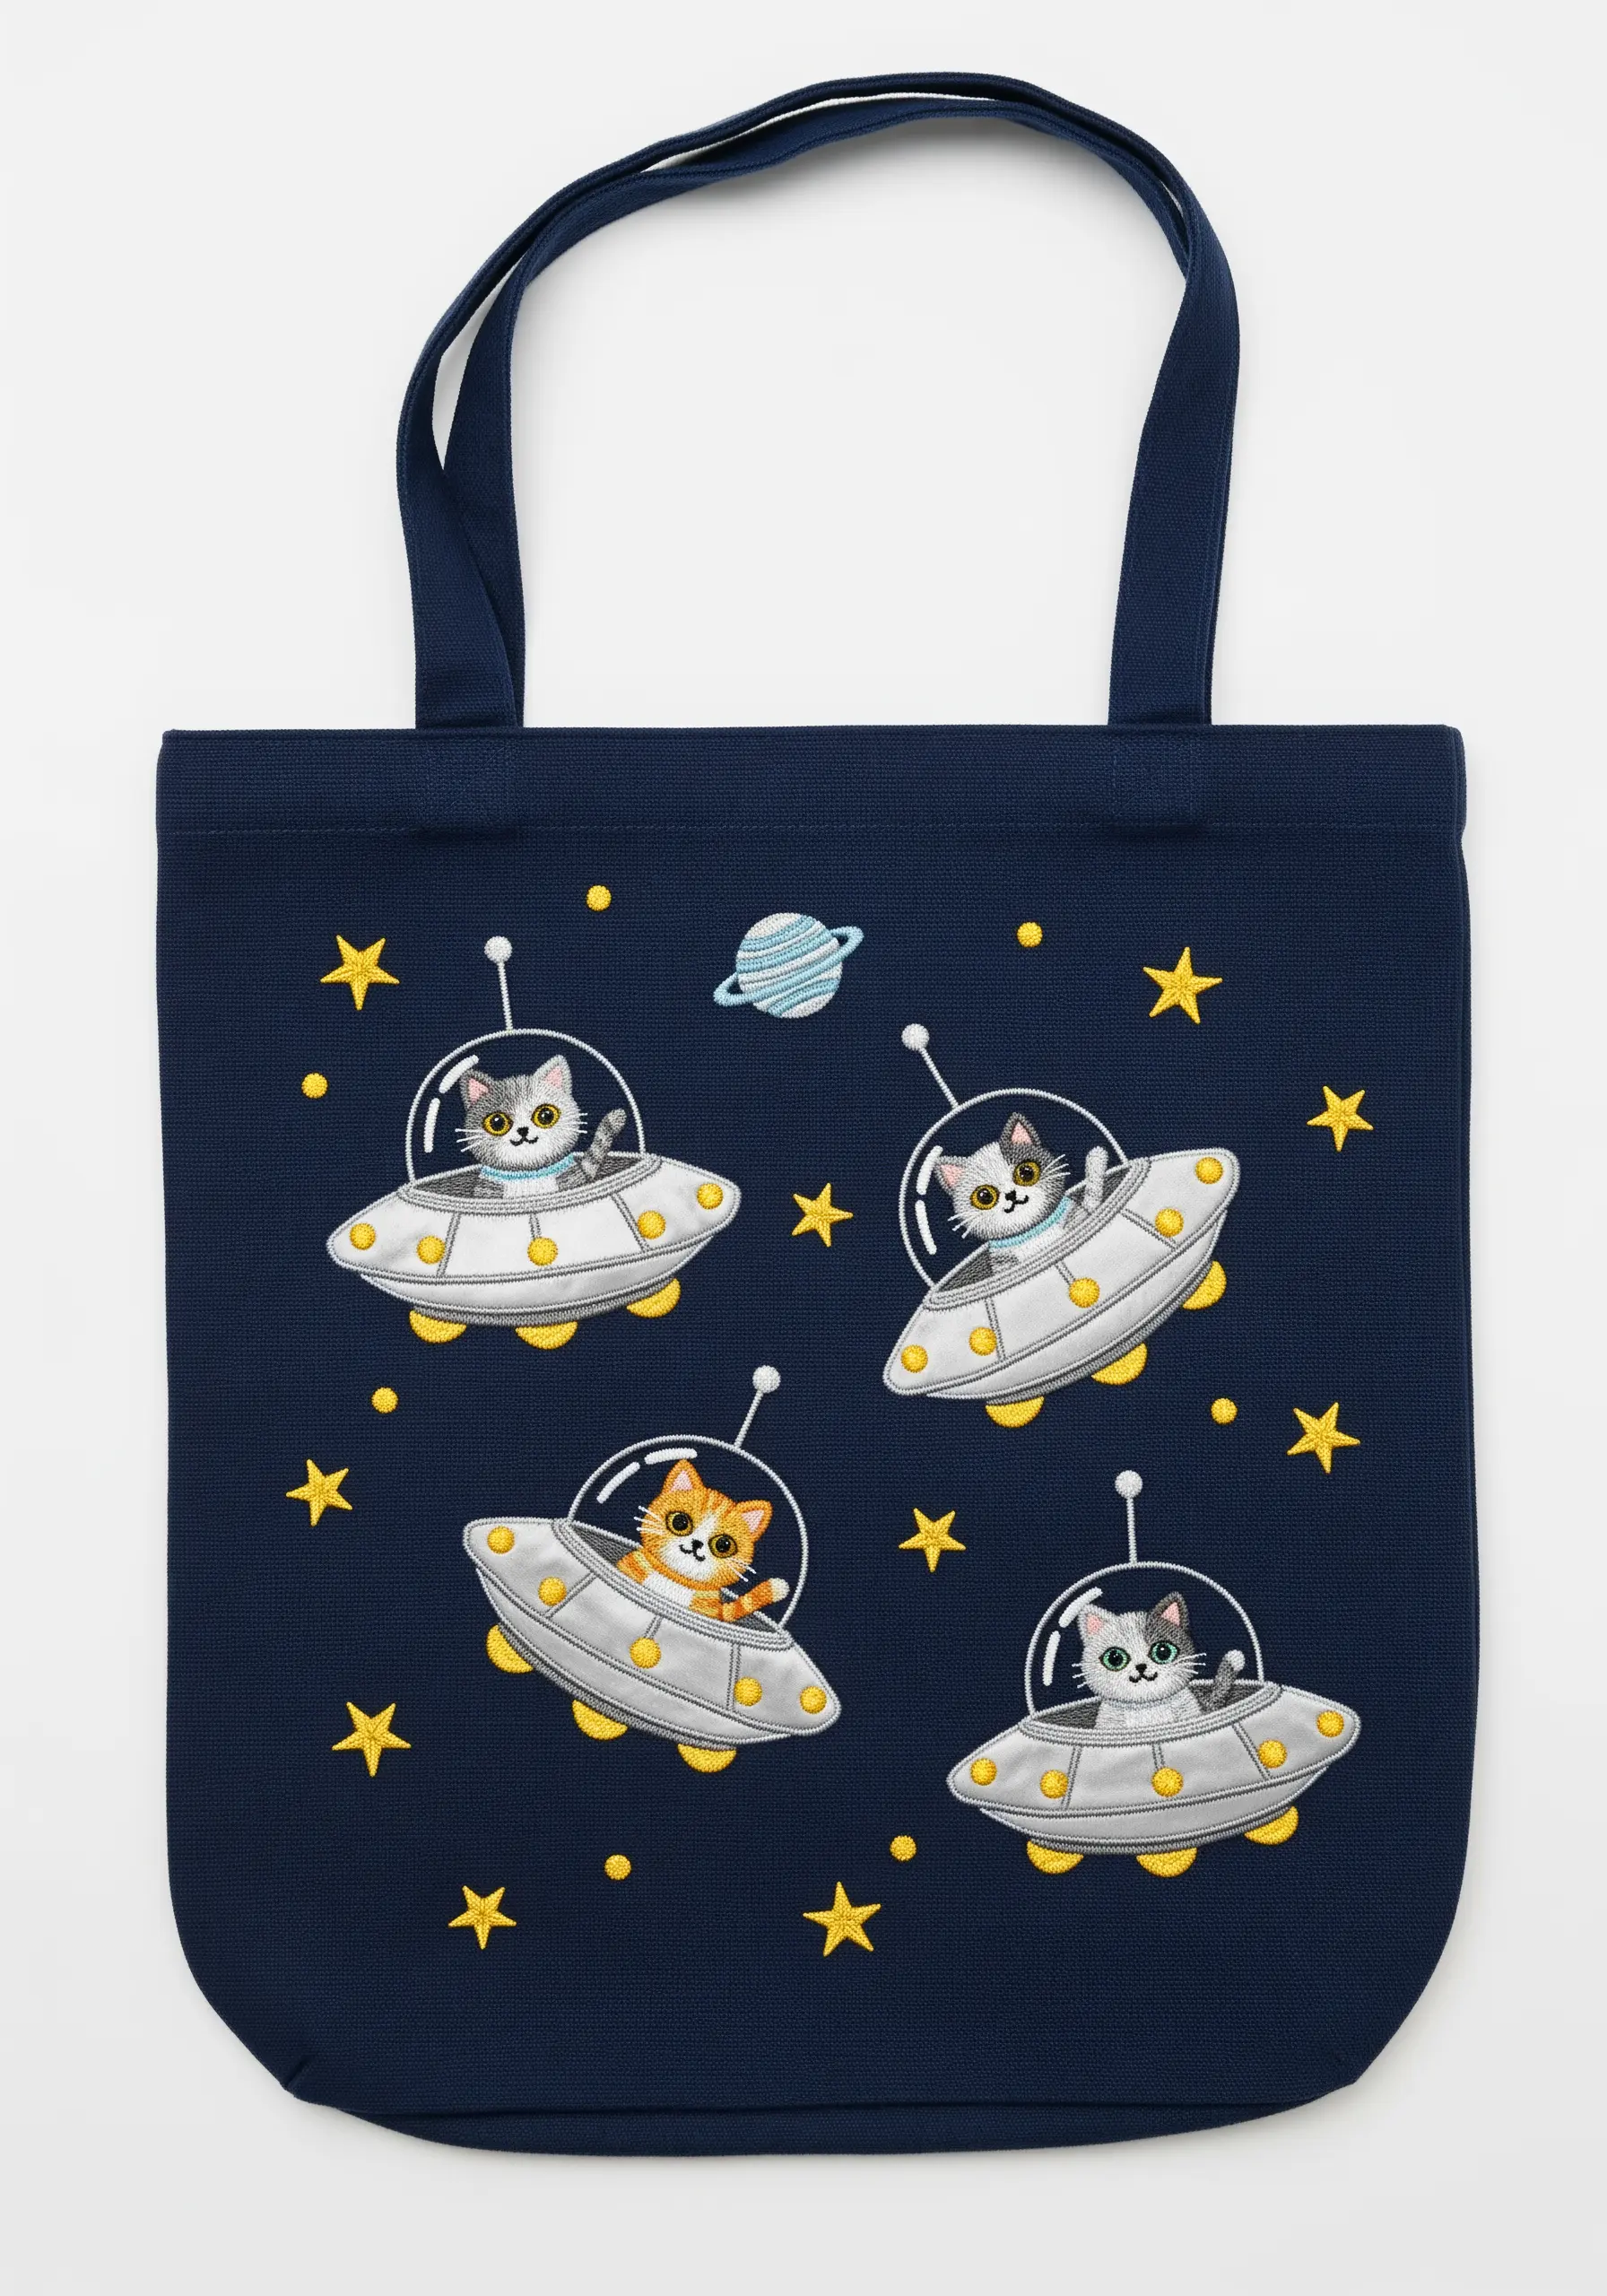
When stitching the metallic UFOs, consistency is key to a smooth, reflective surface.
Use a high-quality silver metallic thread and a lay-flat or satin stitch, ensuring each stitch lies perfectly parallel to the last.
A thread conditioner or beeswax can help tame unruly metallic floss.
For the stars, use a vibrant yellow and stitch them as simple crosses or tiny starbursts to create a cheerful, scattered backdrop that makes the silver pop.
20. Execute Flawless Color Blocking
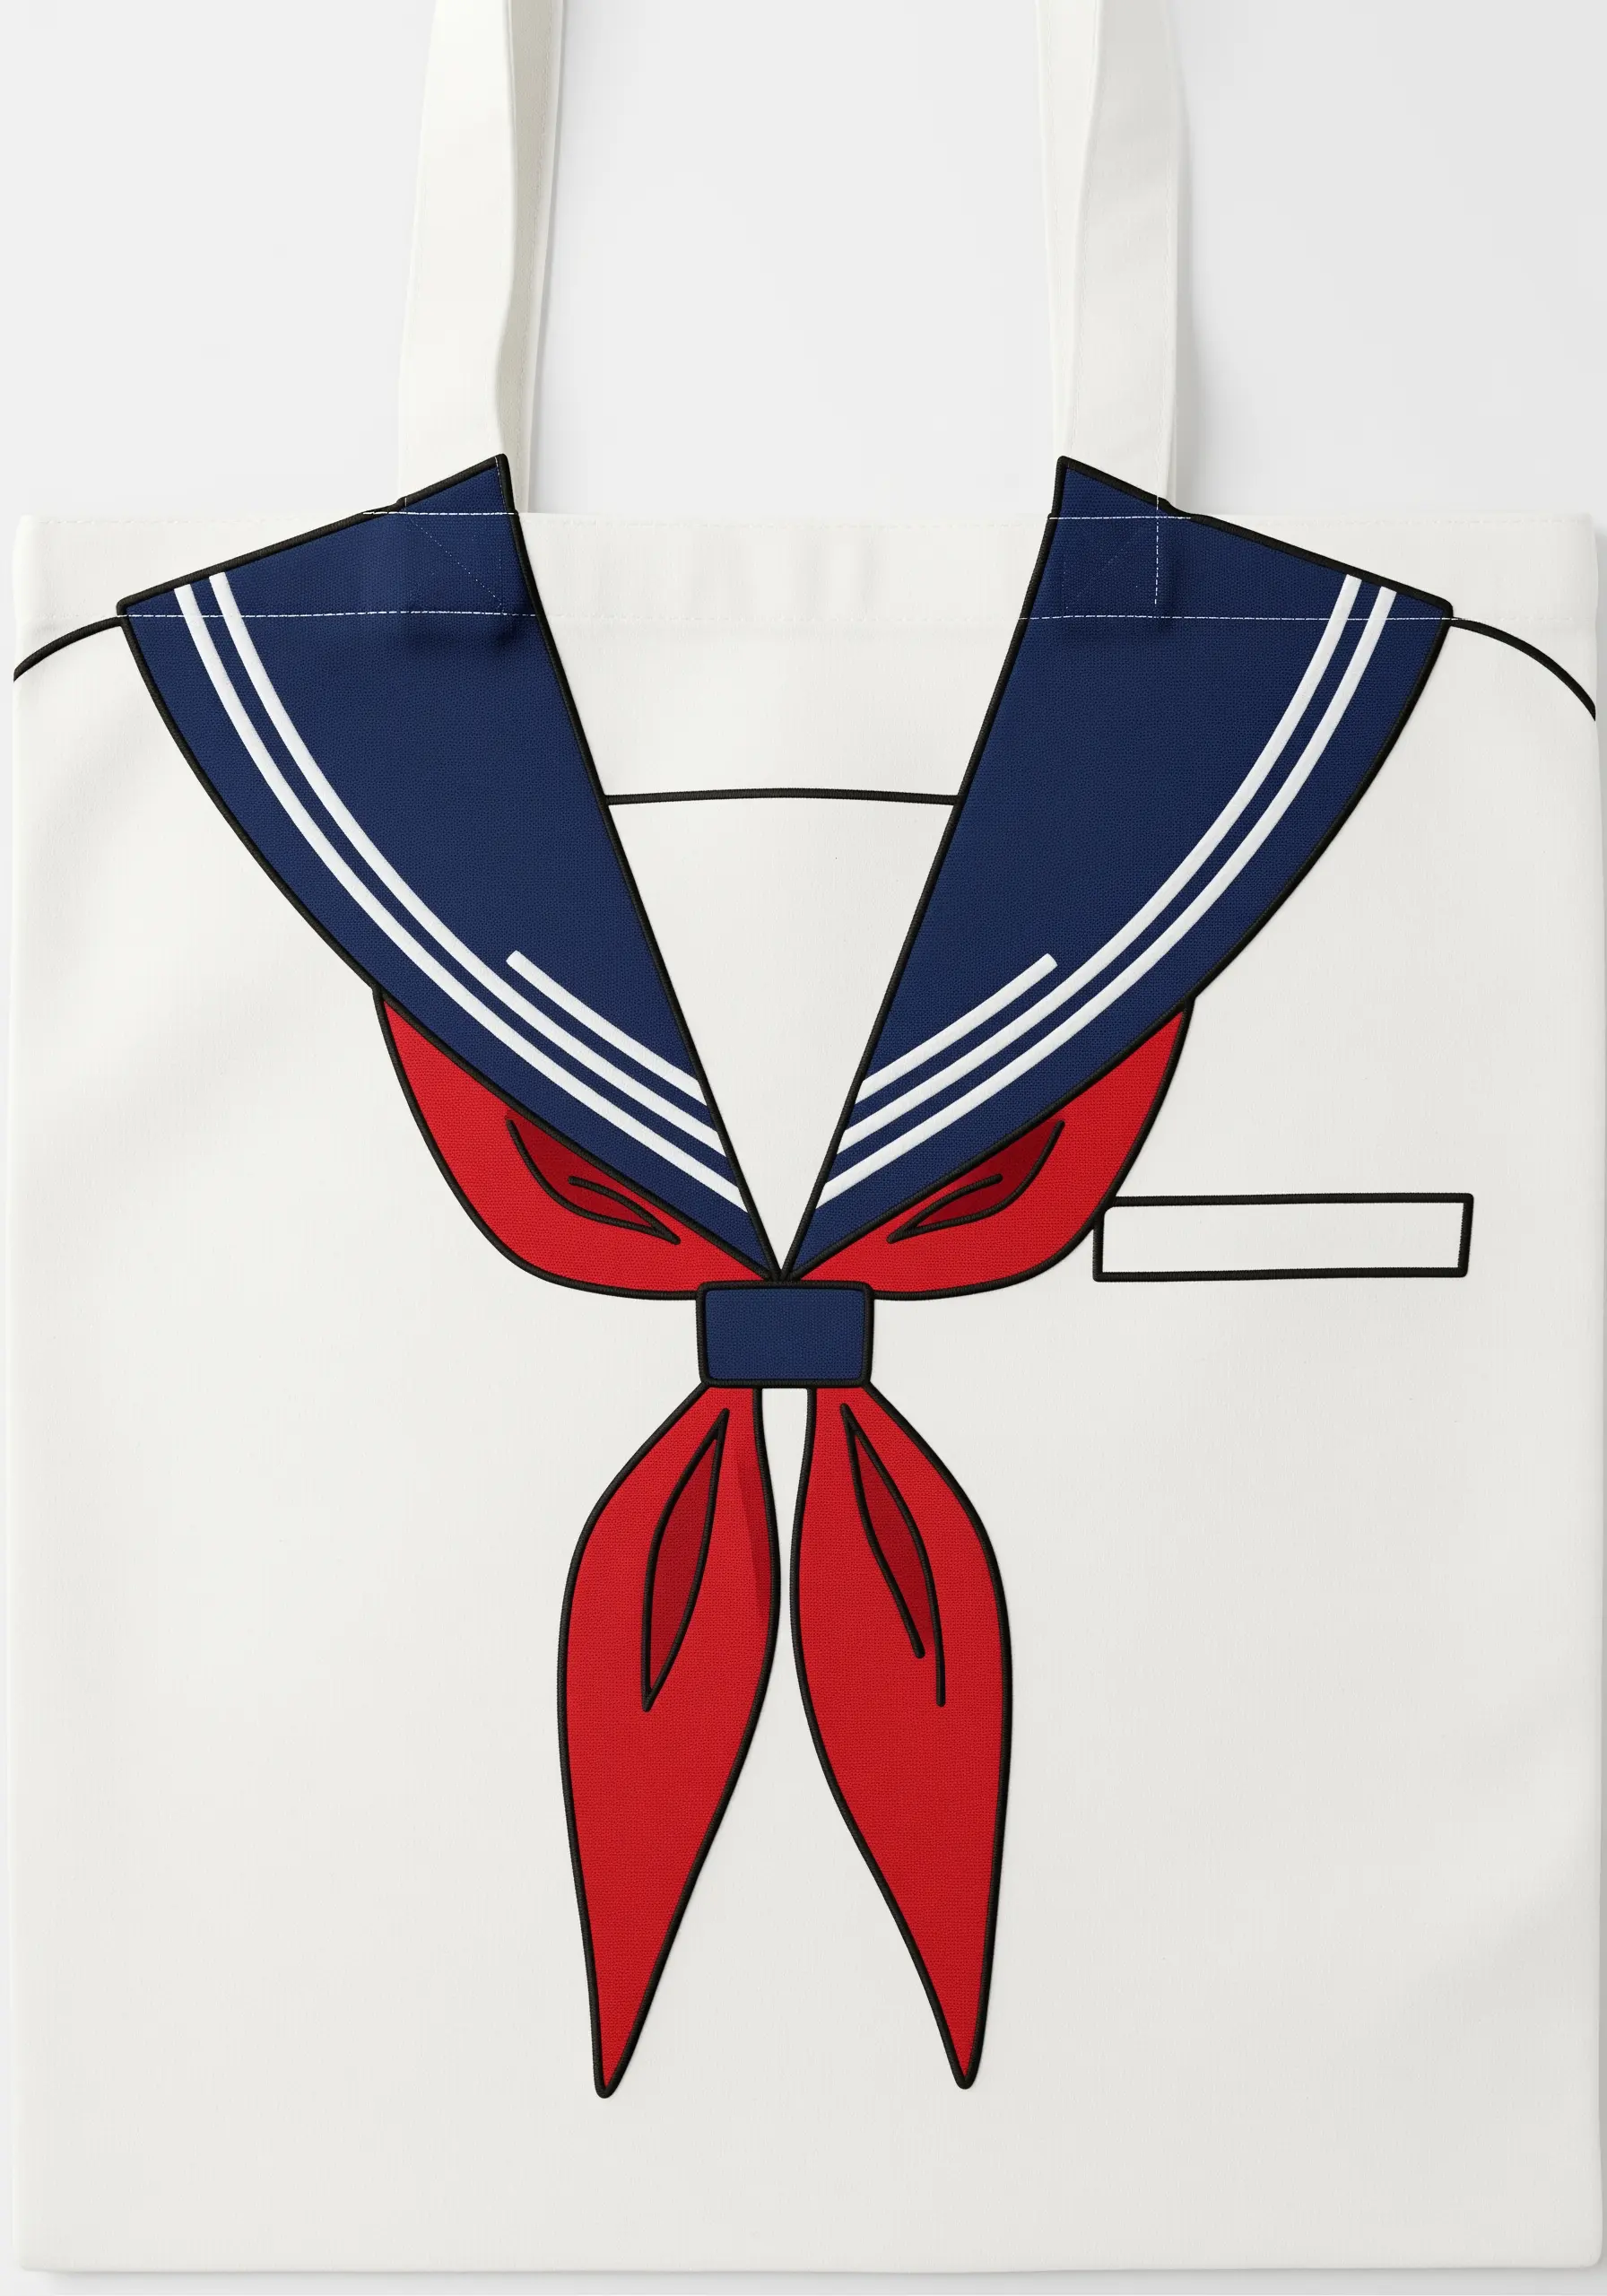
An iconic design like a sailor uniform demands perfectly executed color blocks.
The secret to sharp, clean edges is to first outline each color section with a split stitch.
Then, fill the area with a satin stitch, bringing your needle up just inside the outline and down just outside it.
This technique tucks the satin stitch ends under the outline, creating an incredibly crisp line and preventing gaps between colors.
Always use a stabilizer to prevent the large filled areas from puckering the tote bag fabric.
21. Integrate 3D Embellishments for a Dynamic Finish
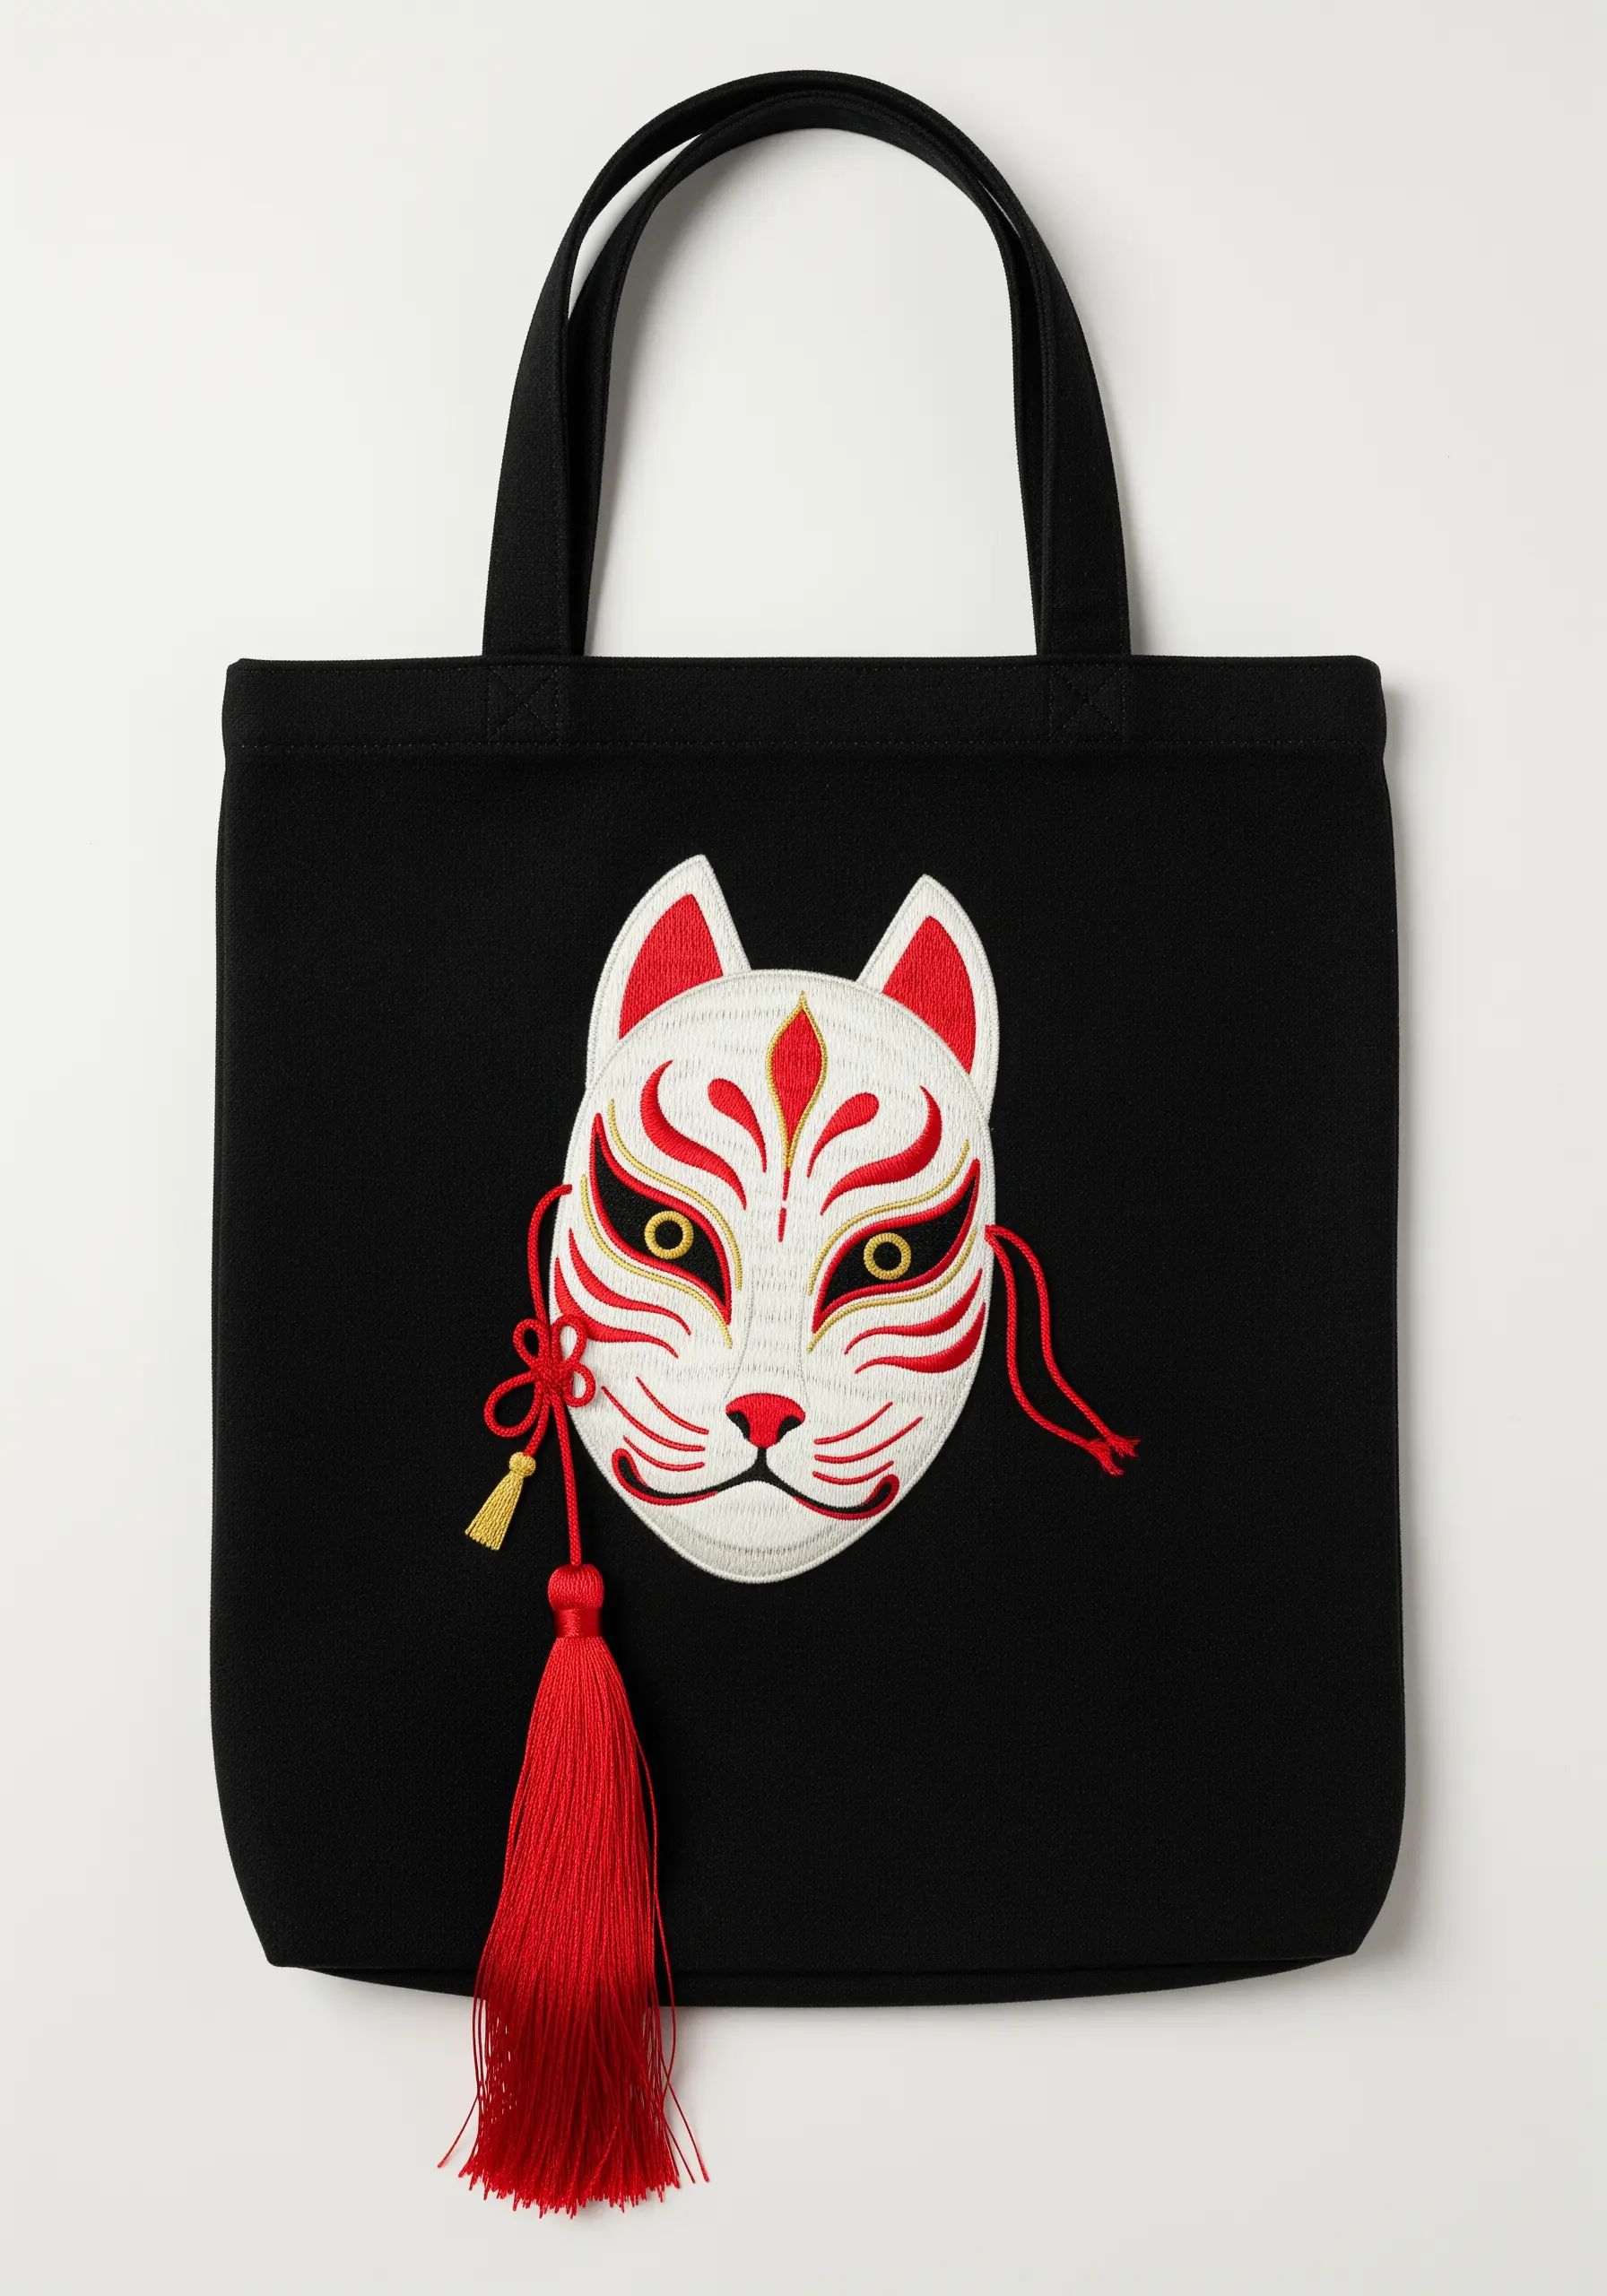
Bring this Kitsune mask to life by adding a real-world element.
After embroidering the mask with precise satin stitches and fine backstitch details, create or attach a miniature red tassel where it would logically hang from the mask’s cord.
Securely stitch the tassel to the tote bag so it can move freely.
This mixed-media approach breaks the two-dimensional plane and adds an engaging, tactile element that makes the entire piece more captivating.
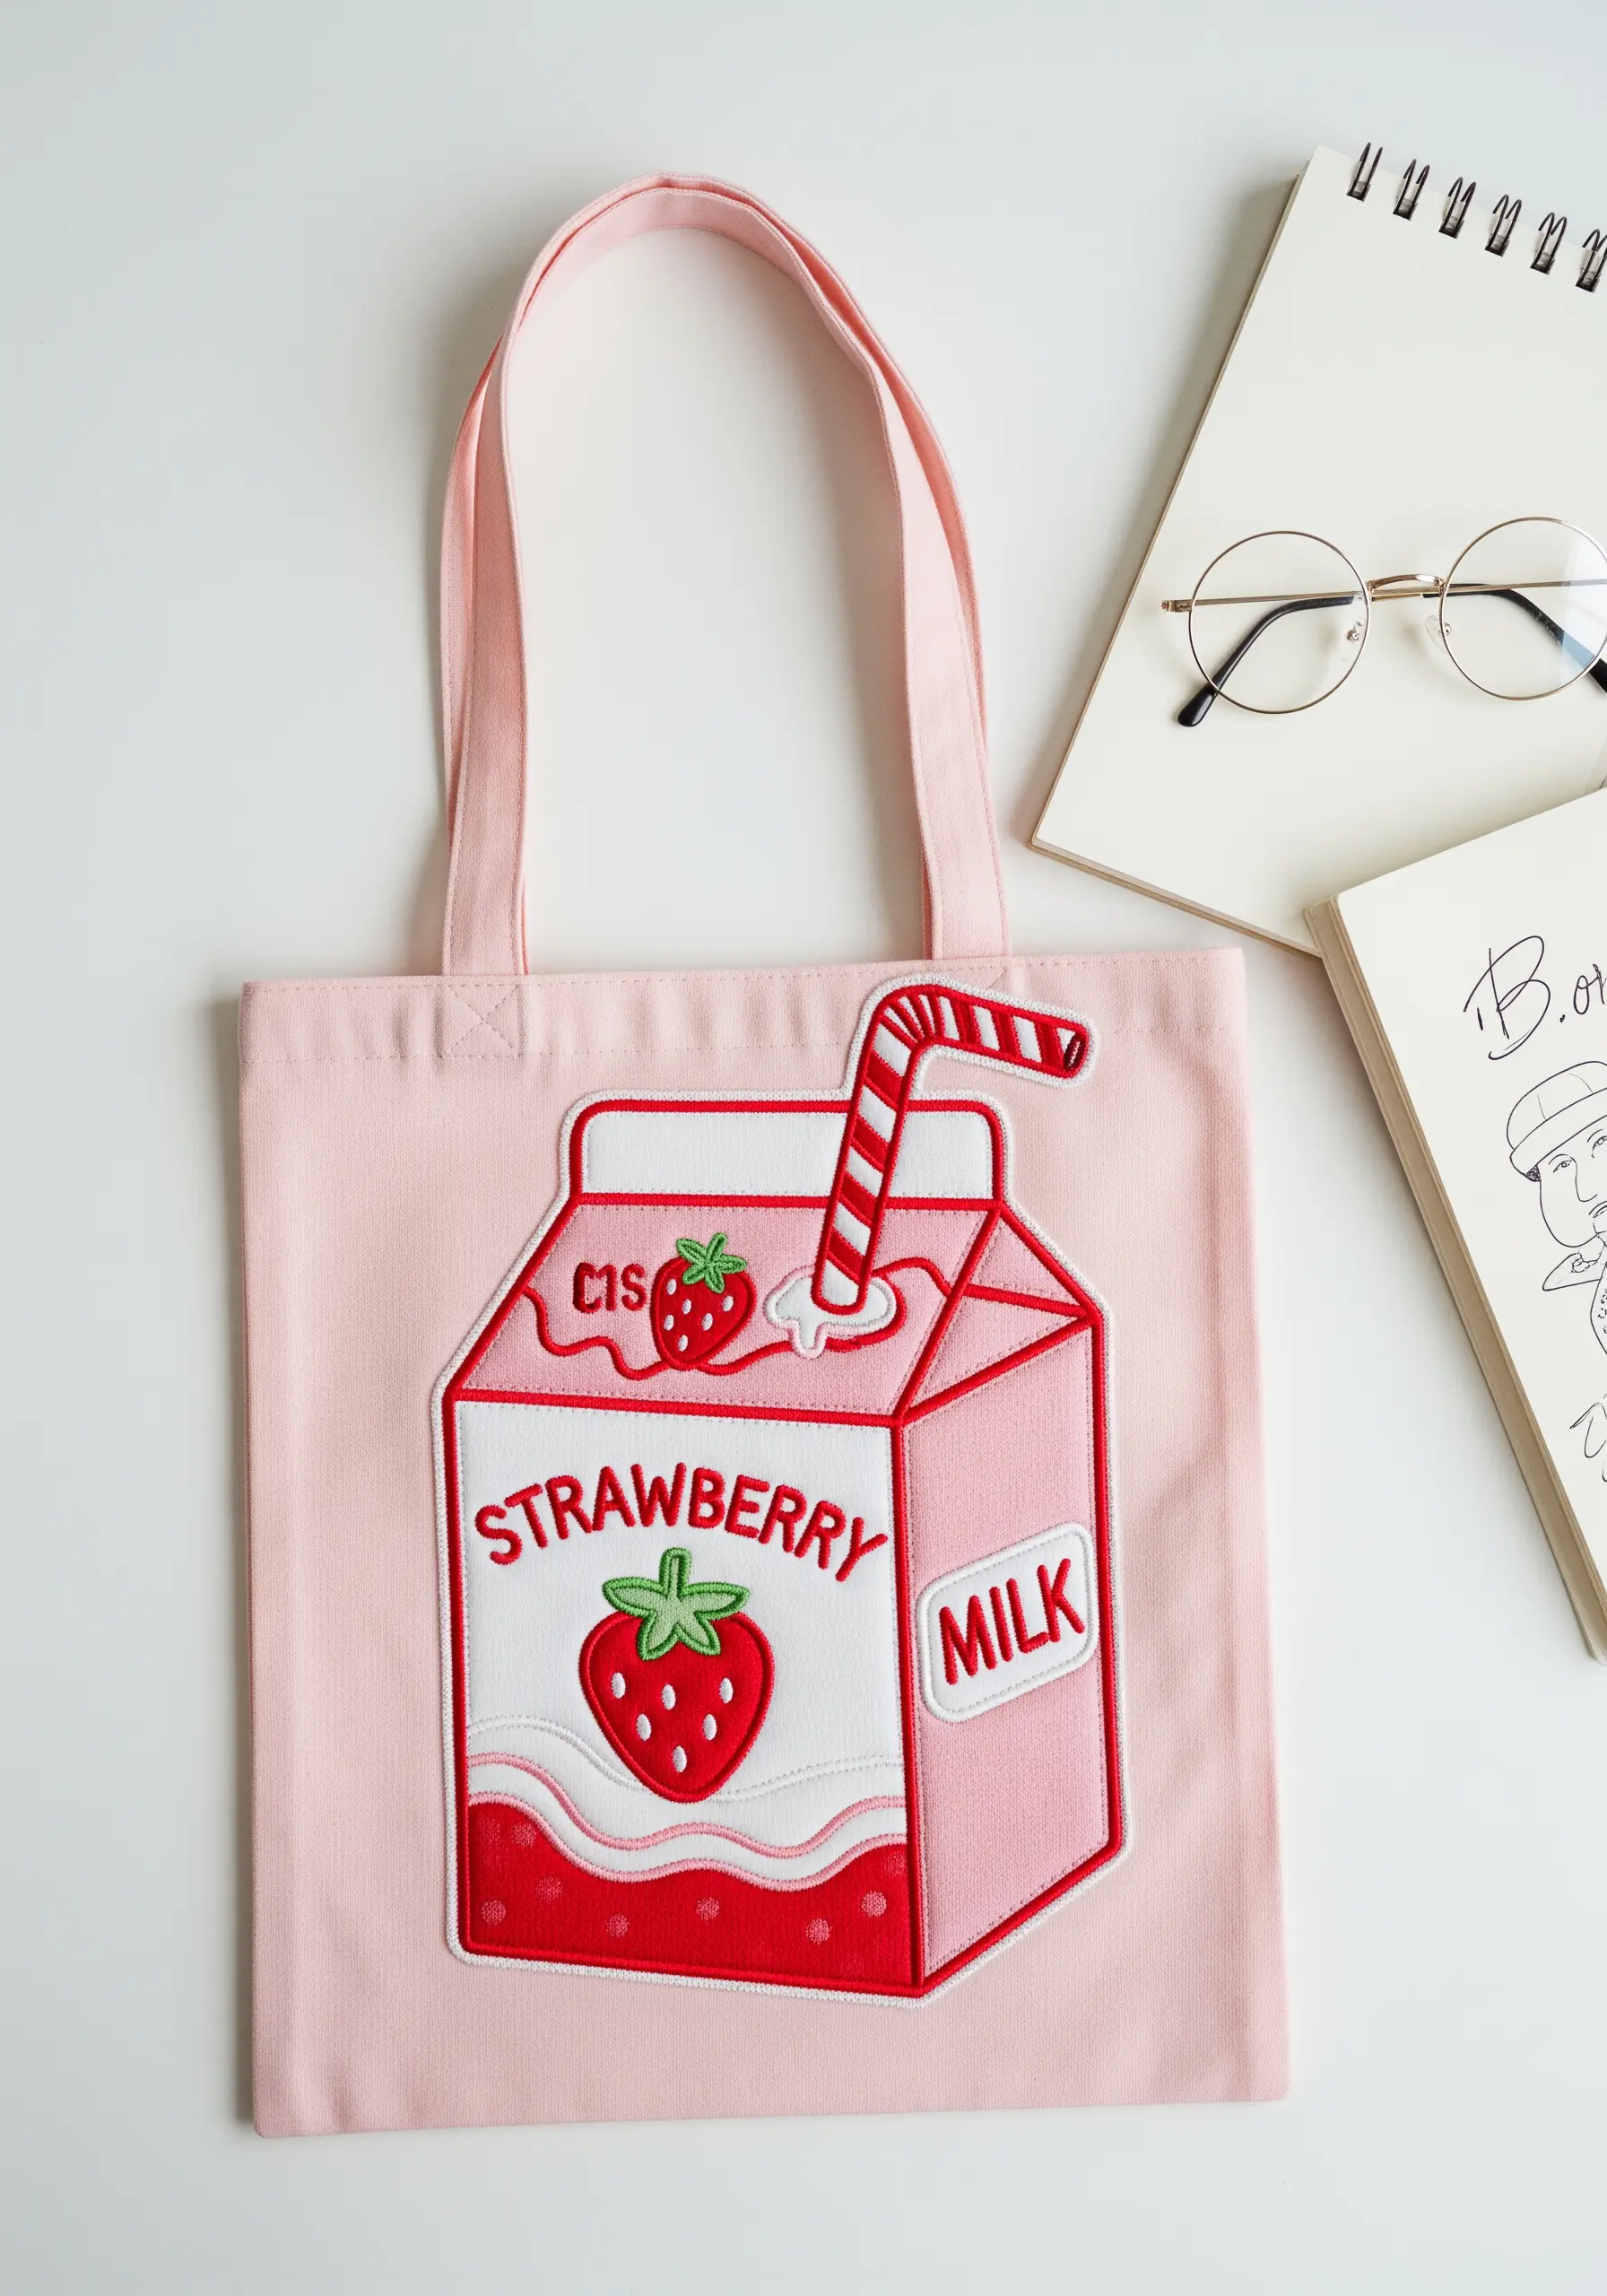
22. Use Padding for a Plump 3D Effect
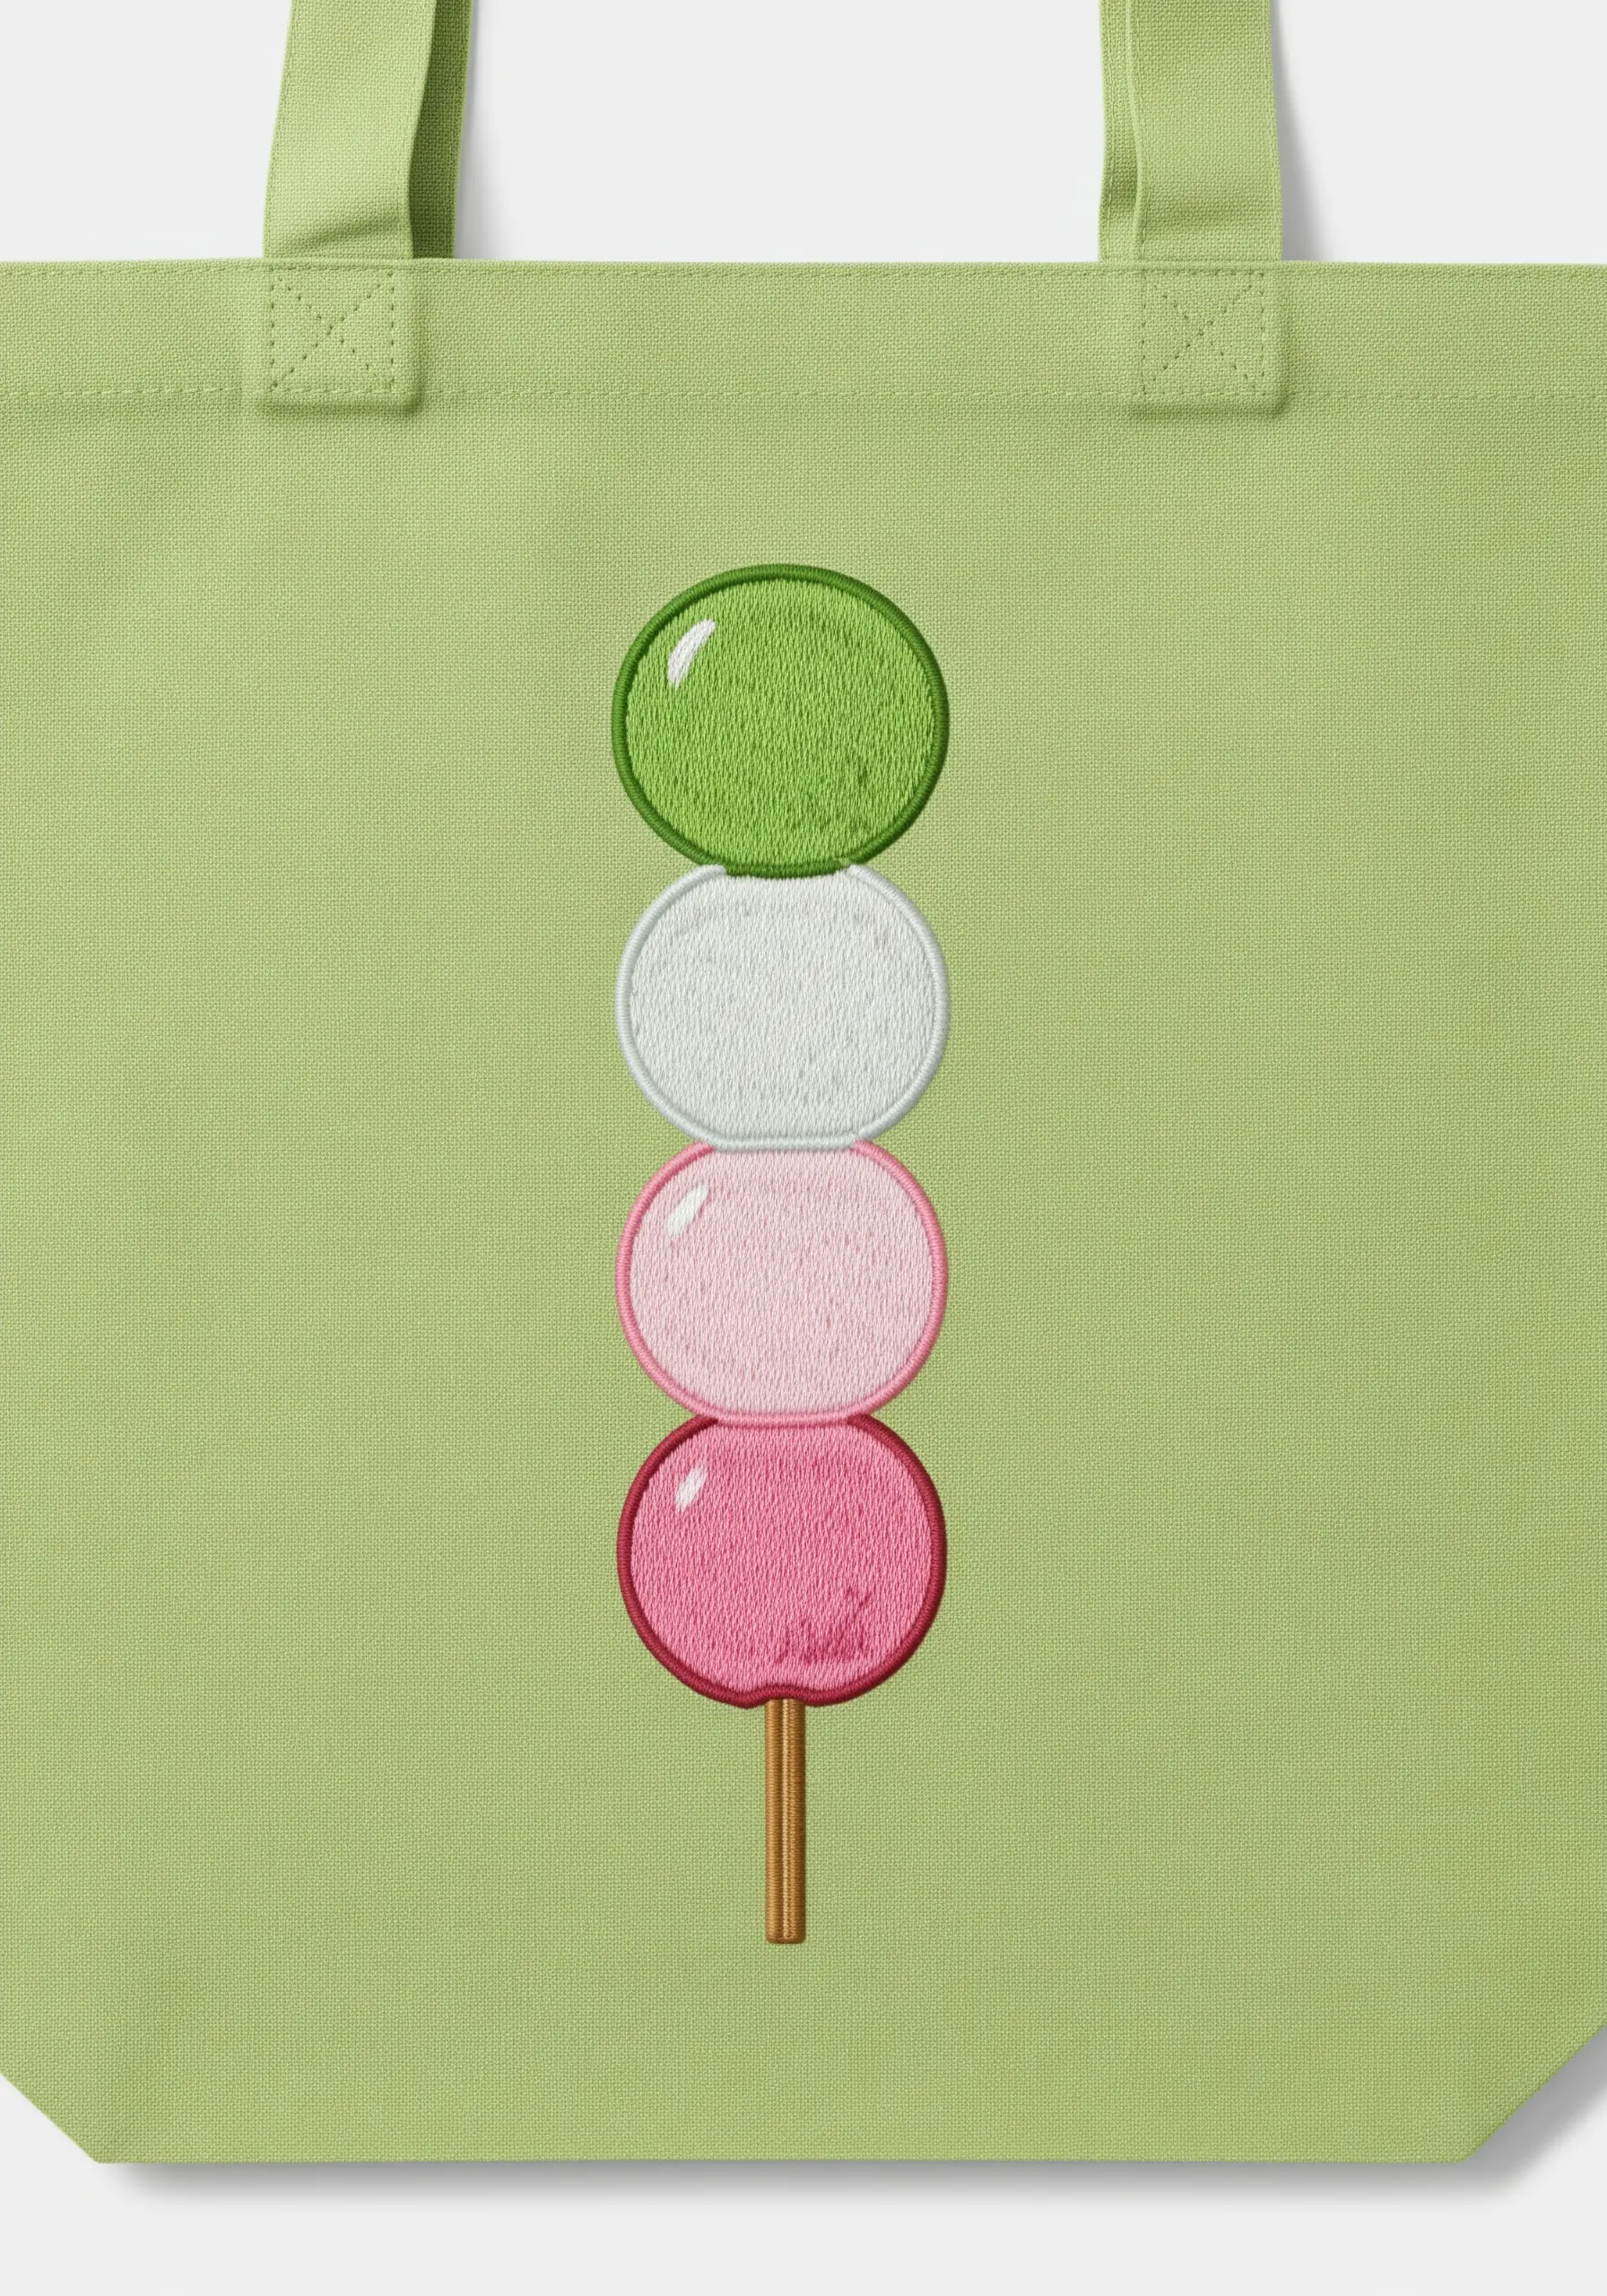
To make the dango look soft and plump, use a padded satin stitch.
Before you begin your final satin stitch, create a foundation of small, straight stitches within the shape of each ball.
Lay these foundation stitches perpendicular to the direction you plan to lay your final satin stitches.
Stitching over this padded base will raise the surface, giving the dango a rounded, three-dimensional quality that makes them look good enough to eat.
23. Weave a Cosmic Gaze with Blended Threads
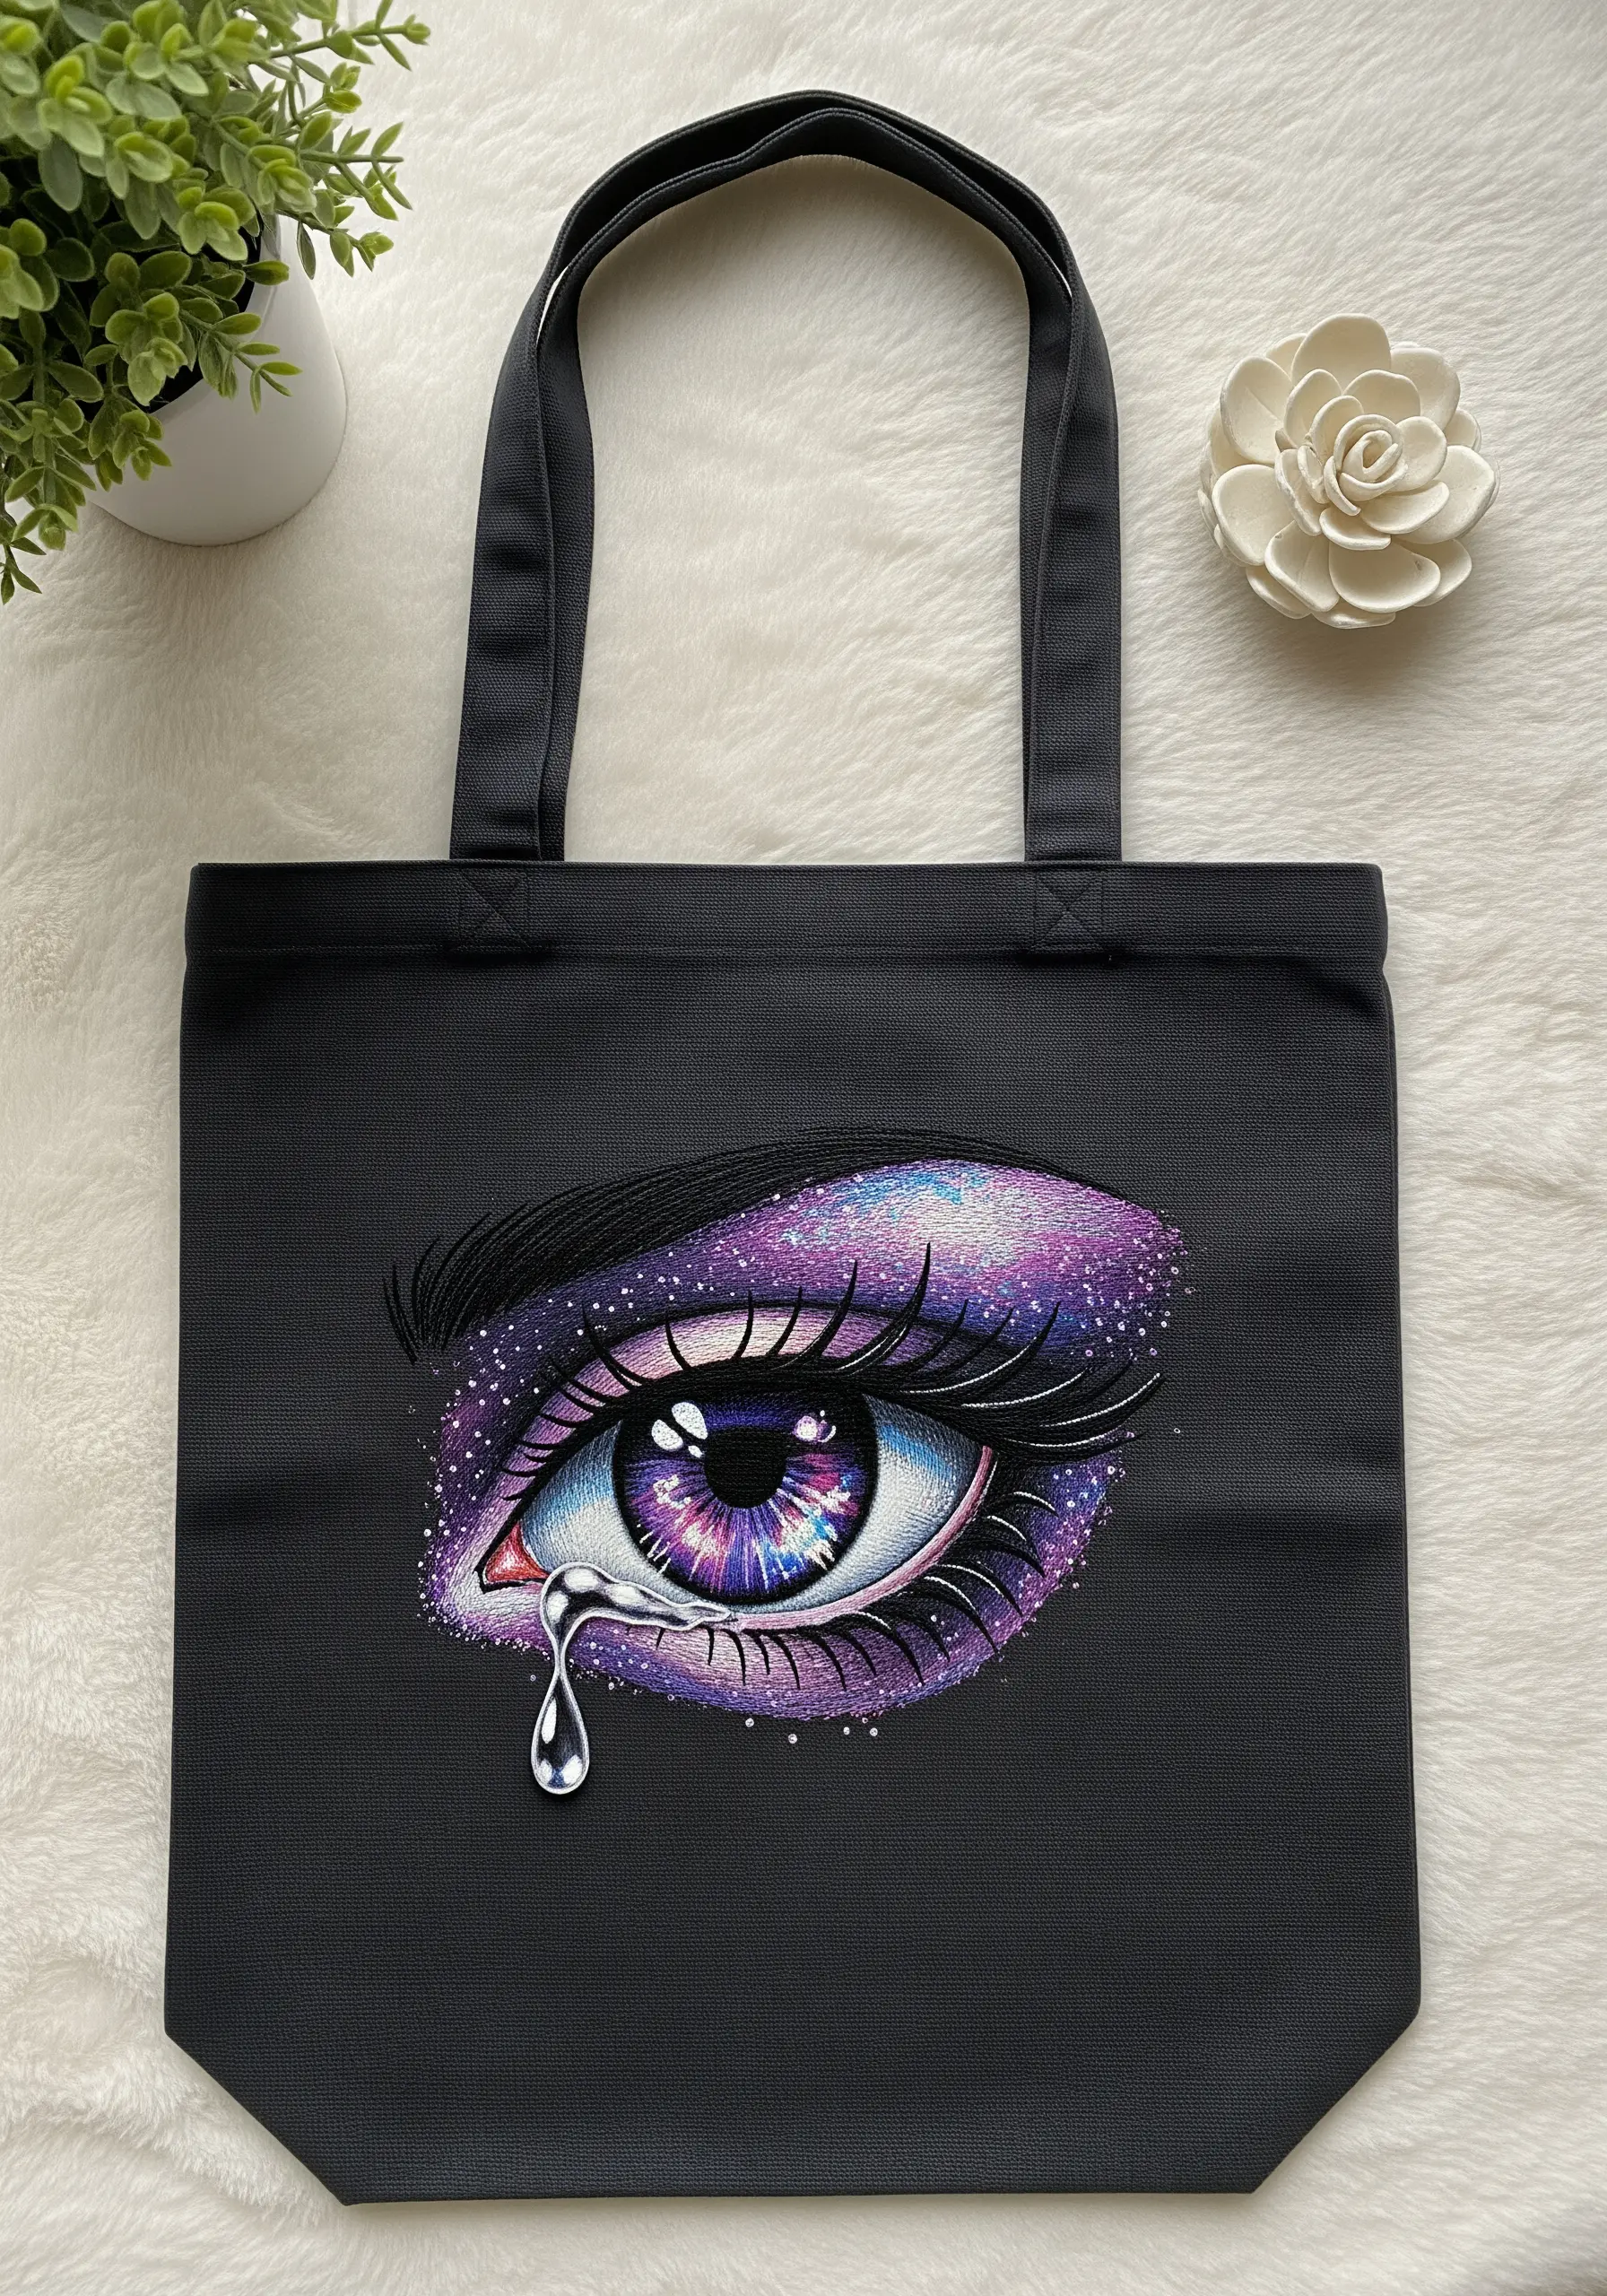
To create the swirling nebula effect in the eye, thread painting is essential.
Use single strands of floss in multiple shades of purple, blue, pink, and black. Work in small, angled long-and-short stitches, allowing the colors to blend organically into one another.
To add the starry sparkle, randomly scatter single stitches of a high-sheen silver or iridescent metallic thread throughout the iris.
A few strategically placed white French knots will serve as larger, brighter stars, completing the cosmic illusion.
24. Define Cartoons with a Bold Outline
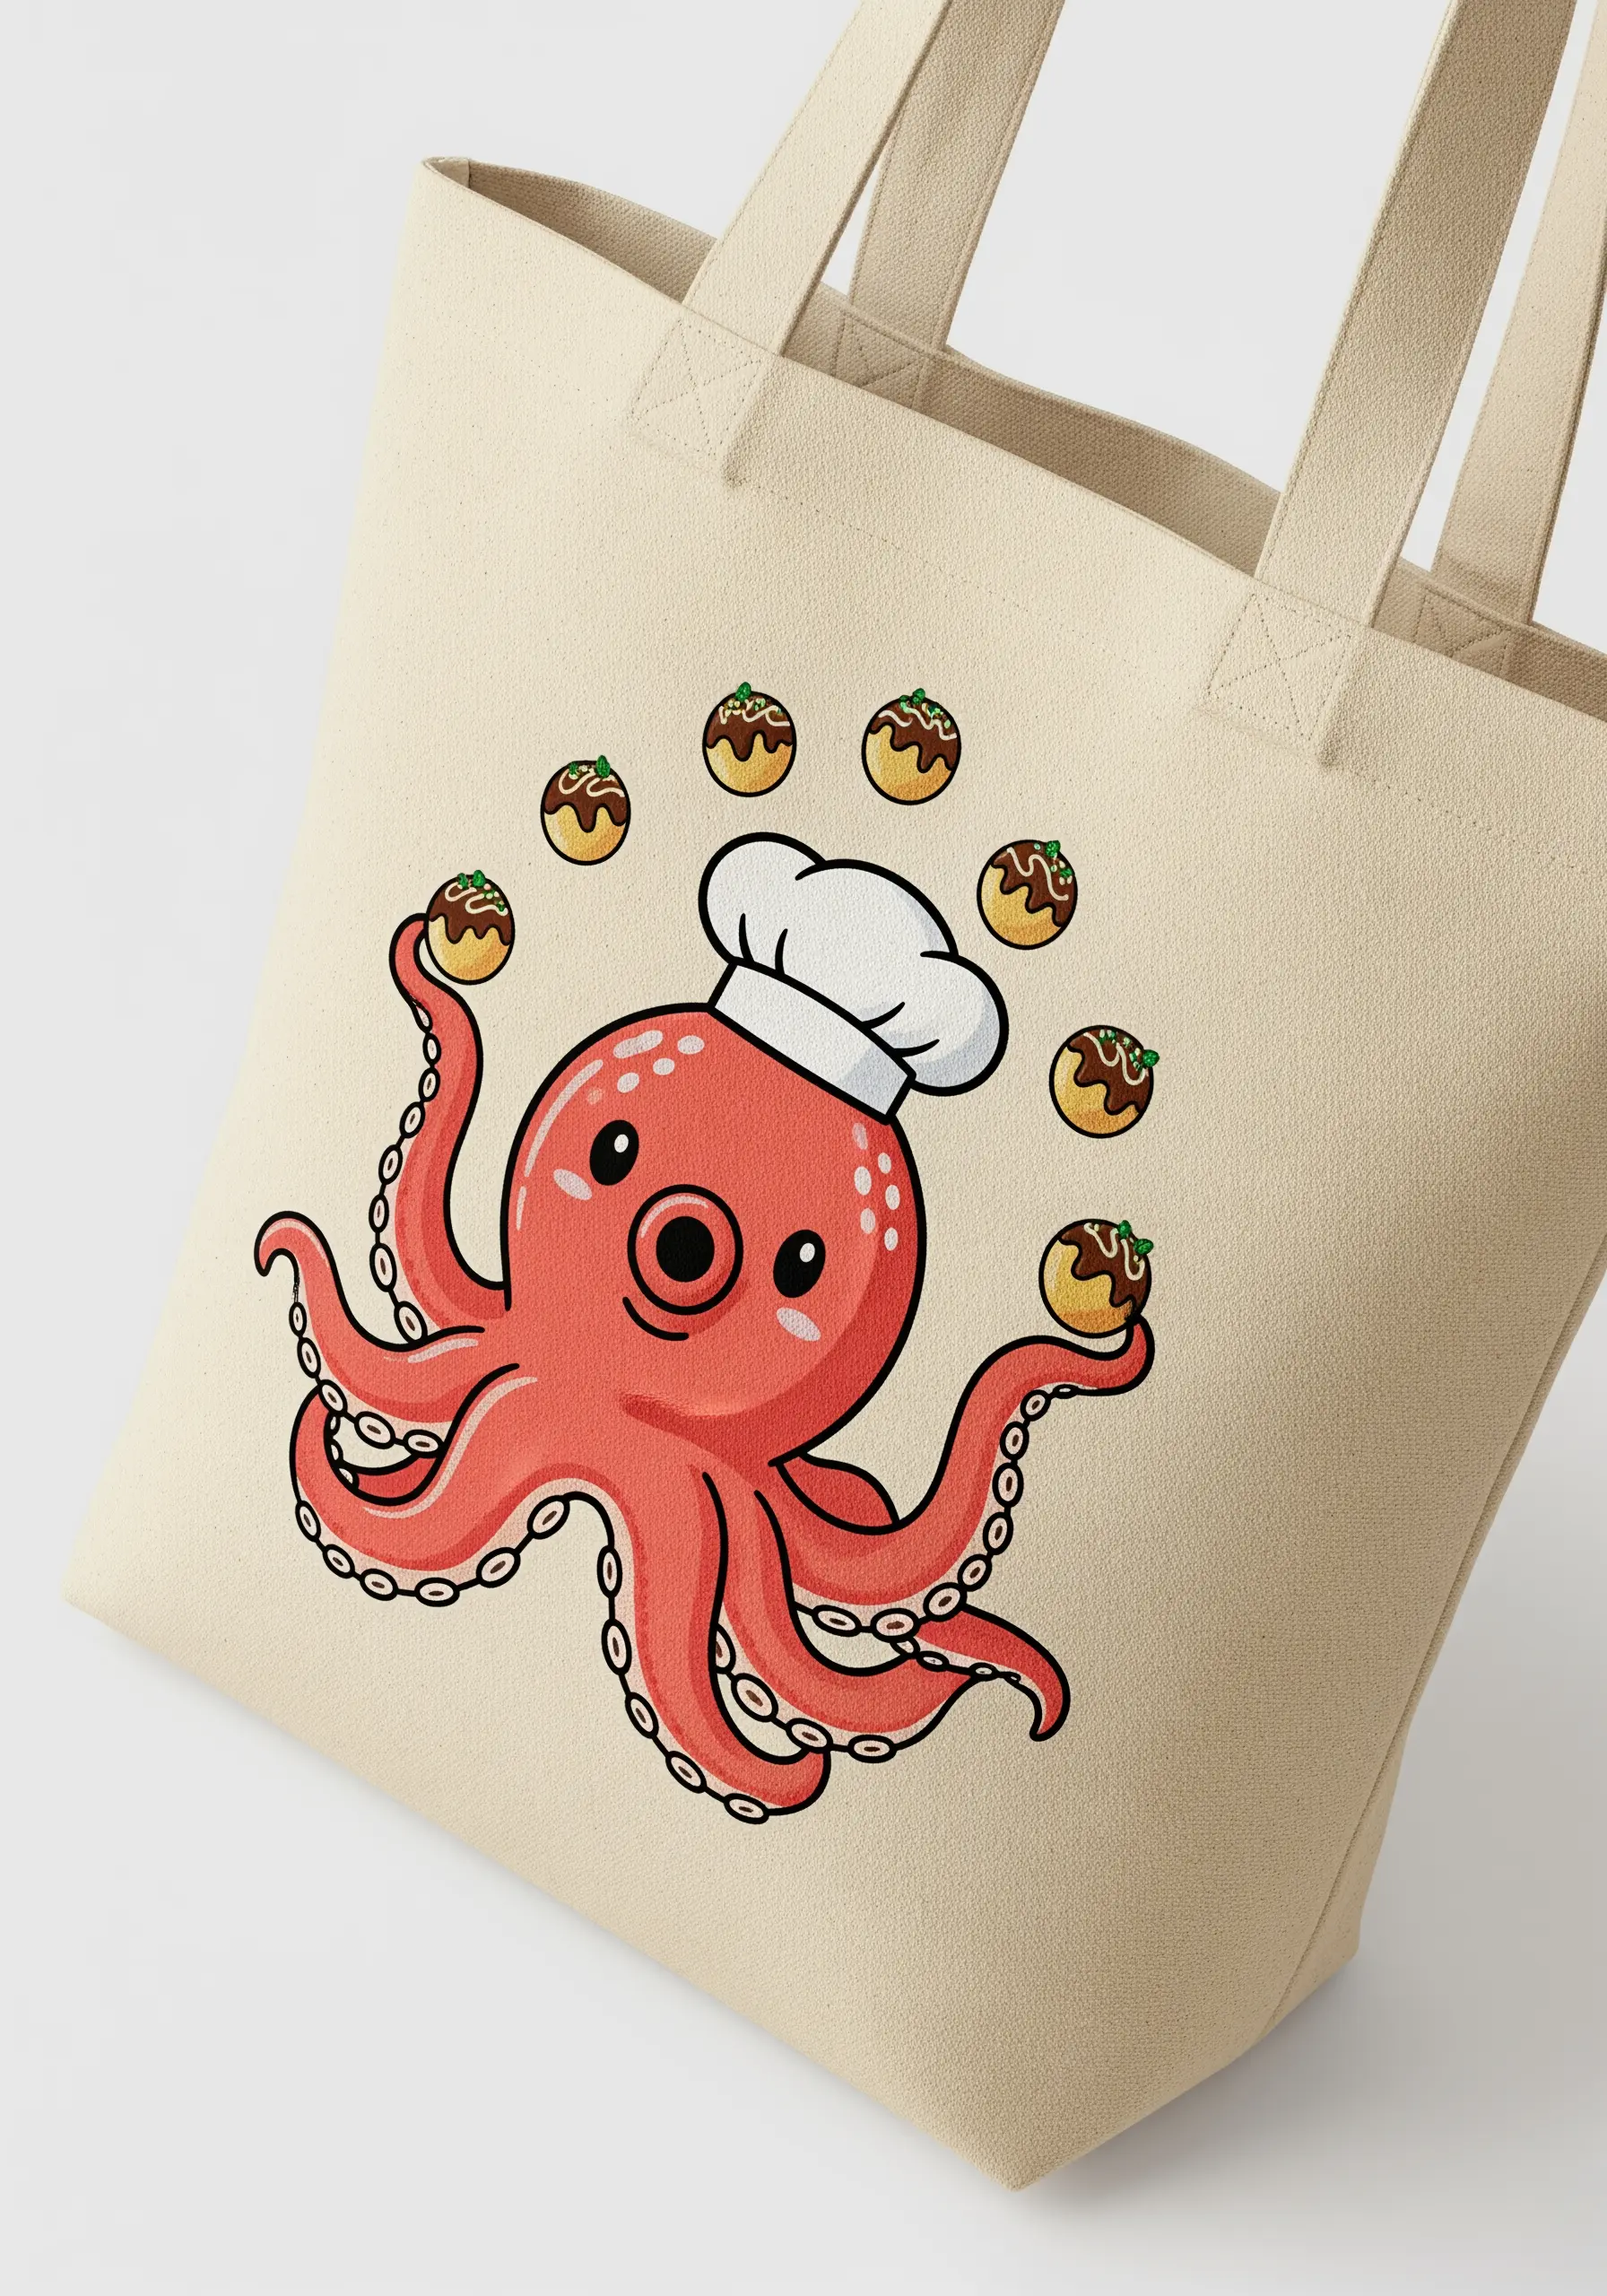
For a clean, cartoonish style like this takoyaki octopus, a strong outline is your most important tool.
Use a whipped backstitch with three strands of black floss to create a smooth, raised line that neatly contains all the colors.
This stitch eliminates the broken look of a standard backstitch and provides a professional, ink-like finish.
Fill the interior sections with a simple satin stitch, letting the bold outline do the heavy lifting of defining the character’s shape.
25. Stitch Crisp, Legible Typography
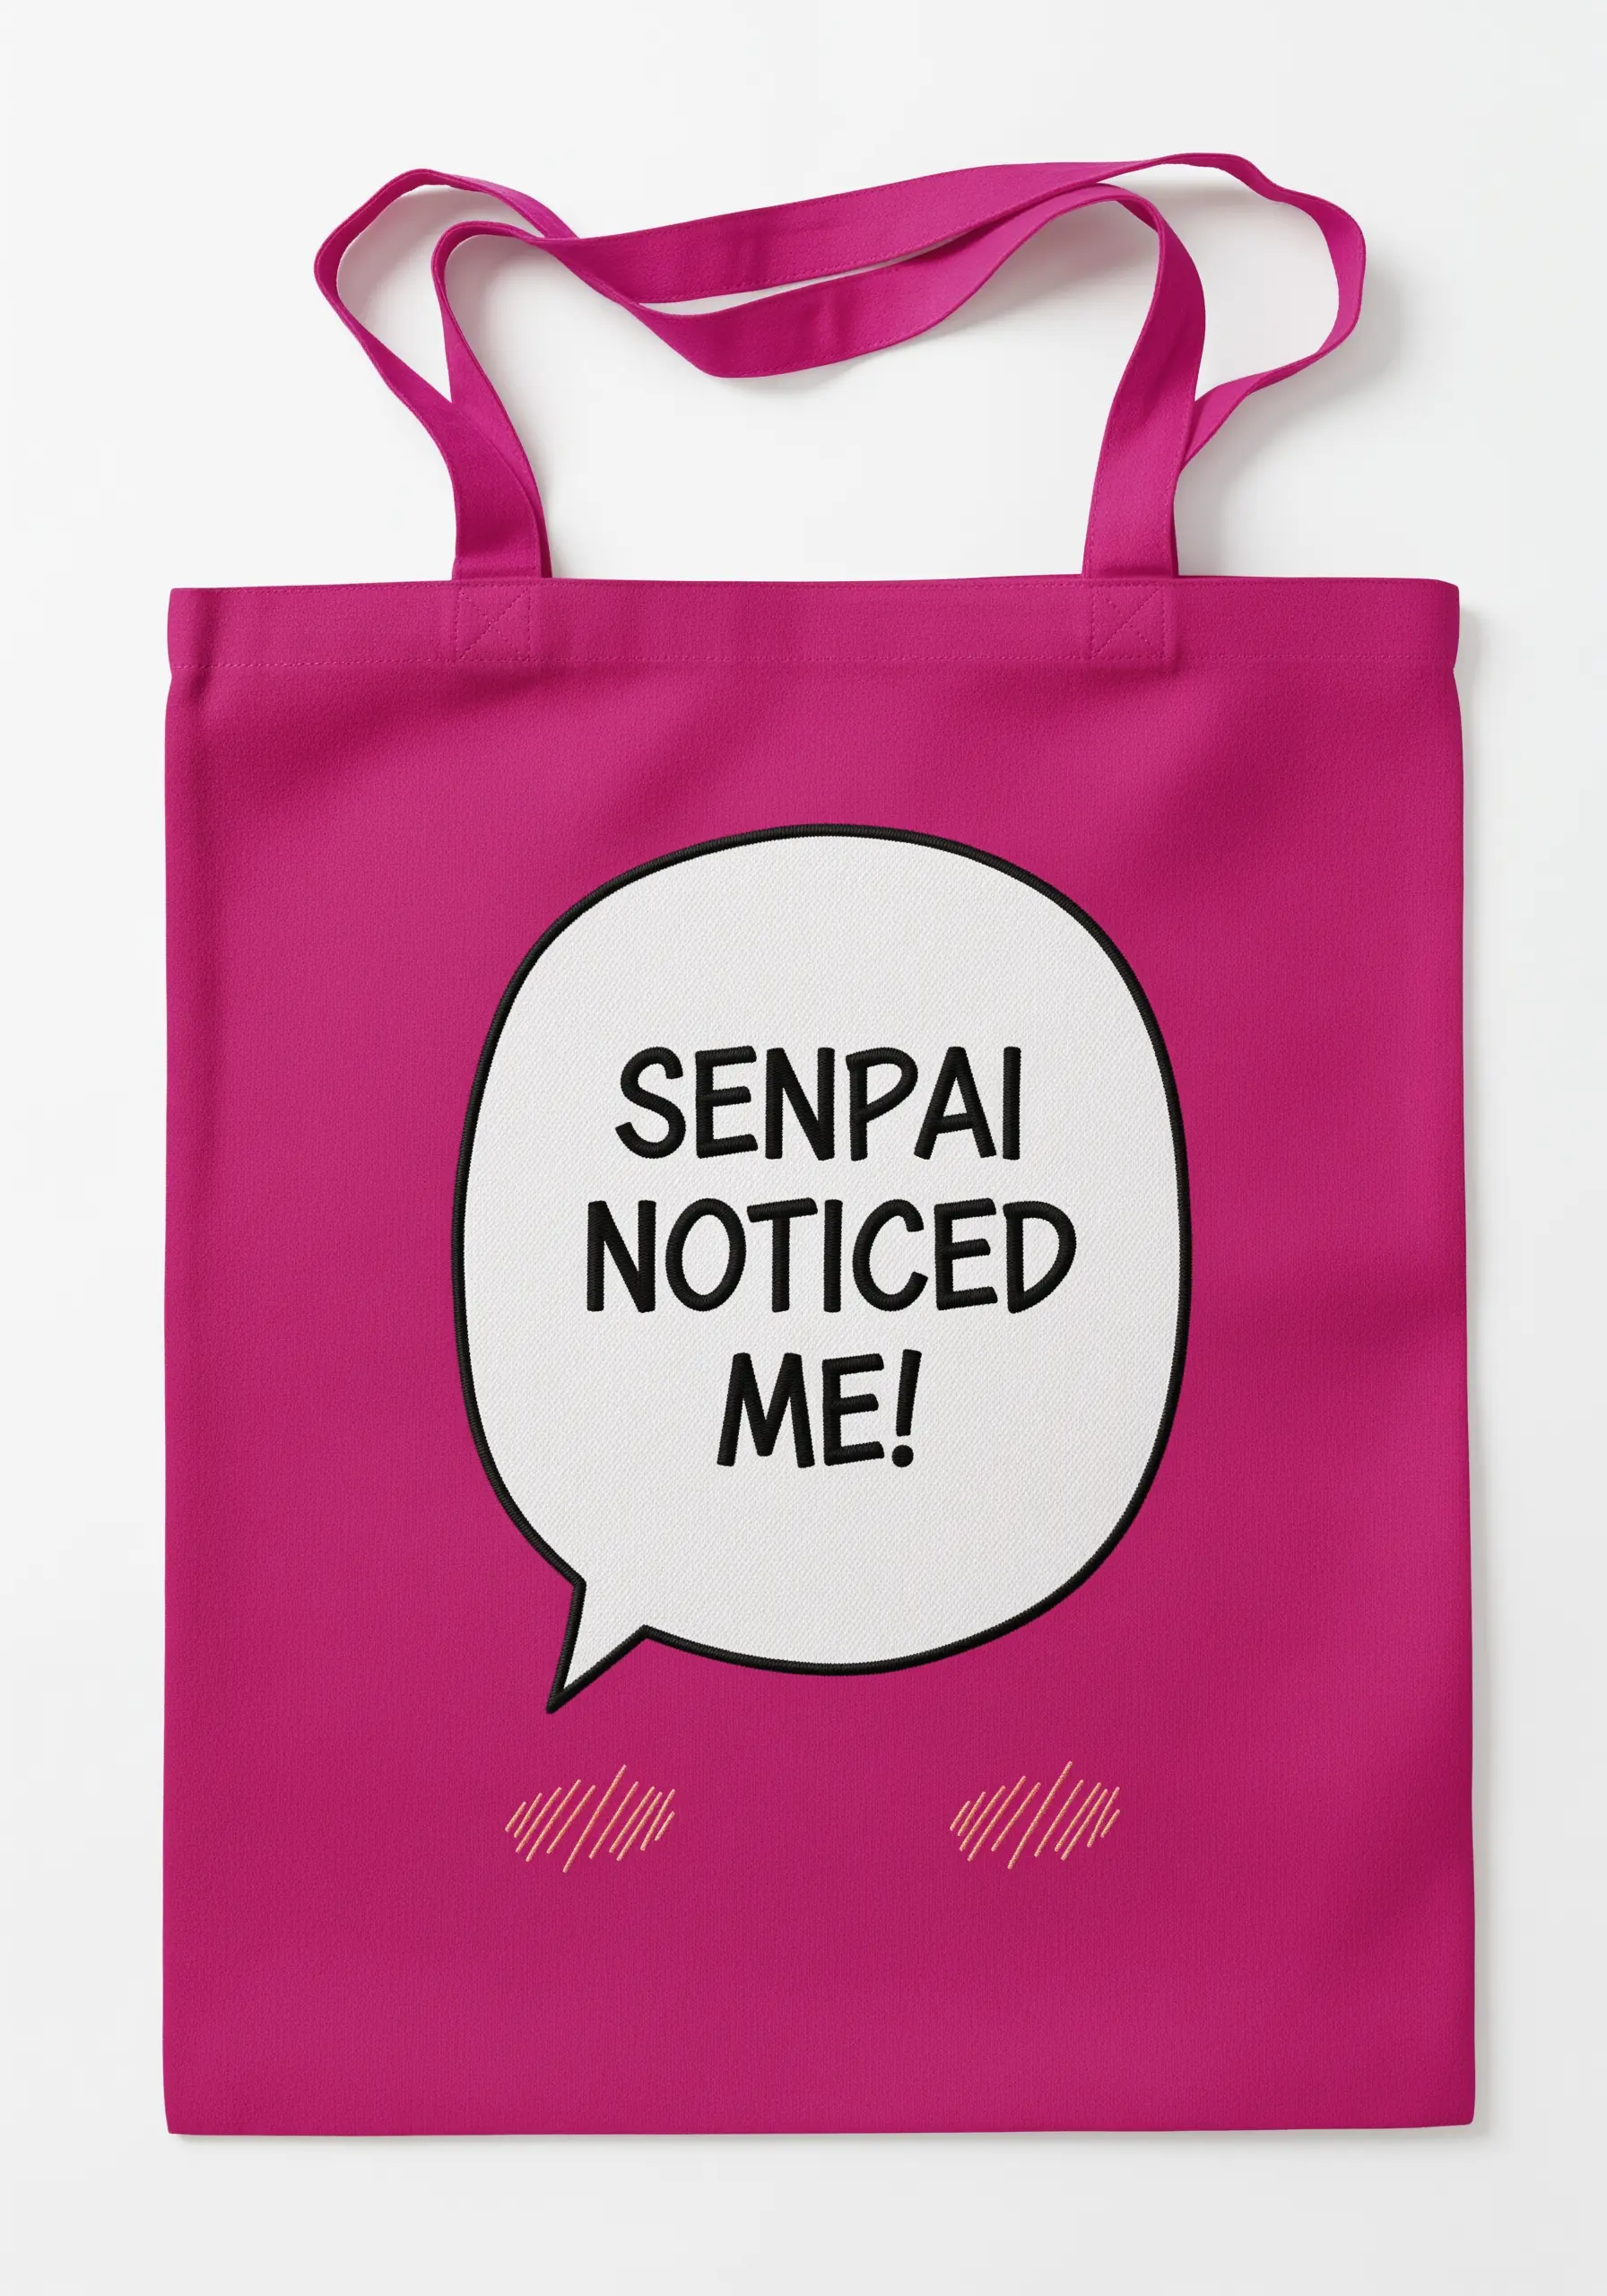
When embroidering text, clarity is paramount.
For the speech bubble’s outline, use a chain stitch to give it a substantial, graphic weight.
For the lettering itself, a small, neat backstitch or stem stitch using two strands of floss will provide the cleanest result.
To ensure perfect letter shapes, trace your text onto a water-soluble stabilizer. Stitch directly over the lines, and then wash the stabilizer away, leaving only your flawless, easy-to-read words.
26. Imply Texture with Subtle Shading
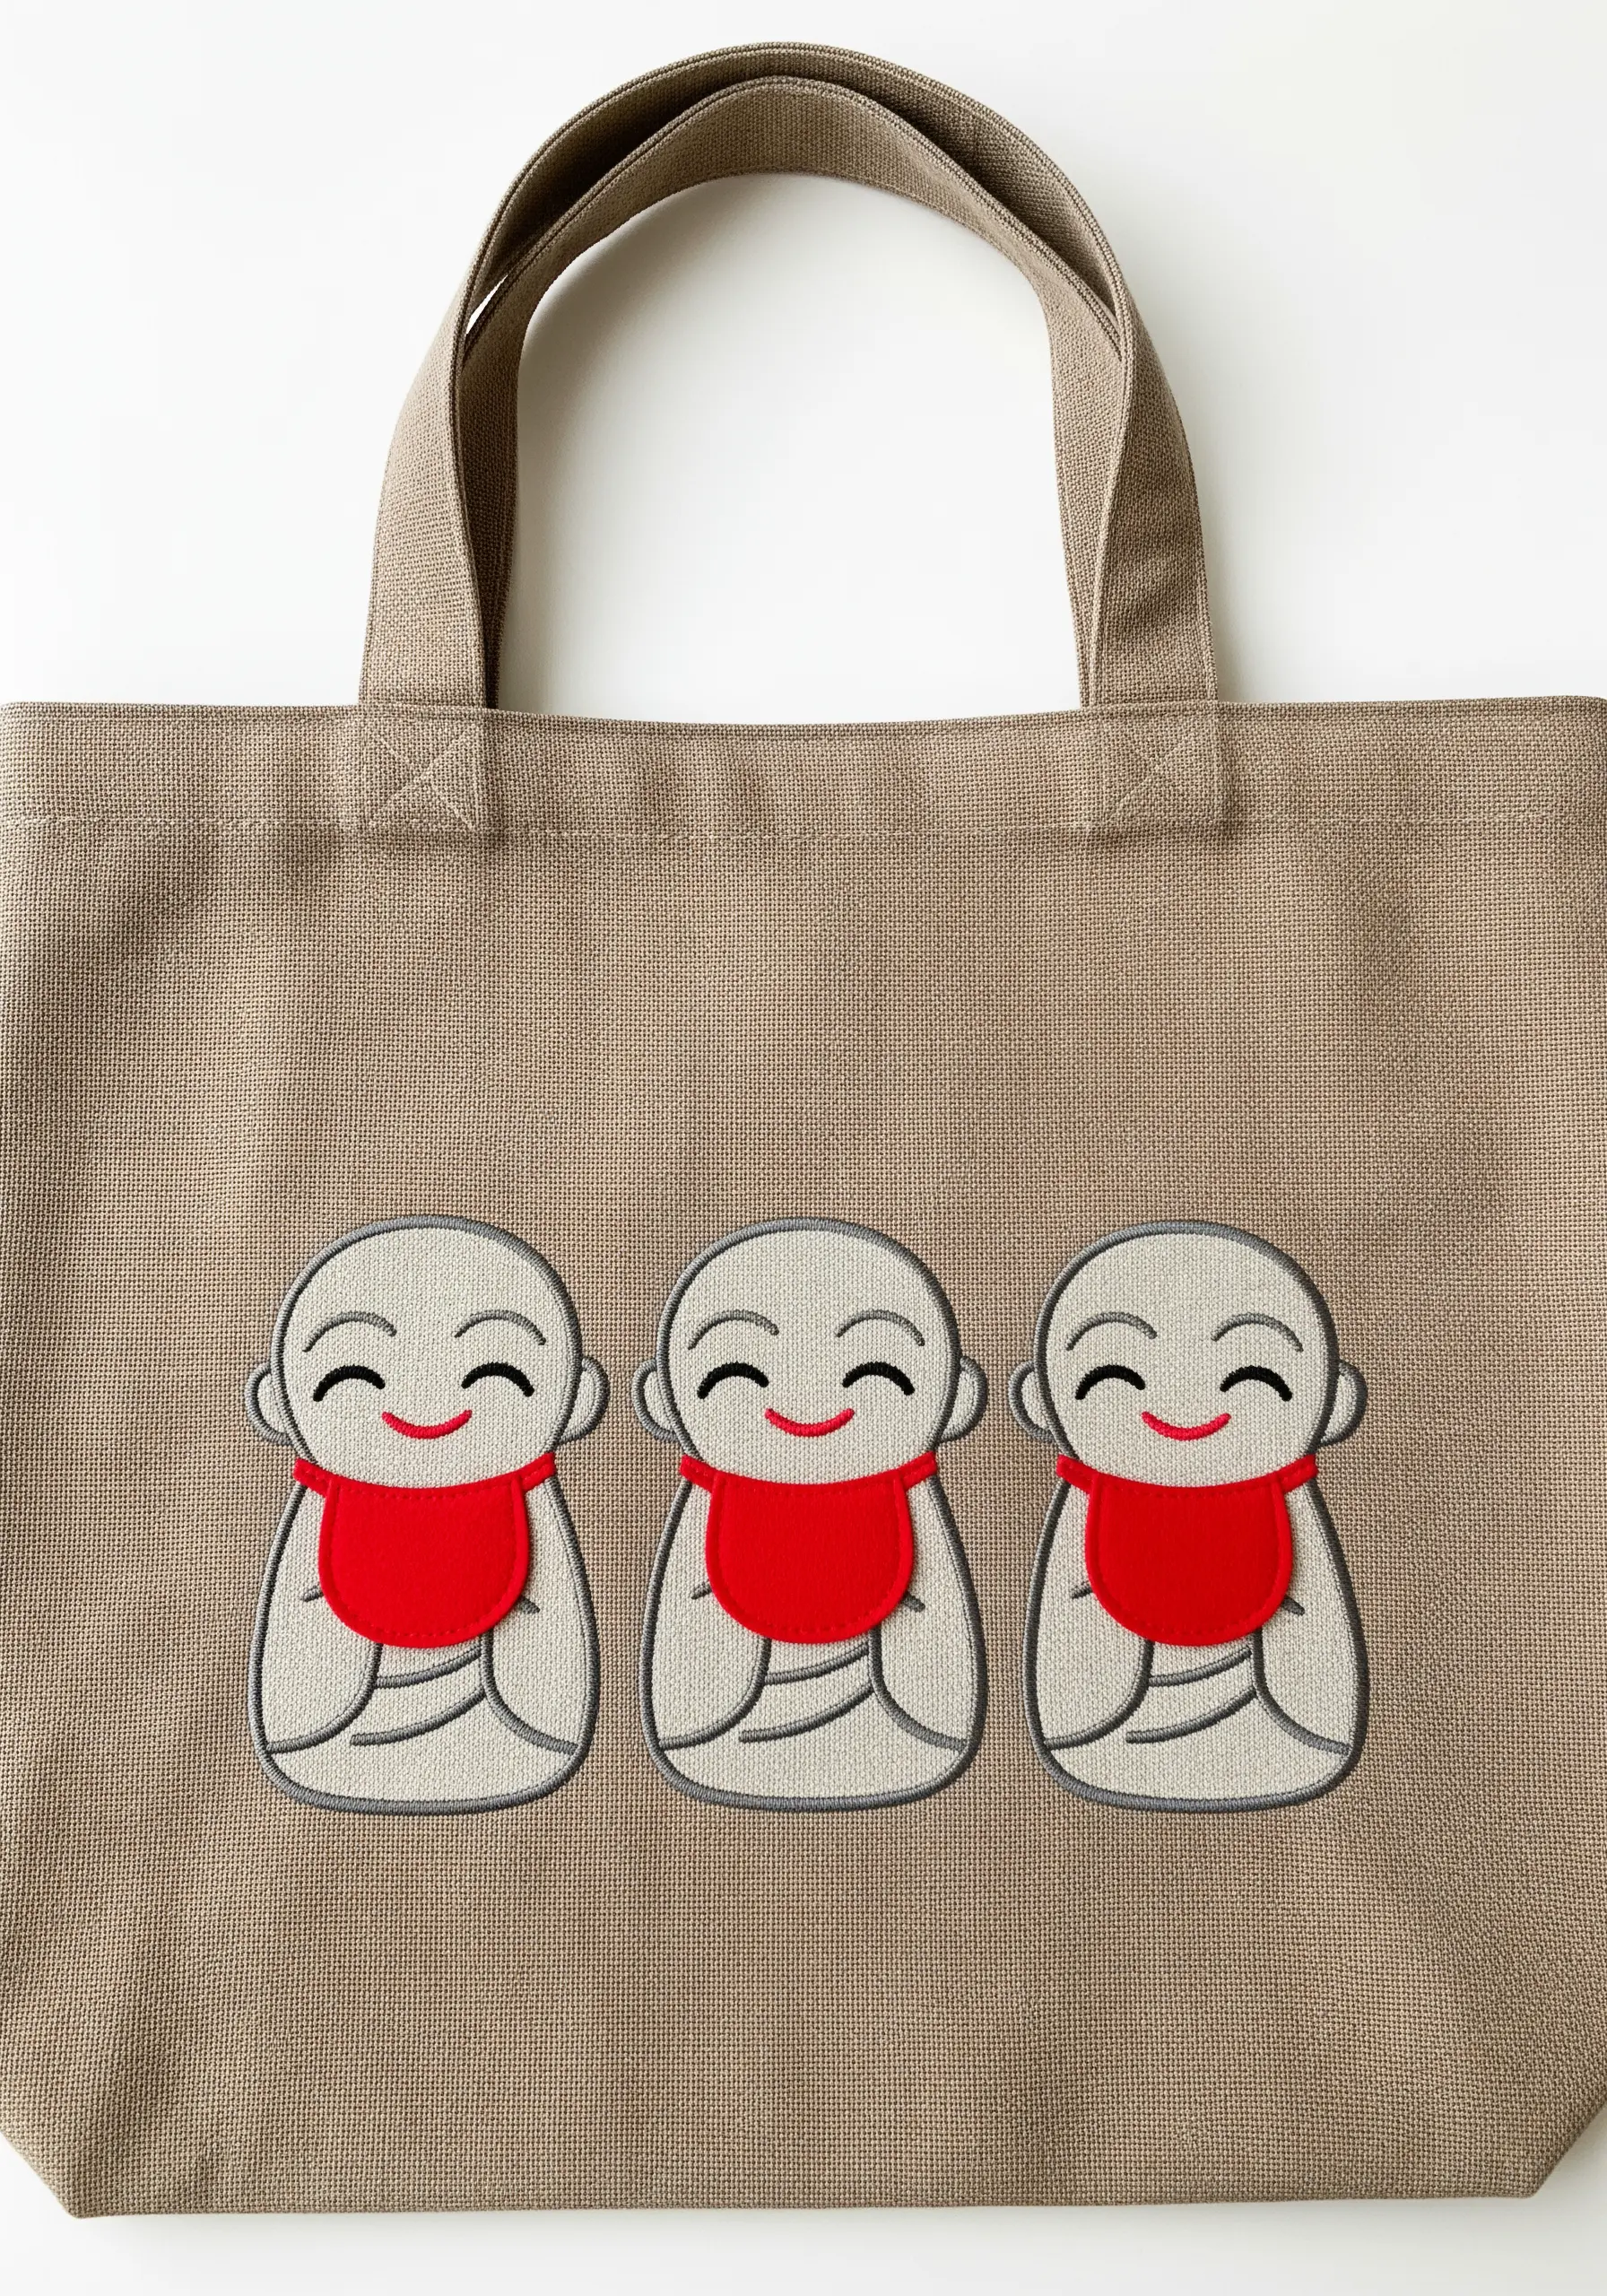
You don’t need complex stitches to suggest the texture of stone.
Fill the main shape of the Jizo statues with a light grey satin stitch.
Then, using a single strand of a slightly darker grey, add a few small straight stitches along the curved edges of the figures.
This minimal shading is all you need to create the illusion of form and a smooth, stone-like surface. The simplicity of the technique enhances the serene feeling of the design.
27. Create Sci-Fi Paneling with Stitch Direction
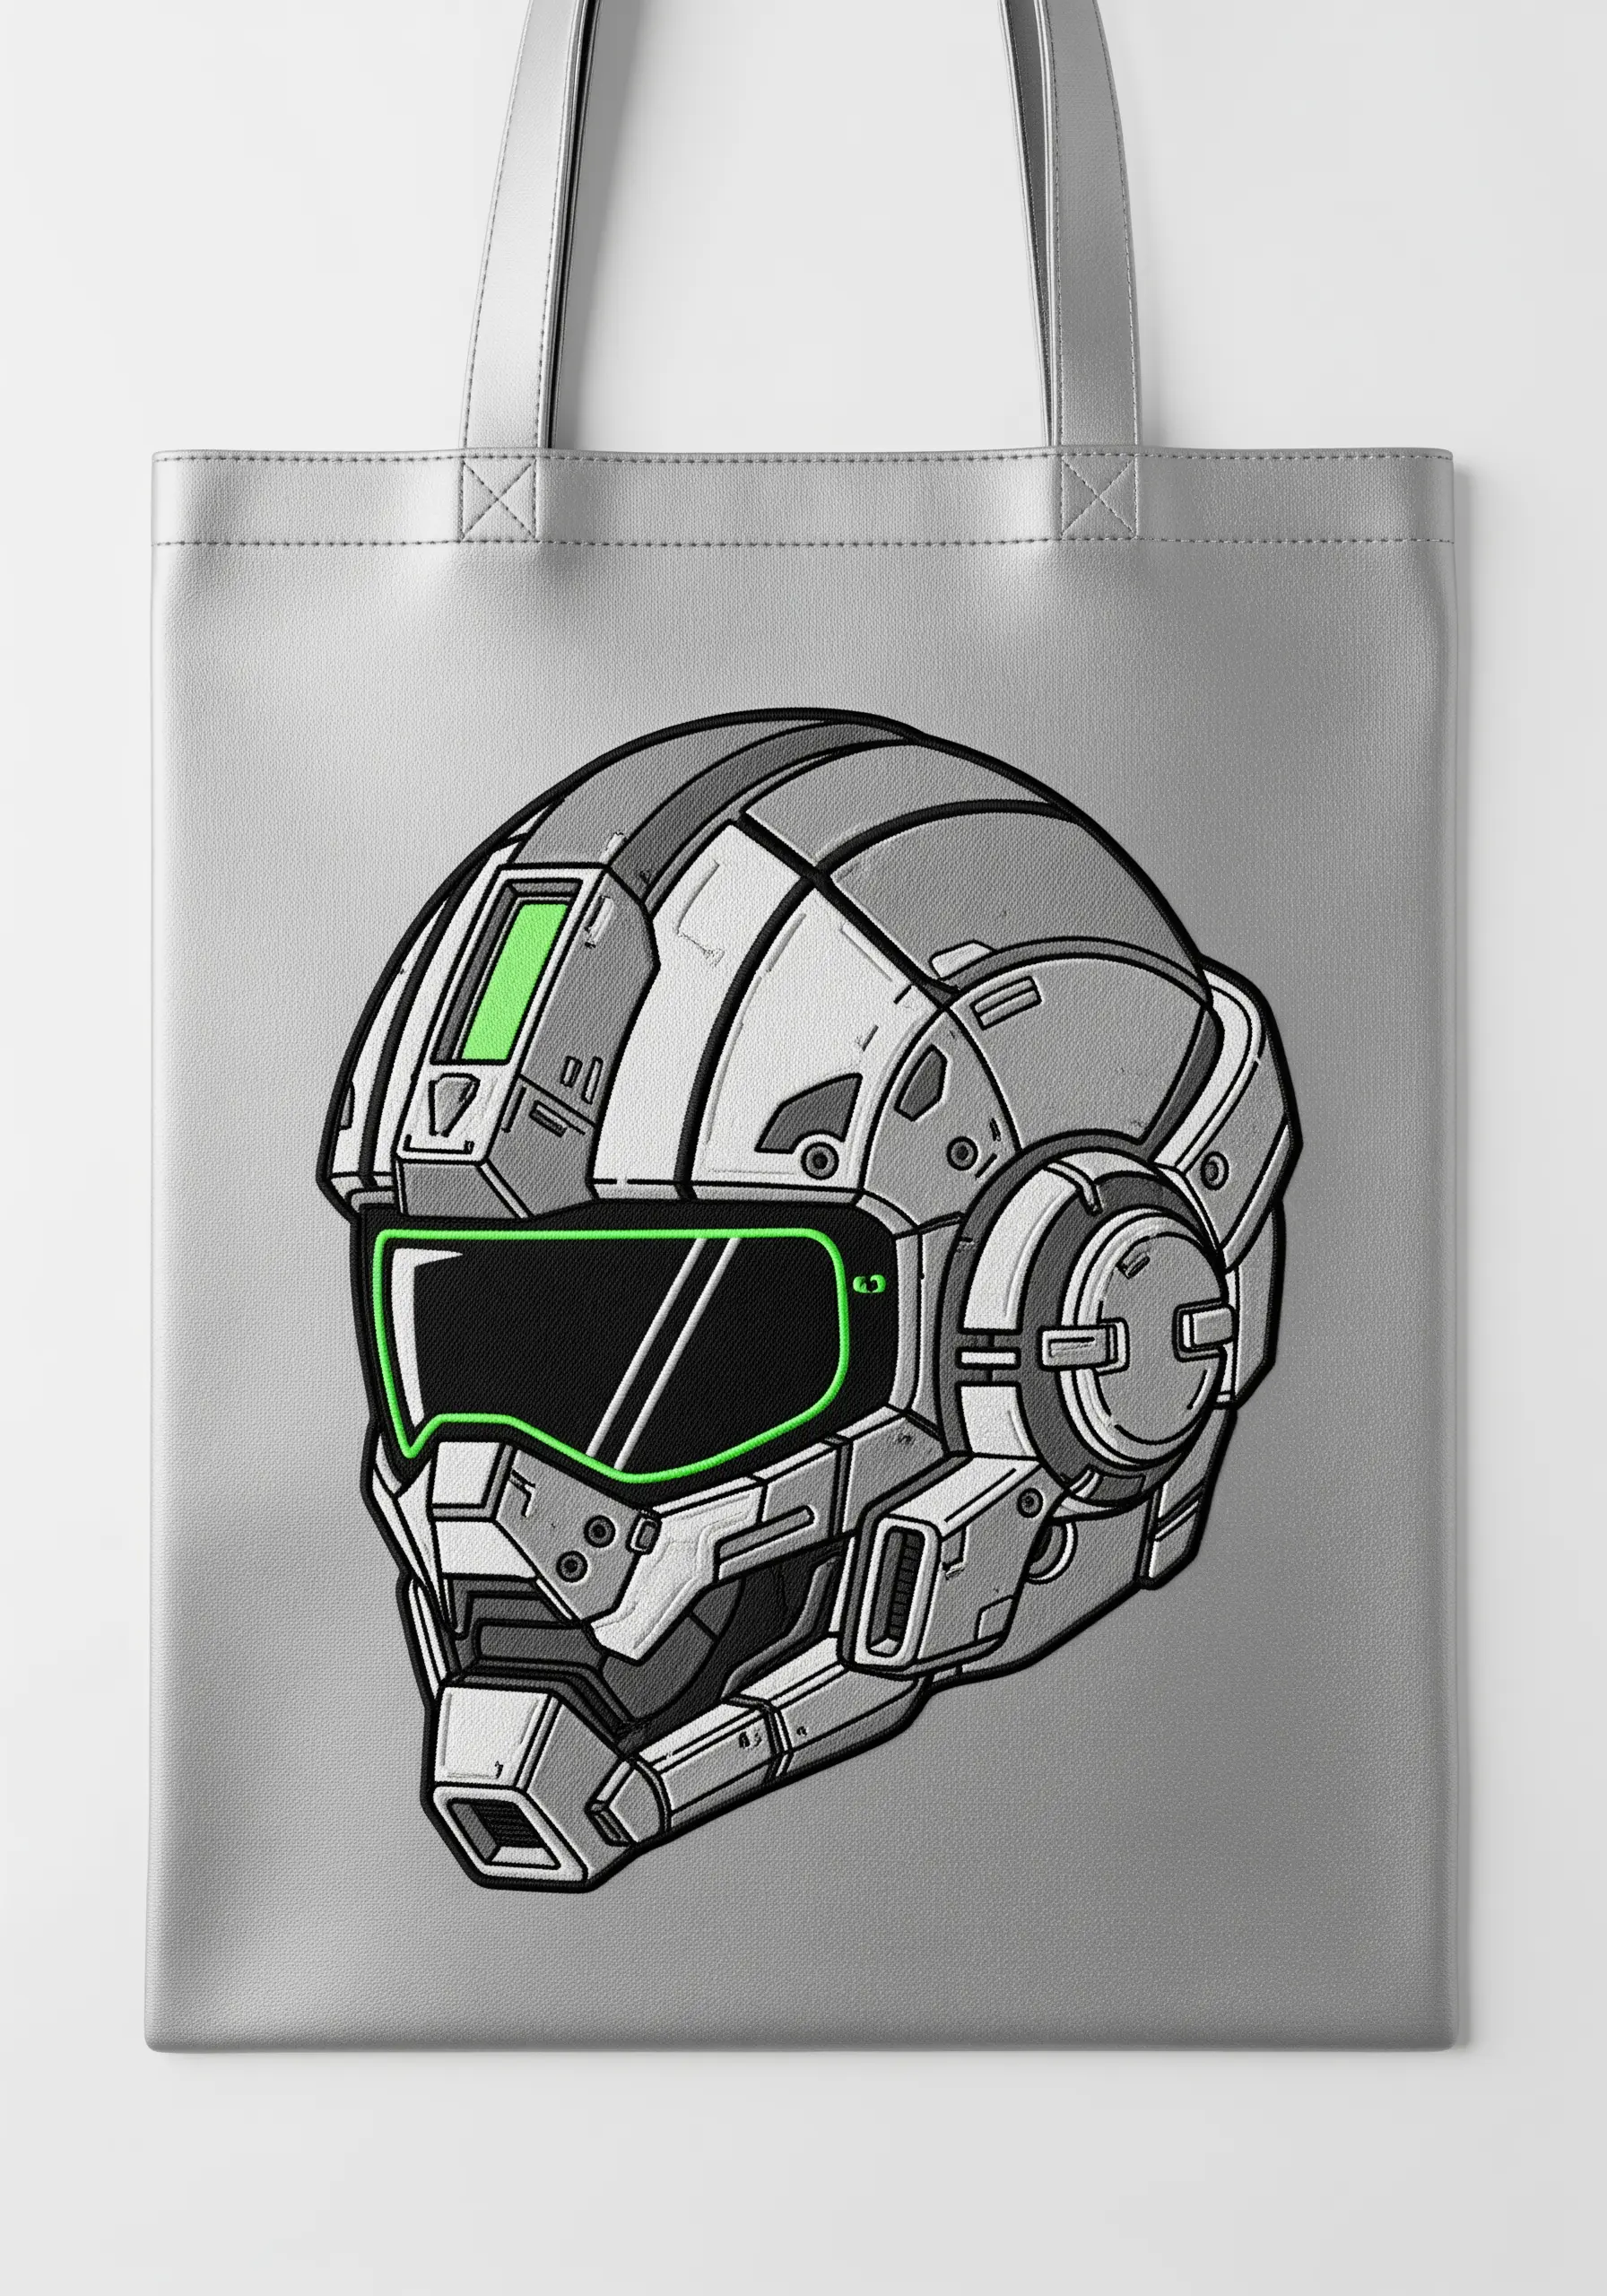
To give this sci-fi helmet a metallic, multi-faceted look, use stitch direction to your advantage.
Fill each small panel of the helmet with a short satin stitch.
For every adjacent panel, change the direction of your stitches—for example, one panel can have vertical stitches, the one next to it horizontal, and another diagonal.
This simple trick makes the light reflect off the thread differently for each section, creating the illusion of separate metal plates without changing thread color.
28. Illustrate Depth with Thread Weight and Color
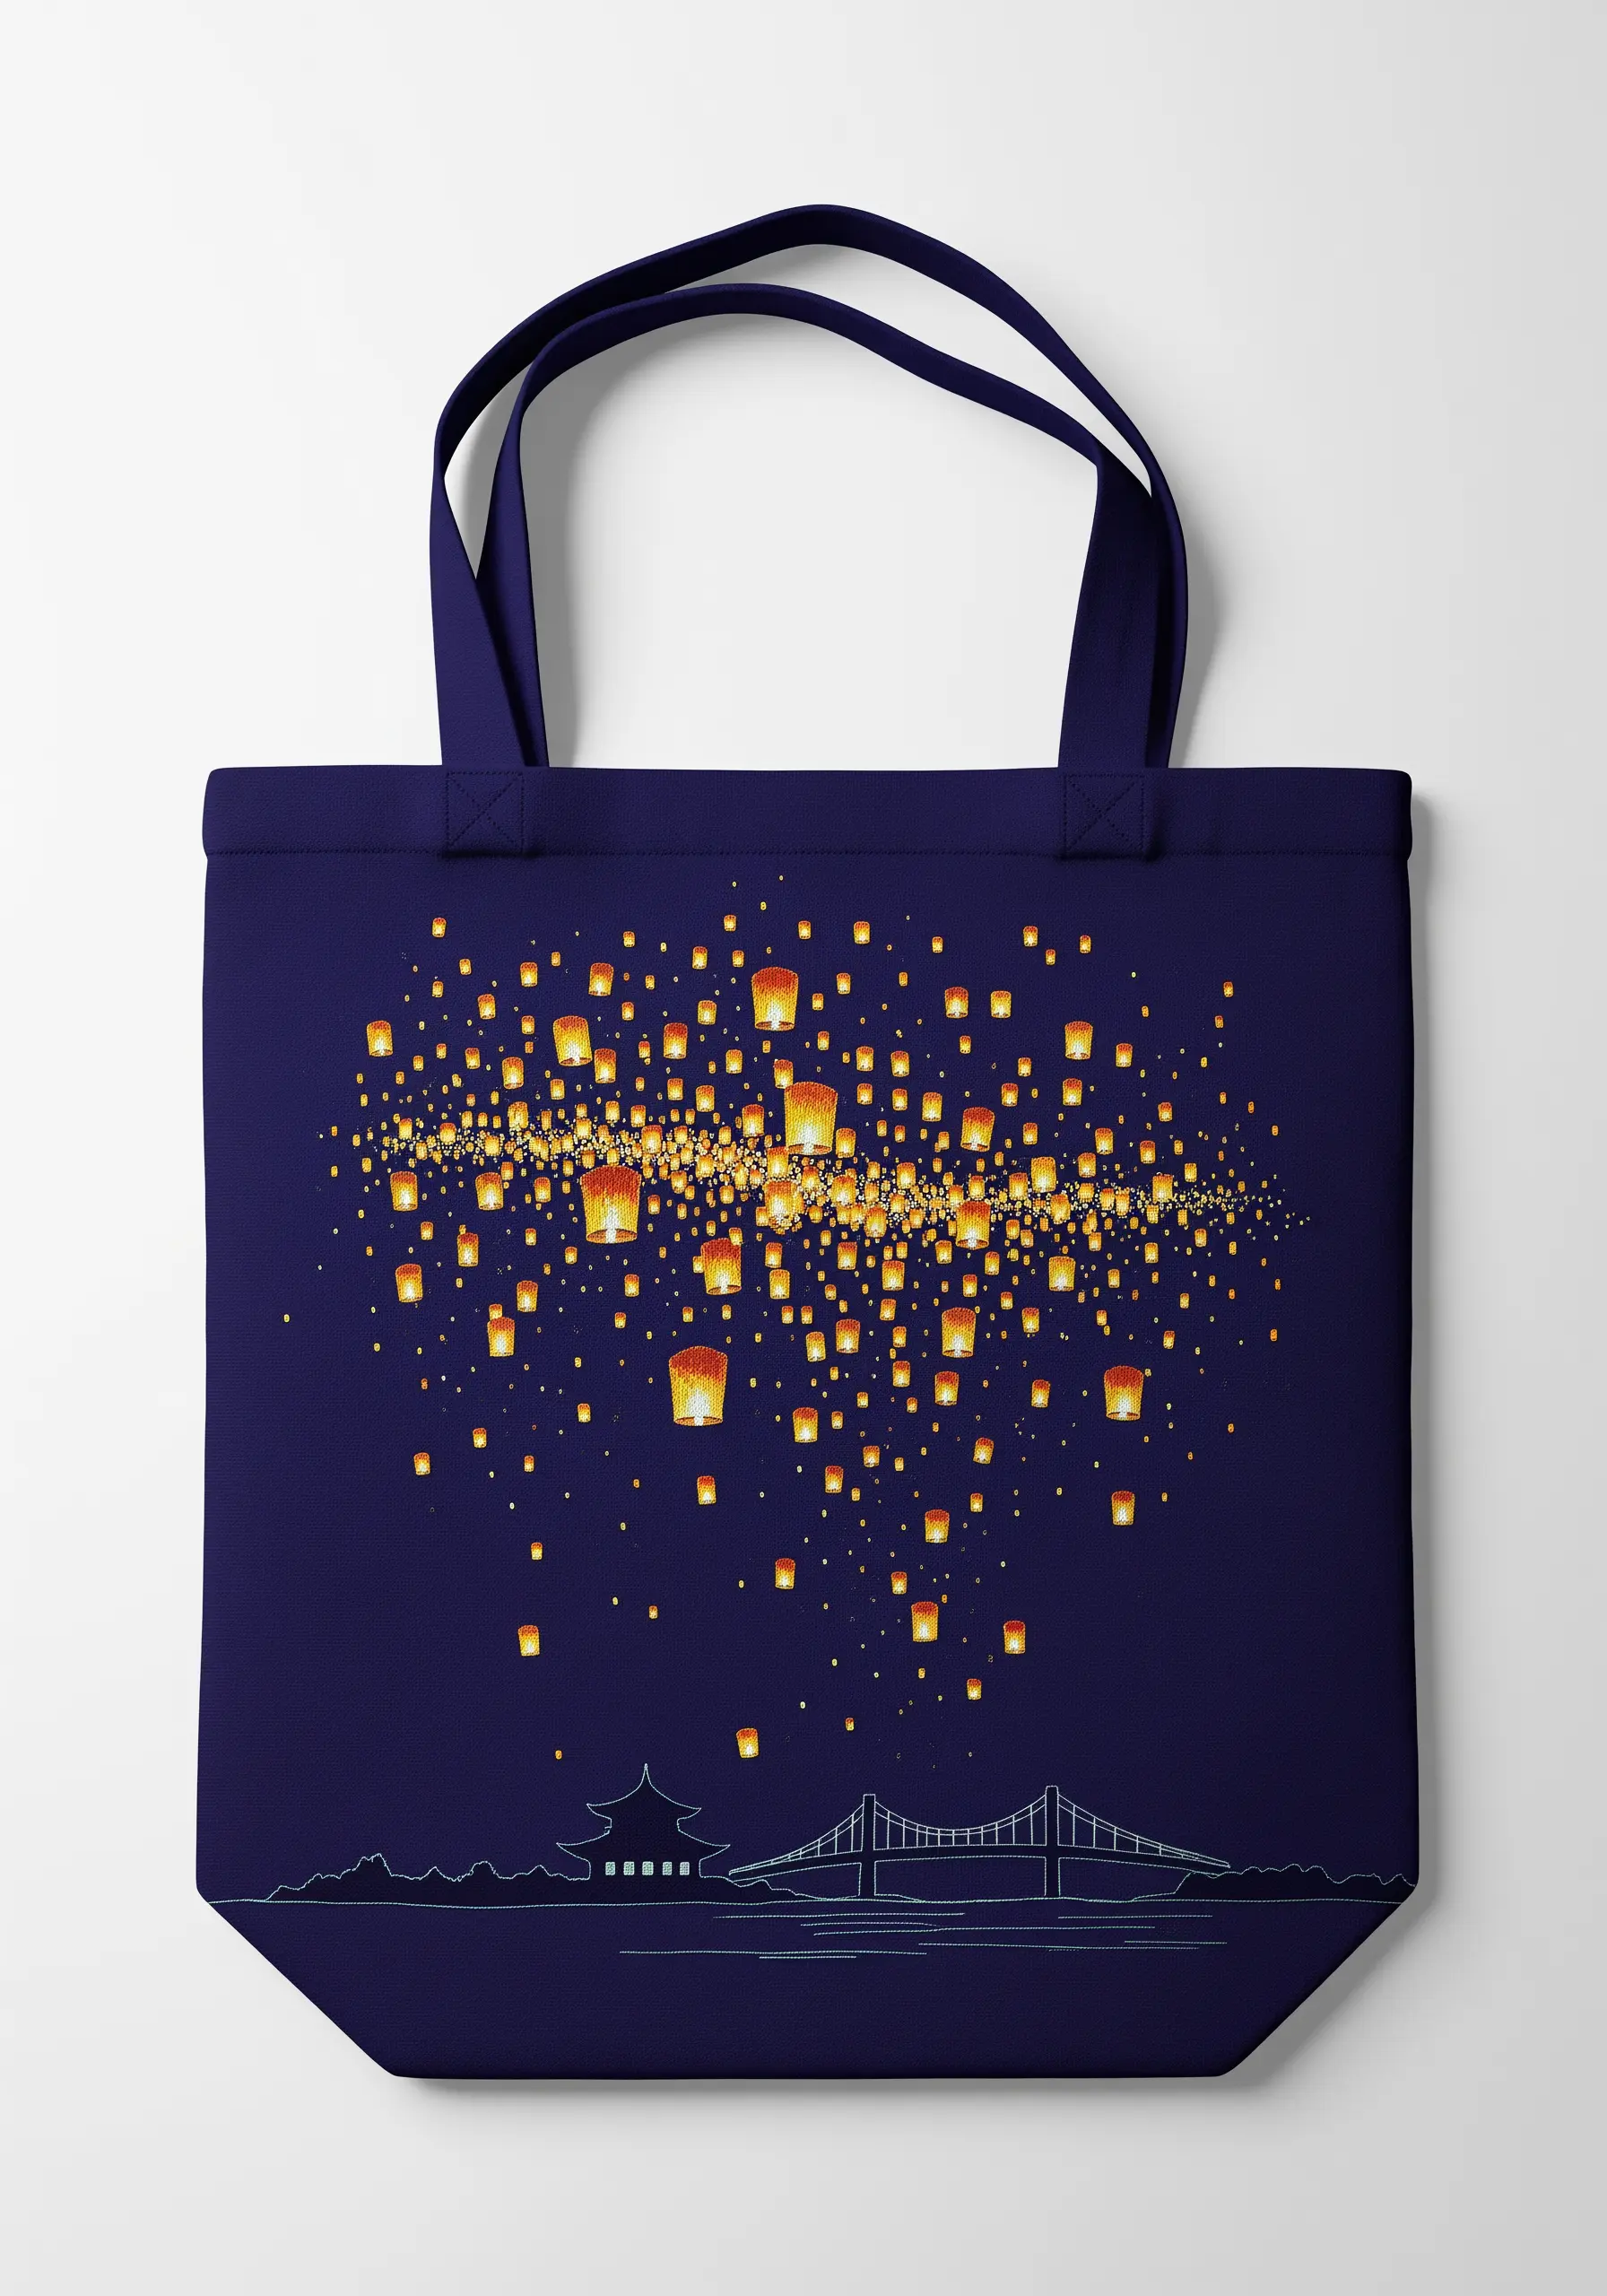
To create the atmospheric perspective of floating lanterns, you need to trick the eye.
For the most distant lanterns, use a single strand of pale yellow floss to make tiny seed stitches or French knots.
As lanterns get closer, increase your thread weight to two strands and use warmer golden yellows, stitching slightly larger shapes.
For the lanterns in the foreground, use three strands of a vibrant orange-gold and stitch them as small, defined satin-stitched squares.
This gradient of size, color, and detail creates a beautiful sense of depth.
29. Add Realism with a Vinyl Overlay
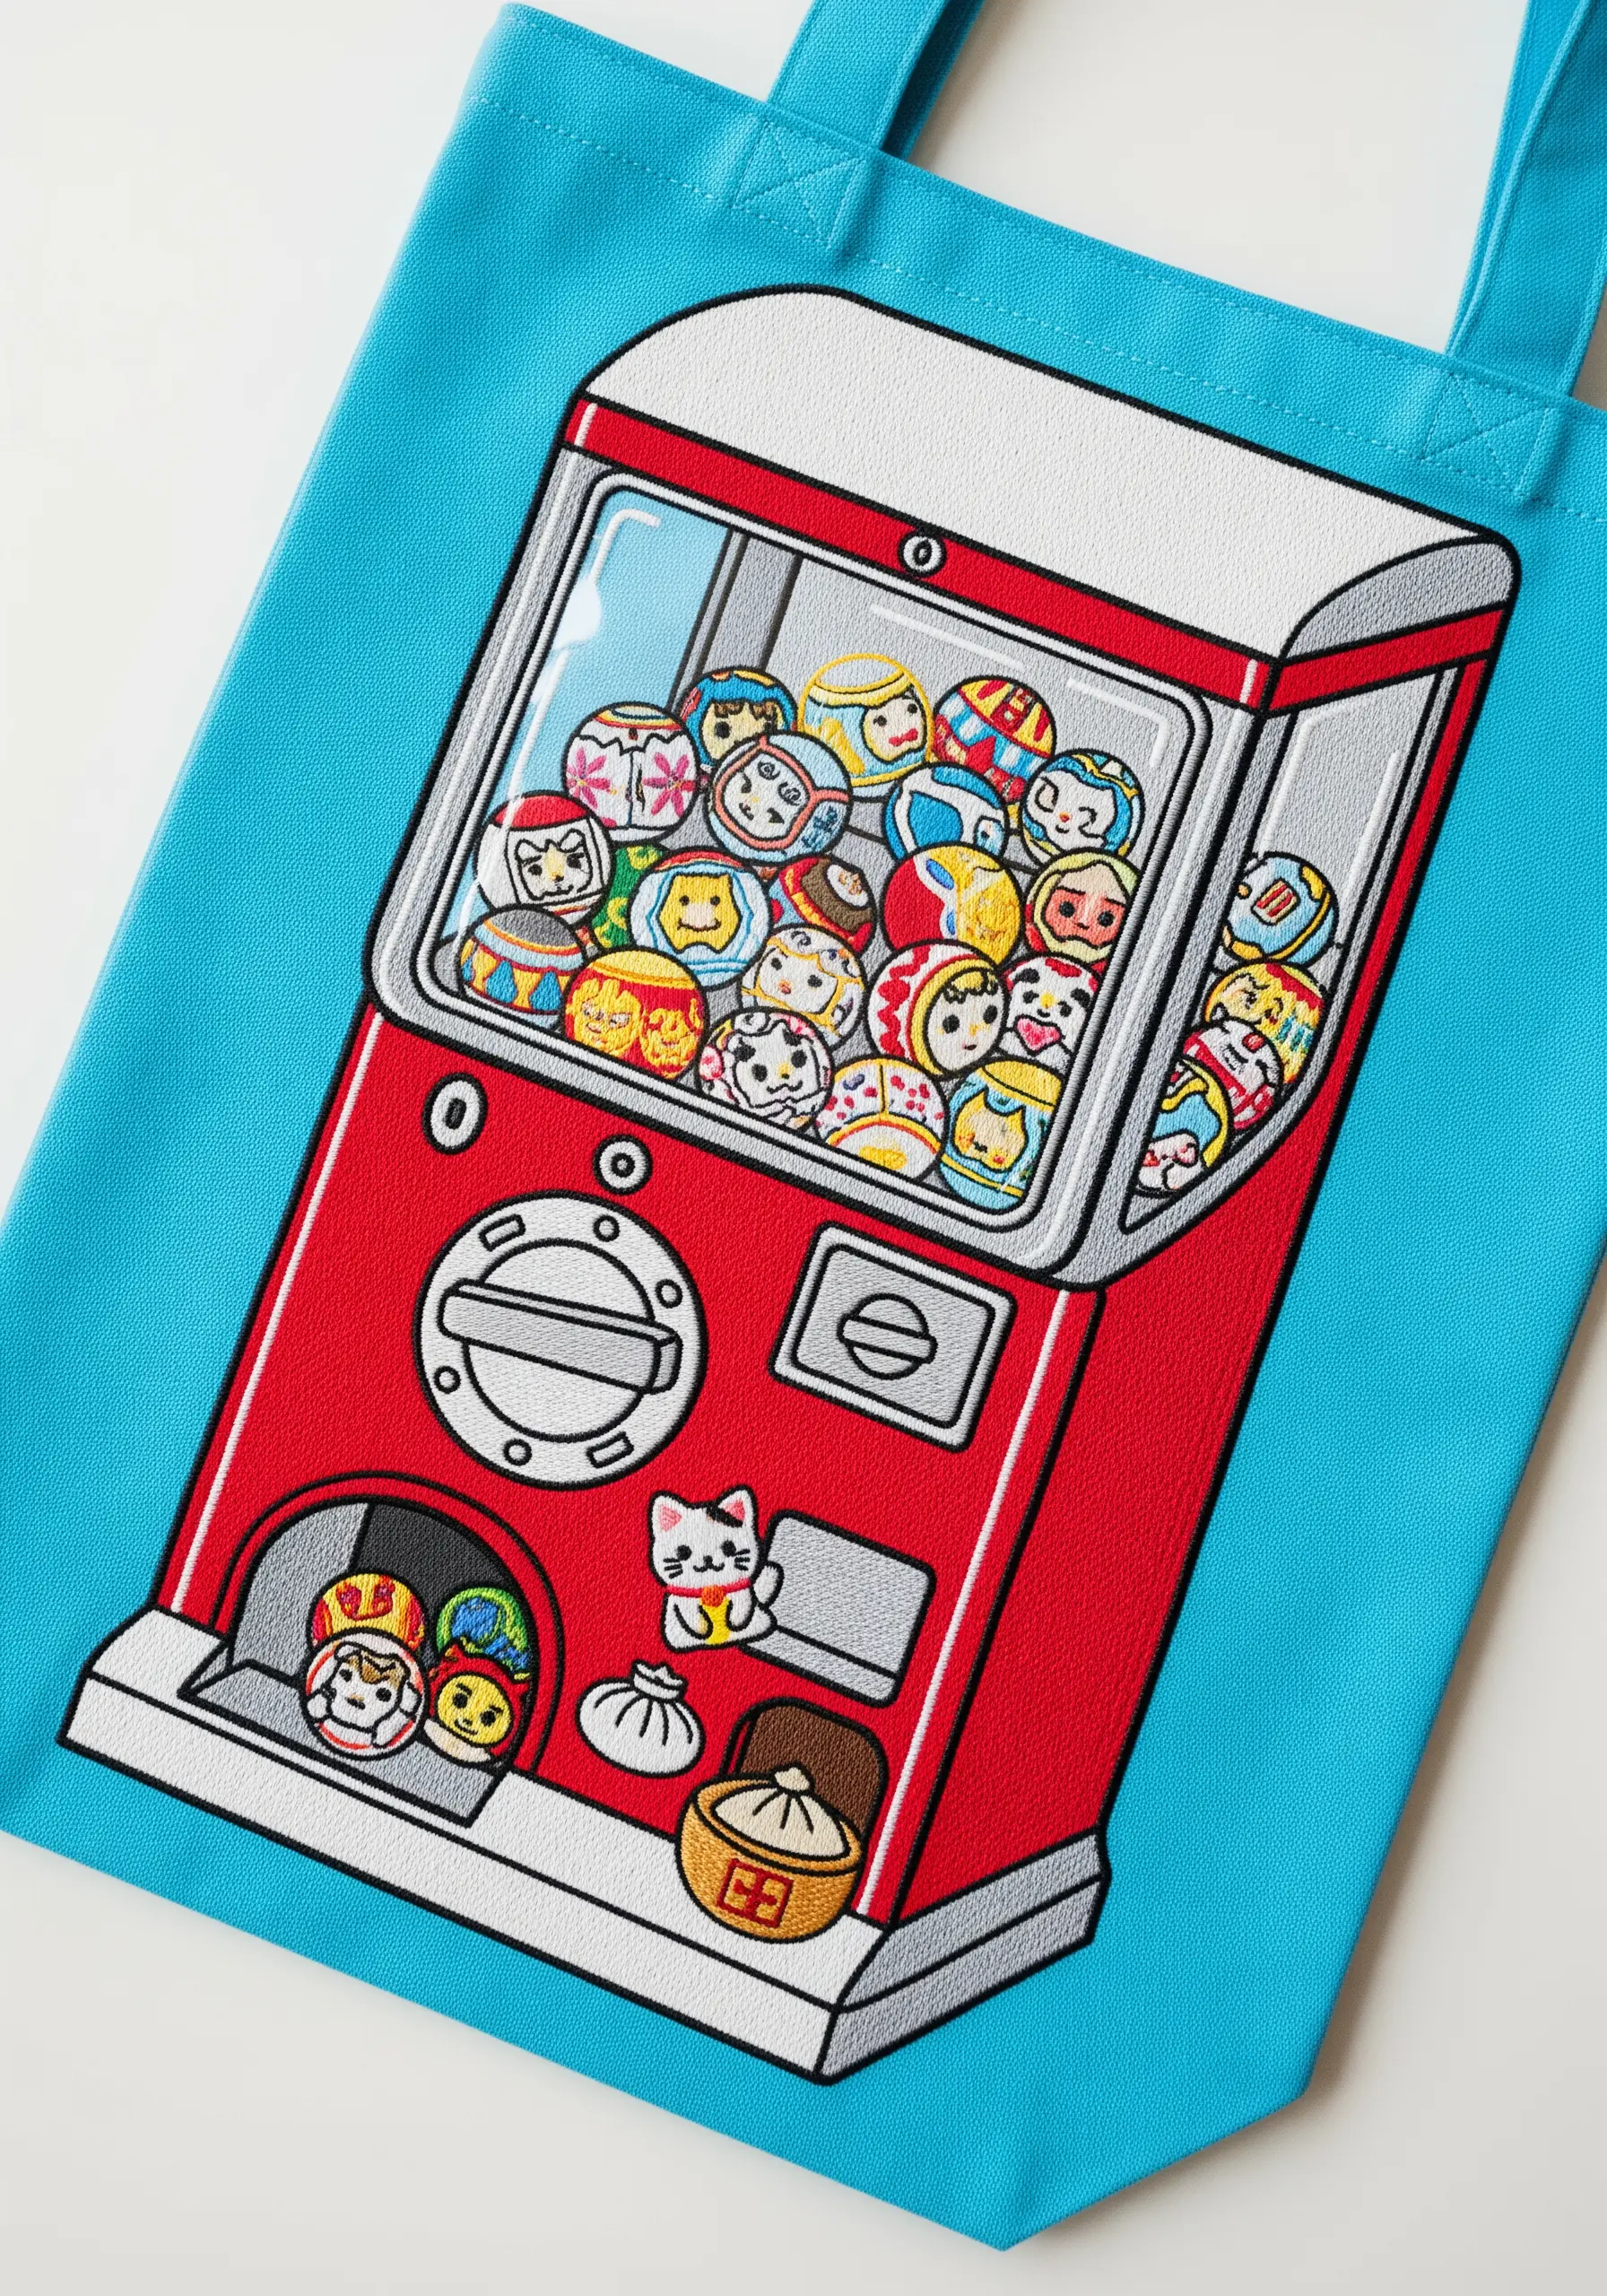
To make the glass of the gashapon machine look genuinely transparent, add a layer of clear vinyl.
First, embroider all the colorful toys inside the machine directly onto the tote bag.
Then, cut a piece of clear vinyl to the shape of the glass window and place it over your stitching.
Secure the vinyl with a neat, clean backstitch around the edge using a silver or grey thread to represent the machine’s frame. This adds a surprising and professional touch of realism.


