

Before you pick up a needle, I want you to reconsider what embroidery can be. It’s not just about filling in shapes or following a pattern. It’s about intention, precision, and the quiet power of a single, well-placed stitch.
Minimalism in embroidery isn’t about doing less; it’s about making every element count. It’s choosing the right thread weight to make a line feel delicate or bold. It’s using the direction of your stitches to create texture and light. It’s understanding that the empty space on the fabric is just as important as the stitches themselves.
Here, you’ll find techniques to sharpen your lines, enrich your textures, and transform your finished pieces into art you’ll be proud to frame. Let’s begin.
1. Master the Expressive Single Line
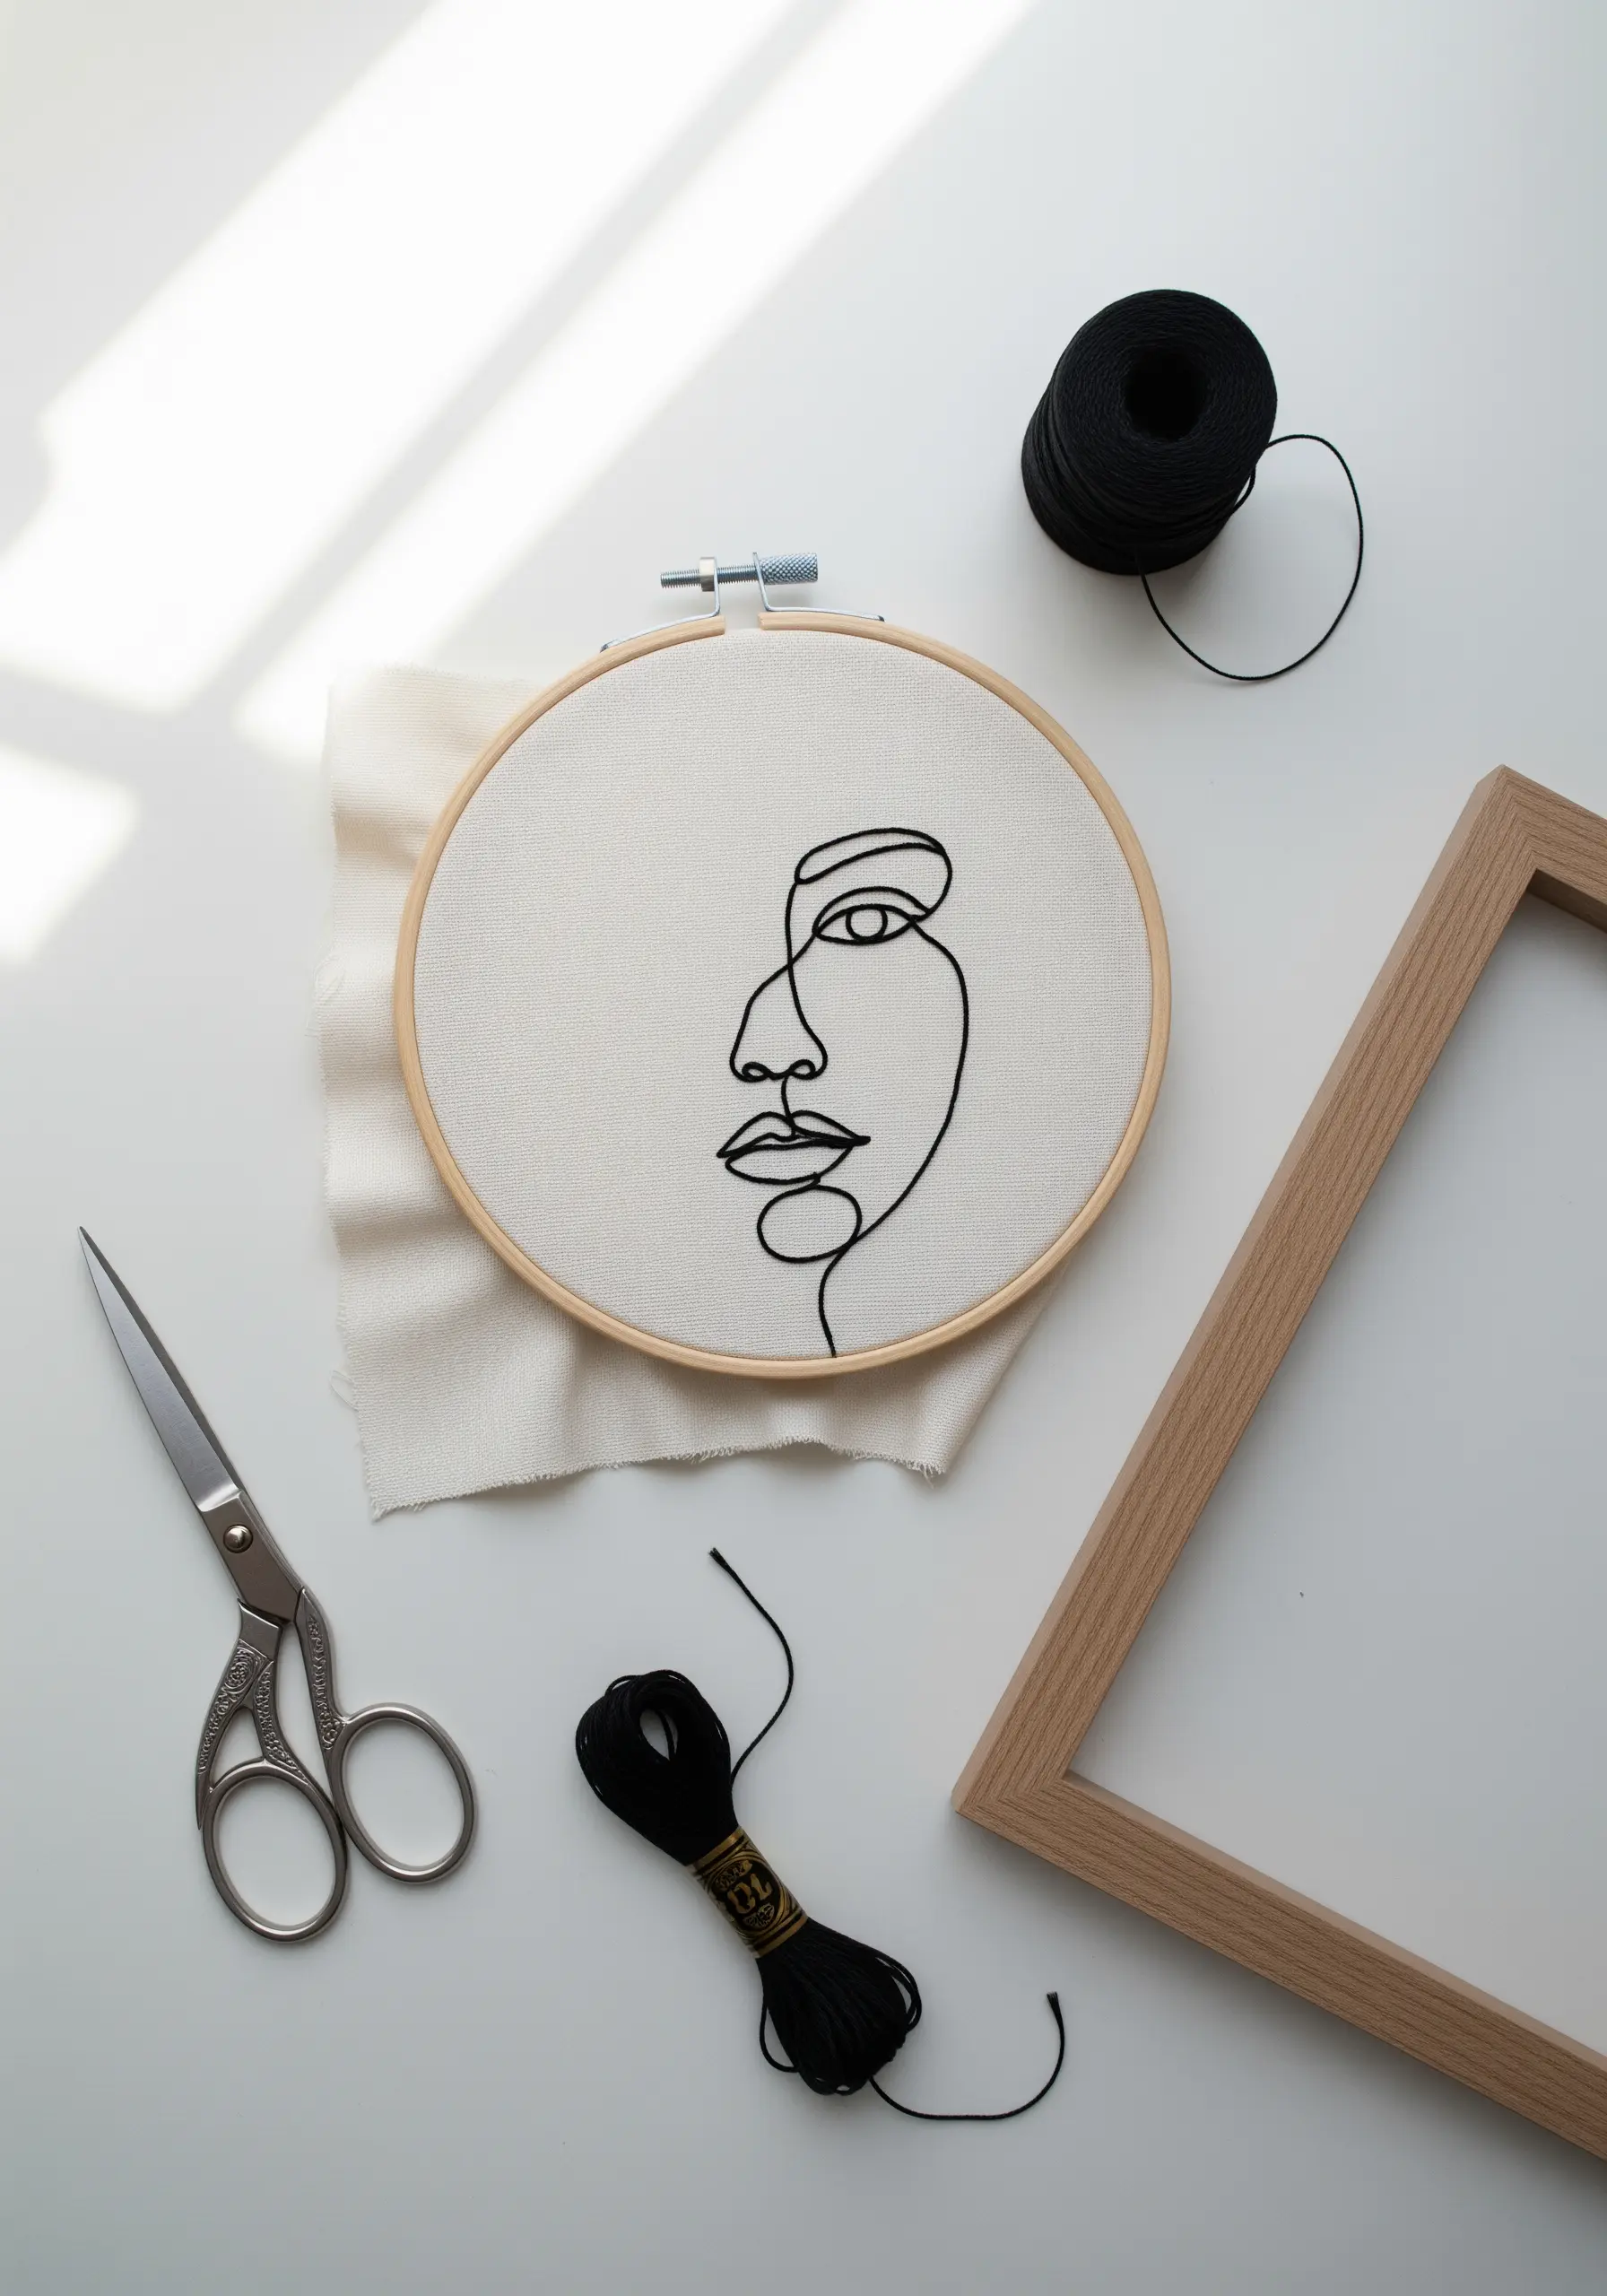
To achieve a fluid, continuous line that looks like an ink drawing, use a whipped backstitch.
First, create a standard backstitch outline.
Then, using the same thread (or a contrasting one), slide your needle under each backstitch without piercing the fabric, creating a smooth, raised cord effect.
This technique eliminates the segmented look of a simple backstitch, making your curves seamless and professional.
For modern line art, use three strands of black cotton floss on a neutral linen for a classic, high-contrast finish.
2. Embroider on Paper for Graphic Precision
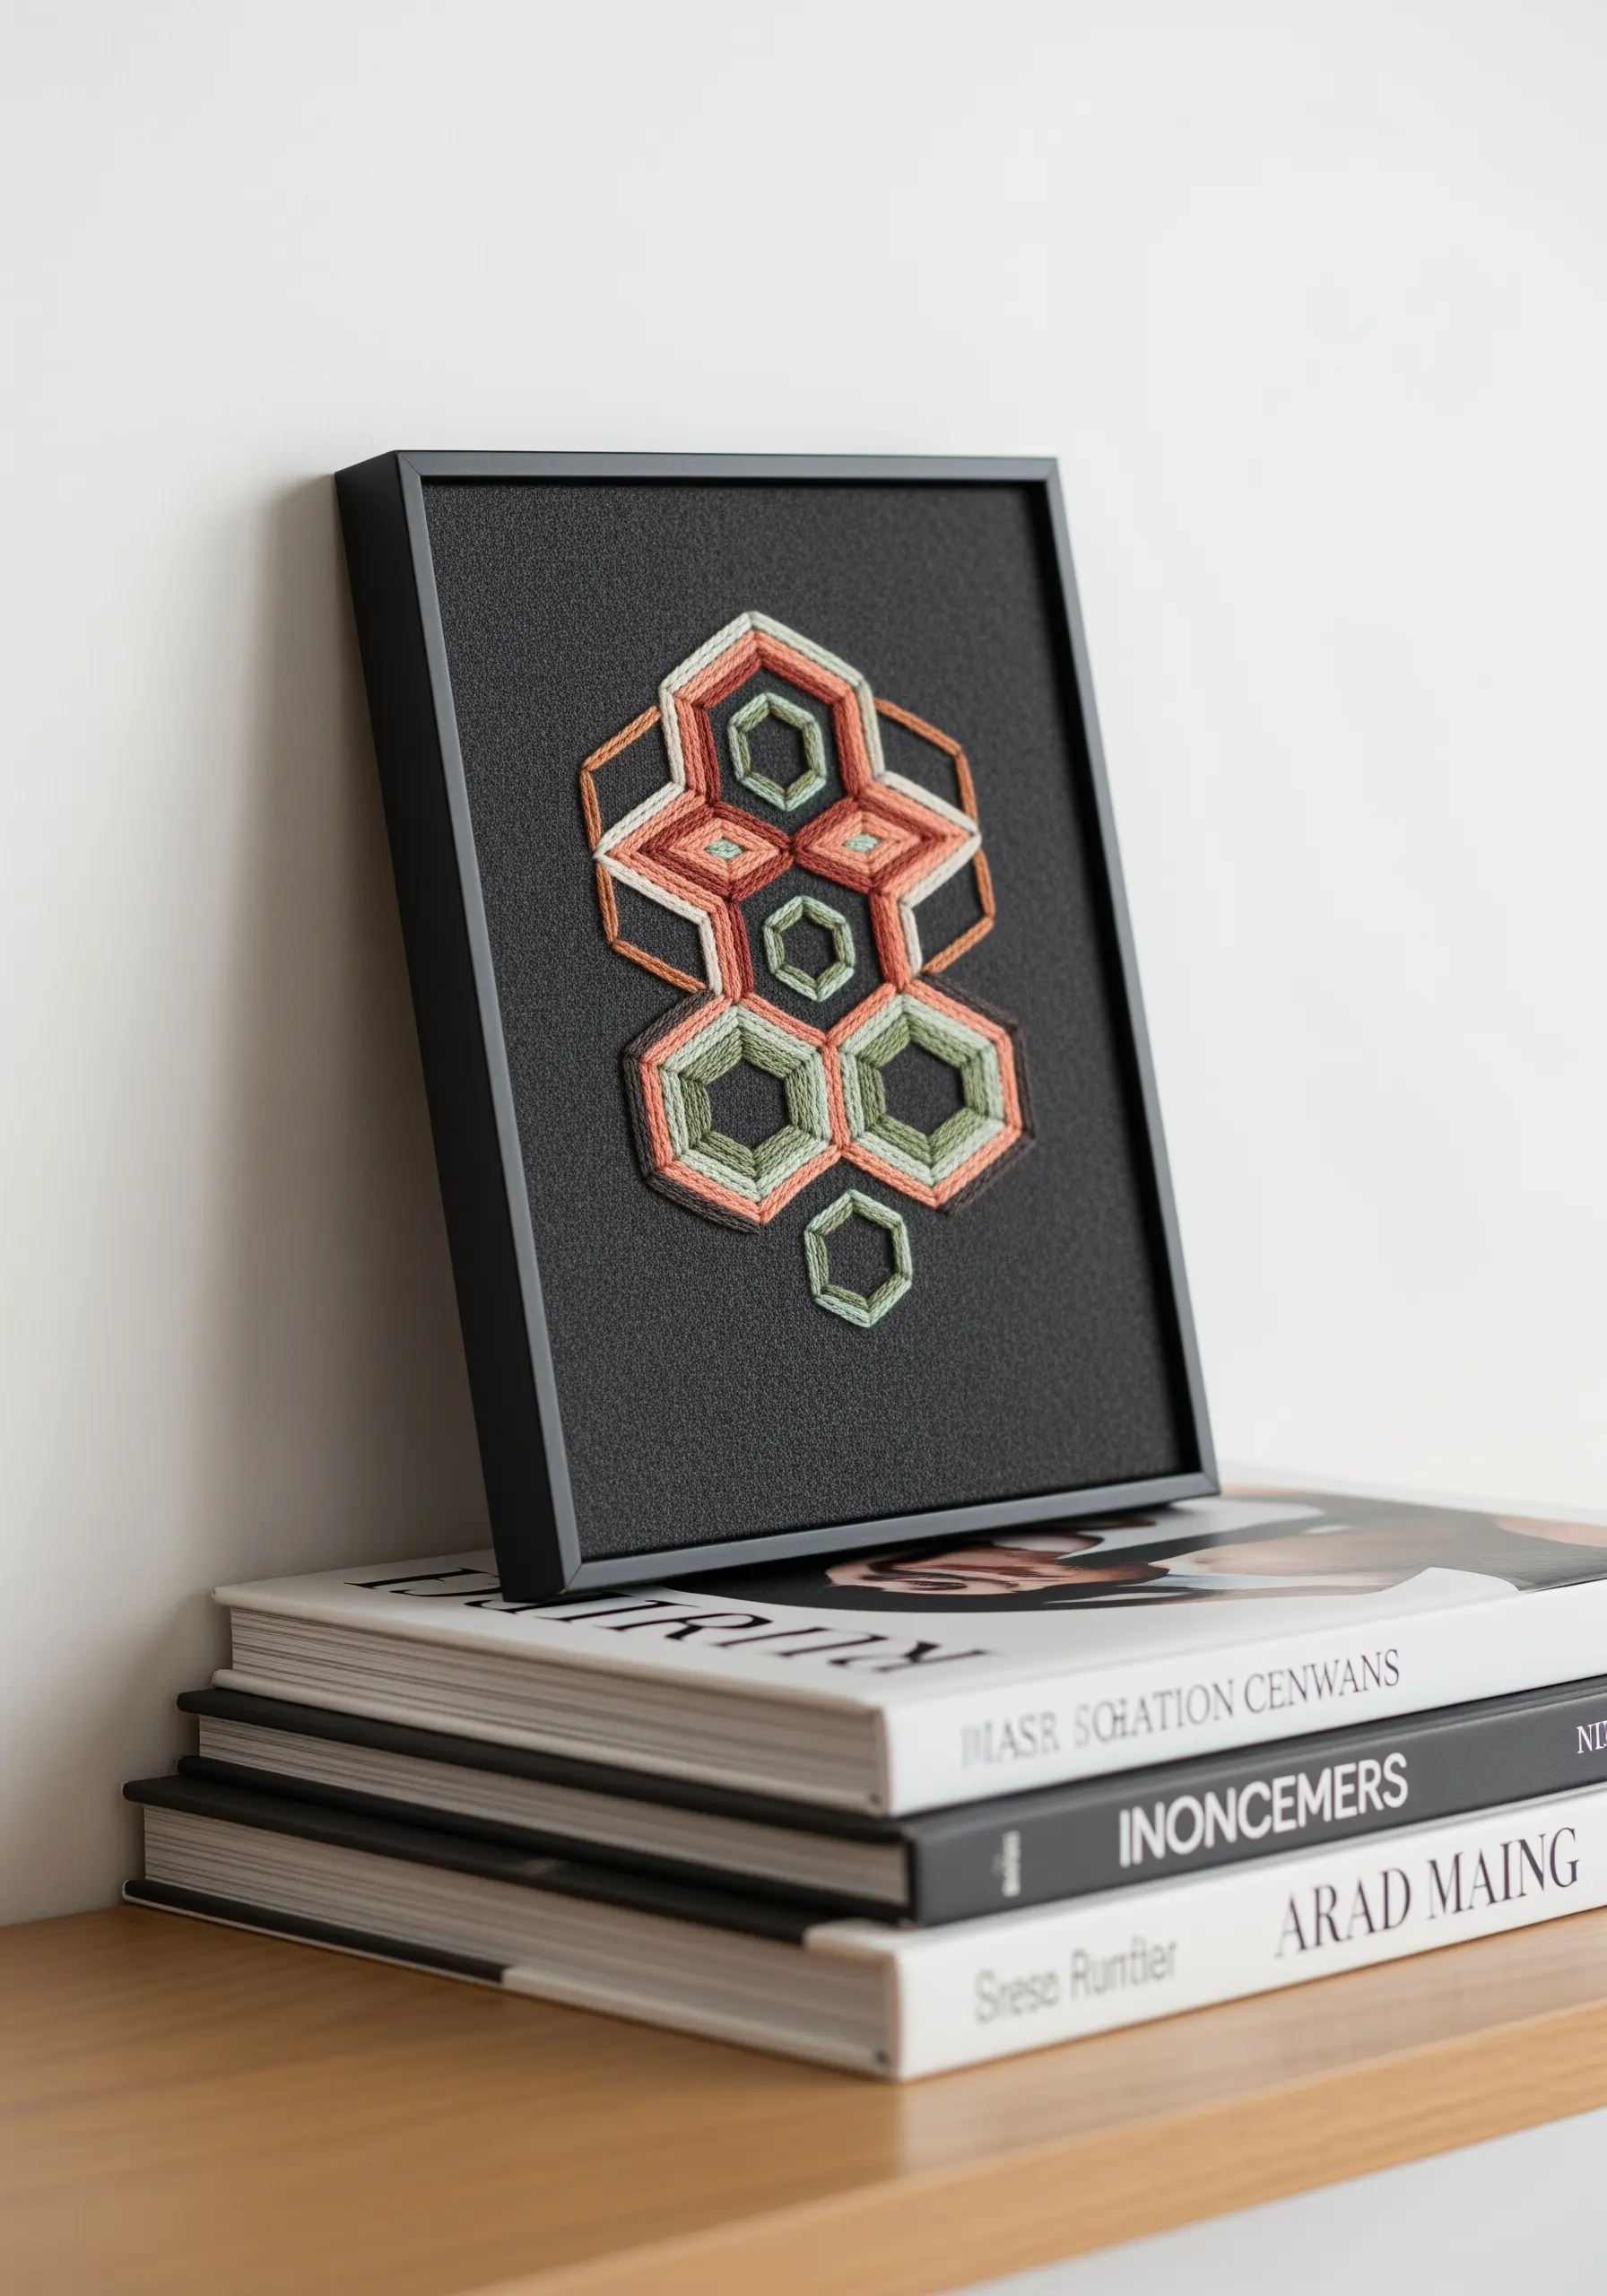
For ultra-sharp geometric designs, swap fabric for a heavy cardstock or textured art paper.
First, pierce your design holes with an awl or a thick needle to prevent tearing.
Use a thicker fiber like tapestry wool or yarn to create bold, textural shapes that stand out against the flat surface.
This method allows for incredible precision and turns your embroidery into a piece of graphic design.
Frame it without glass to let the texture become the focal point.
3. Create Delicate Texture on Lavender Buds
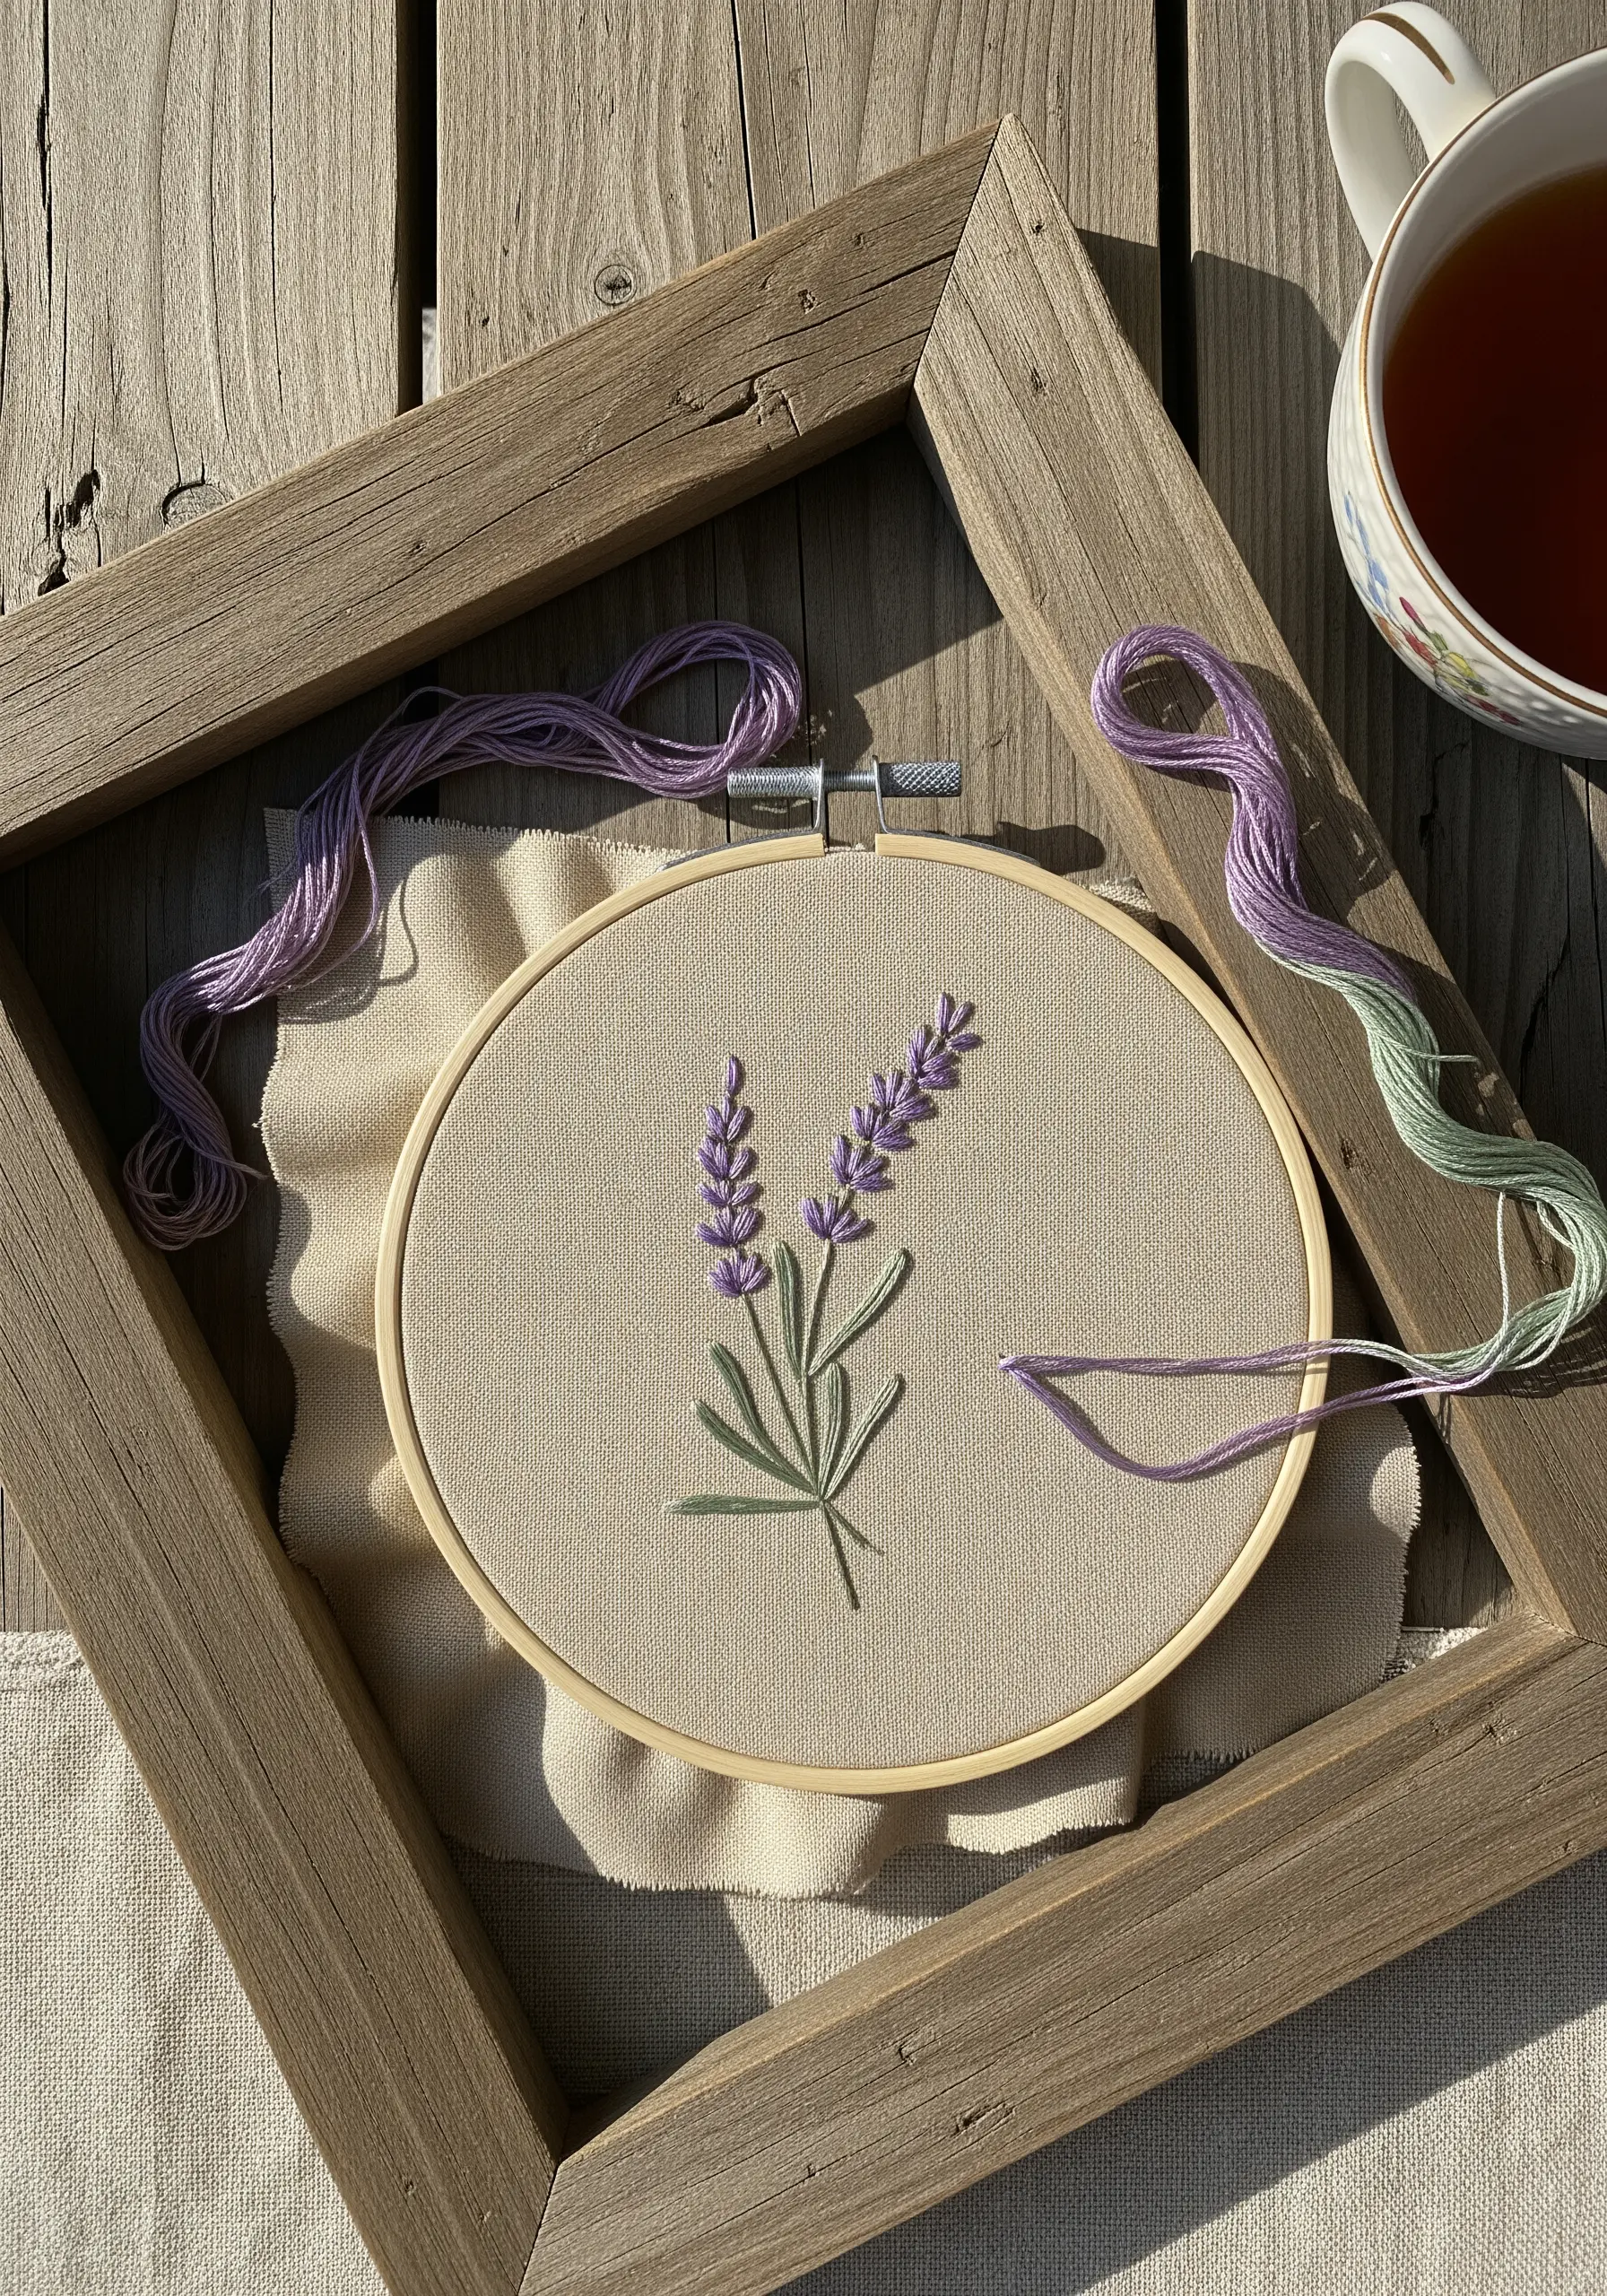
Give your lavender sprigs a realistic, delicate texture by using French knots for the buds.
Instead of wrapping the thread just once around the needle, try wrapping it twice for a slightly fuller knot that mimics a blossom.
Use a variegated purple thread to give the buds subtle, natural color variation without having to change your floss.
Pair the knots with simple straight stitches for the stems, letting the texture of the buds draw the eye.
4. Achieve Perfect Tension in Radiating Lines
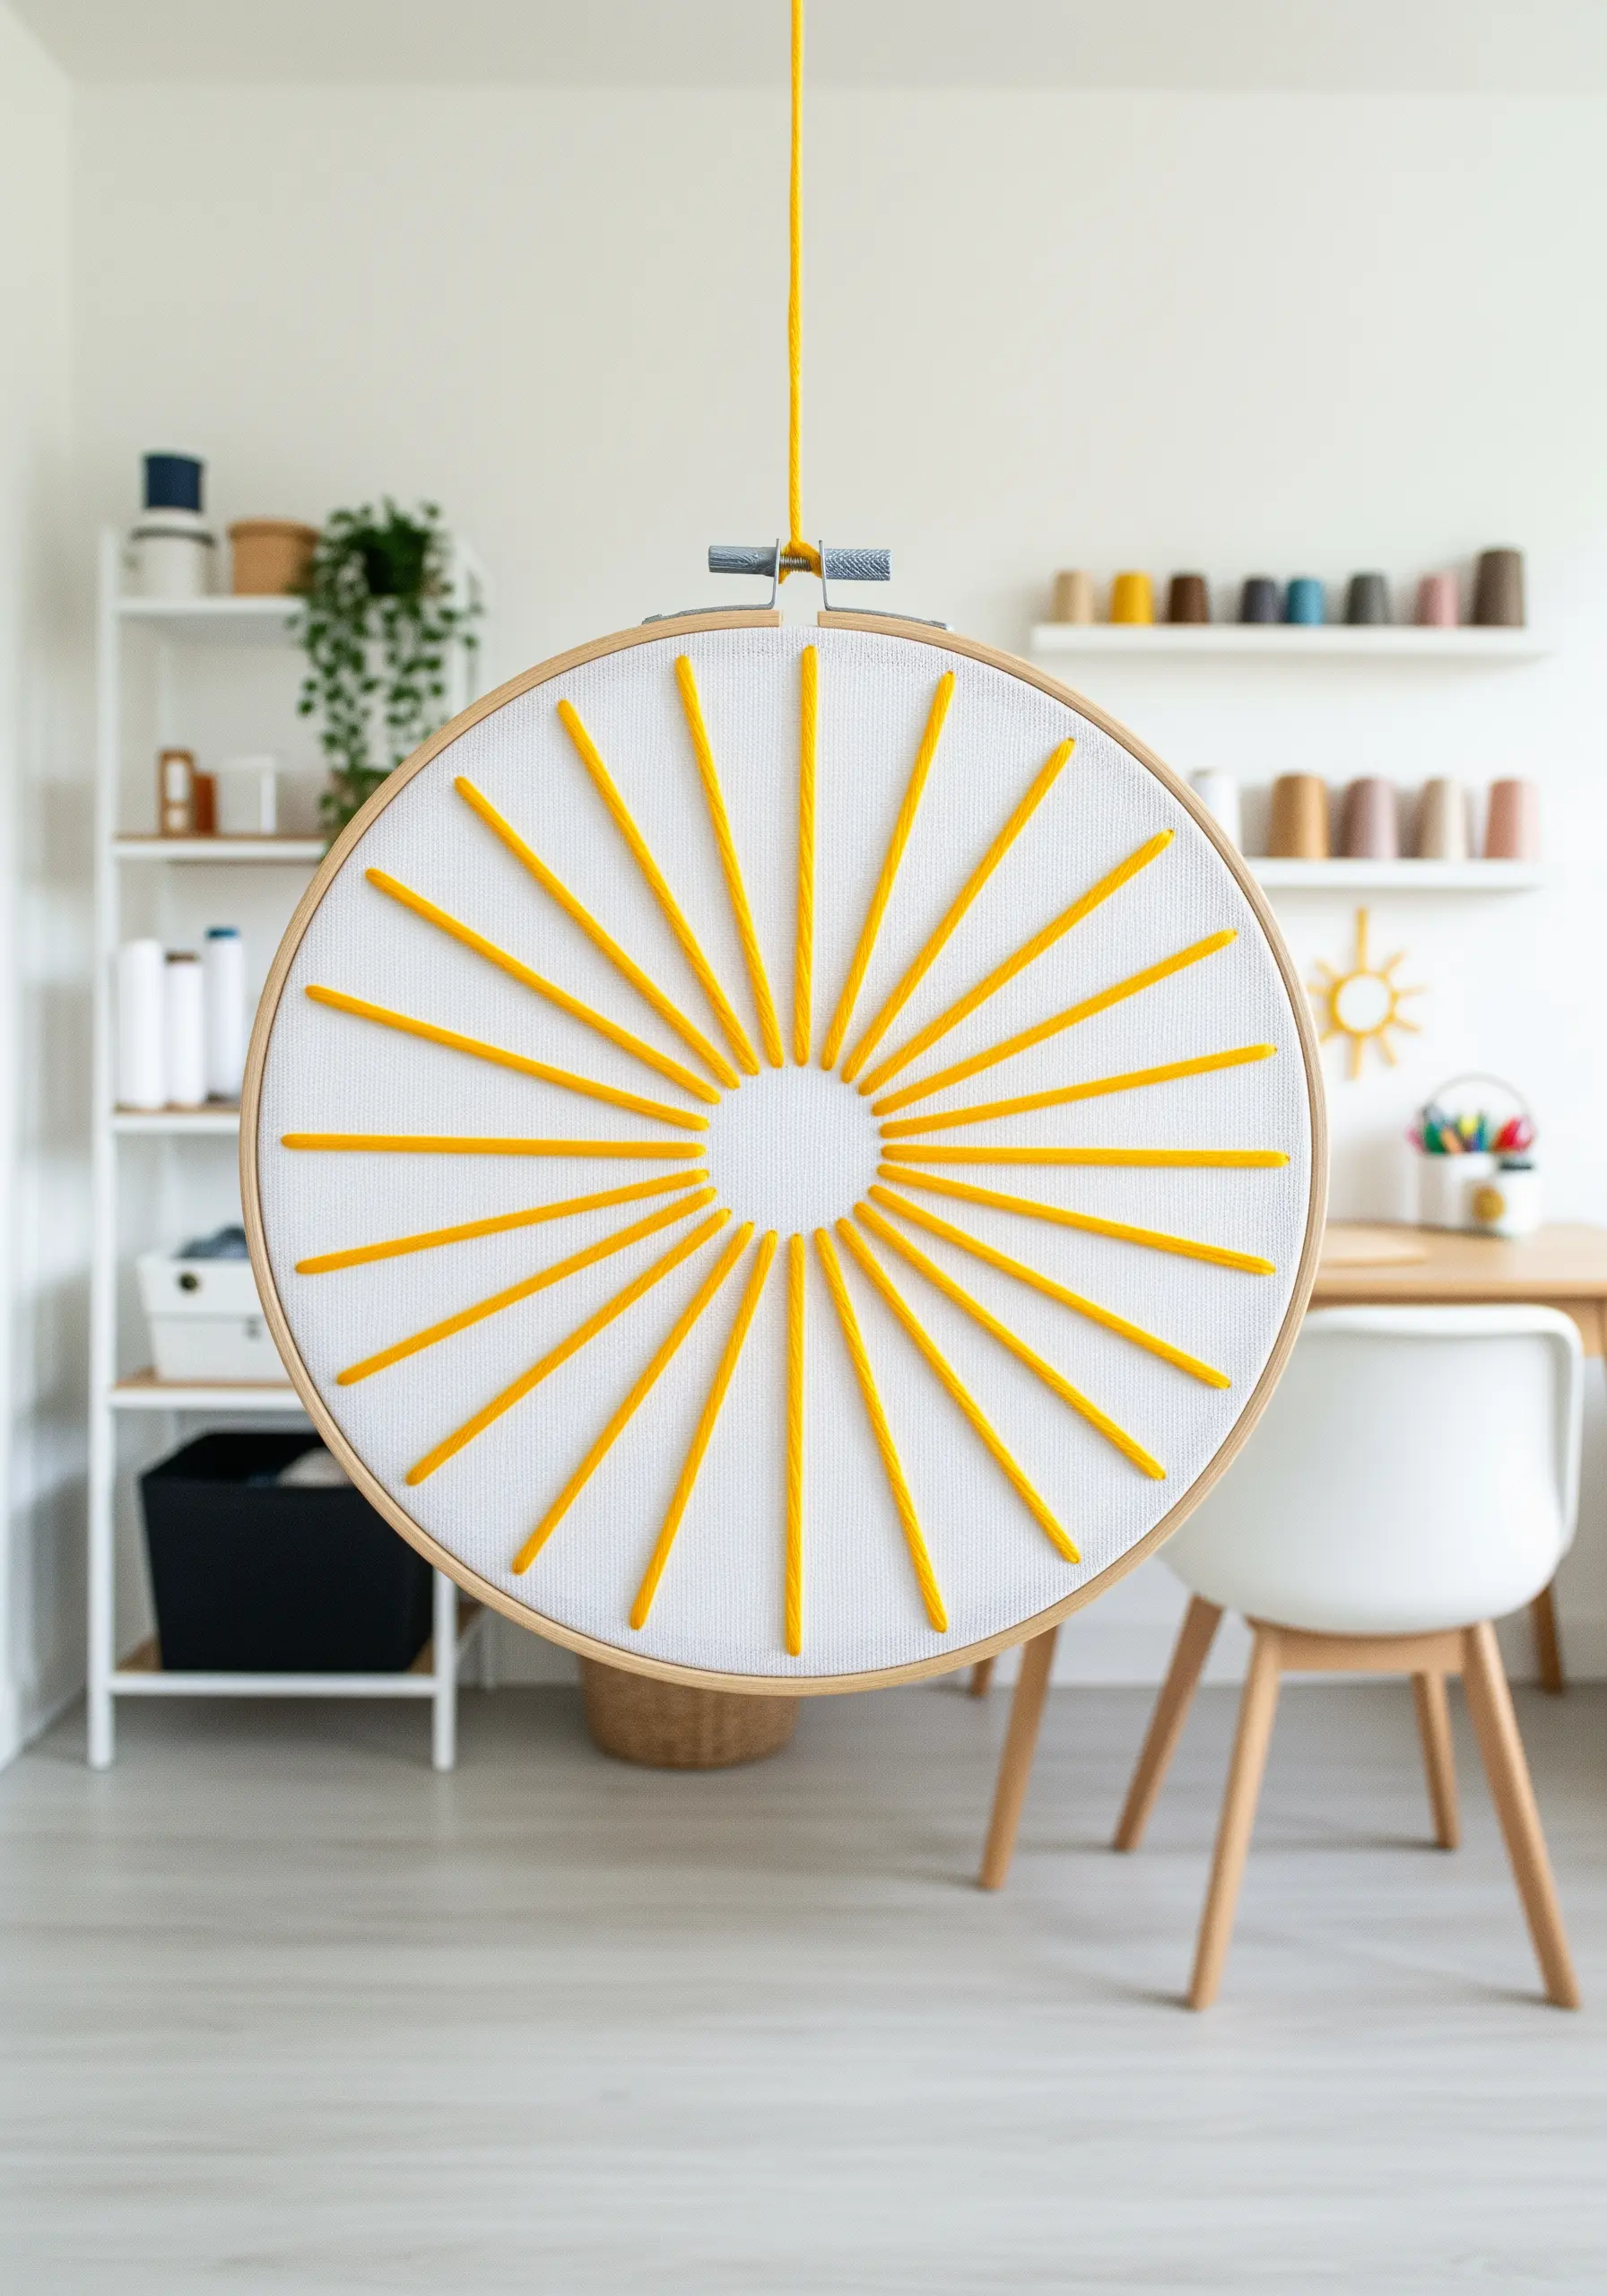
For a flawless sunburst, tension is everything.
Start by stitching the four cardinal points (top, bottom, left, right) to anchor the design and distribute tension evenly across the fabric.
Then, fill in the lines between them, always pulling the thread taut but not so tight that it puckers the fabric.
Using a high-quality, tightly woven fabric like cotton canvas will prevent distortion and help your lines stay crisp and straight.
This design is a masterclass in using negative space effectively.
5. Use Metallics for a Subtle Celestial Glow
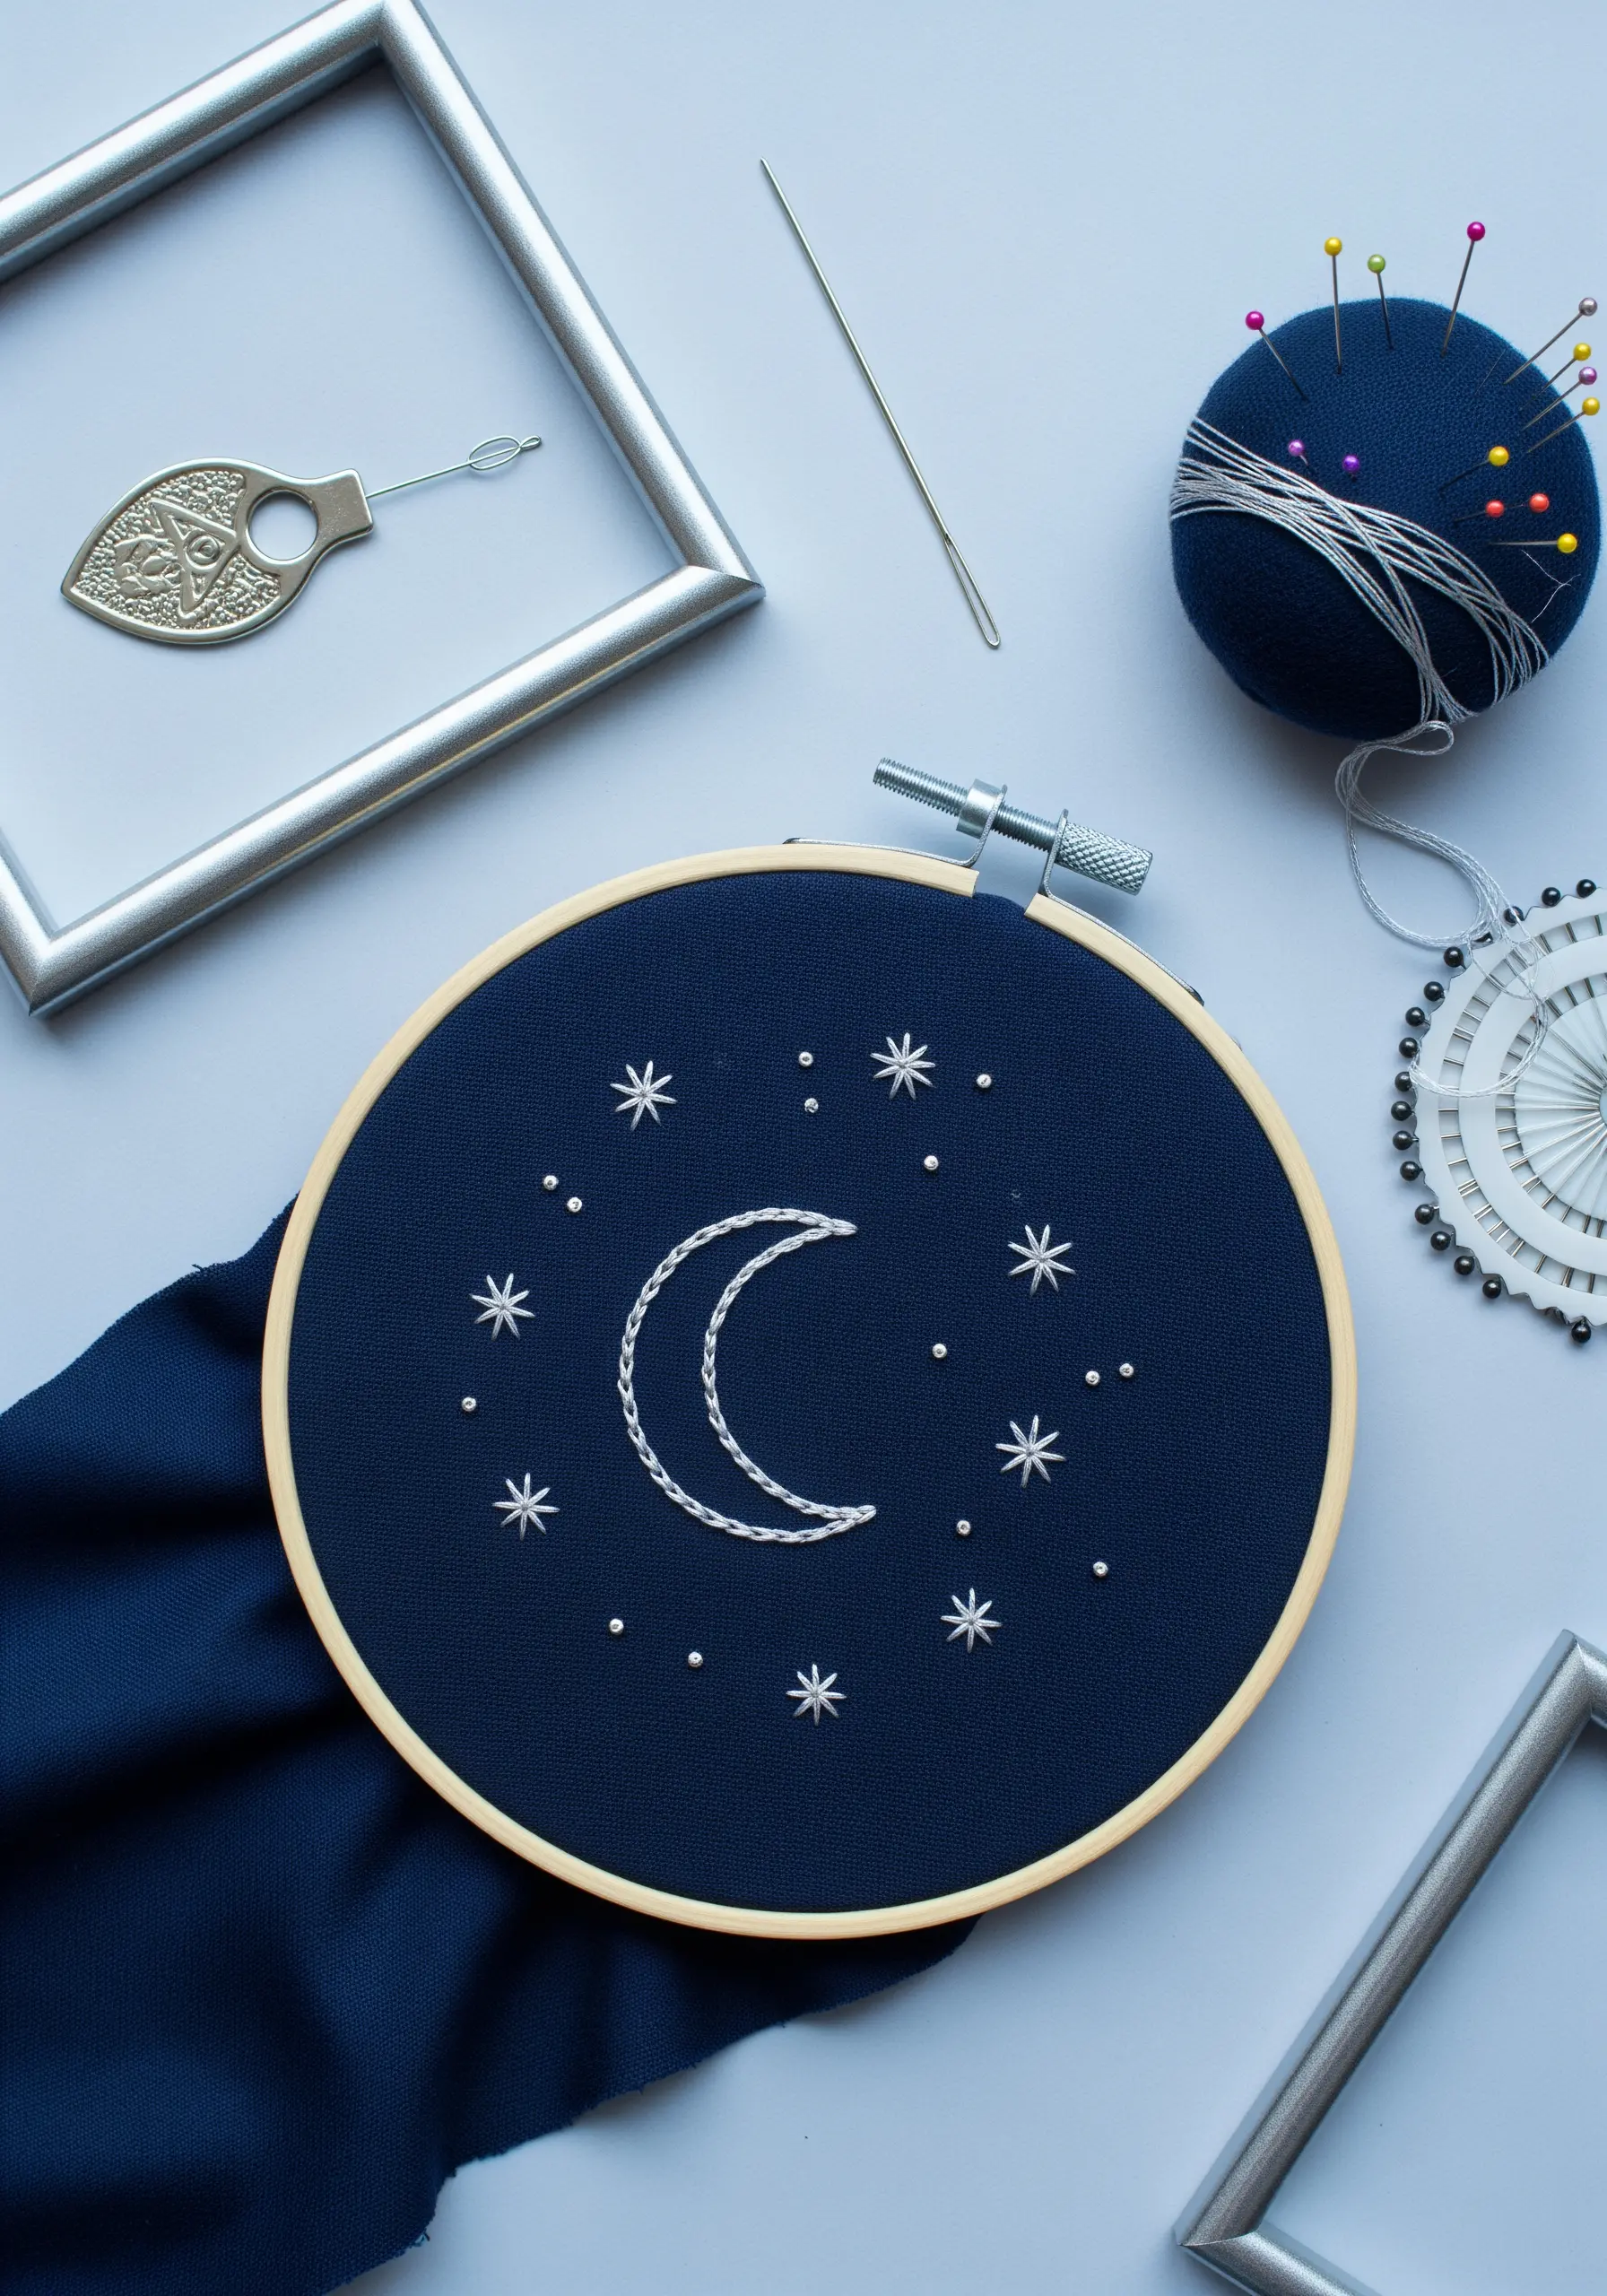
Make your celestial designs shimmer by choosing the right thread.
Instead of a standard cotton floss, use a single strand of silver metallic or a fine pearlescent thread on dark navy linen.
This creates a subtle, light-catching effect that feels more like a distant star than a simple stitch.
Use tiny, single-wrap French knots for the stars and a delicate whipped backstitch for the moon to ensure the metallic thread lies smoothly.
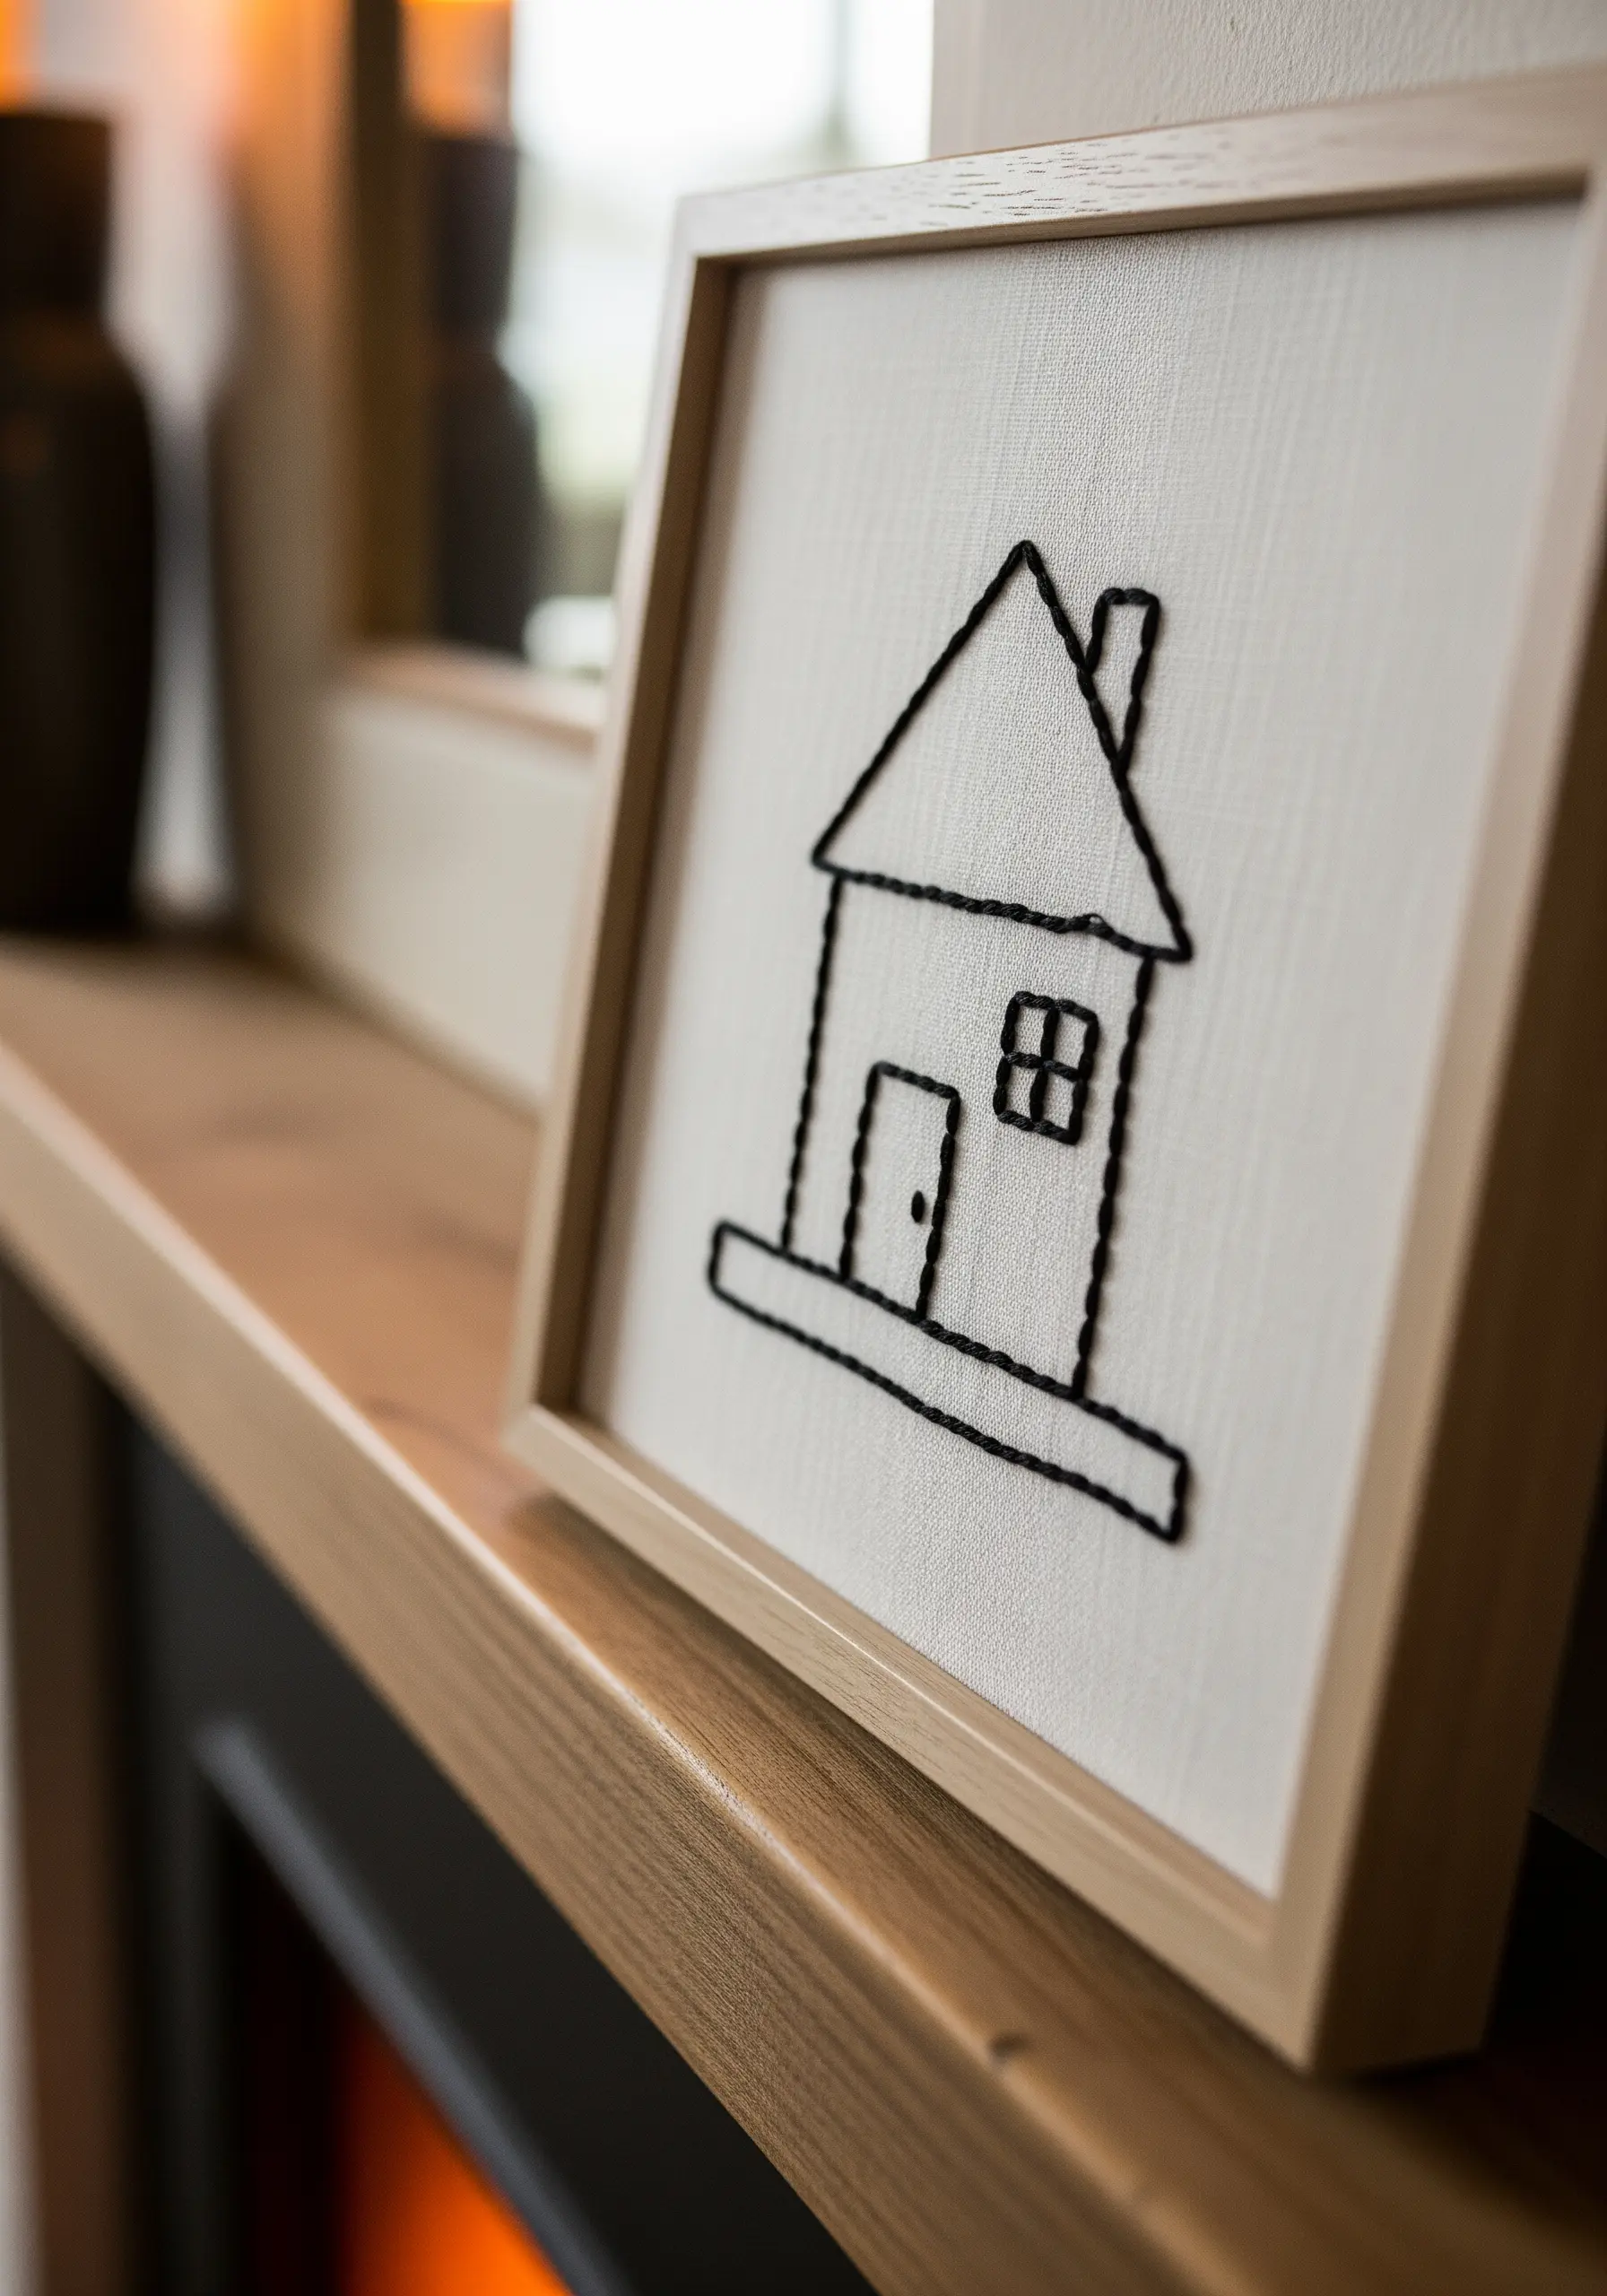
6. Stitch Architectural Lines with Precision

For crisp, clean architectural embroidery, use a single strand of black floss and a sharp needle.
A simple backstitch is perfect for this, but the key is consistency.
Keep your stitch length uniform—around 2mm—for all lines, ensuring a polished, almost machine-made look.
Always use a stabilizer on the back of your fabric to prevent any pulling or puckering, which is crucial for maintaining straight lines and sharp corners.
7. Create a Heathered Effect with Blended Threads
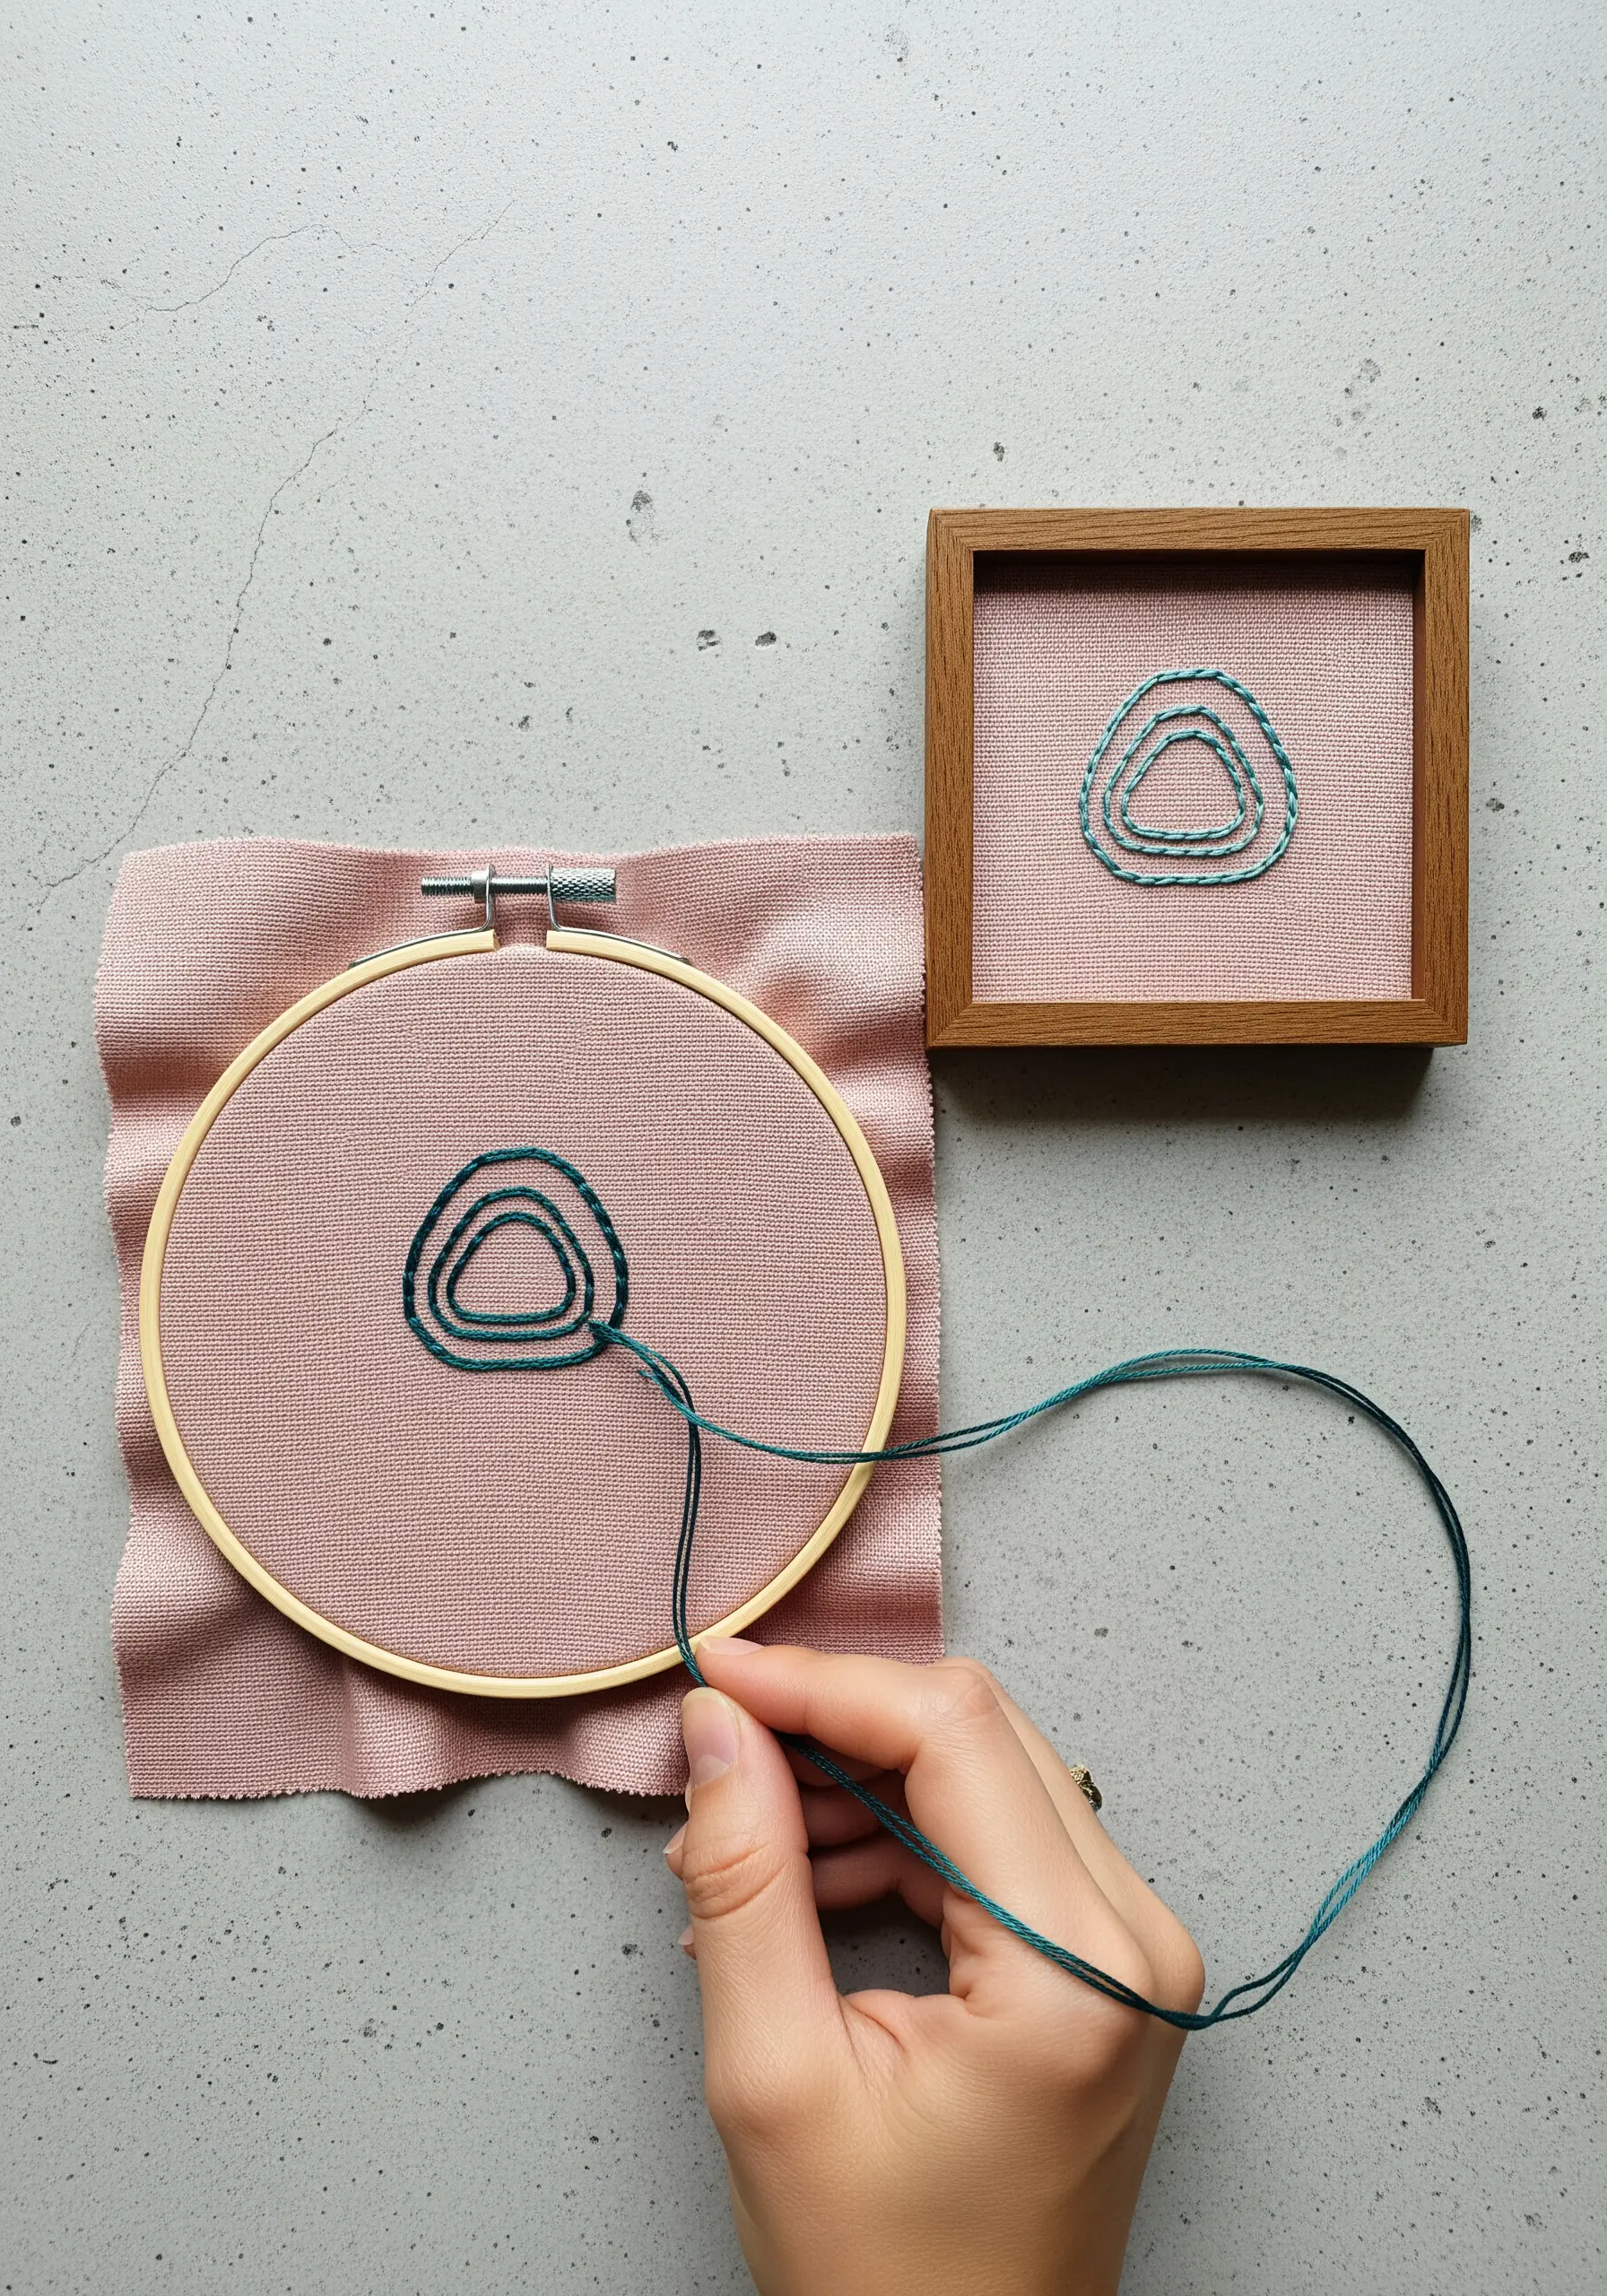
For organic, concentric shapes, create your own custom color by blending threads in the needle.
Instead of using a single color, thread your needle with one strand of dark teal and one strand of a lighter seafoam green.
As you stitch, the colors will twist and blend naturally, creating a subtle, heathered texture with more depth than a solid color.
This technique makes abstract thread landscapes feel more dynamic and alive.
8. Unify a Series with a Cohesive Palette
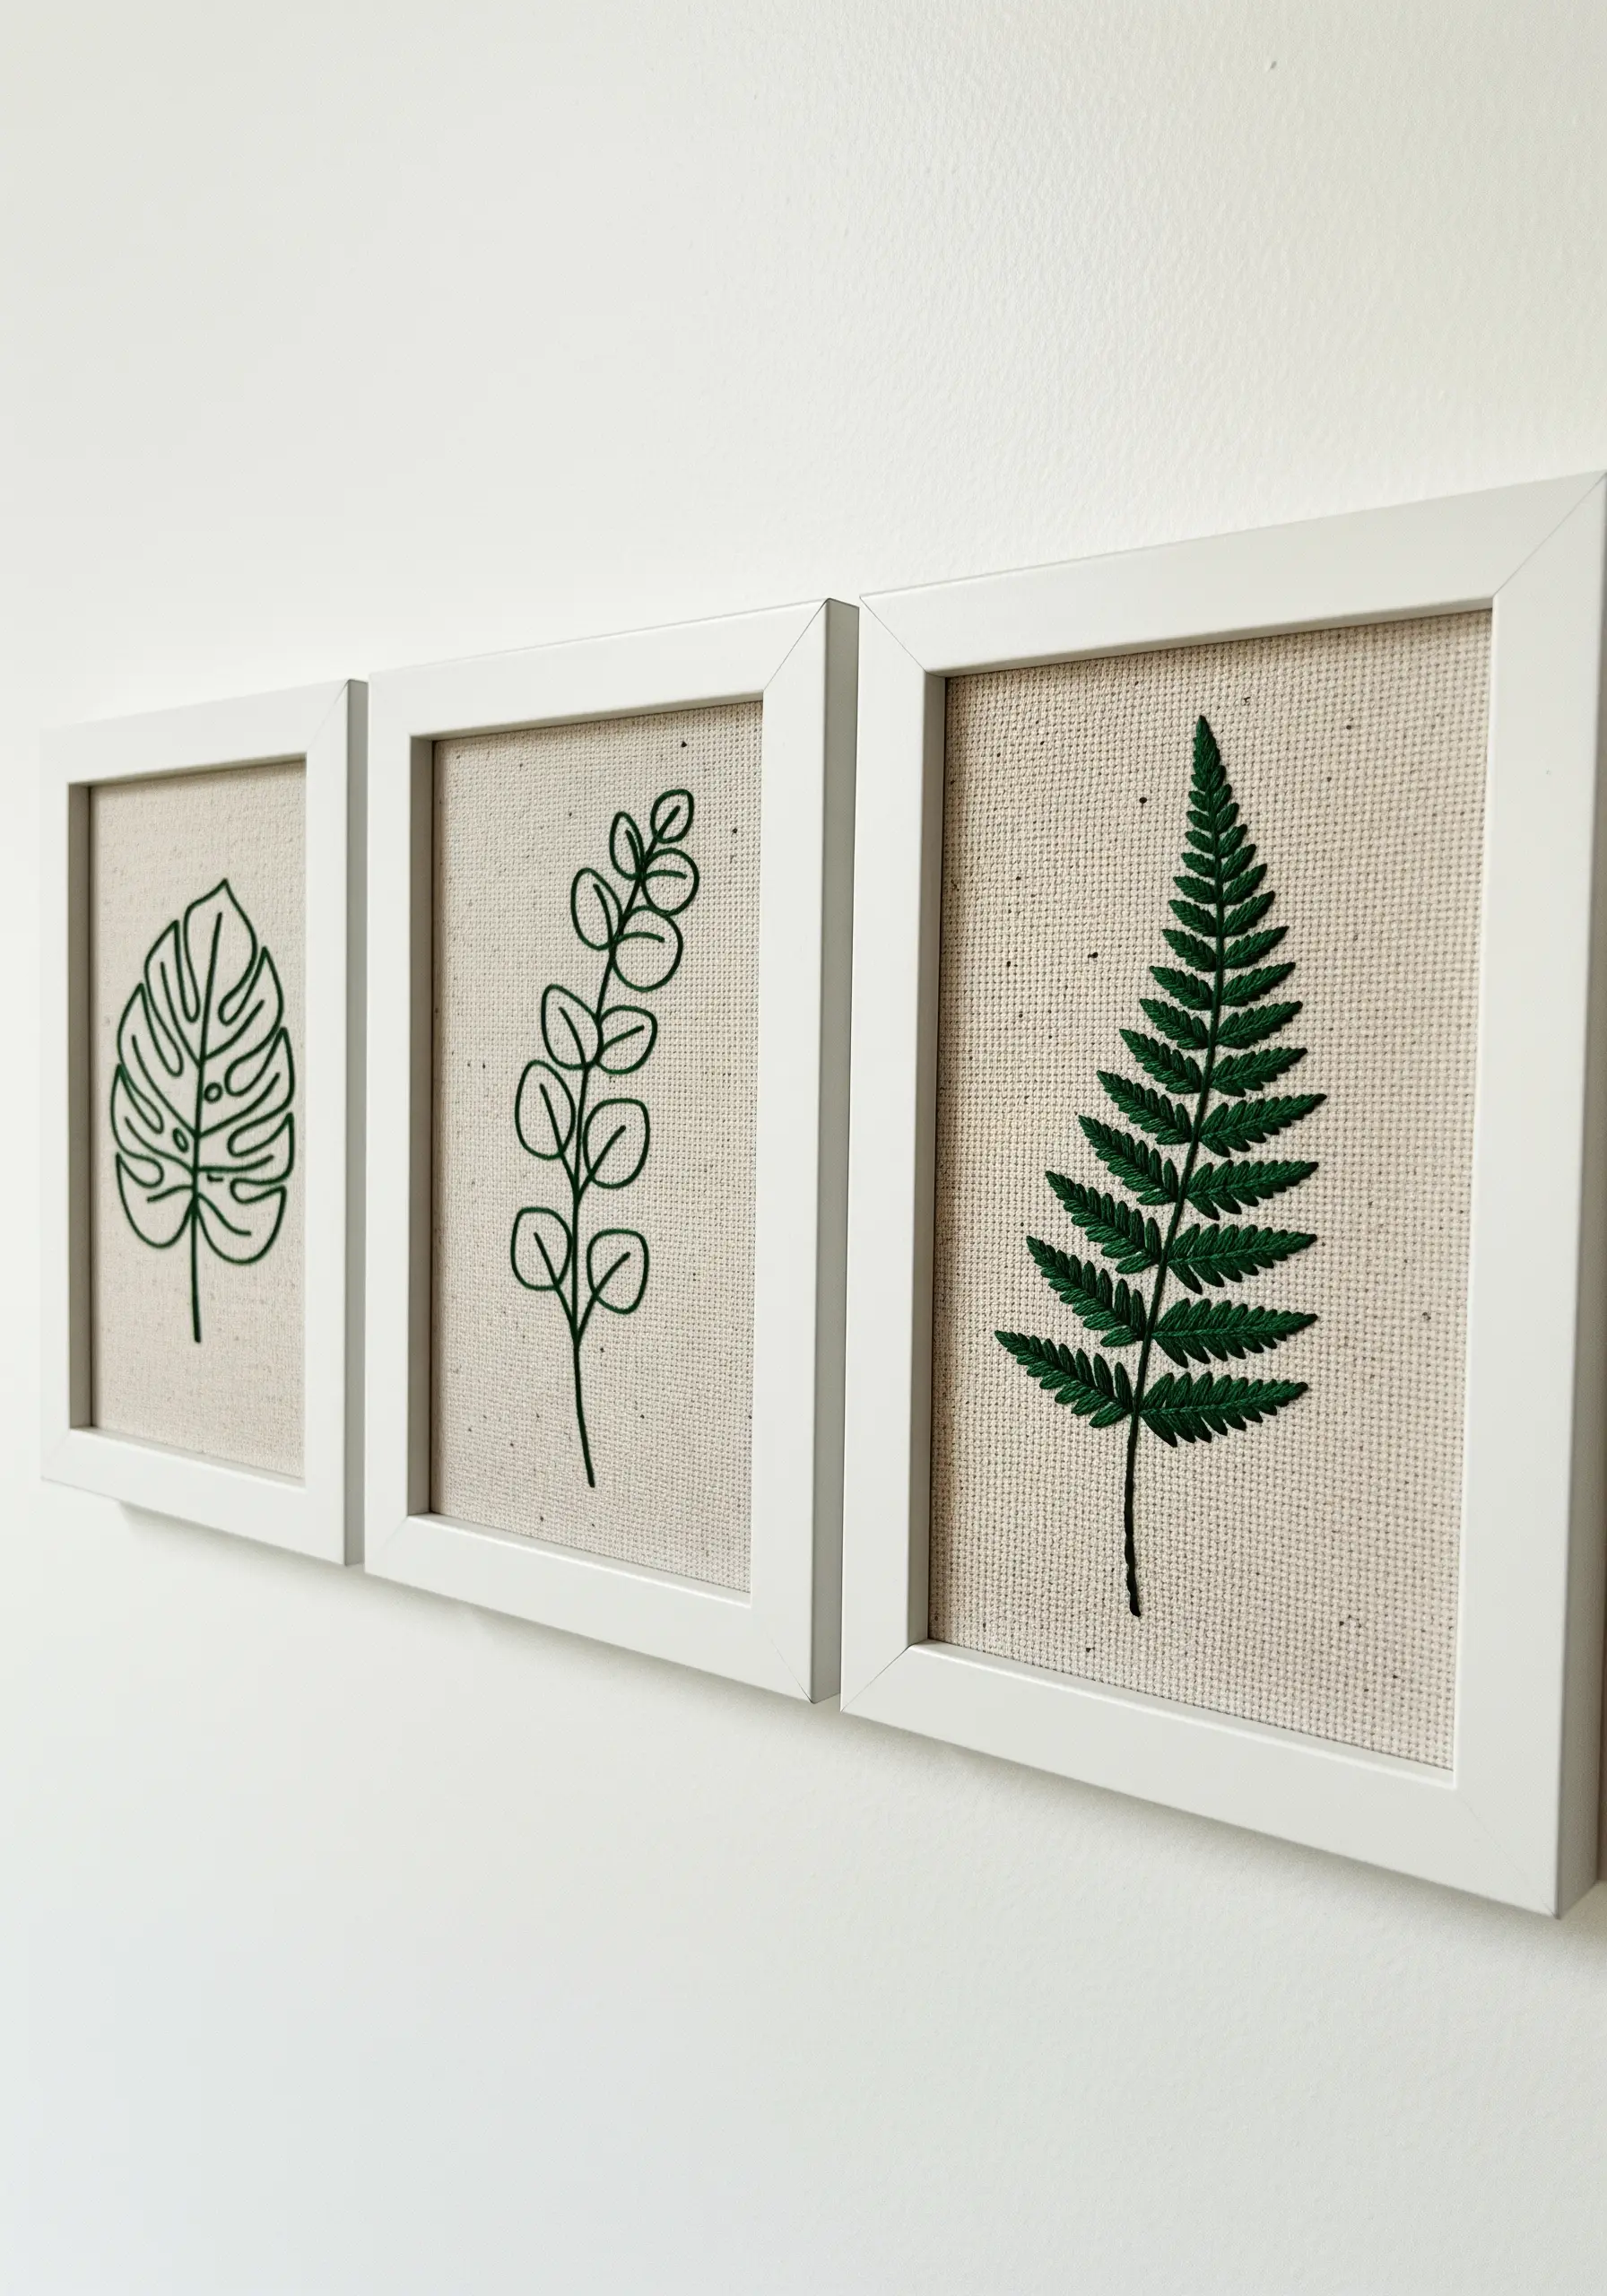
When creating a triptych or series, the key to a professional look is restraint.
Choose one thread color and one fabric for all pieces to create a strong sense of unity.
Introduce variety by changing the stitch technique for each design—for example, use a simple backstitch for one leaf, a stem stitch for another, and a filled satin stitch for the third.
This approach makes the collection feel intentionally designed and visually connected.
9. Translate Sound into Satin Stitch
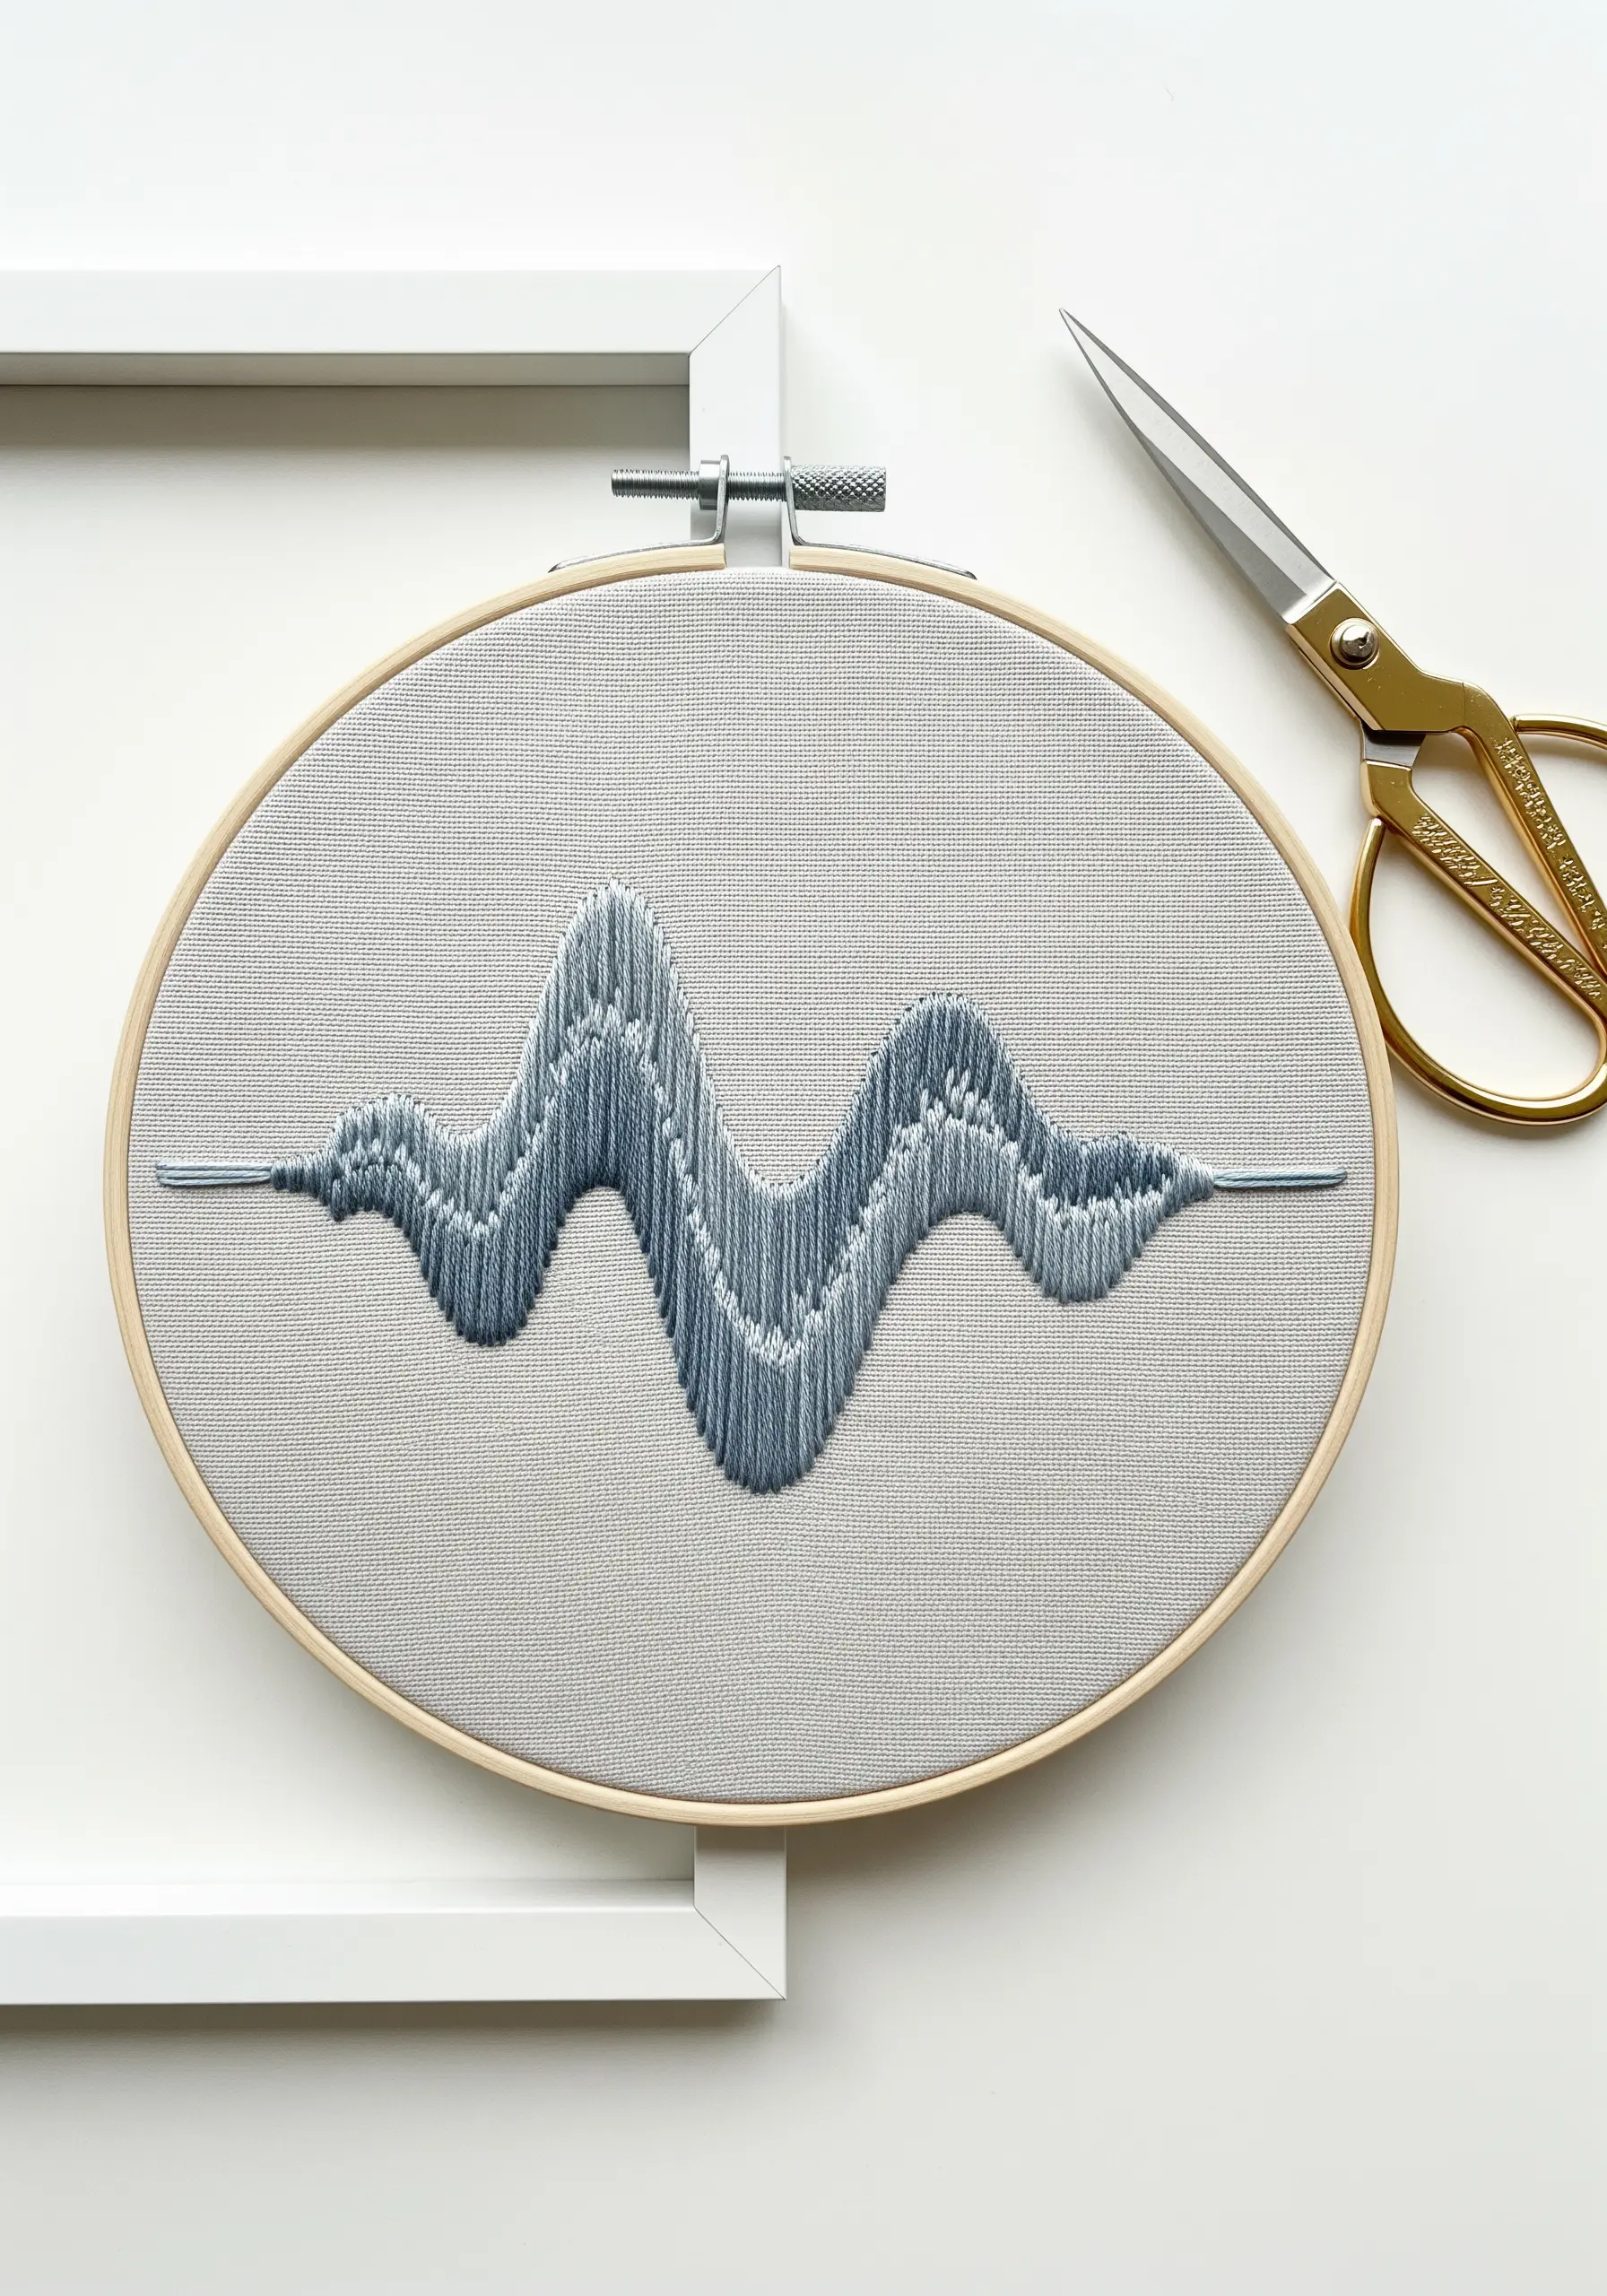
Turn a meaningful soundwave into a piece of art using vertical satin stitches.
The key is to keep your stitches perfectly parallel and tightly packed, creating a solid block of texture.
Use a fine-tipped, heat-erasable pen to draw your guidelines directly onto the fabric, ensuring your peaks and valleys are accurate.
Stitching on a neutral gray fabric allows the shape and texture of the soundwave to become the undisputed focus.
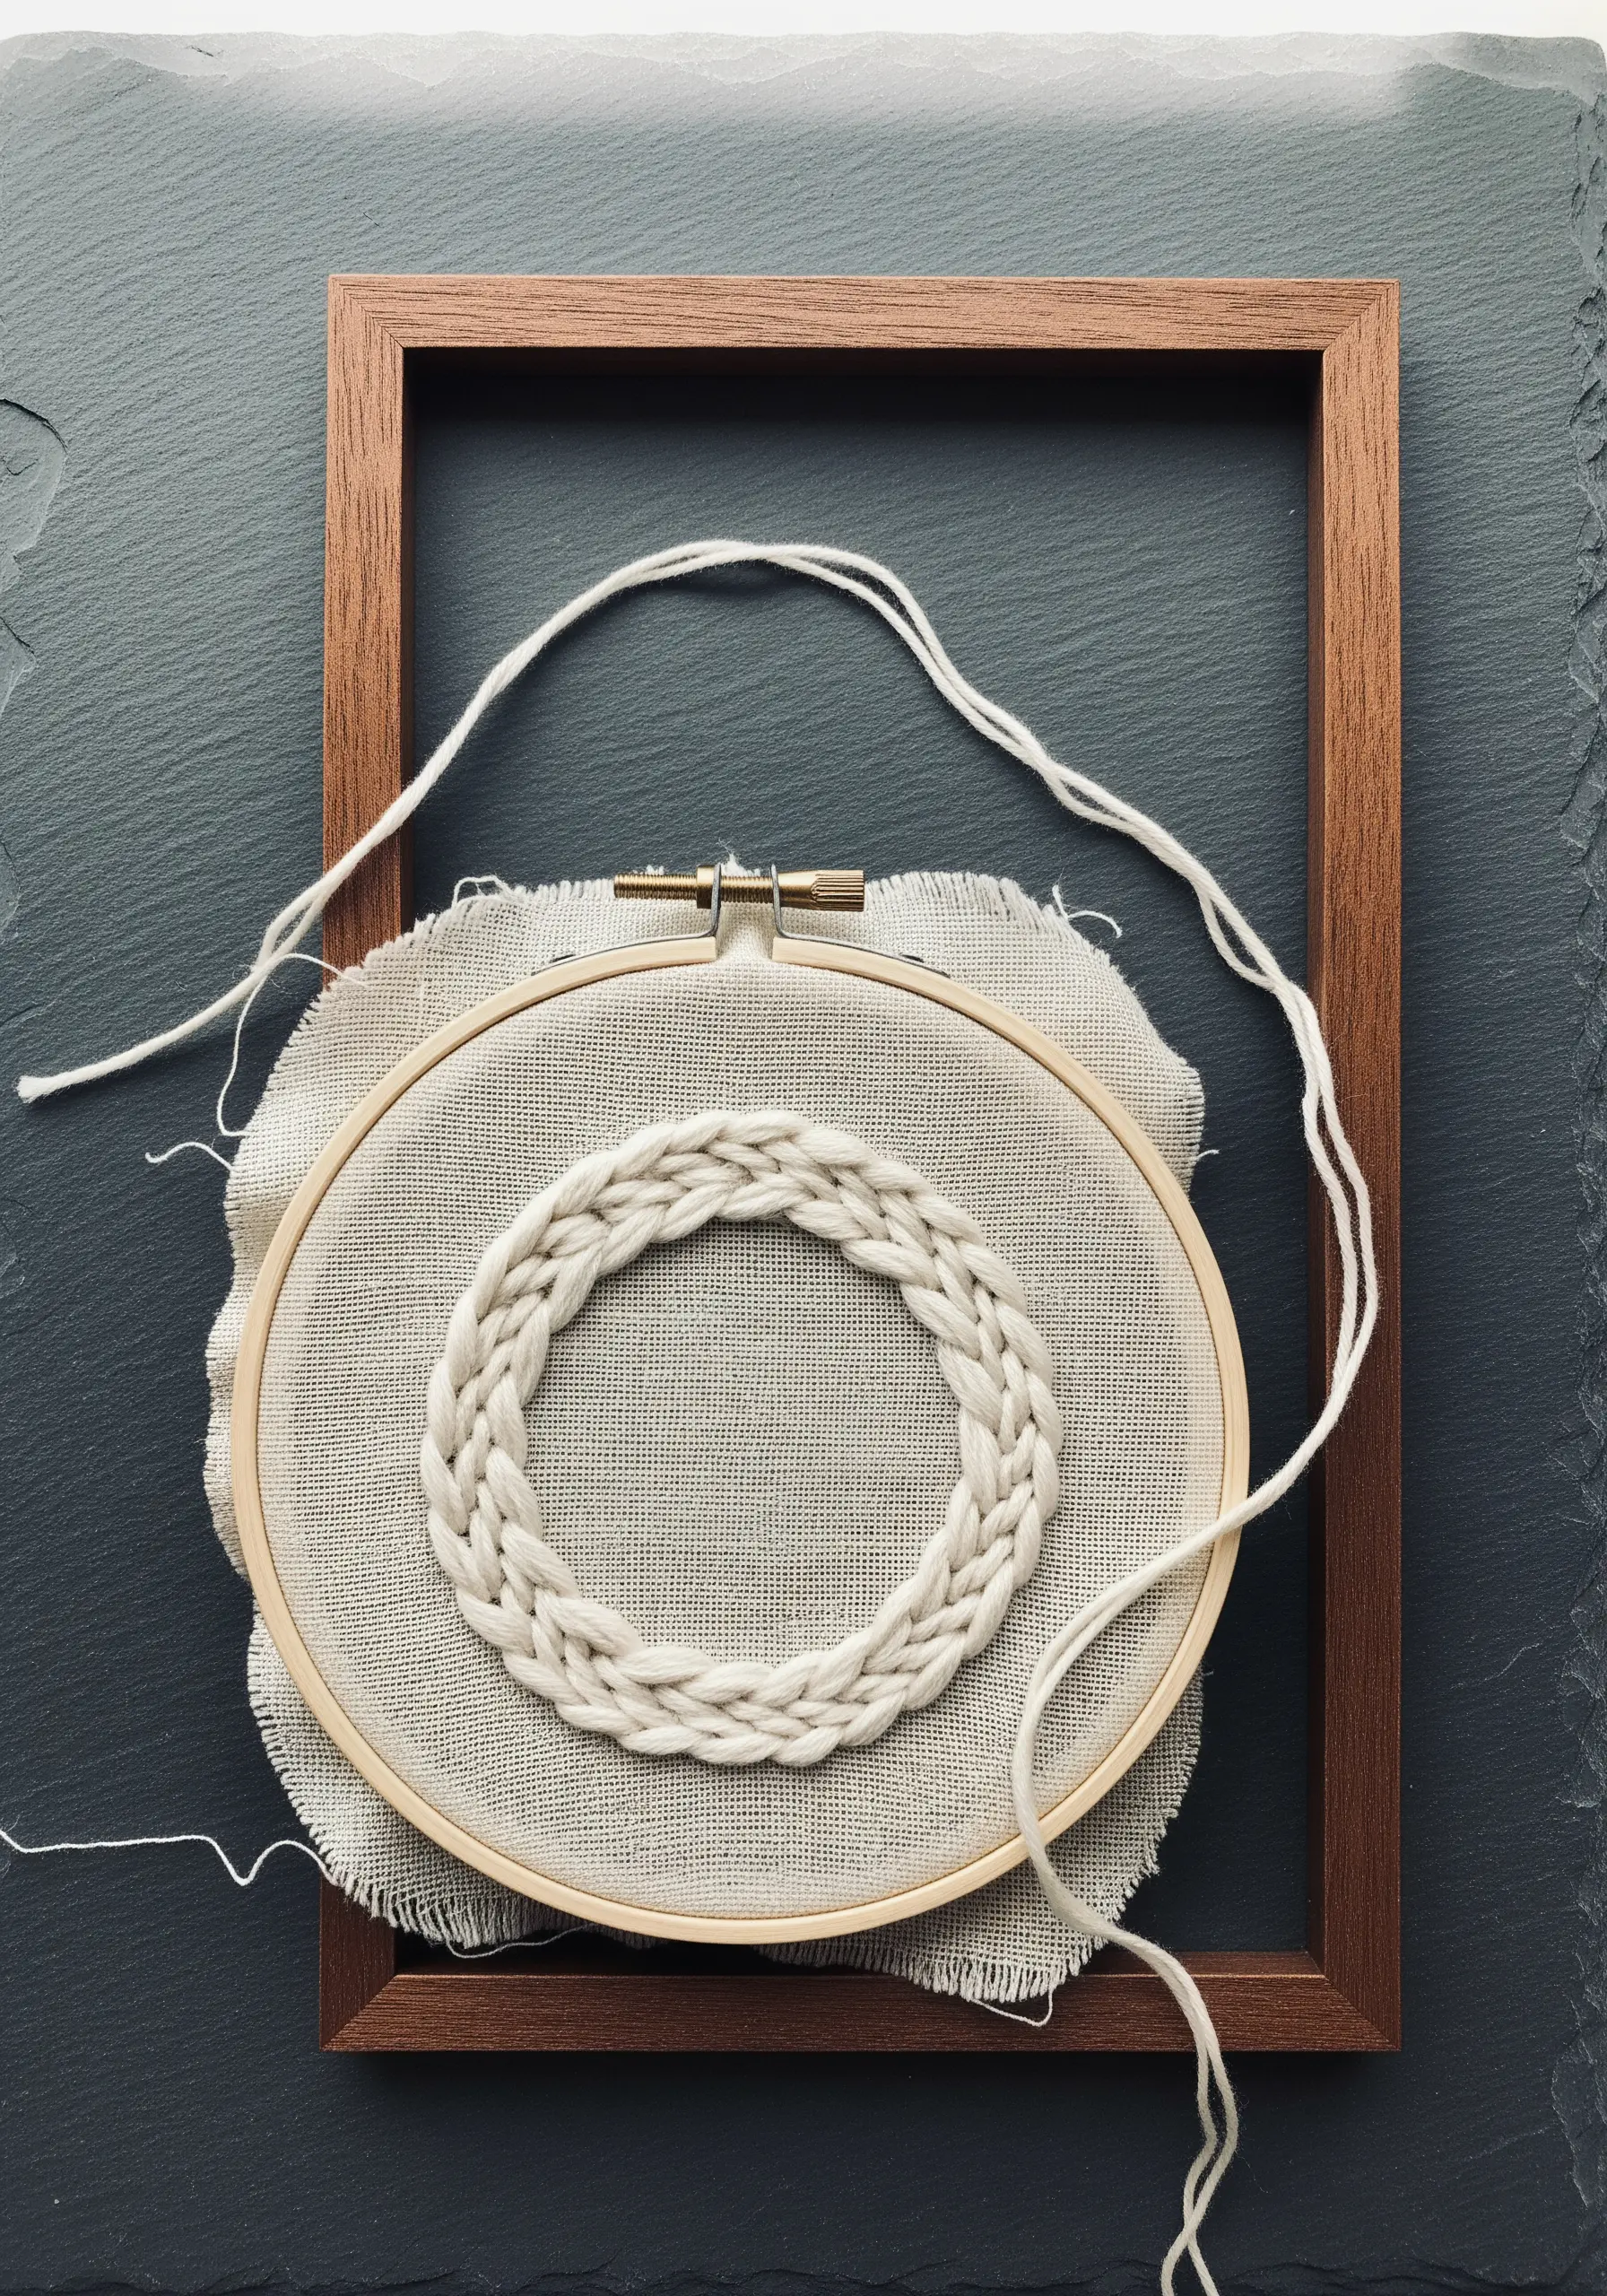
10. Add Dimension with a Padded Chain Stitch

To make these interlocking rings appear truly three-dimensional, use a padded chain stitch.
First, stitch the outline of each ring using a basic chain stitch.
Then, fill the inside of the ring with a second, tightly packed row of chain stitches right next to the first, and continue until the shape is full.
This technique creates a raised, cord-like texture that makes the rings look and feel substantial, enhancing the illusion of them weaving together.
11. Achieve Flawless Lettering with a Split Stitch Base

For elegant, script-like lettering that flows like ink, start with a split stitch foundation.
This simple stitch creates a stable, slightly raised base for your final stitches.
Once the split stitch outline is complete, cover it with a tight satin stitch or a whipped backstitch.
The underlying stitches prevent the fabric from puckering and provide a smooth guide, ensuring your curves are perfect and your lines are impeccably clean.
12. Create Focus with a Single Pop of Color
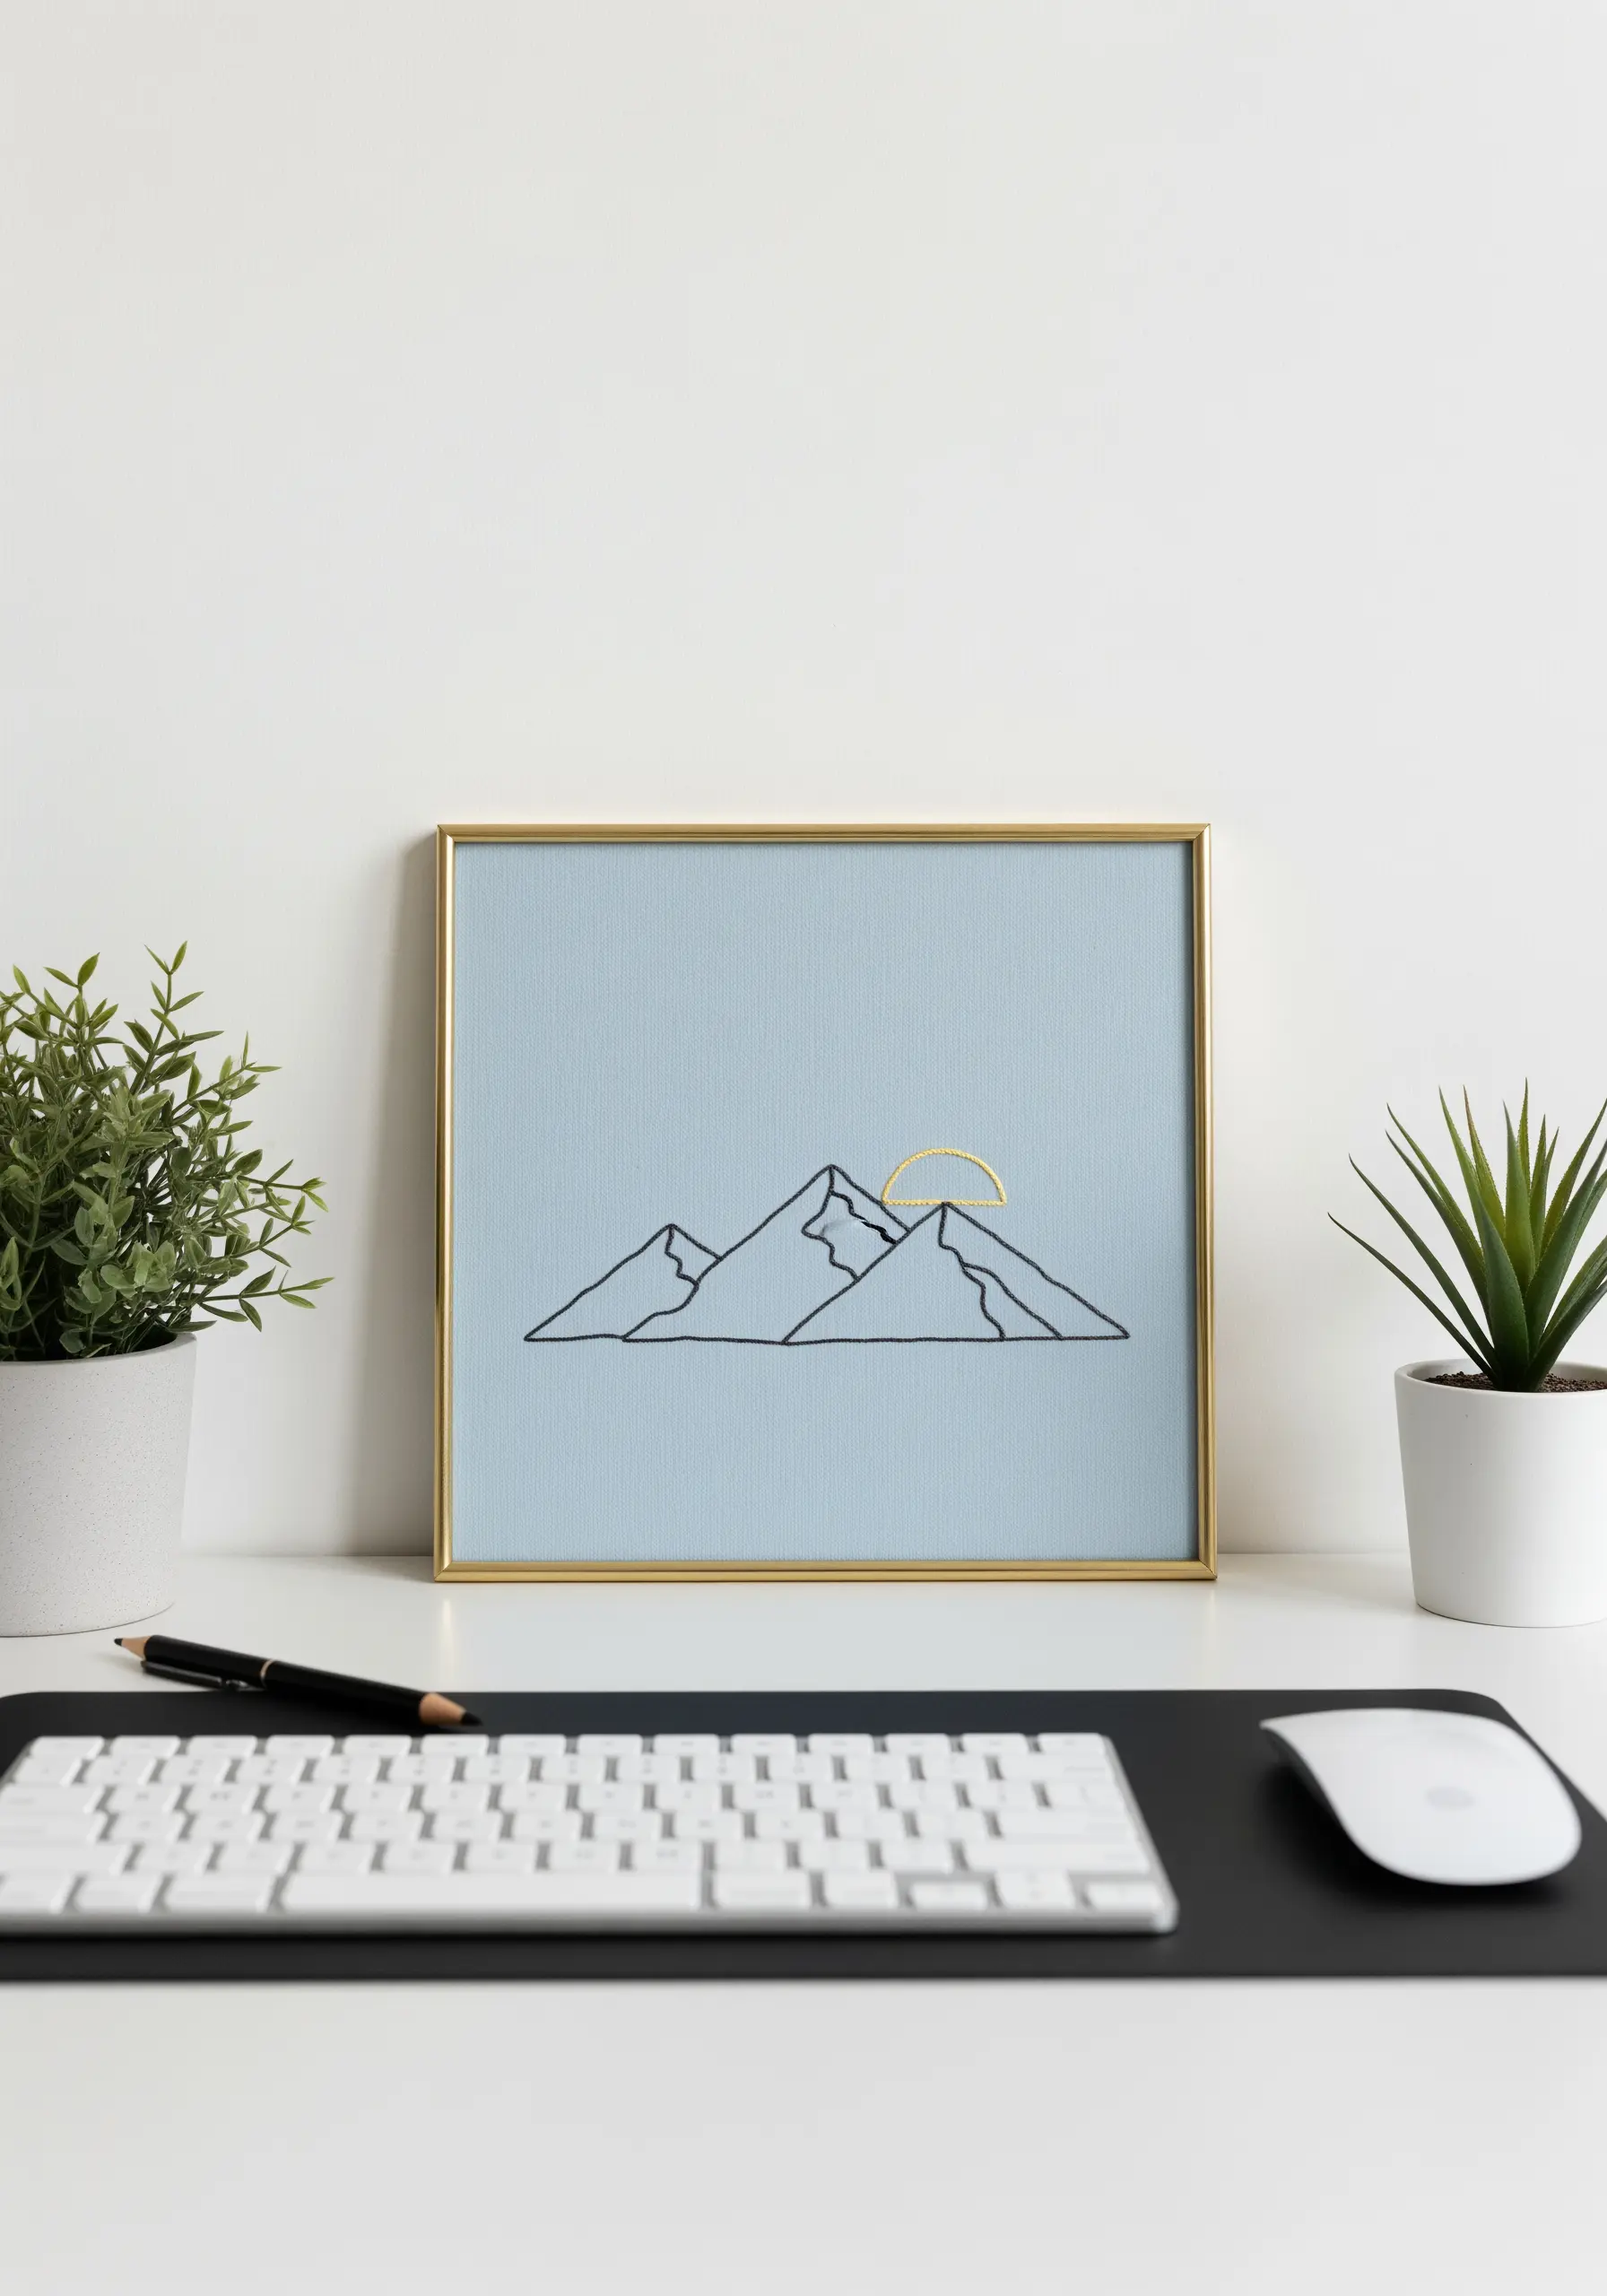
Elevate a simple line drawing by adding one small, strategic element of color.
Here, a simple backstitched mountain range is instantly transformed by a small, satin-stitched sun in a contrasting metallic gold thread.
This technique draws the viewer’s eye and creates a clear focal point, turning a basic outline into a complete composition.
The power of this design lies in its restraint; the minimalist hoop art allows the single color to have maximum impact.
13. Define Shapes with Stitch Direction
When working with abstract color blocks, use the direction of your stitches to create a subtle boundary.
Fill the first shape with perfectly horizontal satin stitches.
For the second shape, switch to vertical satin stitches.
Even where the two blocks of color touch, the change in stitch direction will catch the light differently, creating a clean, defined edge without needing an outline.
This adds a layer of sophisticated, textural detail to your composition.
14. Use French Knots for Pointillist Shading
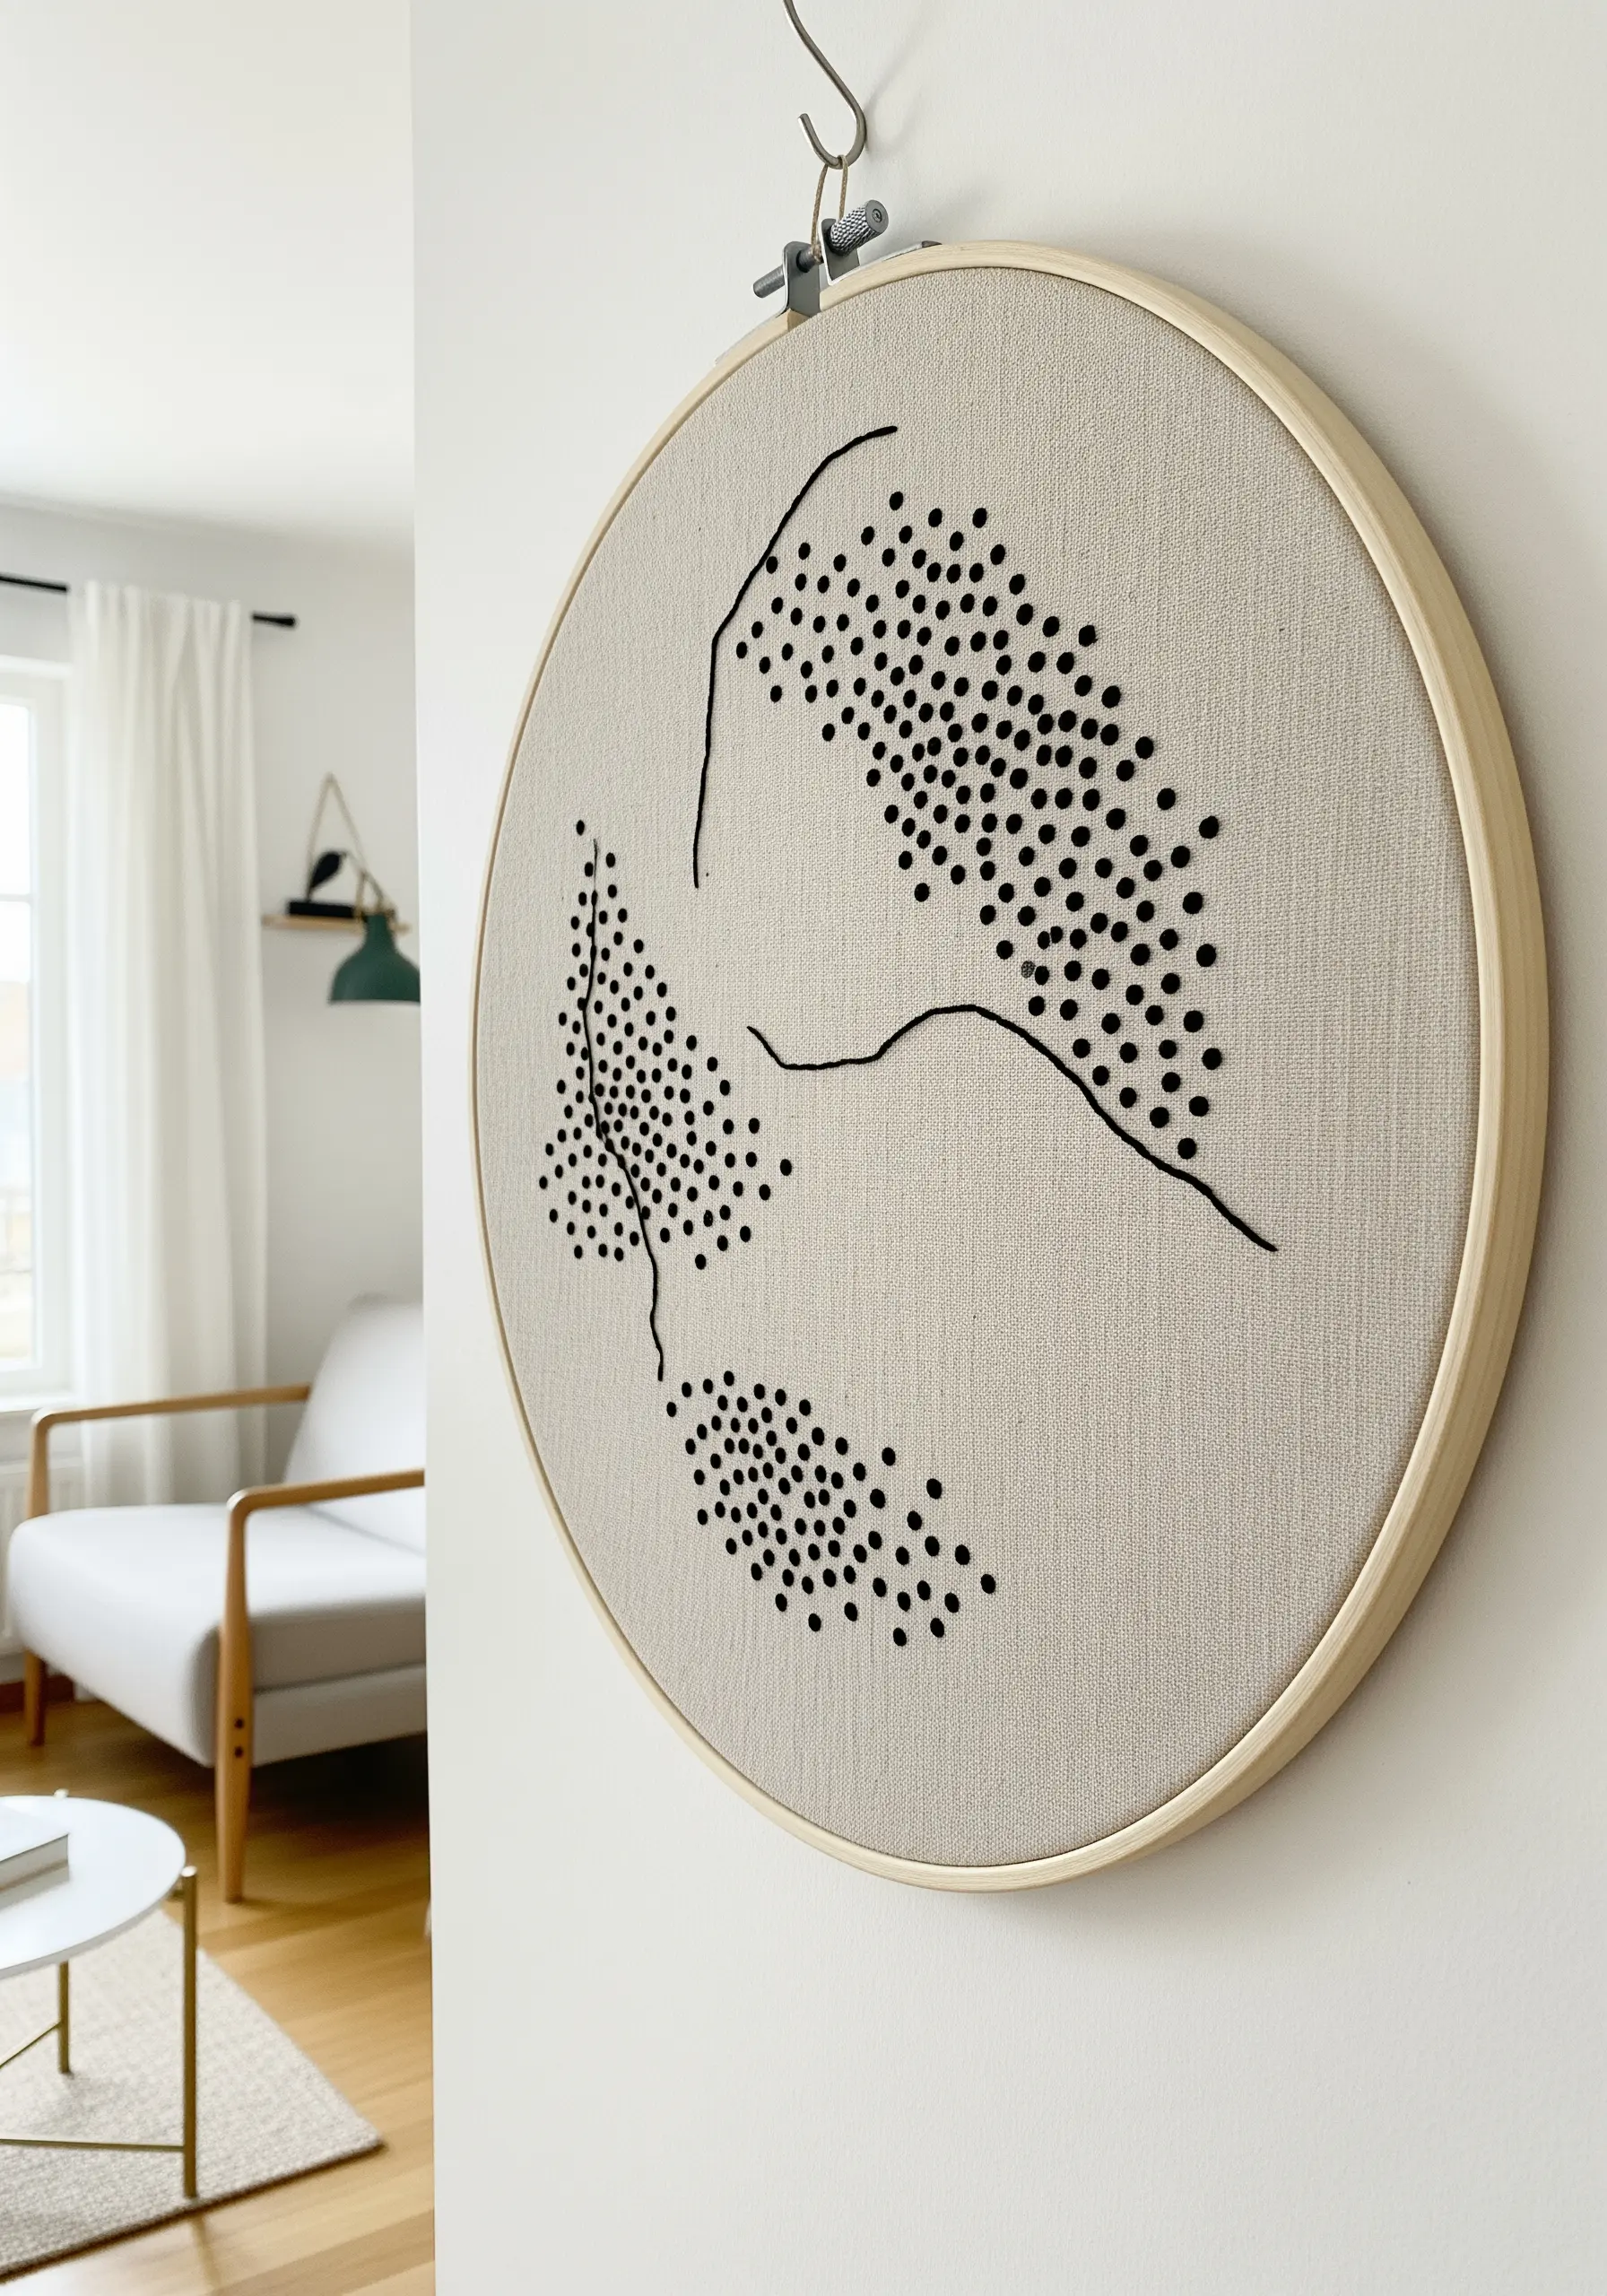
Create depth and form not with lines, but with dots.
You can achieve a beautiful pointillist effect by varying the density of French knots.
Place knots close together in areas that need to be darker or more defined, and space them further apart for lighter, airier sections.
This technique turns a simple stitch into a powerful tool for shading and texture, allowing you to build abstract shapes that feel dynamic and full of movement.
15. Weave Texture Directly into the Hoop
Introduce a soft, sculptural element by weaving yarn directly onto your fabric.
Create a circular framework of straight stitches, like spokes on a wheel, using a strong cotton thread.
Then, use a tapestry needle to weave a thicker, softer fiber like wool roving or chunky yarn over and under the spokes.
This mixed fiber technique adds a beautiful, cozy texture that contrasts wonderfully with the flat embroidered surface.
16. Create Topographic Contours with Layered Stitches
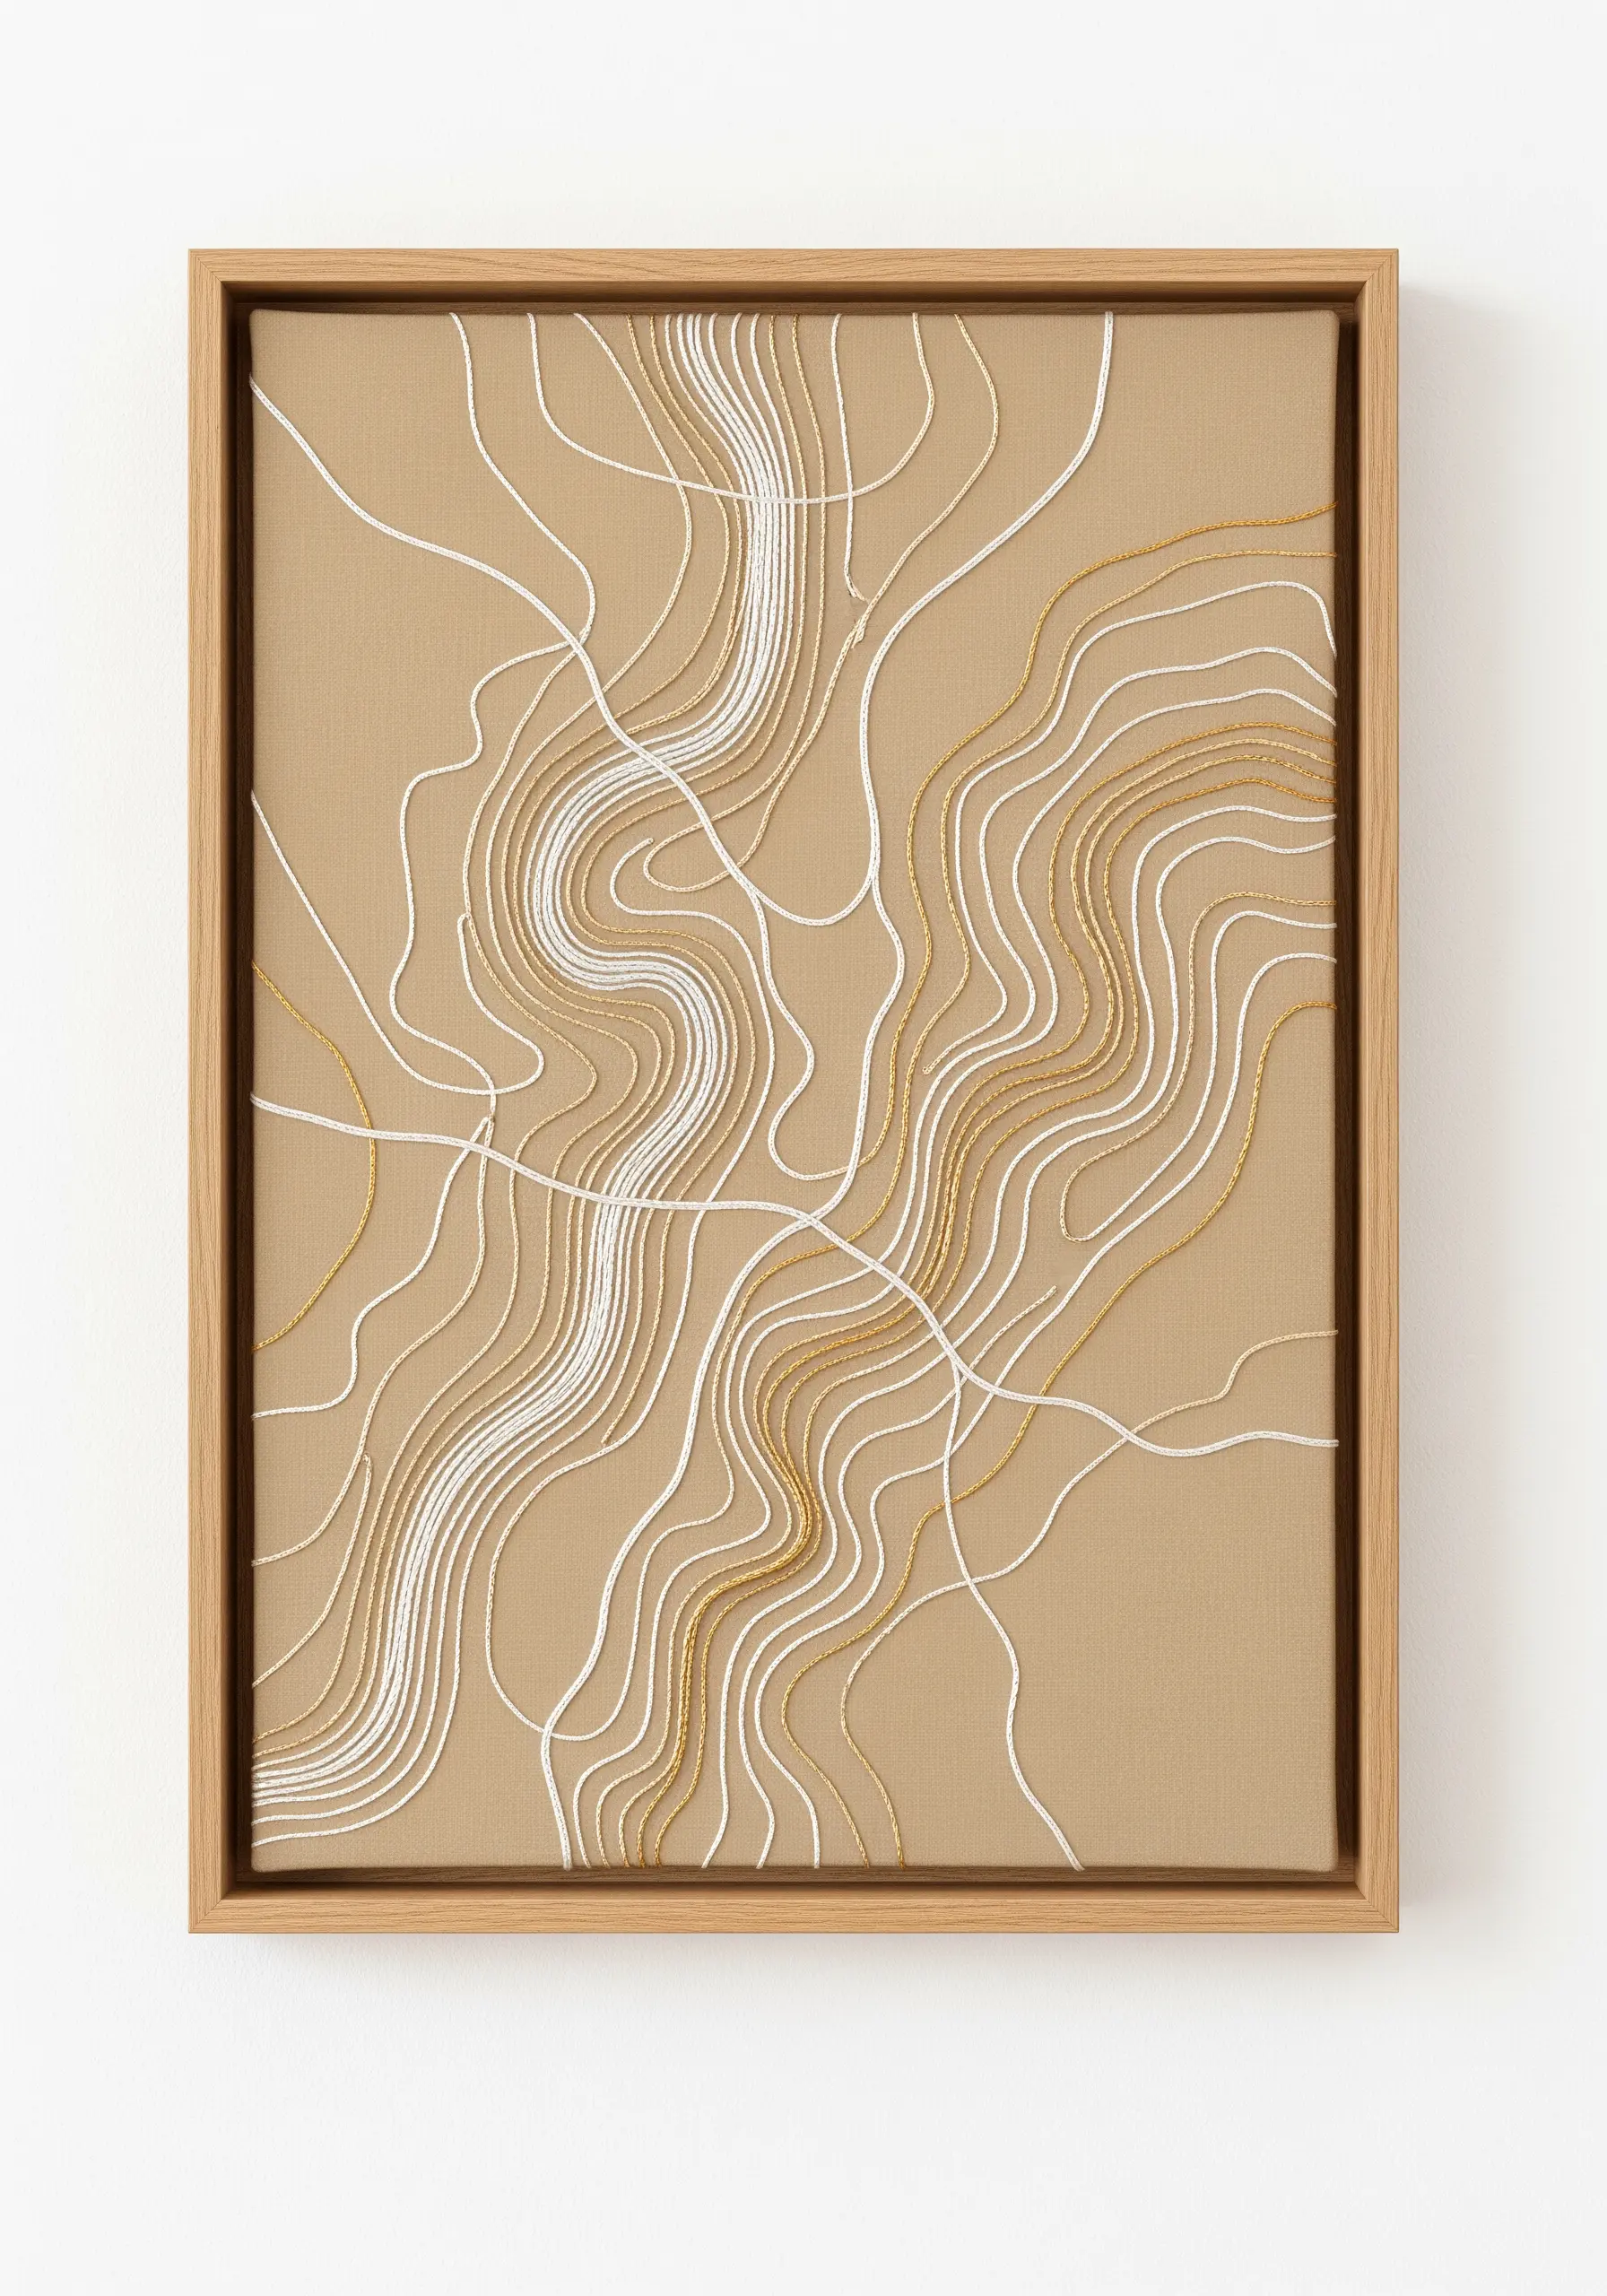
To mimic the flowing lines of a topographic map, rely on repetition and subtle variation.
Use a simple stem stitch or backstitch to create your initial contour line.
Then, stitch parallel lines that echo the first, keeping the spacing between them as consistent as possible.
Introduce a secondary color, like gold, on a few select lines to create highlights and visual interest, guiding the viewer’s eye through the landscape of threads.
17. Build a Sculptural Surface with Knots
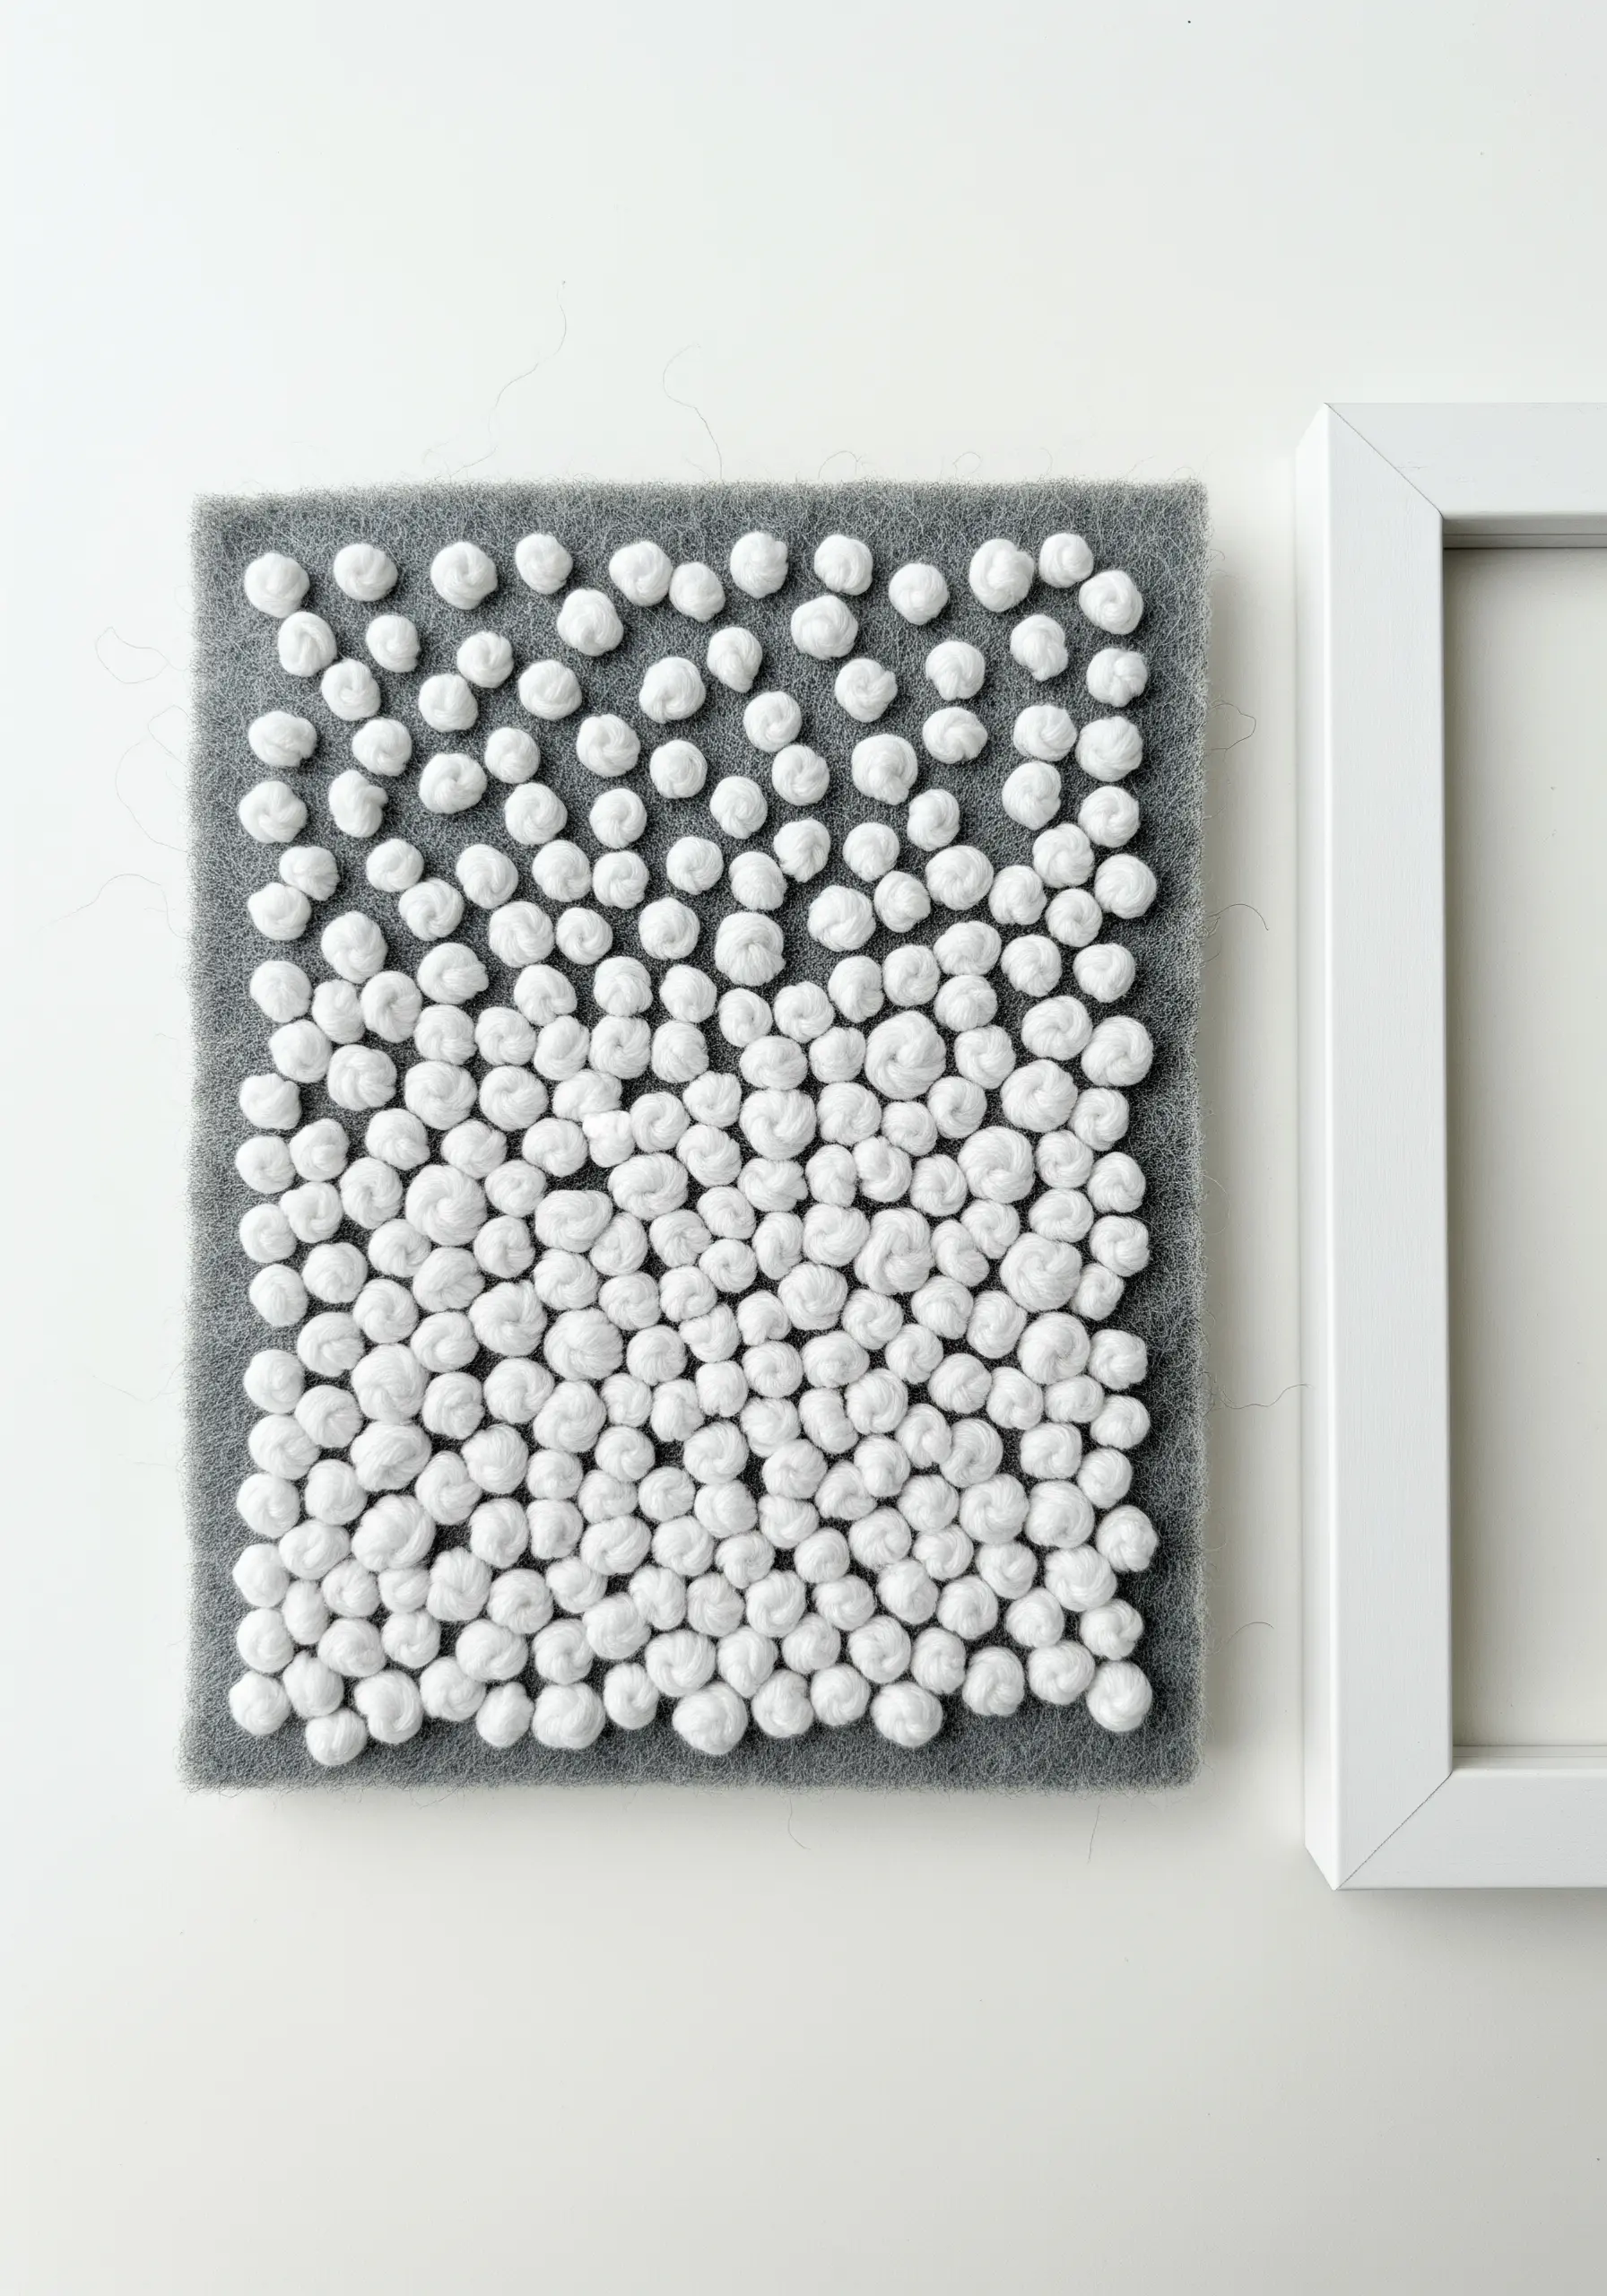
For an intensely tactile piece, fill your entire surface with knots.
The colonial knot is an excellent choice here; it’s sturdy, round, and slightly easier to create consistently than a French knot.
Pack the knots tightly together, starting from the outside edge and spiraling inward.
Using a slightly thicker thread, like a cotton perle, will help you build up a dense, bobbled texture that invites touch.
Explore more ways to stitch natural textures like this for a truly unique finish.
18. Achieve Realism with a Long-and-Short Stitch
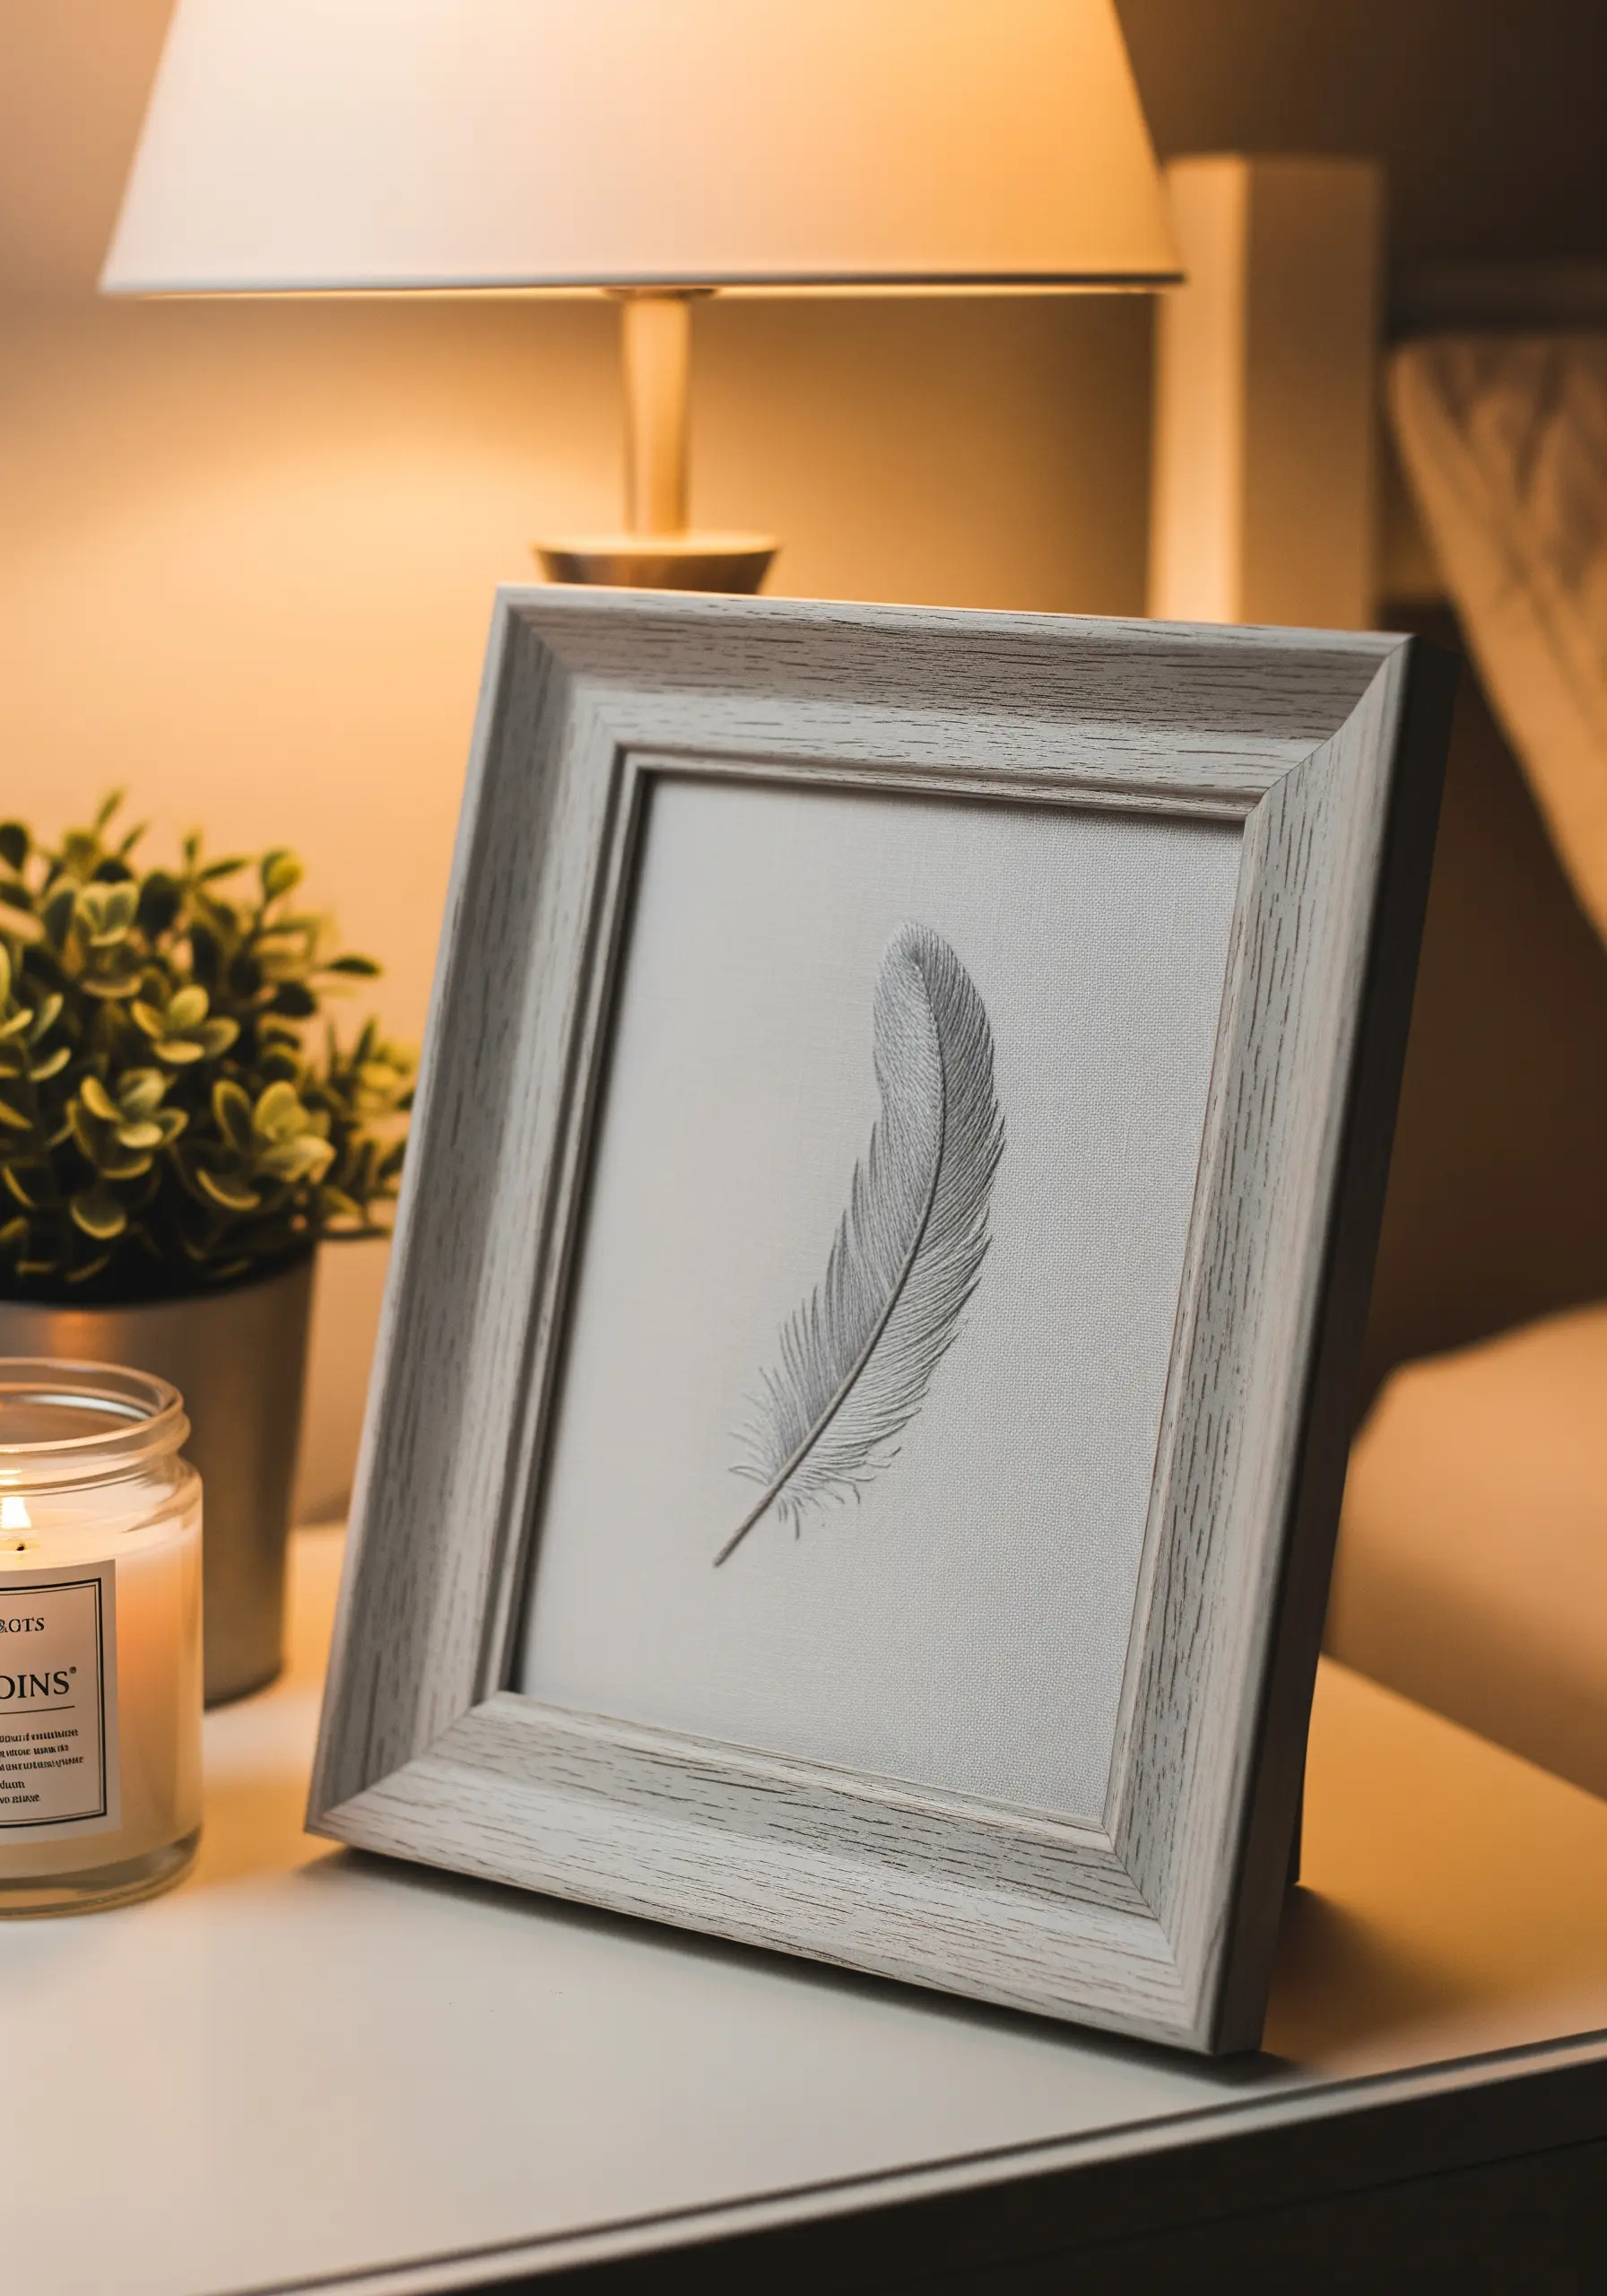
To create the soft, delicate look of a feather, the long-and-short stitch is your best friend.
Use a single strand of floss and divide the feather into sections.
Fill each section with staggered stitches of varying lengths, blending shades of white, off-white, and pale gray to create subtle shading.
Always angle your stitches to follow the natural direction of the feather’s barbs, which is the key to achieving a realistic, weightless appearance.
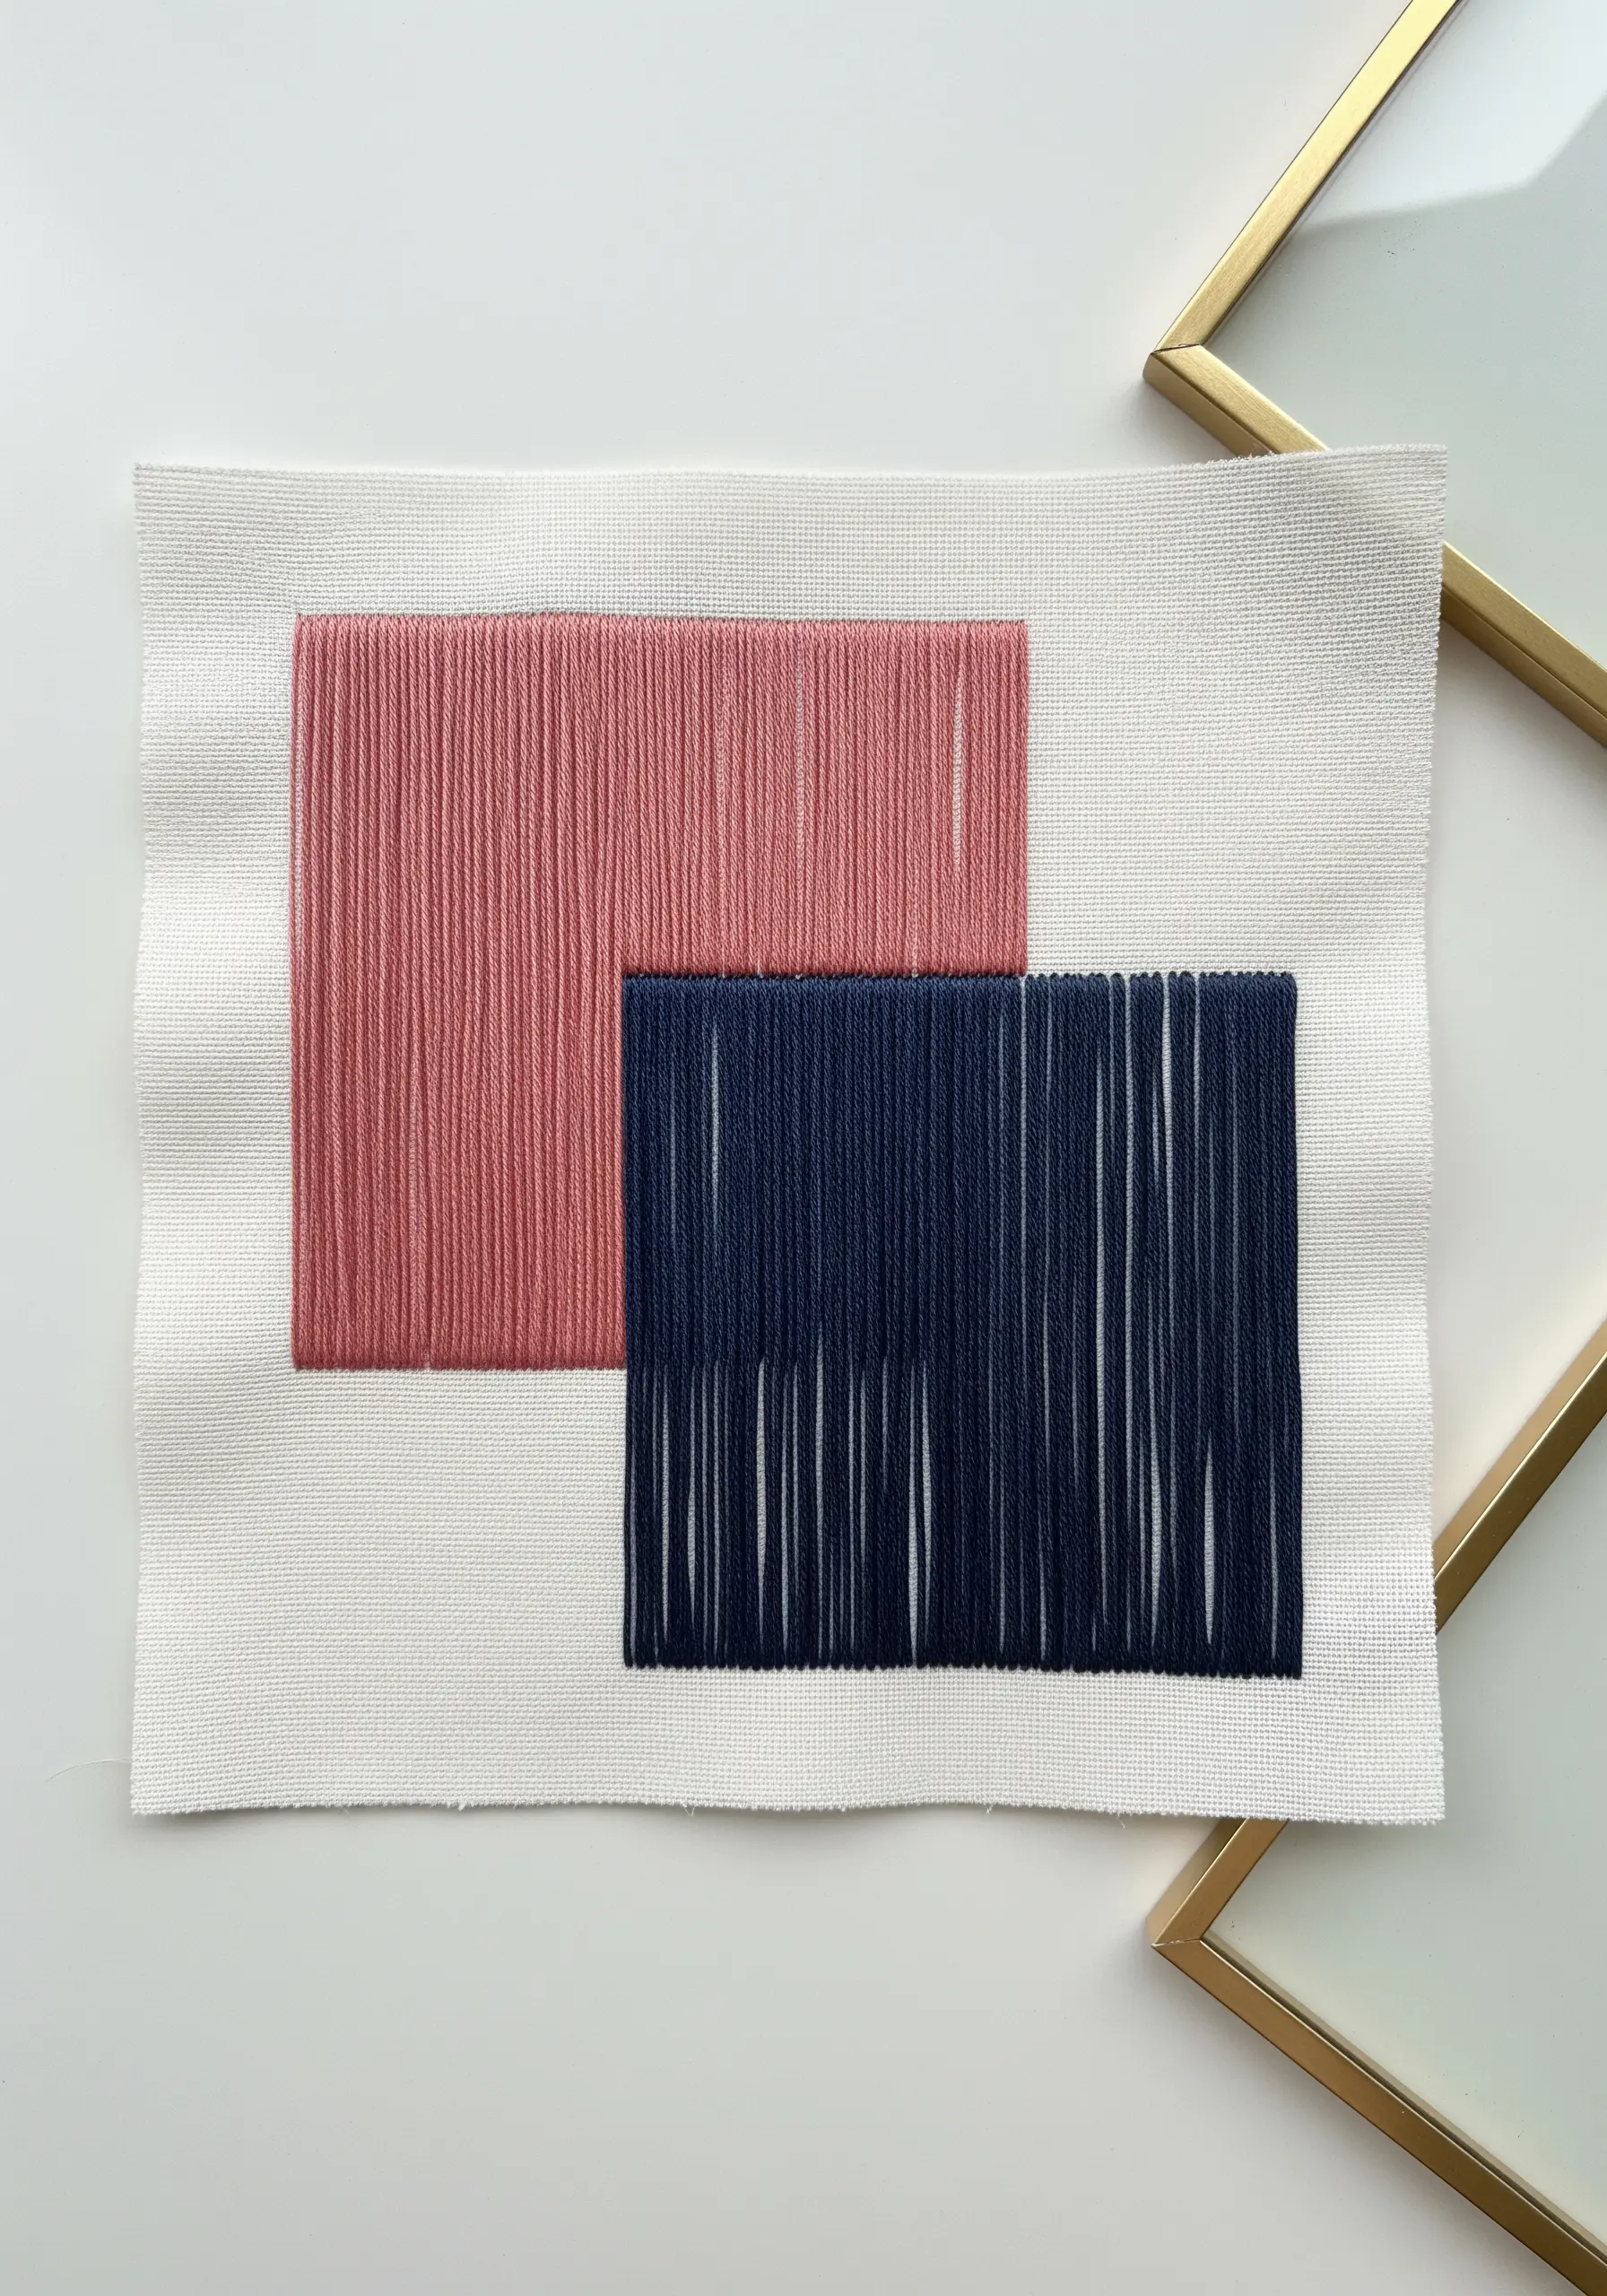
19. Contrast Solid Fills with Delicate Outlines

Create a dynamic composition by pairing a dense, solid shape with a light, airy one.
Fill the first abstract form with a rich, directional satin stitch in a bold color like terracotta.
For the second form, use only a simple backstitch outline in a contrasting, lighter color like cream.
This juxtaposition of solid and void, or heavy and light, creates a visual tension that is both modern and incredibly engaging.
20. Make a Statement with Large-Scale Embroidery
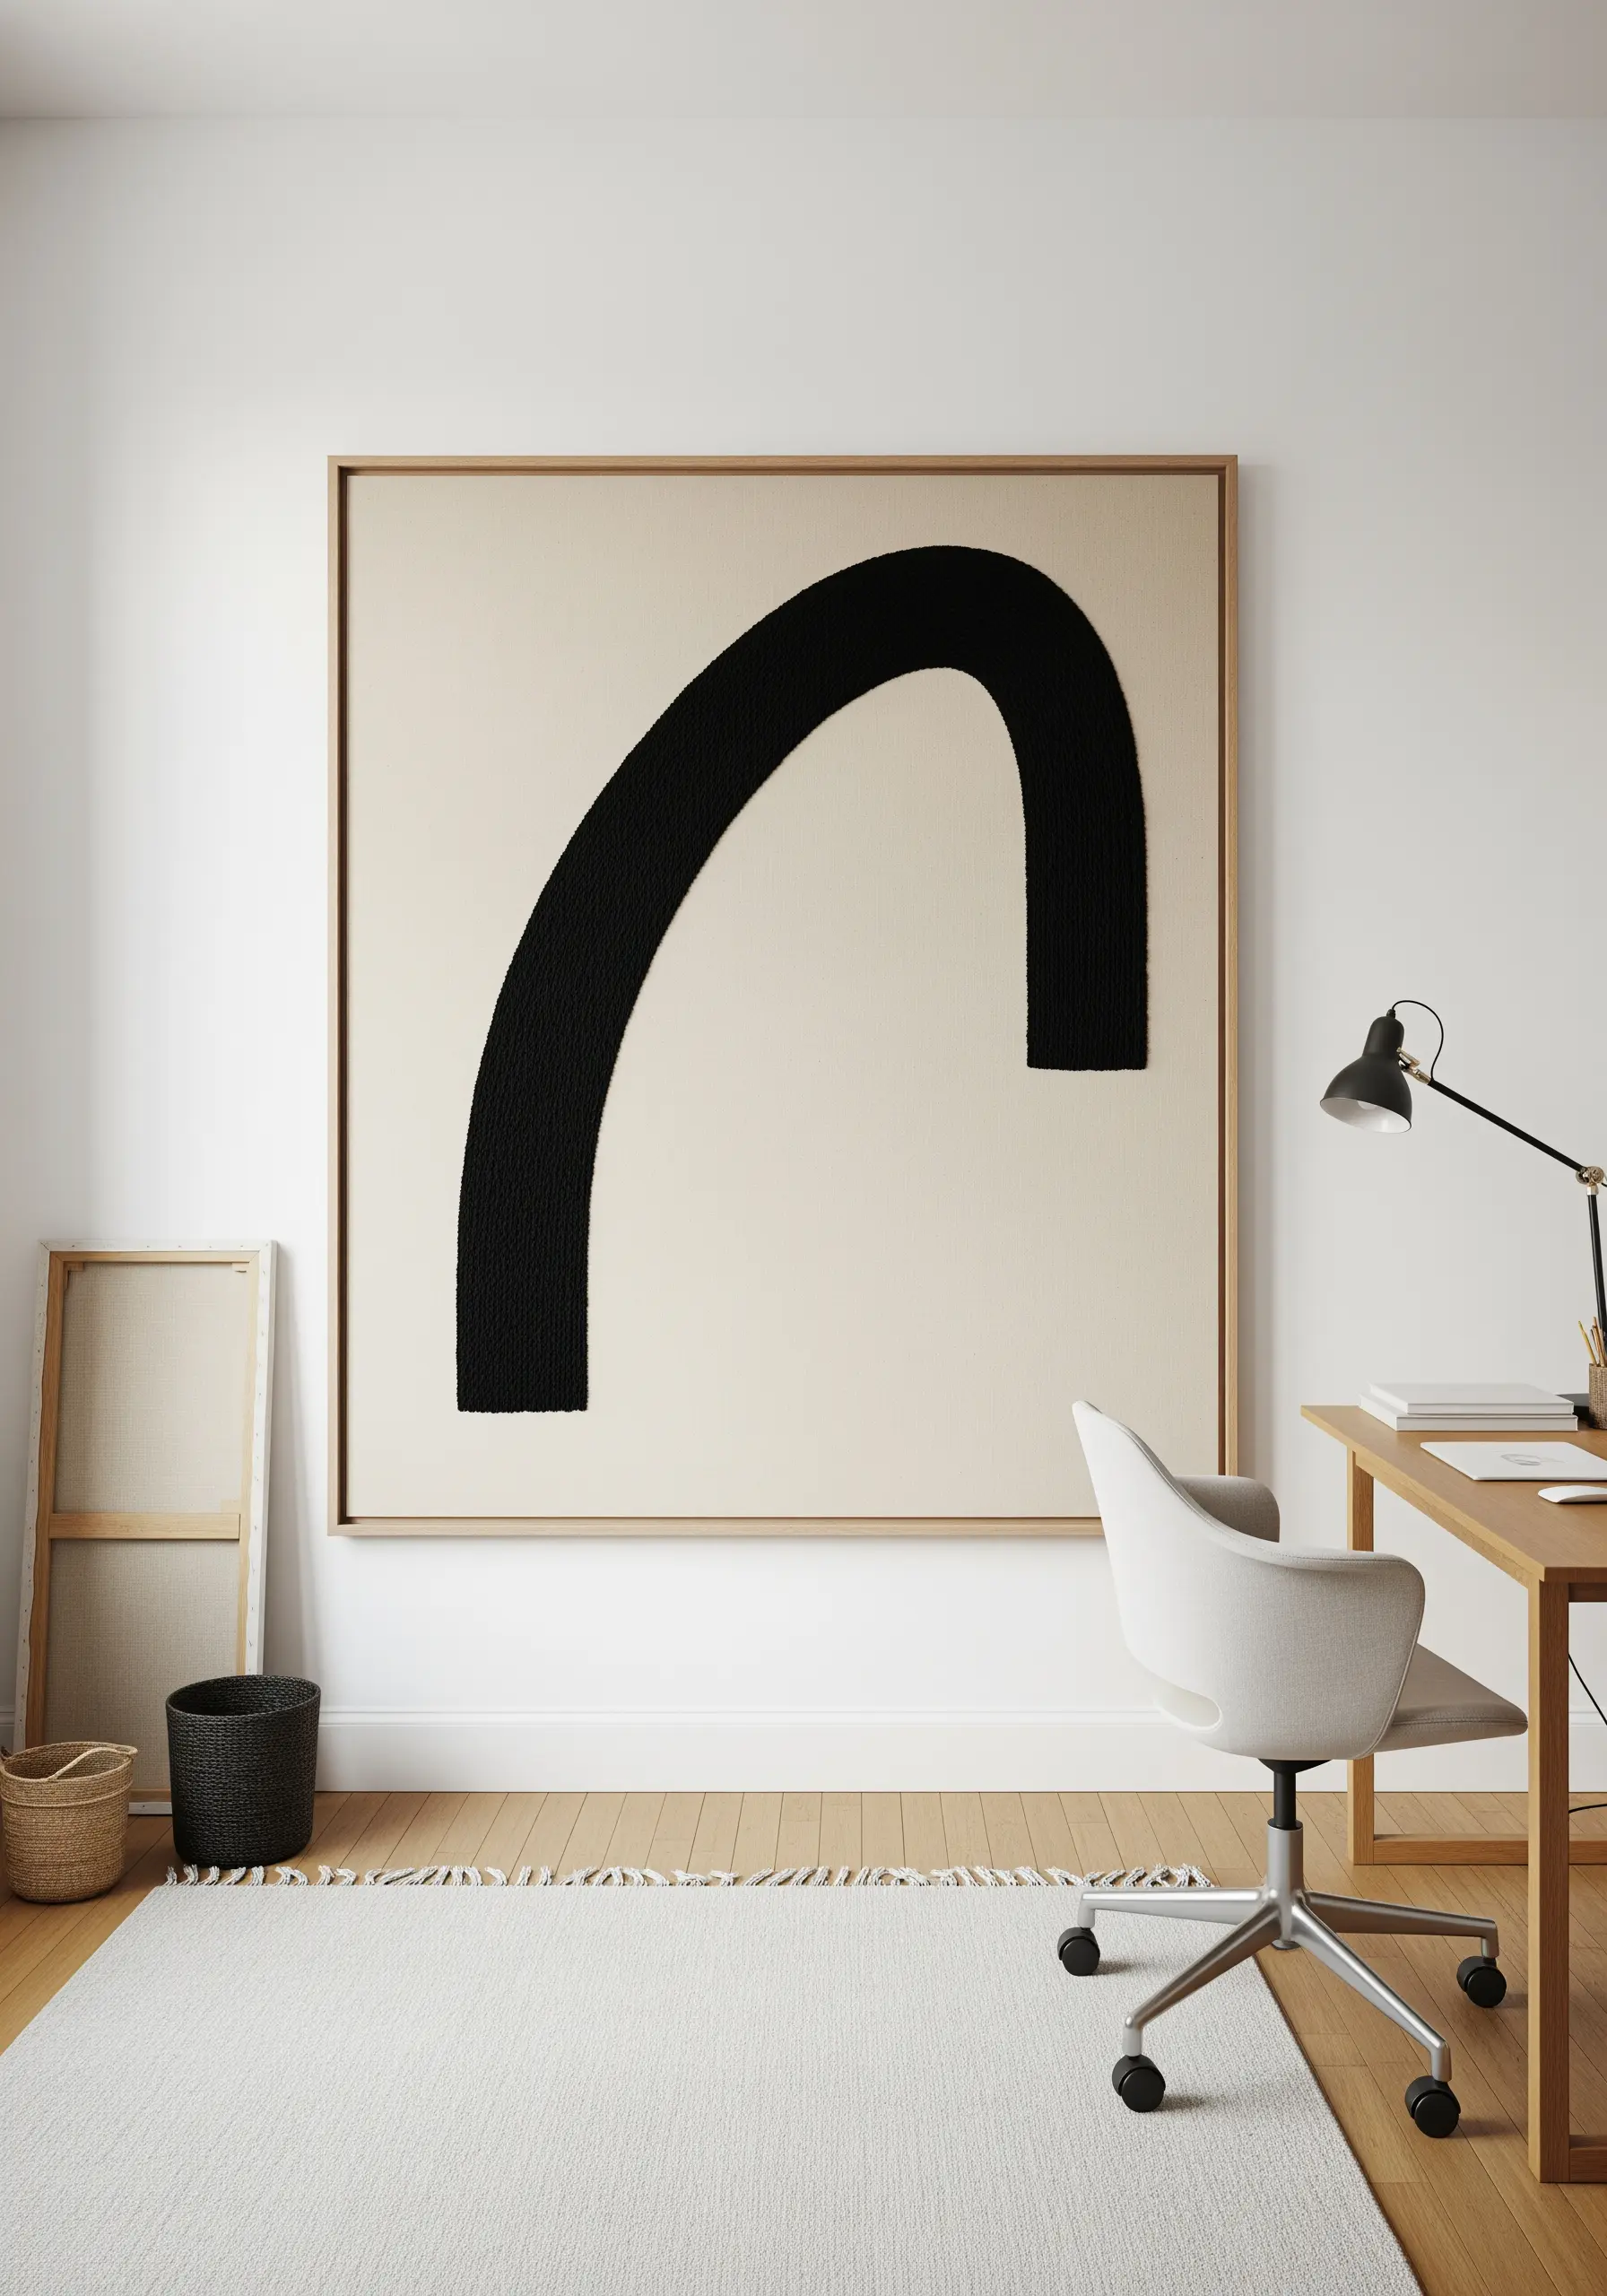
When scaling up your embroidery, adjust your materials accordingly.
For a large, impactful piece like this abstract arch, switch from standard floss to a thicker tapestry wool or even multiple strands of yarn held together.
Use a dense seed stitch (tiny, scattered straight stitches) to fill the shape.
This stitch works up faster than satin stitch on a large scale and creates a beautiful, unified texture that gives the piece a commanding presence in any room.
21. Stitch a Perfect Gradient with a Grid

Creating a seamless color gradient is all about planning.
Lightly draw a grid onto your fabric with a water-soluble marker.
Assign a different shade of thread to each row of the grid, moving from light to dark.
Then, stitch a consistent, small shape—like a single detached chain stitch or a tiny triangle—in each box.
The grid ensures perfect alignment, while the consistent stitch allows the color transition to be the star of the show.
22. Define a Silhouette with a Whipped Split Stitch
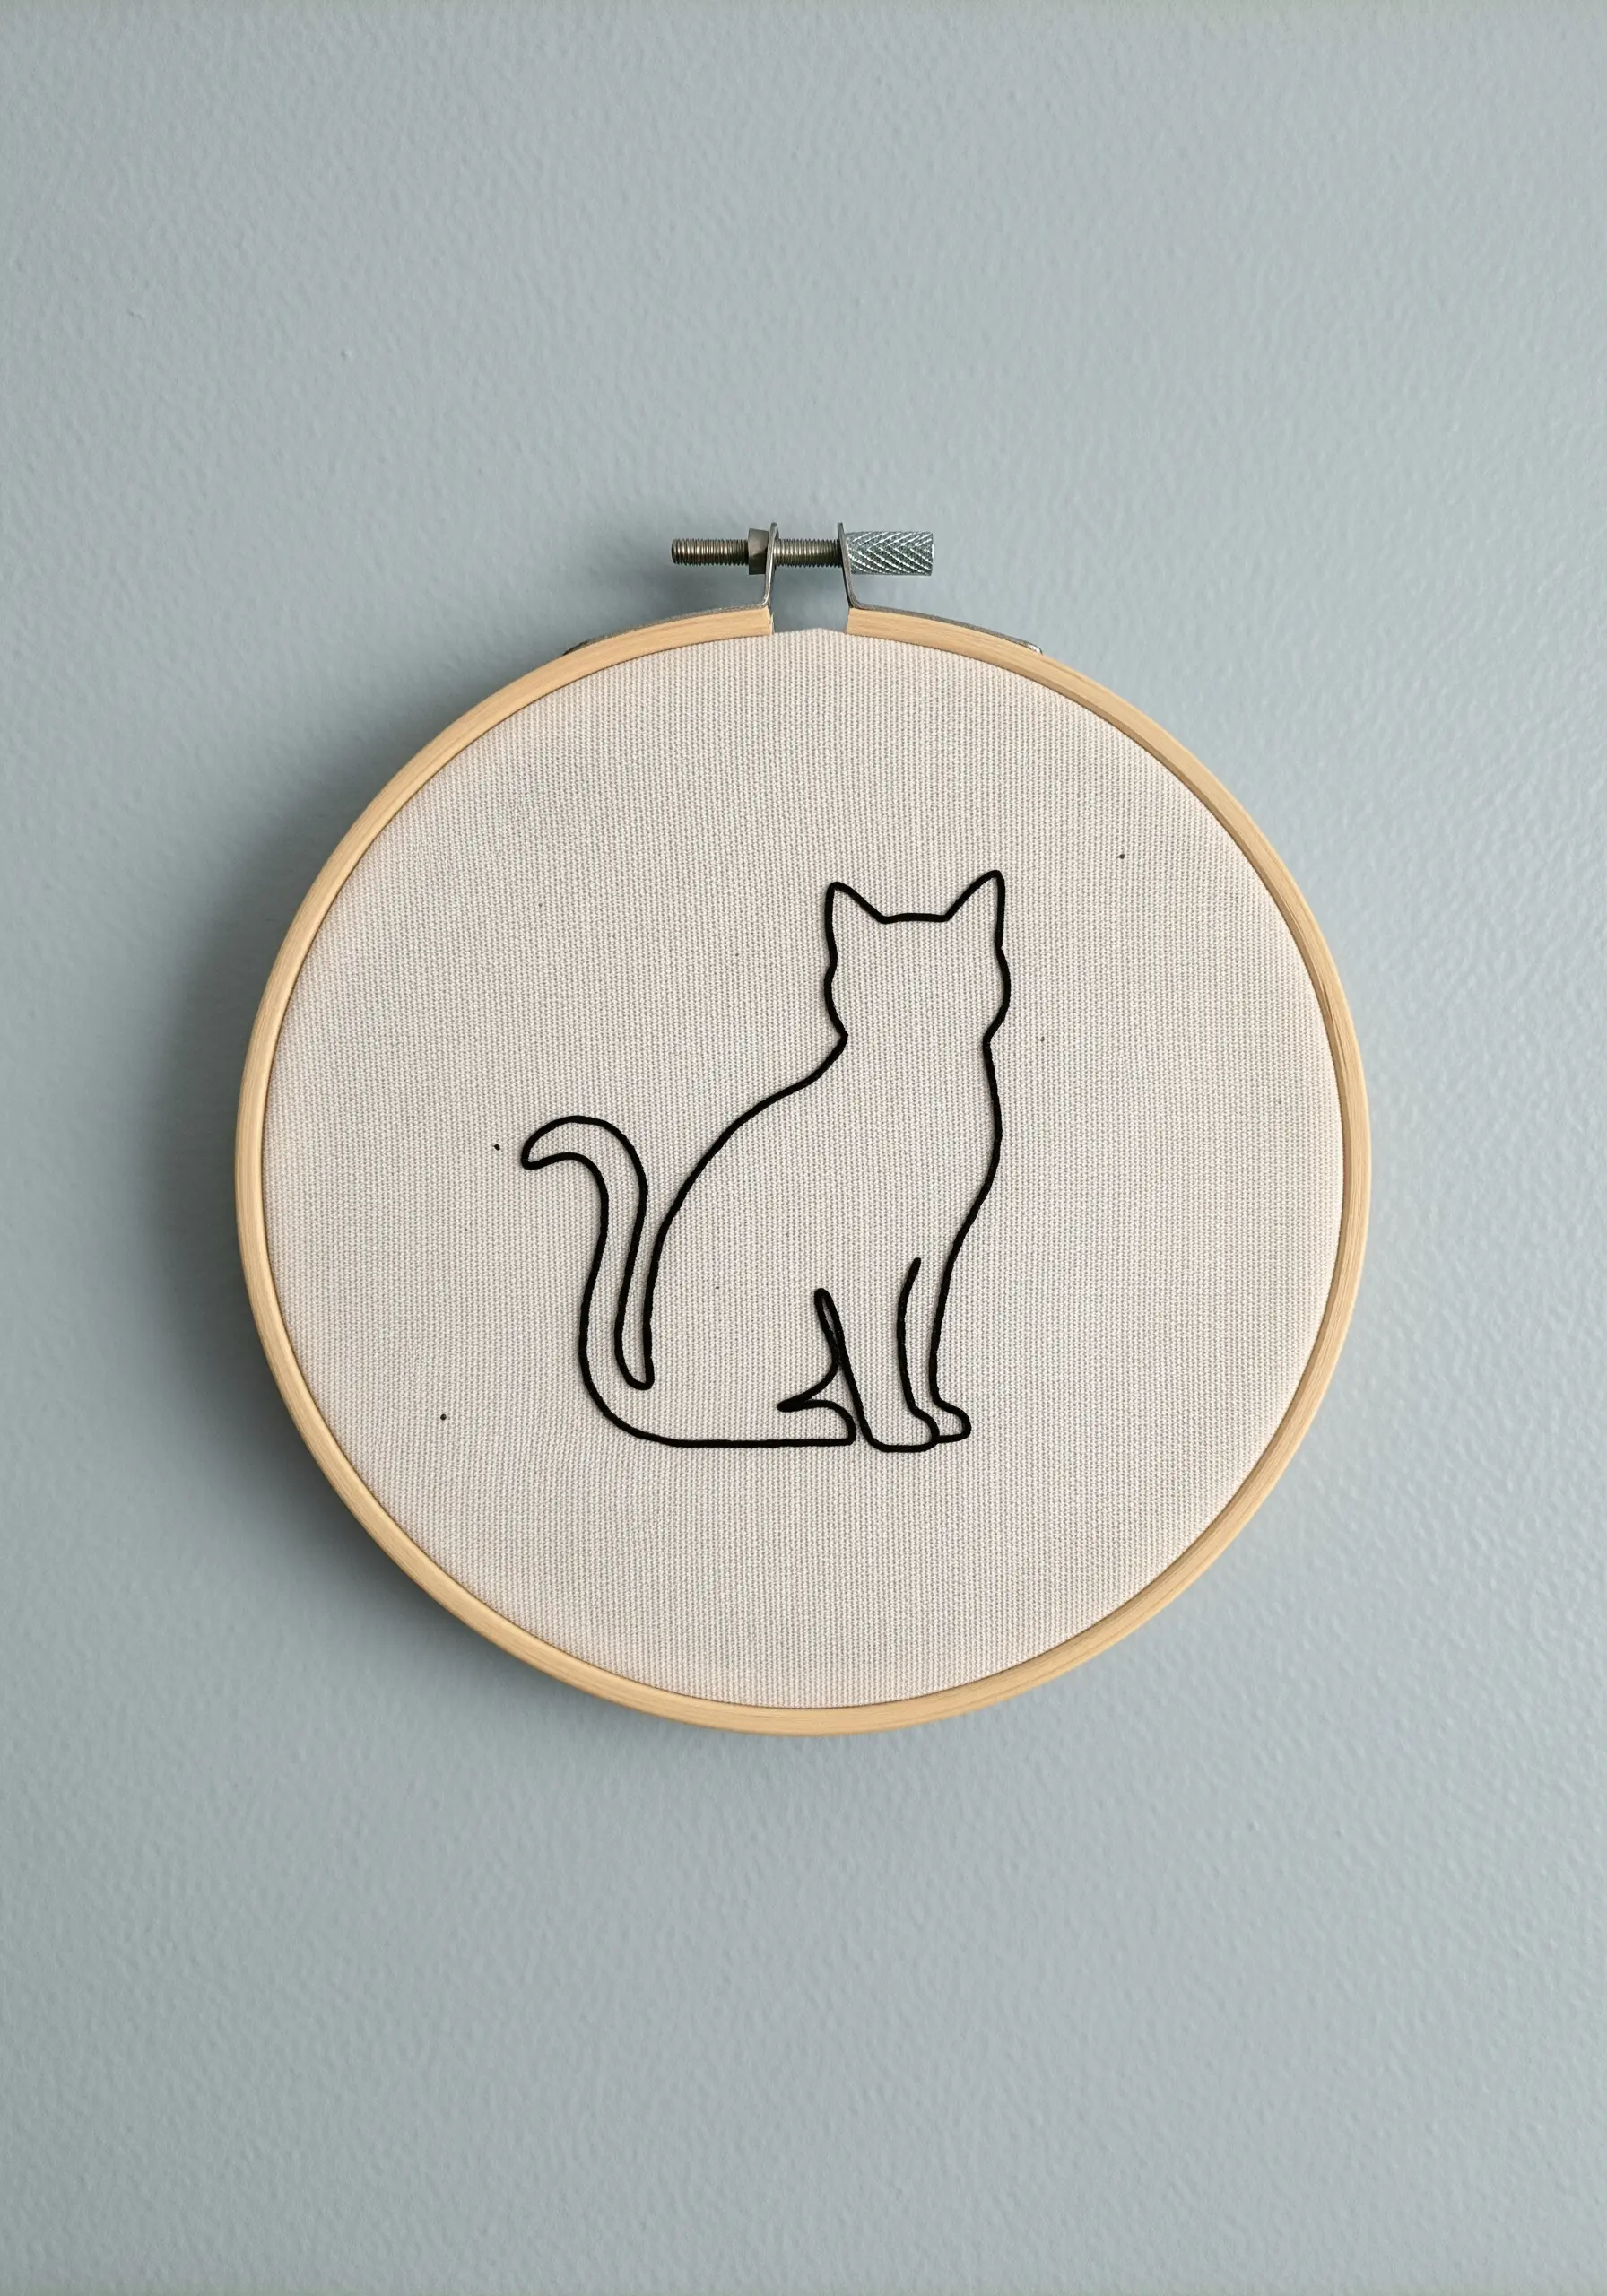
For an outline that is both delicate and bold, use a whipped split stitch.
First, create your entire outline using a basic split stitch, which provides a solid, continuous line.
Next, pass another strand of the same thread under each stitch without piercing the fabric—just like a whipped backstitch.
This second step smooths over the texture of the split stitch, resulting in a perfectly rounded, cord-like line that makes the silhouette pop.
This is one of the best minimalist line art animal designs for practicing clean curves.
23. Balance a Composition with Asymmetrical Details
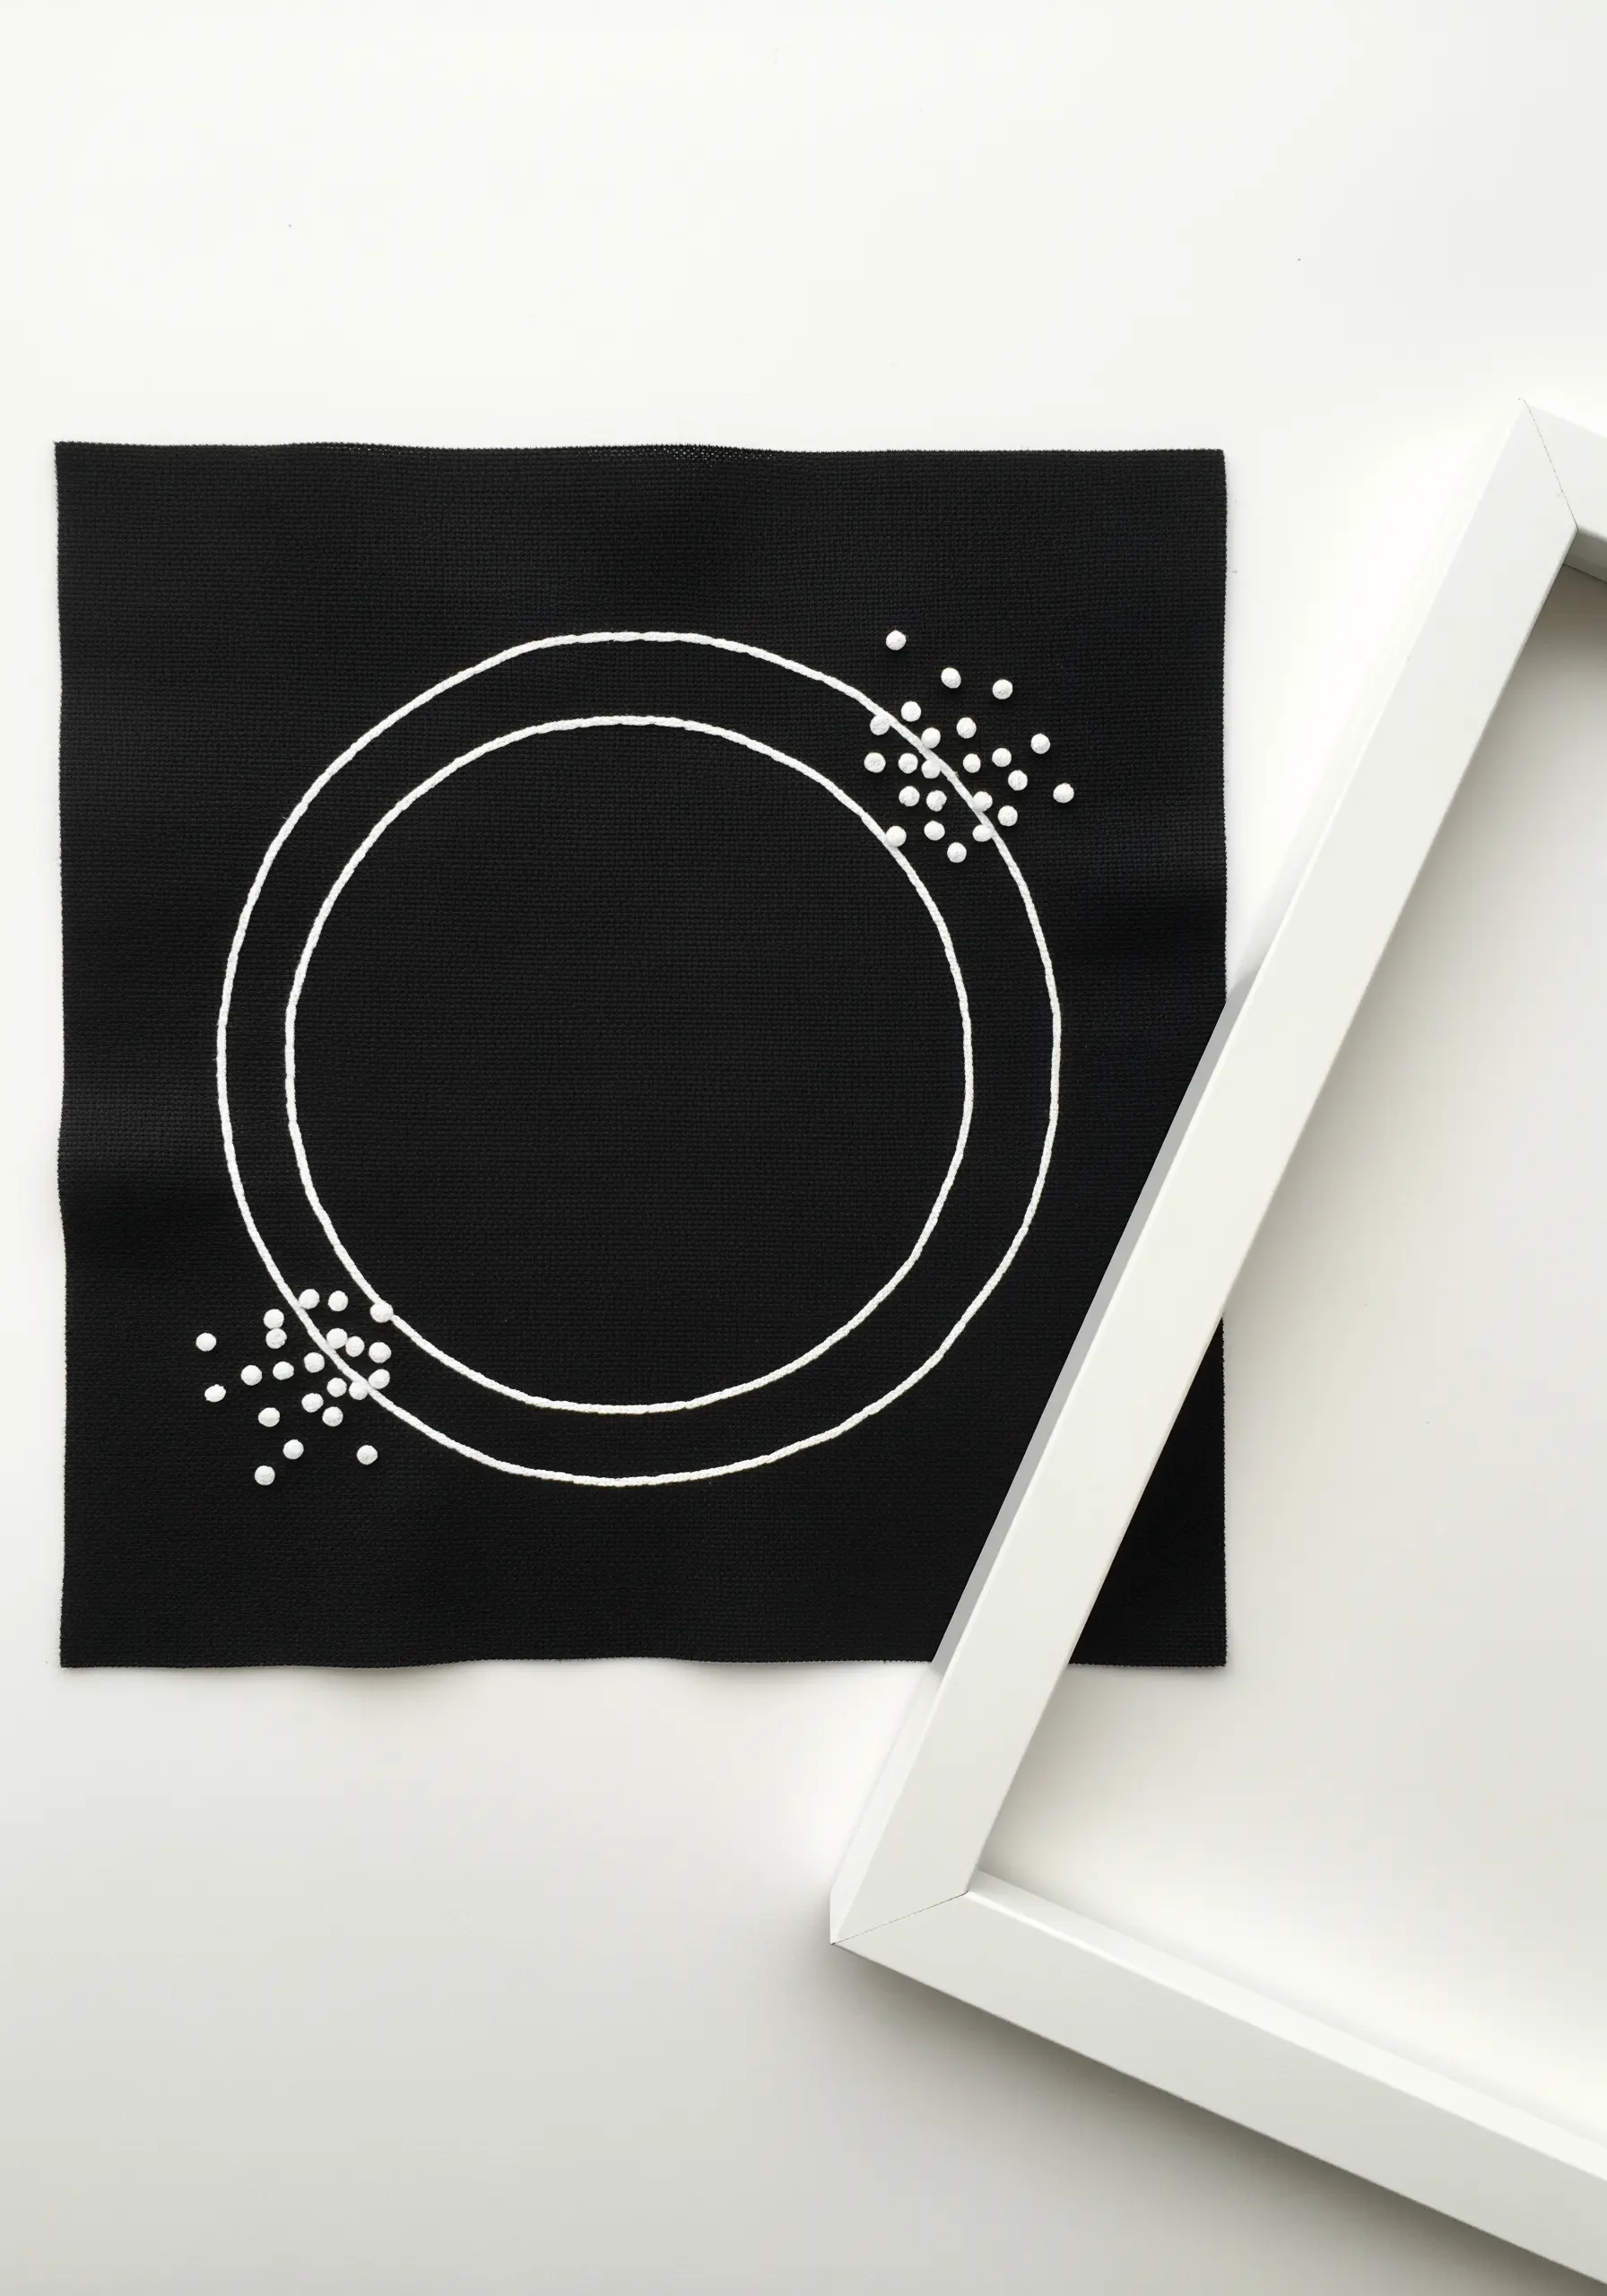
Minimalism doesn’t have to be perfectly symmetrical.
Create visual interest by placing your detailed elements off-center.
Here, two simple backstitched circles feel much more dynamic because the clusters of French knots are placed asymmetrically.
This draws the eye around the composition and makes the negative space feel more active and intentional. It’s a simple trick that adds a sophisticated, artistic touch.
24. Use Directional Satin Stitch for Petal Contours
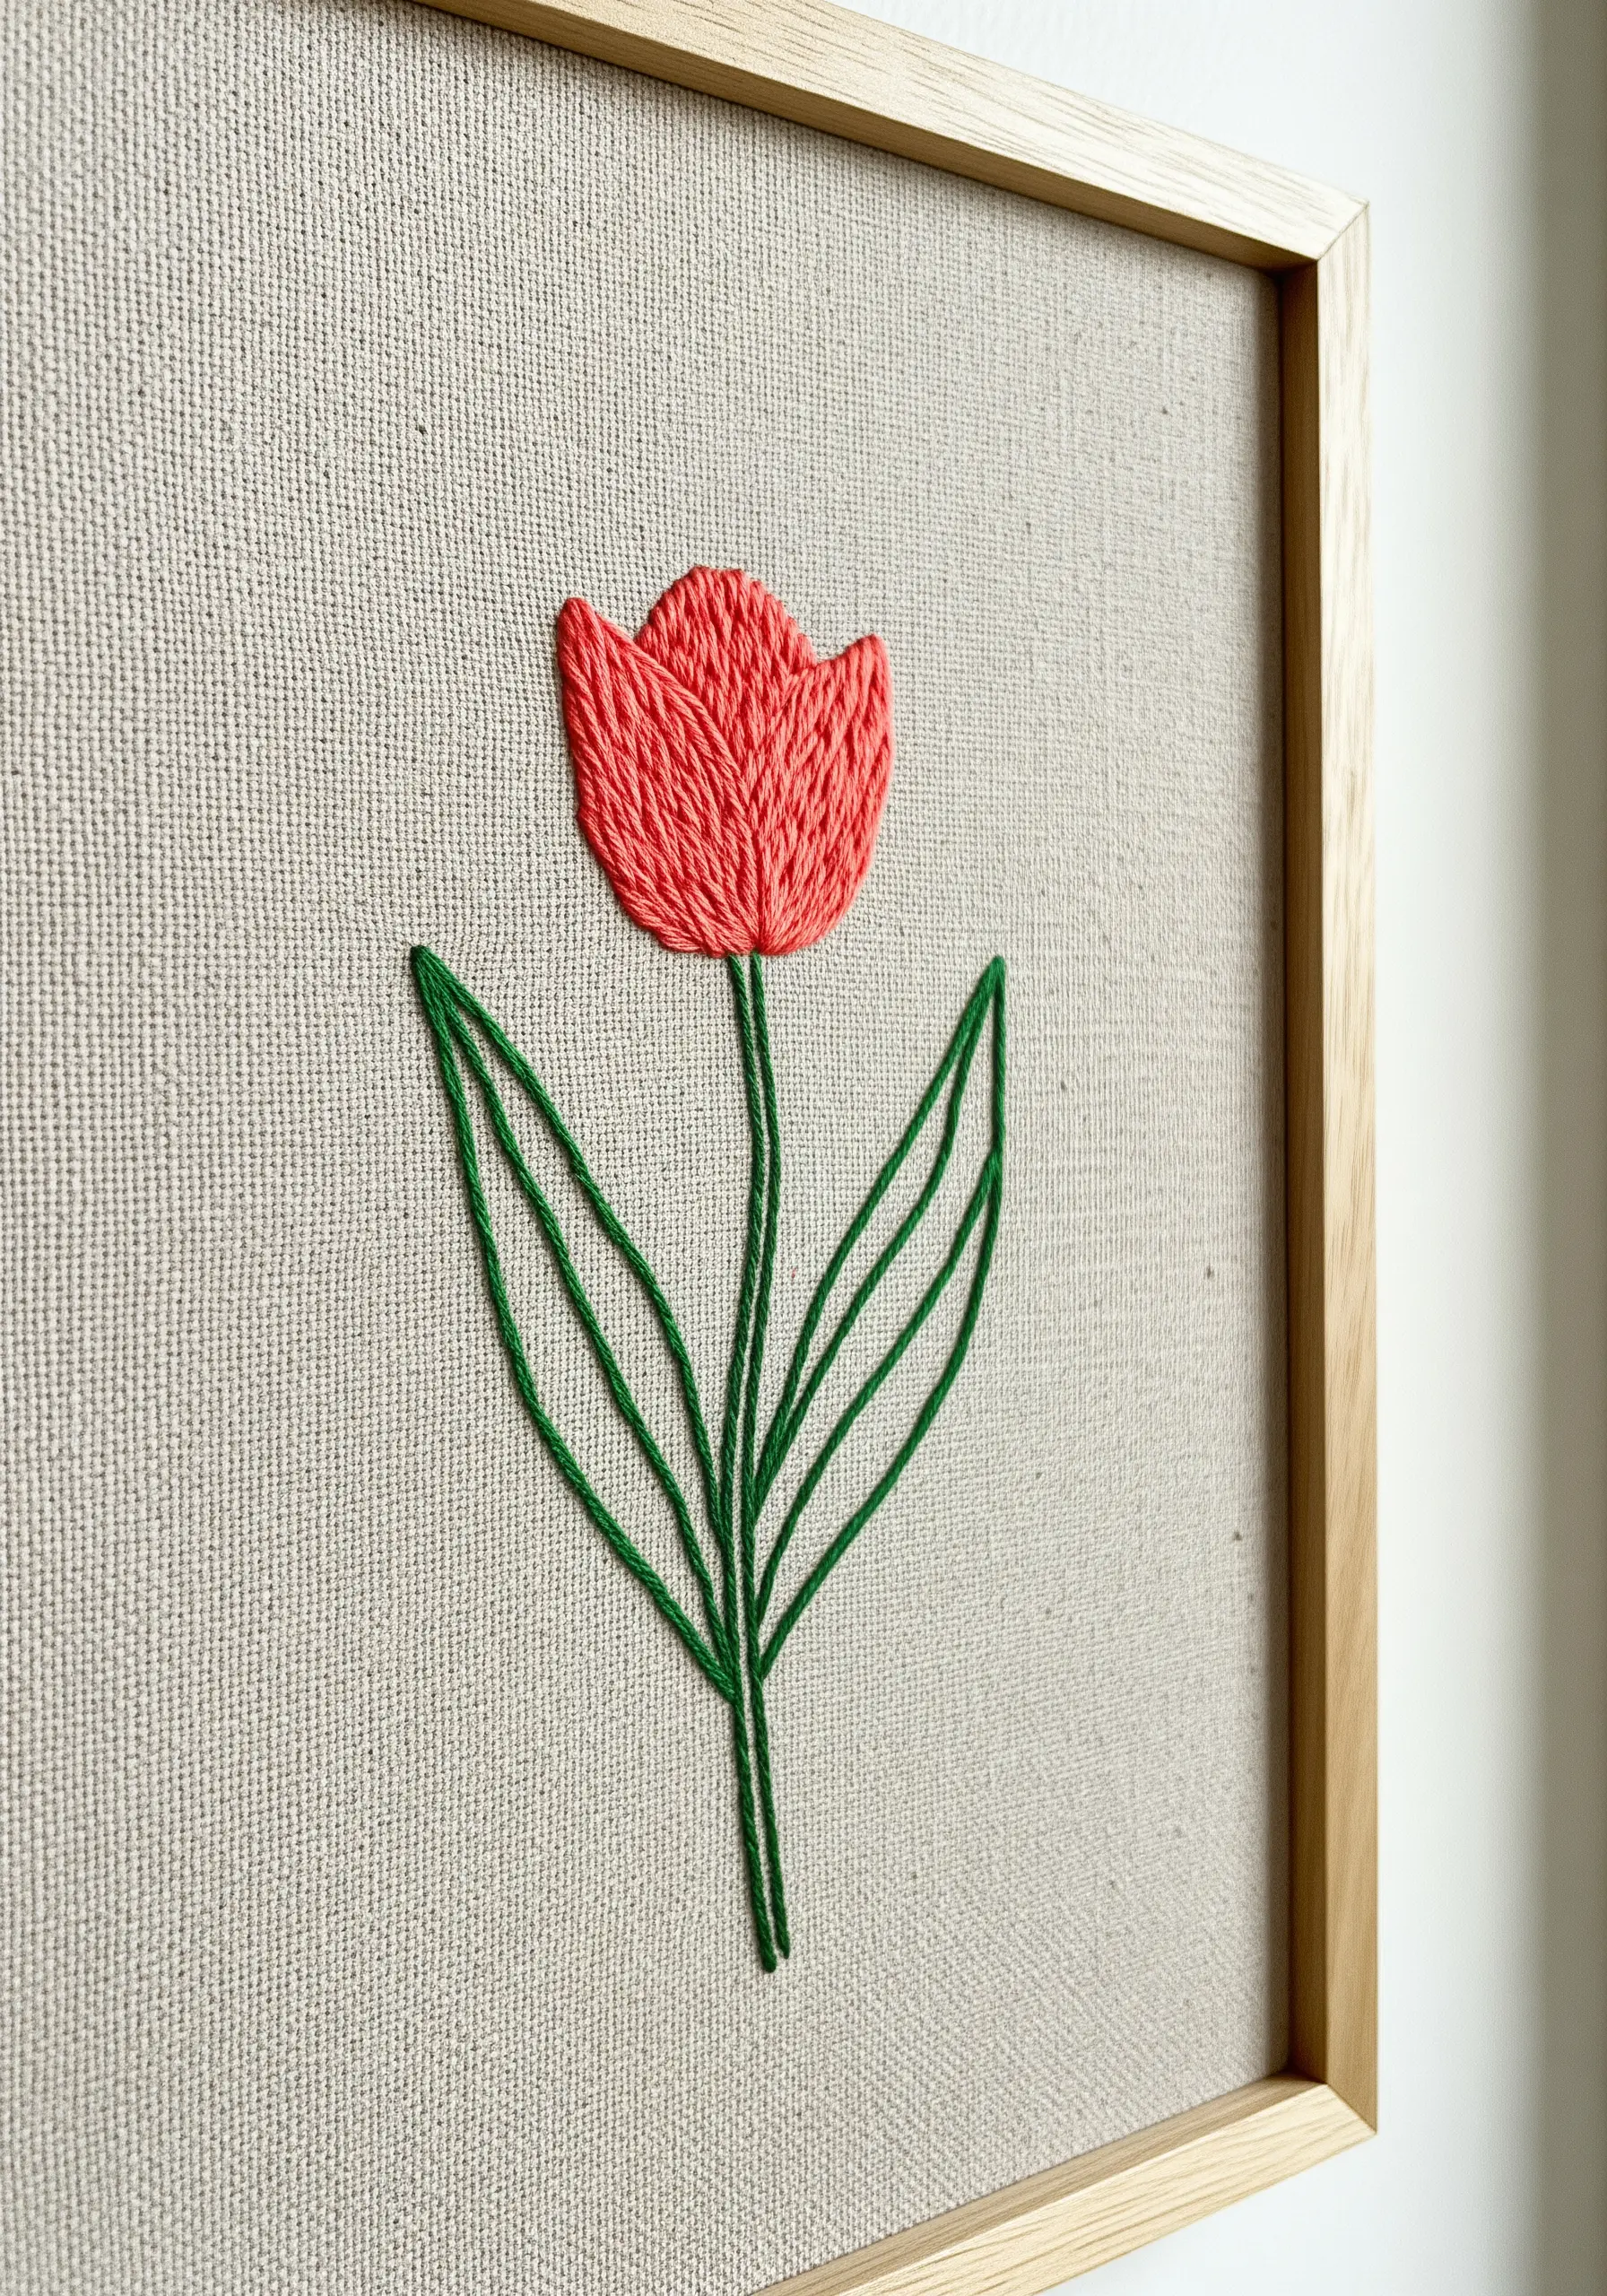
Give your embroidered flowers a natural, contoured shape by paying attention to the direction of your satin stitches.
Instead of stitching all petals horizontally or vertically, angle your stitches to follow the curve of each individual petal, from its base to its tip.
For a tulip, this means creating a gentle fan shape with your threads.
This simple adjustment creates highlights and shadows, making the flower look three-dimensional and much more realistic.
25. Evoke a Landscape with Minimalist Elements
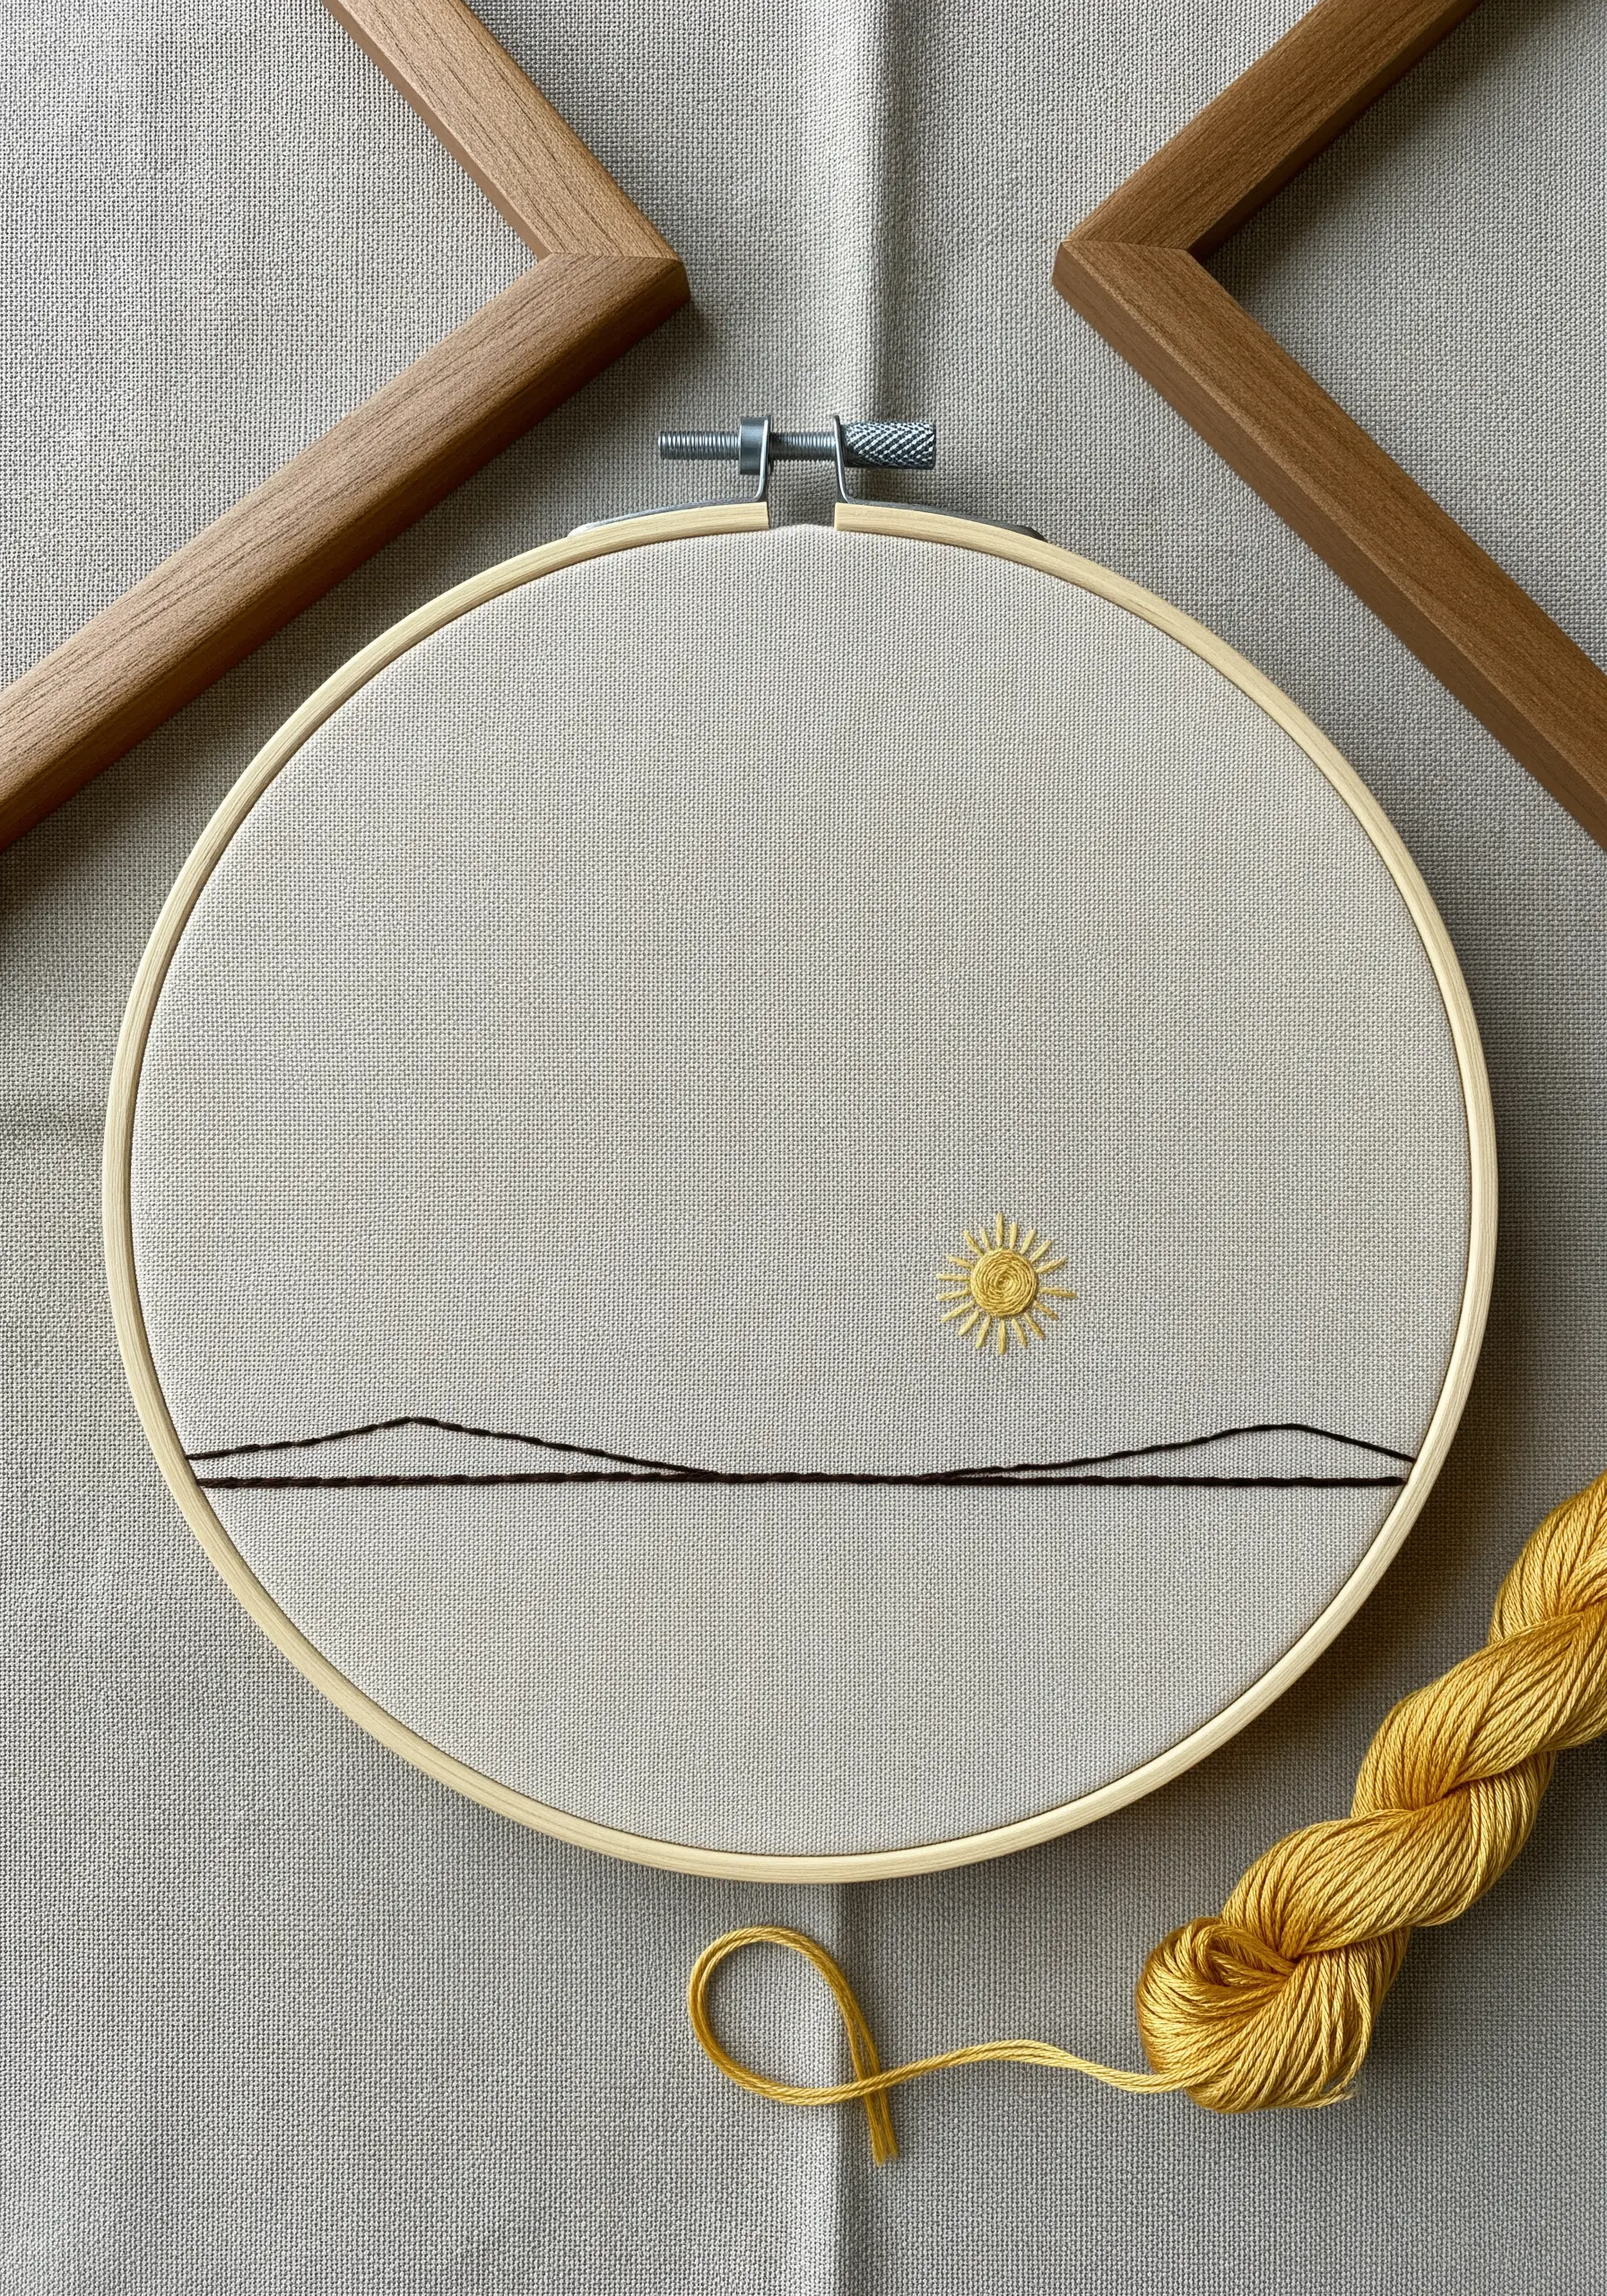
You don’t need a complex design to suggest a vast landscape.
A single, clean line of split stitch can represent the horizon, immediately grounding the composition.
Add a small, textural sun using radiating straight stitches or a cluster of French knots.
The beauty of this approach is its simplicity; the empty space becomes the sky, allowing the viewer’s imagination to fill in the rest of the scene.
26. Elevate Your Finish with a Shadow Box Frame
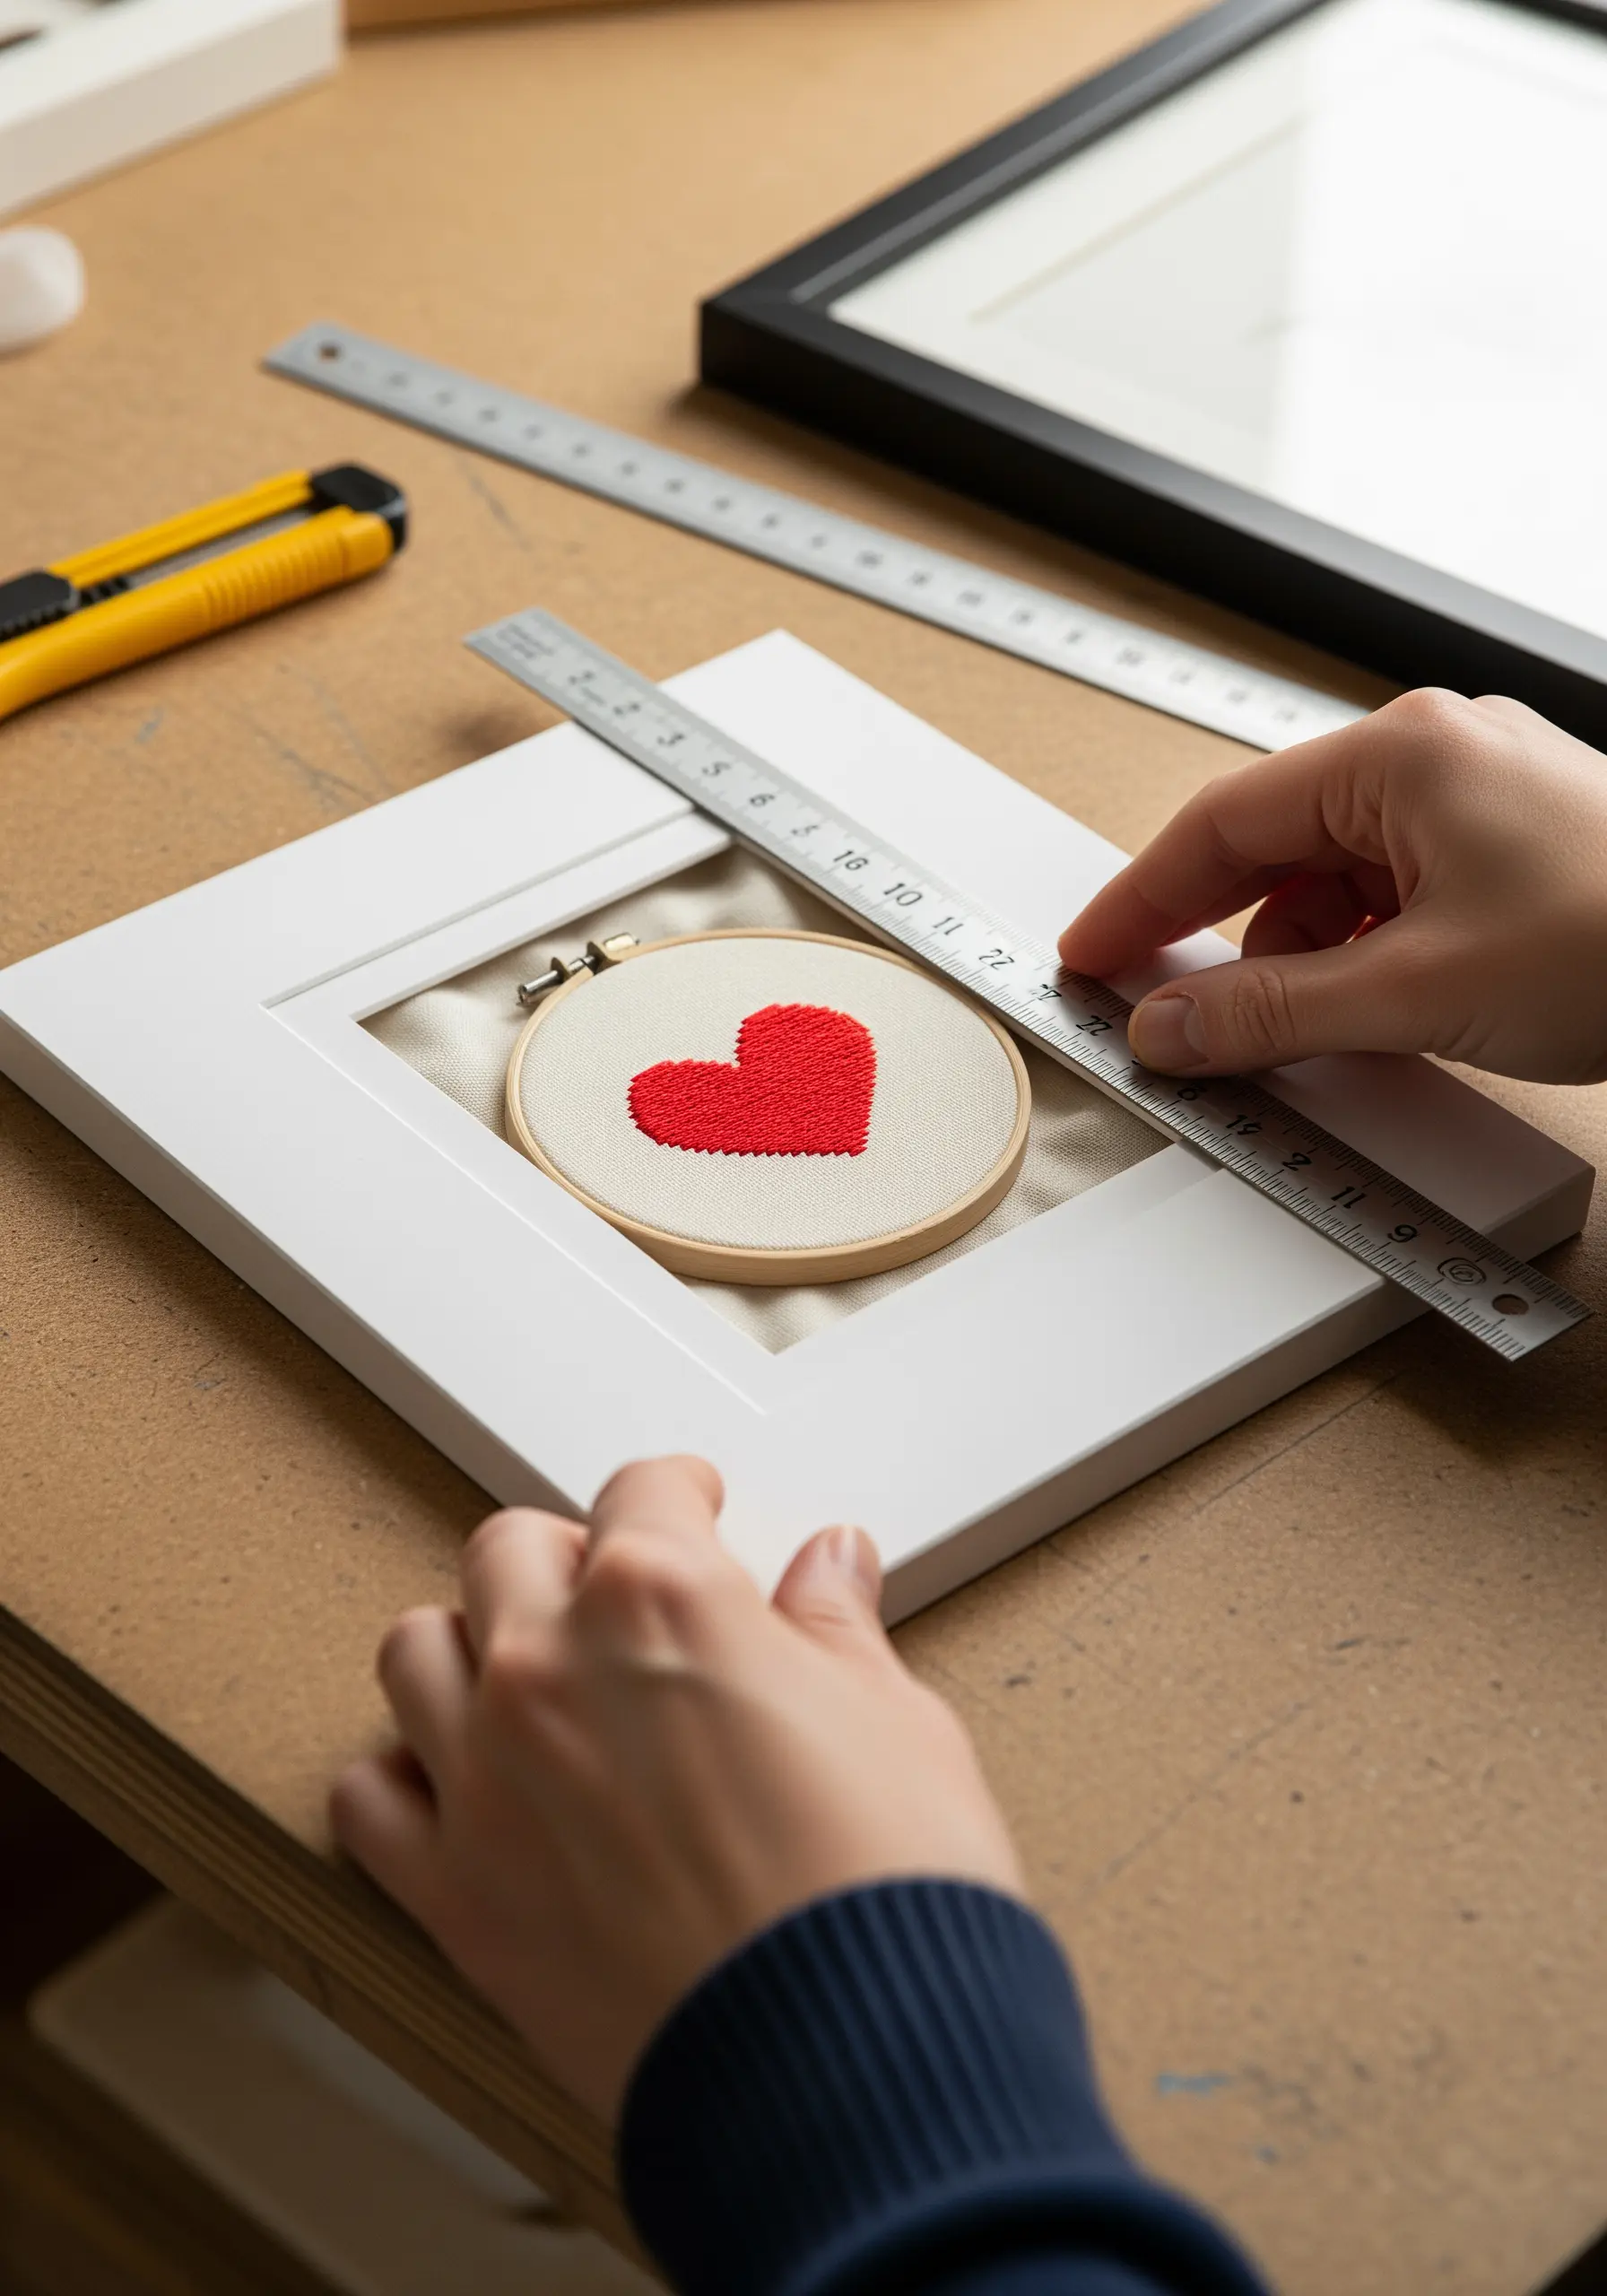
The final presentation can transform your embroidery from a hobby project into a piece of art.
Instead of framing a small hoop directly, mount it within a deep shadow box frame.
Place a mat board behind the hoop to create a clean, professional border.
This method of framing adds depth and presence, drawing attention to the texture and detail of your stitching and signaling that this is a finished, intentional artwork.
27. Create Texture with Tone-on-Tone Stitching
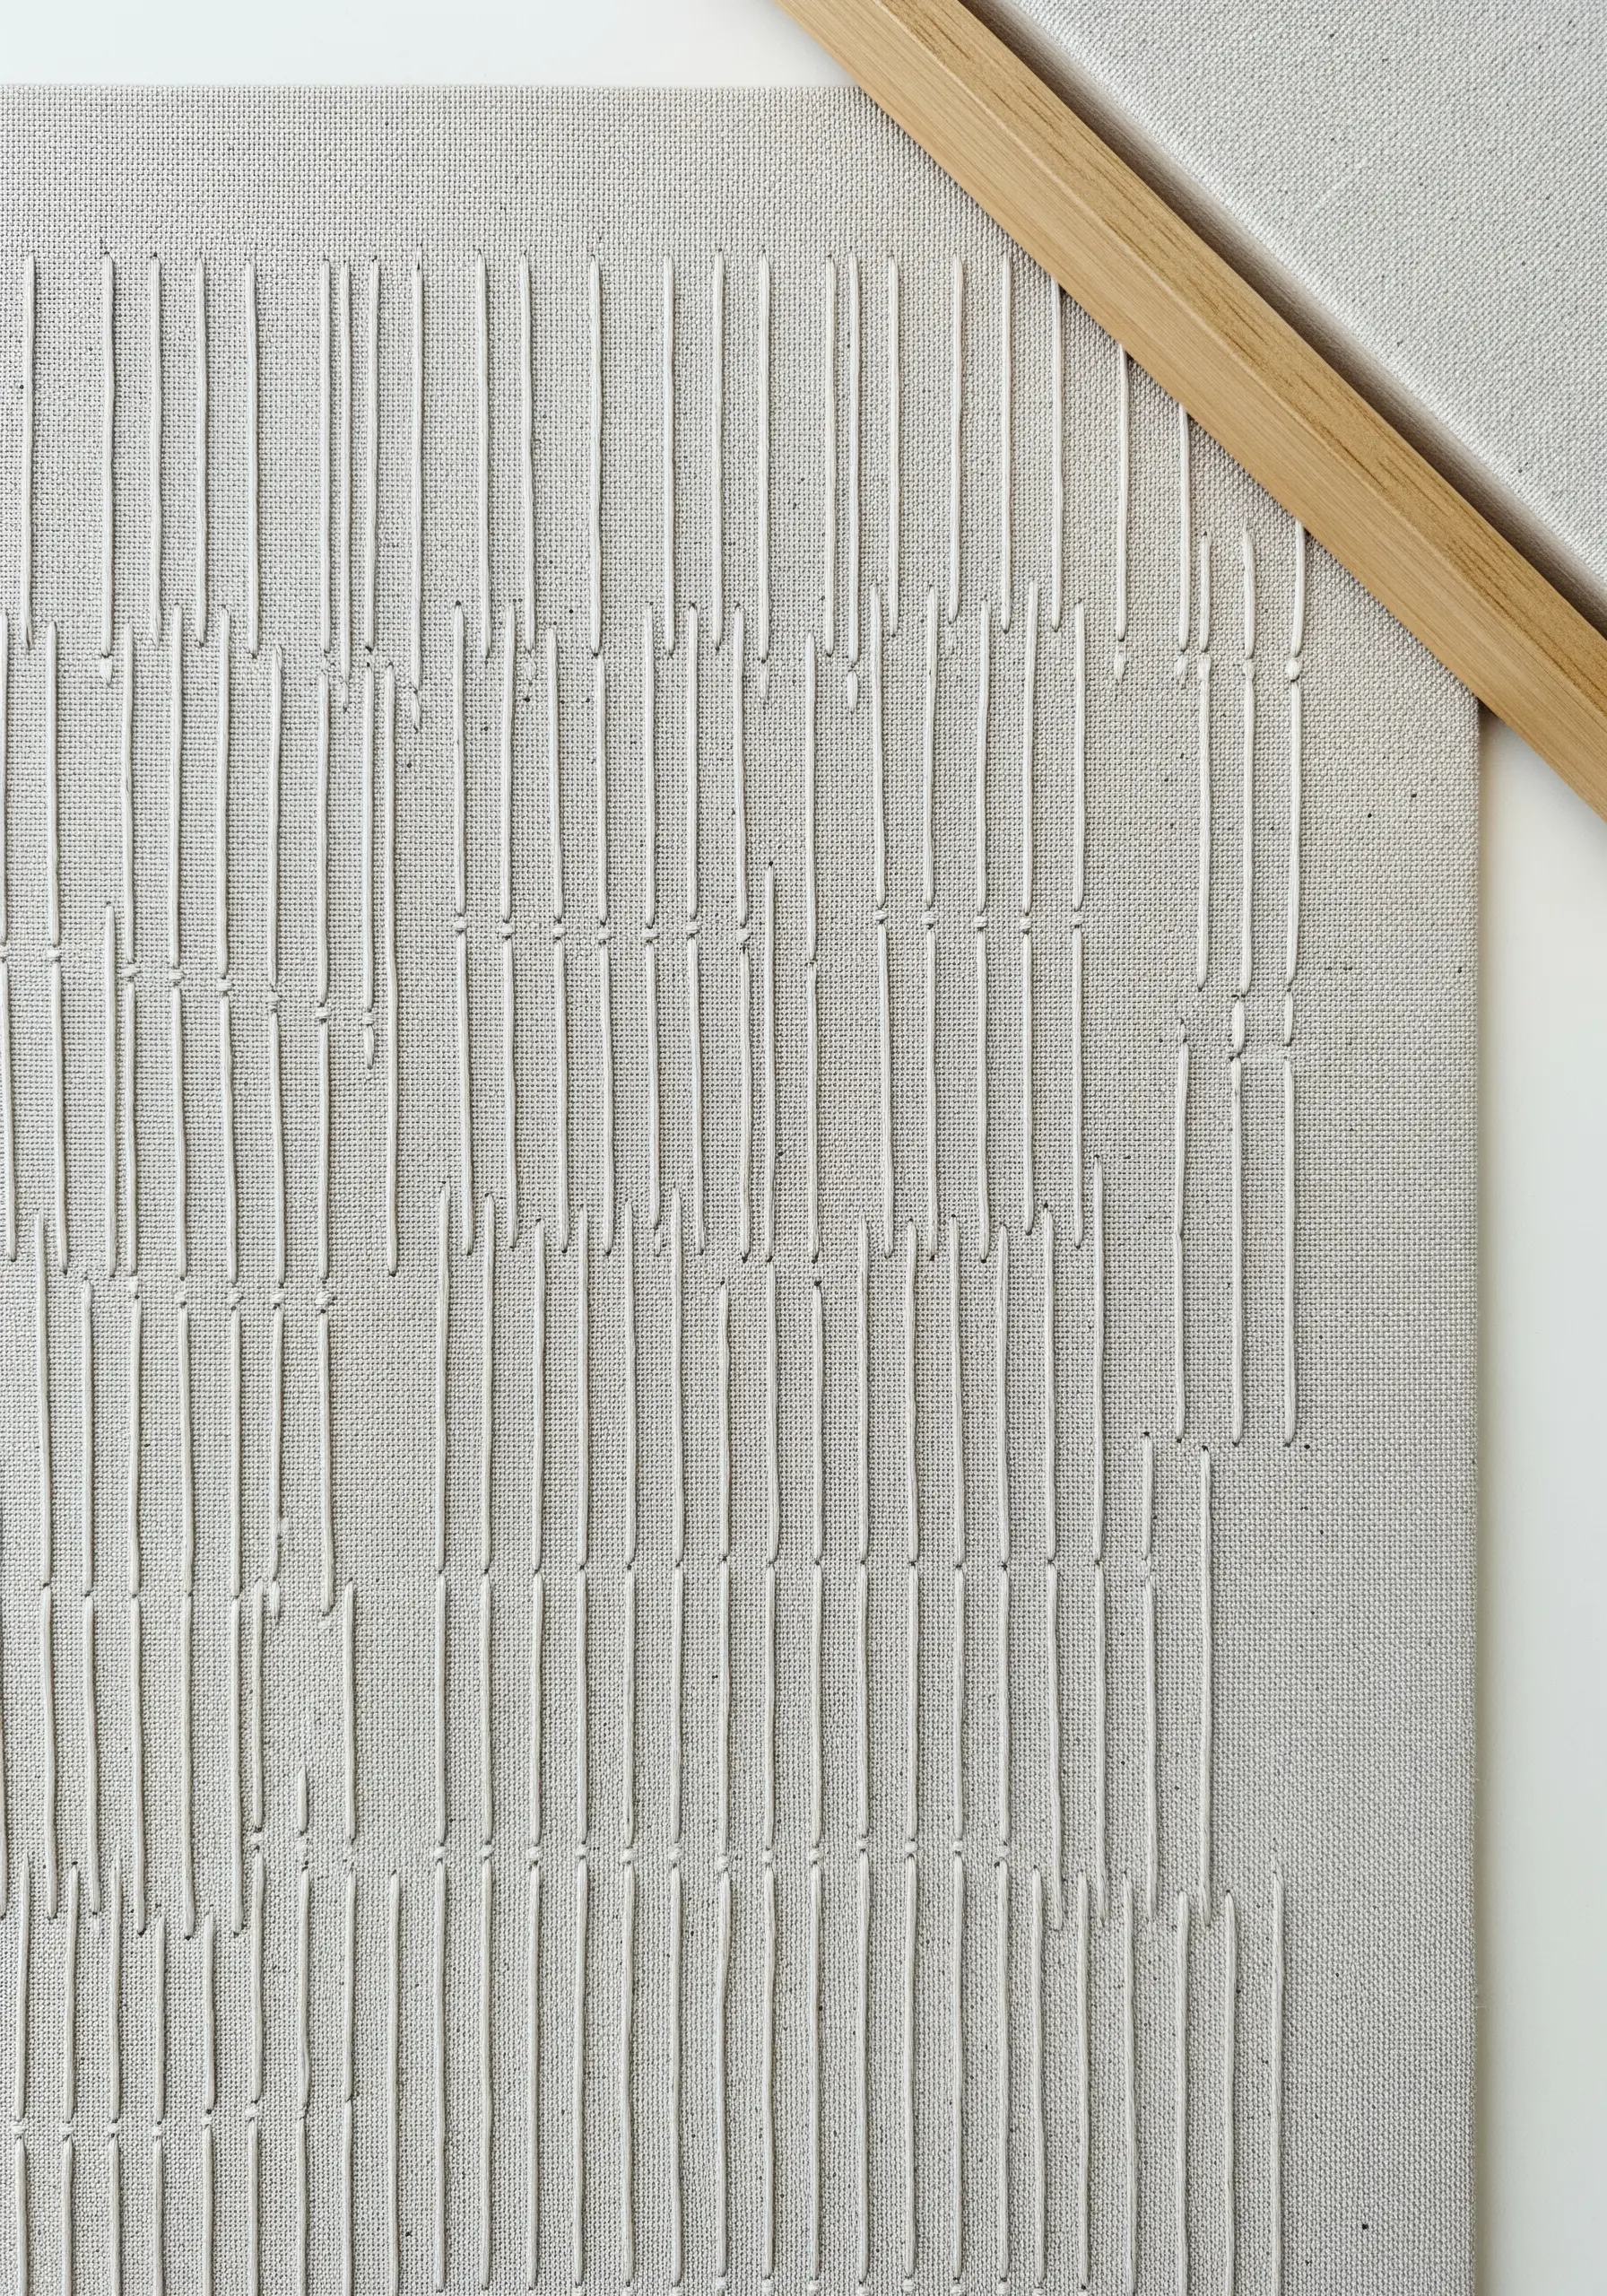
Explore the beauty of texture by using thread that is the same color as your fabric.
This tone-on-tone technique shifts the focus from color to the physical quality of the stitches themselves.
Use a thicker thread, like a size 8 or size 5 cotton perle, to create raised stitches that cast subtle shadows.
Simple running stitches or seed stitches, arranged in a loose grid, create a sophisticated, woven look that is both minimalist and deeply textural.
28. Embrace Precision with Primary Colors

Channel the spirit of modern art by focusing on perfect execution with a limited color palette.
Use bold, primary colors—red, yellow, and blue—to create small, geometric blocks of satin stitch.
The success of this minimalist design depends entirely on the quality of your stitching.
Ensure every stitch is laid perfectly parallel to the next, with clean, sharp edges, transforming simple shapes into a powerful, graphic statement.
29. Stitch Delicate Constellations with Lazy Daisies
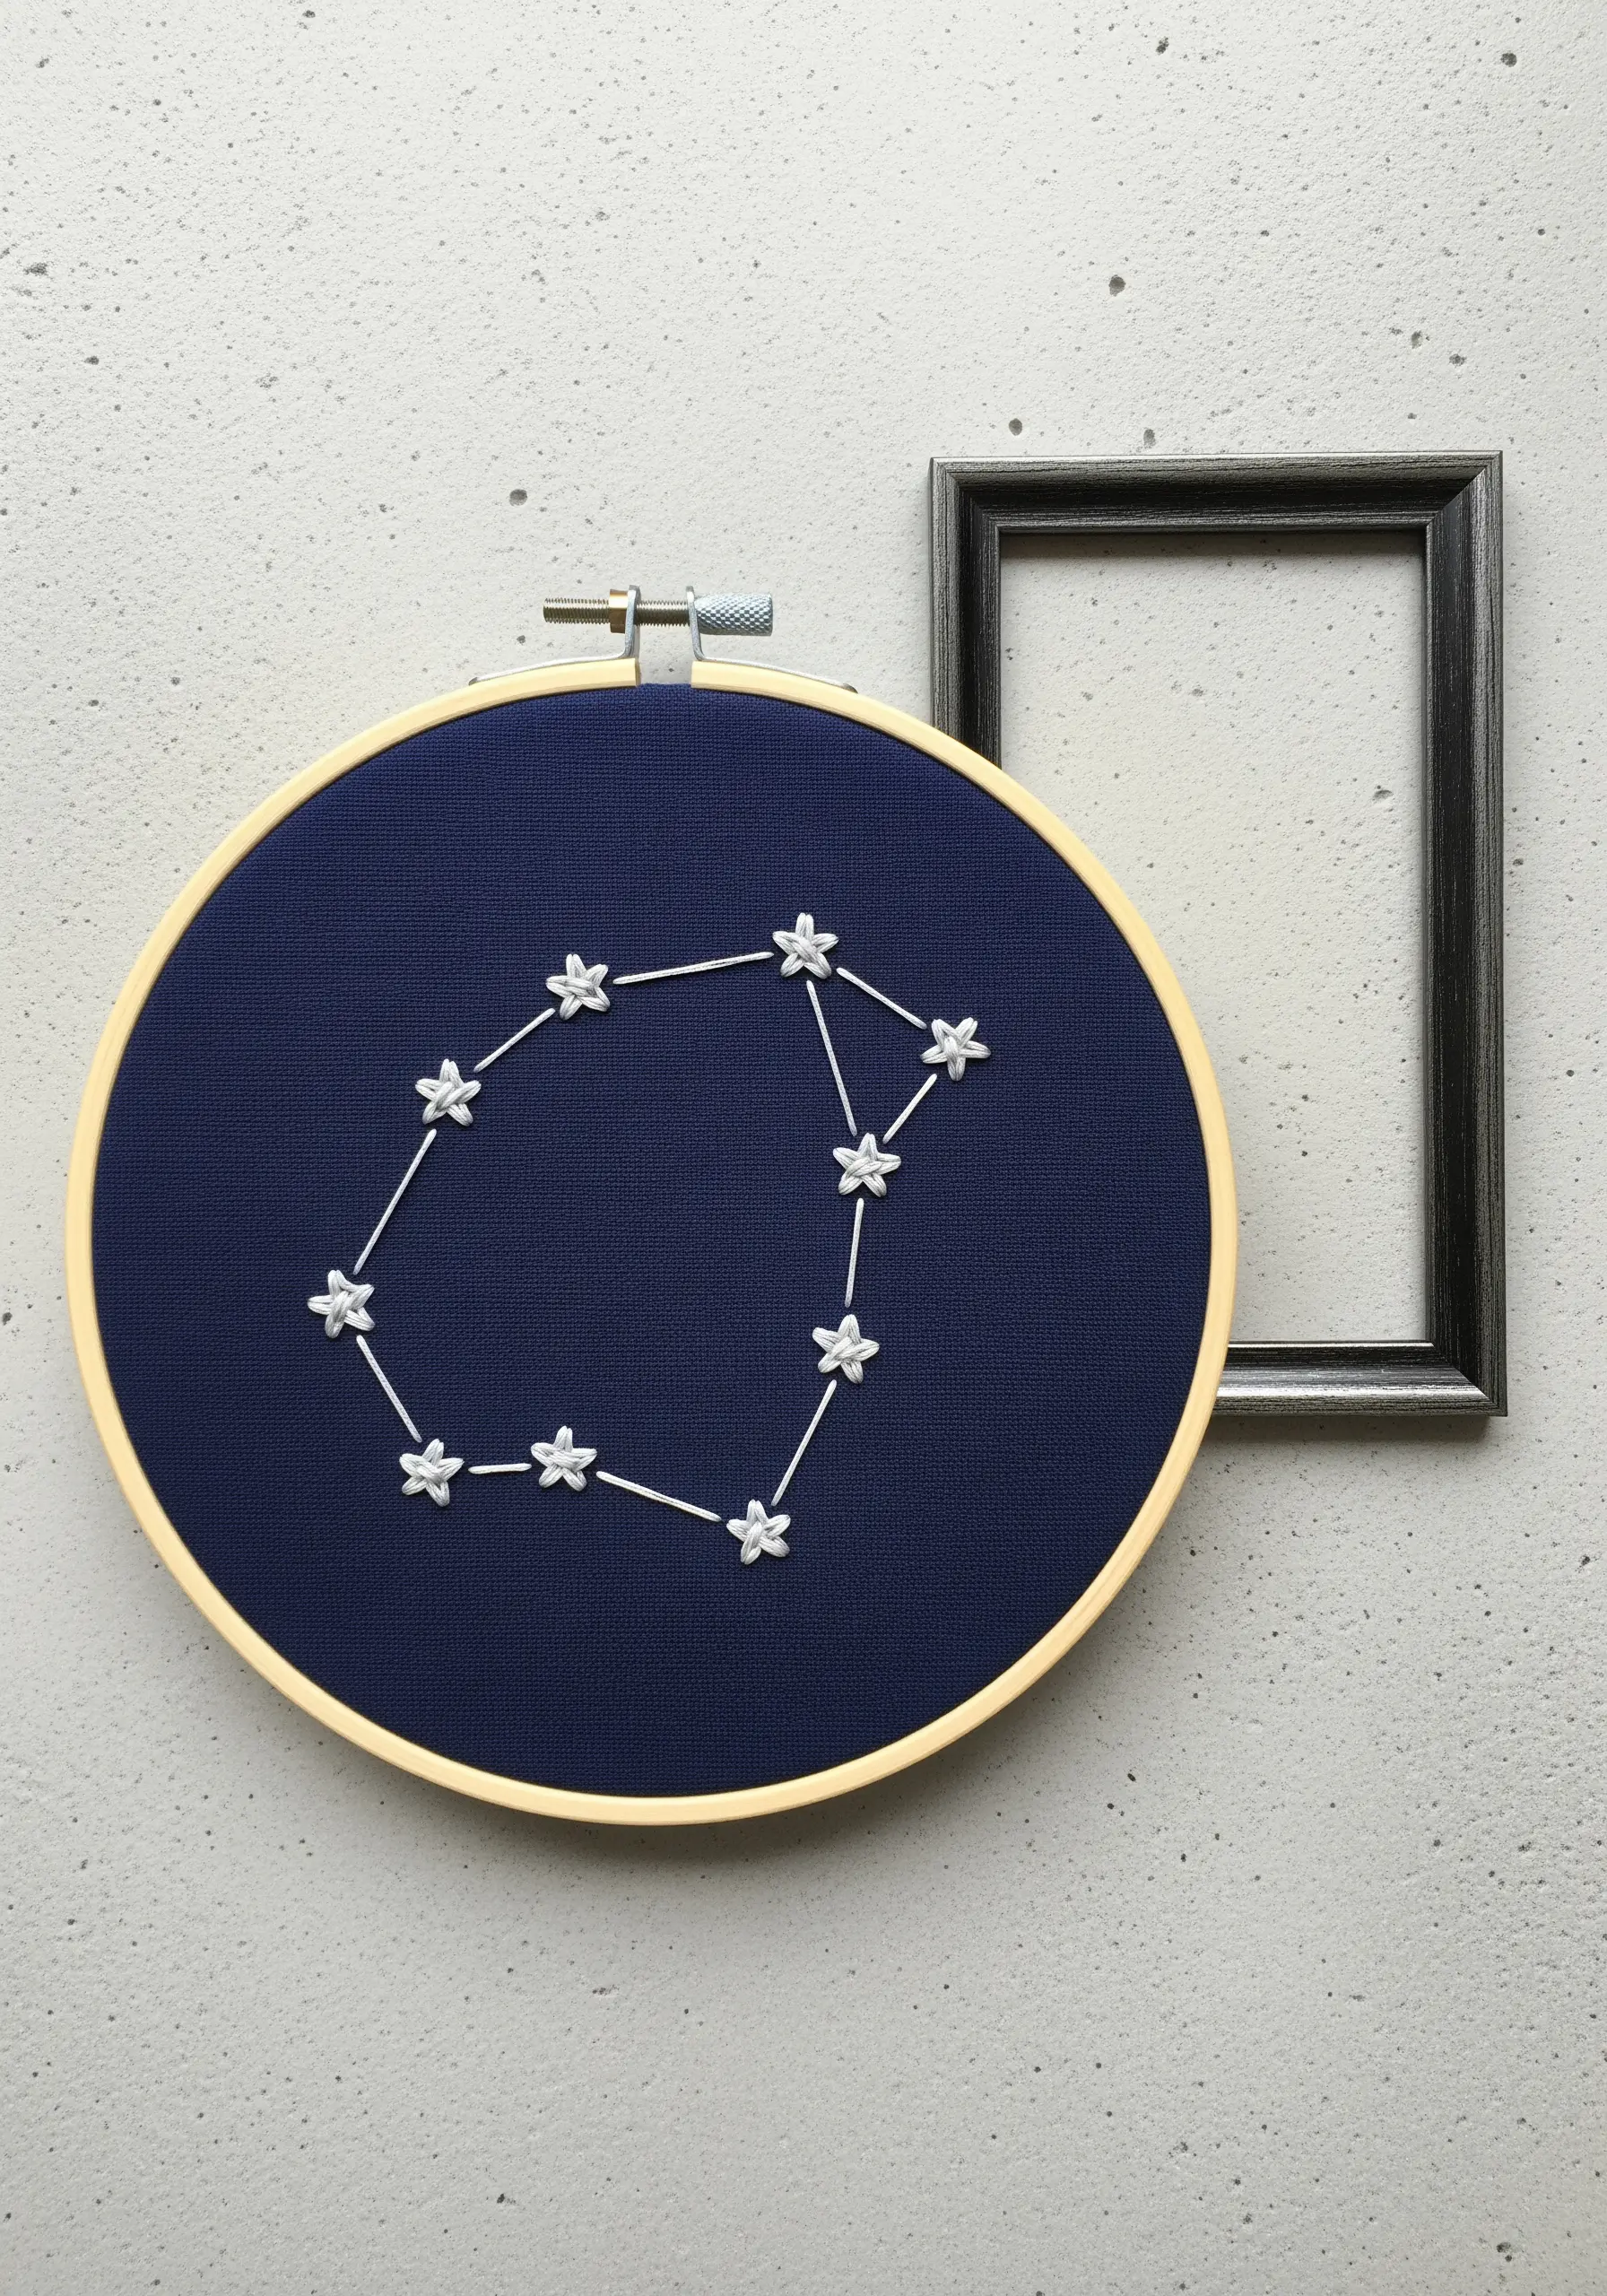
For a whimsical, stylized constellation, use detached chain stitches (lazy daisies) to form your stars.
Create five or six stitches radiating from a central point to form a simple, star-like flower.
This stitch adds more texture and personality than a simple French knot.
Connect your daisy-stitch stars with a fine, single-strand backstitch to complete the celestial map on a deep navy fabric.
30. Emulate a Brushstroke with Thread Painting
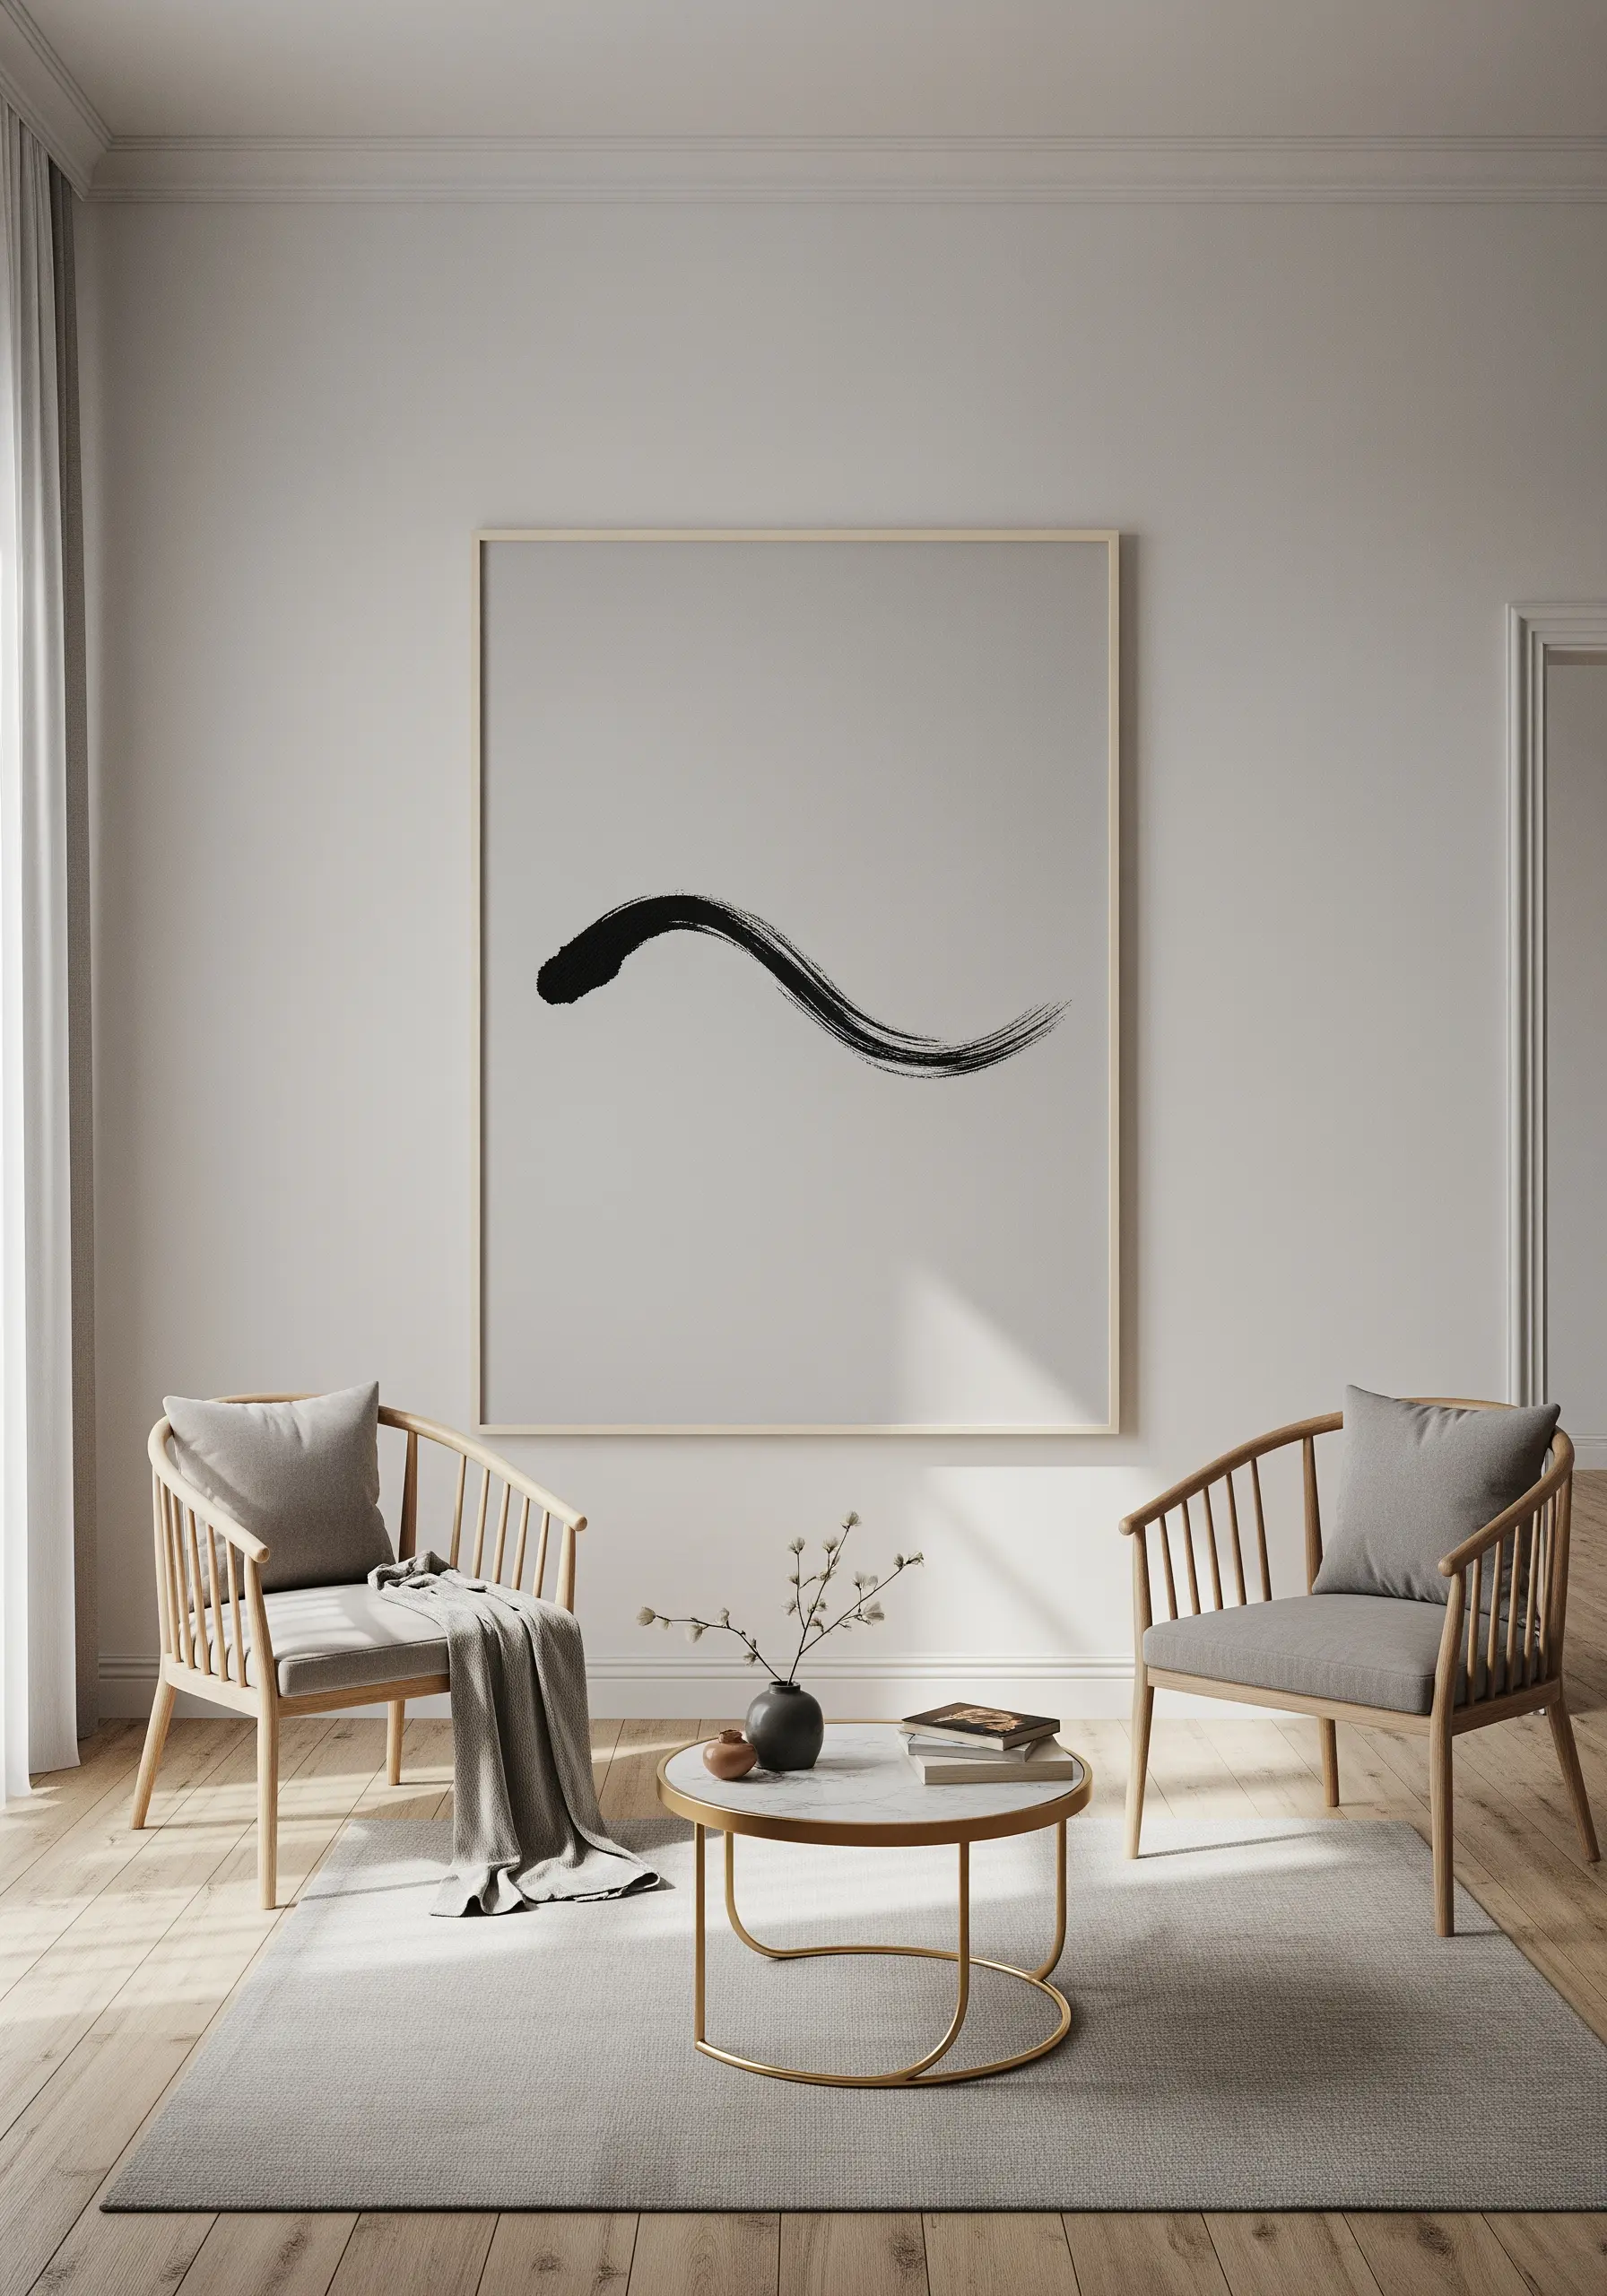
Capture the energy of a calligraphic brushstroke using a dense long-and-short stitch.
Use a thick black thread or multiple strands of floss to fill the shape.
At the edges, allow your stitches to become sparser and vary their length and angle, mimicking the tapered, dry-brush effect of ink on paper.
This technique transforms simple stitches into a gesture of movement and flow, making the thread feel both fluid and powerful.
31. Add Charm with an Imperfect Running Stitch

Sometimes, a less-than-perfect stitch is the right choice.
For a simple, illustrative outline like this pear, use a basic running stitch.
Allow your stitches and the gaps between them to be slightly irregular.
This creates a hand-drawn, sketchy quality that feels warm, personal, and approachable—a welcome contrast to the rigid perfection of other outline stitches.
32. Create Flowing Lines with Thread Wrapping
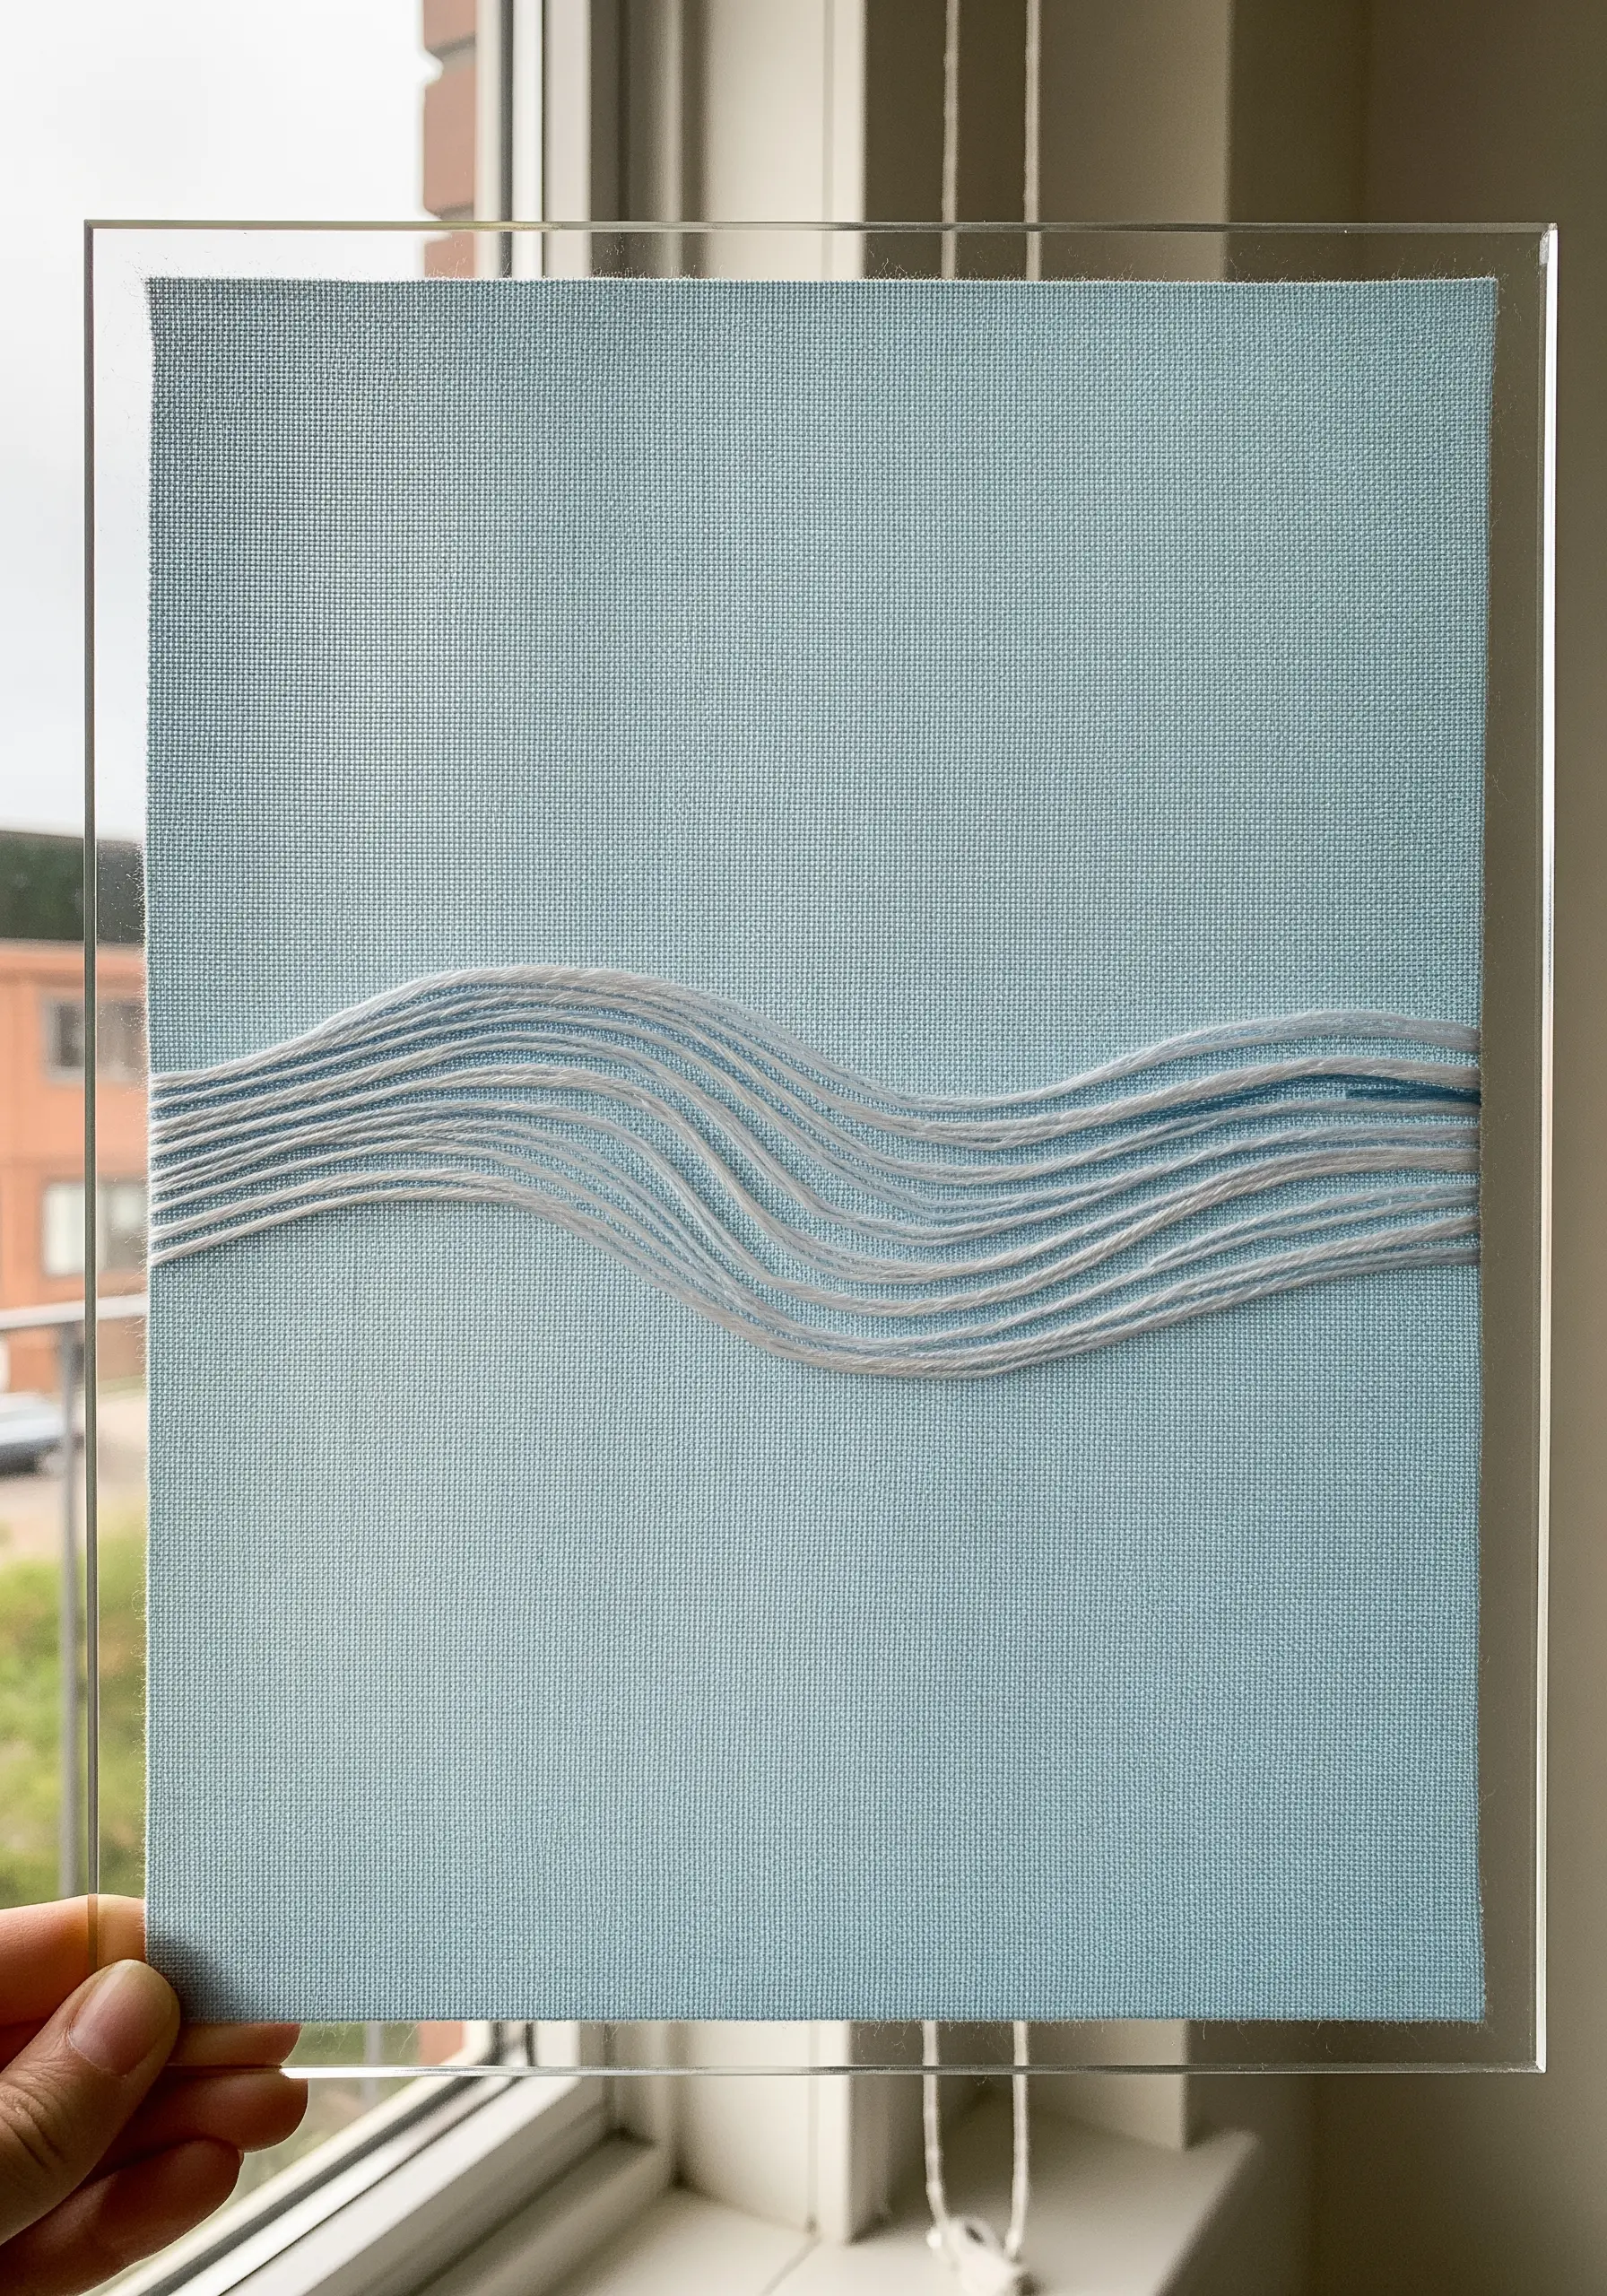
This design uses thread as a sculptural element rather than a stitch.
Mount your fabric onto a stiff board or canvas.
Mark your wave pattern on the back and insert small pins or nails at the turning points.
Then, simply wrap your thread around the guides, building up layers of parallel lines to create a fluid, three-dimensional wave.
This technique allows for perfectly smooth curves that would be difficult to achieve with stitching alone.
33. Explore Woven Textures for Wall Art

For a highly textural, minimalist art piece, look beyond traditional embroidery stitches to the world of weaving.
Use a simple frame loom or even a sturdy piece of cardboard to create a small woven panel.
Alternate between different weaving patterns, like a flat tabby weave and a more dimensional soumak weave, to create distinct textural bands.
Mounting the finished weaving on a canvas creates a sophisticated piece of yarn wall art.
34. Use a Heavier Thread for Bold Outlines
To give a simple line drawing a strong, graphic presence, choose a heavier thread.
Instead of the standard six-strand cotton floss, try a size 5 perle cotton.
This single-ply thread is tightly twisted, giving it a beautiful sheen and a substantial, rounded profile.
Use it with a simple backstitch to create clean, bold lines that stand out, making even the simplest drawing feel confident and intentional.
35. Give Letters a 3D Effect with a Raised Stem Stitch
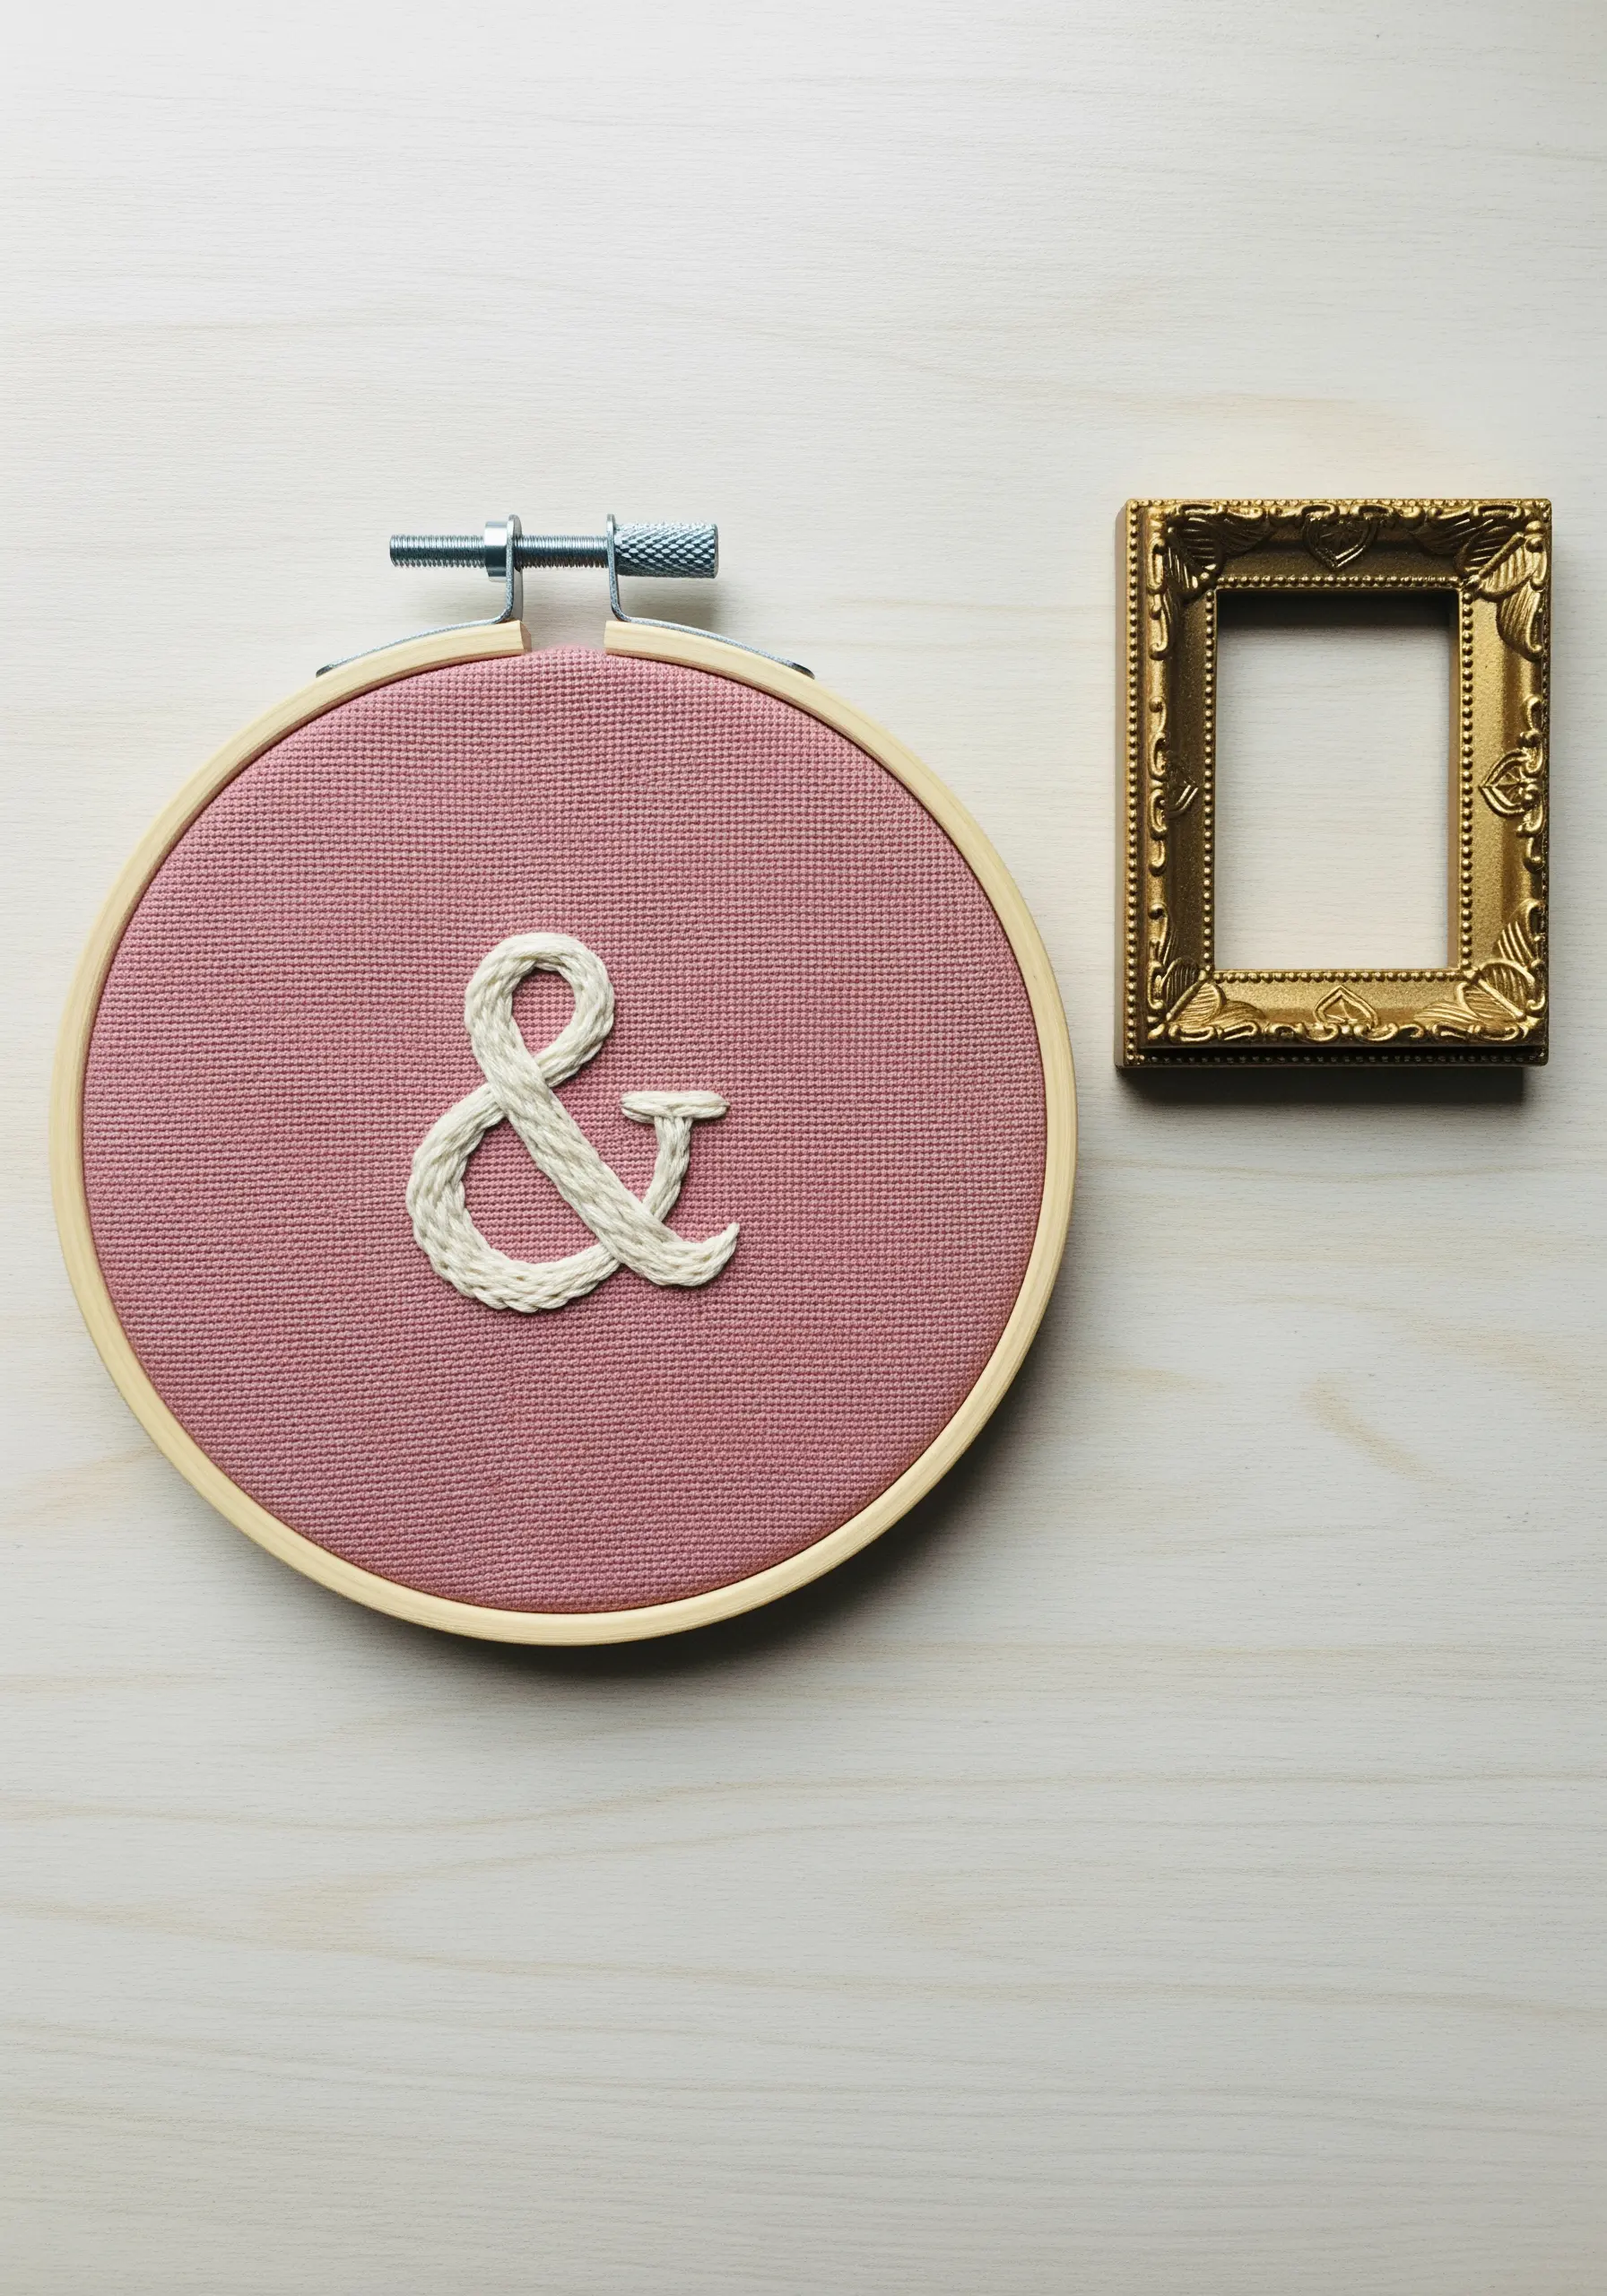
To make a single letter or symbol truly pop, use a raised stem stitch band.
First, create a foundation of several parallel straight stitches to define the width of your letter’s stroke.
Then, work a stem stitch over this padding, passing your needle under the foundation stitches instead of piercing the fabric.
This technique creates a smooth, rounded, and highly dimensional form that lifts off the surface, turning a simple letter into a small sculpture.
36. Tell a Story Across Multiple Frames
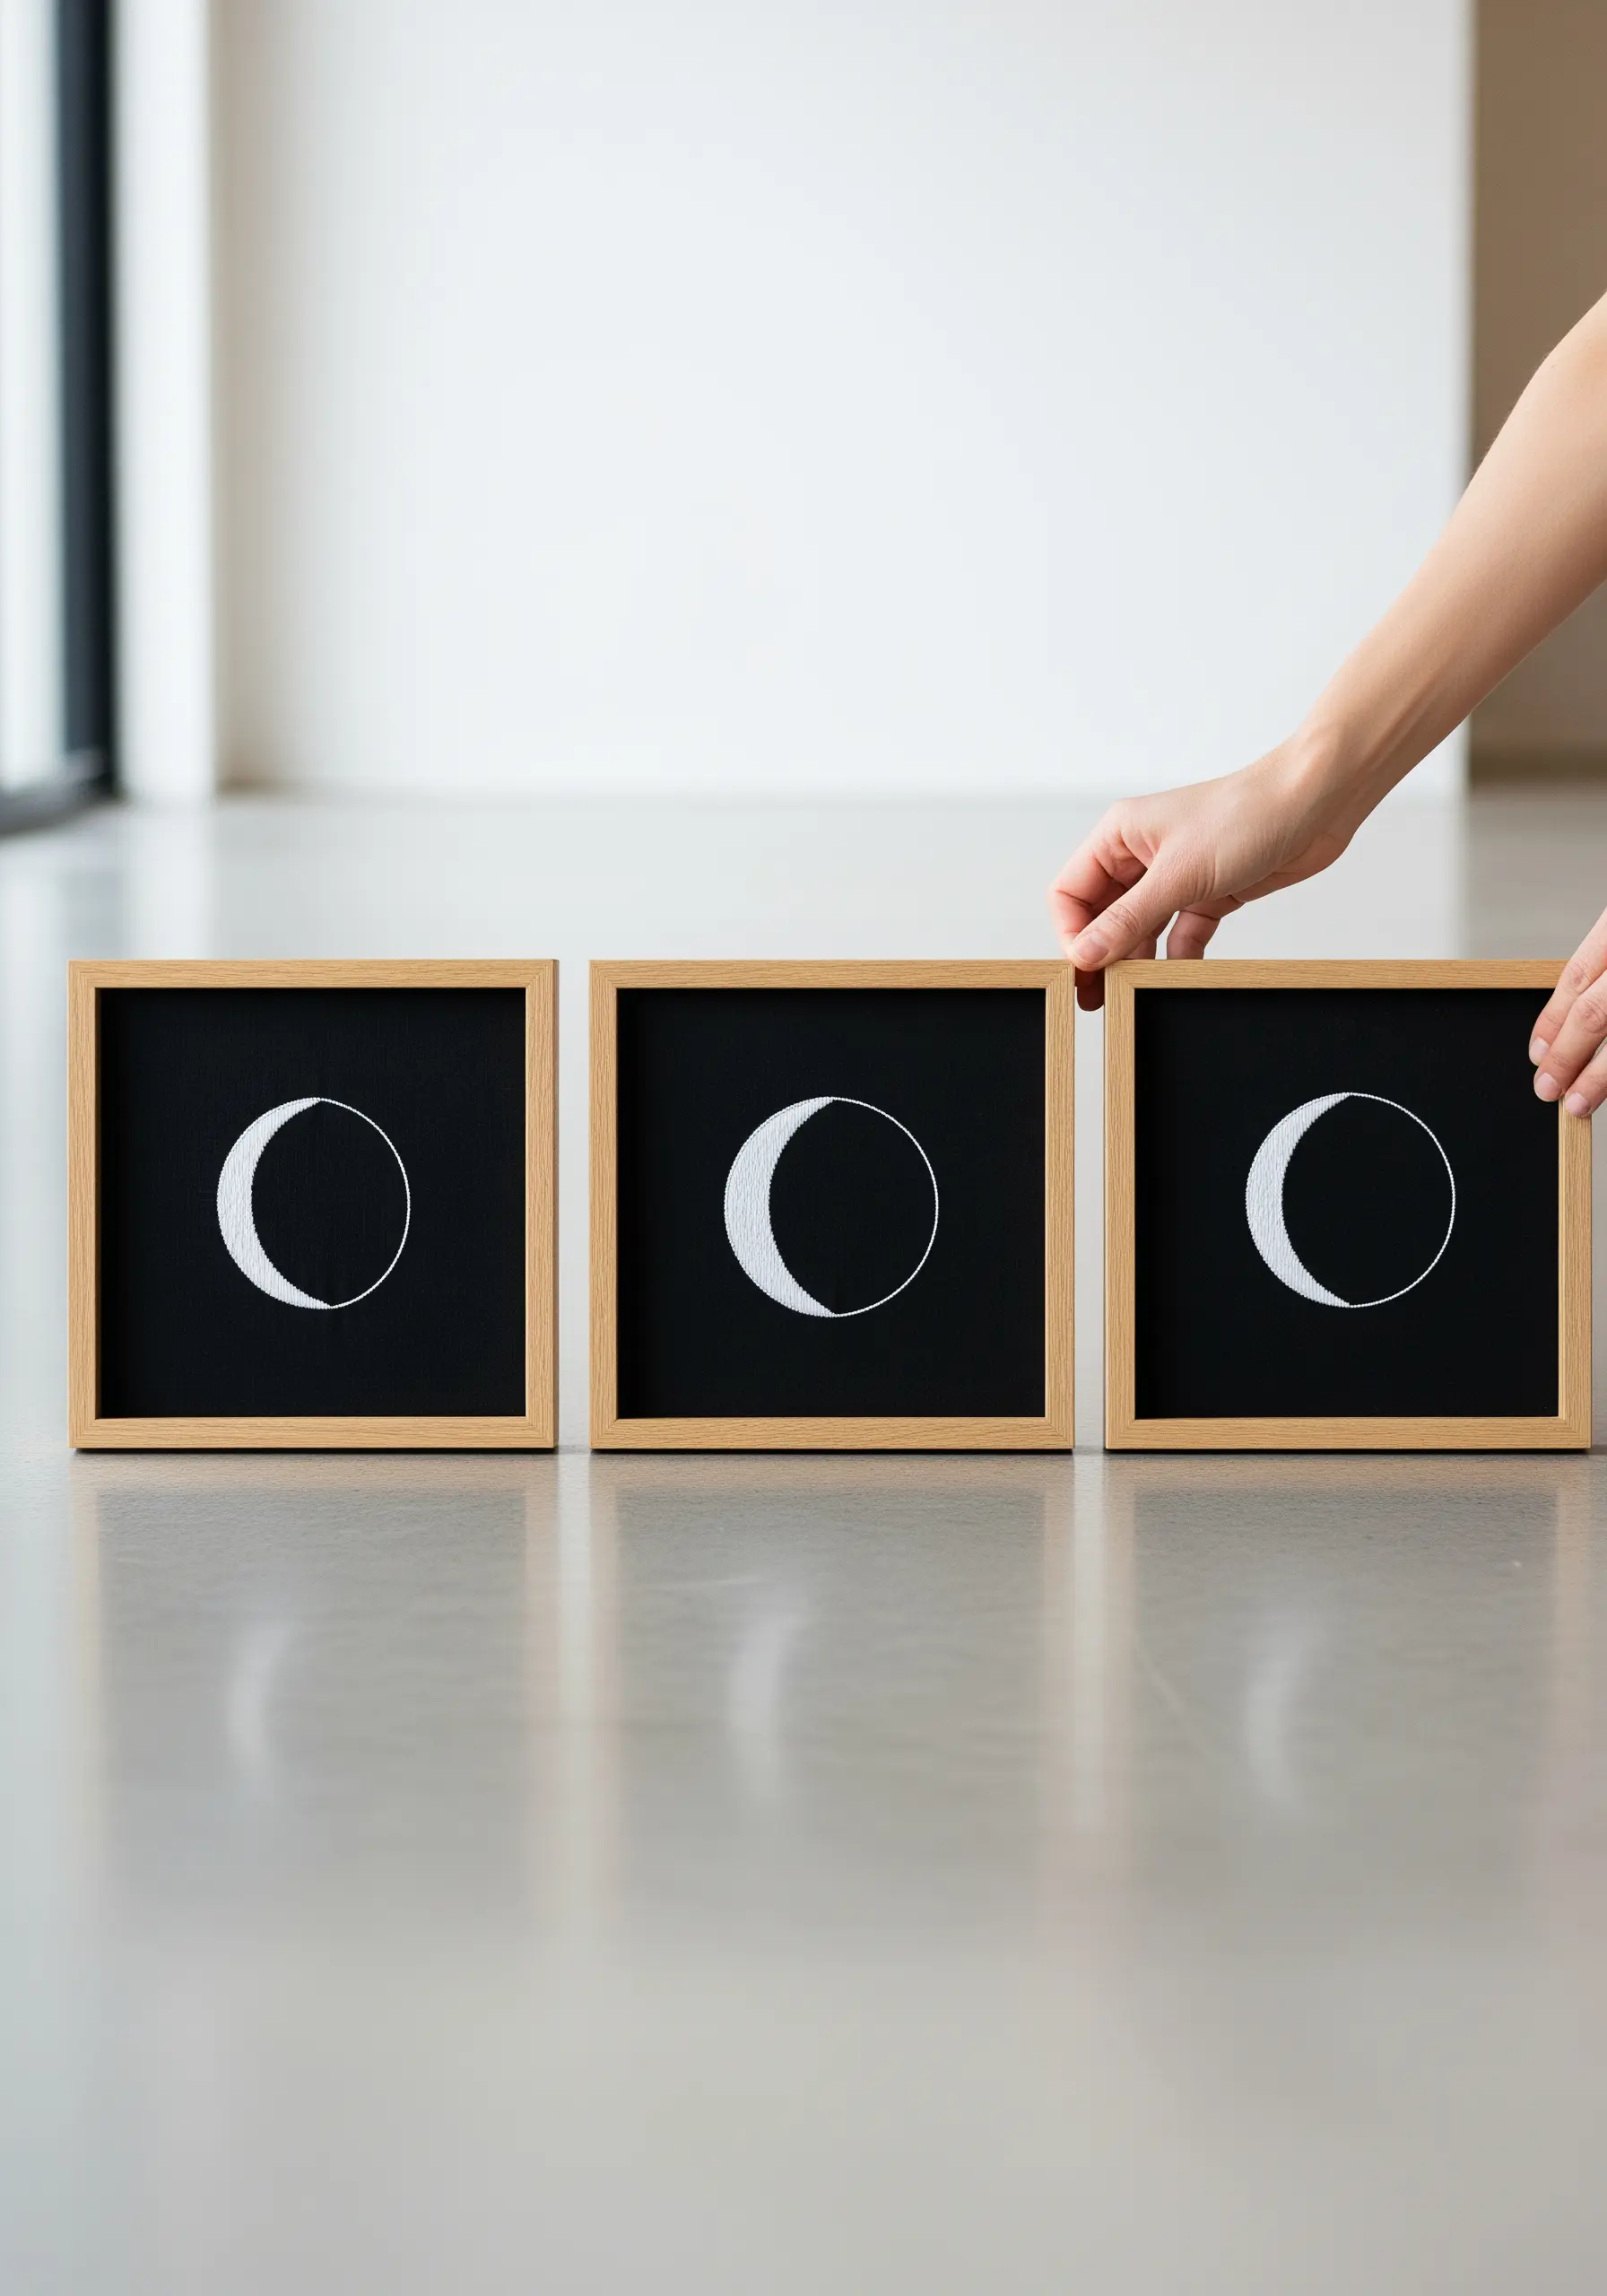
Use a triptych to explore a theme with elegant simplicity, like the phases of the moon.
To achieve a perfect crescent shape with satin stitch, first outline the curve with a split stitch.
Then, fill the shape with satin stitches, using the split stitch outline as a guide to keep your edges crisp and defined.
The high-contrast black and white palette makes this a powerful and modern framed embroidery design that feels cohesive and thoughtfully planned.


