

String art embroidery holds a unique place in textile art, blending the mathematical precision of lines and angles with the softness of thread. It’s an opportunity to think like a sculptor, using tension, direction, and layering to build form and texture on a flat surface.
You don’t need dozens of complex stitches to create something beautiful. The magic is in the technique—in seeing how a simple change can elevate your work. It’s in realizing how layering two shades of gold adds instant depth, how switching from floss to raffia creates rustic charm, or how adding a single row of beads can transform an entire piece.
Think of these patterns not as rigid instructions, but as creative starting points. Adjust the colors, experiment with the textures, and see how the character of a design shifts. This is your space to play with line and color, creating holiday décor that feels intentional, modern, and uniquely yours.
1. Geometric Threading for Modern Wildlife Portraits
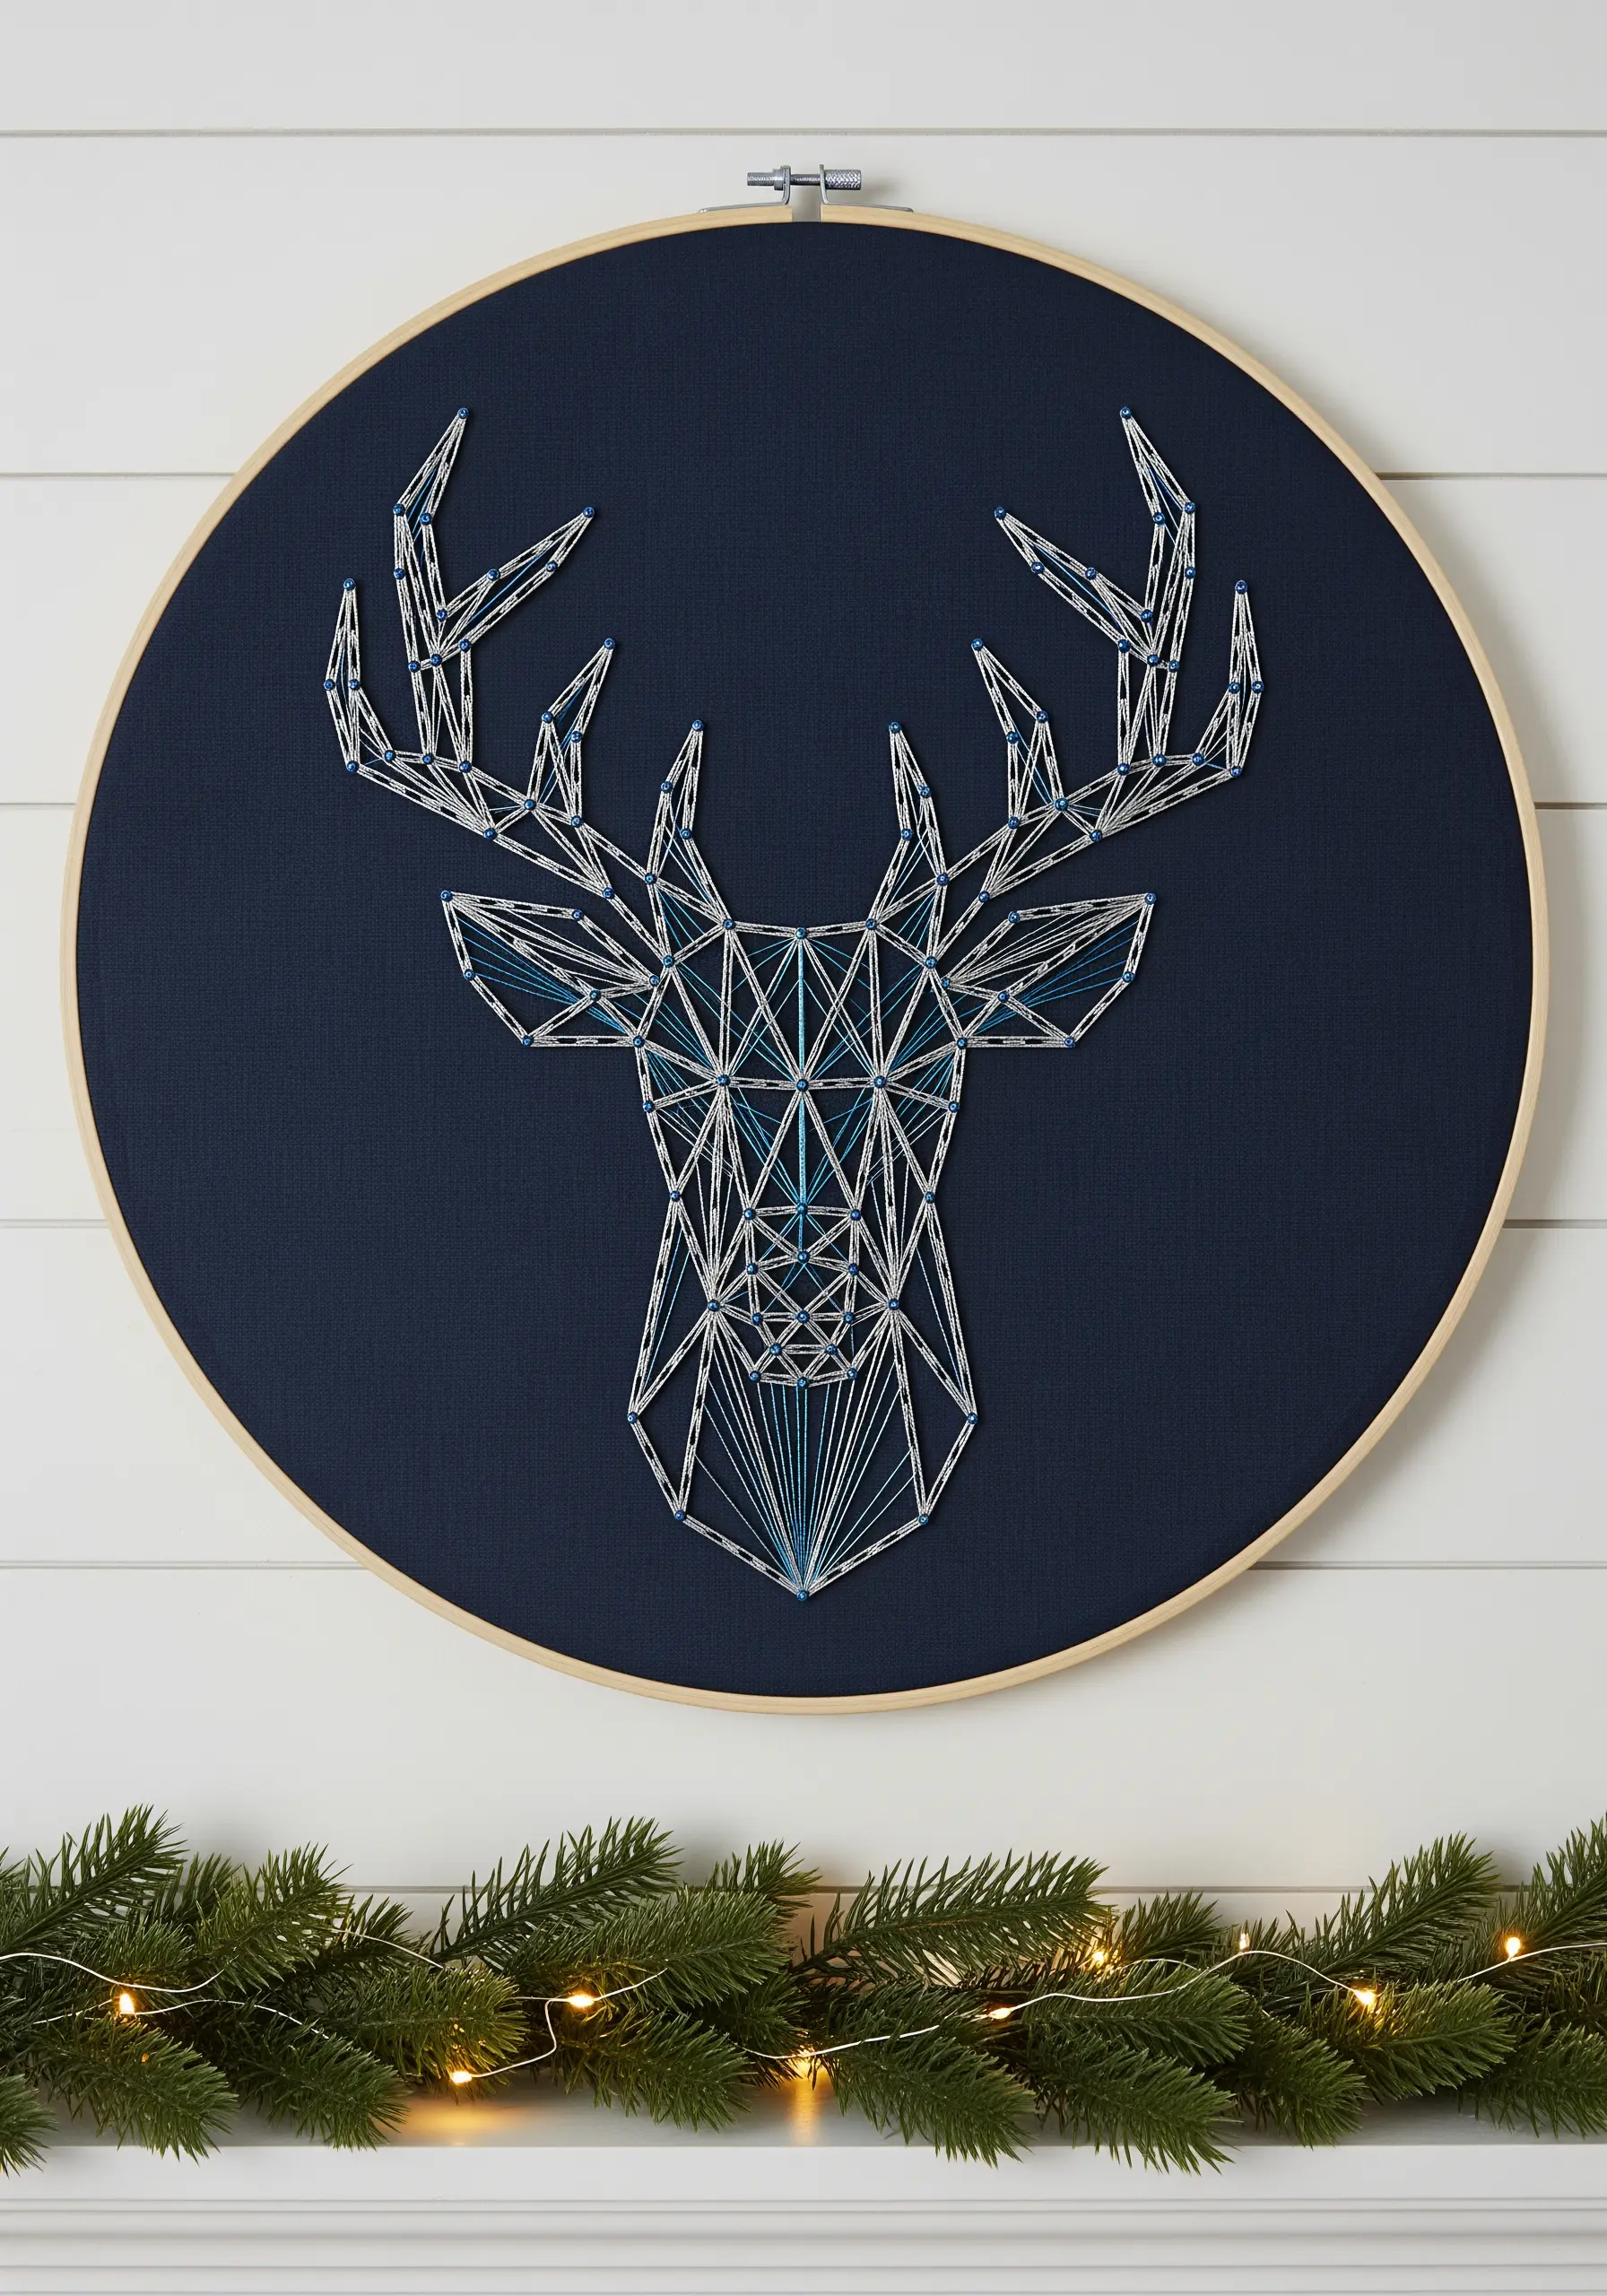
Create visual depth in your geometric designs by layering two or three shades of the same color family, like silver, light blue, and white.
Wrap the lighter threads over the darker ones in key areas to create highlights that define the stag’s facial structure and antlers.
This layering technique gives the flat, graphic design a tangible sense of dimension and form.
A dark navy or black fabric is essential, as it acts as a negative space that makes metallic or light-colored threads appear more luminous.
2. Weaving Color Blocks for a Graphic Folk Art Finish
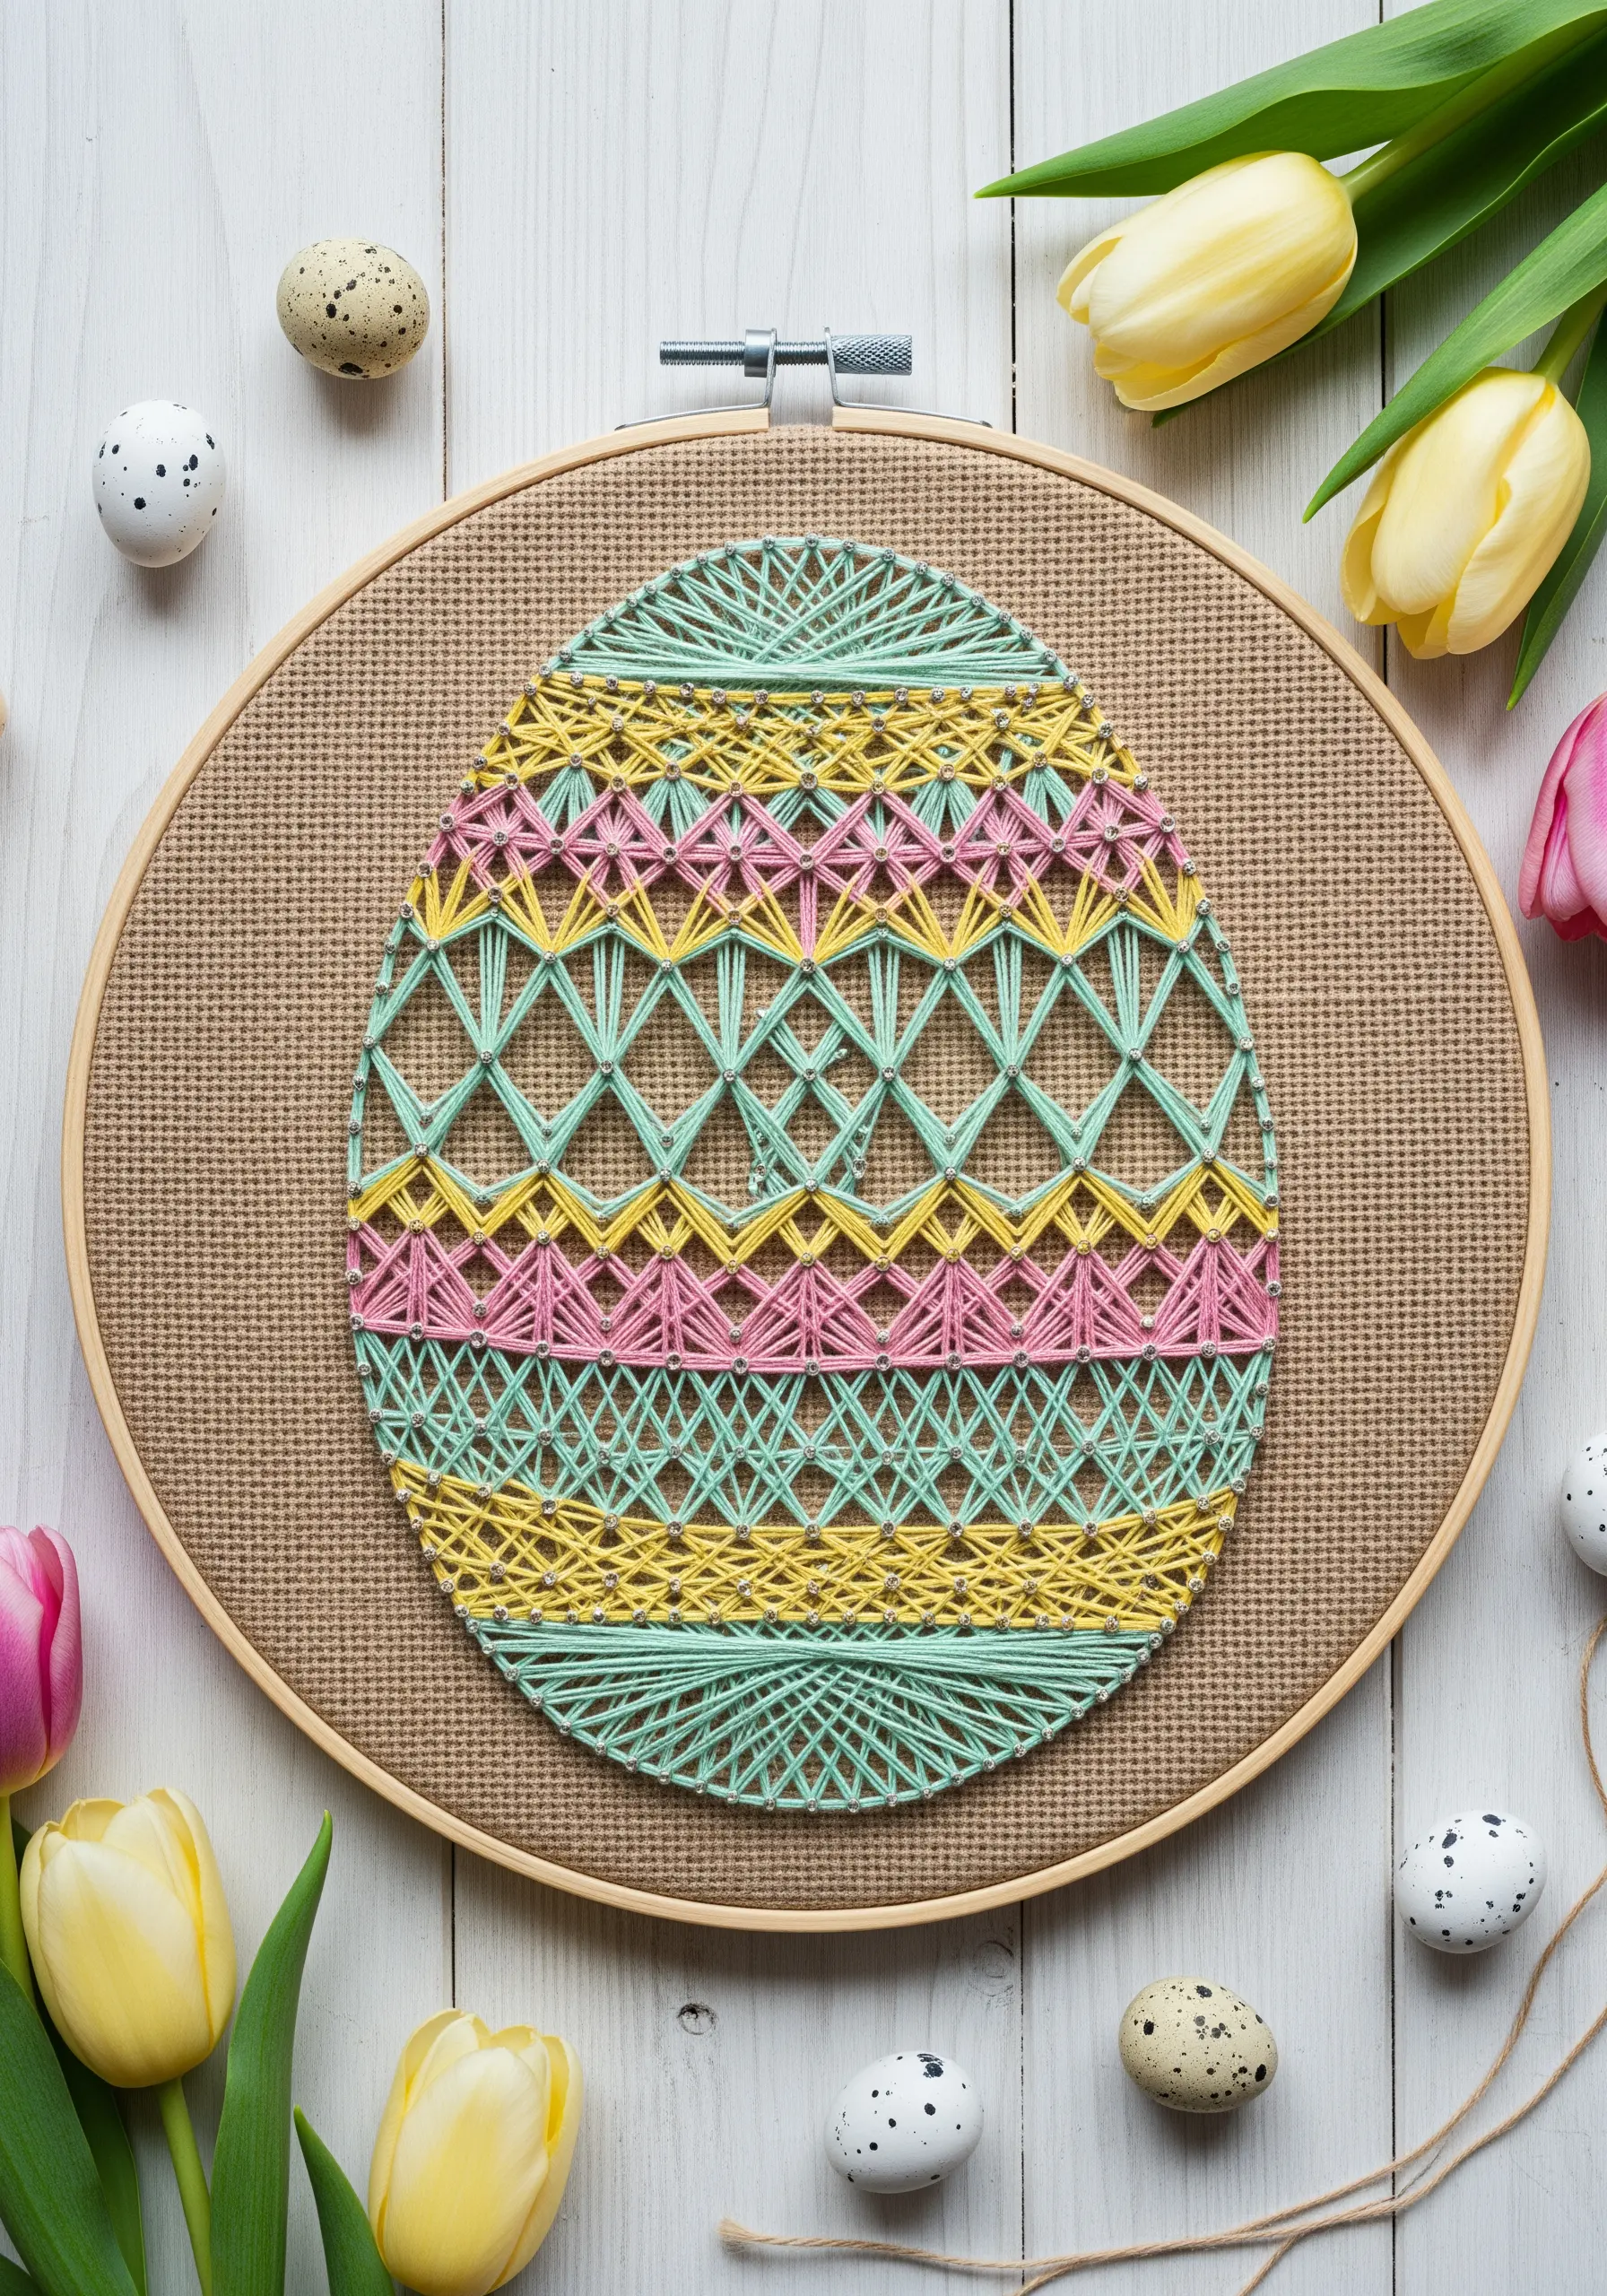
Instead of filling your shape with a single color, divide the design into horizontal bands to create a modern, color-blocked effect.
Assign a different geometric wrapping pattern to each band by changing the sequence of your anchor points.
This method builds a rich, woven texture reminiscent of traditional folk textiles, giving the simple egg shape a more sophisticated finish.
Maintain consistent thread tension across all sections to prevent the burlap or Aida cloth from puckering under the strain.
3. Curating a Cohesive Triptych with Color Harmony
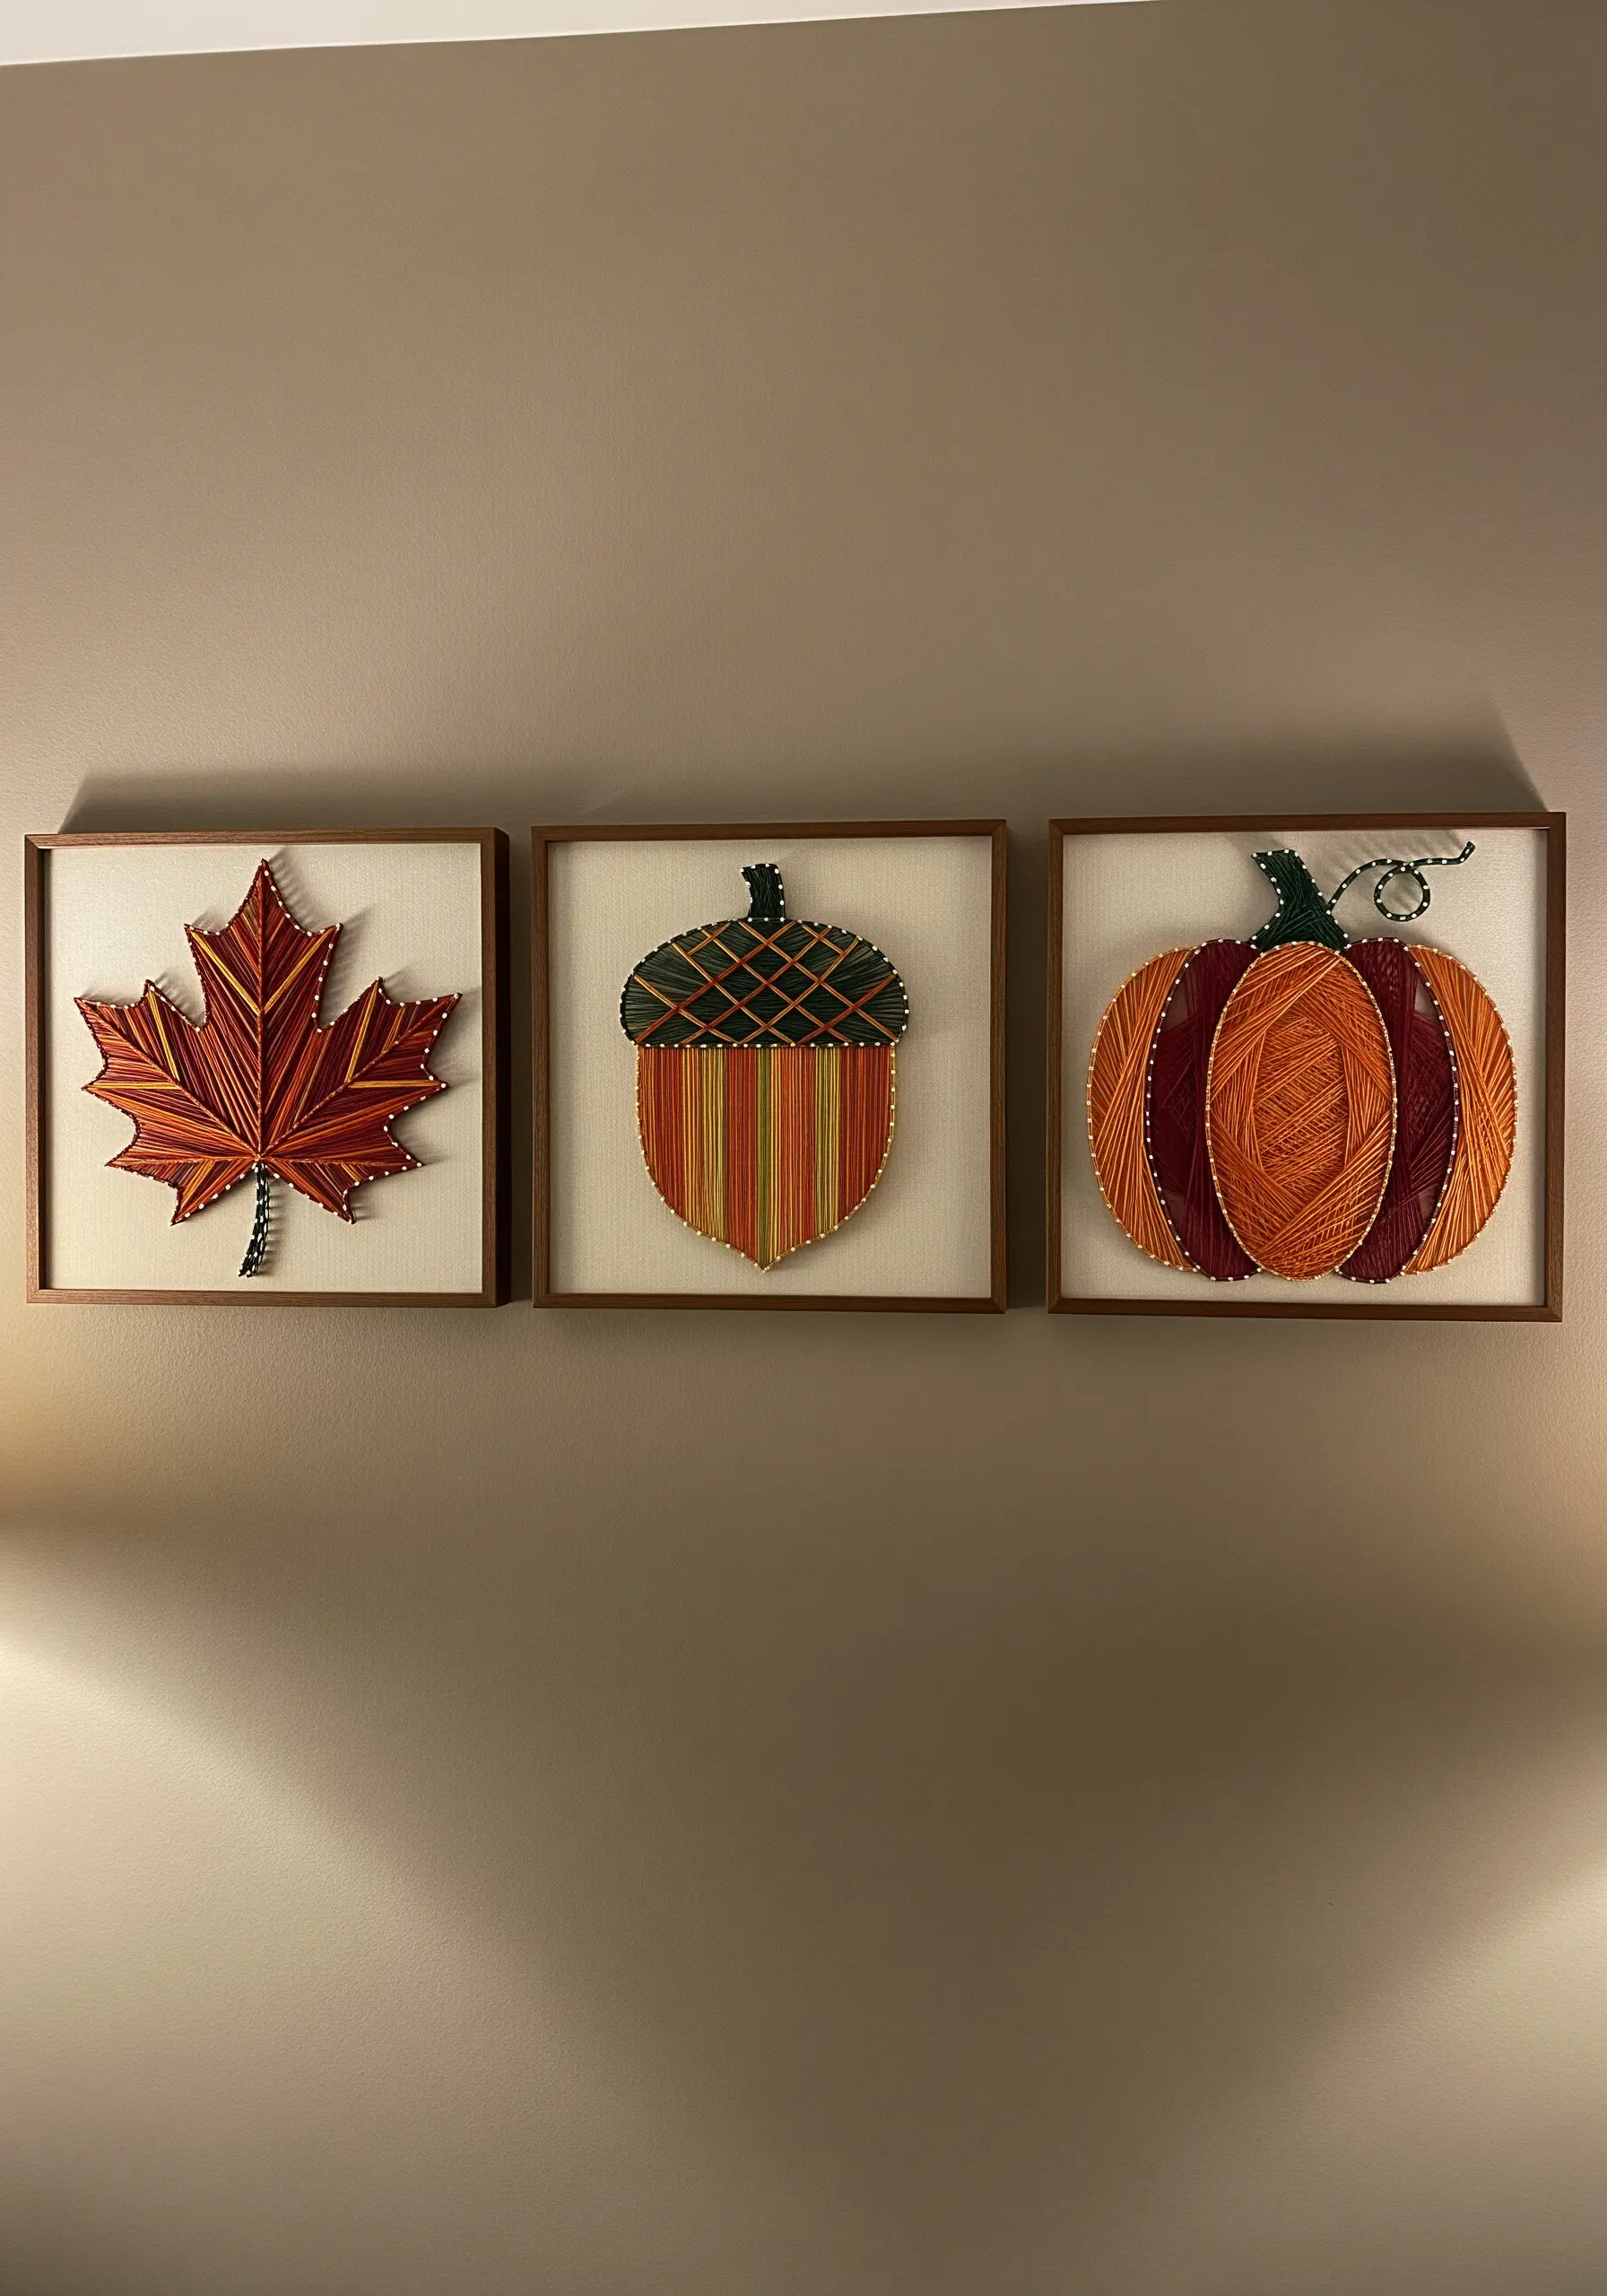
To unify a set of seasonal motifs, choose a limited, warm color palette—like rust, gold, and deep orange—and distribute it across all three pieces.
Use one color as the dominant shade in one piece and as a subtle accent in the others to create a strong visual link.
Mounting them in identical frames transforms individual projects into a single, intentional art installation.
This approach results in stunning framed embroidery pieces that elevate your seasonal décor beyond simple crafts.
4. Accentuating Geometric Points with Seed Beads
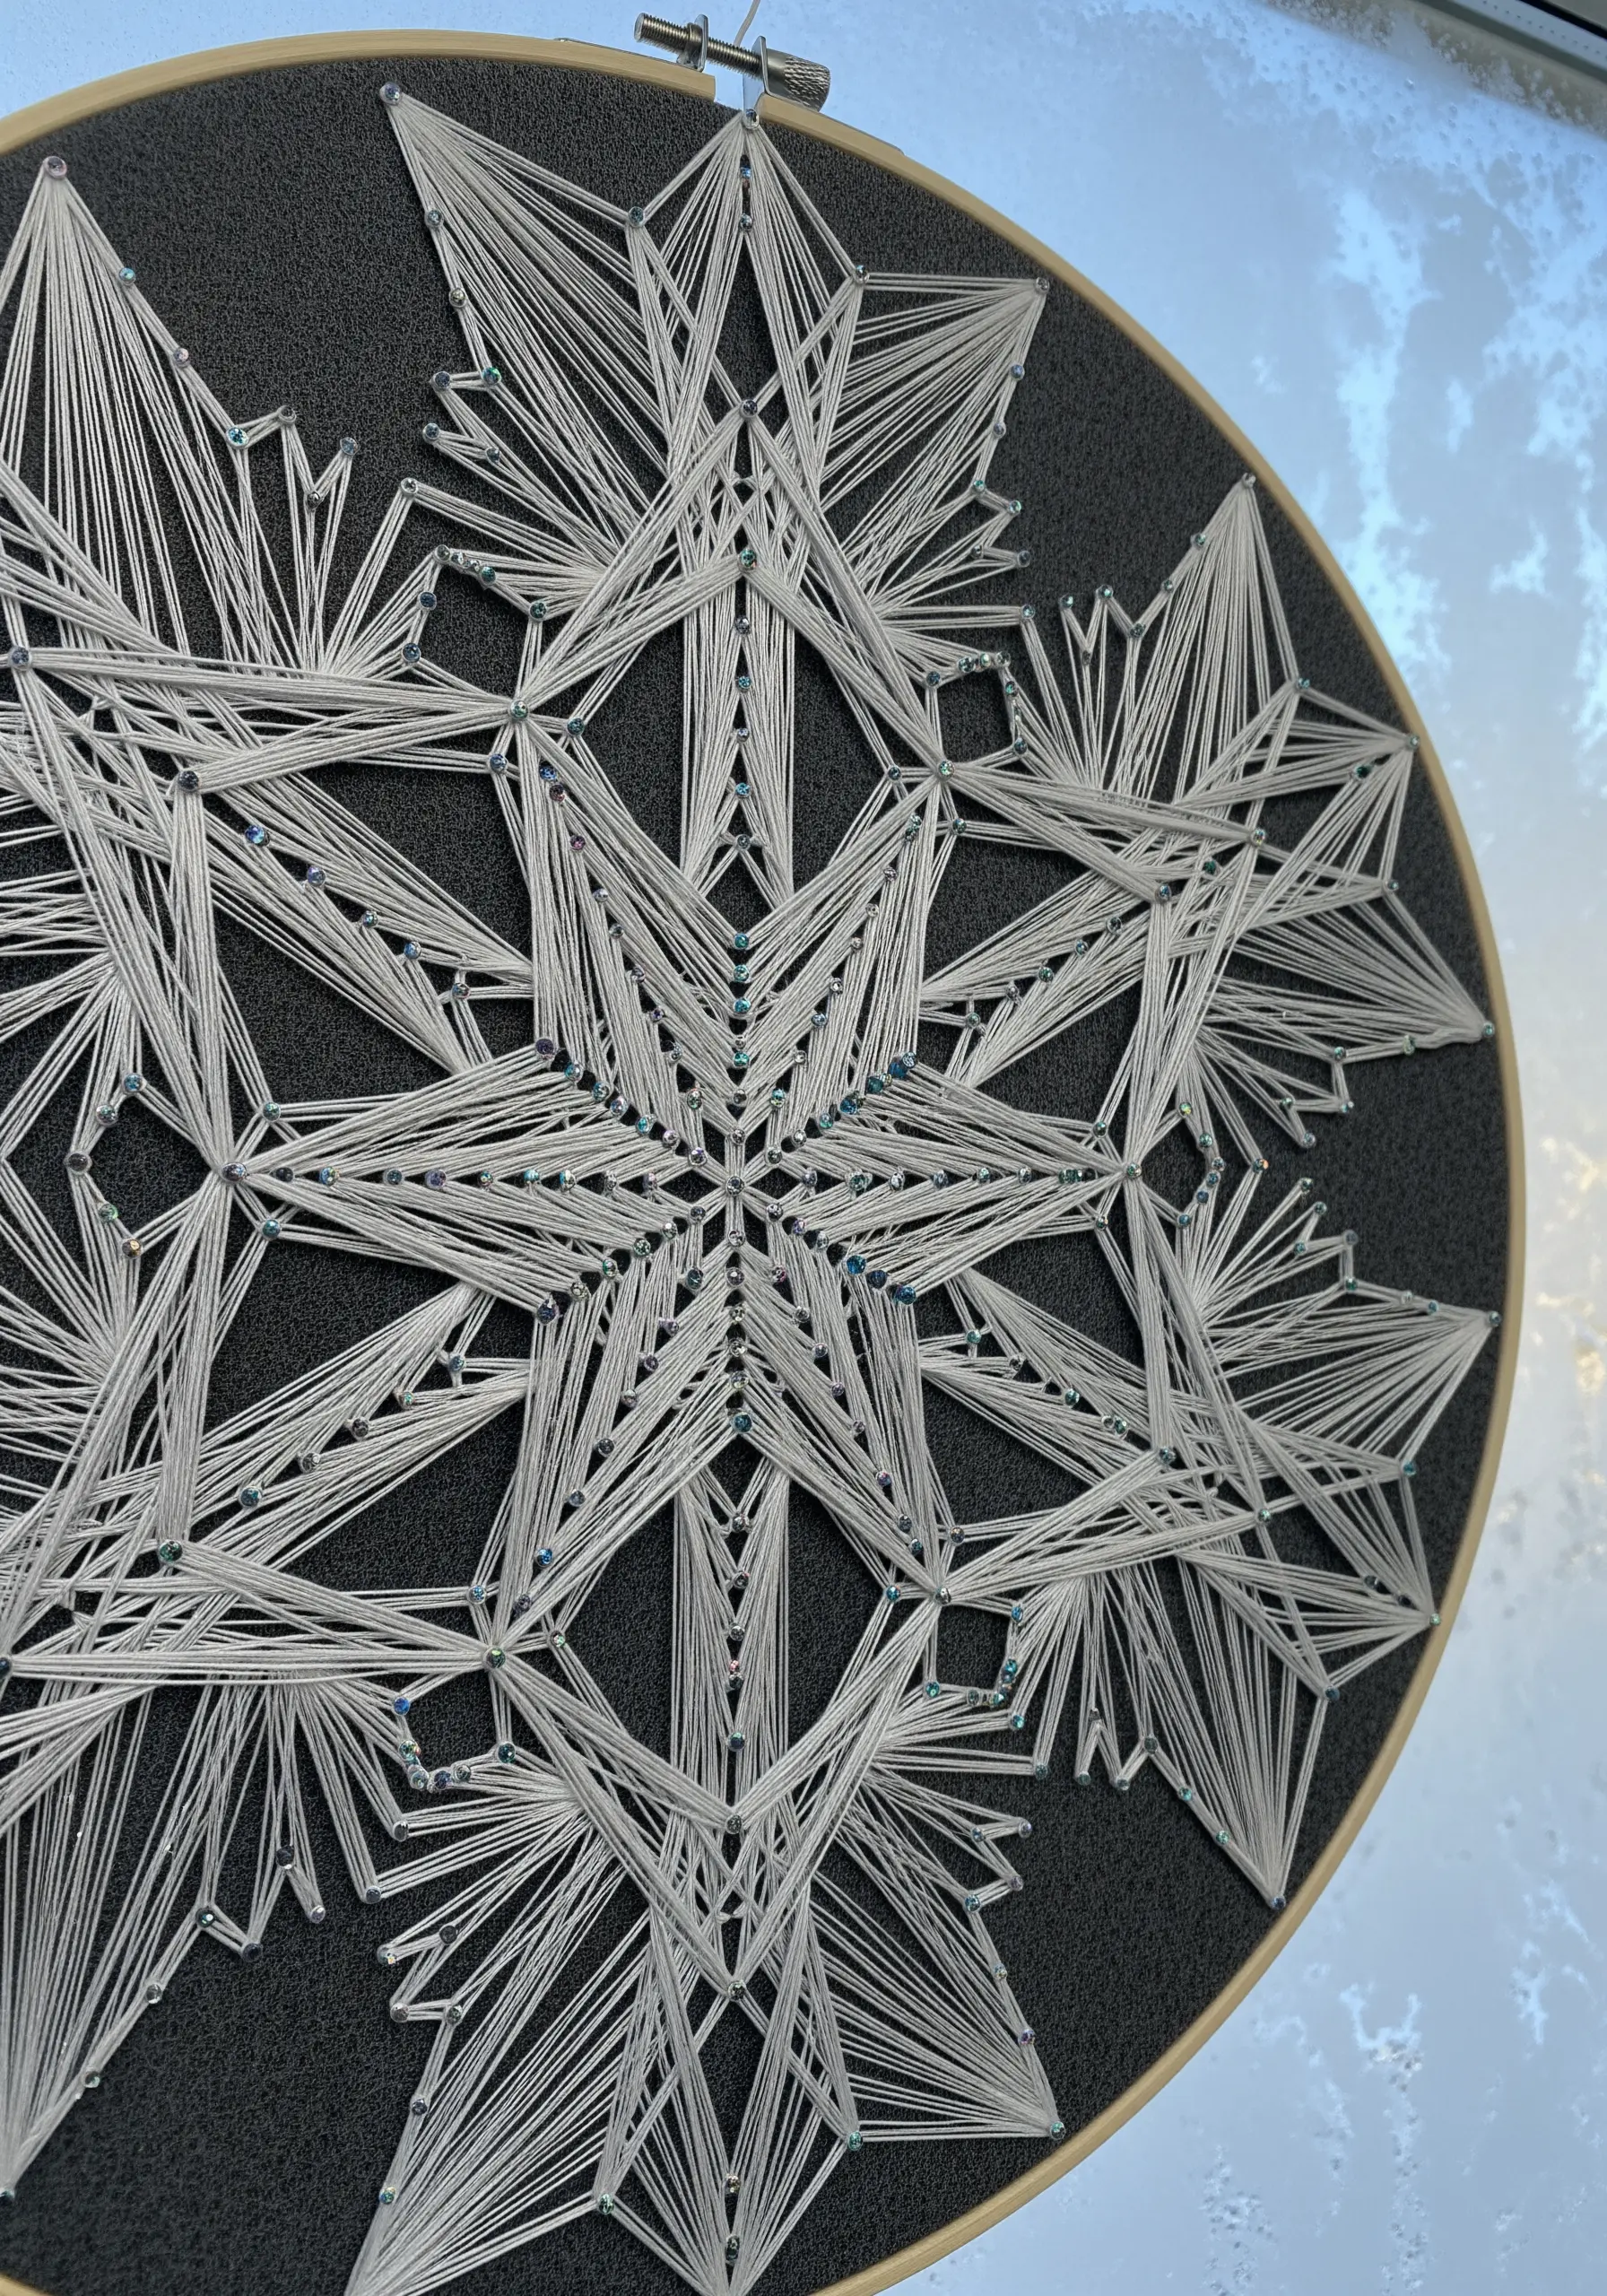
For highly detailed geometric patterns like snowflakes, replace simple knots or stitches with tiny seed beads at each anchor point.
This not only secures your thread but also adds a delicate, icy sparkle that catches the light, enhancing the wintery theme.
The beads act as clean, uniform pivot points, ensuring your lines remain crisp and your geometric structure is mathematically precise.
Use a thread color that contrasts slightly with the bead to make this beautiful, functional detail more visible.
5. Creating Dynamic Fill with Randomised Stitching
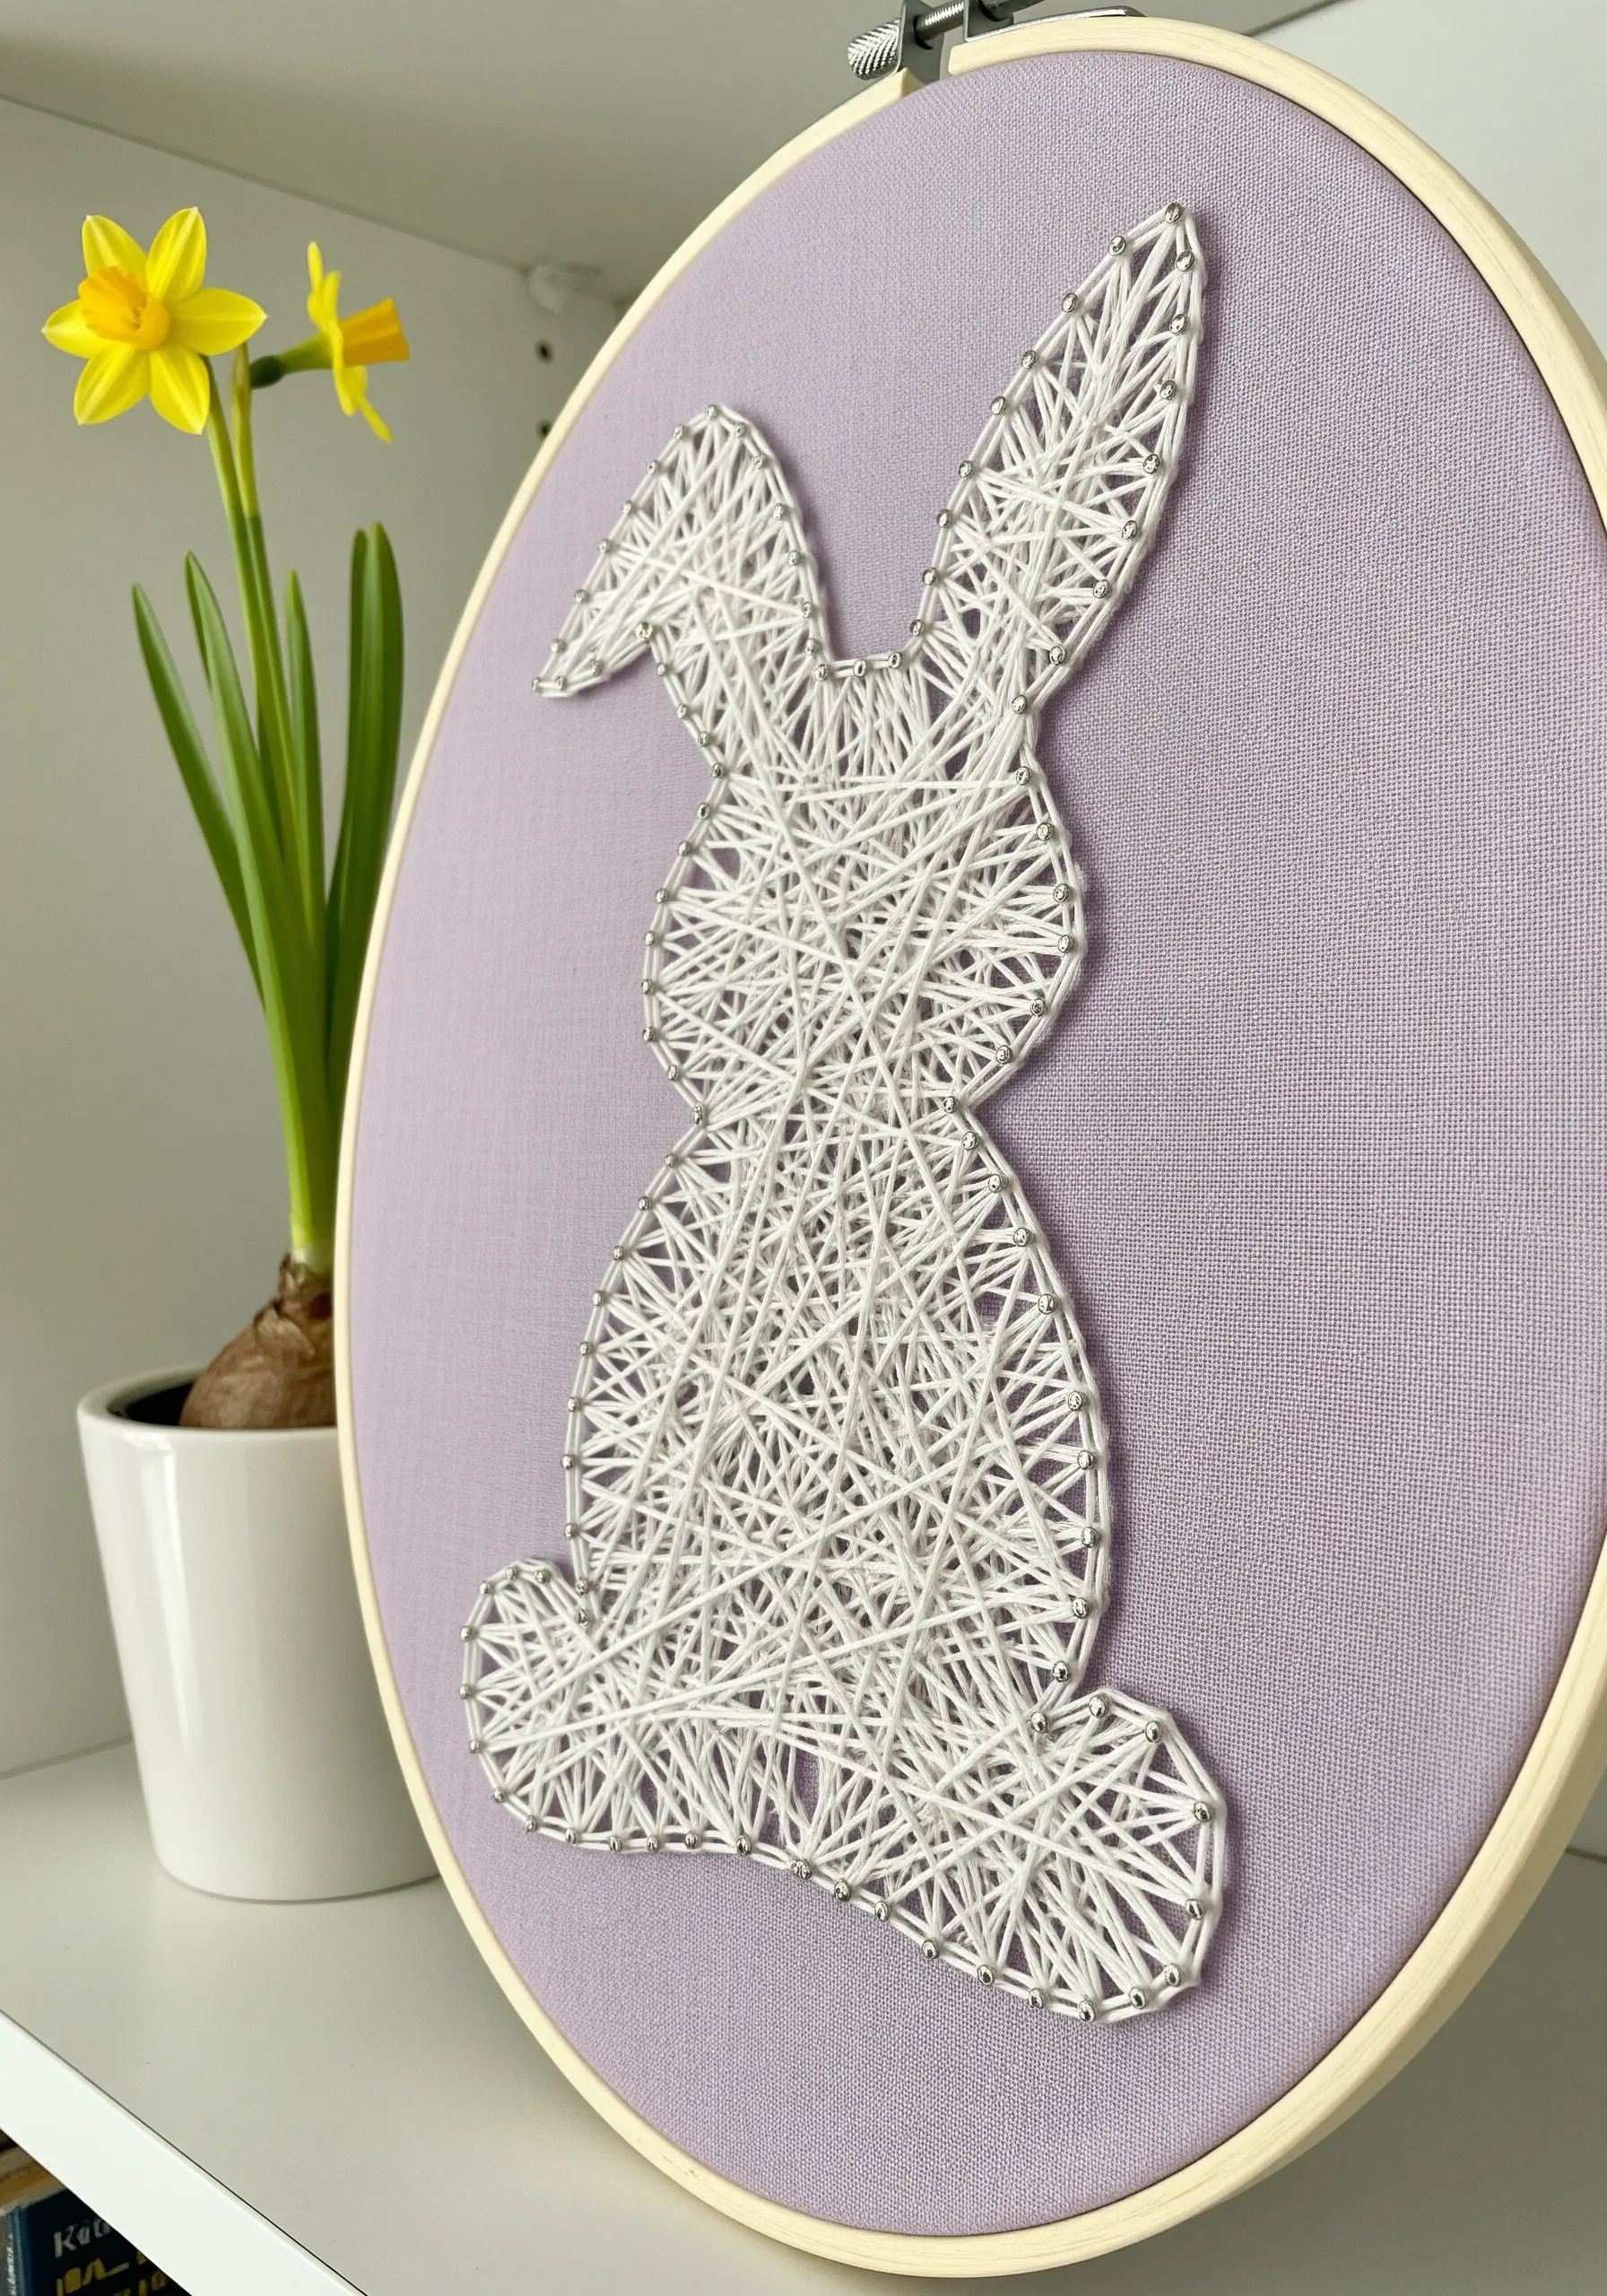
To give a simple silhouette life and texture, avoid uniform, parallel lines and instead wrap your thread randomly between the anchor points.
Criss-cross the threads in multiple directions, building up layers until you achieve the desired density and opacity.
This technique creates a sense of movement and softness that a structured fill cannot replicate, making the final piece feel more organic.
The final texture appears complex and intricate, yet the process is wonderfully intuitive and forgiving.
6. Sculpting Dimension with Layered Thread and Color
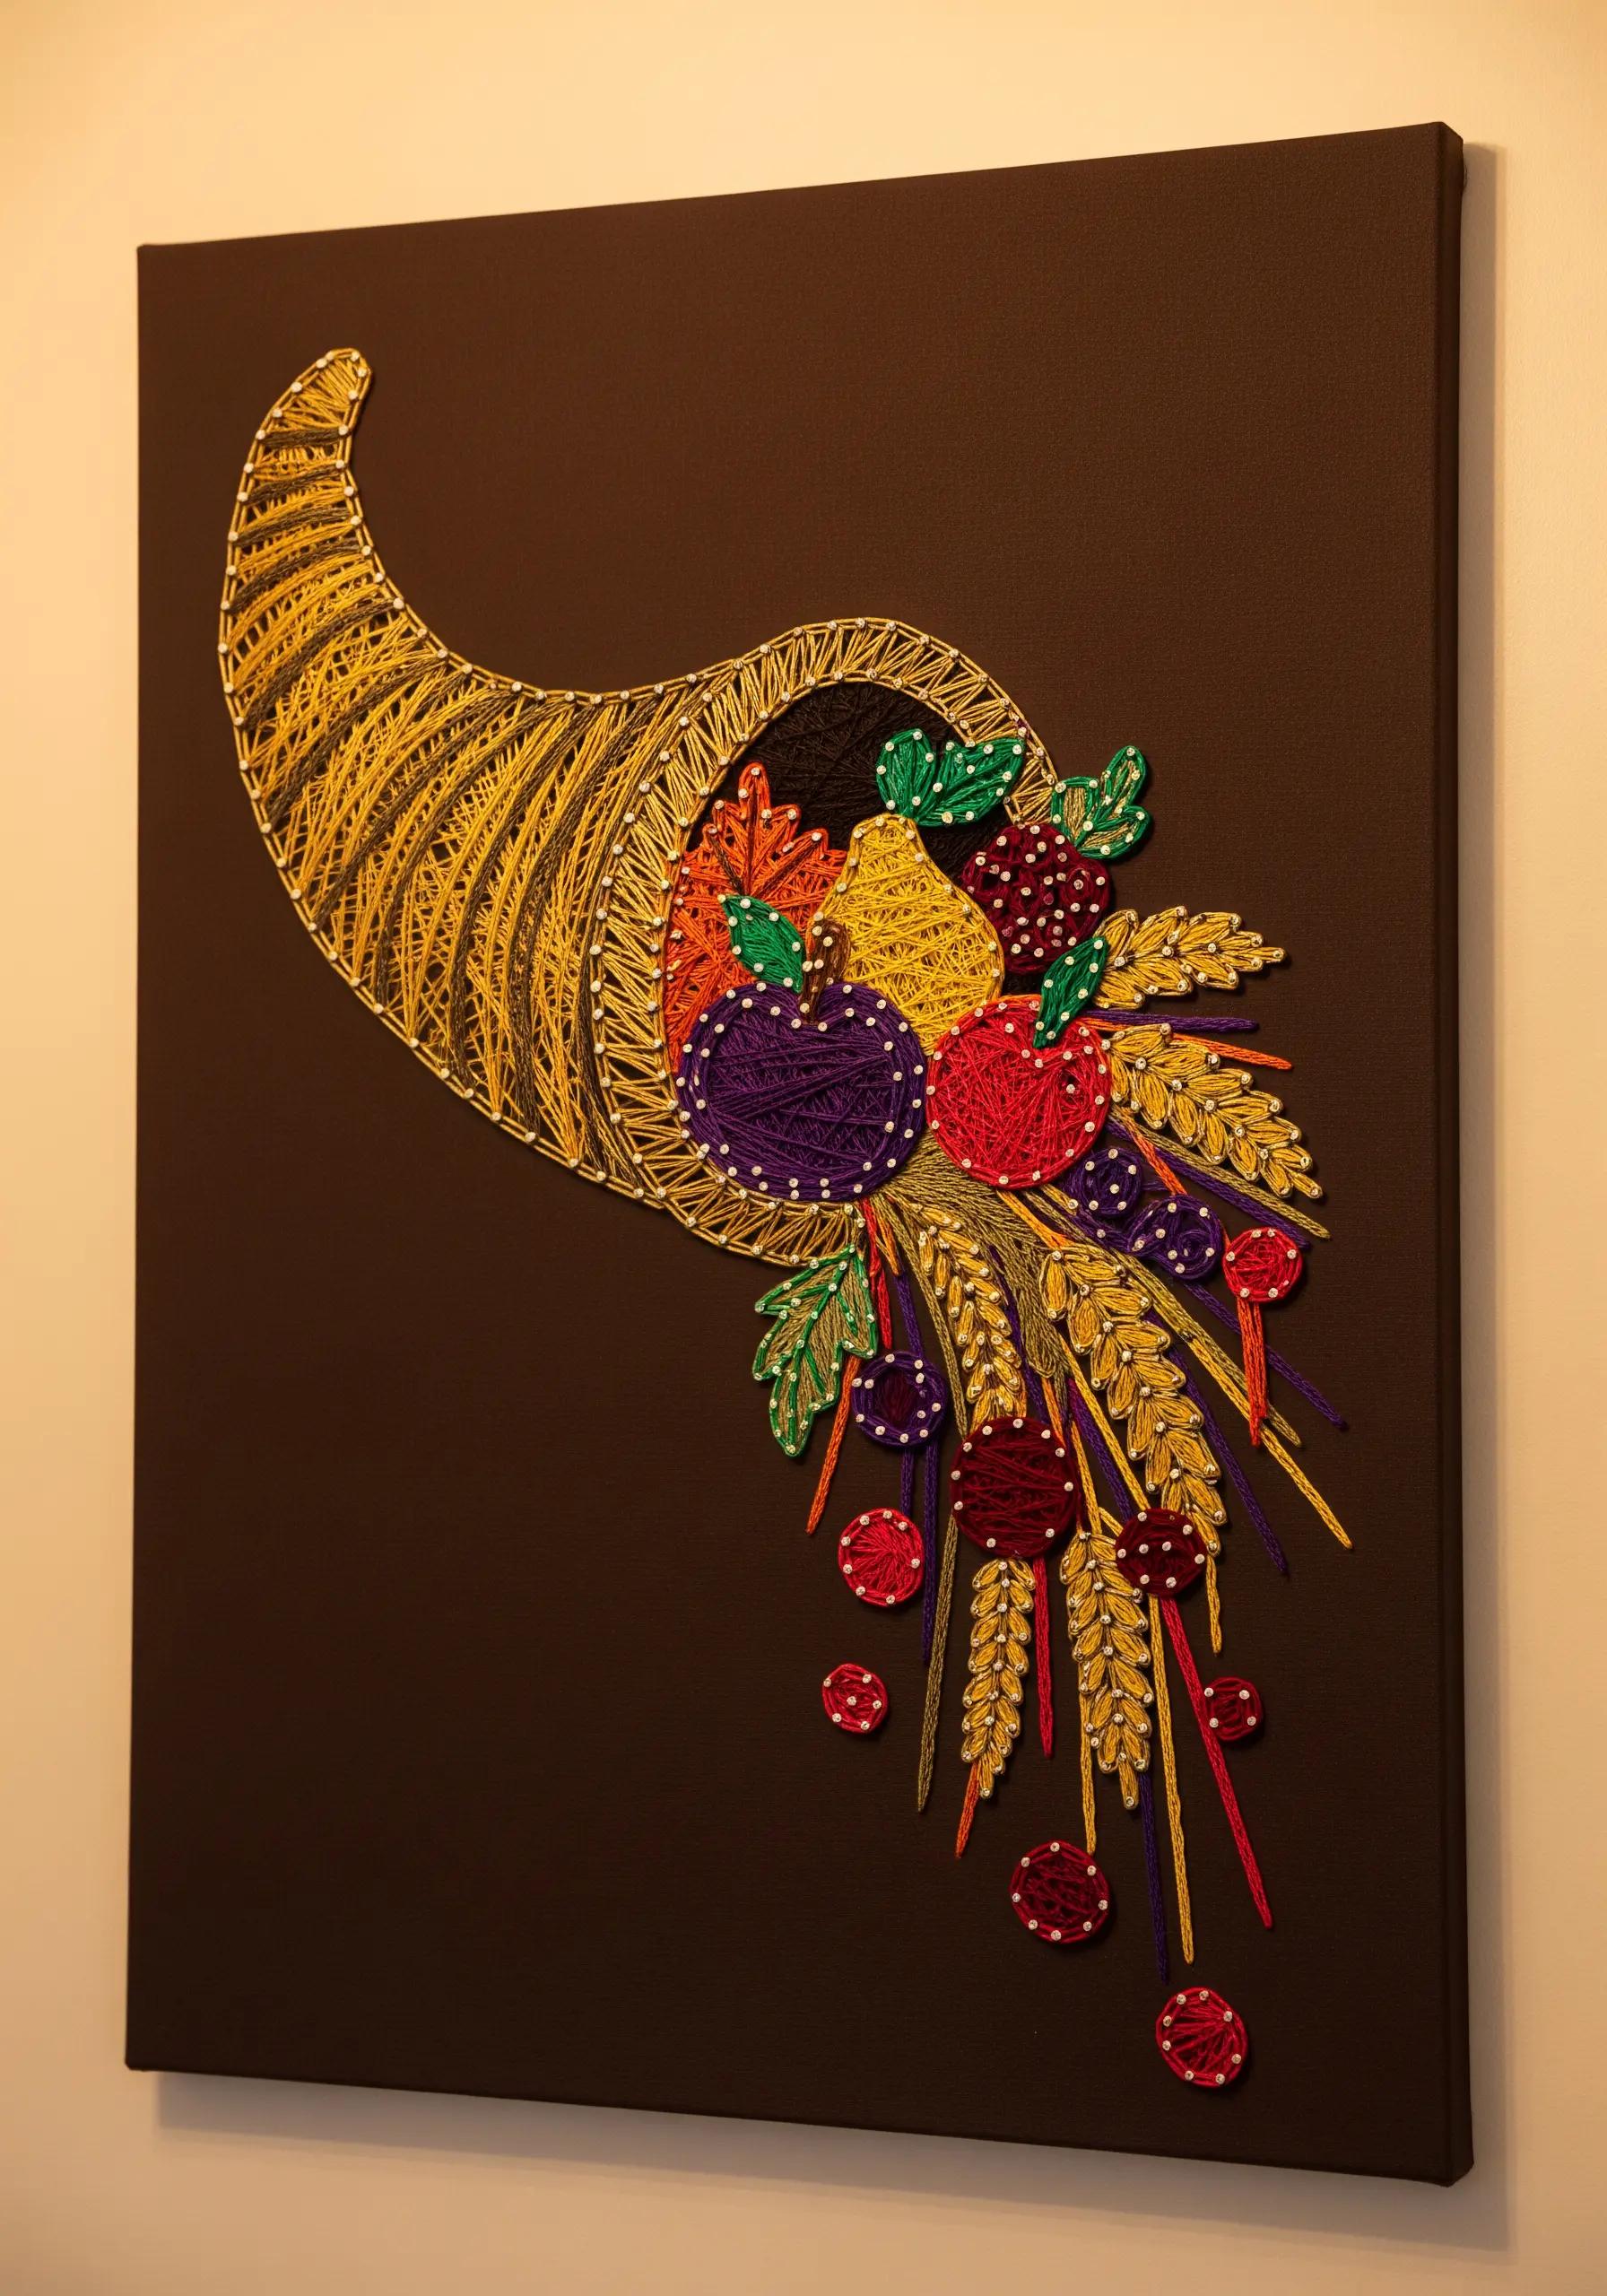
Build your cornucopia from back to front to create a true sense of three-dimensional space.
Stitch the elements deepest inside the horn first—like the purple grapes—then physically layer the next elements, like the apples and wheat, on top.
Vary your thread density to differentiate textures: use a denser fill for solid objects like fruits and a sparser, more linear approach for leafy greens or wheat stalks.
7. Using Anchor Points as Deliberate Design Elements
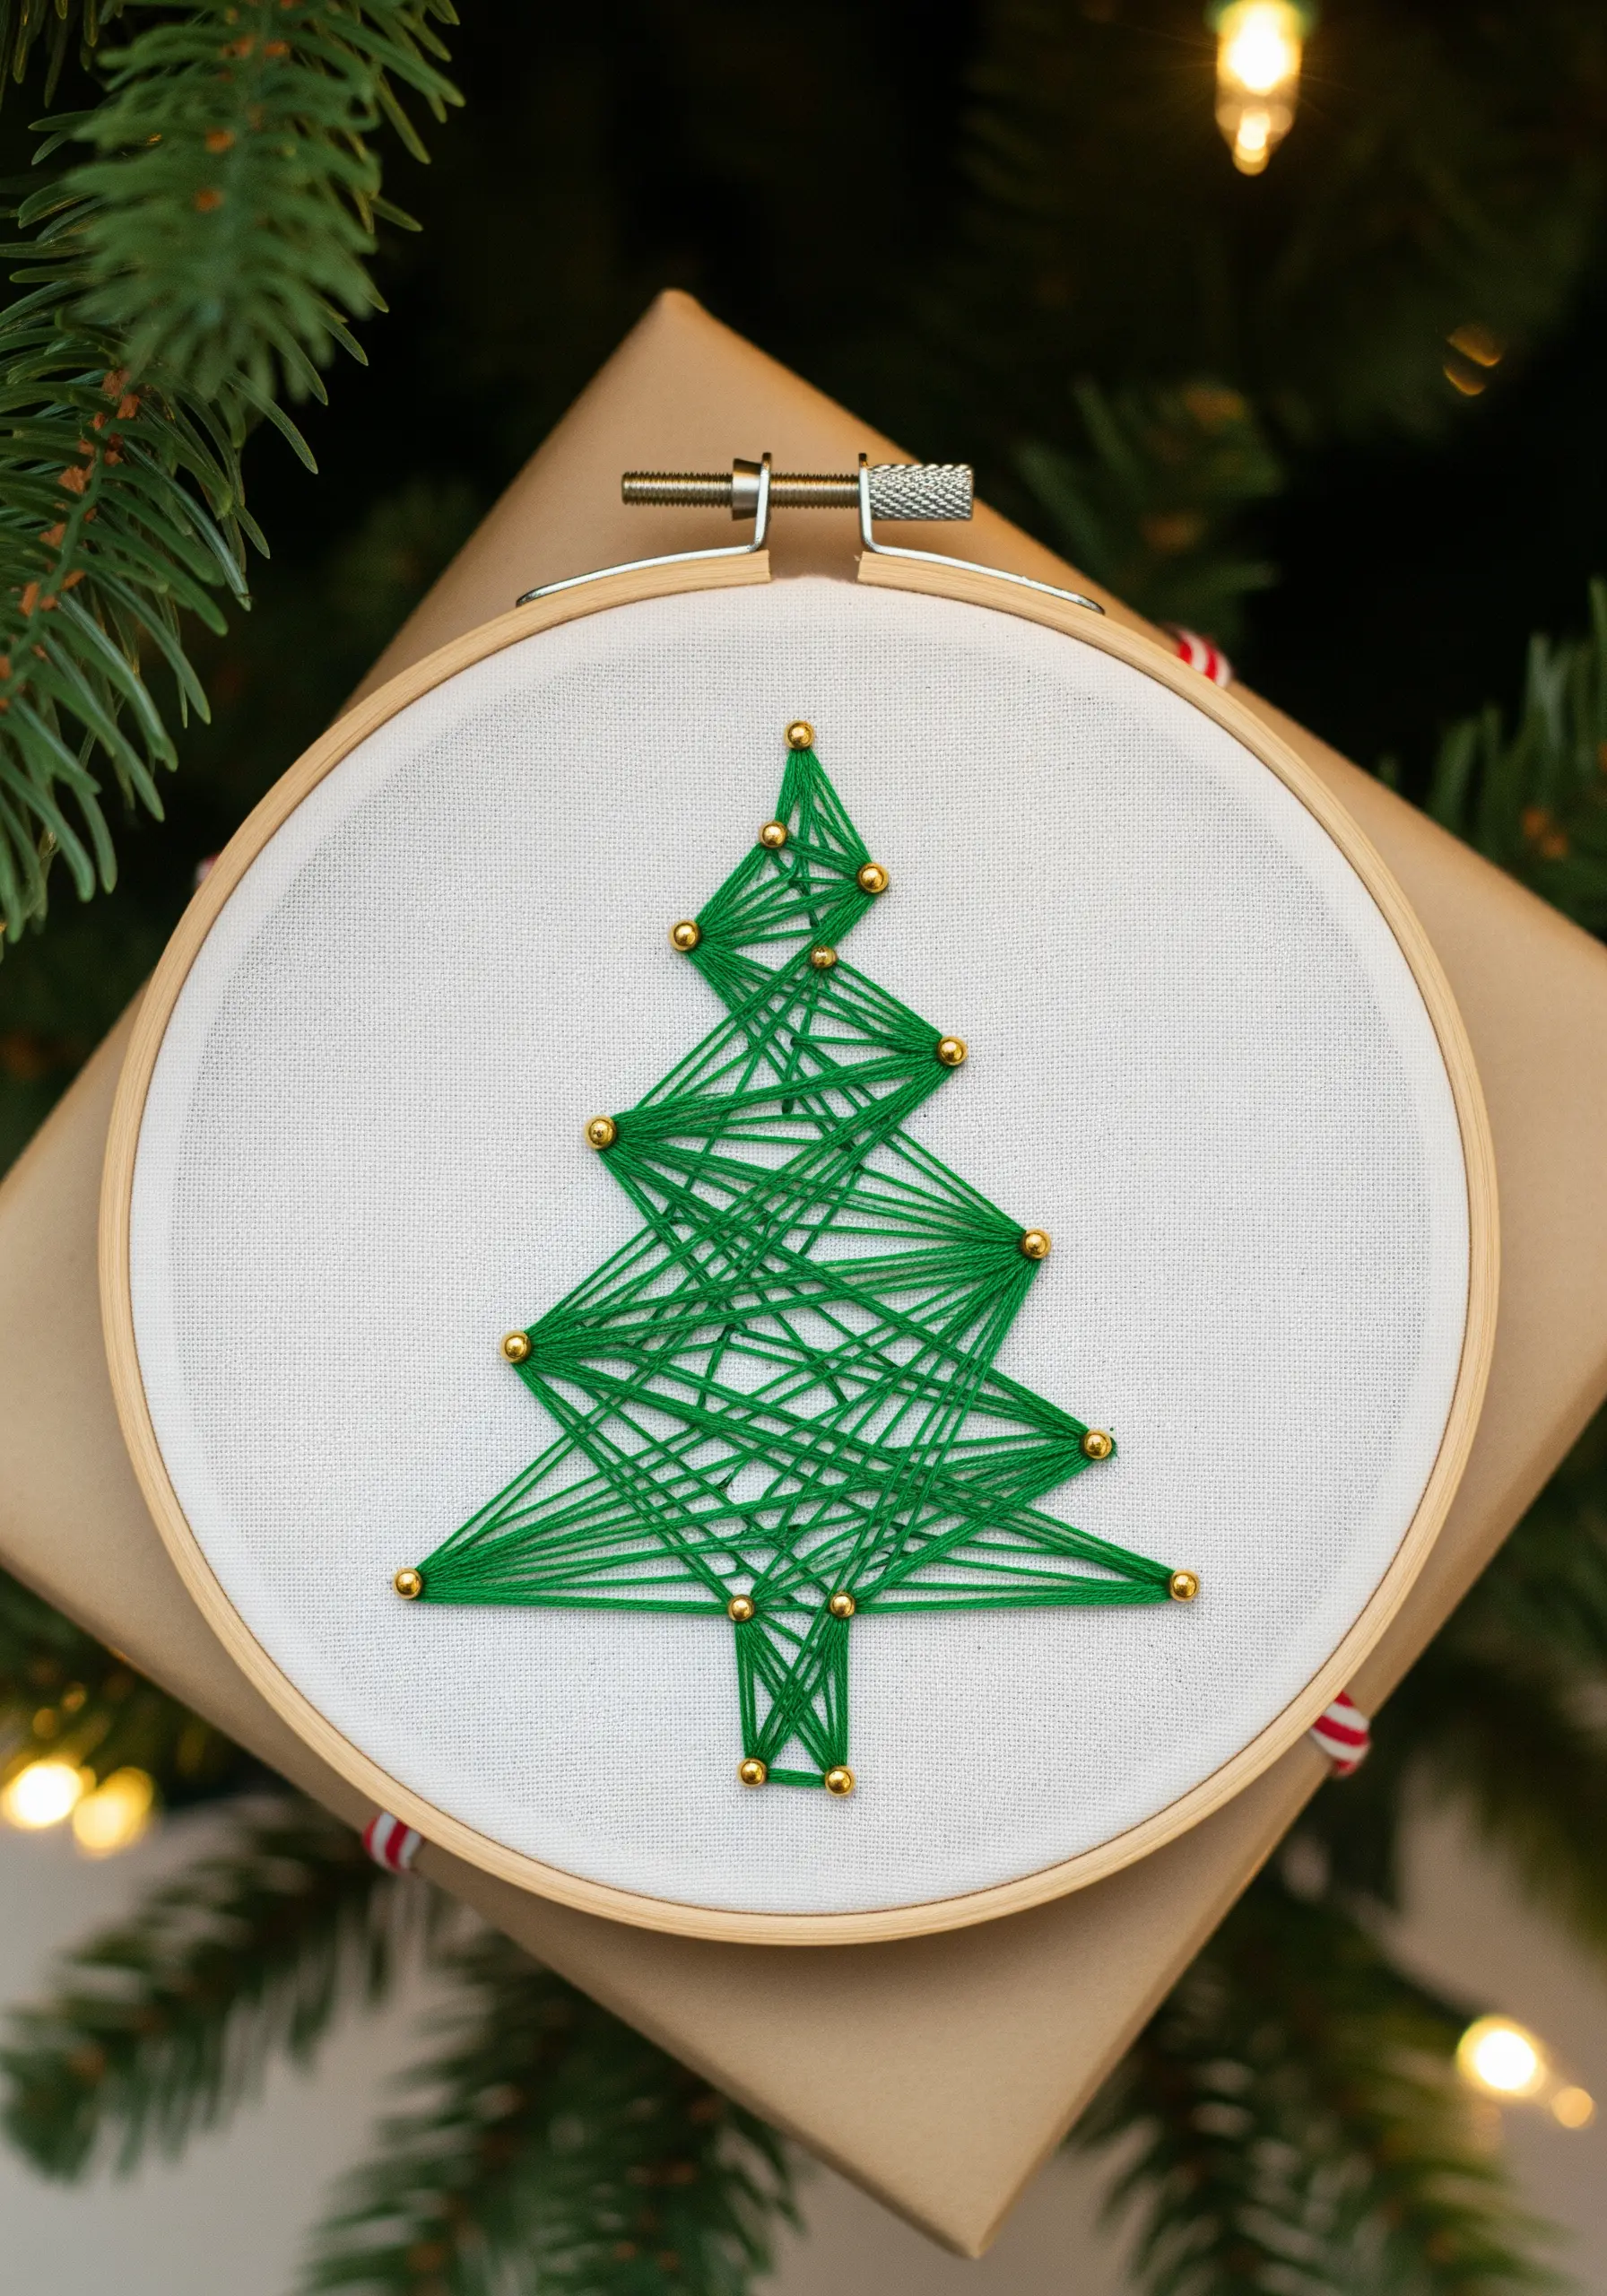
Instead of trying to hide your anchor points, transform them into a celebrated feature of the design.
Here, polished gold beads serve as both functional pivots for the thread and as festive ornaments that define the tree’s shape.
This approach works best for minimal festive motifs, where every detail counts and negative space is as important as the stitched lines.
8. Defining Form and Texture with Directional Stitching
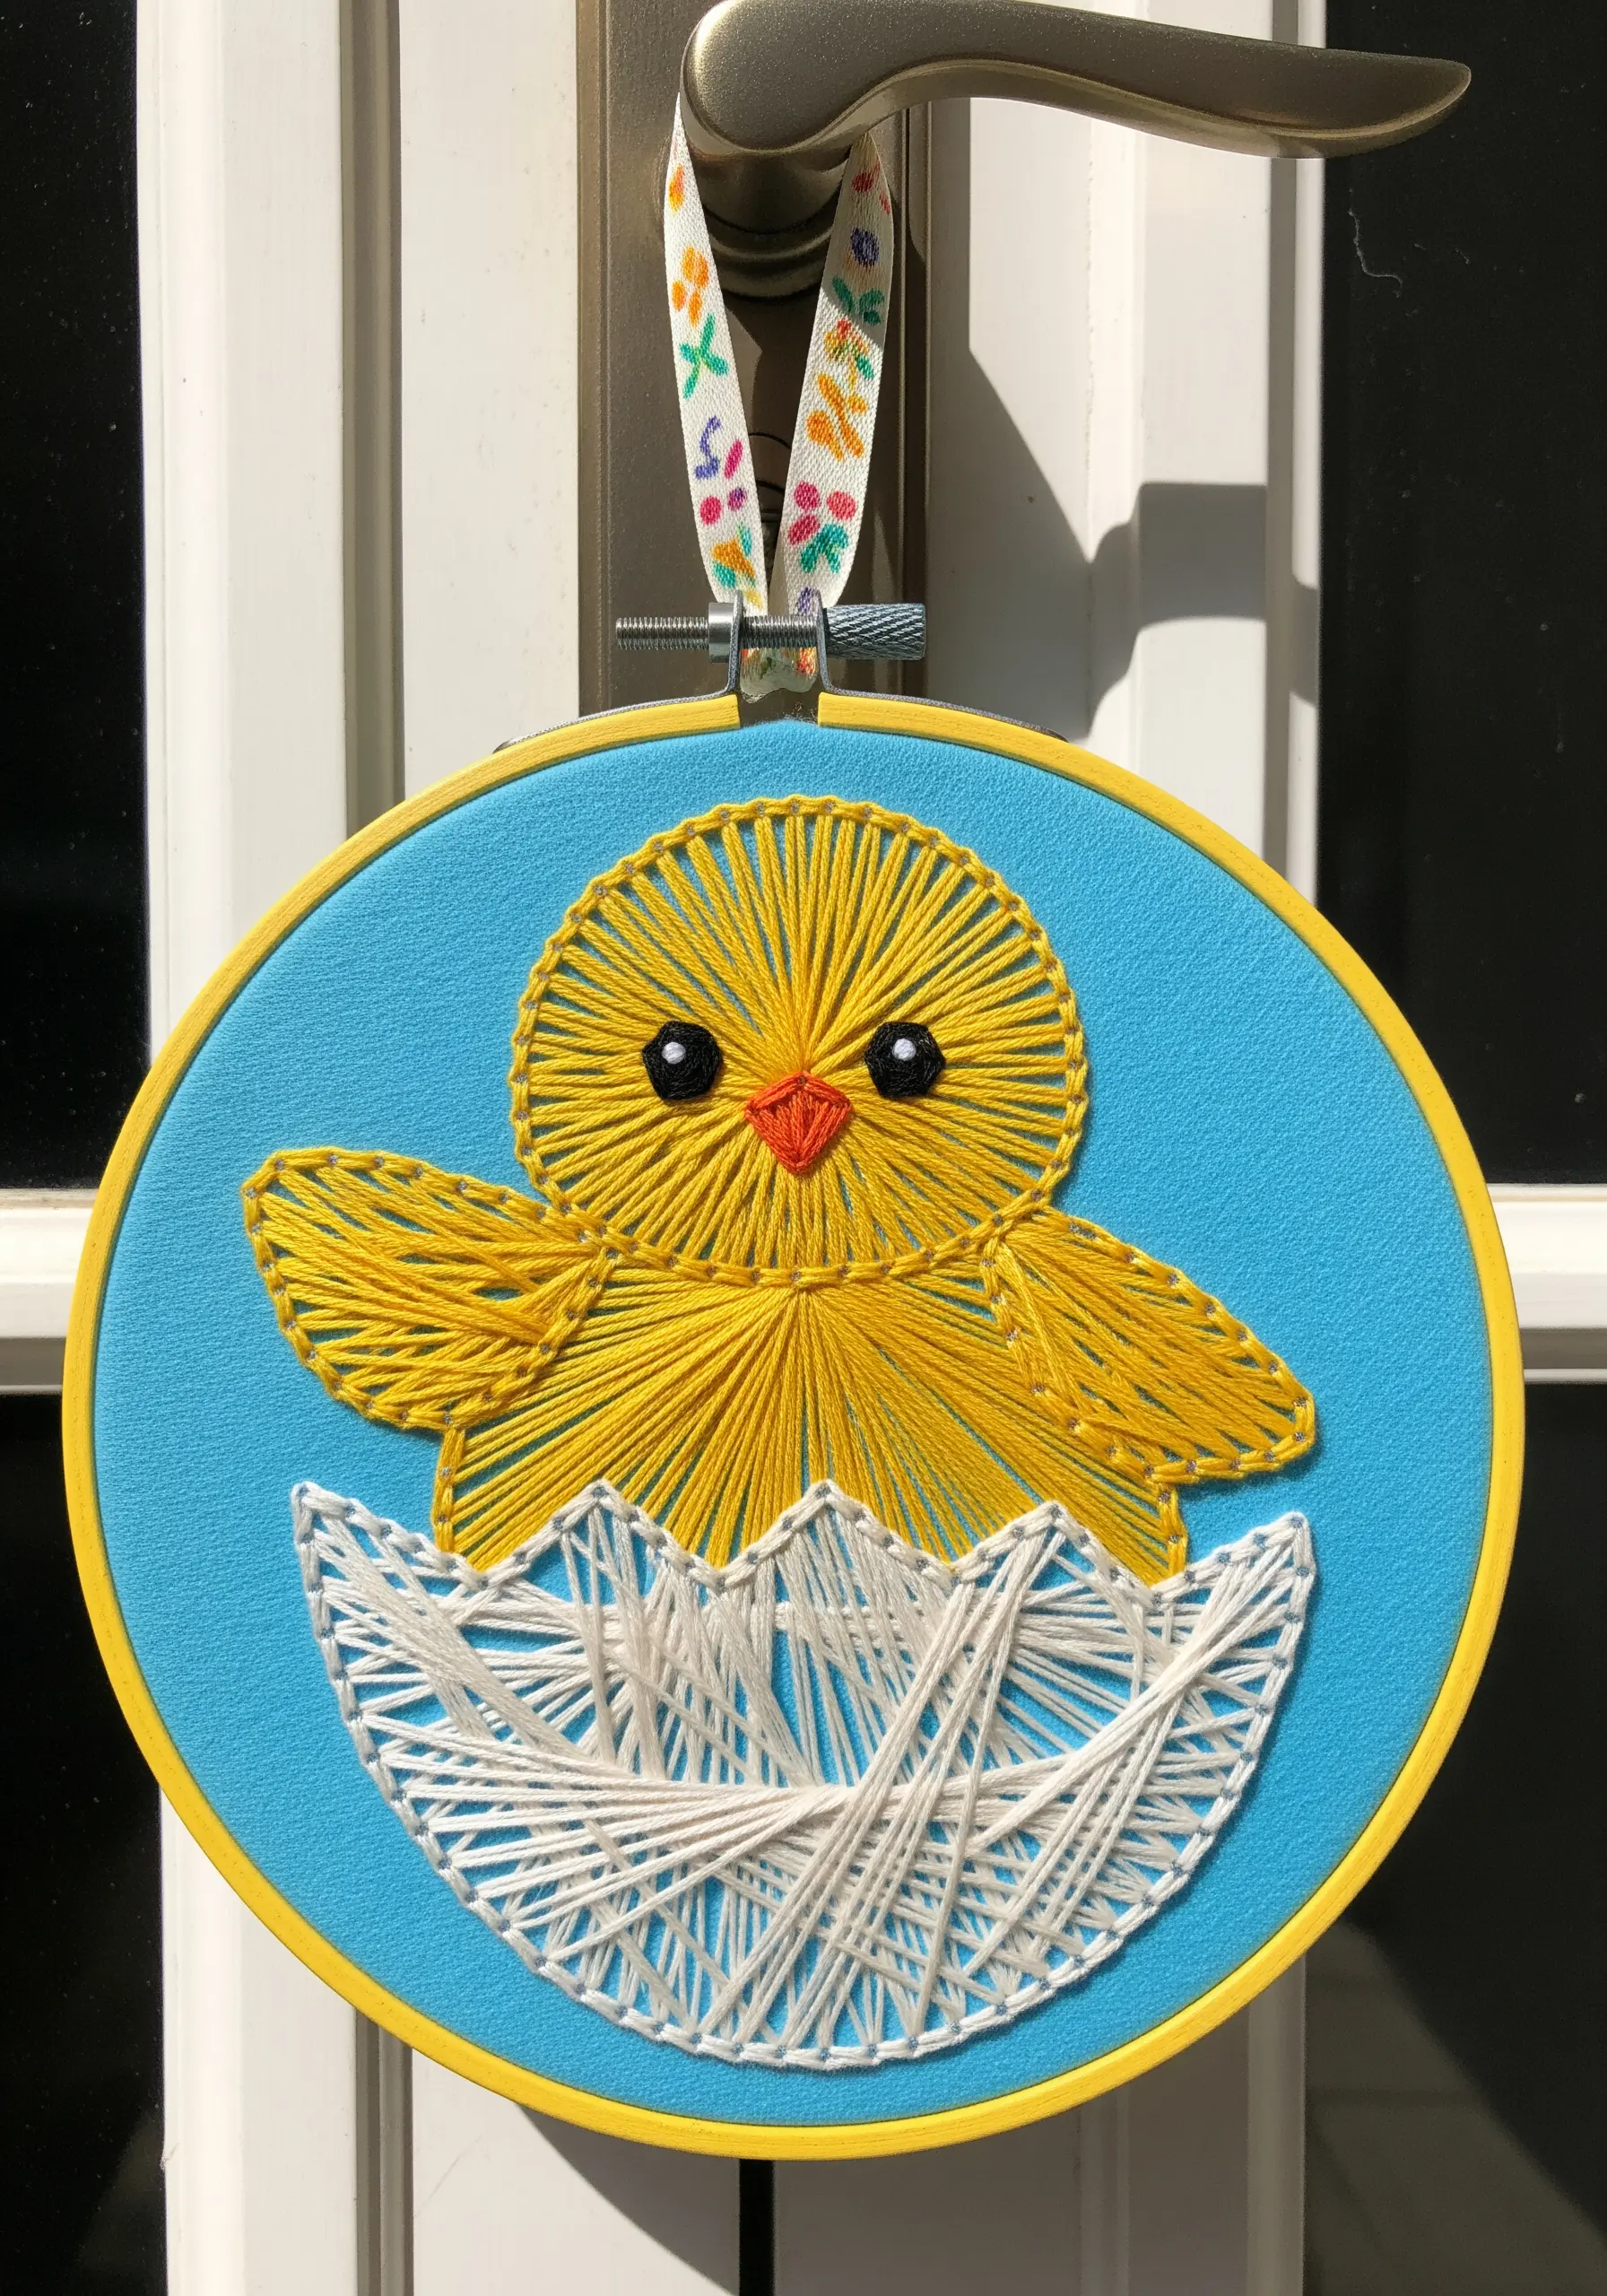
Use the direction of your stitches to communicate shape and texture without adding extra detail.
For the chick, radiate threads from a central point to create a rounded, fluffy appearance that suggests volume.
In contrast, use sharp, angular stitches for the cracked eggshell to convey its brittle, fragmented texture.
This juxtaposition in stitch direction is what gives the simple composition its character and narrative quality.
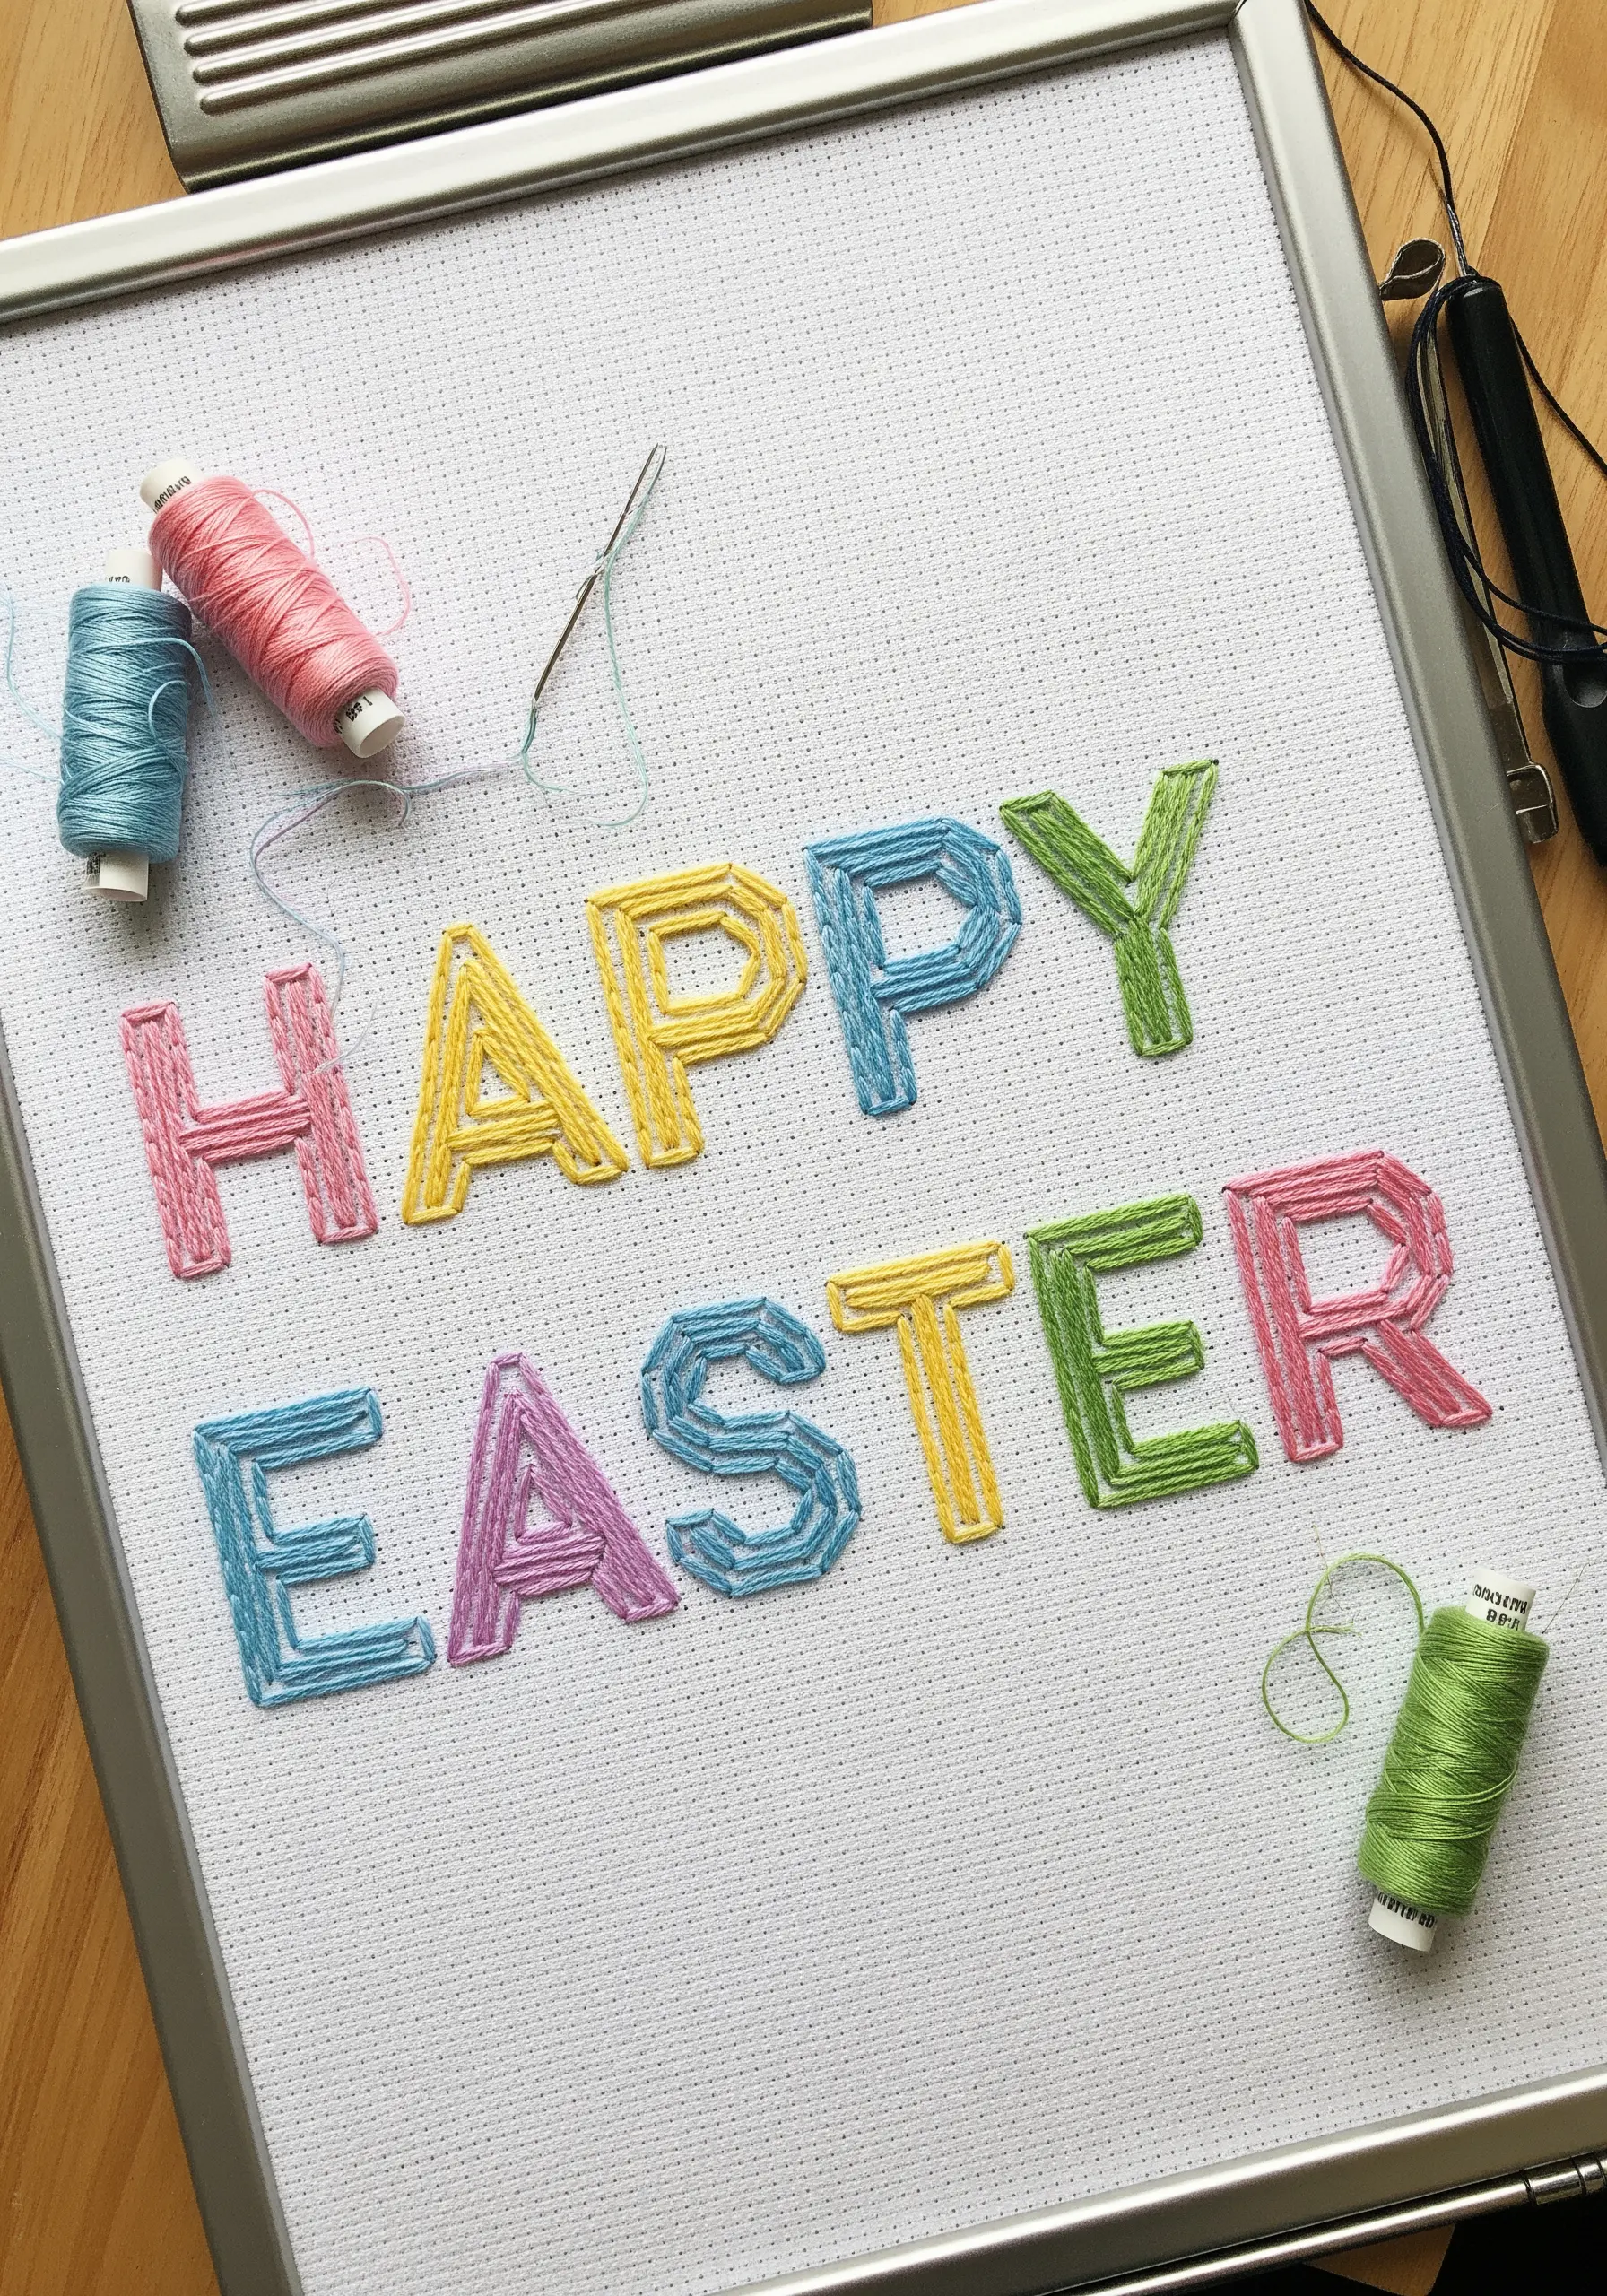
9. Achieving Smooth Curves in Threaded Lettering
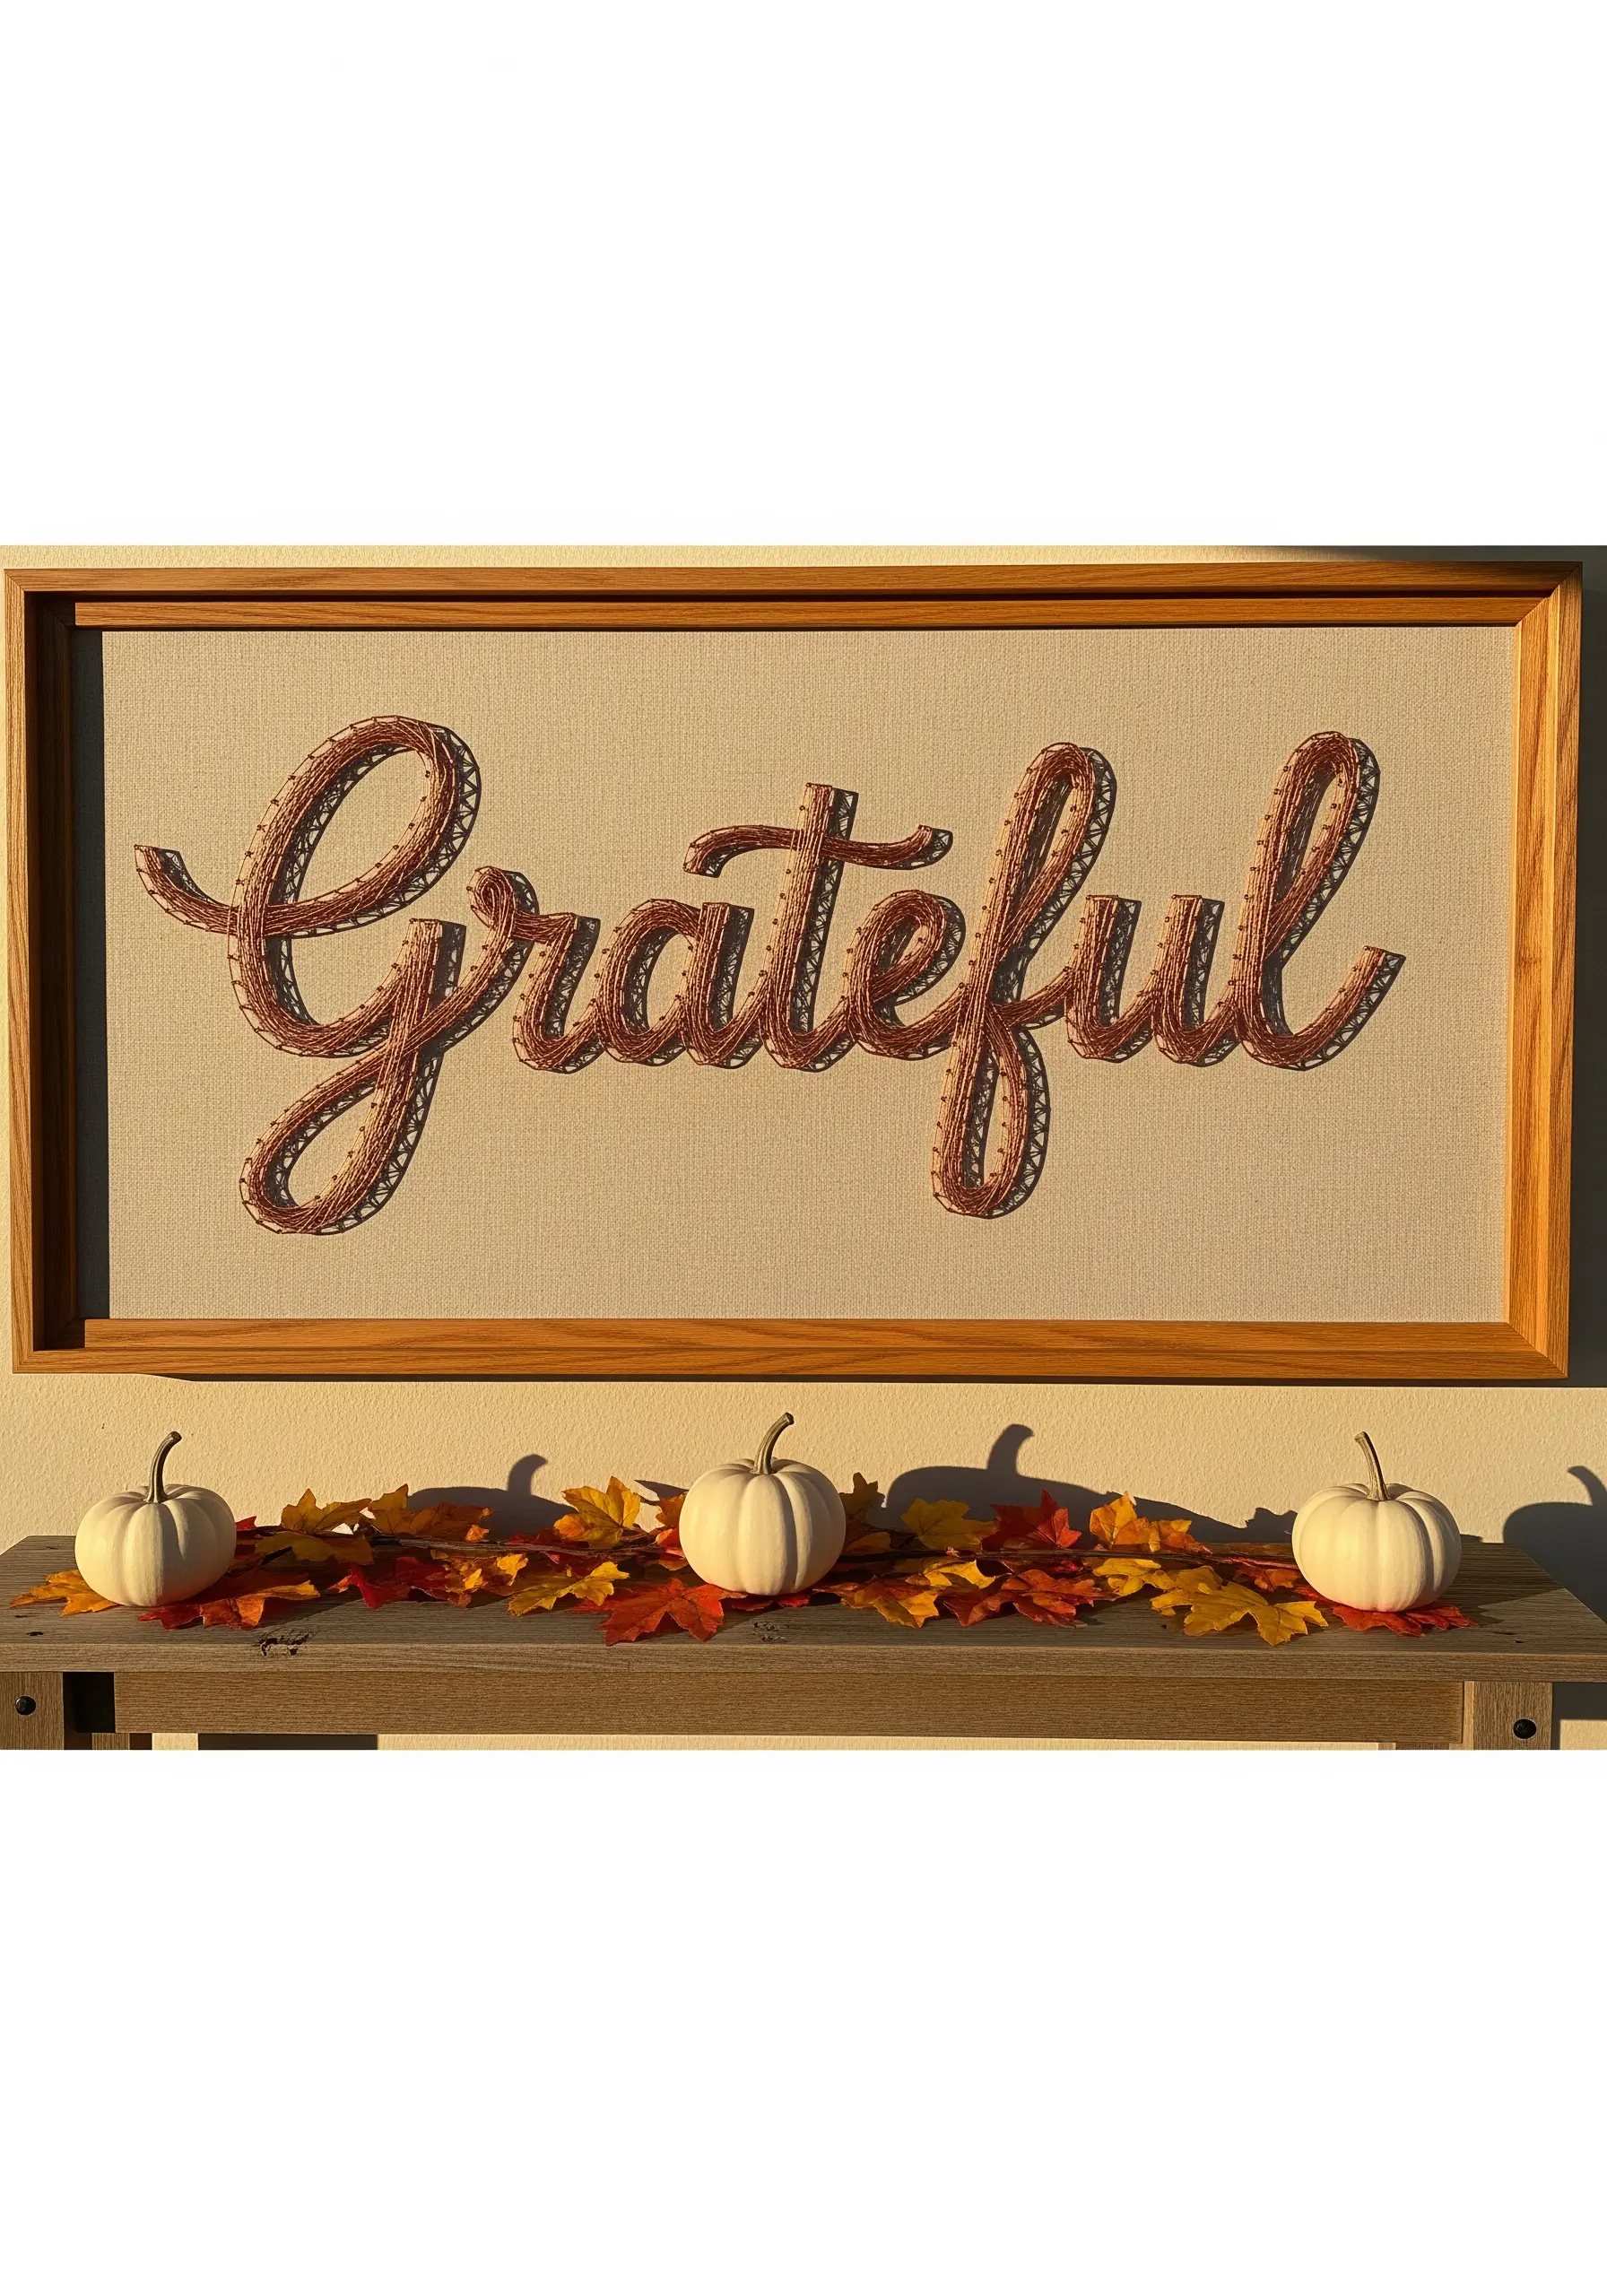
When creating script with string art, the placement of your anchor points is critical for achieving fluid lines.
Position your anchor points closer together on tight curves and farther apart on straighter sections of the letters.
This ensures the thread follows the graceful arc of the font without creating harsh, unnatural angles.
To add dimension, layer a slightly darker shade along the bottom edge of the letters to create a subtle, shadowed effect.
10. Integrating Mixed Media for Playful Texture
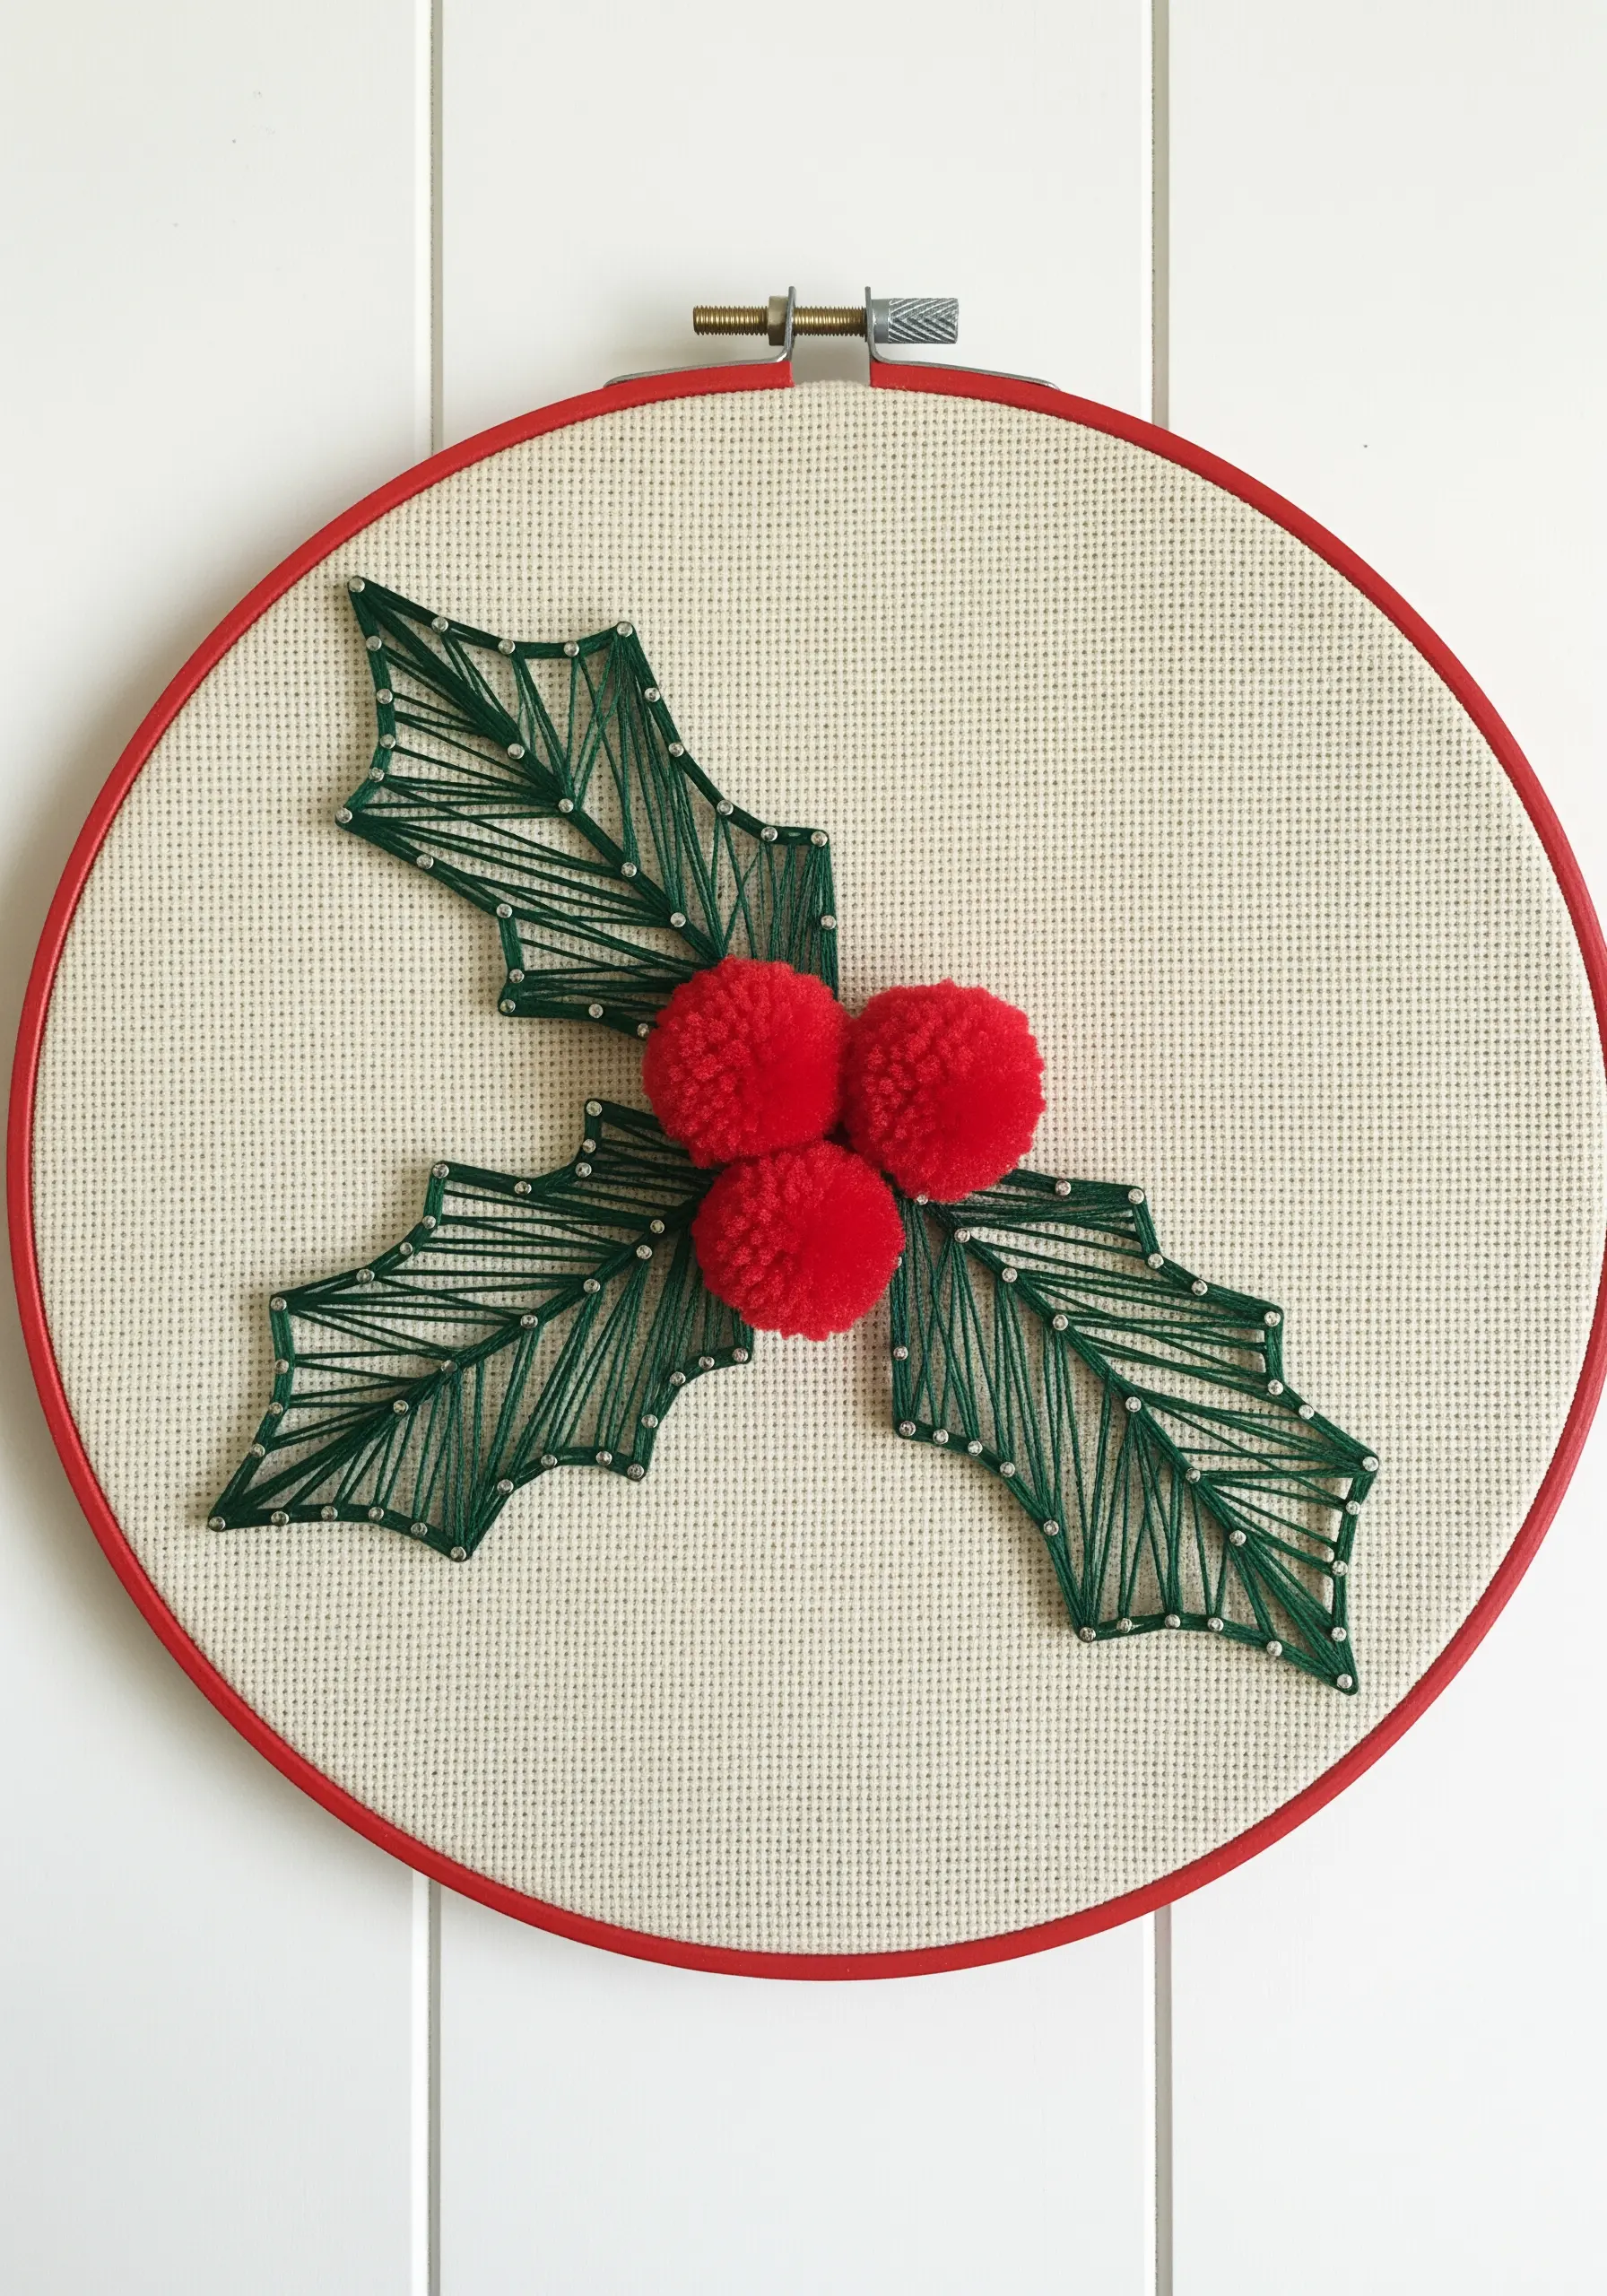
Create a delightful sensory contrast by combining the clean, sharp lines of string art with soft, tactile elements.
Fluffy red pom-poms become three-dimensional berries, adding a playful quality that disrupts the flat plane of the stitched holly leaves.
Secure the pom-poms to the fabric first, then use them as a focal point to build your thread design around.
11. Using Gridded Fabric for Simplified Pattern Making

Choose Aida cloth or a similar gridded fabric to serve as a perfect base for precise string art without the hassle of measuring.
The evenly spaced holes in the fabric eliminate the need for marking out anchor points—you can simply count the squares.
This provides a built-in guide that ensures your designs are symmetrical and perfectly proportioned, making it easy to create neat and polished tiny embroidery patterns.
12. Layering Threaded Shapes to Create Feathered Texture
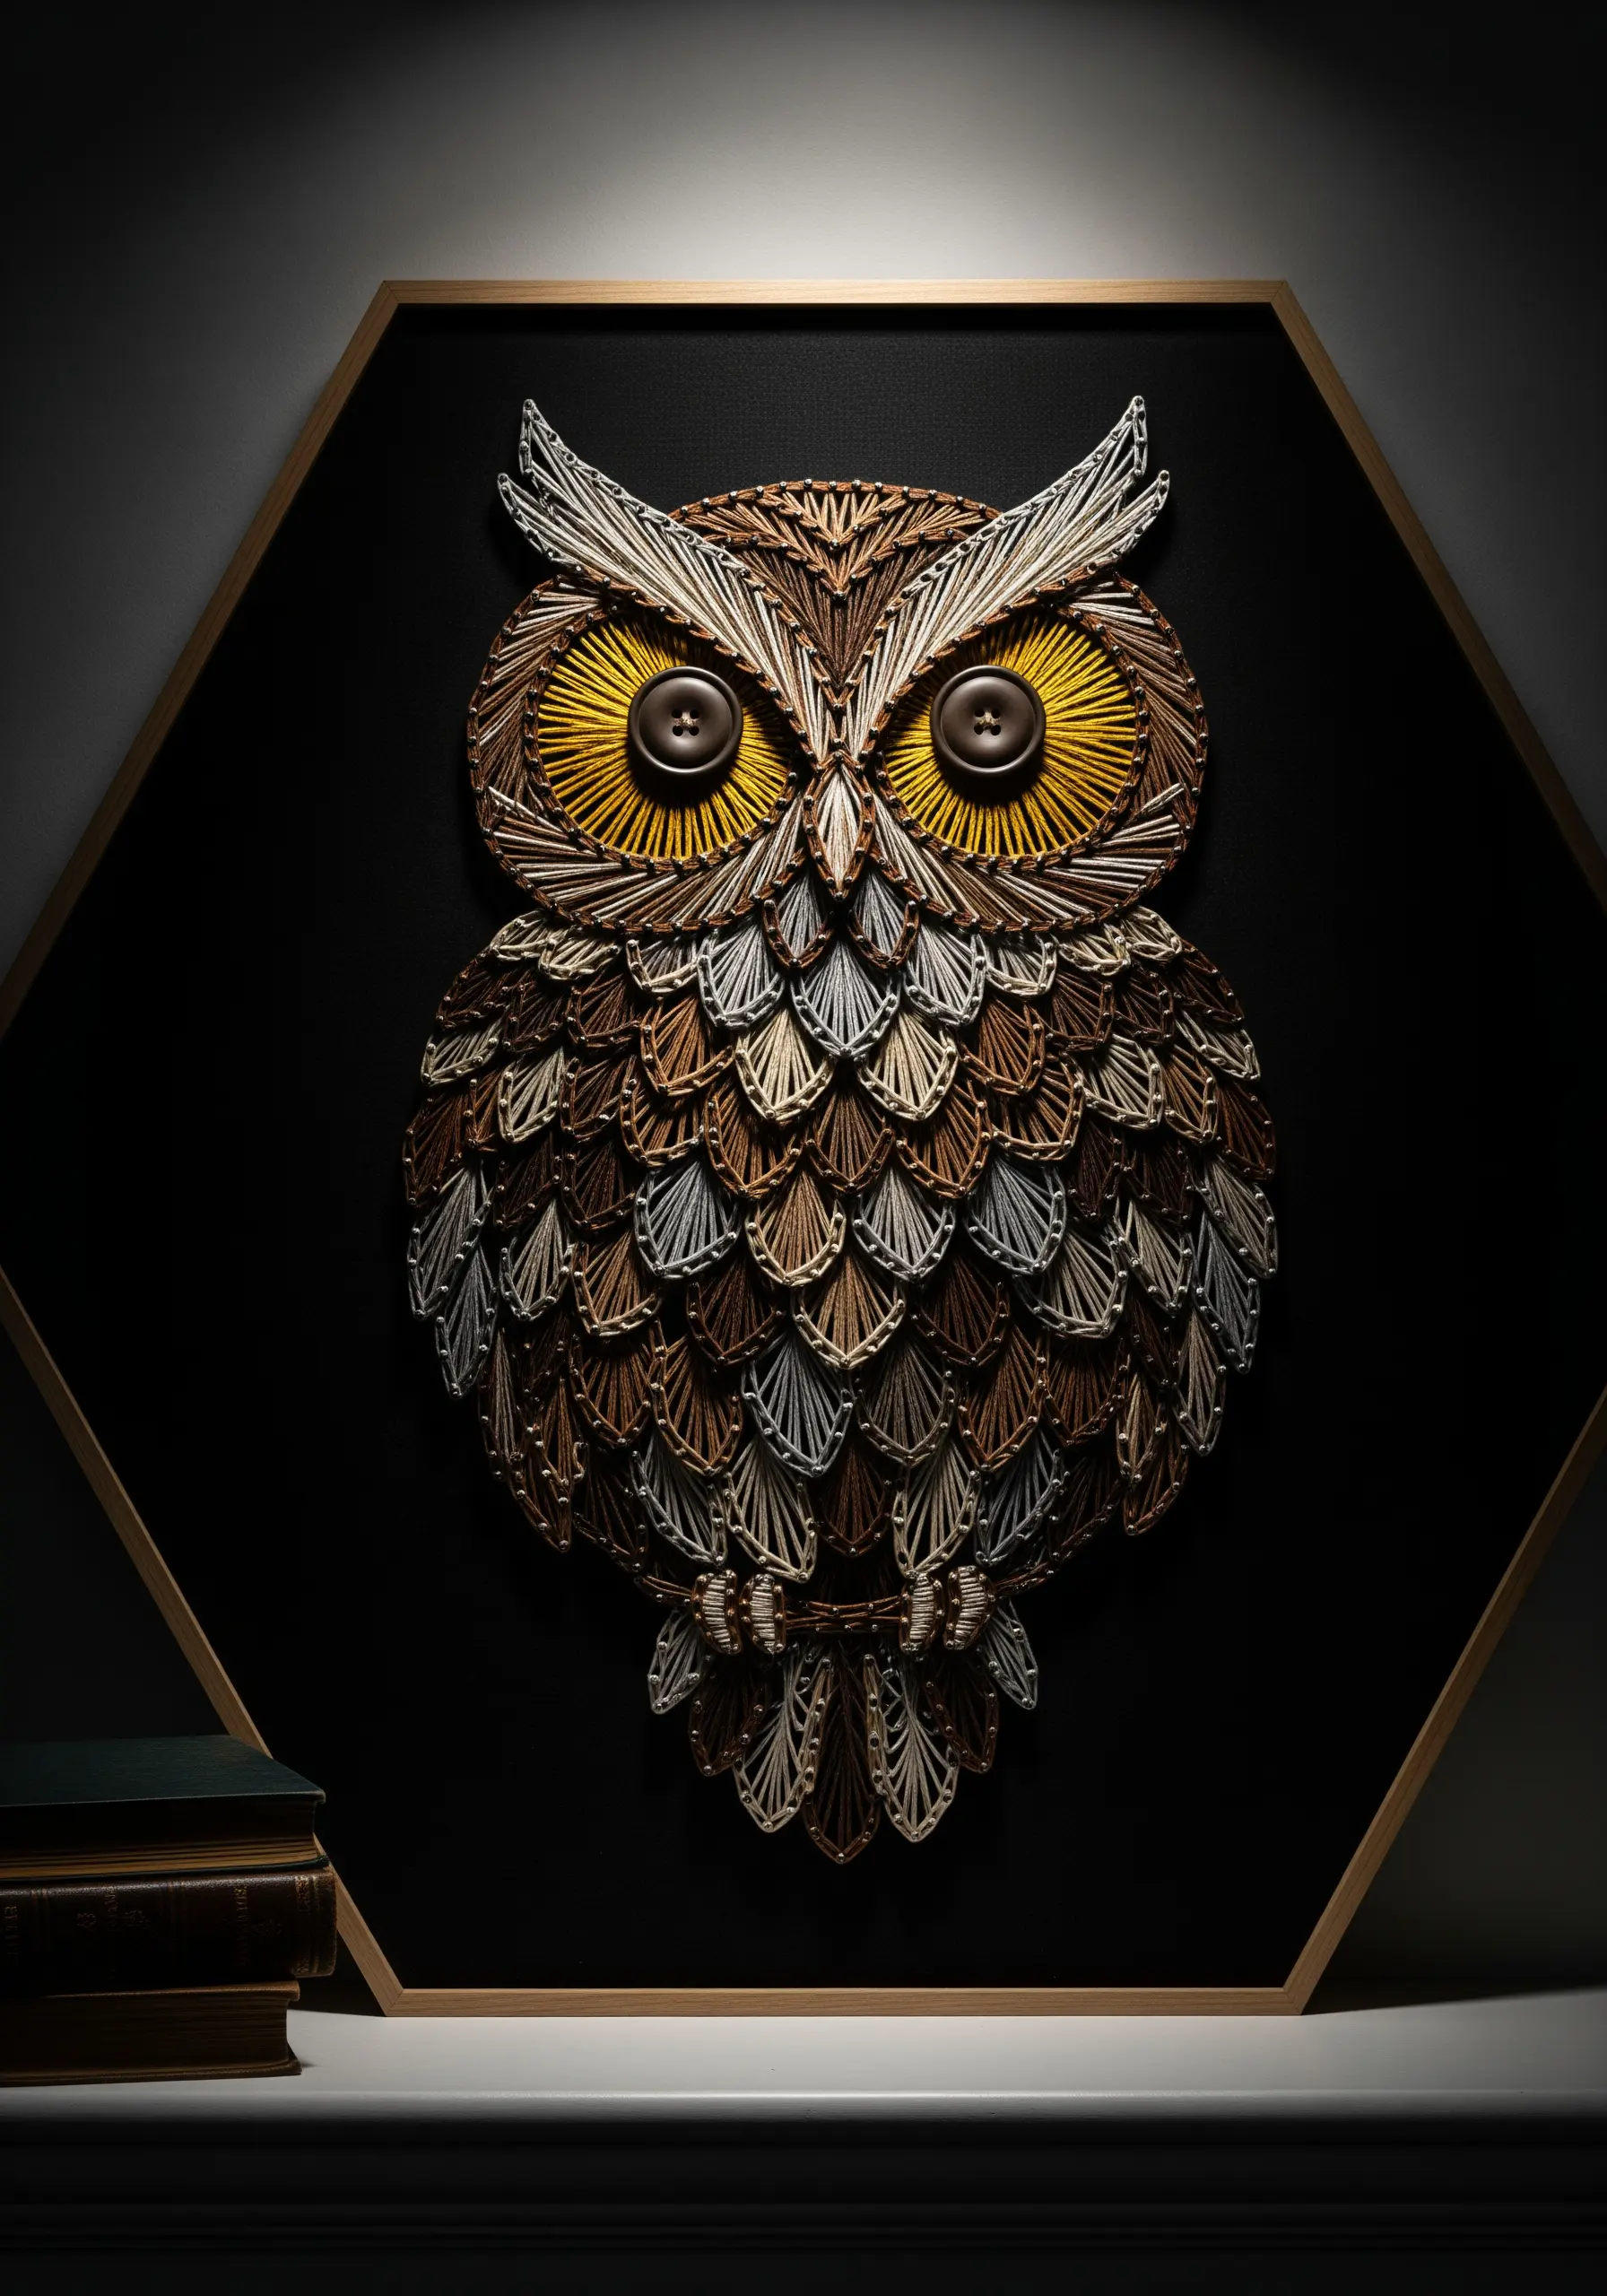
To mimic the complex texture of feathers, work in small, overlapping sections rather than trying to fill the entire shape at once.
Create a series of short, fan-shaped stitches that resemble fish scales or petals, using just three or four anchor points for each shape.
Begin with the bottom layer of feathers and work your way up, slightly overlapping each new row over the previous one.
Using multiple shades of brown, grey, and cream within these small sections will give the owl a remarkably realistic and detailed appearance.
13. Pairing Metallic Thread with Velvet for a Luxe Effect

Create a powerful sense of opulence by combining high-sheen metallic thread with a deep-colored velvet background.
The plush, matte texture of the velvet absorbs light, which makes the reflective metallic thread appear even more brilliant by contrast.
Ensure your velvet is hooped very tightly, using a layer of stabilizer if needed, as the fabric’s pile has a tendency to shift and stretch.
14. Interlacing Colors to Emphasize Woven Patterns
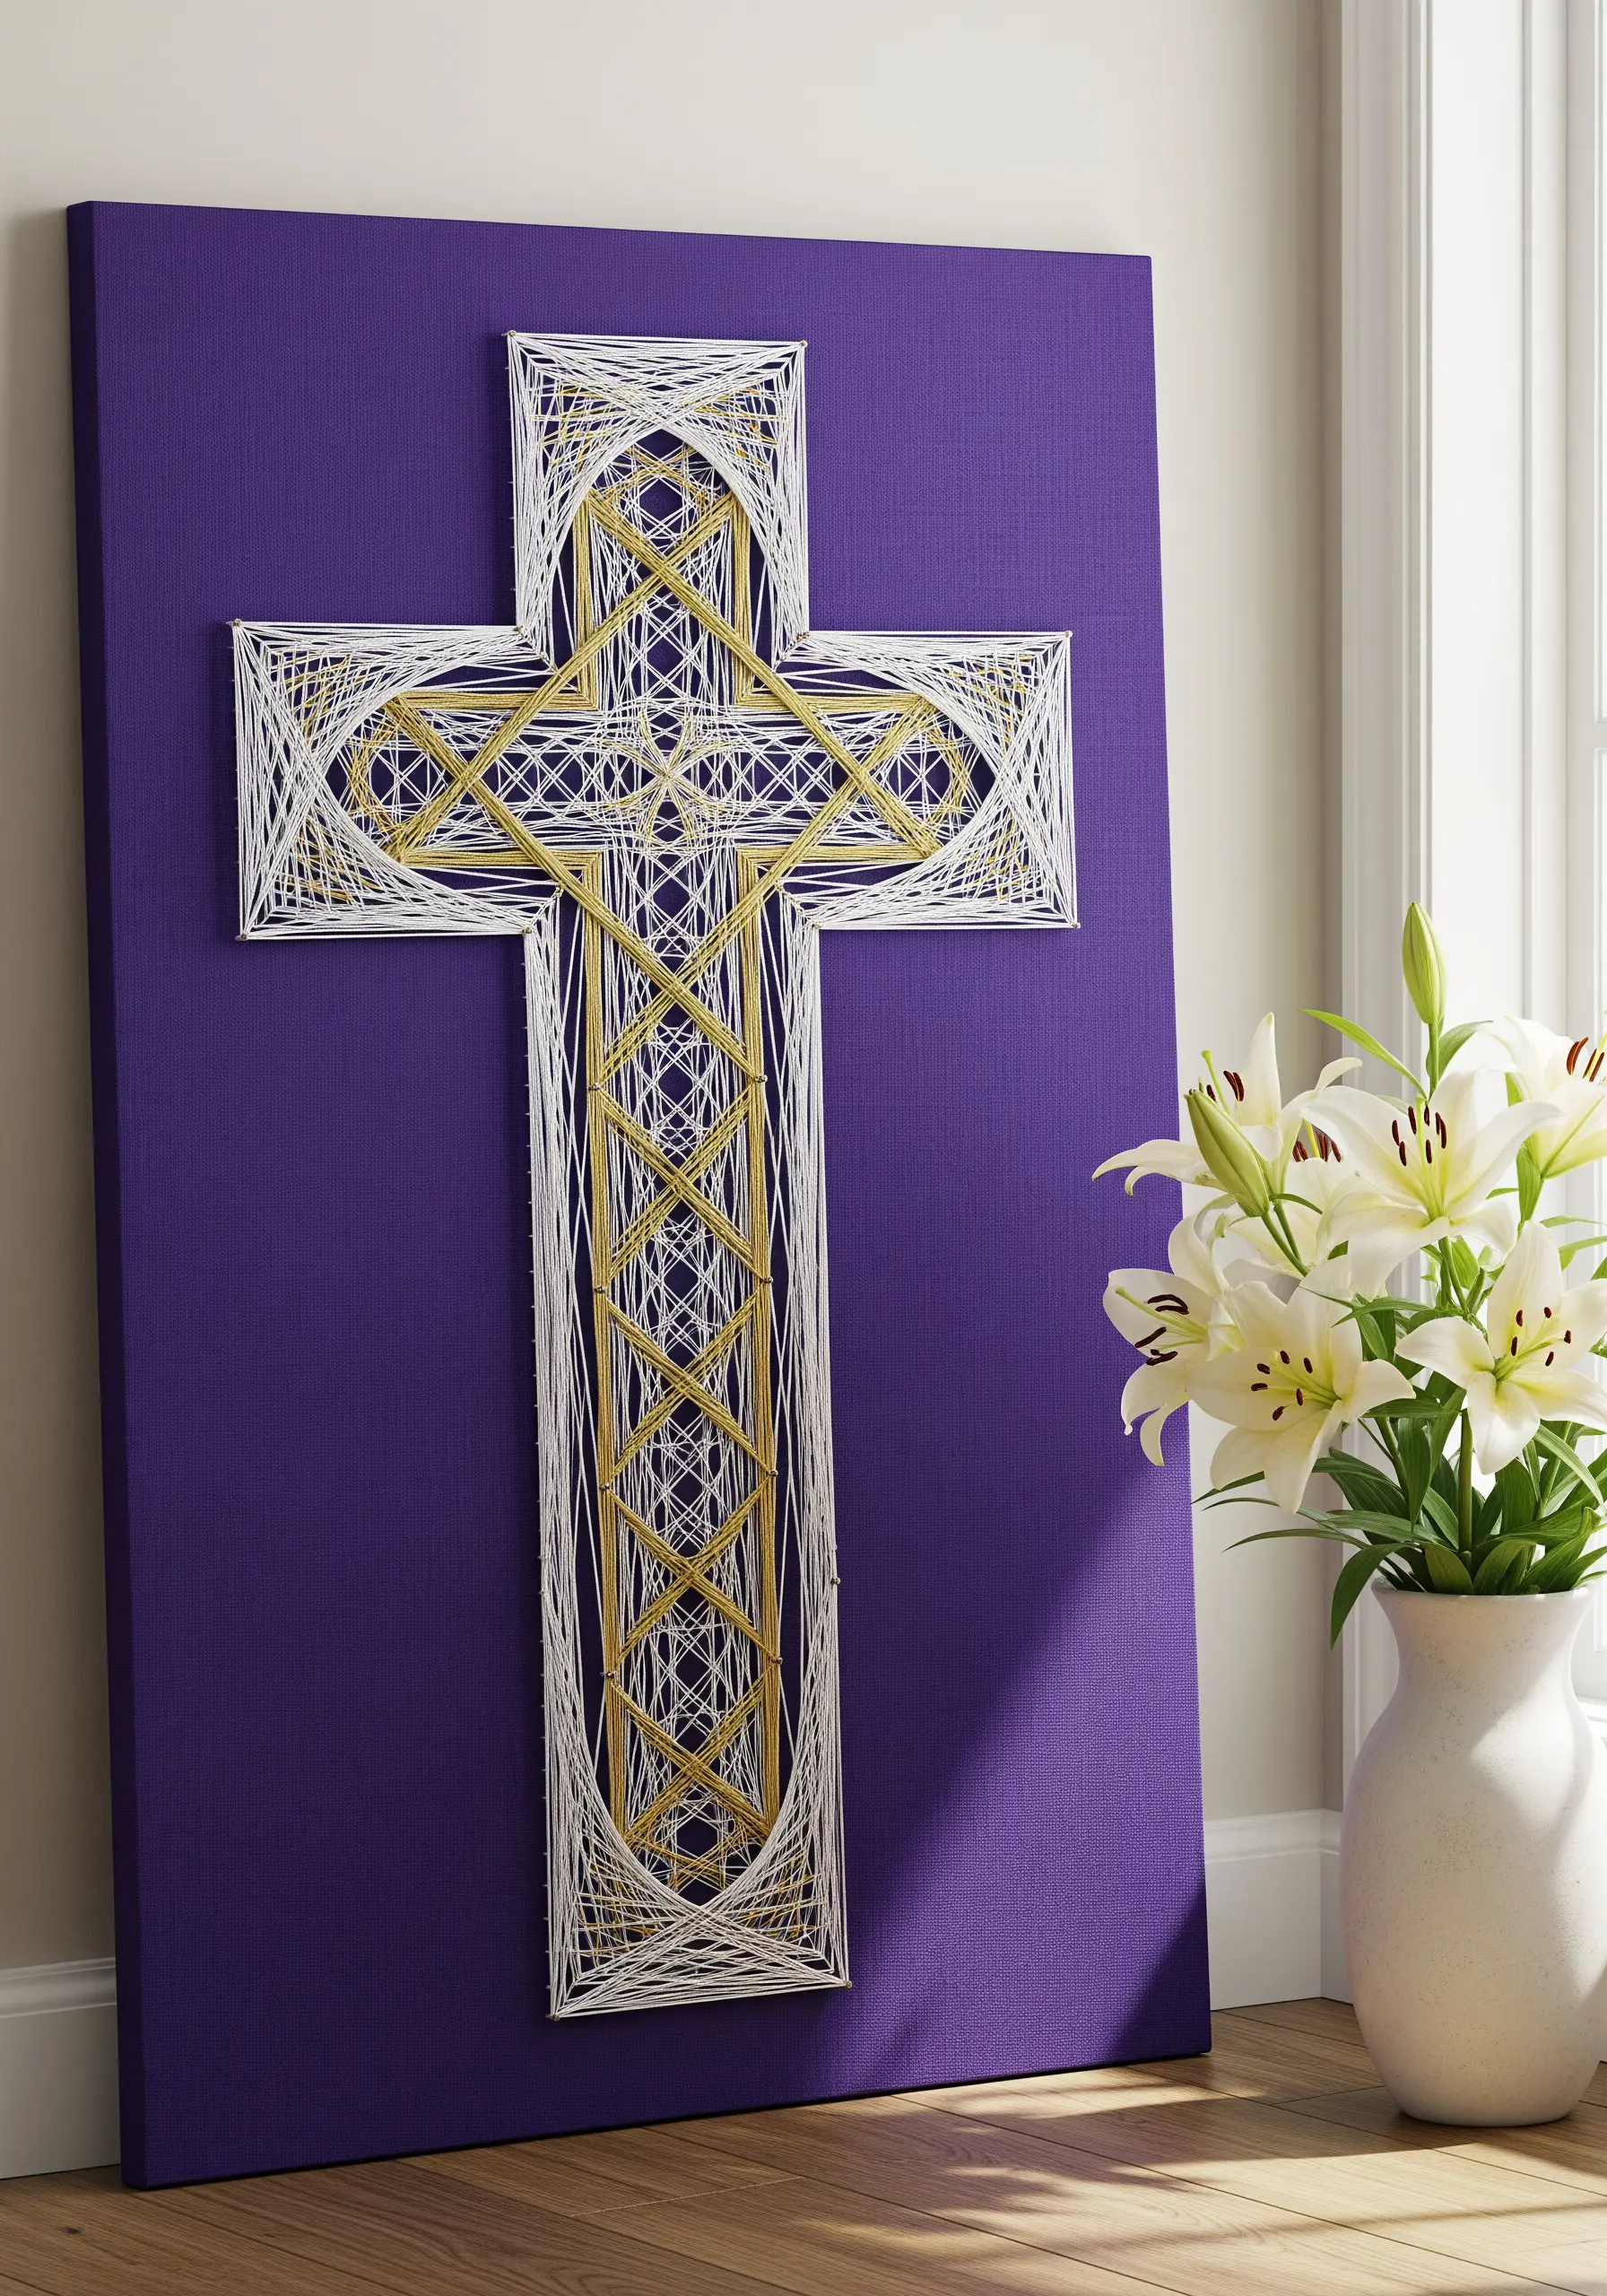
For intricate knotwork or Celtic designs, use two distinct and contrasting colors to highlight the interwoven pattern.
Complete the entire design with one color first, creating the full grid of the pattern.
Then, take your second color and weave it over and under the established threads, following the path of the knot.
This technique makes the complex design legible and creates a beautiful, layered effect that honors the pattern’s origins.
15. Combining String Art and Traditional Stitches for Detail
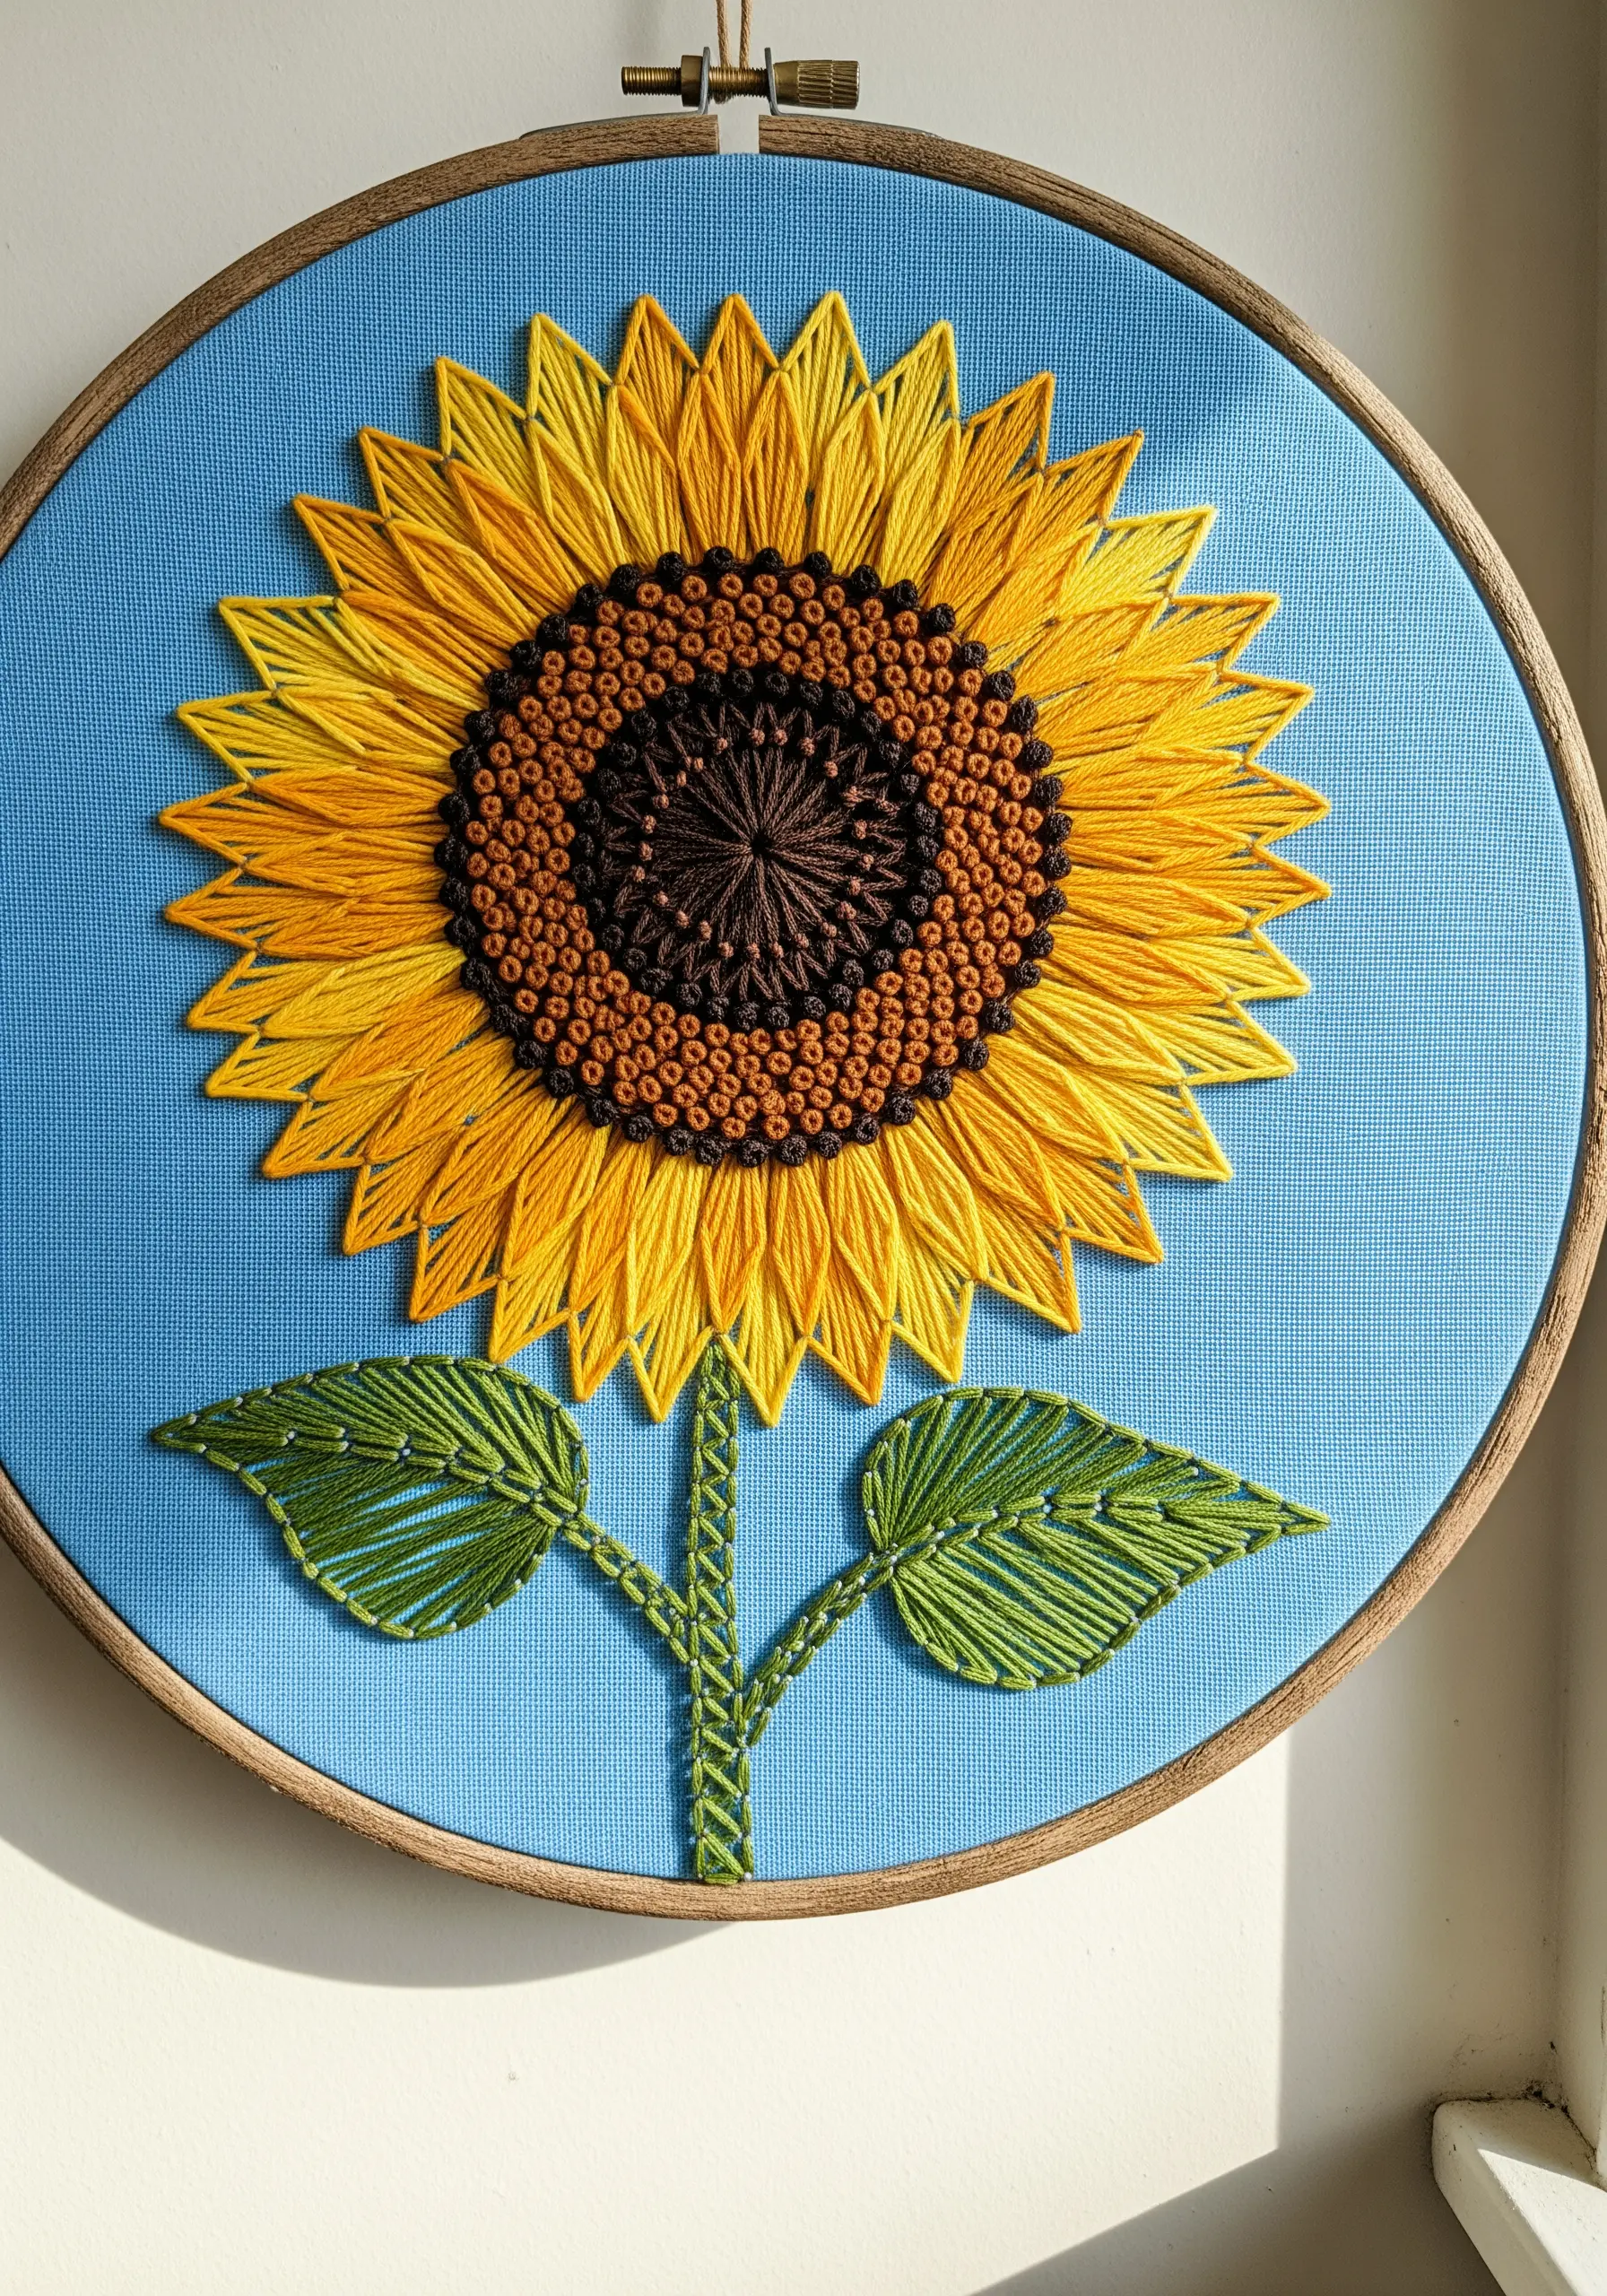
Elevate a string art design by incorporating classic embroidery stitches to render fine details and textures.
Use long, radiating straight stitches for the sunflower petals to create clean lines and bold color.
Then, switch to dense French knots stitched in a spiral for the textured seed center.
This blend of techniques adds a sophisticated level of detail and realism that string art alone cannot achieve, making the piece more visually compelling.
16. Creating Clean Stripes with a Satin Stitch Effect
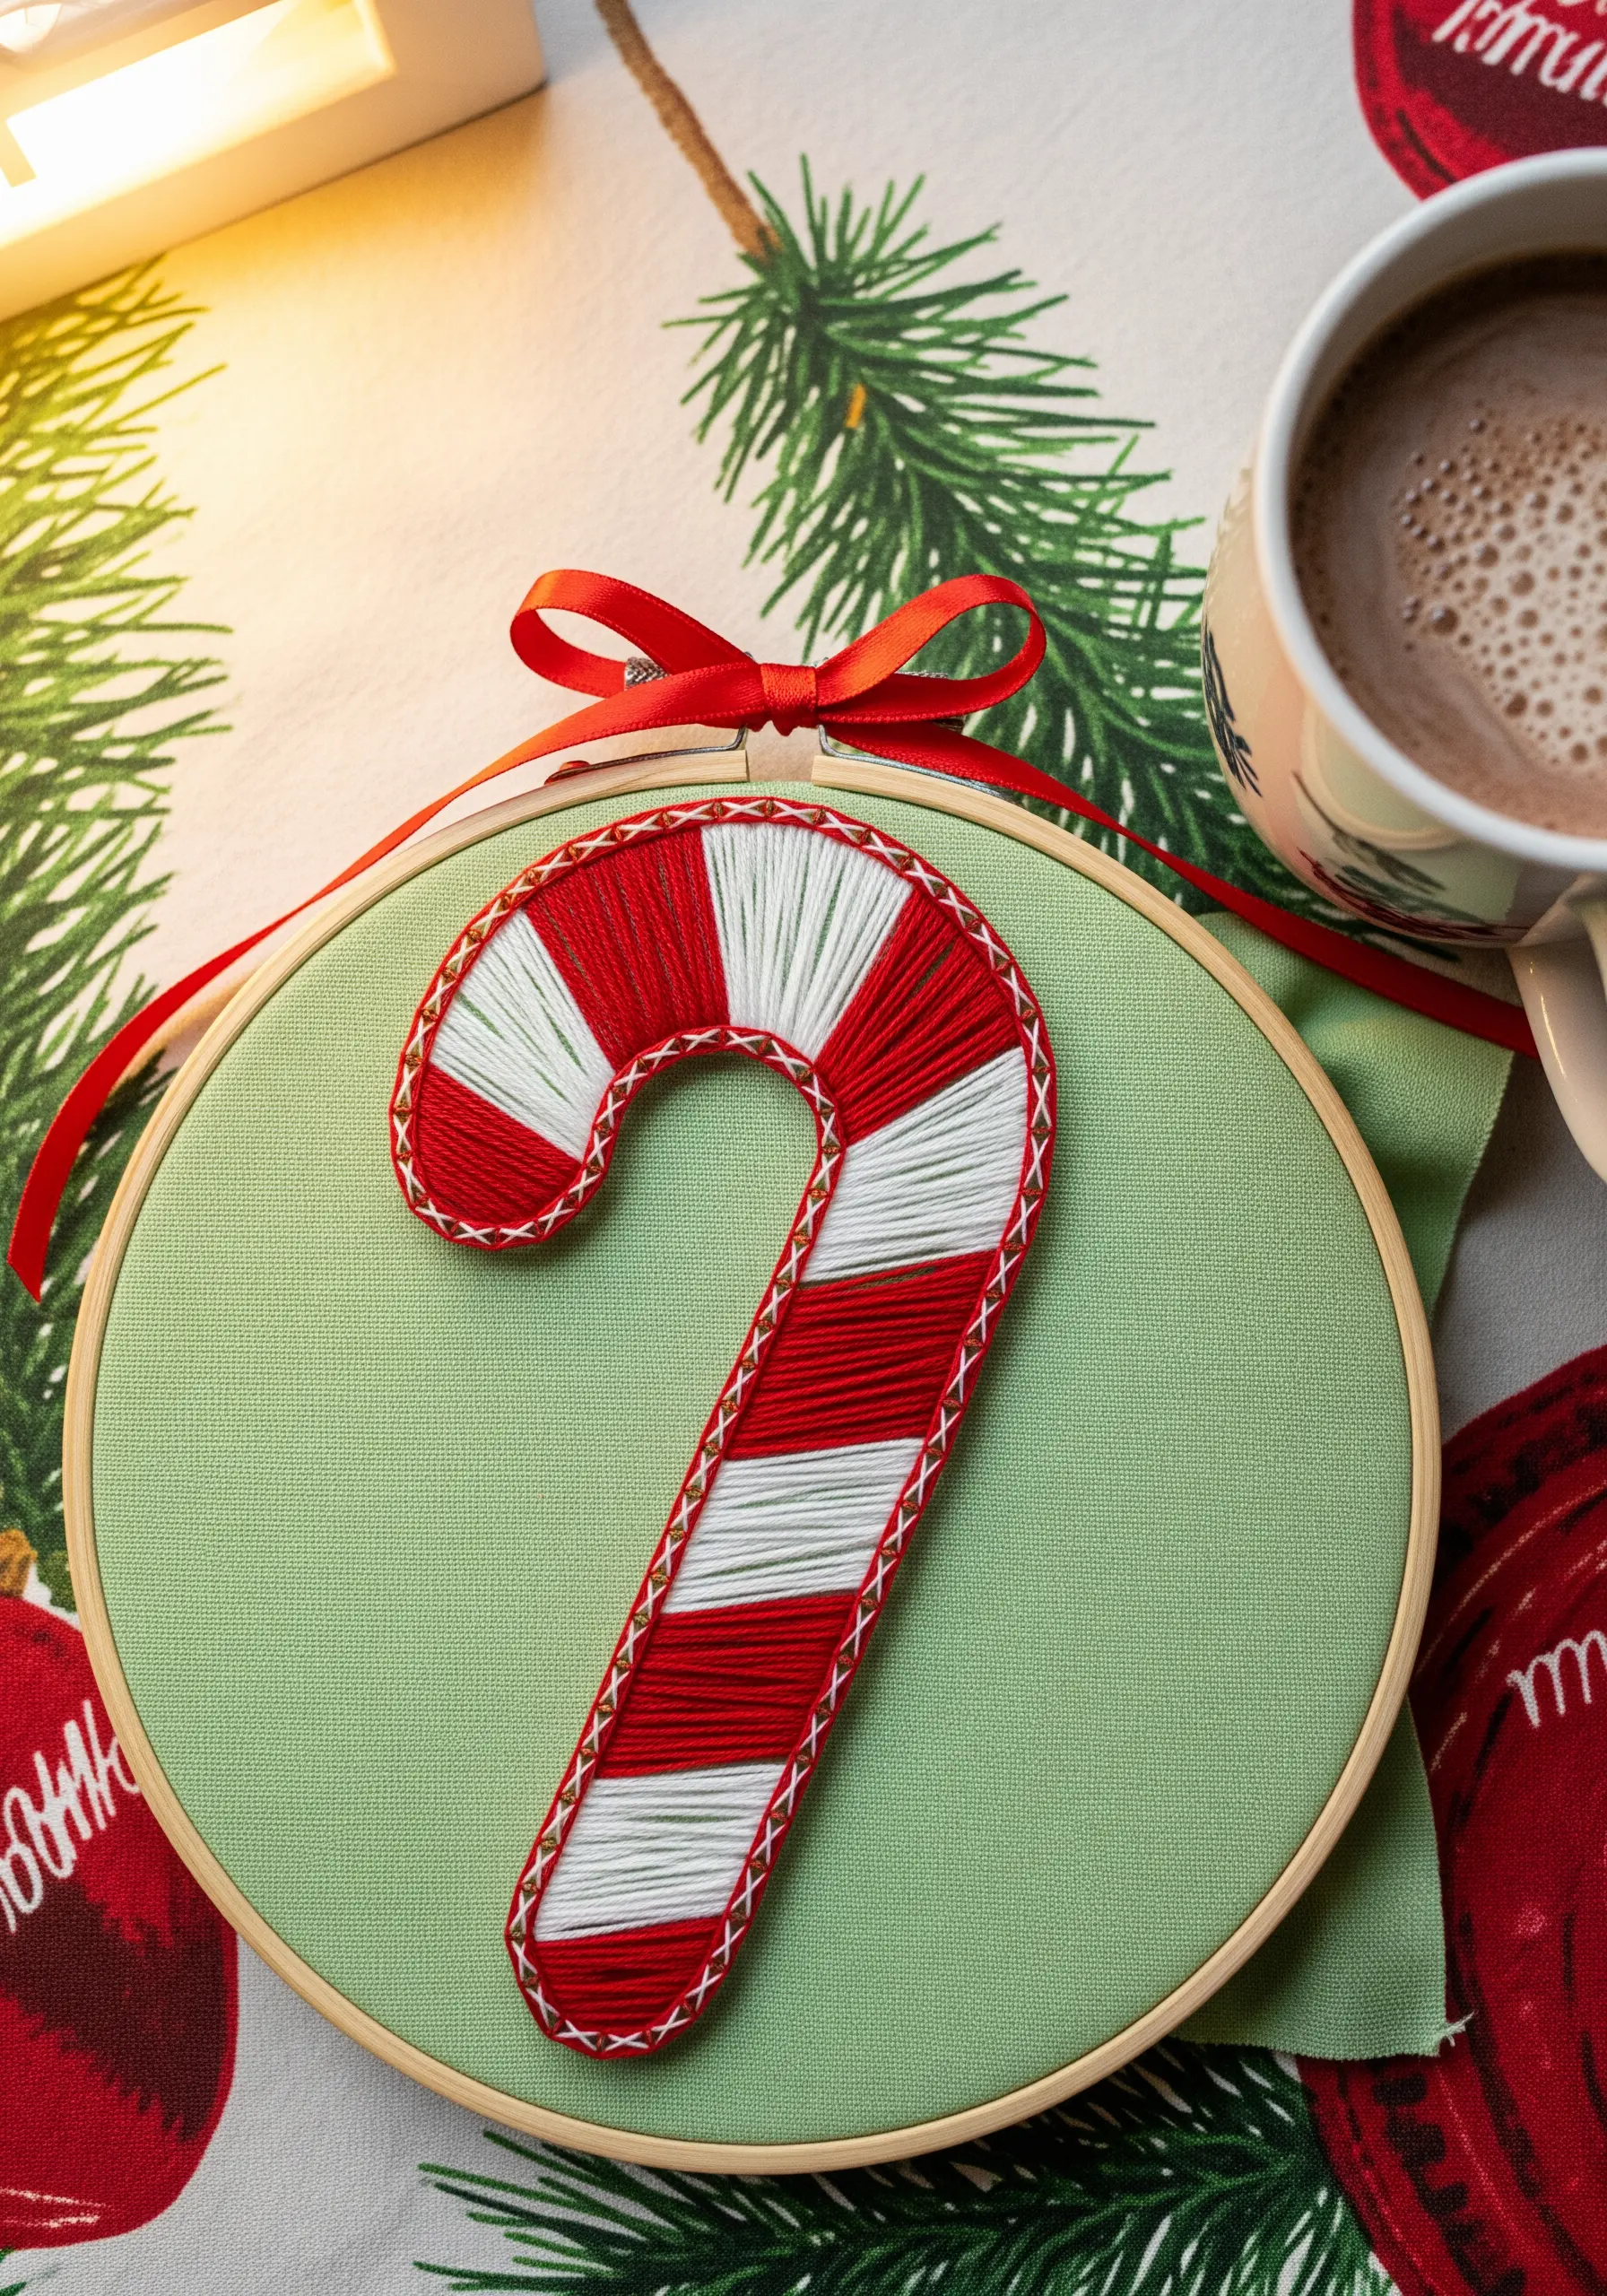
To achieve the solid, clean look of a candy cane stripe, lay your threads parallel and close together, mimicking a satin stitch.
Instead of wrapping around external pins, use a line of backstitches along the candy cane’s outline as your anchor points.
Work your straight stitches from one side to the other, ensuring each new thread lies snugly against the last for full coverage.
Finish with a simple cross-stitch outline in a contrasting color to hide the anchor stitches and create a crisp border.
17. Simulating a Woven Texture with Directional Blocks
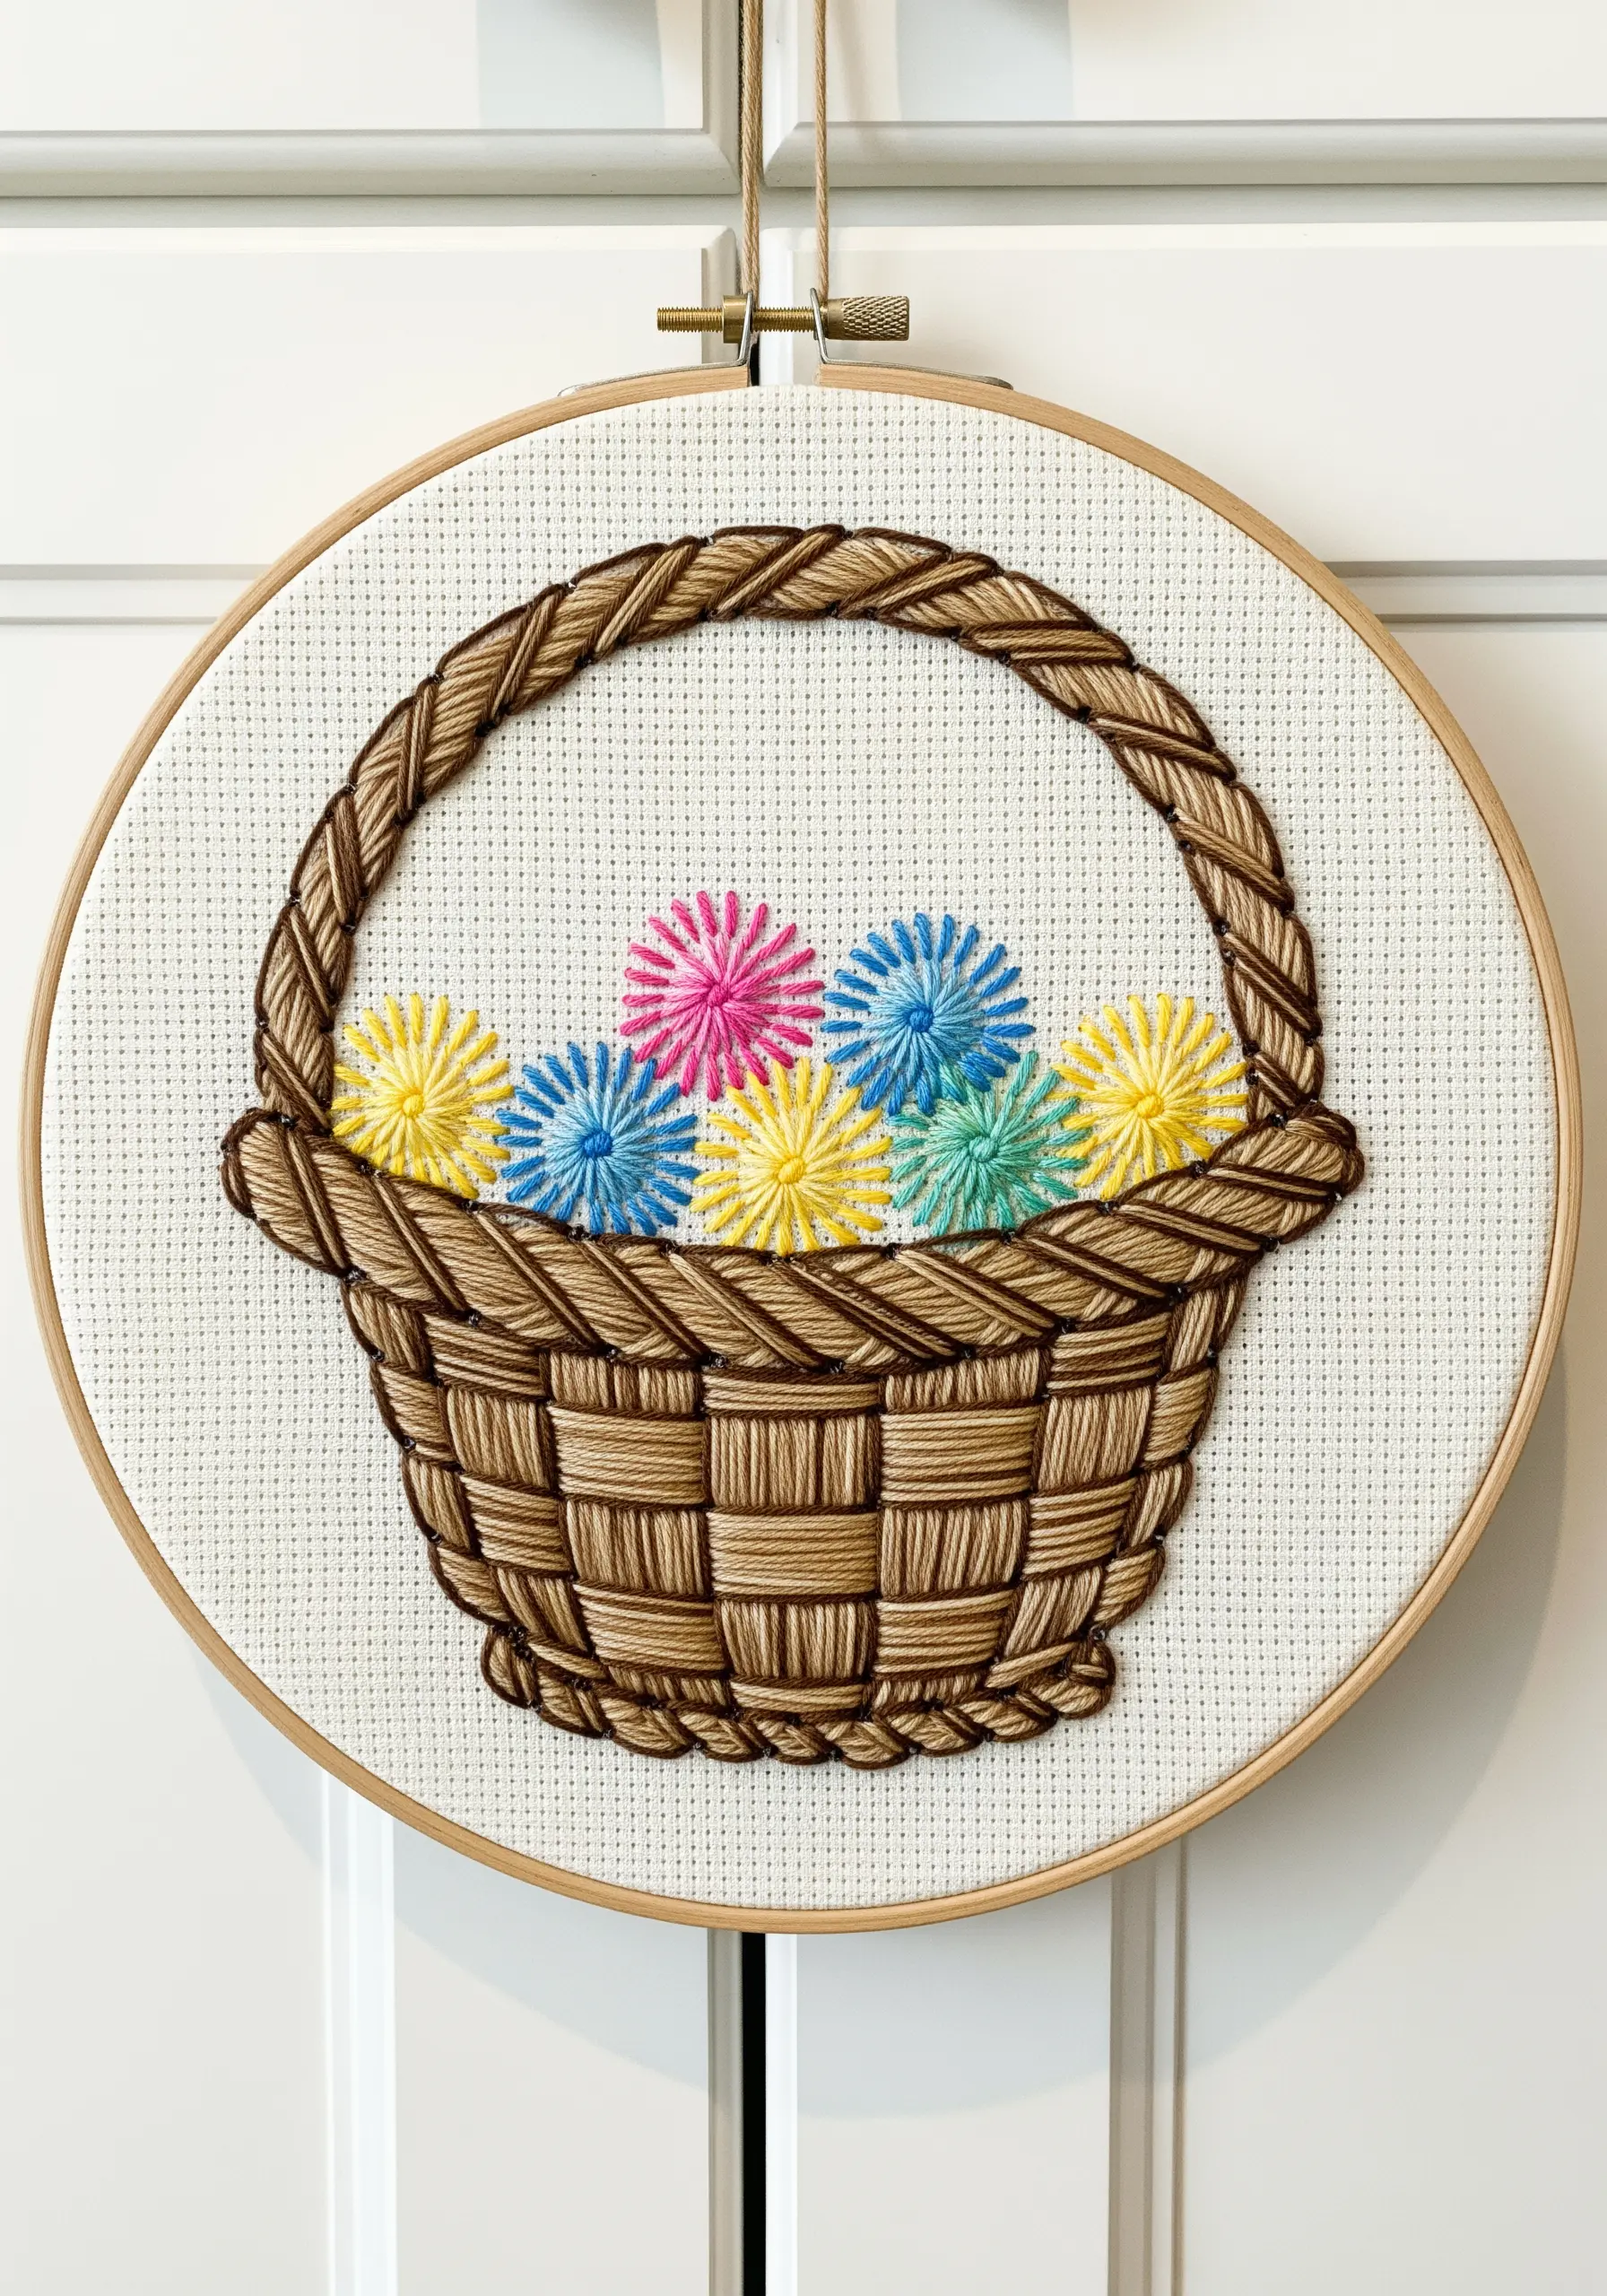
To create the illusion of a woven basket, divide the design into small, rectangular sections.
Fill each section with parallel stitches in one direction (e.g., horizontal).
In each adjacent section, switch the stitch direction to the opposite (e.g., vertical).
Using two shades of brown and slightly overlapping where the sections meet will enhance the illusion of an authentic woven texture.
18. Using Thread Tension to Create Elegant Curves
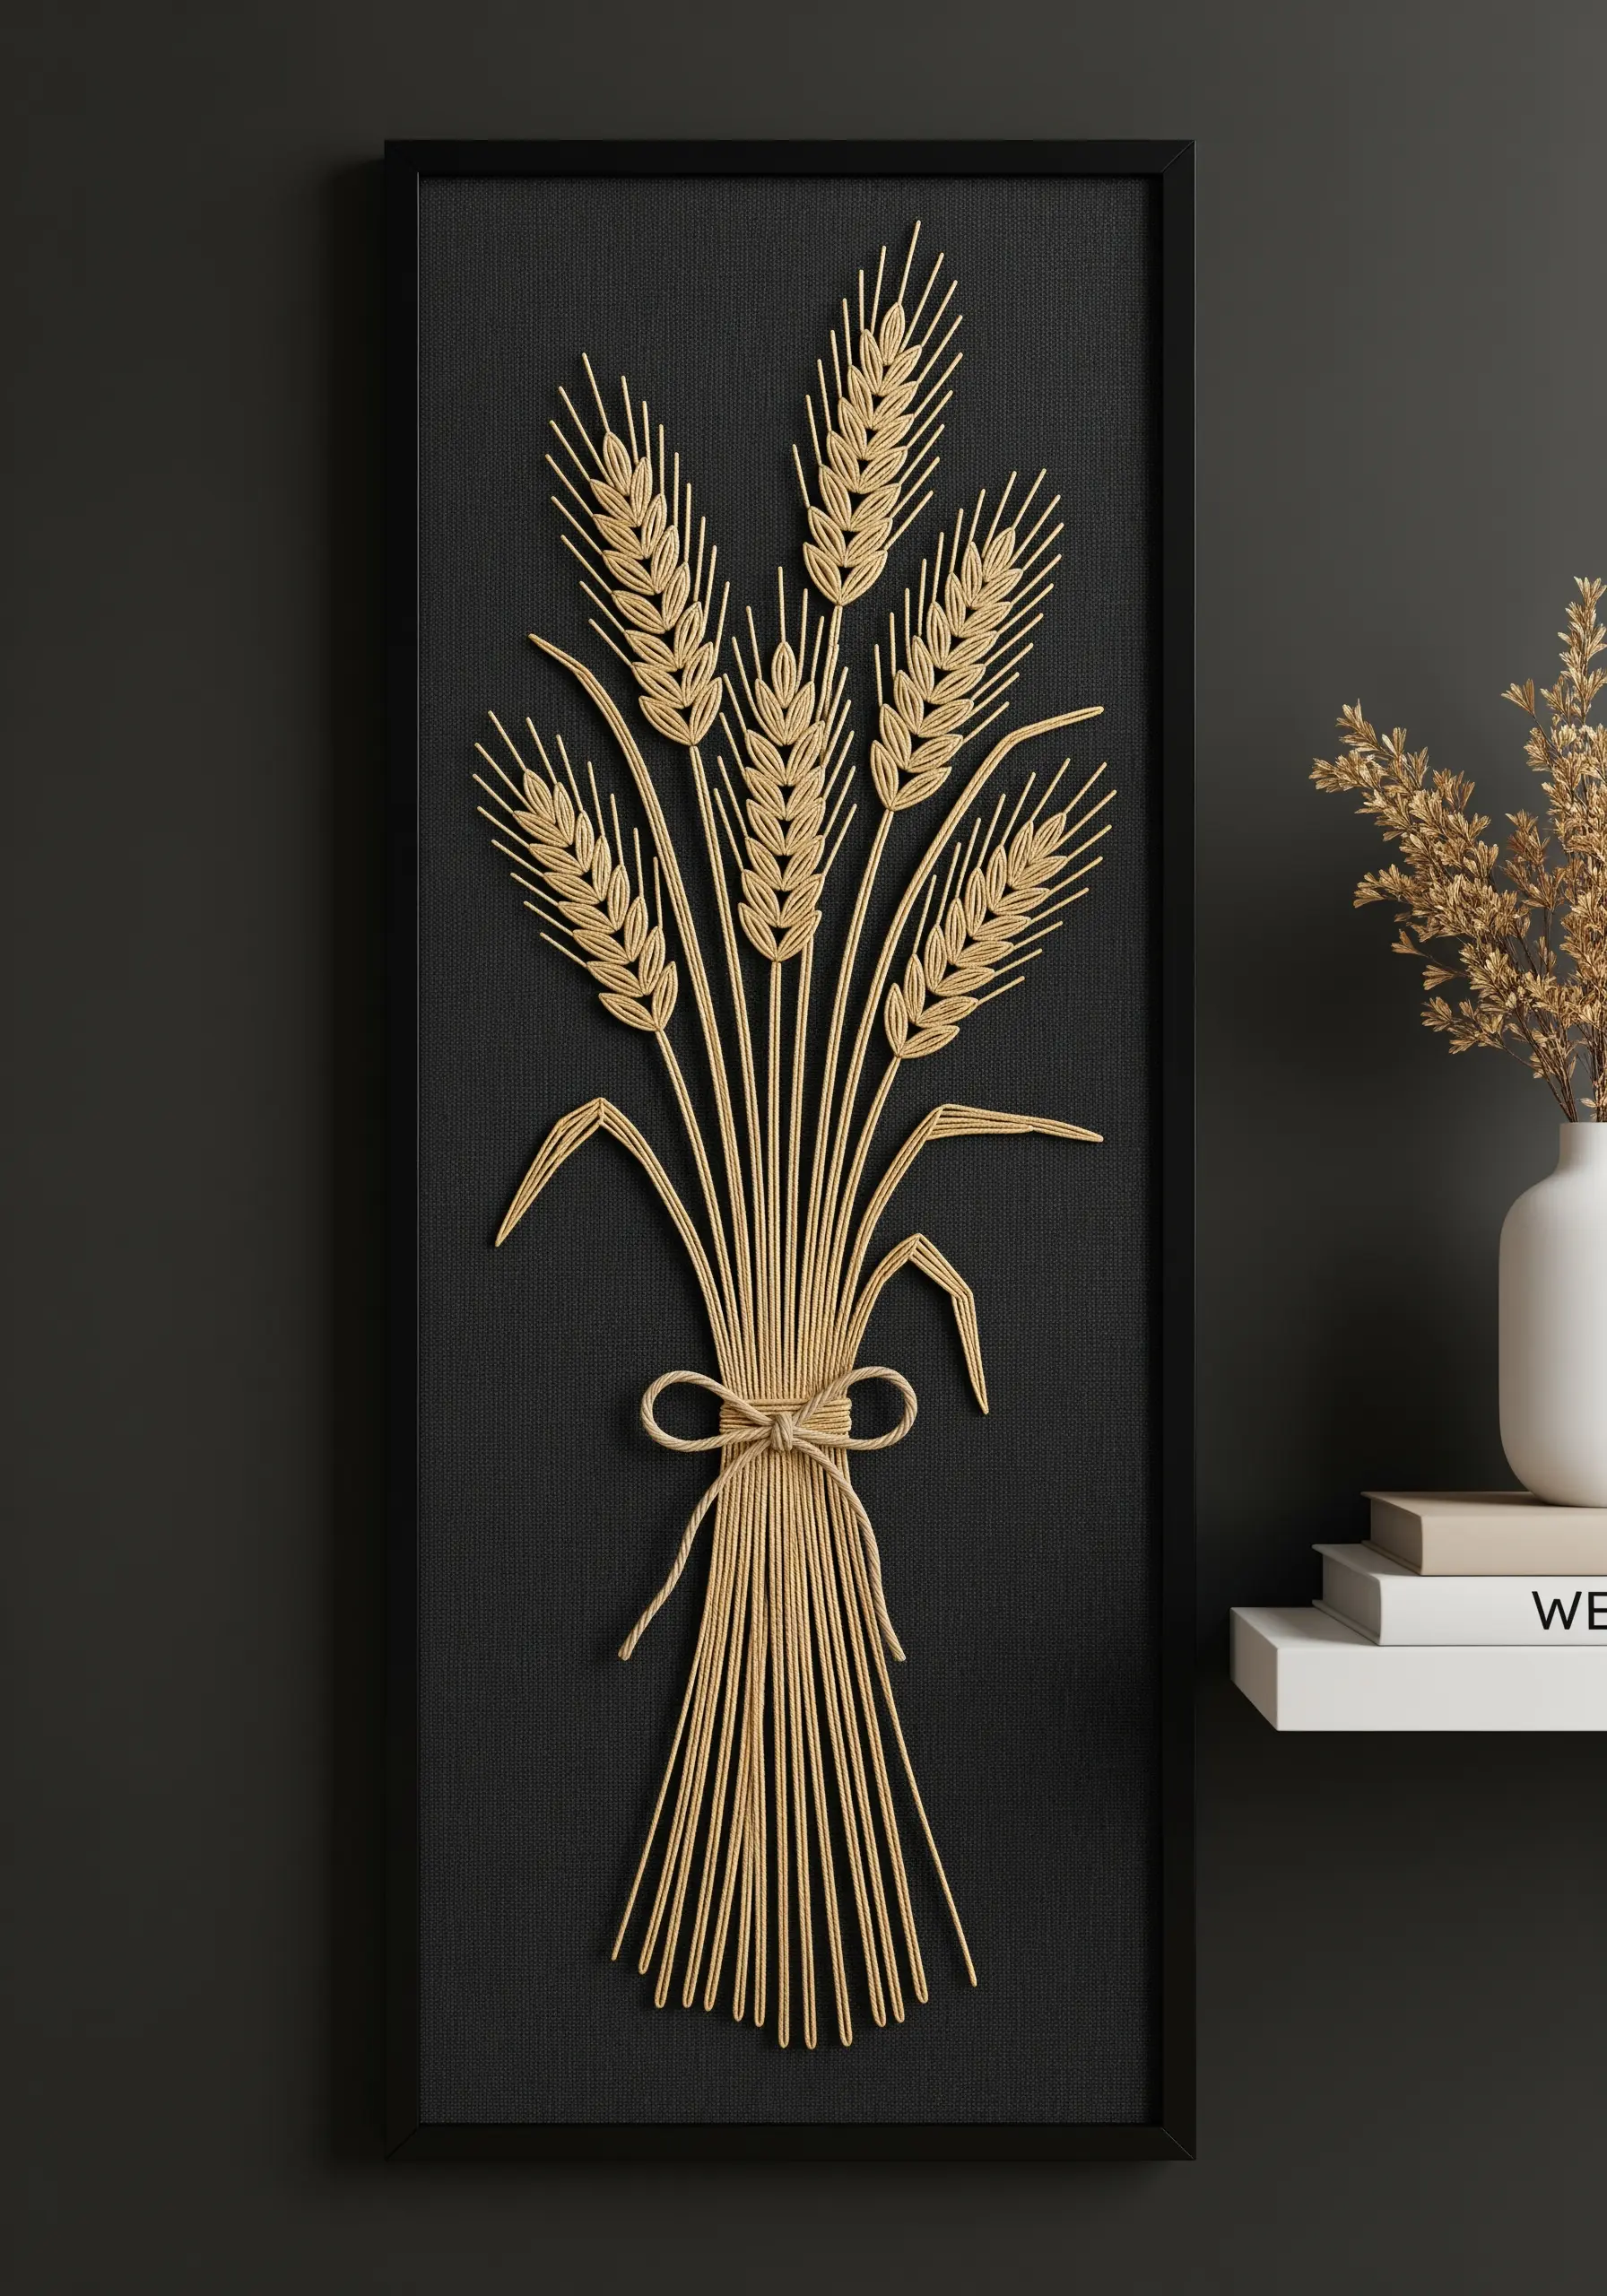
For organic shapes like wheat stalks, you can manipulate the thread’s path to create graceful, flowing curves without a curved outline.
Instead of pulling the thread taut in a straight line between two points, guide it around a third, offset anchor point (like a pin or temporary stitch).
This pulls the thread into a gentle arc, allowing you to create natural lines—a beautiful application of botanical line art principles in three dimensions.
19. Blending Thread and Sequins for Ethereal Effects
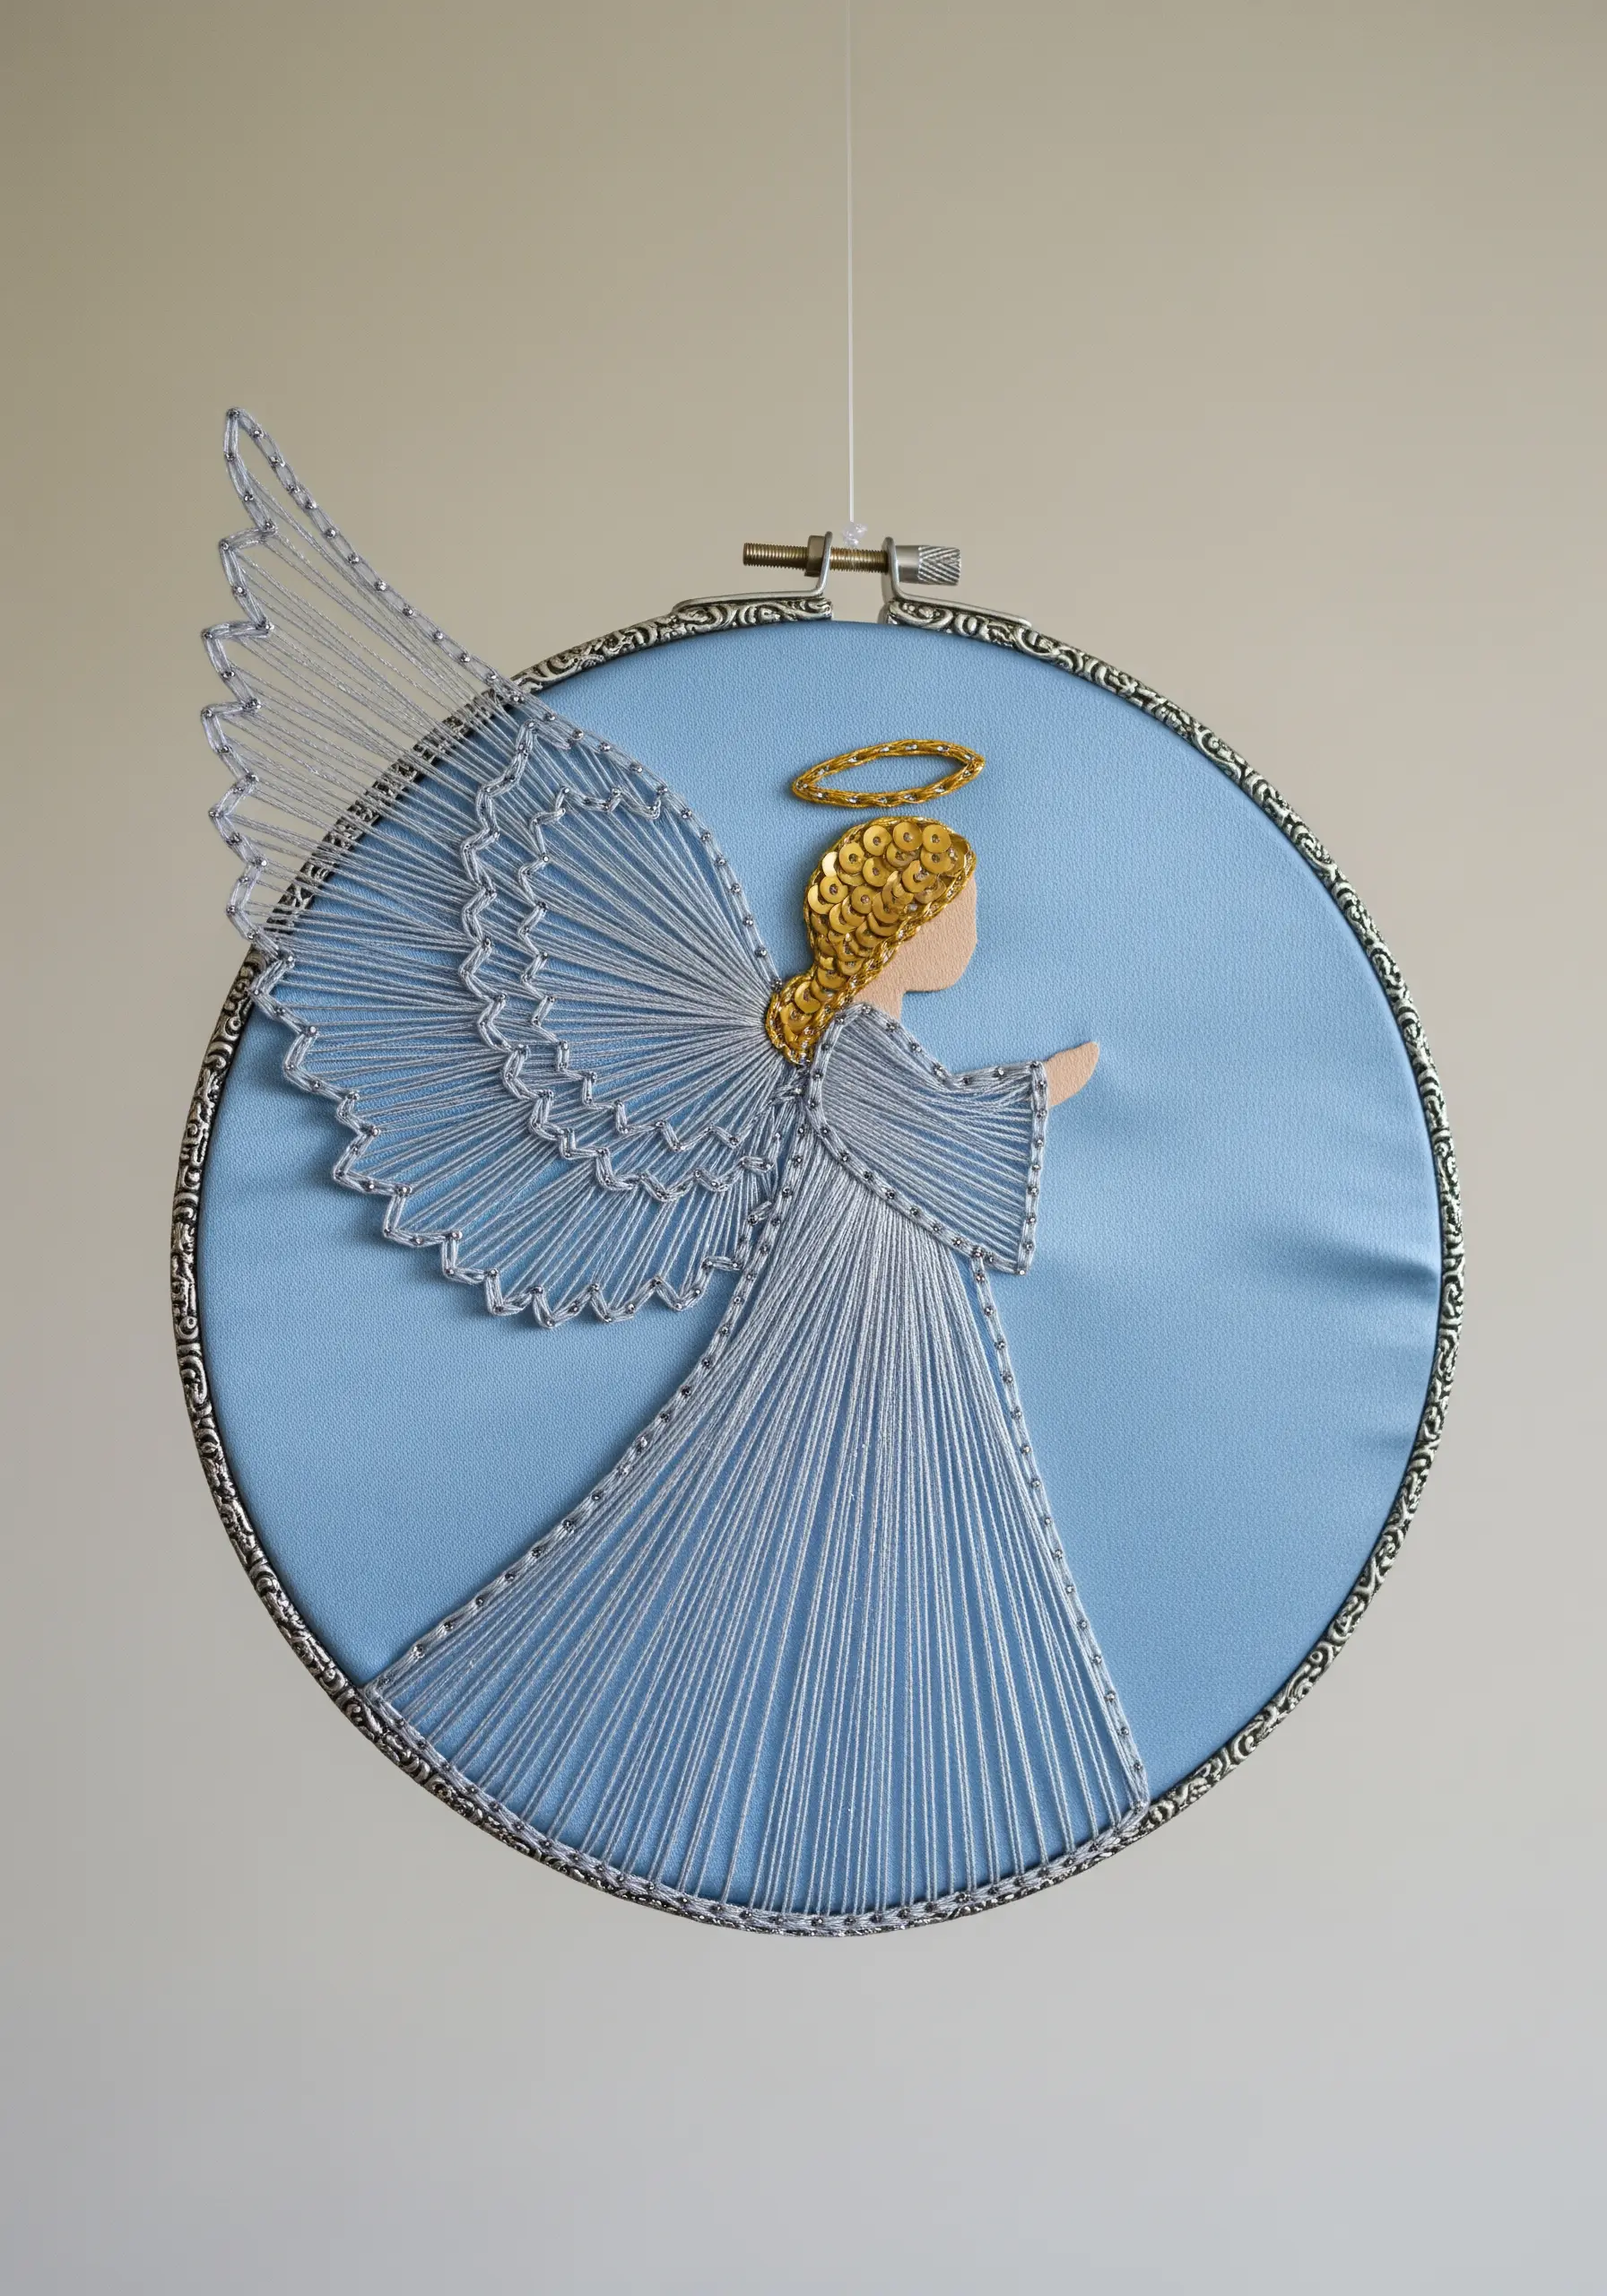
Create an ethereal quality by combining delicate string art with other luminous materials that reflect light differently.
Use a fine, silver metallic thread for the angel’s gown and wings to suggest transparency and light.
For the halo, stitch a ring of overlapping gold sequins instead of using thread. This mixed-media approach adds a focal point of shimmering light and texture, elevating the entire piece.
20. Creating 3D Lettering with a Wrapped Outline
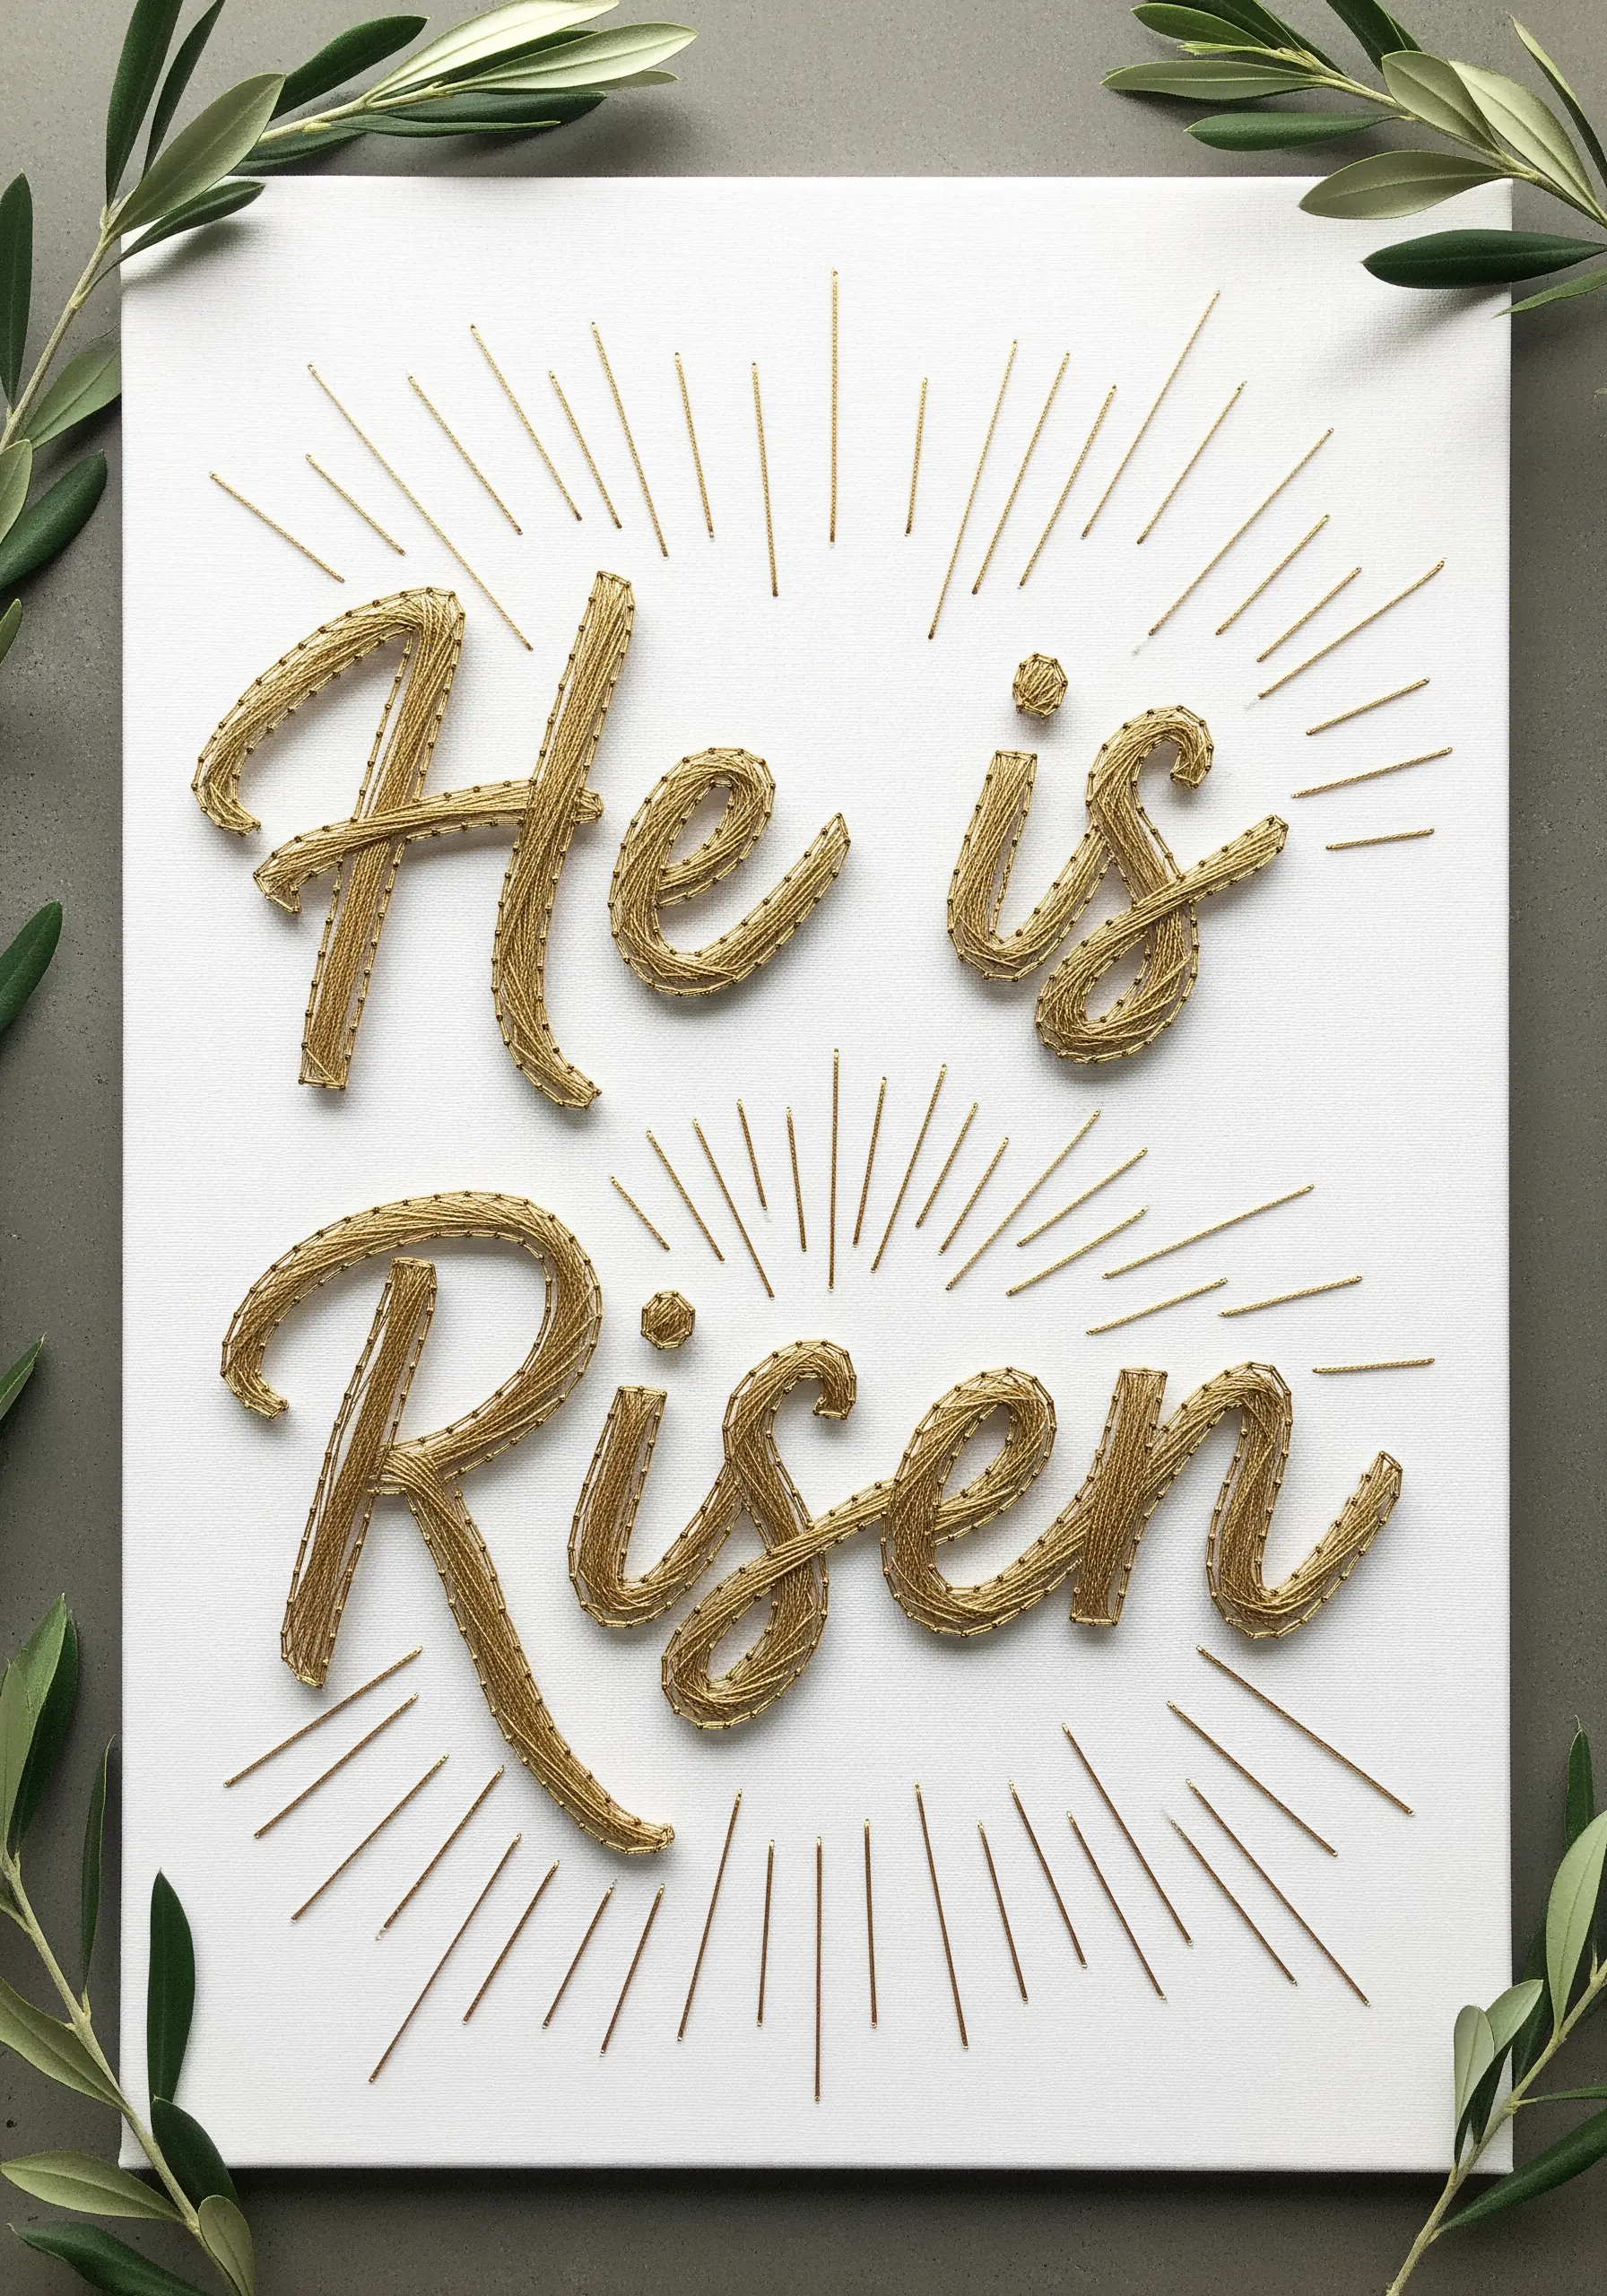
To give your lettering a raised, three-dimensional effect, first create the letter shapes on your canvas using a thicker cord or yarn.
Couch this cord base onto the canvas with a few stitches of matching thread to secure it in place.
Then, use your primary metallic floss to wrap tightly and evenly around the cord, completely covering it.
This stumpwork-adjacent technique gives the text a professional, sculptural quality that stands off the surface.
21. Employing Raffia and Found Objects for Rustic Charm
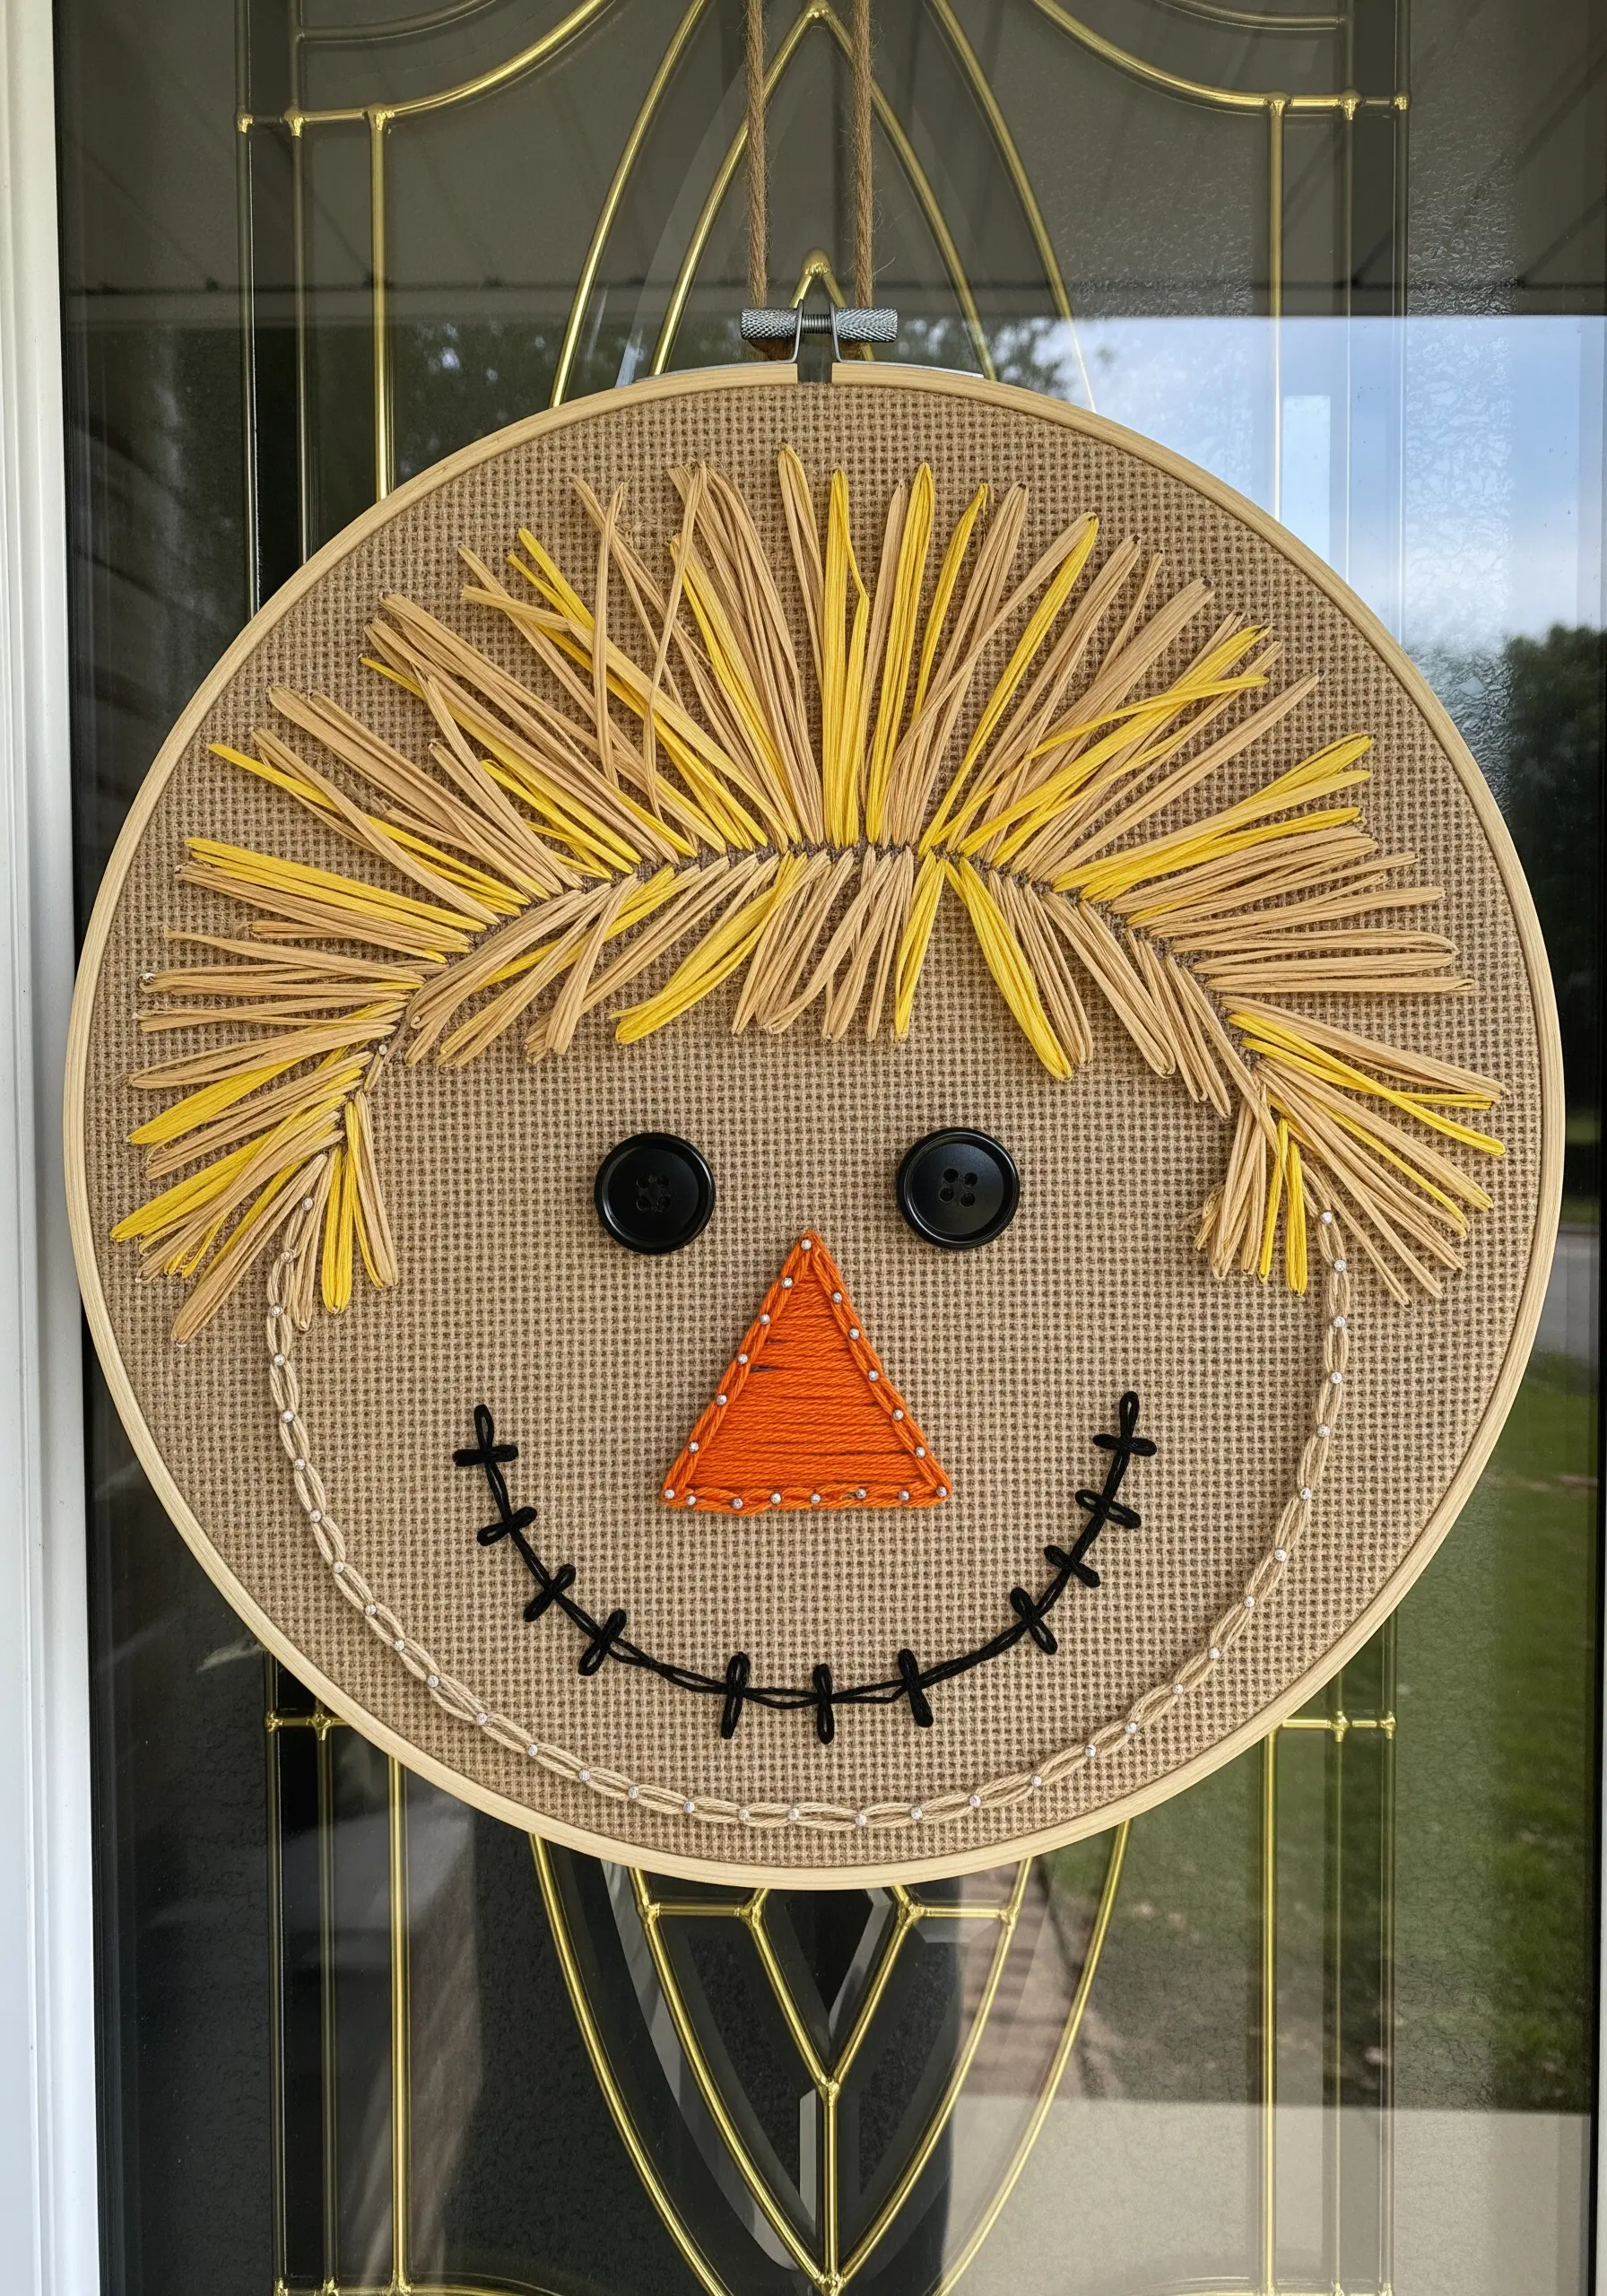
Lean into a rustic aesthetic by substituting traditional embroidery floss with natural, textural materials.
Use strands of paper raffia for the scarecrow’s hair, letting the ends fray and splay out for a more authentic, messy look.
Simple black buttons for eyes and a small, satin-stitched patch of felt for the nose complete the charming, hand-crafted feel.
This approach is less about precision and more about capturing a playful, rustic spirit through mixed media.
22. Achieving Opaque Color Fills with Dense Stitching
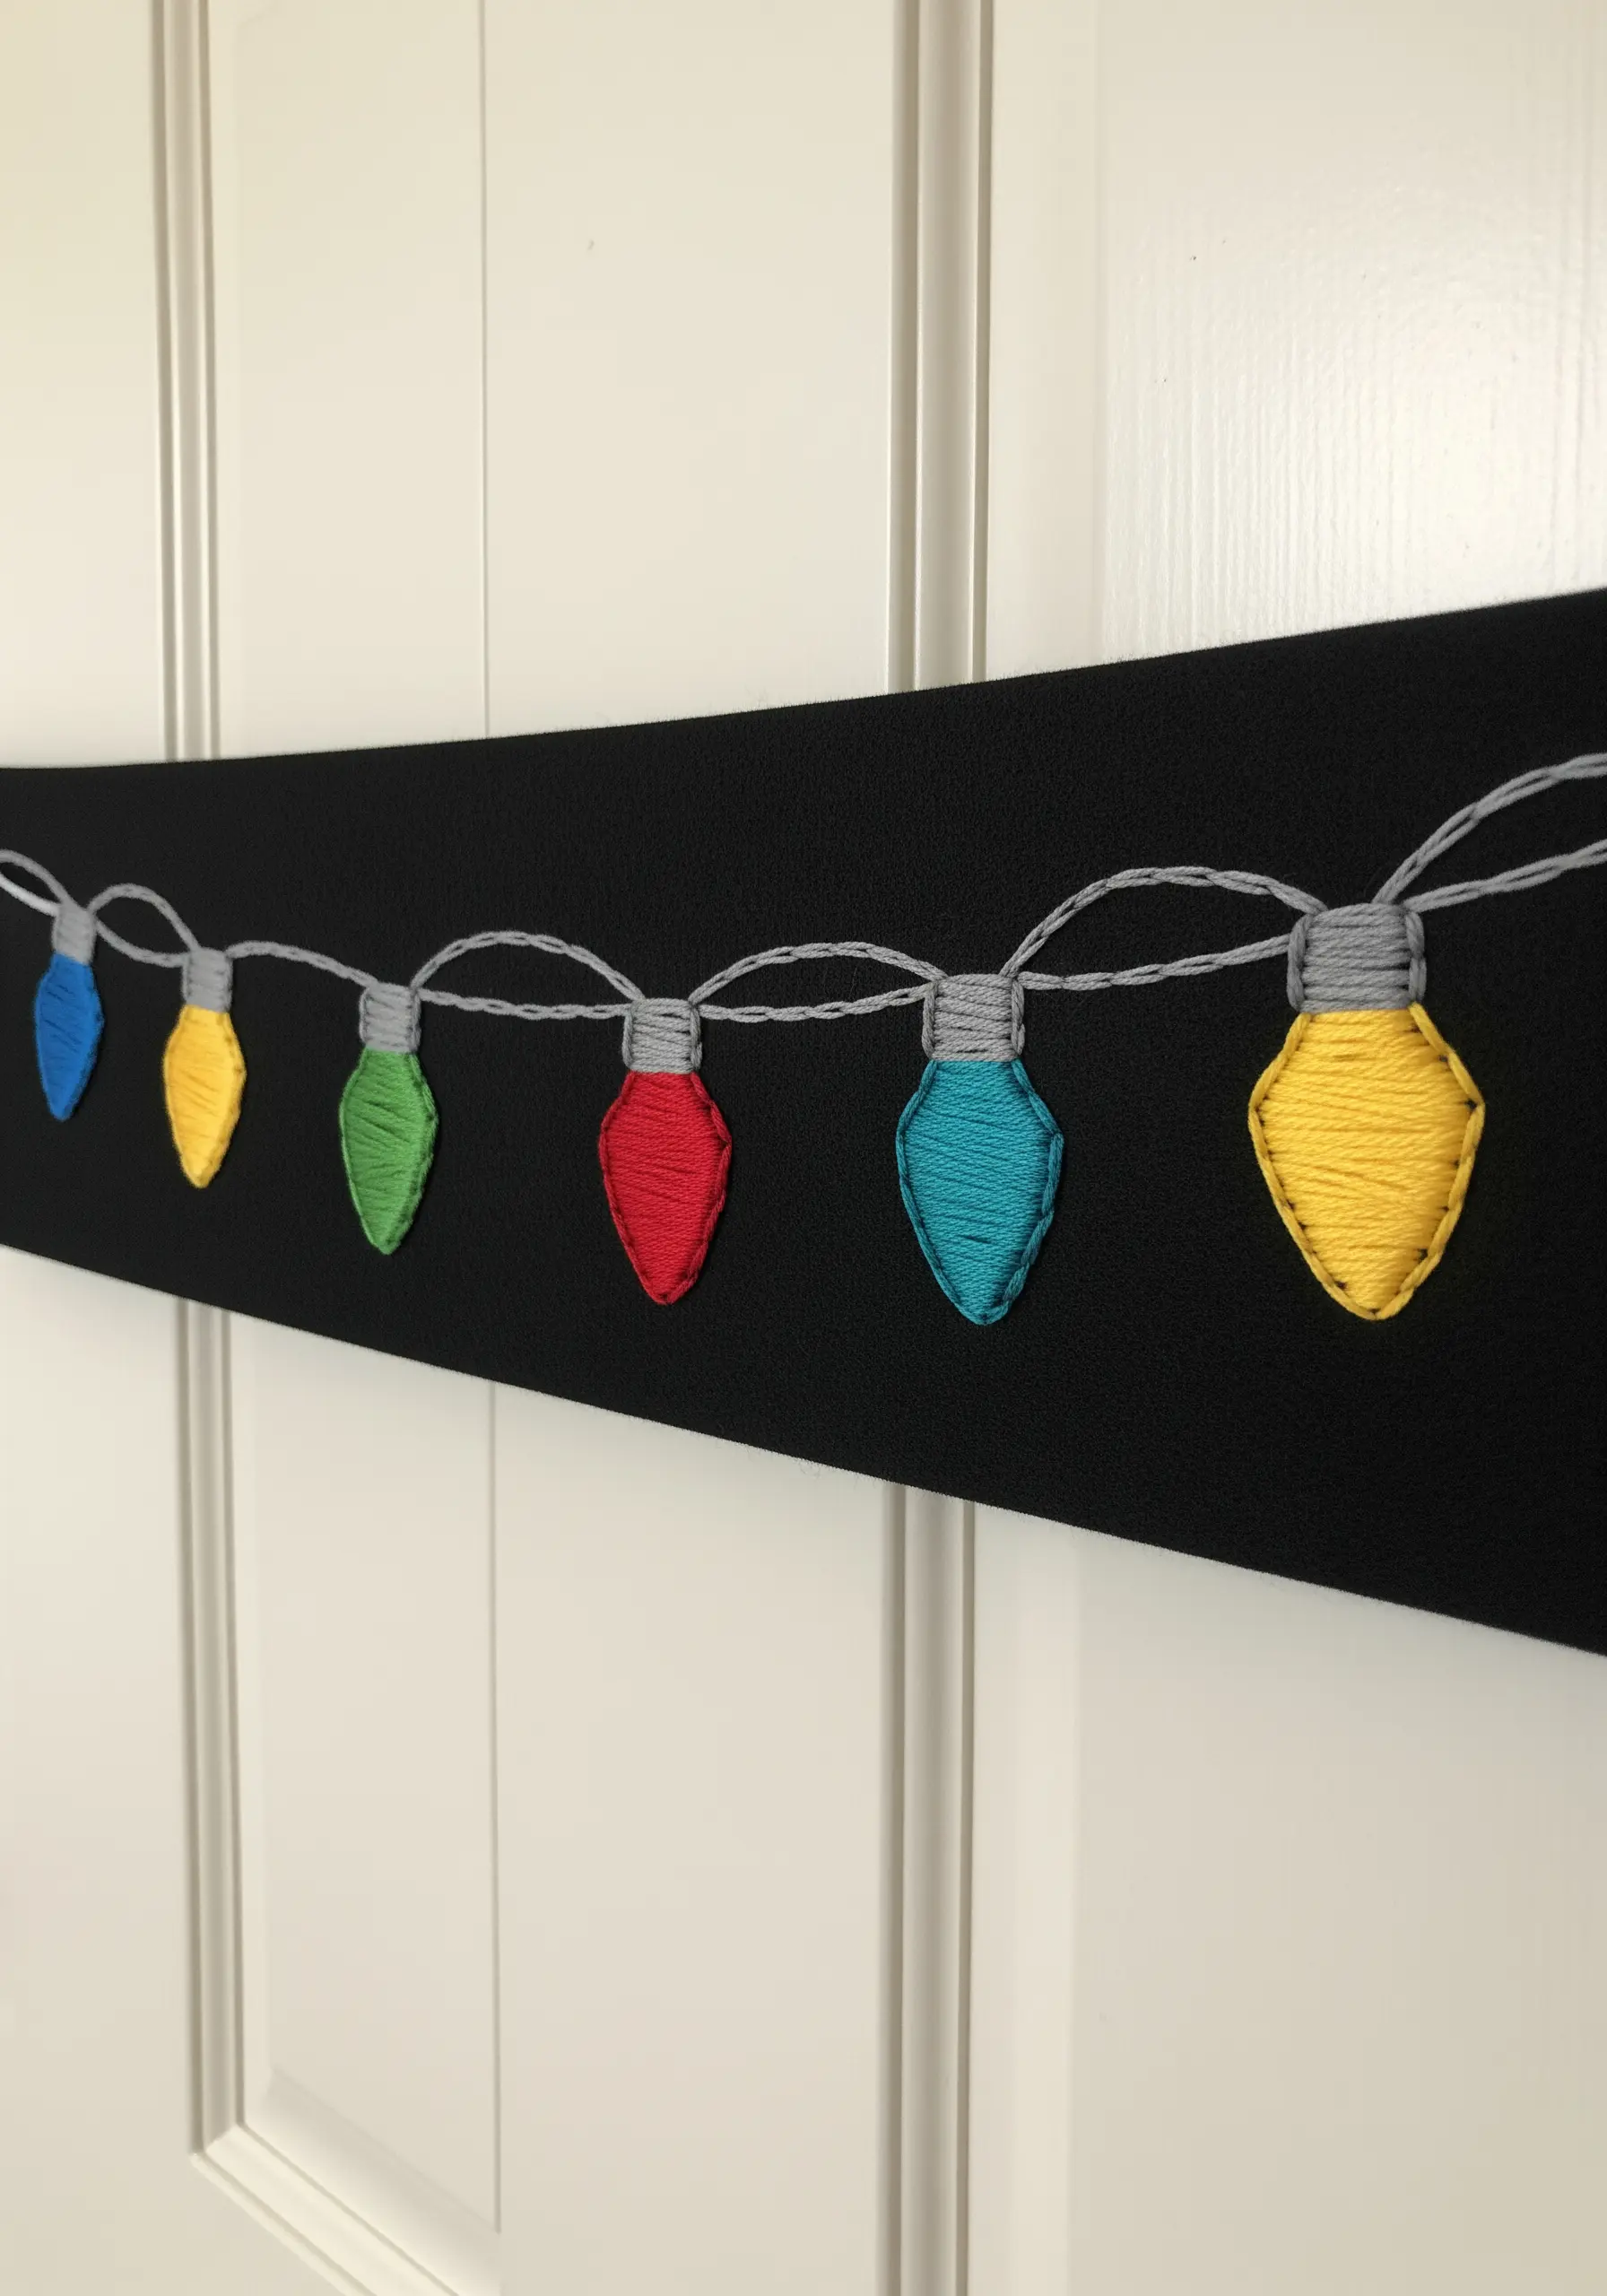
To get a solid, opaque fill for graphic shapes like these lightbulbs, use a dense satin stitch technique.
First, outline the shape with a split stitch. This raised line will give your fill a clean, sharp edge.
Then, fill the interior with parallel straight stitches, making sure each stitch goes just over the outline to ensure full coverage with no fabric showing through.
For a subtle gradient, you could even try using contemporary rainbow blend stitches within each bulb.
23. Composing a Wreath with Varied Stitch Textures
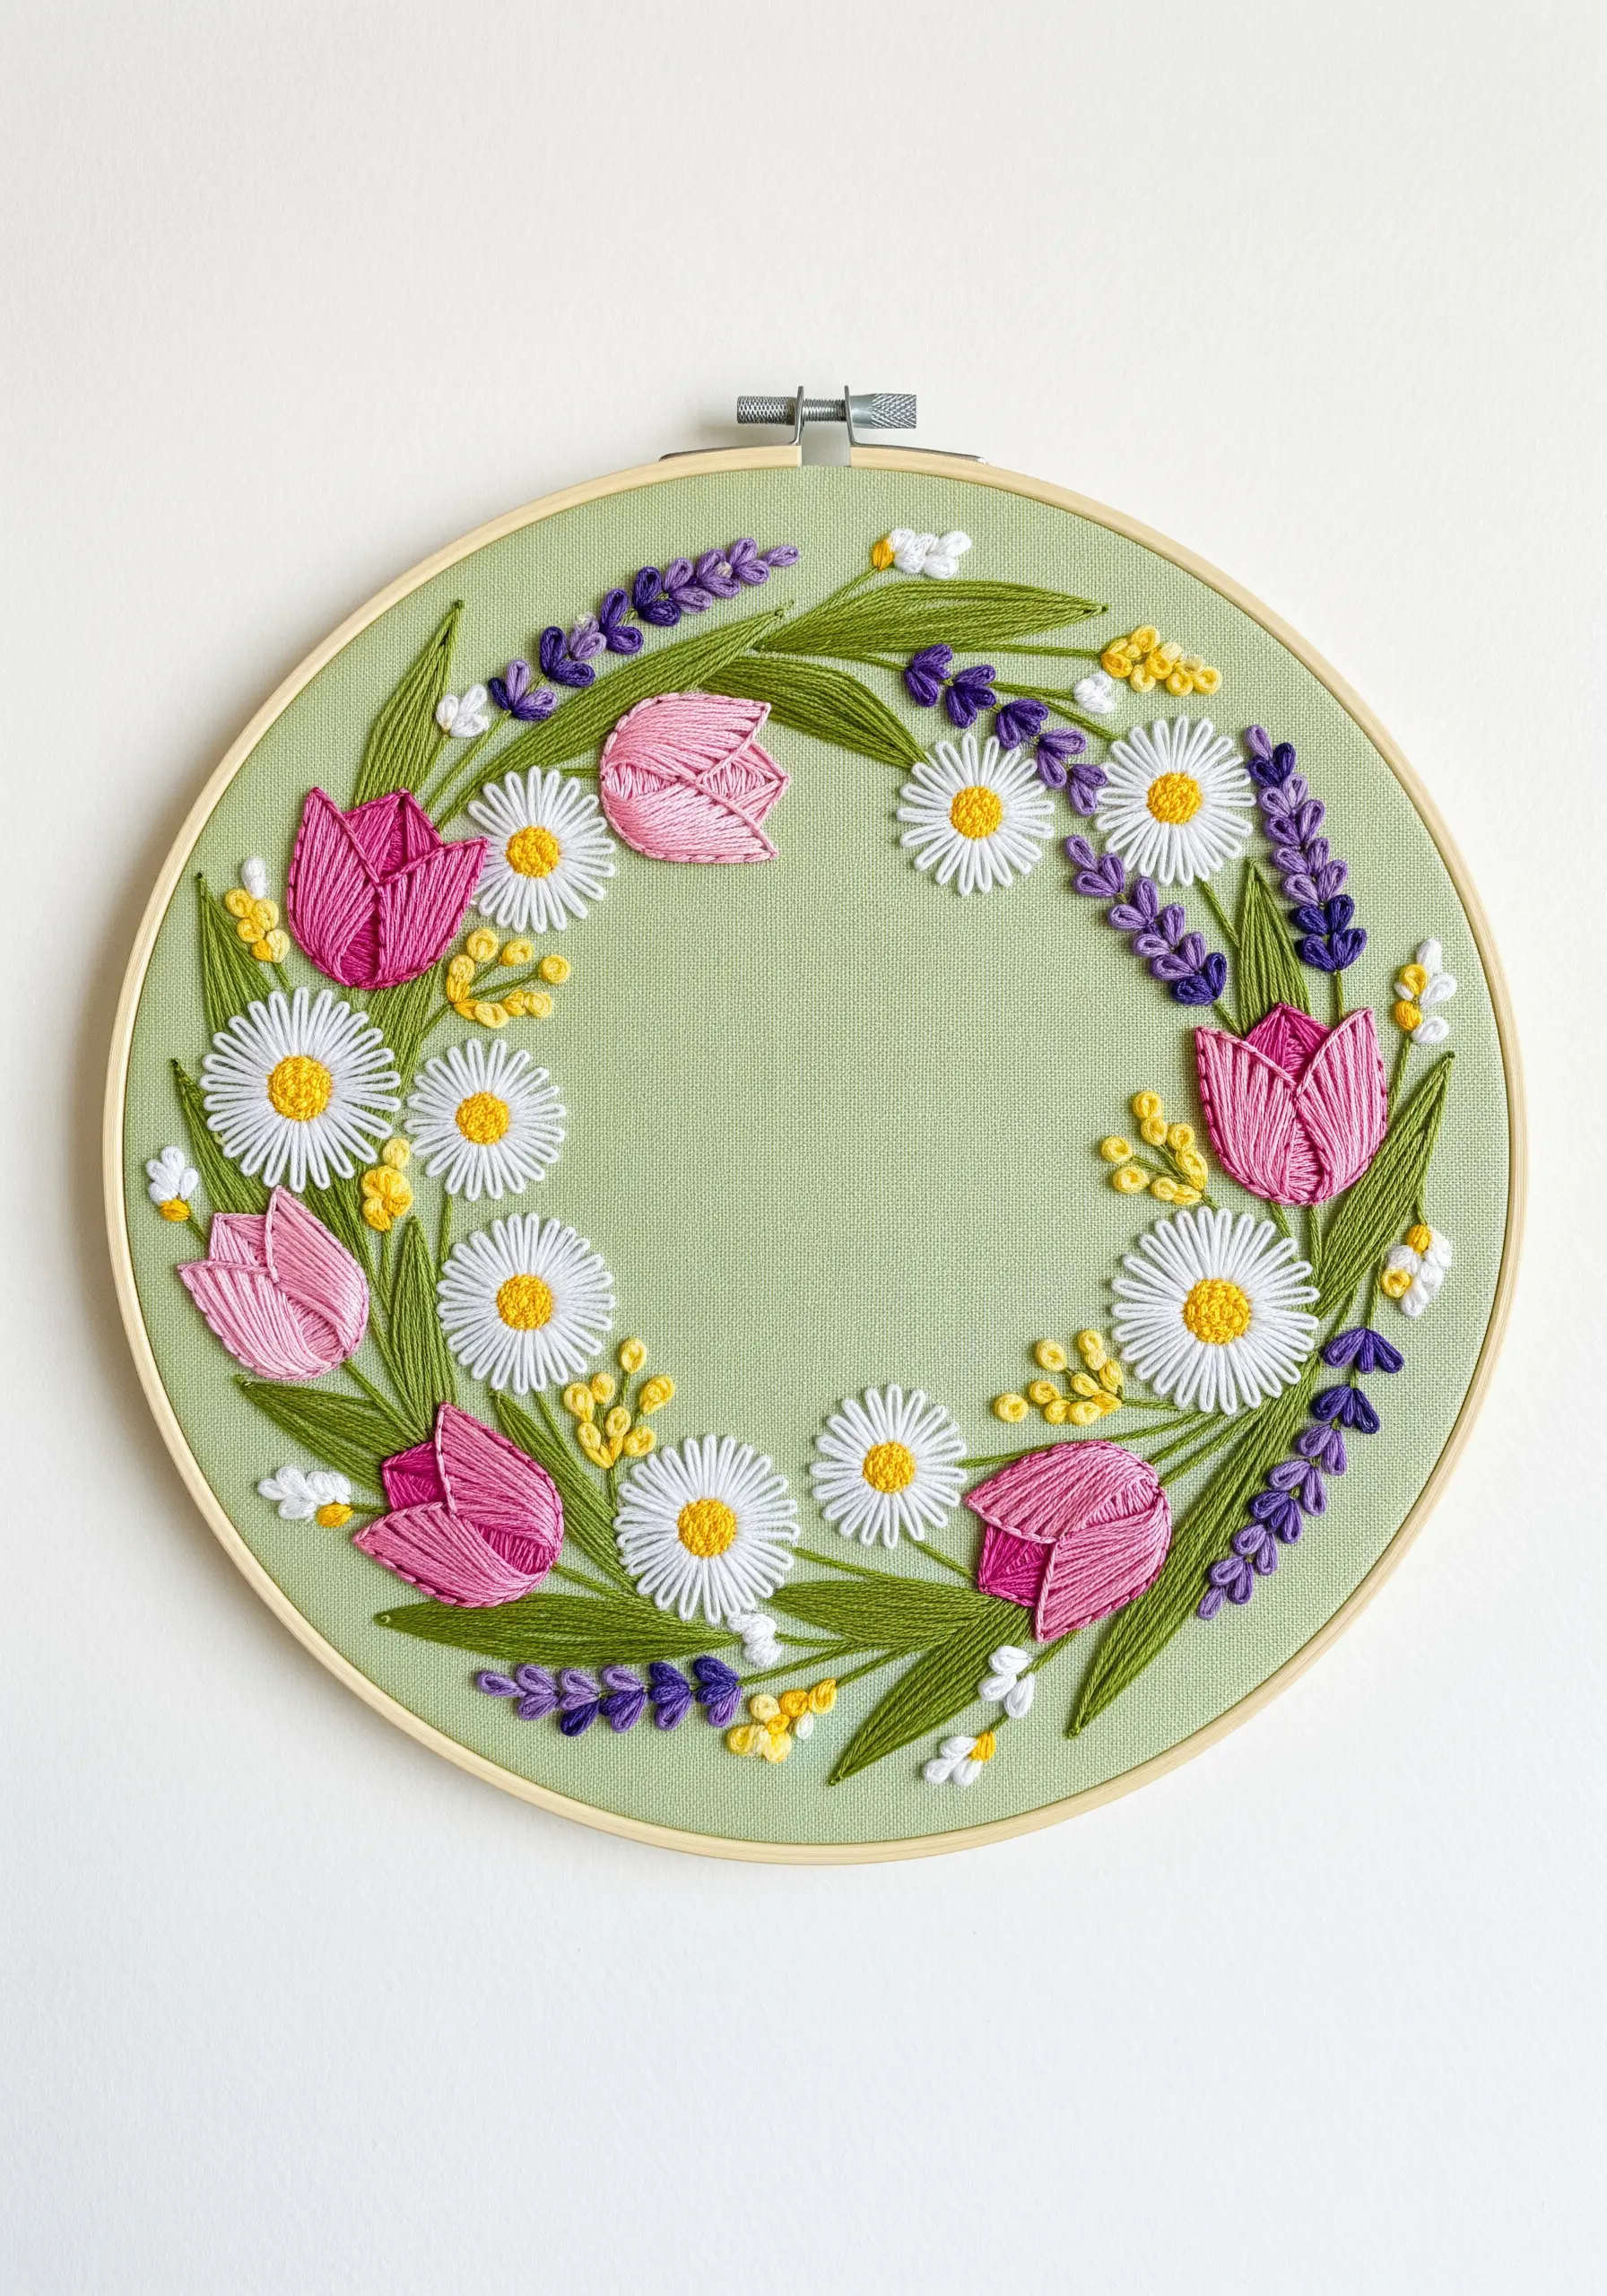
When creating a floral wreath, use a variety of stitches to give each botanical element its own unique character and texture.
Combine smooth, satin-stitched tulip petals with dimensional woven wheel stitches for the daisy centers and clusters of French knots for the yellow filler flowers.
This textural diversity makes the overall composition feel richer and more lifelike.
The interplay between smooth, looped, and knotted stitches adds a depth that makes this project ideal for mindful stitching and calm weekend projects.
24. Building Density with a Freeform Cross-Hatch Fill
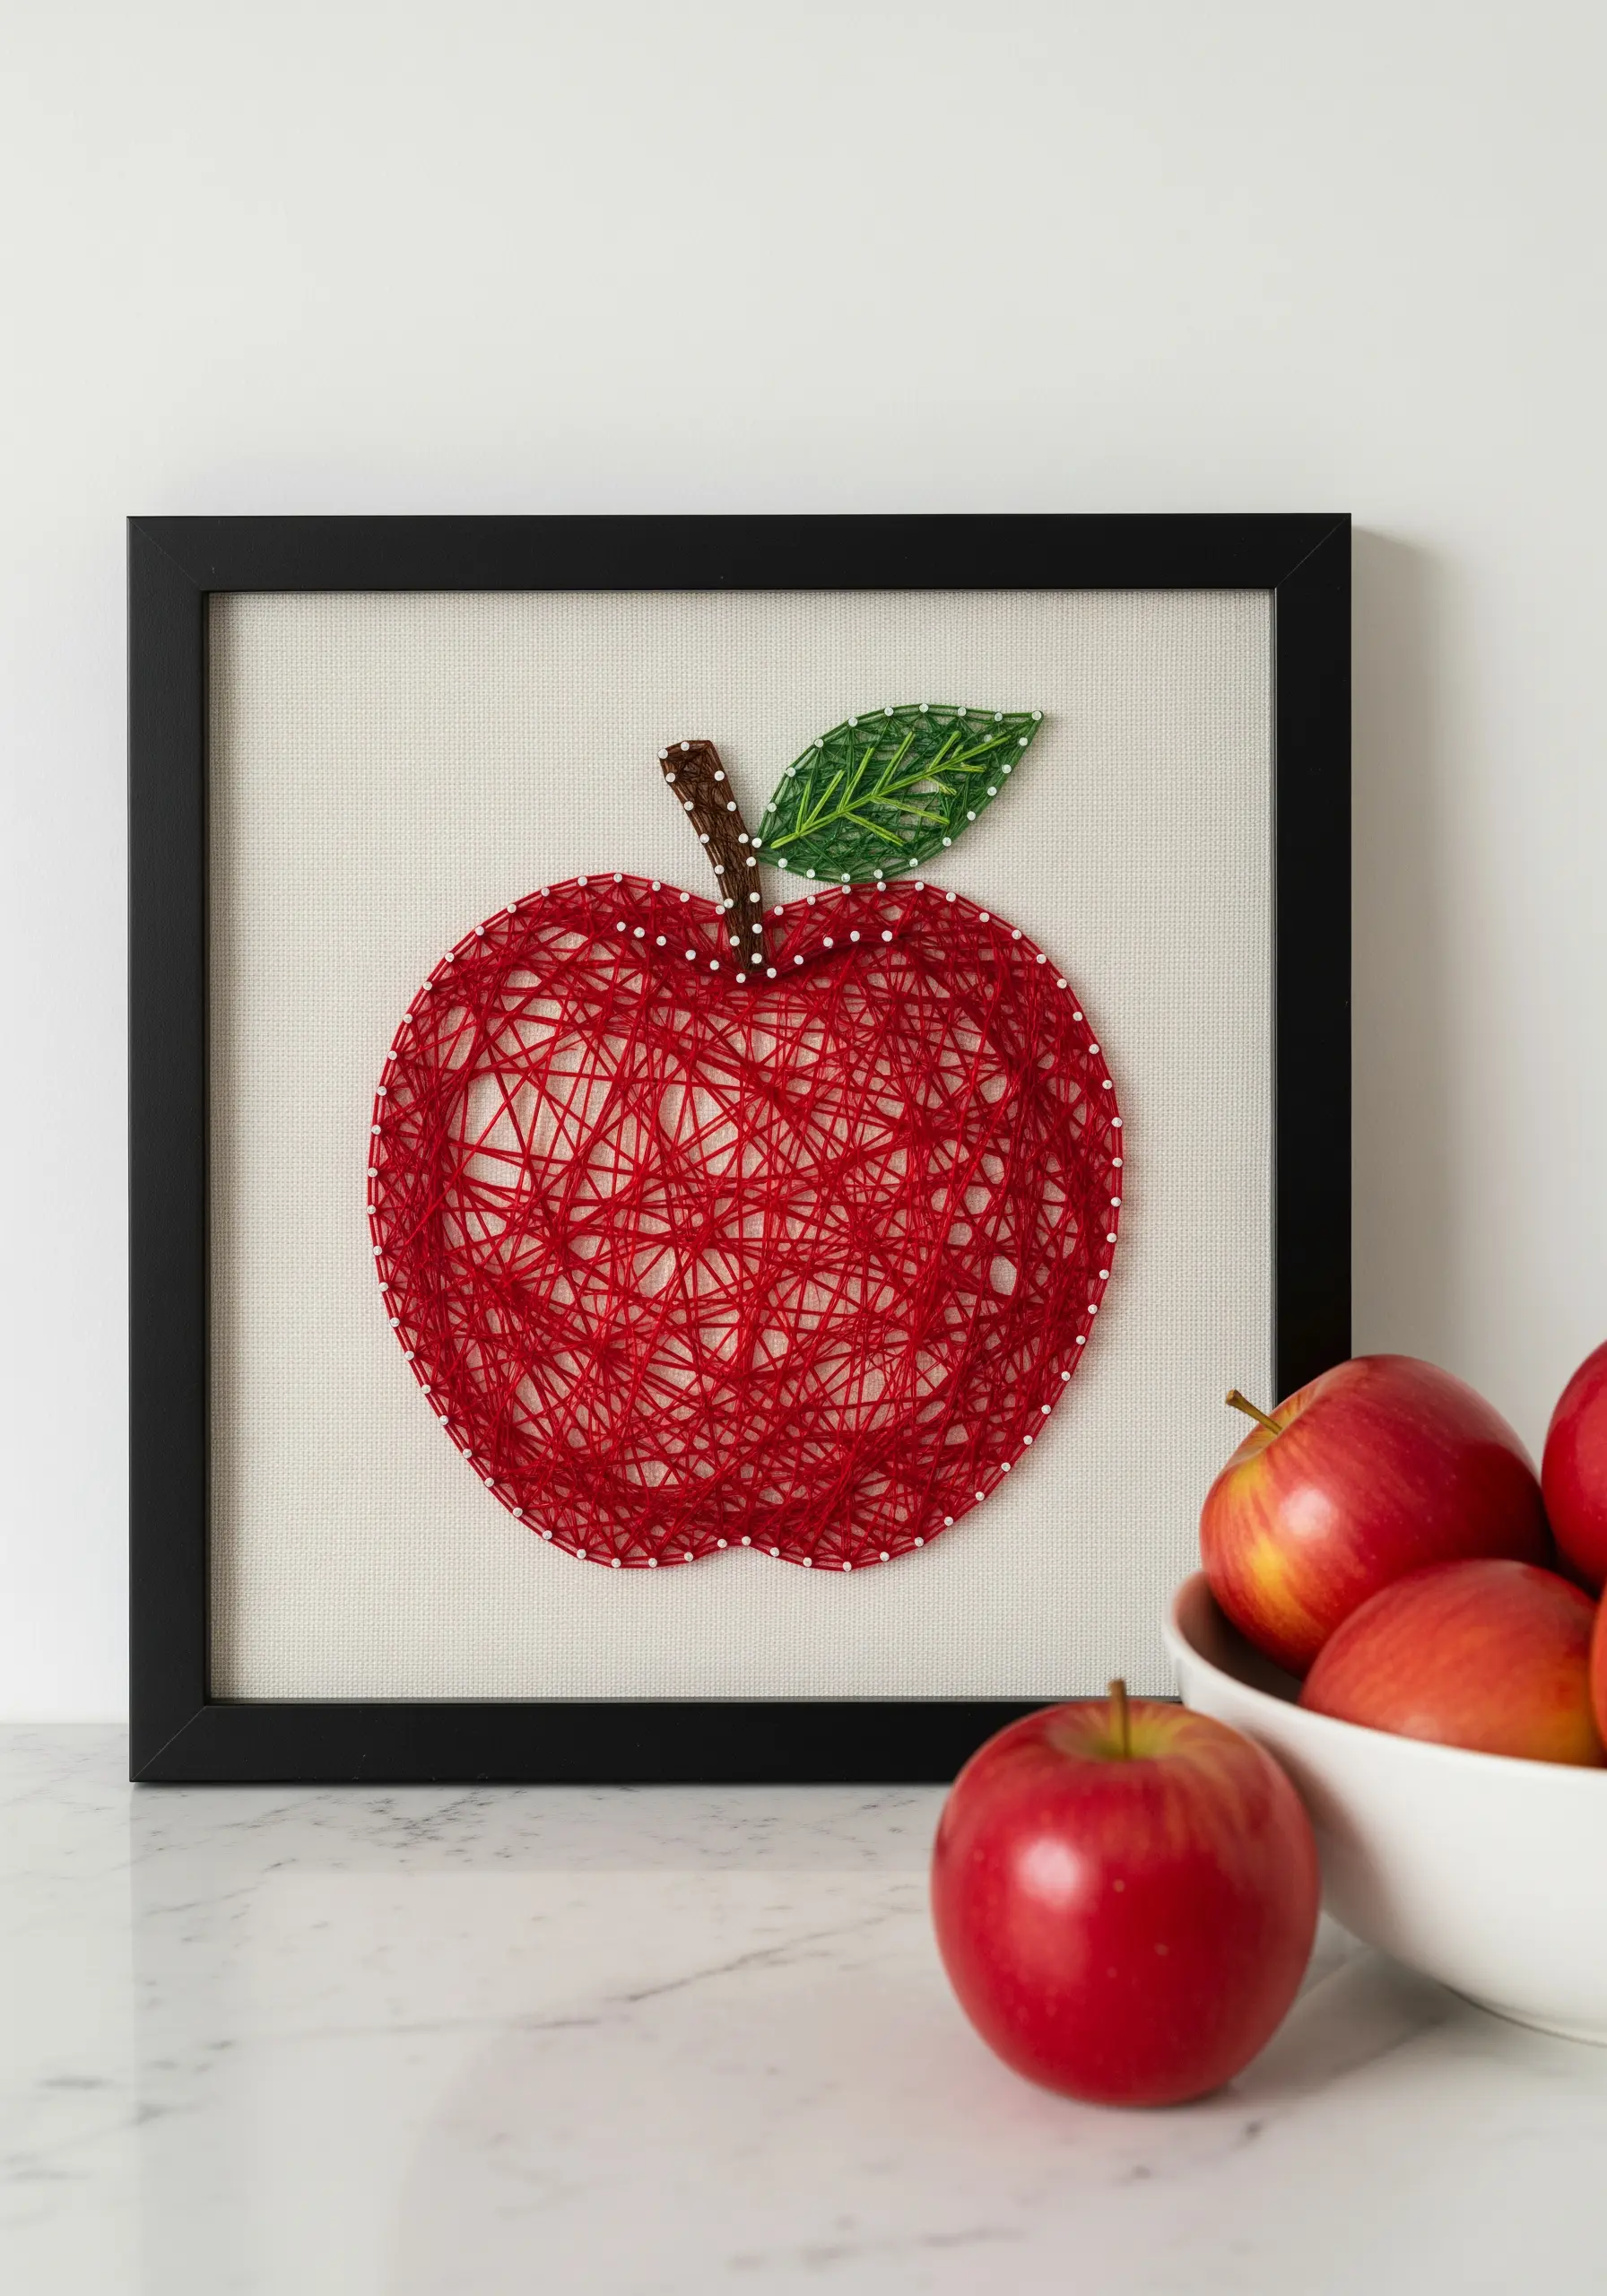
For a modern, graphic fill that is both quick and visually interesting, use a randomized cross-hatching technique.
First, create a strong outline with your anchor points. Then, begin filling the shape by stretching threads across it in multiple, overlapping directions.
Don’t worry about uniformity; the layered, chaotic lines are what build the rich color and texture.
Add more layers in areas where you want to create deeper shadows, giving the flat shape a subtle sense of volume.
25. Using Stitch Direction to Depict a Landscape
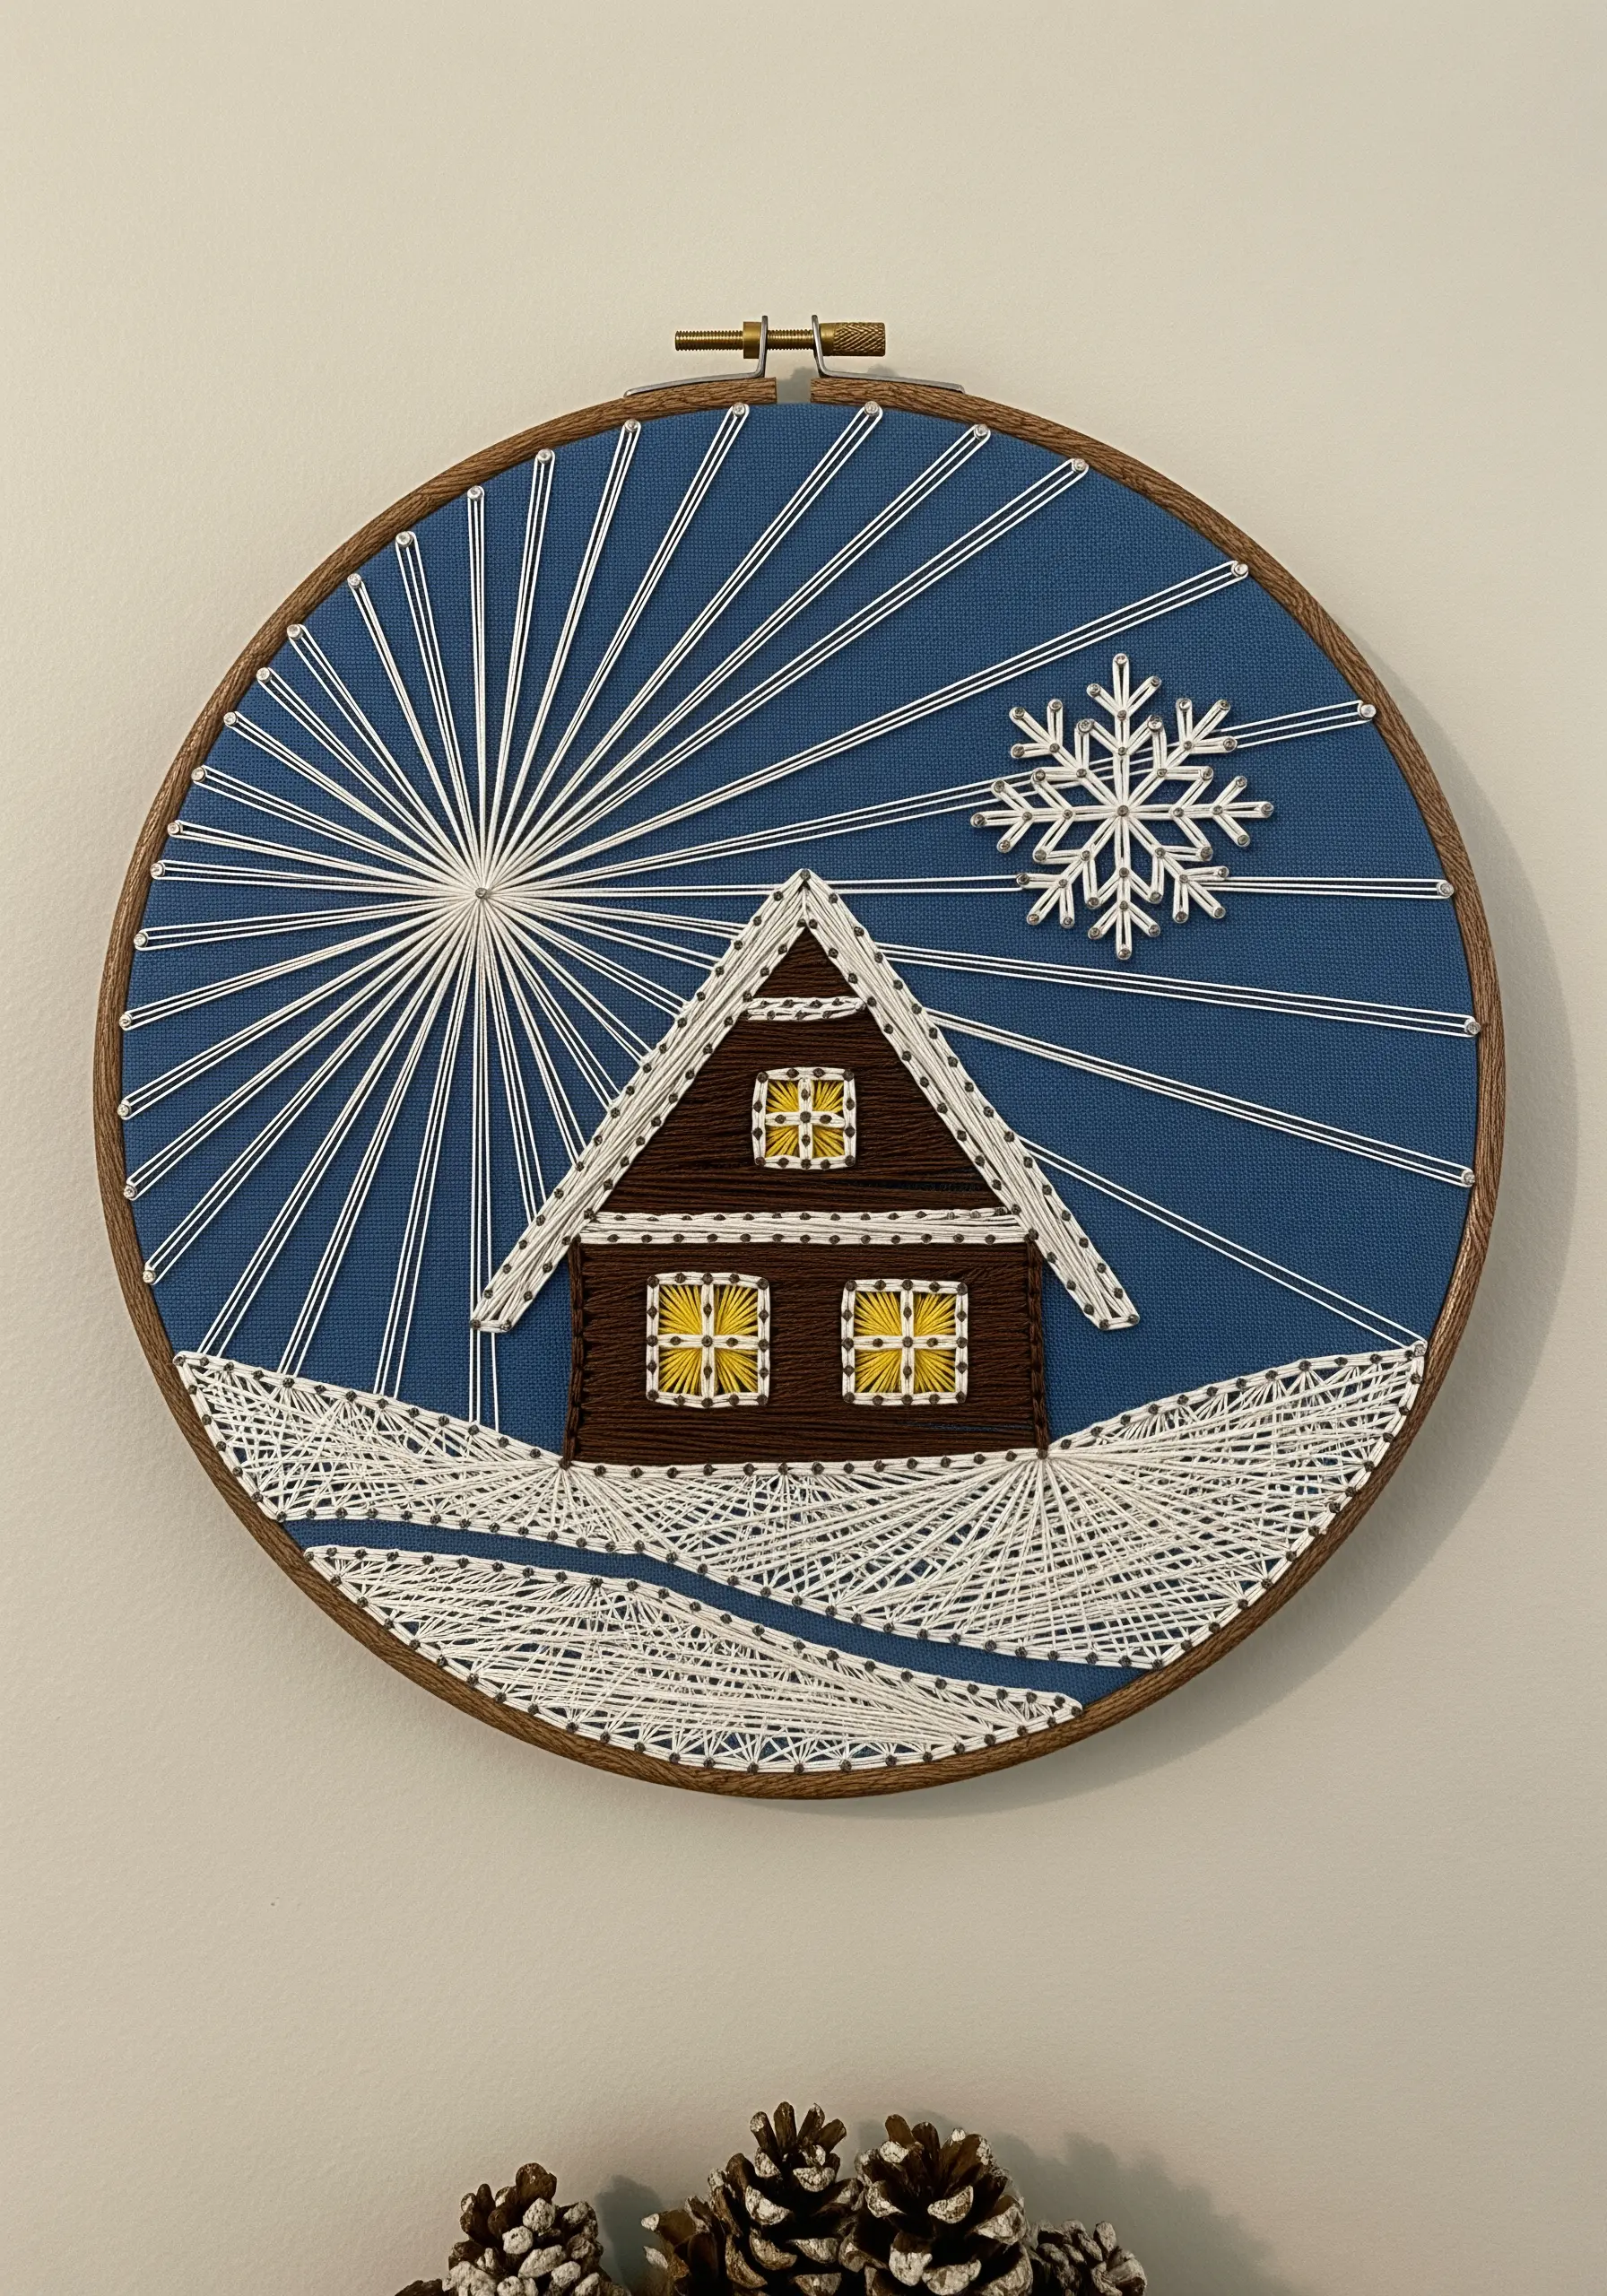
Convey the different elements of a landscape simply through the direction and quality of your lines.
Use long, dense horizontal lines for the snowy ground to suggest stillness and a flat expanse.
For the sky, radiate lines outward from a single, high point to create a dramatic sunburst or aurora effect.
This strategic use of line transforms a simple scene into a dynamic composition with a strong focal point.
26. Creating High-Relief Texture with Looped Stitches
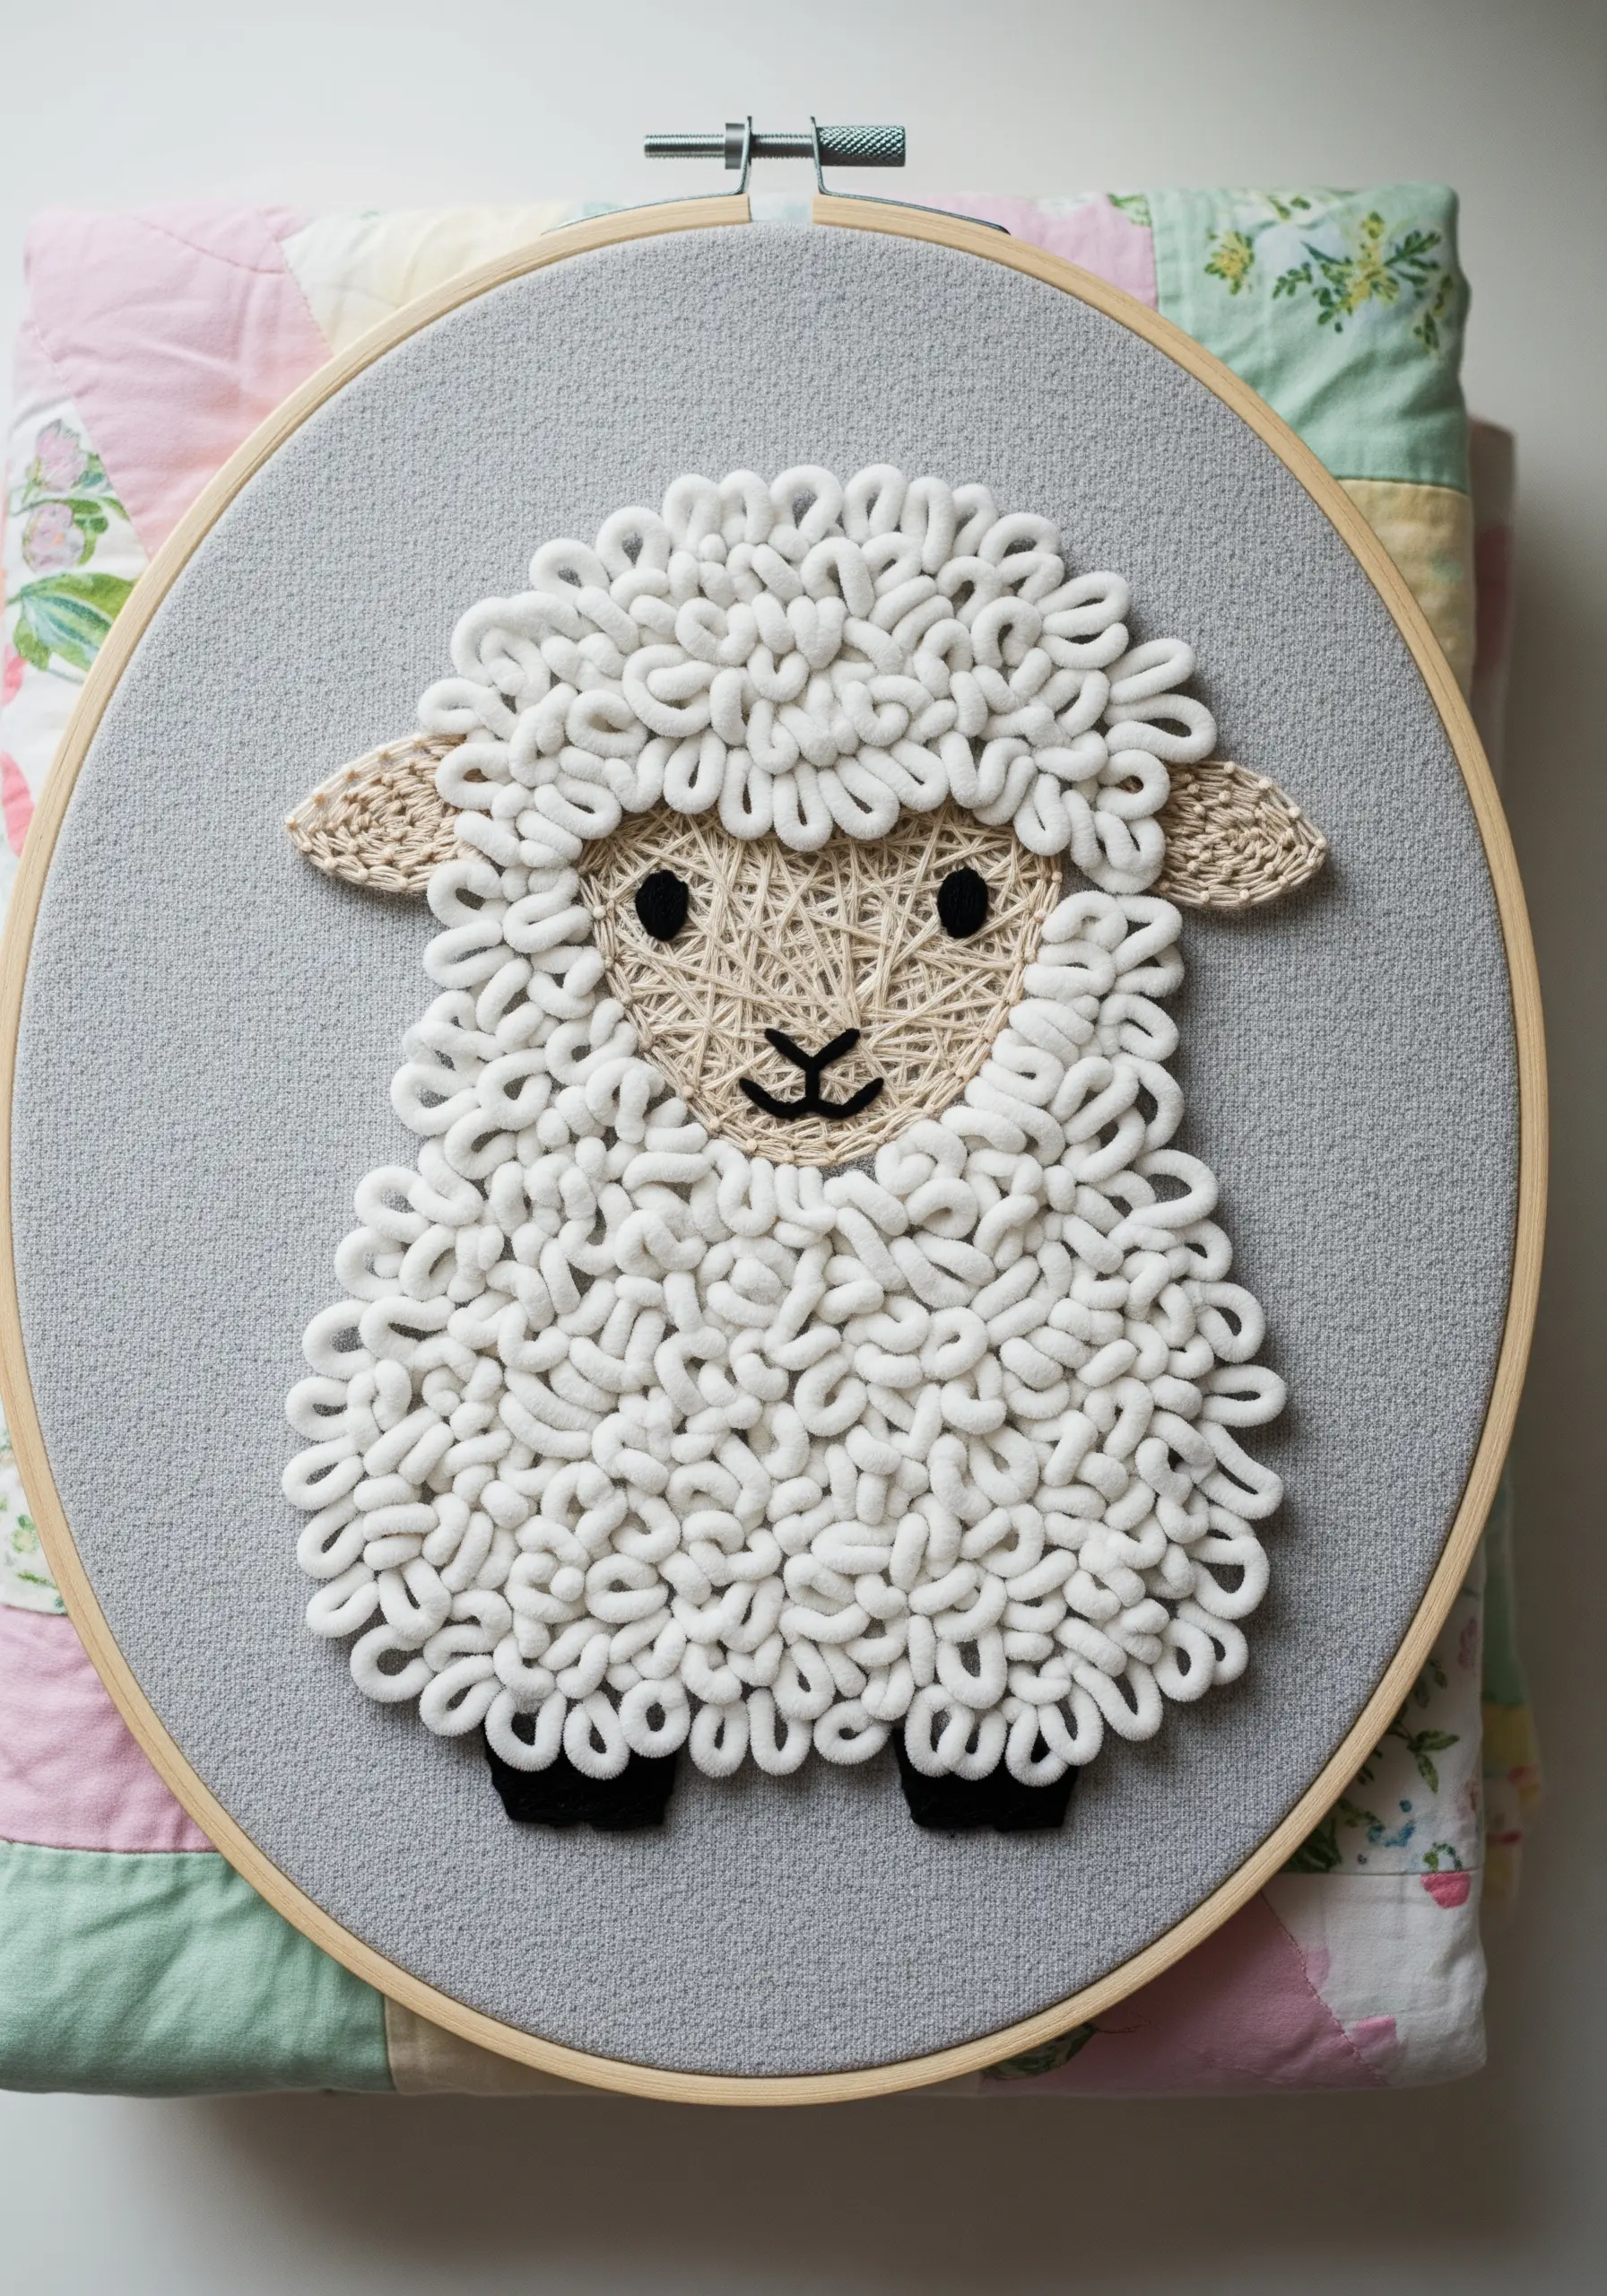
To achieve the sheep’s fluffy, touchable fleece, use a highly textural stitch like the Ghiordes knot or a simple detached looped stitch.
Instead of pulling each stitch taut against the fabric, intentionally leave a small loop on the surface before making the next anchoring stitch.
Pack these loops tightly together to create a dense, plush pile that stands up from the fabric.
This technique creates an incredibly charming and tactile effect perfect for nursery decor, echoing the softness of mother-child line art motifs.
27. Creating an Ombré Effect with Strategic Color Placement
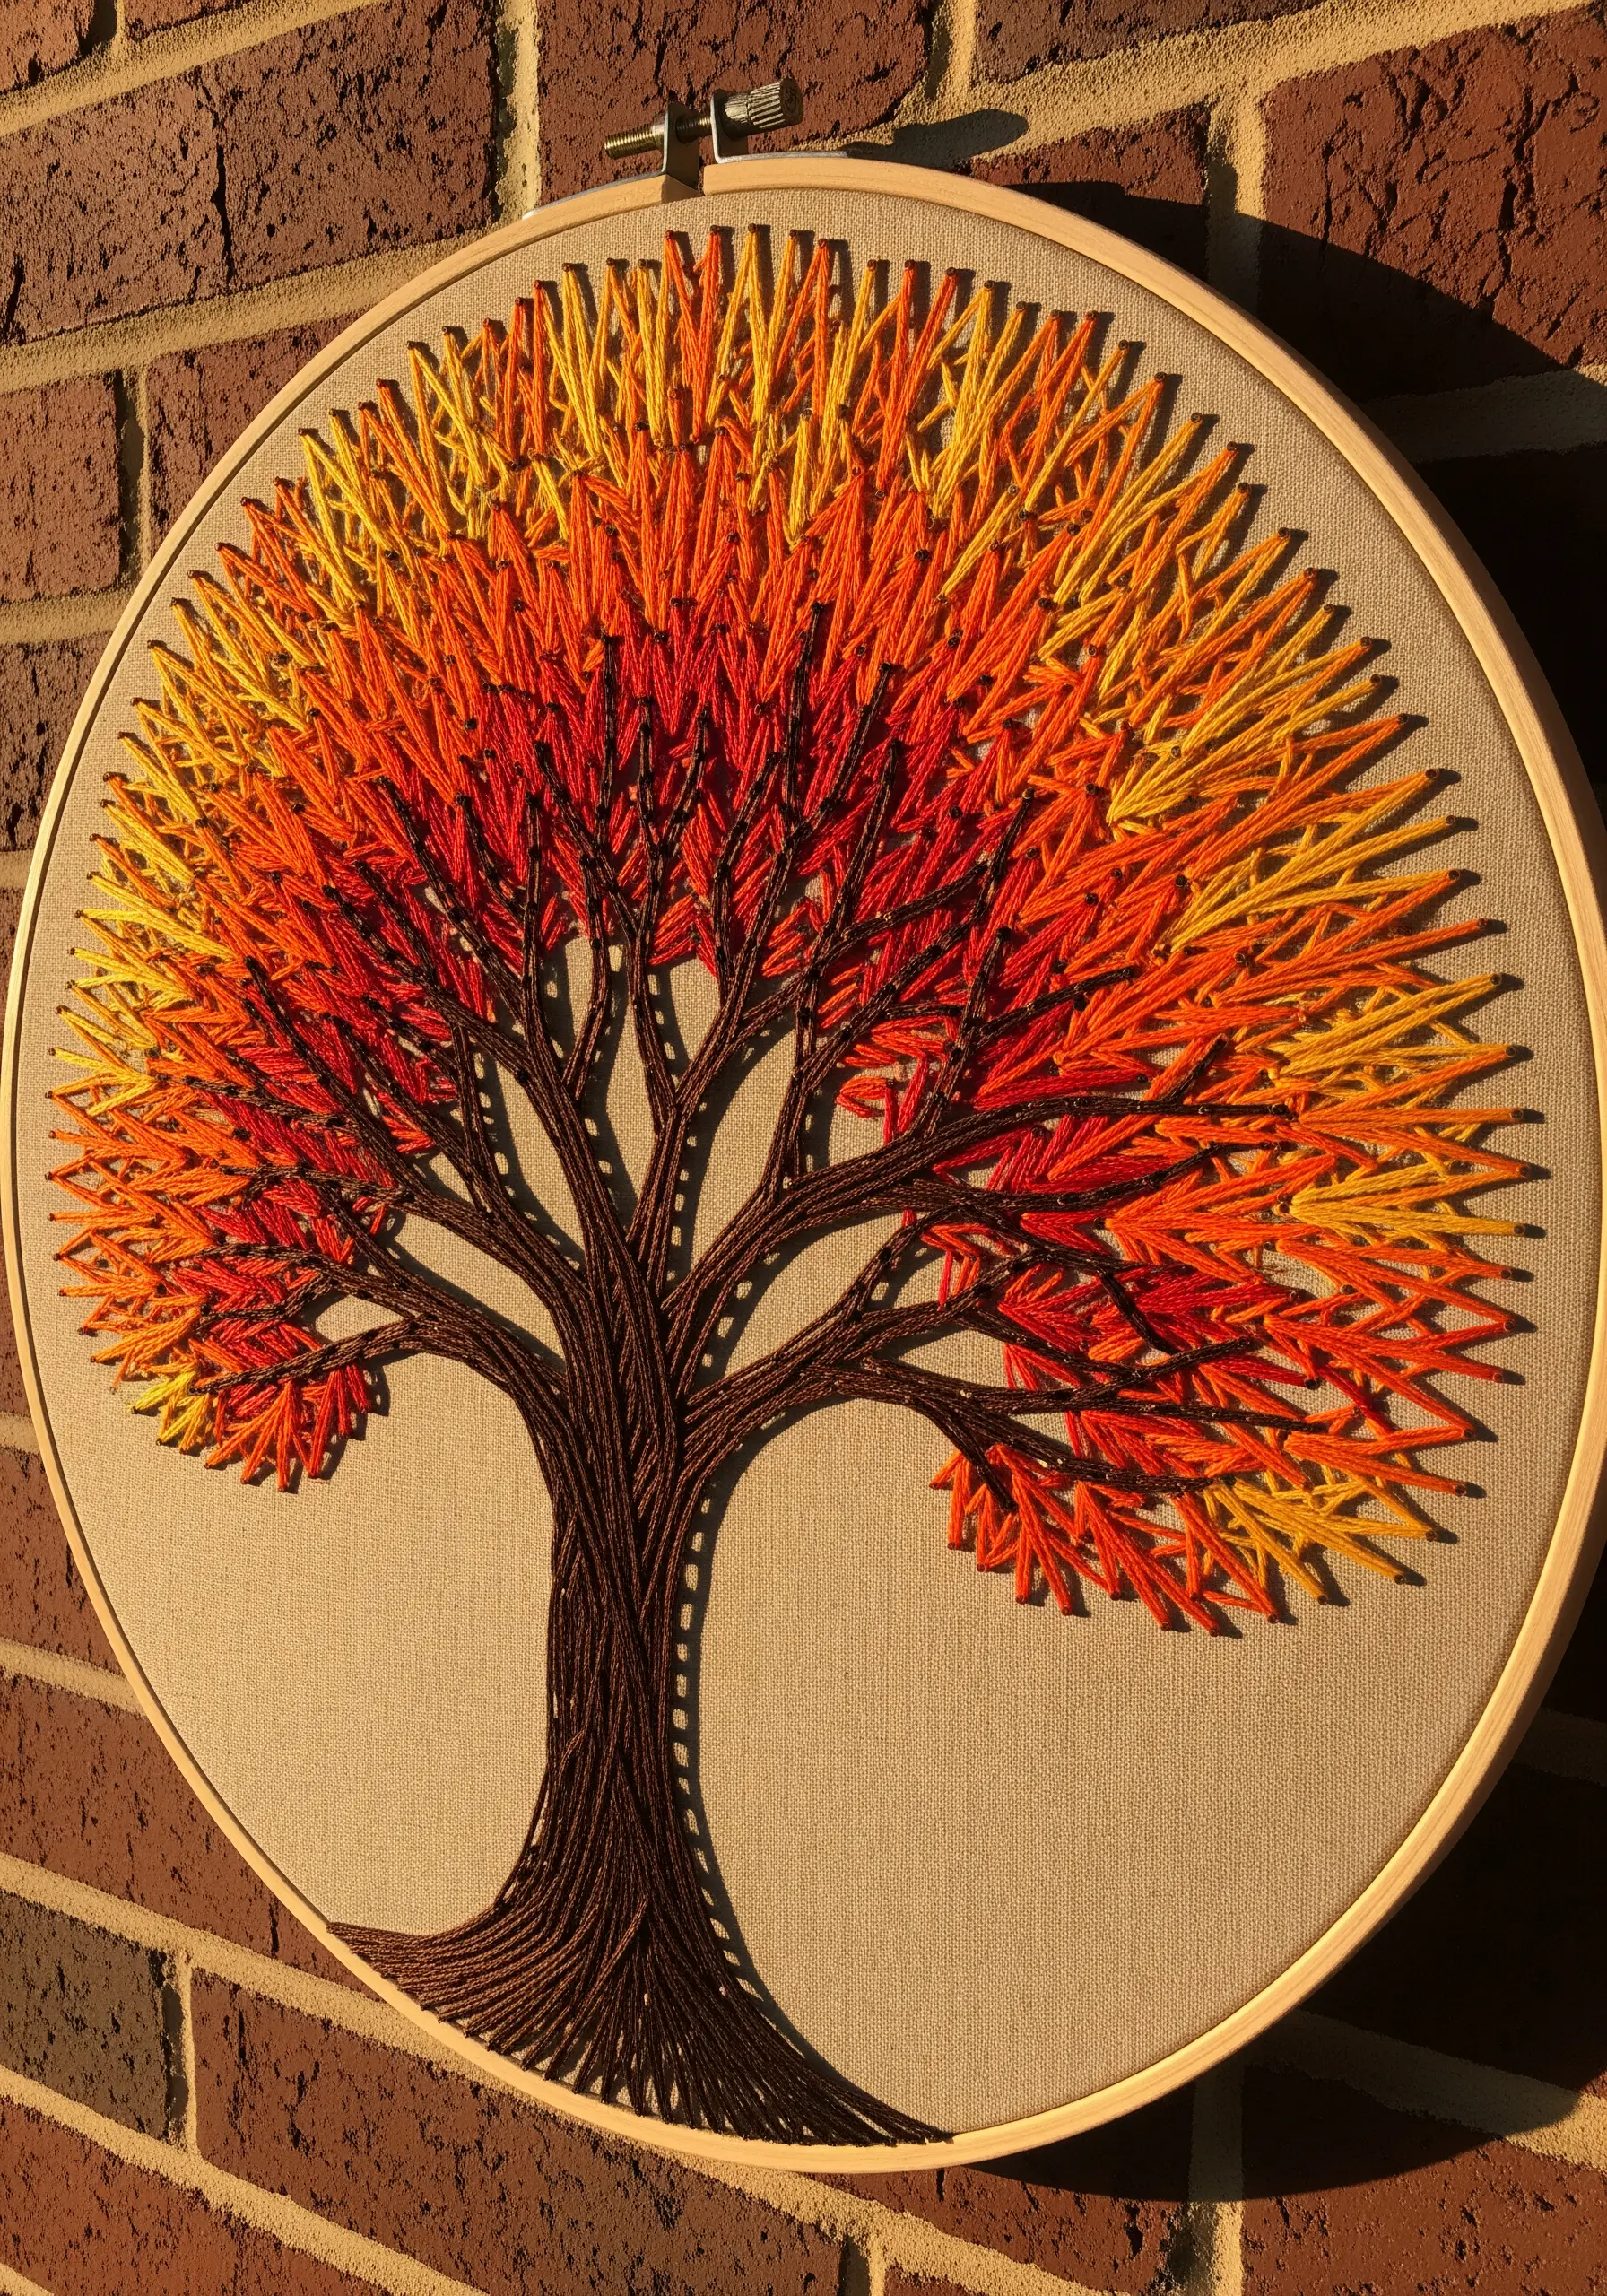
To capture the vibrant feel of autumn foliage, blend your thread colors with intention.
Mentally divide the tree canopy into concentric sections. Use your lightest color (yellow) only at the outermost tips of the branches.
Transition to orange for the middle sections, then deep red, and finally a touch of dark brown near the trunk and main branches.
This deliberate placement creates a beautiful gradient that gives the tree depth and a fiery, seasonal glow.
28. Achieving a Regal Finish with Velvet and Metallics
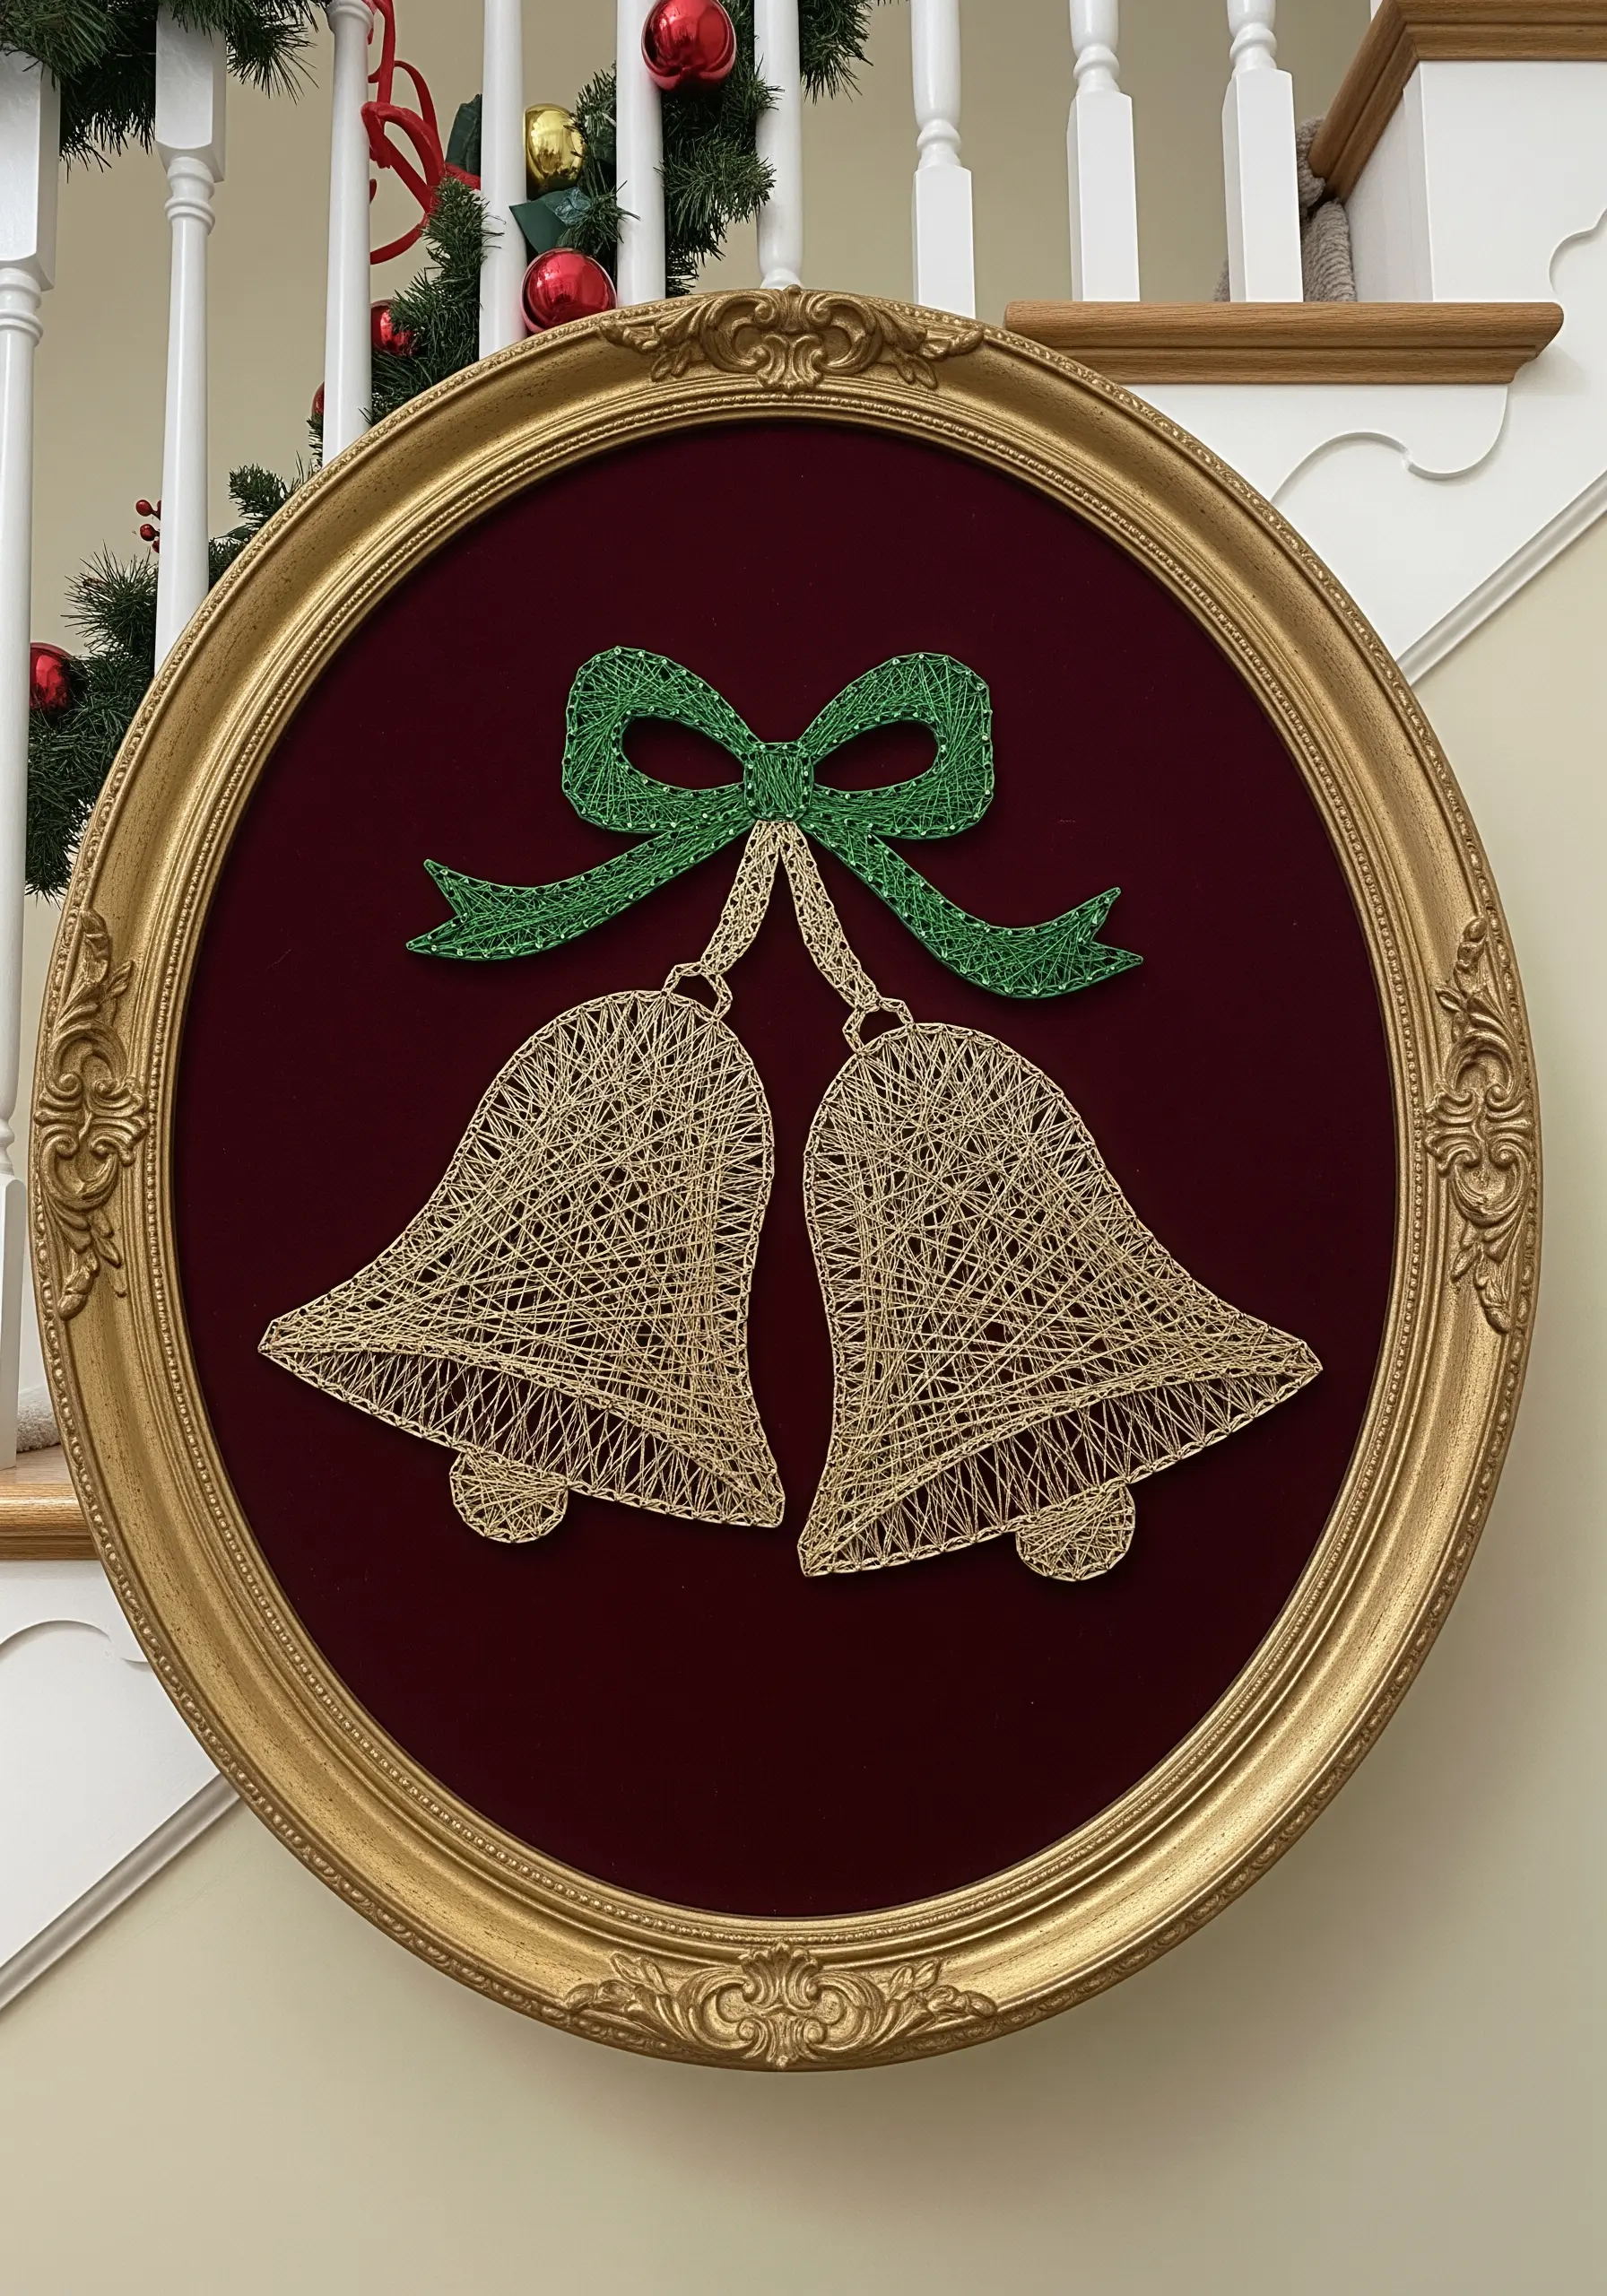
Pair the high shine of gold metallic thread with the deep, light-absorbing quality of a burgundy velvet background for an instantly classic look.
This combination immediately evokes a sense of holiday luxury and tradition, making your work feel like a precious heirloom.
The richness of the velvet makes the metallic thread pop with brilliance. Finish the piece in an ornate, gilded frame to complete the regal aesthetic.
29. Achieving a Woven Effect with Two-Tone Threading
To give your block letters a subtle, textured appearance, fill them with two closely related shades of the same color.
First, lay down a layer of satin stitches with the lighter shade, leaving small, even gaps between each stitch.
Then, go back and fill in those gaps with the darker shade.
This simple technique breaks up the solid color, adding visual interest and a soft, woven or plaid-like appearance without any complex stitching.
30. Unifying a Collection with a Shared Design Element

To create a cohesive set of hangings, use a consistent design element or color across all the individual pieces.
Here, the central vein of each leaf is stitched with the same contrasting white thread, creating a visual through-line that connects the separate hoops.
This small but deliberate choice makes them feel like a matched set, even with their different shapes and colors.
You can use this unifying principle on any collection, from florals to line art travel adventure symbols.


