

You’ve mastered the satin stitch and your French knots are perfect. But now you’re looking for what’s next—a way to give your beautiful stitches a new sense of place and purpose. This is where the thoughtful art of collage comes in.
Think of it not as just gluing paper, but as building a world for your embroidery to live in. By combining thread with paper, photographs, and fabric, you create context. A simple line of backstitch suddenly becomes a journey on a map. A cluster of knots transforms into seafoam crashing on a paper shore.
These ideas are not about learning dozens of complex new stitches. They are about seeing the stitches you already know with fresh eyes. You’ll learn how to use thread to add texture, create focus, and tell a story that a needle and floss alone cannot. This is your next step: moving from stitching motifs to creating entire worlds in thread and paper.
1. Build Dimension with Layered Paper & Thread
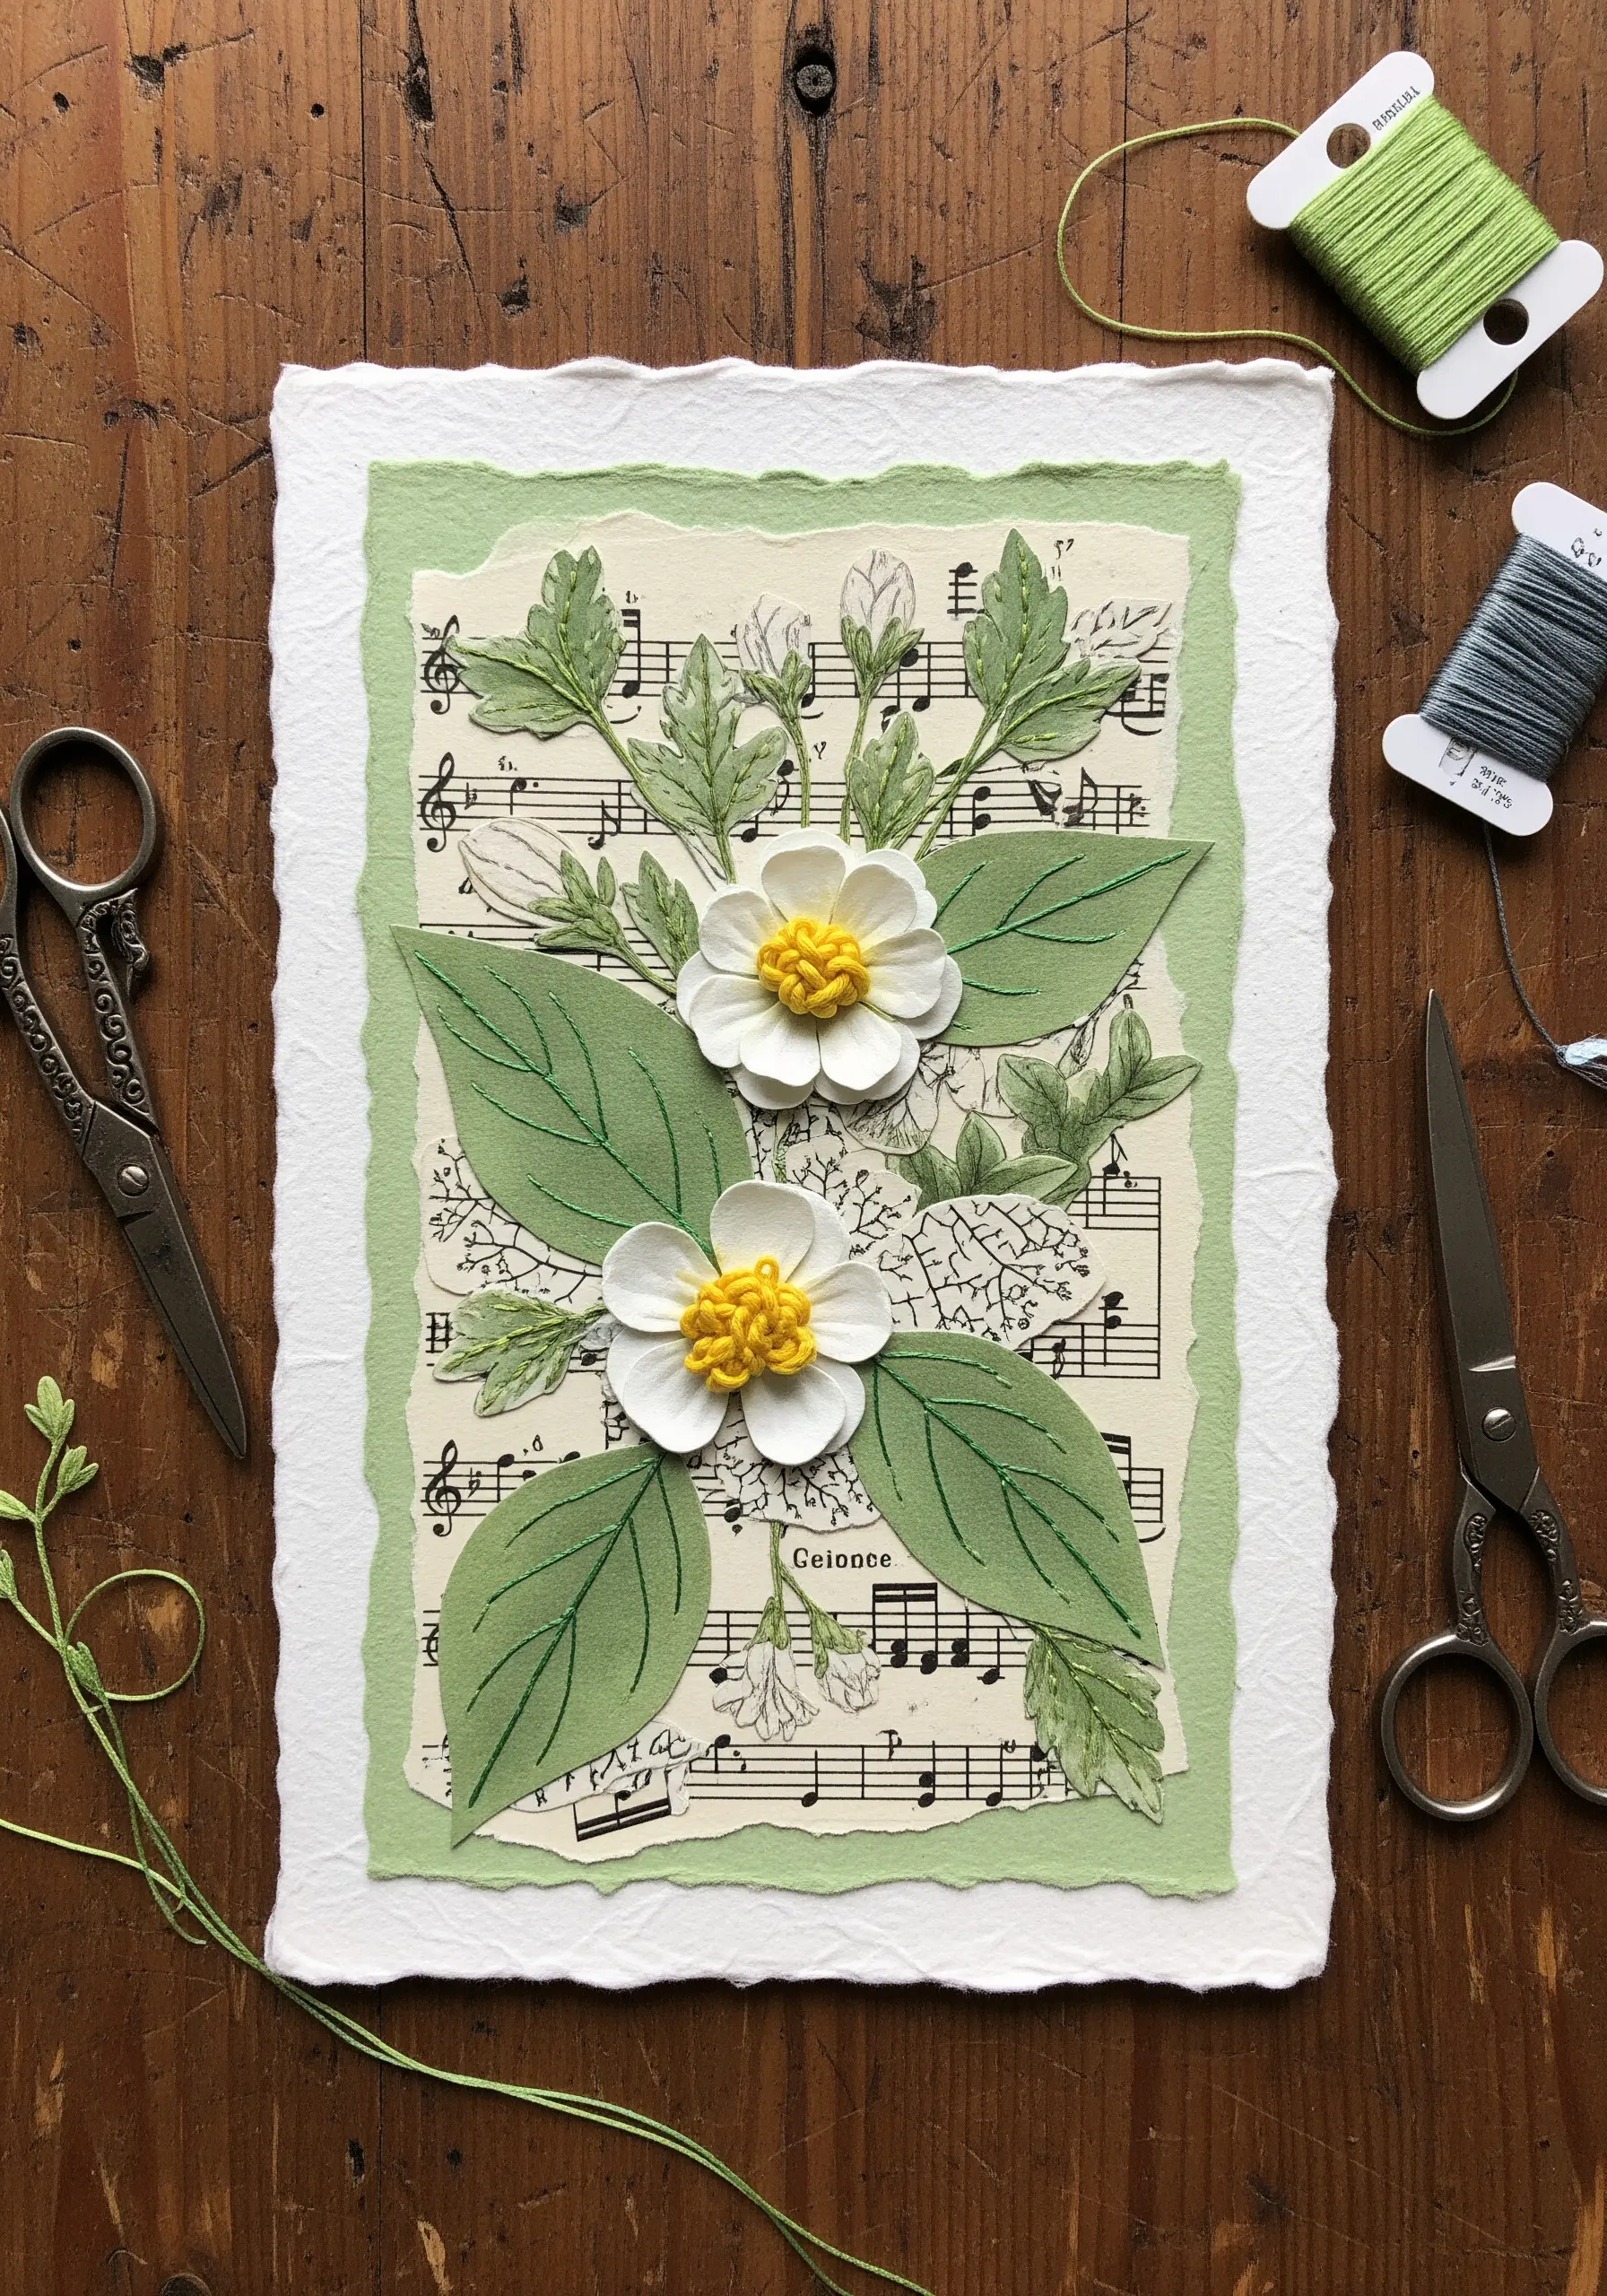
Create a sense of depth by stitching directly onto layered paper elements before assembling your collage.
For the flower centers, use tightly packed French knots with a vibrant, contrasting thread like a six-strand floss to create a raised, pollen-like texture.
To add subtle detail to the paper leaves, use a single strand of matching green thread in a simple backstitch to mimic veins, which adds structure without overwhelming the delicate paper.
Choose a sturdy, handmade paper as your base; its fibrous texture grips the thread better than smooth cardstock and is less likely to tear.
2. Illuminate Dark Surfaces with Metallic Thread
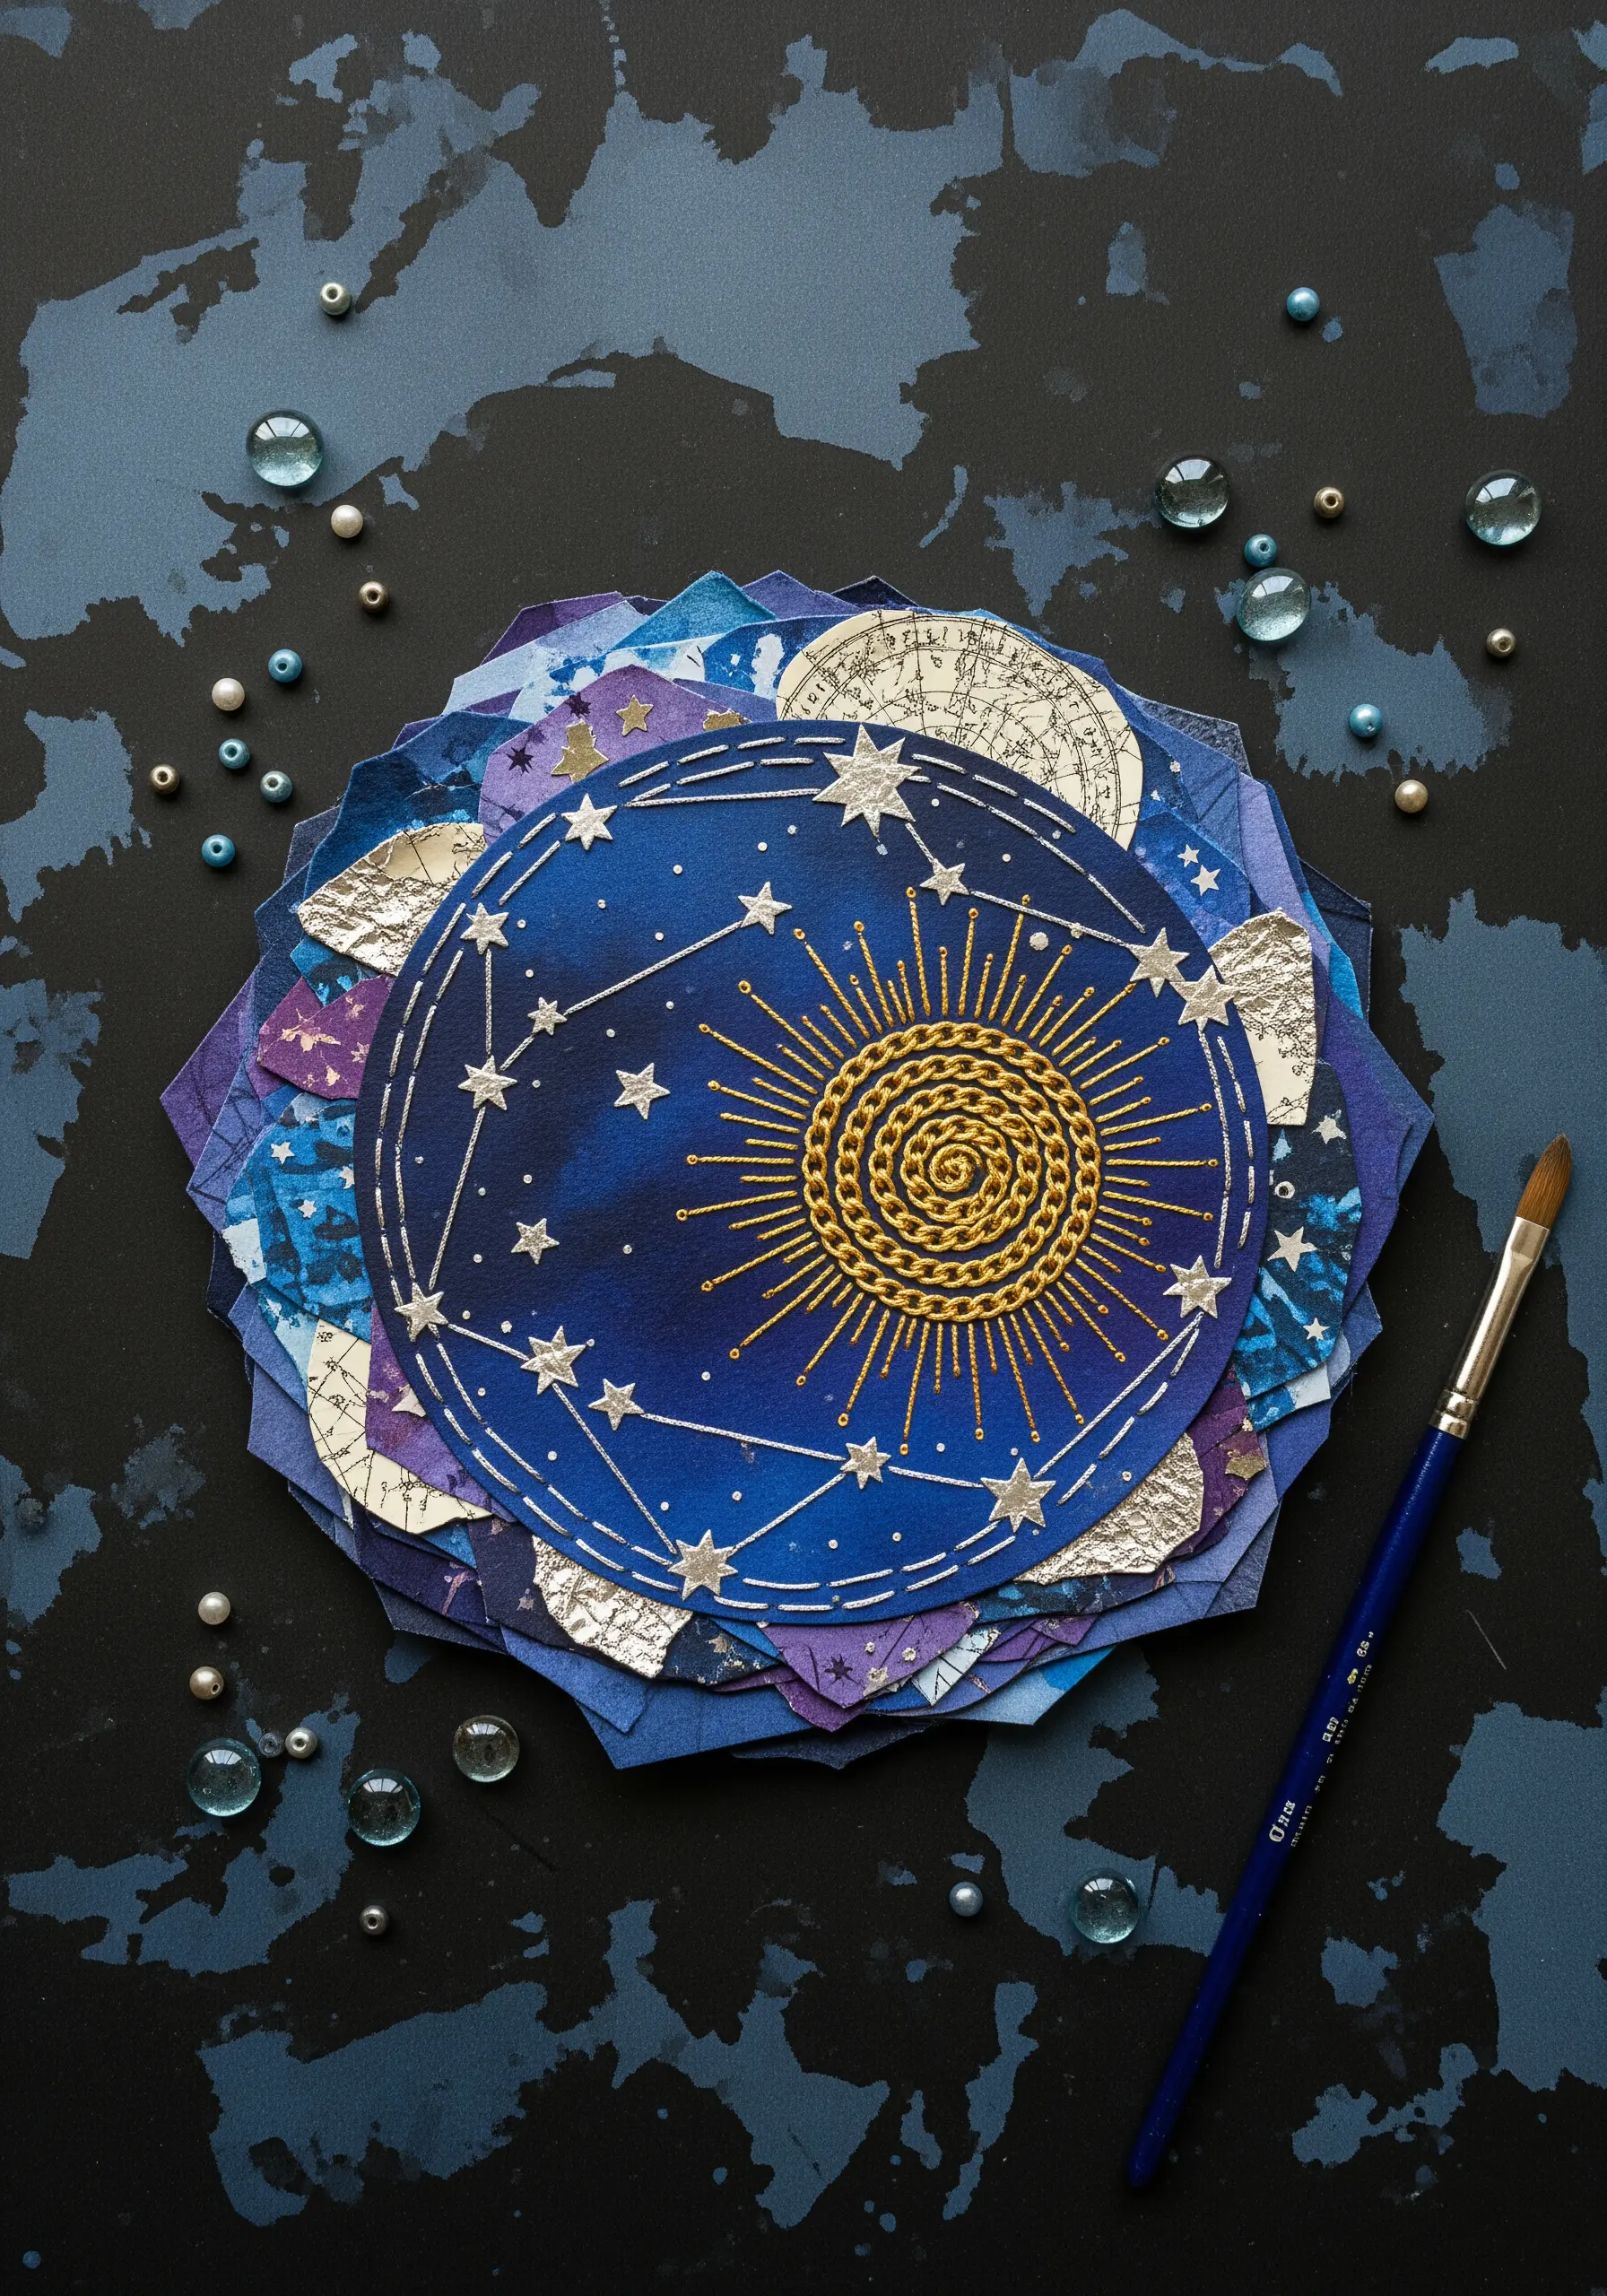
When stitching on dark paper, use a gold or silver metallic thread to create a focal point that catches the light.
To prevent fraying, work with shorter lengths of metallic thread—no more than 12 inches—and consider using a thread conditioner like beeswax.
For the sun’s coiled texture, couch a thicker metallic cord onto the surface using a thinner, matching thread. This technique keeps the cord’s high-shine finish intact, as it doesn’t pass through the paper.
Gently pre-pierce your holes with a larger needle to ensure the paper doesn’t tear as you pull the thread through, resulting in a cleaner finish.
3. Imply Structure with Minimalist Line Art
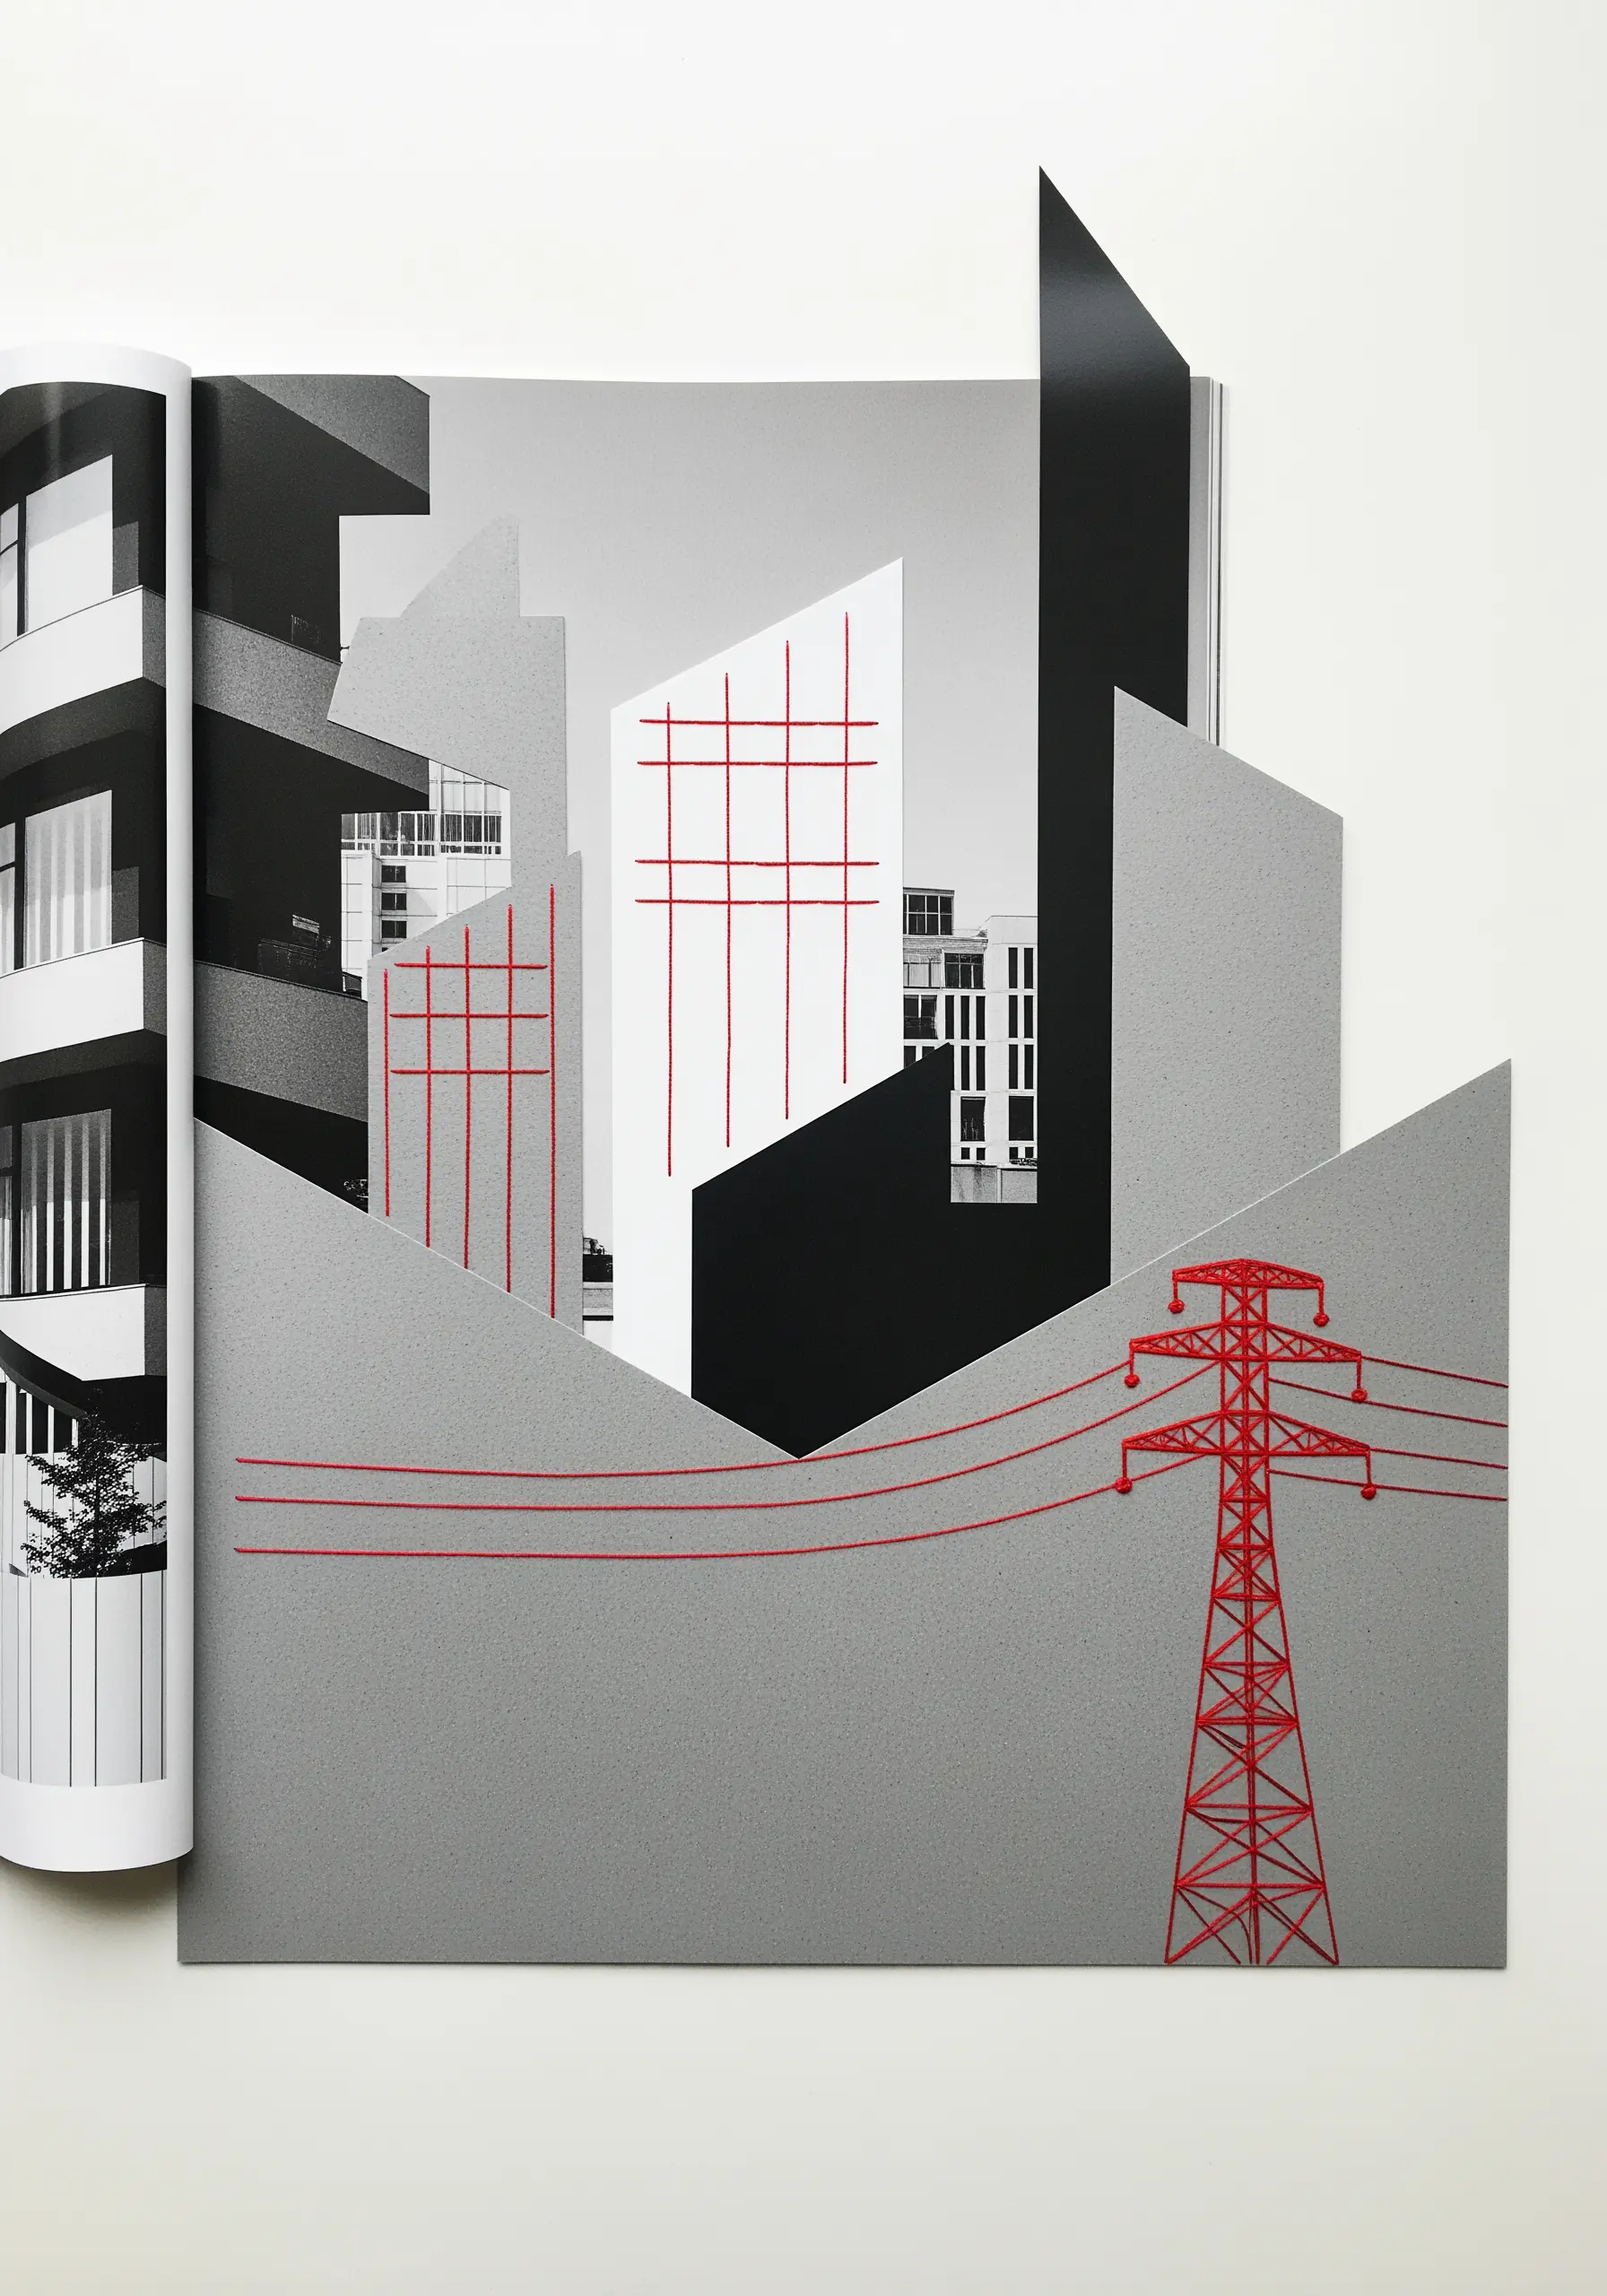
Use thread to introduce a single, bold color into a monochrome collage, transforming simple lines into a powerful graphic element.
A simple running stitch or backstitch is all you need to create these clean, architectural lines. Focus on maintaining even stitch length and consistent tension to prevent the paper from buckling.
This approach proves that embroidery doesn’t need to be dense or complex to be impactful.
The sharp contrast between the red thread and the grayscale imagery creates a visual pathway that guides the viewer’s eye through the entire composition.
4. Sculpt with Yarn for Exaggerated Texture
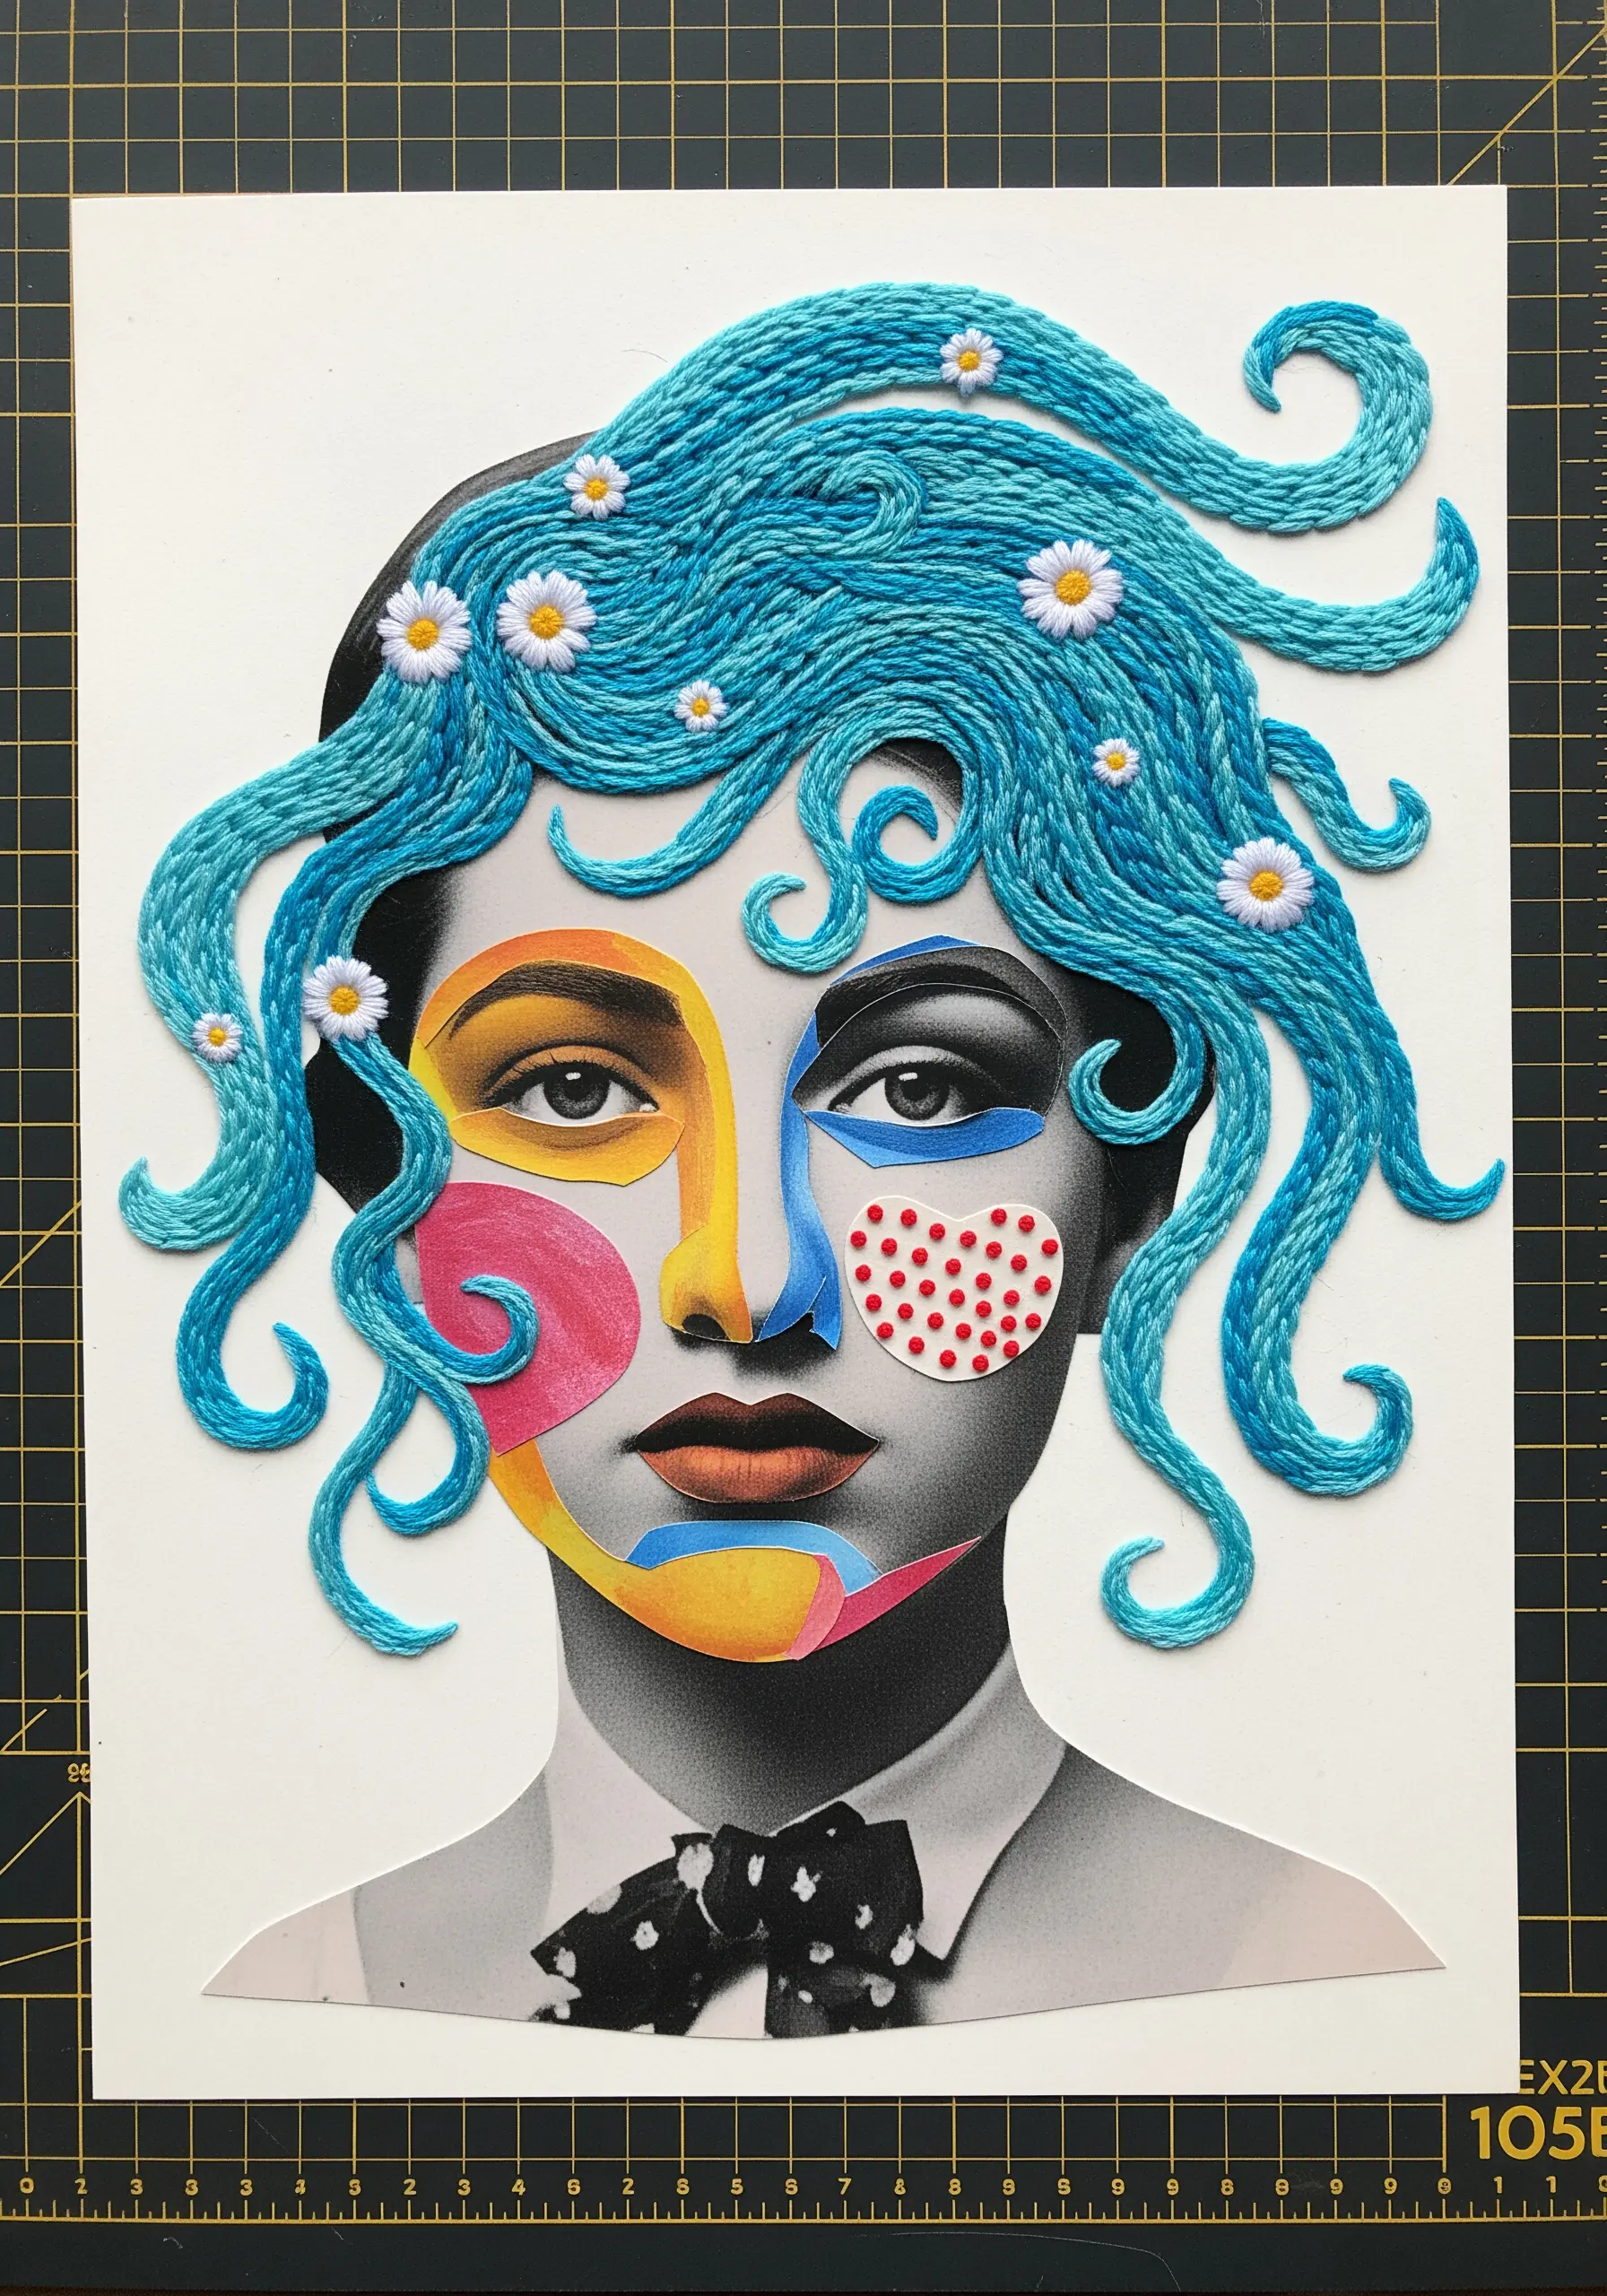
For bold, sculptural effects like flowing hair, use thick yarn instead of standard embroidery floss.
Instead of stitching through the paper, apply the yarn directly to the surface with a strong craft glue, then secure it further with a few discreet couching stitches in a matching fine thread.
This method preserves the yarn’s loft and volume, creating a dramatic 3D effect that contrasts beautifully with the flat paper collage.
Scatter a few tiny floral embroidery designs, like detached chain stitch daisies, to add a delicate, playful counterpoint to the heavy texture.
5. Mimic Natural Forms with Dimensional Stitches
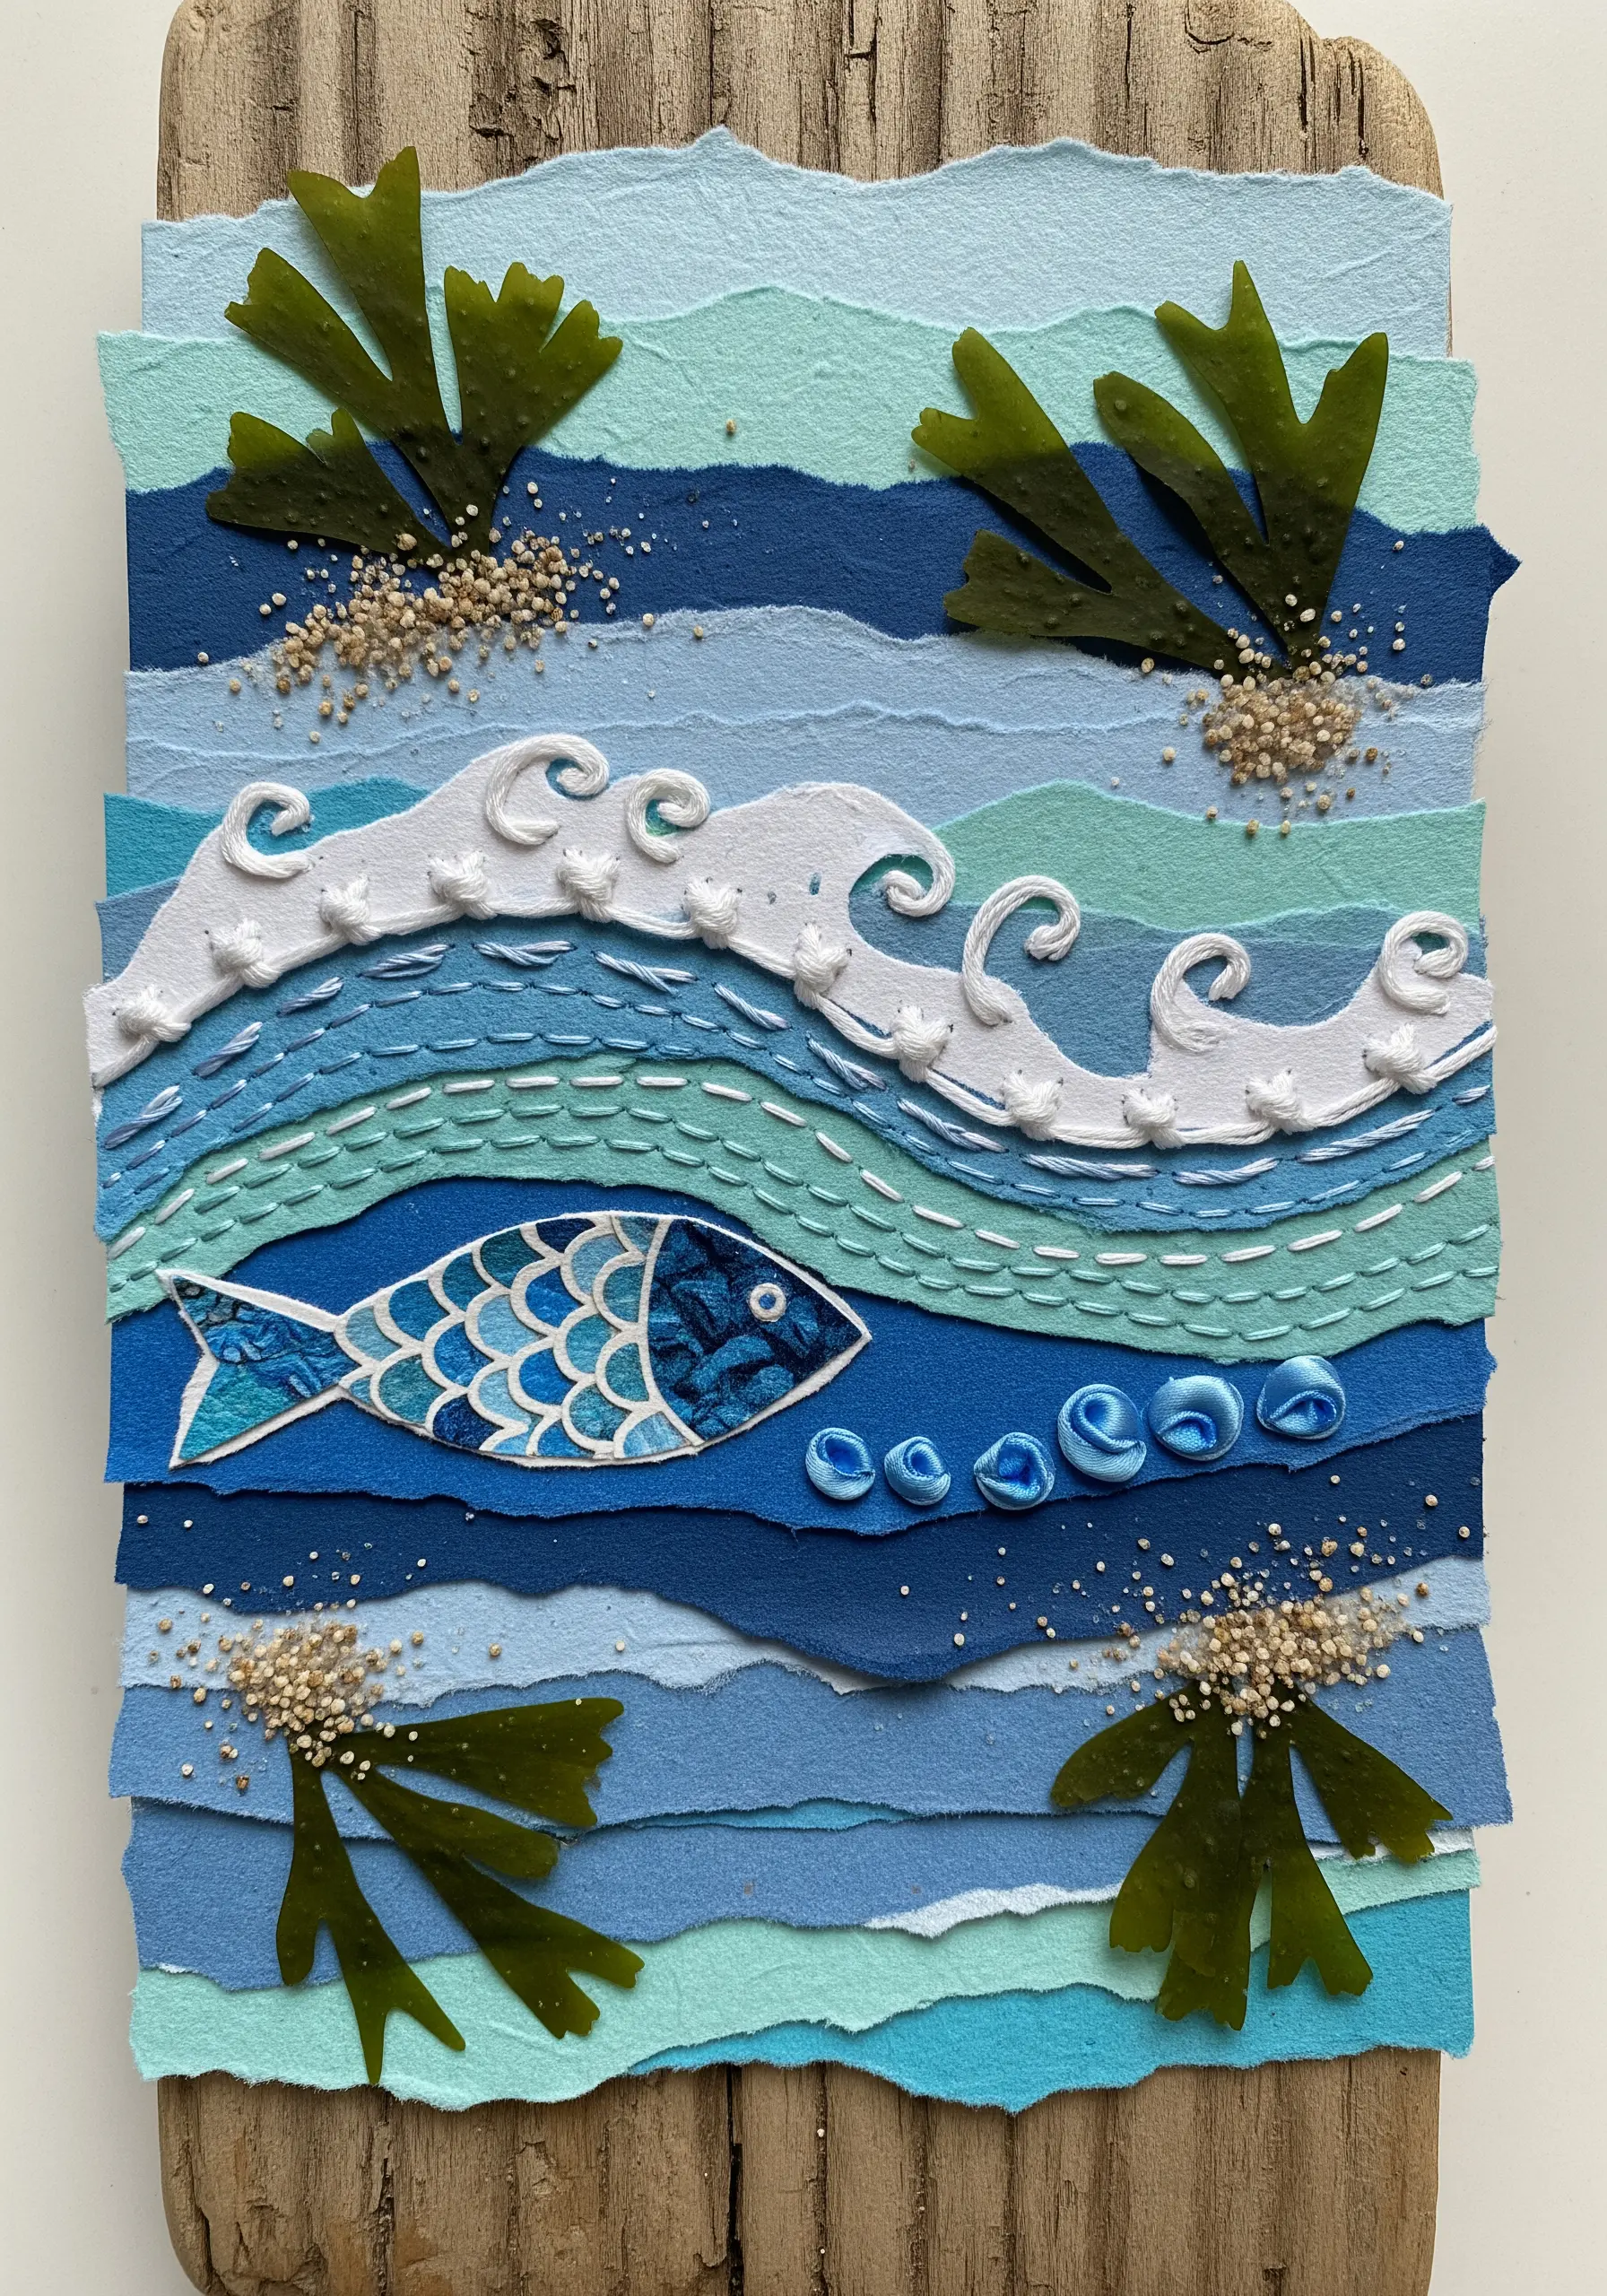
Translate the movement of water into thread by using raised stitches like French knots or bullion knots for seafoam.
Cluster your knots tightly along the crest of the paper waves to create a frothy, textured illusion that stands out against the flat layers of blue.
For the fish scales, outline each shape with a split stitch before filling it with two or three simple straight stitches, giving it a clean, graphic quality.
Incorporating natural elements like sand, secured with glue and a few anchor stitches, seamlessly blends your embroidery into the mixed-media landscape.
6. Integrate Stitches as Abstract Mark-Making
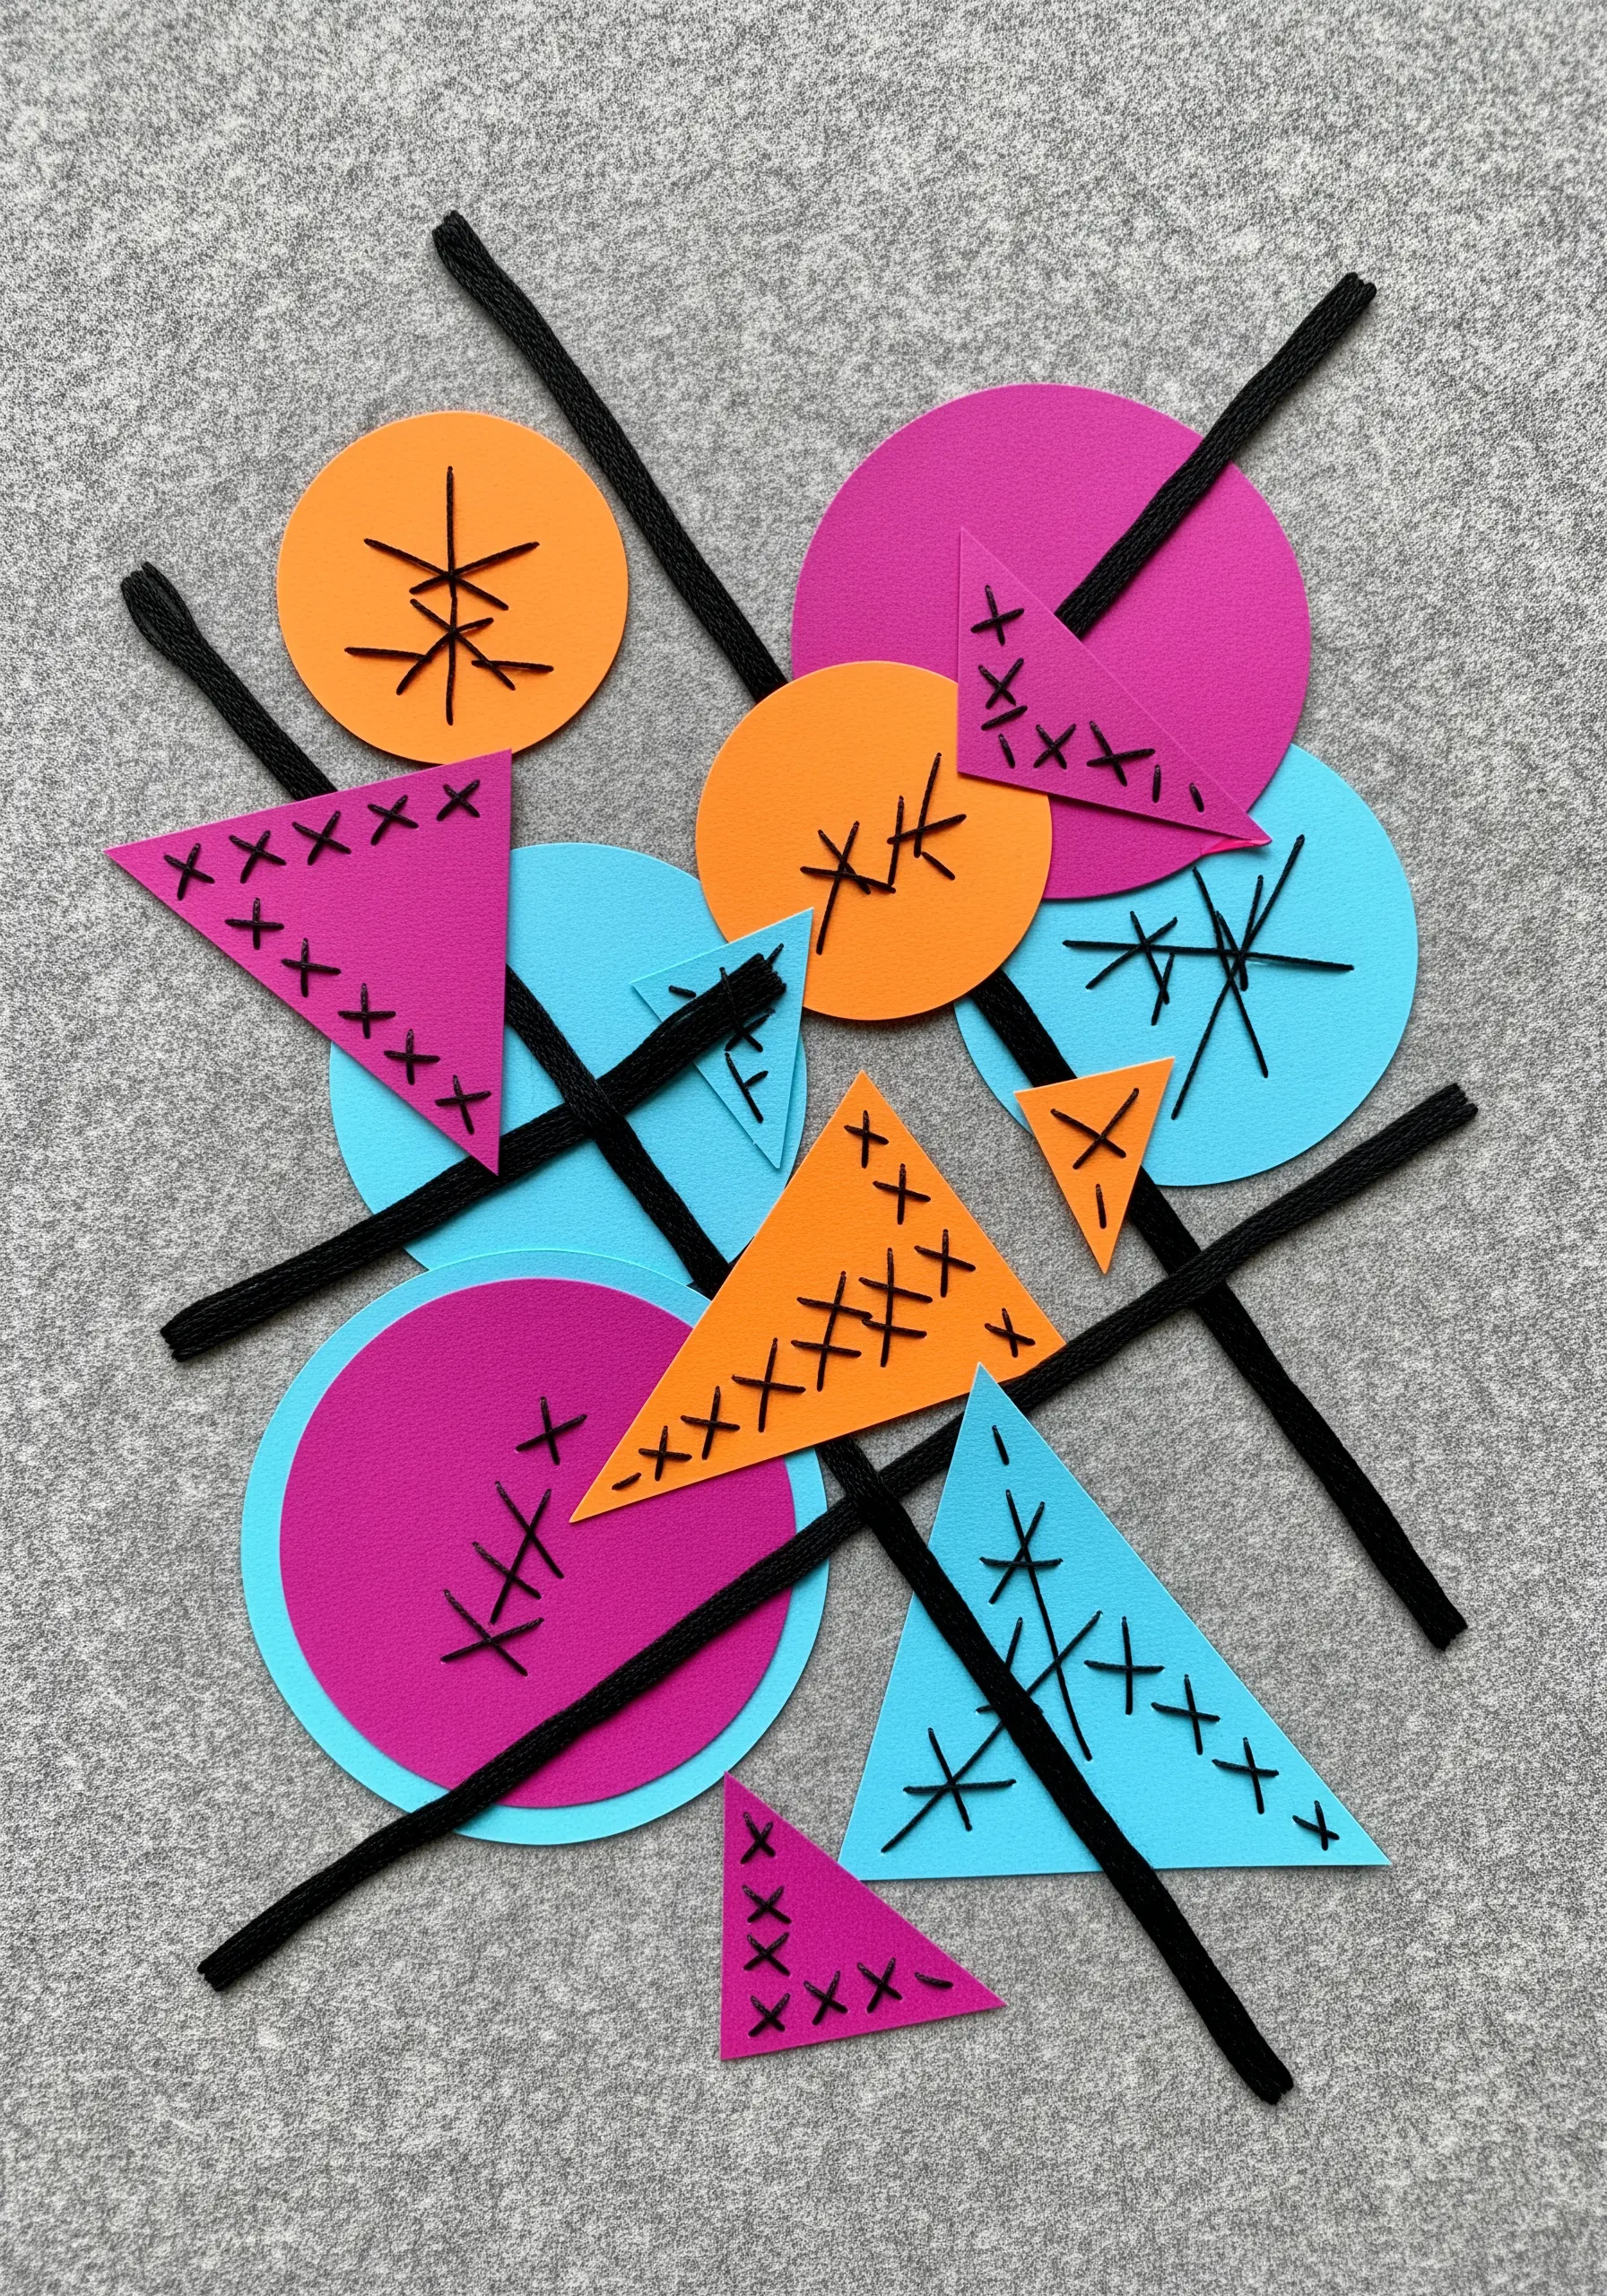
Treat your stitches not as outlines or fillings, but as pure graphic marks that add energy to geometric shapes.
Use a contrasting thread color, like black on bright paper, to make each stitch read as a deliberate, hand-drawn line.
Experiment with simple, primitive stitches—cross stitches, seed stitches, and straight lines—and vary their density and arrangement to give each shape a unique personality.
This technique turns your needle into a drawing tool, adding a layer of raw, handmade texture to an otherwise clean composition. It’s one of the most effective abstract thread collage ideas.
7. Embellish Illustrations with Subtle Texture
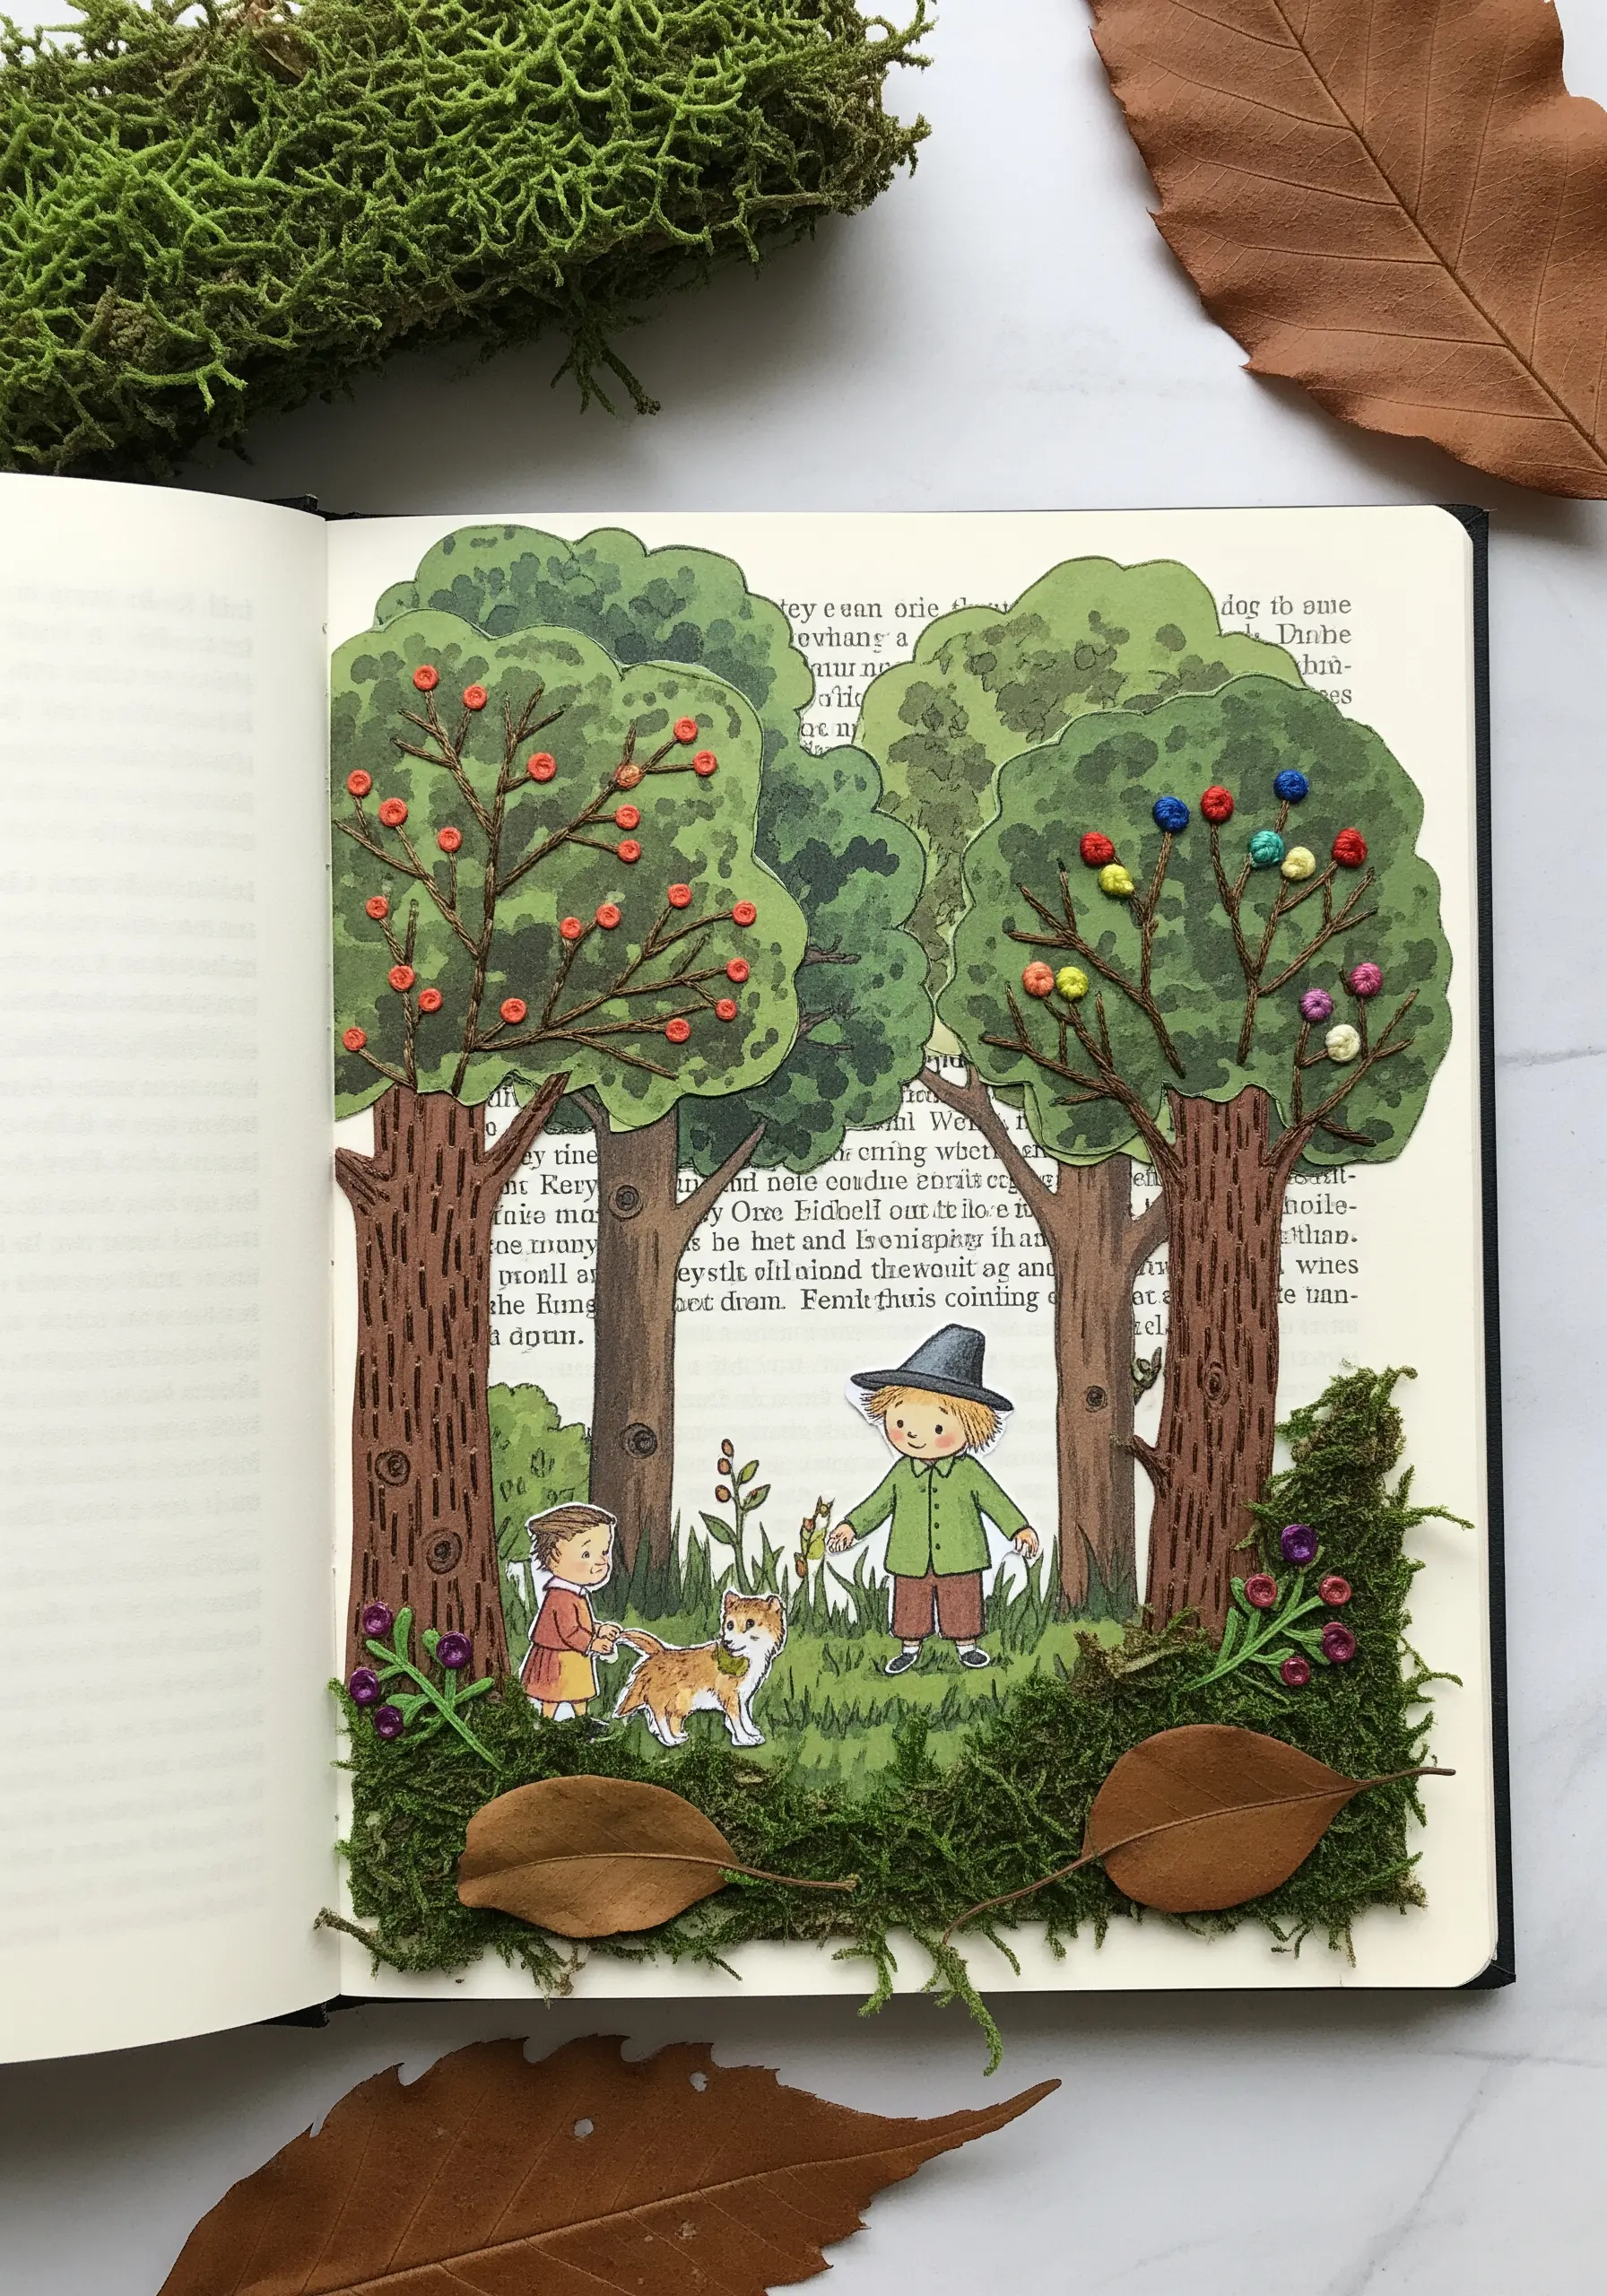
Enhance printed or drawn illustrations by adding small, concentrated areas of embroidery.
A cluster of French knots in various colors can instantly transform a simple tree into a magical, fruit-bearing wonder, adding both texture and a pop of vibrant color.
For branches, use a two-strand stem stitch to add a subtle, twisting dimension that follows the original artwork’s lines.
This focused approach ensures the embroidery enhances the illustration rather than overpowering it, creating a delightful fusion of 2D and 3D elements.
8. Chart a Narrative with a Simple Running Stitch
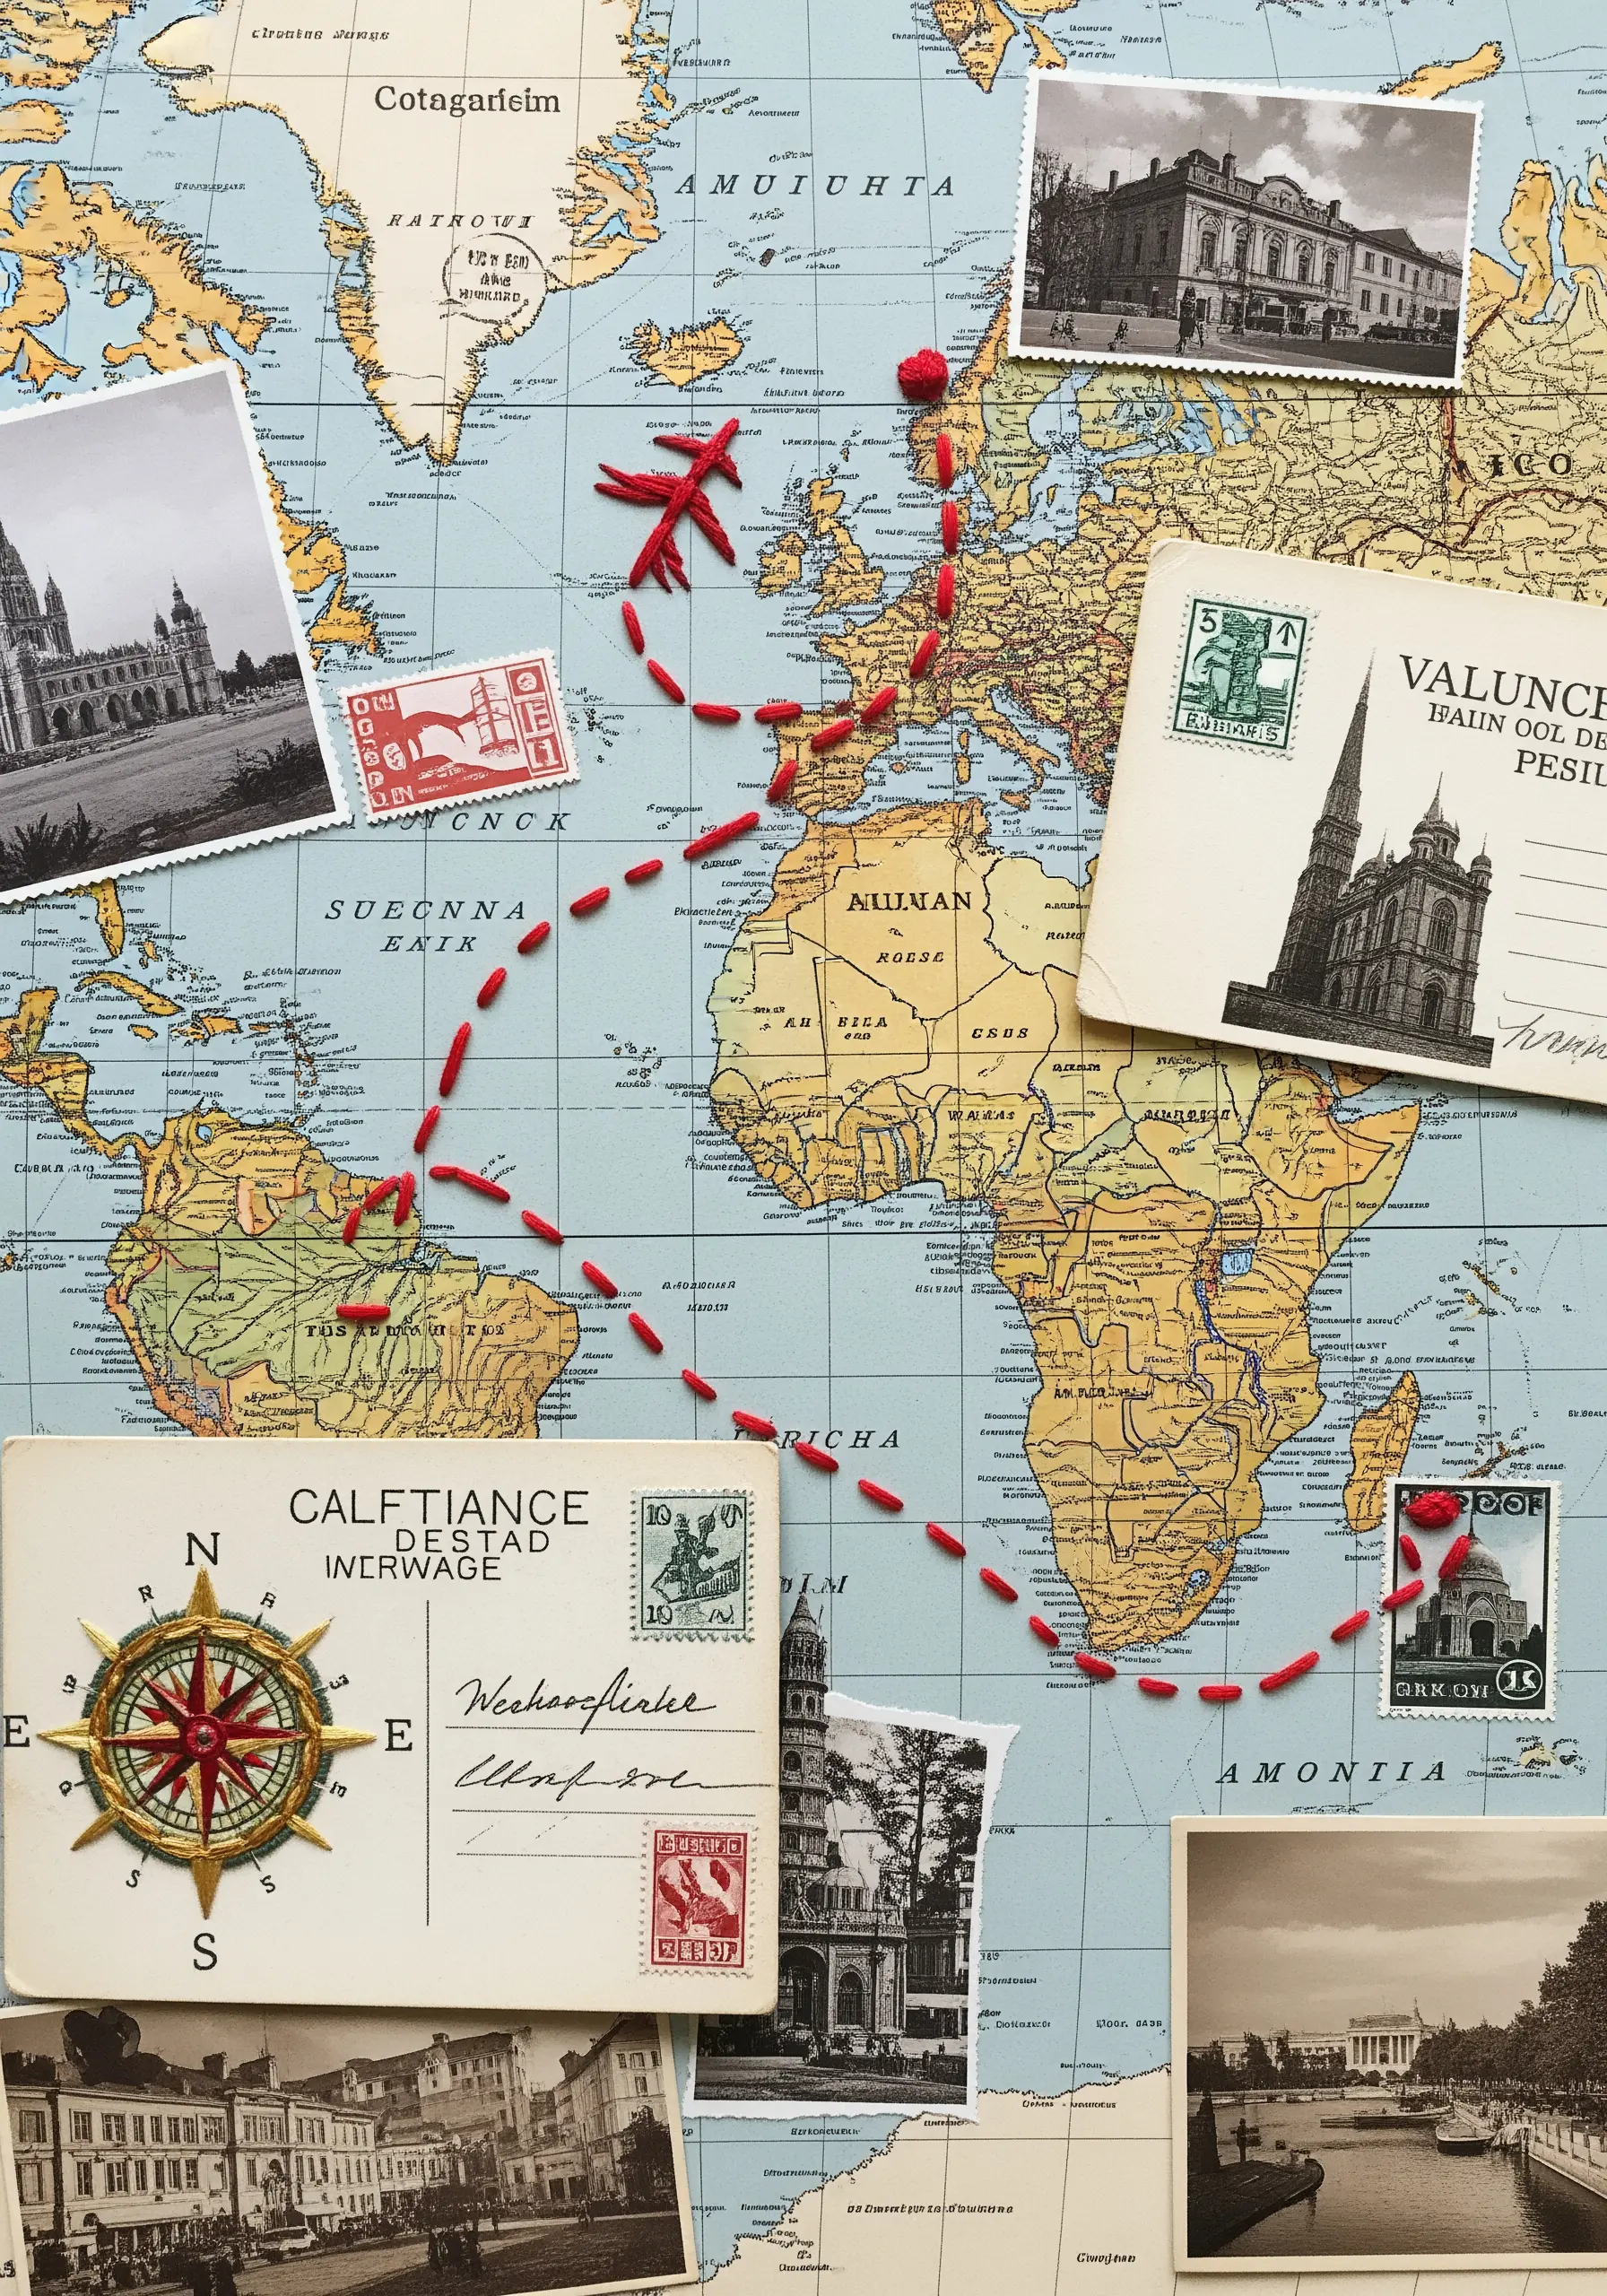
Use a single, continuous line of thread to tell a story or guide the eye across a complex collage, like a map.
A simple running stitch in a bold, contrasting color like red creates a clear visual path that connects different elements of your composition.
The handmade quality of the stitch adds a personal, tactile layer to the printed map, suggesting a journey taken or imagined.
Vary the length of your stitches to create a dashed-line effect that feels dynamic and energetic, perfectly capturing the idea of movement.
9. Juxtapose Organic and Man-Made Forms
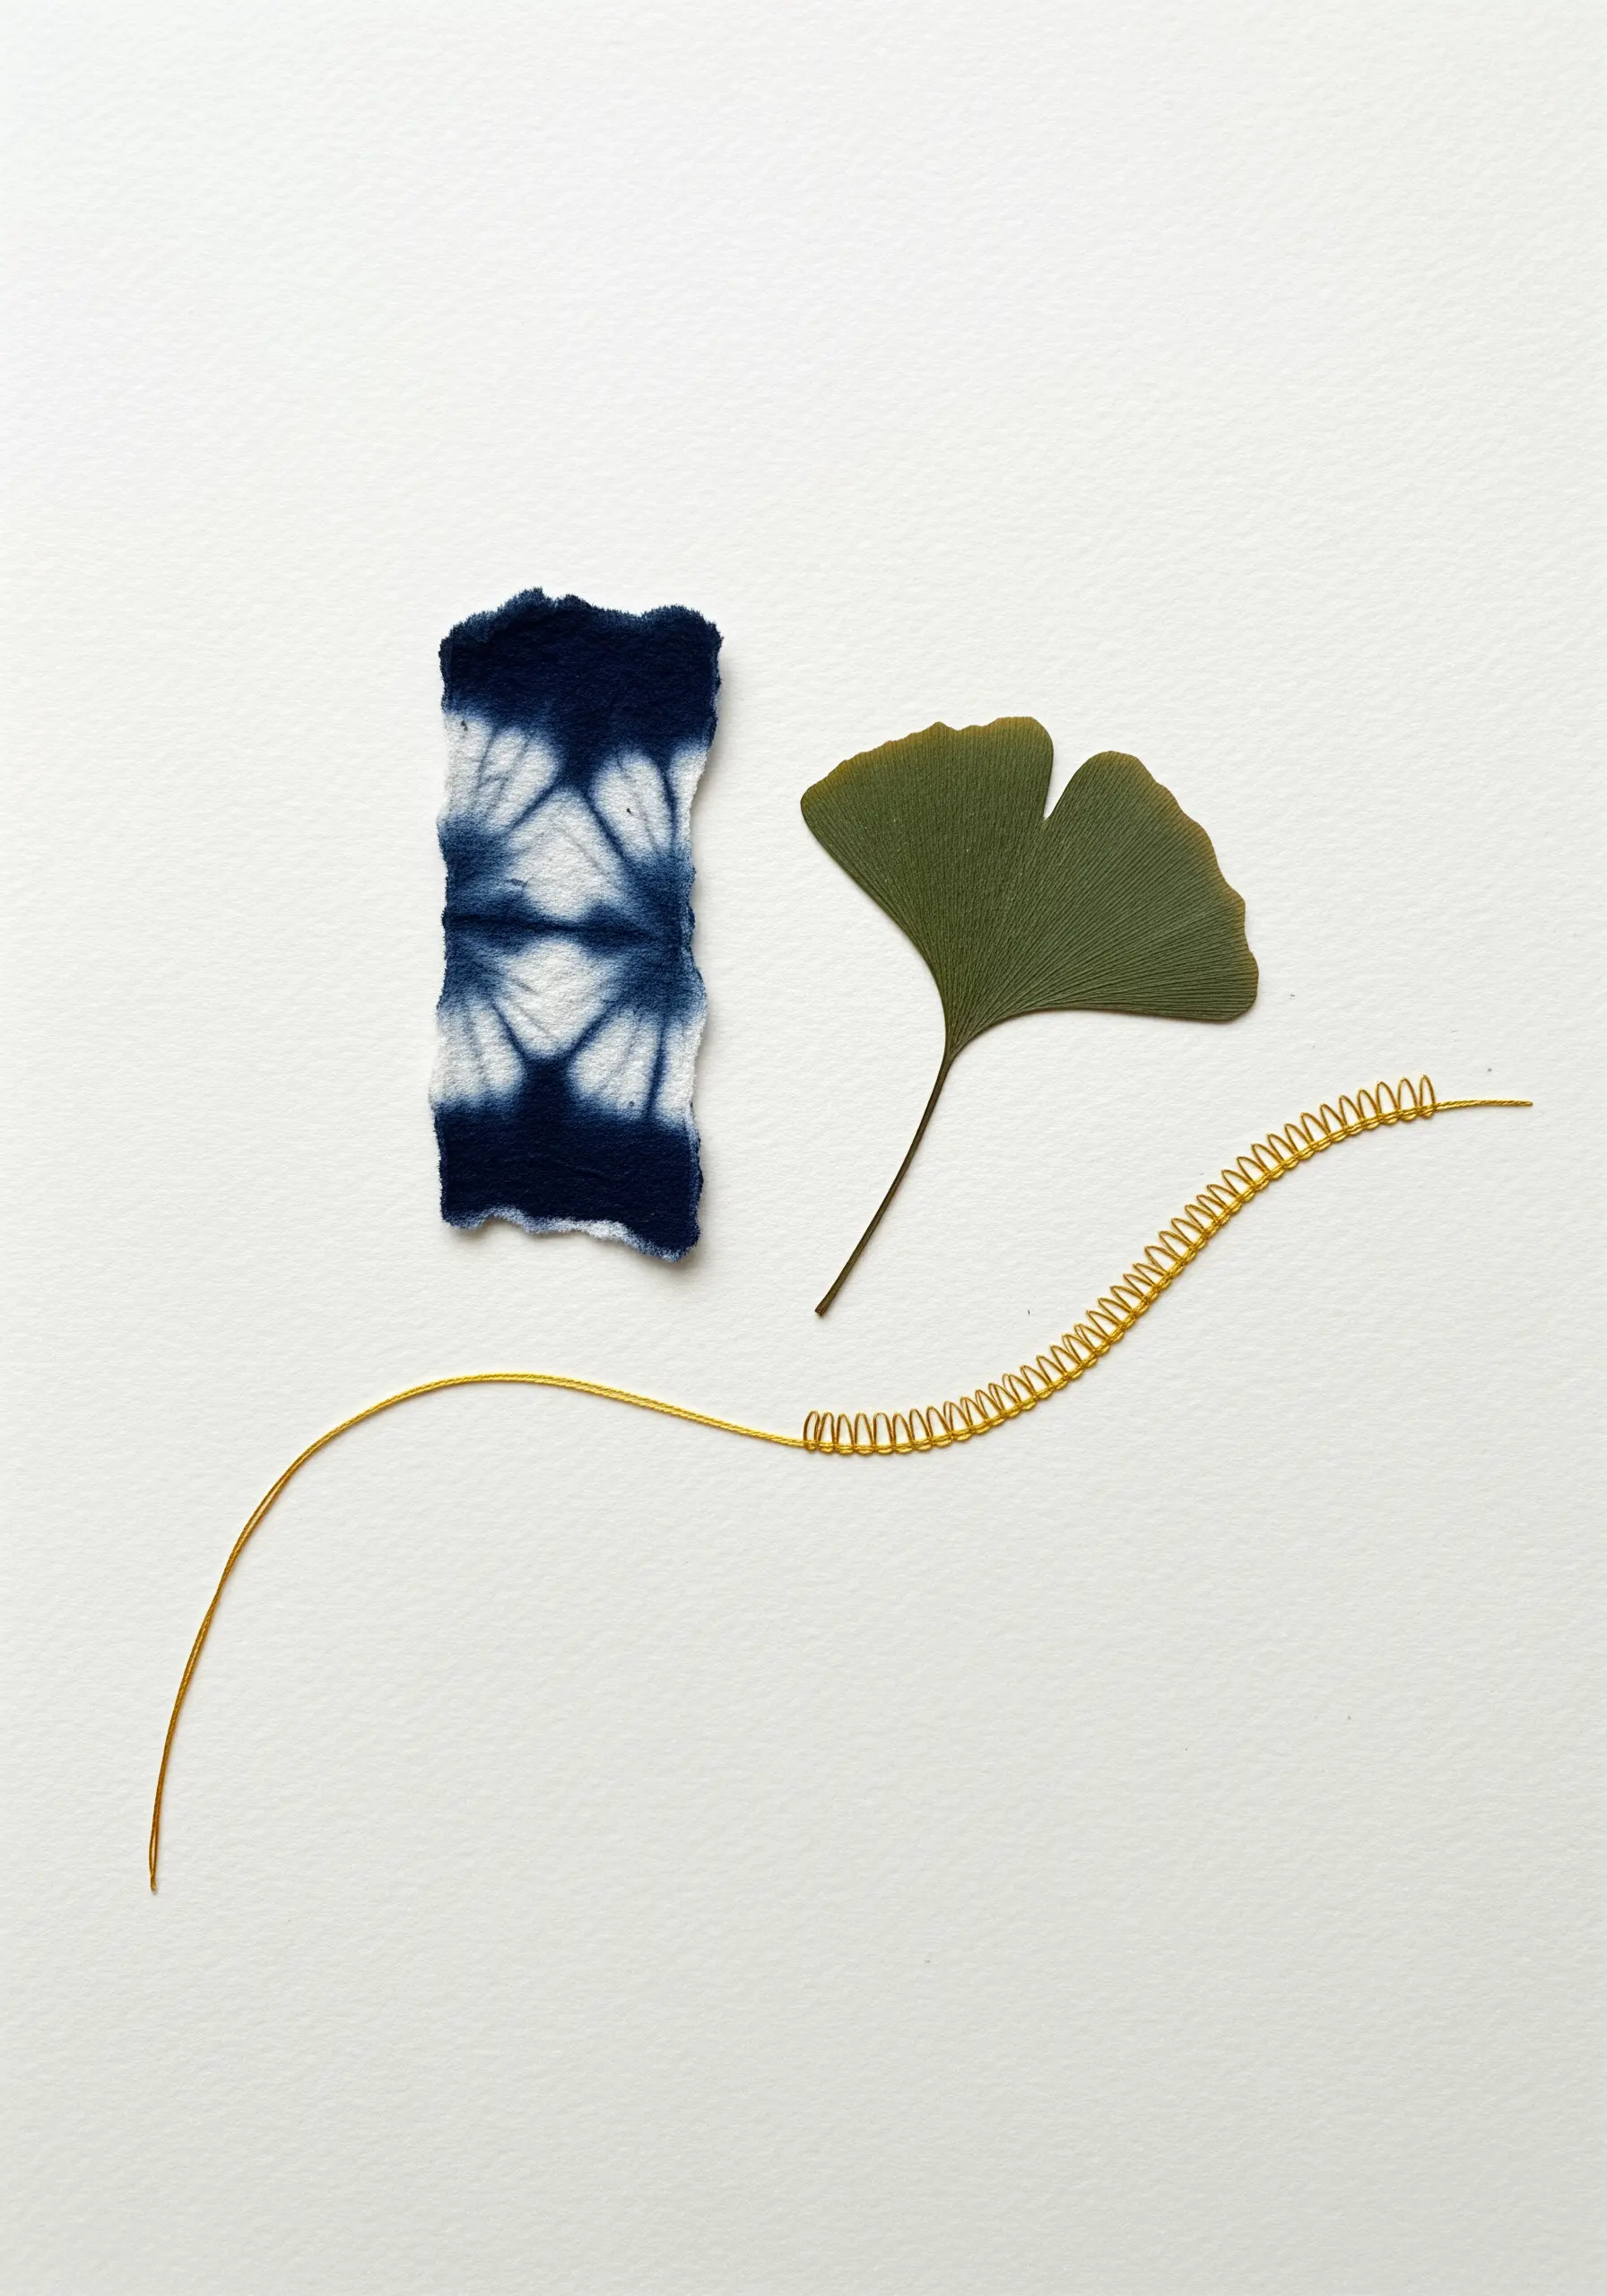
Create a visually arresting composition by placing a natural element, like a leaf, alongside a structured, man-made texture like coiled wire or stitched lines.
The key to this minimalist approach is negative space; allow each object room to breathe so its unique texture and form can be fully appreciated.
Instead of traditional embroidery, consider couching a metallic wire or wrapping it with fine thread to introduce line and sheen without piercing the paper.
This exercise in contrasts—soft vs. hard, natural vs. crafted—creates a sophisticated and thought-provoking piece of art from just a few simple elements.
10. Add Tactile Realism to Illustrations
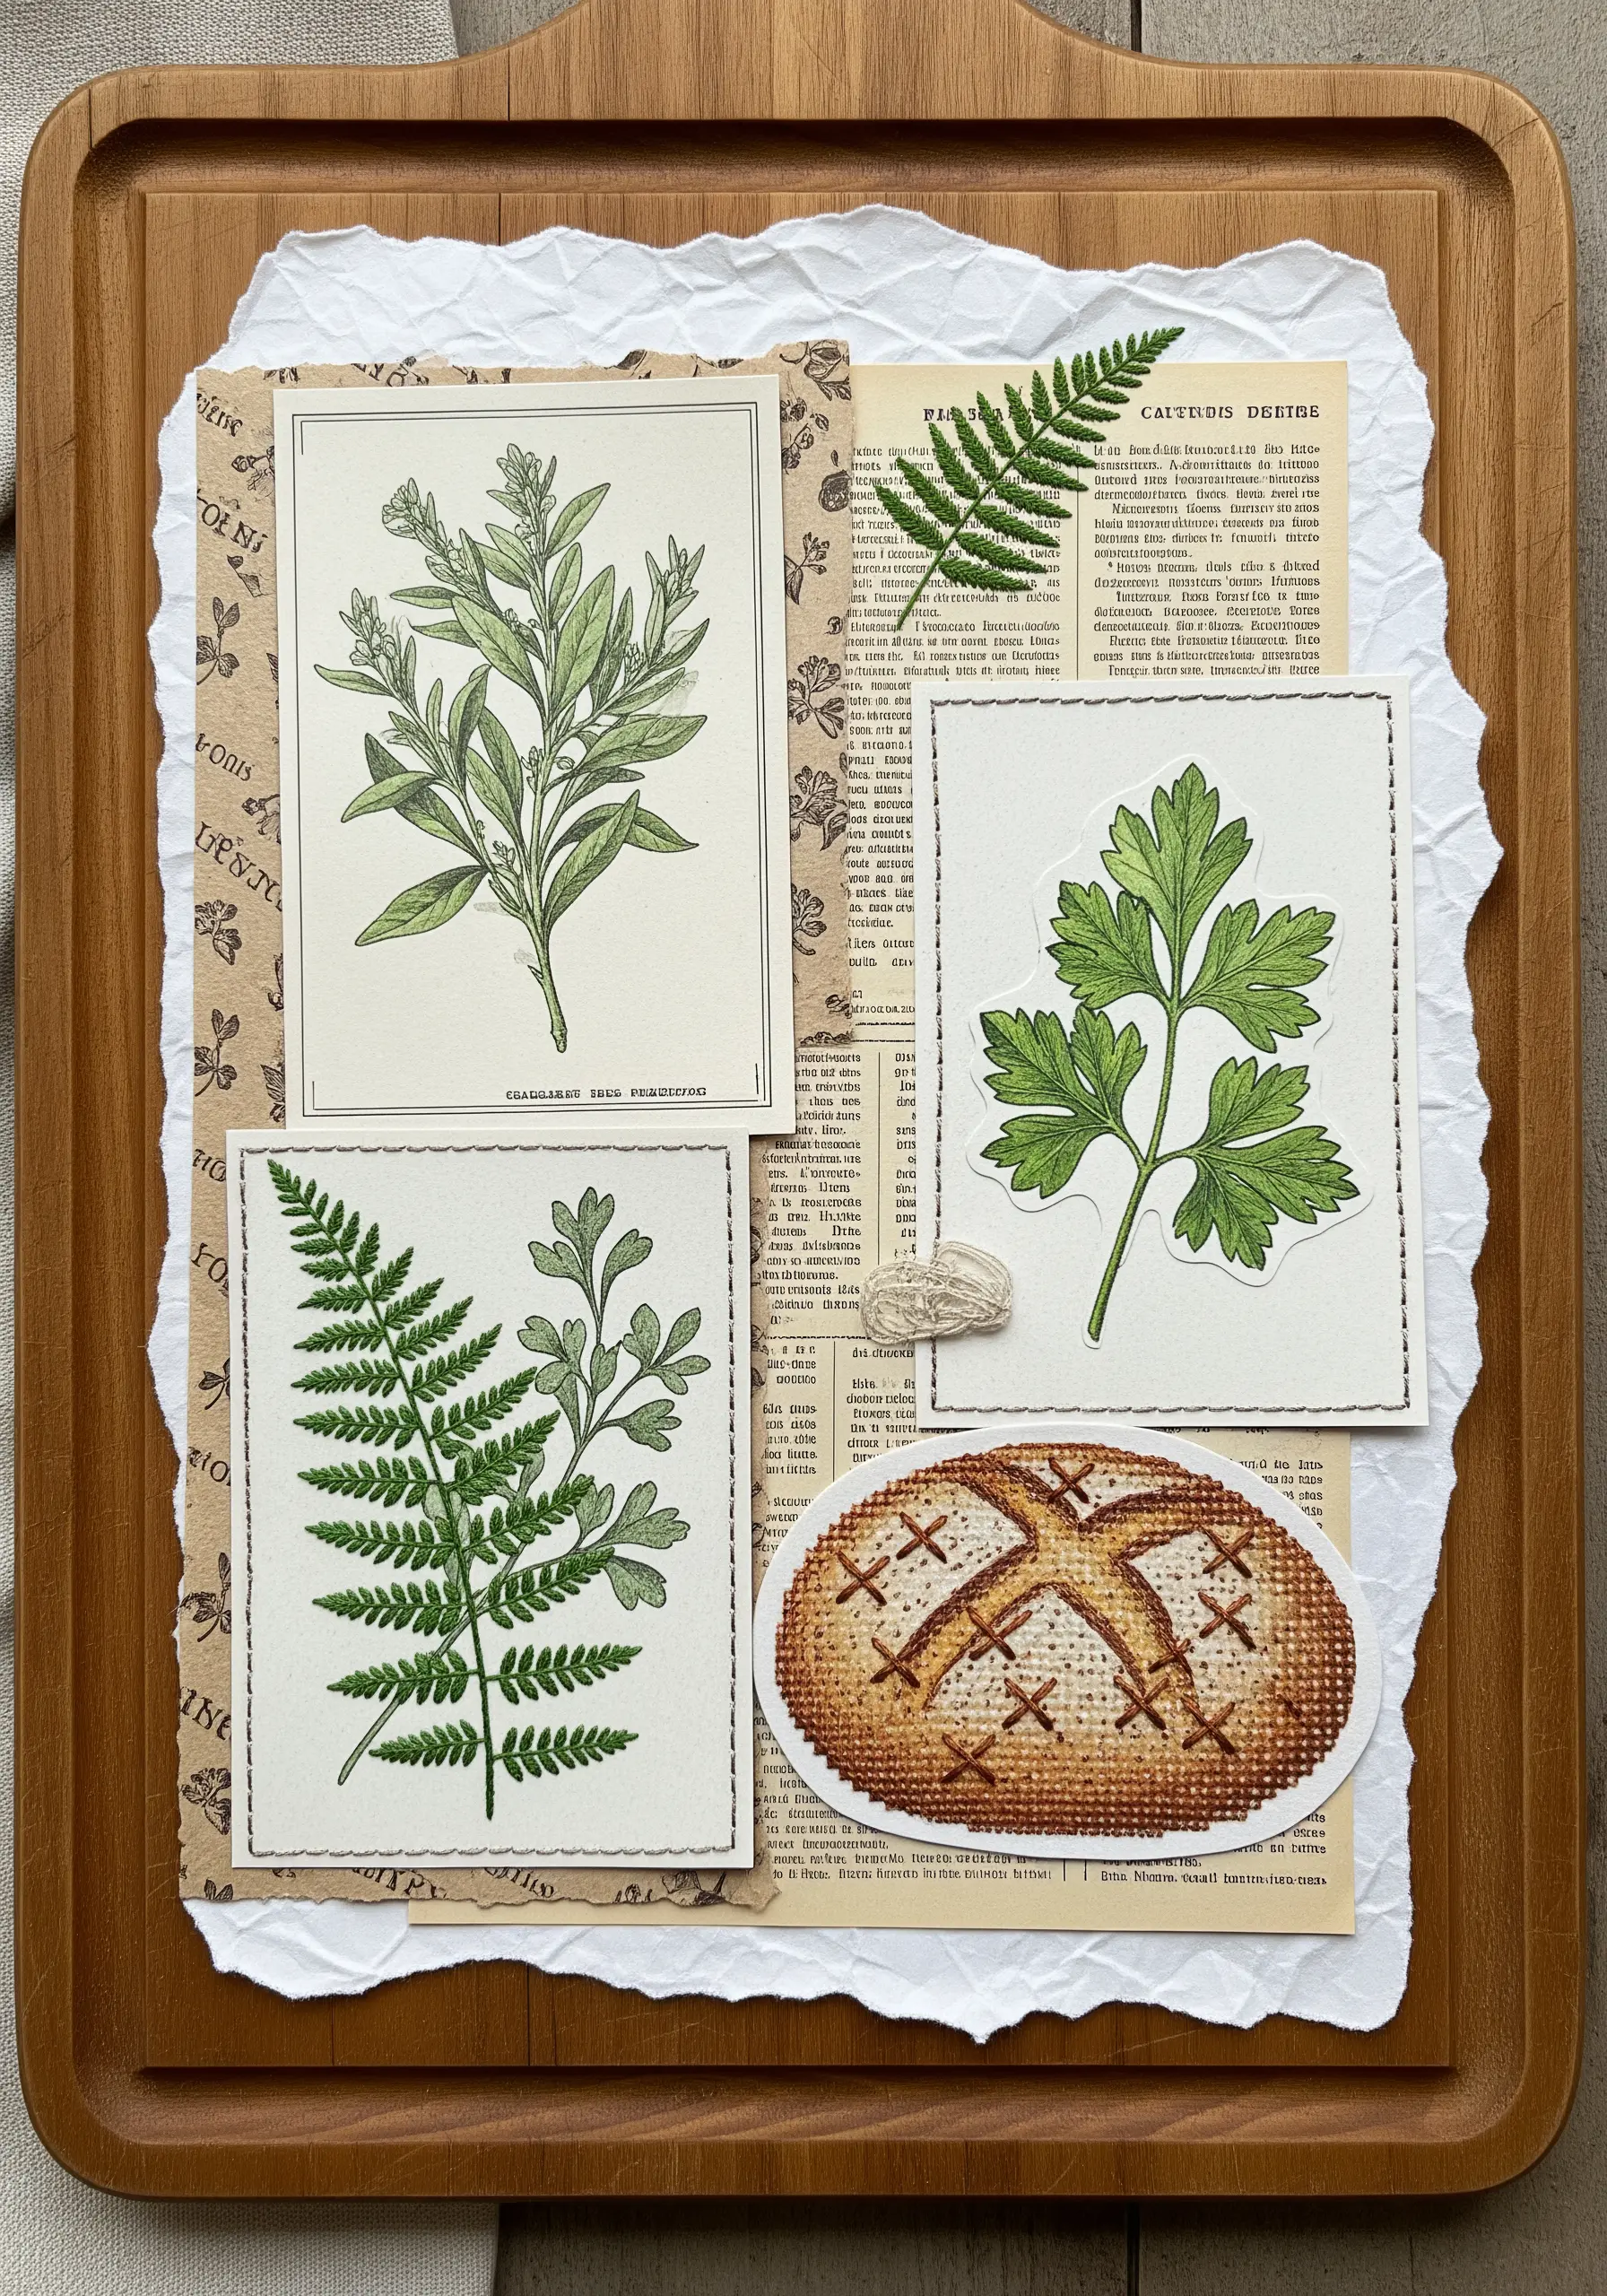
Ground your collage by including one element that is fully embroidered, providing a surprising shift in texture.
For the bread motif, use a cross-stitch on a small piece of Aida cloth or even-weave linen, then cut it out and appliqué it onto your paper collage.
This method allows you to create a detailed, textured piece without struggling to make dense stitches on paper.
The gridded, pixelated look of the cross-stitch offers a charming contrast to the smooth, printed botanical illustrations, making the entire piece more engaging.
11. Translate Beadwork into Stitched Embellishments
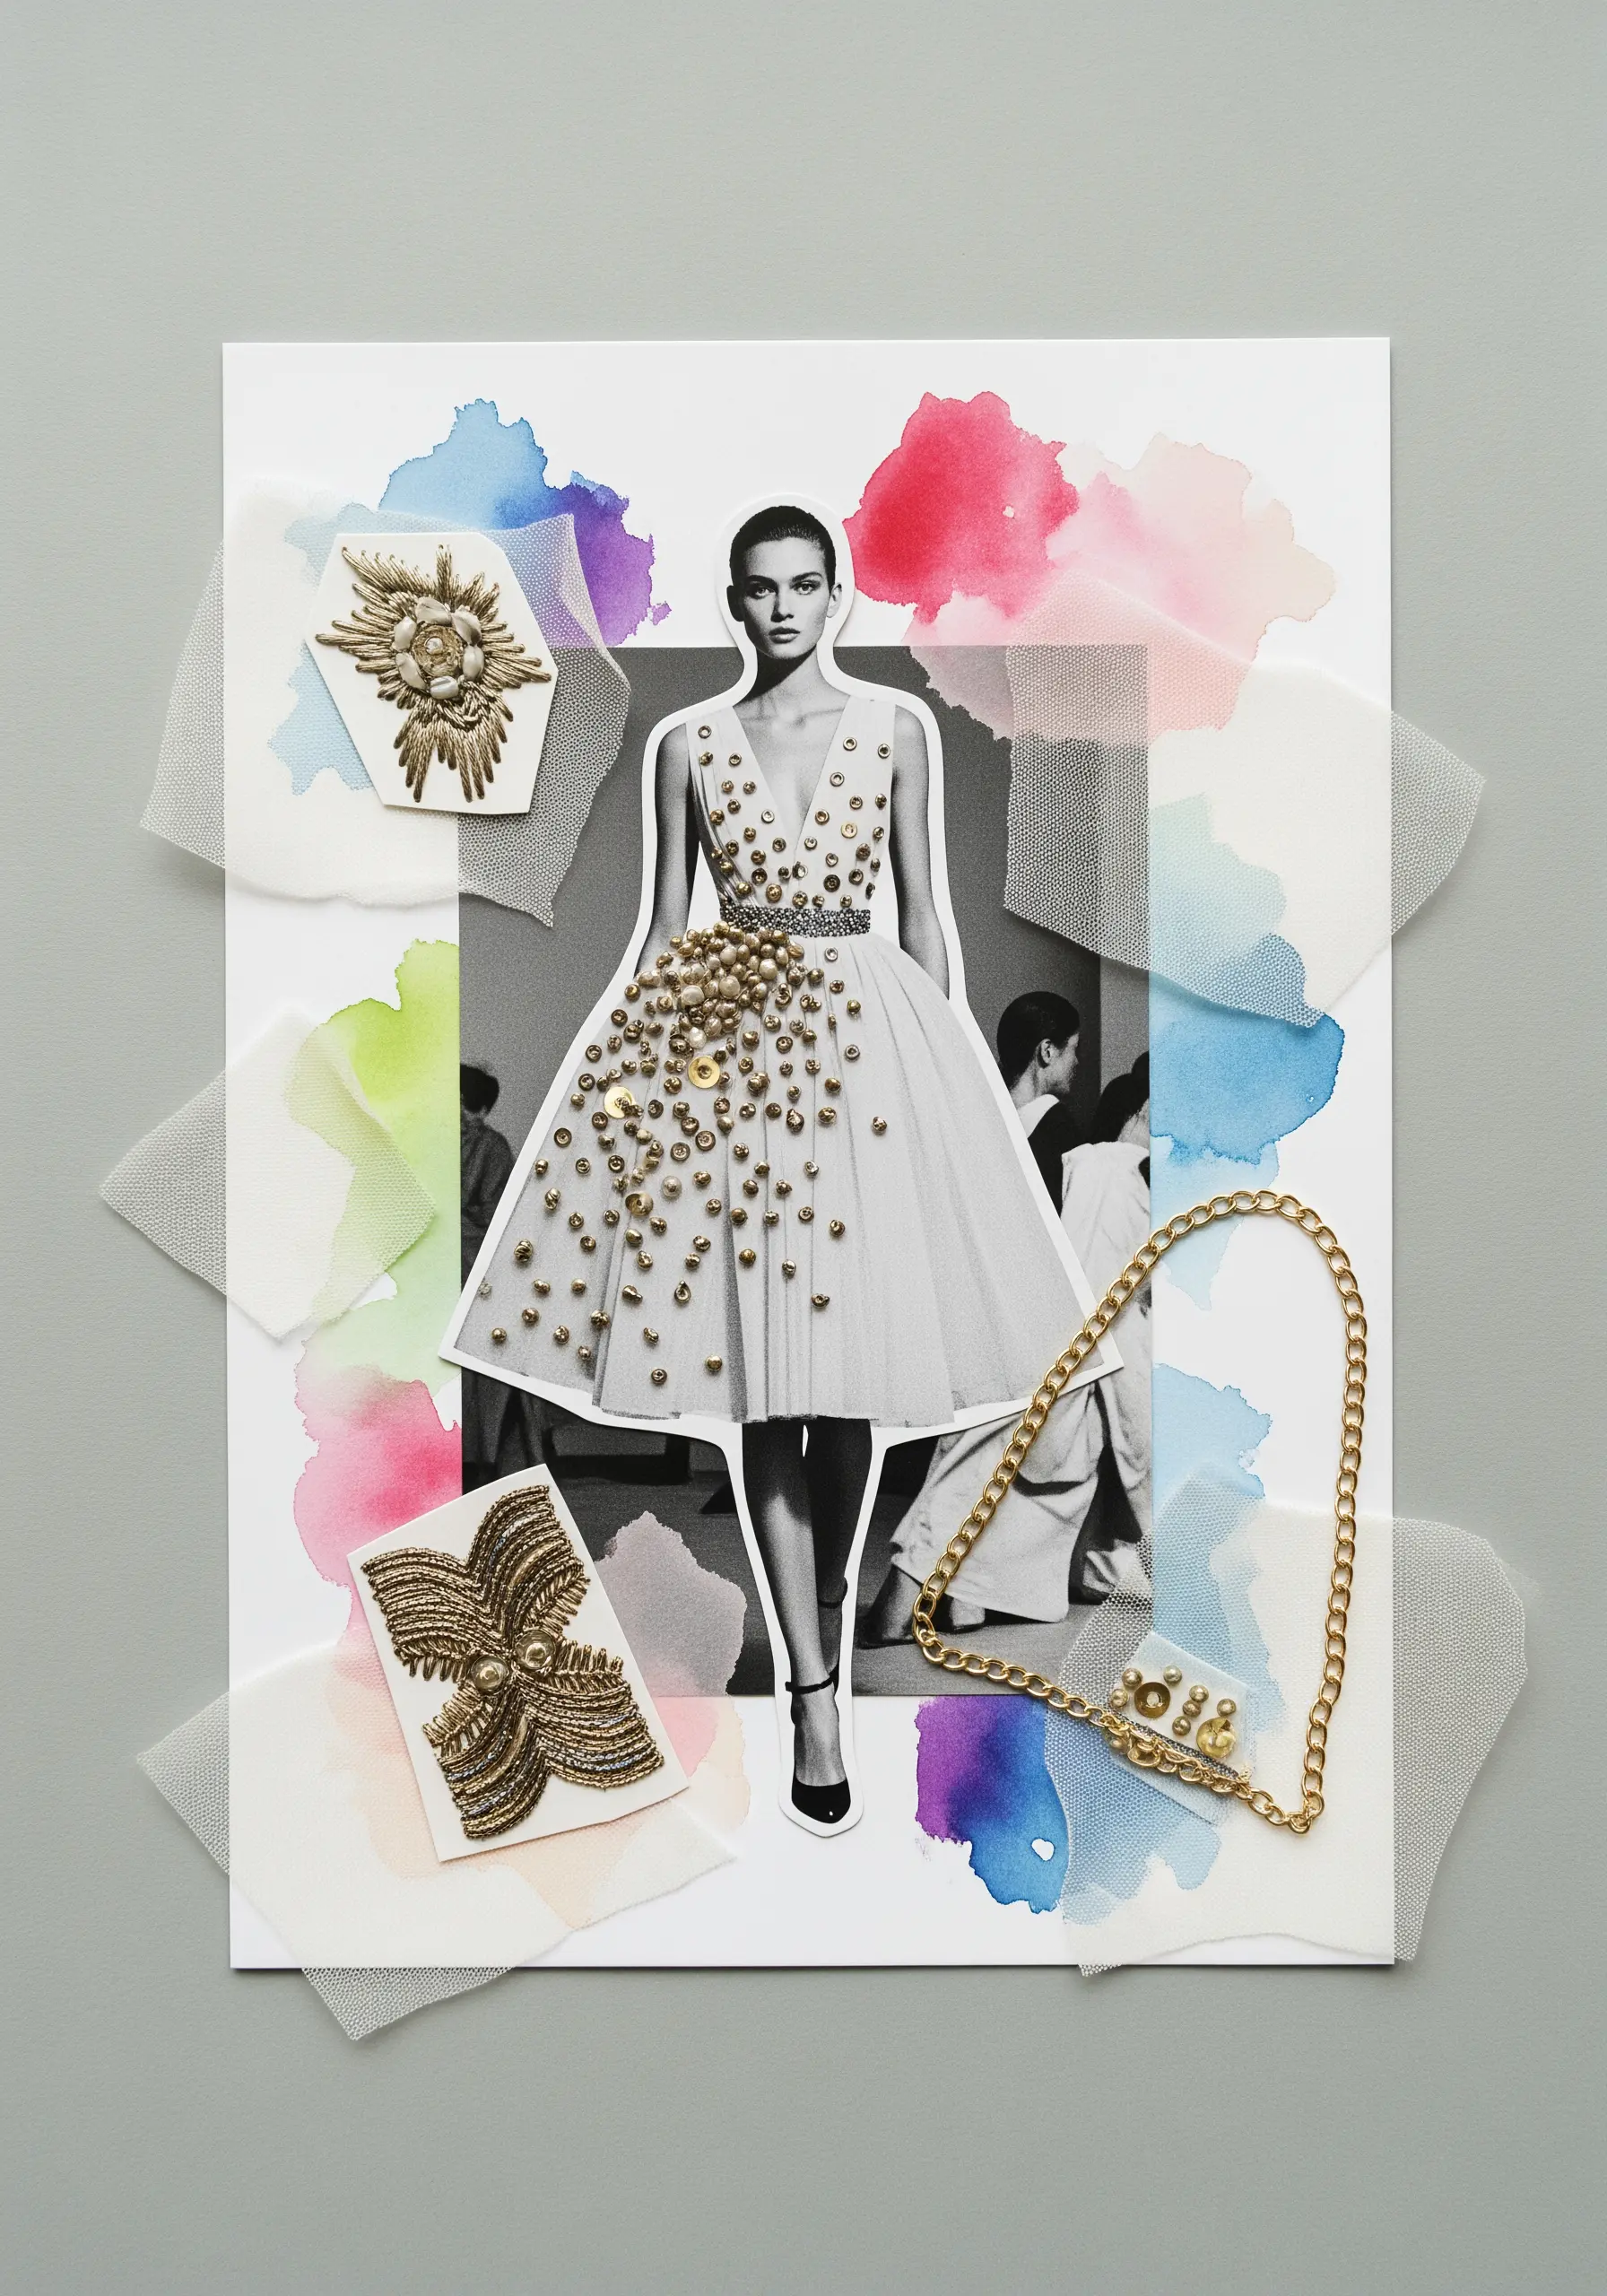
Mimic the effect of haute couture beading by using French knots and seed stitches to embellish a fashion illustration.
Use a metallic or high-sheen gold thread to create clusters of French knots where sparkling beads or sequins would be.
This technique allows you to add texture, richness, and the illusion of light-reflecting surfaces without the weight or expense of actual beads.
Layering sheer fabric like tulle over parts of your collage softens the edges and adds another layer of textile richness, enhancing the fashion-forward feel.
12. Create a Focal Point with Typography
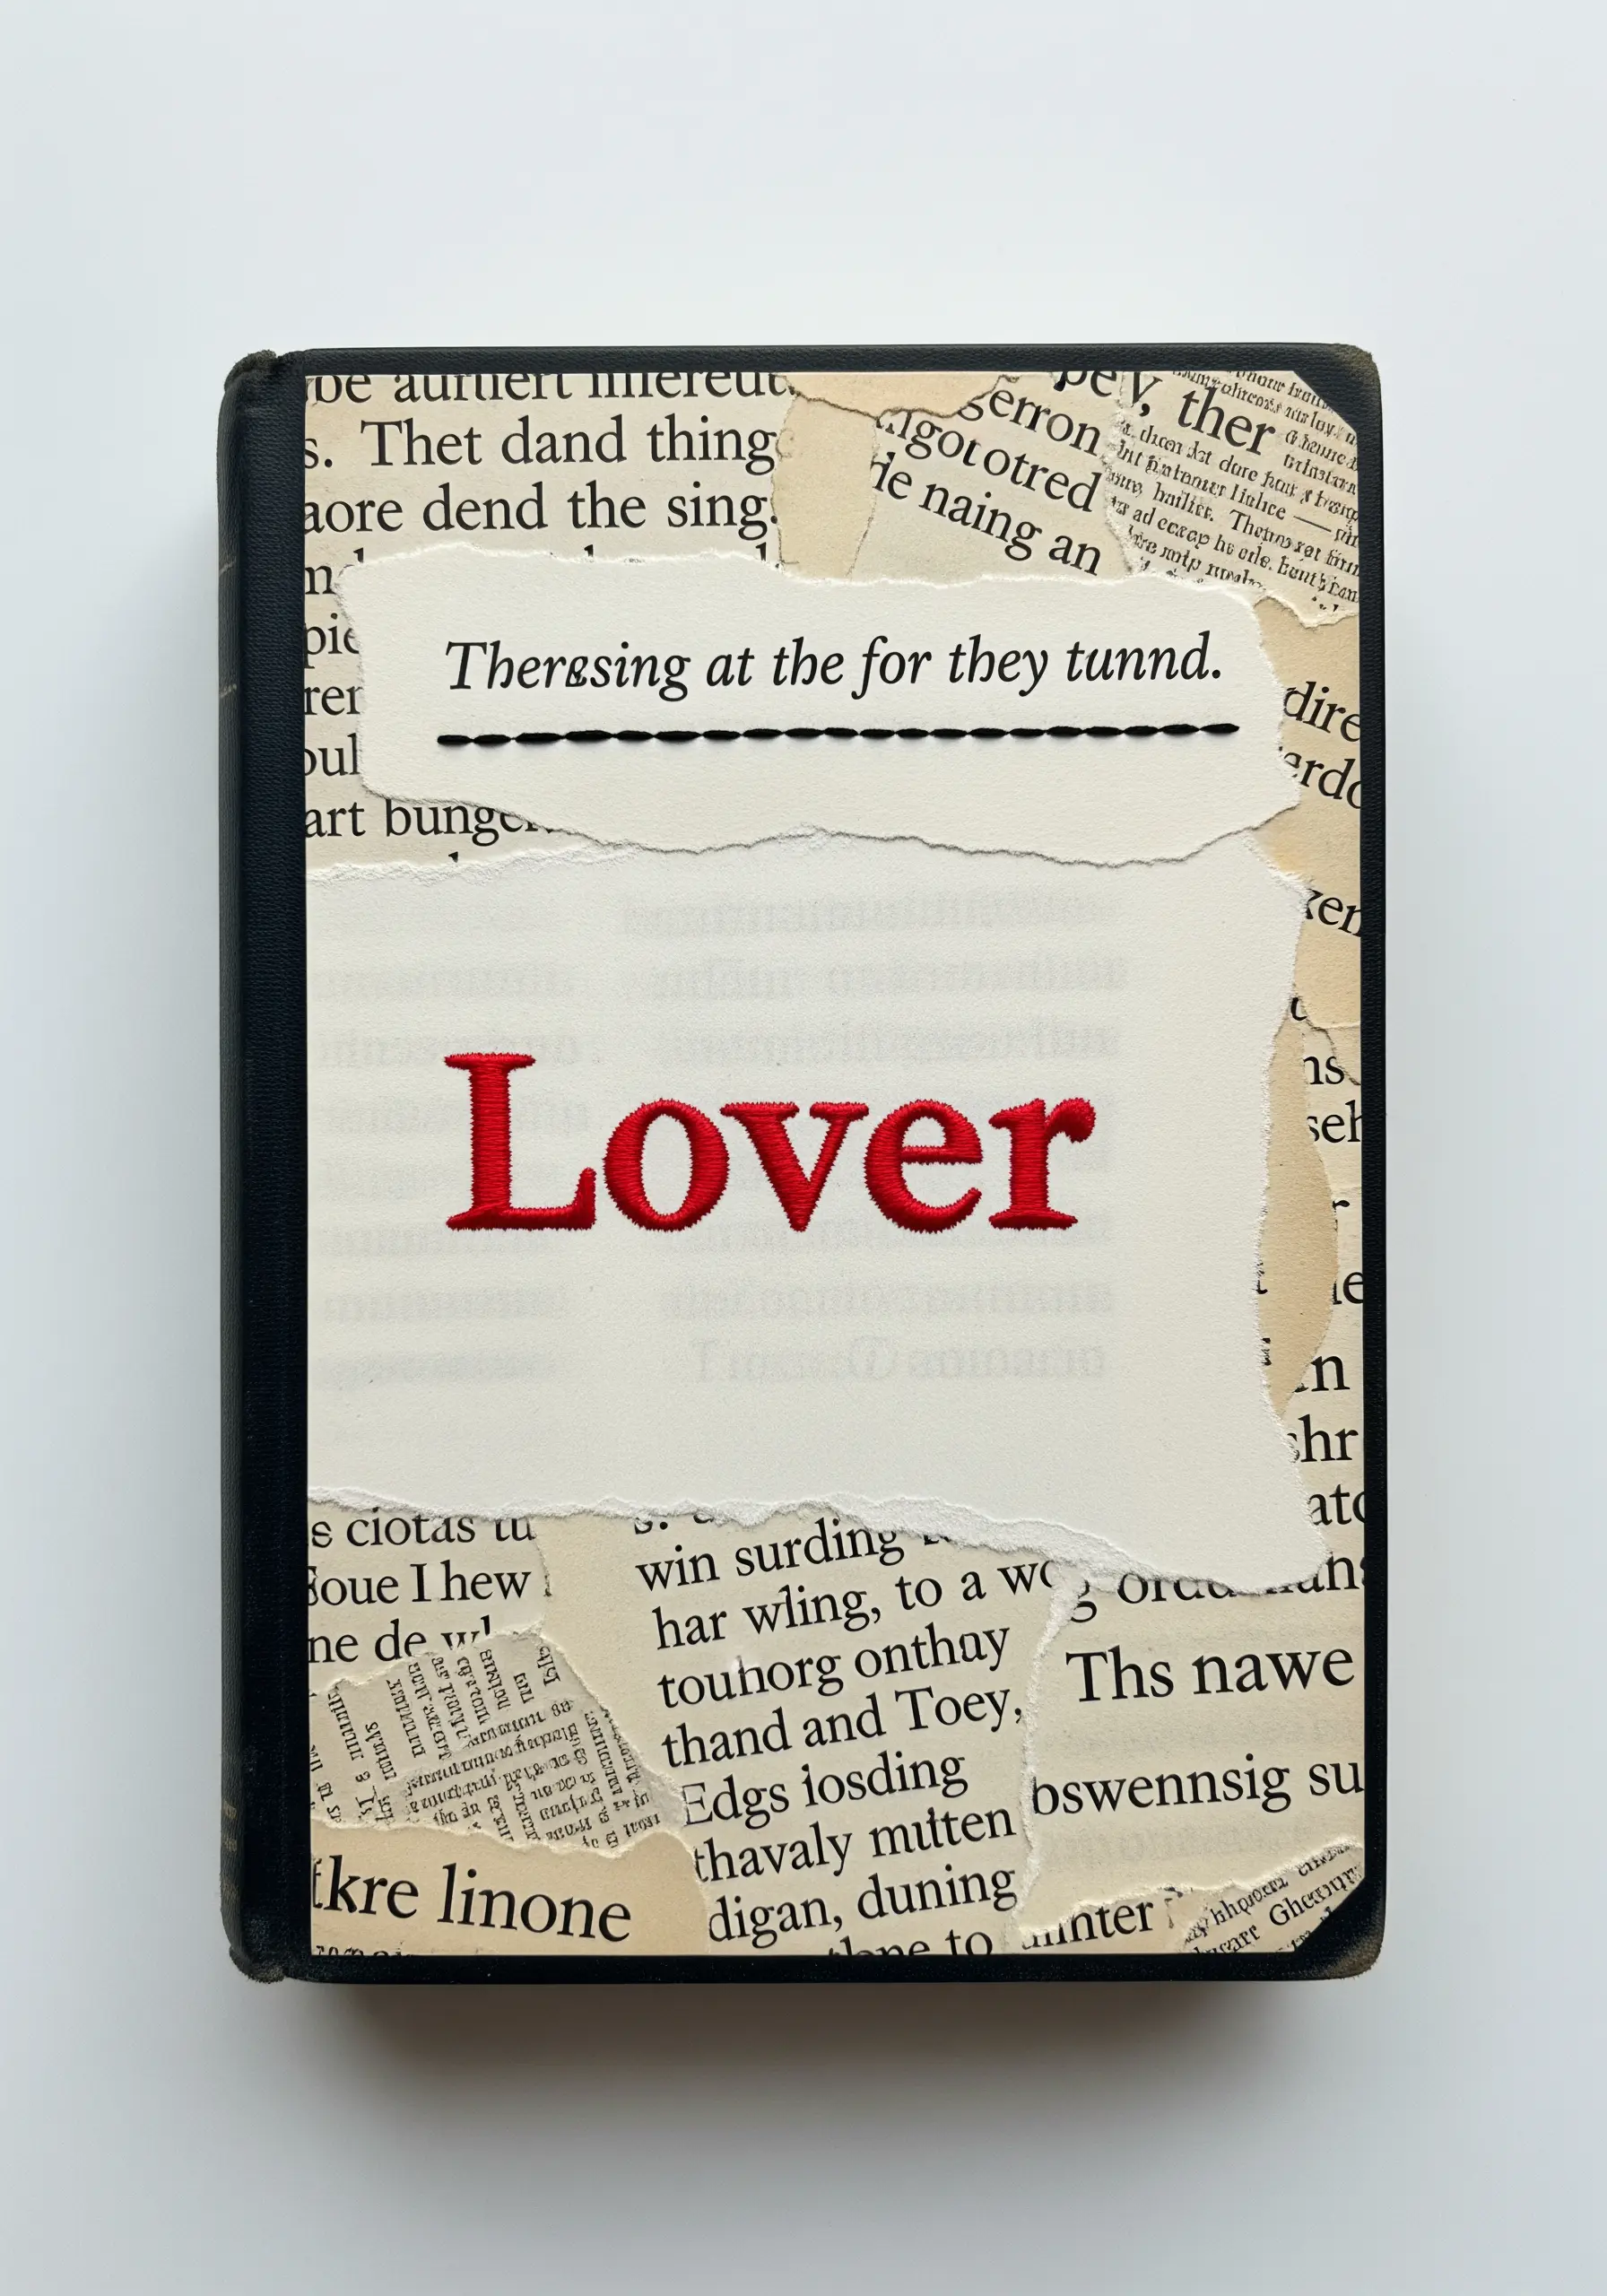
Anchor your collage of disparate text and paper fragments with a single, boldly embroidered word.
Use a dense satin stitch with a high-contrast thread color to ensure the word stands out as the clear focal point.
To achieve crisp, clean edges on your letters, outline them first with a split stitch before filling them in. This provides a raised edge that contains your satin stitches perfectly.
Stitching on a separate piece of sturdy paper or fabric and then adding it to the collage allows for perfect execution without risking the more delicate background elements.
13. Build a Garden of Layered Stitches
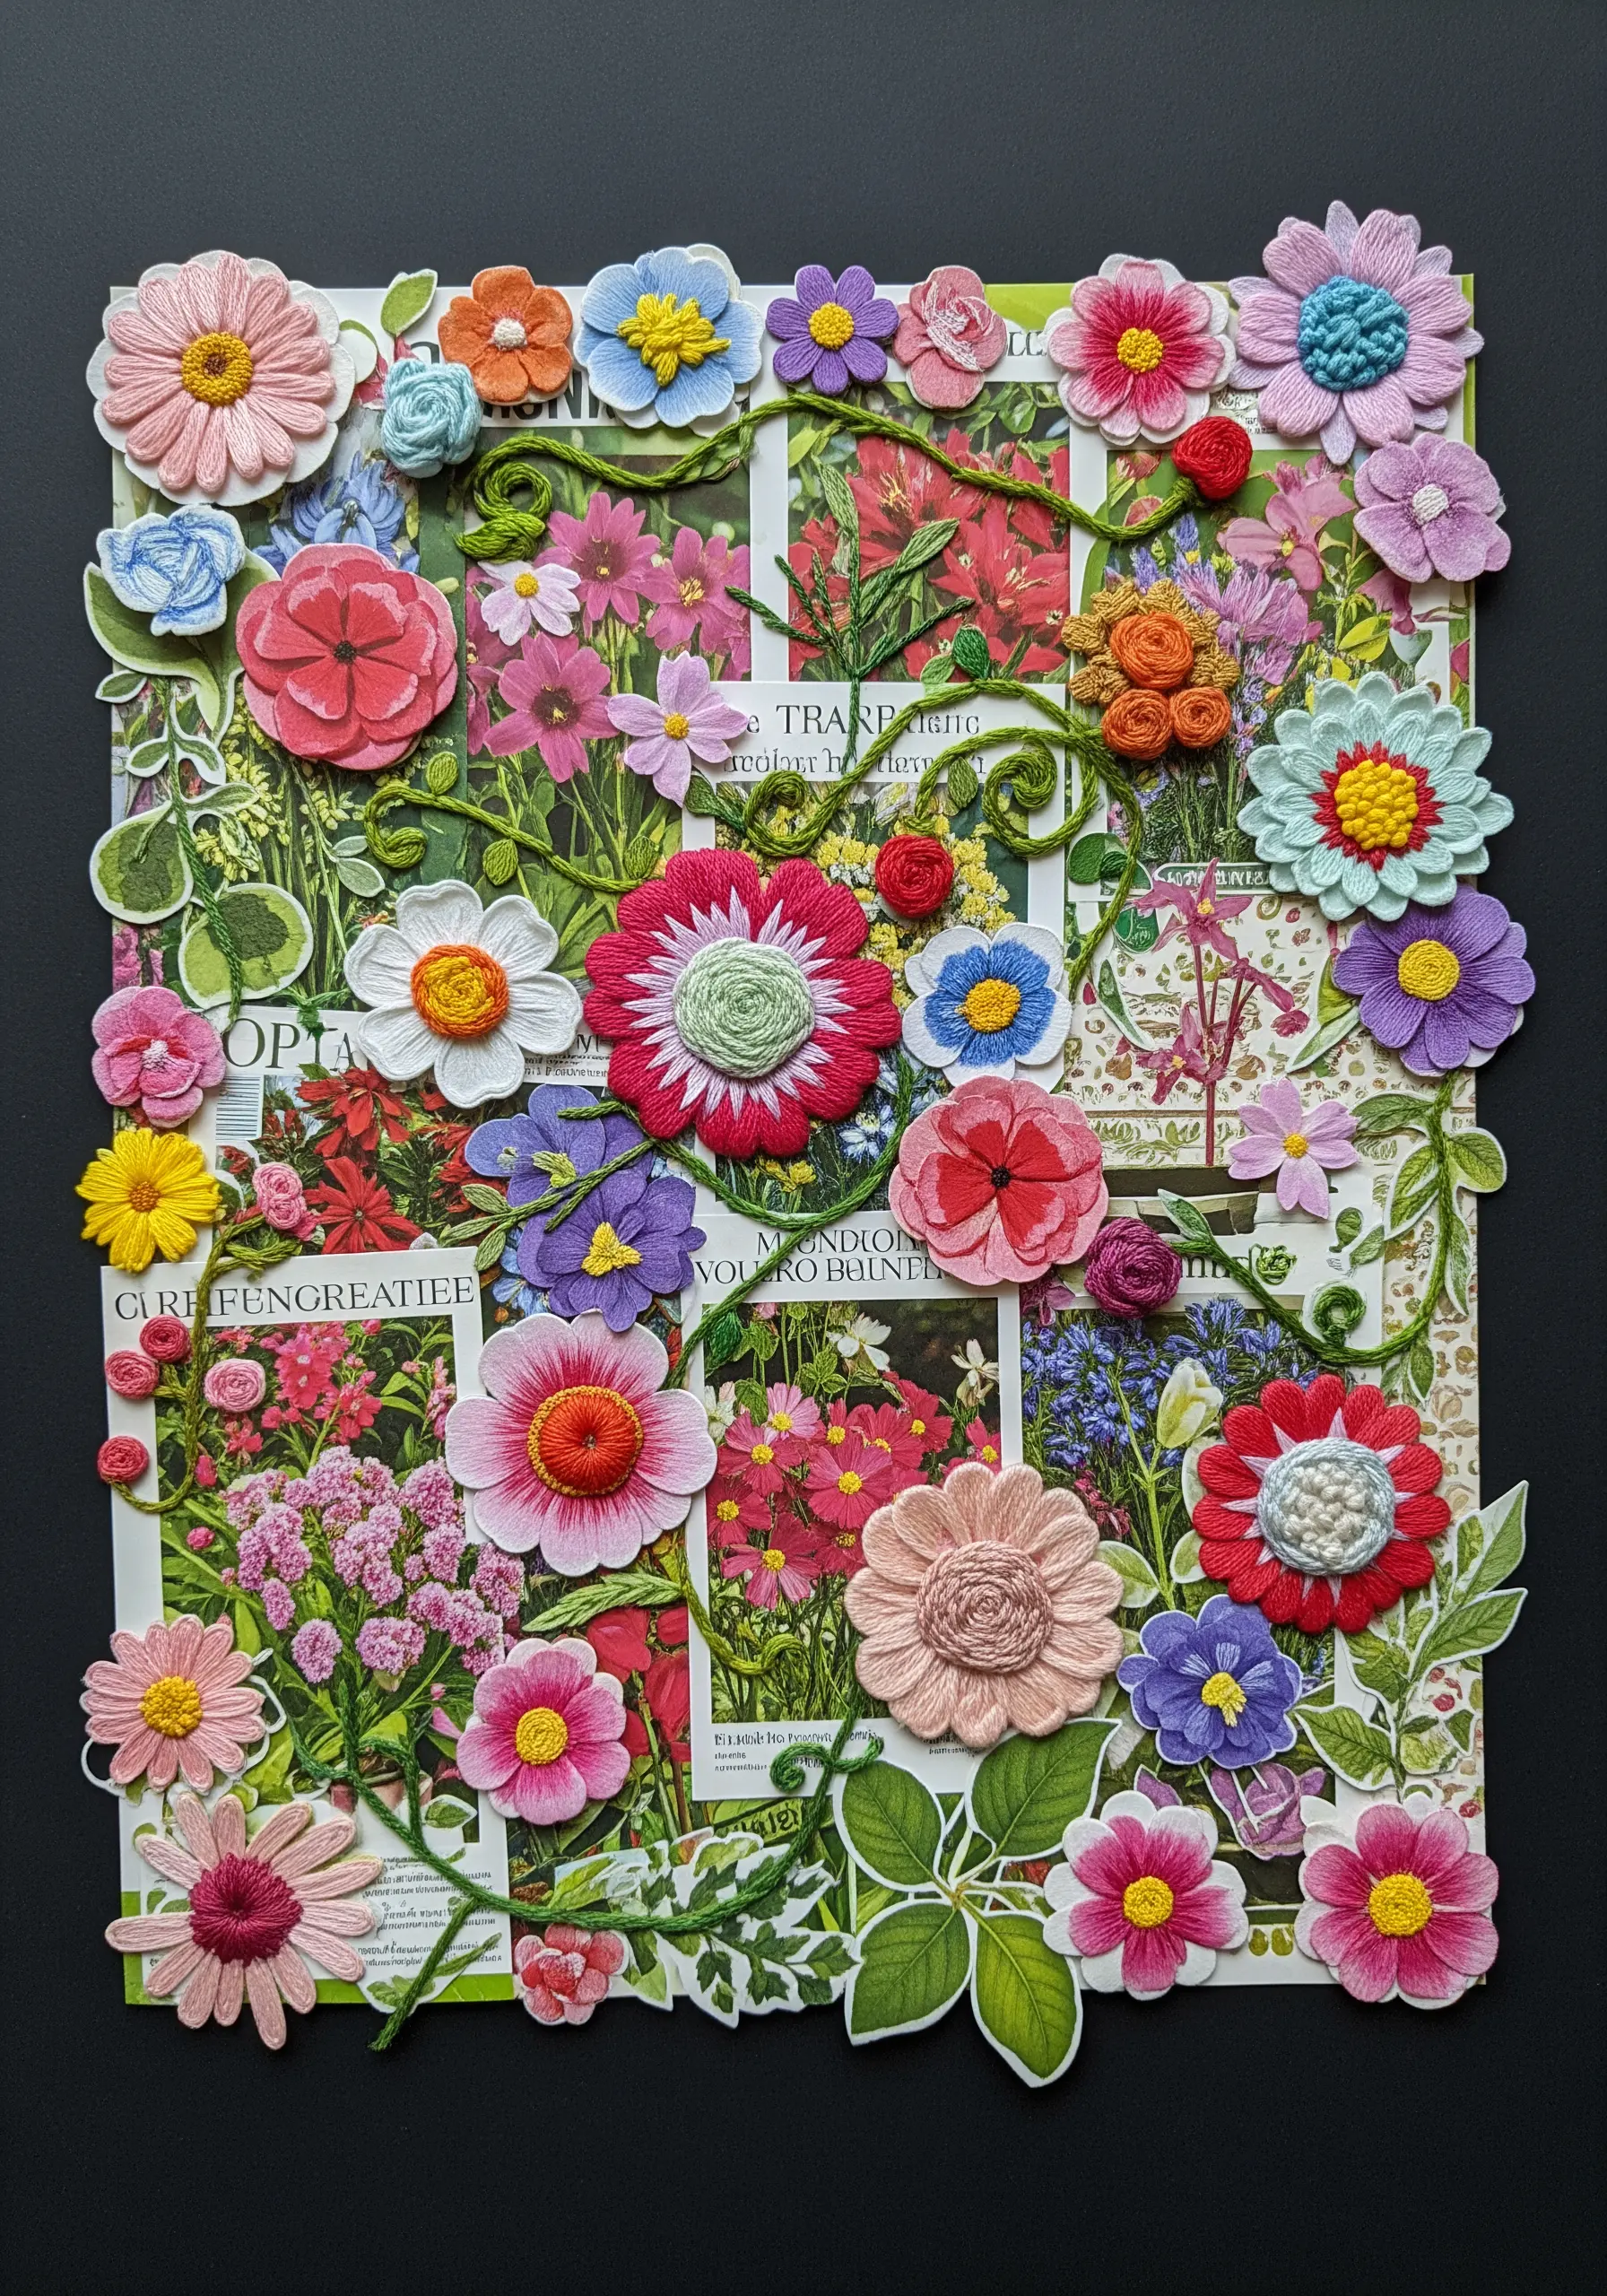
Create a vibrant, maximalist floral collage by mixing printed paper flowers with fully embroidered ones.
For the embroidered flowers, experiment with a variety of stitches to create different textures: padded satin stitch for smooth petals, French knots for fluffy centers, and bullion knots for rosebuds.
Use a wrapped or couched green yarn for the vines, allowing them to meander over and under the paper and stitched elements, physically weaving the entire composition together.
This rich layering of 2D and 3D botanicals creates an immersive piece that invites the viewer to look closer and discover new details. Explore more ideas with these wildflower hoop art projects.
14. Use Loose Threads as a Design Element
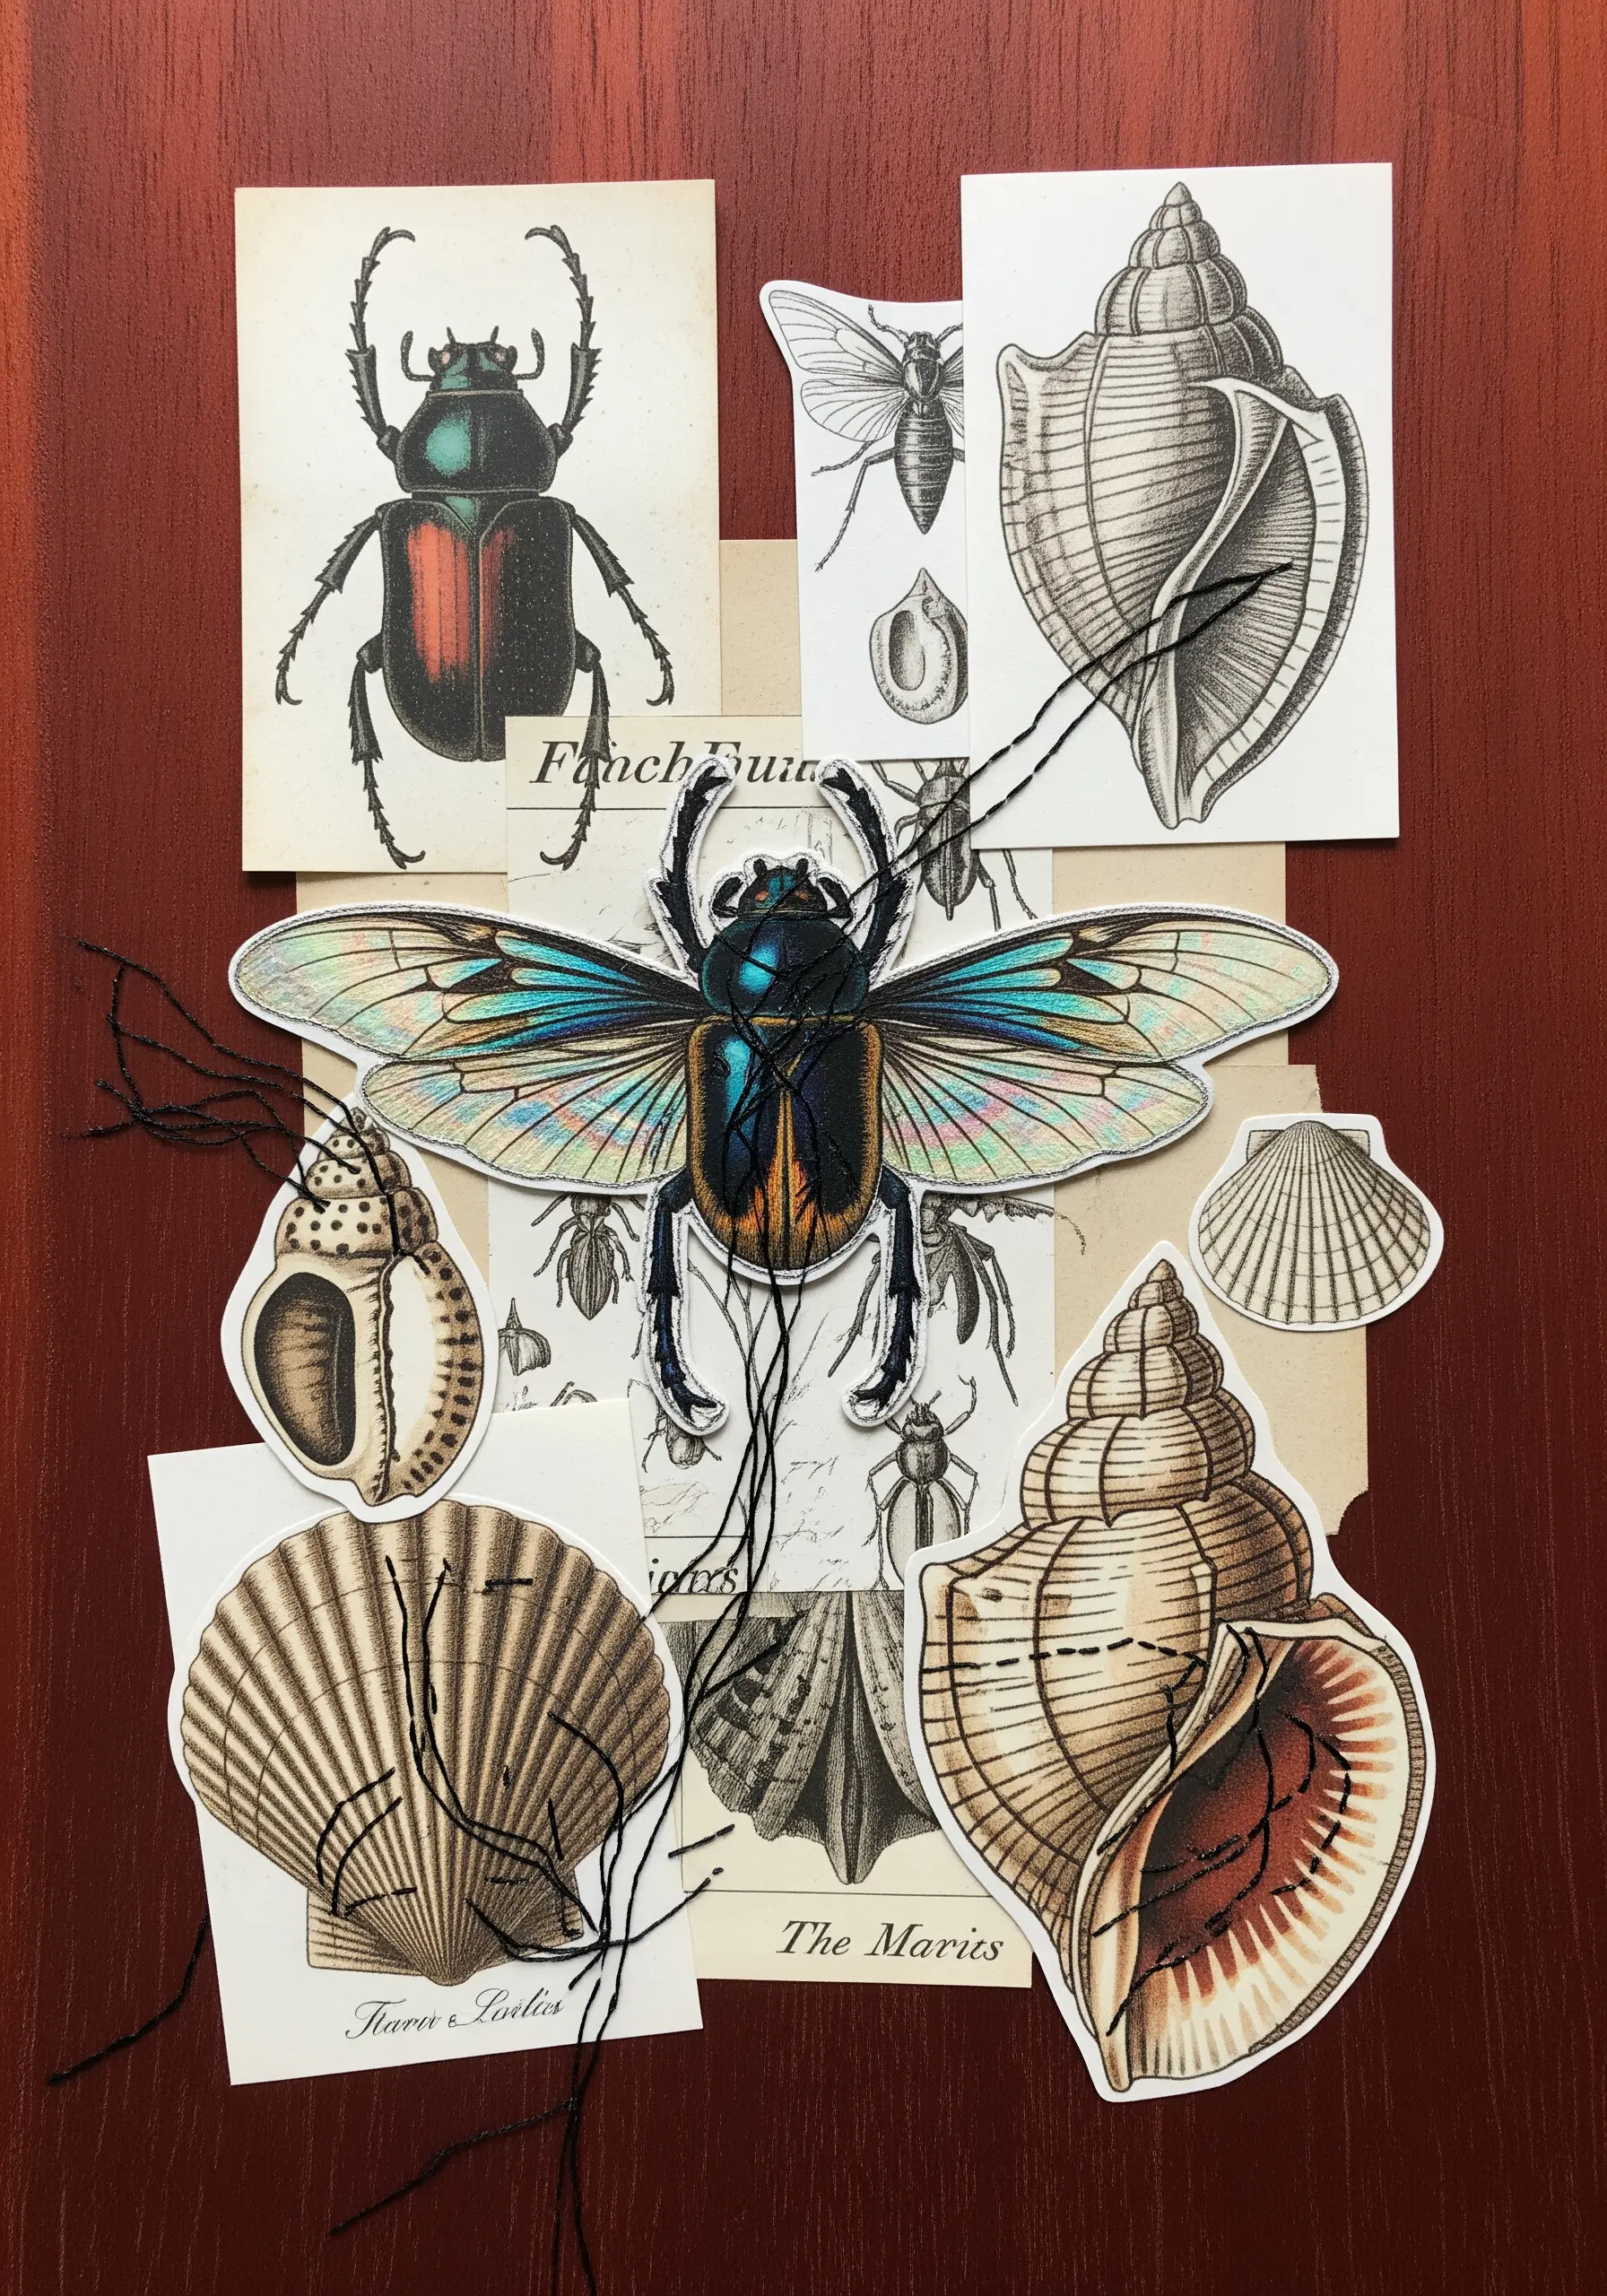
Intentionally leave threads loose and expressive to add a sense of organic chaos and movement to your collage.
Instead of snipping your thread tails, allow them to trail across the composition, securing them only at a few key points with a tiny stitch or a dot of glue.
This technique works especially well for subjects like insects or abstract pieces, suggesting antennae, legs, or lines of energy.
The free-form, uncontrolled nature of the loose threads provides a beautiful contrast to the precise lines of the vintage illustrations, making the piece feel more dynamic and alive.
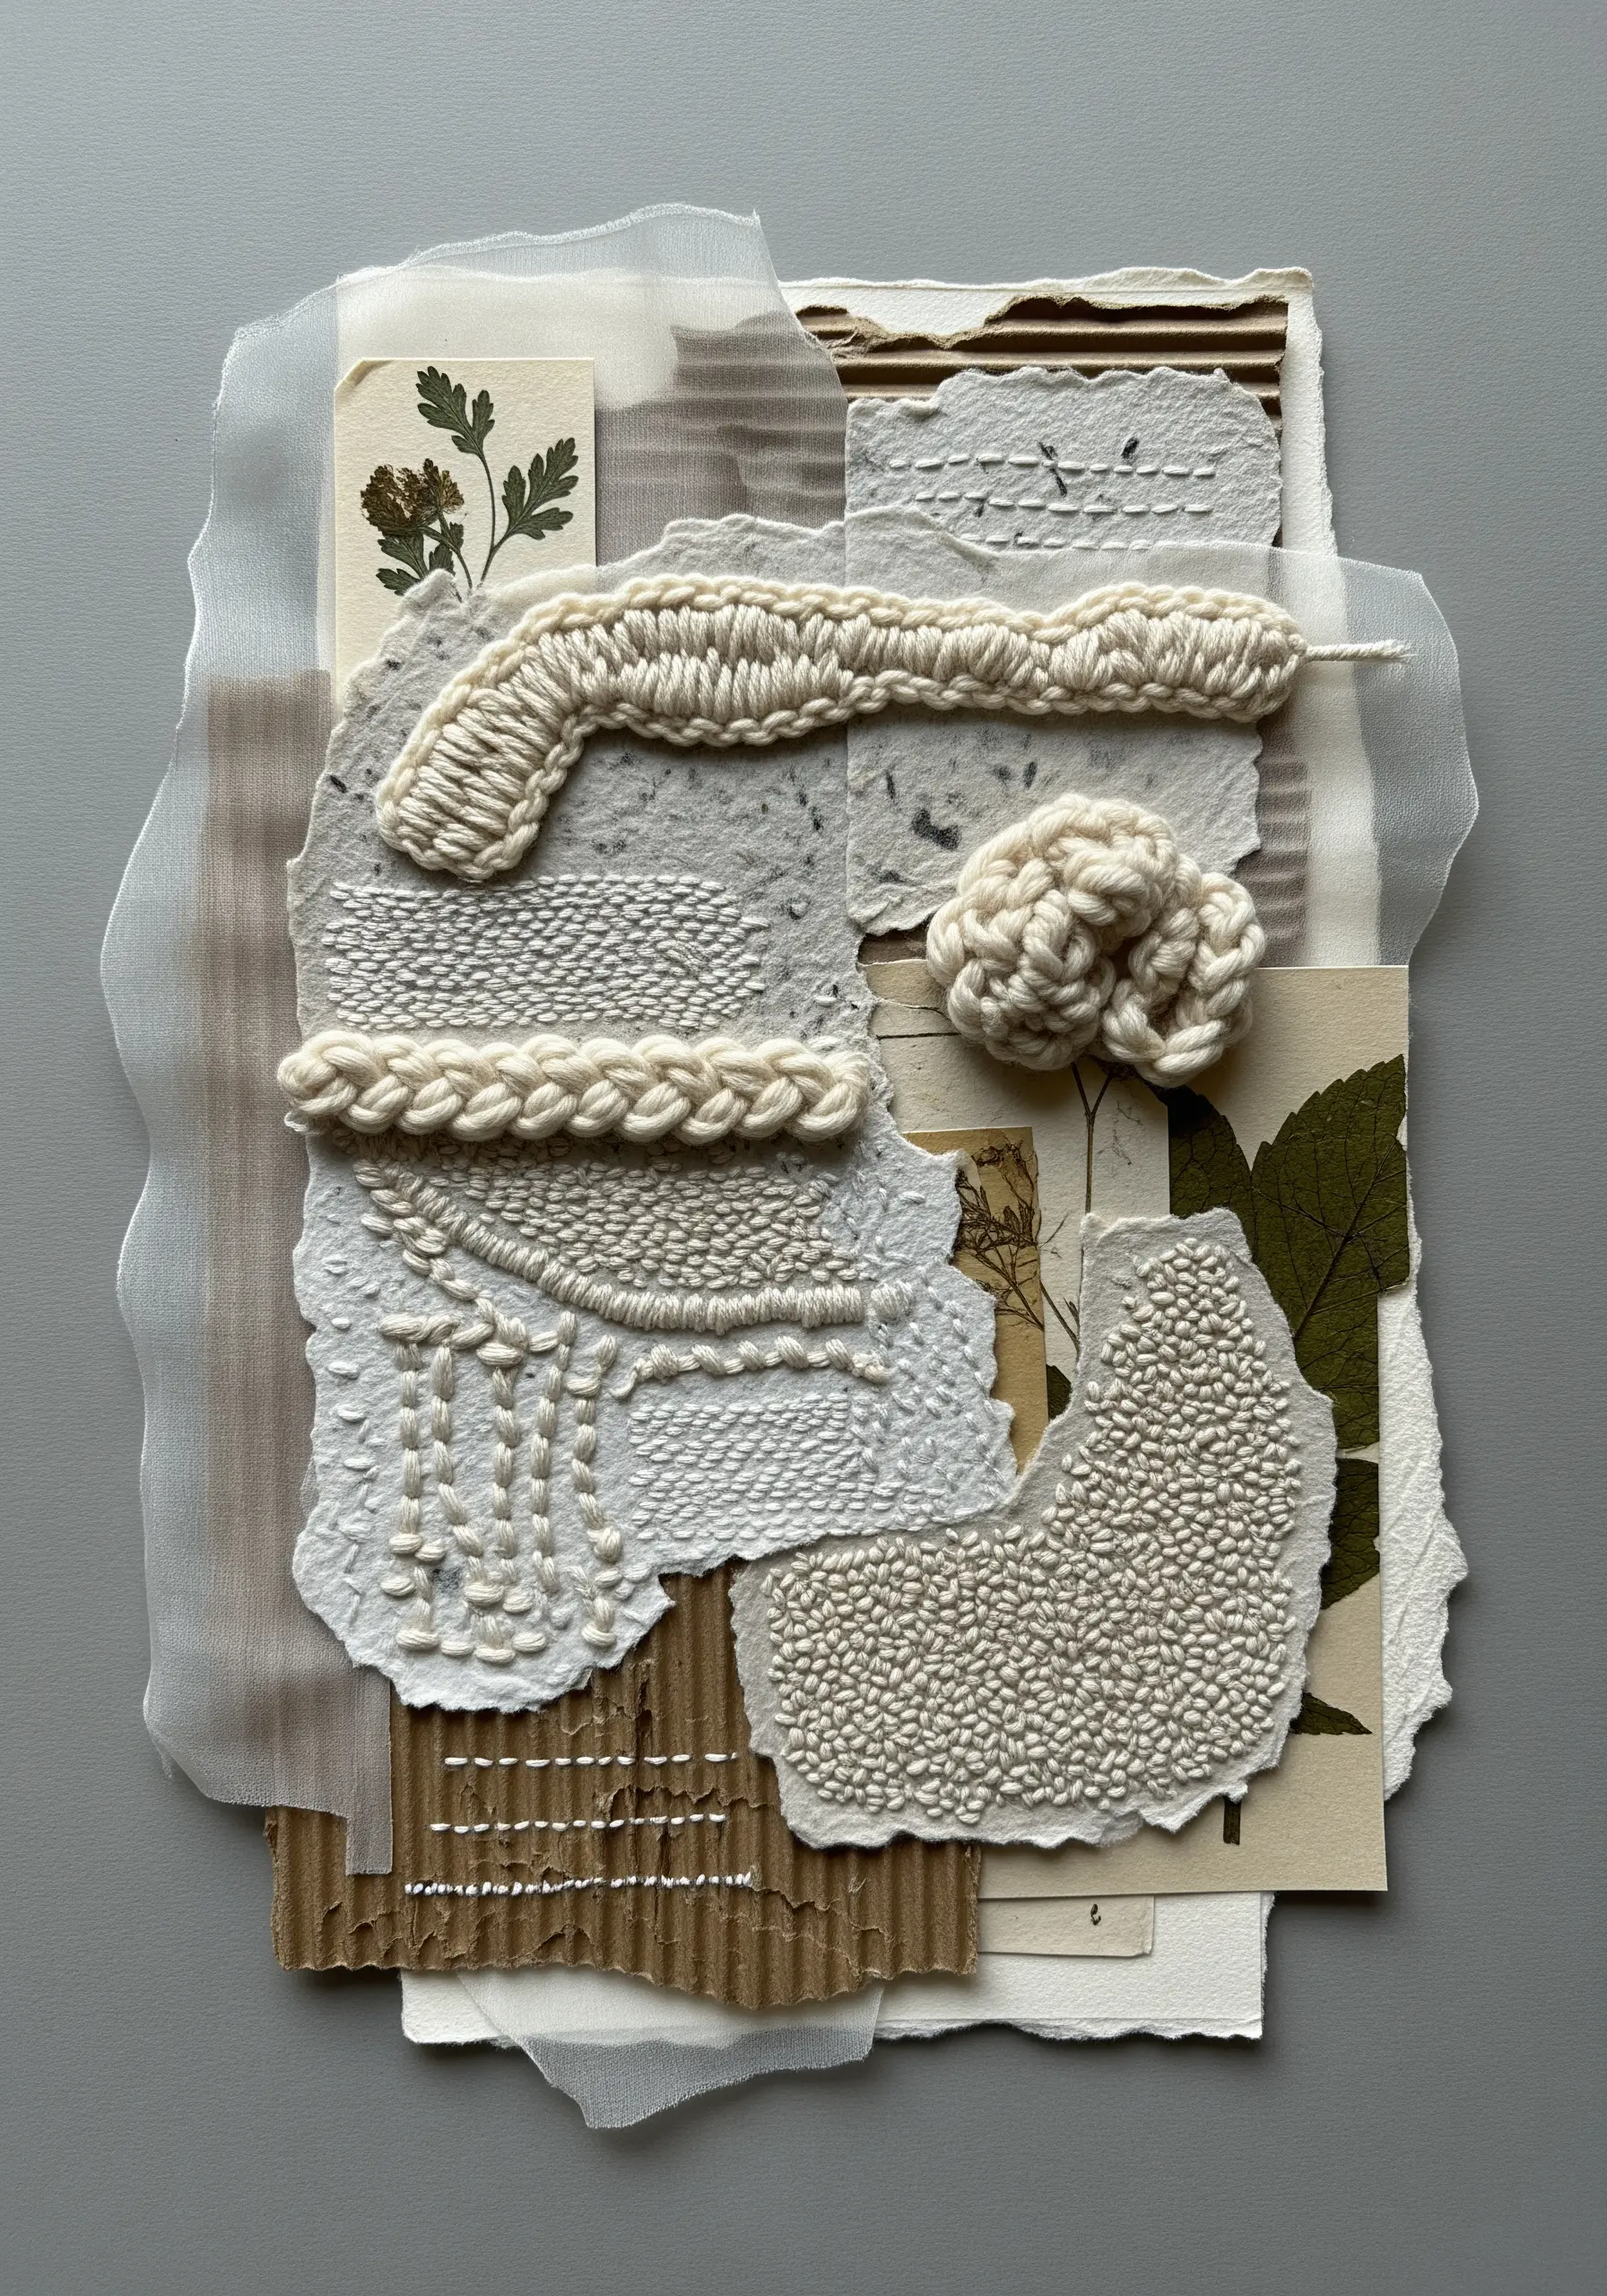
15. Explore a Monochrome Palette of Textures
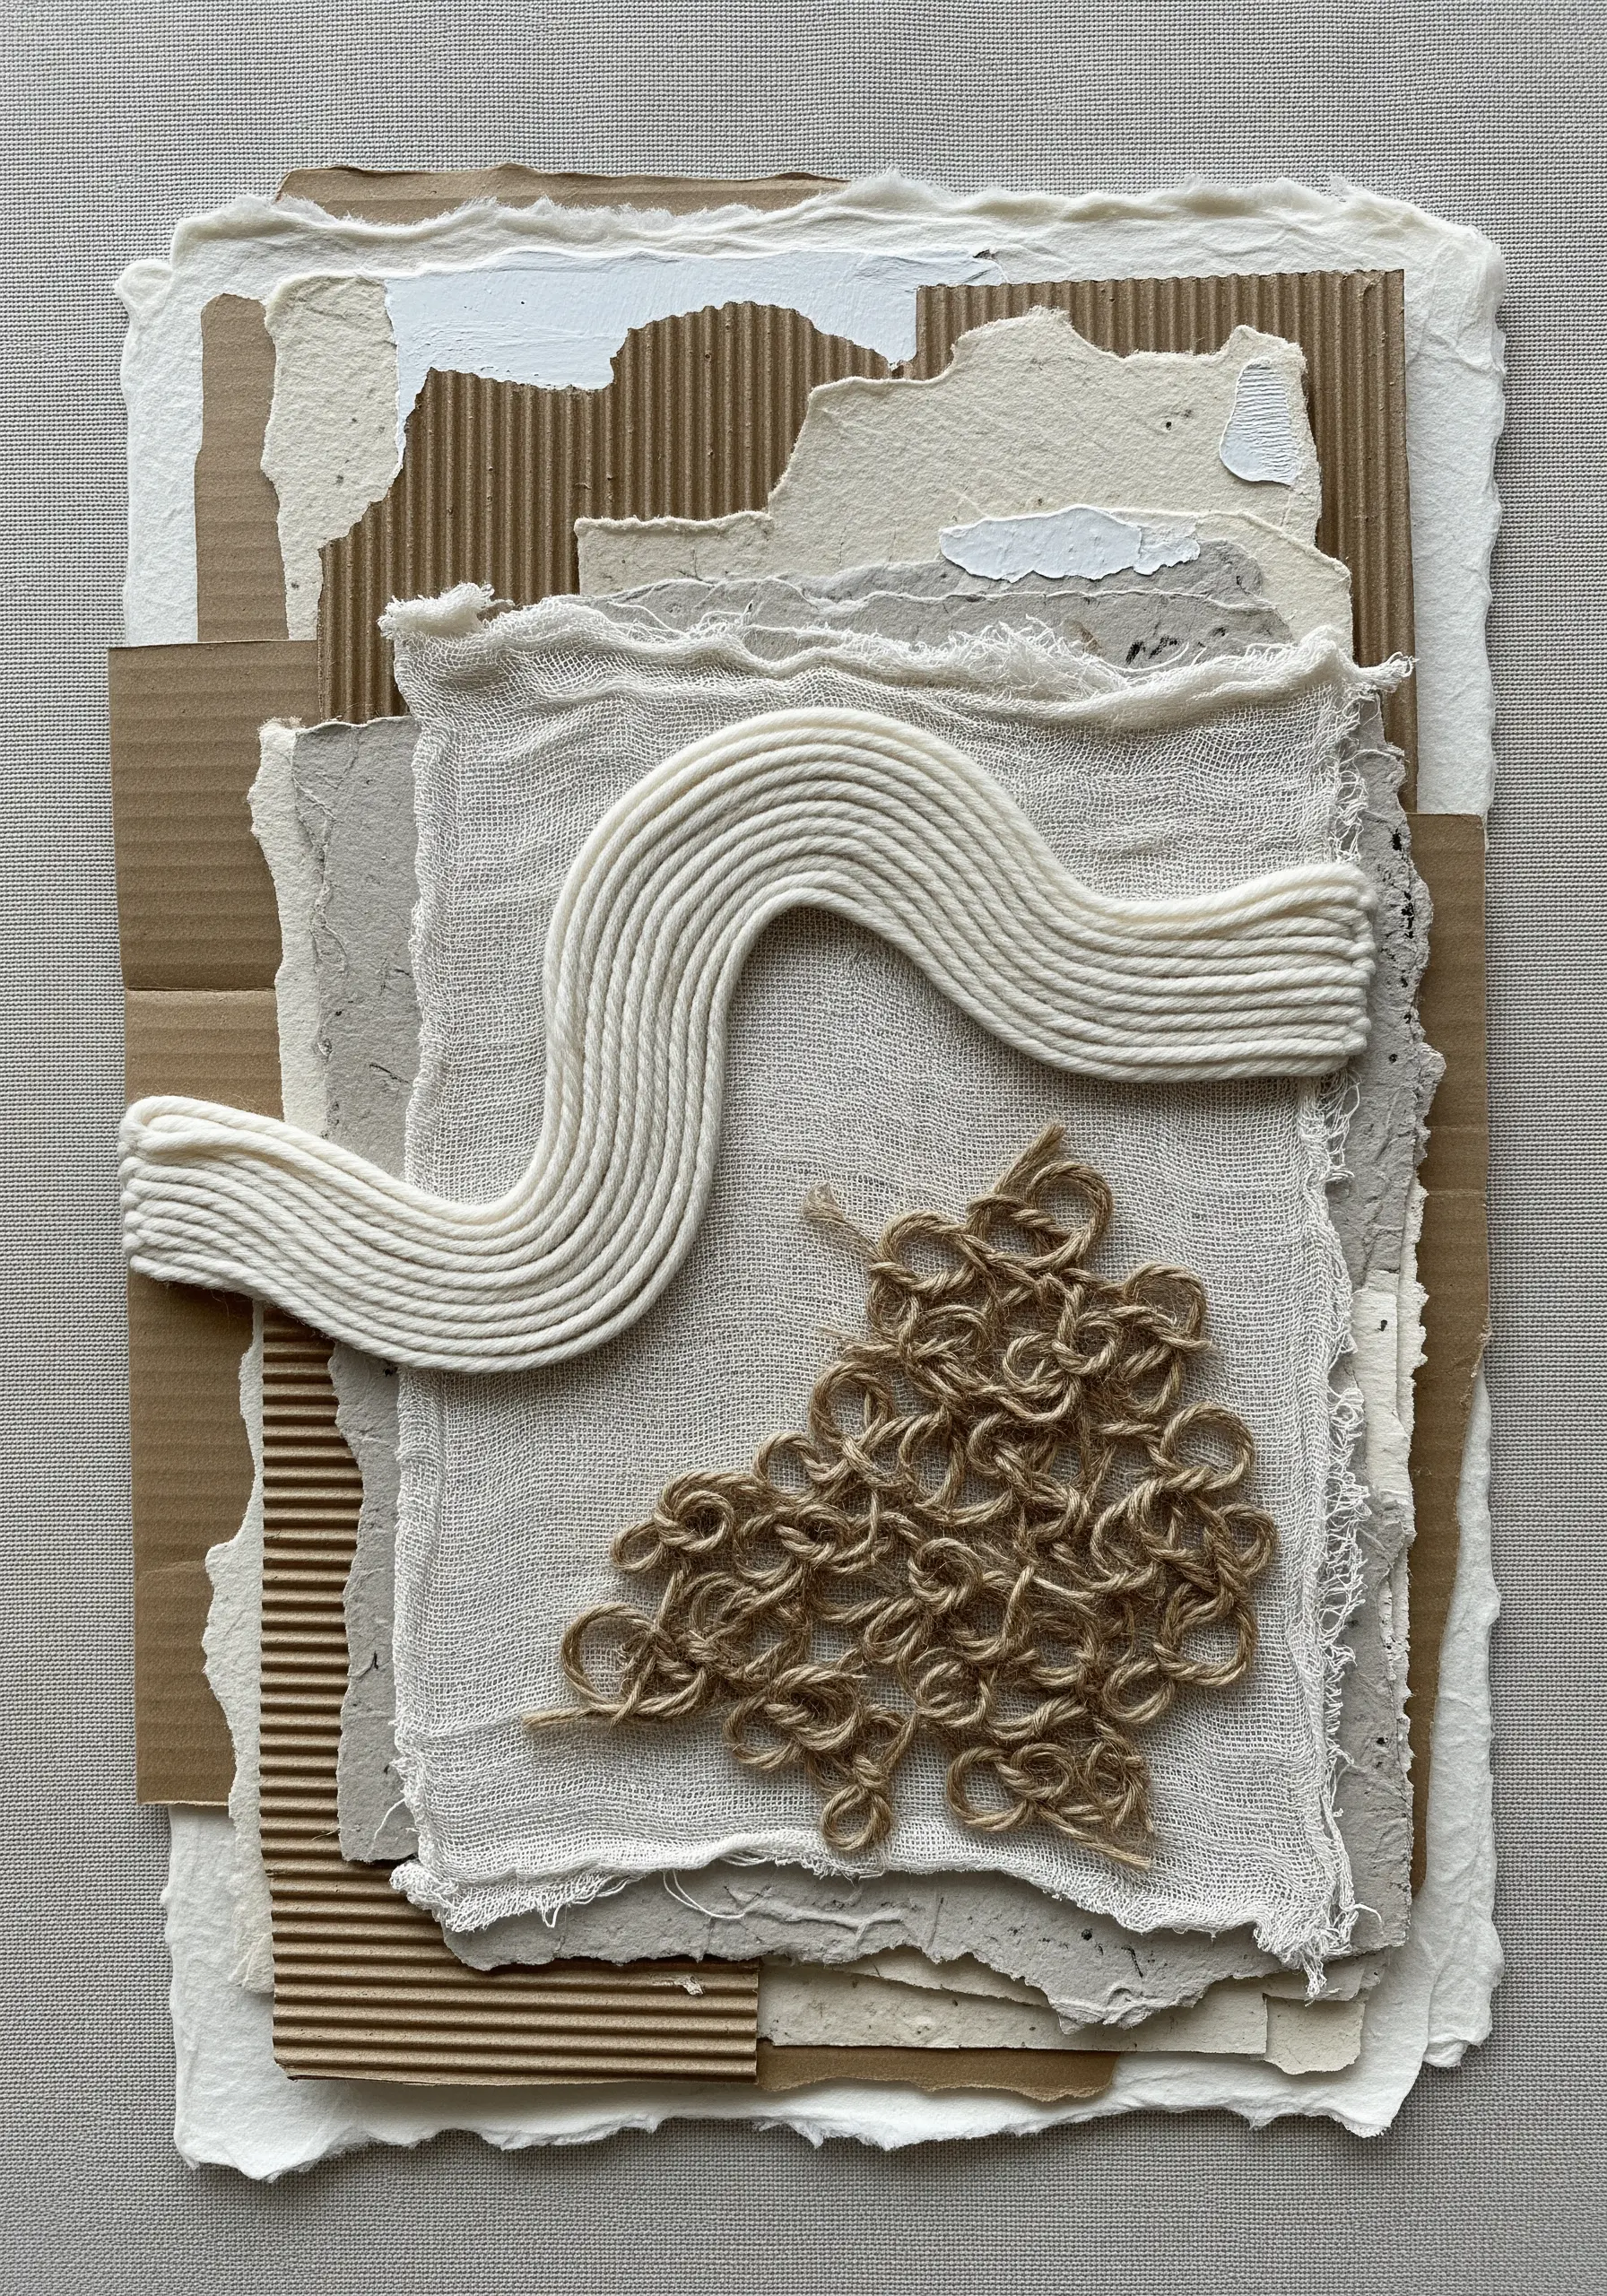
Challenge yourself to create visual interest using only texture, not color. This is a hallmark of sophisticated textured neutral embroidery samplers.
Layer different neutral materials like corrugated cardboard, handmade paper, and raw linen to build a tactile base.
Then, introduce thread in similar tones but varying weights—from fine jute to thick wool yarn.
Use techniques like couching, weaving, and dense seed stitching to create distinct zones of texture that invite touch and closer inspection, proving that a monochrome palette can be incredibly rich and complex.
16. Capture Light with Reflective Gold Thread
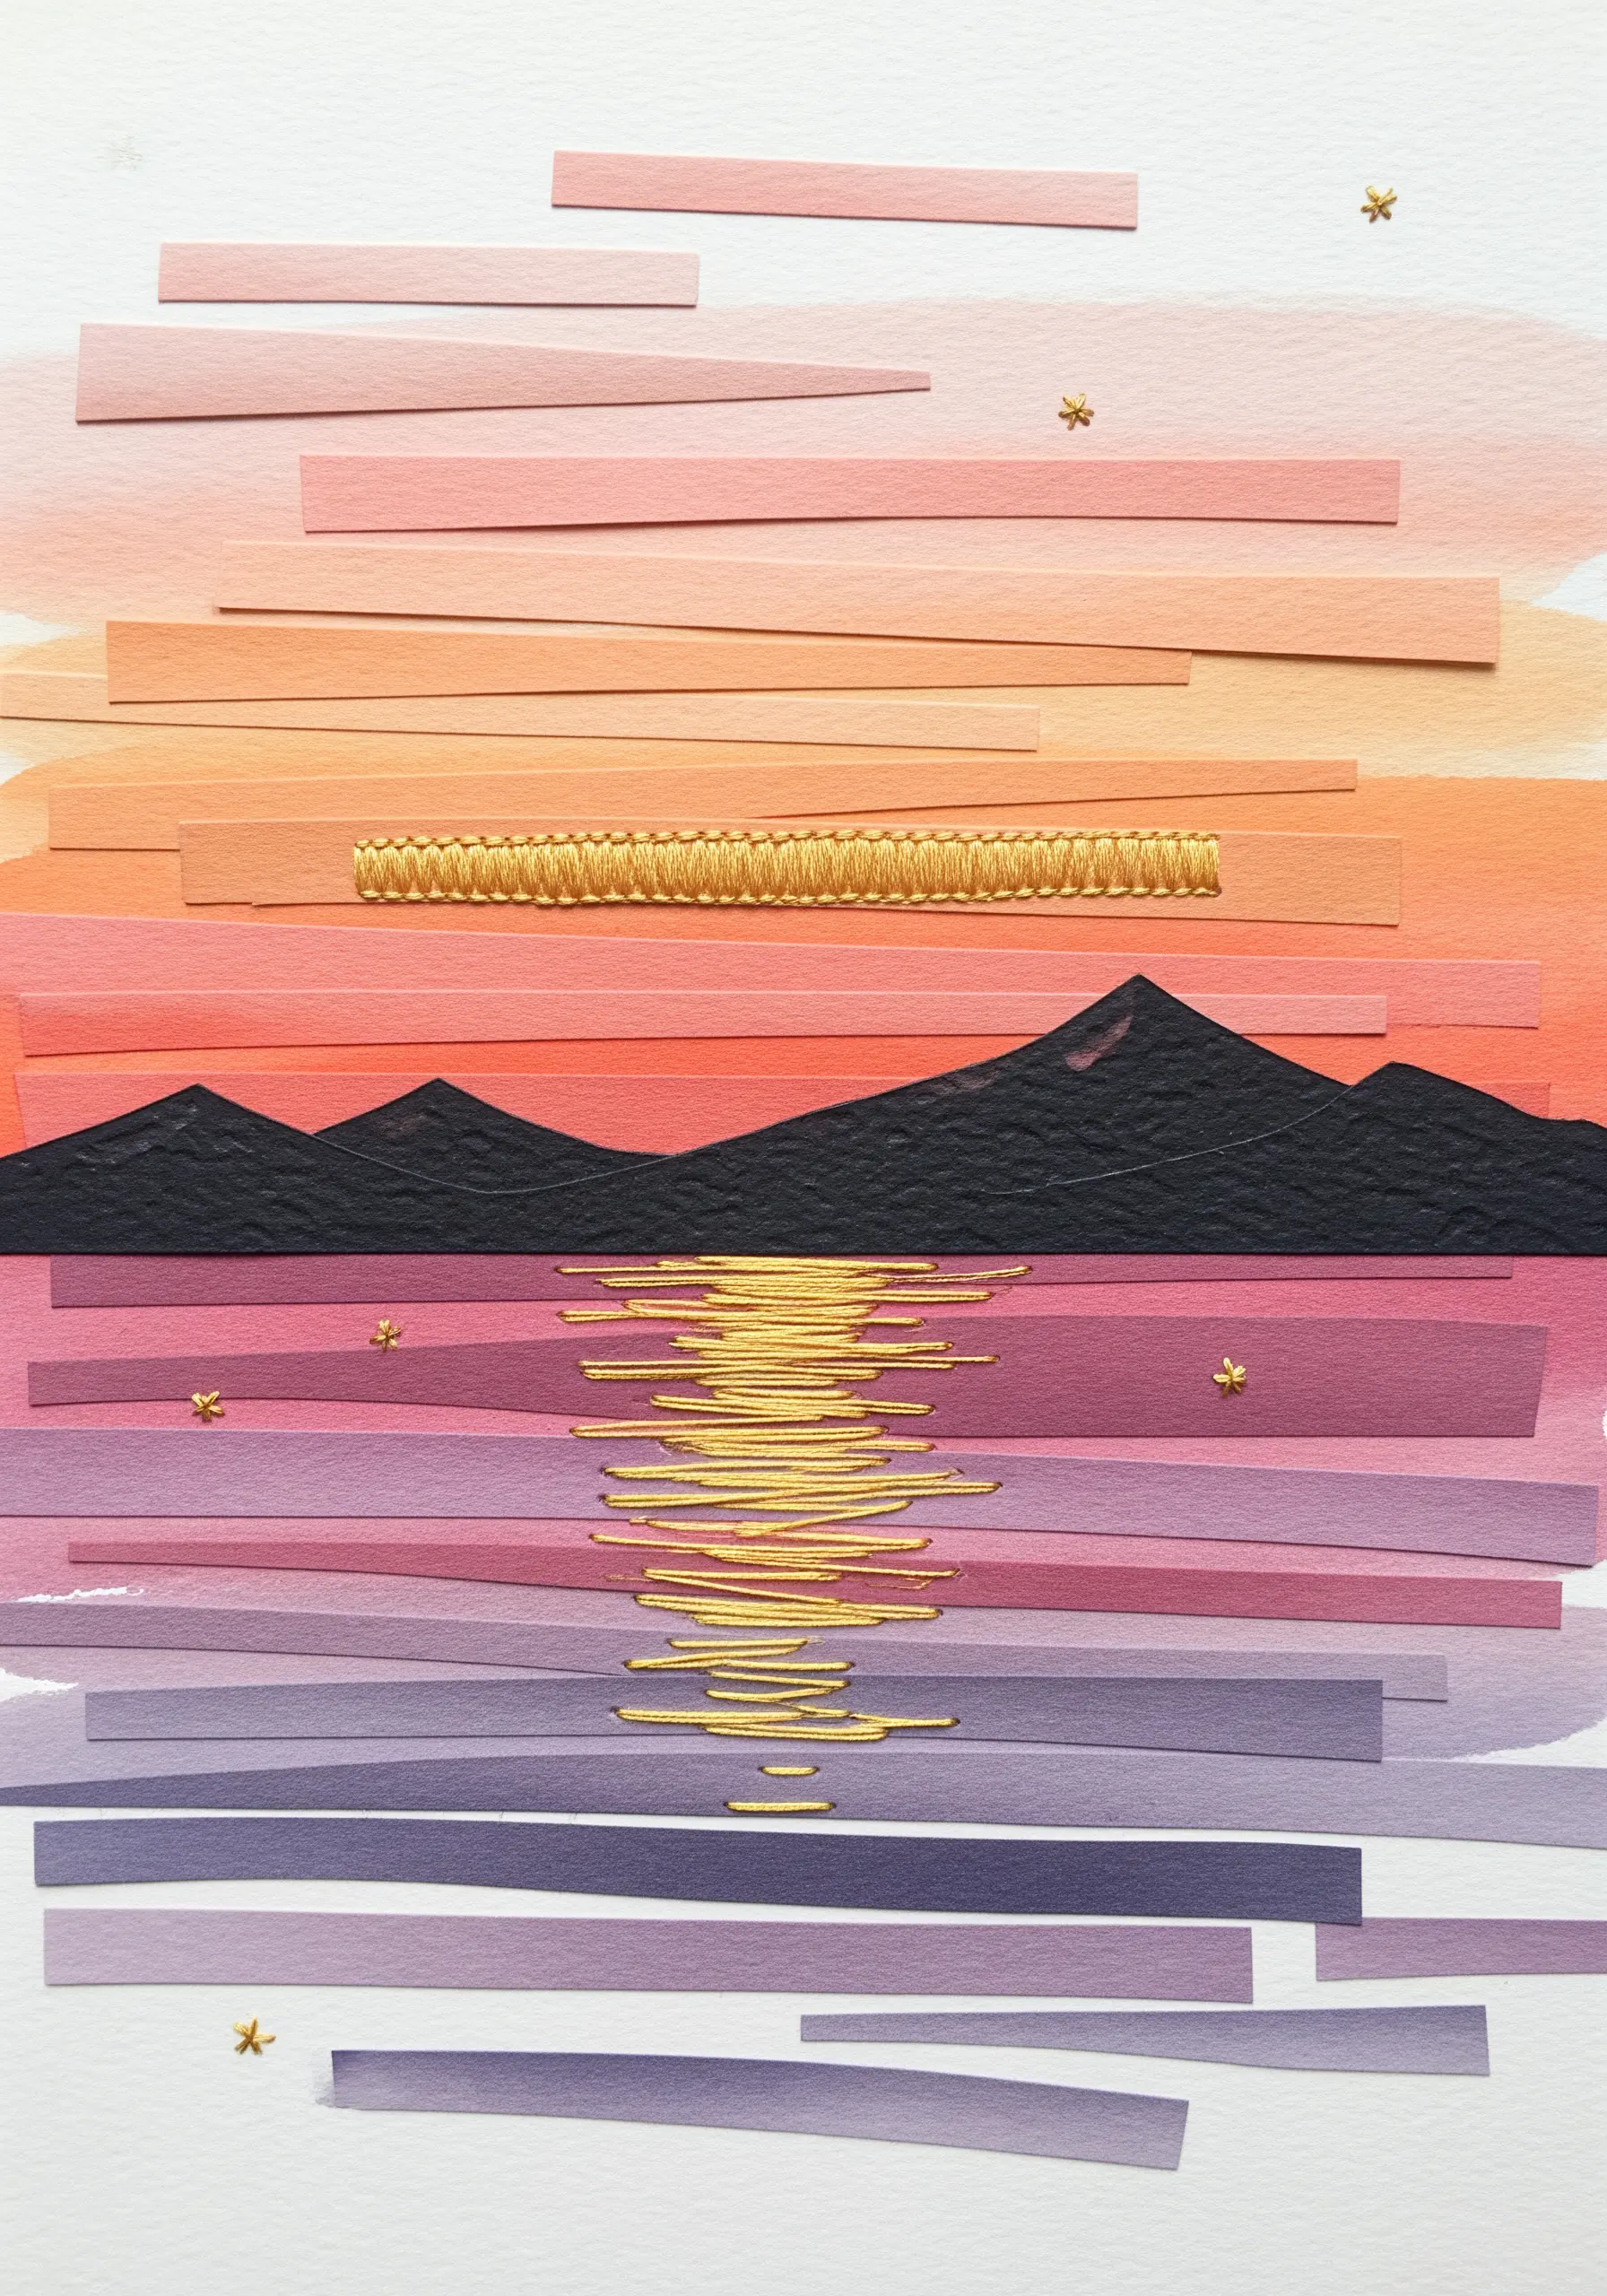
Use satin stitches in a metallic gold thread to represent the reflection of light on water or in a sunset sky.
Lay your stitches horizontally and vary their length slightly to mimic the way light shimmers and breaks across a surface.
The key to a smooth satin stitch with metallic floss is to ensure your threads lay flat and untwisted. A laying tool or even the shaft of a larger needle can help guide them into place.
The intense sheen of the metallic thread against the matte paper creates a powerful focal point and adds a touch of pure magic to a simple landscape.
17. Blend Fabric Appliqué with Simple Stitches
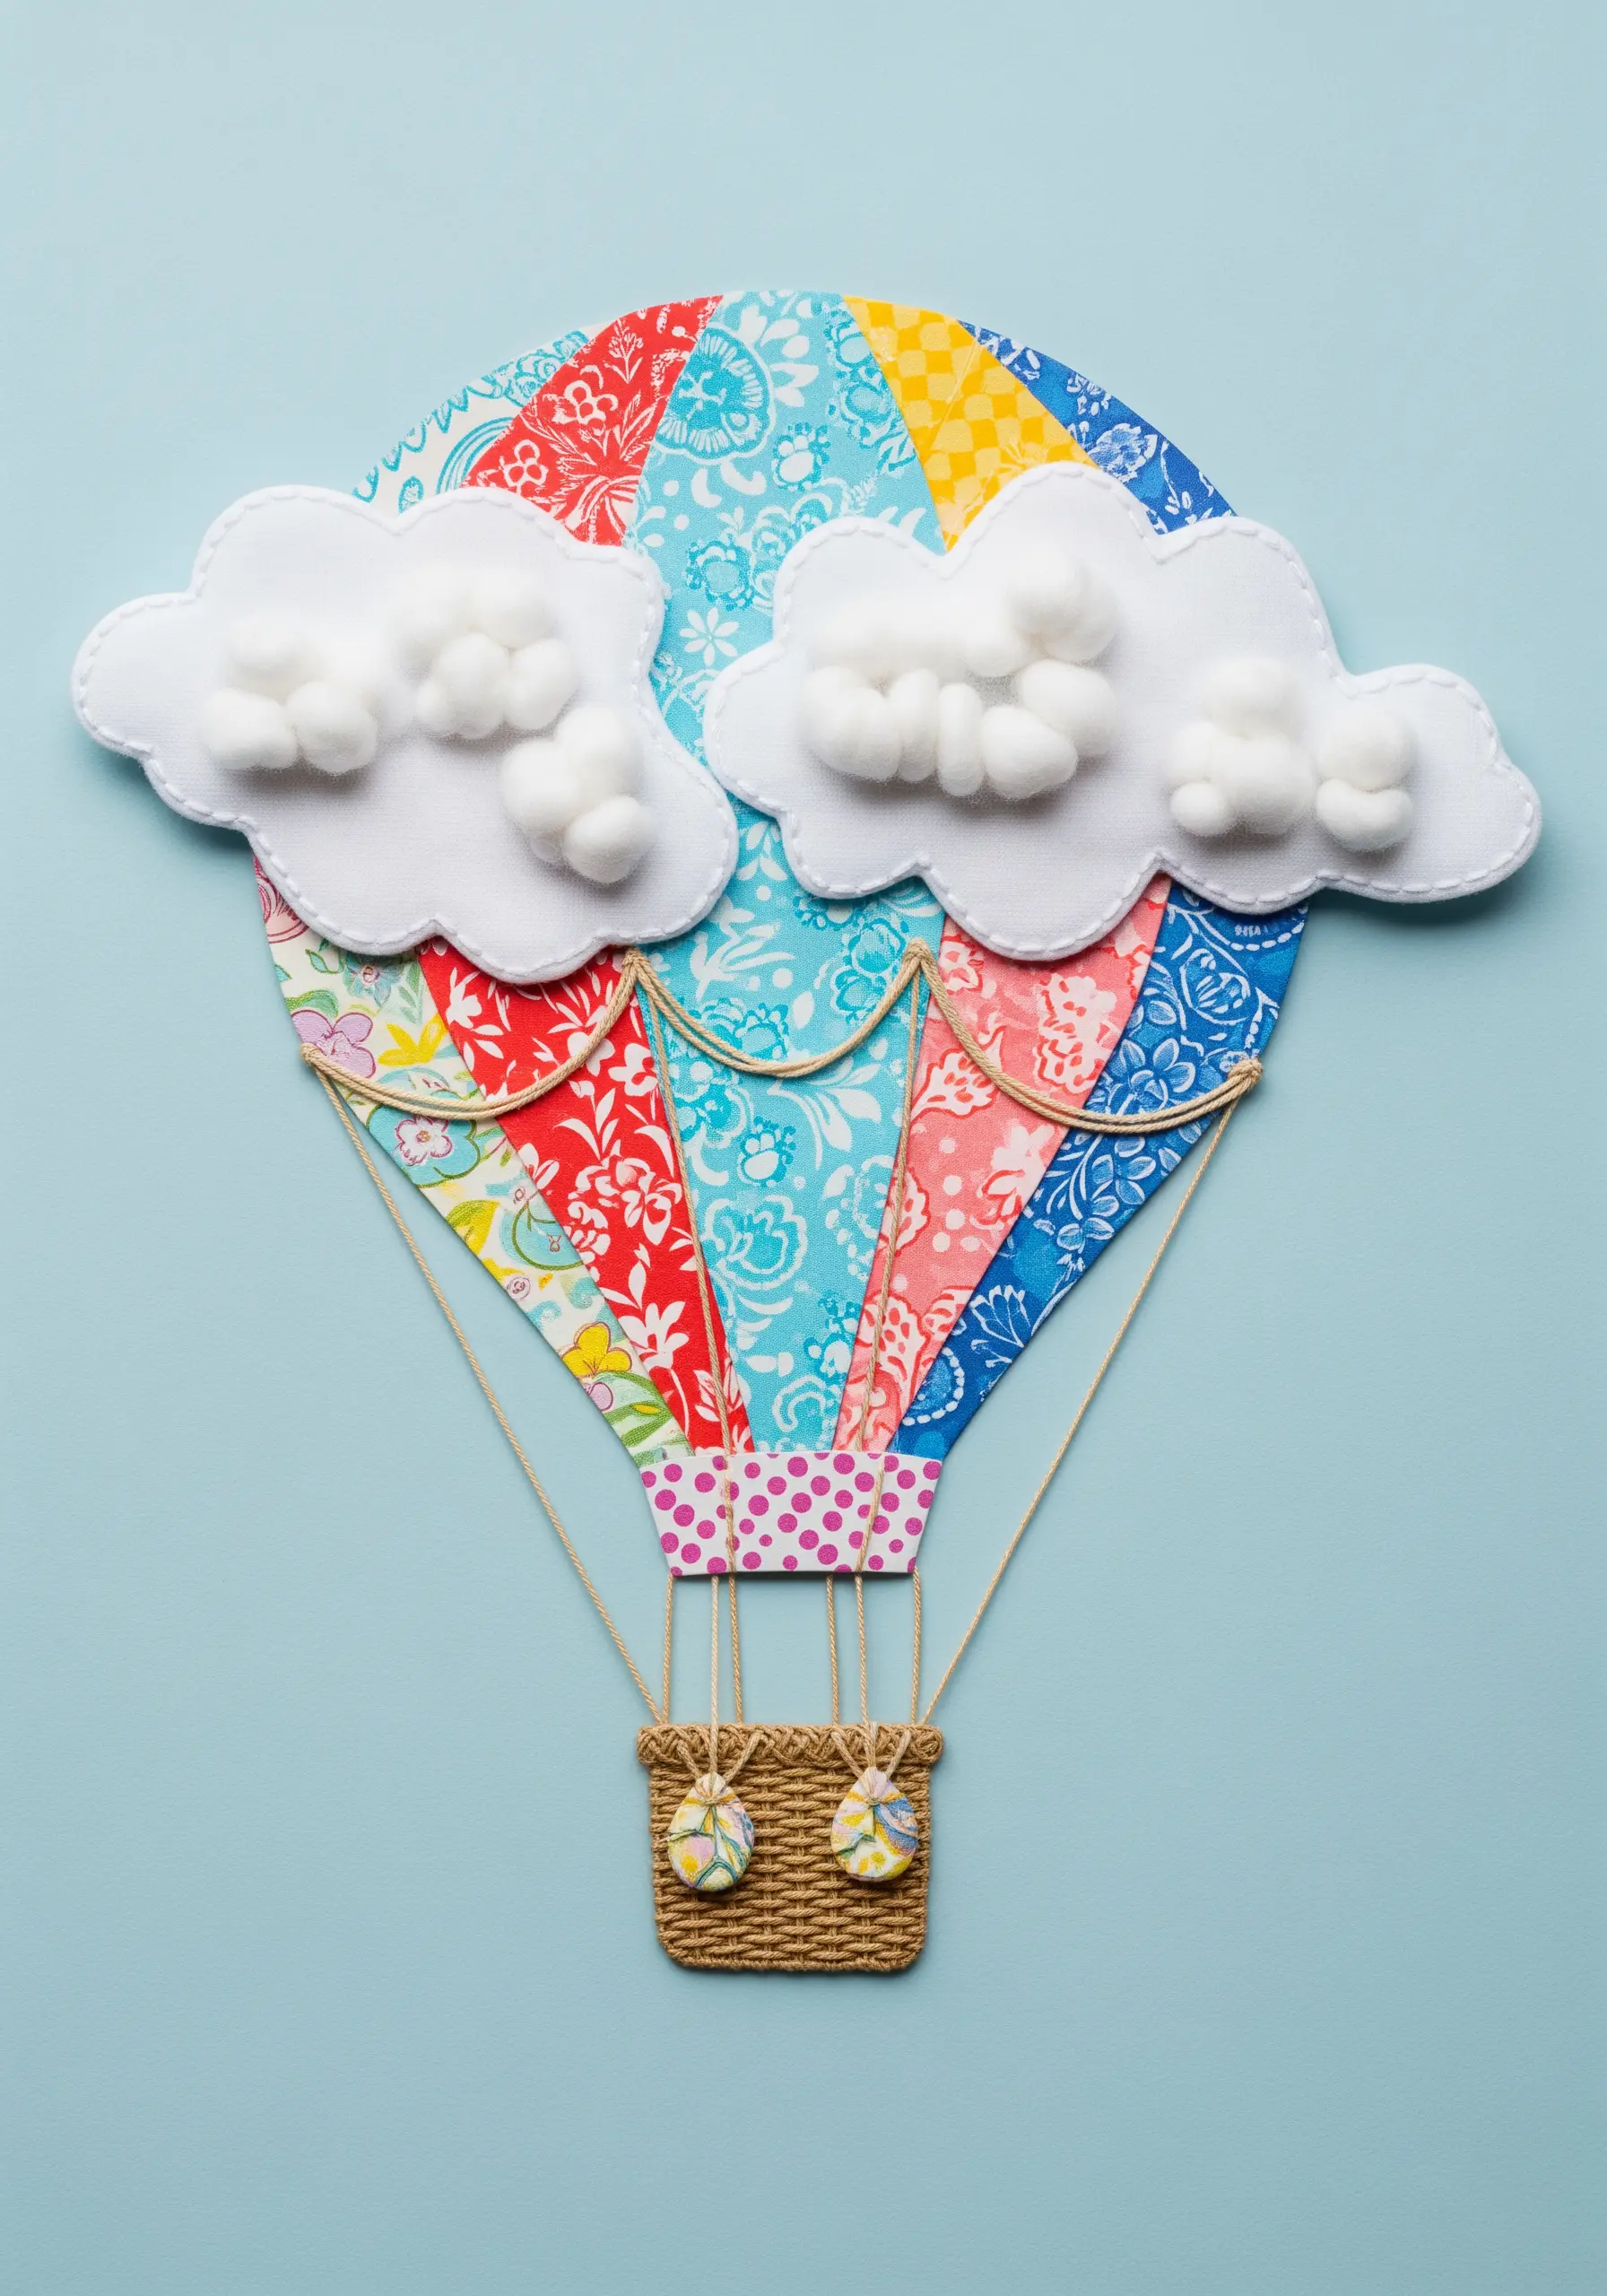
Combine the charm of patterned fabric with the clean lines of simple embroidery for a playful, illustrative style.
First, cut your fabric shapes and secure them to the background with a fusible bonding web like Heat’n Bond for crisp, fray-free edges.
Then, use a simple backstitch or stem stitch around the edges of your appliqué to define the shapes and give them a hand-finished look.
This technique is perfect for creating bold, graphic pieces where the pattern of the fabric does most of the decorative work, and the stitches provide structure and definition.
18. Visualize Music with Abstract Stitching

Translate the rhythm and flow of music into a visual line by stitching directly onto sheet music.
Use a running stitch or whipped backstitch to create an undulating line that mimics the melody’s highs and lows.
Varying the density of your stitches—placing them closer together for intense moments and further apart for calmer passages—adds another layer of musical interpretation.
The combination of the formal, printed notes with the organic, handmade line of thread creates a beautiful dialogue between two different forms of expression, making it one of the most creative mixed-media embroidery projects.
19. Create Bold Outlines with Whipped Backstitch
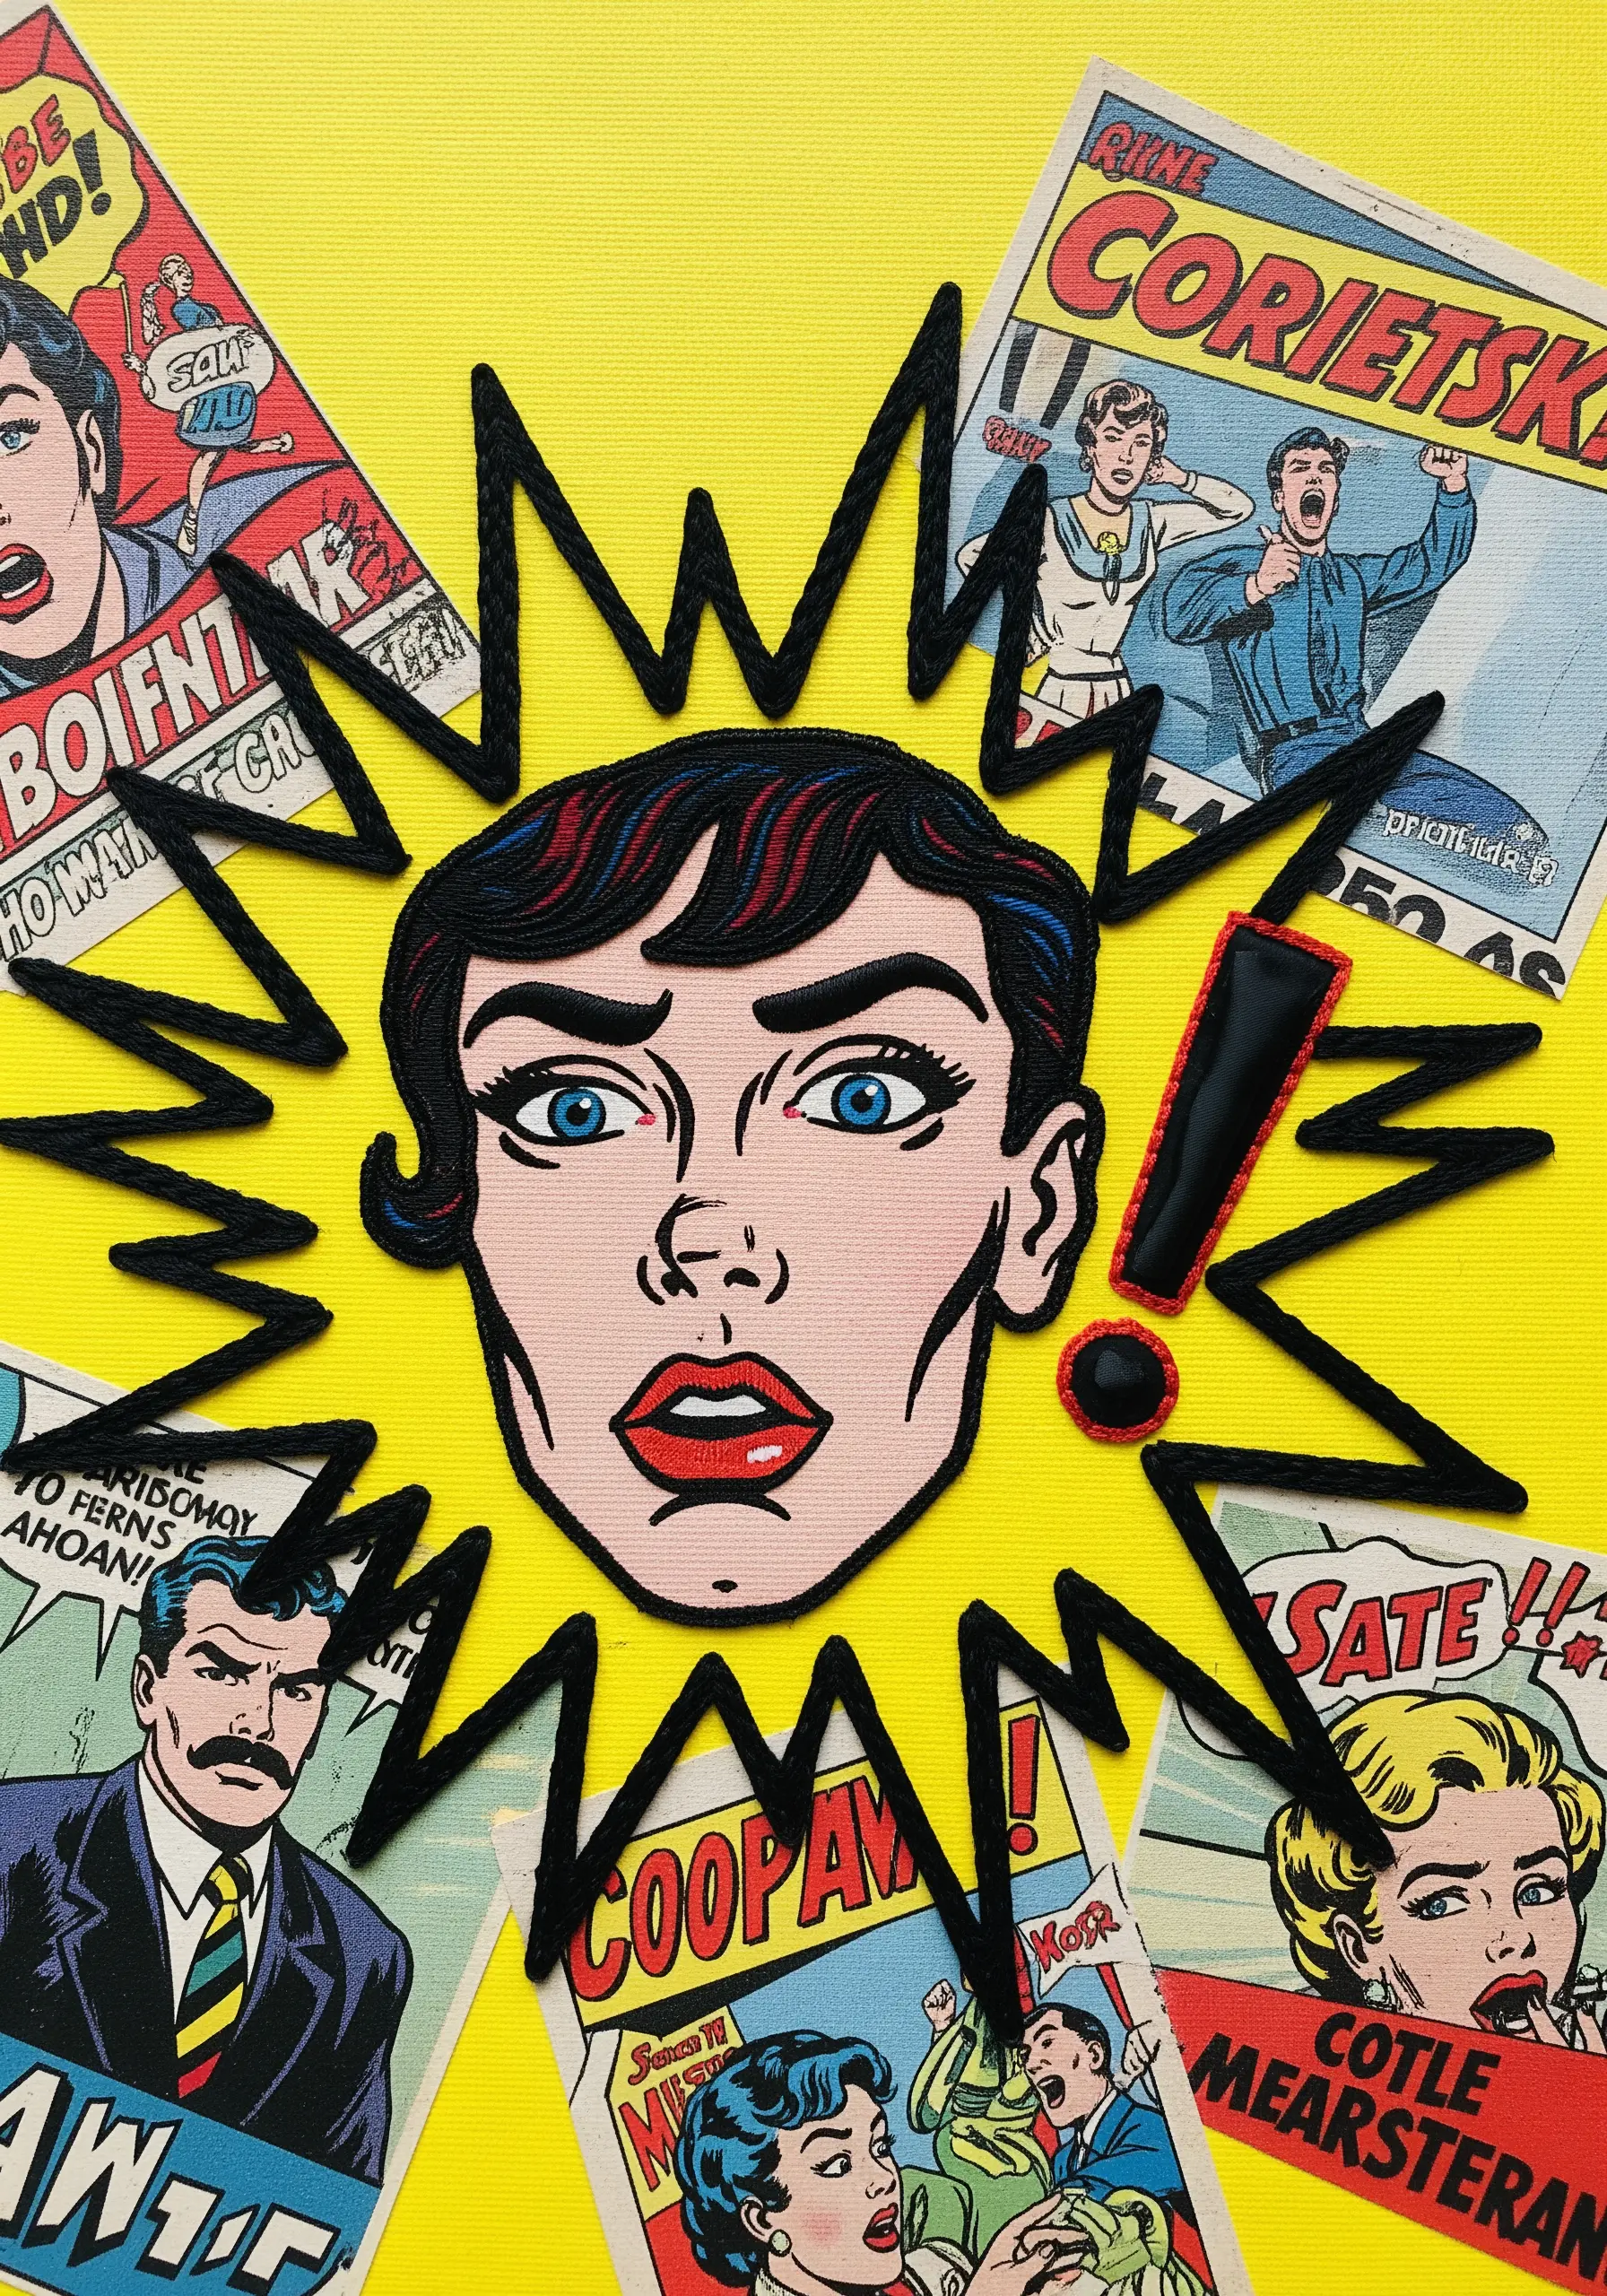
For thick, solid outlines that pop, especially in a graphic or comic book style, use a whipped backstitch.
First, create a standard backstitch outline. Then, using the same or a different color thread, whip your needle under each backstitch without piercing the fabric or paper.
This technique creates a raised, rope-like line that is much bolder and smoother than a simple backstitch, perfect for dramatic emphasis.
Fill in smaller areas with a dense satin stitch to create a solid, patch-like effect that enhances the graphic novel aesthetic.
20. Replicate Industrial Textures with Thread
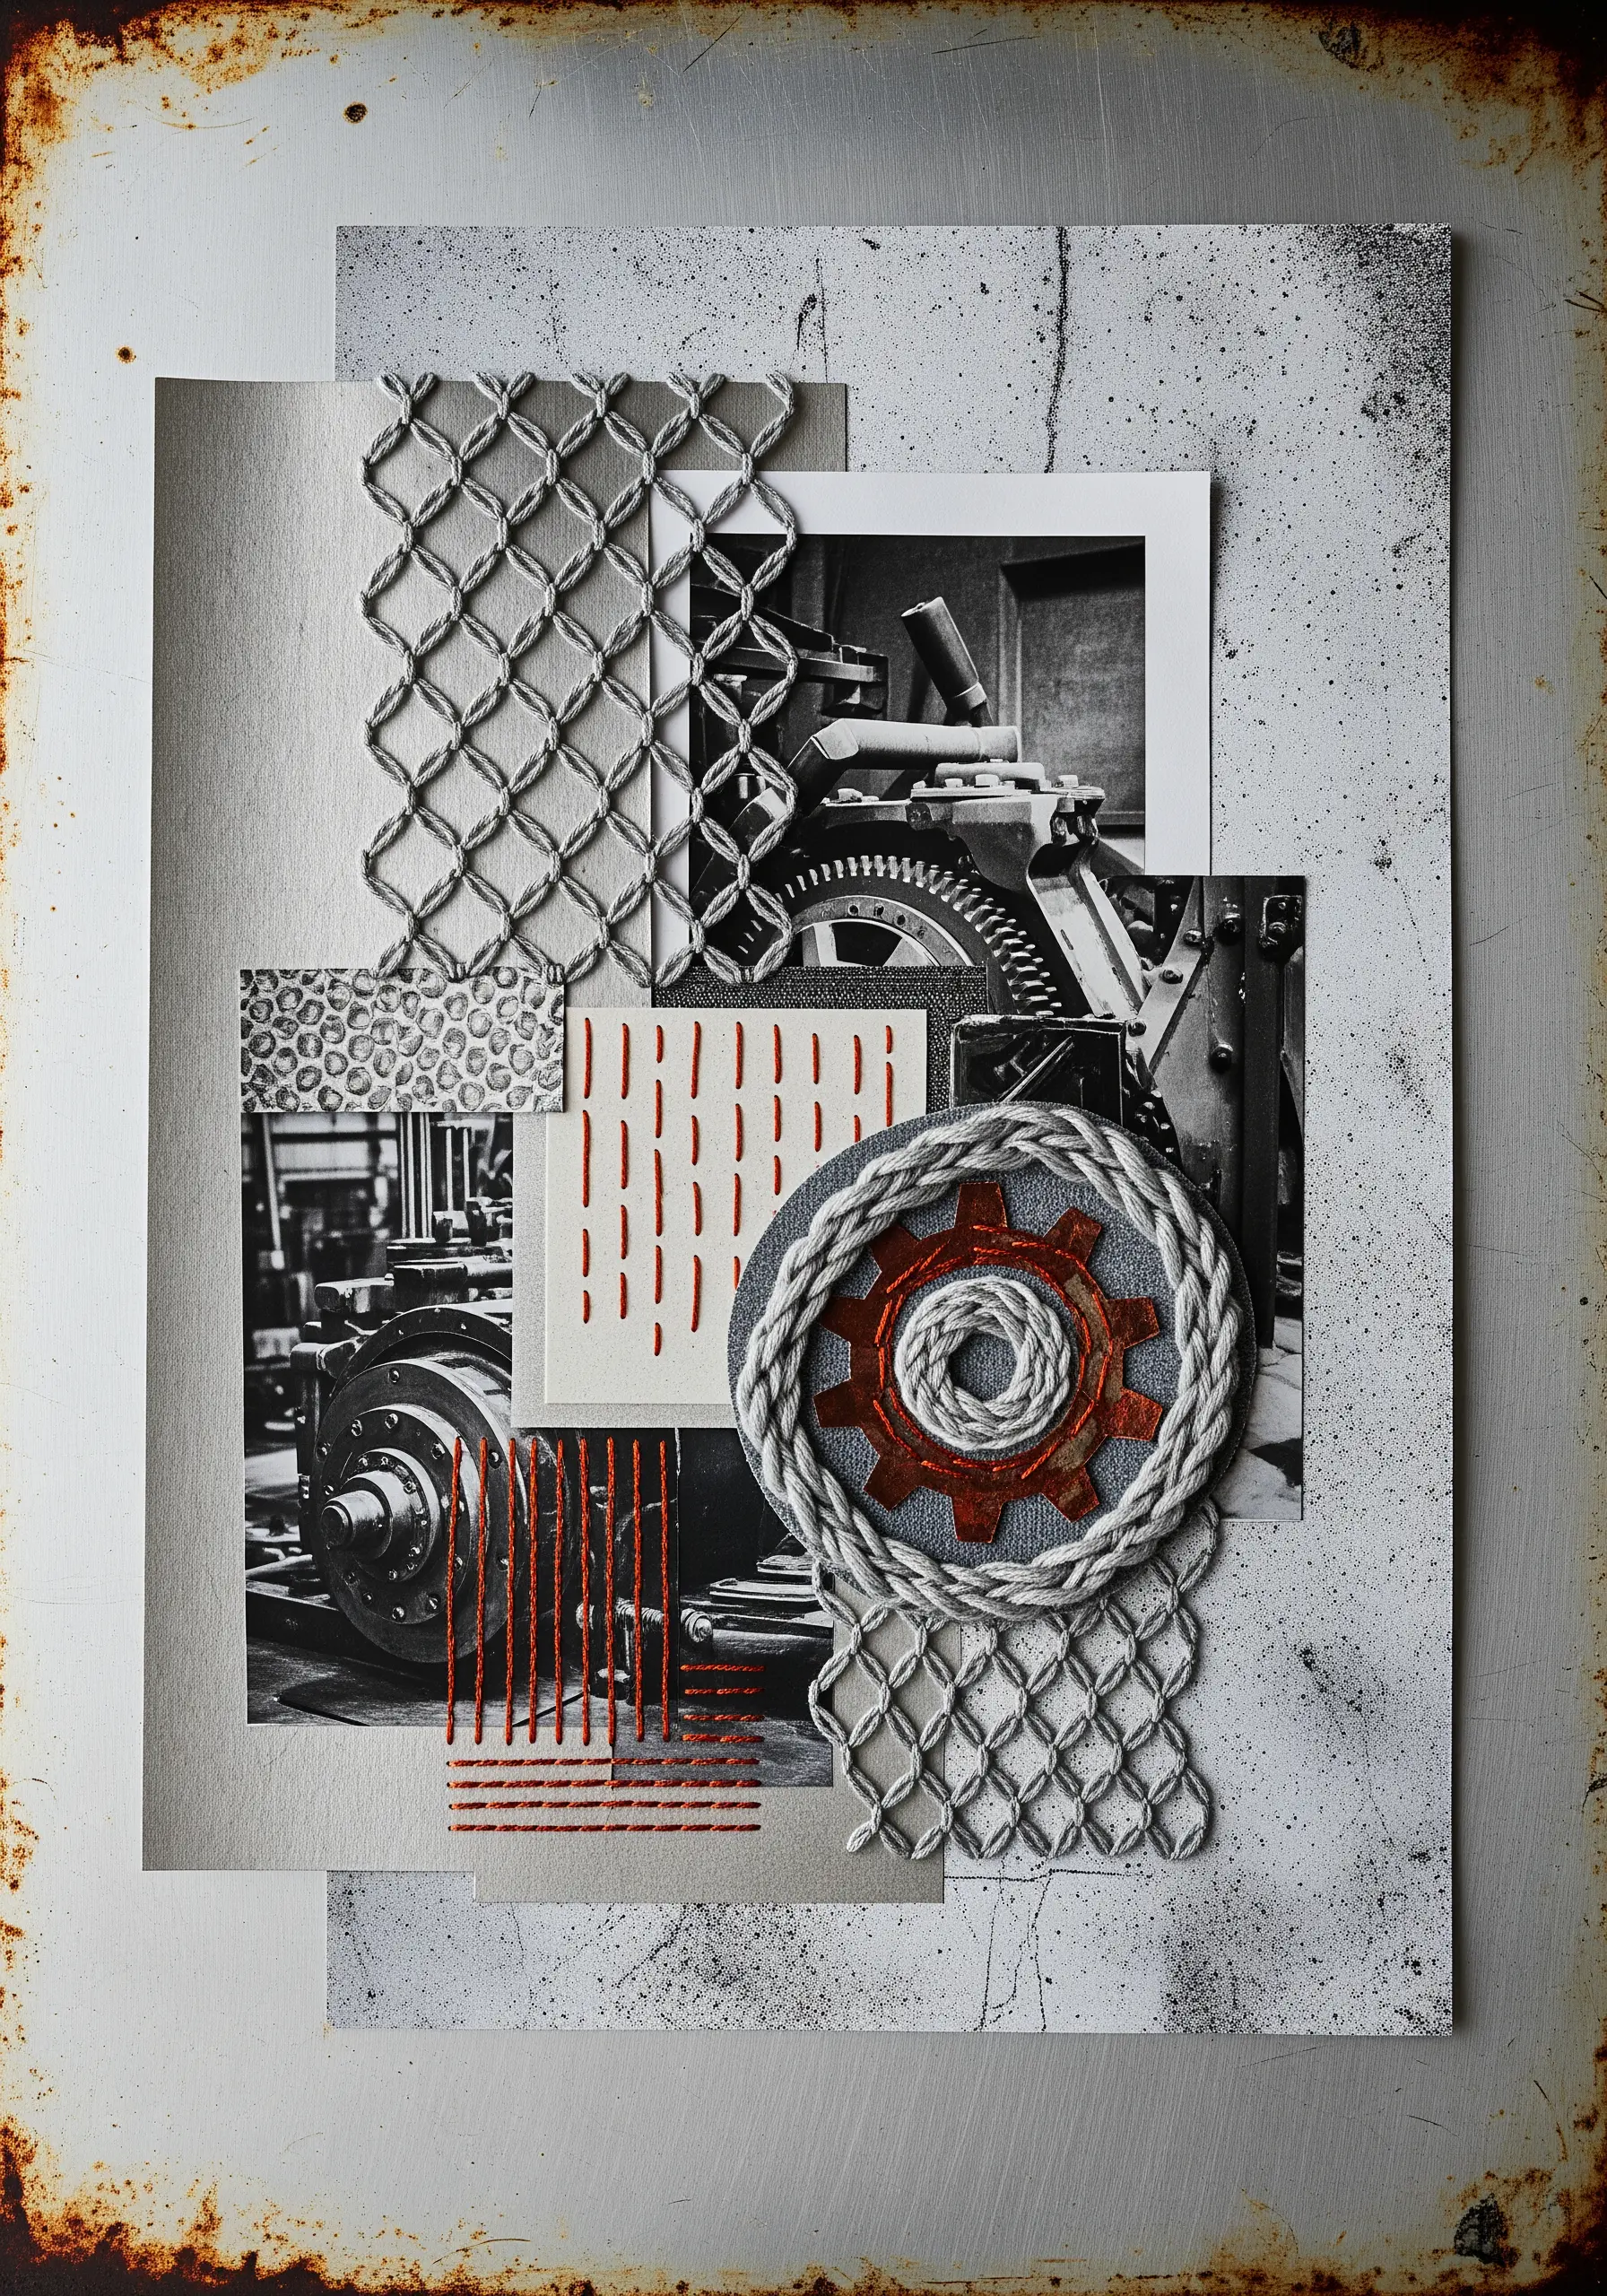
Translate industrial patterns like chain-link fences or grids into embroidery to soften them while retaining their graphic quality.
For a fence pattern, use a grid of intersecting diagonal straight stitches (a technique known as trellis stitch or couching) to create the diamond shapes.
To mimic gears or mechanical parts, couch a thick cord in a spiral, using a contrasting thread for the securing stitches to add detail.
The juxtaposition of soft thread against hard, industrial imagery creates a fascinating tension and highlights the versatility of stitching as a medium.
21. Communicate with Minimalist Stitched Marks
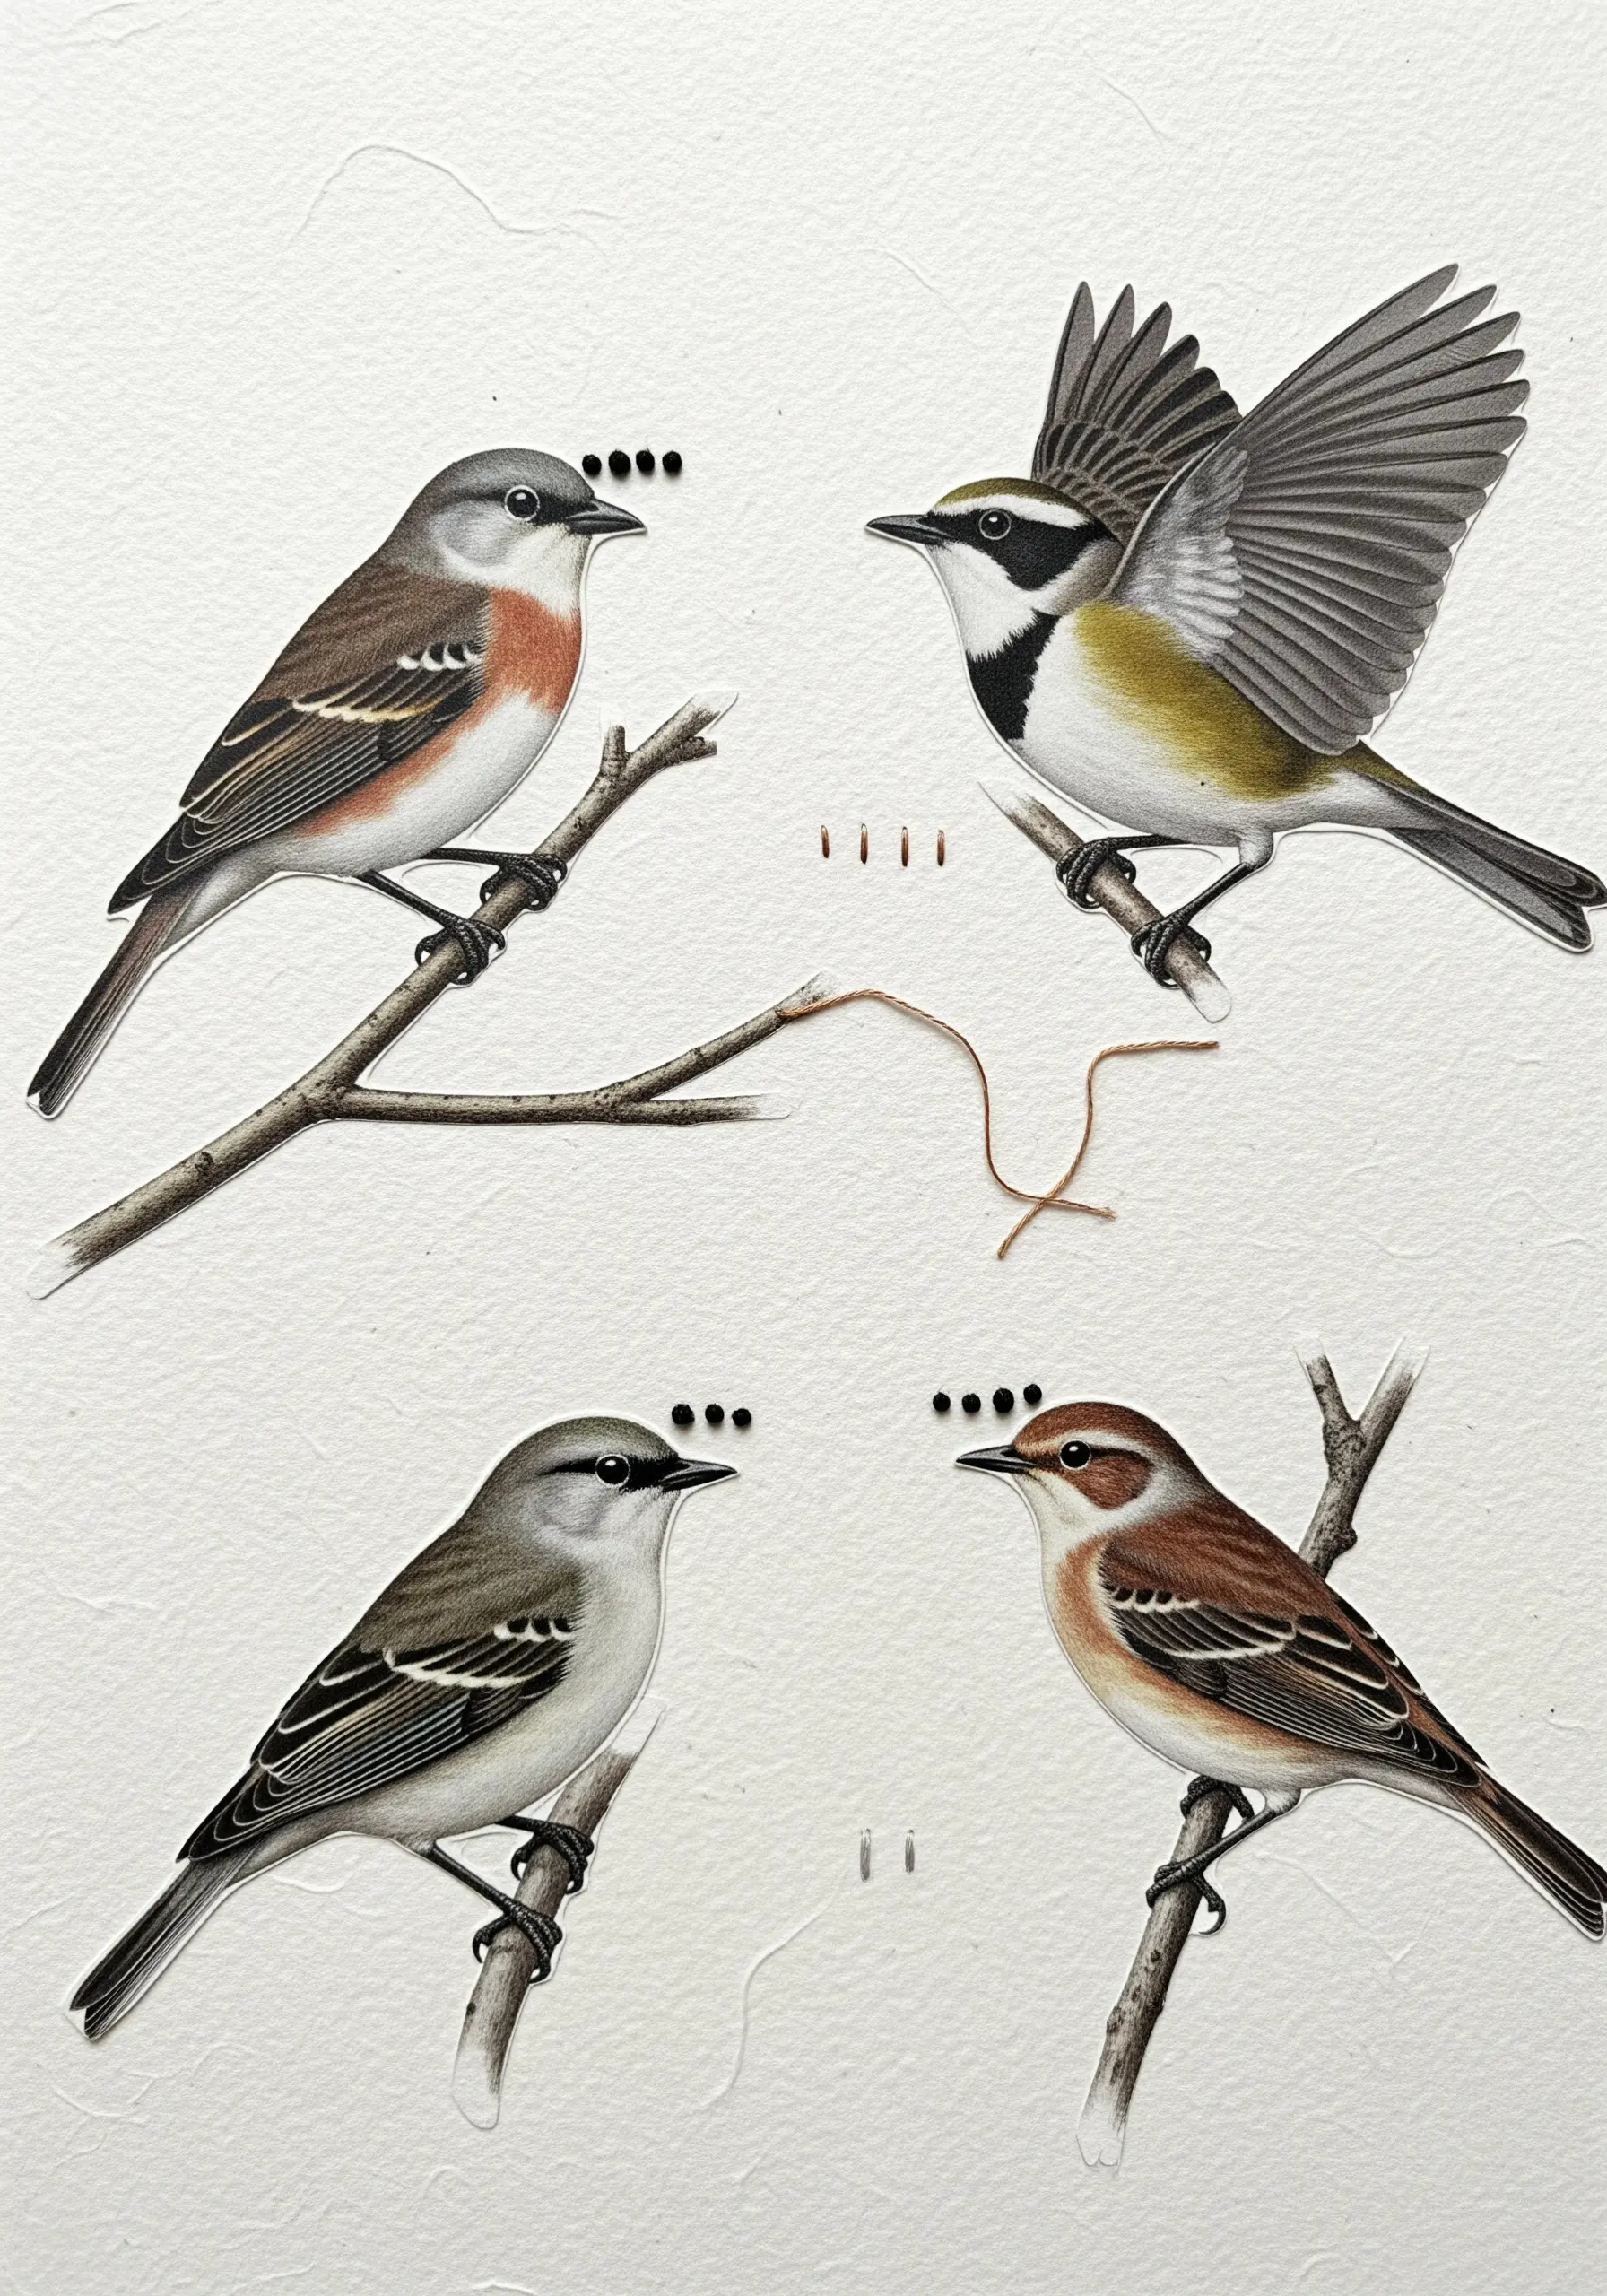
Convey an idea or a piece of dialogue with the simplest possible stitches, turning thread into a form of typography.
Use French knots or tiny straight stitches to create punctuation like ellipses or dashes, adding a layer of unspoken narrative to your collage.
The thread’s texture creates a subtle disruption on the flat surface of the print, drawing the viewer’s attention to these small but significant details.
This minimalist approach demonstrates that just a few carefully placed stitches can add immense personality and storytelling power to an existing image.
22. Define Geometric Shapes with Concentric Stitches
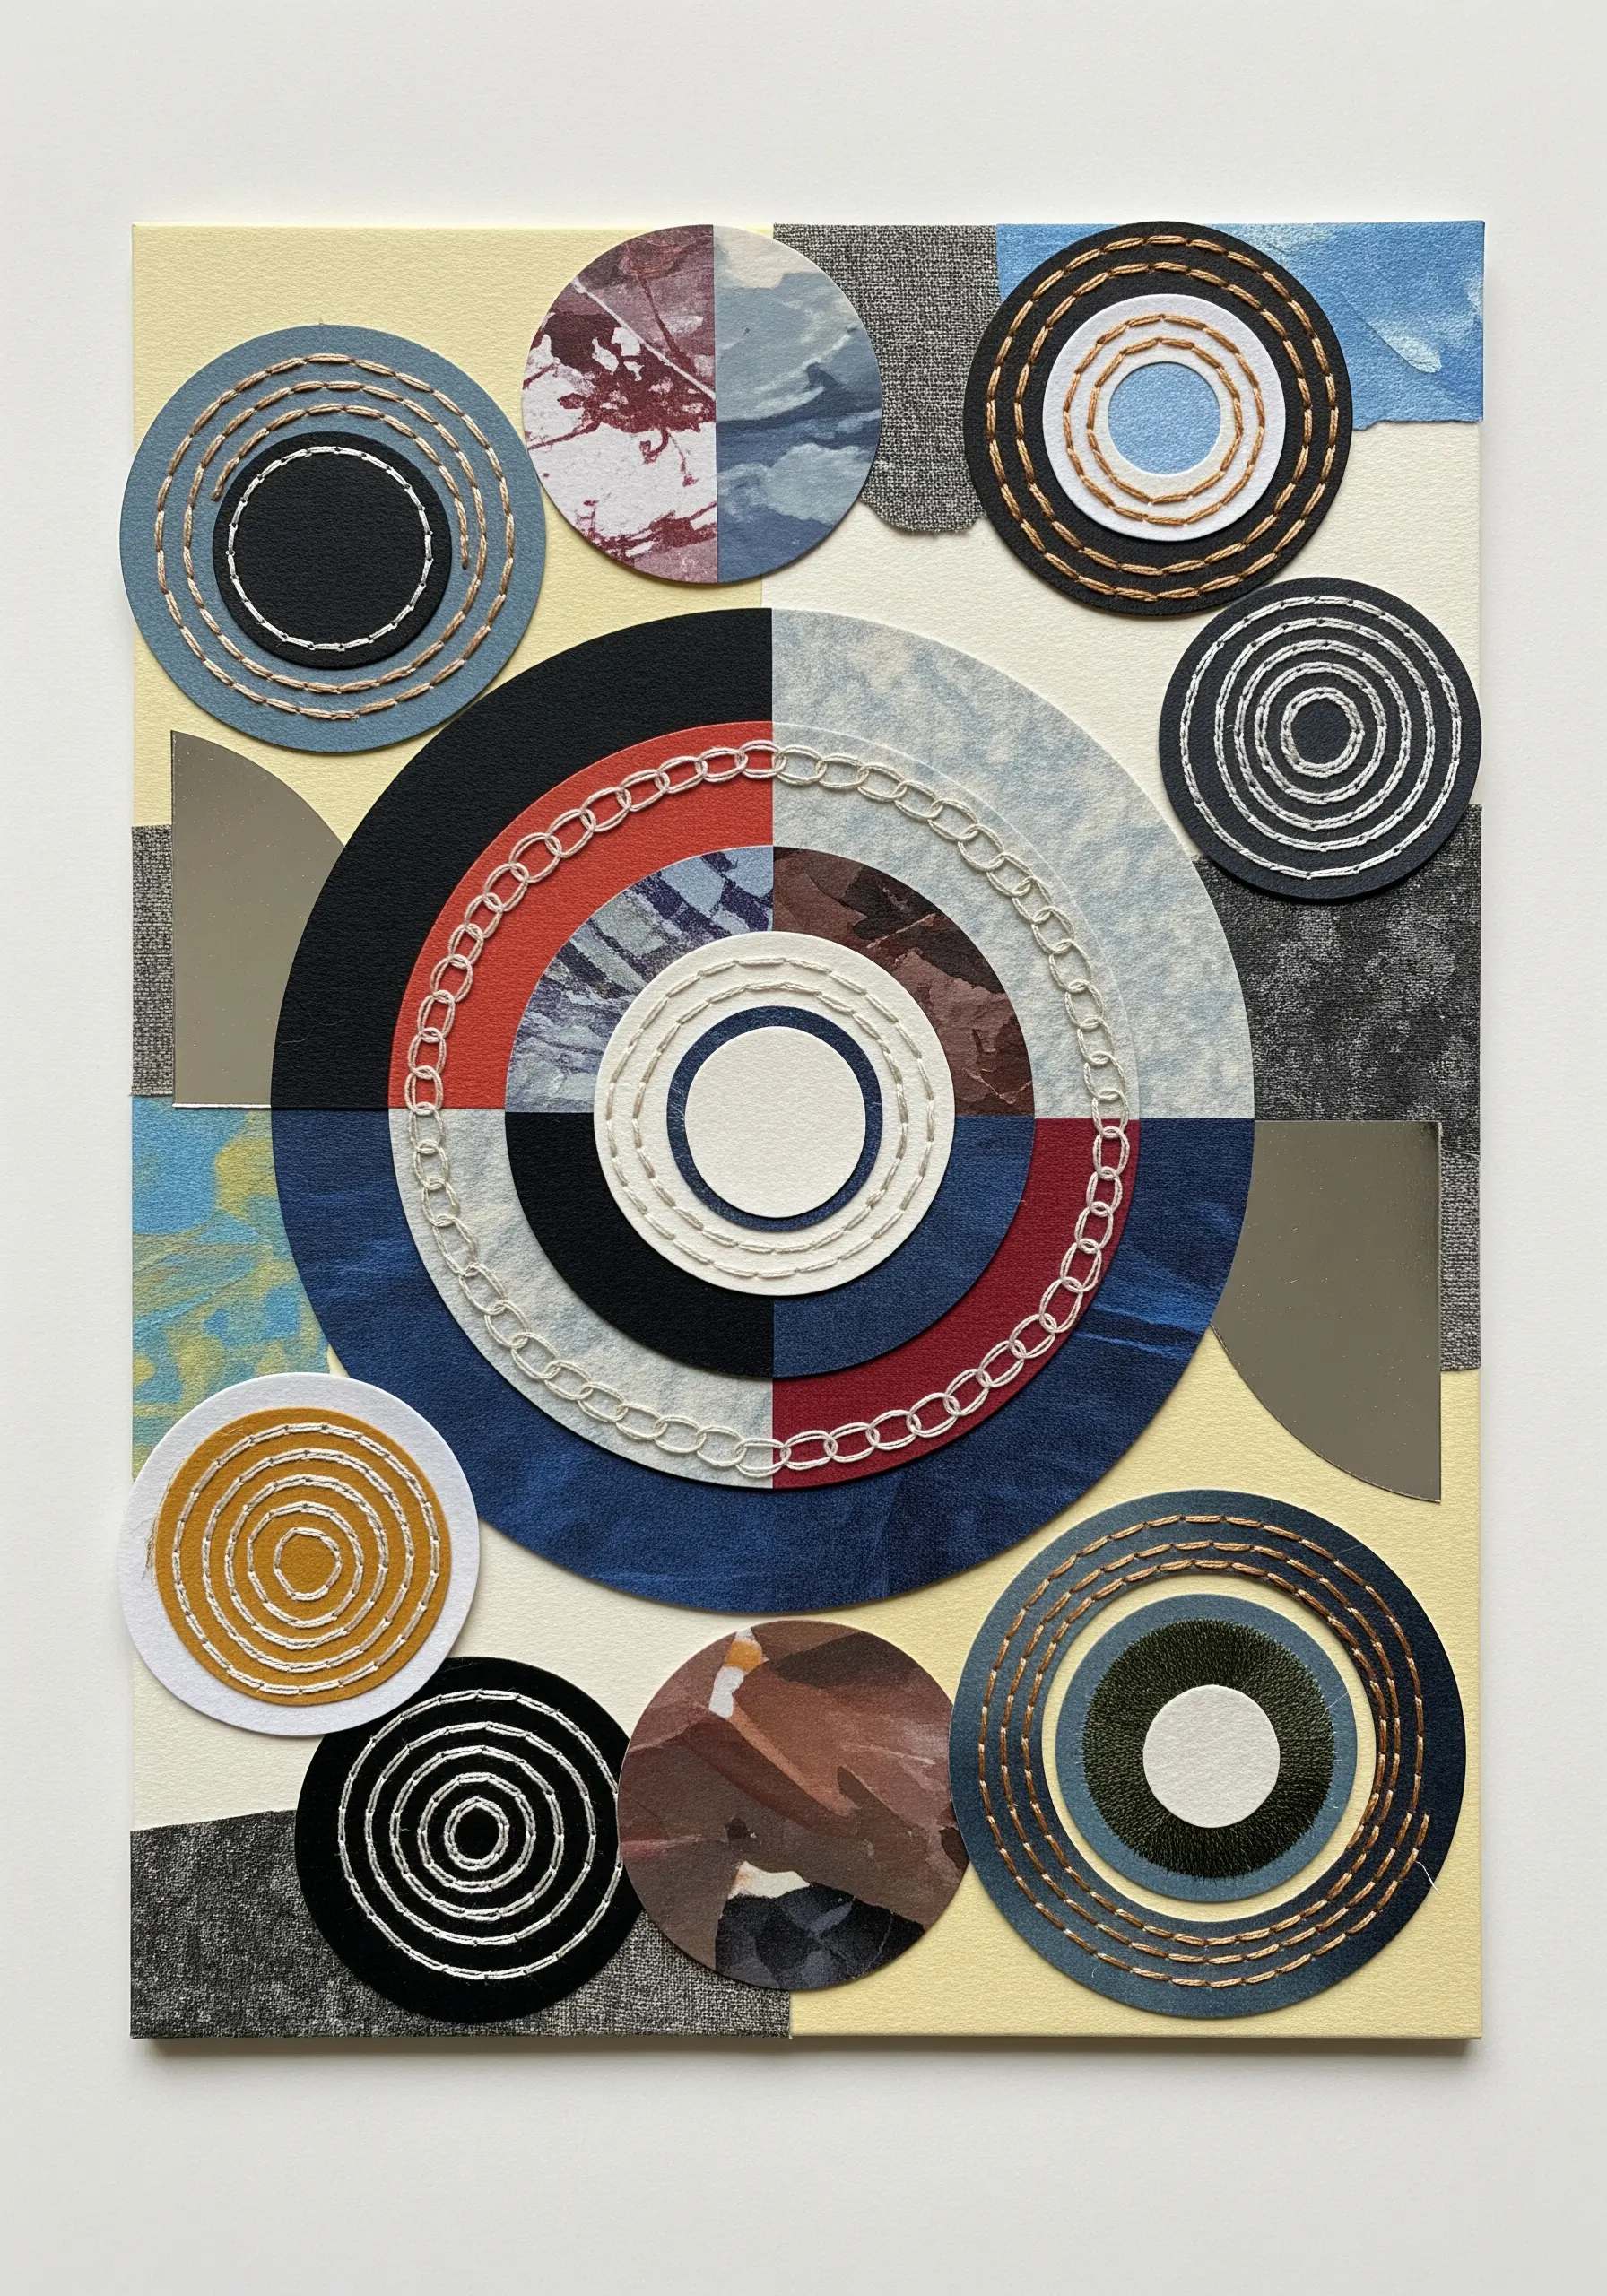
Add focus and texture to simple geometric paper shapes by embellishing them with concentric lines of stitching.
A simple running stitch is perfect for this technique. The key is to maintain a consistent distance between each stitched circle to create a clean, hypnotic effect.
Experiment with thread color—use a contrasting thread for a bold, graphic look, or a matching thread for a more subtle, textural effect.
This method adds a layer of handcrafted detail that transforms basic circles and squares into intricate medallions, elevating the entire abstract composition.
23. Frame Memories with a Simple Stitched Border
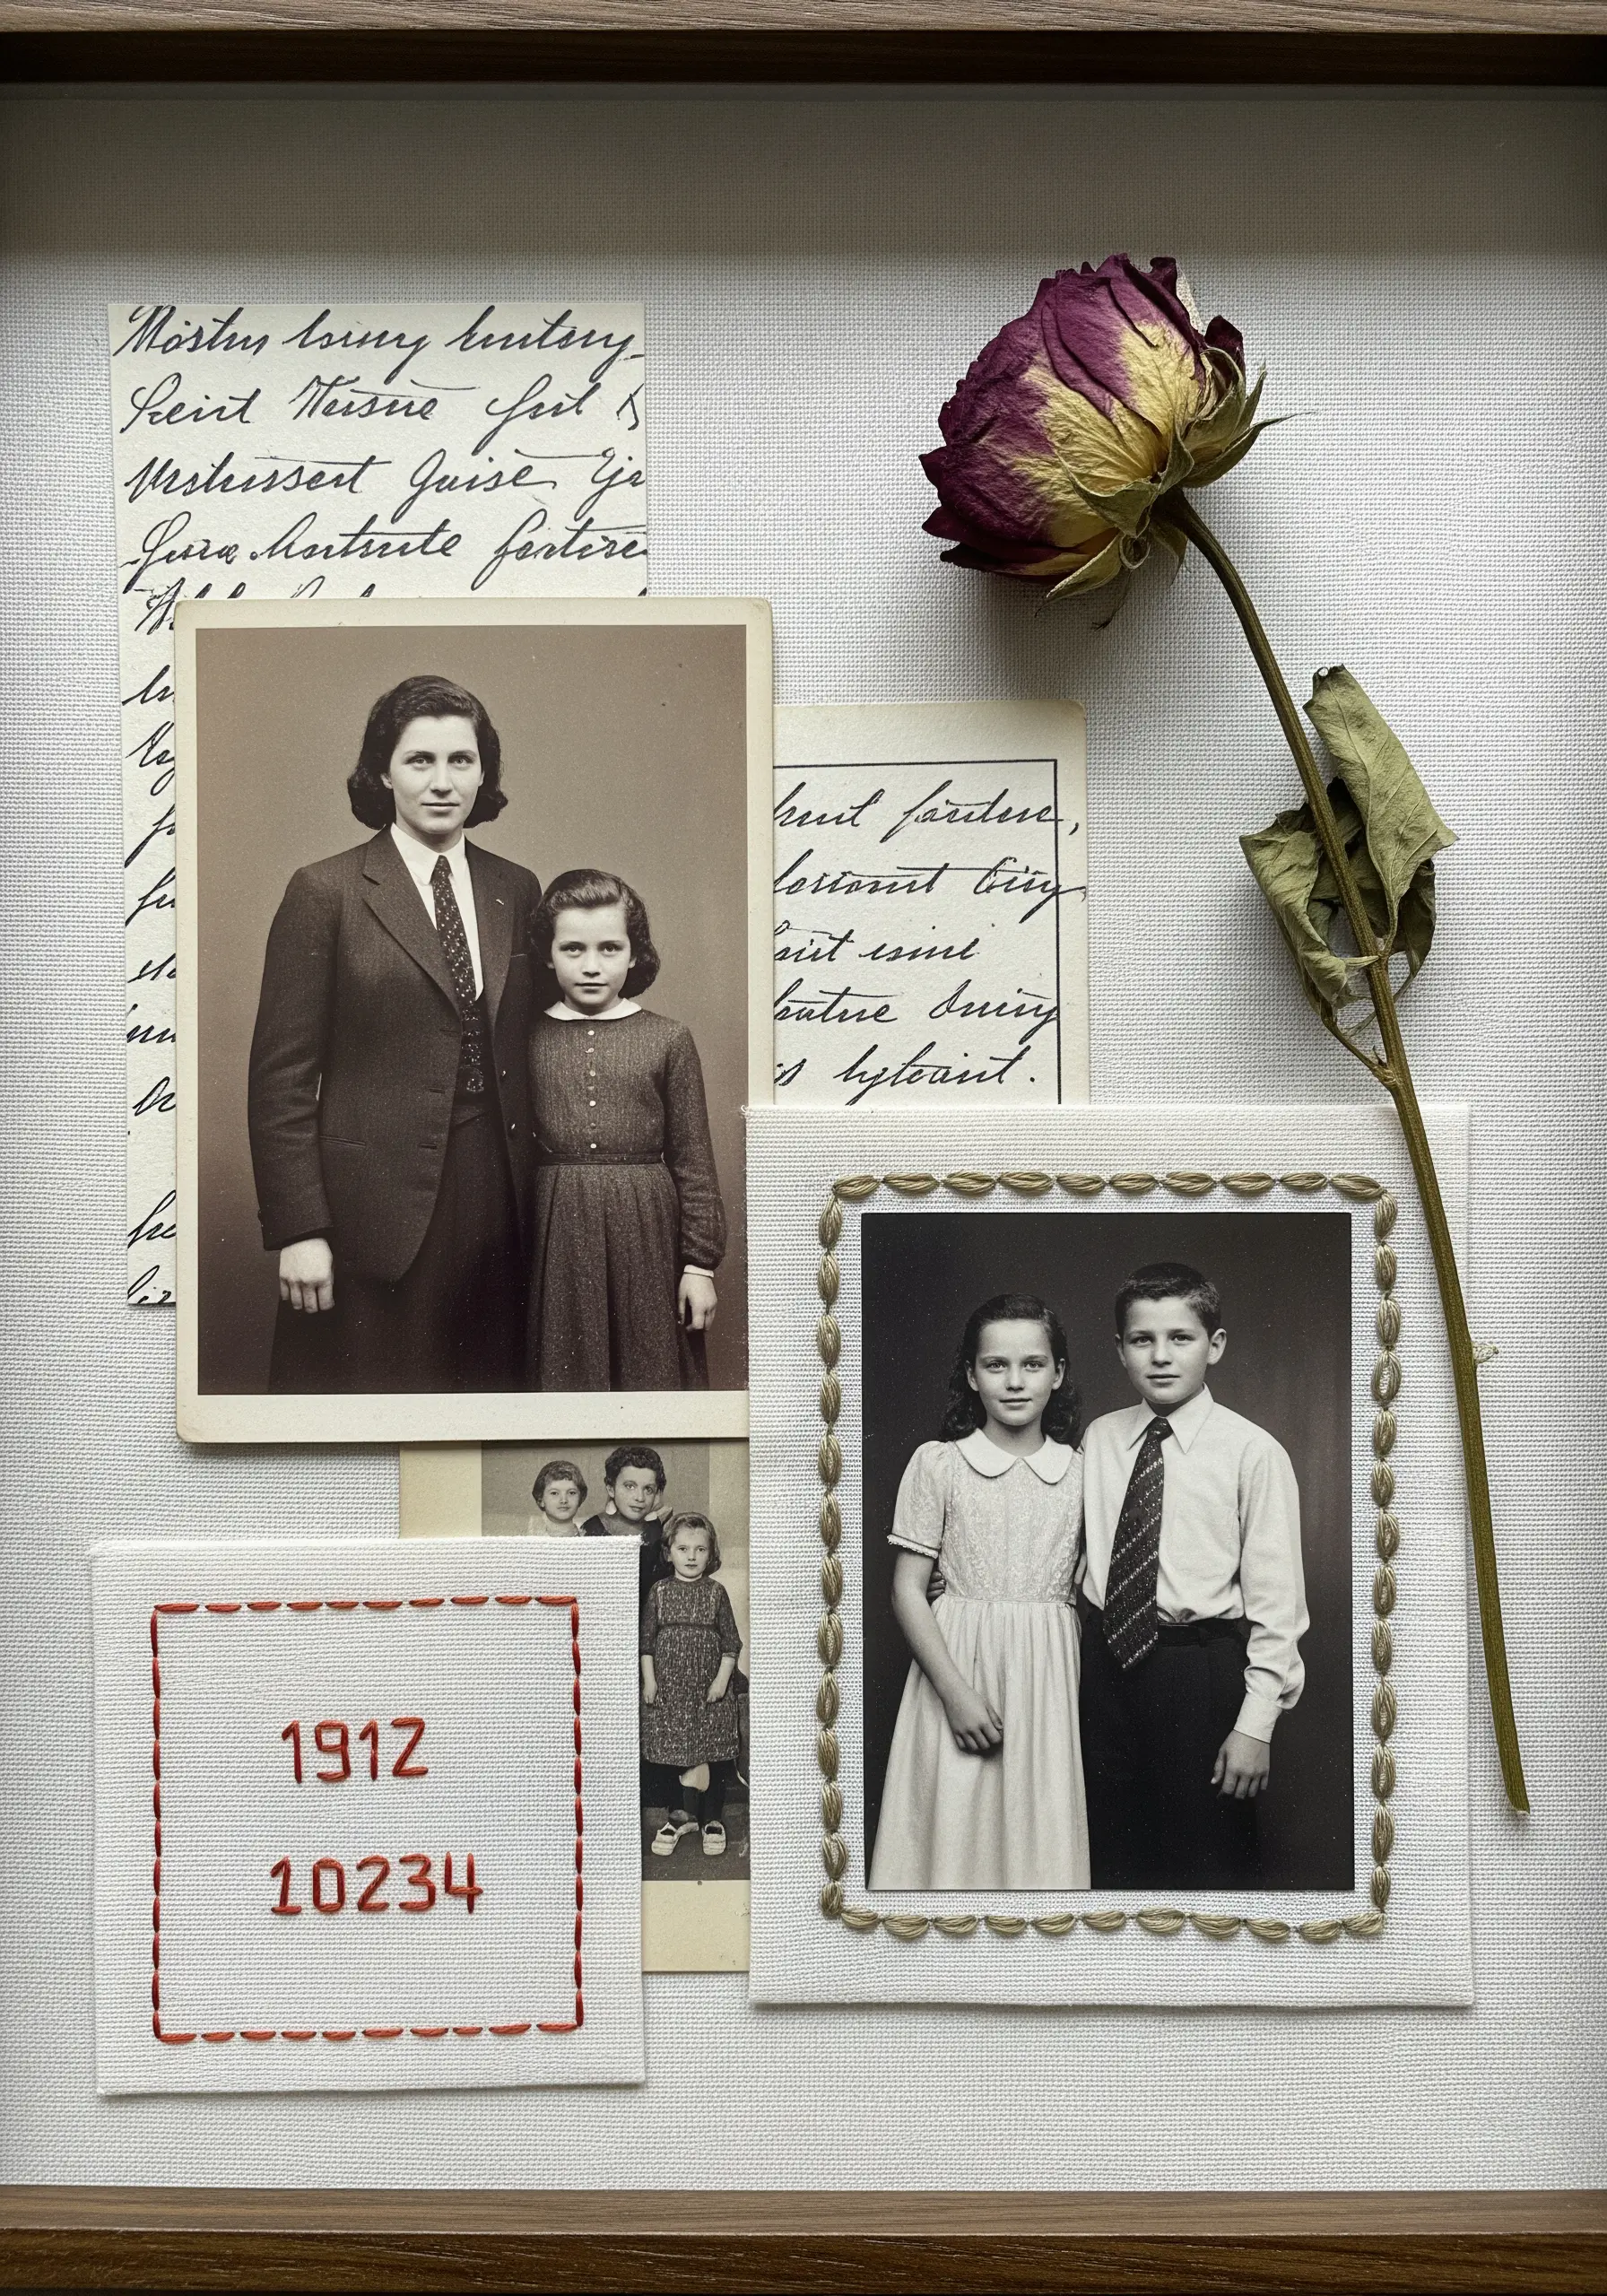
Add a warm, personal touch to vintage photographs by mounting them on fabric and adding a simple embroidered border.
A basic running stitch or backstitch is all you need. The imperfection of the hand-stitching adds a layer of tenderness and history to the piece.
Stitching a significant date or number on a separate fabric patch connects the images to a specific time, turning the collage into a personal archive.
This is a beautiful way to honor family history, transforming old photos from simple artifacts into a cohesive, heartfelt work of art. These make wonderful personalized embroidered gifts.
24. Mark a Path on Illustrated Maps
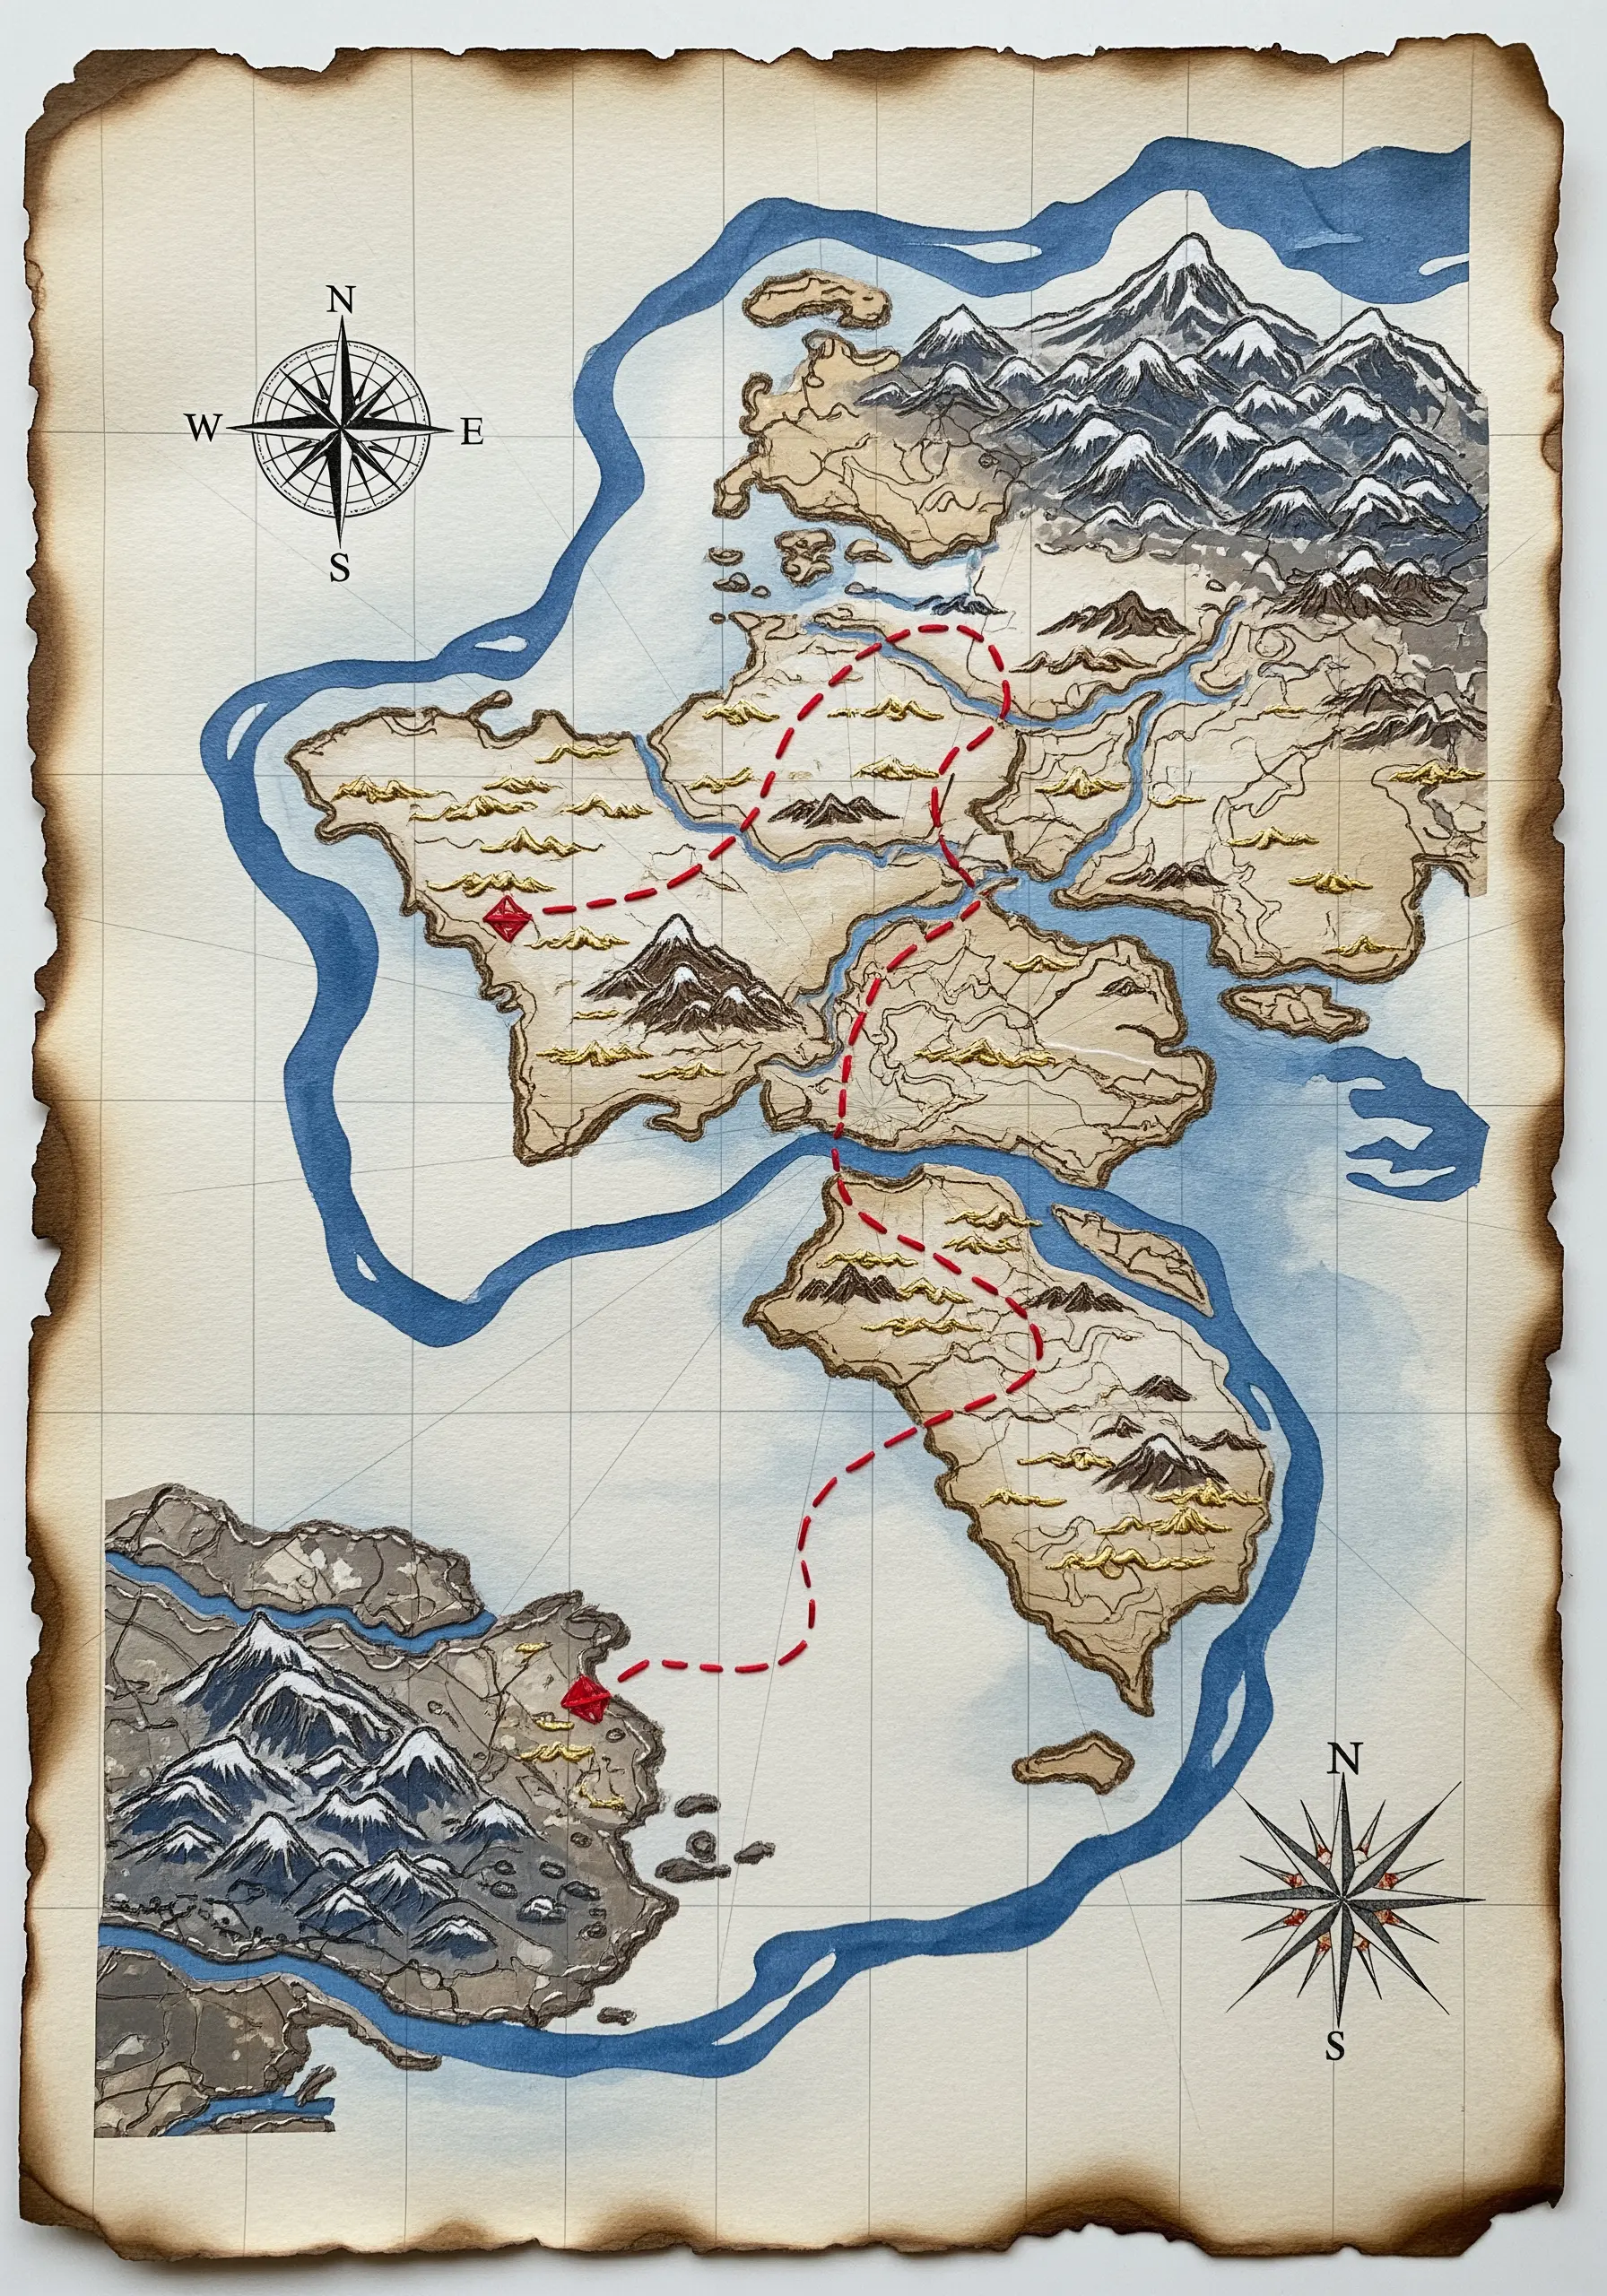
Bring a fantasy or illustrated map to life by stitching the journey’s path directly onto the paper.
Use a bright red, six-strand floss and a simple running stitch to create a dashed line that is easy to follow visually.
The tactile quality of the thread adds a sense of adventure and physicality to the illustrated landscape, making the imagined journey feel more real.
To avoid tearing the paper, use a sharp, fine needle (like a crewel needle) and pull your stitches taut, but not so tight that they cause the paper to warp or buckle.
25. Secure Natural Elements with Invisible Stitches
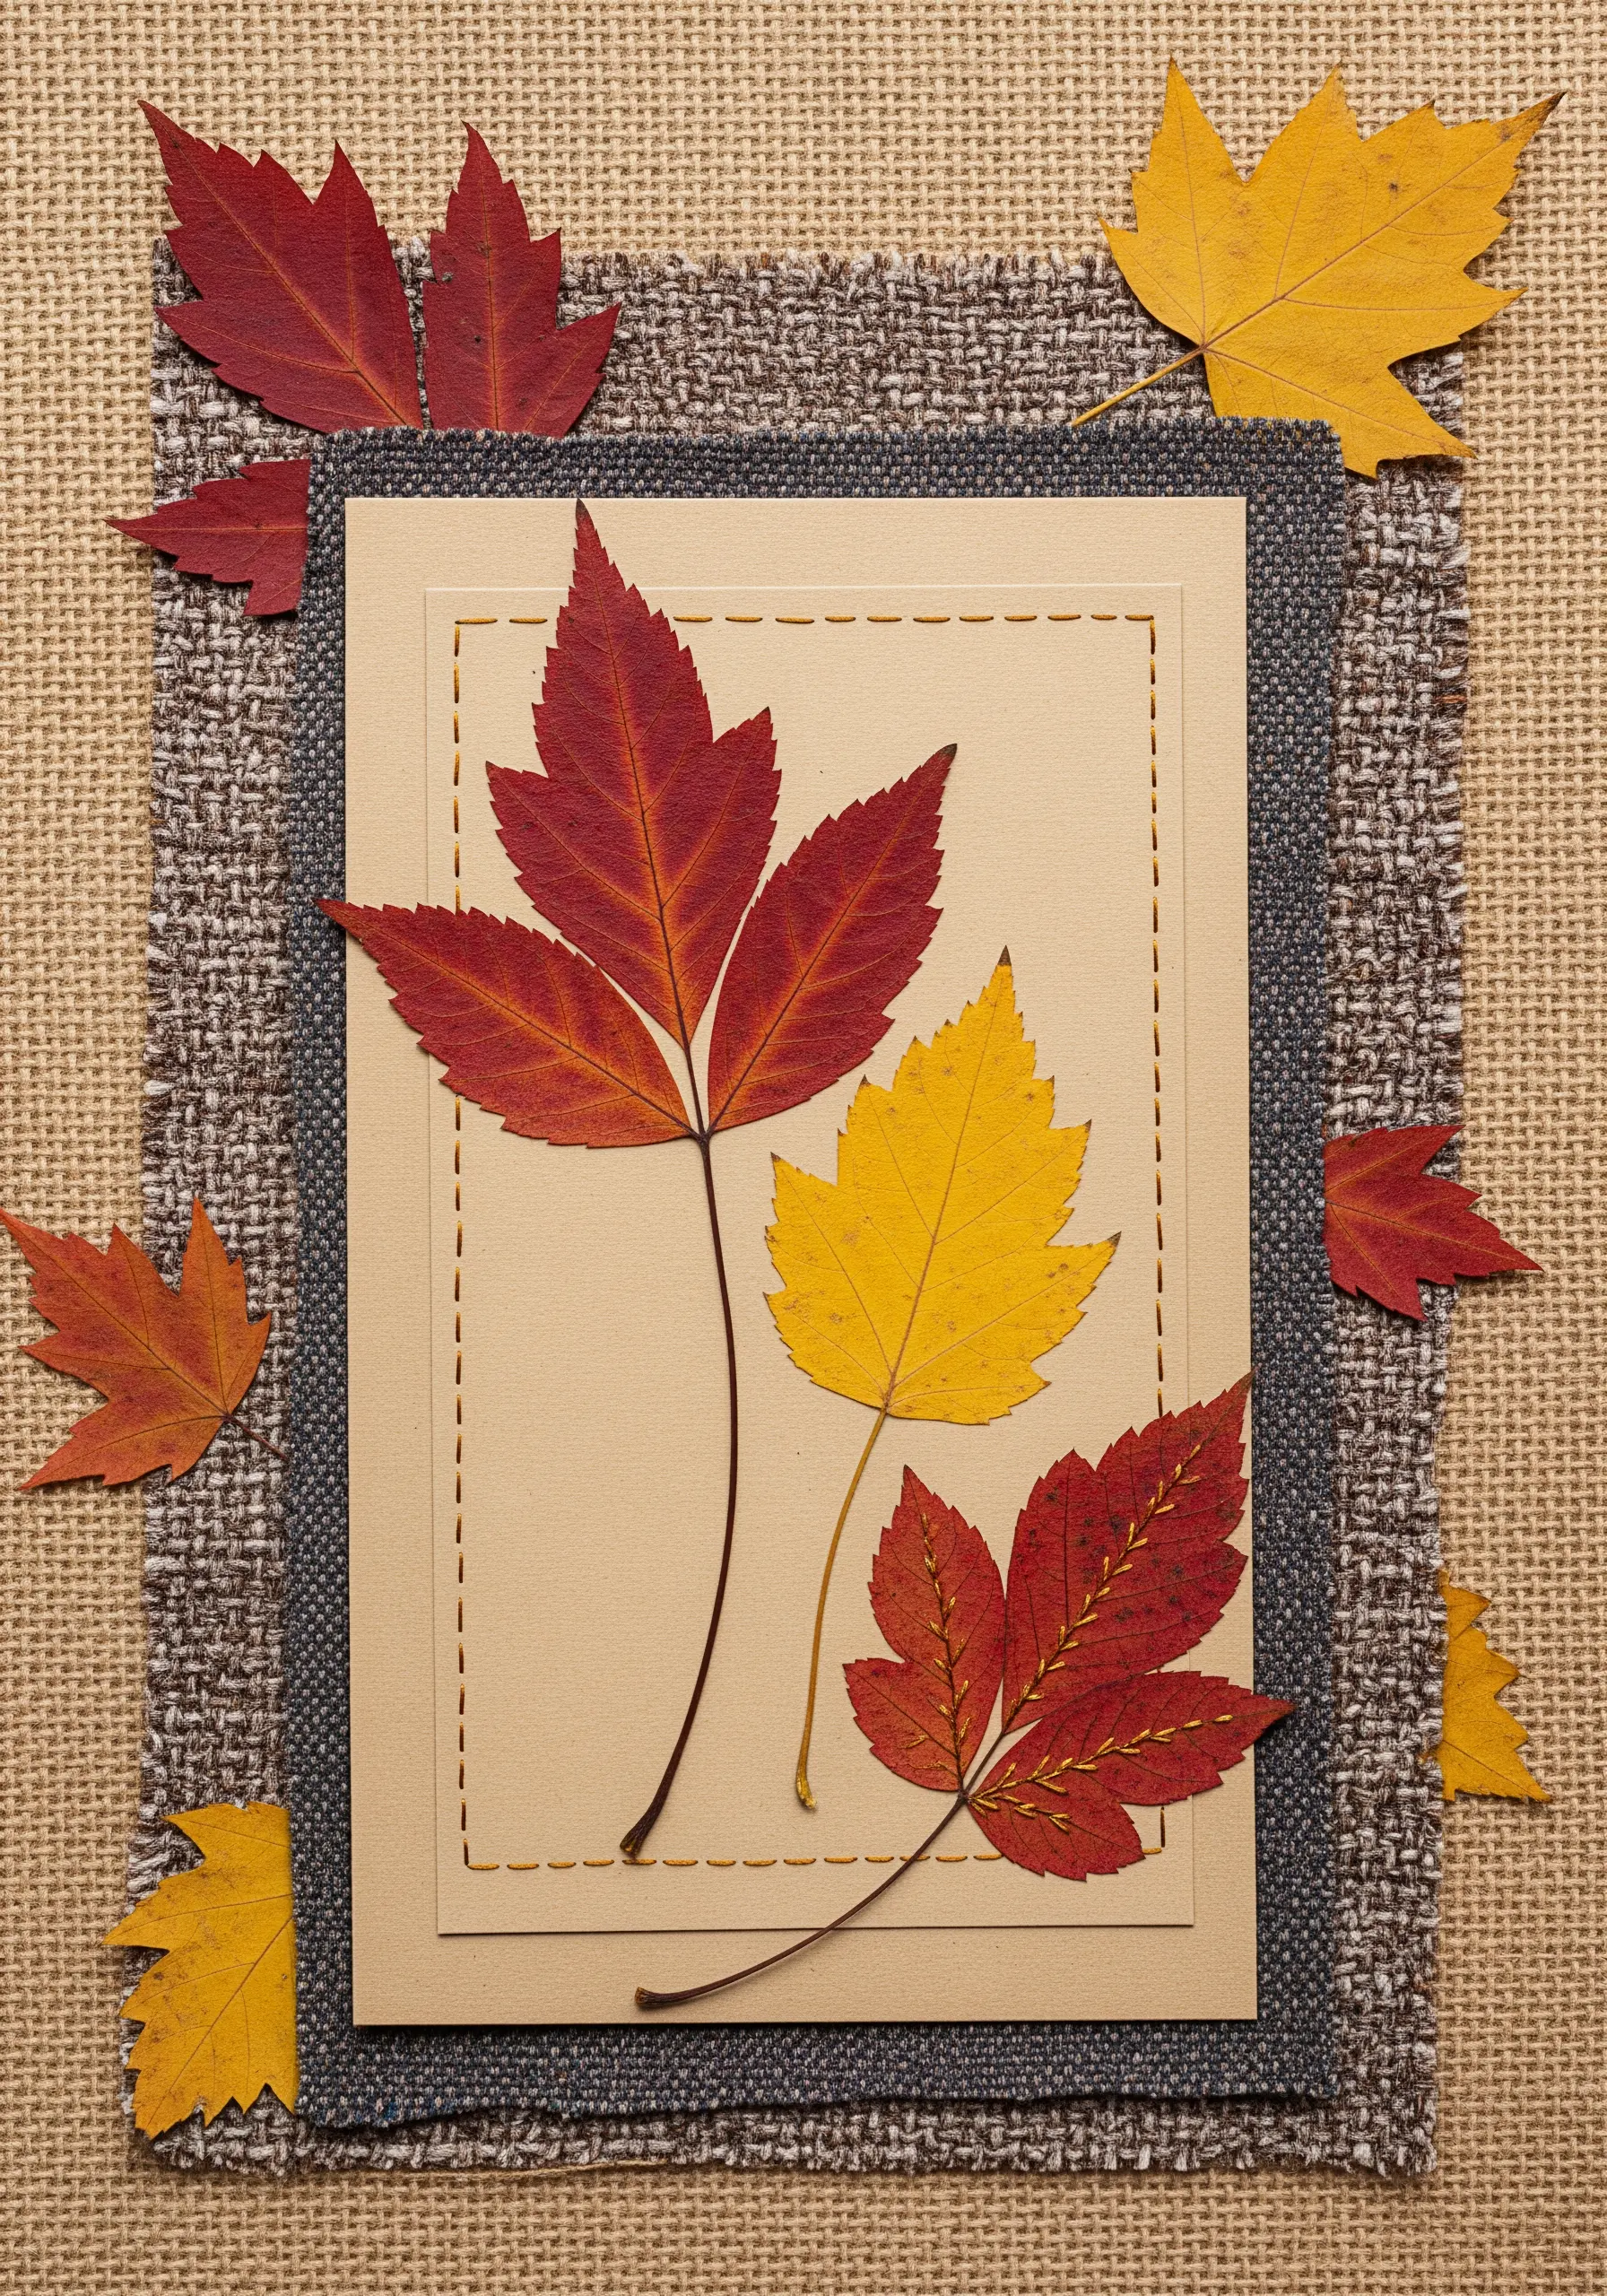
Incorporate delicate, pressed botanicals into your work by securing them with tiny, almost invisible stitches.
Lay the pressed leaf on your paper or fabric background and use a single strand of thread in a matching color to create tiny anchor stitches over the stem and veins.
These small stitches will hold the leaf securely in place without distracting from its natural beauty. For added security, a small dot of acid-free glue can be used under the center of the leaf.
A simple running stitch border on the paper itself helps to frame the composition and visually connect the stitched element to the collage.
26. Isolate and Emphasize with a Stitched Frame
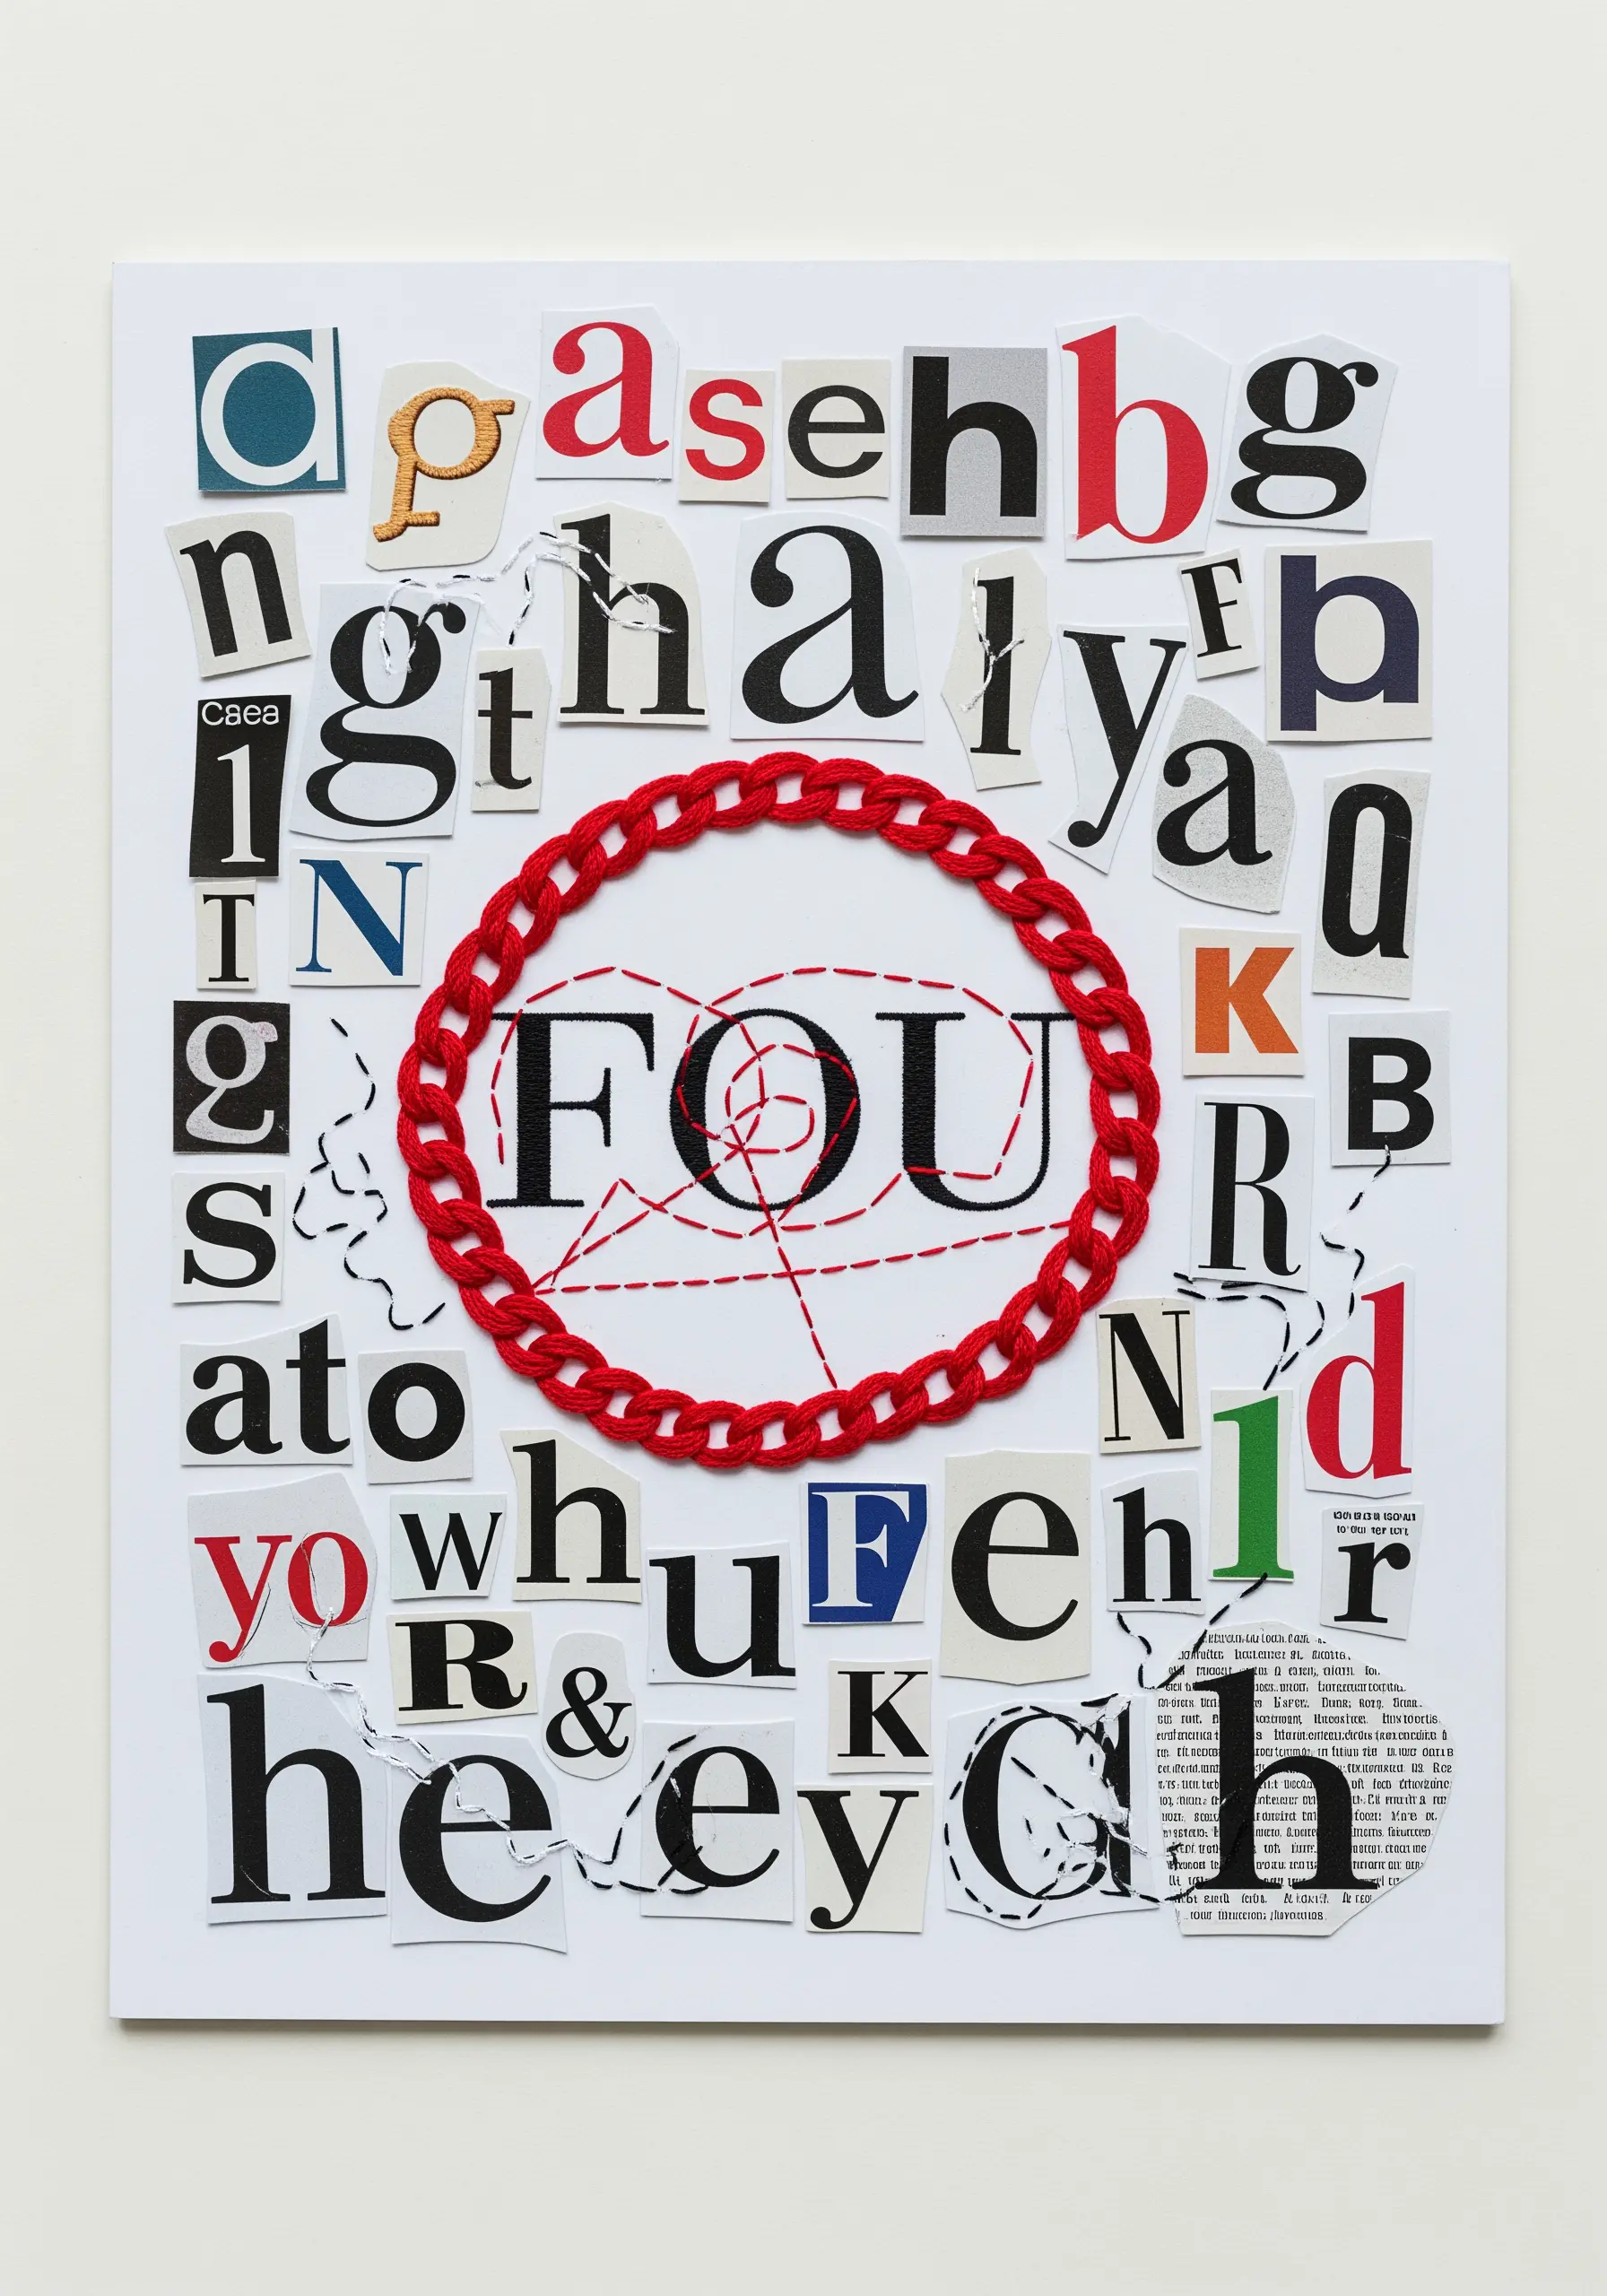
Draw attention to a specific word or phrase within a chaotic typographic collage by encircling it with a bold, textured stitch.
A heavy chain stitch, worked with all six strands of floss, creates a thick, braid-like border that acts as a powerful visual frame.
The solid, dimensional quality of the chain stitch provides a point of calm and focus amidst the jumble of letters, telling the viewer exactly where to look.
Add a few lines of loose, erratic stitching radiating from the center to add a sense of energy and disruption to the composition.
27. Create Art Deco Elegance with Satin Stitch
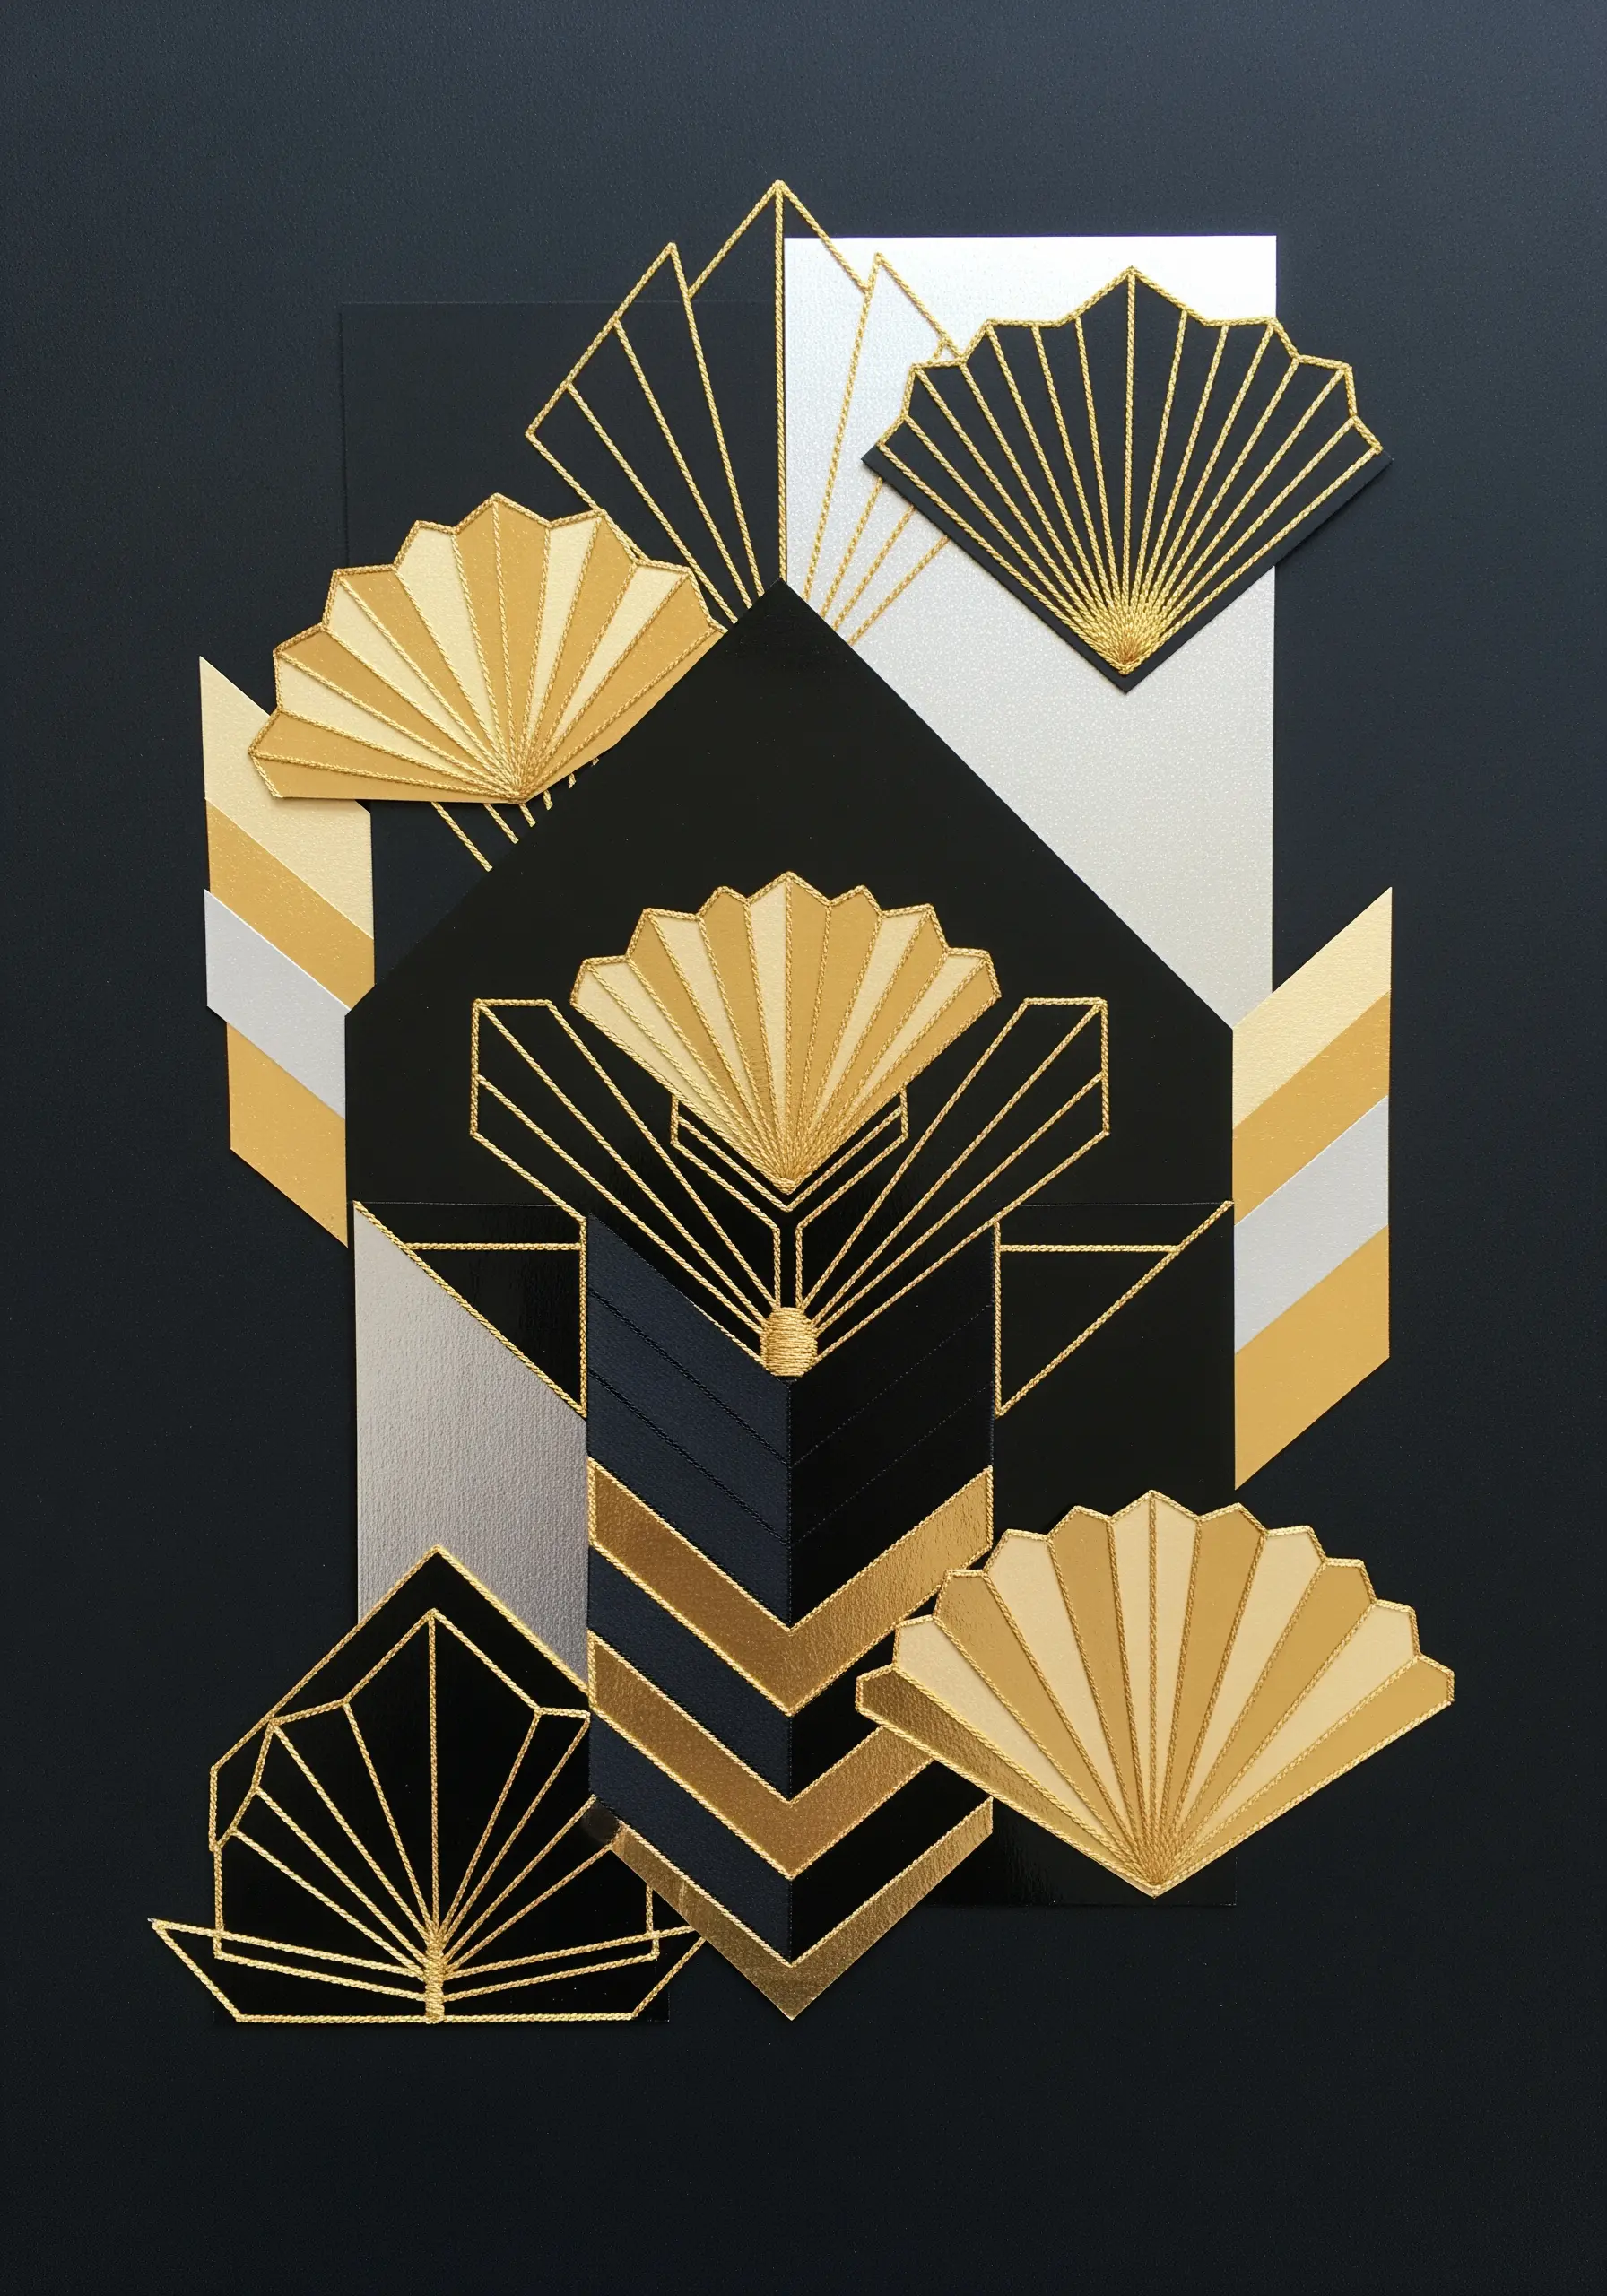
Evoke the clean lines and glamour of the Art Deco period by combining metallic paper with precise satin stitch and backstitch outlines.
Use a high-sheen gold or silver thread to create flawless satin stitch fills. The secret to a smooth finish is to keep your stitches parallel and close together, ensuring consistent tension.
Outline your stitched shapes with a crisp backstitch in a contrasting color, like black or gold, to define the geometric forms and add that classic Art Deco sharpness.
This technique elevates paper collage into something that feels like luxurious, inlaid metalwork.
28. Stitch Ephemeral Details Like Bubbles
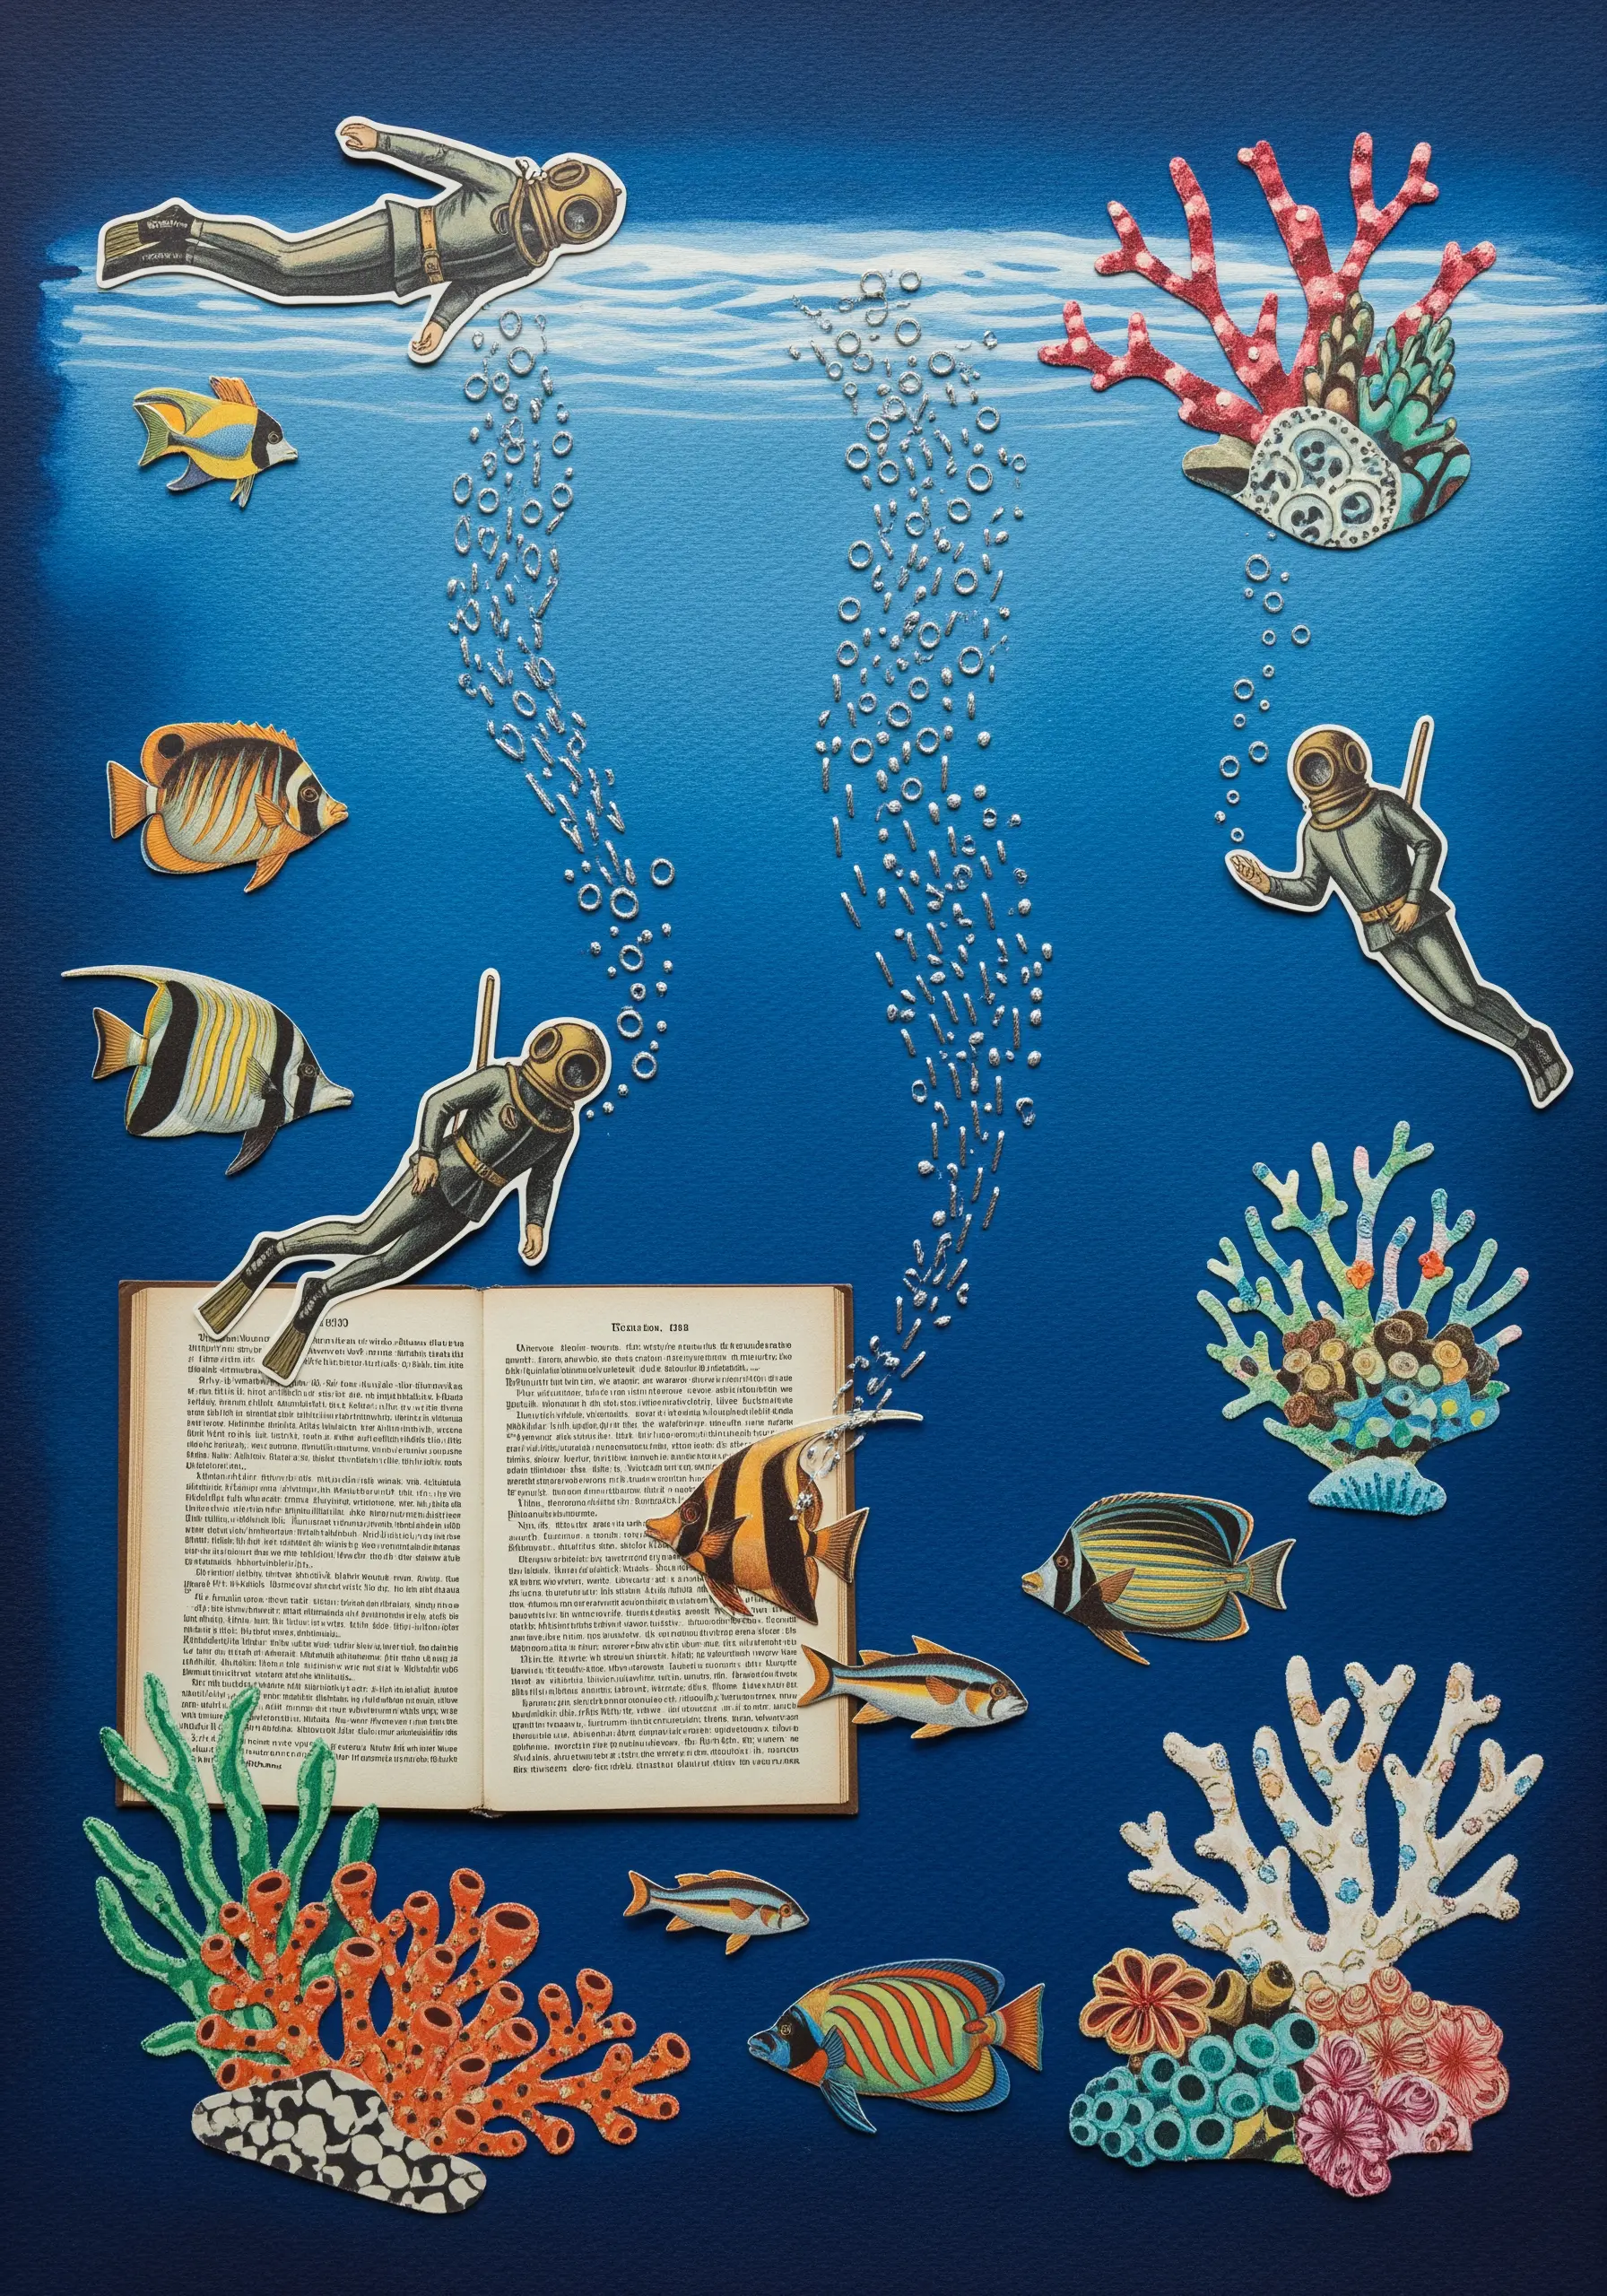
Capture fleeting, delicate elements like air bubbles by using a combination of French knots and simple straight stitches.
Use a shiny, light-colored thread like a white or silver rayon floss to mimic the reflective quality of bubbles in water.
Create clusters of tiny French knots of varying sizes, and intersperse them with single, short straight stitches to suggest movement and effervescence.
This is a perfect example of how embroidery can represent something intangible, adding a touch of magic and life to an underwater scene.
29. Combine Photography and Embroidery Studies
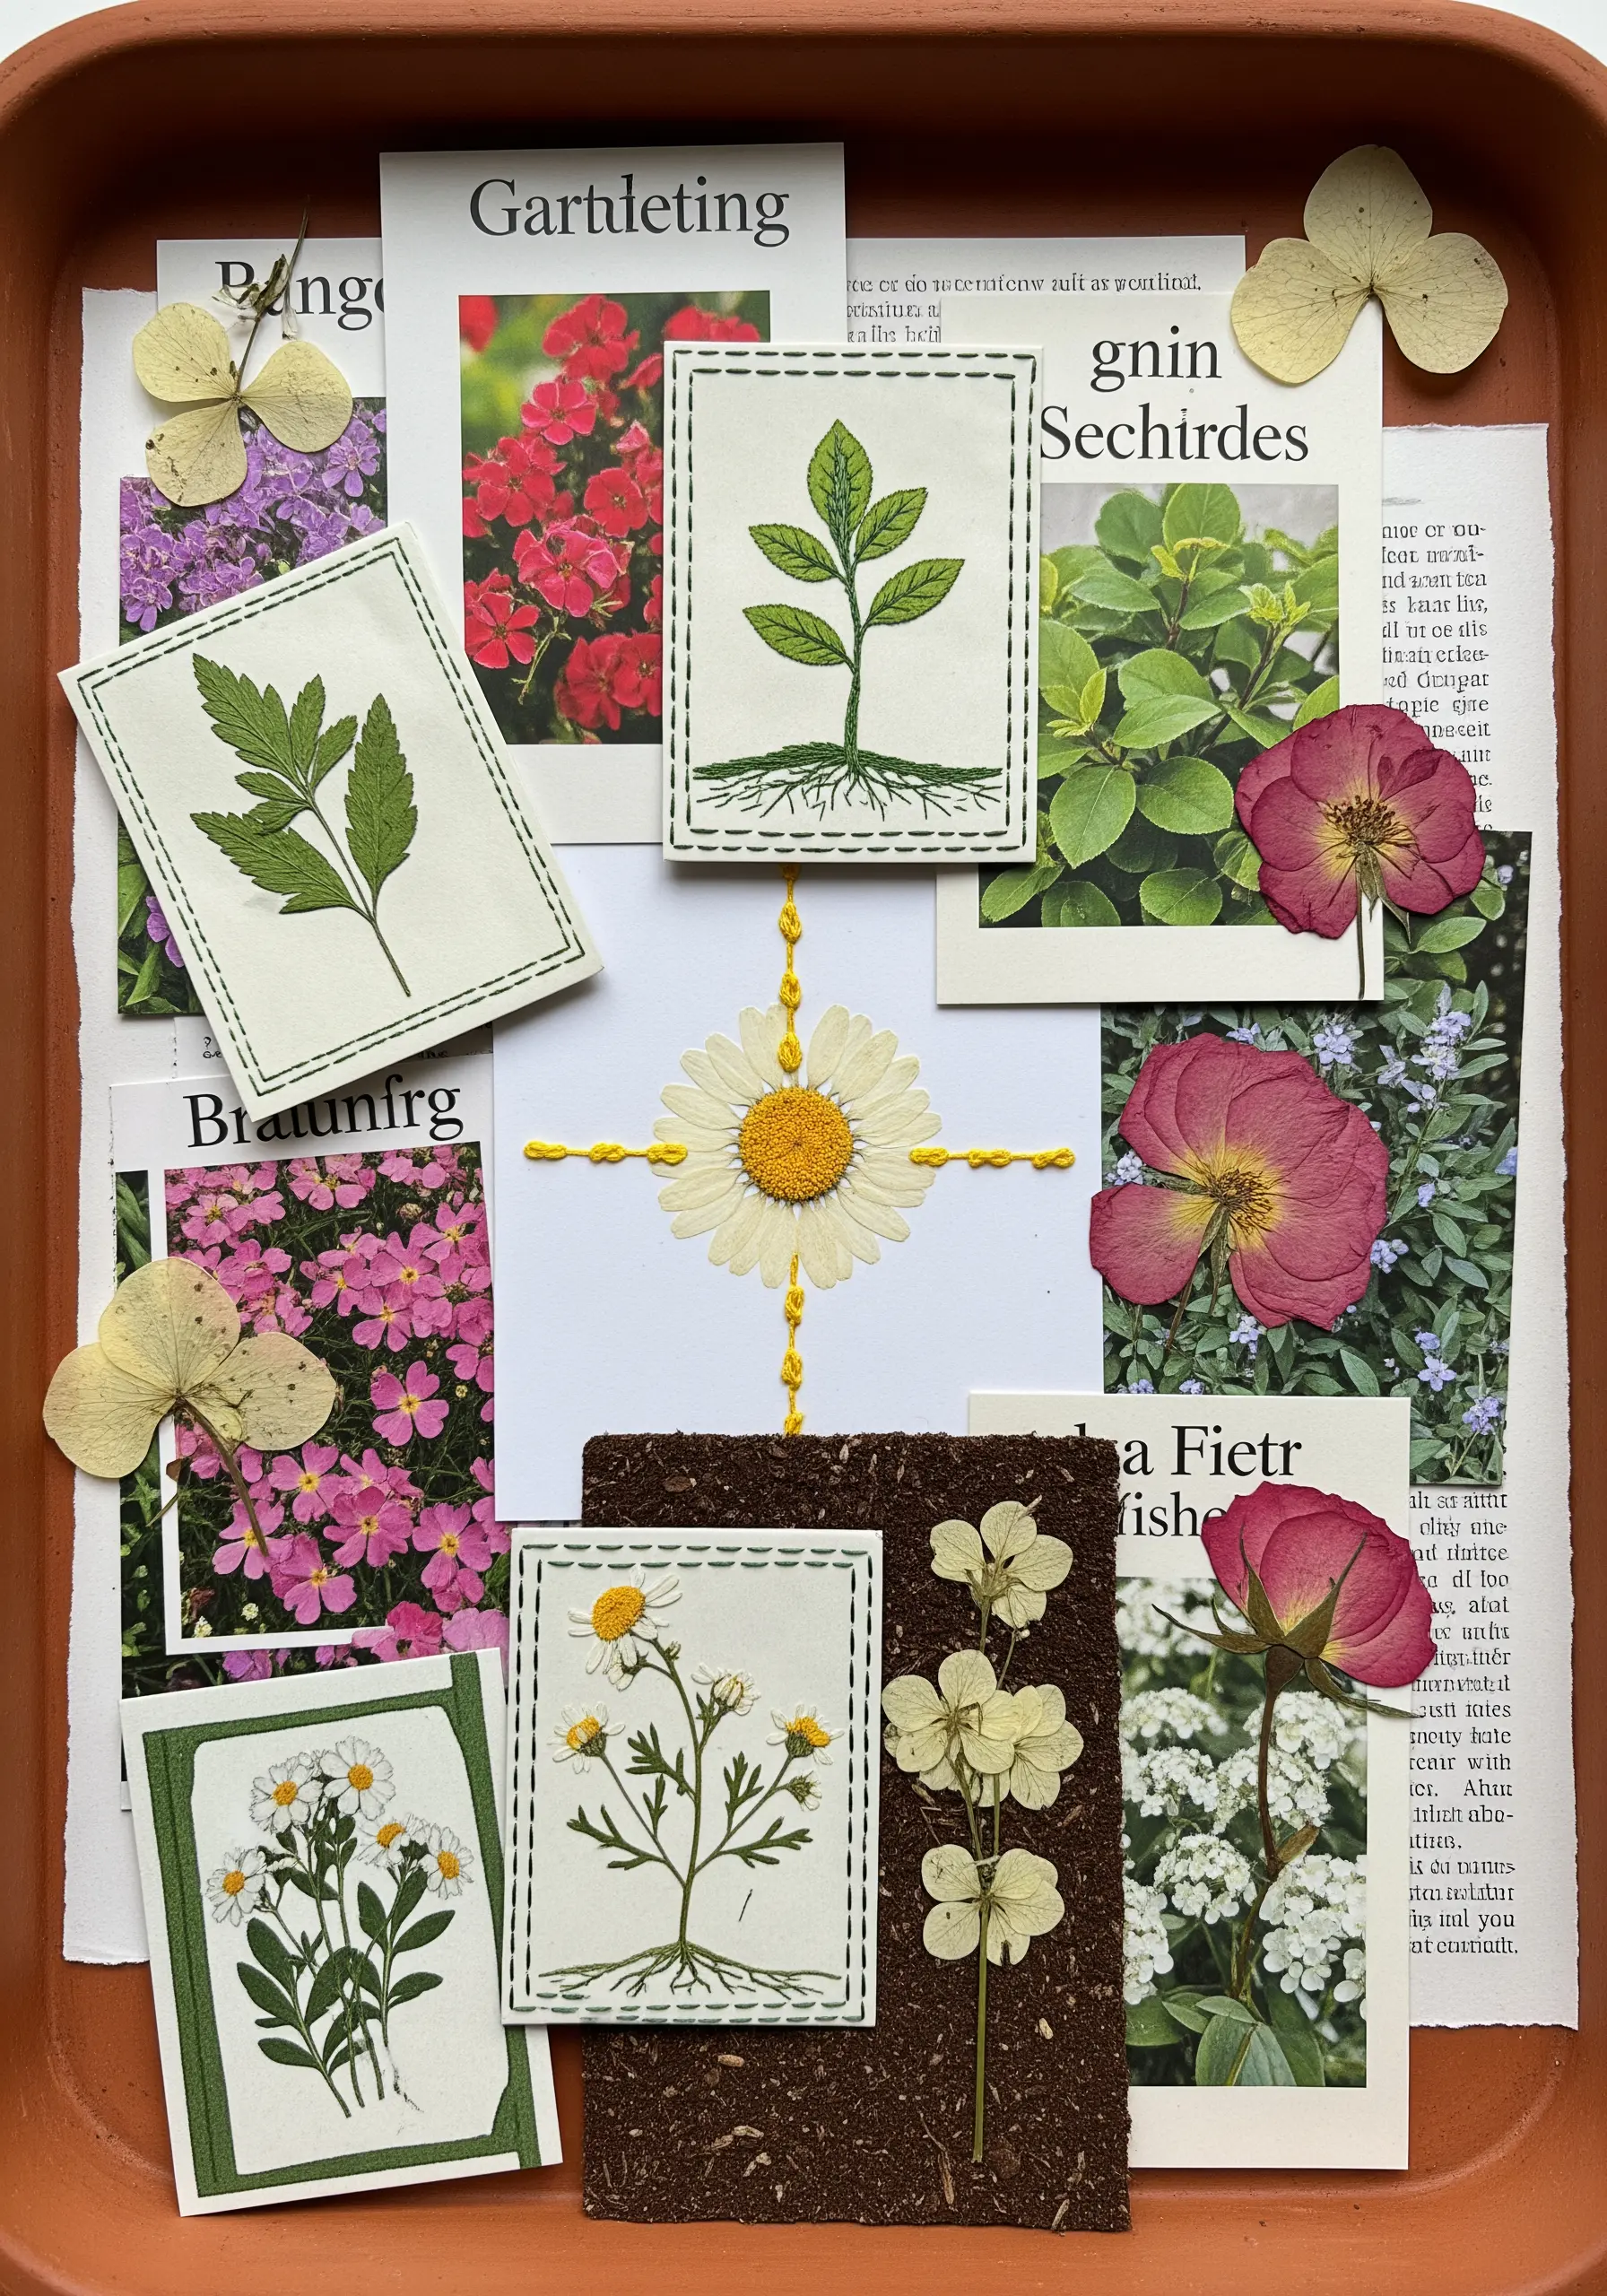
Create a naturalist’s journal page by pairing botanical photographs with small, embroidered studies of the same or similar plants.
Embroider your plant motifs on separate scraps of canvas or heavy paper, allowing you to perfect them before adding them to the final collage.
Use simple stitches like stem stitch for stalks and detached chain stitch for leaves to create clear, illustrative representations.
This approach transforms a simple collage into a thoughtful collection, blending different mediums to explore a single, cohesive theme. It’s an excellent way to get started with garden-inspired hand embroidery projects.
30. Connect Canvases with Flowing Stitches
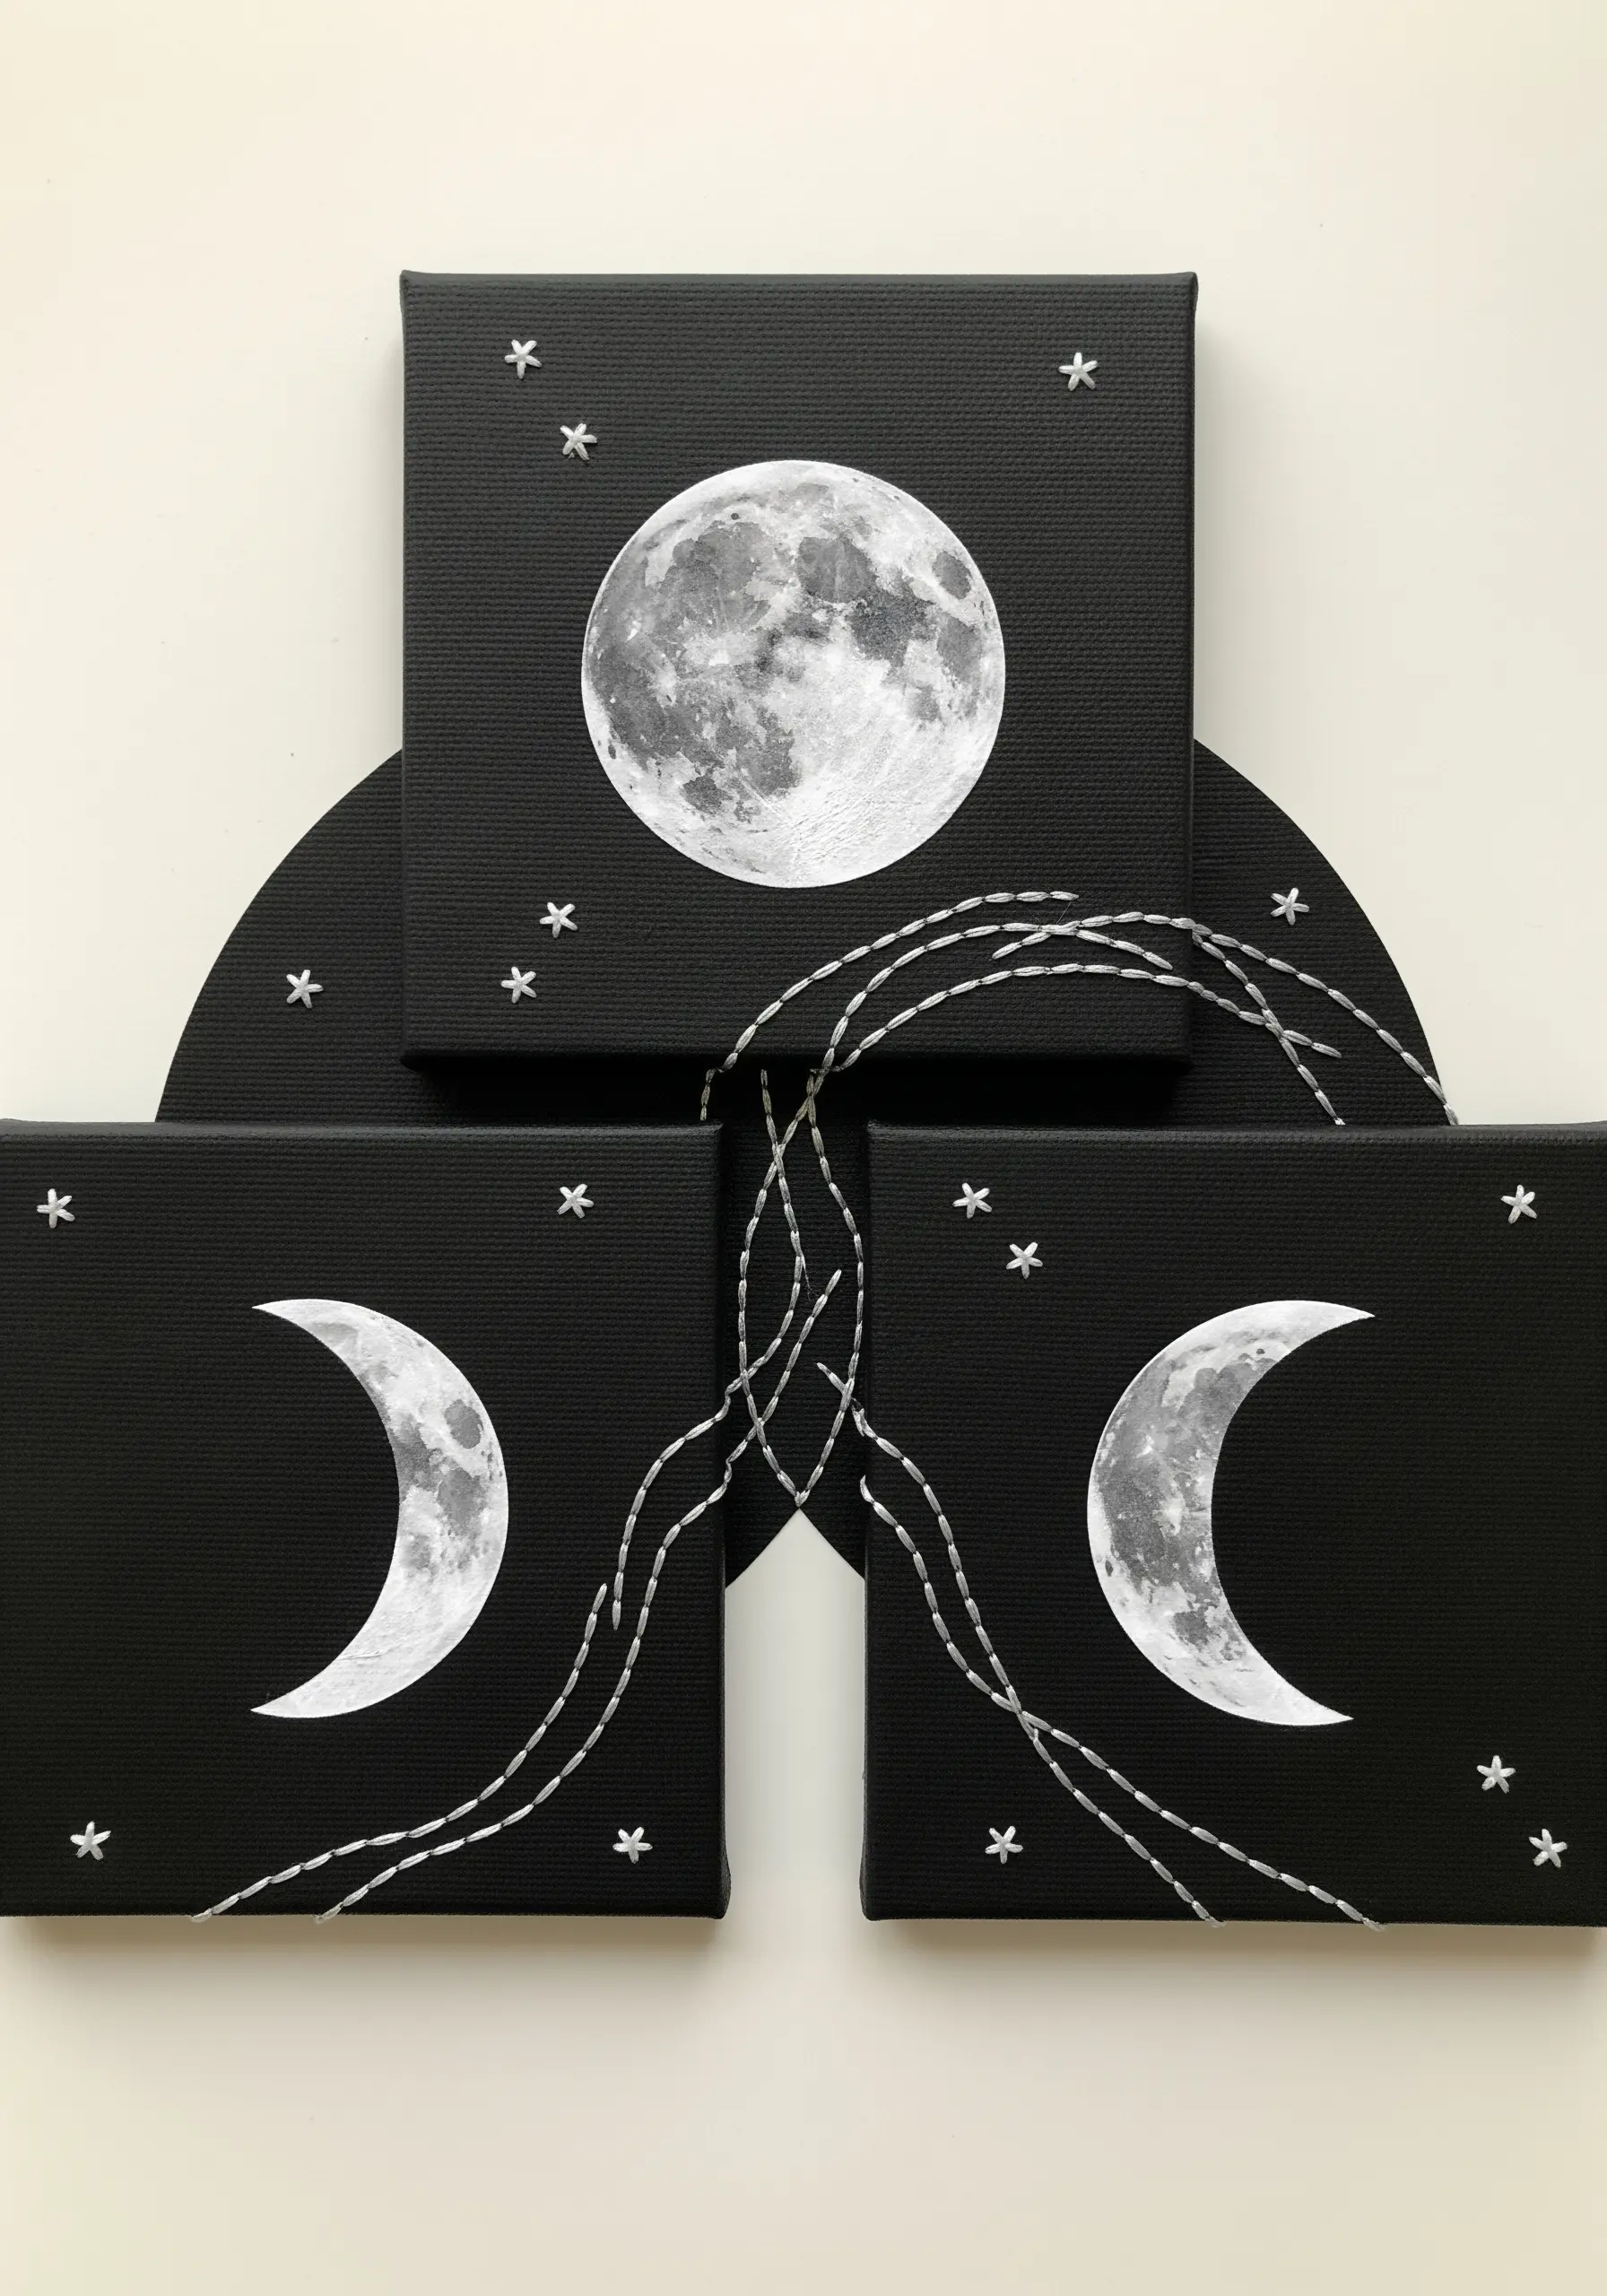
Unify a multi-panel artwork by allowing your stitches to travel from one canvas to another.
Plan your design across the separate canvases first, lightly marking where the thread will exit one and enter the next to ensure a continuous flow.
Use a long, uninterrupted whipped running stitch or stem stitch to create sweeping lines that physically and visually link the individual pieces.
This technique transforms a collection of small artworks into a single, cohesive triptych, creating a sense of movement and connection that is both literal and symbolic.
31. Suggest Movement with Lines of Thread
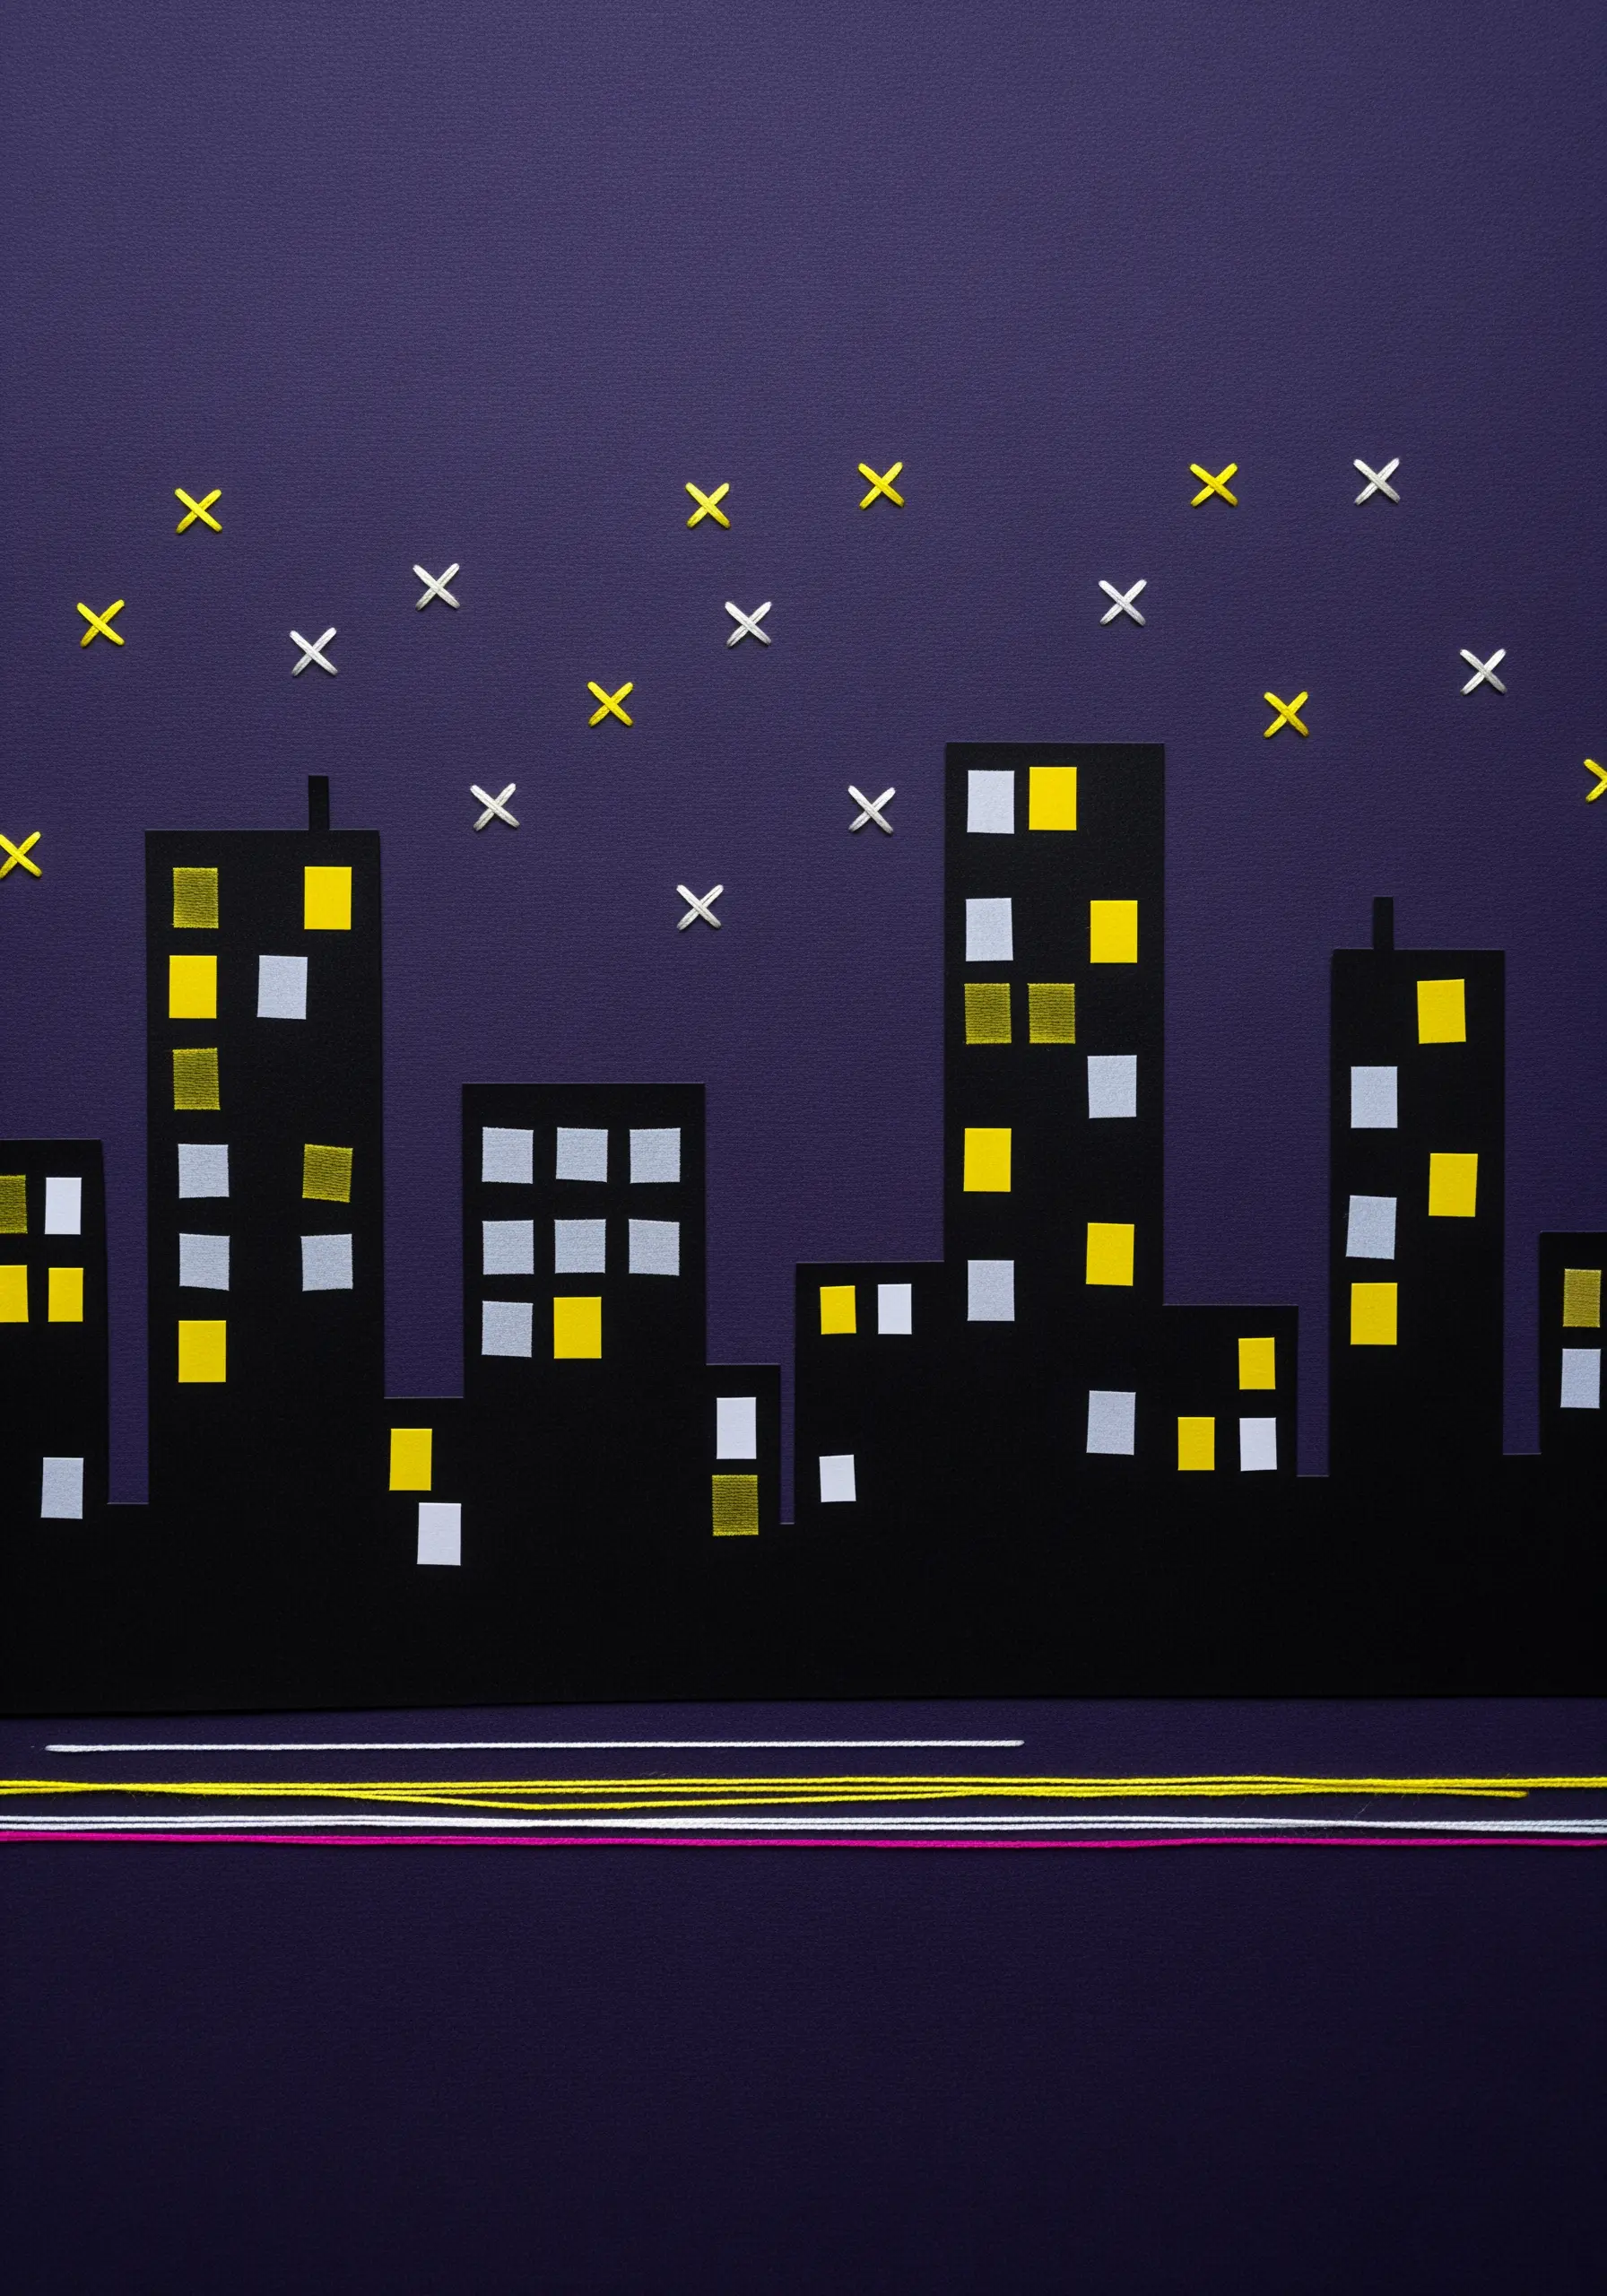
Imply the speed and light of a city at night by using long, horizontal stitches across the bottom of your composition.
Lay down multiple strands of different colored floss—like yellow, white, and magenta—in long, straight stitches to represent the blur of traffic lights.
Unlike a solid satin stitch, keeping the lines separate allows the dark background to show through, enhancing the feeling of speed and motion.
Contrast these long lines with tiny, crisp cross-stitches for the stars, highlighting the difference between distant, static light and close, moving light.
32. Weave Texture into Abstract Compositions
Build a deeply textural collage by incorporating woven and wrapped embroidery techniques alongside traditional stitches.
For the raised, cord-like elements, create a braid from multiple strands of yarn and couch it onto your fabric base.
To create the woven patches, stitch a grid of long straight stitches and then weave your thread over and under them, mimicking a tiny loom.
This multi-technique approach moves beyond surface embroidery, creating a sculptural, fiber-art piece that is rich with tactile appeal. This is the essence of beautiful eye-catching mixed-fiber wall hangings.
33. Elevate Paper Craft with a Touch of Gold
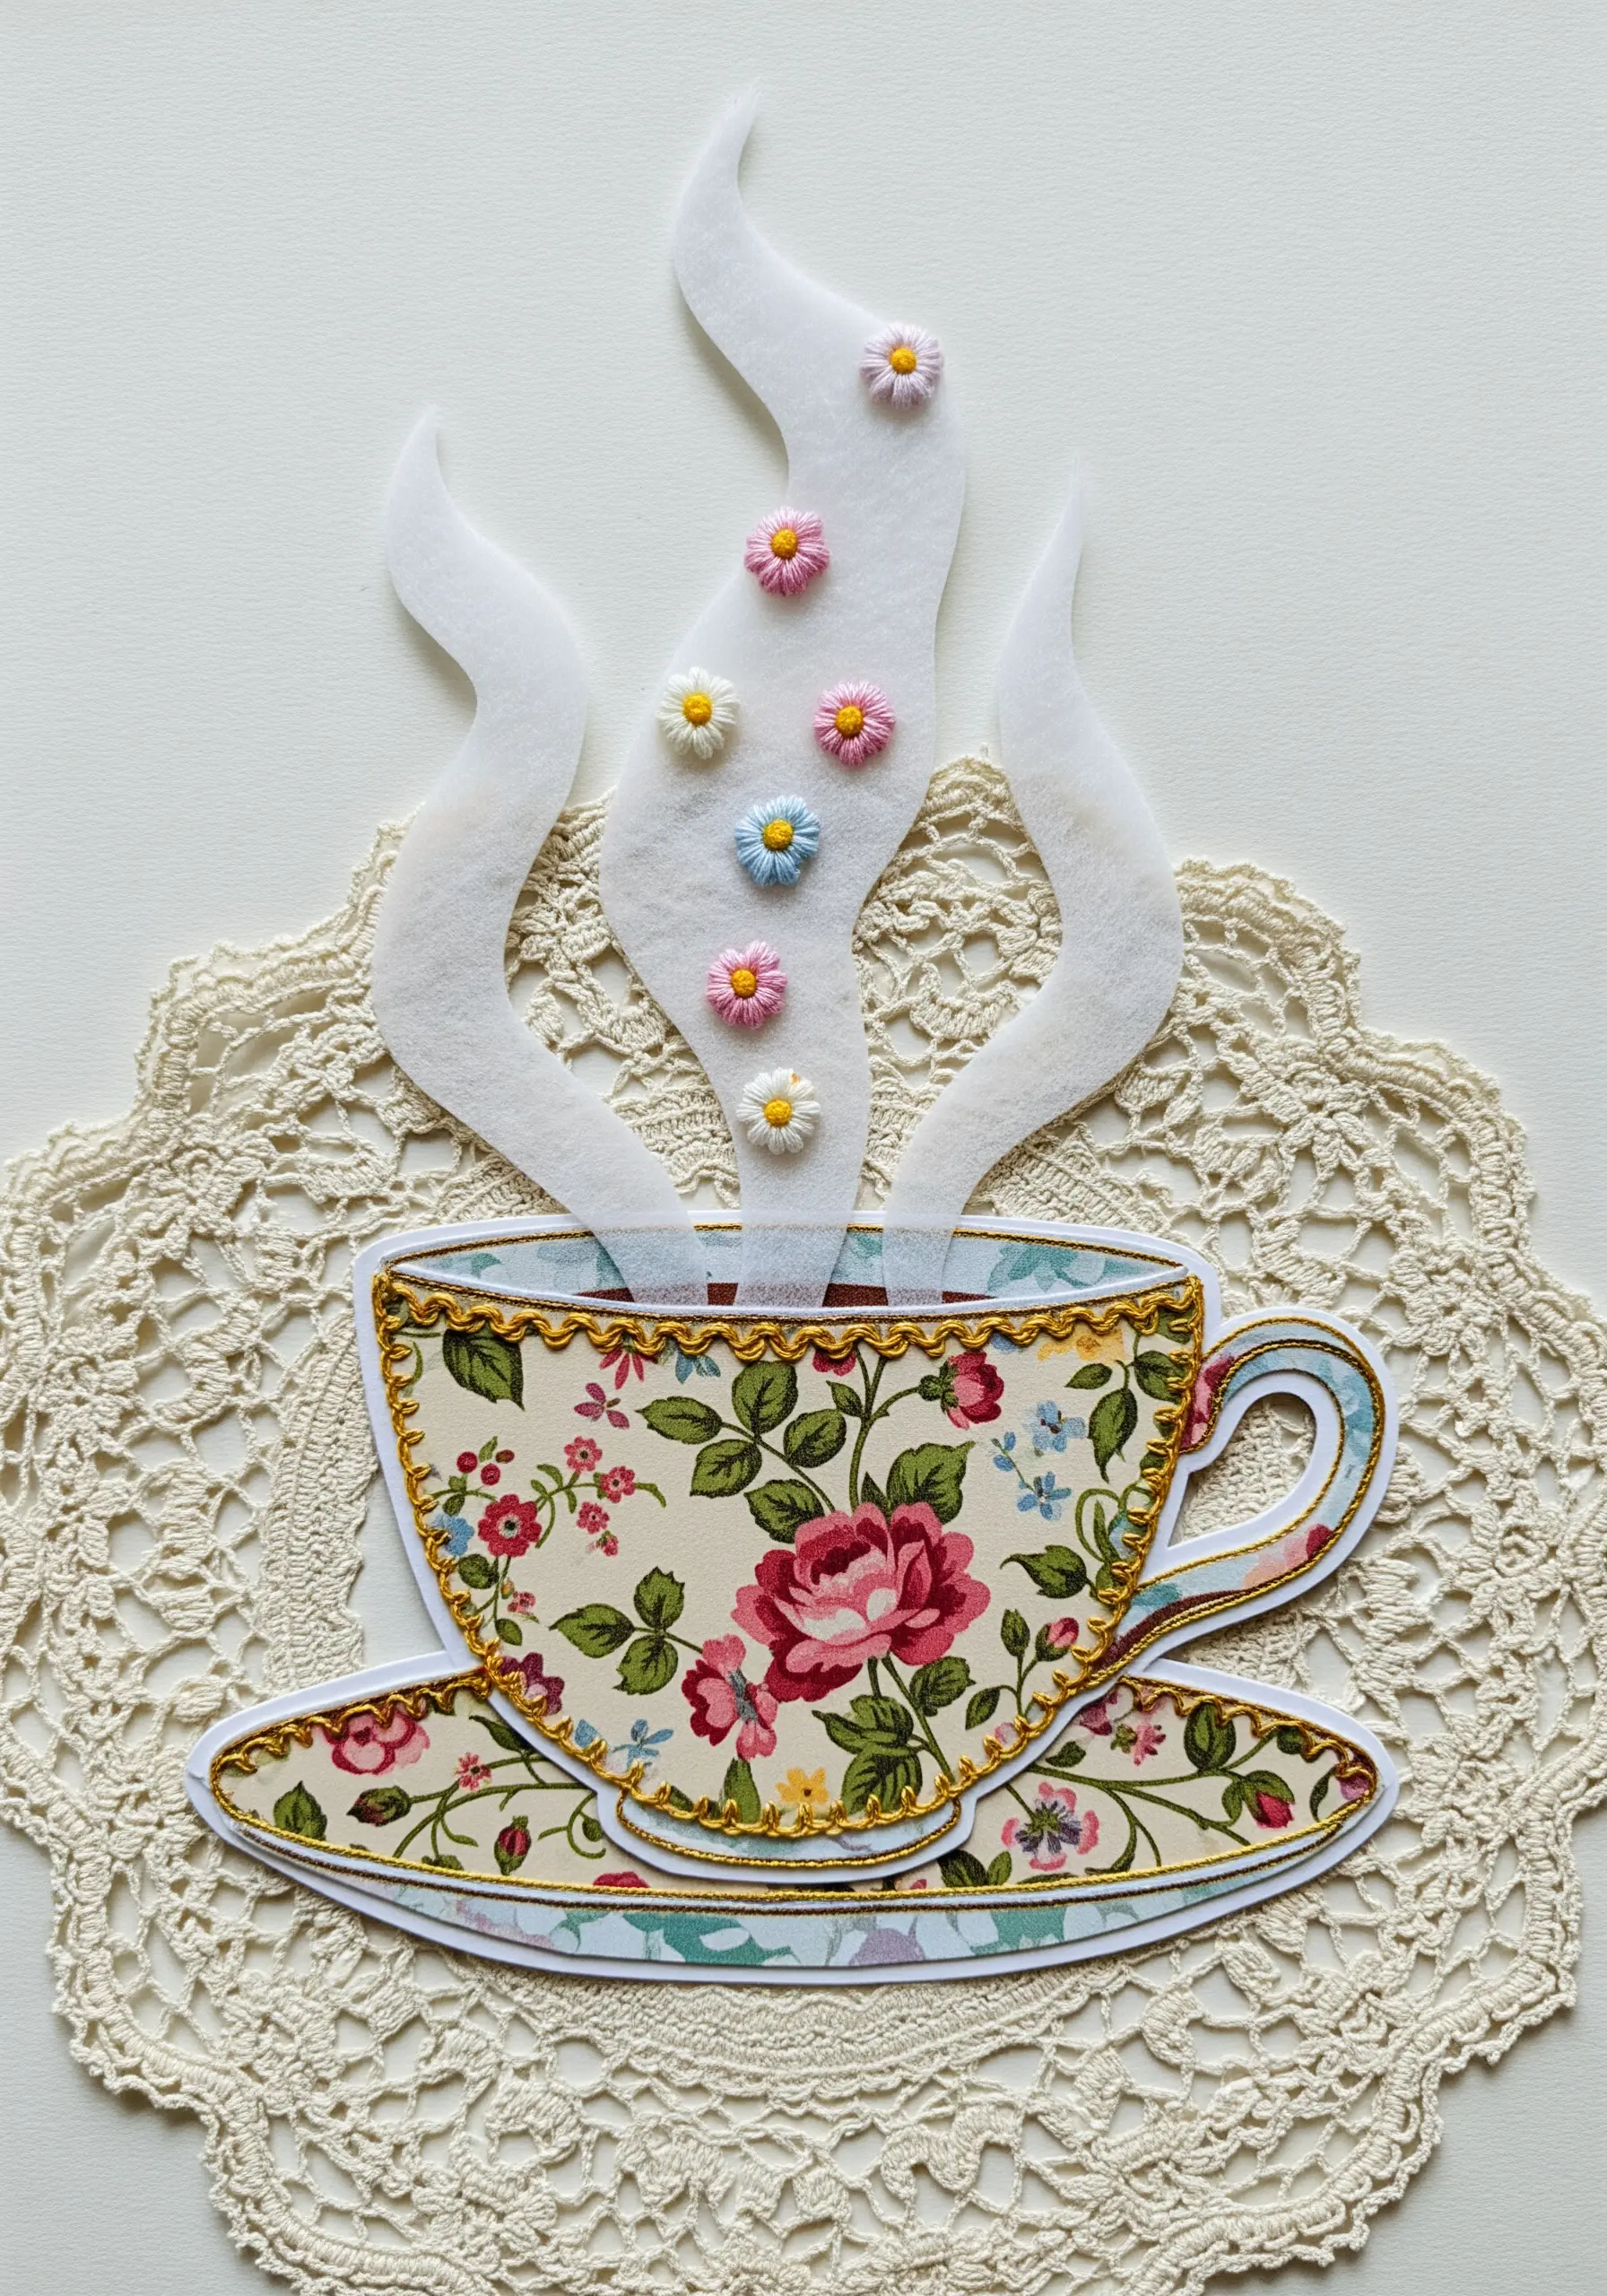
Add a touch of luxury to a simple paper collage by outlining key elements with a fine gold thread.
Use a simple, delicate backstitch to trace the edges of the teacup. The glint of the metallic thread against the matte paper creates an elegant highlight.
For the floral details in the steam, use tiny detached chain stitches (lazy daisies) to add a whimsical, decorative touch.
Even a minimal amount of stitching can completely transform a piece, adding a layer of refinement and handcrafted quality that paper alone cannot achieve.
34. Emulate Folk Art with Bold Cross Stitches
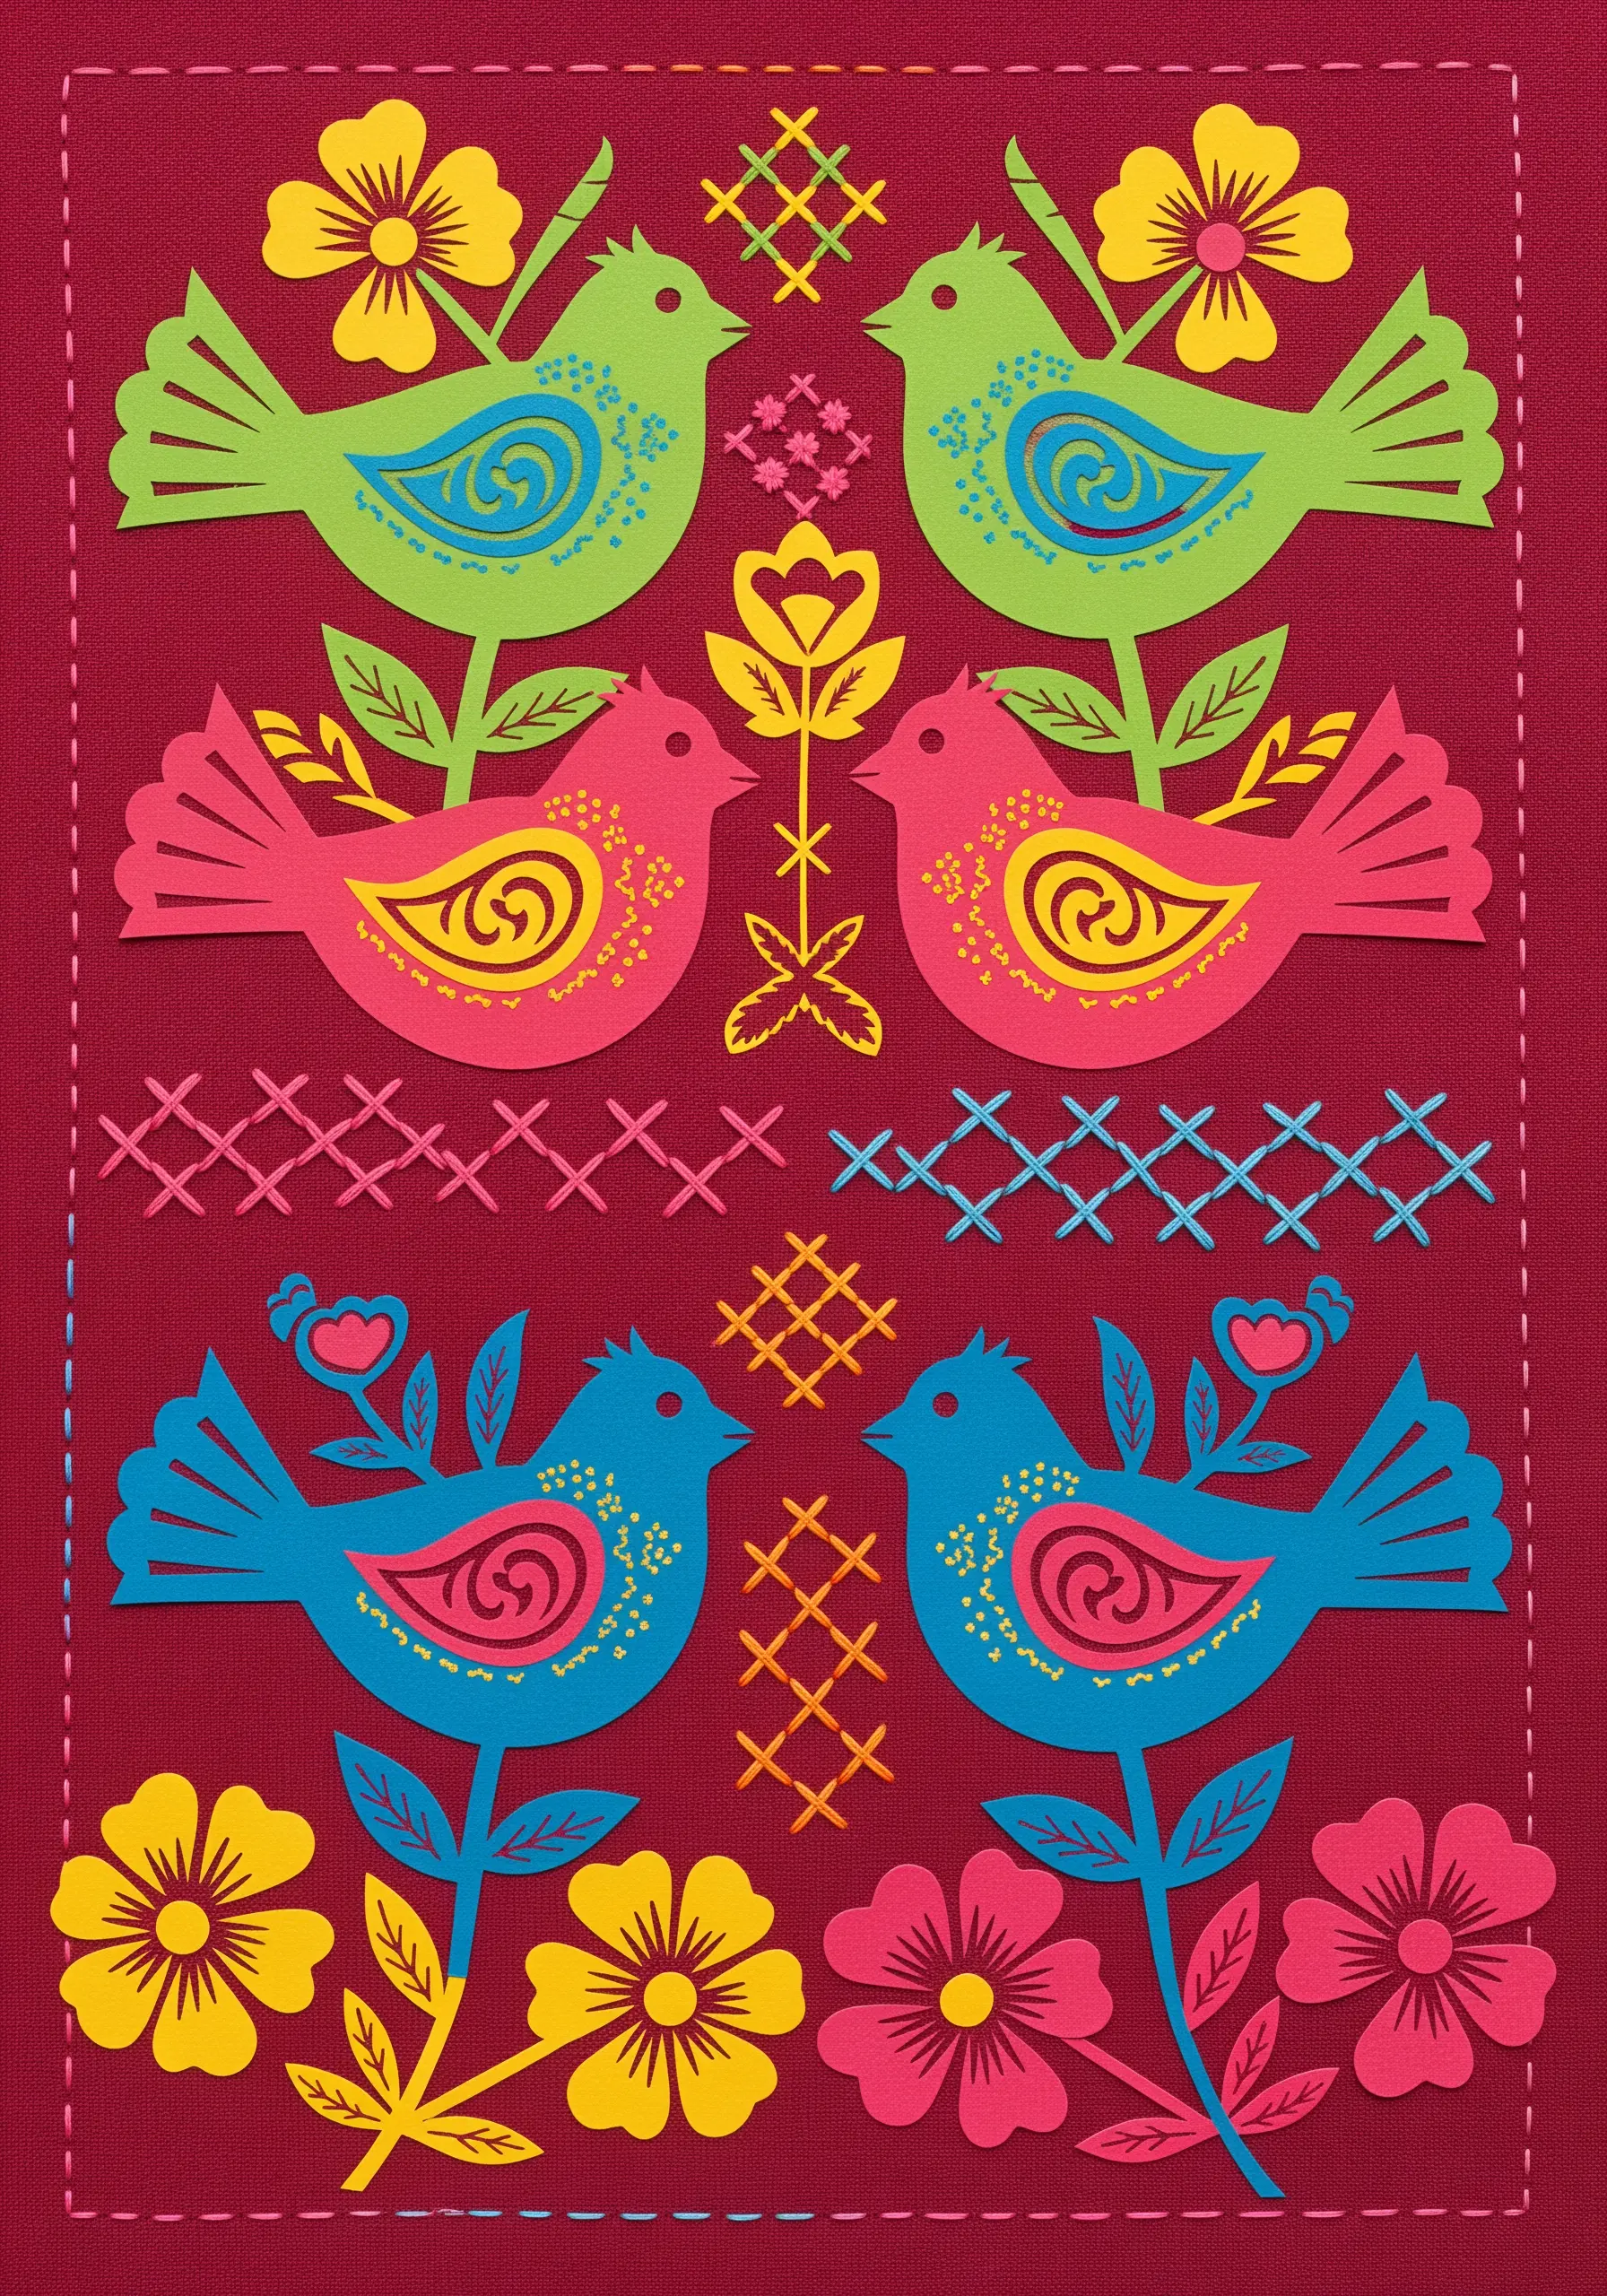
Capture the charm of traditional folk art by incorporating bold, graphic cross-stitch patterns into your paper collage.
Instead of dense embroidery, use cross stitches as repeating decorative motifs, placing them in grids or lines to create borders and accents.
The blocky, geometric nature of the cross stitch pairs perfectly with the clean, cut-paper shapes, reinforcing the folk-art aesthetic.
Using a contrasting thread color ensures that these simple stitches stand out as a key design element, celebrating the intersection of paper craft and traditional embroidery.
35. Trace Pathways with Couched Yarn
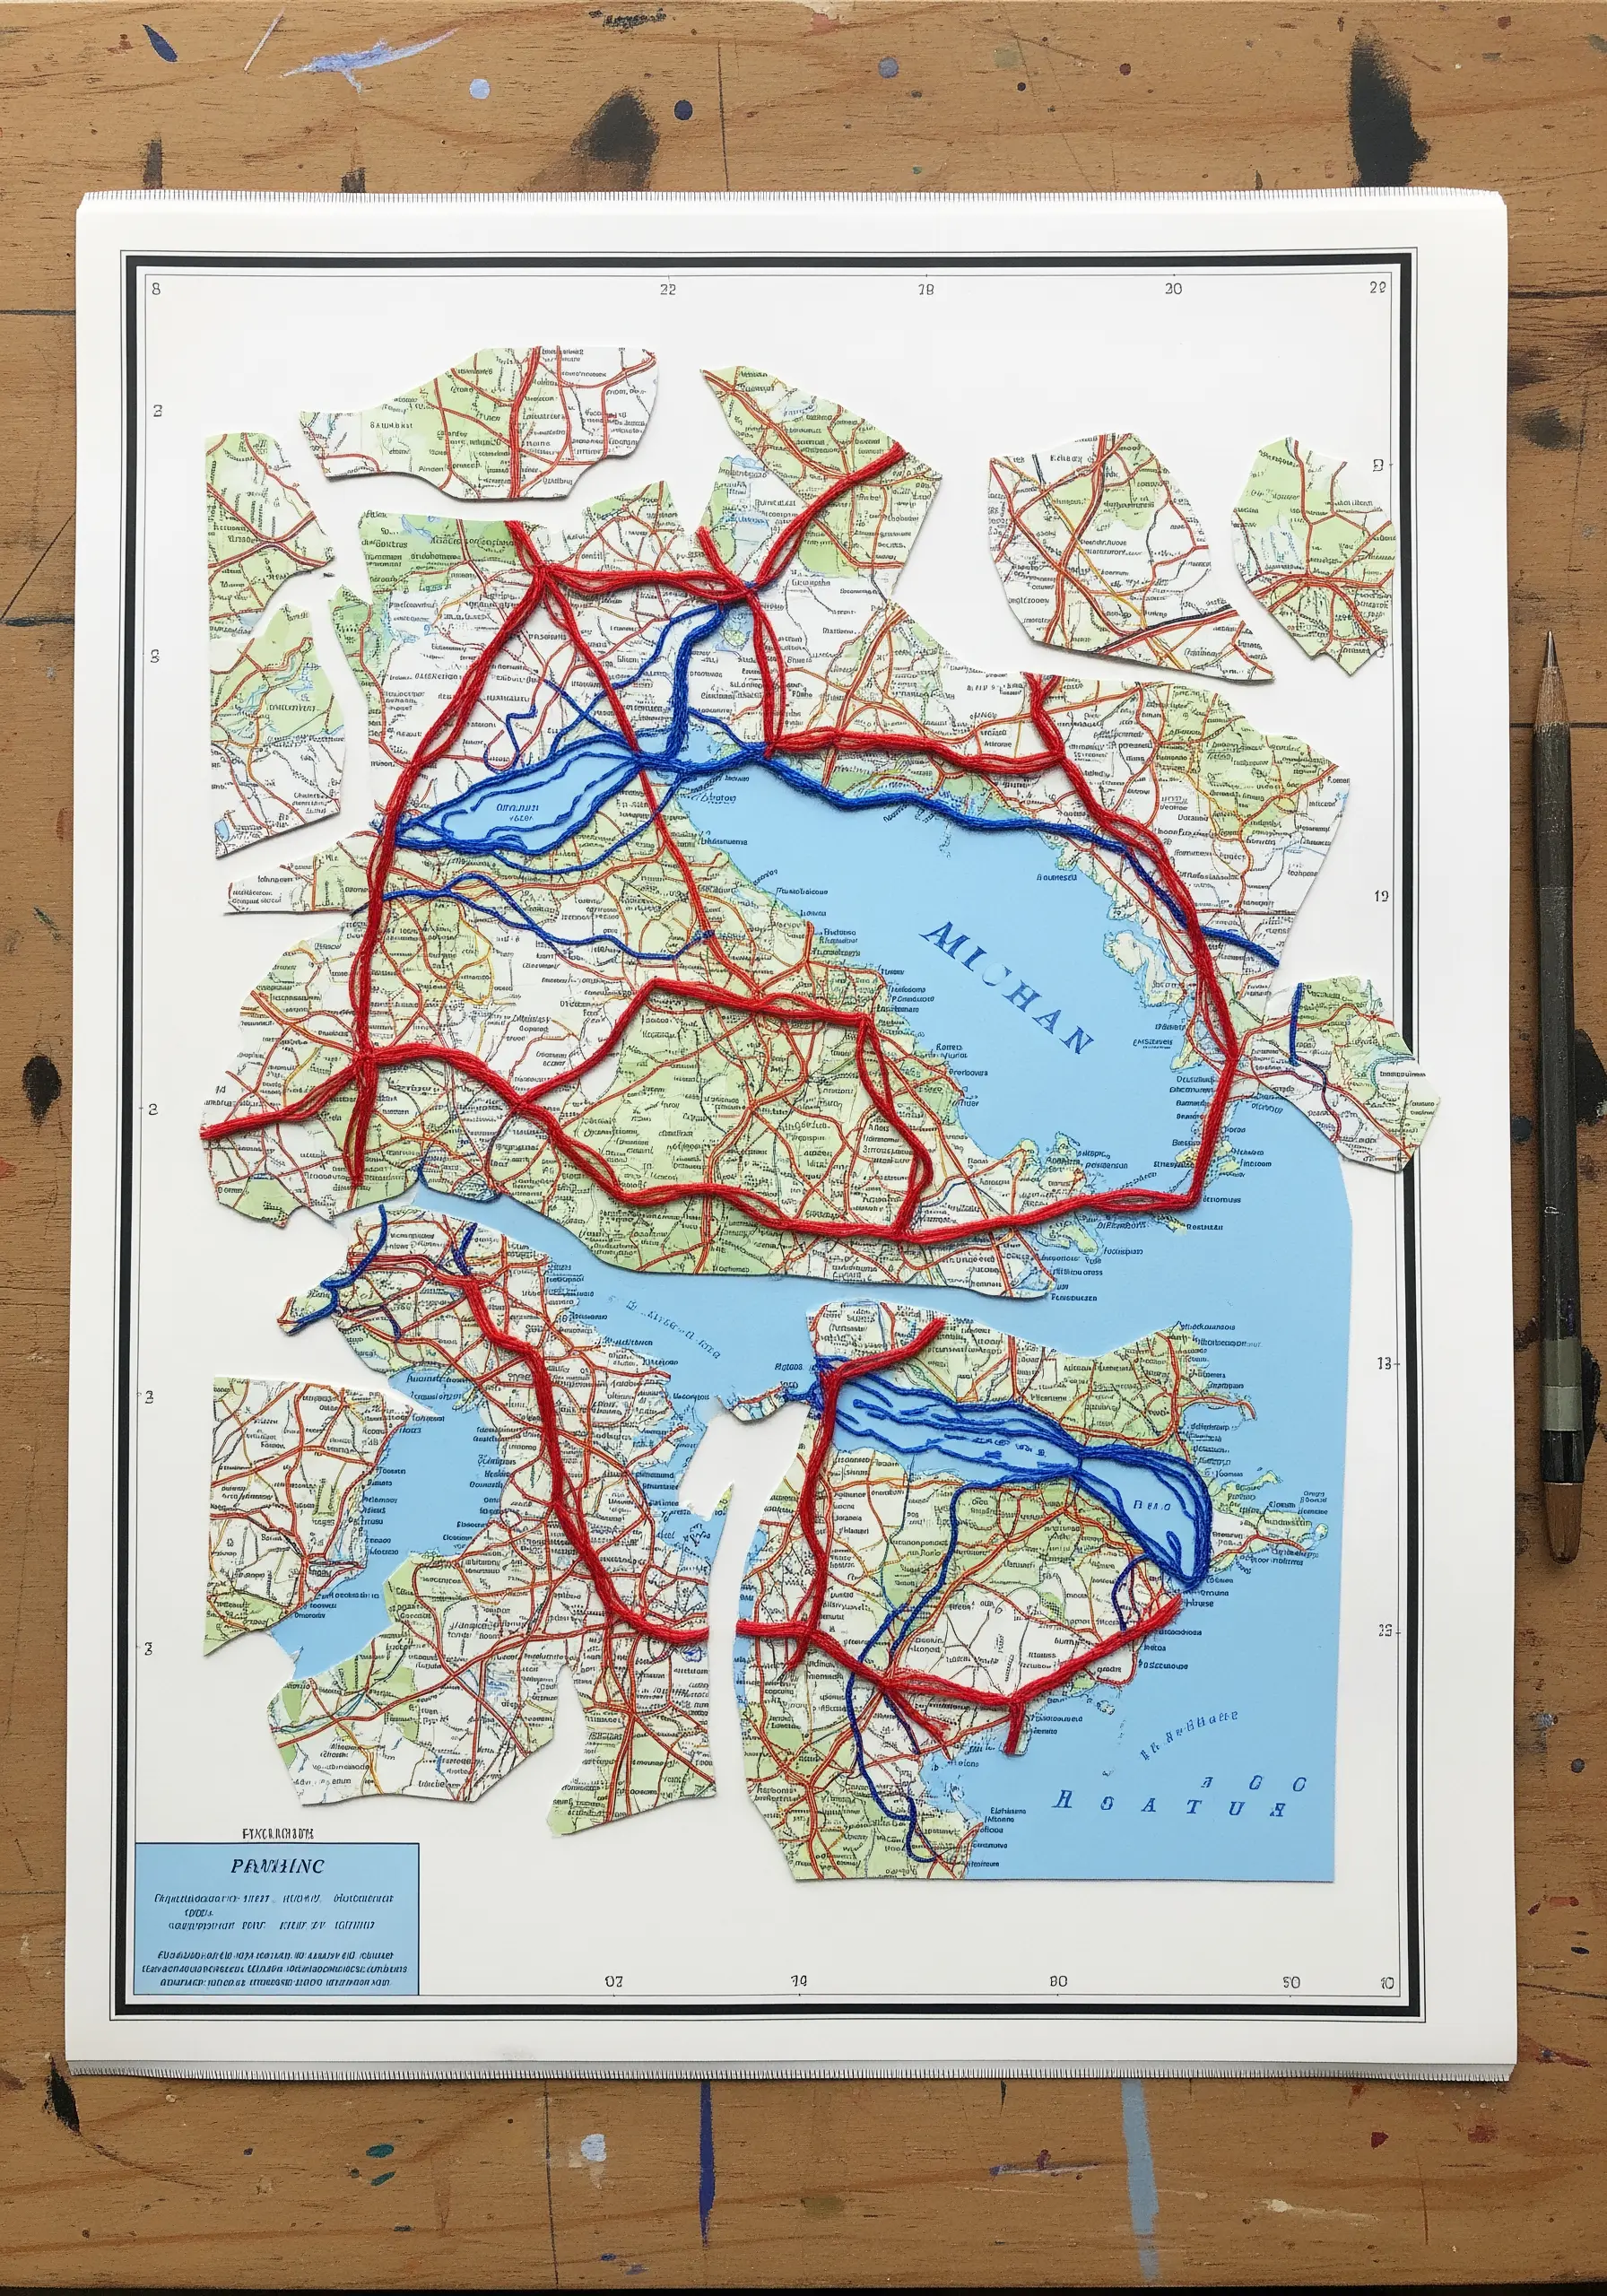
When you want to add a thick, prominent line to a delicate paper surface like a map, couching is the ideal technique.
Lay a thick yarn or cord along your desired path and, using a finer, less conspicuous thread, make small, evenly spaced stitches over the yarn to tack it down.
This method allows you to add a bold, textural line to your collage without creating large, damaging holes in the paper.
Using two different colors, as seen with the red and blue routes, helps to visually organize information and tell a more complex story within the artwork.


